Scope

When roofing a new home, take the opportunity to improve the home’s resistance to high winds, hurricanes, tornadoes, and earthquakes.
- Nail down existing sheathing with additional fasteners per the requirements of the Insurance Institute for Building and Home Safety (IBHS) Fortified Home Program.
- Seal the roof deck with a fully adhered roof membrane or seal all sheathing joints with compatible tape or membrane strips.
- Install metal drip edges at eaves and gable rake edges.
- Select and install roof attic vents that resist the entry of wind-blown rain, snow, and embers. IBHS recommends that vent models be certified as resistant to wind and water intrusion in accordance with Florida Building Code TAS 100 (A).
- Follow the installation guidelines and roofing material guidance of the IBHS Fortified Roof program.
See the Compliance tab for links to related codes and standards and voluntary federal energy-efficiency program requirements.
Description
Strengthening the roof is one of the best ways that builders can increase the disaster resistance of a home because even small breaches in the roof can lead to extensive destruction of the home and its contents during a storm.
This guide will focus on the three main steps to increase the high-wind and hurricane resistance of new roofs recommended by the Insurance Institute for Building and Home Safety (IBHS)’s Fortified Roof program:
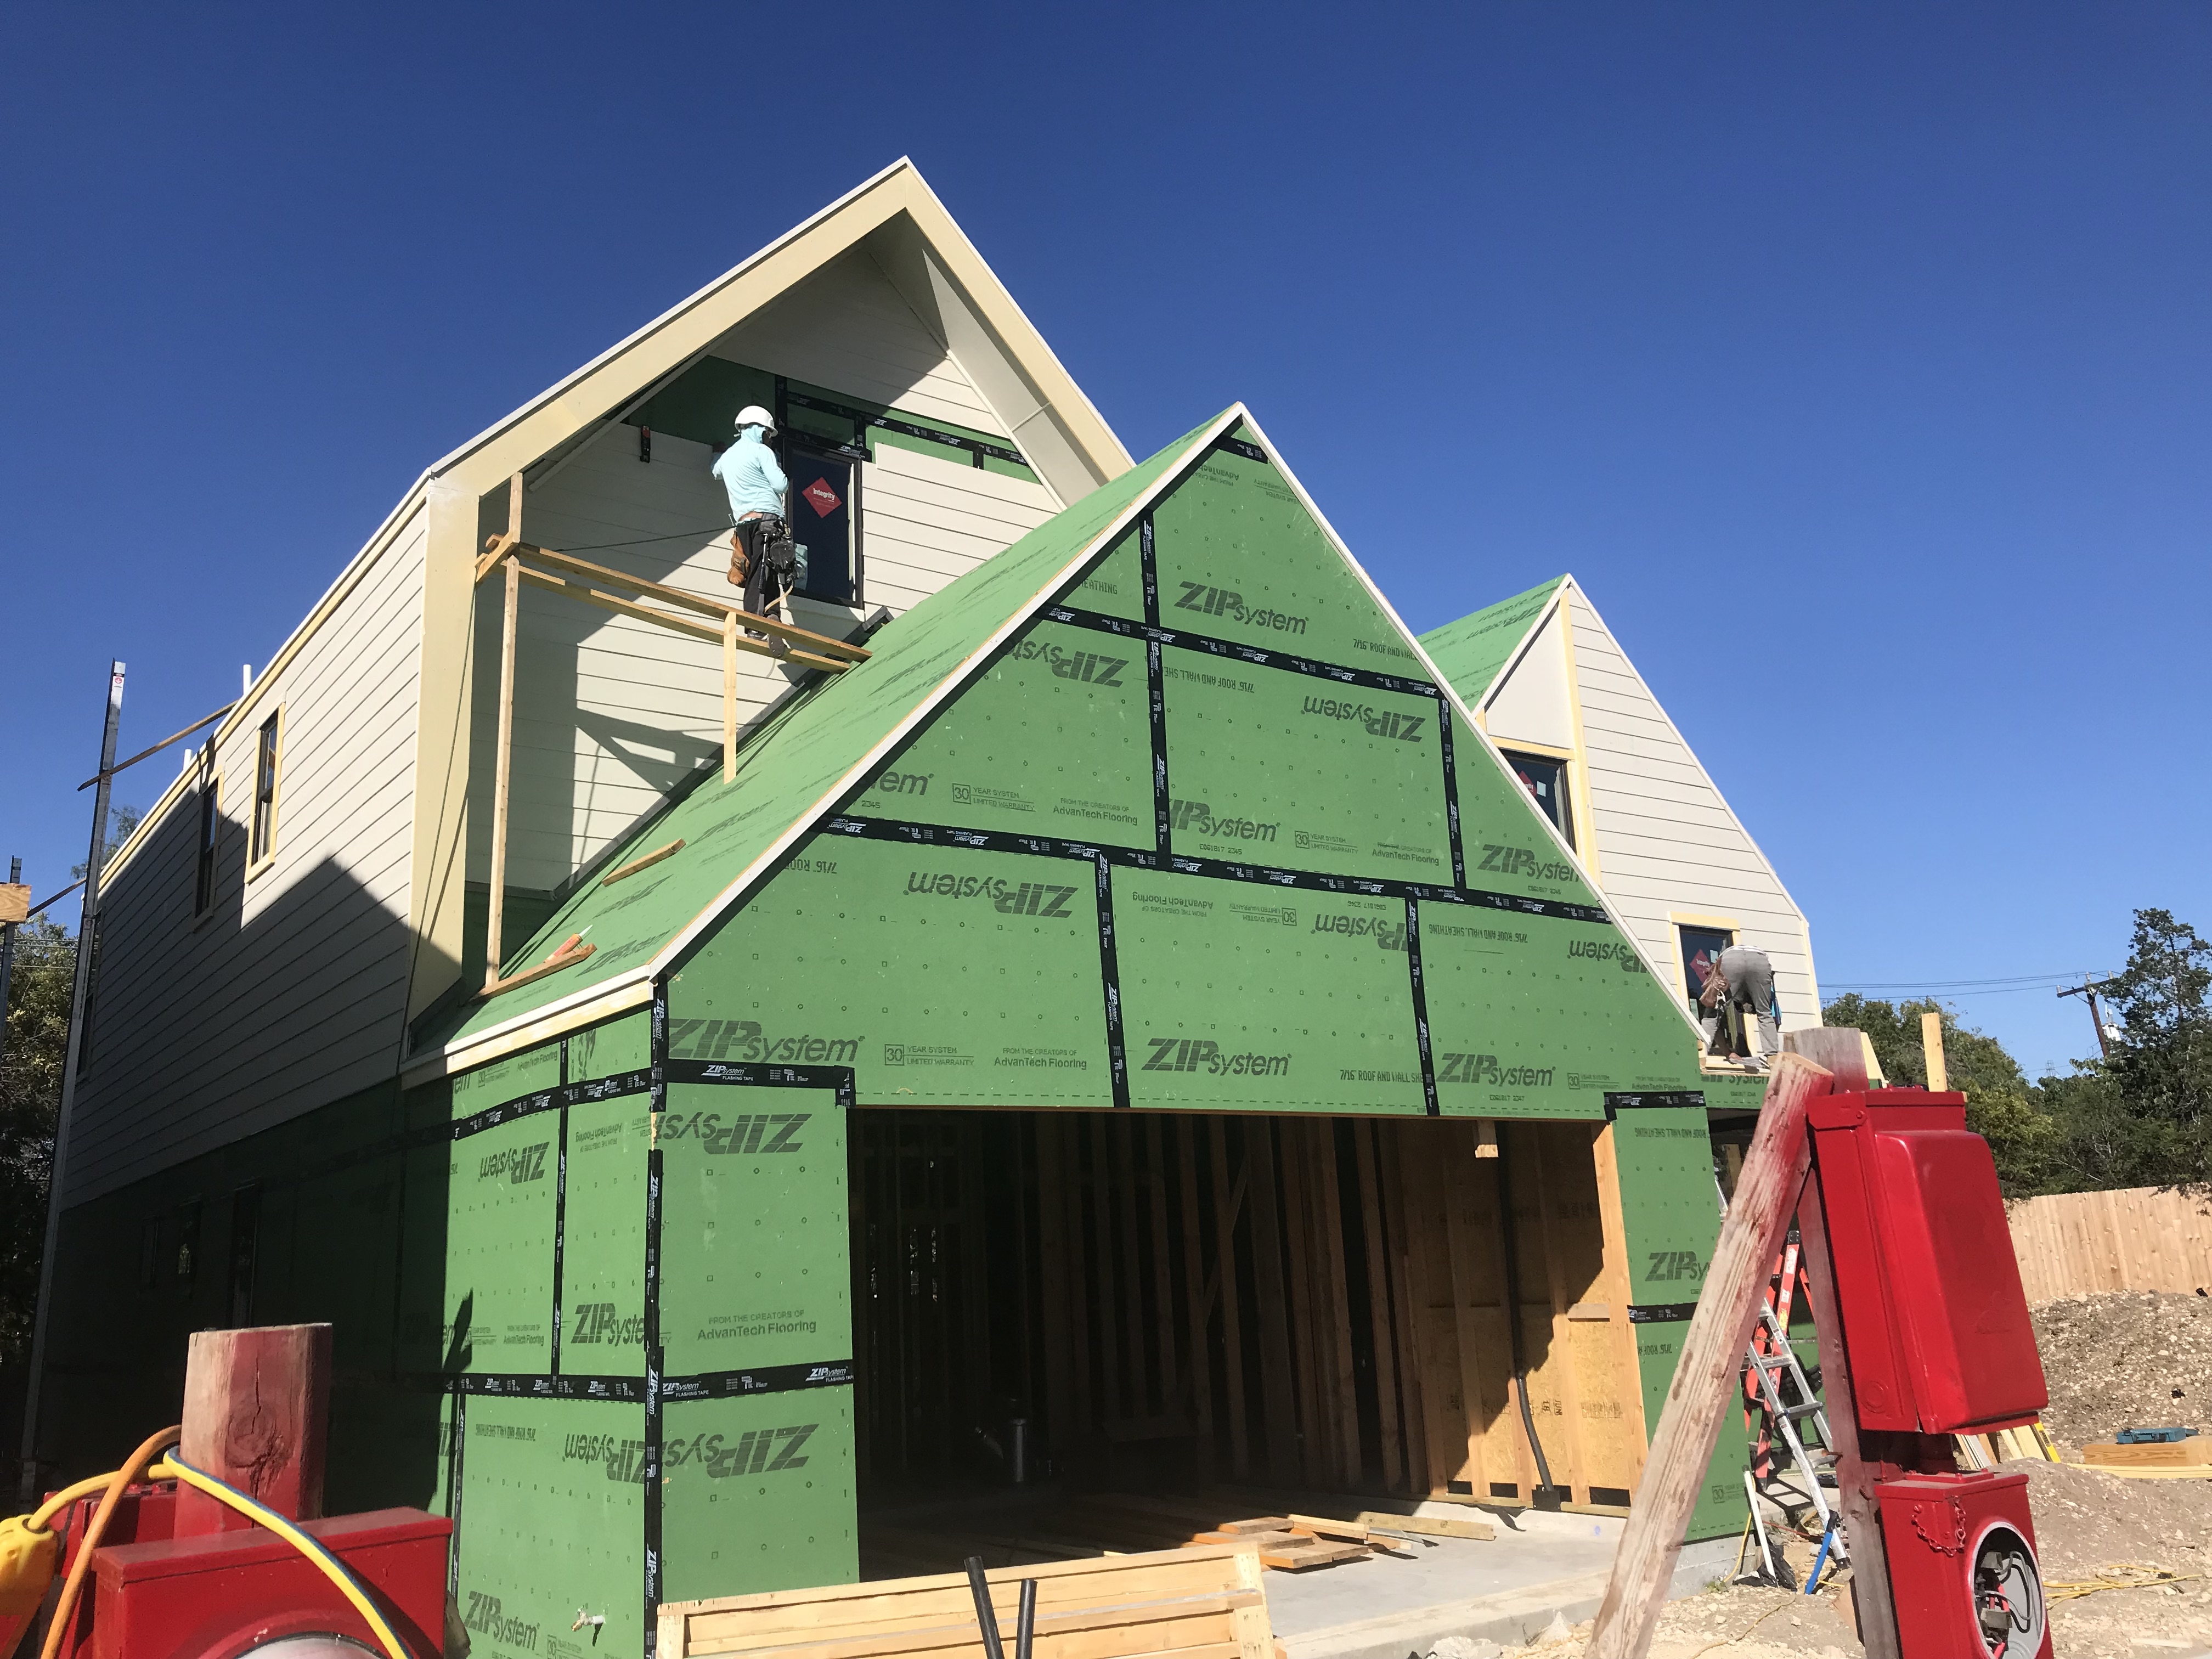
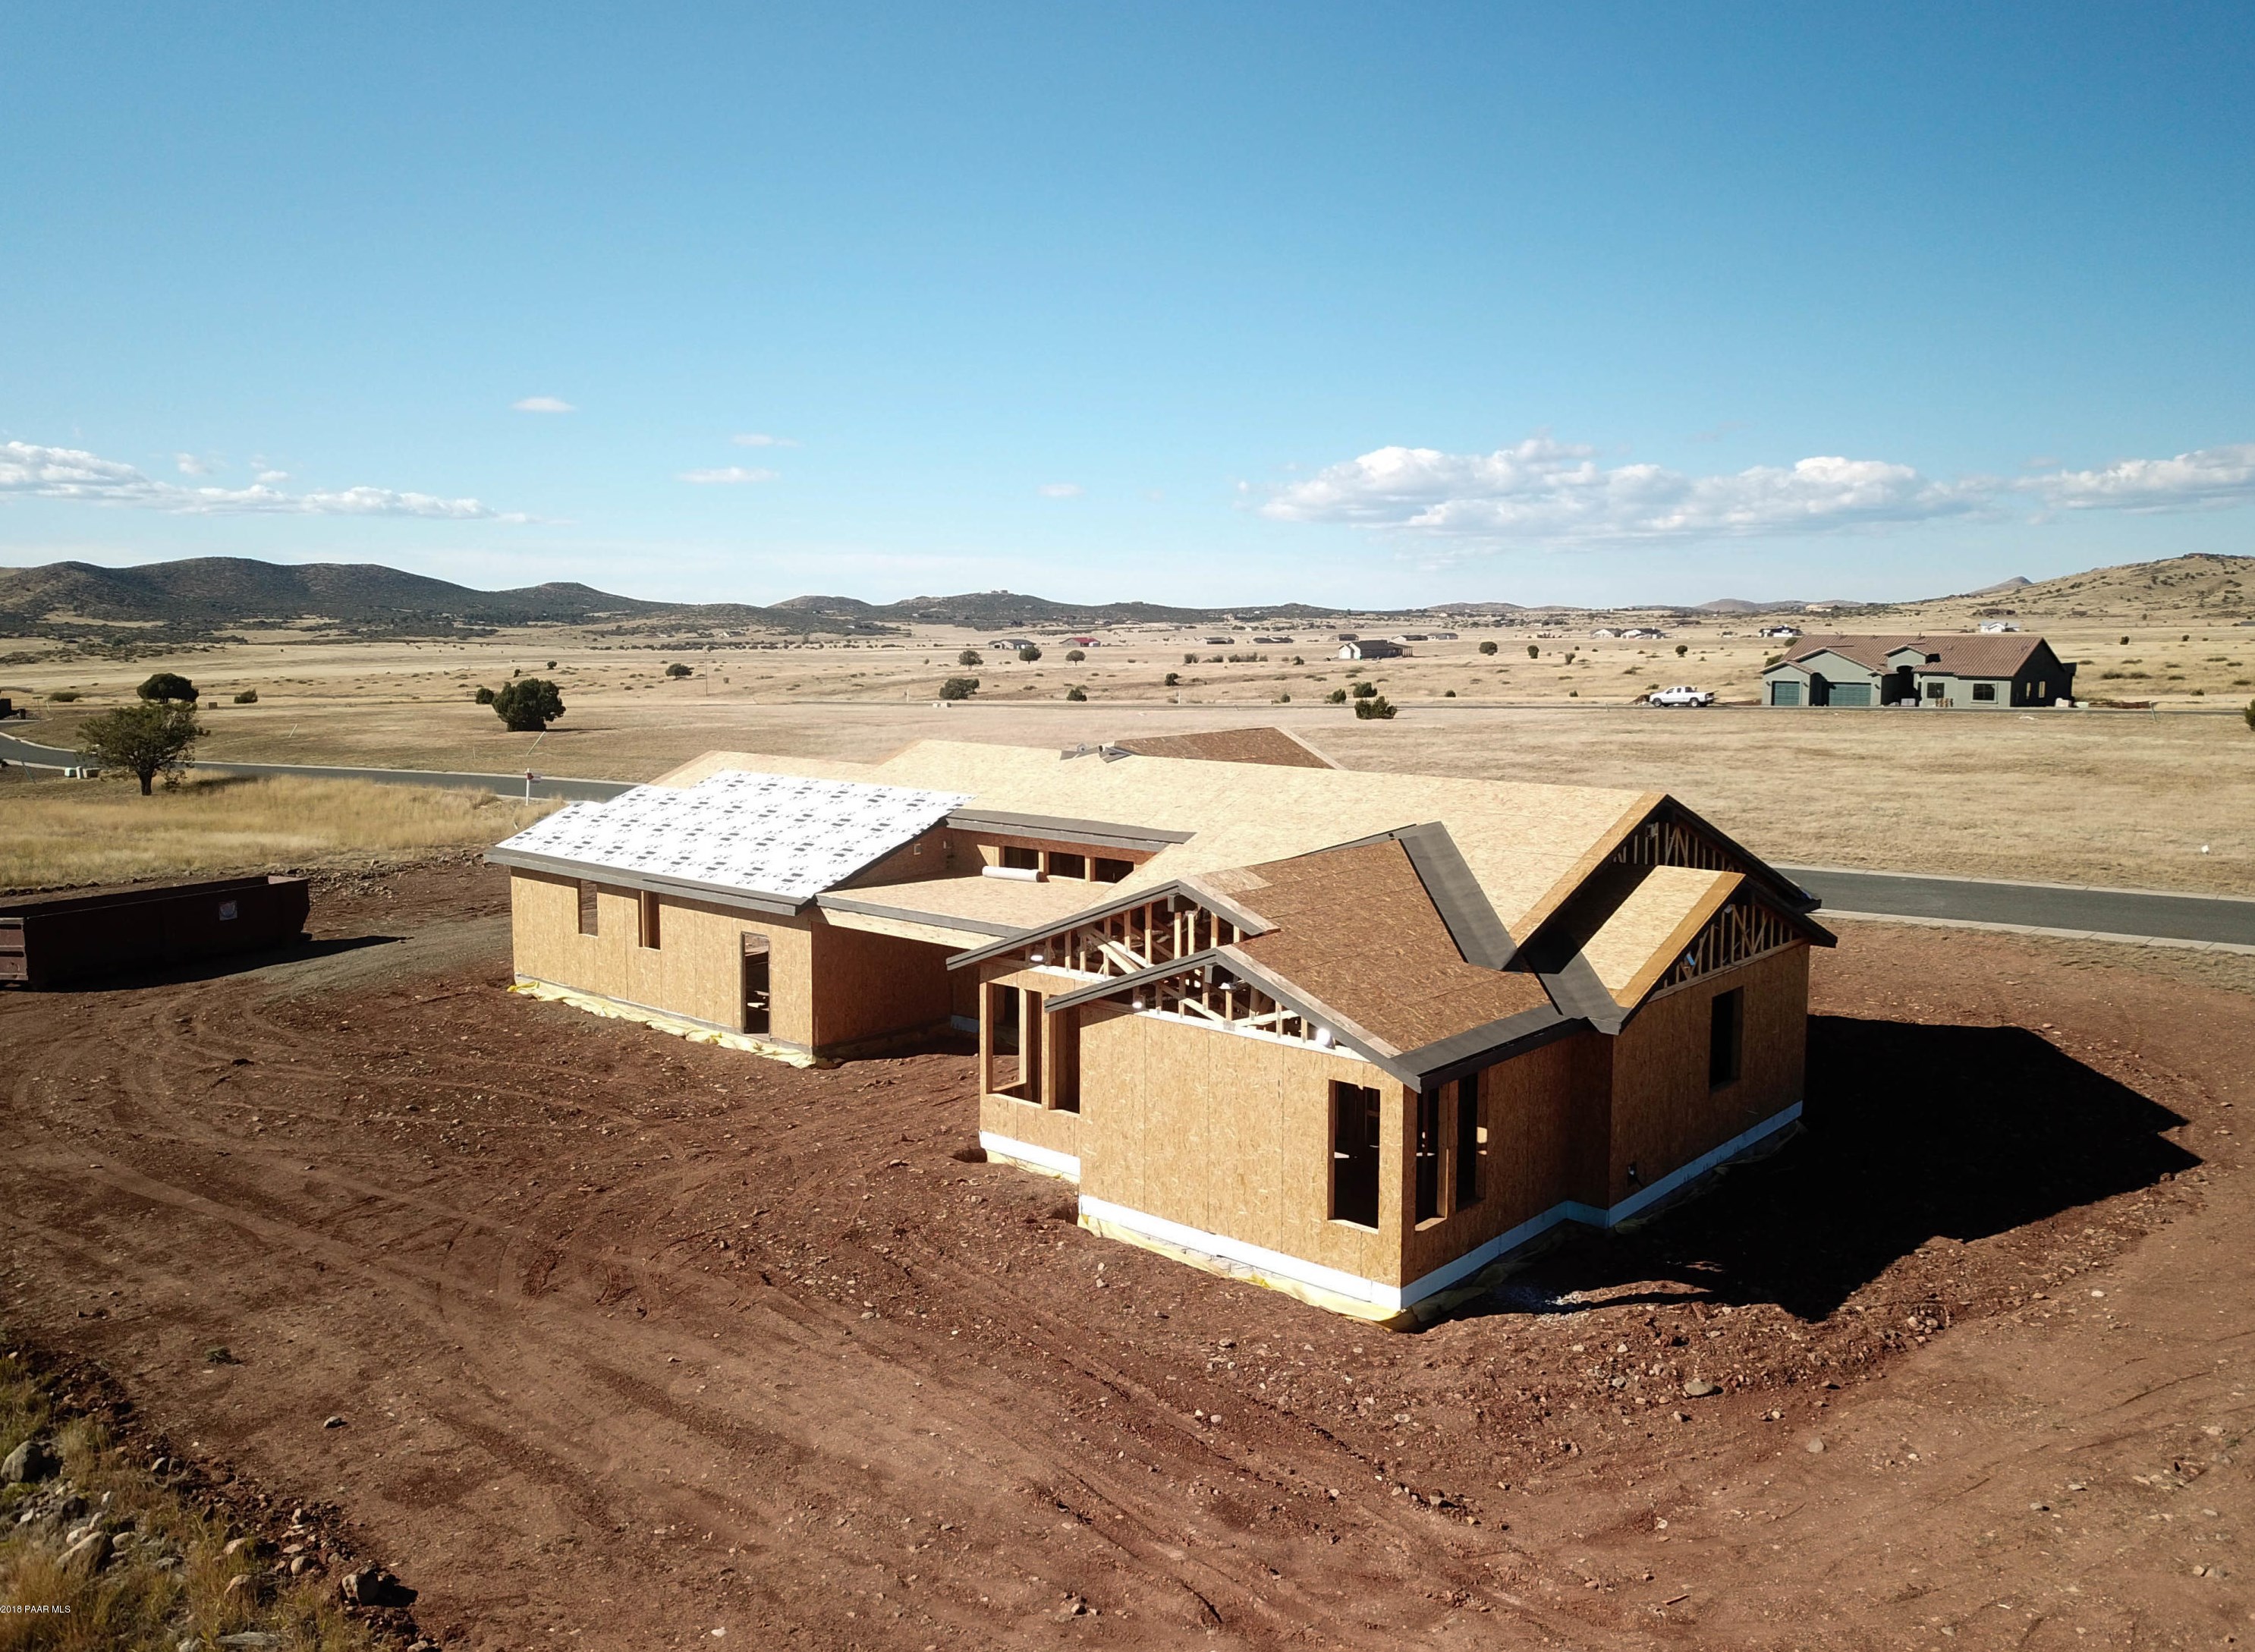
- “Nail it down” - install plywood or OSB using an IBHS-recommended nail fastener spacing and sheathing.
- “Seal it up” - cover the roof decking with a fully adhered roof membrane or seal the seams with tape and cover with underlayment.
- “Lock it in” – install drip edge over the underlayment at all eaves and rakes.
These steps are described in detail in the sections below, followed by a discussion of other roofing considerations, including flashing, venting, and cladding choices. Additional information can be found in the IBHS Fortified Home New Roof Requirements Overview and the Fortified Home Hurricane Technical Summary, which provide detailed installation instructions. IBHS offers extensive resources for roofers on its Fortified Roof webpage, including installation videos, factsheets, and checklists. IBHS also offers online training for roofers through its Fortified Wise University.
See the Retrofit tab of this guide for information on re-roofing existing roofs.
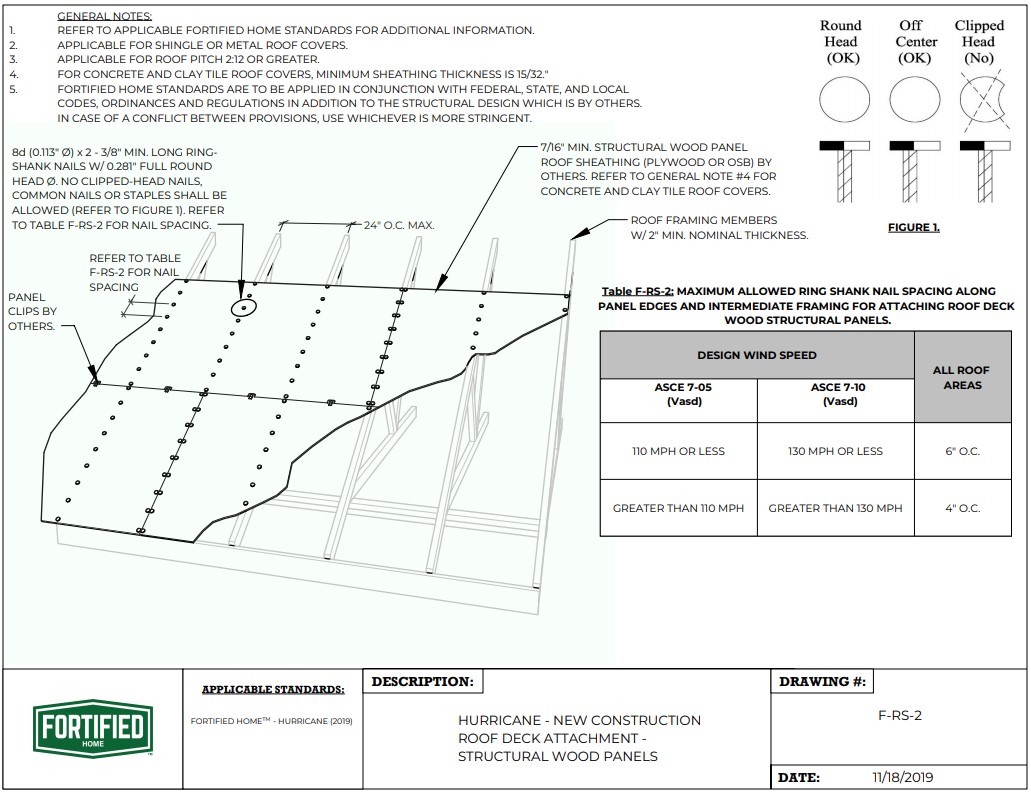
Structural Attachment (“Nail it Down”)
IBHS recommends that the roof sheathing should be a minimum of 7/16 in. plywood or OSB. The deck must be attached with 8d ring-shank nails, spaced at 4 inches on center within 4 feet of the roof edges and each side of the ridge and at 6 inches on center throughout the rest of the roof. IBHS recommends plywood roof sheathing instead of OSB (Fortified Home Hurricane Standards).
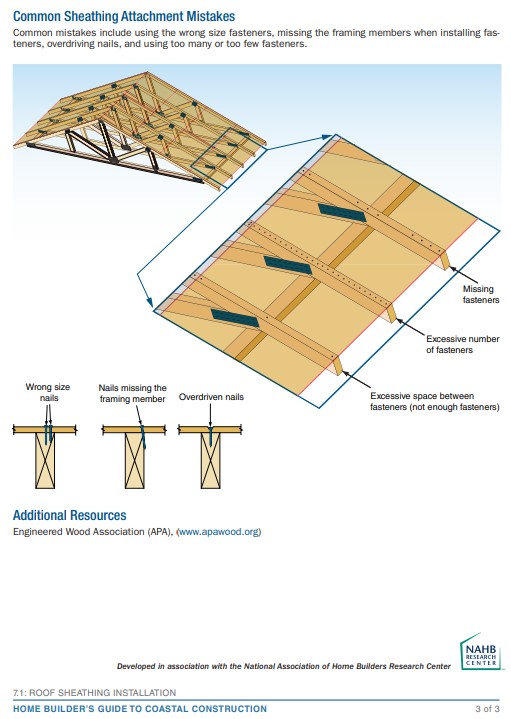
Sheathing details from IBHS for hurricane areas are shown in Figure 1.
For additional sheathing detail drawings, see the IBHS Fortified Roof Standard Detail Set for Fortified Roof (2019).
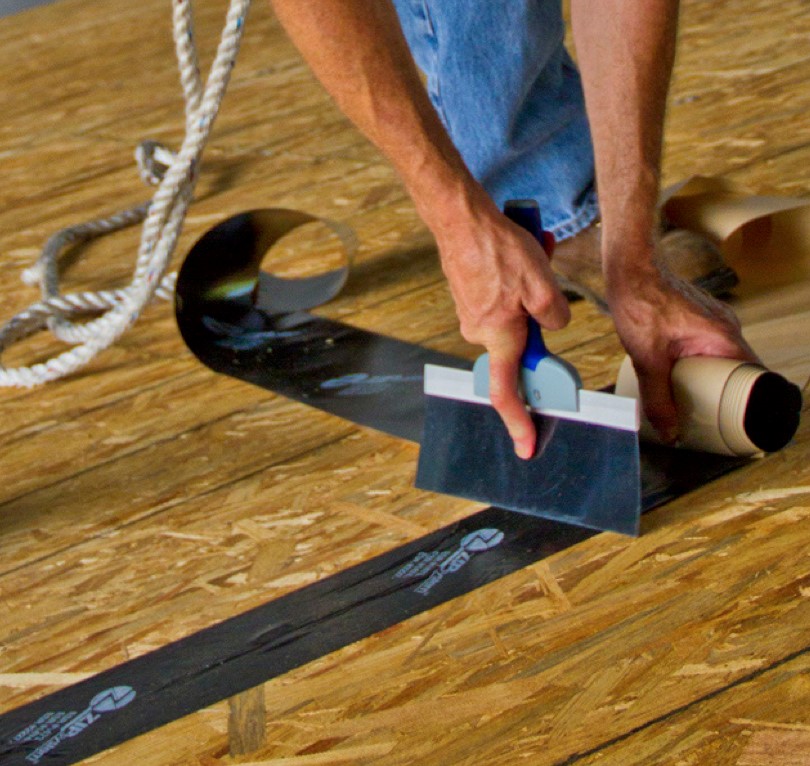
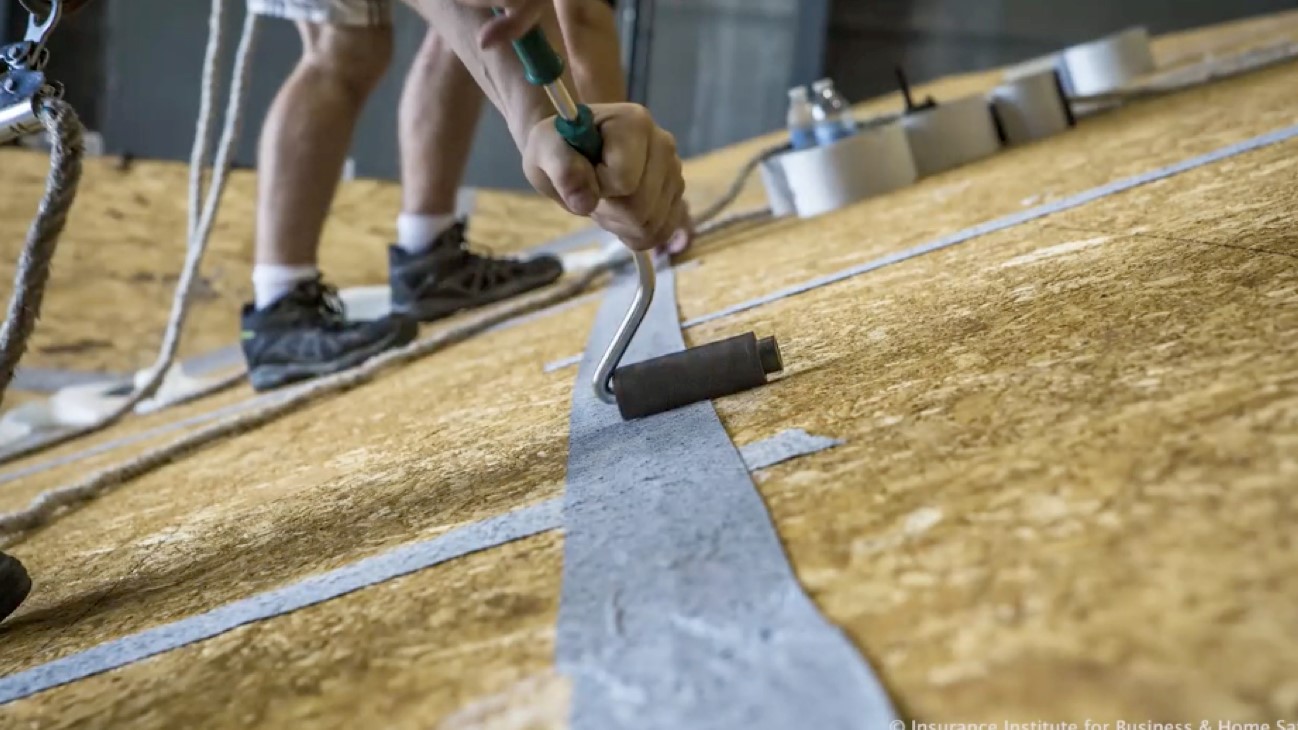
Seal the Deck (“Tape it Up”)
Seal the roof deck. IBHS Fortified allows three methods for sealing the roof deck. See the IBHS Fortified Home Hurricane Technical Summary for materials and installation details:
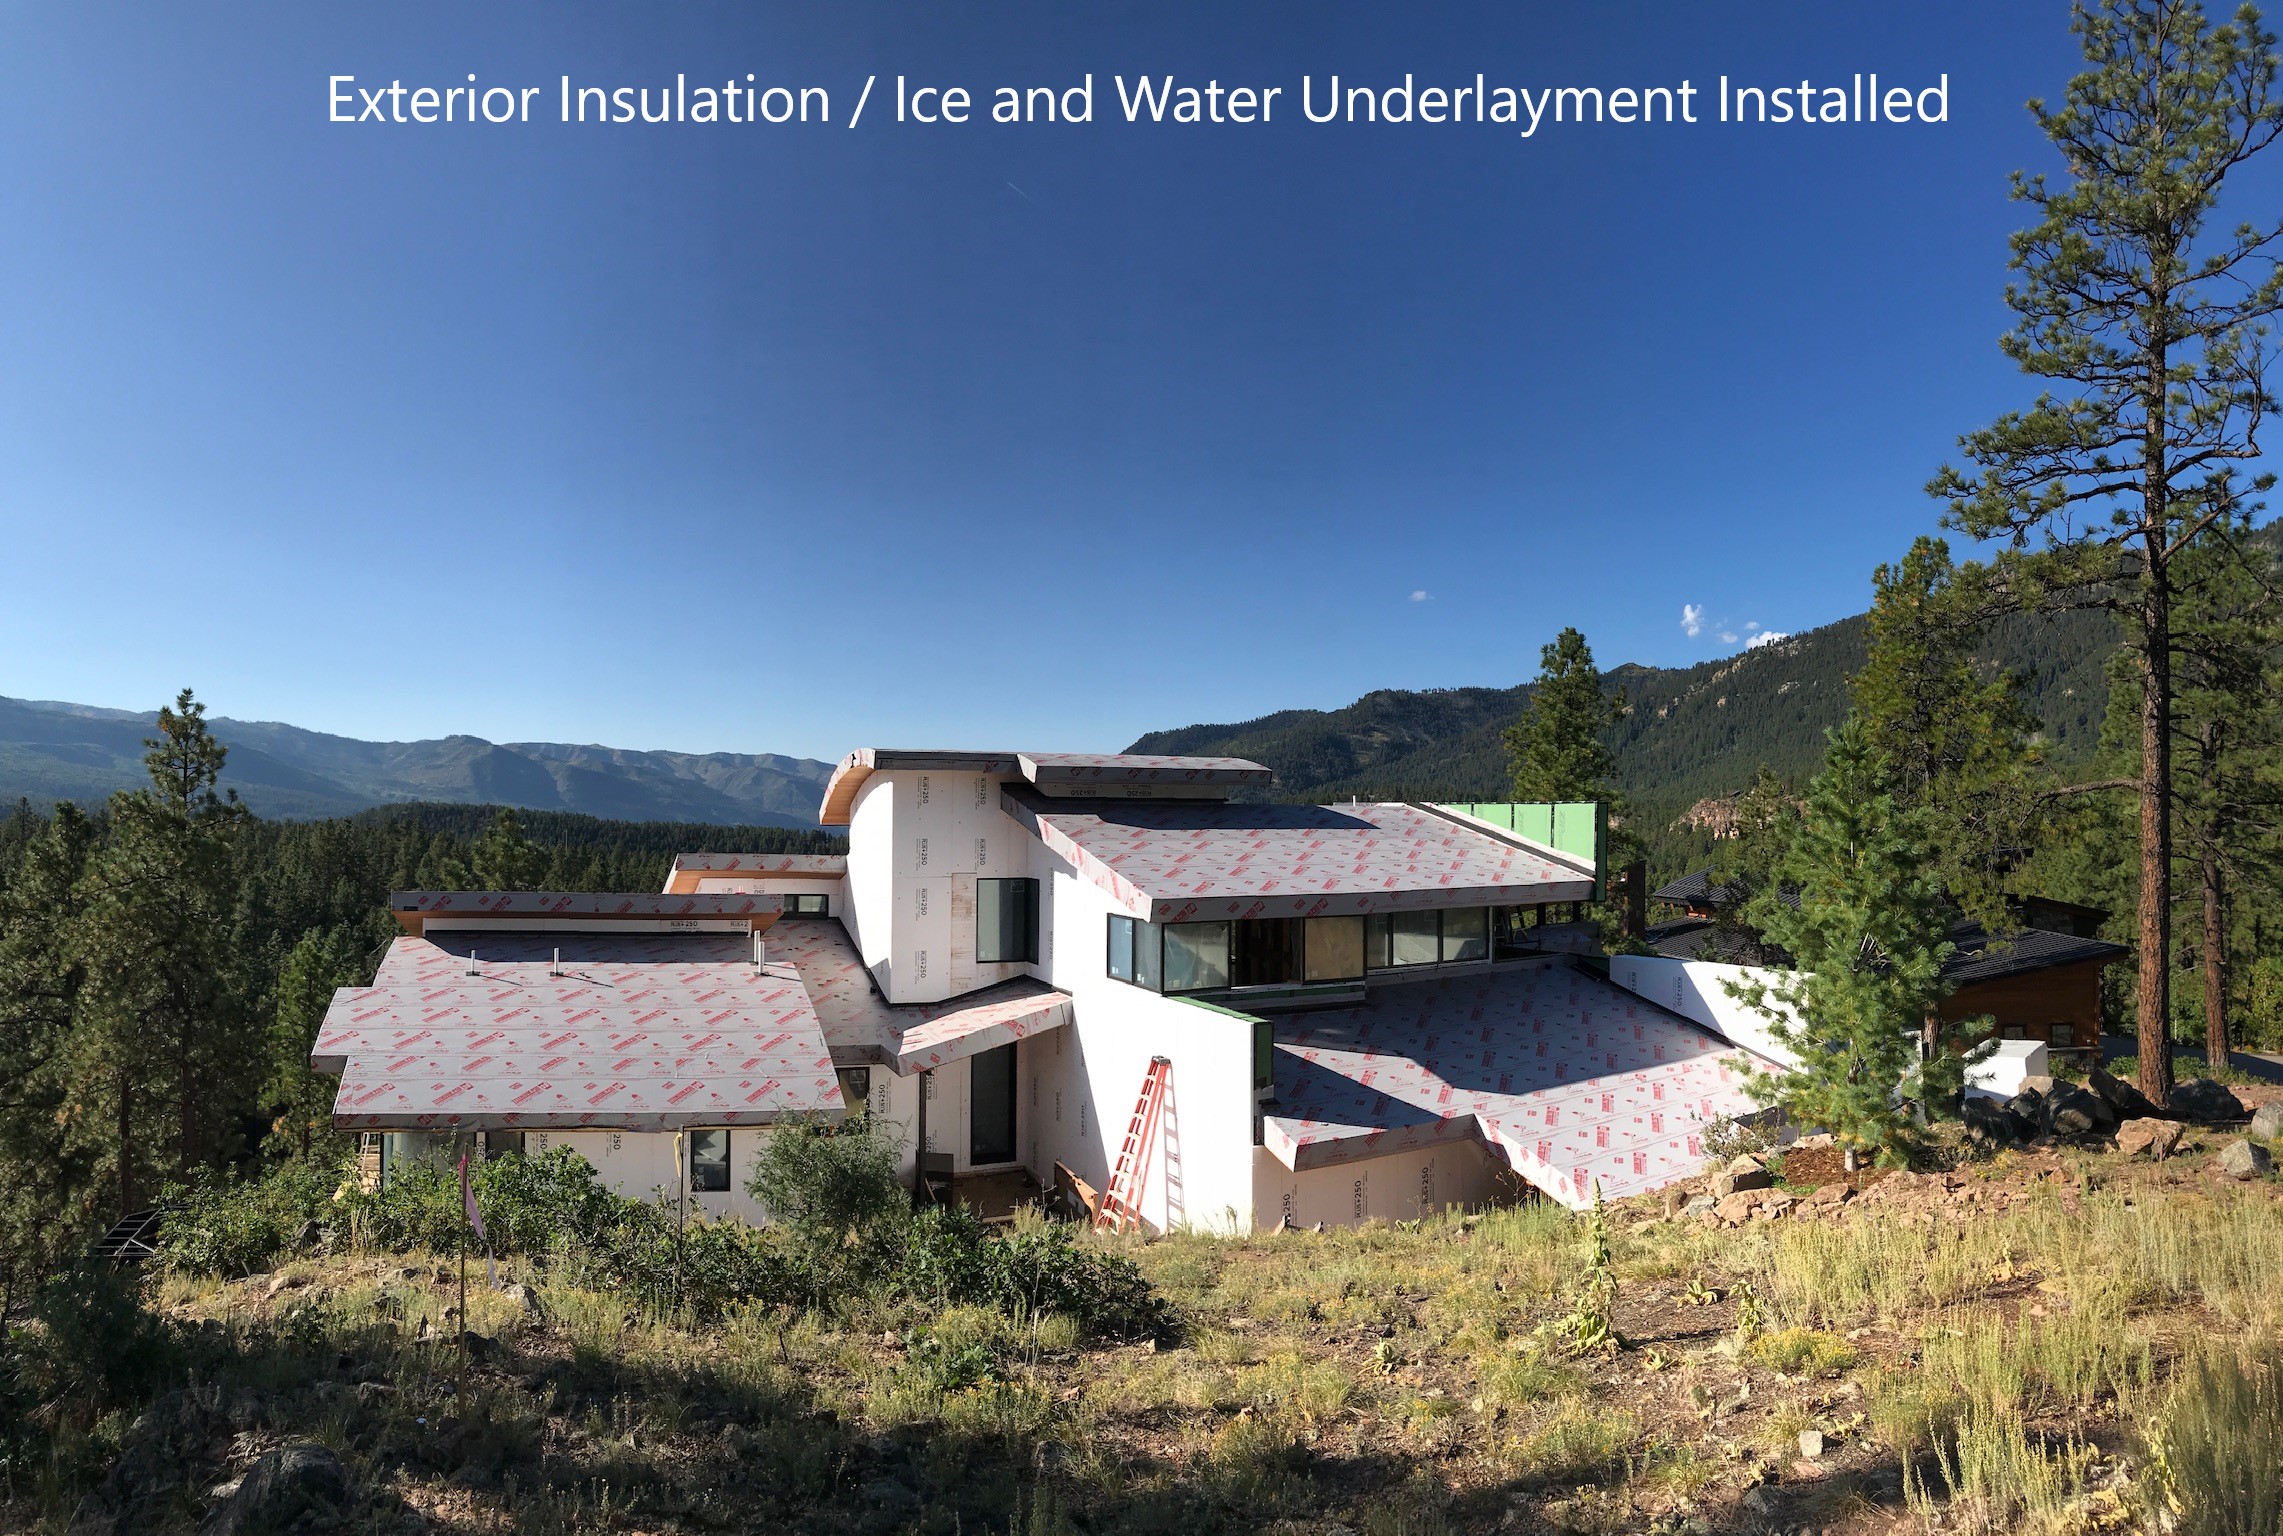
- Cover the entire roof deck with a layer of self-adhering polymer-modified bitumen membrane. IBHS recommends covering the membrane with #15 felt if asphalt shingles will be installed to provide a bond break with the shingles.
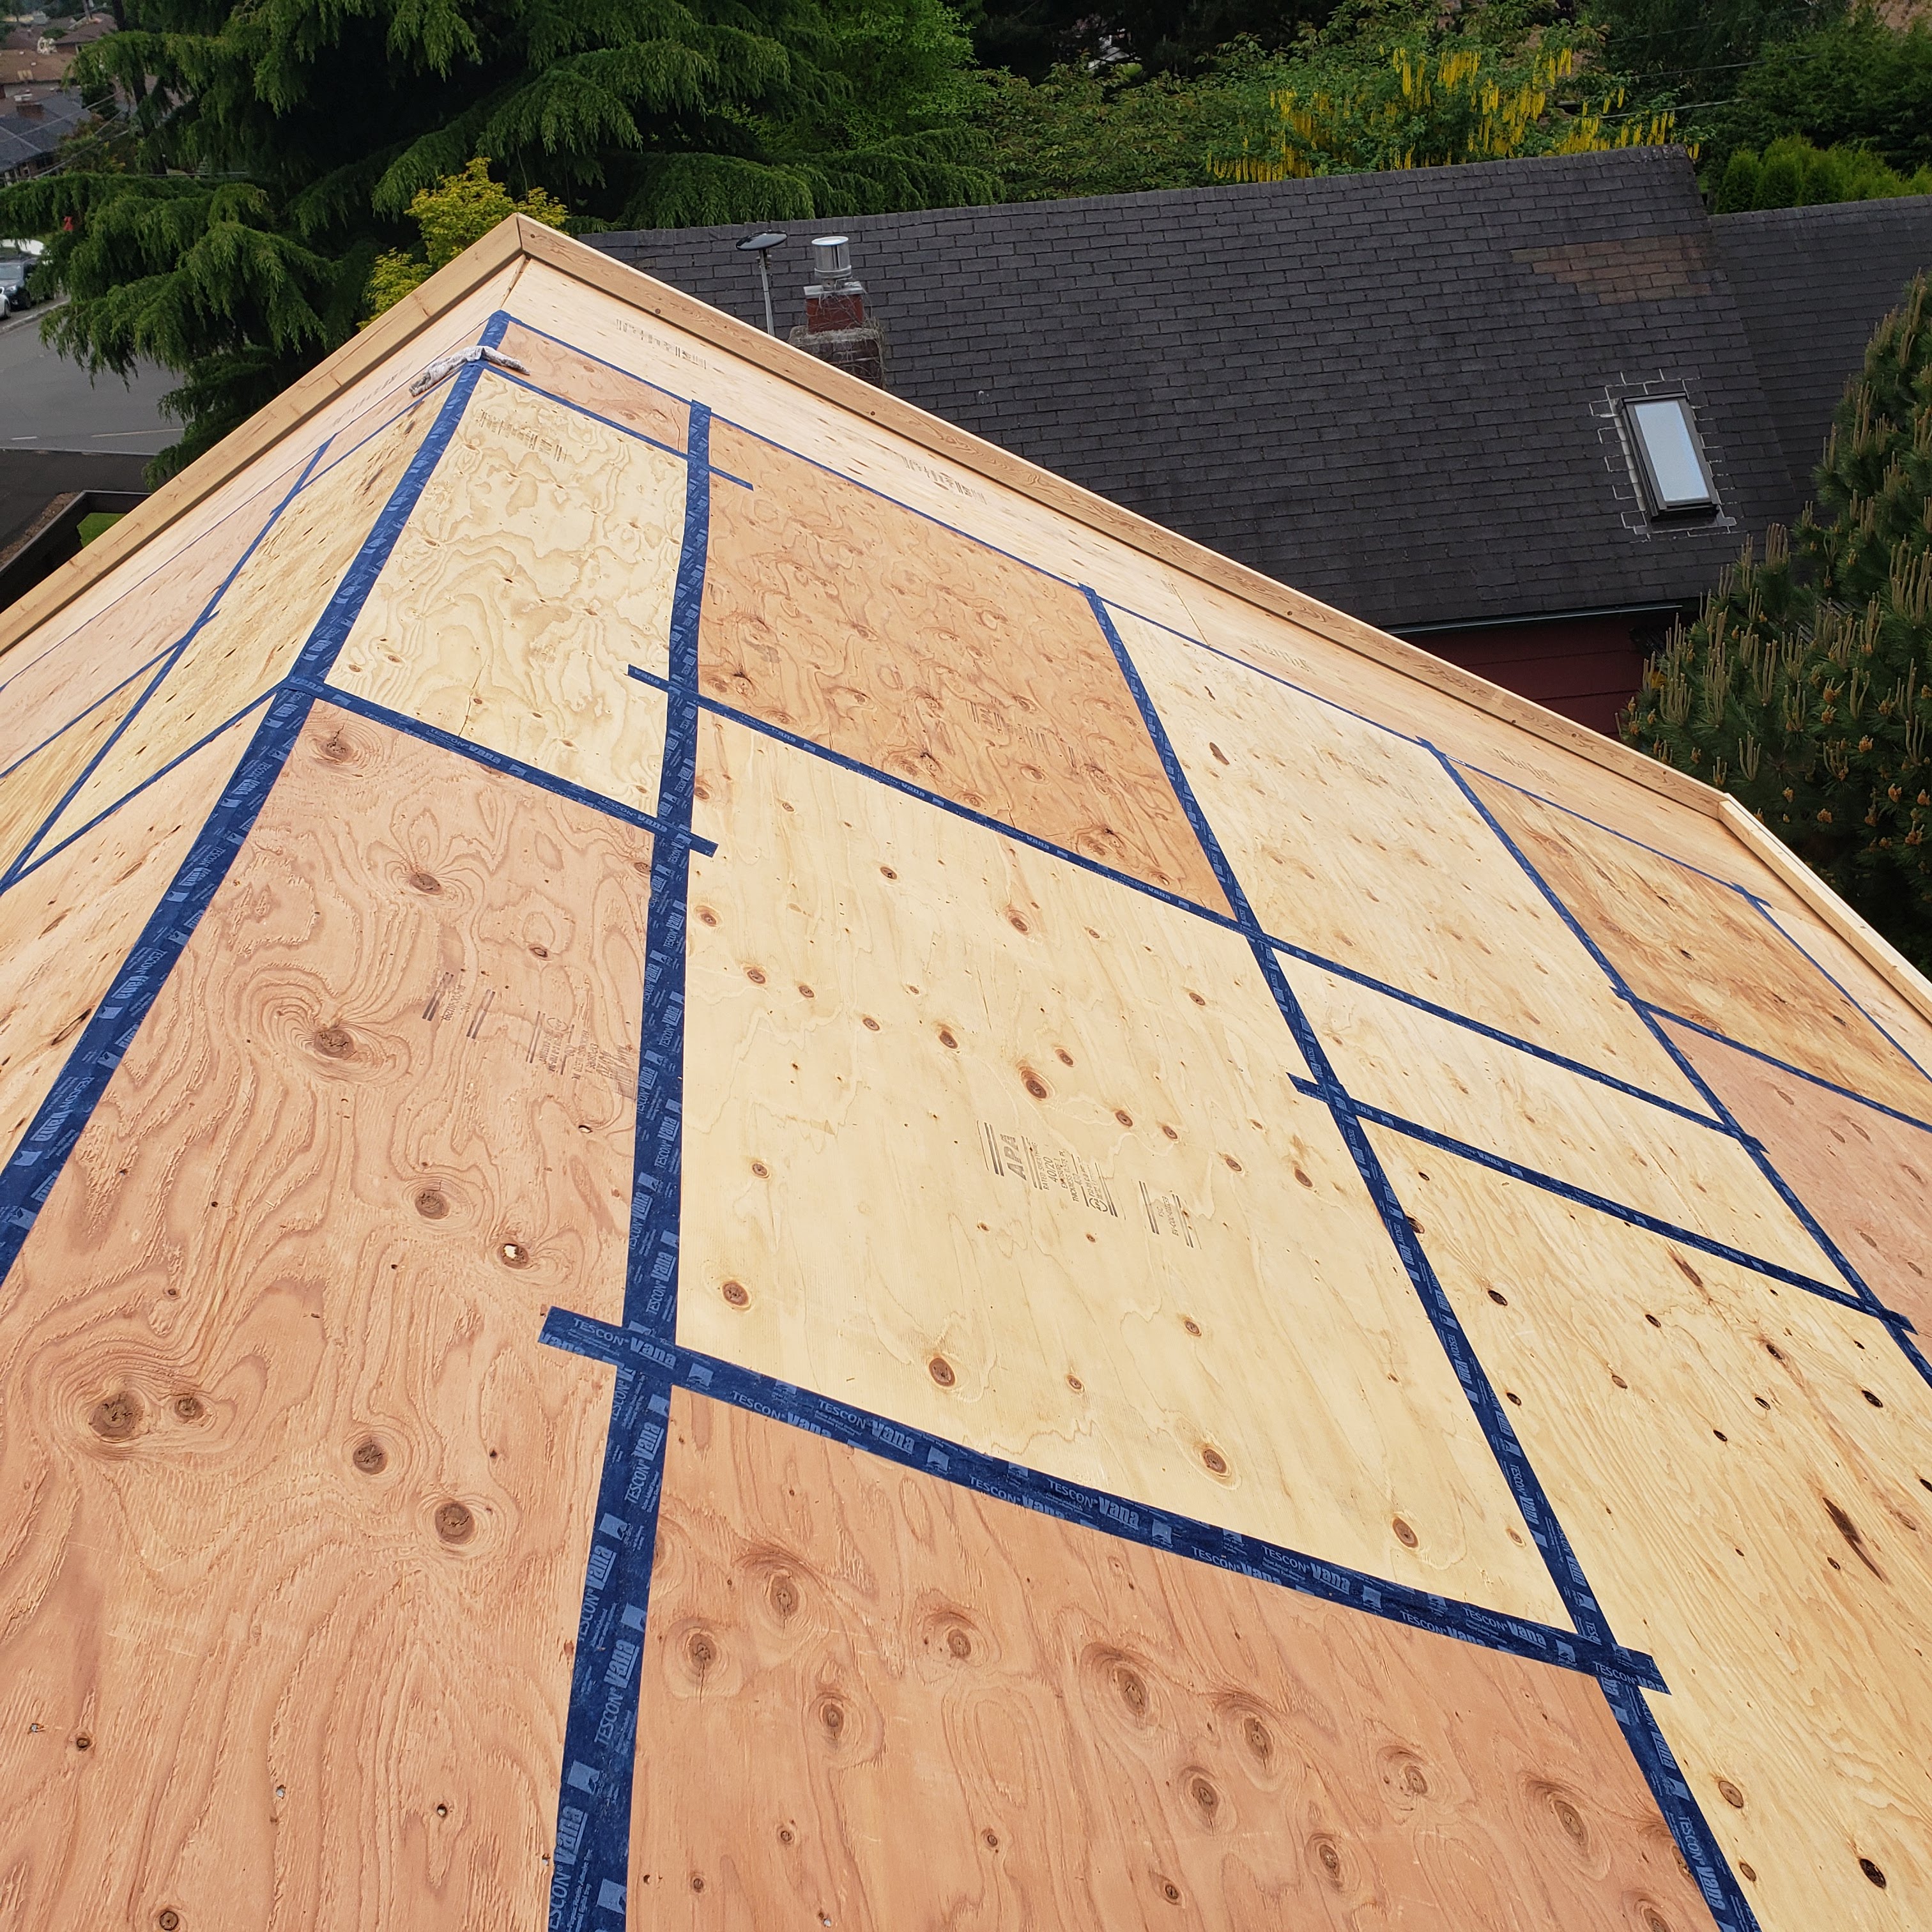
- Tape the horizontal and vertical joints in the roof sheathing panels with an approved, self-adhering flashing tape and cover with an underlayment of code-compliant ASTM D226 Type II (#30) or ASTM D4869 Type III or Type IV (#30) building felt or an approved synthetic underlayment.
- Cover the roof decking with two layers of 30# building felt.
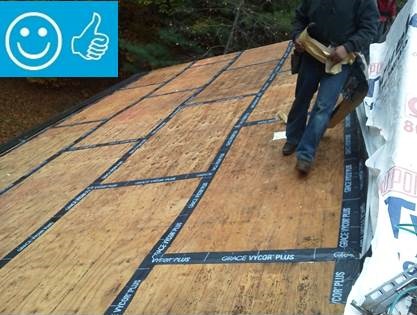
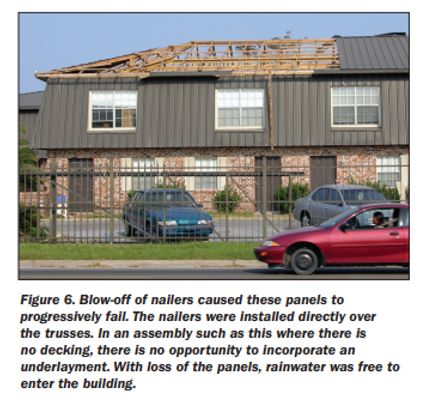
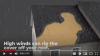
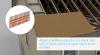
In high-wind zones, Building America recommends using the fully adhered roof membrane, which resists wind pressures and provides a “second line of defense” should any of the roof covering blow off. As an alternative, Building America recommends sealing the roof deck sheathing joints with flashing tape or membrane strips that are compatible with the plywood or OSB sheathing (Figures 2 and 3). Tapes and membrane selection for sealing the roof deck sheathing are discussed in the IBHS Fortified Home document Seal the Roof Deck: Choosing the Right Tape.
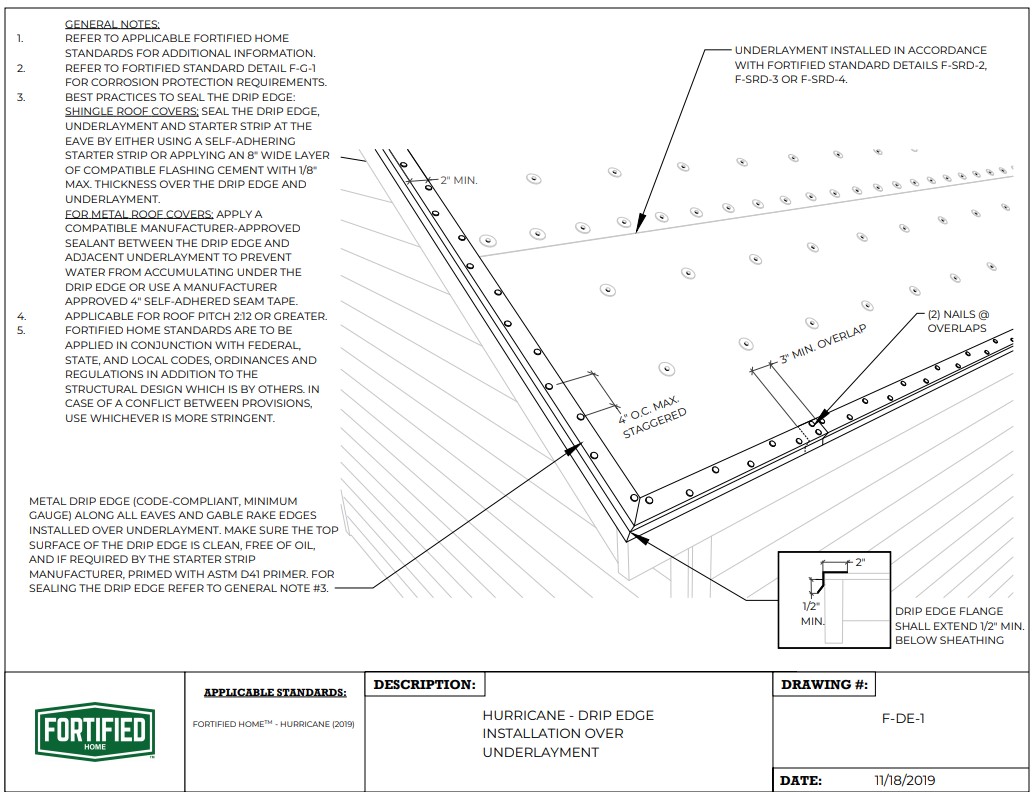
Eaves and Gable Rake Edges (“Lock it In”)
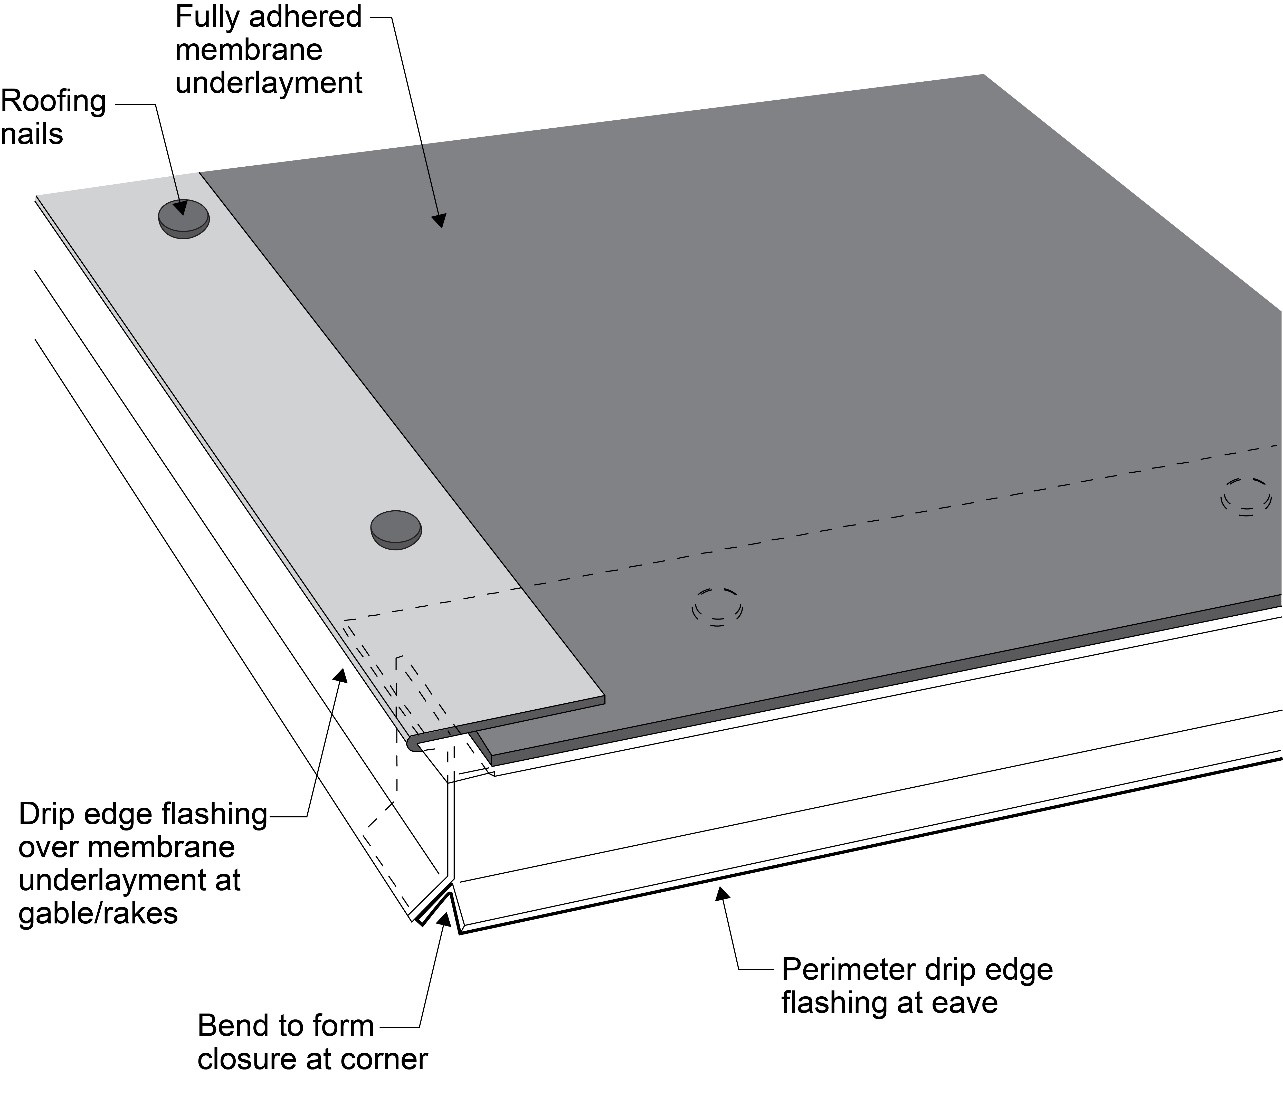
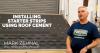
In high-wind zones, it is recommended that drip edges be installed at roof eaves and roof rakes (Figure 4). The following drip edge installation requirements are recommended:
- Code-compliant metal drip edges should be installed at eaves and gable rake edges (applicable codes set the minimum gauge required).
- Drip edges should overlap a minimum of 3 inches at joints.
- Eave drip edges should extend a minimum of ½ inch below the sheathing and overlap the top of the roof sheathing edge a minimum of 2 inches.
- The drip edge should be mechanically fastened to the roof deck at a maximum spacing of 4 inches, and the fasteners should be compatible with the flashing.
- Drip edges at eaves can be installed over the fully adhered membrane underlayment if flashing cement is used to seal the edges.
- Drip edges at rakes should be installed over the fully adhered membrane underlayment.
See the guide Roof Edge Protection for more information.
Other Considerations
Flashing. Proper flashing will keep rain and wind out of the roof at critical junctures around chimneys, flues, and other penetrations through the roof, at roof valleys, and where roofs meet walls. There are several guides in the Solution Center that describe best practices for flashing. See, for example, Step and Kick-Out Flashing at Roof-Wall Intersections and Roof Deck Valleys and Penetrations Sealed.
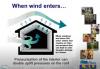
Venting. Many attics are vented; however, the vents can be an entry point for wind-blown rain, snow, and embers. They can also increase the risk of roof failure, should the vents come loose in a high-wind event, and allow winds to enter and overpressurize the attic. Consider constructing the home with an unvented attic. For more information, see the guides Vented vs. Unvented Attic, Unvented Conditioned Attic with Spray Foam Insulation Below Roof Deck, and Unvented Attic Insulation.
For vented roofs, select and install roof attic vents that resist the entry of wind-blown rain, snow, and embers. IBHS recommends that vent models be certified as resistant to wind and water intrusion in accordance with Florida Building Code TAS 100 (A). See the guide Roof Vents for more information
Roof Claddings. Regarding roofing cladding selections, roof coverings should be designed for the component and cladding wind pressures corresponding to the site design uplift pressures. The IBHS certification program requires that the roofing manufacturer’s tested uplift design pressures should have a factor of safety of 2.0. DP ratings listed in certified reports from the following organizations can be used as documentation for FORTIFIED: an International Code Council Evaluation Service (ICC-ES) Report, Florida Building Code Product Approval, or Miami-Dade Notice of Acceptance (NOA), or Texas Department of Insurance (TDI) Product Evaluation. Because design pressure ratings can vary across different parts of a home’s roof, IBHS recommends for simplicity that the builder pick a system and installation method that is adequate for the highest design pressures expected on the roof based on ASCE 7-10 or ASCE 7-16 (see the Fortified Home Hurricane Standards 2019). The 2015 IRC references two separate tables to determine the required design wind uplift pressures for roof coverings. Using these tables can be confusing, so the IBHS FORTIFIED Home™ program created a calculator to help roofers and evaluators determine the appropriate design pressures for steep-slope roof coverings. FORTIFIED Technical Bulletin FH-2020-01 provides additional information. Hail ratings are listed in the Fortified Home Hail Supplement to the High Wind Standards. See the Solution Center guides Asphalt Shingle Roofs, Clay or Concrete Tile Roofs, Metal Roofs, and Low-Slope Roofs for more information.
Success
In high wind zones, follow the guidelines of the IBHS Fortified Home program for installing and sealing roof decks to resist expected wind loads. A fully adhered roof membrane underlayment should be installed.
Asphalt shingles that are installed at eaves should be installed over an asphalt shingle starter strip that is adhered to the fully adhered membrane underlayment, to the drip edge, or both.
Asphalt shingles that are installed at gable rake edges should be set in a minimum 8-inch-wide strip of flashing cement.
Finally, it is recommended that soffit assemblies be constructed to address high wind loads in order to avoid “soffit collapse.” See the Solution Center guide Roof Vents for more information.
Climate
Follow the recommendations in this guide and as outlined in the construction standards provided by the IBHS Fortified Home program for hurricanes, high winds, and hail.
Training


CAD

Compliance
Retrofit
Scope
When re-roofing an existing home, take the opportunity to improve the home’s resistance to high winds and stormwater entry.
- Remove all existing roof covering and flashings, remove debris, and clean the deck.
- Inspect and replace damaged sheathing, framing, and flashing if needed.
- Nail down existing sheathing with additional fasteners per the requirements of the IBHS Fortified Home Program.
Additional information can be found in the IBHS Fortified Home New Roof Requirements Overview, which also summarizes reroofing guidance and the IBHS Re-Roofing Checklist. (There are three guides: for Hurricanes, High Winds, and High Winds and Hail. They are substantially similar in their requirements. The High Wind and Hail designation requires that roof coverings and accessories be rated as impact resistant.)
Description
The existing roof sheathing and flashing should be inspected, and damaged materials should be replaced. Additional fasteners are likely to be necessary. New/additional fastener spacing and type for the roof deck sheathing should follow the minimum requirements specified by IBHS Fortified Home Program in their See the IBHS Fortified Roof Standard Detail Set for Fortified Roof.
Often when re-roofing an older home, roof decks constructed with deck boards rather than plywood or oriented strand board (OSB) sheathing will be encountered. Solid sheathing (plywood or OSB) should be installed over the deck boards. See the IBHS document, Fastening Roof Sheathing Over Existing 1x Roof Deck Boards, for additional guidance.
If the roof covering is in good shape and will not be replaced, the roof of an existing home can still be strengthened by installing closed-cell spray polyurethane foam (SPF) adhesive on the underside of the roof deck to seal all seams in the sheathing and all sheathing to framing joints (Figure 1).
See the following Solution Center guides for more information on retrofitting existing roofs:
Flashing of Roof-Wall Intersections in Existing Homes
Water Managed Roof – Re-roofing and Adding Insulation Over a Sloped Roof
Water Managed Roof – Re-roofing and Adding Insulation over a Flat Roof

More
More Info.
Access to some references may require purchase from the publisher. While we continually update our database, links may have changed since posting. Please contact our webmaster if you find broken links.
The following authors and organizations contributed to the content in this Guide.
Building Science Corporation
Pacific Northwest National Laboratory