



Scope
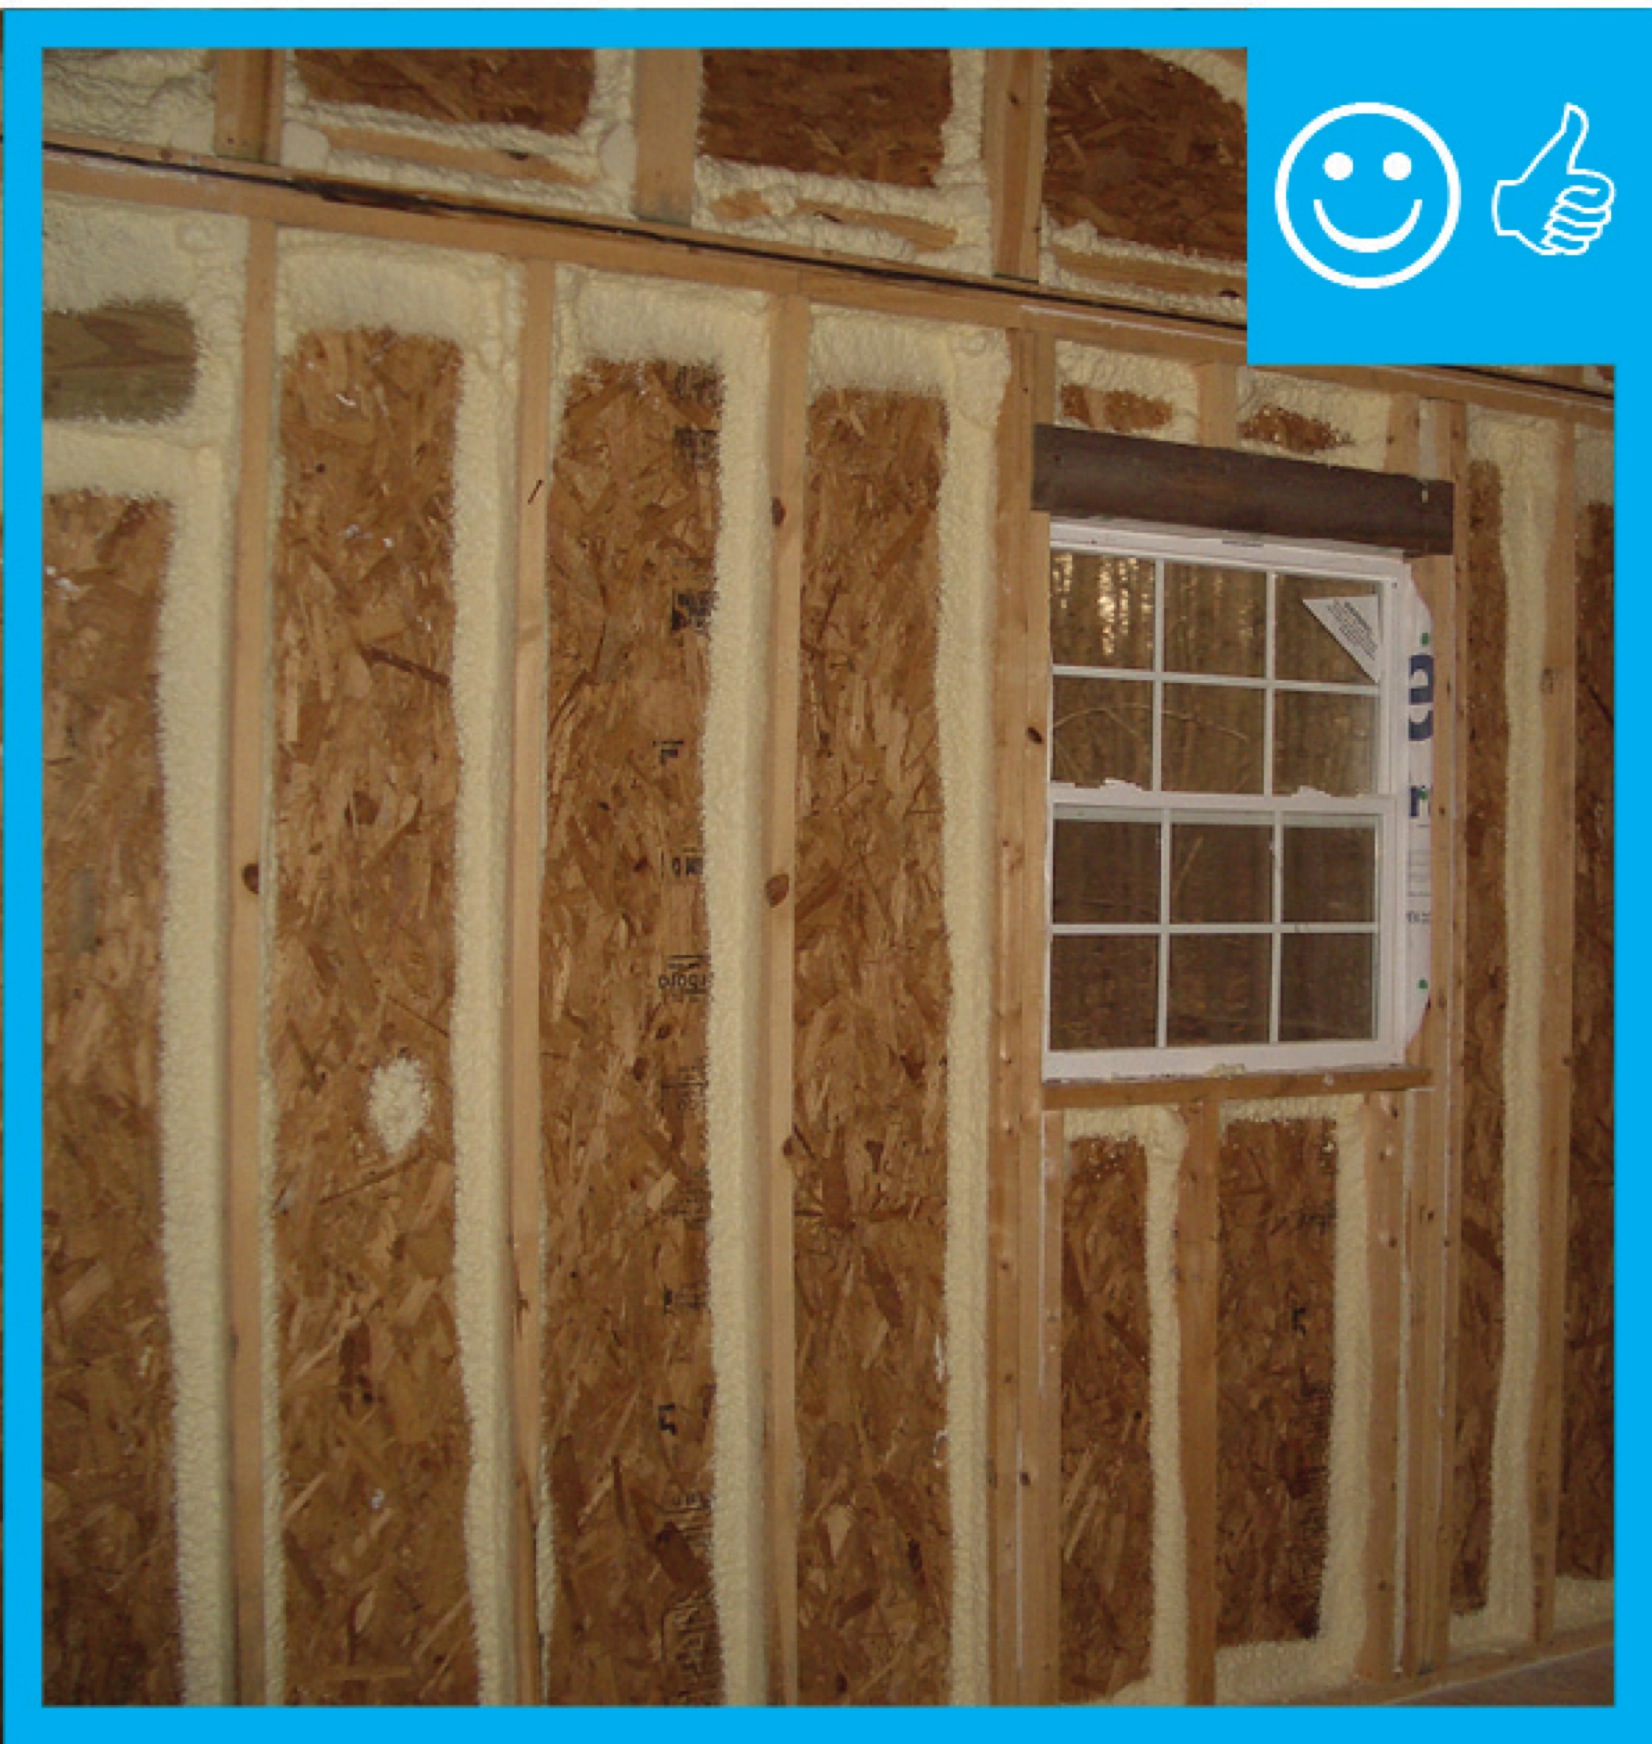
Ensure that a continuous air barrier exists around the entire thermal envelope of the home and that the air barrier is in full contact with the insulation.
- Identify on house plans what materials will constitute the air barrier in all components of the home’s thermal envelope including the walls, floors, and ceiling.
- Install the continuous air barrier which could consist of one or a combination of any of the following air barrier materials:
- rigid materials like foam board insulation, drywall, plywood, or OSB
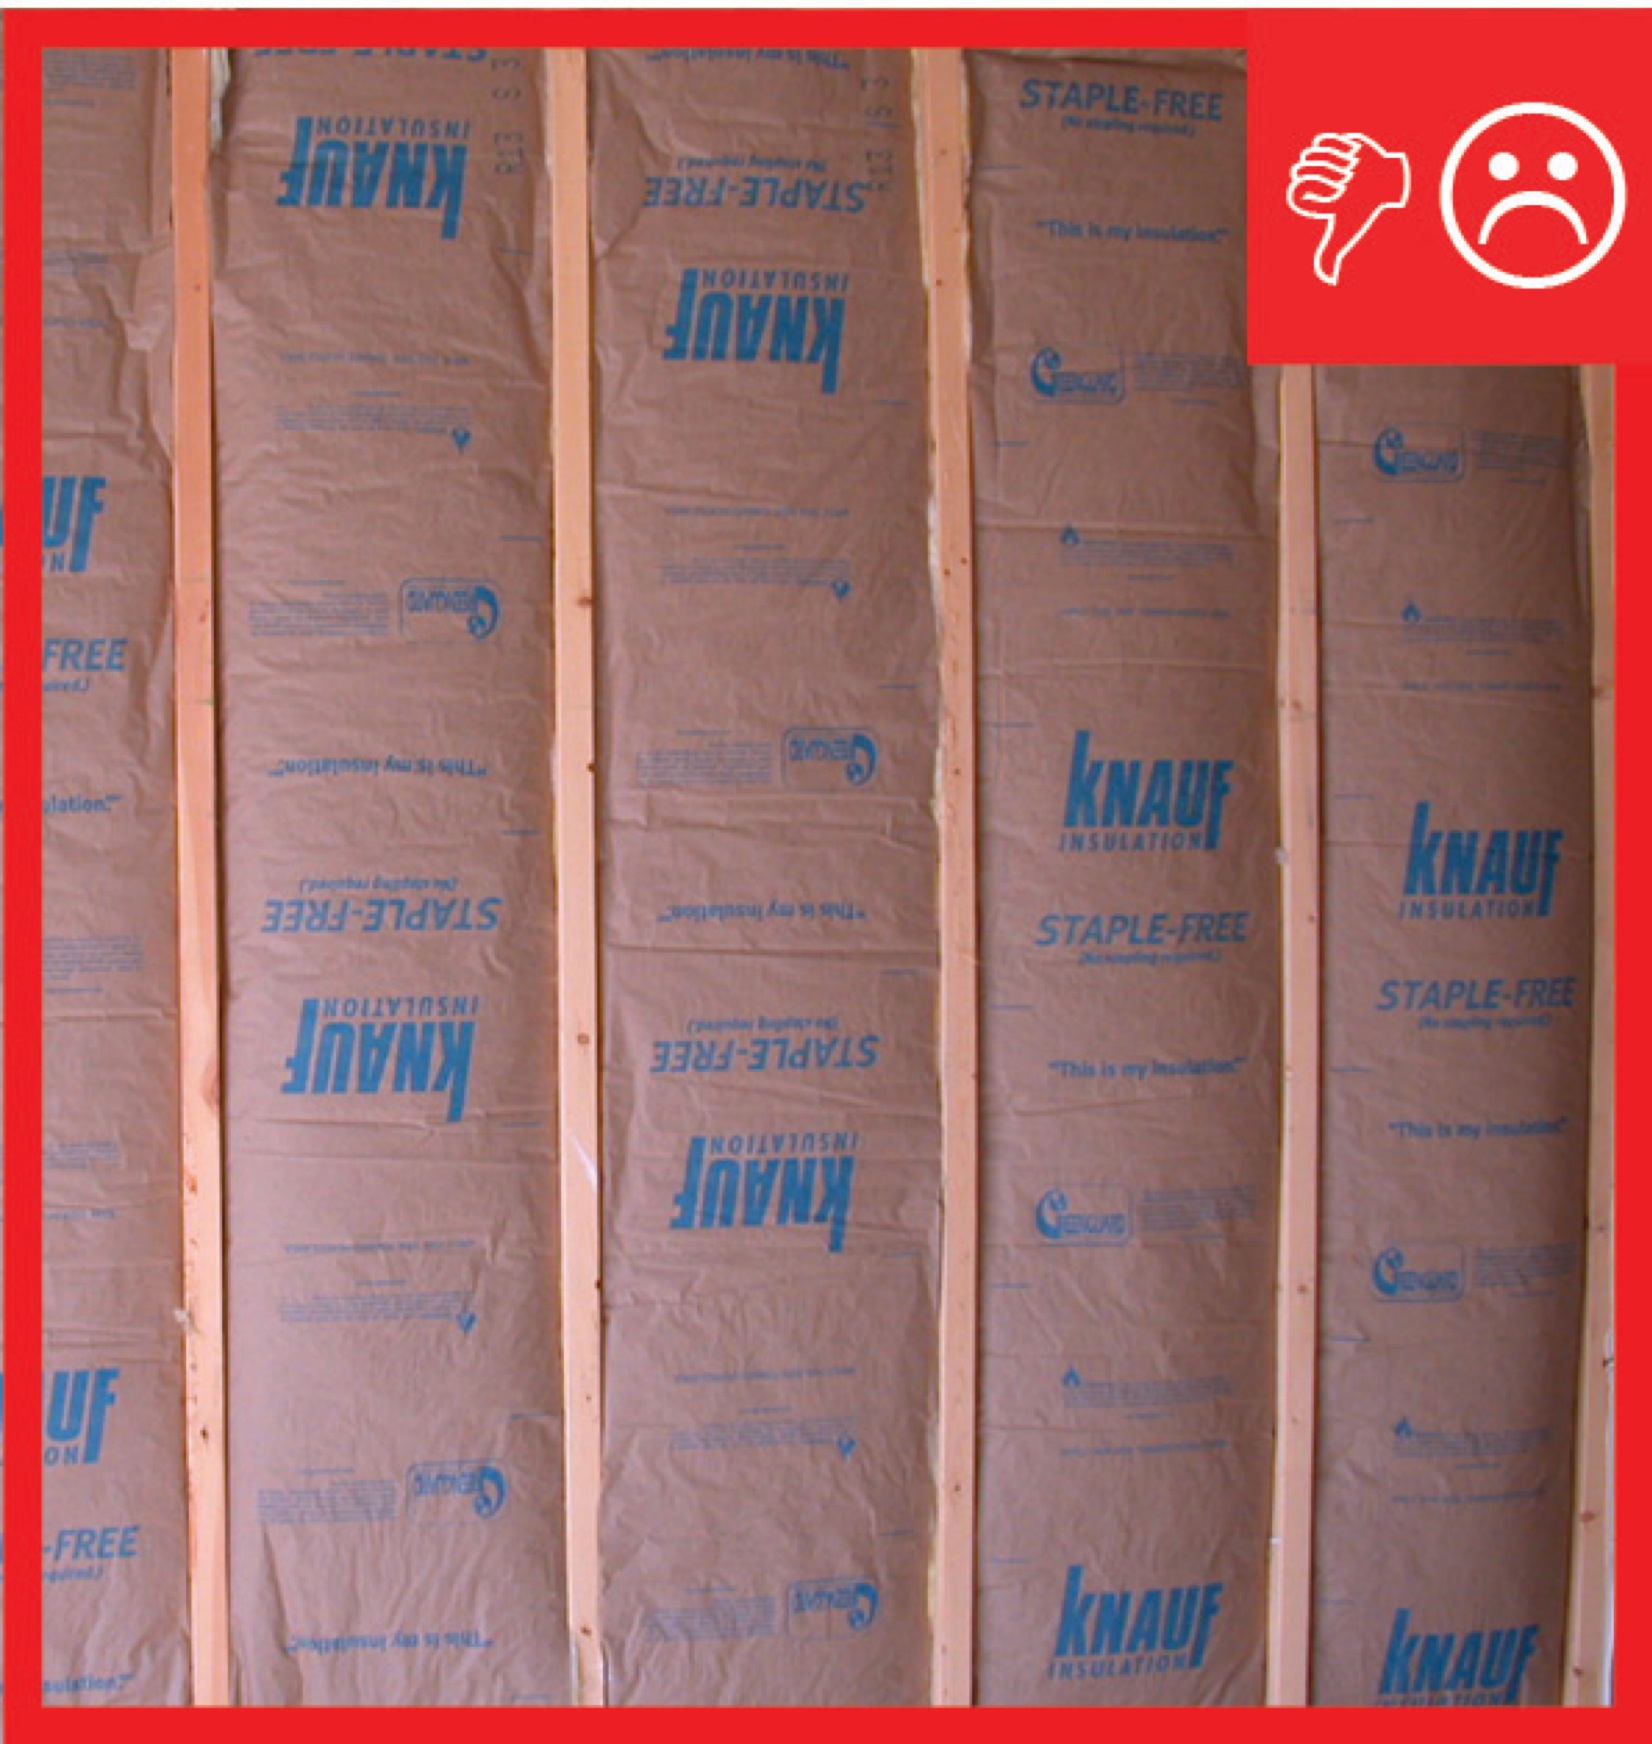
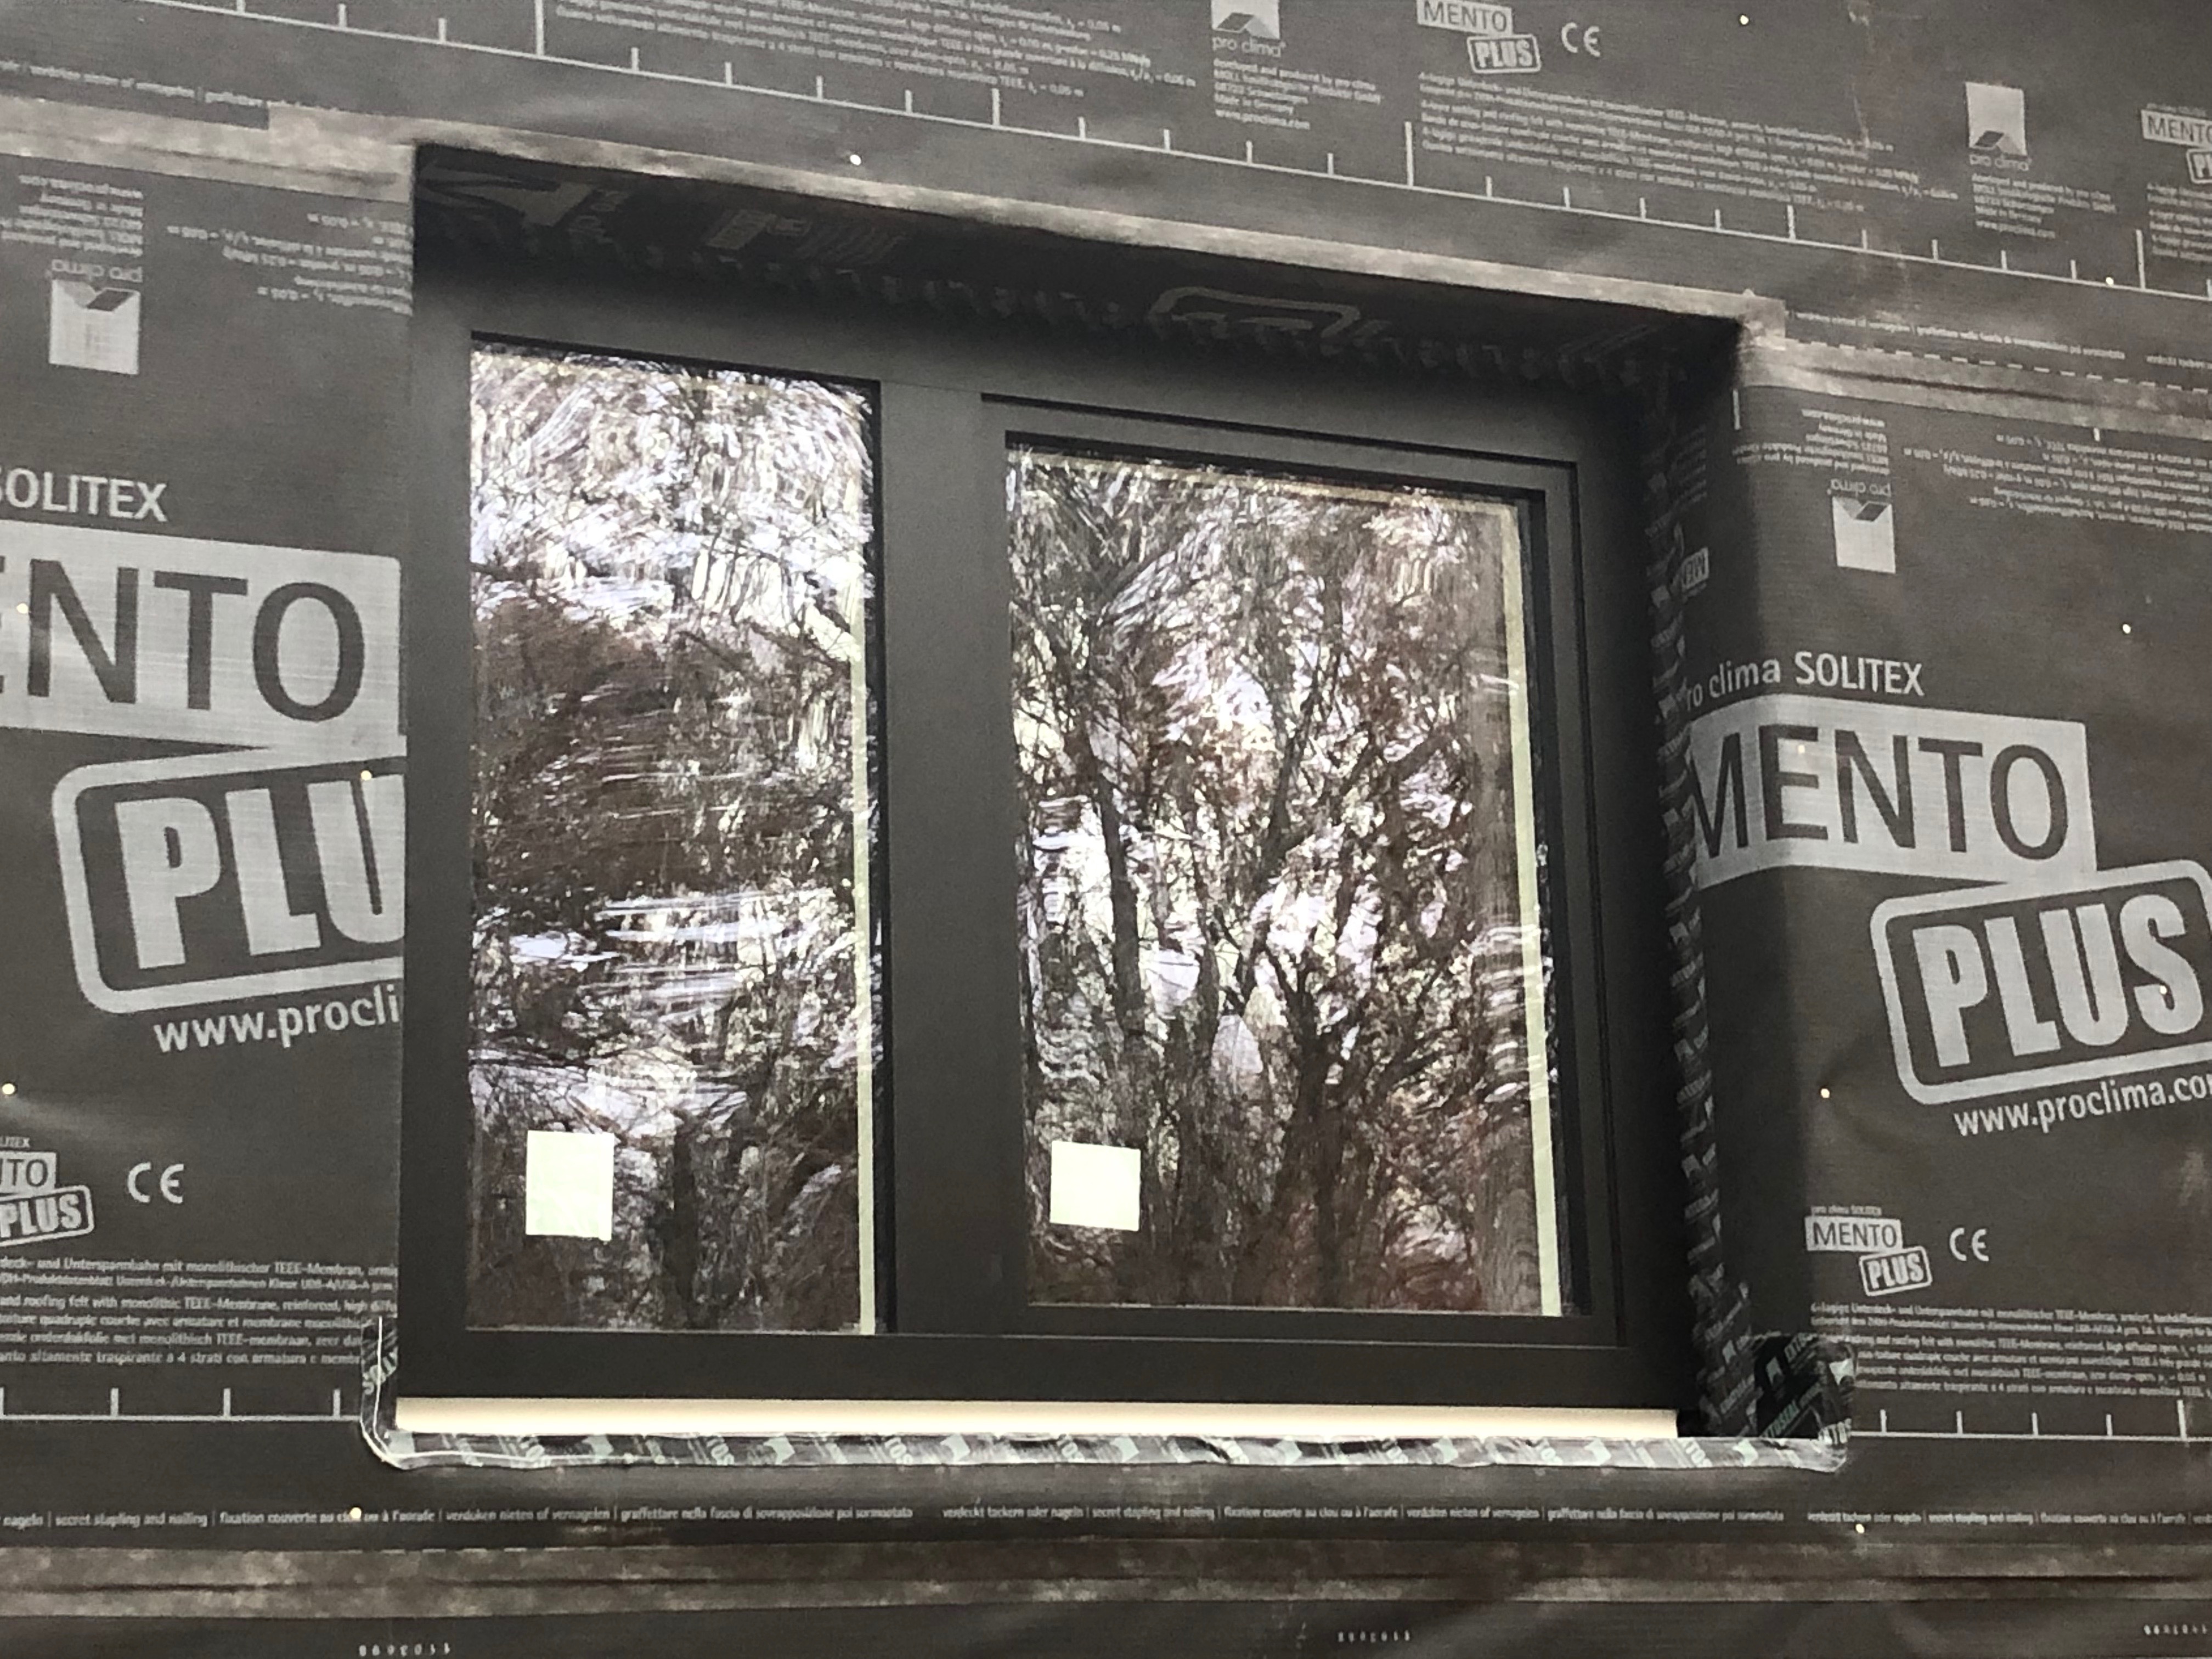
- flexible materials like house wrap, with all seams and edges sealed and with the house wrap supported using approved fasteners (don't use kraft paper or other materials that tear easily)
- fluid-applied membranes like liquid membranes, which are applied with a paint brush, roller, or sprayer over the sheathing
- spray foam – if used as the air barrier it should be at least 5.5 inches thick if open-cell or at least 1.5 inches thick if closed-cell spray foam insulation.
- Seal all seams, gaps, and holes in the air barrier.
- ENERGY STAR requires that an air barrier be installed at the exterior vertical surface of the wall insulation in all climate zones and also that an air barrier be installed at the interior vertical surface in Climate Zones 4-8. For ceilings, ENERGY STAR permits the air barrier to be at the interior or exterior horizontal surface in IECC Climate Zones 1-3 and at the interior horizontal surface in Climate Zones 4-8 (ENERGY STAR).
See the Compliance Tab for links to related codes and standards and voluntary federal energy-efficiency program requirements.
Description
The walls, floors, and roof/ceiling compose the physical shell of the home, also called the building enclosure or building envelope. Within these assemblies are components that comprise the home’s thermal envelope (insulation) and air barrier (sometimes referred to as the thermal boundary and pressure boundary). The air barrier layer or layers prevent the unwanted entry of outside air and escape of inside air. Code requires, and best practice dictates, that the home’s thermal layer of insulation be fully aligned with (in full continuous contact with) the home's continuous air barrier (see 2009, 2012, and 2015 IRC). The home’s thermal barrier of insulation must also be continuous for best performance. It should be installed without misalignments, compressions, gaps, or voids. See the guide Insulation Installation Achieves RESNET Grade 1 for more installing insulation.
The air barrier can consist of any durable solid material that blocks air flow between conditioned space and unconditioned space, for example drywall, OSB, or rigid foam insulation can serve as an air barrier. While ENERGY STAR recommends rigid air barriers, flexible air barriers such as house wrap are acceptable if they are fully sealed at all seams and edges and supported using approved fasteners. For the air barrier to be continuous, any seams between sheets of material, or joints between one material and another, or holes must be sealed with a long-lasting air-sealing material. For example, seams in plywood or OSB can be caulked, seams in rigid foam can be sealed with compatible tapes, joints between drywall and framing can be sealed with caulk or spray foam, gaps around windows can be sealed with foam rods, spray foam, and self-adhesive flashing, holes around piping, wiring, or electrical boxes can be sealed with caulk, spray foam, or gaskets. Some exterior wall assemblies require additional air sealing details as described in the following guides: Walls behind Showers and Tubs, Staircase Walls, Walls behind Fireplaces, Attic Knee Walls, Skylight Shaft Walls, Walls Adjoining Porch Roof, Air Sealing Attached Garage, and Double Walls.
The air barrier may be installed on the interior side of the insulation, the exterior side of the insulation, or both, depending on the building component and the climate. For example, according to the ENERGY STAR Rater Field Checklist, in ceilings in IECC Climate Zones 1-3, the air barrier can be aligned with either the interior or exterior horizontal surface of the insulation but, in Climate Zones 4-8, it must be aligned with the interior horizontal surface of the ceilings (i.e., mudded, taped drywall). In walls, the air barrier (e.g., OSB or rigid foam sheathing) should be aligned with the exterior vertical surface of the insulation in all climate zones and also at the interior vertical surface of the wall insulation (the drywall) in Climate Zones 4-8. Regarding floors, the air barrier should be aligned with the exterior vertical surface of the insulation (at the rim joists) in all climate zones and if the floor is over unconditioned space, the subfloor must be aligned with the interior horizontal surface of the floor insulation (i.e., the insulation must be touching the subfloor above it, for example by installing batt insulation with metal staves or twine that will keep the batts up against the floor above).
While the thermal envelope (the insulation) is easy to see, it is sometimes difficult to determine what components comprise the air barrier, especially where one building component meets another, such as at rim joists. This is a problem because, to be effective, the air barrier must be continuous around the entire building envelope. This can be addressed at the design stage by making a copy of the plans and drawing or highlighting the components that will form the air barrier in each subassembly. See Figure 1.
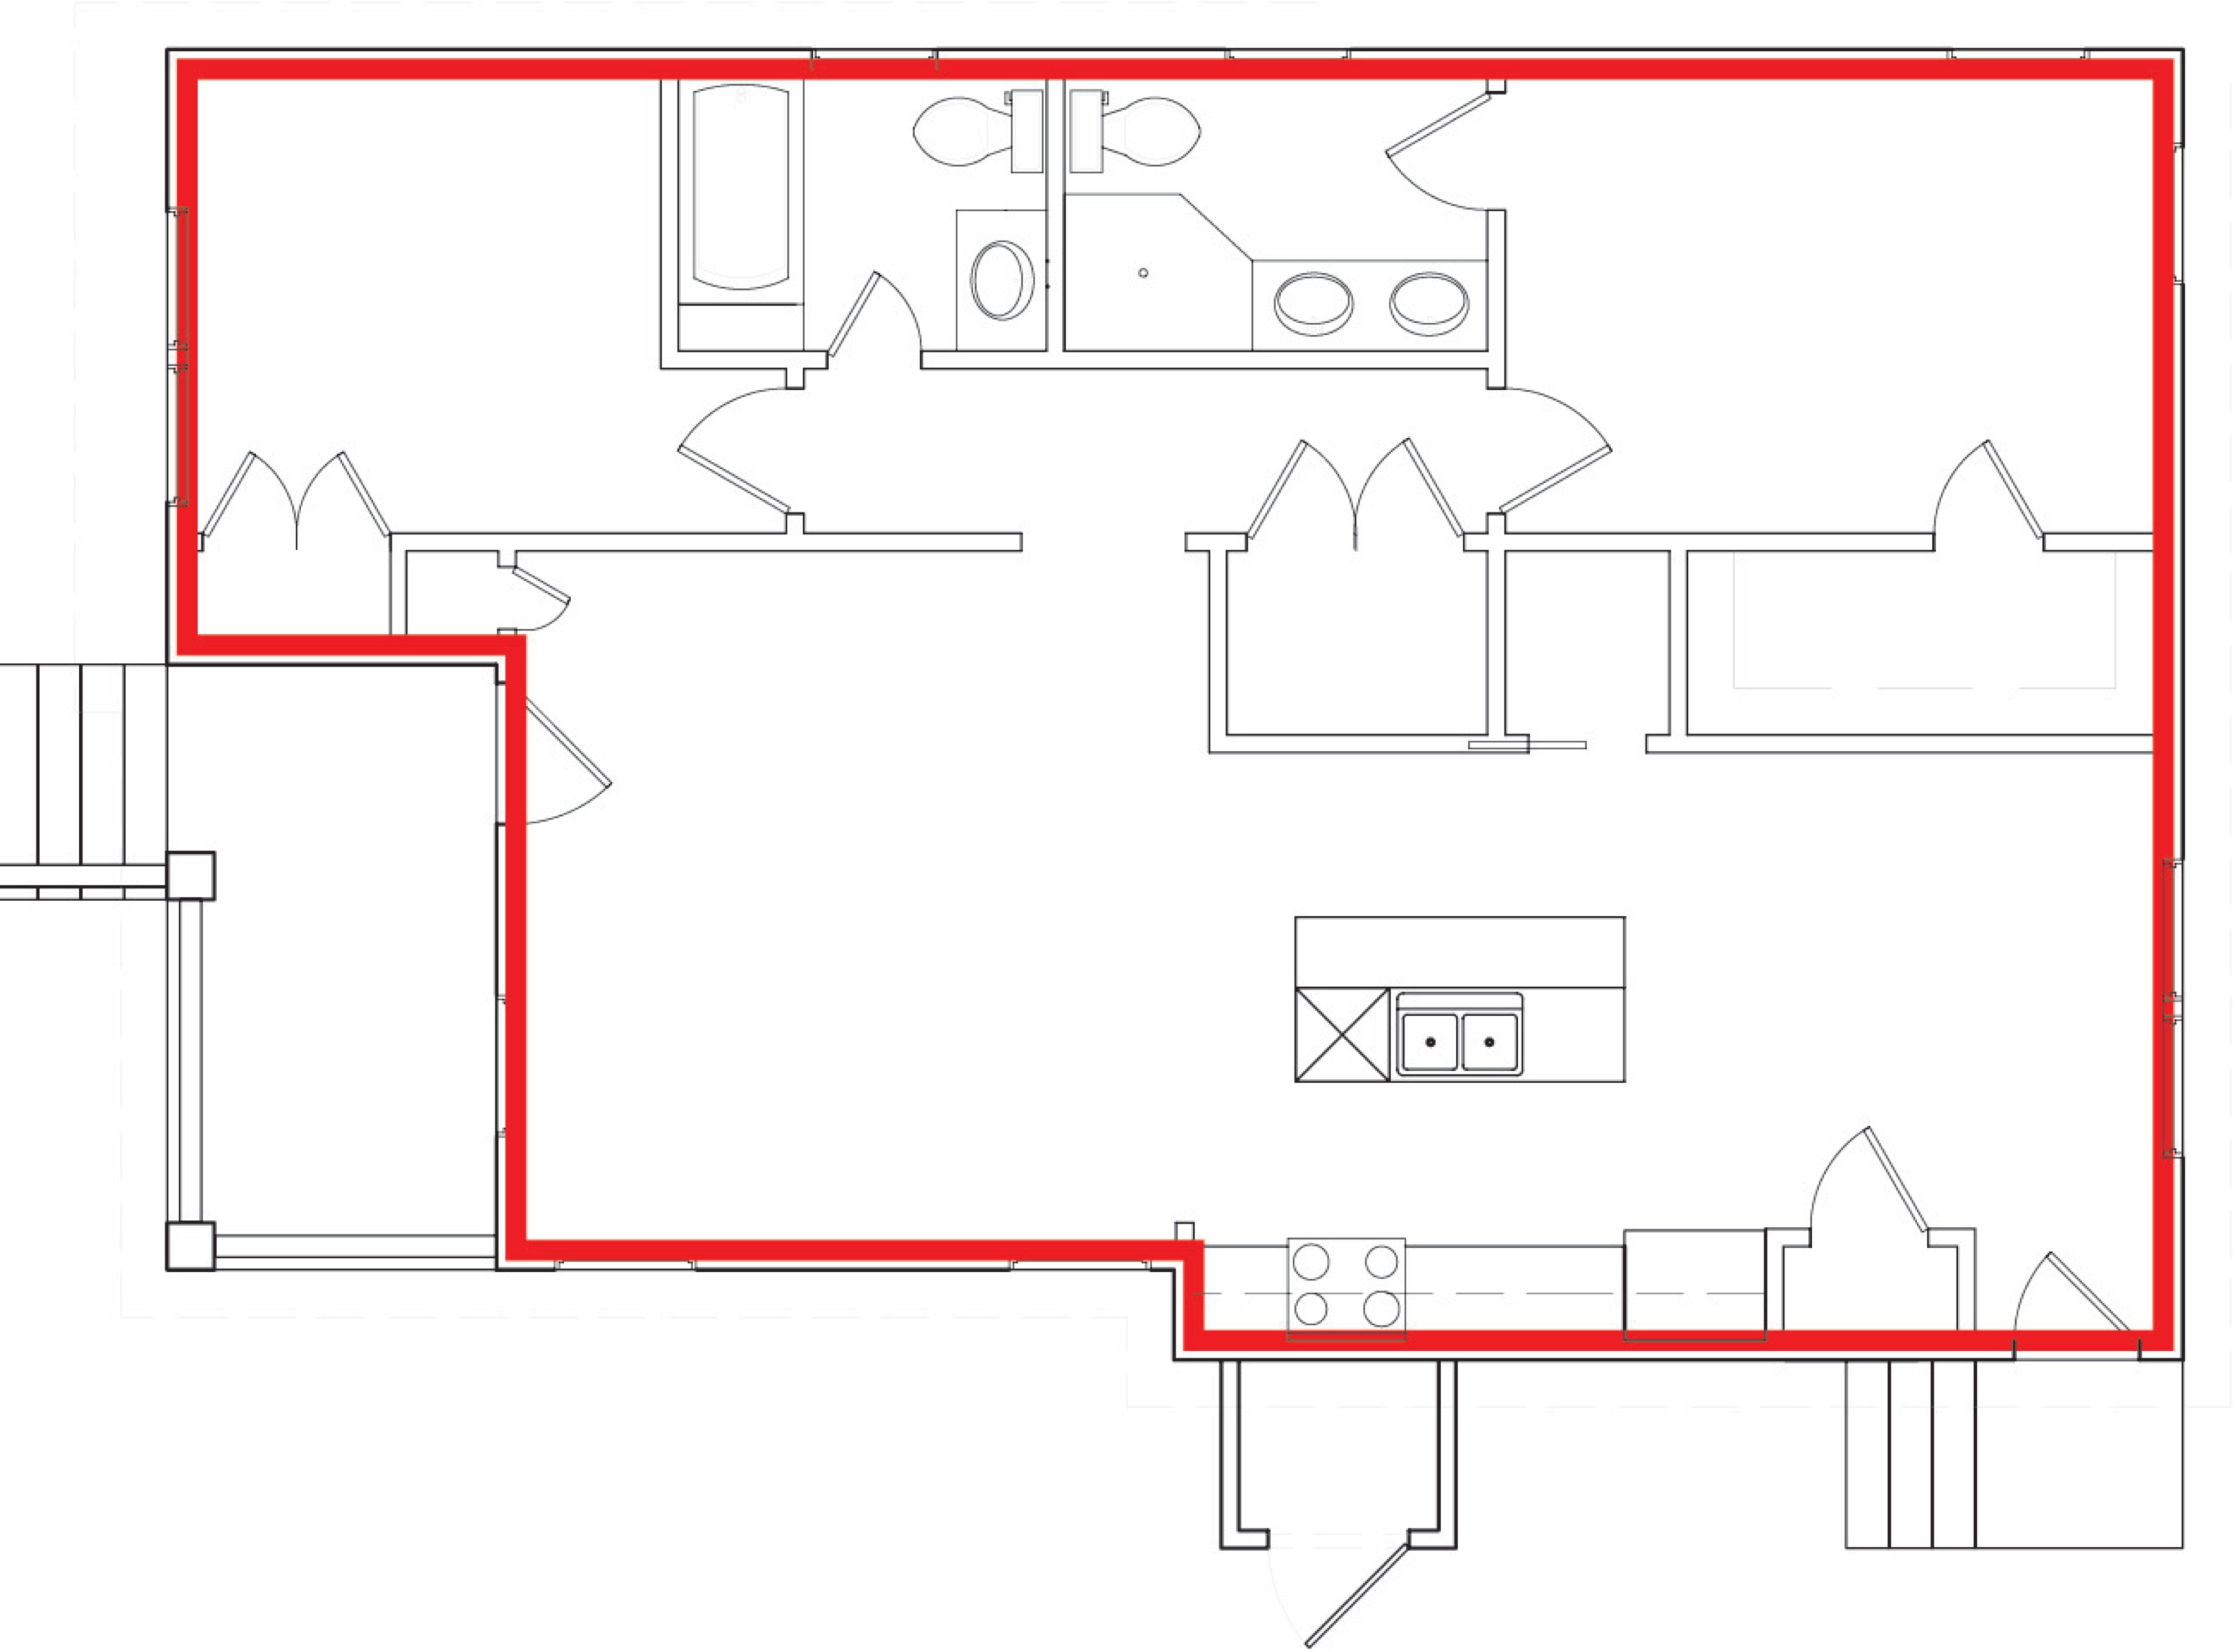
How to Install a Continuous Air Barrier
- Determine the location of the air barrier in the ceilings, walls, and floors, and specify it on the house plans. According to ENERGY STAR requirements, the air barrier location is based on the home’s climate zone location:
* Ceilings - At interior or exterior horizontal surface of ceiling insulation in Climate Zones 1-3; at interior horizontal surface of ceiling insulation in Climate Zones 4-8.
* Walls - At exterior vertical surface of wall insulation in all climate zones; and also at interior vertical surface of wall insulation for Climate Zones 4-8.
* Floors - At exterior vertical surface of wall insulation in all climate zones; and, if over unconditioned space, also at interior horizontal surface with supports to ensure alignment. - Install the air barrier and ensure that is continuous across all components of the thermal envelope (see Figure 2 for an example of continuous air sealing). An air barrier is defined as any durable solid material that blocks air flow between conditioned space and unconditioned space, including necessary sealing to block excessive air flow at edges and seams and adequate support to resist positive and negative pressures without displacement or damage.
ENERGY STAR Single-Family New Homes recommends, but does not require, rigid air barriers. ENERGY STAR specifies that open-cell foam have a finished thickness ≥ 5.5 inches and closed-cell foam have a finished thickness ≥ 1.5 inches to qualify as an air barrier, unless the manufacturer indicates otherwise. If flexible air barriers such as house wrap are used, they should be fully sealed at all seams and edges and supported using fasteners with caps or heads ≥ 1 inch in diameter, unless otherwise indicated by the manufacturer. Flexible air barriers should not be made of kraft paper, paper-based products, or other materials that are easily torn. If polyethylene is used, its thickness should be ≥ 6 mil. ENERGY STAR highly recommends, but does not require, inclusion of an interior air barrier at band joists in Climate Zone 4 through 8. All insulated vertical surfaces are considered walls (e.g., above- and below-grade exterior walls and knee walls) and must meet the air barrier requirements for walls, with the exception of adiabatic walls in multifamily dwellings. All insulated ceiling surfaces, regardless of slope (e.g., cathedral ceilings, tray ceilings, conditioned attic roof decks, flat ceilings, sloped ceilings), must meet the requirements for ceilings. - Air seal all seams, gaps, and holes in the air barrier. For example:
* Use caulk and approved tape to seal seams in sheathing, subflooring, and drywall.
* Use caulk and spray foam to seal gaps around wiring, piping, etc.
* Cut pieces of rigid air blocking material like rigid foam or plywood and caulk in place to block larger air gaps.
* Use caulk or putty to seal around electrical boxes or install boxes with built-in rubber gaskets.
* Use sheet metal and fire-rated caulk to air seal around flues. - See the ENERGY STAR Rater Field Checklist, Thermal Enclosure System, 4. Air Sealing, for guides that provide specific air-sealing details.
How to Install a Continuous Thermal Barrier
- Install the insulation and ensure that it is in full alignment with (in contact with) a continuous air barrier at the walls, floors, and ceilings. Take care to make the air barrier continuous by caulking at joints between wall components such as at rim joists. Follow RESNET Grade I Insulation Installation Standards when installing the insulation. See the ENERGY STAR Rater Field Checklist, Thermal Enclosure System, 2. Fully-Aligned Air Barriers, for guides that provide specific insulation alignment details.
- Install insulation at levels that meet or exceed code. If pursuing ENERGY STAR certification, insulation levels should meet or exceed the 2009 IECC requirements (Table 402.1.1). If pursuing DOE Zero Energy Ready Home certification, insulation levels should meet or exceed 2012 IECC requirements (Table 402.1.1). See the Compliance tab for additional information.
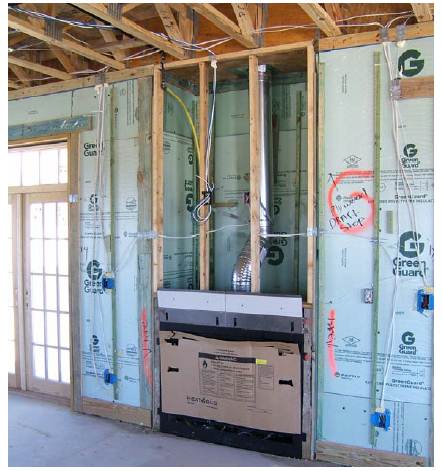
Ensuring Success
Verify with a visual inspection that a continuous air barrier exists to completely enclose the conditioned space of the house. Inspect that all seams, gaps, and holes in the air barrier are sealed with caulk, foam, or tape. Verify whole house air leakage with a blower door test. Visually inspect that all insulation levels meet or exceed 2009 IECC levels and achieve Grade I installation per RESNET standards.
Typical R-values for common insulation materials are summarized in this table, which also identifies the vapor retarder classification for each insulation.
Region
The map in Figure 1 shows the climate zones for states that have adopted energy codes equivalent to the International Energy Conservation Code (IECC) 2009, 12, 15, and 18. The map in Figure 2 shows the climate zones for states that have adopted energy codes equivalent to the IECC 2021. Climate zone-specific requirements specified in the IECC are shown in the Compliance Tab of this guide.
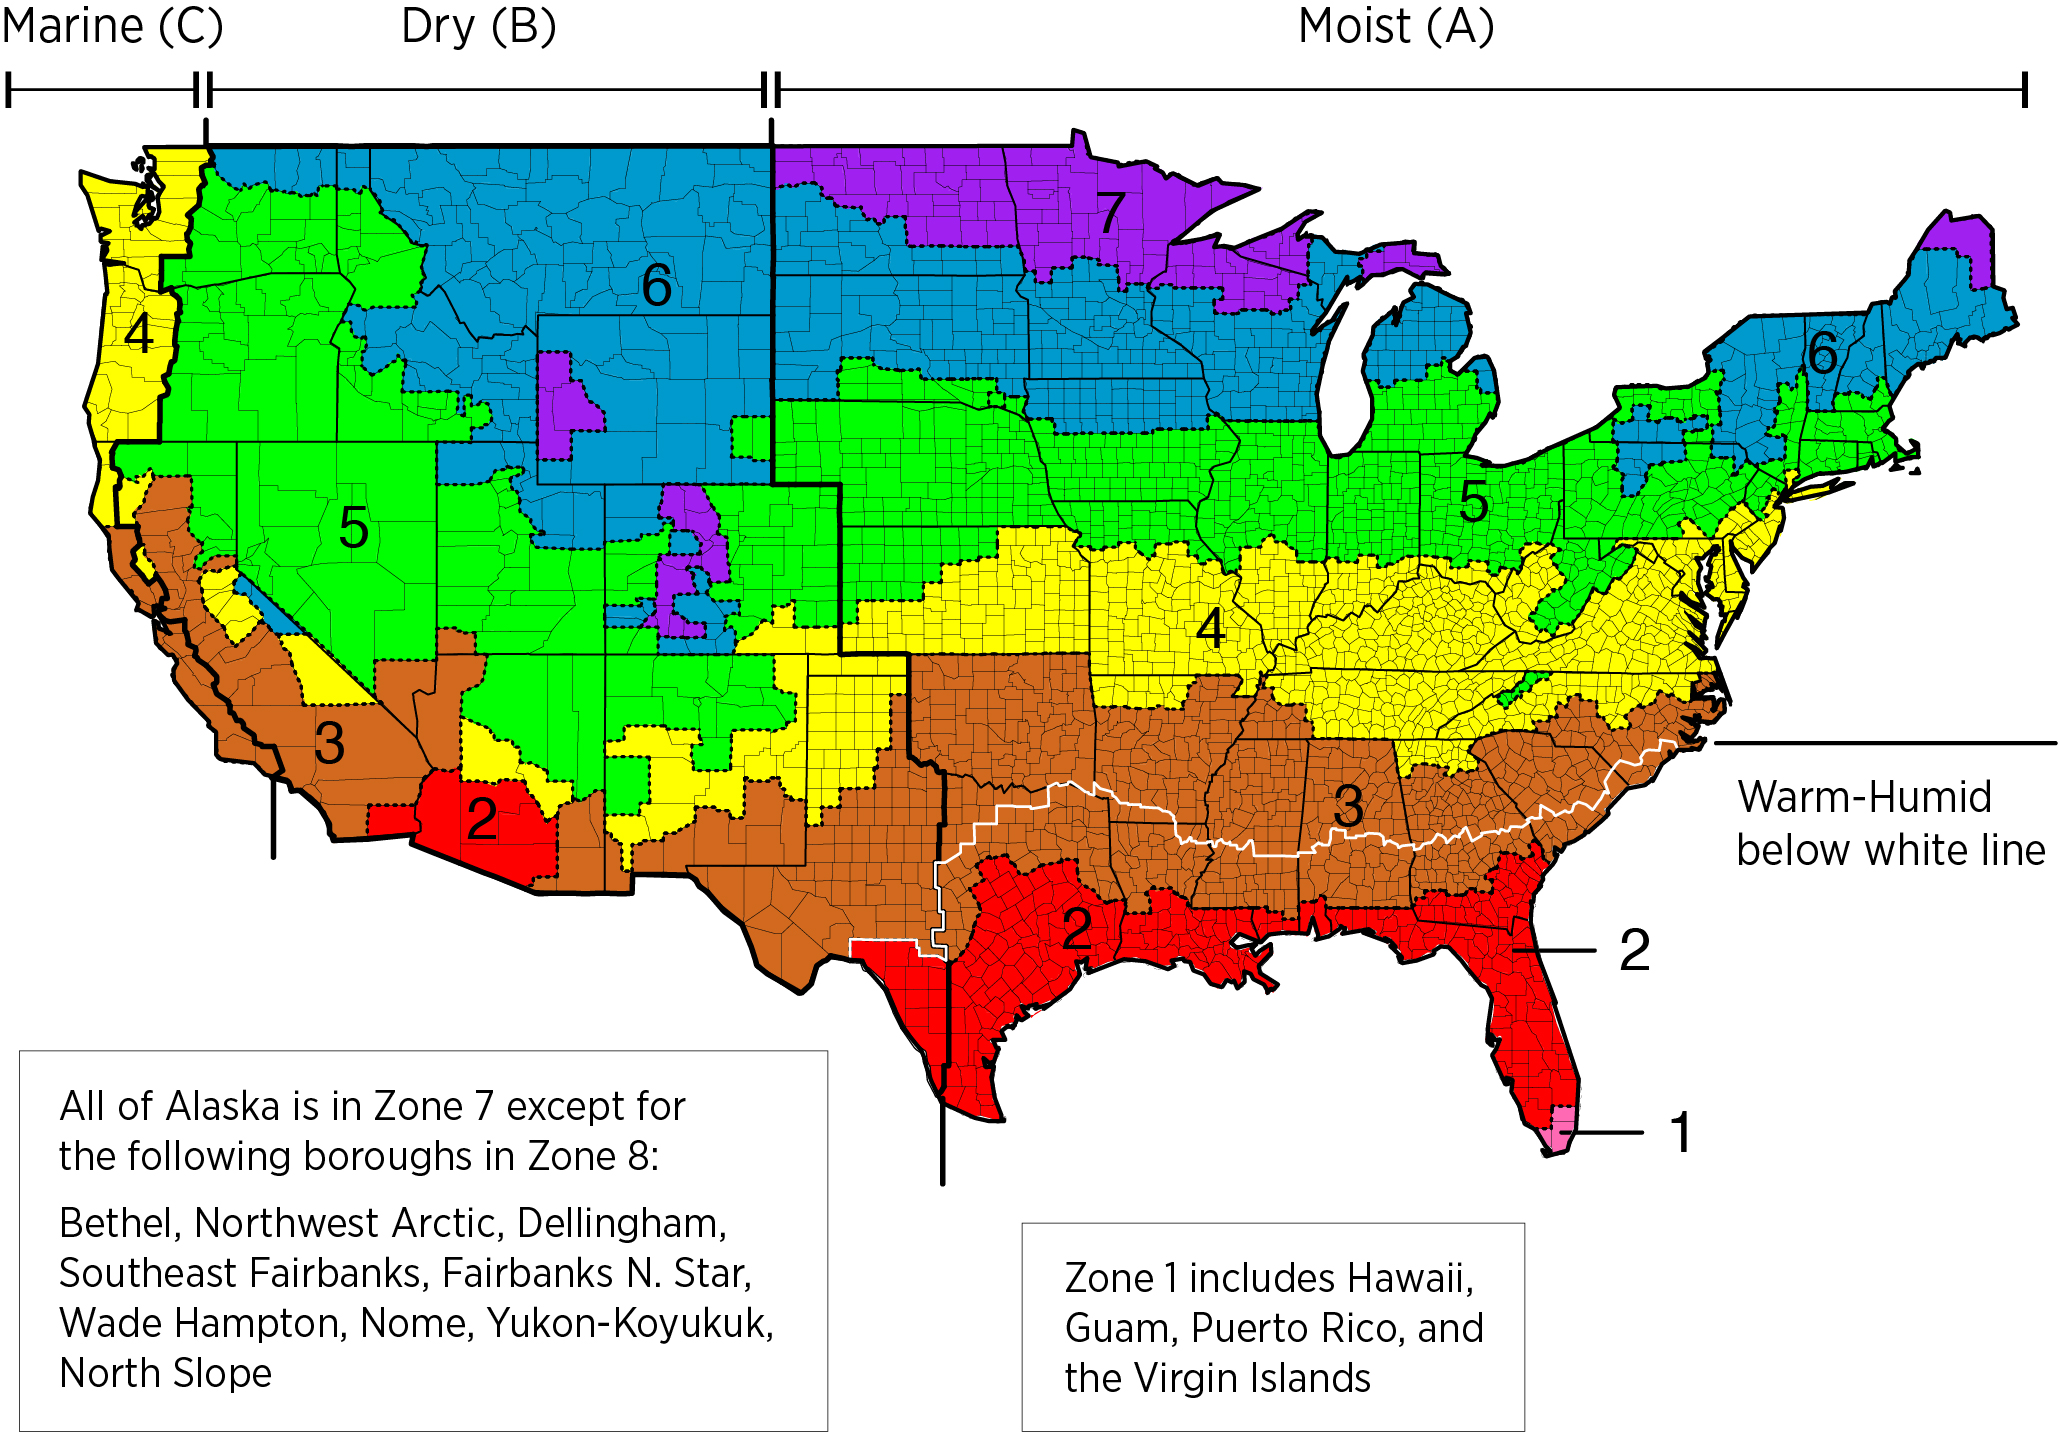
Source
2012 edition of code establishing a baseline for energy efficiency by setting performance standards for the building envelope (defined as the boundary that separates heated/cooled air from unconditioned, outside air), mechanical systems, lighting systems and service water heating systems in homes and commercial businesses.
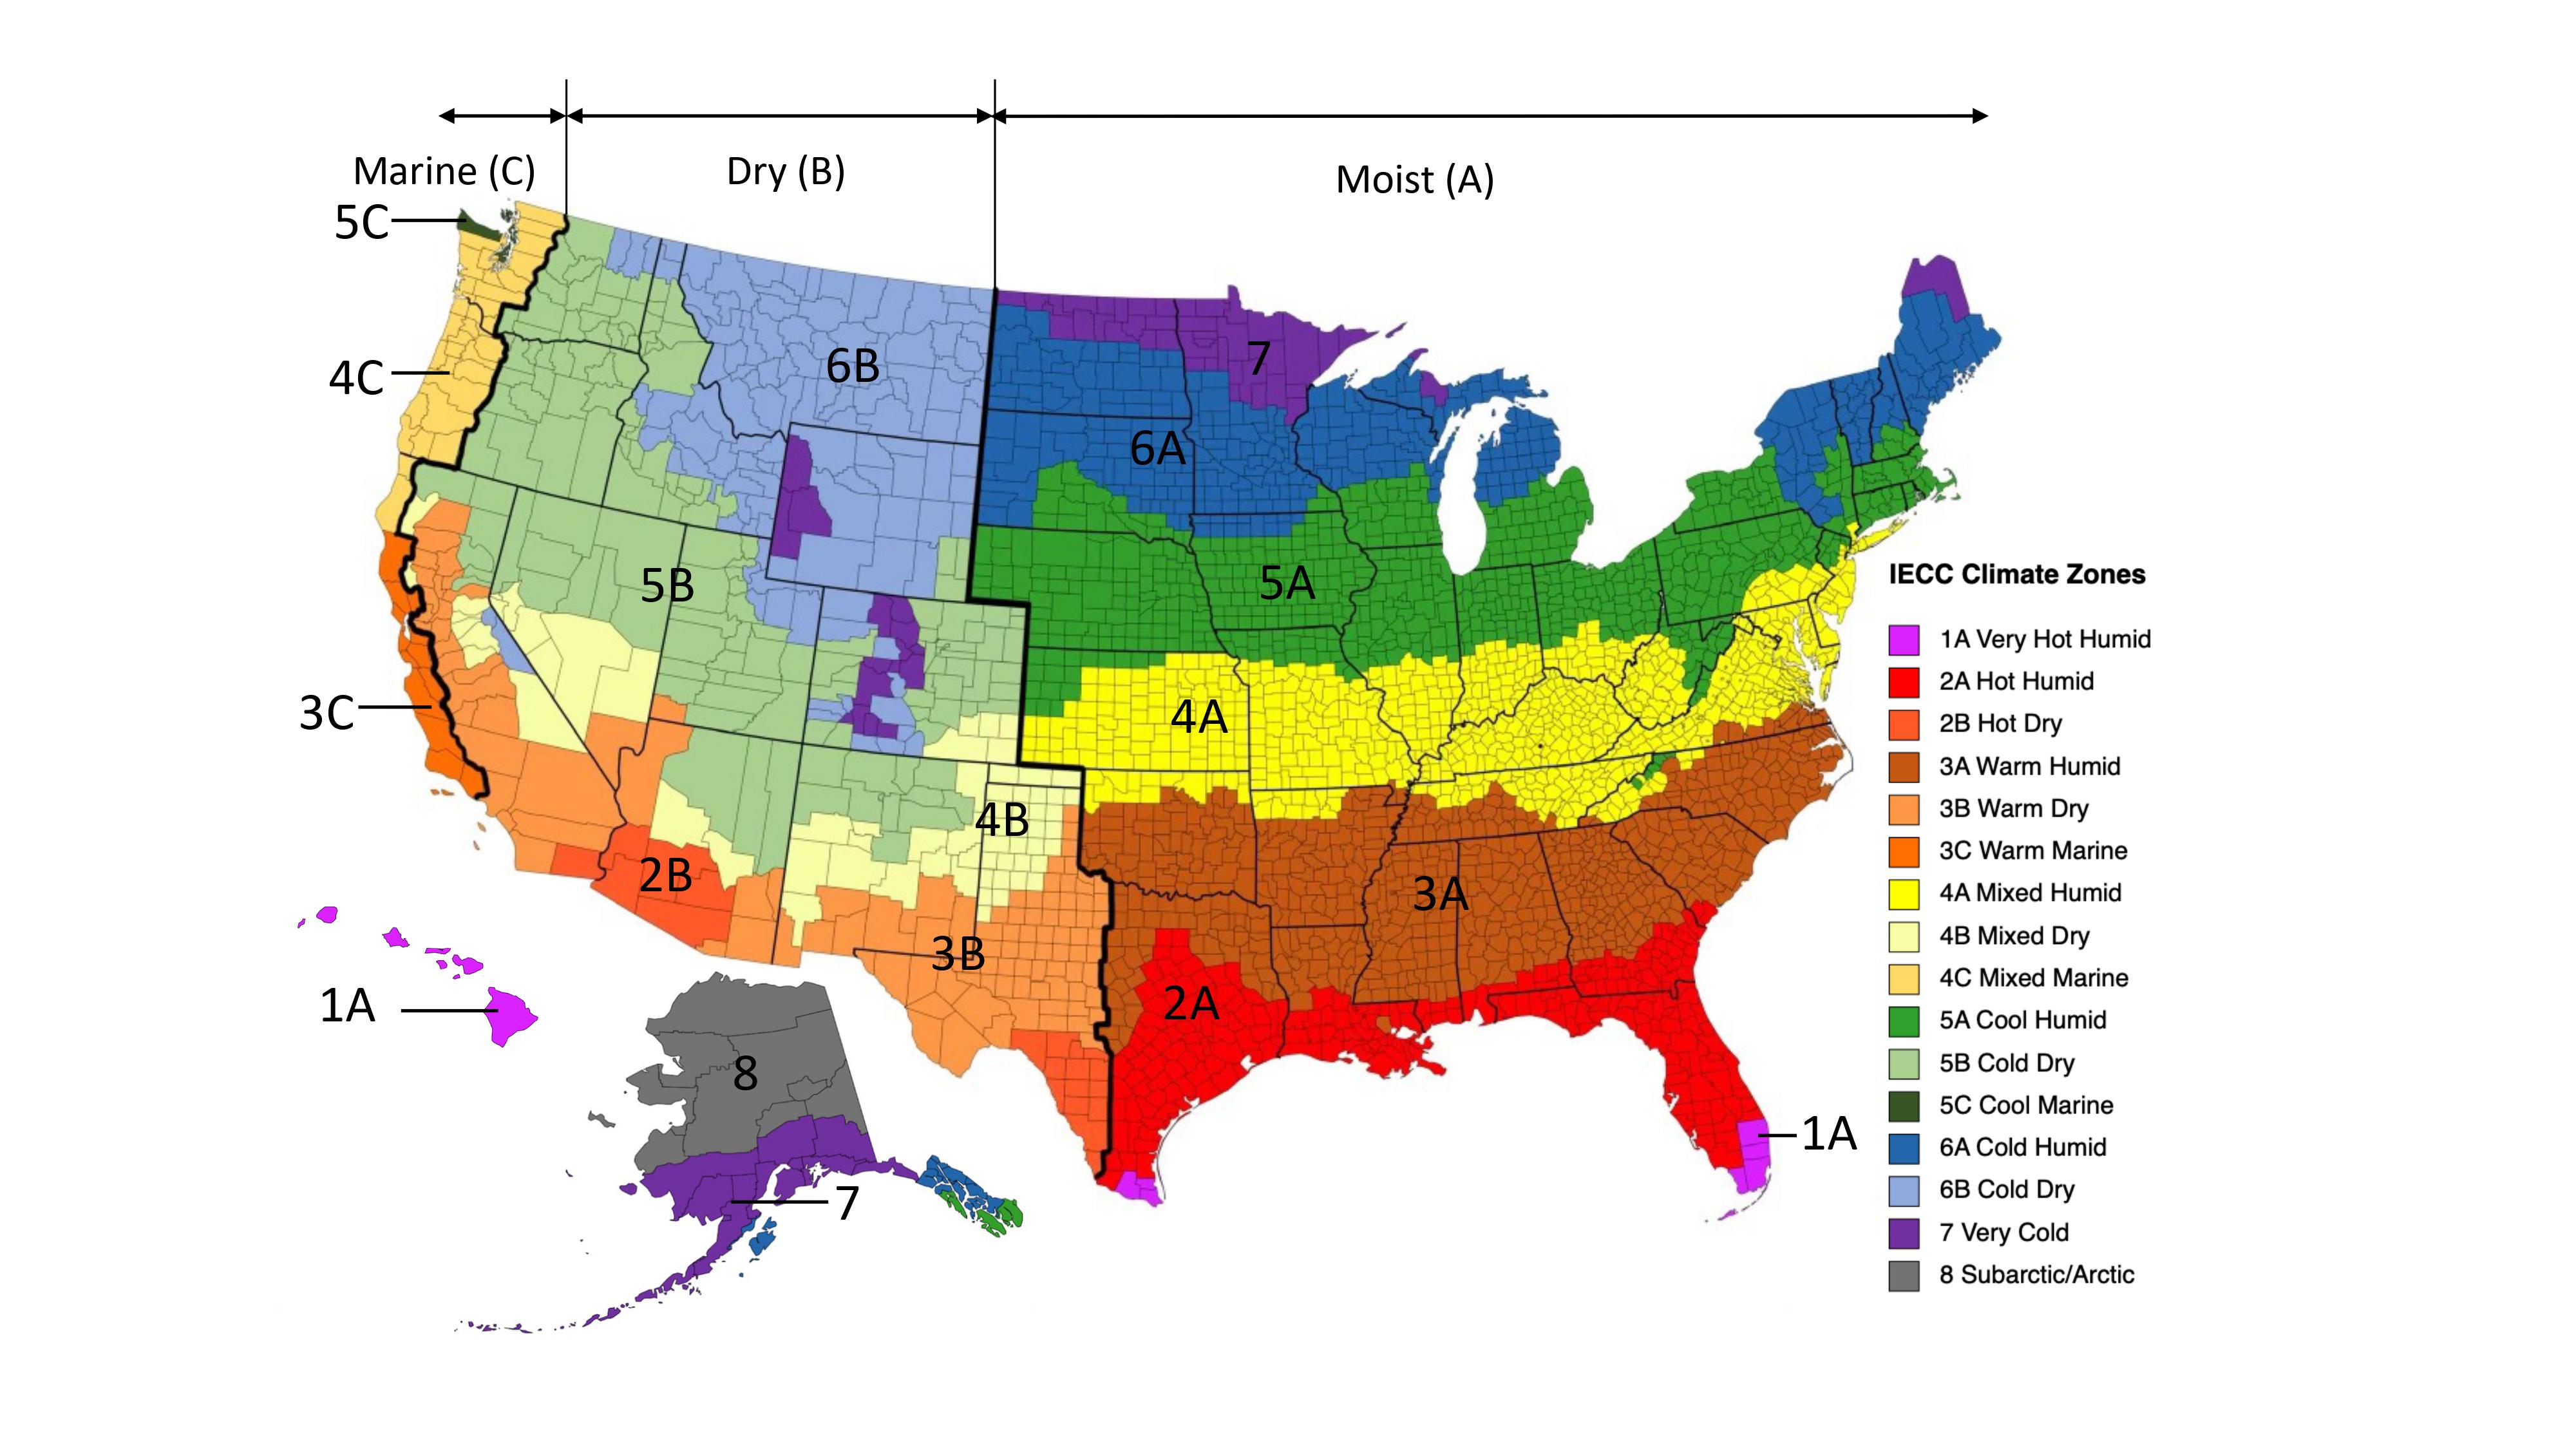
Source
2021 edition of code establishing a baseline for energy efficiency by setting performance standards for the building envelope (defined as the boundary that separates heated/cooled air from unconditioned, outside air), mechanical systems, lighting systems and service water heating systems in homes and commercial businesses.
Training
Right and Wrong Images
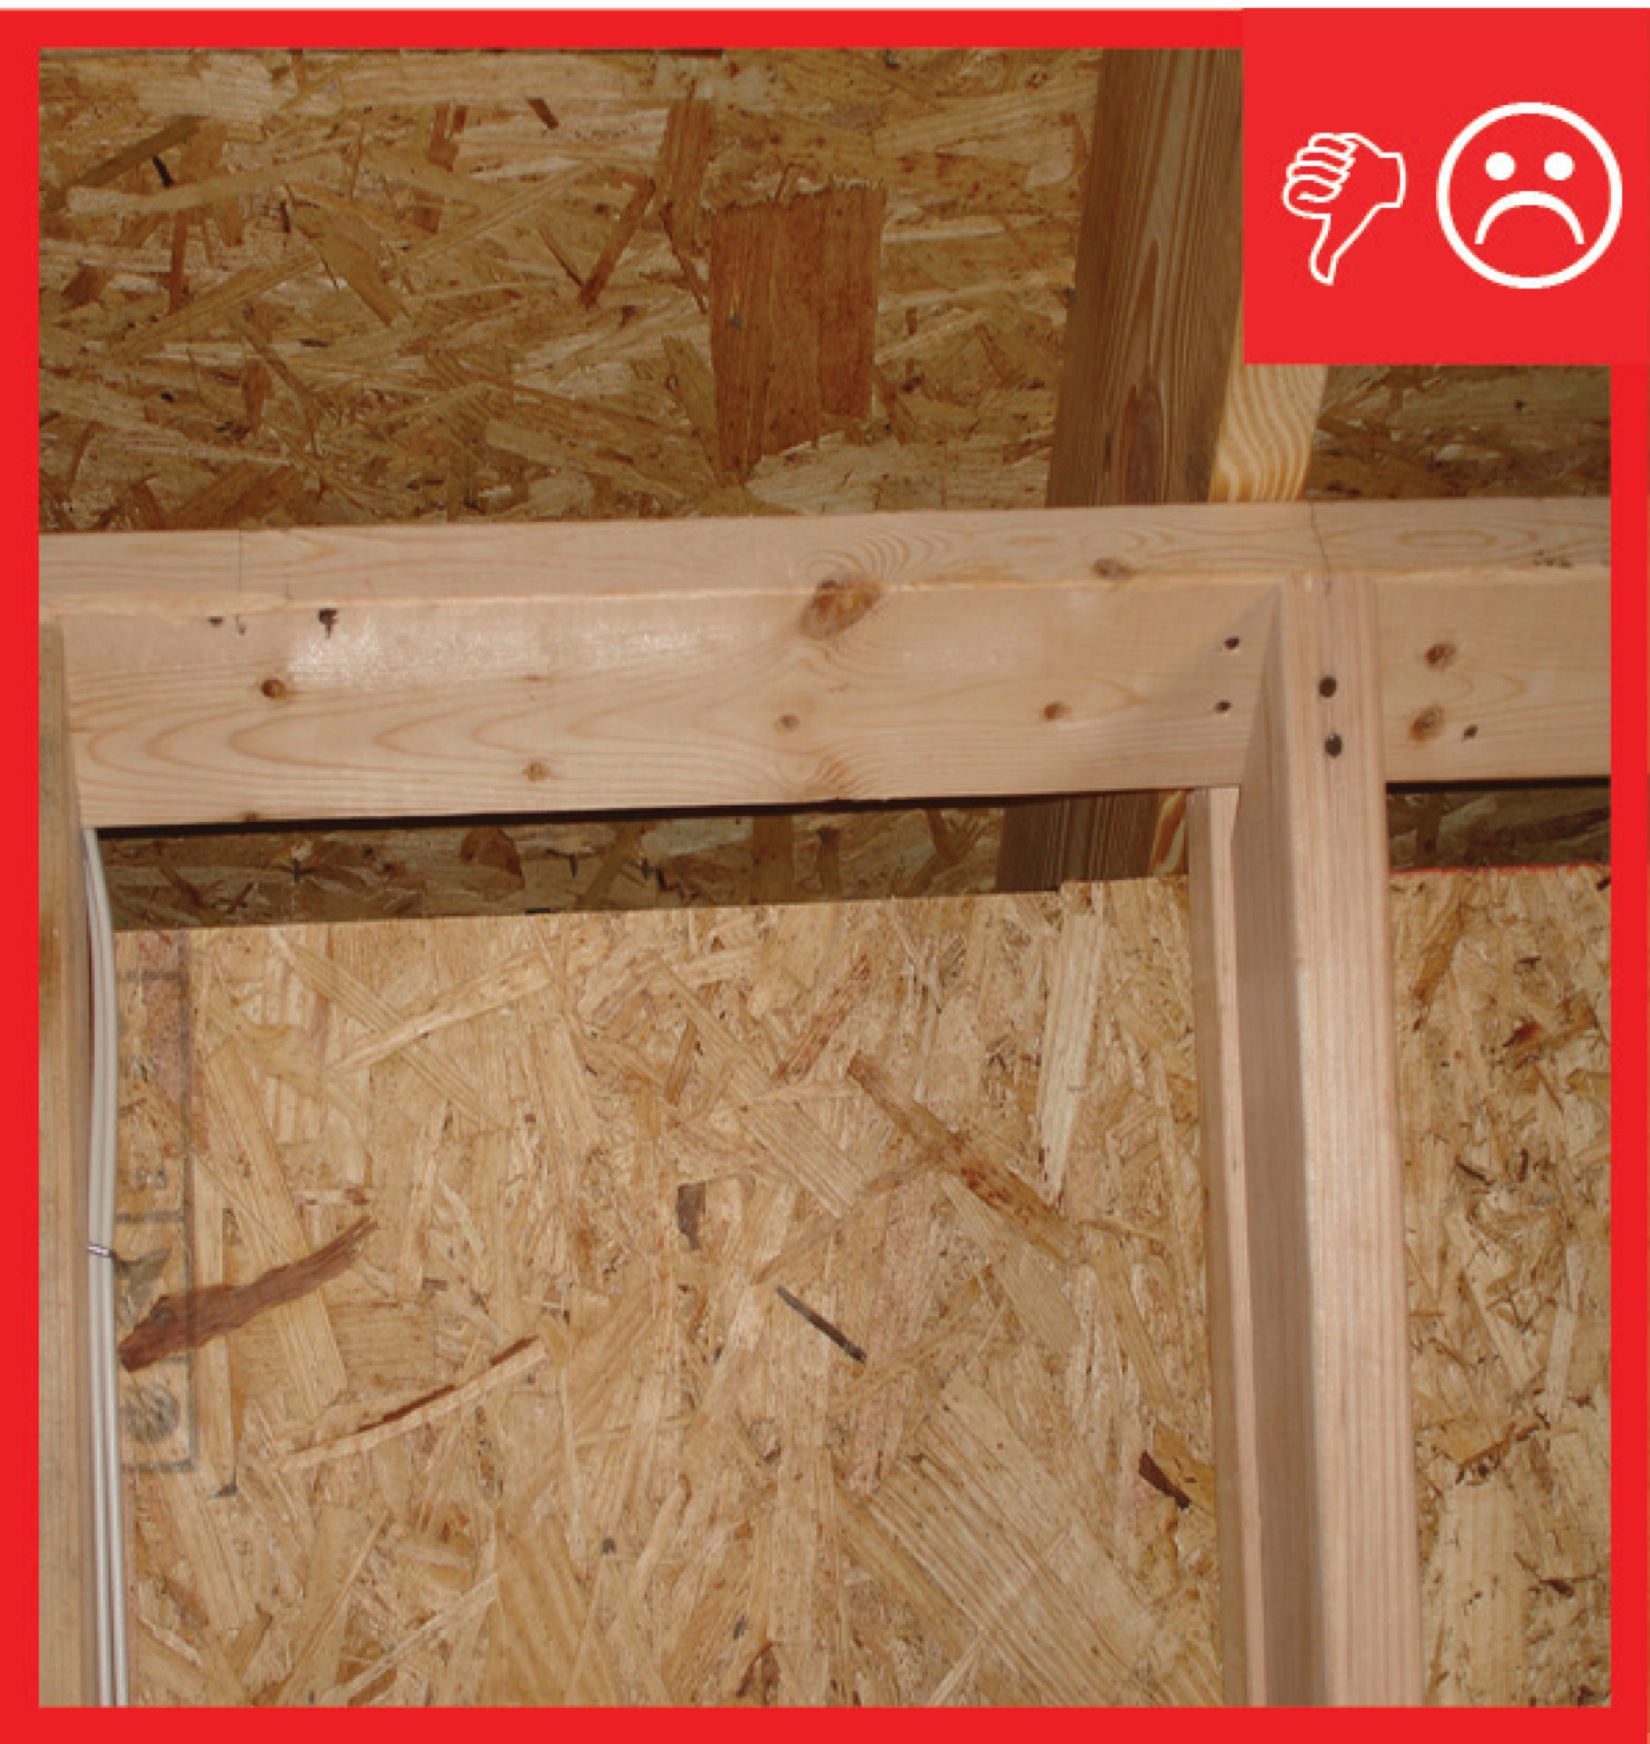
Source
Guide describing details that serve as a visual reference for each of the line items in the Thermal Enclosure System Rater Checklist.
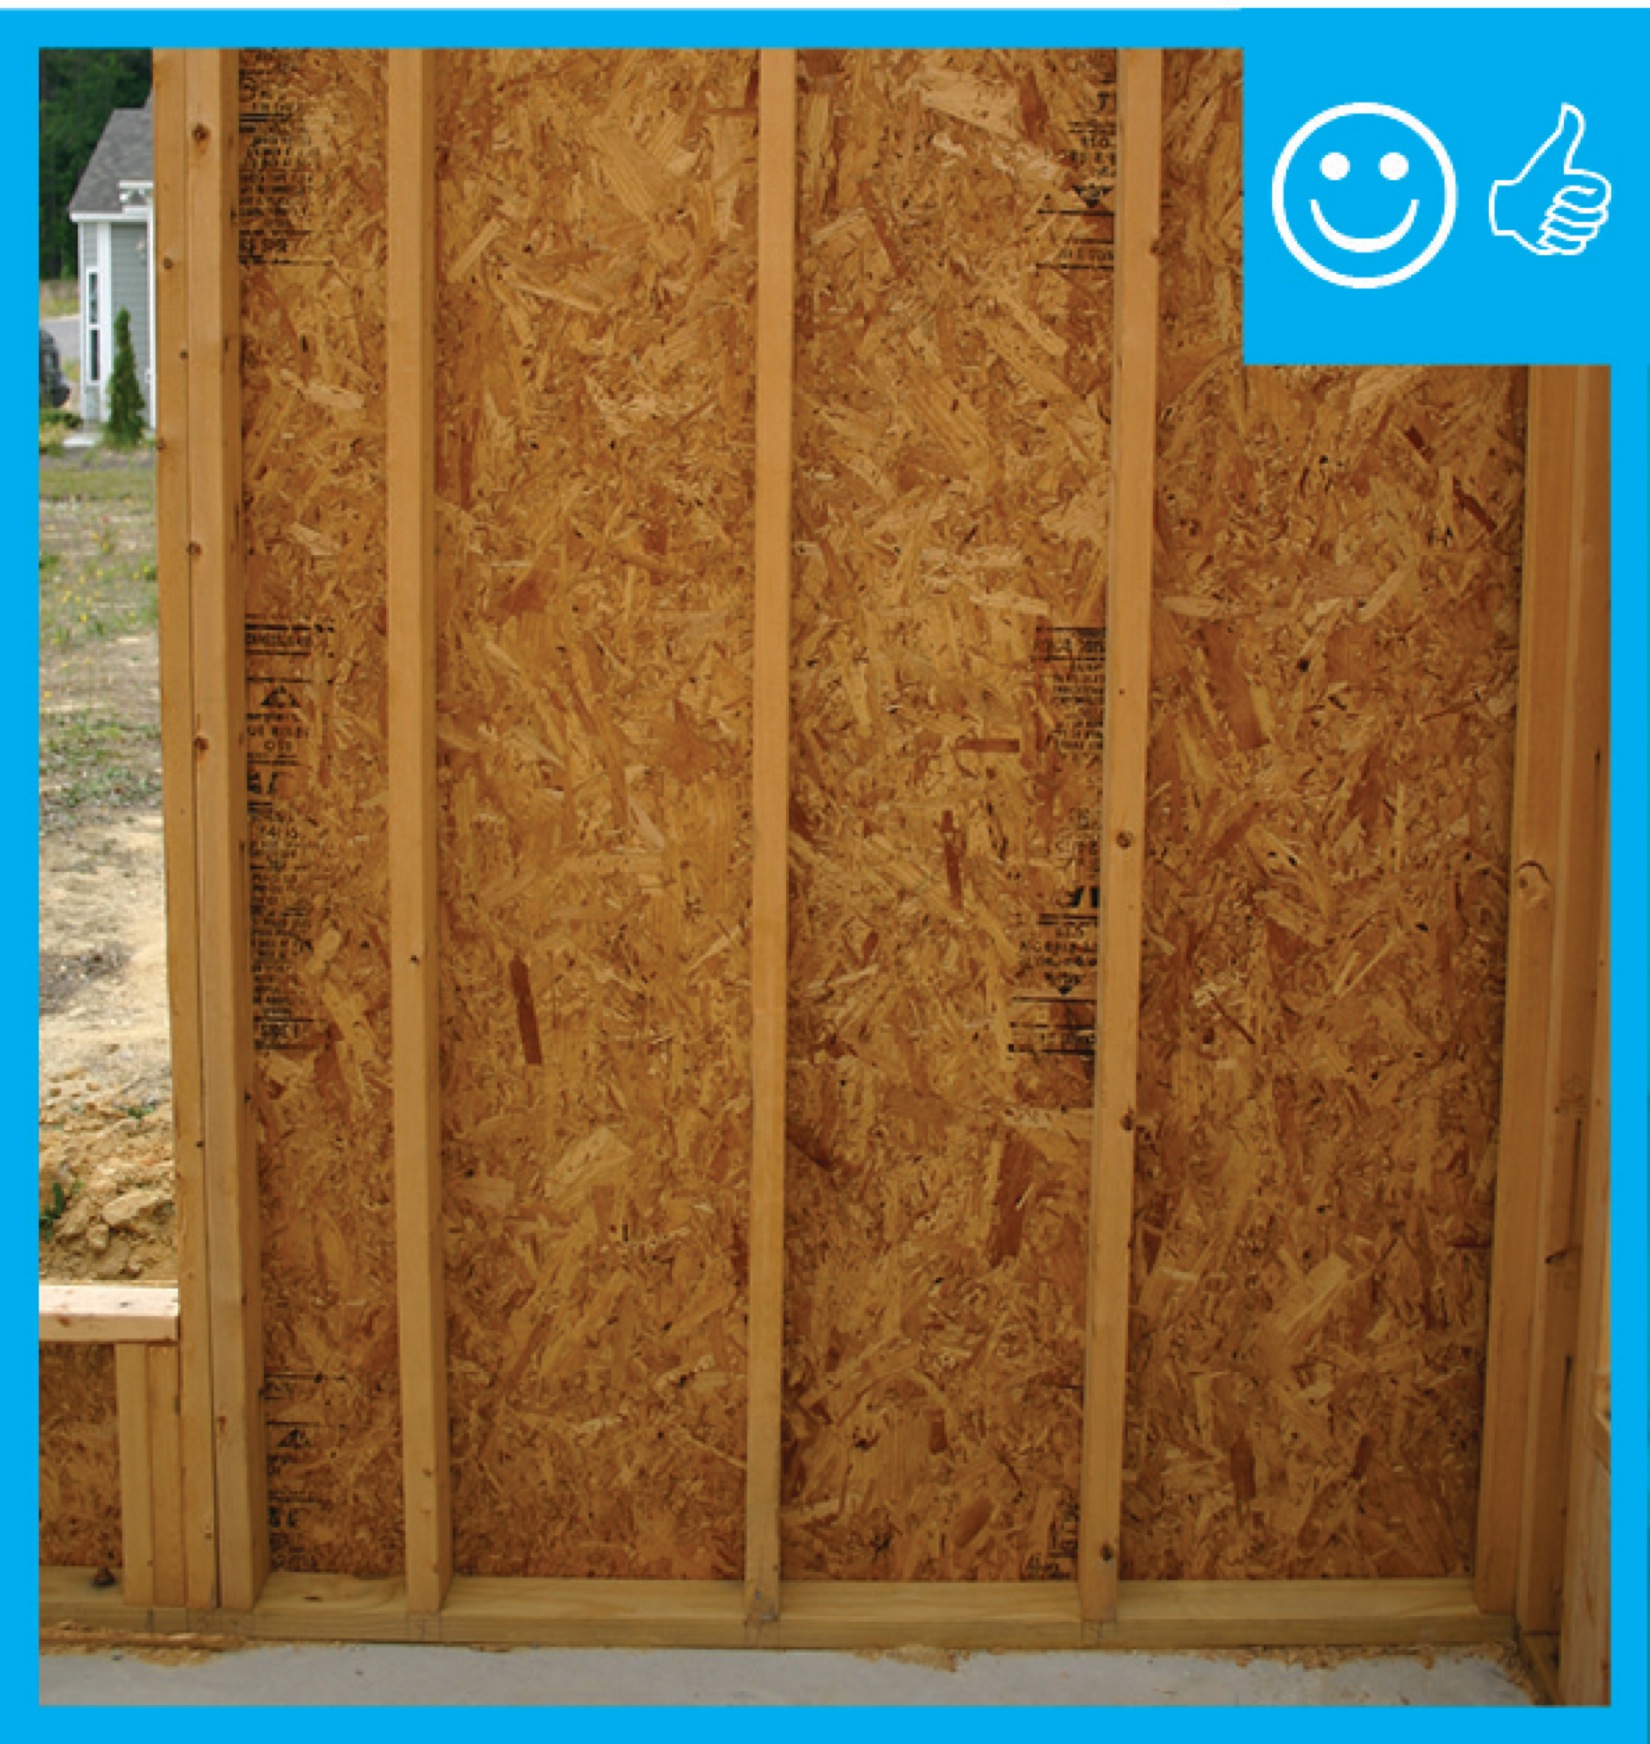
Source
Guide describing details that serve as a visual reference for each of the line items in the Thermal Enclosure System Rater Checklist.
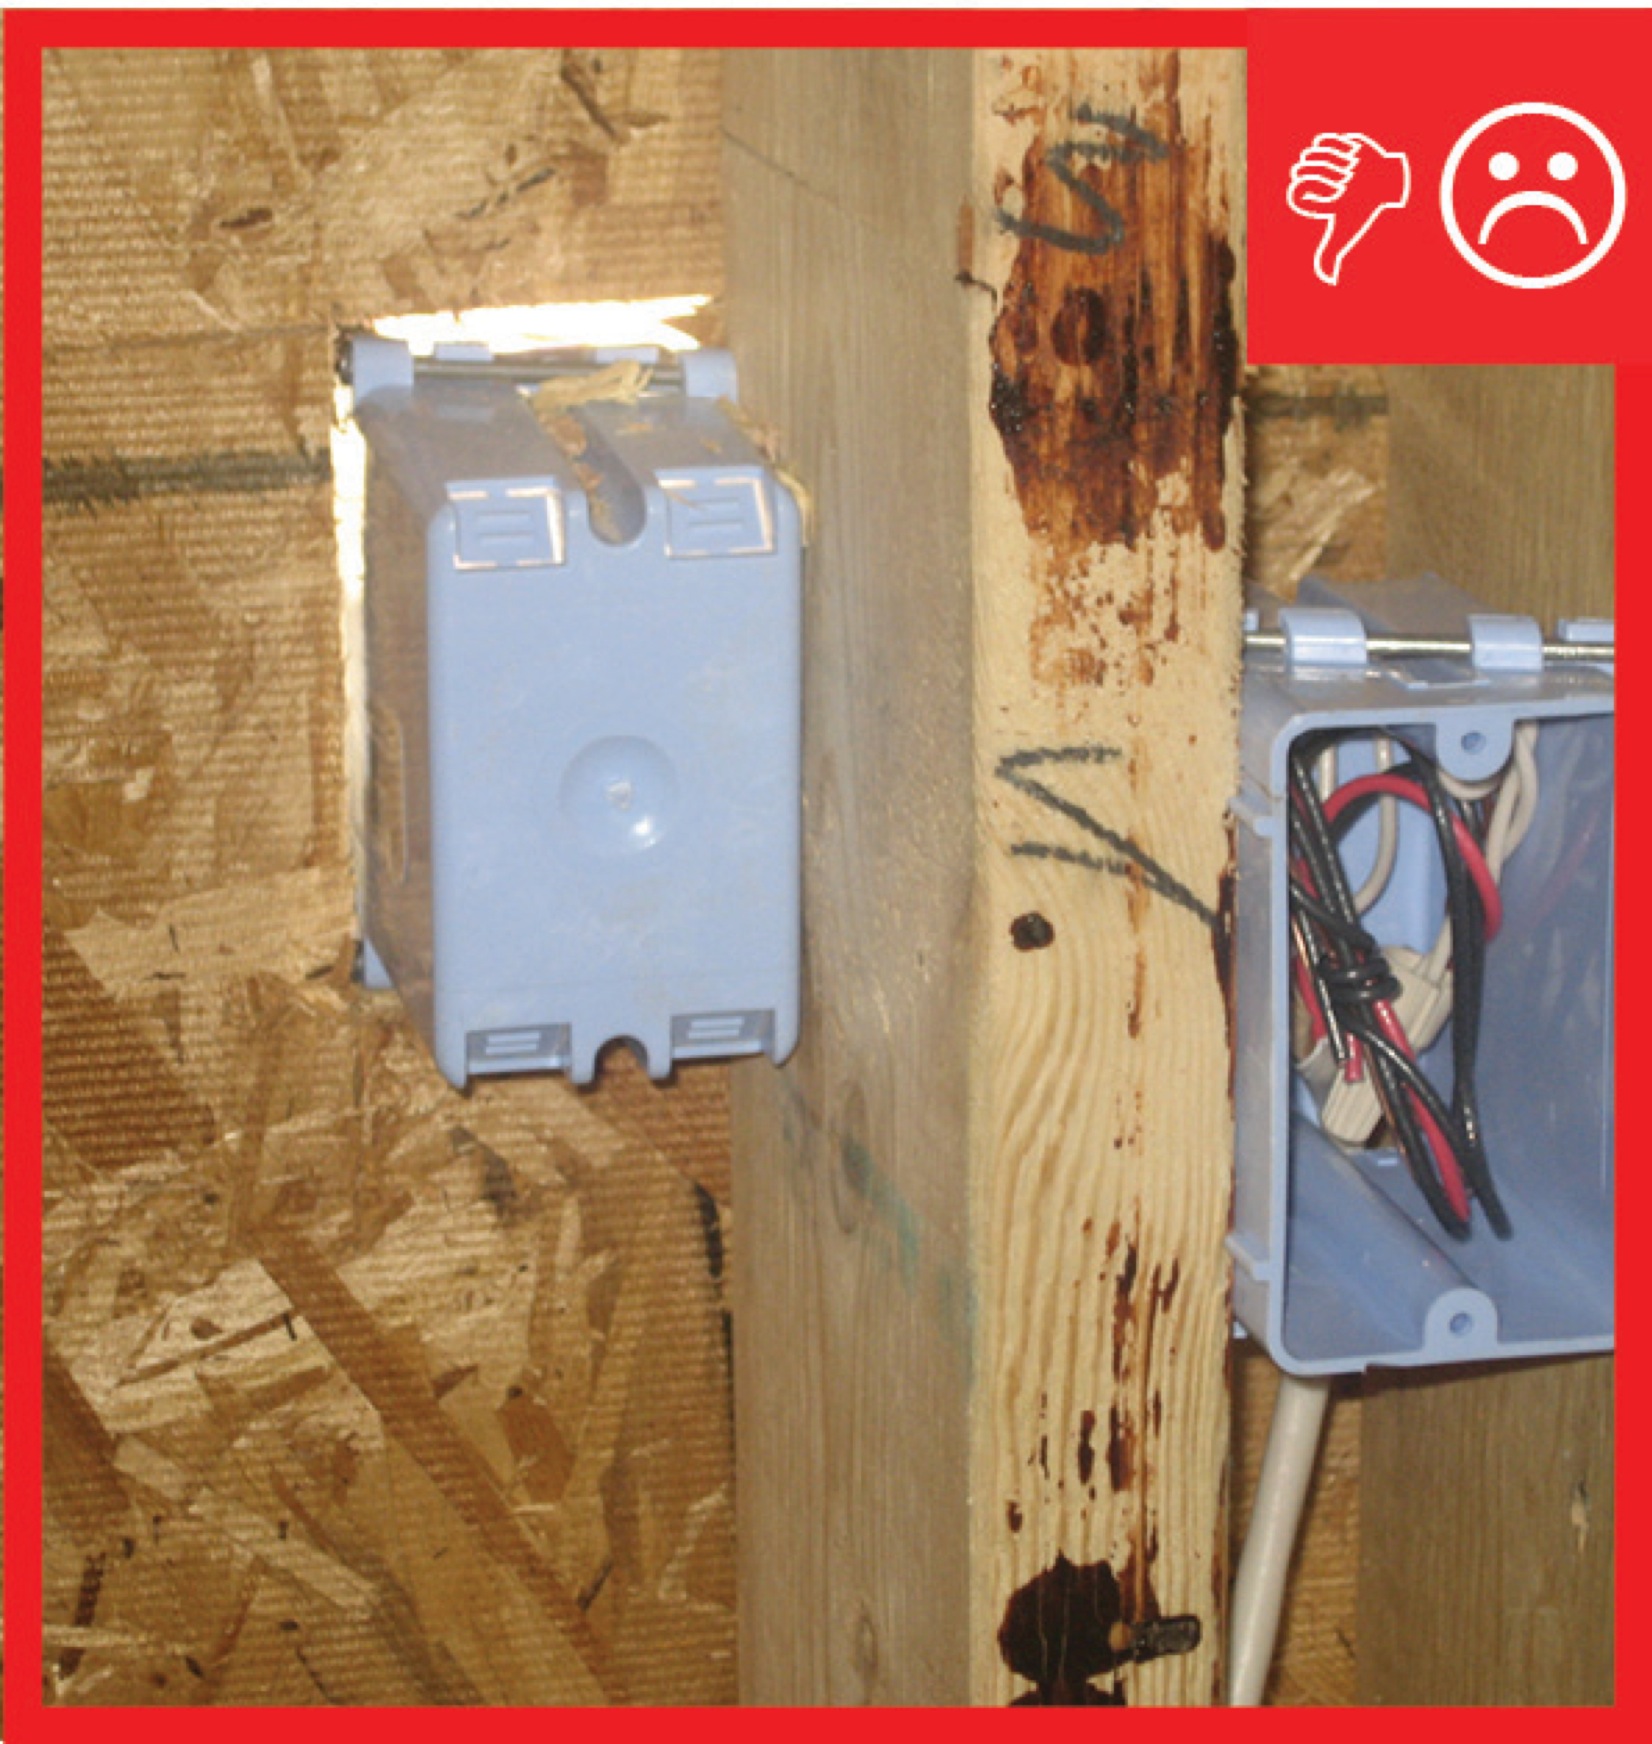
Source
Guide describing details that serve as a visual reference for each of the line items in the Thermal Enclosure System Rater Checklist.
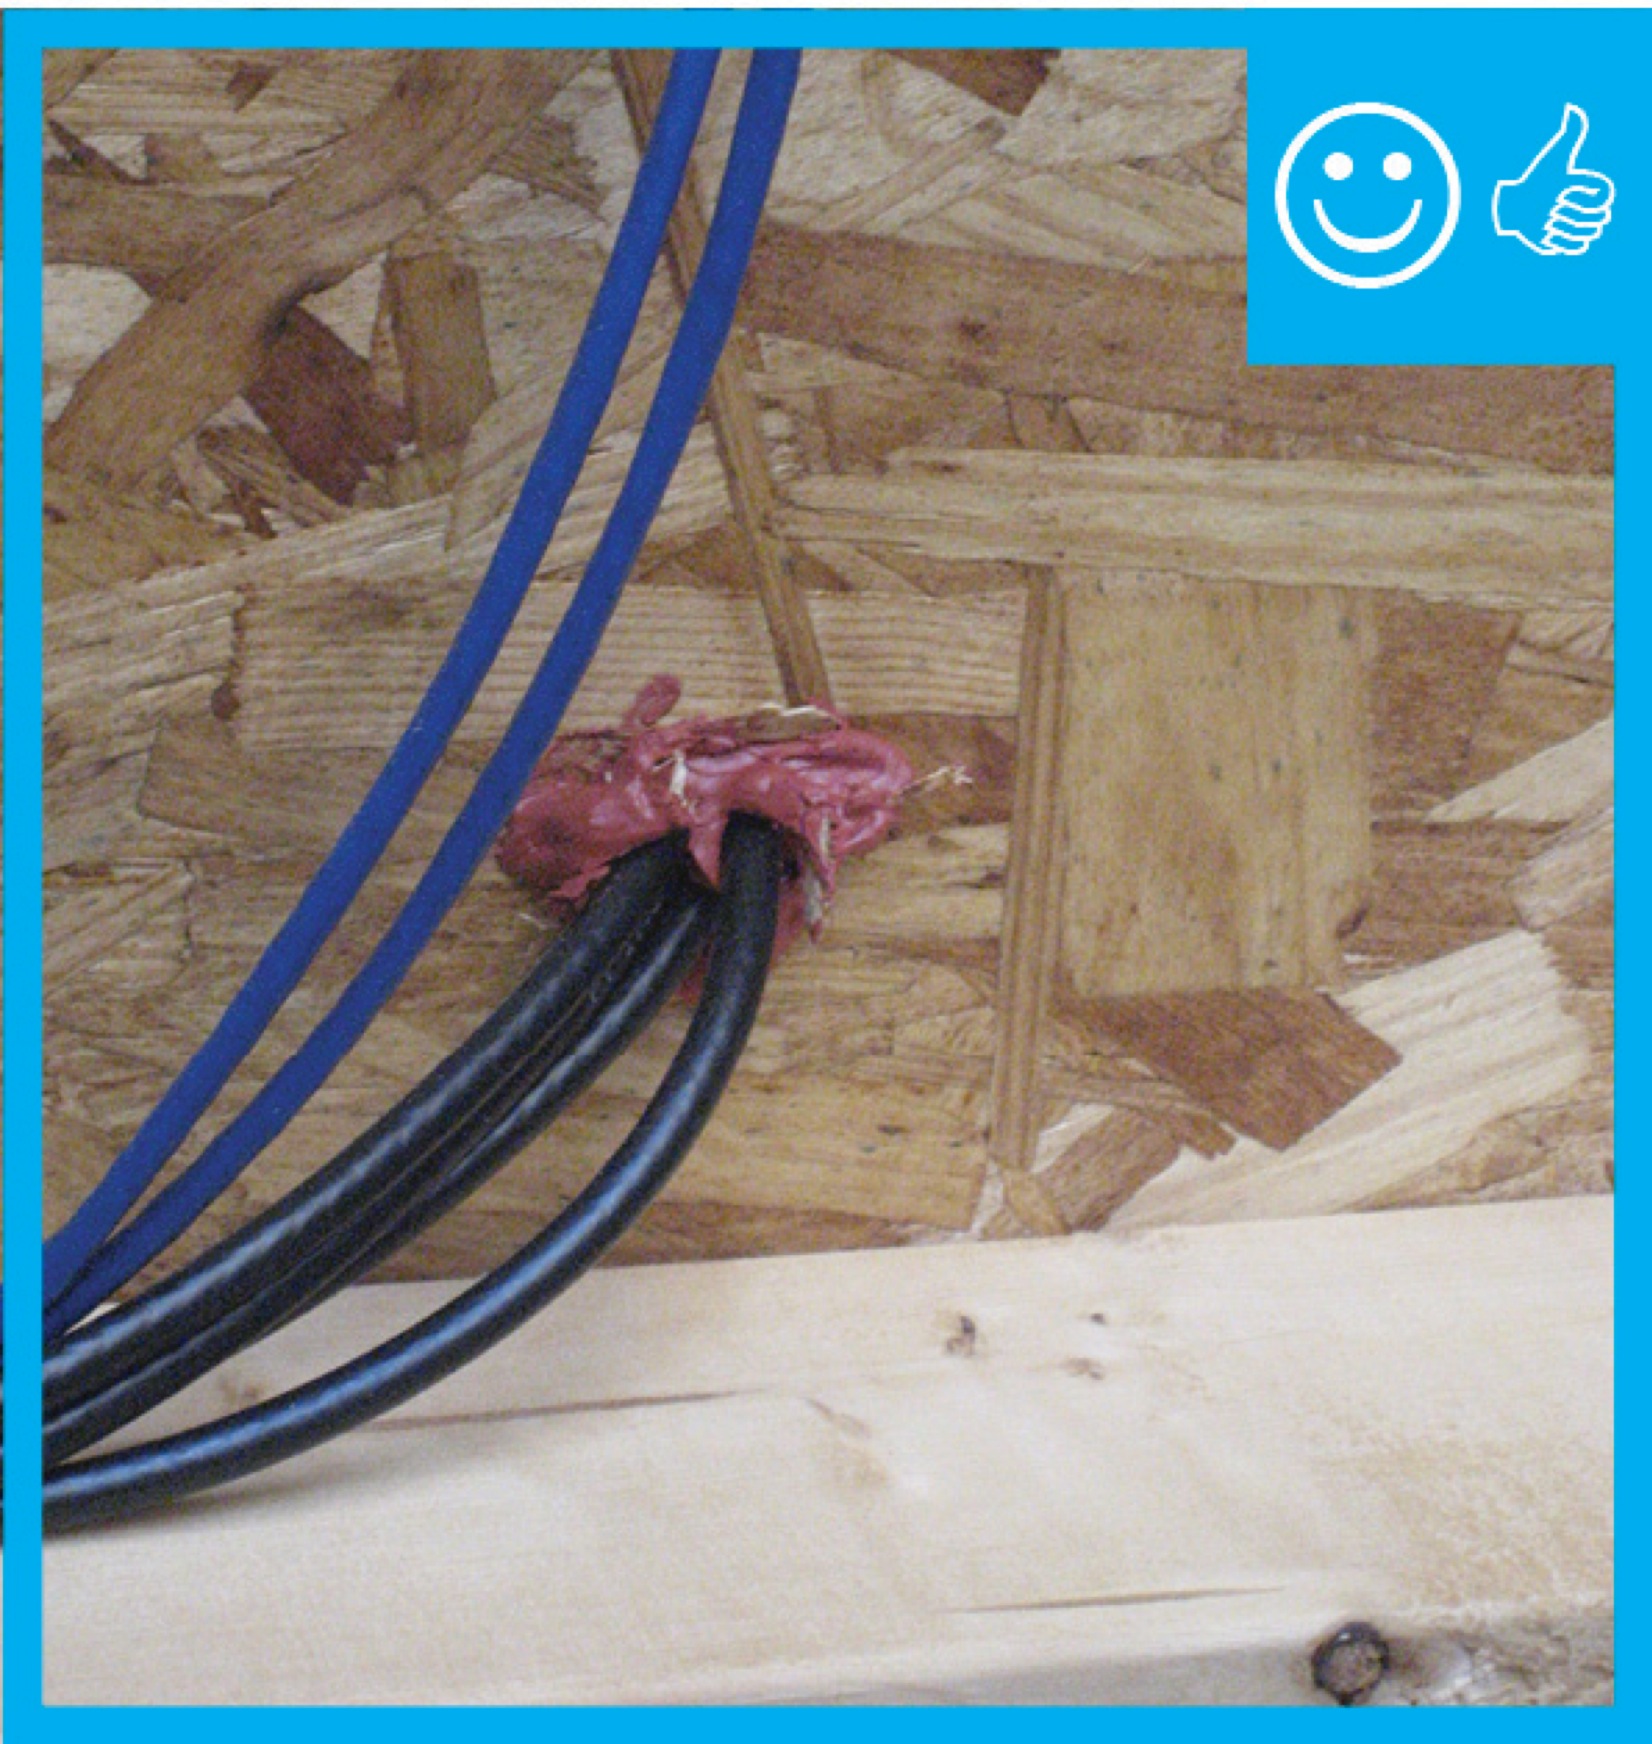
Source
Guide describing details that serve as a visual reference for each of the line items in the Thermal Enclosure System Rater Checklist.

Source
Guide describing details that serve as a visual reference for each of the line items in the Thermal Enclosure System Rater Checklist.
Source
Guide describing details that serve as a visual reference for each of the line items in the Thermal Enclosure System Rater Checklist.
Source
Guide describing details that serve as a visual reference for each of the line items in the Thermal Enclosure System Rater Checklist.

Source
Guide describing details that serve as a visual reference for each of the line items in the Thermal Enclosure System Rater Checklist.

Source

Source
Source

Source

Source
Videos



CAD Files


Compliance
More Info
Case Studies
References and Resources
*For non-dated media, such as websites, the date listed is the date accessed.
Contributors to this Guide
The following authors and organizations contributed to the content in this Guide.
Building Science Corporation, lead for the Building Science Consortium (BSC), a DOE Building America Research Team
Sales
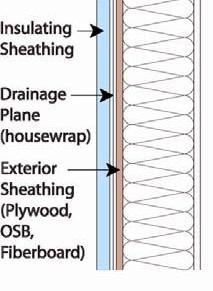
Fully Aligned Air Barriers = Whole-House Draft Barrier
Technical Description
A whole-house draft barrier is a continuous layer of air-tight materials that block air leaks. This barrier can be integrated with other materials to also function as a water barrier, thermal barrier, and vapor barrier. For example, rigid foam insulation can be used to block thermal flow as well as air flow when seams are sealed with tape, caulk, adhesives, or liquid-applied sealants. Some rigid foams have an integrated water control layer as well. Additionally, drywall can serve as an interior air barrier when the seams are taped and spackled, and caulk, spray foam, or gaskets are used to seal around wiring, plumbing, and other penetrations. It also serves as the vapor barrier when finished with paint. Insulation should be in full contact with the air barrier layer.
Questions? Comments? Contact our webmaster.