

Scope
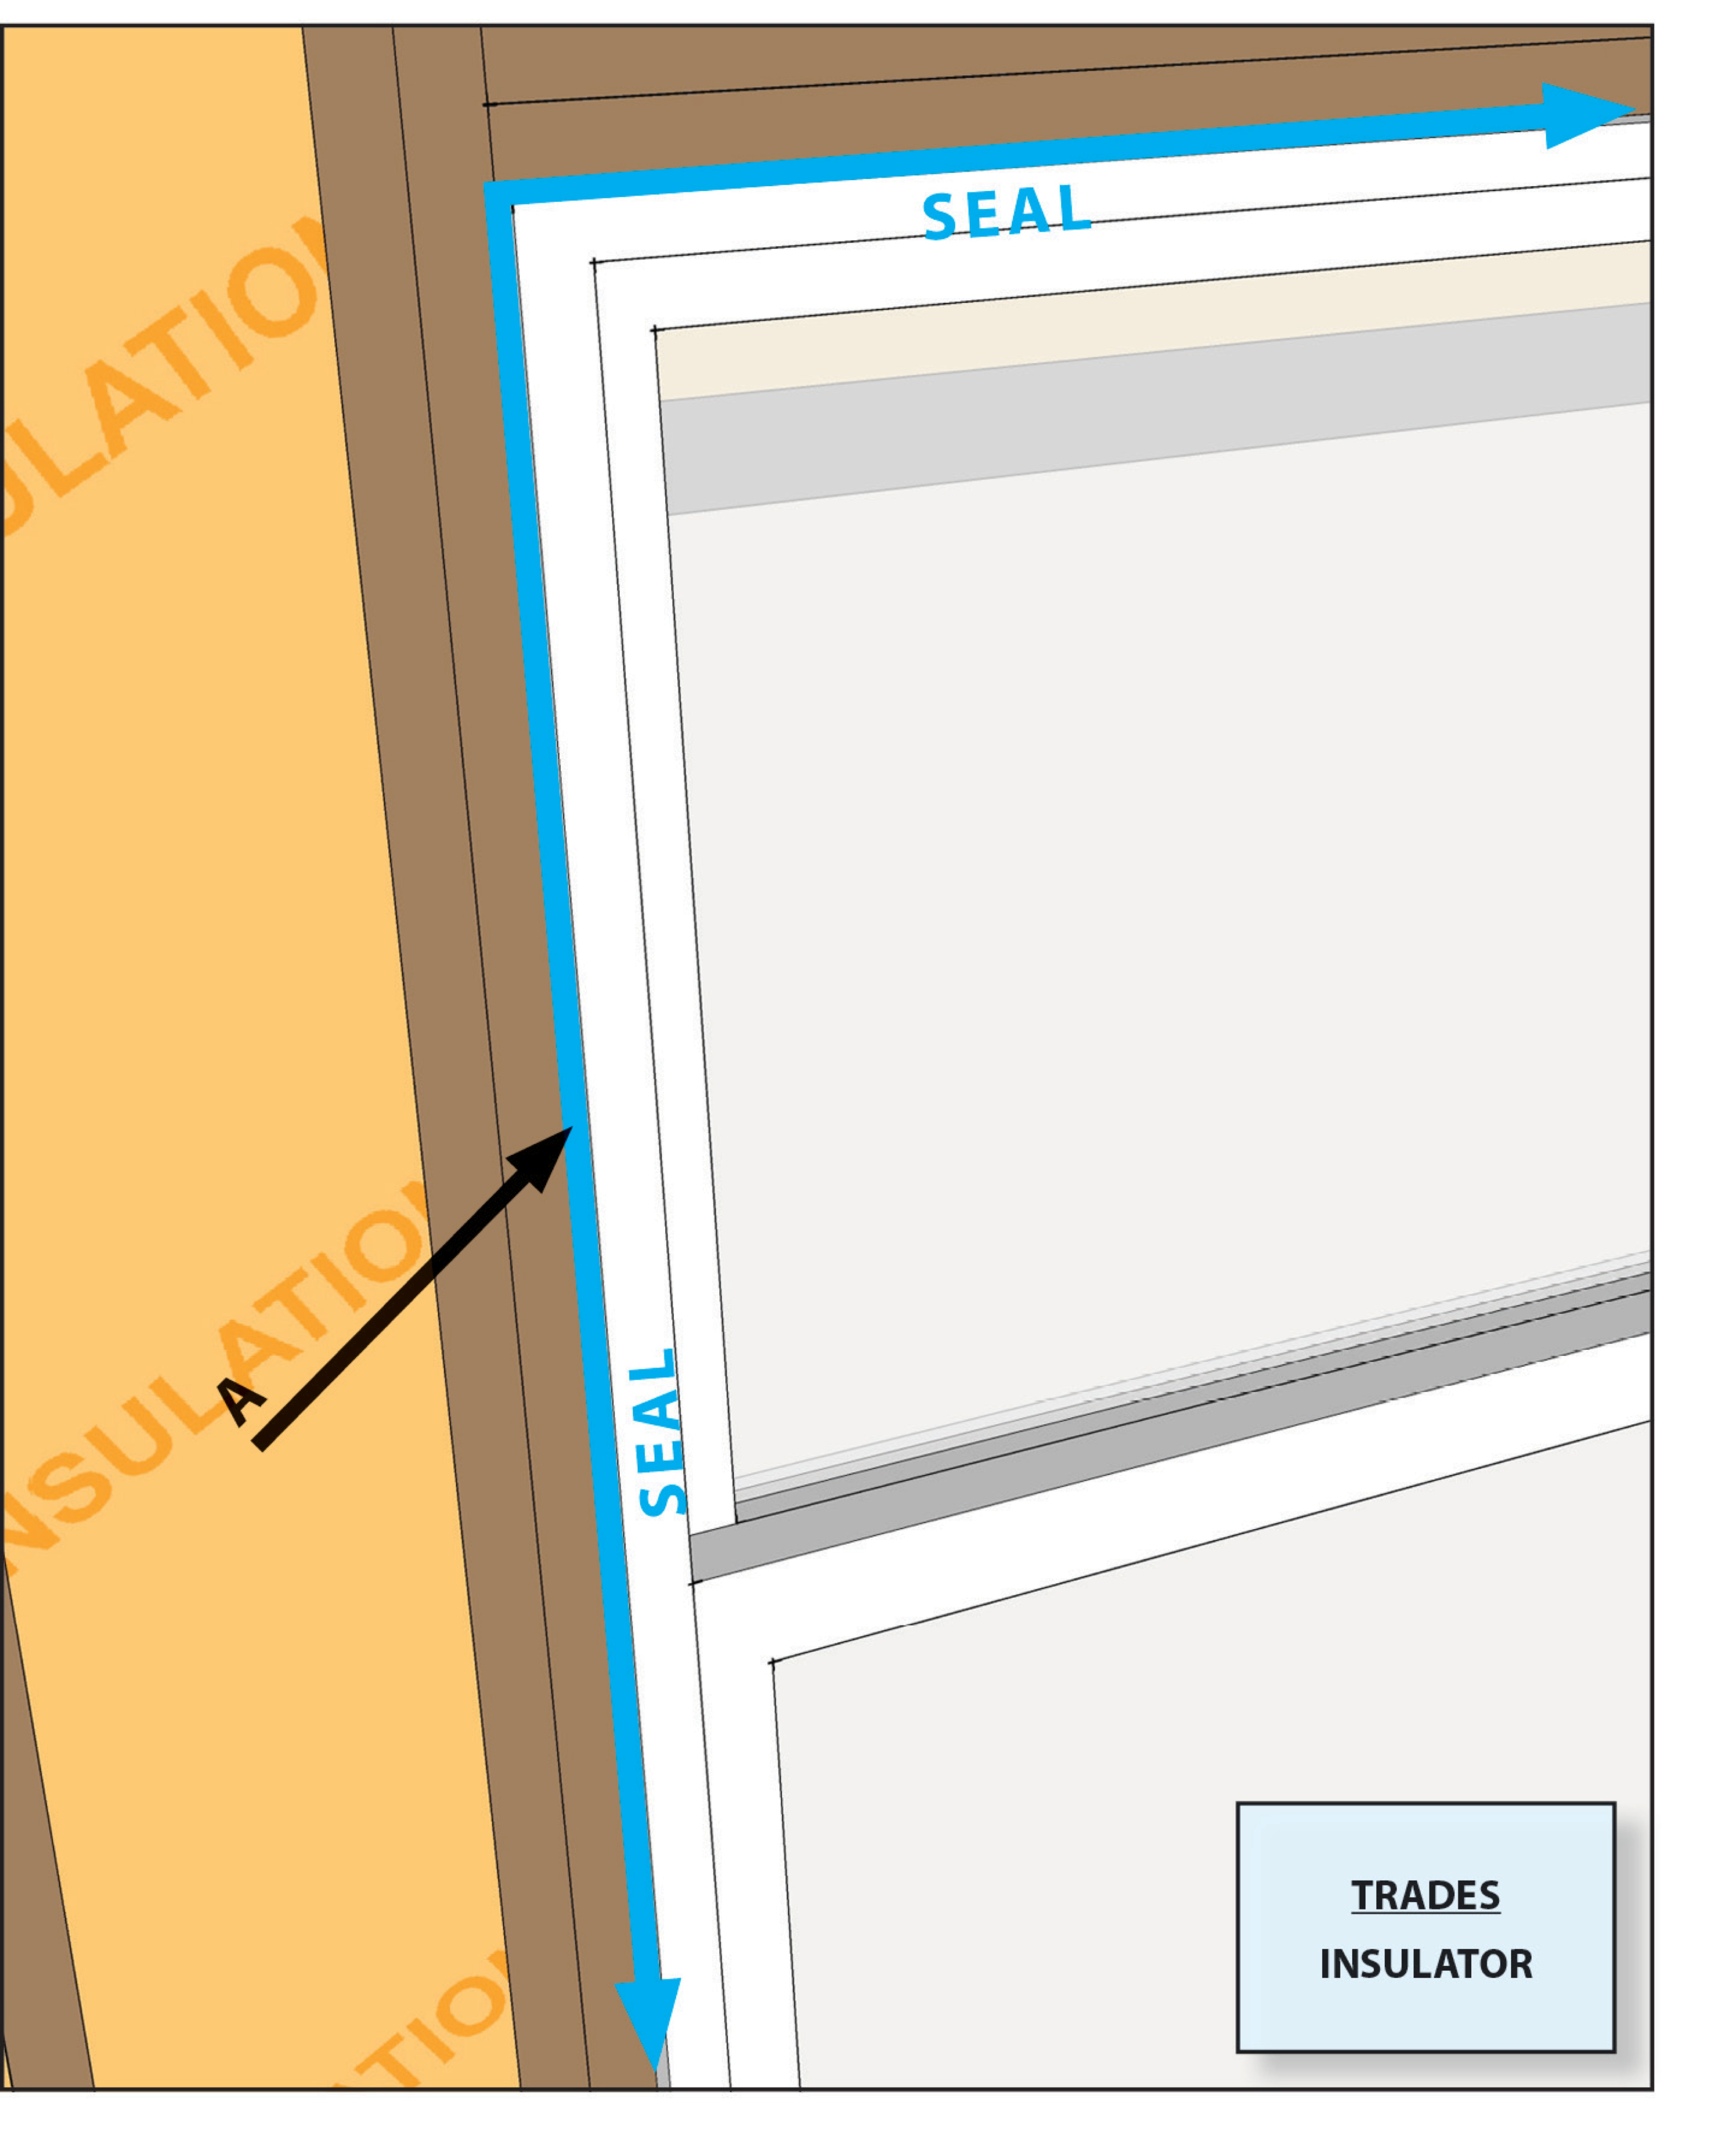
Air-seal the rough opening around doors and windows prior to installing trim to minimize air leakage.
- Fill the rough opening around windows and exterior doors with caulk, canned spray foam, or foam backer rod. If spray foam, use a low-expansion foam designated for doors and windows.
- Do not rely on fibrous insulation alone to block airflow.
See the Compliance Tab for links to related codes and standards and voluntary federal energy-efficiency program requirements.
Description
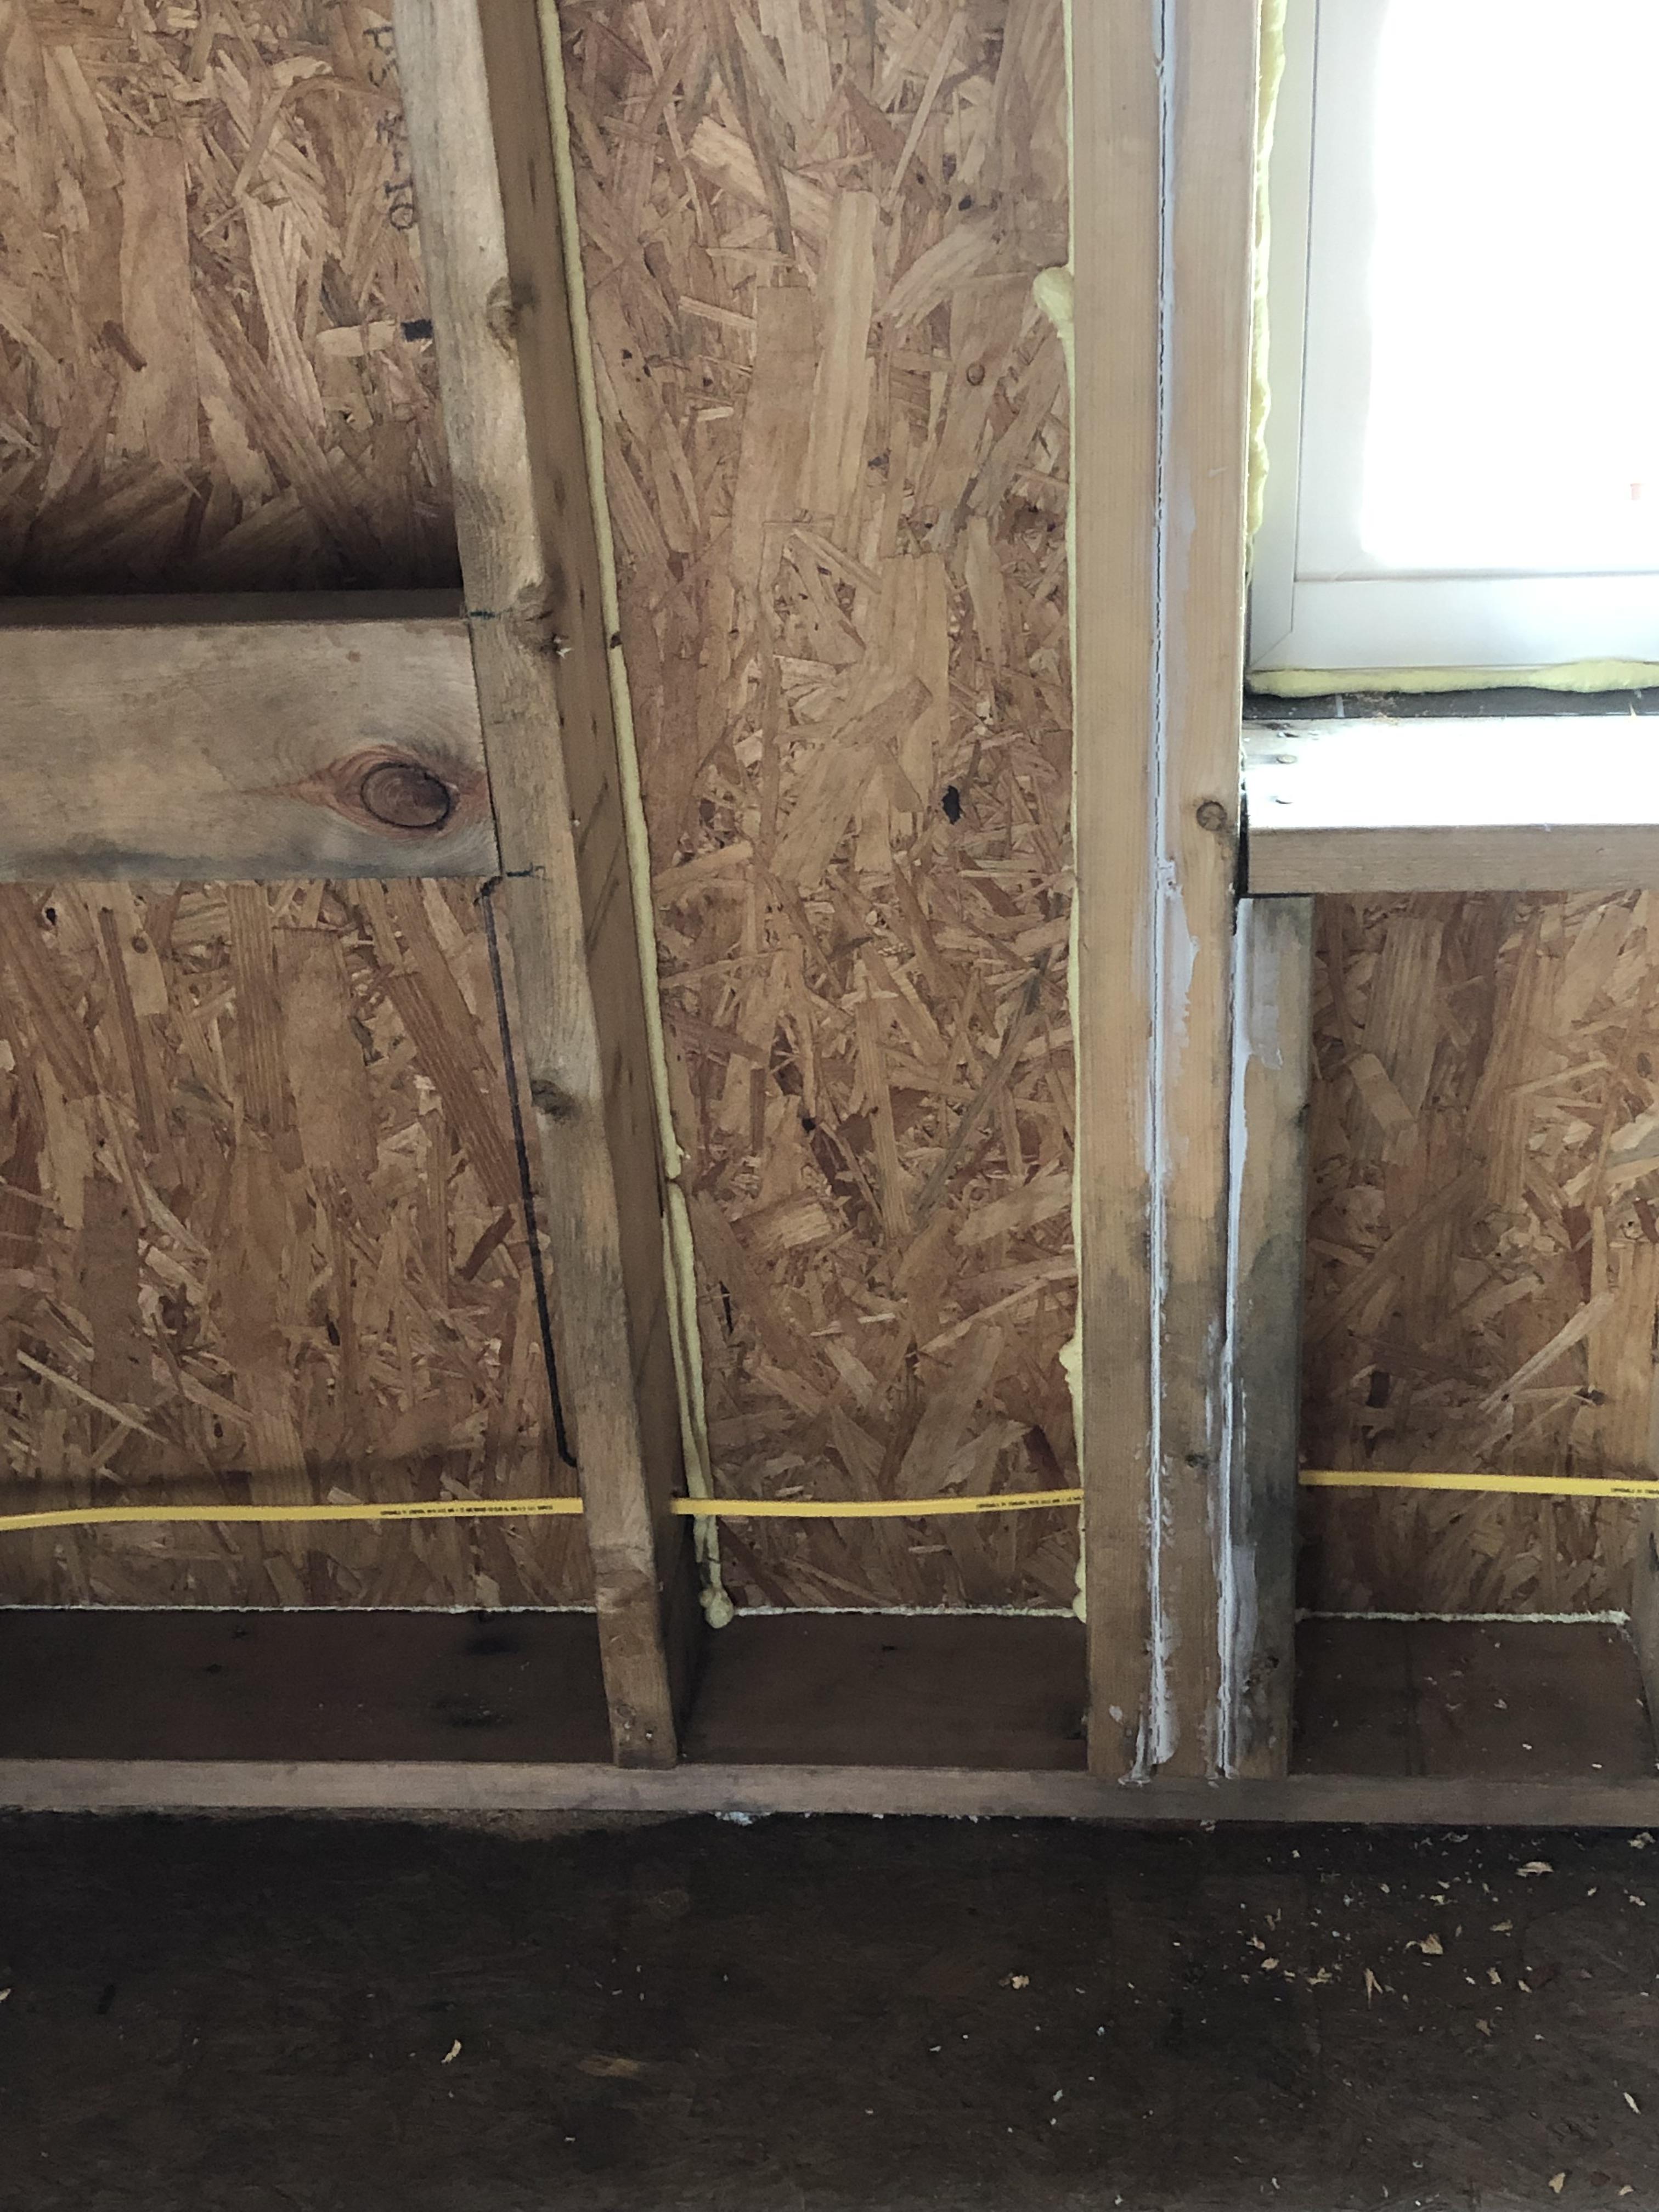
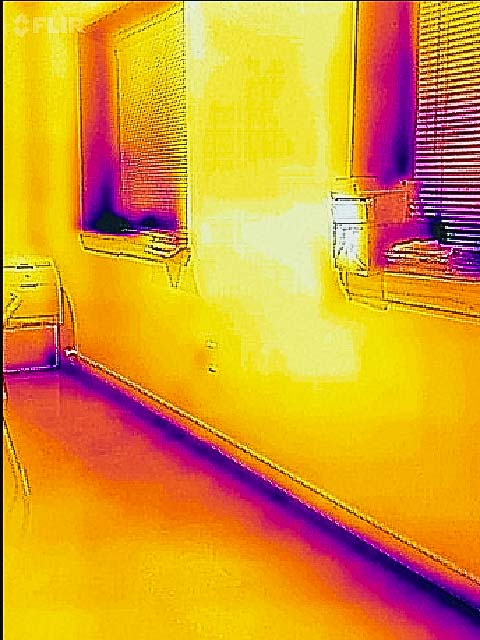
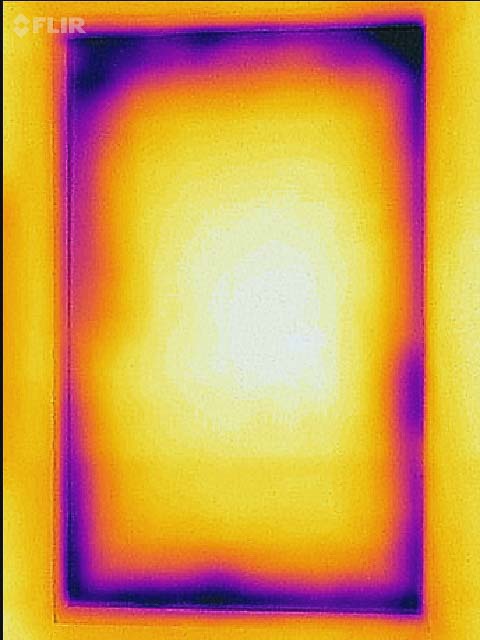
Window and door rough openings are essentially big holes in the building envelope, and while these holes get filled with window and door units, the gaps between the units and the framing rough openings can be major sites for uncontrolled air leakage in a home (DOE 2000). However, by sealing these rough opening gaps, this air leakage can be significantly reduced. A study conducted at Oak Ridge National Laboratory’s Buildings Technology Center on window air-sealing showed that windows with 3/4-inch rough-in gaps had an equivalent leakage area of 28.2 cm2/ m2. When the gap was sealed from the interior side of the wall, the equivalent leakage area was cut to 0.5 cm2/m2 (Baechler et al. 2010).
Sealing the gaps between window and door units and the framing rough openings requires care and precision. Unlike other parts of the air barrier on exterior walls, which have layers of redundancy, the seal around a window and door unit stands on its own (BSC 2009).
Window and Door Sealing Materials
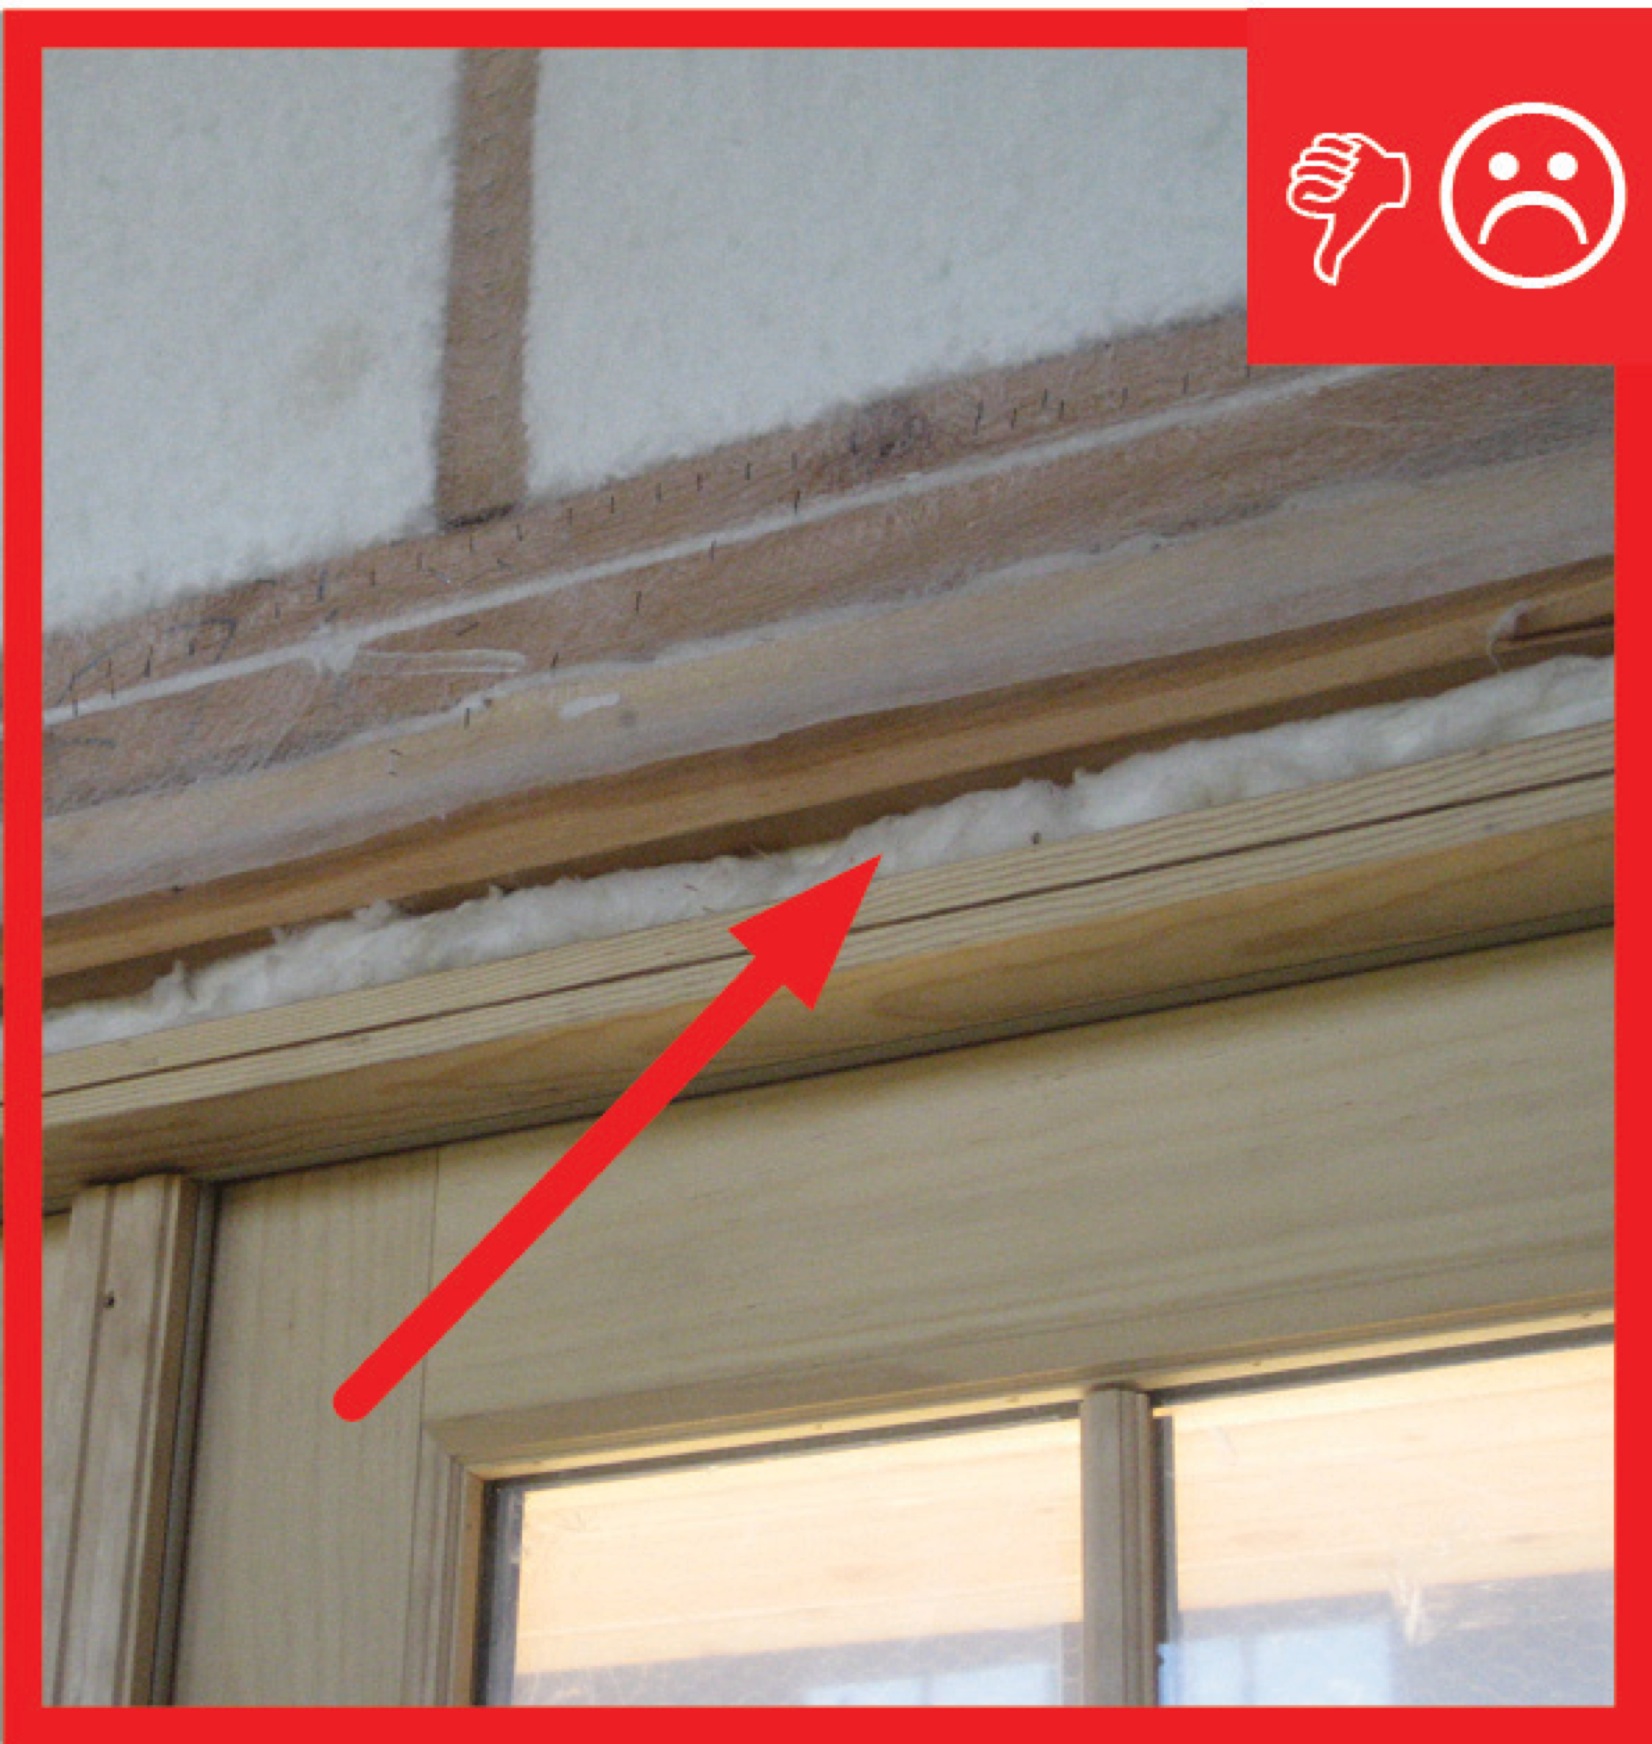
Too often, an attempt to seal around a window or door unit is made by stuffing the gap with fiberglass insulation. However, because fiberglass is not an air barrier, air can readily seep through the insulation fibers. Instead, the gap should be filled with one or more of the following materials (DOE 2000):
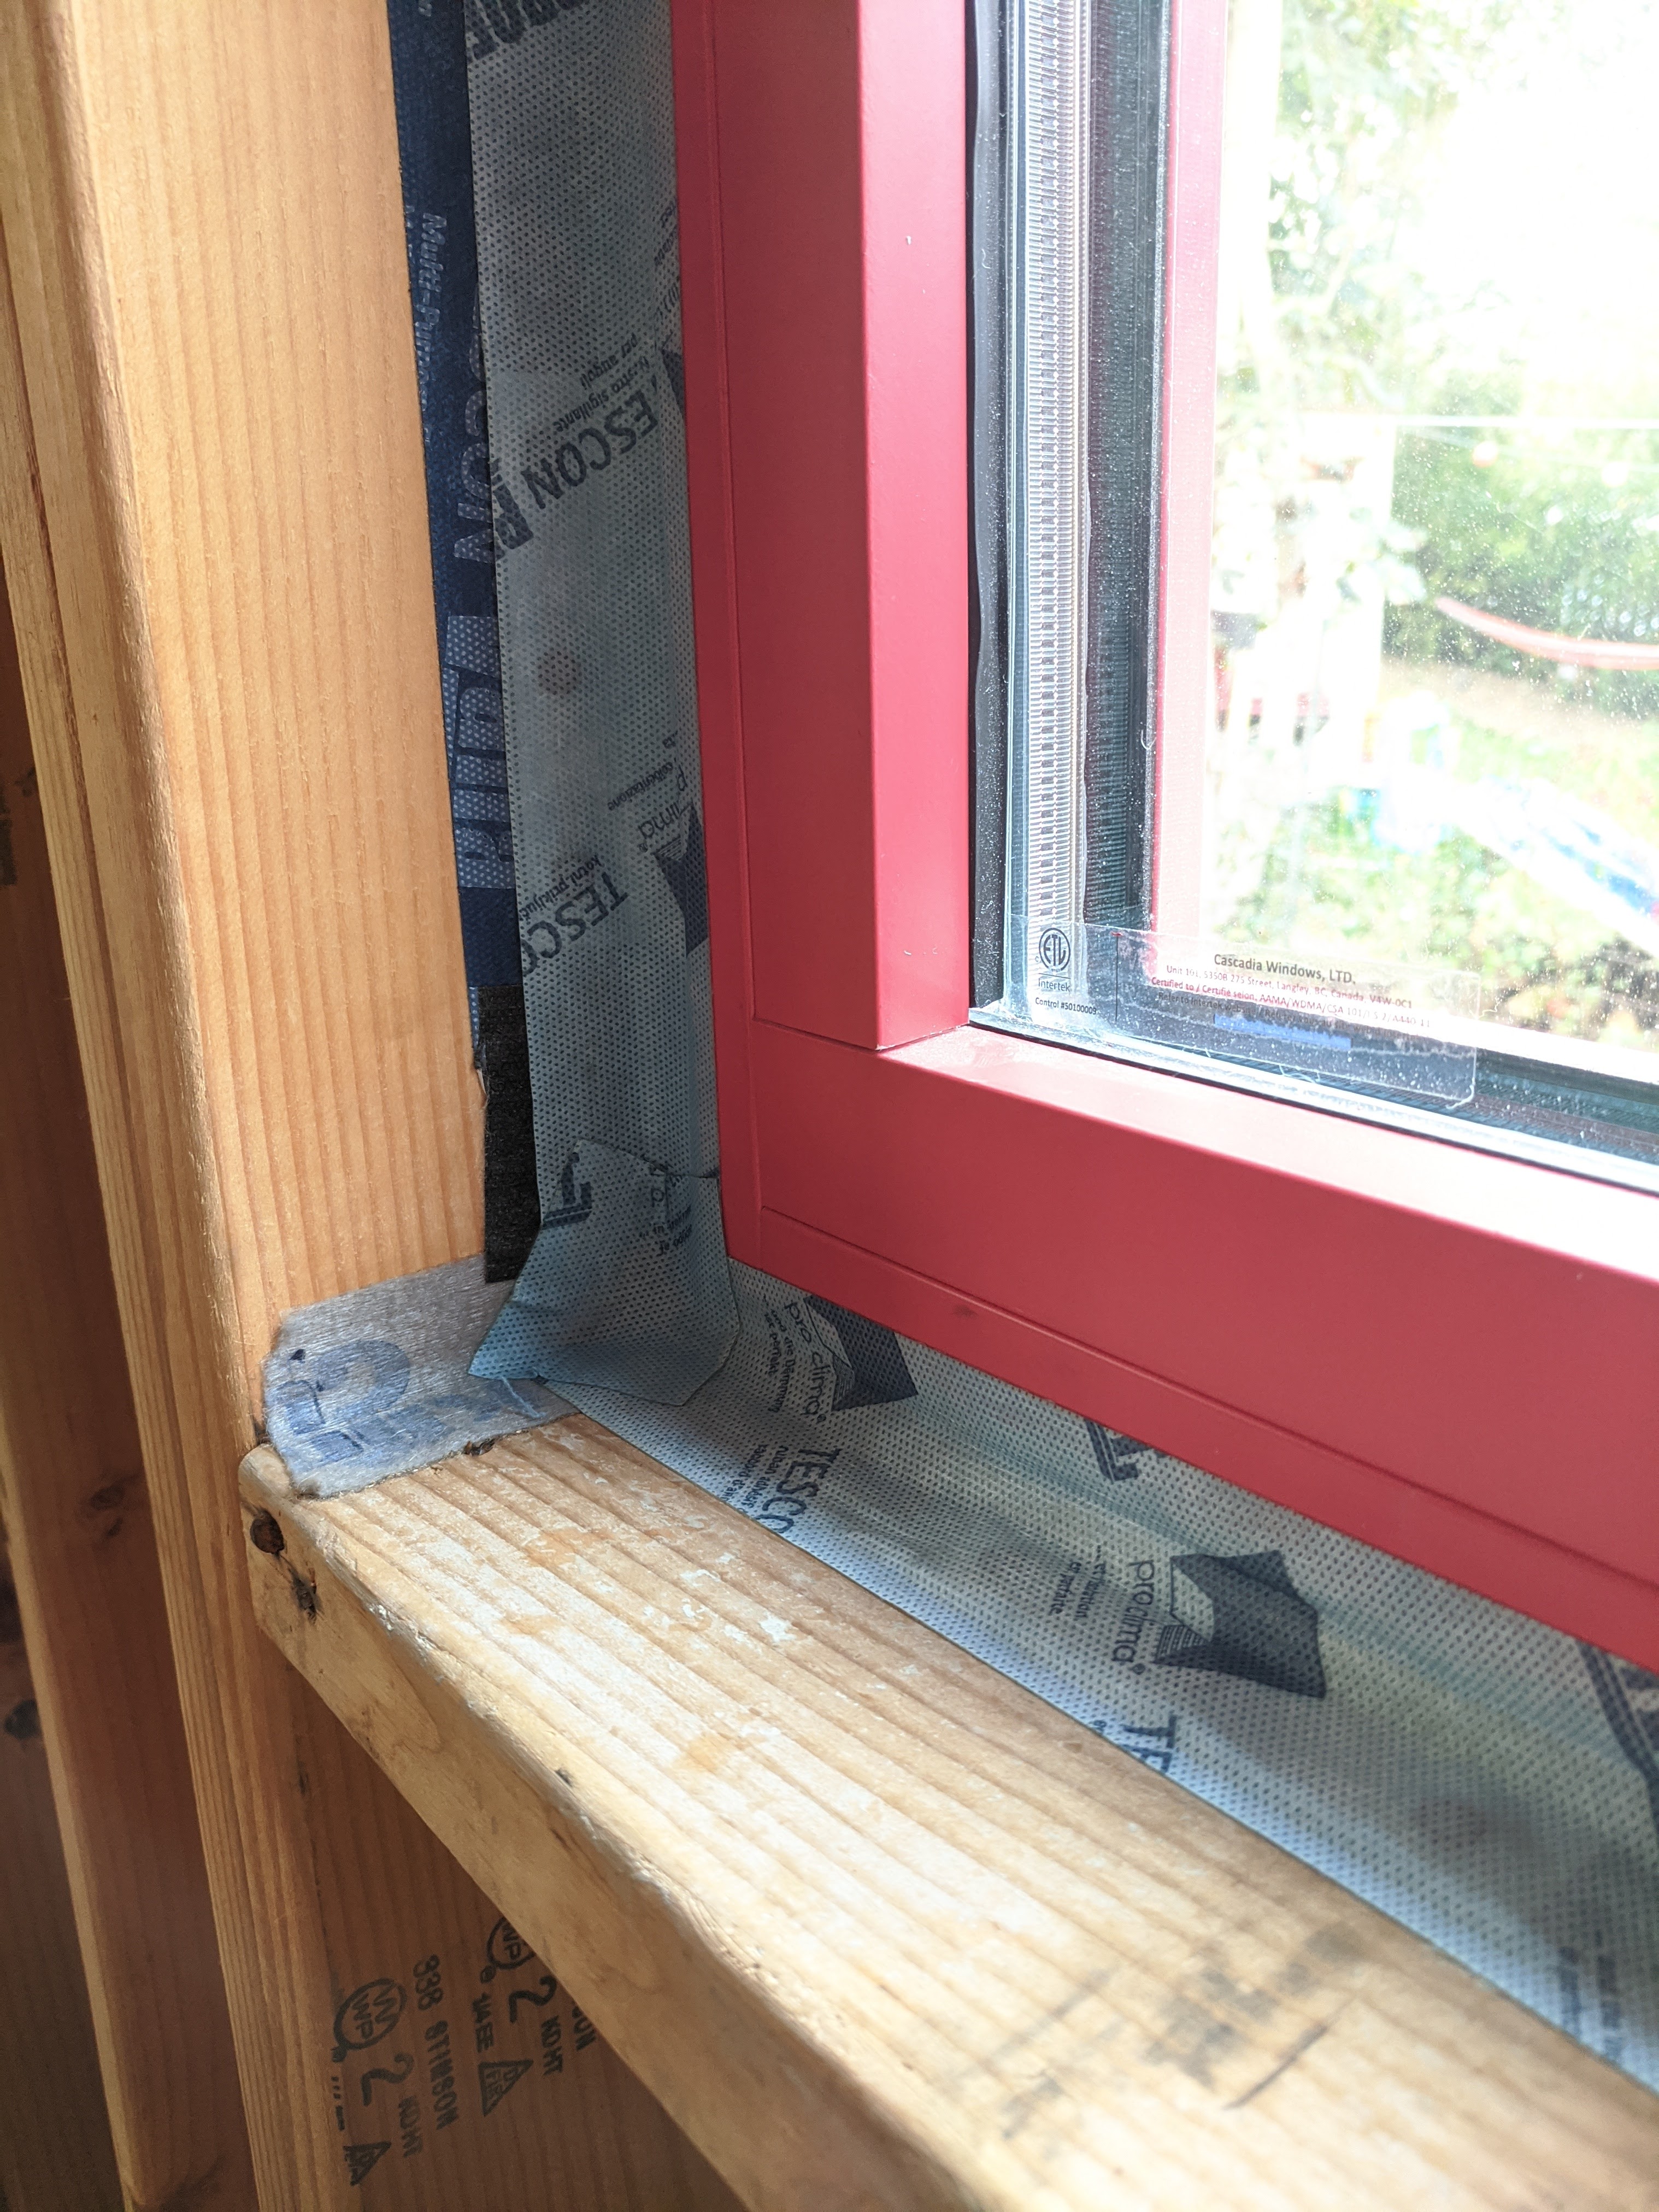
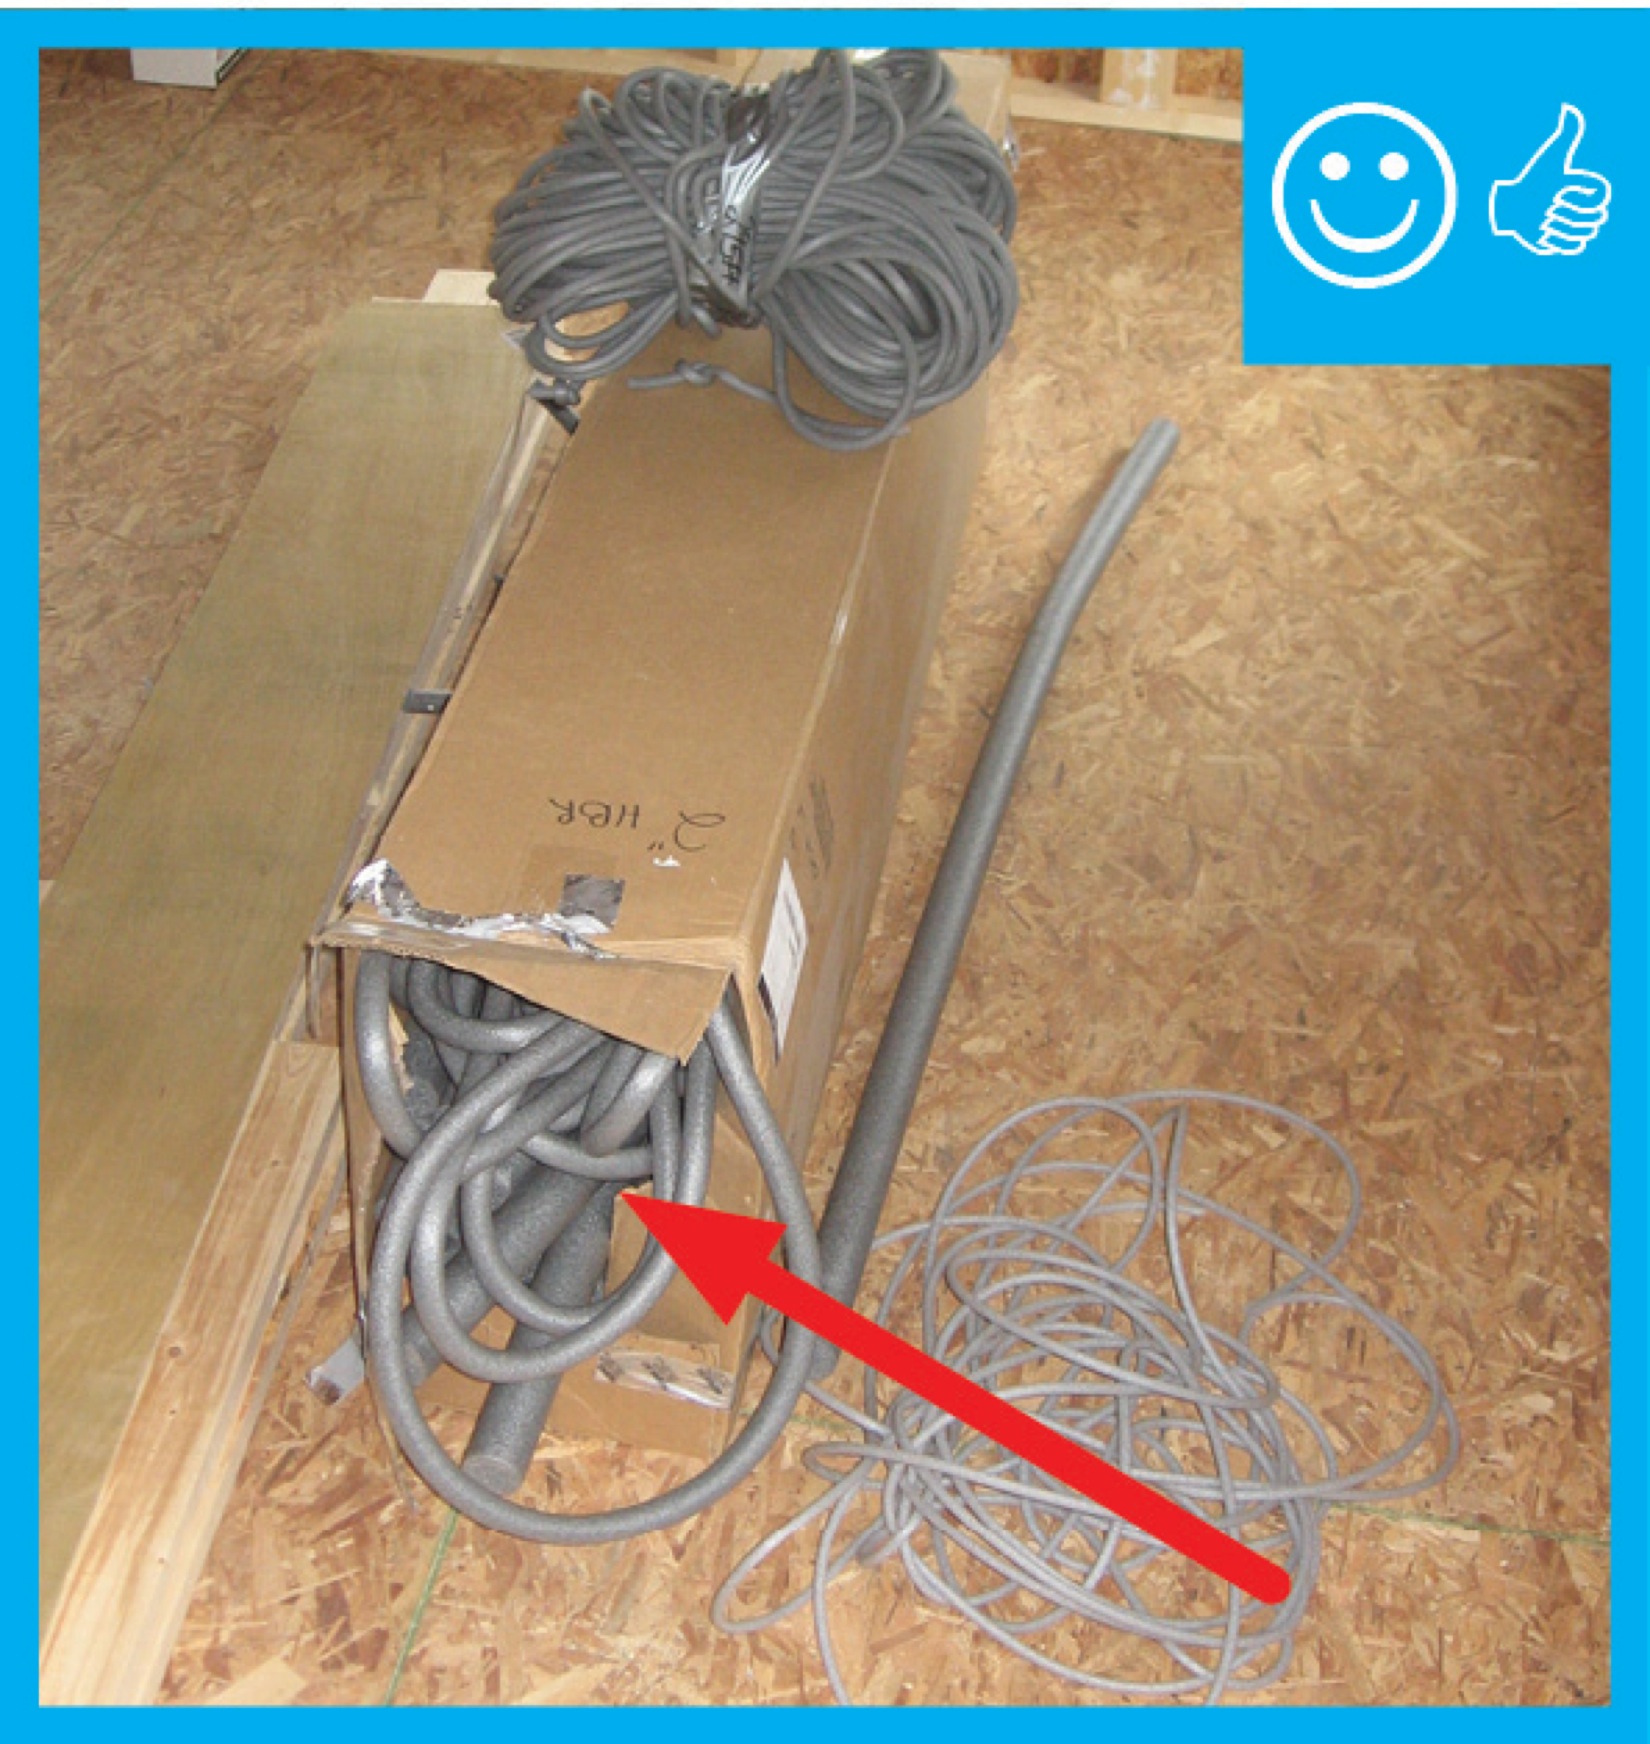
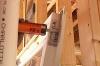
Backer rod comes in both open- and closed-cell varieties. Only closed-cell products (usually made of polyethylene foam) should be used for sealing window and door rough openings, as open-cell foams can absorb and hold moisture. Closed-cell backer rod is typically available in 1/4 to 1-1/2-inch-diameters, and sold by the foot from a reel. Larger diameter backer rod (up to 4 inches) is also available in 6- or 7-foot lengths. Always use backer rod that is wider than the gap, so it can be pressed firmly into the gap and create a tight seal (Figure 1).
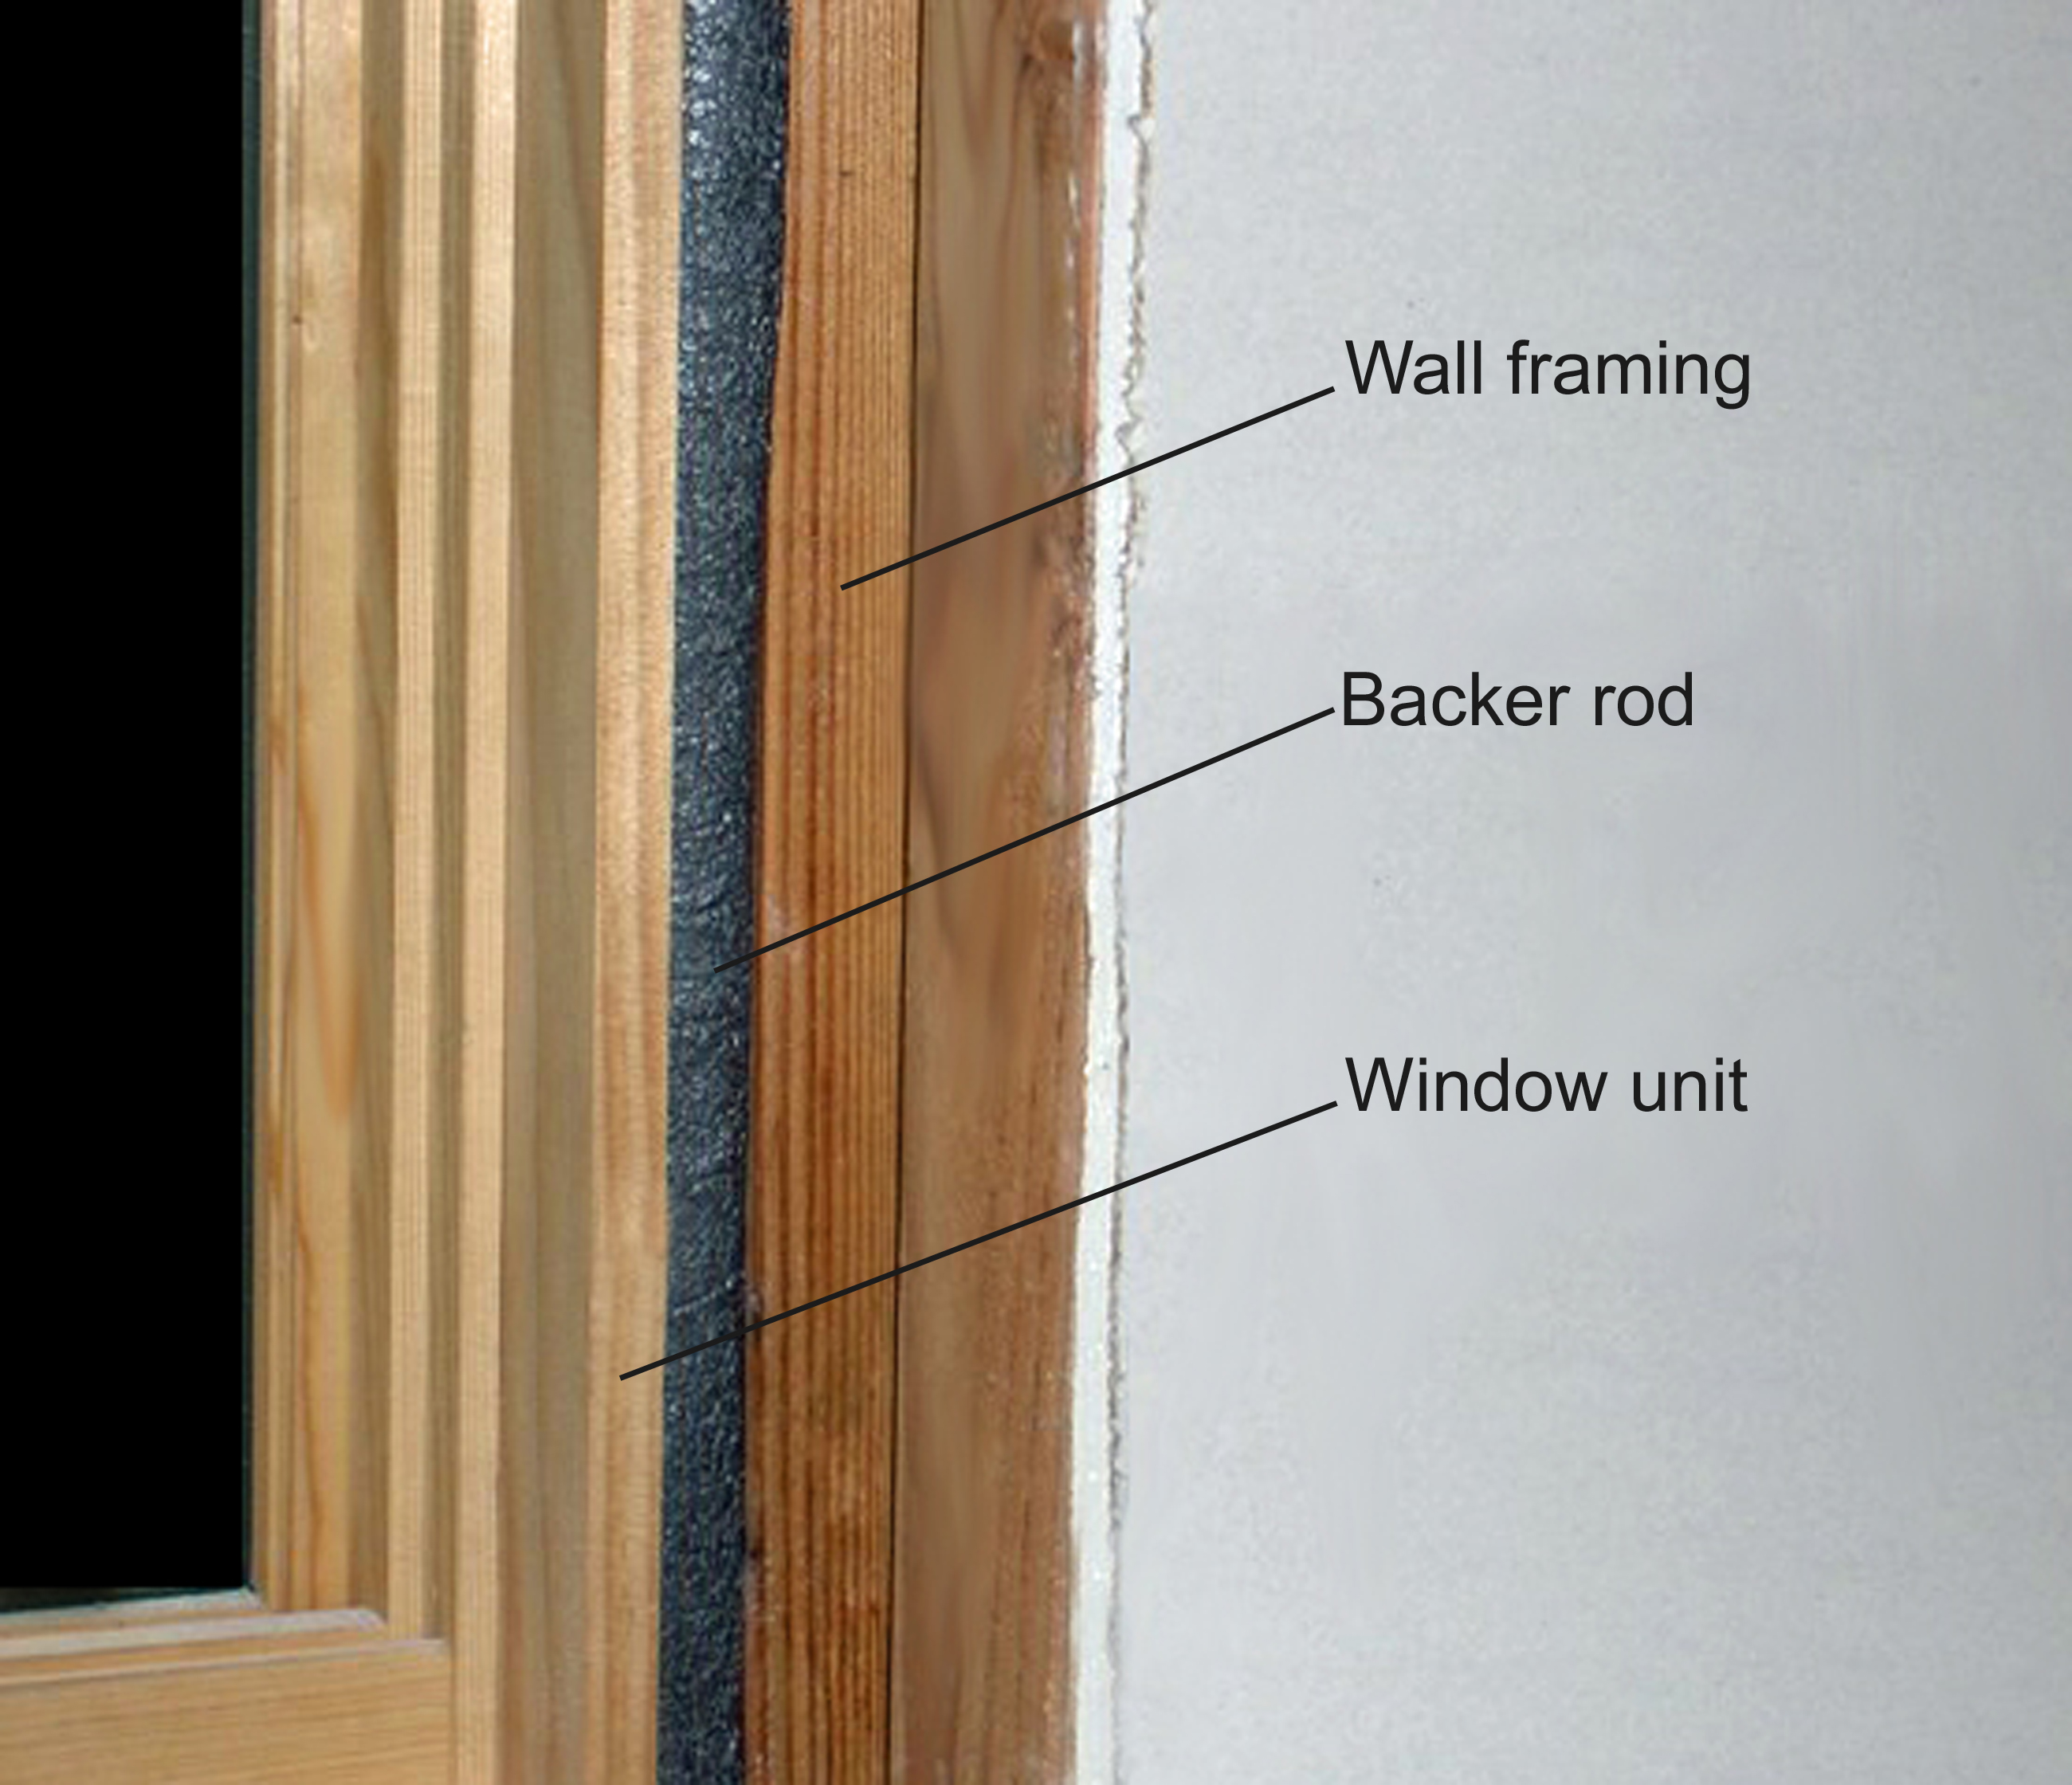
Figure 1. Closed-cell backer rod for air-sealing window and door rough openings (Source: Courtesy of Digital Learning Labs, LLC). - Caulk can be used to seal smaller gaps less than 1/2 inch wide. Caulk has the advantage of providing a more positive seal in irregular gaps, and when applied carefully, can create a tight seal around the shims used to install window and door units. For best results, use a silicone or polyurethane sealant that will shrink less than acrylic products when fully cured (Jackson 1997).
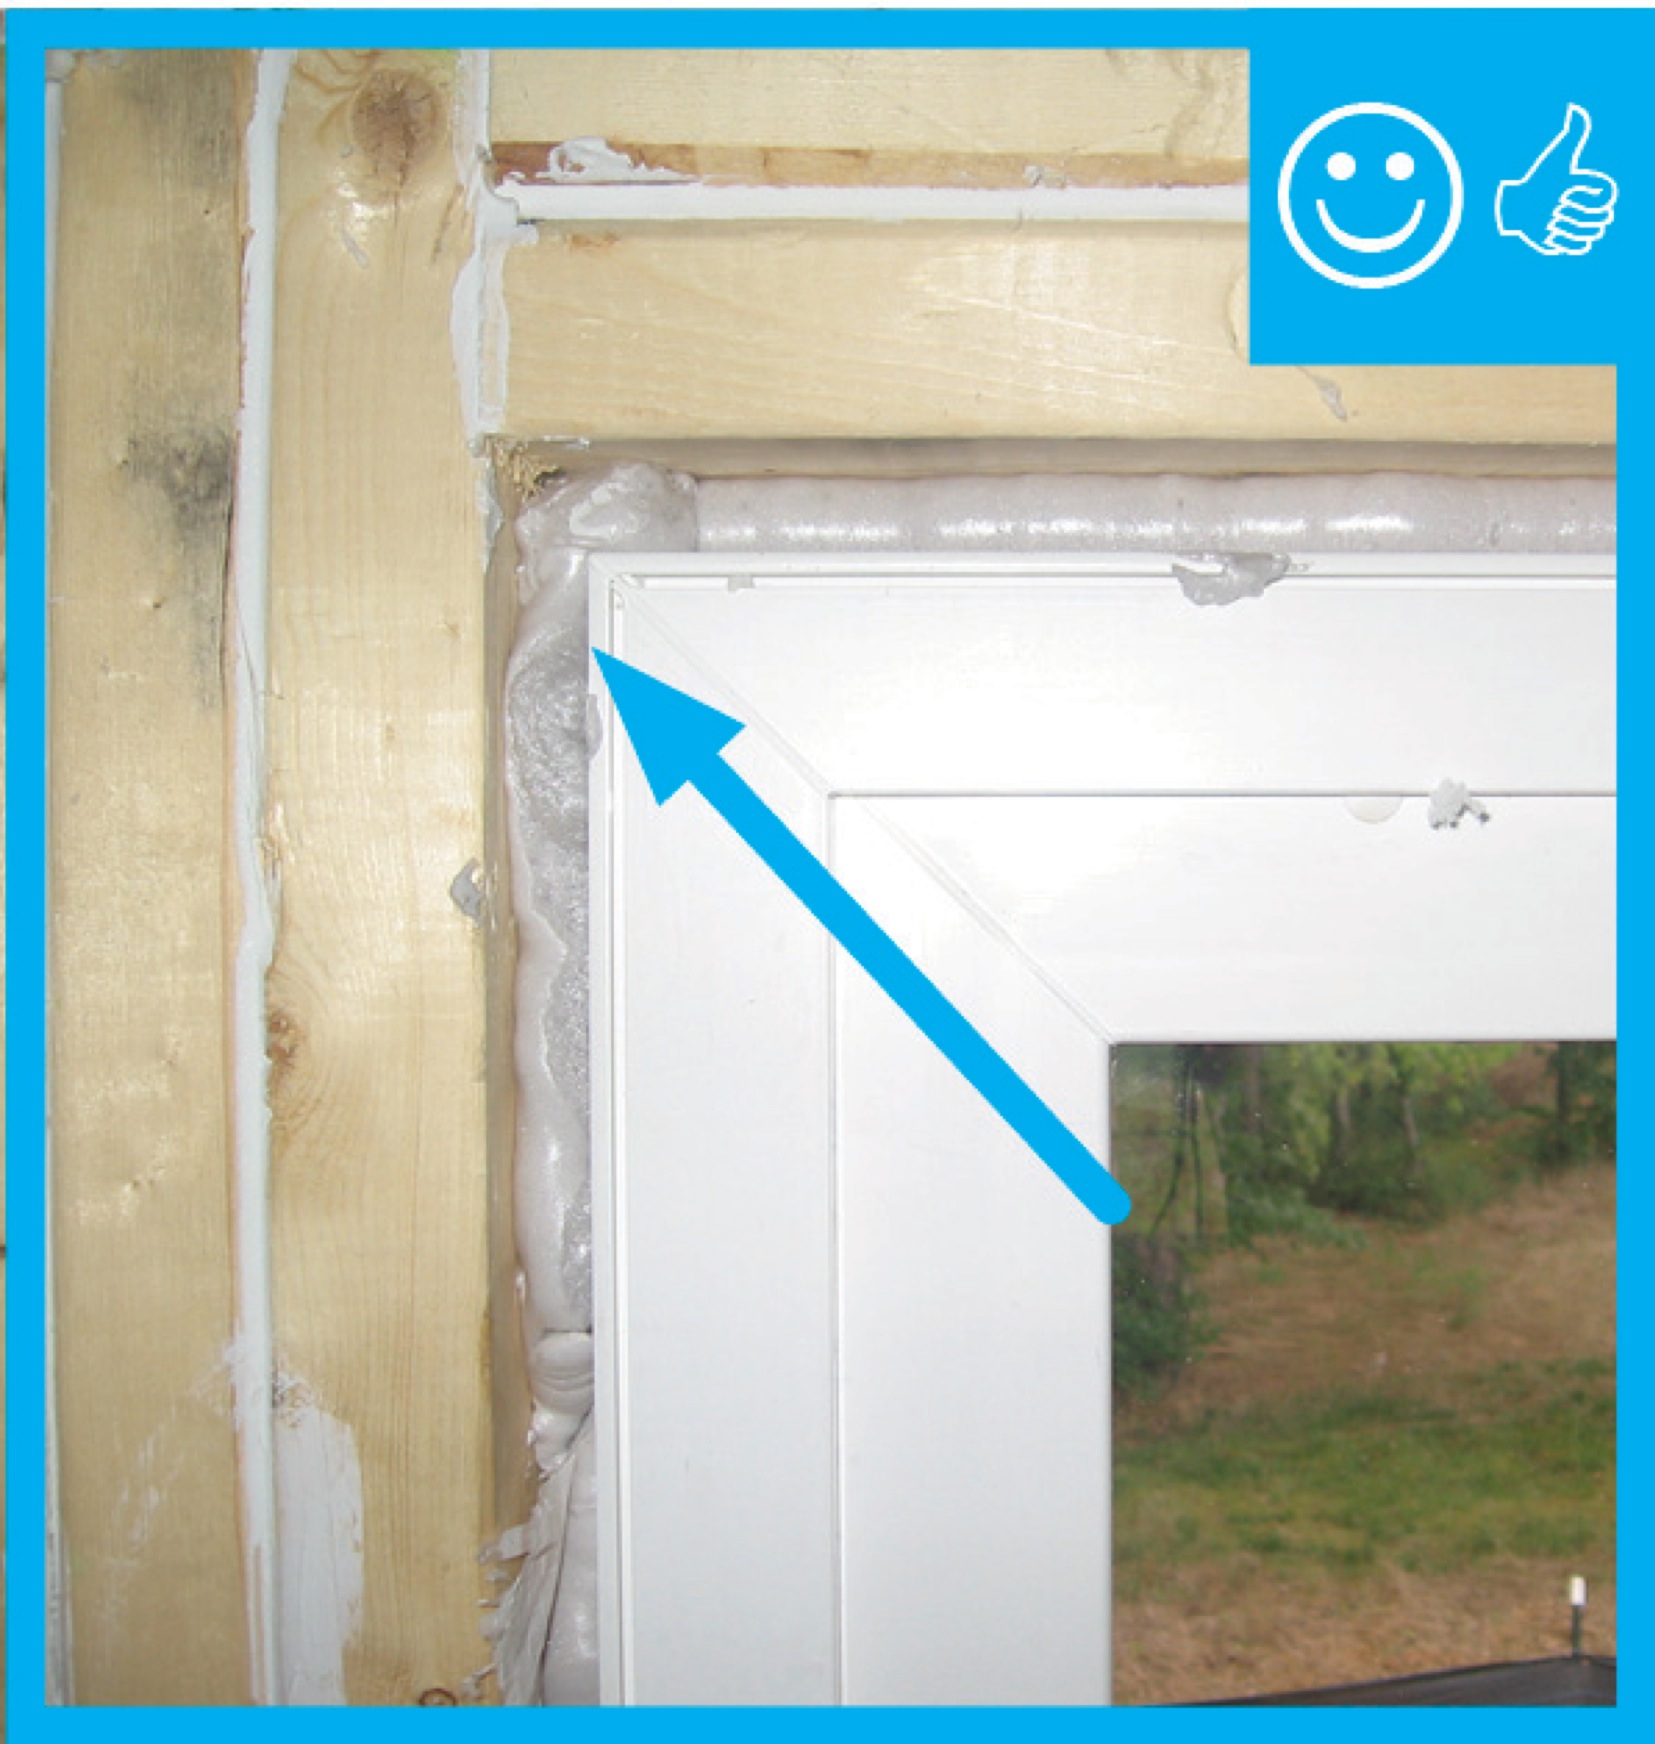
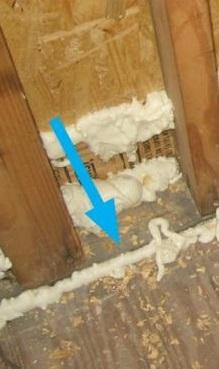
Nonexpanding foam can be used to effectively seal the gap between the wall framing and window or door unit (Figure 2). It is important to use a nonexpanding product specially formulated for use as a window or door sealant. Ordinary expanding foam can swell with enough force to distort the jambs, and cause problems with operating the windows and doors. Use of ordinary expanding foam will often void window and door warranties.
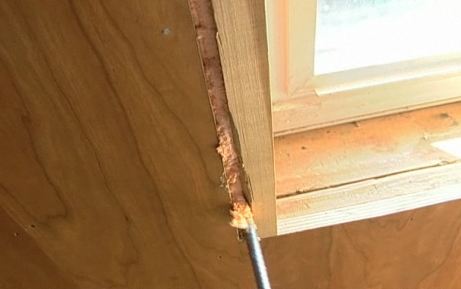
Figure 2. Although nonexpanding foam can effectively seal gaps between the jamb and the wall framing, only use nonexpanding foam sealants that are designed specifically for windows and doors (Source: Courtesy of Building Media).
Air-Sealing Window and Door Rough Openings
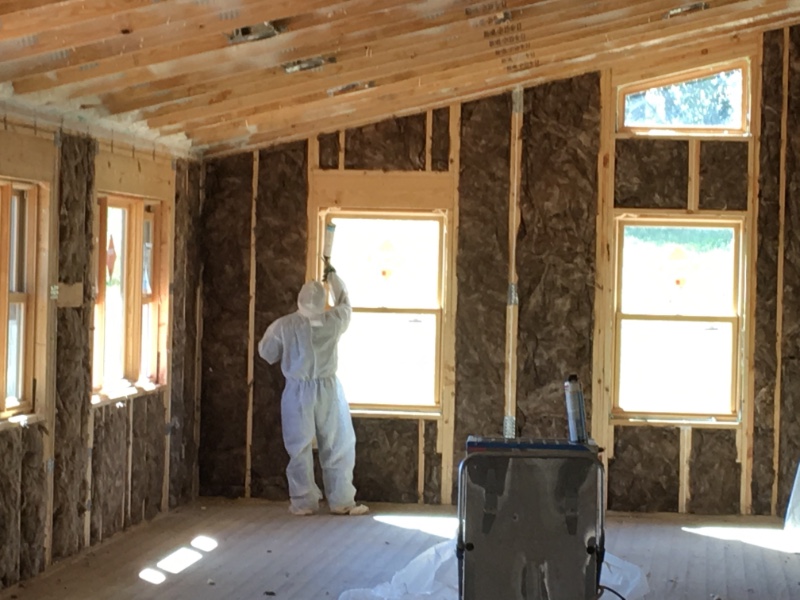
Air-sealing window and door rough openings is typically done by the insulation contractor, but in some cases it may be done by the window and door installer or by the finish carpenter prior to installing window and door trim.
With the window or door unit permanently installed in the rough opening, air-seal the opening as follows:
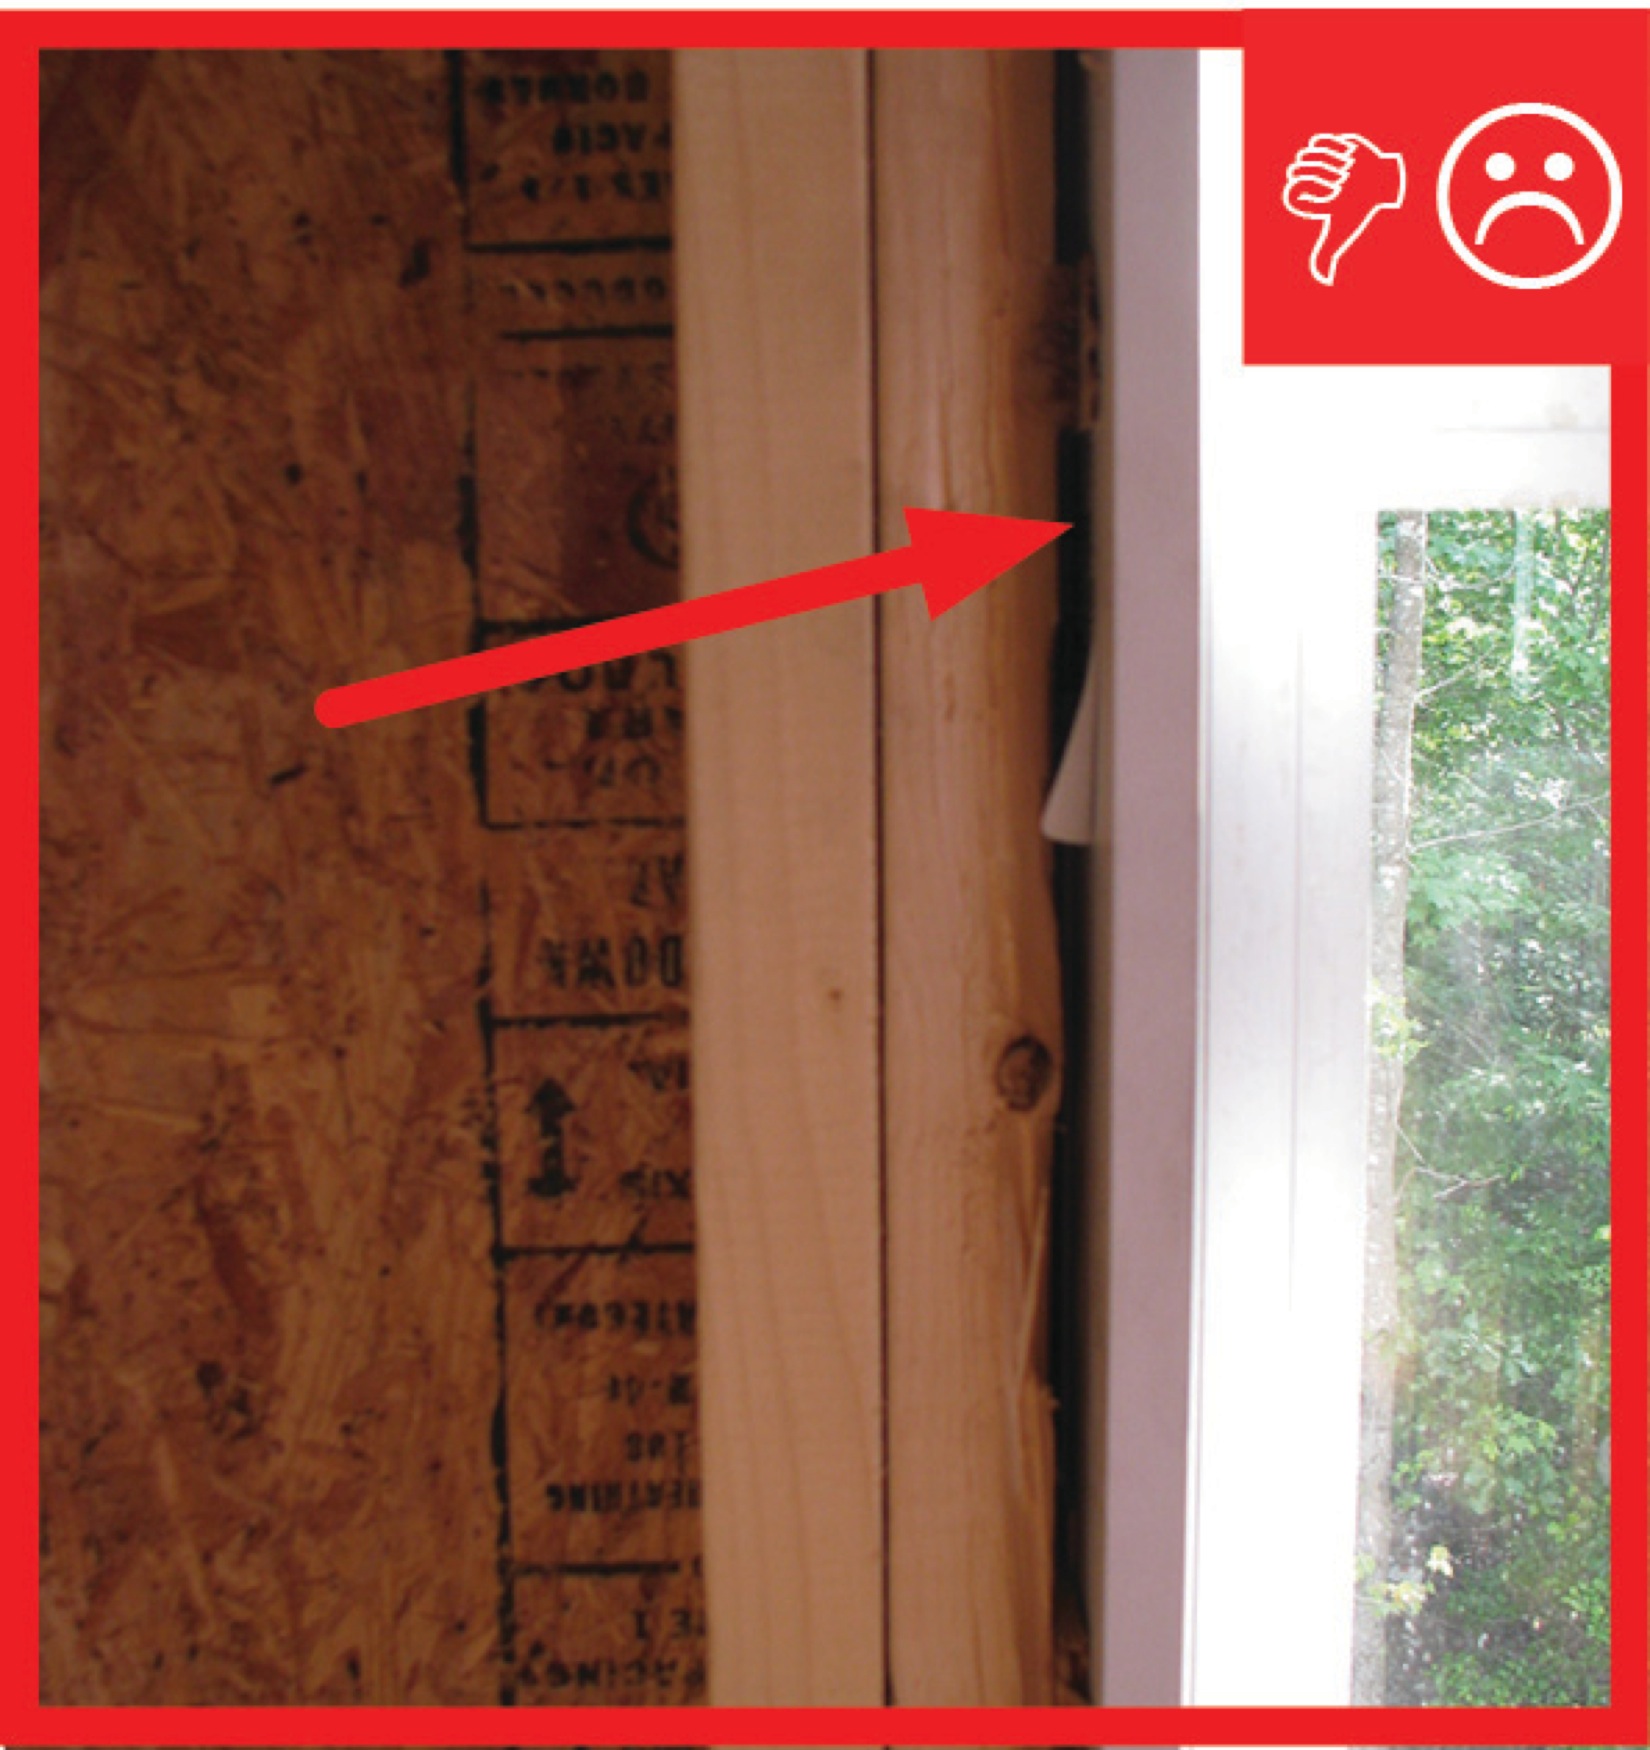
- Trim back the shims securing the window or door unit to the wall framing. If possible, try to cut these back behind the interior face of the wall and jambs, so that sealant can be applied over the shims for a tighter seal.
- Apply the sealant toward the interior edge of the window or door unit. Using this approach, the gap to the exterior can drain freely and will be pressure equalized with the exterior, which limits the potential for an air pressure difference to force water into the joint (BSC 2009).
- With backer rod: Press the backer rod into the gap between the wall framing and the window or door unit. Use a flat bar to push it in. Apply even pressure; don't force it in, or the tool will tear the backer rod. Push the backer rod to an even depth. If caulk will be applied over it, take care to create an even surface that will provide a uniform substrate for the caulk.
With caulk: If the gap is less than 1/2 inch wide, apply caulk over the backer rod for a tighter seal. Caulk should always be applied against backer rod, not just squeezed into the gap. Tool the bead against the backer rod. This will create an hour-glass shape (Figure 3), which allows the sealant to expand and contract over time without cracking. Without the backer rod, the bead of caulk would be too thick and would be prone to cracking when it cures, and it would be resistant to flexing with movements in the building materials of the wall system as they change dimension with seasonal changes in temperature and humidity.

Figure 3. After tooling, a bead of caulk (light blue) should have an hour-glass shape when applied against backer rod (dark blue), which allows the caulk to expand and contract over time without cracking (Source: Courtesy of Digital Learning Labs, LLC). - With nonexpanding foam, wear gloves when applying spray foam to prevent the foam from adhering to skin. Insert the spray nozzle about half an inch into the gap between the wall framing and the window or door unit. Keep the spray nozzle moving at a steady speed while applying the foam. If the nozzle moves too slow, foam will fill too much of the cavity; if the nozzle moves too fast there will be gaps in the bead.
- With all types of sealant materials, pay close attention near the shims that hold the unit in the rough opening. It is important that the sealant fit tightly around these obstacles in the sealant path.
Ensuring Success
Visual Inspection
Visually inspect the seals between the window rough openings and the window and door units prior to installing interior finish materials. The seal from backer rod, caulk or nonexpanding foam should be uniform without any visible gaps.
Blower Door Testing with Smoke Pencil Diagnostics
Blower door testing, conducted as part of whole-house energy performance testing, may help indicate whether windows have been successfully sealed. With the blower door pressurizing the house, use a smoke pencil to check for air around windows. A smoke trail moving away from the smoke pencil into the wall around the window or door unit indicates a leak that should be sealed.
Region
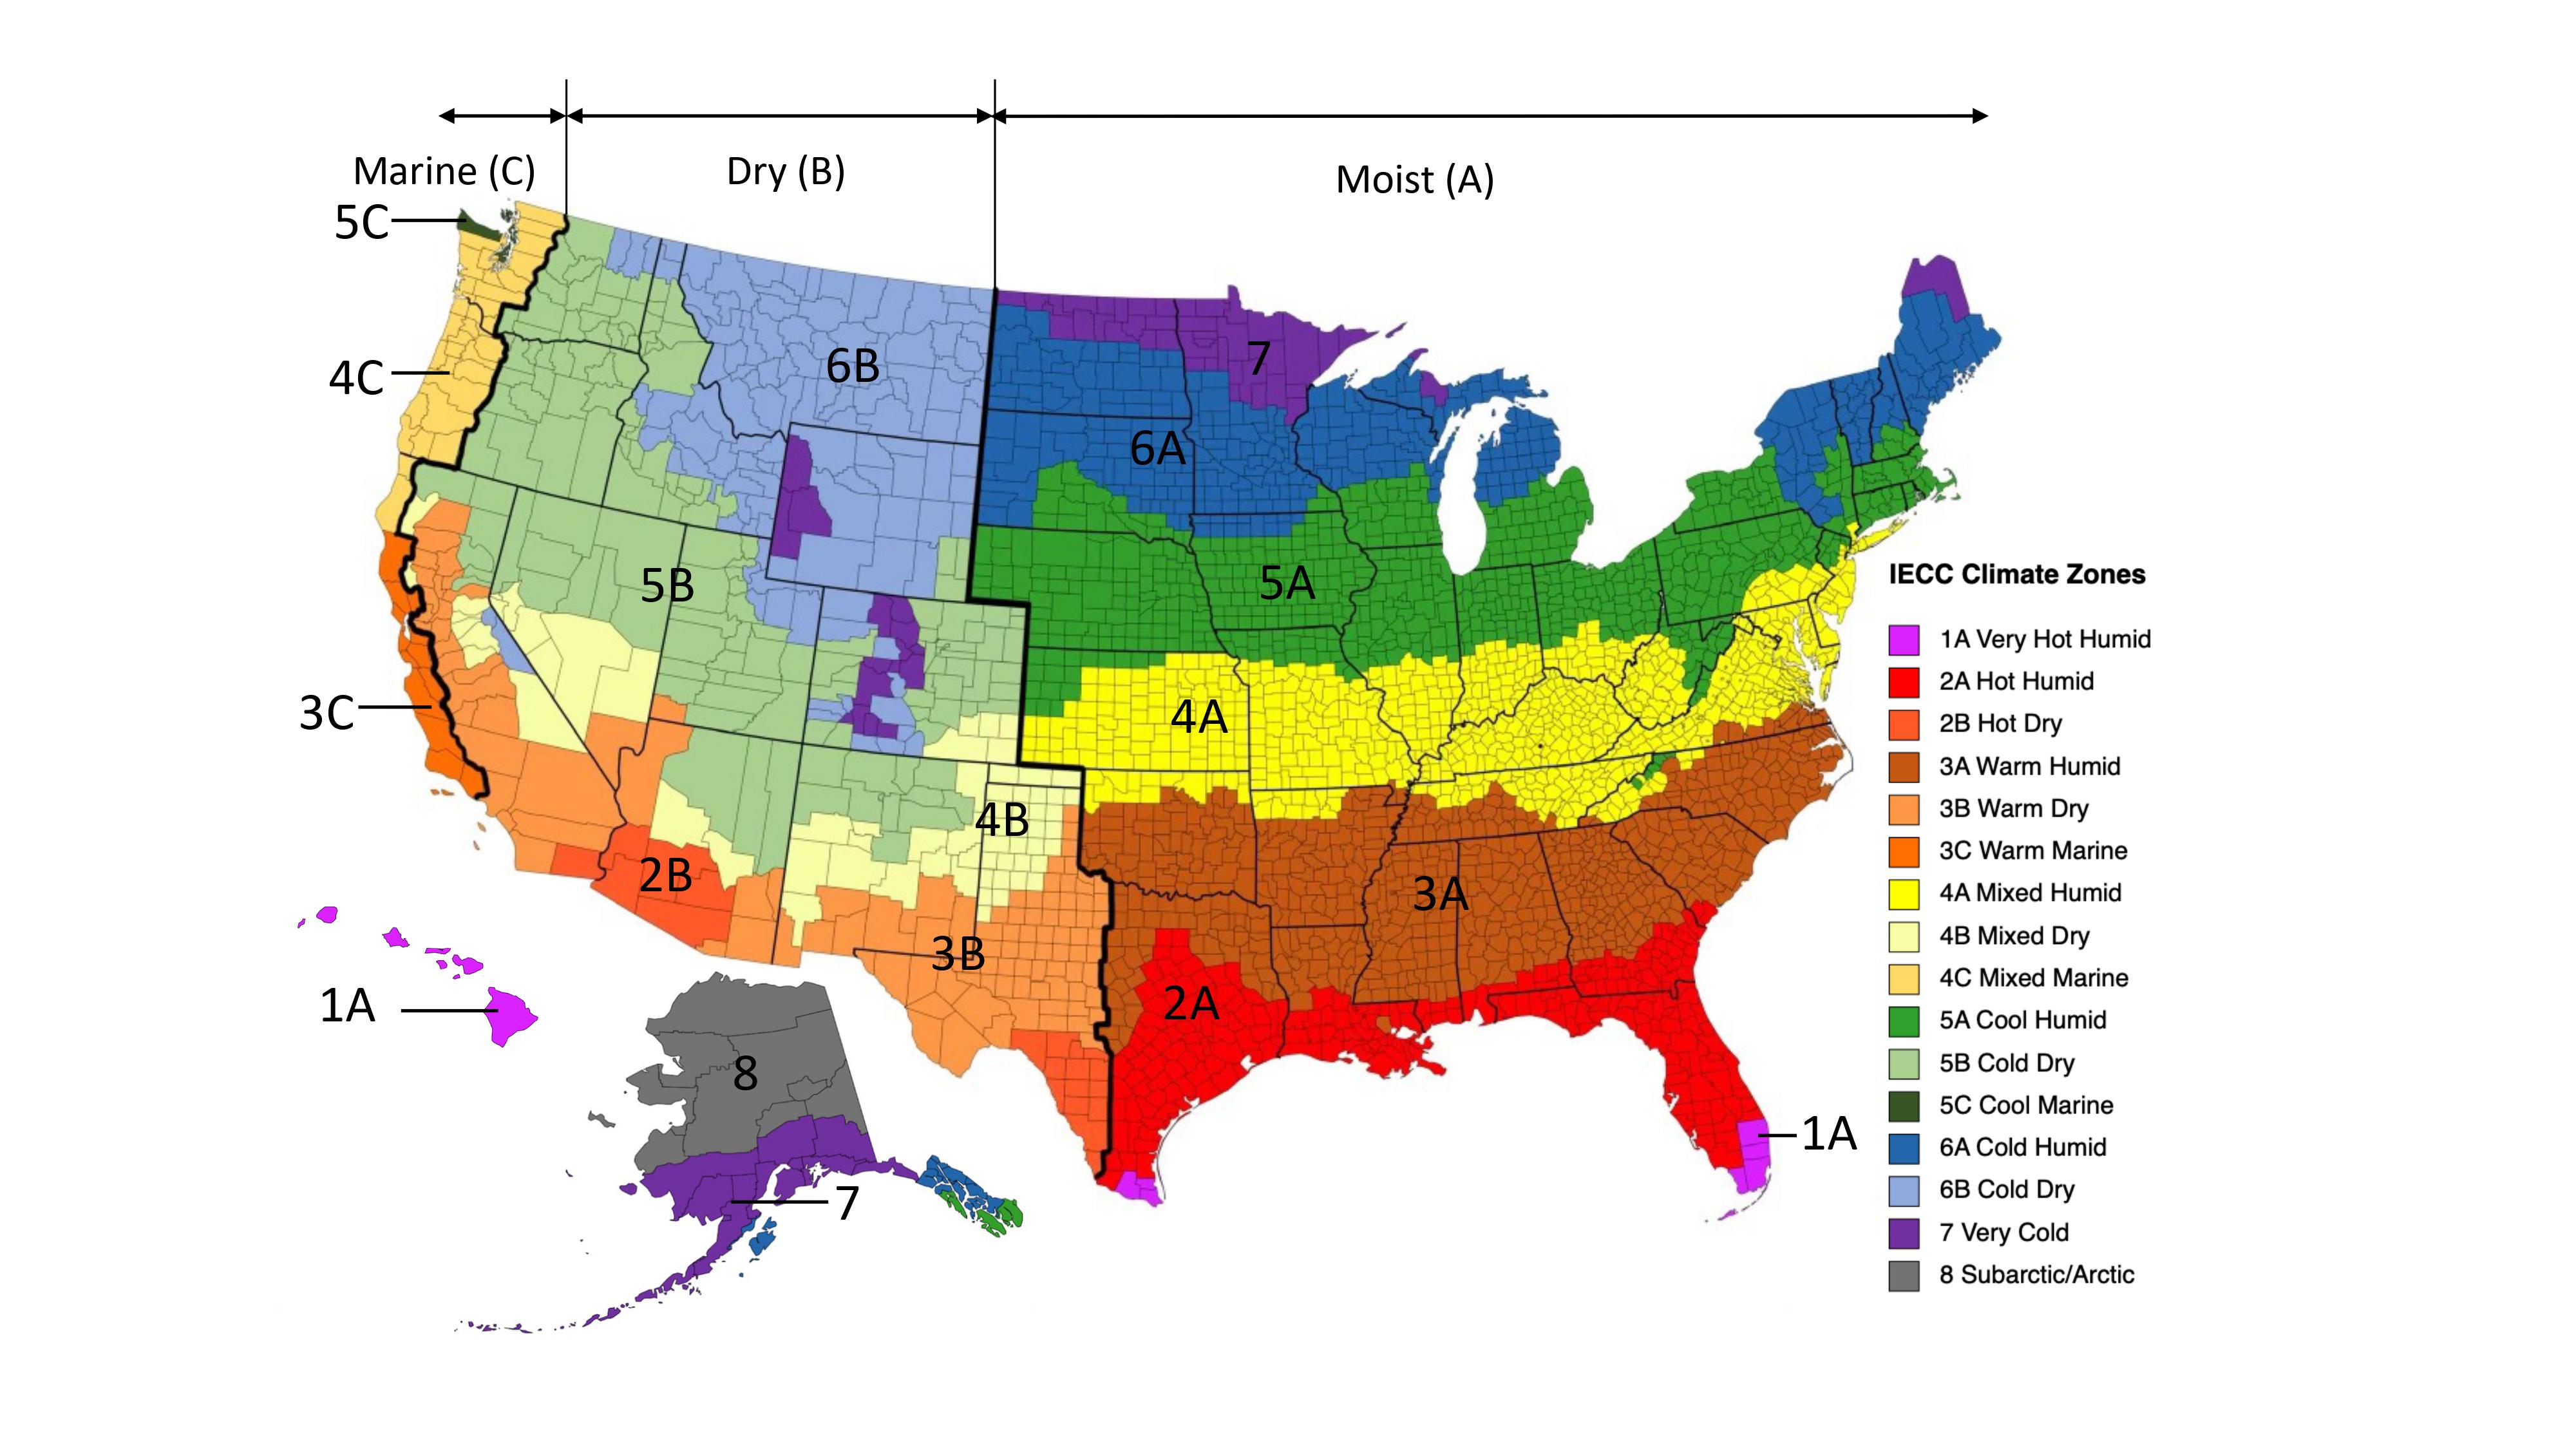
The map in Figure 1 shows the climate zones for states that have adopted energy codes equivalent to the International Energy Conservation Code (IECC) 2009, 2012, 2015, and 2018. The map in Figure 2 shows the climate zones for states that have adopted energy codes equivalent to the IECC 2021. Climate zone-specific requirements in the IECC are shown in the Compliance Tab of this guide.

Source
2012 edition of code establishing a baseline for energy efficiency by setting performance standards for the building envelope (defined as the boundary that separates heated/cooled air from unconditioned, outside air), mechanical systems, lighting systems and service water heating systems in homes and commercial businesses.
Source
2021 edition of code establishing a baseline for energy efficiency by setting performance standards for the building envelope (defined as the boundary that separates heated/cooled air from unconditioned, outside air), mechanical systems, lighting systems and service water heating systems in homes and commercial businesses.
Training
Right and Wrong Images

Source
Source
Source
Source
Guide describing details that serve as a visual reference for each of the line items in the Thermal Enclosure System Rater Checklist.
Source
Guide describing details that serve as a visual reference for each of the line items in the Thermal Enclosure System Rater Checklist.

Source
Guide describing details that serve as a visual reference for each of the line items in the Thermal Enclosure System Rater Checklist.
Source
Source
Guide describing details that serve as a visual reference for each of the line items in the Thermal Enclosure System Rater Checklist.
Source
Source
Guide describing details that serve as a visual reference for each of the line items in the Thermal Enclosure System Rater Checklist.
Source

Source

Source
Source
Videos


Compliance
More Info
References and Resources
*For non-dated media, such as websites, the date listed is the date accessed.
Contributors to this Guide
The following authors and organizations contributed to the content in this Guide.
Building Science Corporation, lead for the Building Science Consortium (BSC), a DOE Building America Research Team
Sales
Tight Air Sealed Home = Comprehensive Draft Protection
Technical Description
Poorly air-sealed homes are less comfortable and cost more to maintain because they provide a pathway for drafts, cold spots, moisture, and insects into the home. Comprehensive draft protection includes a continuous air barrier around the whole house along with caulking and sealing in all holes and cracks. This includes around wiring, plumbing, ducts, and flues; where wall framing meets flooring; around windows; where drywall meets top plates and sill plates; where rim joists meet foundation walls and subfloors; etc. Spray foam insulation can be used at rim joists, floors above unconditioned space, and in attics to insulate and air seal at the same time.
Questions? Comments? Contact our webmaster.