

Scope
Install an air barrier behind staircases installed on exterior walls.
- Install insulation without misalignments, compressions, gaps, or voids in exterior wall cavities behind staircases installed along exterior walls.
- Install a rigid air barrier to prevent wall cavity insulation from sagging and to create a continuous thermal barrier. Rigid air barrier material could include rigid foam insulation, drywall, plywood, or OSB, among others.
- Seal all seams, gaps, and holes in the air barrier with caulk or foam.
- Ensure that the air barrier is continuous and in full contact with the insulation.
- If spray foam insulation is used for the wall cavity insulation, the spray foam can serve as the air barrier if it is at least 5.5 inches thick if open-cell or at least 1.5 inches thick if closed-cell spray foam insulation.
- ENERGY STAR requires that an air barrier be installed at the exterior vertical surface of the wall insulation in all climate zones and also that an air barrier be installed at the interior vertical surface in IECC Climate Zones 4-8 (ENERGY STAR).
See the Compliance Tab for links to related codes and standards and voluntary federal energy-efficiency program requirements.
Description
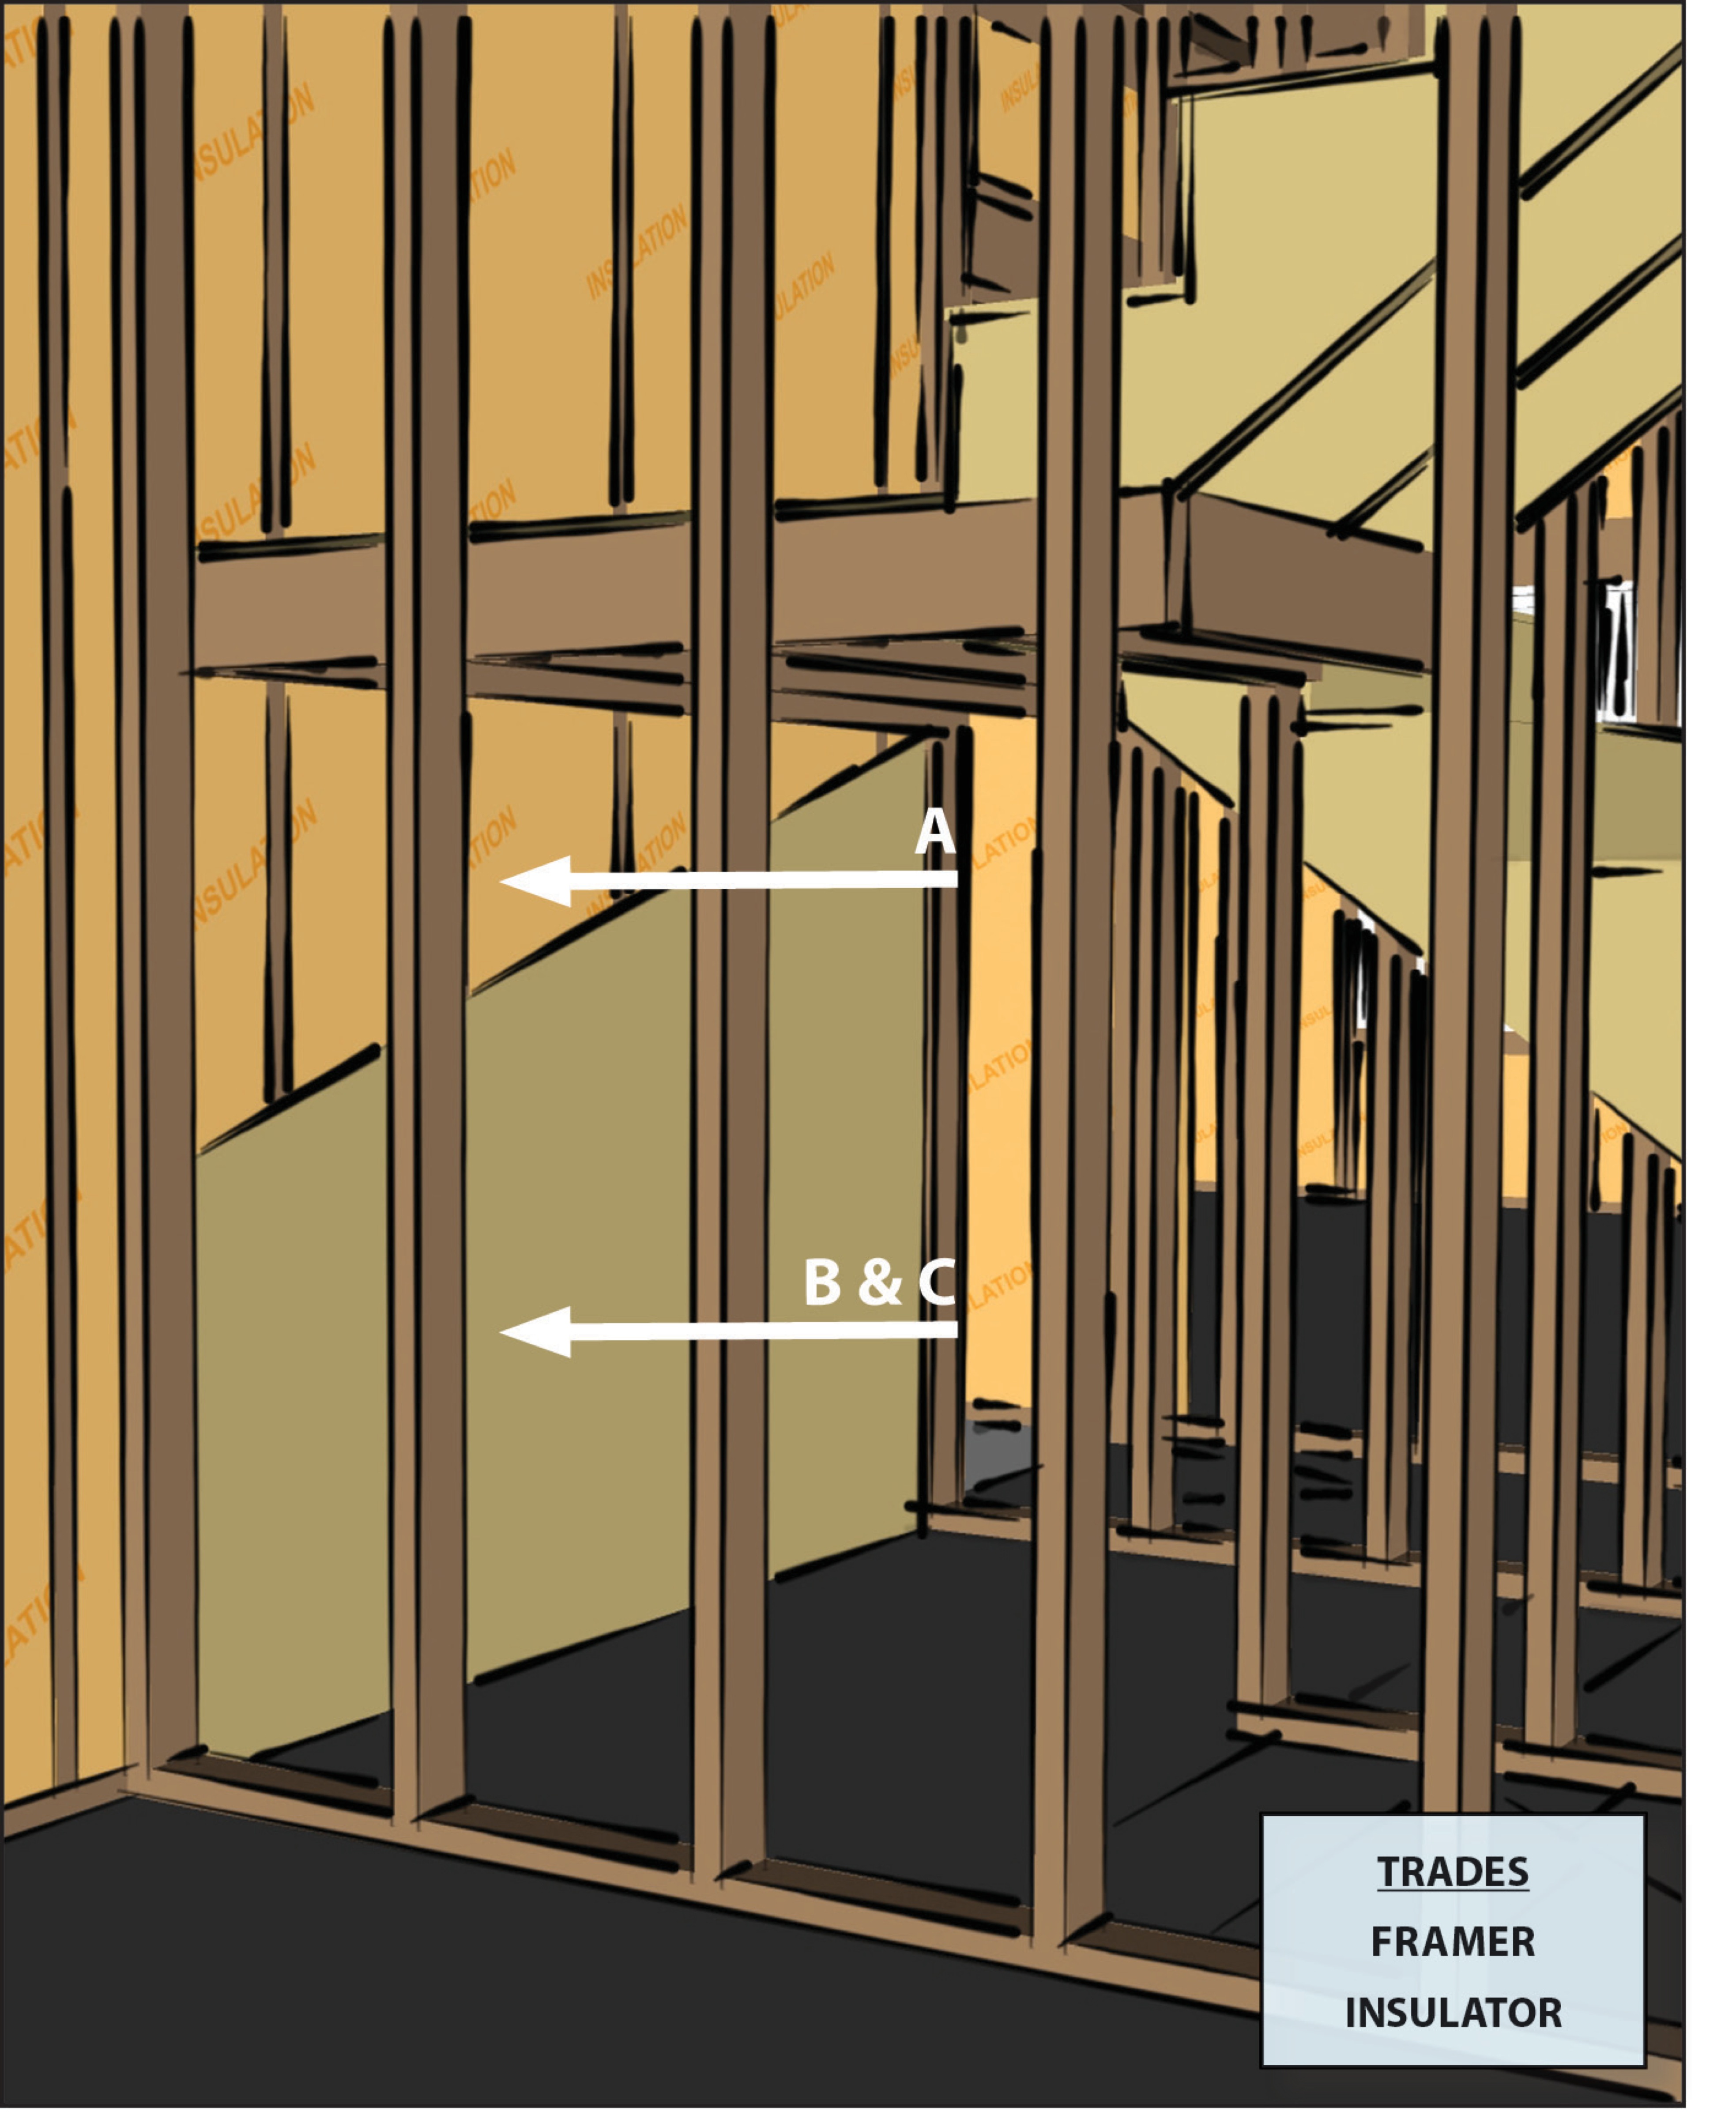
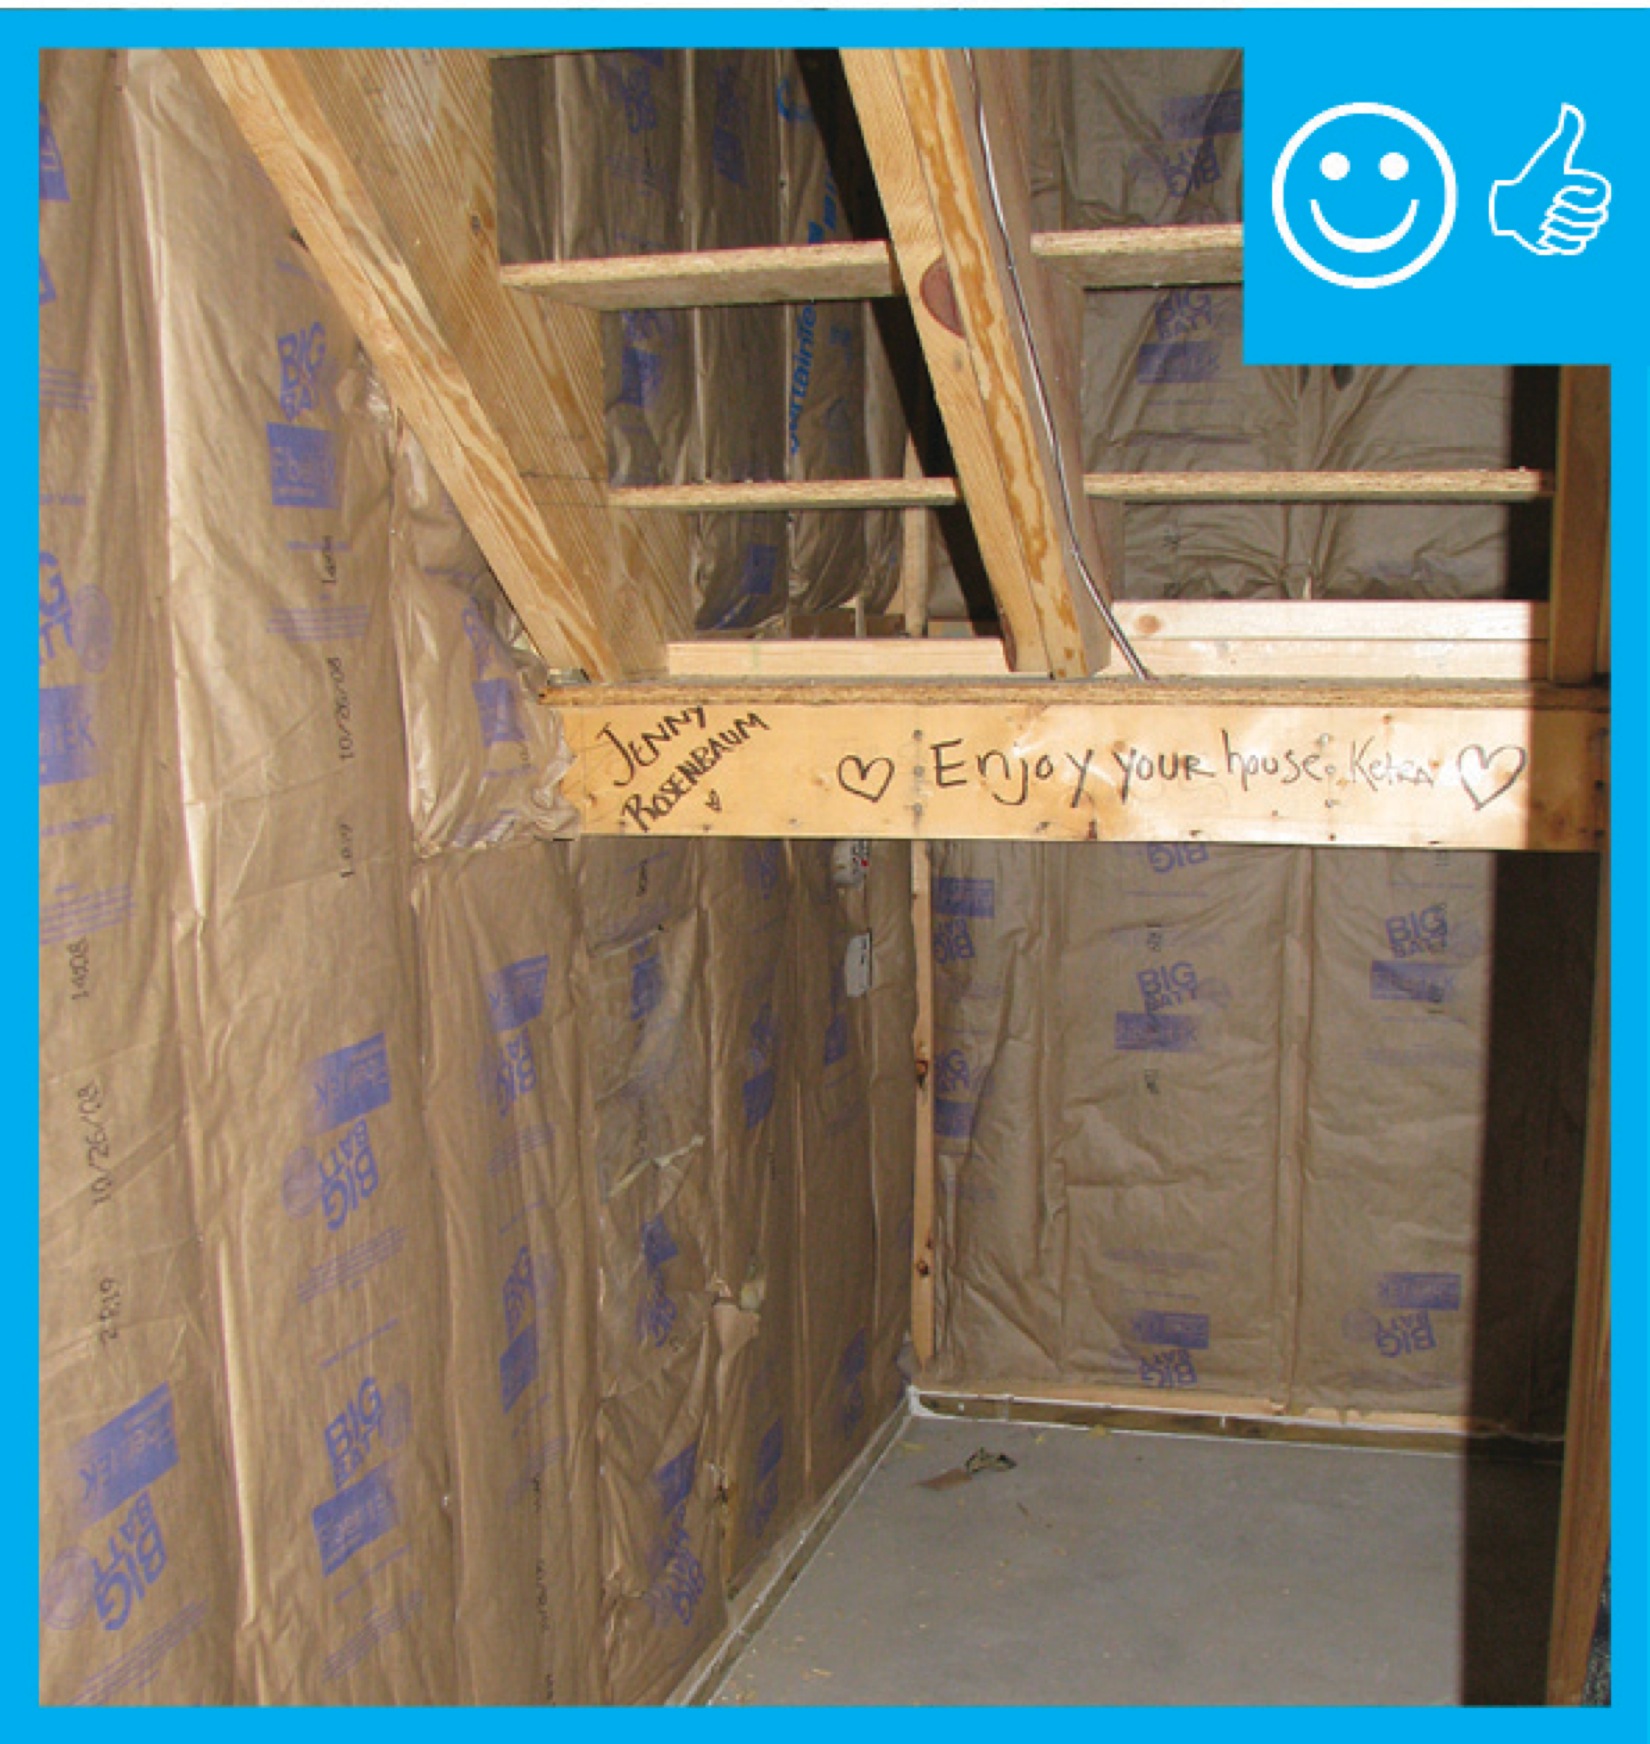
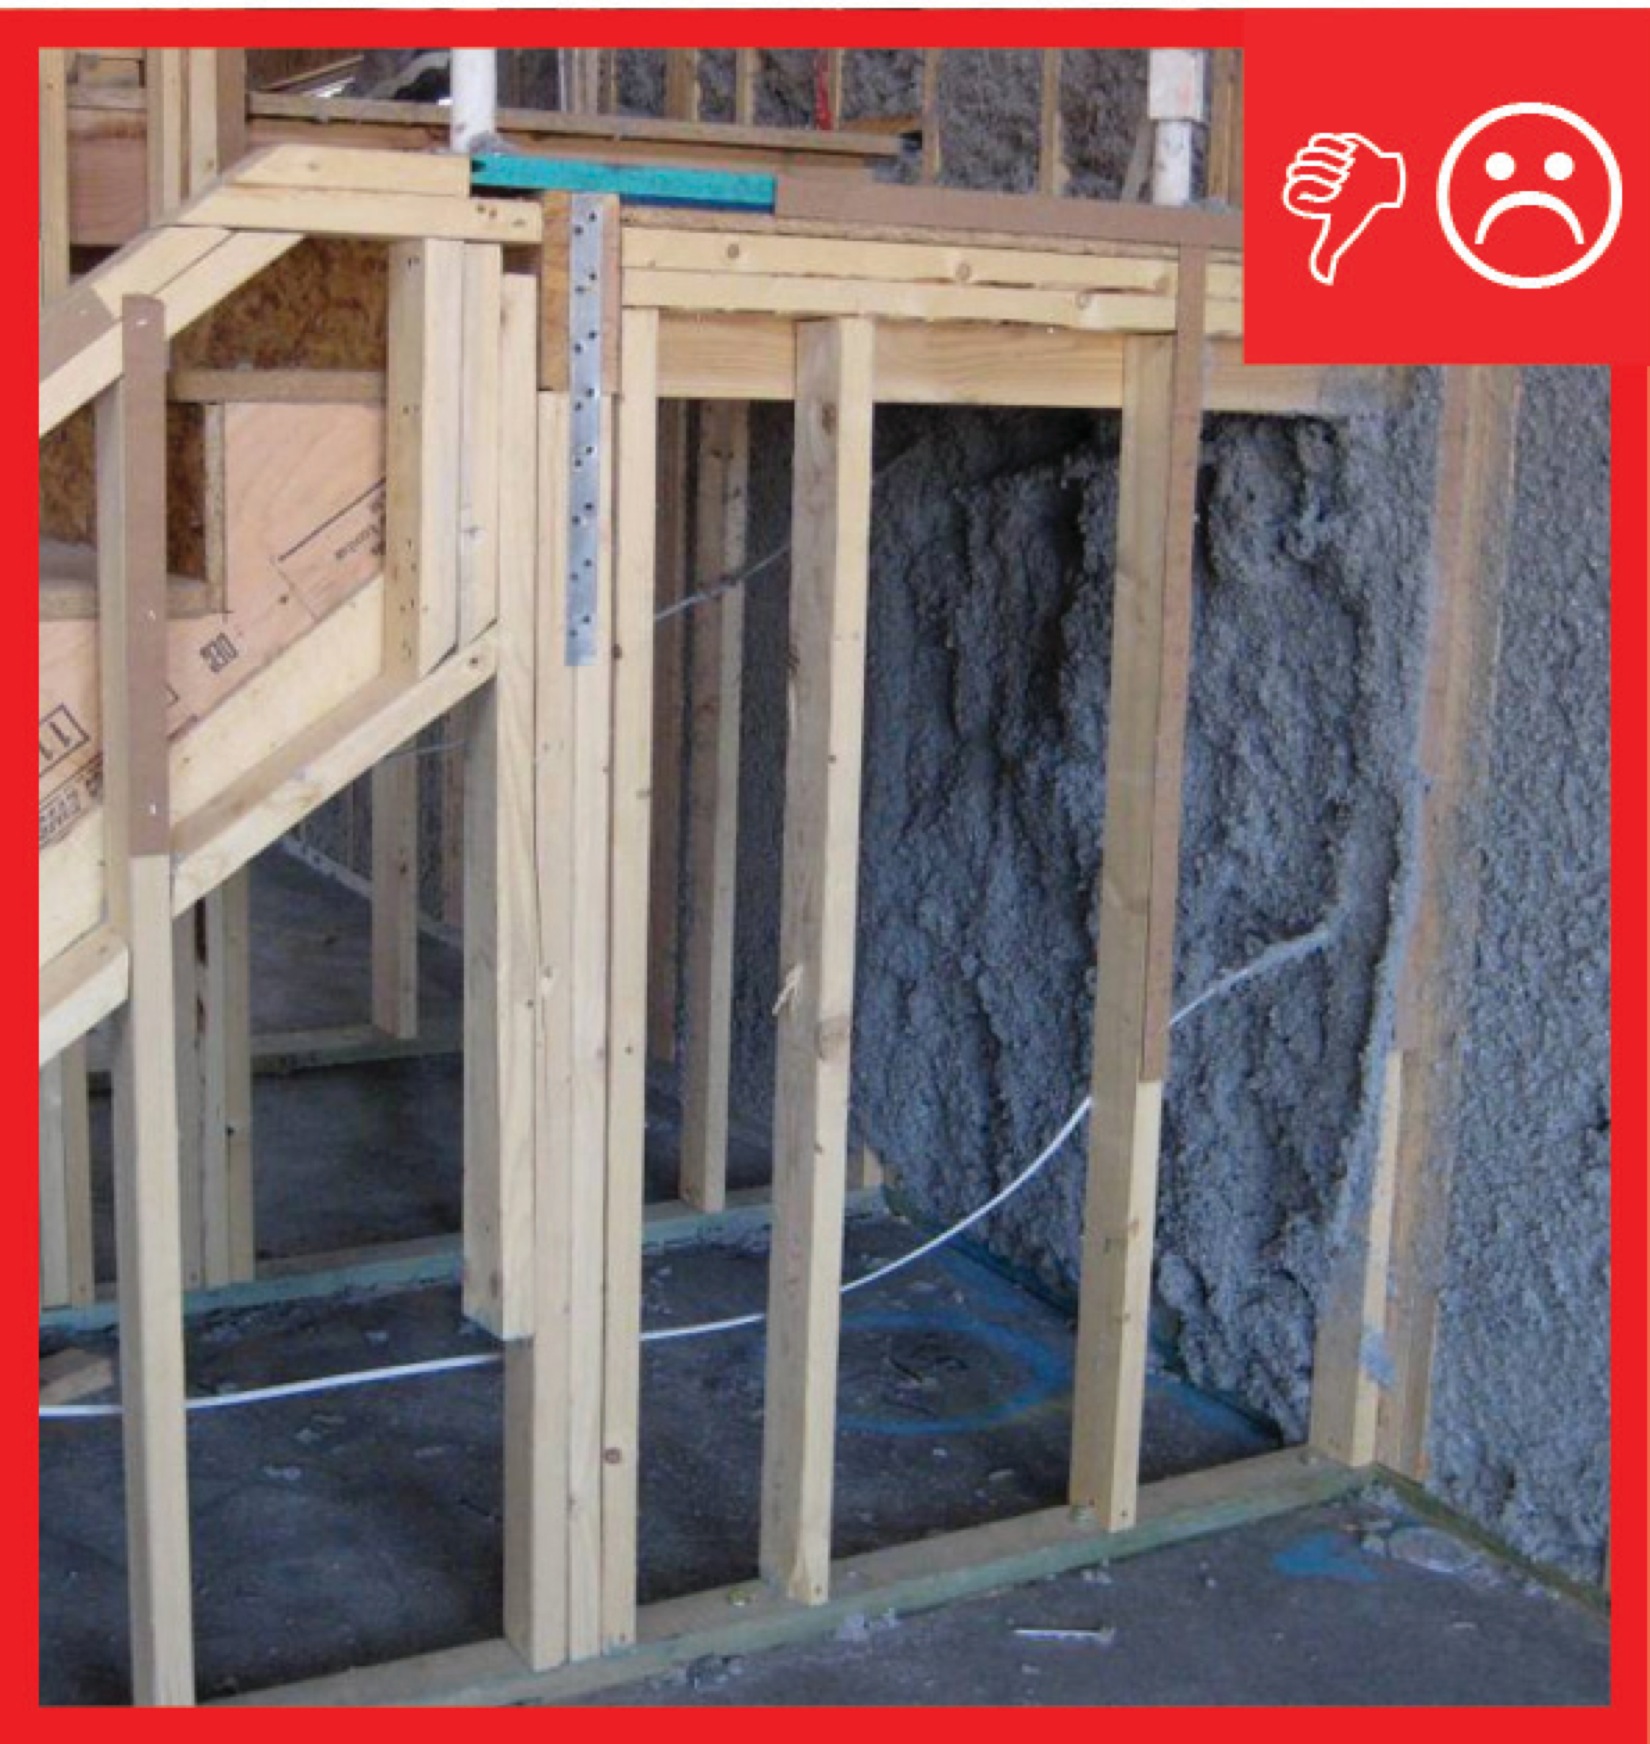
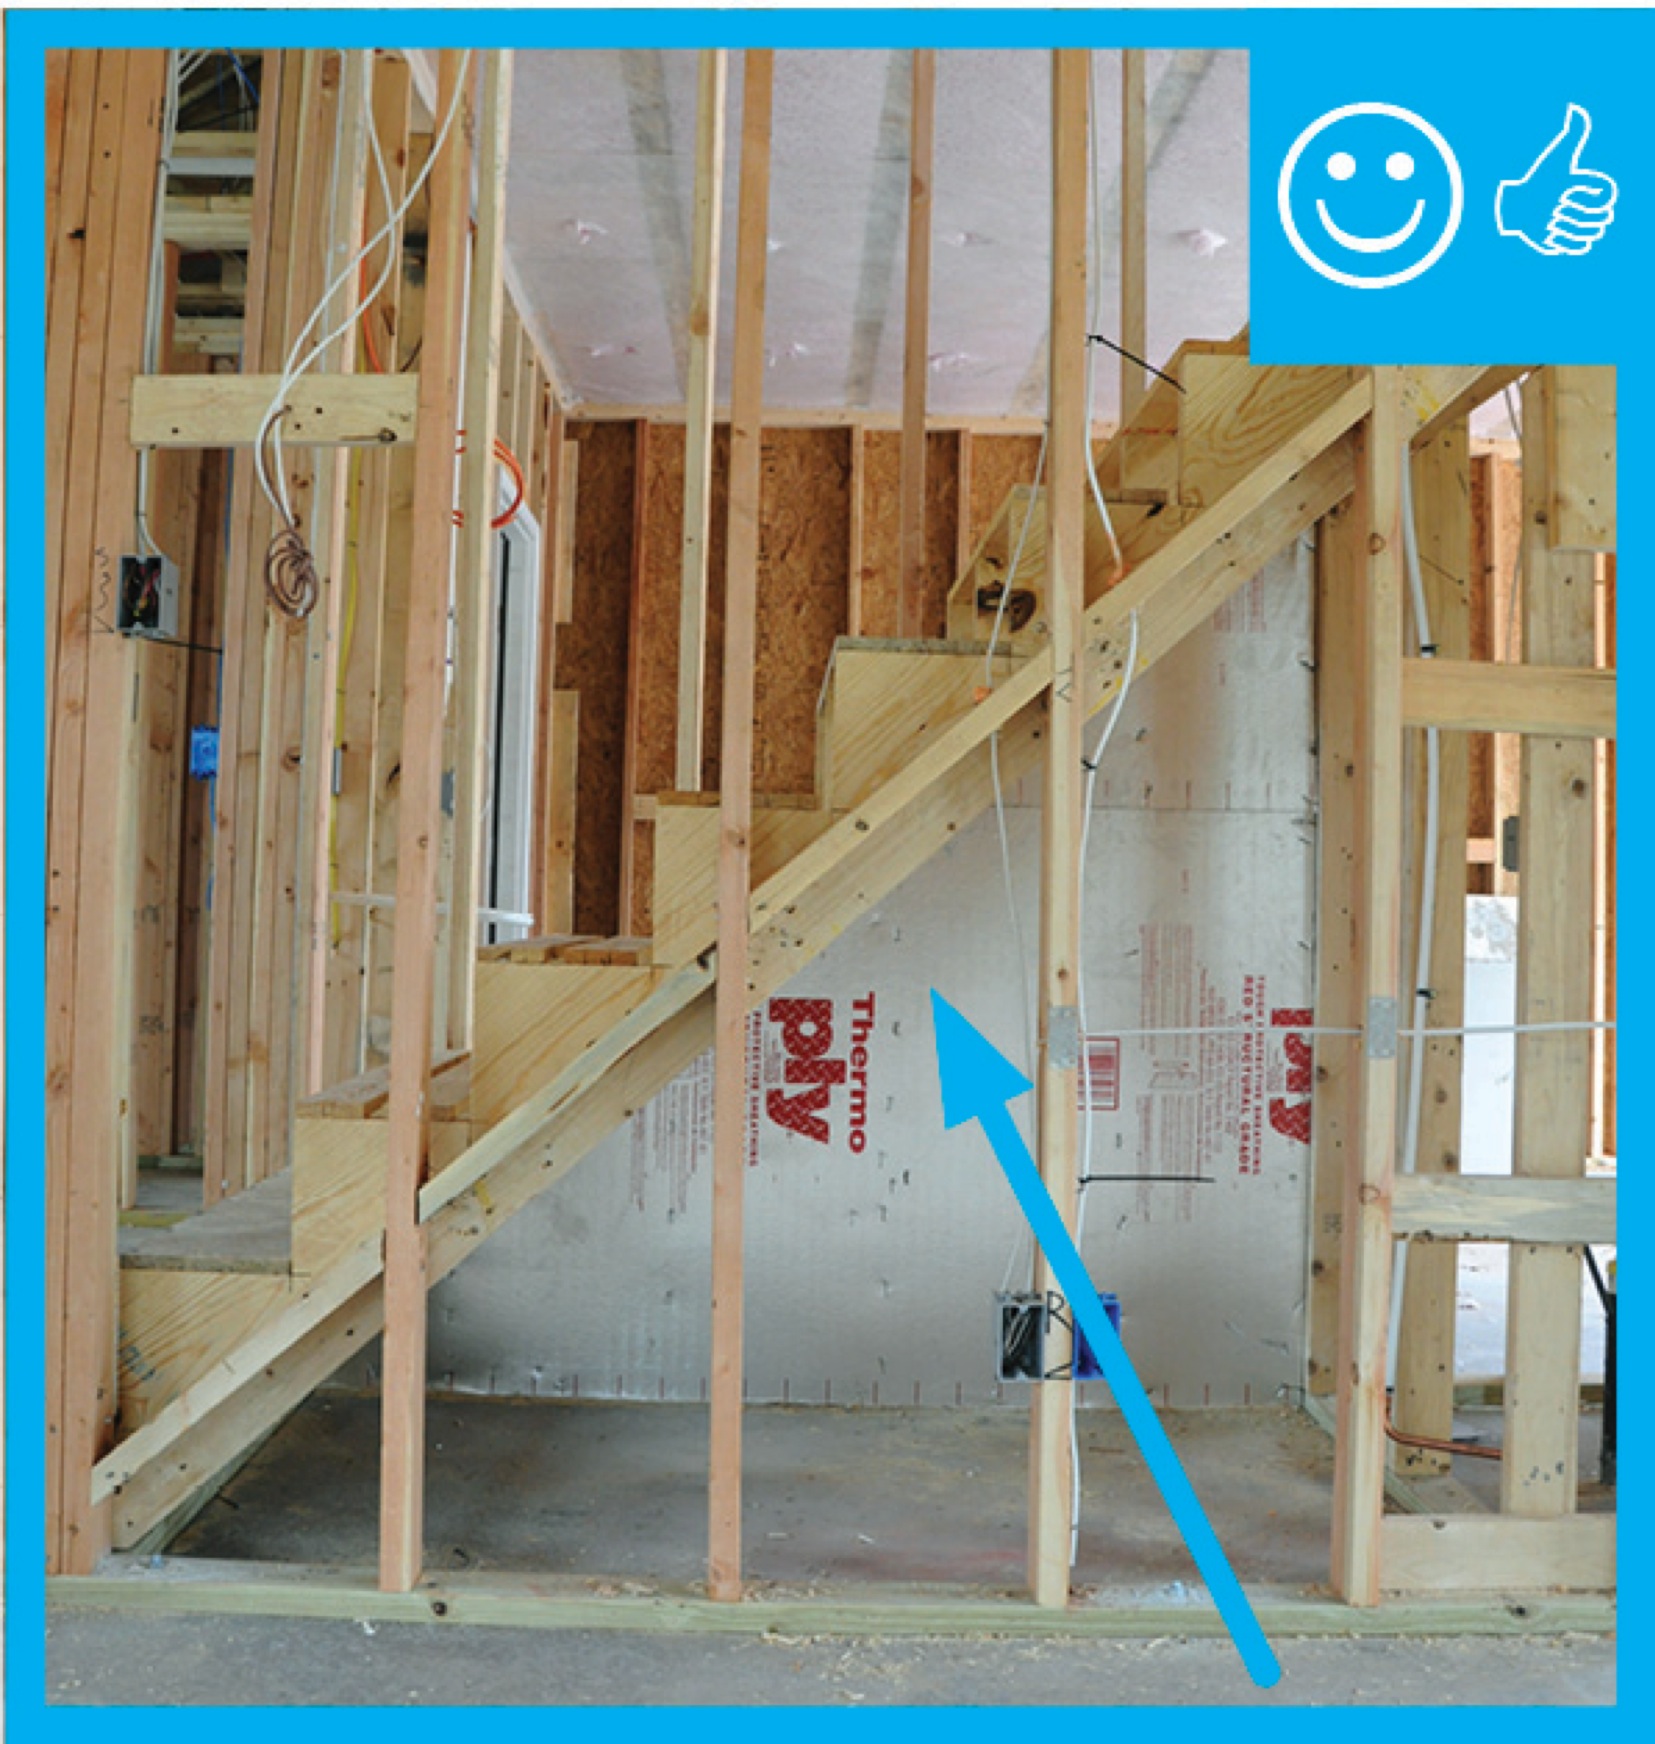
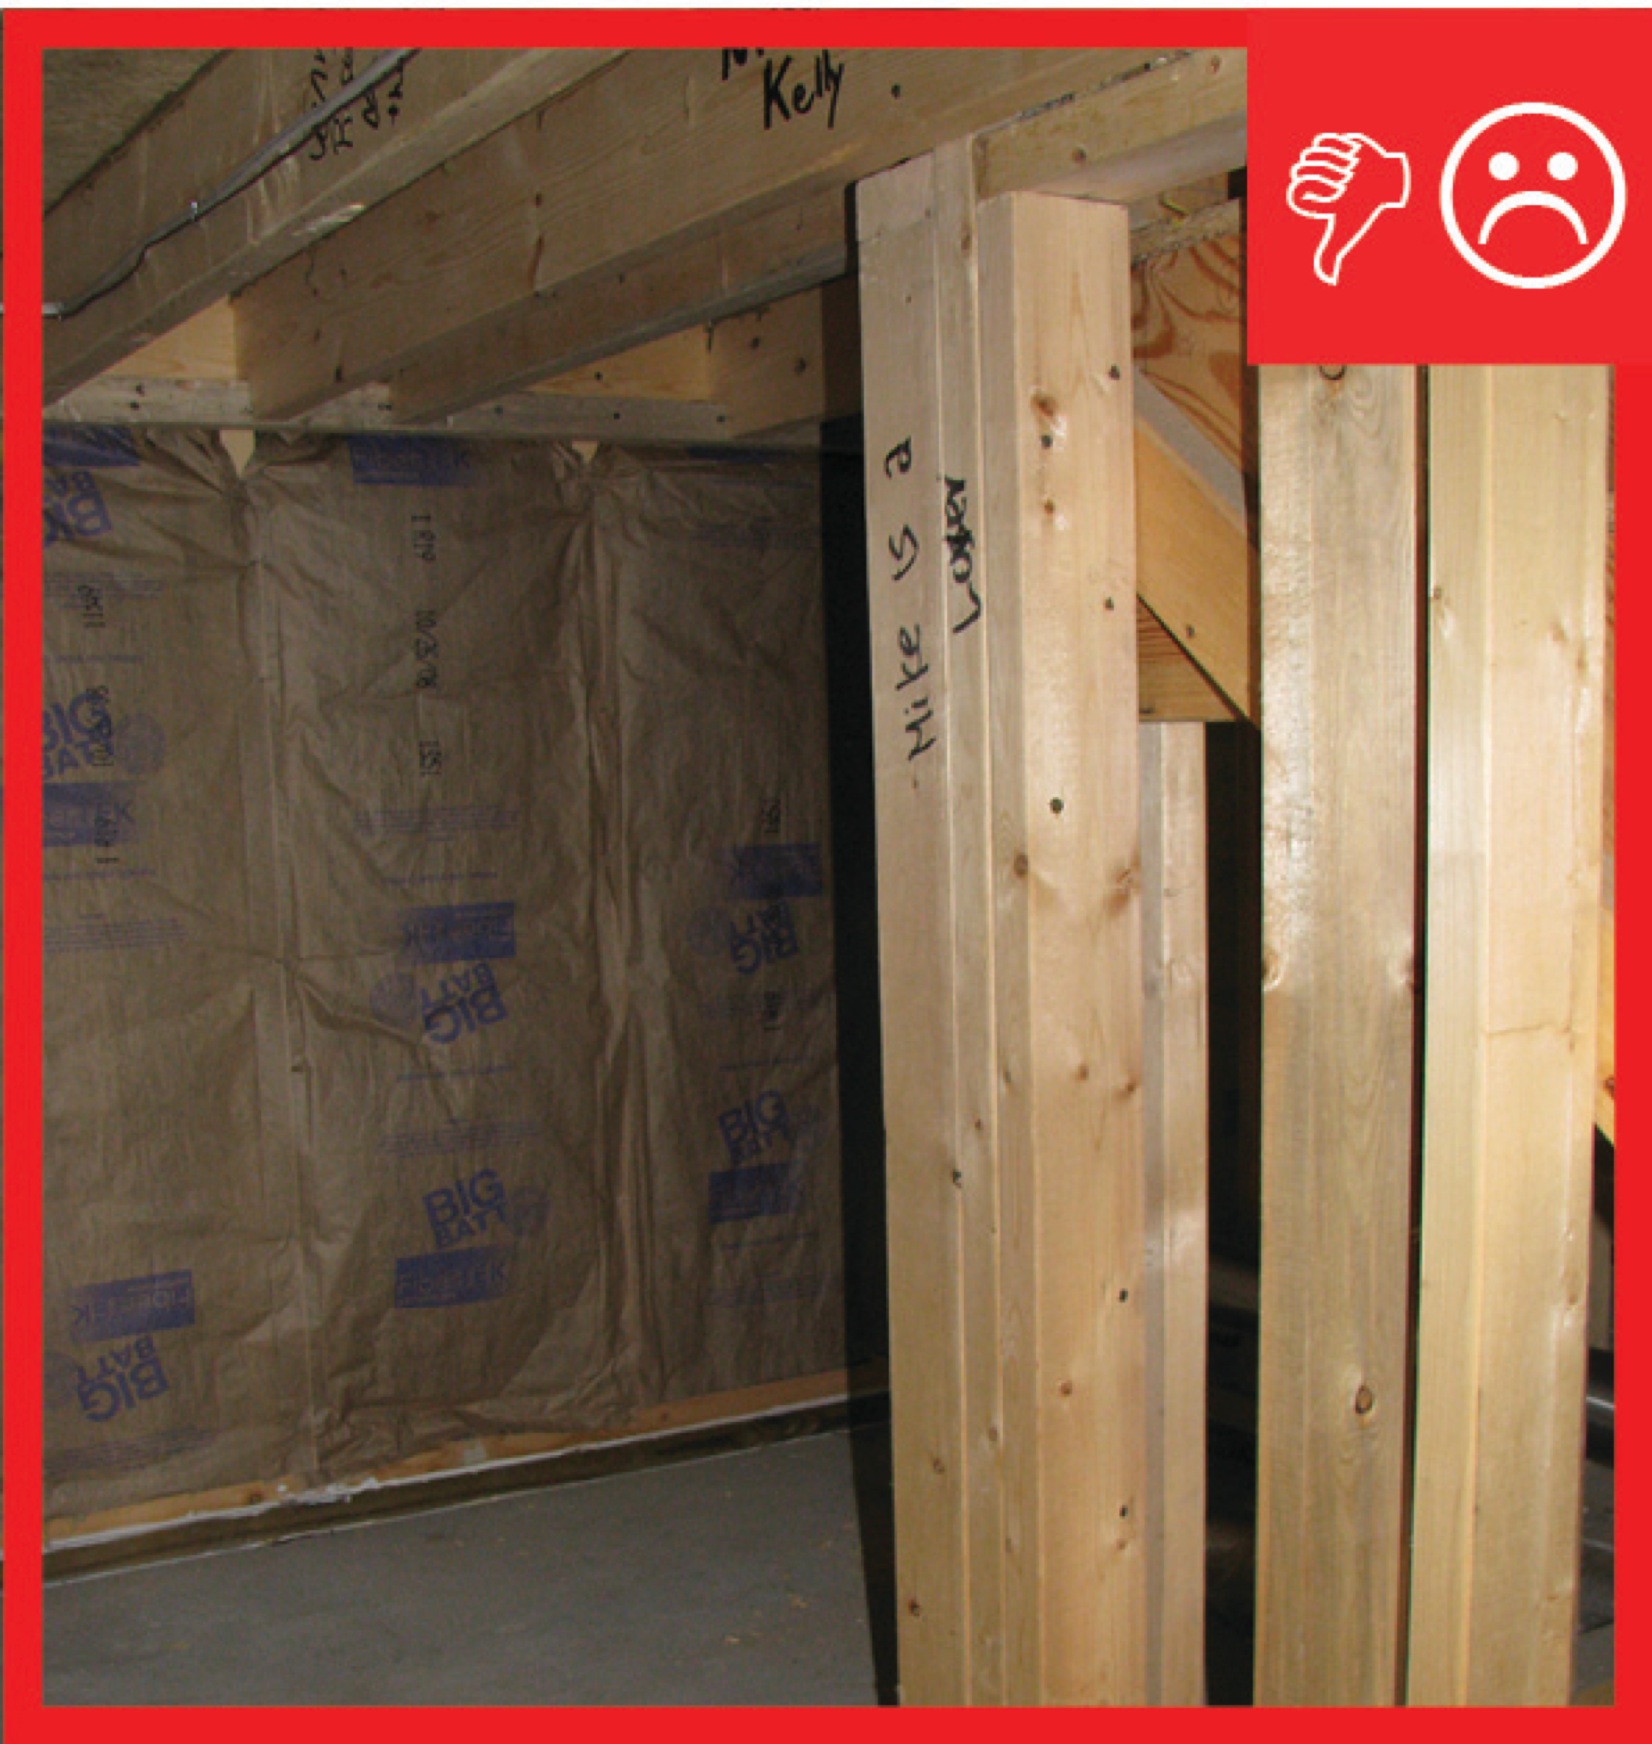
Staircases and staircase landings are often located along exterior walls or walls adjoining unconditioned spaces like garages or attics. Insulating and air blocking of the exterior wall below the stairs is sometimes overlooked. When the insulation in the exterior wall cavities is not fully aligned with (touching) the interior wall sheathing (drywall), the insulation’s effectiveness is reduced. After filling the wall cavities with insulation, the walls should be covered with a rigid air barrier material such as rigid foam insulation, OSB, or drywall that is taped at any seams and sealed to the bottom plate, top plate, and framing at the edges with caulk. The insulation should fill the cavity and be fully aligned with the rigid sheathing.
Staircases may be prefabricated or custom site-built. Prefabricated stairs are often used when the stairs will be covered with carpet, although they can be ordered with hardwood and custom finishes. Custom staircases are sometimes built when the stair treads will be hardwood.
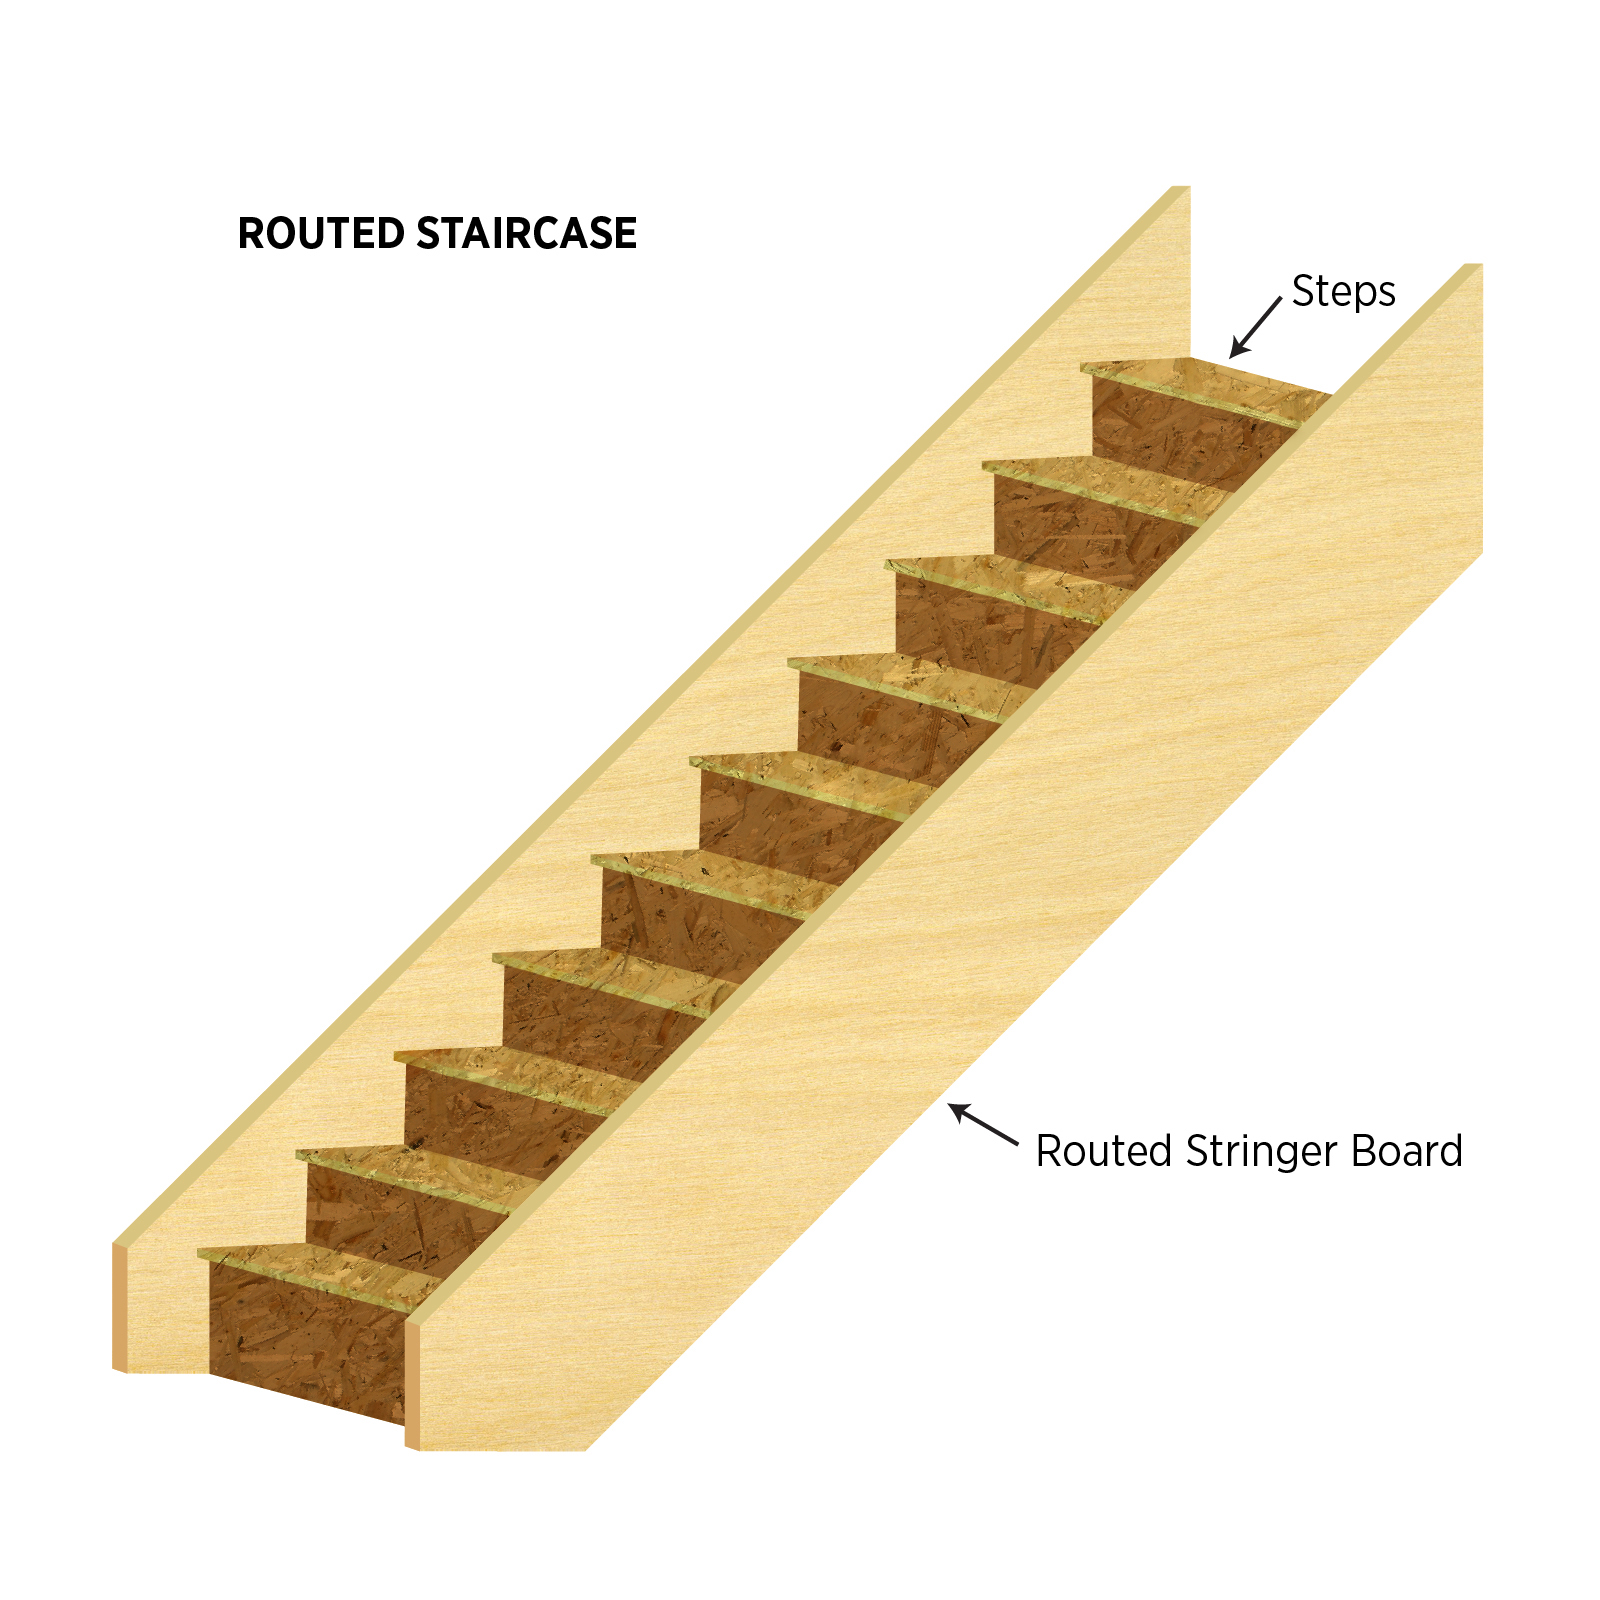
Prefabricated stairs come with the stair treads and risers already attached to the stringer boards. The most common varieties are the notched stringer stair (Figure 1) and the routed stringer stair (Figure 2). The notched staircase uses three stringers that are cut out or notched to hold the stair step treads and risers. Routed stringer stairs use two stringer boards that are not notched. The routed stringer differs from the notched stair by utilizing two visible skirt boards as its structural support stringers. Each stringer is usually a solid finished piece of wood, typically 12 inches high and 1.25 inches thick, that is routed to hold the treads and risers. The steps are nailed and glued to the stringers. Because these stringer boards extend above and below the sides of the steps, they serve as the finish boards as well.
These materials may be installed by insulators, framers, or drywallers. This task should be included in the contract for the appropriate trade depending on the workflow at the specific job site.

How to Install a Site-Built or Prefabricated Notched Stringer Staircase on an Exterior Wall
Attach a spacer board to the outer side of the outside notched stringer board on the side that will attach to the wall (Figure 3). Attach the spacer board flush with the bottom edge of the stringer board. The spacer board should be thick enough to allow room to slide the drywall between the stringer and the exterior wall studs. If you want to install a finish board along the steps, use a wider spacer (e.g., a 2x4) that will accommodate the thickness of both the drywall and the finish board.
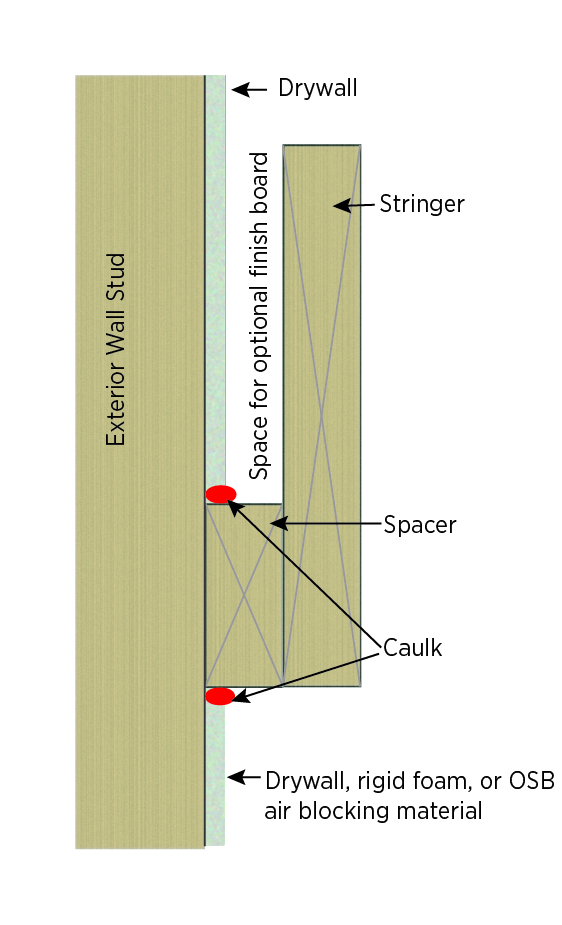
Figure 3. Construct and air seal a site-built or prefabricated notched-stringer staircase by caulking the seam between the spacer and the drywall above and below the spacer. (Source: PNNL.) - Attach the stringers at the base floor and the second floor or landing. Insulate the wall. Attach the stringer board to the exterior wall studs through the spacer board. The spacer board will give you room to slide the drywall between the riser and the exterior wall studs.
Cut drywall to fit from the top of the spacer board to the ceiling. Apply caulk or joint compound along the top of the spacer (or bottom edge of the drywall). Slide the drywall behind the stringer board so it is resting on the spacer board and fasten it to the exterior wall studs (Figure 4). Install a finish board next to the drywall if desired.
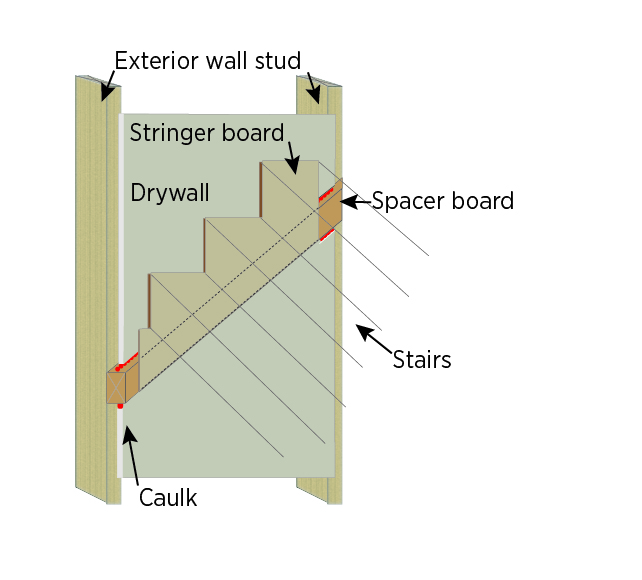
Figure 4. Install drywall above and below a prefabricated routed stringer staircase and caulk the edge of the drywall to the spacer board to air seal a staircase on an exterior wall. (Source: PNNL.) - Below the stairs, apply caulk to the exterior wall framing and the bottom edge of the spacer board then install rigid foam, drywall, or another sheet good from the bottom of the stringer board to the bottom plate of the wall. Caulk or tape any seams.
How to Install a Prefabricated Routed Stringer Staircase
If a prefabricated routed stringer staircase is used, insulate the wall, then attach the bottom end of the stringers to the floor and the top end to the second floor or landing. Fasten the staircase through the stringer boards to the exterior wall studs. Install drywall cut at a diagonal to fit from the top of the stringer/finish board to the ceiling. Apply caulk or joint compound to the seam between the top of the finish board and the drywall (Figure 5). Cover the seam with trim.
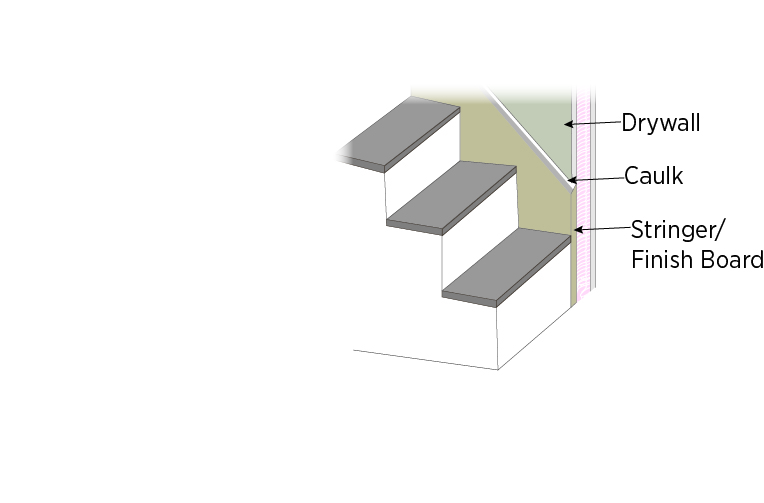
Figure 5. Air seal a prefabricated routed stringer staircase by caulking the seam between the drywall and stringer finish board above the staircase and the seam between the stringer and rigid air barrier below the staircase. (Source: PNNL.) - Below the stairs, apply caulk to the exterior wall framing and to the bottom edge of the stringer board, then install rigid foam, drywall, or another sheet good from the bottom of the stringer/finish board to the bottom plate of the wall. Caulk or tape any seams.
Ensuring Success
The site supervisor should visually inspect the exterior wall underneath staircases or staircase landings located on exterior walls during construction to confirm that the wall cavity is insulated and that a rigid air barrier material is installed on the interior surface of the exterior wall in contact with the cavity insulation. Blower door testing conducted as part of whole-house energy performance testing may help indicate if there are air leaks at staircases. High-performance branding programs and the 2009 and 2012 IECC require that builders meet specified insulation levels and infiltration rates. See the Compliance tab for these specified infiltration rates.
Region
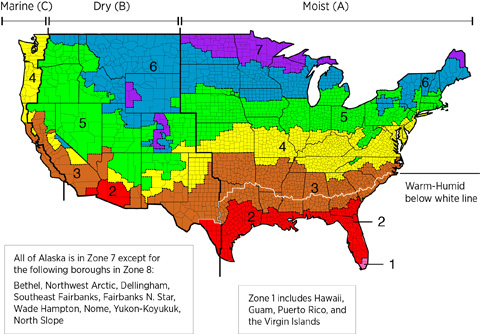
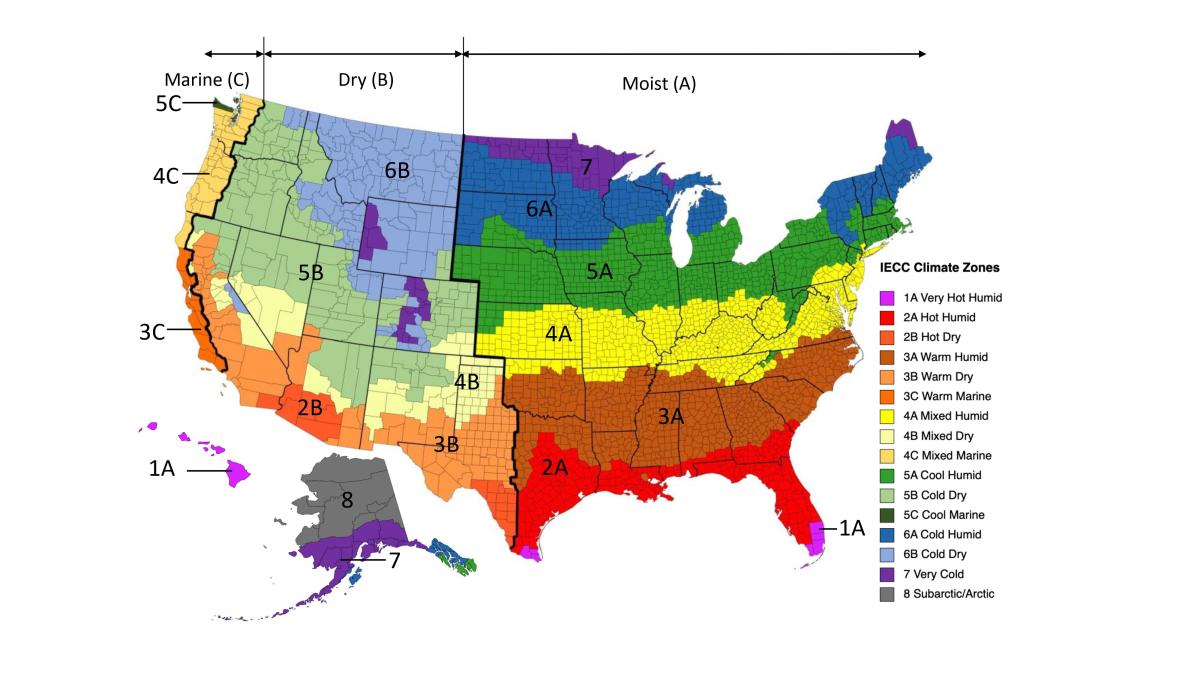
The map in Figure 1 shows the climate zones for states that have adopted energy codes equivalent to the International Energy Conservation Code (IECC) 2009, 12, 15, and 18. The map in Figure 2 shows the climate zones for states that have adopted energy codes equivalent to the IECC 2021. Climate zone-specific requirements specified in the IECC are shown in the Compliance Tab of this guide.
Training
Right and Wrong Images
Source
Guide describing details that serve as a visual reference for each of the line items in the Thermal Enclosure System Rater Checklist.
Source
Guide describing details that serve as a visual reference for each of the line items in the Thermal Enclosure System Rater Checklist.
Source
Guide describing details that serve as a visual reference for each of the line items in the Thermal Enclosure System Rater Checklist.
Source
Guide describing details that serve as a visual reference for each of the line items in the Thermal Enclosure System Rater Checklist.

Source
Guide describing details that serve as a visual reference for each of the line items in the Thermal Enclosure System Rater Checklist.
Compliance
More Info
References and Resources
*For non-dated media, such as websites, the date listed is the date accessed.
Contributors to this Guide
The following authors and organizations contributed to the content in this Guide.
Sales
Fully Aligned Air Barriers = Whole-House Draft Barrier
Technical Description
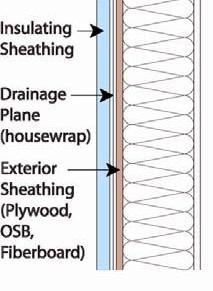
A whole-house draft barrier is a continuous layer of air-tight materials that block air leaks. This barrier can be integrated with other materials to also function as a water barrier, thermal barrier, and vapor barrier. For example, rigid foam insulation can be used to block thermal flow as well as air flow when seams are sealed with tape, caulk, adhesives, or liquid-applied sealants. Some rigid foams have an integrated water control layer as well. Additionally, drywall can serve as an interior air barrier when the seams are taped and spackled, and caulk, spray foam, or gaskets are used to seal around wiring, plumbing, and other penetrations. It also serves as the vapor barrier when finished with paint. Insulation should be in full contact with the air barrier layer.
Questions? Comments? Contact our webmaster.