

Scope
Air-seal around all electrical wiring and electrical boxes installed through walls, ceilings, and flooring to prevent air leakage and moisture movement between unconditioned and conditioned space. Sealants (e.g., caulk, fire-retardant caulk, fire-rated spray foam, etc.) should be compatible with all adjoining surfaces and meet the fire and air barrier specifications according to code.
- Using a drill, cleanly cut holes for electrical wiring with diameter no more than 1 inch larger than the wiring diameter.
- Seal around installed wiring using caulk or canned spray foam.
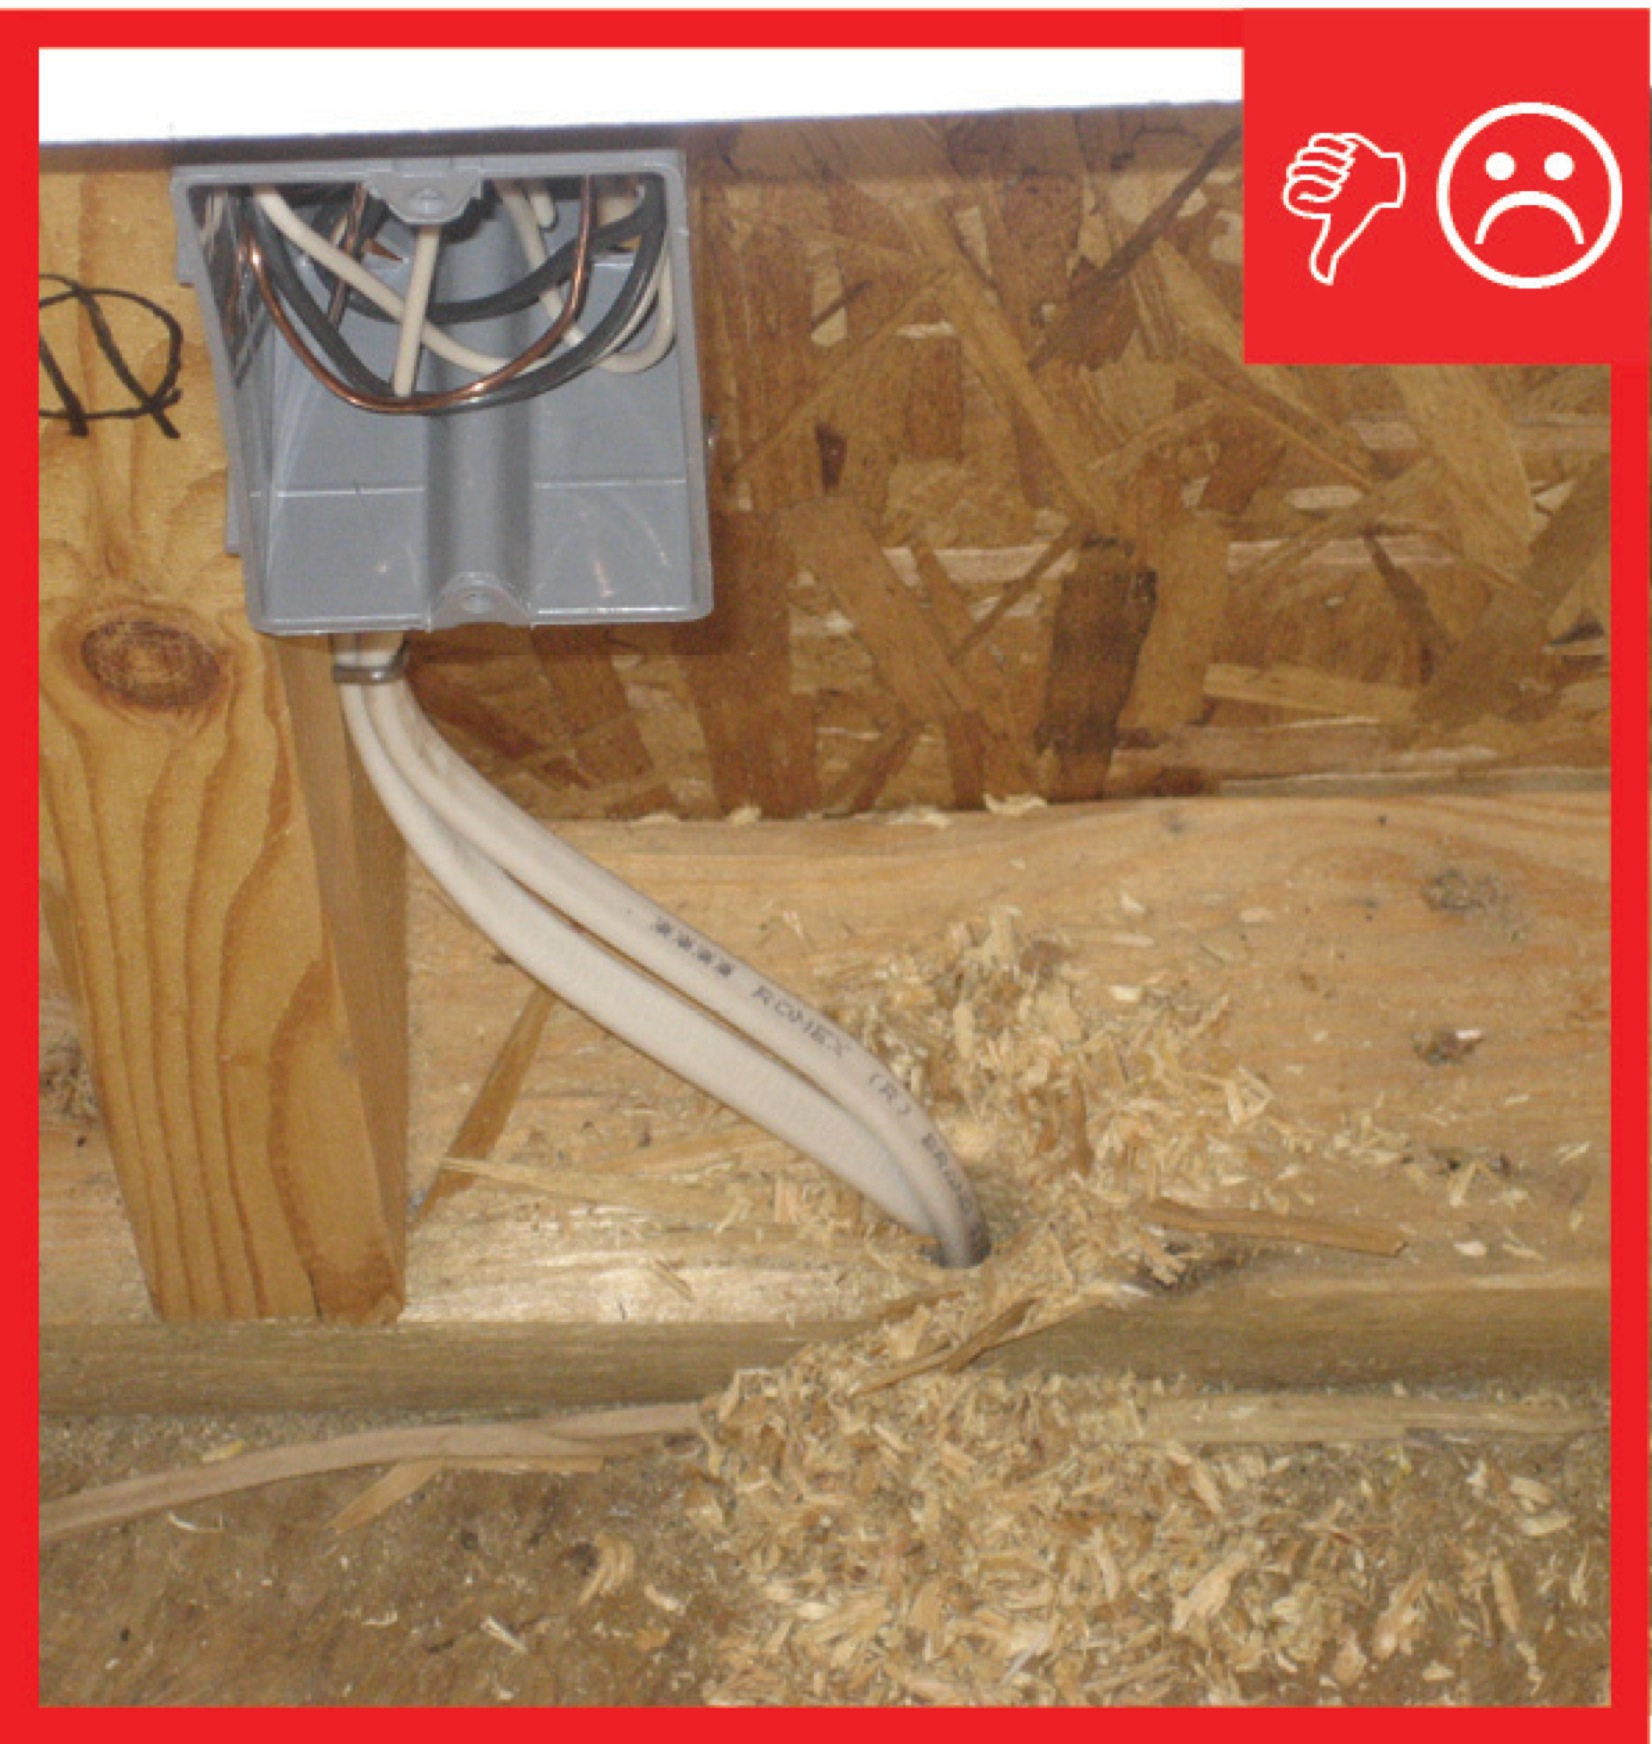
- For ceiling-mounted electrical boxes, install the electrical box in the ceiling drywall, then caulk around the base and caulk all holes in the box with fire-retardant caulk.
- For wall-mounted electrical boxes, install gasketed, airtight electrical boxes or install standard electrical boxes, then caulk all openings and seal the box to the drywall with caulk.
See the Compliance Tab for links to related codes and standards and voluntary federal energy-efficiency program requirements.
Description
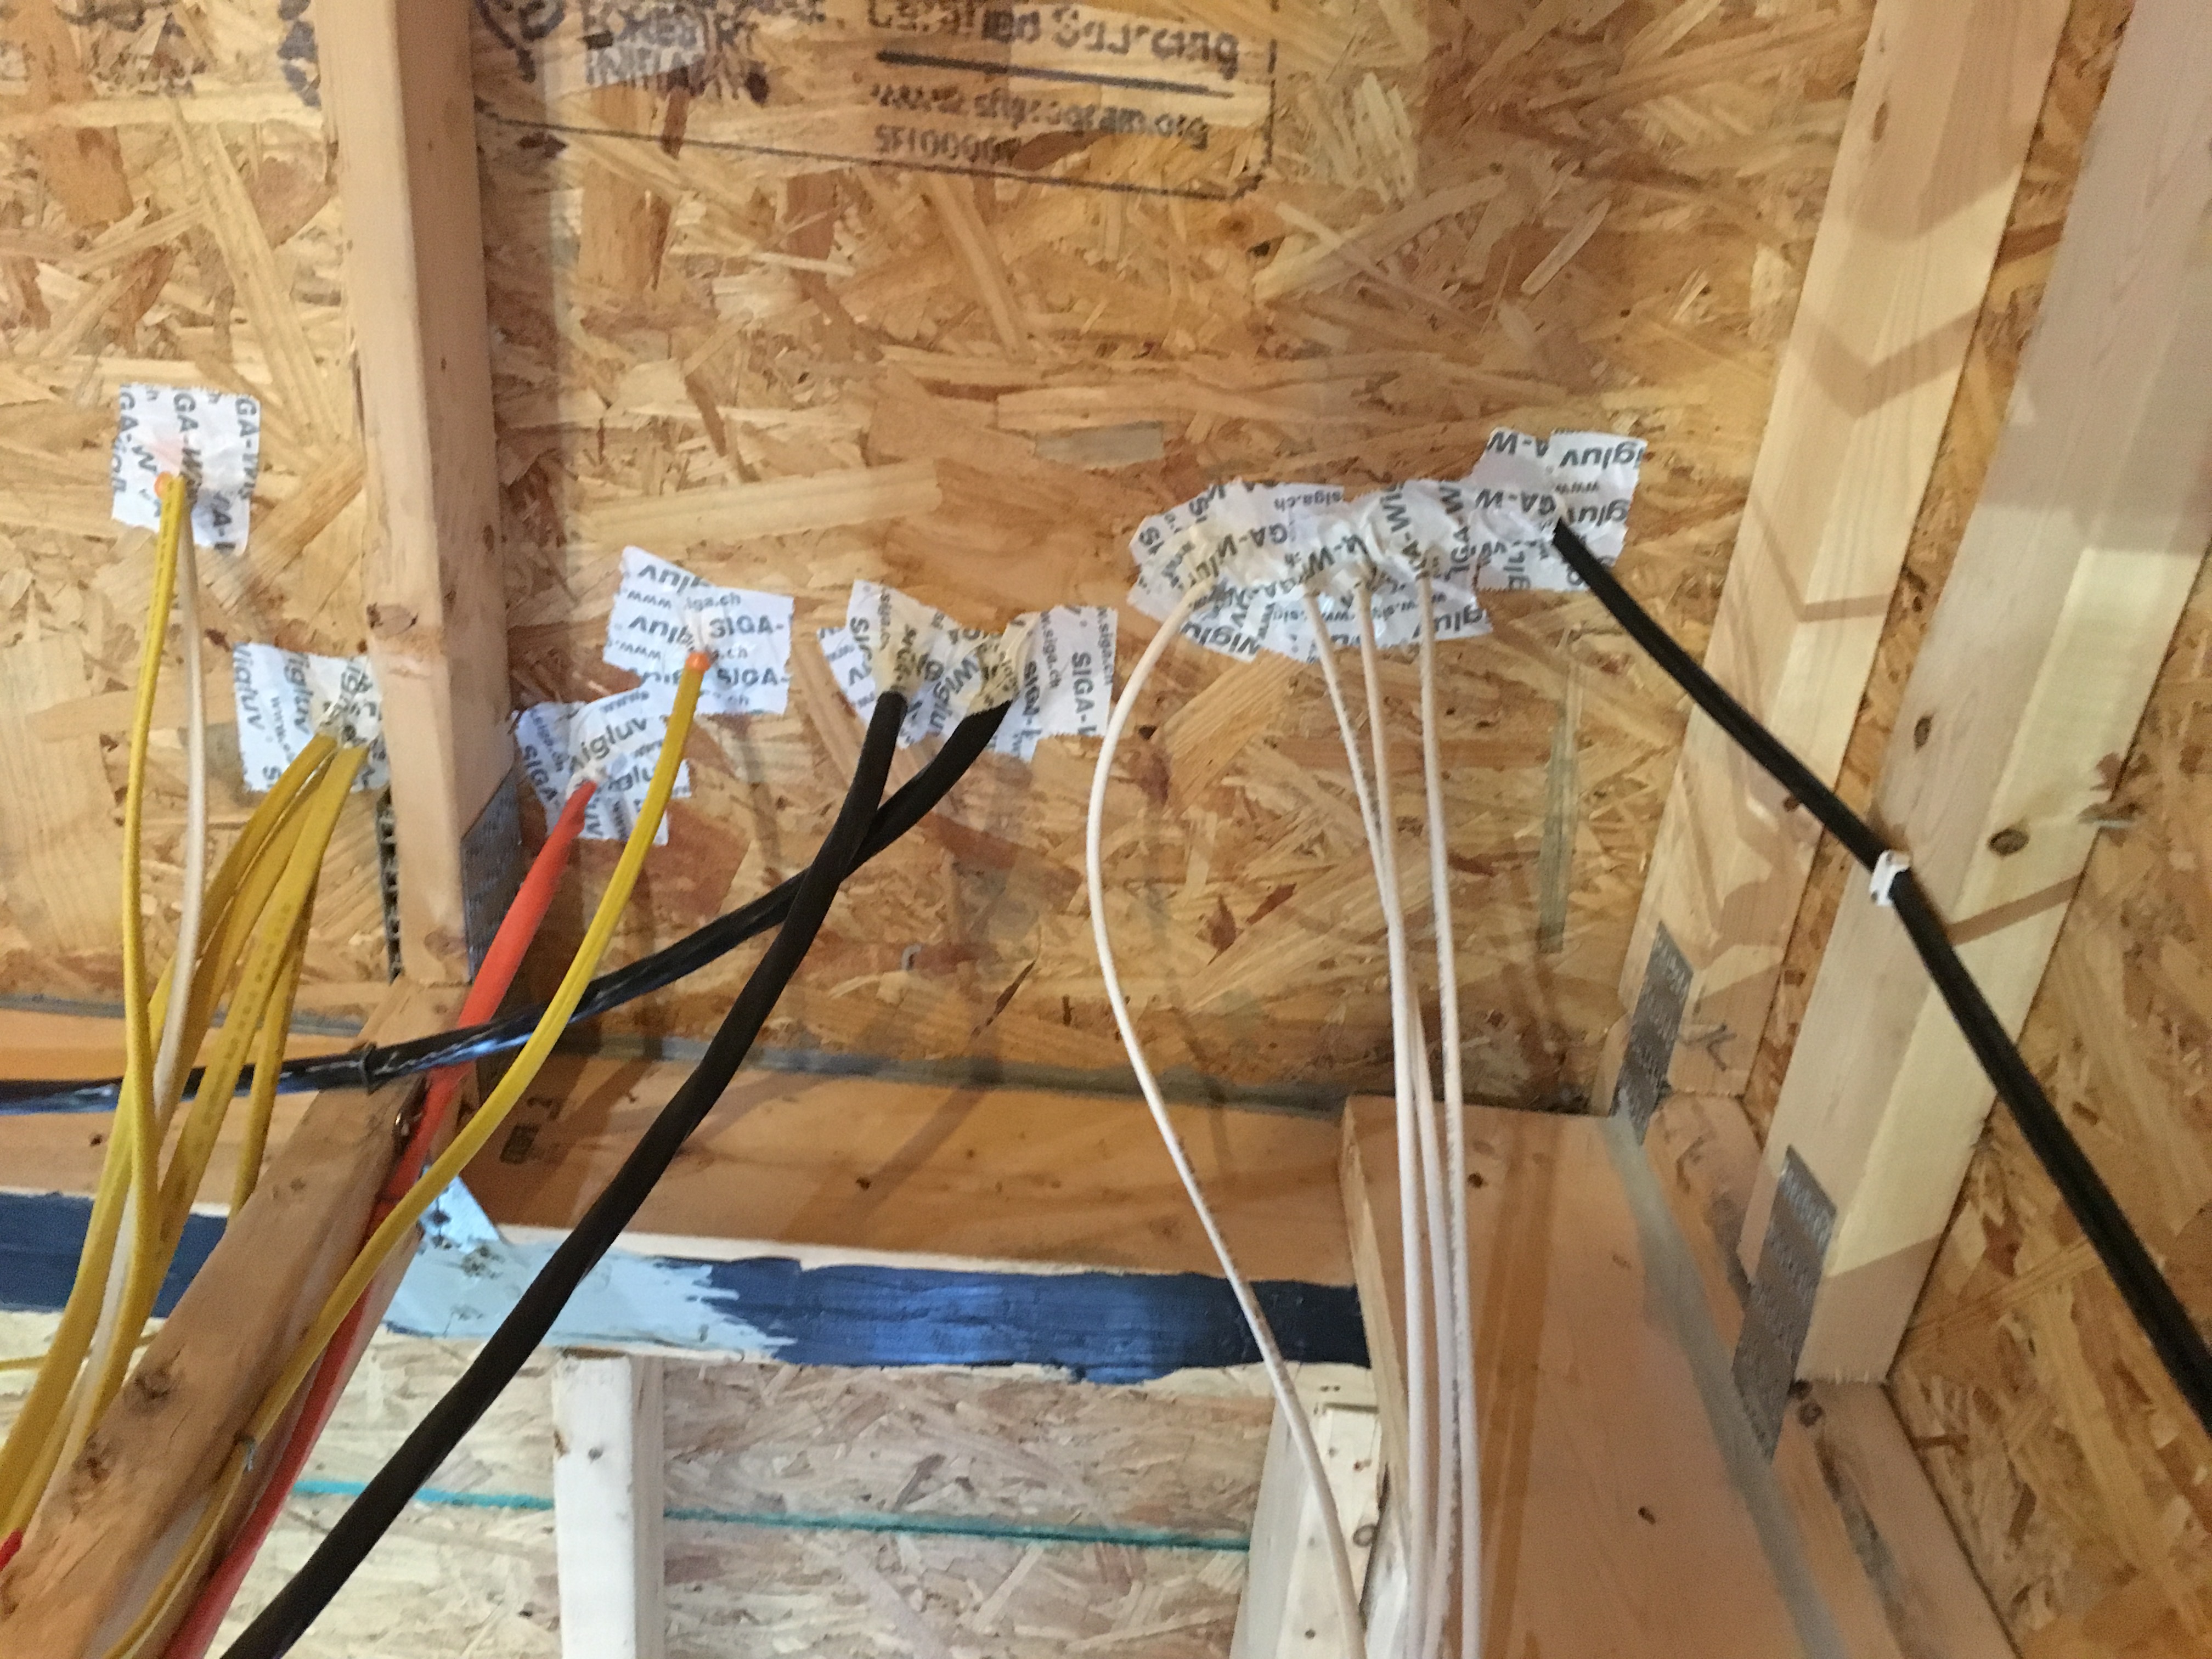
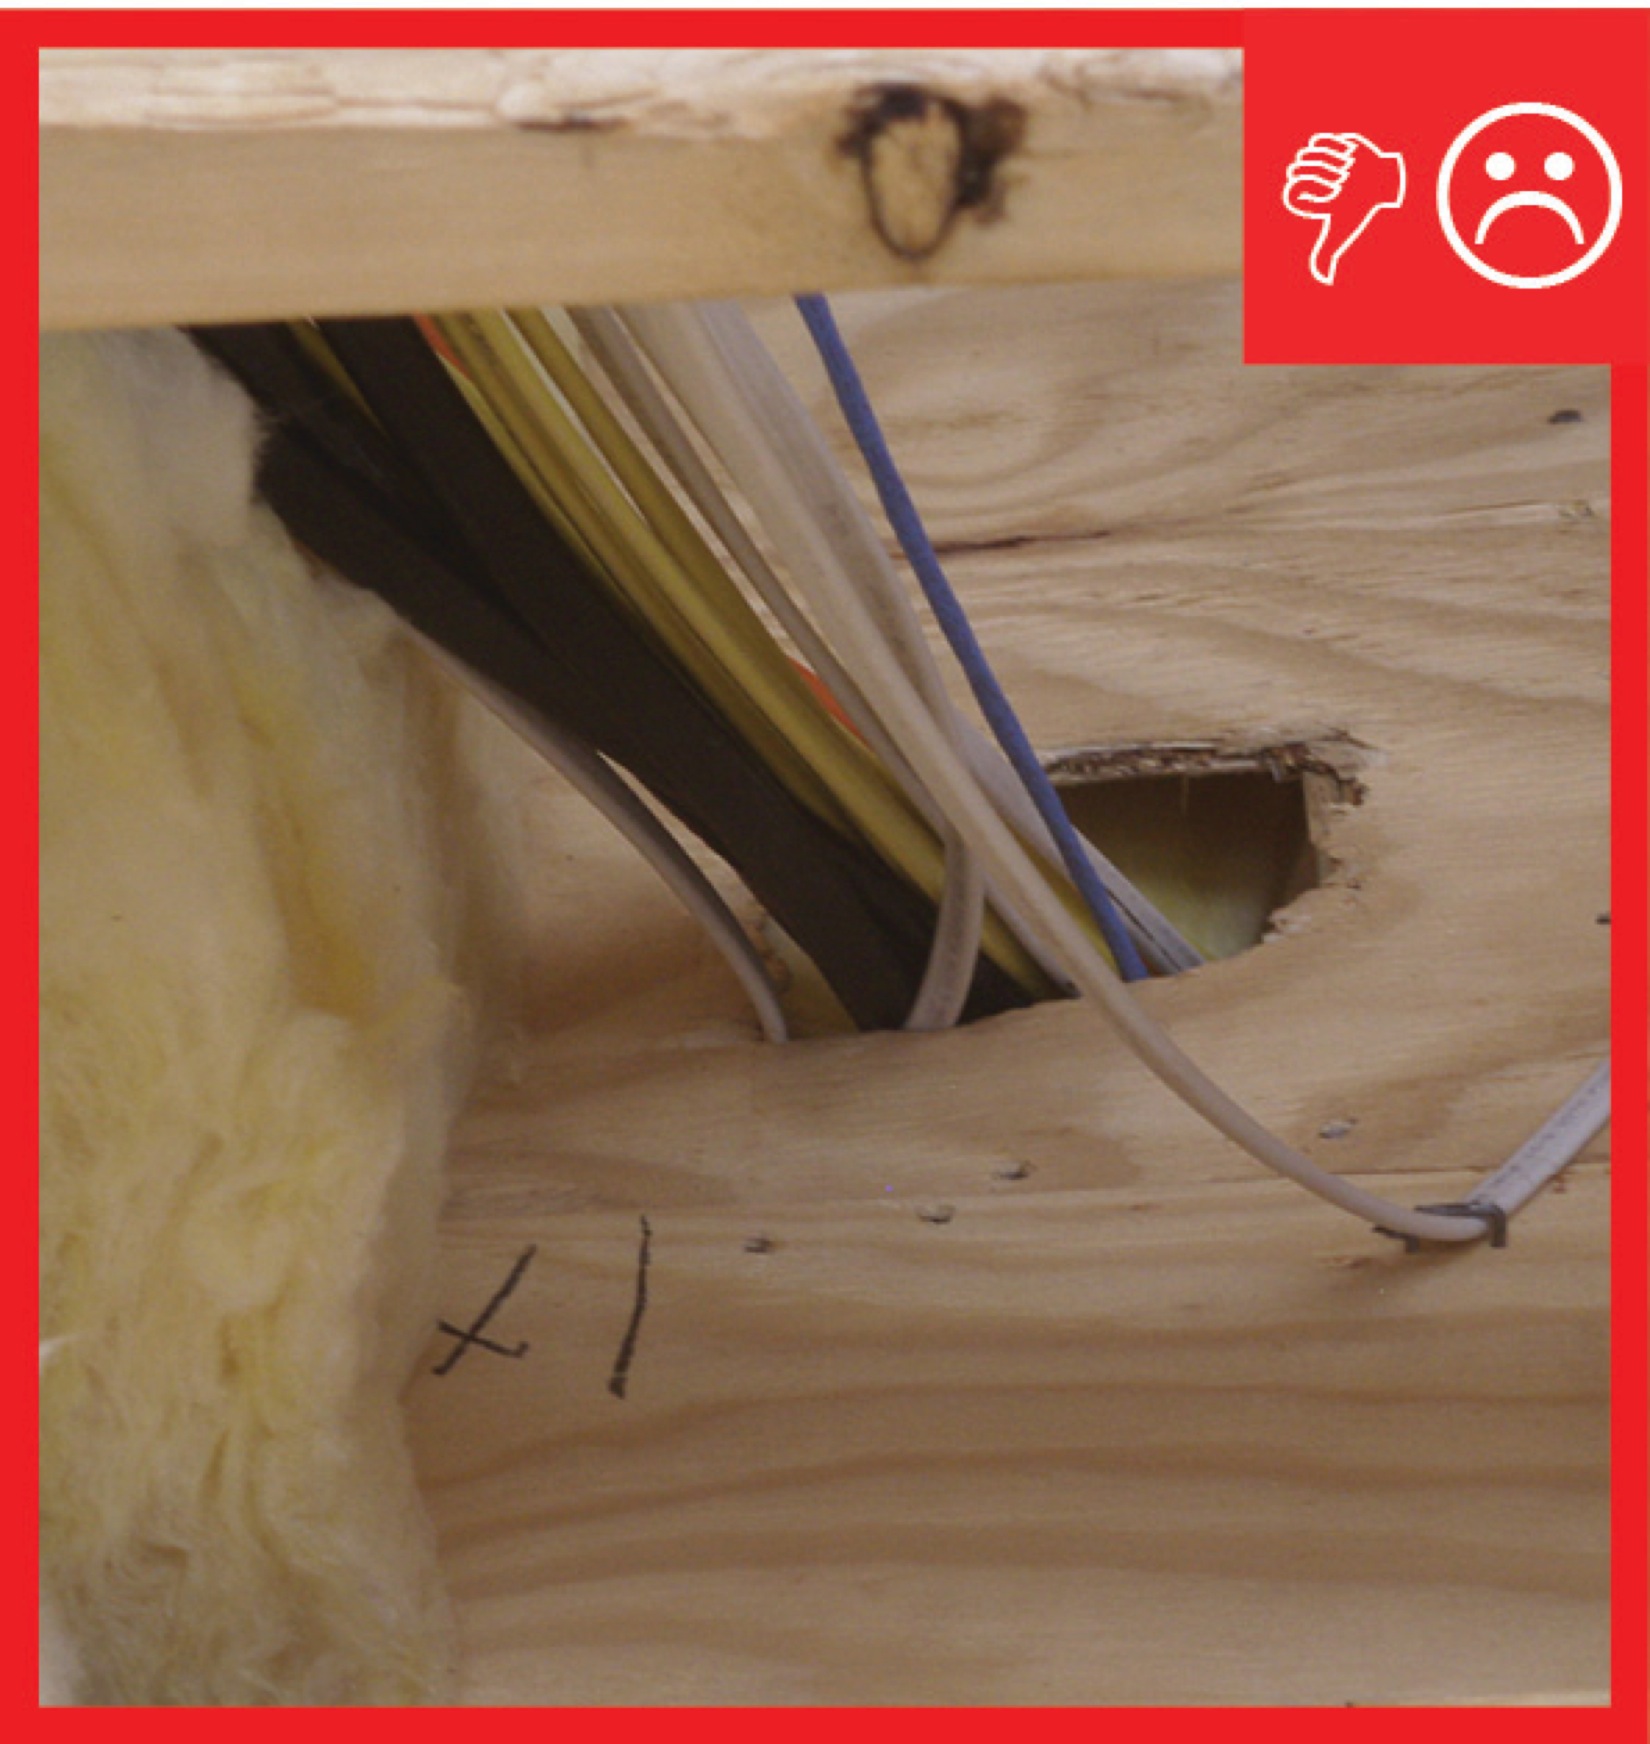
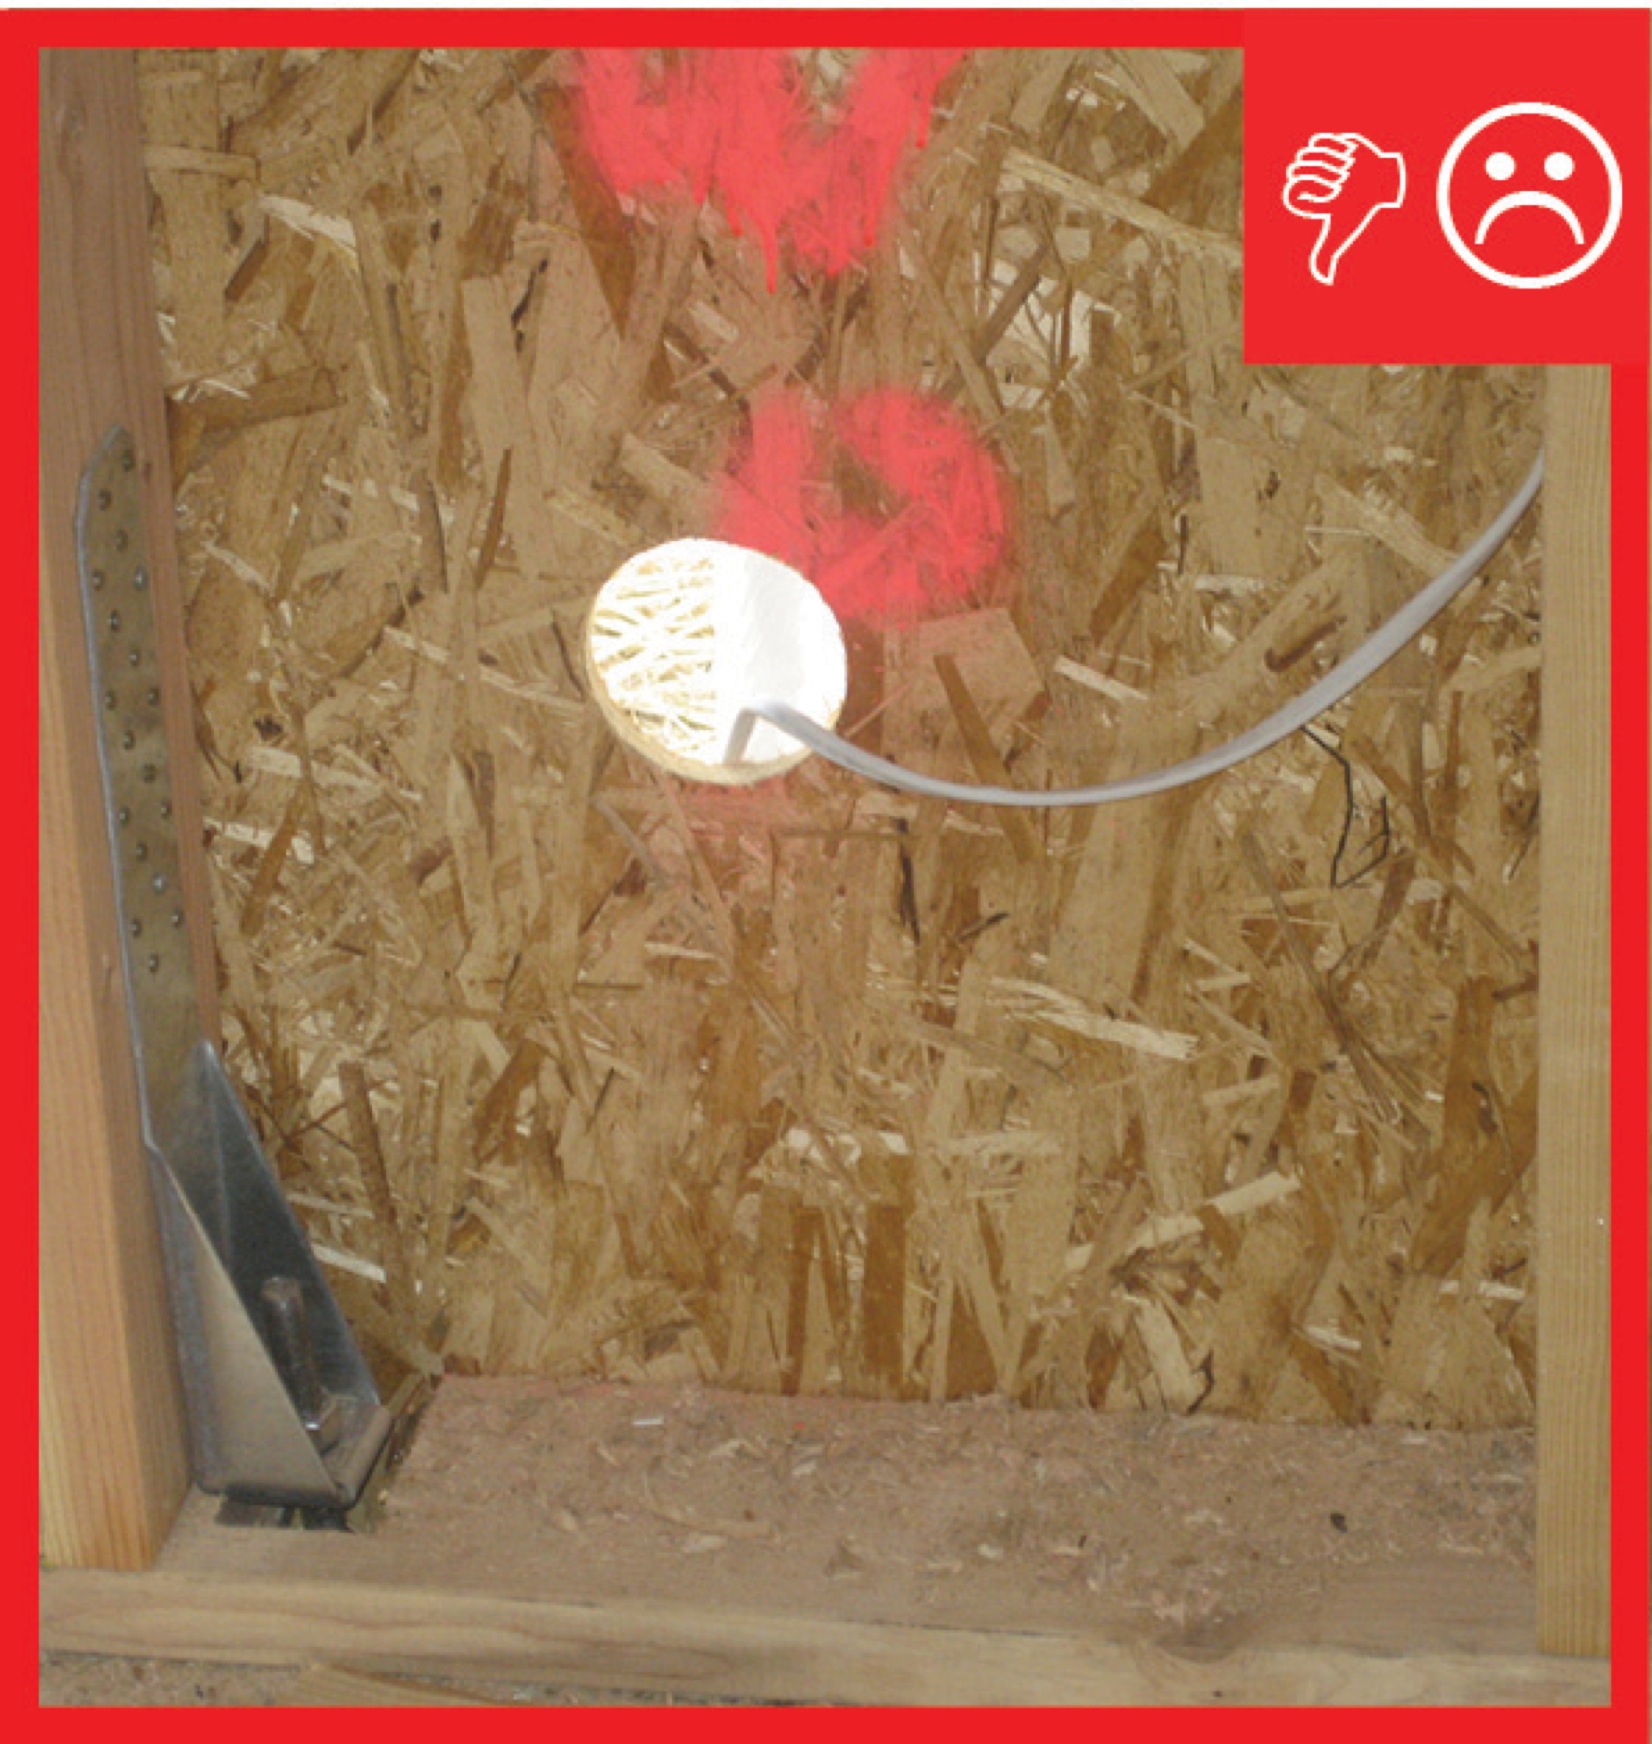
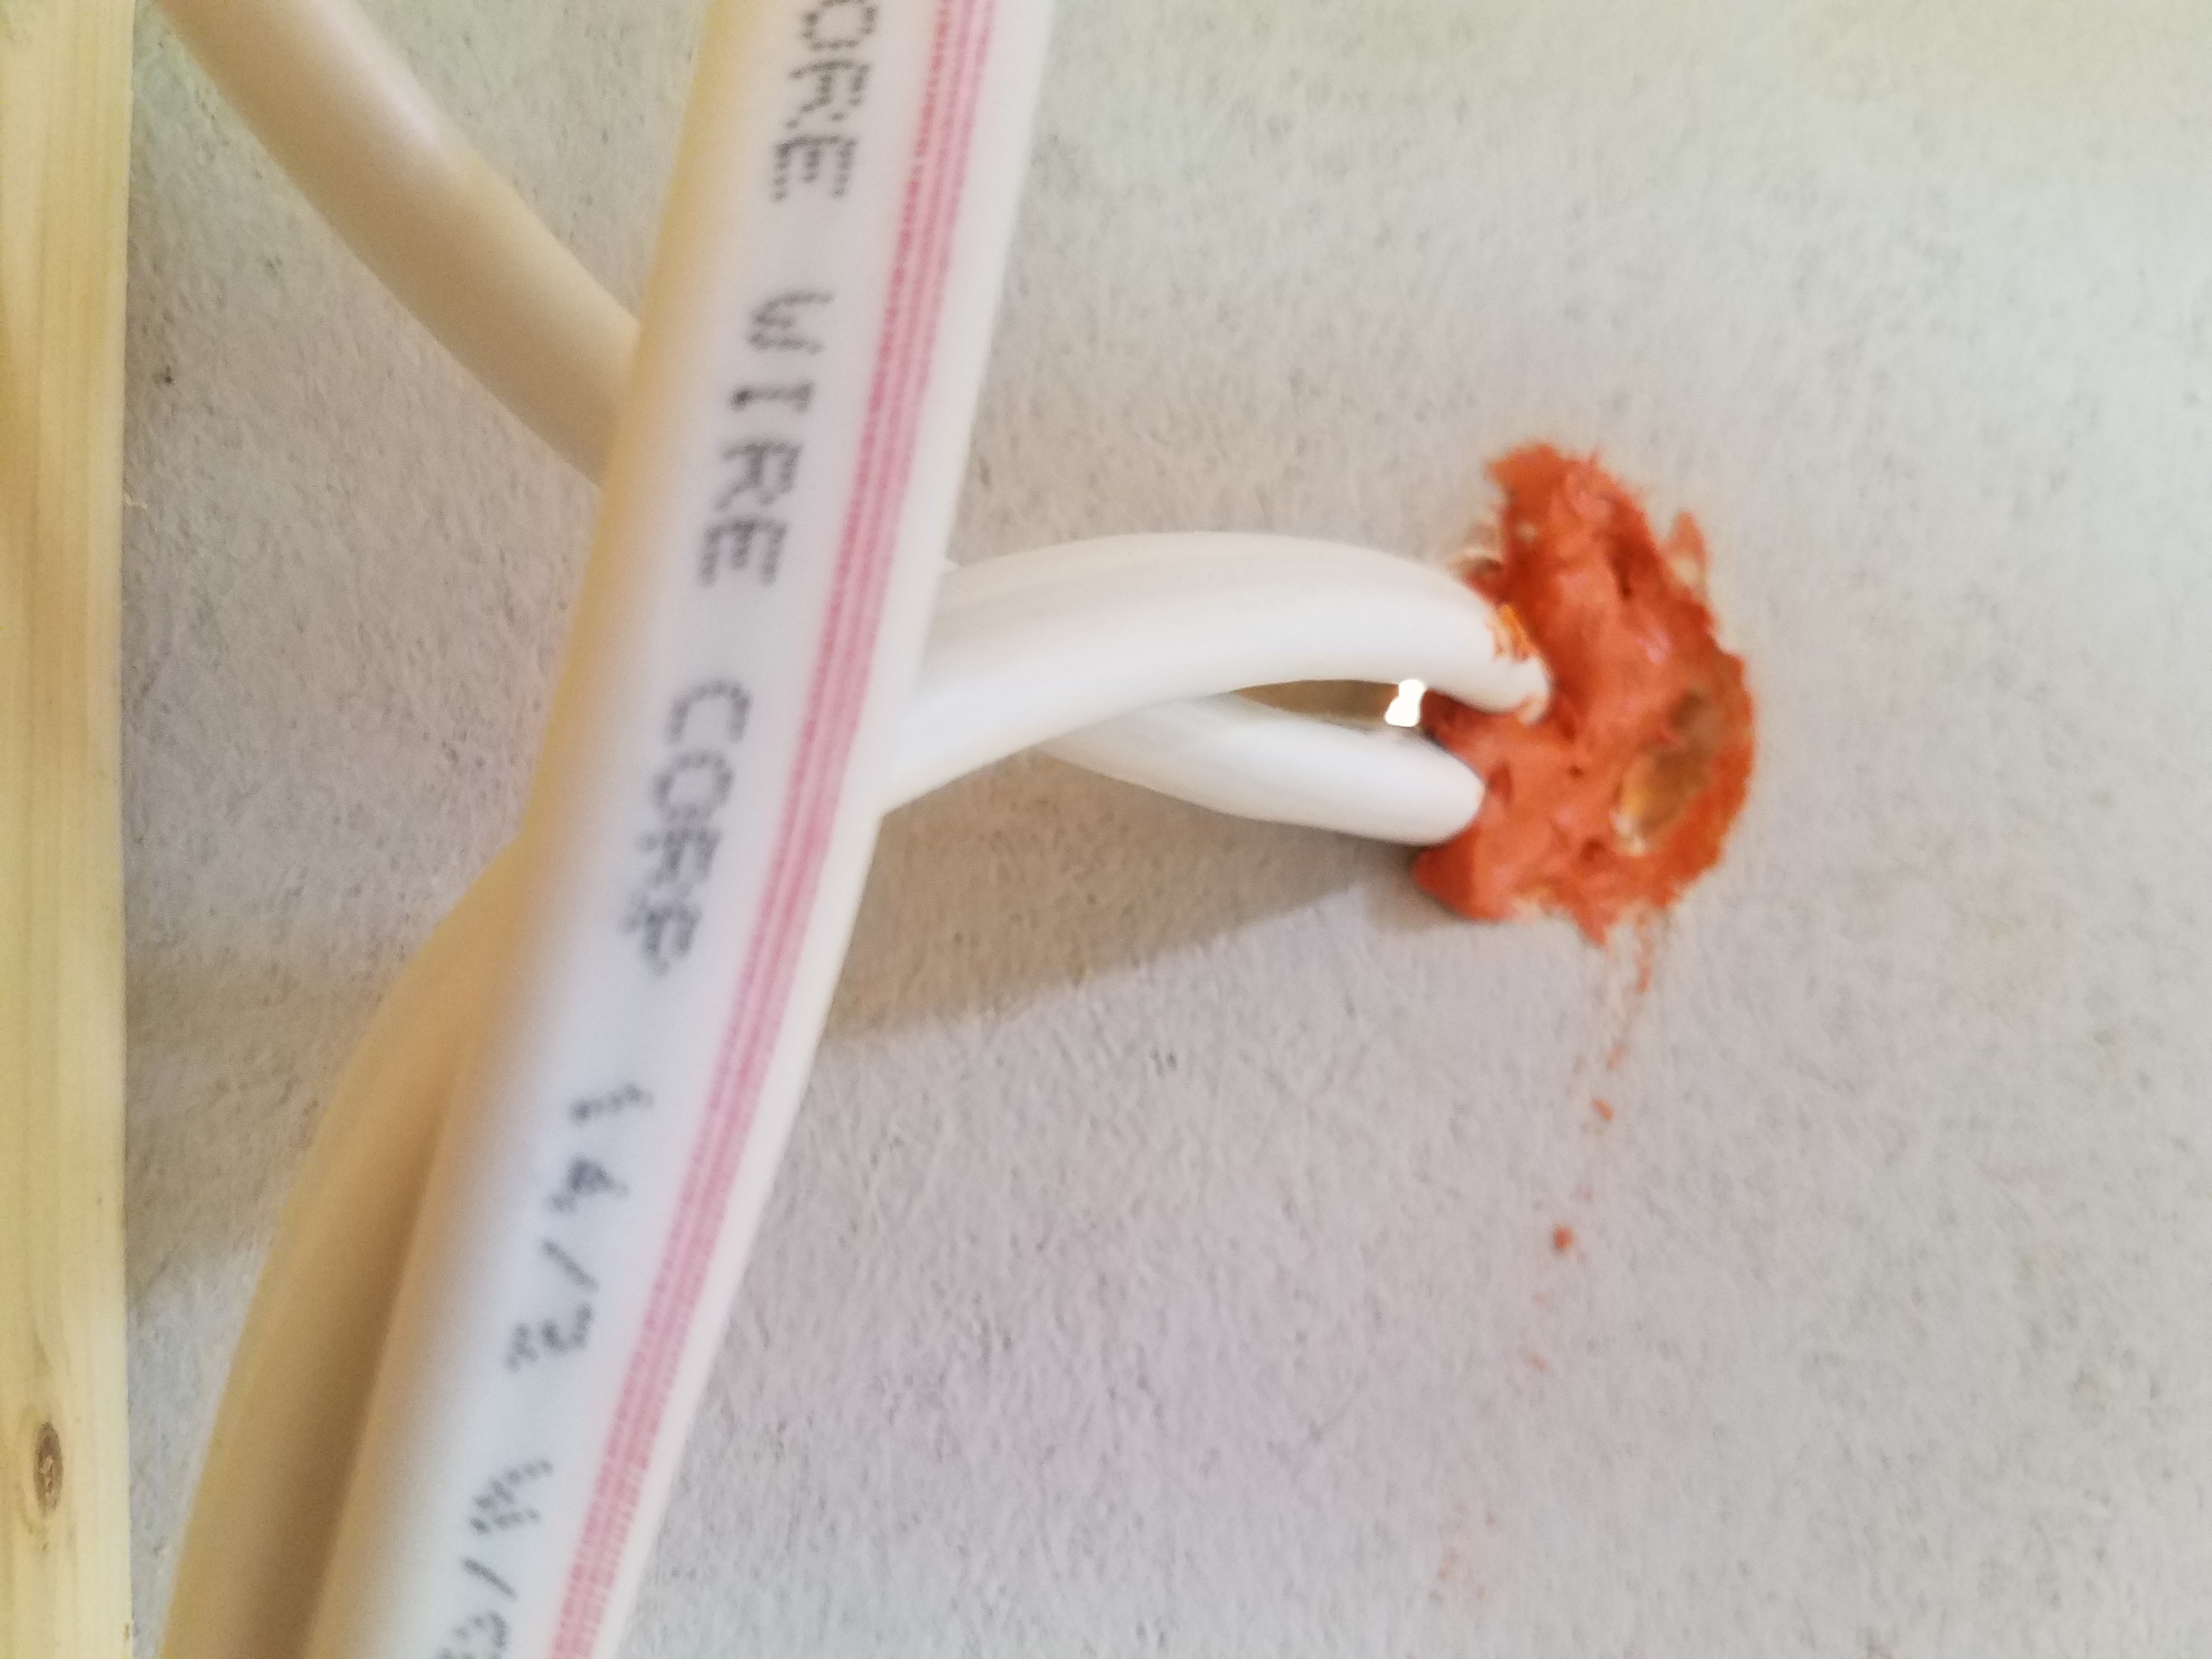
Air can pass through tiny gaps around electrical wiring and holes in electrical boxes, carrying conditioned air into wall cavities and up into unconditioned attics or allowing air from unconditioned garages and crawlspaces into living spaces. Pressure and temperature differences between conditioned and unconditioned spaces encourage this air flow. These air leaks represent energy losses, and they could also potentially allow warm, moisture-laden air into unconditioned spaces where it can condense on cold surfaces creating moisture problems. Conversely, air leaking into the house from the garage or crawlspace can affect indoor air quality and cause drafts. Air barriers need to be continuous to be effective; this means sealing all penetrations in exterior walls and in walls, ceilings, or floors adjoining unconditioned spaces. Holes drilled to pass wiring through studs and top and bottom plates should be caulked or foam sealed to prevent air from following the wiring through wall cavities.
Be sure to schedule caulking of electrical penetrations after the wiring has been installed and before the drywall is completed. Responsibility for sealing air leaks around electrical wiring and electrical boxes should be included in the contract for the appropriate trade, depending on the workflow at specific job sites.
How to Air-Seal Electrical Boxes and Wiring
- For ceiling-mounted electrical boxes, install the electrical box in the ceiling drywall, then caulk around the base and caulk all holes in the box with fire-retardant caulk (Figure 1).

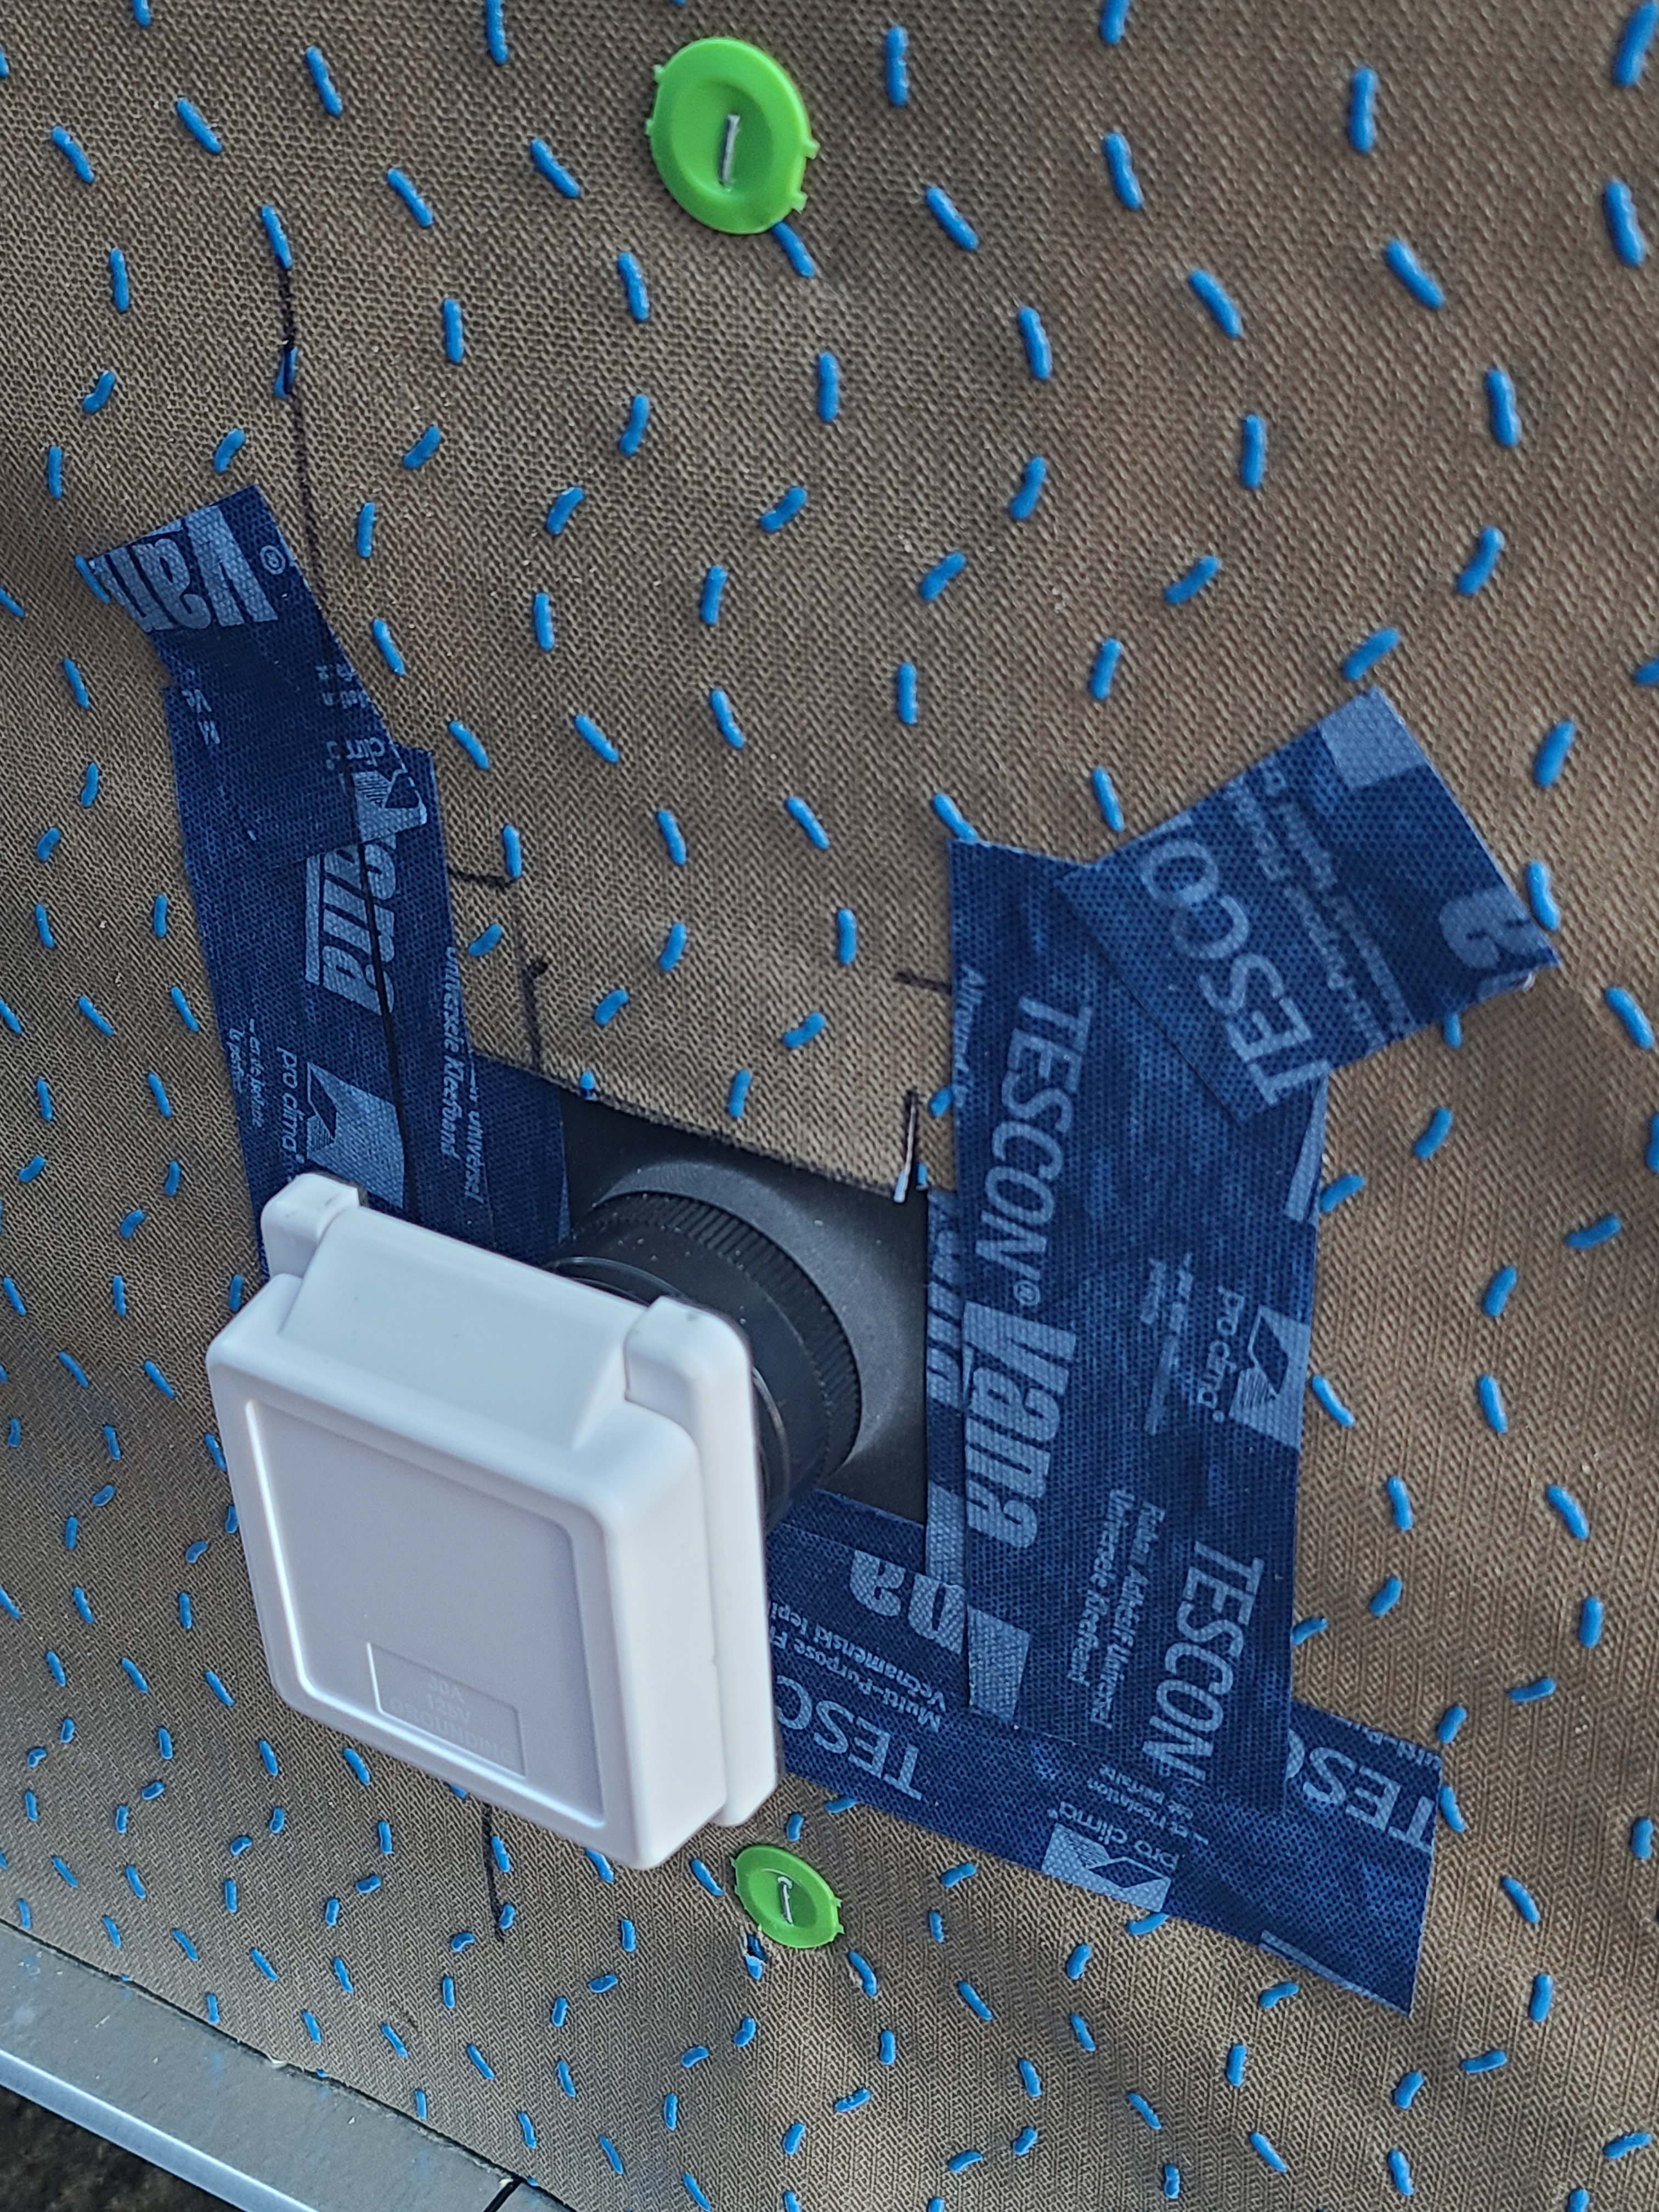
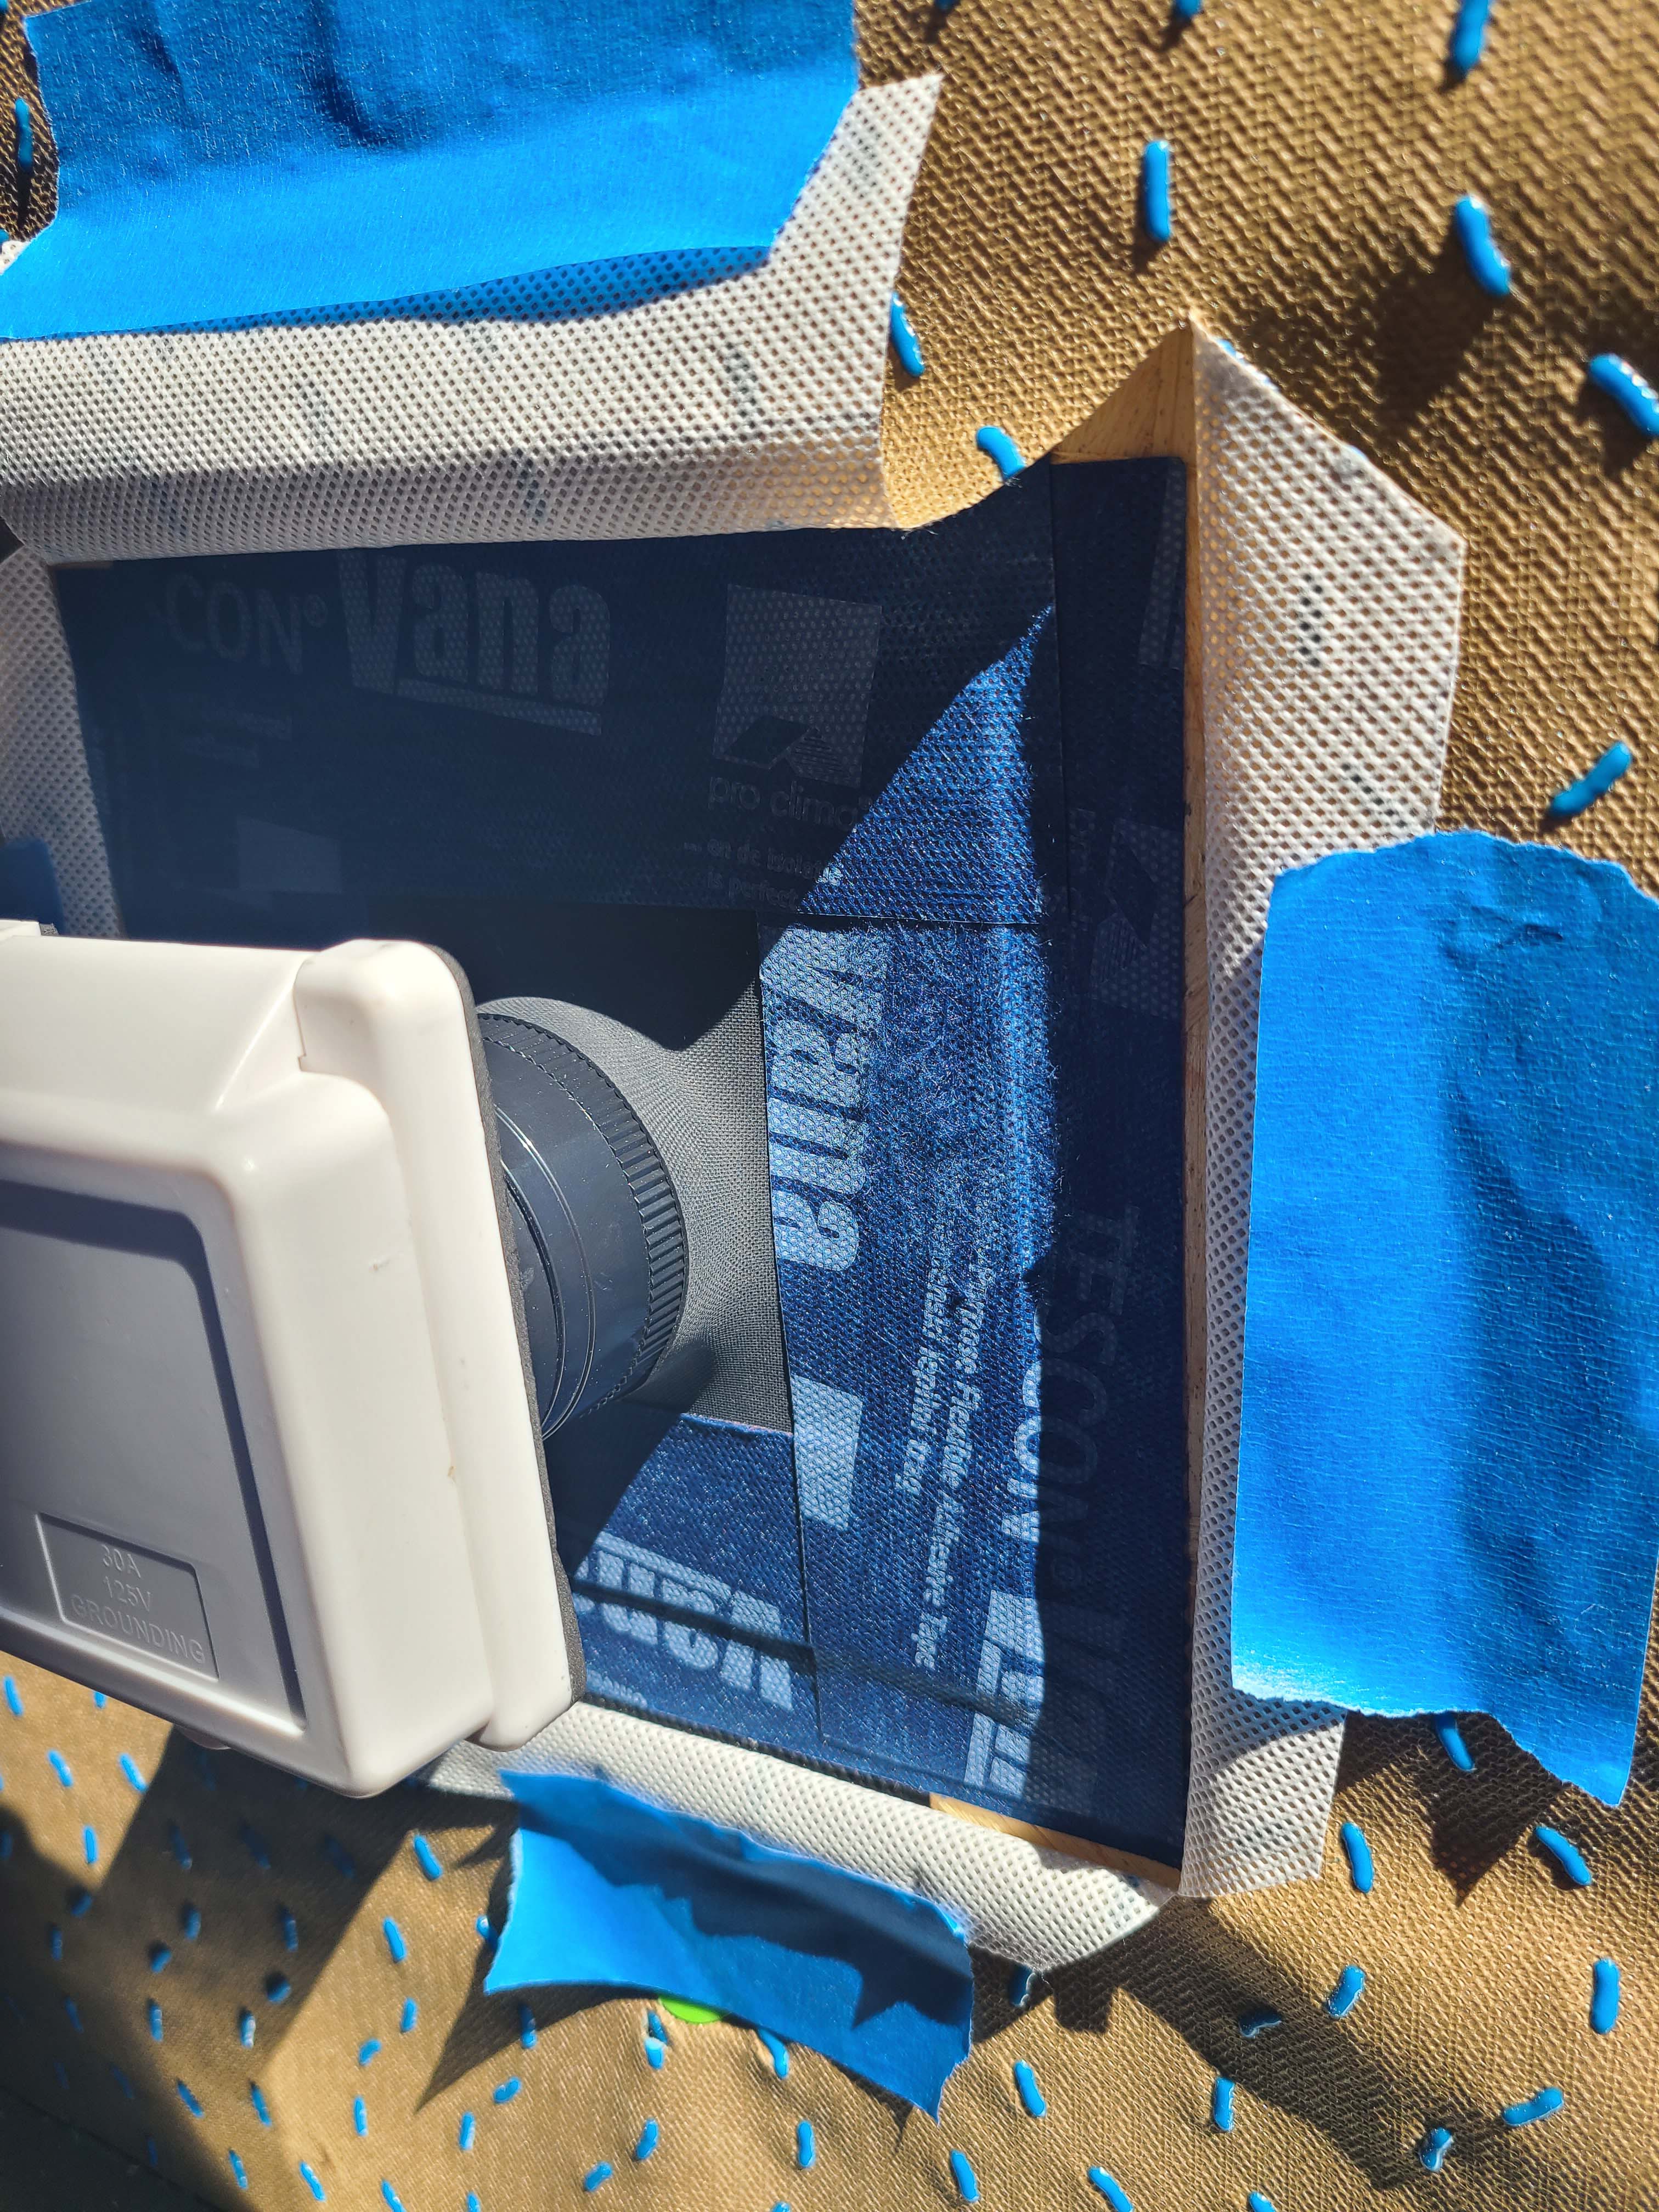
- For wall-mounted electrical boxes, specify that the electrician install prefabricated, airtight electrical boxes that have flexible boot seals at wire penetrations and a gasketed flange at the face (Figure 2).

Source
Brochure about creating an air barrier by sealing drywall assemblies.
- Another option is to install standard electrical boxes and seal all openings in the box (including around wire penetrations) with caulk or sealing putty, then seal the face of the box to the drywall with caulk (Figure 3).

Source
Brochure about creating an air barrier by sealing drywall assemblies.
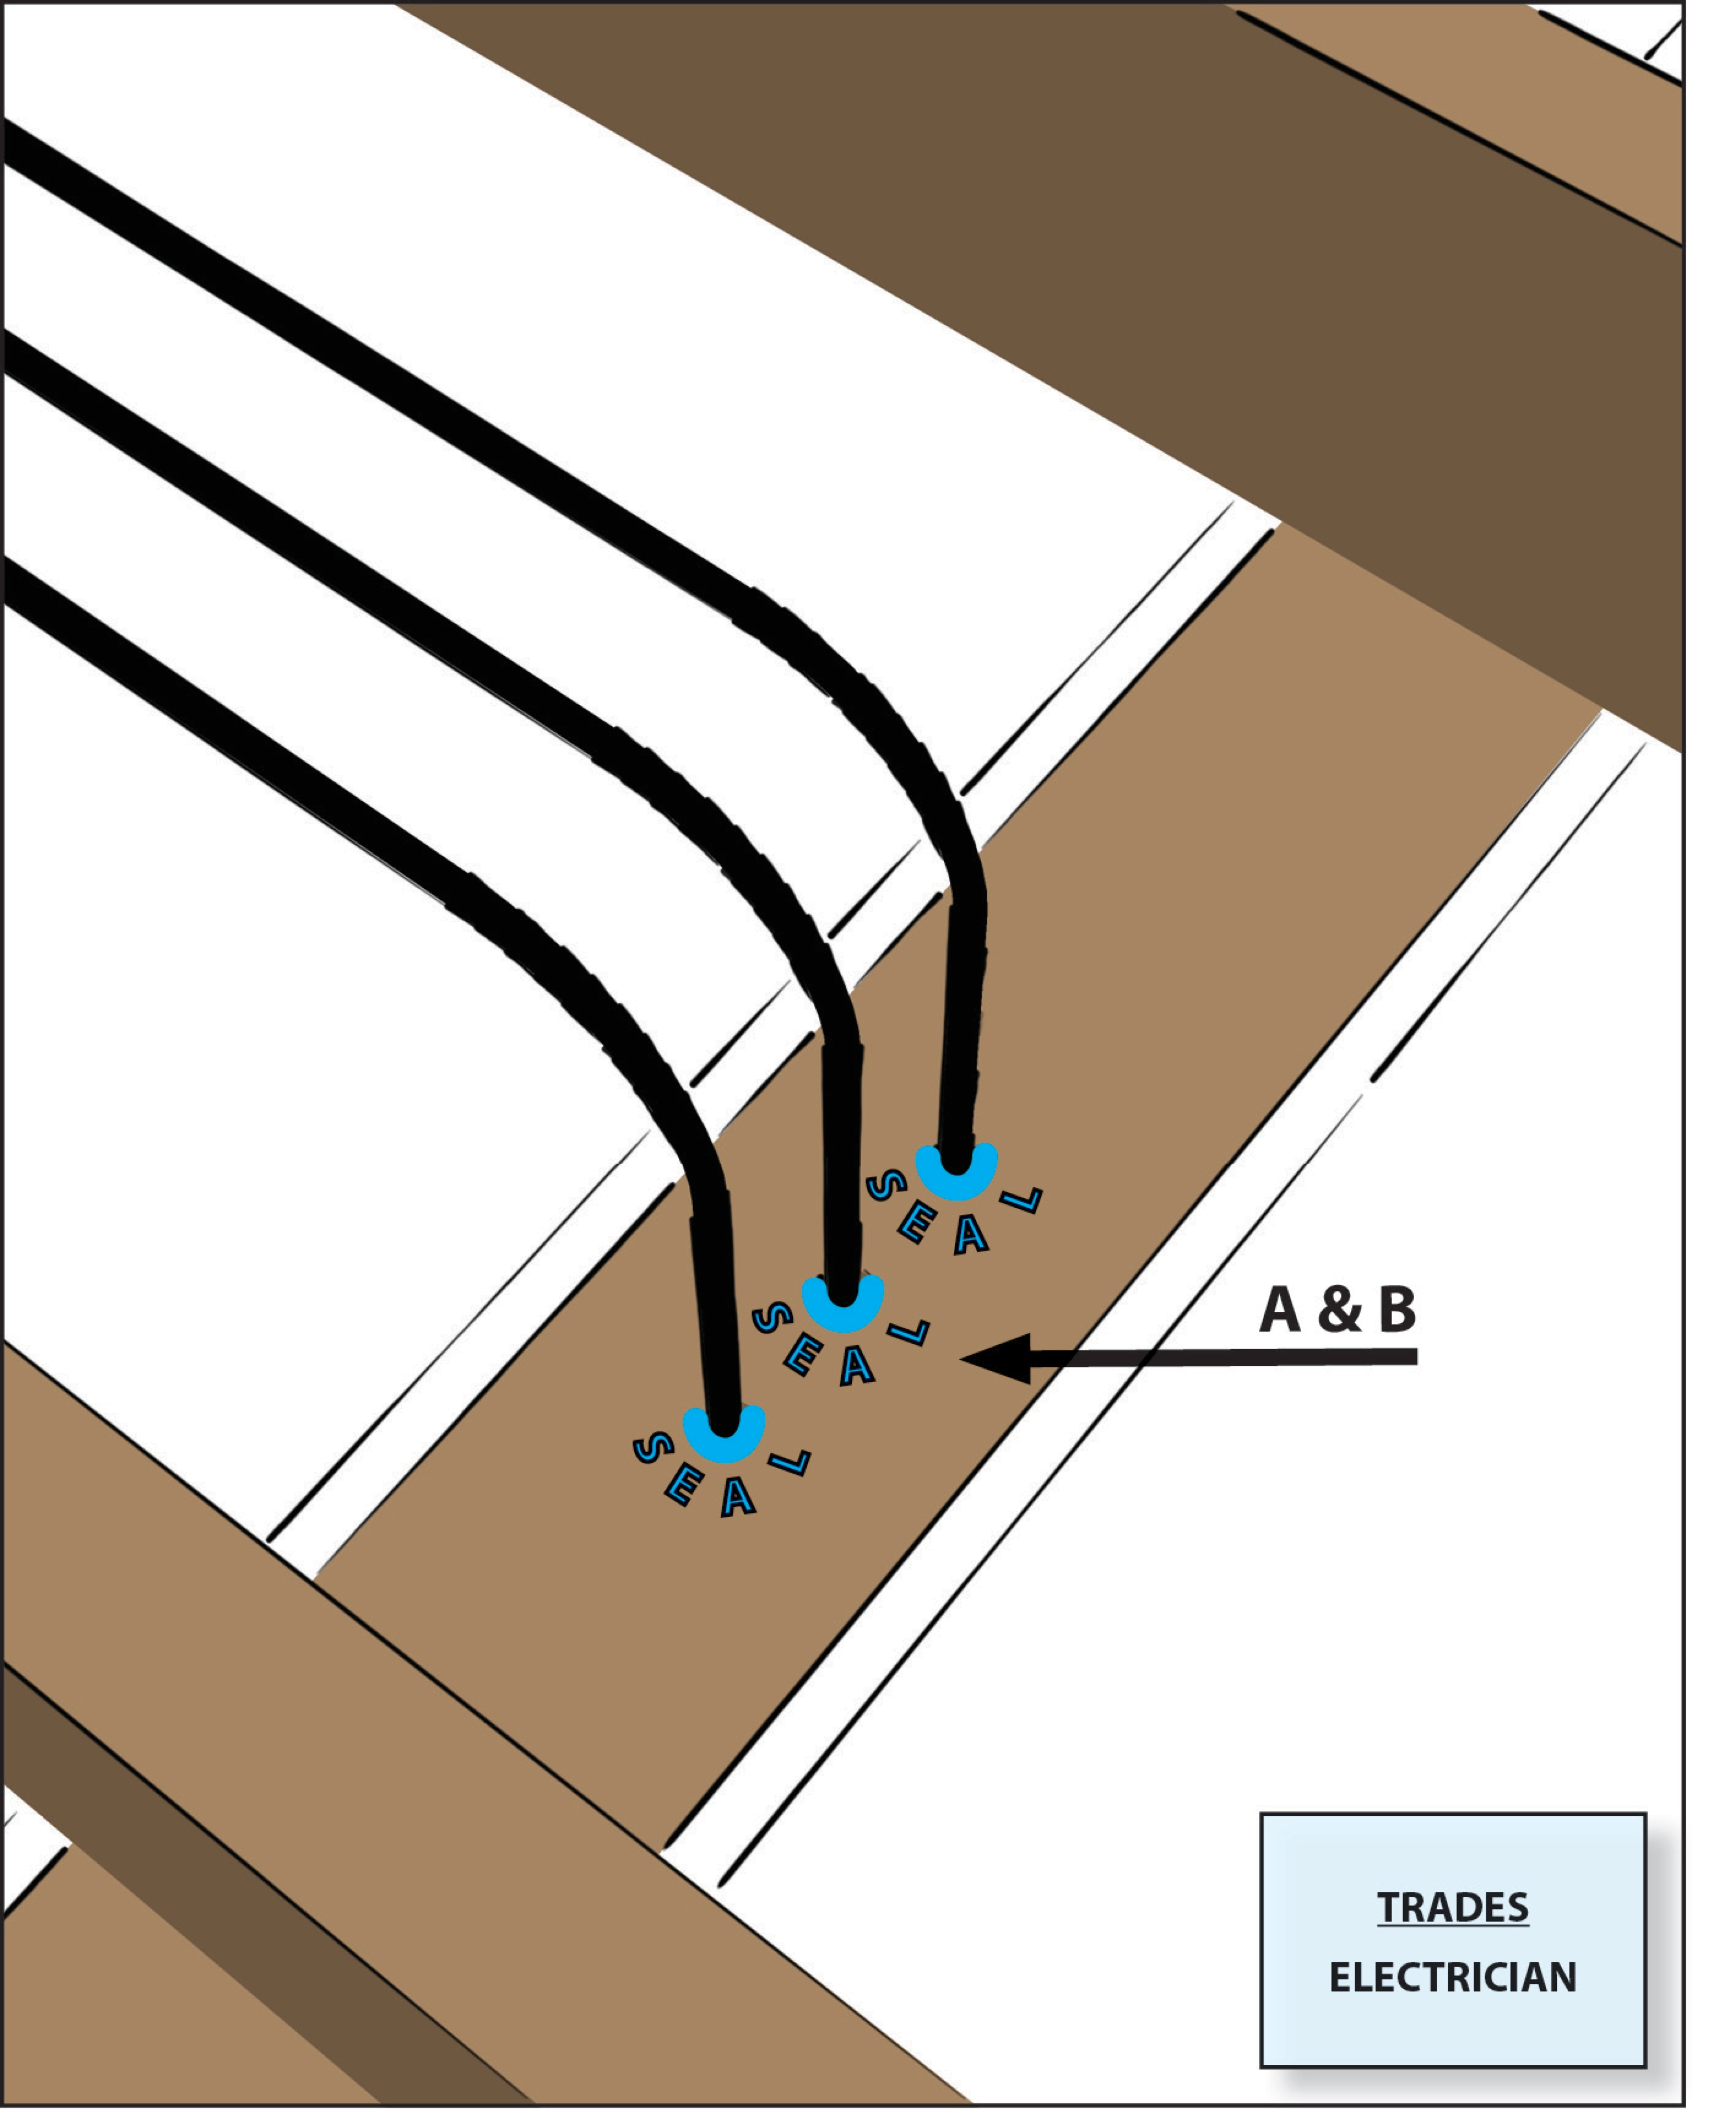
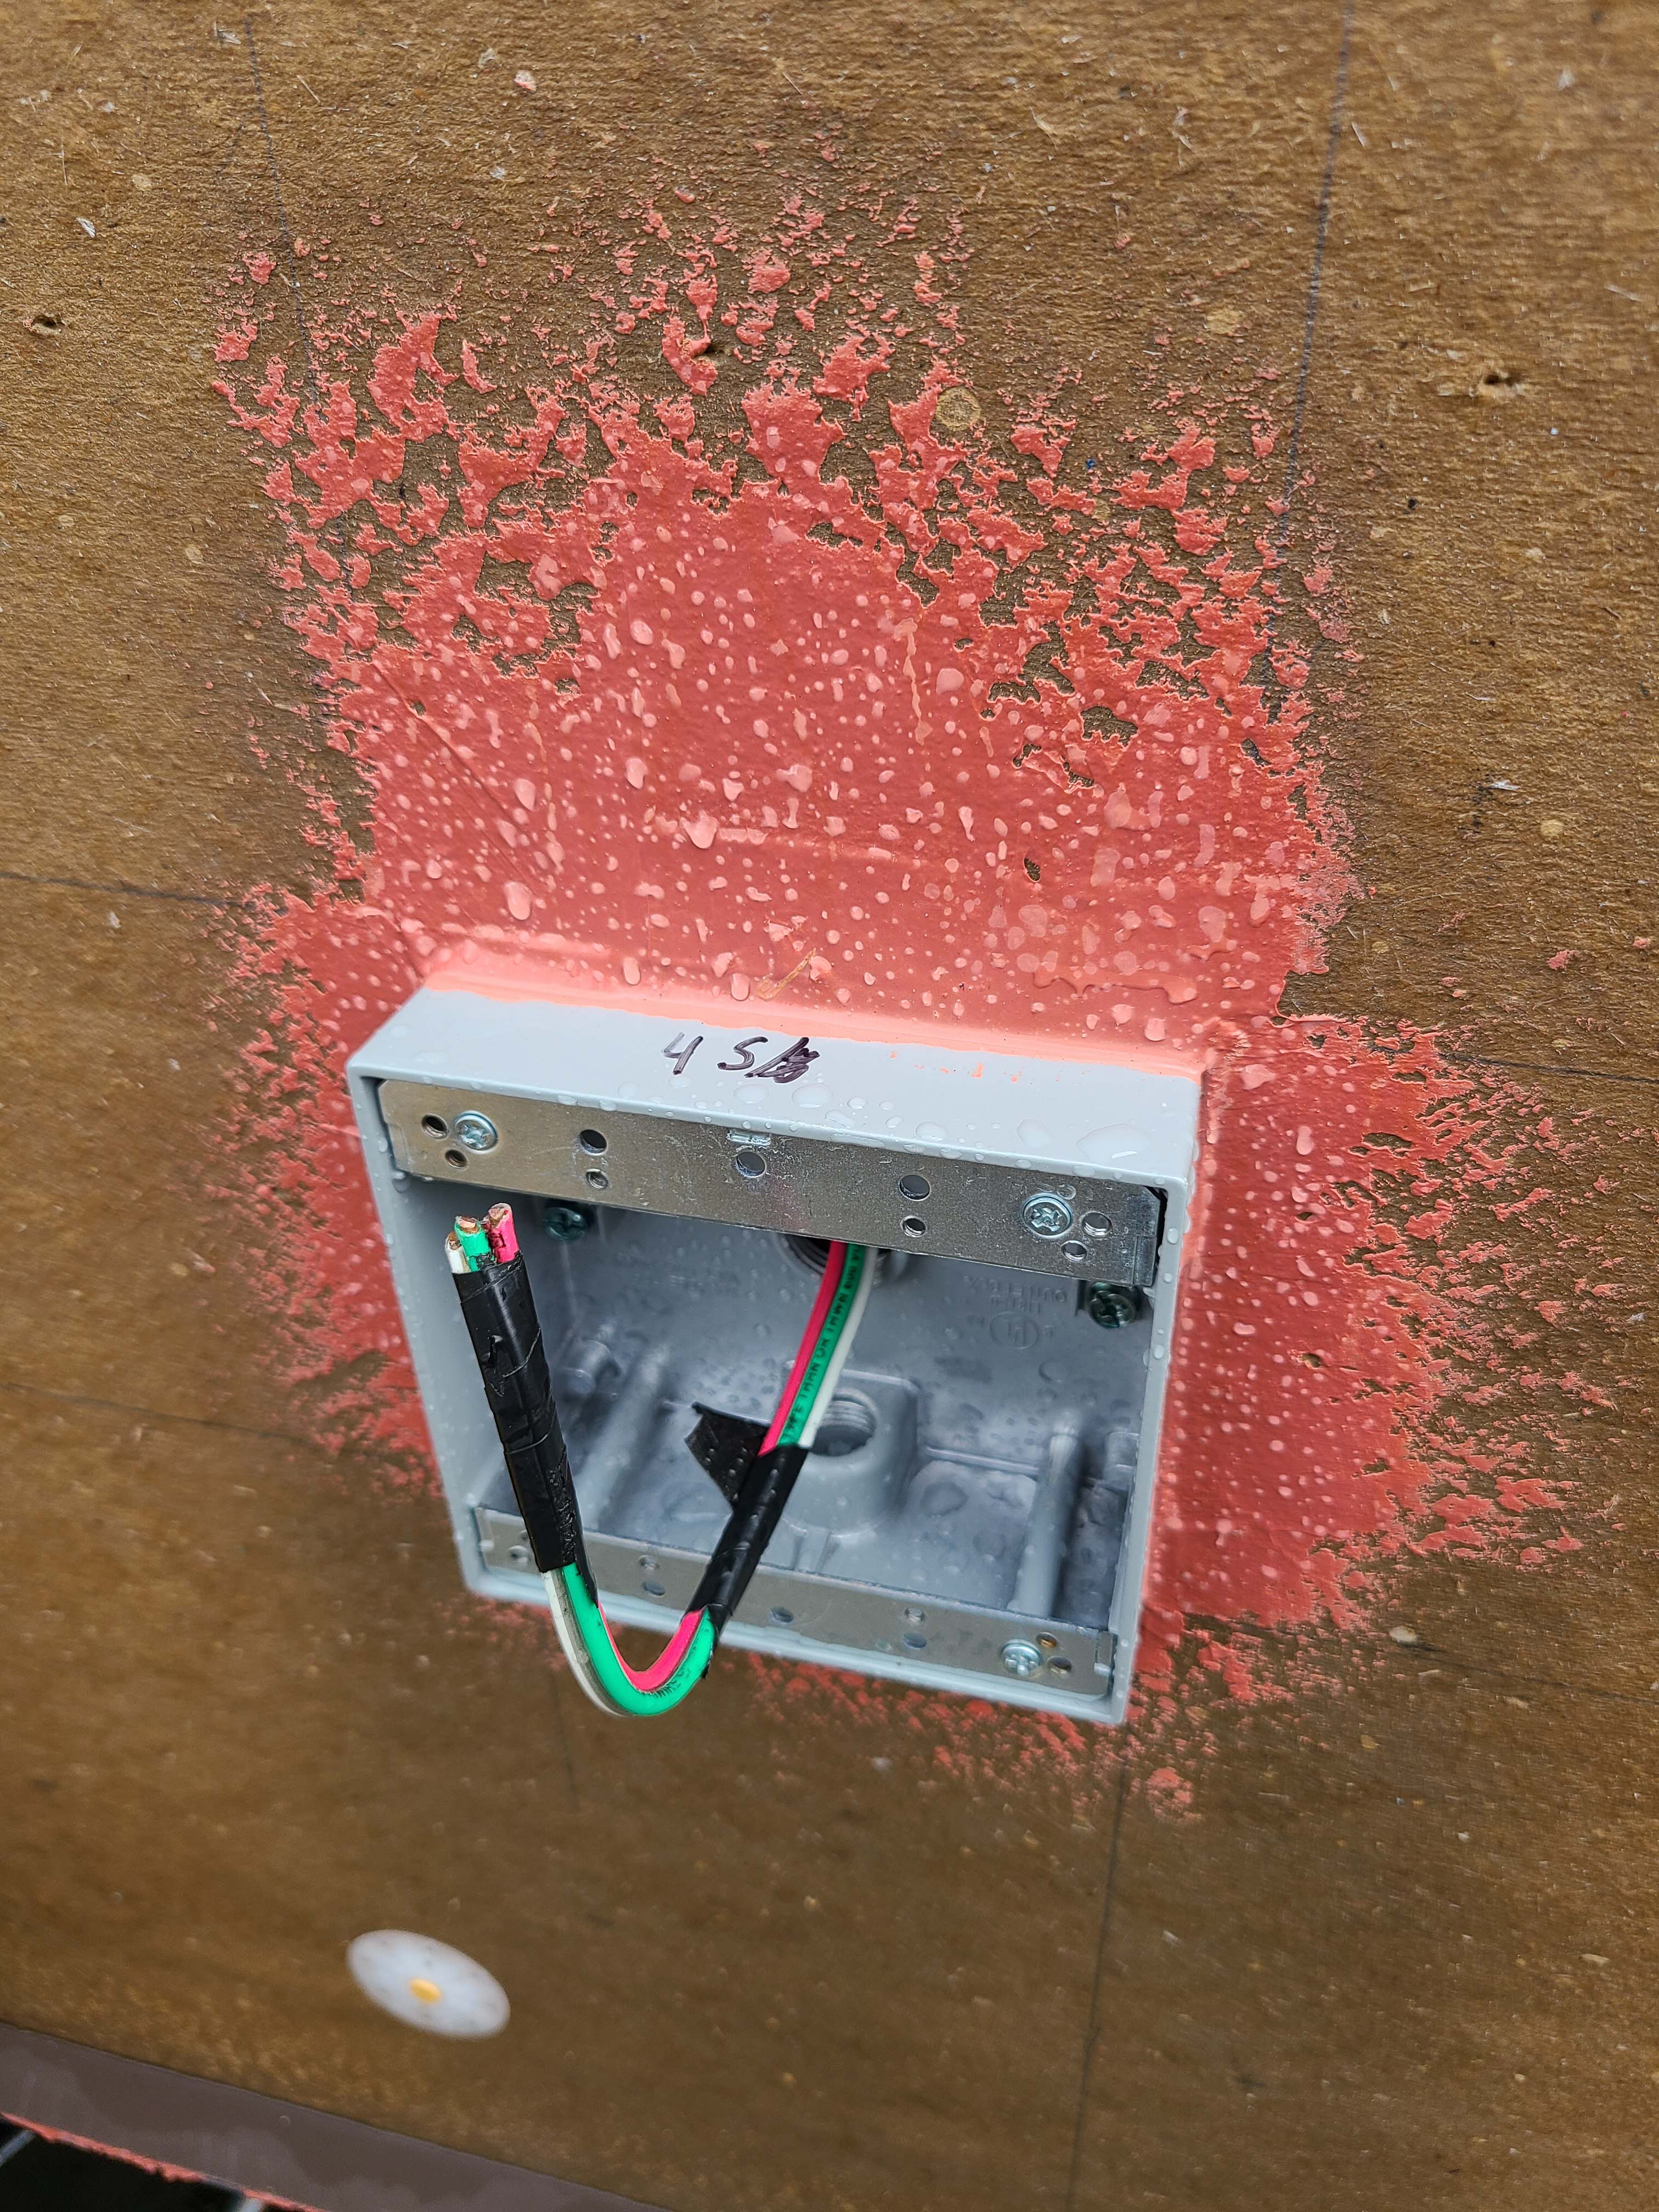
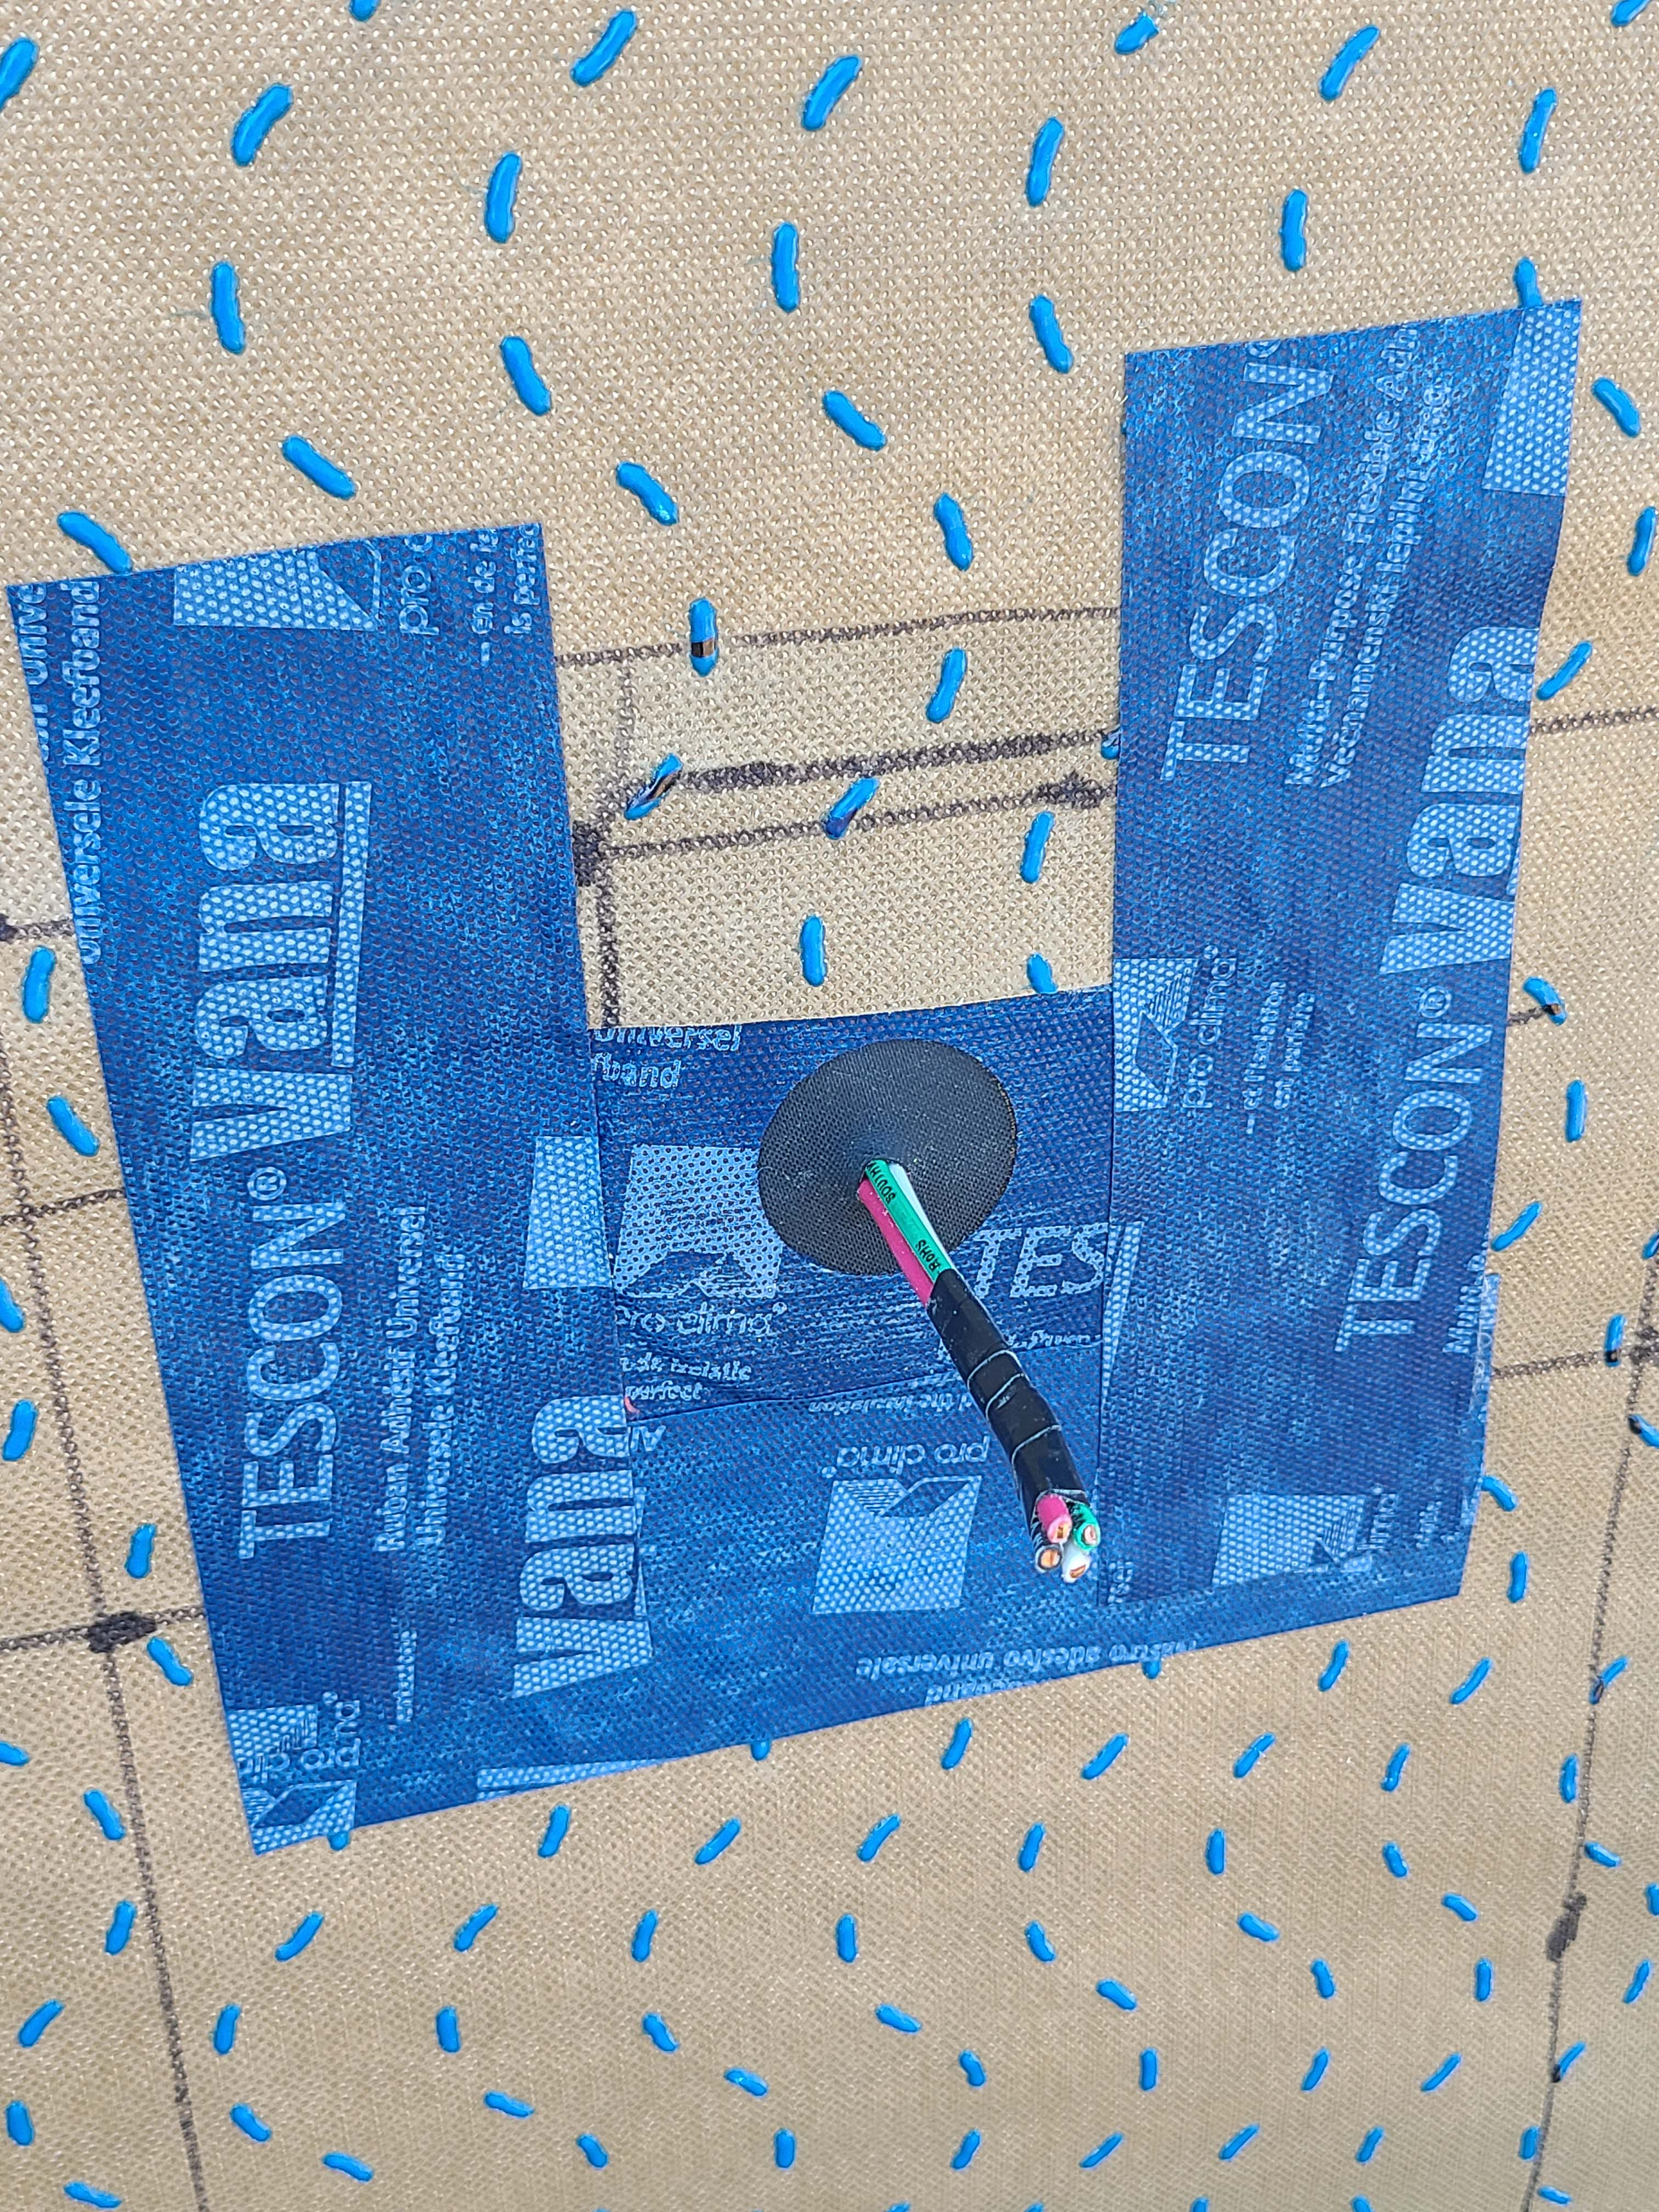
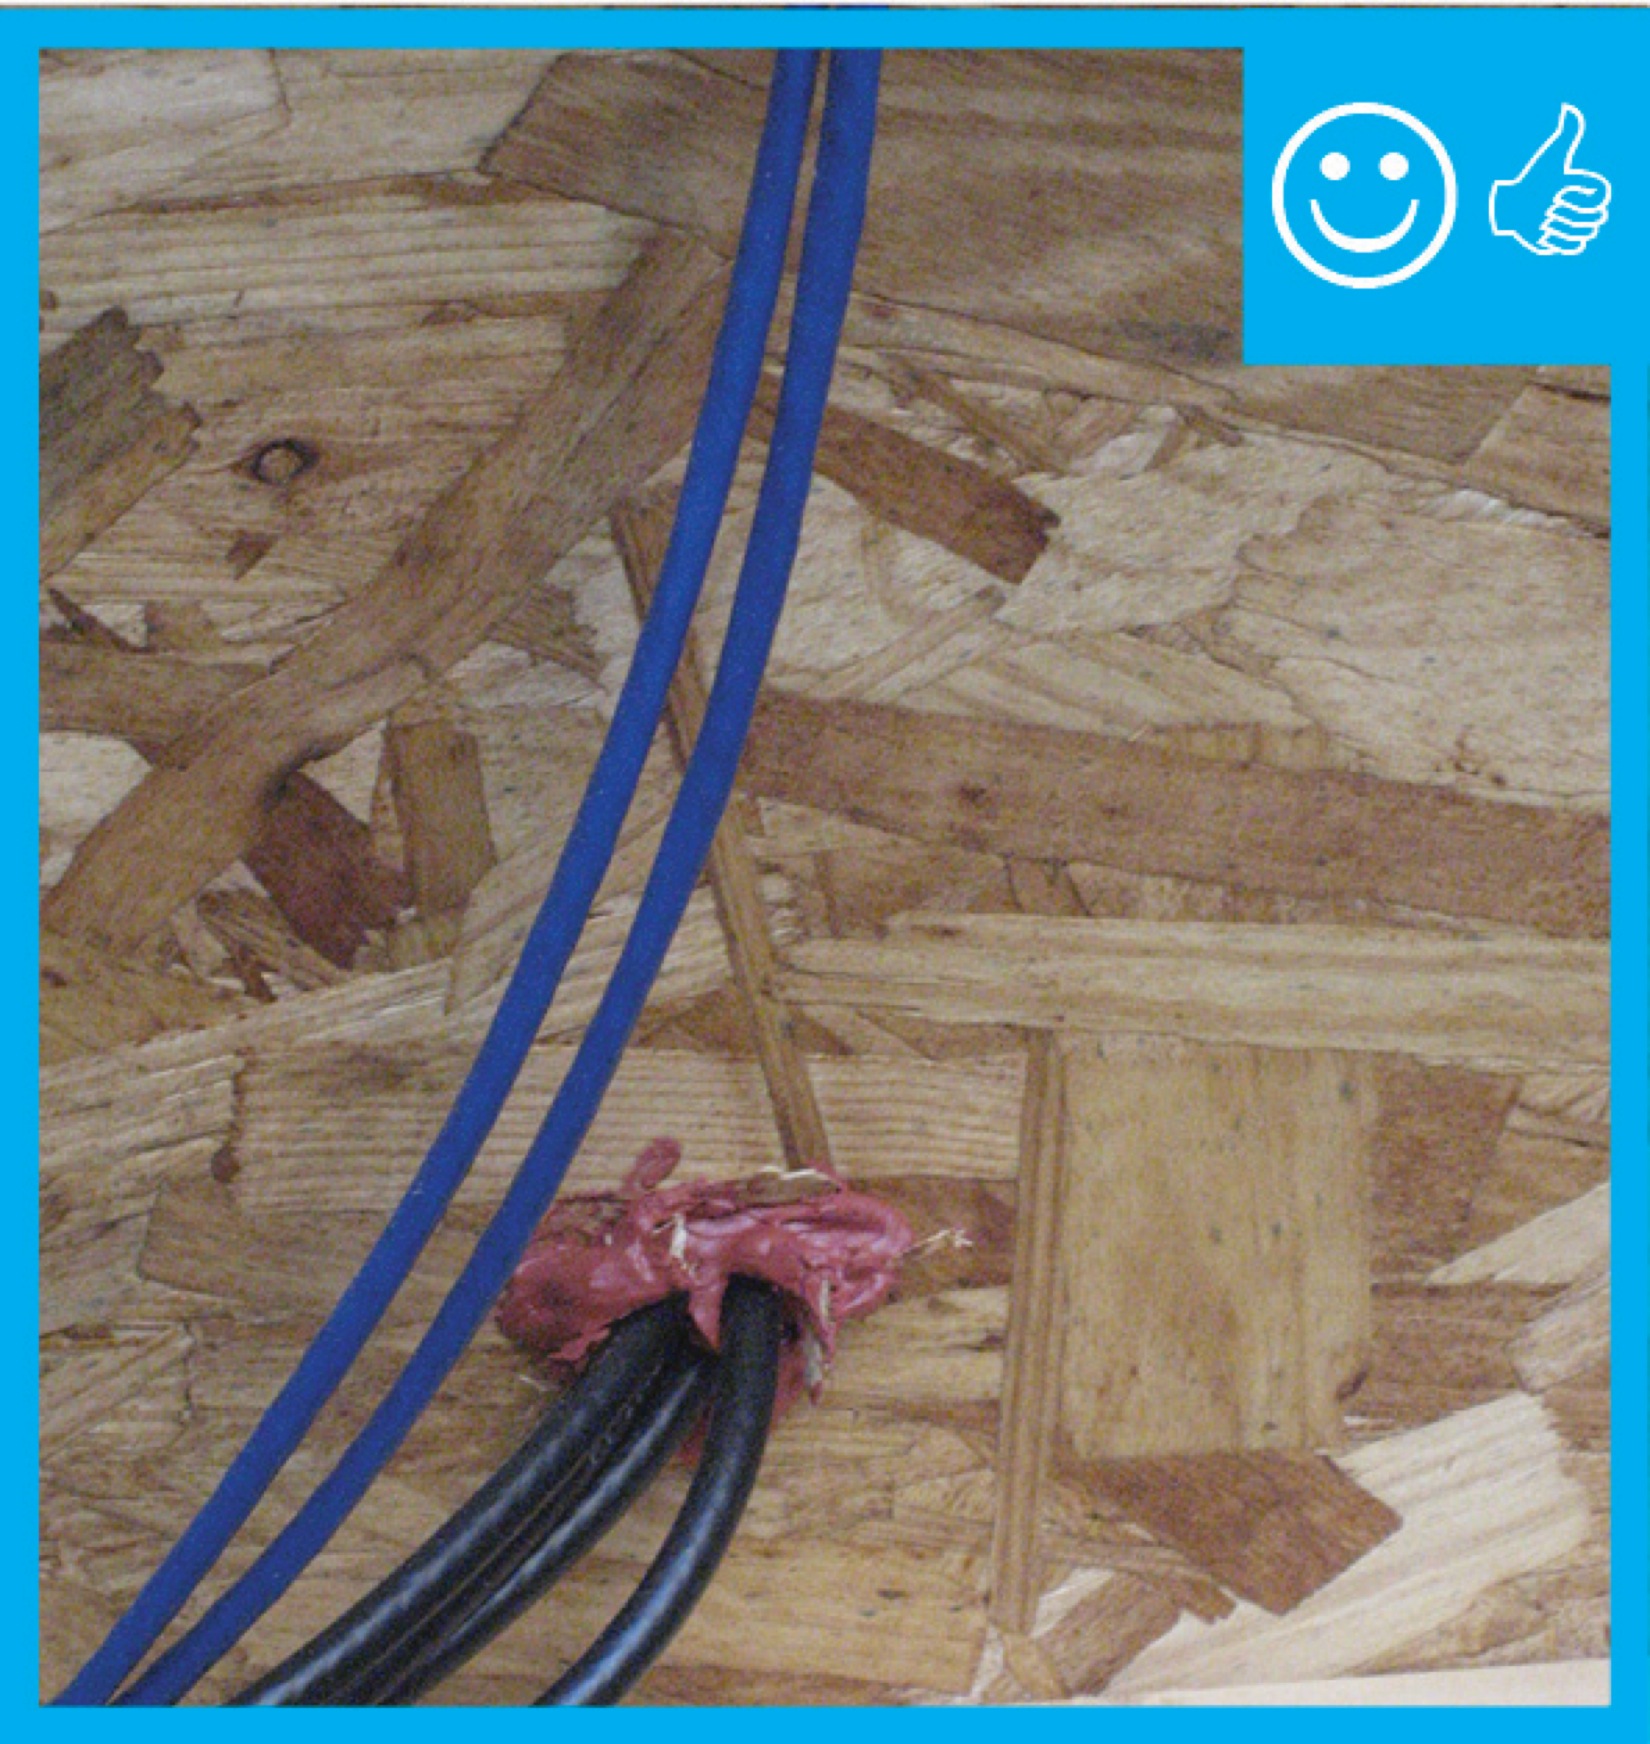
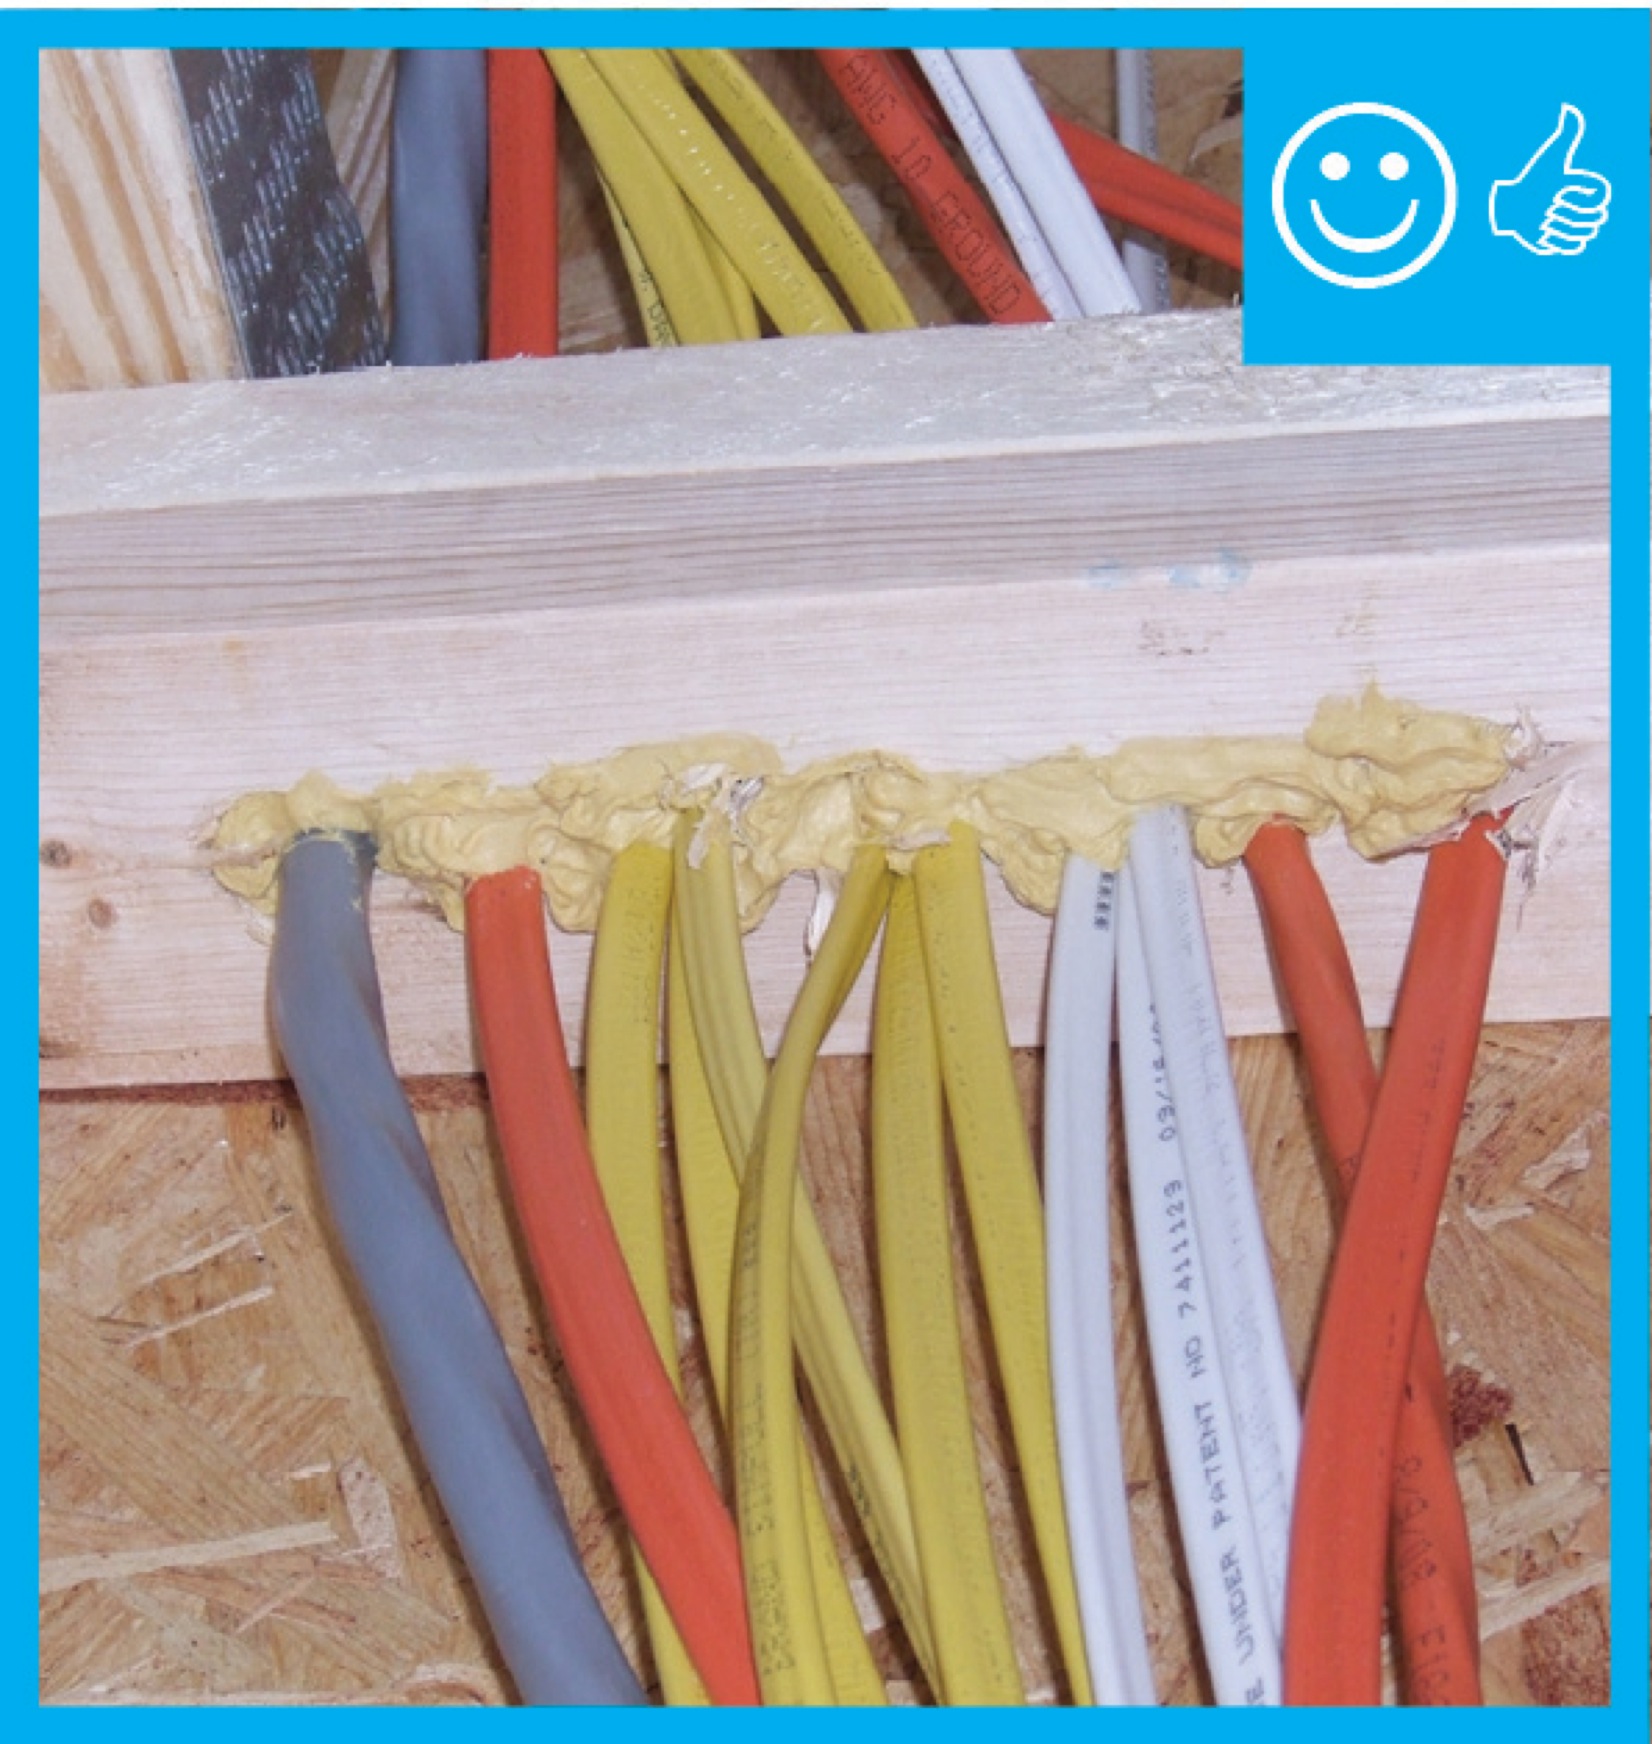
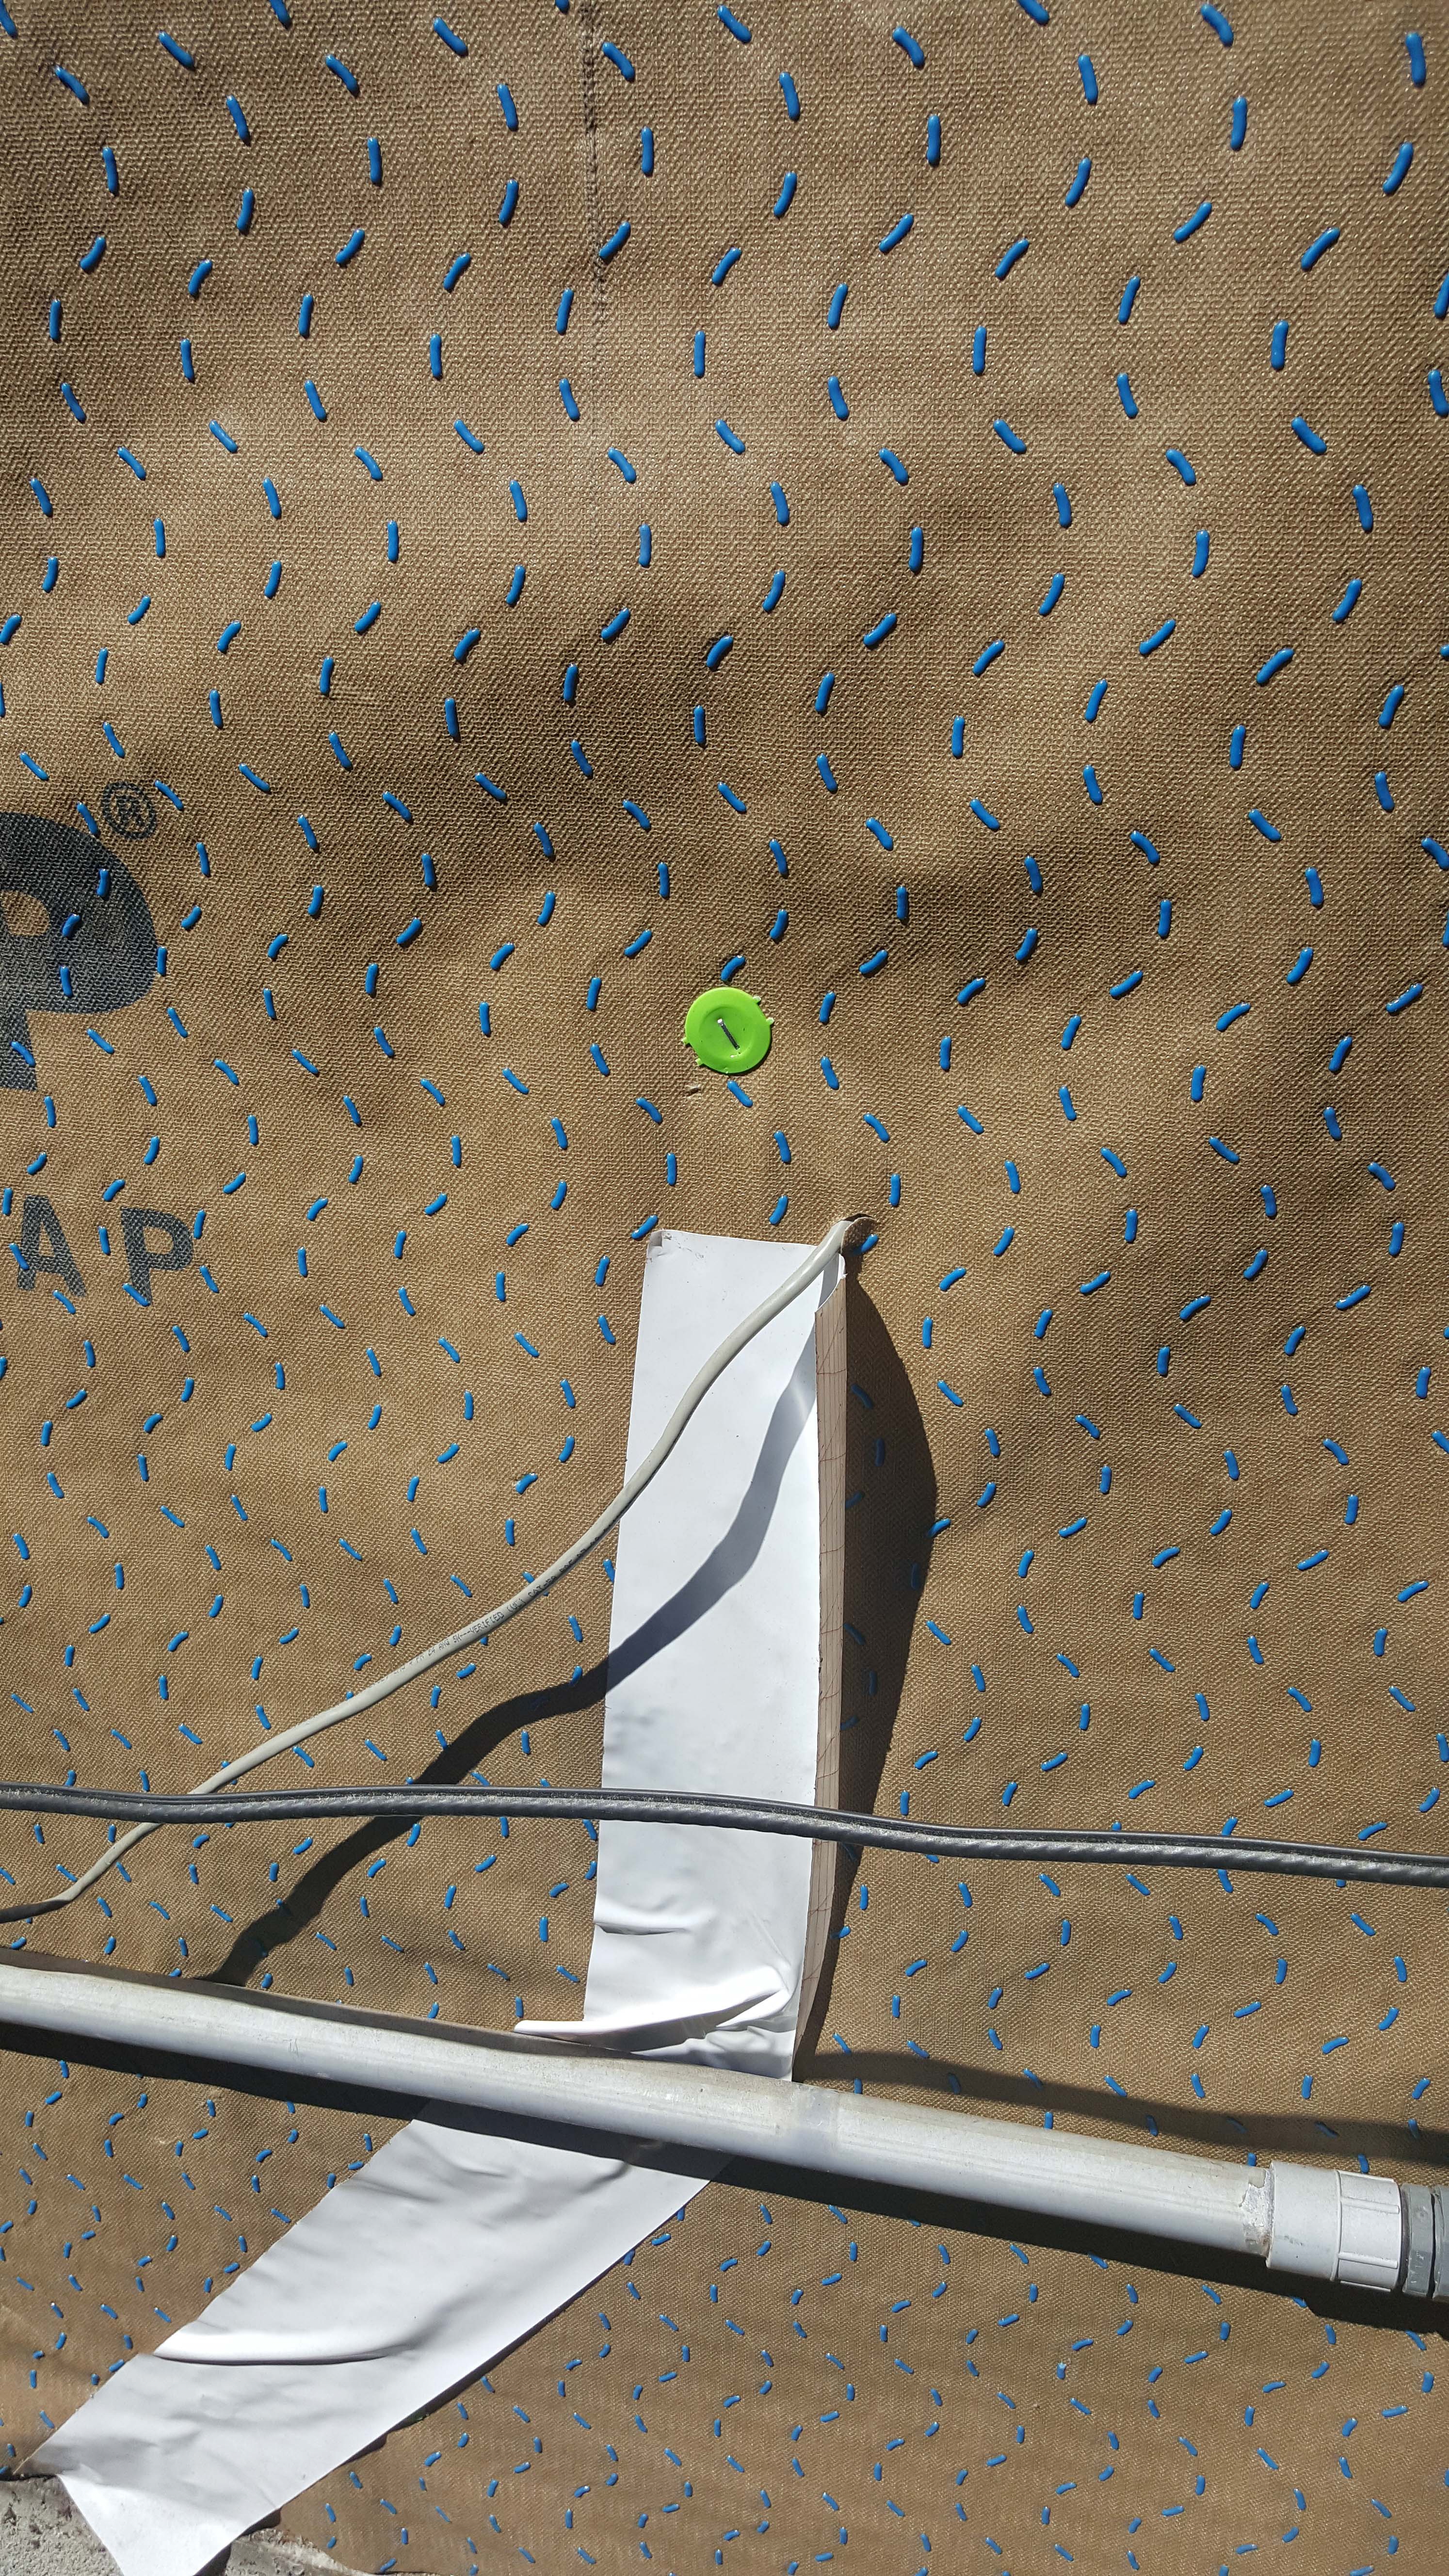
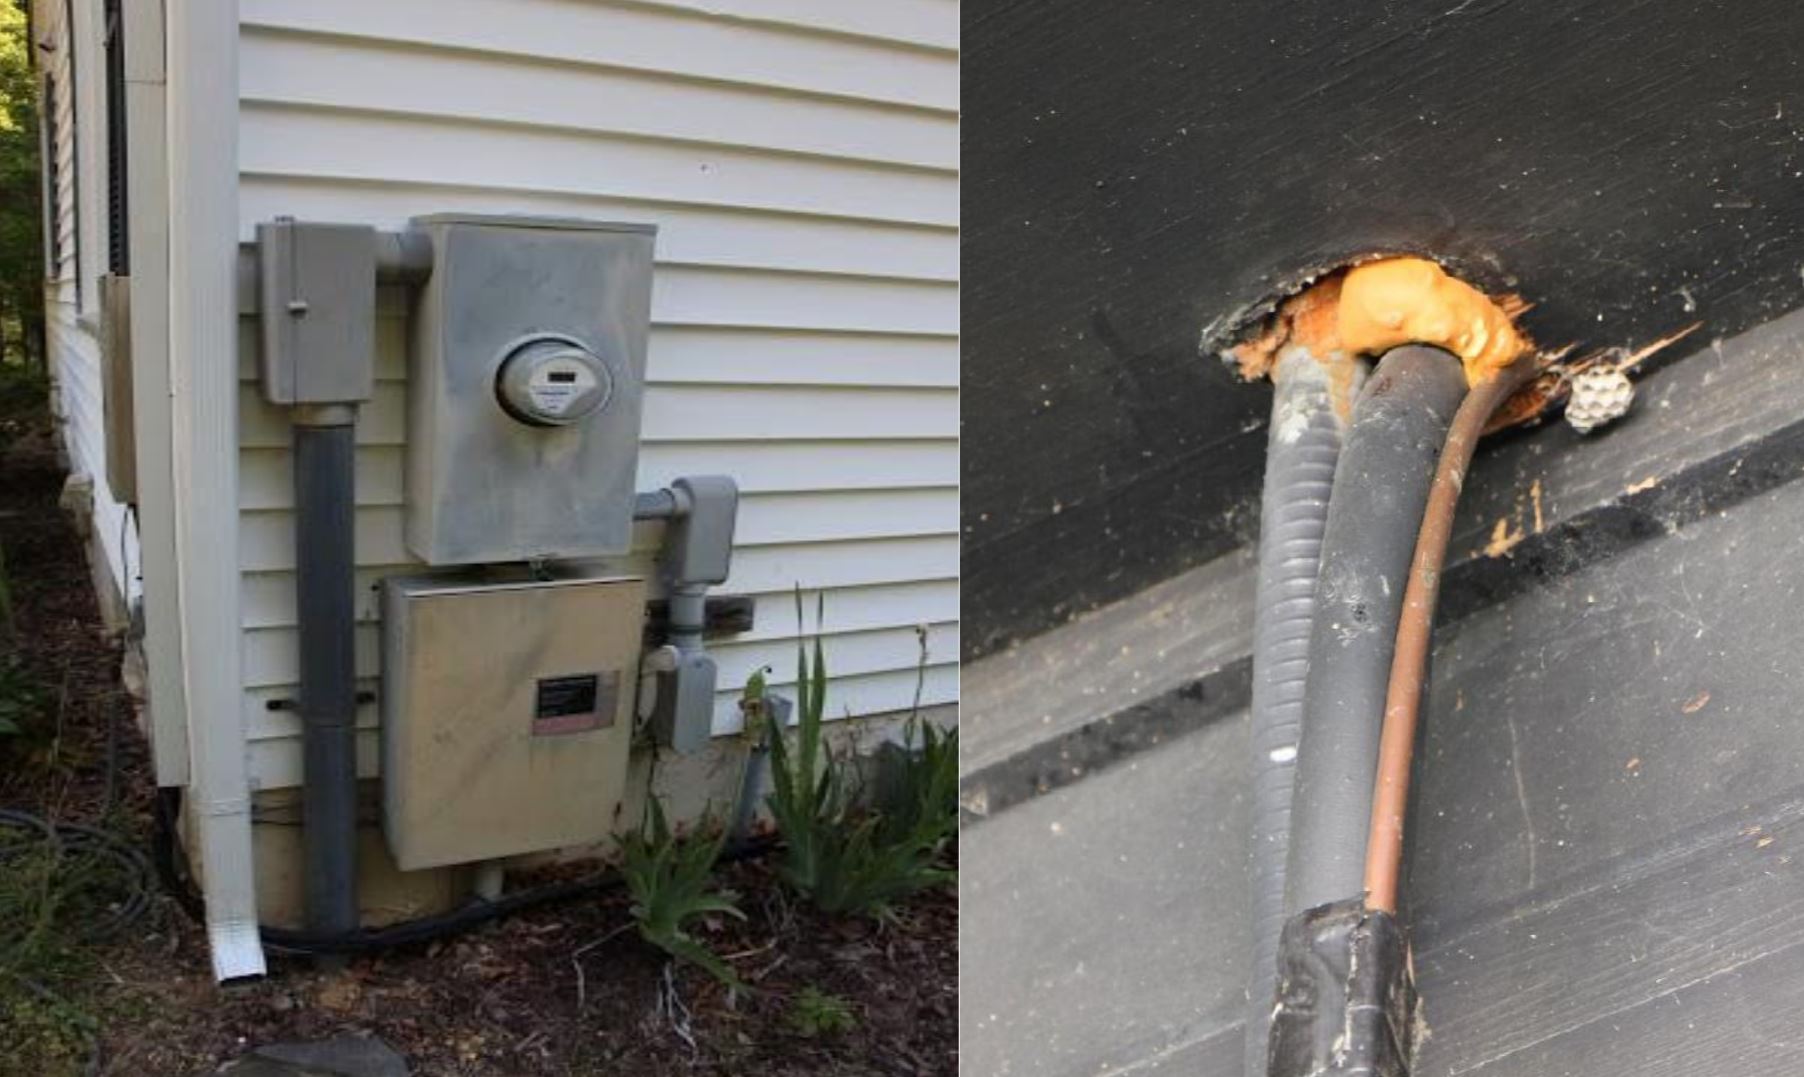
- Seal all wiring holes through the exterior walls of the house, such as holes for electrical wiring, security system wiring, television and telephone cables, porch light fixtures, and exterior electrical outlets (Figure 4). Use caulk, gaskets, or spray foam (note that spray foam degrades in sunlight).

Source
Guide describing measures that builders in the cold and very cold climates can take to build homes that have whole-house energy savings of 40% over the Building America benchmark with no added overall costs for consumers.
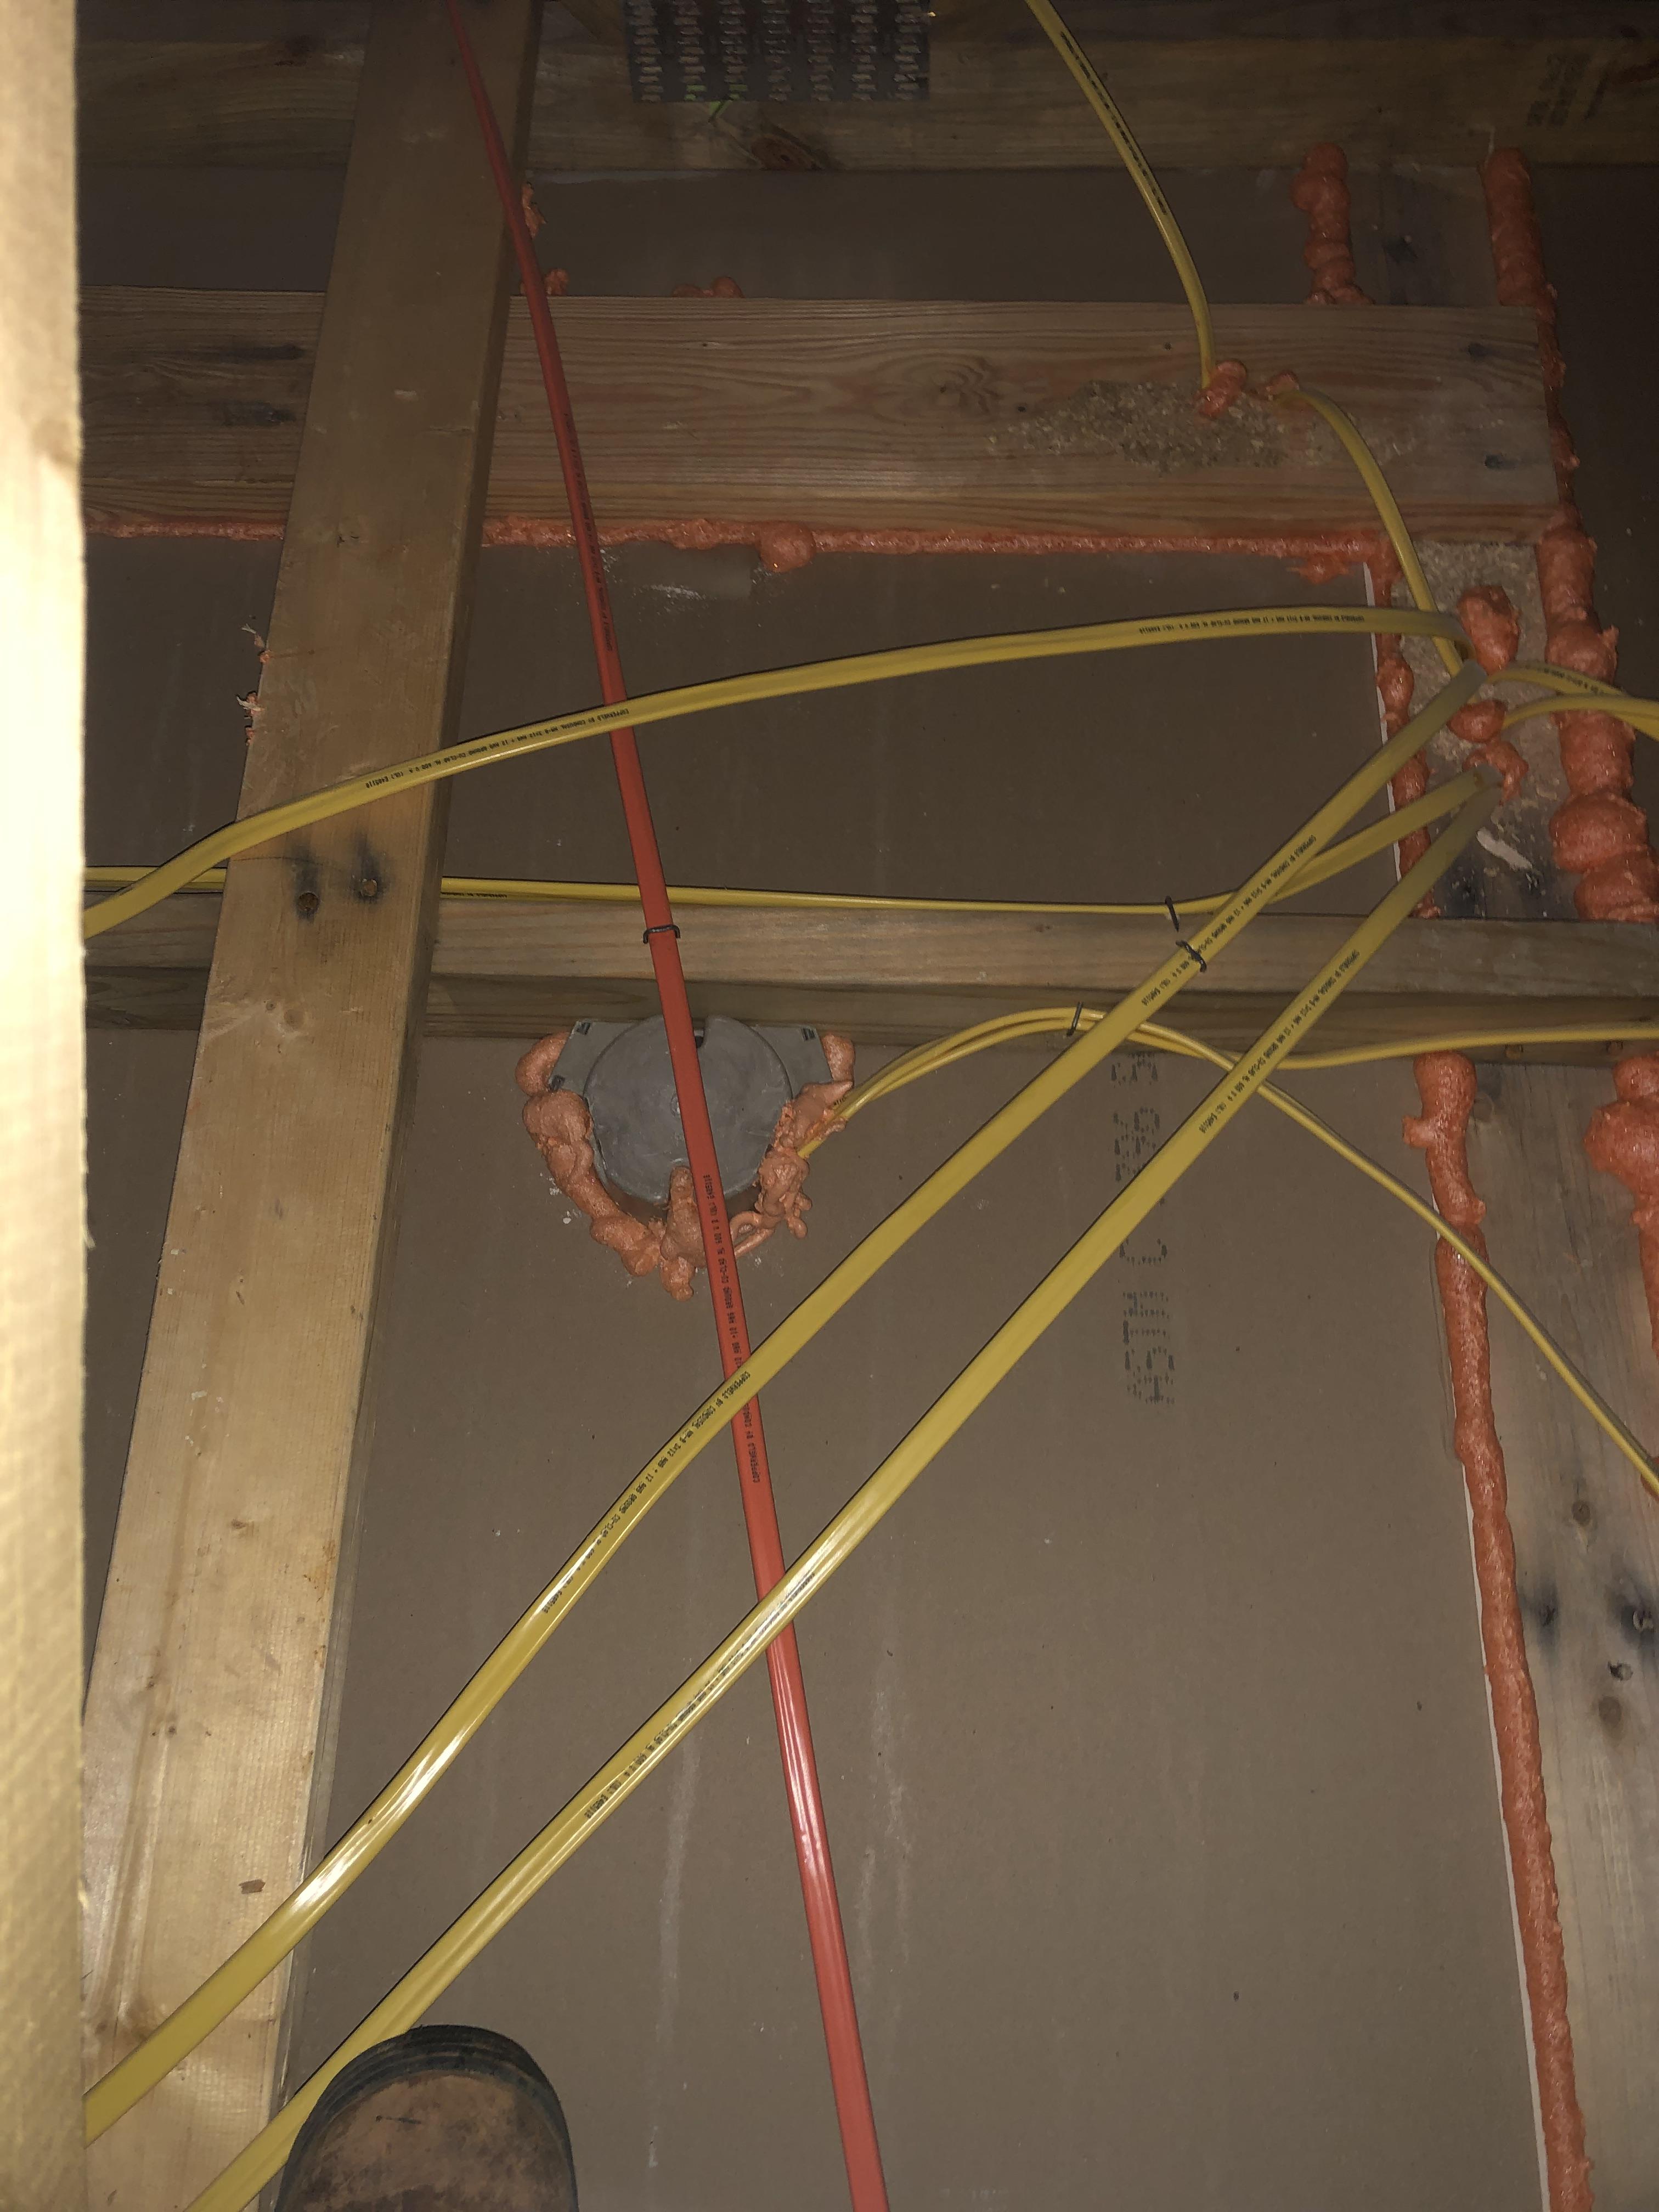
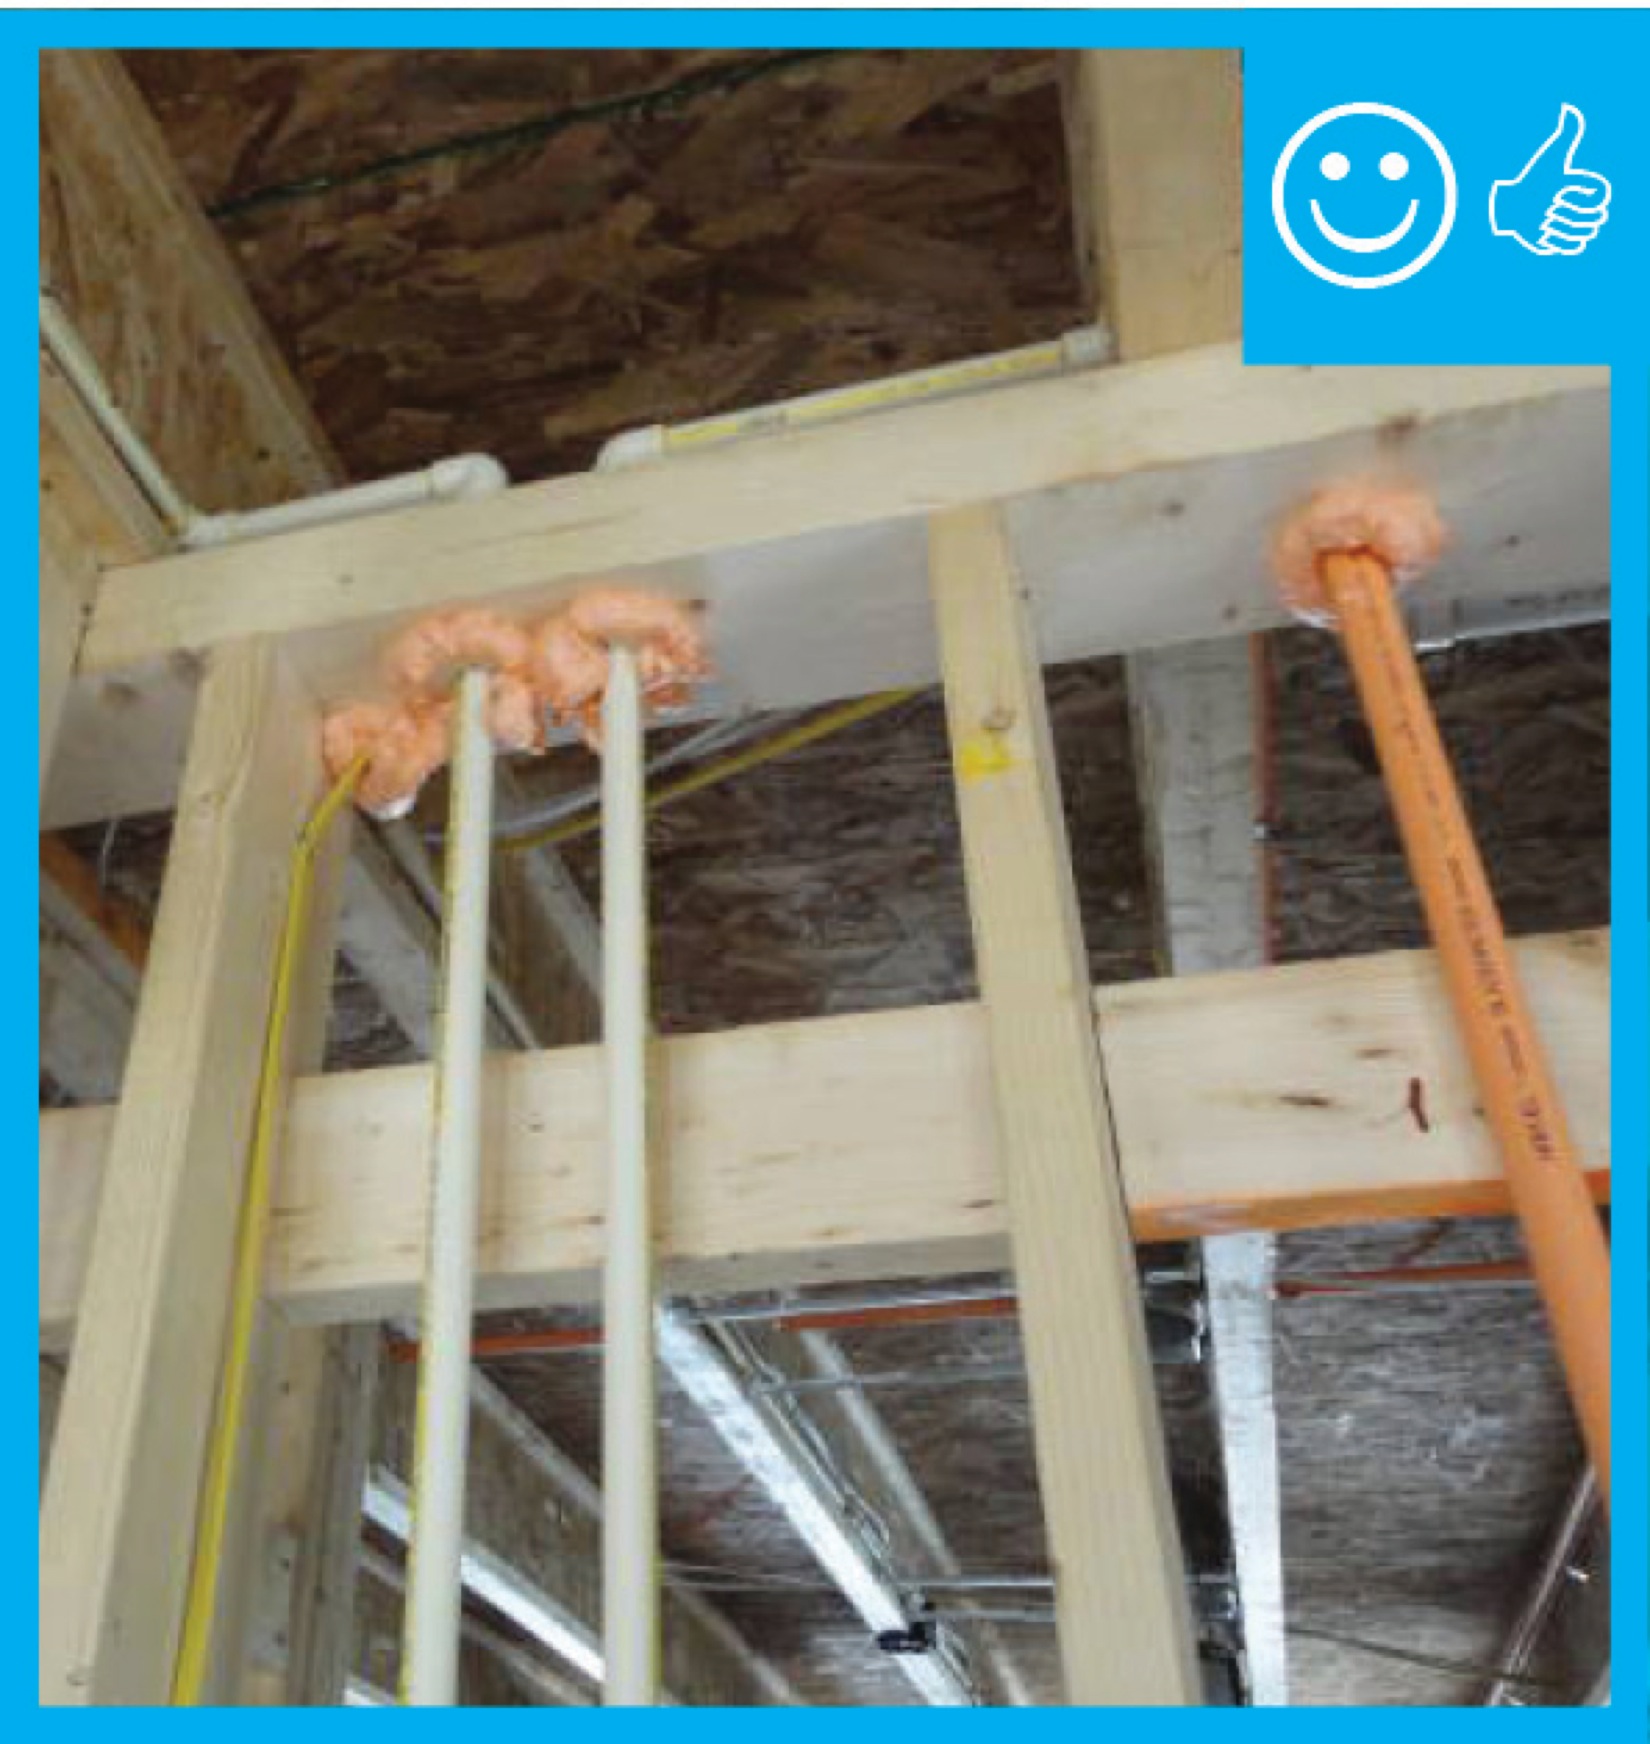
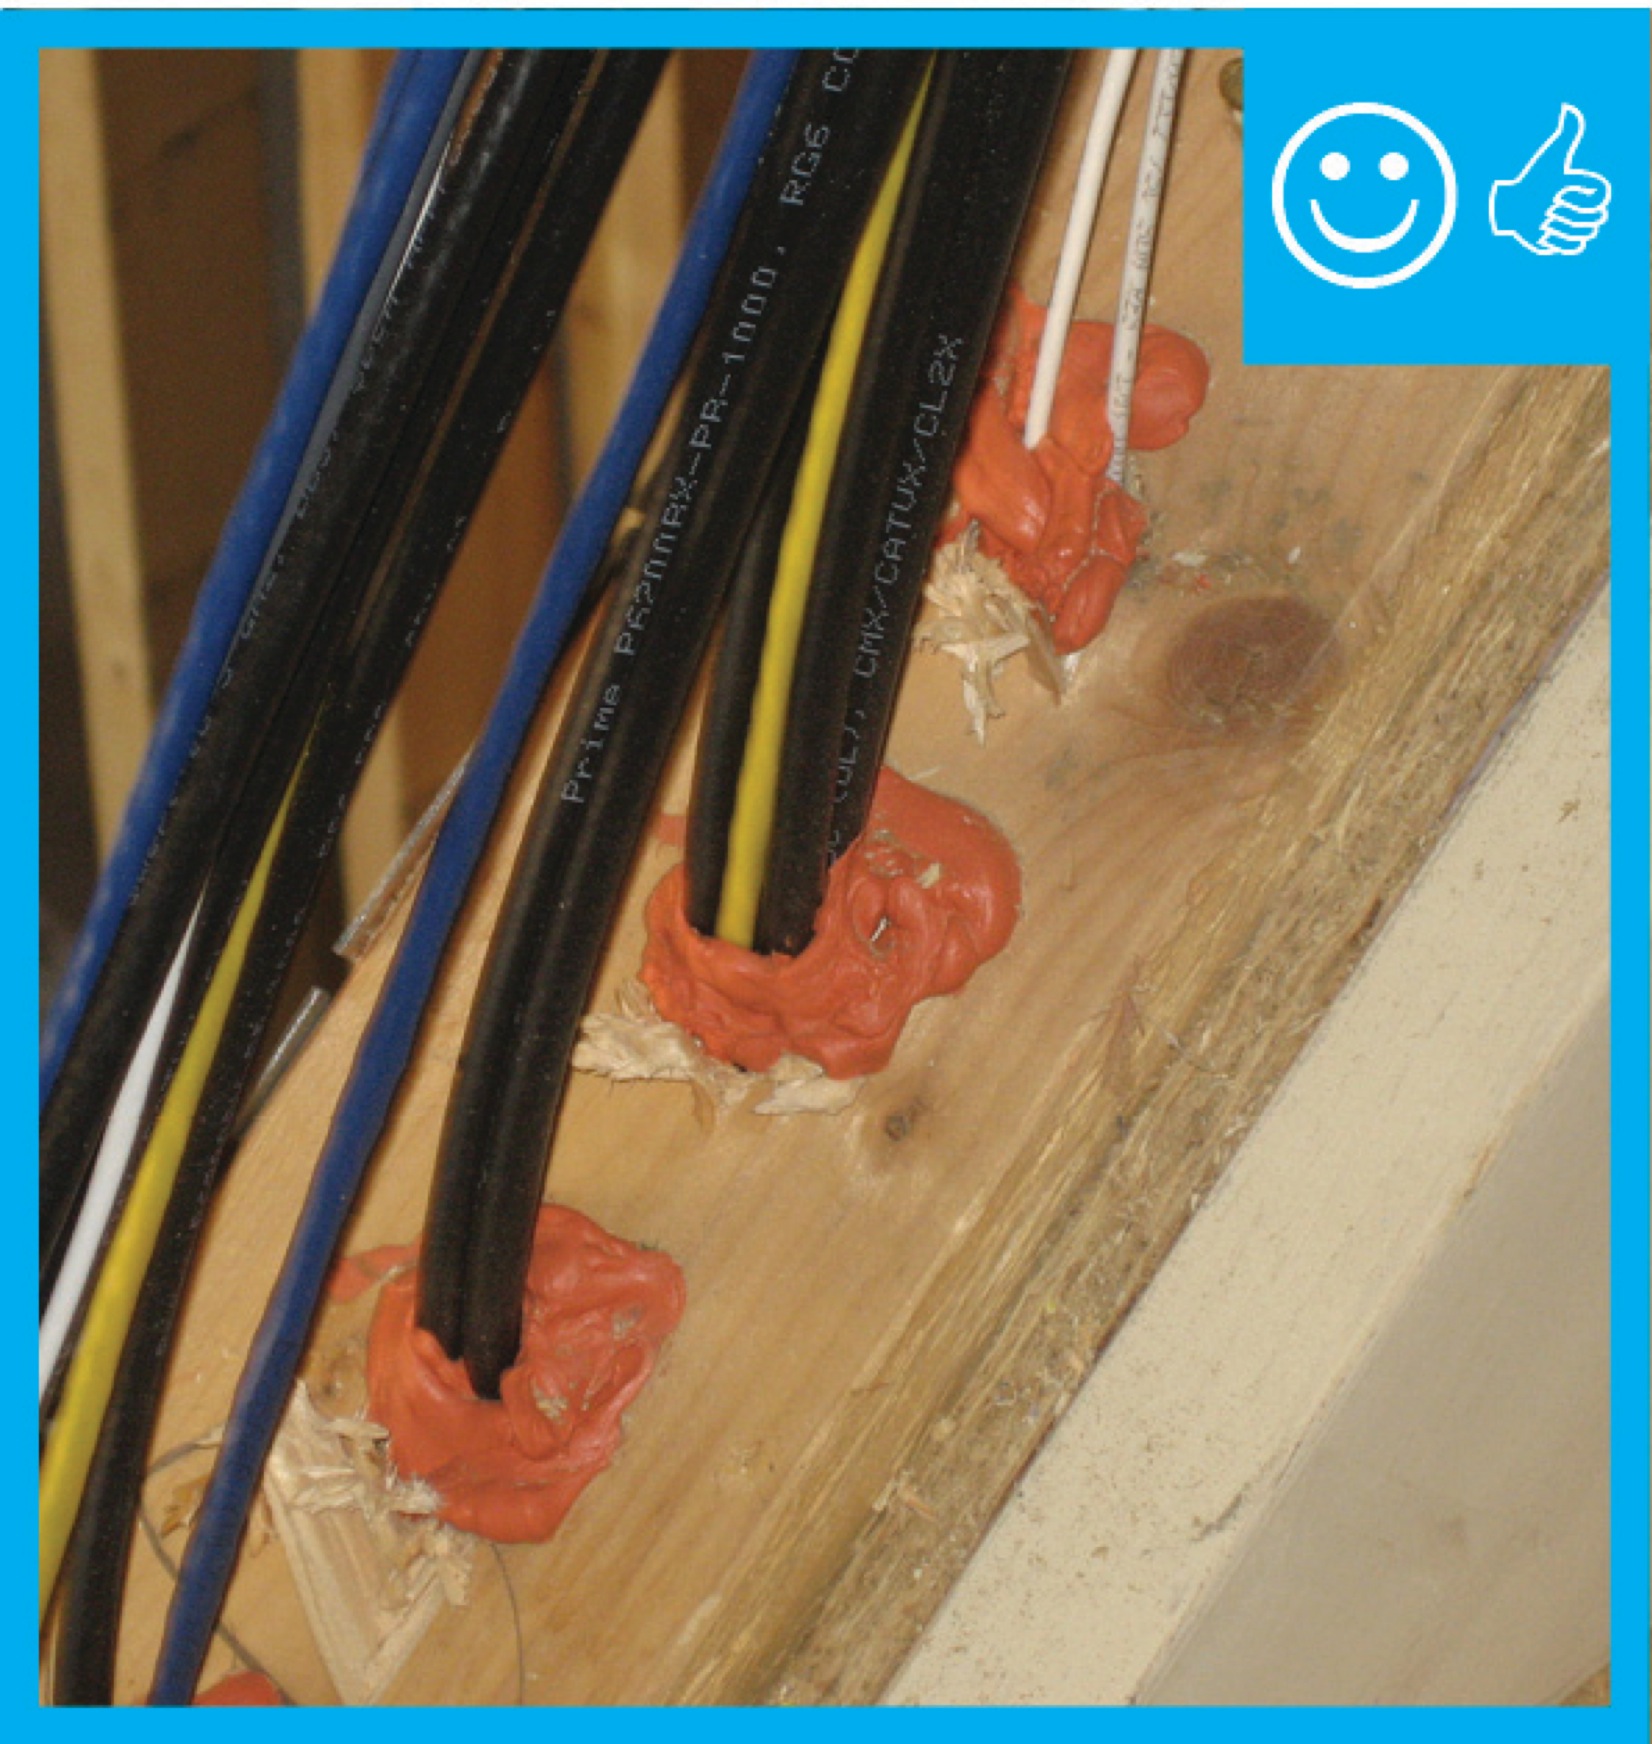
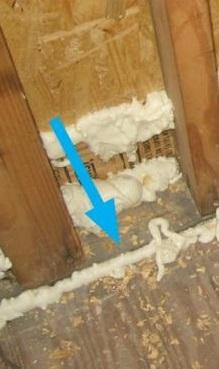
- Use caulk or canned spray foam to seal wiring holes through all top plates and bottom plates (Figure 5).
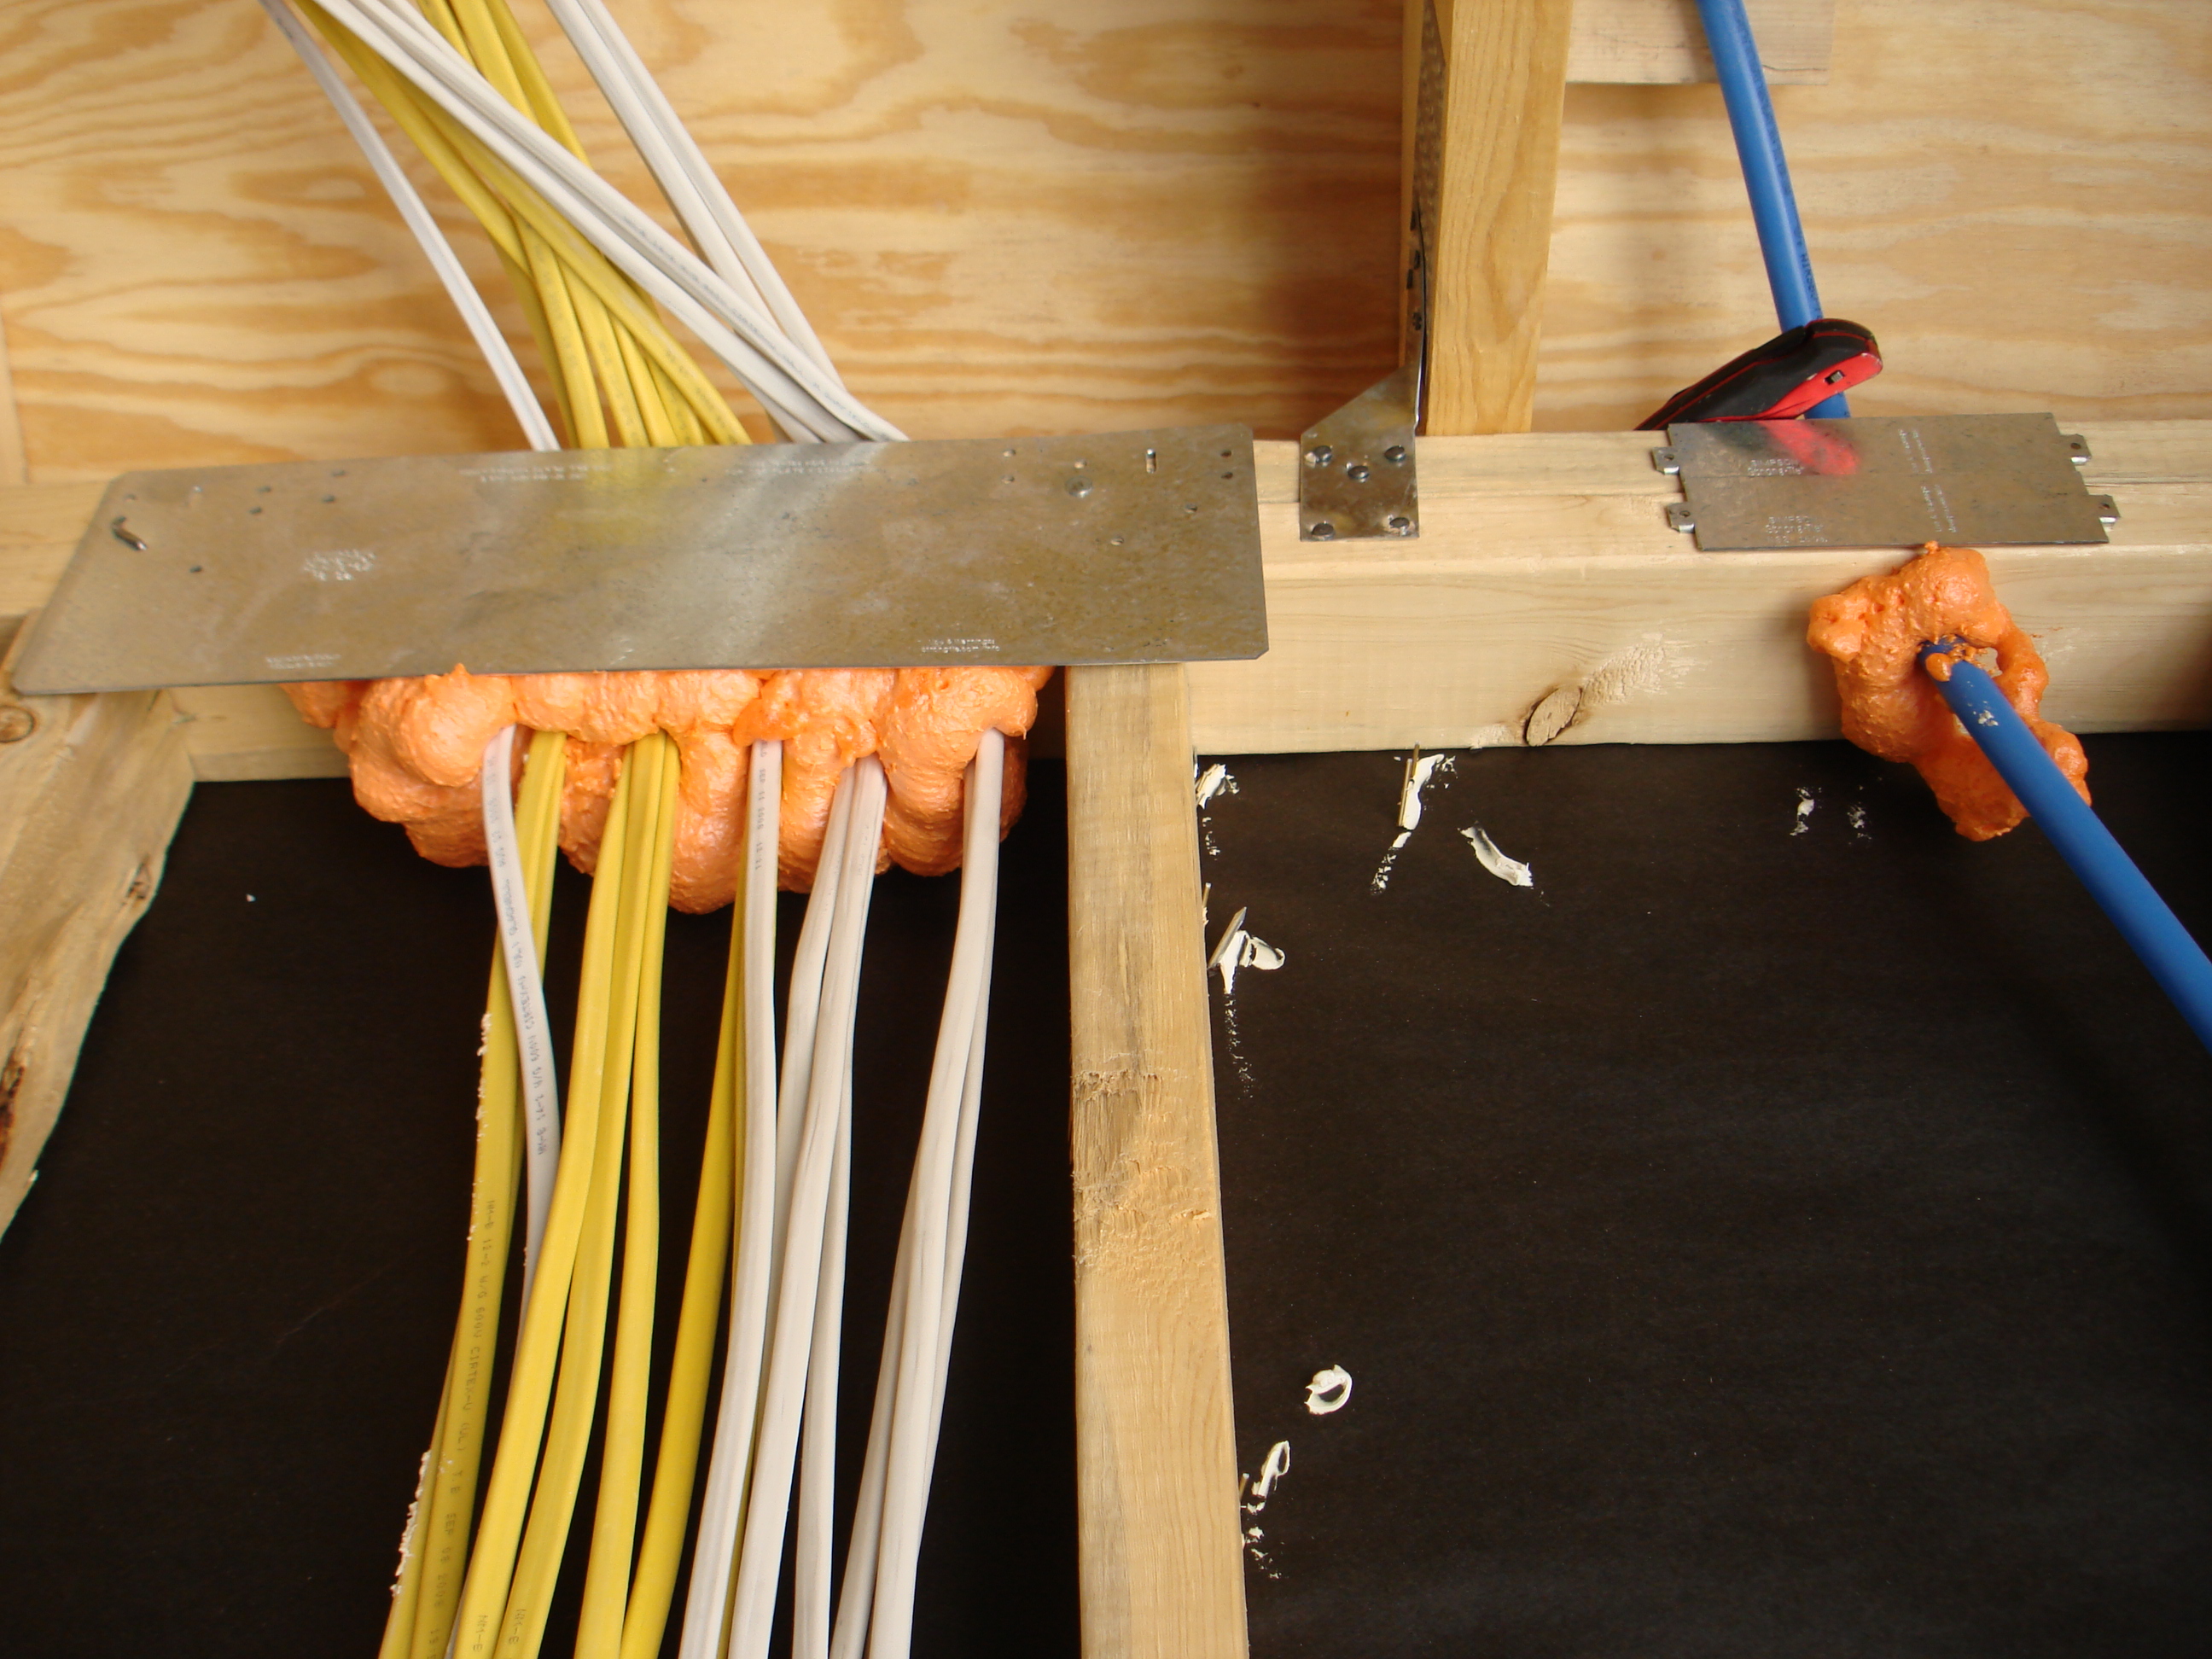
Source
Guide describing measures that builders in the cold and very cold climates can take to build homes that have whole-house energy savings of 40% over the Building America benchmark with no added overall costs for consumers.
Ensuring Success
Holes around wiring should be visually checked to see if caulk and canned spray foam have been applied before insulation and drywall are installed. Blower door testing, which is conducted as part of the whole-house energy performance test, may help indicate whether holes for electrical wiring in exterior walls have been successfully sealed. An experienced technician can also check for air leaks with a smoke pencil or by feeling with the back of the hand.
Region
No climate-specific information applies.
Training
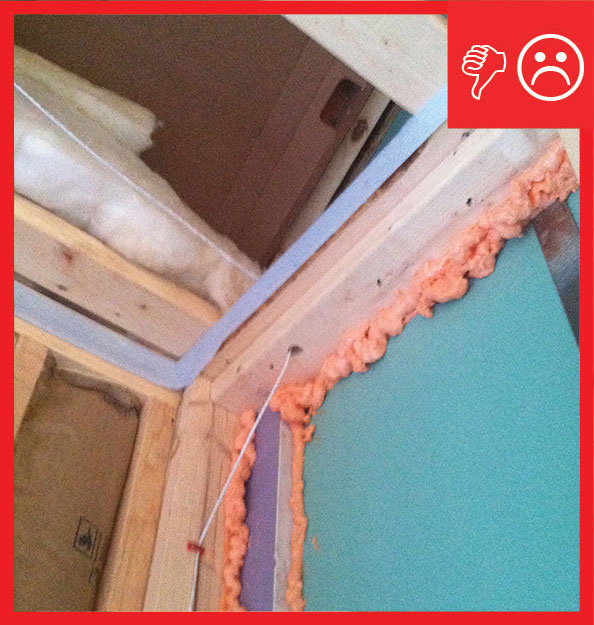
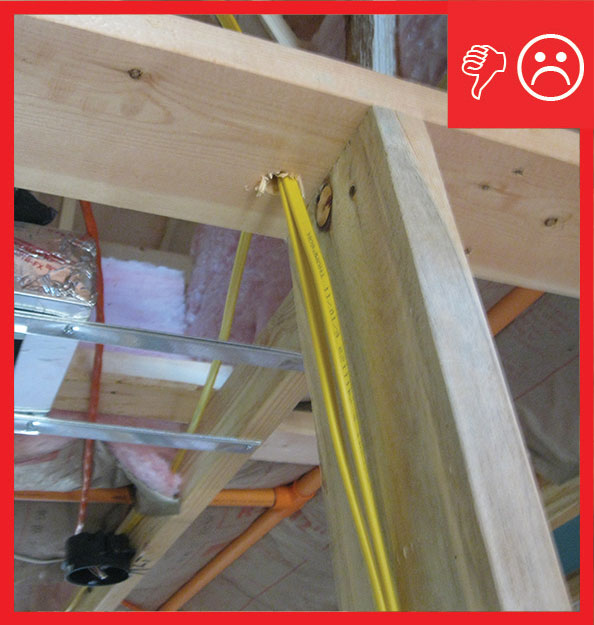
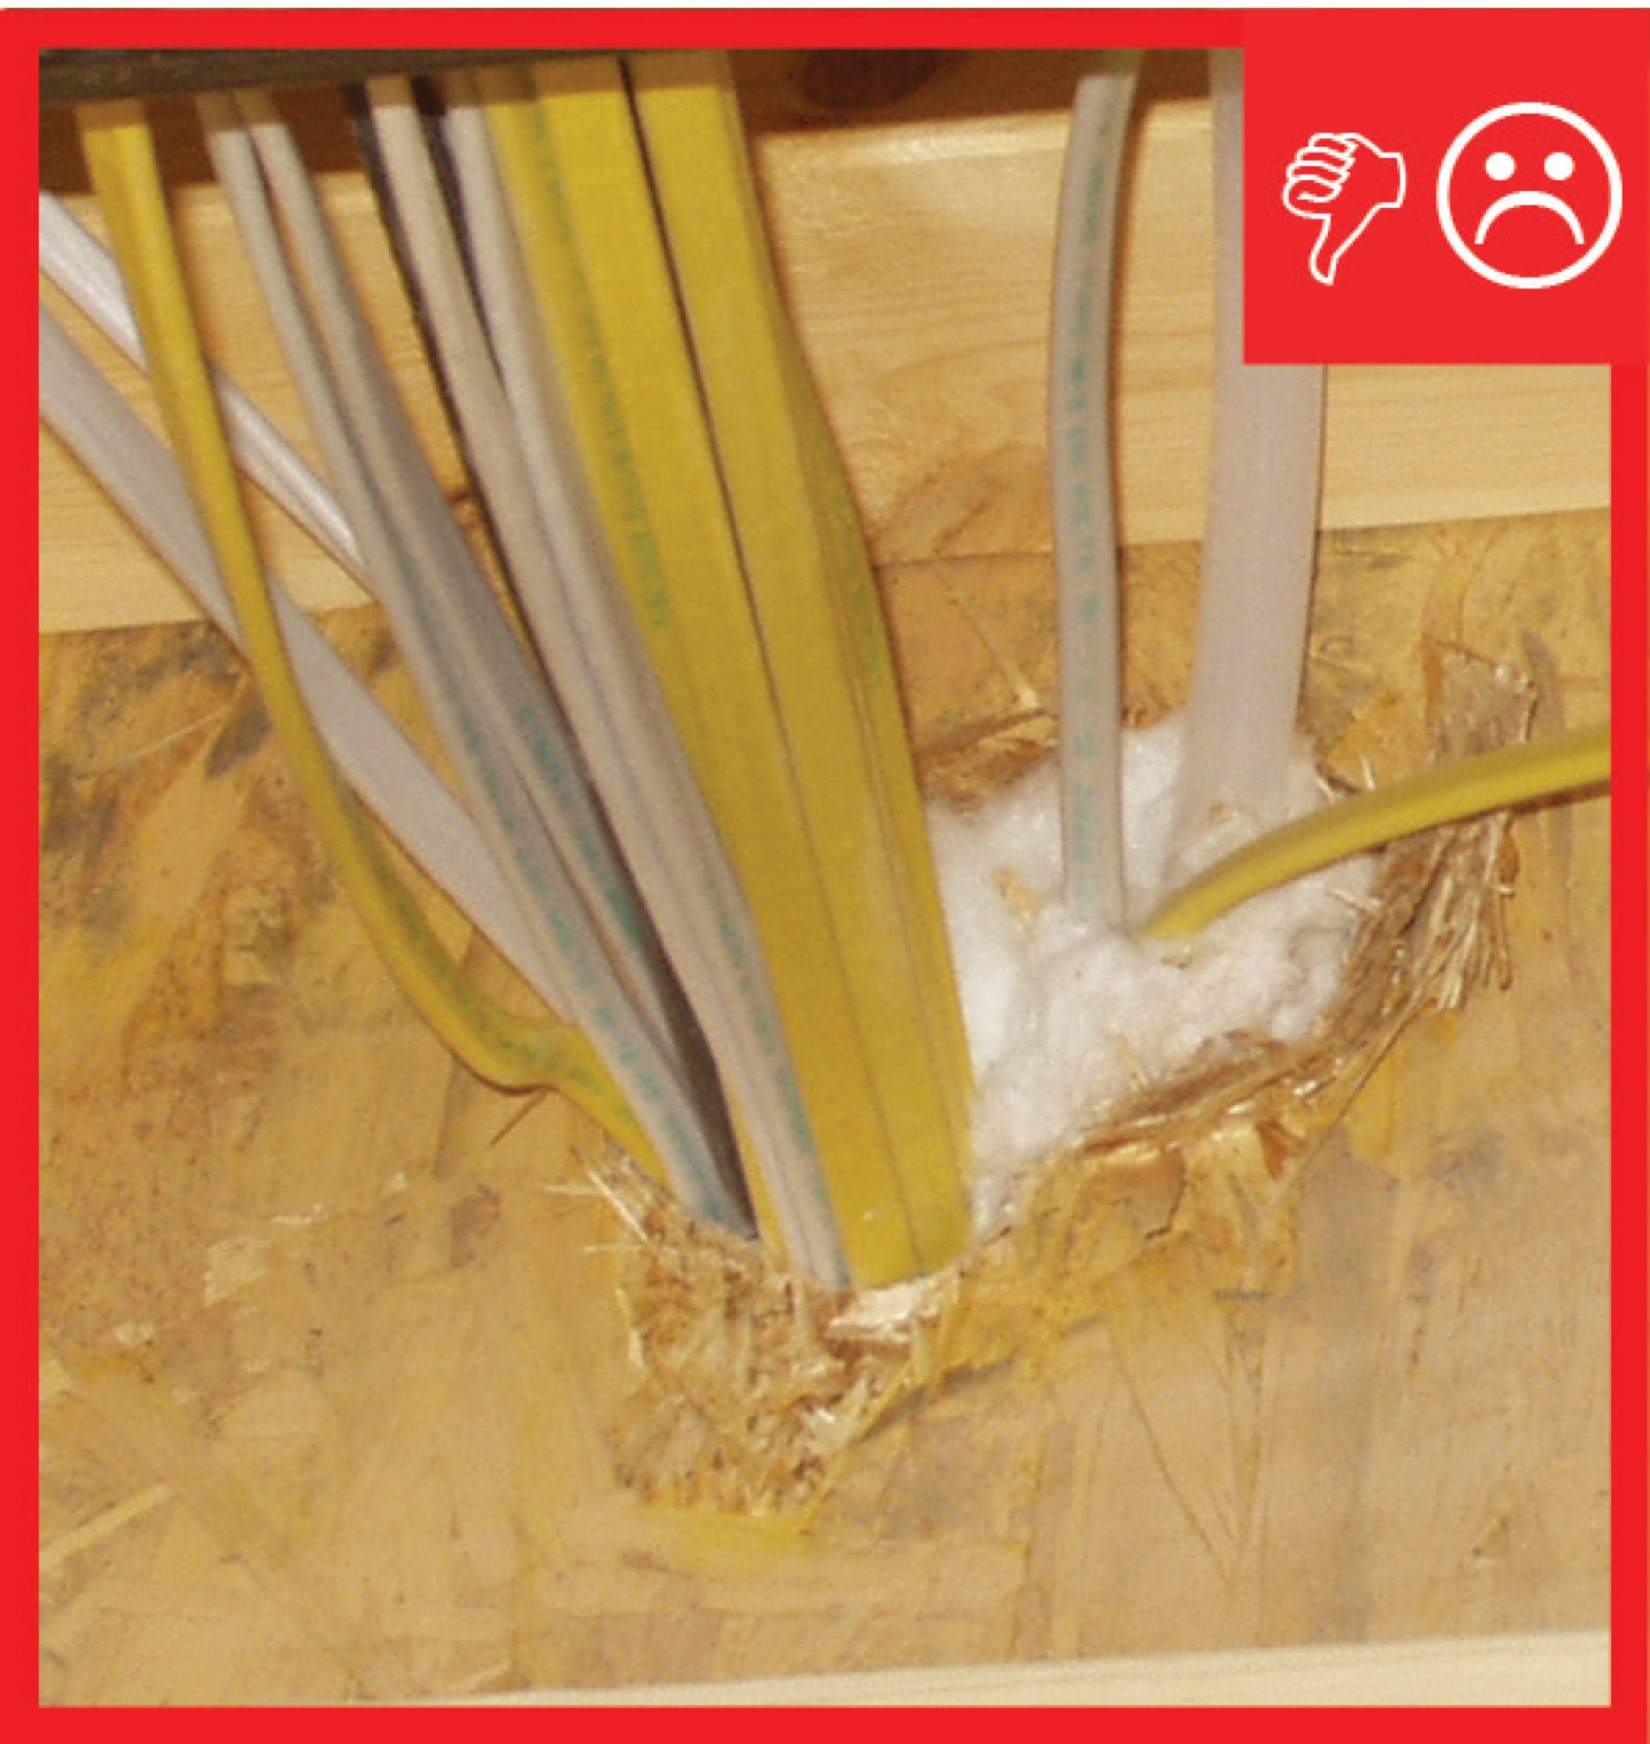
Right and Wrong Images
Source

Source
Source
Source
Source
Source
Source
Source
Guide describing details that serve as a visual reference for each of the line items in the Thermal Enclosure System Rater Checklist.
Source
Source
Source
Source
Guide describing details that serve as a visual reference for each of the line items in the Thermal Enclosure System Rater Checklist.
Source
Guide describing details that serve as a visual reference for each of the line items in the Thermal Enclosure System Rater Checklist.
Source
Guide describing details that serve as a visual reference for each of the line items in the Thermal Enclosure System Rater Checklist.
Source
Source
Guide describing details that serve as a visual reference for each of the line items in the Thermal Enclosure System Rater Checklist.
Source
Source
Source
Guide describing details that serve as a visual reference for each of the line items in the Thermal Enclosure System Rater Checklist.
Source
Guide describing details that serve as a visual reference for each of the line items in the Thermal Enclosure System Rater Checklist.
Source
Guide describing details that serve as a visual reference for each of the line items in the Thermal Enclosure System Rater Checklist.

Source
Source
Source
Source
Manual describing methods for rodent-proofing buildings.

Source
Source
Source
Source
Source

Source
Videos


CAD Files


Compliance
Retrofit
SCOPE
In an existing home, seal around wiring to minimize unwanted air and moisture flow.
- First, assess the current electrical system for any exposed or damaged wiring and for the presence of old knob-and-tube wiring.
- Consult a qualified electrician if any wiring is suspicious.
- Postpone air-sealing until safety issues have been resolved.
- Obtain an electrical safety assessment if required by the authority having jurisdiction.
- Seal around all accessible electrical wiring and electrical boxes installed through walls, partitions, floors, or ceilings to prevent air leakage and moisture movement between unconditioned and conditioned space.
- Use sealants (e.g., caulk, fire-retardant caulk, fire-rated spray foam, etc.) that are compatible with all adjoining surfaces and meet the fire and air barrier specifications according to code.
If accessing wiring and electrical boxes from the attic, see the Pre-Retrofit Assessment of Attics, Ceilings, and Roofs. If accessing wiring and electric boxes from the attic, see the Pre-Retrofit Assessment of Crawlspaces and Basements.
See the U.S. Department of Energy’s Standard Work Specifications (SWS) for more on electrical wiring and sealing wall penetrations. All global worker safety and health and safety air-sealing specifications in DOE’s SWS should be followed.
DESCRIPTION
When it comes to electrical systems in existing homes, the first step is to assess the current electrical system for any exposed or damaged wiring and for the presence of old knob-and-tube wiring. A qualified electrician might need to be consulted if any wiring is suspicious and air-sealing work should be postponed until any issues have been resolved, to eliminate the risk of shock or electrocution. An electrical safety assessment may be required by the authority having jurisdiction.
All of the holes in the ceilings, walls, and floors for electrical wiring, outlets, light switches, light fixtures, and electrical boxes can add up to a significant amount of air leakage through the building's thermal envelope if these holes aren’t properly air-sealed. Even wiring holes in interior walls can contribute to air leakage because the tops and bottom plates of these interior walls are often not properly sealed at the time of construction. (See the guide on Air Sealing Drywall to Top Plate).
How to Air-Seal Existing Electrical Boxes and Wiring
- Remove switch plates and seal the gap between the electrical junction box and the drywall with caulk then install gaskets flush with the front-facing side of the junction box before reinstalling the switch plates.
- For ceiling-mounted electrical boxes, access from the attic to caulk around the box and caulk all holes in the box with approved sealants. First, find boxes by removing insulation. Replace insulation when done. Be careful not to compress the attic insulation, which could alter thermal performance.
- If attic access is not possible, caulk around the base of the ceiling-mounted electrical boxes where the box meets the ceiling drywall, from the rooms below.
- For wall-mounted electrical boxes, caulk all openings in the box (including around the wire penetrations) and seal around the box where it meets the drywall.
- Seal wiring gaps and holes (e.g., for security system wiring, television and internet cables, exterior outlets, and switches) through exterior walls, floors, or ceilings, with caulk, gaskets, spray foam, putty, or other approved sealants.
See the Training Tab for a video on how to air seal electrical boxes.
COMPLIANCE
See Compliance tab.
More Info
Case Studies
References and Resources
*For non-dated media, such as websites, the date listed is the date accessed.
Contributors to this Guide
The following authors and organizations contributed to the content in this Guide.
Pacific Northwest National Laboratory
Building Science Corporation, lead for the Building Science Consortium (BSC), a DOE Building America Research Team
Sales
Tight Air Sealed Home = Comprehensive Draft Protection
Technical Description
Poorly air-sealed homes are less comfortable and cost more to maintain because they provide a pathway for drafts, cold spots, moisture, and insects into the home. Comprehensive draft protection includes a continuous air barrier around the whole house along with caulking and sealing in all holes and cracks. This includes around wiring, plumbing, ducts, and flues; where wall framing meets flooring; around windows; where drywall meets top plates and sill plates; where rim joists meet foundation walls and subfloors; etc. Spray foam insulation can be used at rim joists, floors above unconditioned space, and in attics to insulate and air seal at the same time.
Questions? Comments? Contact our webmaster.