


Scope
Install an exhaust fan in the bathroom to exhaust steam to the outdoors.
- Install the fan to vent outdoors, not into an attic, crawlspace, or space between floors.
- Choose a duct with the diameter specified by the fan manufacturer.
- Install the duct with the most direct route to the outside with as few bends as possible.
- Seal all seams and around ceiling and wall or roof penetrations with mastic or spray foam. Flash exterior surfaces as needed.
- Install a fan that meets Rater-measured airflow codes and standards for local exhaust; meet whole-house ventilation requirements if the bath fan is used for whole-house mechanical ventilation.
See the Compliance Tab for links to related codes and standards and voluntary federal energy-efficiency program requirements.
Description
Regardless of what kind of ventilation system you have for the rest of the house, exhaust fans are recommended in the bathrooms to provide local exhaust to remove excess moisture, cleaning chemical fumes, etc. The fan should be ducted to exhaust outside of the home, not into the attic, crawlspace, garage, interstitial floor space, or wall cavities. Operable windows should not be relied on for consistent bathroom ventilation.
Bathroom fans can be run intermittently (occupant controlled) or continuously; some fan models have multiple speed settings and can be used for either. When operated intermittently, it is recommended to control the fan using a timer switch rather than a standard wall switch. It is recommended to leave the fan running for one hour after a shower for effective humidity control. A timer switch allows the user to set the runtime to 1 hour, after which the fan will automatically shut off.
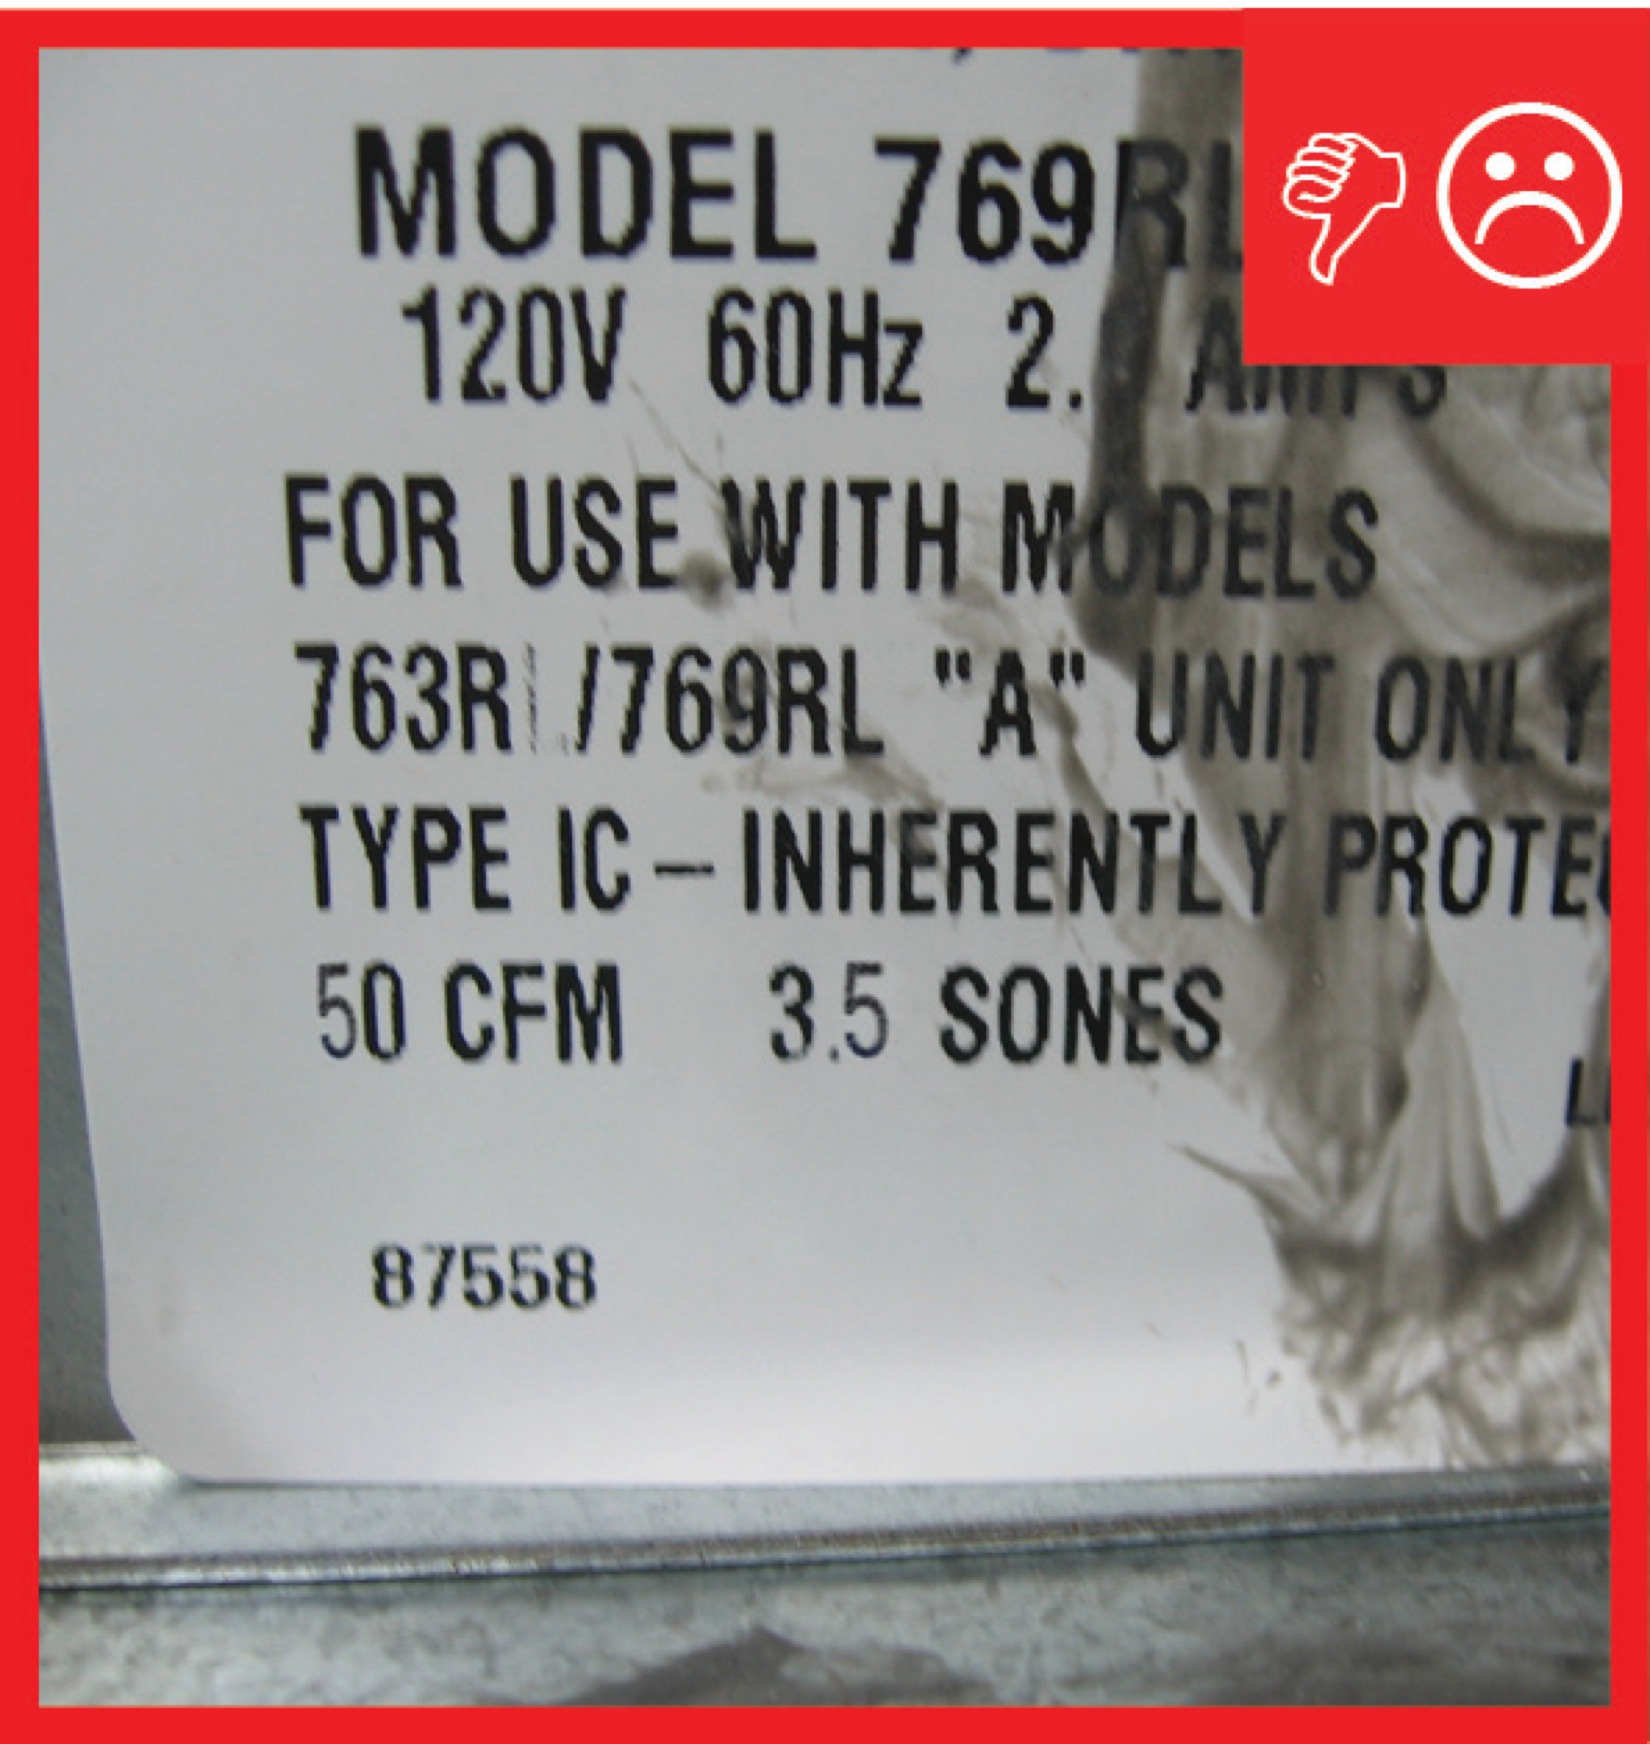
To fulfill the local exhaust airflow requirements of ASHRAE 62.2 (2010) and the International Residential Code (IRC 2021, Section M1507), bathroom fans should have a mechanical exhaust capacity of ≥ 50 cfm for intermittent operation or ≥ 20 cfm of ventilation when operated continuously. Select fans that are ENERGY STAR rated with low sound ratings and low power draw. ENERGY STAR recommends that exhaust fans have sound ratings of ≤ 1 sone if set to run continuously or ≤ 3 sones if operating intermittently. For more on bathroom fan ratings and ASHRAE 62.2 requirements, see Intermittent Supply/Exhaust Fan Ratings and Continuous Supply/Exhaust Fan Ratings. For more on bathroom exhaust strategies in multifamily buildings, see Ventilation and Exhaust Strategies for Multifamily Housing.
Although a single-point exhaust fan such as a bathroom fan could be used to provide code-required whole-house ventilation, this strategy is not recommended. For more on whole house ventilation strategies and requirements, see the Building America Solution Center Guides Whole House Ventilation Strategies for New Homes and Whole House Ventilation Strategies for Existing Homes.
How to Install Bathroom Exhaust Fans
Step 1: Determine the appropriate fan size for your application. For a continuous rate of ≥ 20 cfm, ENERGY STAR recommends selecting a fan that provides more than 50 cfm to pull the required amount. For an intermittent rate of ≥ 50 cfm, ENERGY STAR recommends selecting a fan with a rating of at least 70 cfm. Choose ENERGY STAR-rated fans to ensure energy efficiency and low noise level.
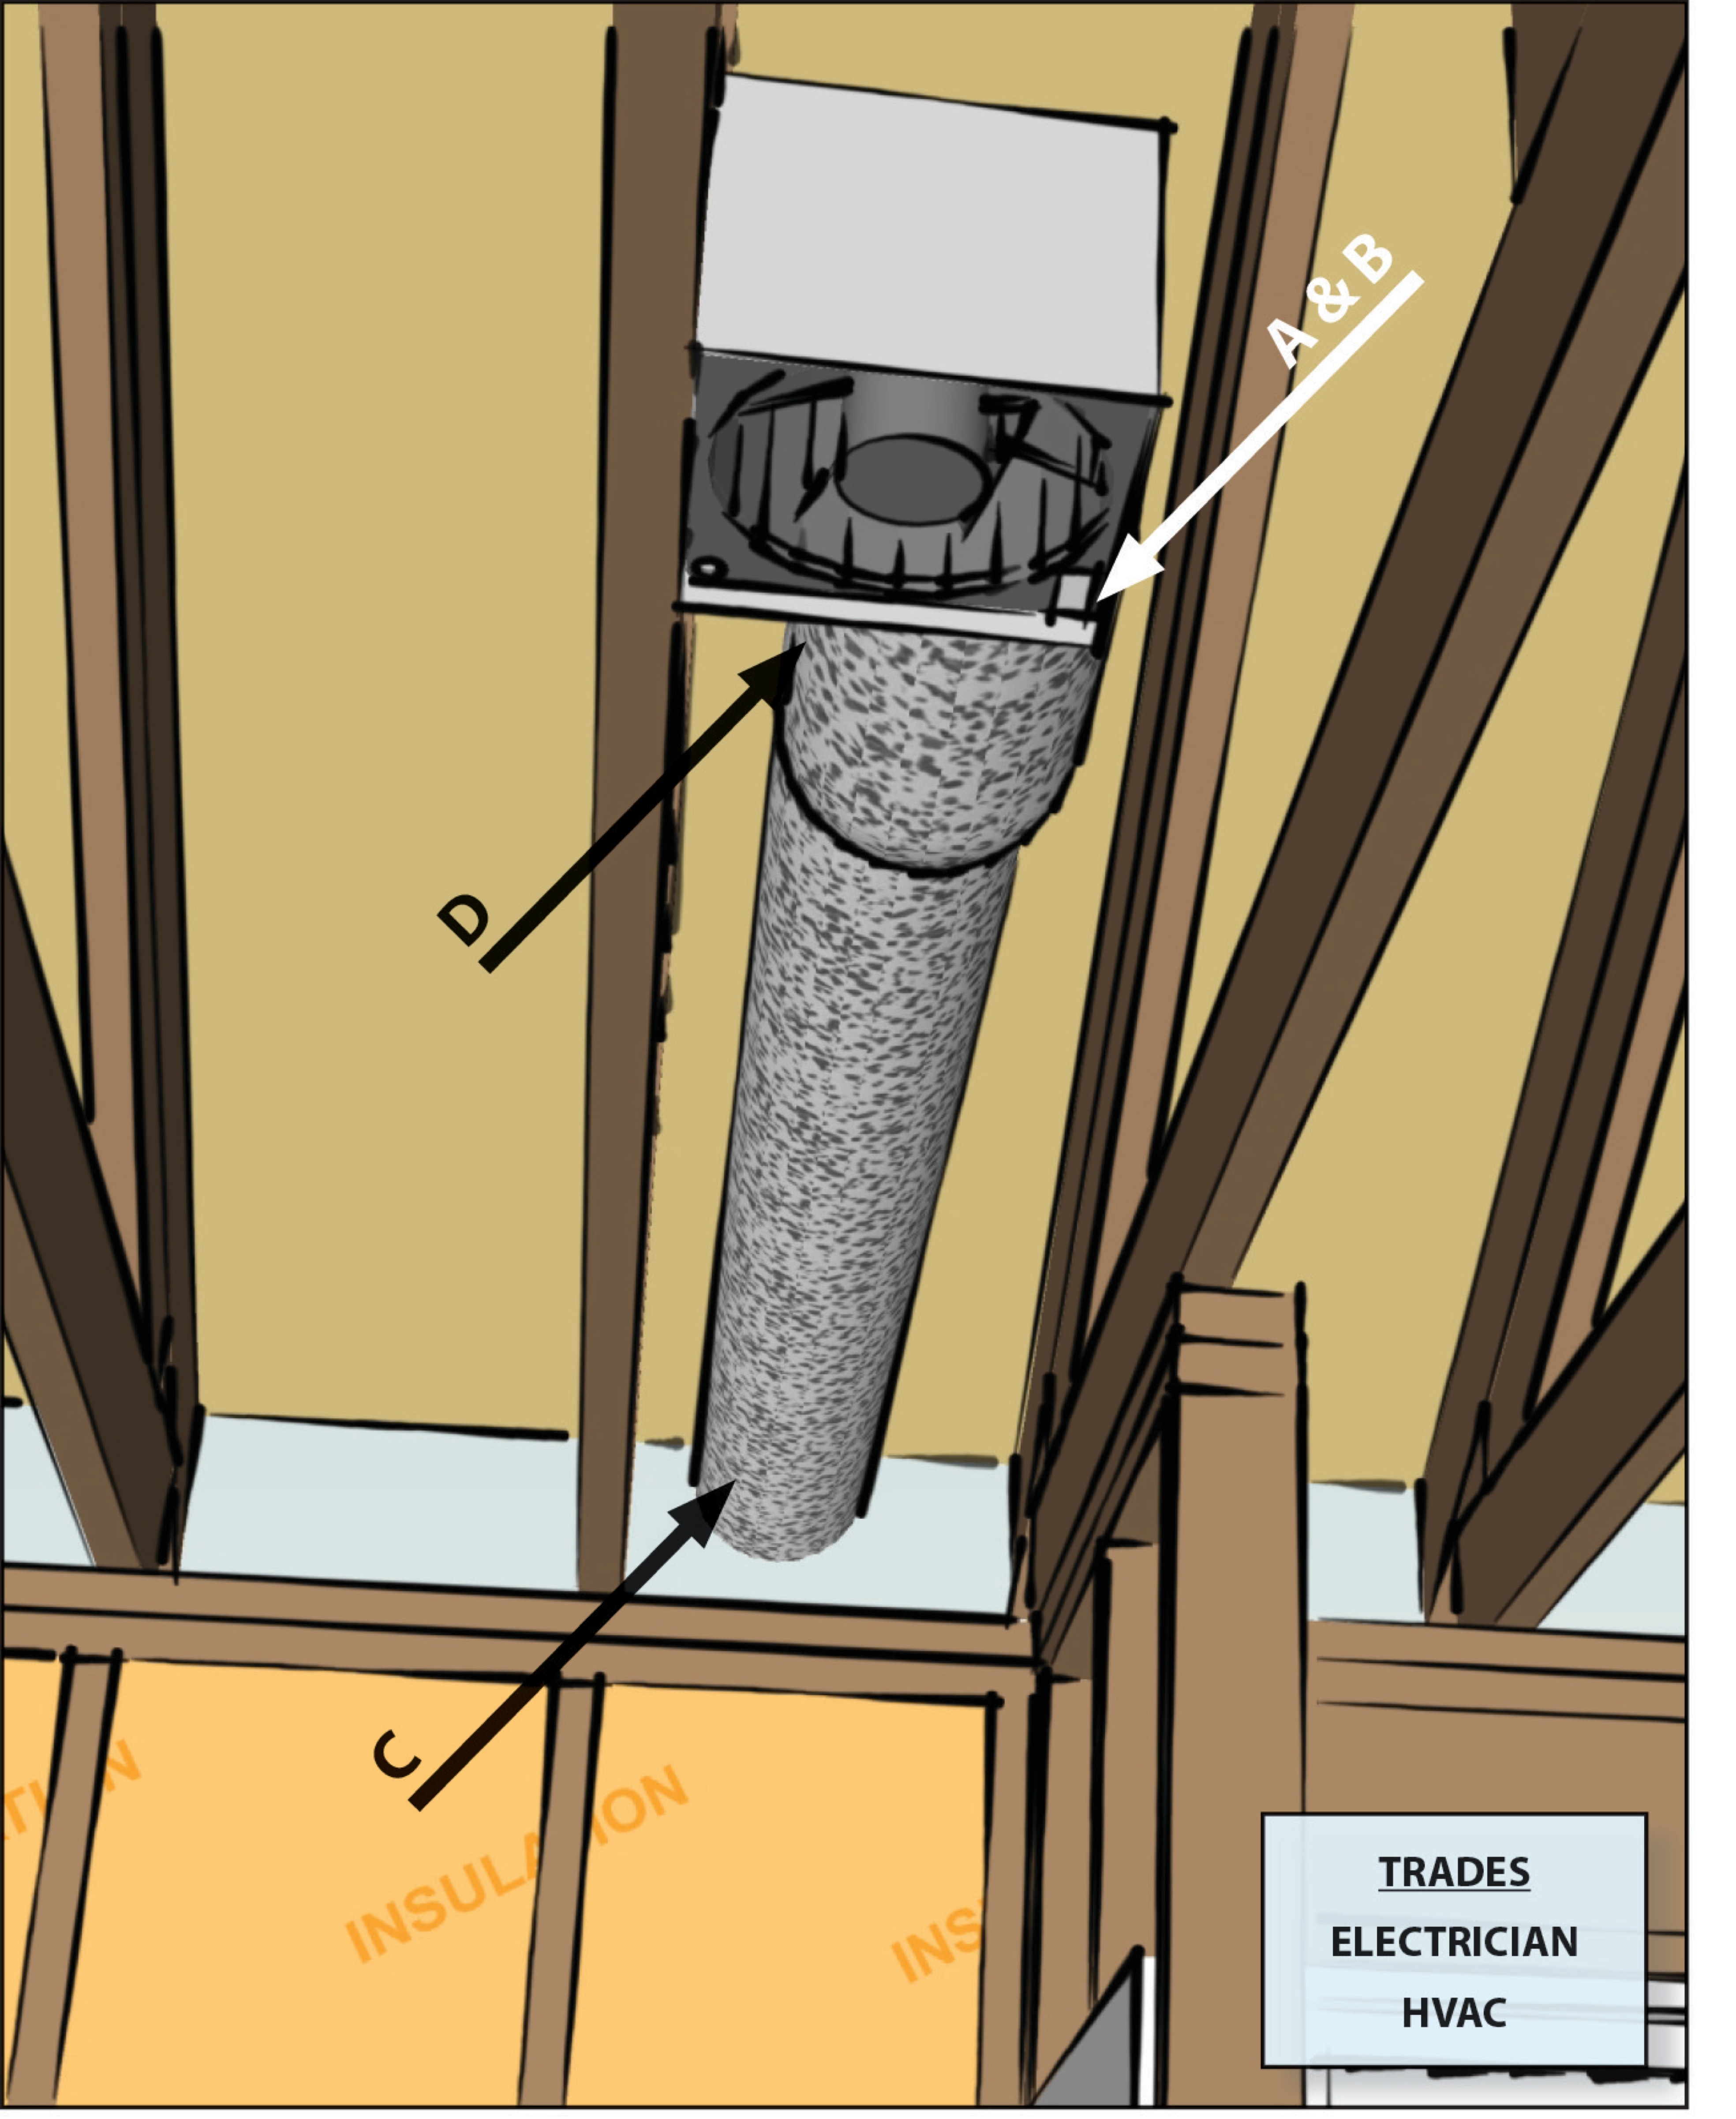
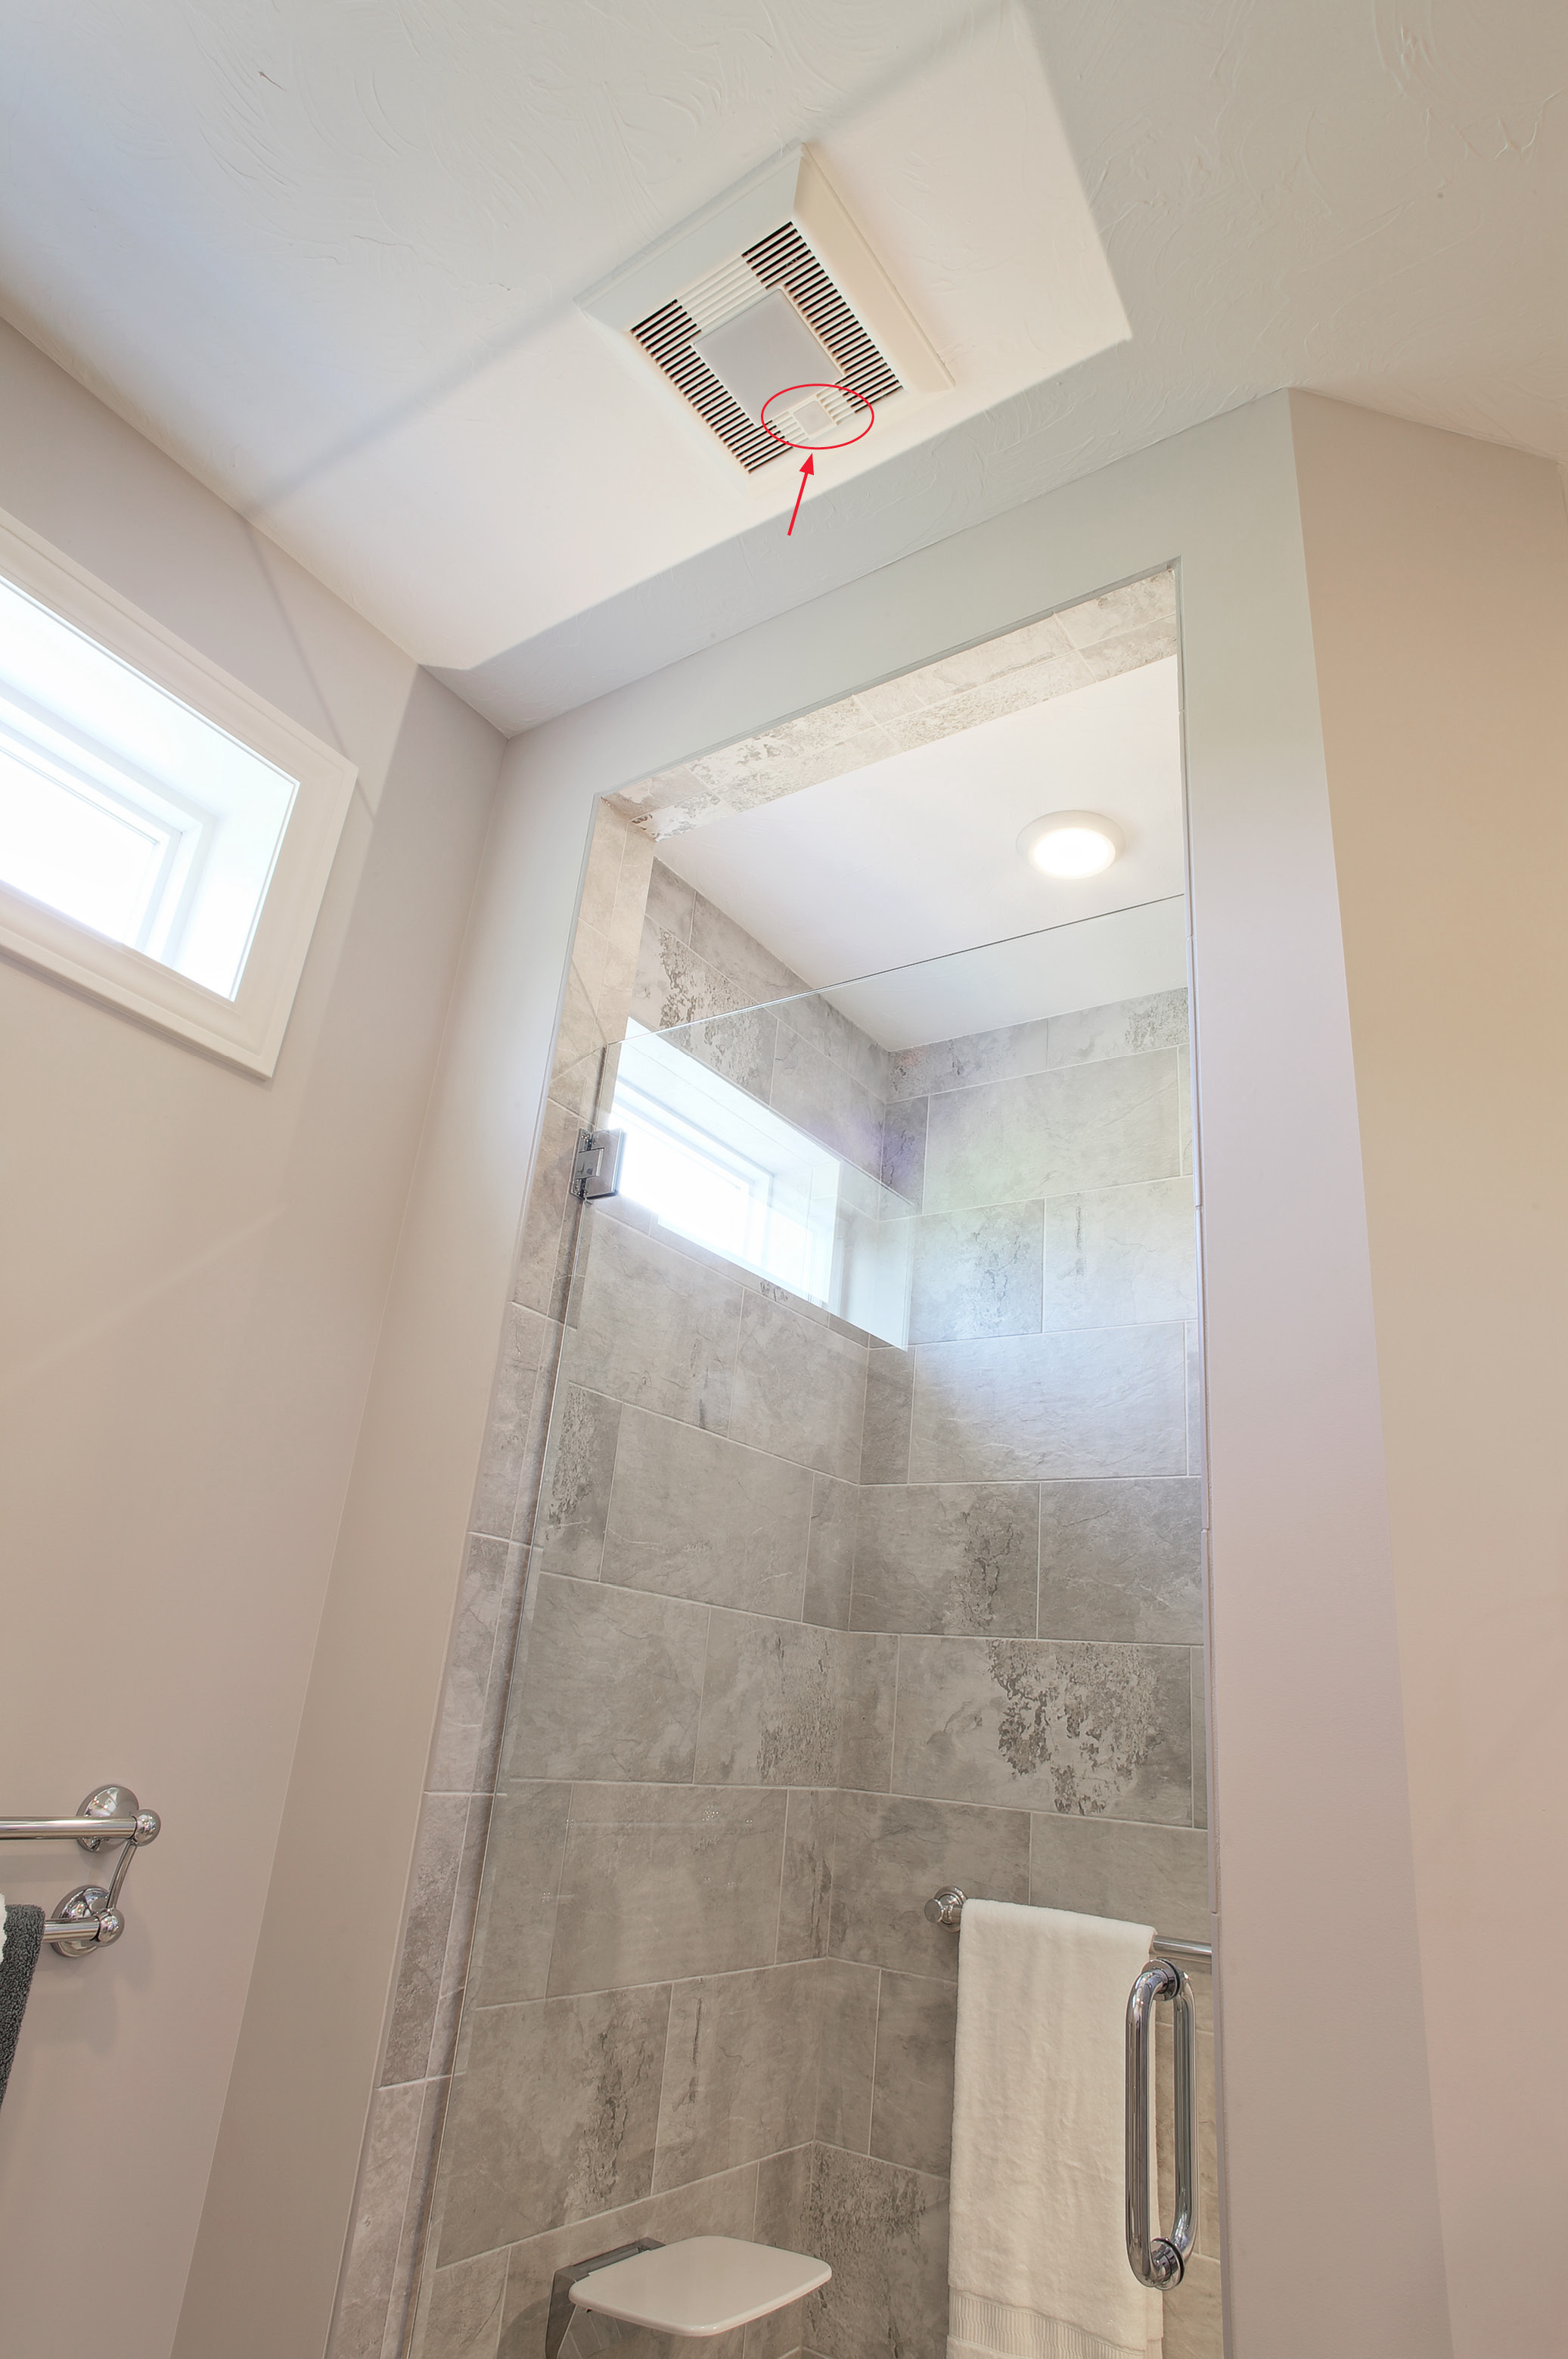
Step 2: Install the fan in the bathroom ceiling in accordance with the manufacturer’s instructions. The fan’s exhaust port should face in the direction of the termination point. Cut an opening in the ceiling just large enough to fit the fan. After installation, air seal between the fan housing and the drywall with caulk.
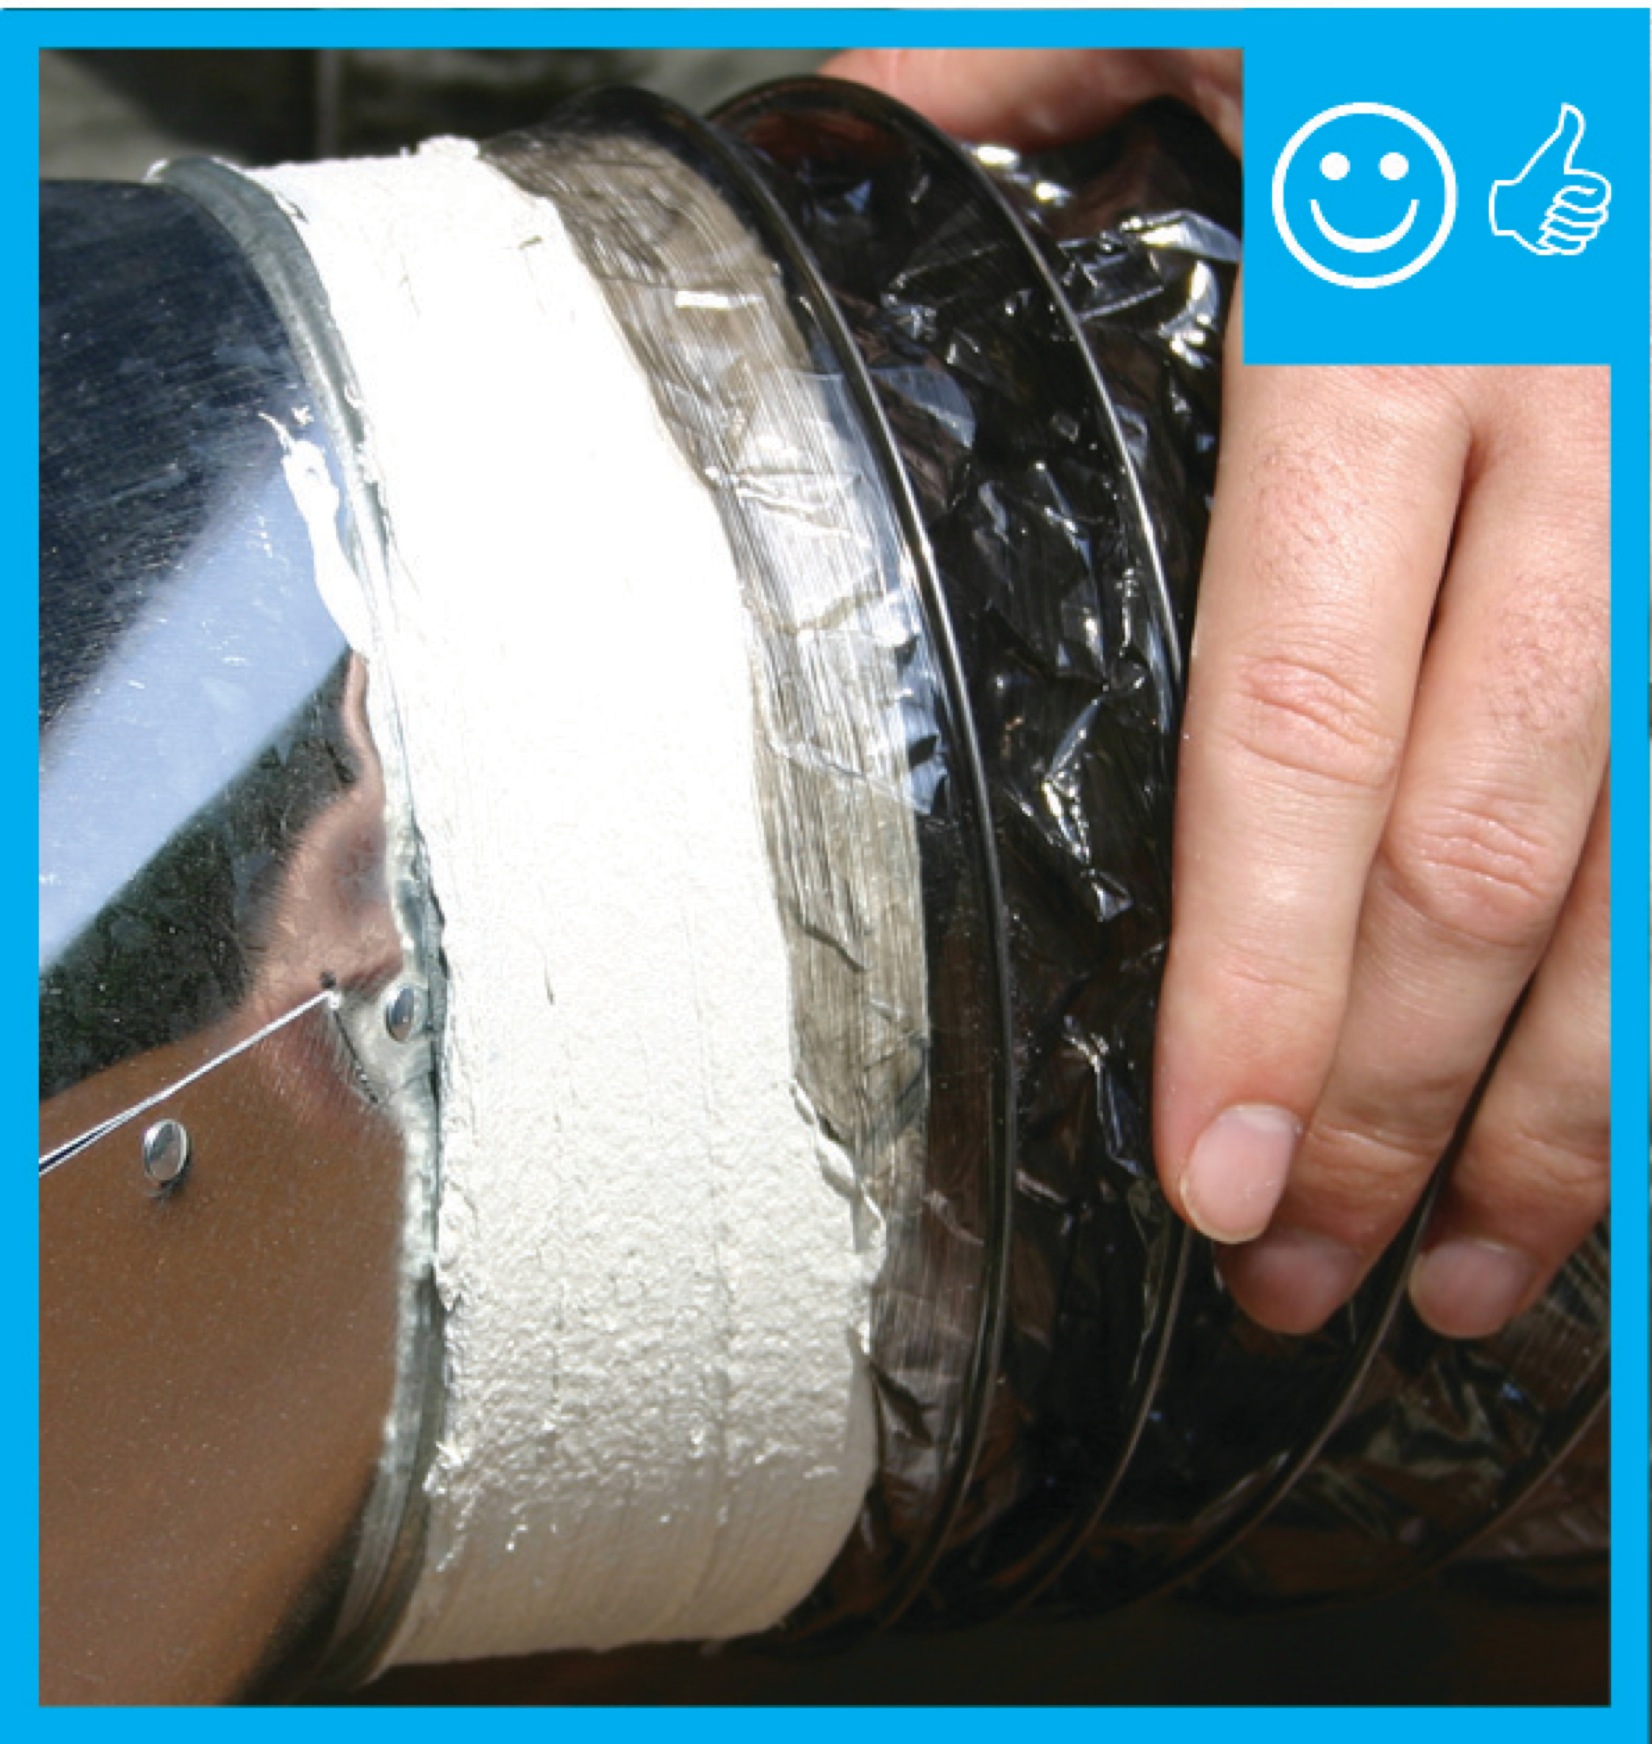
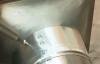
Step 3: Connect the exhaust duct to the fan port with mechanical fasteners or a pipe clamp and seal with mastic or UL-approved metal tape. Choose a smooth-surfaced duct such as galvanized sheet metal or PVC that is the size specified by the manufacturer. If aluminum flex duct is used, it should be stretched tight to avoid unnecessary sagging and to minimize friction. Ideally, the duct should be the same diameter as the exit opening on the fan housing.
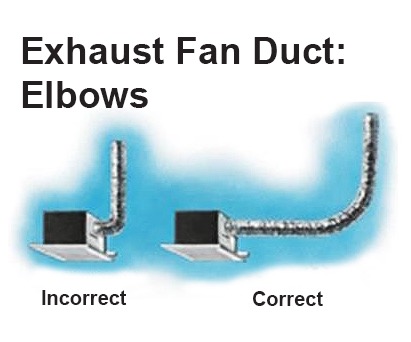
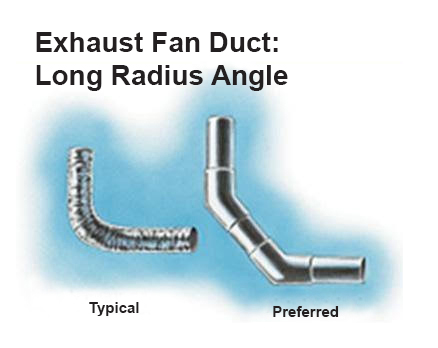
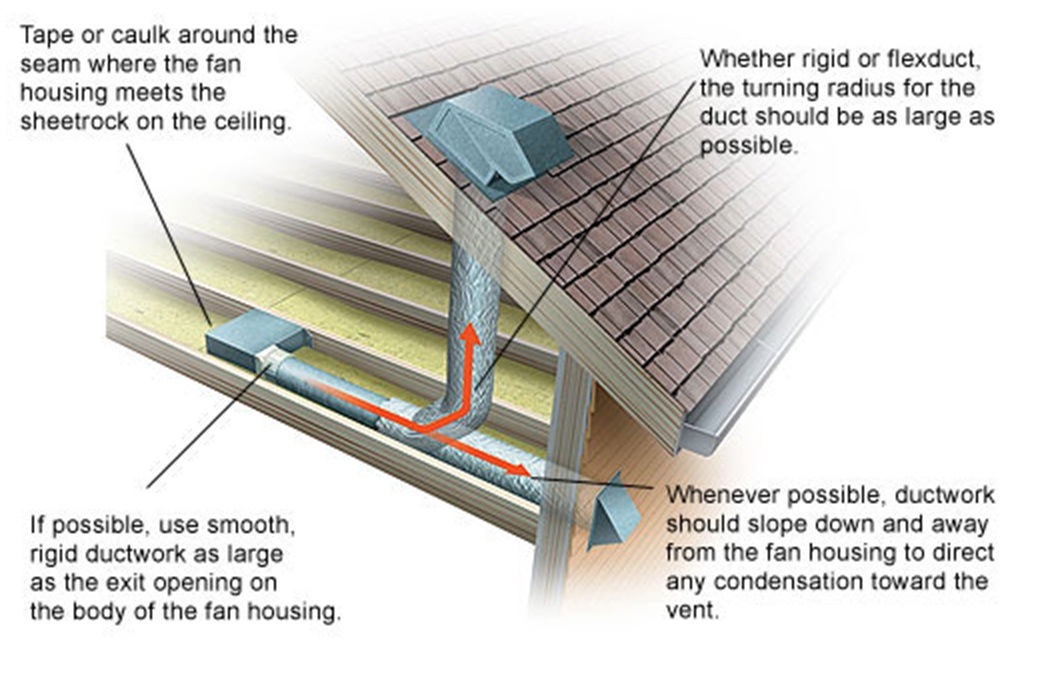
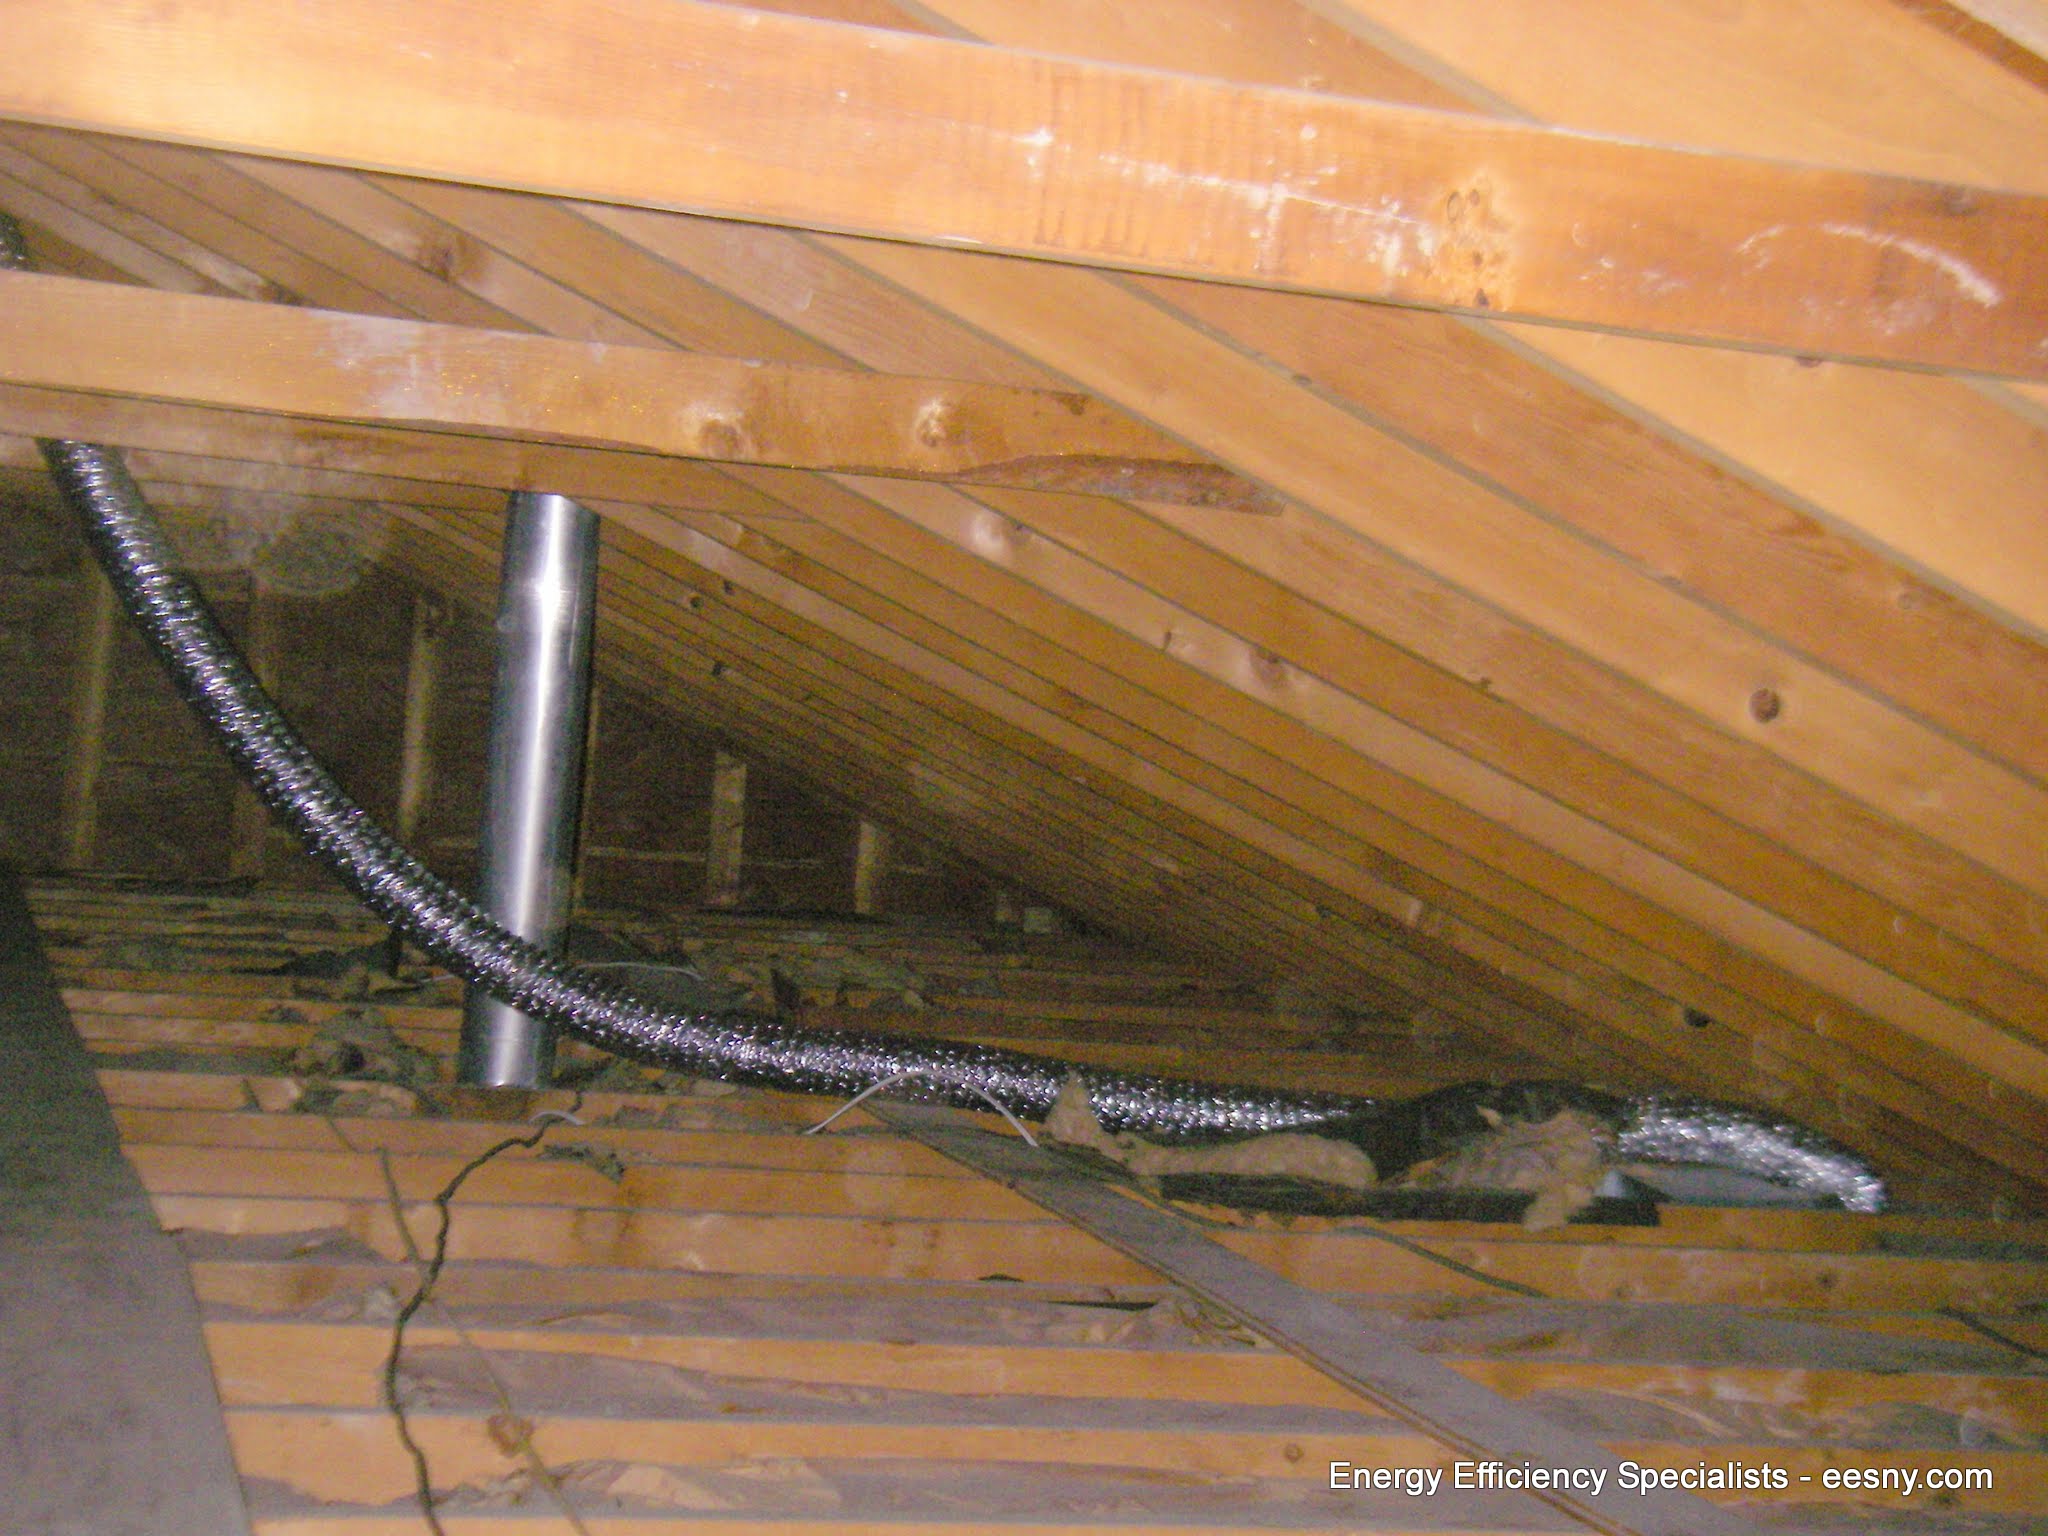
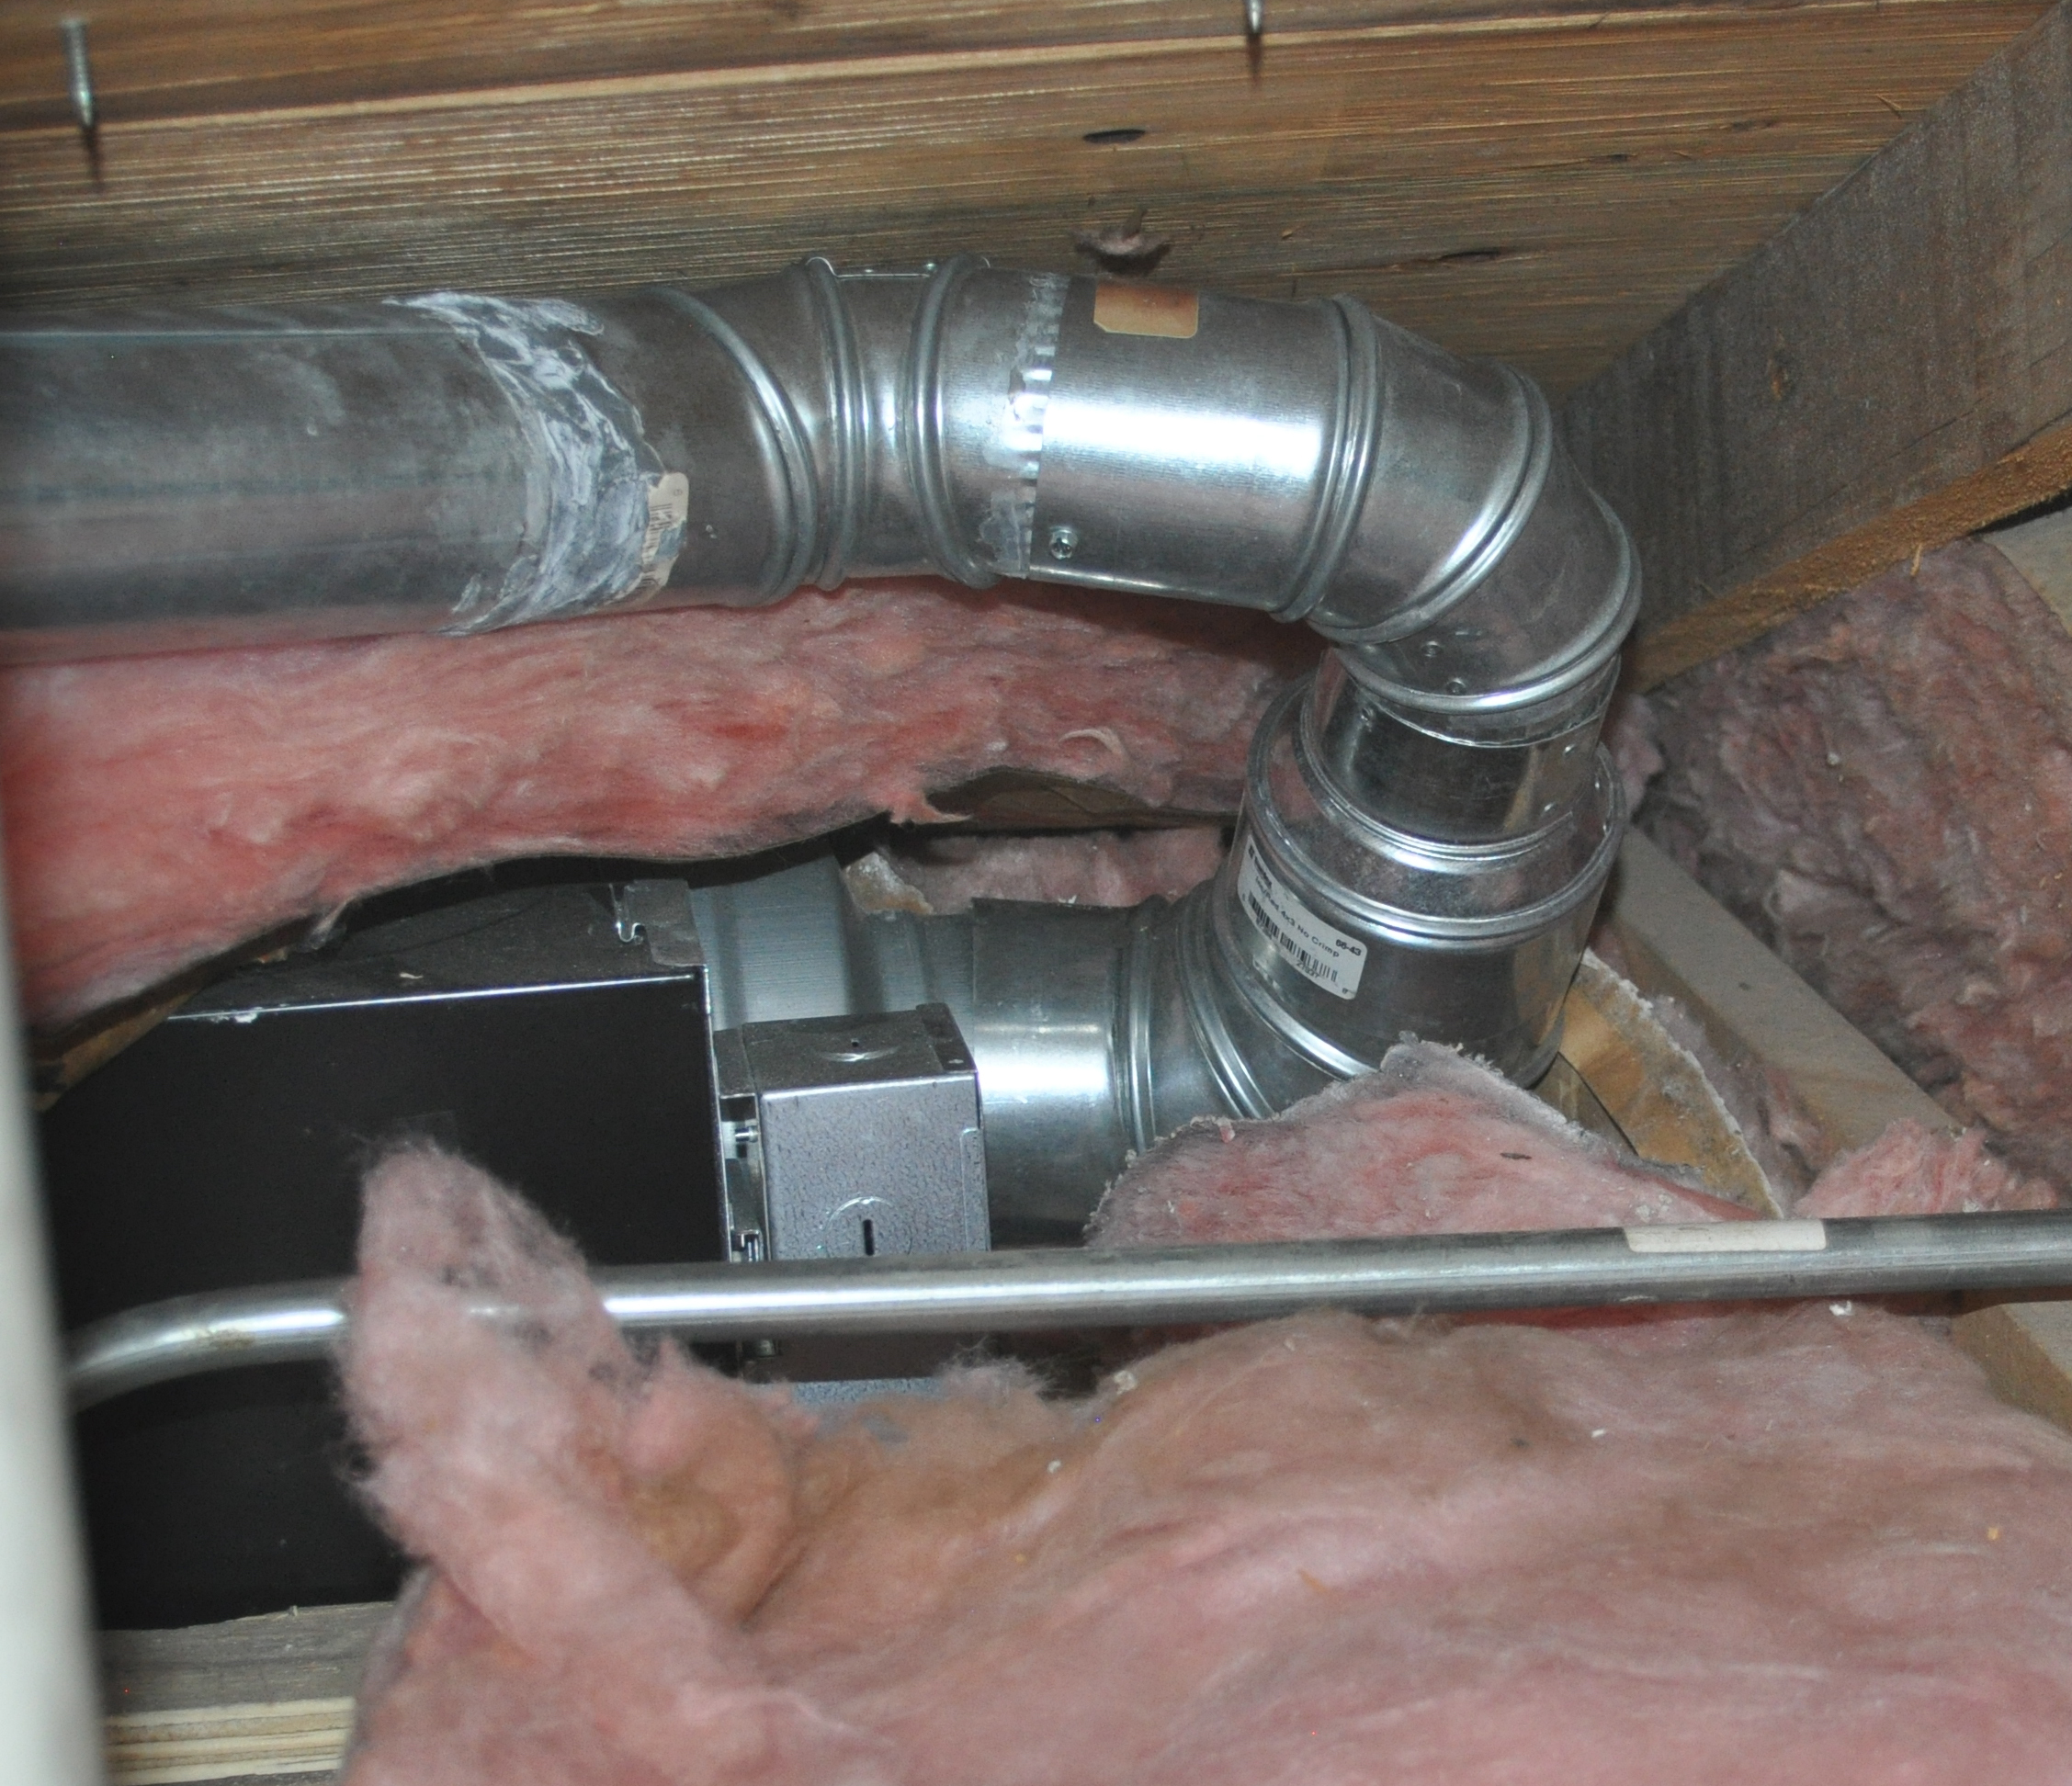
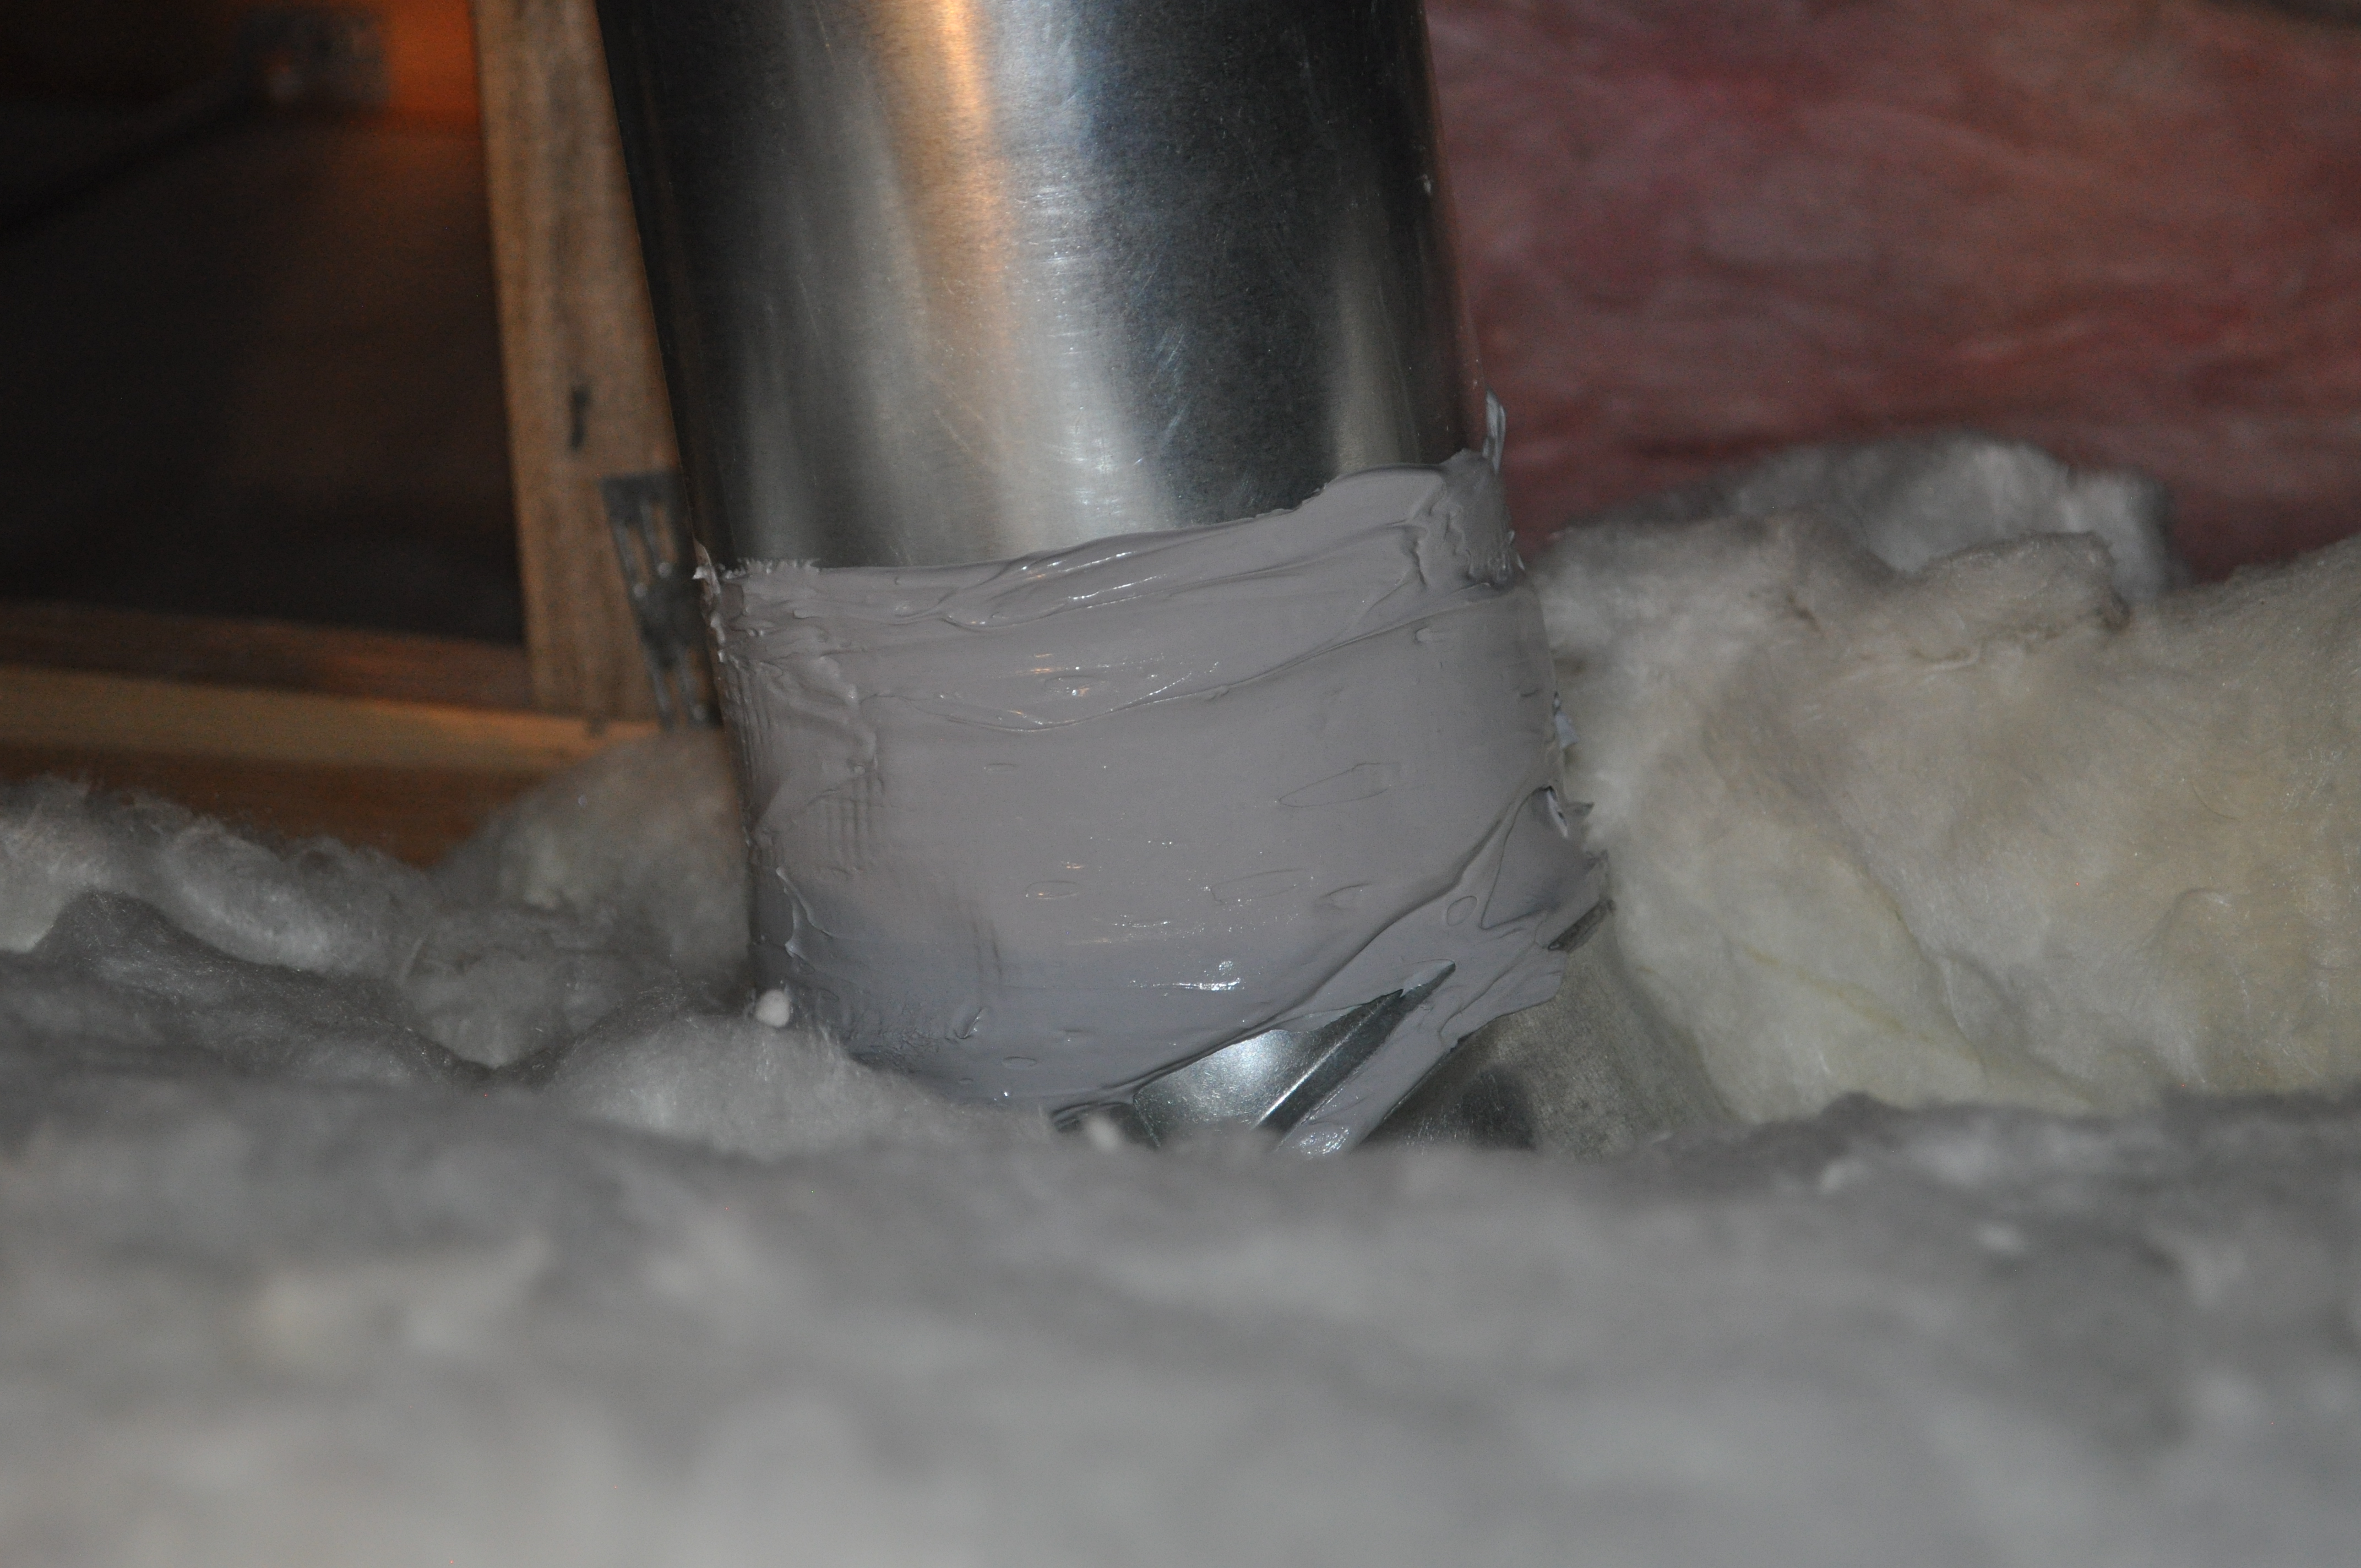
Step 4: Vent the fan exhaust directly to the outside, not into an attic or crawlspace. The duct should be supported so that it hangs as straight as possible and positioned so that it has as few bends as possible (Figure 1). At a minimum, the first three feet of duct extending from the fan exhaust port should be straight; an installation with a 90-degree elbow immediately adjacent to the fan exhaust port can significantly reduce airflow. If bends are necessary, gradual bends are preferred to 90-degree elbows for optimum flow and less airflow noise (Figure 2). The duct should be routed so that it is out of the way of other ducts and equipment in the attic and care should be taken not to crush or kink the duct during or after installation. If possible, the duct terminal should be located to the side wall slightly below the fan, allowing the duct to slope down and away from the housing to direct any condensation away from the fan. Seal duct joints and seams with mastic or metal tape, including longitudinal seams in rigid metal duct. To minimize condensation, insulate the duct.
Source
Source
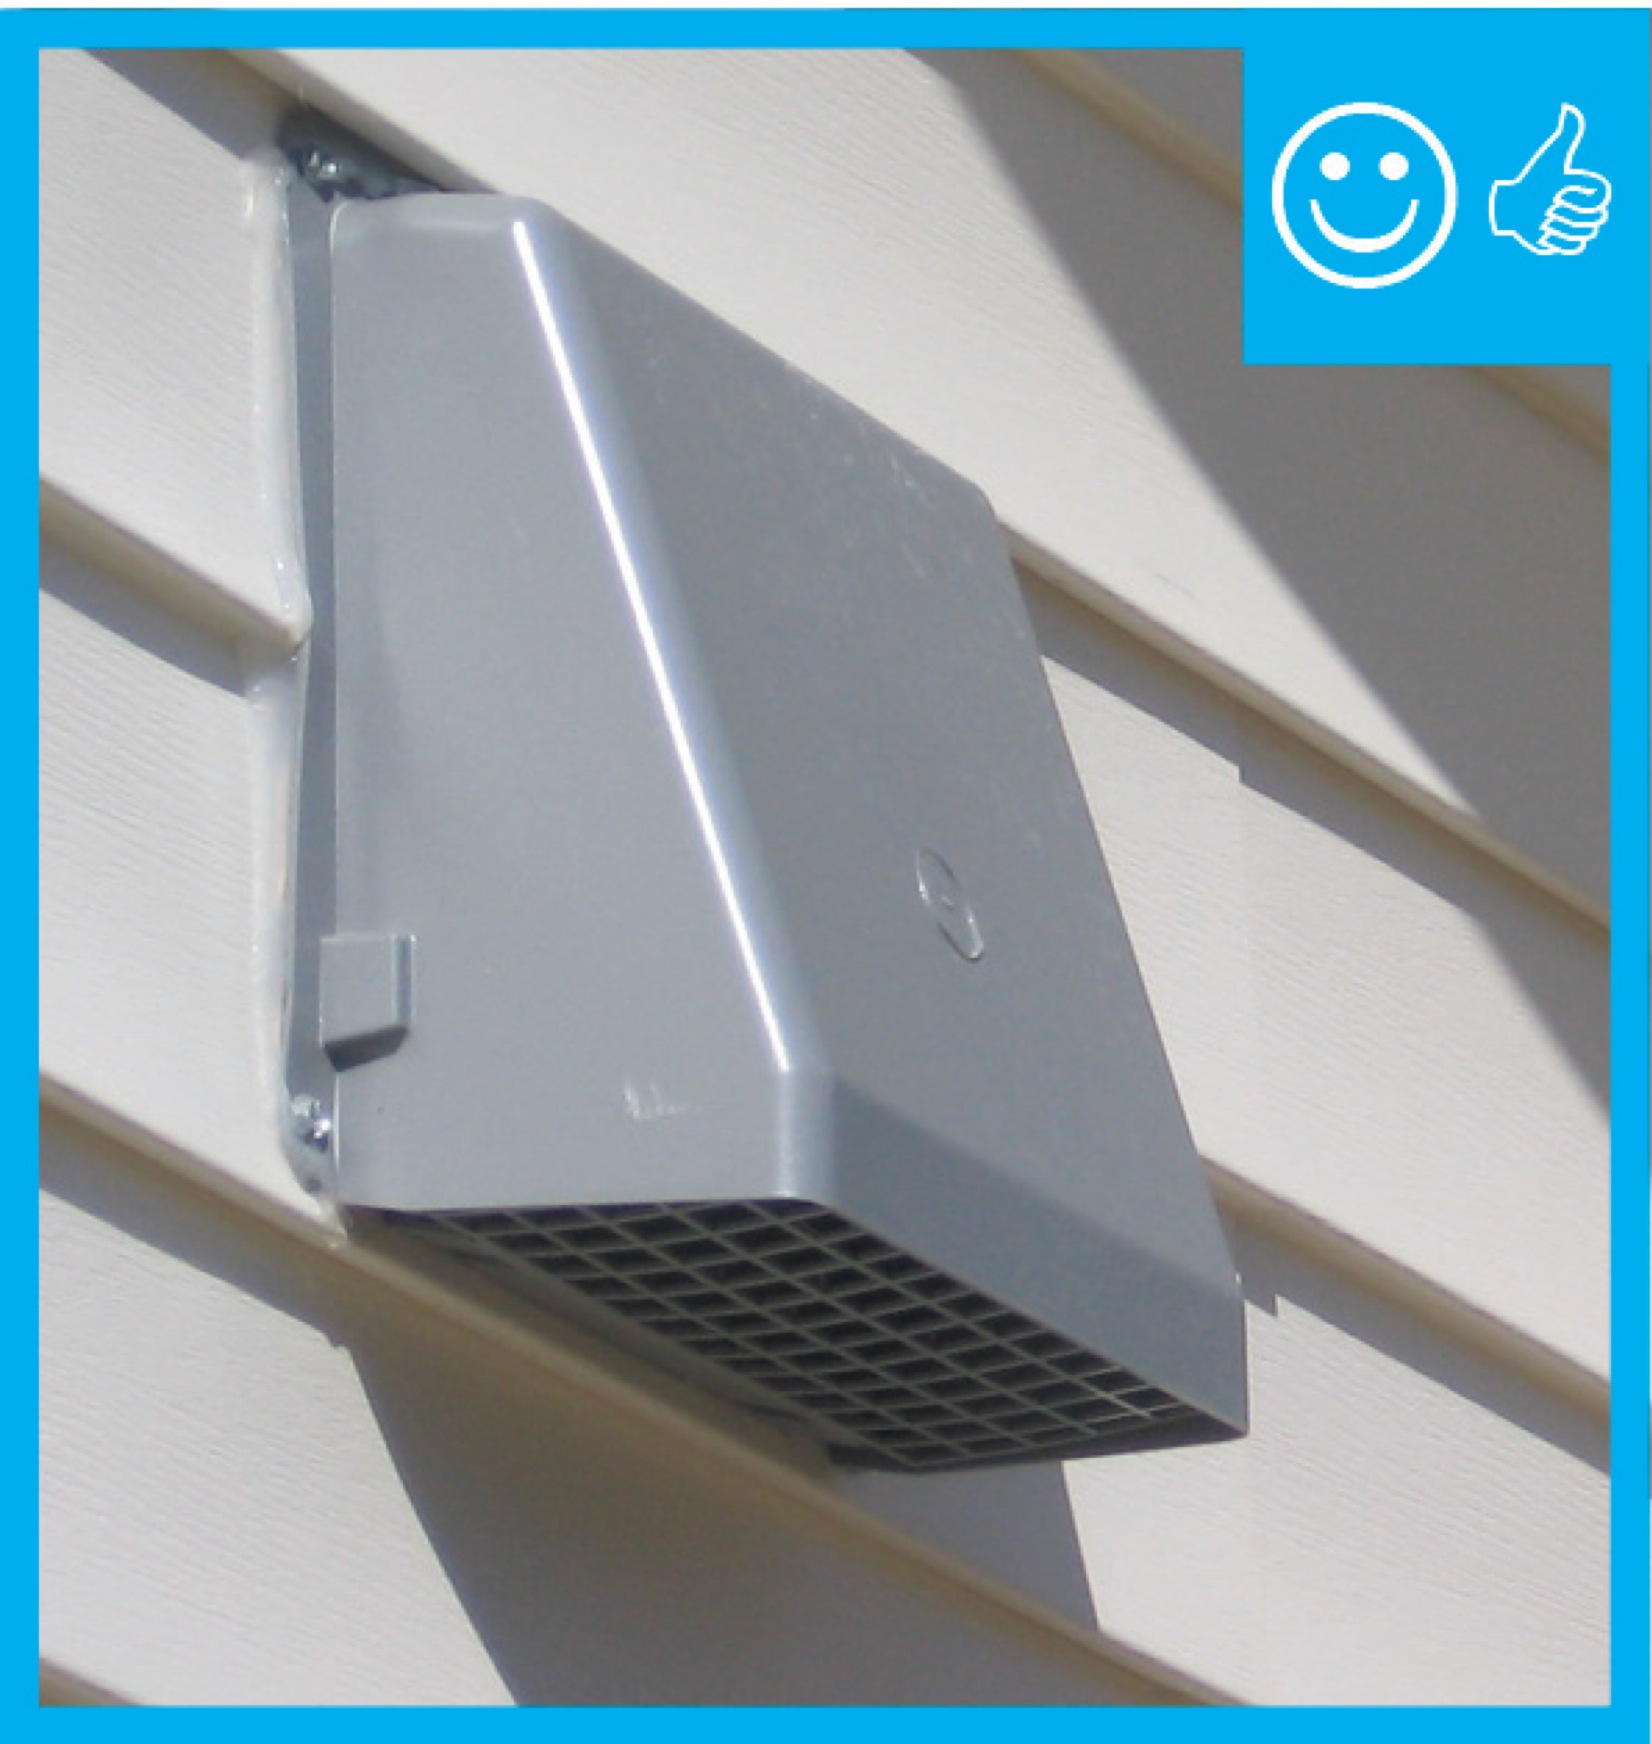
Step 5: Ensure the exhaust duct outlet vent is located at the exterior of the home at least 10 ft from any mechanical air inlet or at least 3 ft from any gravity air inlet per Section M1504.3 of the IRC (Figure 3). The wall cap should include a damper that closes when the fan is not exhausting; this can be a motorized damper or a gravity-operated, butterfly, or cape-style fabric sleeve damper. The wall cap may come with a screen or grille to keep out birds and animals. The exhaust air should not be directed onto a walkway. For more information, see the guide Ventilation Air Inlet Locations.
Source
Step 6: If the fan is located in an attic, cover the fan housing with an insulated, airtight box made of rigid foam (Figure 4). Seal the seams with housewrap tape. Use caulk or spray foam to seal the box to the ceiling drywall and to seal around the exhaust pipe. Cover the box with attic insulation.

Step 7: For bathroom exhaust fans used as part of a whole-house ventilation system, make sure that the fan switch is clearly designated and install override controls that are clearly labeled and located in an accessible place, such as near the thermostat, on the electrical panel, on the switch plate, or on the air handler. See Obvious Ventilation Controls and Continuously Operating Ventilation and Exhaust Fans for more information.
Ensuring Success
Visually inspect the fan for proper installation as follows:
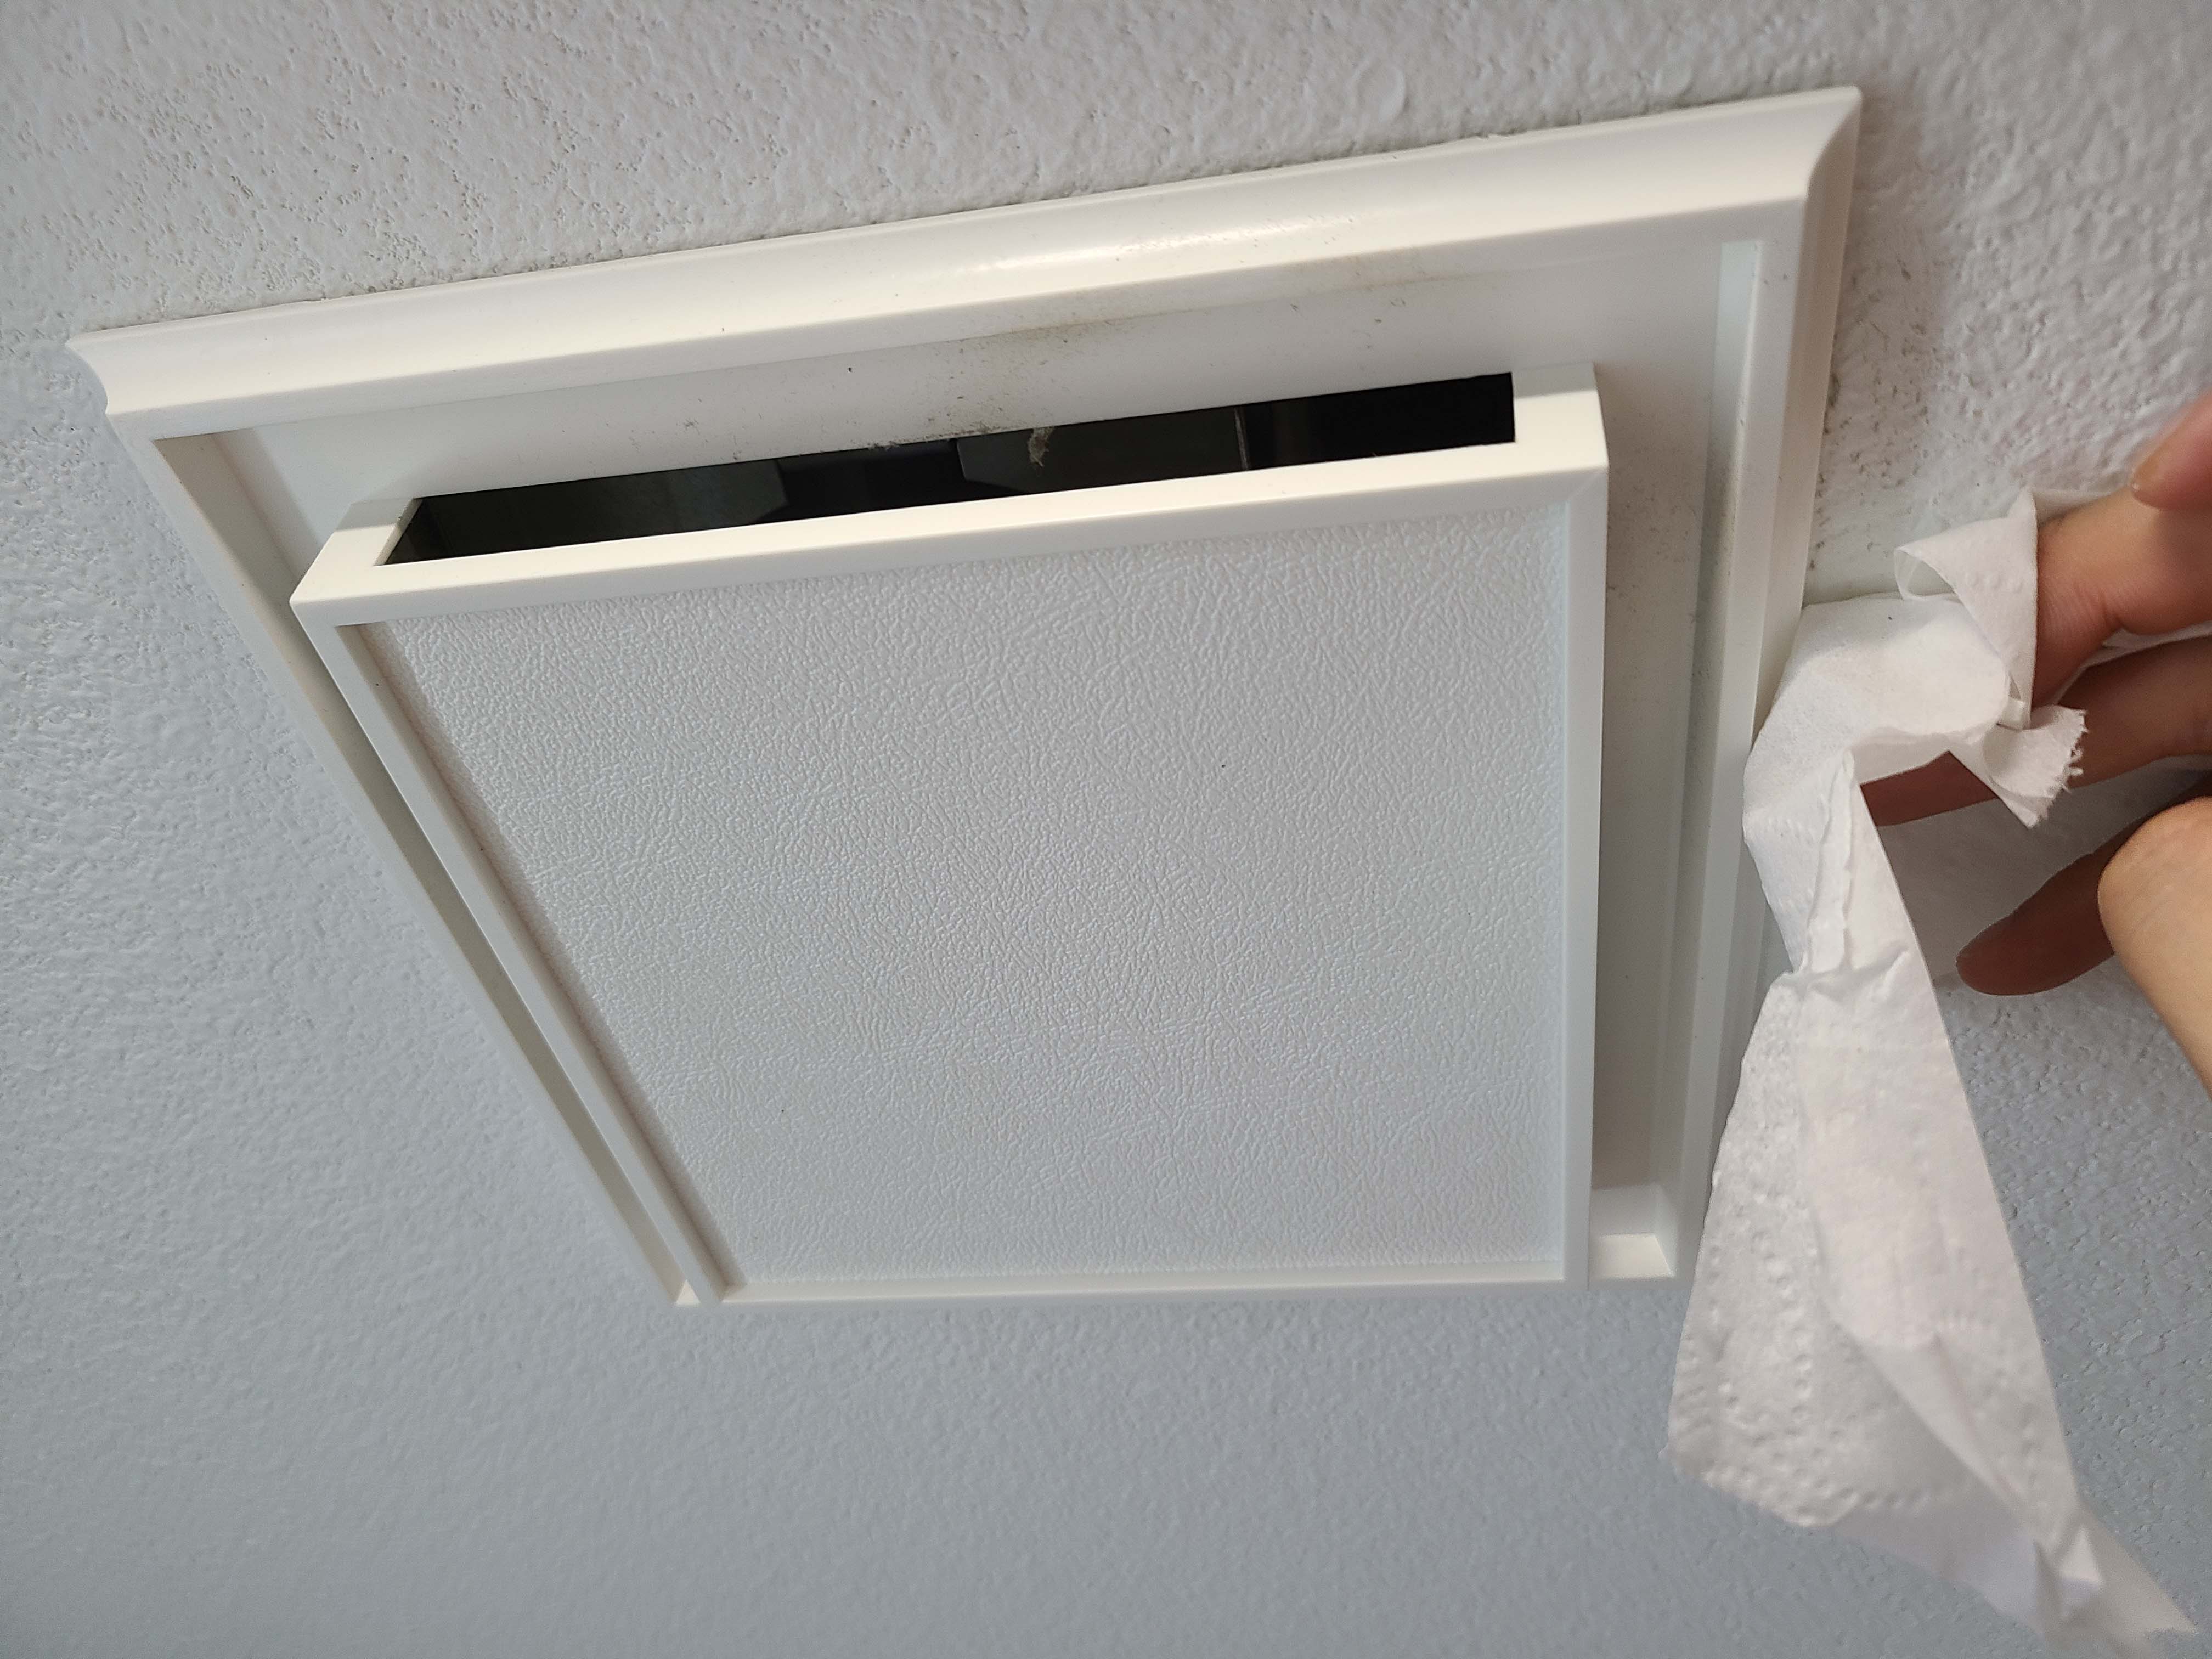
- Ensure that the fan exhausts outside, not into the attic; that it is set to exhaust, not recirculate; that any dampers on the outside termination are able to open freely; and that packing tape is removed.
- Confirm that any openings made in the ceiling for the fan or exhaust duct are properly air sealed and that the exhaust duct is sealed to the fan housing with both mechanical fasteners and mastic for flex duct and mechanical fasteners and mastic or spray foam for rigid duct.
- Check the sone rating; ASHRAE 62.2 requires 3 sones or less for intermittent (occupant-controlled) kitchen or bath exhaust fans or 1 sone or less for continuous fans.
- See the Compliance tab for calculating exhaust rates to meet ASHRAE 62.2 requirements and ENERGY STAR guidelines for intermittent and continuous operation, as well as IRC requirements on fan size. If the bathroom fan will be used as the primary means for meeting code-required ventilation, calculate the ventilation rate required based on the size of the home as described in ASHRAE 62.2 and ensure that the fan’s tested flow rate will meet this requirement. The U.S. DOE offers the RED CalcTM tool as a free, reliable resource to aid contractors with this calculation. Various other tools for calculating ASHRAE 62.2 ventilation rates are available on the market as well.
In homes pursuing ENERGY STAR or Zero Energy Ready Home certification, a certified energy rater will test the fan’s operation to determine the flow rate using a powered flow hood, an airflow resistance device, or a passive flow hood using test procedures described in ANSI/RESNET/ICC 380-2016 Section 5.1, or those established by the Associated Air Barrier Council, the National Environmental Balancing Bureau, ASHRAE, or another equivalent method. Bathroom fans are typically rated by how many cubic feet per minute the fan will exhaust in a factory setting. Duct work, termination choices, and installation may decrease the measured cubic feet per minute below the factory-rated value. To ensure the installed fan exhausts the correct amount of cubic feet per minute, EPA recommends the HVAC contractor install a fan with a rating higher than the required measured amount. For more information, see Testing of Mechanical Ventilation Systems and Measuring Mechanical Ventilation Airflow.
Region
No climate specific information applies.
Training
Right and Wrong Images
Source
Website describing the U.S. Environmental Protection Agency's ENERGY STAR New Homes and Apartments program with links to builder and homeowner resources.

Source

Source
Website describing the U.S. Environmental Protection Agency's ENERGY STAR New Homes and Apartments program with links to builder and homeowner resources.
Source
Website describing the U.S. Environmental Protection Agency's ENERGY STAR New Homes and Apartments program with links to builder and homeowner resources.
Source
Source
Videos
Compliance
Retrofit
SCOPE
If the bathroom currently lacks a fan, install a fan. If the existing fan has insufficient draw as determined by occupant experience or through fan testing by a home energy rater, replace the existing fan.
If the current bathroom fan exhausts into the attic, crawlspace, or between floors, replace or reroute the duct so that it exhausts to the outside.
Verify that the exhaust fan duct has an operating damper and that the exterior end of the exhaust duct is protected with a hooded wall cap and that the opening is covered with screening to keep out birds and pests.
See the assessment guide, Pre-Retrofit Assessment of Attics, Ceilings, and Roofs.
For more on exhaust fan ventilation, see the U.S. Department of Energy’s Standard Work Specifications.
See the Scope tab for additional job specifications.
DESCRIPTION
Installation of a new bathroom exhaust fan is warranted if the bathroom currently has no exhaust fan. Other reasons to replace the fan include noise or moisture complaints by the homeowner or fan testing as part of a home energy audit that reveals that the fan has insufficient draw. Draw and fan efficiency may be improved by simple maintenance steps such as vacuuming the fan cover and fan blades and verifying that the termination of the exhaust duct is not clogged with debris. Follow the installation instructions provided in the Description tab.
COMPLIANCE
See Compliance tab.
More Info
Case Studies
References and Resources
*For non-dated media, such as websites, the date listed is the date accessed.
Contributors to this Guide
The following authors and organizations contributed to the content in this Guide.
Sales
High-Efficiency Bathroom Fans = High-Efficiency Bath Fan

Technical Description
Bathroom exhaust fans remove moisture from the home to help keep relative humidity levels down. This is important for discouraging condensation and the growth of mold, mildew, and dust mites. Continuous or intermittently operating exhaust fans can also be part of a whole-house ventilation strategy. ENERGY STAR certified ventilation fans provide better efficiency and comfort with less noise, and in some cases, have controls for spot exhaust and continuous ventilation. They feature high-performance motors and improved blade design, providing more effective exhaust and longer life.
Questions? Comments? Contact our webmaster.