Scope
Install a ductless heat pump to provide heating and cooling to a single room or to an entire home:
- Determine whether a ductless system is more appropriate than a ducted system for your situation based on the following parameters:
- whether or not space is available for ductwork and a central air handler
- the amount of area needing to be conditioned
- zoning needs
- ventilation system configuration (fresh air)
- cooling efficiency
- heating efficiency
- dehumidification performance
- heating capacity at low outdoor temperatures (cold climate performance)
- indoor air filtration
- noise criteria.
- Perform ACCA Manual J heating and cooling load calculations for the space(s) to be conditioned by the heat pump.
- Determine number, type, and location of indoor units (heads).
- Determine number and location of outdoor units.
- Use ACCA Manual S methods to size and select a system with properly matched indoor and outdoor units. (If sizing the heat pump to provide heating in a cold climate, consider alternative methods to Manual S such as those presented by NEEP, NRCan, and U.S. DOE.)
- Assess the home’s electrical system and perform any upgrades needed to accommodate the heat pump and any auxiliary electric heating.
- Install the system including indoor unit(s), outdoor unit(s), refrigeration lines, condensate piping, electrical wiring, and thermostat control wiring, and/or control modules.
- Commission the system to ensure proper operation.
See the Compliance Tab for related codes and standards requirements, and criteria to meet national programs such as DOE’s Zero Energy Ready Home program, ENERGY STAR Certified Homes, and Indoor airPLUS.
Description
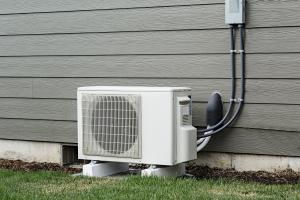
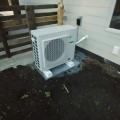
High-performance ductless heat pumps (Figure 1) are an efficient alternative to traditional ducted heat pump systems, gas or oil furnaces, and electric resistance heating systems. Advances in technology in recent years have increased heat pump performance to the point that units are now available with heating efficiencies above 22 HSPF2 (heating season performance factor) and cooling efficiencies above 35 SEER2 (Seasonal Energy Efficiency Ratio). Many models are capable of heating in cold climates without a backup source, producing nearly 100% heating capacity at temperatures well below 0°F.
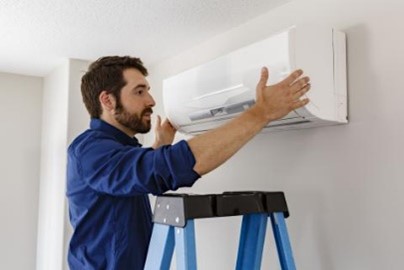
Ductless heat pumps have been used in Asia and Europe since the 1970s and they comprise 80% to 90% of the residential HVAC (heating, ventilating, and air-conditioning) market there. They have been used in U.S. commercial buildings since the 1980s and are now rapidly growing in the U.S. residential market.
Ductless vs. Traditional Ducted Heat Pumps
For information on traditional ducted heat pumps and air-conditioning units, see Traditional Split Heat Pumps and Mechanical Air-Conditioning.
The basic functions of ductless heat pumps are the same as those of traditional ducted heat pumps:
- Provide heating.
- Provide cooling.
- Provide dehumidification.
- Provide air filtration.
The basic components of ductless heat pumps are also the same as those of traditional ducted heat pumps:
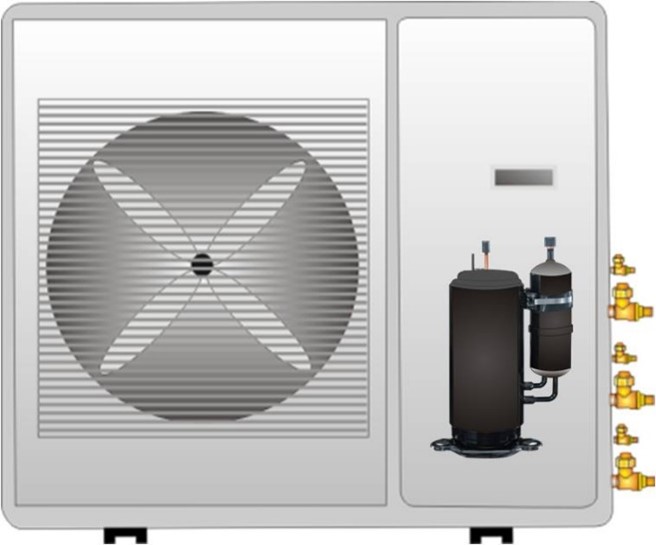
- An outdoor unit that extracts heating or cooling from the outdoor air. The outdoor unit has a compressor, a fan, and the outdoor coil (condenser coil). The outdoor unit is often referred to as the condenser or condensing unit.
- Indoor unit(s) that condition indoor air and distribute it within the home. An indoor unit contains a fan, an indoor coil, and some form of air filtration.
However, the form, function, and performance of ductless systems can differ from traditional ducted systems in several ways, as detailed below.
Air Distribution and Zoning
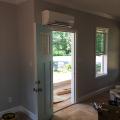
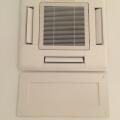
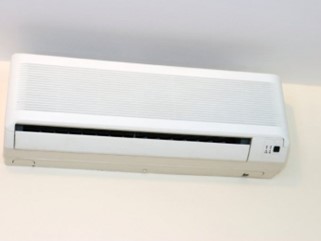
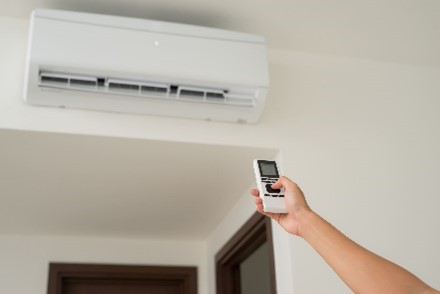
The fundamental difference between ductless systems and traditional ducted systems is how the heated or cooled air is distributed within the home. With a traditional ducted system, one centrally located air handler blows conditioned air through a system of ducts that deliver the air to individual rooms through registers (vents) in the floor, ceiling, or wall. The central air handler is usually located in an attic, crawlspace, basement, garage, or closet. With a ductless system, on the other hand, there is no central air handler or ductwork. Instead, small indoor units are installed inside the space they are heating and cooling. These indoor units are essentially small air handlers having a small fan that blows air directly into the space. Ductless indoor units are often referred to as “heads” or as “fan coils.” The indoor units are usually hung on a wall or installed in a ceiling (Figures 2 and 3), though floor-mounted console units are also available.
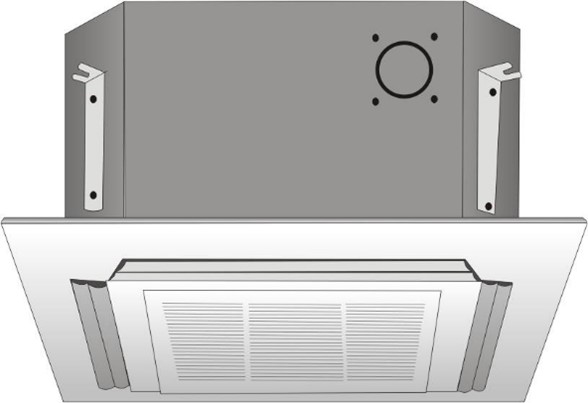
It is often the case with ductless systems that it does not make sense for an indoor unit to be installed in every single room. This is due to cost implications and because even the smallest indoor heads may provide much more heating or cooling than is needed for the individual space. This poses a problem, as those rooms without indoor units may become uncomfortable. One option for distributing conditioned air to rooms without indoor heads is to install small air transfer fans that exchange air between rooms with indoor heads and rooms without indoor heads. This approach requires a return path for air to flow between the rooms, such as a vent between the rooms or undercut doors. Air is thus blown from one room to the other via the fan, then returns to the first room through the vent or under the doors.
Overall, ductless configurations tend to allow better zoning and reduced fan energy consumption. Less fan energy is required because the units do not have to push air through ductwork. Ductless units allow zoned heating and cooling because each indoor unit operates independently of the others (Figure 4). In this way, different areas of the home can be set to different temperatures if desired. Some units can even be turned off while other units continue to heat or cool.
Duct Heat Loss
A major advantage of ductless systems when compared to ducted systems has to do with the potential heating and cooling losses through ductwork and the air handler. If a ducted system has the air handler and/or ducts located outside the conditioned space (for example, in a vented attic, vented crawlspace, or garage), heating and cooling losses will occur. It has been shown that losses related to duct systems can account for more than 30% of heating and cooling energy consumption if ducts are located in an unconditioned area. These losses occur through air leaks in the air handler and ducts, as well as through conduction of heat through the walls of the duct or air handler. With a ductless system, all of these losses are eliminated because the indoor units are located within the conditioned space. Ducted systems can eliminate these losses as well, however, simply by ensuring the air handler and all ducts are located within the thermal boundary (insulated walls, floors, and ceiling) of the home. In this case, any heating or cooling that leaks out of the system simply goes directly into the conditioned space, and no real losses occur. However, space constraints can make it very difficult to locate all ductwork and the air handler inside.
General Performance Trends
Ductless systems also tend to differ from traditional ducted systems in terms of performance. In general, ductless systems tend to have higher heating and cooling efficiencies, provide poorer dehumidification in cooling mode, and provide less air filtration. There are also currently (as of 2023) many more ductless models on the market that can provide reliable heating at very cold temperatures. These units are generally referred to as cold climate heat pumps. Some models can operate at an outdoor temperature of -15°F for heating, eliminating the need for backup heat sources in many locations.
It is important to note that all of these performance characteristics are simply general trends, and none of these aspects are inherent to ductless or ducted technology. Market trends change continually, and individual models should be compared with respect to all of these performance areas.
Air Filtration
Filtration options and regular maintenance requirements of ductless systems differ from traditional ducted systems. Many ductless systems have washable, mesh air filters with very low particulate capture efficiency (poor filtration). Though they perform poorly for capturing fine particulates, they minimize obstruction to airflow. This aids the typically low power, low pressure blower fans in ductless indoor units to achieve the required airflows. Many of these standard filters are recommended to be cleaned about every two weeks (vacuumed or washed). Due to the low filtration performance of most standard washable mesh filters, additional filters are available for ductless units to improve air quality. These additional filters need additional regular cleaning or replacement.
The design of any additional filters should be scrutinized to assess how effective they will be in providing additional air filtration. For example, see Figure 5 below. The additional filters (outlined in red) only cover a small portion of the overall washable mesh filter area. With this design, most of the air will take the path of least resistance and bypass the additional air filter. Filter designs such as these provide minimal additional benefit.

As another option, separate air cleaners can be utilized to make up for poor air filtration in ductless units. These can come as portable floor mounted units, central systems, or even DIY systems using box fans and disposable HVAC filters. Utilizing a separate air cleaning system will unfortunately reduce or eliminate the energy savings and space saving benefits of ductless systems.
In contrast to ductless units, most traditional ducted systems are designed to use disposable filters that are recommended to be replaced every 3 months. These filters can be purchased off-the-shelf at varying performance levels, from very low particulate capture efficiencies to very high particulate capture efficiencies (as indicated by higher MERV ratings (minimum efficiency reporting value). With the correct filter, standard ducted systems can provide excellent filtration for the entire home. See the “High MERV Filters” guide for more information. When investigating ductless or ducted heat pump options, it is recommended to inquire about the MERV rating of the air filters compatible with the unit, cost of replacements, and the recommended schedule of filter cleaning or replacement.
Variable Speed Compressors
Ductless heat pumps generally have inverter-controlled, variable-speed compressors. Ducted systems can also have variable speed compressors, but single-speed compressors are more common in these more traditional units. The variable speed inverter technology adjusts the compressor speed, allowing the system to adapt more smoothly to shifts in demand with less temperature variation and lower energy use. Ductless heat pumps and advanced ducted units also have linear expansion valves rather than open/close valves, and multi-speed rather than single-speed fans to continuously match the heating or cooling load. These features allow variable speed heat pumps to have wide capacity ranges. When maximum capacity is not needed, the compressor output decreases, increasing energy efficiency. The inverter compressor allows the system to ramp down to as little as 10% of rated capacity (Figure 6). In contrast, conventional single-stage air-conditioning and heating systems can only operate at full capacity and must stop and start repetitively when maximum capacity is not needed.
Humidity Control
Heat pumps and air conditioners have traditionally been relied upon for dehumidification as well as cooling. When providing cooling under typical conditions, these systems will automatically remove a certain amount of moisture from the air. A standard way to quantify how well a unit dehumidifies is called the Sensible Heat Ratio (SHR). SHR could theoretically range from 0 to 1, with lower values indicating better dehumidification performance. Traditional heat pumps and air-conditioners typically have SHRs of around 0.75. This has historically proven to provide sufficient dehumidification when the unit is properly sized and humidity conditions are not abnormal. Newer, more efficient units tend to have higher SHRs (worse dehumidification). This is particularly true for ductless systems. In homes where humidity may be an issue, a separate dehumidification system may be needed. See the Climate tab for more information.
Thermal Comfort
Many ductless heat pumps sense the room’s temperature from the intake of the indoor unit. On a high wall unit or a recessed ceiling cassette, that means the indoor unit is sensing the room’s temperature from near the top of the wall or the ceiling. Since warm air rises, the temperature of the room when measured from near the top of the wall or the ceiling is higher than at head and chest level where a typical wall thermostat for a ducted unit would be located. Thus, in both the heating season and the cooling season, the room temperature at head and chest level can be colder than the setpoint temperature, causing discomfort. One can mitigate the discrepancy by setting the temperature of the indoor unit to a slightly higher temperature, whether heating or cooling.
Some makes and models of ductless high wall and recessed ceiling cassette indoor units can easily utilize a wired or wireless wall thermostat to solve the temperature sensing issue. Some makes and models require the use of the manufacturer's own thermostat, which can sometimes be costly, while others allow the use of any generic 5-wire thermostat. A few makes and models have a temperature sensor embedded inside the remote which allows the user to switch the indoor unit from using the temperature sensor inside the indoor unit to using the temperature sensor embedded inside the remote. Lastly, third party thermostats are available that utilize learning logic to determine what temperature setpoint to send to the indoor unit to achieve the desired temperature at head and chest level.
Floor console ductless heat pumps generally don’t have this problem since the indoor unit’s intake is closer to head and chest level. Ducted cassette mini-splits also don’t have this problem since they use a wired or wireless wall thermostat.
Electrical Considerations
Unlike central ducted split-system heat pumps, there are single zone 115/120V ductless heat pumps available on the market ranging in size from 6,000 BTU/hr to 12,000 BTU/hr. Their modest current draw allows them to be installed into lightly loaded existing 15A and 20A 120V circuits. Installing multiple units each on their own 15A or 20A branch circuit could allow a home with no space in the circuit breaker panel and no room to install ducts to switch from electric baseboards or cadet wall heaters to heat pumps.
Fire Safety
HVAC ductwork can provide a path for fire to travel from a room into the attic, and for smoke to travel from one room to another. Toxic smoke inhalation is the leading cause of death from fires. Ductless heat pumps can improve the fire safety of a home by reducing a home’s pathways for the spread of fire and smoke from one room to another. Even systems using air transfer fans or multiple ducted mini-splits that each serve only one to three rooms can reduce the spread of fire and smoke as compared to a single duct system that serves the whole house.
Maintenance of Ductless Systems
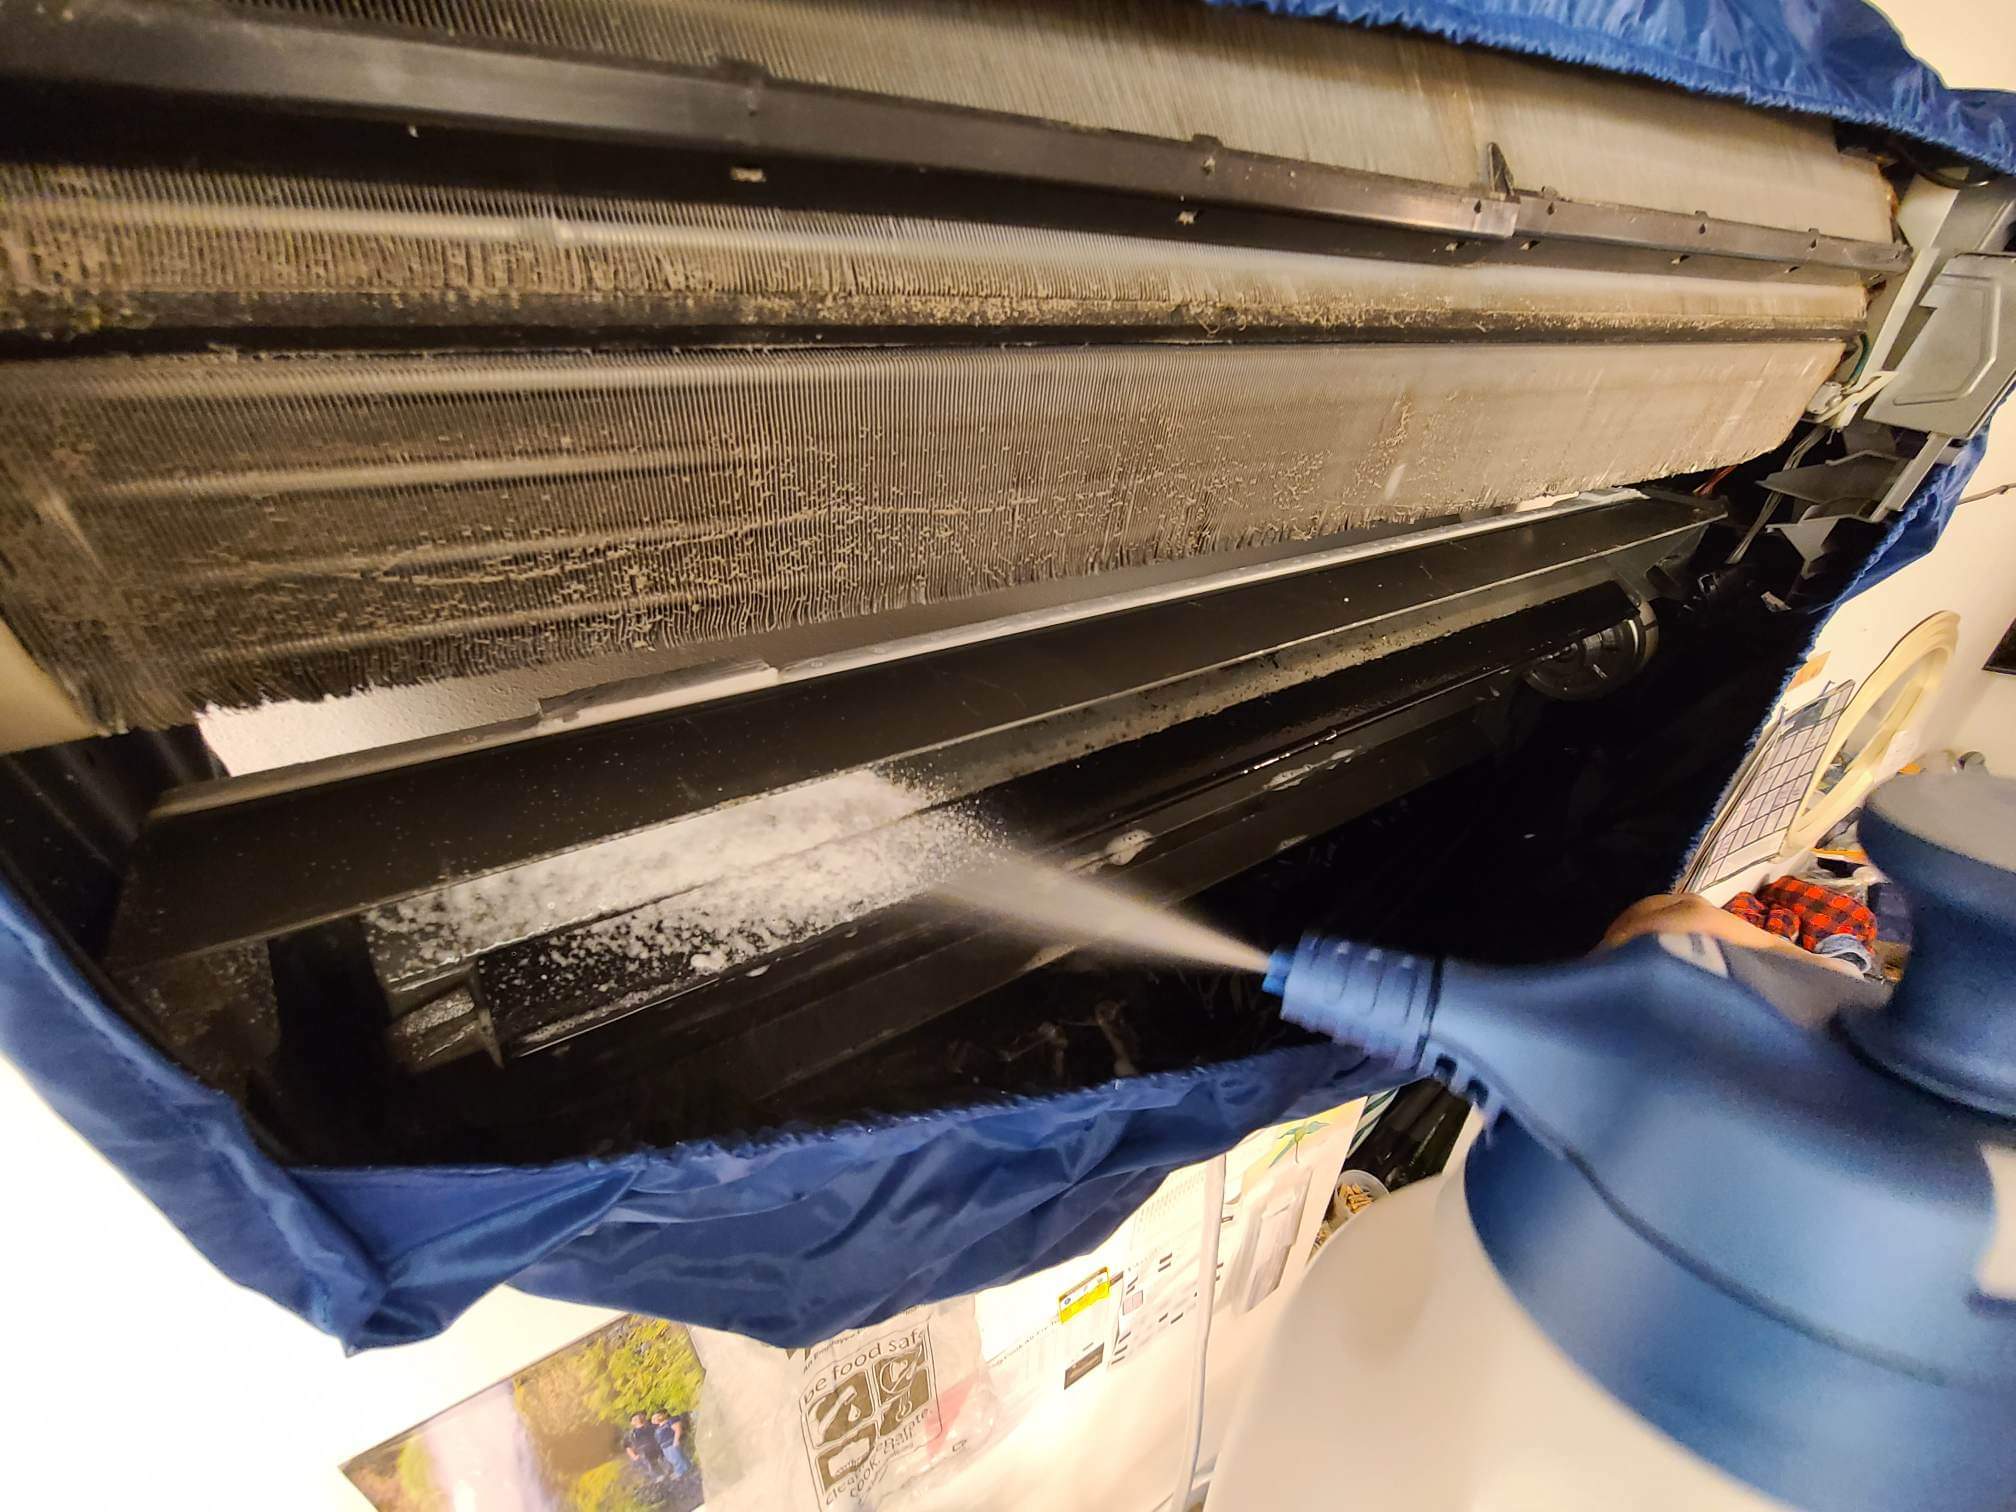
Ductless heat pump systems often have very poor air filtration. This results in more dust accumulation on the internal components of the indoor unit, which can quickly reduce performance, efficiency, and indoor air quality. The design of most wall-mounted units results in a configuration that encourages moisture to accumulate on the blower wheel (fan) in cooling mode. This in turn causes more dust to stick and build up (Figure 7). The accumulation of dust and moisture can lead to fungal growth, a significant concern for indoor air quality. This design configuration issue is more common in high wall-mounted units than ceiling cassettes and floor console units.

It is recommended to deep clean wall-hung ductless heads every 1 to 3 years depending on usage and environmental conditions. More humid conditions and more frequent usage will result in more frequent cleaning needed. If the ductless head is in a dry climate and or used only part-time as supplemental conditioning, then it will need less frequent deep cleans. To evaluate whether a deep cleaning is needed, look closely into the area of the blower wheel. If you see a buildup of dust and mold on the blower wheel and air direction vanes, then it is time for a deep cleaning.
Deep cleaning is generally not a DIY job. Indoor unit designs are typically difficult to disassemble for cleaning, and specialized equipment is needed such as foaming pump sprayers, mini-split bibs, and special cleaning agents (Figure 8).
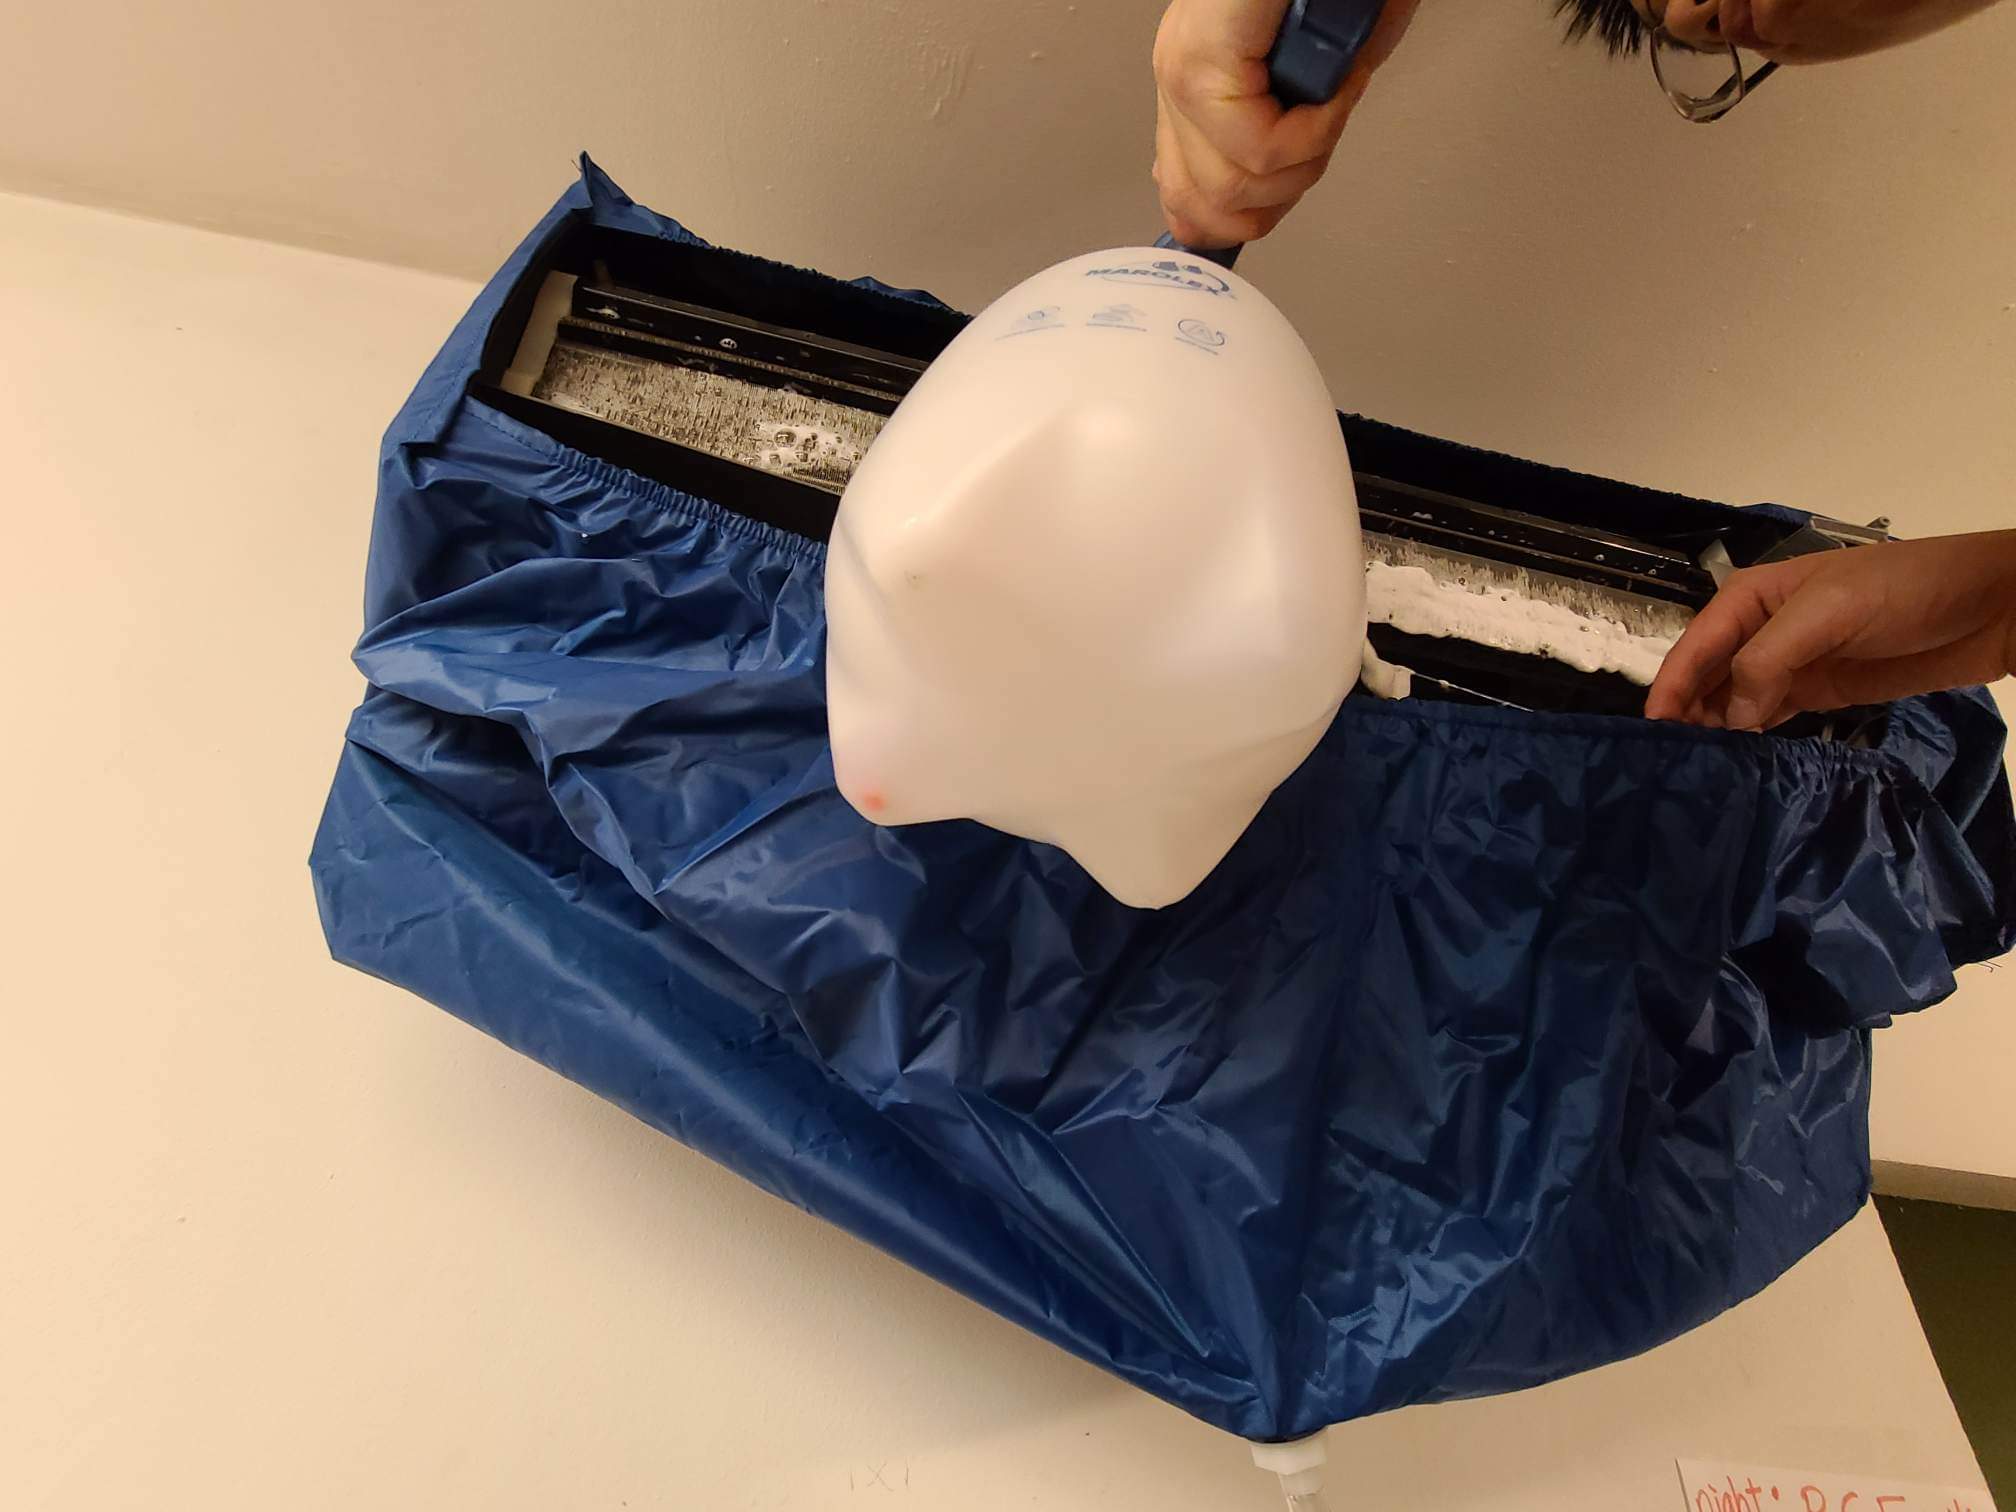
It is not recommended to shortcut the deep cleaning by simply using an aerosol can of foaming evaporator cleaner. The steps to properly deep clean a wall hung ductless mini-split head include:
- Disassemble the plastic outer casing.
- Remove the blower wheel for cleaning.
- Brush and vacuum the surface dust on the coil.
- Spray enough pressurized liquid cleaner to remove the mold in-between the fins of the coil (Figure 9).
- Wipe and/or scrub the air path, air vanes, and condensate tray to remove dust, mold colonies, and biofilm.
Regular filter maintenance is also recommended. A typical manufacturer recommendation is to clean the standard mesh filters every two weeks (wash and/or vacuum). Additional filters, if installed, will have an additional cleaning or replacement schedule.
Ductless System Configurations
Ductless heat pumps can be designed to provide heating and cooling to just one space such as an addition, a room that cannot easily be reached by ductwork, or an area that tends to get too cold in winter or overheat in summer. These systems would typically have only one indoor head (mini-split system). Ductless systems can serve an entire house as well. This typically requires more than one indoor head (“multi-split” system). It is generally not recommended to connect more than three indoor units to one outdoor unit, but some models allow as many as eight indoor units to connect to one outdoor unit.
Ductless heat pumps work well for use in small, very efficient homes with open floor plans or in larger well-insulated homes where zoned heating and cooling are desired. They also work well in additions. They can also be a beneficial part of an energy-efficient renovation where a less-efficient central heating system is kept in place for supplemental heating or cooling and one or more ductless heat pumps are installed in the primary living areas. Since interior space is not needed for bulky ductwork or air handlers, ductless systems are very convenient for retrofit applications.
Single-Zone Mini-Split Systems
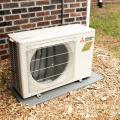
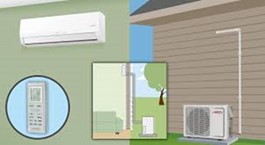
The simplest ductless heat pumps consist of a single outdoor unit and a single indoor unit (Figure 10). These one-to-one systems are often called “mini-splits”. The outdoor unit is mounted on an exterior wall or on a concrete, stone, or plastic composite pad outside the house; refrigerant tubing and control wiring connect the inside and outside units through a small hole in the wall.
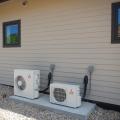
Zoning can be accomplished by using multiple independent mini-split systems. Each system is separate from the other systems, so the units can easily be set to different set points or even different modes. This arrangement will require one outdoor unit for every indoor unit, however.
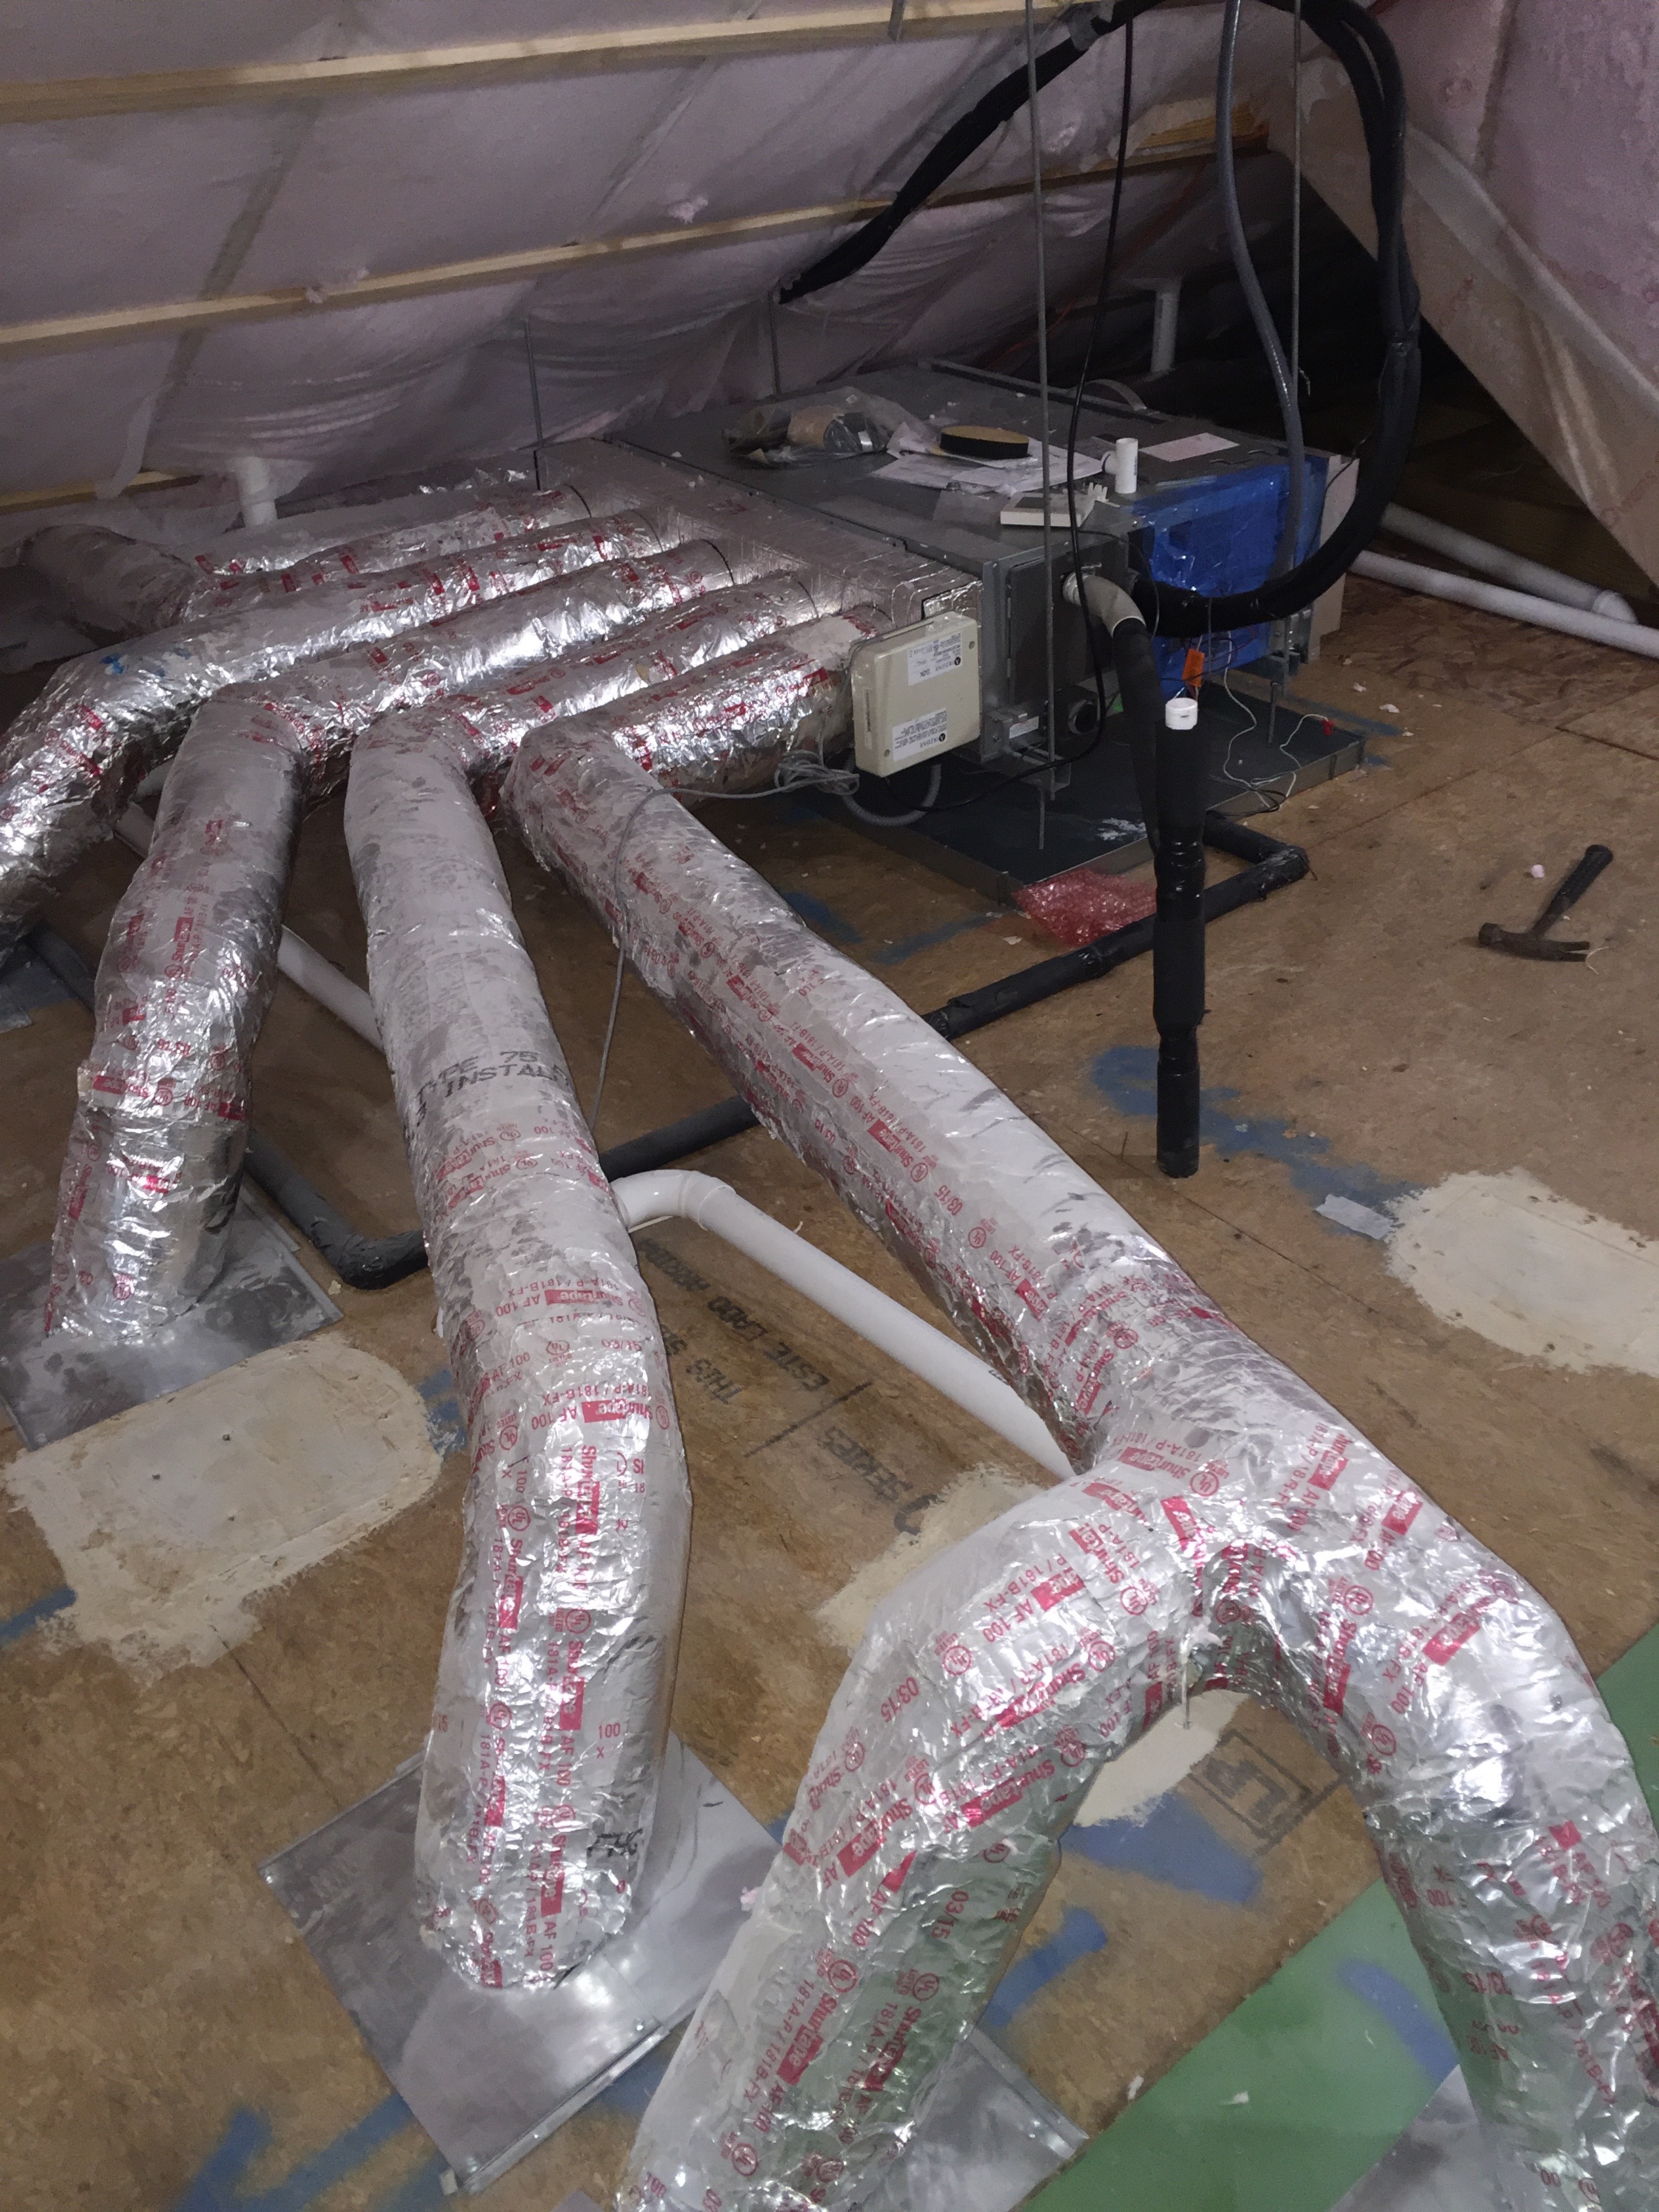
Another option, available from several manufacturers, is a mini-split air handler with short ducts to provide conditioned air to several nearby rooms at once, such as bedrooms, bathrooms, offices, or storage rooms (Figure 11). The air handler is typically a horizontal unit, although some manufacturers make vertical units. The air handler has a larger blower motor to move air through the supply ducts and it also has a ducted return. The ducted air handler is connected by refrigerant tubing to the outdoor unit along with any other ducted or ductless air handlers that are part of the system and, as with all of the indoor units, it must be verified that it matches the outdoor unit using the AHRI (Air-Conditioning, Heating, and Refrigeration Institute) equipment matching system.
Multi-Split Systems
Ductless systems can also be arranged as “multi-split” systems, where multiple indoor heads or mini-split air-handlers are connected to a single outdoor unit. Each indoor head is individually controlled by its own wireless thermostat, which also communicates with the outdoor unit (Figure 12).
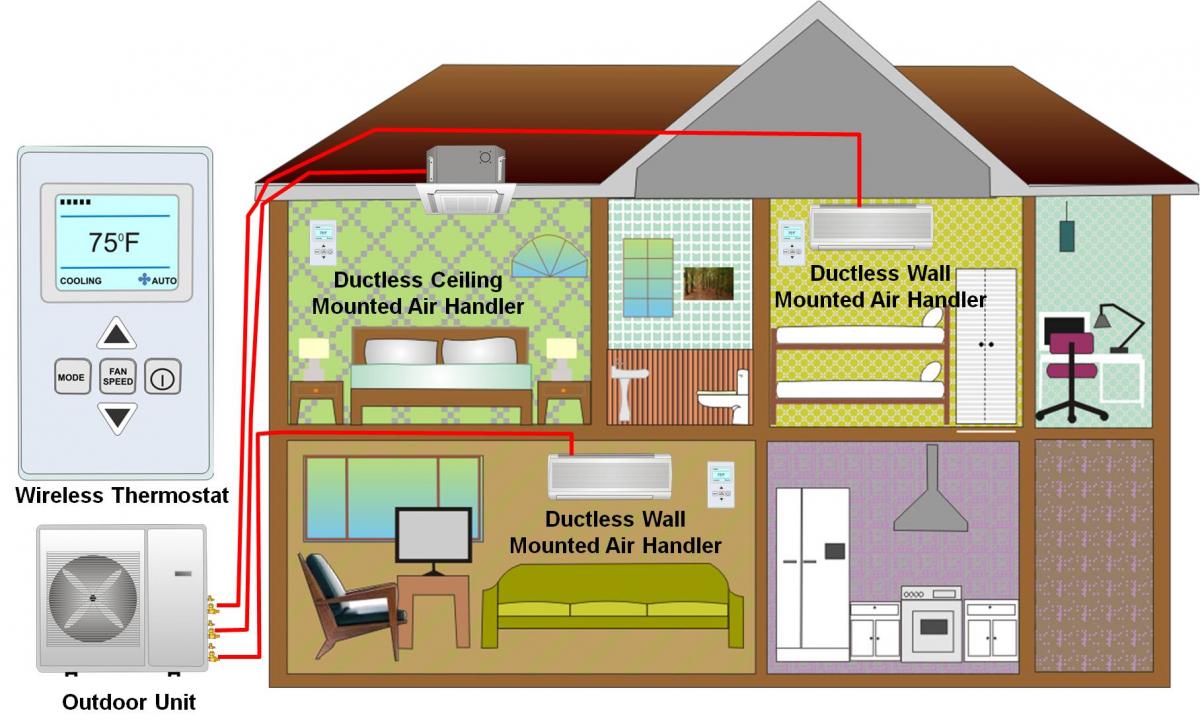
The three-zone ductless multi-split system shown in Figure 12 conditions the two bedrooms upstairs and the living room downstairs. While the system shown in this scenario could include additional ductless heads to condition the kitchen, the office, and the bathroom, these additional units would provide more capacity than is needed to condition the small spaces and the extra units would add considerably to the overall cost of the system. One option to address these smaller spaces is to install small air transfer fans that blow room air from a room with an indoor ductless head to a room without an indoor head. This exchange of room air helps balance out variations in temperature between spaces with indoor heads and those without.
One outdoor unit can accommodate a single ductless head, a single ducted air handler, multiple ductless heads, multiple ducted air handlers, or any combination of these (Figure 13).

A multi-split heat pump arrangement allows one to set different temperatures in different zones. However, care must be taken to ensure all the indoor units are set to the same mode (cooling or heating). Failure to do this can result in extreme decreases in efficiency as some systems will control the outdoor unit to switch back and forth between heating and cooling modes to accommodate different mode settings on different indoor units.
Multi-split heat pumps allow one to turn off one or more indoor units, leaving only a fraction of the indoor units running. However, the energy savings from doing this can range from modest to negative. It can be negative energy savings if turning off indoor units causes the heating or cooling load to drop below the minimum capacity of the outdoor unit, causing it to cycle on and off. Additionally, even when an indoor unit is turned off in a multi-split heat pump, some refrigerant will generally still flow through the indoor unit.
If the desire is to frequently operate with one or more indoor units turned off in a multi-split heat pump system, it will most likely be better to install more than one outdoor unit. Grouping the indoor units that will often be running to one outdoor unit and leaving the indoor units that will only occasionally run to another outdoor unit will allow more efficient operation.
Sizing and Selecting a Ductless Heat Pump
Correctly sizing the outdoor unit and each indoor unit (head) to the space loads is imperative for efficient and comfortable operation. Correctly locating the heads is also important for air delivery to the desired location. Oversized or incorrectly located indoor units can result in short cycling, which wastes energy and does not provide proper temperature or humidity control. A system that is too large will be more expensive to buy and operate.
Calculate the heating and cooling load for the home or space to be conditioned using the ACCA Manual J: Residential Load Calculation. This calculation should be performed for individual zones (one per indoor unit) as well as for the entire house.
Properly size the equipment for the design heating or cooling load following the sizing guidelines in ACCA Manual S: Residential Equipment Selection (see below for alternative approaches when sizing for heating in a cold climate). When determining equipment sizing per ACCA Manual S, use the original equipment manufacturer (OEM)’s expanded performance table to obtain performance data at design conditions, rather than using the performance data on the AHRI certificate, which lists heating and cooling capacity and SEER2 and EER2 (Energy Efficiency Ratio) cooling efficiencies at factory conditions of 95°F outdoor, 80°F indoor, and 67°F wet bulb.
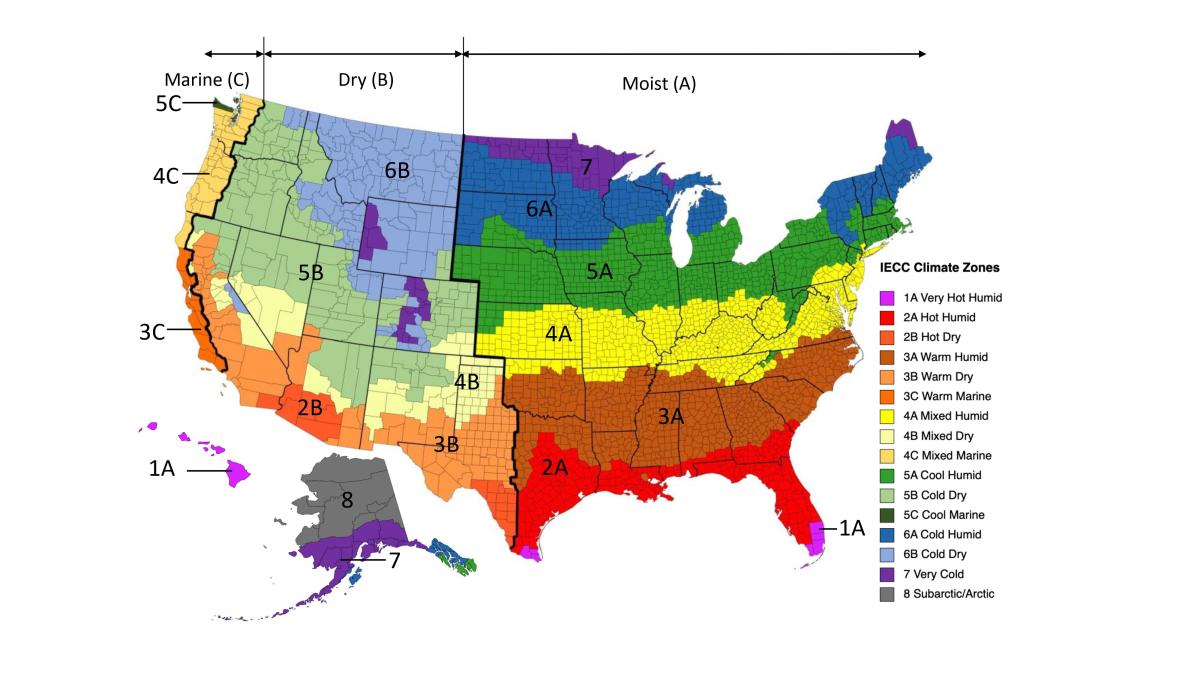
Alternative sizing methods should be used if the heat pump is to be used primarily for heating in a cool or cold climate (International Energy Conservation Code (IECC) climate zone 4 or higher, as shown on the climate zone maps on the Climate tab). Refer to the following resources for more information:
- NEEP’s Cold Climate Air Source Heat Pump List. This list compiles capacity tables and charts for numerous heat pump manufacturers and models. It also provides a tool for sizing cold climate heat pumps. It is maintained by the Northeast Energy Efficiency Partnerships (NEEP).
- NRCan’s Air-Source Heat Pump Sizing and Selection Guide. This is a step-by-step guide to sizing and selecting heat pumps for a cold climate. It was produced by Natural Resources Canada (NRCan).
- US DOE’s Cold Climate Heat Pump Sizing Training Module . This is a training module intended for HVAC technicians. The module consists of three sets of course notes along with problem sets for evaluation. It is housed on the US Department of Energy (DOE)’s Building Science Education website.
If you are participating in an energy-efficiency program, select cooling equipment that complies with the requirements for your climate zone. To determine your climate zone, see the IECC 2021 climate zone map on the Climate tab.
Properly match the indoor and outdoor components of the heat pump system as demonstrated by a certificate from the AHRI. AHRI assigns a certification number and efficiency ratings to specific combinations of equipment (outdoor unit, indoor unit, indoor coil, fan type, etc.) that have been tested by the manufacturer according to AHRI test procedures using AHRI-specified test conditions (AHRI 210/240-2023). If an AHRI certificate is not available, a copy of the catalog data provided by the OEM should be attached to the system indicating an acceptable combination and performance data.
Install the heat pump in accordance with the manufacturer’s instructions and relevant standards including ACCA Standard 5: HVAC Quality Installation Specification and ACCA’s Technician's Guide & Work Book for Quality Installations and ACCA Standard 9: HVAC Quality Installation Verification Protocols.
How to Select and Install Ductless Heat Pumps
- Choose a system configuration based on homeowner needs. This includes determining whether to use ducted, ductless, or combination systems, how many zones and indoor heads are needed, the boundaries of each zone, and the location of each head.
- Calculate heating and cooling loads for each zone and for the entire home using ACCA Manual J. This is especially important if you have done significant air sealing and insulating, which will reduce your heating and cooling load.
- Size and select equipment using ACCA Manual S or, if sizing to provide heating in Climate Zones 4 or higher, follow sizing guidance from NEEP, NRCan, and US DOE . When determining equipment sizing, use the original equipment manufacturer (OEM)’s expanded performance table to obtain performance data at design conditions, rather than using the performance data on the AHRI certificate. For example, if the home is kept at 75°F and the outdoor design temperature for the location is 100°F, locate those columns on the performance table and match them to the design load.
- Choose the highest performing model the project costs will allow, to meet the design heating and cooling load of the project. Take note of dehumidification performance as indicated by the sensible heat ratio (SHR) of the unit (lower SHR indicates better dehumidification during cooling). Note cooling efficiency (SEER2), heating efficiency (HSPF2), noise criteria, air filtration (higher MERV filters provide better filtration), and cold weather performance. If you are participating in an energy-efficiency program, select equipment that complies with the requirements for your climate zone.
- Determine whether a whole-house dehumidifier will be needed. If the selected heat pump has a high SHR, then additional dehumidification may be needed, particularly if located in a humid environment (Moisture Region A in the maps on the Climate Tab),
- Confirm that the indoor and outdoor components of the heat pump system match, as demonstrated by a certificate from the Air Conditioning, Heating and Refrigeration Institute (AHRI) or a copy of the catalog data provided by the original equipment manufacturer indicating an acceptable combination.
- Refrigerant line connections for ductless heat pumps often utilize flare joints to connect the indoor unit(s) to the outdoor unit. It is important to use best practices and proper tools to cut, deburr, and flare copper tubing to decrease the likelihood of refrigerant leaks. Cut tubing gradually to avoid deforming the pipe and deburr with the pipe angled downward so any shavings don’t get trapped in the pipe. Use a good quality eccentric flaring tool, with a depth stop and a clutch to consistently make good quality flares. Check that the flare is the proper size with a size gauge, and before connecting, visually inspect the flare to ensure that it is free of deformations or scratches. Use a torque wrench to properly tighten the flare nut per manufacturer specifications. Over-tightening can cause leaks. NOTE: Factory line sets often come with flares and flare nuts. You may need to cut tubing and make new flares if these are damaged. For the line set to outdoor unit connection, if the outdoor unit comes with flare nuts use those instead of the ones provided by the line set.
- Pressure-test the system with nitrogen per manufacturer specifications. Use digital gauges to easily identify drops in pressure which indicate leaks. If leaks are present, use an approved non-corrosive bubble leak detector at the joints to identify the location of the leak.
- After pressure testing, perform a standing vacuum test per manufacturer instructions. This process can quickly be done by using a proper vacuum process, which includes using Schrader valve removal tools, large diameter hoses, and a digital micron gauge. A manufacturer will typically recommend a 300 micron or lower vacuum pressure and for the pressure to remain below 500 microns for the duration of the test. If micron level does not rise during the vacuum decay test, this ensures there are no leaks, air, nitrogen, or moisture left in the system. This is a critical step to ensuring quality installation.
- Follow the manufacturer’s recommendations for refrigerant charging. Too much or too little refrigerant can reduce the efficiency of the equipment and lead to premature component failures. Most heat pumps come with refrigerant in the ODU. Refrigerant may need to be added if the line set length(s) are longer than the factory charge allows. Conversely, some refrigerant may need to be recovered if the line set length(s) are shorter than the factory charge allows. Use the charging method recommended by the manufacturer. There are three methods for charging: the subcooling method (typically for units with a thermal expansion valve), the superheat method (typically for units with a fixed orifice), or the weigh-in method (using the refrigerant weight amount listed on the data plate on the outdoor unit). Most ductless heat pumps will use the weigh-in method. Verify that you are using the correct method for the specific heat pump model to be installed. Refrigerant charging must be done by an EPA certified technician.
- Make sure the condensate line and drain pans are correctly installed.
- Test the system in all modes to ensure proper operation.
Success
The performance of any heat pump system depends heavily upon proper sizing and quality installation. It can be tempting to skip the step of performing heating and cooling load calculations using ACCA Manual J, especially for a system replacement where you know the size of the existing equipment. It is vital that this step be performed for every job, however, to protect the homeowner from paying more than is necessary, to enable a properly performing system, and to protect the contractor from liability.
Quality installation is arguably much more important than the make and model of the selected equipment when it comes to system performance, efficiency, and longevity. Proper refrigerant charge, secure connections, and overall quality work have long-term financial, environmental, and comfort implications.
Climate
For ENERGY STAR and DOE Zero Energy Ready Home climate-specific guidance, see the Compliance tab.
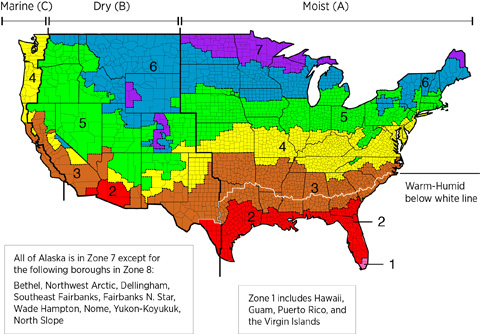
In humid climates, consider adding a dehumidifier for indoor humidity control, especially in the milder parts of the cooling season. In Figure 1 and Figure 2 below, locations in Moisture Region “A” have typically humid climates. Many ductless heat pumps provide poor dehumidification, particularly those optimized for high cooling efficiency ratings or for cold climate operation. The sensible heat ratio (SHR) of a unit provides a good indication of its dehumidification capability. A lower SHR translates to better dehumidification. If a unit with a high SHR is selected, consider installing a whole-house dehumidifier or room dehumidifiers in key locations. See the “Whole-House Dehumidification” guide for more information.
In humid climates, set the time-delay relay on the heat pump indoor unit fan to 30 seconds or less to prevent moisture on the evaporator coil from evaporating back into the air stream and contributing to indoor humidity. Some heat pump models have a “dry mode” where operation is optimized for dehumidification rather than efficient cooling. Utilizing this mode could be part of a home’s dehumidification strategy.
Considerations for Cold-Climate Applications
Some ductless heat pumps are appropriate for heating without a backup source in very cold conditions. When designing and selecting heat pumps for heating in climate zones 4 or higher, consider the following recommendations:
- When selecting equipment, review manufacturer data and examine capacities and efficiencies at low temperatures. See NEEP recommendations for cold-climate heat pumps.
- Install outdoor units well above snow height – stands can be used, as well as wall mounts. Be aware of potential vibration issues if the unit is attached to a wall.
- Do not install outdoor units where water or melting snow or ice will fall on the unit. If located in such places, protect heat pumps with a cover of some sort. For instance, the location should be under the gable end of the roof, as opposed to under an eave end (snow can slide off an eave and land on the unit). See Figures 1 and 2.
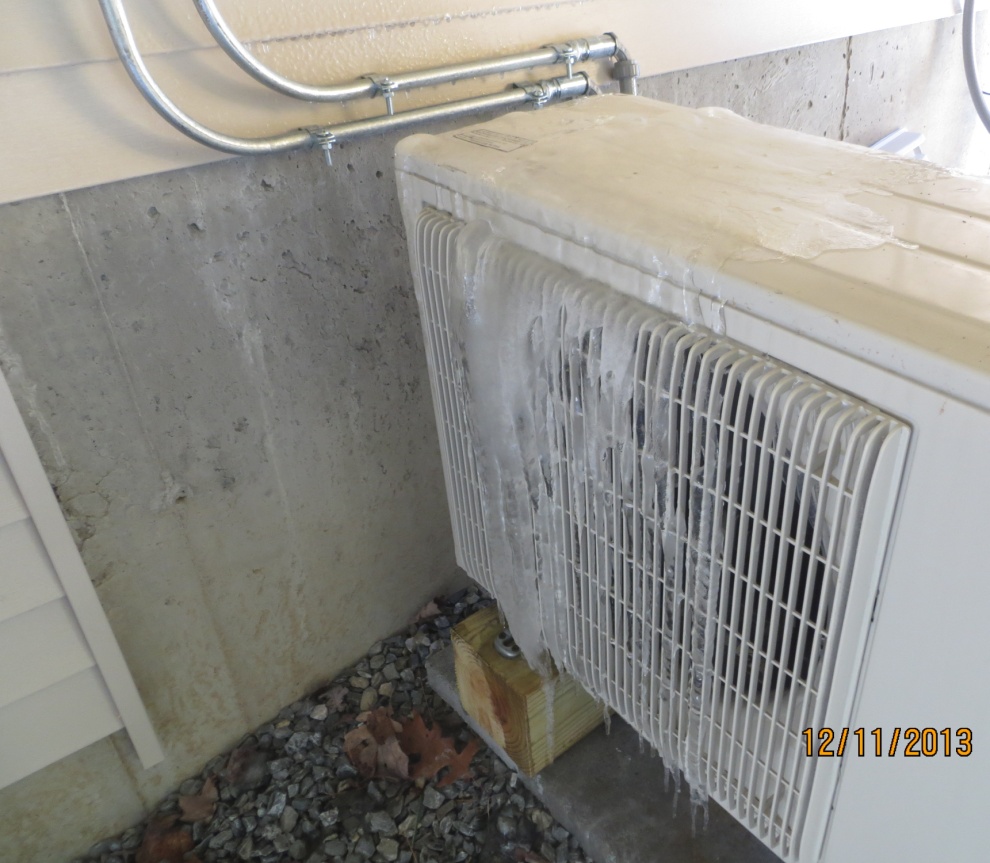

- Avoid installing the outdoor unit near a walkway to avoid slippery conditions from water produced by the unit.
- Think about which spaces need heating or cooling in winter and summer. Since hot air rises, it is possible that some homes may be heated sufficiently from the first floor in the winter. In the summer, the hottest part of a house may be the upper floors. The house may be cooled sufficiently from the upper floors. Both strategies require a fairly open connection between floors.
- Indoor fan coils mounted near the ceiling will draw warmer return air from the space. While this is desirable during the cooling season, it is an efficiency liability during the heating season. Ductless fan coils may need to be mounted high so as not to obstruct movement within a home, but for heating performance, lower installations are better.
- In general, heat pumps are most efficient when indoor fan speed is set to “auto.” If fan speed is manually set to one particular speed, capacity and efficiency may be reduced.
The map in Figure 3 shows the climate zones used by energy codes equivalent to the International Energy Conservation Code (IECC) 2009, 2012, 2015, and 2018. The map in Figure 4 shows the climate zones used by energy codes equivalent to the IECC 2021. Climate zone-specific requirements specified in the IECC are shown in the Compliance Tab of this guide.
Training
Compliance
Compliance
The Compliance tab contains both program and code information. Code language is excerpted and summarized below. For exact code language, refer to the applicable code, which may require purchase from the publisher. While we continually update our database, links may have changed since posting. Please contact our webmaster if you find broken links.
ENERGY STAR Single-Family New Homes, Version 3/3.1/3.2
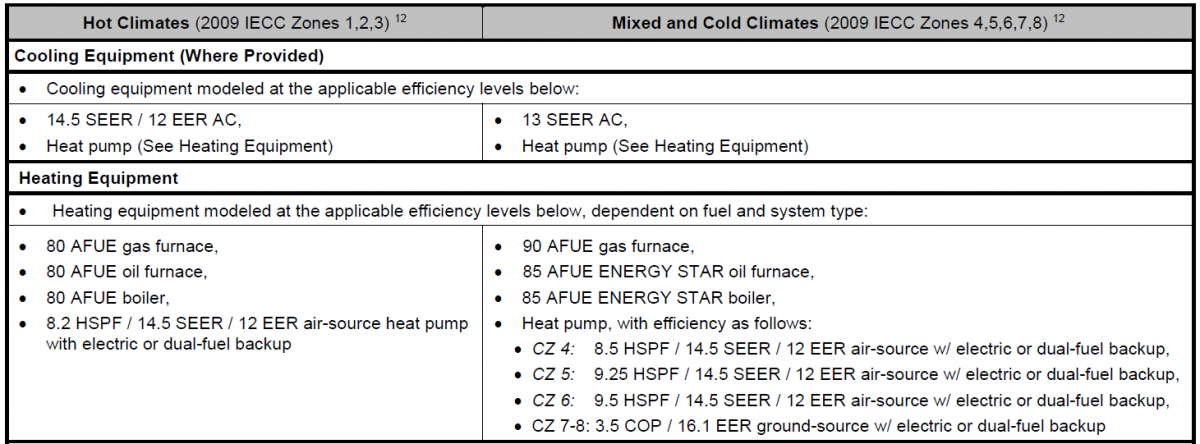
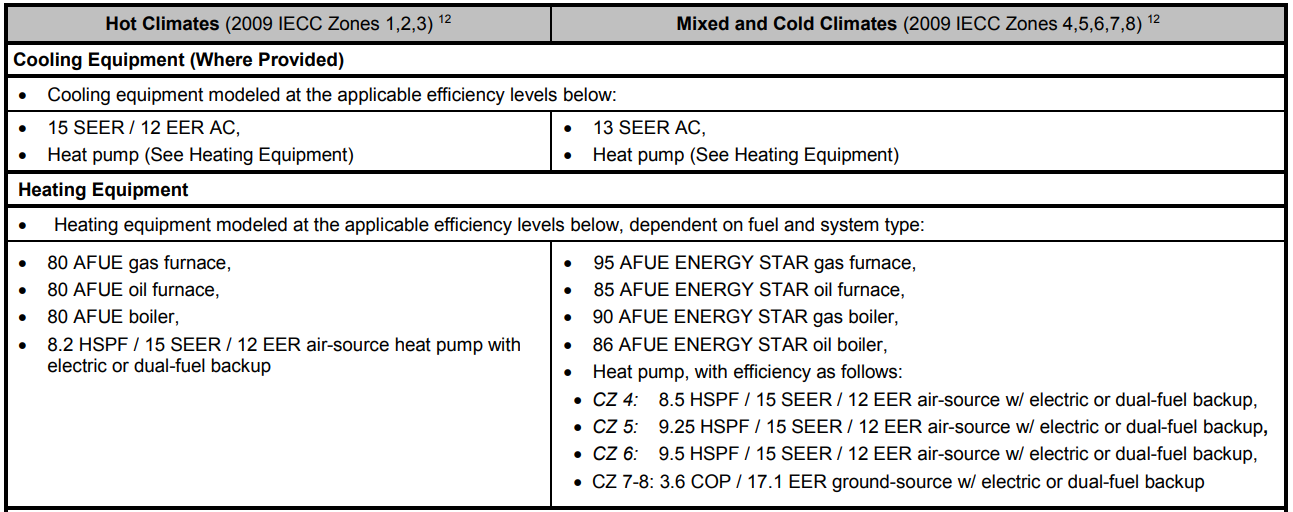
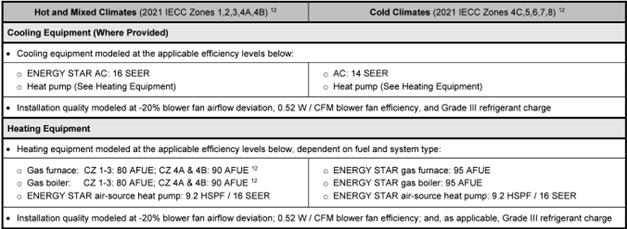
The ENERGY STAR Reference Design Home is the set of efficiency features modeled to determine the ENERGY STAR ERI (energy rating index) Target for each home pursuing certification. Therefore, while the features below are not mandatory, if they are not used then other measures will be needed to achieve the ENERGY STAR ERI Target. In addition, note that the Mandatory Requirements for All Certified Homes, Exhibit 2 (see list below), contain additional requirements such as total duct leakage limits, minimum allowed insulation levels, and minimum allowed fenestration performance. Therefore, EPA recommends that partners review the documents in Exhibit 2 prior to selecting measures.
Please note that the Reference Design Home HVAC efficiencies differ depending on version. Please see the ENERGY STAR Single-Family New Homes Implementation Timeline for the program version and revision currently applicable in in your state.
DOE Zero Energy Ready Home Version 1
Exhibit 1 Mandatory Requirements.
Exhibit 1, Item 1) Certified under the ENERGY STAR Qualified Homes Program or the ENERGY STAR Multifamily New Construction Program.
Exhibit 2 DOE Zero Energy Ready Home Target Home.
The U.S. Department of Energy’s Zero Energy Ready Home program allows builders to choose a prescriptive or performance path. The DOE Zero Energy Ready Home prescriptive path requires builders to meet or exceed the minimum HVAC efficiencies listed in Exhibit 2 of the National Program Requirements (Rev 07), as shown below. The DOE Zero Energy Ready Home performance path allows builders to select a custom combination of measures for each home that is equivalent in performance to the minimum HERS (Home Energy Rating System) index of a modeled target home that meets the requirements of Exhibit 2 as well as the mandatory requirements of Zero Energy Ready Home Exhibit 1.
DOE Zero Energy Ready Home Version 2
Exhibit 1 Mandatory Requirements.
Exhibit 1, Item 2) Certified under the ENERGY STAR Single Family New Homes Version 3.2.
Exhibit 2 DOE Zero Energy Ready Home Target Home.
The DOE Zero Energy Ready Home performance path allows builders to select a custom combination of measures for each home that is equivalent in performance to the minimum HERS (Home Energy Rating System) index of a modeled target home that meets the requirements of Exhibit 2 as well as the mandatory requirements of Zero Energy Ready Home Exhibit 1.
2009 International Energy Conservation Code (IECC)
403.1 Each heating and cooling system should have its own thermostat. If the primary heating system is a forced-air furnace at least one thermostat must be programmable and capable of controlling the heating and cooling system on a schedule to maintain different temperatures at different times of the day.
403.6 Heating and cooling equipment sizing shall be in accordance with Section M1401.3 of the 2009 International Residential Code.
2012, 2015, 2018, and 2021 International Energy Conservation Code (IECC)
R403.1 (R403.1.1 in 2015, 2018, and 2021 IECC) Each heating and cooling system should have its own thermostat. If the primary heating system is a forced-air furnace, at least one thermostat must be programmable and capable of controlling the heating and cooling system on a schedule to maintain different temperatures at different times of the day.
R403.6 (R403.7 in 2015, 2018, and 2021 IECC) Heating and cooling equipment shall be sized in accordance with ACCA Manual S based on building loads calculated in accordance with ACCA Manual J or other approved heating and cooling calculation methods.
Retrofit: 2009, 2012, 2015, 2018, and 2021 IECC
Section R101.4.3 (in 2009 and 2012). Additions, alterations, renovations, or repairs shall conform to the provisions of this code, without requiring the unaltered portions of the existing building to comply with this code. (See code for additional requirements and exceptions.)
Chapter 5 (in 2015, 2018, 2021). The provisions of this chapter shall control the alteration, repair, addition, and change of occupancy of existing buildings and structures.
2009, 2012, 2015, 2018, and 2021 International Residential Code (IRC)
Comply with all relevant sections of the applicable International Residential Code, including Chapter 14: Heating and Cooling Equipment.
Retrofit: 2009, 2012, 2015, 2018, and 2021 IRC
Section R102.7.1 Additions, alterations, or repairs. Additions, alterations, renovations, or repairs shall conform to the provisions of this code, without requiring the unaltered portions of the existing building to comply with the requirements of this code, unless otherwise stated. (See code for additional requirements and exceptions.)
Appendix J regulates the repair, renovation, alteration, and reconstruction of existing buildings and is intended to encourage their continued safe use.
Air Conditioning Contractors of America (ACCA) Standards
ACCA Manual S. Residential Equipment Selection, American National Standards Institute (ANSI)/ACCA 3-Manual S-2014, provides information on how to select and size heating and cooling equipment to meet Manual J loads based on local climate and ambient conditions at the building site. Manual S covers sizing strategies for all types of cooling and heating equipment, as well as comprehensive manufacturers’ performance data on sensible, latent, or heating capacity for various operating conditions.
ACCA Manual D: Residential Duct Systems, ANSI/ACCA 1-Manual D-2016, provides ANSI-recognized duct sizing principles and calculations that apply to all duct materials; the system operating point (supply cfm and external static pressure) and airway sizing for single-speed and multi-speed (ECM) blowers; a method for determining the impact of duct friction and fitting pressure drop on blower performance and air delivery; and equivalent length data.
ACCA Manual J: Residential Load Calculation, ANSI/ACCA 2-Manual J-2016, provides information for calculating heating and cooling loads for equipment sizing for single-family detached homes, small multi-unit structures, condominiums, town houses, and manufactured homes.
ACCA Standard 5: Heating Ventilation Air Conditioning (HVAC) Quality Installation Specification, ANSI/ACCA 5 QI-2015, details nationally recognized criteria for the proper installation of residential and commercial HVAC systems, including forced air furnaces, boilers, air conditioners, and heat pumps. The Standard covers aspects of design, installation, and distribution systems, as well as necessary documentation. The Technician’s Guide for Quality Installation, produced by ACCA, explains the HVAC Quality Installation (QI) Specification and provides detailed procedures for the steps technicians must complete and document to show compliance with the HVAC QI Specification.
ACCA Standard 9: HVAC Quality Installation Verification Protocols, ANSI/ACCA 9 QIVP-2016 , specifies the protocols to verify the installation of HVAC systems in accordance with ACCA Standard 5. The protocols provide guidance to contractors, verifiers, and administrators who participate in verification efforts using independent objective and qualified third parties to ensure that an HVAC installation meets the requirements in Standard 5.
Retrofit
SCOPE
Assess the need for replacing or upgrading the HVAC system. See Pre-Retrofit Assessment of Existing HVAC Systems.
Review the guide Pre-Retrofit Assessment of Combustion Appliances to ensure safe conditions exist and unsafe conditions won’t be introduced if combustion appliances are replaced or if other energy-efficiency upgrades are made to a home with combustion appliances.
View the Standard Work Specifications regarding heat pump controls.
DESCRIPTION
Assessment
The typical lifespan of HVAC equipment is 15 to 20 years. New equipment has much higher efficiencies, safety, control flexibility, and performance capabilities. Existing equipment should be carefully assessed to determine whether investment in repairs, upgrades, or expansion is warranted. See the following BASC guides and resources for information to aid in making this determination. The guides also contain important safety and health information for dealing with older construction and equipment.
- Pre-Retrofit Assessment of Existing HVAC Systems
- Building America Best Practices Series Volume 14 - HVAC: A Guide for Contractors to Share with Homeowners
Replacement
Ductless mini-split heat pumps are a popular choice for supplementing or replacing heating and cooling equipment in a home that does not already have ducts, for example in a home that currently uses baseboard or wall unit electric heaters or wood stove heating. They have the added advantage of providing cooling in addition to heating. They are sometimes added to a home to become the primary heating and cooling system while an older, less efficient system stays in place to provide back-up heat in cases of very cold weather.
Although installing new HVAC equipment can be costly and labor-intensive, it often reaps large rewards in energy cost savings and comfort. For decision-making guidance including a discussion of the available system types and their advantages, see Pre-Retrofit Assessment of Existing HVAC Systems and Building America Best Practices Series Volume 14 - HVAC: A Guide for Contractors to Share with Homeowners. See the following Solution Center guides for more specific information on other HVAC systems:
- Mechanical Air-Conditioning
- Evaporative Cooling Systems
- Traditional Split Heat Pumps
- Ground-Source Heat Pumps
Repair/Upgrade
Full system maintenance is often overlooked by homeowners who don’t understand the strong relationship between general maintenance and performance.
The Air Conditioning Contractors of America Association, Inc. (ACCA) is one of the best sources for guidance on the installation, commissioning, and maintenance of HVAC equipment. Their free Quality Standards can be found on the ACCA website.
Useful documents available for download from the ACCA website include the following:
- ACCA Standard 5: HVAC Quality Installation Specification - minimum design and installation requirements for HVAC applications by professional contractors following industry-recognized quality installation practices.
- ACCA Standard 12: Home Evaluation and Performance Improvement - minimum requirements to evaluate a residence with regard to energy efficiency, water conservation, occupant comfort, and indoor air quality.
- ACCA Standard 9: HVAC Quality Installation Verification Protocols - details the requirements, roles, and obligations of installers and others to ensure that HVAC installations comply with the ANSI/ACCA 5.
- ACCA Standard 4: Maintenance of Residential HVAC Systems - establishes the minimum level of acceptable compliance for HVAC equipment maintenance inspections for residential applications.
- ACCA Standard 6: Restoring the Cleanliness of HVAC Systems- procedures for cleaning HVAC systems.
Additions
Ductless mini-split heat pumps are an excellent choice for providing heating and cooling when additional rooms will be added to the home, or when an attic, basement, or garage will be converted to living space. If the home already has an existing mini-split heat pump with multiple indoor heads, the existing system may have sufficient capacity to extend conditioning to the additional space. This should be confirmed by performing an accurate load calculation (ACCA Manual J) for the entire house including the addition. If the current system doesn’t meet the additional needed capacity (and/or for increased efficiency or for zone control) you may decide to add a new, dedicated mini-split heat pump with a separate external compressor/condenser unit.
In some cases, a dedicated mini-split may be desirable for zone control and comfort even where the capacity of the existing HVAC system is sufficient to condition the additional space. Additions that tend to heat-up or cool-down at a much different rate compared to the main house may be good candidates for a dedicated mini-split. Two examples are a sunroom addition with lots of glass, or an addition with five exposed sides (three exterior walls, an insulated ceiling, and a floor over unconditioned space) such as a bonus room above a garage.
When selecting a separate unit, perform an accurate load calculation in accordance with ACCA Manual J, select the proper capacity equipment in accordance with ACCA Manual S, and design the duct system in accordance with ACCA Manual D (where applicable).
More
More Info.
Access to some references may require purchase from the publisher. While we continually update our database, links may have changed since posting. Please contact our webmaster if you find broken links.
The following authors and organizations contributed to the content in this Guide.
Sales
Ductless Mini-Split Heat Pump = High-Efficiency or Ultra-Efficient Ductless Heat Pump
In addition to the savings that come with being an efficient heat pump, ductless heat pumps save energy and money by avoiding the use of ducts or using much more compact duct layouts inside the conditioned space. That’s because ducts are often sources of heat loss where not properly insulated and sealed, especially if installed in unconditioned attics or crawlspaces. The indoor unit is mounted on a wall, where it directly warms or cools a large part of the home. More than one indoor unit can be placed in the home in combination with a single outdoor unit. Additionally, some indoor units can be integrated with simple duct layouts. The outdoor units are smaller than standard heat pumps.
