

Scope
Air-seal drywall to top plates at all attic/wall interfaces to minimize air leakage.
- Install drywall then seal the seam from the attic side with caulk, foam, or drywall adhesive (but not other construction adhesives).
OR - Before installing drywall, install caulk or other sealant or a foam gasket to the face of the top plate then install the drywall. If this method is used, make sure the sealant or gasket remains intact during the drywall installation.
See the Compliance Tab for links to related codes and standards and voluntary federal energy-efficiency program requirements.
Description
In simplest terms, a wall is a six-sided box consisting of a horizontal top plate, a horizontal bottom plate, and vertical side studs, with a gypsum board and wall sheathing back, all fastened together to create a wall cavity that is typically filled with insulation when this wall is part of the building’s exterior shell. If air is allowed to flow through the wall cavity, i.e., if the wall cavity is not air tight, the flowing air can reduce the insulation’s effectiveness. If the wall cavity is not airtight, convective loops can also develop within wall cavities, due to temperature differences between the inside and outside surfaces and top and bottom sections of the wall. These convective loops can encourage more air flow, further reducing insulation effectiveness and potentially resulting in moisture problems.
To ensure the optimum energy performance and moisture management of the whole house, all of the wall components should be connected to the each other and to the ceiling and floor in a way that creates a continuous and complete air barrier system.
Gypsum board drywall is an air barrier material (BSC 2009). The taping of drywall seams results in a plane of airtightness at the field of the wall. However, several steps must be taken
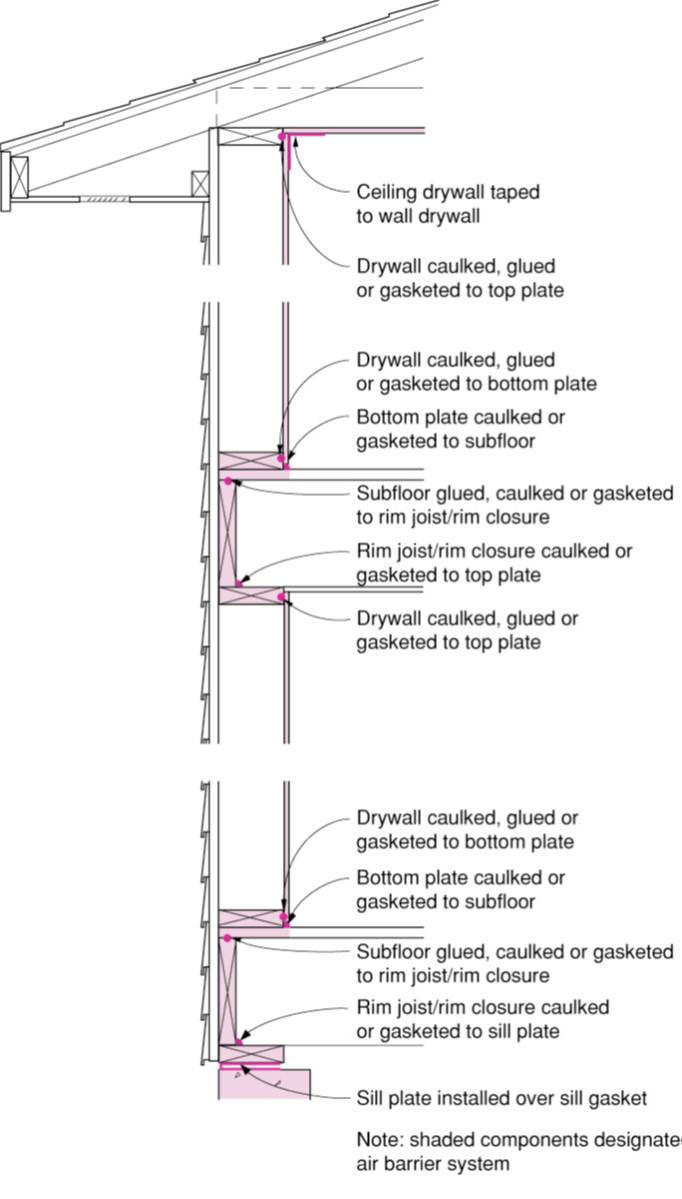
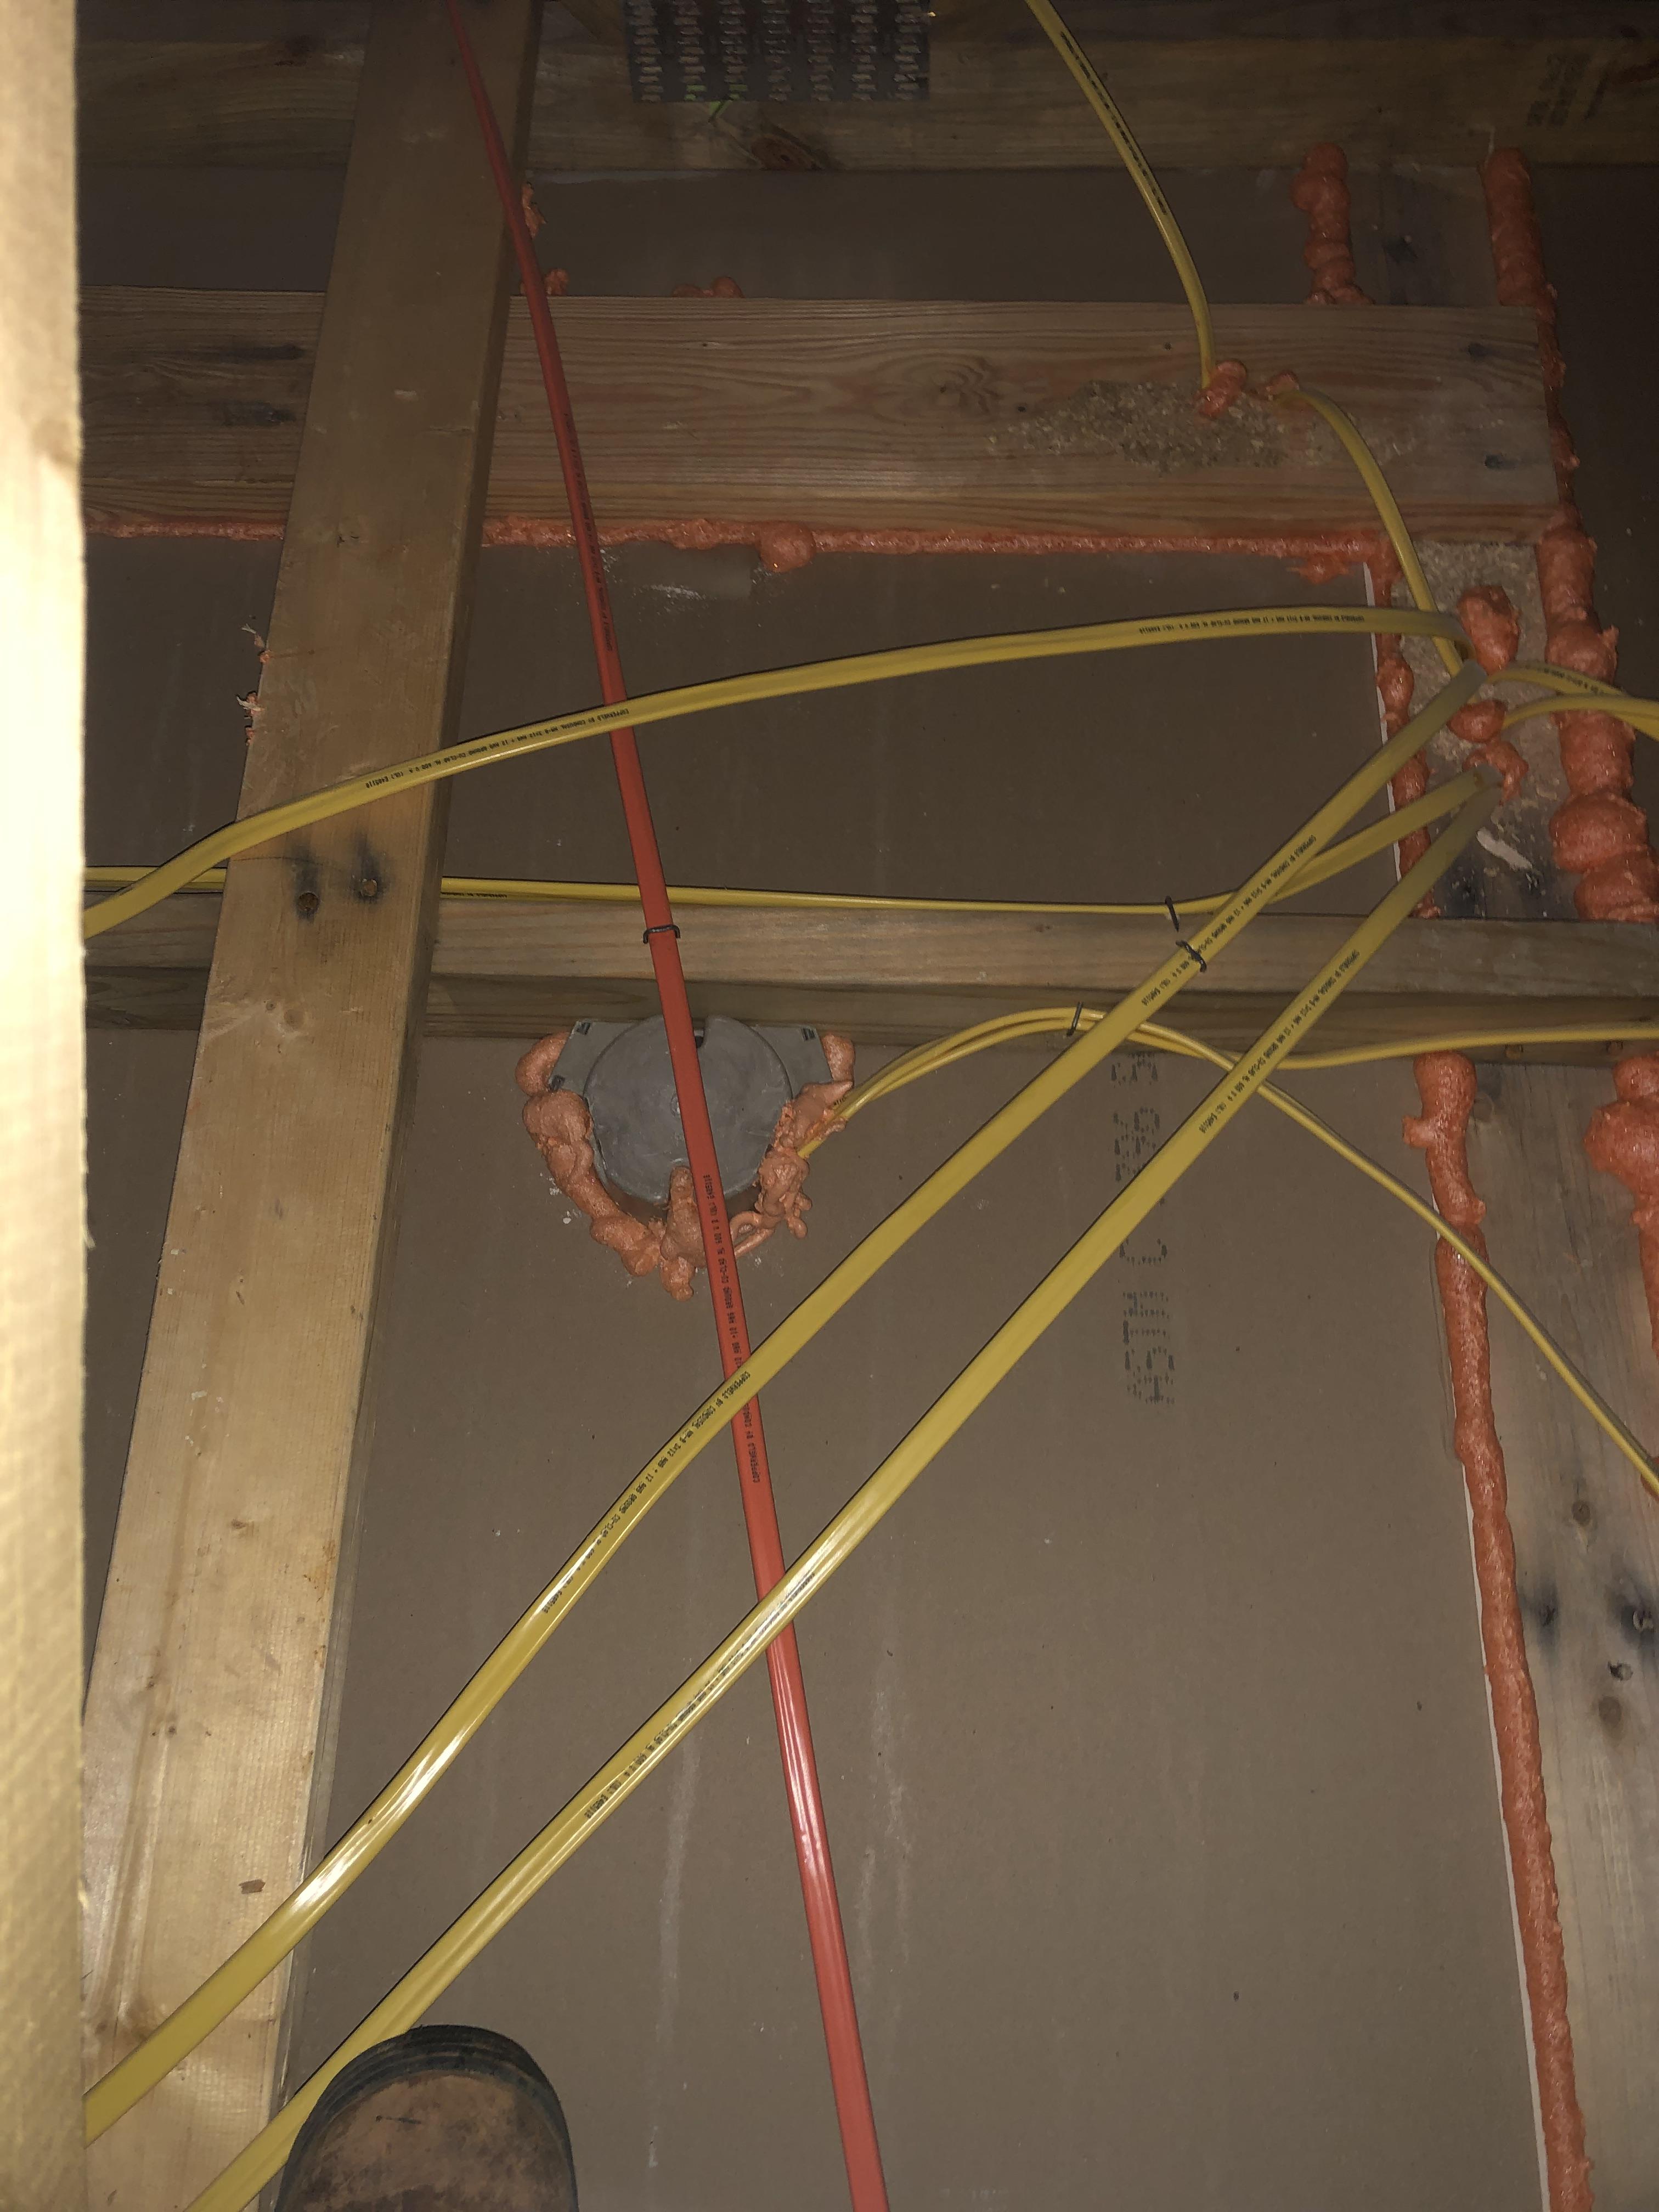
to use this material properly to create a continuous and complete air barrier system. To do this, it is important to create air barrier continuity at the perimeter of drywall assemblies as well as at all penetrations through the drywall. Air barrier continuity at the perimeter of drywall assemblies is achieved by sealing the edges of the drywall to solid framing materials. This requires a continuous sealant along:
- all exterior wall bottom and top plates,
- all top plates at insulated ceilings,
- rough opening perimeters,
- both sides of the first interior stud of partition walls (BSC 2009).
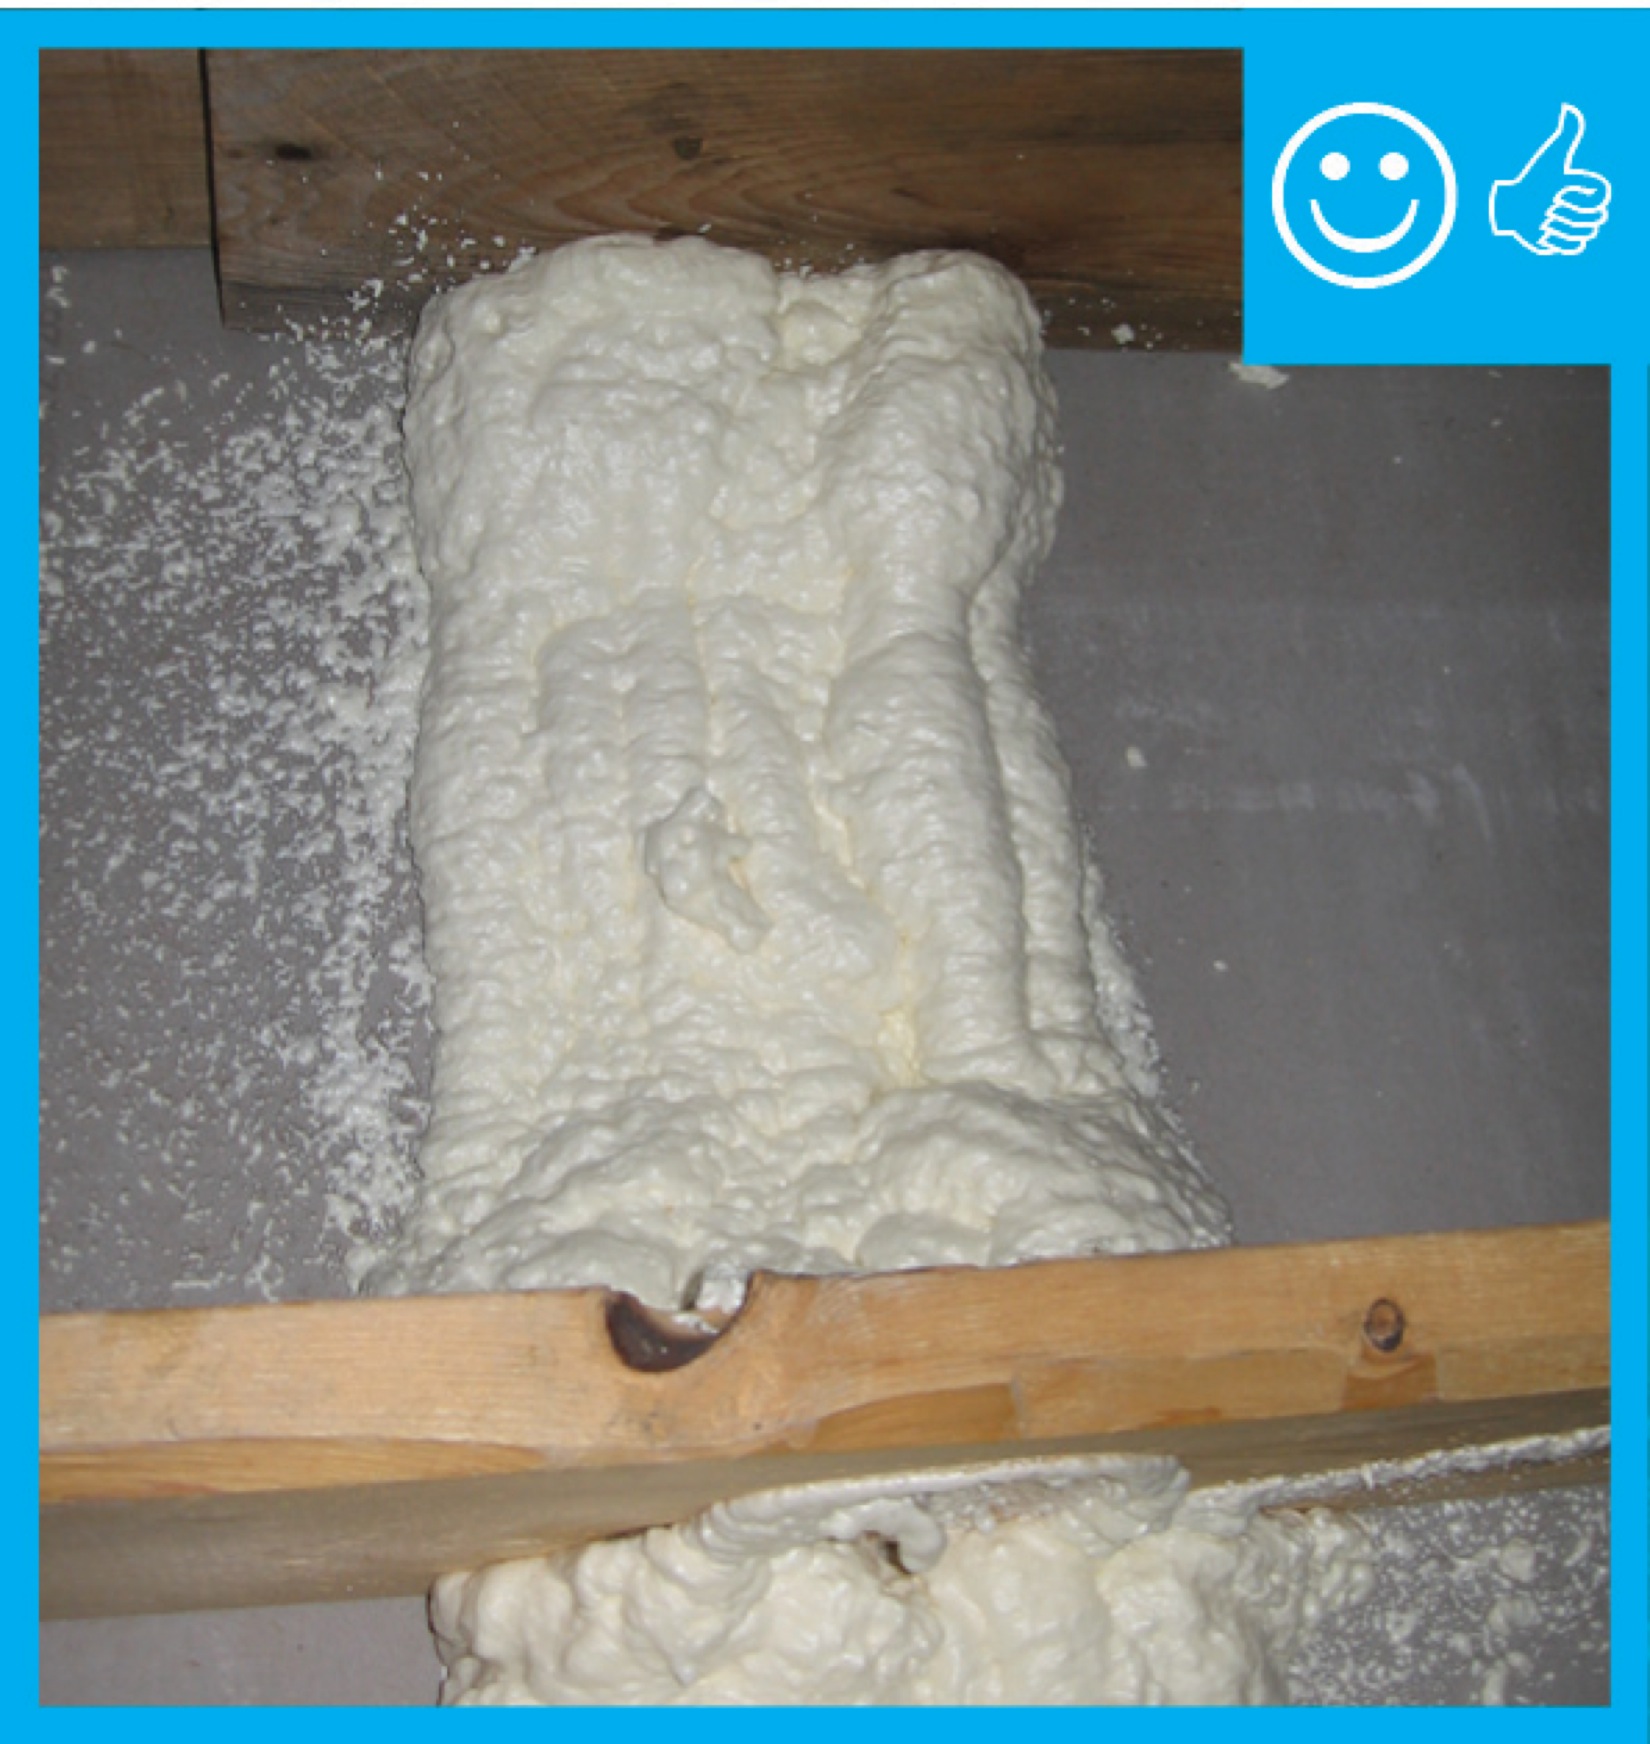
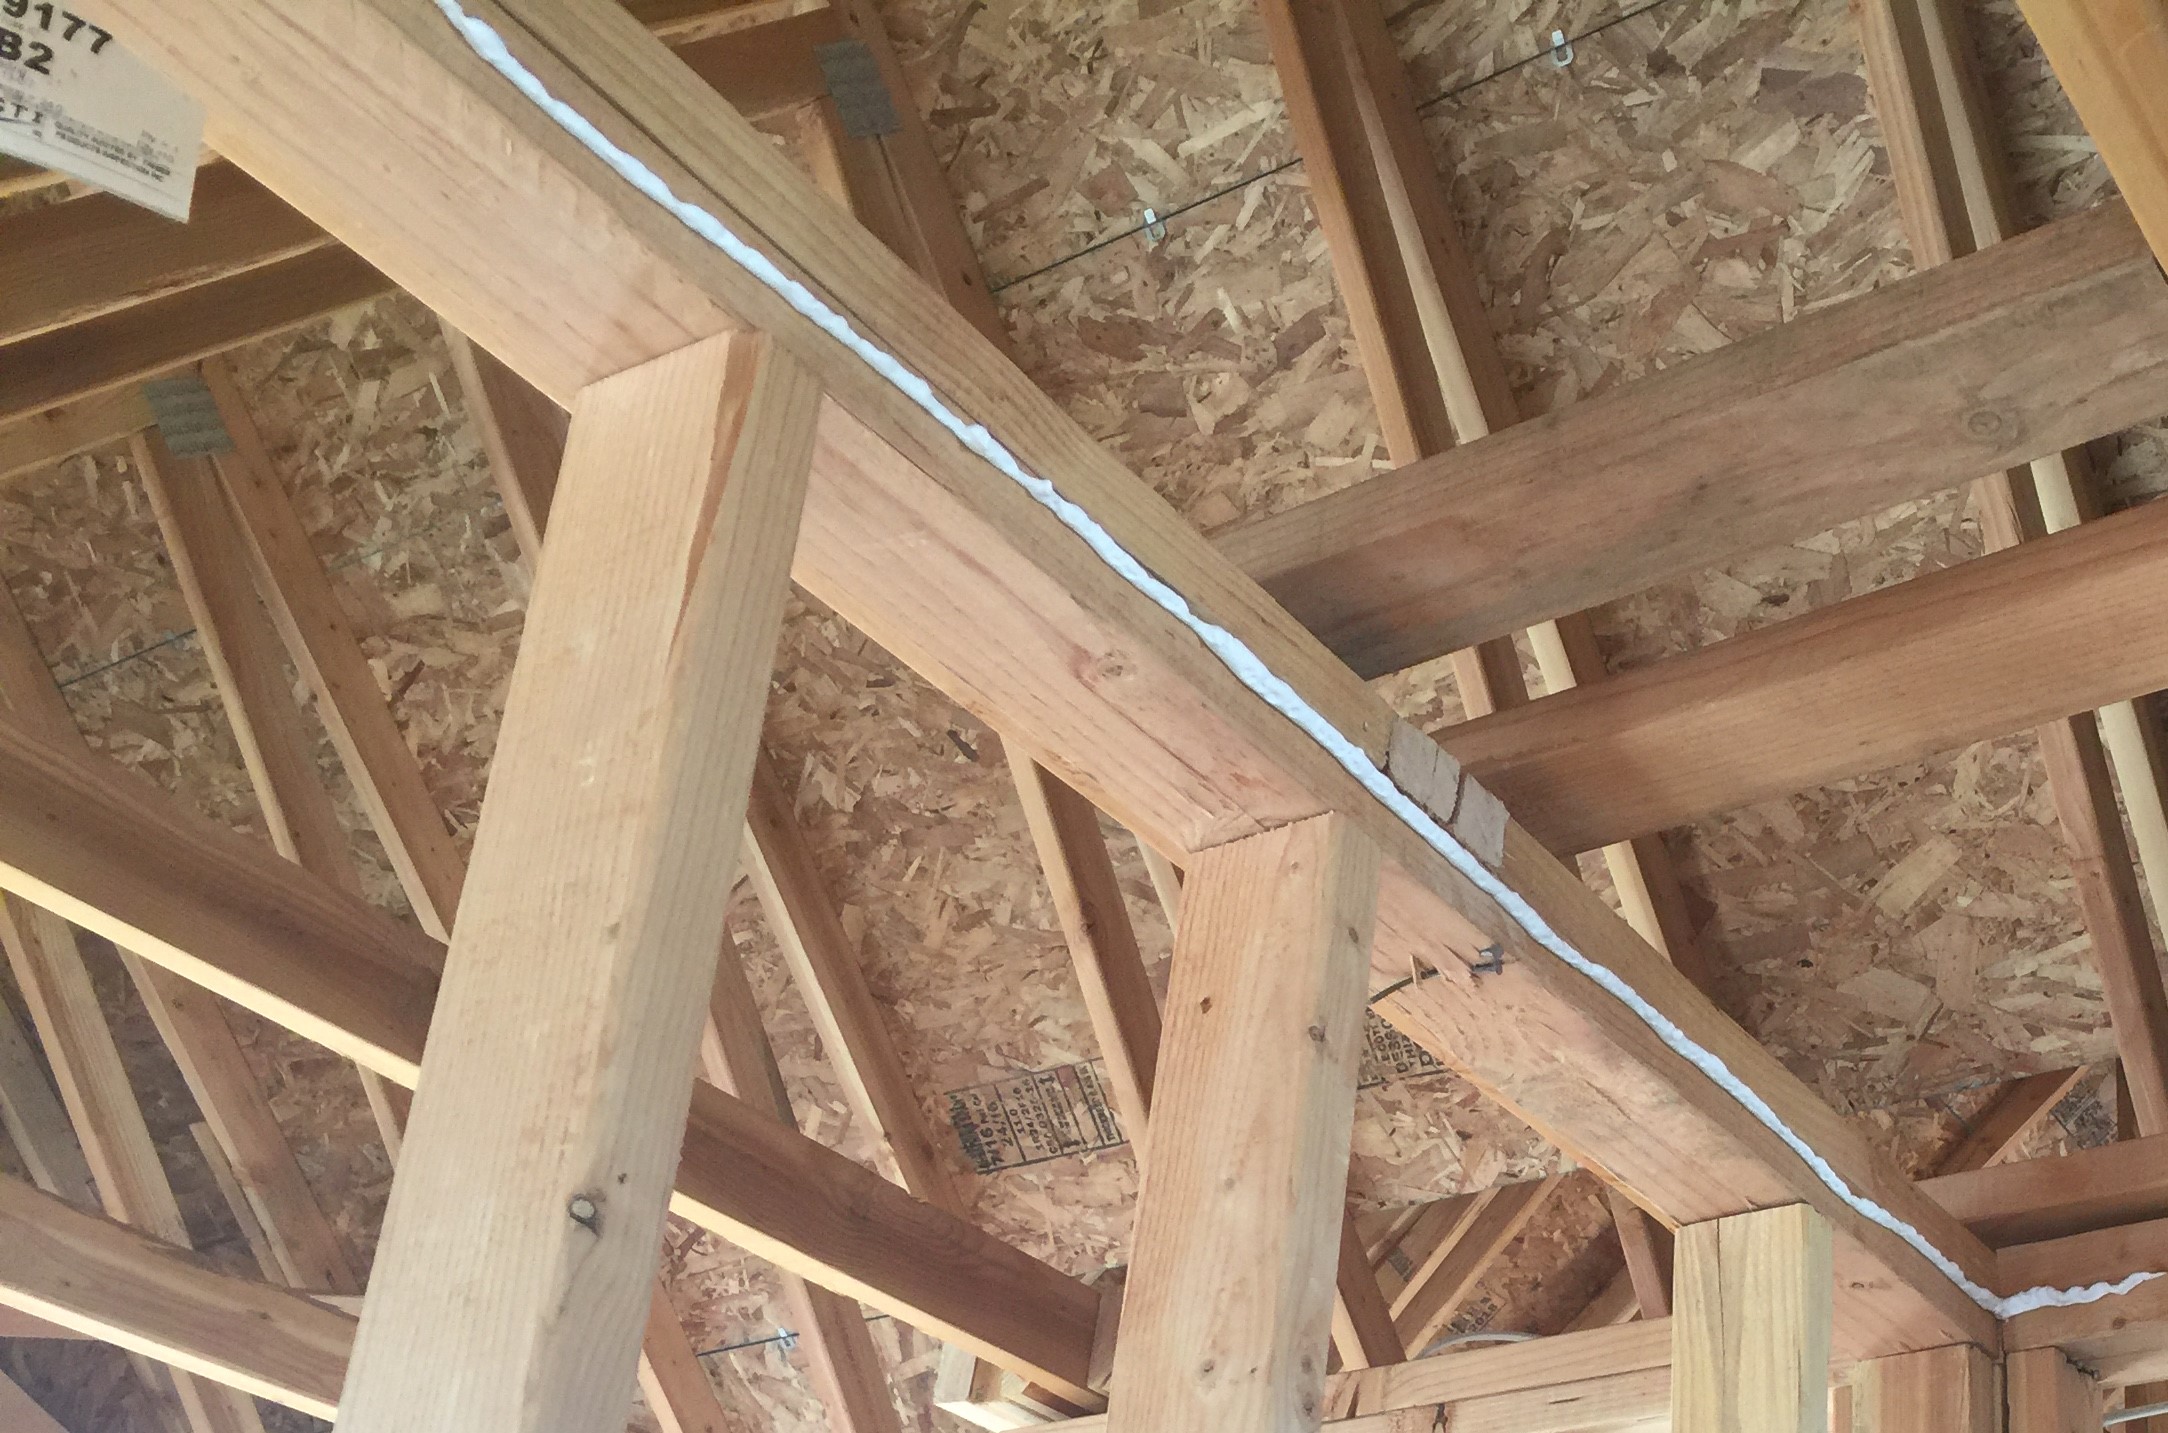
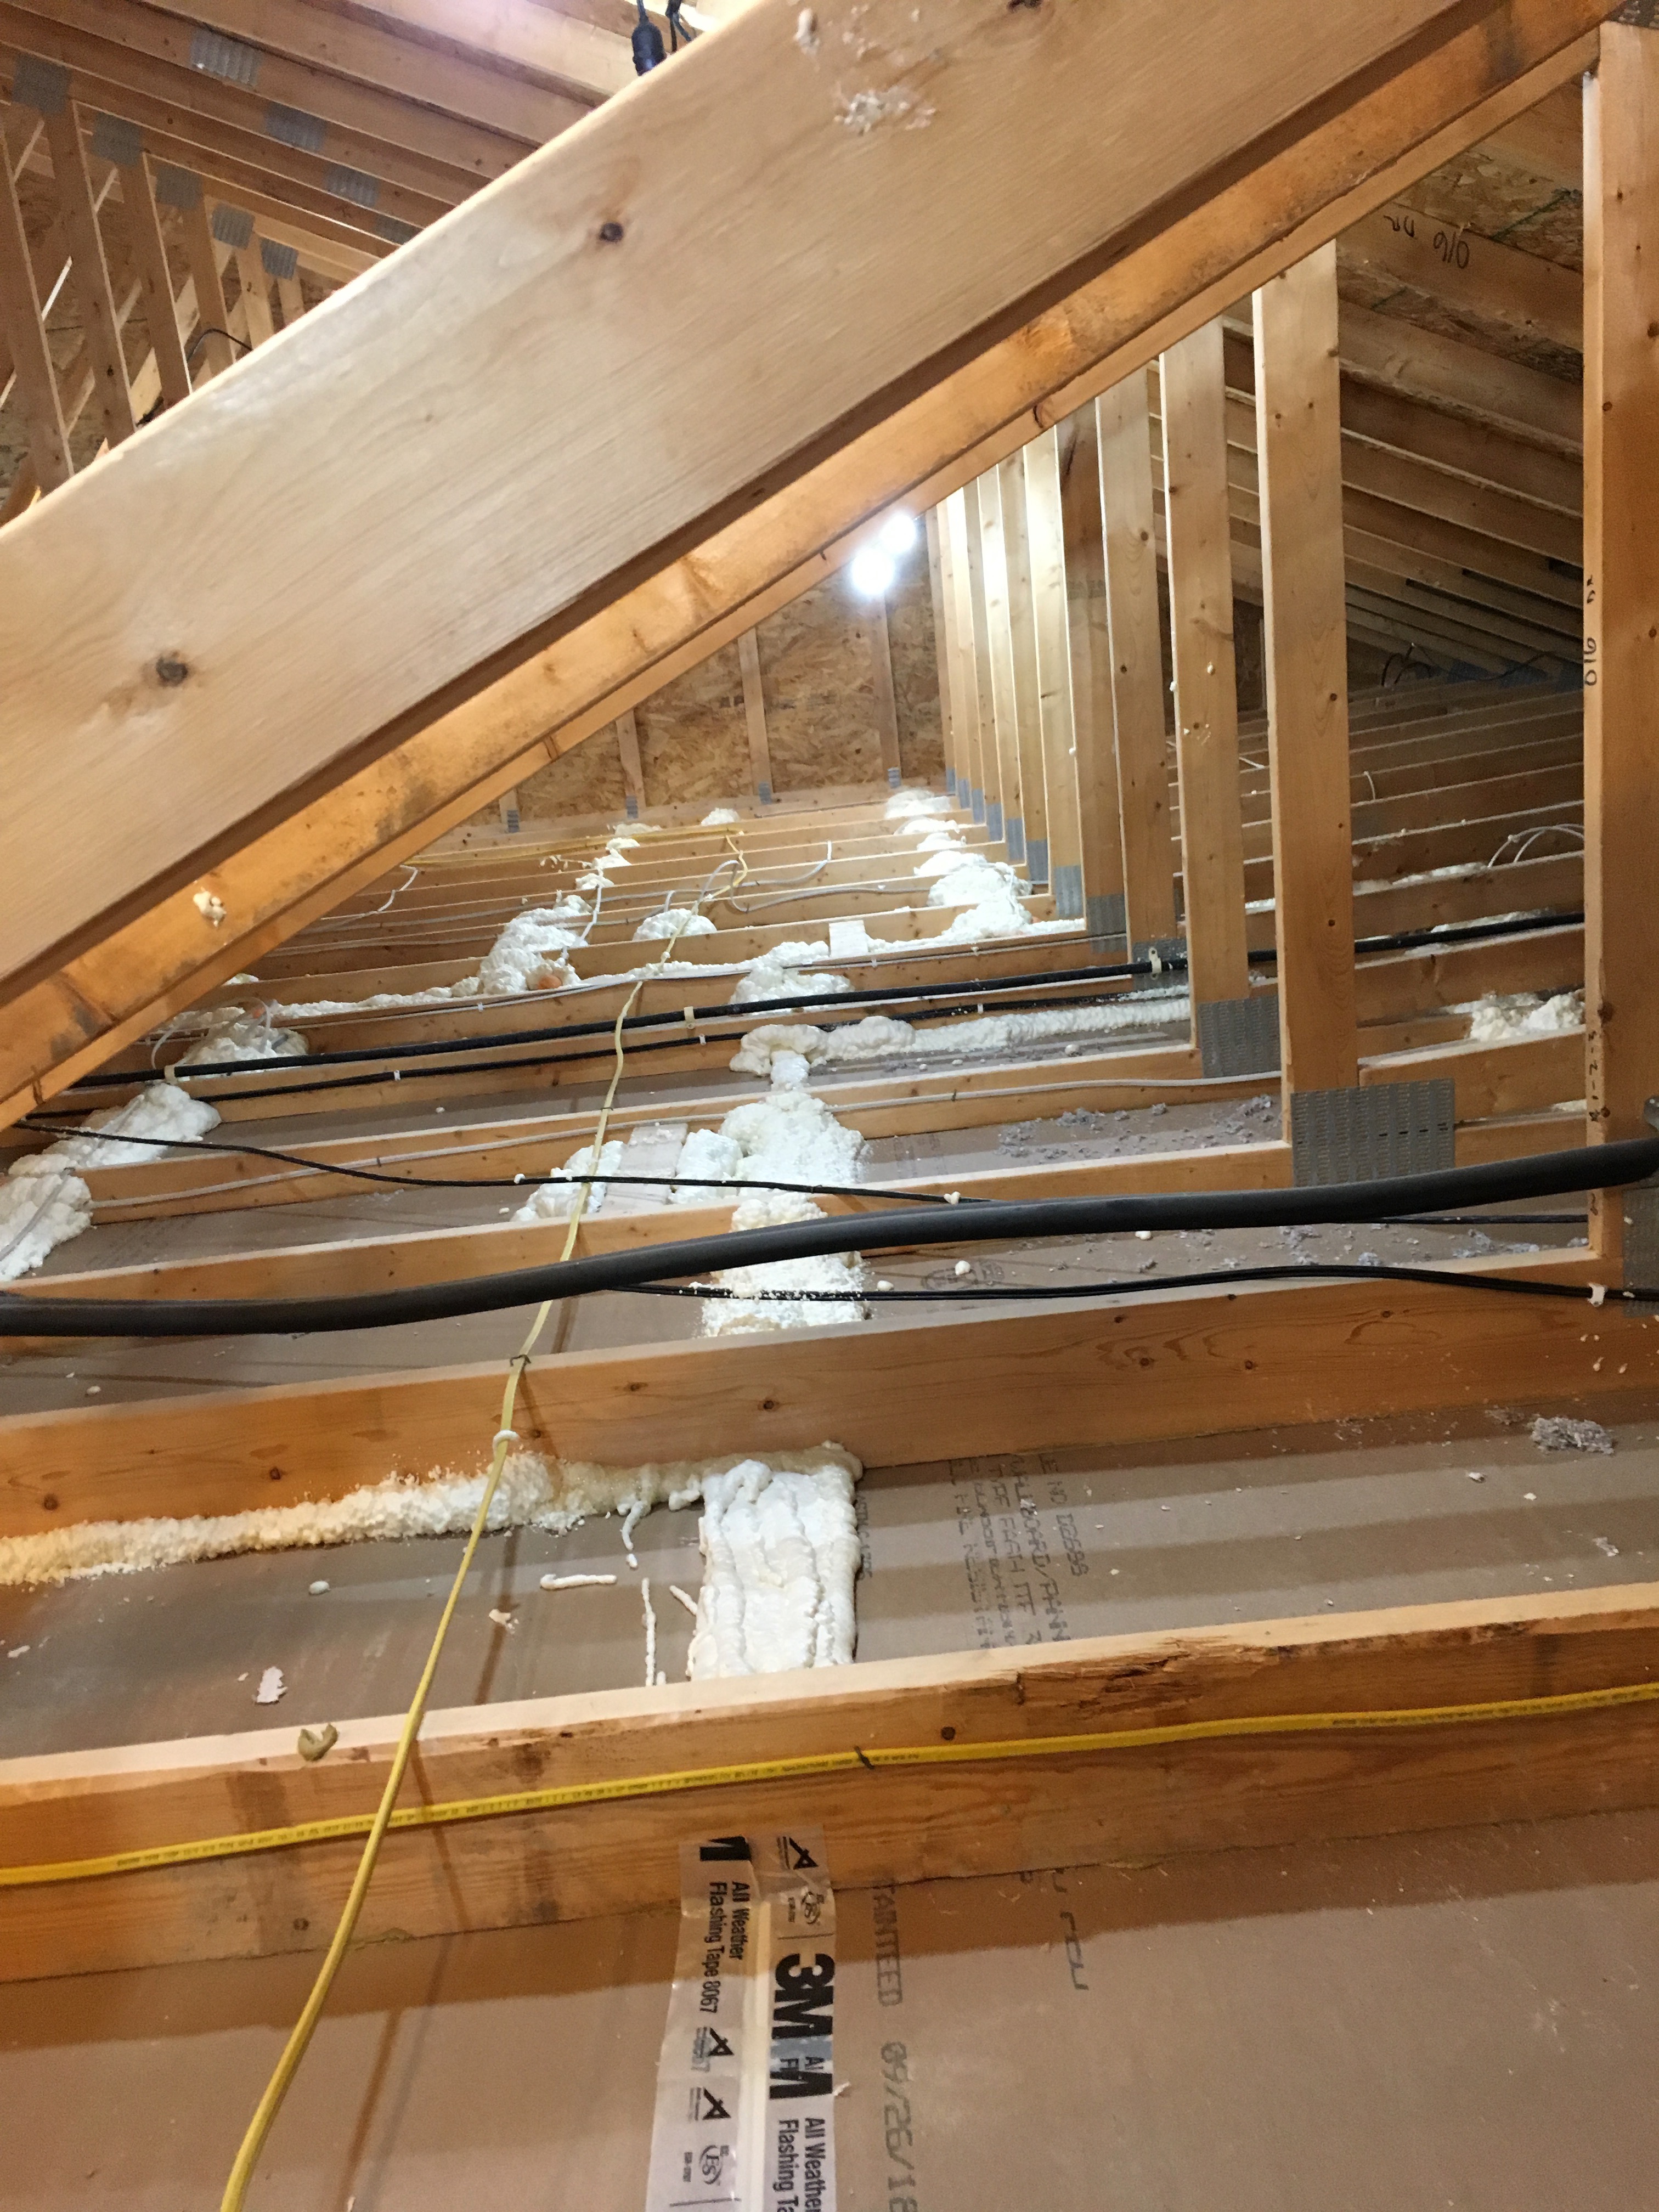
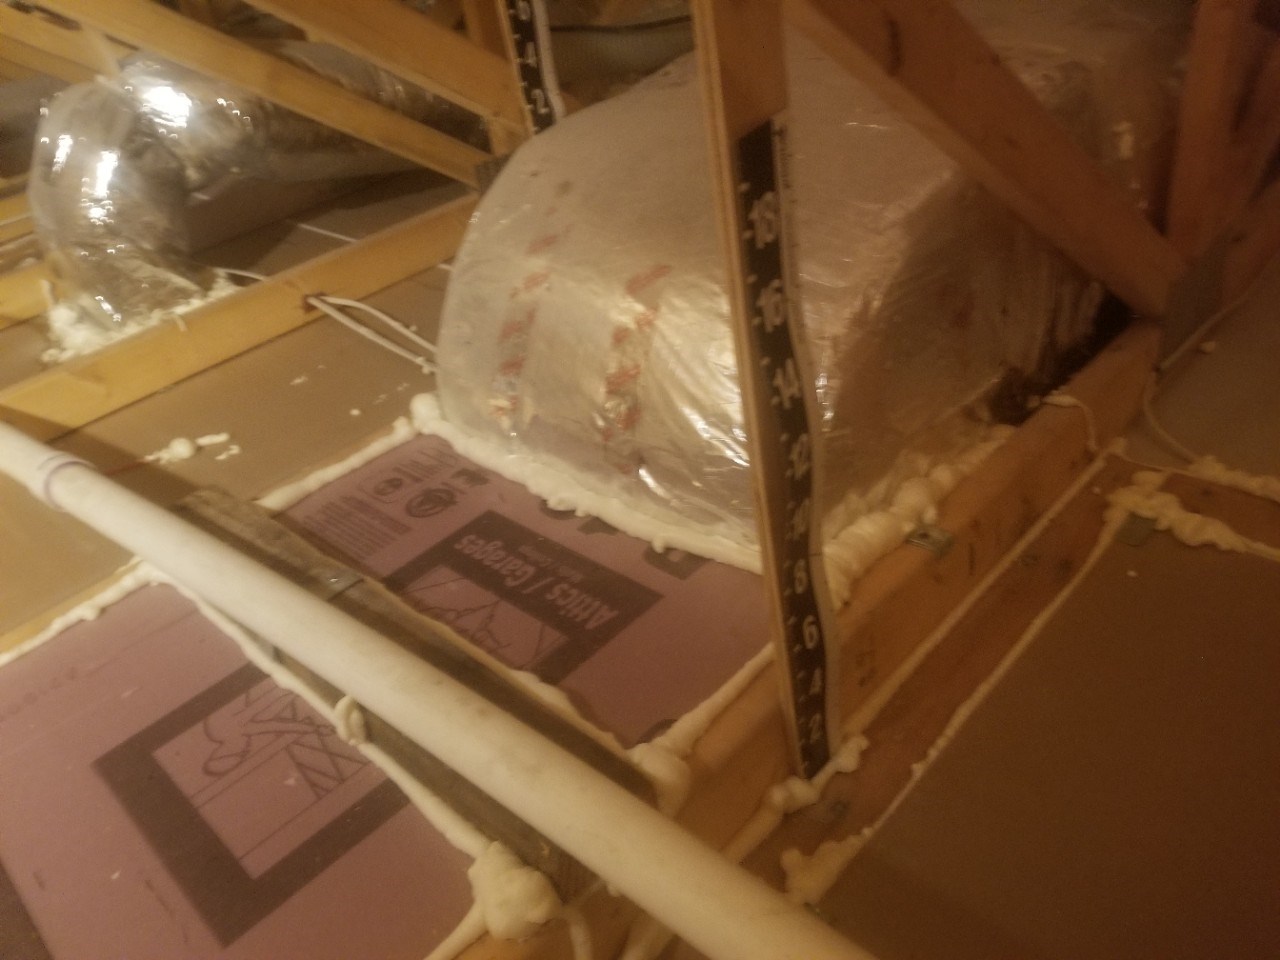
This air sealing can be achieved by applying caulk, glue, sprayer-applied sealant, or strips of foam gasket material to the surface of the top plates, bottom plates, and framing around doors and windows before installing the drywall. This would typically be done by the drywall installer. Other methods not described below for air sealing the top plates include installing spray foam insulation on the attic side of the ceiling at the eaves, which serves to both air seal the top plate and insulate this sometimes difficult-to-insulate area (although this will not address interior wall seams) or spray foam insulating the entire ceiling deck. Canned or one-part spray foam or sealant can be applied to all top plate seams from the attic side, although limited attic space can make this challenging. Another option is to use an air-borne aerosol sealant process, which will airseal all leaks in the home including air leaks at top plates (see Field Trial of an Aerosol-Based Enclosure Sealing Technology).
How to Air Seal the Drywall to the Top Plate
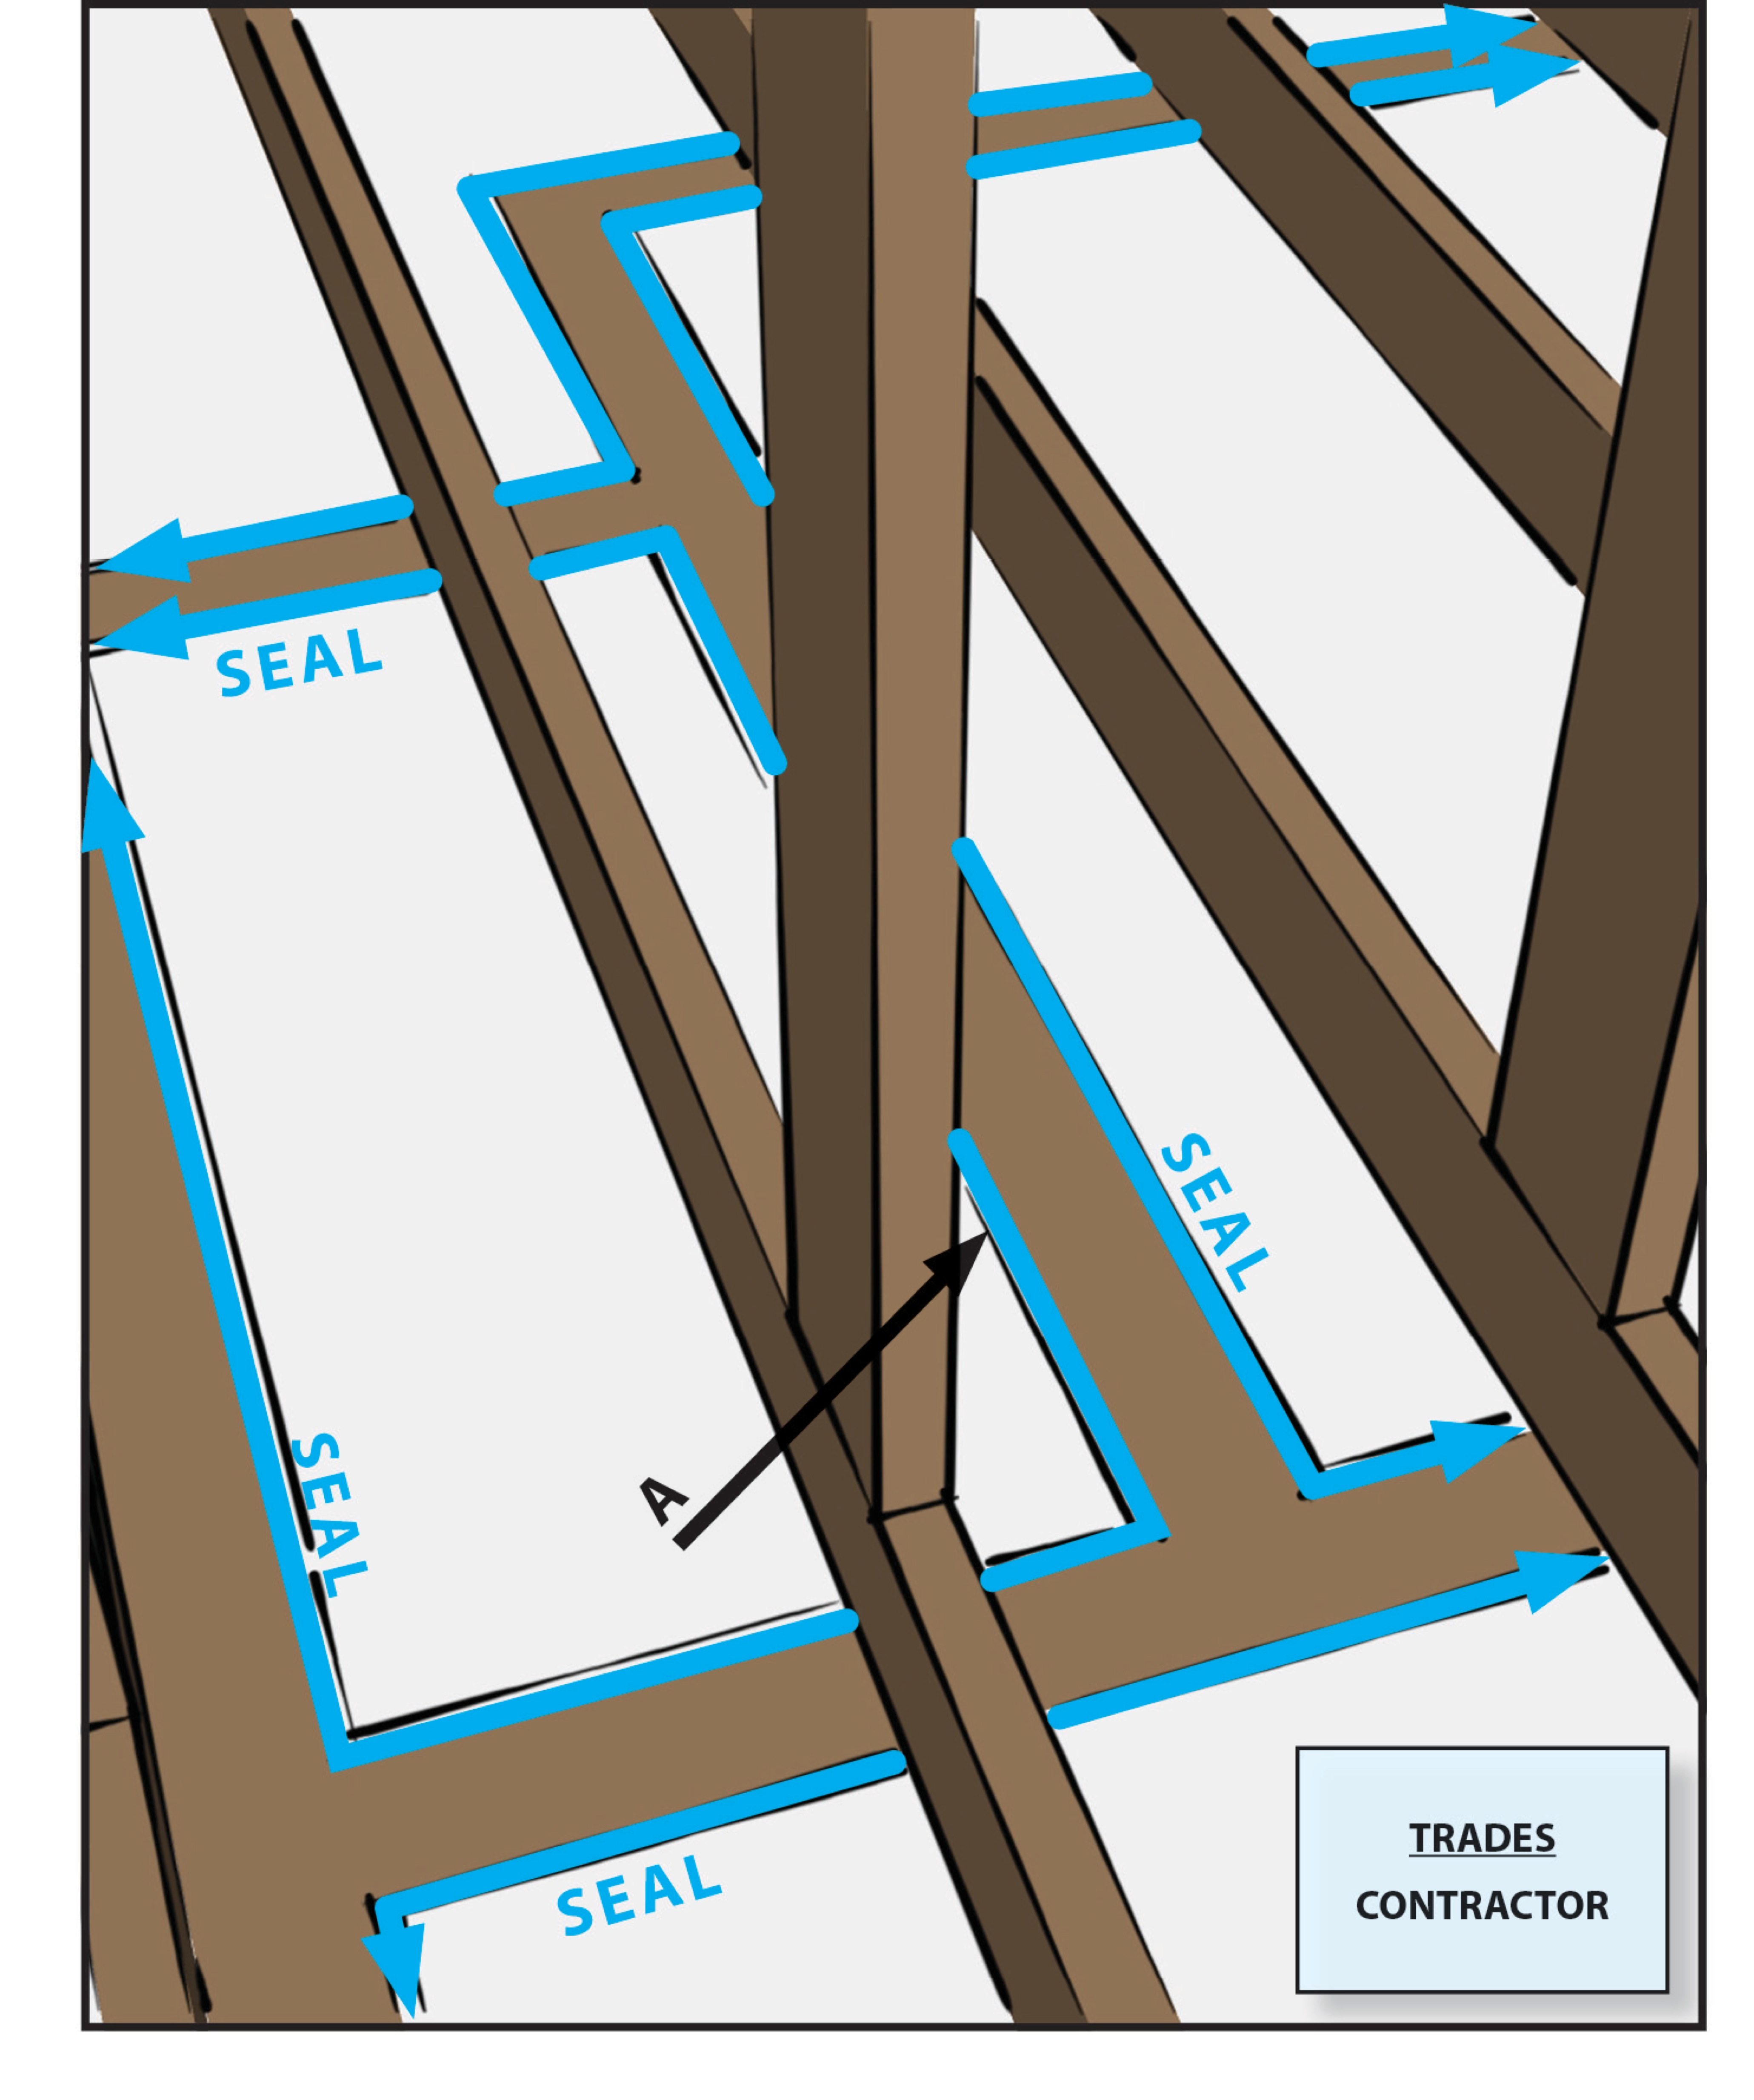
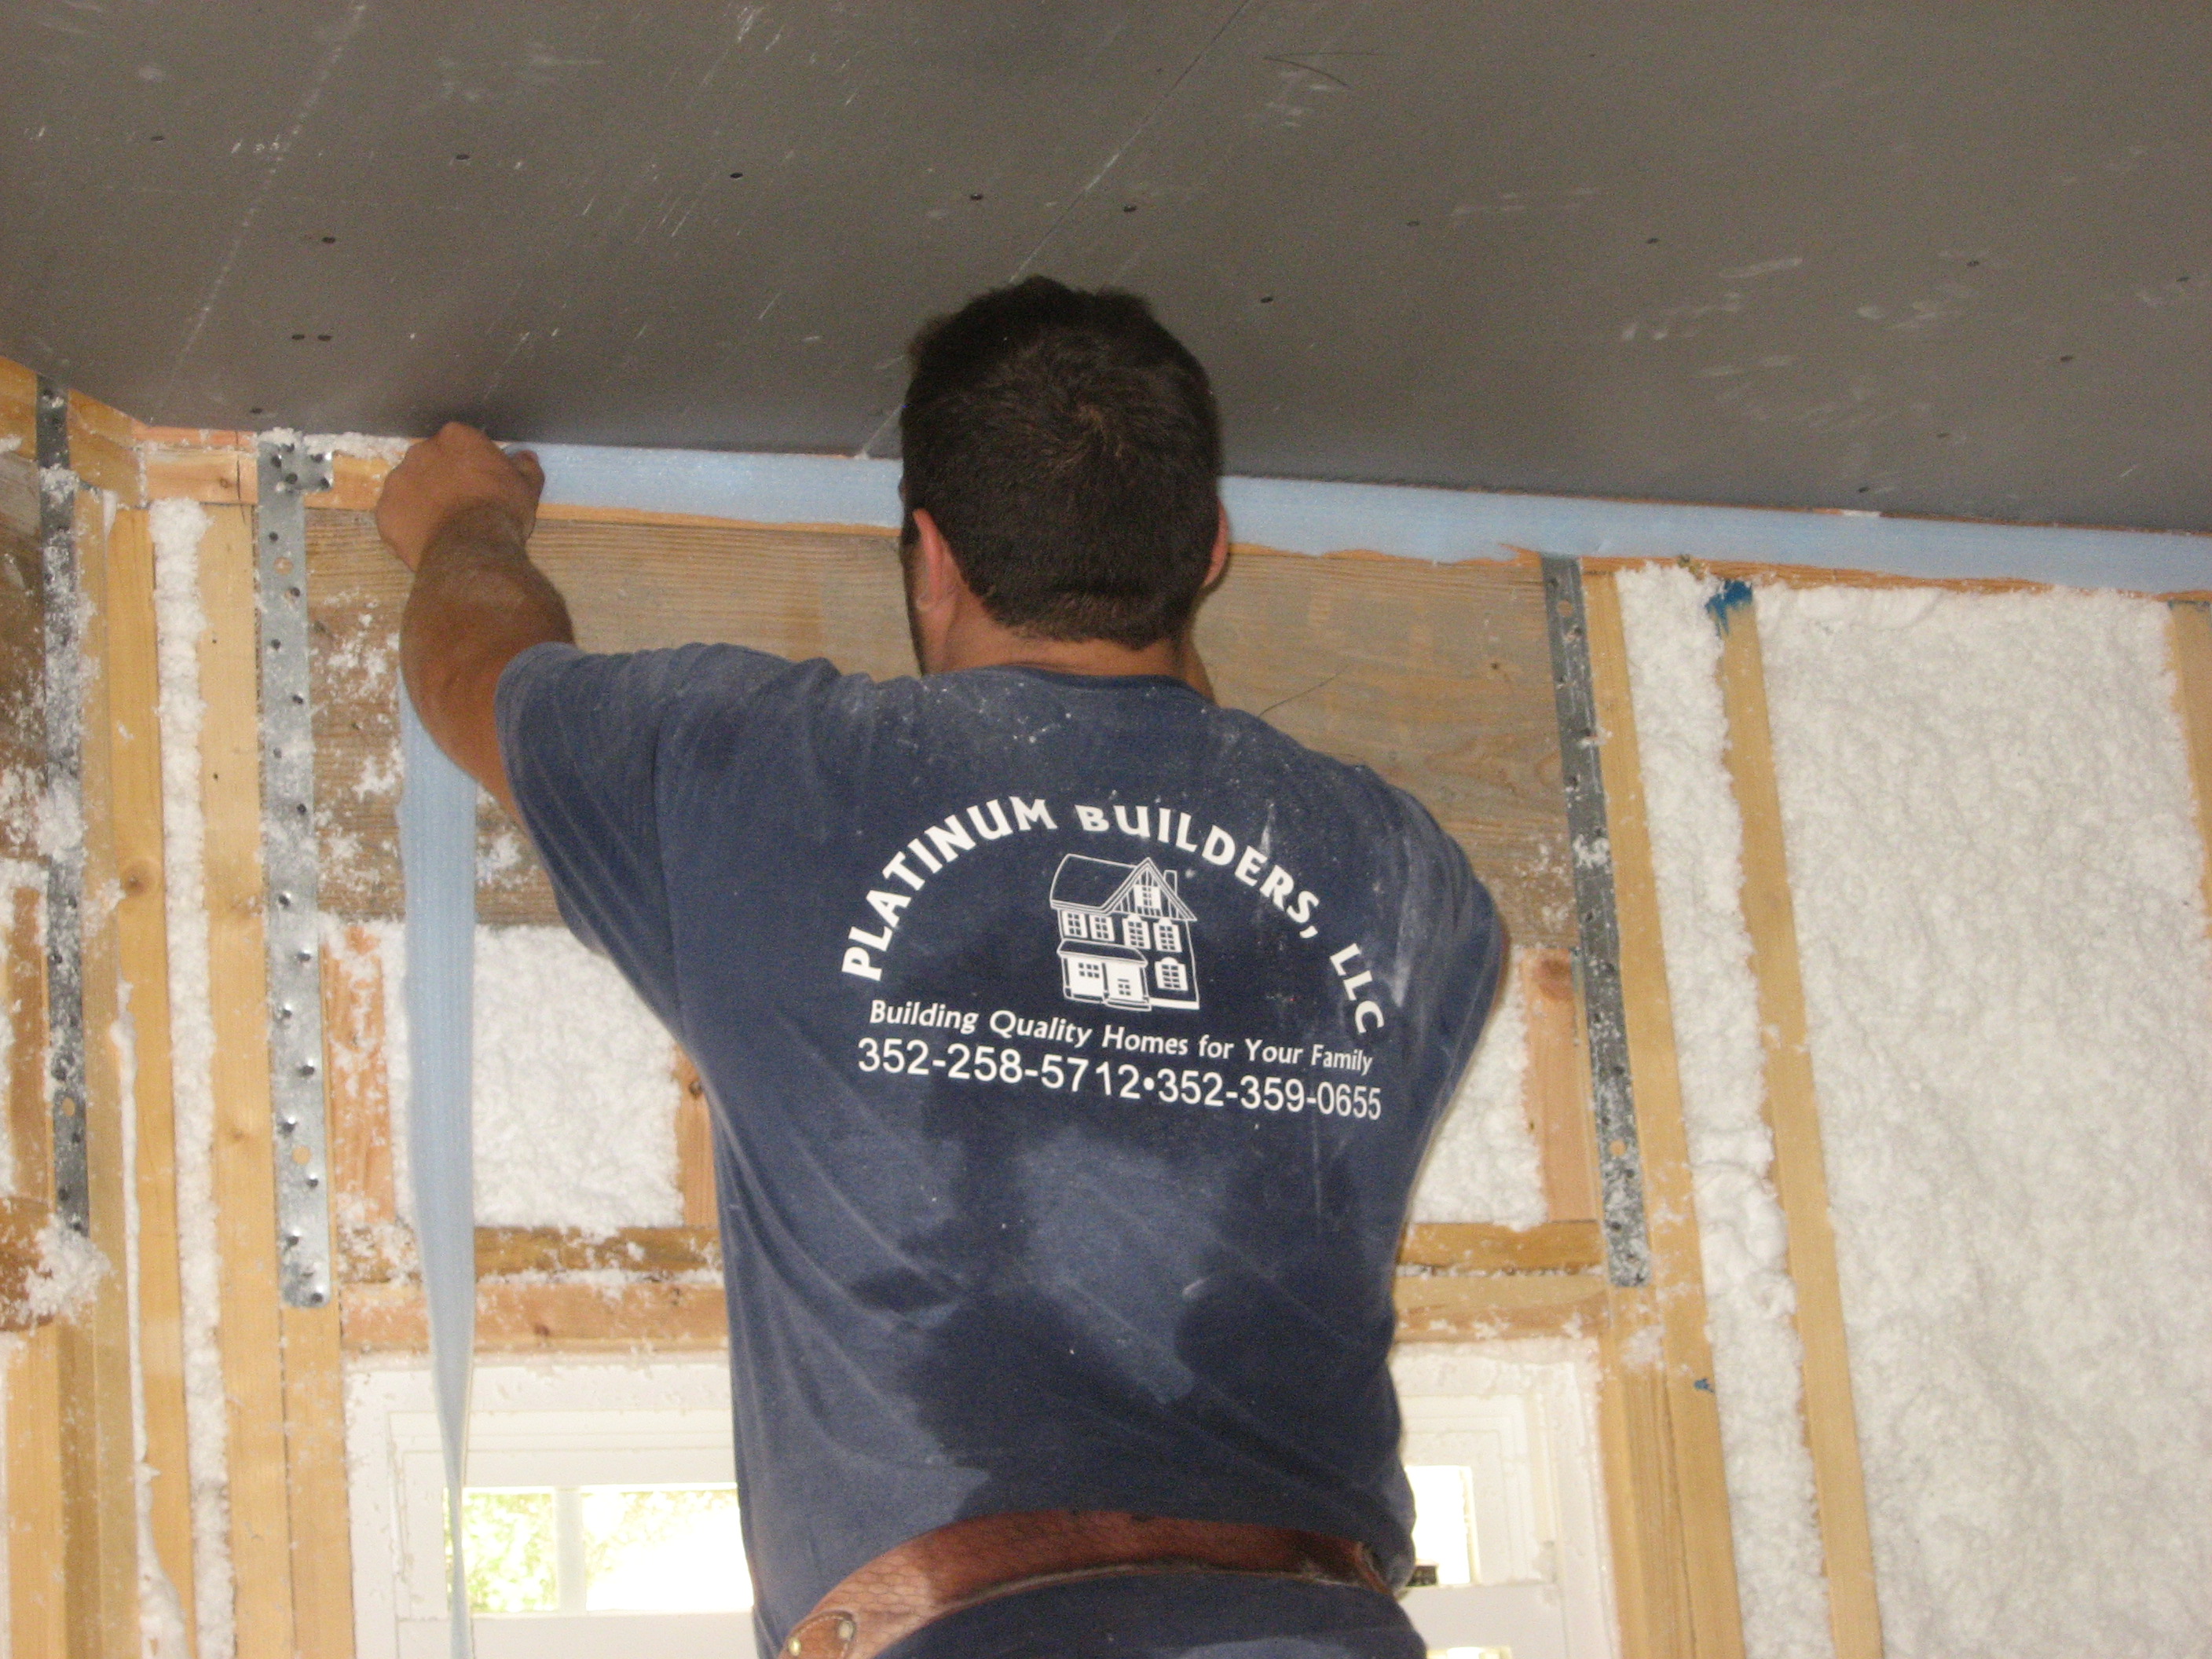
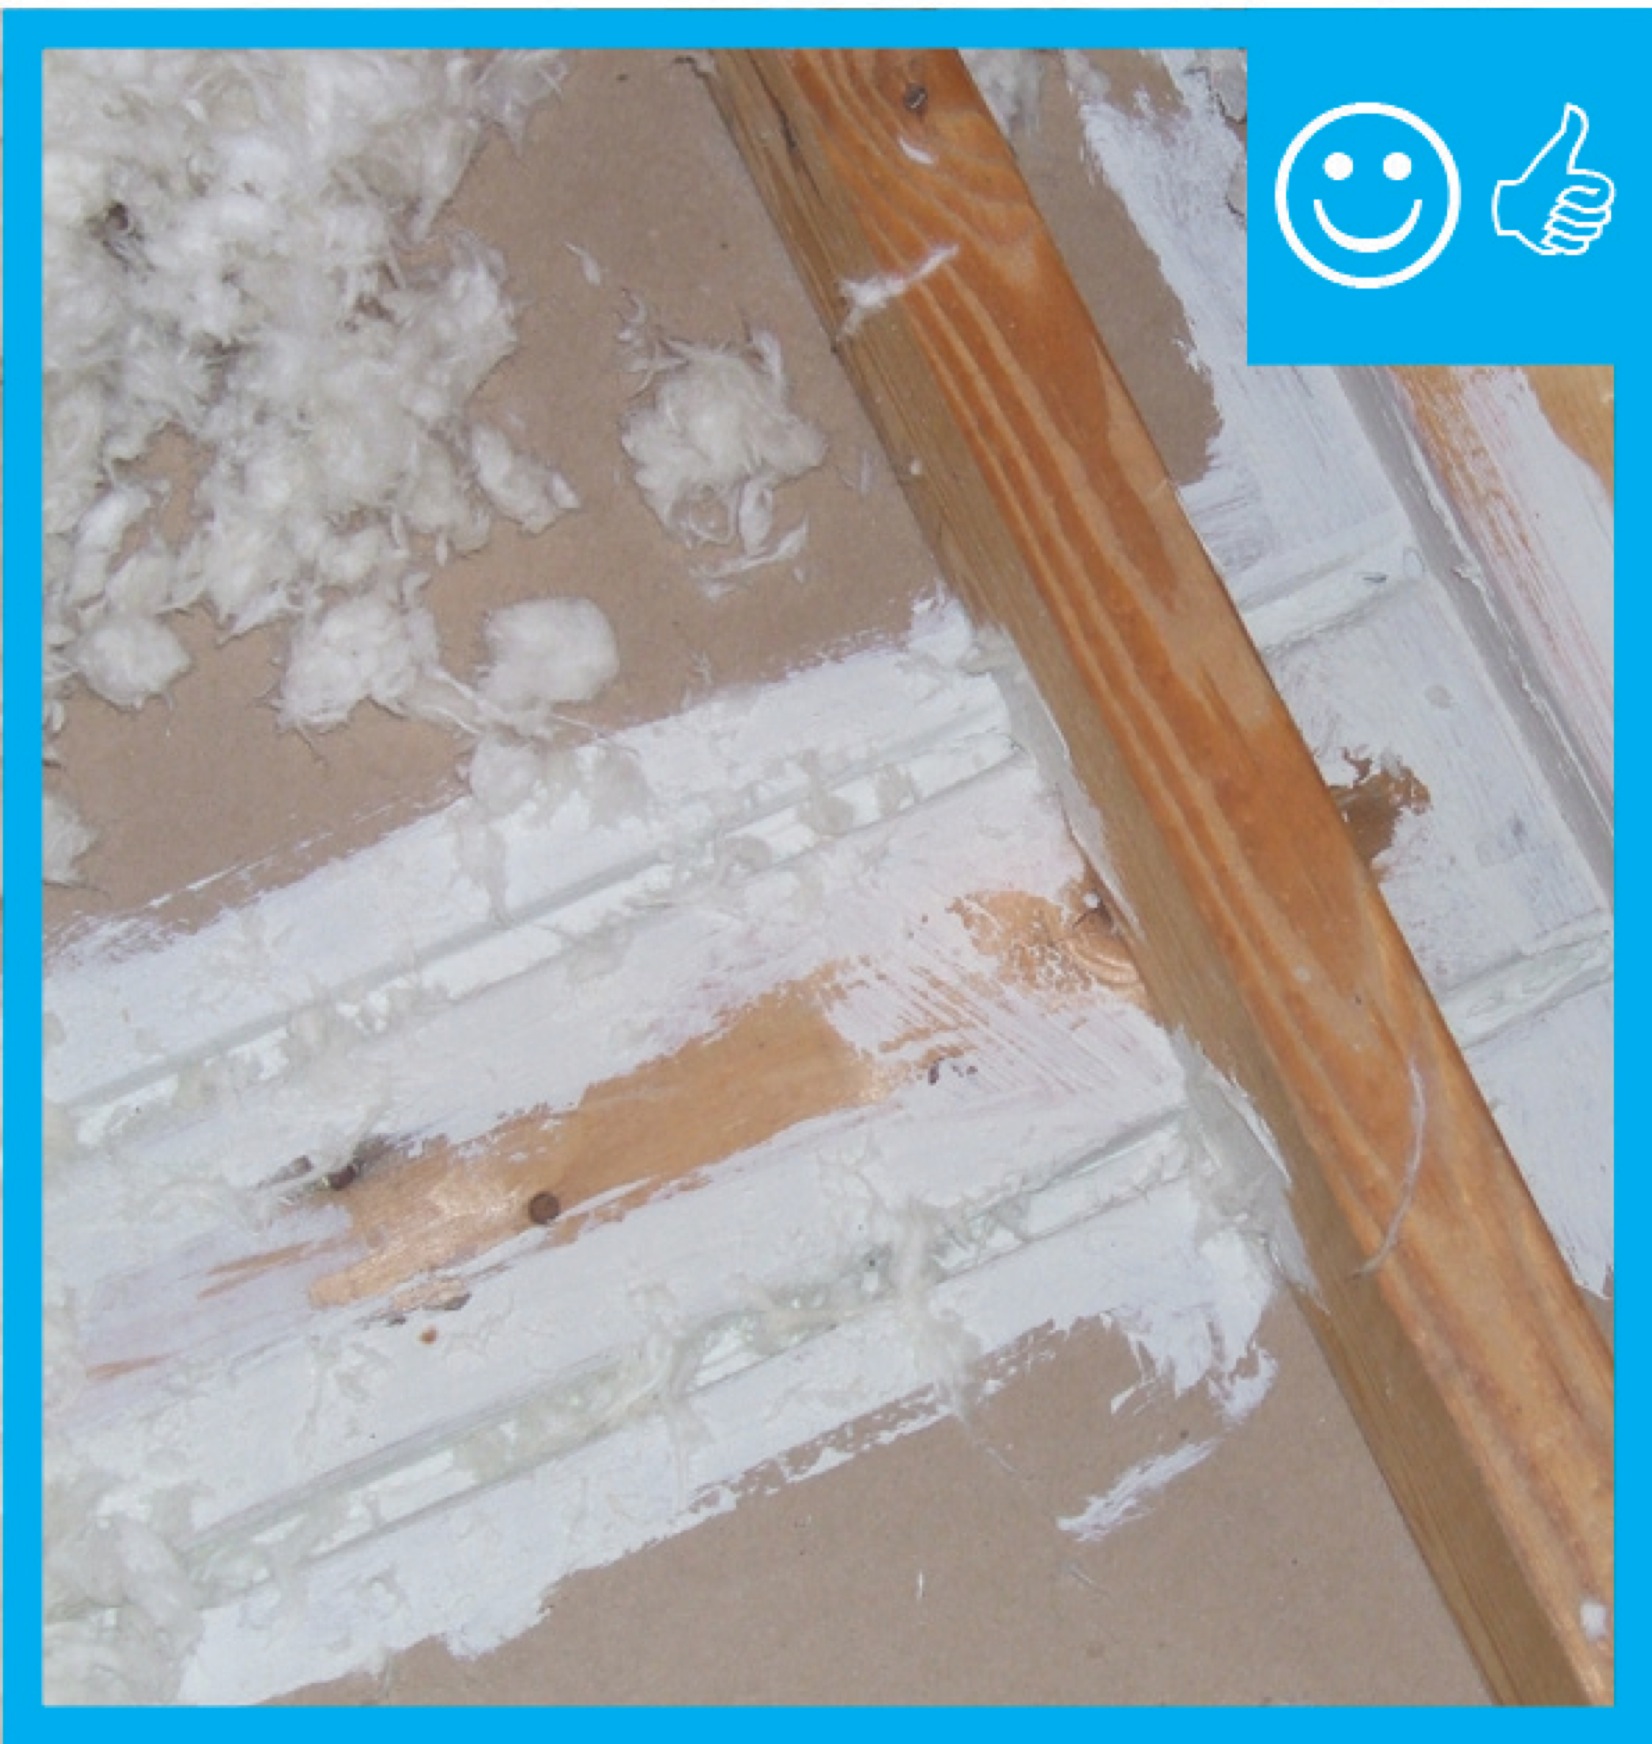
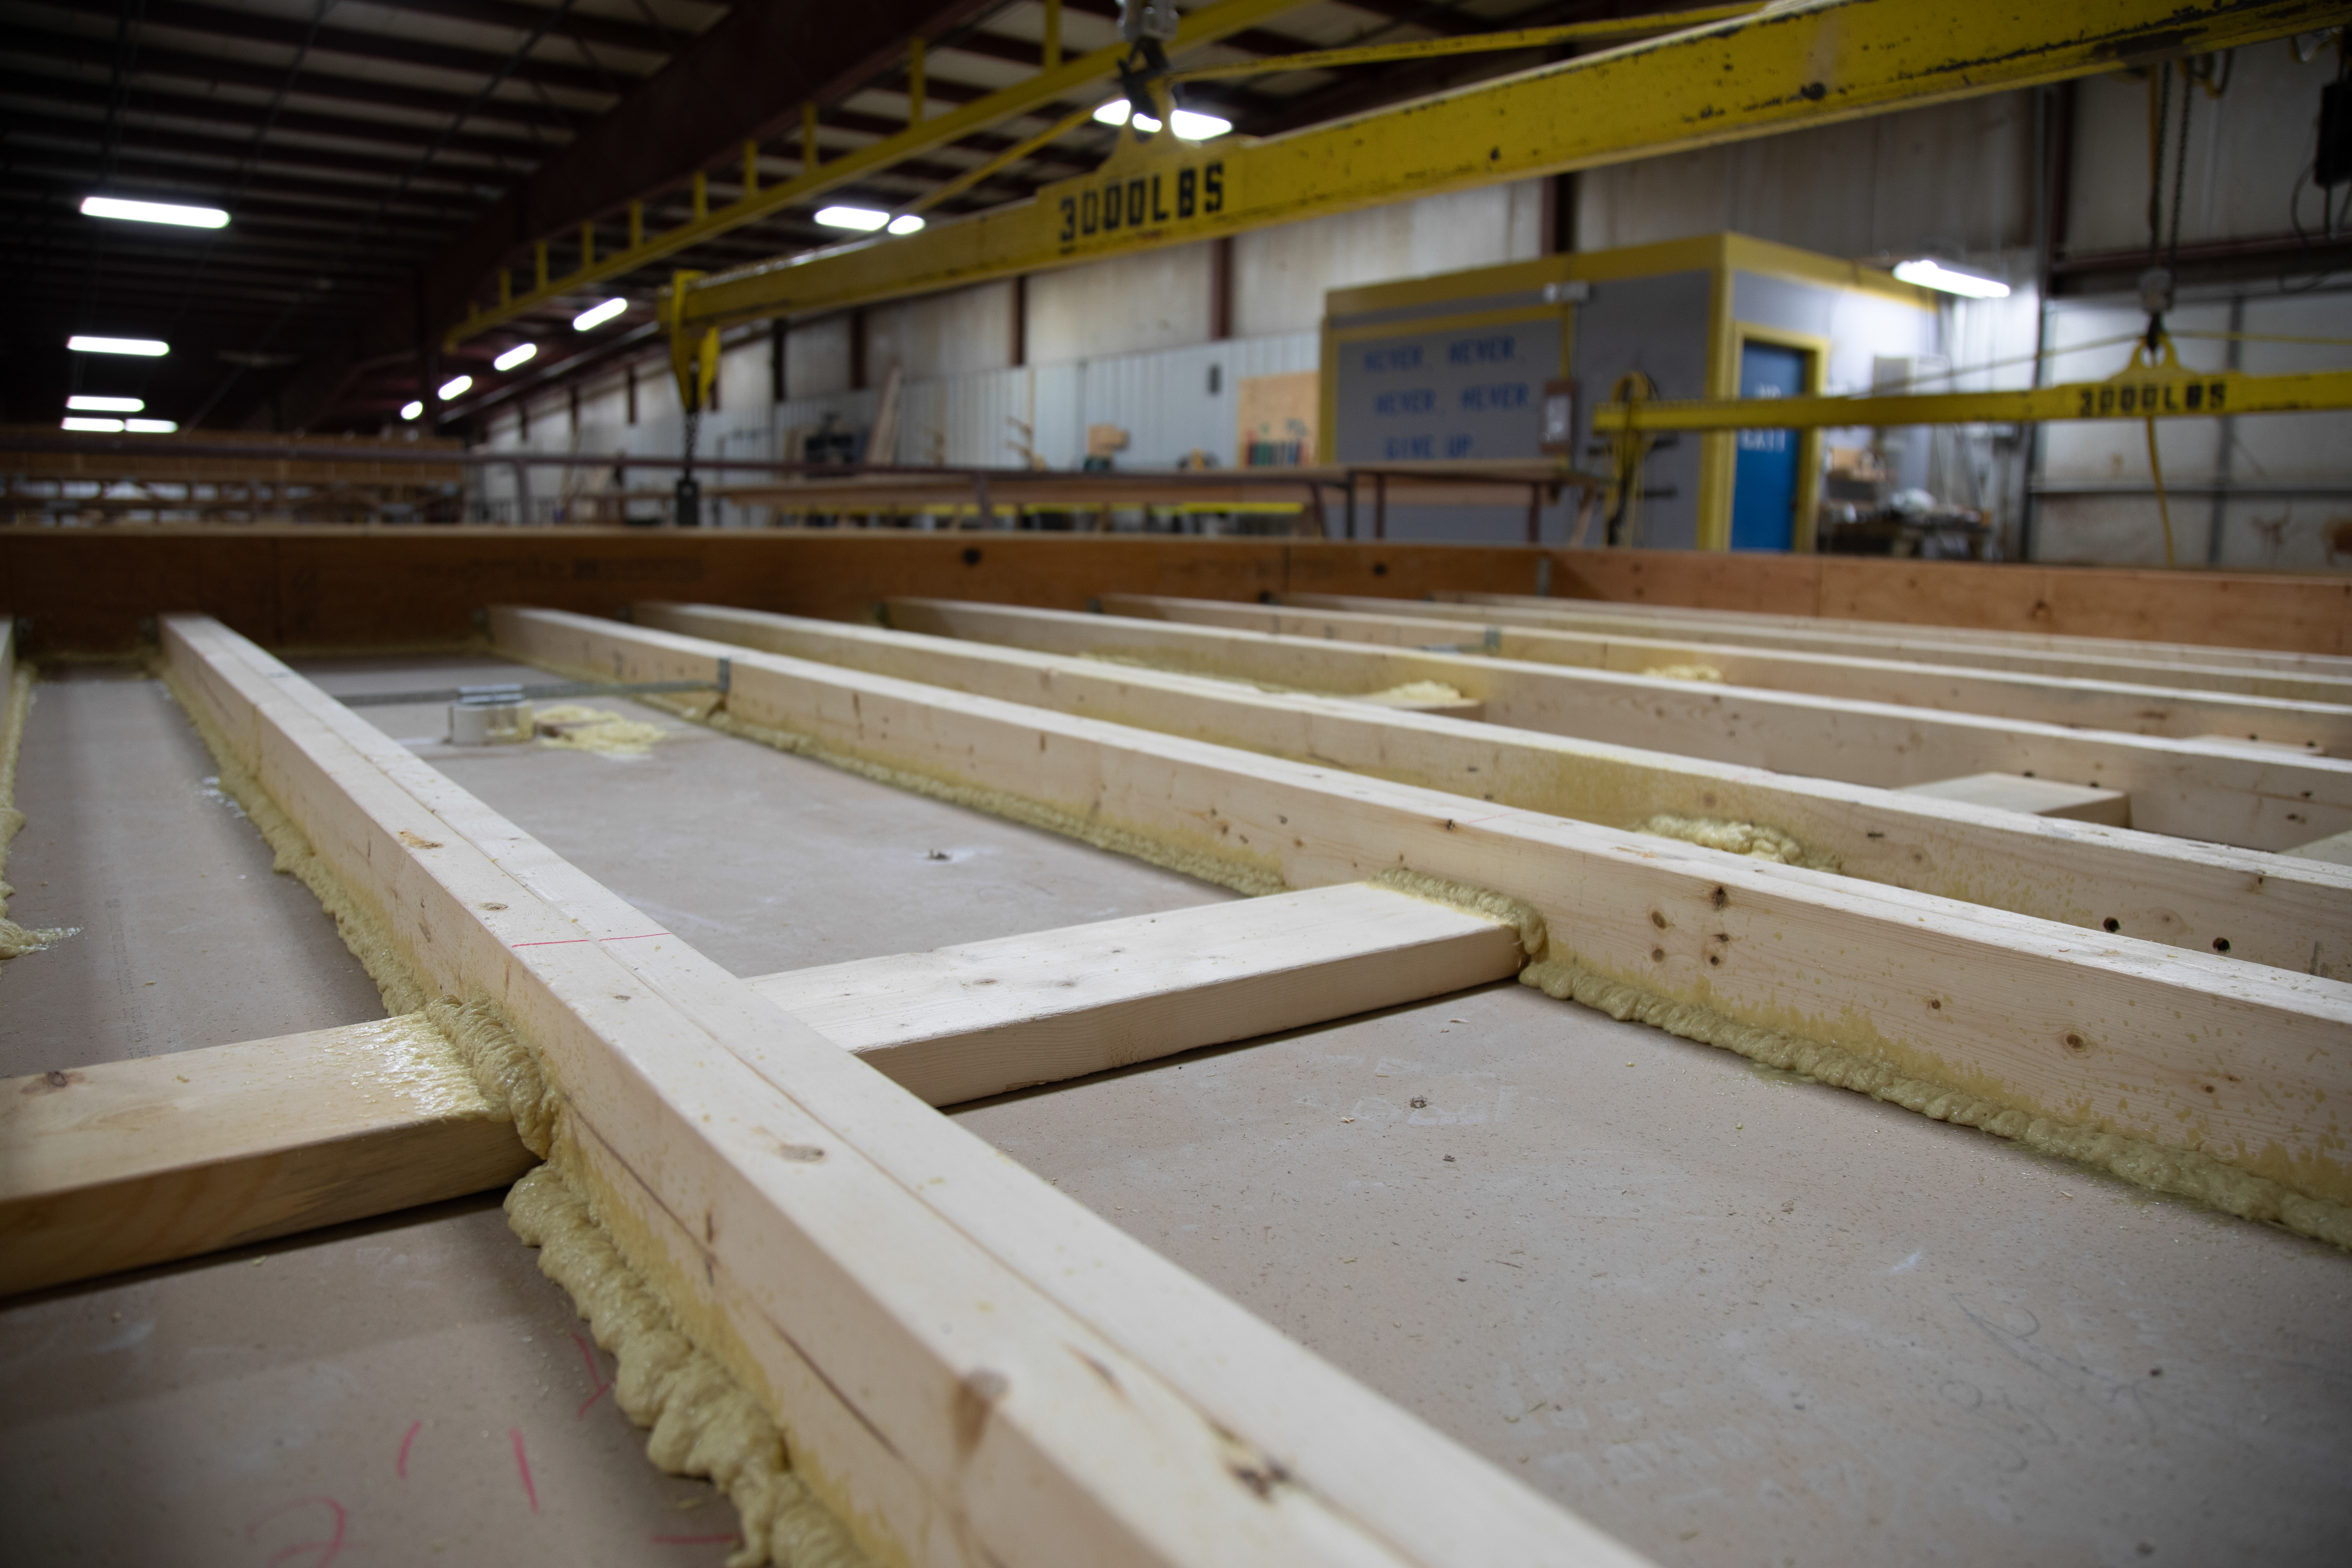
- Apply a continuous bead of caulk or glue or staple a strip of compressible foam gasket material (Figure 1) along the top plate and bottom plates and door and window framing along all exterior walls and all interior walls (Figure 2).
- Install drywall over caulk, glue, or gasket material. Mud and tape drywall.

Source
Brochure about creating an air barrier by sealing drywall assemblies.
Source
Brochure about creating an air barrier by sealing drywall assemblies.
Ensuring Success
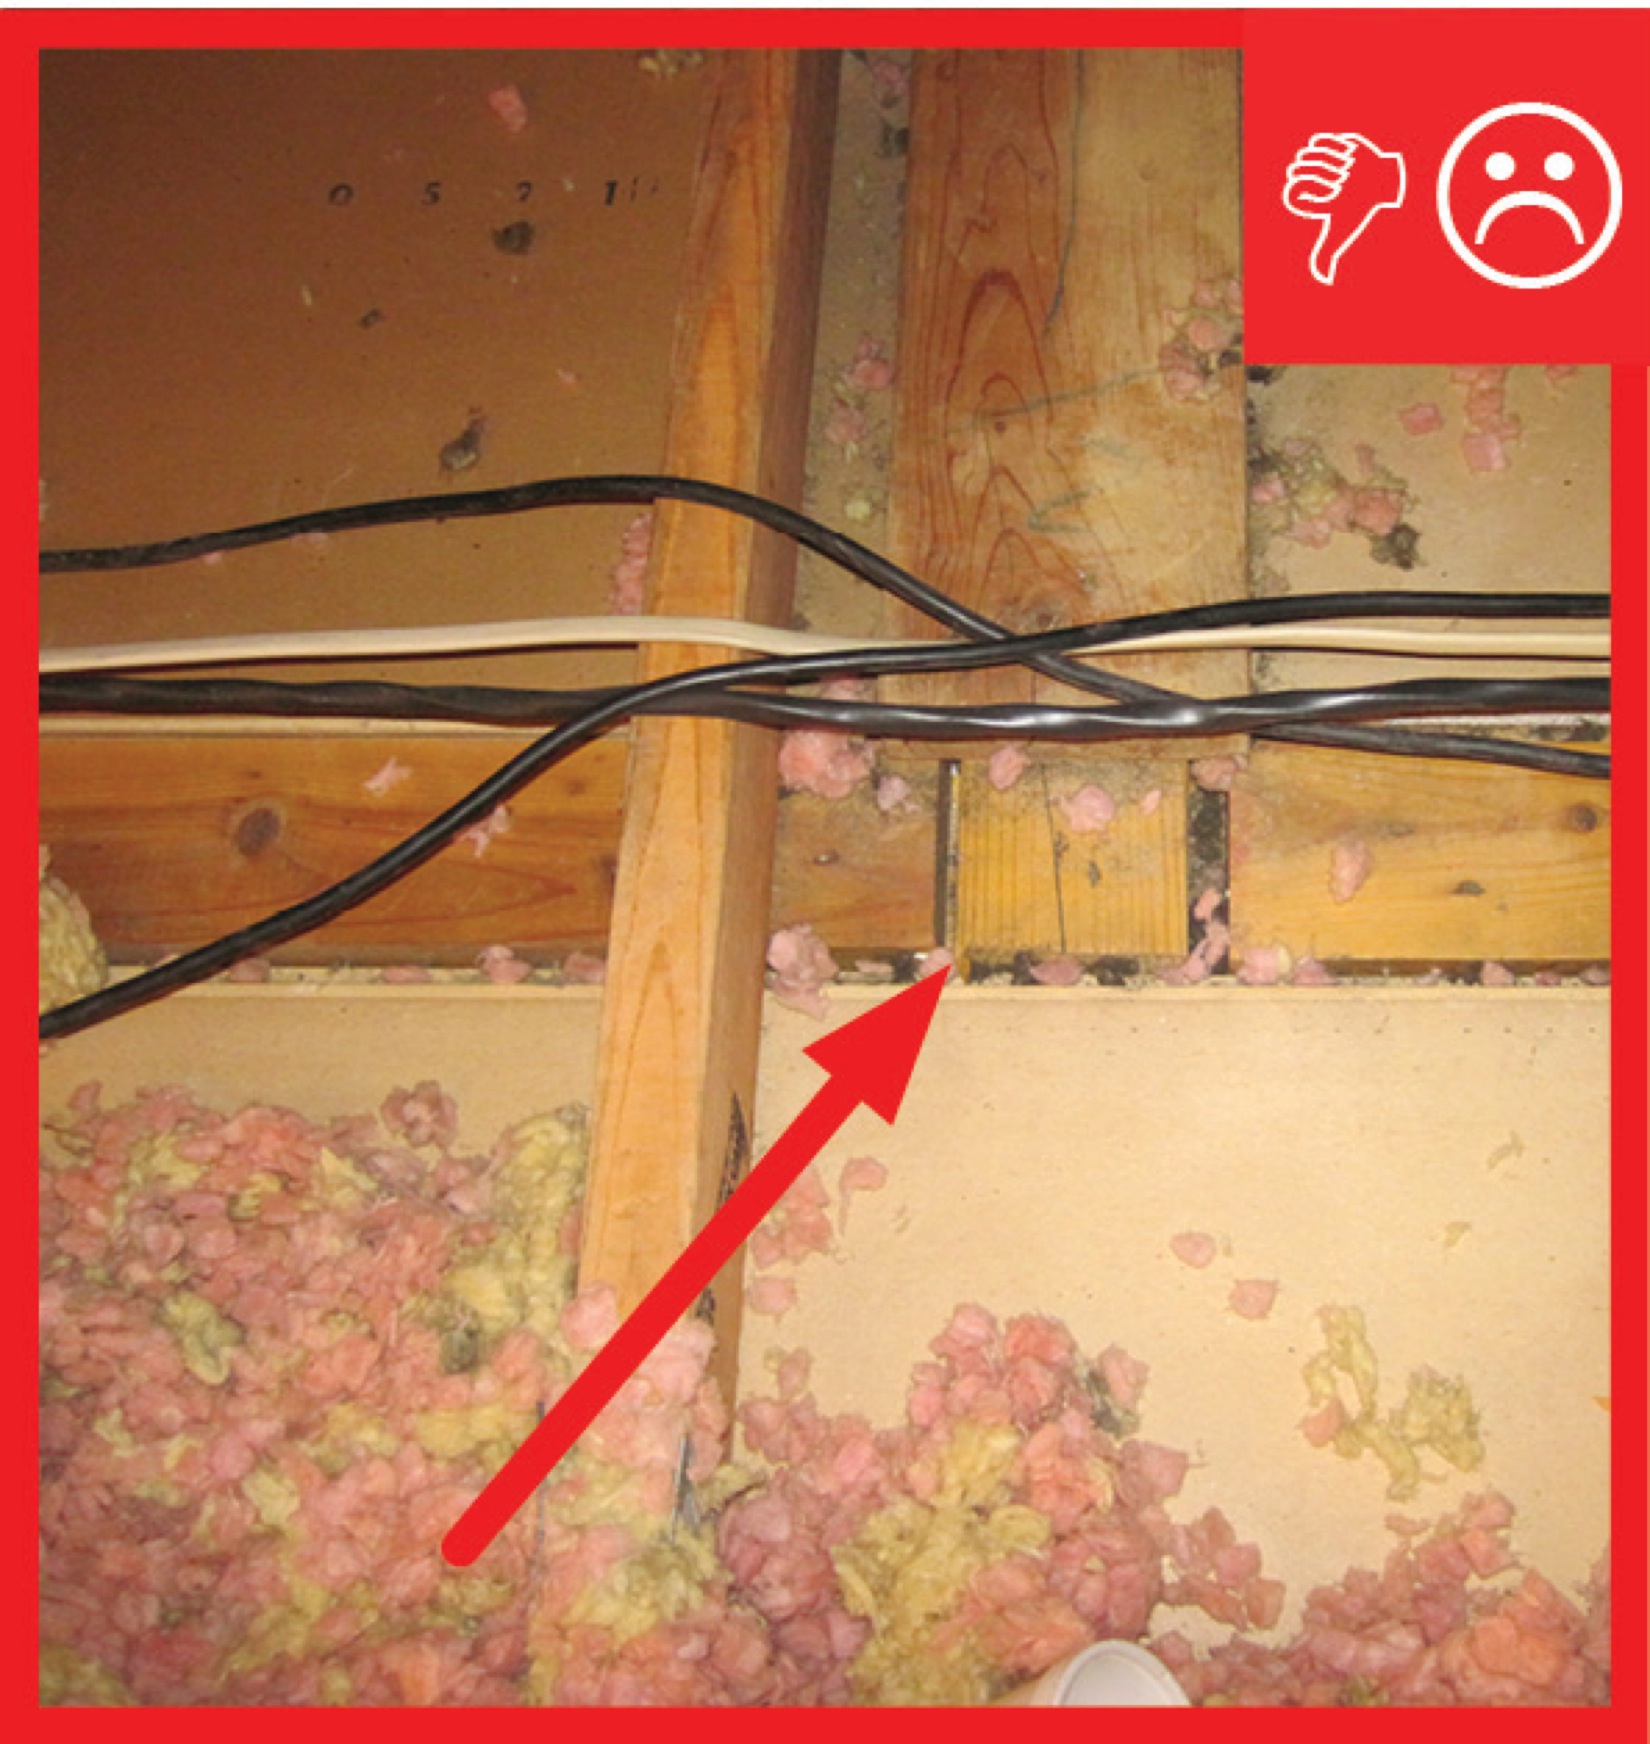
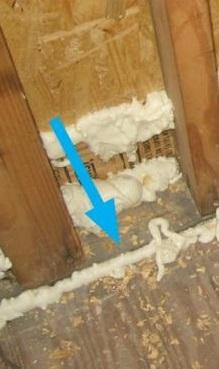
When drywall is installed, visually inspect that drywall installer is applying caulk or a foam gasket along surface of top plate before hanging drywall. After drywall installation it may be possible to detect air leakage at this location with an IR camera or smoke pencil during a blower door pressure test. Although taped, mudded drywall should provide some air barrier as well.
Region
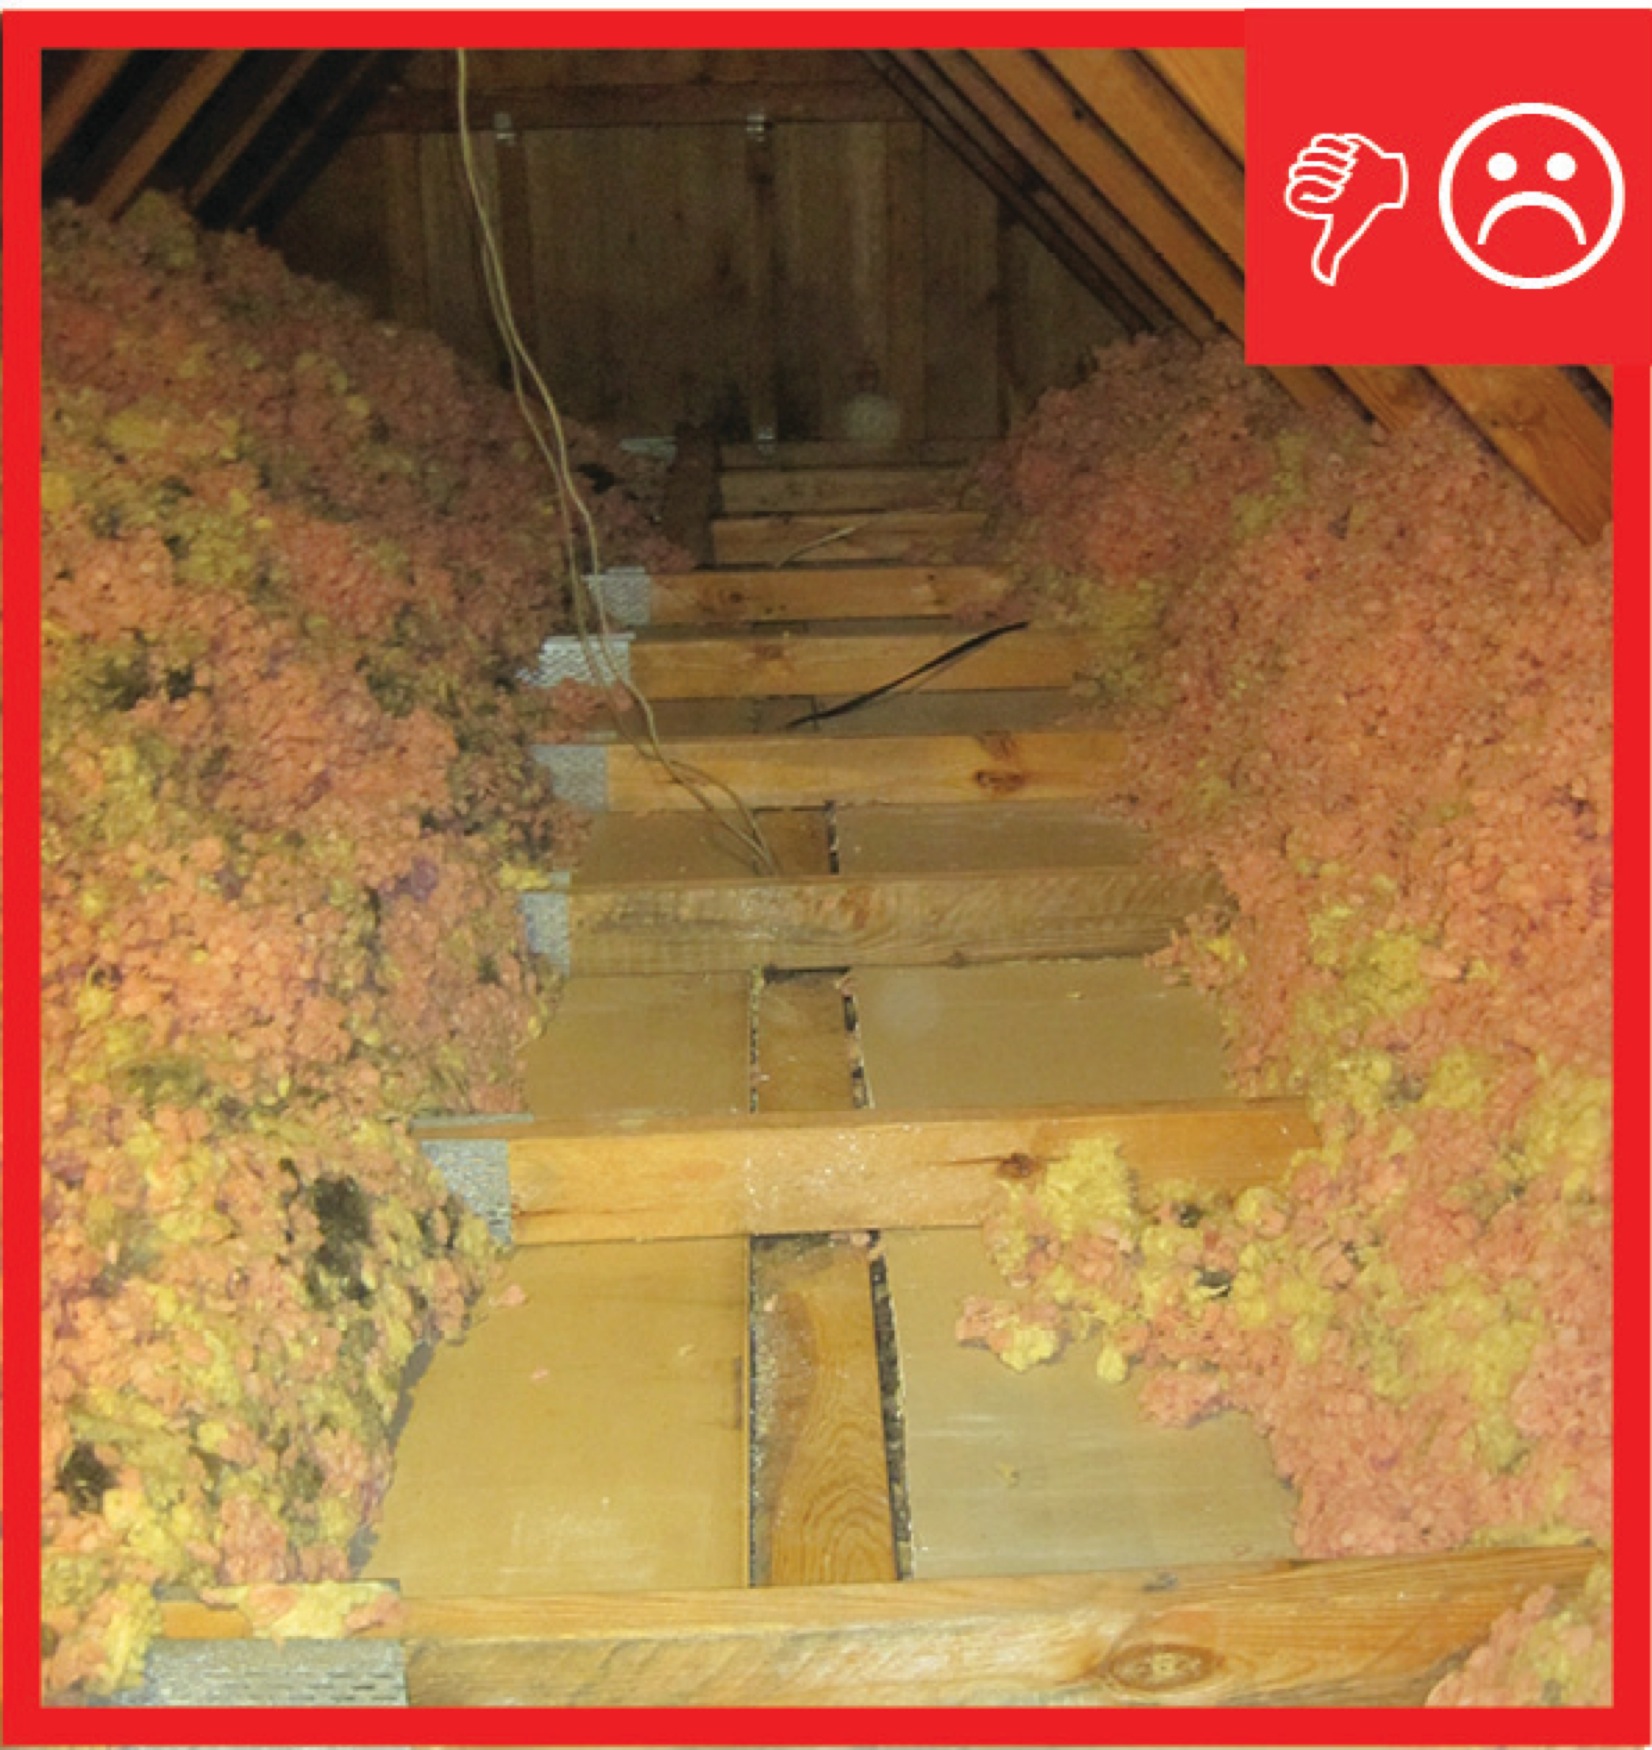
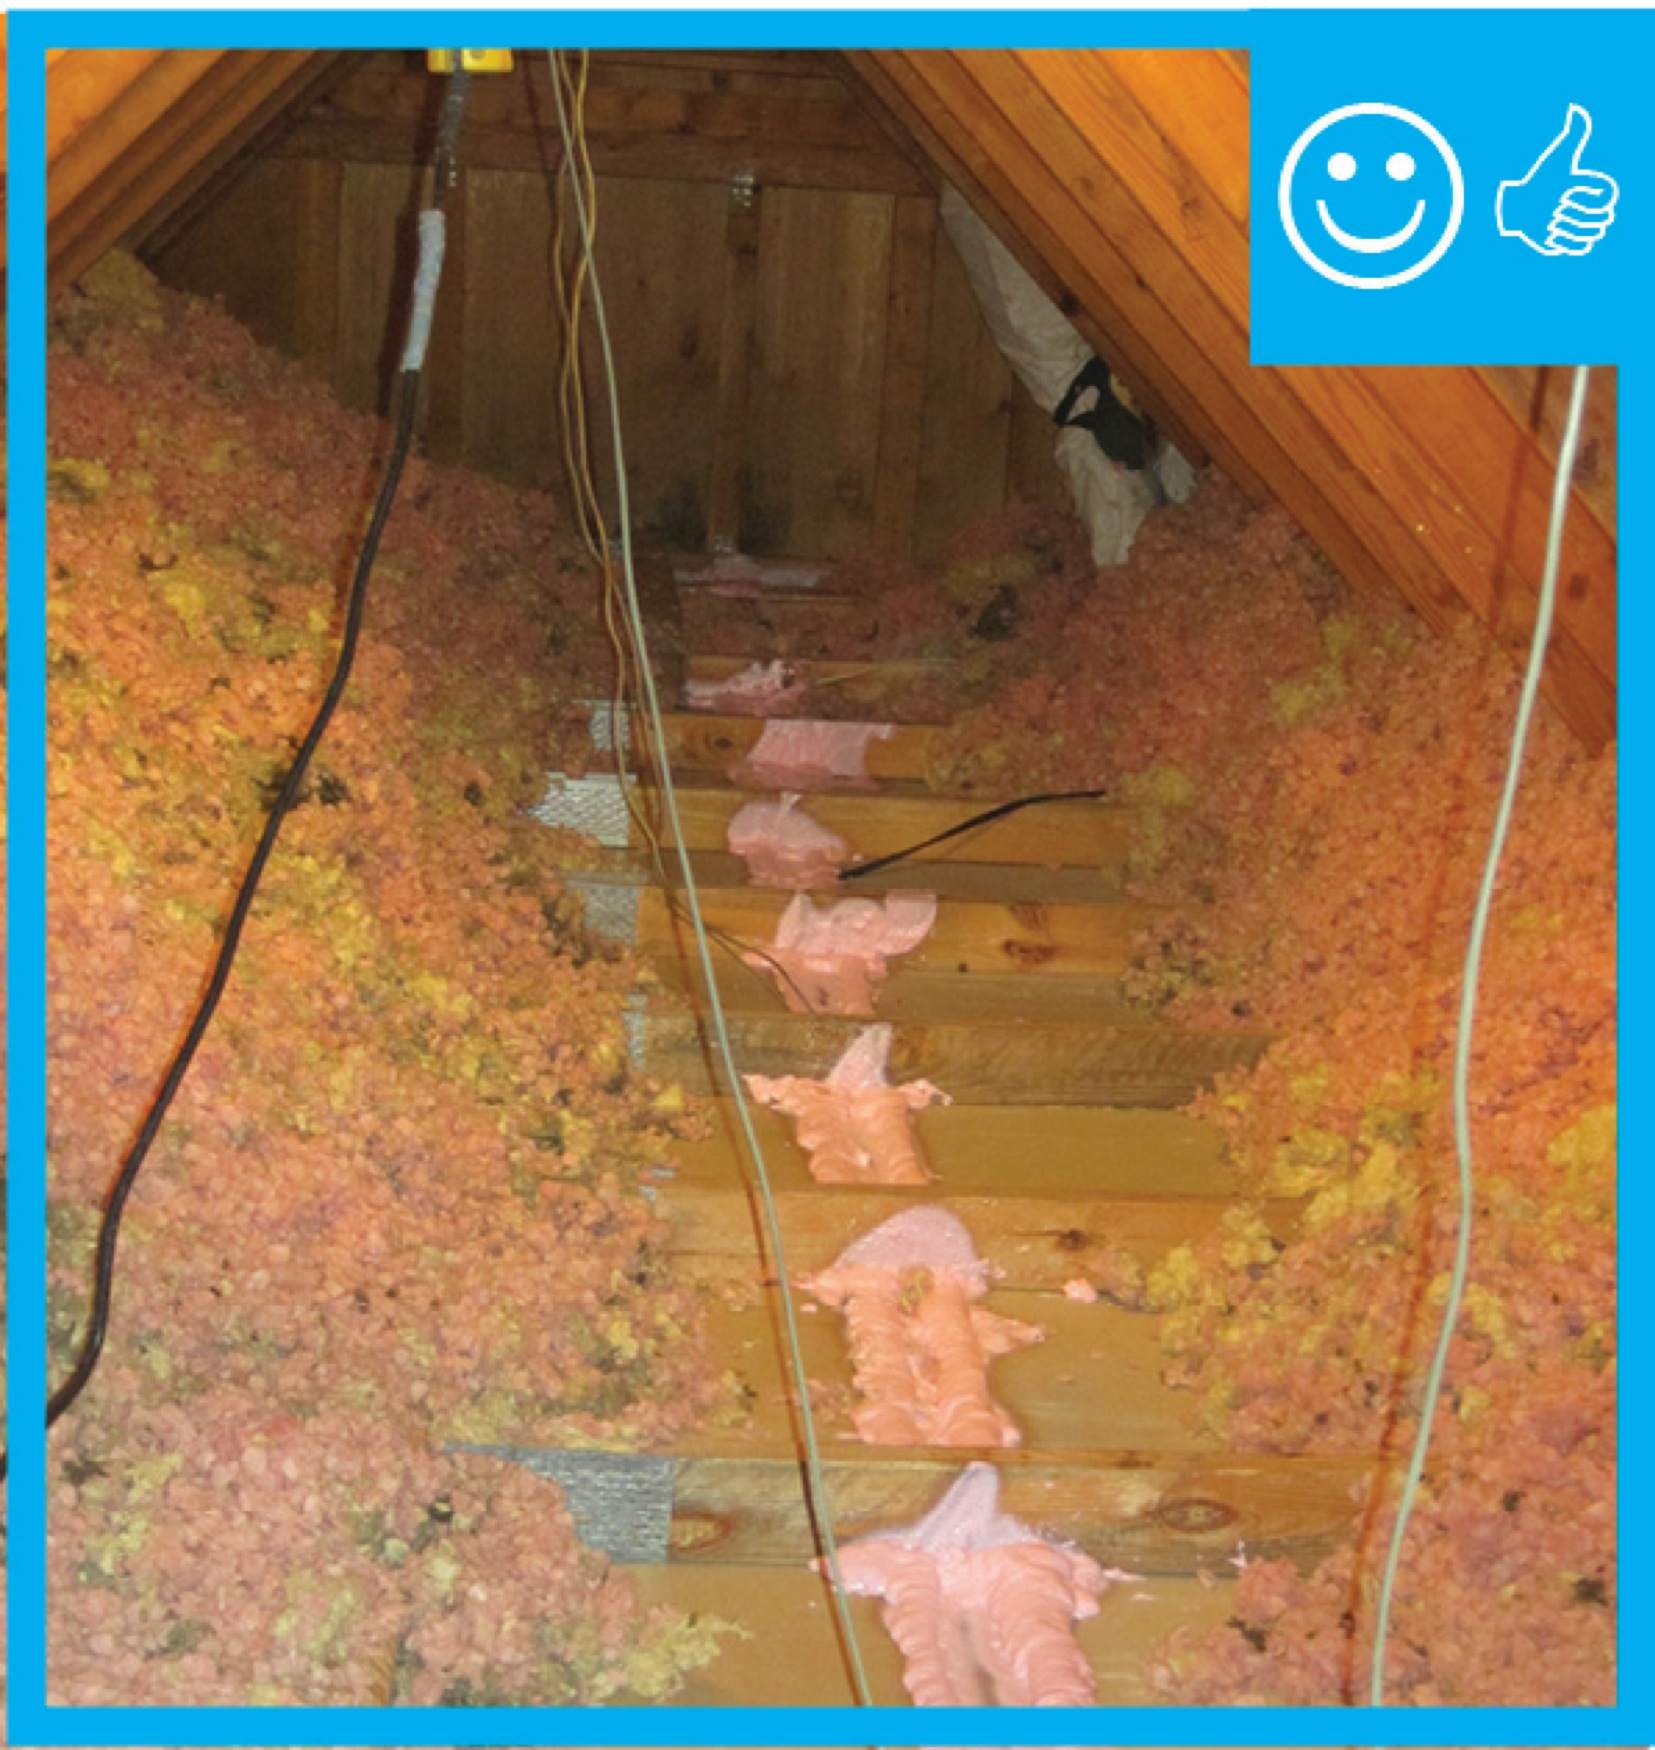
Colder climates will increase the potential for heat loss and air leakage, and the impacts of that heat loss, if the top plates are not properly insulated and air sealed. Heat loss into the attic can warm the underside of the roof deck which can contribute to snow melt and ice dam formation. Significant air leakage from the house into the attic increases the potential for condensation and frost formation in the attic, if warmer vapor-laden conditioned air is allowed to escape into a wintertime attic with cold surfaces.
Training
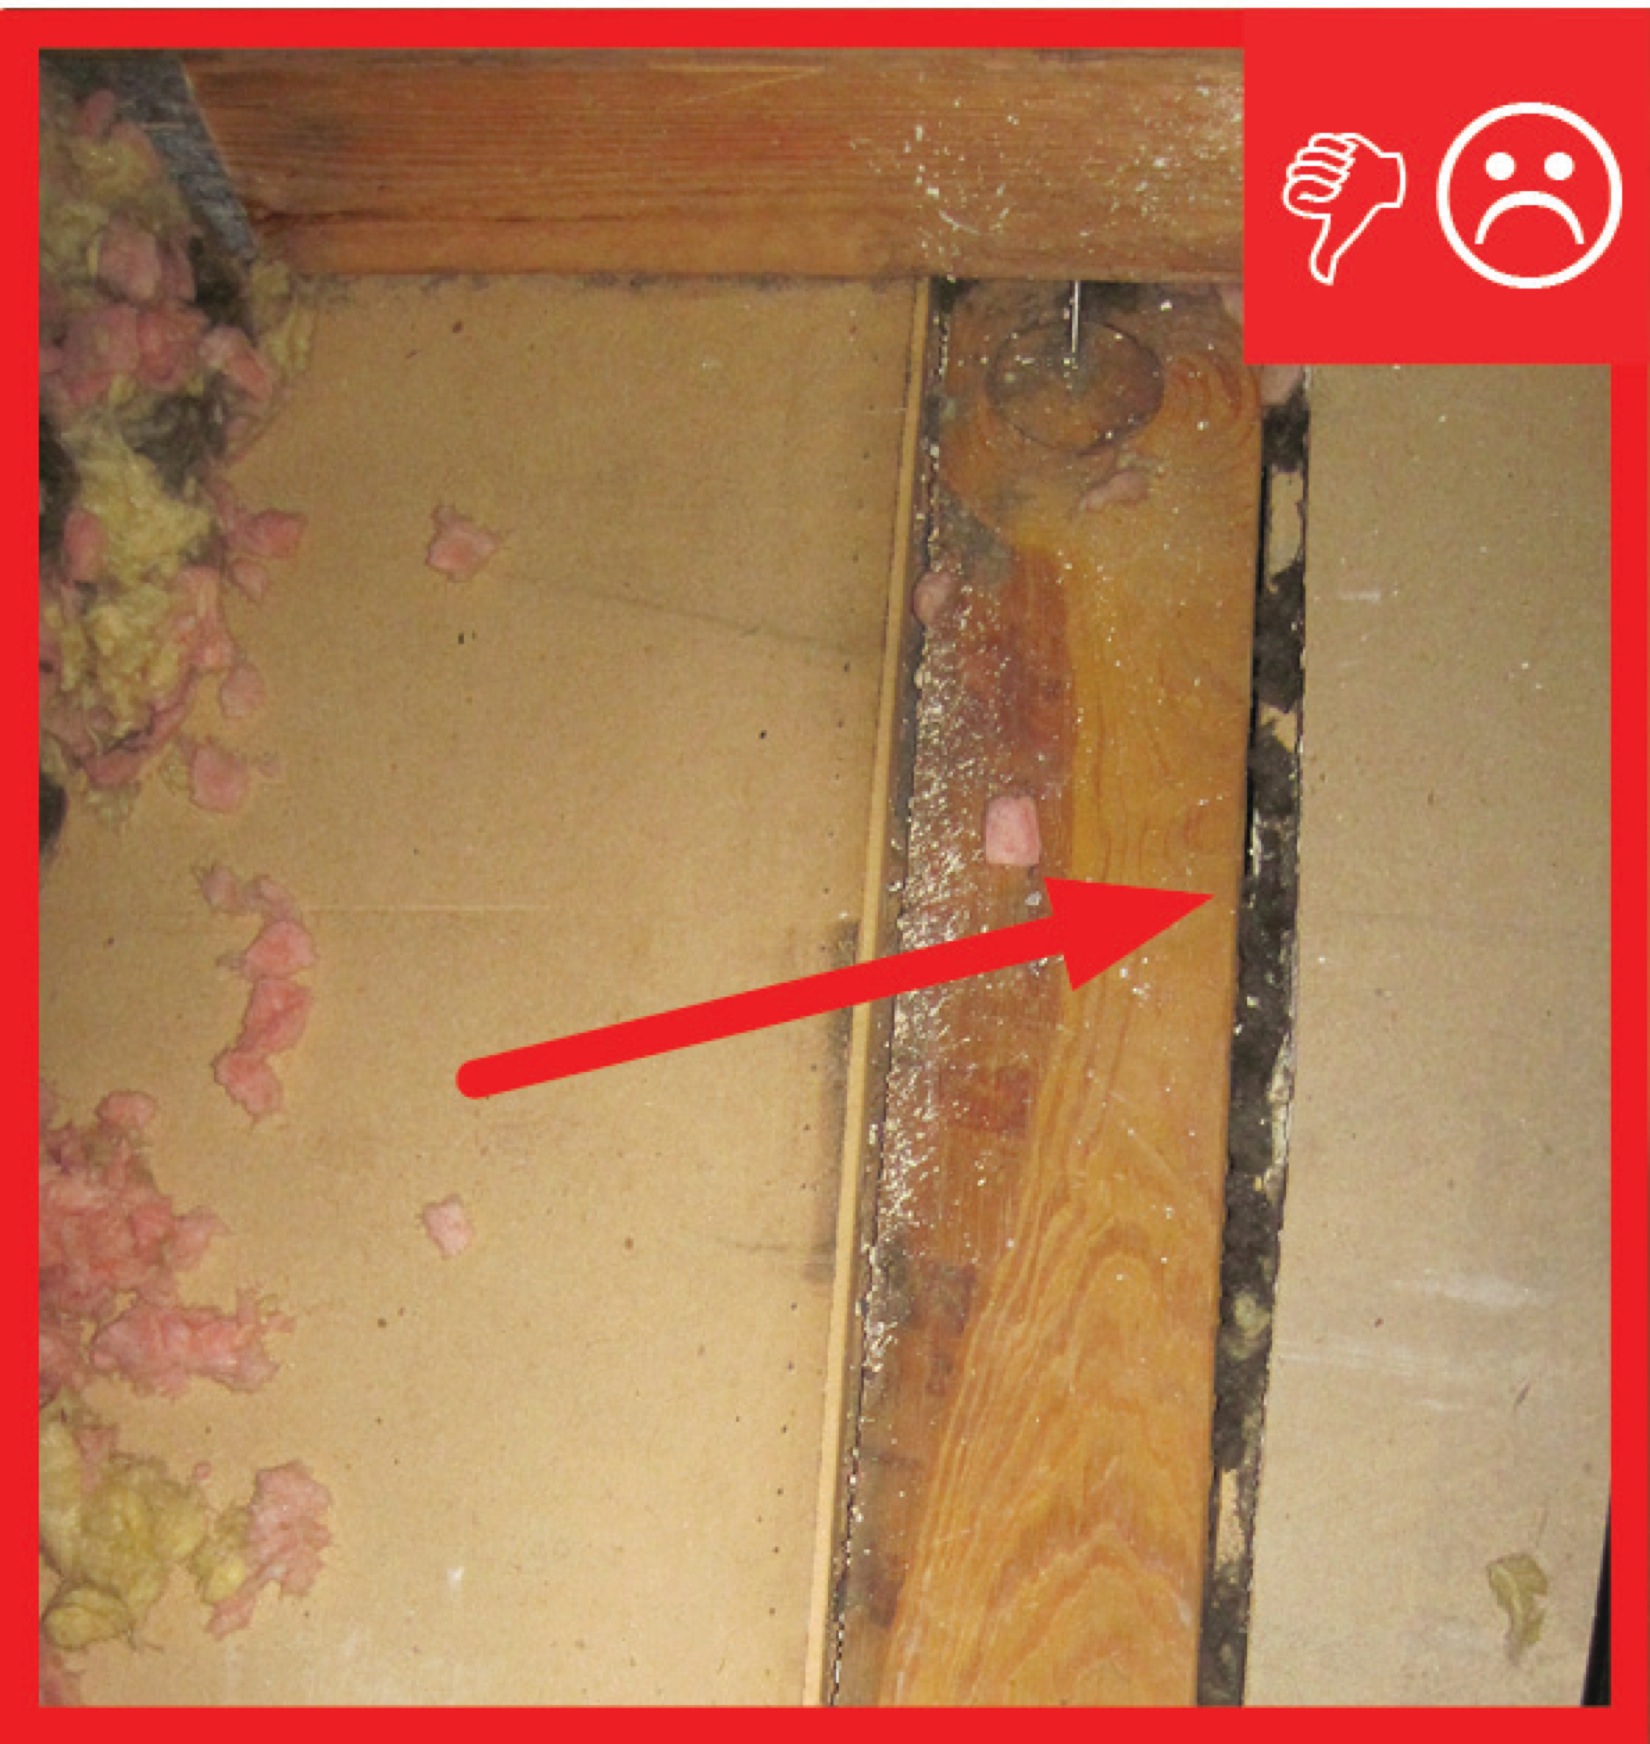
Right and Wrong Images
Source
Guide describing details that serve as a visual reference for each of the line items in the Thermal Enclosure System Rater Checklist.
Source
Guide describing details that serve as a visual reference for each of the line items in the Thermal Enclosure System Rater Checklist.
Source
Guide describing details that serve as a visual reference for each of the line items in the Thermal Enclosure System Rater Checklist.
Source
Guide describing details that serve as a visual reference for each of the line items in the Thermal Enclosure System Rater Checklist.
Source
Guide describing details that serve as a visual reference for each of the line items in the Thermal Enclosure System Rater Checklist.
Source
Guide describing details that serve as a visual reference for each of the line items in the Thermal Enclosure System Rater Checklist.
Source
Source
Source
Source
Source

Source
Source

Source

Source
Videos

CAD Files

Compliance
Retrofit
SCOPE
Air seal the top plate-to-drywall seams to reduce air leakage in an existing home, using one of the following or another method:
- Install spray foam insulation on the attic side of the ceiling at the eaves.
- Install spray foam insulation on the attic side over the entire ceiling deck.
- Install one-part spray foam, caulk or another form of sealant to all top plate seams from the attic side.
- Use an airborne aerosol sealant process to air seal all leaks in the home including air leaks.
See the U.S. Department of Energy Standard Work Specifications for additional guidance on air sealing walls.
For guidance on working in attics, see the guide Pre-Retrofit Assessment of Attics, Ceilings, and Roofs.
DESCRIPTION
The process for air sealing top plates by installing a sealant on the face of the framing before installing the drywall is an effective technique in new home construction. It is not typically applicable in existing homes except when drywall is being installed such as in an addition or gut rehab that involves drywall replacement.
Other methods can be employed for air sealing top plates in existing homes, include installing spray foam insulation on the attic side of the ceiling at the eaves, which serves to both air seal the top plate and insulate this sometimes difficult-to-insulate area (although this will not address interior wall seams) or spray foam insulating the entire ceiling deck. Canned or one-part spray foam or sealant can applied to all top plate seams from the attic side, although limited attic space can make this challenging. Another option is to use an airborne aerosol sealant process, which will air seal all leaks in the home including air leaks at top plates (see Field Trial of an Aerosol-Based Enclosure Sealing Technology).
COMPLIANCE
See Compliance tab.
More Info
References and Resources
*For non-dated media, such as websites, the date listed is the date accessed.
Contributors to this Guide
The following authors and organizations contributed to the content in this Guide.
Building Science Corporation, lead for the Building Science Consortium (BSC), a DOE Building America Research Team
Sales
Tight Air Sealed Home = Comprehensive Draft Protection
Technical Description
Poorly air-sealed homes are less comfortable and cost more to maintain because they provide a pathway for drafts, cold spots, moisture, and insects into the home. Comprehensive draft protection includes a continuous air barrier around the whole house along with caulking and sealing in all holes and cracks. This includes around wiring, plumbing, ducts, and flues; where wall framing meets flooring; around windows; where drywall meets top plates and sill plates; where rim joists meet foundation walls and subfloors; etc. Spray foam insulation can be used at rim joists, floors above unconditioned space, and in attics to insulate and air seal at the same time.
Questions? Comments? Contact our webmaster.