Showing results 2251 - 2500 of 4973
Image
Right - A drywall gasket is installed along the top plate before installed drywall.
Image
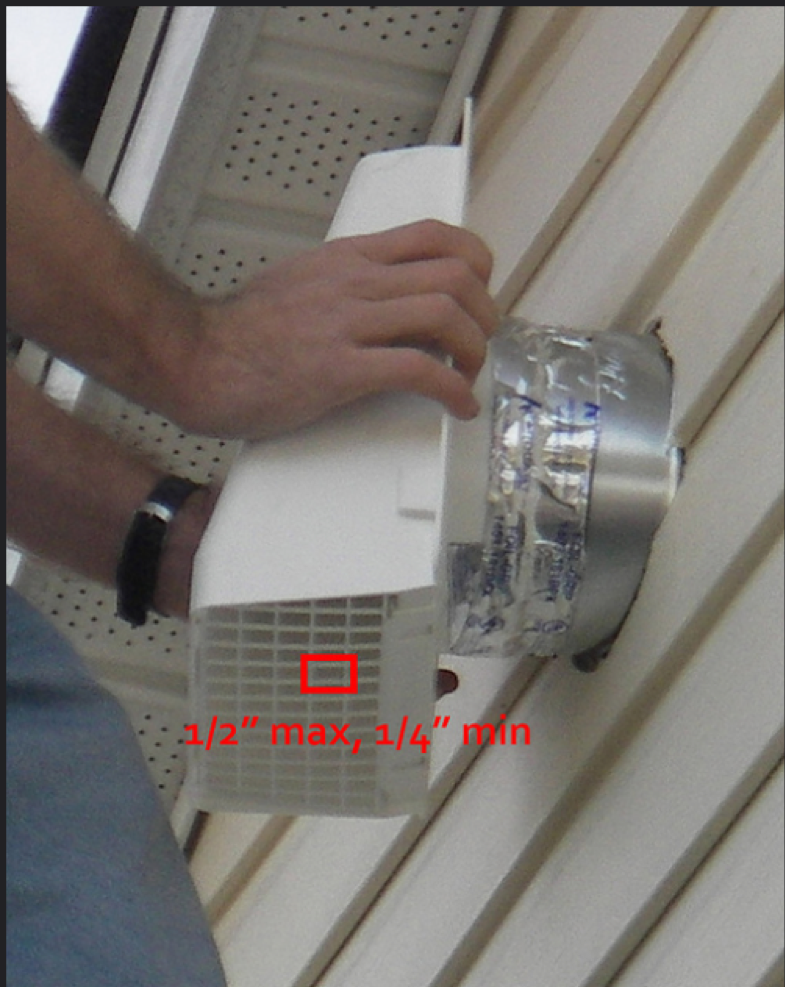
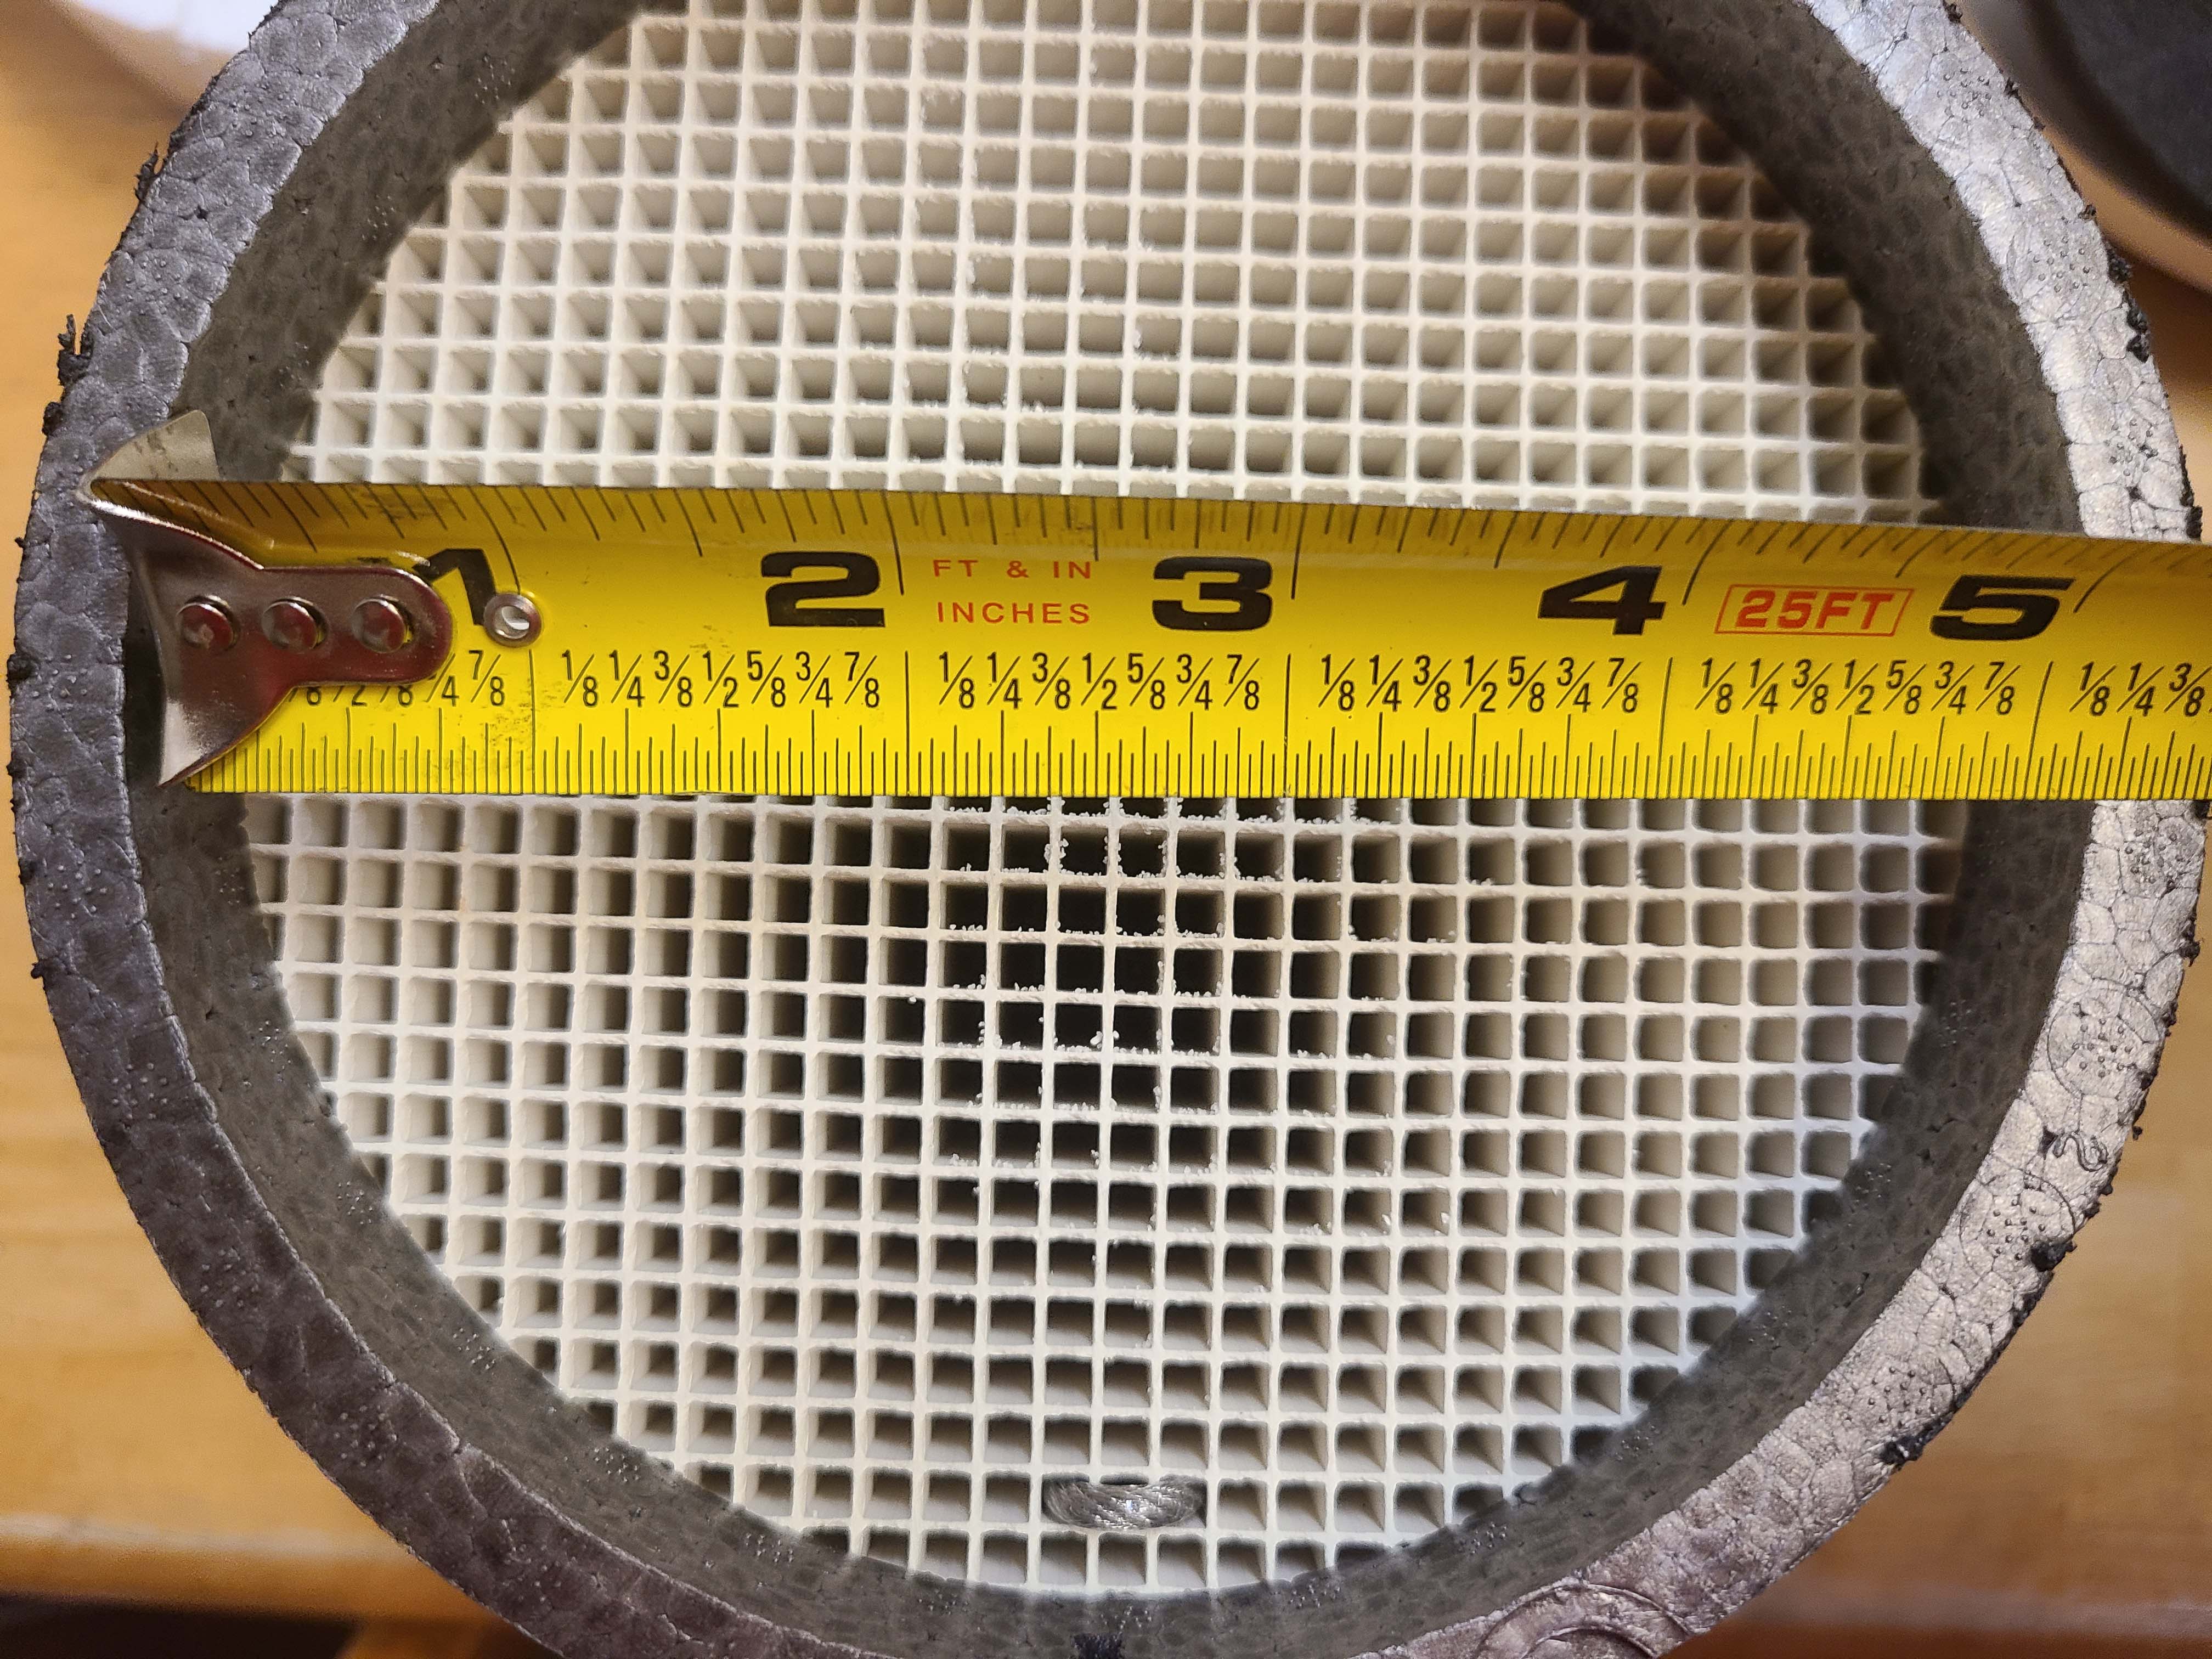
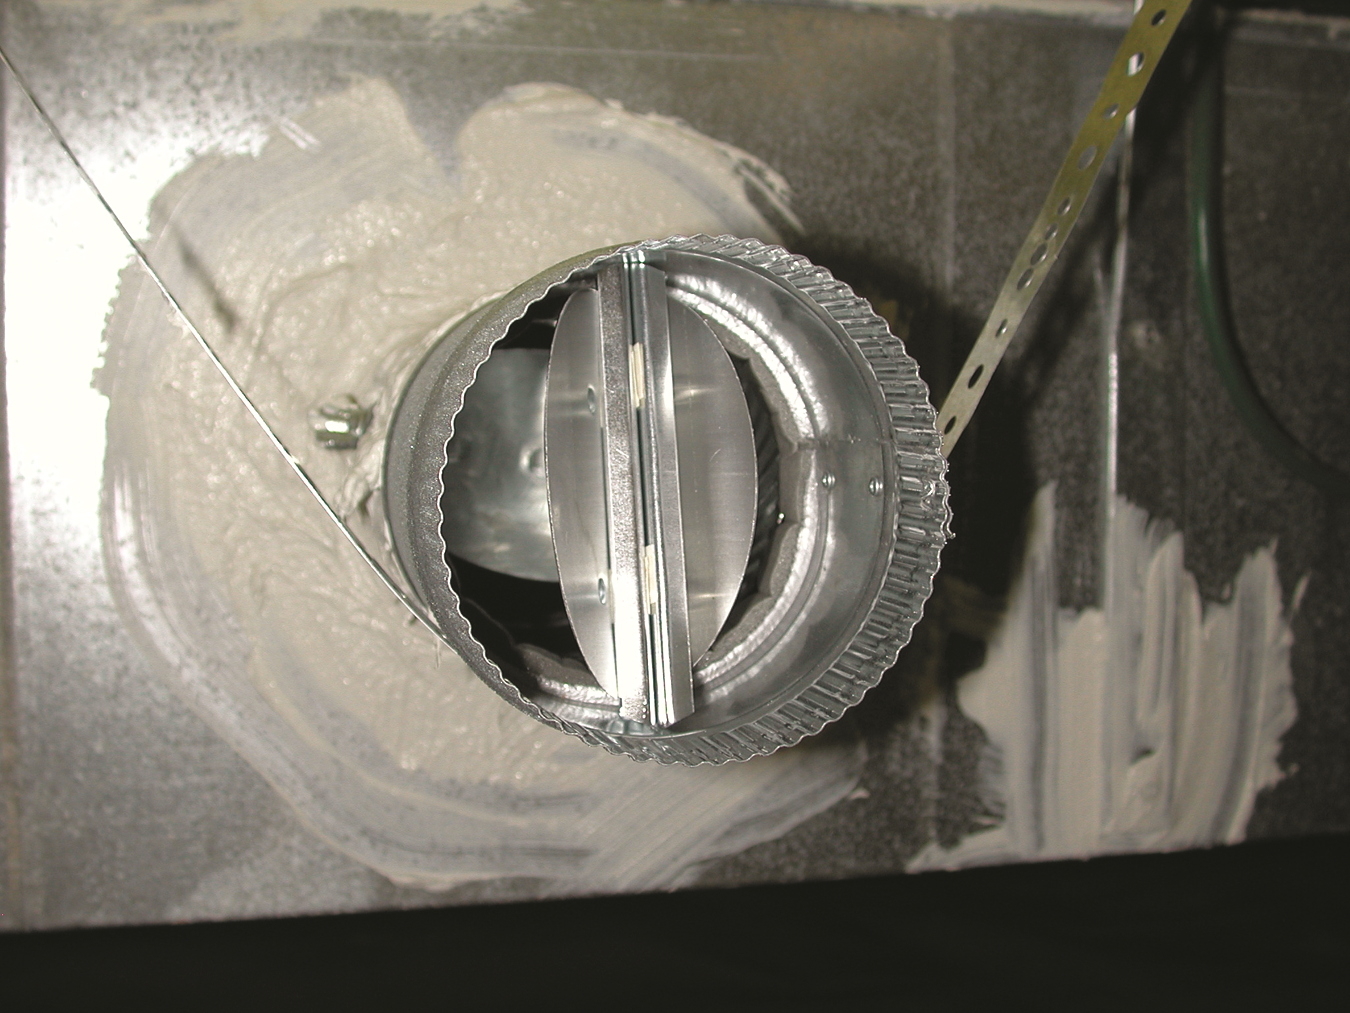
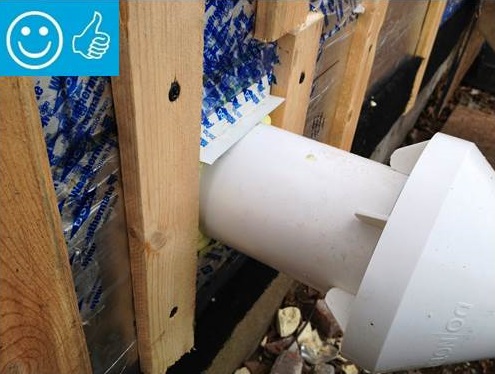
Right - A durable, vented cover is installed over this exhaust duct to prevent bird and pest entry
Image

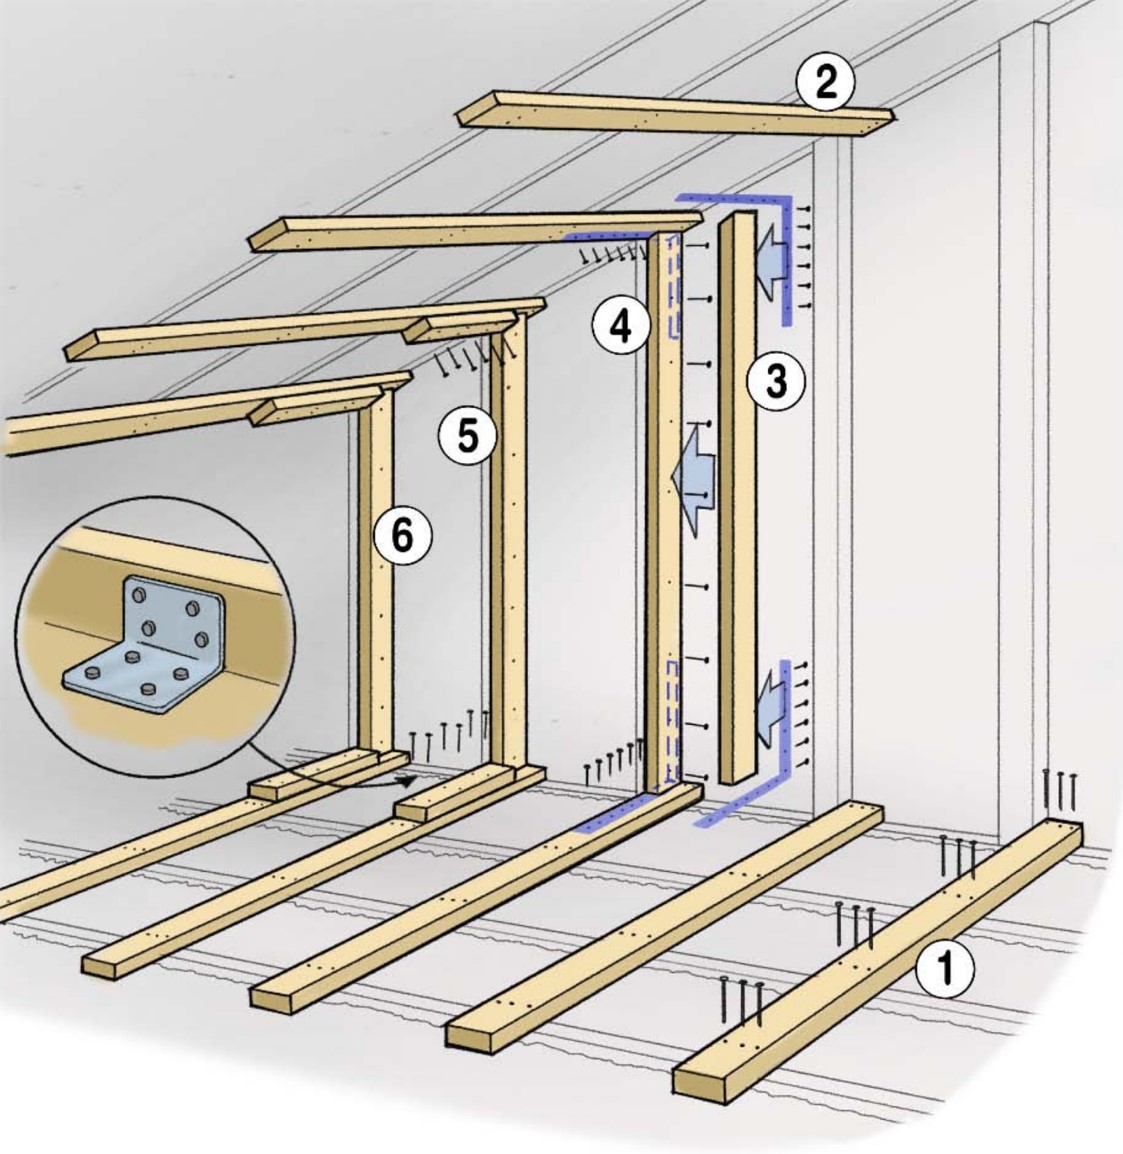
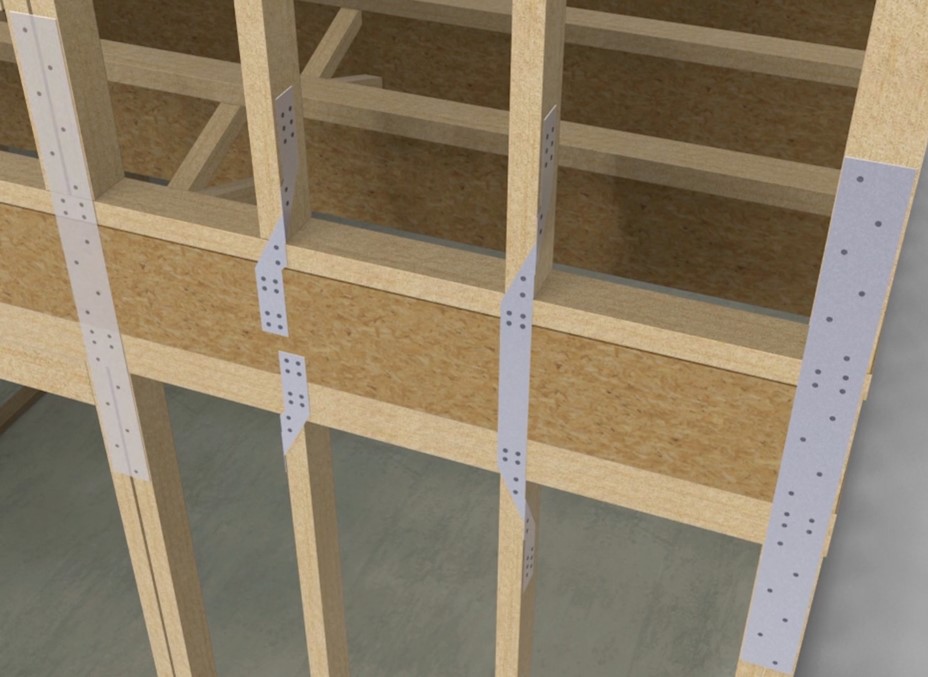
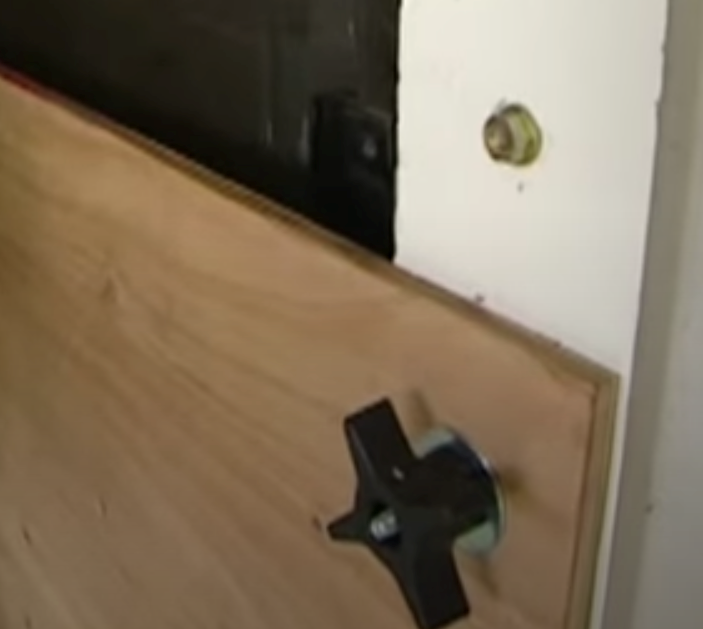
Right - A floor-to-floor hold down can be installed as a retrofit without removing the siding.
Image
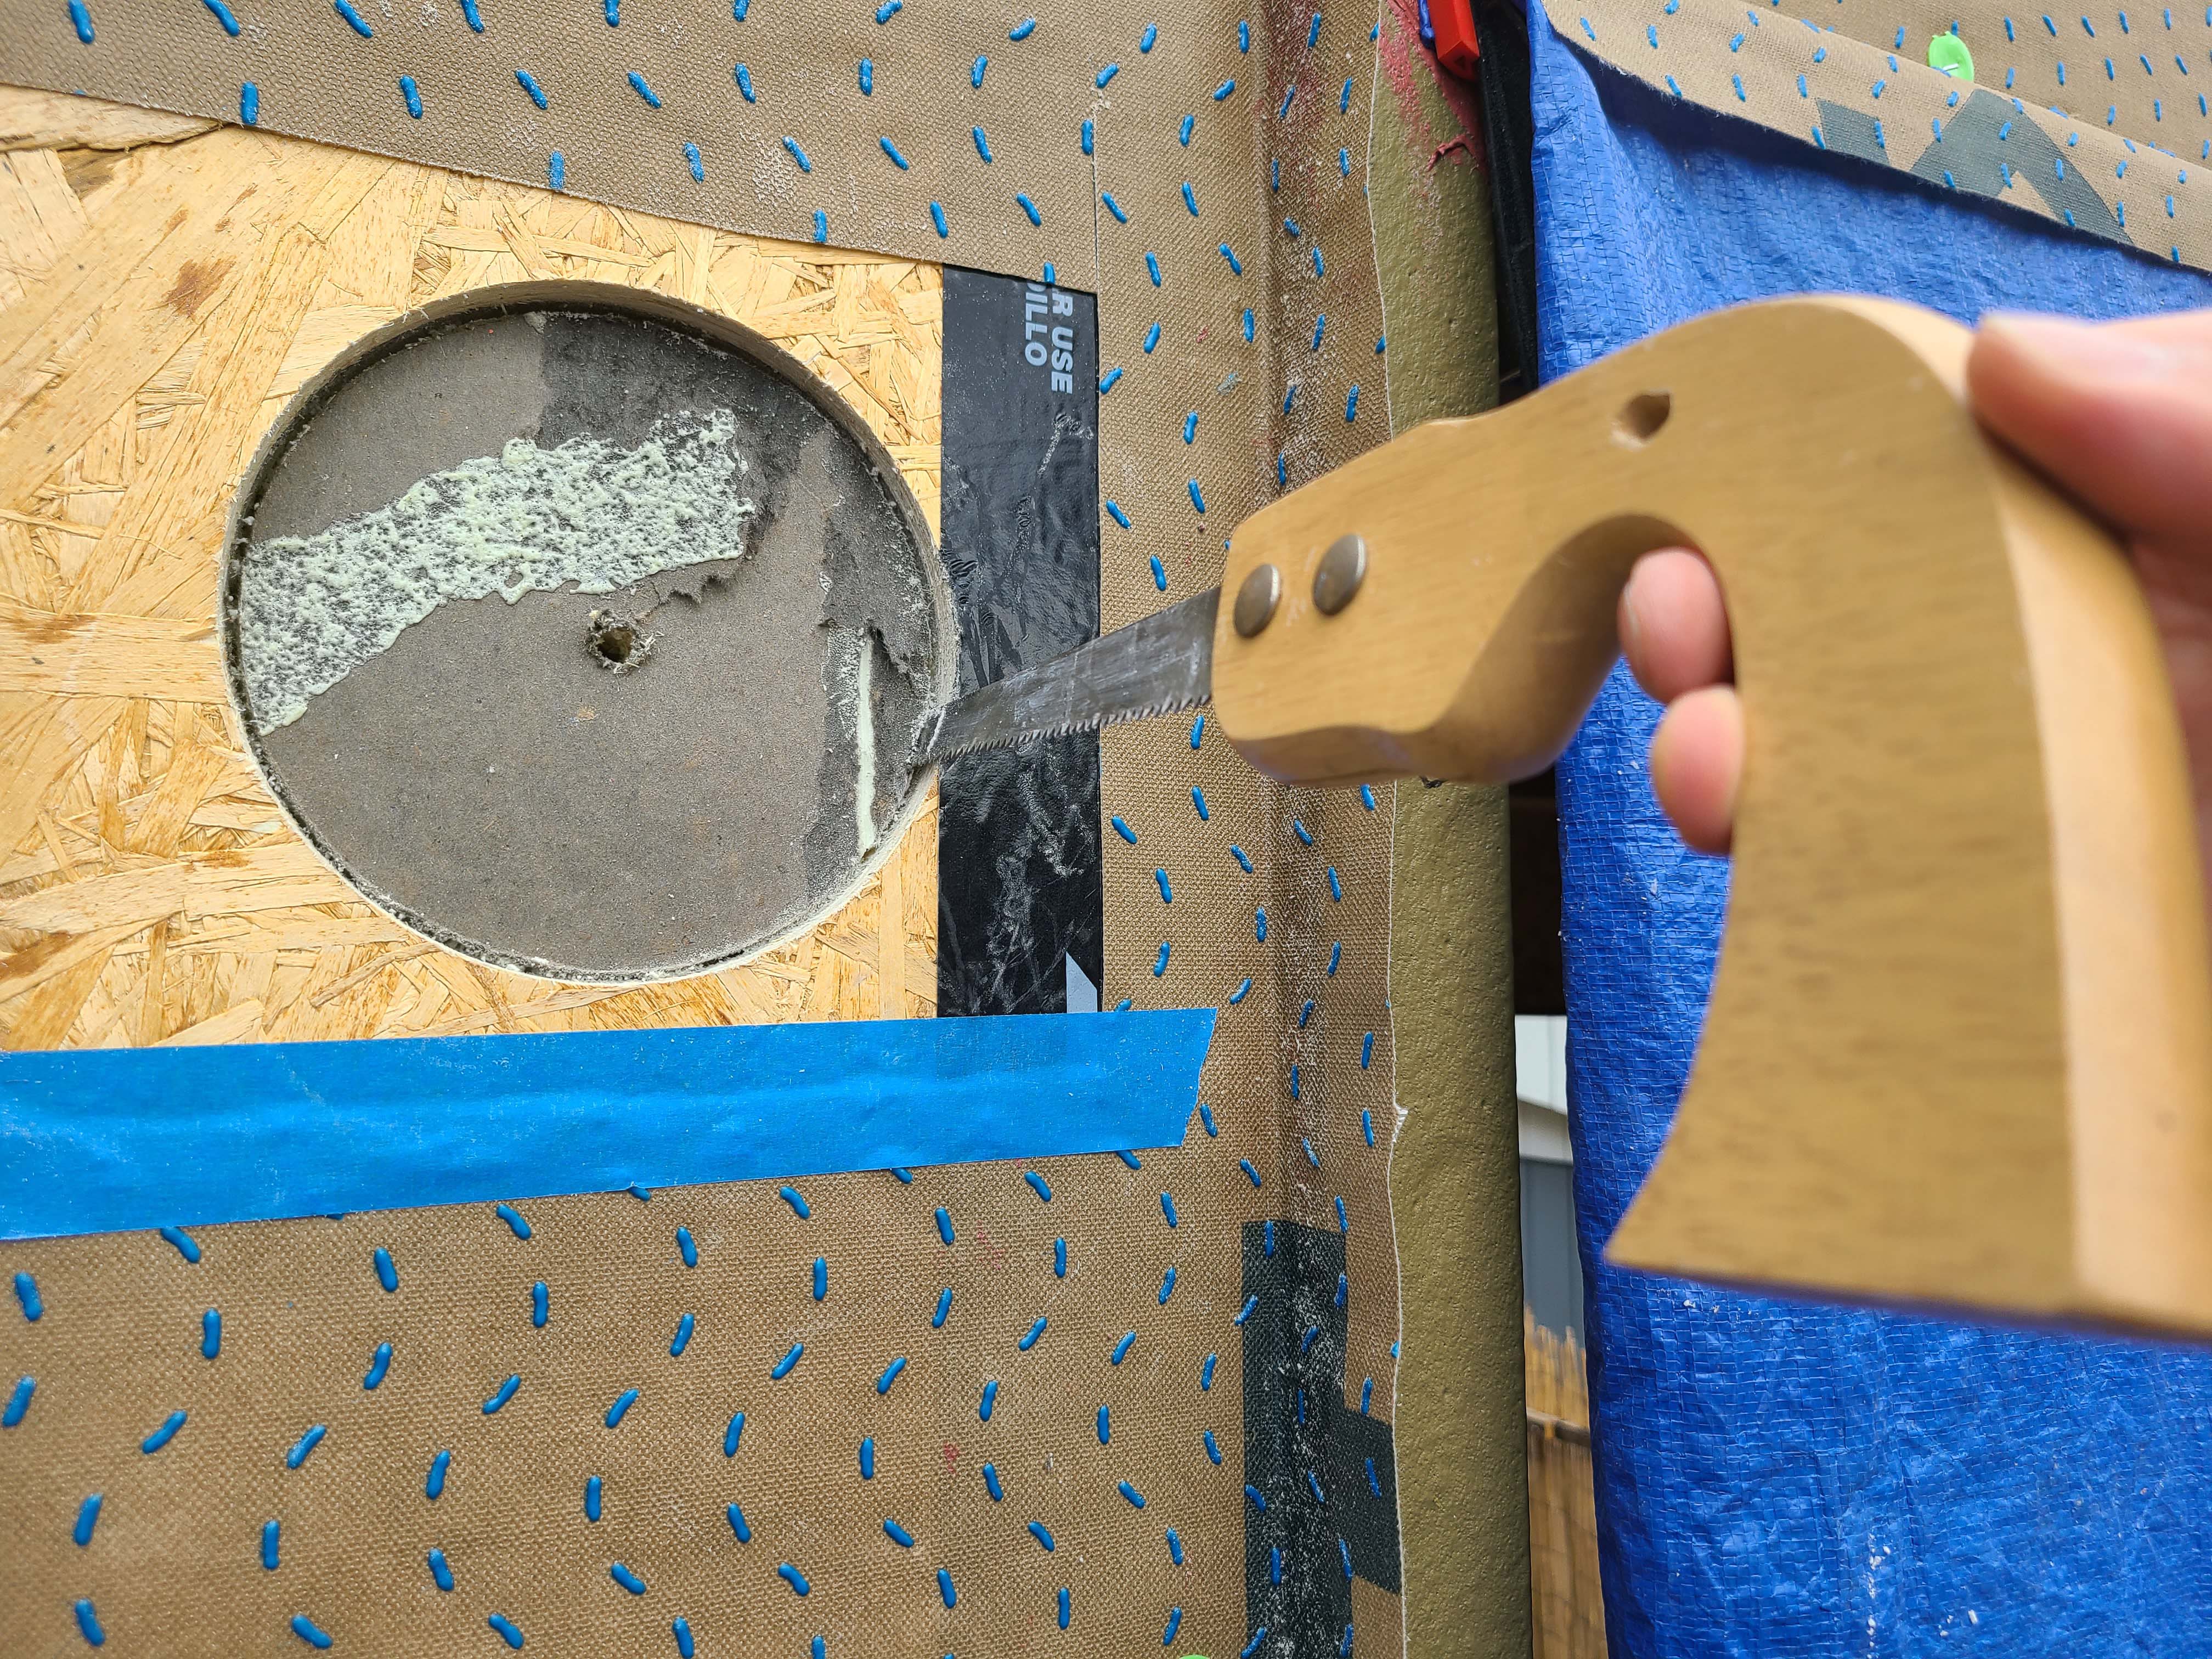
Right - A hand saw is used to remove wall material for a small through-the-wall HRV; 6 of 14.
Image
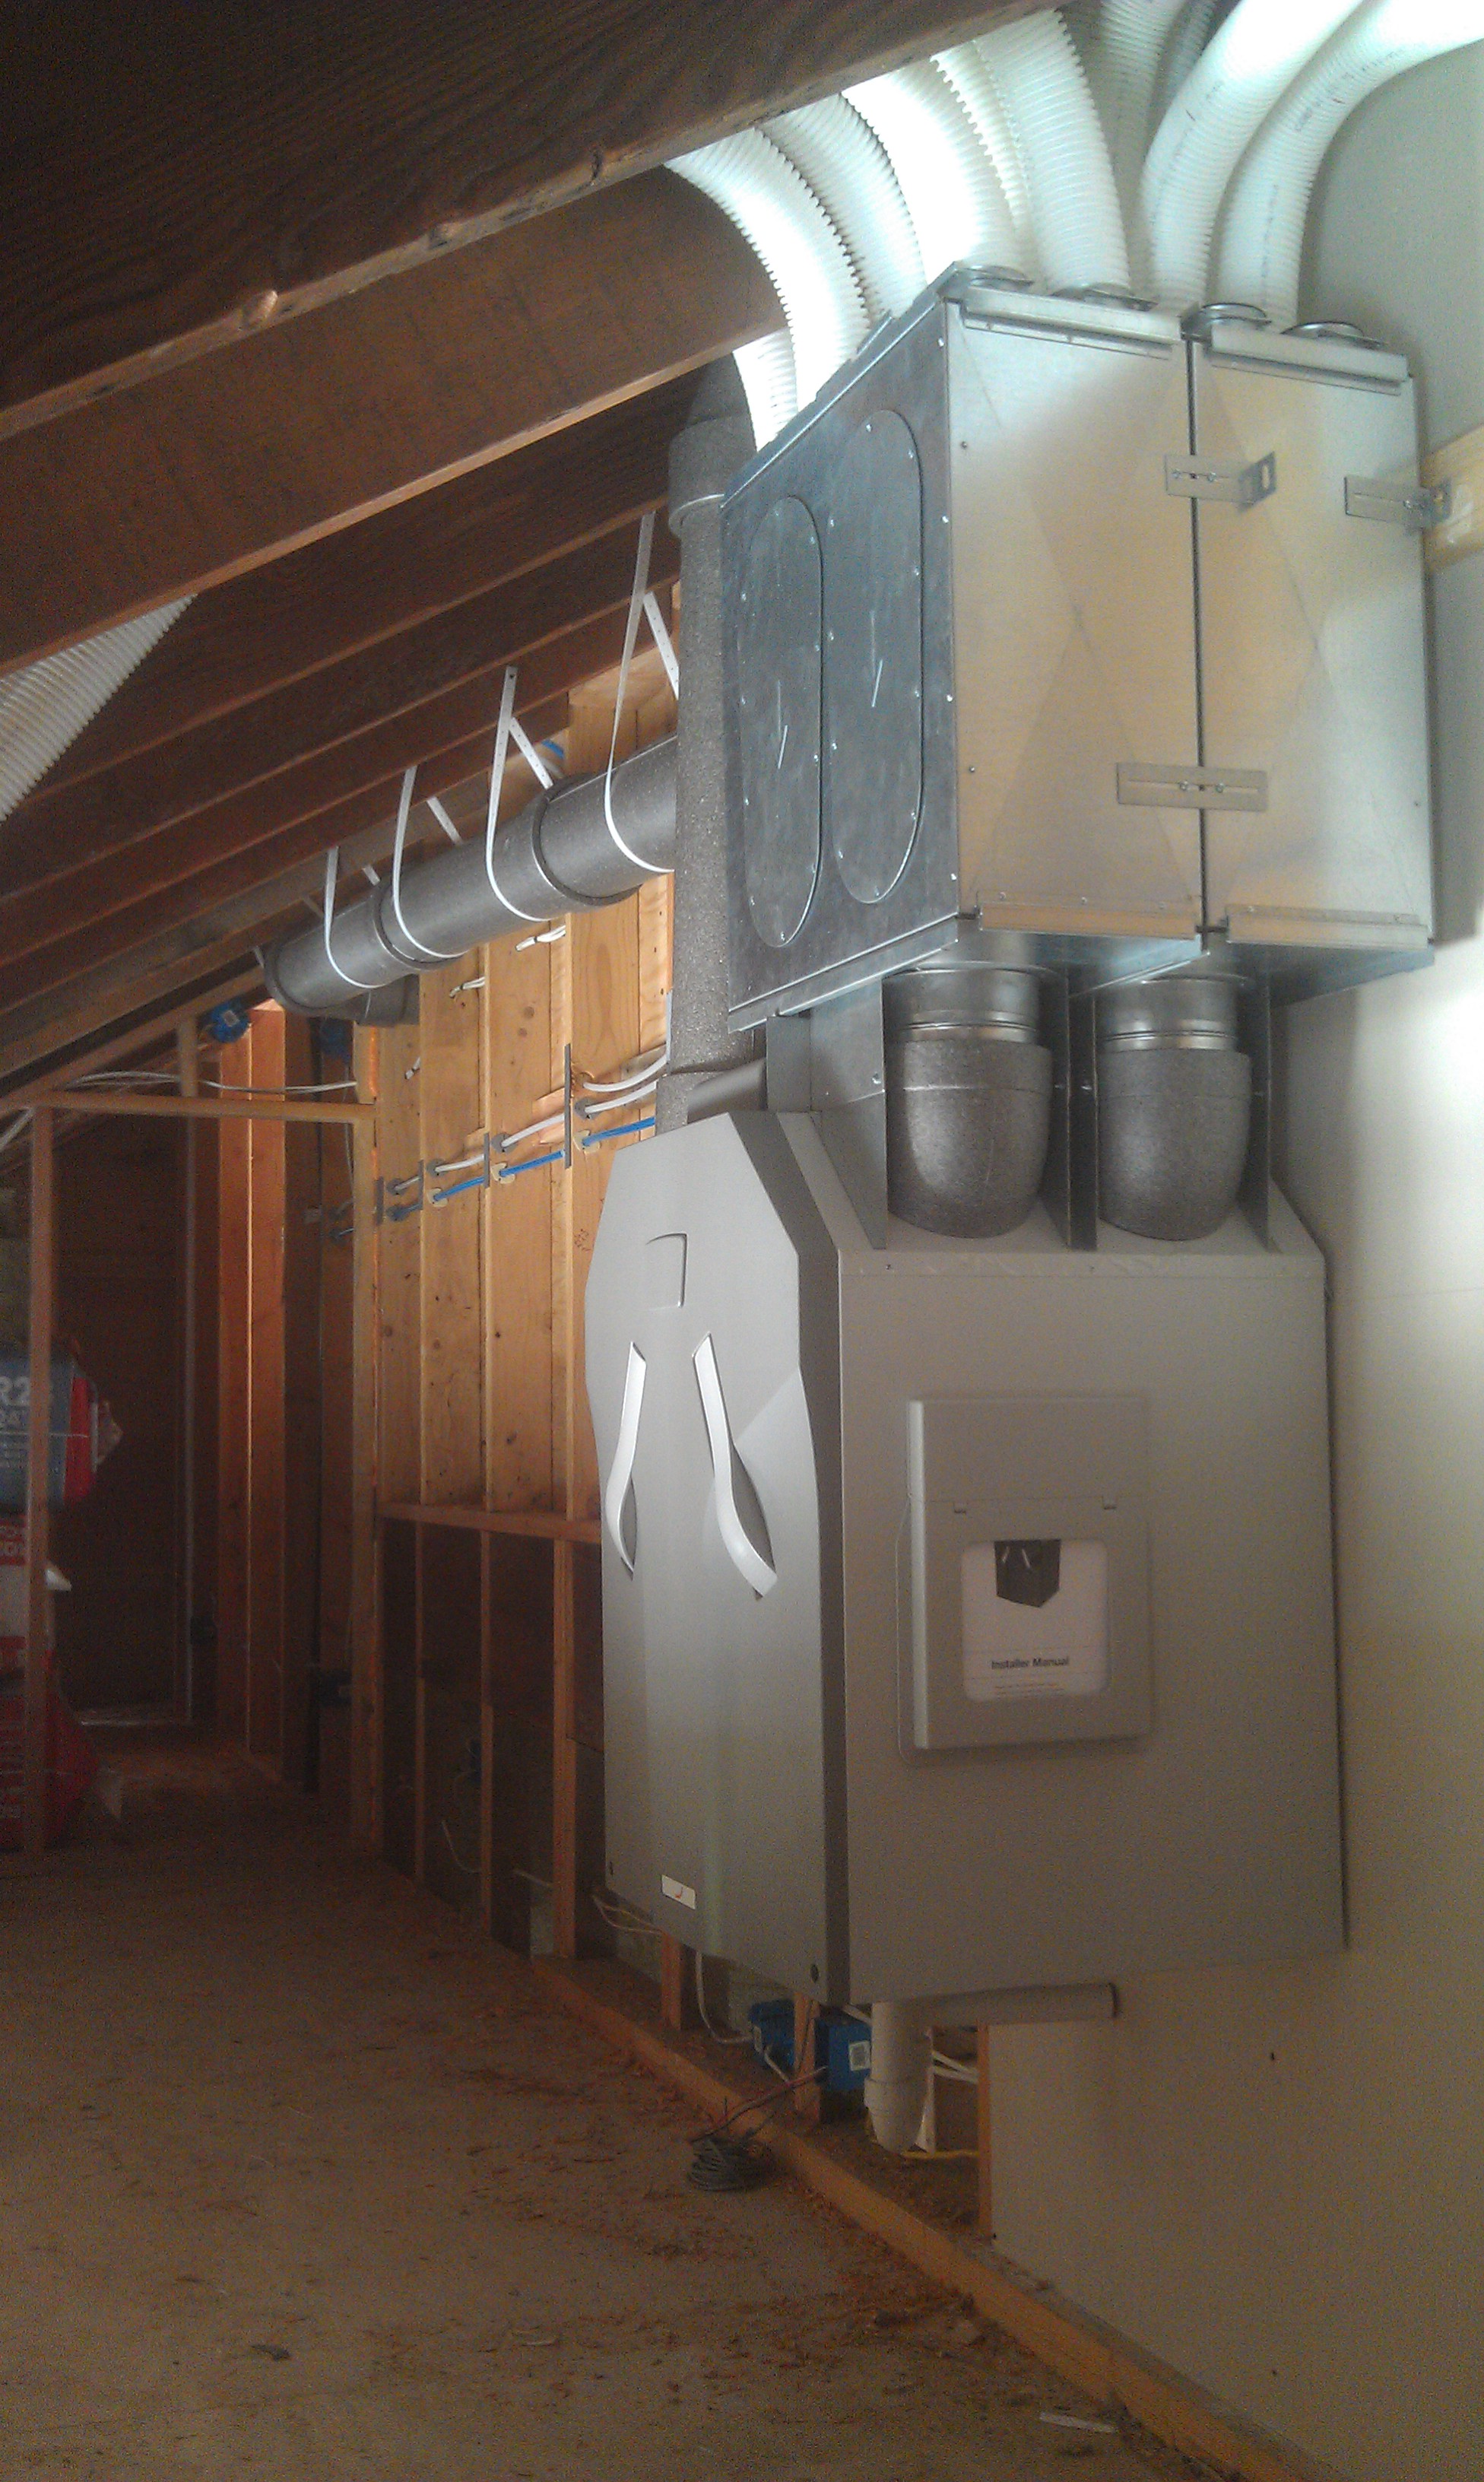
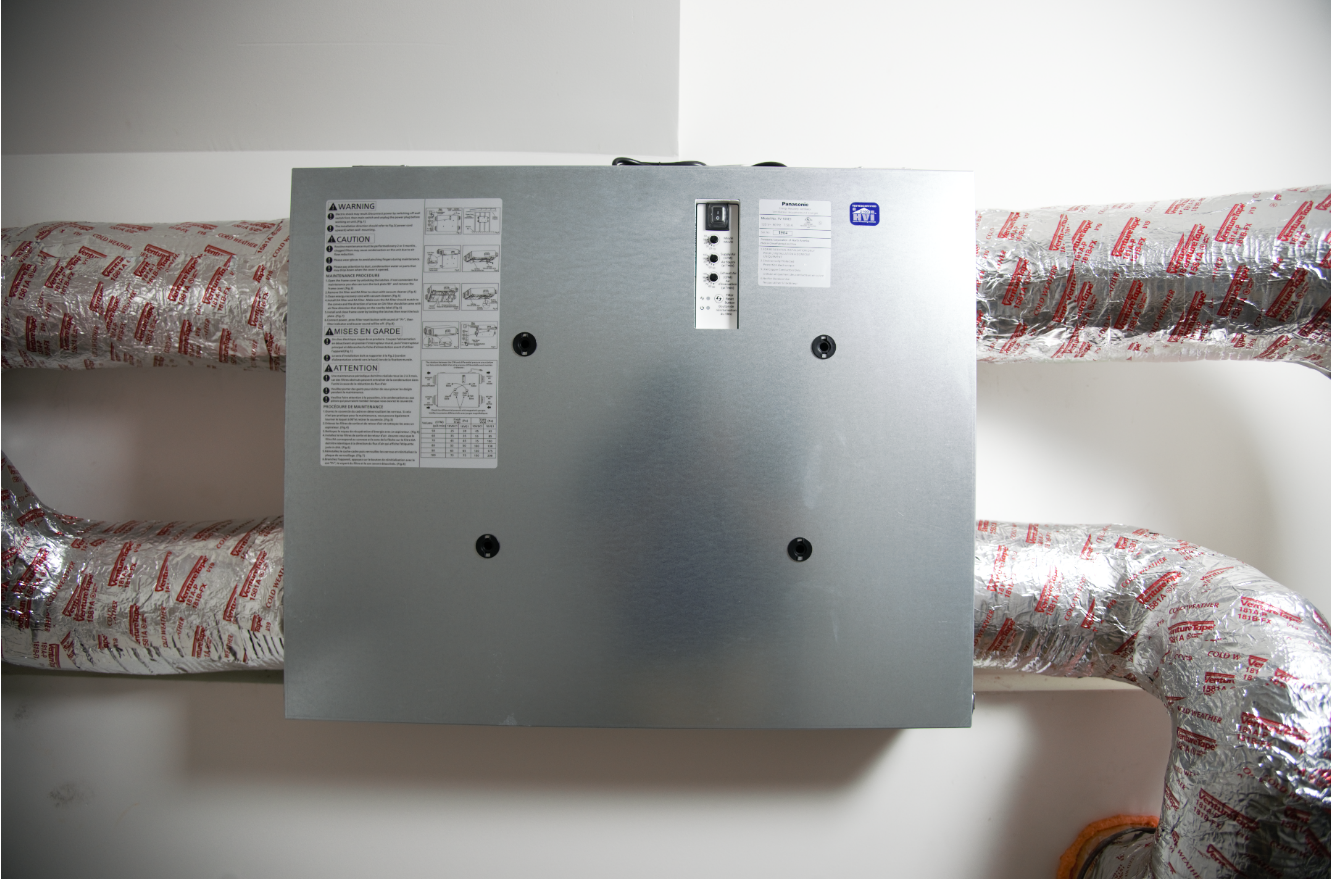
Right - A heat recovery ventilator supplies all living spaces with fresh air while transferring heat for energy savings.
Image
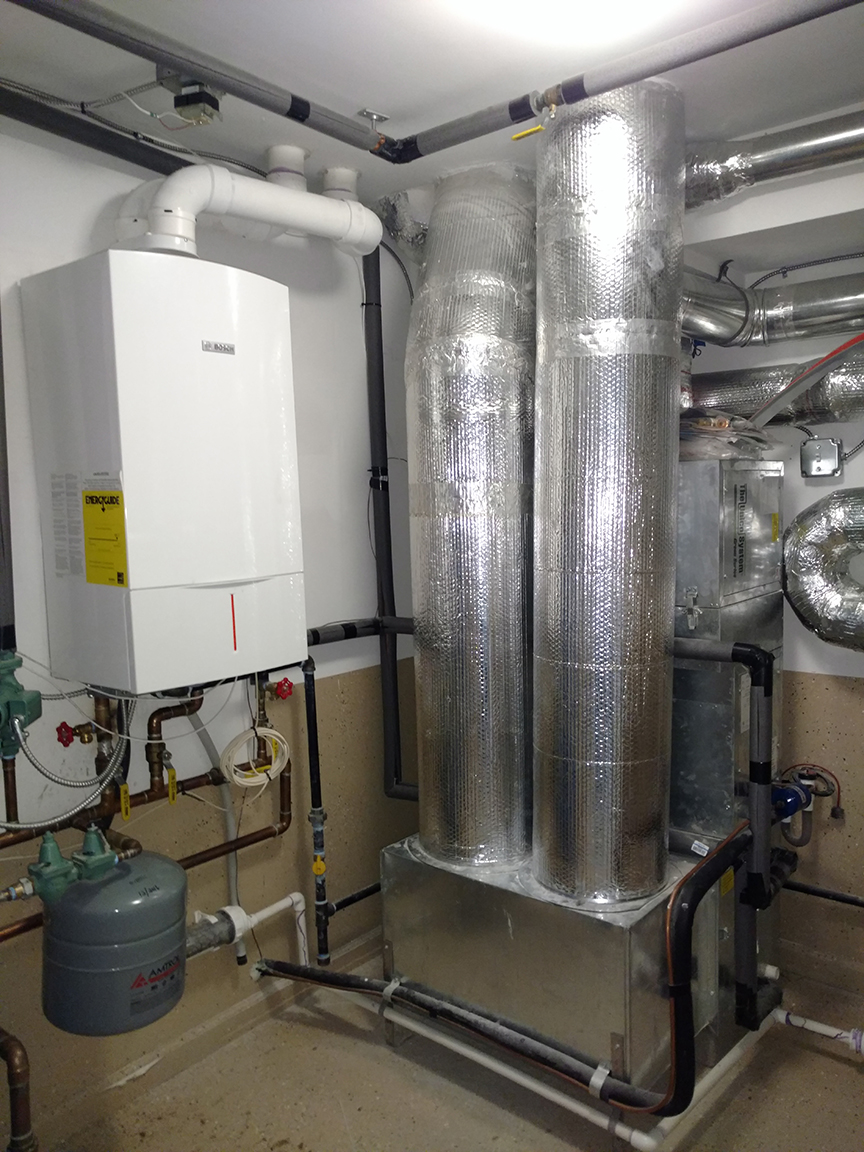
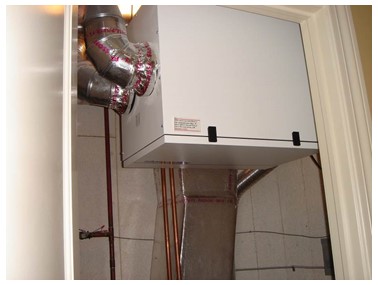
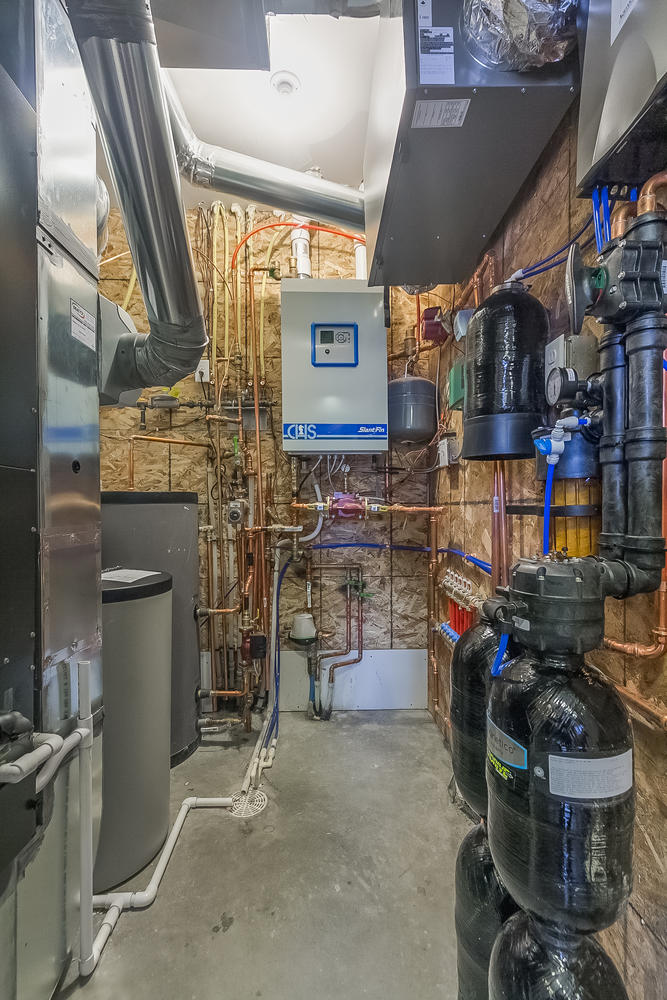
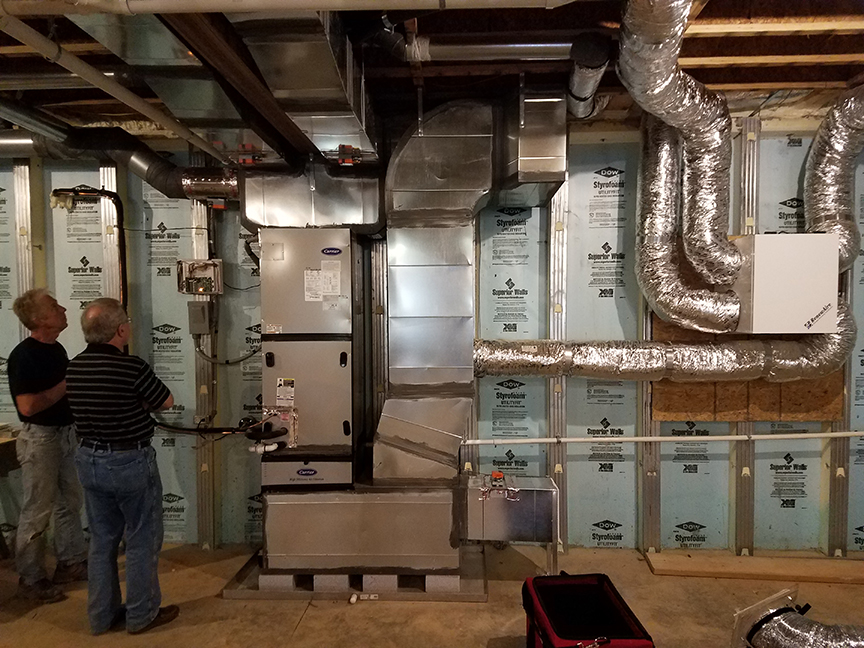
Right - A high-efficiency (95 AFUE) wall-hung gas-fired boiler heats water for the hydro-coil space heating system and also provides a back-up for the solar hot water system.
Image
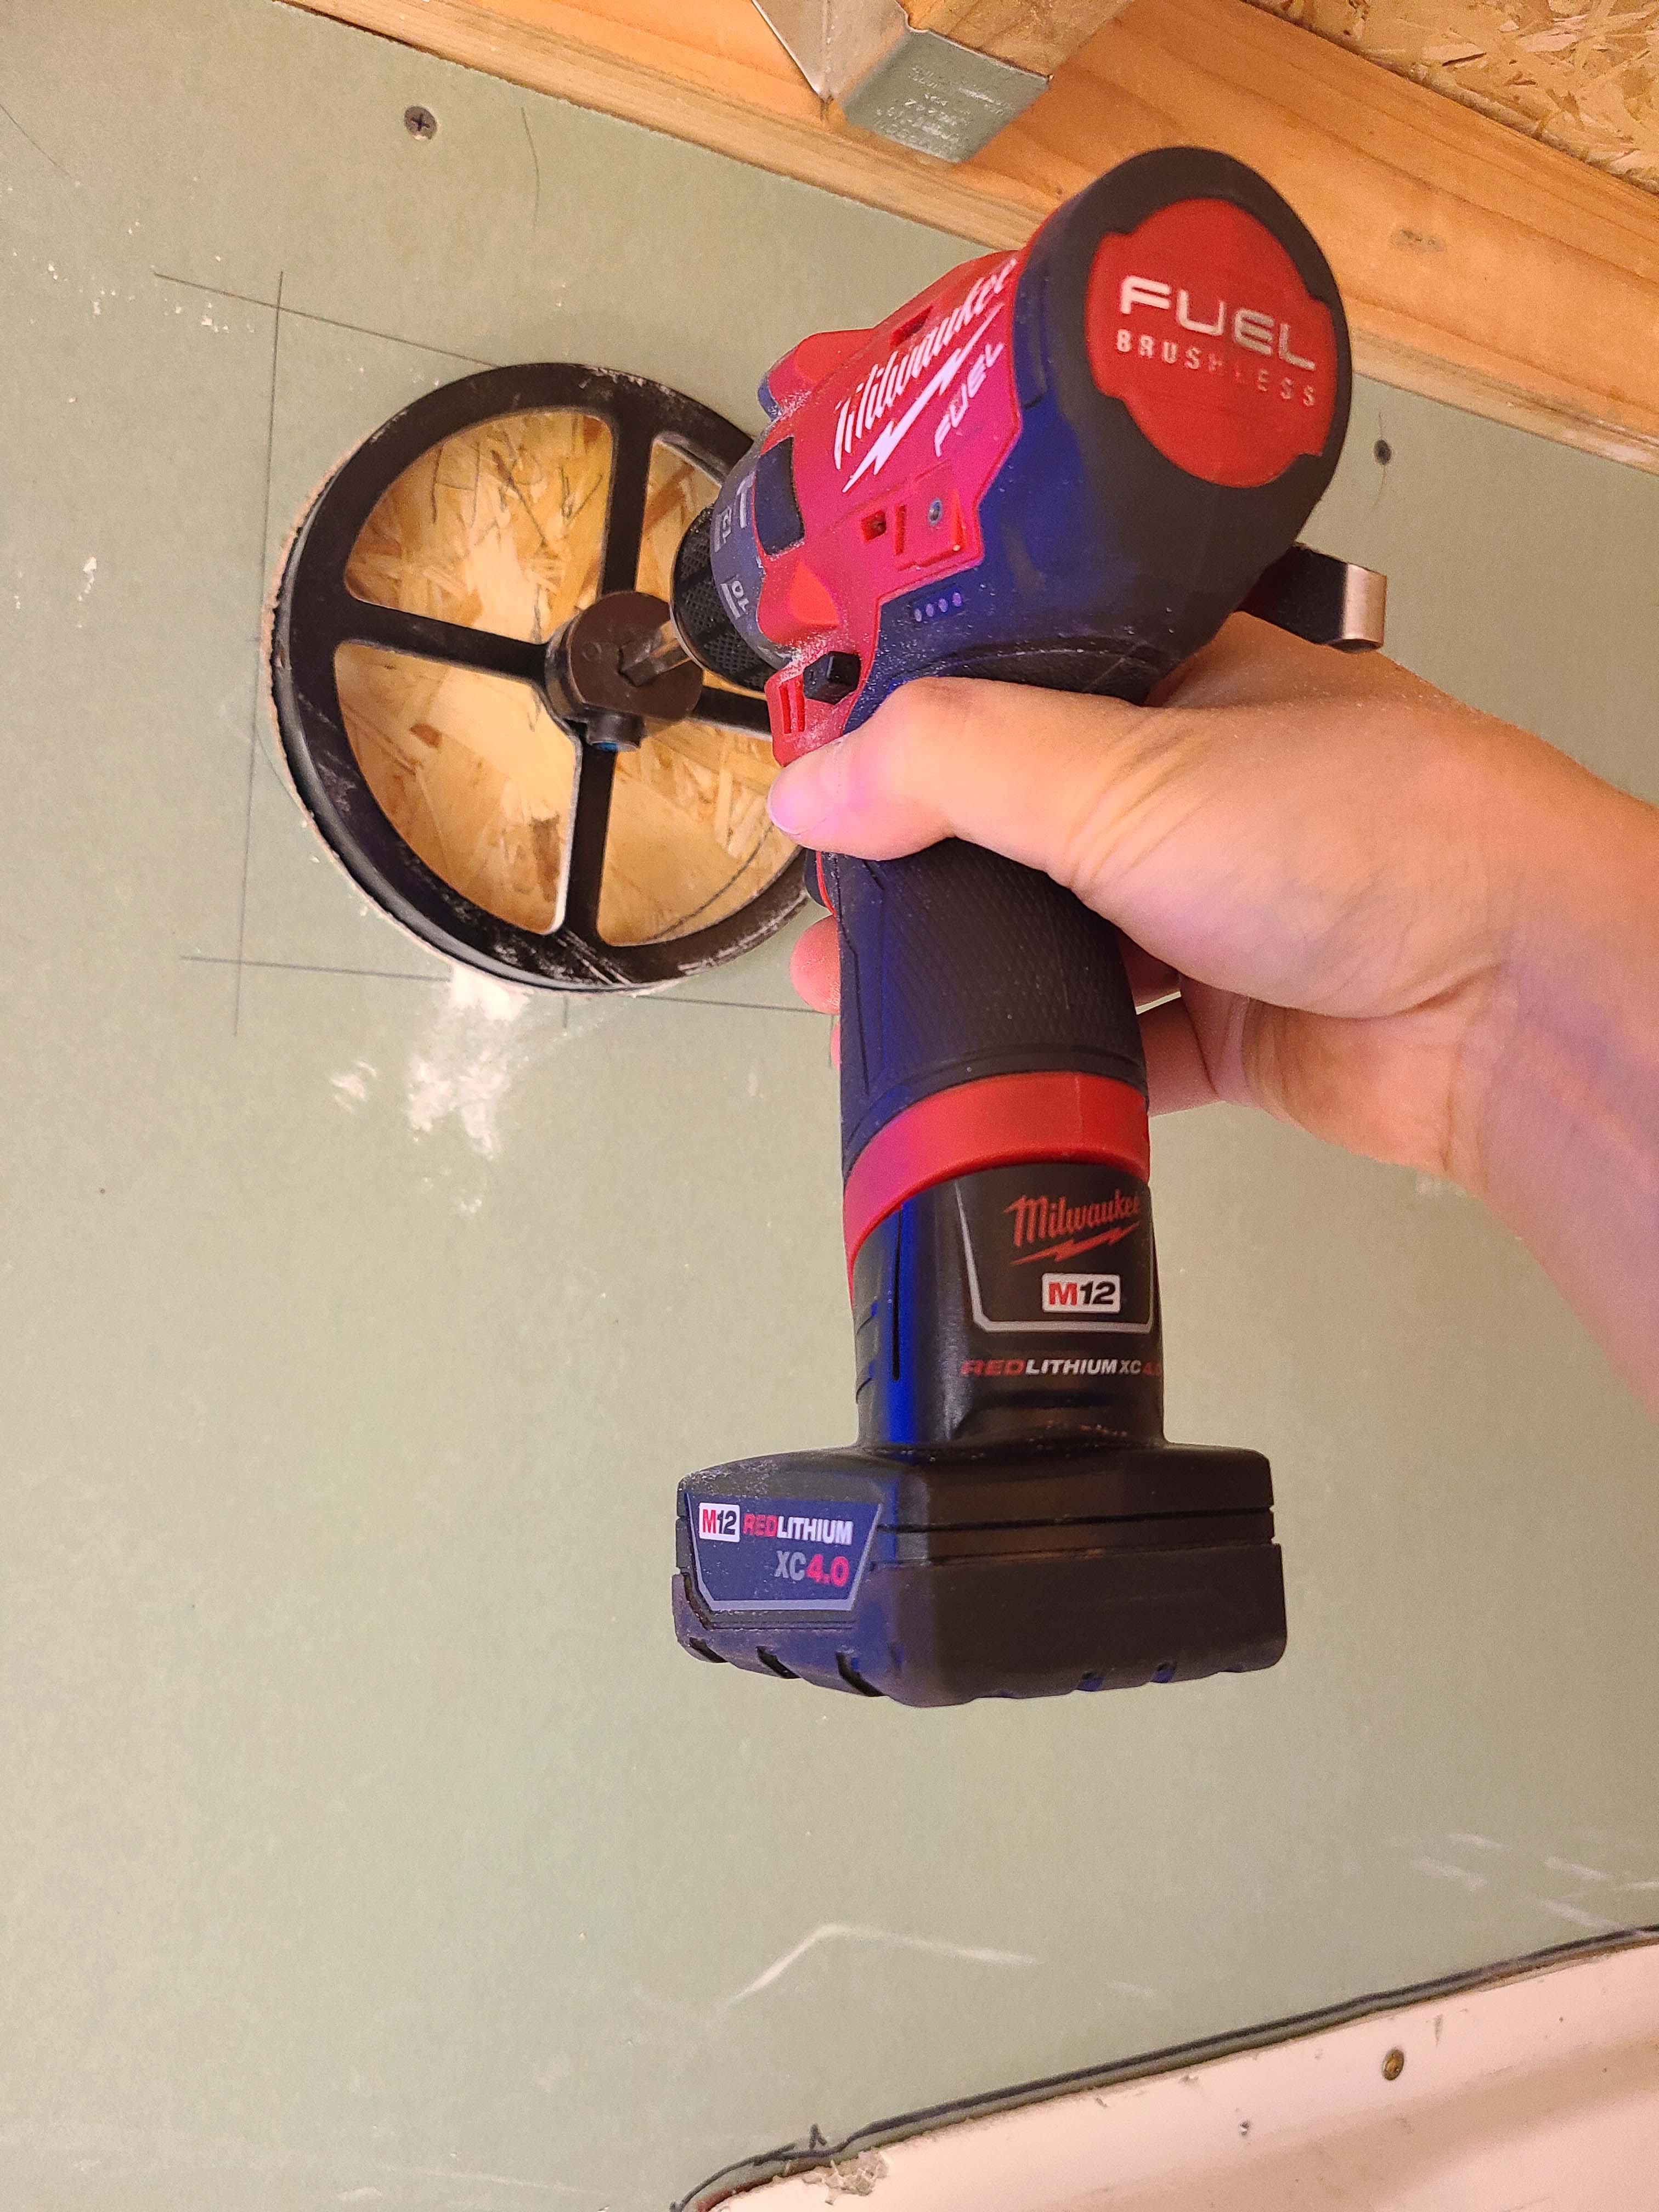
Right - A hole is drilled into the wall for installation small through-the-wall HRV; 5 of 14.
Image

Right - A home-run (also called central manifold or parallel piping) system distributes hot water directly from a distribution manifold next to the water heater to each fixture using individual small-diameter PEX pipes.
Image
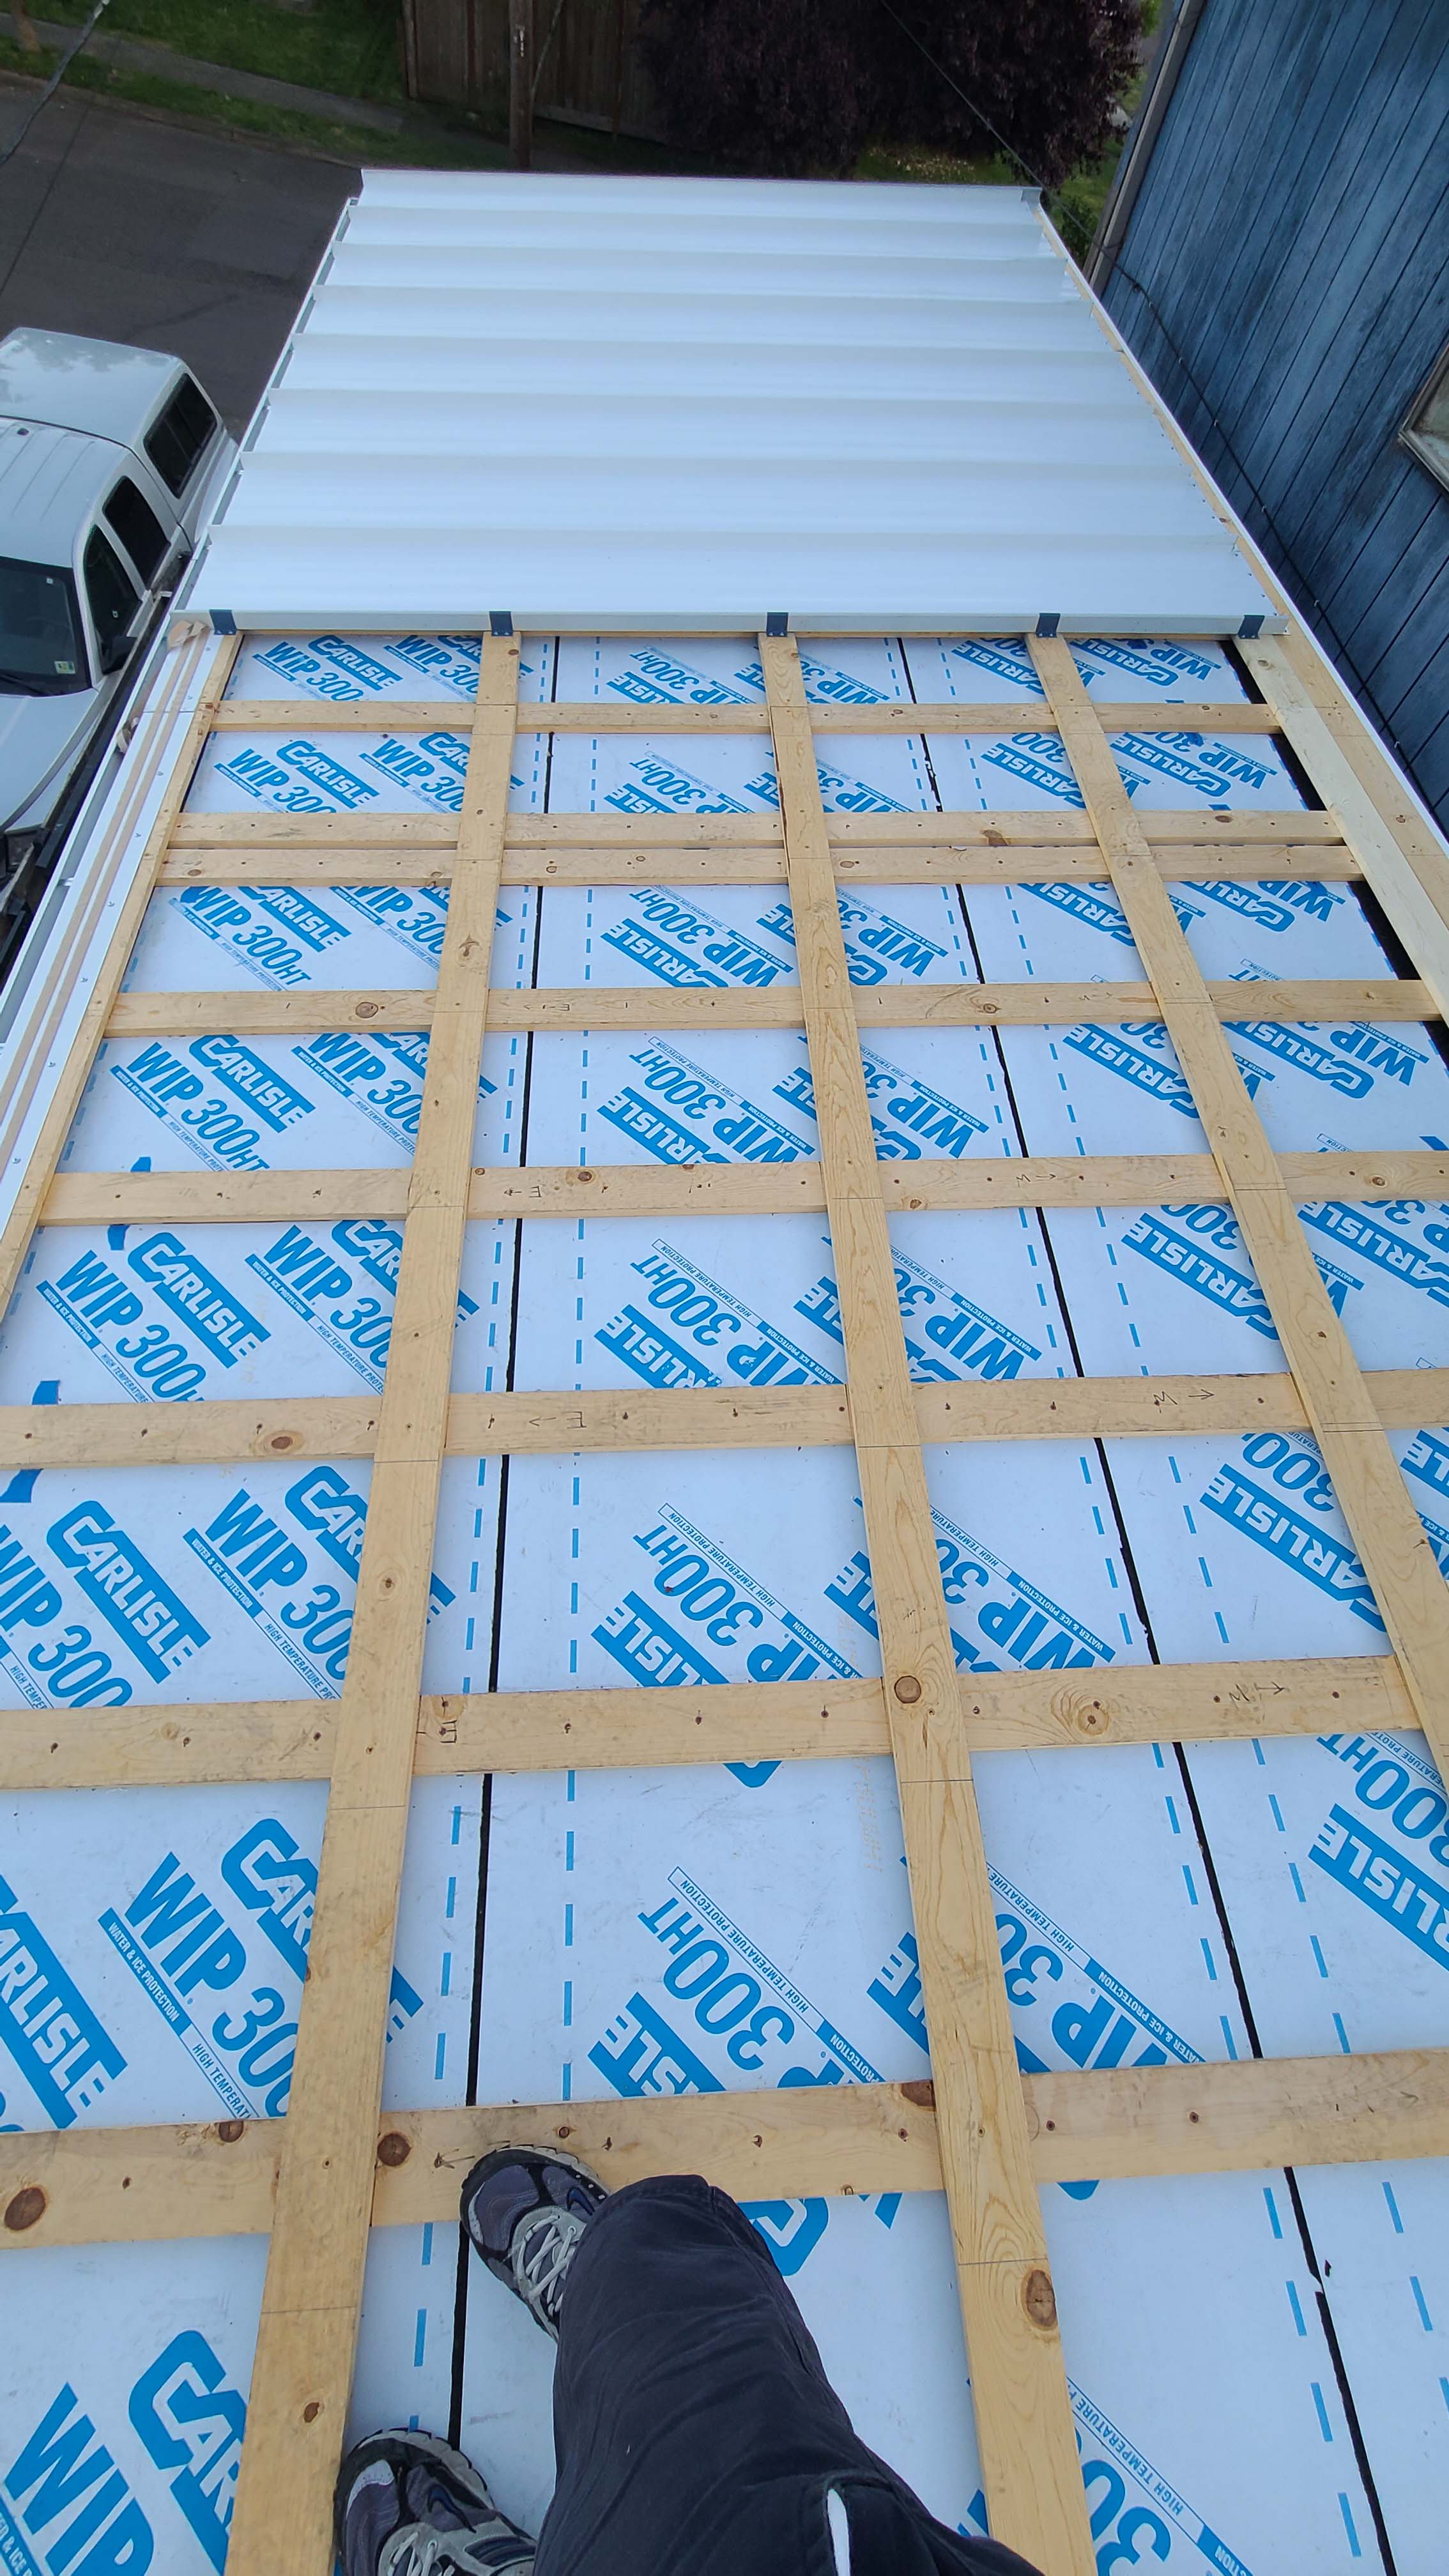
Right - A lattice of 1X4 furring strips provides a ventilation gap between the decking and metal roofing for this shed roof.
Image
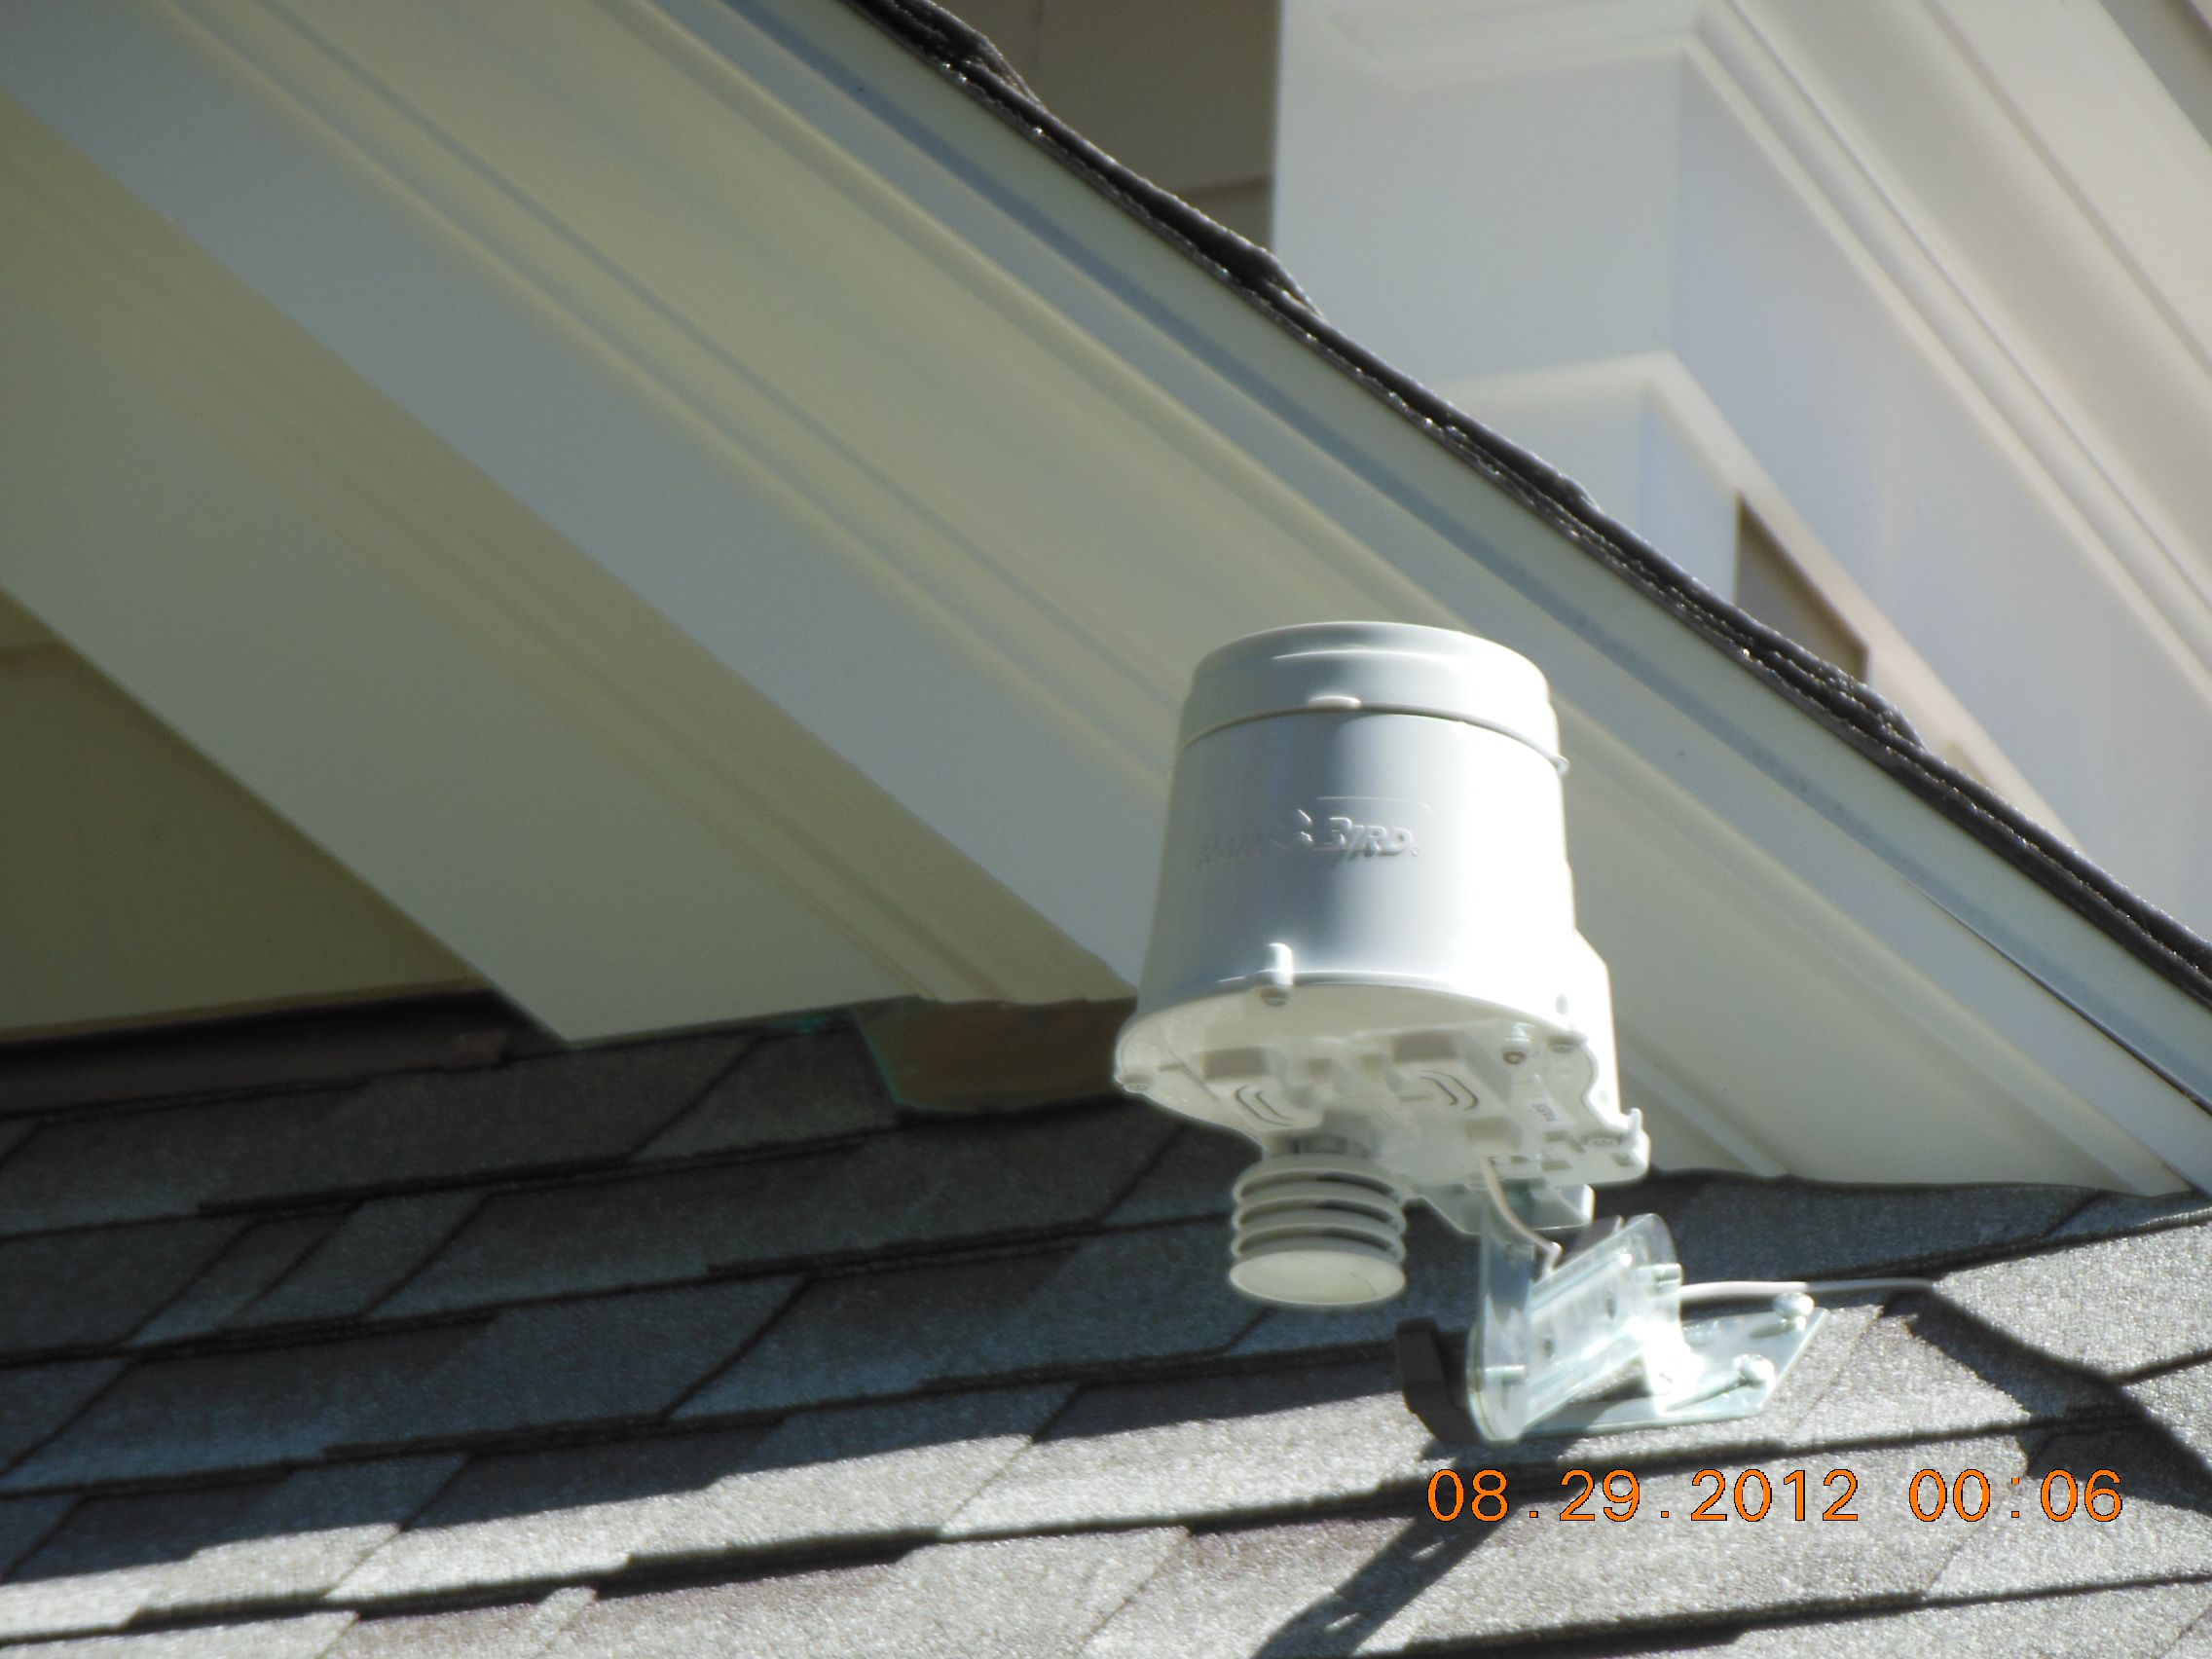
Right - A moisture sensor is installed on the roof to control the sprinkler system.
Image

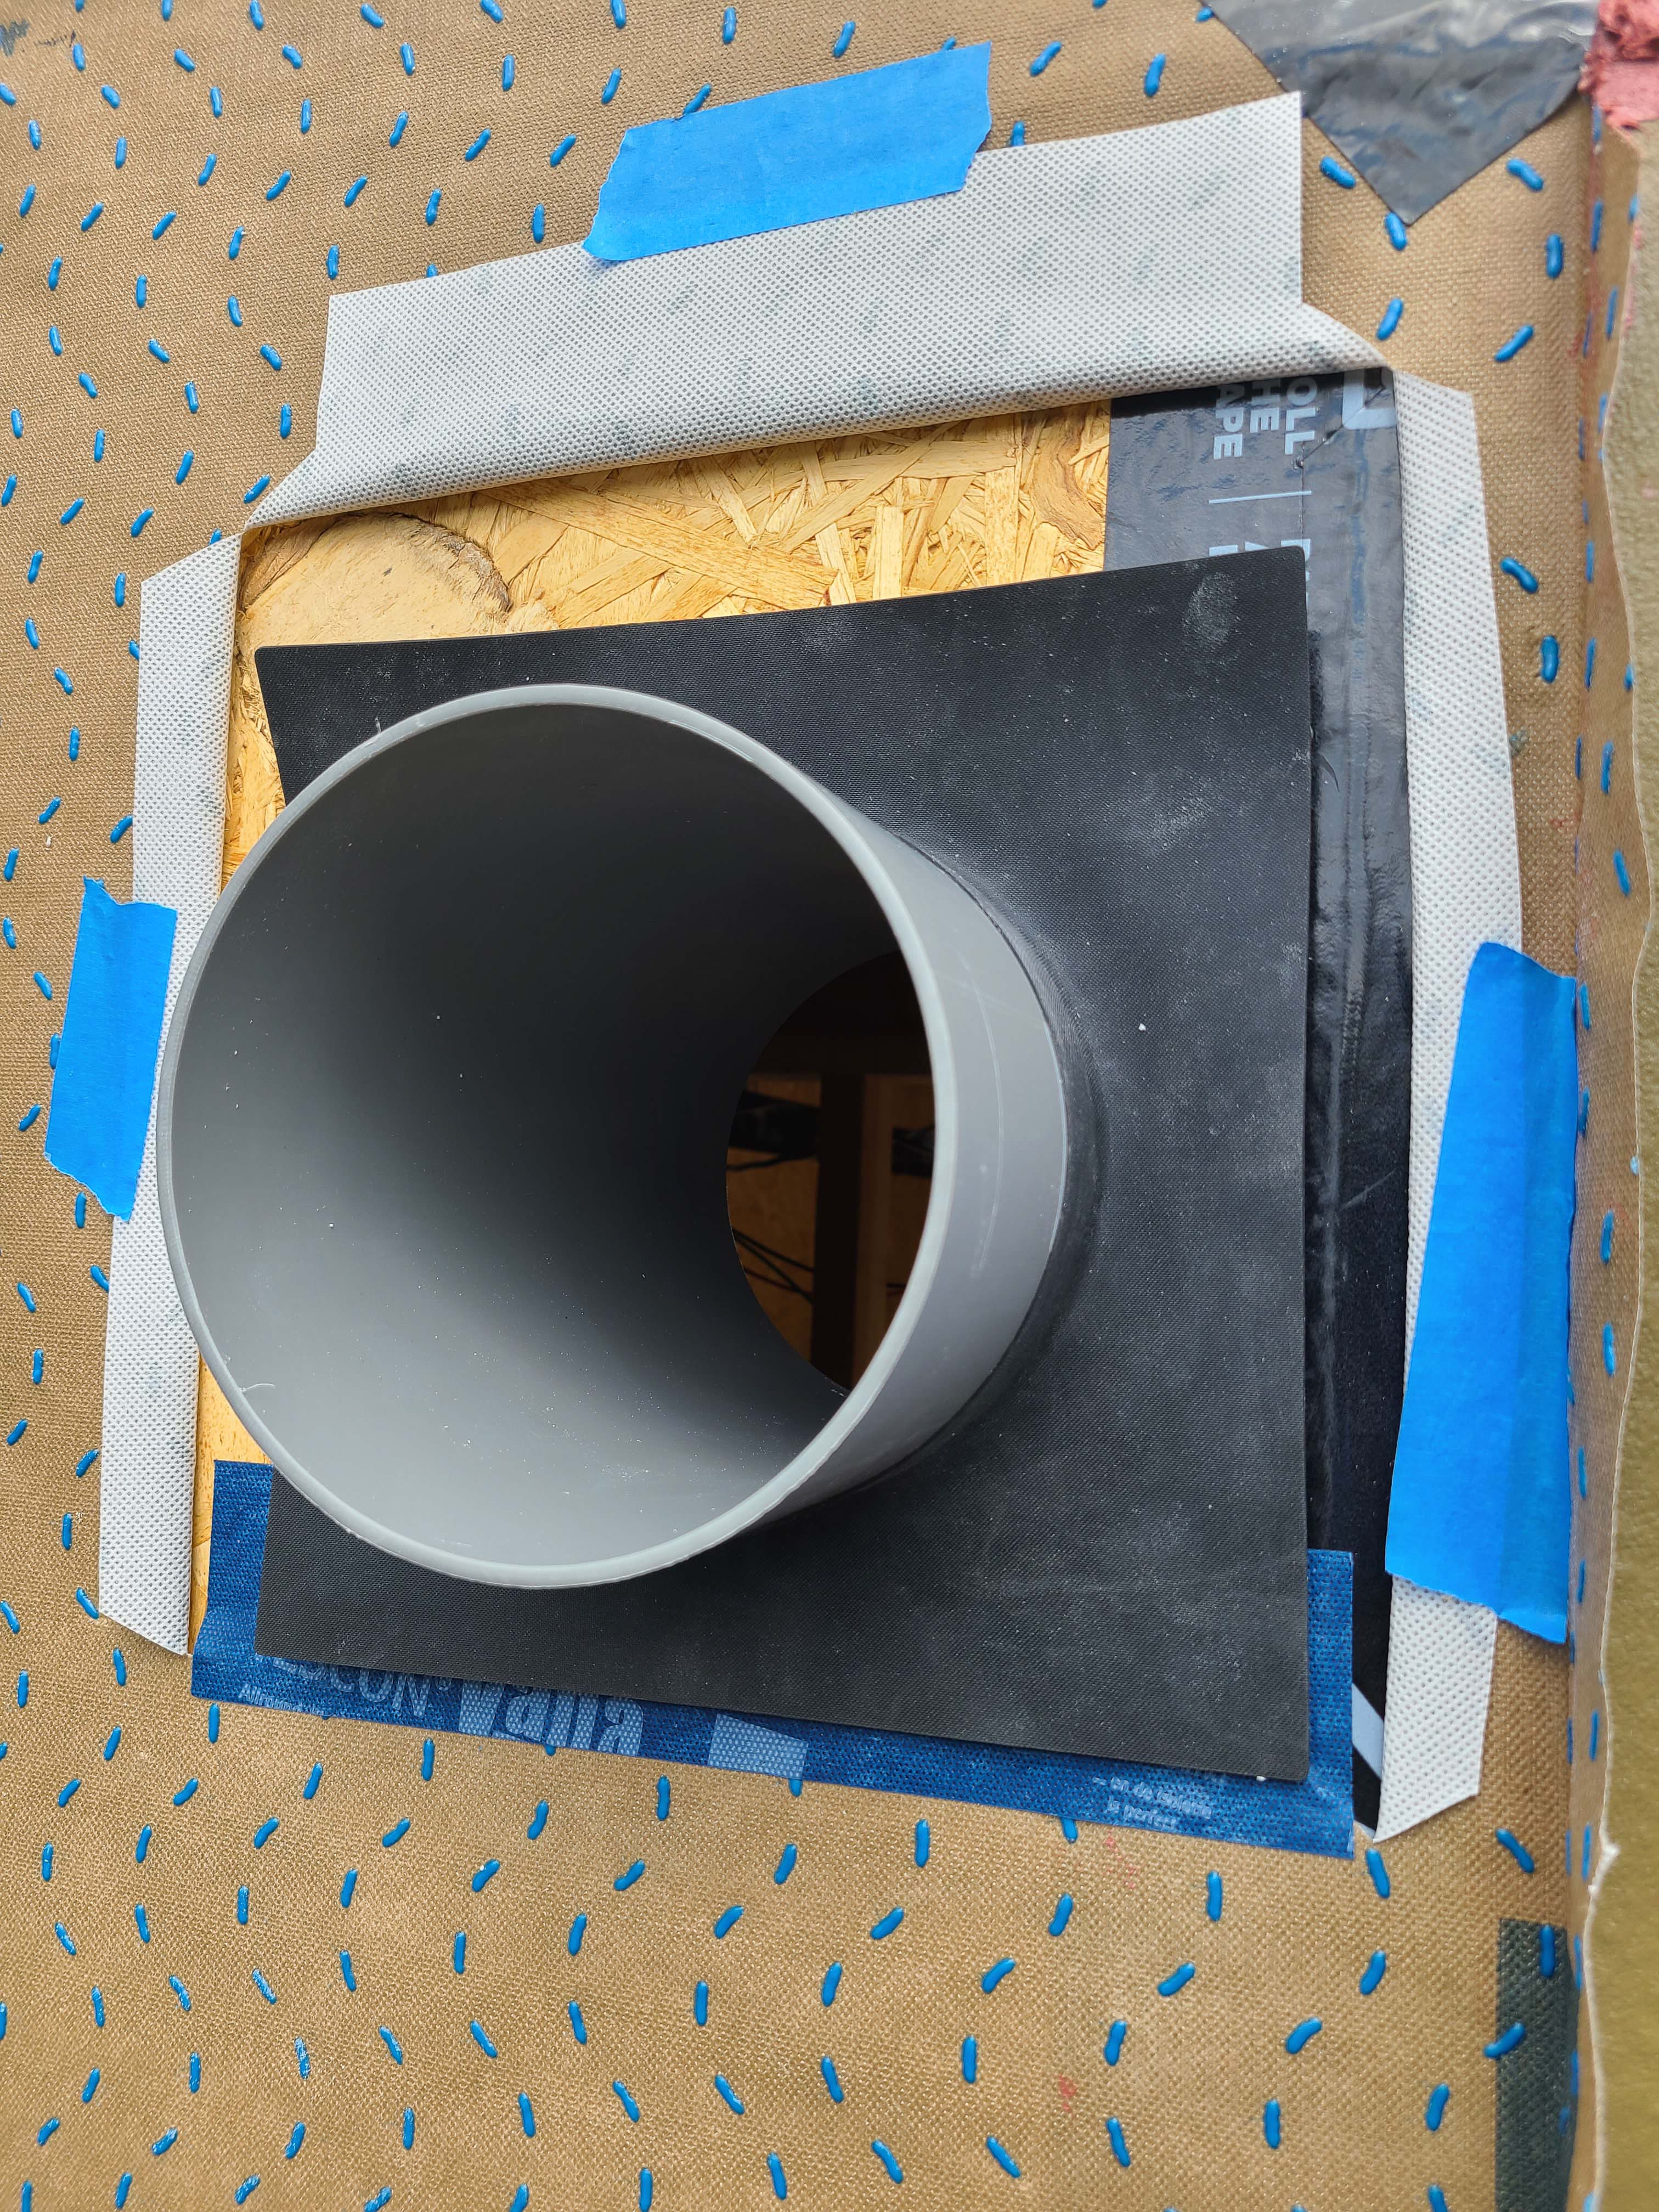
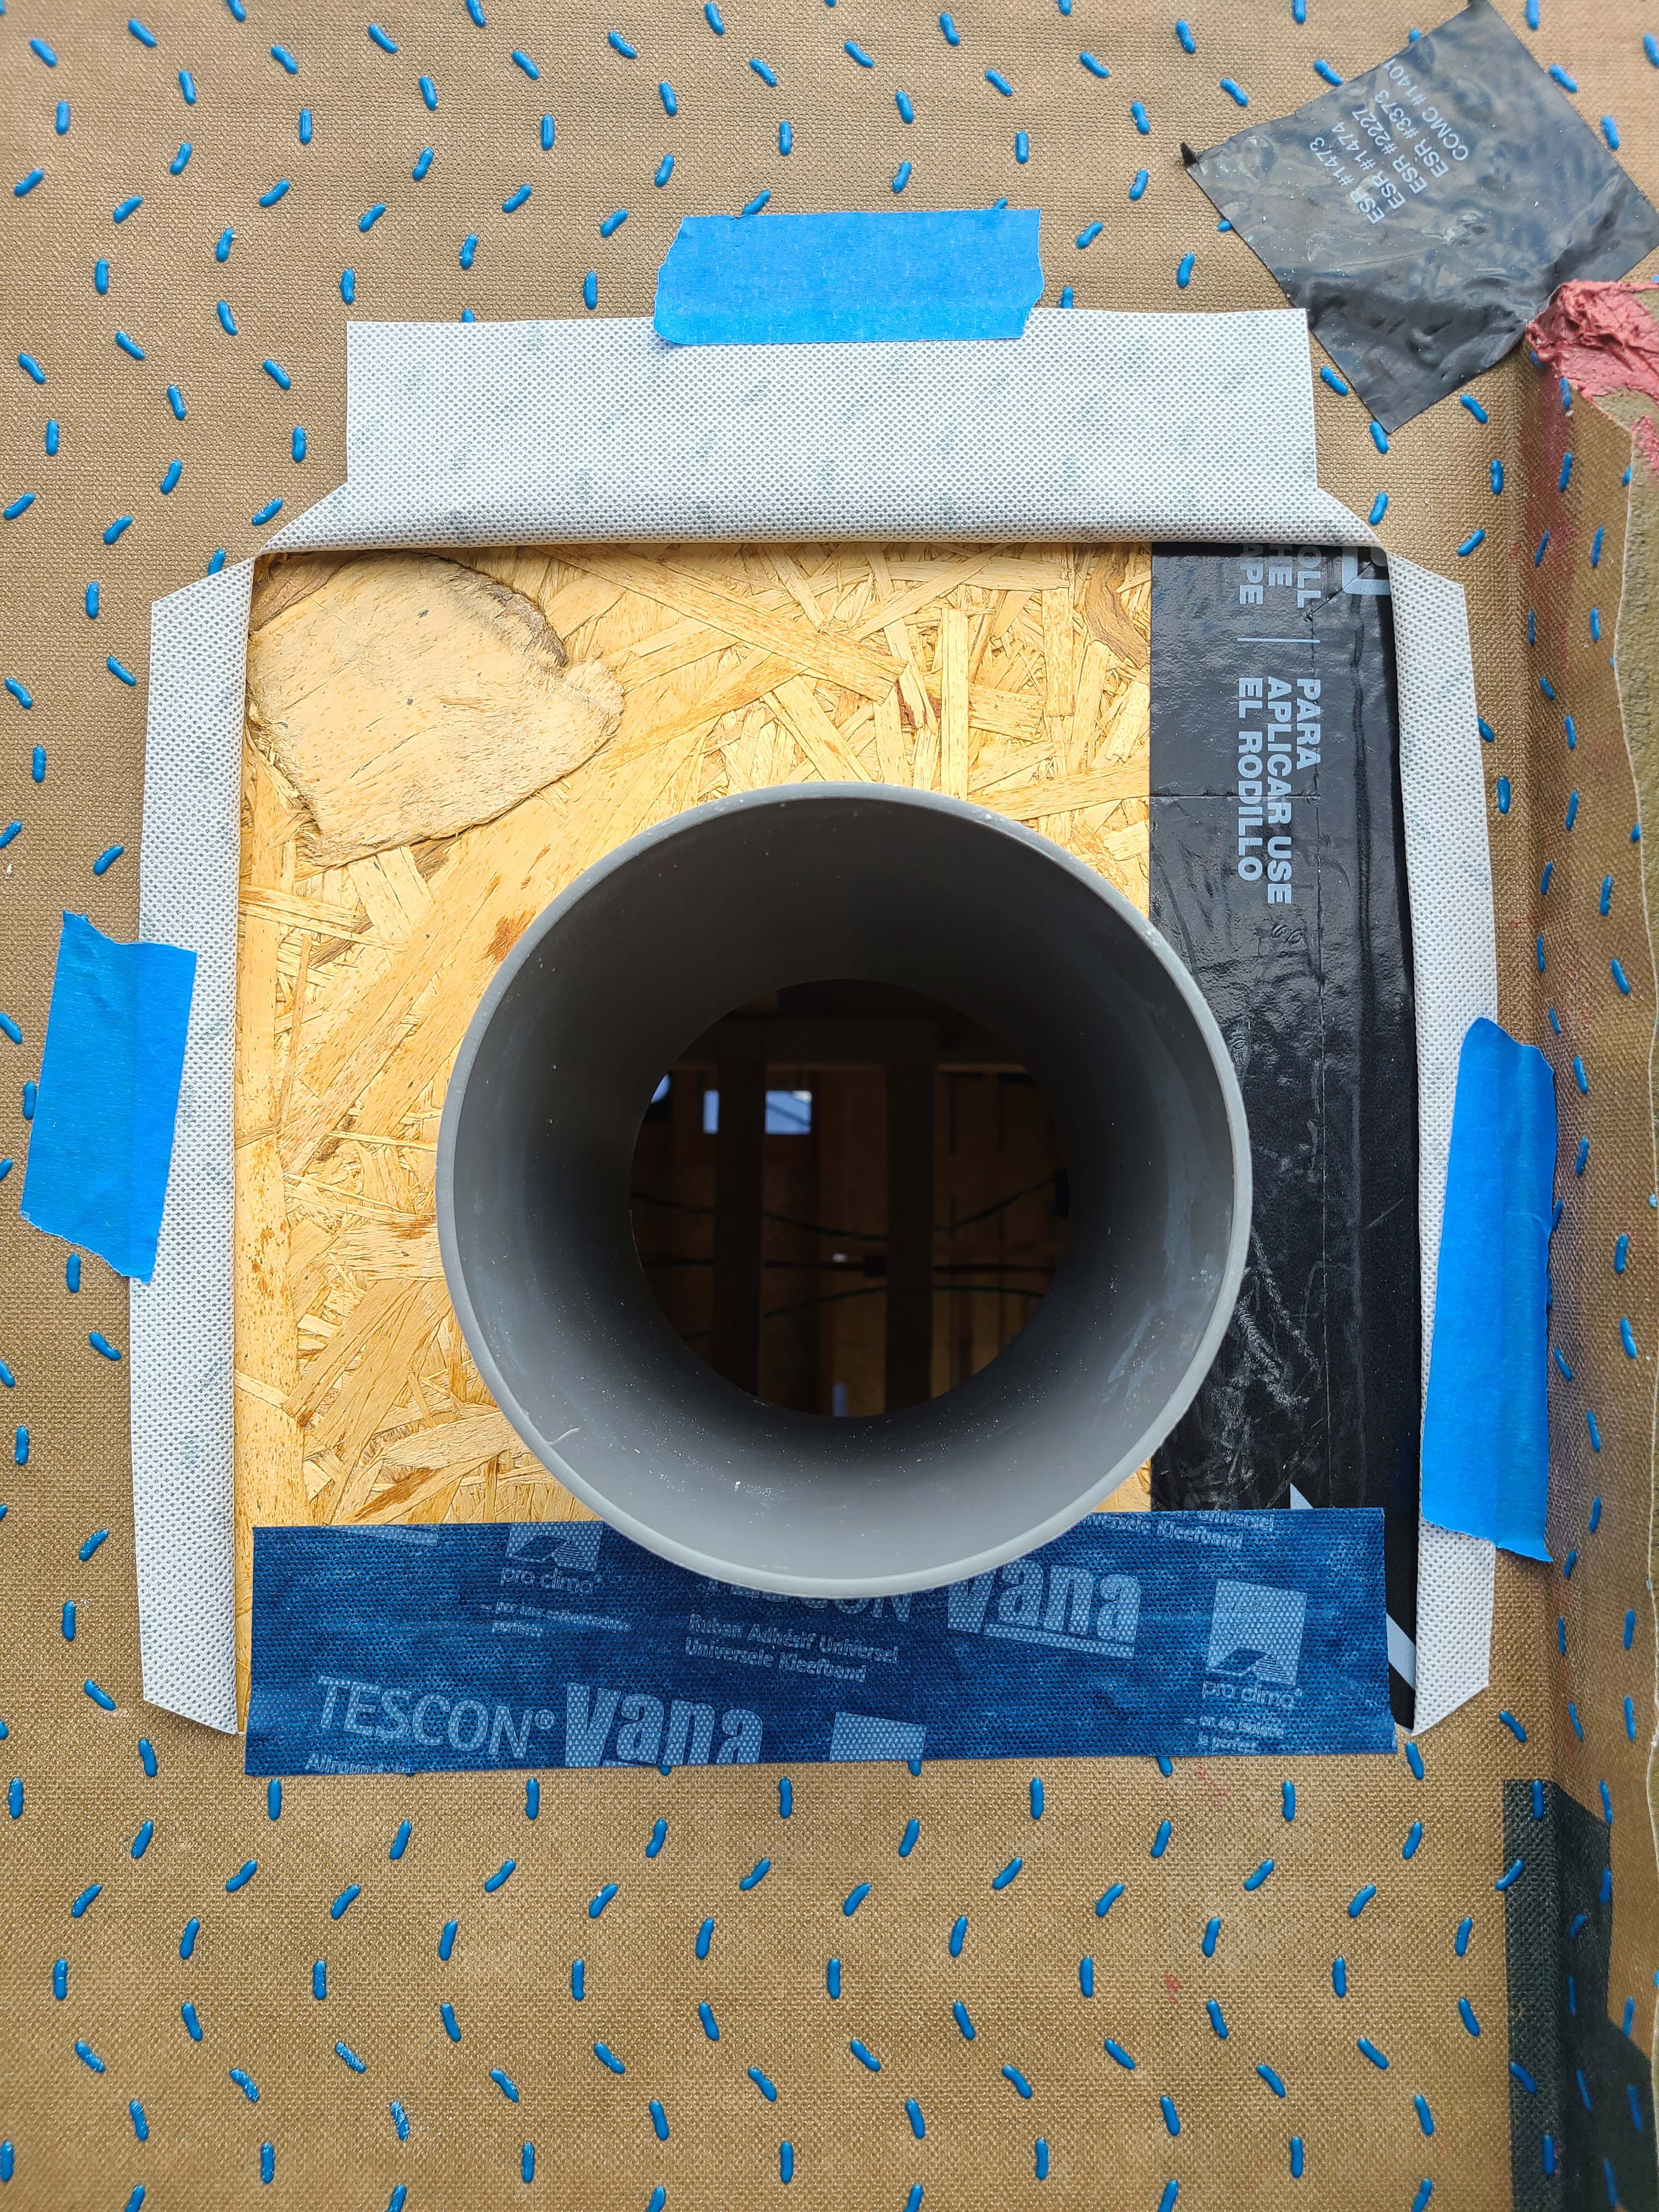
Right - A second layer of flashing tape is applied over the EPDM gasket and first layer of tape at sides and top around the duct; 14 of 14.
Image
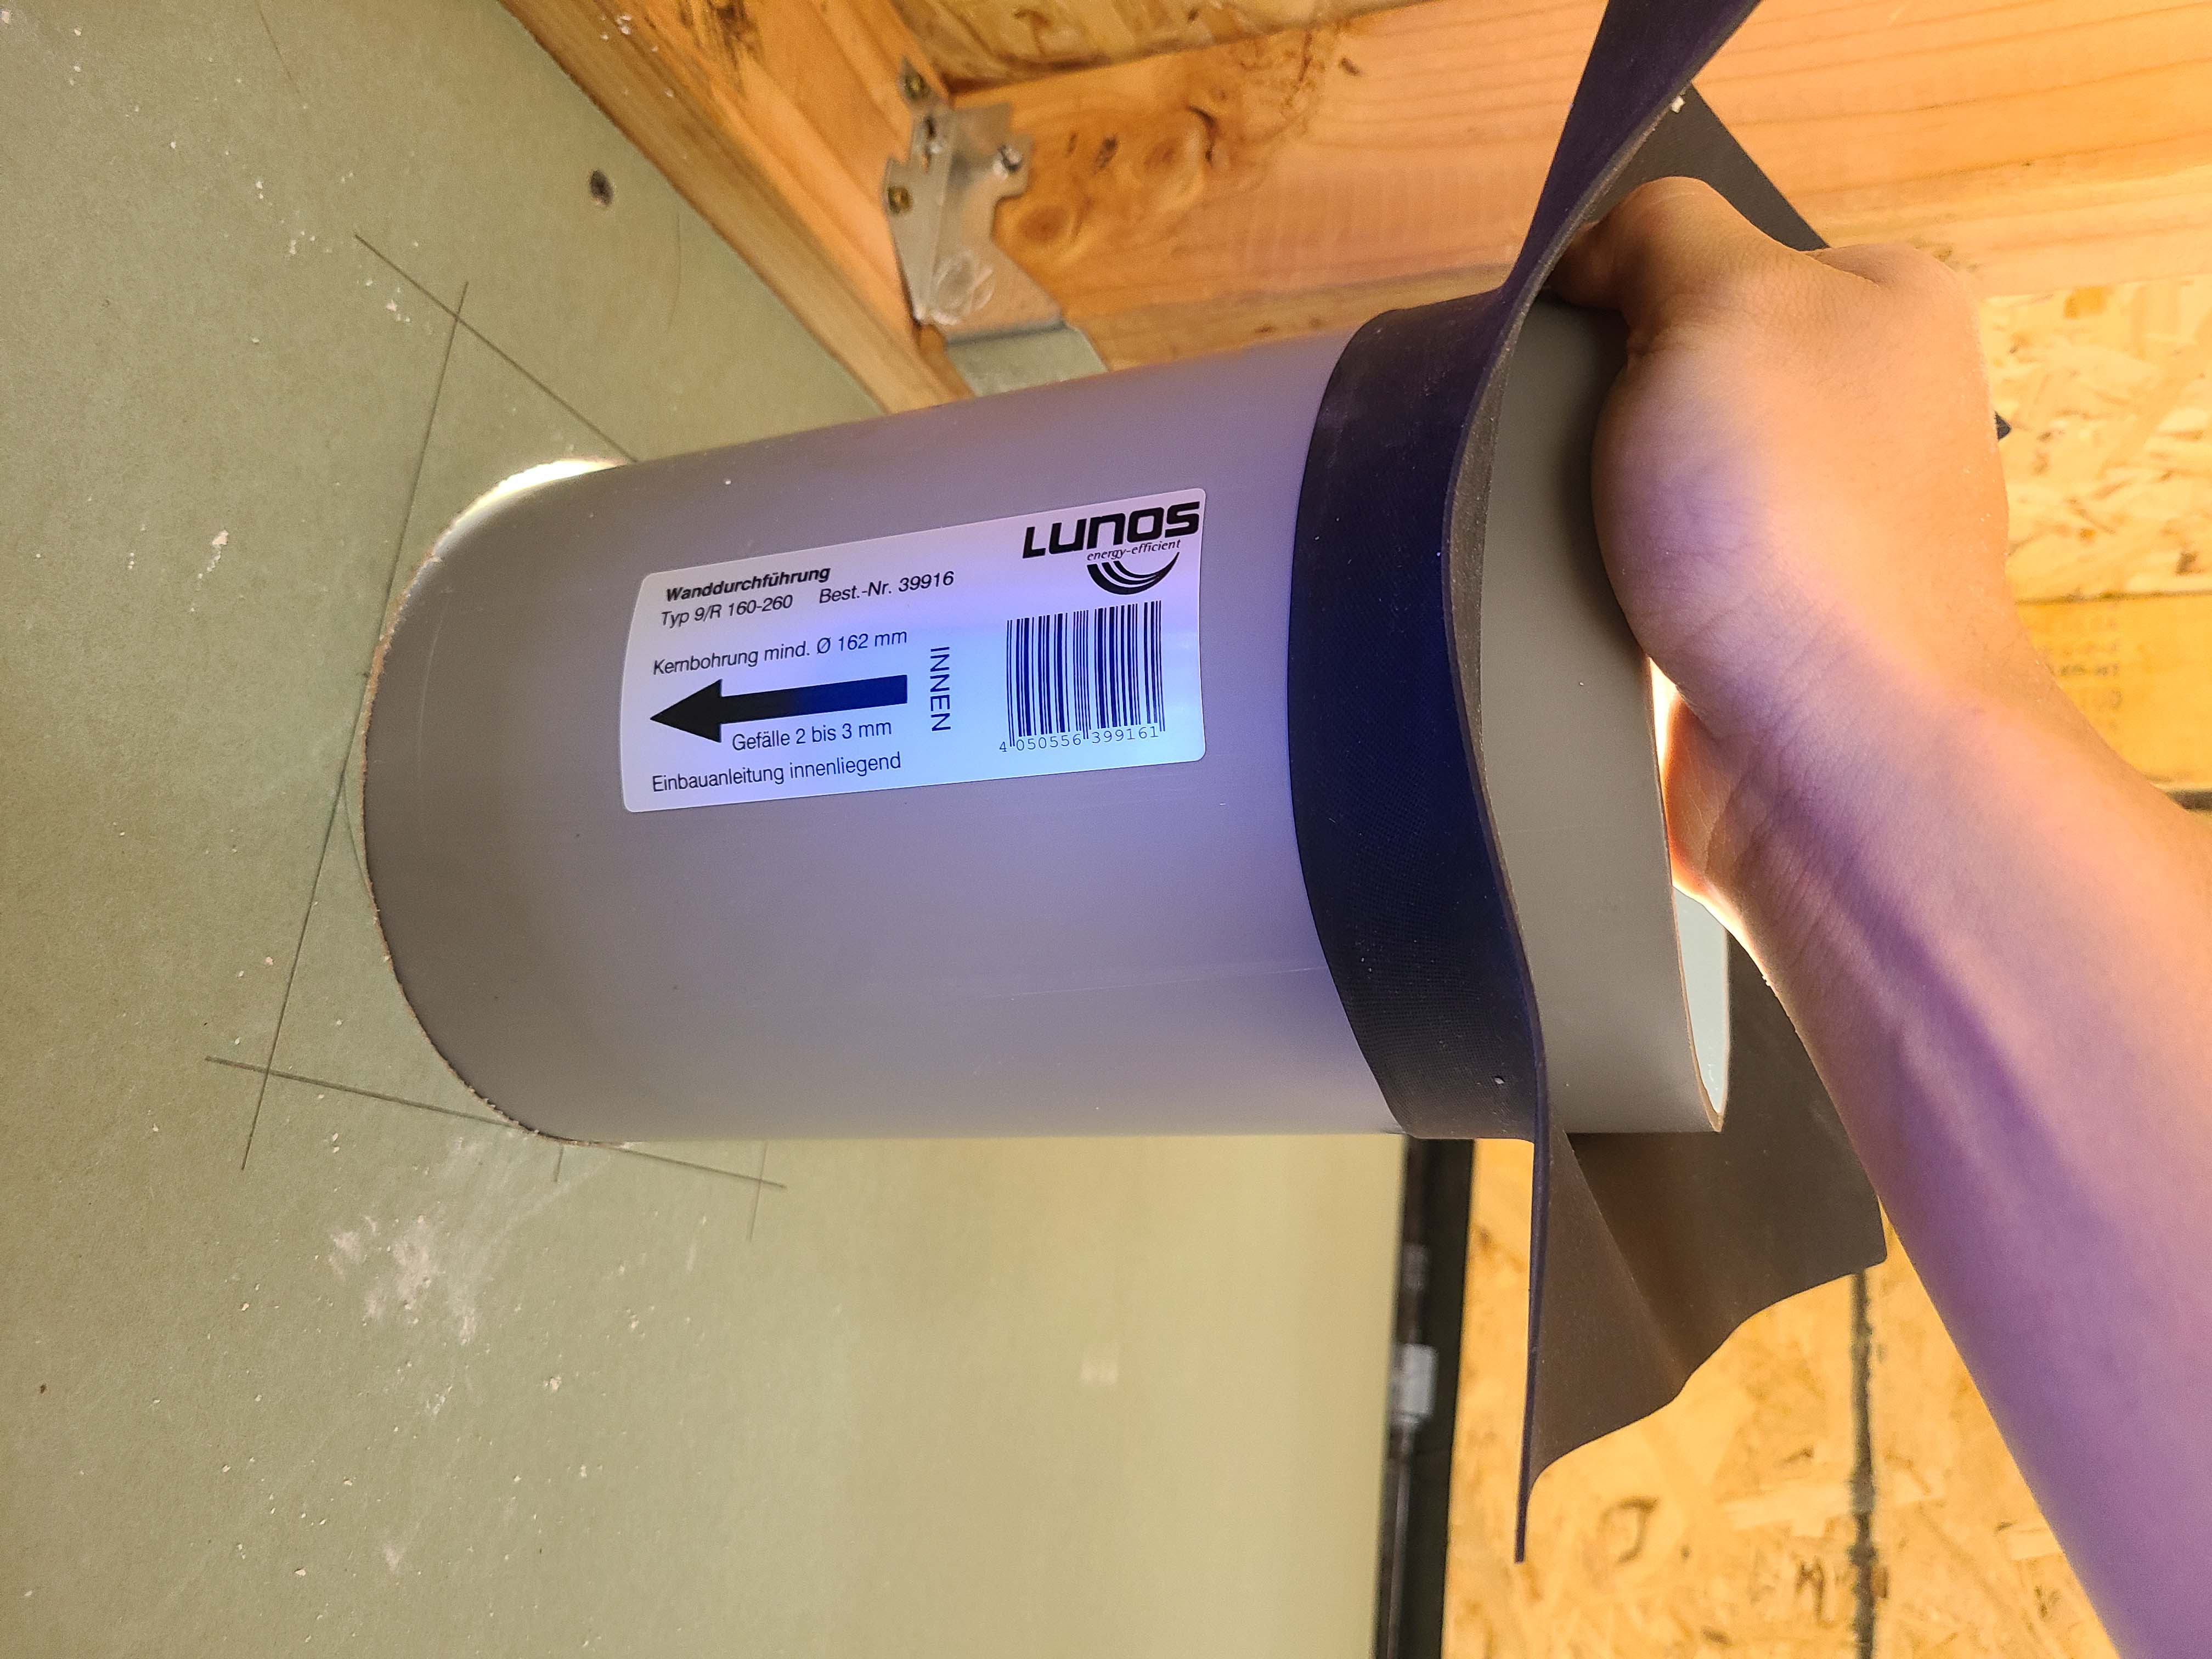
Right - A small through-the-wall HRV duct is installed in an exterior wall; 7 of 14.
Image

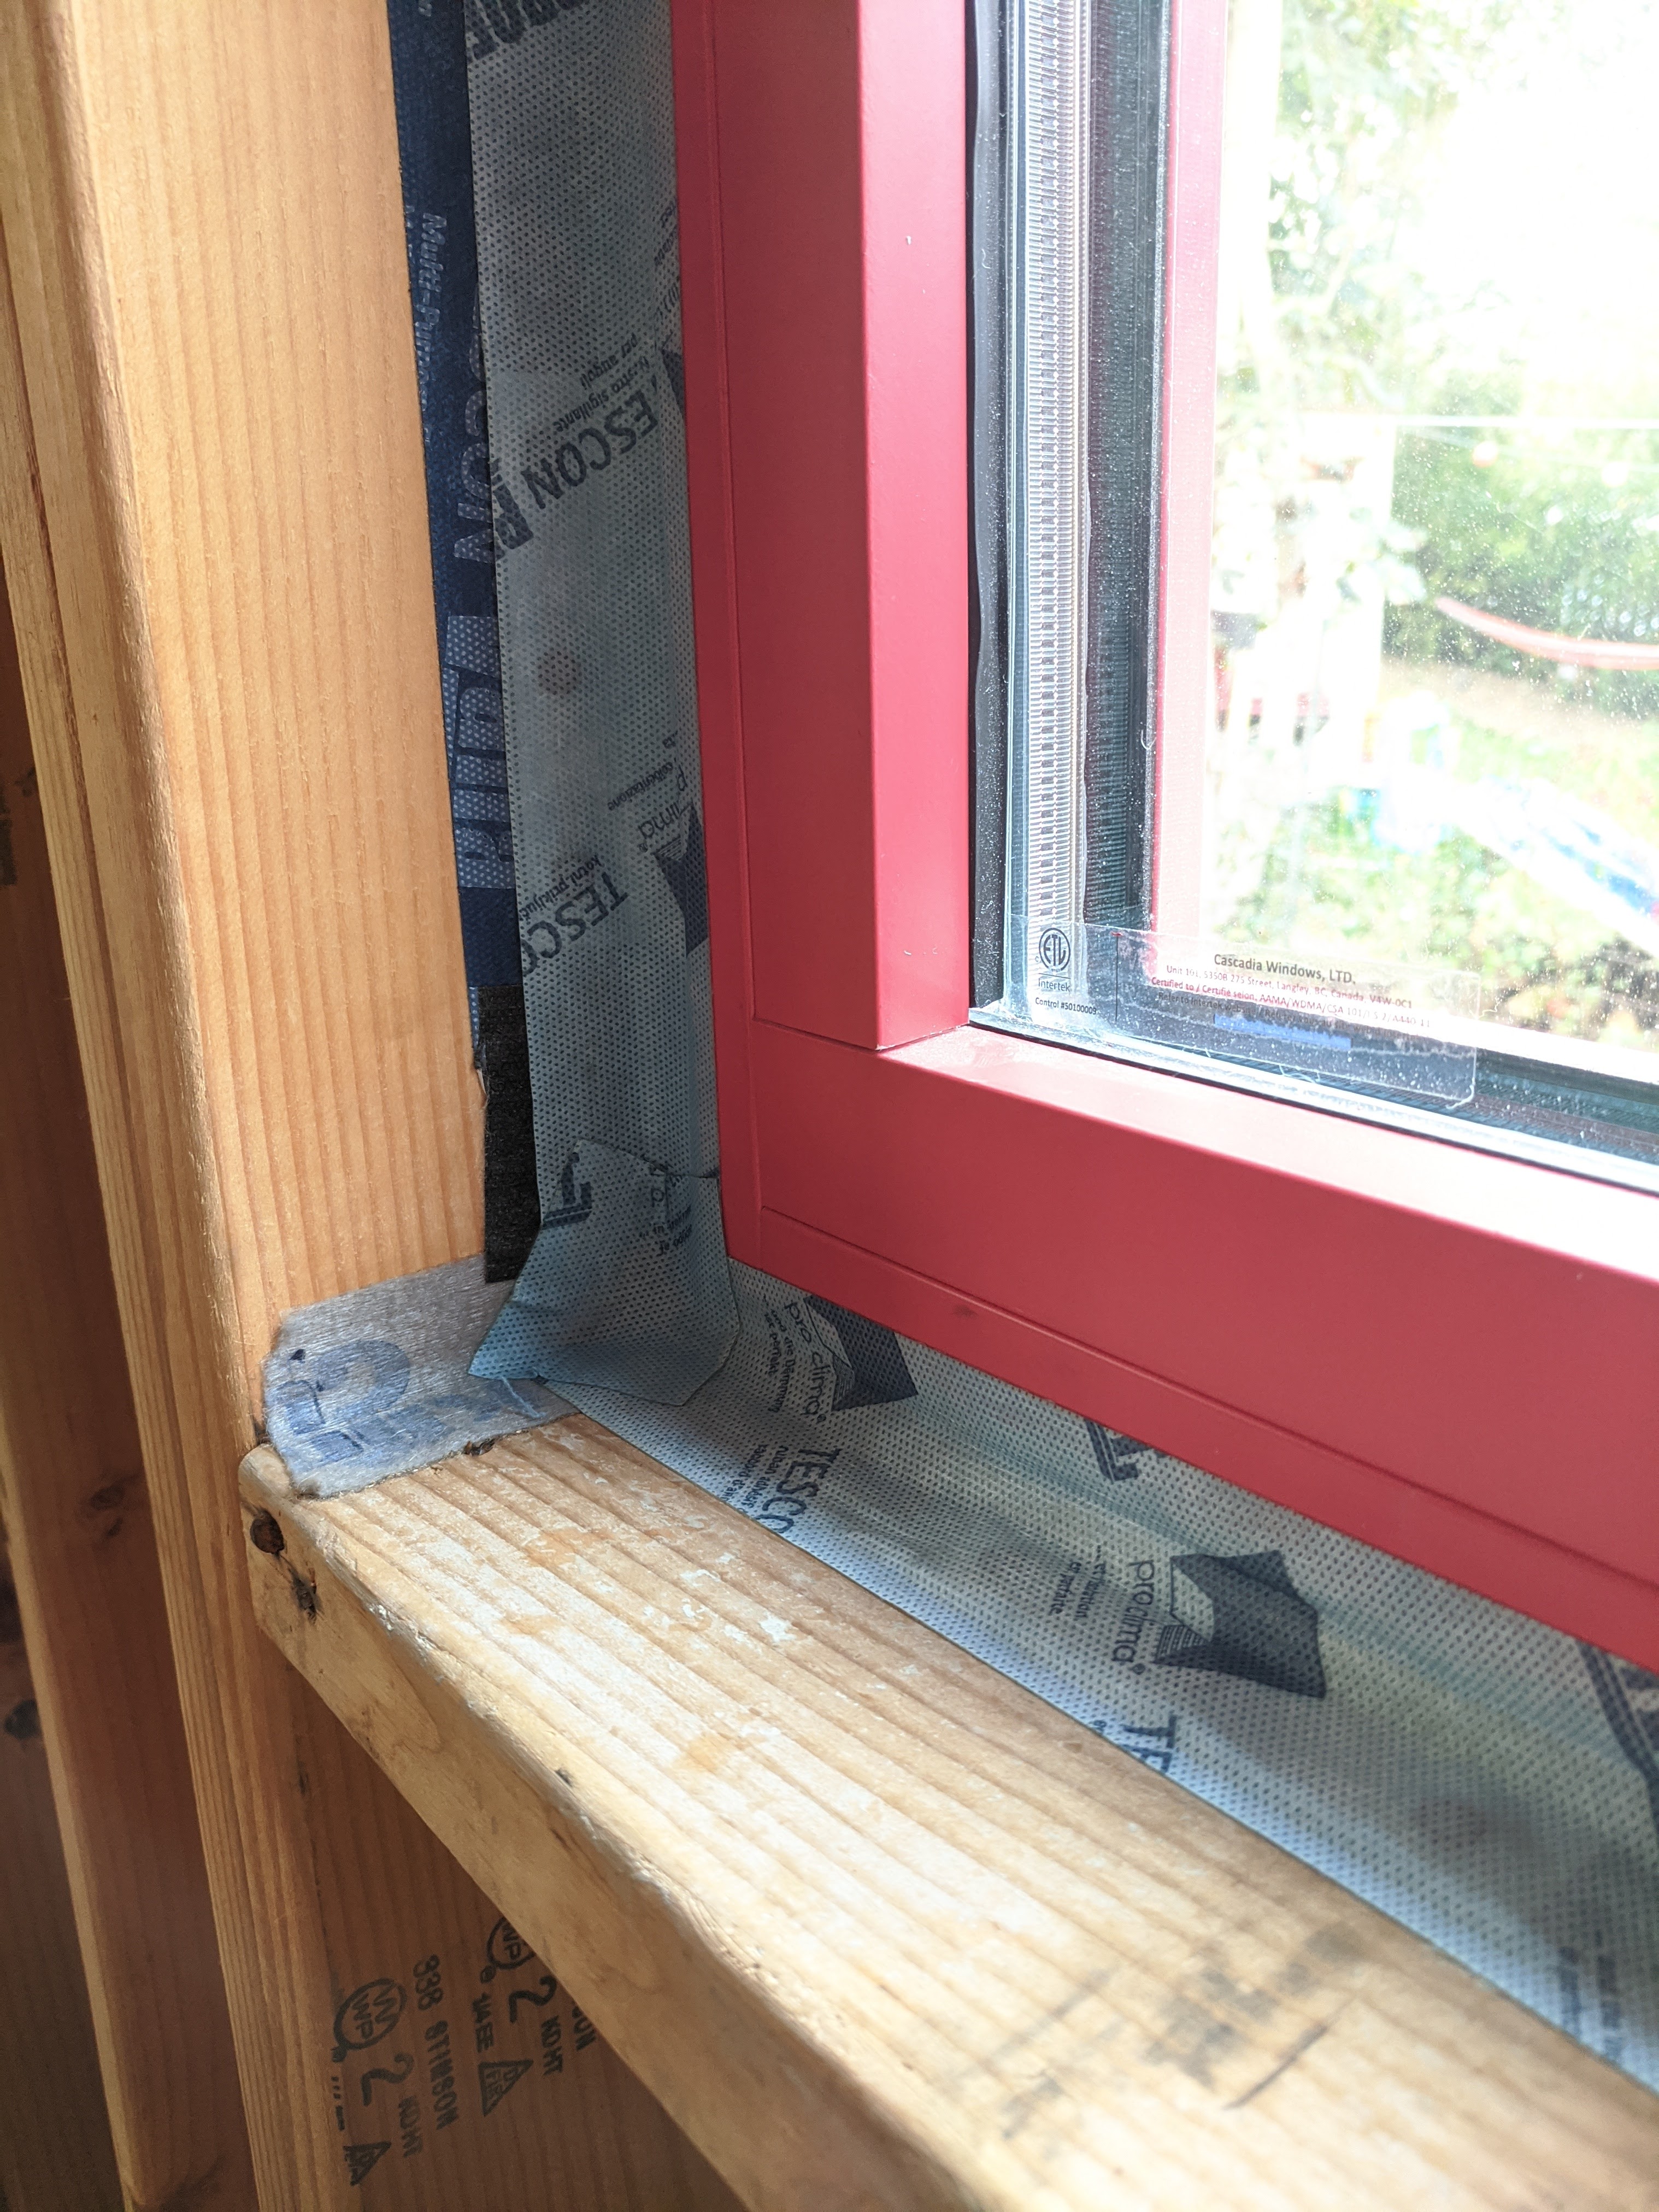
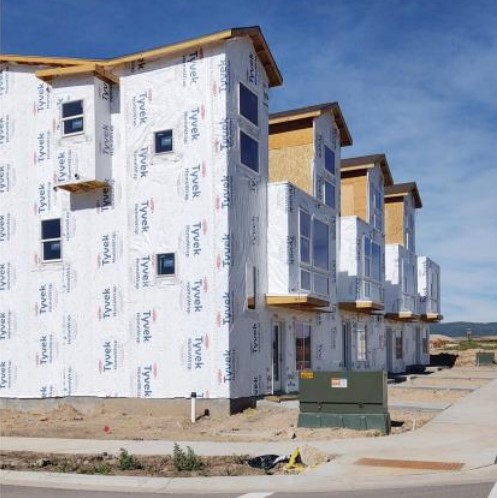
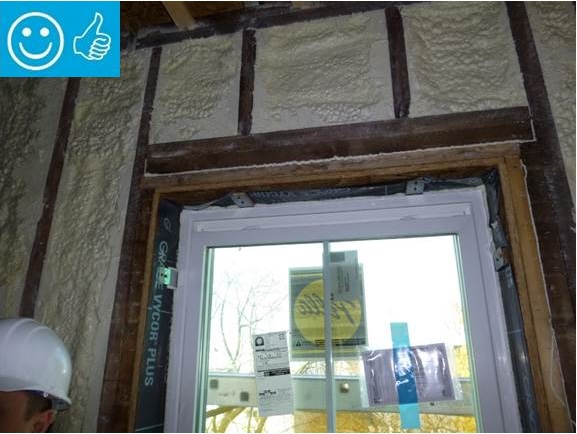
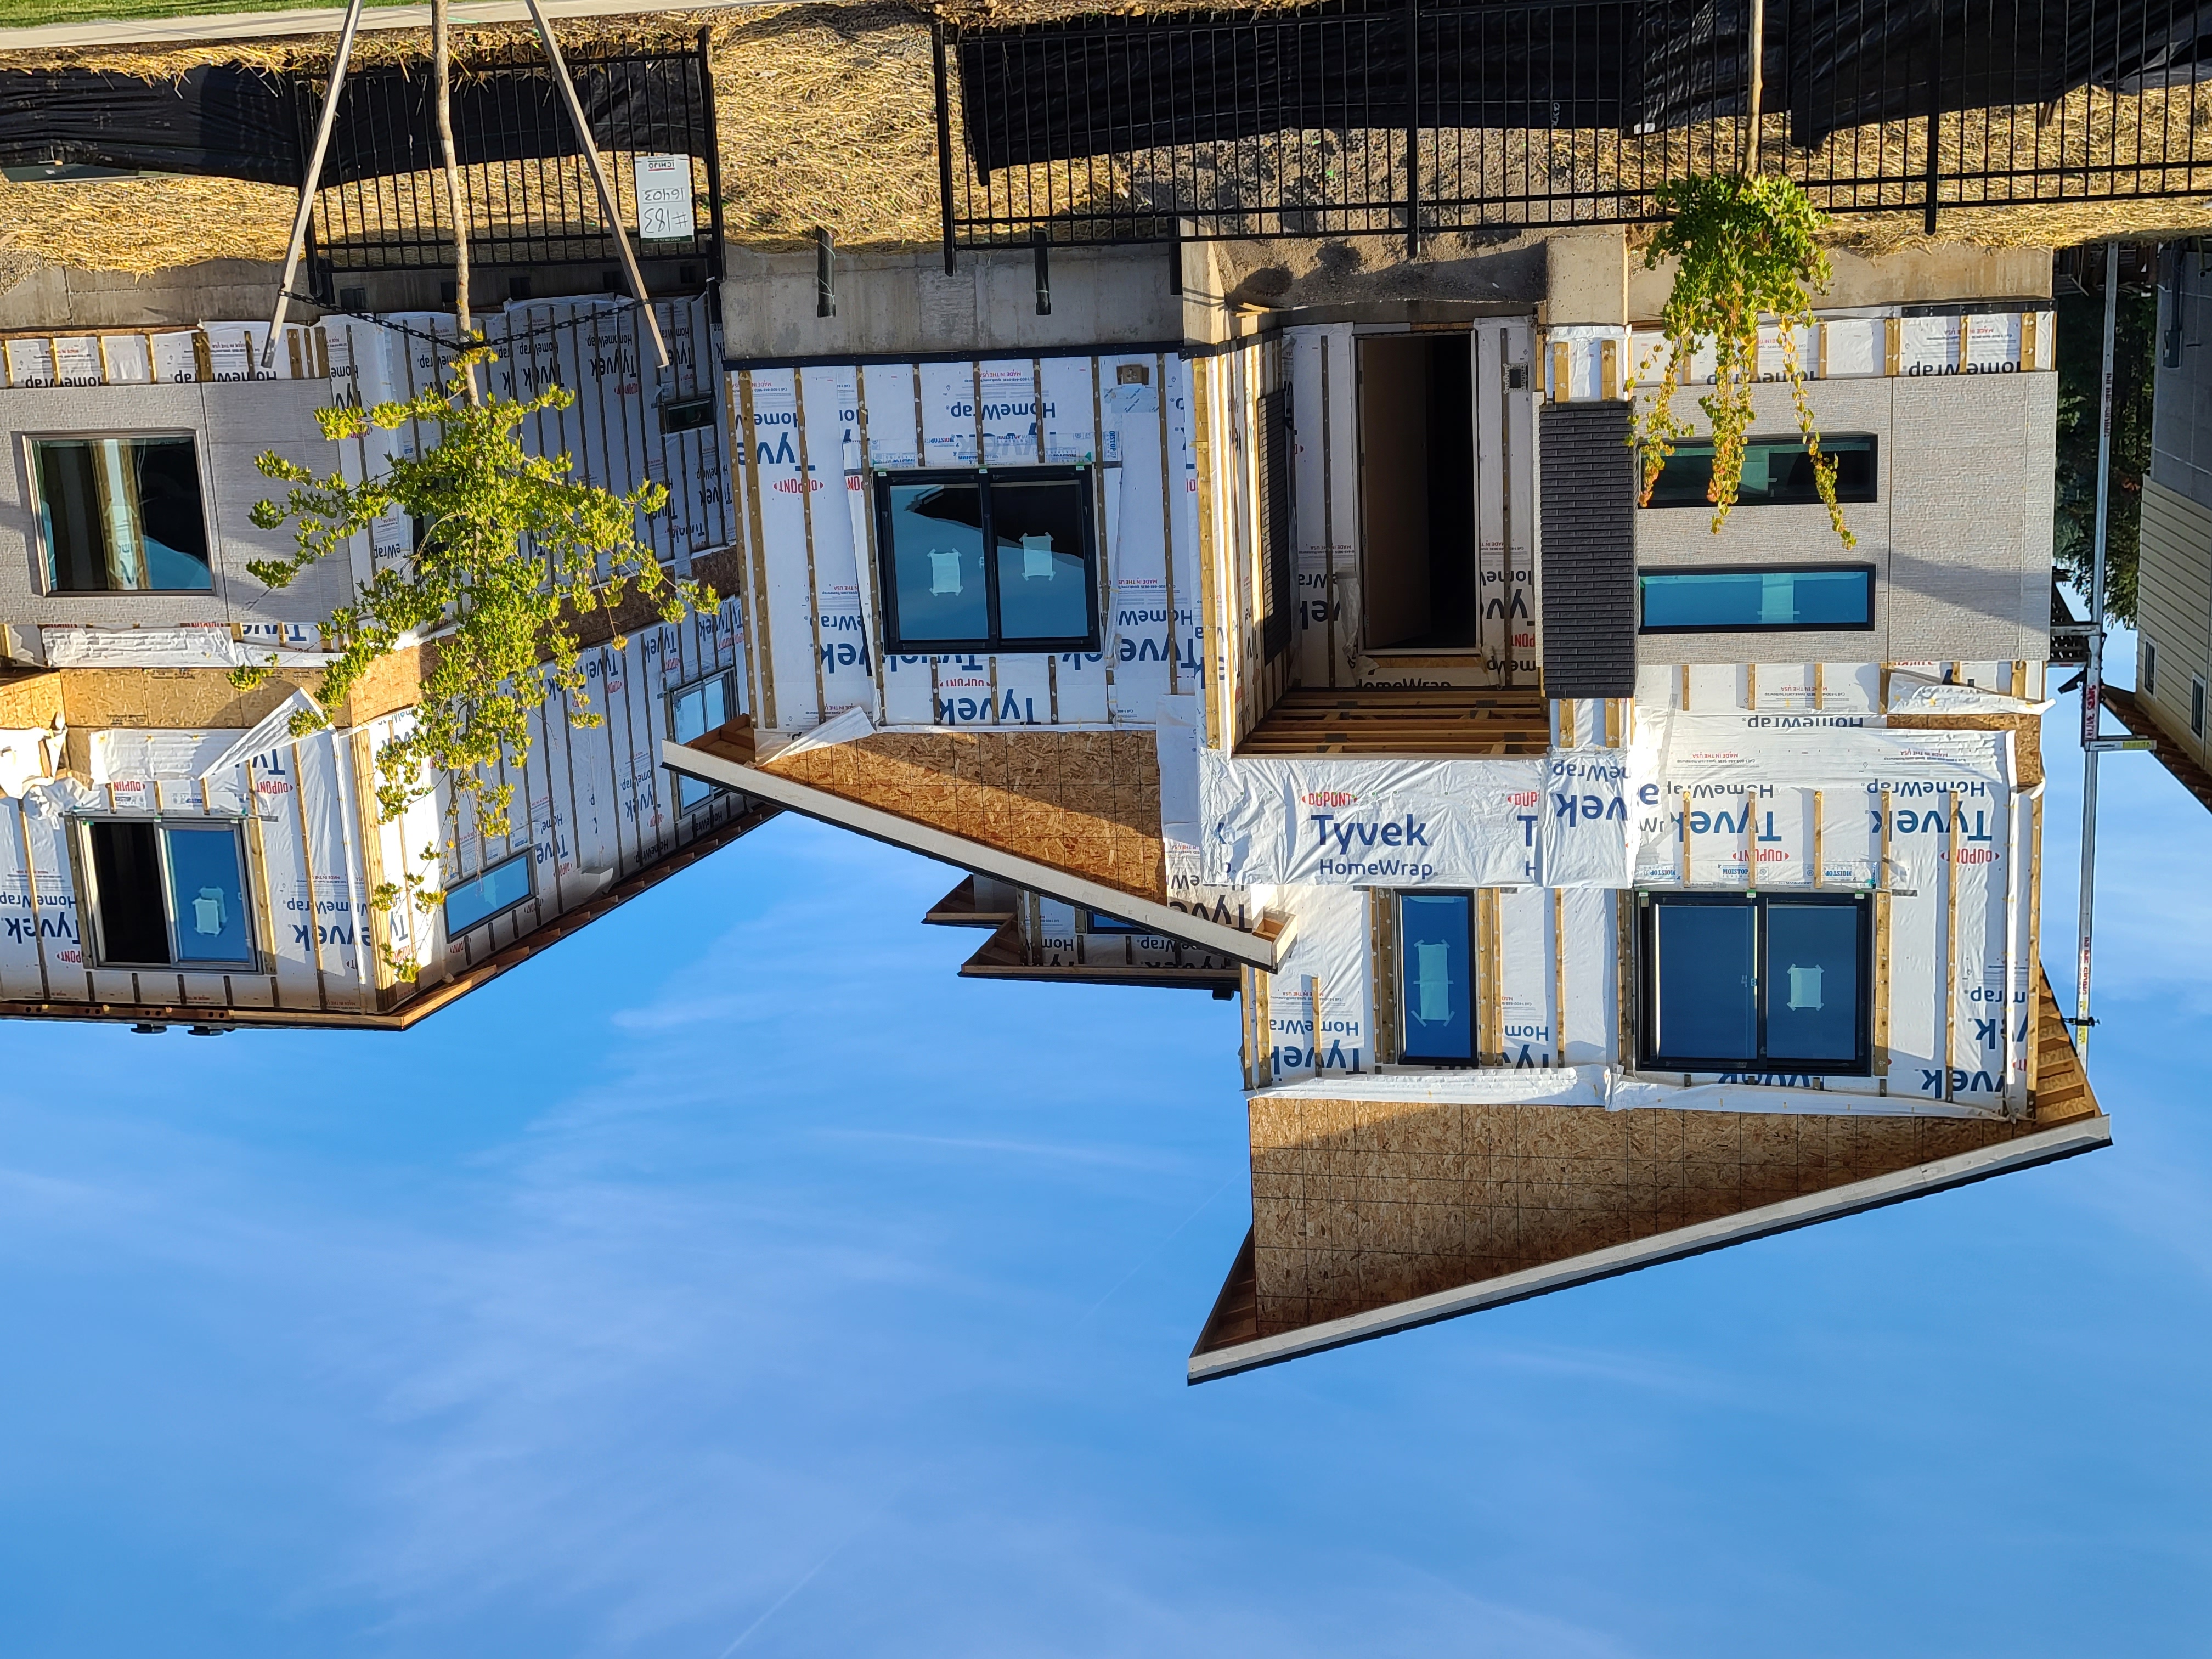
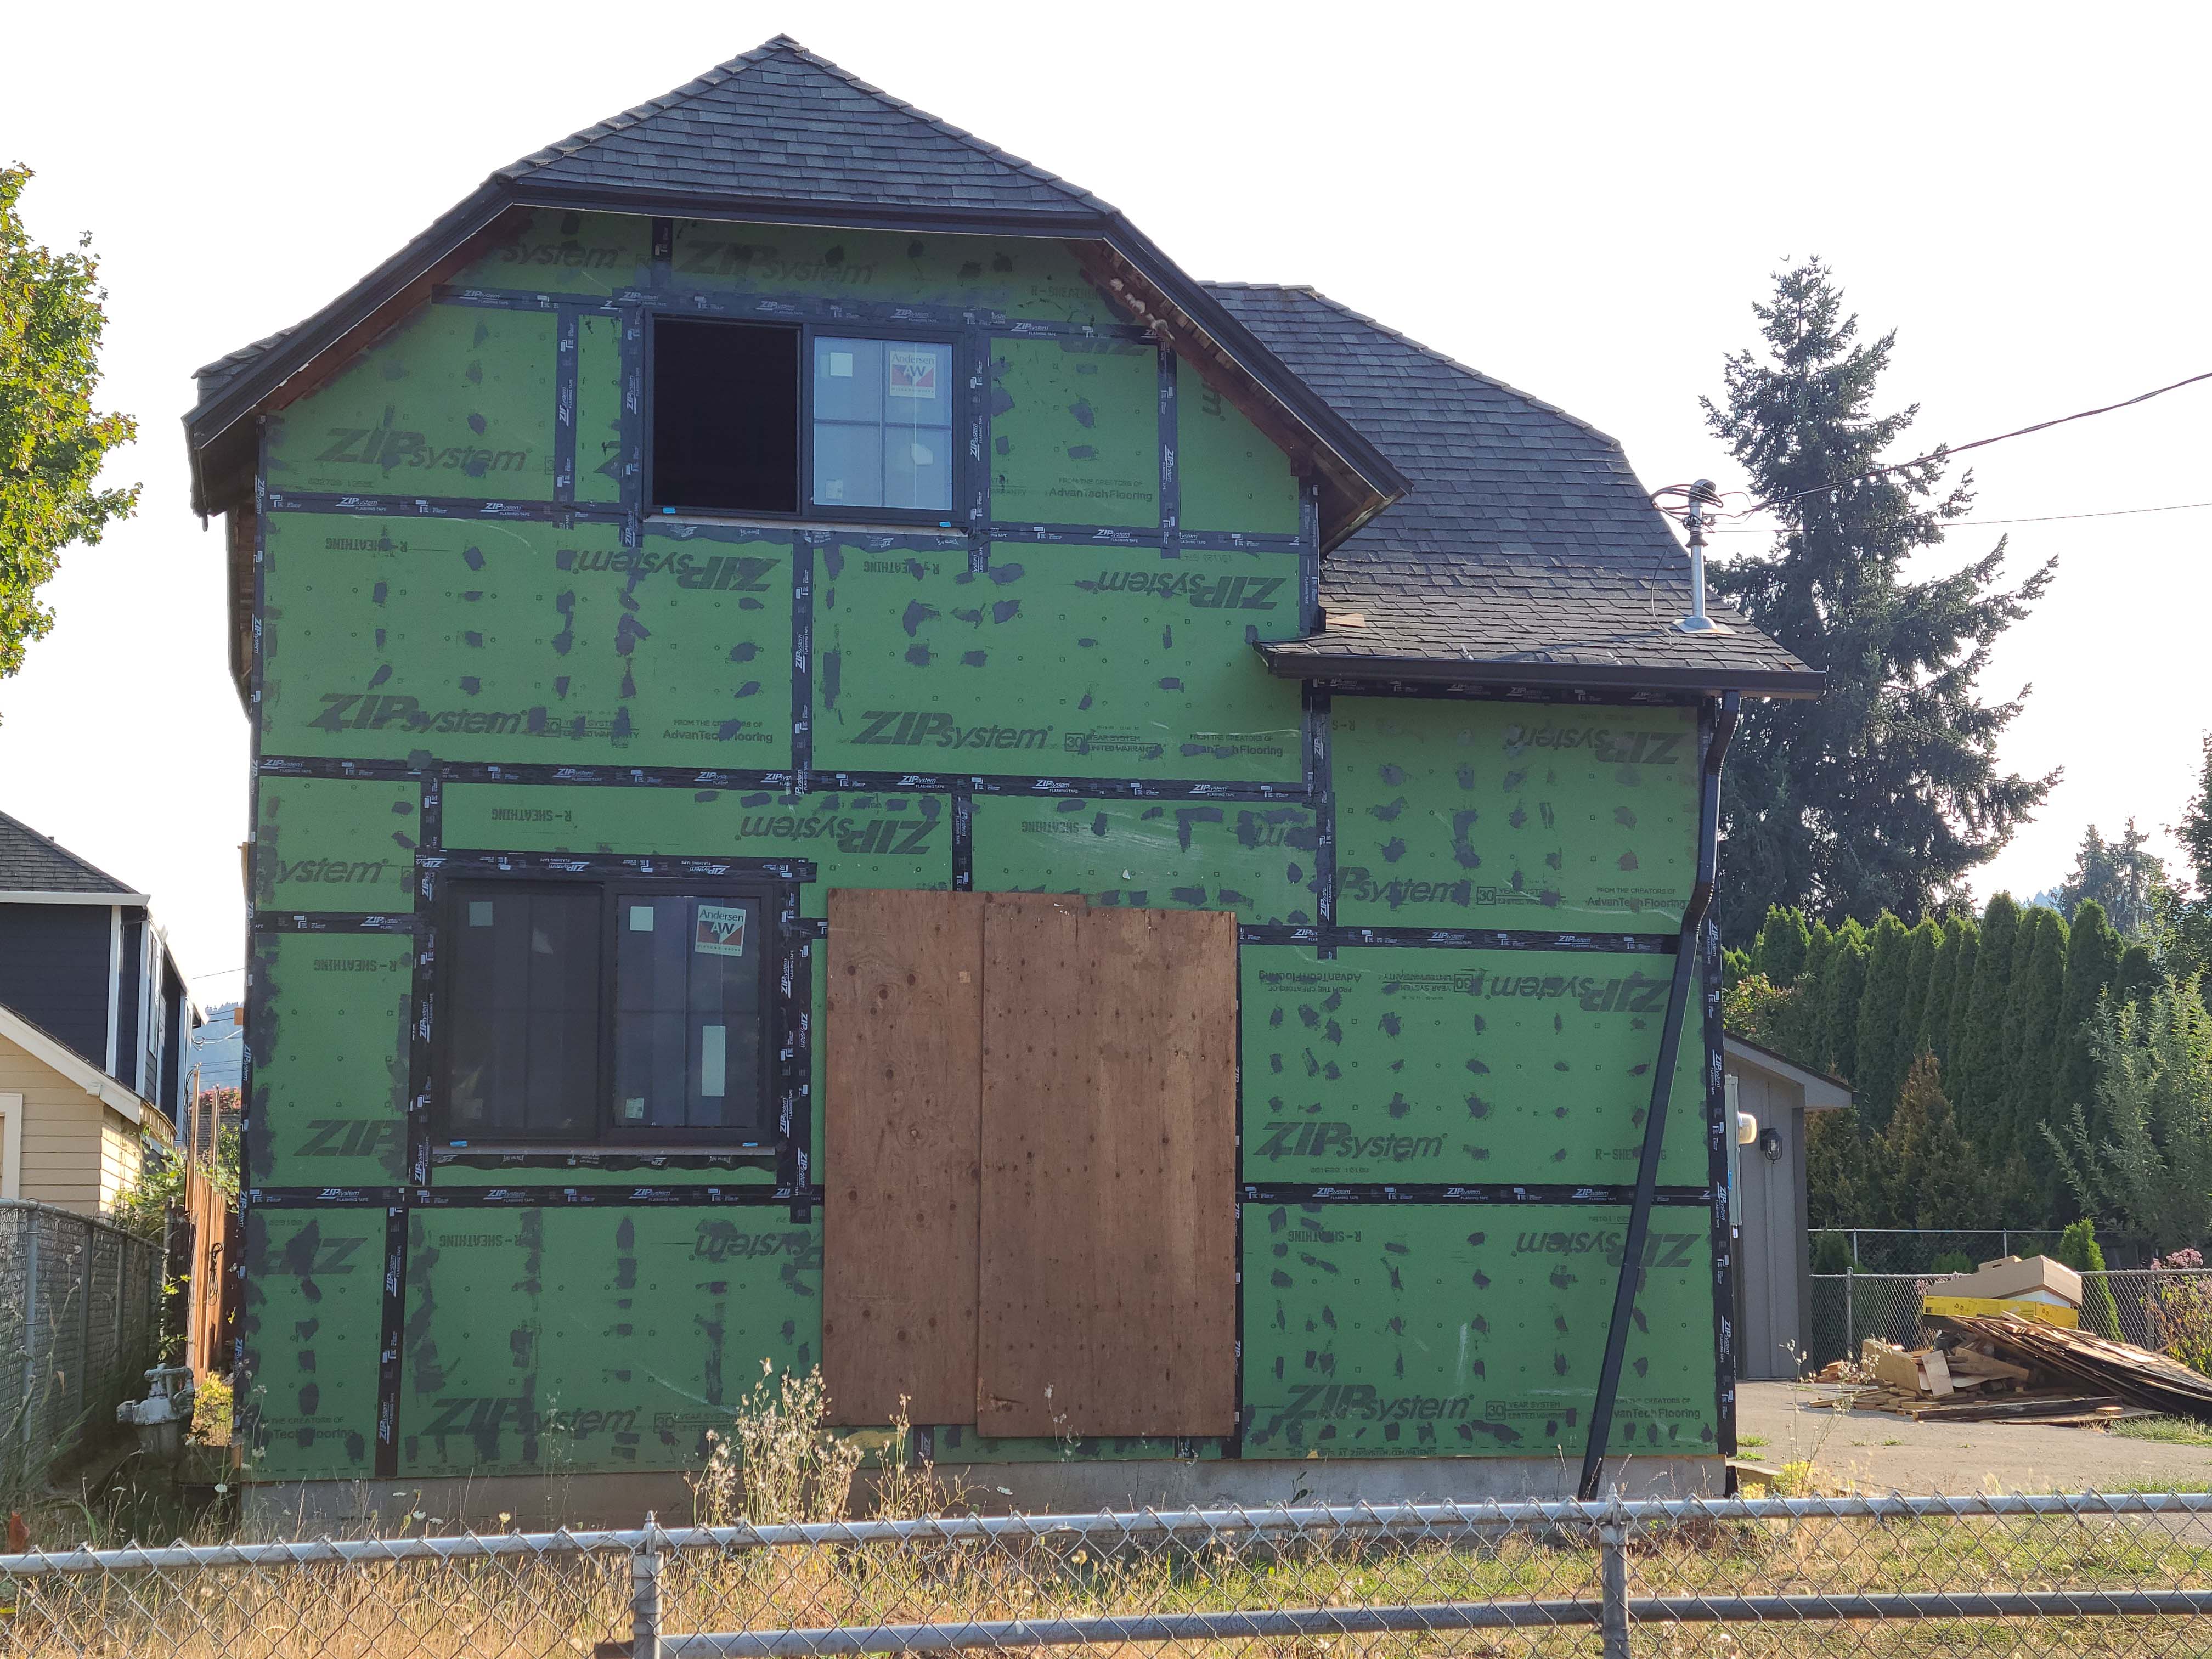
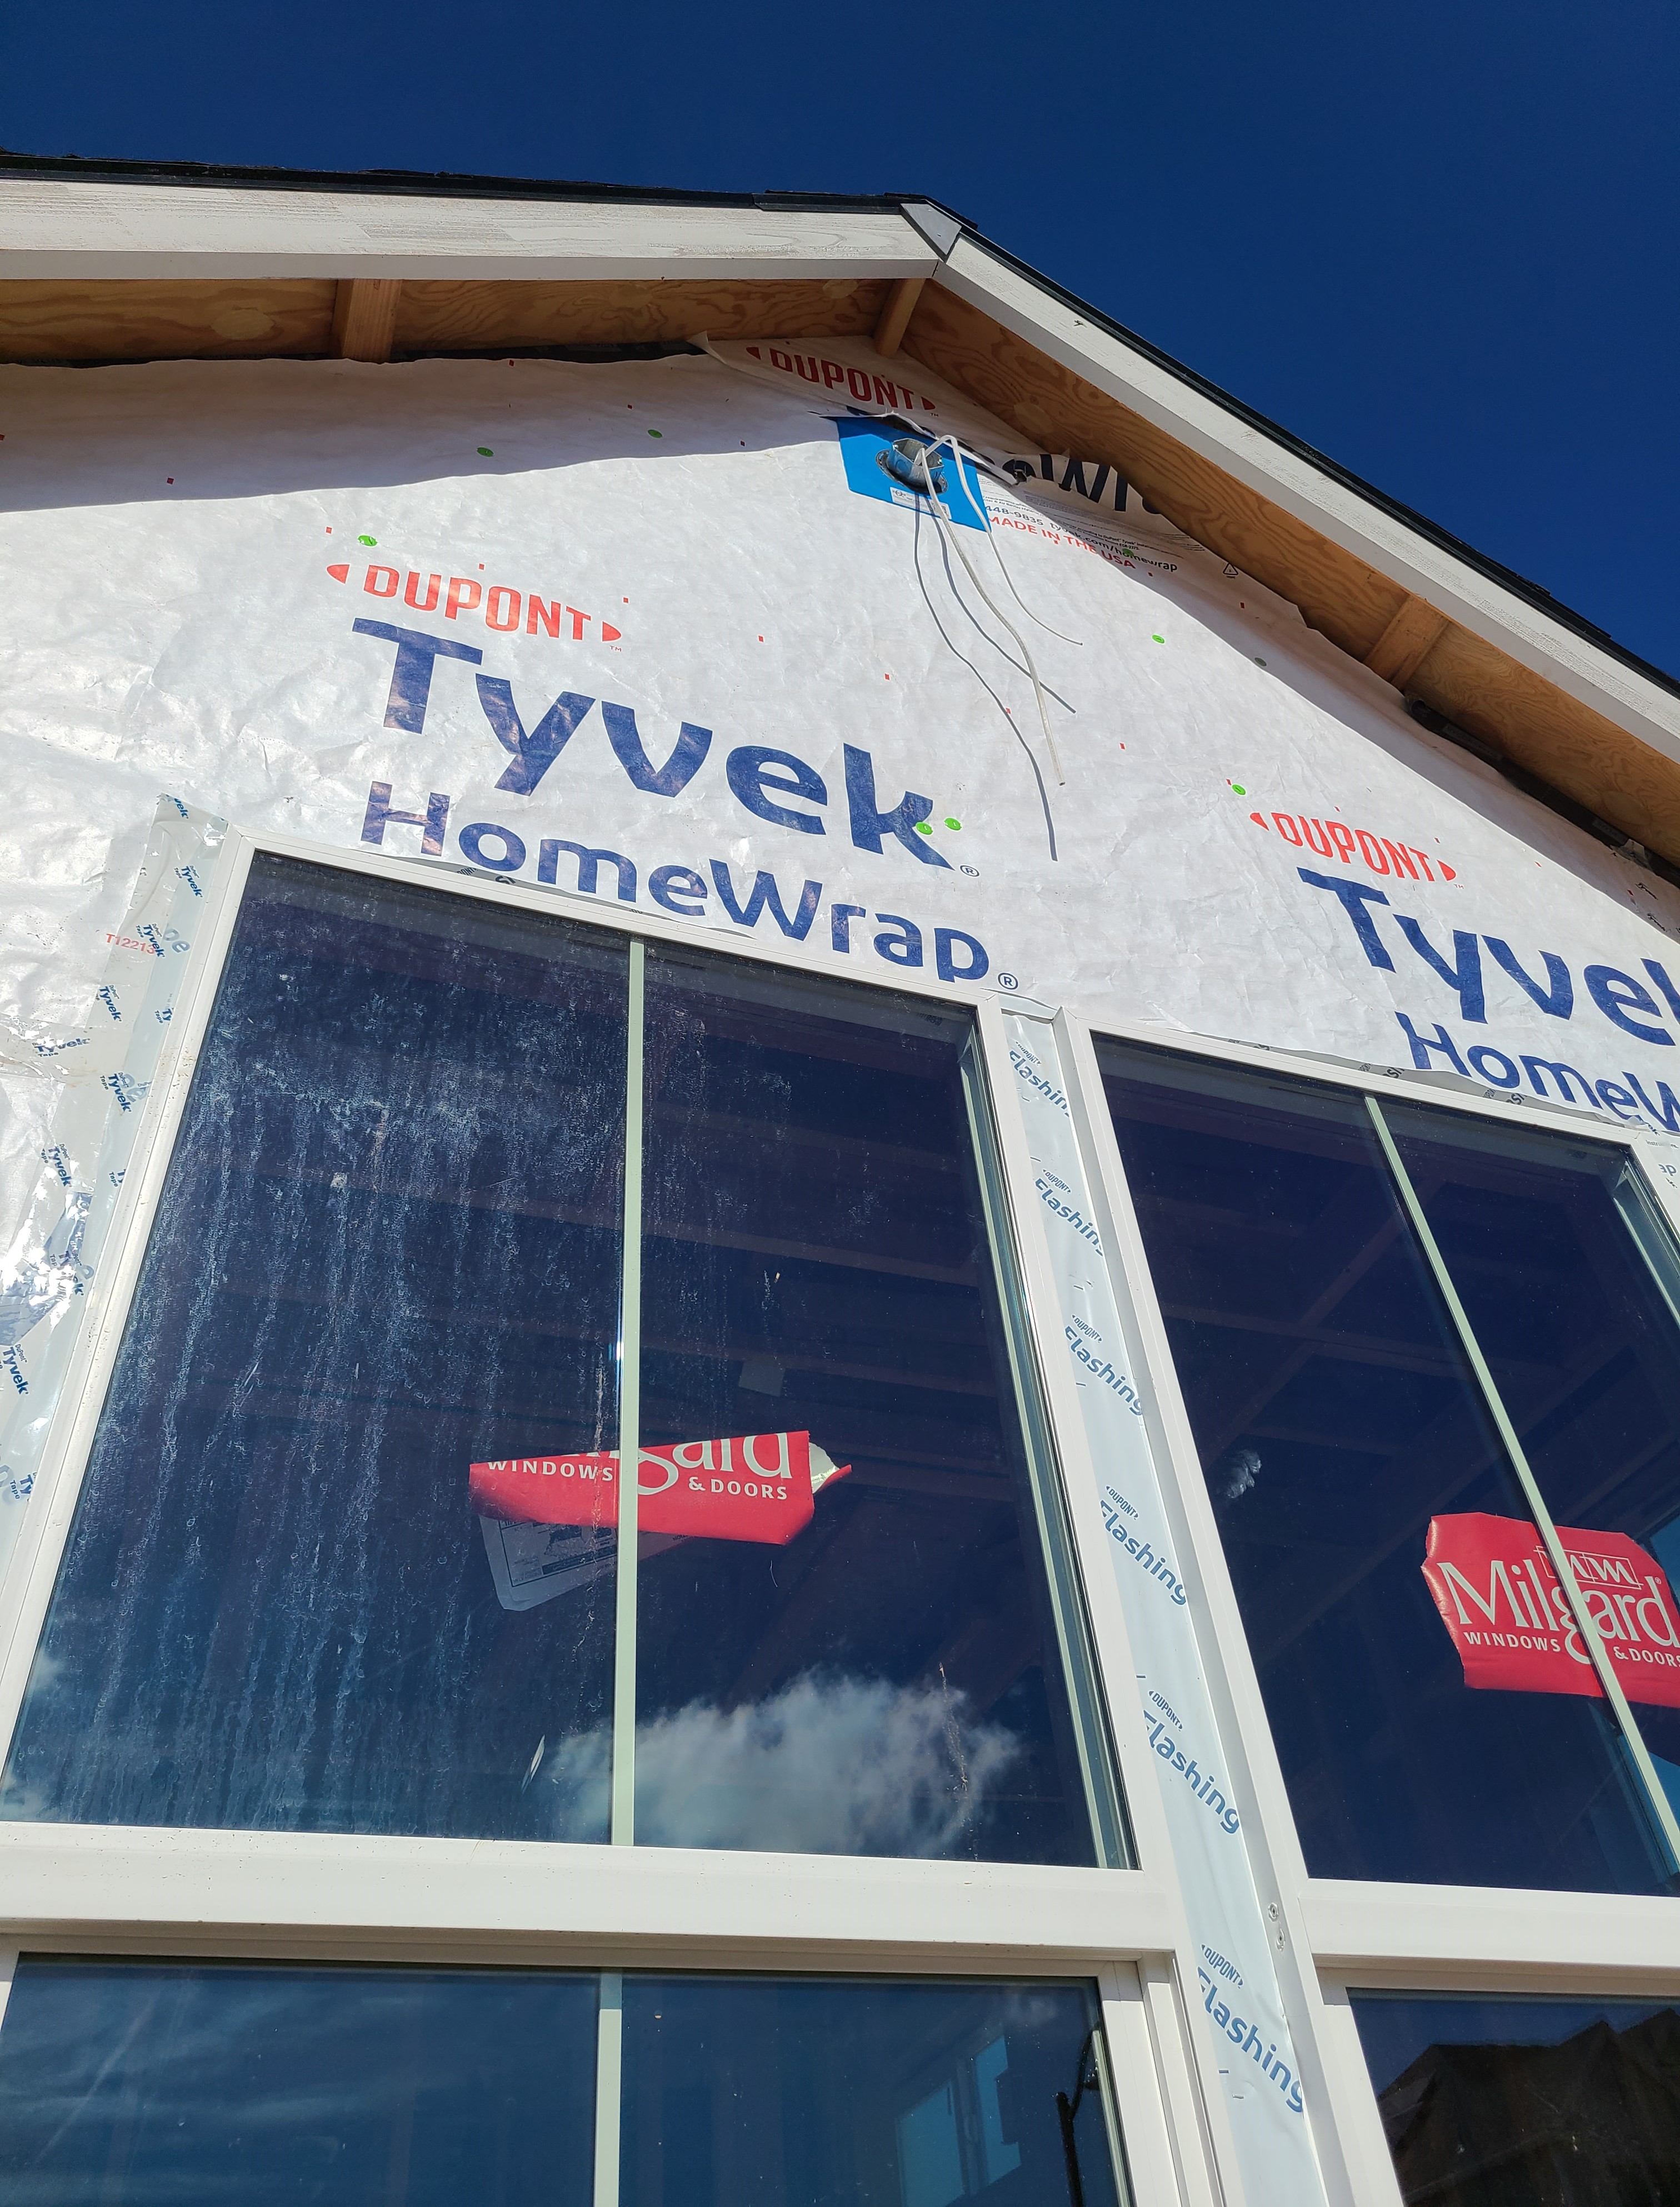
Right - A smart vapor barrier wraps the walls and window frames of this home. Seams are taped to provide an air- and water-resistant barrier.
Image
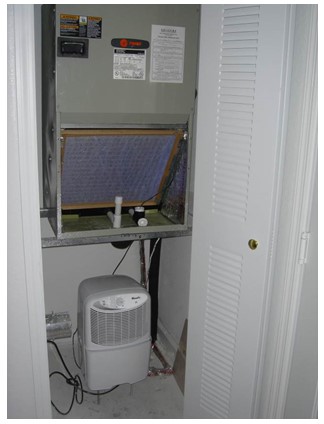
Right - A stand-alone dehumidifier is located in the return air closet of this multifamily dwelling located in a humid climate
Image

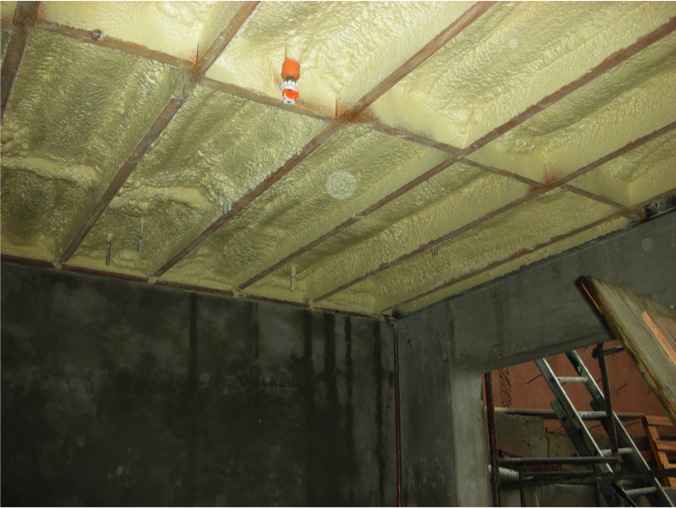
Right - A technician applies a thin layer of closed-cell foam to air-seal an unvented attic assembly before filling the ceiling joists with batt or blown insulation.
Image
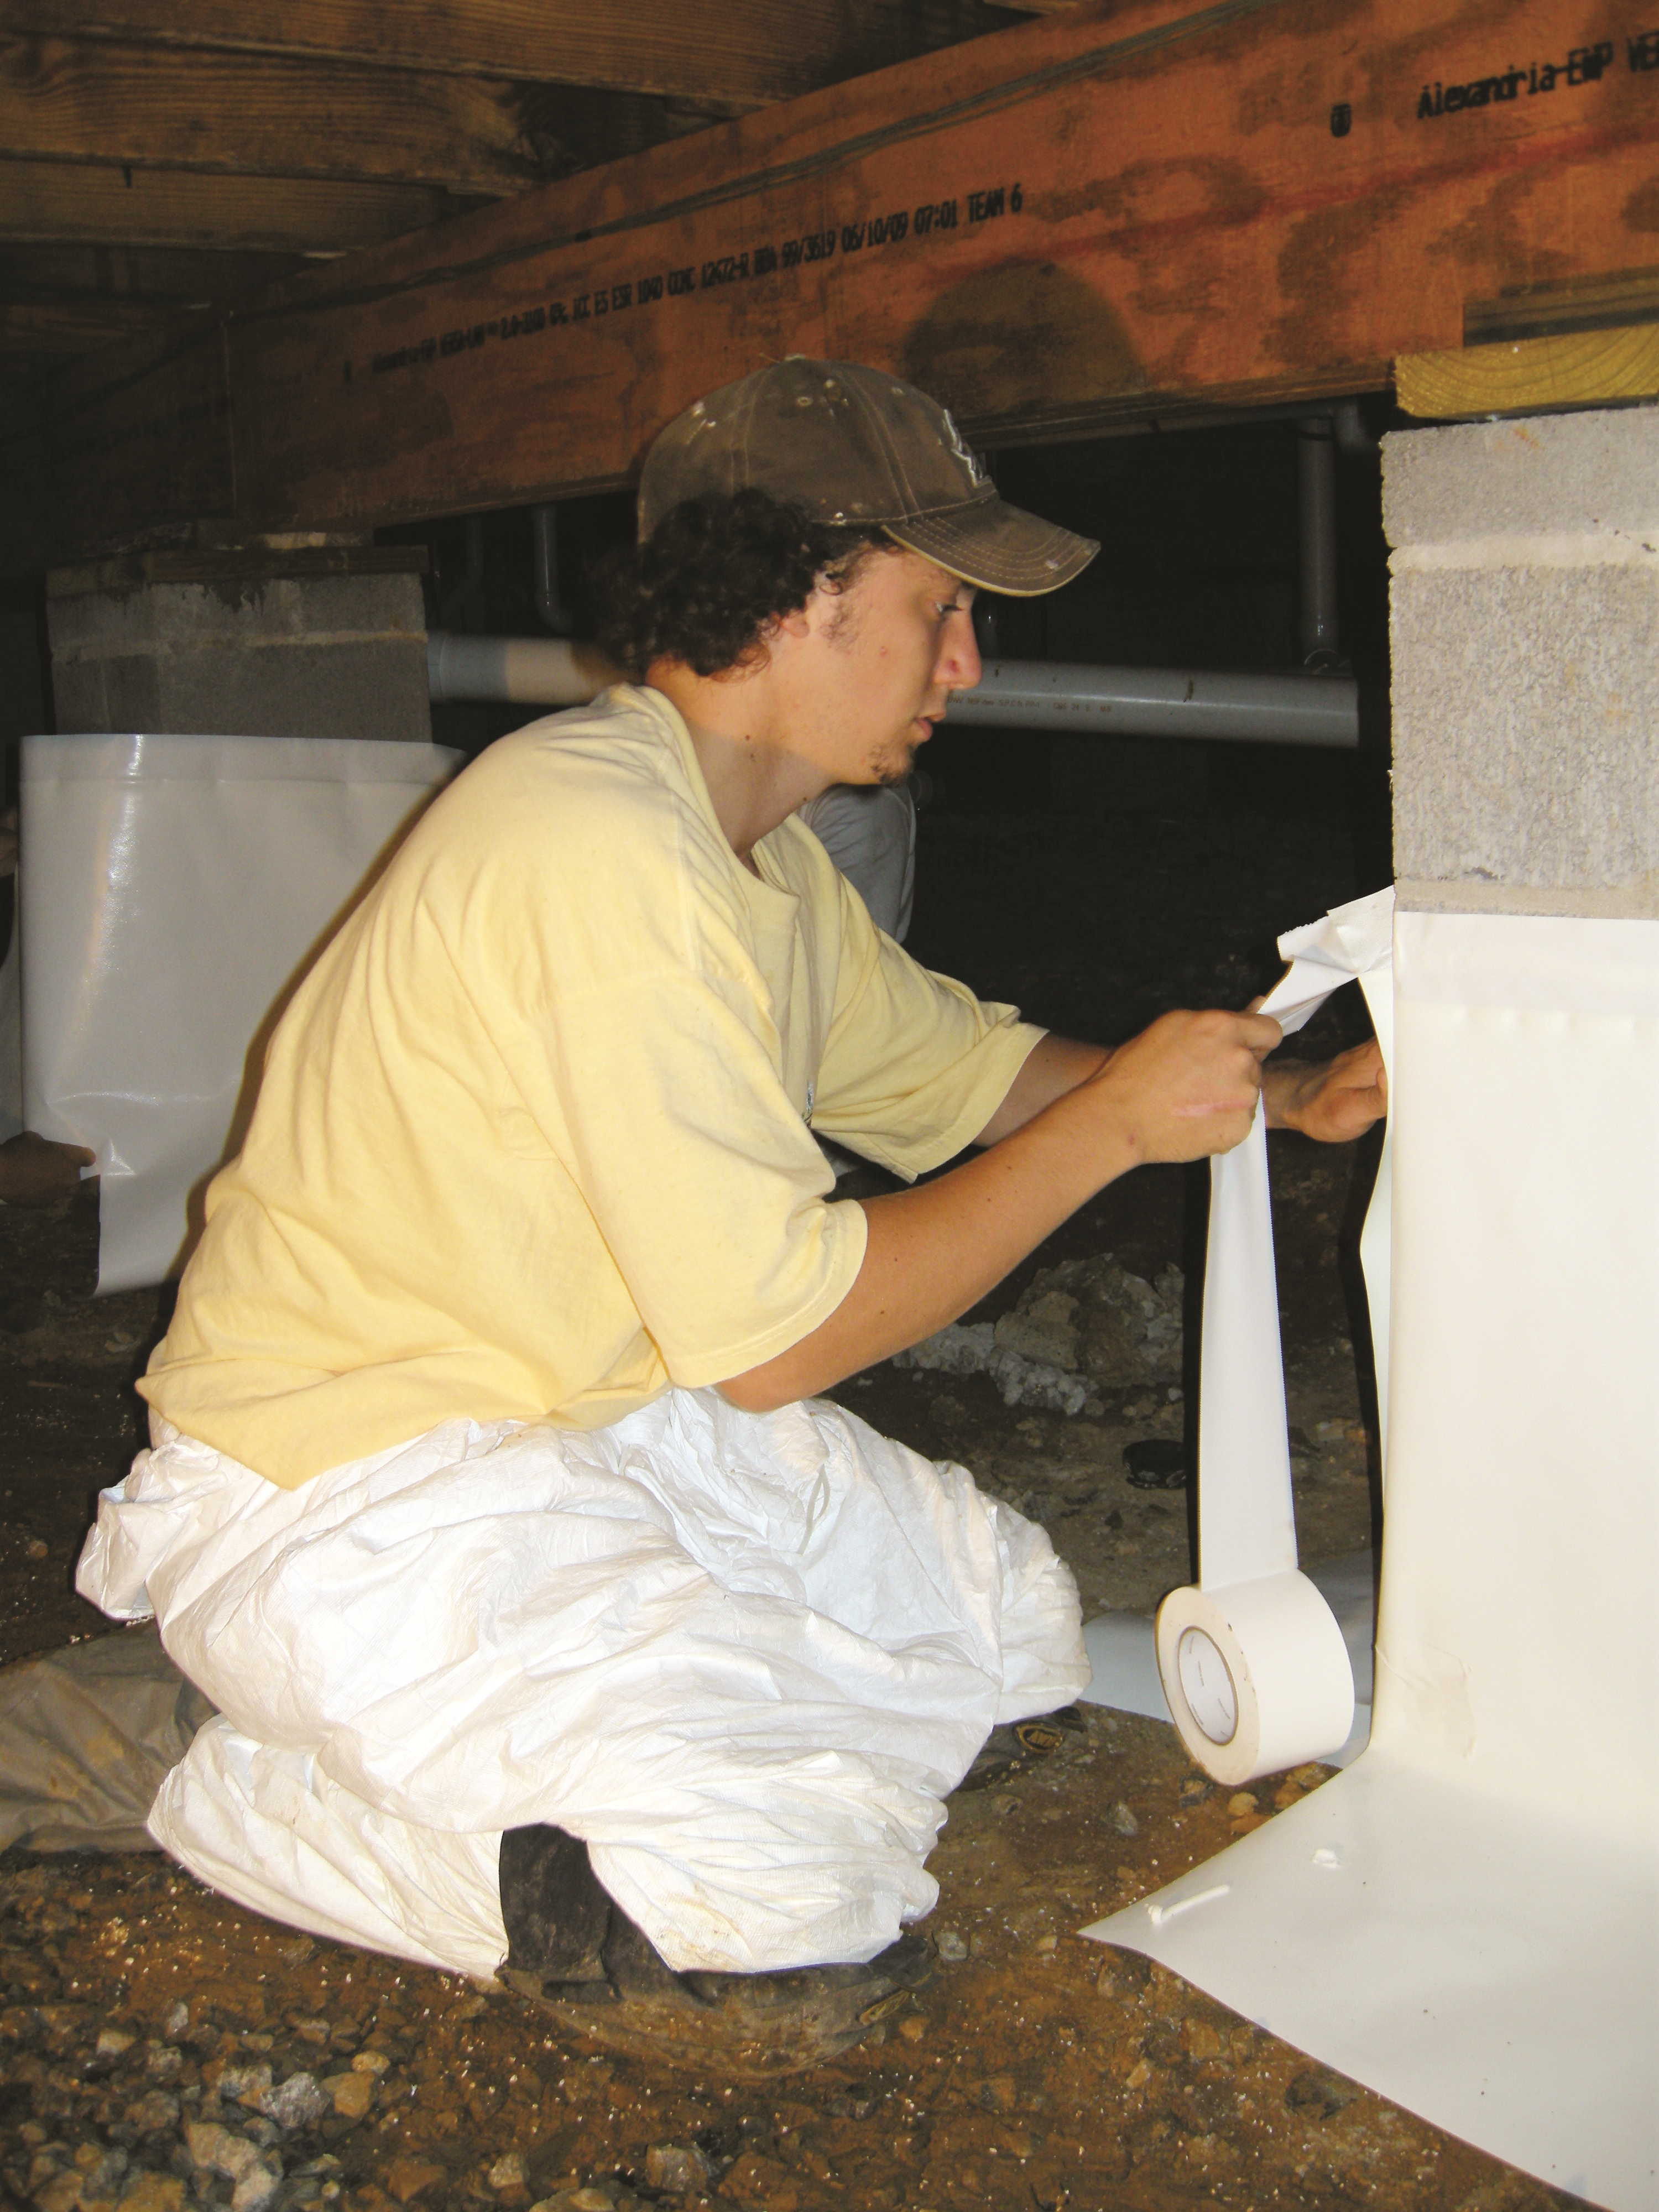
Right - A technician wraps the foundation piers with a vapor retarder in preparation for laying vapor retarder over the floor of this crawlspace.
Image
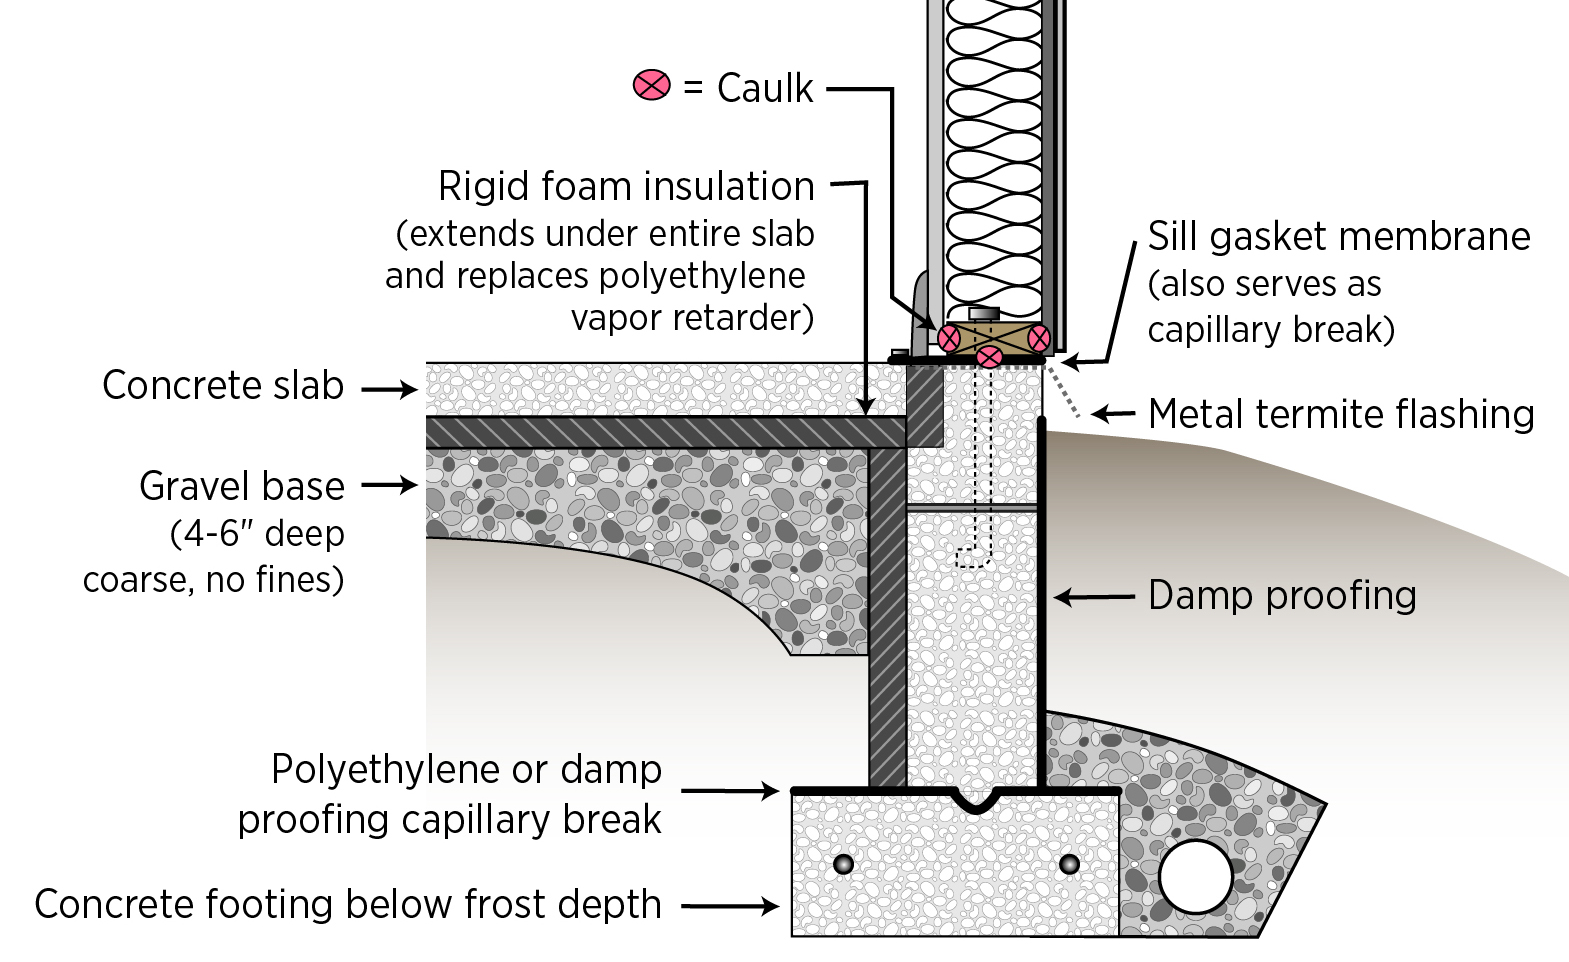
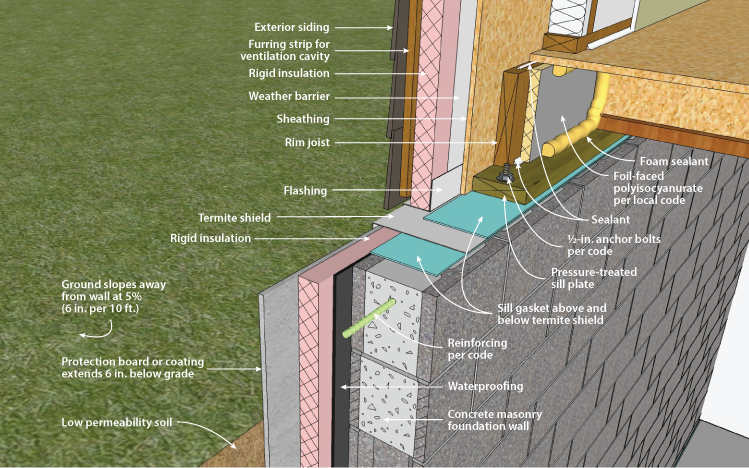
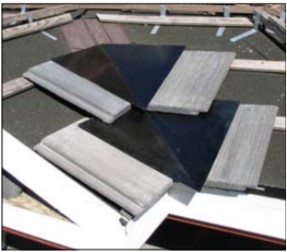
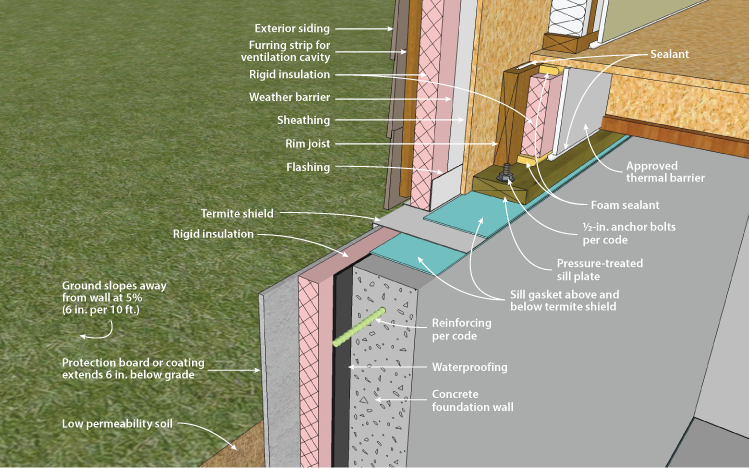
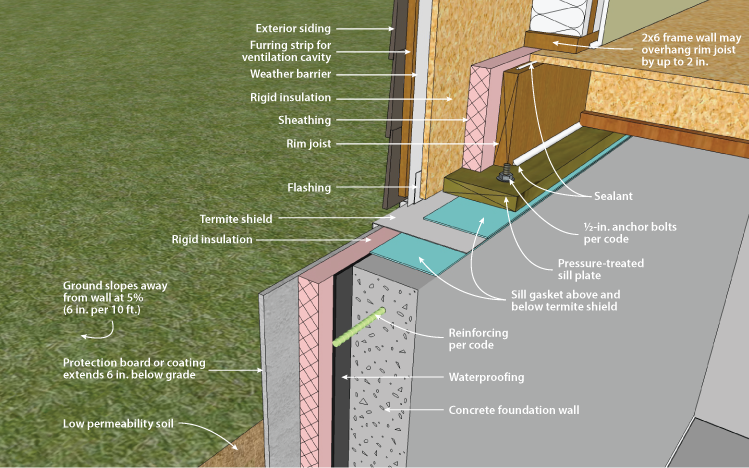
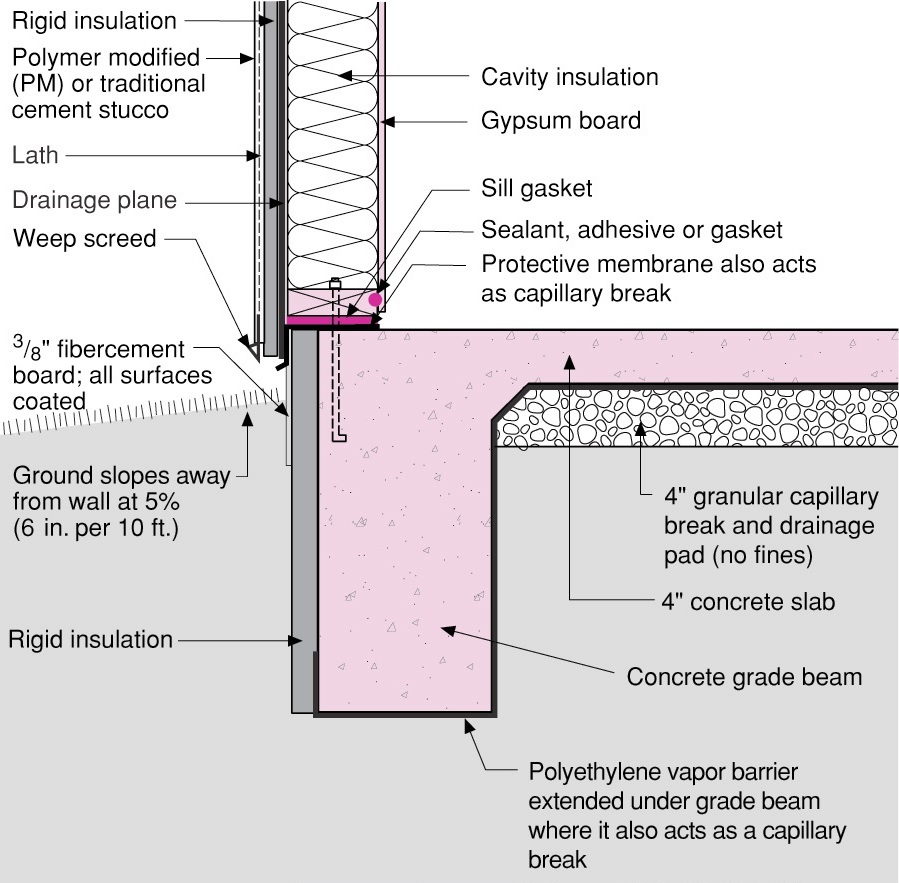
Right - A termite shield and a sill gasket are installed between the sill plate and the foundation on a raised slab foundation.
Image
Image
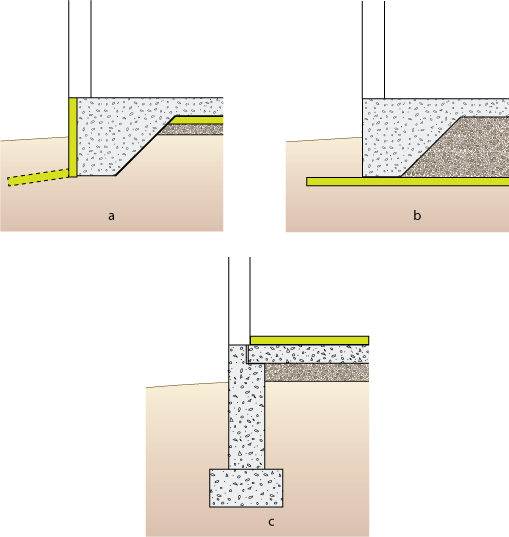
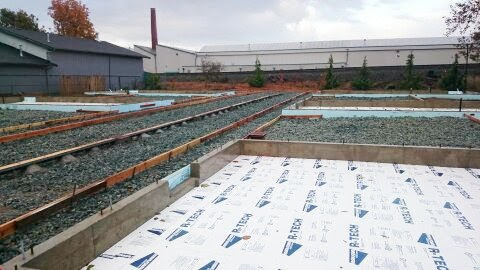
Right - Additional potential locations for slab-on-grade insulation include (a) under the slab and outside the perimeter with optional underground moisture block, (b) under the whole foundation, or (c) on top of the slab.
Image

Right - After installing the EPDM gasket around the HRV duct, first the lower edge, then the sides of the gasket are taped; 11 of 14.
Image
Right - After installing the EPDM gasket around the HRV duct, first the lower edge, then the sides, then the top of the gasket are taped; 12 of 14.
Image
Right - After installing the EPDM gasket around the HRV duct, the lower edge of the gasket is taped first before taping the other edges of the gasket; 10 of 14.
Image
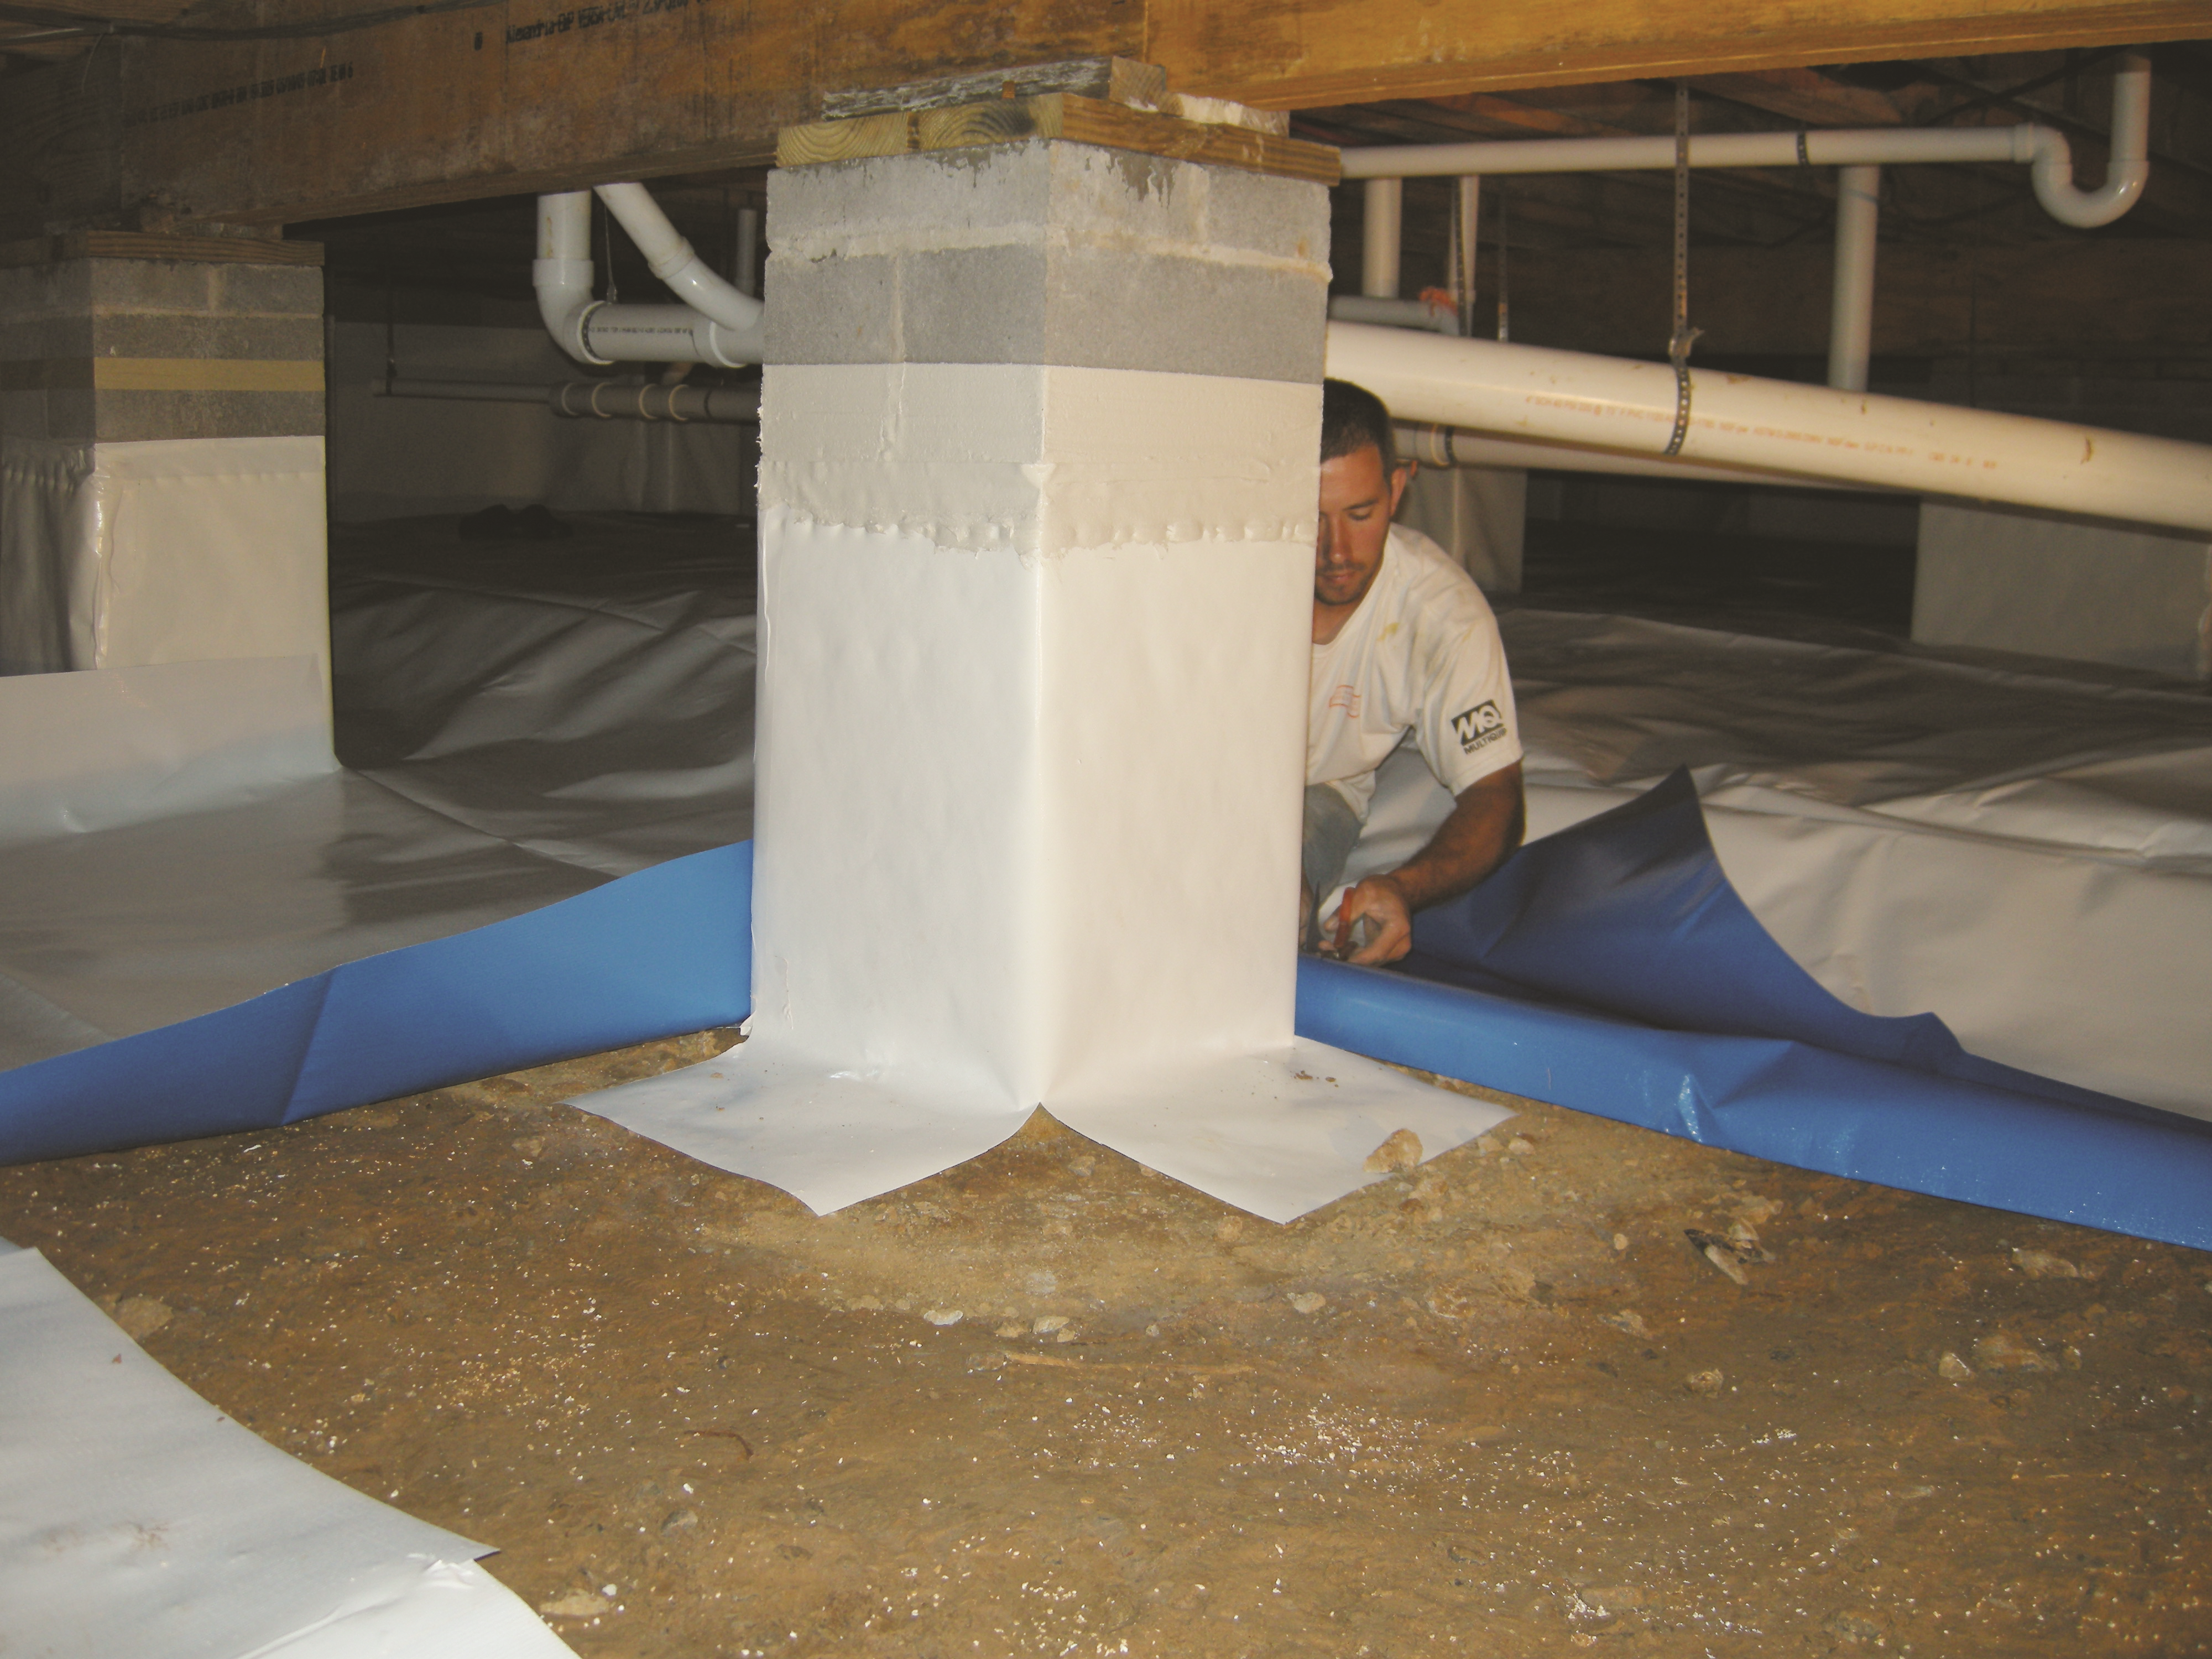
Right - After wrapping the posts, a technician lays a vapor retarder over the floor of a crawlspace.
Image
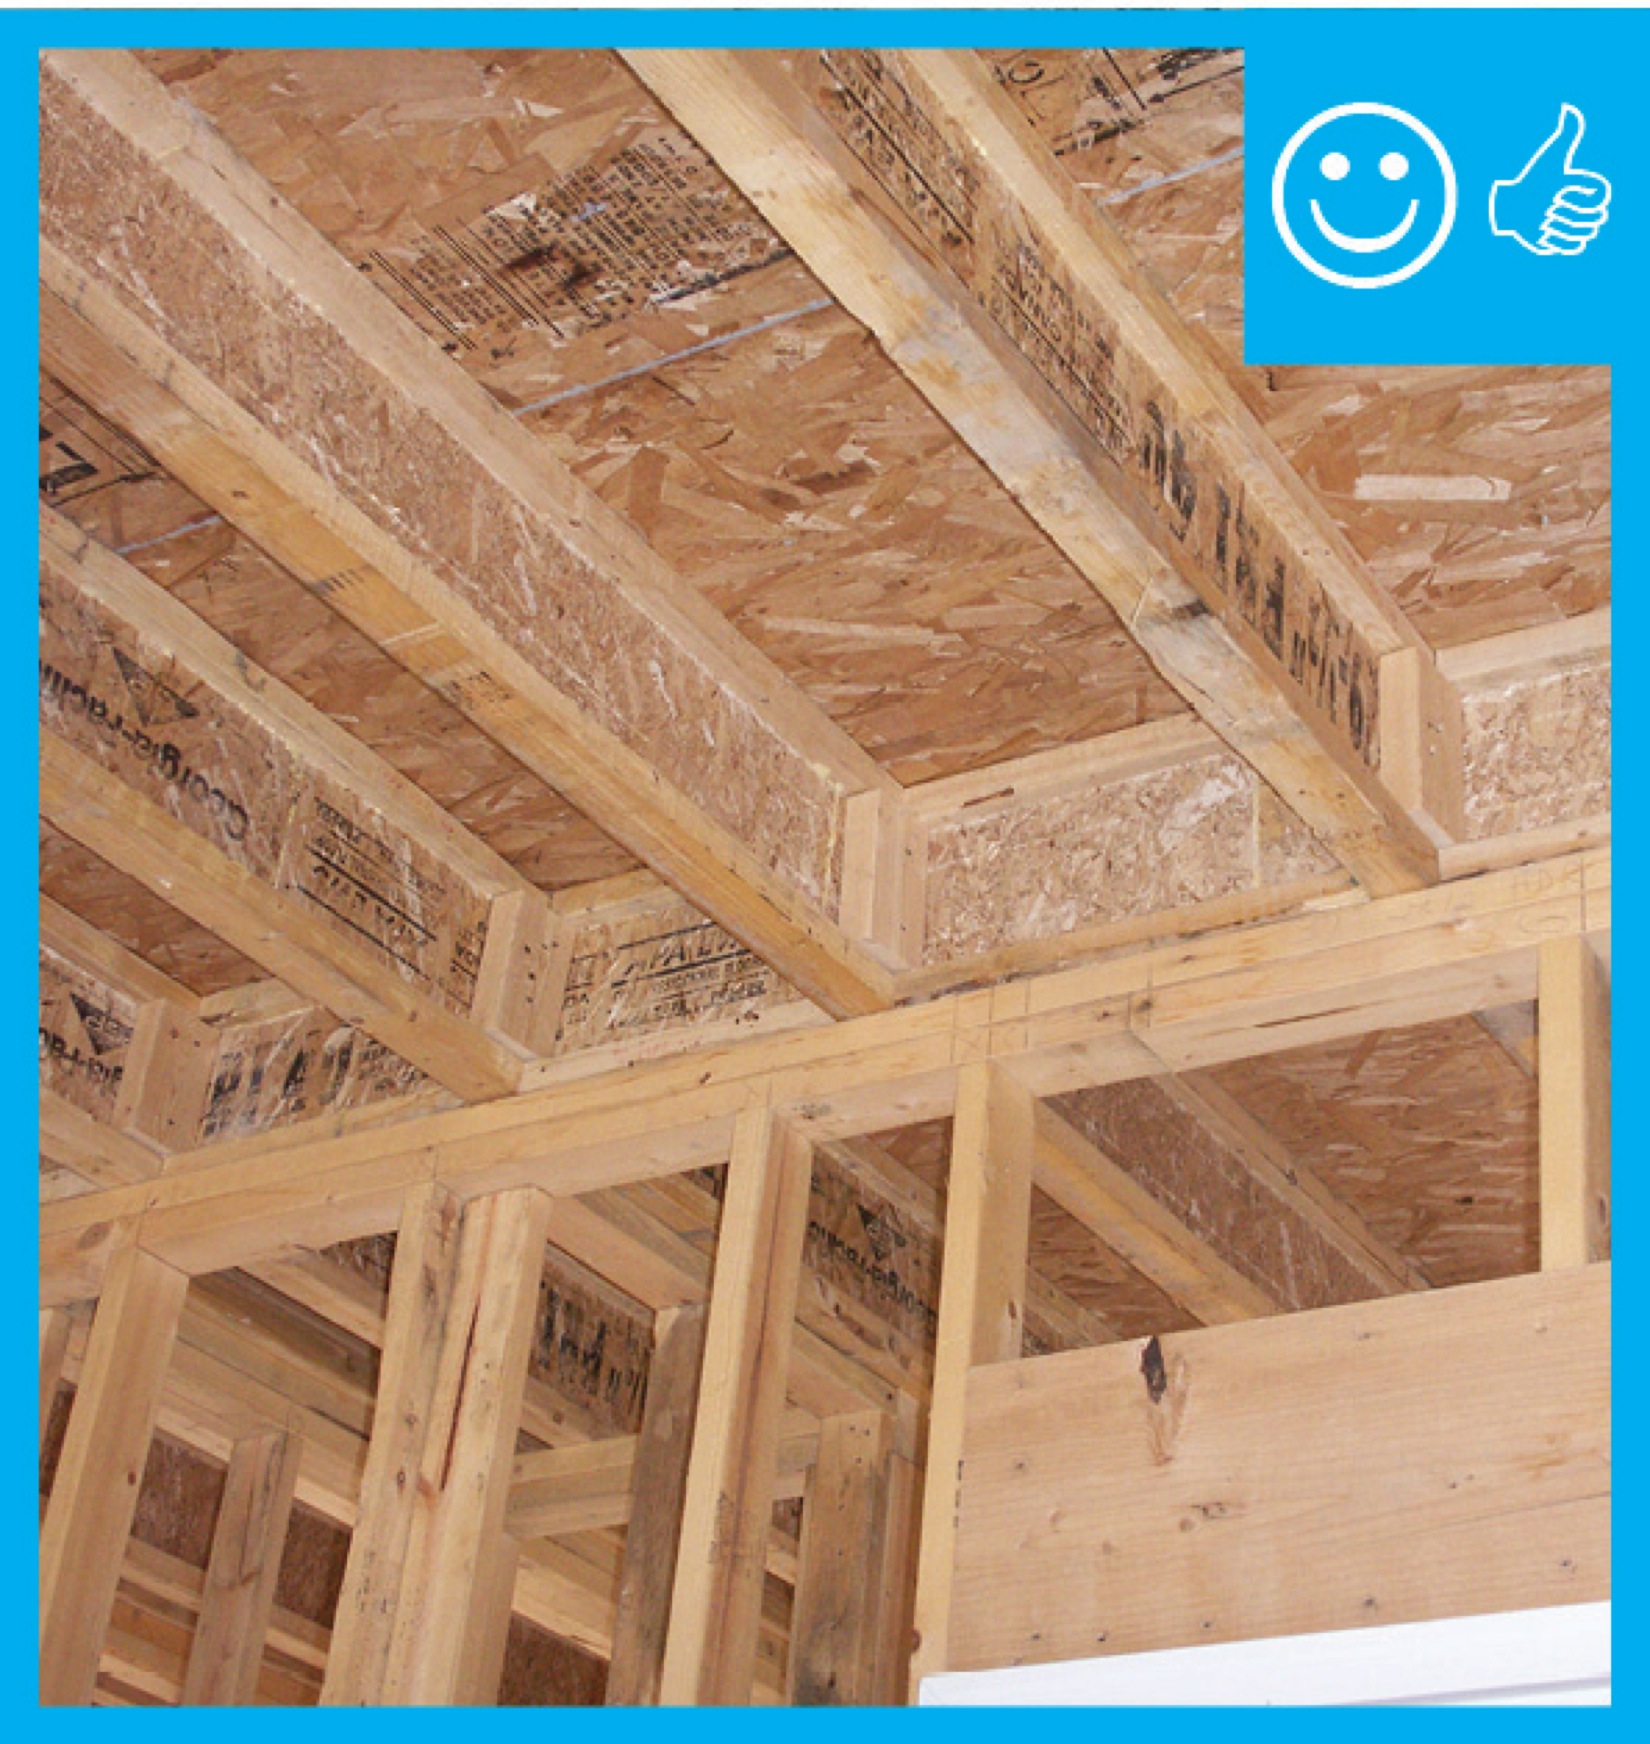
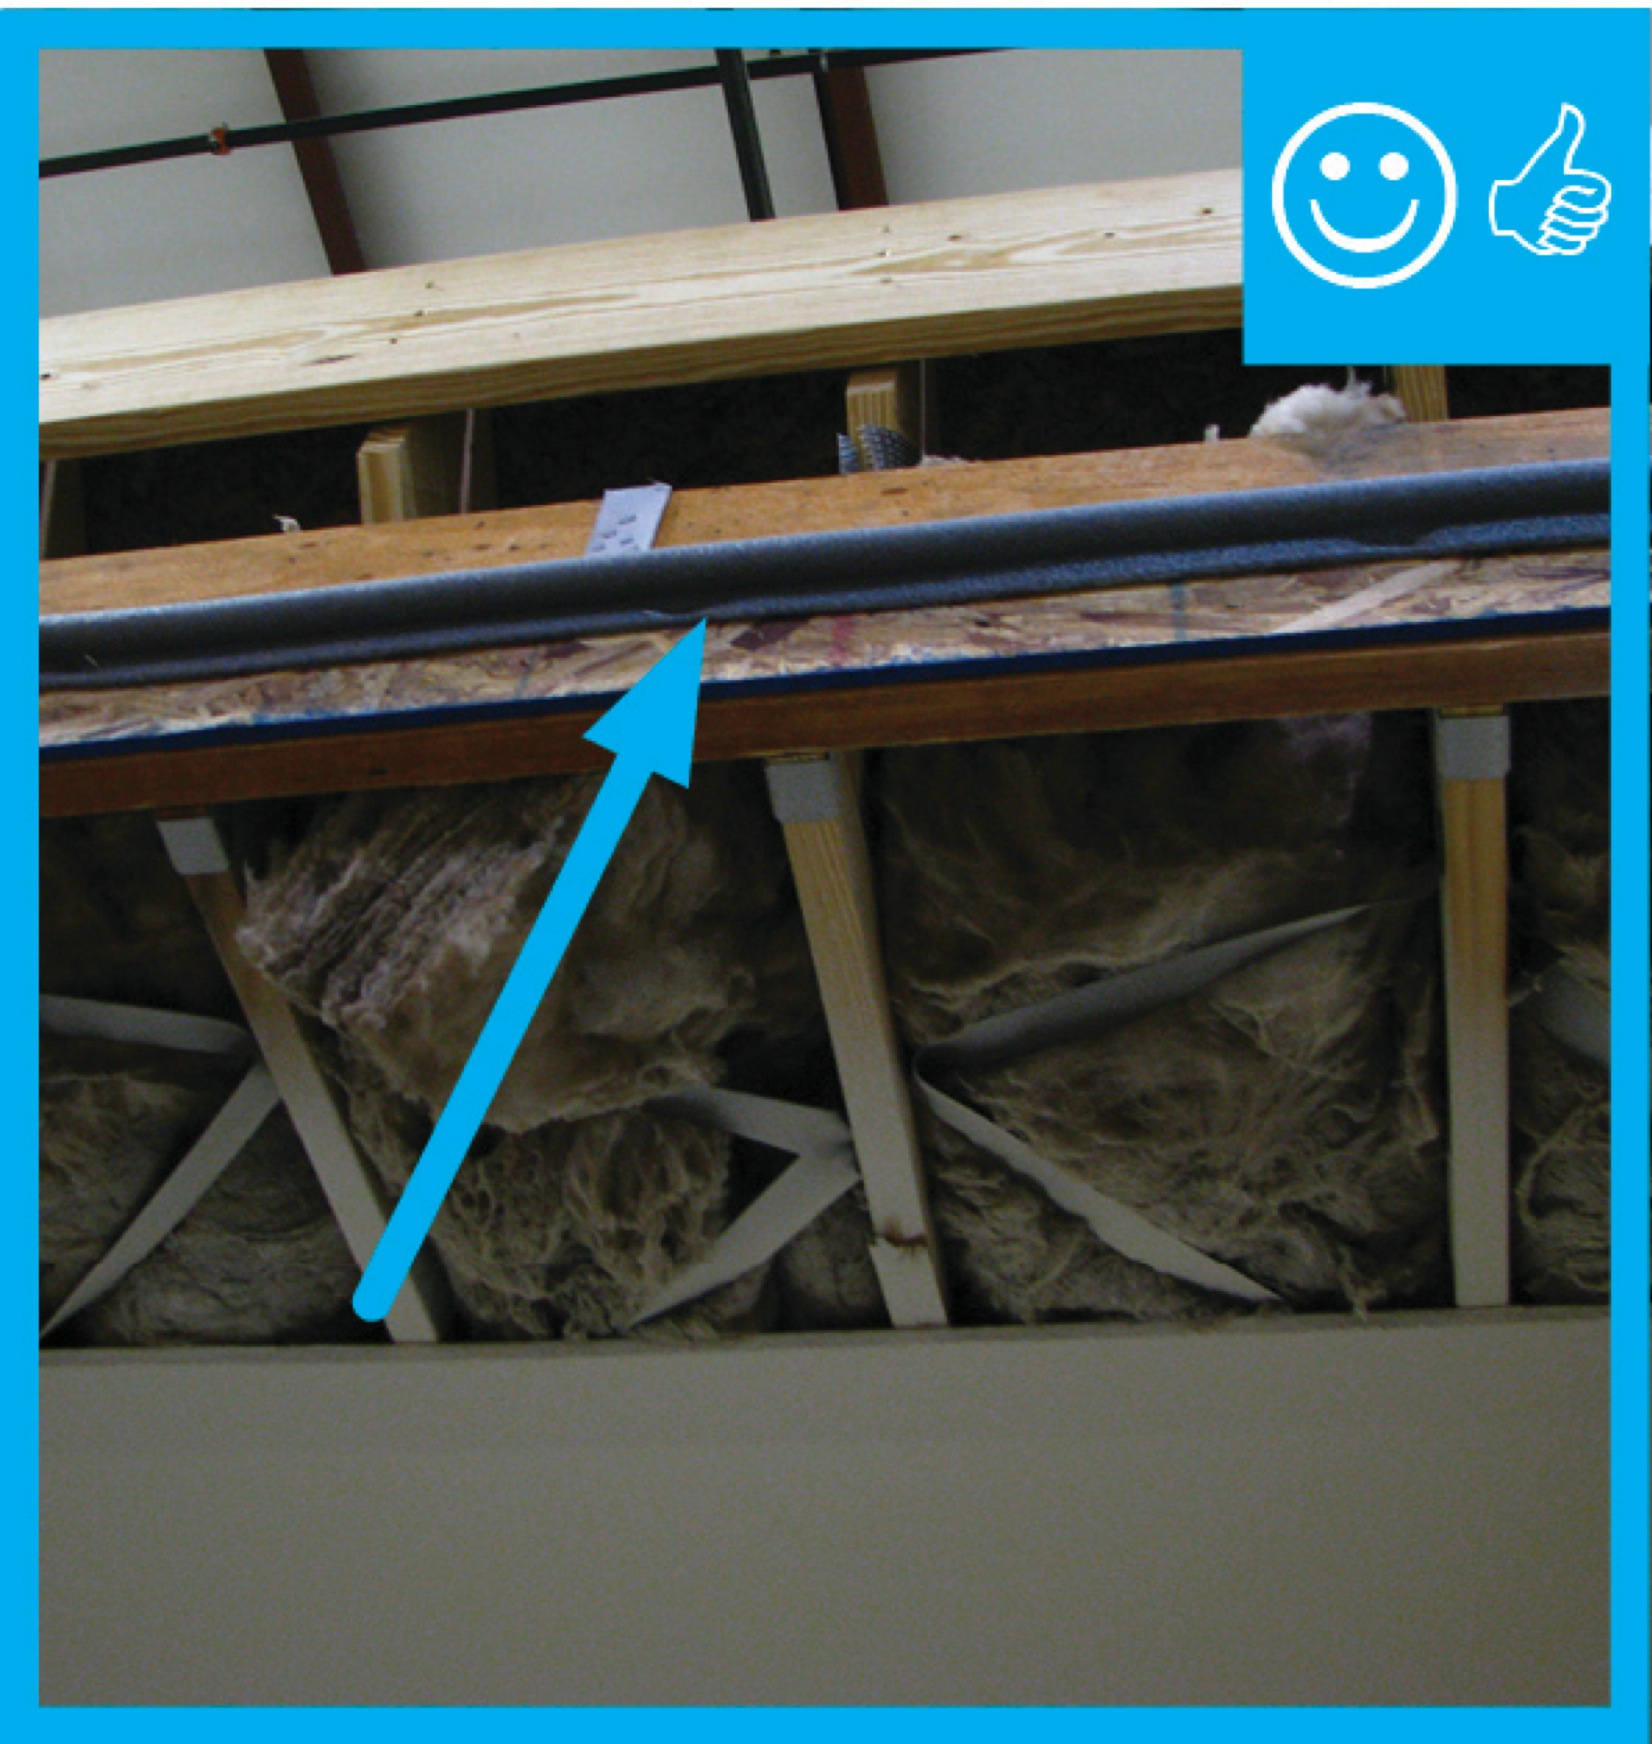
Right - Air barrier is present and installed between the floor system and unconditioned space.
Image
Image
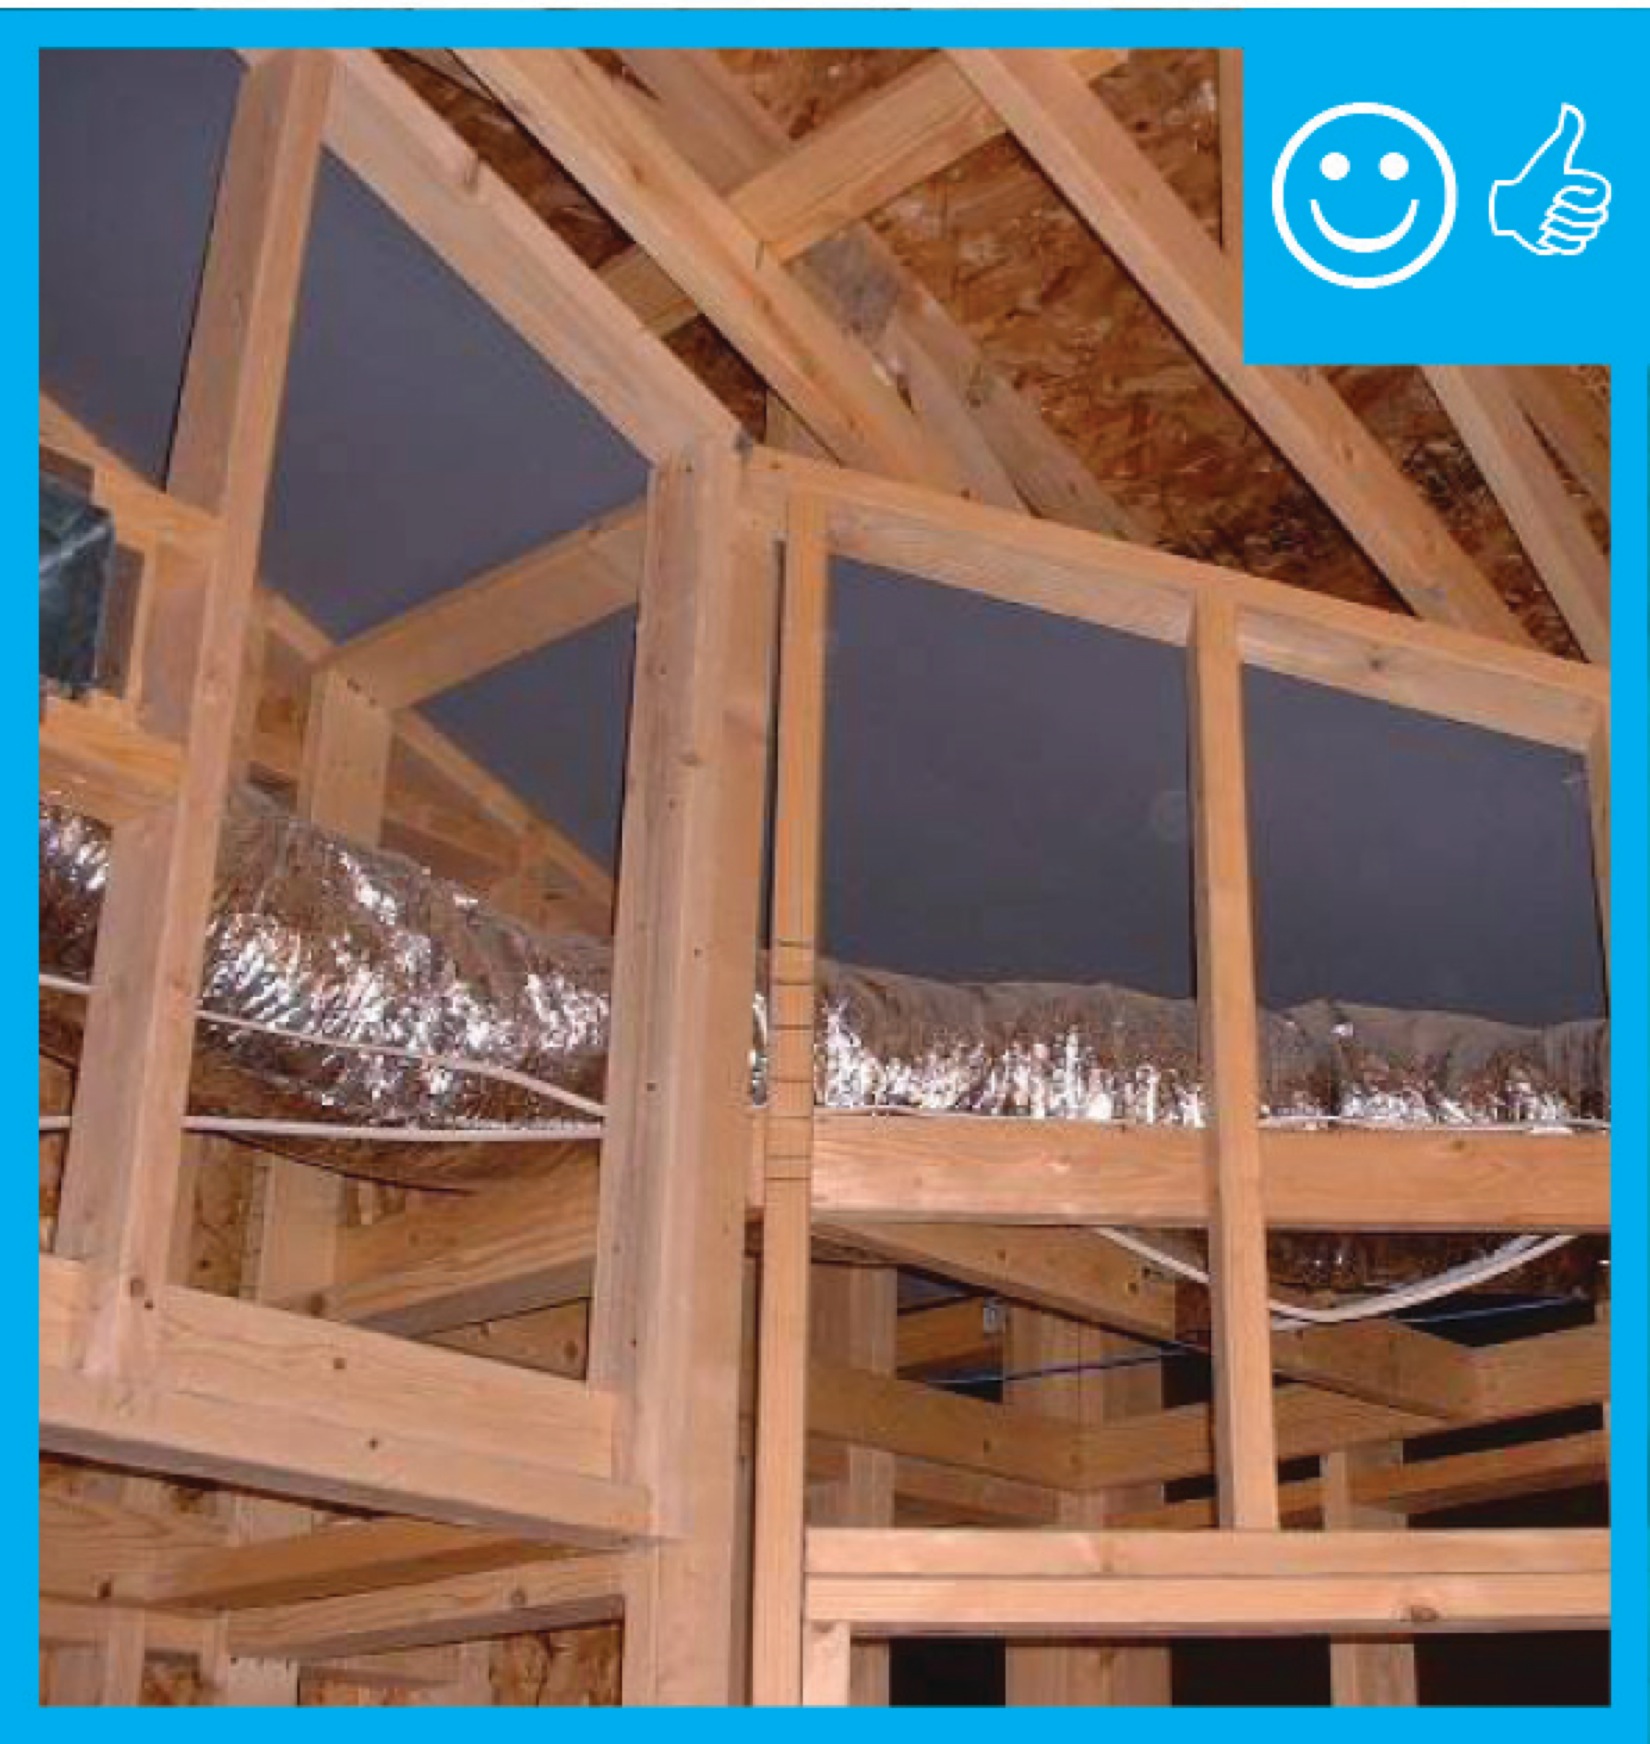
Right - Air barrier is present between the dropped ceiling/soffit and the attic.
Image
Right - Air barrier is present between the dropped ceiling/soffit and the attic.
Image
Image
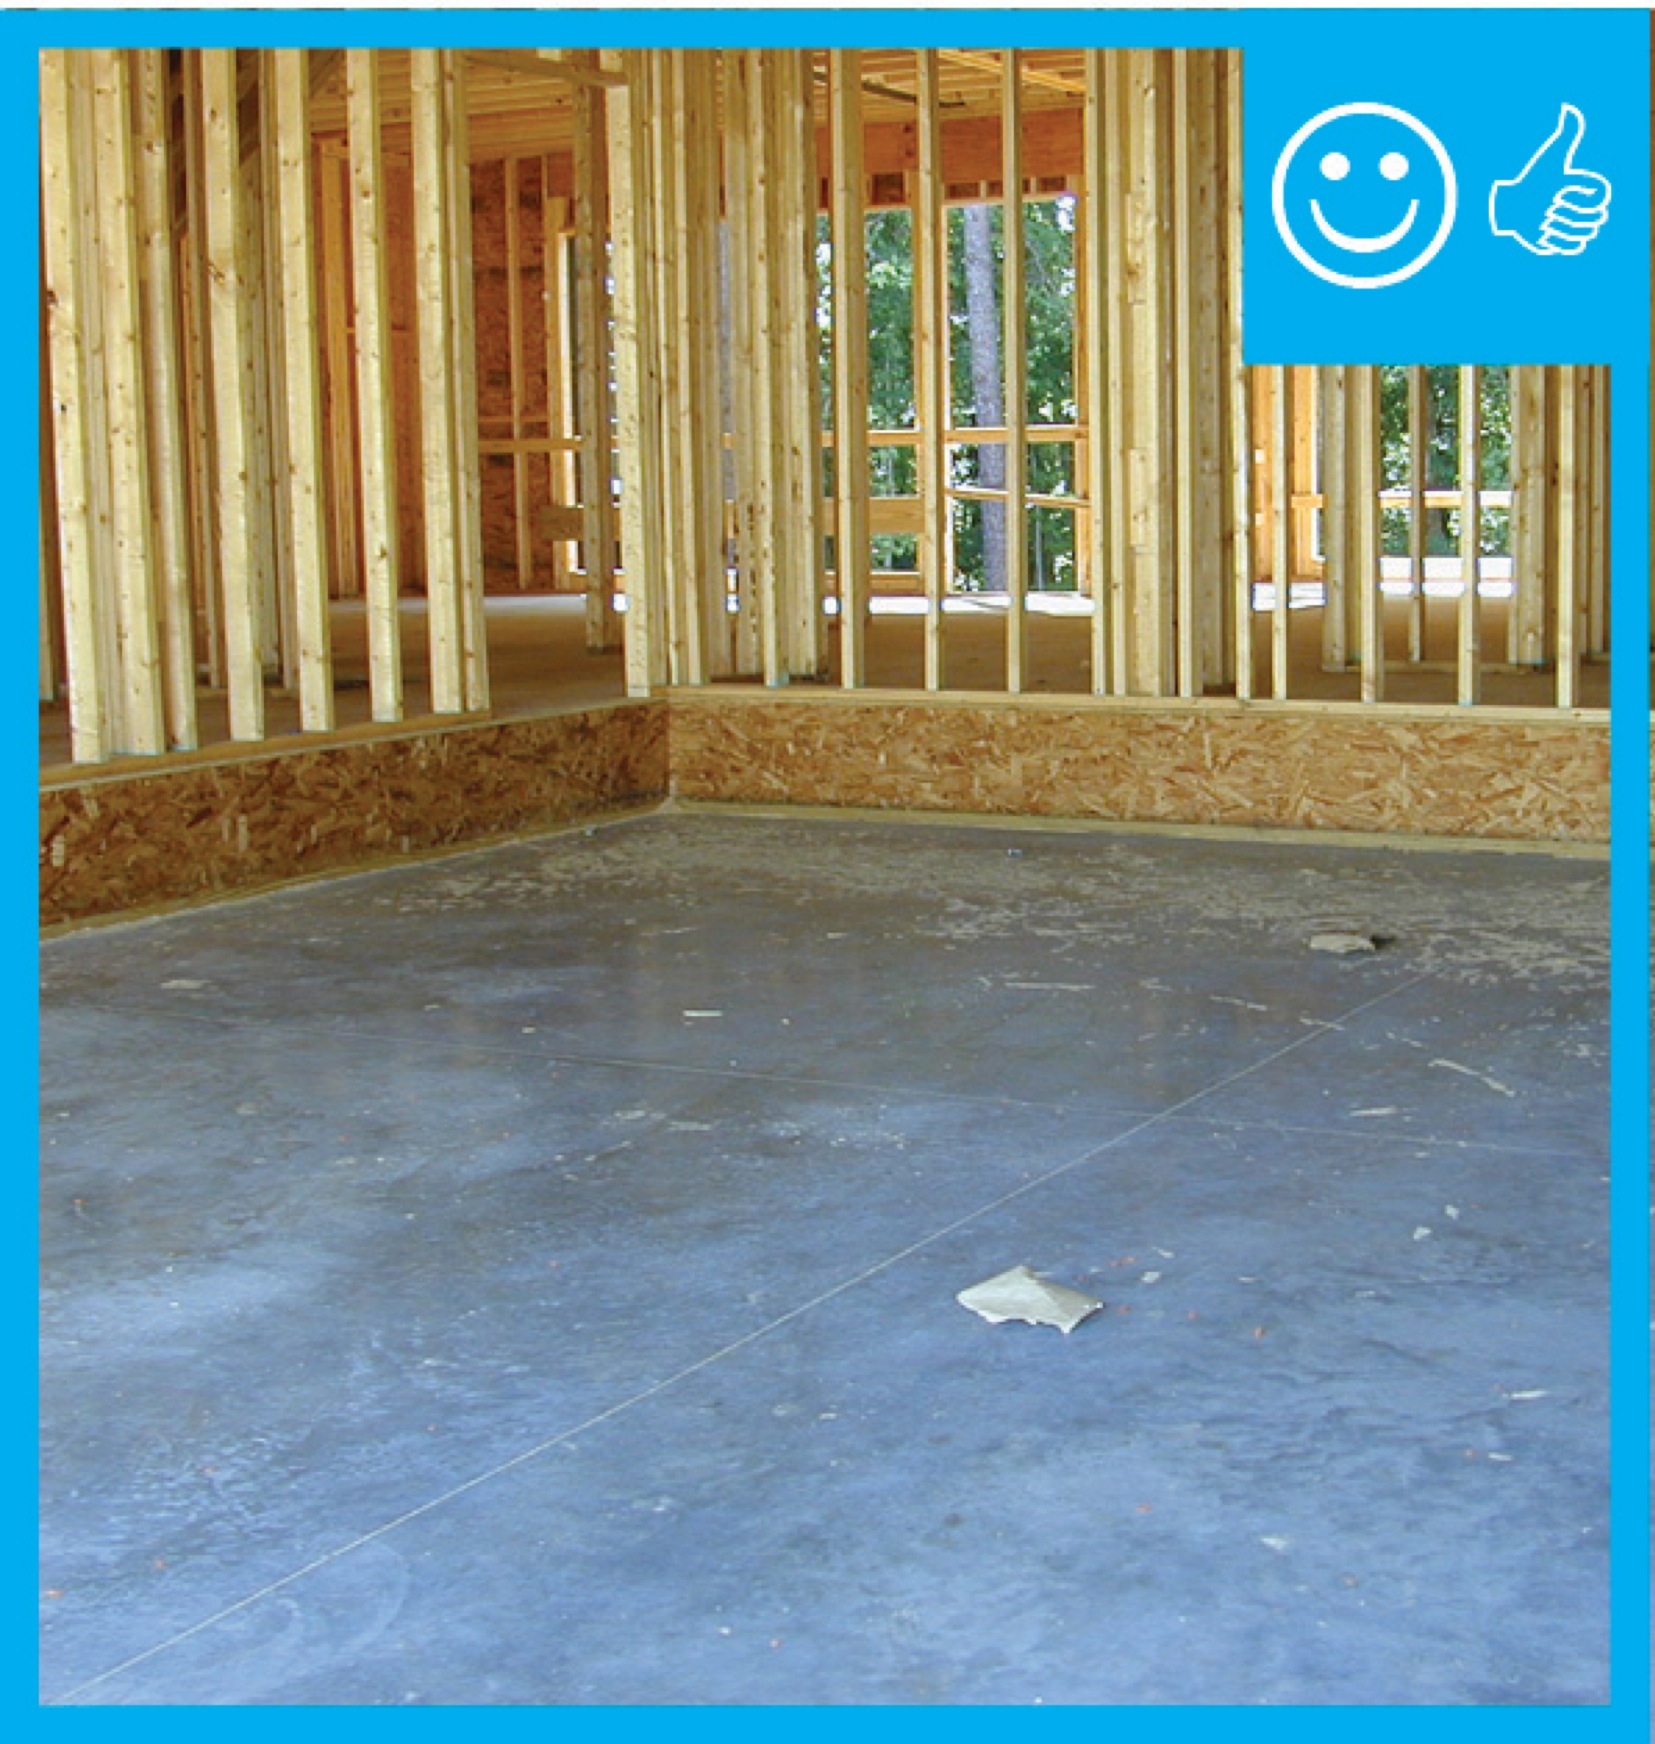
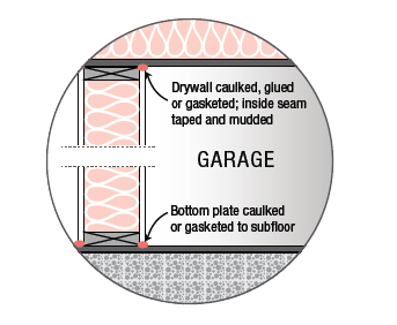
Right - Air-sealing the wall between the garage and the home is vital for occupant health and safety.
Image
Image

Right - All seams in the HVAC equipment and ductwork are sealed with mastic; because the HVAC equipment is in the garage, it is an air-sealed closet.
Image
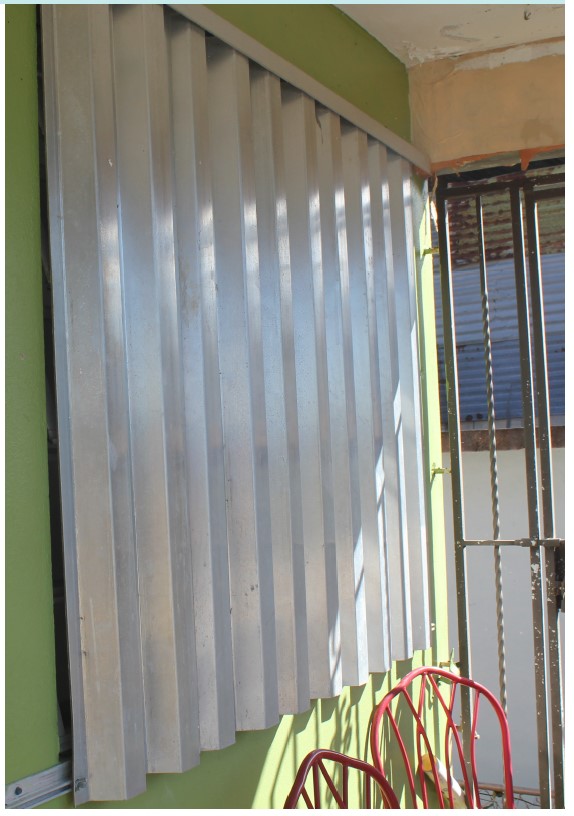
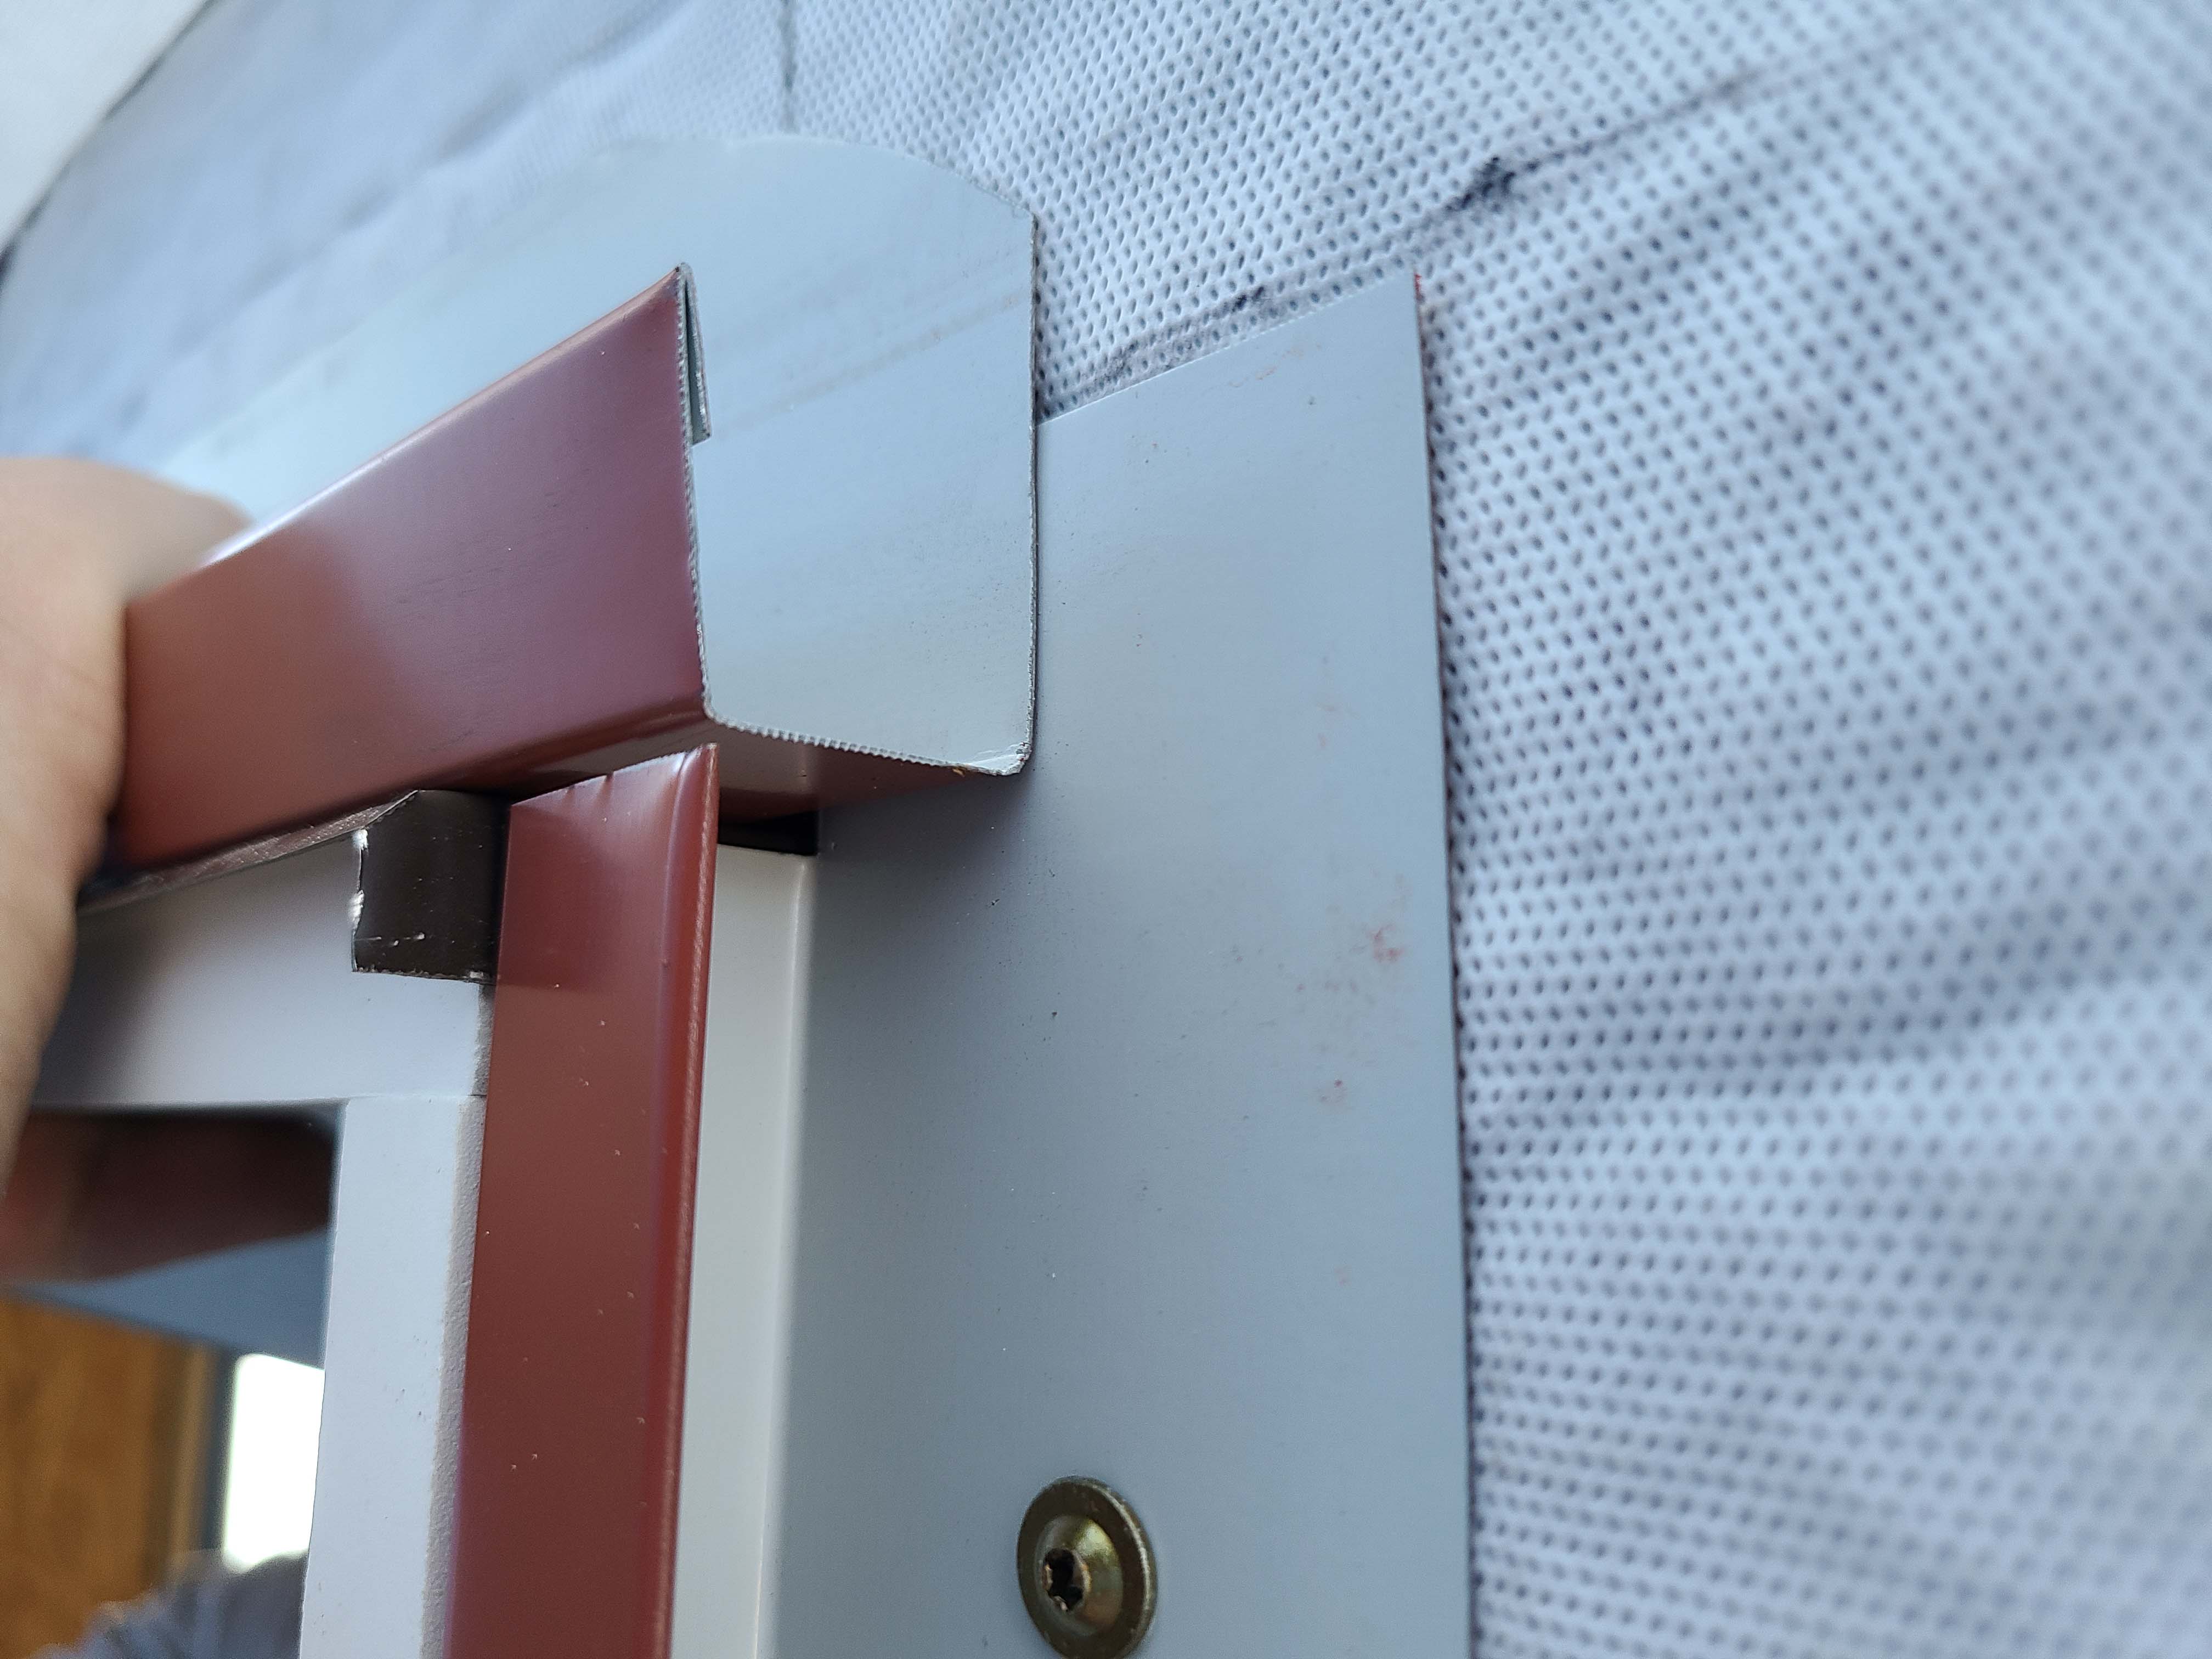
Right - Aluminum accordion coverings are permanently installed and can be deployed quickly but must be manually closed from the outside.
Image
Right - Aluminum or polycarbonate panels attach to permanently mounted railings and require installation from the exterior.
Image
Right - An energy recovery ventilation (ERV) brings fresh air into the home while exhausting stale air. Both ducts pass through a heat exchanger where heat from the warmer duct is transferred to the cooler duct.
Image
Right - An EPDM gasket is installed around an HRV duct installed in an exterior wall; 9 of 14.
Image
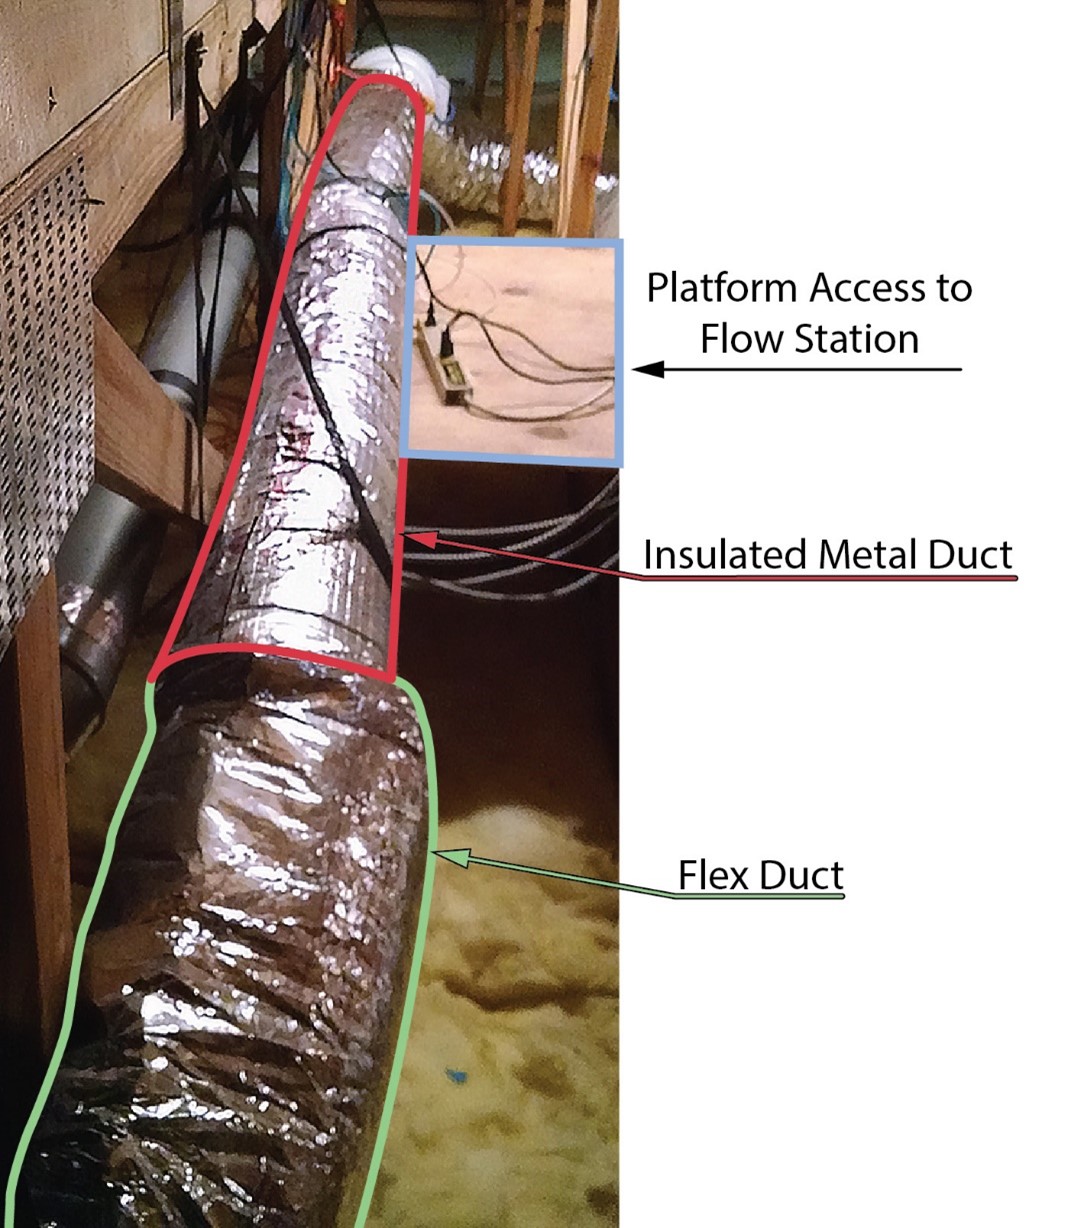
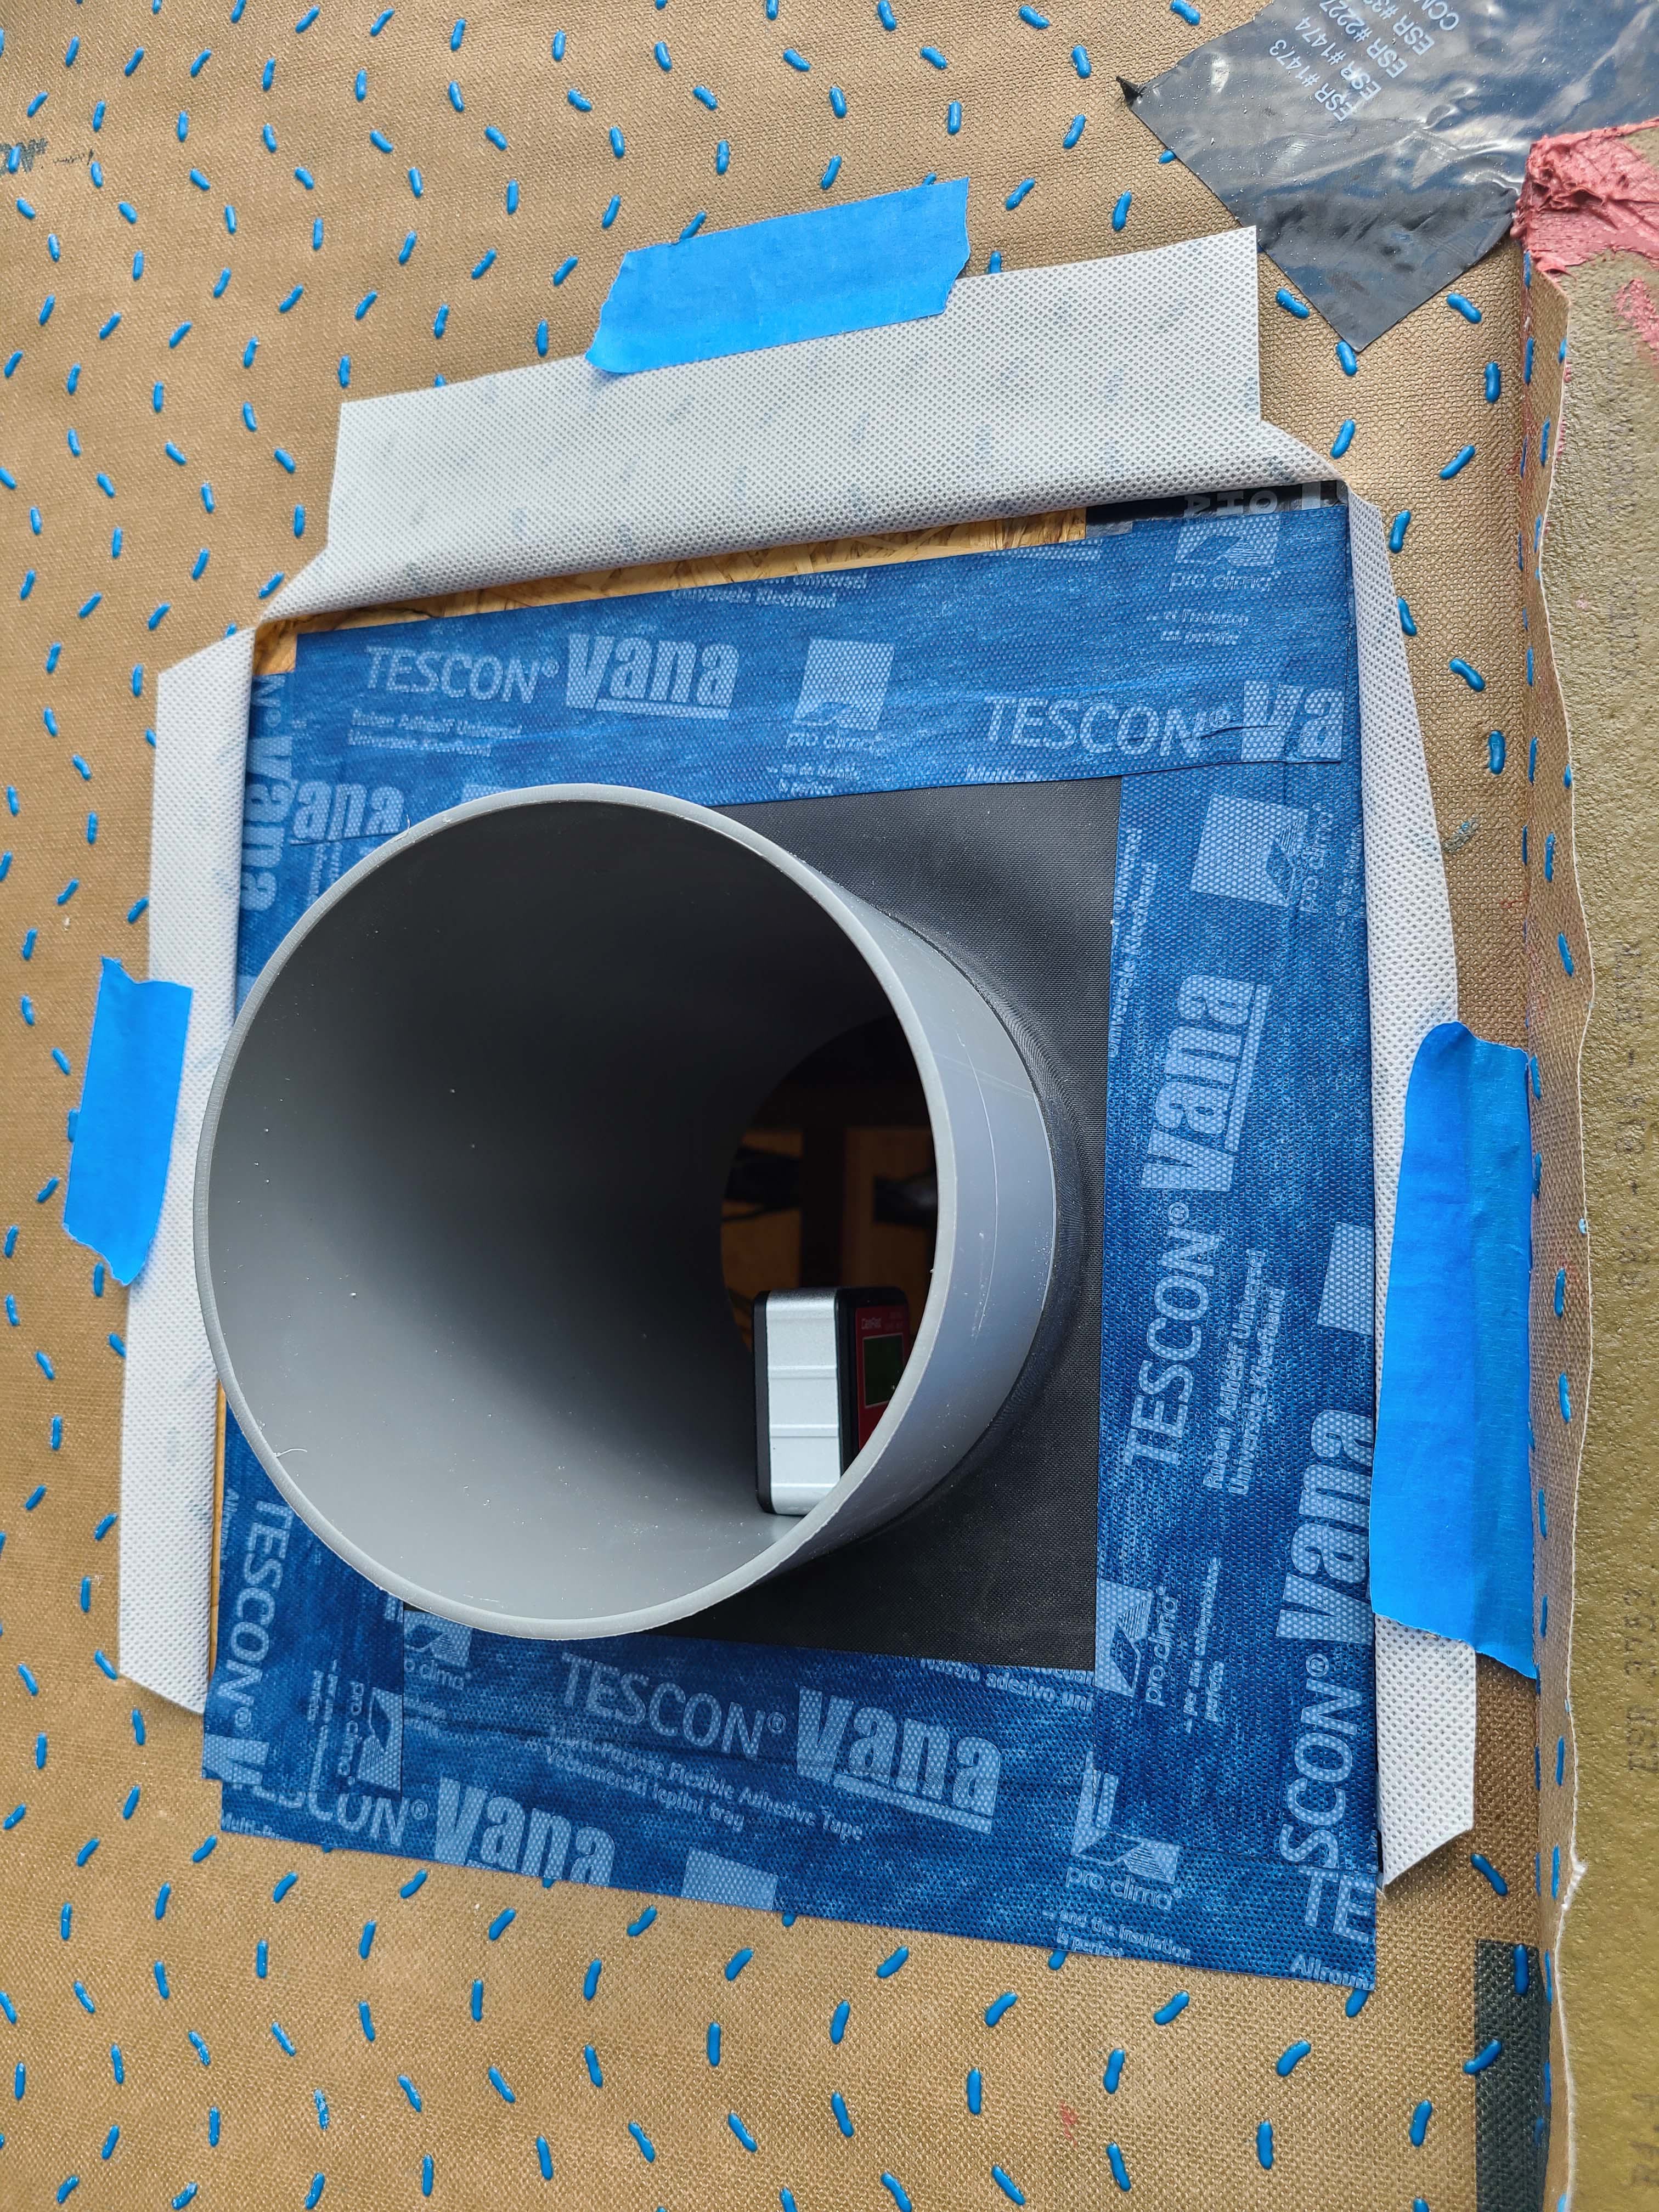
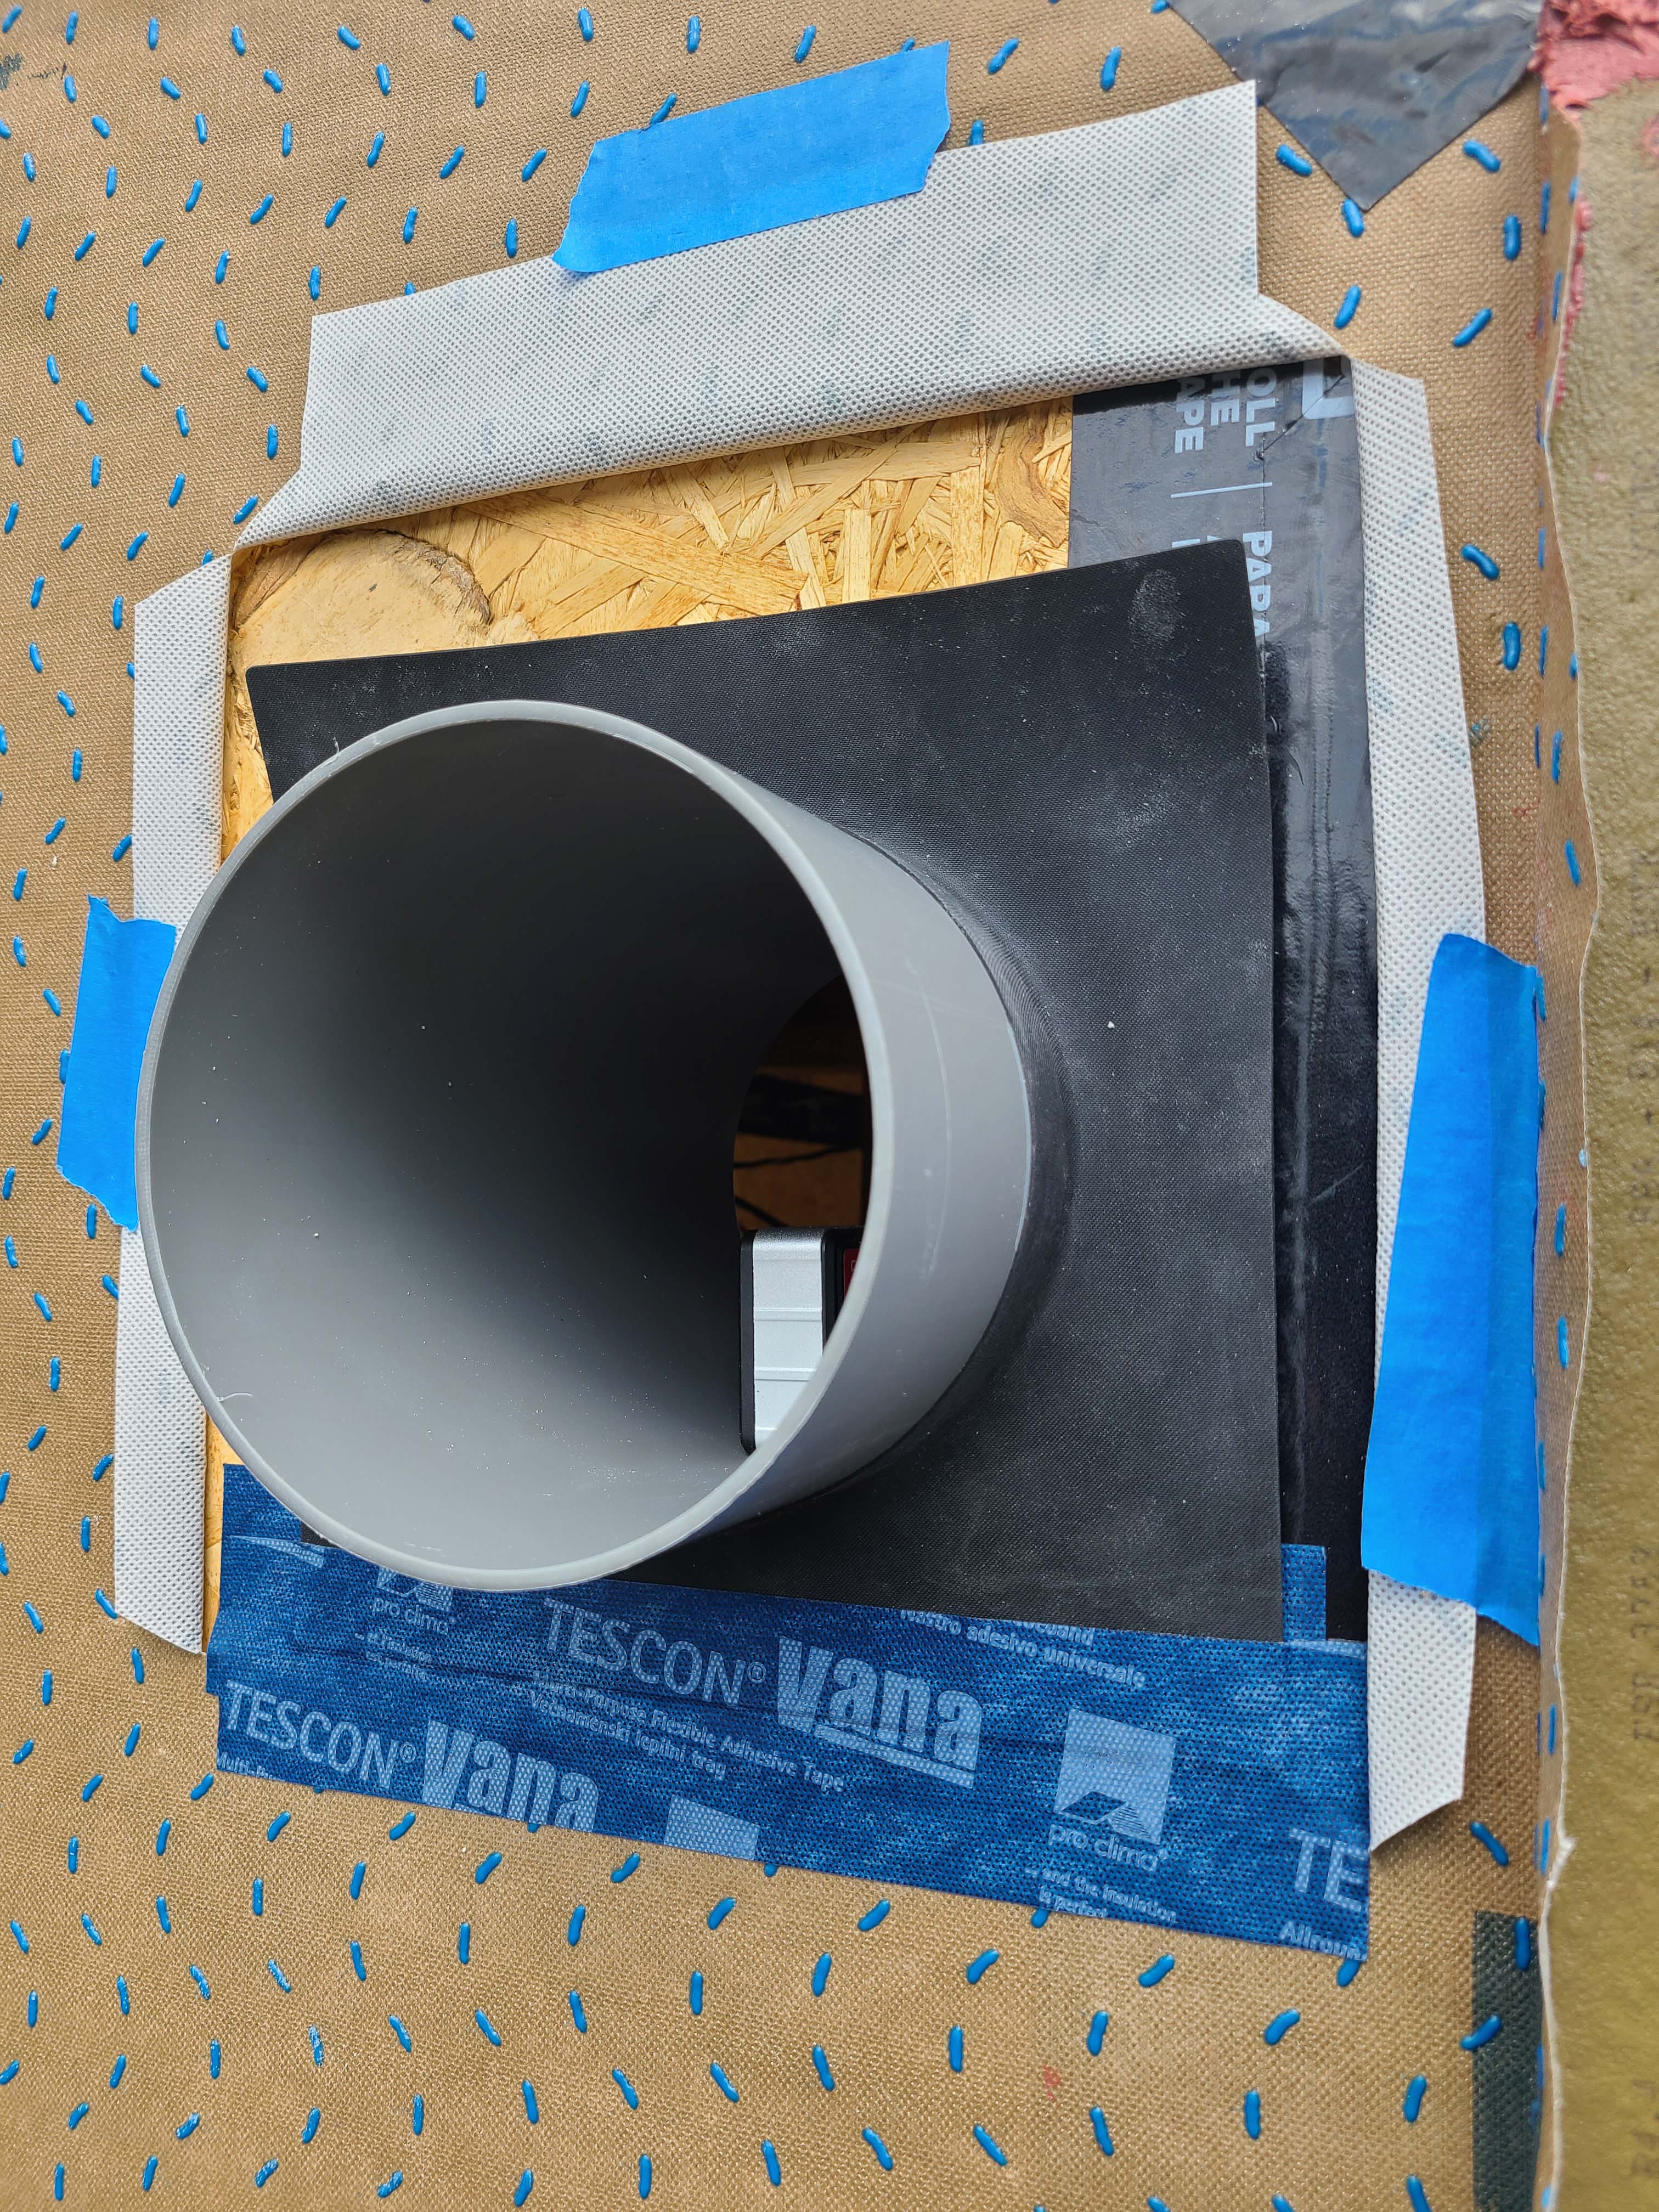
Right - An in-line air flow testing station is installed in a straight section of smooth metal duct (red outline) to determine the air flow rate of a fresh air intake for a whole house ventilation system.
Image
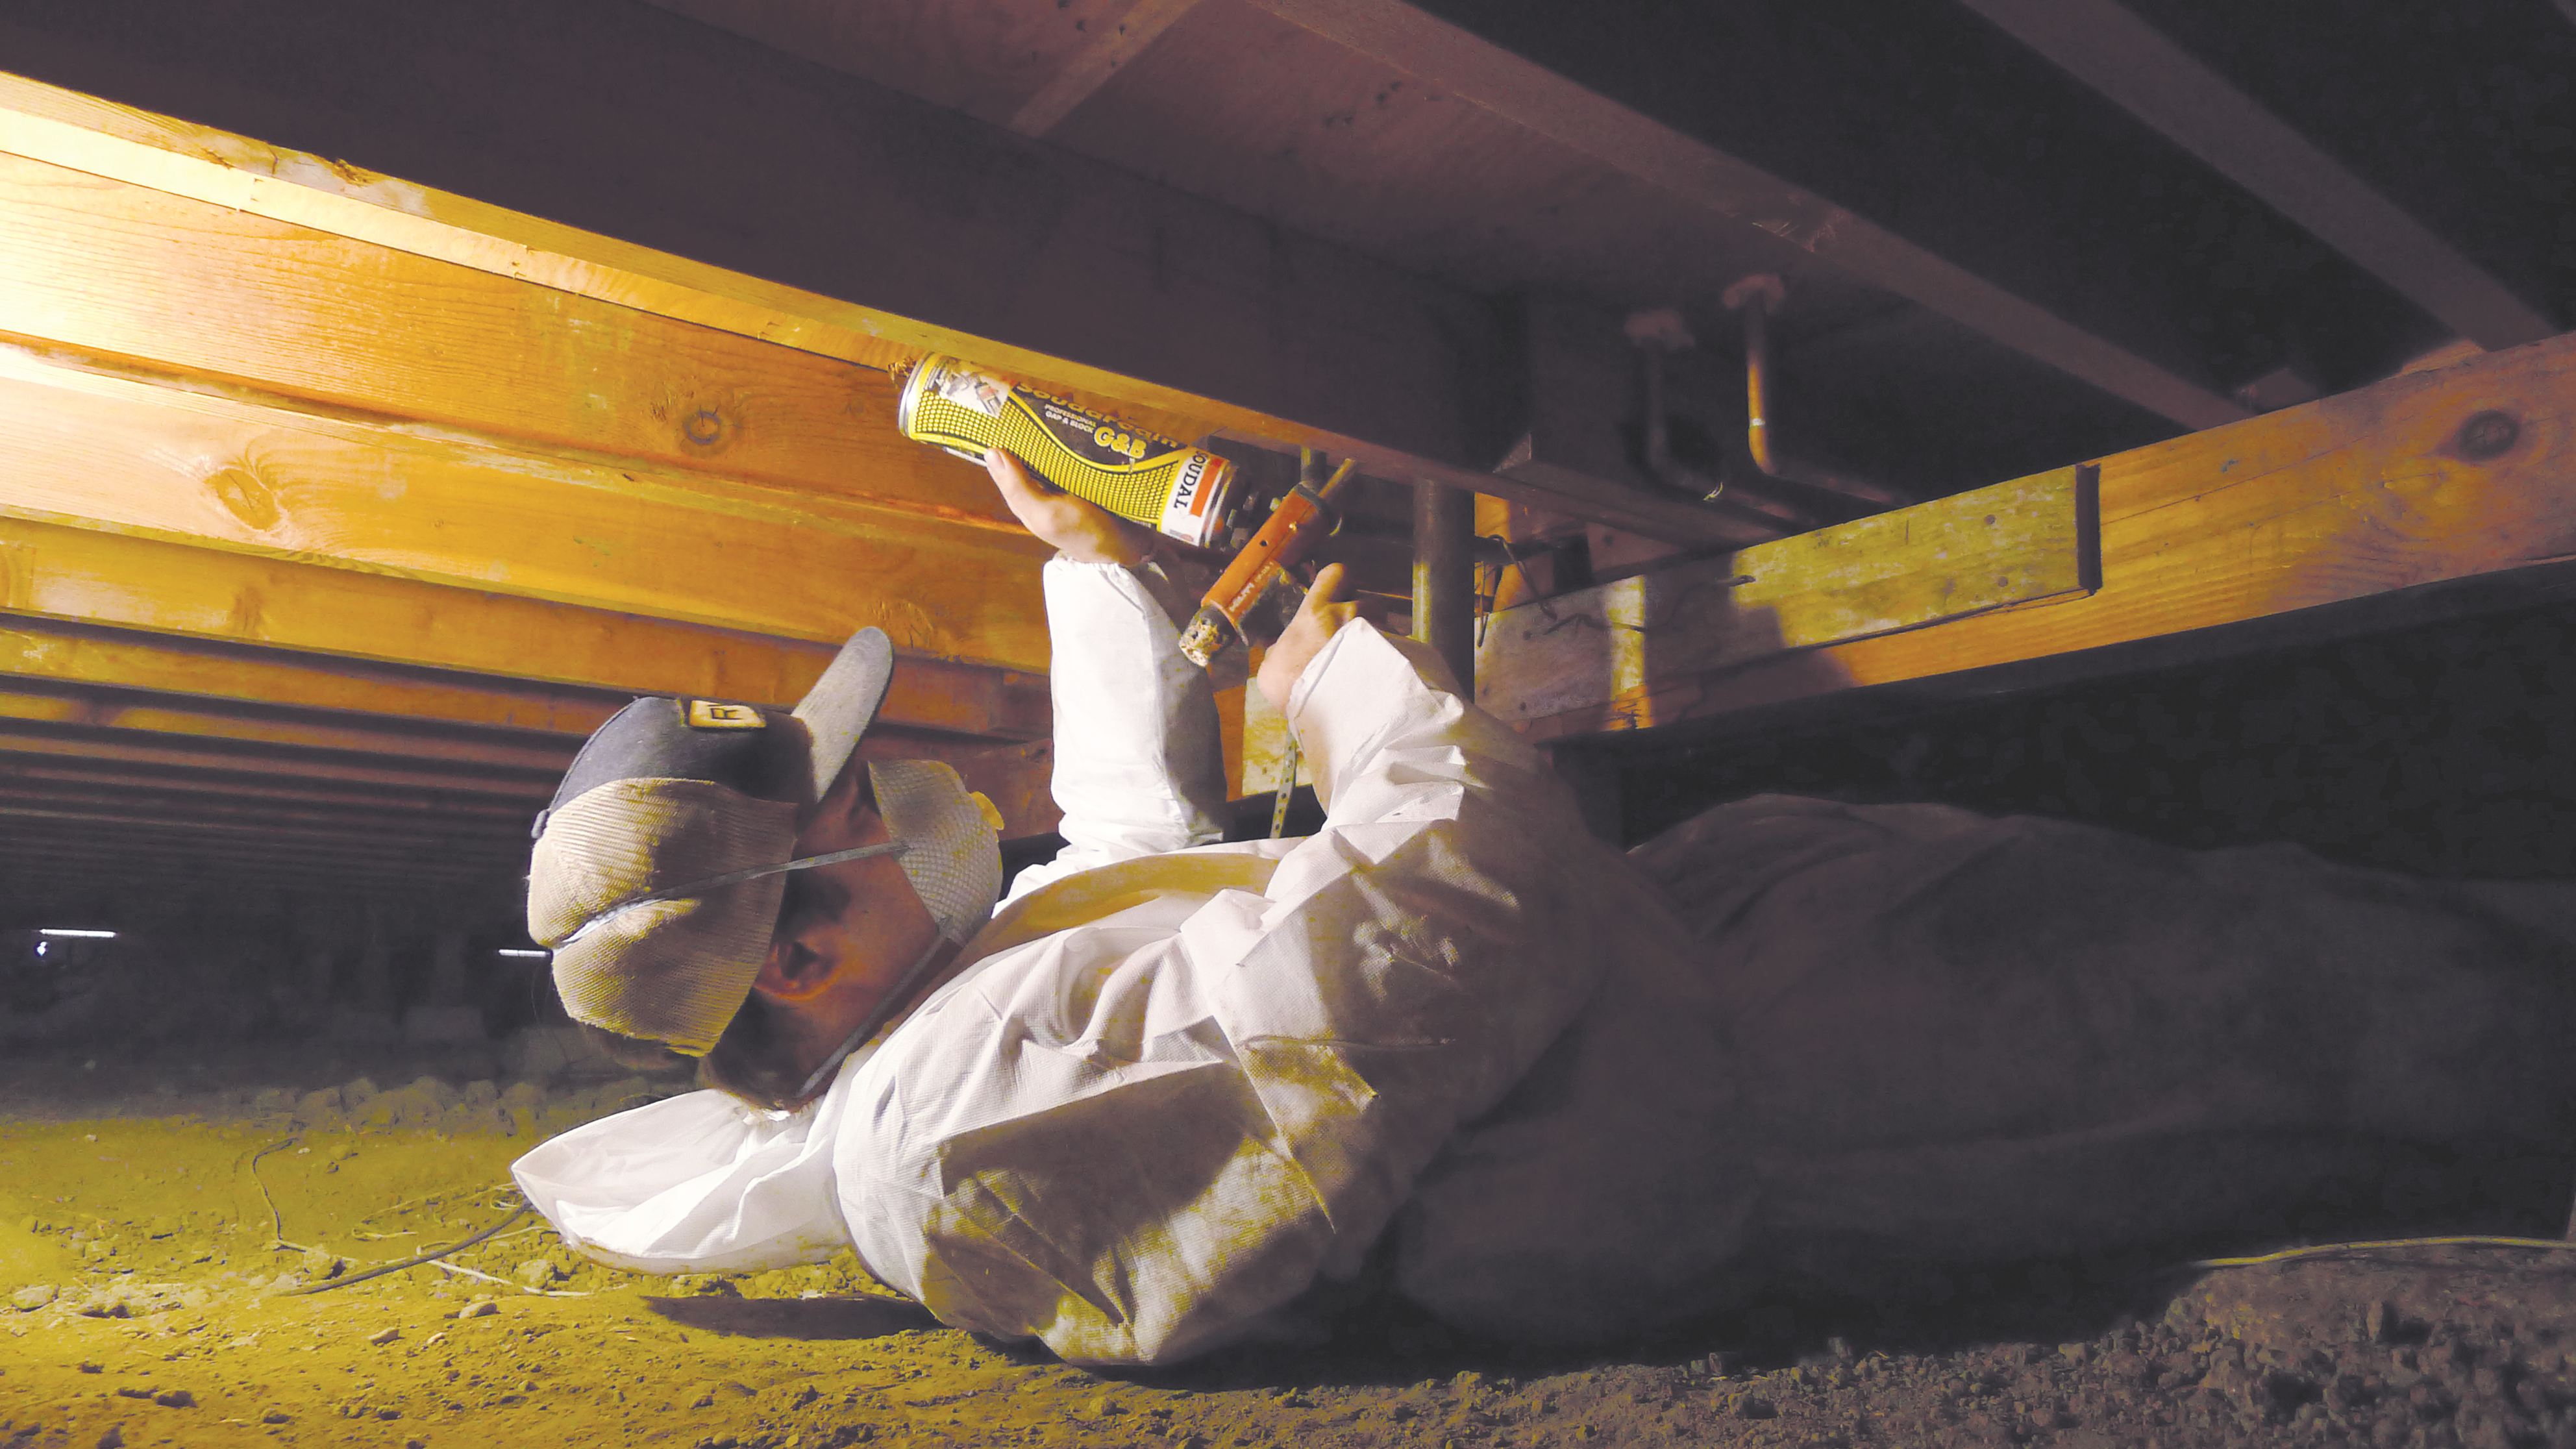
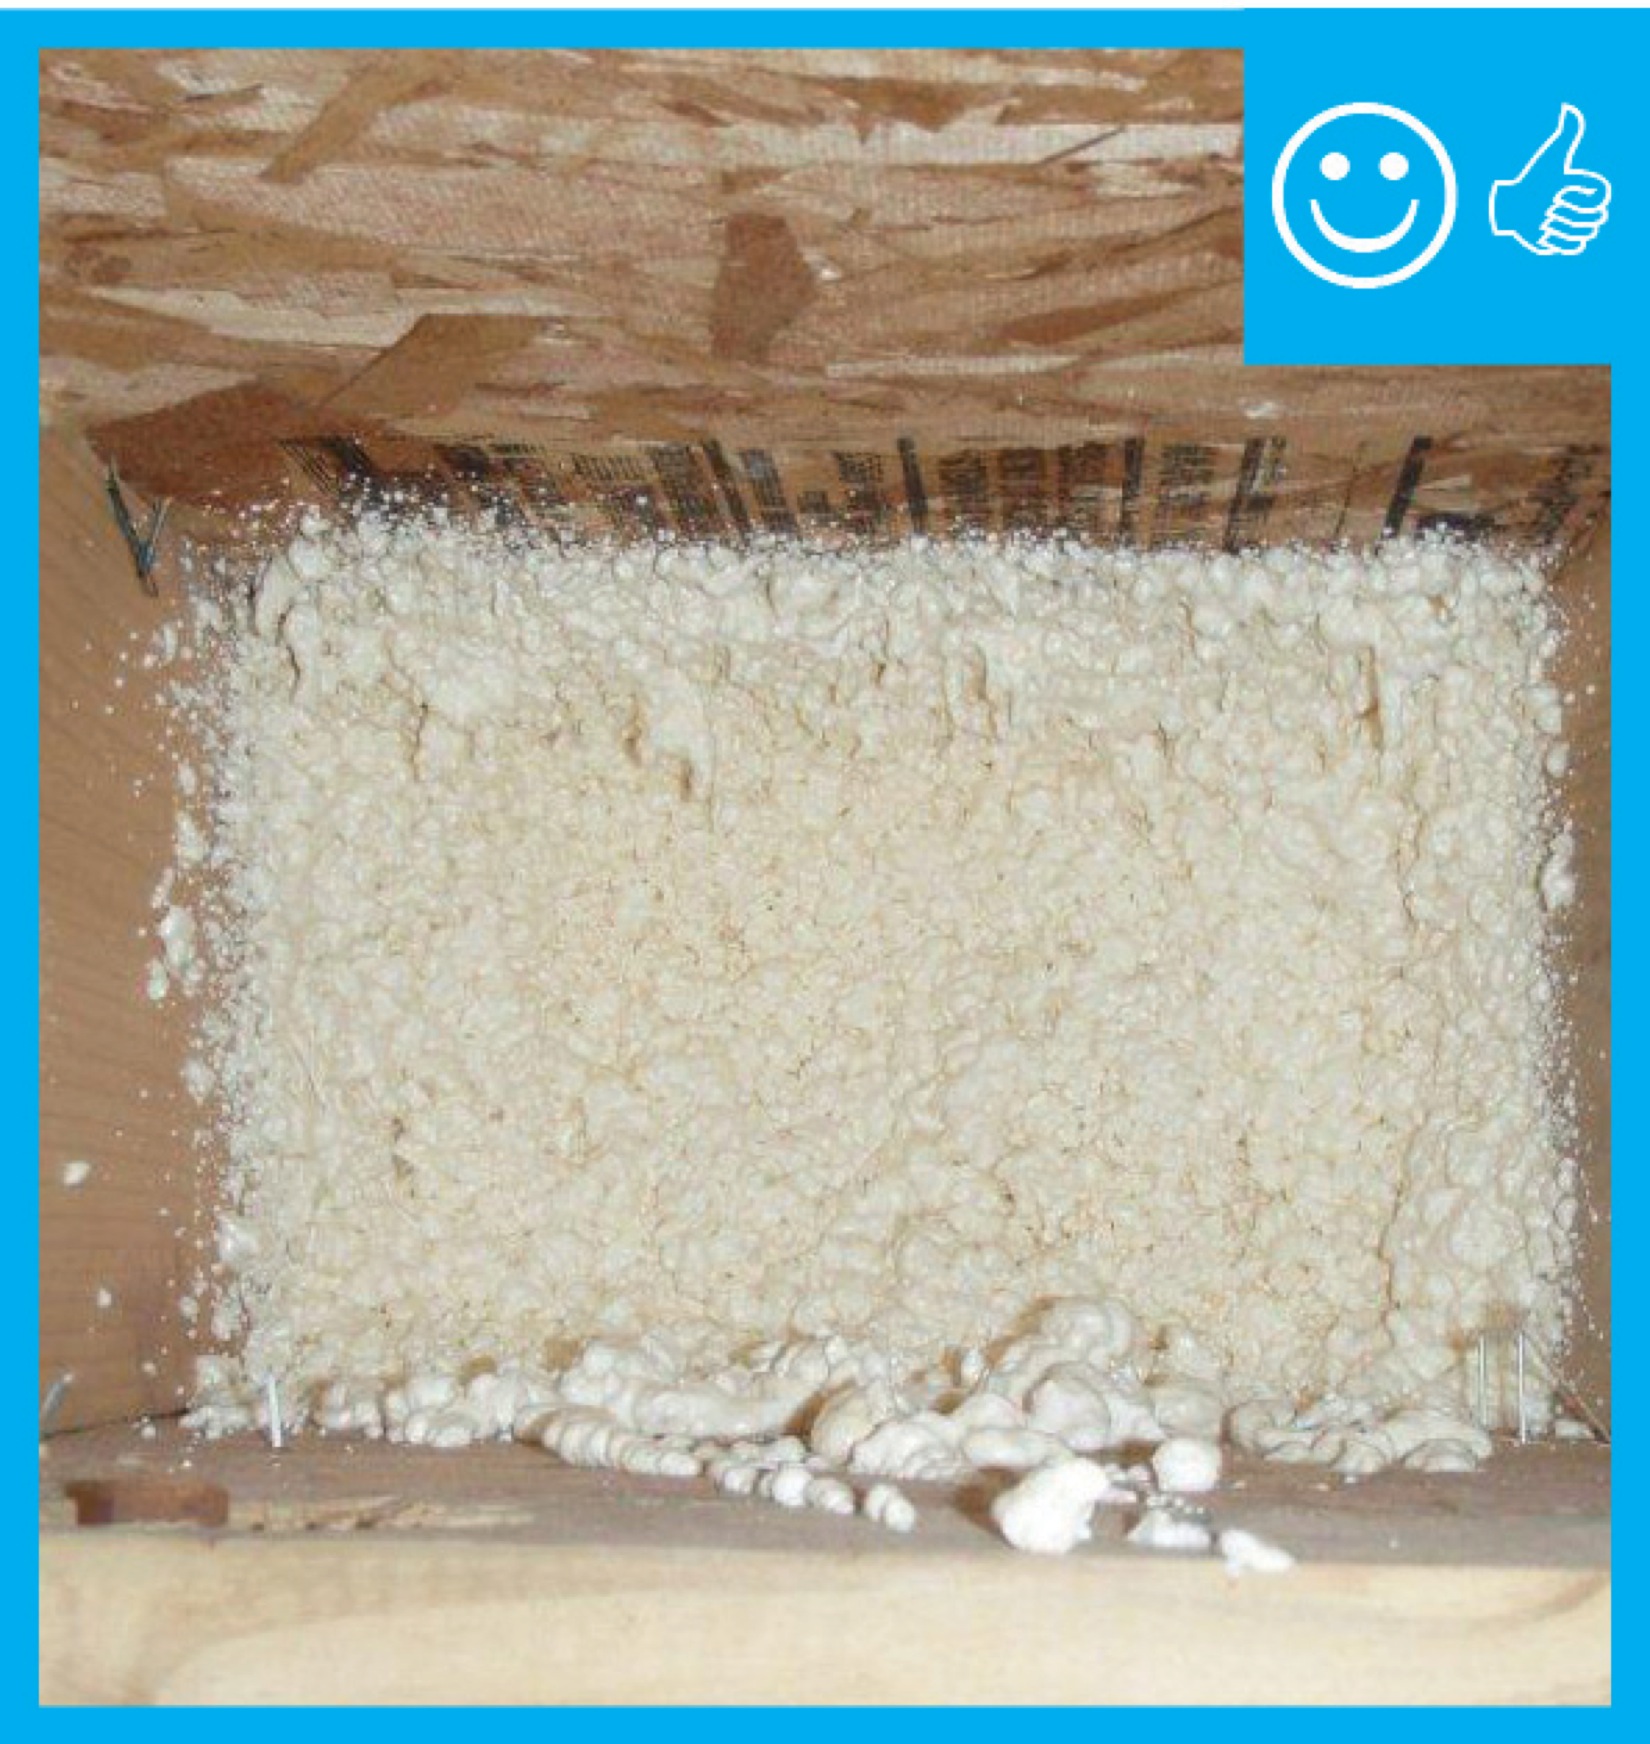
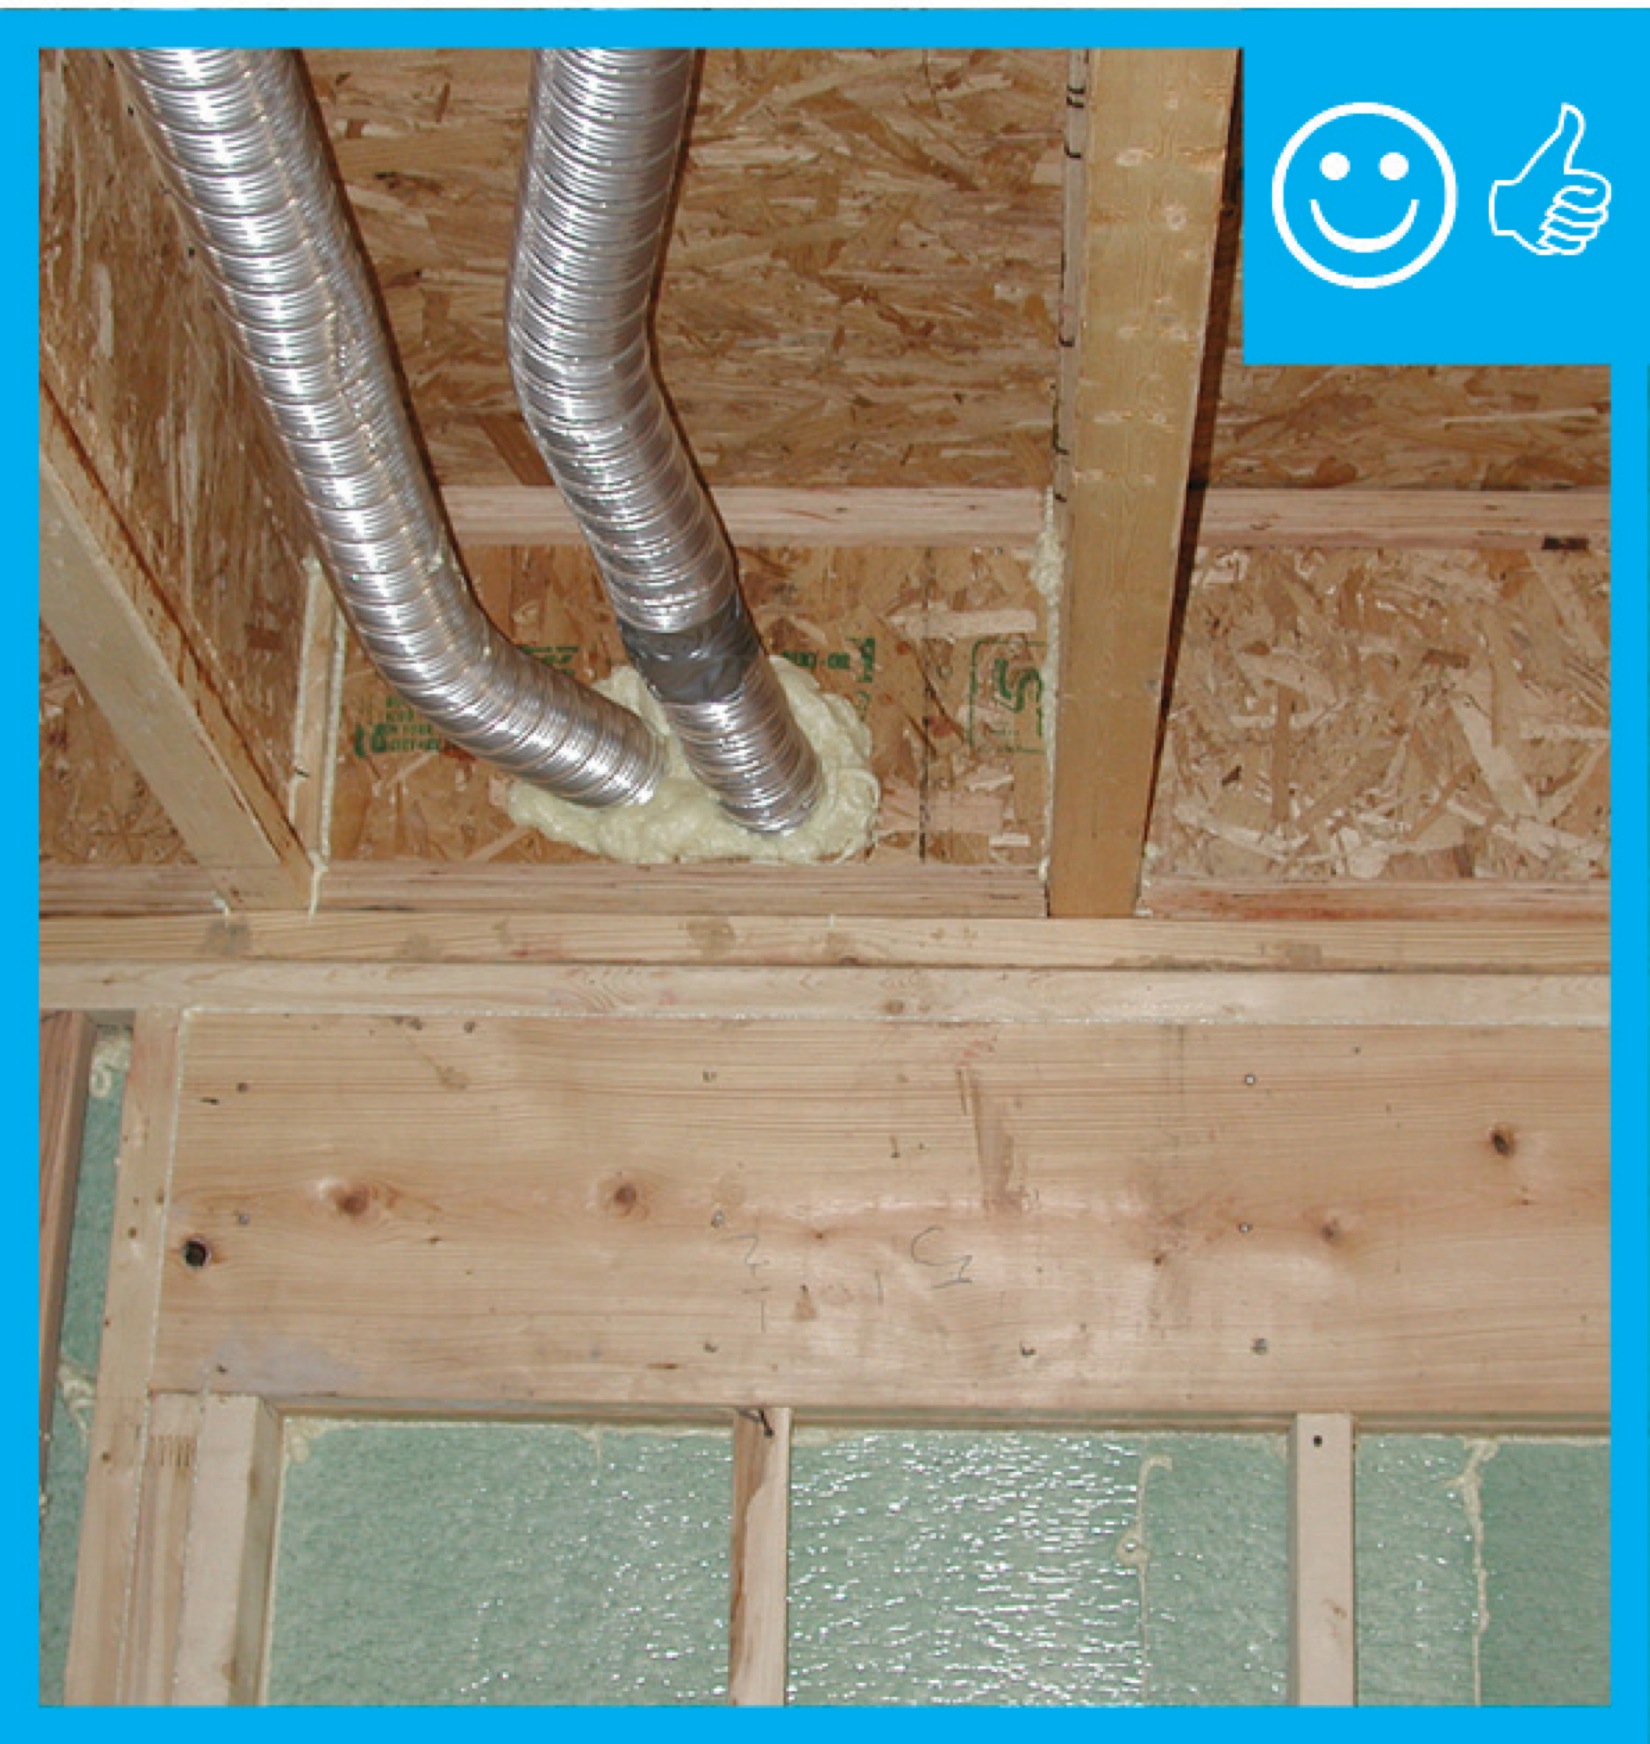
Right - An installer uses canned spray foam to air seal joints in an existing subfloor.
Image
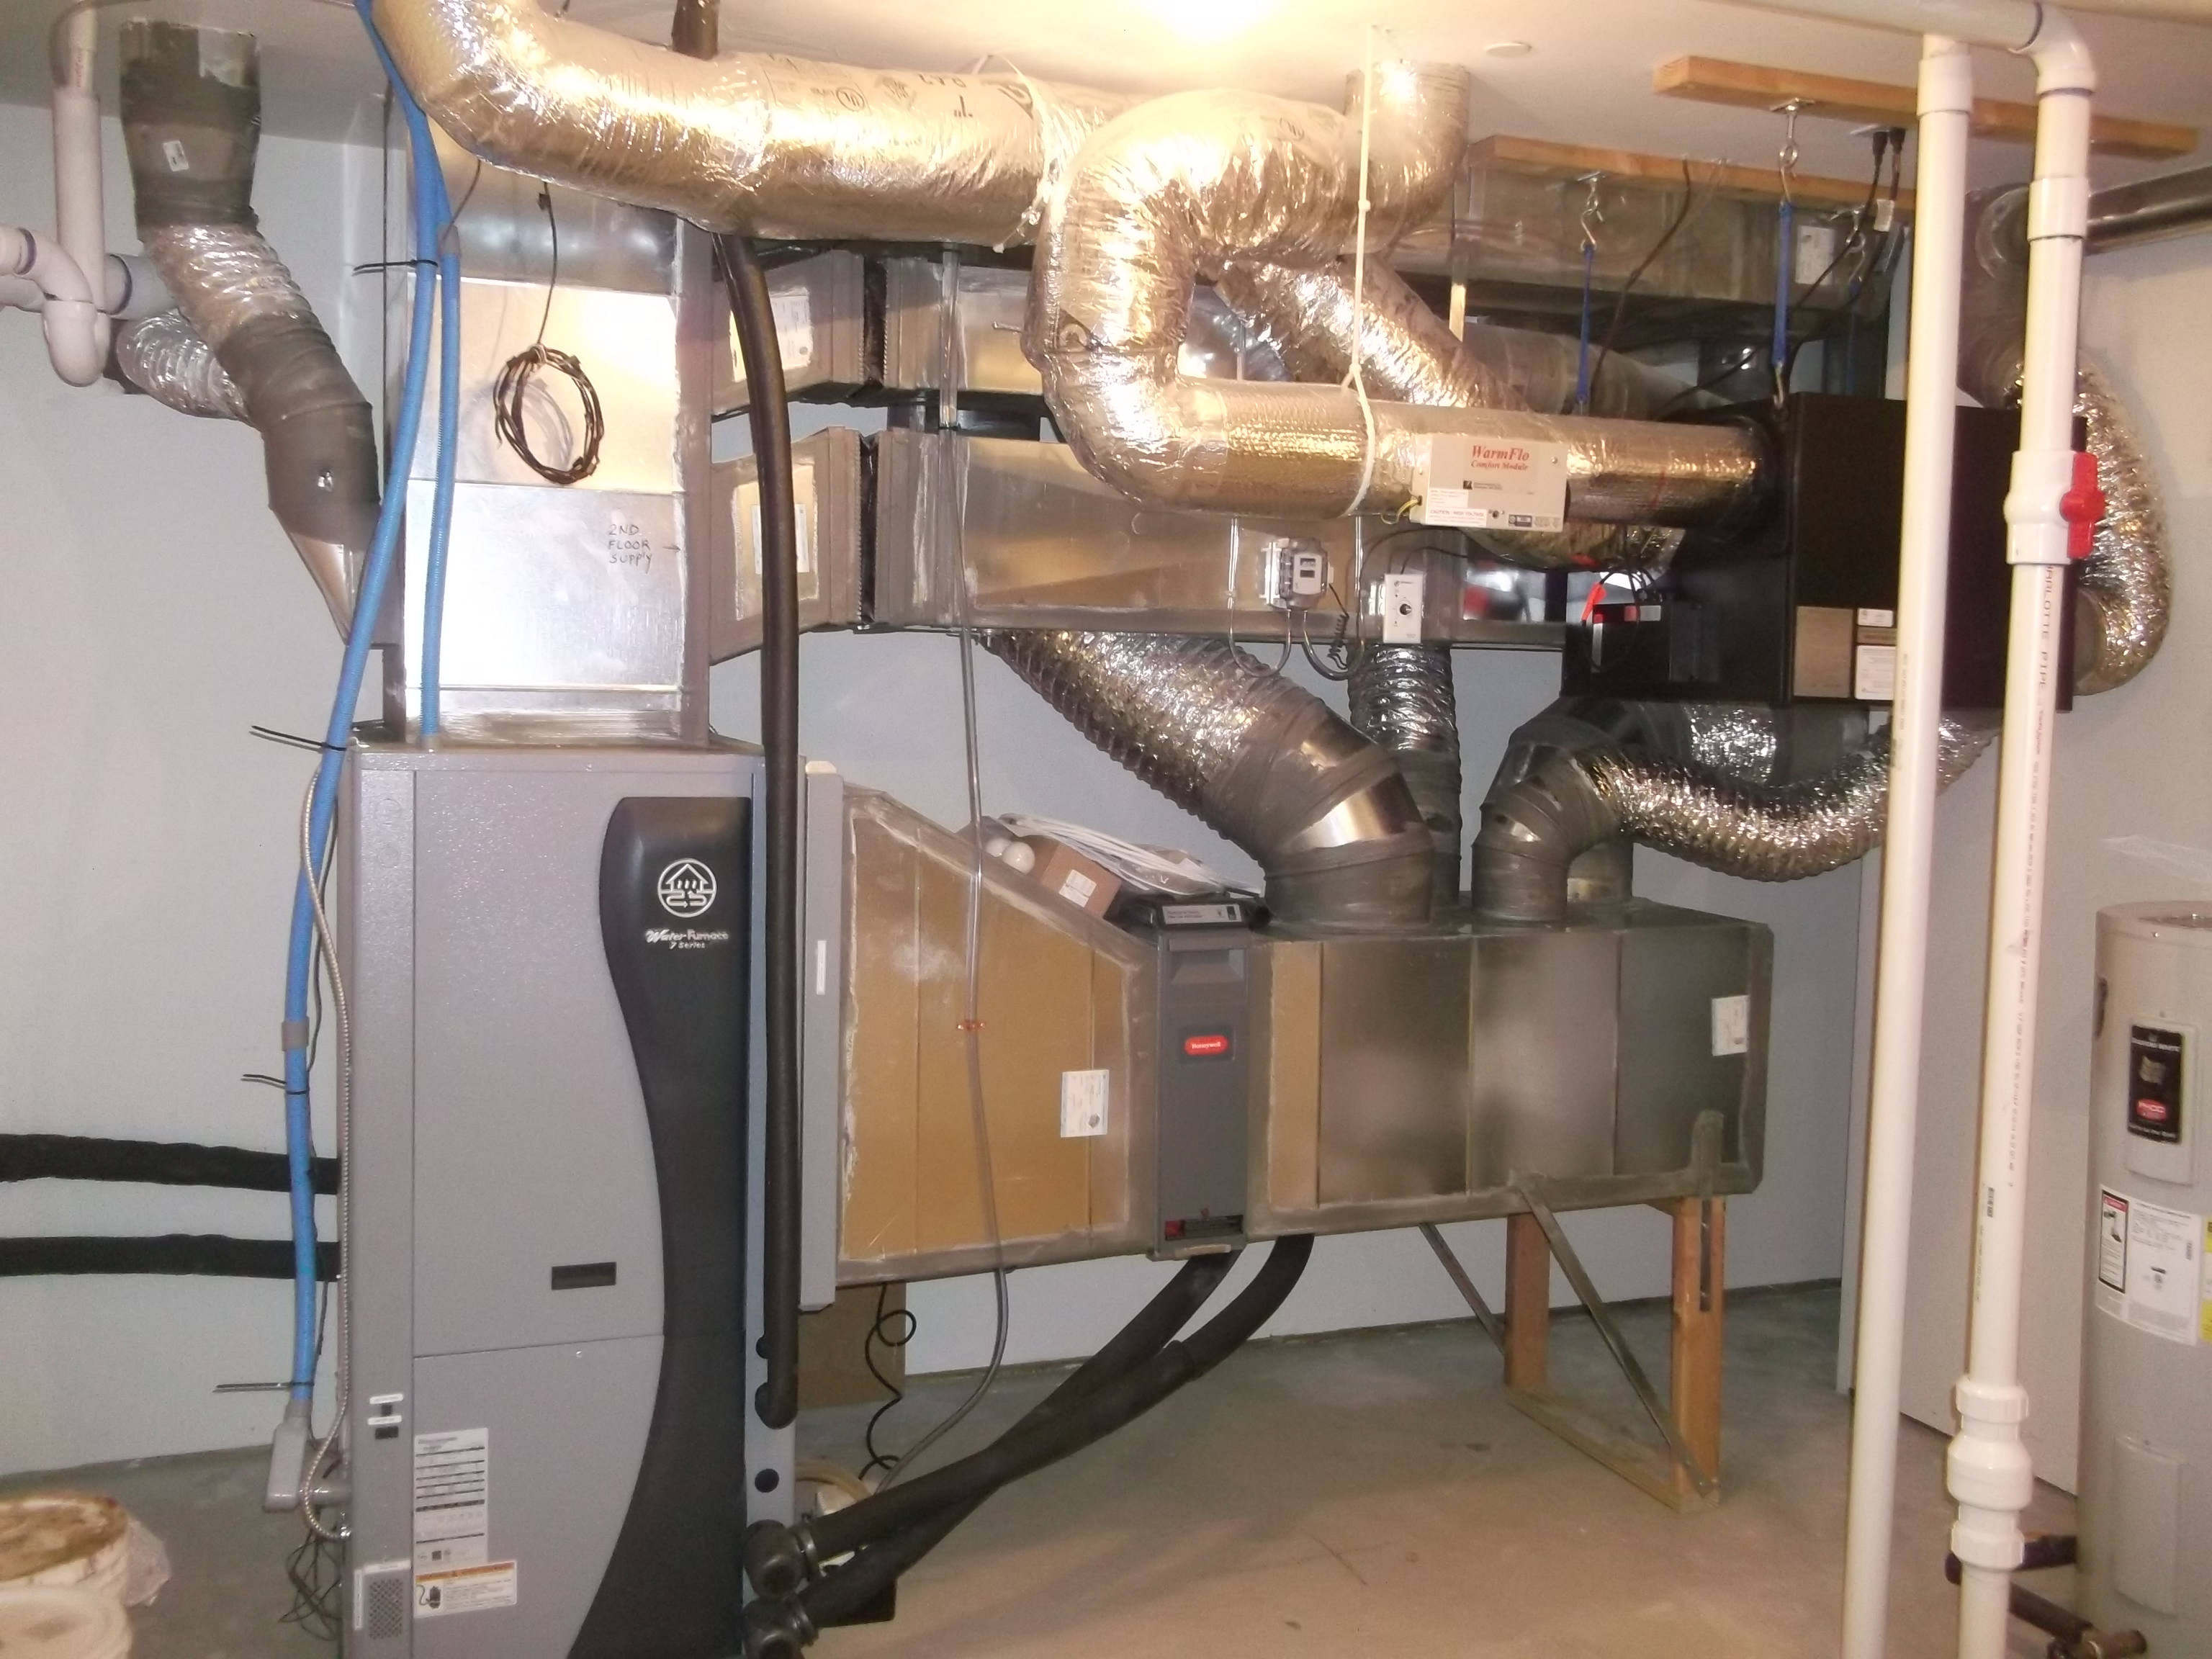
Right - An ultra-efficient (COP 5.7) ground source heat pump provides hot water to an air coil in the central air handler which uses a variable-speed electrically commutated fan motor to distribute conditioned air to the home’s ducts.
Image
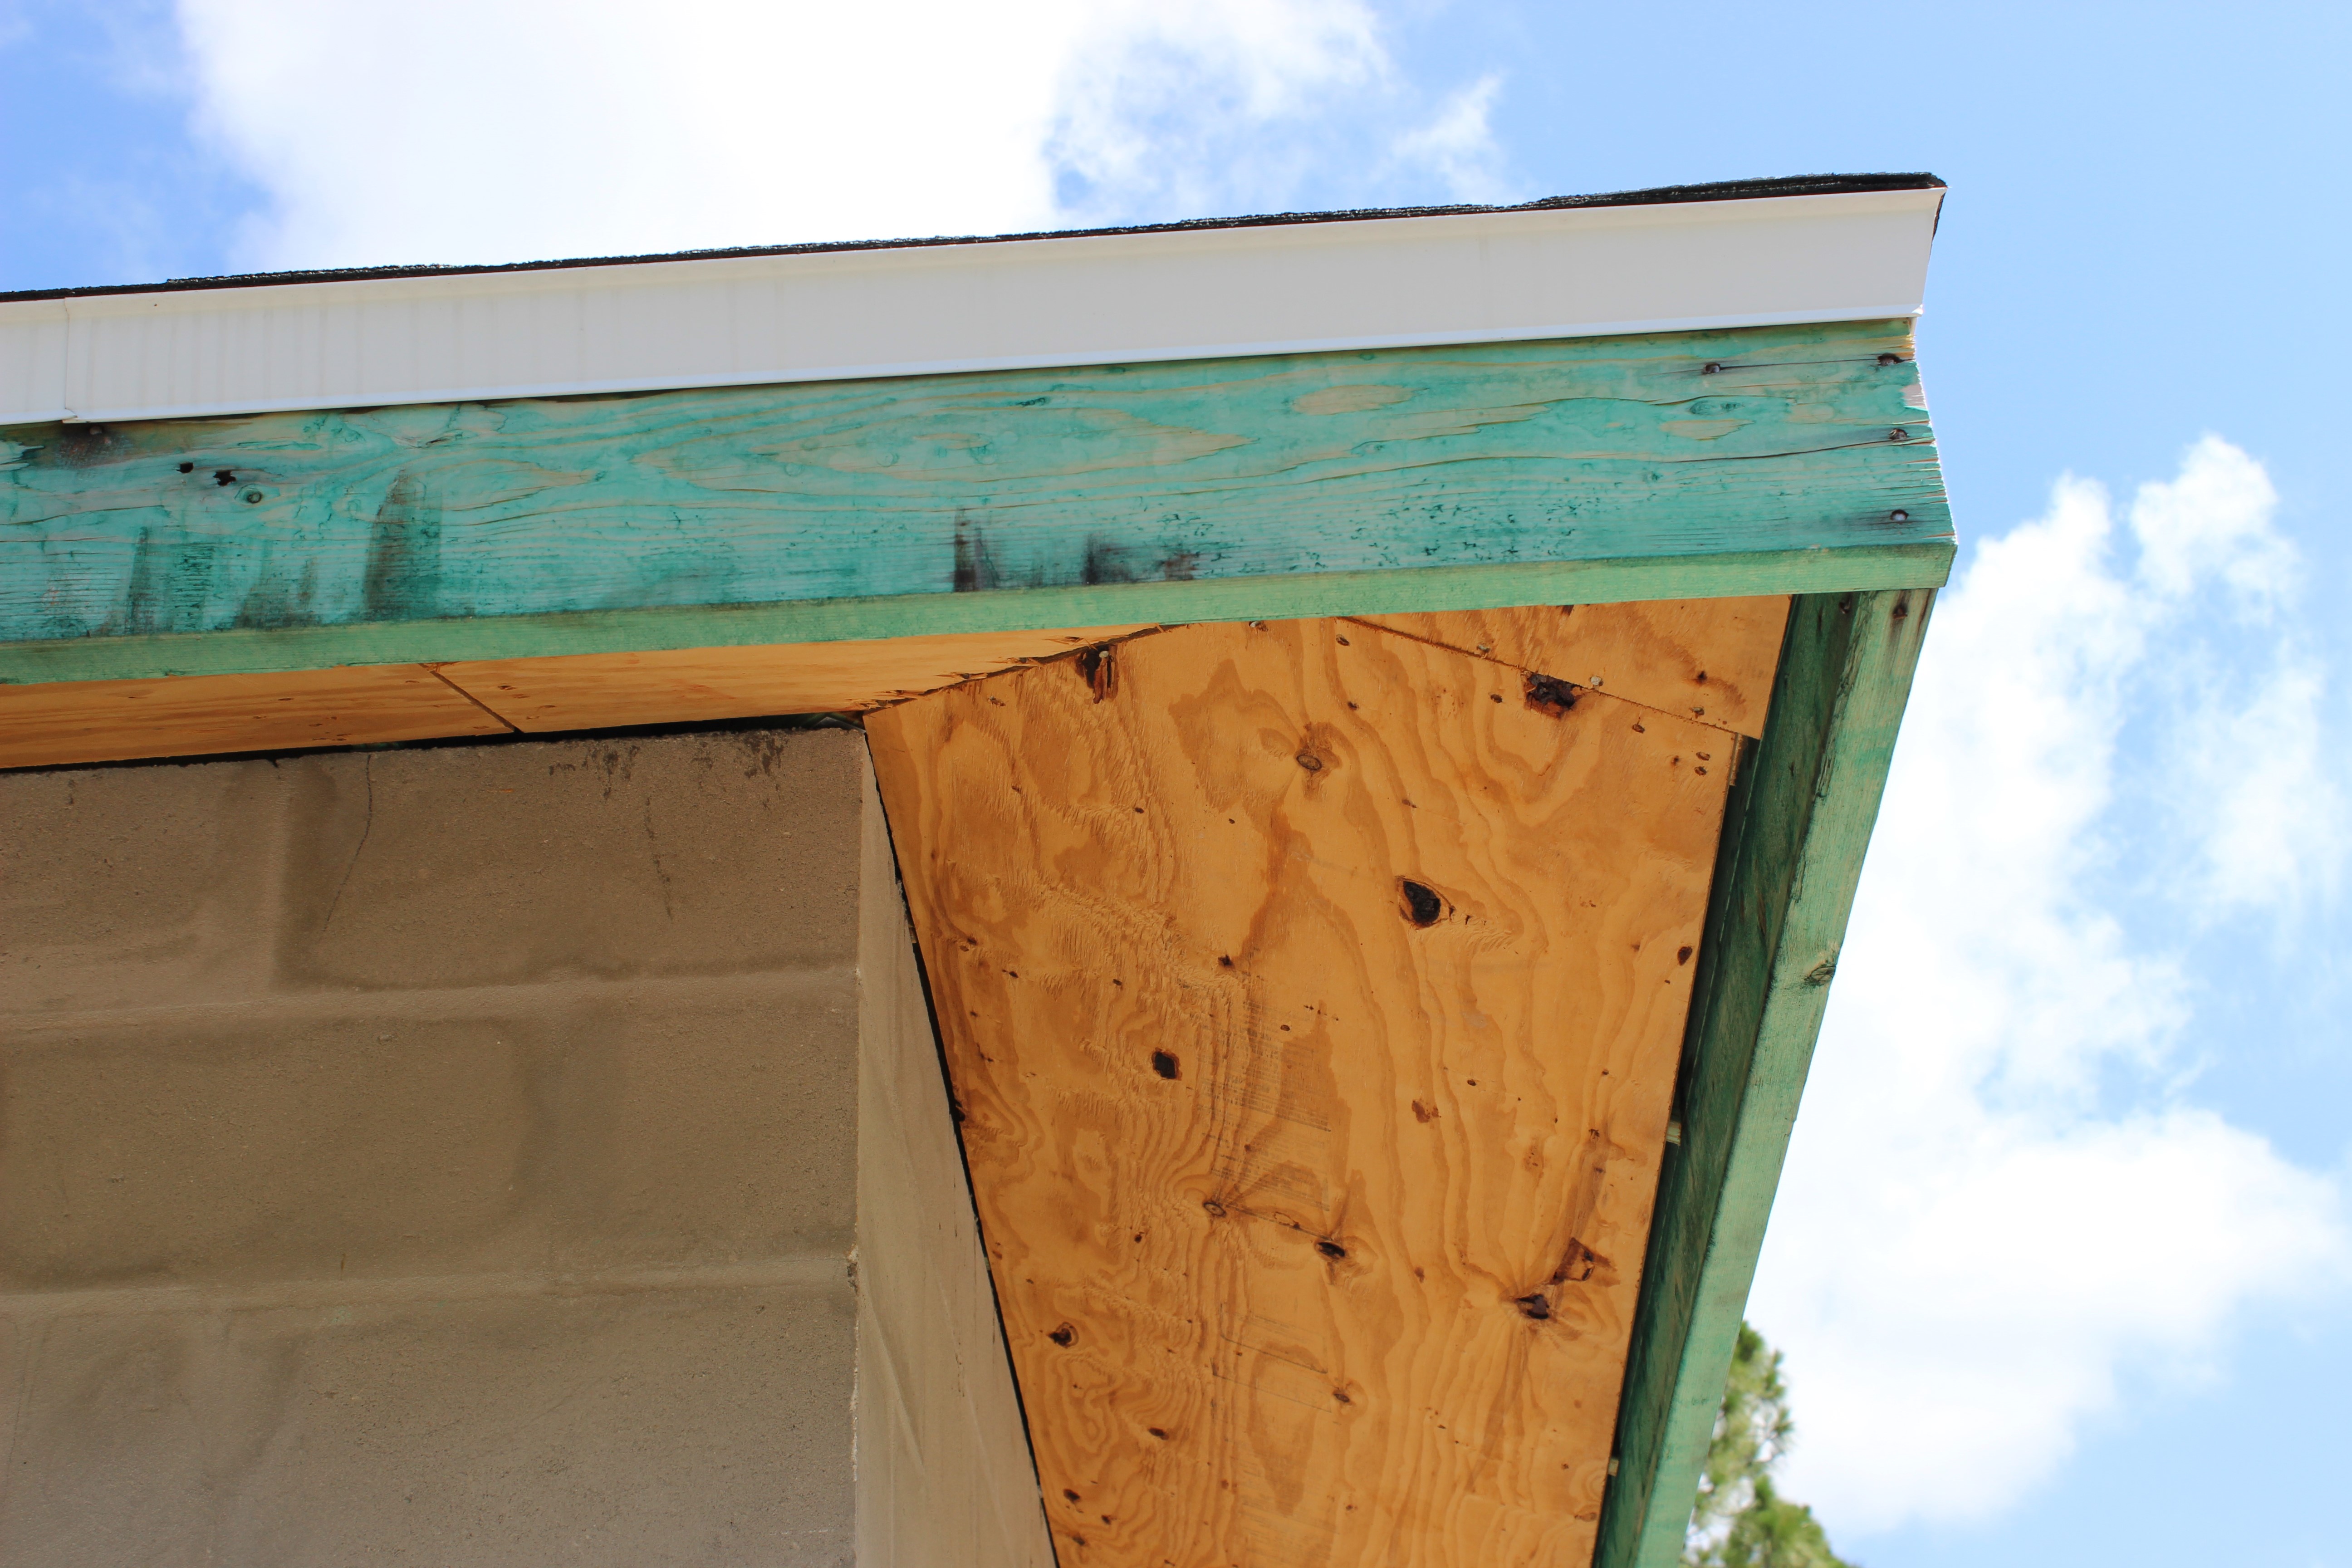
Right - An unvented attic with no soffit vents, borate-treated fascia board, metal drip edge, and concrete block construction on this south Florida home help make it resistant to hurricanes, pests, and wind-born wildfire embers.
Image
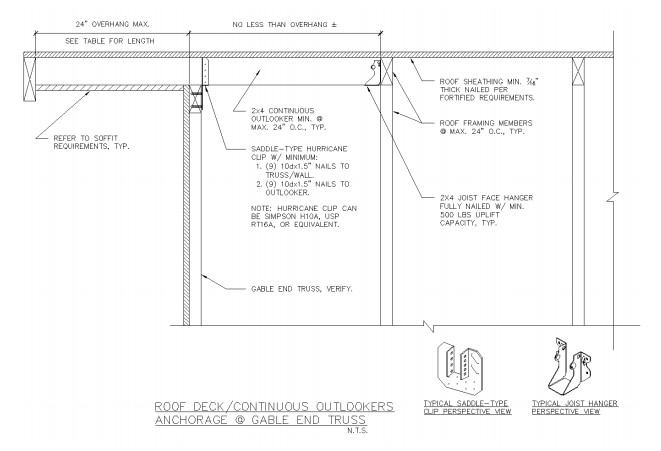
Right - Anchorage to increase the wind uplift resistance of outlookers forming the overhang at a gable end truss wall.
Image
Image
Right - Attach exterior insulation with insulation washers and tape the seams of the insulation is used as an air barrier.
Image
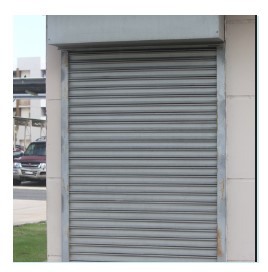
Right - Automatic metal roller shutters are always in place and can be electronically or manually opened and closed.
Image
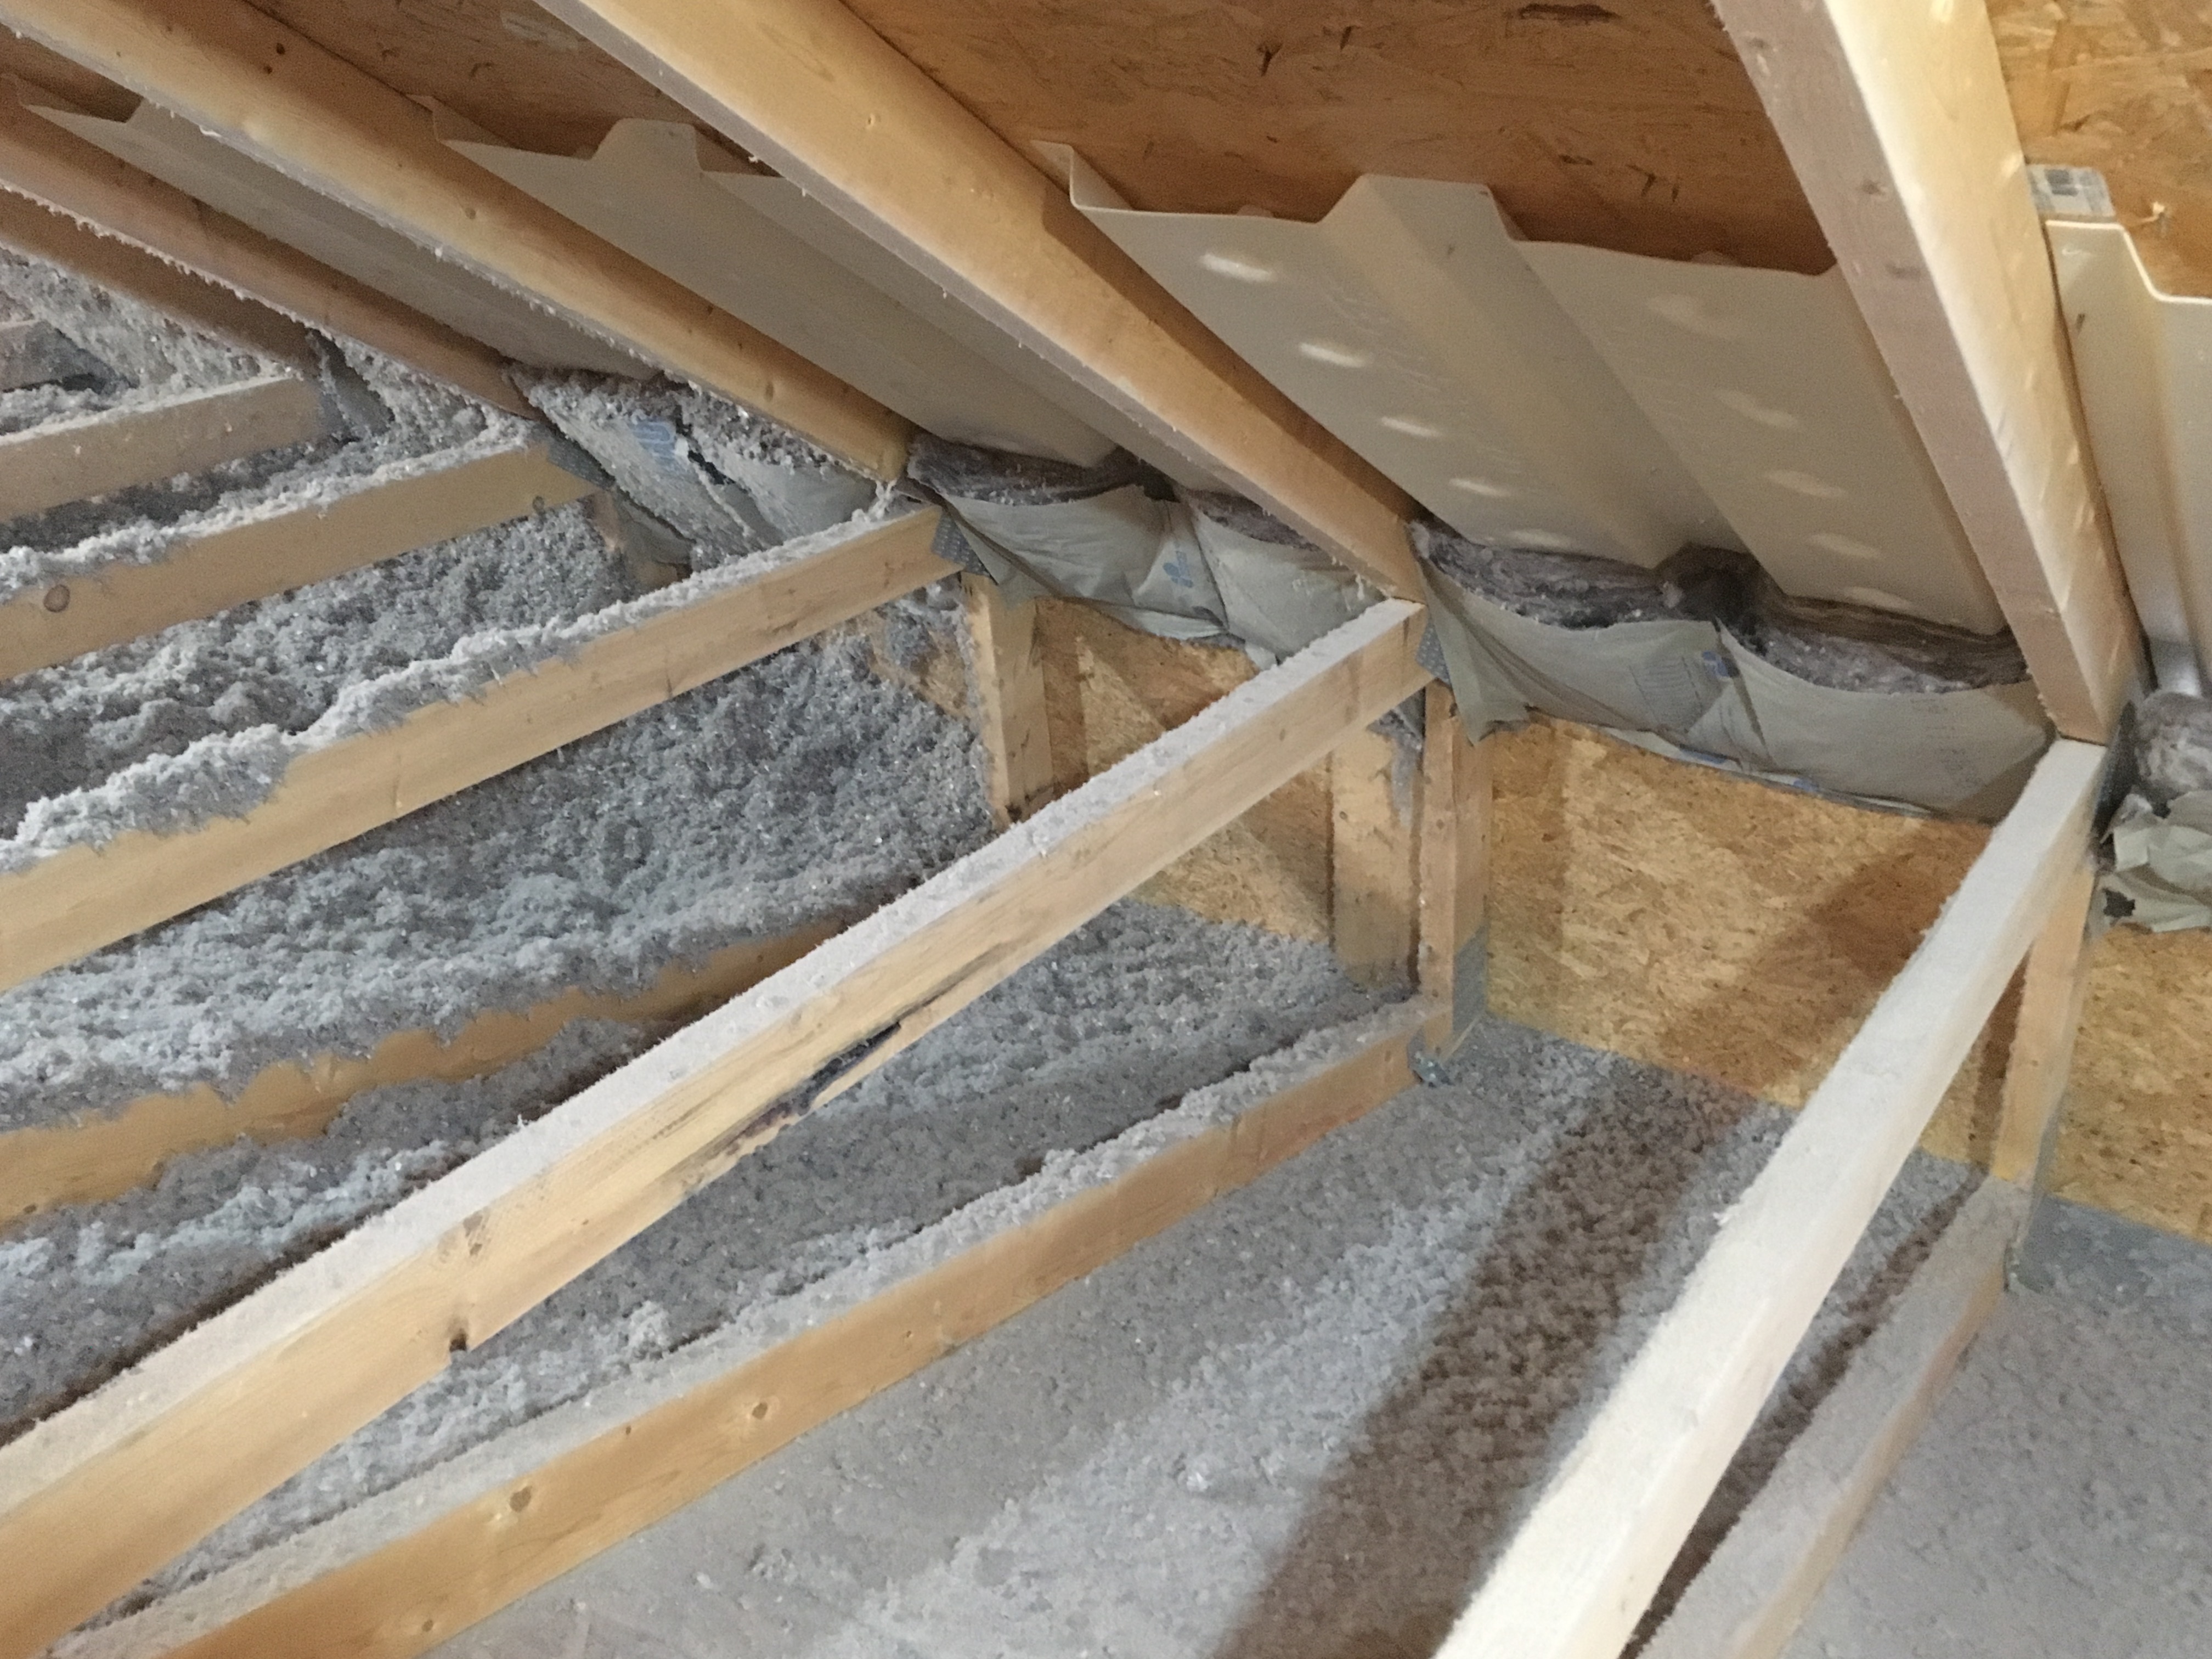
Right - Baffles above the raised heel trusses and wind dams behind the trusses will keep wind from blowing the cellulose insulation away from the eaves.
Image

Right - Baffles are installed in attic to keep blown insulation from blocking soffit vents and ventilation path
Image
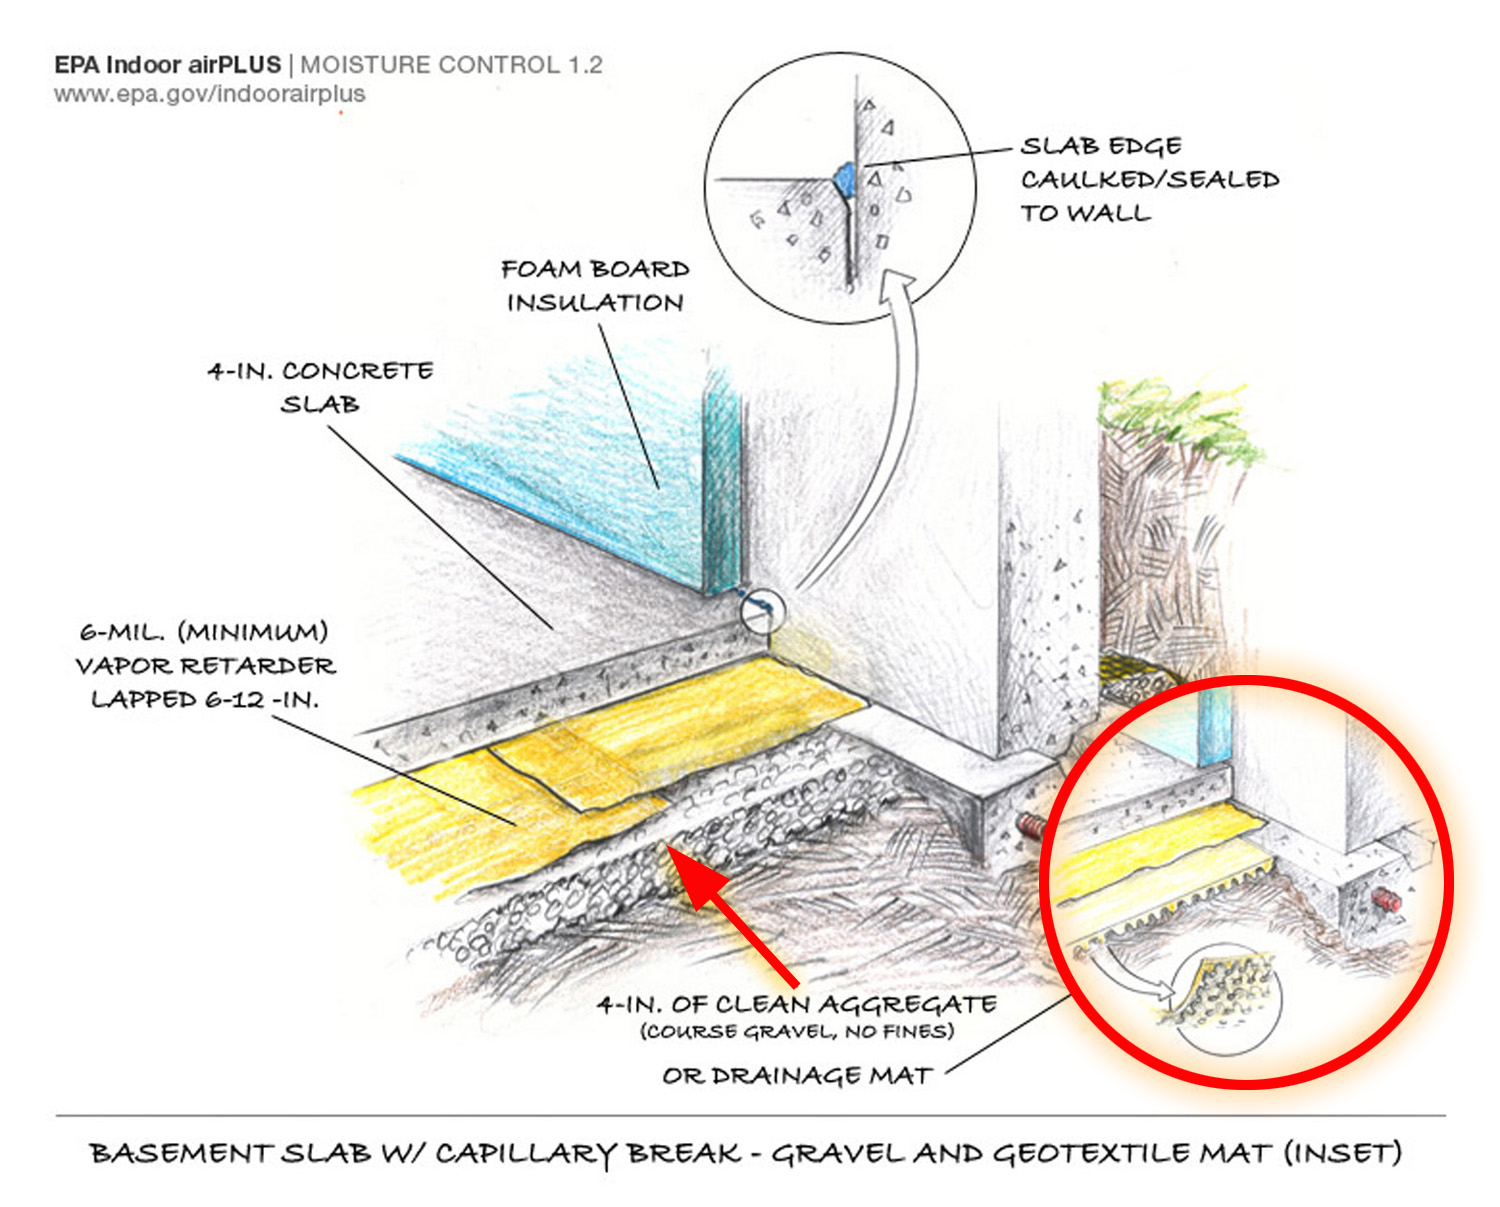
Right - Basement slab with a capillary break of either gravel or a drainage mat.
Image
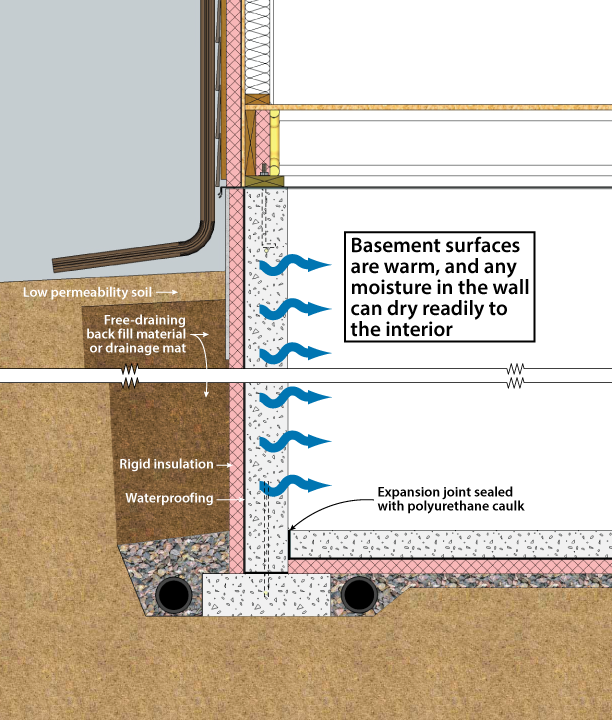
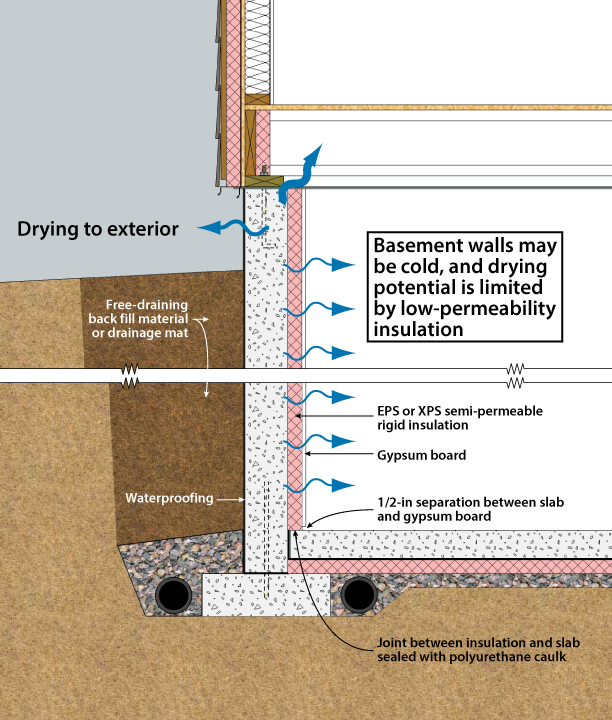
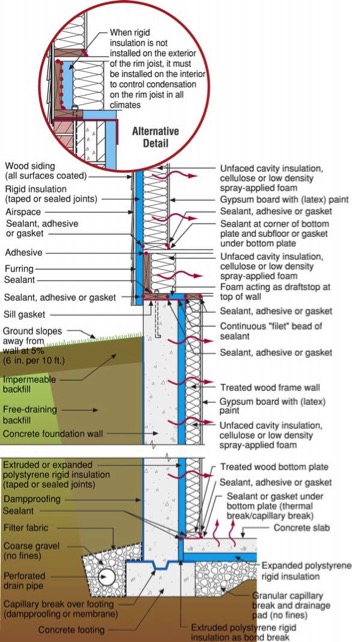
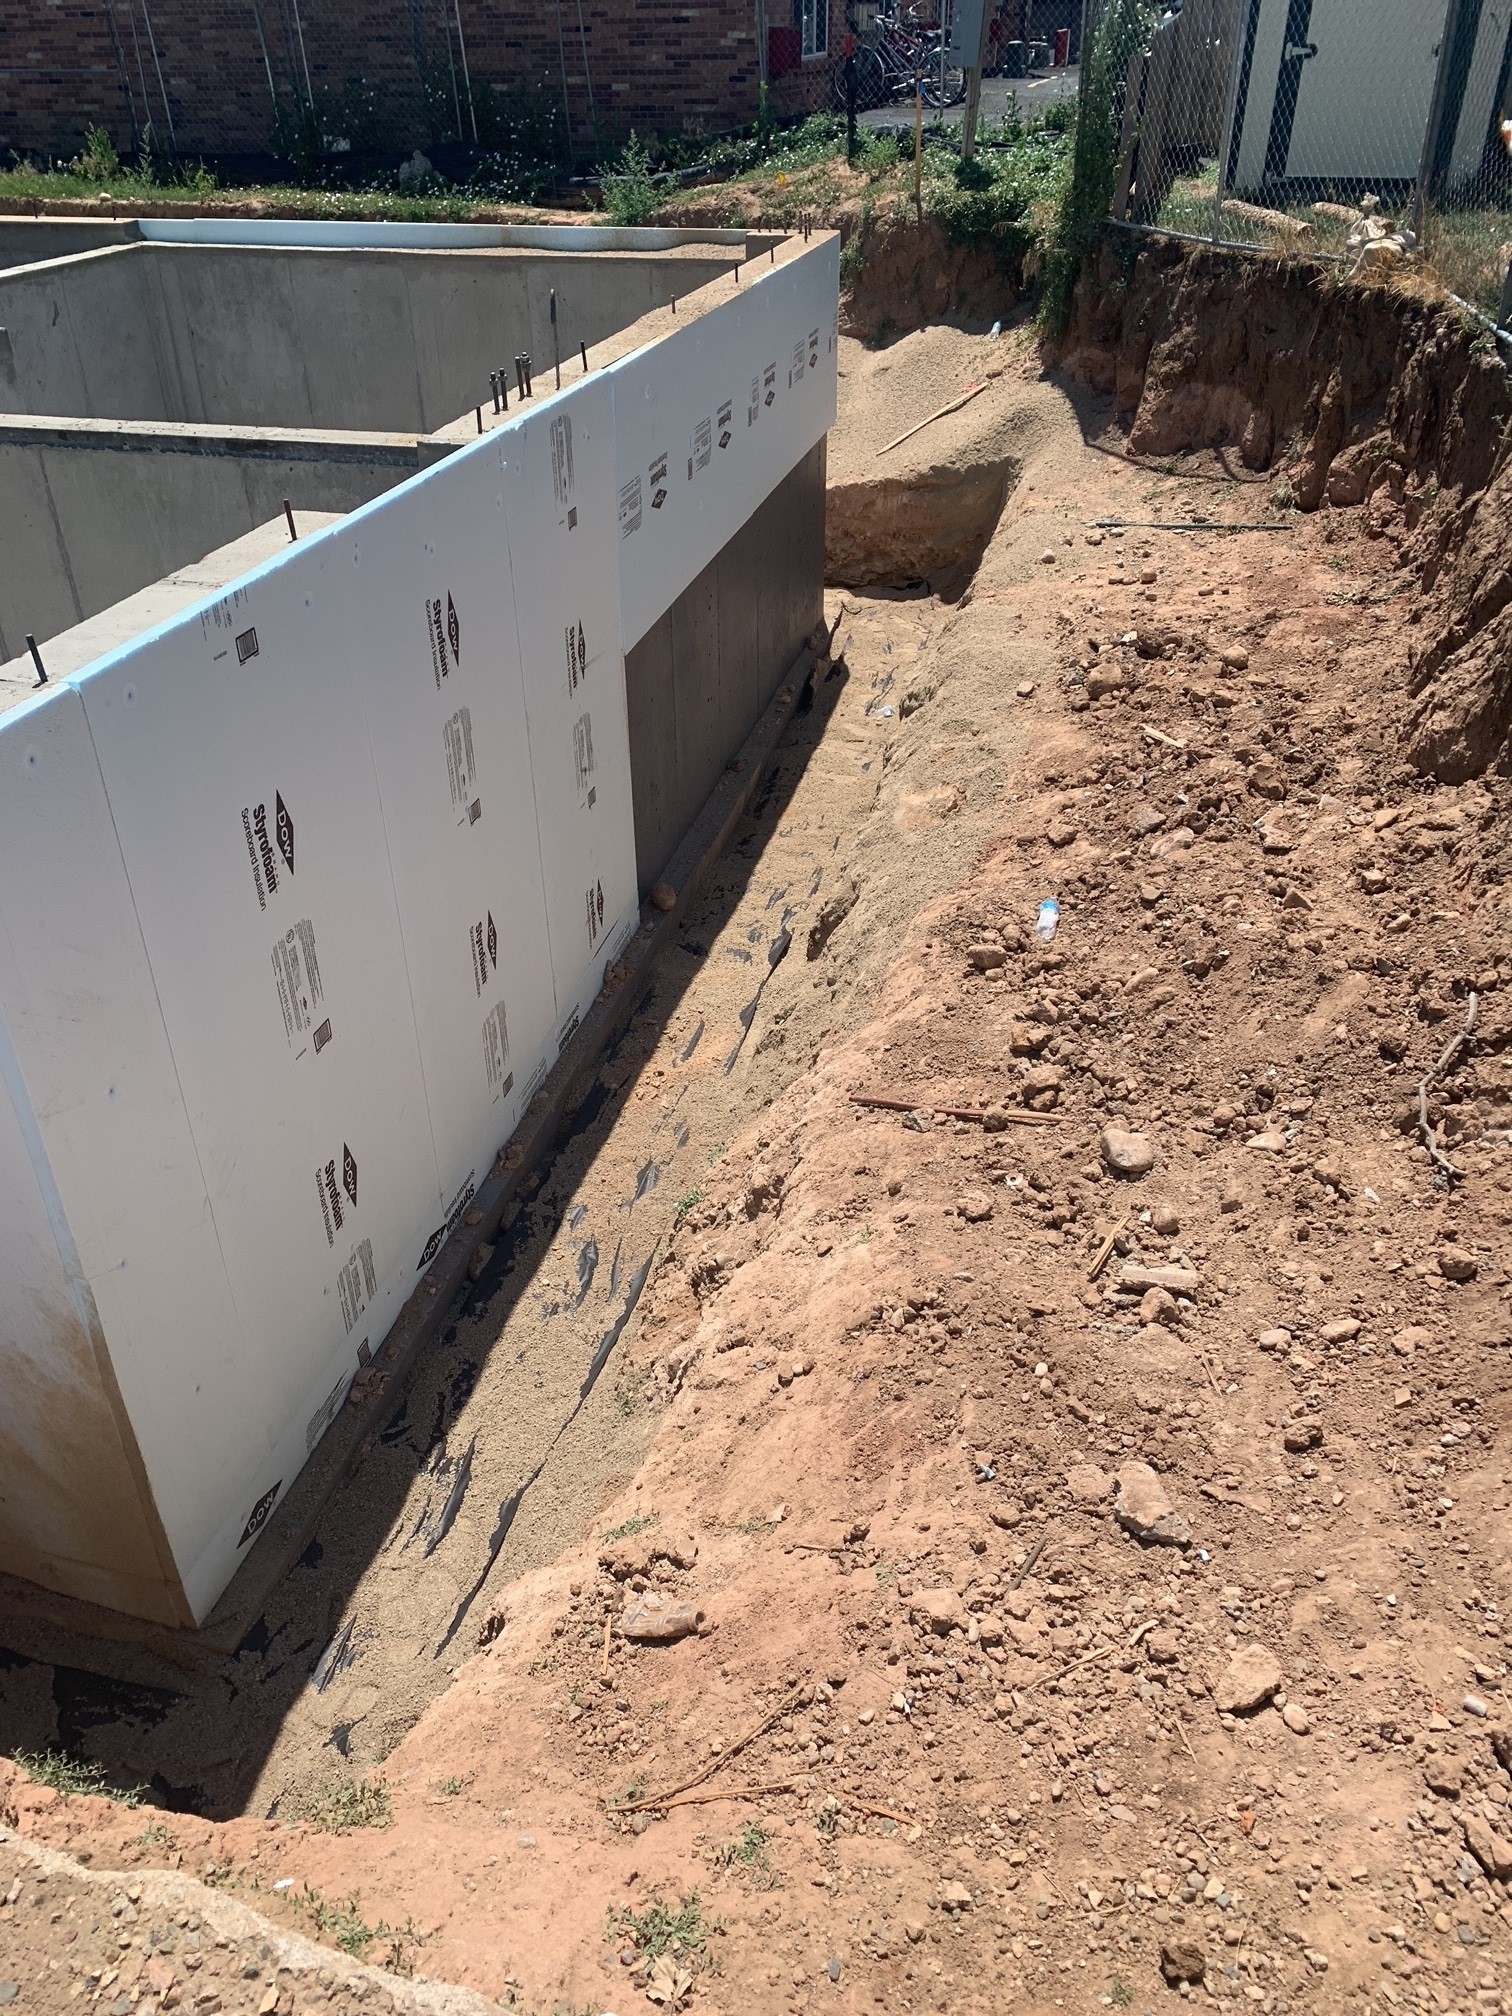
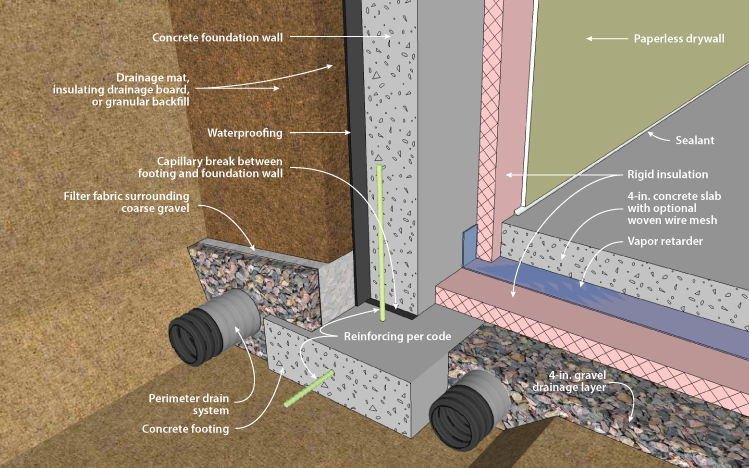
Right - Basement with exterior XPS or EPS insulation and insulation under the basement slab.
Image
Image
Image
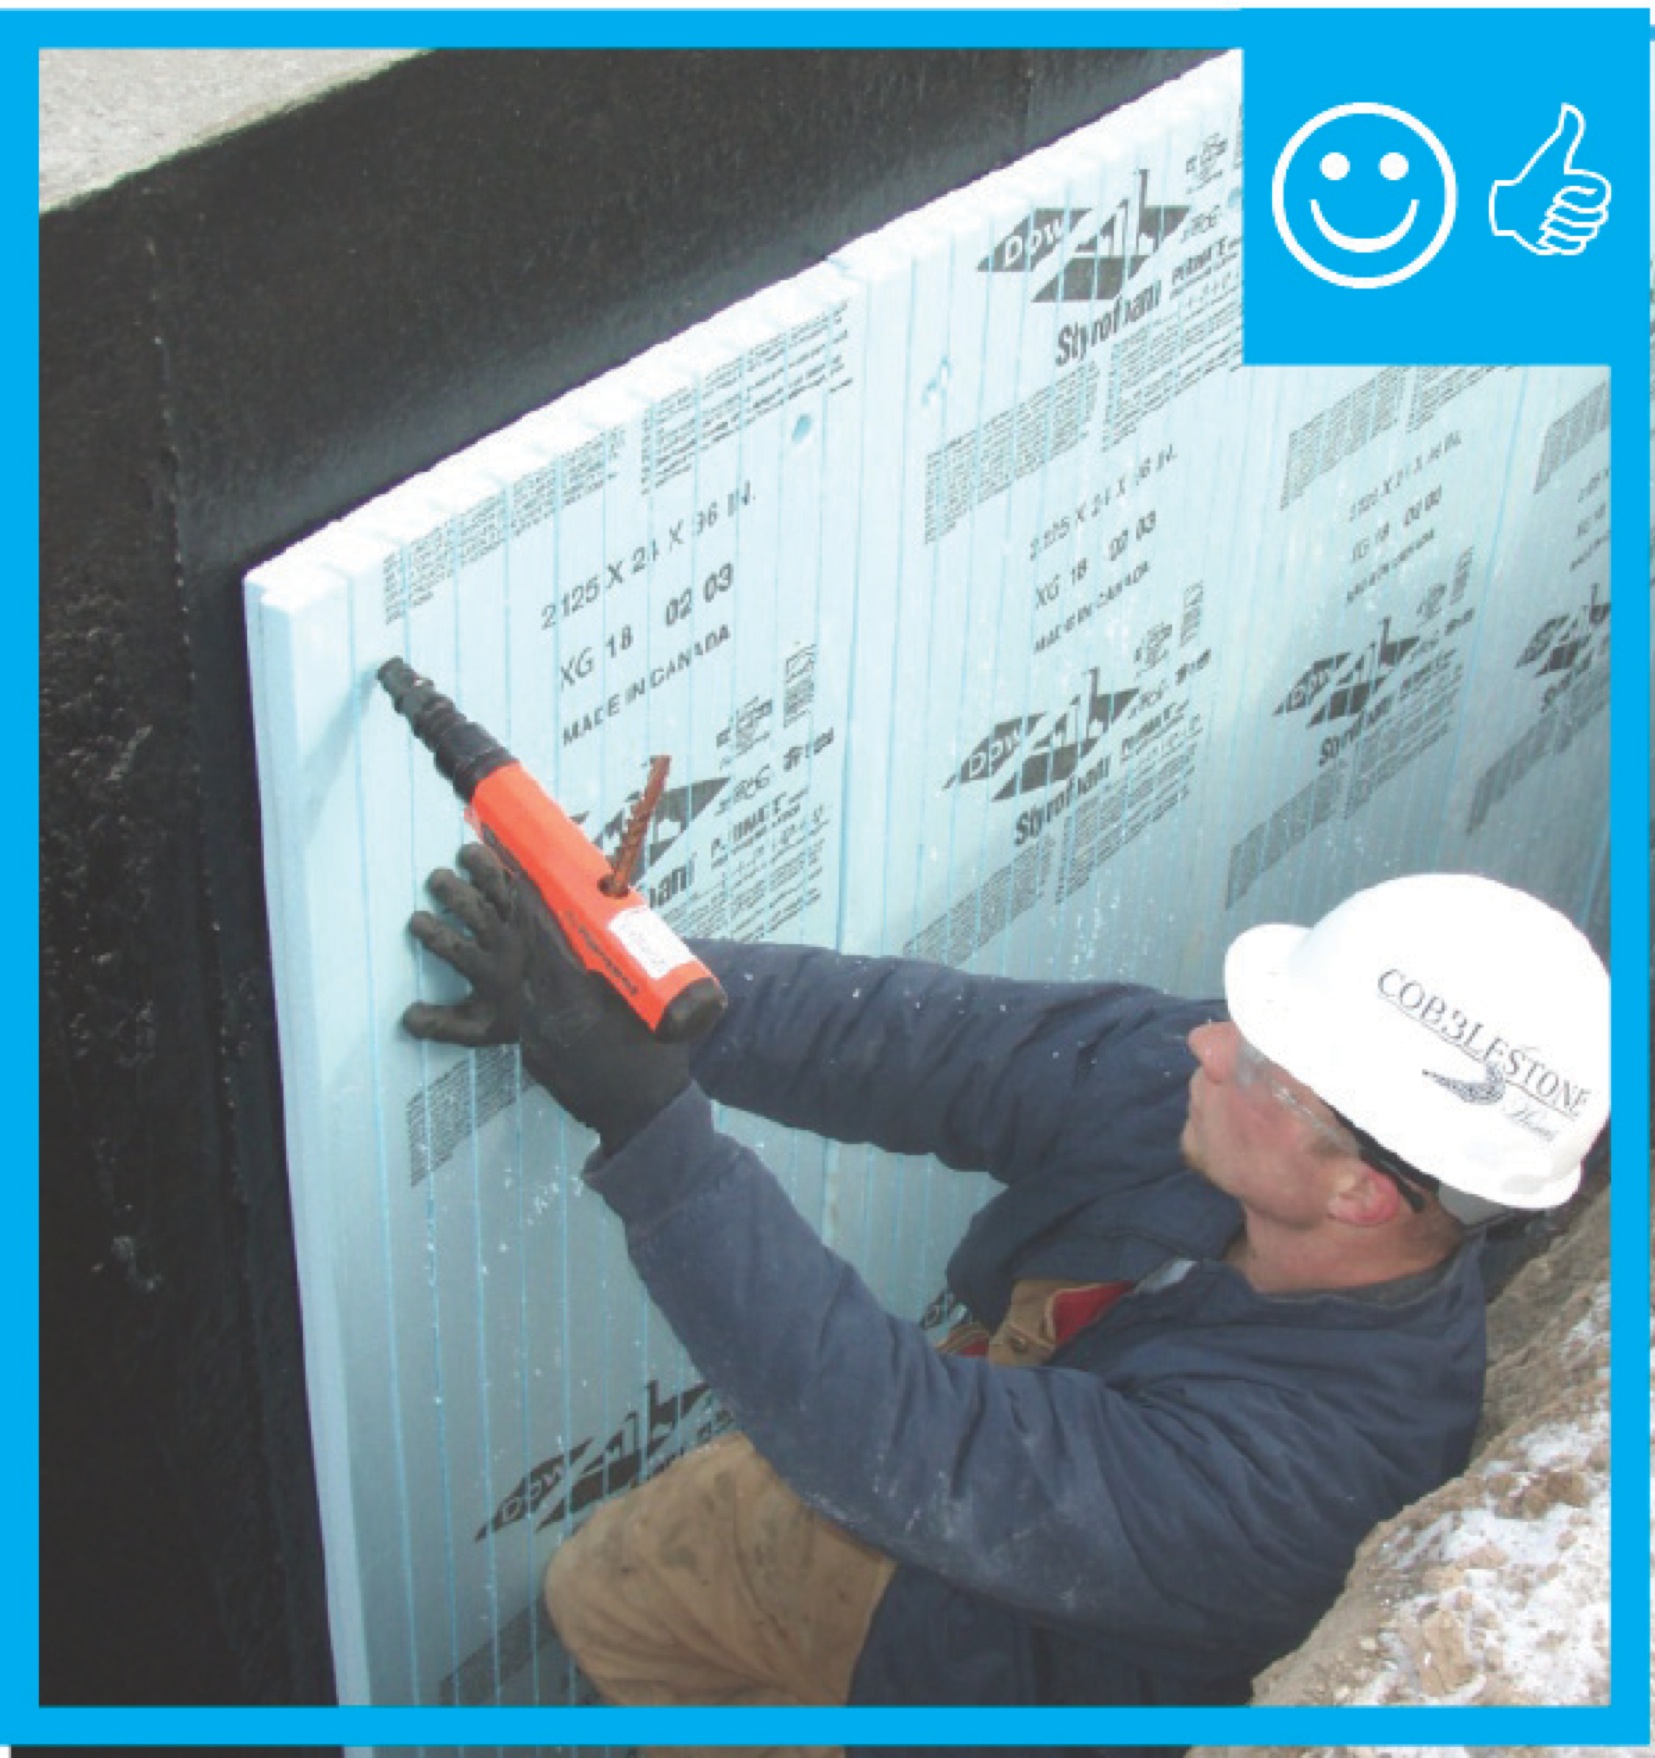
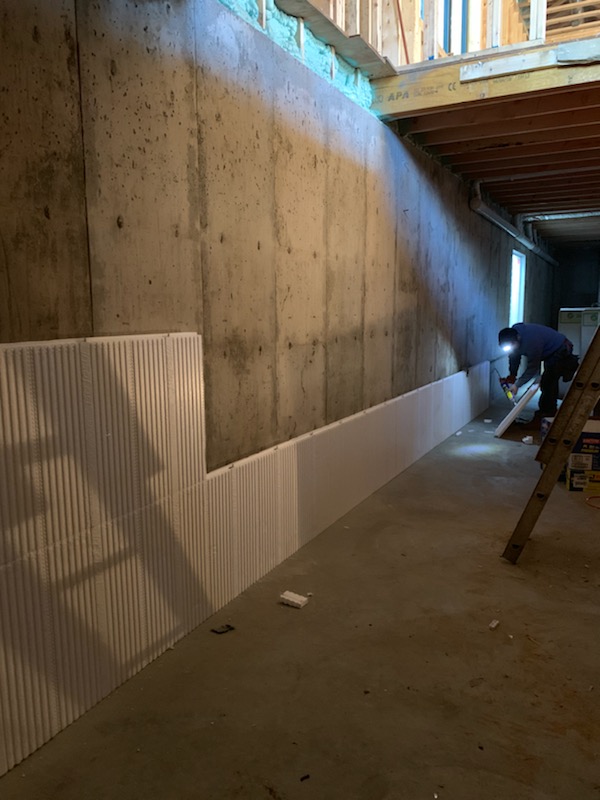
Right - Below-grade concrete has been properly sealed against moisture and is now having insulation installed.
Image
Right - Blocking has been installed between the ceiling joists and air sealed in place with canned spray foam to stop air flow beneath the attic knee wall.
Image

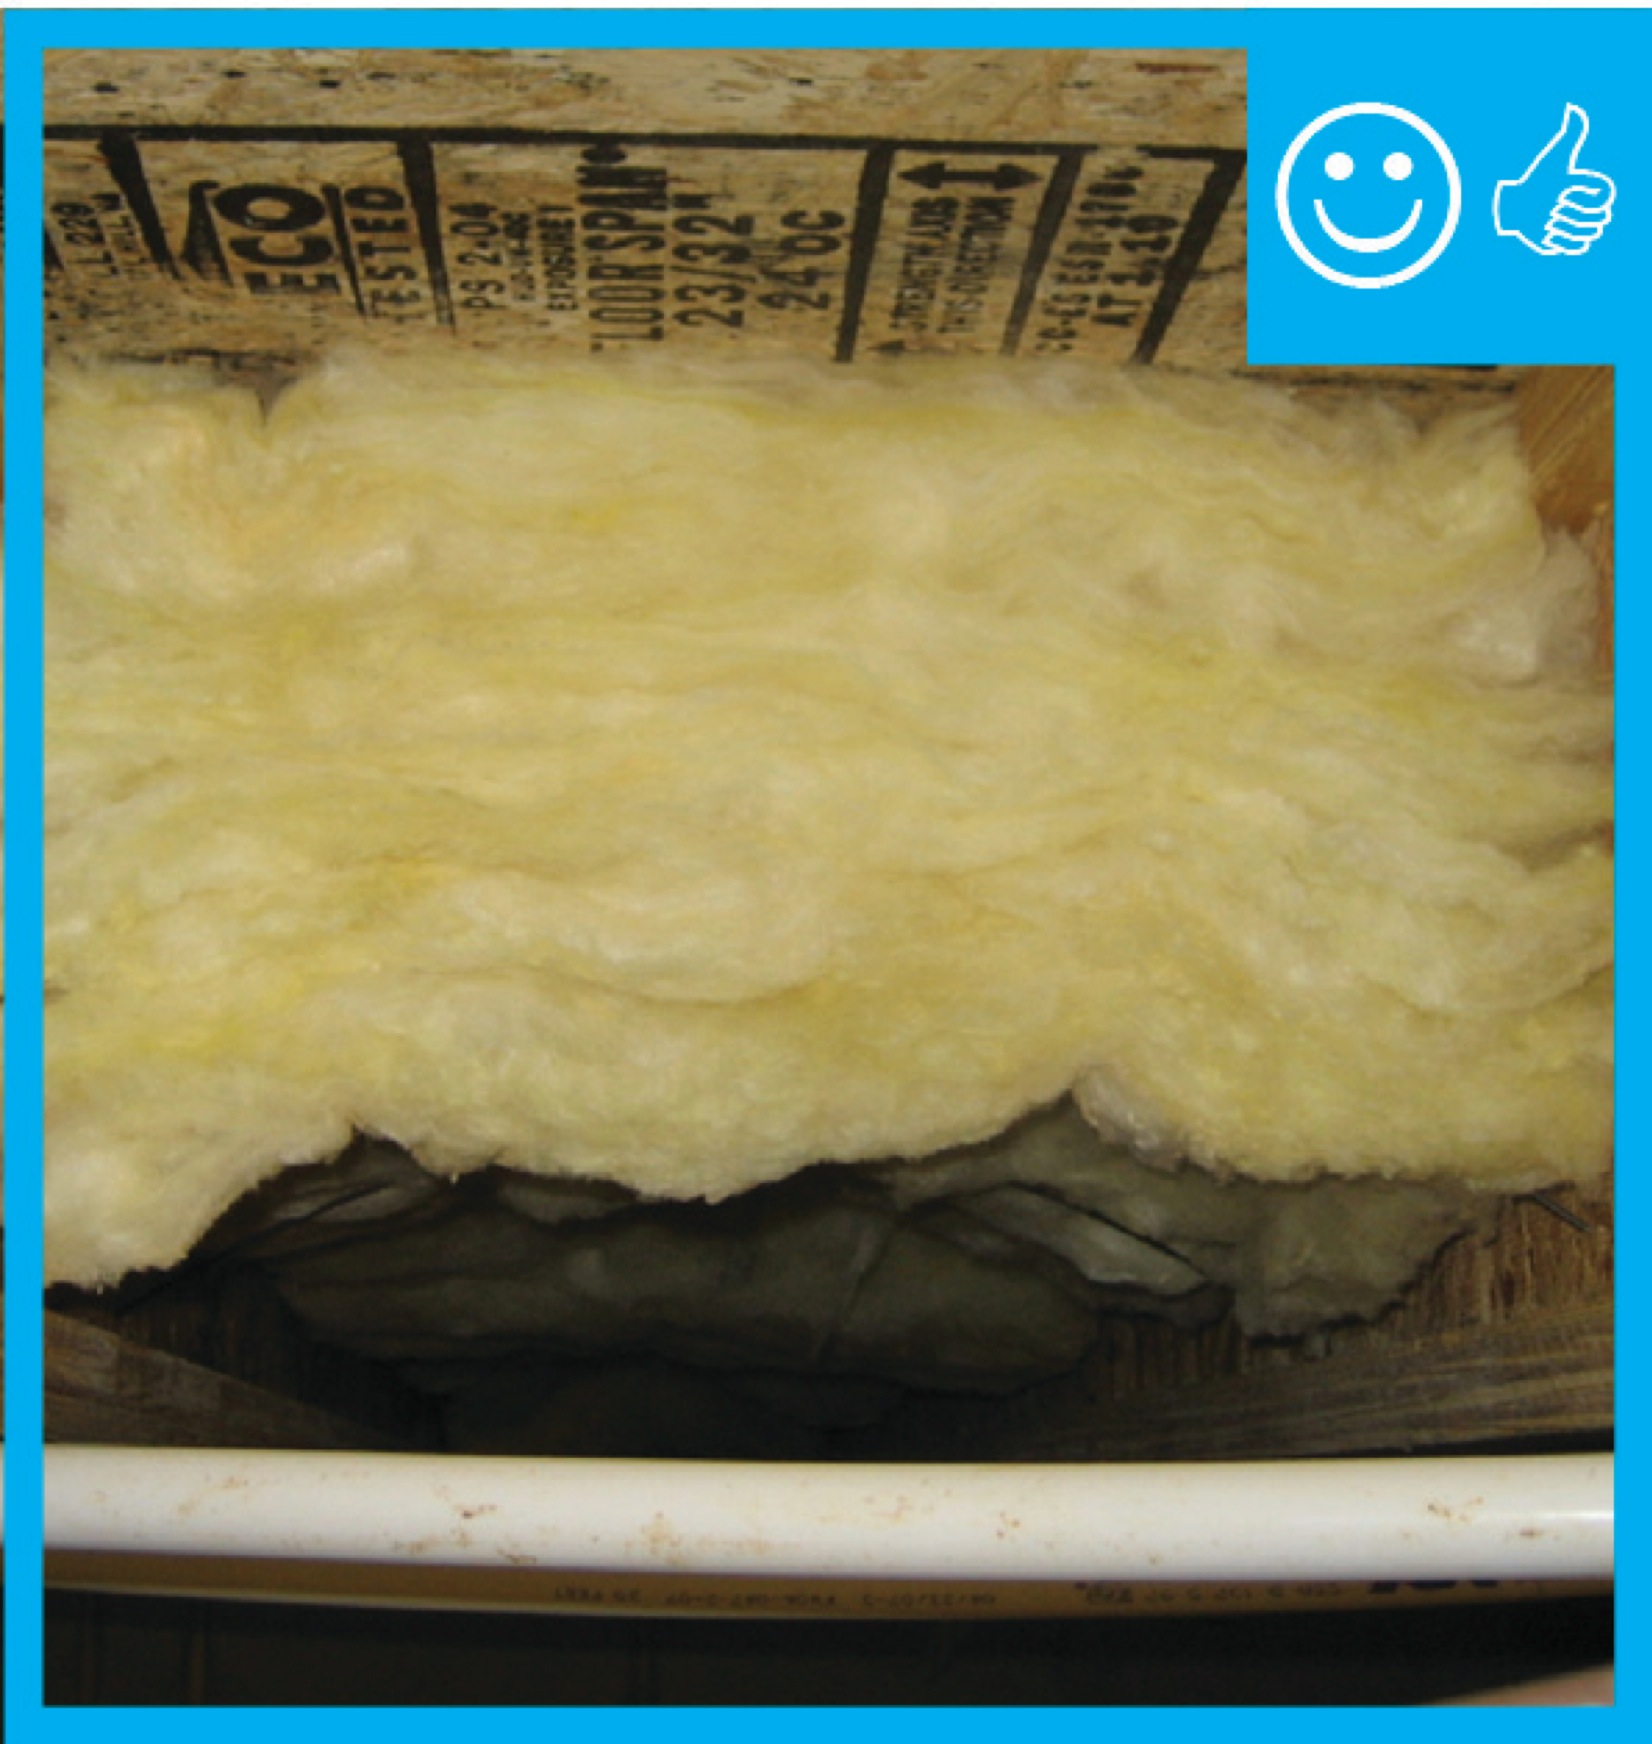
Right - Blown insulation in existing attic provides even coverage completely filling the attic space to a depth that covers the ceiling joists.
Image

Right - Braced wall line spacing is correctly calculated for determining wall bracing in accordance with the IRC.
Image
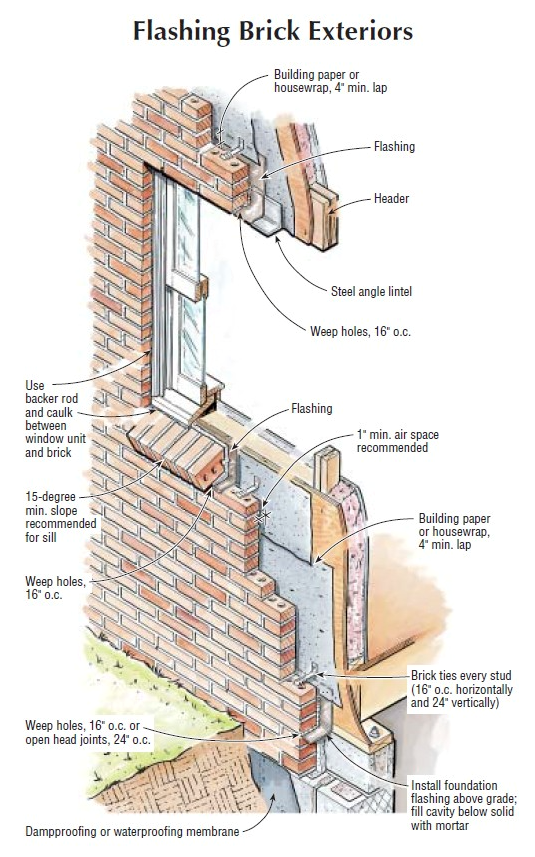
Right - Brick veneer is installed with a 1-inch air space behind the brick, metal flashing and weep holes above and below the windows and at the base of the wall to direct out water that gets behind the brick.
Image
Right - Closed-cell spray foam covers the ceiling and joists to insulate and air-seal the ceiling deck.
Image
Right - Closed-cell spray foam covers the interior of the foundation wall and wall framing is placed to the inside of the spray foam.
Image

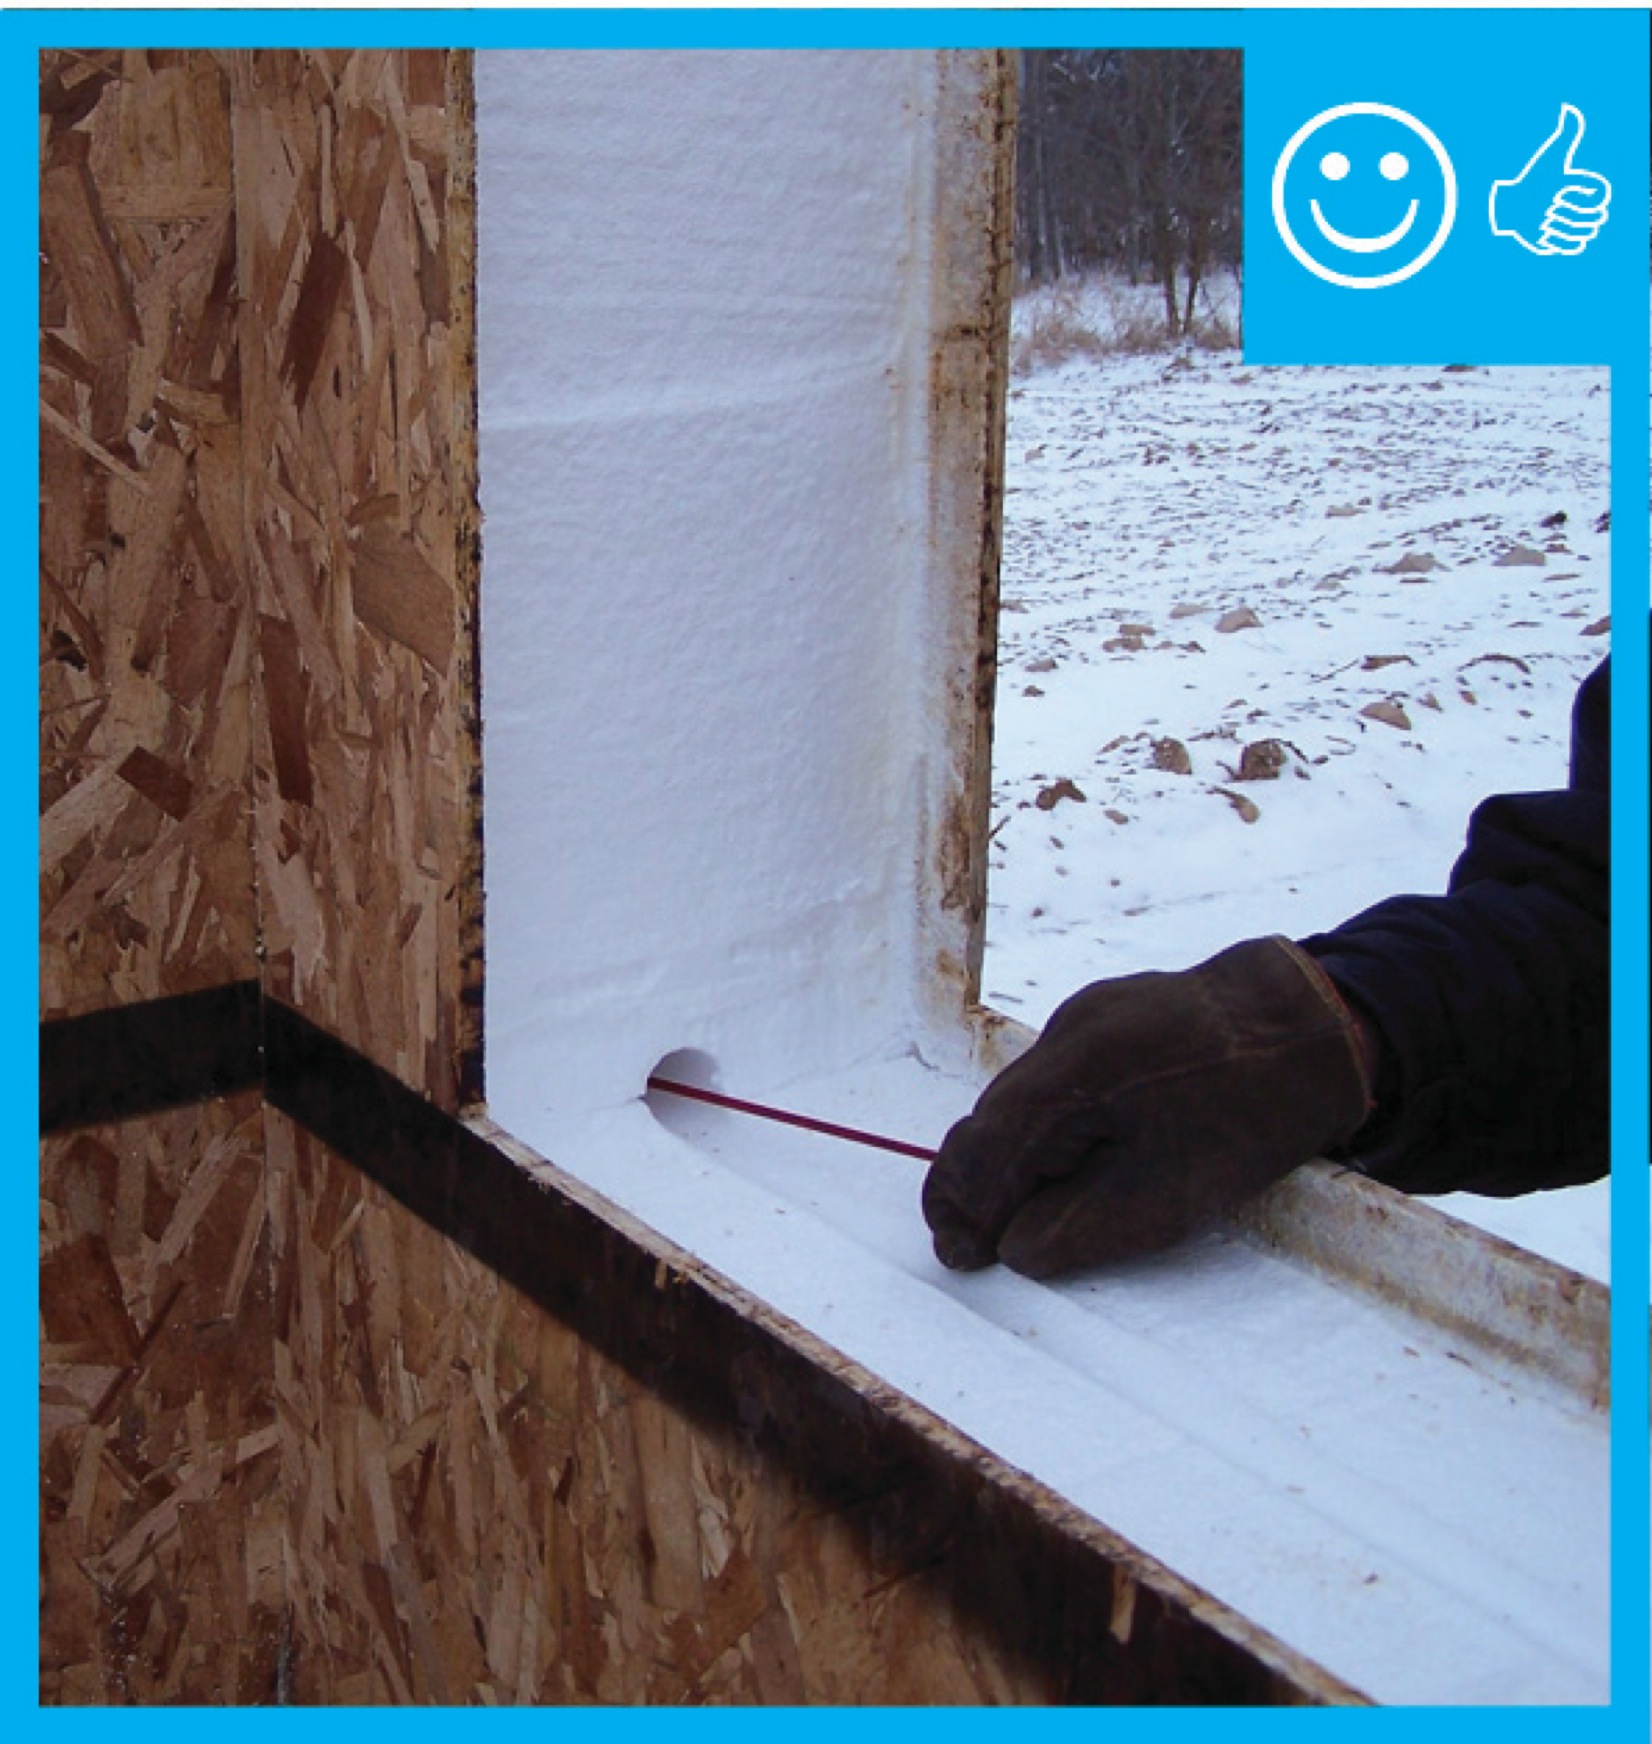
Right - Closed-cell spray foam insulation fills the wall cavities of the exterior walls in this home retrofit
Image

Right - Closed-cell spray foam is installed as a skim coat to provide air tightness to an exterior wall cavity before installing batt or blown cavity insulation.
Image
Right - Closed-cell spray foam is used to retrofit an existing rubble basement foundation wall.
Image
Right - Closed-cell spray foam was applied to the interior of a foundation wall.
Image
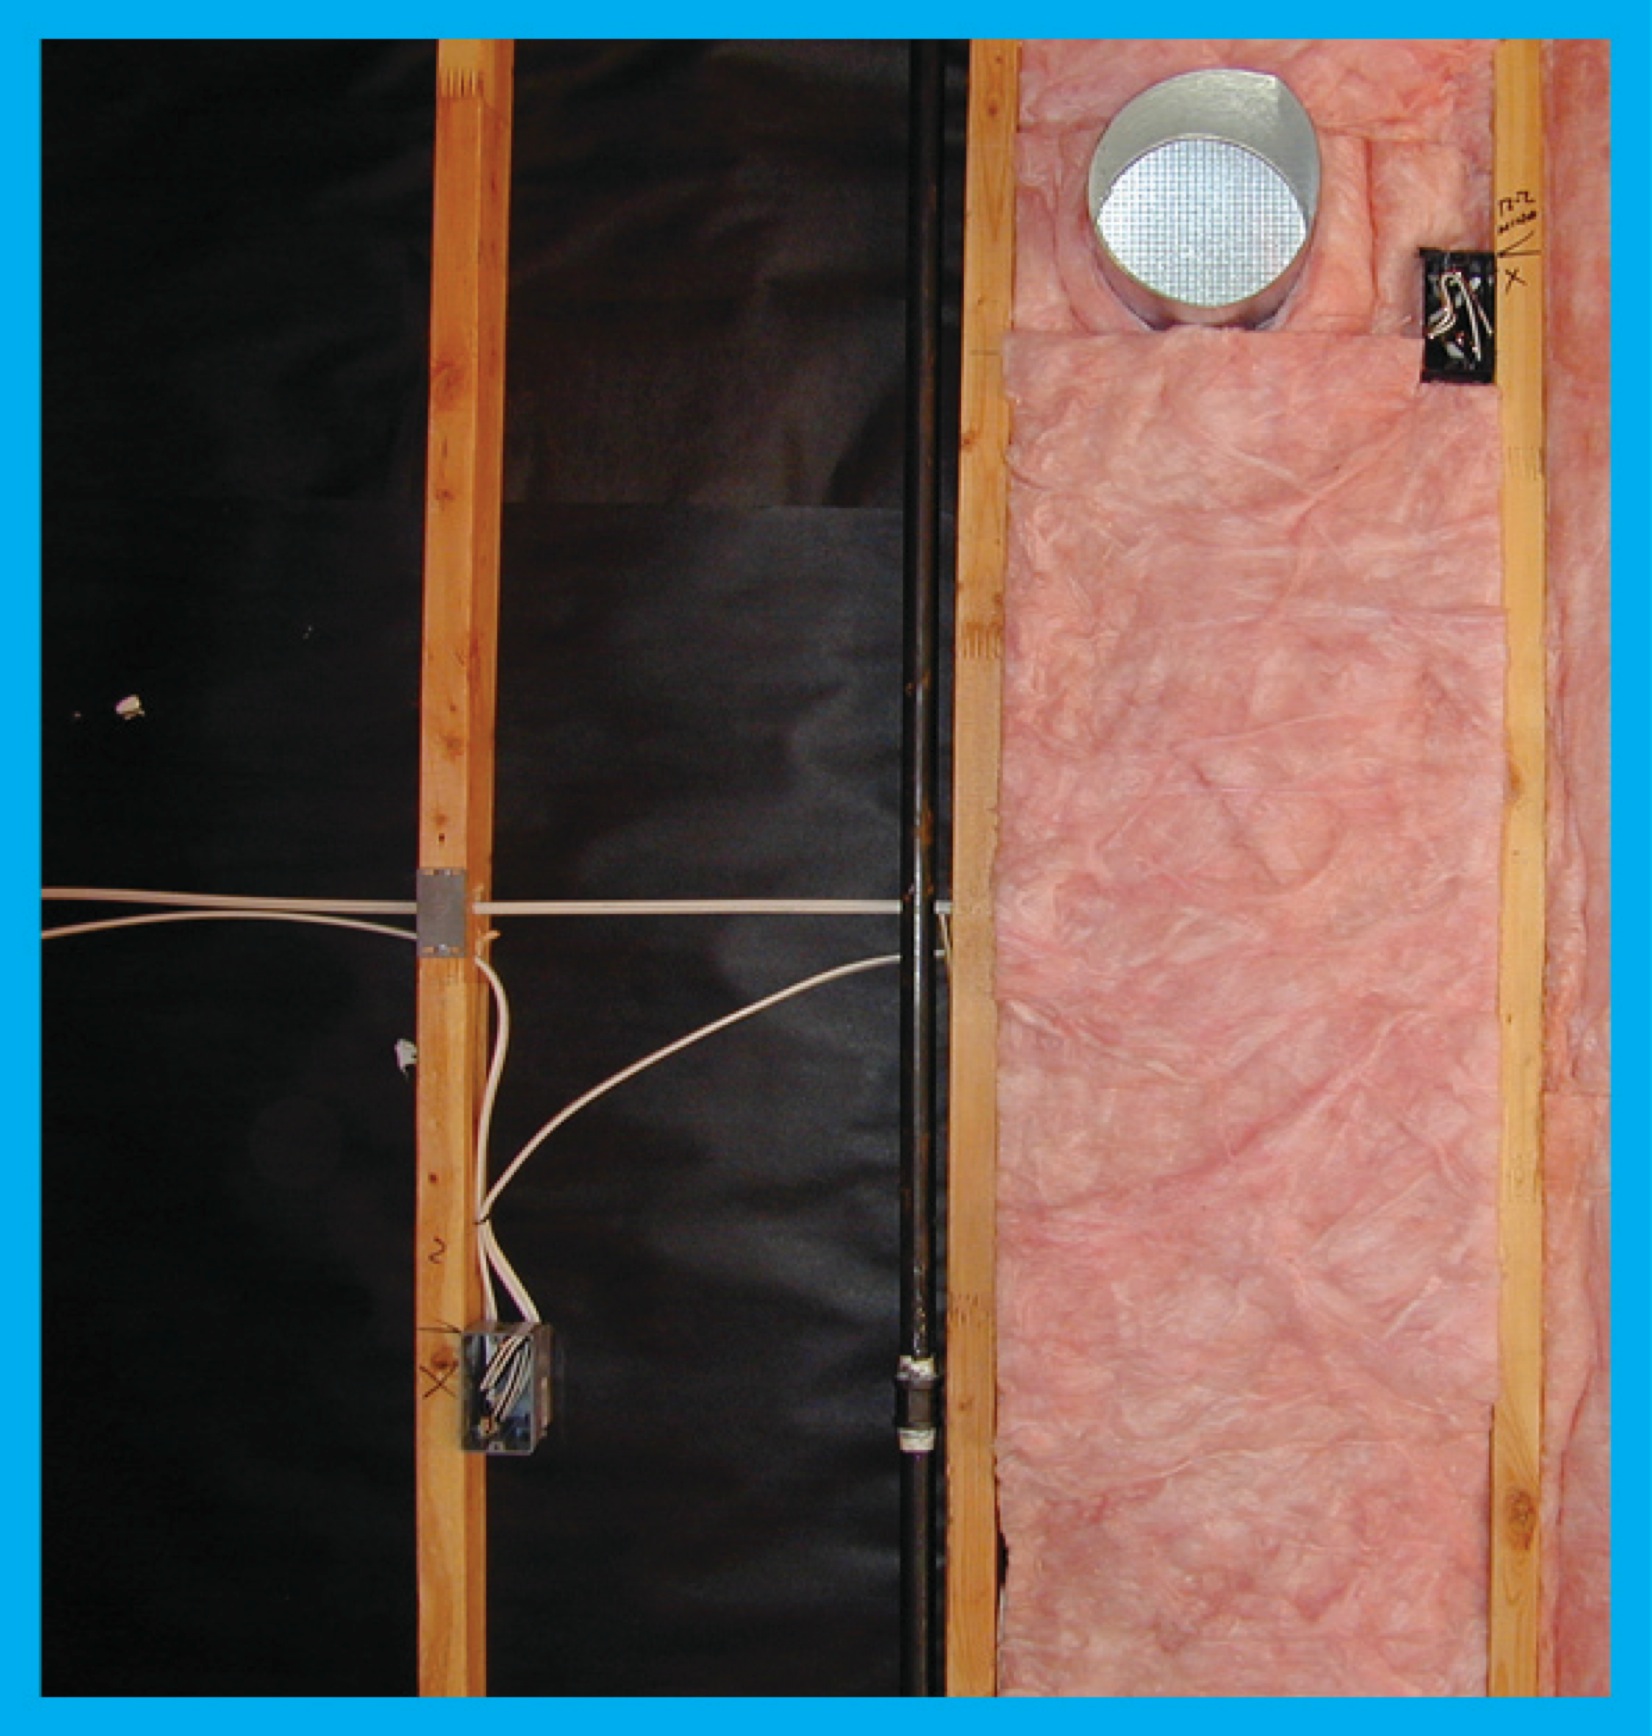
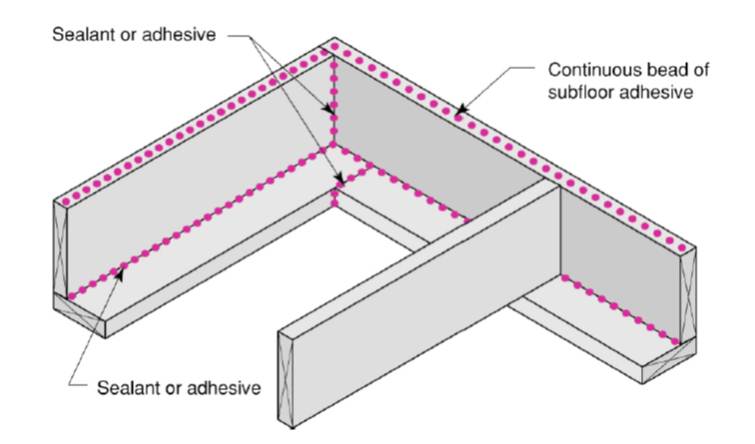
Right - Comprehensive air sealing of the walls includes caulking of the subfloor-sill plate seams and corner seams, taping of electrical boxes, and spray foaming around pipe penetrations.
Image
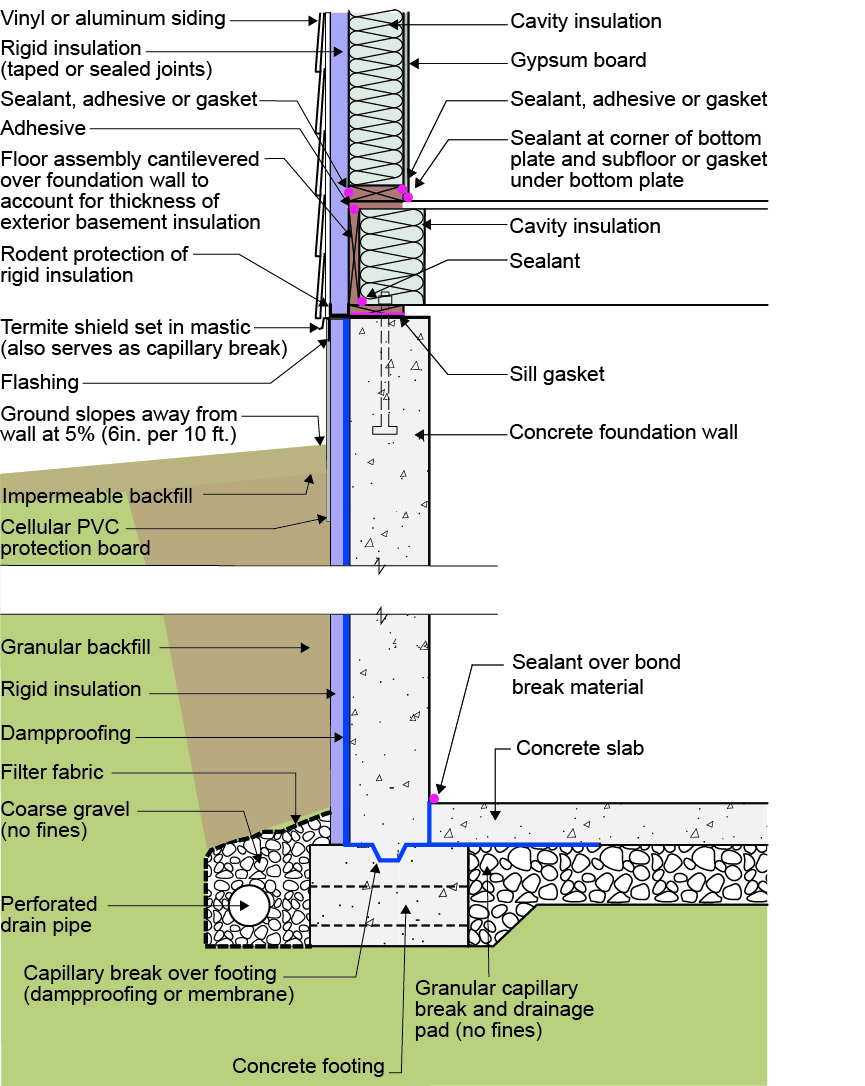
Right - Concrete masonry unit (CMU) basement wall showing exterior insulation and sill detail; above-grade wall has sheathing to the inside of the rigid foam.
Image
Right - Continuous wall sheathing and blocking has been installed to brace the raised heel trusses.
Image
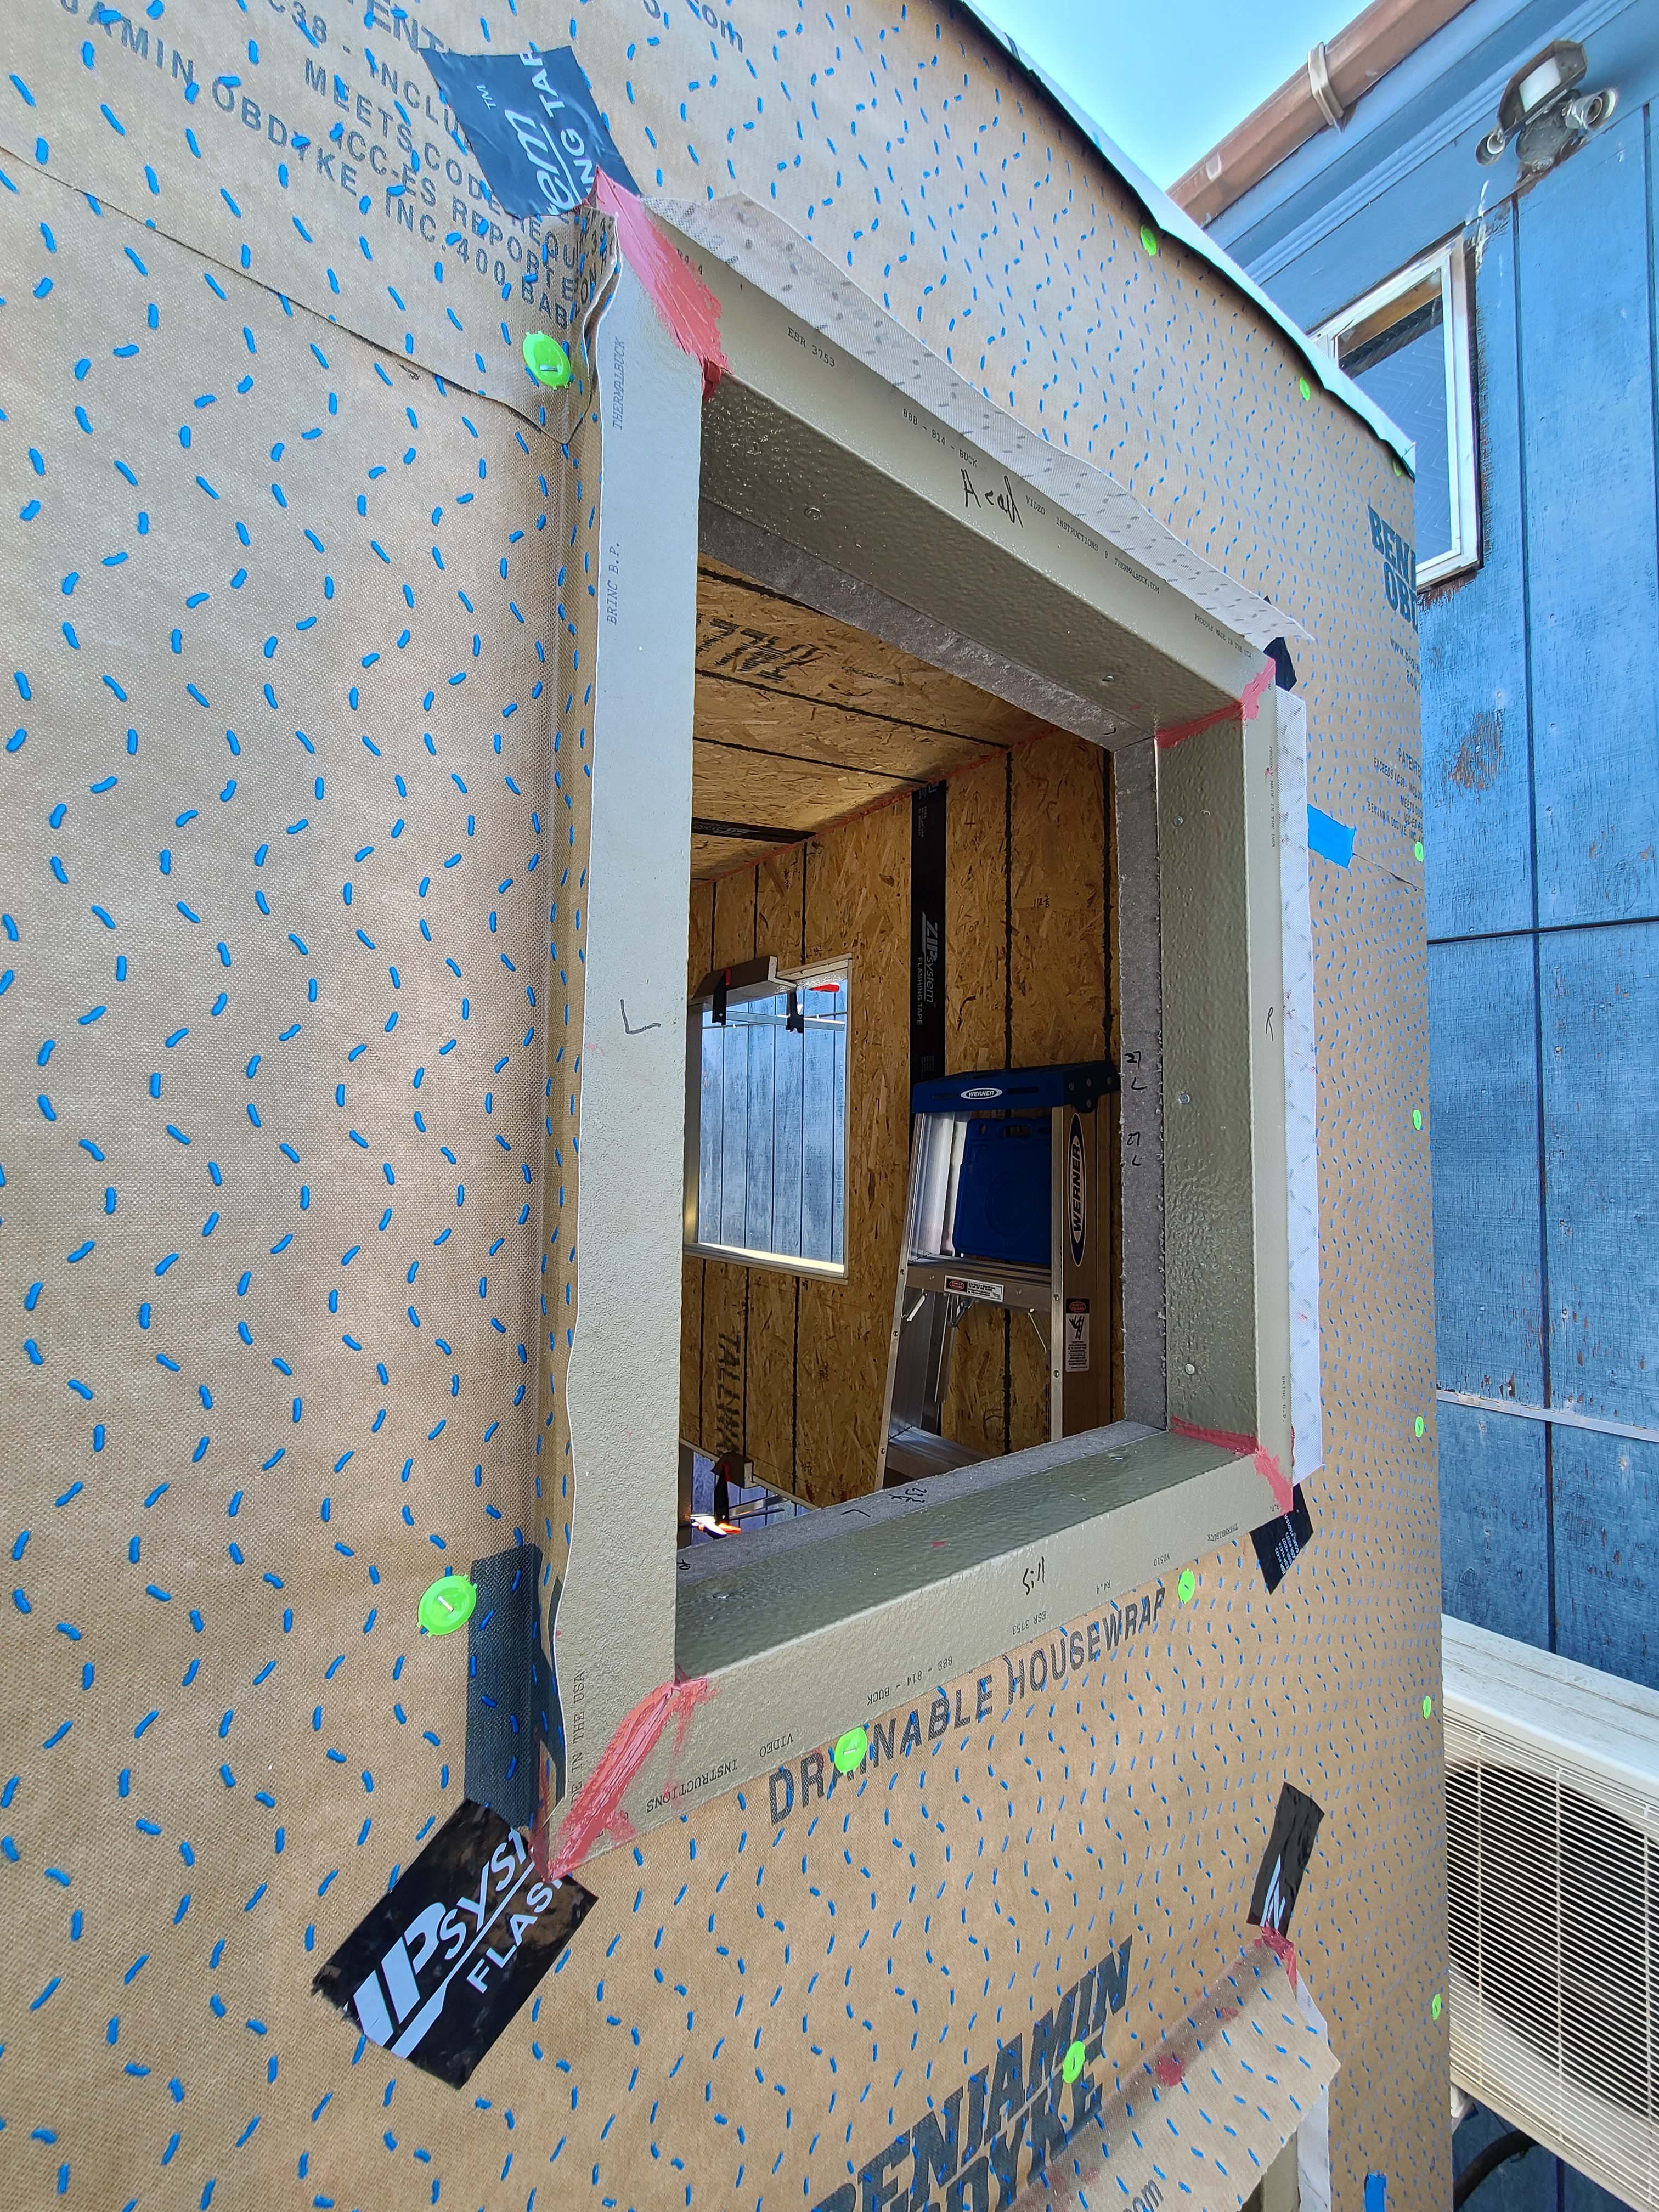
Right - Corners of window are protected with draining house wrap that laps onto the sides of the window trim, paint-on flashing at window trim corners, and self-adhered flashing to reinforce corners.
Image
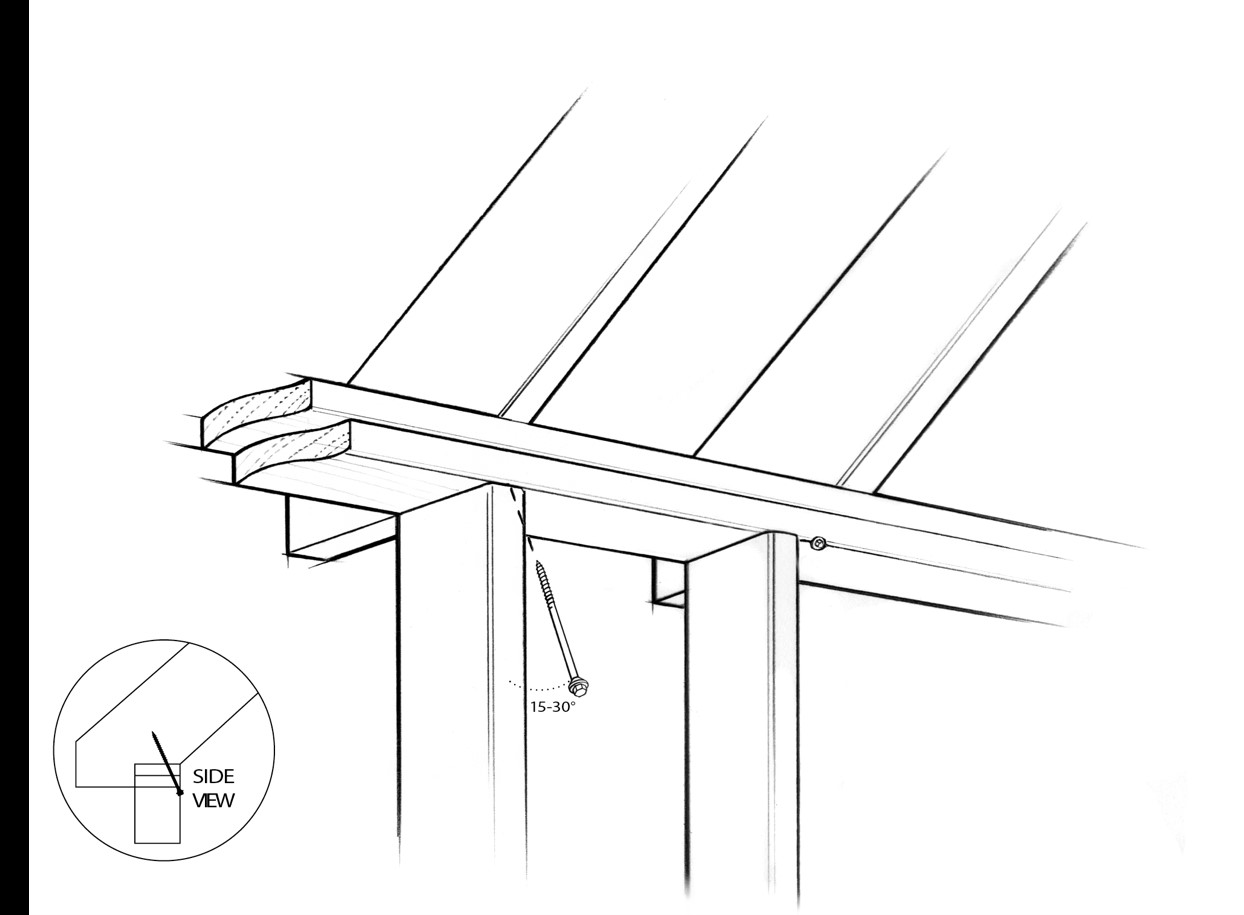
Right - Correct angle for installing an engineered structural screw to secure a rafter to a wall for hurricane resistance.
Image
Image
Right - Corrugated house wrap is installed over the sheathing (in this case SIPs) and overlapped and taped at all seams.
Image
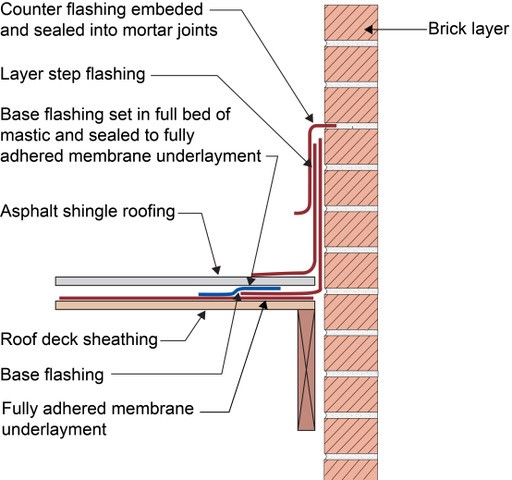
Right - Counterflashing tops a layer of step flashing which comes down above the asphalt shingle and a layer of L-shaped base flashing which comes down and extends below the shingle; the base flashing is adhered to the roof underlayment with mastic, shown
Image
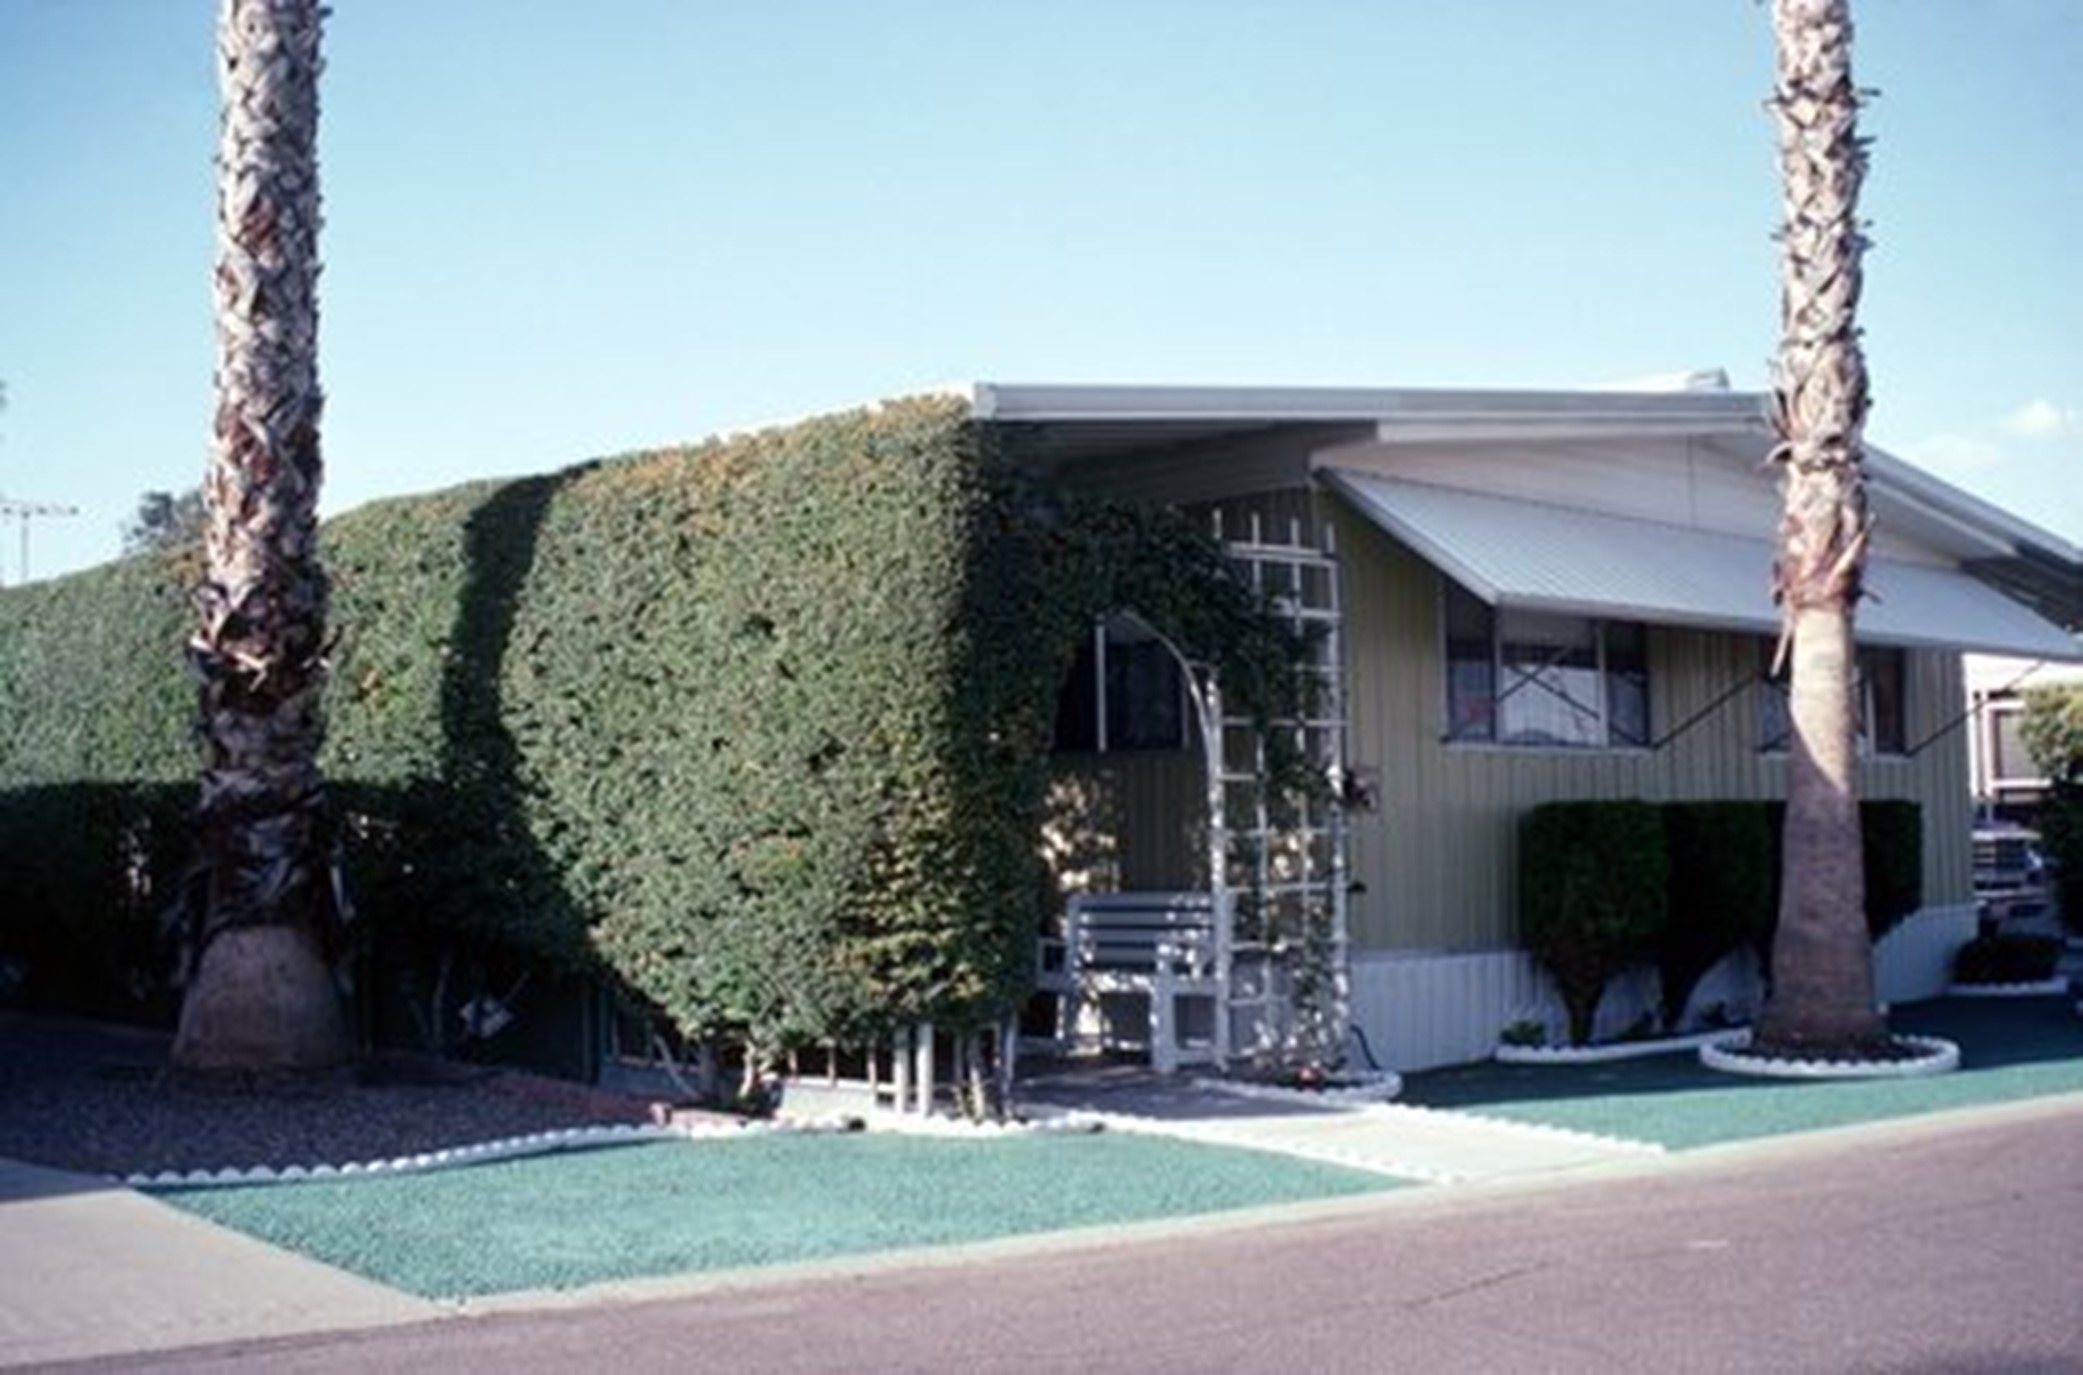
Right - Dense vines growing on a covered trellis along the west side of this home provide effective shade for the wall and windows and create a shaded, protected walkway and outdoor seating area.
Image
Image
Image

Right - Dovetail-shaped plastic mesh is installed to collect mortar droppings at the base of the wall to keep weep holes from being clogged.
Image
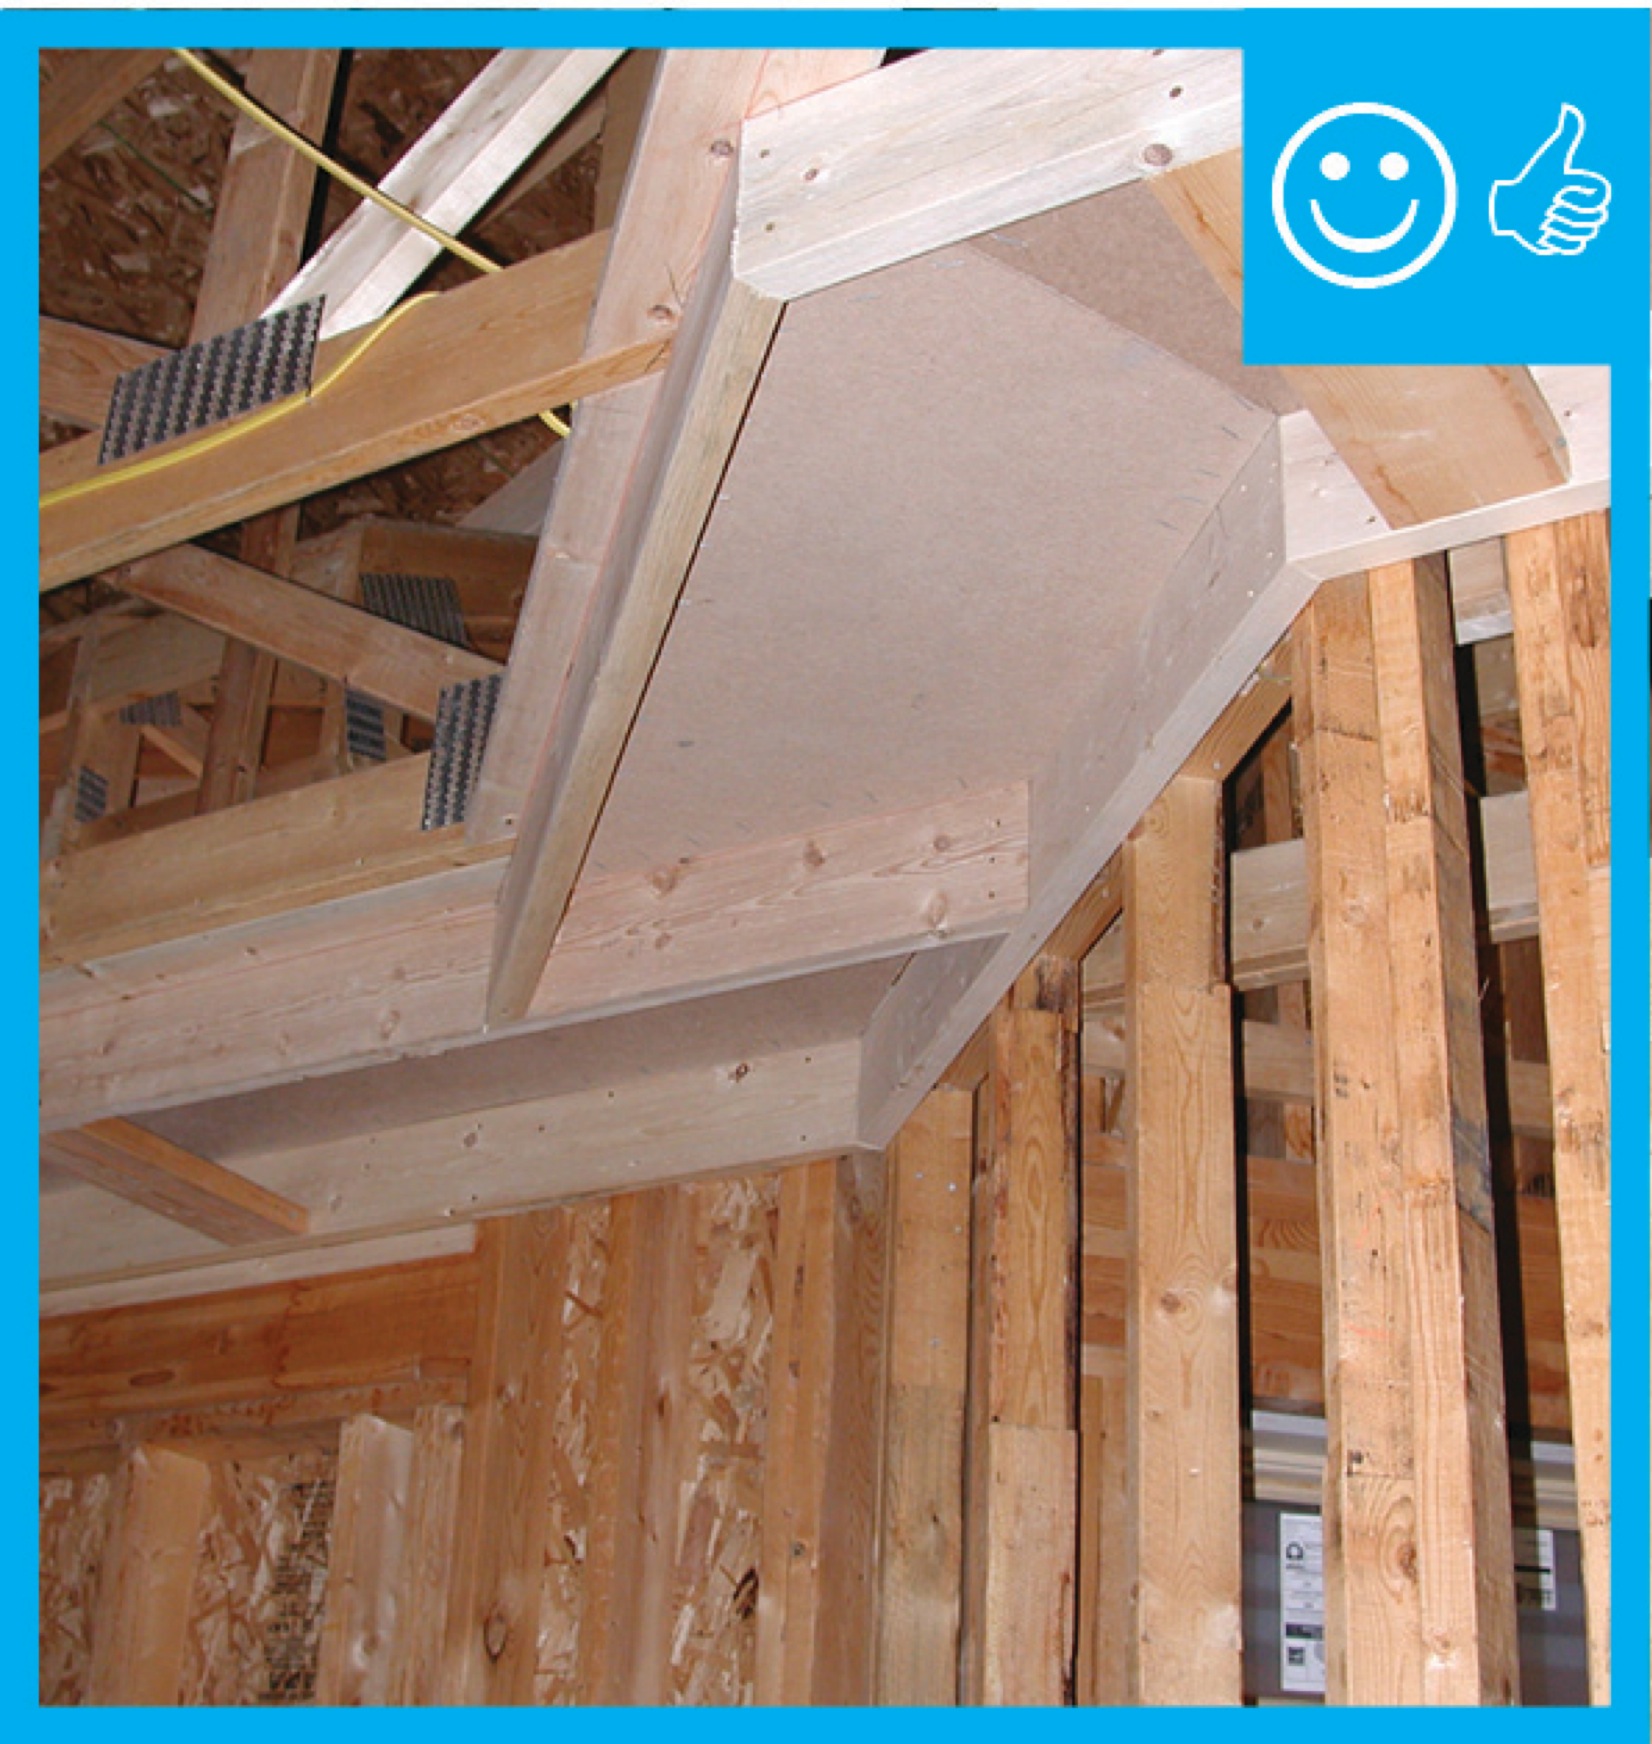
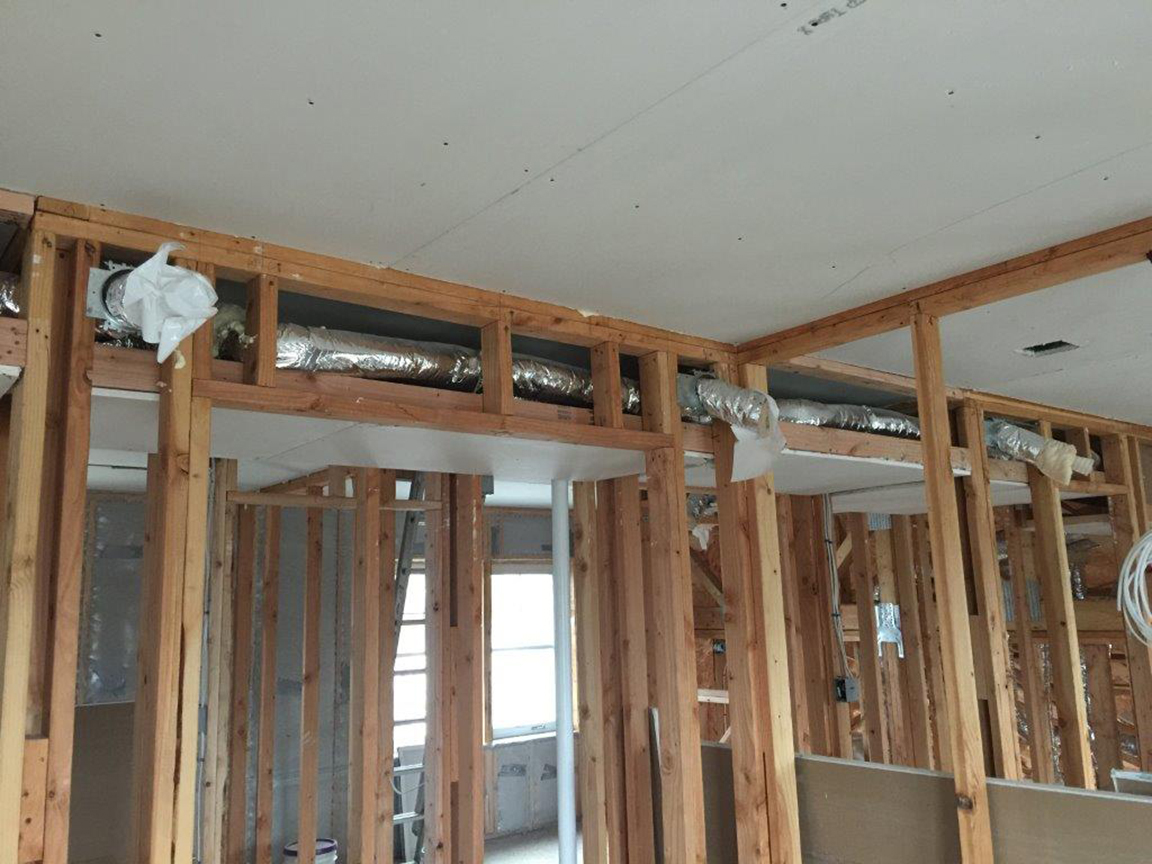
Right - Drywall was installed before installing the duct chase to ensure the ducts will be separated from the attic.
Image
Image
Right - Ducts and heat pump cabinet are properly sealed with mastic, high MERV filter is installed, and duct and refrigerant lines are air sealed at ceiling.
Image
Right - Each individual unit in this multifamily building has its own energy recovery ventilator (ERV) to provide balanced ventilation to the dwelling
Image
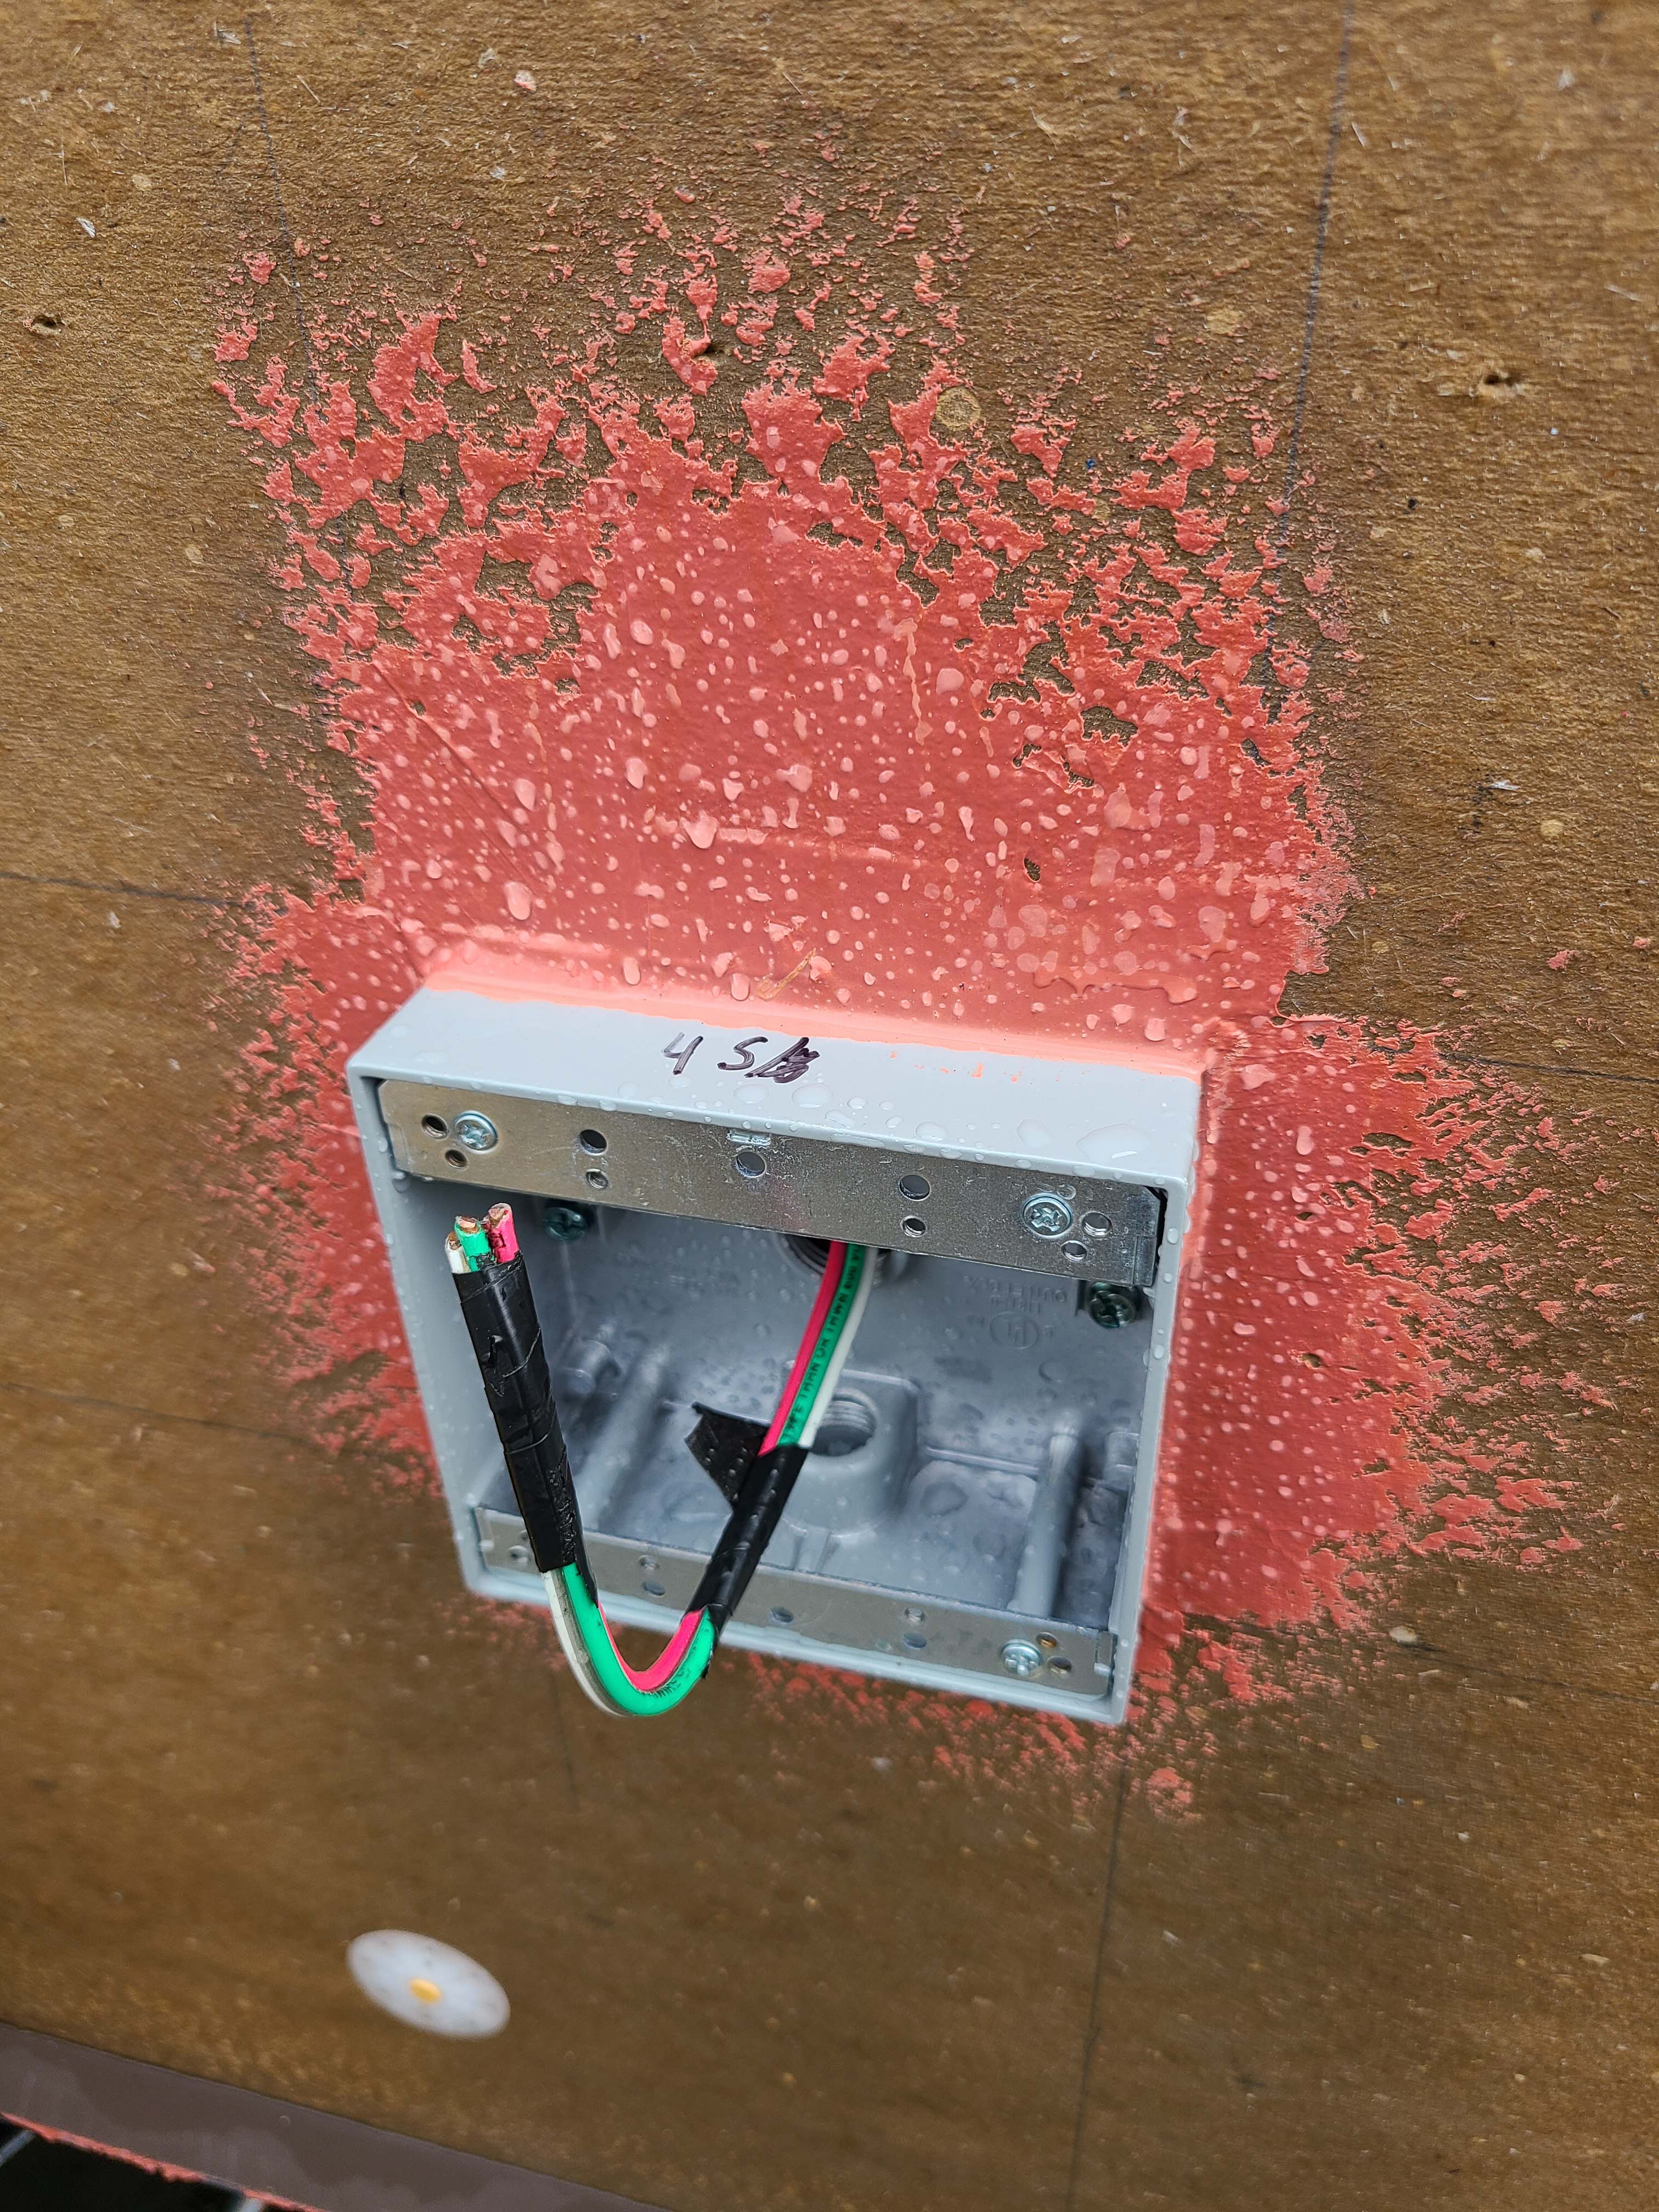
Right - Electrical box in exterior wall is completely sealed with liquid flashing.
Image

Image
Image

Right - Engineered portal frames are used for wall bracing to resist wind and earthquake loads.
Image
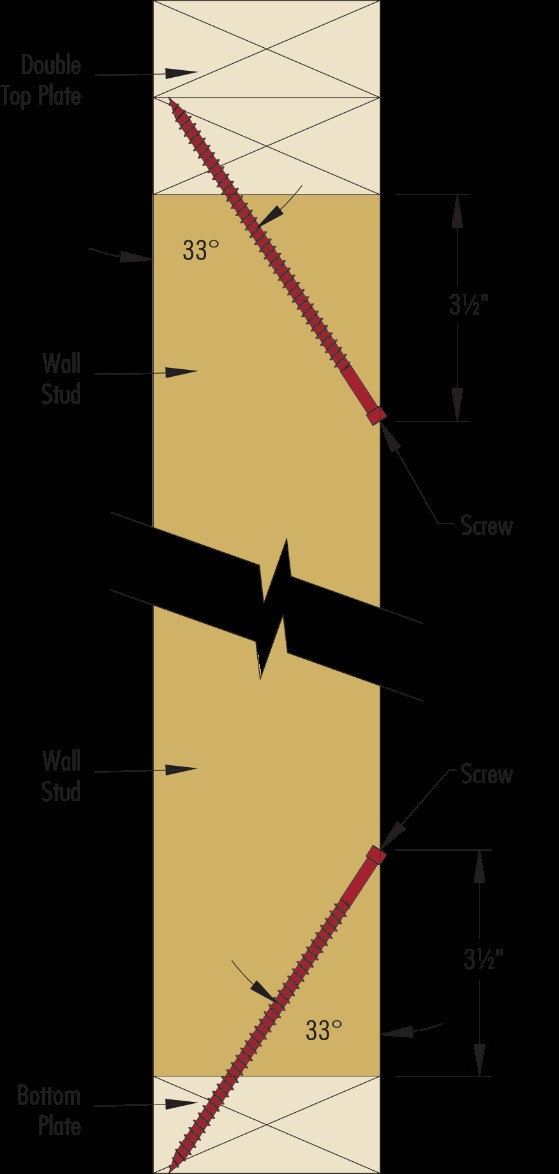
Right - Engineered structural screws are installed to secure a stud to a top and bottom plate for increased hurricane or seismic resistance.
Image
Image
Image

Image
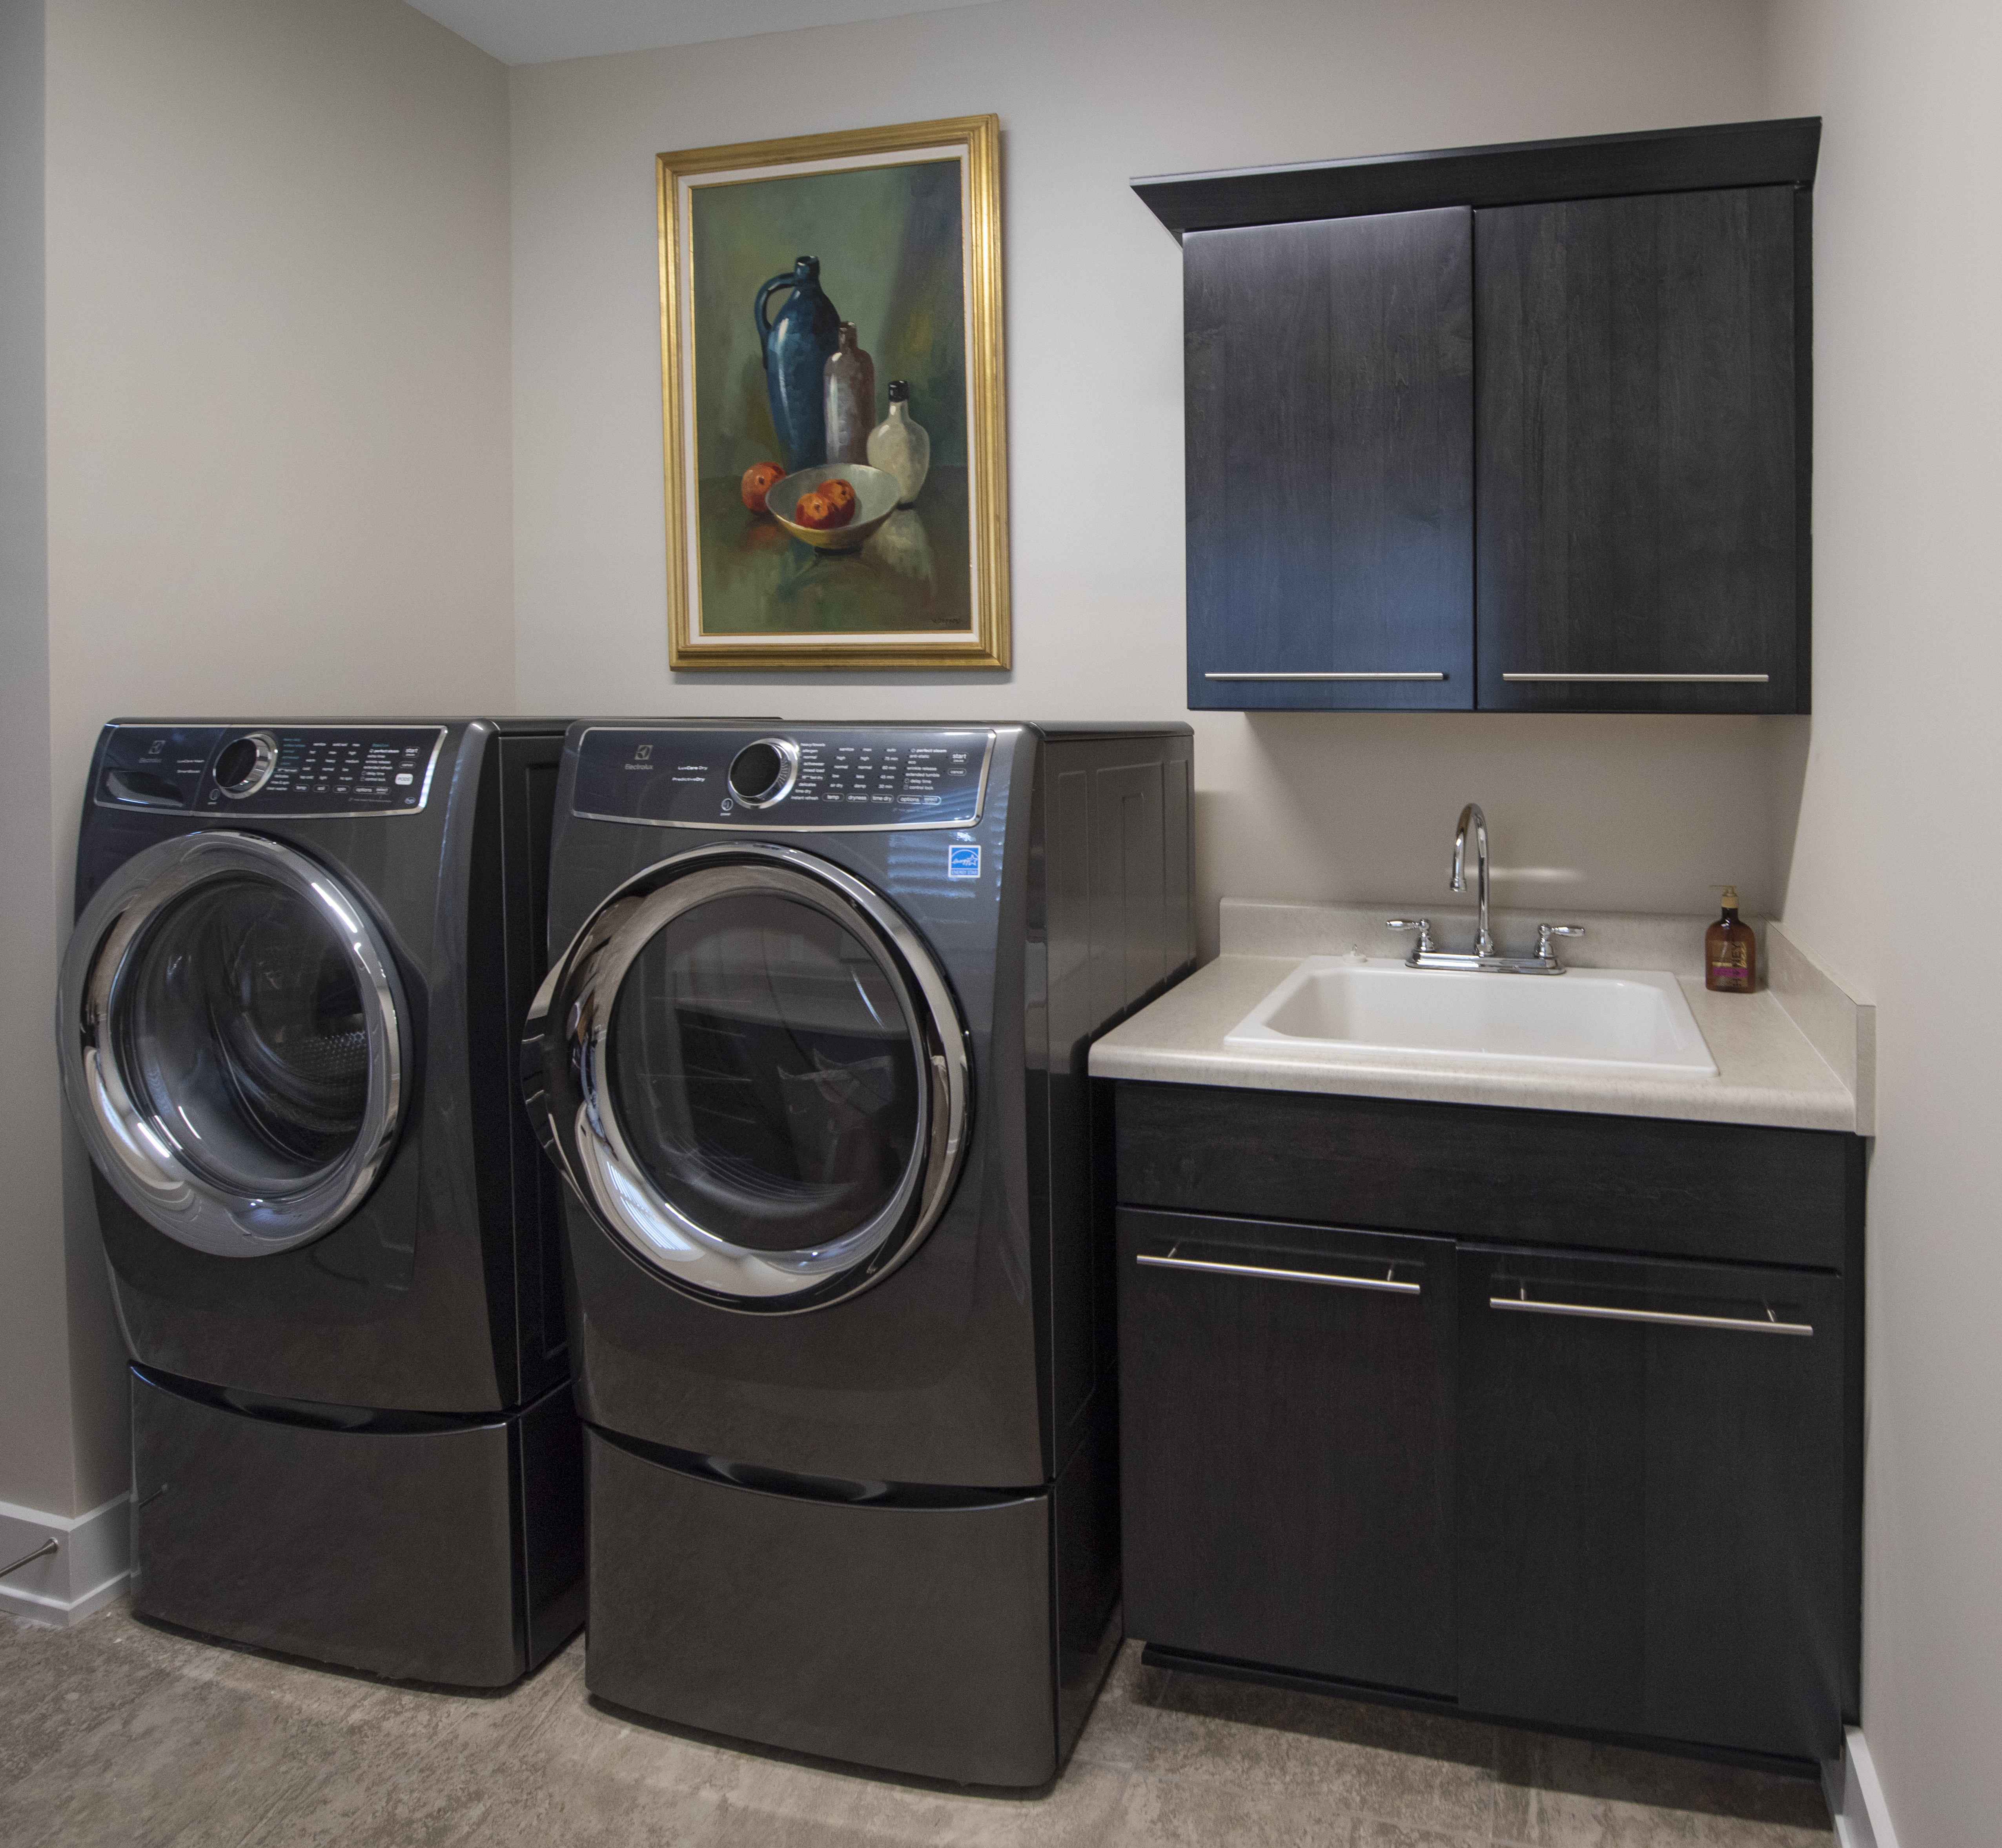
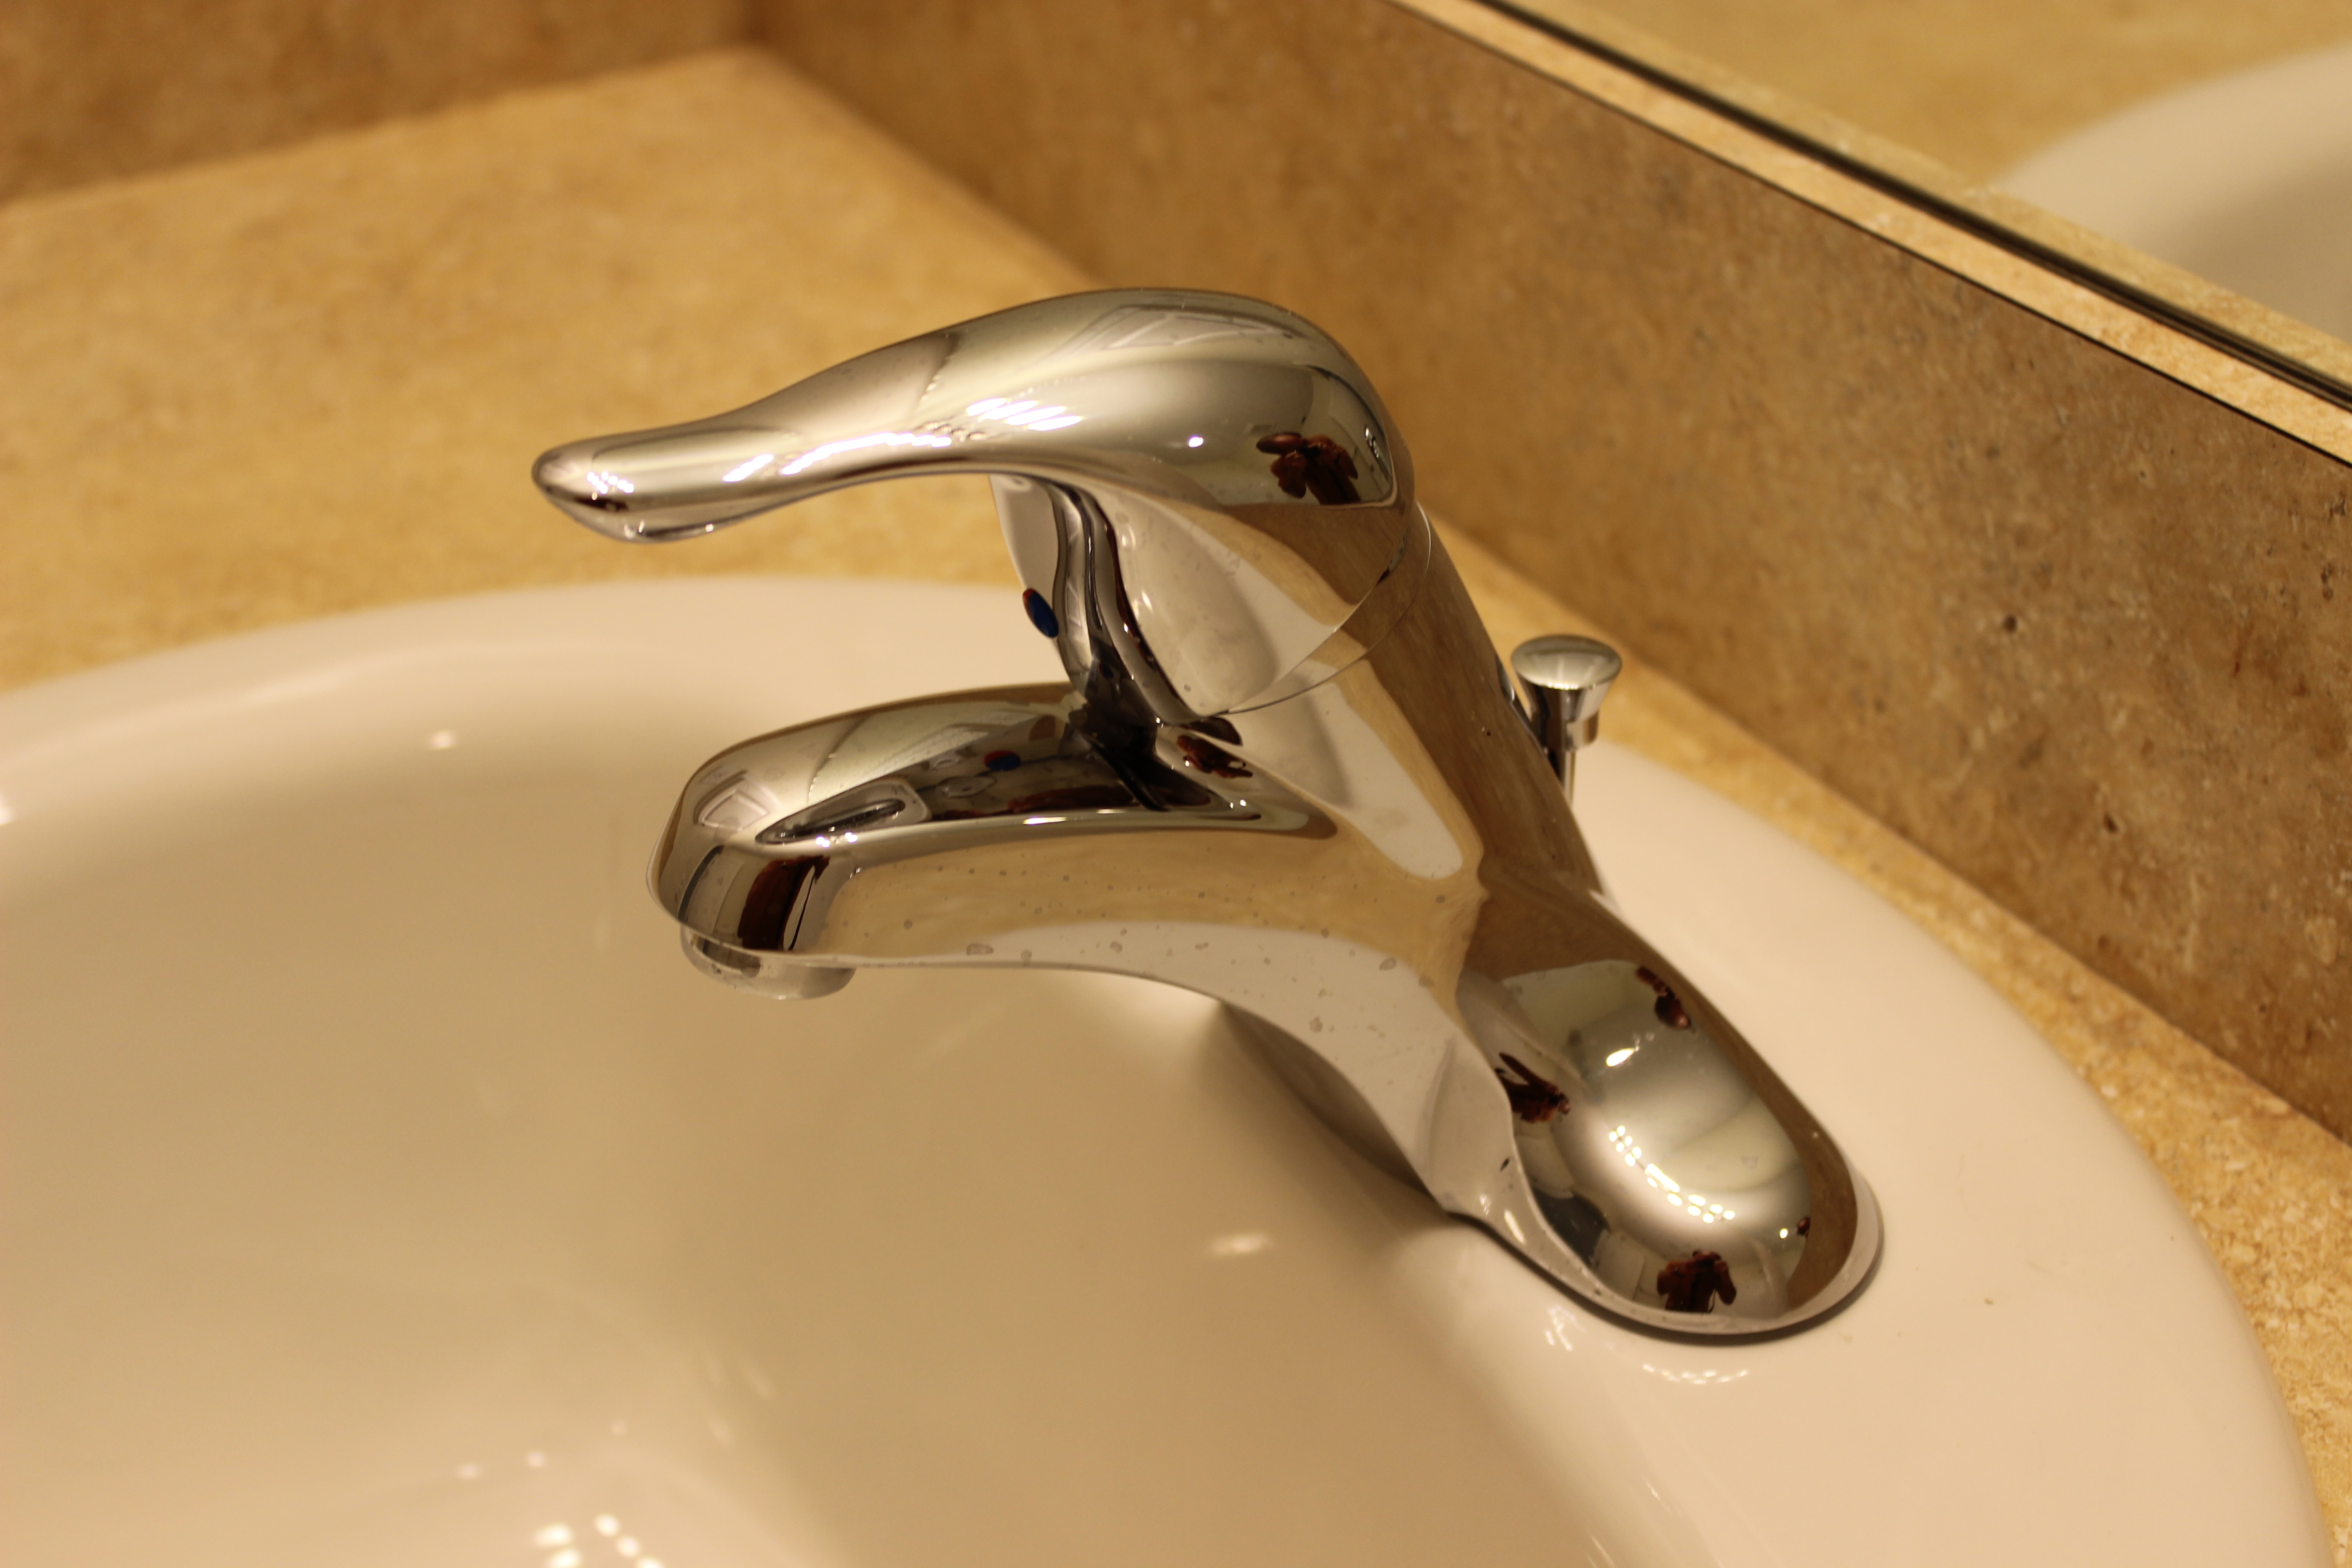
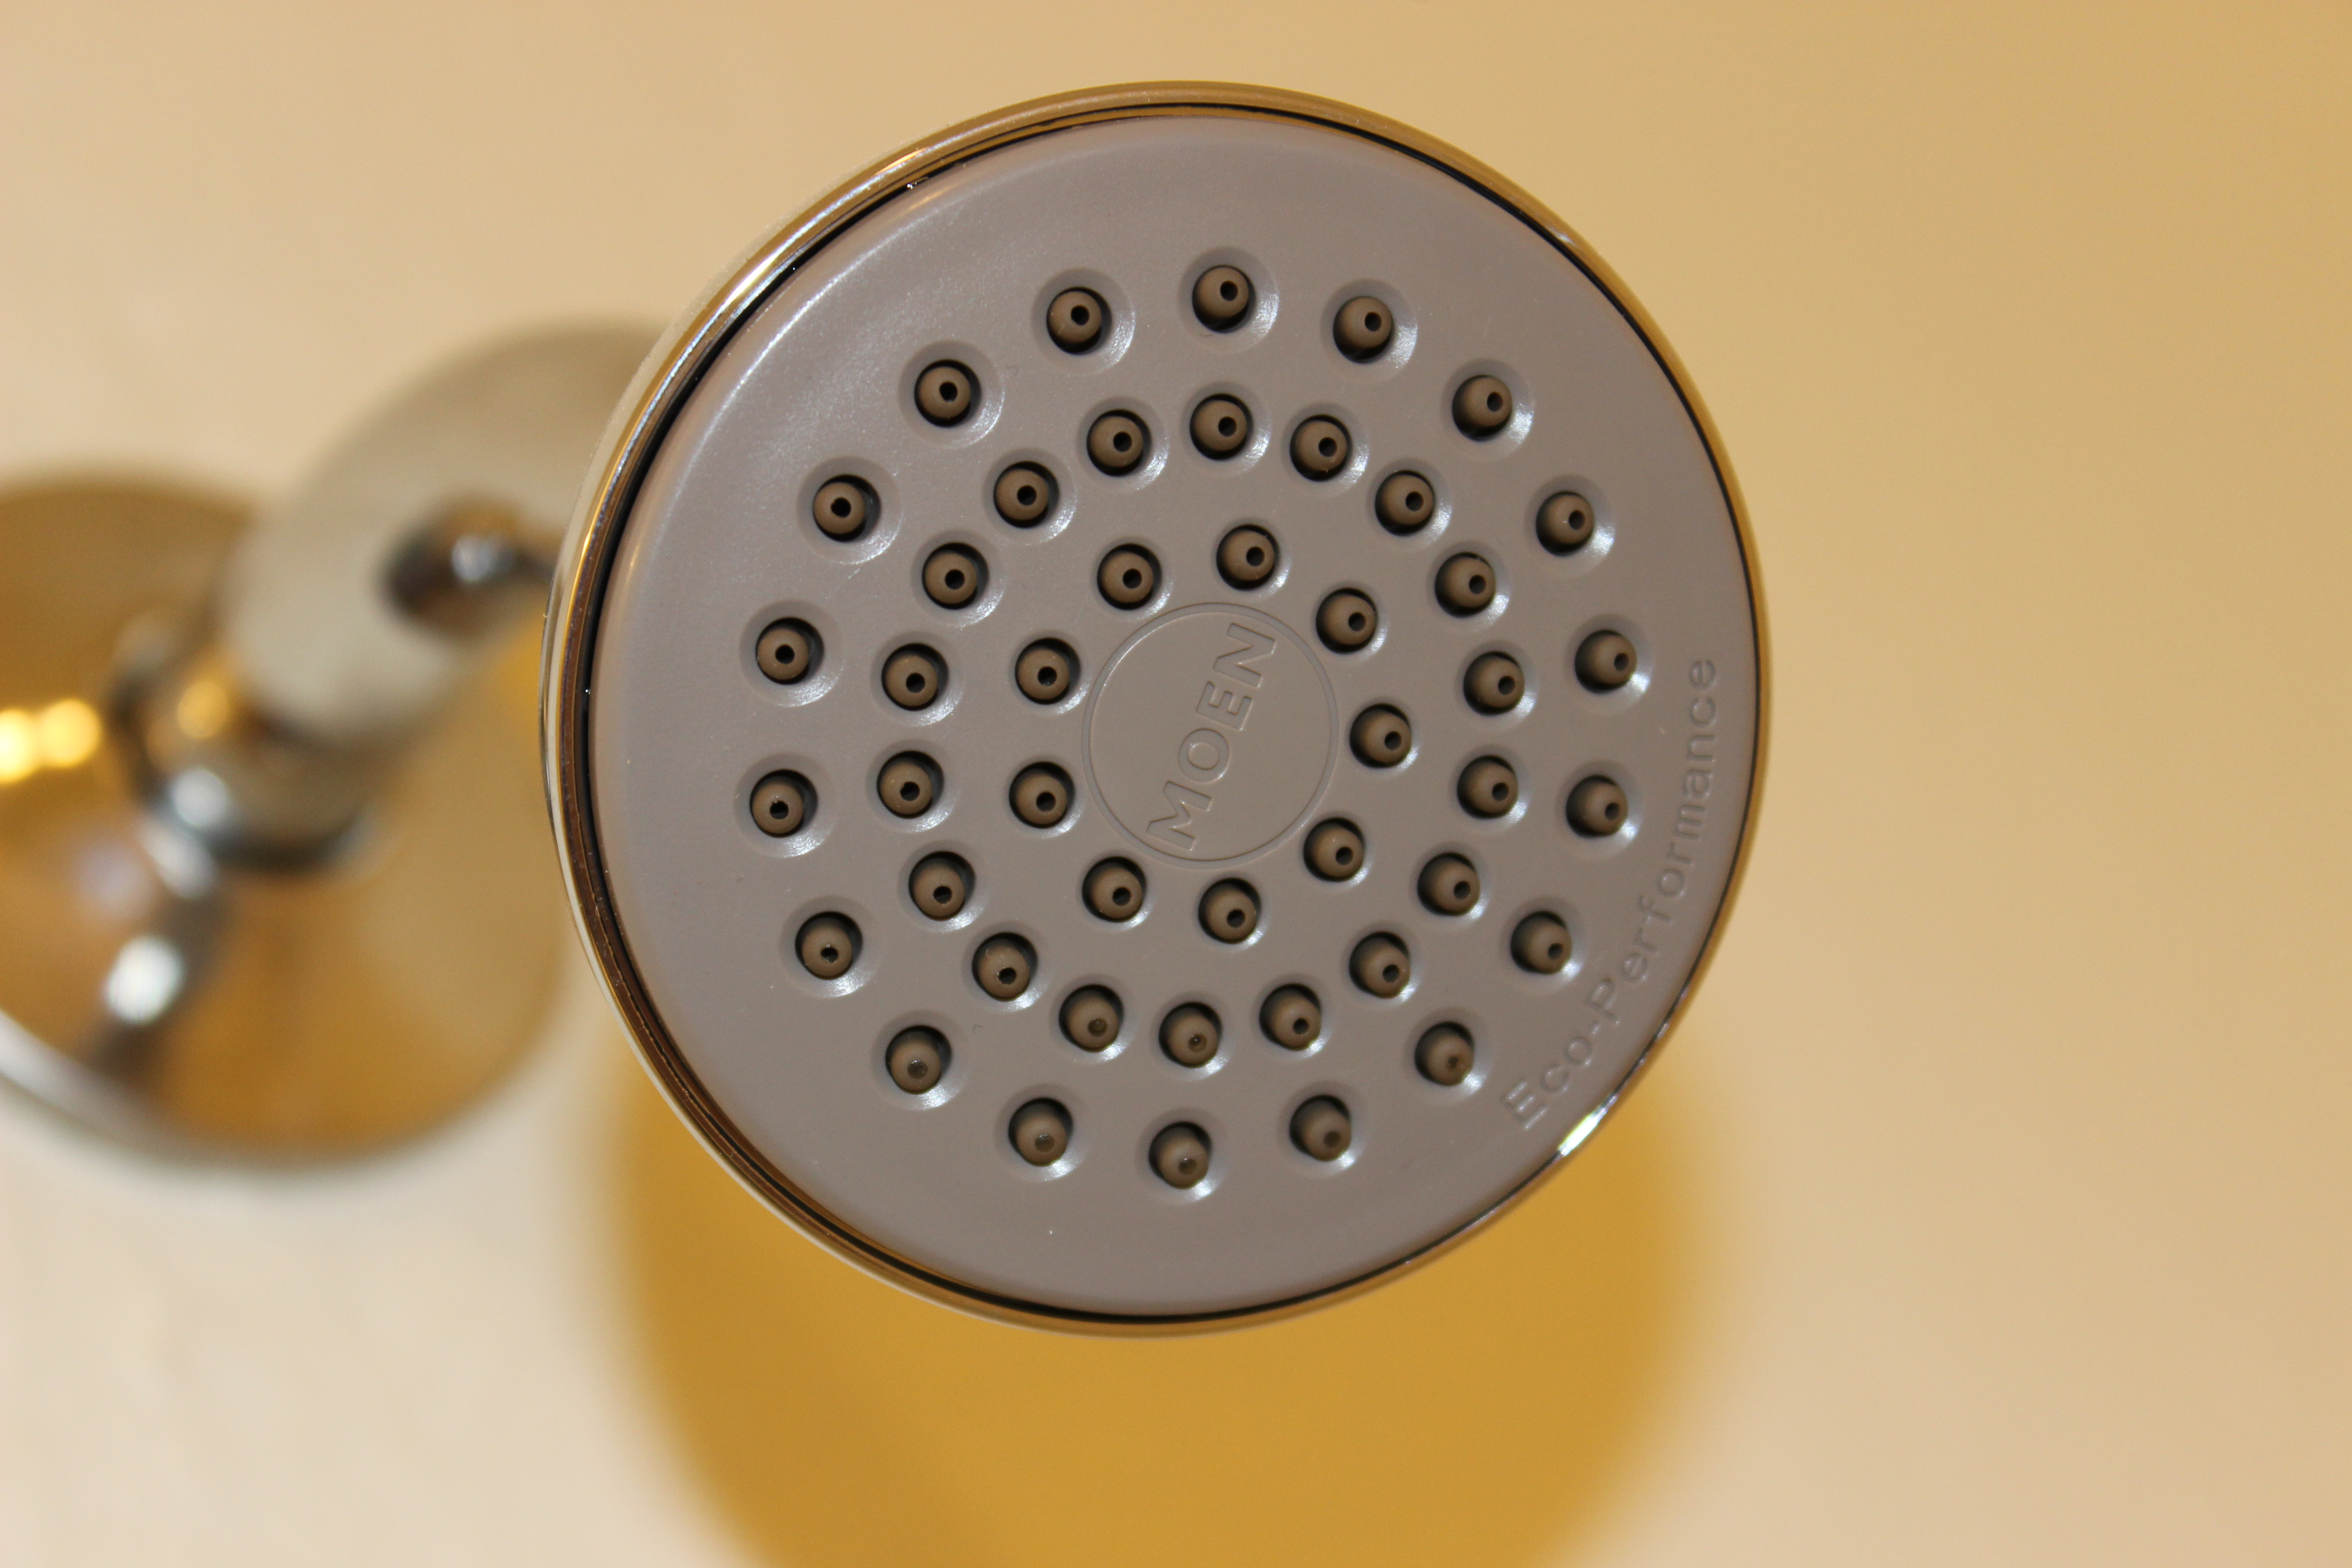
Right - EPA WaterSense-rated low-flow plumbing fixtures are verified as using less water than typical plumbing fixtures.
Image
Image

Image
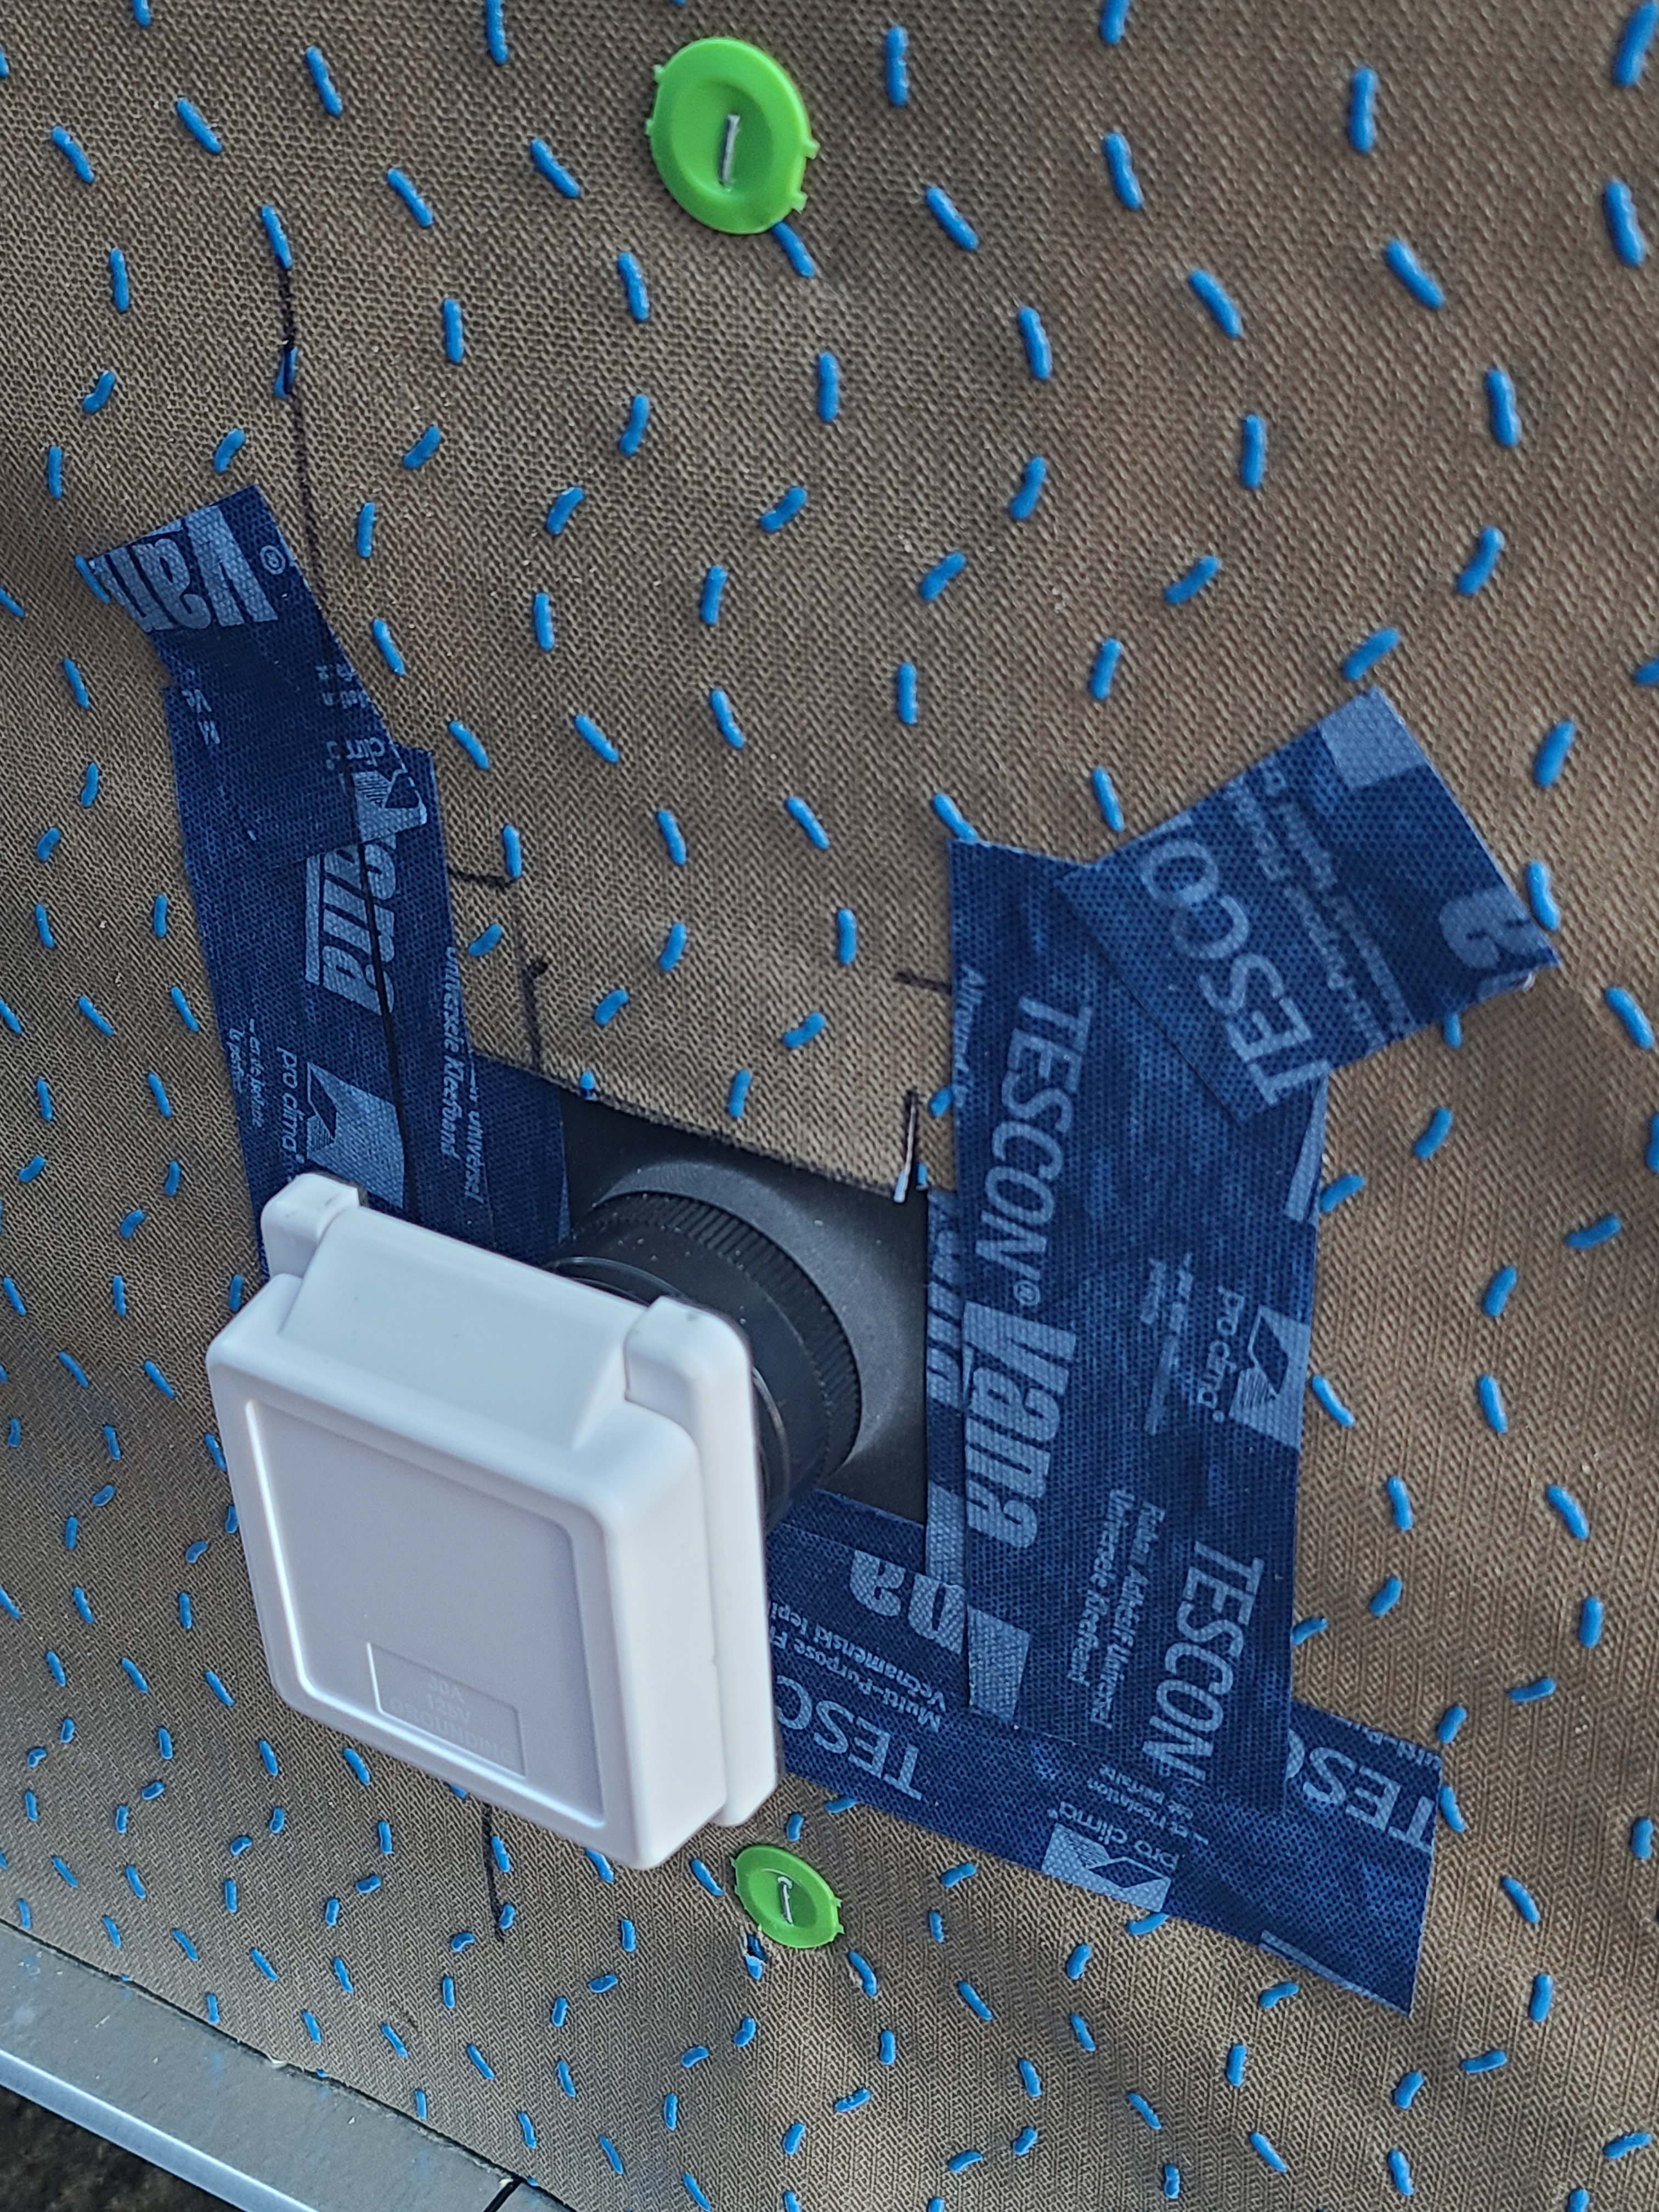
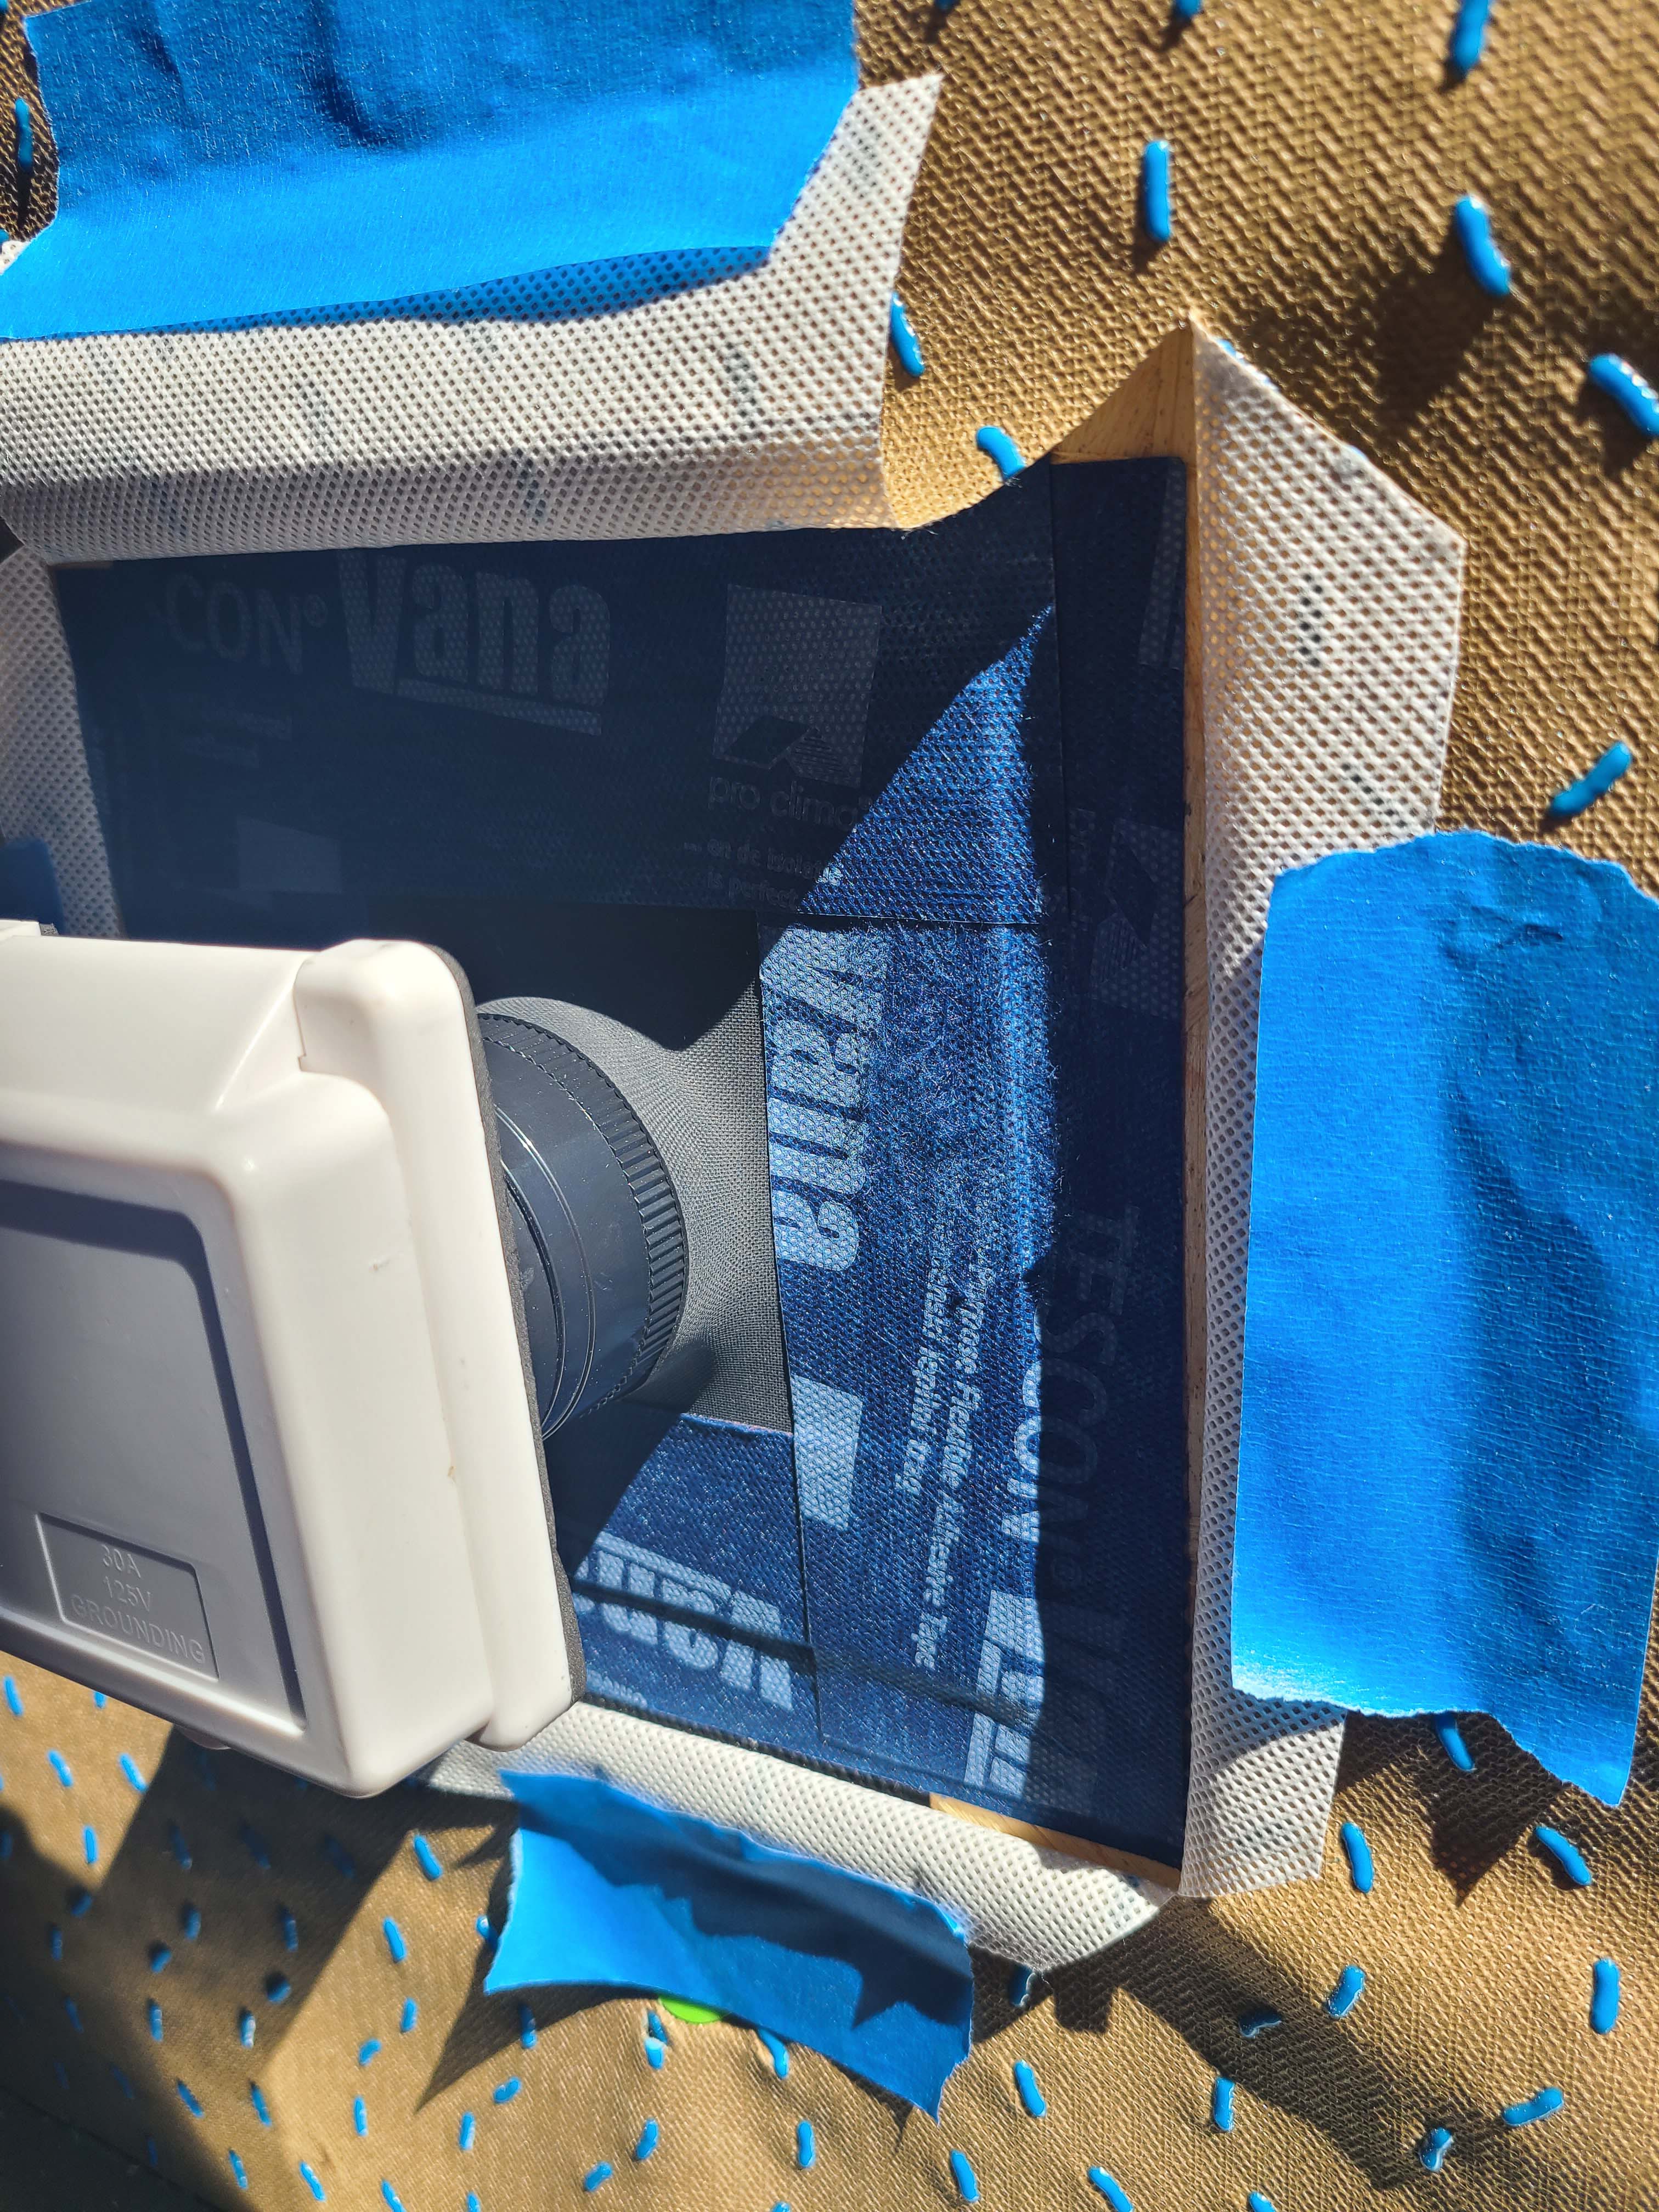
Right - External outlet wall penetration is flashed with tape that is properly layered with house wrap.
Image

Image
Right - Fiberglass/mineral wool insulation thermally isolates the garage from the interior occupied space above.
Image
Right - Flaps are cut into house wrap installed over an HRV duct then taped out of the way to install flashing; 8 of 14.
Image

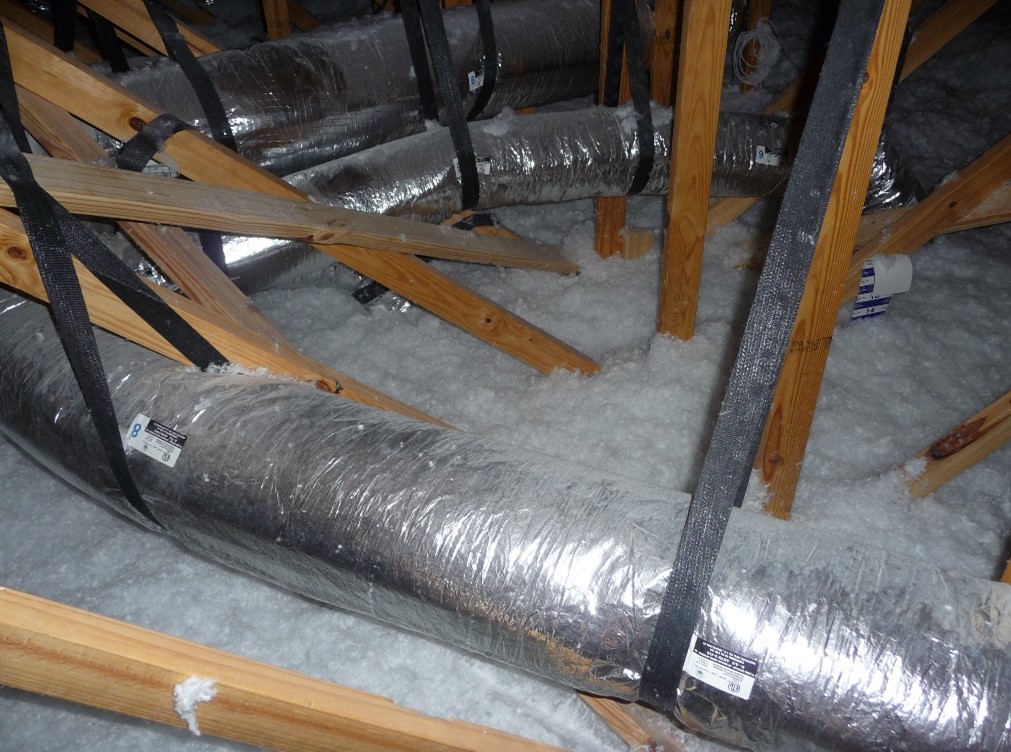
Right - Flex duct installed with adequate support and pulled taut to provide adequate air flow
Image
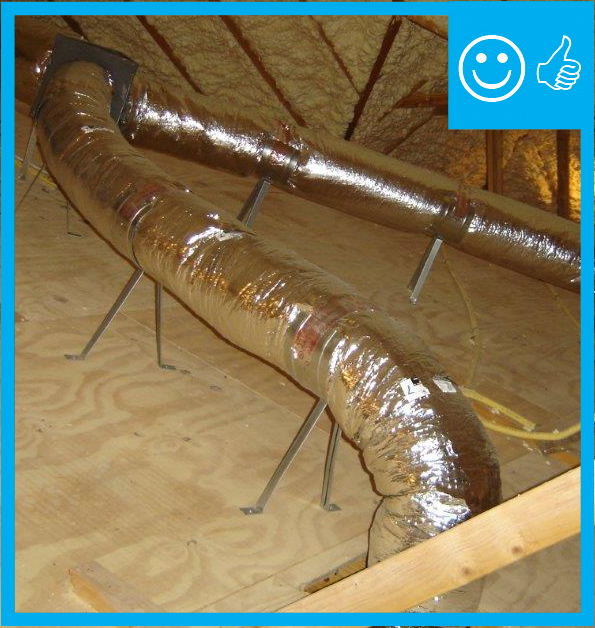
Right - Flex duct installed with frequent supports, straight runs, and gradual turns to allow good air flow
Image
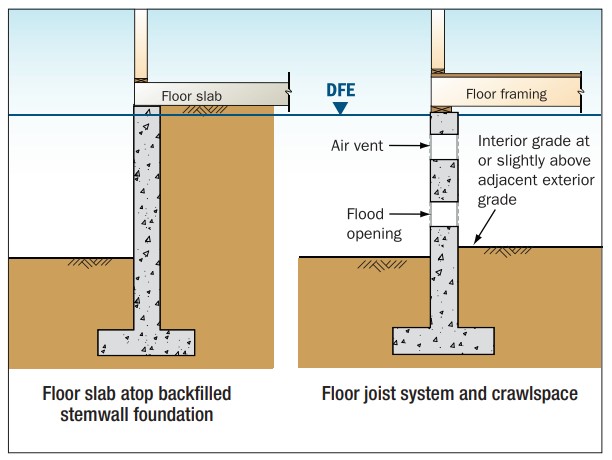
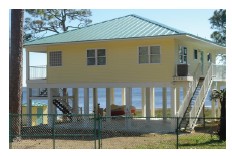
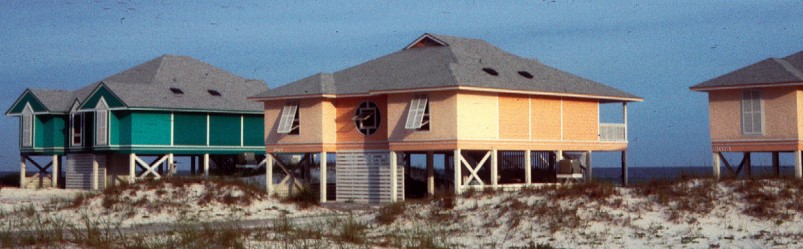
Right - Flood resistant slab and crawlspace foundations elevate the floor above the design flood elevation.
Image
Image
Image
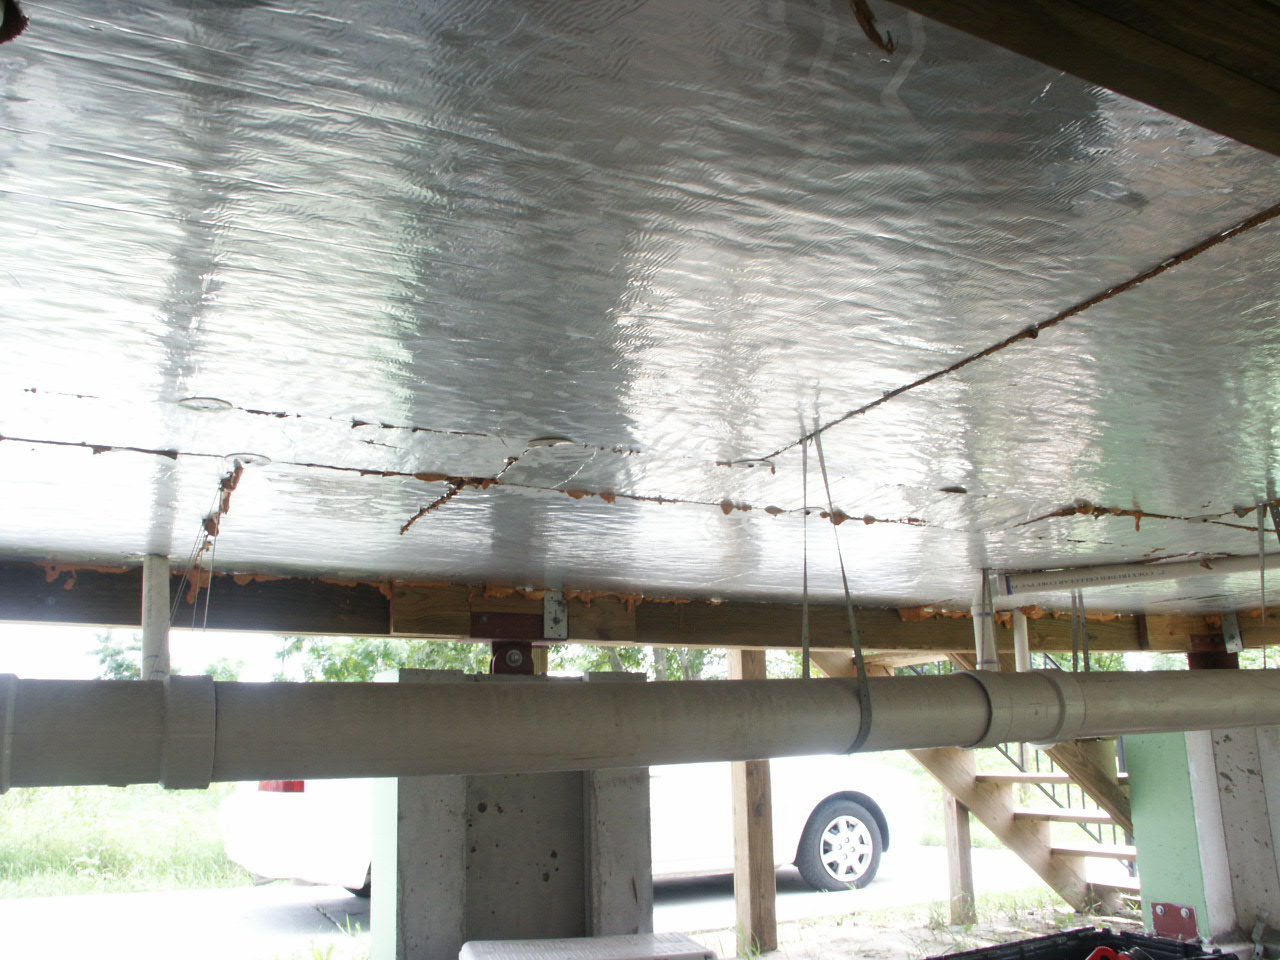
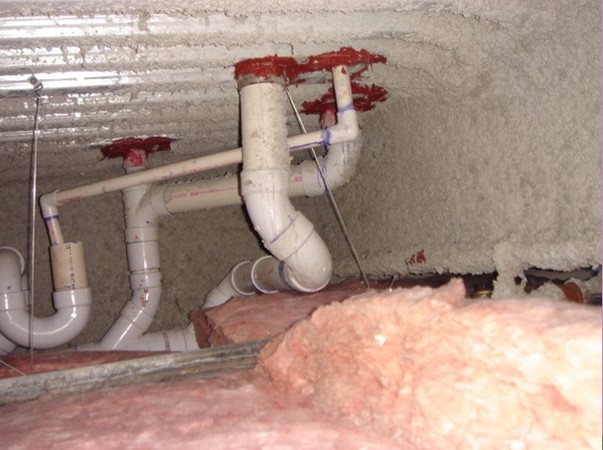
Right - Foil-faced polyisocyanurate insulating rigid foam sheathing is installed below the floor framing of this house built on piers; however, the seams should be sealed with metal taped and the plumbing elevated and protected.
Image

Right - Foil-faced polyisocyanurate insulating rigid foam sheathing is installed rather than fibrous insulation below the floor framing of this house built on piers
Image
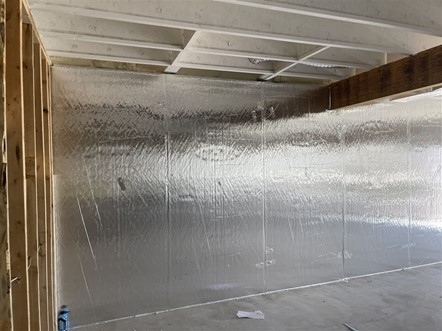
Right - Foil-faced polyisocyanurate rigid foam board is tightly installed and sealed against a concrete foundation wall prior to installing fibrous blanket insulation.
Image
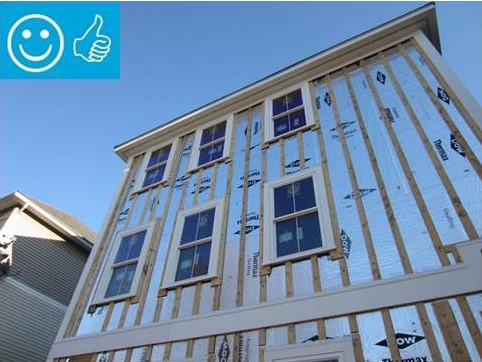
Right - Foil-faced polyisocyanurate rigid foam is attached to the existing exterior wall with vertical wood furring strips
Image
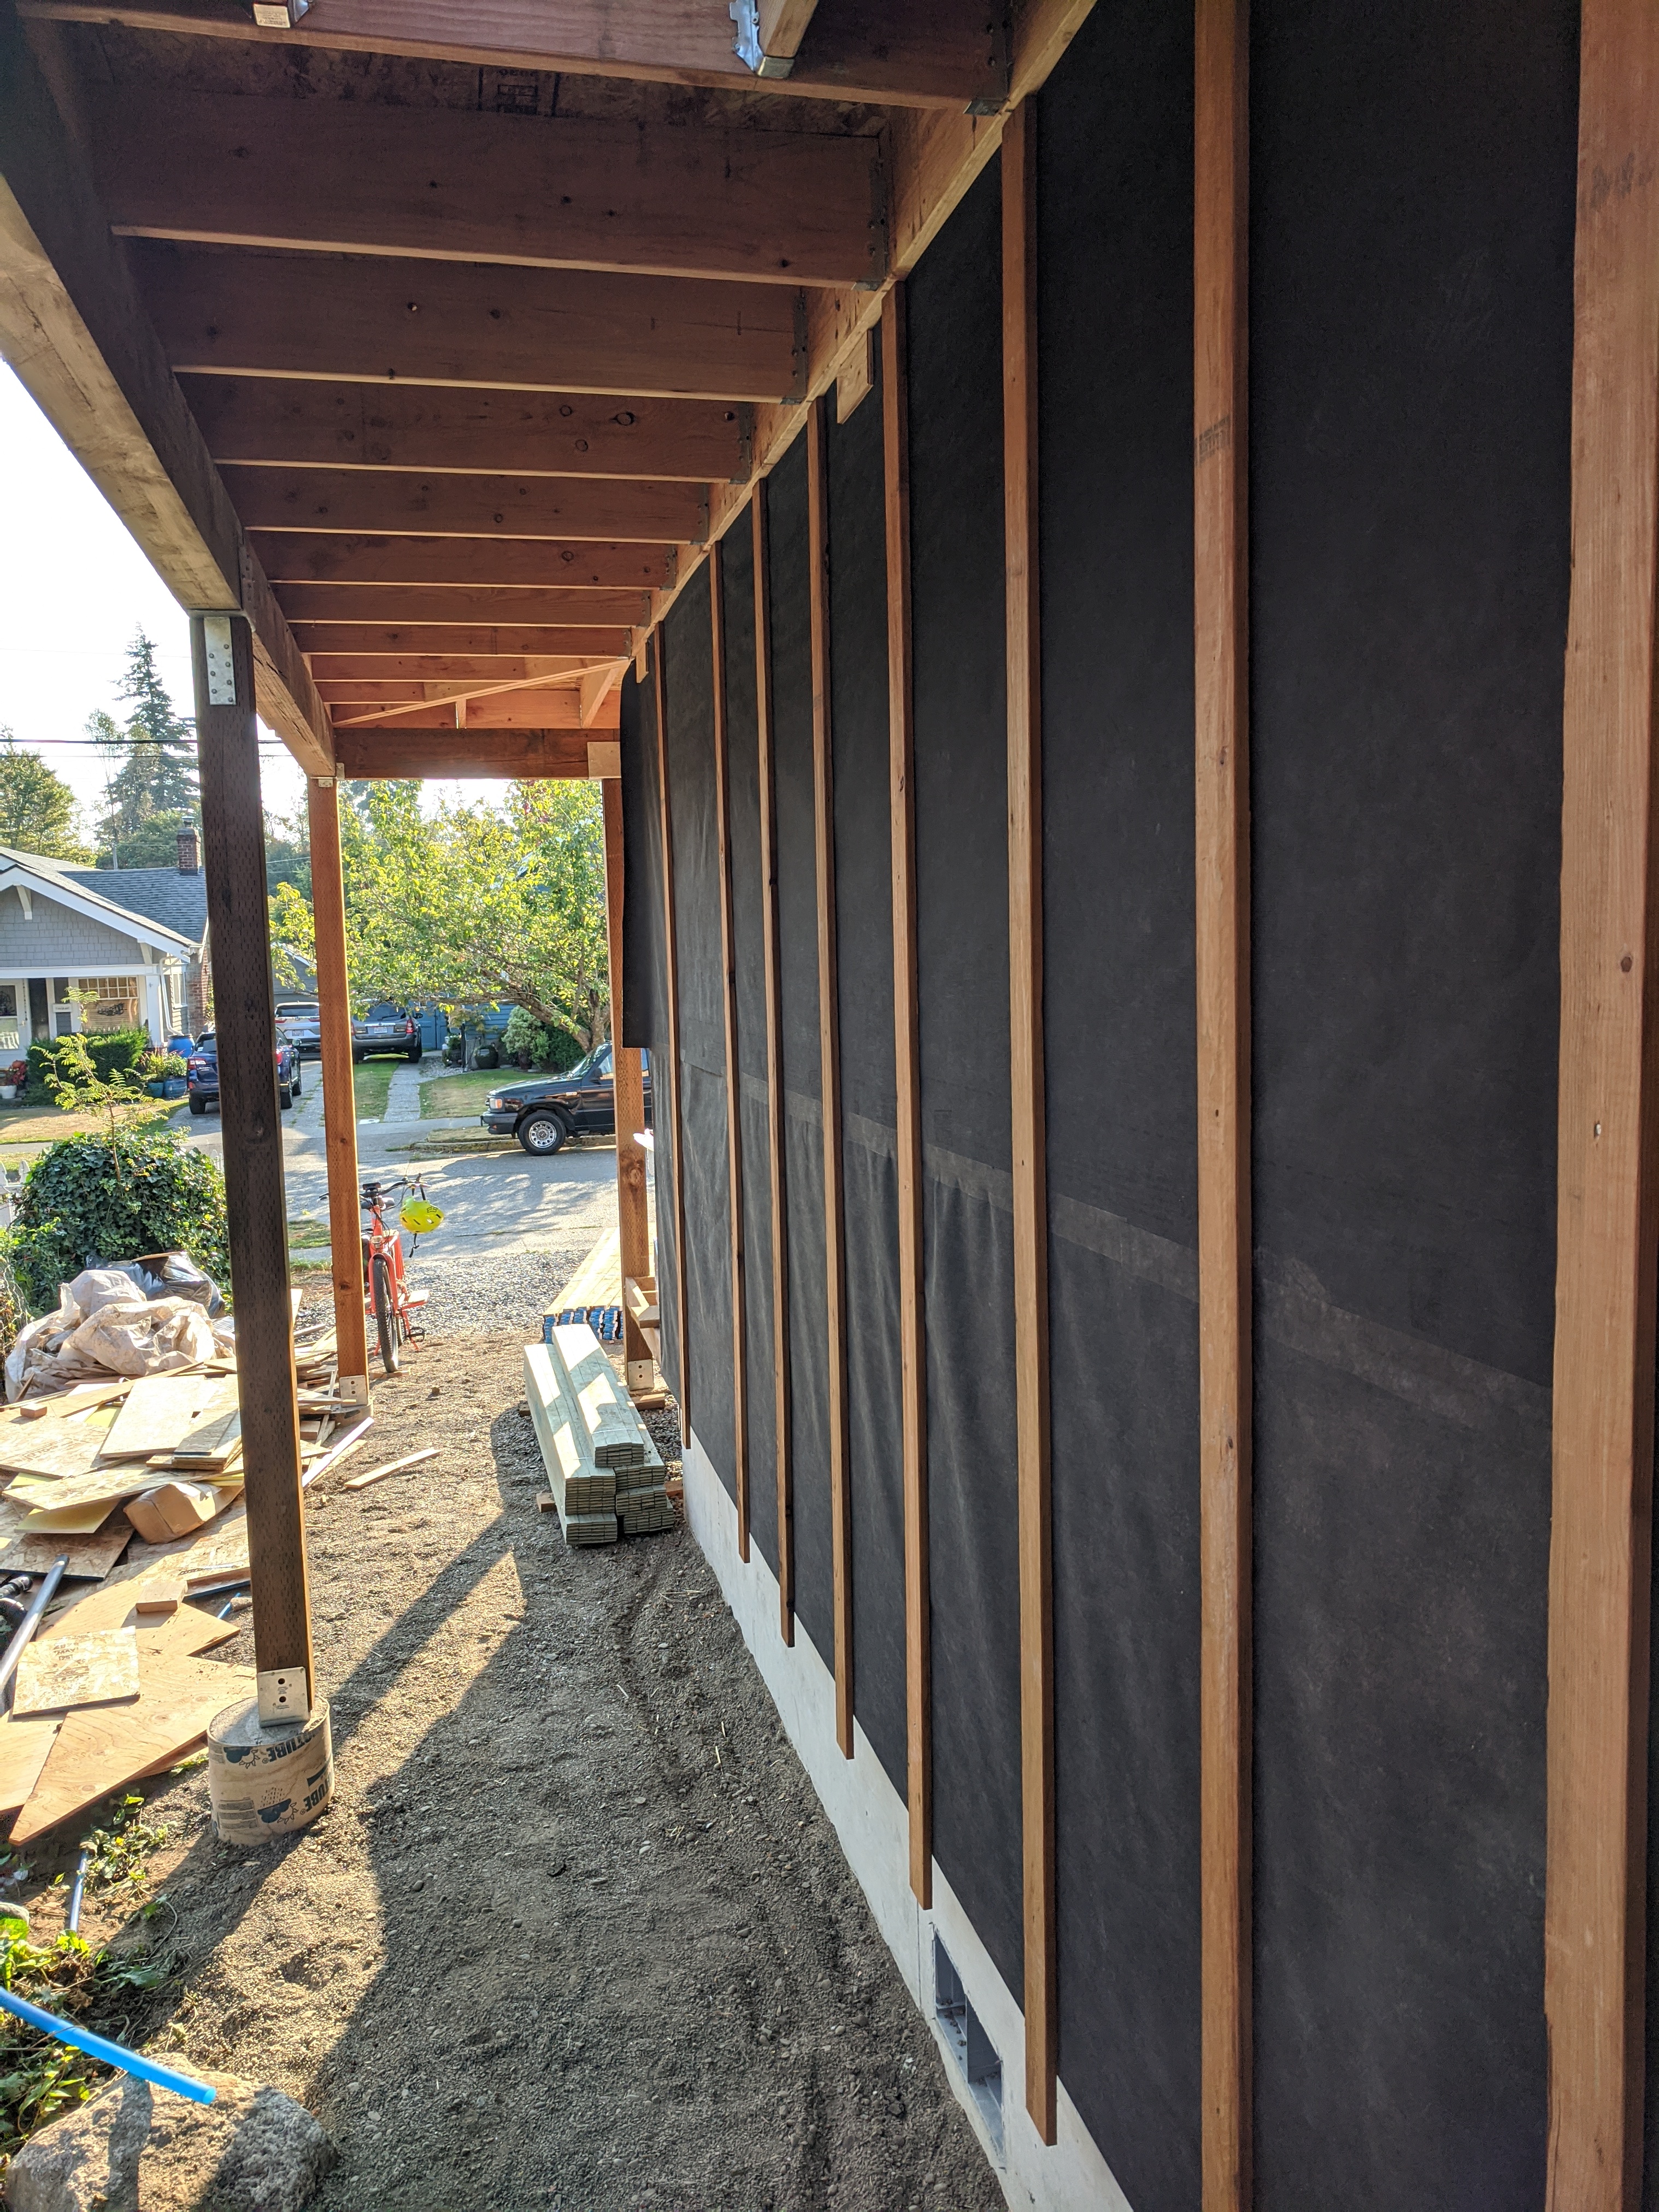
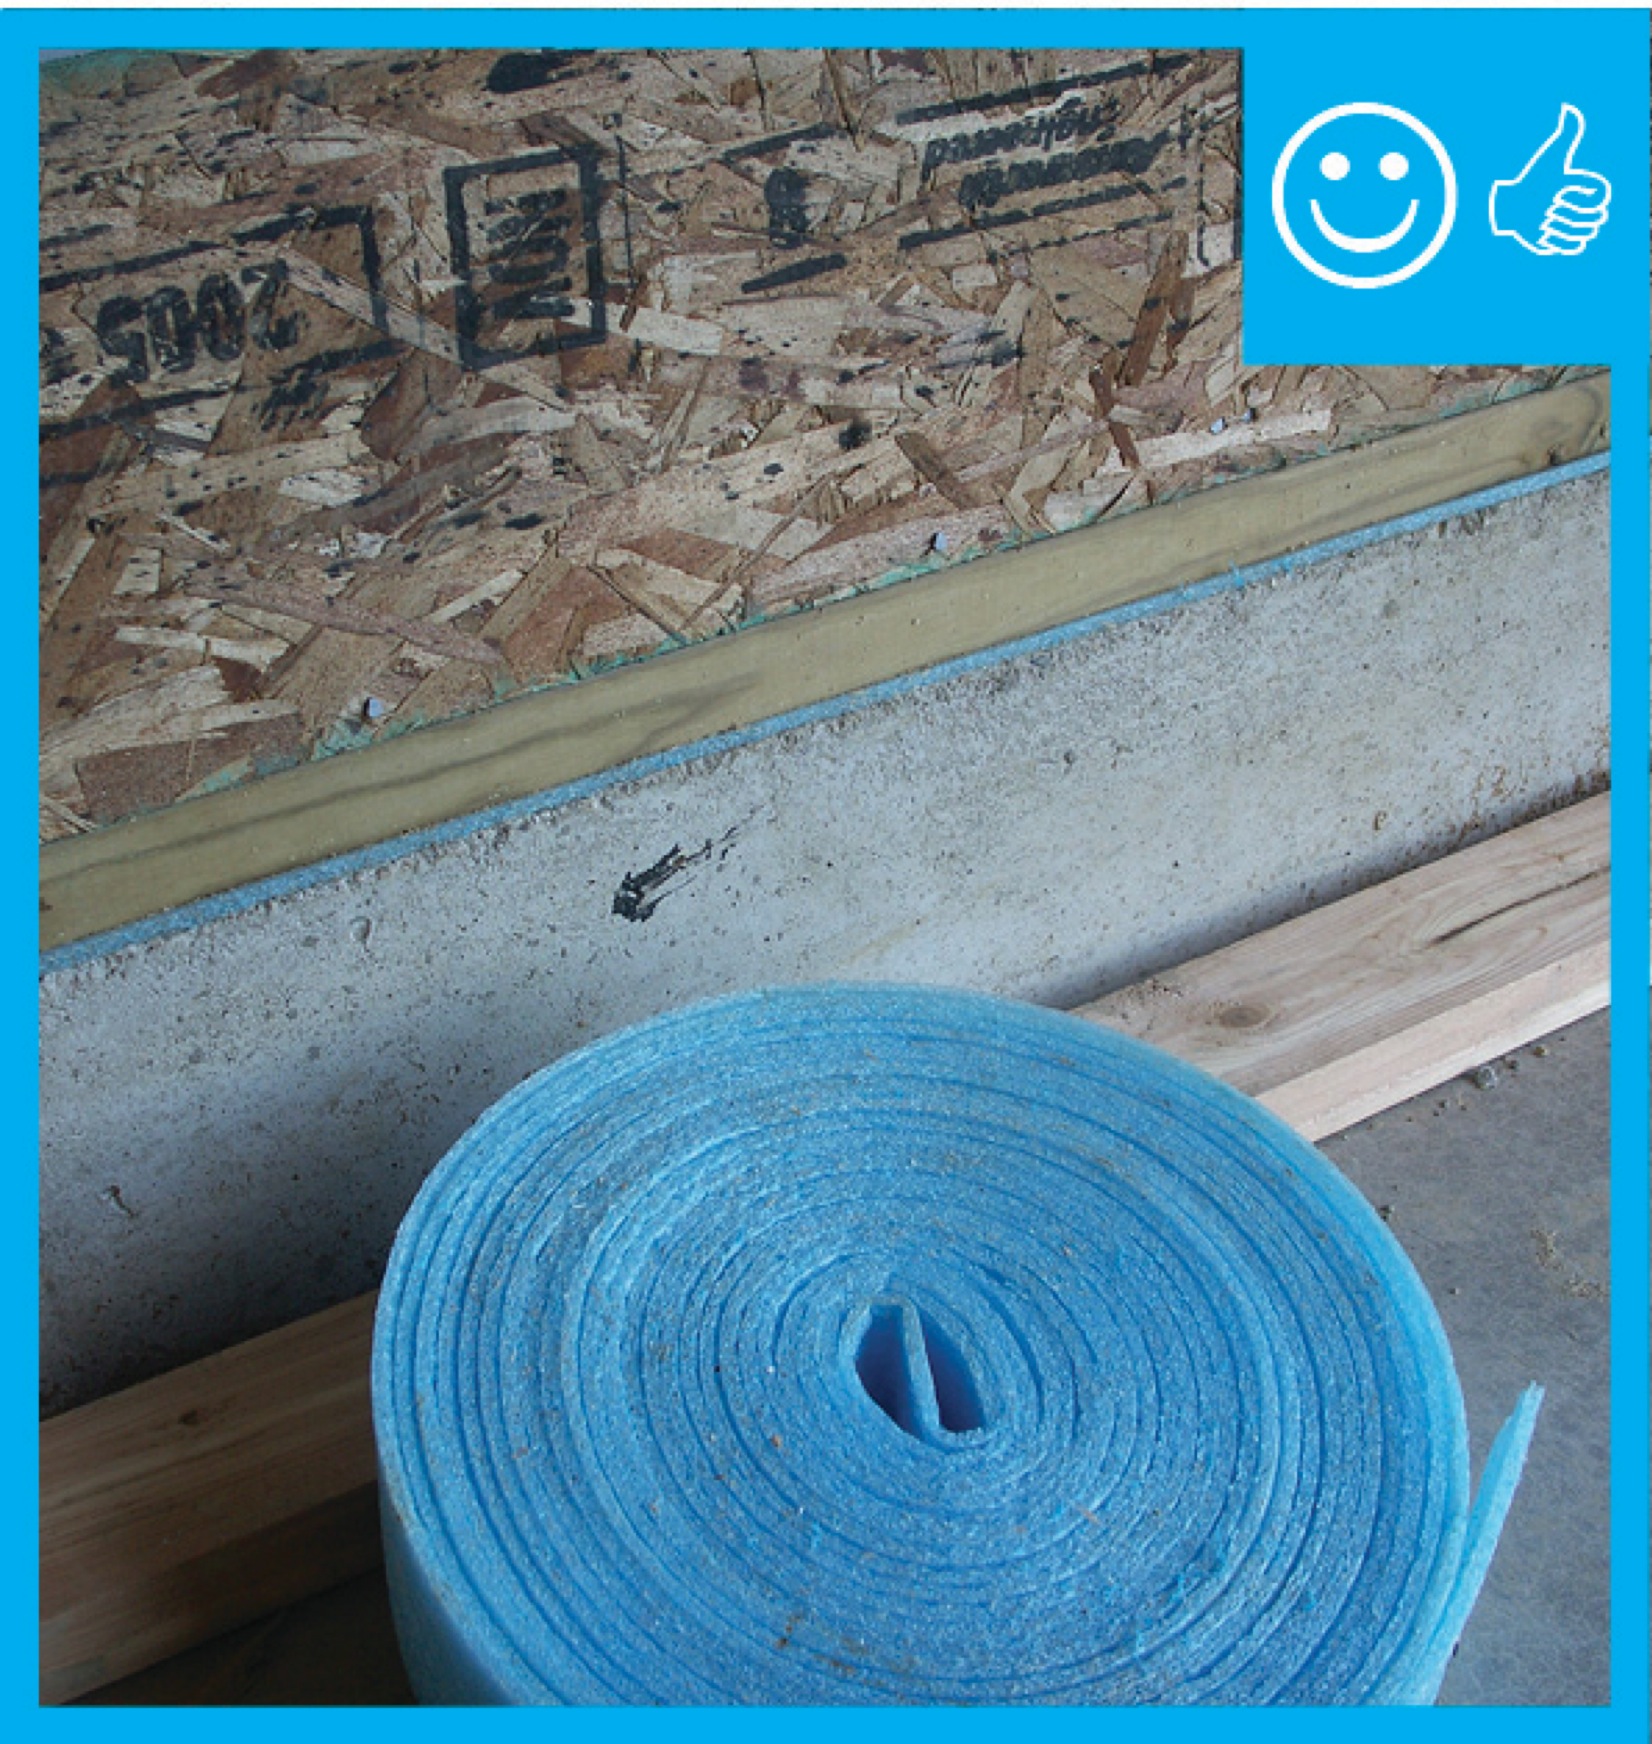
Right - Furring strips create an air gap to allow penetrating moisture to drain instead of wicking into walls; they also provide a nailing surface for siding.
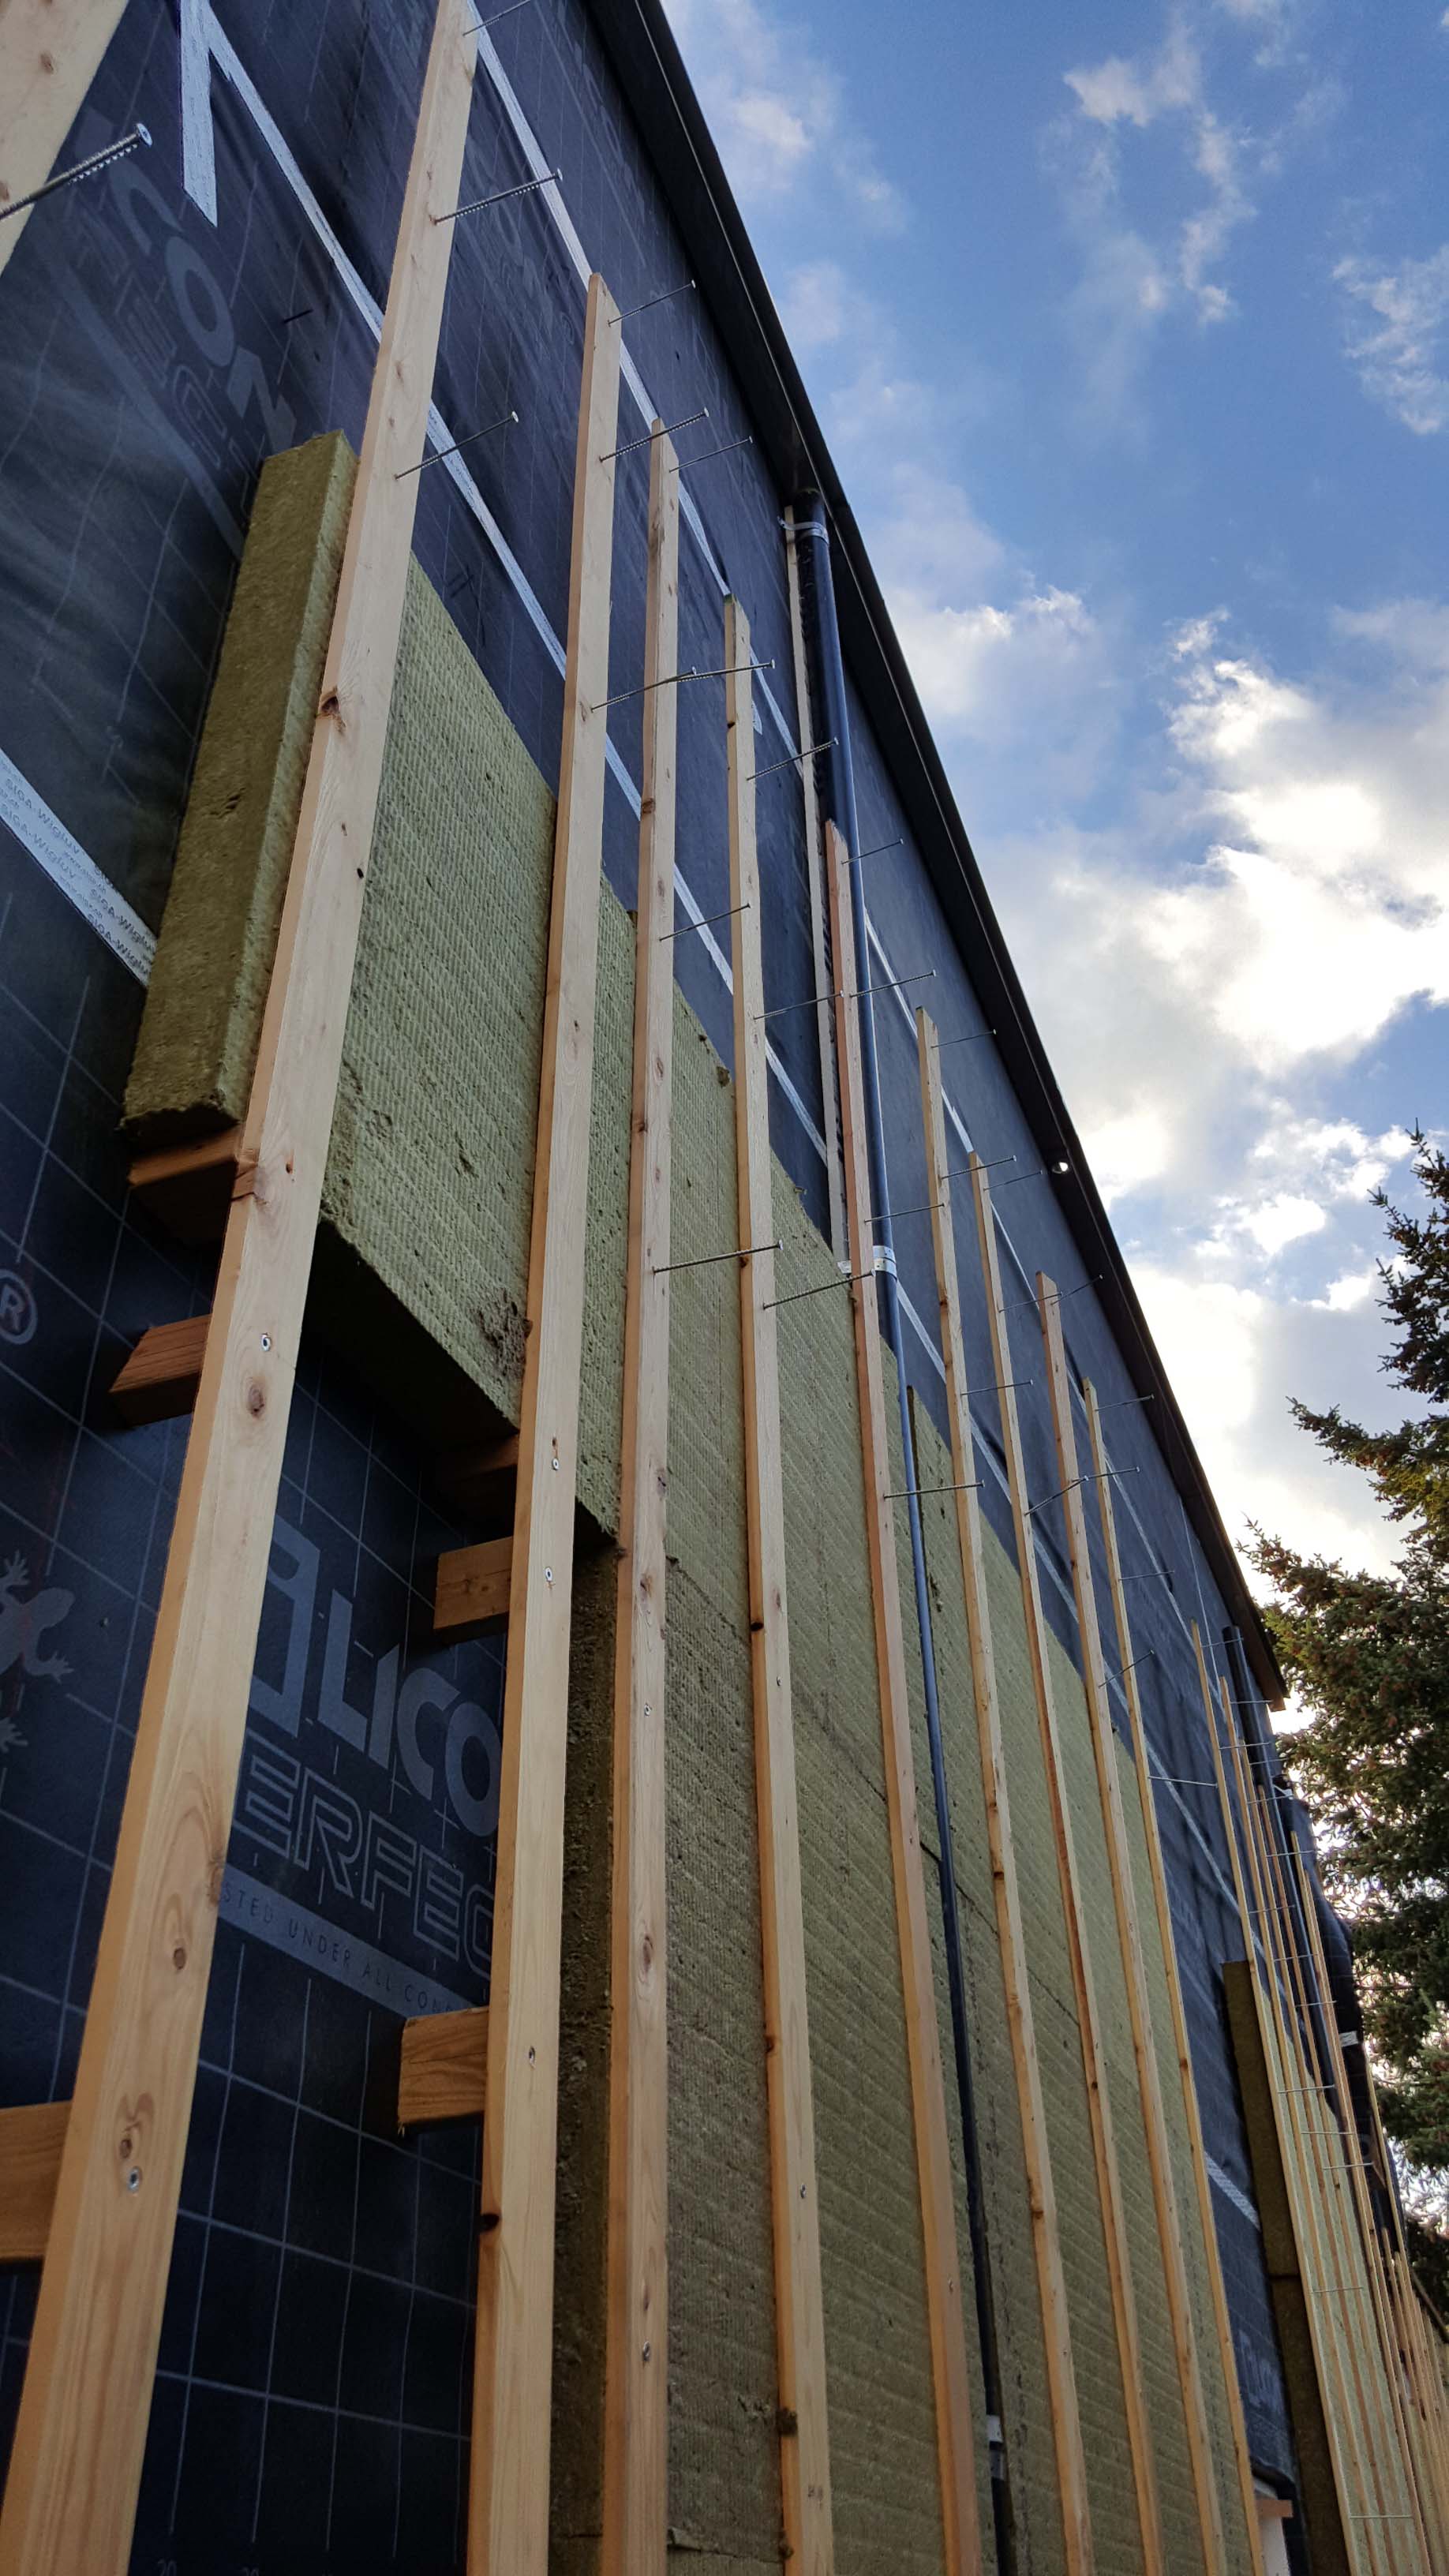
Image
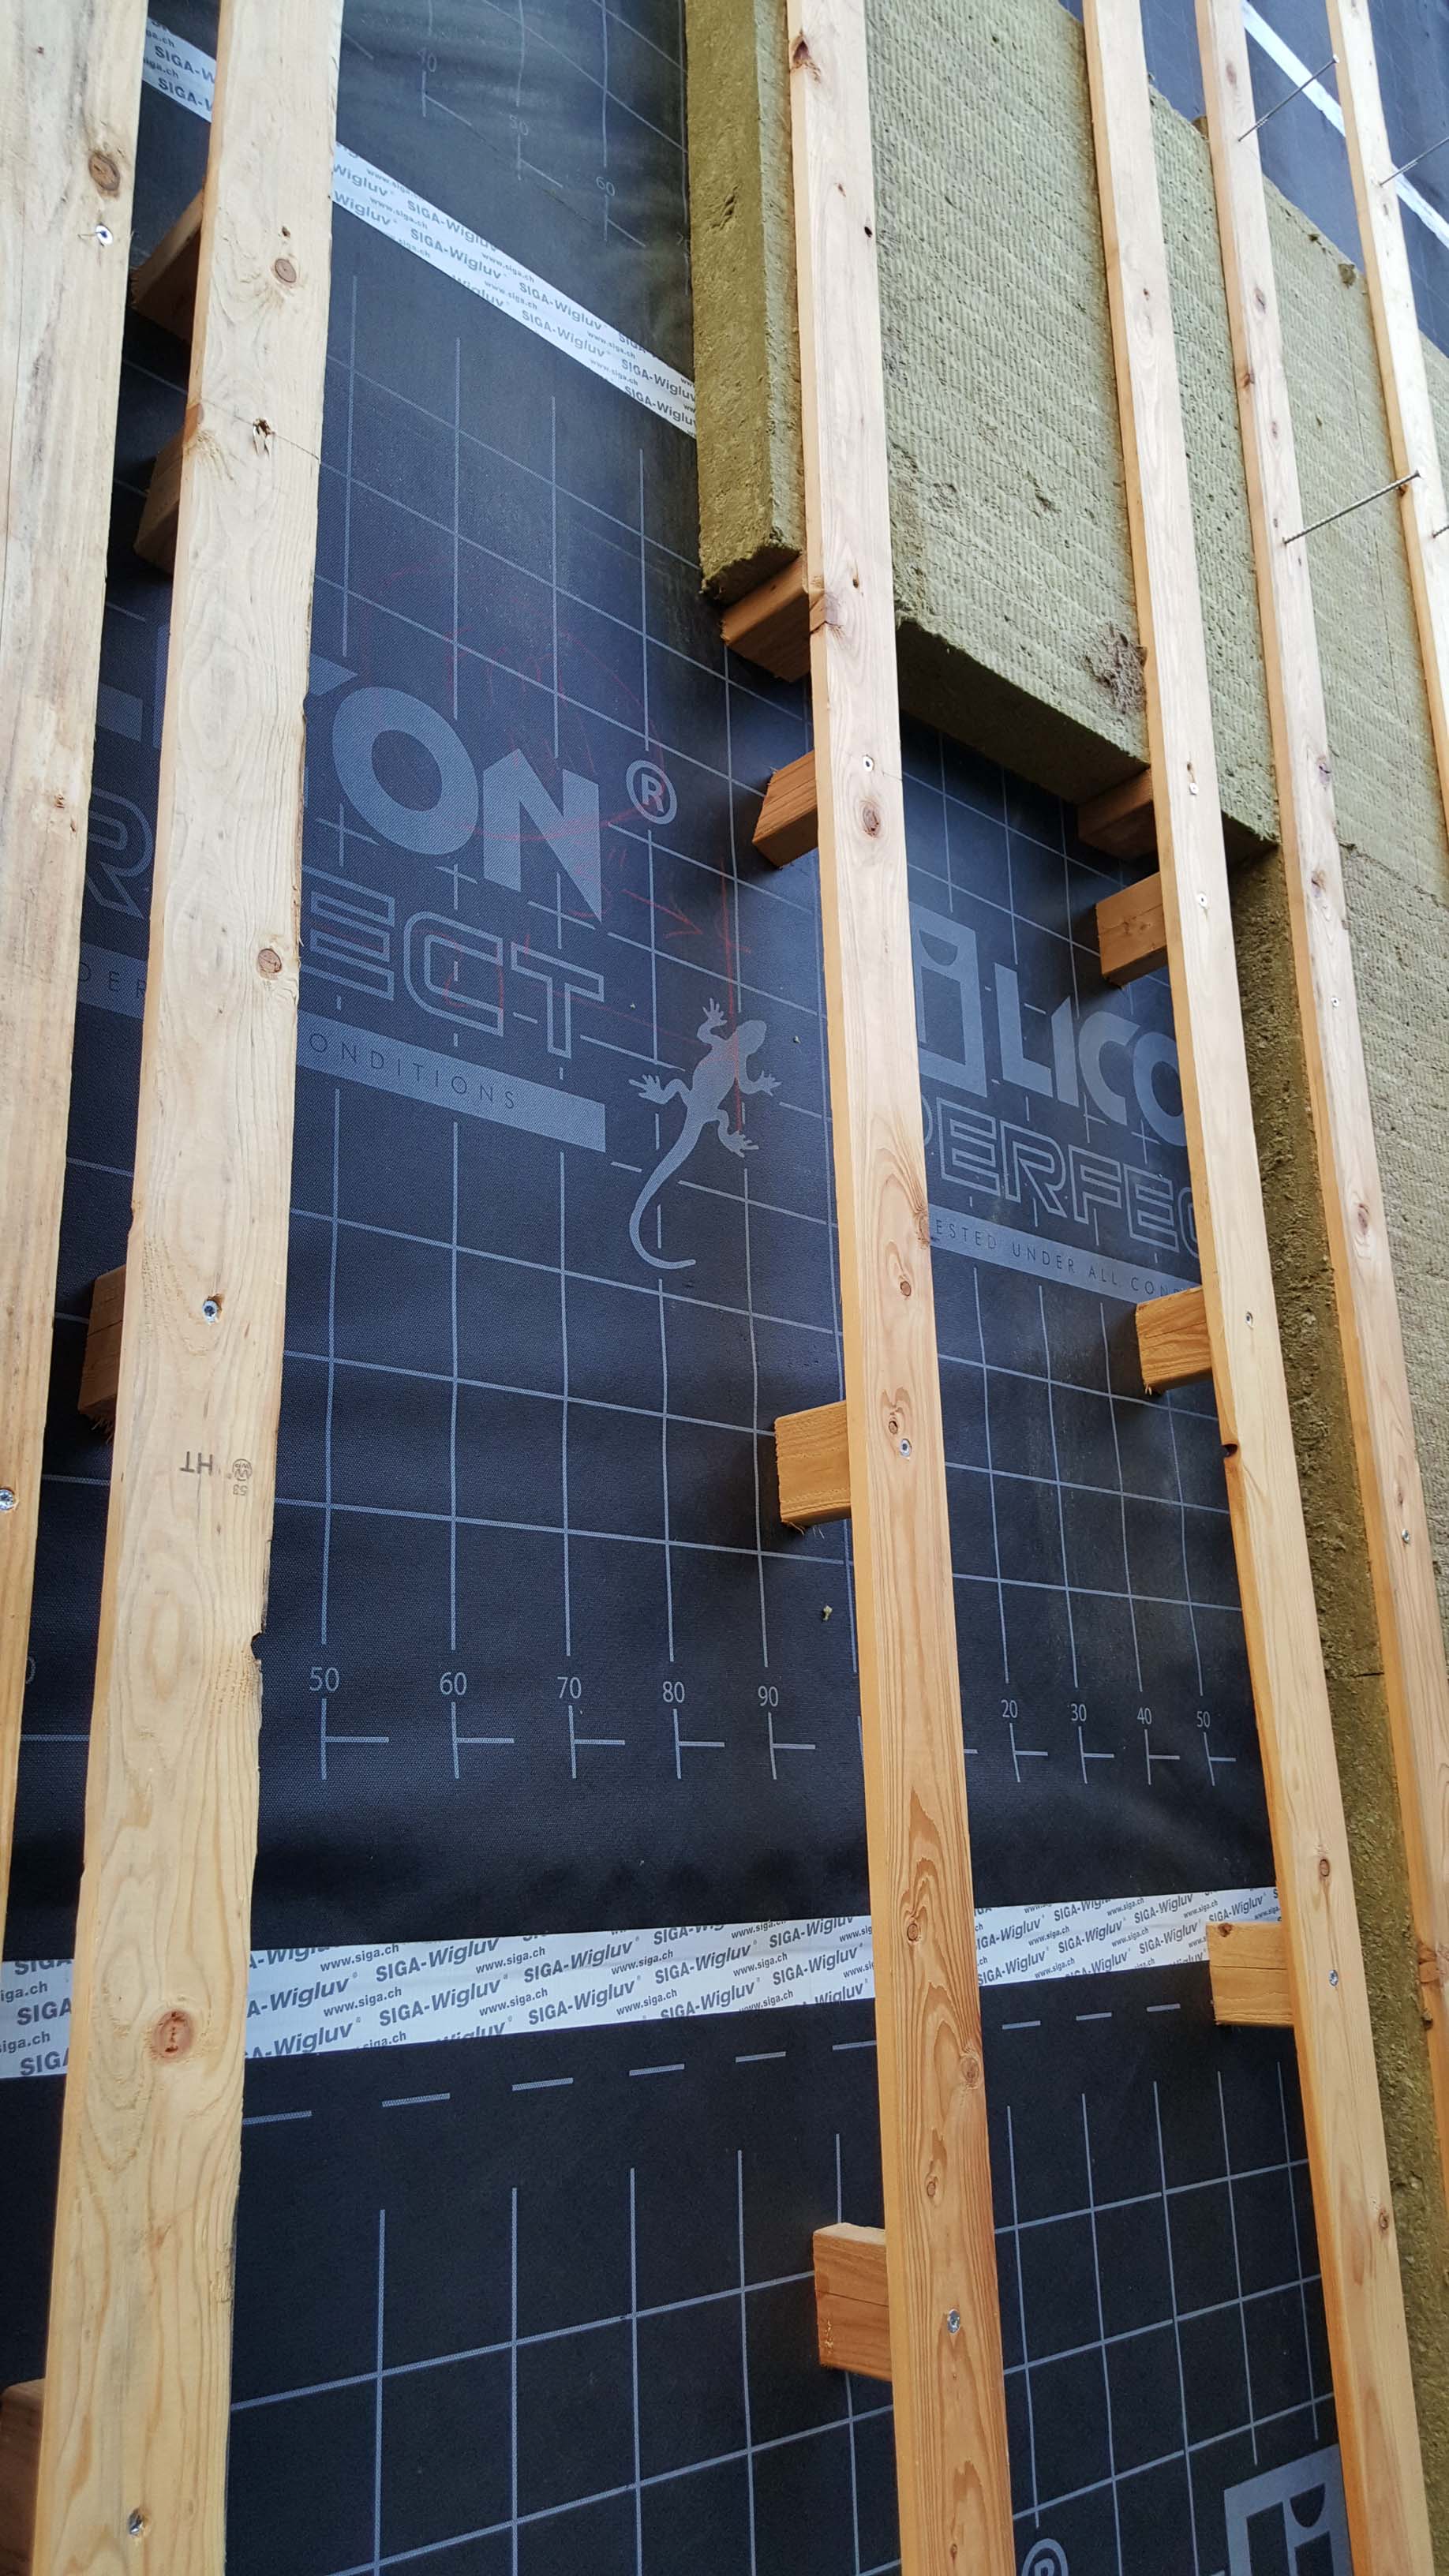
Right - Furring strips were installed with blocking to allow adequate room for 4 inches of mineral wool.
Image
RIght - Furring strips, house wrap, and siding are installed in the field after assembling panelized walls.
Image
Image
Right - Gasket installed at marriage wall connection prior to assembling modules
Image
Image
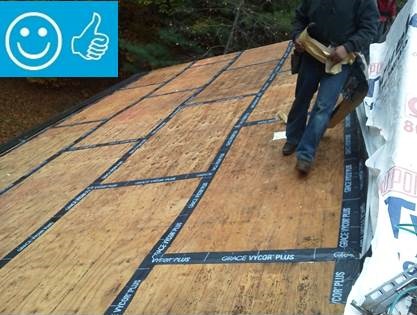
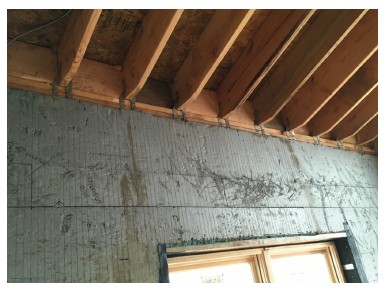
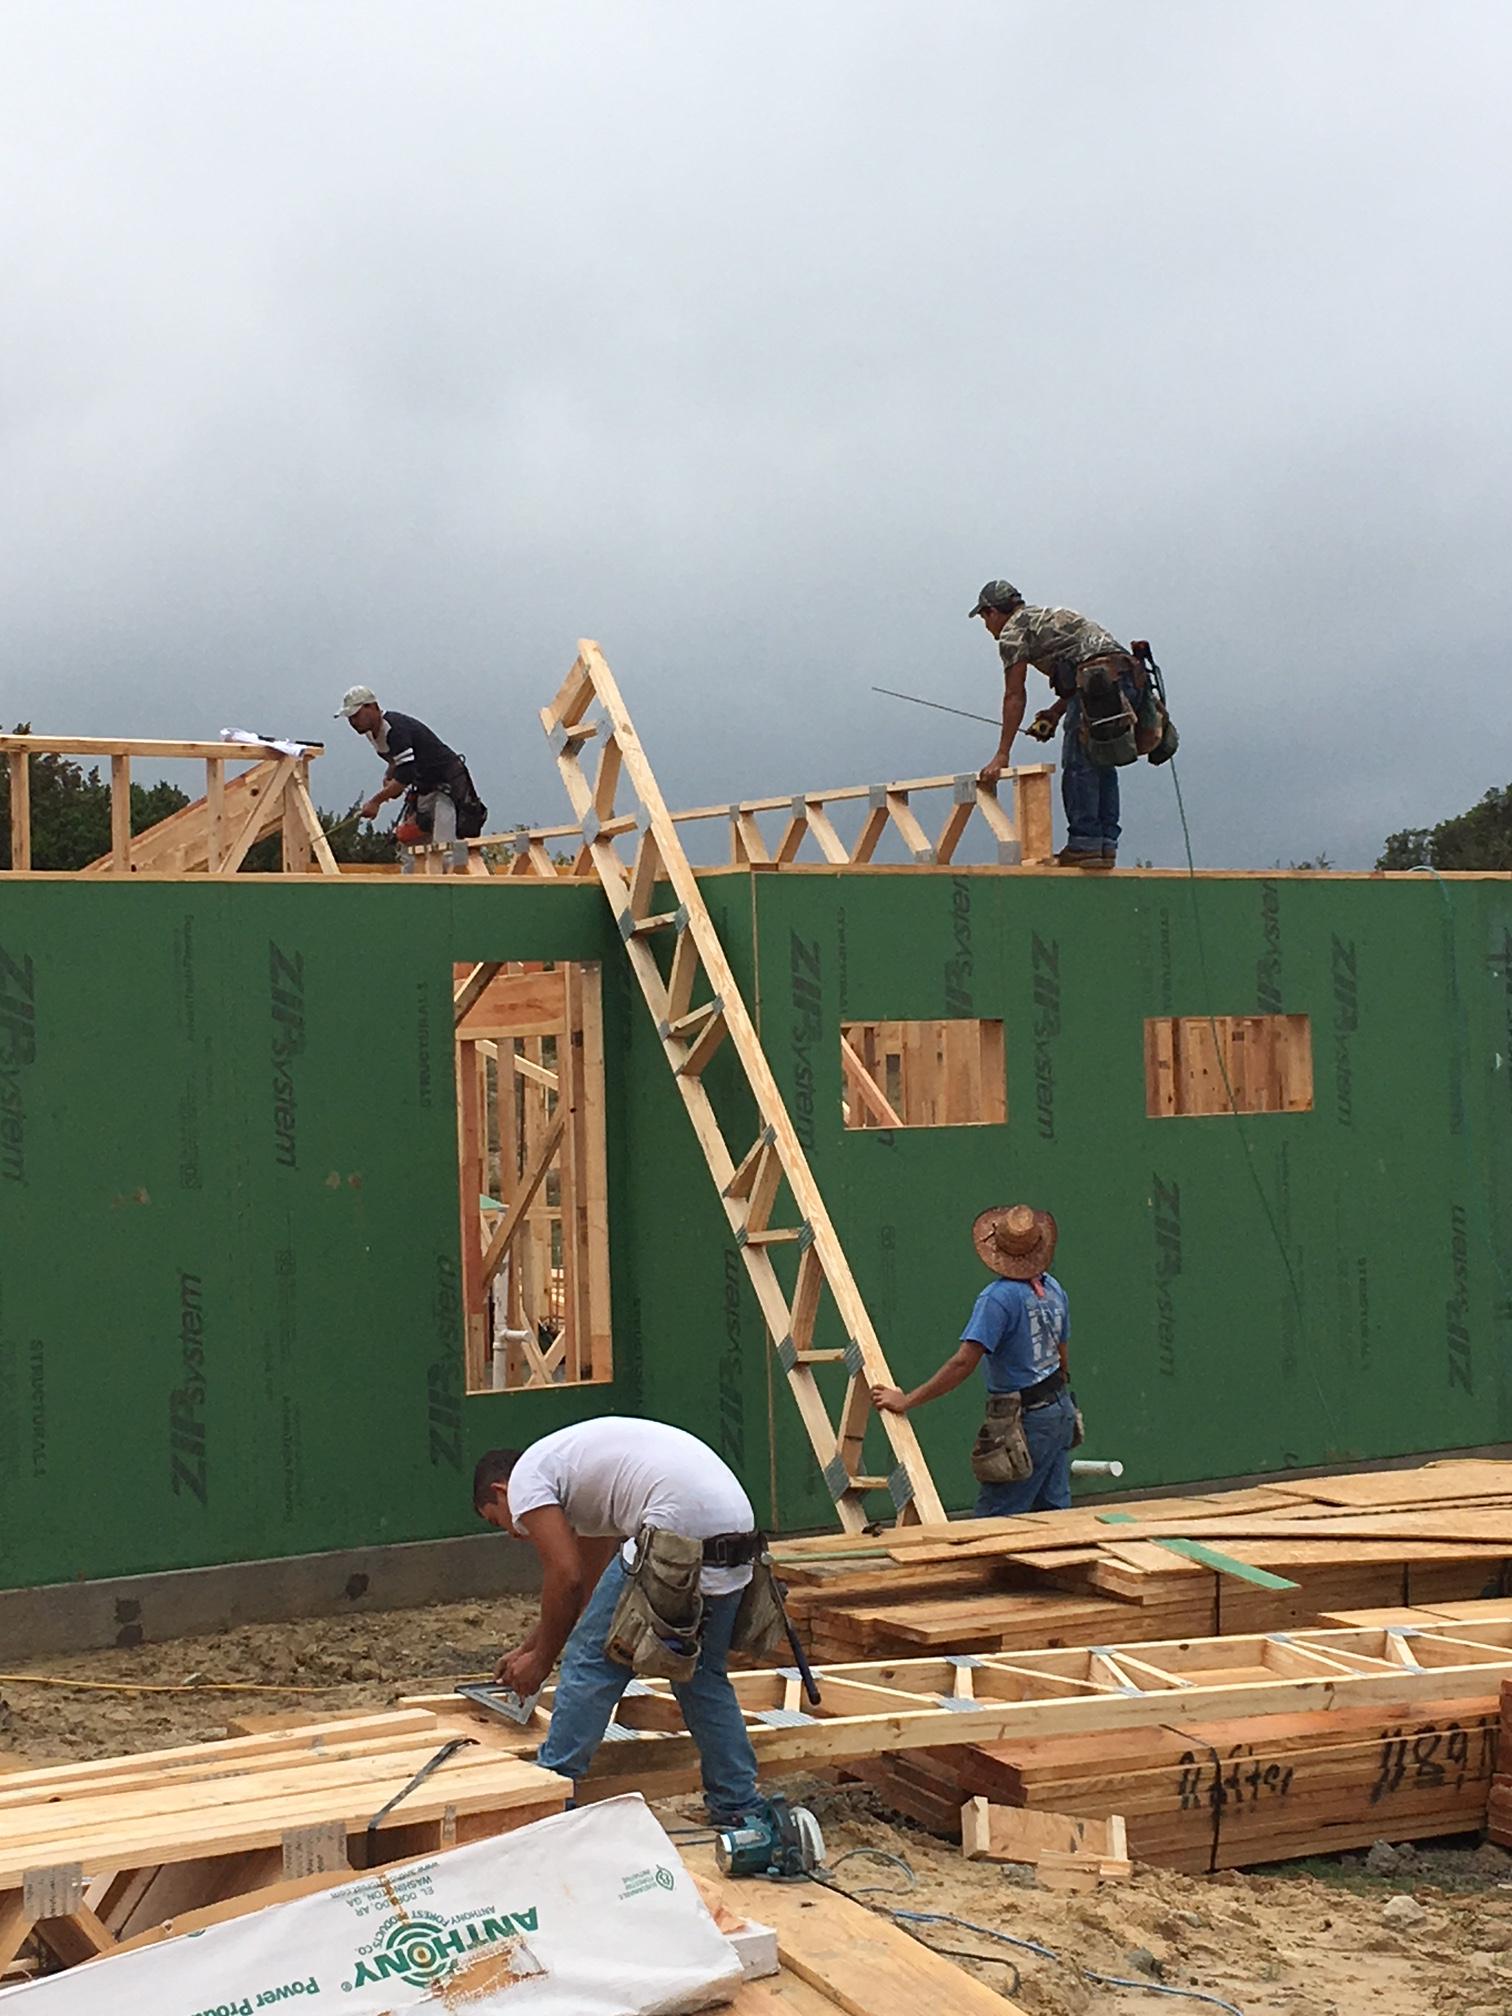
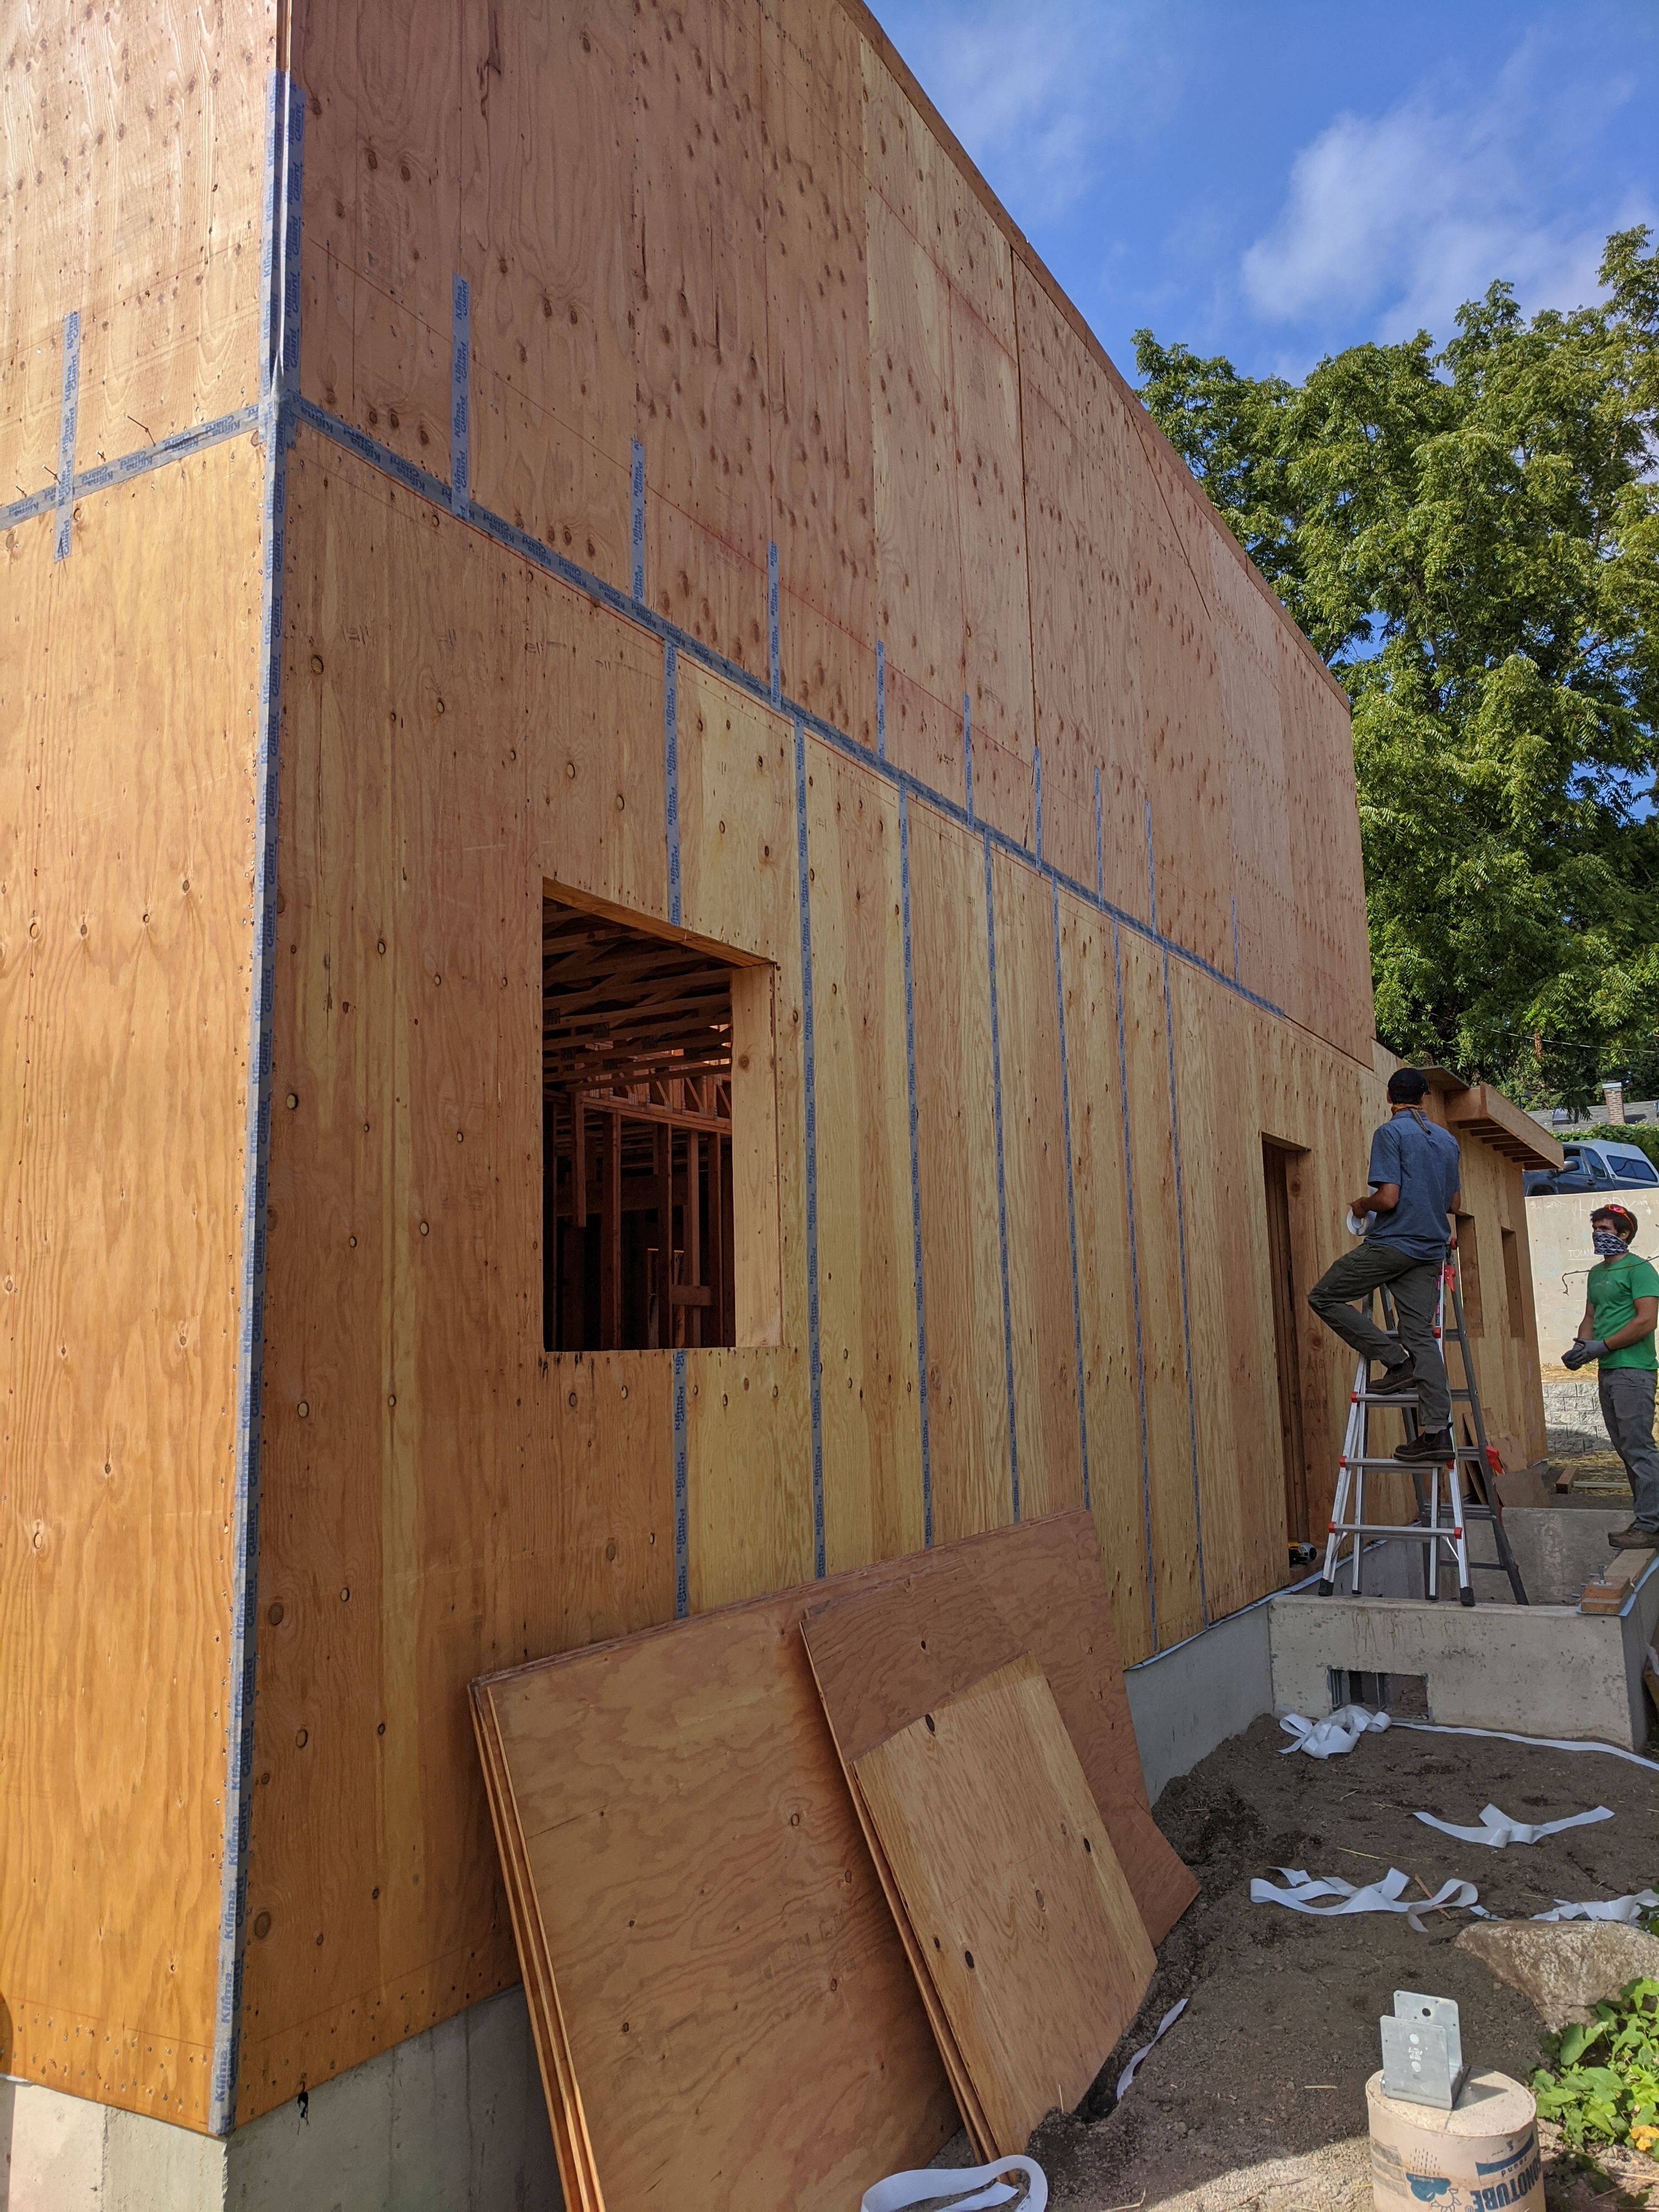
Right - Here, air control is established by taping the seams of the plywood panel sheathing. The roof sheathing is also trimmed flush with the wall sheathing to allow a simple and airtight connection between the roof and wall assemblies
Image
Right - Hole drilled to verify sealant is present - Hole will be sealed after verification
Image
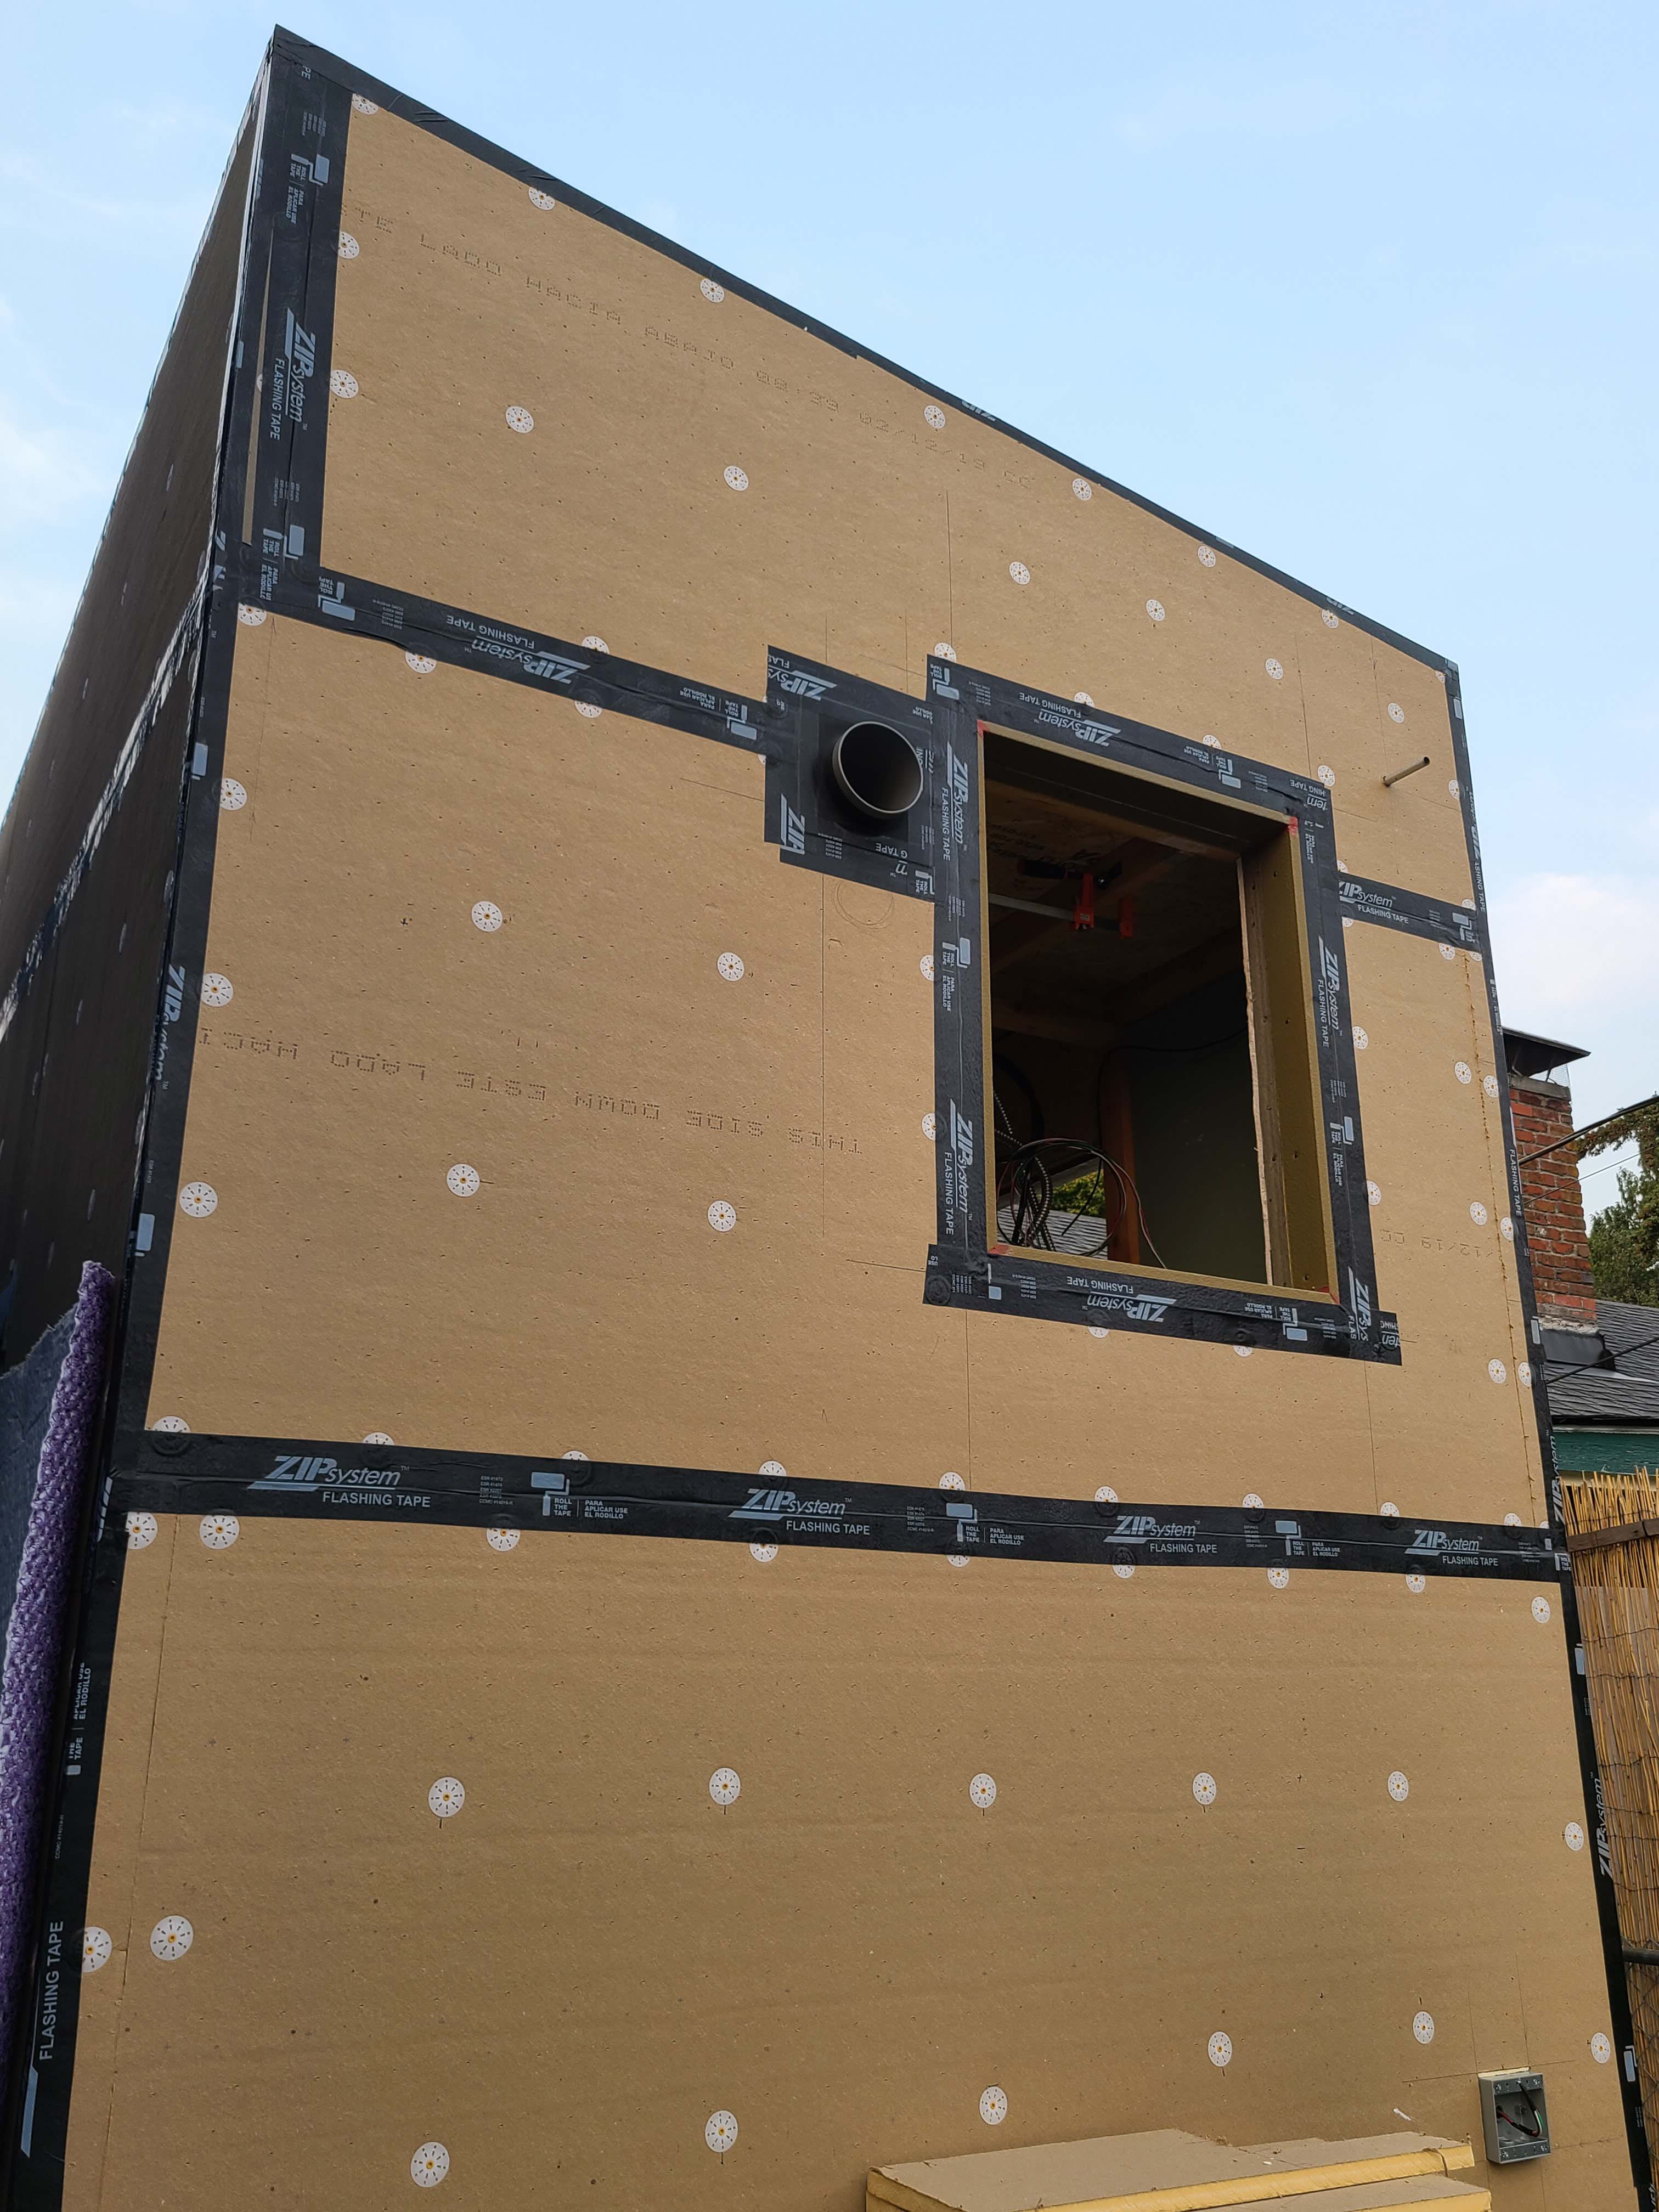
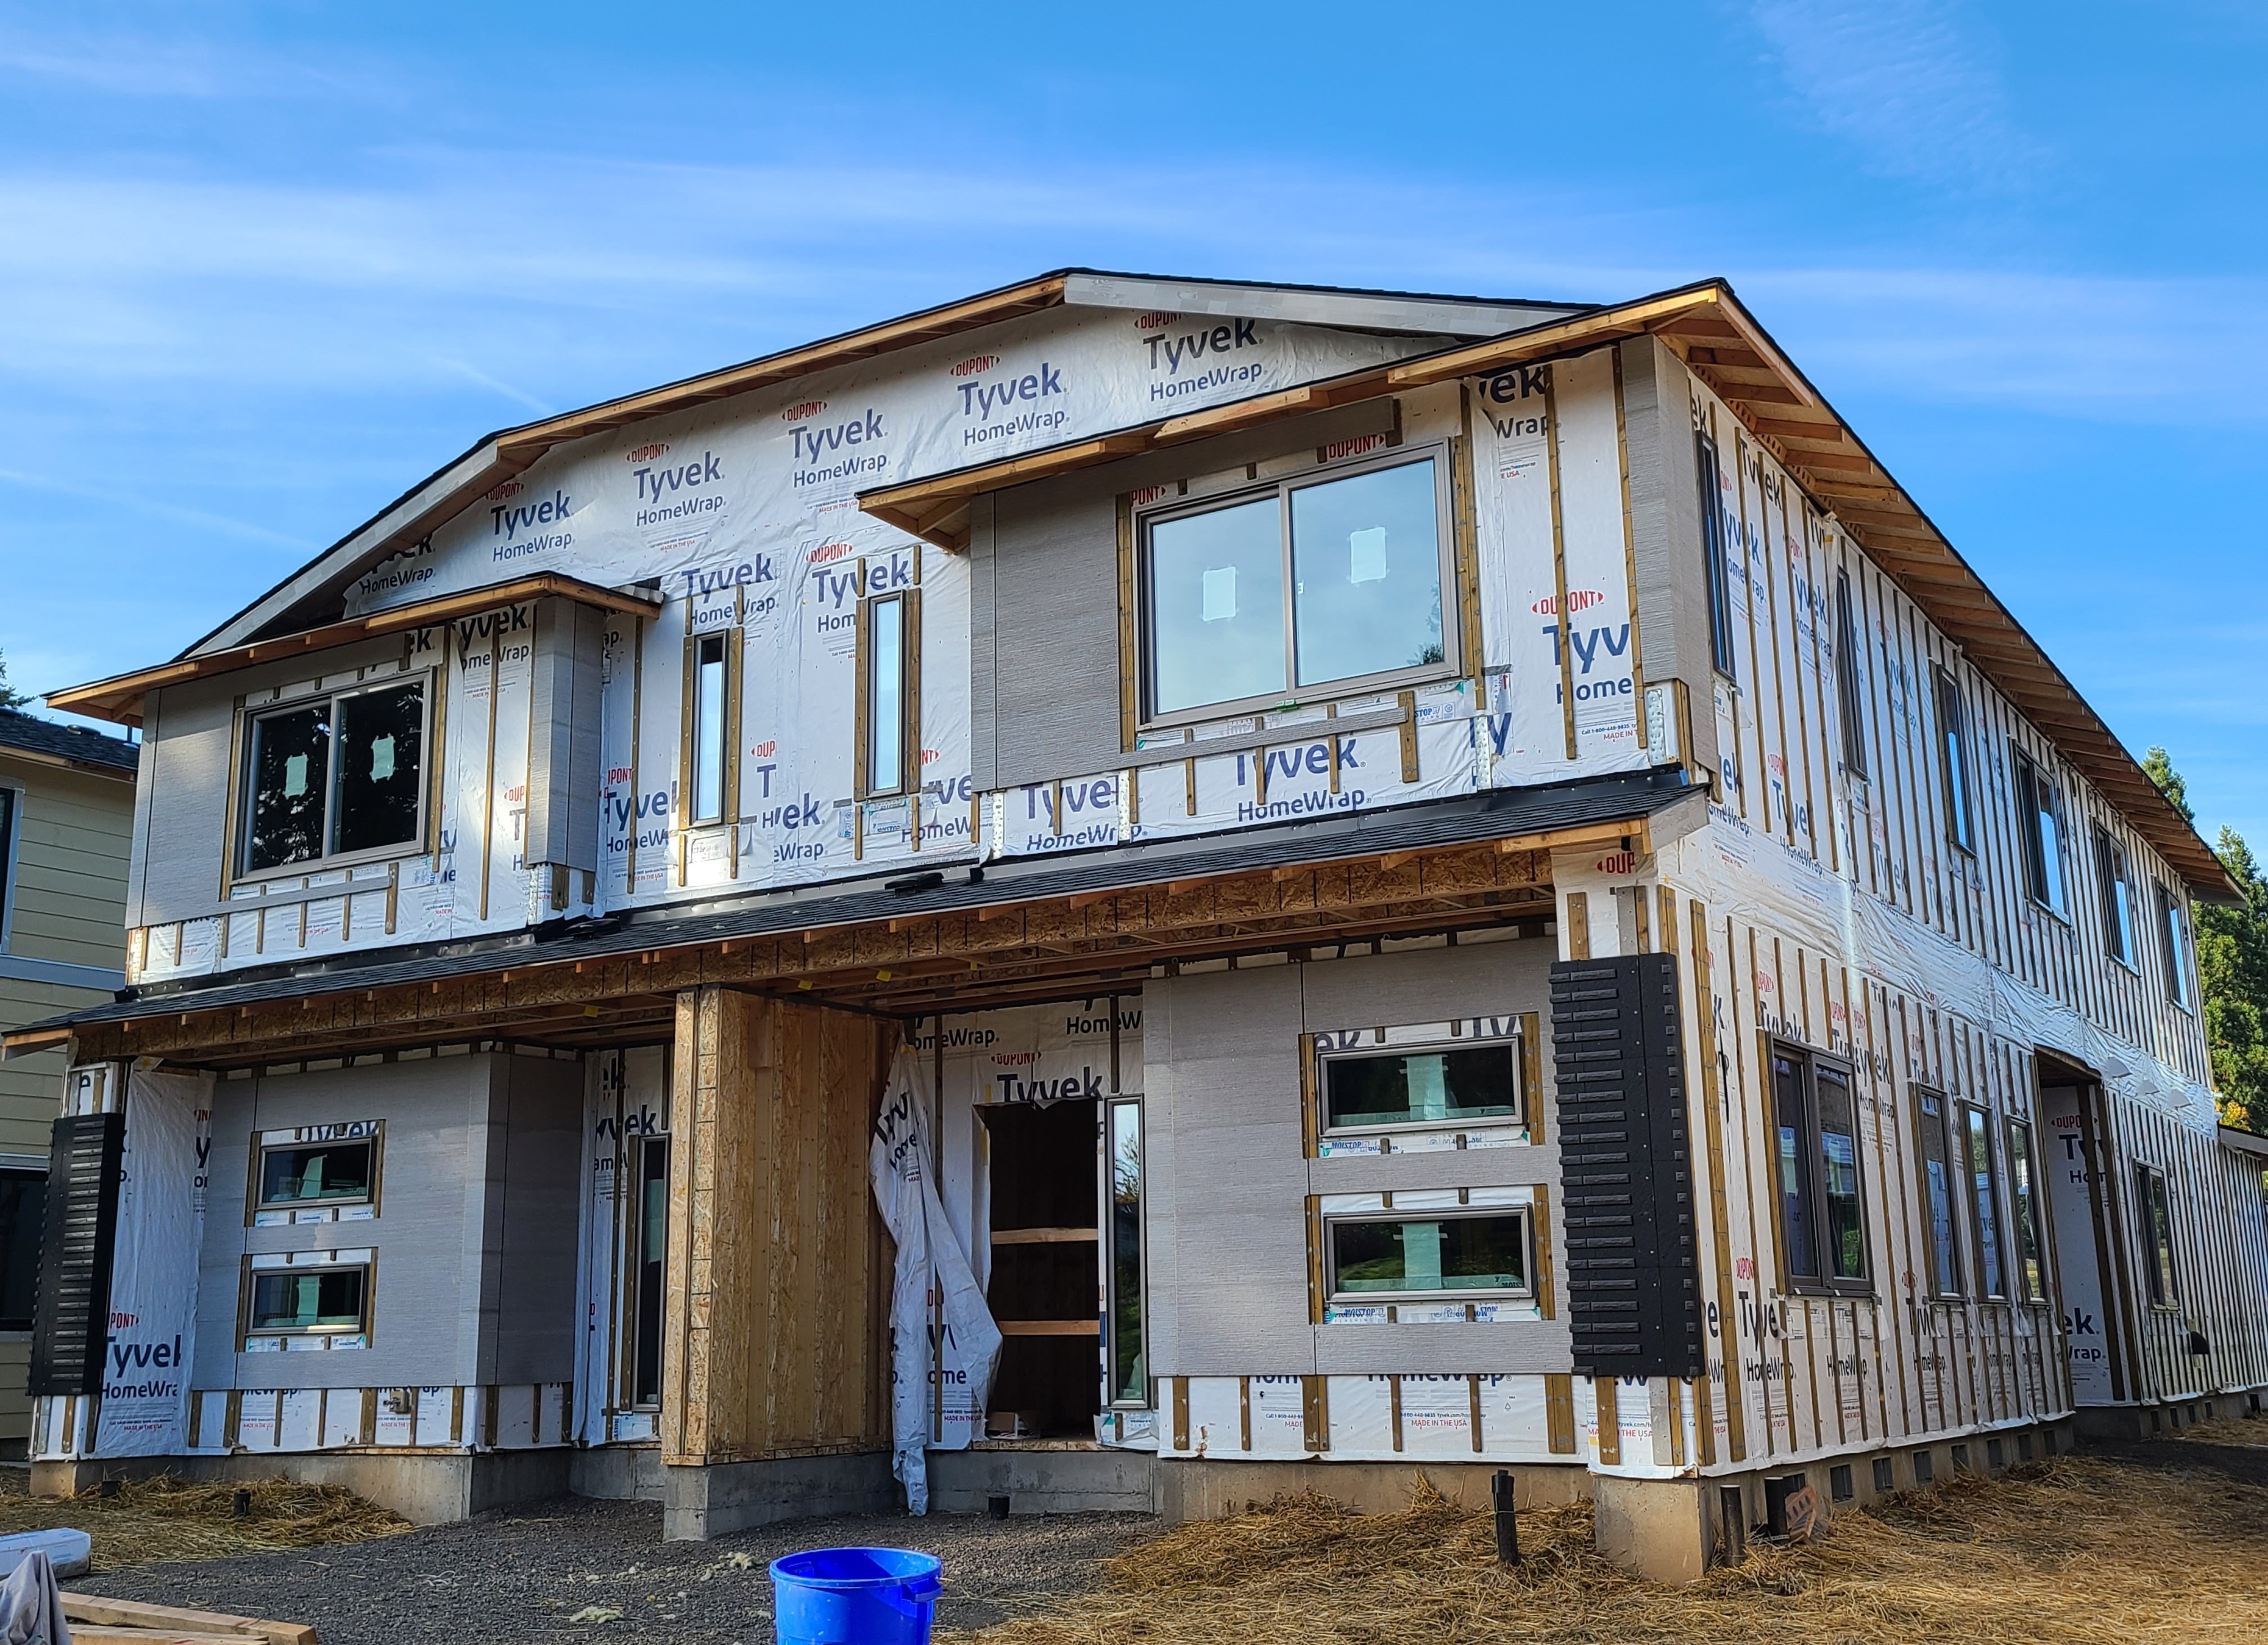
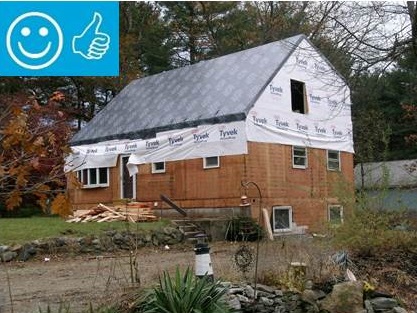
Right - House wrap is carefully installed from the top of the roof line to the foundation; seams are overlapped and taped to provide a continuous air- and weather-resistant barrier
Image

Right - House wrap is lapped back over first layer of flashing tape, then a second layer of flashing tape is applied to the sides around the duct; 13 of 14.
Image

Right - House wrap is overlapped “shingle” style to direct moisture down and away from the house; seams will be taped so house wrap serves as both an air and weather barrier.
Image

Image
Right - HVAC ducts should be well-supported with minimal bends and pinching.
Image
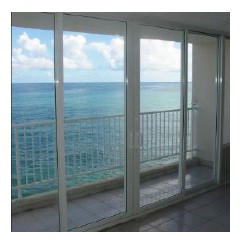
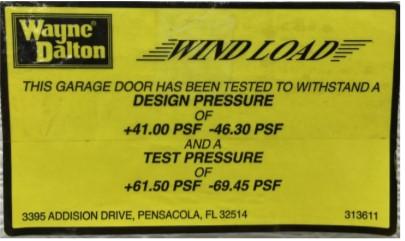
Right - Impact-resistant glass protects windows from wind-borne debris and is always in place, requiring no manual deployment during a storm.
Image
Right - In areas prone to costal flooding, elevate the bottom floor well above the design flood elevation.
Image
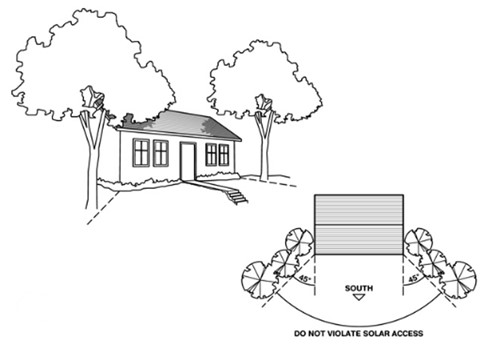
Right - In cooler climates, landscape shading should focus on the east- and west-facing walls, while leaving the south side of the house clear for solar access in winter (well-sized roof overhangs could provide summer shading for the south-facing windows)
Image
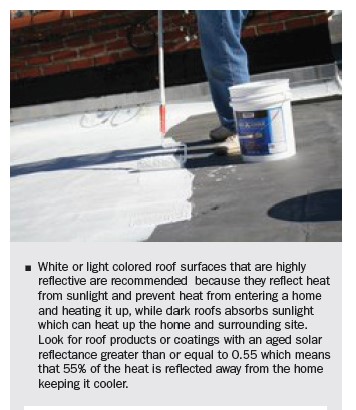
Right - In hot climates, paint flat roofs light colors to reflect solar heat gain.
Image
Right - Install backflow prevention devices on plumbing pipes to prevent wastewater from entering the home's plumbing system.
Image
Right - Installation steps for the L-bent strap method of bracing a gable end wall
Image
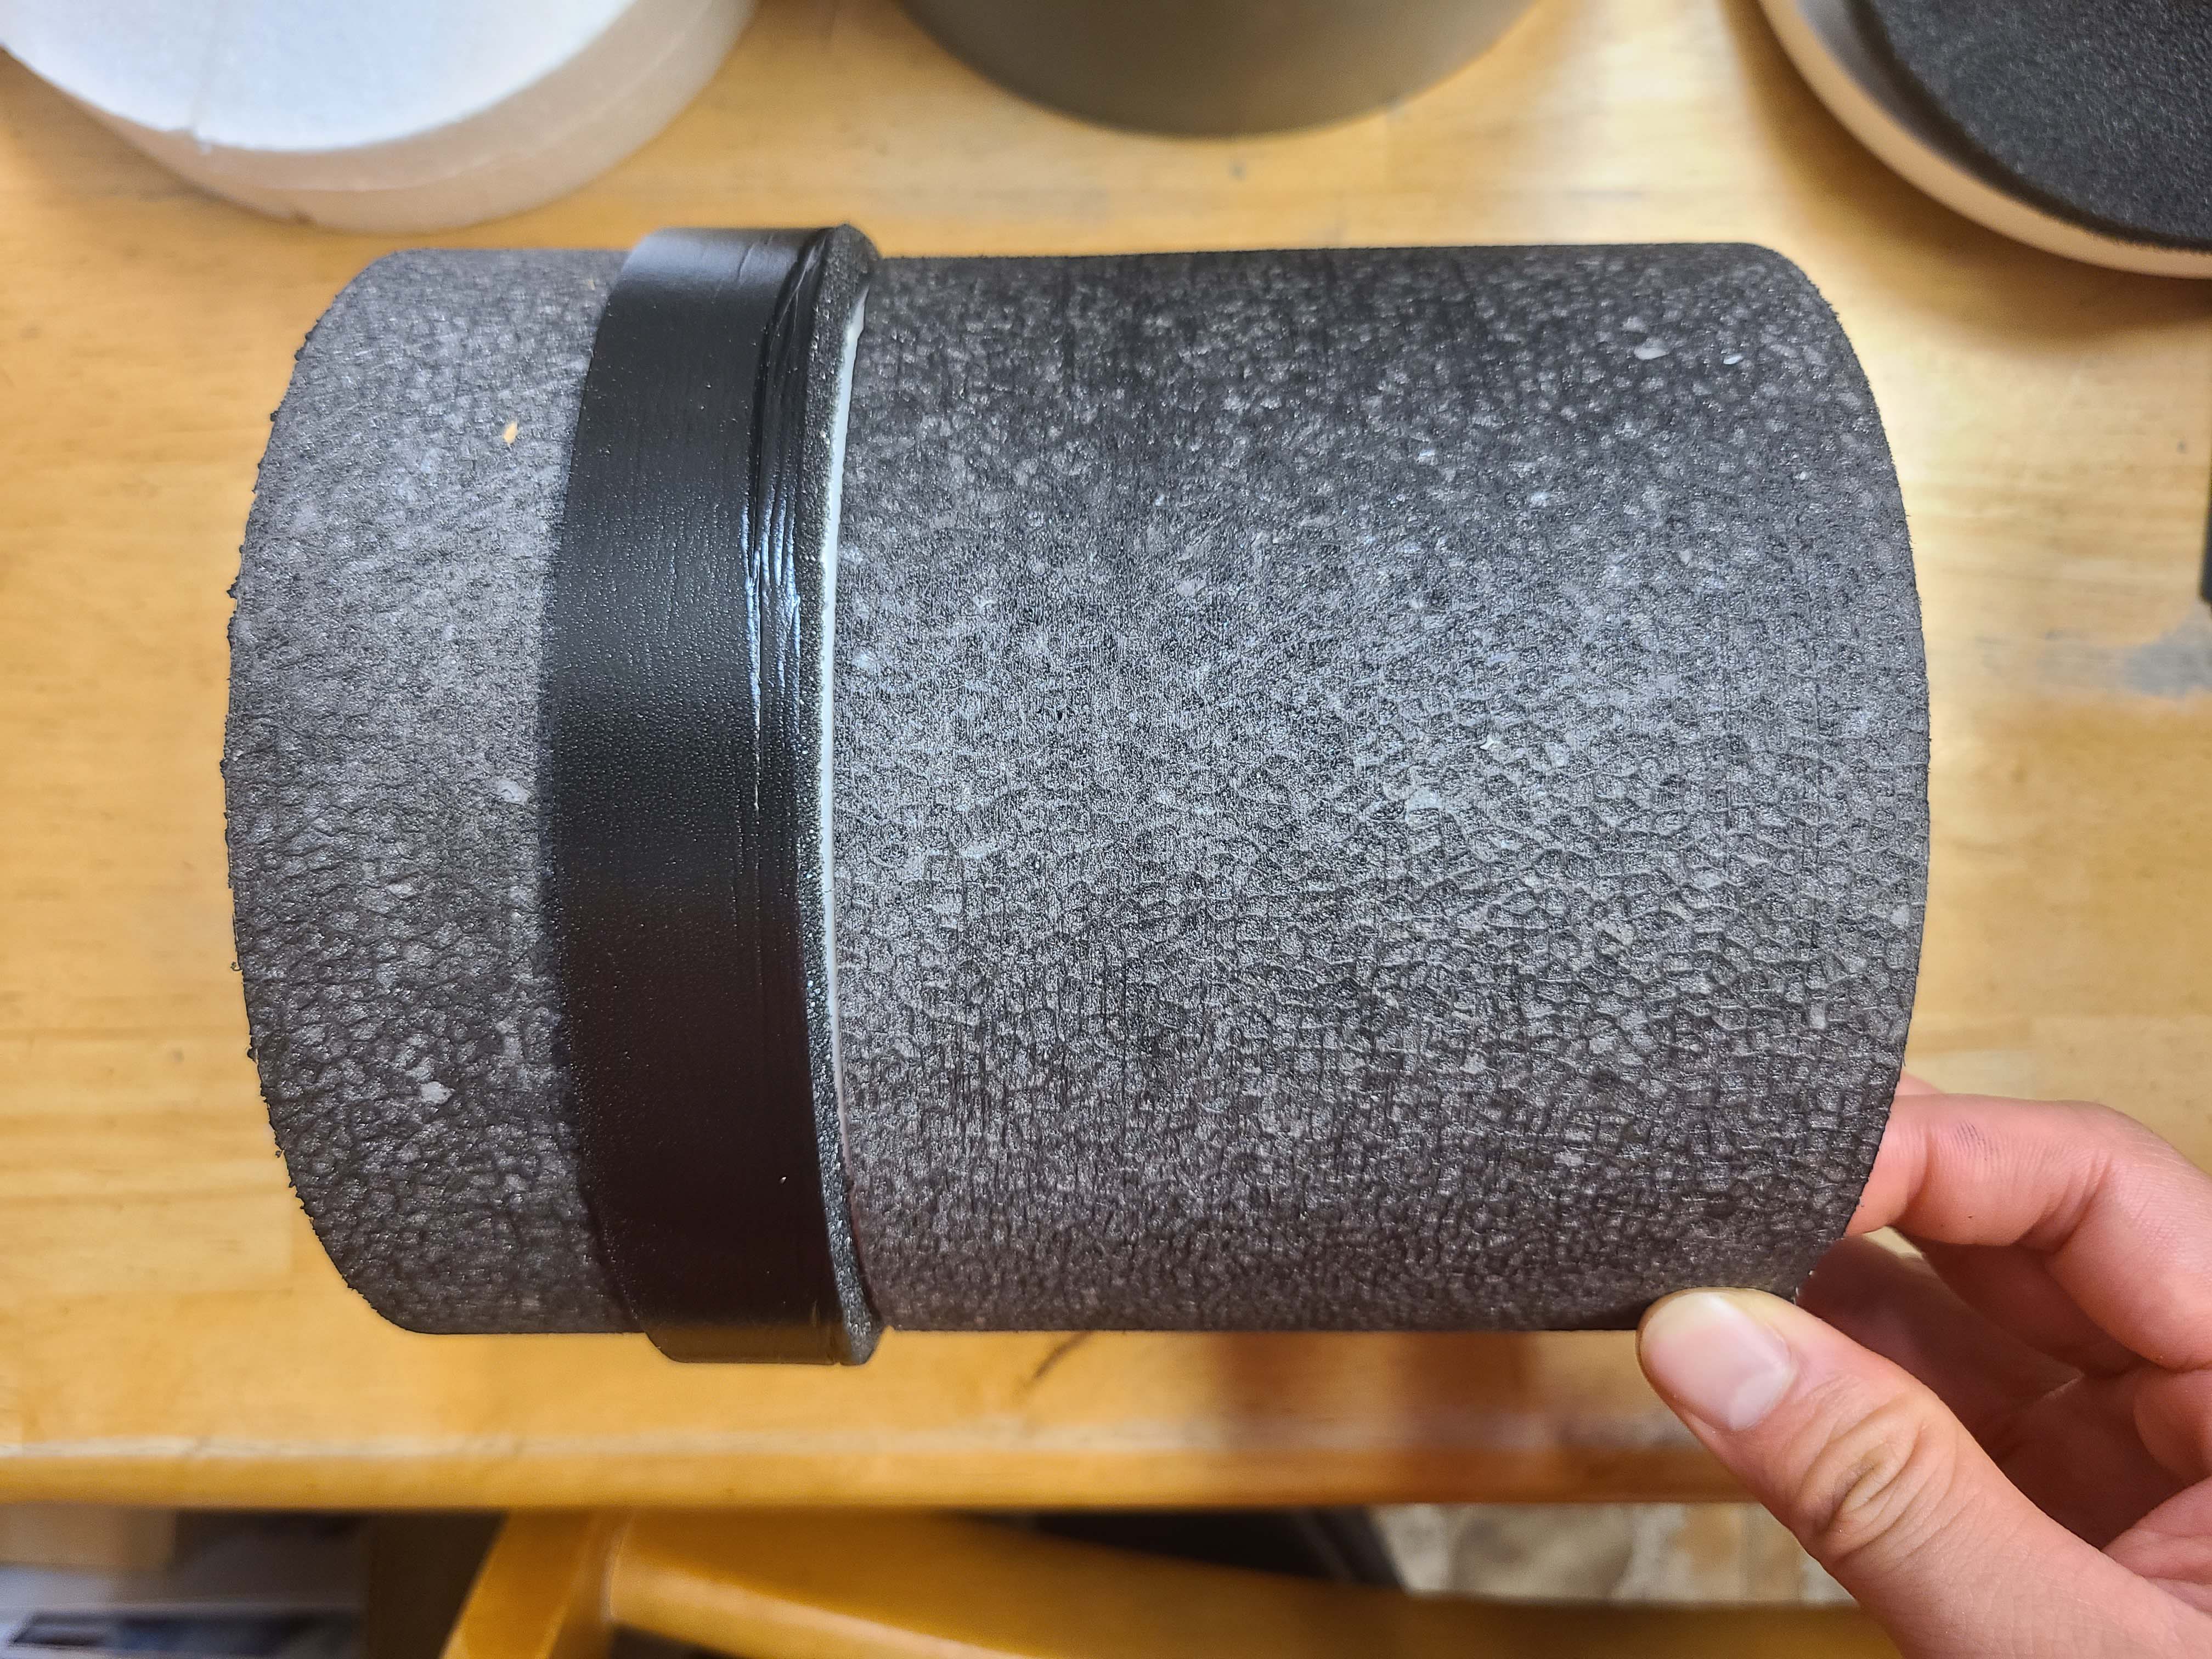
Right - Insulating sleeve for small through-the-wall HRV unit with sealing gasket; 3 of 14.
Image
Right - Ladder blocking allows insulation to be installed in exterior walls at interior-exterior wall intersections.
Image
Right - Lawn clippings were placed evenly to create a layer of mulch around the garden.
Image
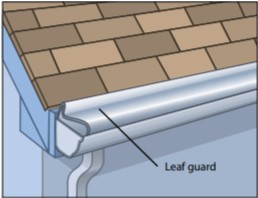
Right - Leaf guards allow rainwater into the gutter but keep combustible debris out, increasing the home's resistance to wildfires.
Image
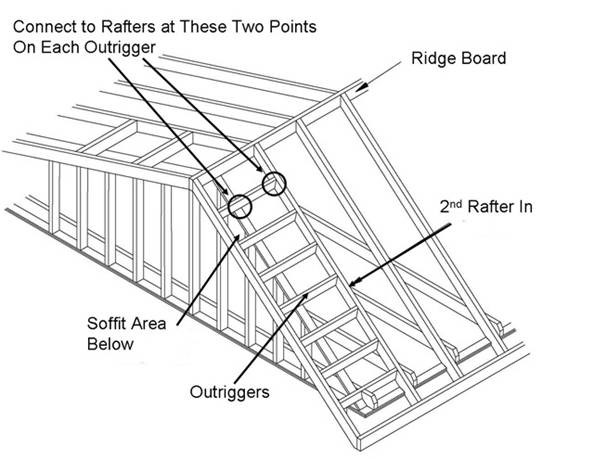
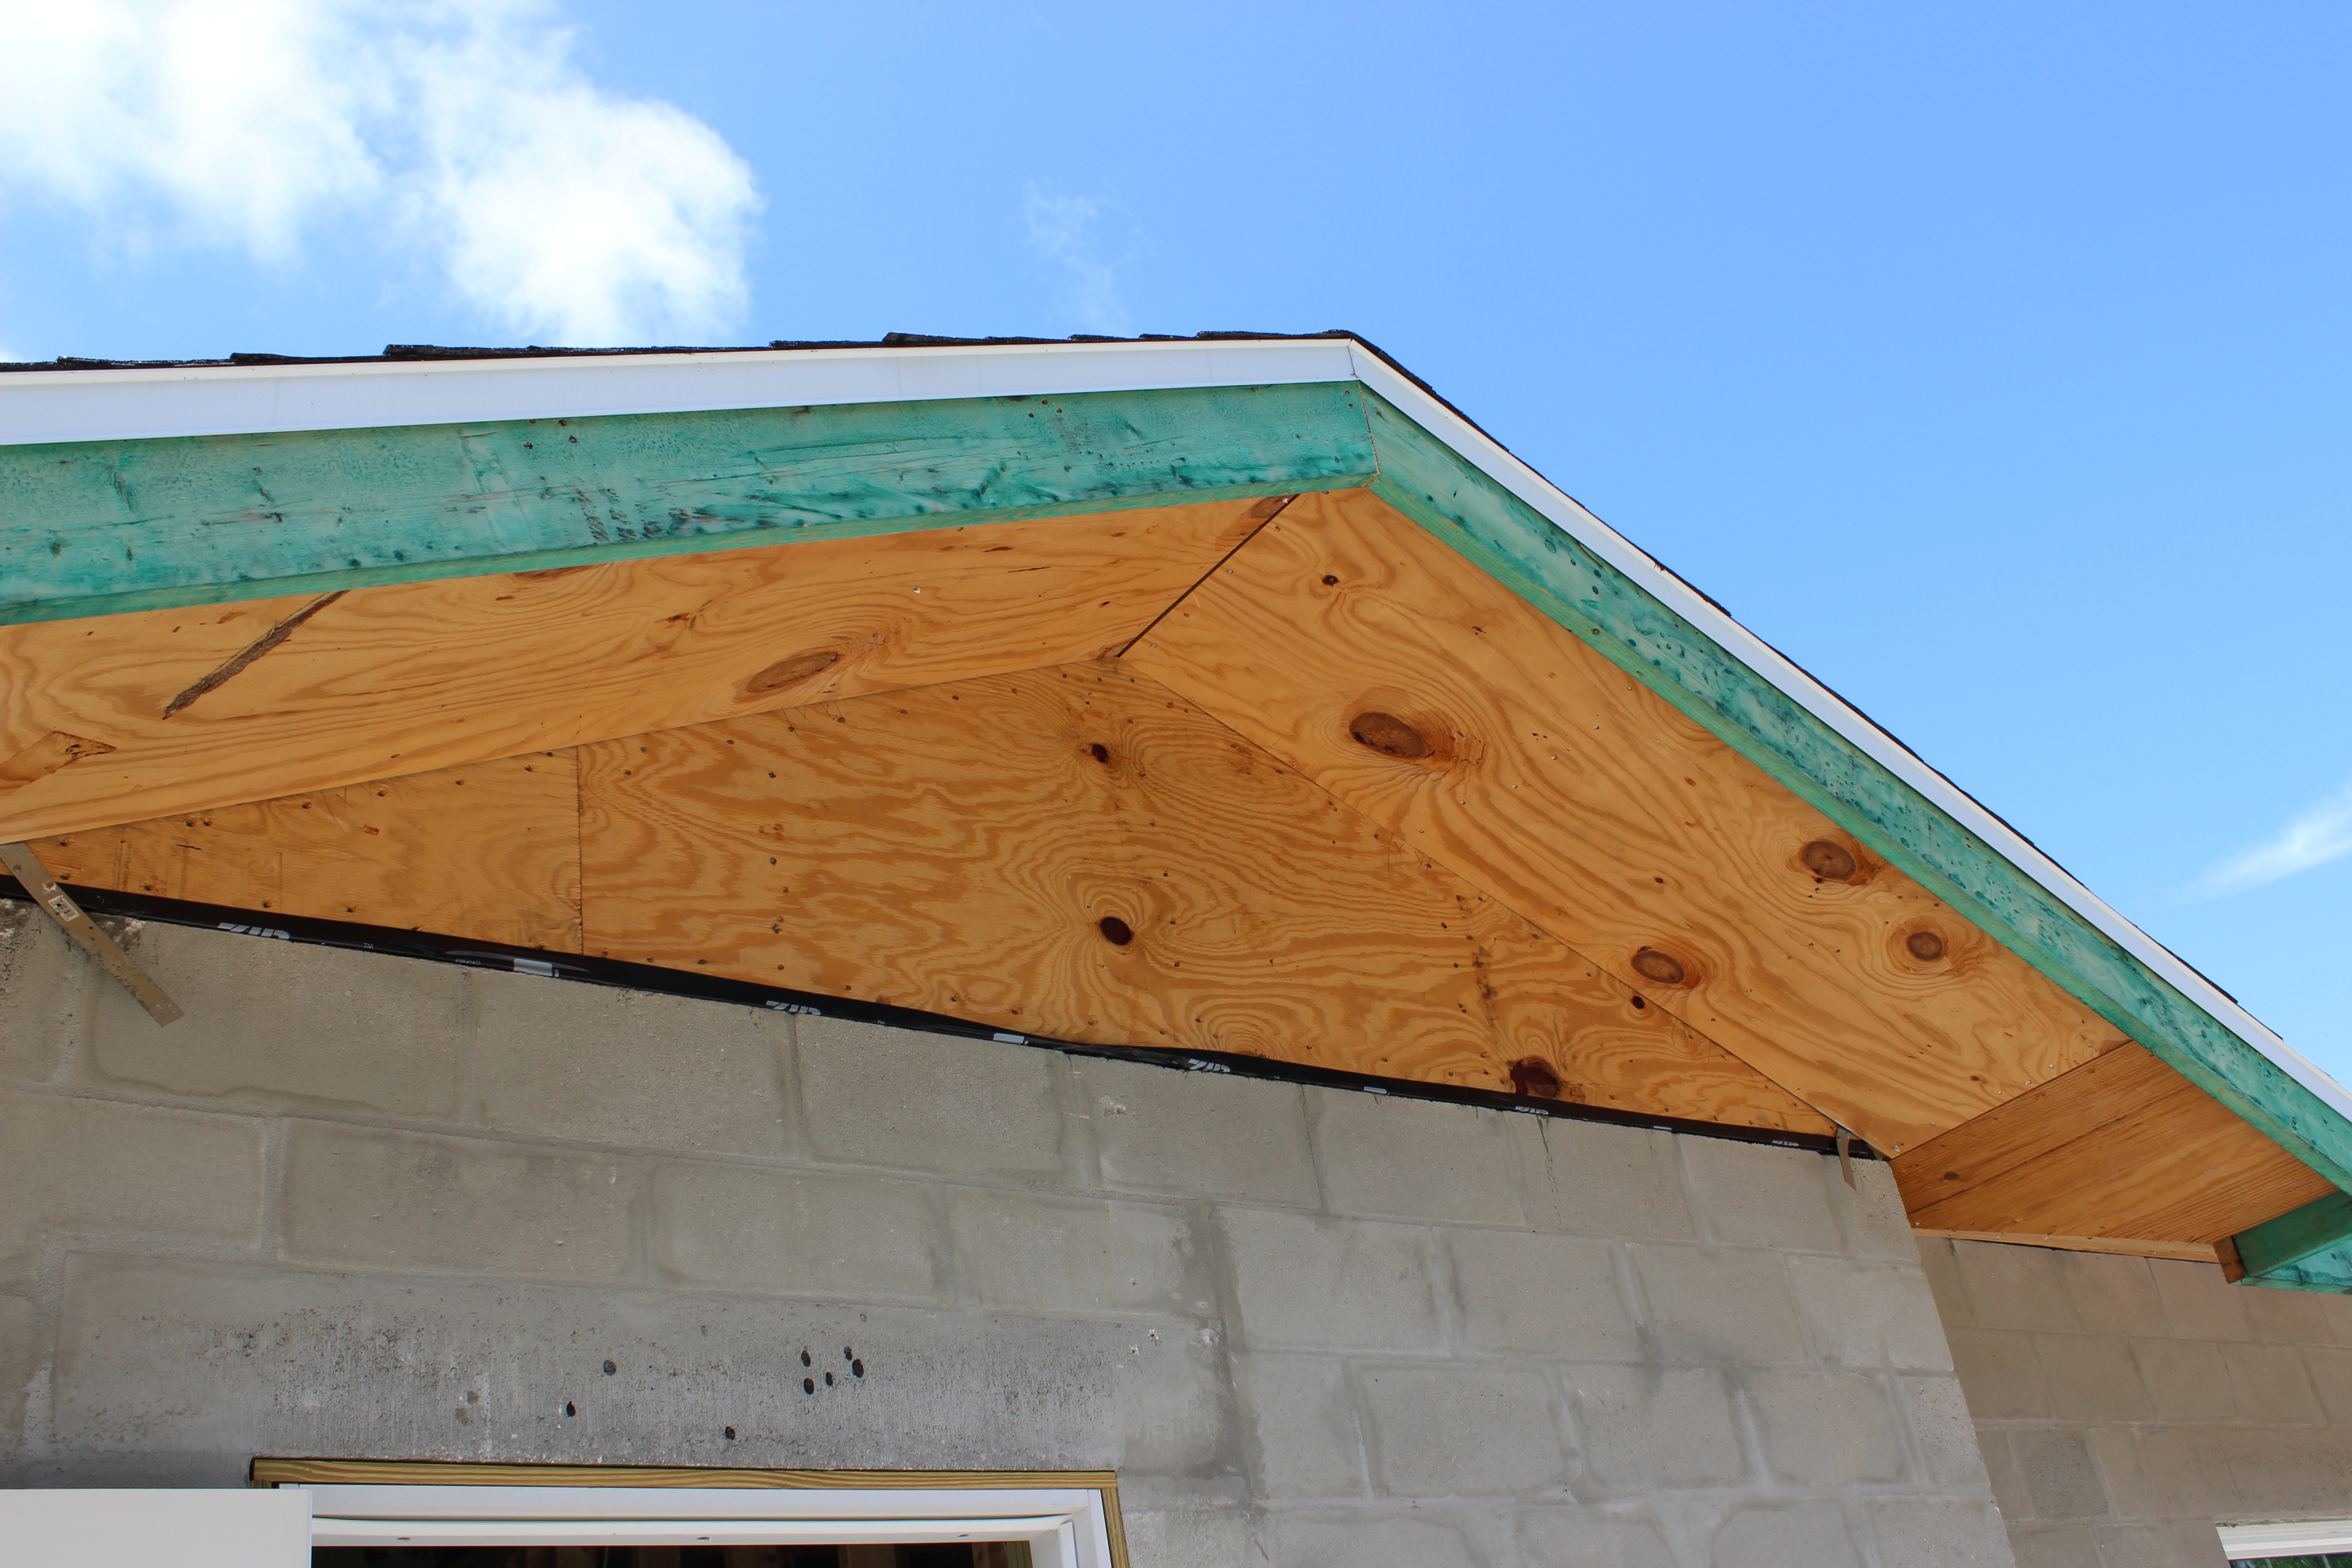
Right - Lookout or outrigger framing for a gable overhang provides two points at each outrigger to add metal connectors to strengthen the overhang against wind uplift.
Image
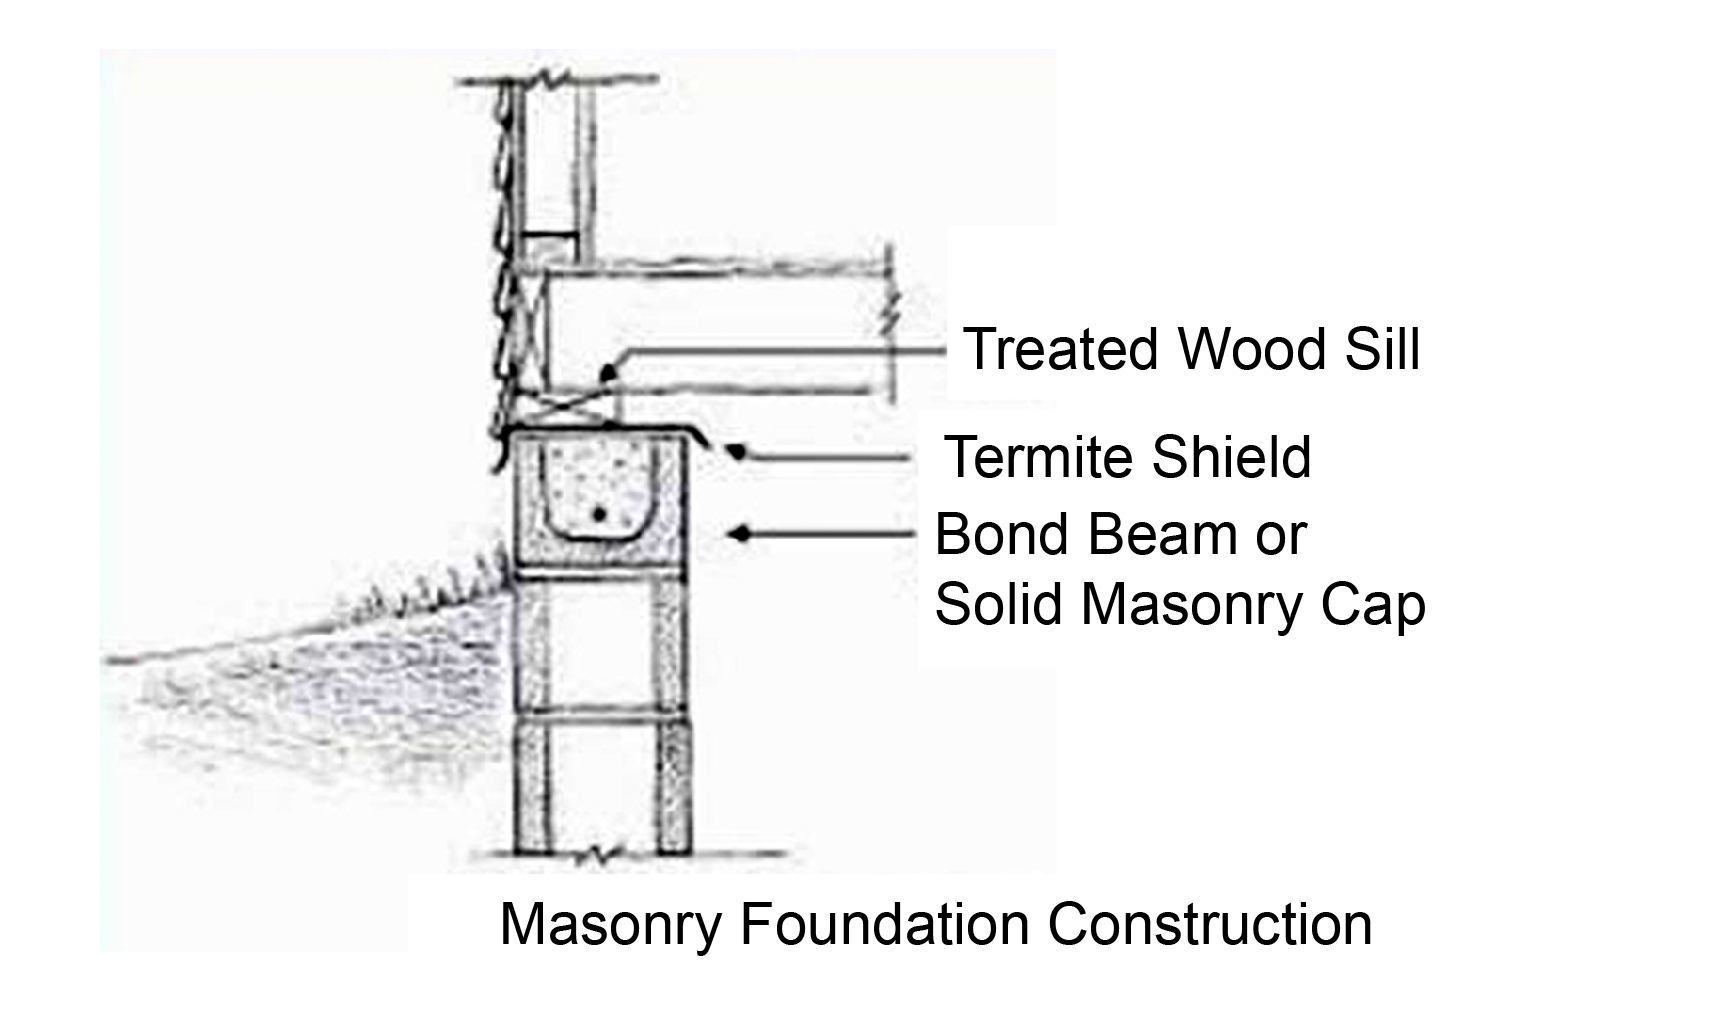
Right - Make concrete masonry unit foundations more termite resistant by using a solid masonry block or bond beam for the top course, installing a termite shield, and using a borate-treated sill plate.
Image
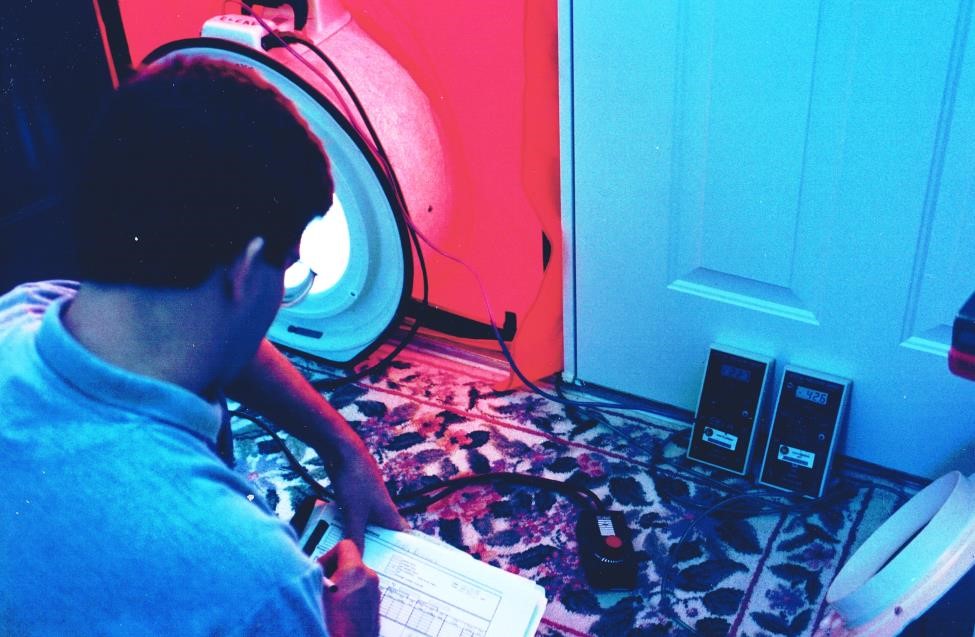
Right - Manometers are placed away from the indoor side of the fan during blower door testing
Image
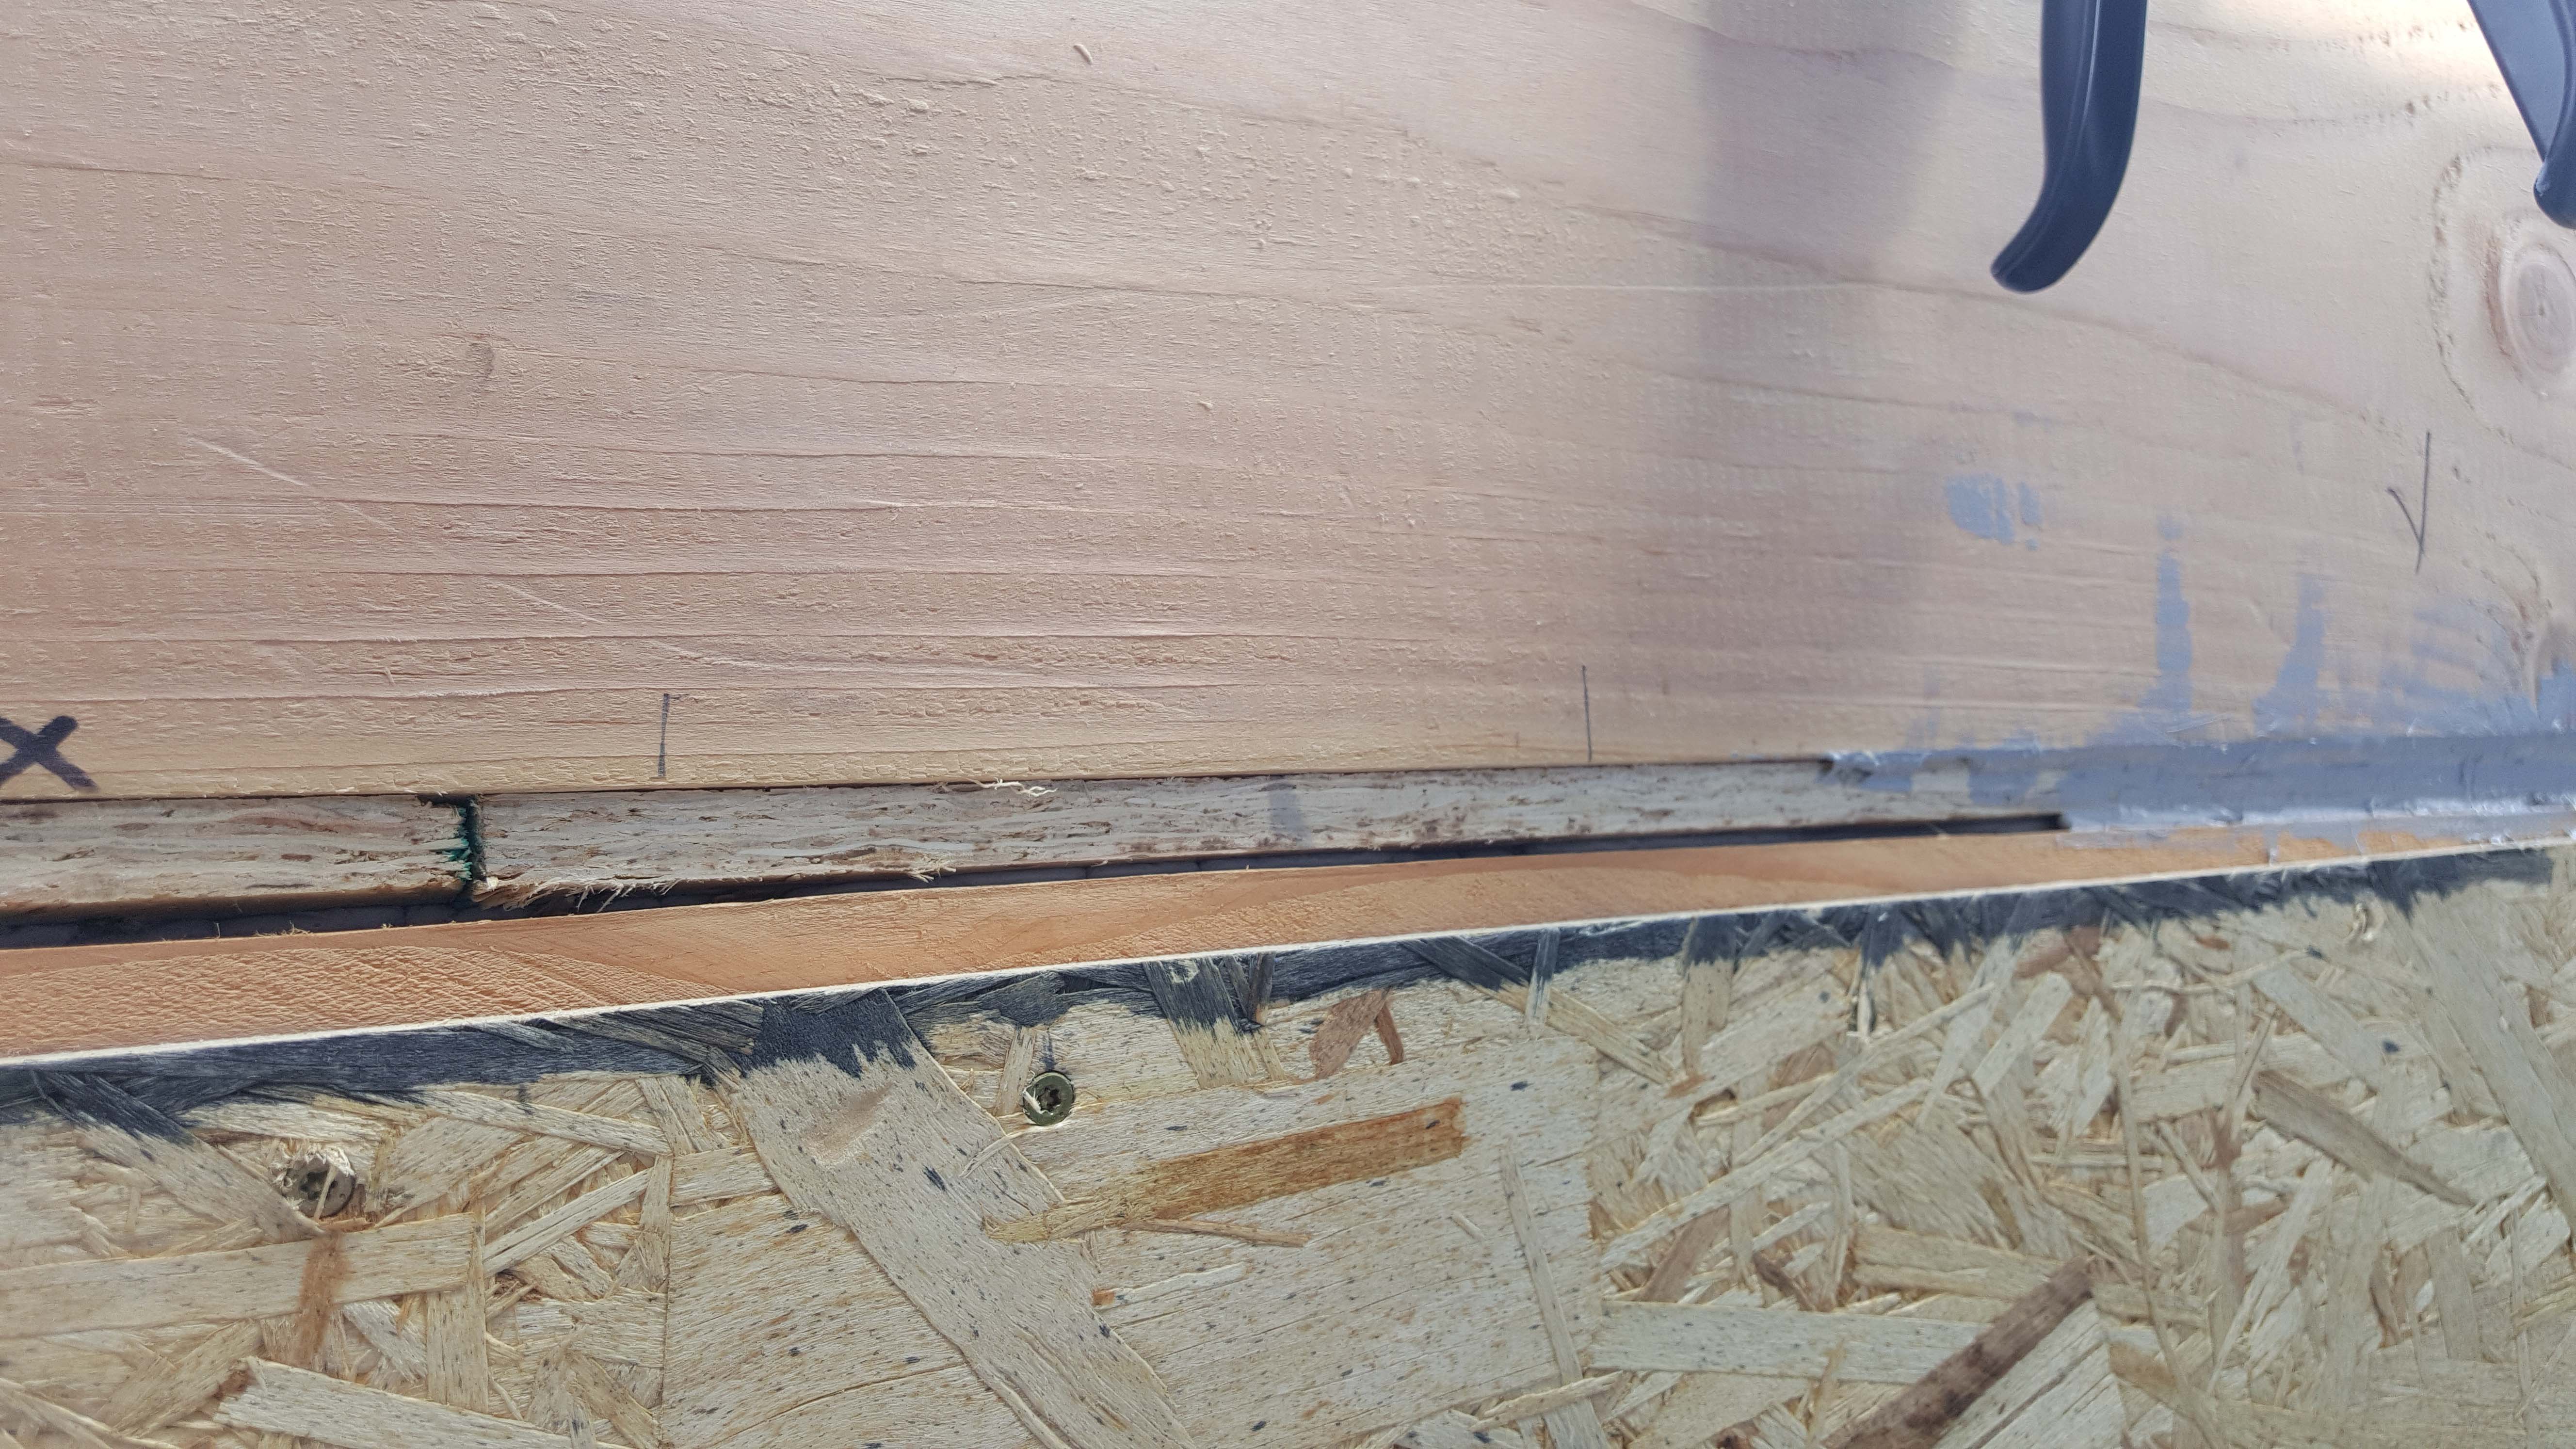
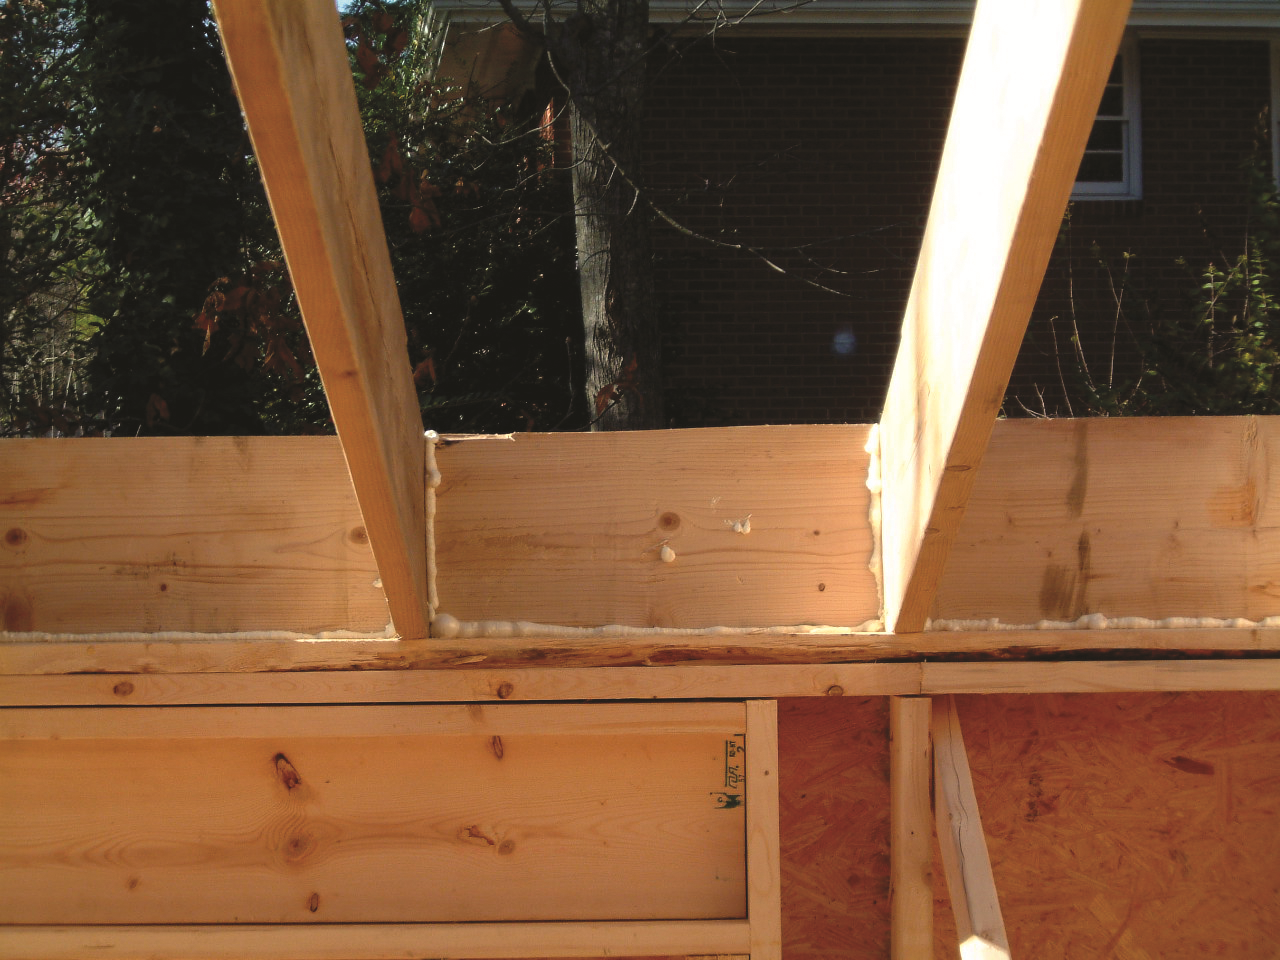
Right - Mastic is being installed to air seal the wood-to-wood joints in this wall.
Image
Right - Metal connectors provide uplift resistance at the rim joist between floors in new construction for a continuous load path.
Image
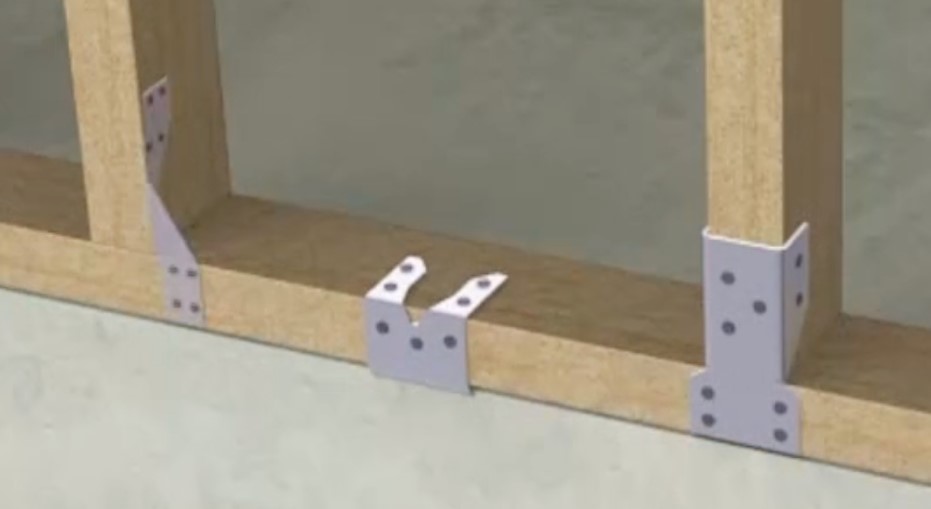
Right - Metal connectors provide uplift resistance at the stud-to-bottom plate connection in new construction for a continuous load path.
Image
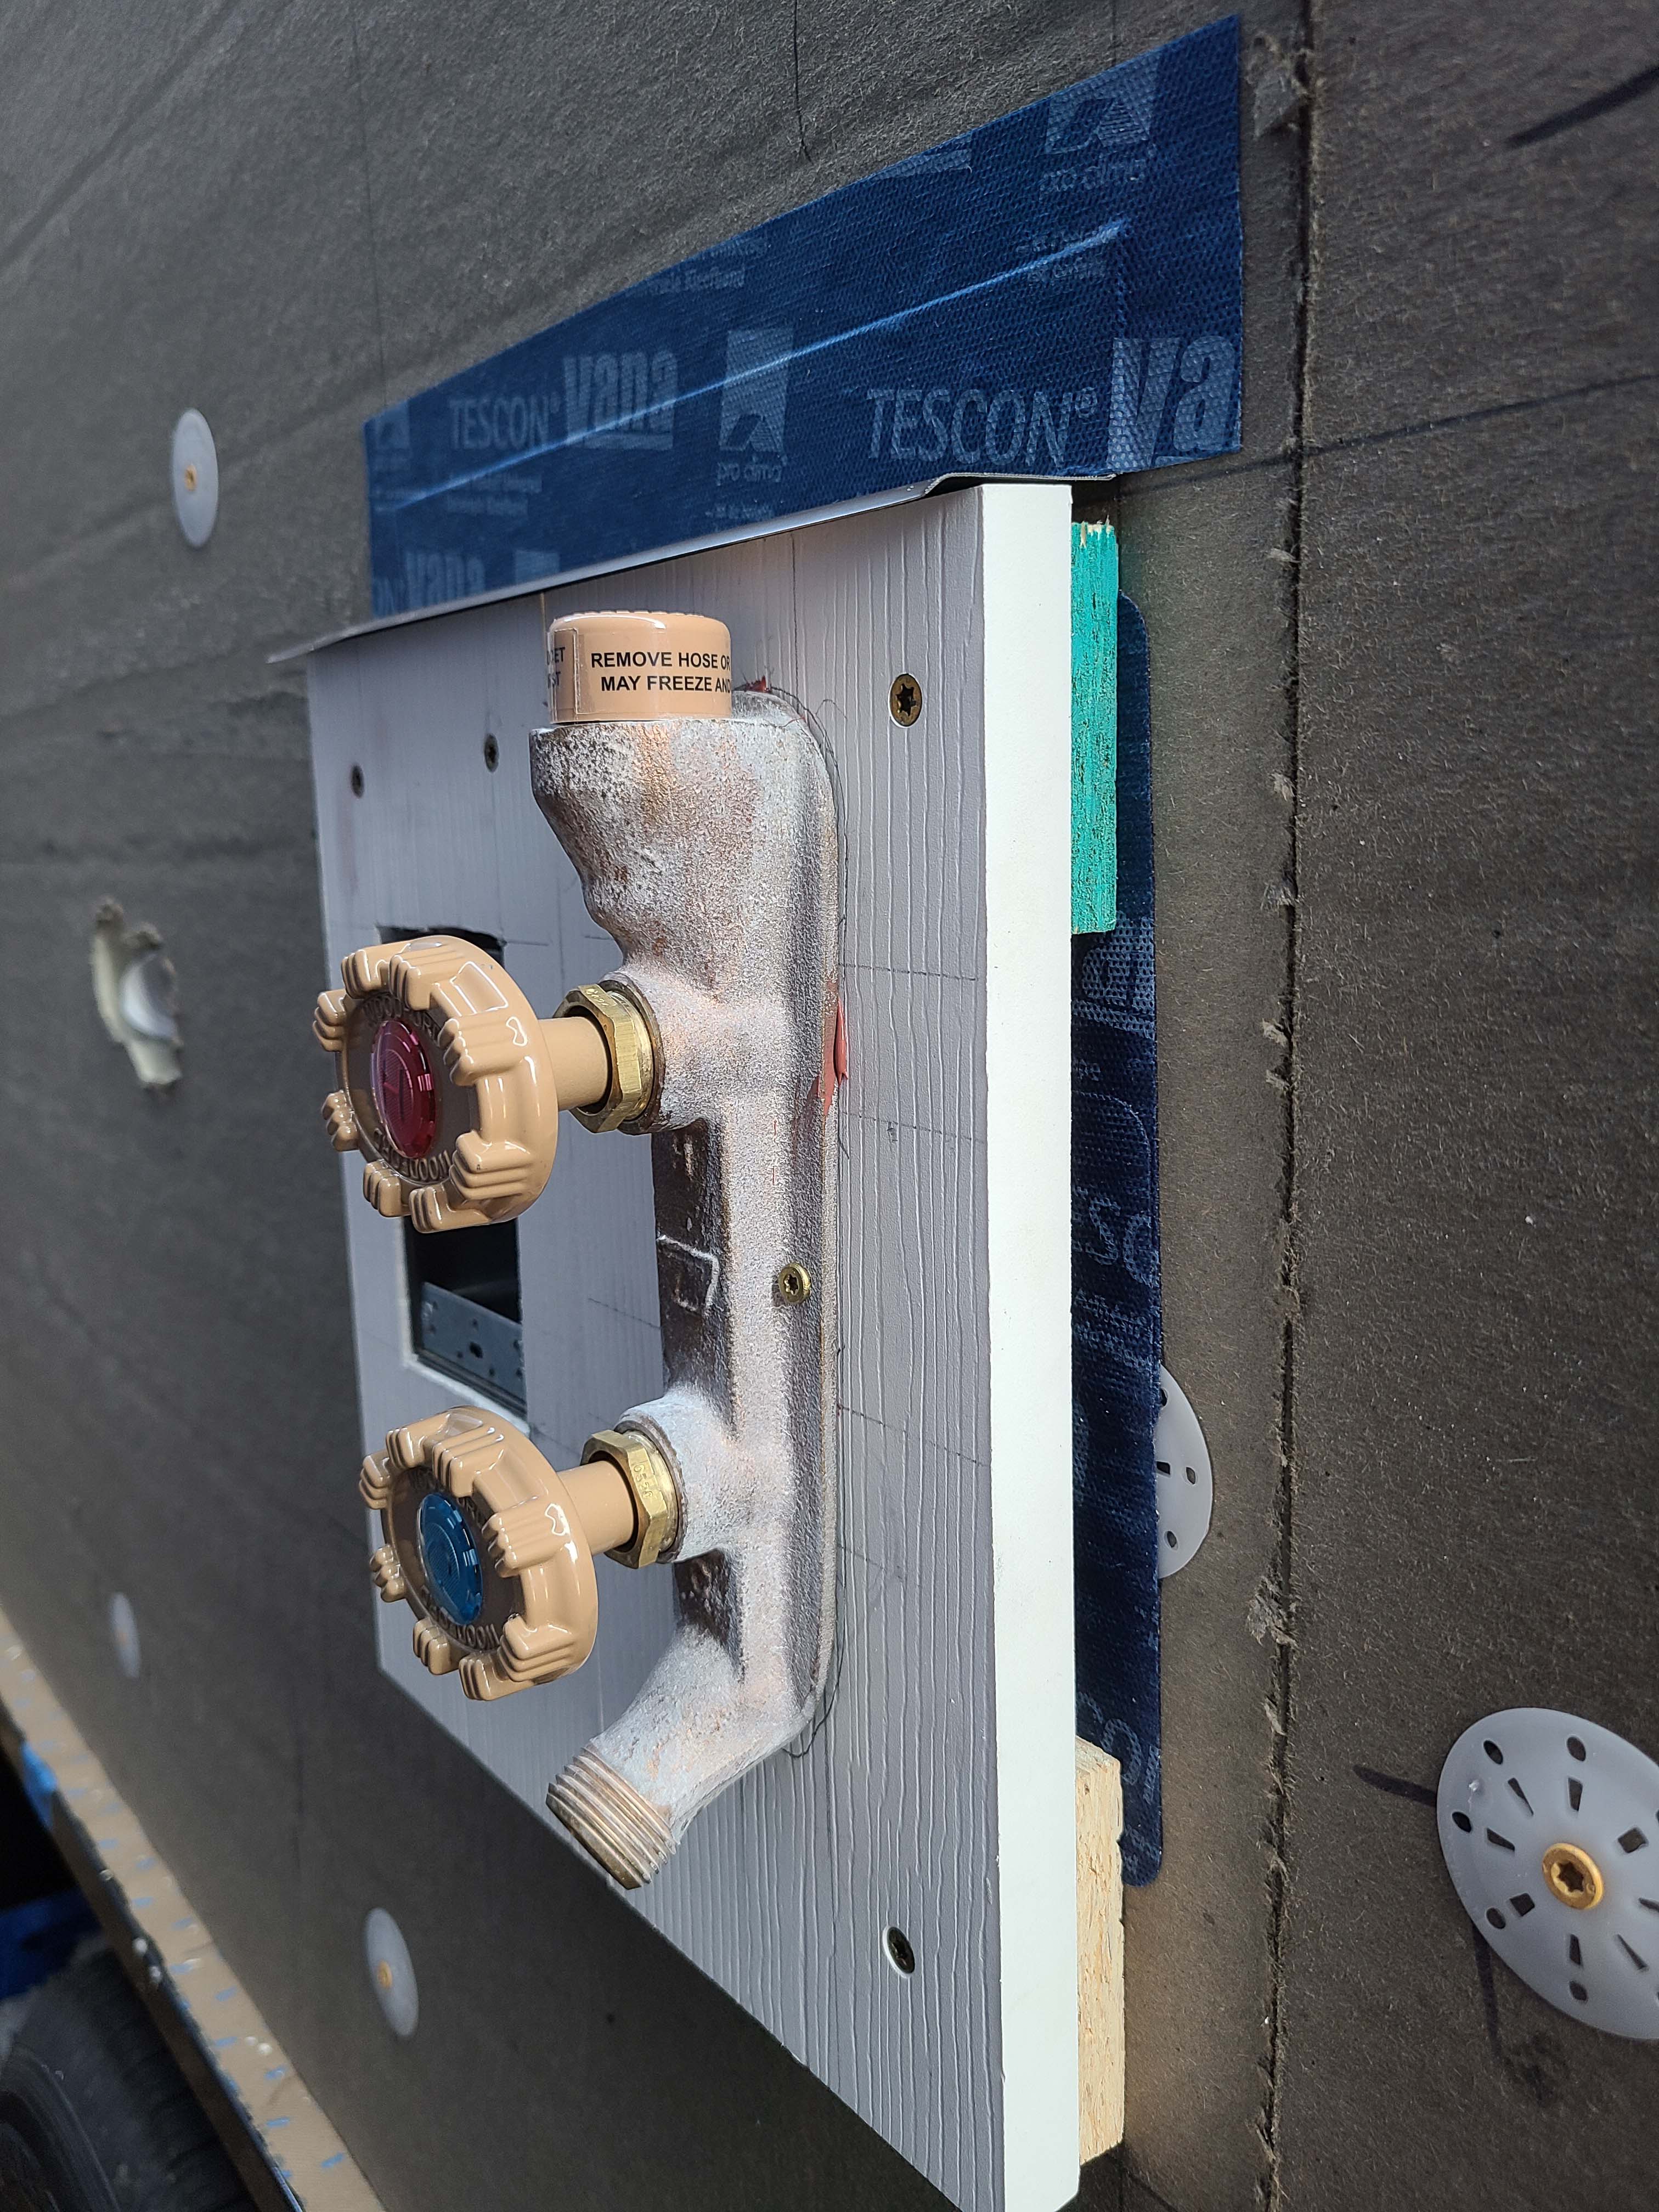
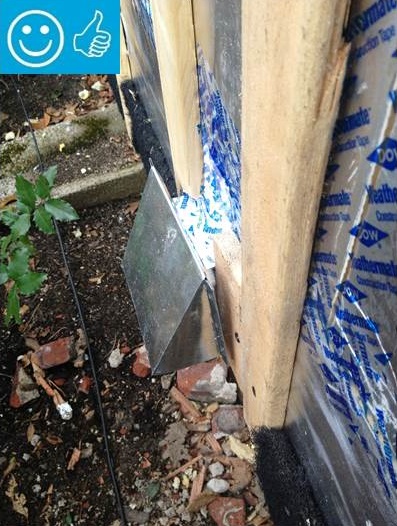
Right - Metal drip edge flashing is installed above hose bib and top of metal flashing is taped to wall.
Image
Right - Metal drip edge on this south Florida CMU home protects the top of the fascia and edge of the roof deck from water, wind-blown rain and embers, and insects.
Image
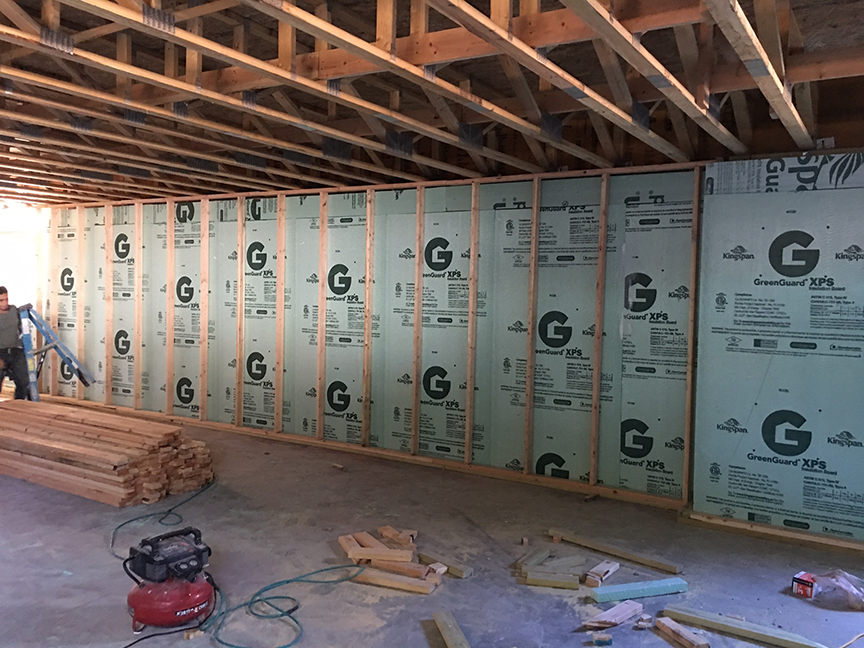
Right - Mineral Wool insulation is installed on the exterior of wall with furring strips.
Image
Right - Mold- and water-resistant fiber glass insulating sheathing is installed after panelized walls are assembled on site.
Image

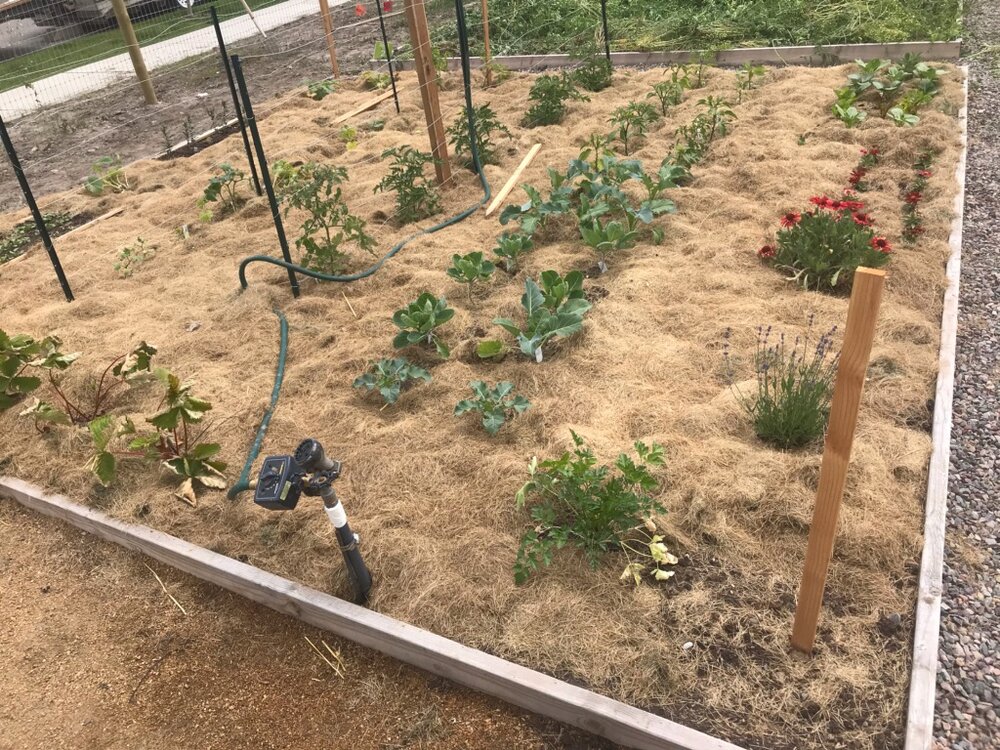
Right - Mulch covers the empty spaces in this garden, retaining moisture, moderating temperatures, and providing nutrients as it decomposes.
Image
Image
Image
Right - New flashing has been installed to complete the air and water control layers at the window openings of this wall retrofit that includes insulating the wall cavities with spray foam
Image
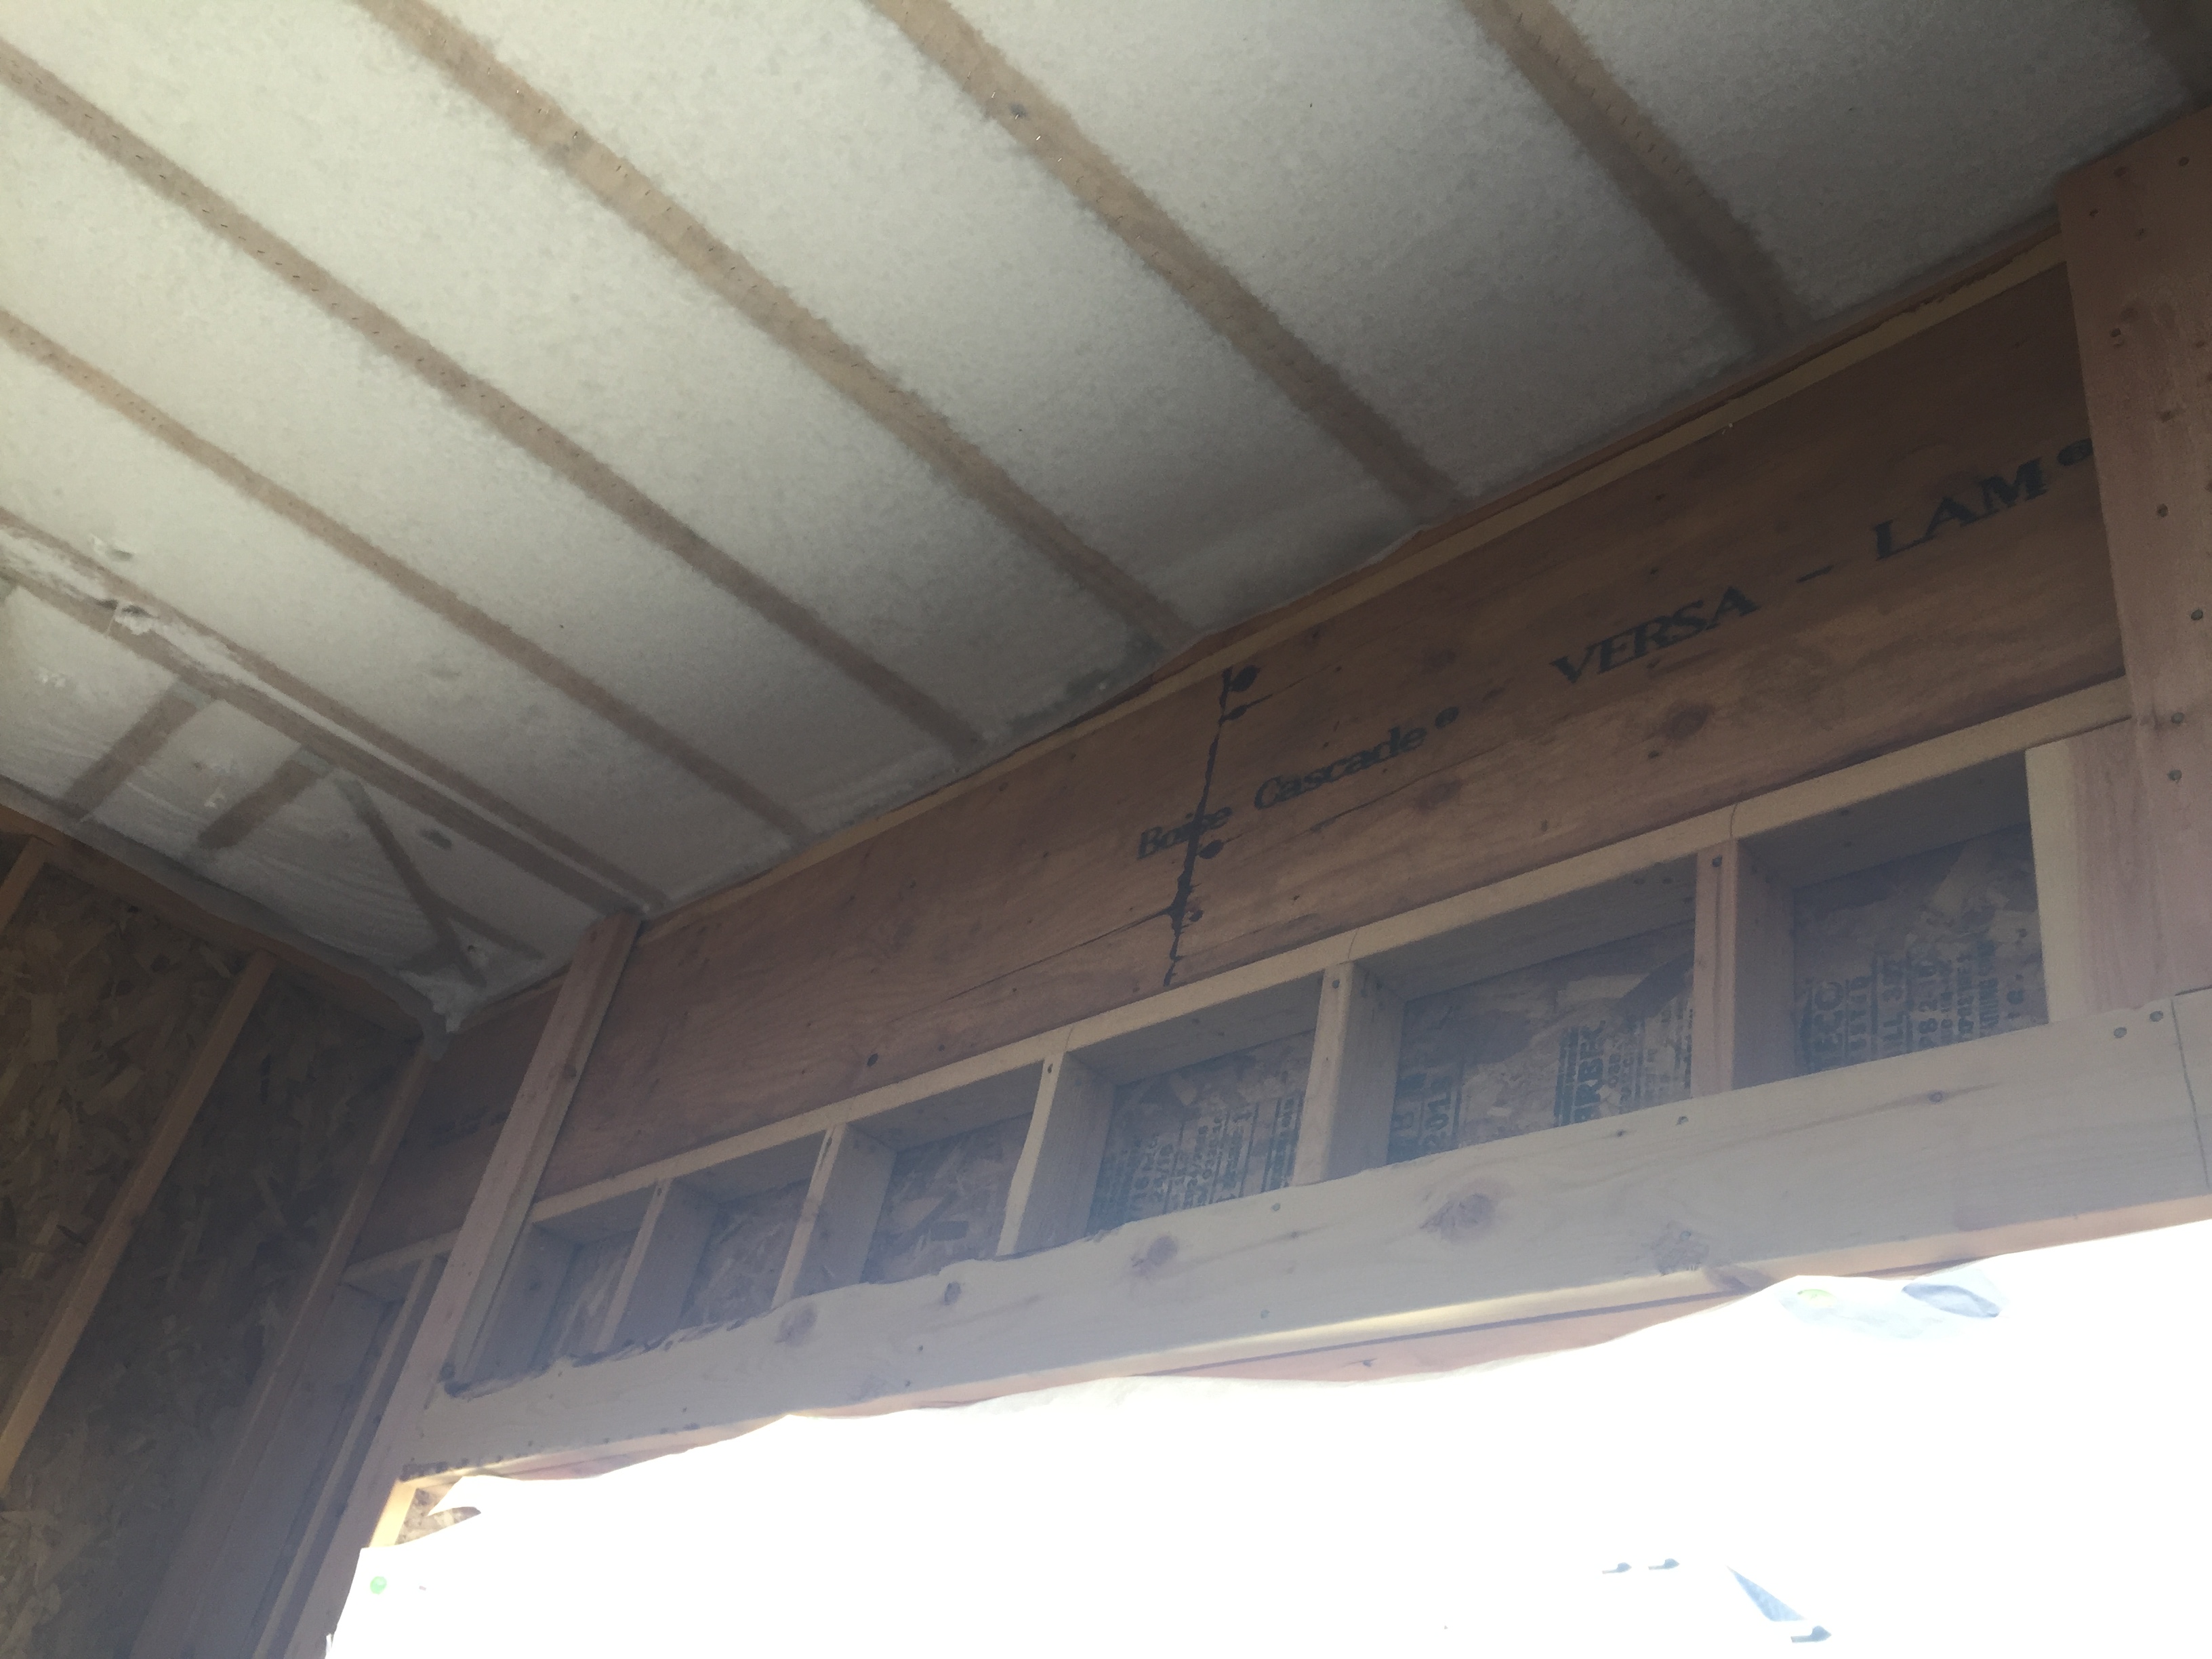
Right - Open-cell polyurethane spray foam to R-28 on underside of roof turns new attic into conditioned space for HVAC.
Image
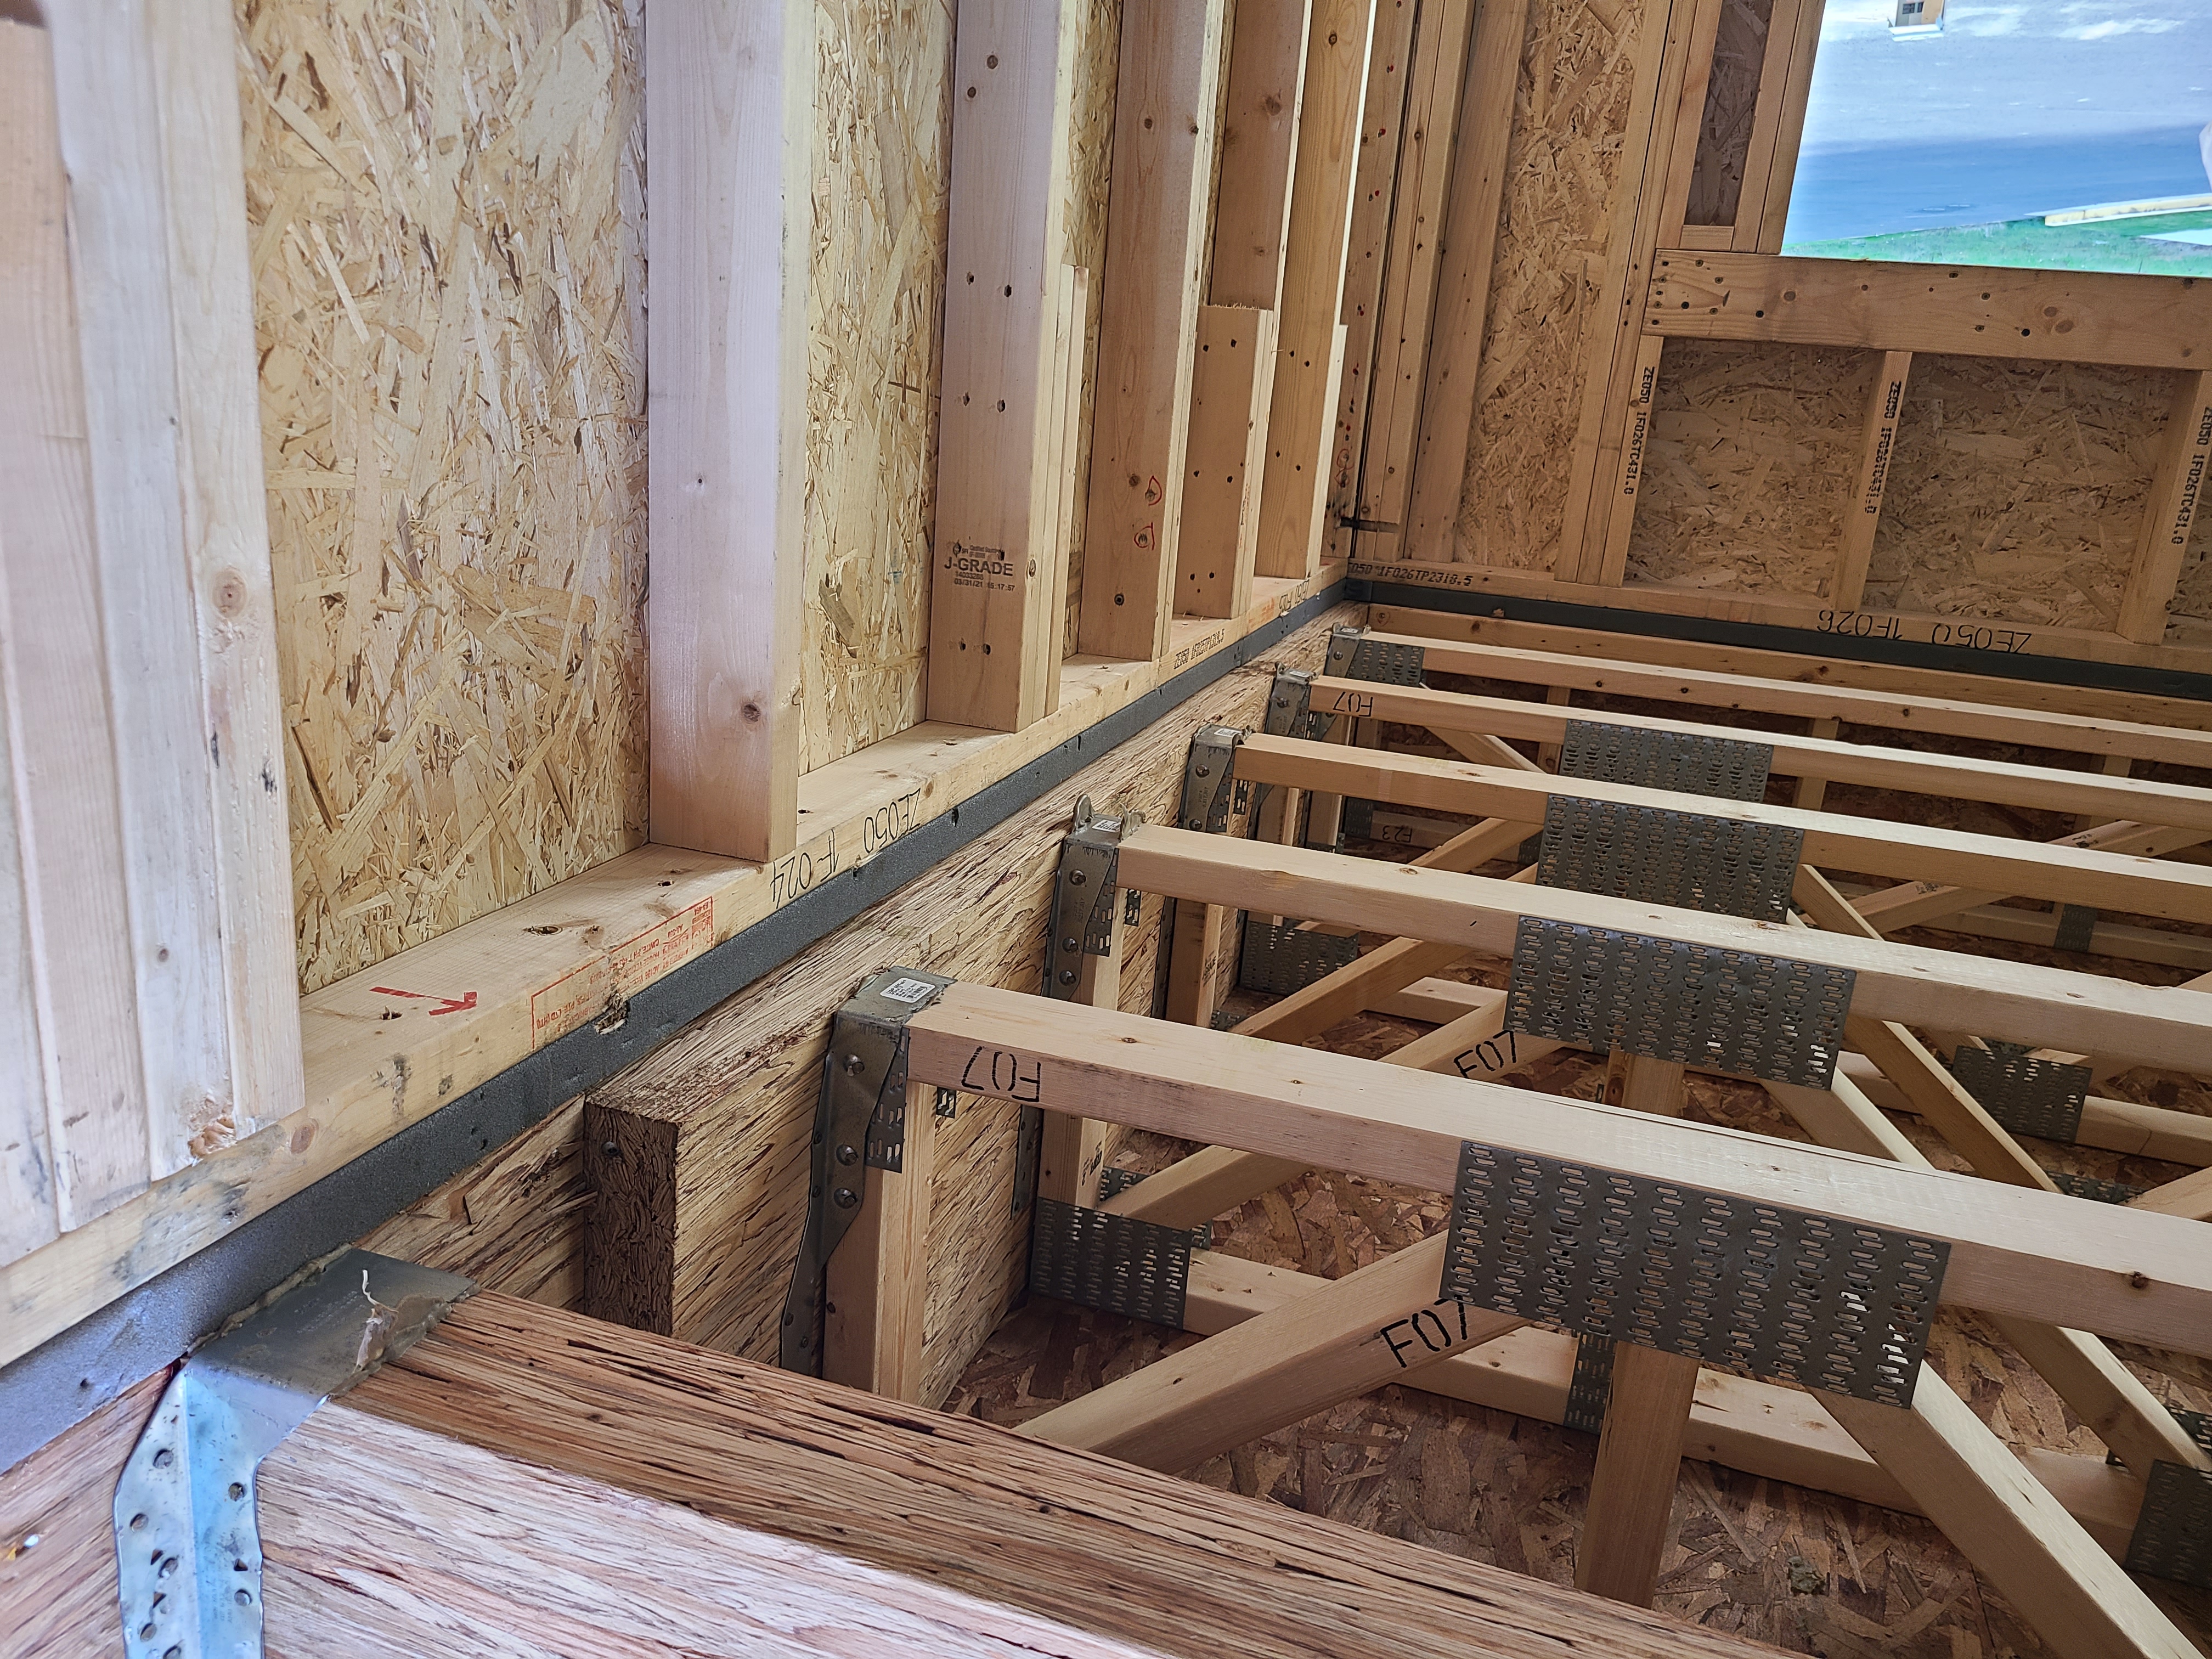
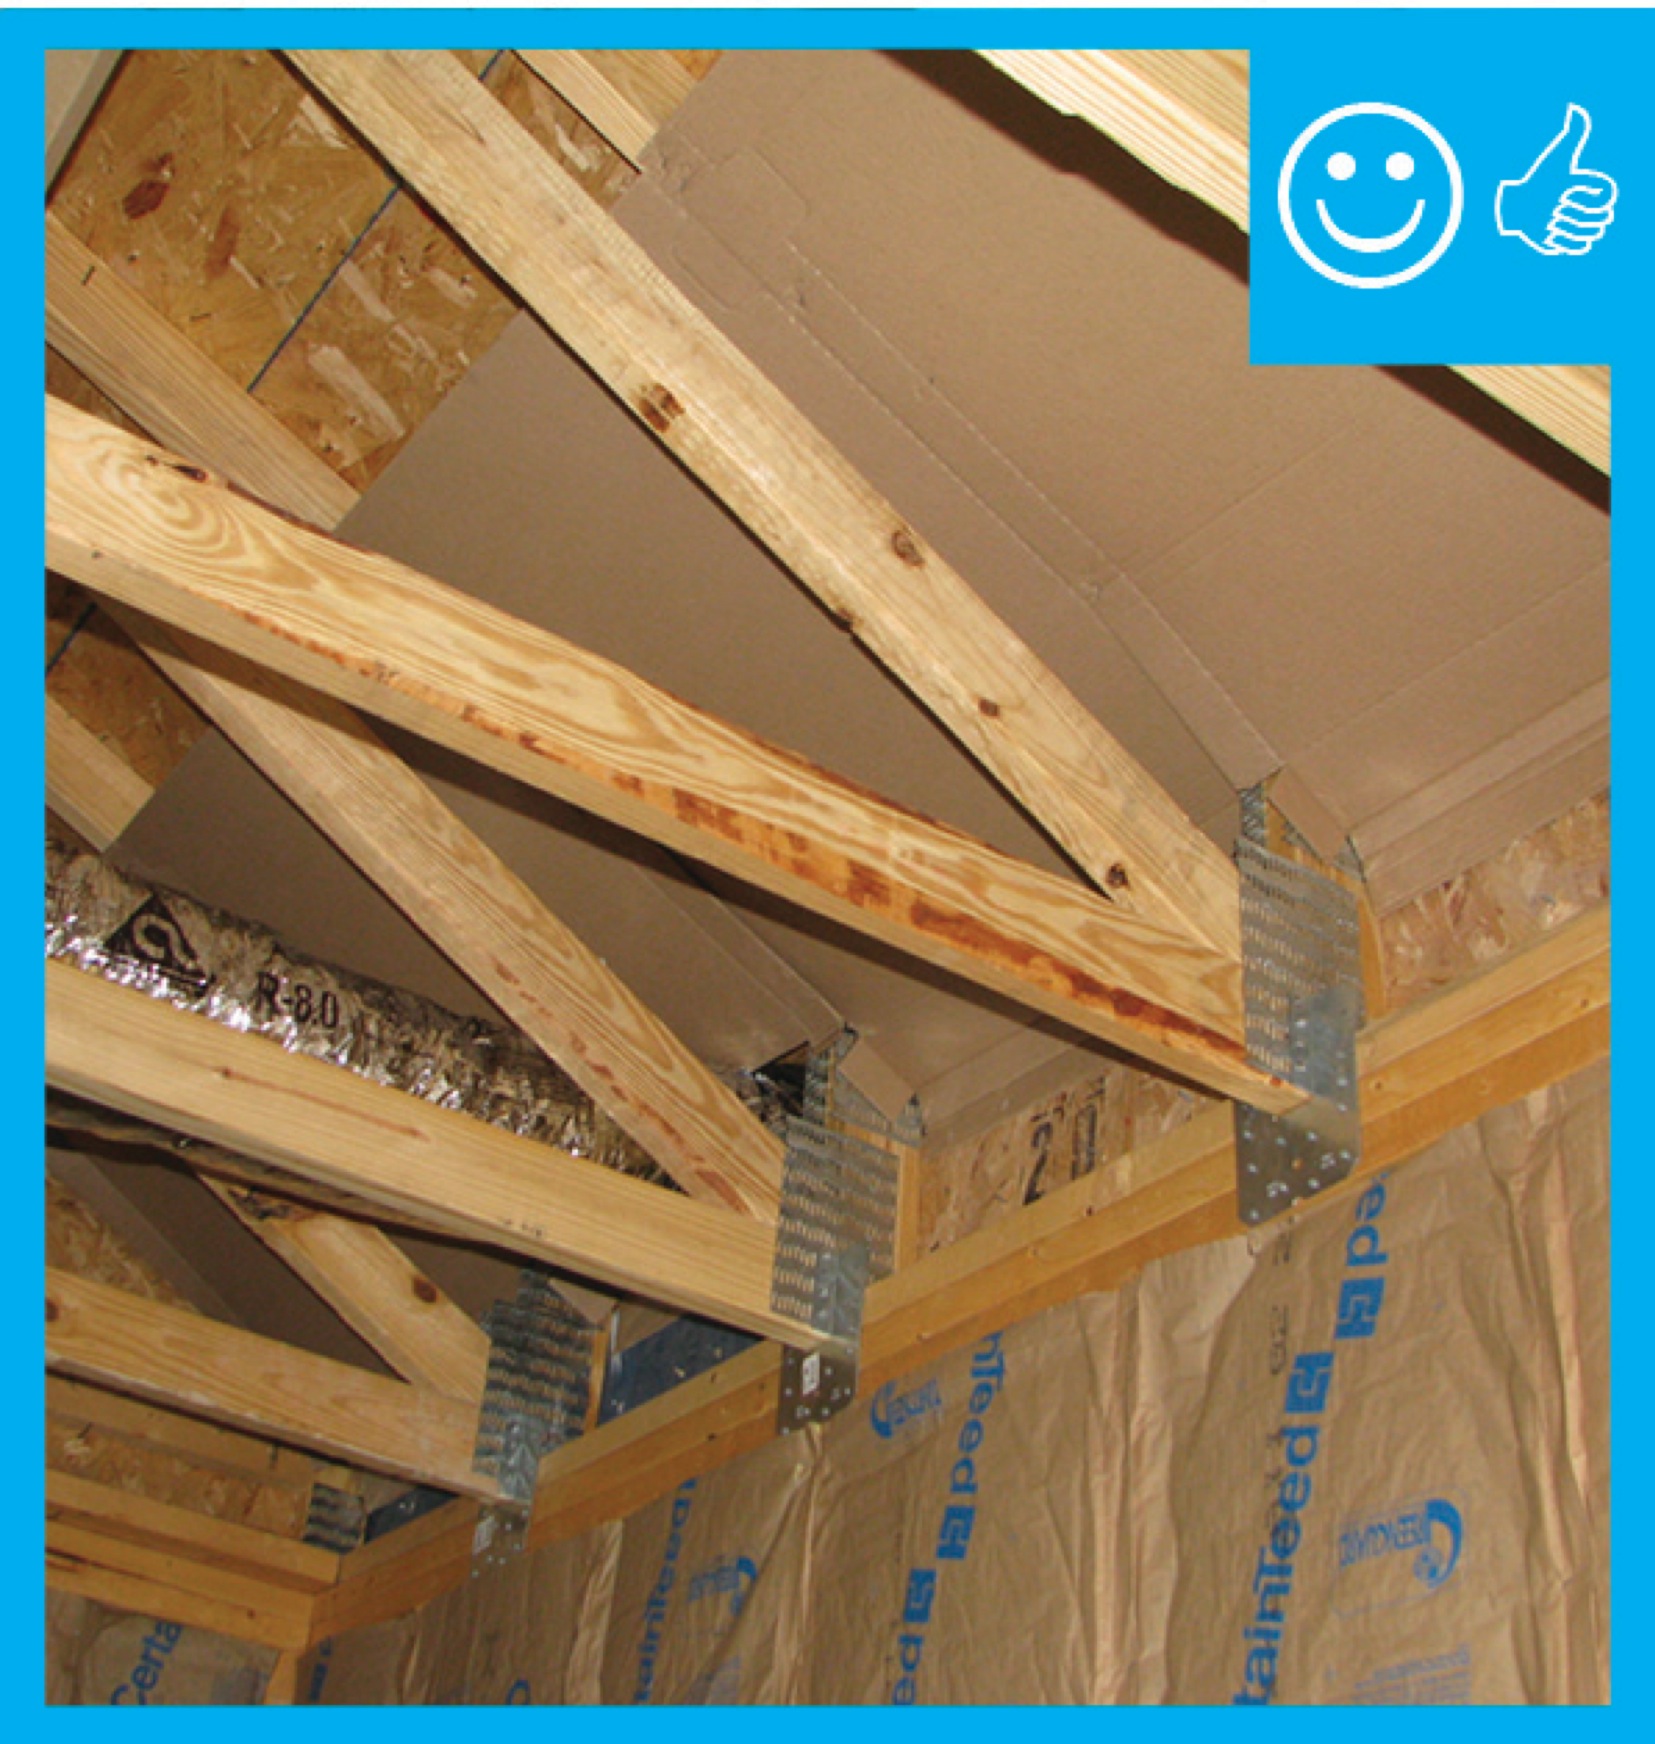
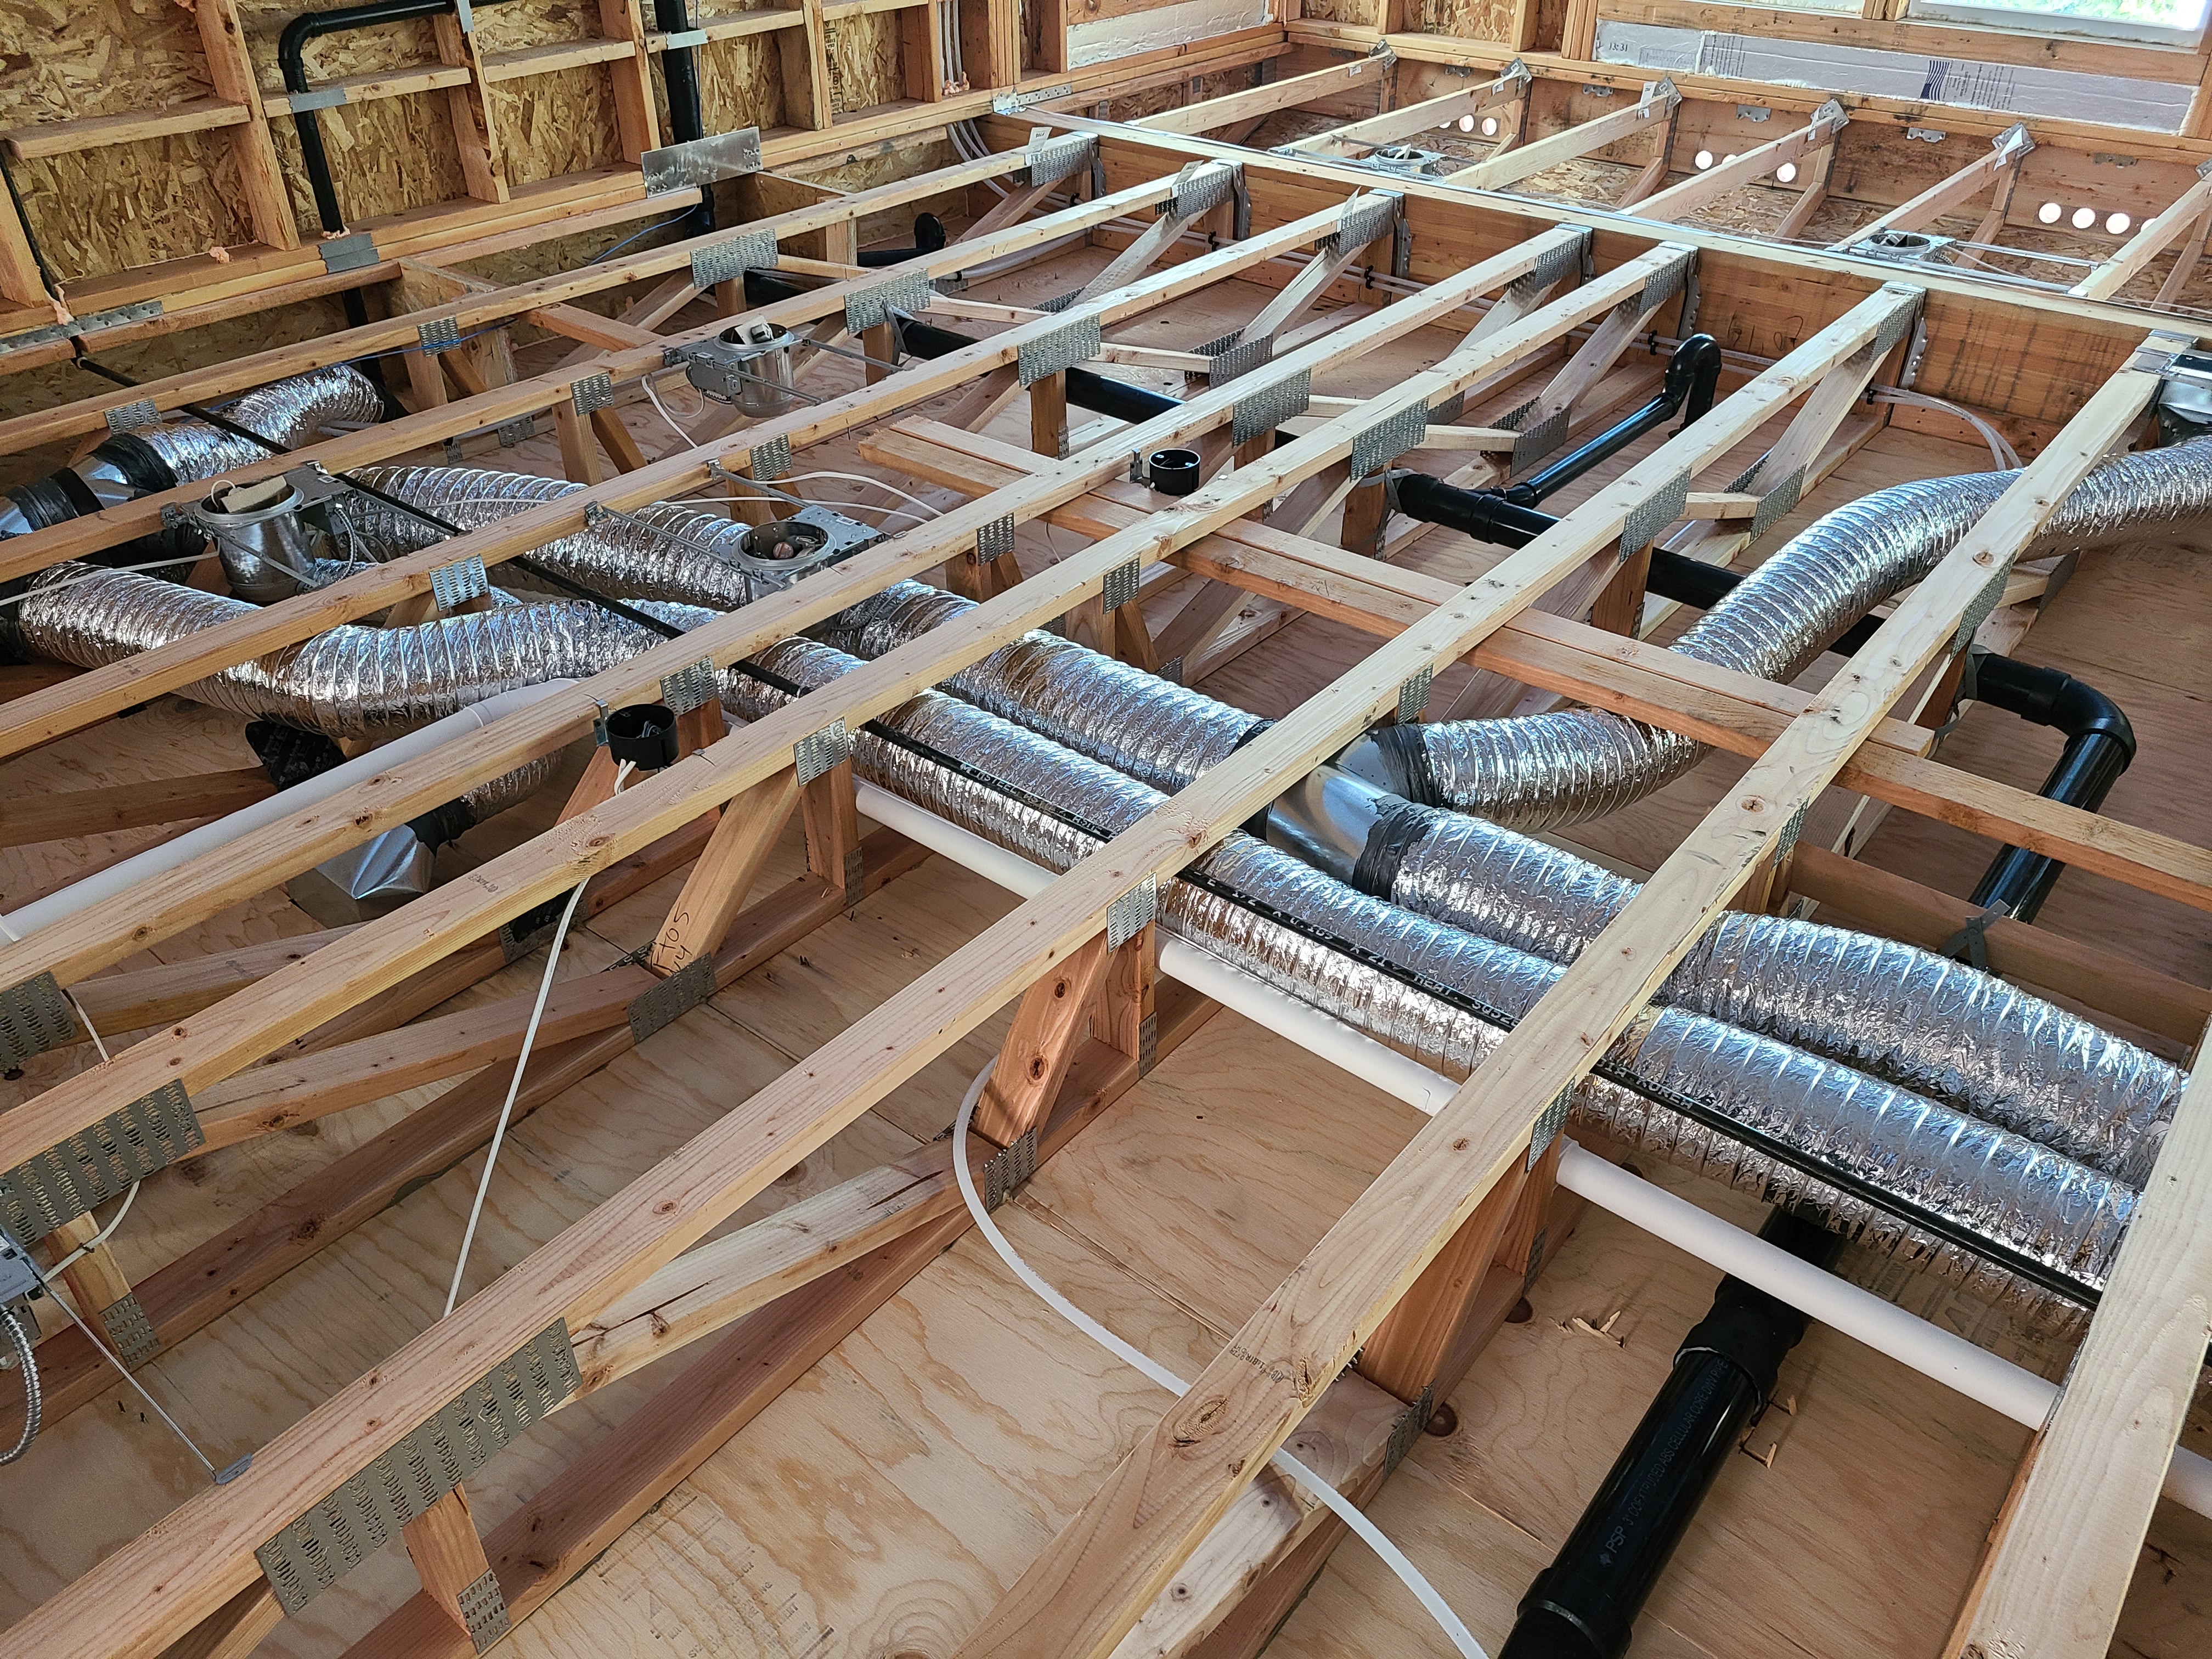
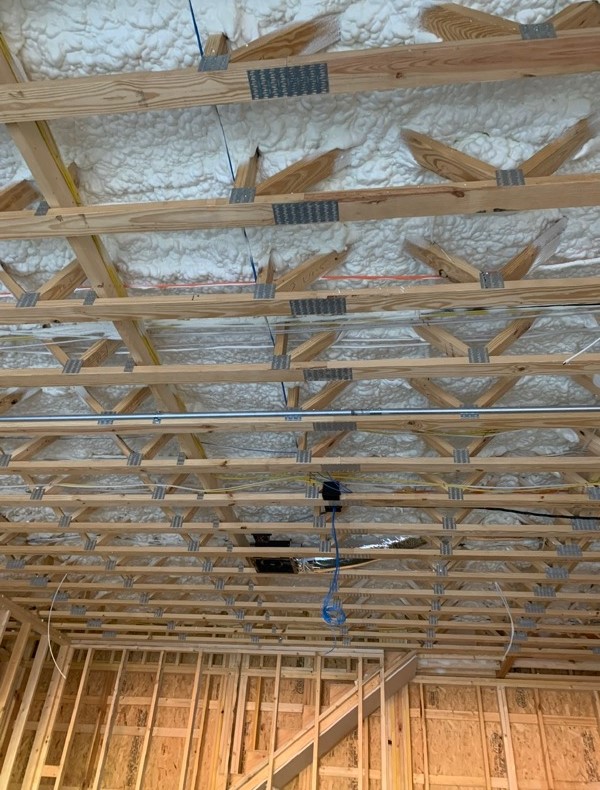
Right - Open-web floor and ceiling trusses provide space for ducts in conditioned space.
Image
Right - Painter's tape is used to hold back house wrap while flashing layers are completed around the electric outlet.
Image
Right - Panelized walls came to site with house wrap and furring strips pre-installed; seams will be overlapped and taped on site.
Image
Right - Panelized walls came to site with house wrap pre-installed and ready to unfurl to cover foundation-to-sheathing seam.
Image
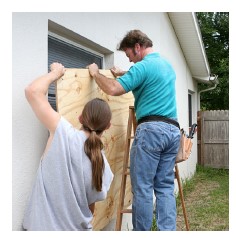
Right - Panels of 7/16-inch treated plywood are inexpensive but take time to install and are difficult to install on higher windows.
Image

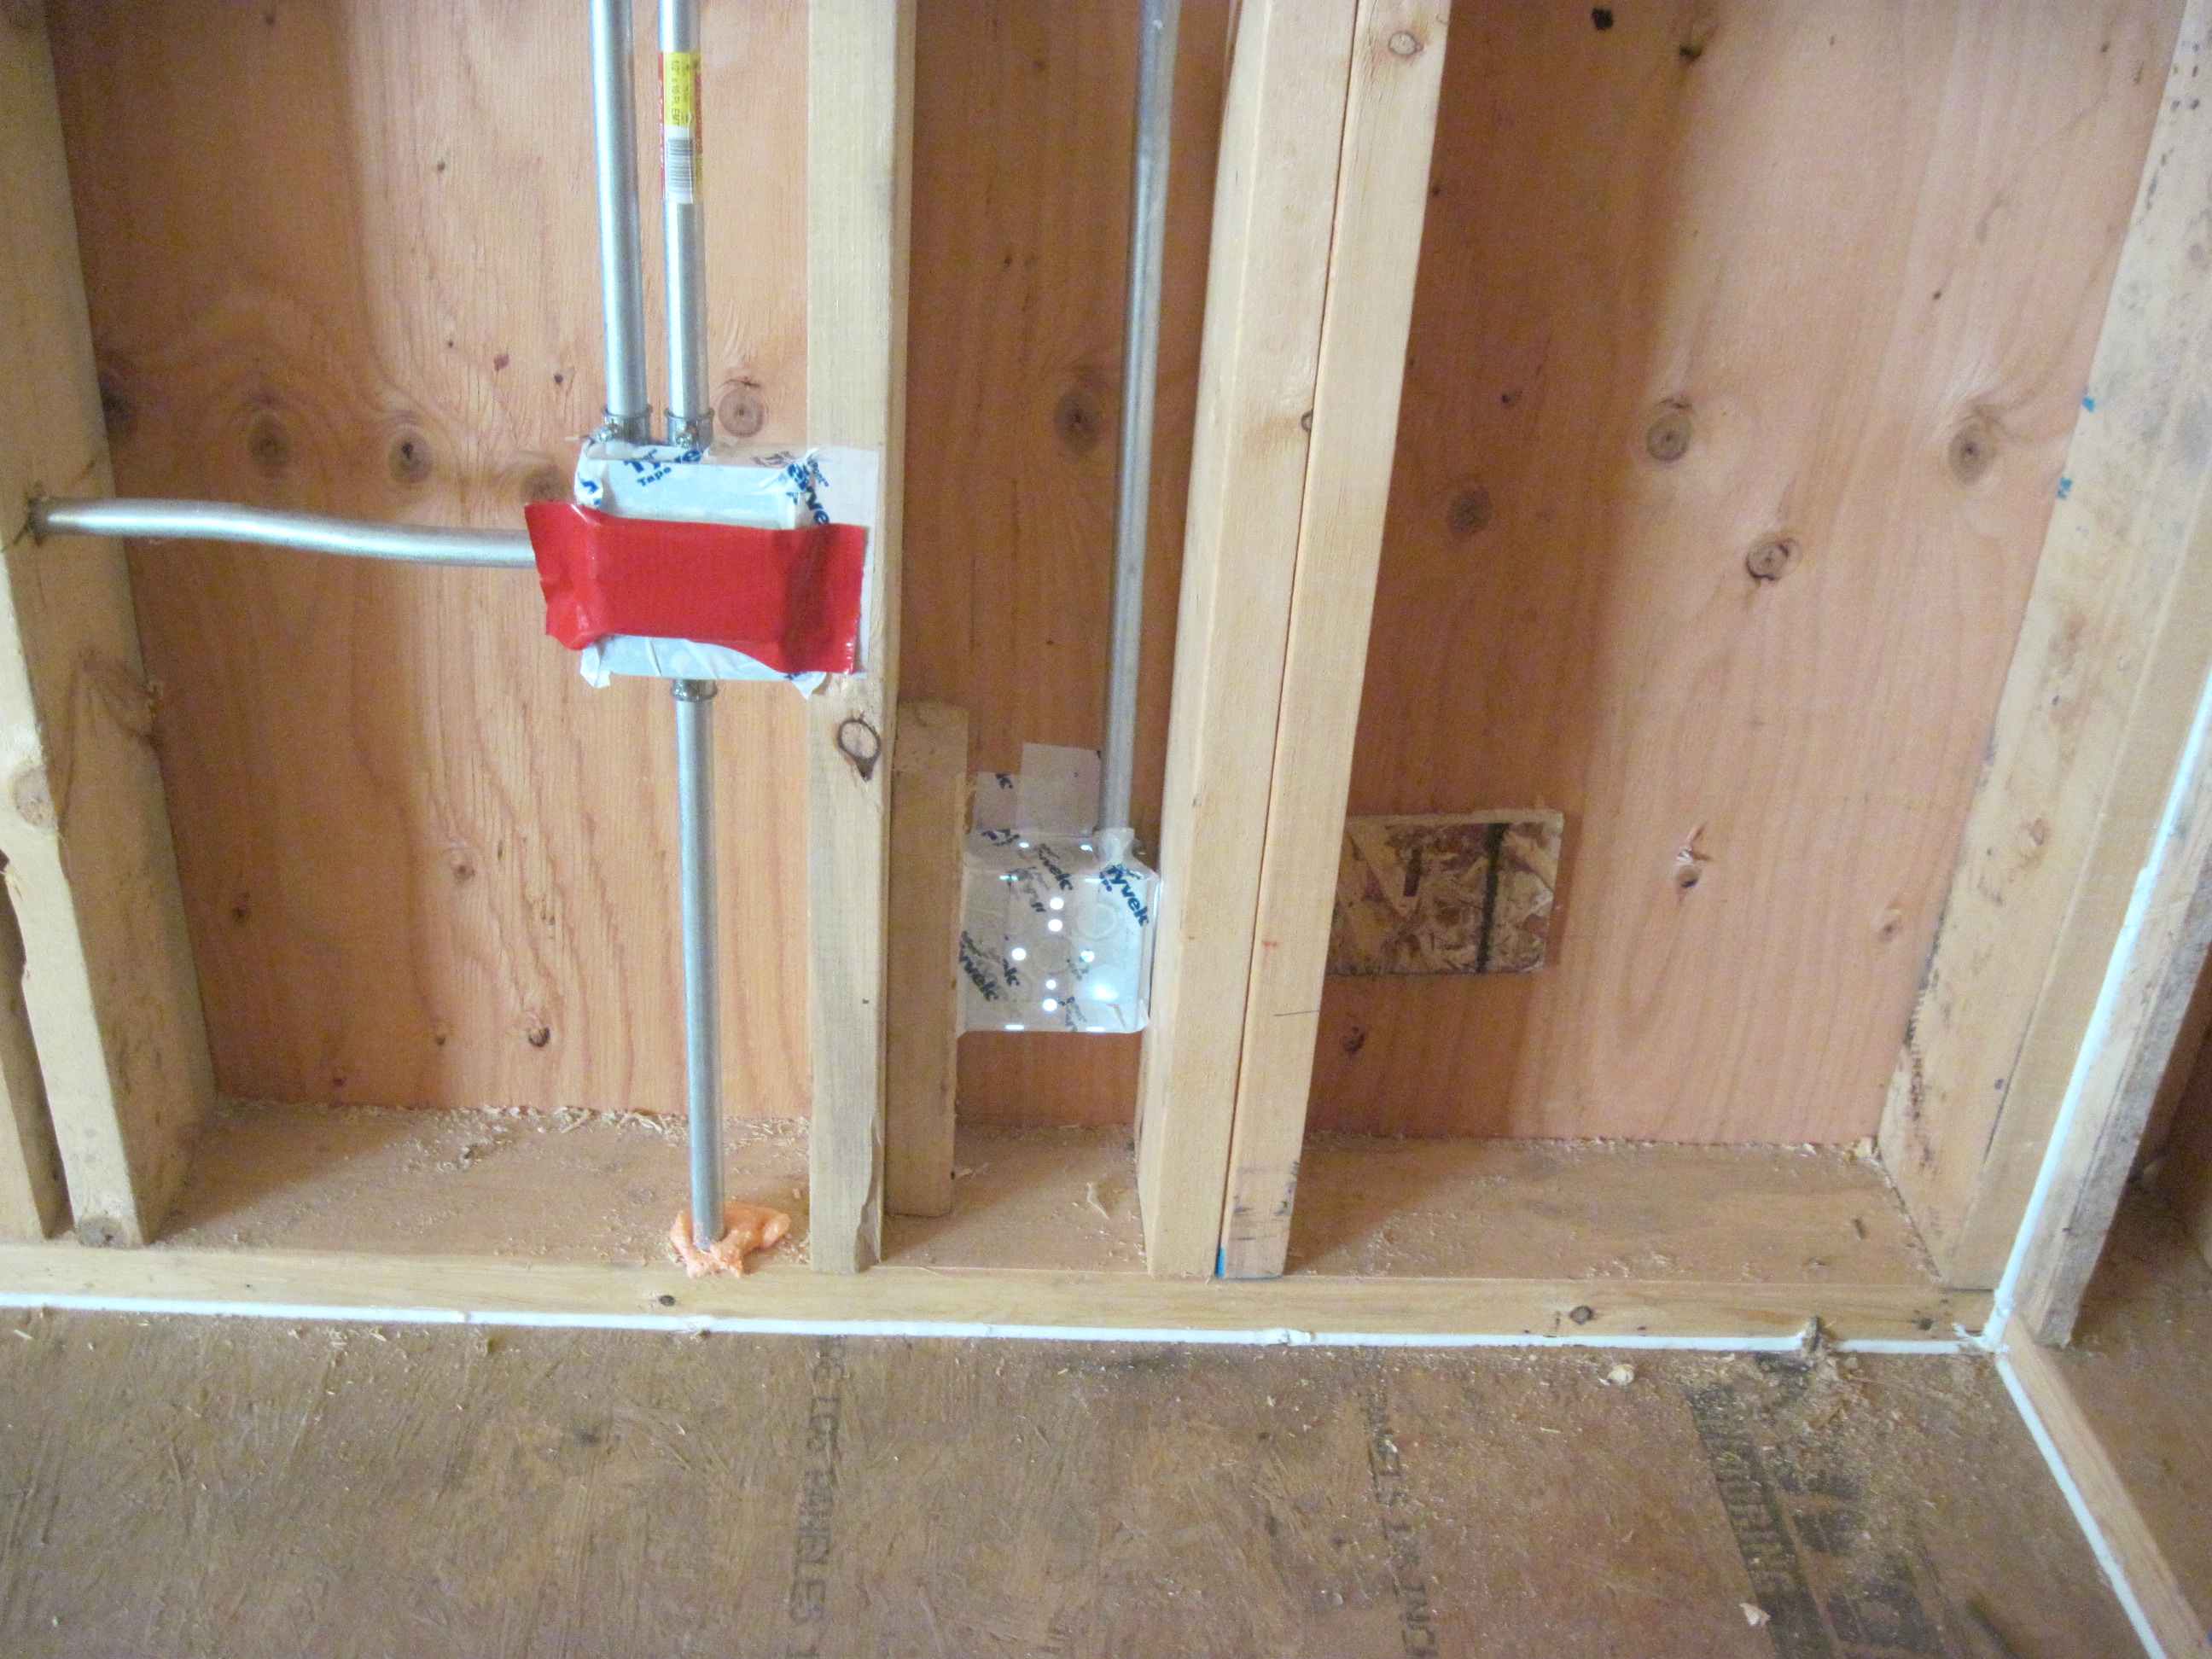
Right - Peel and stick flashing and flashing tape seal a plumbing pipe that penetrates an exterior wall.
Image
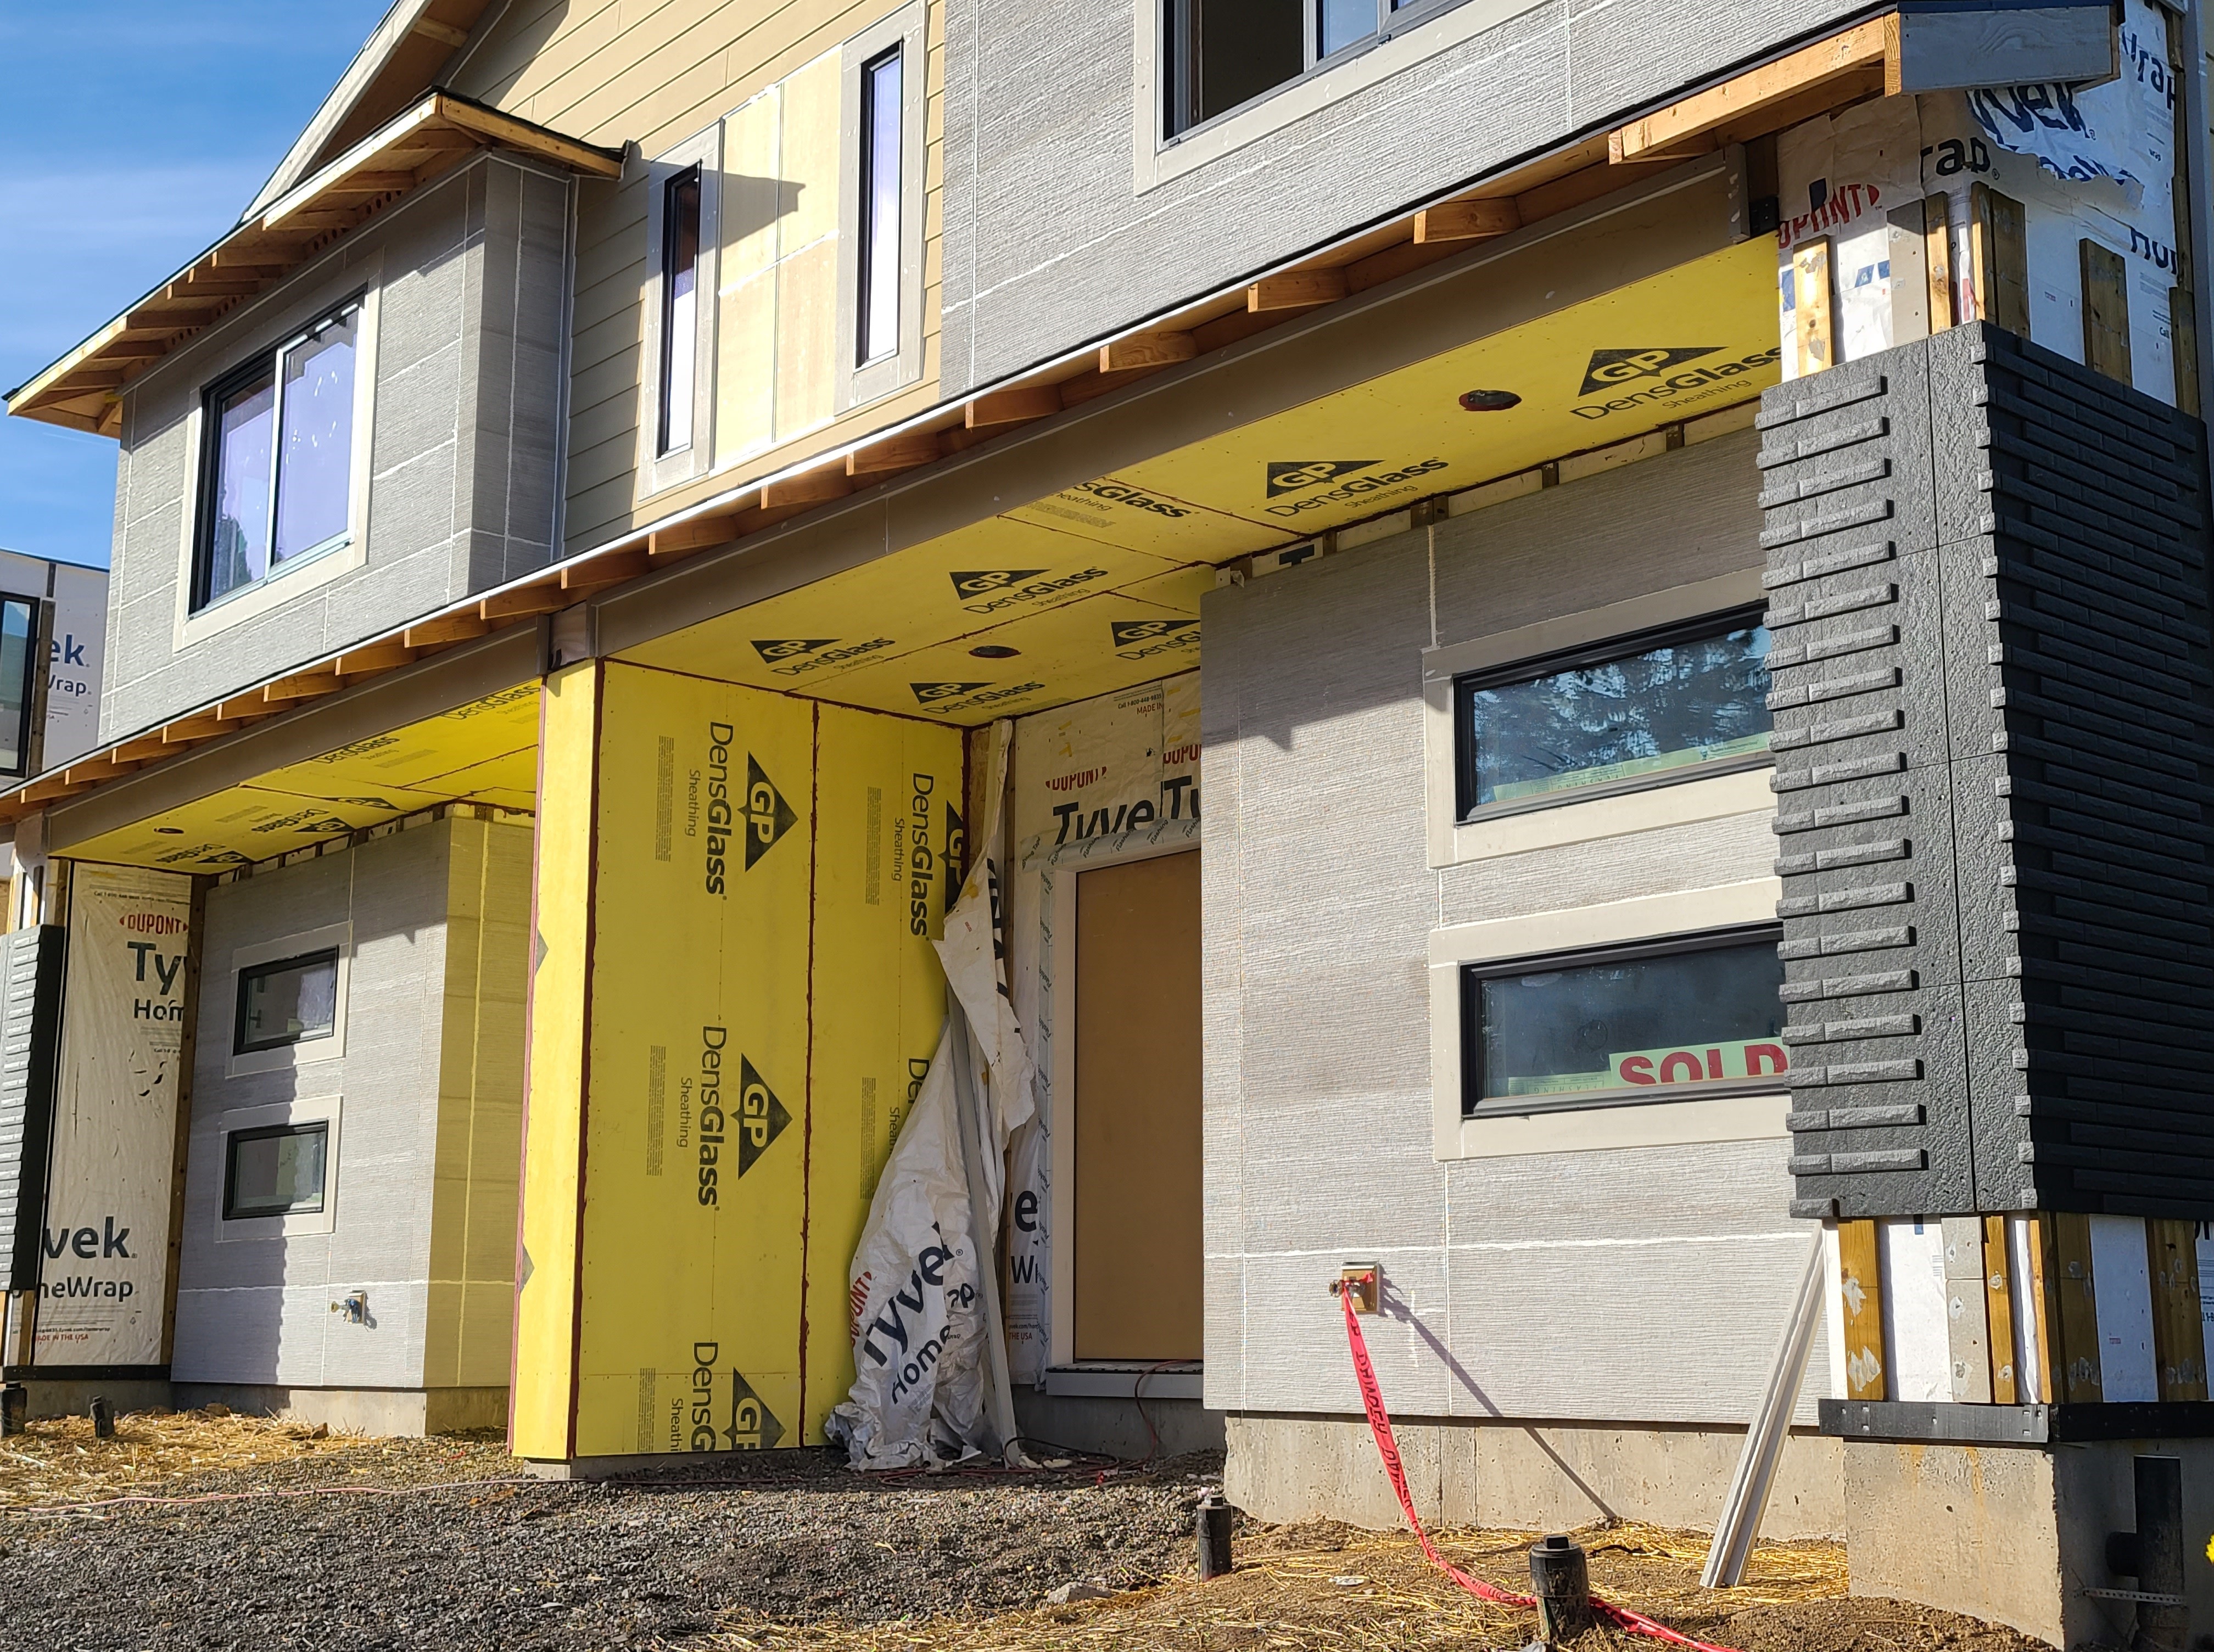
Image

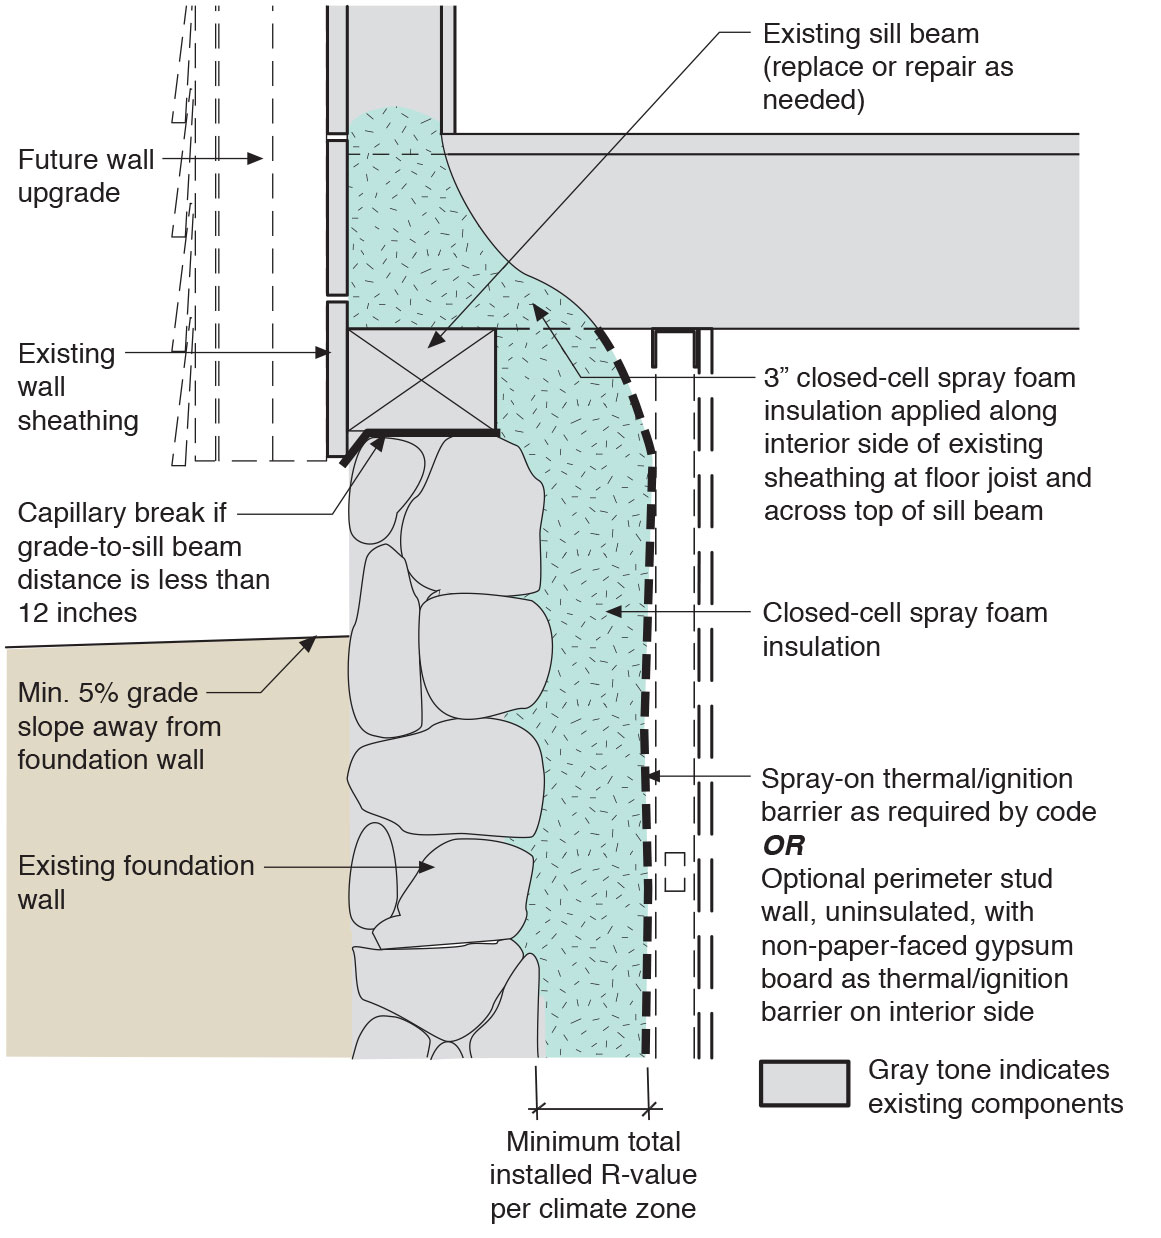
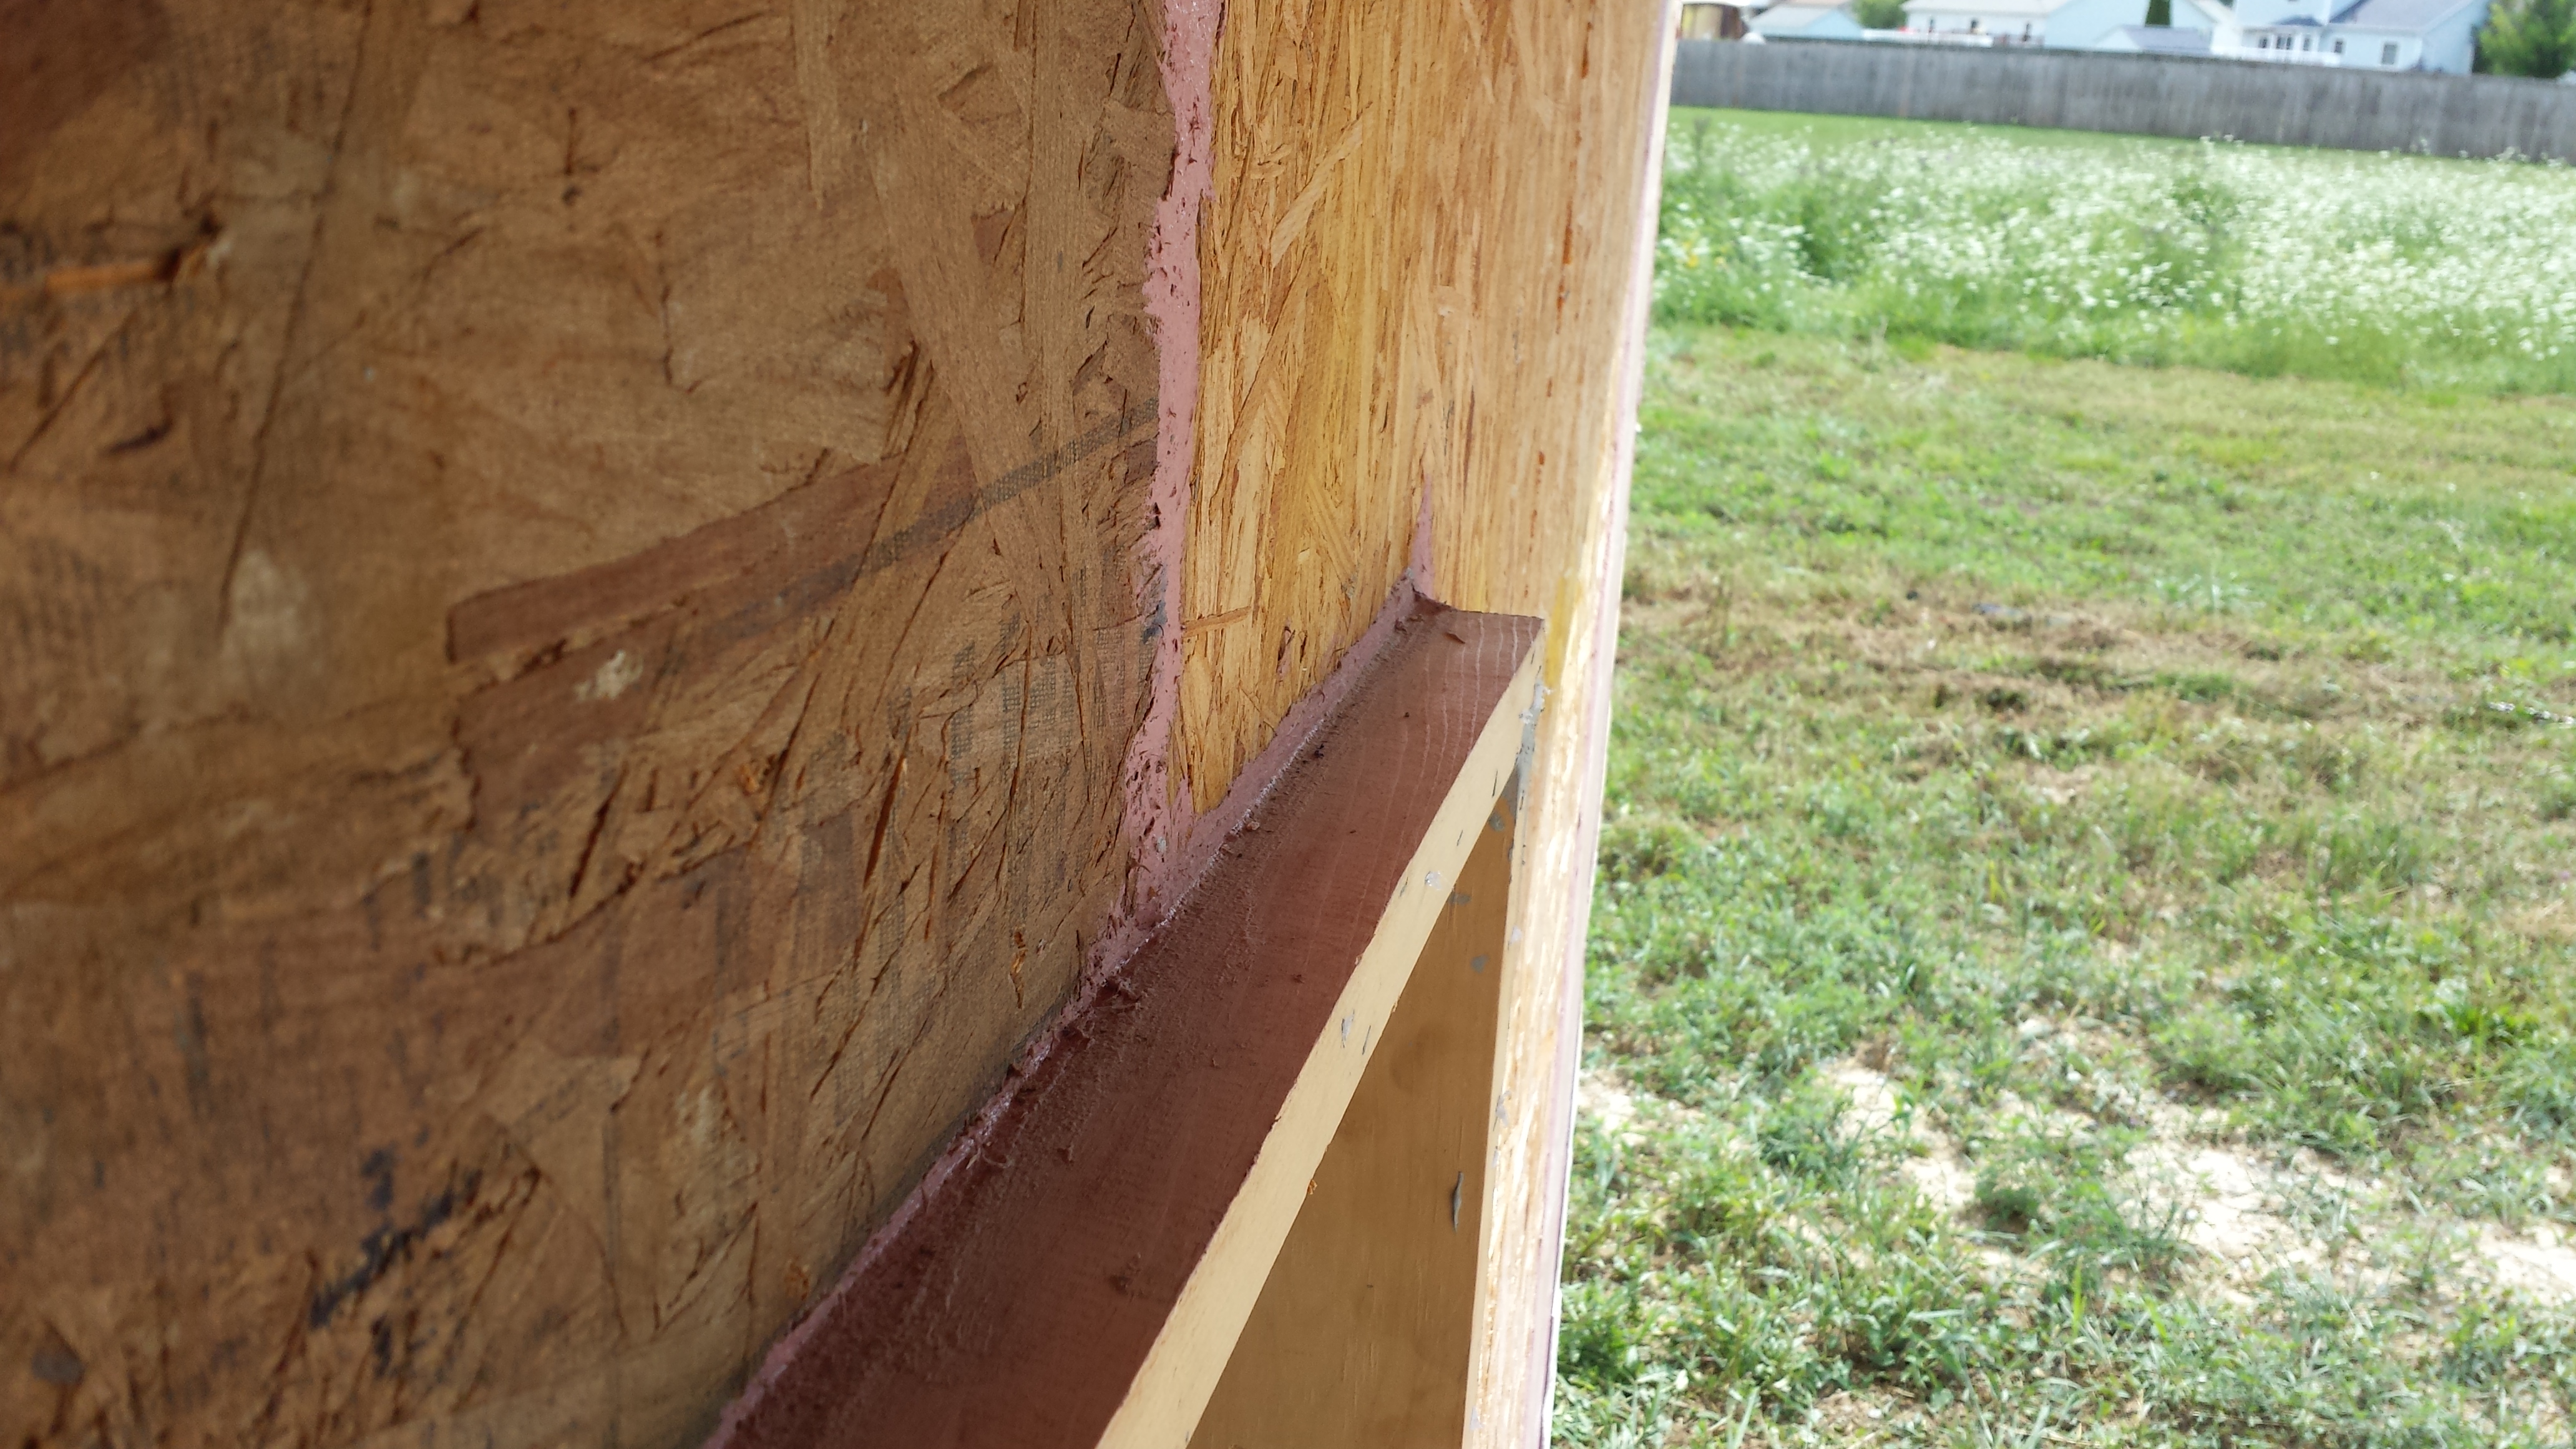
Right - Permeable rigid mineral wool insulation and appropriate water-management flashing details are integrated with new rigid foam siding to keep water away from the sill beam above the foundation wall
Image
Right - Pieces of metal flashing are installed under each tile course along the valley centerline to prevent debris accumulation between and below concrete roof tiles.
Image
Right - Plywood storm protection covering for windows is installed with removable threaded-rod fittings.
Image
Right - Plywoood sheathing is taped at the seams to create a continuous air barrier that prevents air infiltration through critical junctures in the wall, such as at corners and between floors.
Image
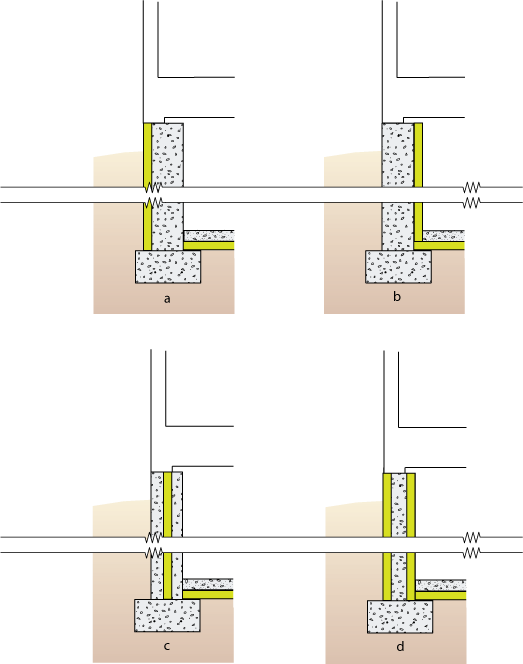
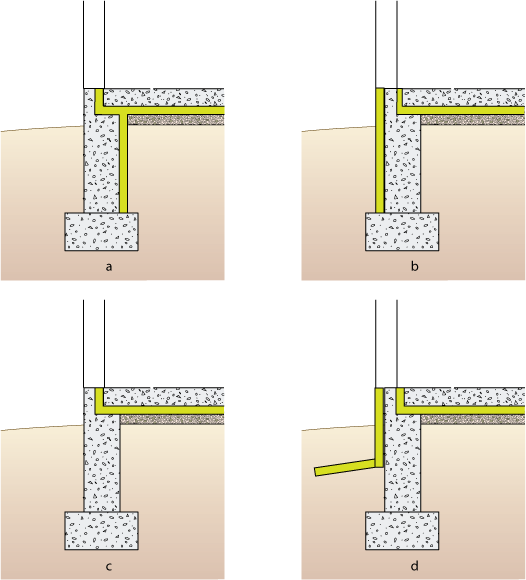
Right - Potential locations for basement insulation in new construction, slab insulation should always be underneath, with walls insulated (a) inside, (b) outside, (c) sandwiched inside, or (d) inside and outside of walls.
Image
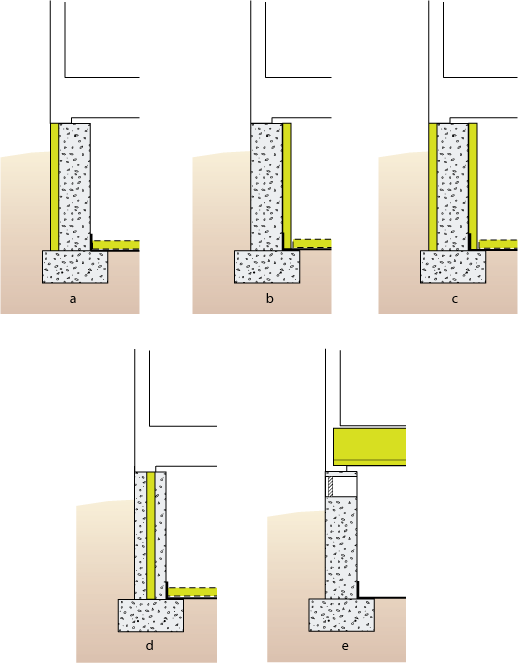
Right - Potential locations for crawlspace insulation: vapor sheeting should always cover the floor with insulation (a) outside walls, (b) inside walls, (c) both sides of walls, (d) sandwiched inside walls, or (e) under the first floor.
Image
Right - Potential locations for slab-on-grade stem insulation in new construction: slab insulation should always be underneath, with stem walls insulated (a) inside, (b) outside, (c) not at all, or (d) outside with underground extension to repel moisture.
Image
Right - Poured concrete basement wall showing exterior insulation and sill detail; above-grade wall has sheathing to the inside of the rigid foam.
Image
Right - Poured concrete basement wall showing exterior insulation and sill detail; above-grade wall has sheathing to the outside of the rigid foam.
Image
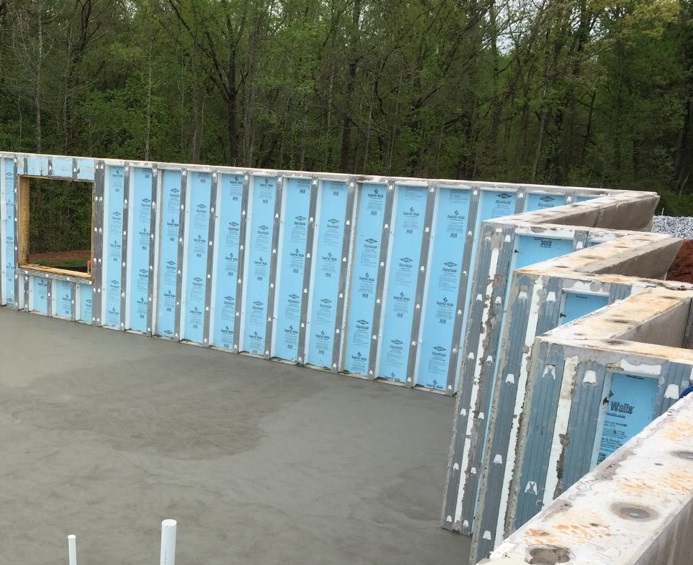
Right - Precast concrete basement walls come to the site with integrated rigid foam insulation and steel-faced concrete studs.
Image
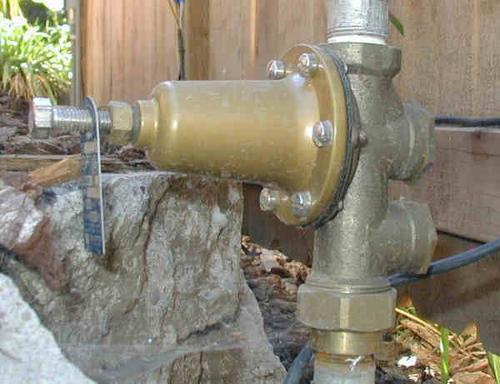
Right - Pressure reducing valves installed outside the home reduce water pressure before water is distributed to fixtures.
Image
Right - Prevent condensation in fibrous insulation-filled basement wall cavities by installing rigid or spray foam between the frame wall and the concrete foundation wall and by not installing a Class I vapor retarder over the framed wall.
Image
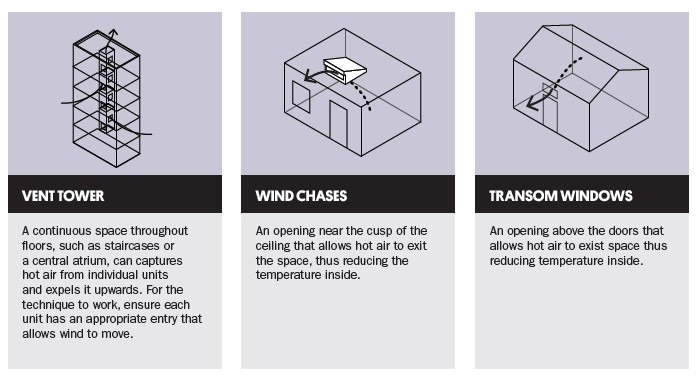
Right - Provide passive ventilation in hot climates by installing wind chases and vents.
Image

Image
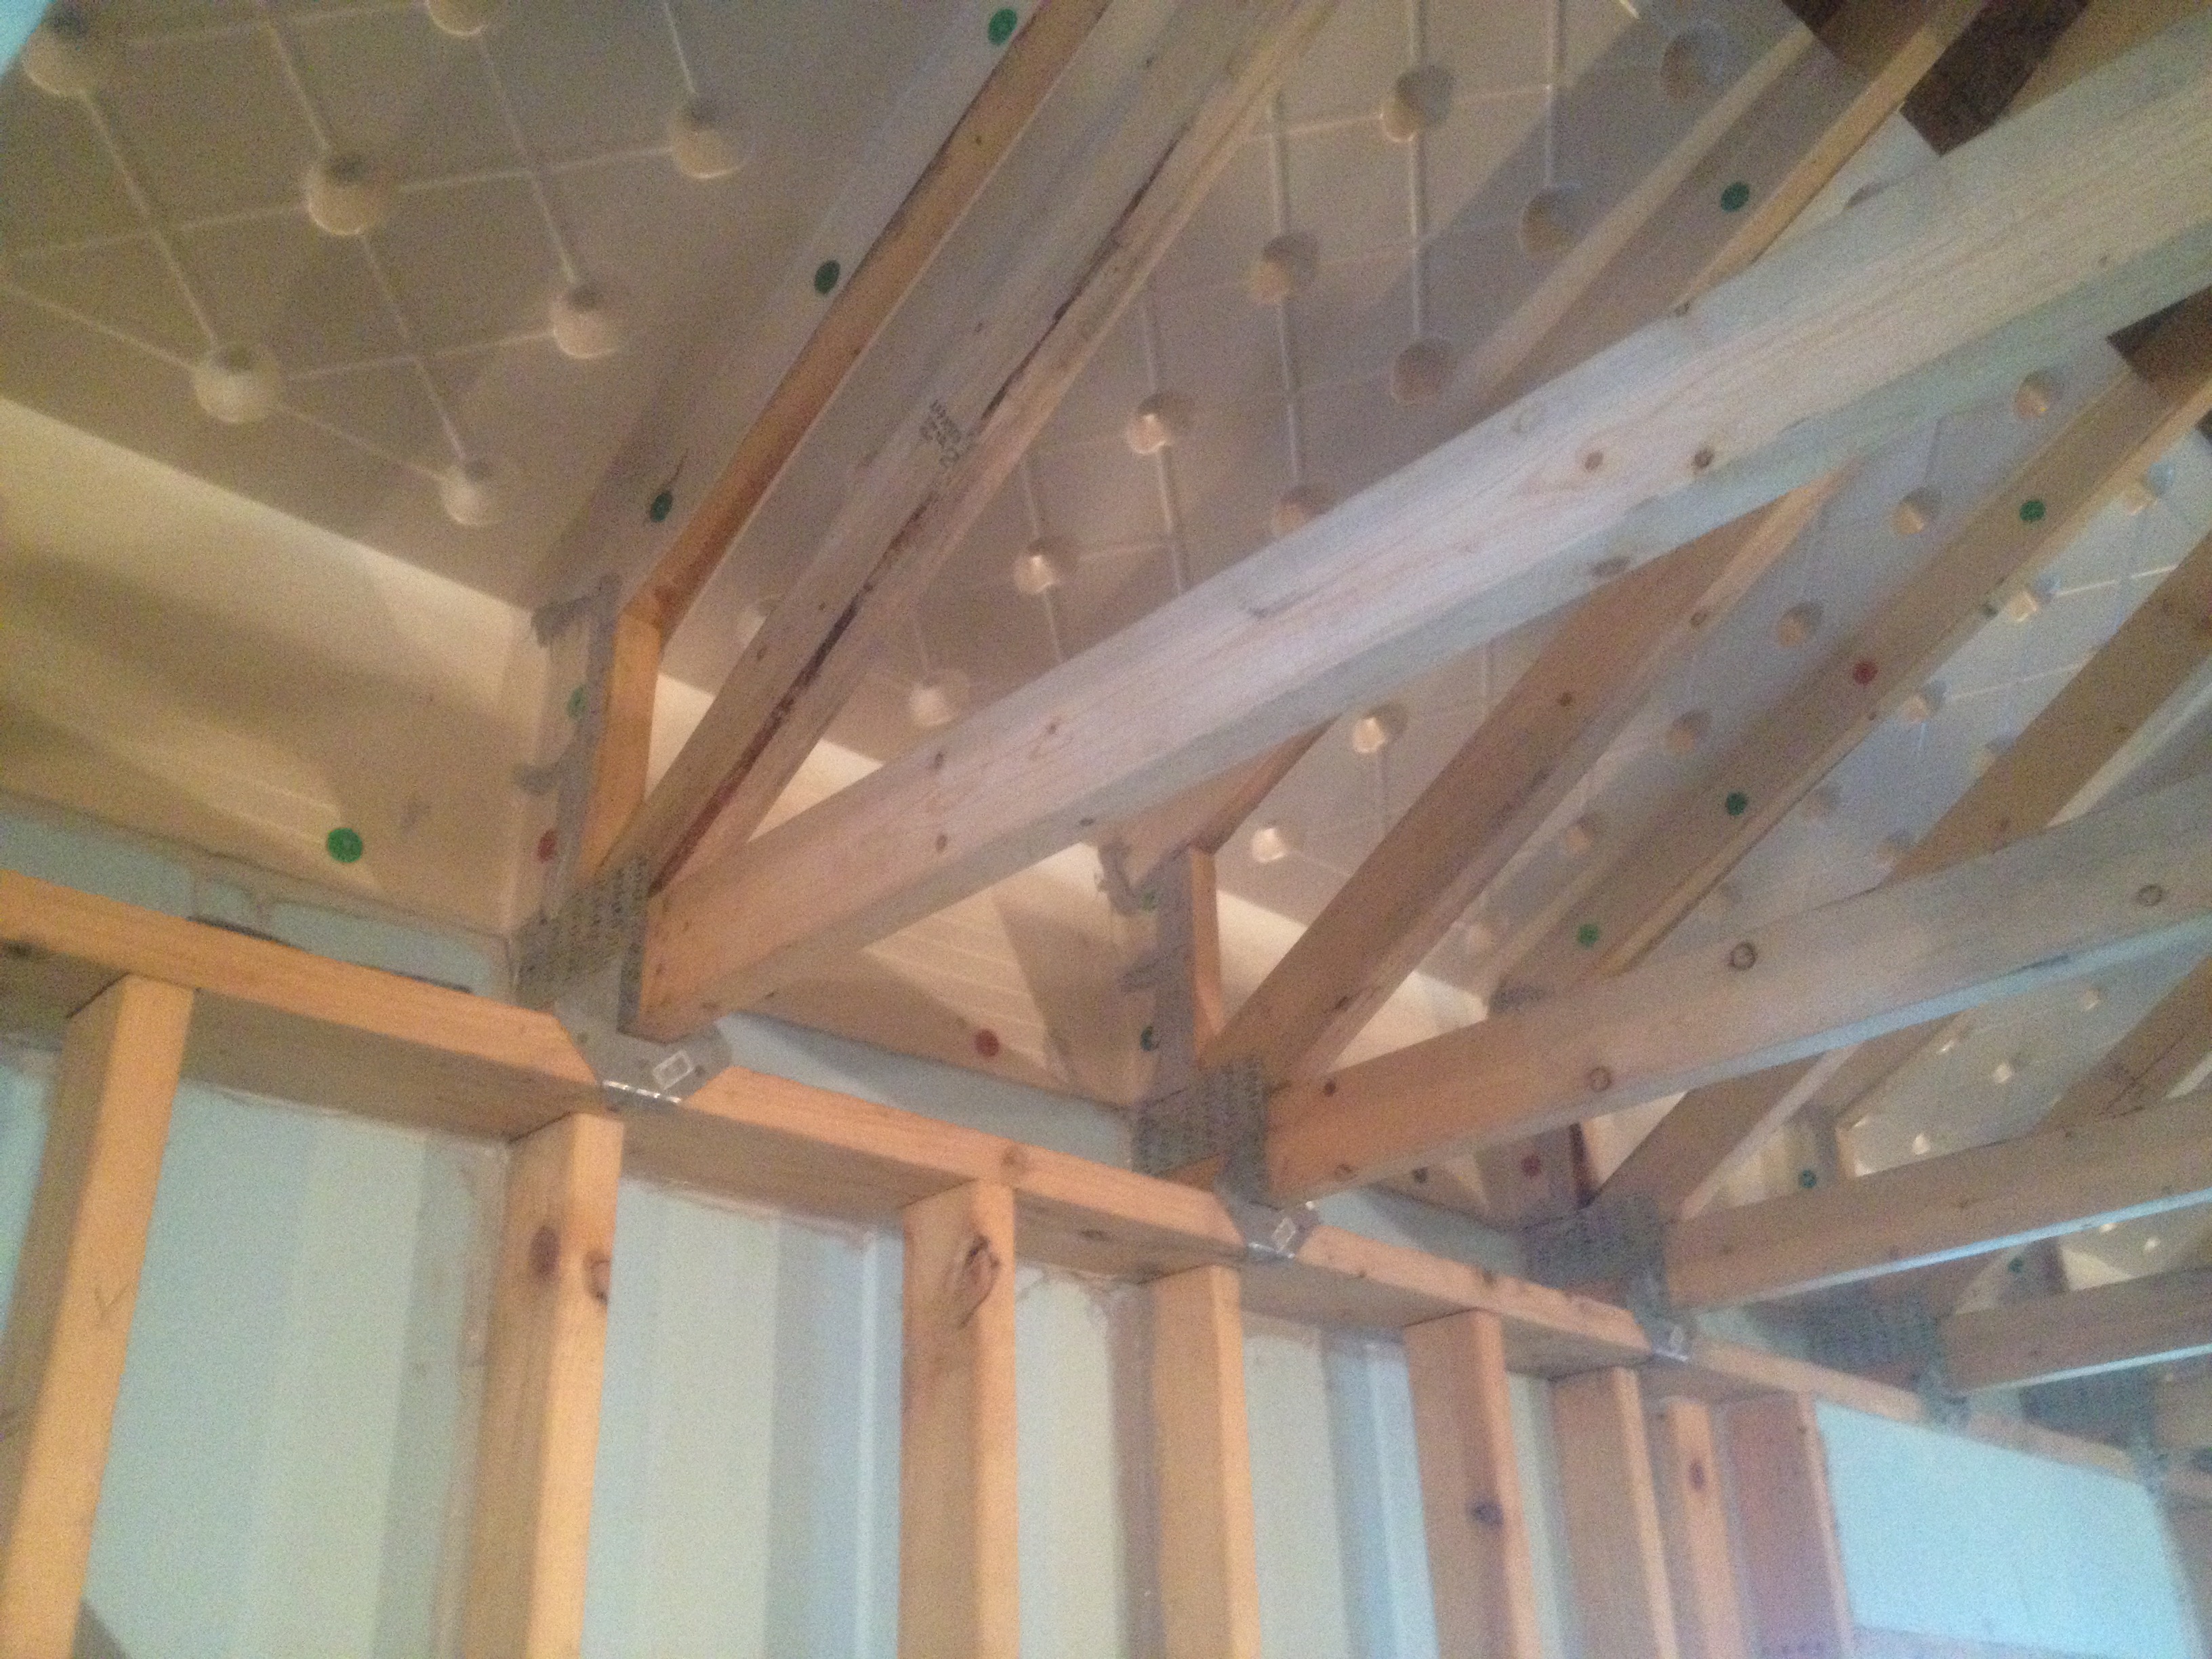
Right - Raised-heel roof trusses allow more room at the eaves for attic insulation.
Image

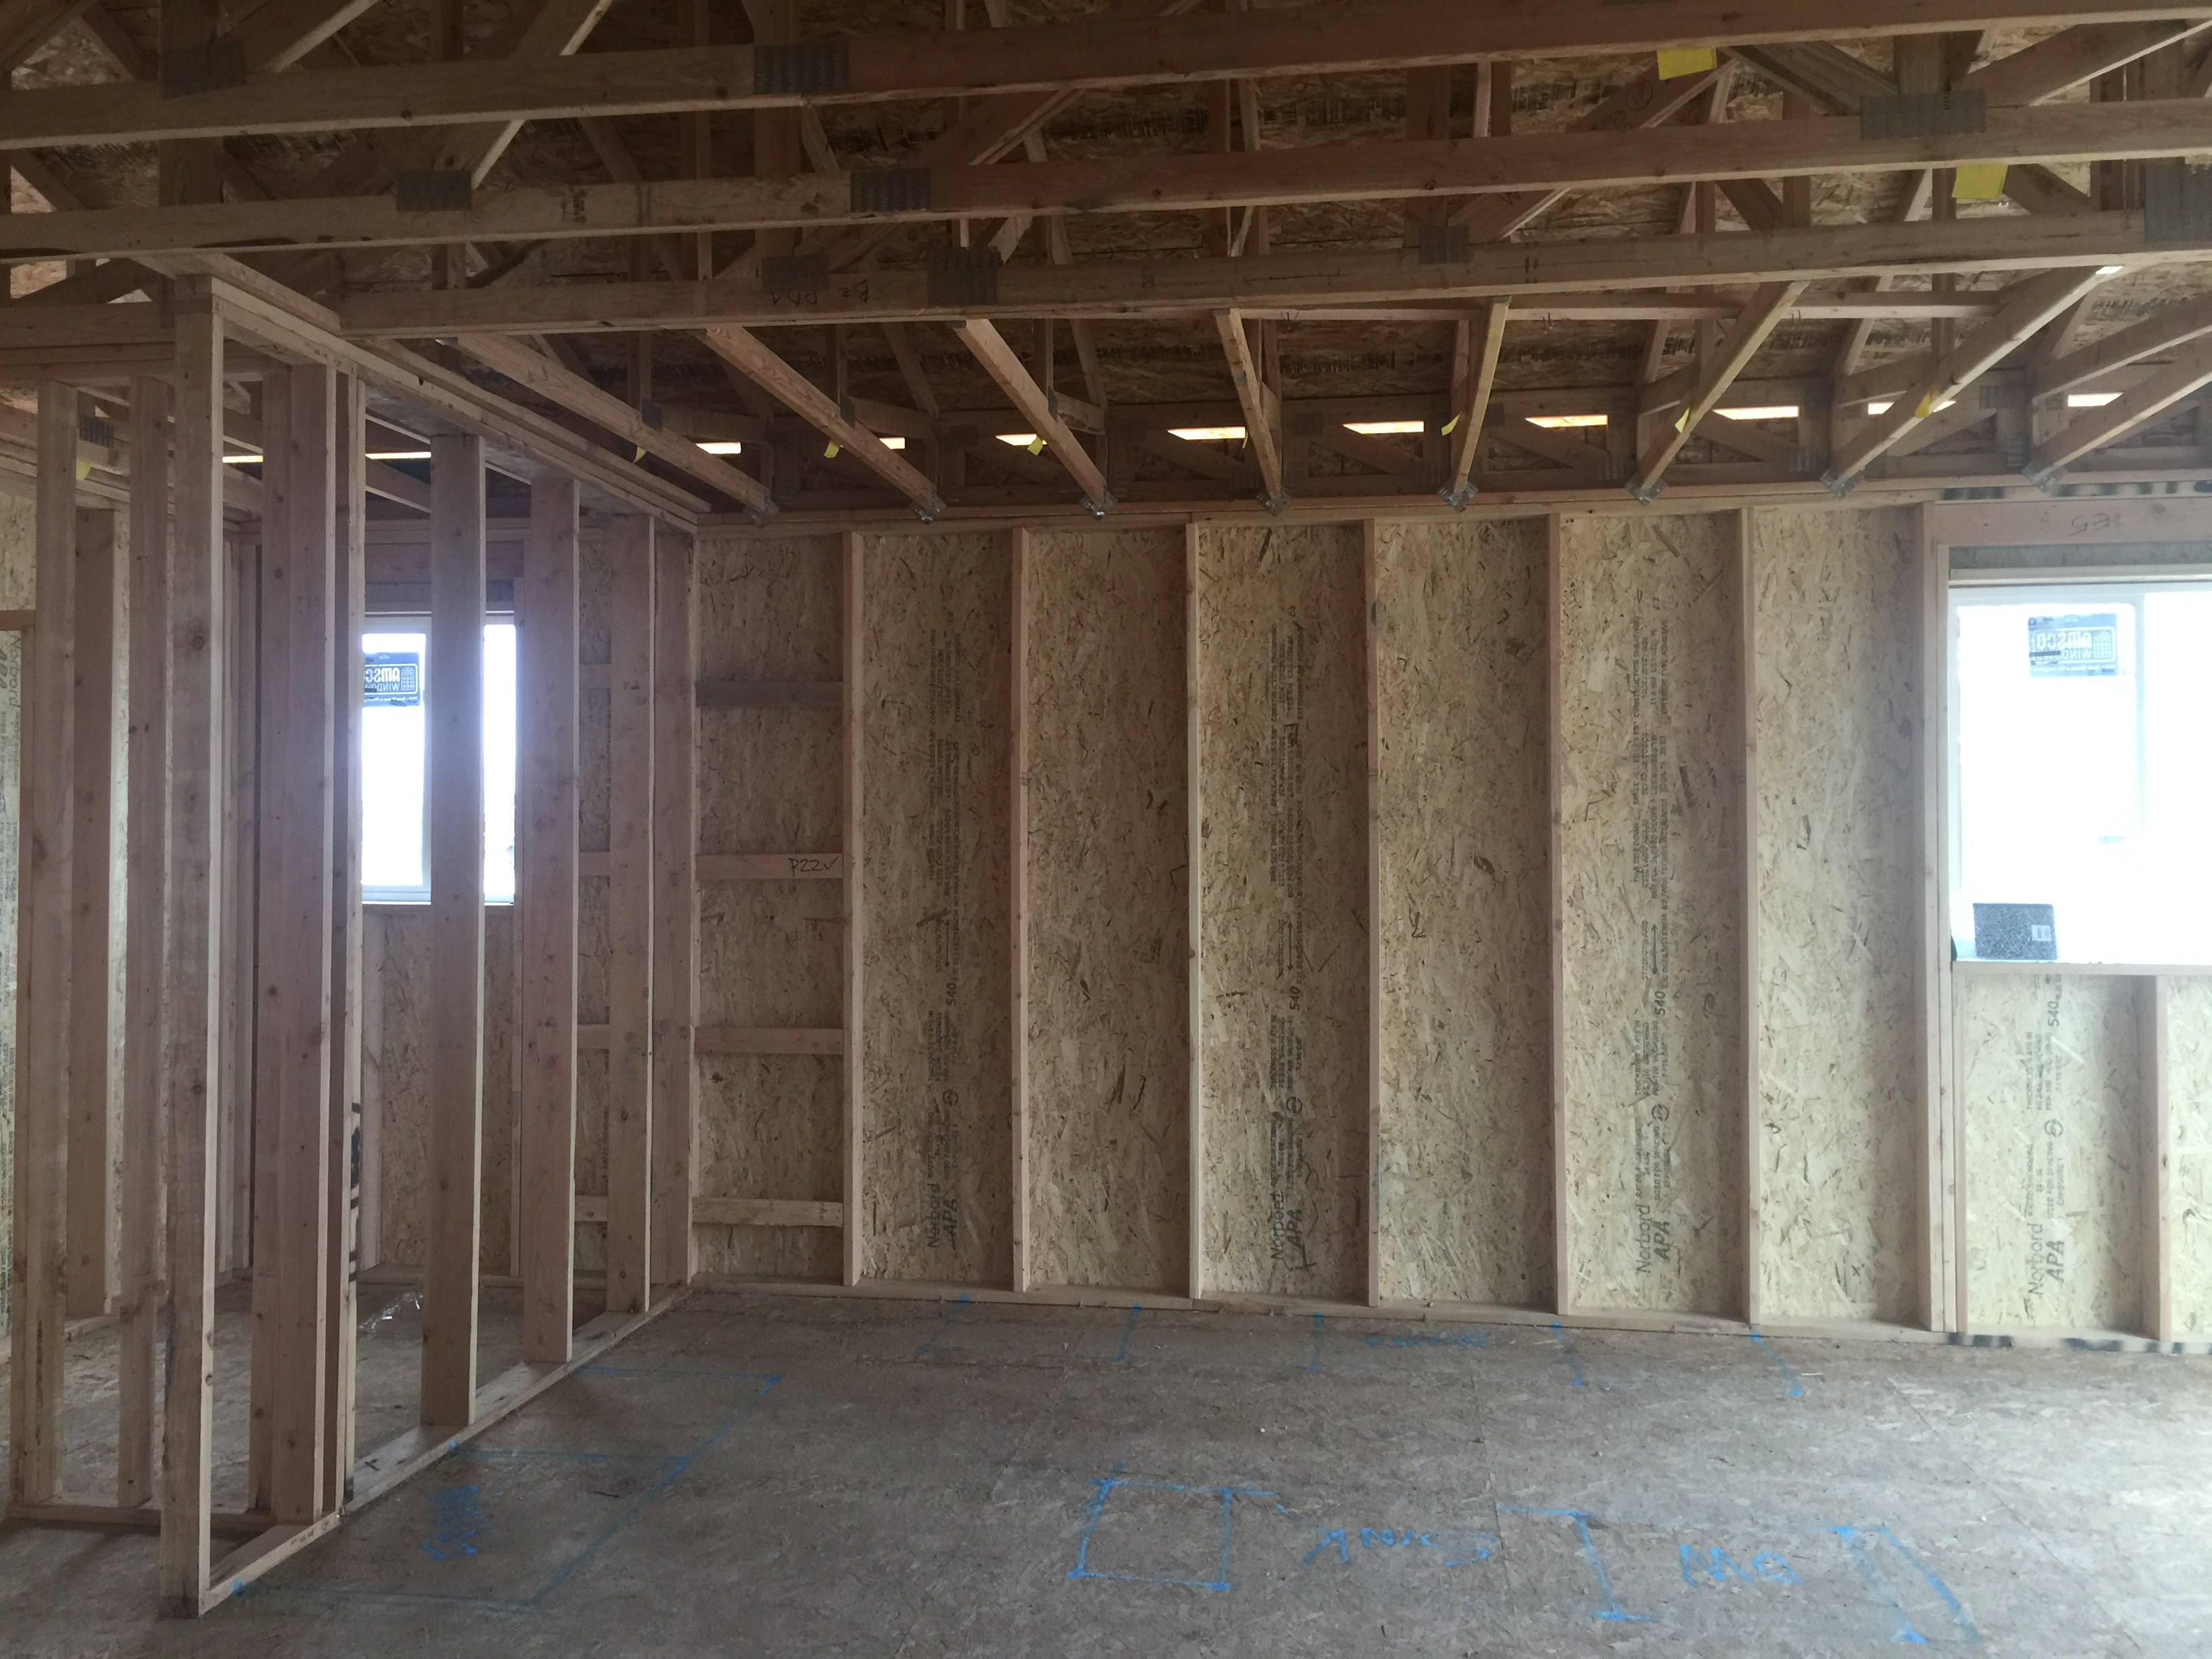
Right - Raised-heel trusses increase the roof height above the eaves allowing more space for insulation above exterior wall top plates; exterior wall sheathing extends up to keep wind from soffit vents from disrupting insulation.
Image
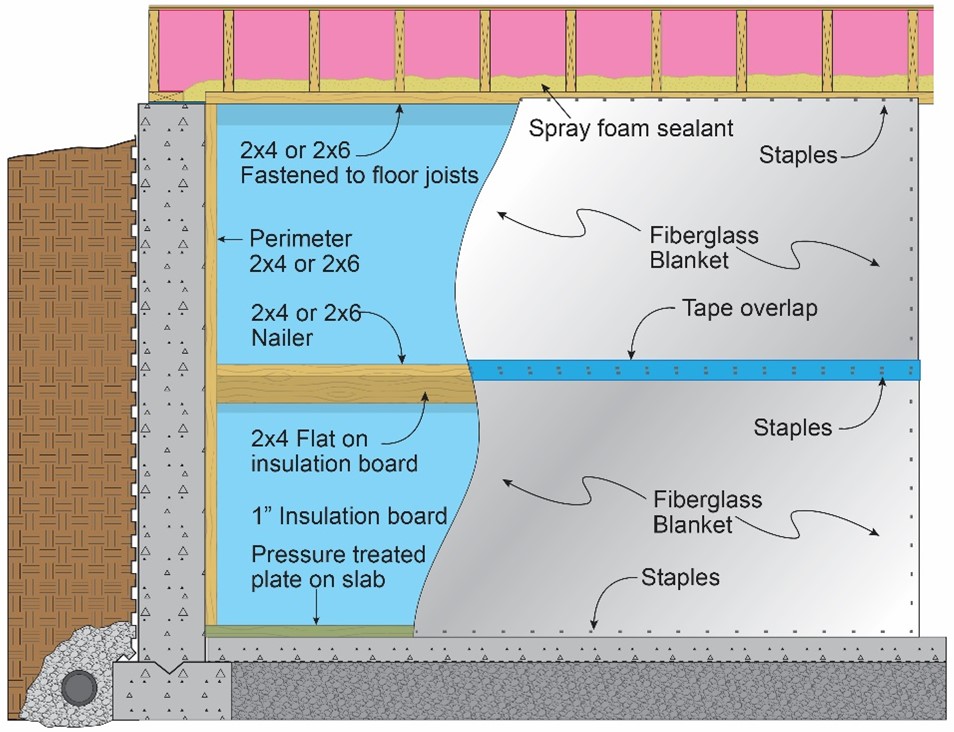
Right - Reduce condensation risks to blanket insulation by installing perforated vapor retarder covered fiberglass blankets over rigid foam that is air-sealed at all edges; staple the blanket to nailers and top/bottom plates and tape over the seams.
Image
Image
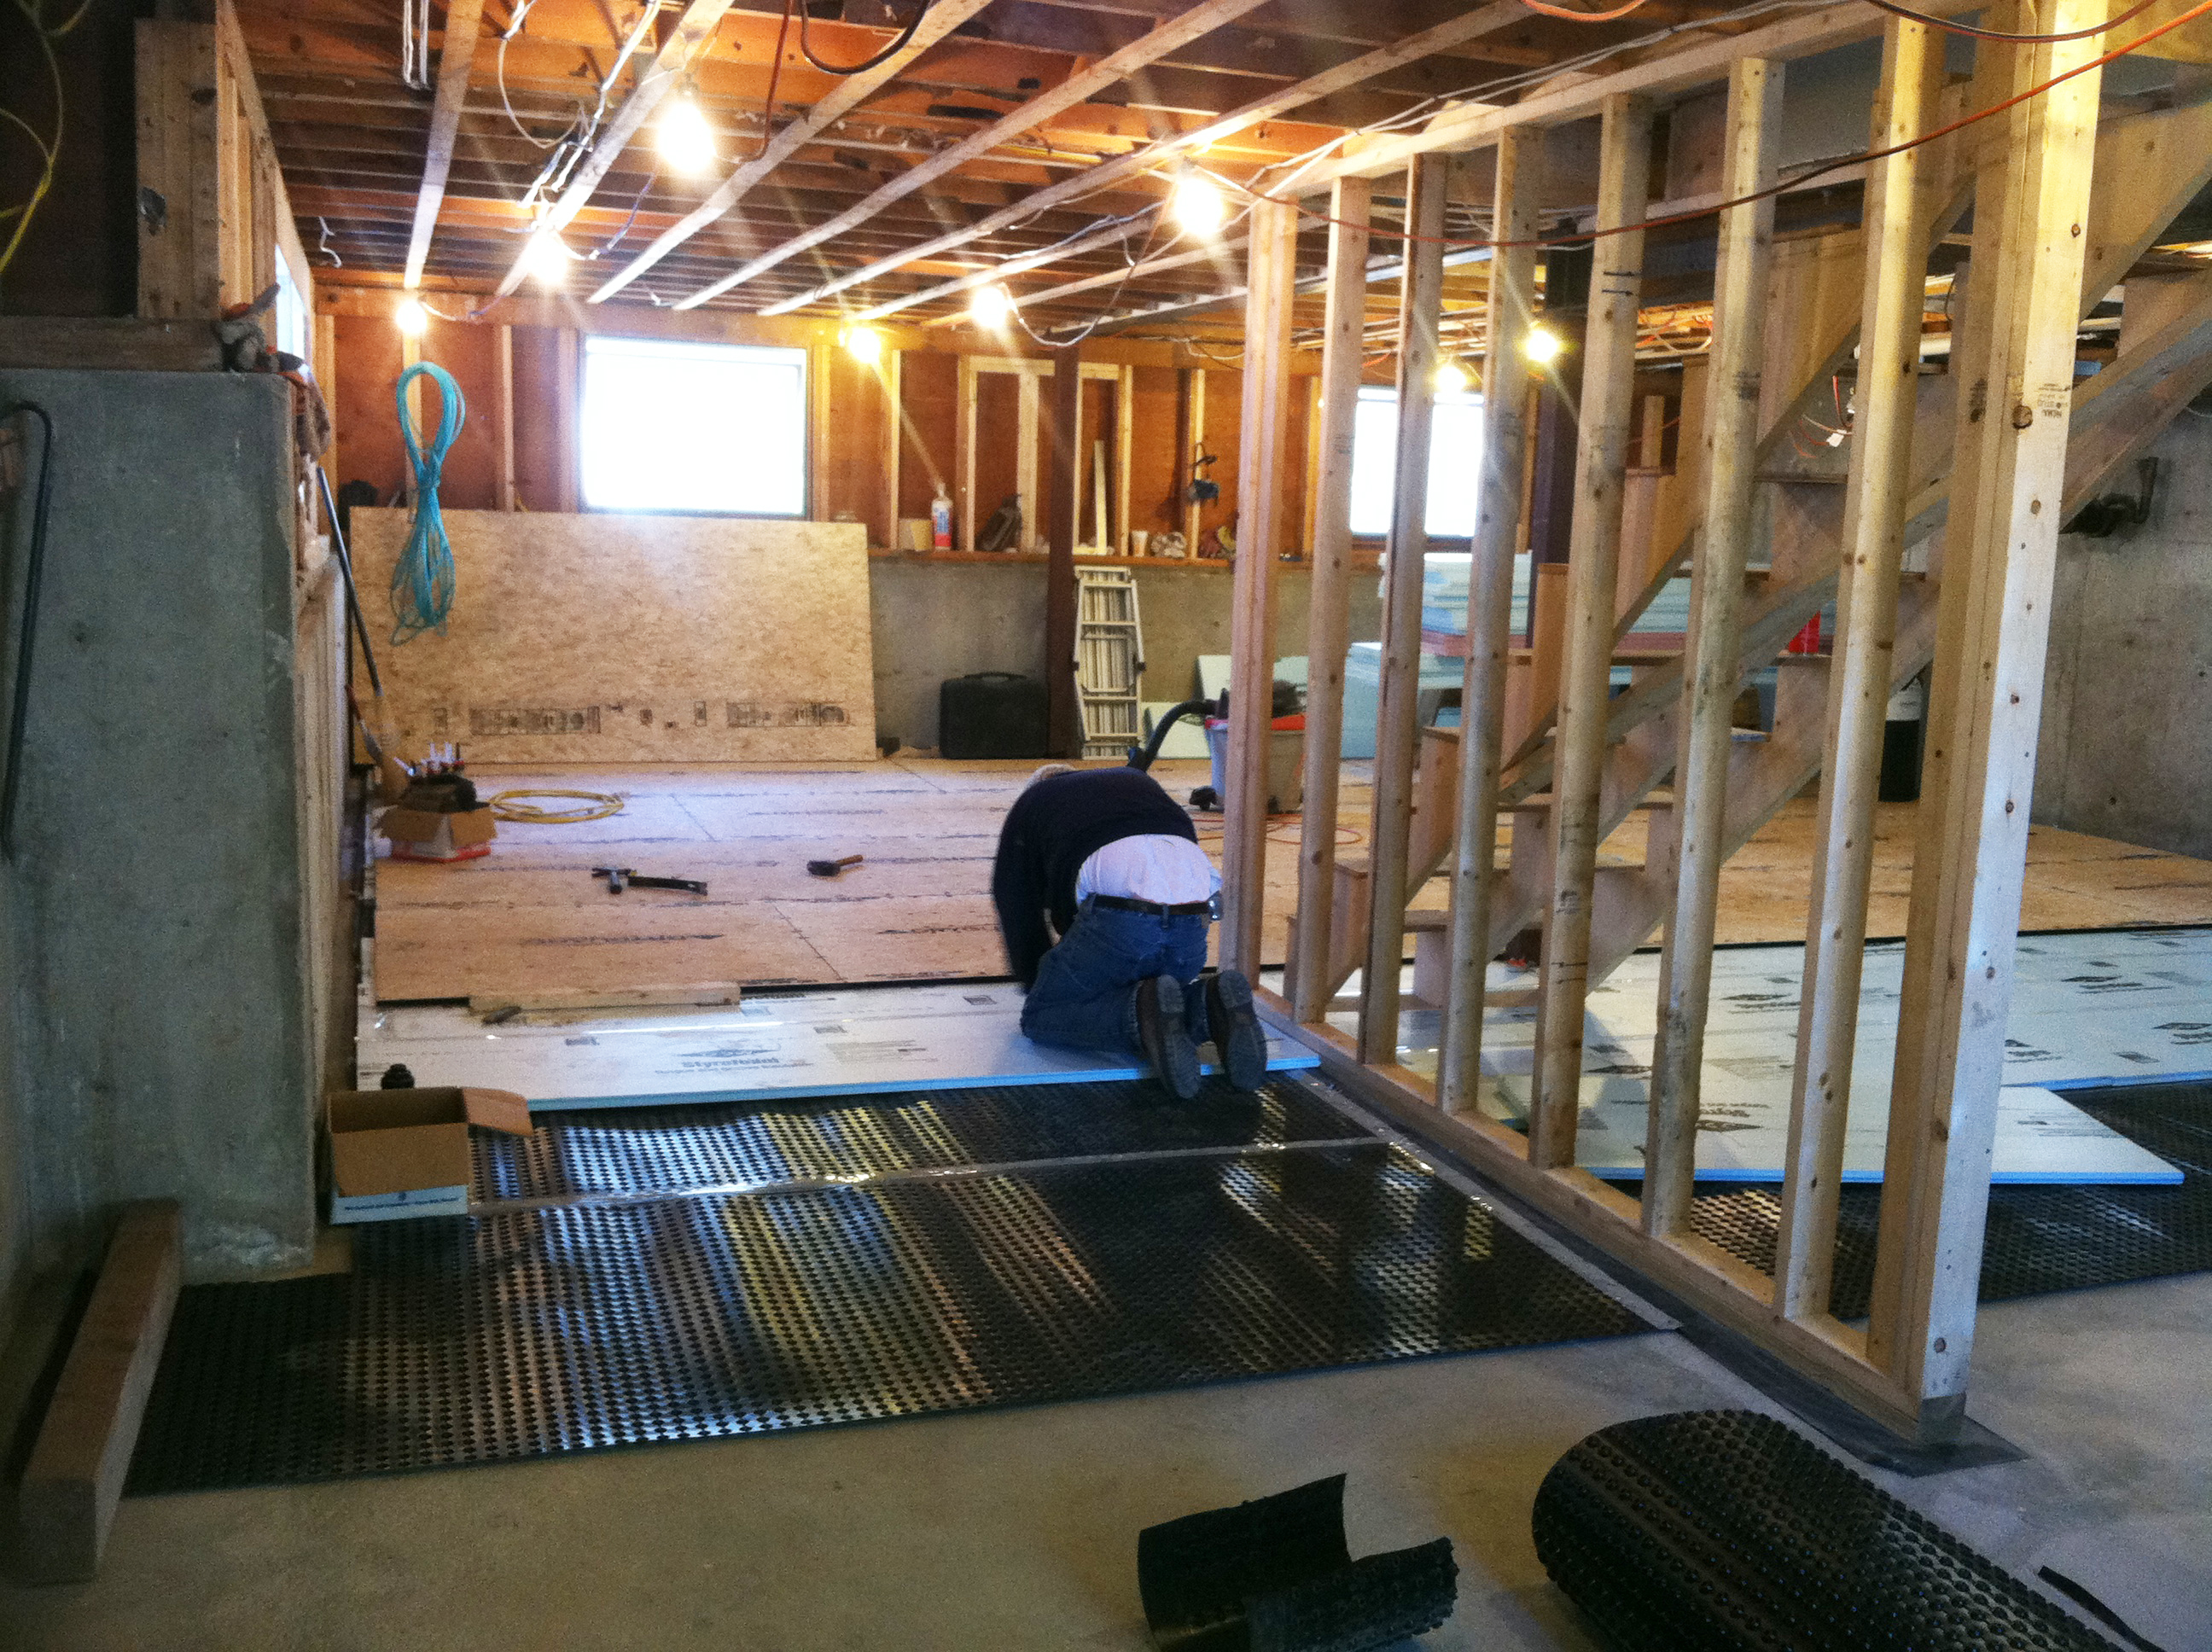
Right - Retrofit of an existing basement slab by adding dimple plastic mat, rigid foam insulation, and a floating subfloor.
Image
Right - Rigid foam board is attached to the interior surface of the basement walls.
Image
Right - Rigid foam insulation is installed along the exterior edge of an existing foundation slab.
Image
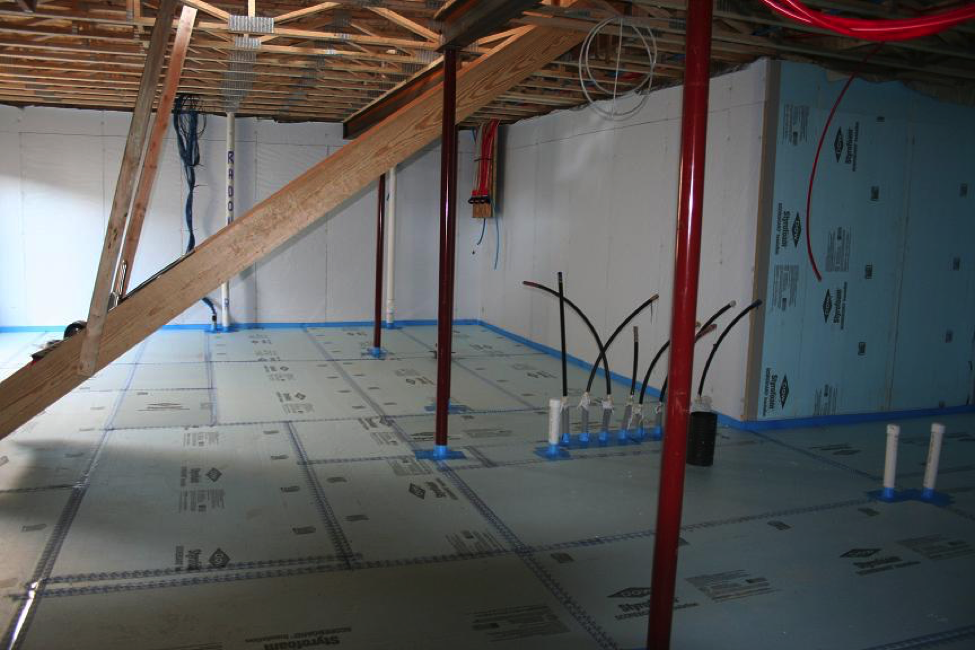
Right - Rigid foam insulation is taped at seams and installed over a drainage pad of aggregate to serve as a capillary break under the basement slab.
Image
Right - Rigid foam is installed over a waterproofing membrane that has been applied to the basement foundation walls.
Image
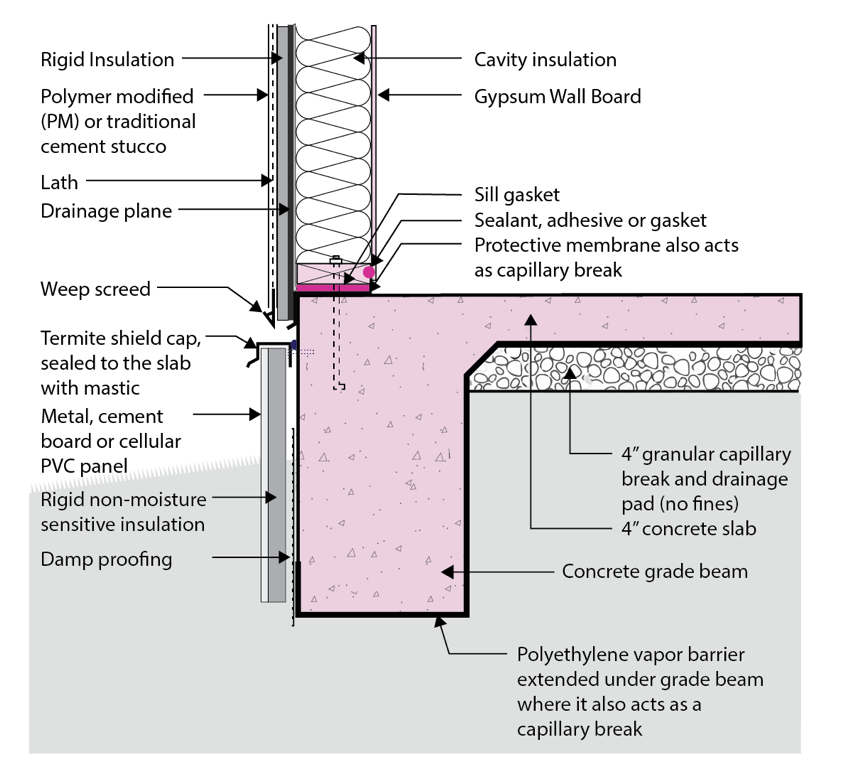
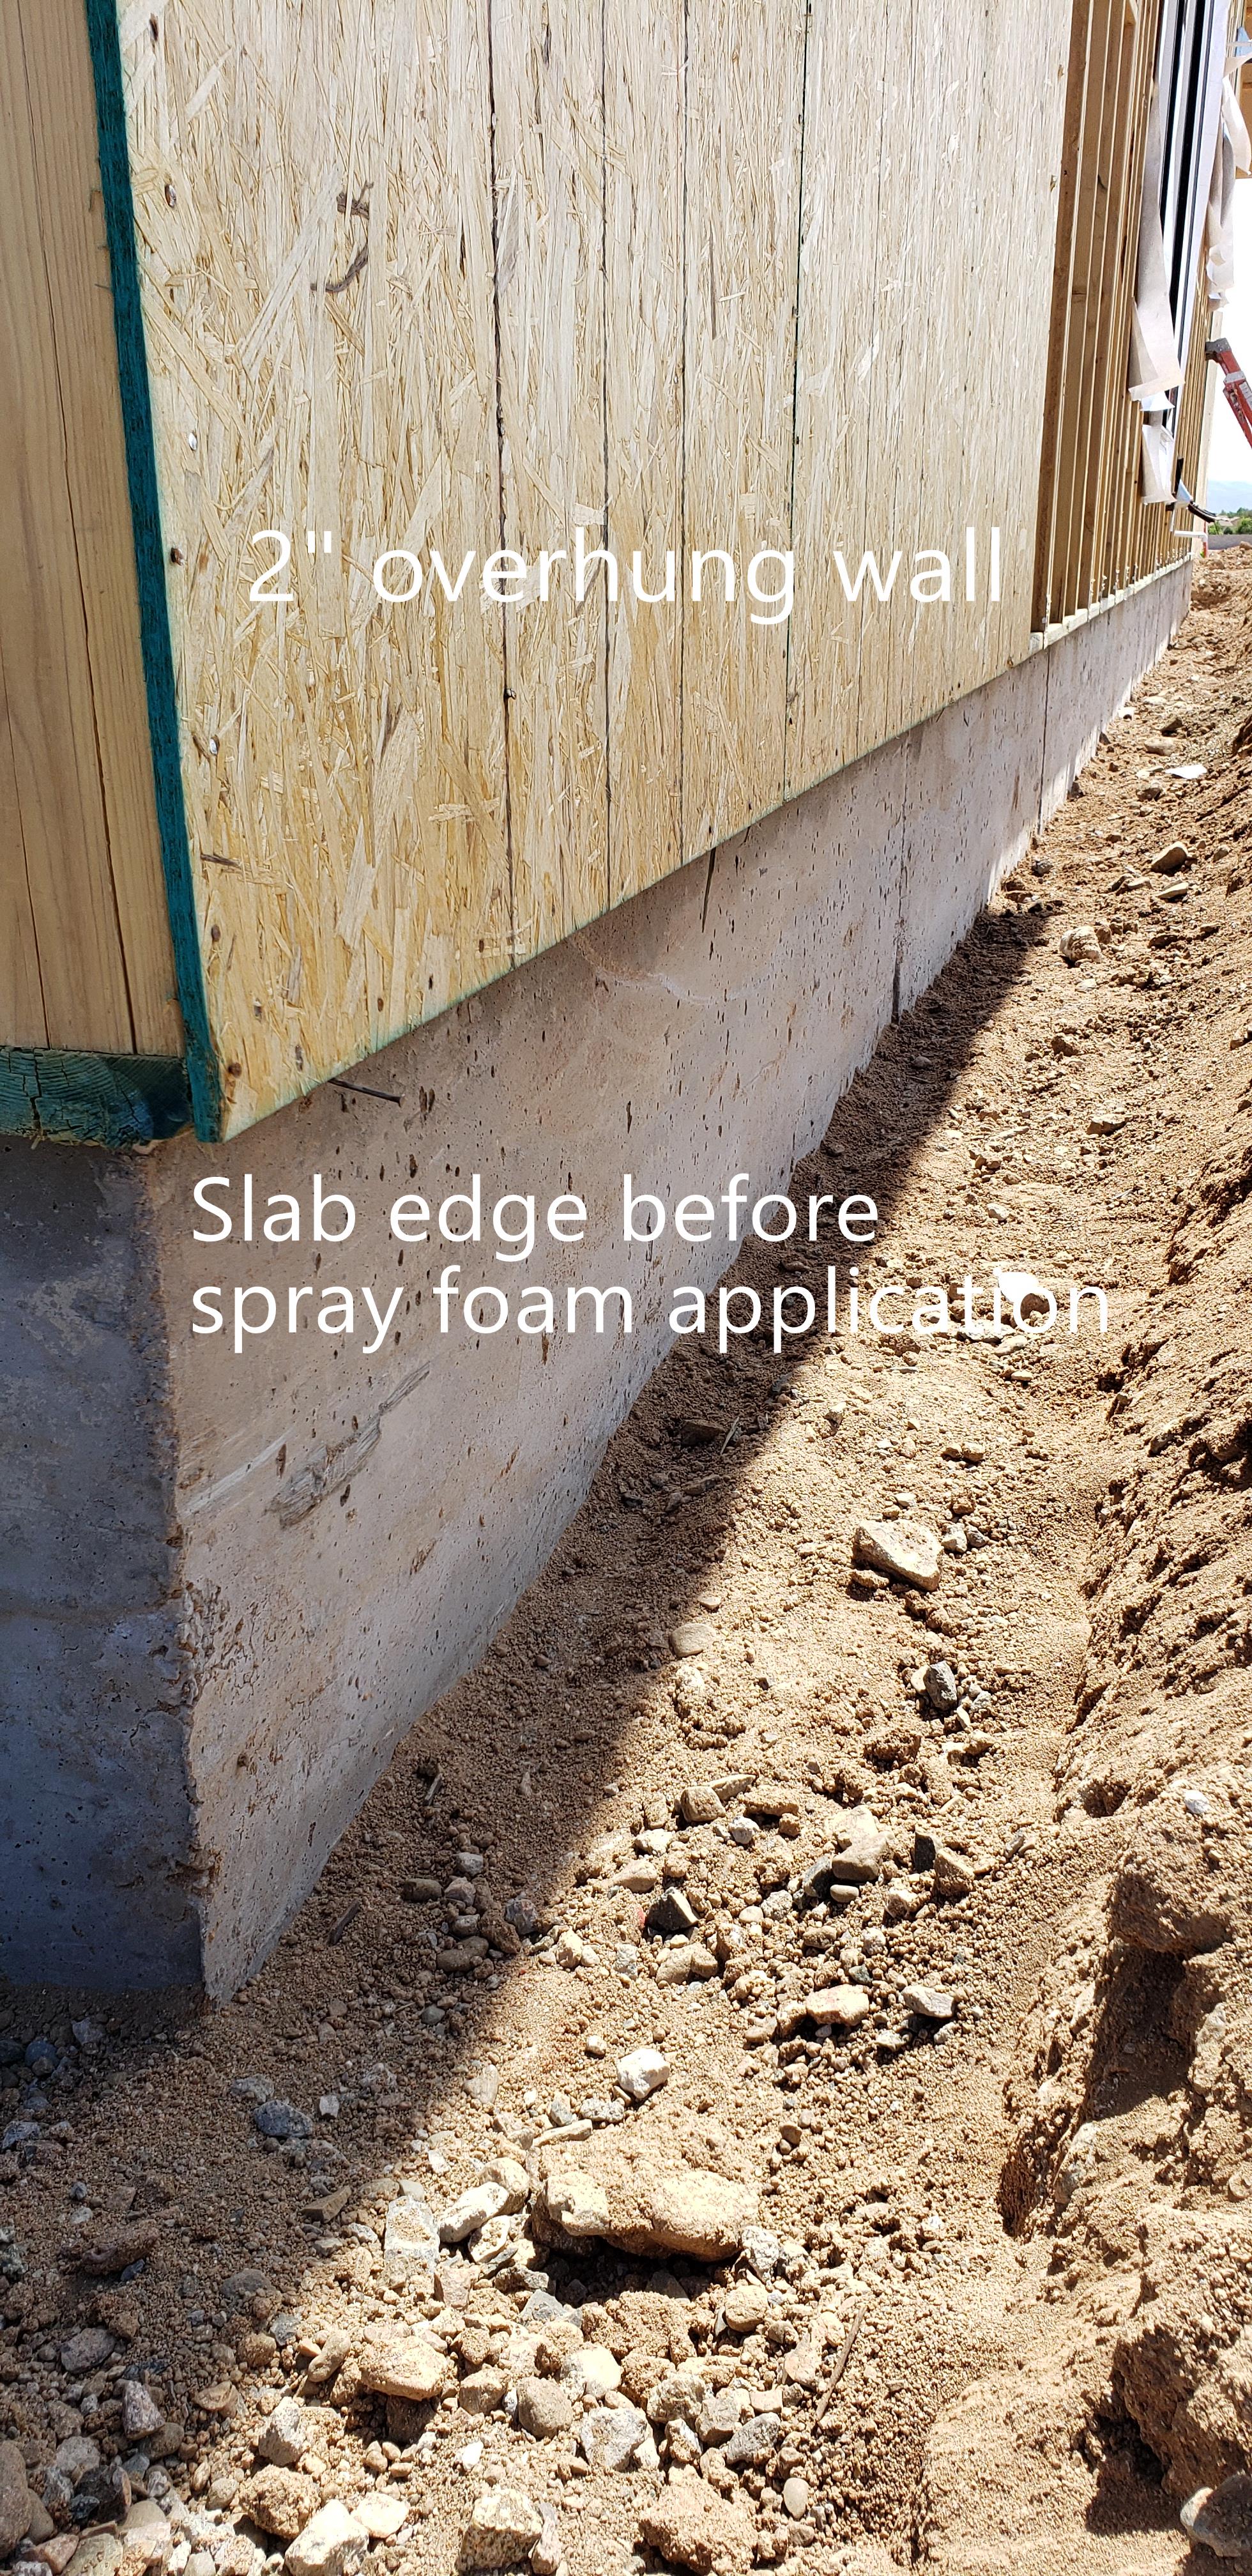
Right - Rigid foam slab edge insulation is installed along the exterior edge of a monolithic slab foundation.
Image

Right - Roofs with simple geometries are less susceptible to ignition from wind-borne embers getting lodged on the roof in a wildfire.
Image
Image
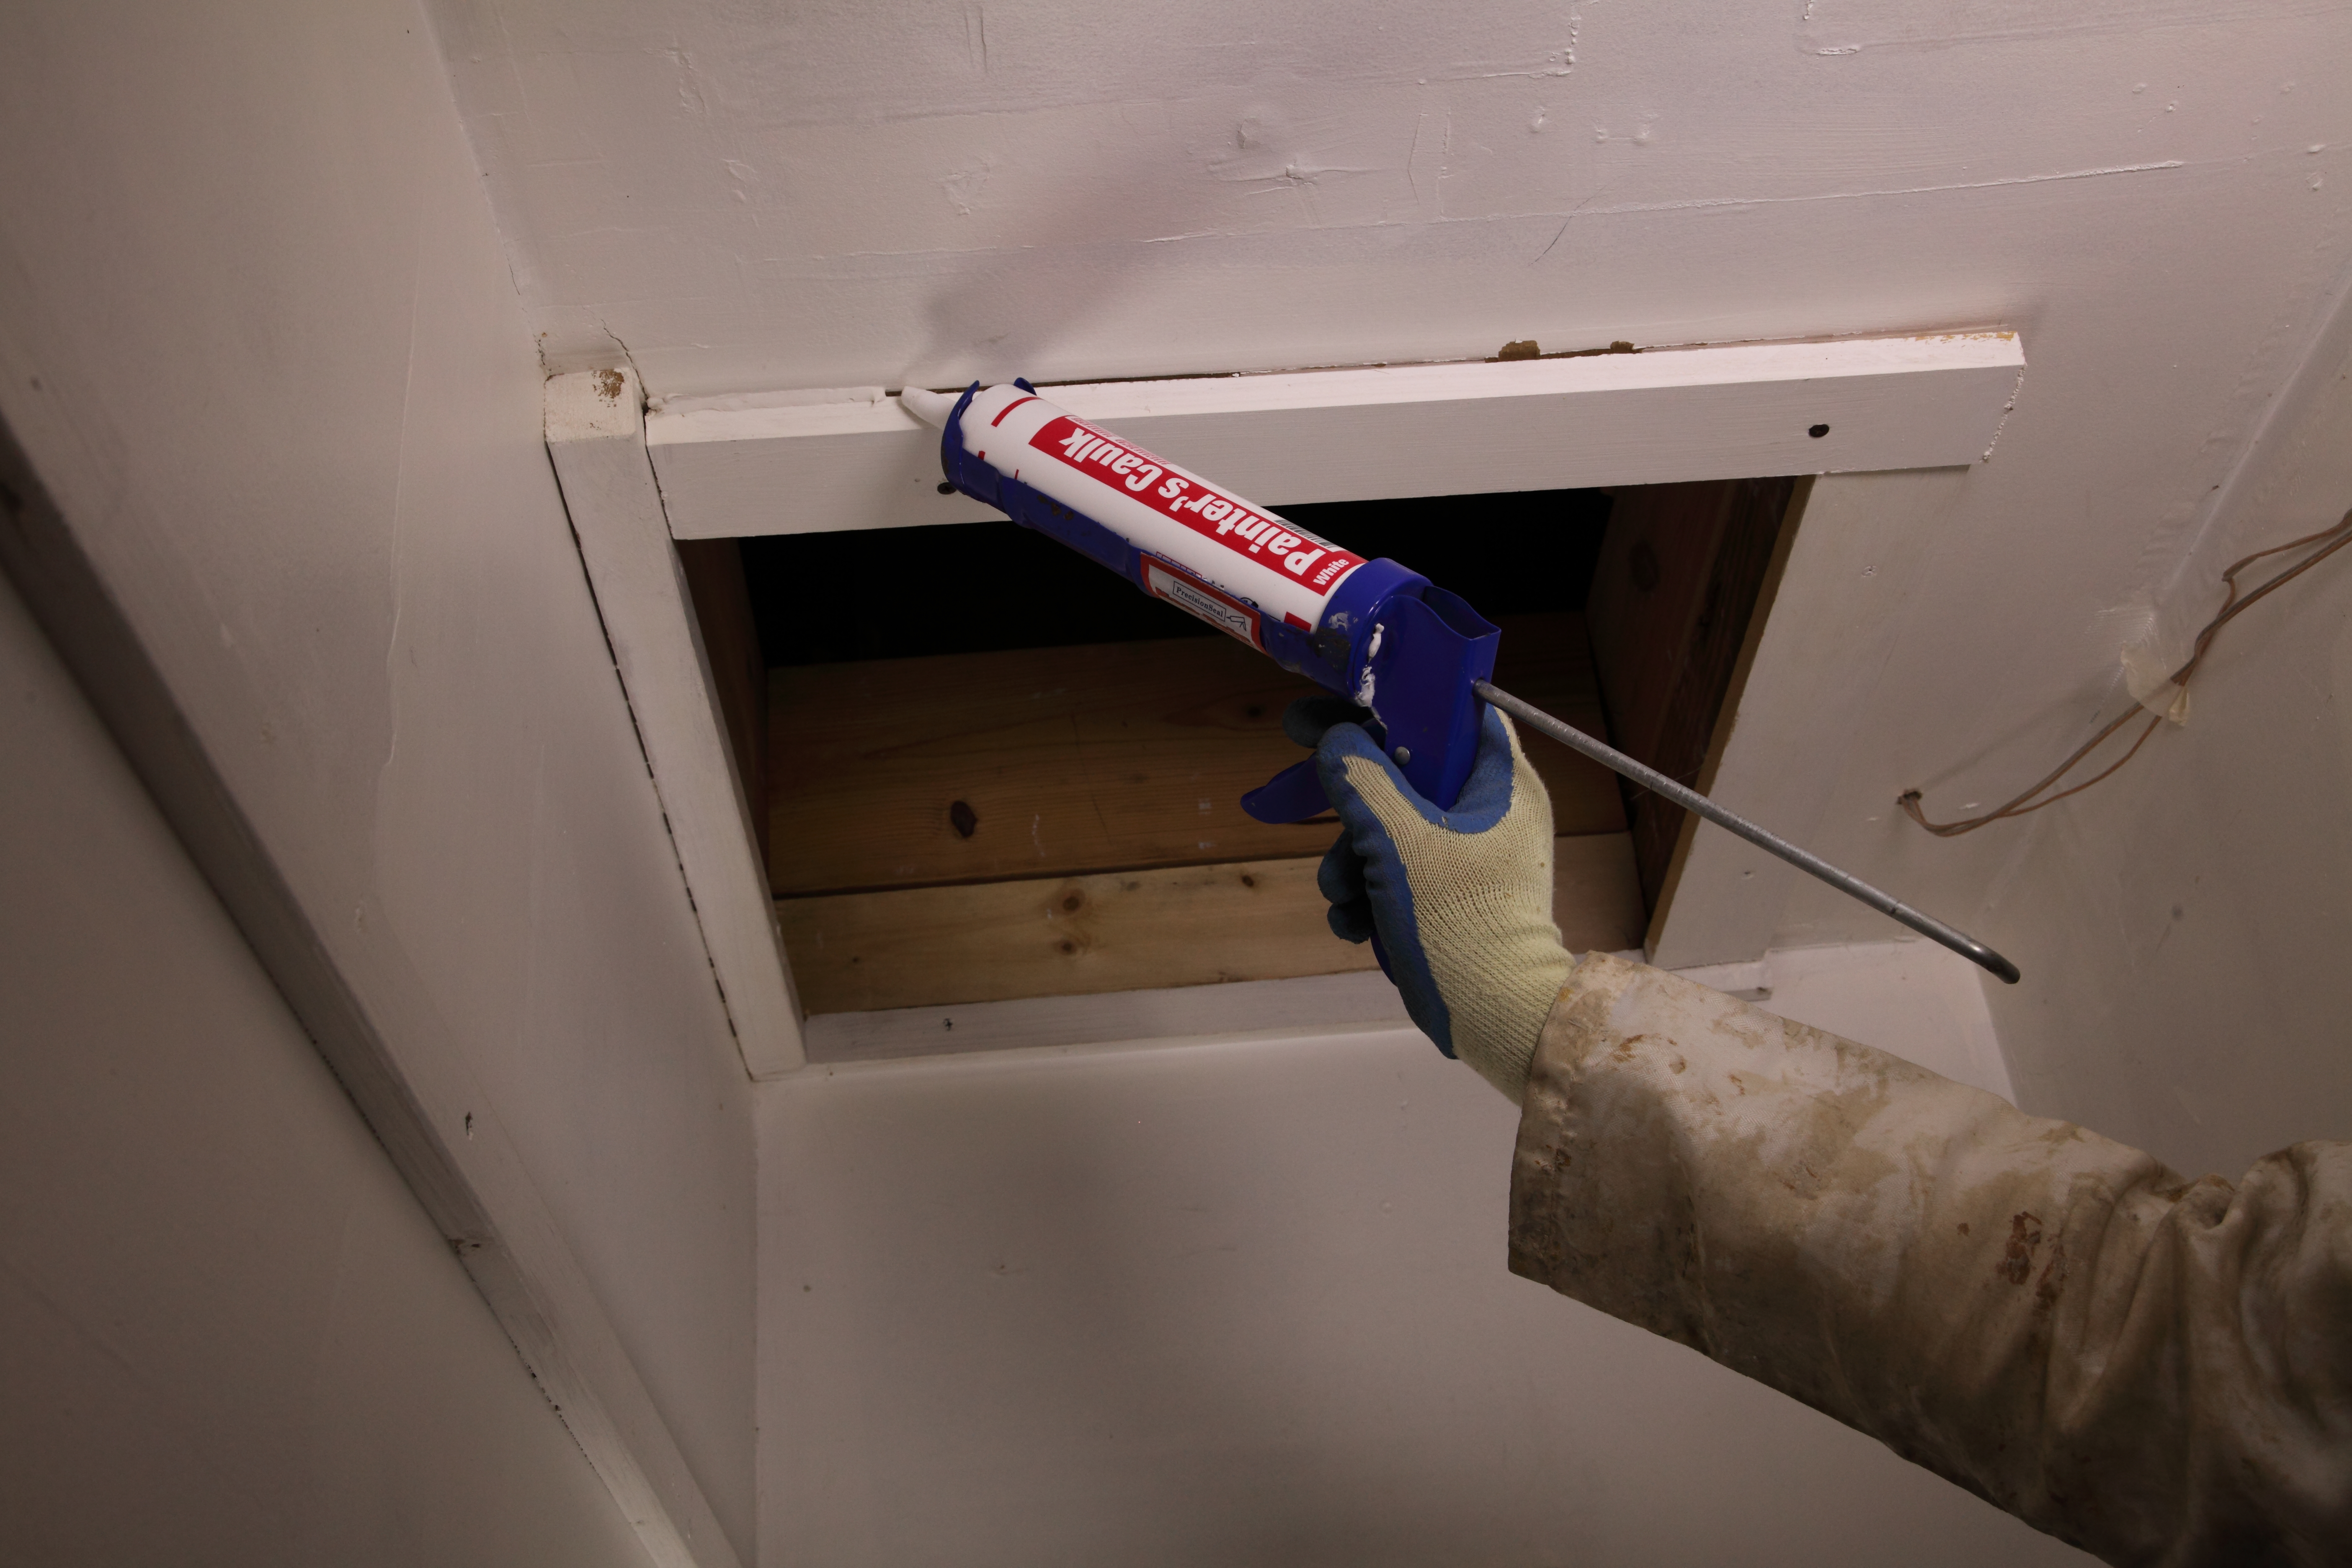
Right - Sealant is installed at the top and bottom plates of a gypsum covered wall separating a garage from the conditioned space of the home.
Image
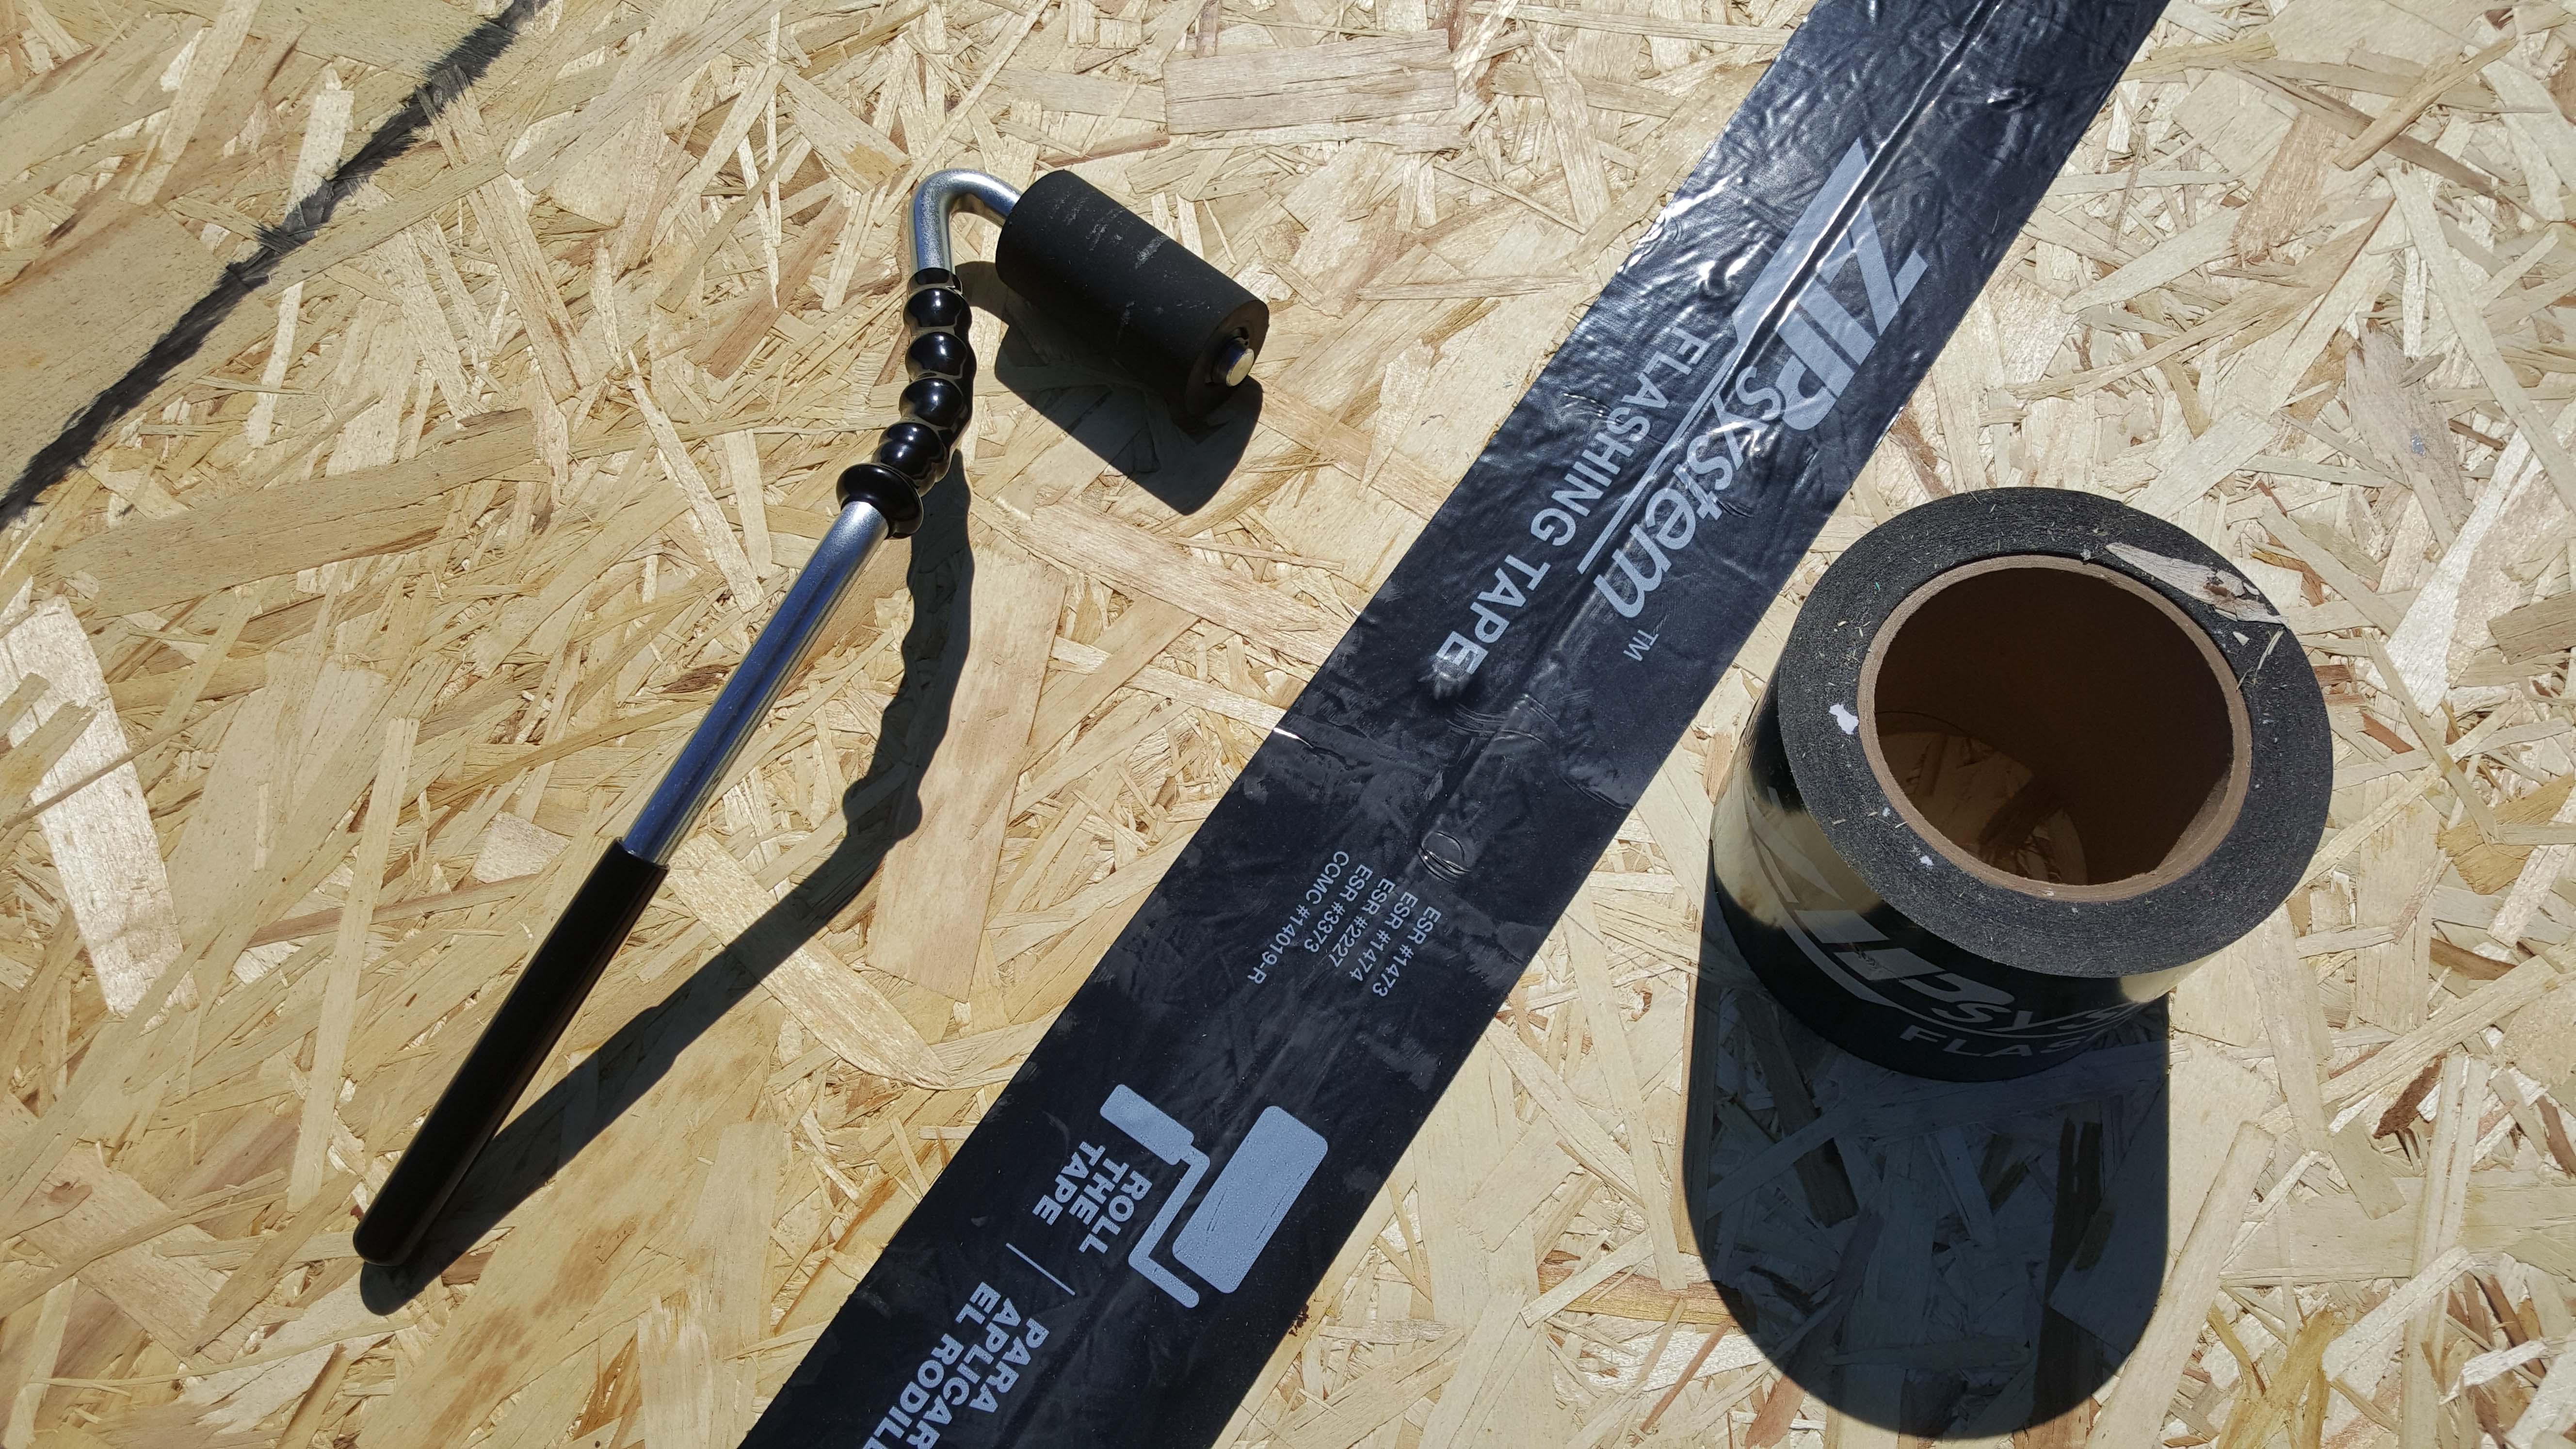
Right - Seam-sealing flashing tape is installed with roller to fully adhere to the OSB.
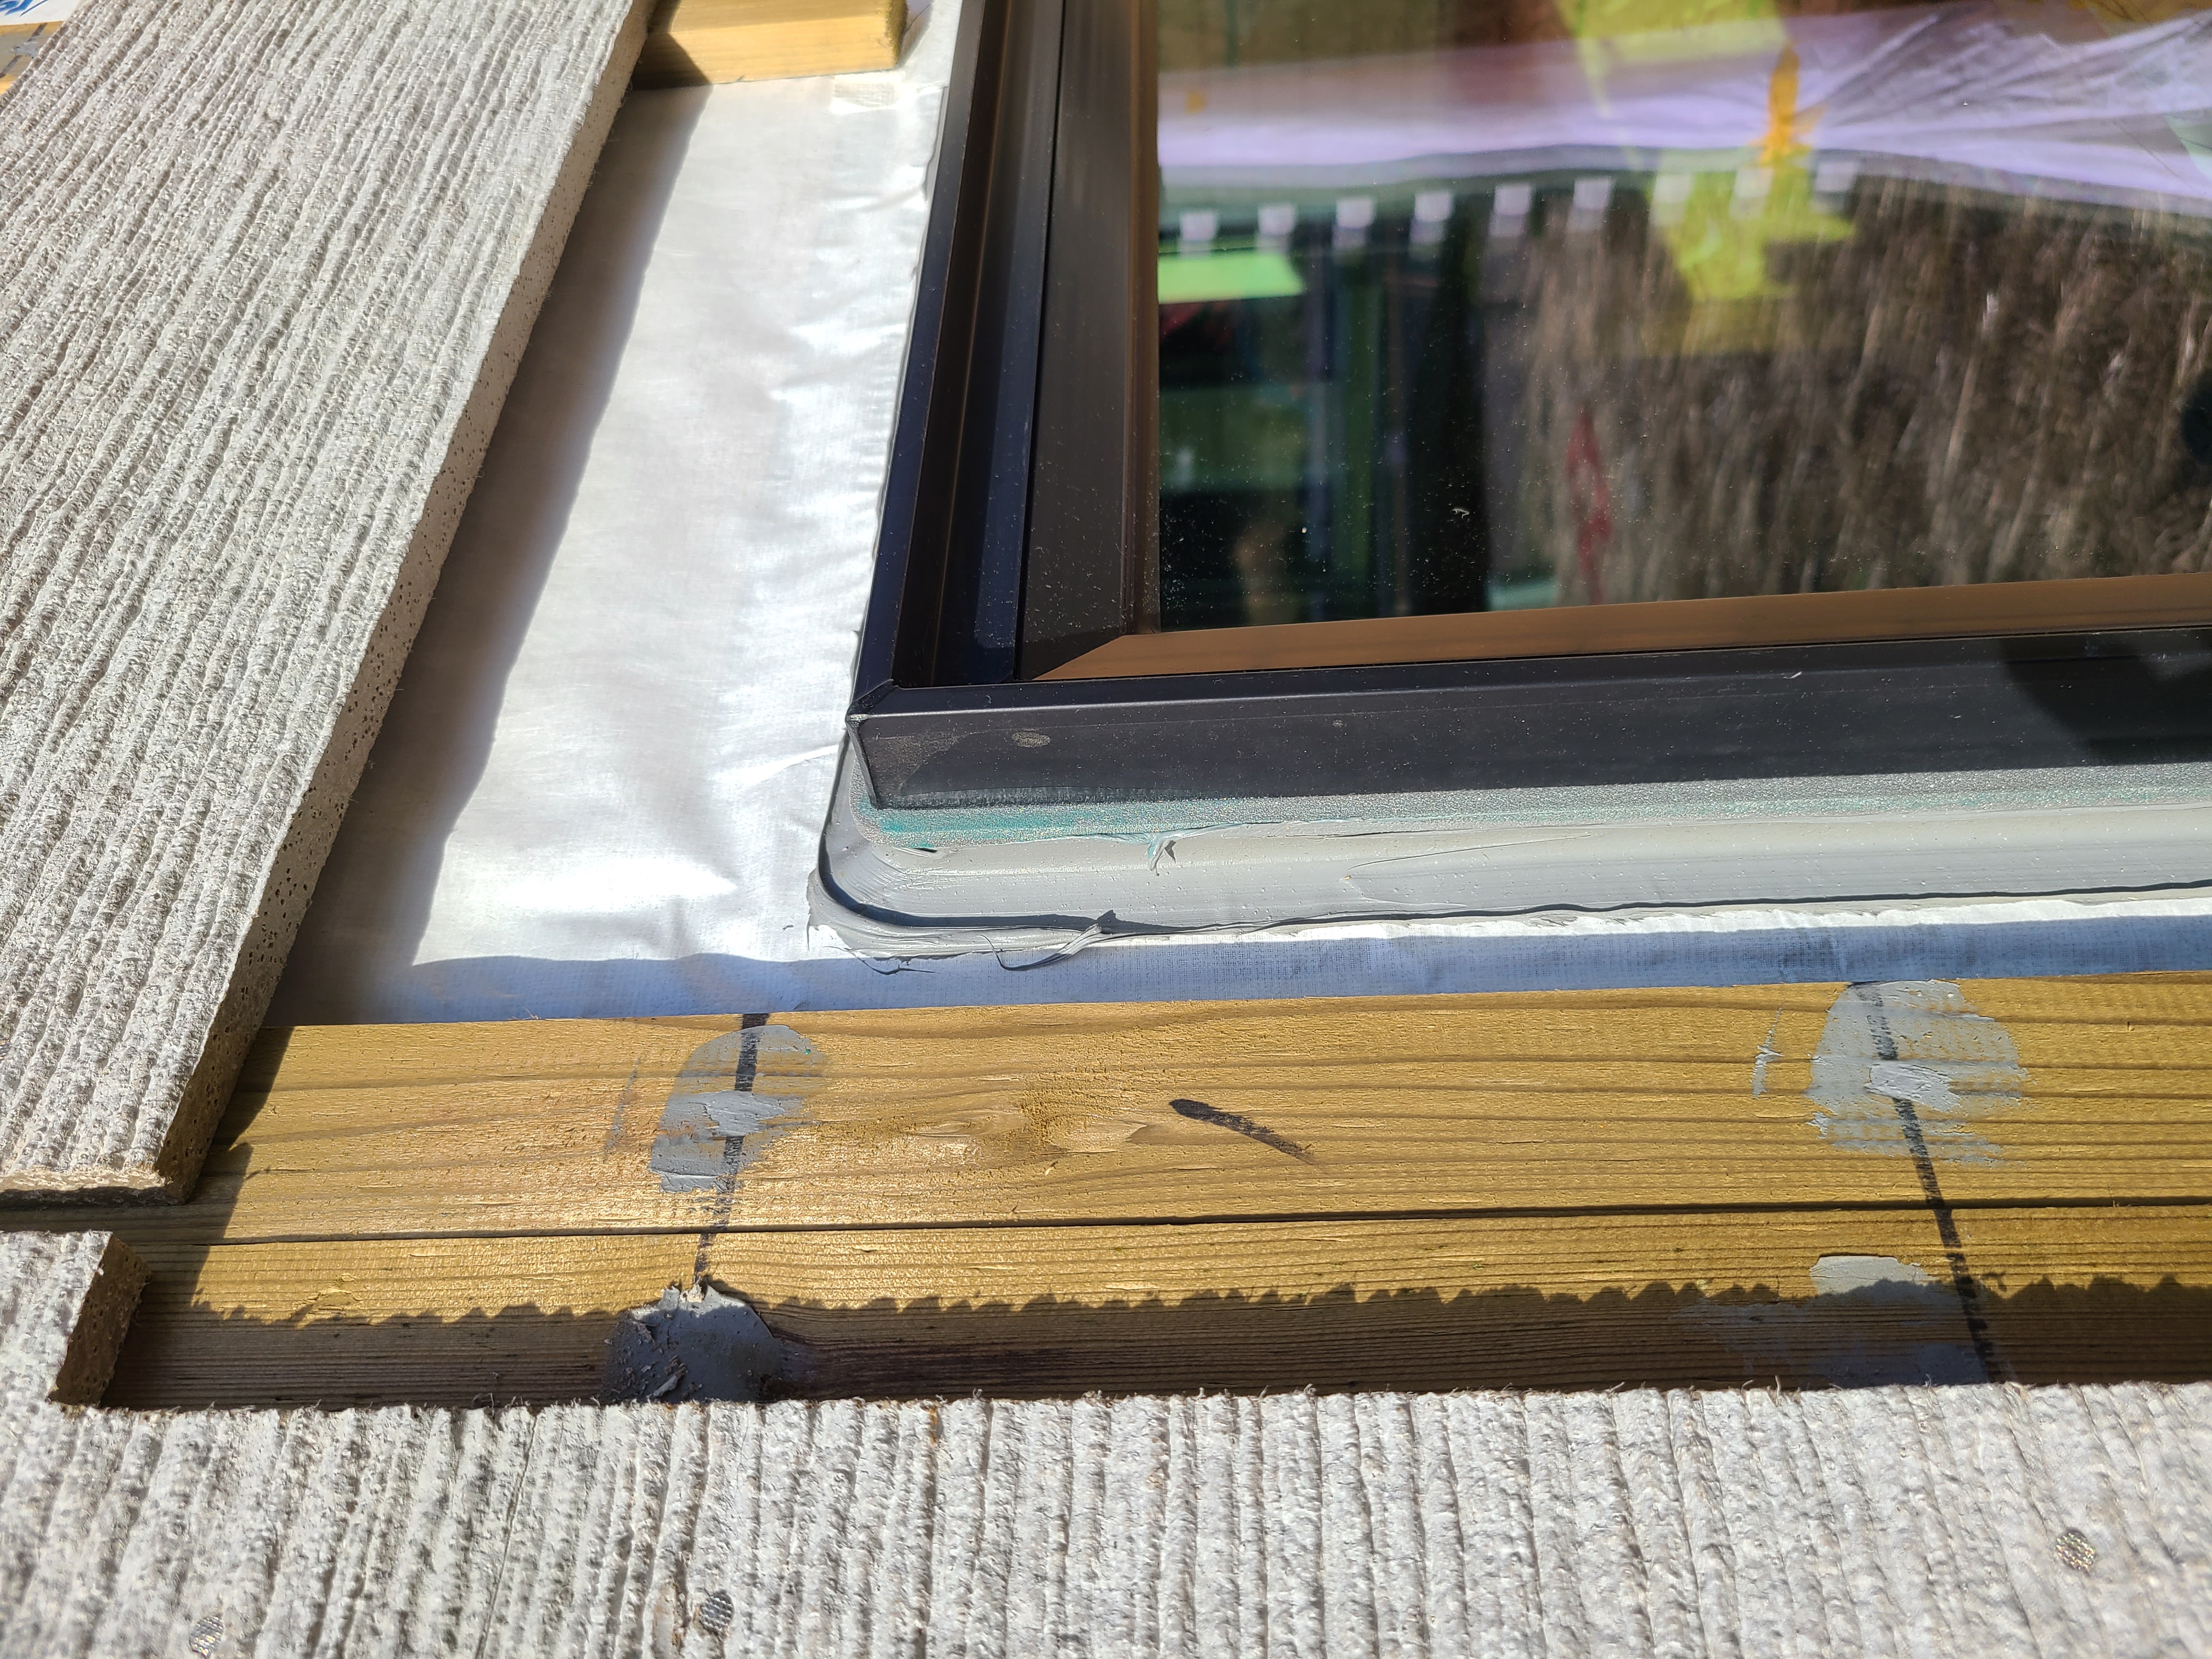
Image
Right - Seams in coated sheathing and joints around window are properly sealed and flashed with tape and all nail holes are covered with paint-on sealant.
Image
Image
Image
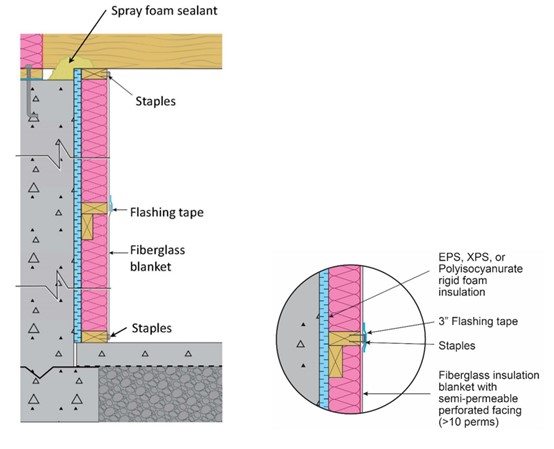
Right - Section view showing how to air-seal and insulate a basement wall with perforated blanket insulation by installing it over air-sealed rigid insulation board to reduce condensation risk in the fiberglass blanket.
Image
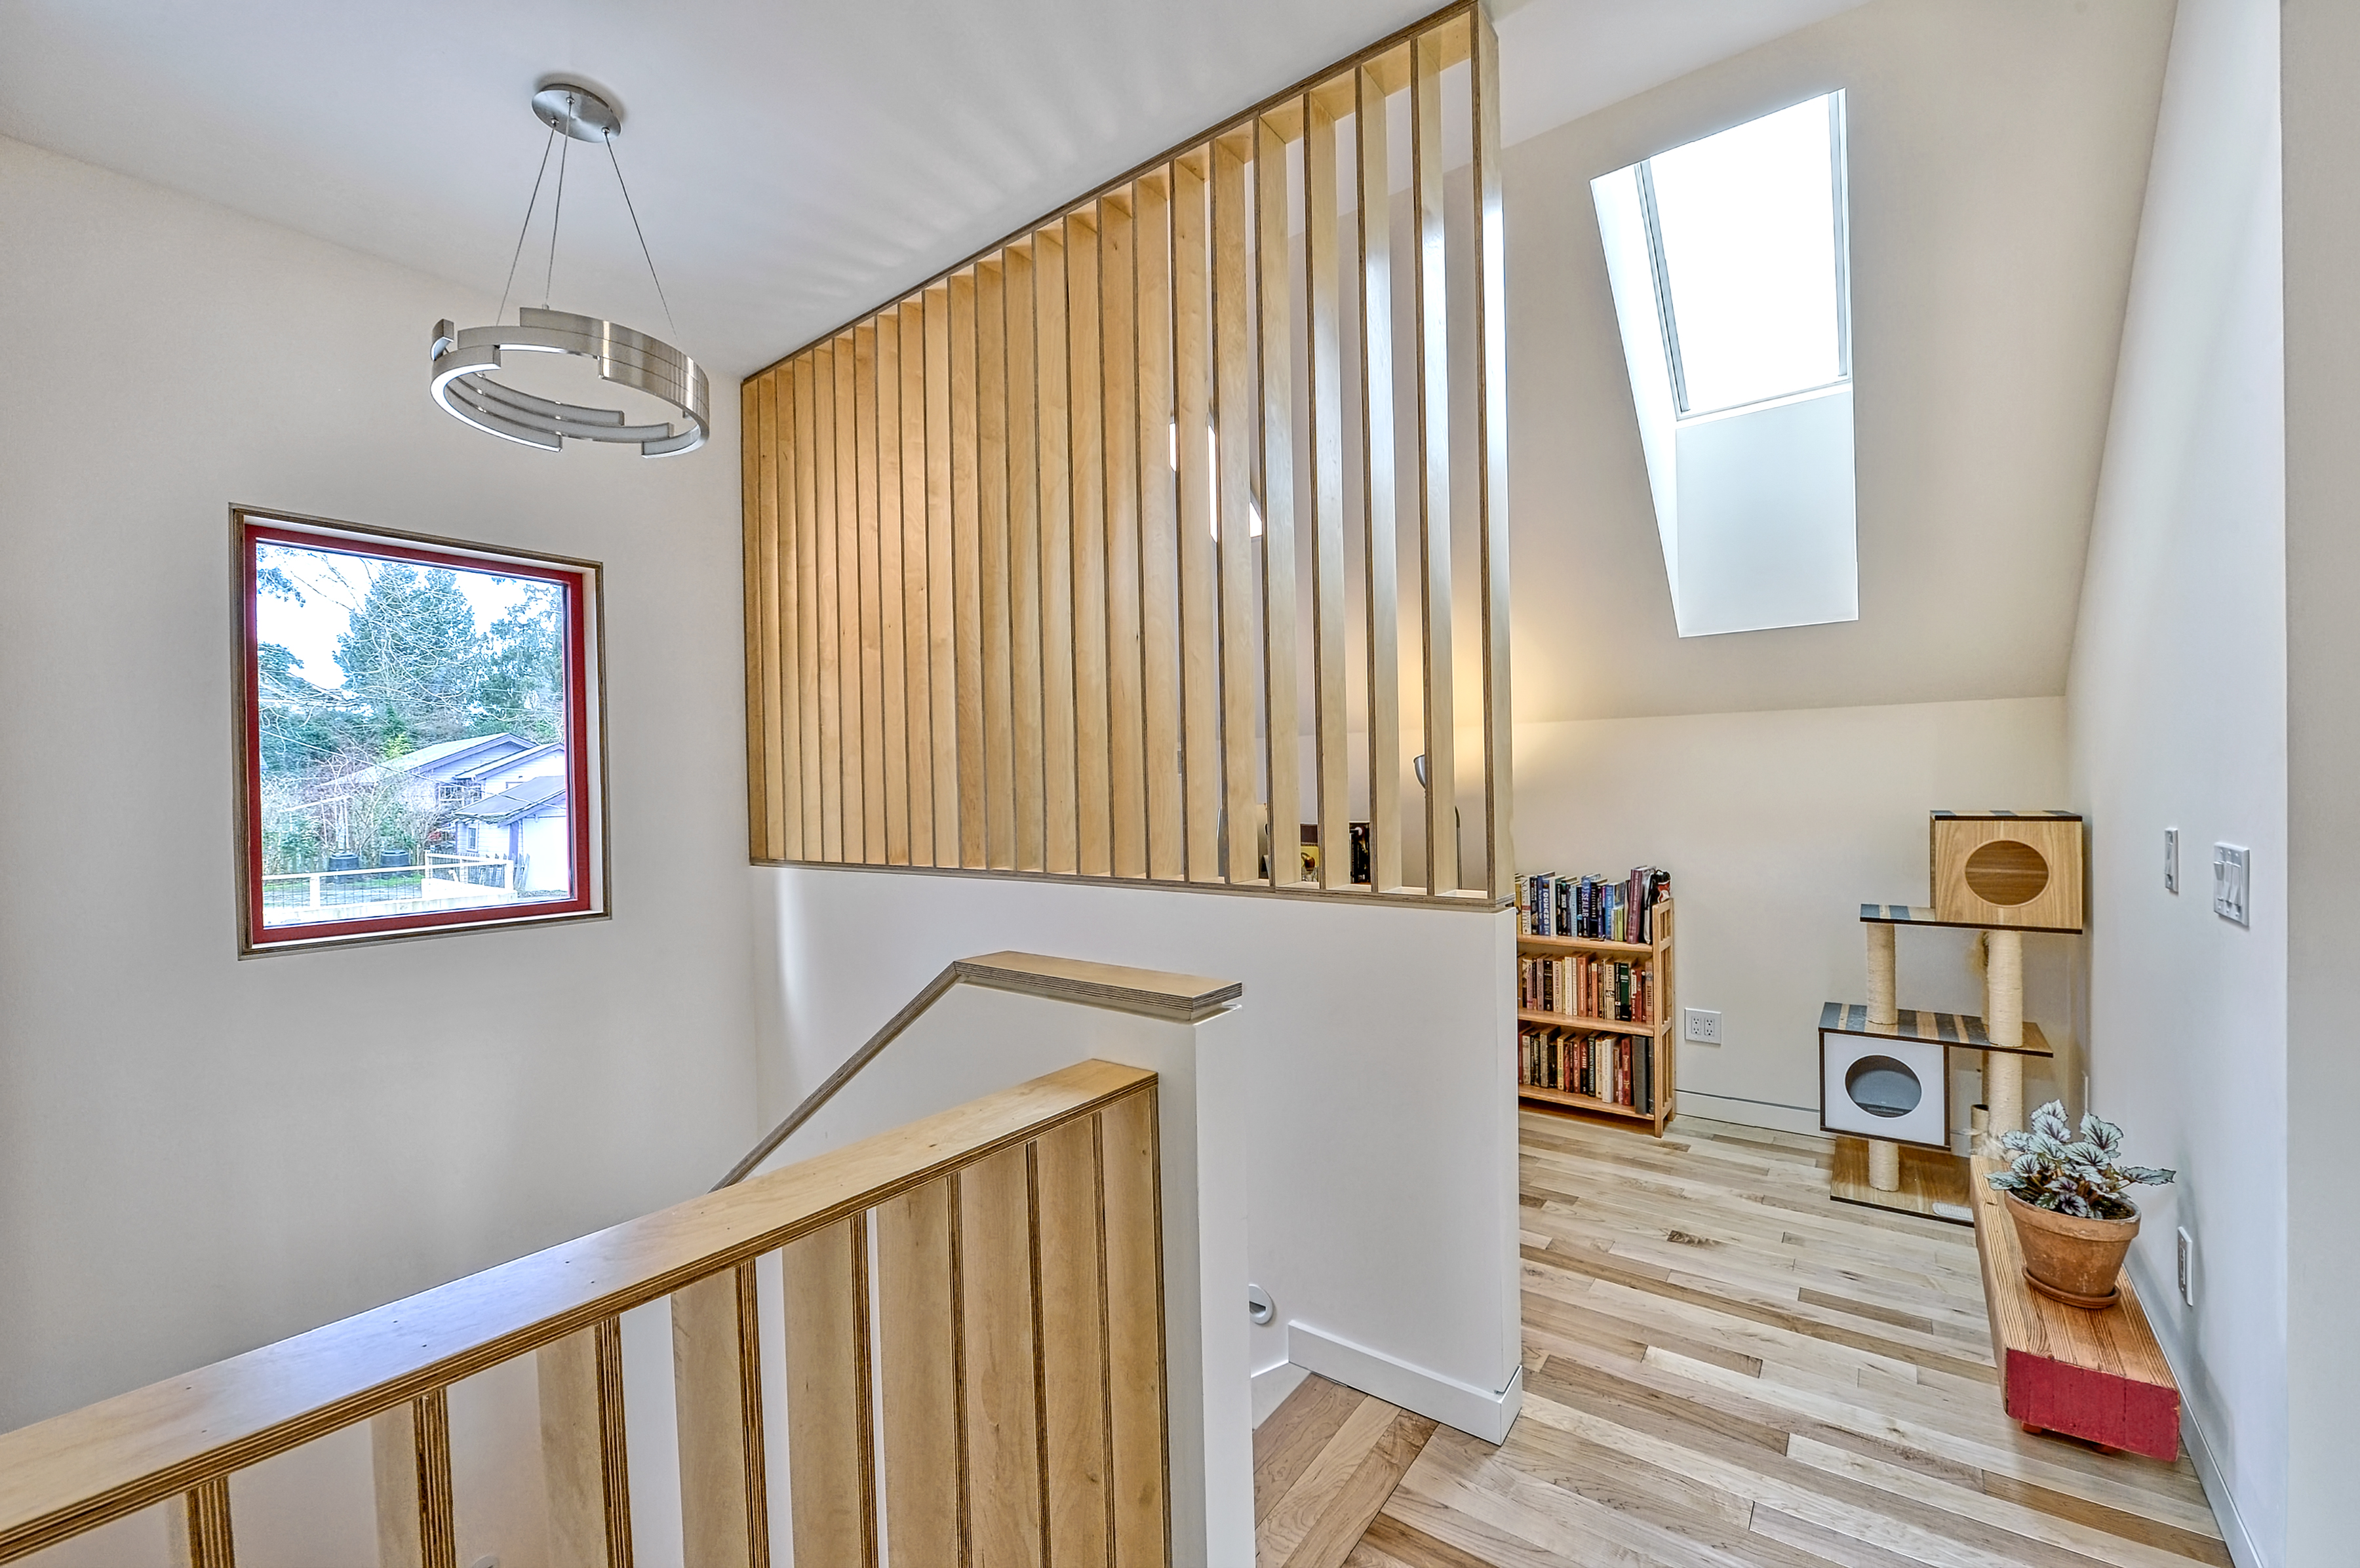
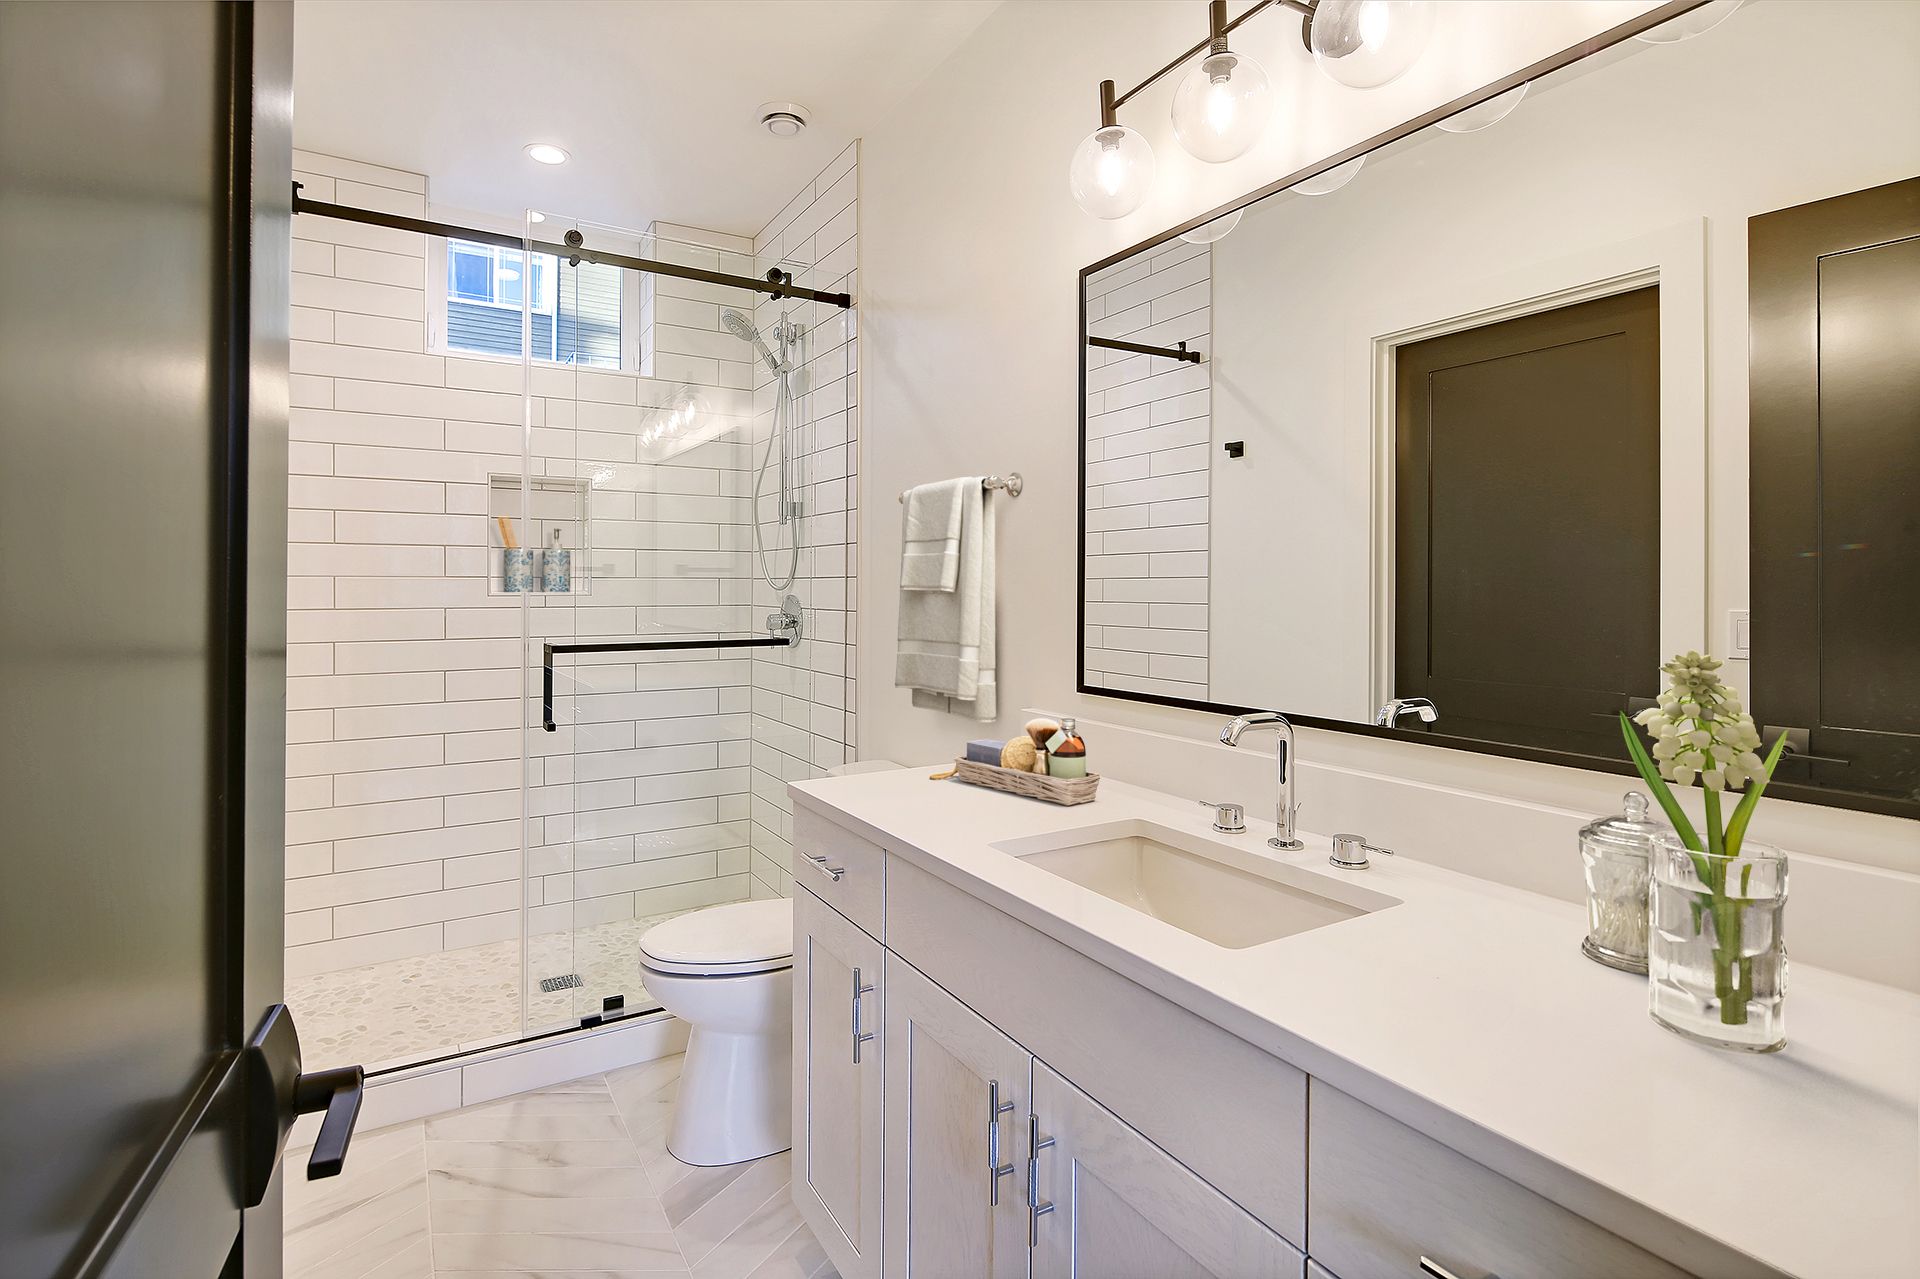
Right - Skylights can add natural light in rooms with limited wall space and if openable can provide desirable ventilation, especially when located at the top of stair wells.
Image
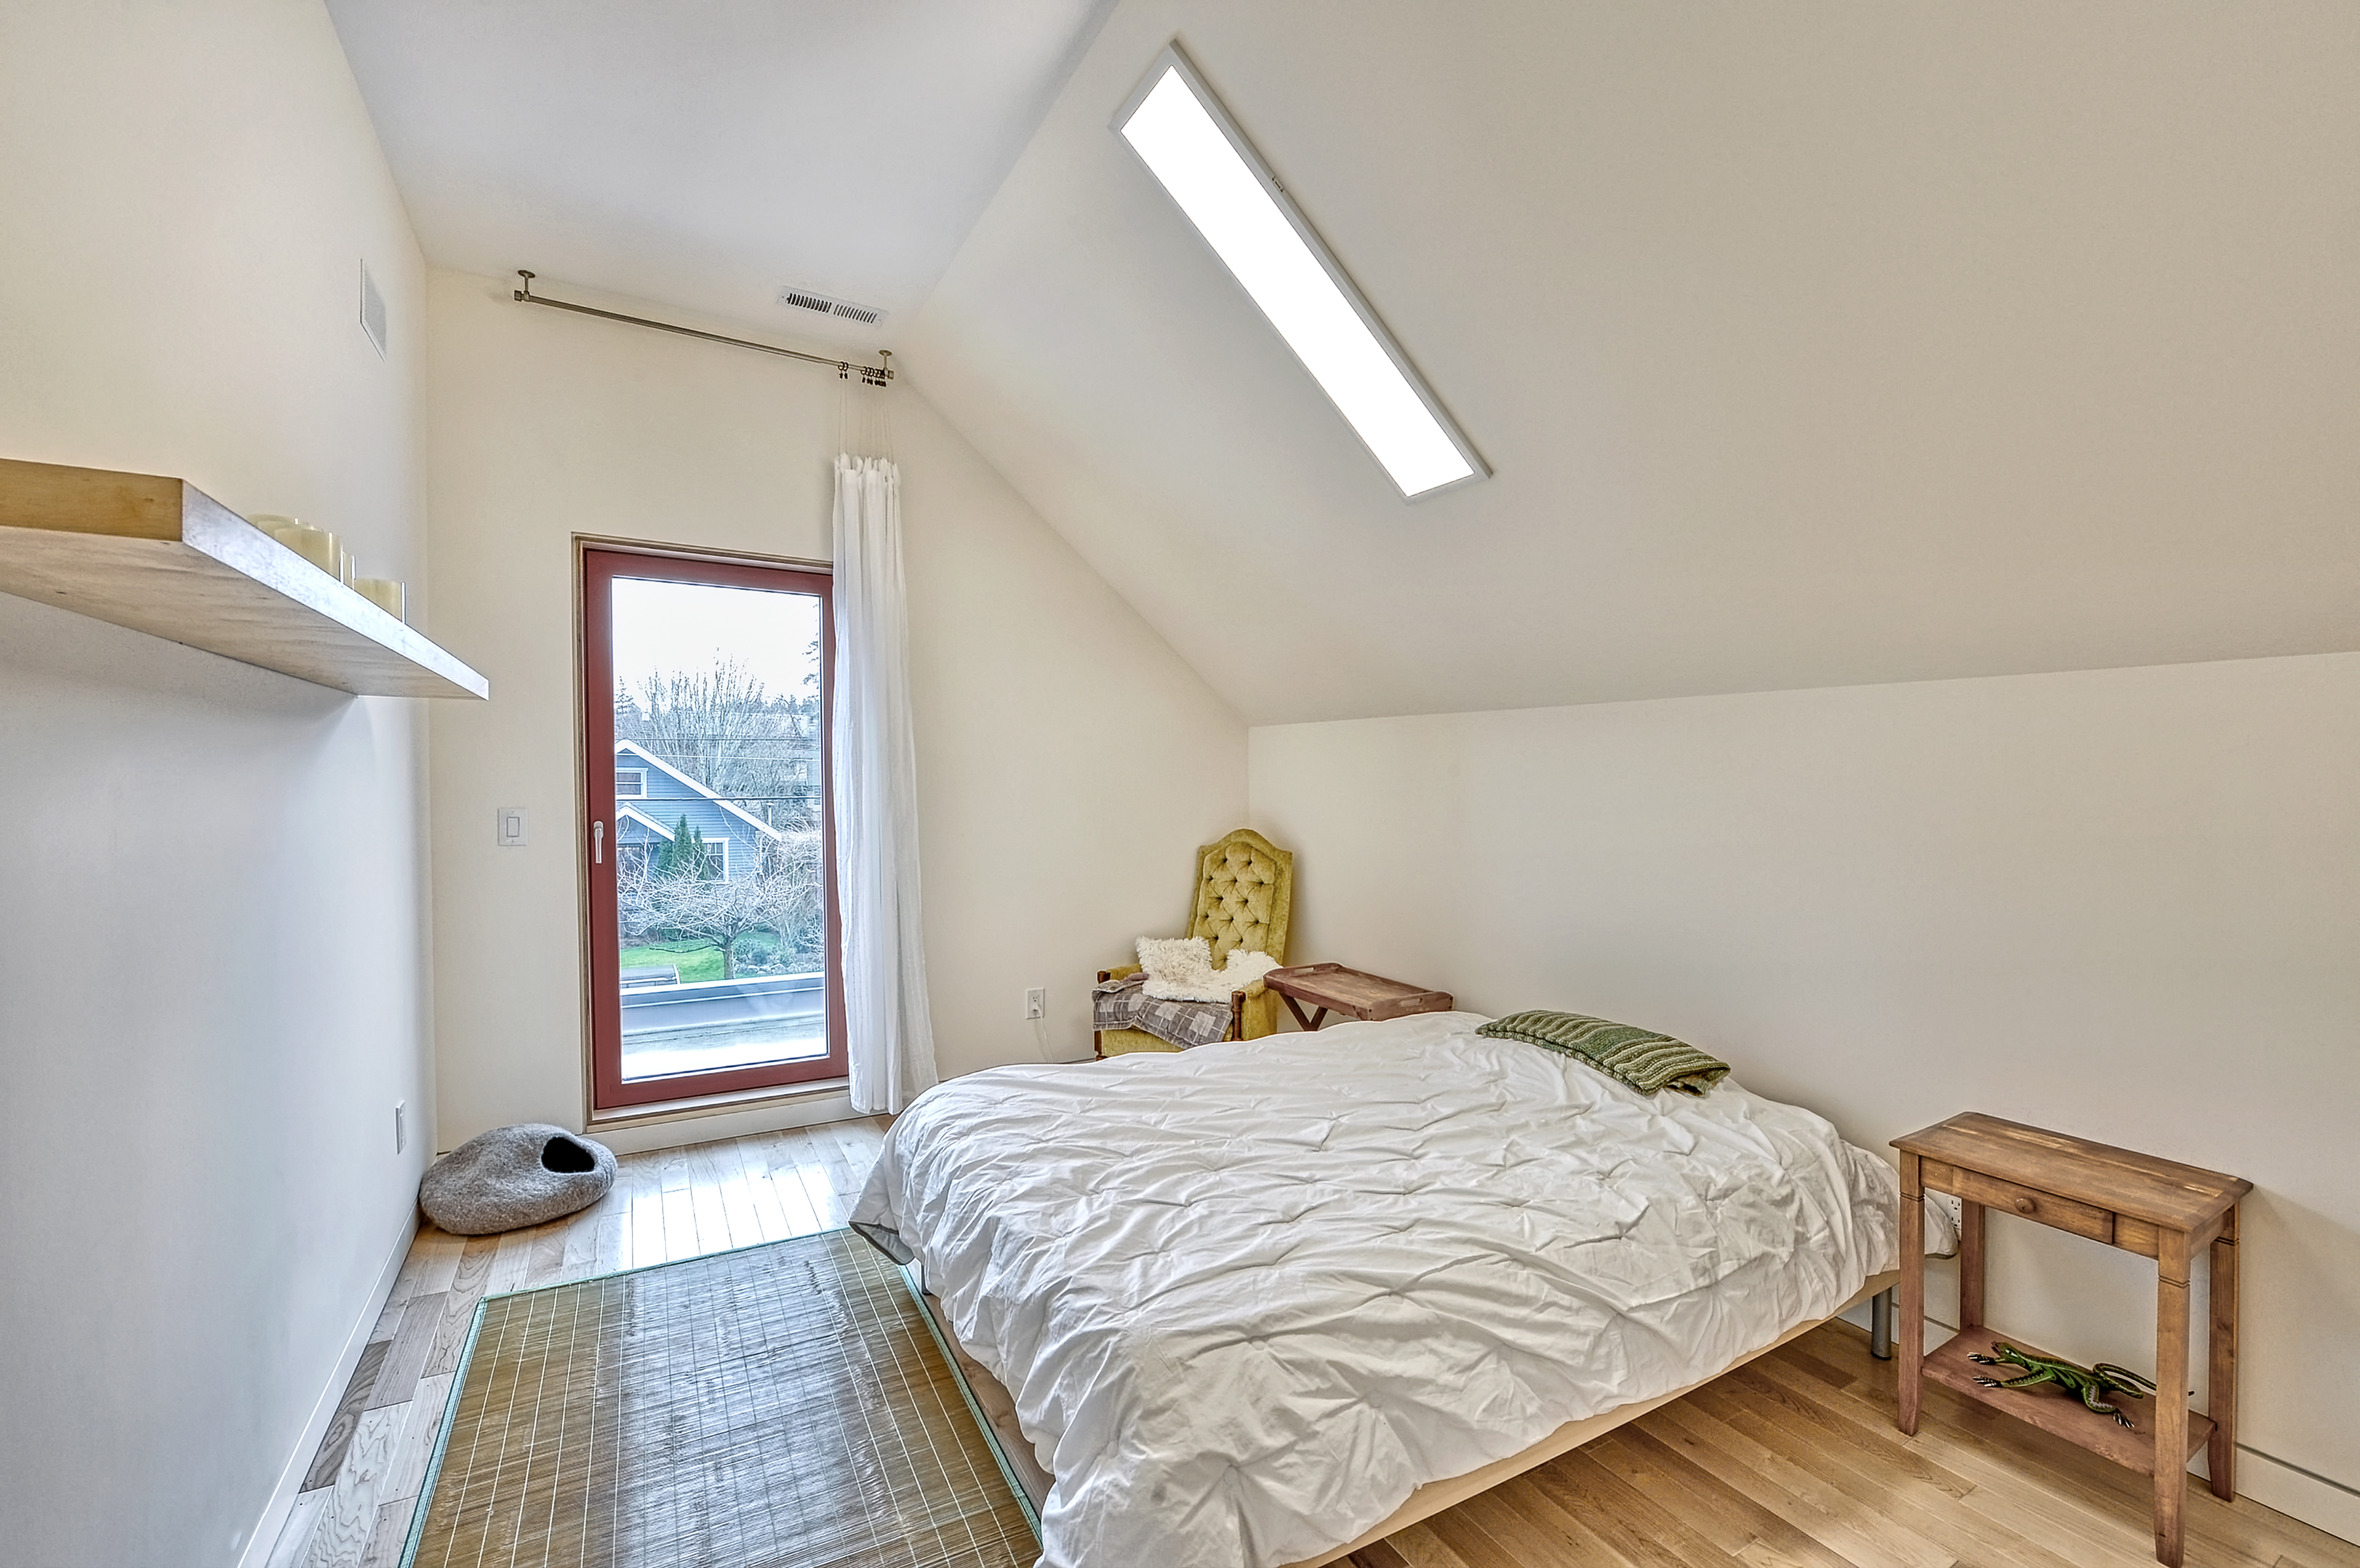
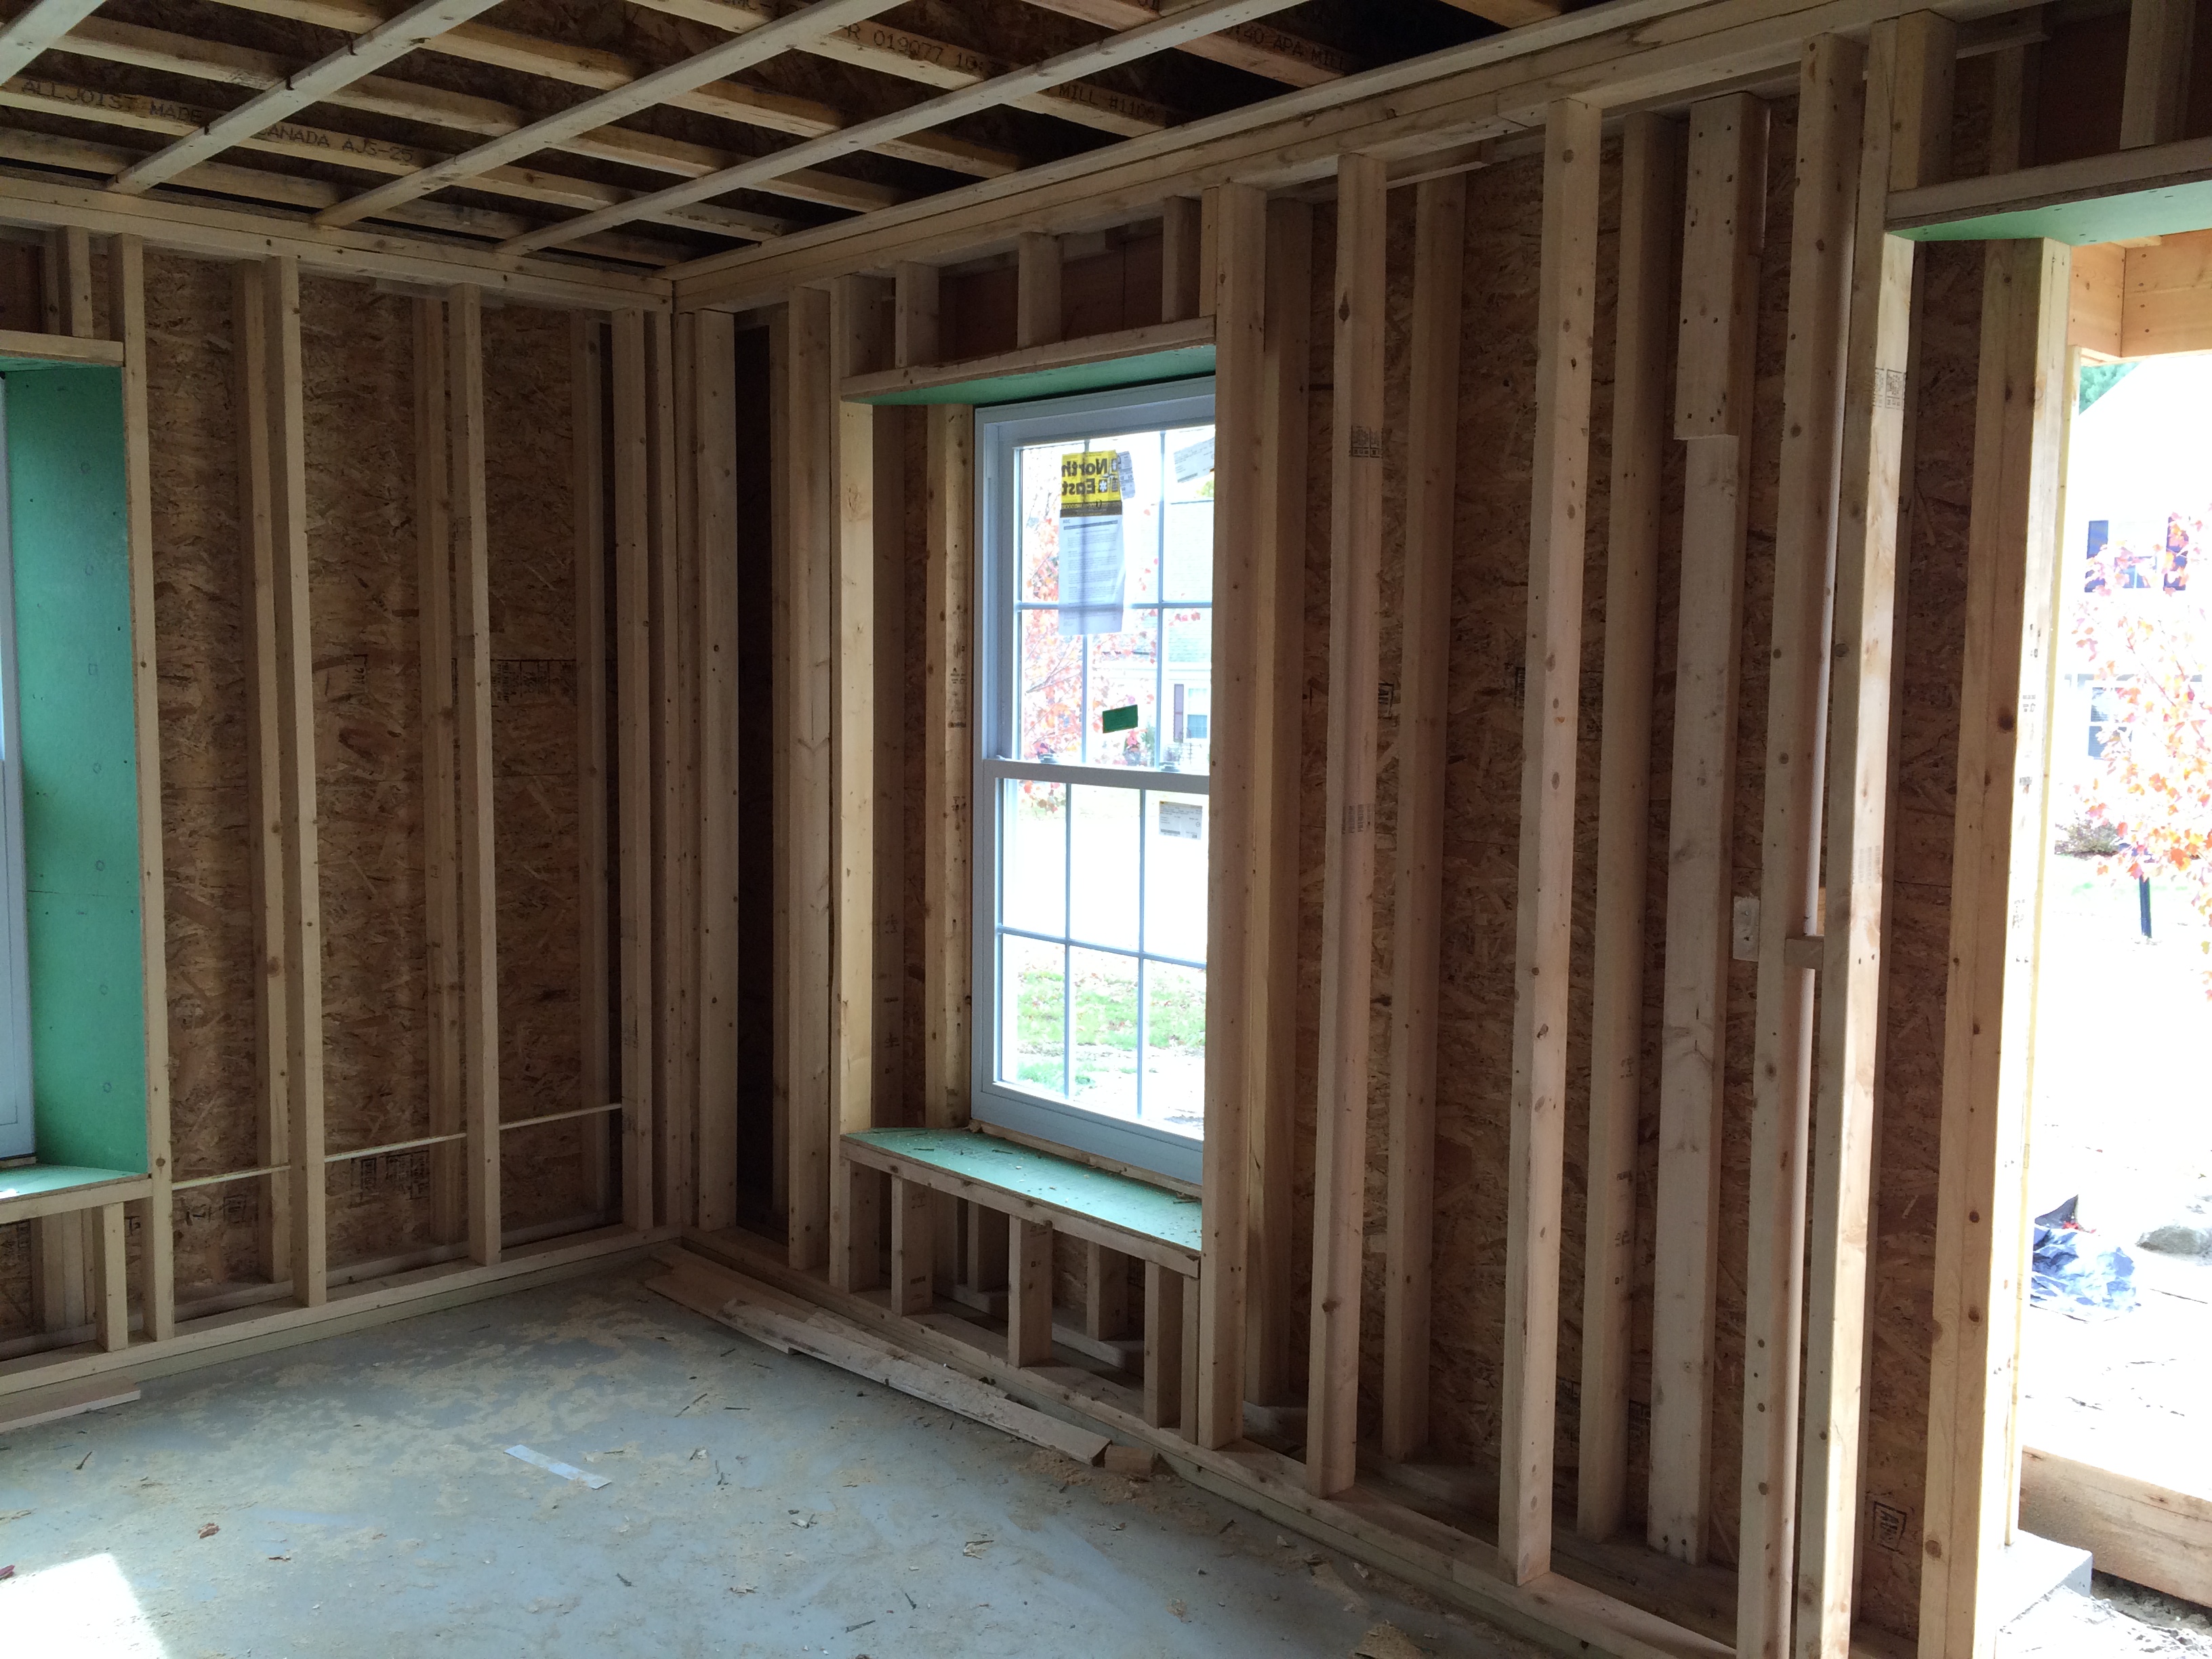
Right - Skylights provide natural light while maintaining privacy in a narrow second-story bedroom.
Image
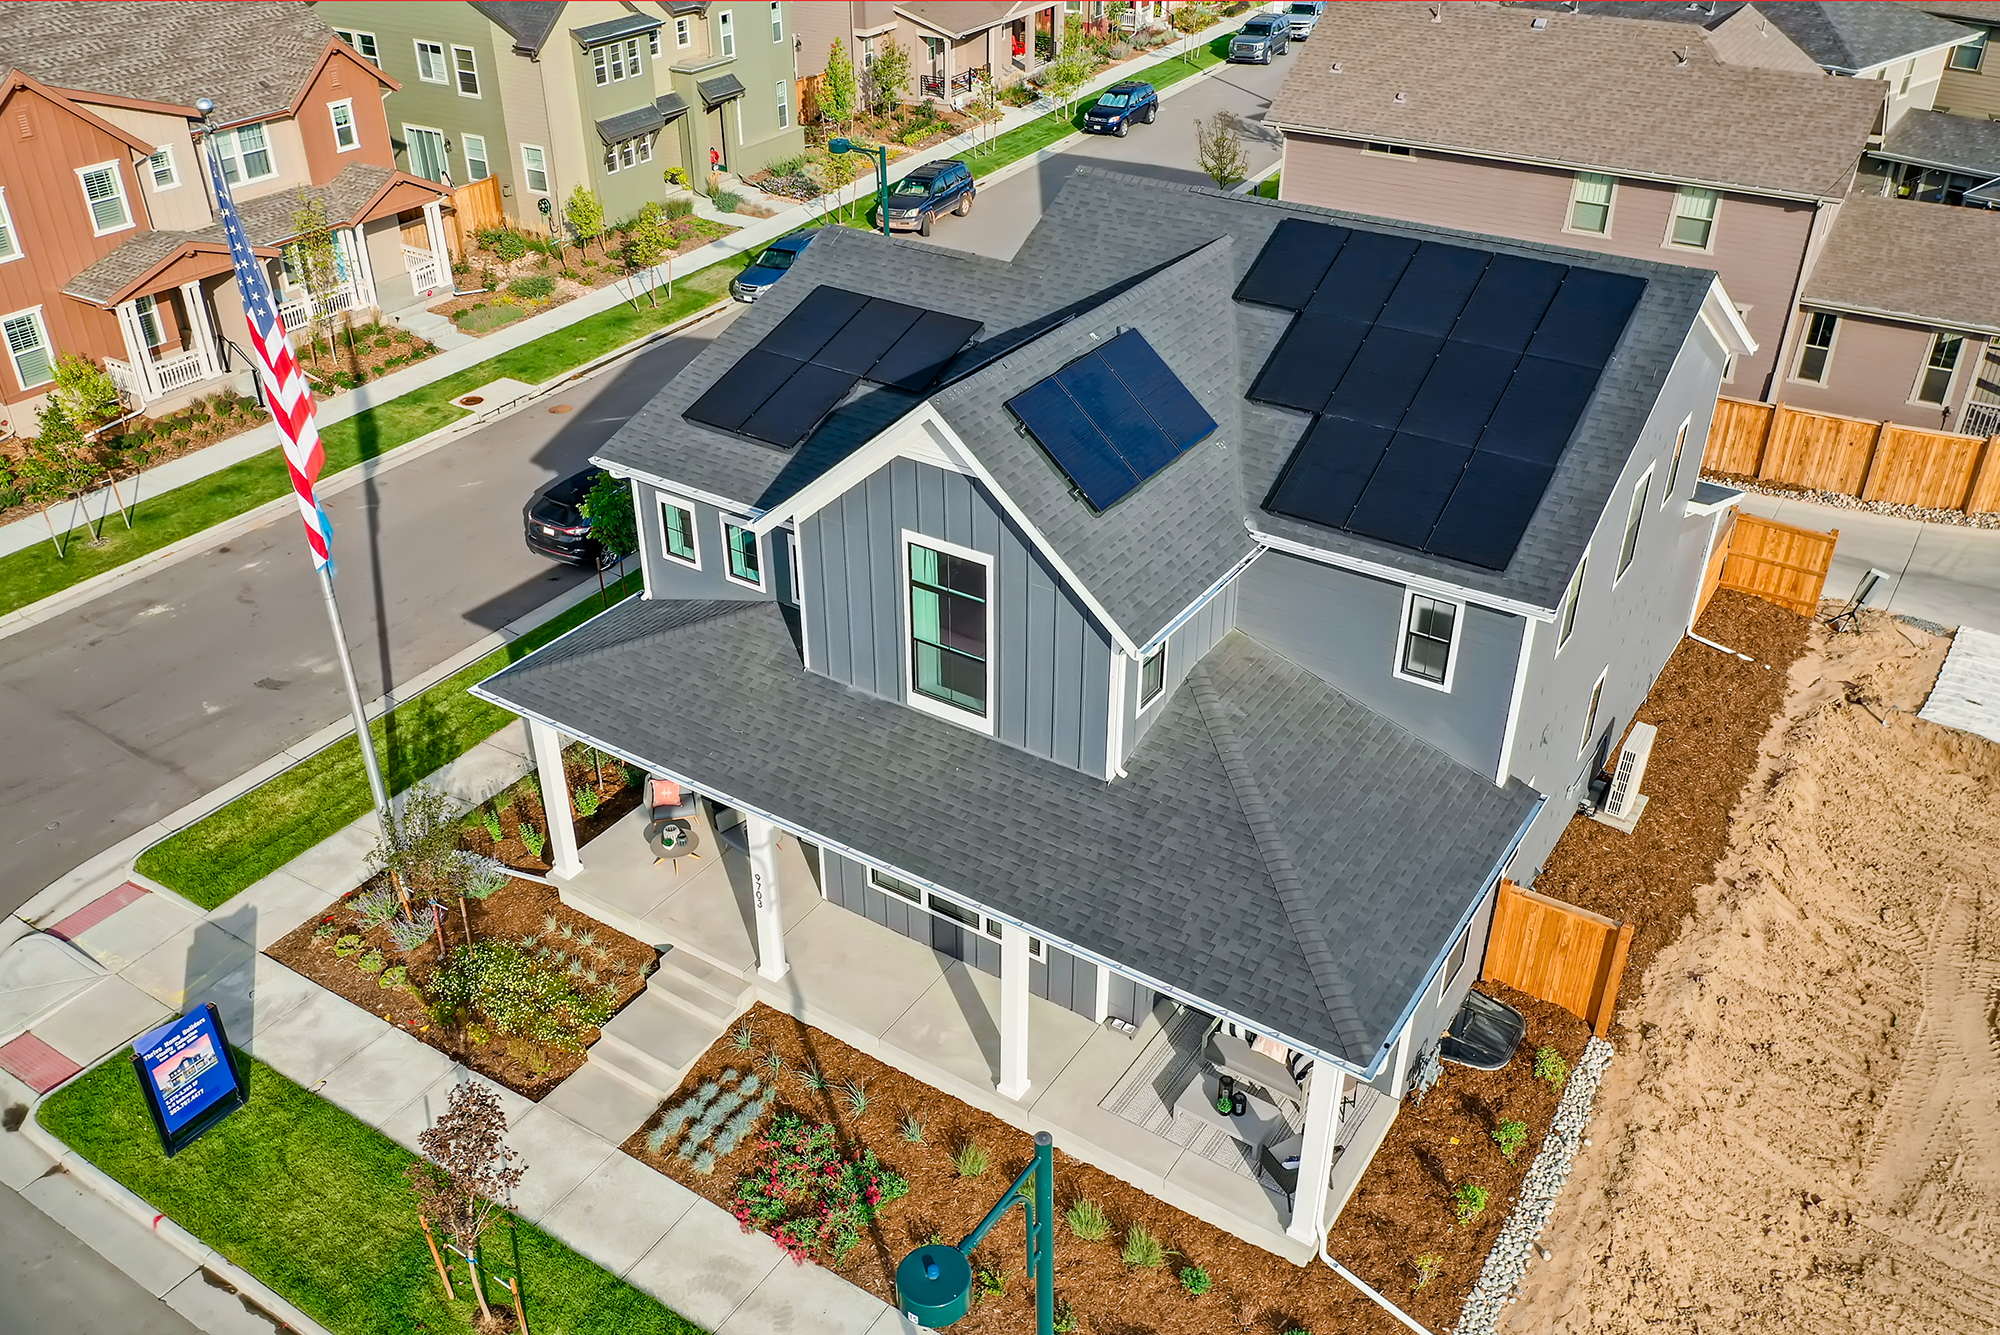
Right - Solar photovoltaic panels are installed on the highest parts of the roof to avoid being shaded by other parts of the house.
Image
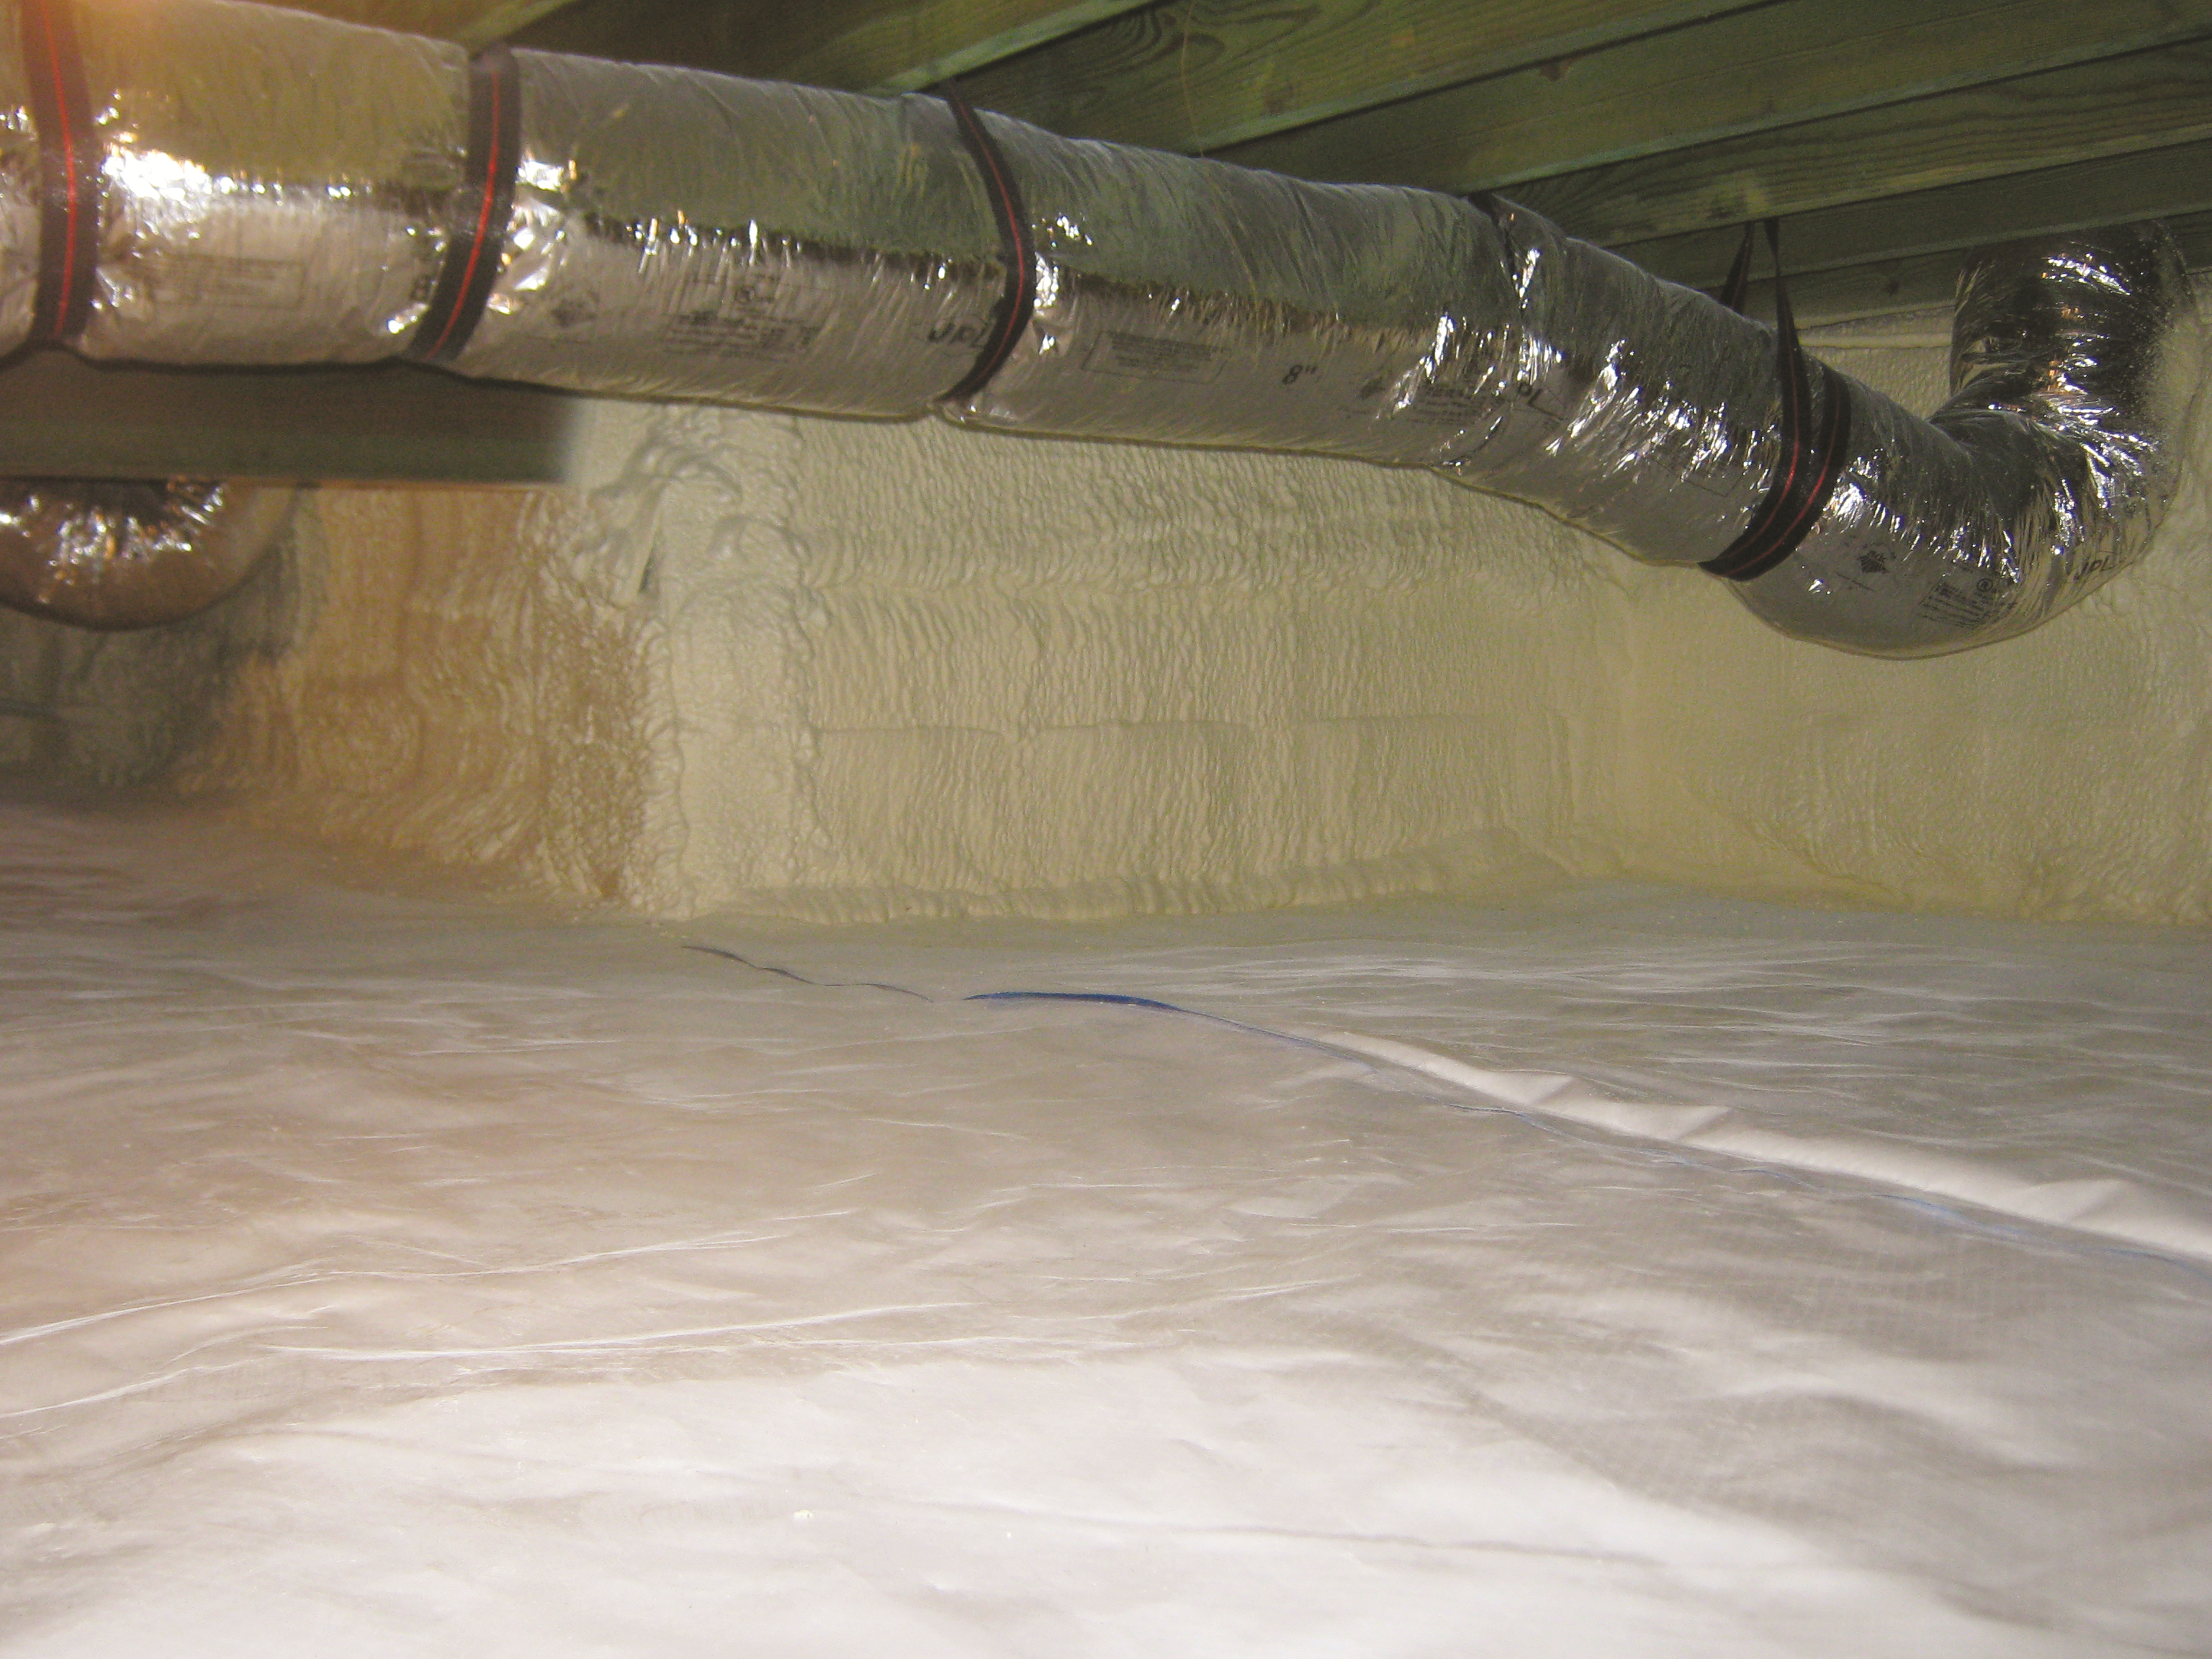
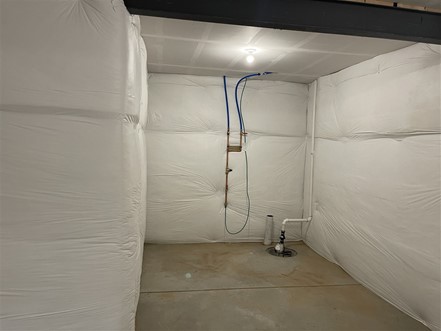
Right - Spray foam covers the walls and a sealed vapor retarder lines the floor of this unvented crawl space.
Image
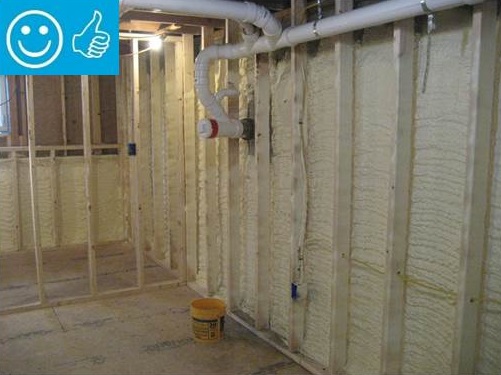
Right - Spray foam fills the walls and rim joists to air seal and insulate while caulk seals the framing joints.
Image
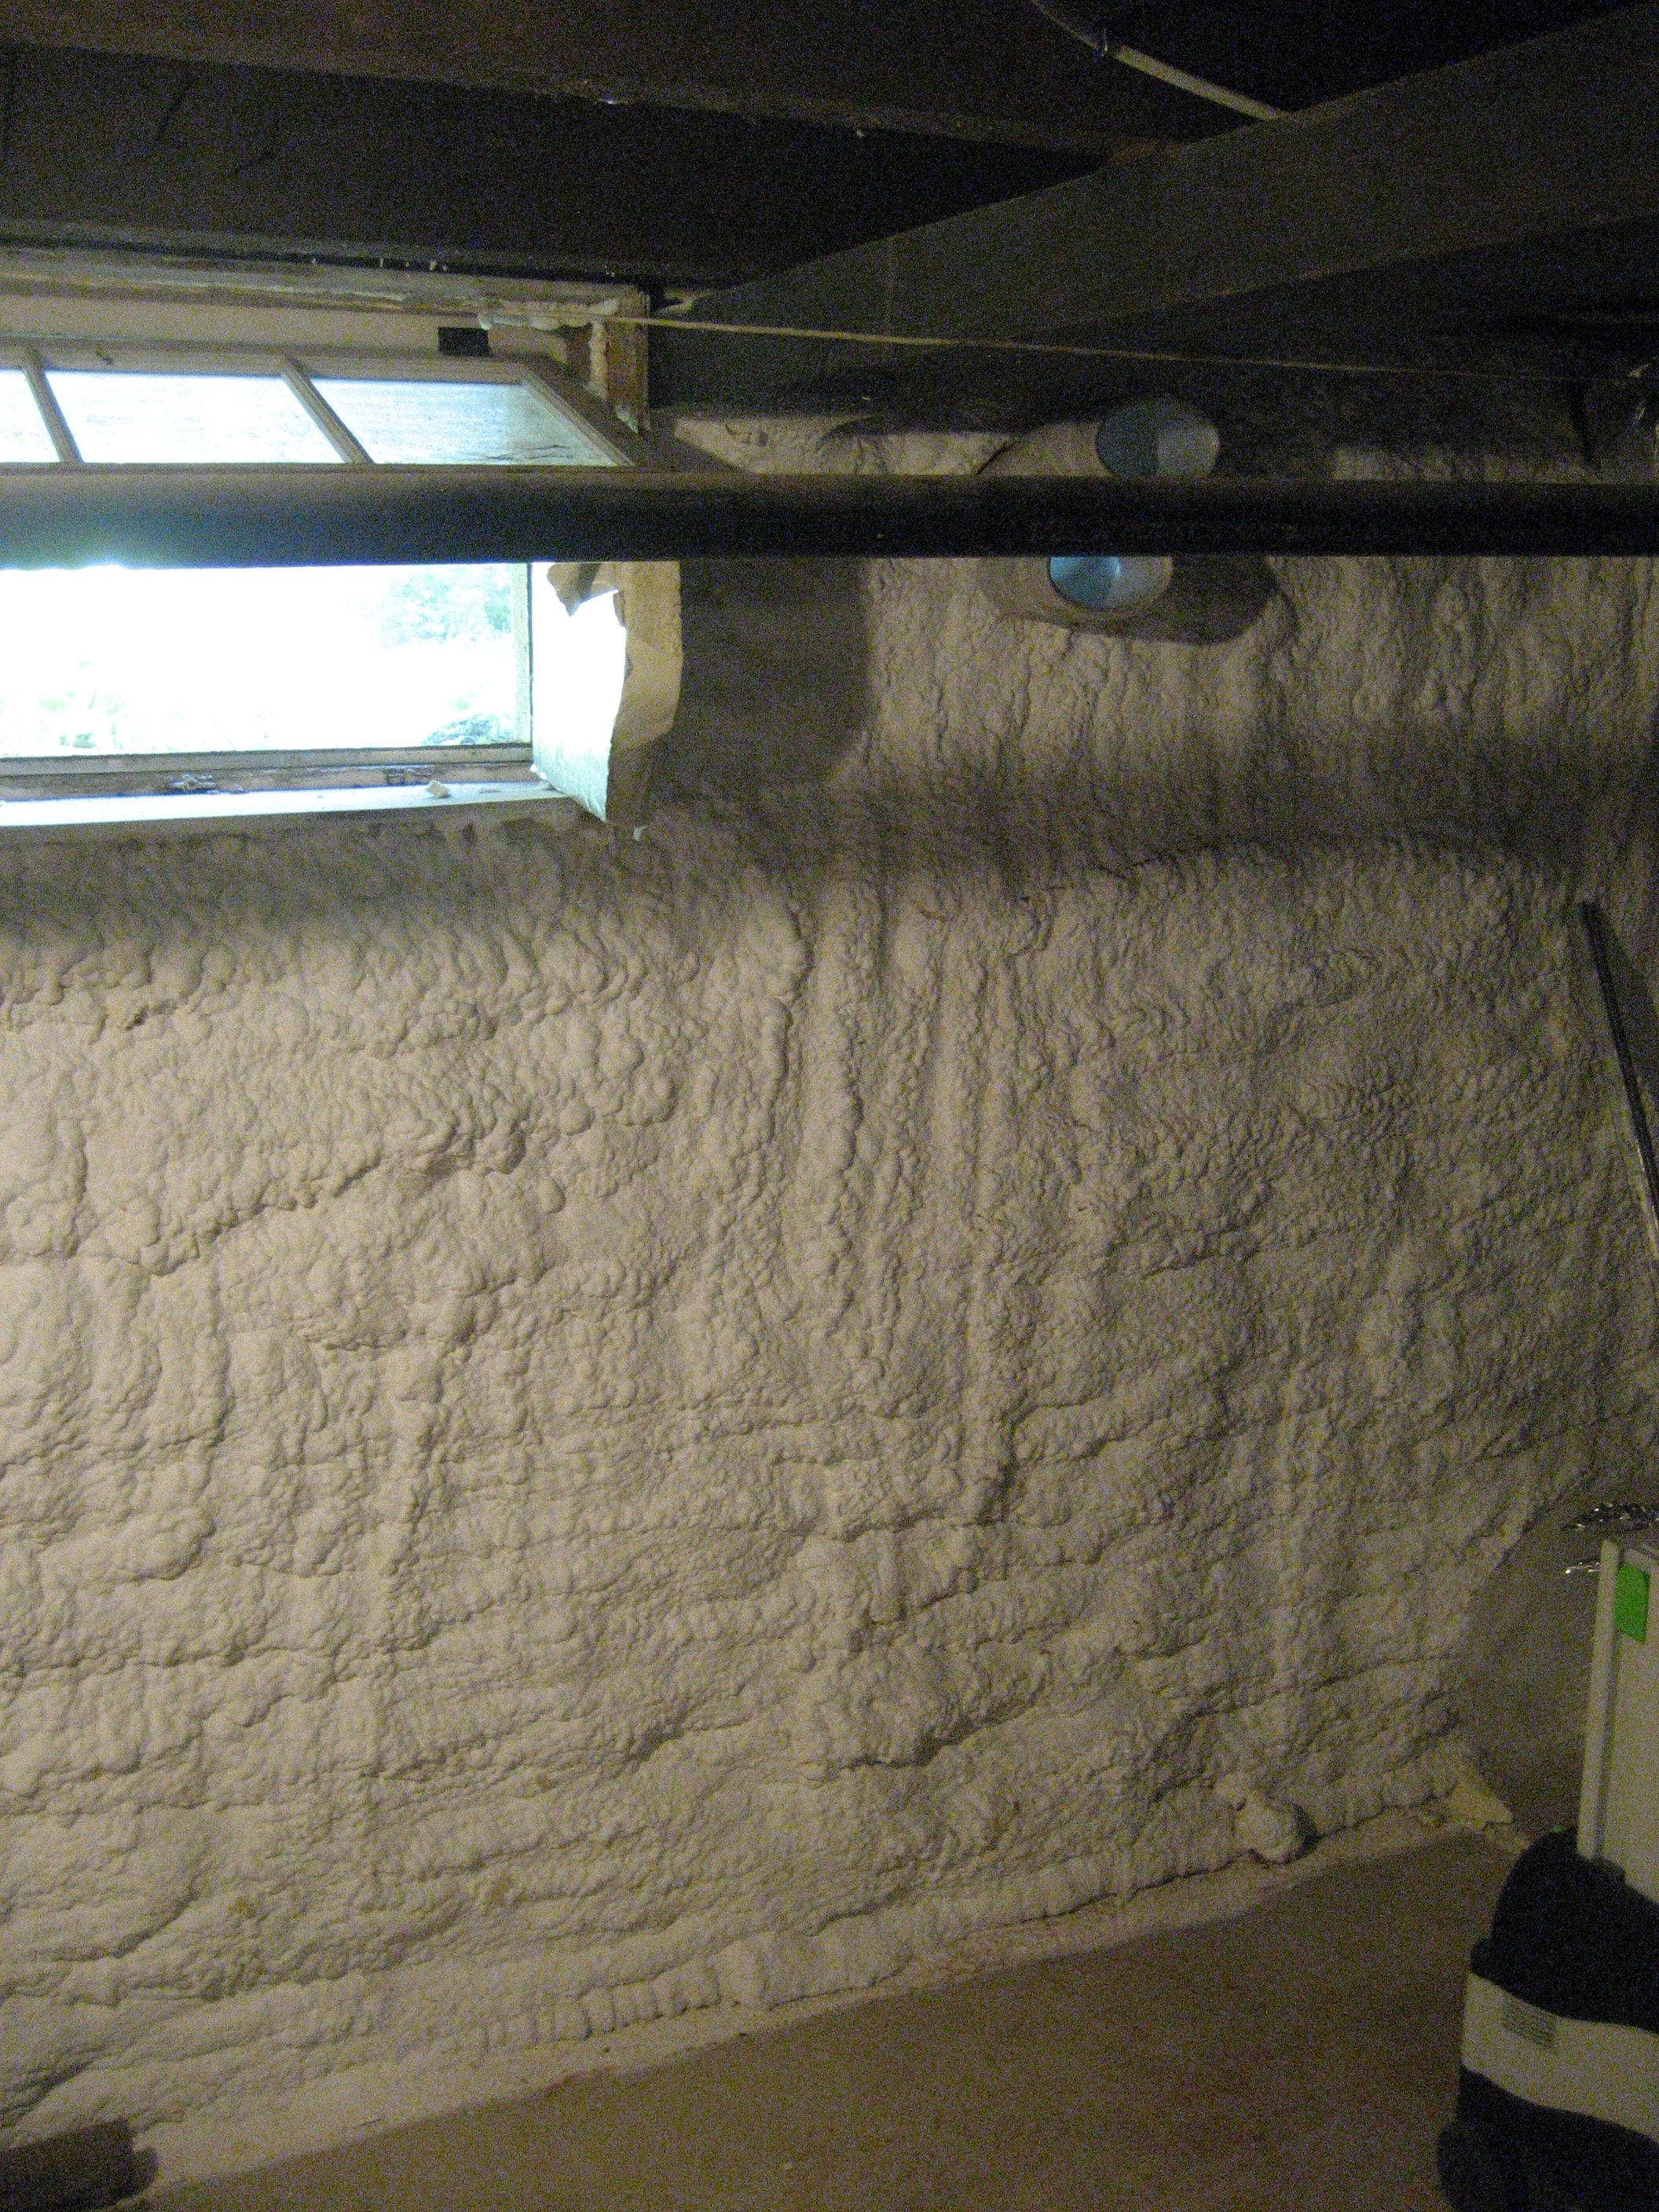
Right - Spray foam insulates and air-seals the stone walls of this unvented crawlspace.
Image
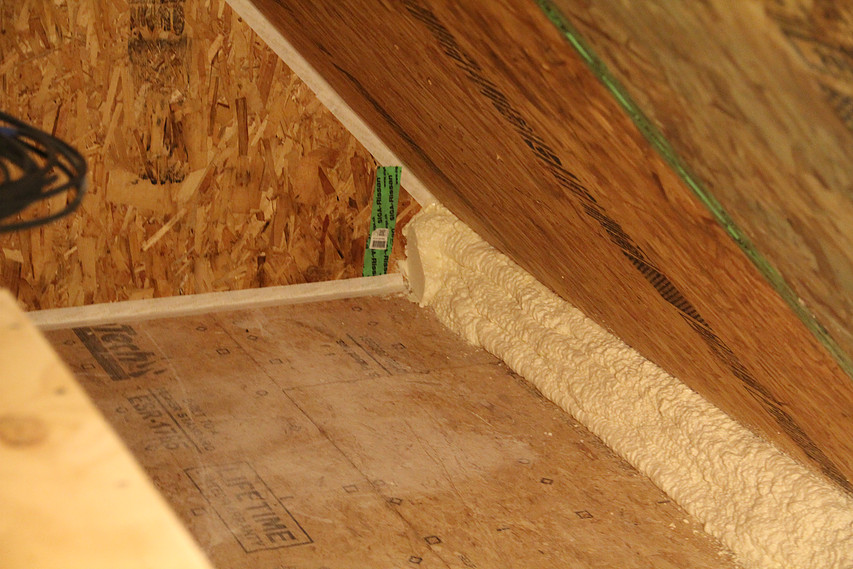
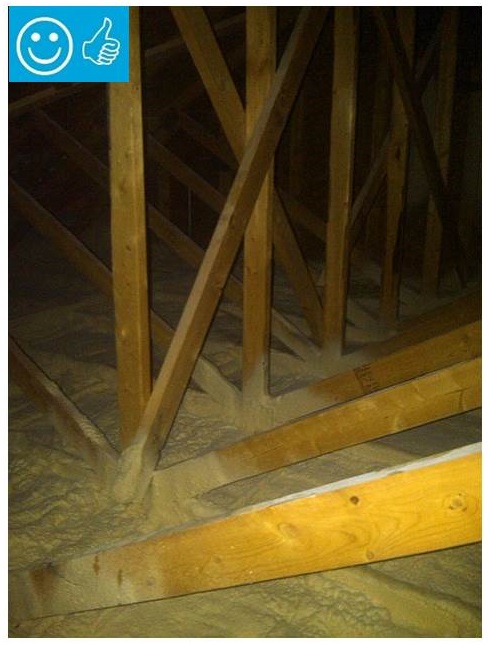
Right - Spray foam insulates the attic eave between the attic floor and the SIP roof panel.
Image
Right - Spray foam insulation air-seals the ceiling-to-drywall seams at the wall top plate.
Image
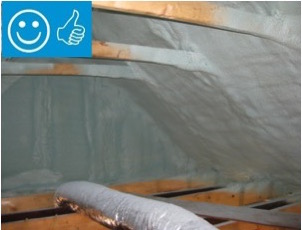
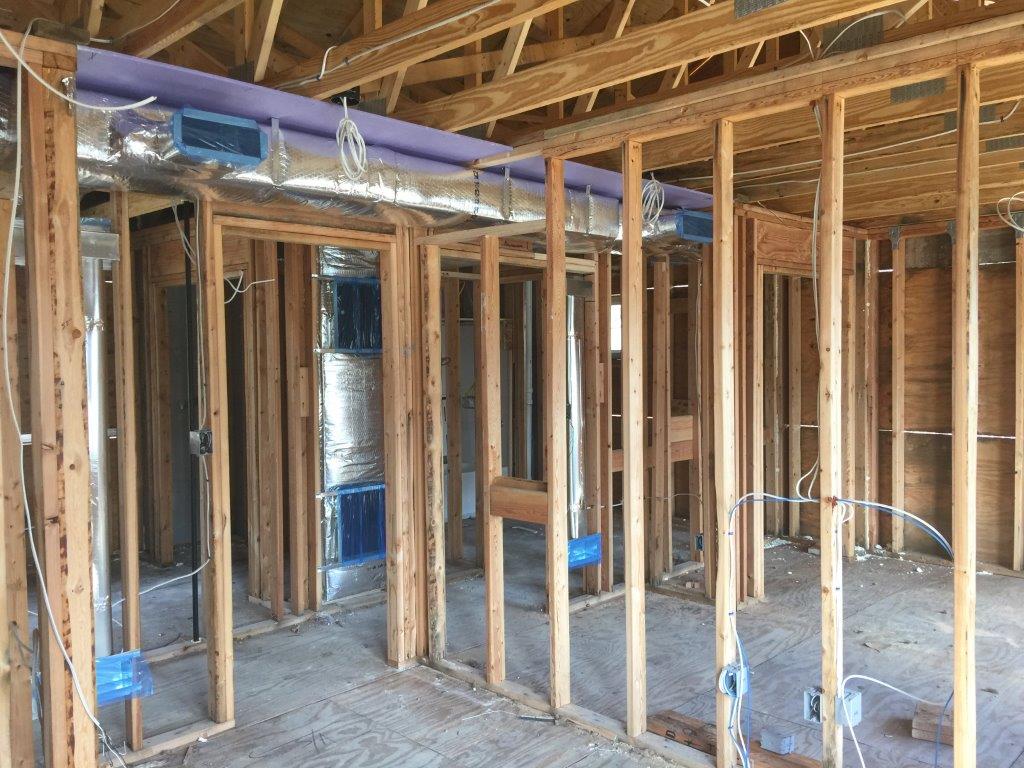
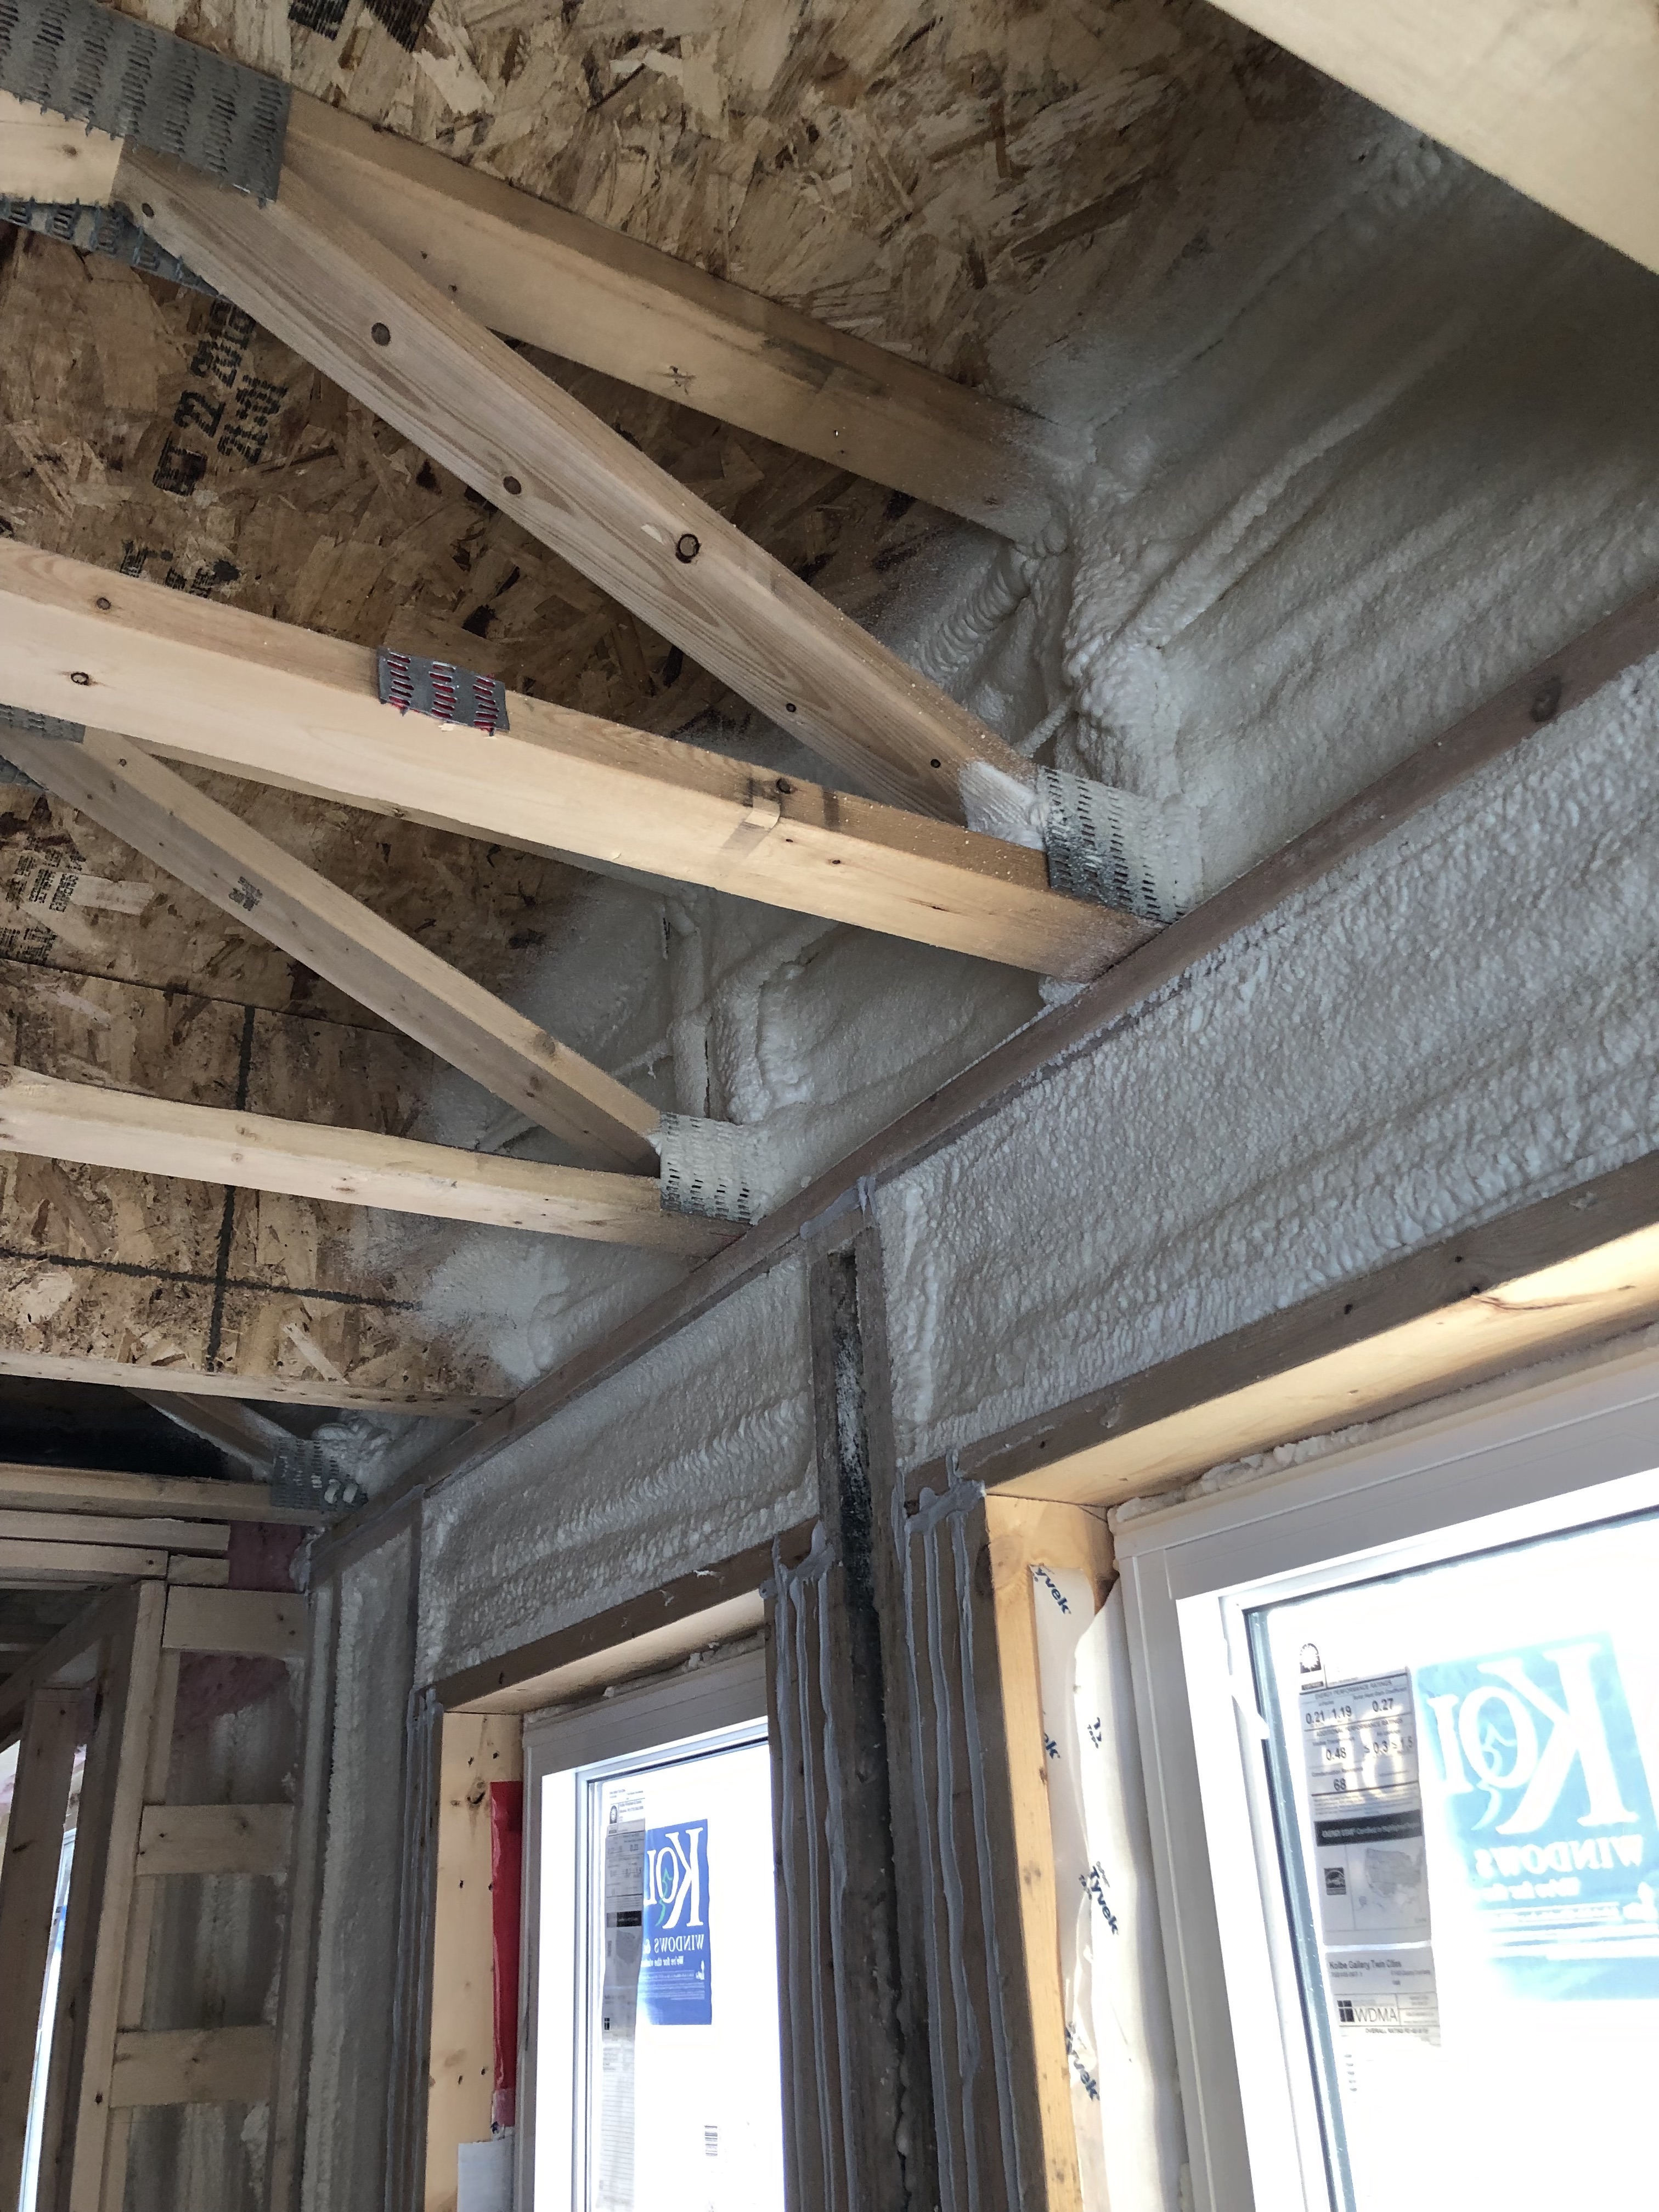
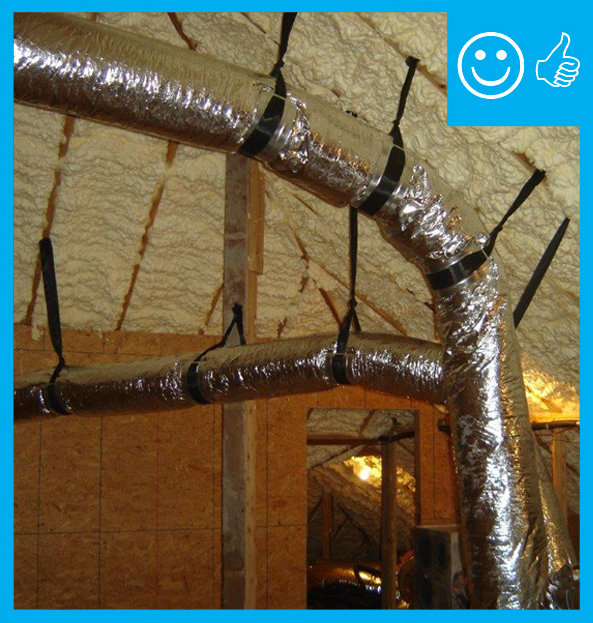
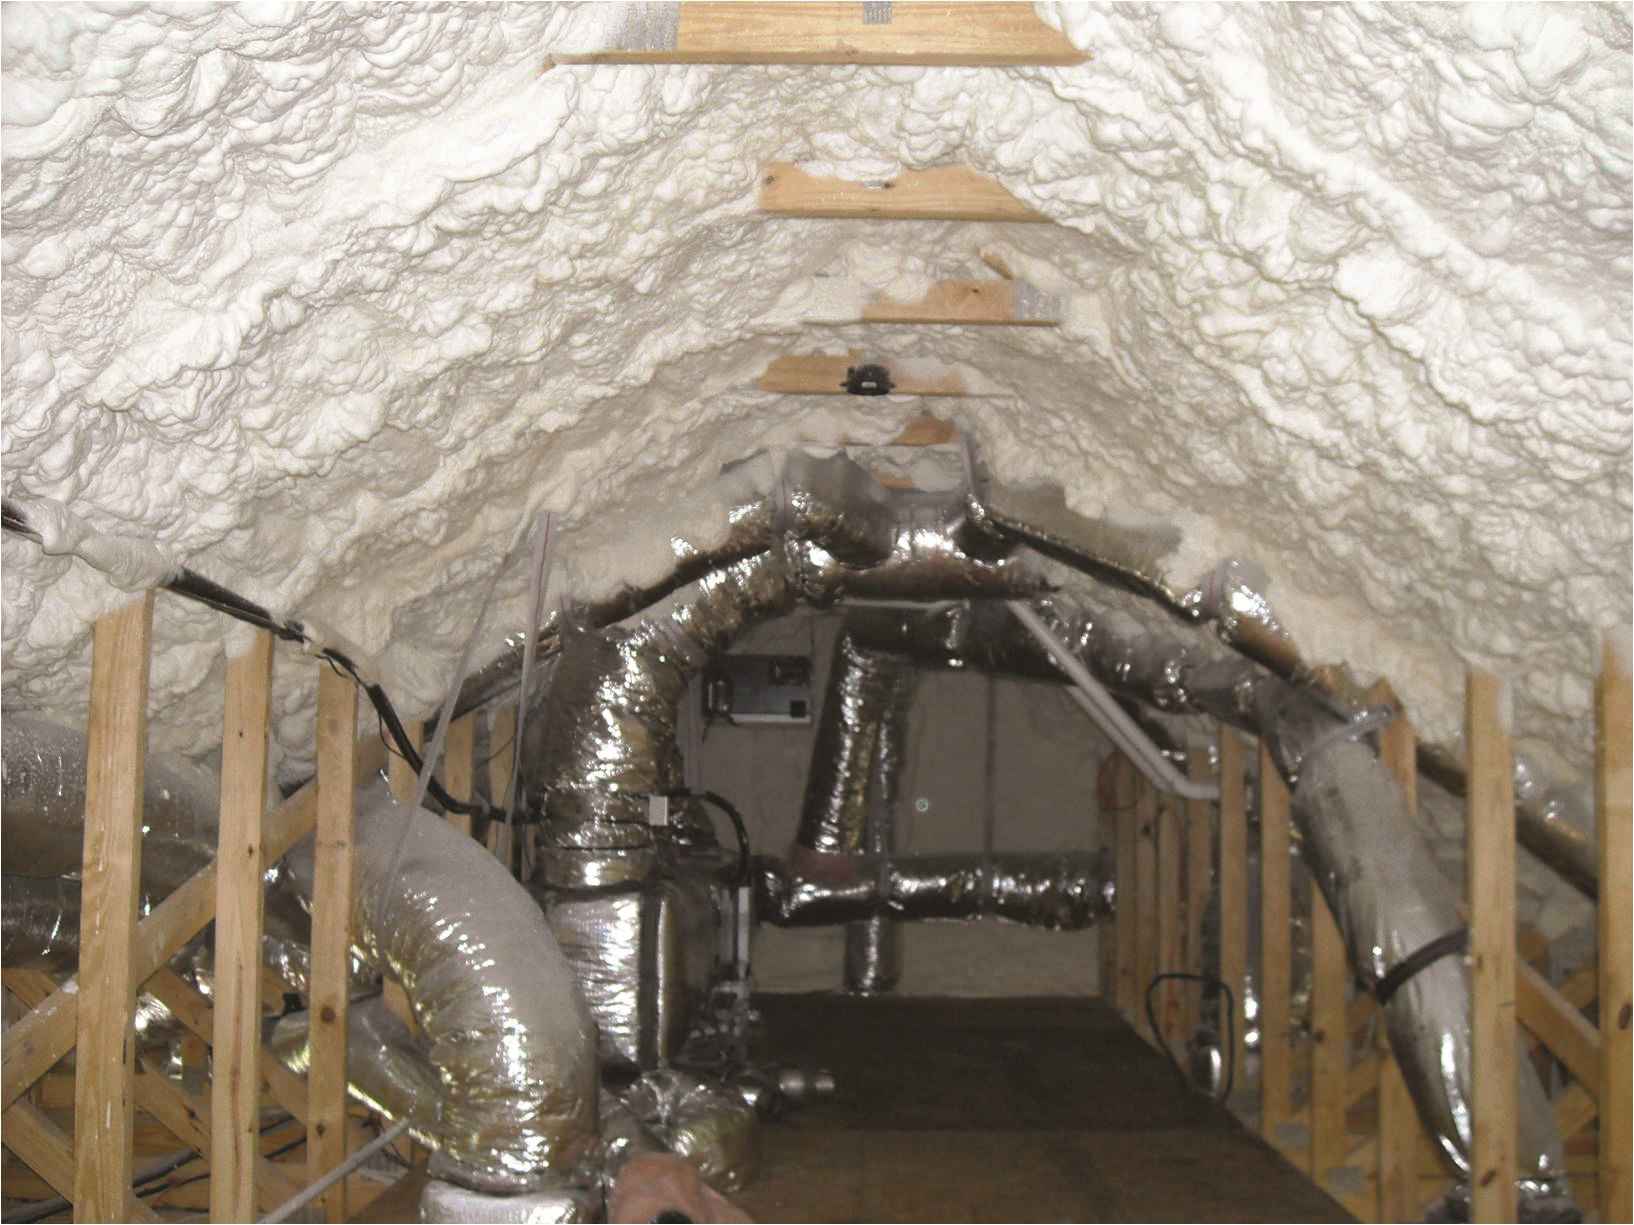
Right - Spray foam insulation has been sprayed onto the underside of the sloped roof and the gable end wall to provide a sealed, insulated attic for housing the HVAC ducts
Image
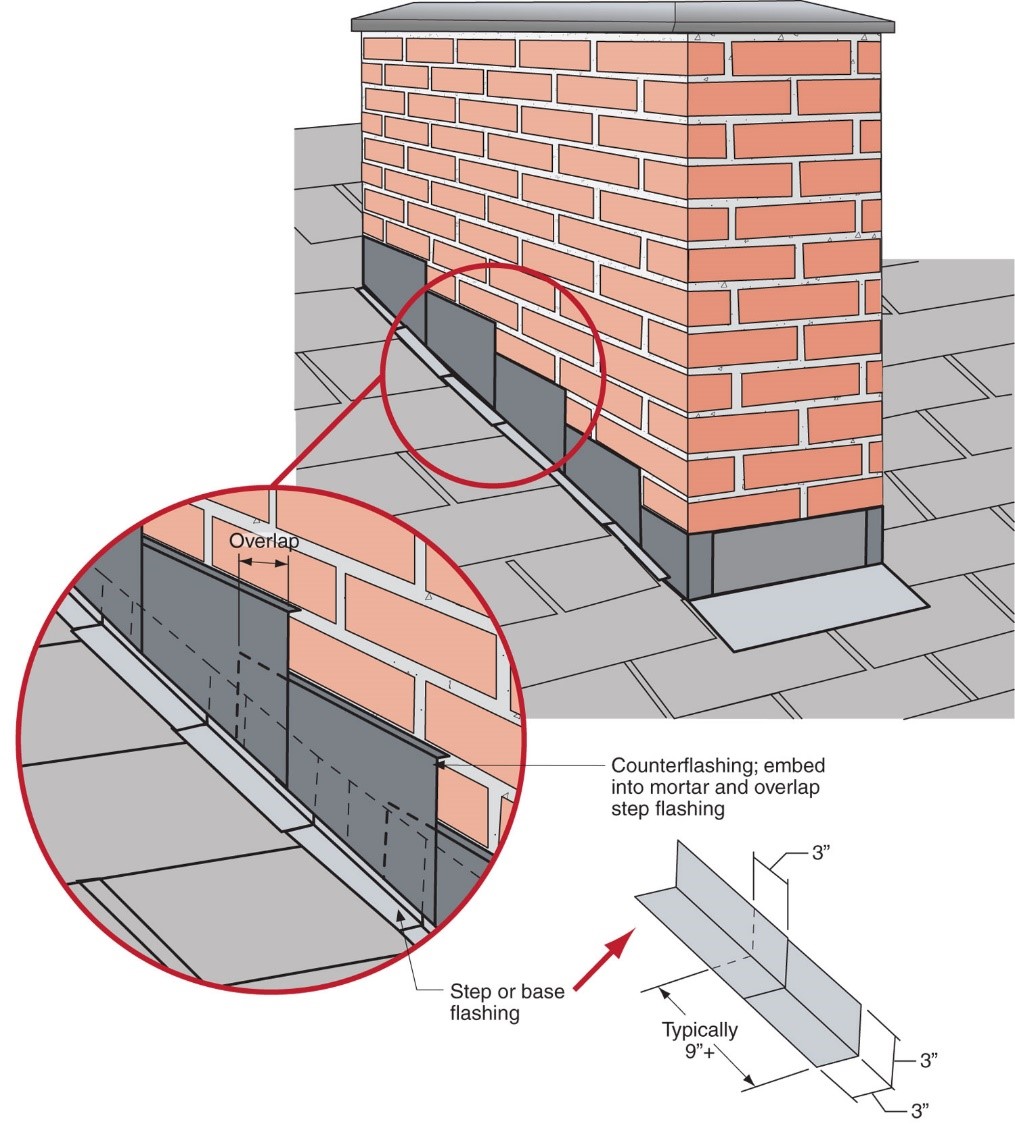
Right - Step flashing along a chimney is integrated in a layered manner with asphalt shingle roofing and topped with counterflashing that is embedded into brick mortar joint above
Image
Right - Straps are spaced close enough together to provide adequate support of the flex duct
Image
Image
Right - Tape flashing keeps moisture out around and below the window; extra tape reinforces the corners to prevent tearing of the house wrap and to keep water out of this critical juncture.
Image

Right - Technicians use adhesive when installing the vapor barrier along the walls of this crawlspace.
Image
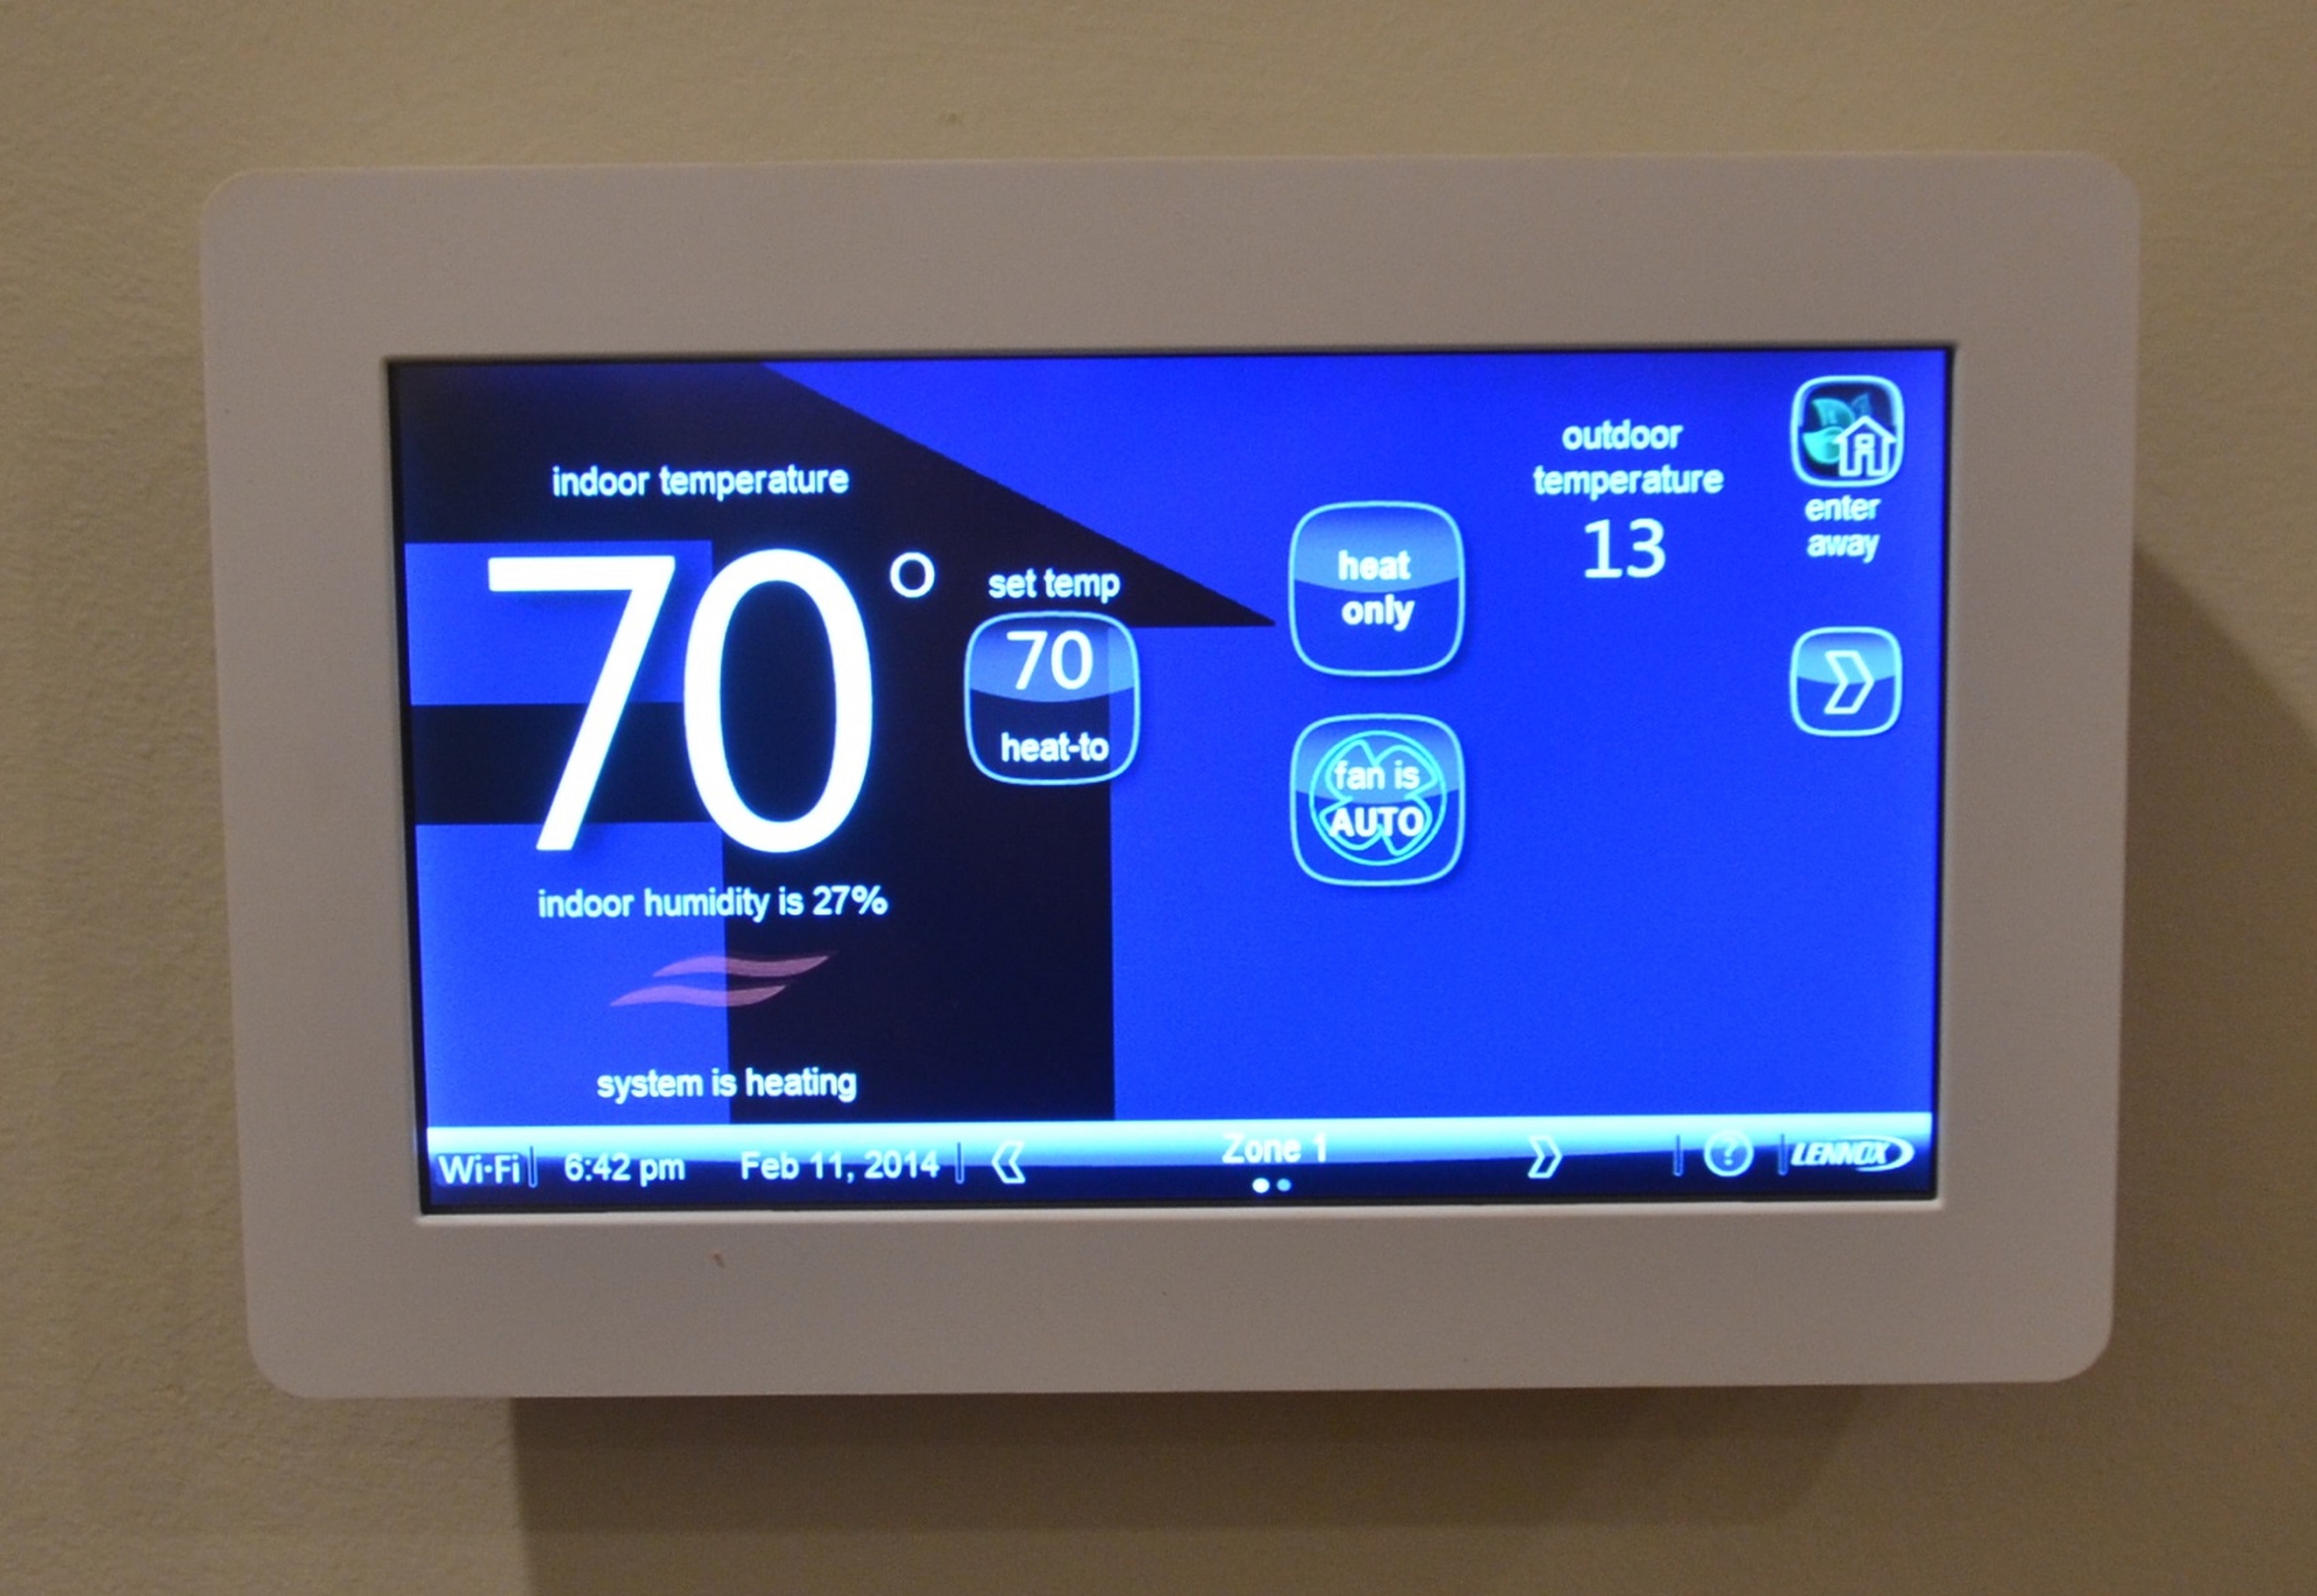
Right - The advanced controls in a programmable thermostat can be used to improve the efficiency of the home’s HVAC system.
Image
Right - The air control membrane installed over the roof sheathing is continuous. It connects to the air control of the wall around the entire perimeter without interruption. The roof overhangs have been cut off to make this connection continuous
Image
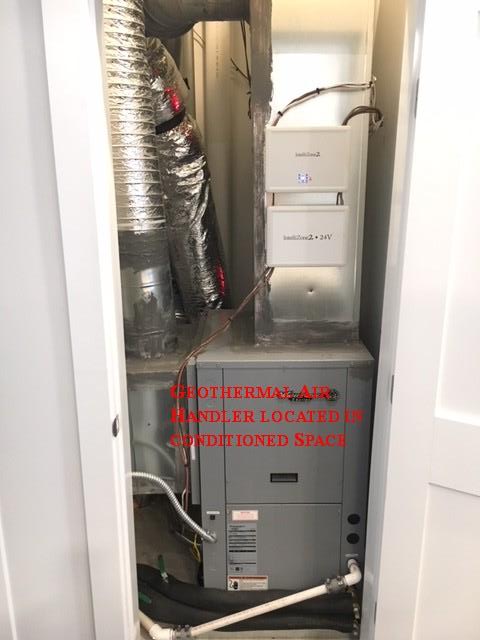
Right - The air handler for this geothermal heat pump is located in conditioned space.
Image
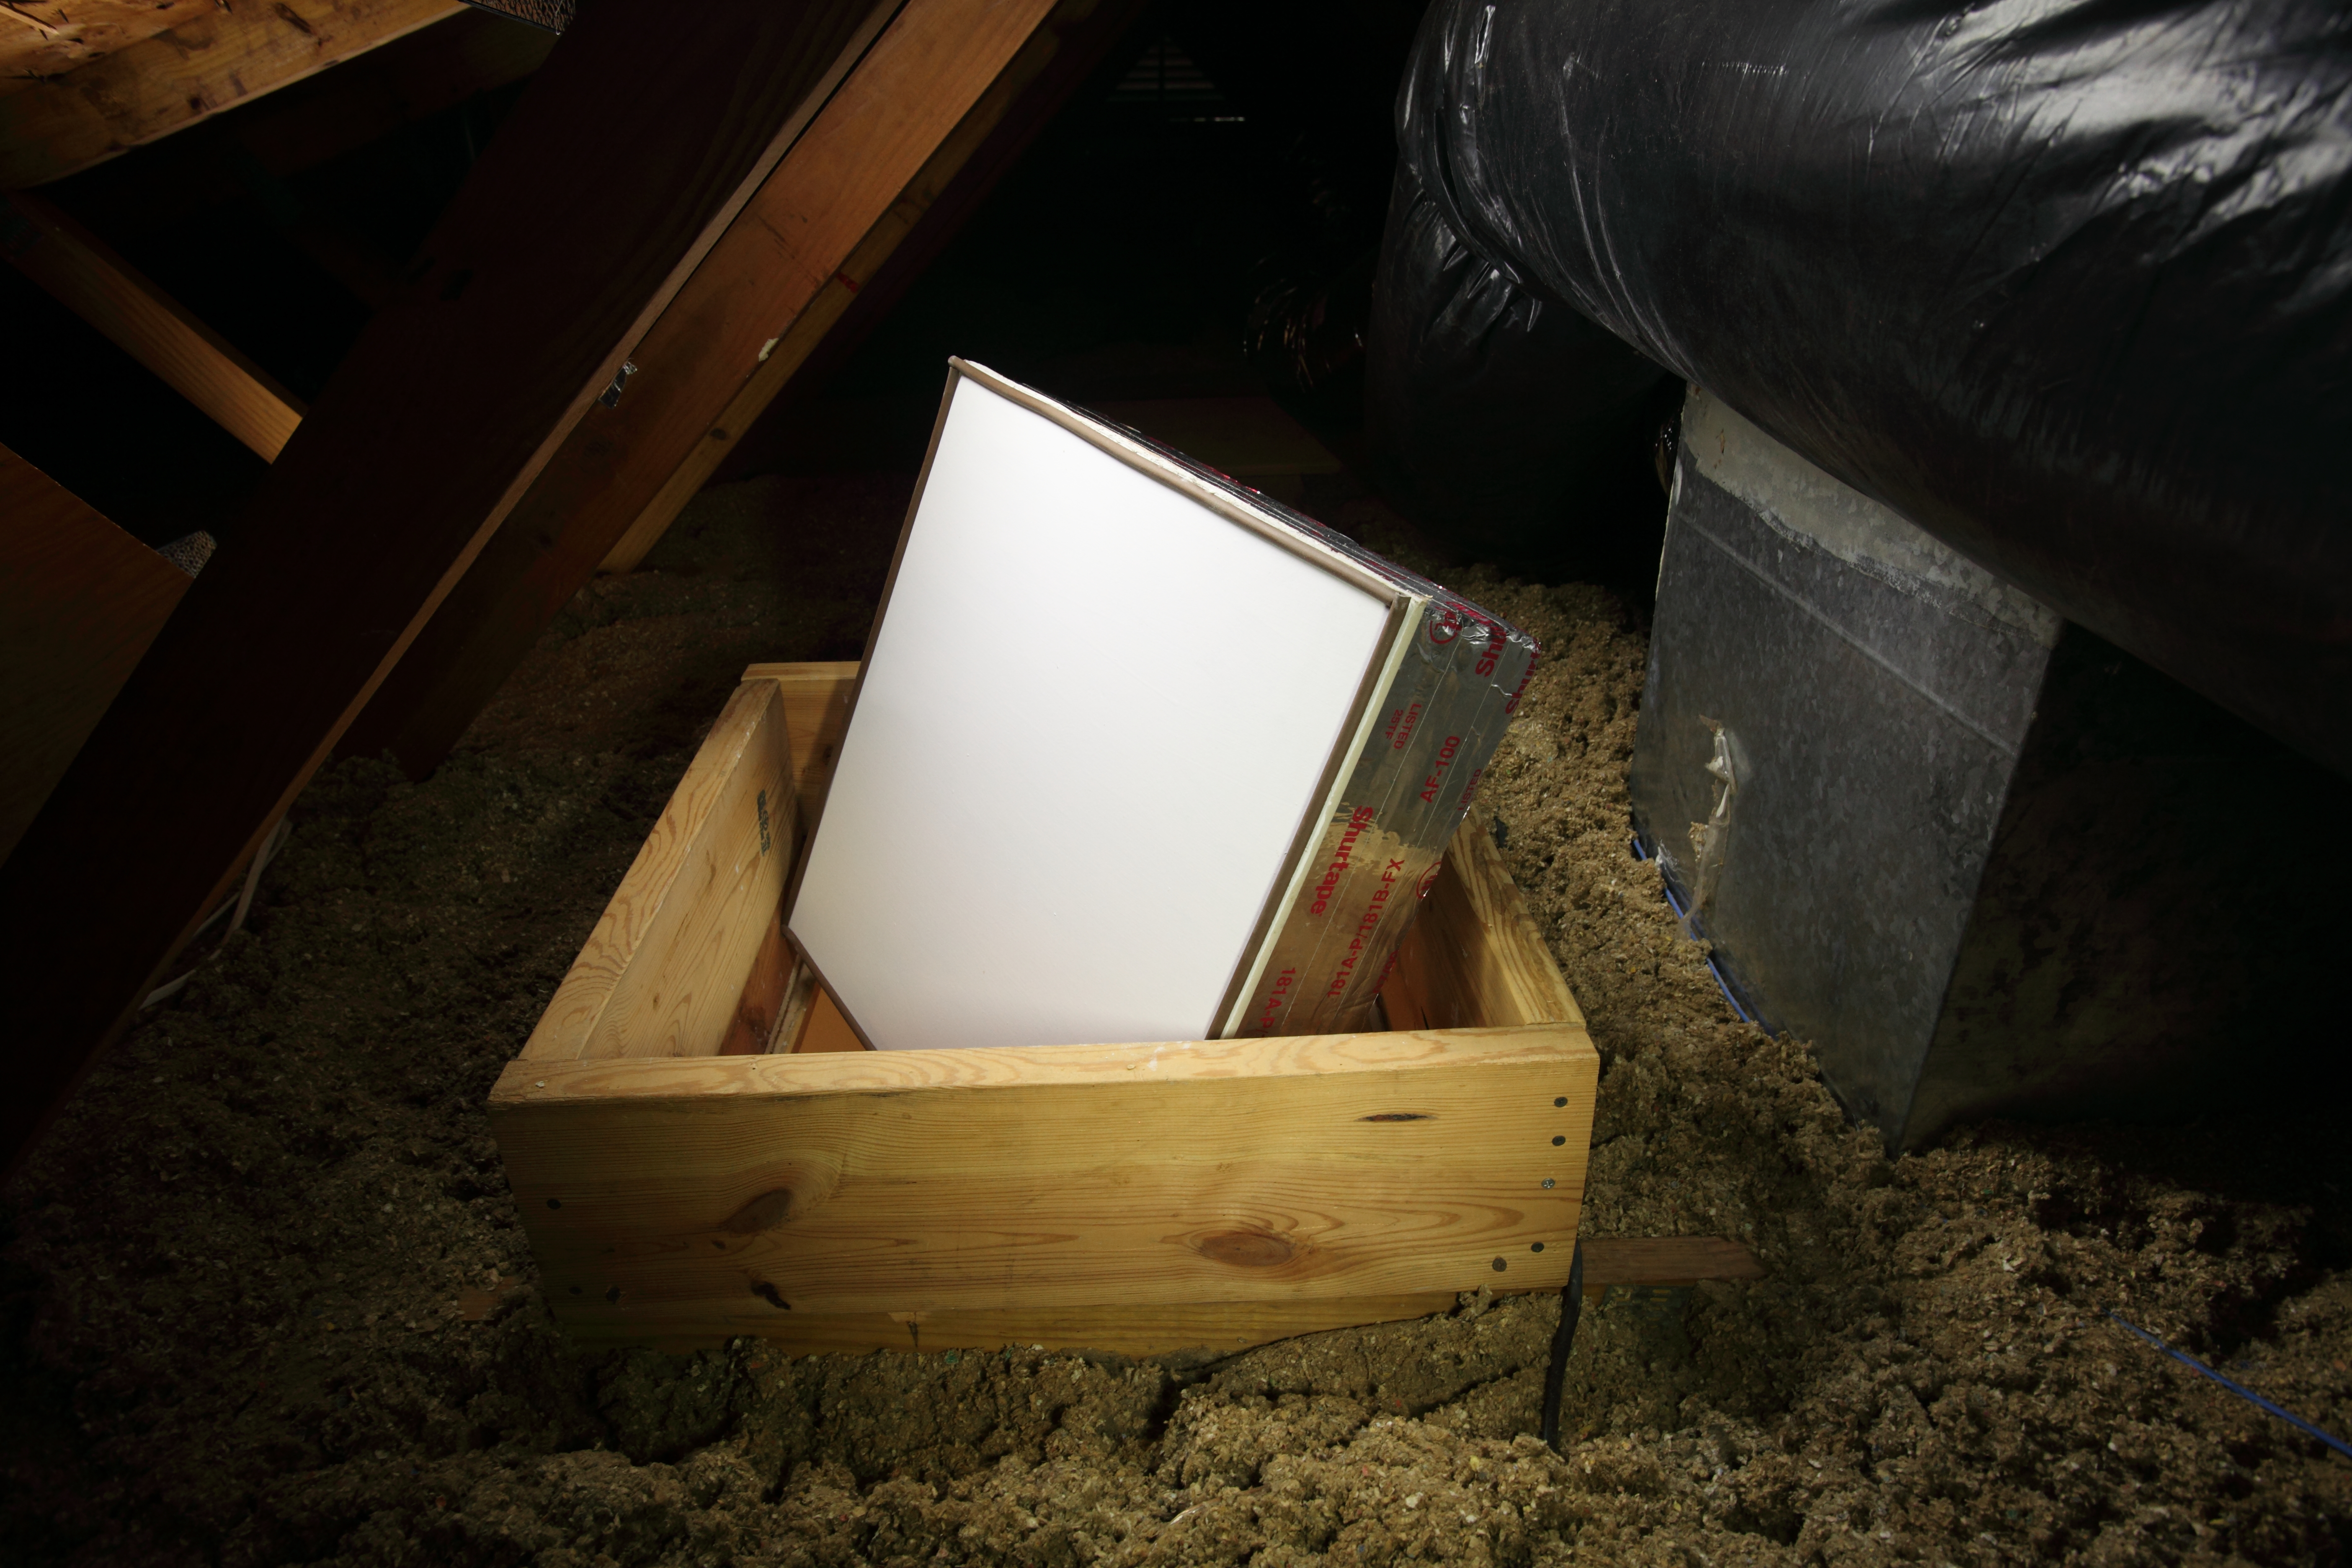
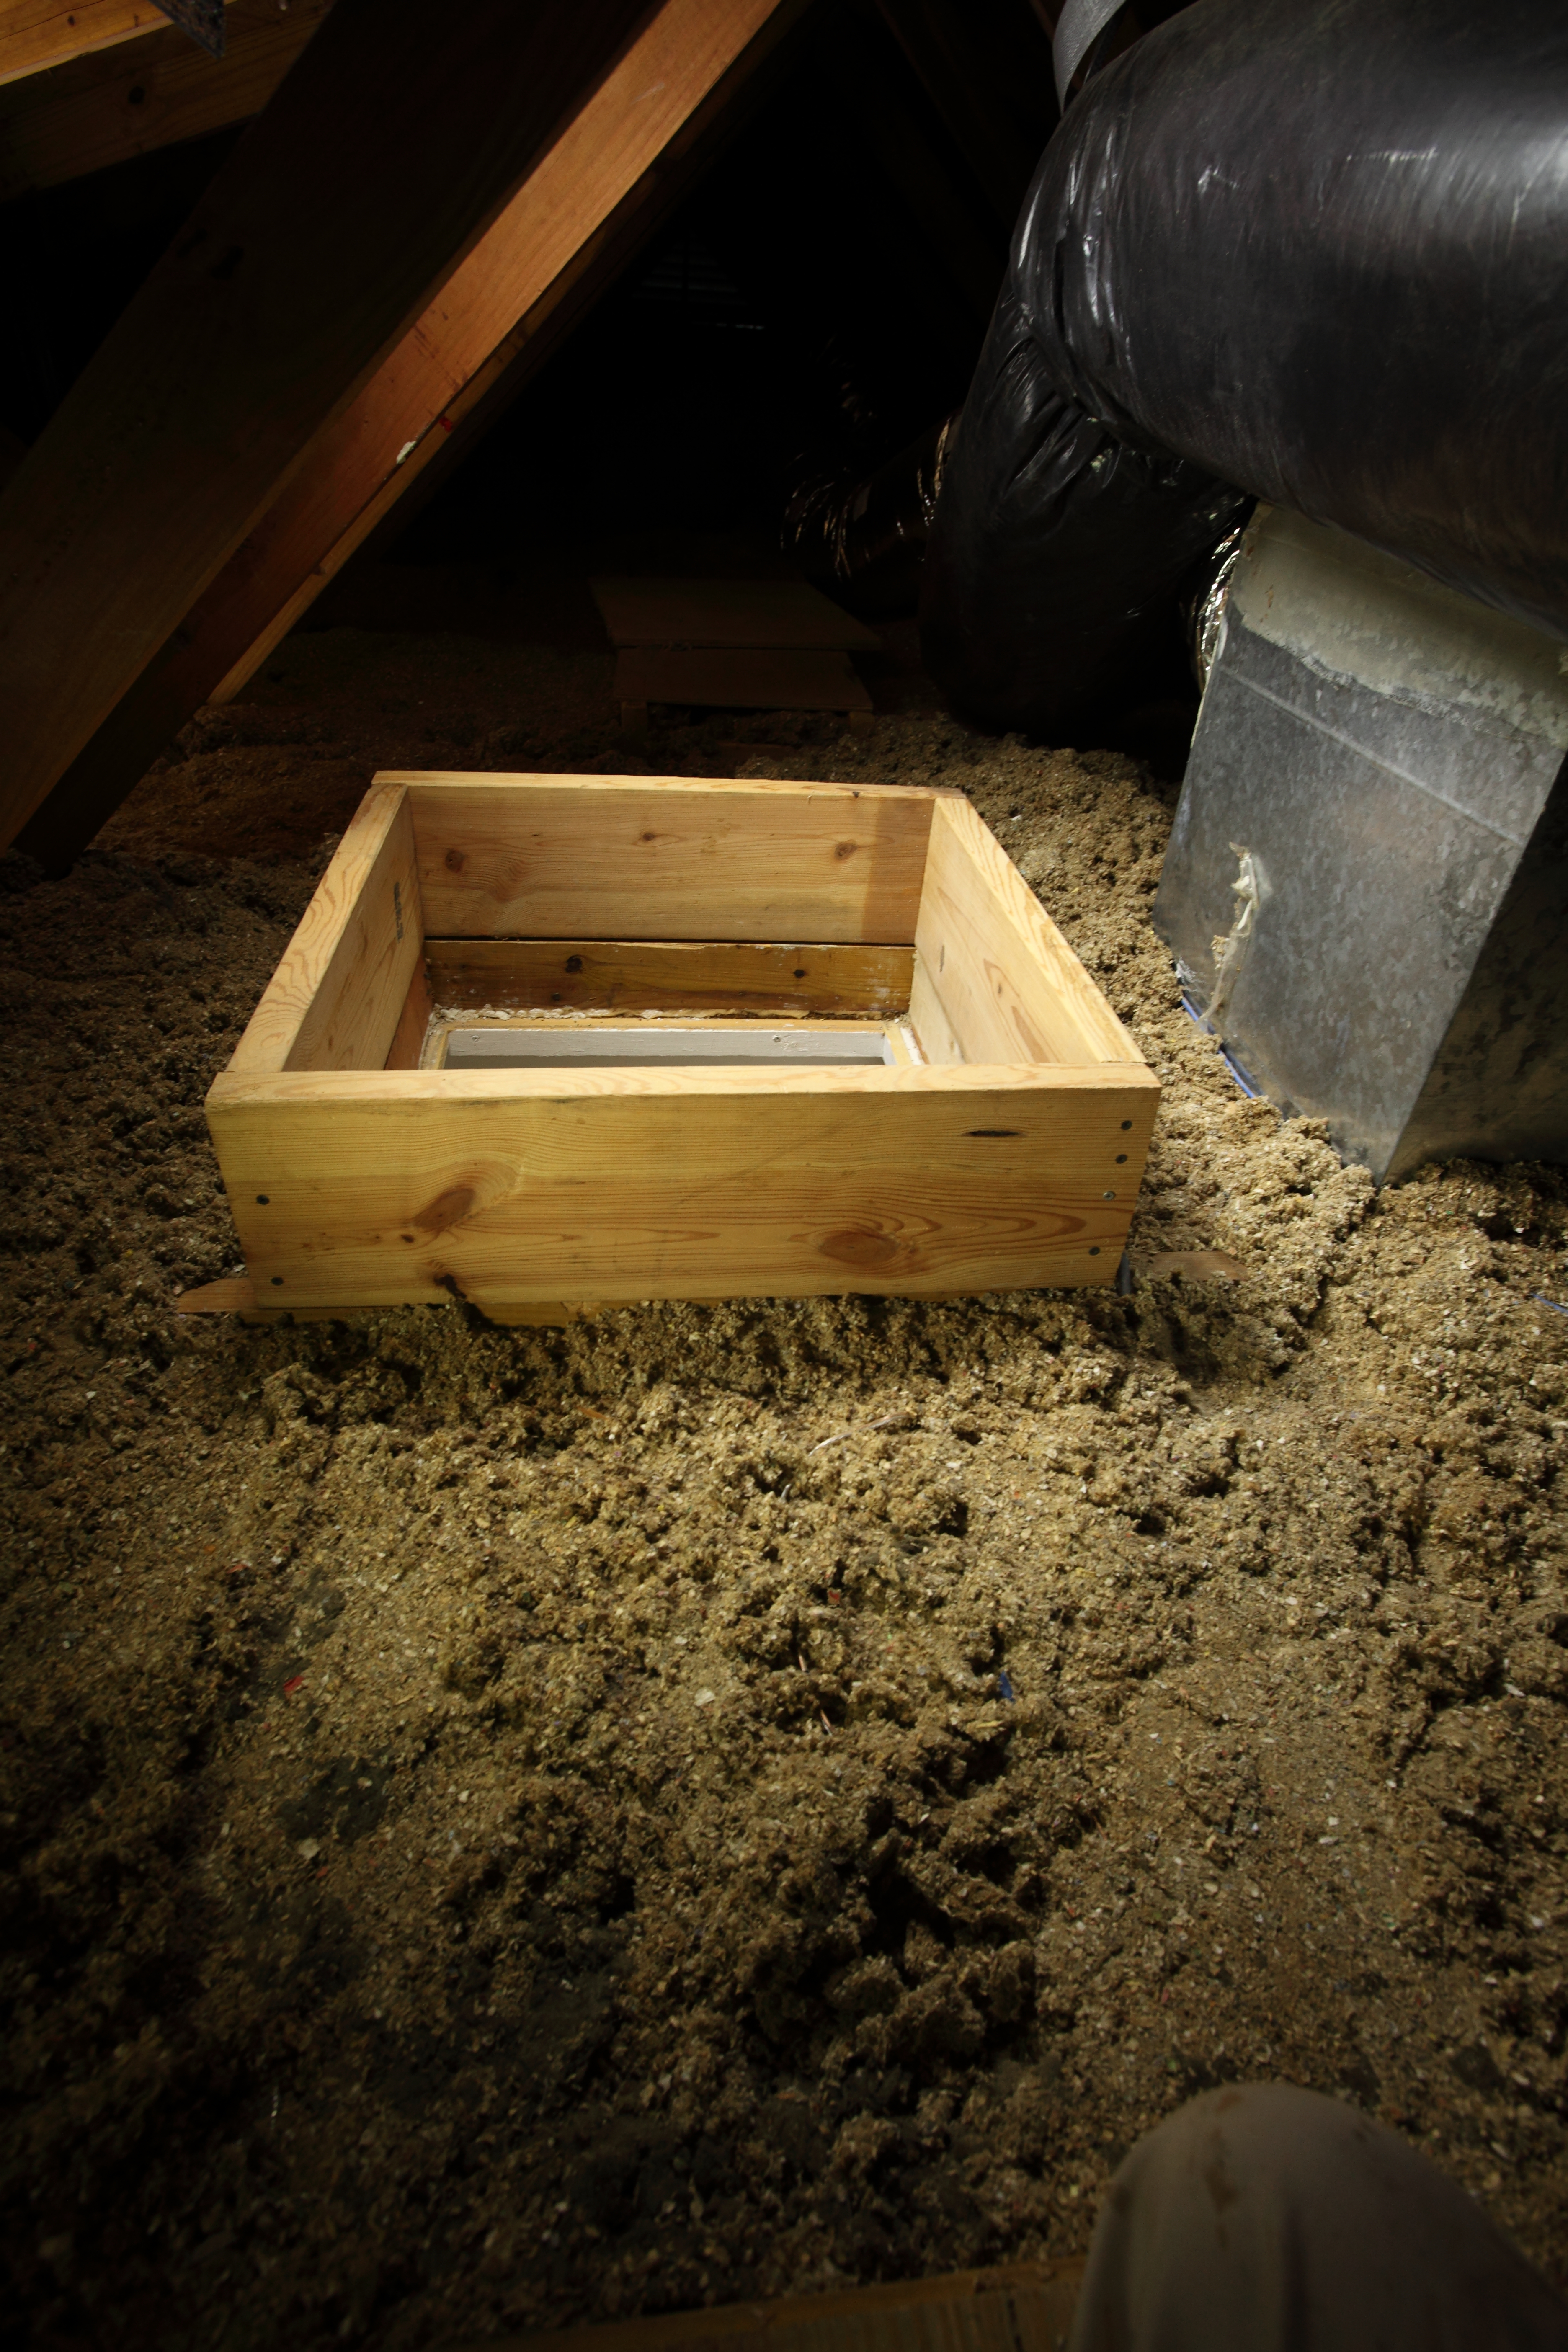
Right - The attic access panel is insulated and weather stripped and a dam is built to hold back the blown attic floor insulation
Image
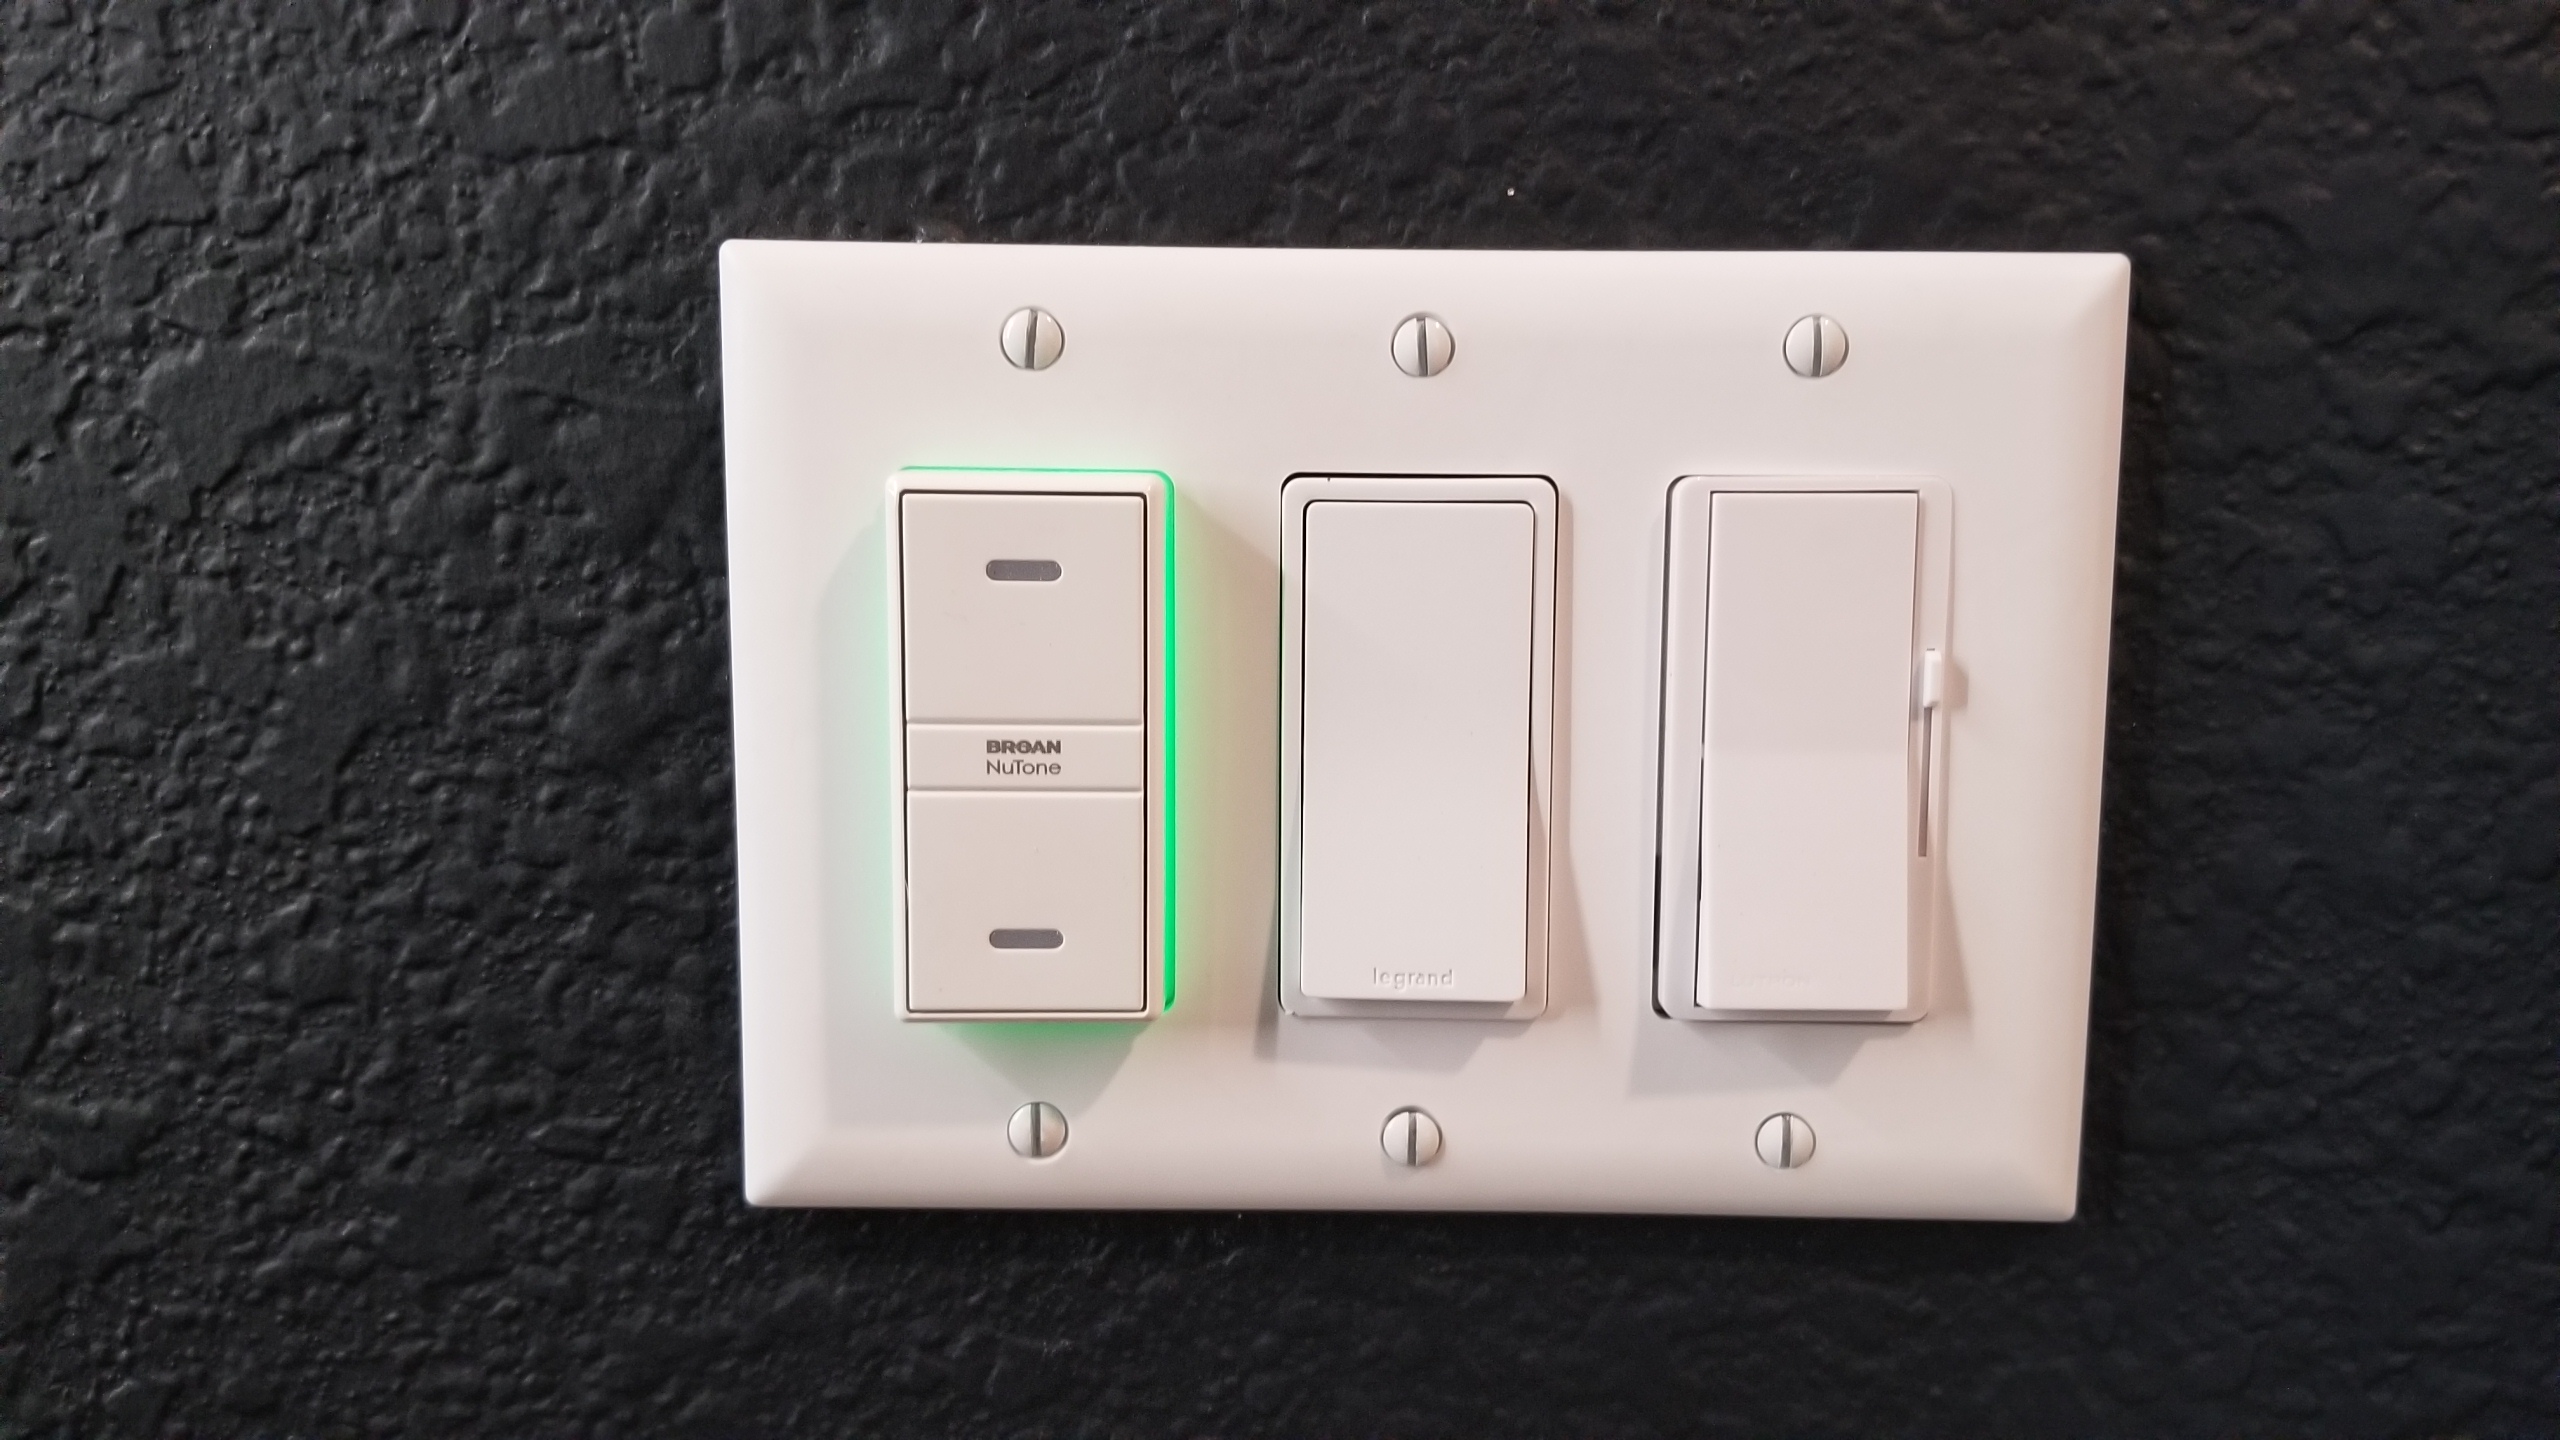
Right - The automated ventilation system has a sensor built in switch that can detect indoor air pollution; if it senses a rise in humidity, VOCs, smoke, carbon dioxide, or small particulates, the system will turn on the nearest fan to eliminate pollution
Image
Right - The basement foundation is insulated on the exterior and termite shield extends out past the top of the insulation.
Image

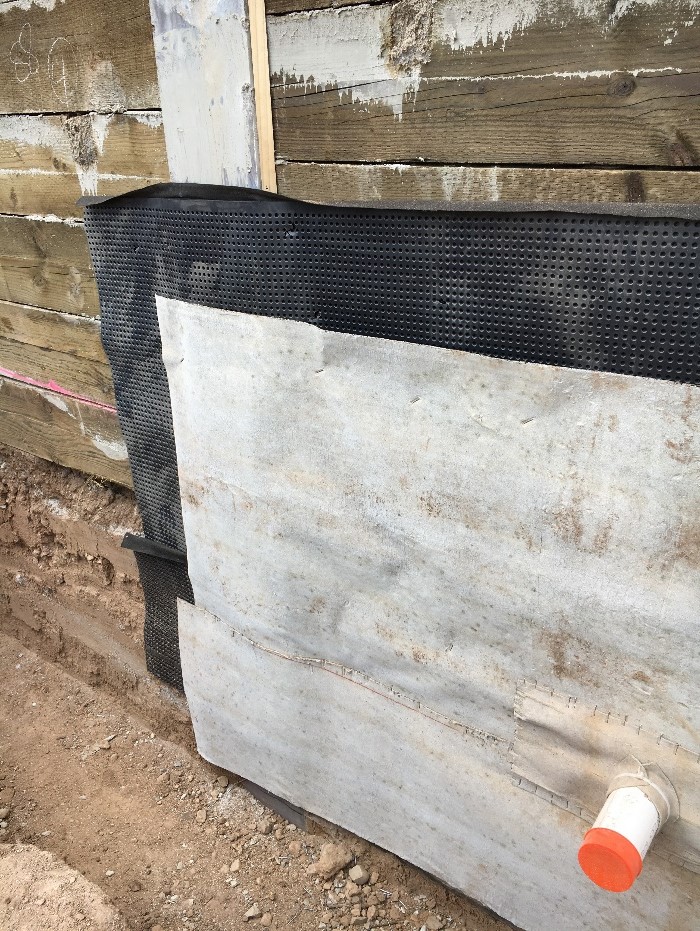
Right - The basement walls are wrapped with 3 inches of XPS rigid foam that will be taped at the seams then covered with a dimpled plastic water barrier.
Image
Right - The blanket fiberglass insulation is installed over a continuous layer of rigid foam insulation; the fiberglass is covered with a vapor retarder that is tape sealed at the seams.
Image
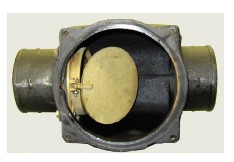
Right - The butterfly damper of this crawlspace supply register opens when the HVAC fan is running; the damper duct is sealed with mastic and supported by strapping.
Image
Right - The ceiling above the garage is air-sealed and insulated with spray foam.
Image
Right - The ceiling above the garage is insulated and air-sealed with open-cell spray foam to keep garage fumes out of the living space above.
Image
Right - The concrete basement wall is insulated on the interior with rigid foam; the footing detail is shown.
Image
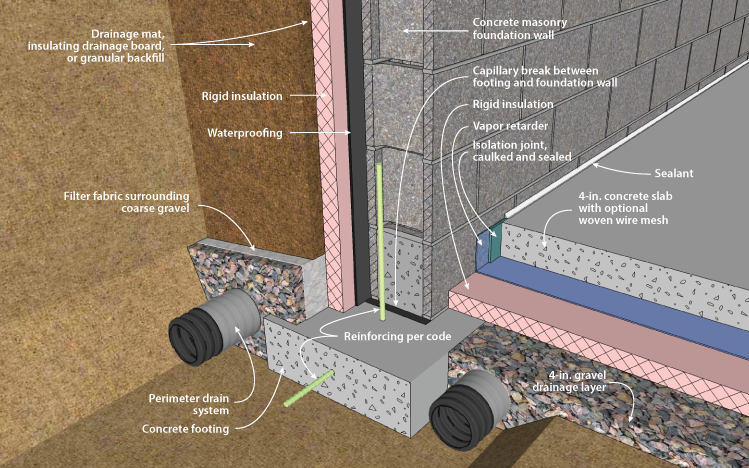
Right - The concrete masonry unit (CMU) basement wall has exterior insulation; the footing details include interior and exterior footing drain pipe.
Image
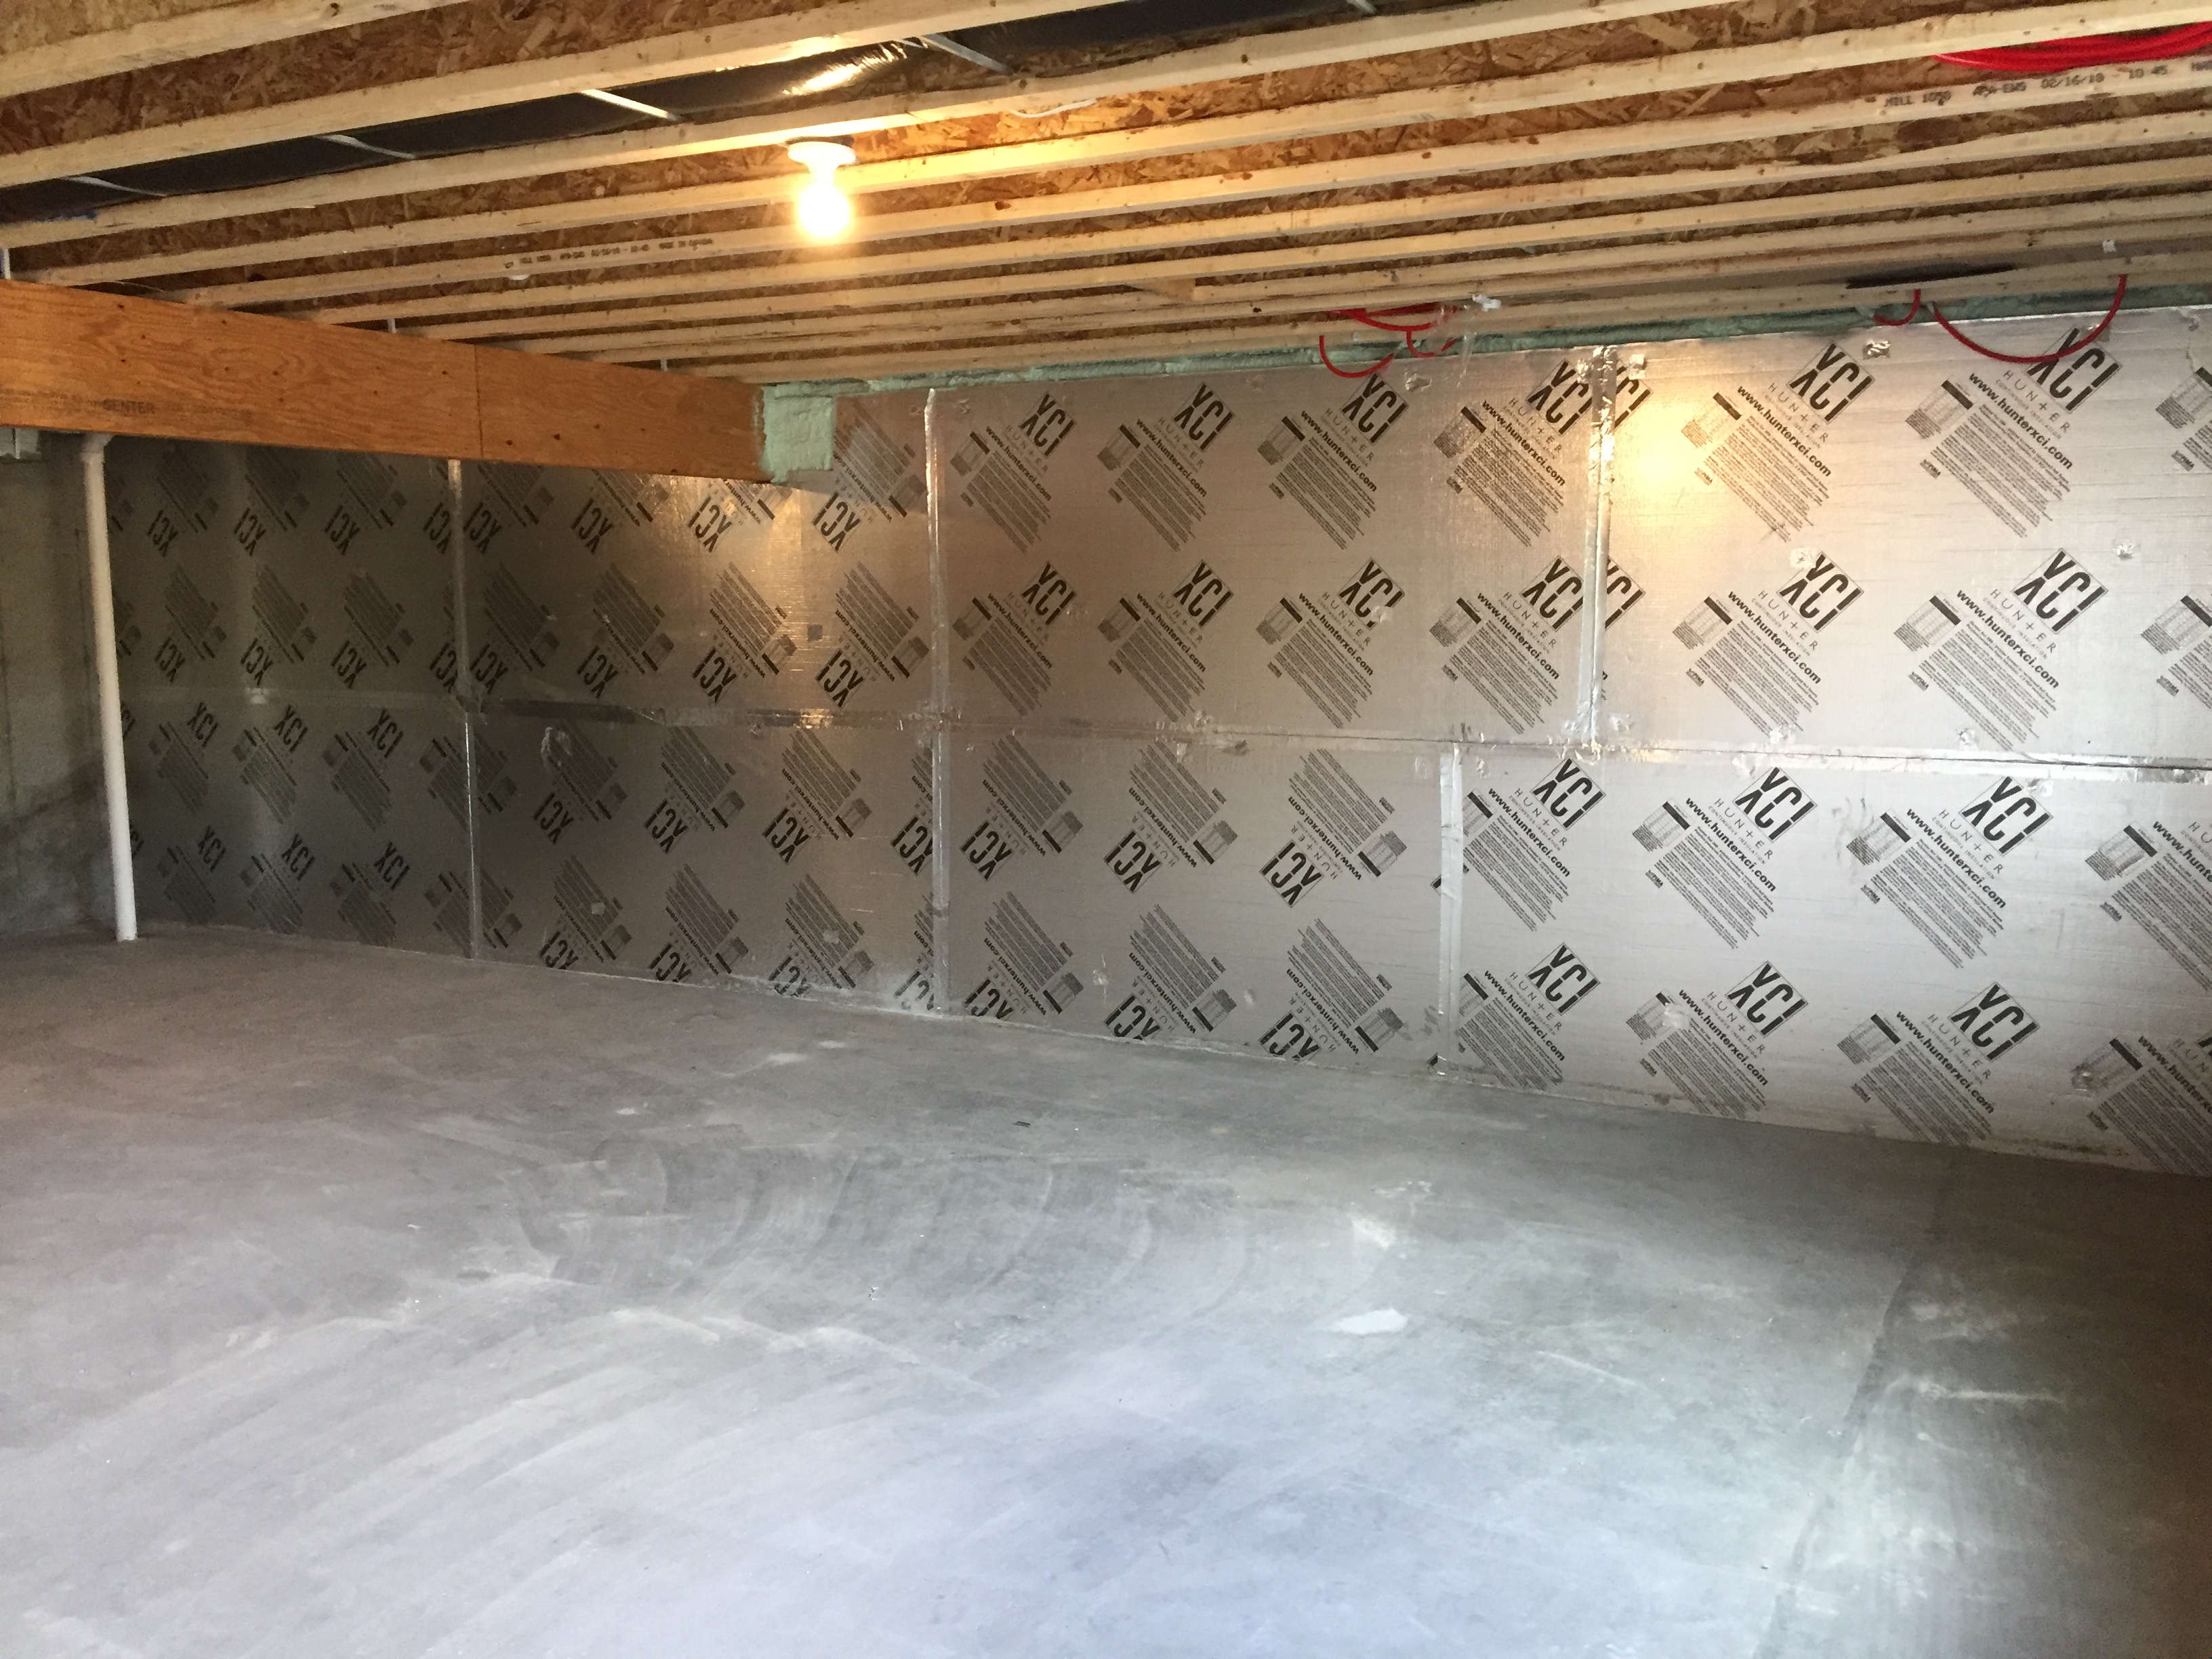
Right - The conditioned basement is insulated on the interior with 1 inch of polyiso R-6.3 rigid insulation.
Image
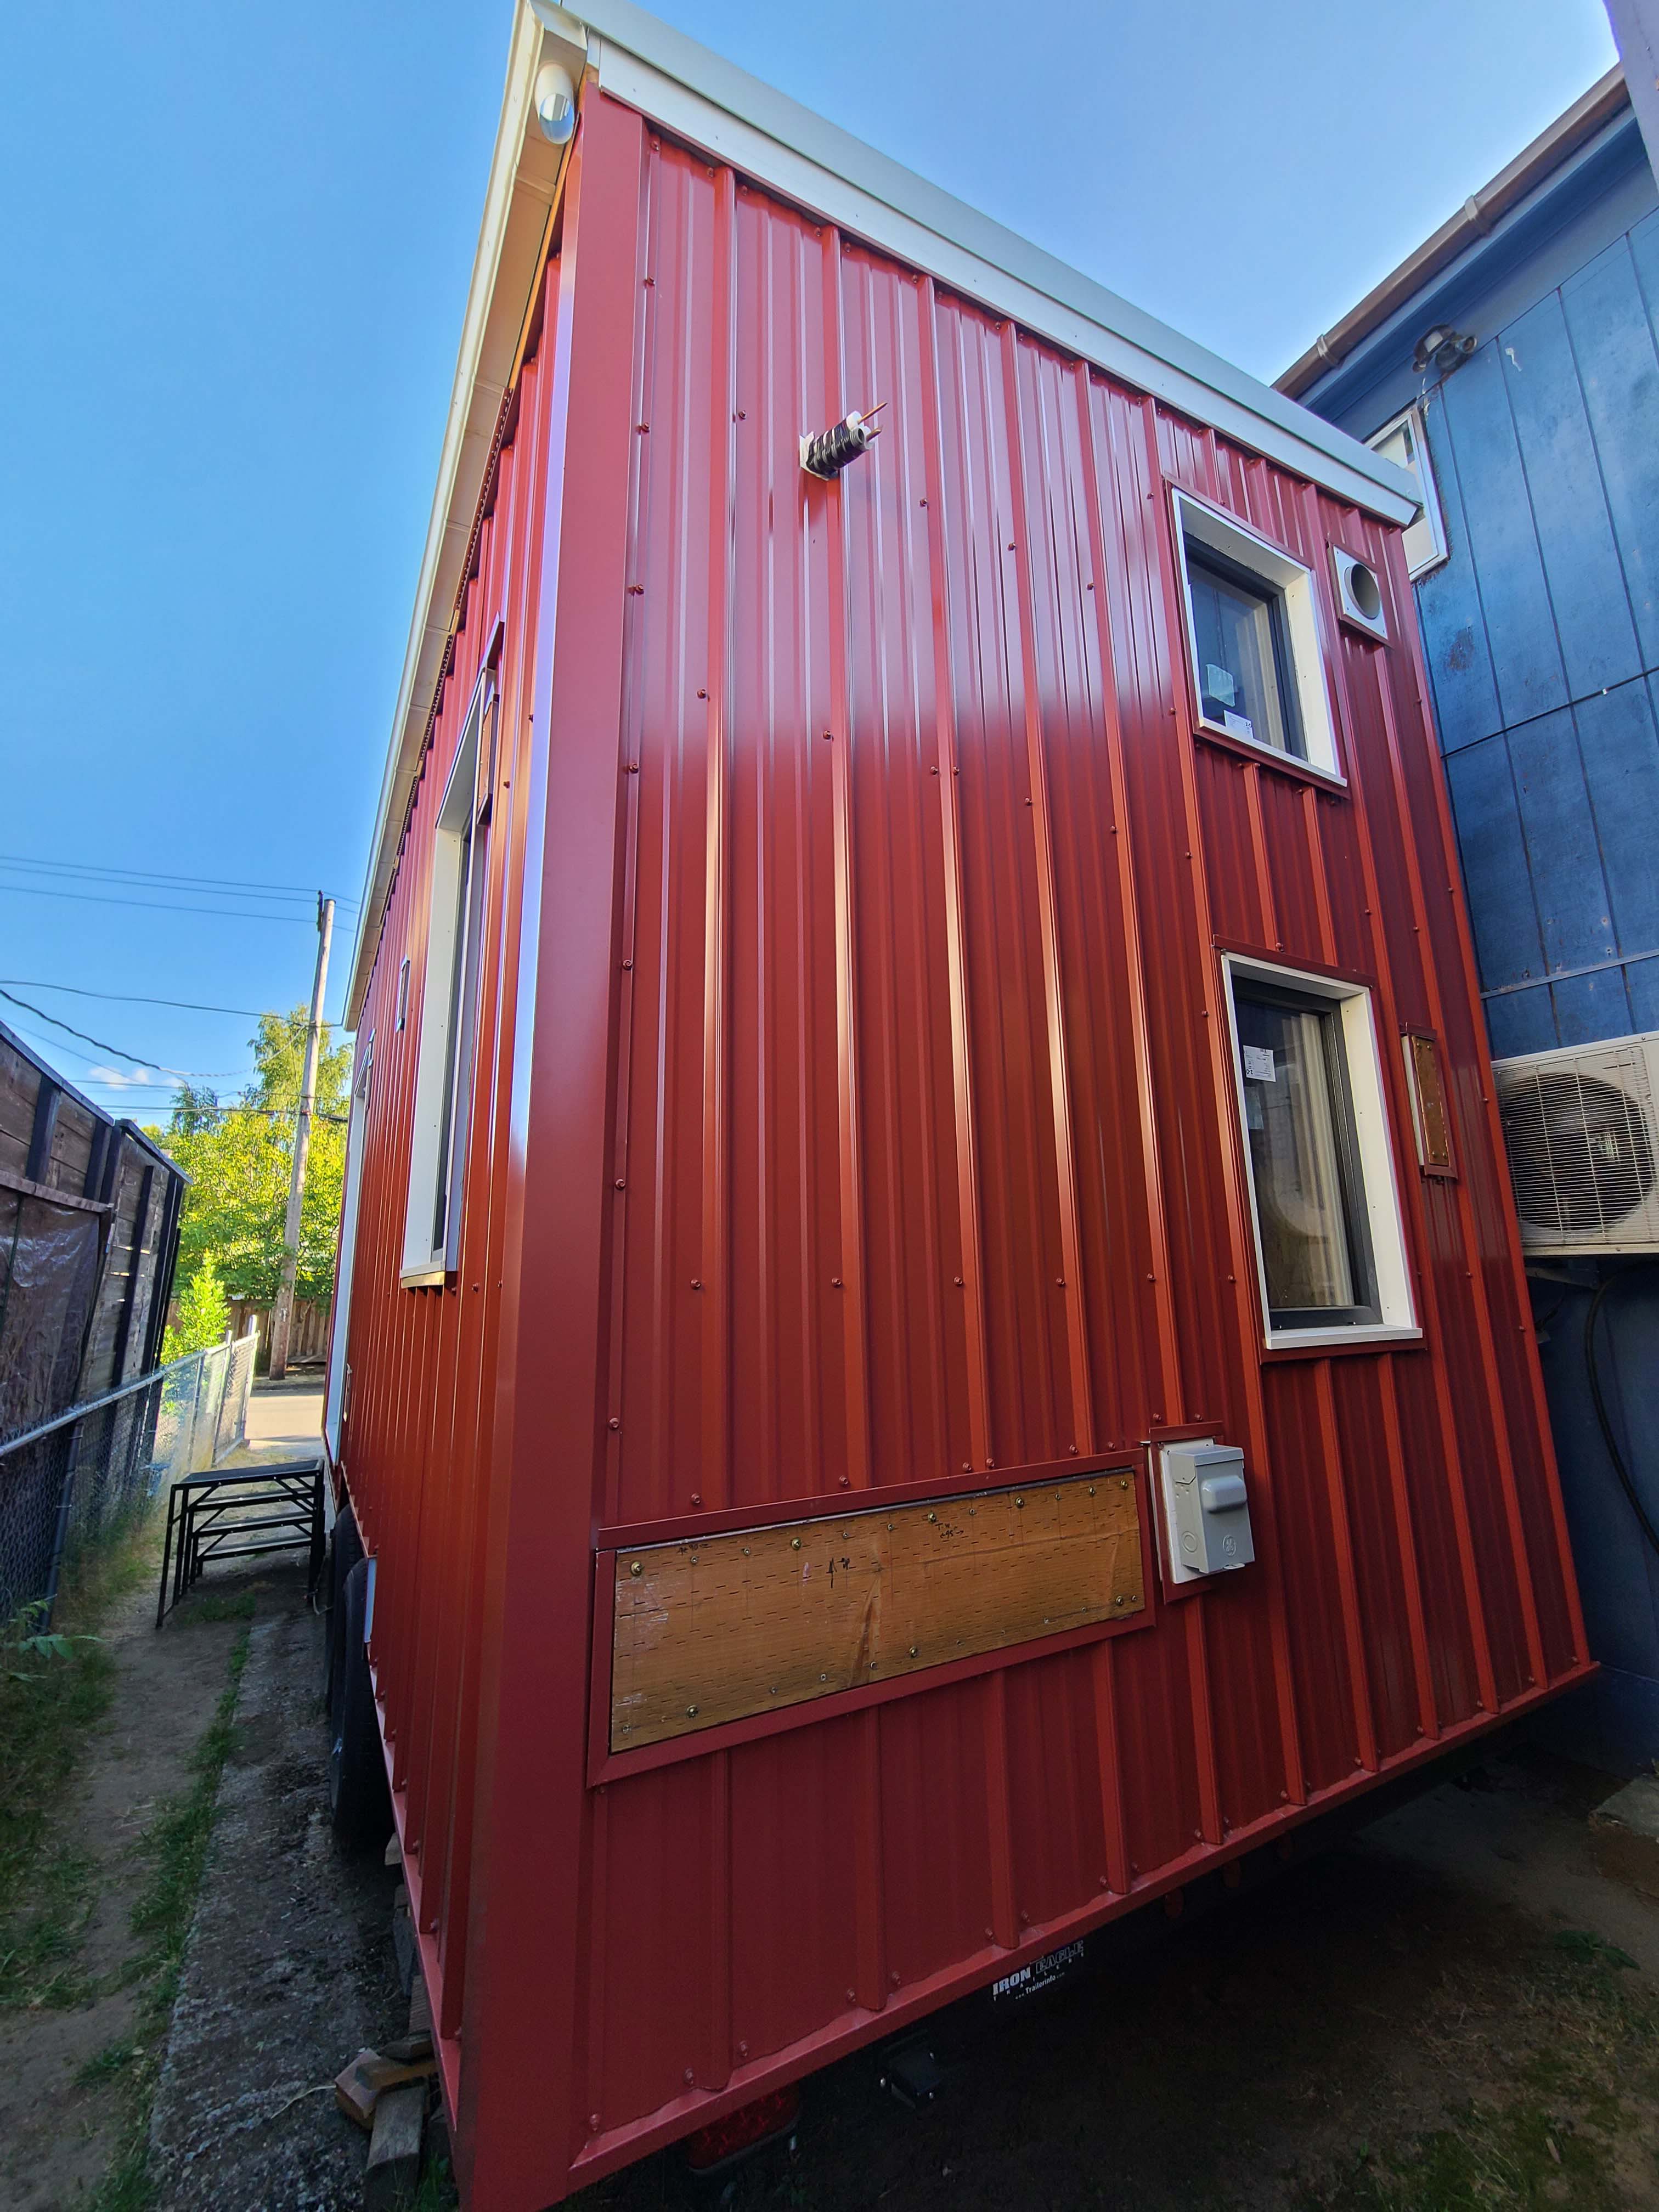
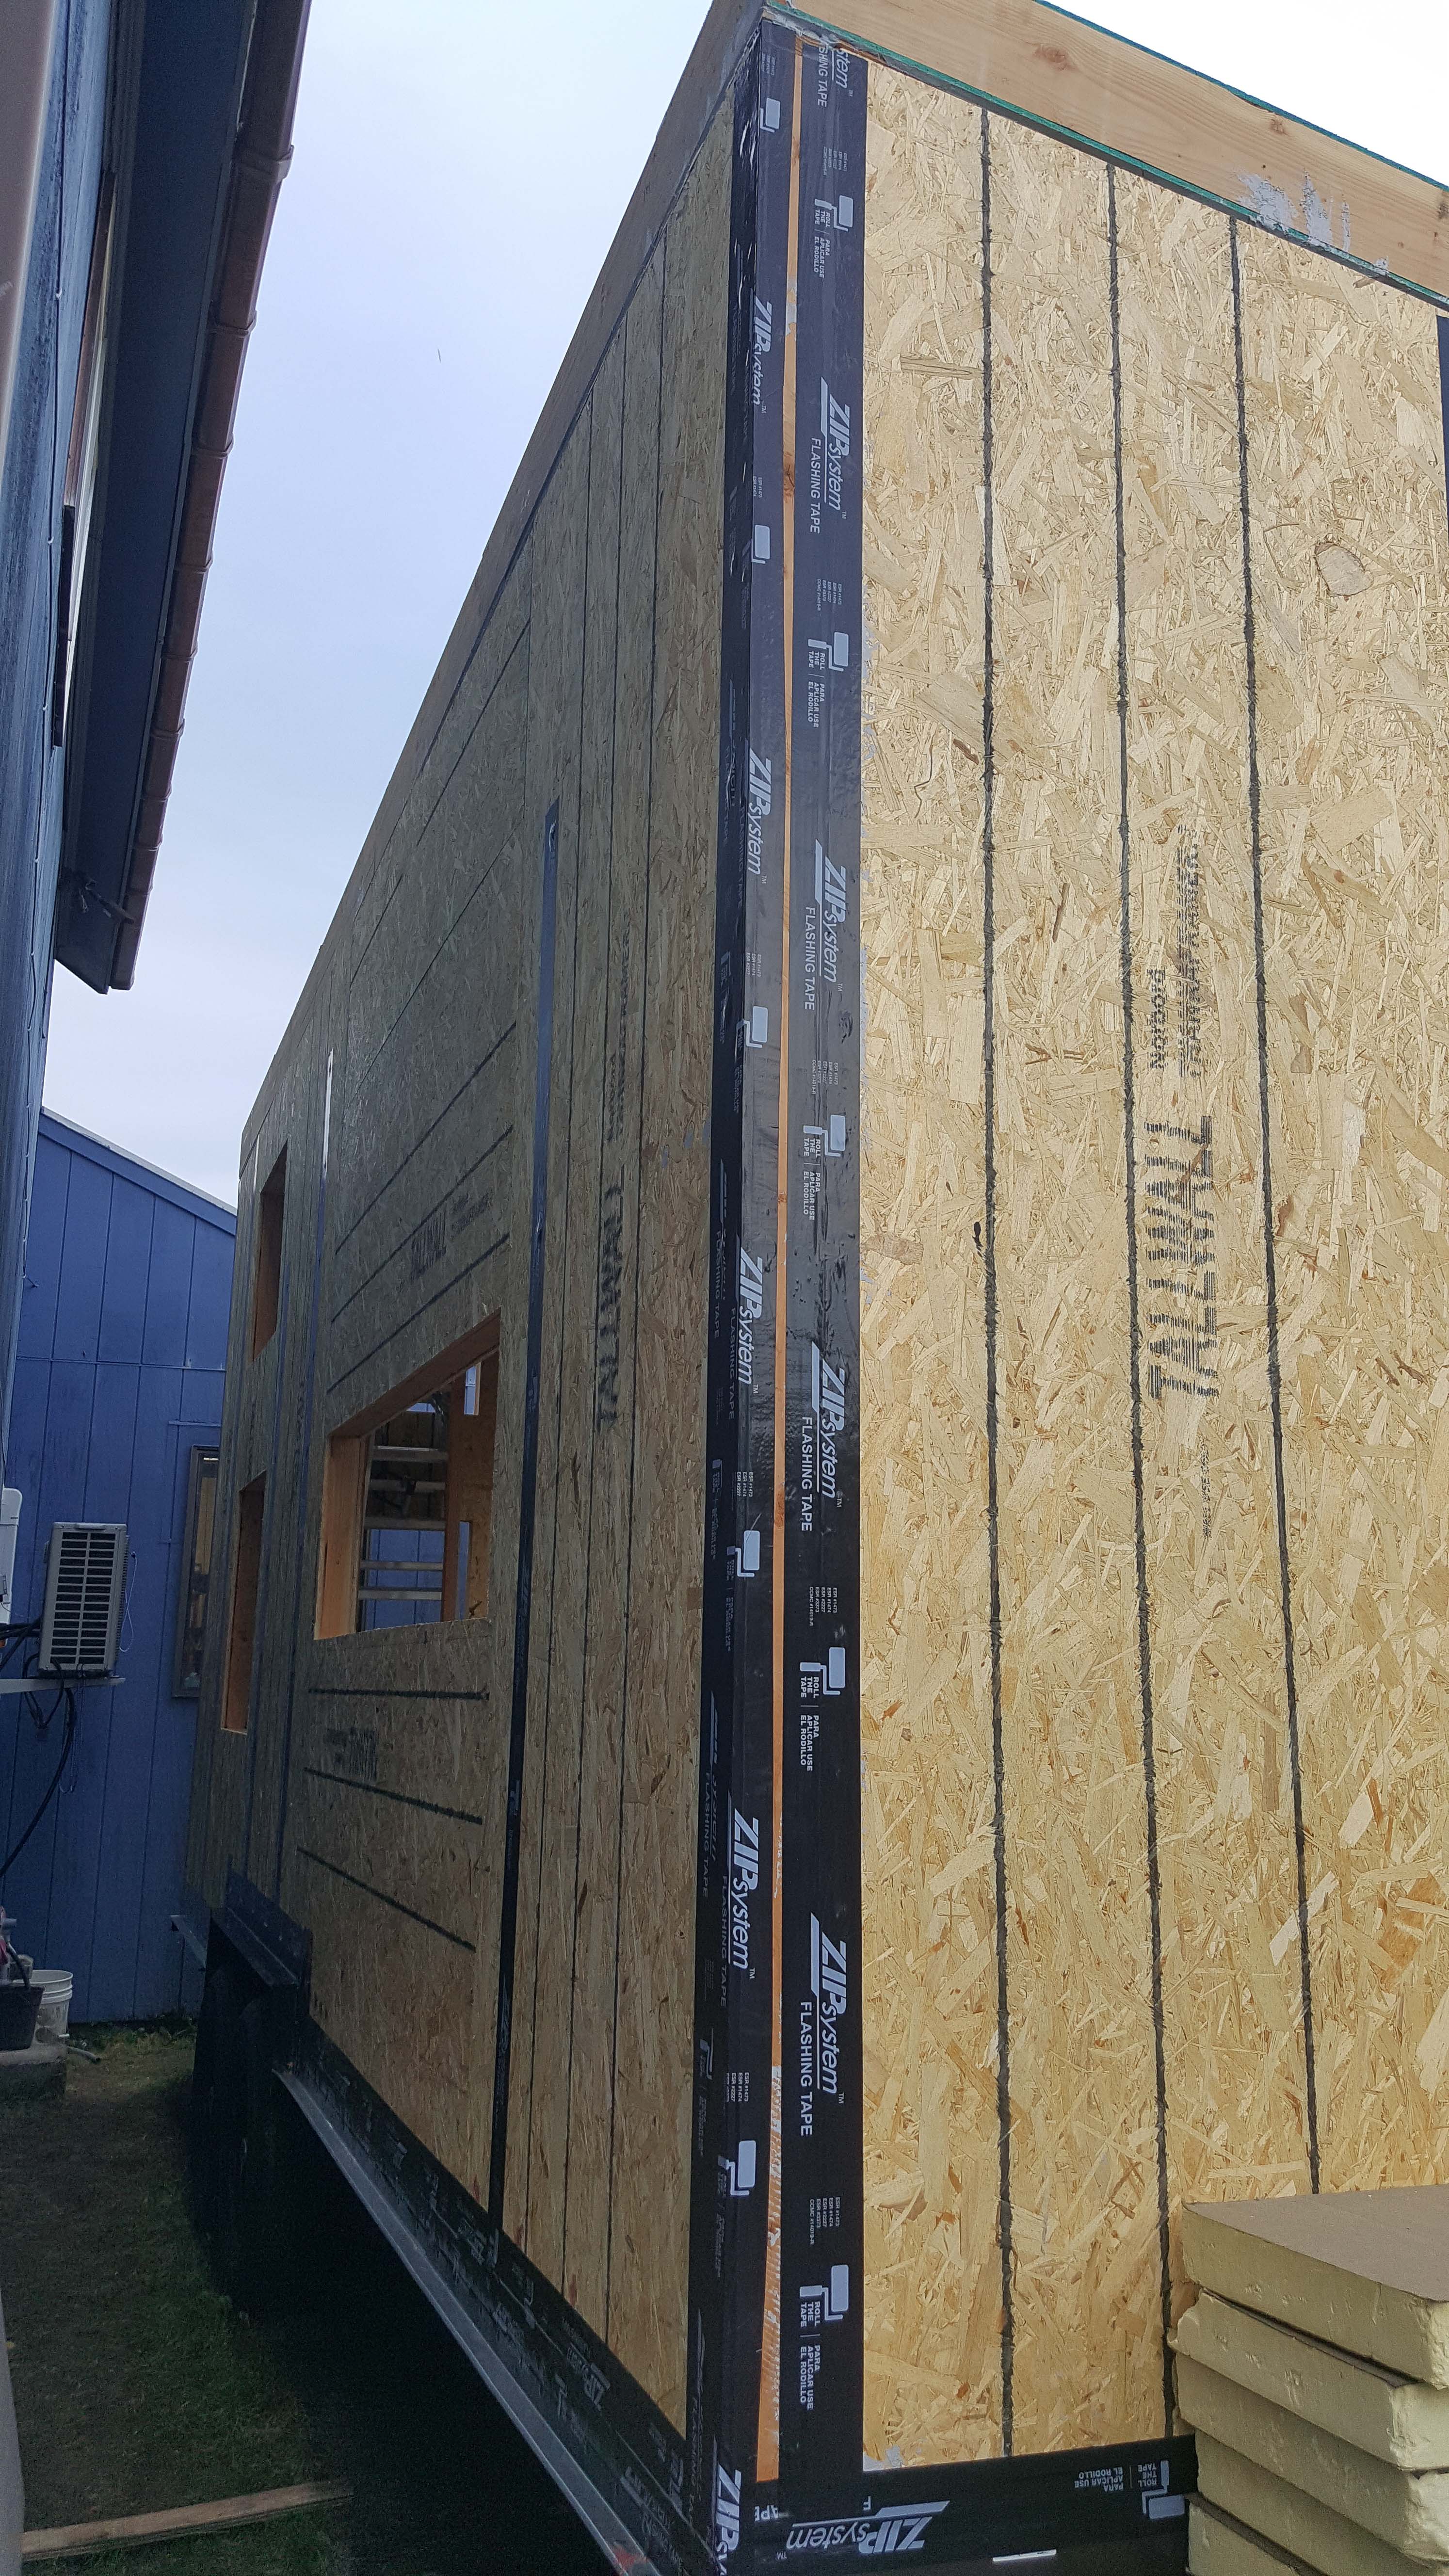
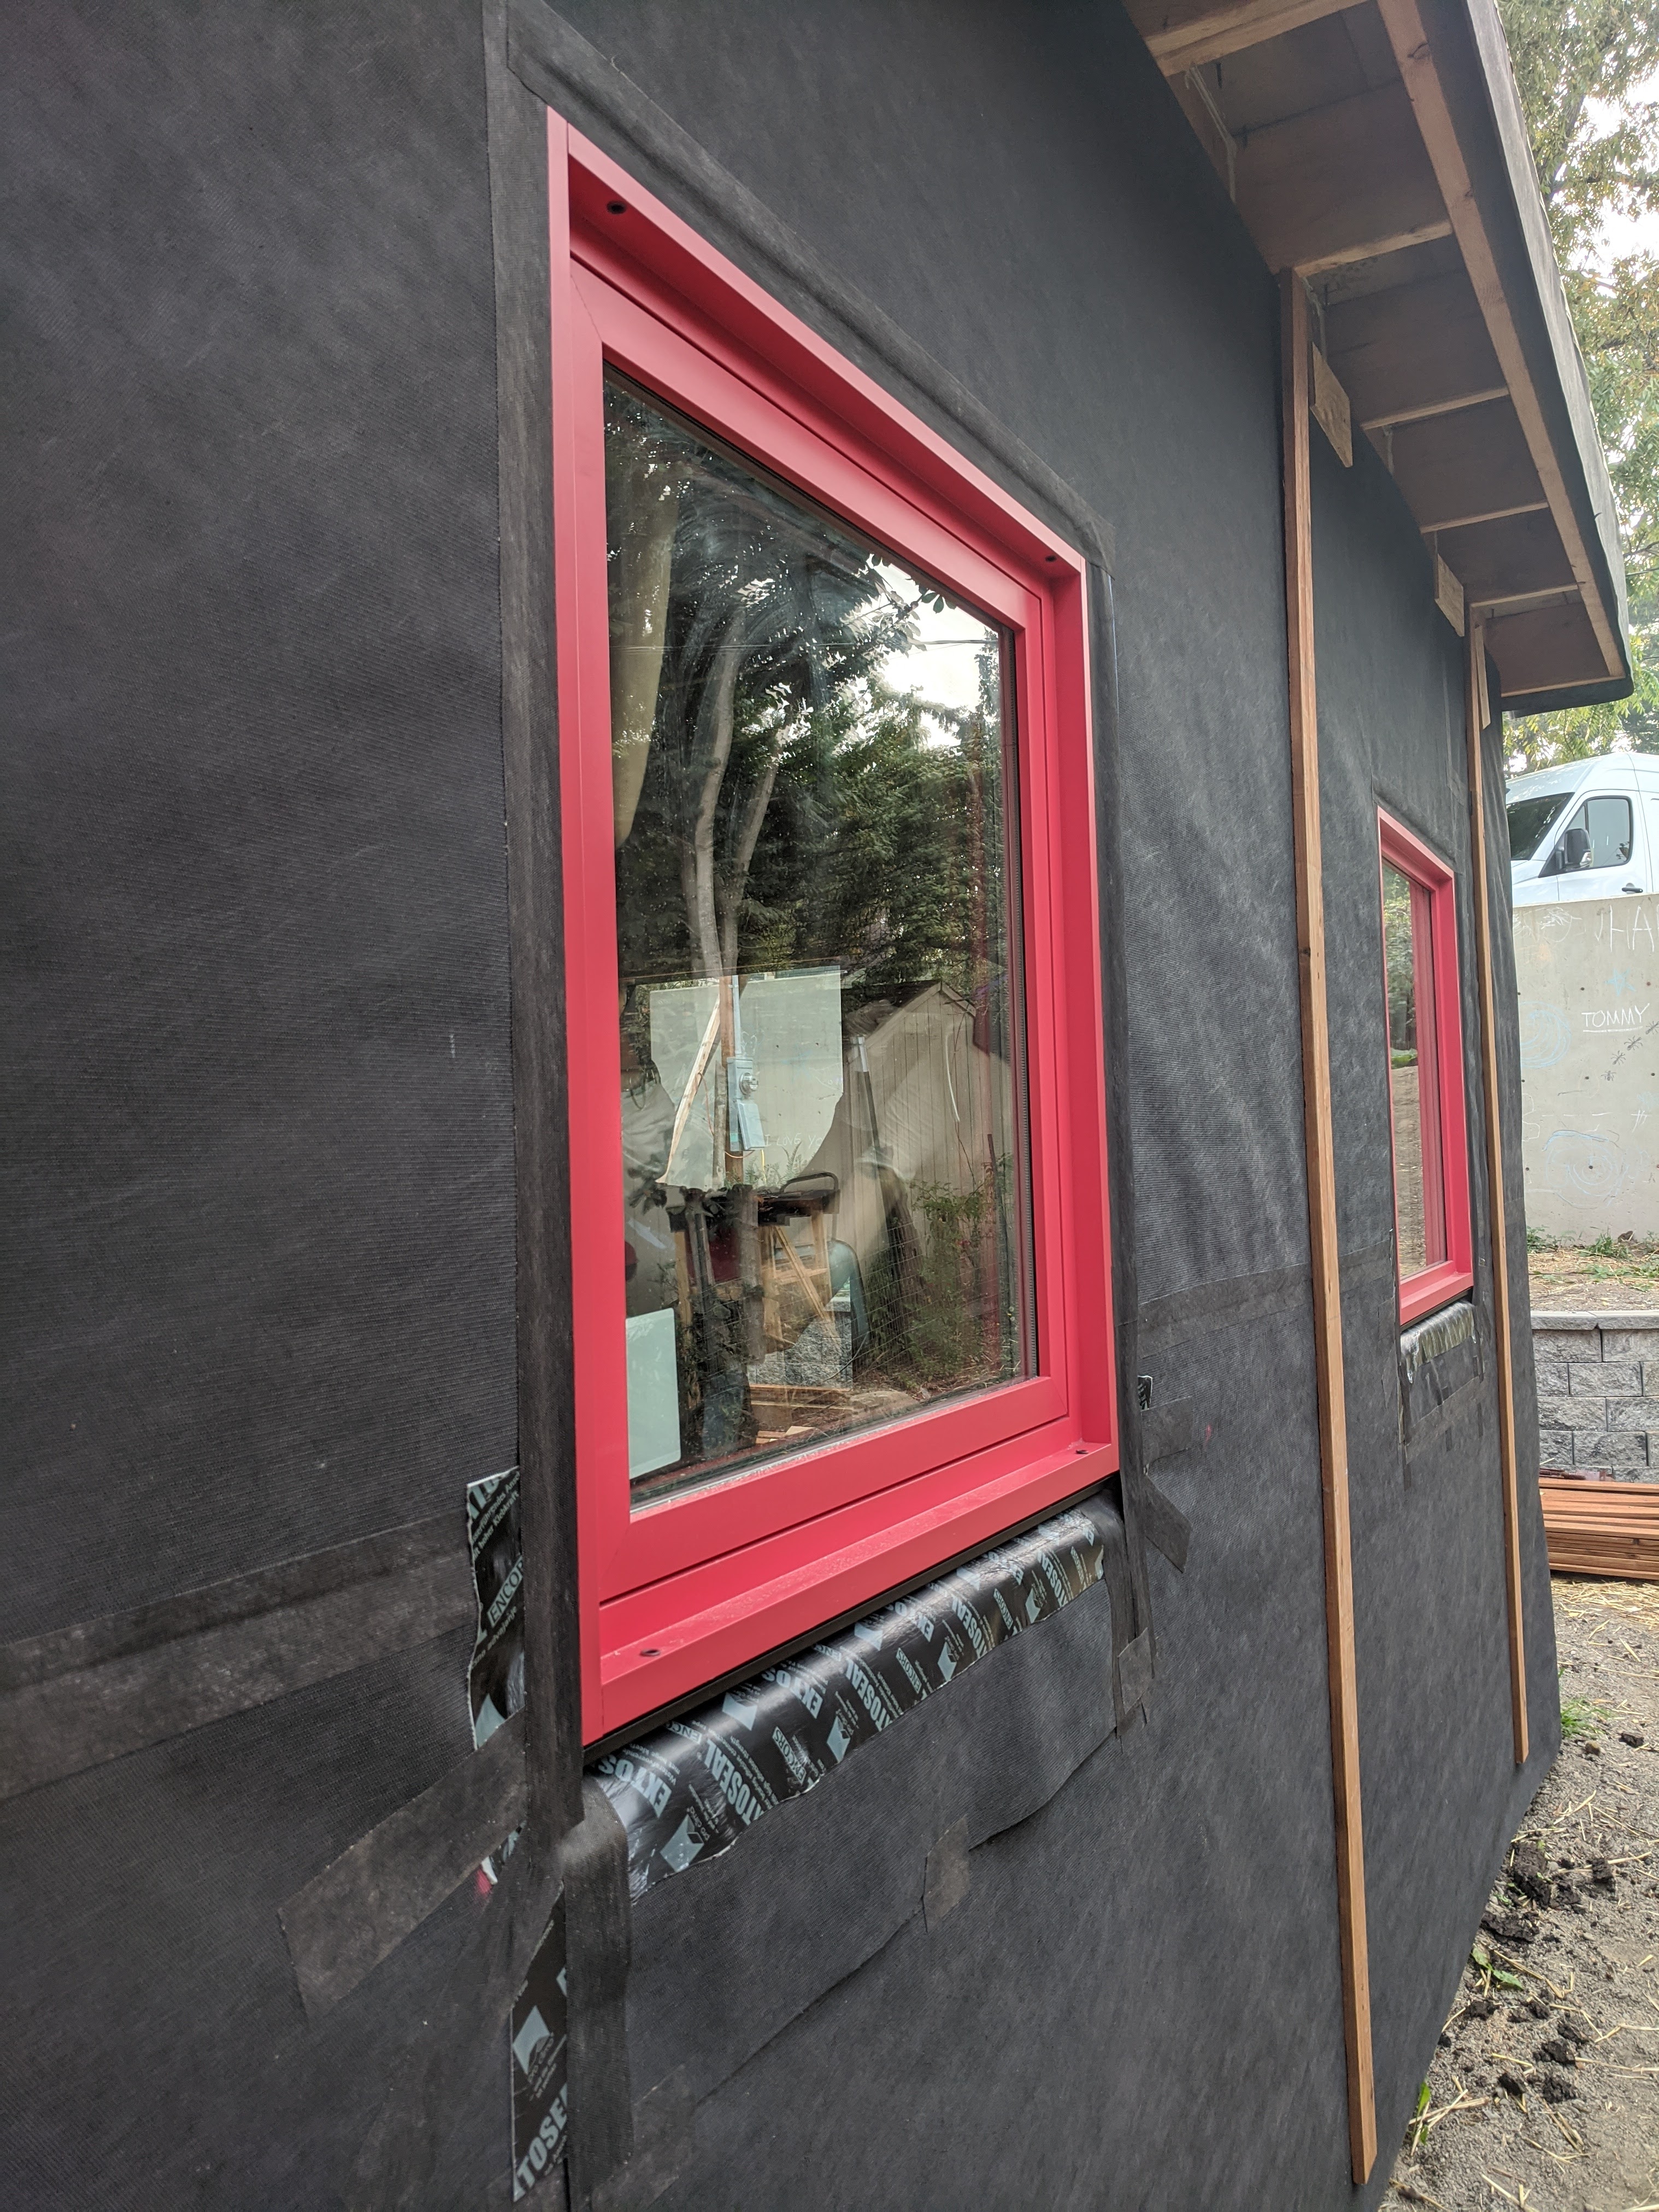
Right - The corrosion-resistant metal siding on this tiny house is fire resistant.
Image
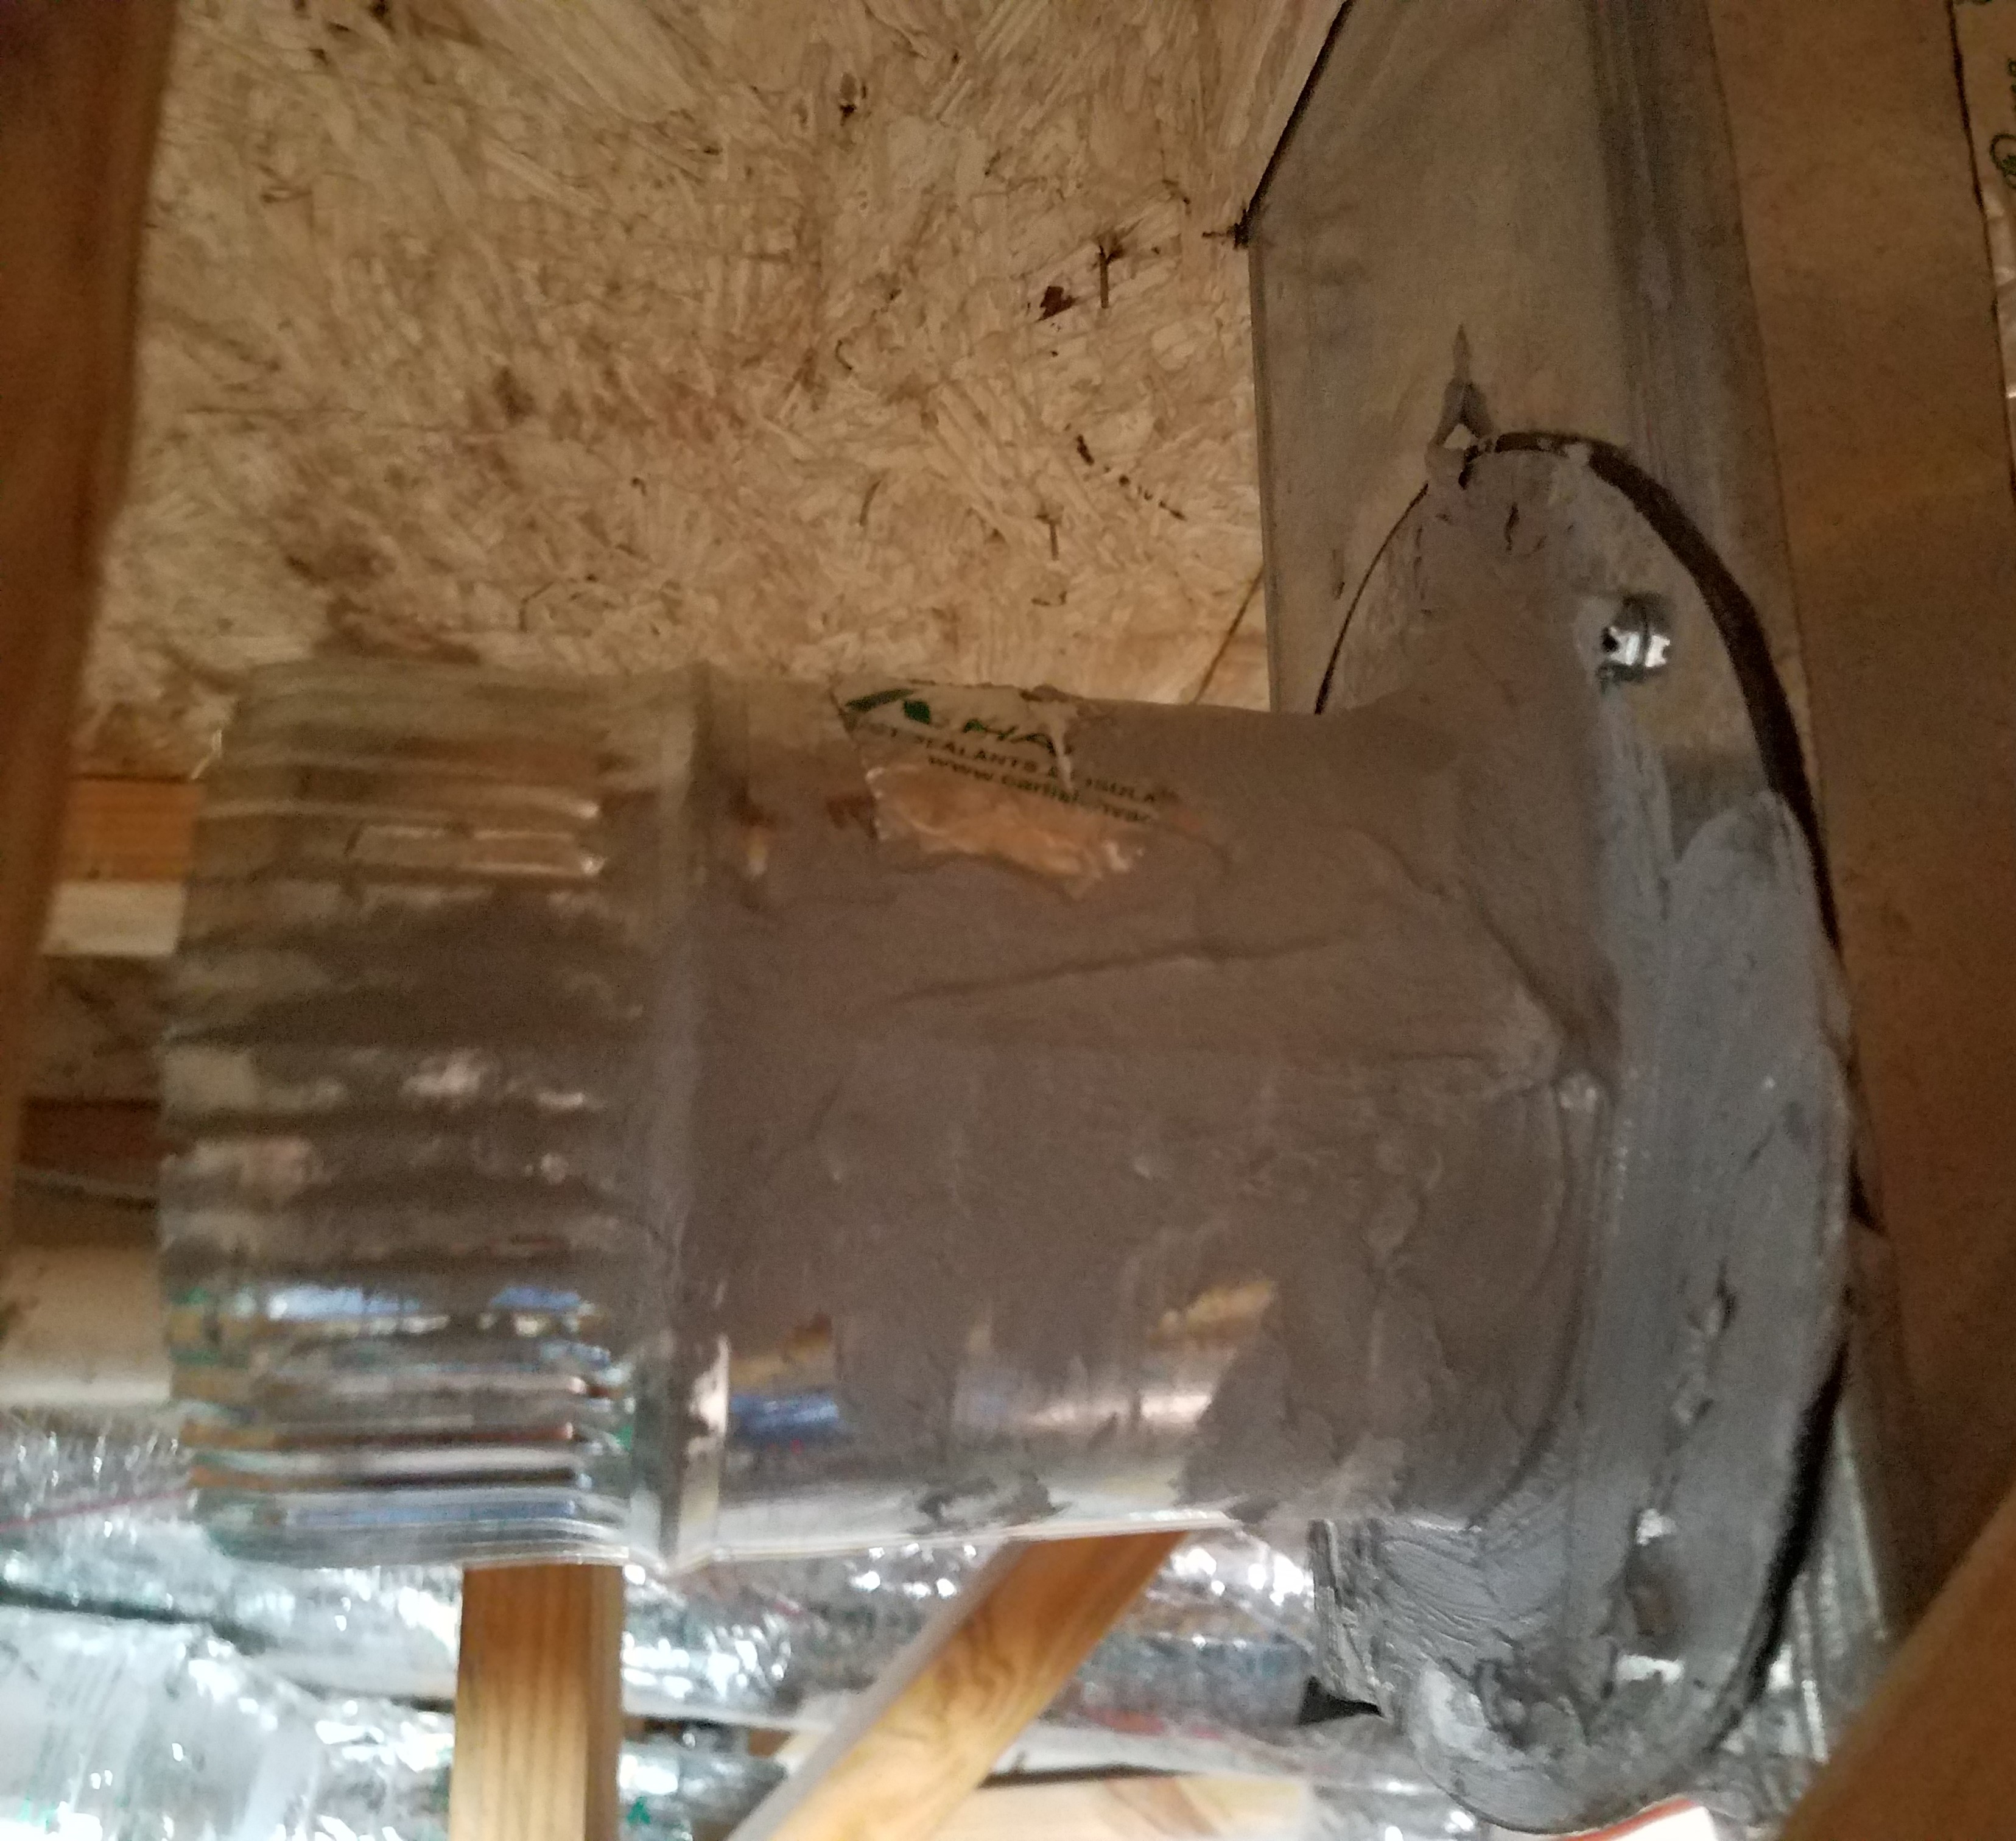
Right - The duct shows redundant sealing including the caulk, tape, and flashing
Image
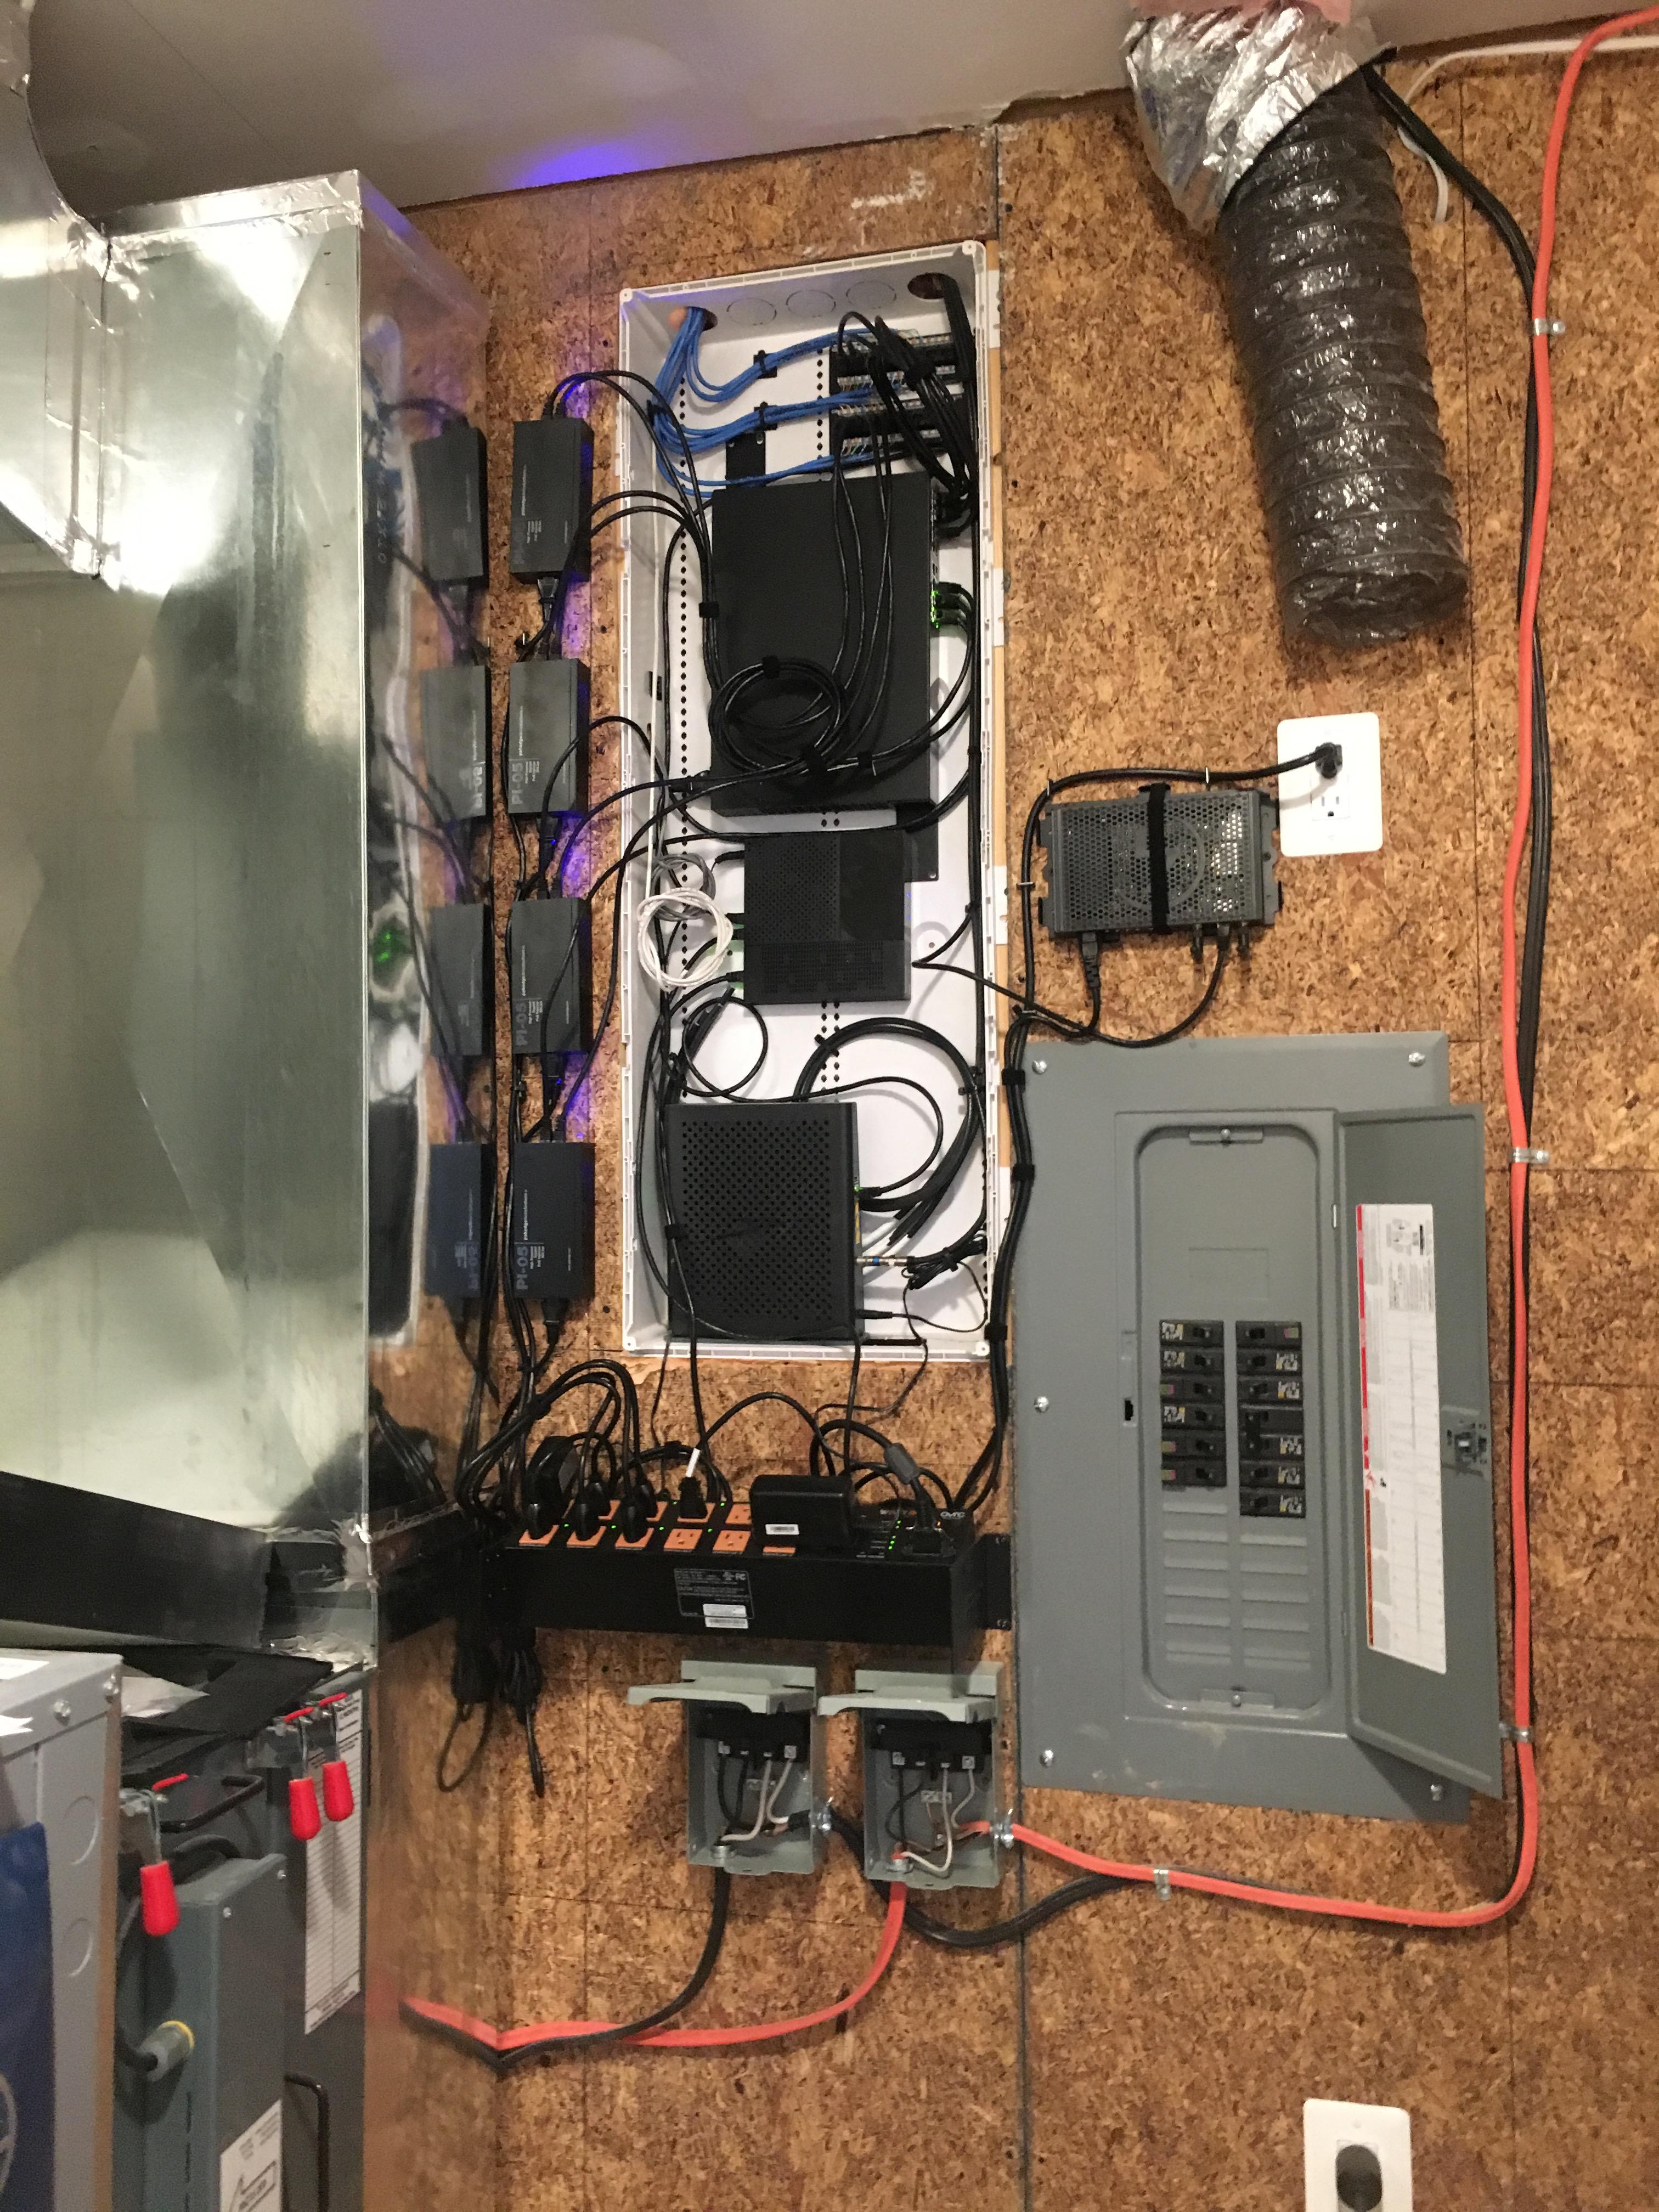
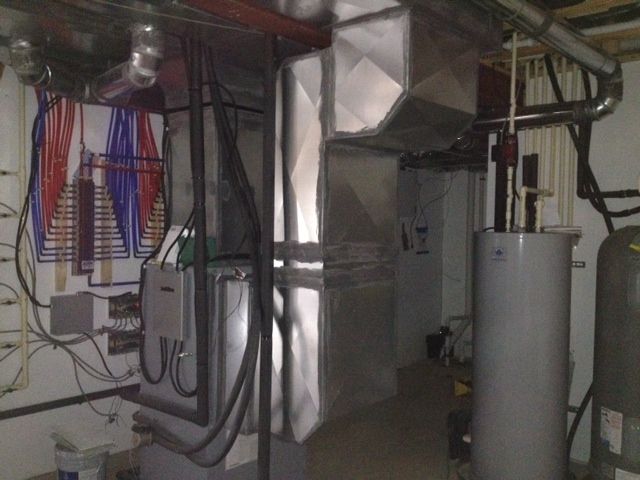
Right - The electronics for this home’s smart home system, including a Wi-Fi router, and controls for lighting, HVAC, security, energy production and tracking are housed together with the electrical panel and HVAC equipment in the home’s utility room.
Image
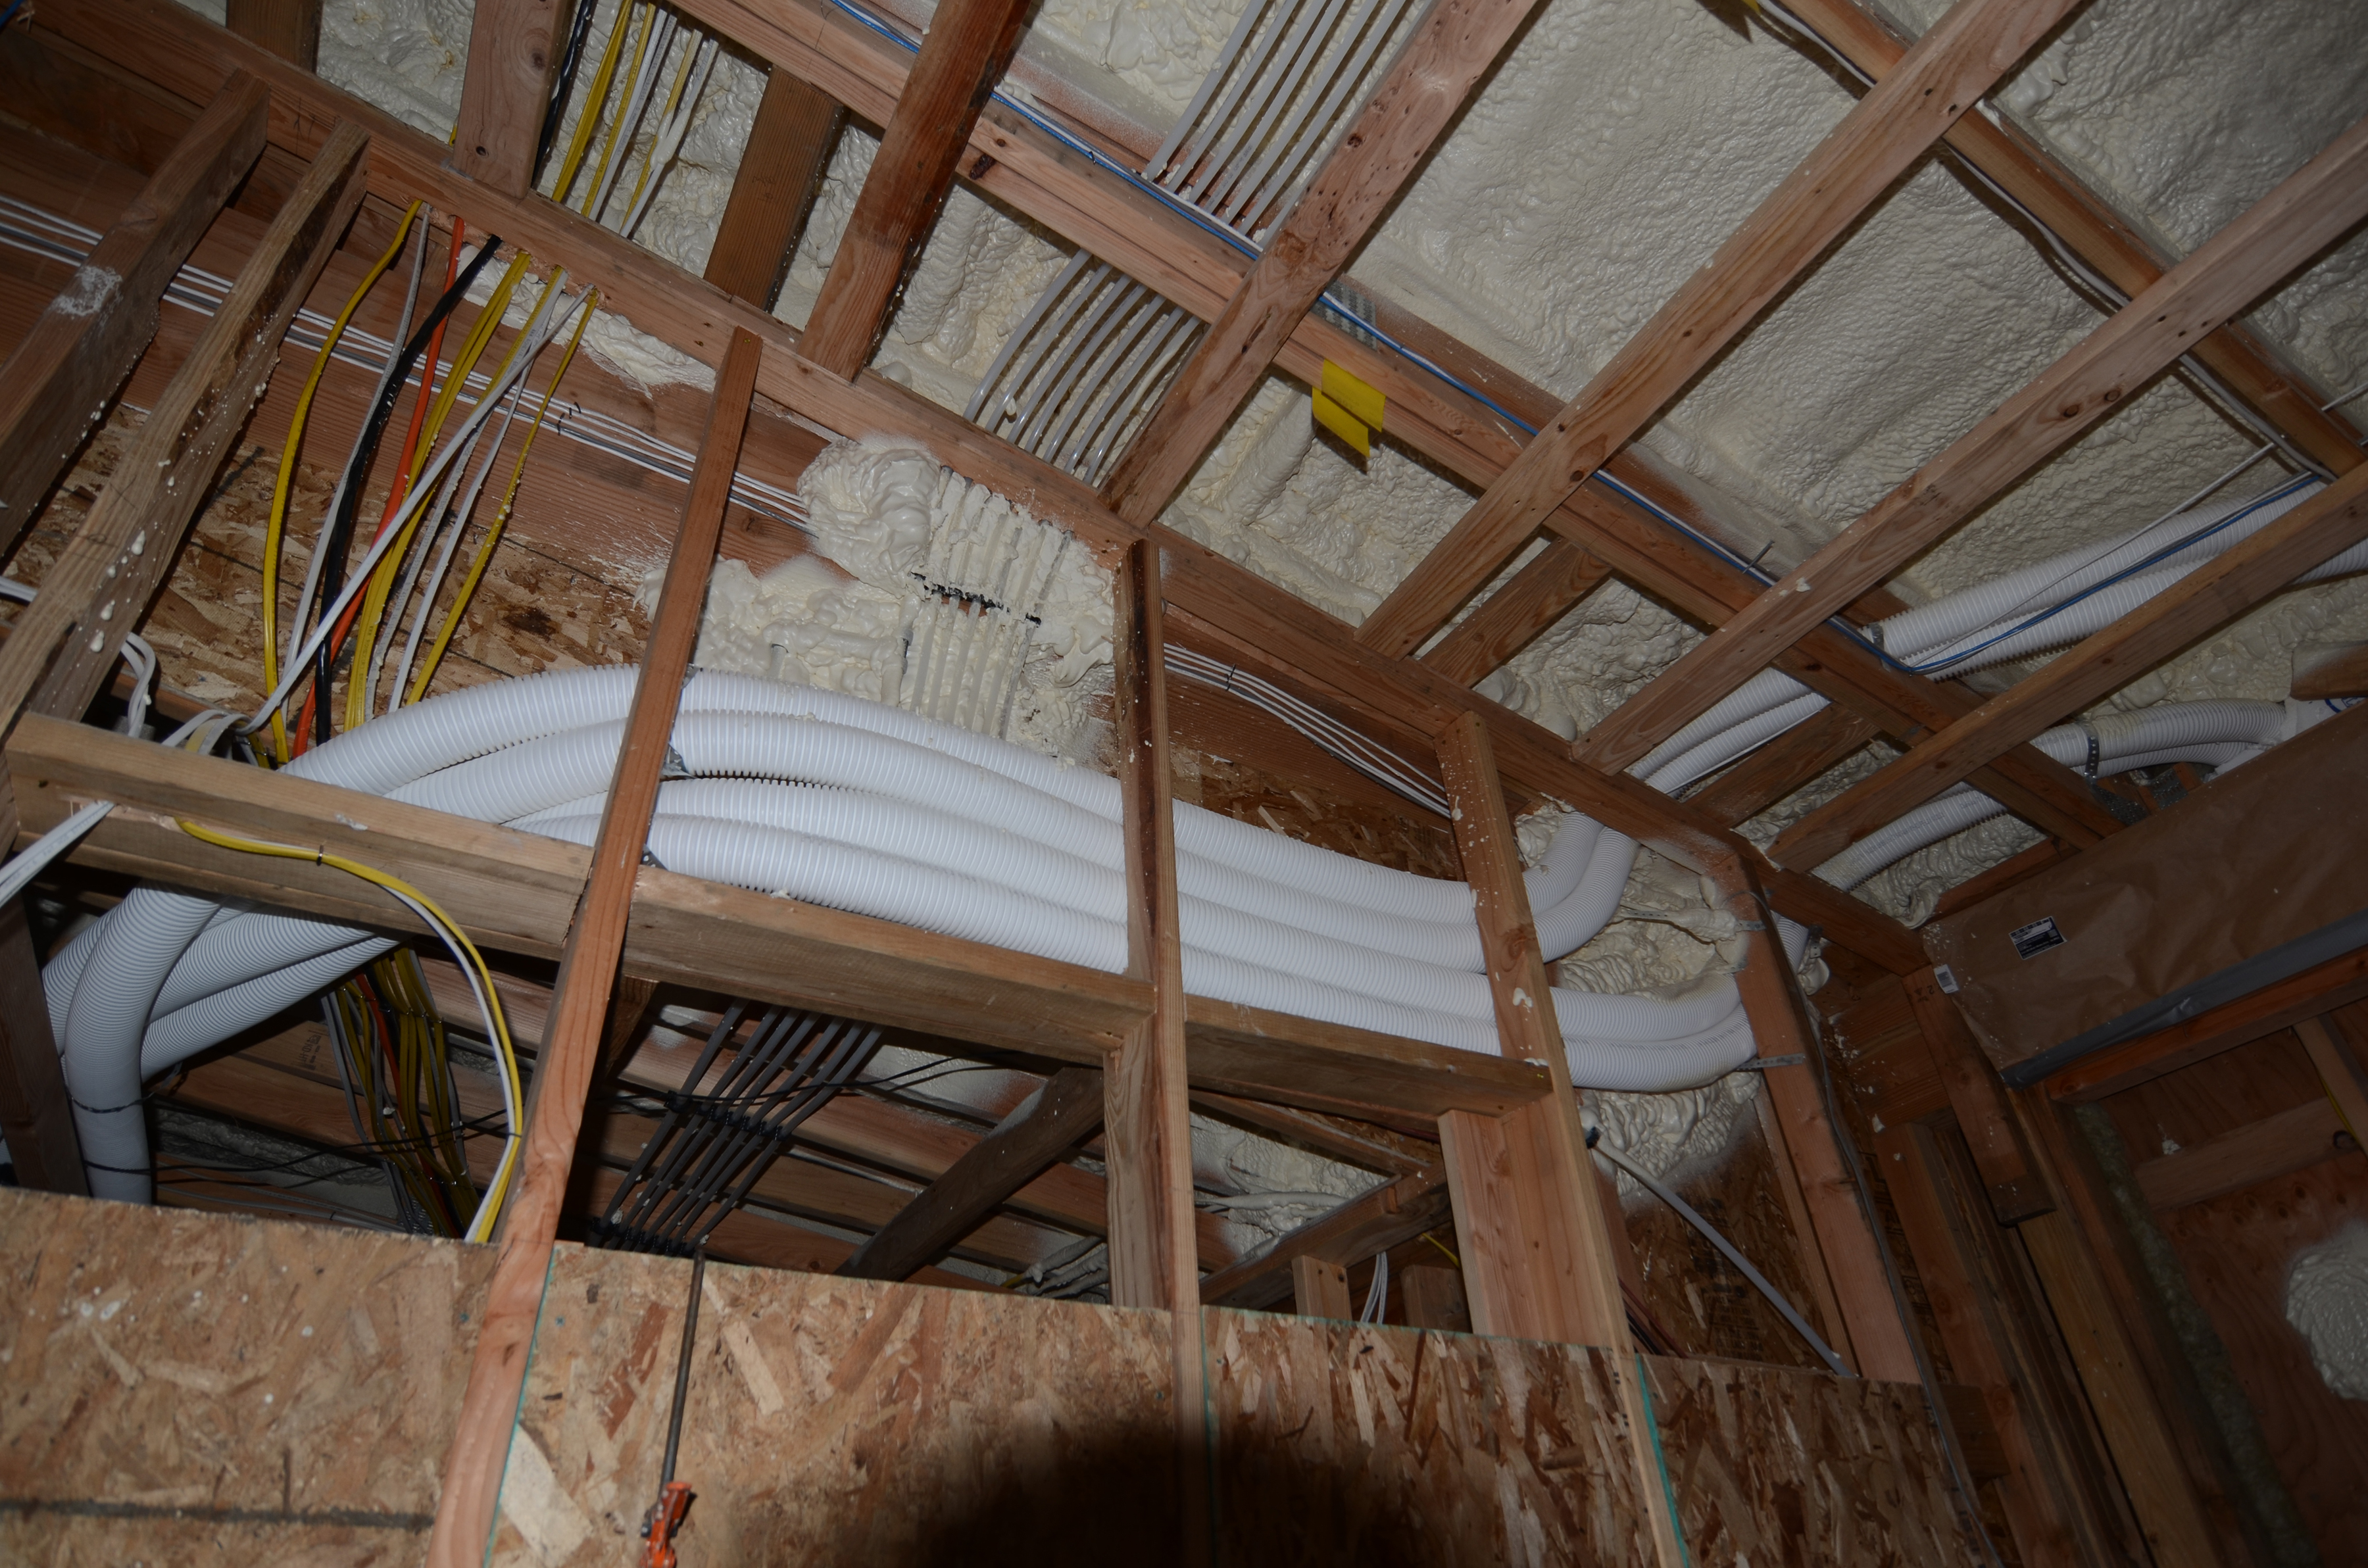
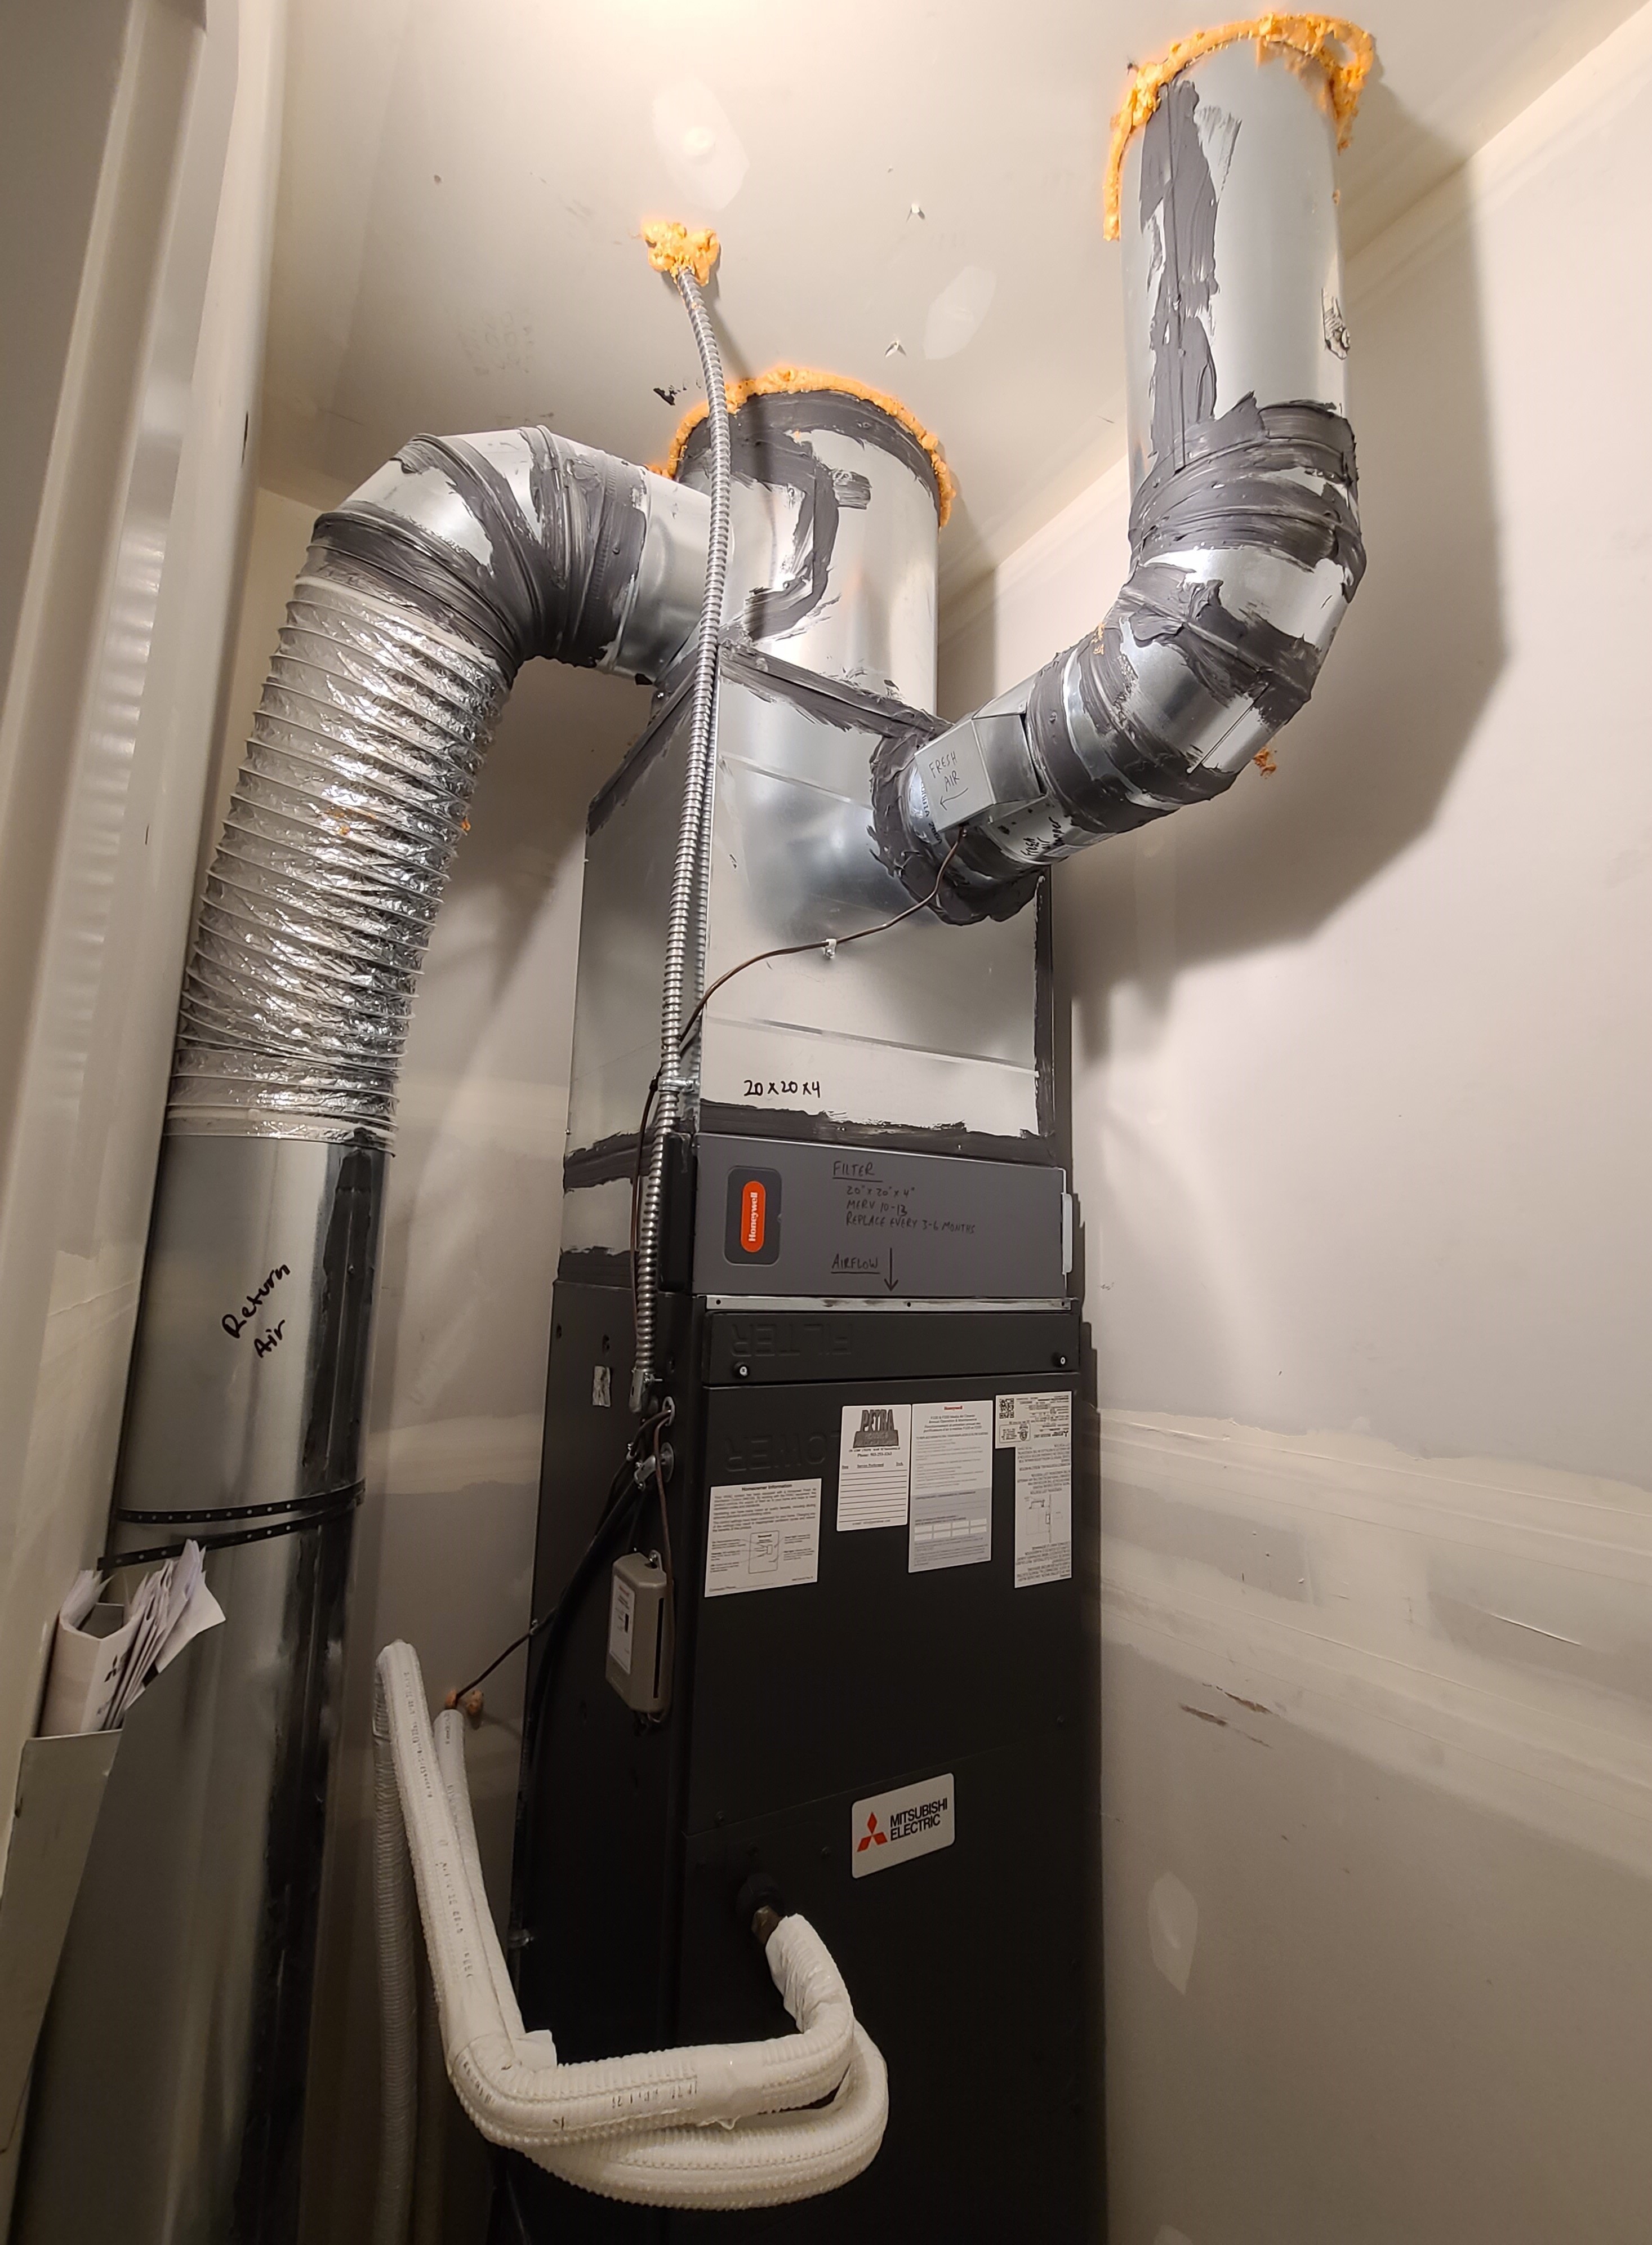
Right - The energy recovery ventilator ducts supply filtered outside air to multiple locations in the home and continuously exhaust stale air to provide clean, balanced ventilation.
Image
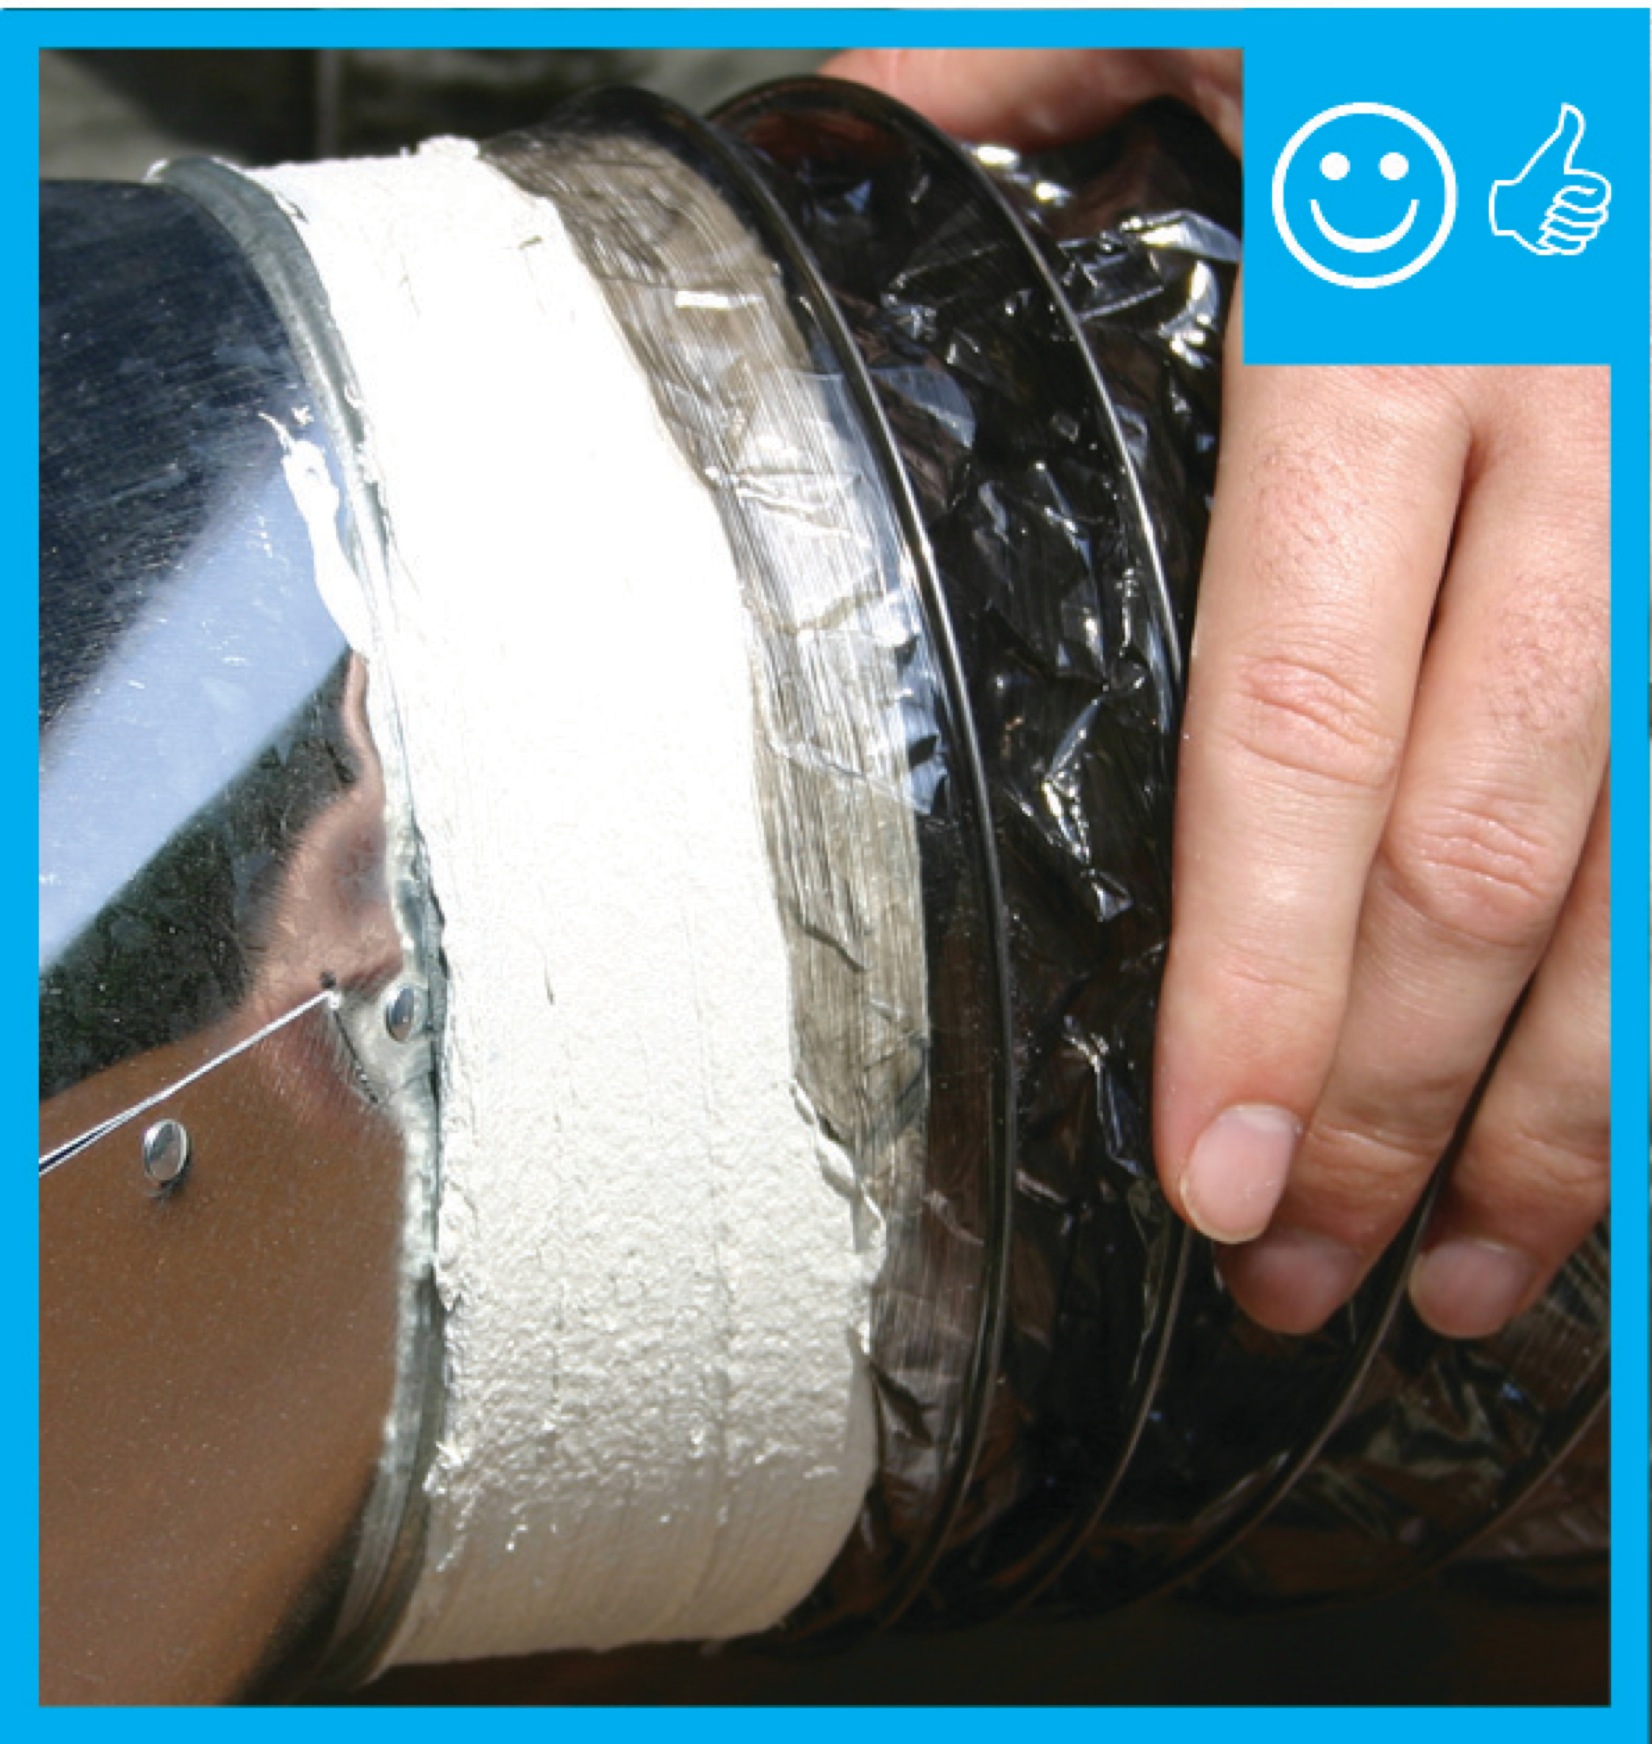
Right - The exhaust duct has been mechanically fastened and sealed with mastic.
Image
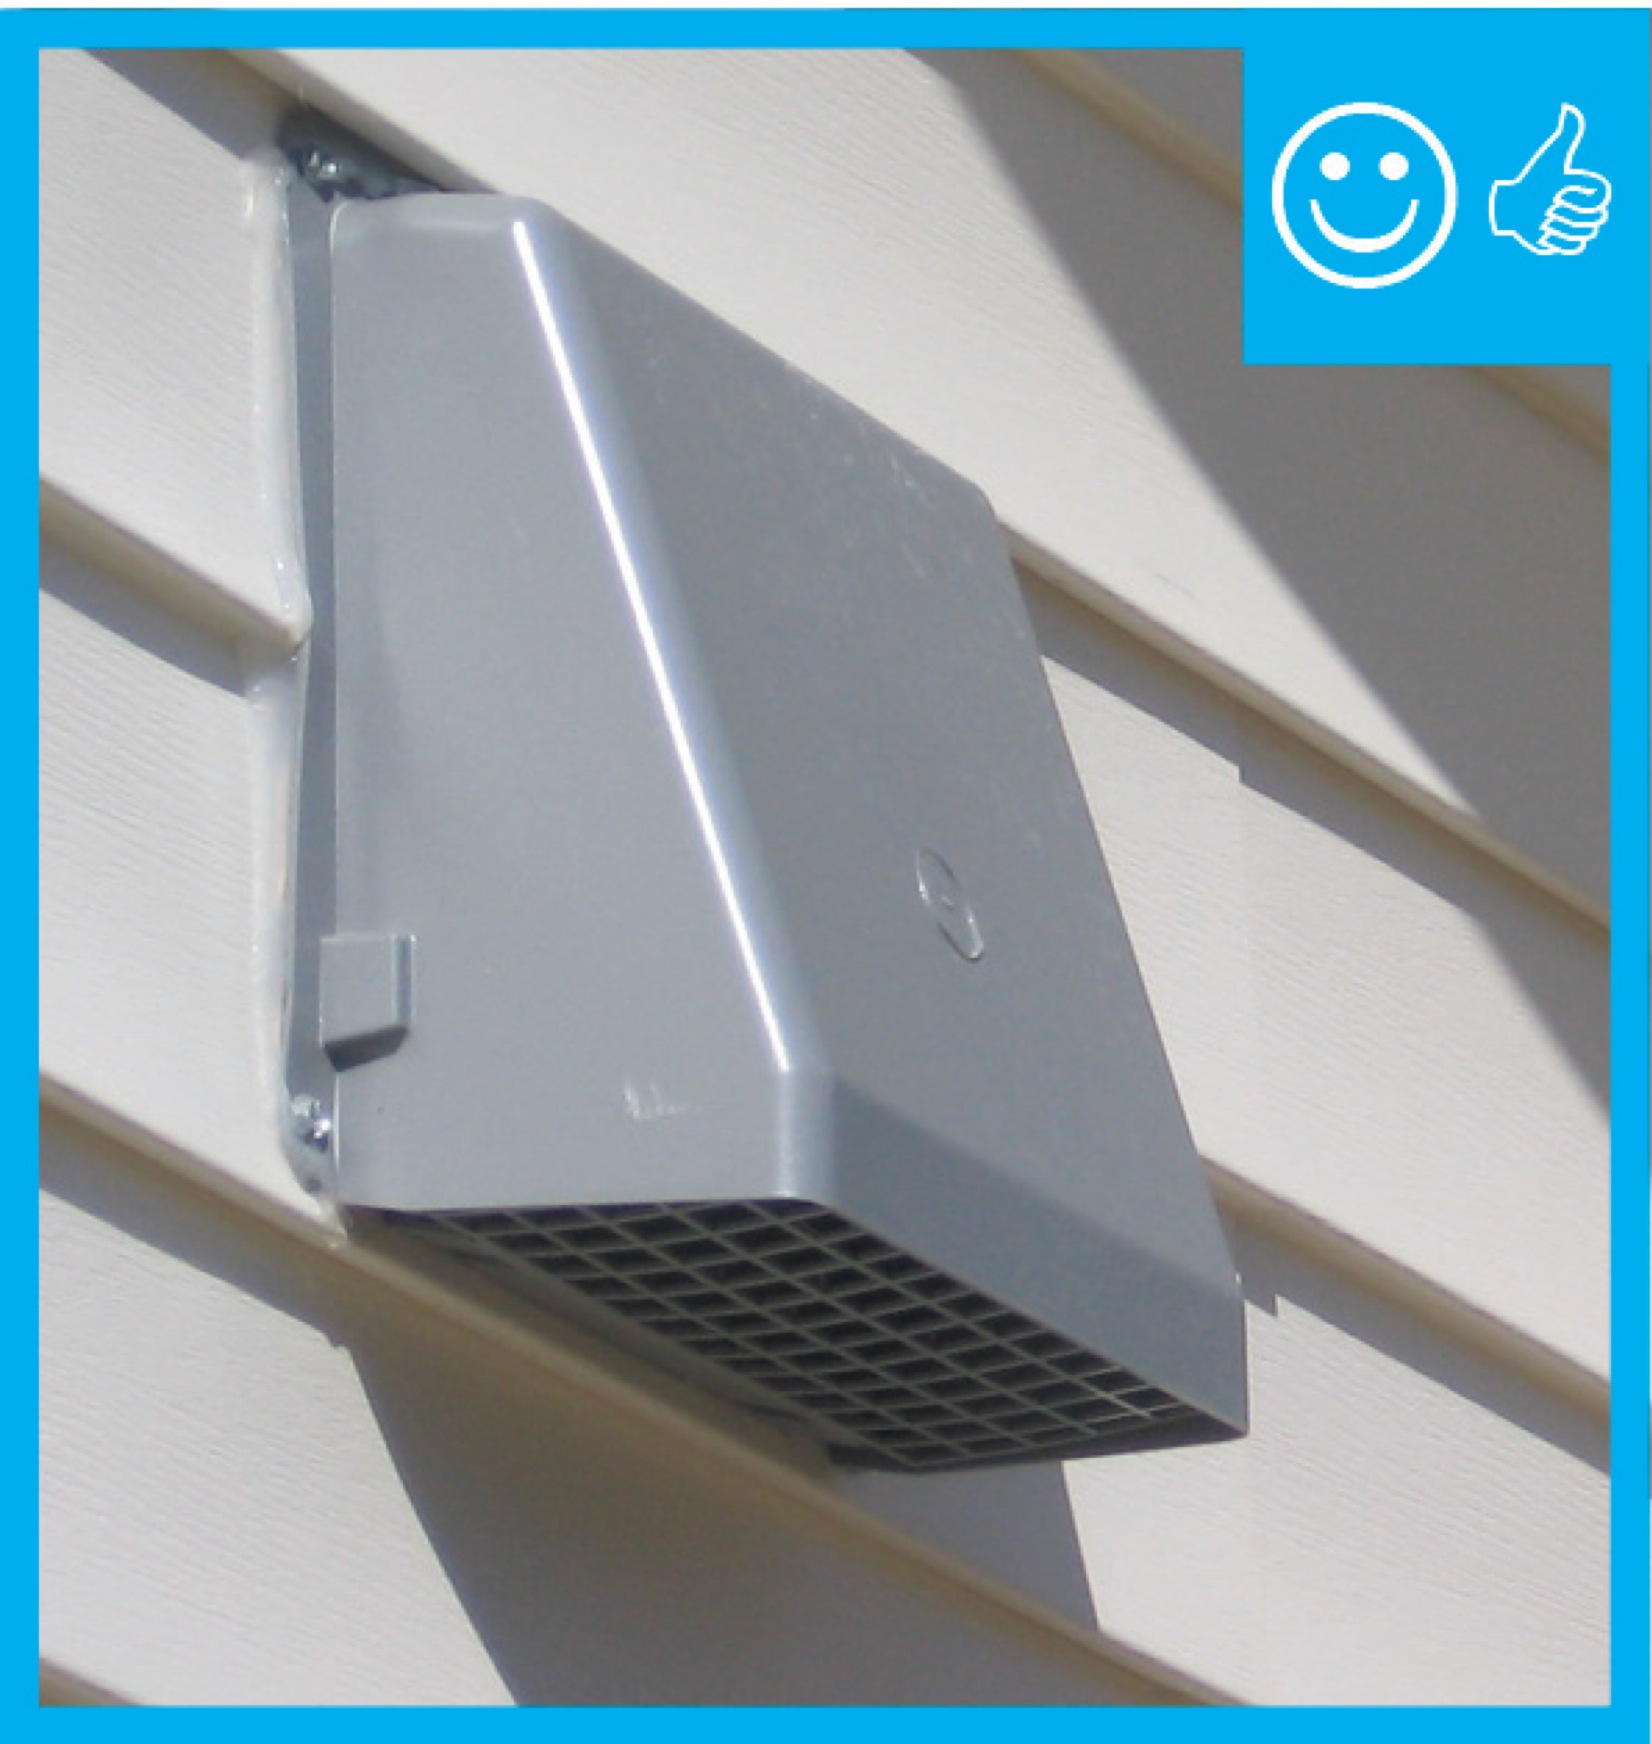
Right - The exhaust vent duct terminates to the outdoors with a vent cover that has been properly caulked and covered with a metal pest screen.
Image
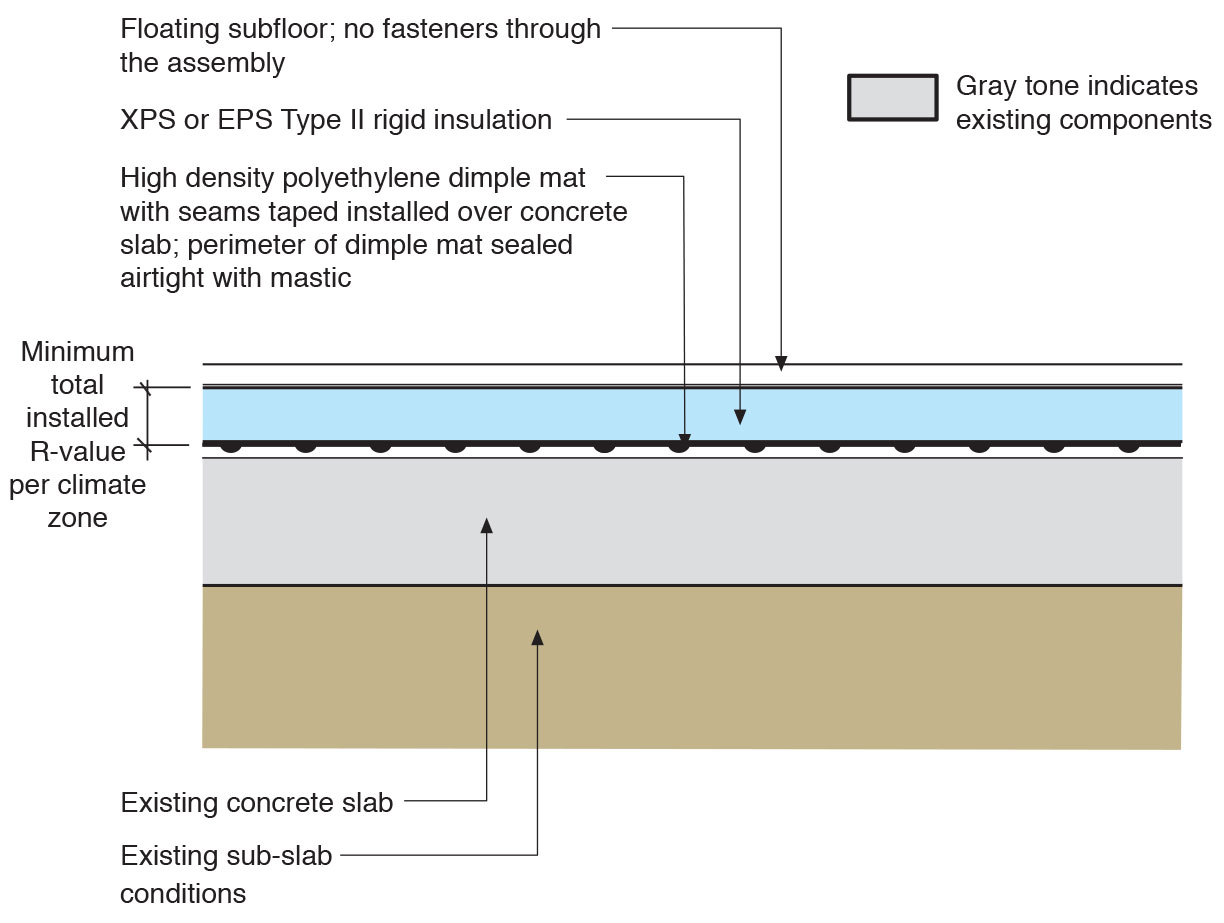
Right - The existing basement slab is retrofitted by installing a dimple plastic drainage mat, rigid foam insulation, and a floating subfloor.
Image
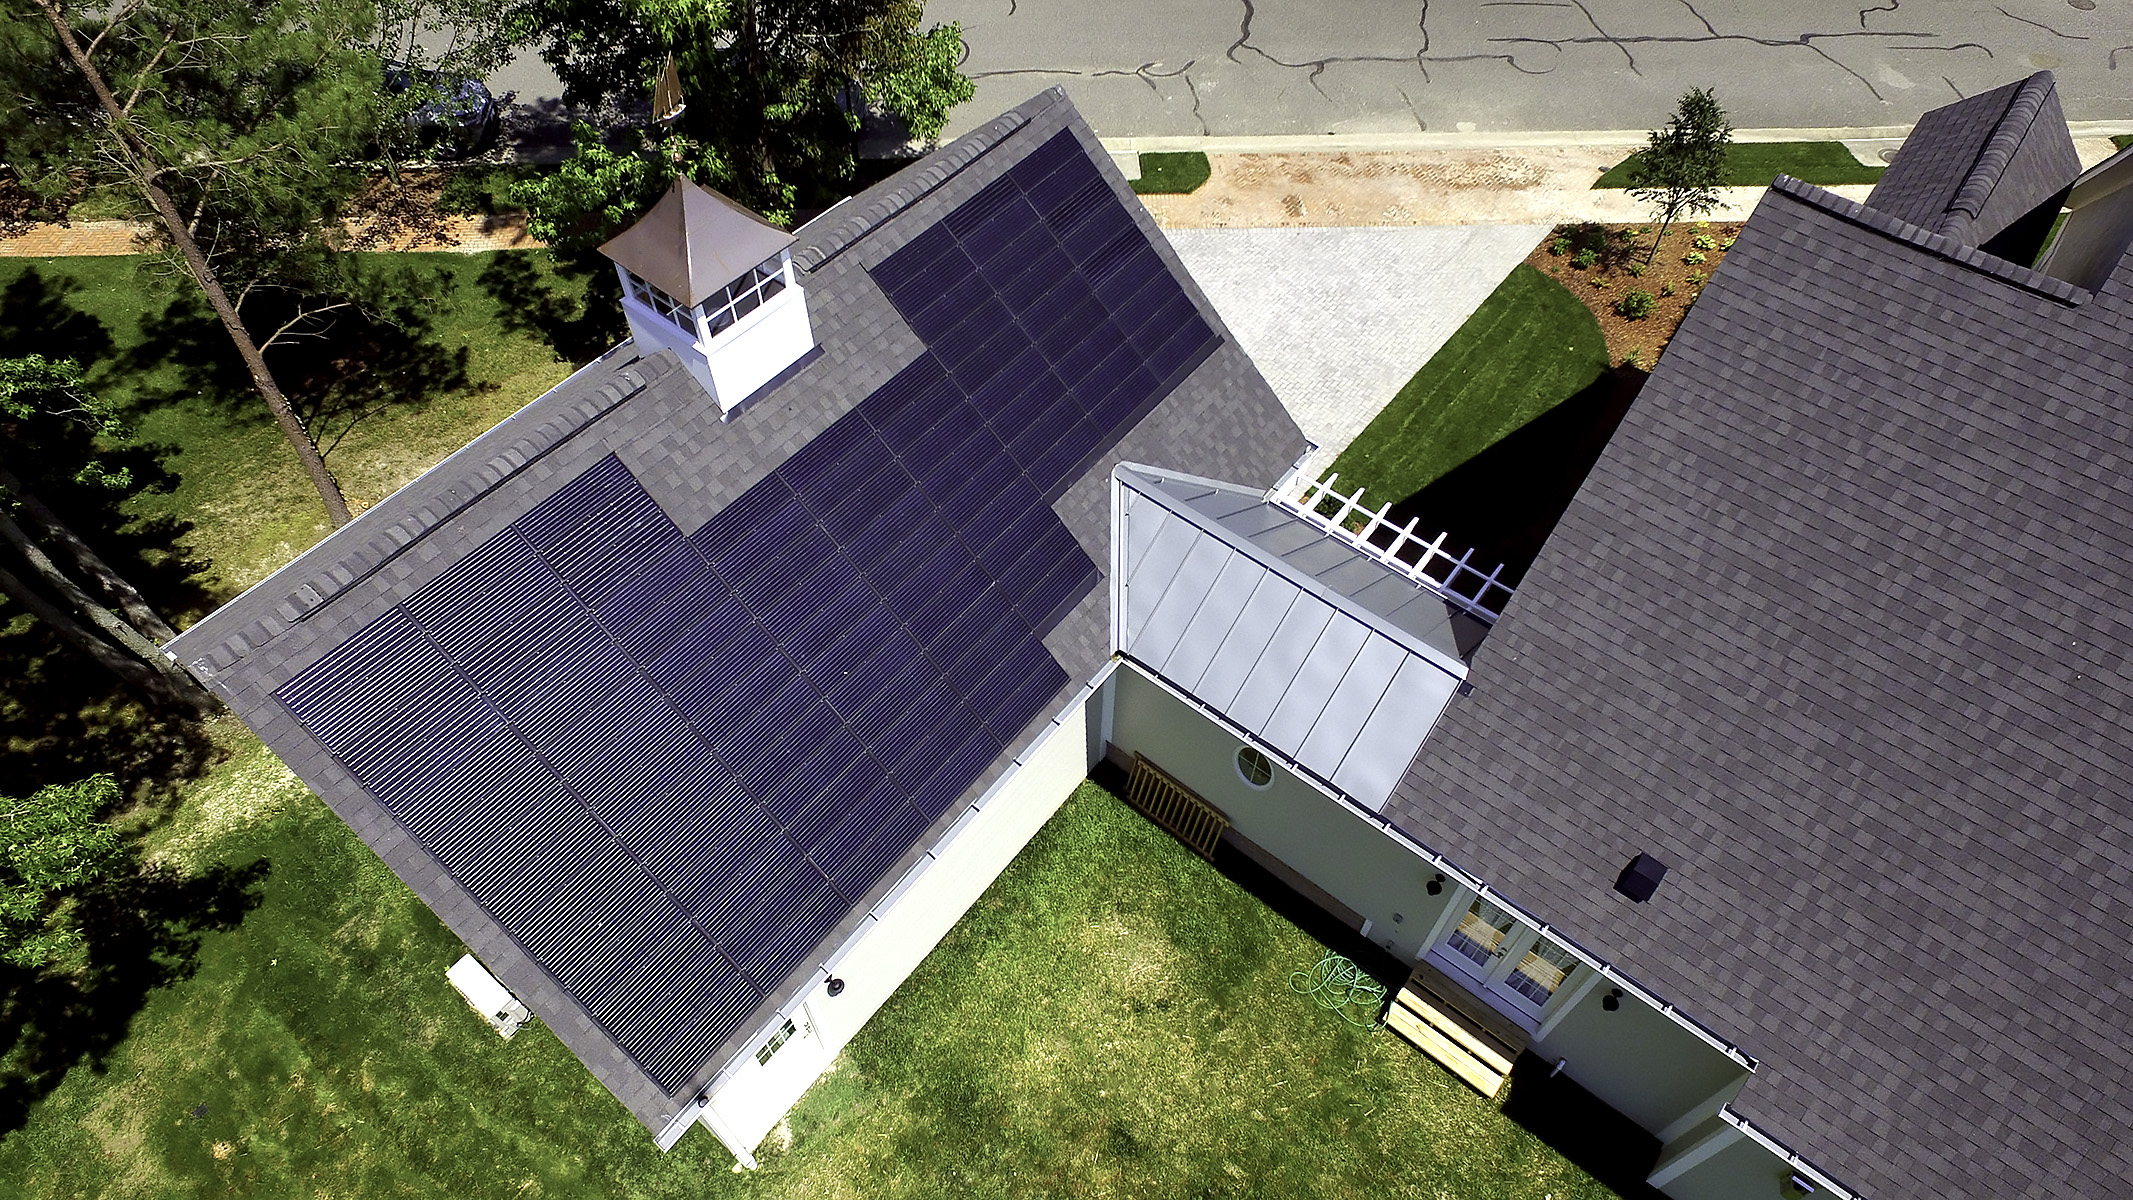
Right - The garage roof is correctly oriented for the home’s solar shingle system.
Image
Right - The geothermal heat pump provides hot water for radiant floor heating, domestic hot water, and the air handler for space conditioning upstairs.
Image
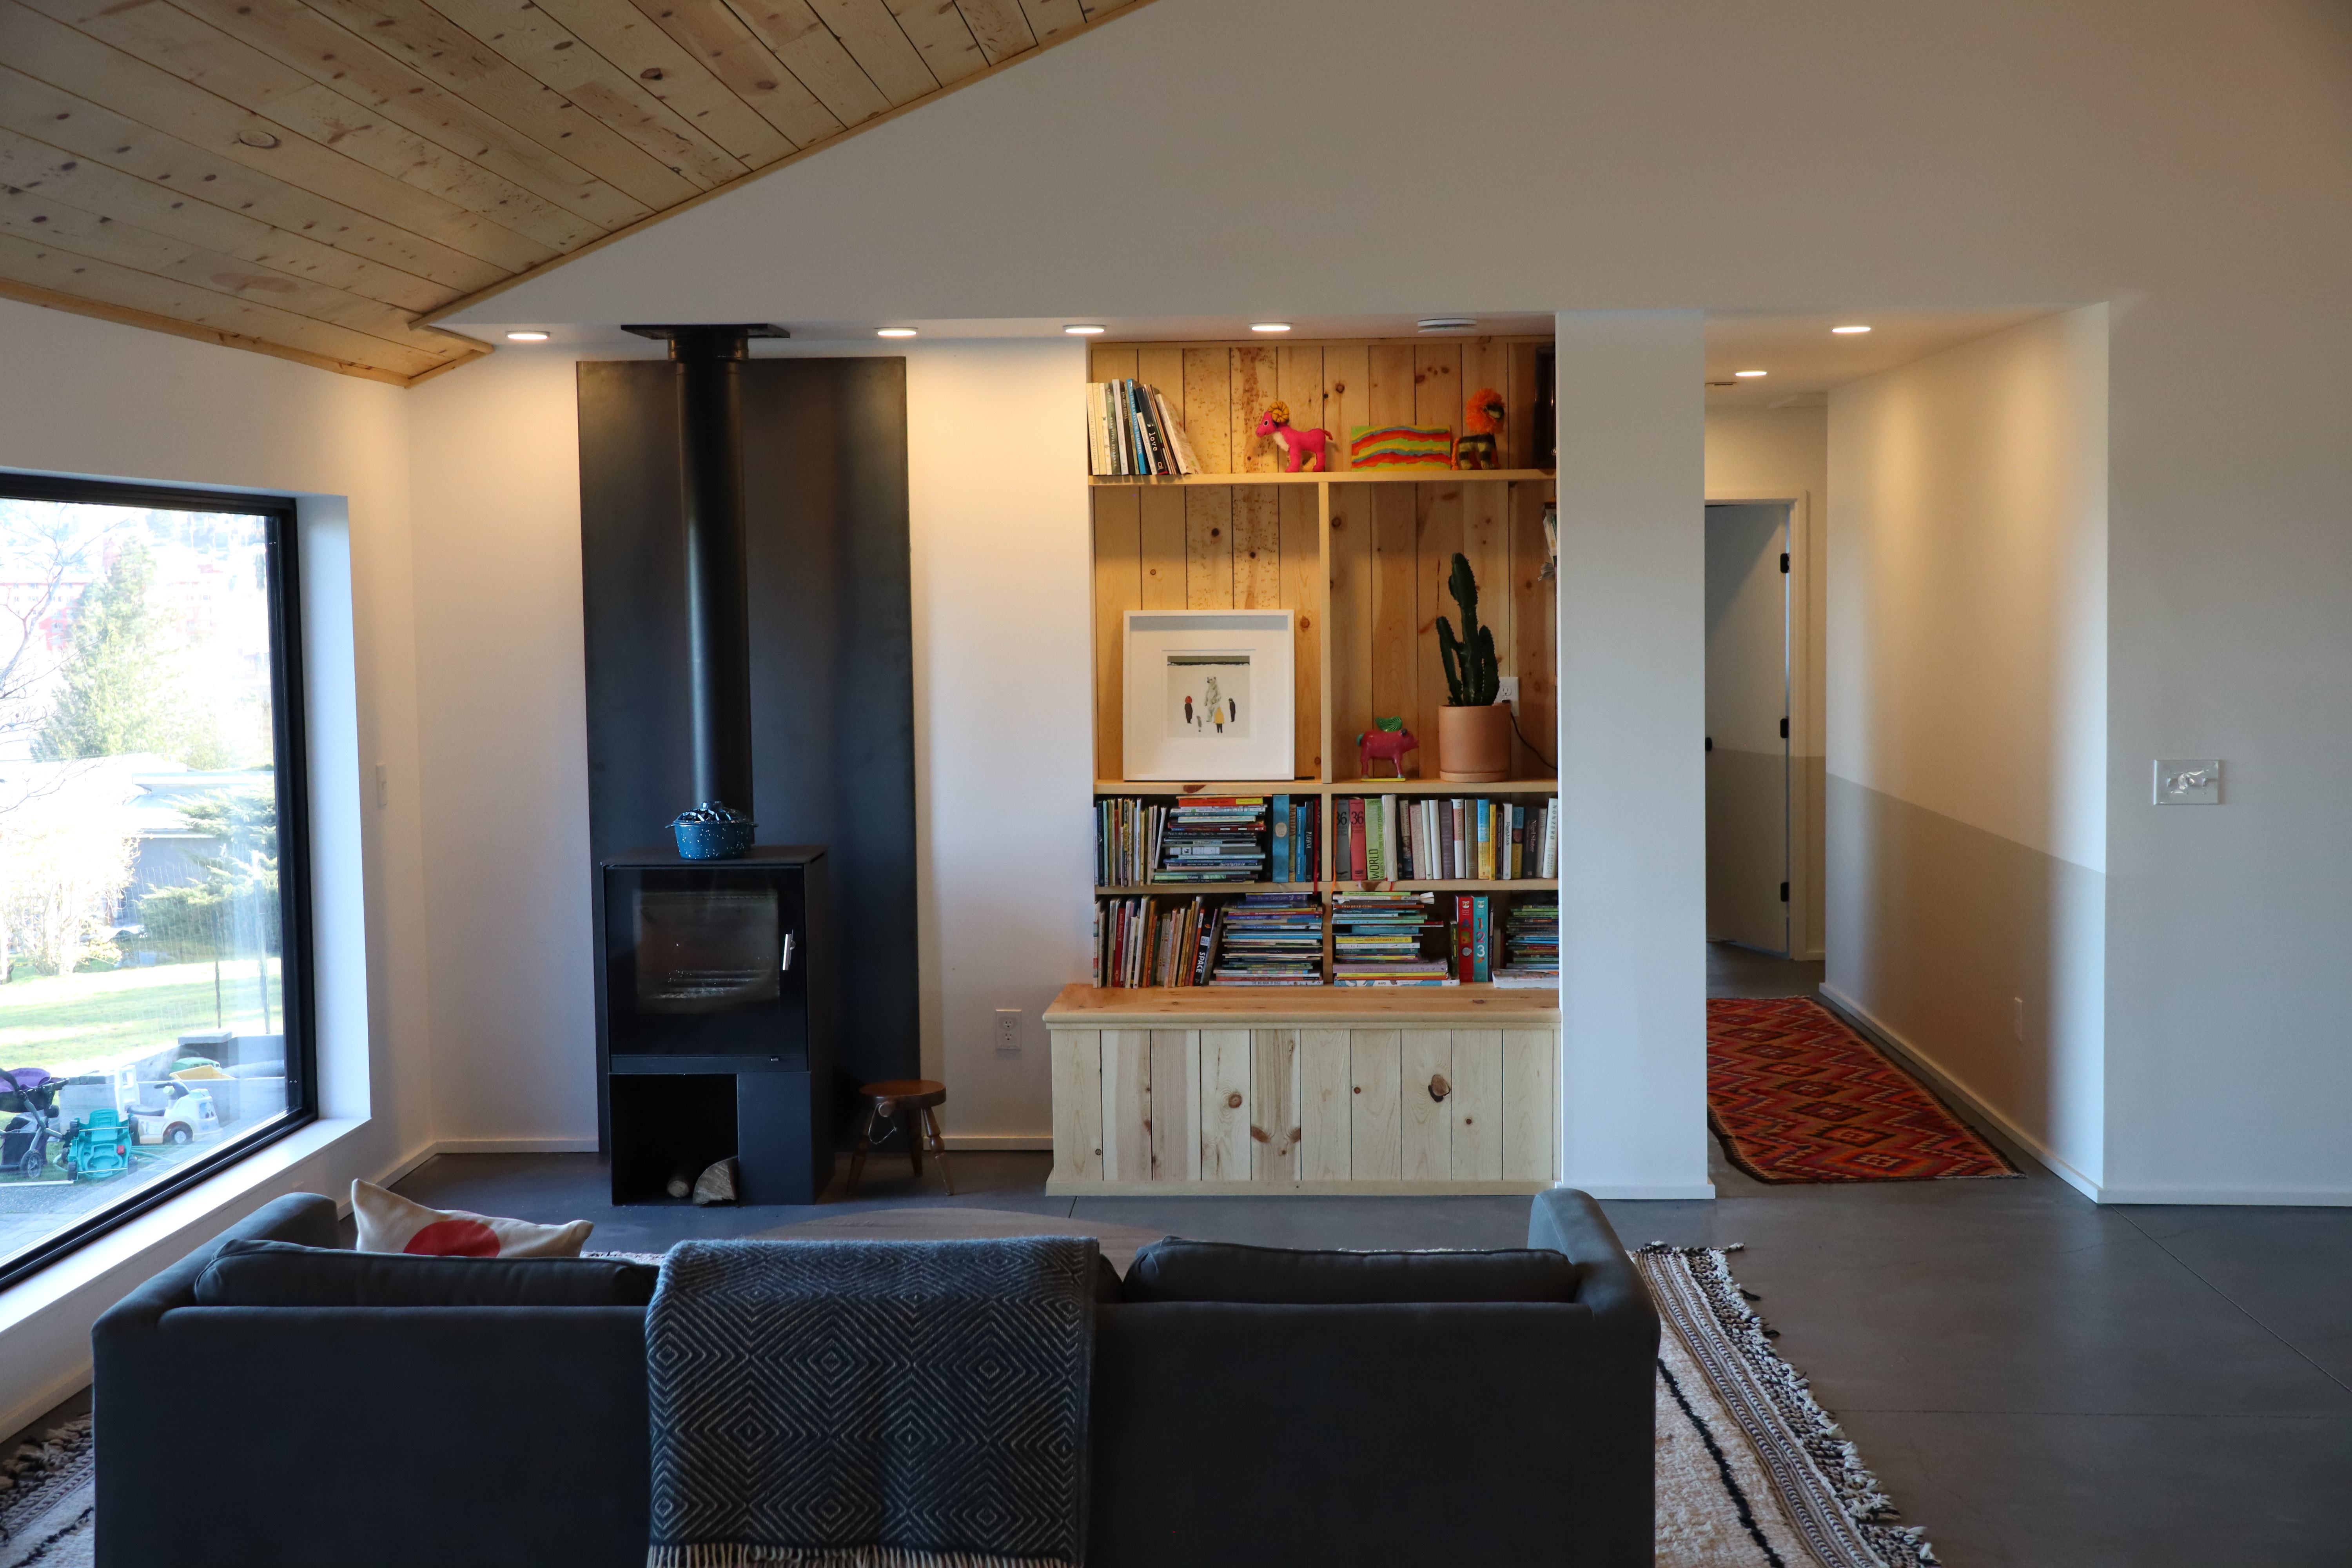
Right - The high-efficiency wood stove is located on an interior wall in this home to provide a secondary heating source in cold climates.
Image
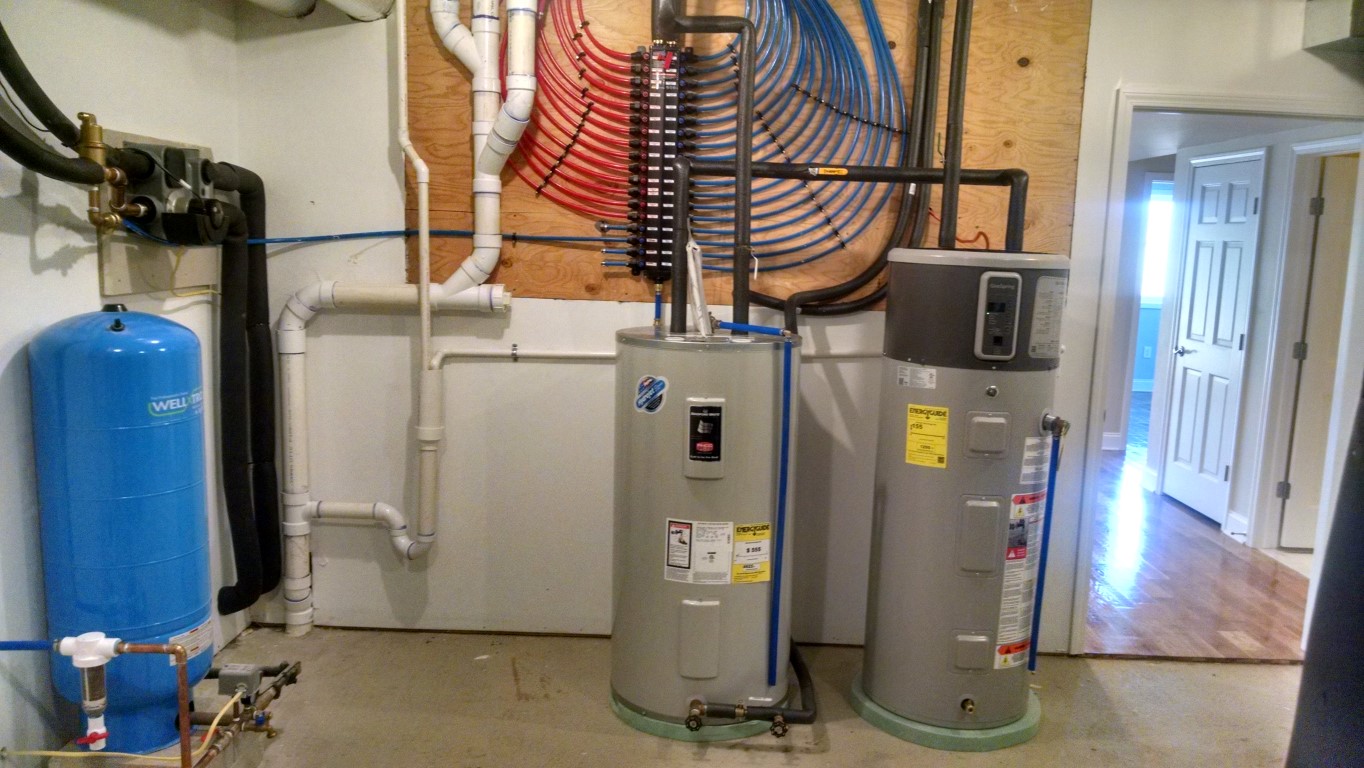
Right - The home’s ground source heat pump preheats water for the air source heat pump water heater.
Image
Right - The home’s high-efficiency gas boiler provides domestic hot water as well as in-floor radiant heat, while a high-efficiency heat pump provides cooling and a secondary source of heating.
Image
Right - The house wrap is properly flashed and taped, and all penetrations are properly flashed.
Image
Image
Right - The HVAC ducts are located in conditioned space in a dropped hallway ceiling with very short duct runs for more efficient delivery.
Image
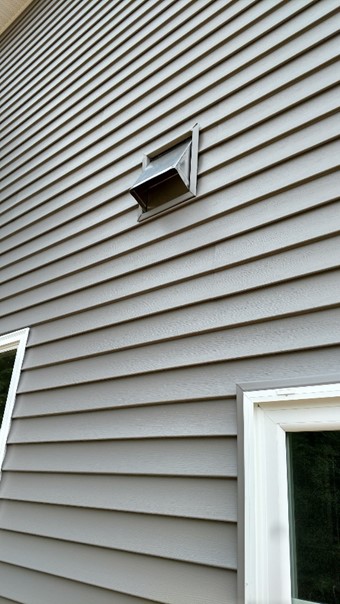
Right - The kitchen exhaust duct termination is integrated aesthetically and functionally with the exterior cladding; however, the opening should be screened to keep out pests.
Image

Image
Right - The pipe penetration is properly flashed and furring strips are installed on each side in preparation for installing cladding
Image

Image

Right - The posts and floor of this crawlspace are covered with a heavy sheet of vapor retarder that is sealed to the post, the walls, and at all seams.
Image
Right - The poured concrete basement walls are insulated along the inside with 2.5 inches of extruded polystyrene insulation.
Image
Right - The precast insulated concrete walls of the basement provide a conditioned space for the high-efficiency (18 SEER, 9.5 HSPF) air-source heat pump, with its variable-speed fan, five-stage compressor, and MERV 11 filter.
Image
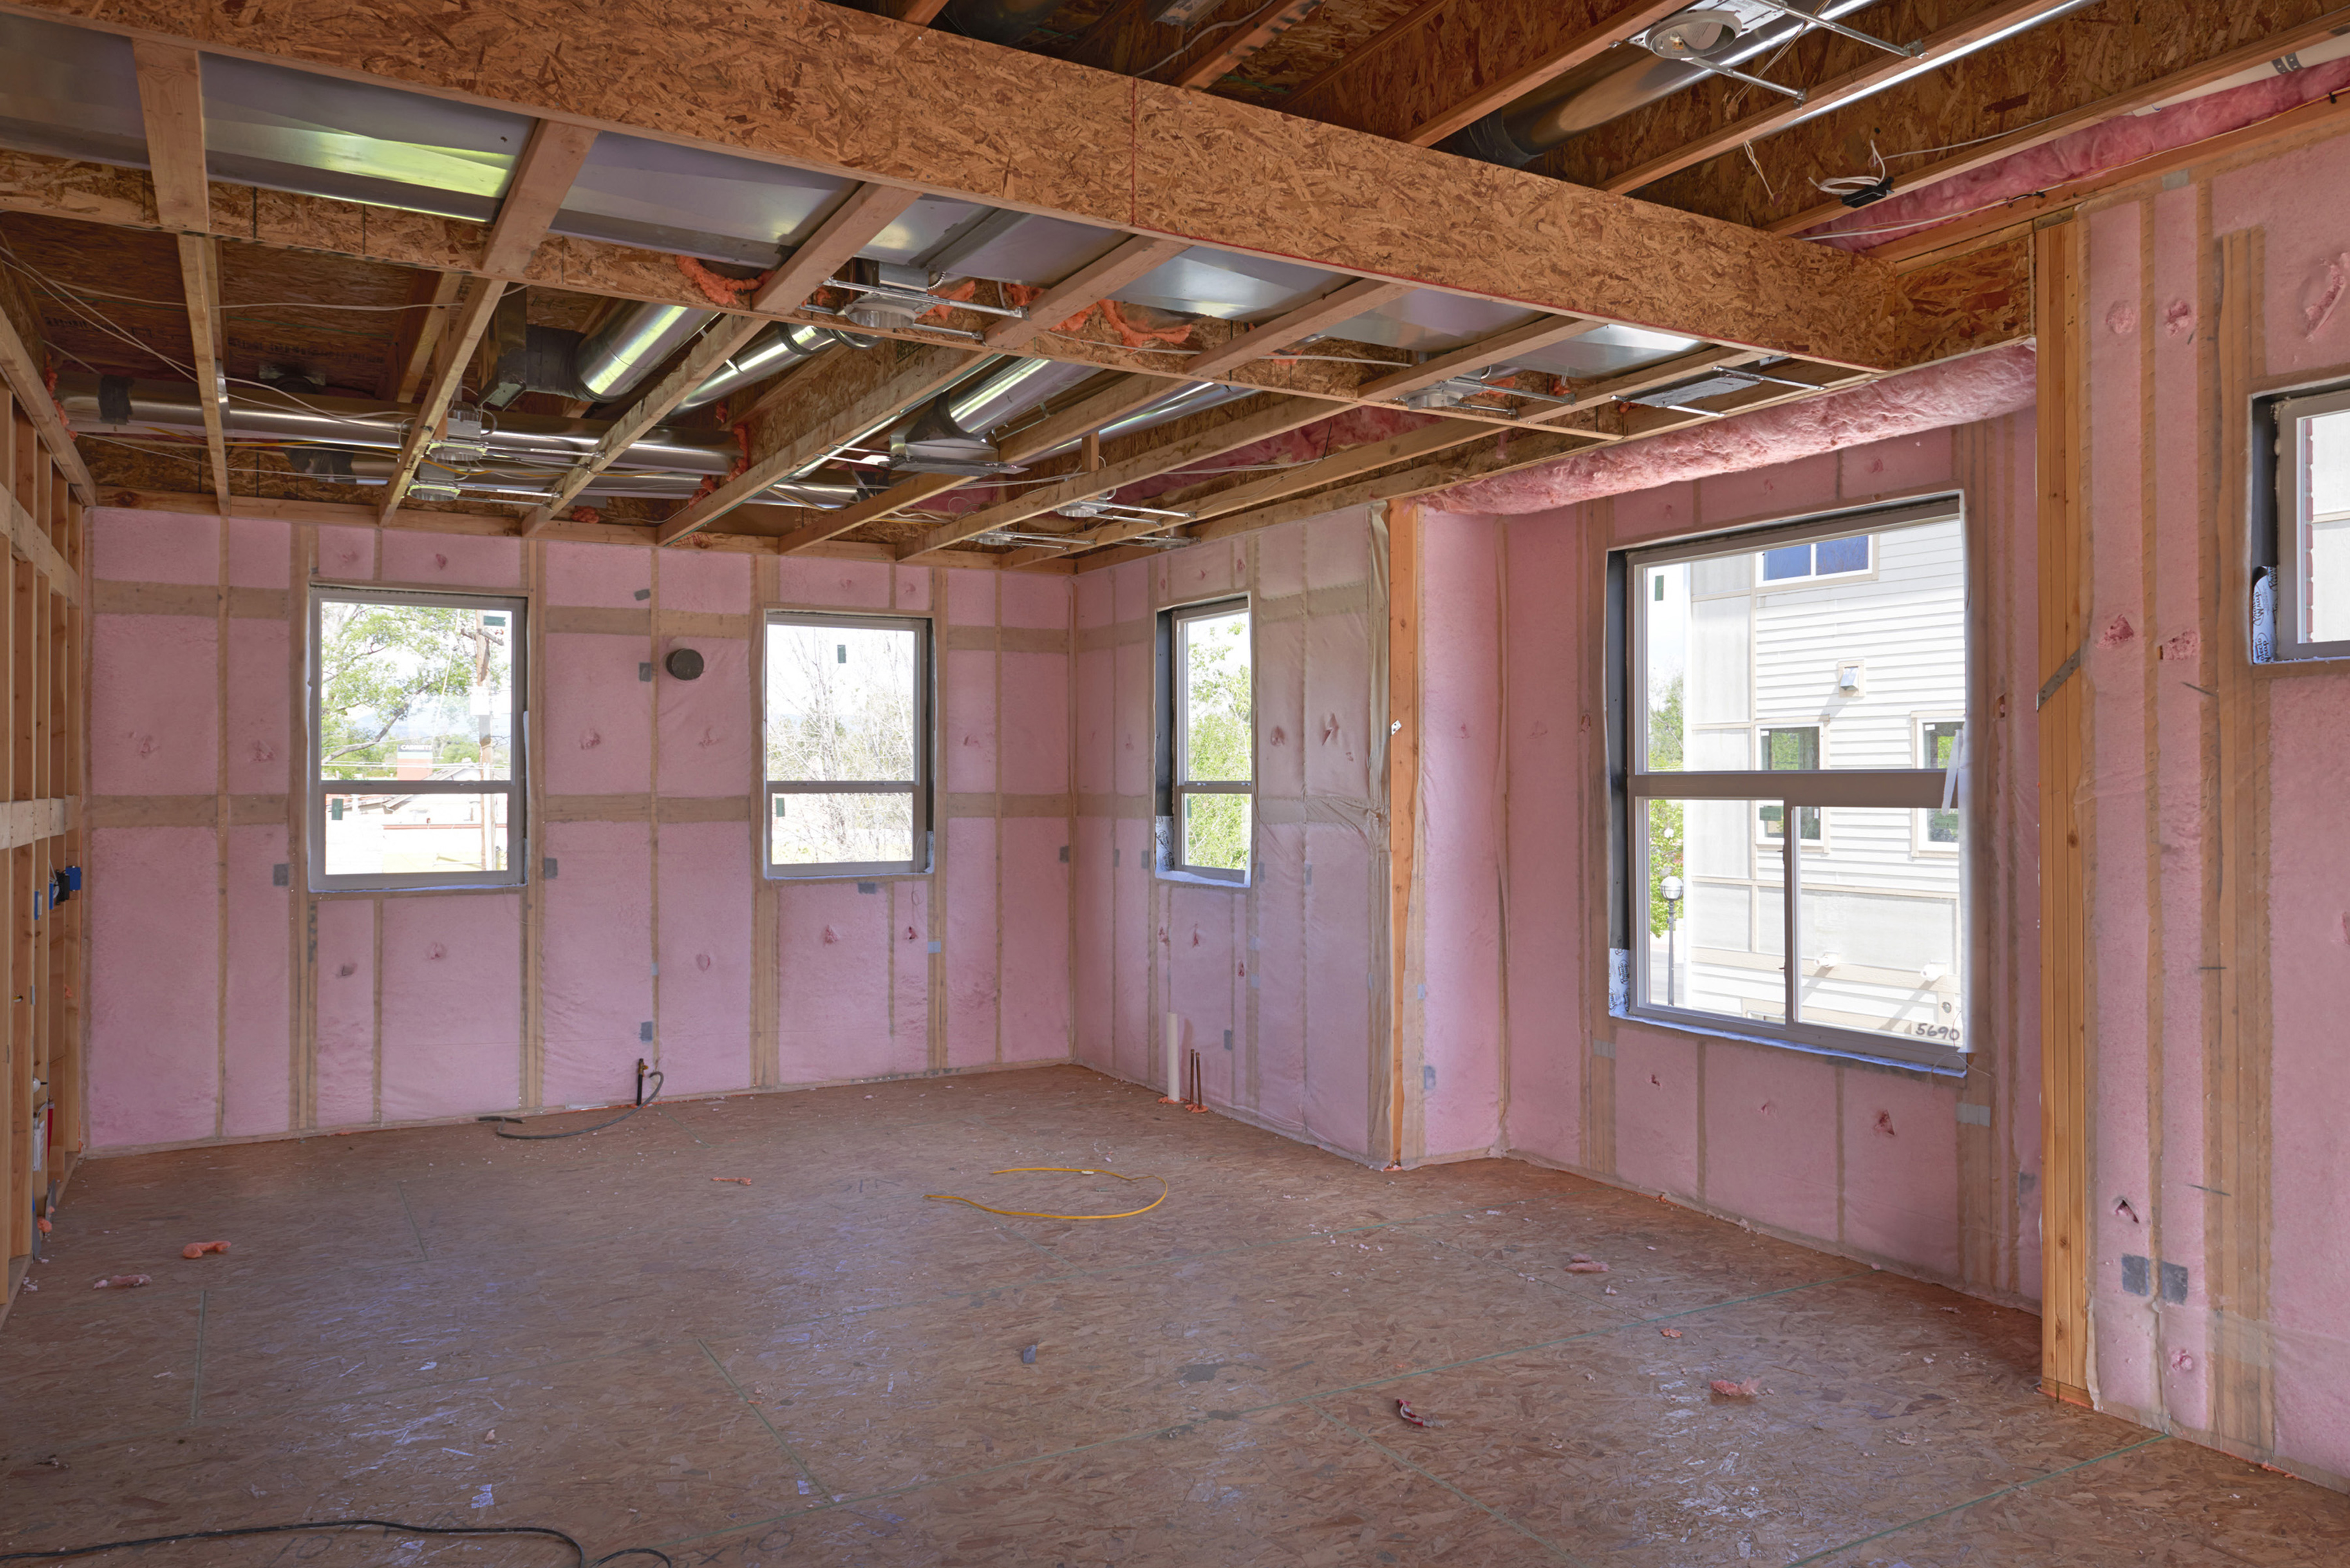
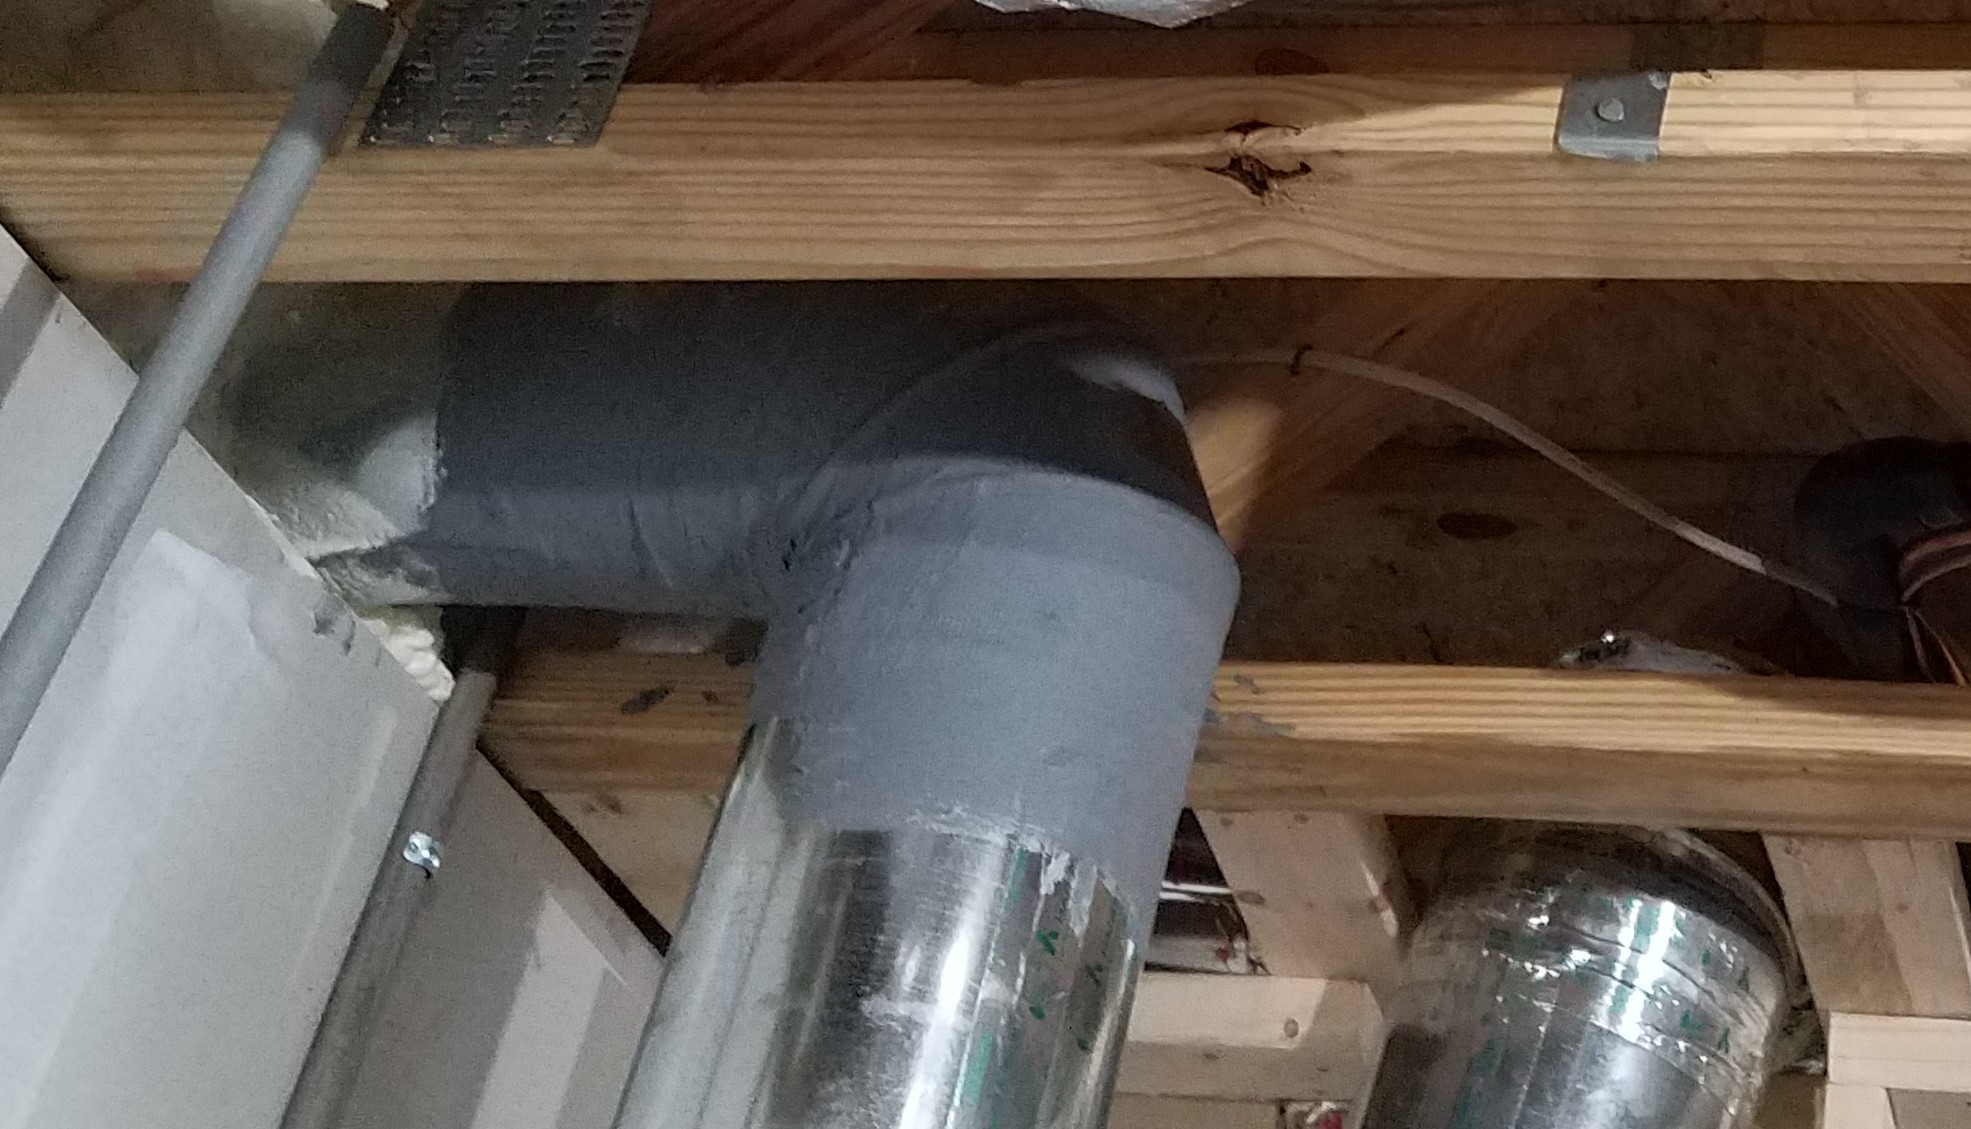
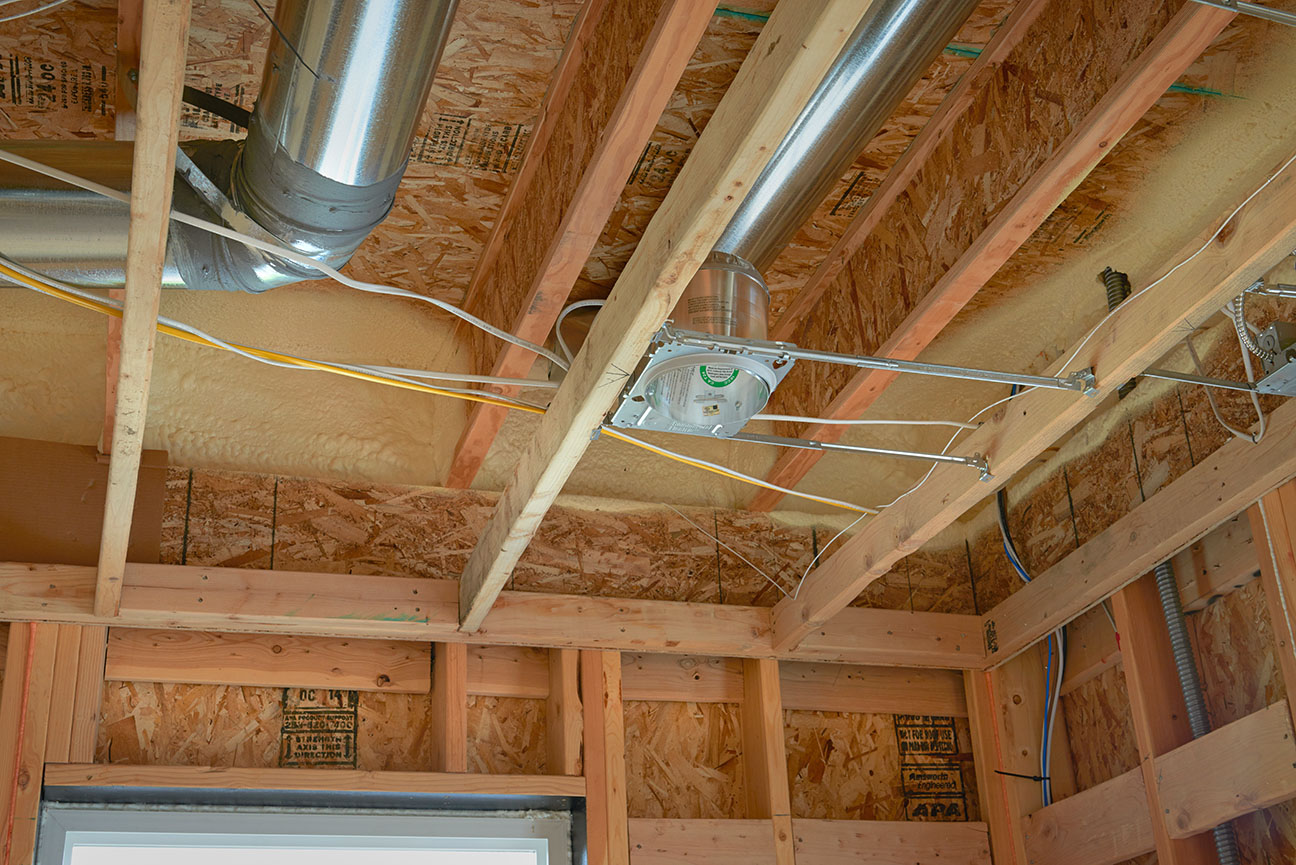
Right - The rigid metal HVAC ducting is installed between the floor joists rather than in an unconditioned attic or crawl space to minimize heat loss.
Image
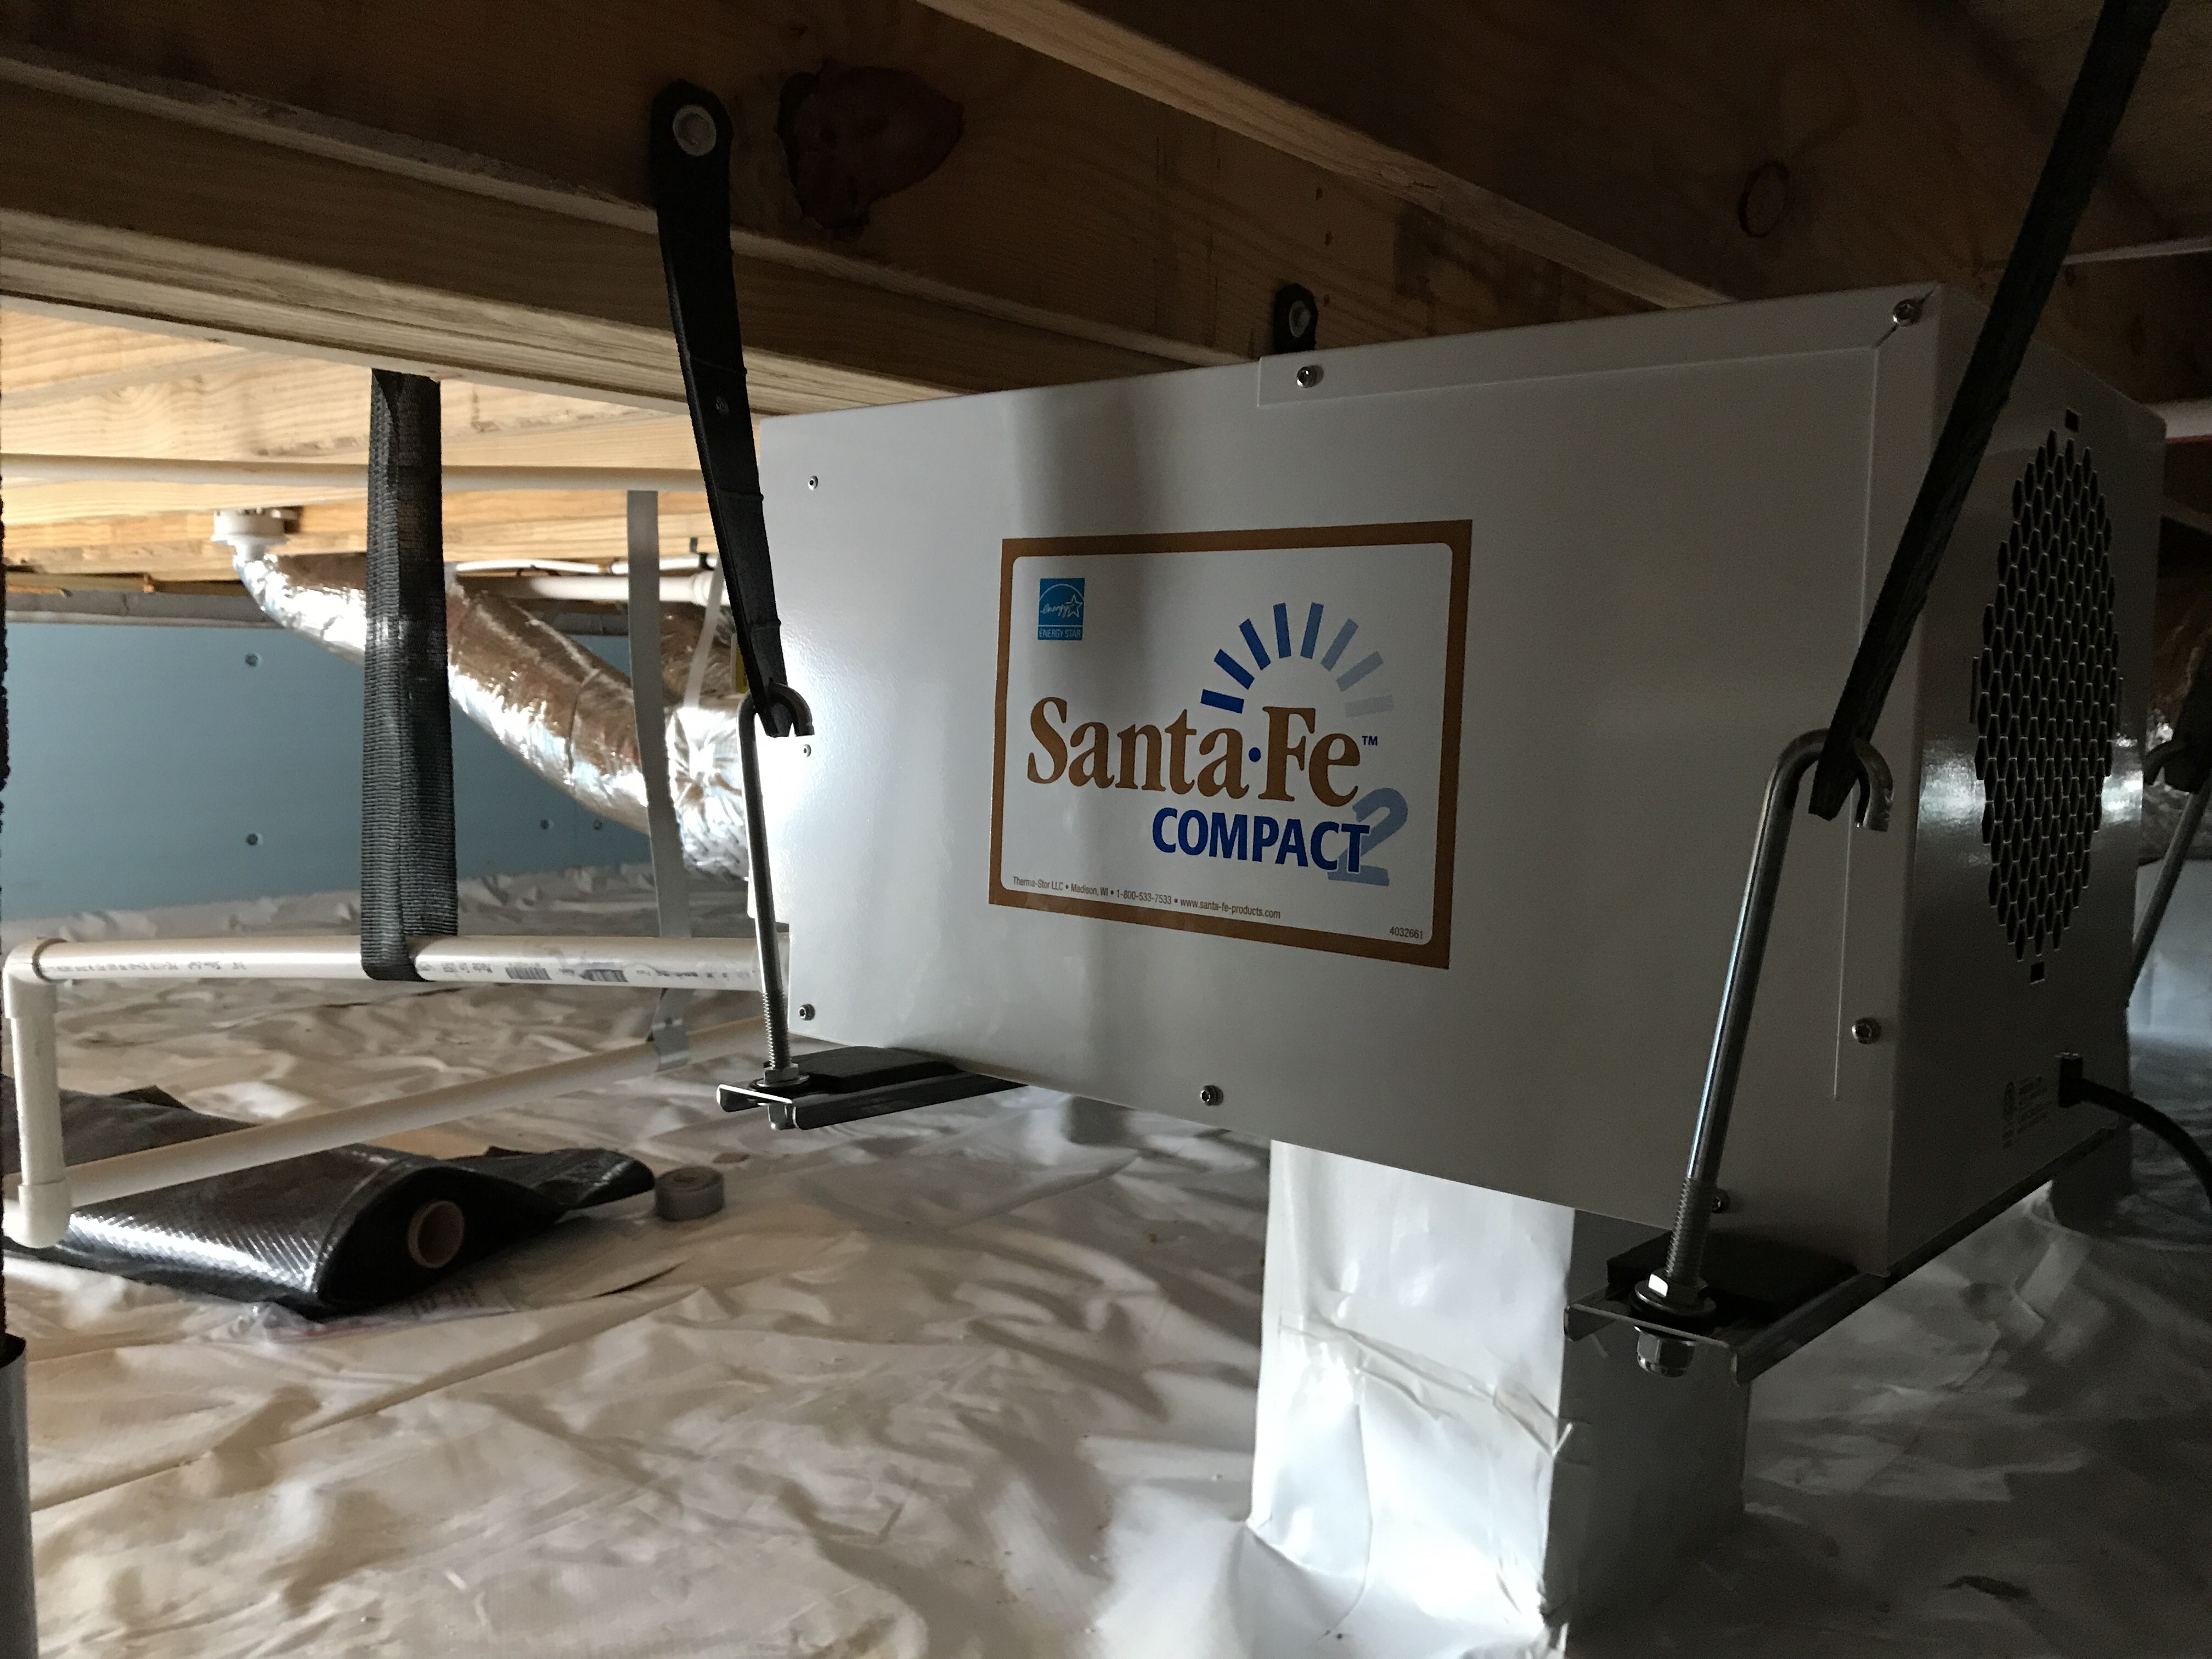
Right - The sealed conditioned crawlspace provides a clean, dry, and temperate environment for the home’s supplemental dehumidifier.
Image
Right - The seams in the OSB sheathing are sealed with a sprayer-applied sealant.
Image
Right - The service penetration in the waterproofing membrane is well-sealed, and there is a drainage mat acting as a protective layer on the interior of the soldier piles and wood lagging.
Image
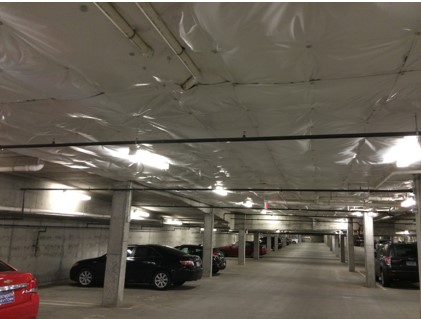
Right - The service penetrations through the structural slab in this garage plenum are air sealed.
Image
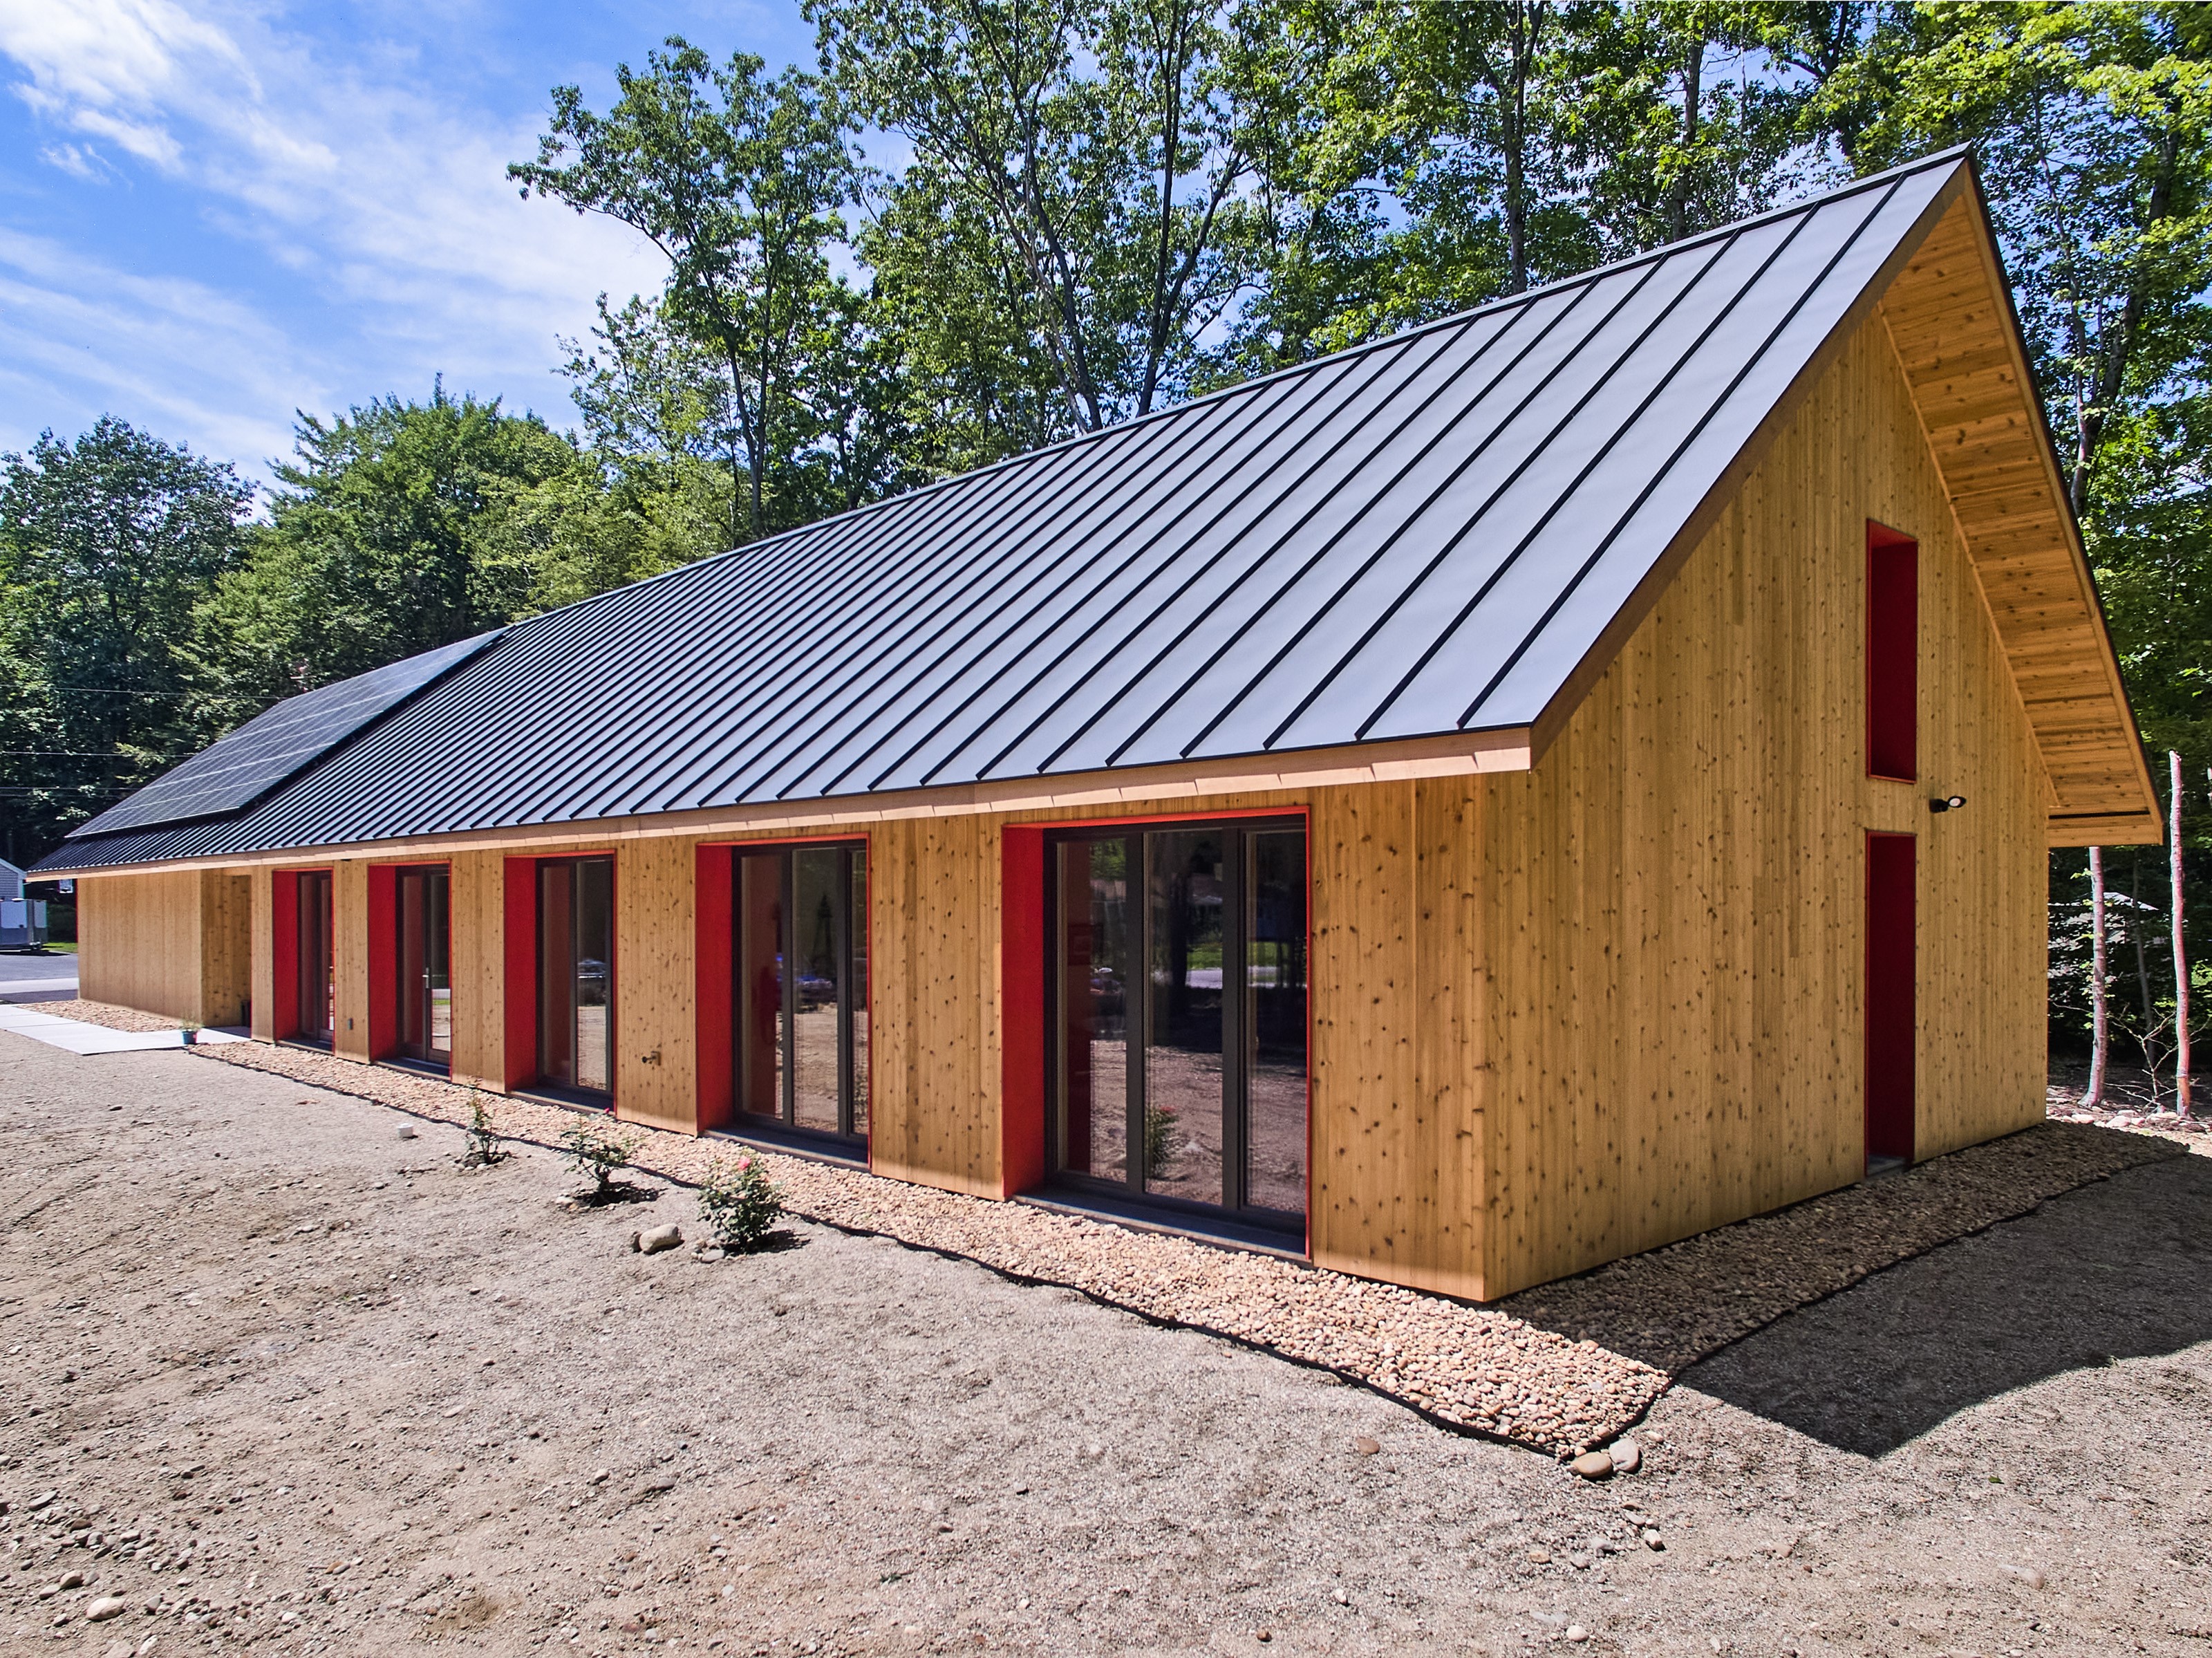
Right - The simple rectangular design of this home provides a large expanse of roof for solar panels.
Image
Image
Right - The slab-on-grade foundation is insulated with two layers (R-20) of XPS foam under the-slab and R-10 on the exterior of the stem walls.
Image
Image
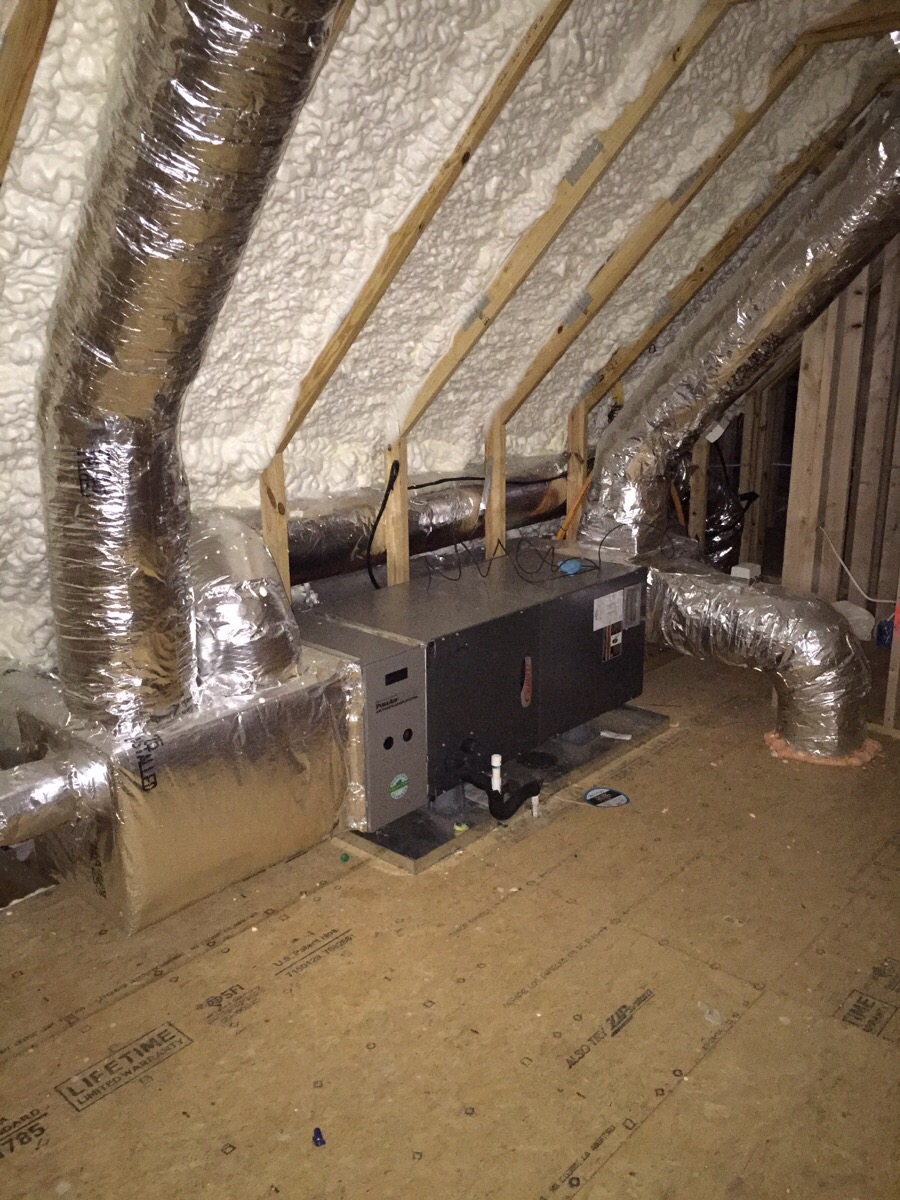
Right - The underside of the attic roof deck is insulated with open-cell spray foam to provide an insulated space for HVAC equipment.
Image
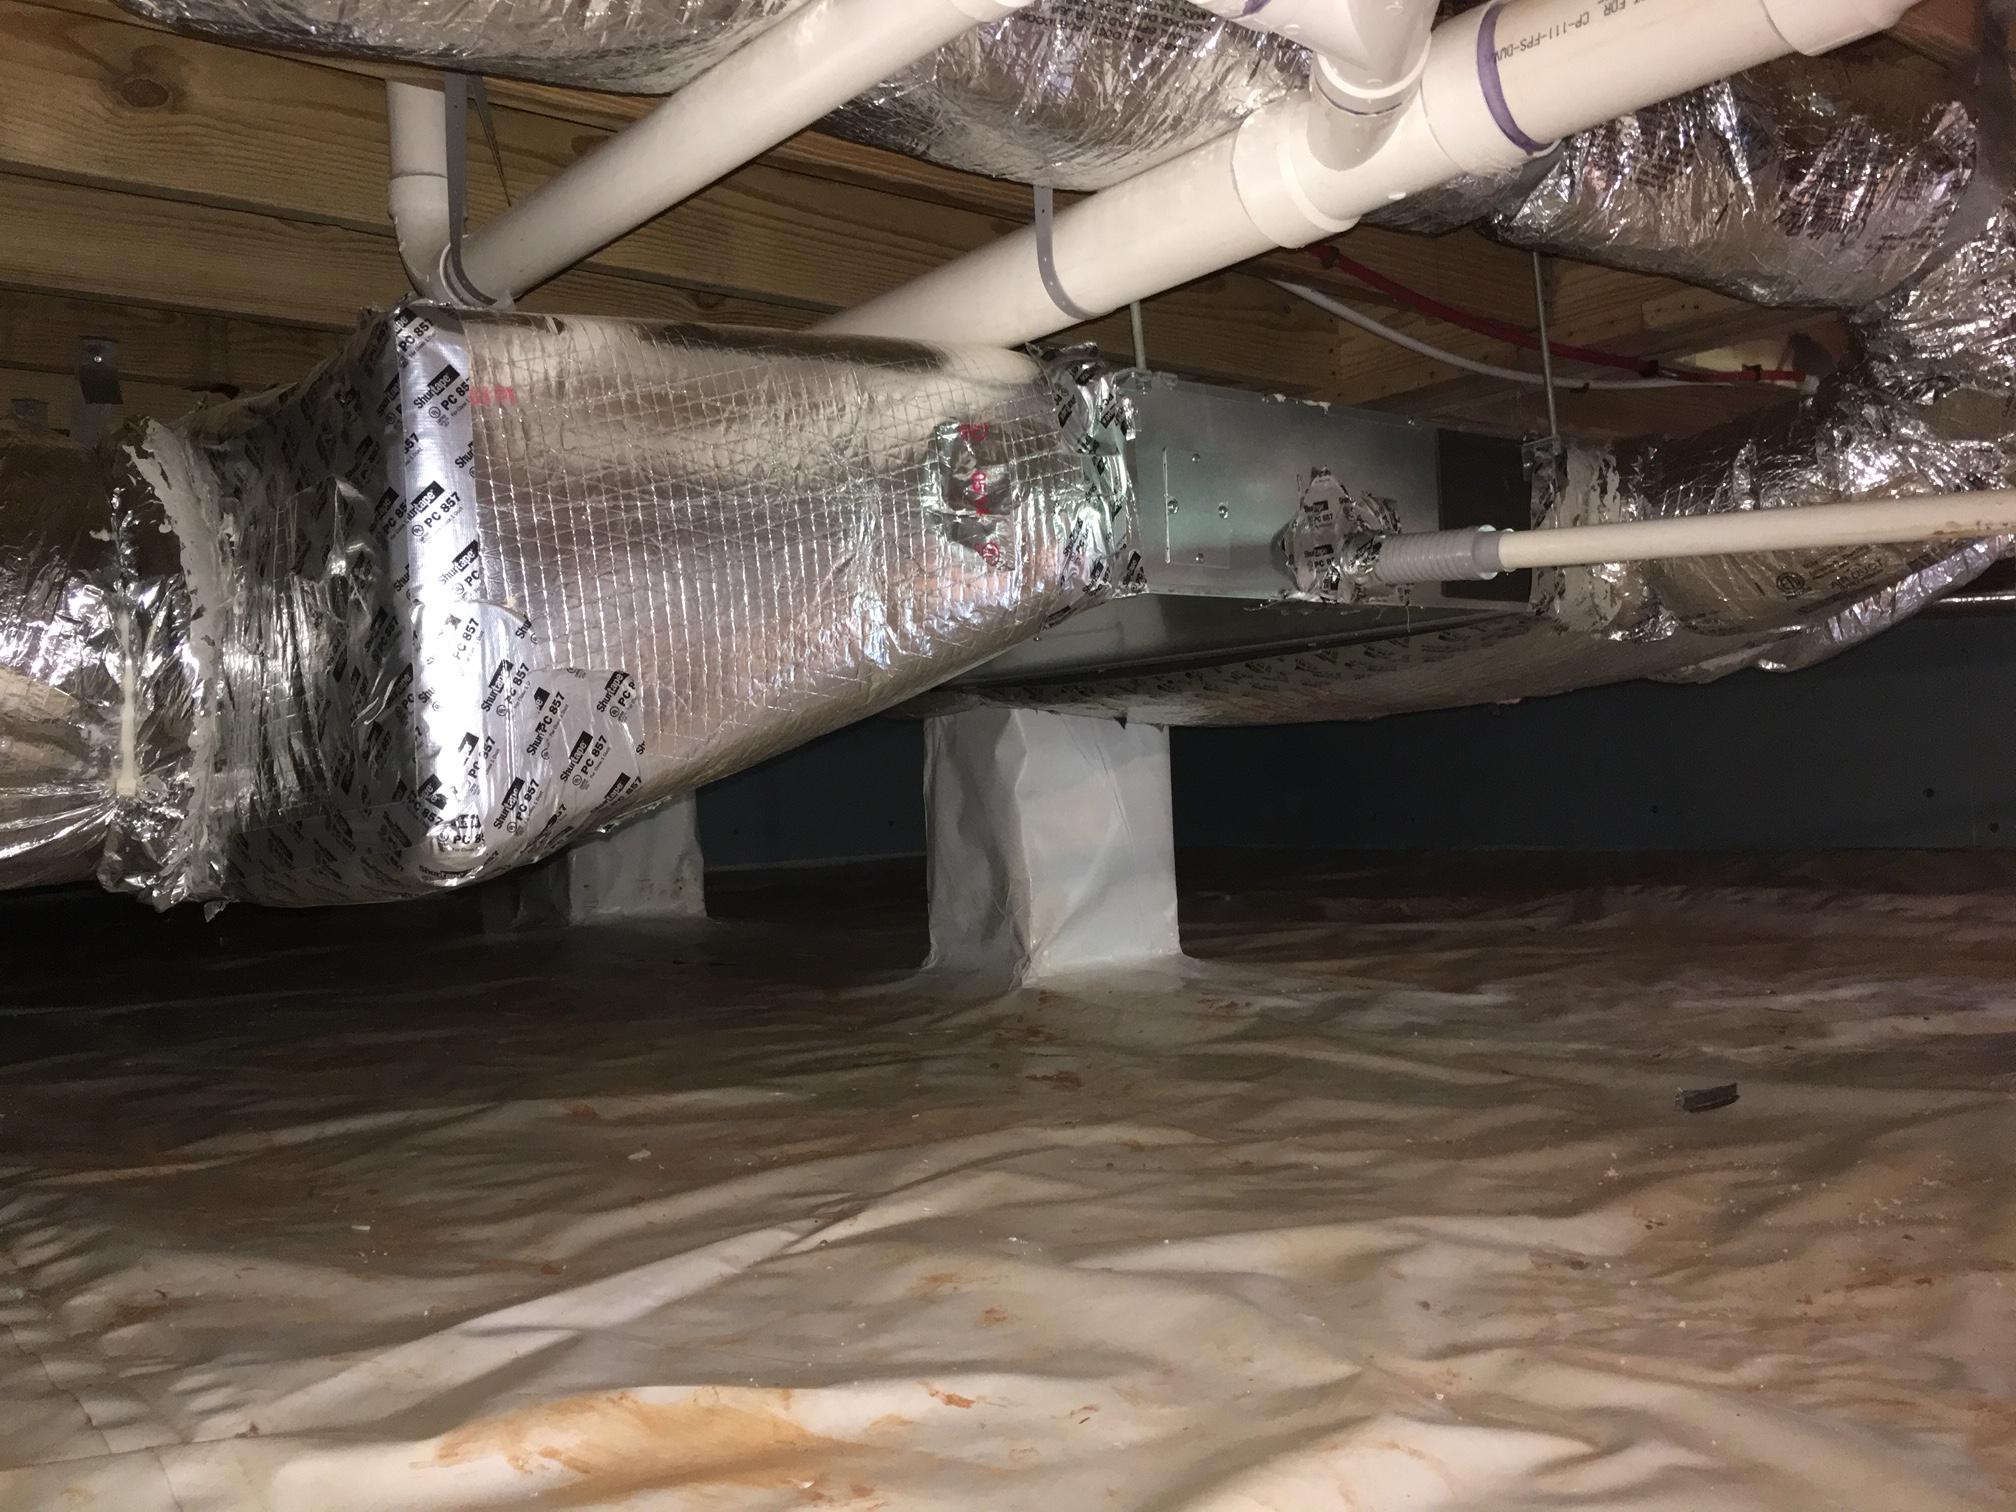
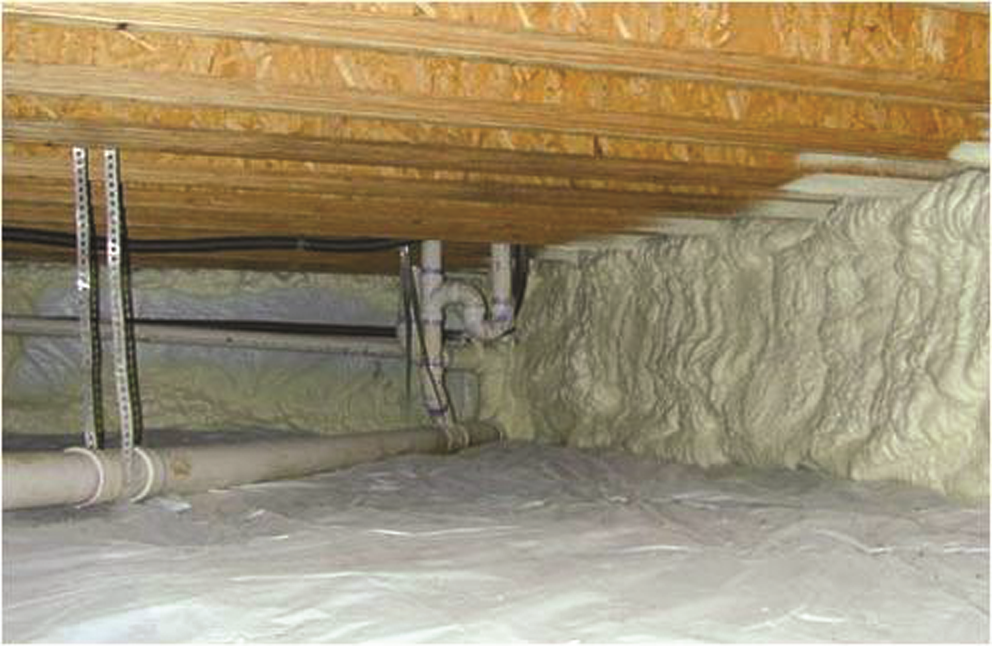
Right - the vapor barrier is extended up the sides of the piers in this crawlspace, which is sealed and insulated to house the HVAC ducts.
Image
Image

Right - The wall framing is connected to roof framing with metal ties for hurricane-resistant construction.
Image

Right - The wall top plates are sealed with foam before installing insulation on the ceiling deck.
Image
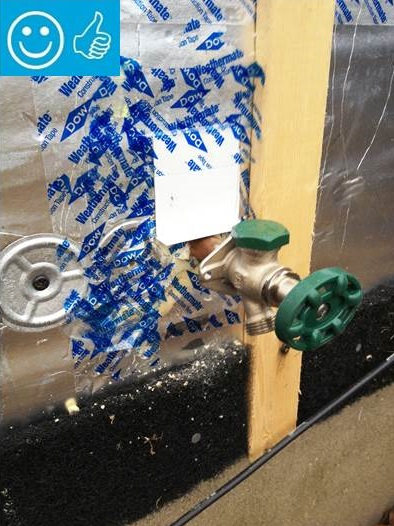
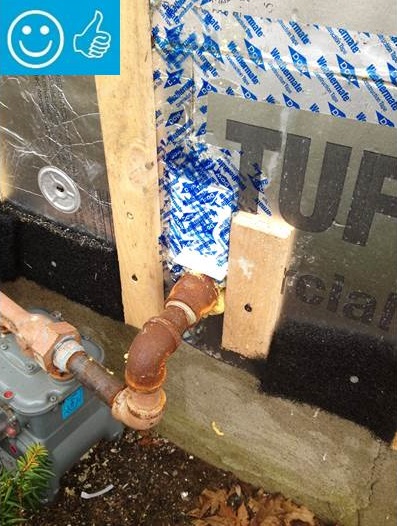
Right - The water and air control layers are properly integrated around the hose bib
Image
Right - These attic knee walls are insulated with rigid foam and sealed with spray foam to form a continuous air barrier at the gable end of this cathedral ceiling.
Image
Right - These homes have hurricane shutters to protect against high winds and to provide solar control.
Image
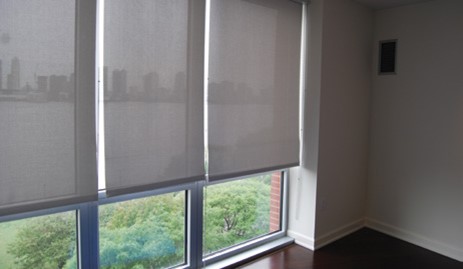
Right - These interior solar screens help control glare and solar heat gain while maintaining view to the outside.
Image

Right - These inverters convert the power from the home’s 6.8-kW of photovoltaic panels from DC to AC for connection to the grid; the inverters can also be connected to batteries for backup power storage.
Image
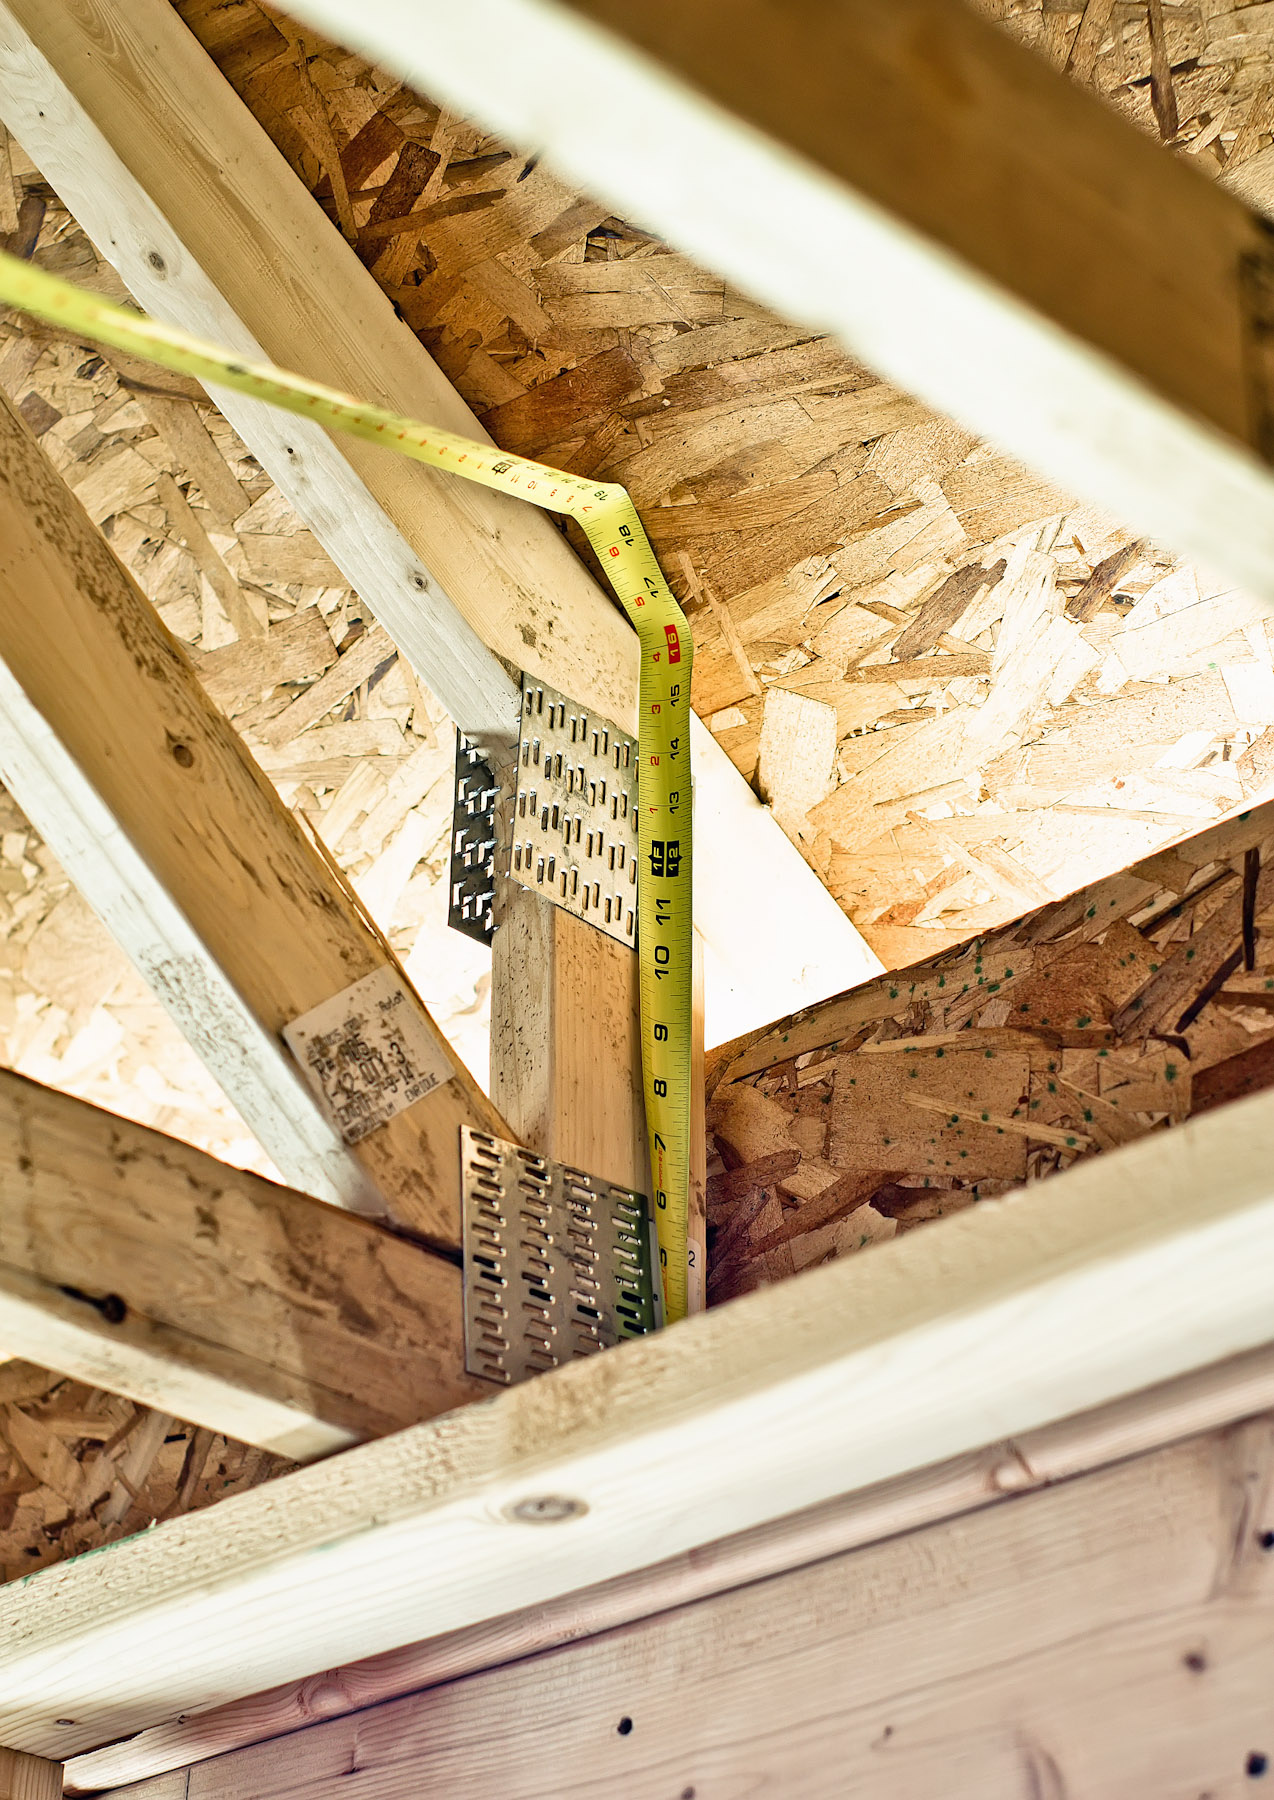
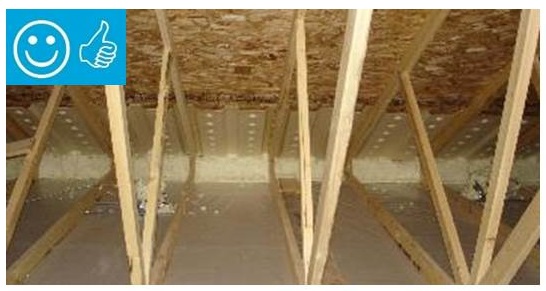
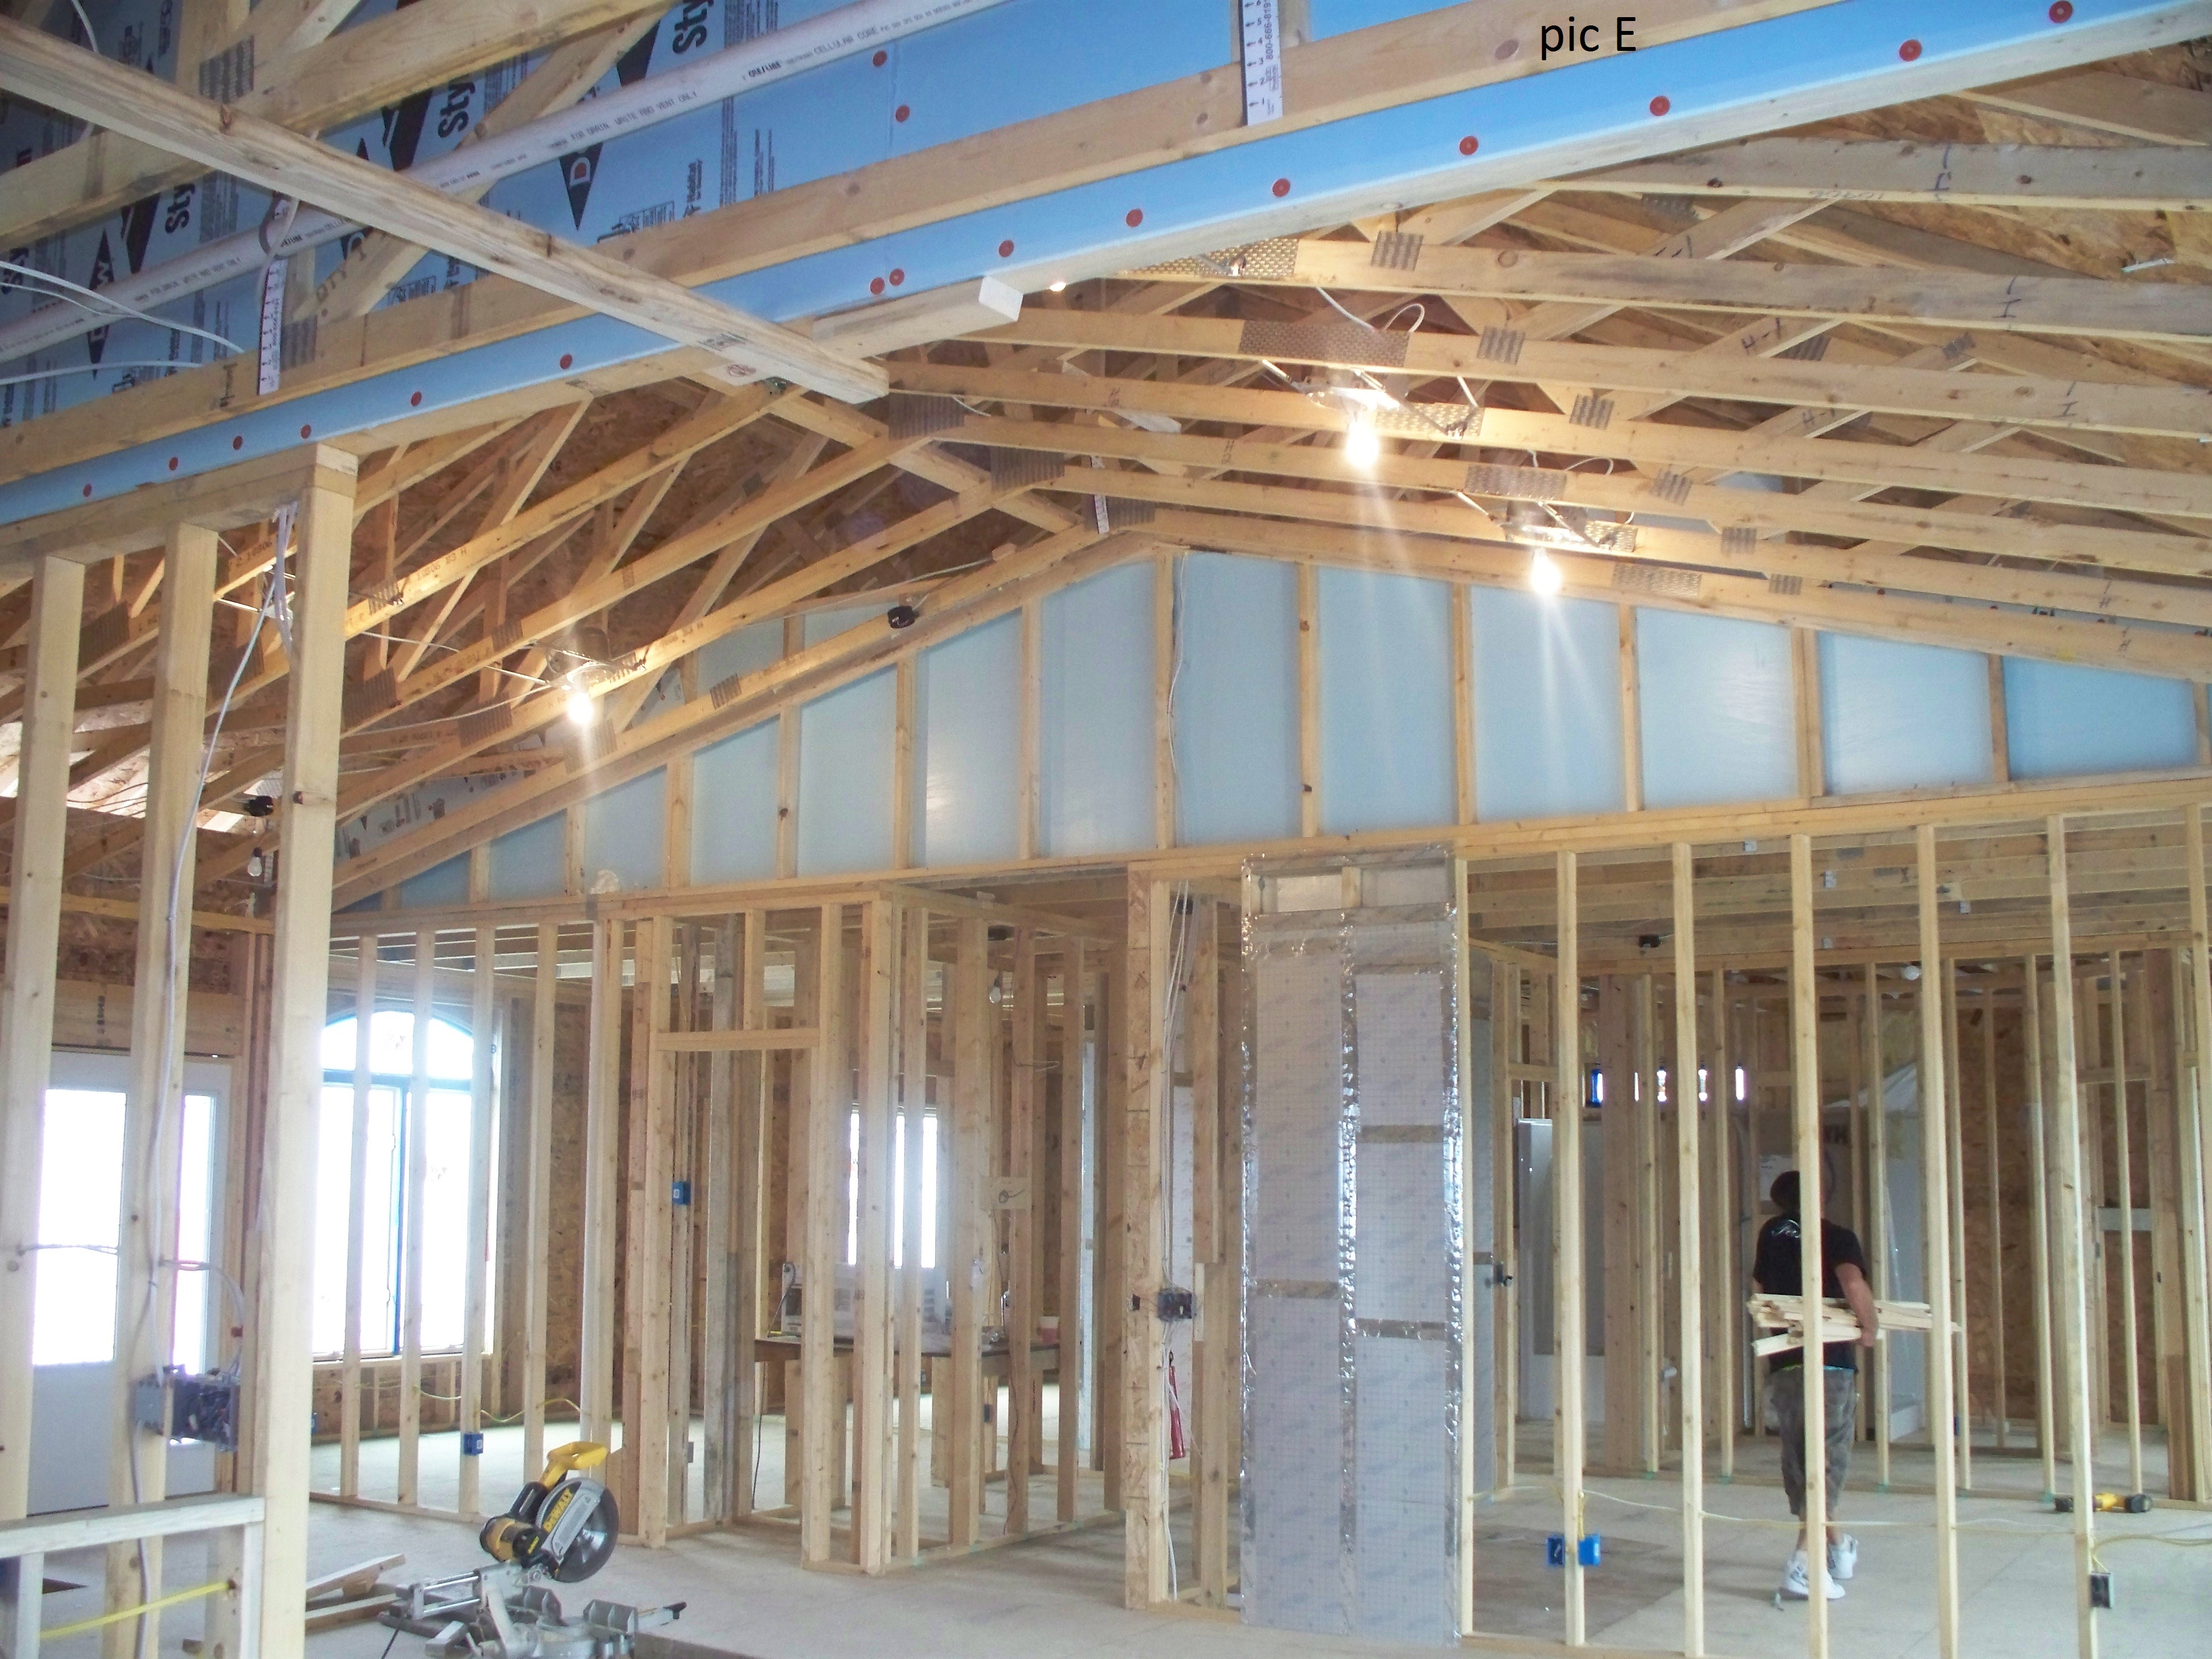
Right - These raised heel roof trusses provide 16 inches of space over the outer walls for full insulation coverage at the attic perimeter.
Image

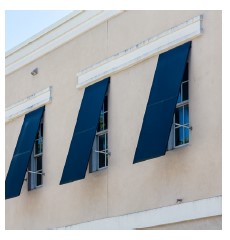
Right - These removeable awnings provide ample shade to windows and patio space, reducing heat gain to the home.
Image
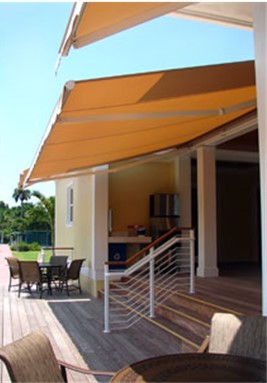
Right - These retractable awnings provide shade to this outdoor living space and reduce heat gain and glare within the home.
Image
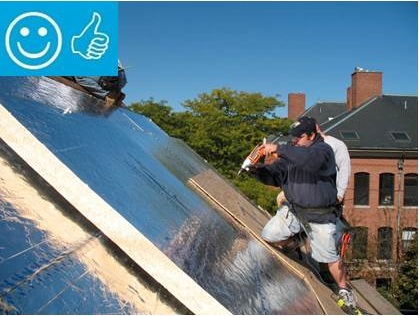
Right - These roof insulation panels are installed in multiple layers with joints offset both vertically and horizontally. The plywood nail base fastened to the roof framing holds the insulation layers together snuggly thus minimizing gaps