
Scope

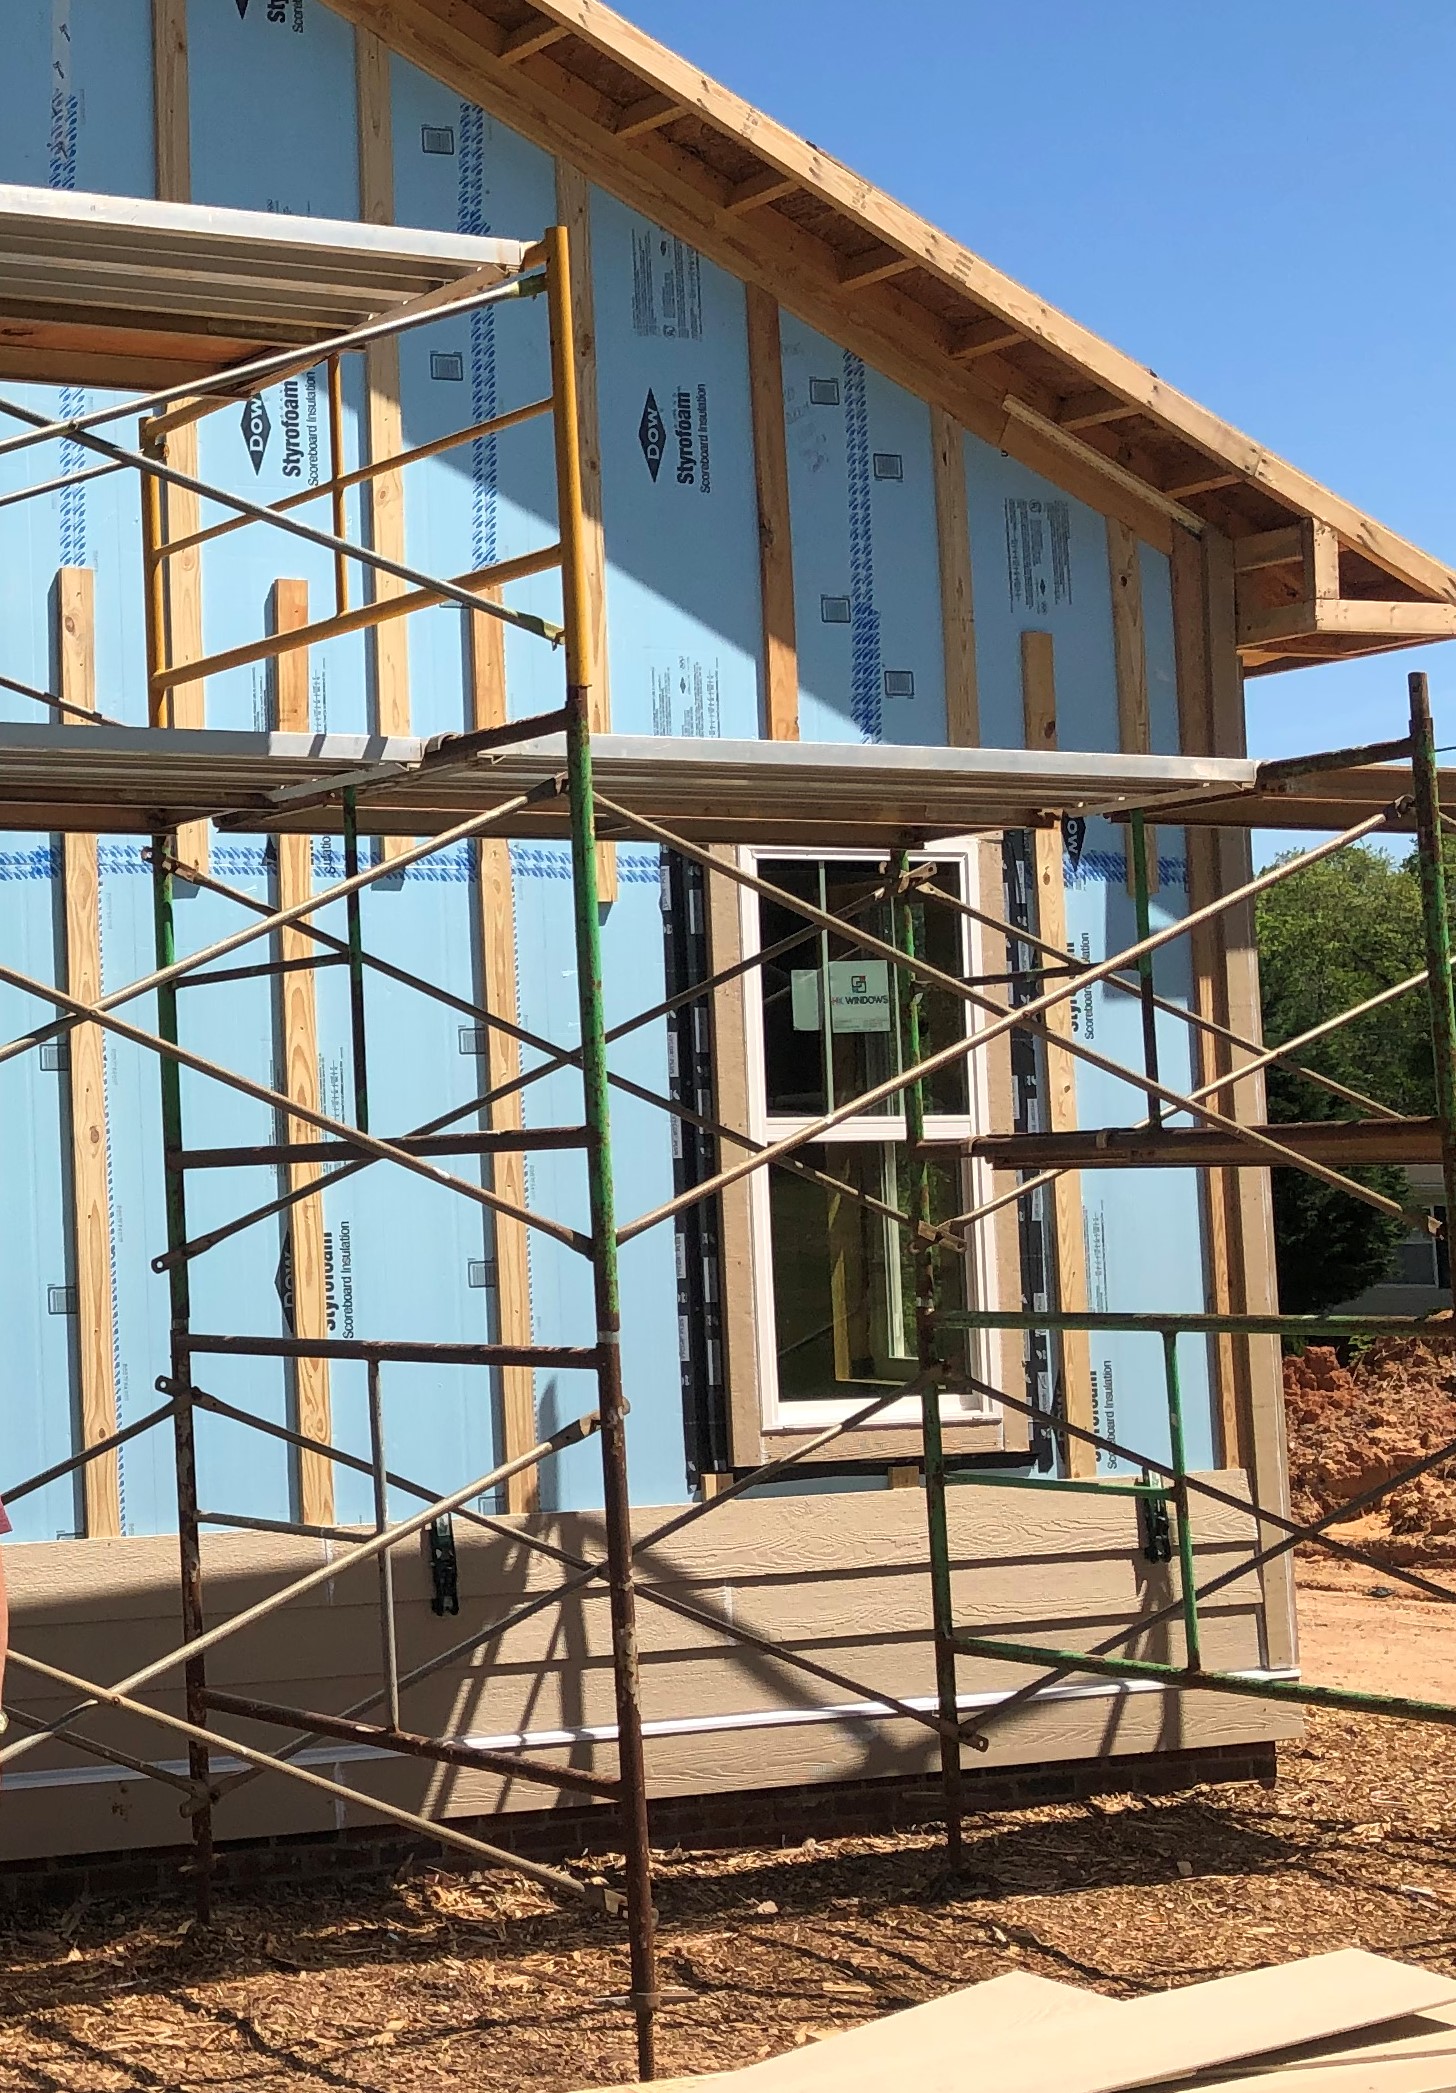
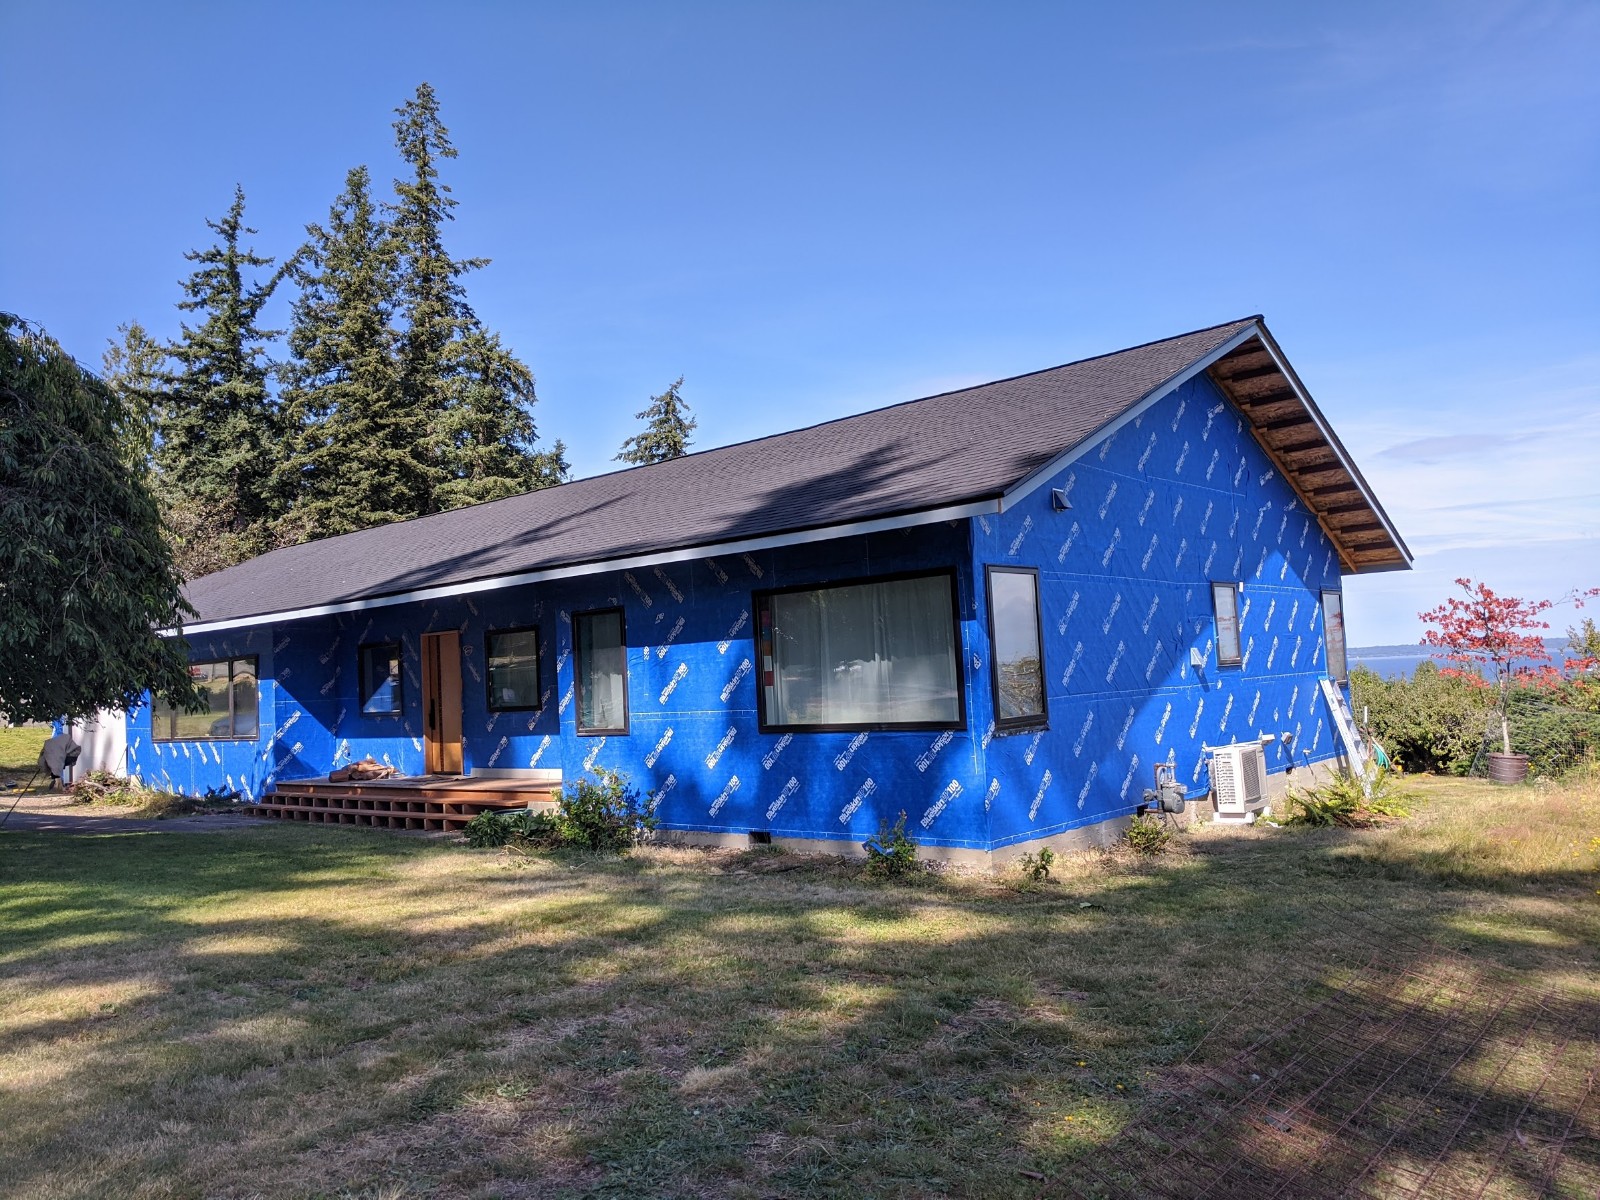
Install a fully sealed continuous drainage plane behind the exterior cladding on the walls of the home to keep water out of the wall cavities.
- Make sure that this layer laps over flashing installed around doors, windows, and wall penetrations and any flashing installed at the top or base of walls.
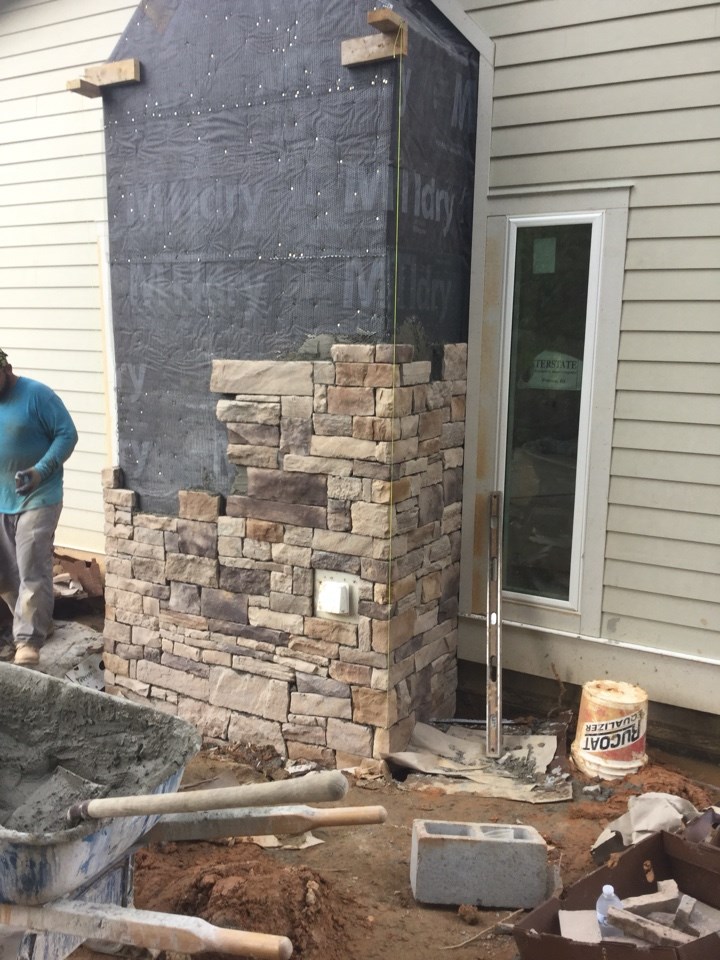
- Provide an additional bond-break drainage plane layer behind all adhered stone / masonry veneer or stucco wall cladding assemblies.
- Possible monolithic weather-resistant barrier materials include house wrap that is sealed or taped at all joints; rigid foam insulation or other sheathing materials with a weather-resistant coating if all joints are fully taped; building paper or building felt installed with shingle-style laps; liquid-applied coatings; or other water-resistive barrier materials recognized by the ICC-ES or another accredited agency.
See the Compliance Tab for links to related codes and standards and voluntary federal energy-efficiency program requirements.
Description
Most exterior wall cladding systems leak. Wind pressure and capillary action can drive rainwater through the many cracks, joints and small gaps in a building's exterior, and with typical residential siding systems, it is nearly impossible to seal all those holes. Even if a builder succeeds in sealing a majority of the holes, the caulks and sealants used to seal them will not last as long as the exterior cladding materials, and the sealants will need to be reapplied periodically. A wall that tries to block entry of water using caulks and sealants is sometimes called a "barrier wall," but it is not a very practical system for residential buildings (BSC 2007).
A more practical way to protect building exteriors from rainwater relies on a "drainage approach," achieved by installing a drainage plane beneath the exterior cladding. With this approach, any water that leaks through the cladding will run into a water-resistant surface and safely drain down the wall. For a detailed Building America-sponsored research report about taped insulating sheathing drainage planes, see Measure Guideline: Guidance on Taped Insulating Sheathing Drainage Planes.
To work effectively, the drainage plane must be designed and installed to channel water away from the building. This will involve the following (Smegal and Lstiburek 2012):
- Lap drainage plane materials over all exterior wall flashings so water flowing down the walls is directed away from the building. Common wall flashings include flashing at the base of walls, sidewall flashing where roofs intersect walls, and flashings around window and door openings.
- Carefully seal around all penetrations through the wall. Examples of common wall penetrations include those for water spigots, exhaust vent outlets, HVAC line sets, and wiring for outdoor light fixtures and receptacles.
While the primary function of a weather-resistant barrier is rainwater control, the drainage plane may also serve as an air barrier if the seams in the drainage plane are taped or otherwise sealed. An effective air barrier is critical to the long-term durability of the building, particularly in hot and cold climates where moisture-laden air moving into the enclosure may cause condensation problems (Lstiburek 2006).
Drainage Plane Materials
Materials that may be used to create an effective drainage plane include the following.
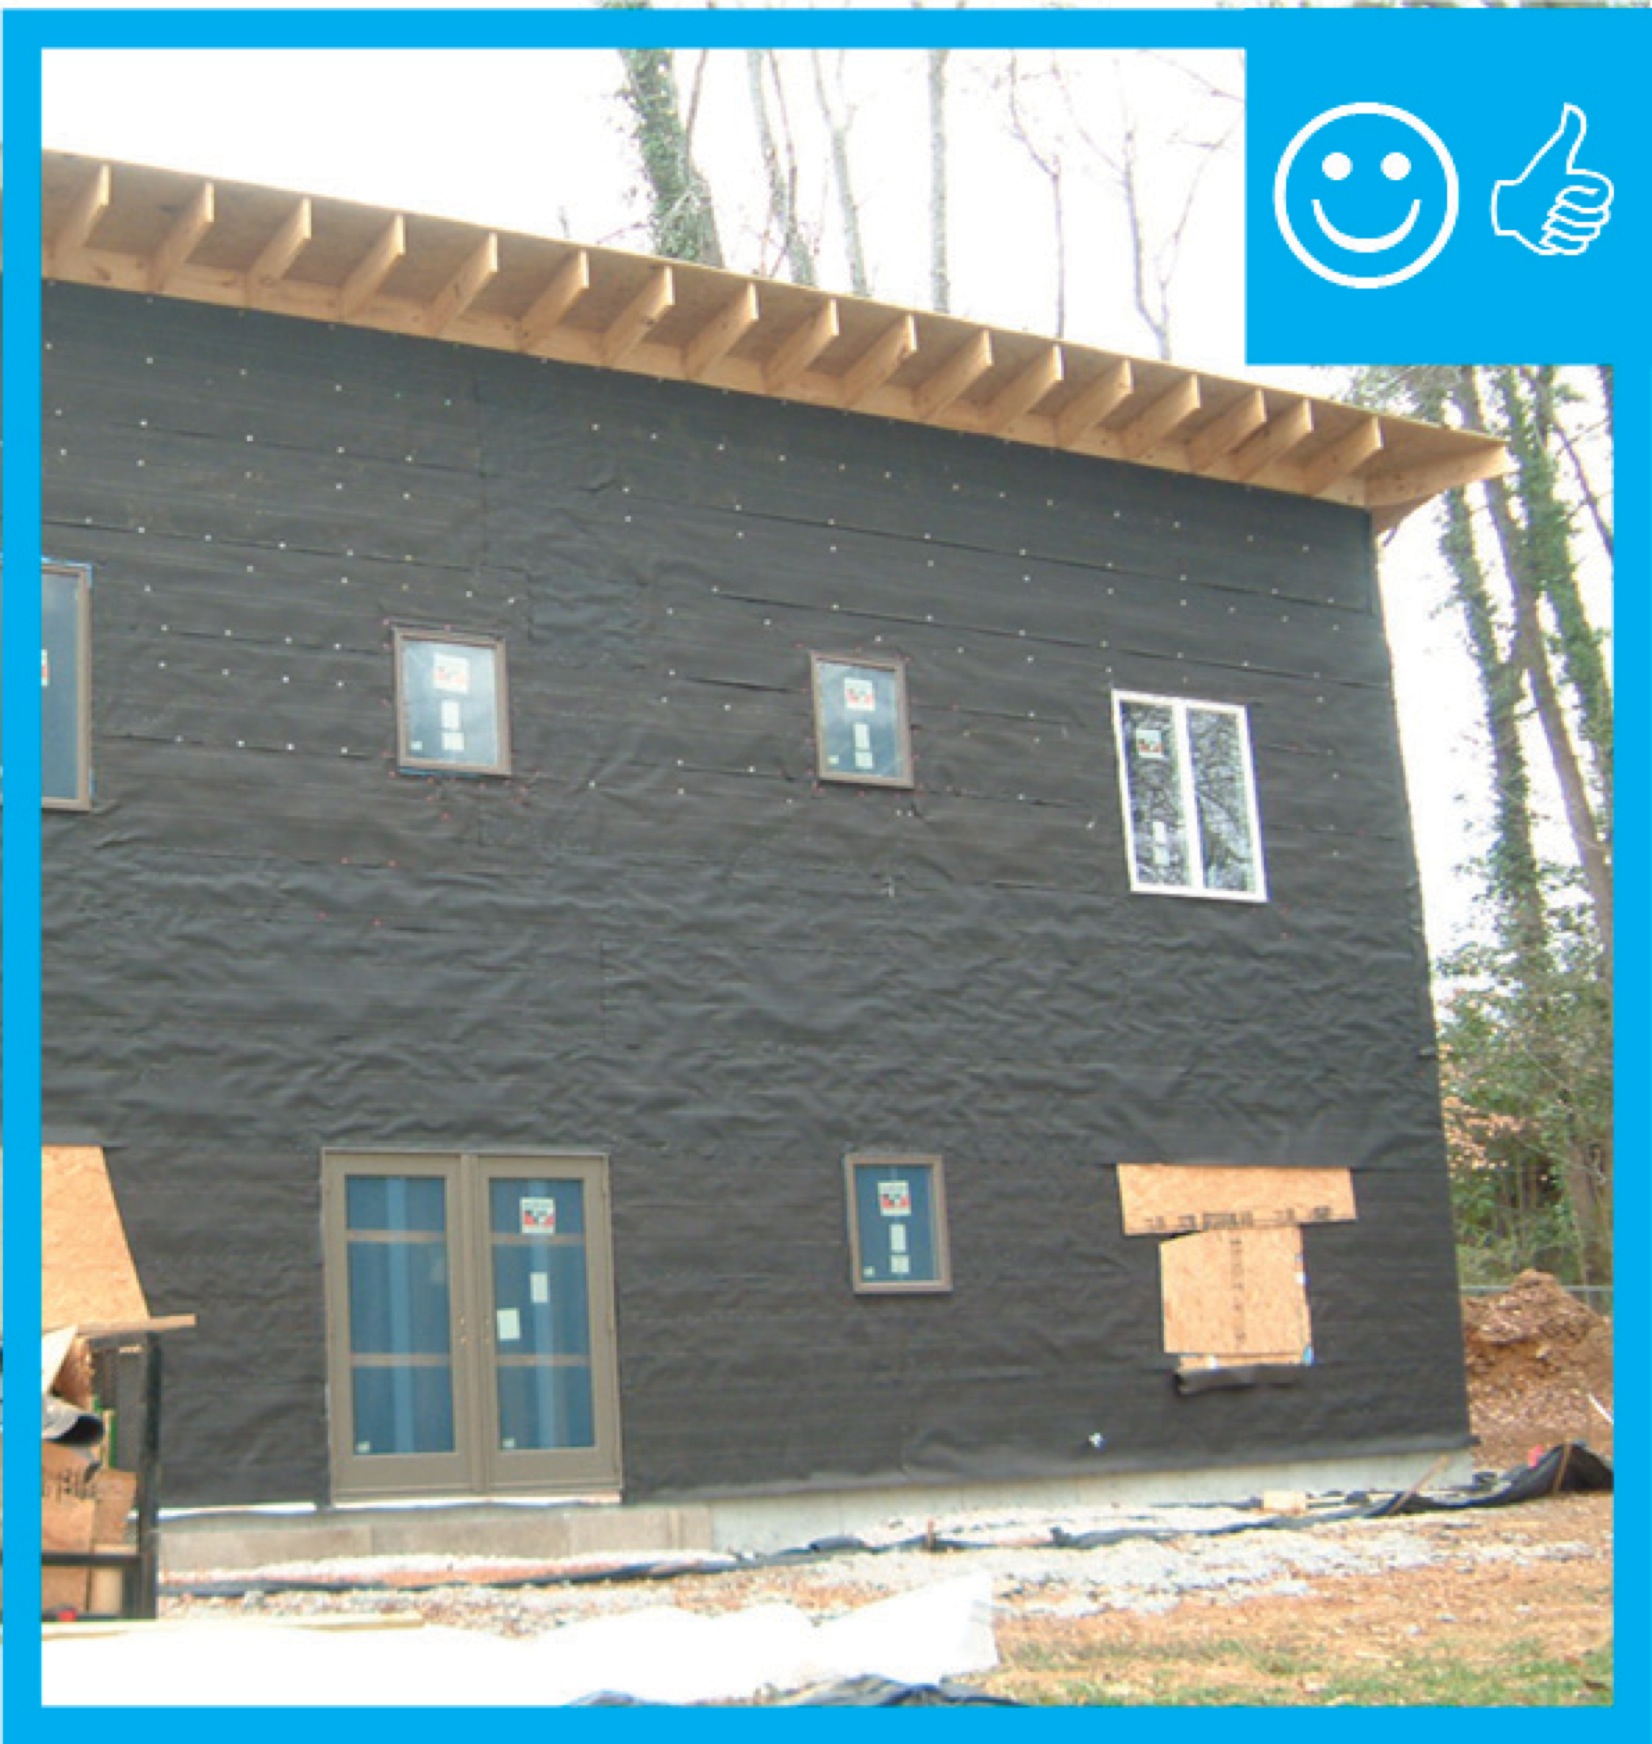
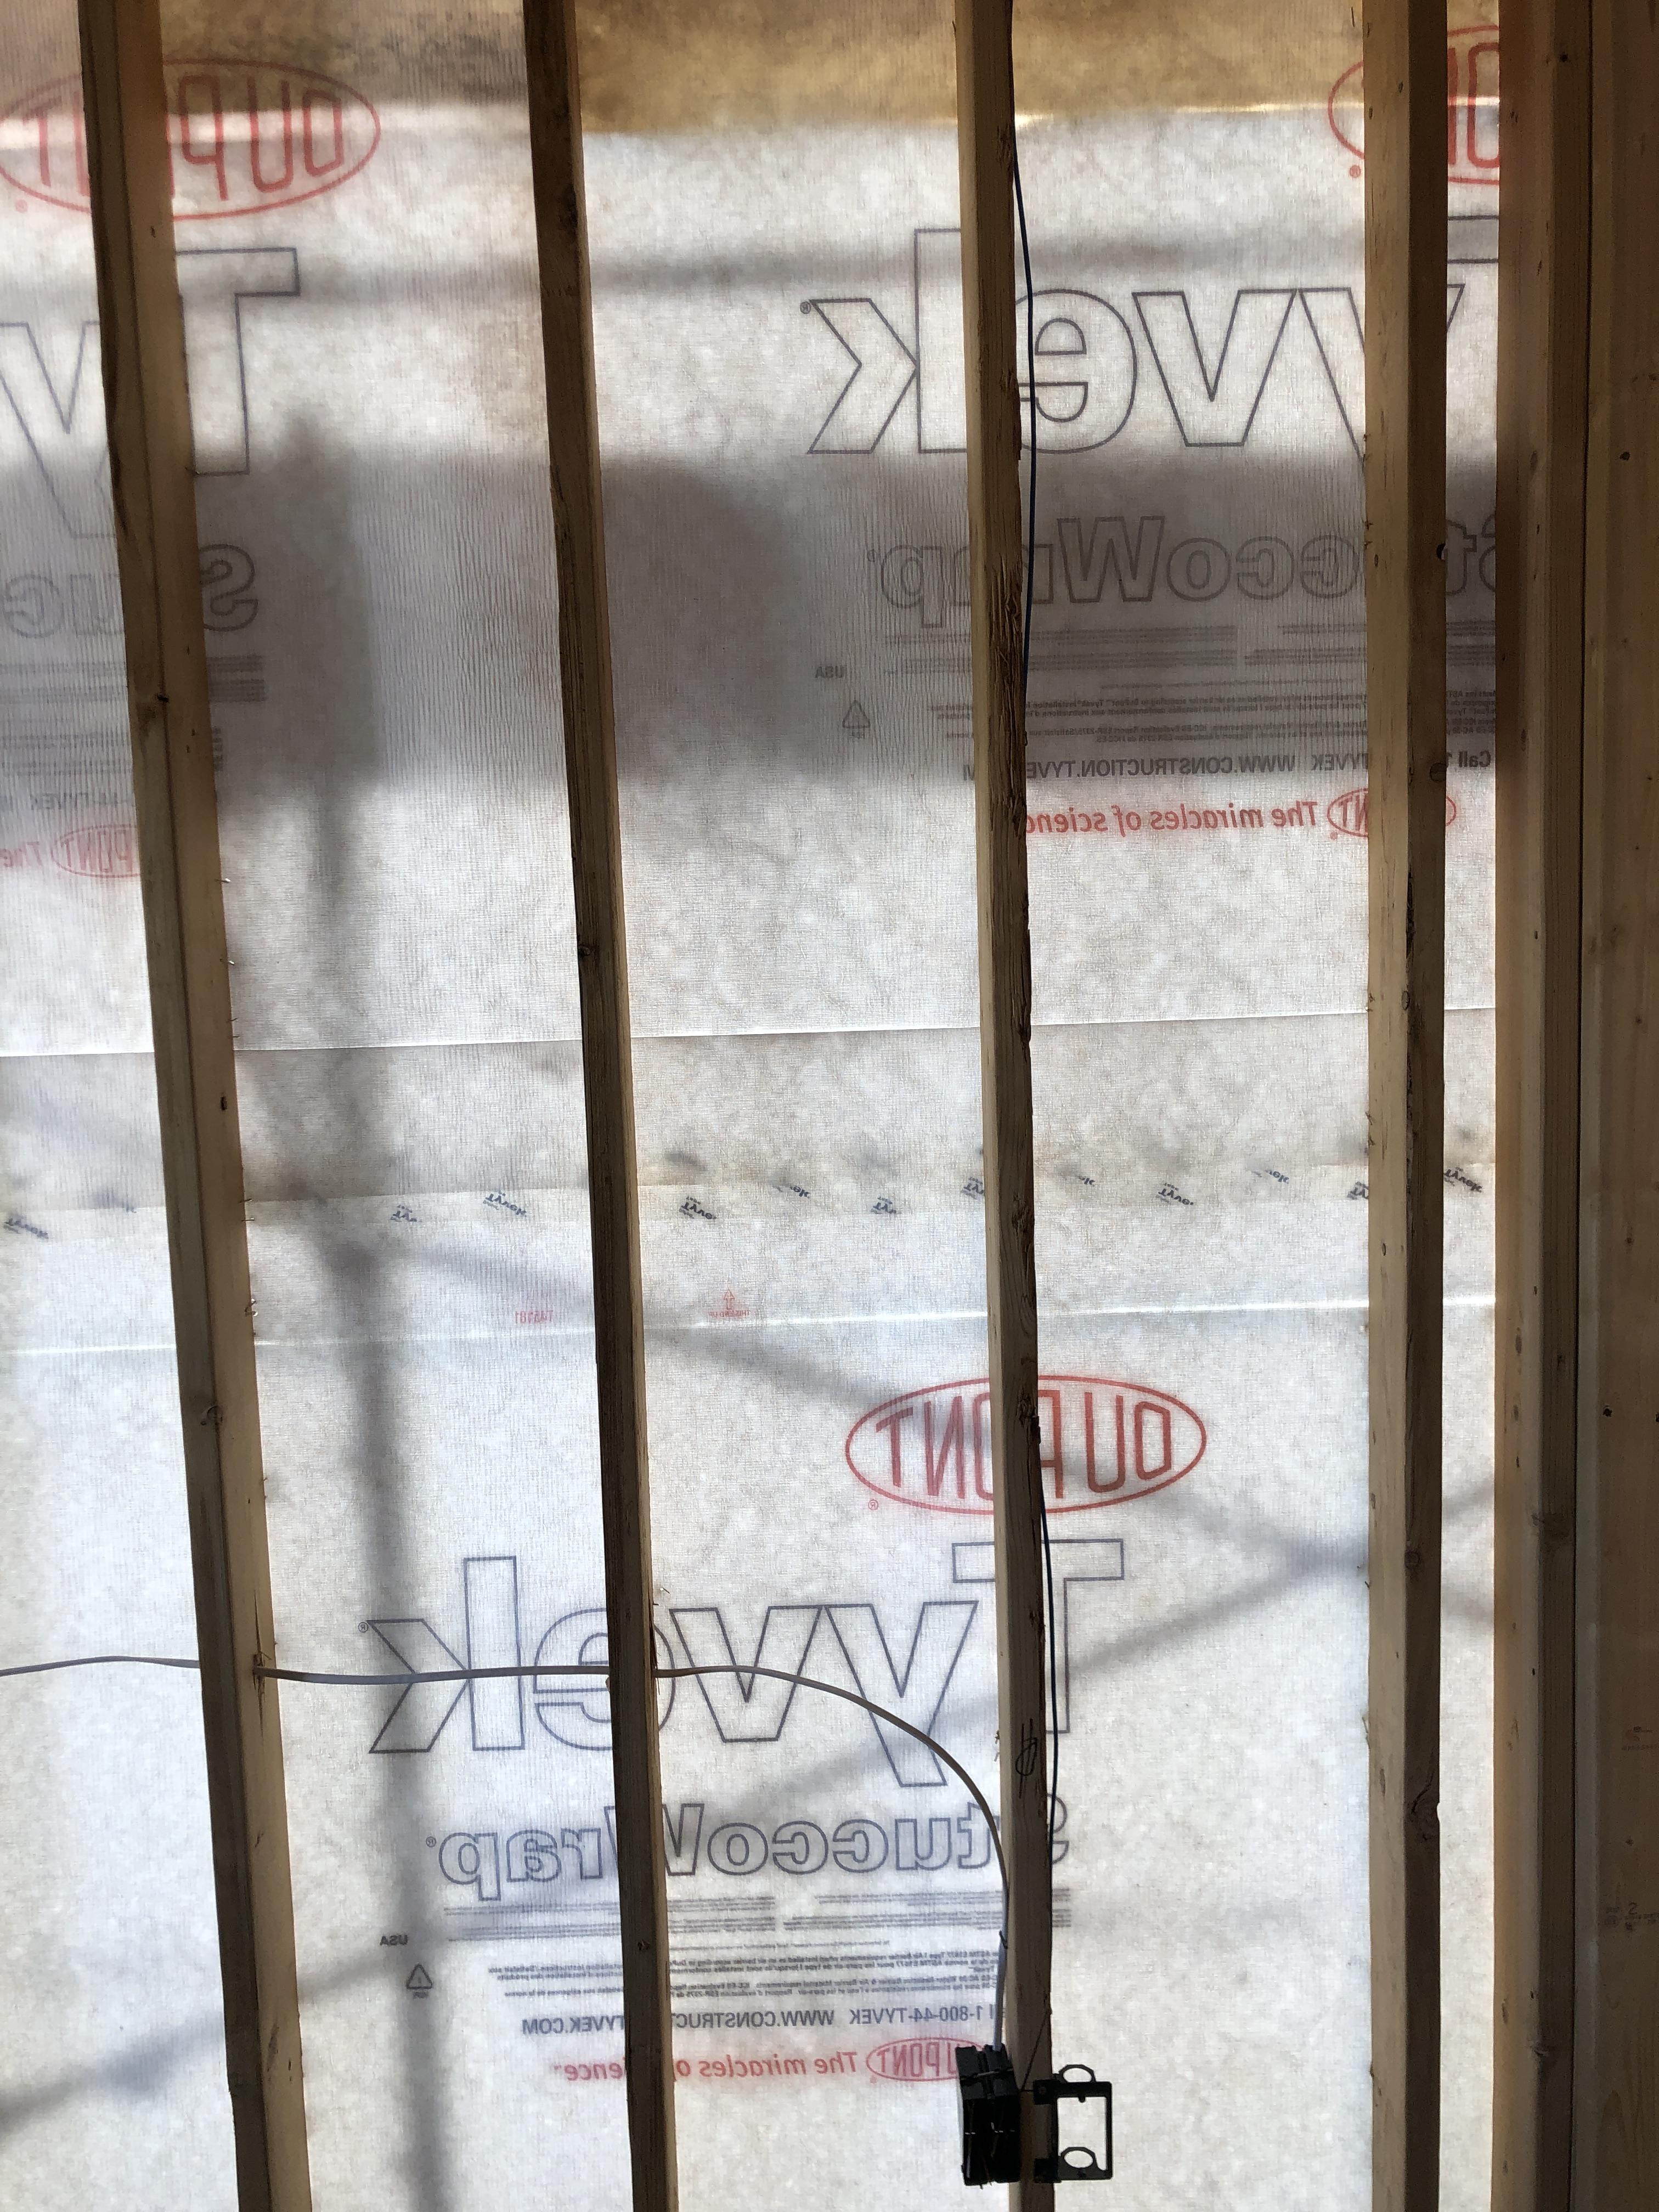
House wrap, sealed or taped at all joints: A wide variety of plastic house wrap materials, perforated and non-perforated, exist on the market. Perforated products have tiny holes punched in them. The holes allow water vapor to pass through the material but are small enough to block droplets of liquid water, which are held together by surface tension and too large to pass through the holes. Non-perforated products rely on tiny interstitial gaps between fibers or woven bands of plastic that allow water vapor to diffuse through the material. To evaluate the differences, look for the performance results of ASTM tests for water holdout and permeability (DOE 2000).
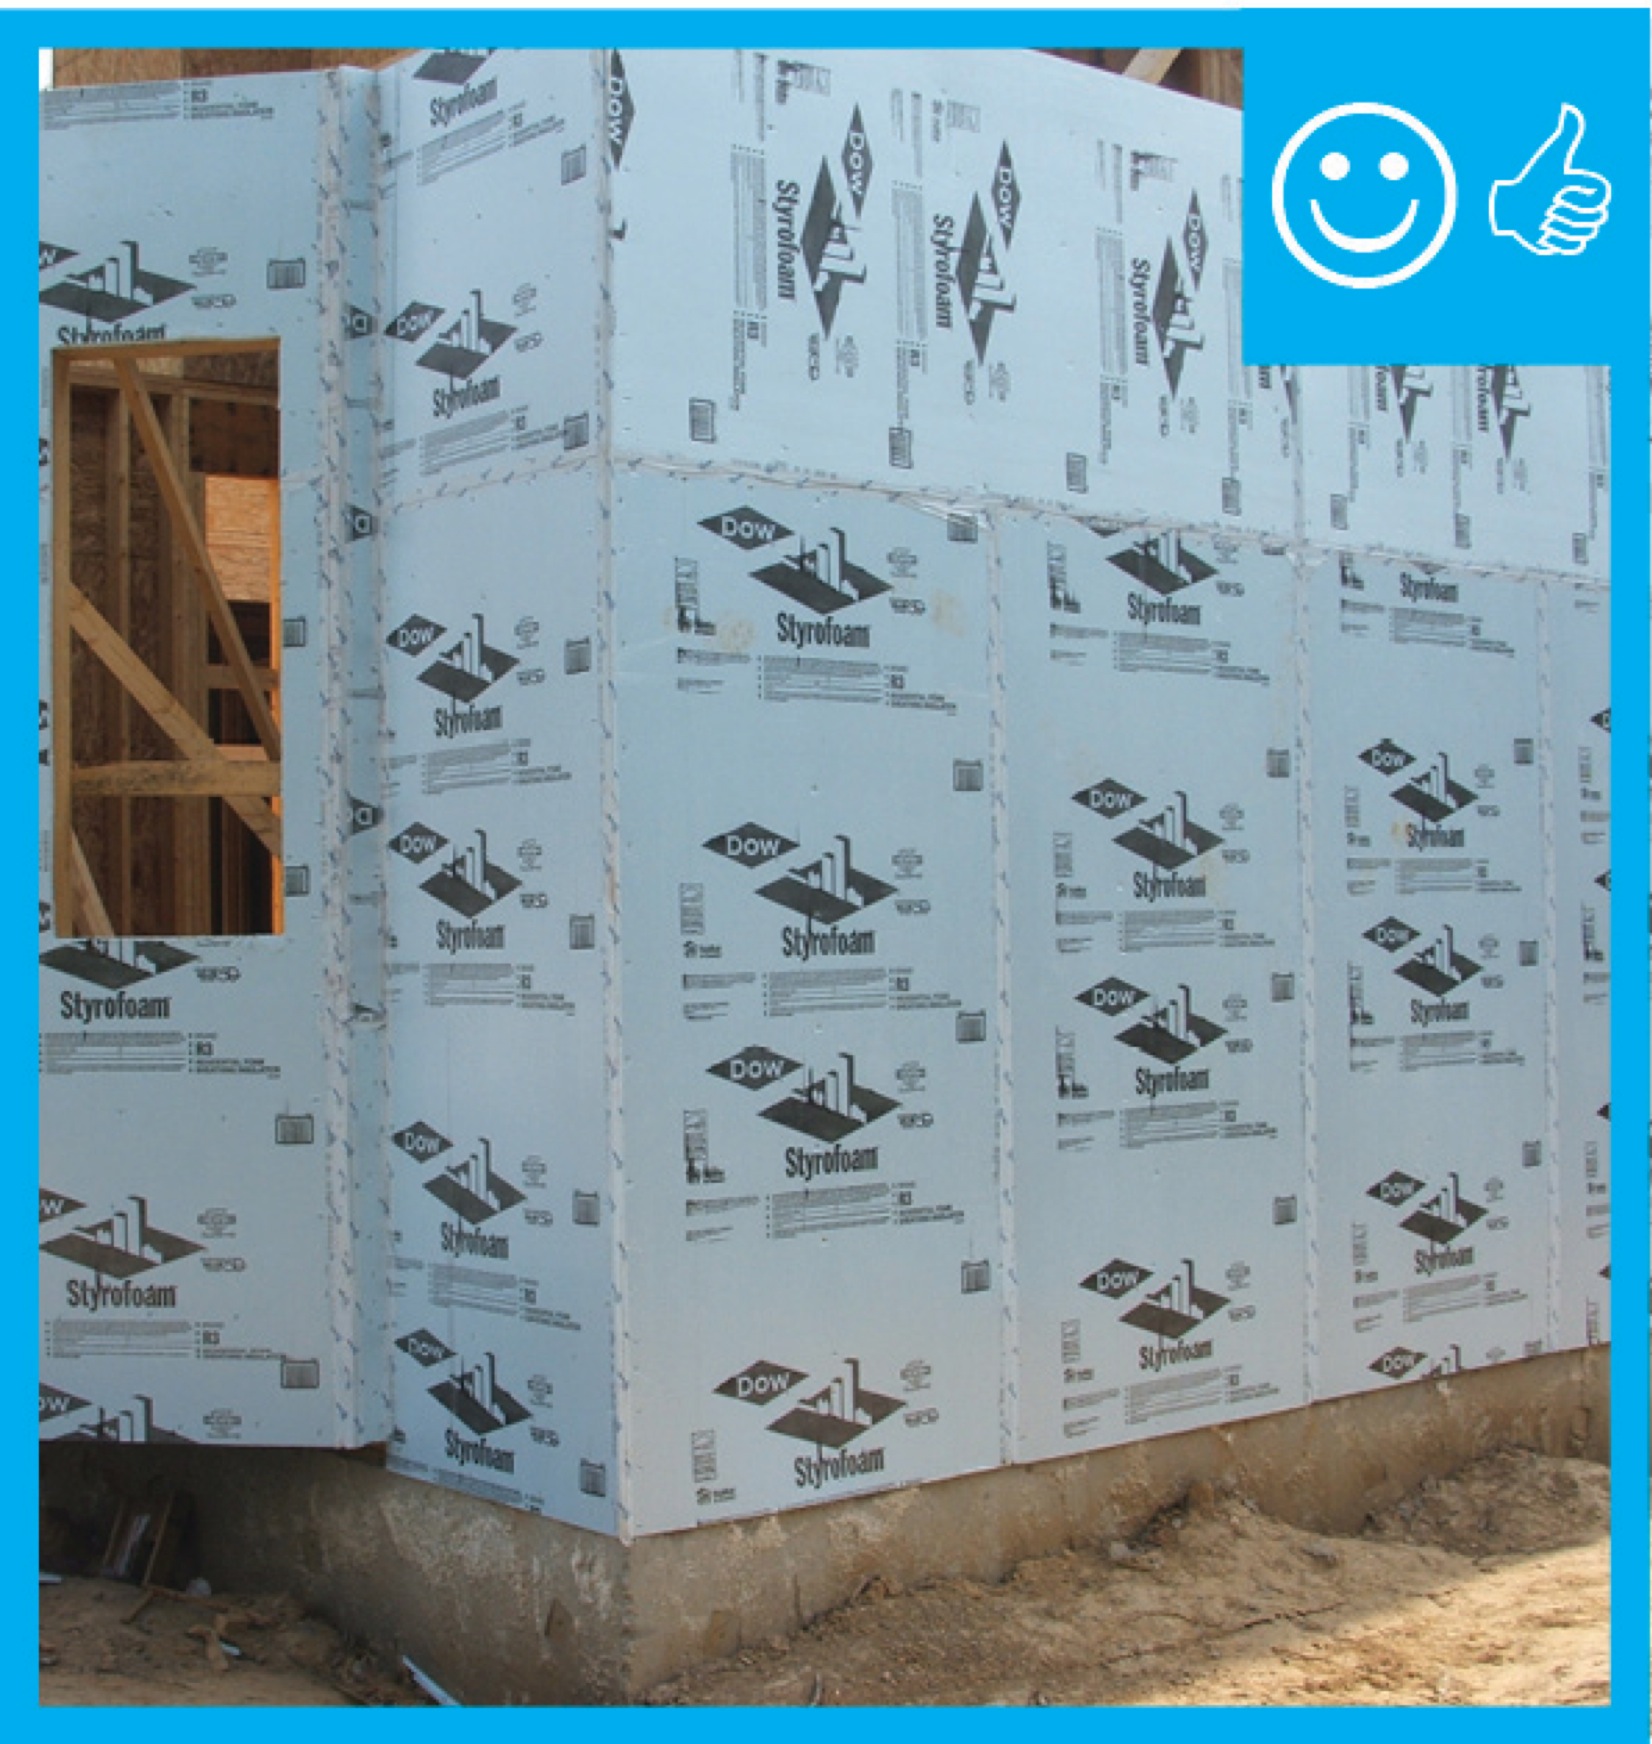
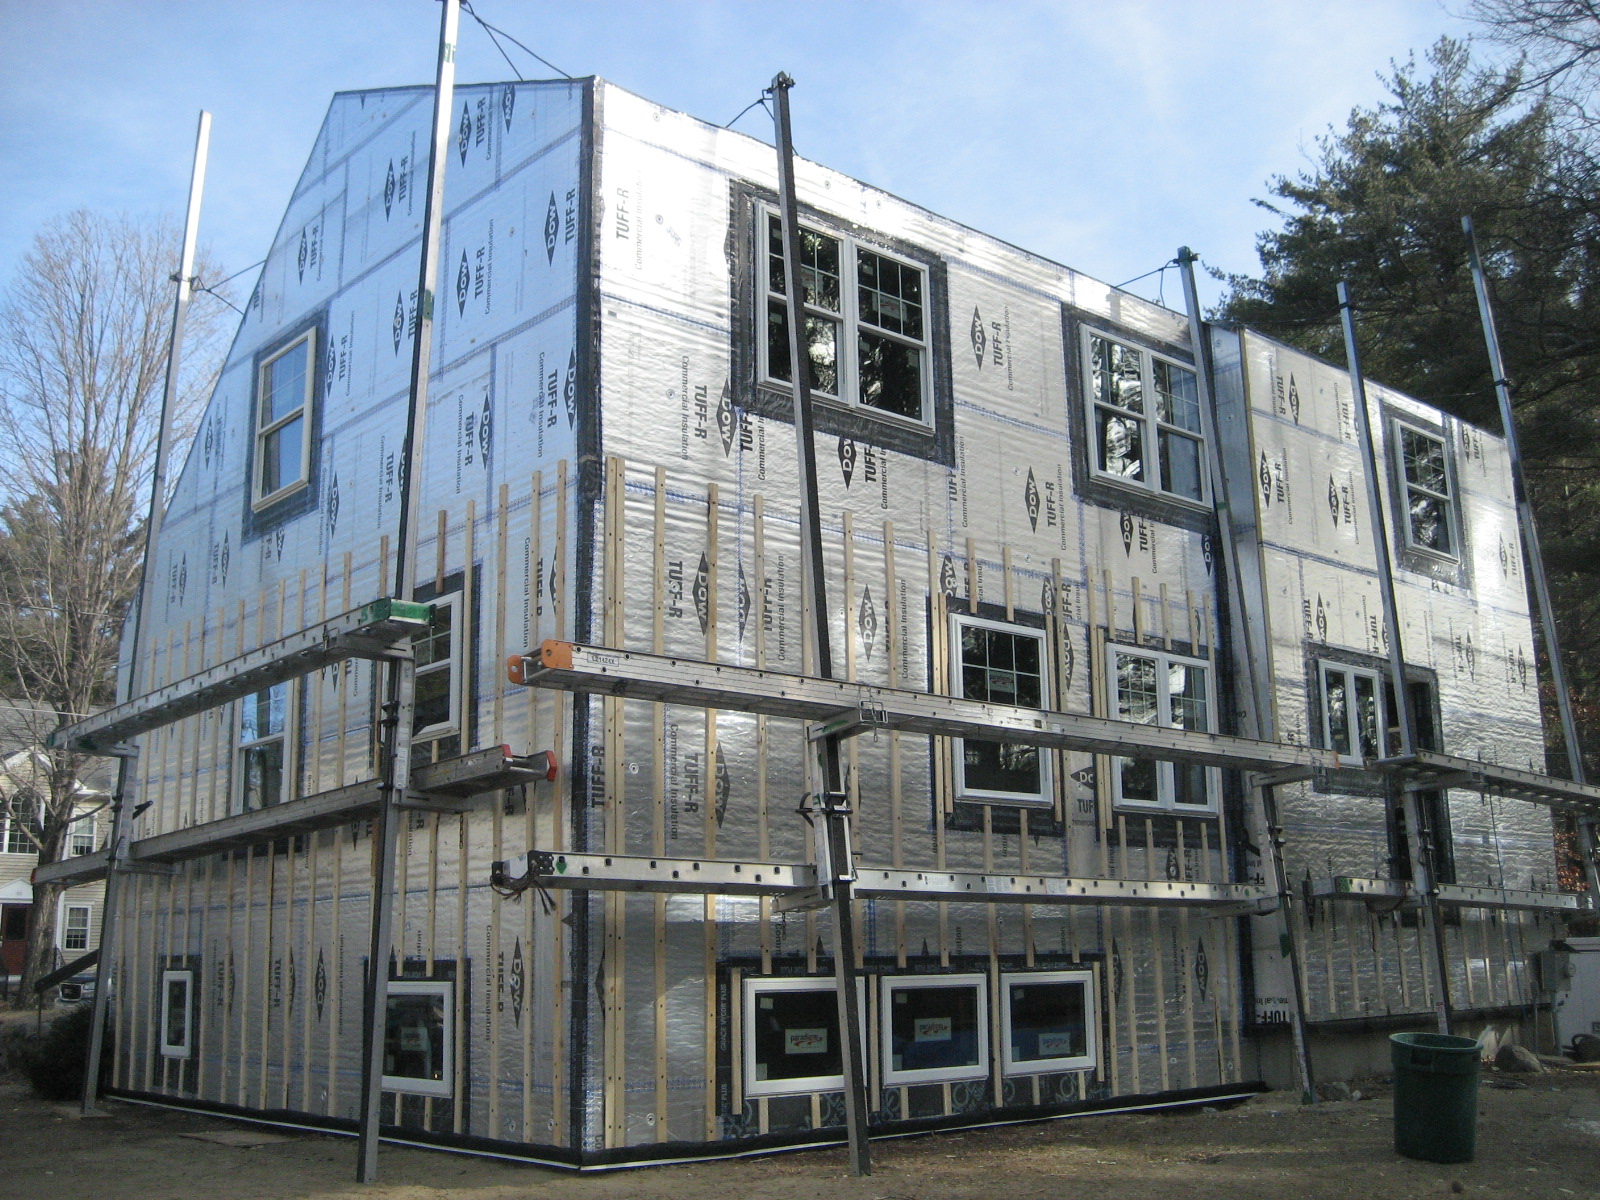
Rigid foam insulation, fully taped at all “butt” joints: There are three common varieties of rigid foam insulation on the market that can be used for creating an exterior drainage plane (BSC 2007):
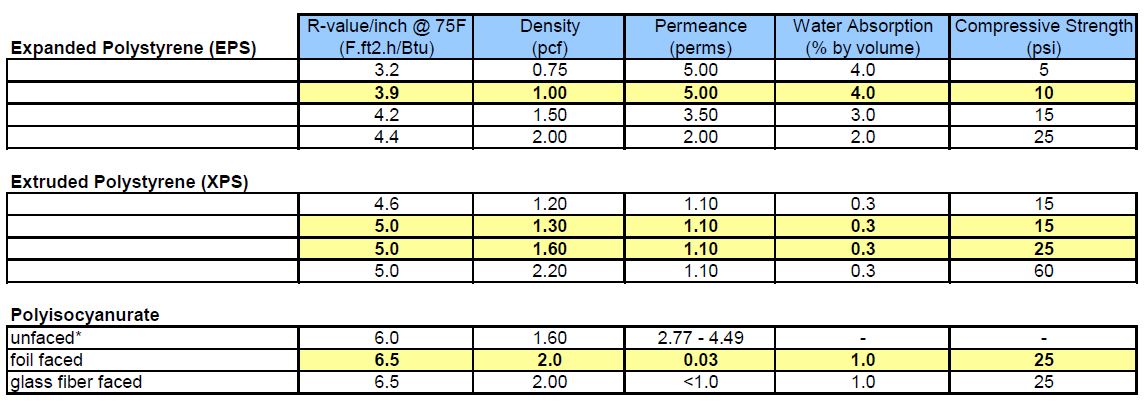
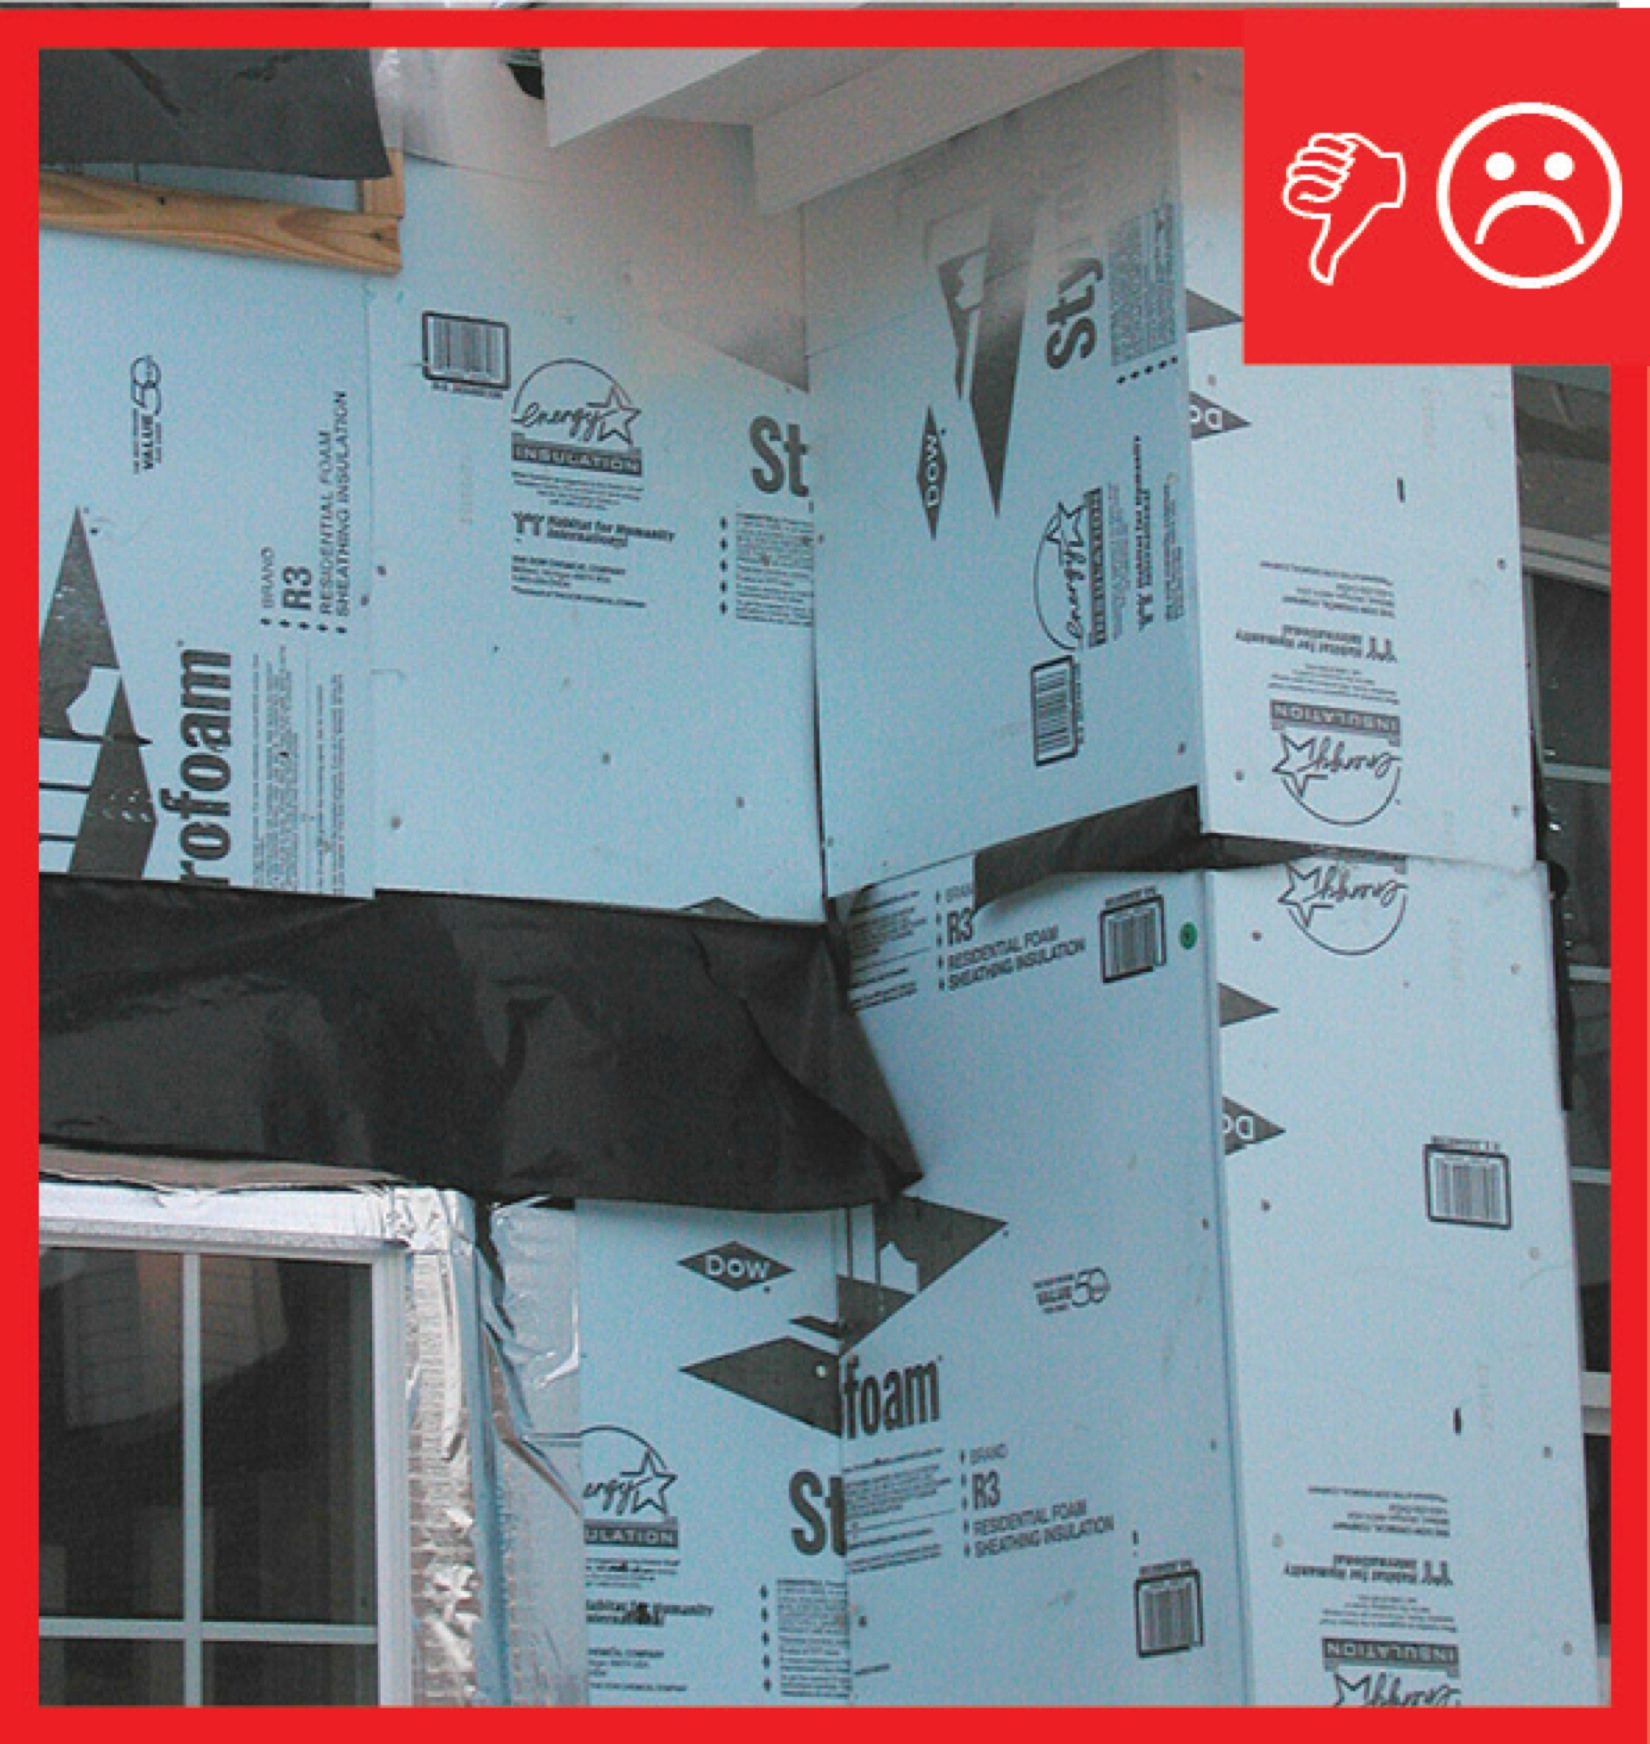
- Expanded polystyrene (EPS; sometimes referred to as "bead board"): Unfaced EPS foam should not be used as a drainage plane, as the boards will absorb water (see Table 1 below). If EPS foam is chosen as a continuous exterior insulation, cover the installed foam boards with a weather-resistant barrier such as house wrap. There are some faced EPS foam products on the market that are appropriate for use as a drainage plane material. Careful cutting and handling is needed when using EPS boards, as the edges of the boards can break off easily.
- Extruded polystyren (XPS): provides a durable matrix of closed cells that holds out water well, provided the "butt" joints between the panels are taped. For best results, use XPS panels with shiplapped joints. The lap will allow water to drain out of the joints between the foam boards. Note that even if shiplap joints are used, the joints still need to be taped.
- Polyisocyanurate (commonly referred to as "polyiso"): Faced polyiso foams can be used as a drainage plane, provided the "butt" joints between panels are taped. Unfaced polyiso foam will absorb water and should not be used as a drainage plane unless the installed boards are covered with a weather-resistant barrier, such as house wrap.
Note in Table 1 that key differences exist in the properties of different foam sheathings. For use as a drainage plane, the water absorption rate is critical. Only XPS or faced polyisocyanurate can be used as a drainage plane without installation of an additional weather-resistant barrier. New EPS products that include a facing are not included in this table; these may be appropriate for use as a drainage plane.
For additional information on installing rigid foam as a continuous drainage plane, see the guide Taped Insulating Sheathing Drainage Planes.
All foam boards are subject to degradation from the ultra-violet (UV) rays of the sun and should be covered with cladding soon after installation on the exterior of walls. Foam boards that become wet prior to installation can also warp. It is important to store materials on site in a covered, dry location.
Building paper typically comes in 36-inch-wide rolls in two common weights designated as #15 and #30. The numbers are from a time when asphalt-impregnated felt weighed 15- or 30-pounds per square (one square = 100 square feet). Today products are made with asphalt-impregnated Grade-D building paper and weigh considerably less per square, but the designations are still used by product manufacturers to distinguish lighter and heavier weight materials.
Compared with house wraps, all building papers tend to tear more easily during installation. They also absorb water more readily than house wraps and are less resistant to ultra-violet light from sunlight (BSC 2007).
Other water-resistant barriers recognized by ICC Evaluation Service (ICC-ES) include liquid-applied membranes and peel-and-stick adhesive-backed membranes. These products are typically used more on commercial jobs than residential jobs. However, such products are becoming increasingly available to residential contractors. Building America-sponsored research suggests that the use of liquid-applied membranes provides distinct advantages for residential drainage planes (Smegal and Lstiburek 2012).
Installation of building wraps, including house wrap and building paper, is typically done by the subtrades that install the cladding system. In most parts of the United States, the drainage plane materials are installed over exterior walls before the windows get installed. However, in some parts of the western United States (predominately in stucco markets) the drainage plane may be installed after the windows have been installed.
Before installing any drainage plane material, be sure to review the installation guidelines provided by the product manufacturer. General guidelines for installing most common house wraps and building paper are provided below. The installation procedures for house wrap and building paper are roughly the same. The primary differences are:
- More courses are usually required for building papers, due to the short width of building paper rolls.
- Different sealants are required to bond flashing materials and seal penetrations. Generally, tape can be used for house wraps but is not used for building papers as the bond will not last very long. Some caulks may be appropriate. For any drainage plane material, even house wrap, always check with the product manufacturer for recommendations on compatible sealants. For a detailed Building America-sponsored research report about taped insulating sheathing drainage planes, see Grin and Lstiburek 2012.
How to Install House Wrap and Building Paper
For installing either house wrap or building paper, follow this overall guidance (DOE 2000):
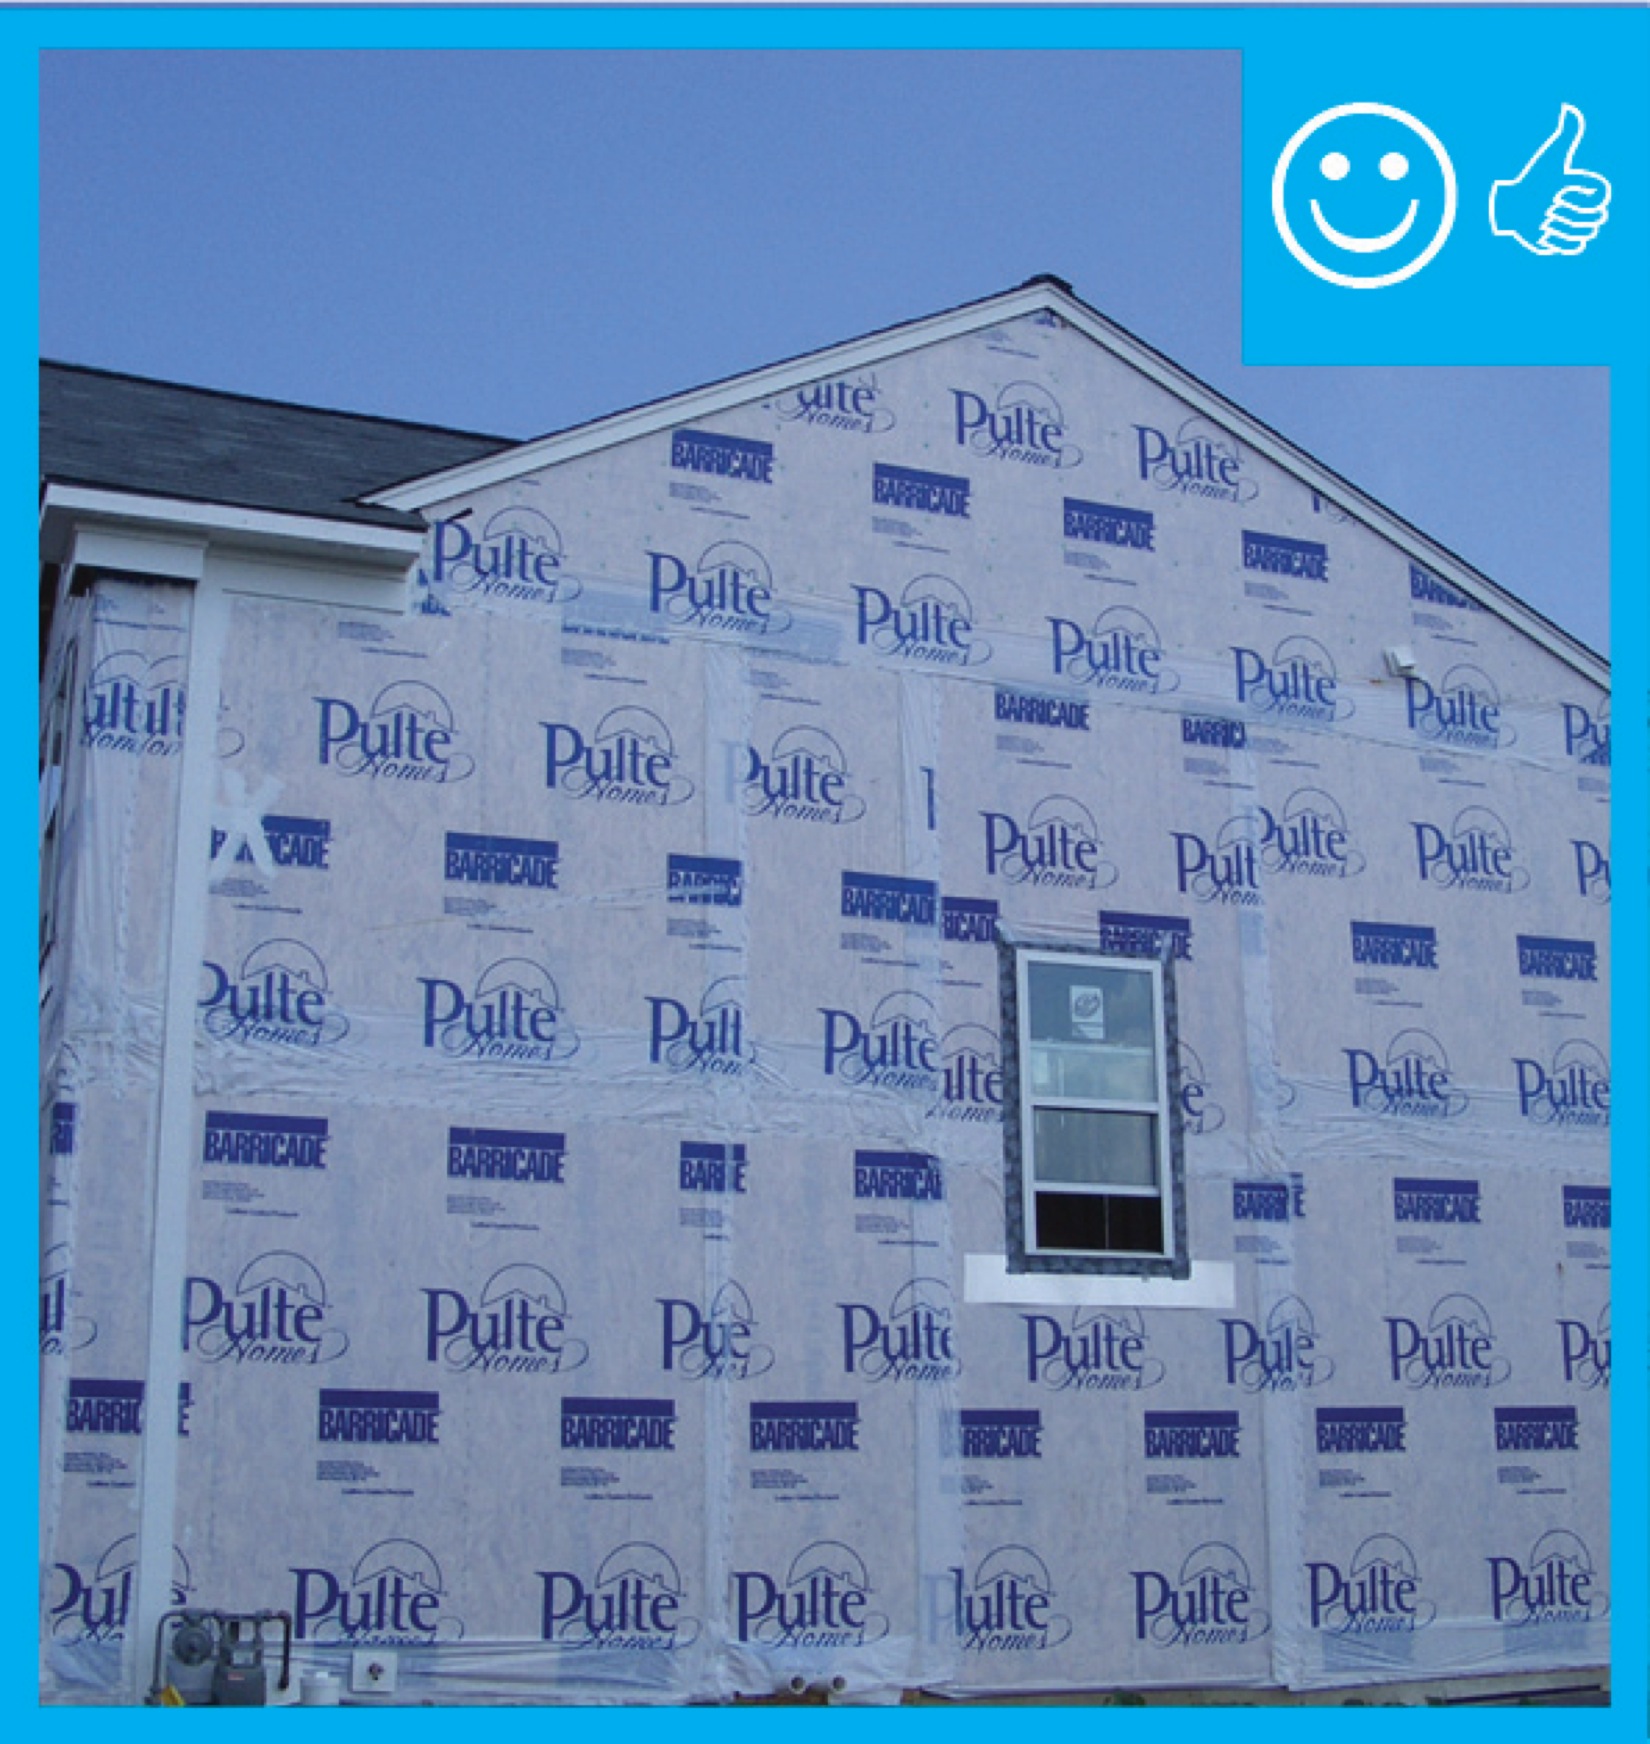
- Start at the bottom of the exterior walls and work your way up, installing each subsequent course so it overlaps the course below, as shown in Figure 1.
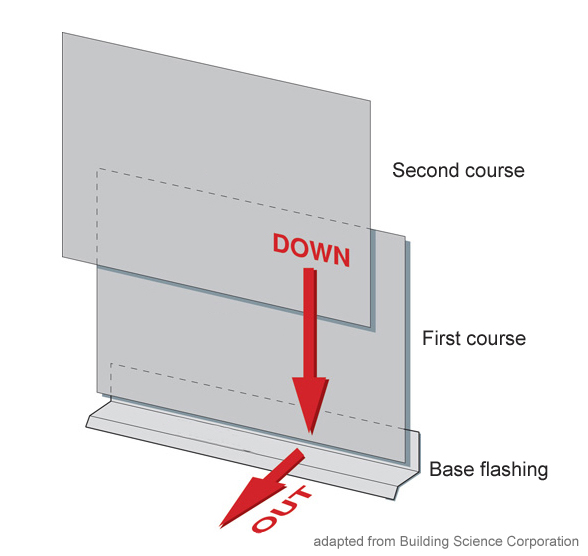
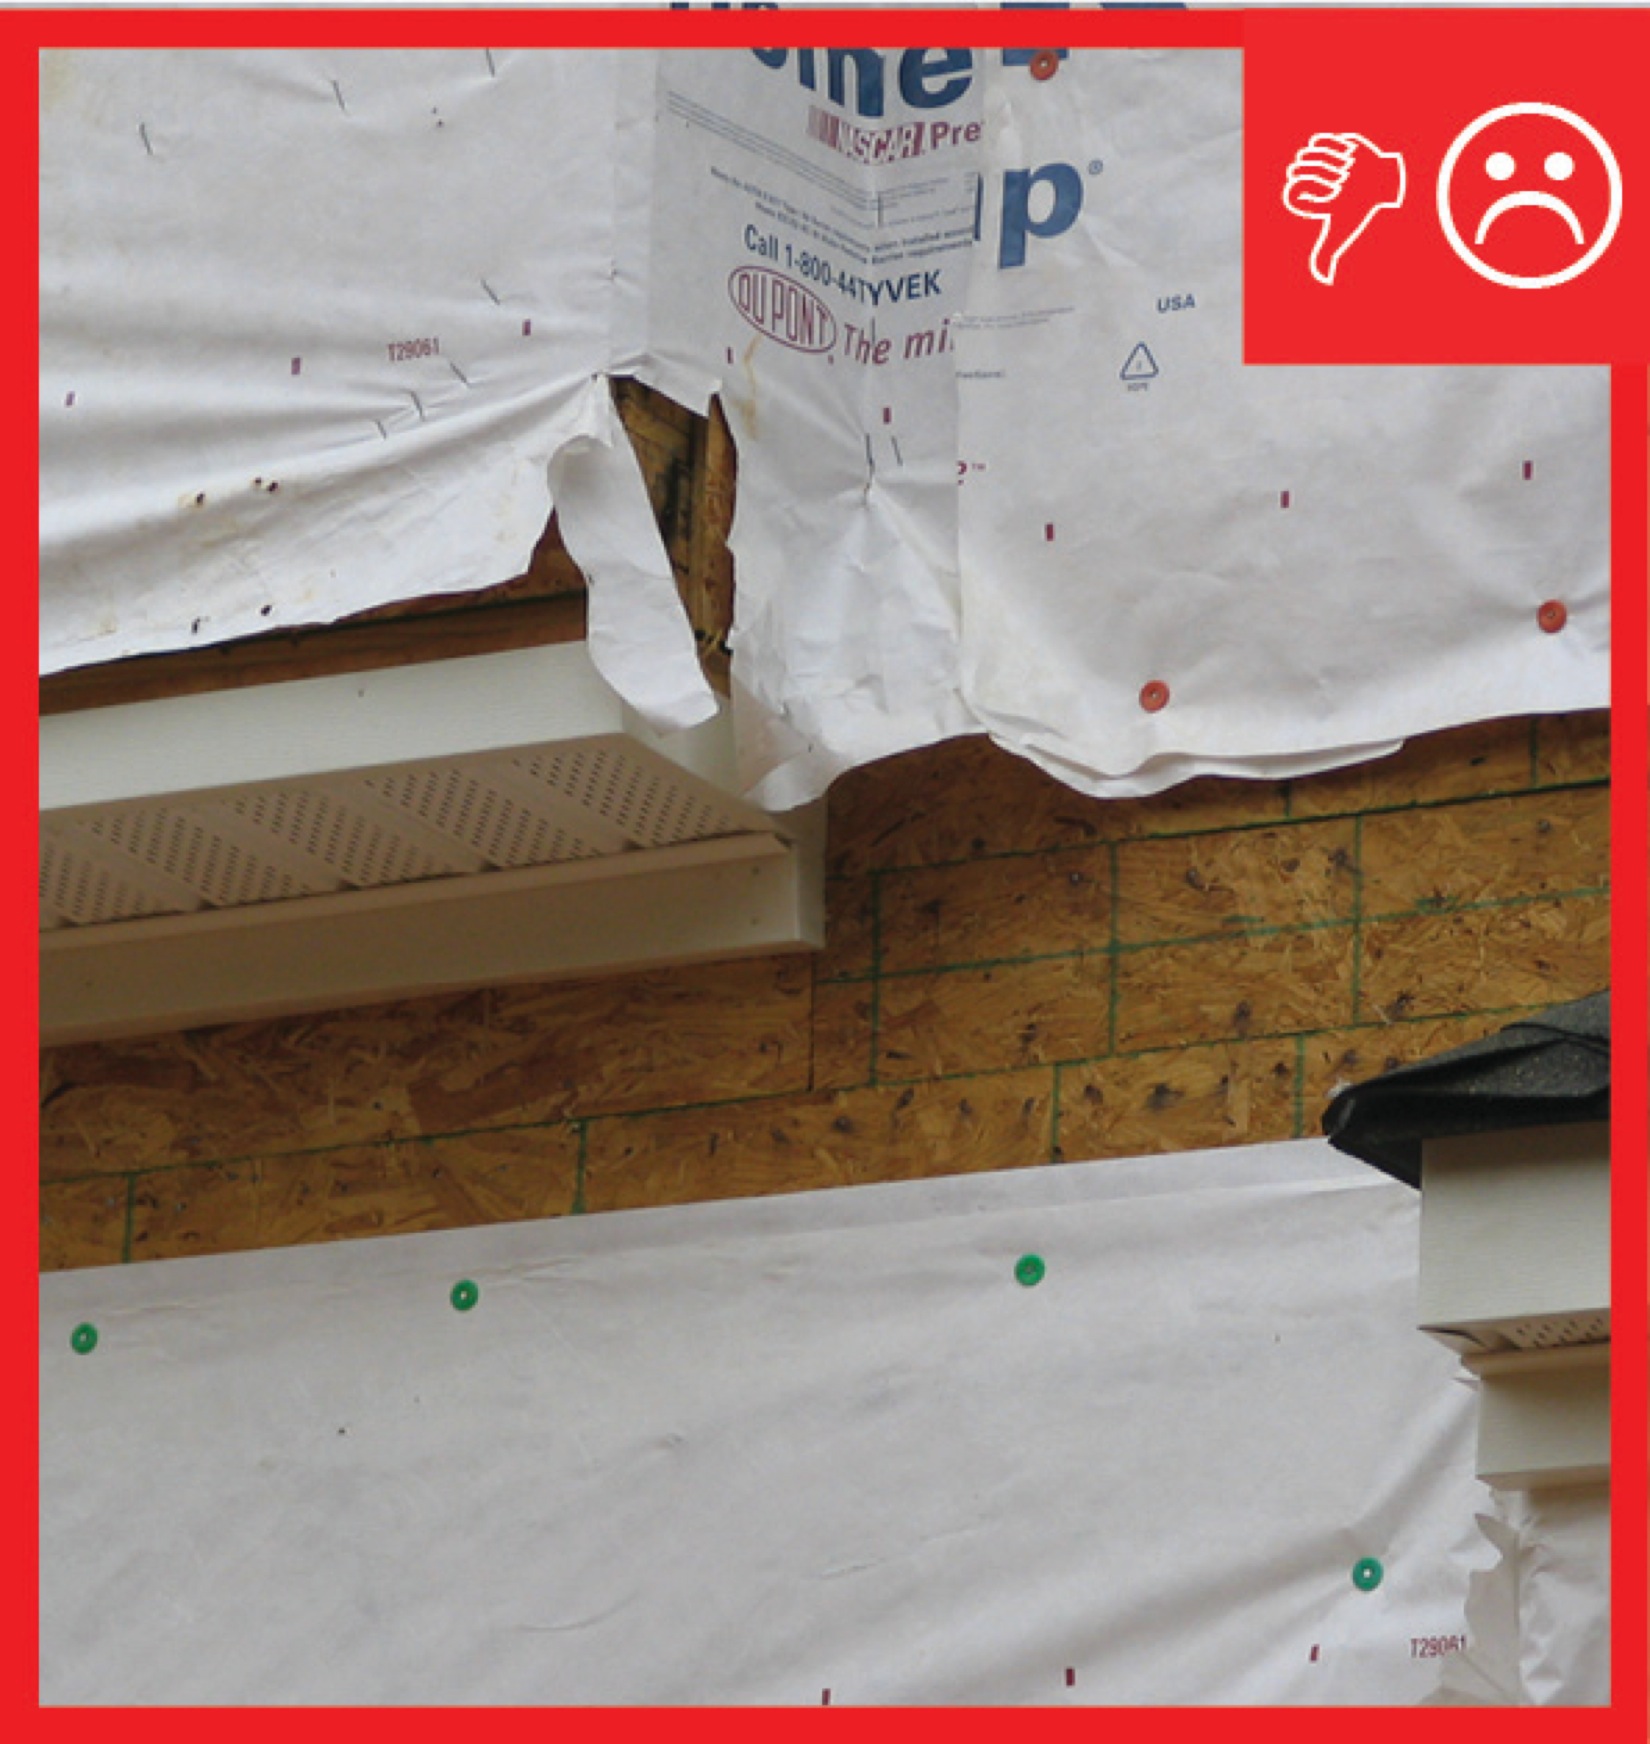
2. Unroll house wrap or building paper horizontally. Begin at a building corner, leaving a 6- to 16-inch overlap to wrap around the corner. The amount of overlap will vary according to the product manufacturer’s recommendations. The first course should overlap the flashing at the base of the walls. For details on installing base flashings, see Flashing at Bottom of Exterior of Walls. Also, be sure to overlap the vertical leg of any deck flashing, roof-wall flashing, or other flashing, using a consistent "shingle-style" lapping method. This will require installing flashings before installing the drainage plane to avoid "reverse shingling." (See this mistake in Figure 2.)
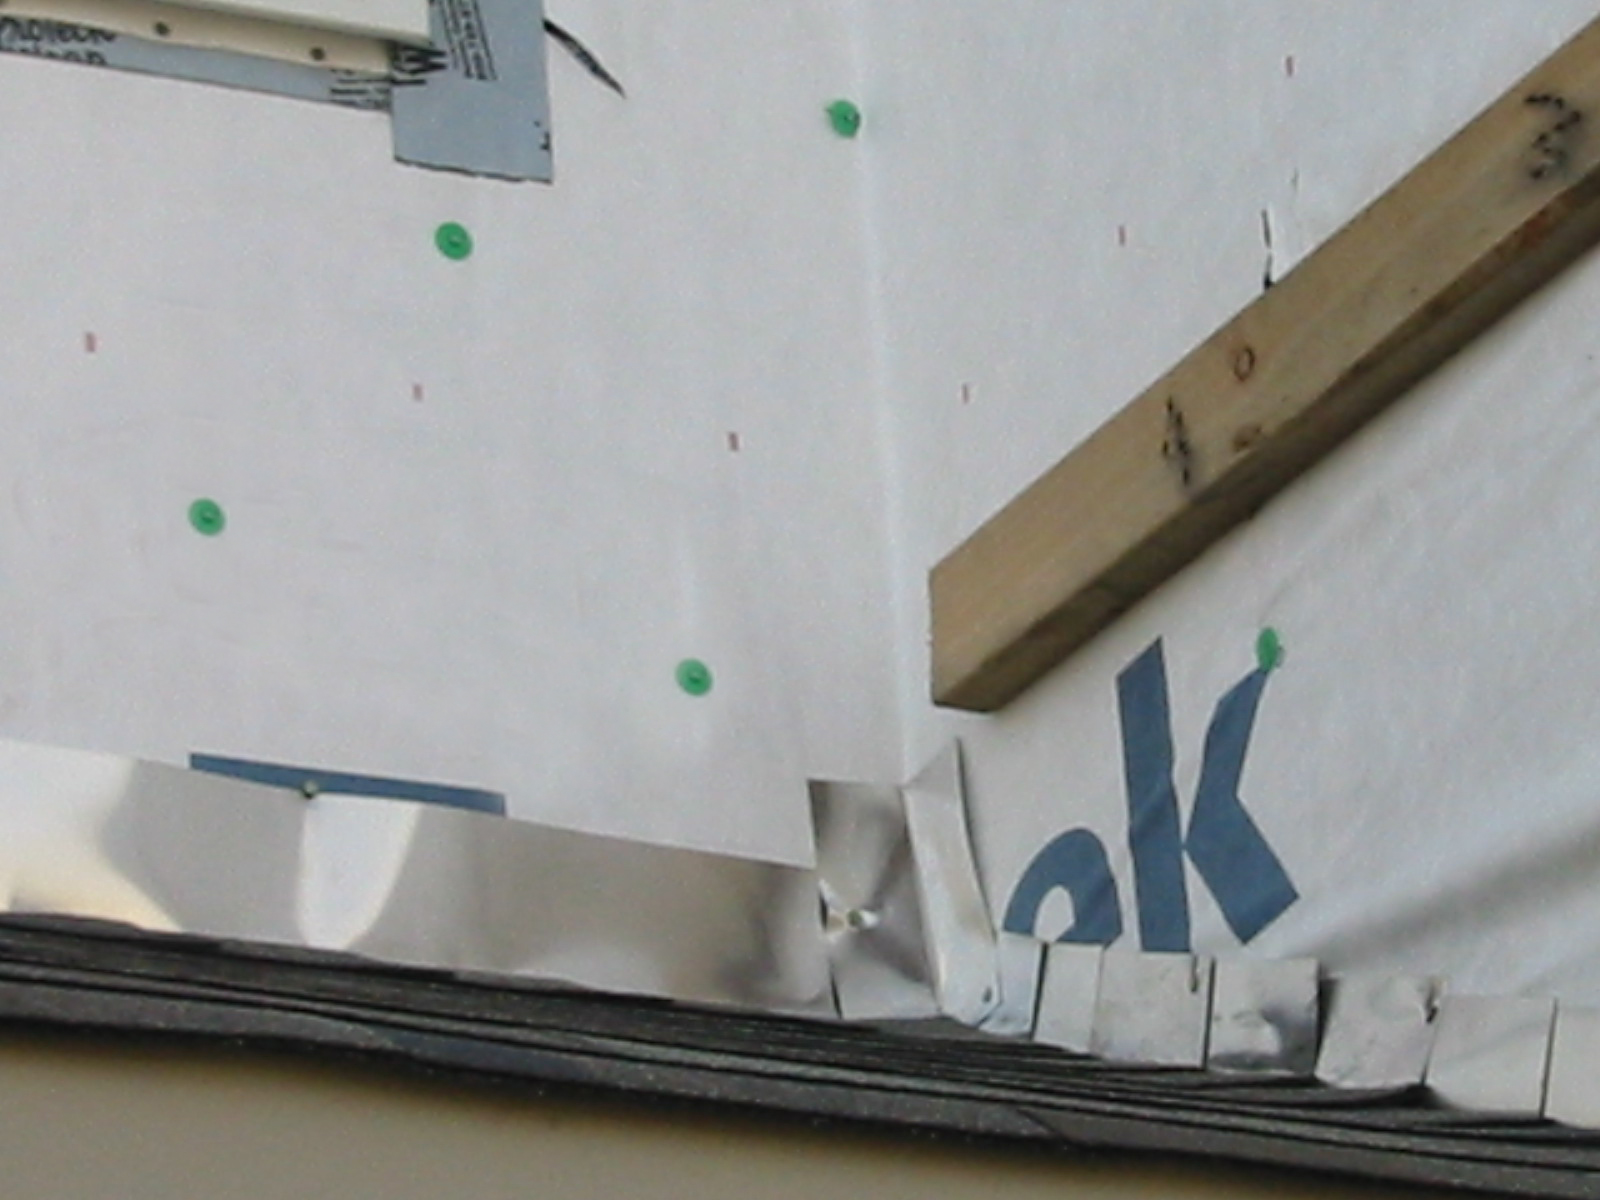
Figure 2. In this example of reverse shingling, the house wrap was incorrectly installed before the step flashing; it should have overlapped the step flashing to prevent rain water from getting behind the step flashing. Roll out the material over window and door openings and come back afterwards to integrate it with window and door flashings. For details on integrating drainage plane materials with window and door flashings, see Fully Flashed Window and Door Openings.

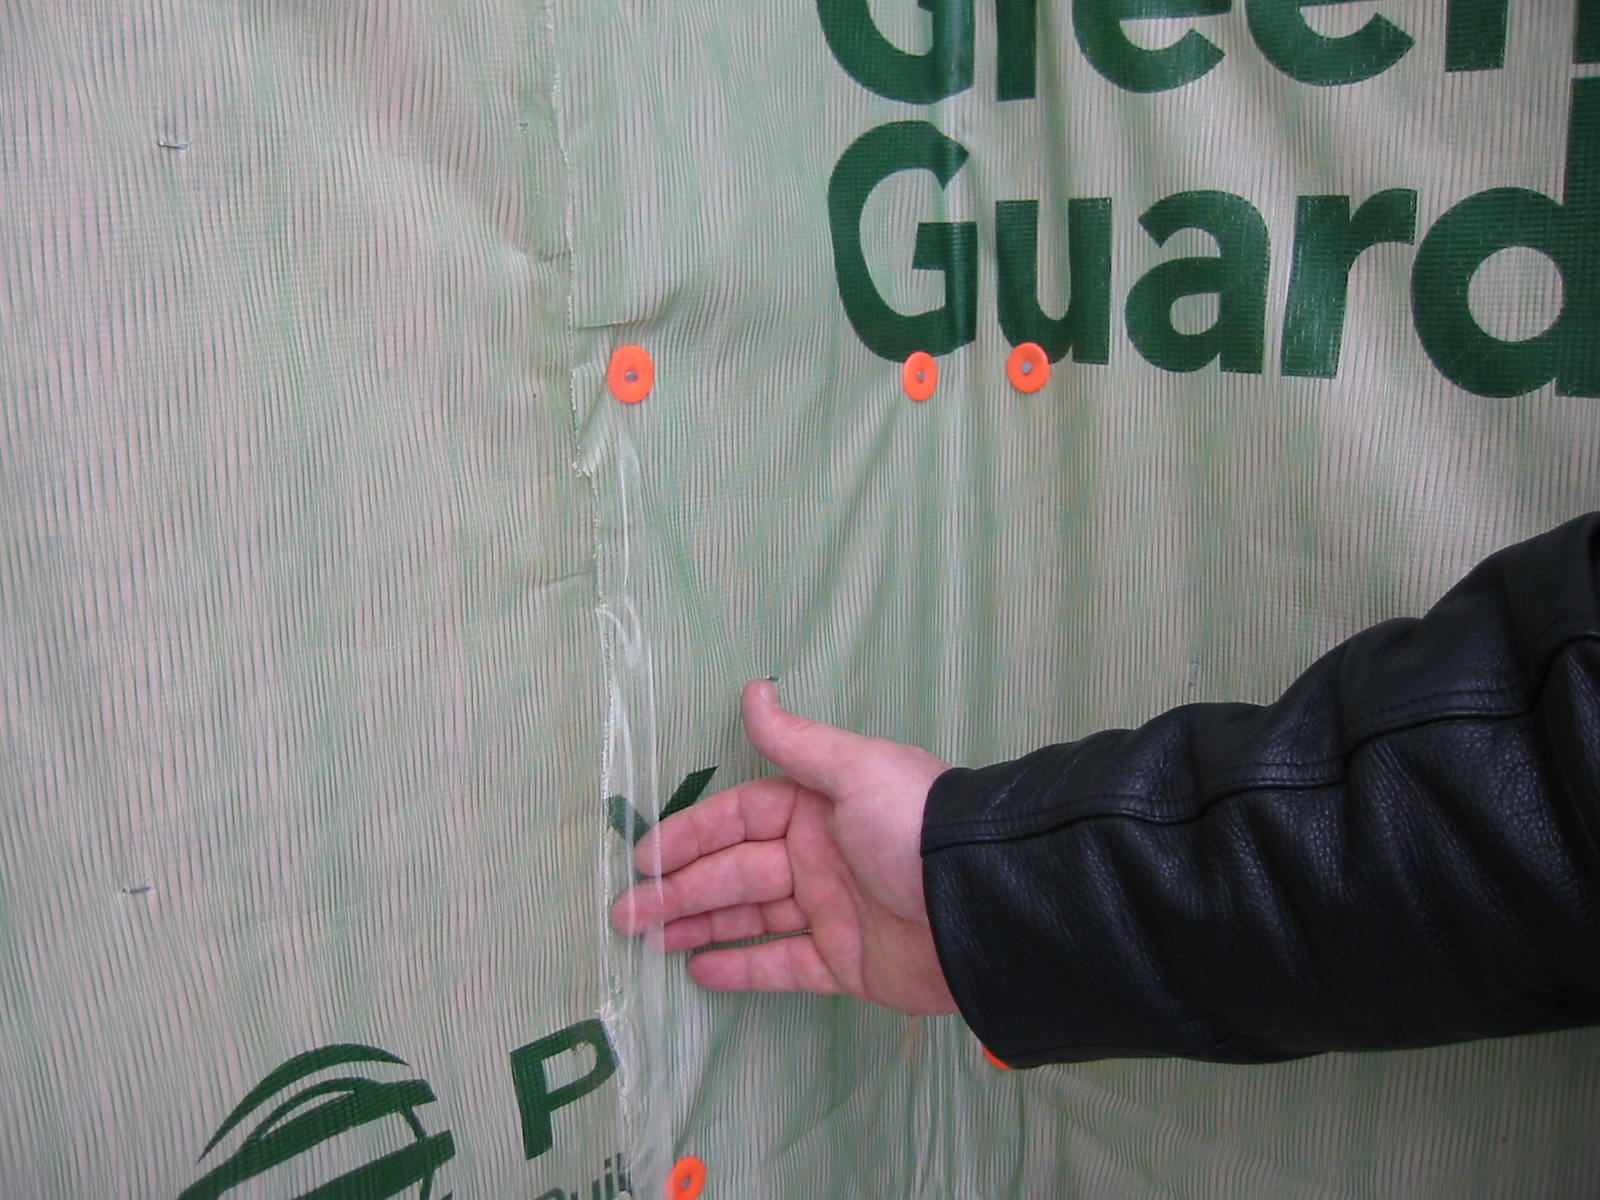
Figure 3. Key installation details for weather-resistant barriers include sealing all seams and around all openings. - Stagger the ends of each course so seams between courses do not align and overlap all seams following manufacturer recommendations. A 4- to 6-inch inch overlap for vertical seams is typical, and a 2-inch overlap for horizontal seams is typical.
Secure house wrap or building paper to the wall sheathing or framing members using wide-crown staples or nails with a large head. For wood-framed construction, cap nails that have a large plastic washer are recommended (see Figure 4). Space fasteners following manufacturer guidelines; every 12 to 18 inches is typical.
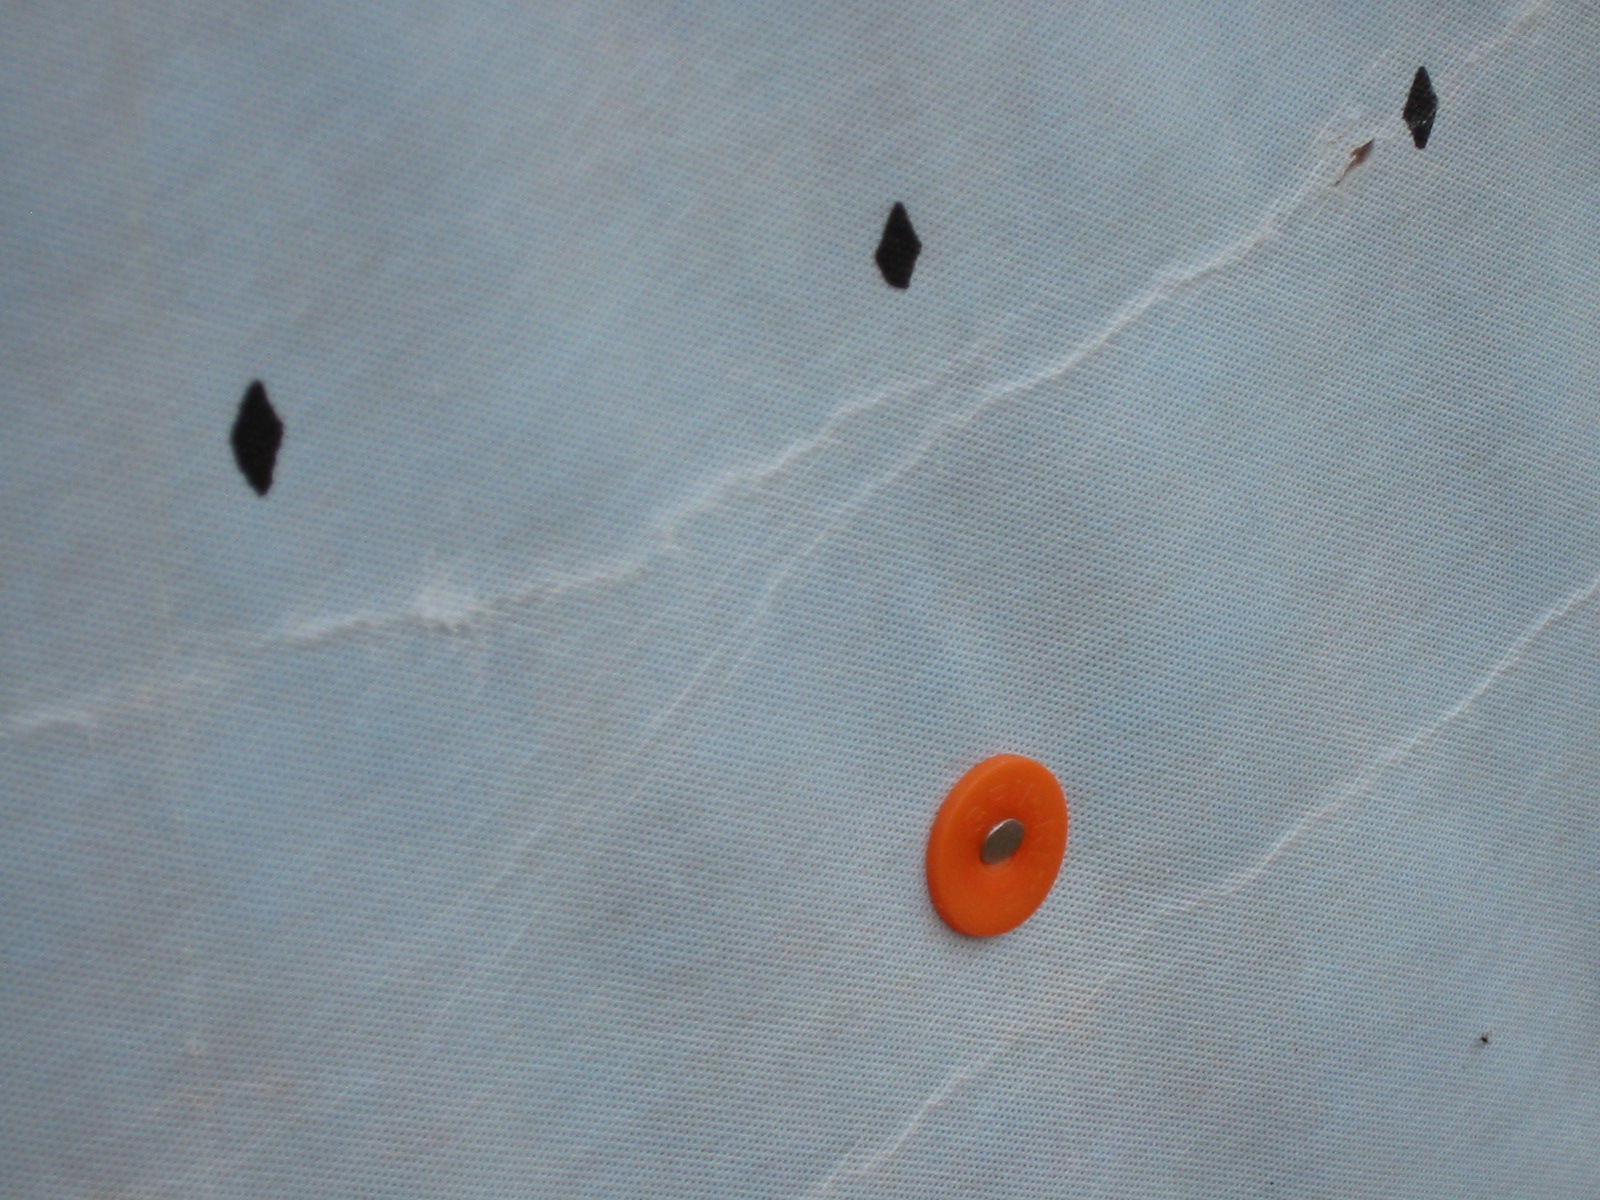
Figure 4. Cap nails are used to secure a weather-resistant barrier. - Seal penetrations (such as light fixtures, water spigots, exhaust vents, or piping for mechanicals) with tape, caulk, or sealant. Follow the product manufacturer's recommendations when selecting caulks and sealants to be sure they are compatible with the drainage plane materials.
- For house wrap materials that will serve as an air barrier, tape all horizontal and vertical seams. In addition, caulk the top edge at the top wall plate and the bottom edge that overlaps the base flashing. Be sure to use a sealant that is formulated to adhere to the flashing material and is compatible with the house wrap.
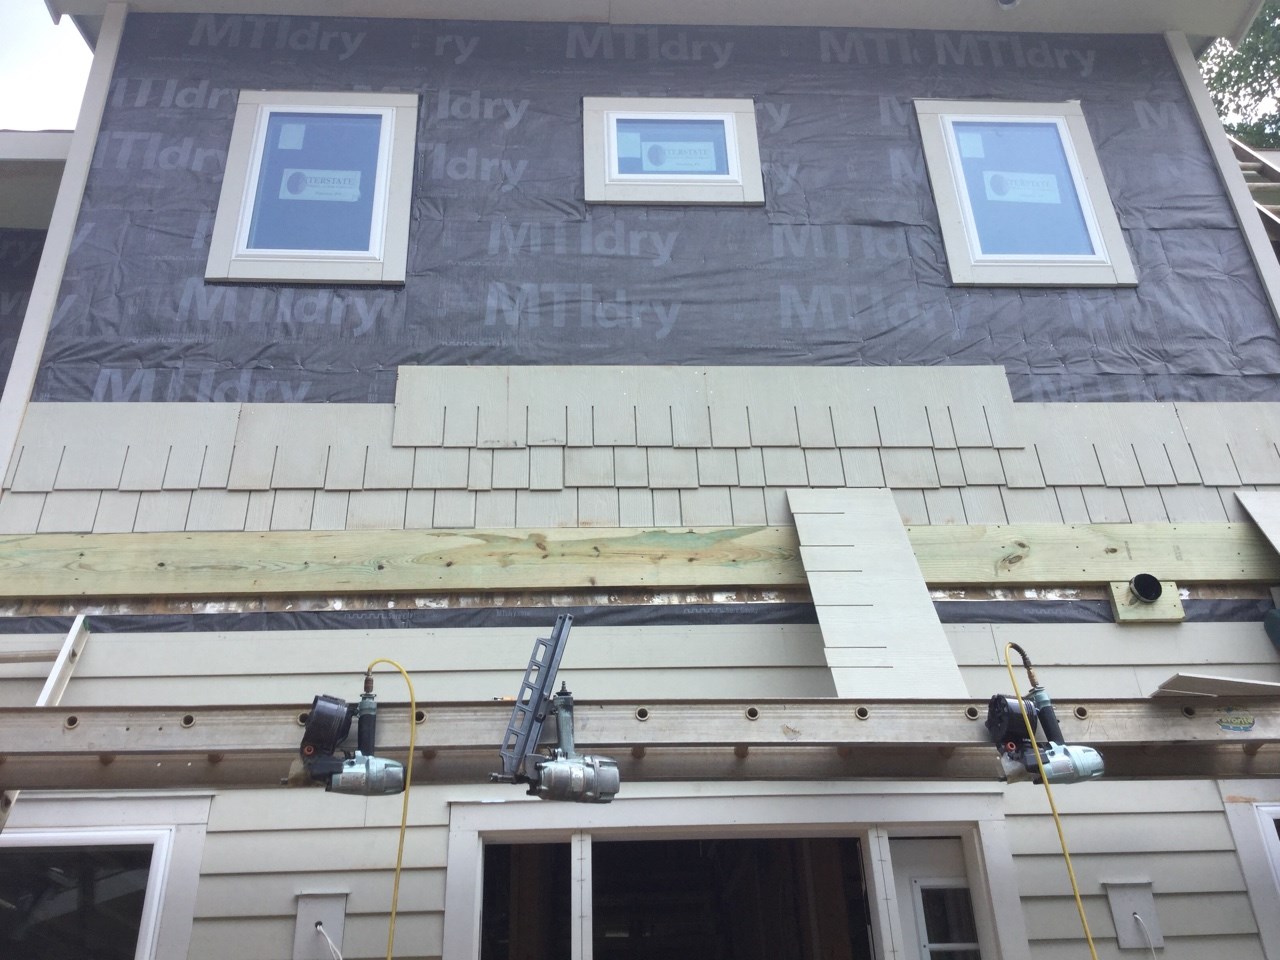
- Install the cladding system as soon as possible after the house wrap or building paper has been installed. Any house wrap or building paper will tear, or the holes created by the fasteners will elongate if left exposed to repetitive wind loading for extended periods of time. In addition, ultra-violet (UV) light from the sun breaks down house wraps and building paper. Building paper is especially vulnerable to UV degradation. Some house wraps are more UV-resistant than others, but all have limitations on how long they can be left exposed to sunlight.
Concerns with Different Cladding Materials
When house wrap or building paper is used for the drainage plane, different cladding systems may require different preparations.
Wood and Fiber-Cement Board Siding. Moisture moving through wood may leach compounds known as surfactants. These compounds reduce the surface tension of water, allowing water to soak through house wraps. To reduce the leaching of surfactants from the wood, the siding boards should be coated on all sides with clear, water-repellent wood preservative, followed by a coat of primer and two coats of finish paint (DOE 2000).
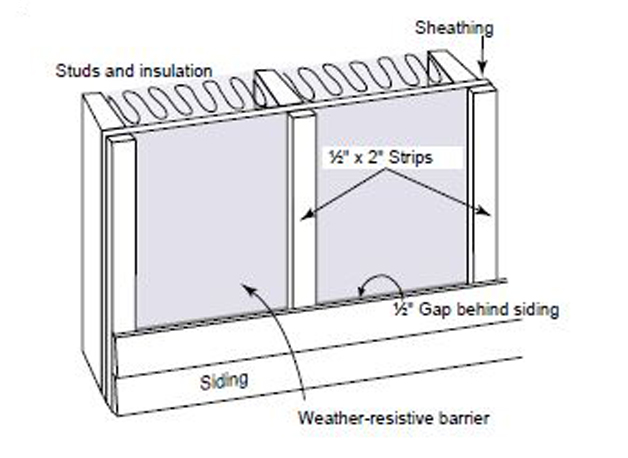
Best practice with board siding calls for installing the siding on furring strips (or a drainable nylon mat) installed over the drainage plane. This provides an air gap between the siding and the weather-resistant barrier that improves drainage and increases the drying potential on the backside of the cladding and minimizes the potential for leaching. Building America recommends a gap of at least 1/16-inch behind lap siding and a drainage space of ¾ inch between stucco and plastic house wraps to control liquid-phase water penetration. A 1-inch air gap is needed behind brick veneer as required by the 2009 International Residential Code (IRC) (Baechler et al. 2010). For more information on constructing wood or fiber cement-sided walls with drainage planes and rain screens, see the guide Flashing at Bottom of Exterior Walls.
Masonry Veneer. Brick and other masonry veneers tend to absorb water. For this reason, these claddings are sometimes referred to as "reservoir claddings" (BSC 2009). To prevent the water absorbed by the masonry from leaking into the framed wall, building codes often require a minimum 1-inch gap behind masonry veneer. Care must be taken by masons to avoid letting mortar clog this gap. If the mortar squeeze-out is too great, it can act as a bridge to channel water to the framed wall by capillary action. Maintaining an open space behind brick will also allow convective airflow through the space, which will promote drying (BSC 2005).
Another problem with reservoir claddings is sometimes referred to as "solar drive" or "vapor drive." When water-loaded masonry is warmed by the sun, the water will tend to evaporate out of the brick. The moisture drive (i.e., direction the moisture will travel) will be from the warmer area to the cooler, so the vapor will tend to move toward the inside of the building when the sun is shining on the masonry exterior. This moisture can pass through any vapor-permeable house wrap or building paper installed as a drainage plane on the framed wall. Solar drive is not a problem when the house wrap has been installed over a semi-permeable OSB sheathing, but it can be a problem if the framed wall has been sheathed with fiber board.
For more information on constructing brick veneer walls with drainage planes and rain screens, see the guide Flashing at Bottom of Exterior Walls.
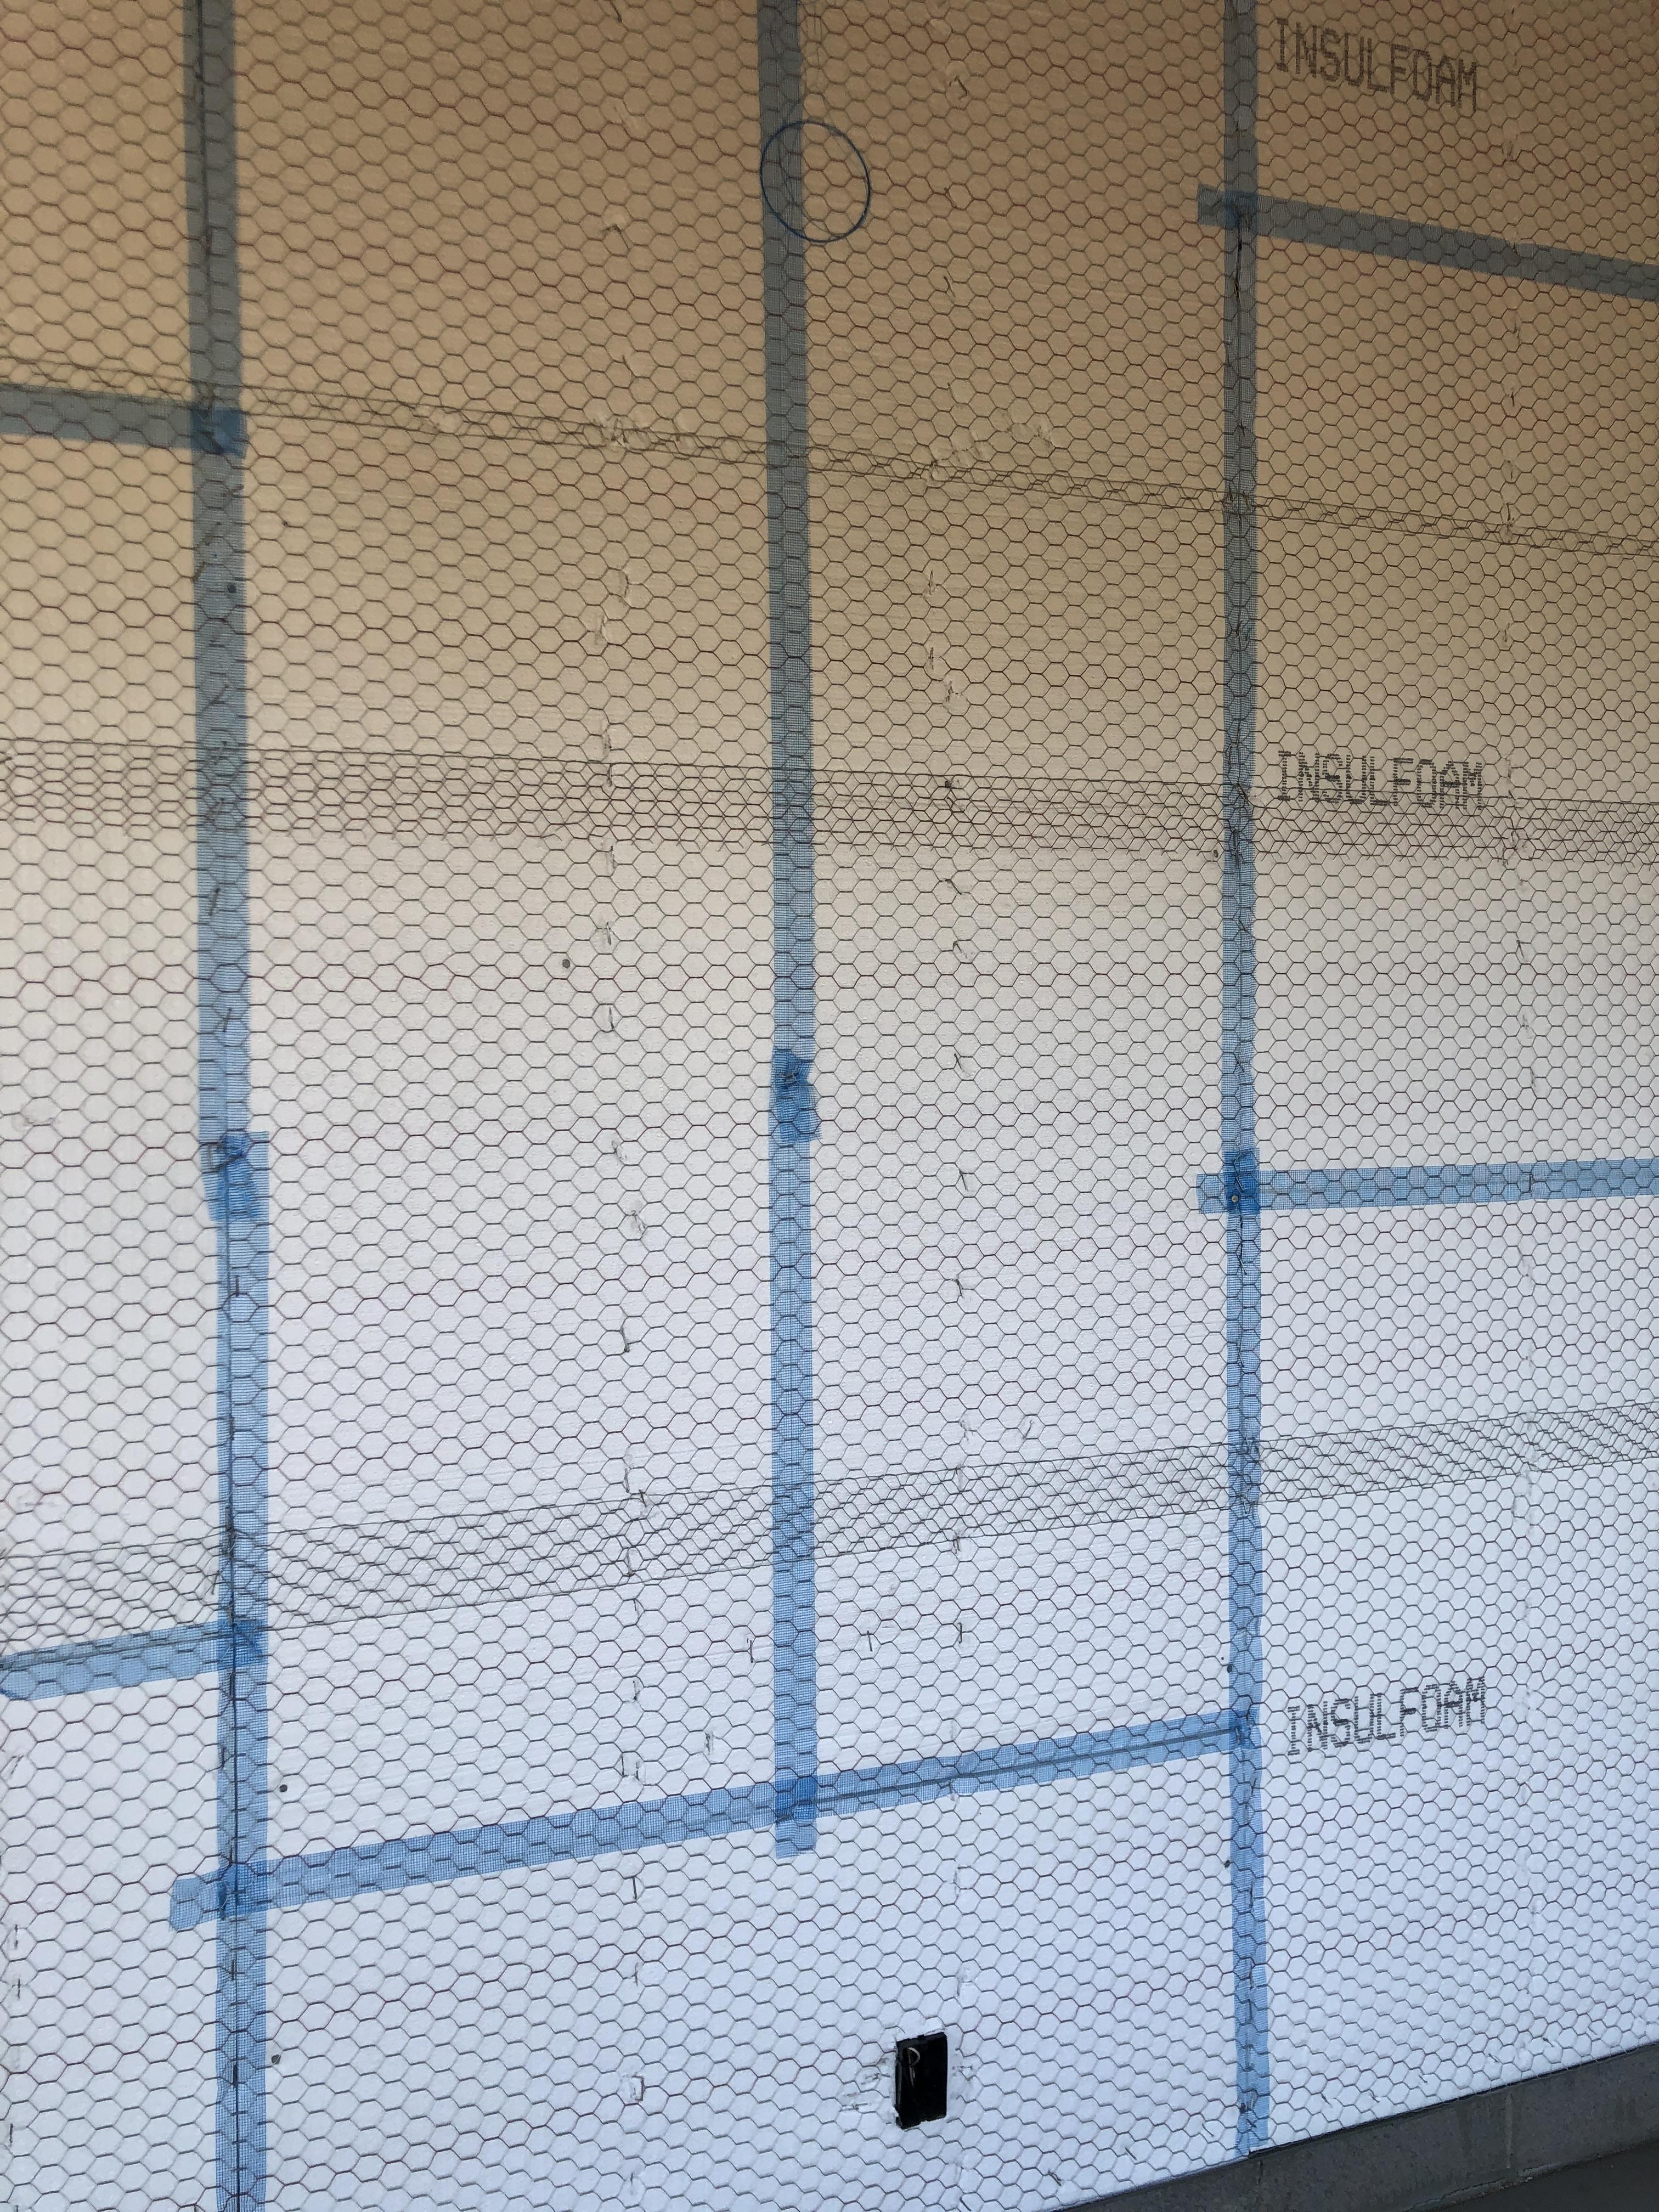
Stucco.Hard-coat stucco tends to adhere to wet stucco and this allows water to soak through a single layer of house wrap or building paper (BSC 2007). For this reason, building codes in stucco markets often require two layers of building paper or a layer of building paper over a house wrap. Best practice calls for building paper behind the stucco and then a layer over a "wrinkled" or grooved house wrap that provides small channels to promote drainage. The first layer of paper directly behind the stucco creates a bond breaker. Water that soaks through this layer will encounter the second layer and drain safely down the wall and way from the building. For more information on constructing stucco-clad walls with drainage planes and rain screens see the guide Flashing at Bottom of Exterior Walls.
Installing Foam Sheathing
To install the foam boards over exterior walls, follow this overall guidance. For detailed information on installing rigid foam as a continuous drainage plane, see the guide Taped Insulating Sheathing Drainage Planes.
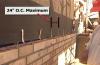
Use 1-inch diameter plastic cap nails, or 3/8-inch head roofing nails, or broad-crown staples (minimum 3/4-inch crown). All fasteners must be installed through to the studs, and therefore must be long enough to penetrate wood studs at least 3/4-inch. Secure the foam boards 12 inches on-center around the perimeter, and 16 inches on-center in the field (Foam Sheathing Coalition 2011).
Do not overdrive the nails or staples. This is easy to do with a pneumatic nailer or stapler if the air pressure is not properly regulated. The result of too much air pressure will result in divots around each fastener that can catch water and reduce the water hold-out capacity of the foam as a drainage plane.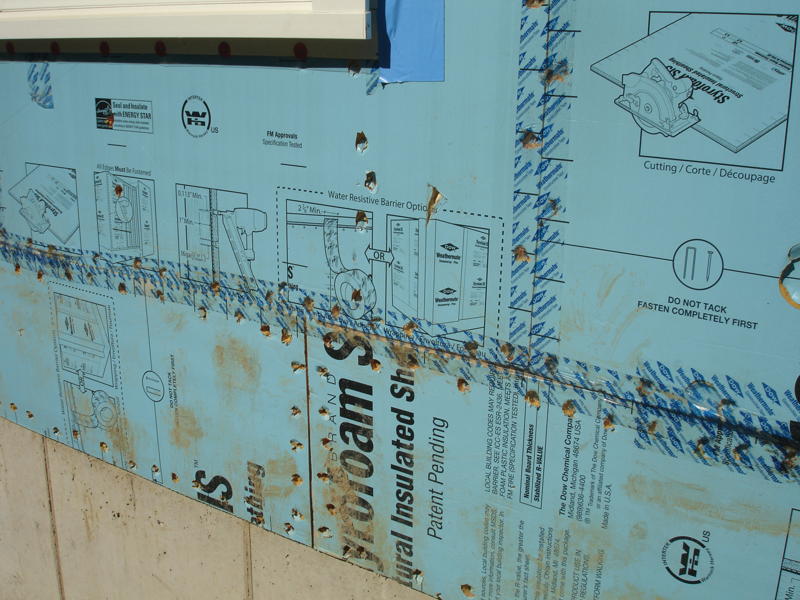
Figure 6. If the air pressure on a pneumatic nailer is too strong, the nails will create holes in the sheathing that can catch water. Integrate window and door flashings. Typically this involves:
- installing a pan flashing to drain the bottom of the window or door opening;
- bedding the nail flange of the window in sealant when setting the window;
- installing jam flashings, followed by a head flashing, over the window nail flanges.
Detailed step-by-step guidance for installing windows with foam sheathing can be found through Building Science Corporation.
- Seal around wall penetrations (such as those from plumbing and mechanicals) with expanding foam. Try not to overfill the cavity; any excess foam will have to be trimmed back prior to installing the cladding.
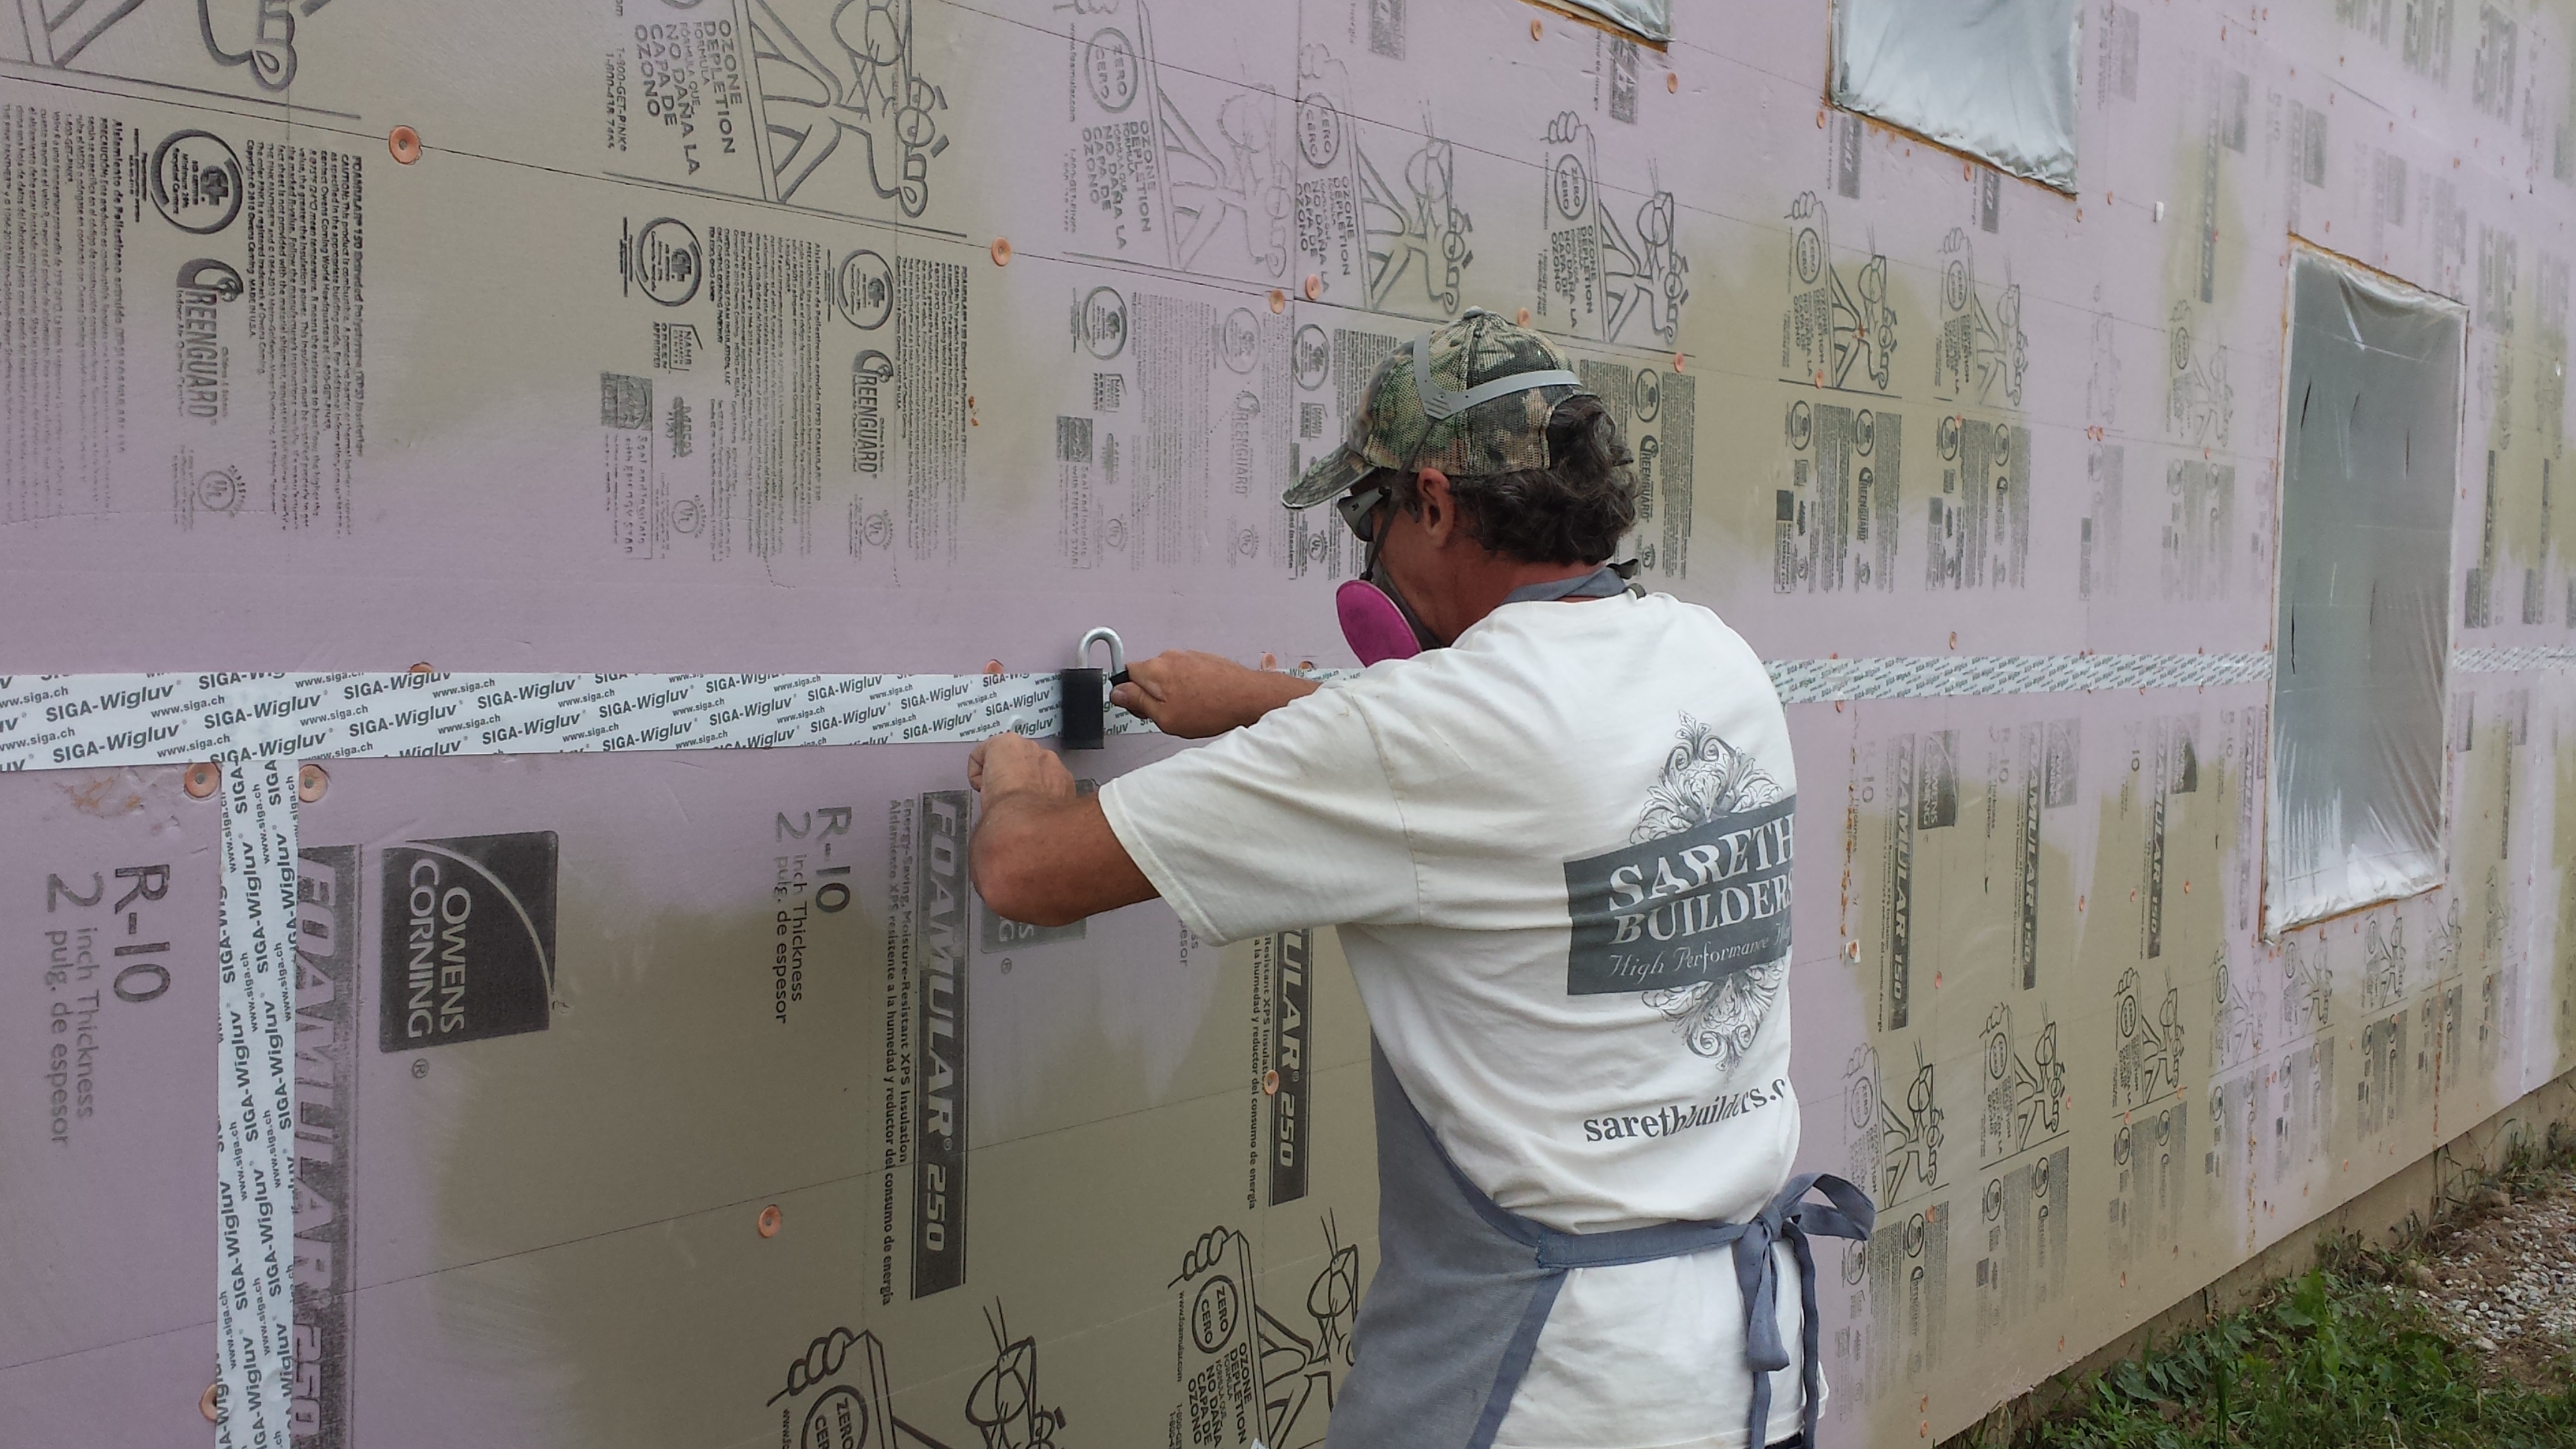
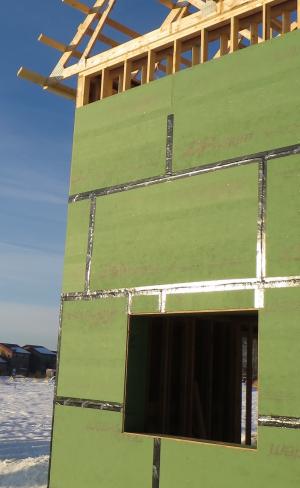
- Tape joints with 2- 7/8-inch construction tape. Center the tape over the joint. Do not use narrow tape, as it will not be wide enough to cover the nails that secure the edges of the foam boards at each seam. Also, be sure to use a construction tape recommended by the foam manufacturer. Ordinary duct tape will not adhere to rigid foam for very long.
Install the cladding system as soon as possible after installing the rigid insulating sheathing. All foam sheathings (as well as the expanding foam sealants used to seal penetrations) will degrade from prolonged exposure to ultra-violet (UV) light from the sun.
When installing cladding, take care to stagger joints, so they don't align with the joints in the foam sheathing as seen in Figure 7.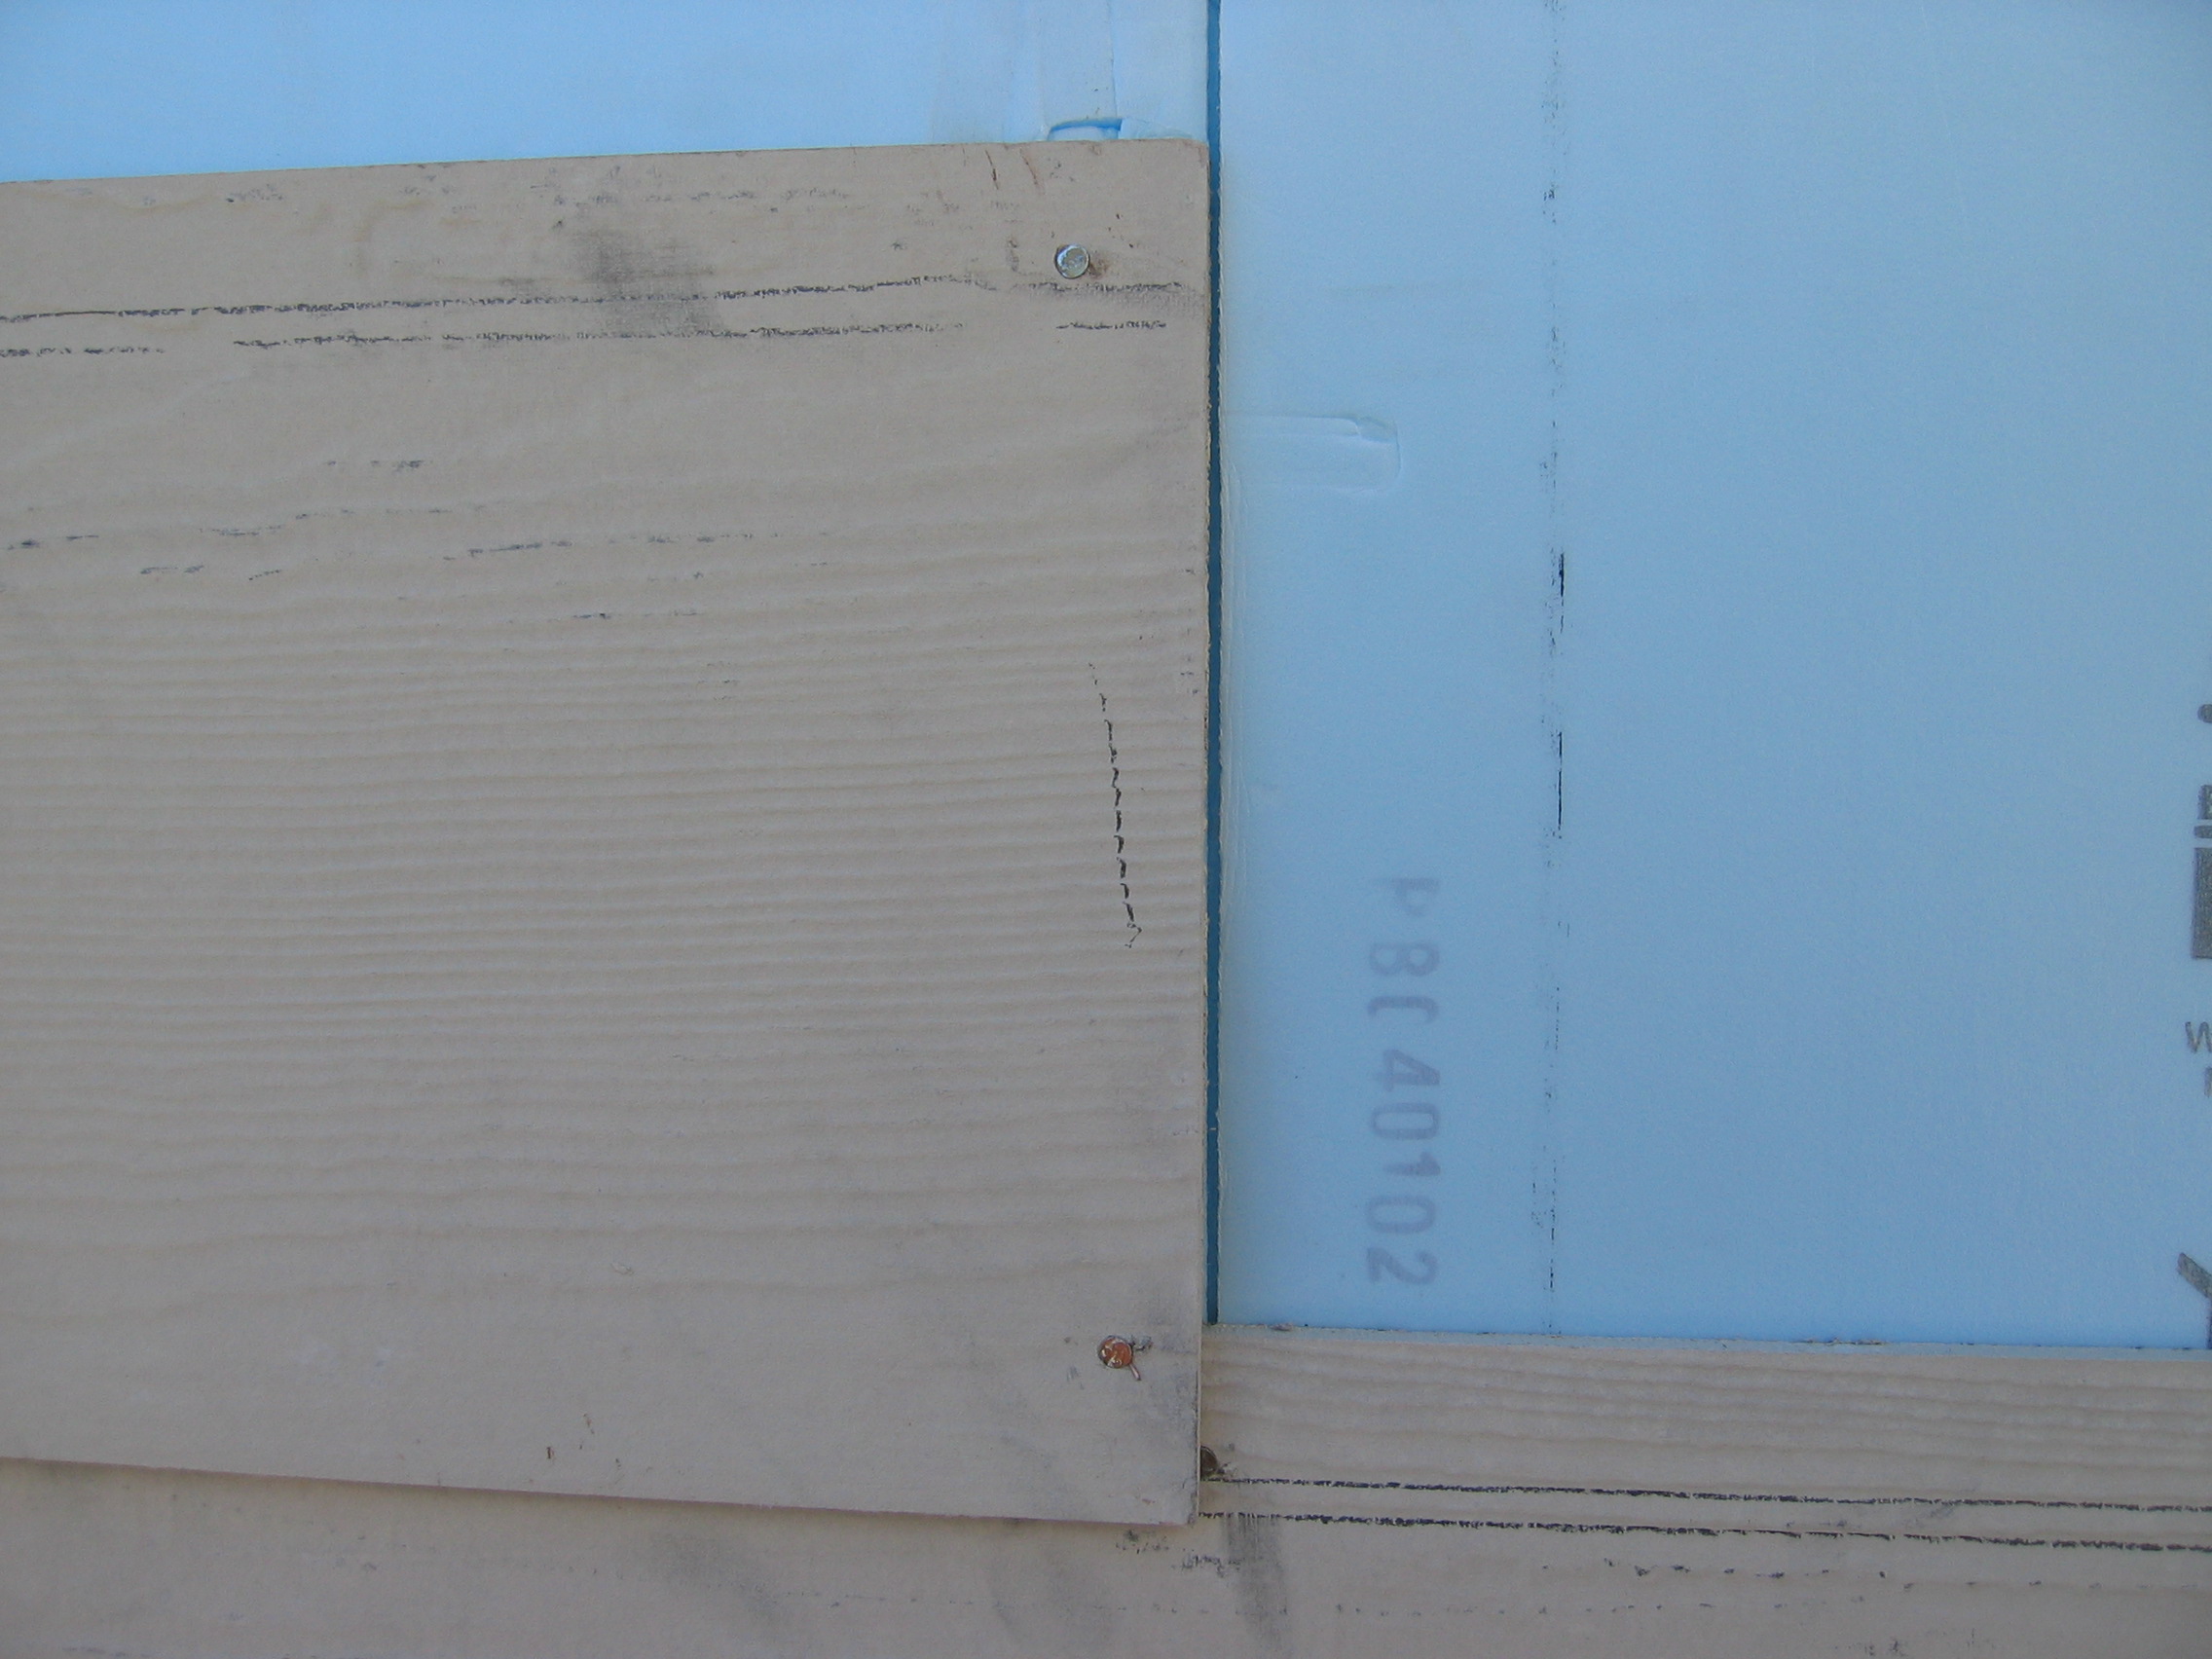
Figure 7. The seams in the rigid foam layer should have been taped and the seams in the siding should not align with the seams in the foam as tape alone offers limited protection from wind-driven rain.
A Vapor Barrier Concern with Foam Sheathing
Rigid foam insulation products that have good water hold-out properties (namely XPS and faced polyiso) and are appropriate for use as a drainage plane, tend to have low permeance and will limit the amount of moisture that can evaporate out of wall assemblies. In cold climates and in the cooler seasons of a mixed humid climate, there is a potential for creating a double-sided vapor barrier if a vapor barrier has been installed on the interior surface of the wall assembly (which is often required by code).
To avoid moisture problems when an interior vapor barrier has been installed, the insulating sheathing must be thick enough to ensure that the dew point temperature is not reached within the wall assembly. Guidance on the foam thickness can be taken from the IRC requirements defined in Table R601.3.1 (adapted in Table 2 below). When the foam is installed to this minimum thickness, a Class III vapor barrier (e.g., latex wall paint) can be used, eliminating a permeable interior control layer, which allows the wall to dry to the inside.
| Climate zone | Minimum R-value of foam sheathing |
|---|---|
| Marine 4 | R-2.5 for 2x4 walls
R 3.75 for 2x6 walls |
| 5 | R-5 for 2x4 walls
R-7.5 for 2x6 walls |
| 6 | R-7.5 for 2x4 walls
R-11.25 for 2x6 walls |
For more detailed guidance on specifying the thickness of rigid foam sheathing, refer to this Building America sponsored work.
Installing Other Water-Resistant Barriers
Follow manufacturer guidelines for installing other water-resistant barriers, including liquid-applied membranes and self-adhesive (paper-backed) membranes.
Liquid-applied membranes are applied by spraying, rolling, or brushing the material over exterior wall sheathing. Most systems include a manufacturer-specific tape or transition membrane over sheathing joints and at corners. General installation guidelines can be found in these Building America-sponsored reports: Smegal and Lstiburek 2012 and Grin and Lstiburek 2012.
Success
Visually inspect the exterior walls before siding is installed to ensure that the weather-resistive barrier or rigid foam sheathing is correctly installed and correctly integrated with wall flashings to direct water out and down, away from the wall cavities. Seams in house wrap and rigid foam insulation should be taped, and the tape must adhere uniformly to the substrate without peeling or open "fish mouths" (i.e., folds in the tape that create an opening that does not adhere to the house wrap or rigid foam sheathing).
Climate
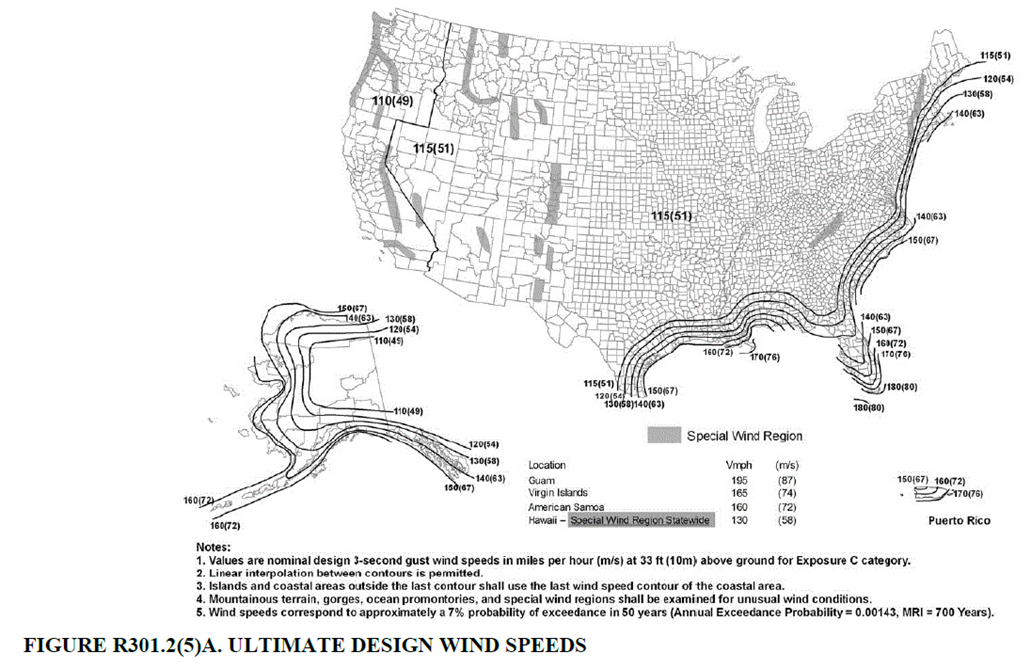
The International Residential Code, chapters 6 and 7, discuss wall construction and wall coverings and components to resist vertical and lateral loads and to provide wind and water resistance for the walls. Exterior walls must be designed and built to withstand code-specified basic (design) wind speeds. 2018 IRC R703.1.1 states that the exterior envelope shall be designed and constructed in a manner that prevents the accumulation of water within the wall assembly by providing a water-resistant barrier behind the exterior cladding as required by Section R703.2 and a means of draining to the exterior any water that penetrates the exterior cladding.
In areas that frequently experience strong winds, enhanced flashing details are recommended to provide better protection against wind-driven rain. Enhancements include flashings that have extra-long flanges, and the use of sealant and tapes. General guidance is offered here, but it is recommended that designers also attempt to determine what type of flashing details have successfully been used within the area where the residence will be constructed. Flashing design should recognize that wind-driven water can be pushed vertically. The height to which water can be pushed increases with wind speed. Water can also migrate vertically and horizontally by capillary action between layers of materials (e.g., between a flashing flange and house wrap) (FEMA P-762 2009). Follow code or manufacturers’ guidance for overlapping house wrap and flashings.
- In high wind and hurricane zones, as shown in Figures 1 and 2, ensure that siding is resilient to prevent damage to the draining plane.
- Use house wrap or other weather-resistant material installed per manufacturer’s instructions.
- Remember that water can be driven vertically as well horizontally by wind and can be drawn up as well as in by capillary action between layers.
Training


Compliance
Retrofit
SCOPE
Retrofit an existing house with a new water control membrane drainage plane behind the existing cladding.
- Remove all existing cladding (siding).
- Remove any existing building paper or house wrap.
- Assess the condition of the exterior sheathing and replace it if necessary.
- If windows and doors are not properly flashed, remove and reinstall them to properly integrate them with the new water control membrane and drainage plane.
- Follow the steps in the Scope and Description tab for new construction to install a drainage plane layer.
For more information on conditions that may be encountered when working with walls in existing homes, see the assessment guide on walls, windows, and doors.
See the U.S. Department of Energy’s Standard Work Specifications for more on sealing walls to keep out moisture, air, and pests. Follow safe work practices as described in the Standard Work Specifications.
DESCRIPTION
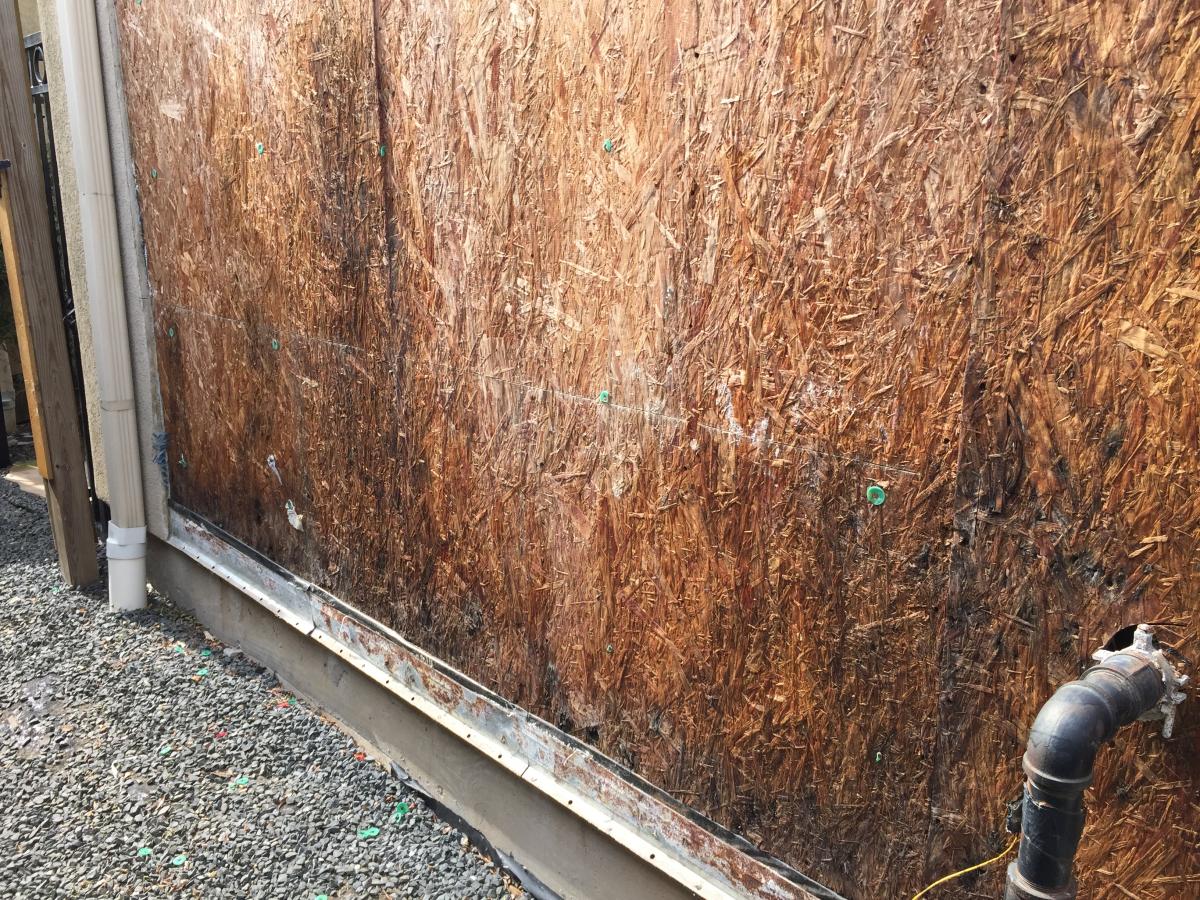
Retrofitting an existing house with a new drainage plane and water control membrane is an invasive and costly project that involves removing the exterior cladding in its entirety. It is undertaken in extreme circumstances such as when a new cladding is desired for aesthetic reasons or because the current siding is in bad condition, and the existing siding cannot be “over-clad” (for structural reasons or setback requirements, for example). In these cases, the weather-resistant barrier is often replaced as part of the cladding replacement. It may also be done if the exterior of the wall has experienced extensive water damage and repair is not possible without increasing drainage and replacing the water control membrane. In the latter case, replacement of the exterior sheathing is also frequently required. Stucco or adhered-stone houses with inadequate drainage have required this type of retrofit.
As described in the Description tab, the weather-resistant barrier can consist of many types of material including house wrap, building felt, a fluid-applied barrier product, or taped insulating sheathing.
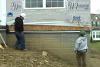
To retrofit an existing house with a new drainage plane, the existing cladding and building paper should be removed in their entirety, the condition of the existing exterior sheathing should be assessed, and the sheathing should be replaced if necessary before installing a new water control membrane per the guidelines in the “Description” tab. Since this type of retrofit is frequently undertaken in response to water-related failure, it is important to identify contributing factors (such as poor flashing details at windows and doors, missing kickout flashing at roof-wall junctures, lack of overhangs, improperly flashed penetrations, etc.). These issues should be repaired as needed prior to re-cladding. Regardless of the cladding system, a gap should be provided between the cladding and the weather-resistant barrier to provide space for air flow and drainage. Building America recommends a gap of at least 1/6-inch behind lap siding and a drainage space of ¾ inch between stucco and plastic house wraps to allow any water that might get into the wall to escape from the wall. An air gap of 1 inch or more is needed behind brick and stone veneer, as required by the International Residential Code (2012 IRC Table R703.7.4). This gap can be achieved by adding a drainage mat or installing the cladding over spacers or furring strips.
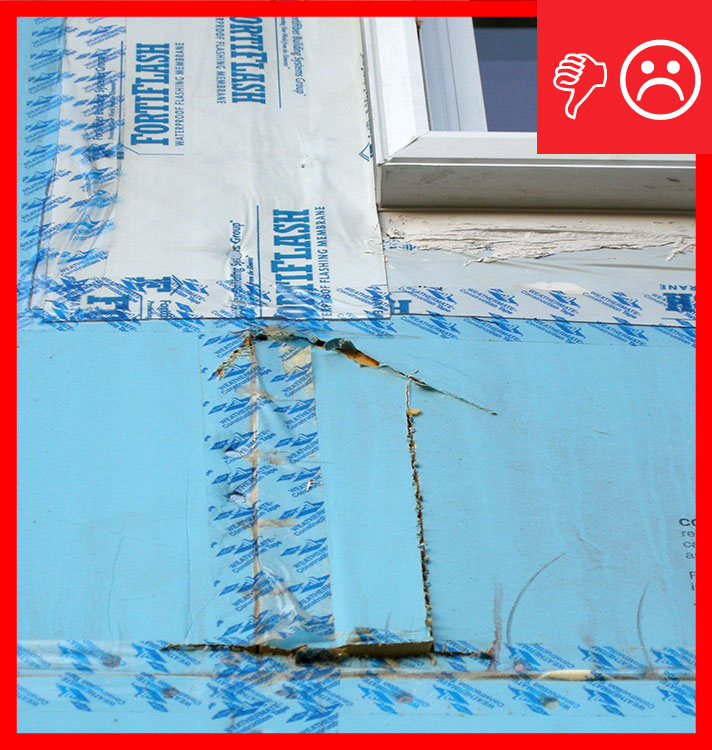
Figure 1 shows extensive damage to the sheathing on a house that did not provide sufficient drainage behind the stucco. The risk of this type of failure increases in multi-story houses, areas of high rainfall, houses with little or no overhangs, architecturally complex designs, and in homes with an absent or inadequate drainage gap between the cladding and the water control membrane. (Note that with stucco and adhered stone claddings, the gap in front of the drainage plane can be provided by a second layer of building paper or by a drainage mat).
How to Add a Drainage Plane behind Exterior Wall Cladding
- Remove all existing cladding.
- Remove any existing building paper or house wrap.
- Assess the condition of the exterior sheathing and replace it if necessary.
- If windows and doors are not properly flashed, remove and re-install them so they can be properly integrated with the new water control membrane and drainage plane. See the guide Fully Flashed Window and Door Openings for guidance.
- Follow the recommendations in the “Scope” tab for new construction.
See Compliance Tab.
More
More Info.
Access to some references may require purchase from the publisher. While we continually update our database, links may have changed since posting. Please contact our webmaster if you find broken links.
The following authors and organizations contributed to the content in this Guide.
Sales
Continuous/Sealed Weather Resistant Barrier = Wall Water Barrier
A wall water barrier blocks the penetration of moisture that gets past the siding and provides a path for it to safely drain down and away from the wall. The water-resistant surface could be house wrap that is lapped shingle style, water-resistant rigid foam insulation that is taped or sealed at all seams, or a wet-applied moisture-resistant coating. The water barrier must be carefully sealed and flashed at all exterior wall openings and penetrations (e.g., windows, doors, water spigots, exhaust vent outlets, HVAC condensate lines, light fixtures, and receptacles), and all wall intersections (e.g., roofs, foundations, and other transitions).