



Introduction
Add weatherstrip to windows and doors that open to the outdoors or unconditioned spaces like attics and basements to decrease air leakage and heating and cooling losses.
Why
Air leakage through narrow gaps around windows and doors can cause drafts, allow in dust, pollen, insects, and noise; and cause heating and cooling losses resulting in higher utility bills. Adding weatherstripping to windows and doors can make your home more comfortable while cutting your energy costs.
What You'll Need
- Tape measure
- Weatherstripping material (types include felt, reinforced foam, vinyl, or silicone, tape, magnetic tape, tubular rubber or vinyl, and more)
- Caulk and caulk gun (optional)
- Utility knife
1. Check windows and doors for air leaks.
Look at all the windows and exterior doors around your house, and look for worn or missing weatherstripping.
Check for air leaks around windows and doors by feeling for drafts with your hand. (You can also try holding a piece of tissue up next to the door or window frame to see if it moves.) You can increase the likelihood of noticing air leaks by closing all of the windows and exterior doors, opening bathroom and laundry doors, and turning on all of the exhaust fans. This will suck the air out of your home and pull air in through leaks in the walls of your home, including leaks around doors and windows.
Here are some other ways to check for gaps around exterior doors:
- Wait until nighttime. Turn on the porch light then step into the room with the exterior door and turn off the interior lights. If you can see any light coming in around the door (Figure 1), you’ve got gaps where outside air can also come in.
- Take a dollar bill and hold it in the doorway next to the door frame, then close the door on the bill. If you can easily pull out the bill, air is probably leaking in around your door. It’s especially important to add weatherstrip to the door between the house and the garage, to keep garage fumes out of the house.

Source
Guide describing details that serve as a visual reference for each of the line items in the Thermal Enclosure System Rater Checklist.
2. Choose weatherstripping.
Decide what kind of weather stripping you need and measure the window and door frames to get an idea of how much you’ll need. Newer doors have a kerf or groove gut into the framing around the door that will receive formed vinyl gasket trim. Older doors have no groove. You can use foam tape weather stripping that is adhered with self-adhered adhesive strips. Or you can use metal and vinyl weatherstripping that is screwed into place. See types of weatherstripping in Figure 2 below and in Table 1 under More Information.
See the following Building America Solution Center DIY guides for specific guidance on different installation practices: install and Weatherstrip a Garage Door; Install or Replace Door Sweeps; if you have an old home with the original wooden windows with pulleys, see Air Seal and Insulate Wood Single-Pane Windows. If you are feeling significantly colder temperatures around a door or window frame when temperatures drop outside, you may need more than weatherstripping to control heat flow. You may want to pull off the trim and see if the rough openings around your windows or doors were ever insulated and air-sealed or if they are open conduits to outside air. In this case, see Air Seal and Insulate Window Rough Openings.
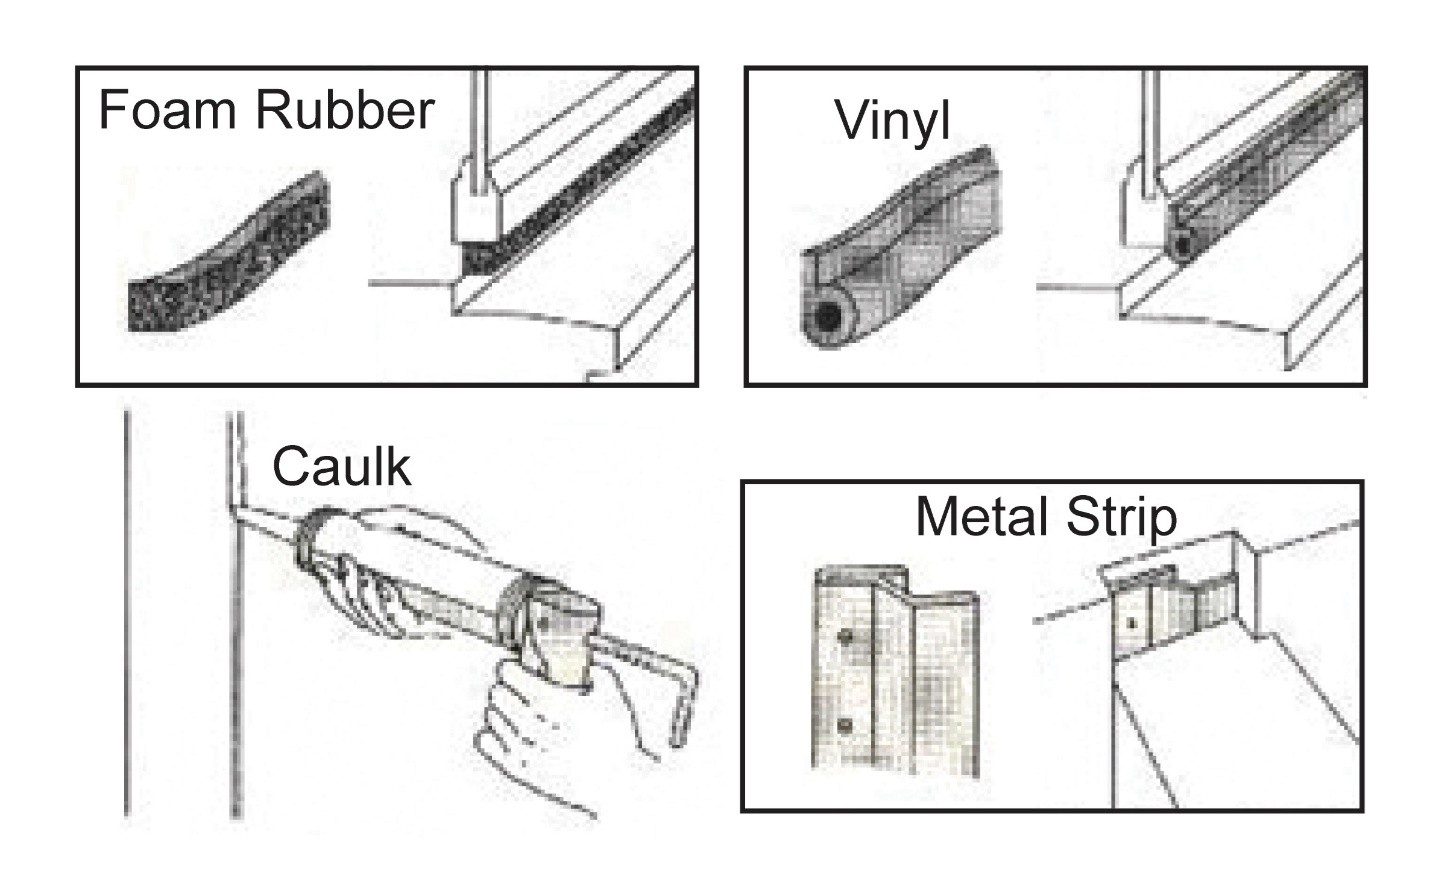
Source
Online textbook describing energy, including energy types, and energy use in homes.
3. Install weatherstripping around door and window frames.
- Remove any existing weatherstripping.
- Clean surfaces to receive weatherstripping with dish soap and water.
- Let surfaces dry completely.
- Measure and cut weatherstripping for each surface.
- Follow manufacturer’s to install the product you purchased (Figure 3).
- Open and close the door or window to ensure it will fit snuggly without blocking the window or door’s ability to close completely (Figure 4). Adjust if needed.
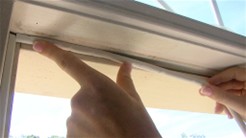
Source
Webpage describing weatherstrip tips and tricks to properly air seal doors.

Source
Guide describing details that serve as a visual reference for each of the line items in the Thermal Enclosure System Rater Checklist.
4. Caulk frame and trim edges.
Caulking the seams in and around the window or door frame and trim can help reduce air leakage as well. As noted above, if you are feeling significantly colder temperatures around a door or window frame when temperatures drop outside, consider inspecting the rough openings around your windows or doors – see the Building America Solution Center DIY guide Air Seal and Insulate Window Rough Openings.
5. Sealing window meeting rails.
If you notice a lot of air leakage at the meeting rail (the horizontal line in the middle of the window where the two sashes meet in a double-hung window), there are different options for sealing this gap. One temporary solution is to purchase putty air sealing cord that you insert into the gap between the two sashes in the fall and remove in the spring, when you want to open your windows again. More permanent solutions include interlocking metal strips or silicone gaskets. Make sure the locking mechanism will still open and close after installing the weather stripping. If there is no locking mechanism, consider installing one, as this will likely pull the sashes closer together for a tighter seal.
Another option to consider is installing interior or exterior storm windows, especially if you have single-pane windows. Newer storm windows can open and close like the primary window and have insulating frames as well as the insulation value of another layer of glass, so the storm window will provide both air sealing and insulating, as well as some sound proofing benefit. See the Building America Solution Center DIY guides Install Exterior Storm Windows and Install Interior Storm Windows.
6. More information on weatherstripping types
See Table 1 for a discussion of different weatherstripping options.
| Table 1. Types of Weatherstripping (Source: adapted from DOE 2012). | ||||
|---|---|---|---|---|
| Weatherstripping | Best Uses | Cost | Advantages | Disadvantages |
Tension seal: Self-stick plastic (vinyl) folded along length in a V-shape or a springy bronze strip (also copper, aluminum, and stainless steel) shaped to bridge a gap. The shape of the material creates a seal by pressing against the sides of a crack to block drafts. | Inside the track of a double-hung or sliding window, top and sides of door. | Varies. | Durable, invisible when in place, very effective. Vinyl is fairly easy to install. Look of bronze works well for older homes. | Surfaces must be flat and smooth for vinyl. Can be difficult to install, as corners must be snug. Bronze must be nailed in place (every three inches or so) so as not to bend or wrinkle. Can increase resistance in opening/closing doors or windows. Self-adhesive vinyl available. Some manufacturers include extra strip for door striker plate. |
Felt: Plain or reinforced with a flexible metal strip; sold in rolls. Must be stapled, glued, or tacked into place. Seals best if staples are parallel to length of the strip. | Around a door or window (reinforced felt); fitted into a door jamb so the door presses against it. | Low. | Easy to install, inexpensive. | Low durability; least effective at preventing airflow. Do not use where exposed to moisture or where there is friction or abrasion. All-wool felt is more durable and more expensive. Very visible. |
Reinforced foam: Closed-cell foam attached to wood or metal strips. | Door or window stops; bottom or top of window sash; bottom of door. | Low. | Effective sealer, scored well in wind tests, rigid. | Can be difficult to install; must be sawed, nailed, and painted. Very visible. Manufacturing process produces greenhouse gas emissions. |
Tape: Nonporous, closed-cell foam, open-cell foam, or EDPM (ethylene propylene diene monomer) rubber. | Top and bottom of window sash; door frames; attic hatches and inoperable windows. Good for blocking corners and irregular cracks. | Low.. | Extremely easy to install, works well when compressed, inexpensive. Can be reinforced with staples. | Durability varies with material used, but not especially high for all; use where little wear is expected; visible. |
Rolled or reinforced vinyl: Pliable or rigid strip gasket (attached to wood or metal strips). | Door or window stops; top or bottom of window sash; bottom of a door (rigid strip only). | Low-Mod. | Easy installation, low to moderate cost. Self-adhesive on pliable vinyl may not adhere to metal; some types of rigid strip gaskets provide slot holes to adjust height, increasing durability. Comes in varying colors to help with visibility. | Visible. |
Door sweep: Aluminum or stainless steel with brush of plastic, vinyl, sponge, or felt. | Bottom of interior side of in-swinging door; bottom of exterior side of exterior-swinging door. | Mod- high. | Relatively easy to install; many types are adjustable for uneven threshold. Automatically retracting sweeps also available, which reduce drag on carpet and increase durability. | Visible. Can drag on carpet. Automatic sweeps are more expensive and can require a small pause once door is unlatched before retracting. |
Magnetic: Works similarly to refrigerator gaskets. | Top and sides of doors, double-hung and sliding window channels. | High. | Very effective air sealer. | |
Tubular rubber and vinyl: Vinyl or sponge rubber tubes with a flange along length to staple or tack into place. Door or window presses against them to form a seal. | Around a door. | Mod- high. | Effective air barrier. | Self-stick versions challenging to install. |
Reinforced silicone: Tubular gasket attached to a metal strip that resembles reinforced tubular vinyl. | On a doorjamb or a window stop. | Mod- high. | Seals well. | Installation can be tricky. Hacksaw required to cut metal; butting corners pose a challenge. |
Door shoe: Aluminum face attachment with vinyl C-shaped insert to protect under the door. | To seal space beneath door. | Mod- high. | Sheds rain on the exterior, durable. Can be used with uneven opening. Some door shoes have replaceable vinyl inserts. | Fairly expensive; installation moderately difficult. May require door bottom planing. |
Bulb threshold: Vinyl and aluminum. | Door thresholds. | Mod- high. | Combination threshold and weatherstrip; available in different heights. | Wears from foot traffic; relatively expensive. |
"Frost-brake" threshold: Assembly including an exterior slope, interior lip, and threshold joing, where the joint acts as a thermal break; e.g., metal exterior and wood interior with a vinyl joing. | Door threshold. | Mod- high. | The use of different materials means less cold transfer. Effective. | Moderately difficult to install, involves threshold replacement. |
Fin seal: Pile weatherstrip with plastic Mylar fin centered in pile. | For aluminum sliding windows and sliding glass doors. | Mod- high. | Very durable. | Can be difficult to install. |
Interlocking metal channels: Enables sash to engage one another when closed. | Around door perimeters. | High. | Exceptional weather seal. | Very difficult to install as alignment is critical. To be installed by a professional only. |
