

Scope
Air-seal around all plumbing and piping installed through walls, ceilings, and flooring adjacent to unconditioned space to prevent air leakage.
- Using a saw or drill, cleanly cut all holes no more than 1 inch larger in diameter than the diameter of the pipe.
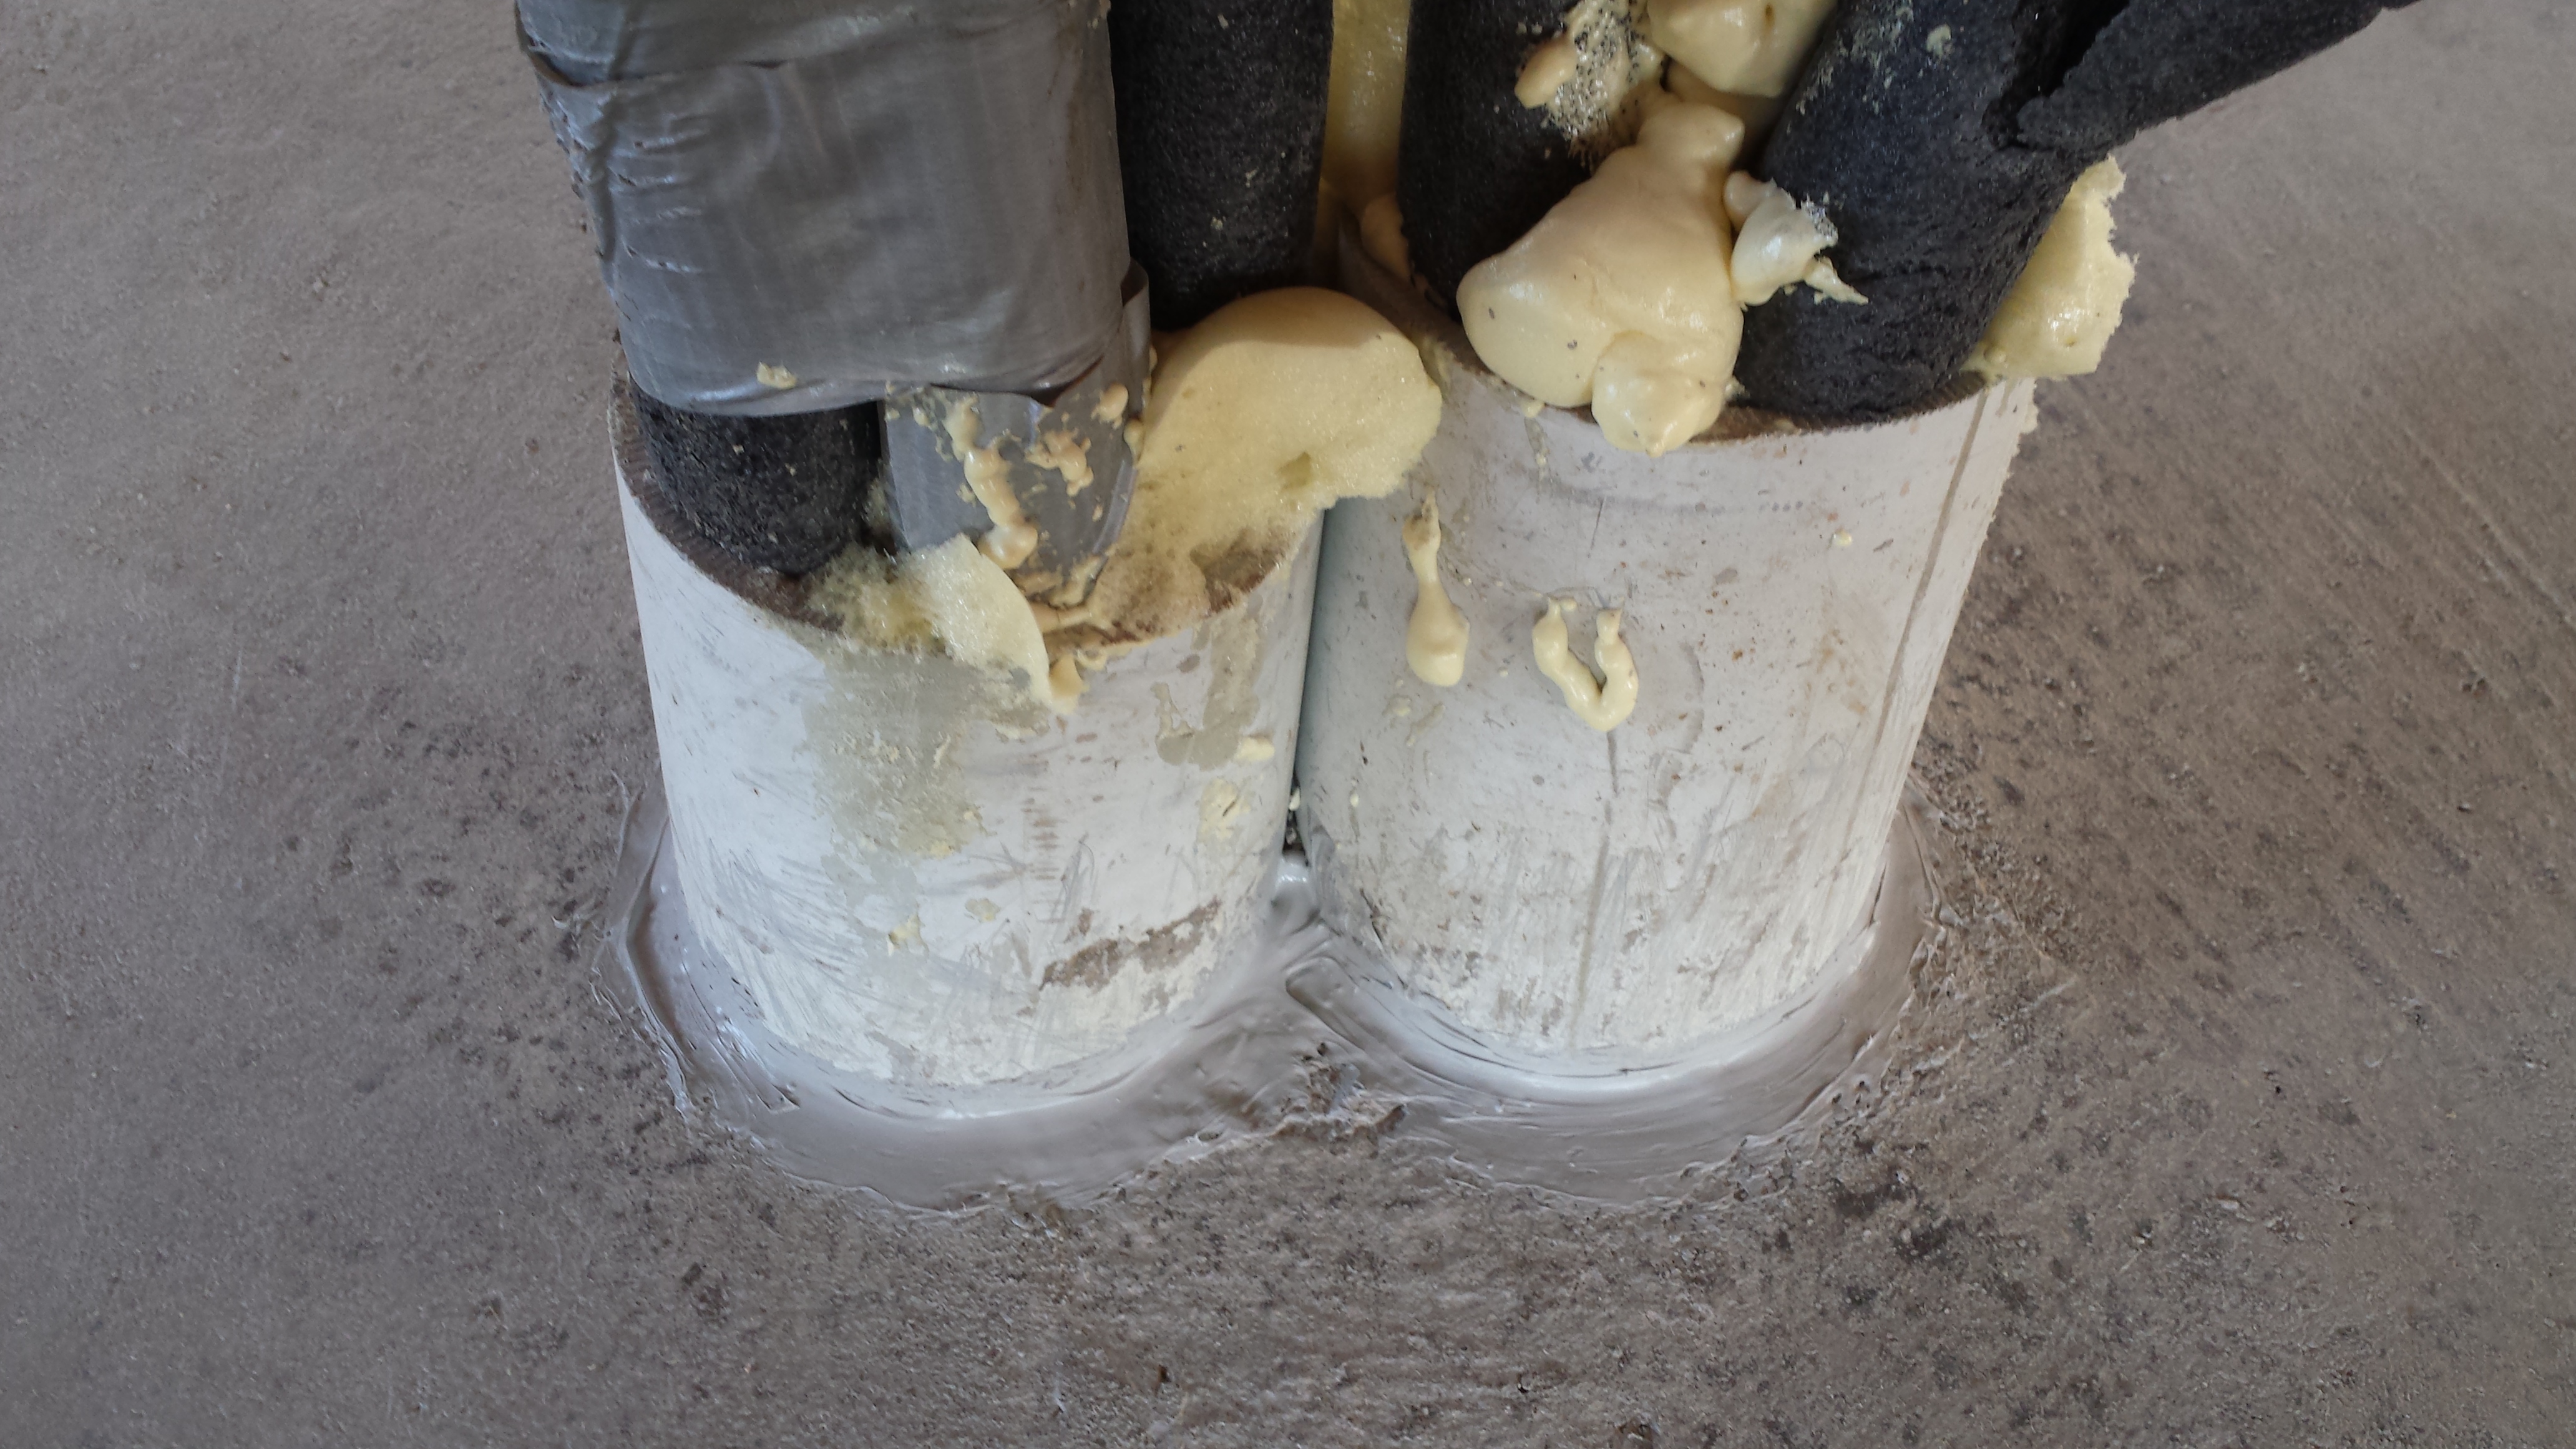
- Seal all gaps and holes to unconditioned space with caulk or canned spray foam. For larger gaps, rigid blocking material can be cut to fit over the gap and sealed in place with caulk or spray foam.
See the Compliance Tab for links to related codes and standards and voluntary federal energy-efficiency program requirements.
Description
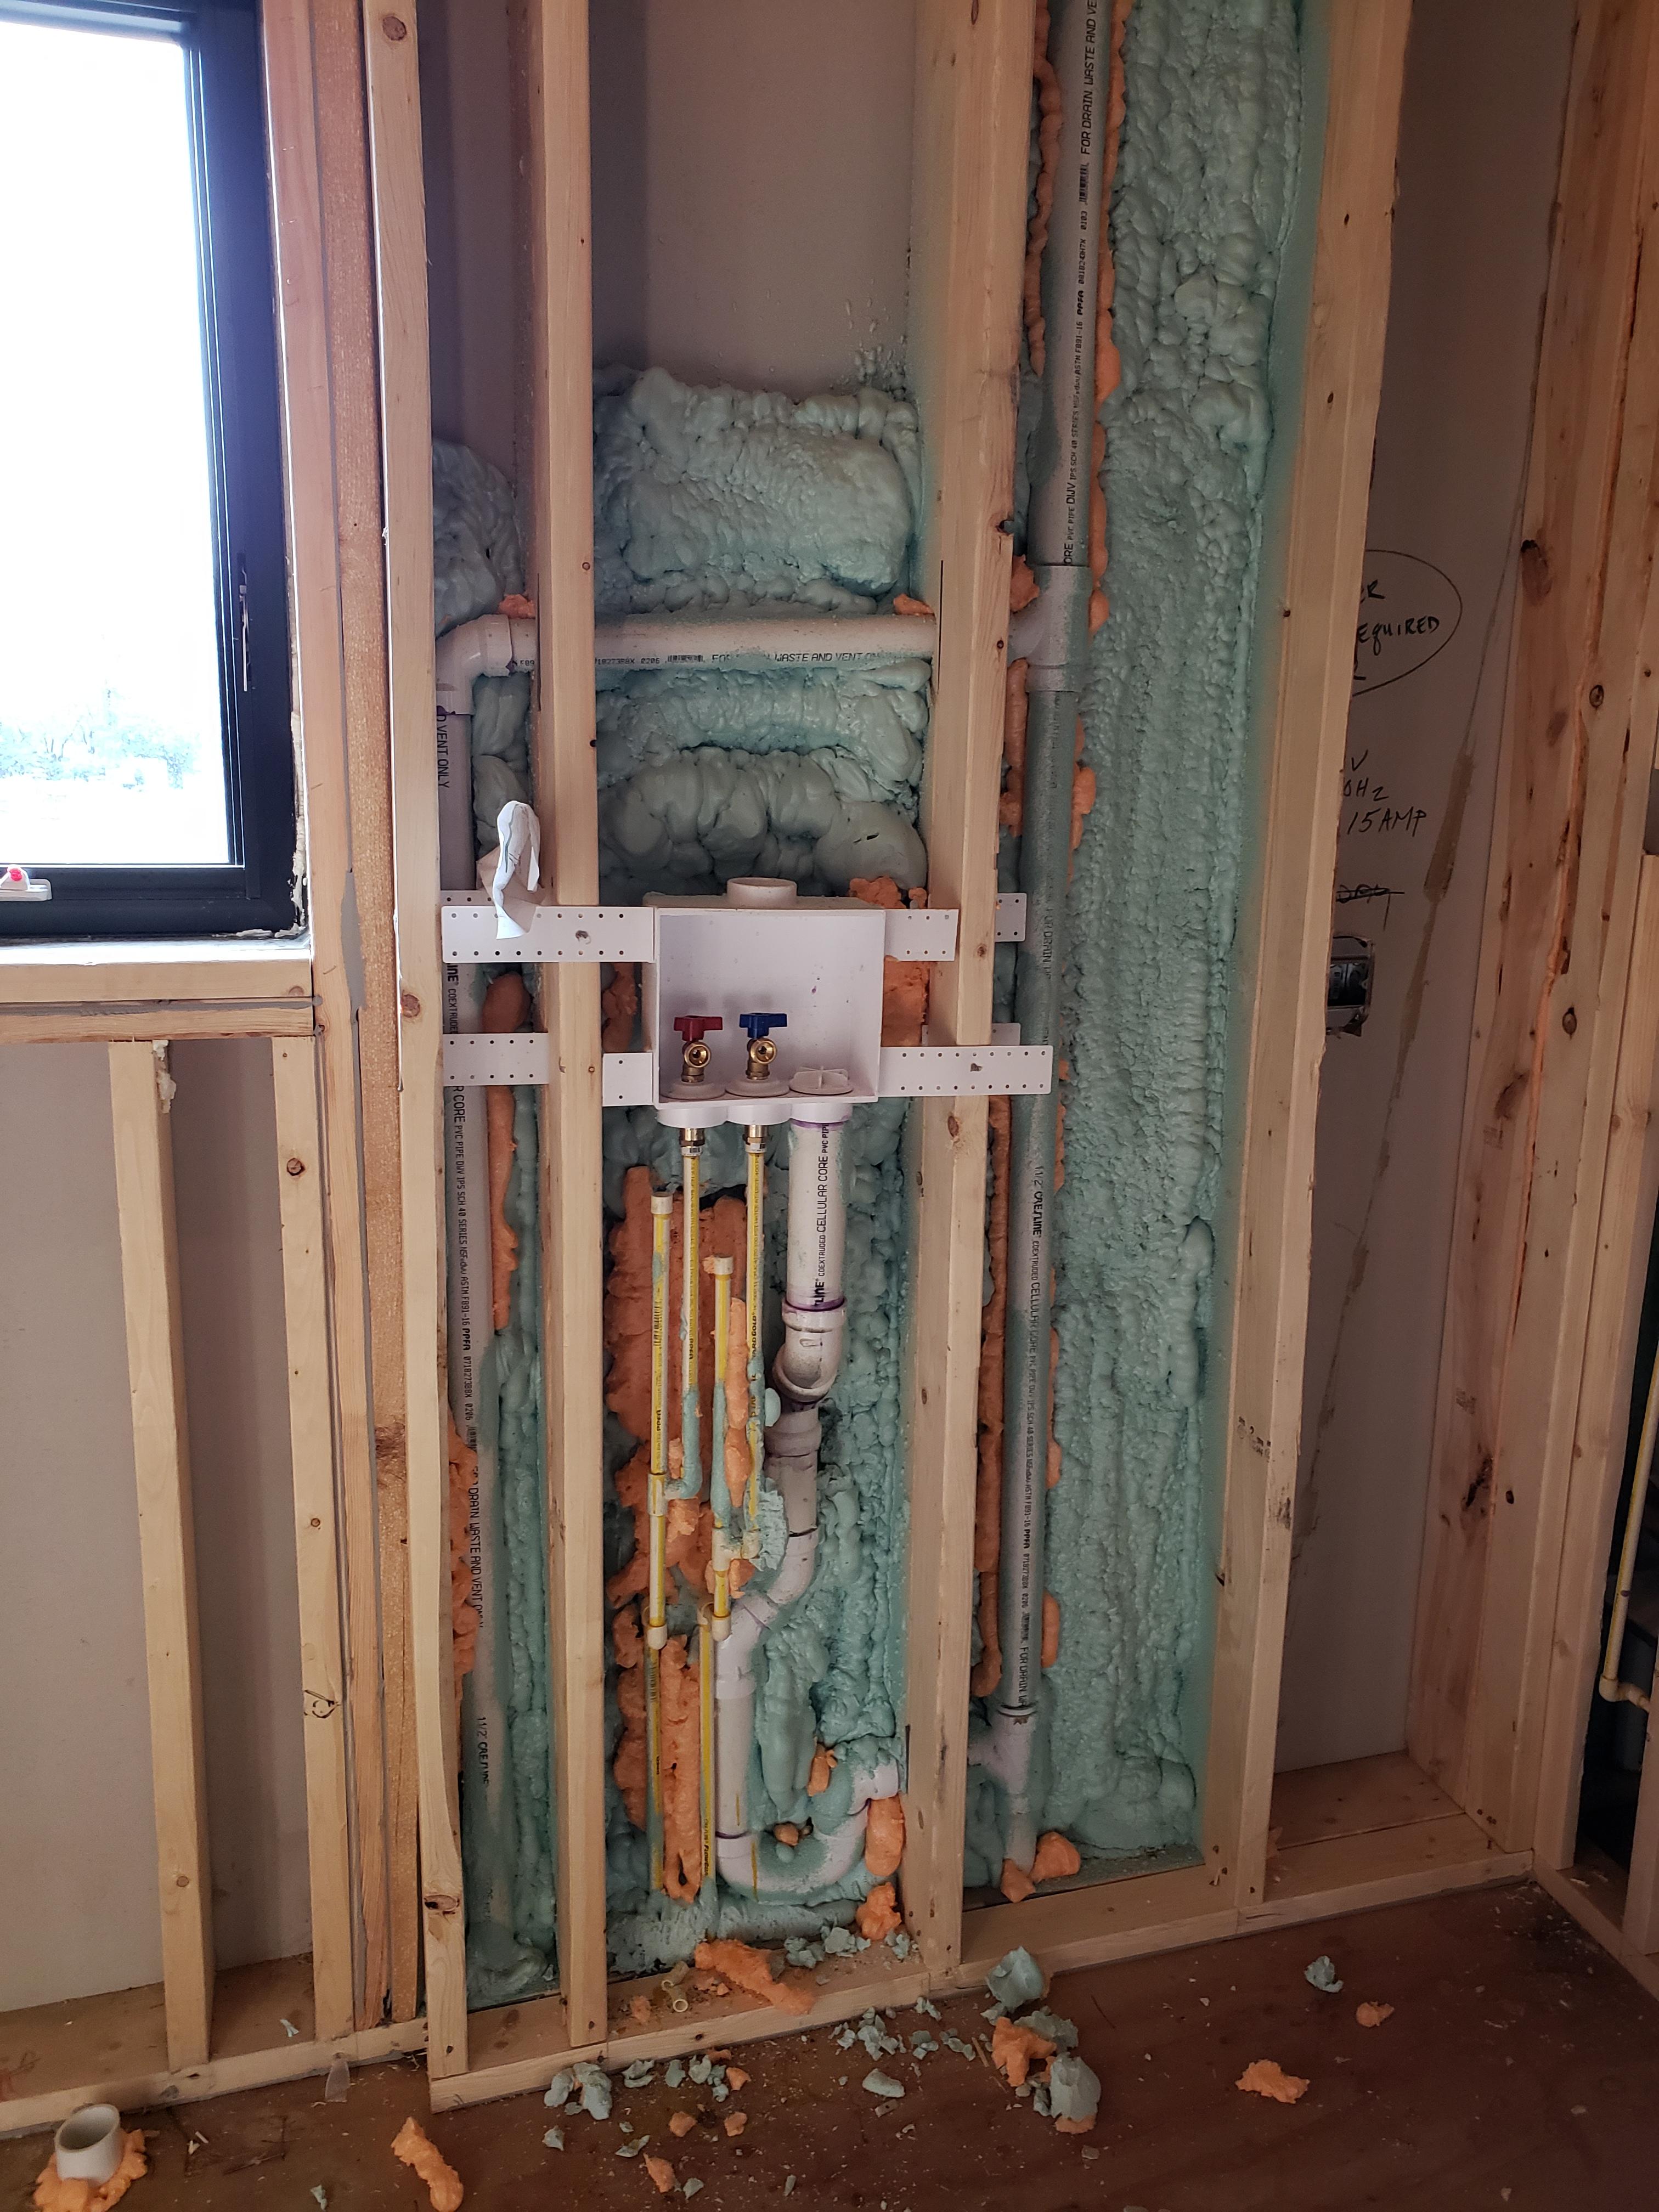
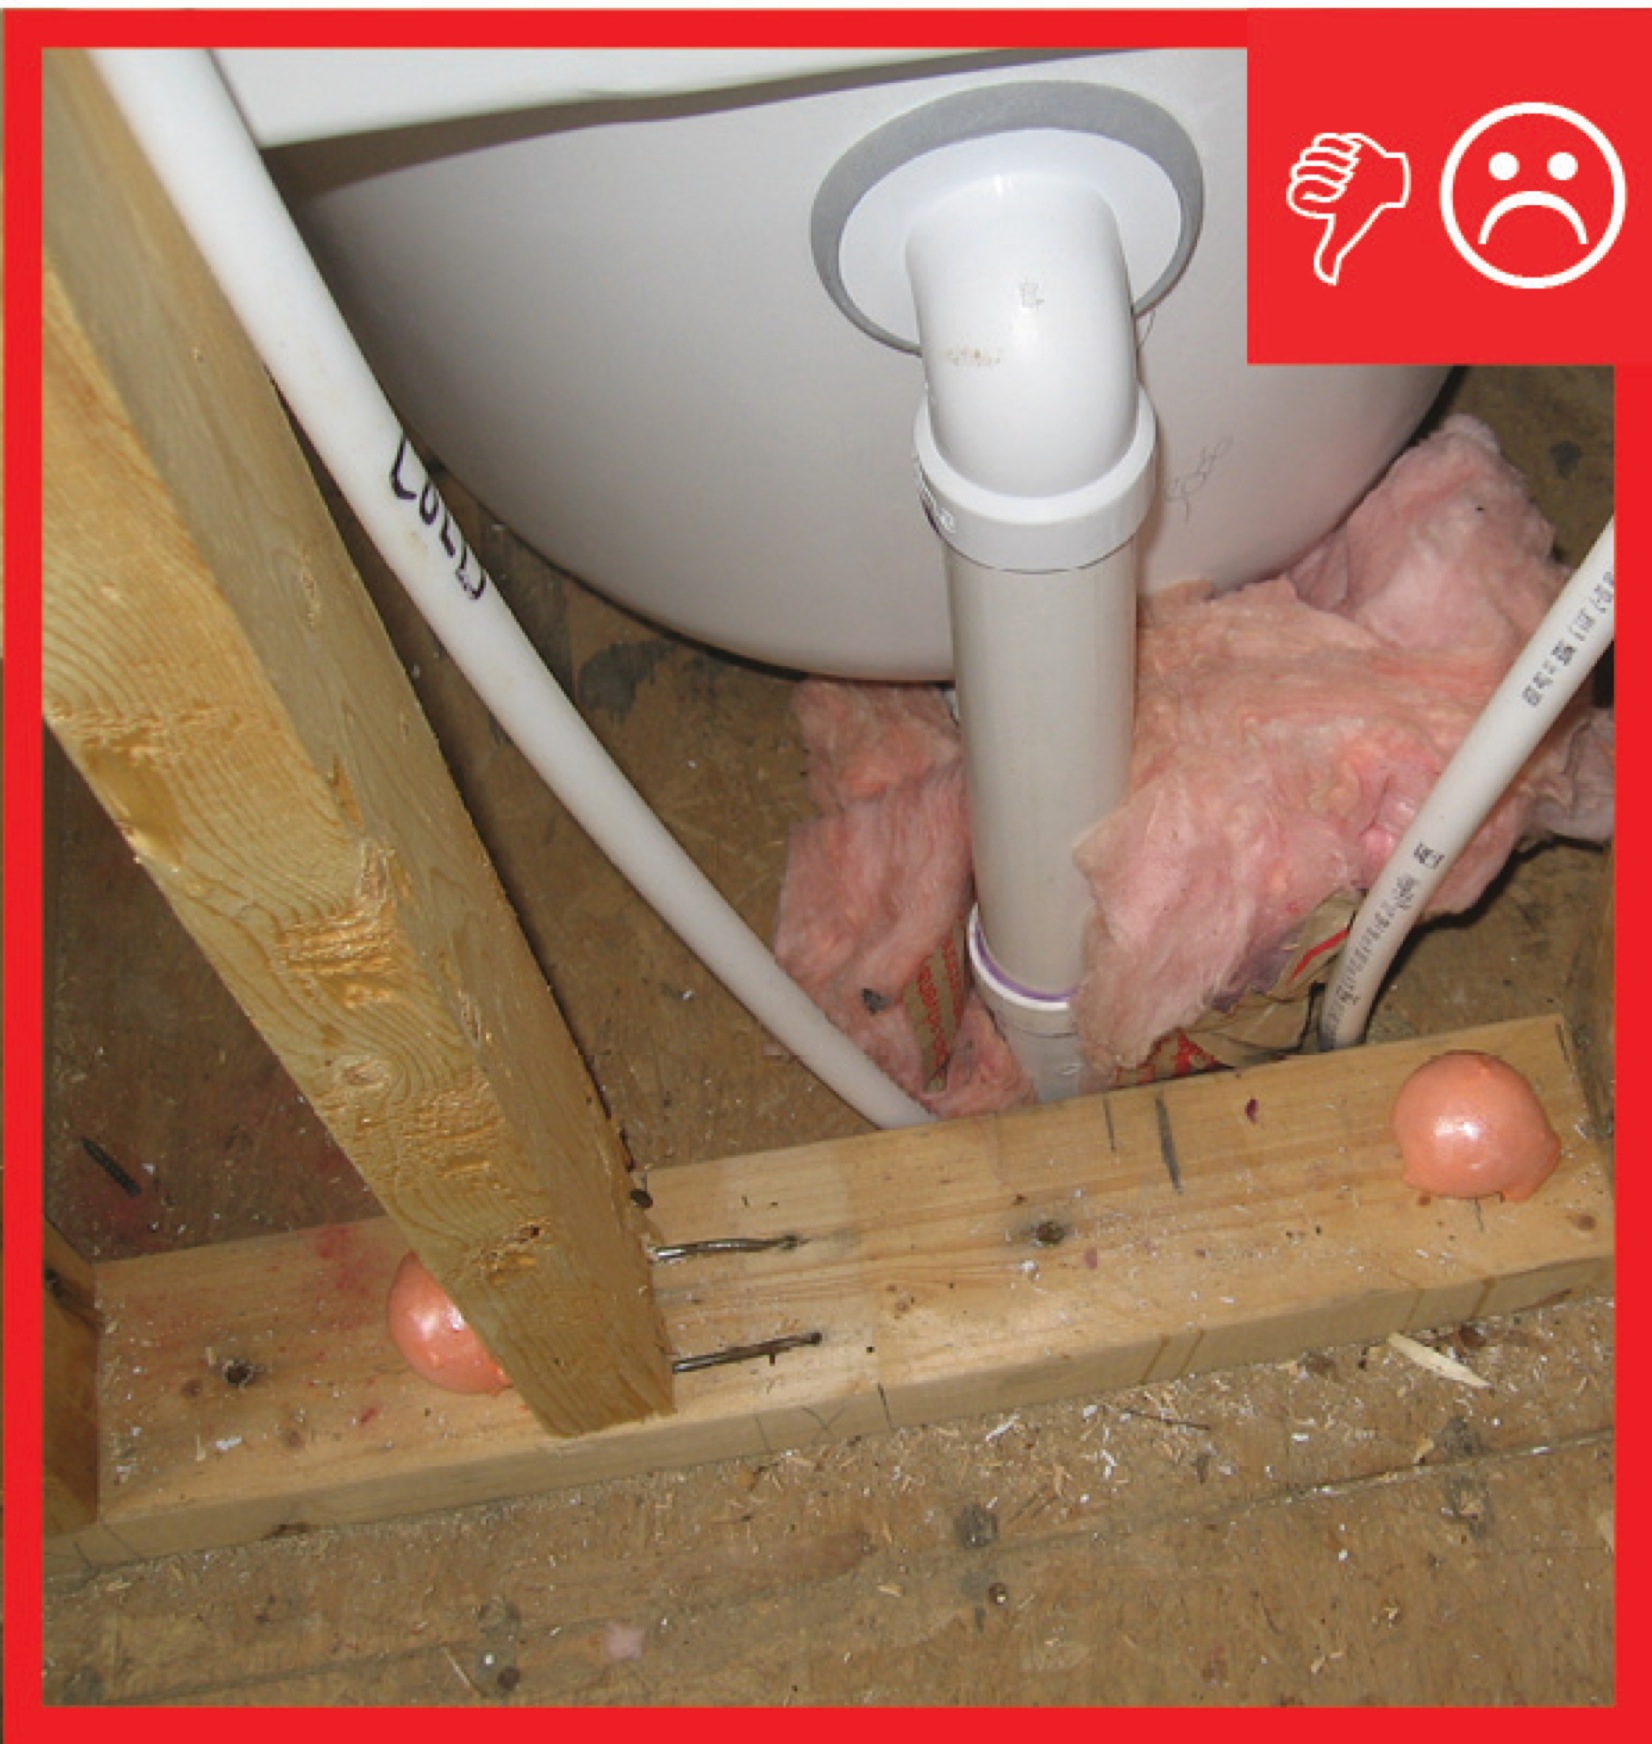
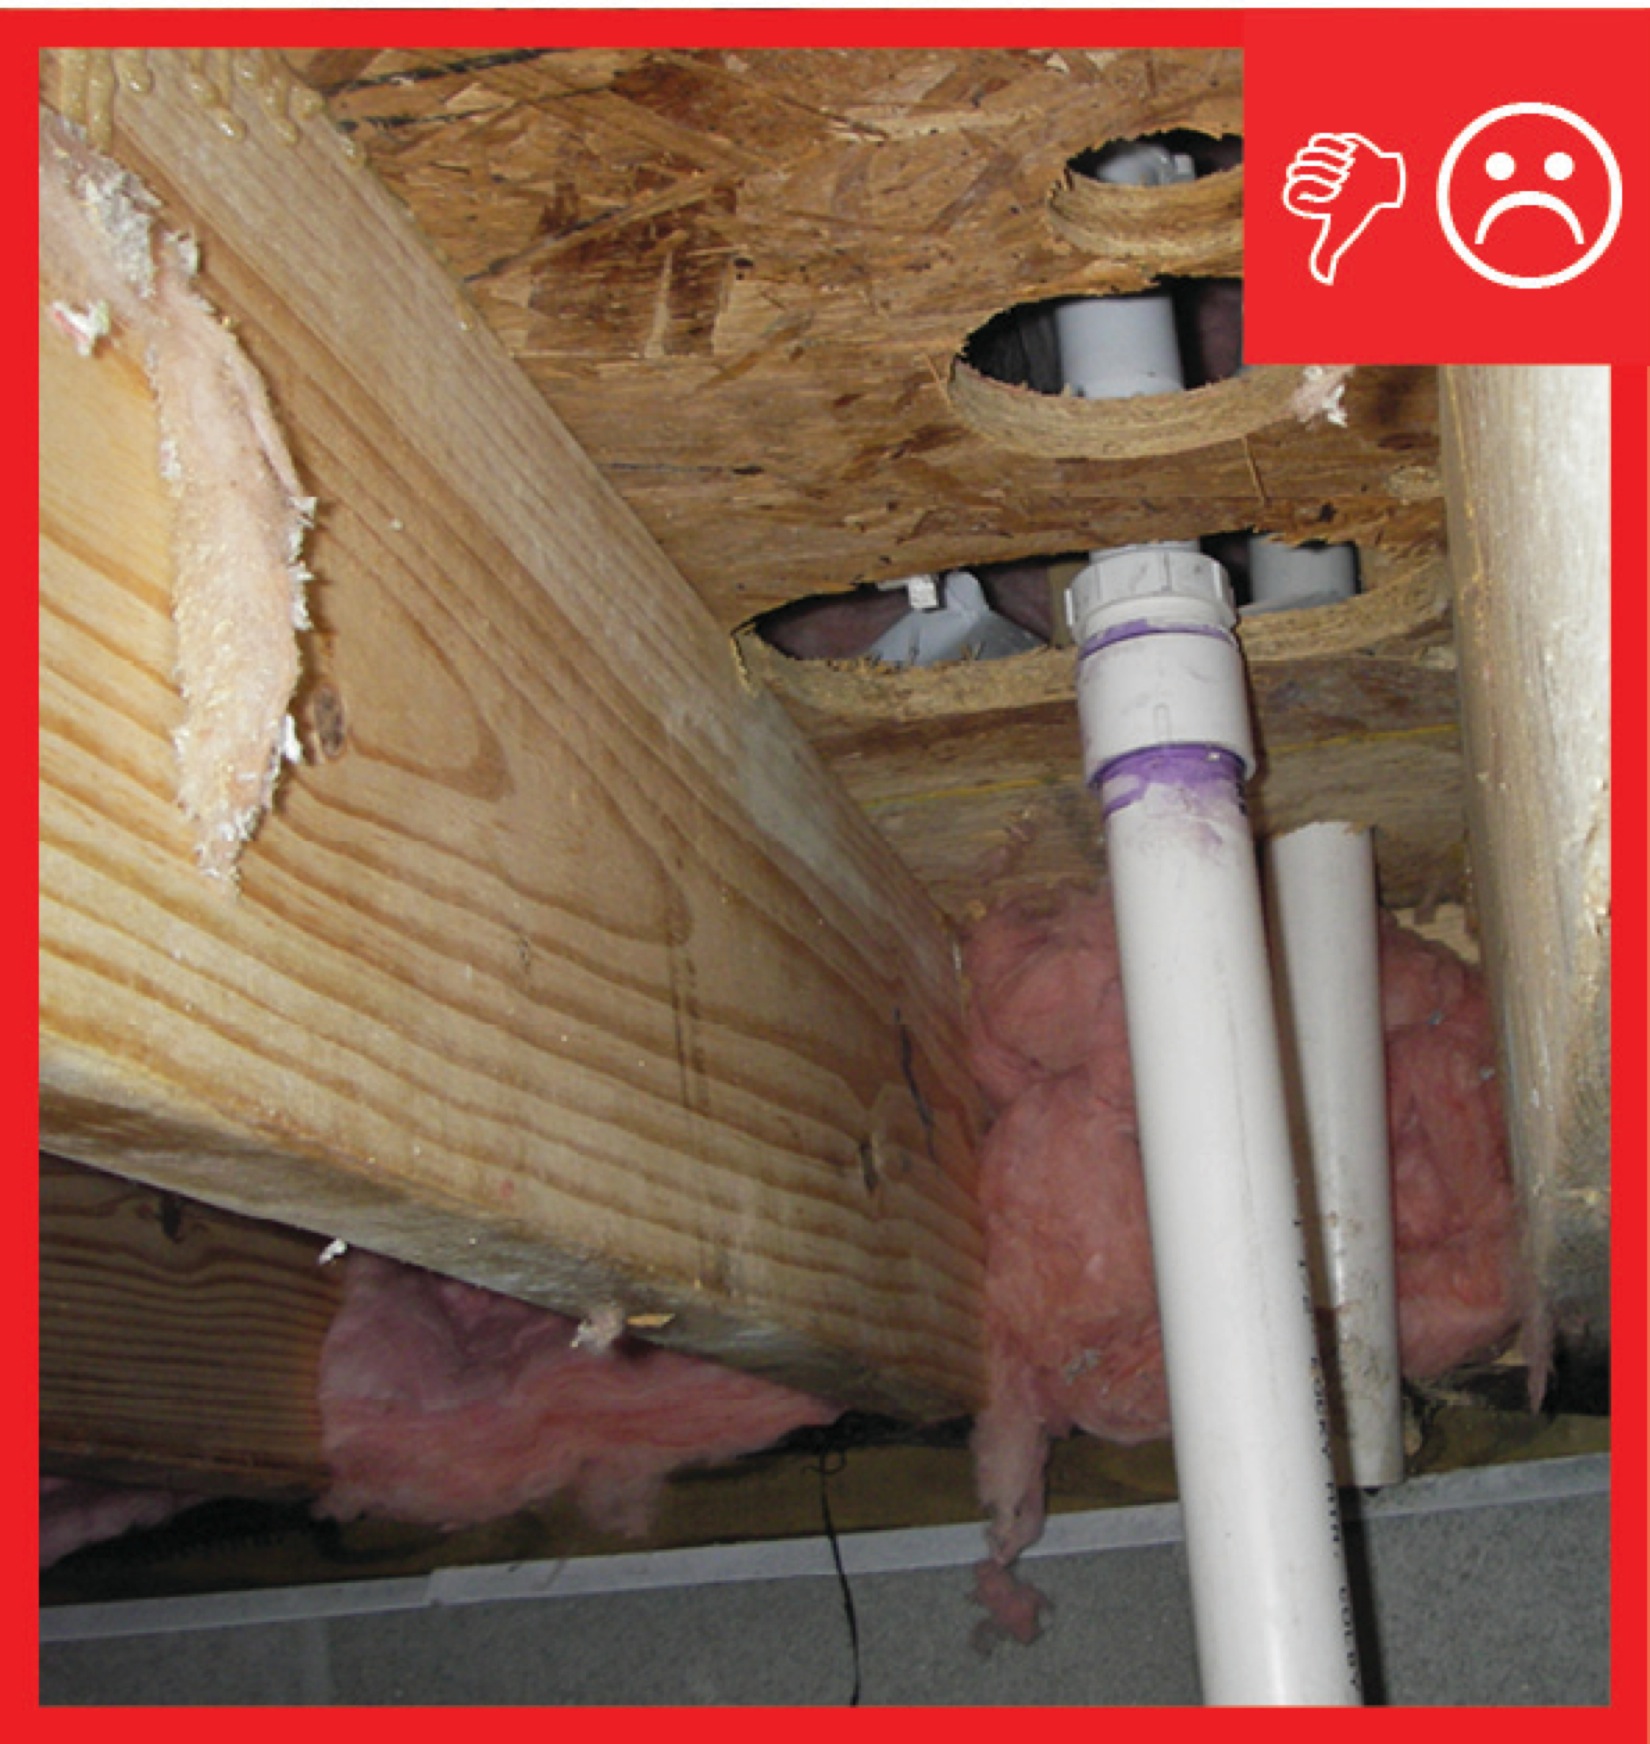
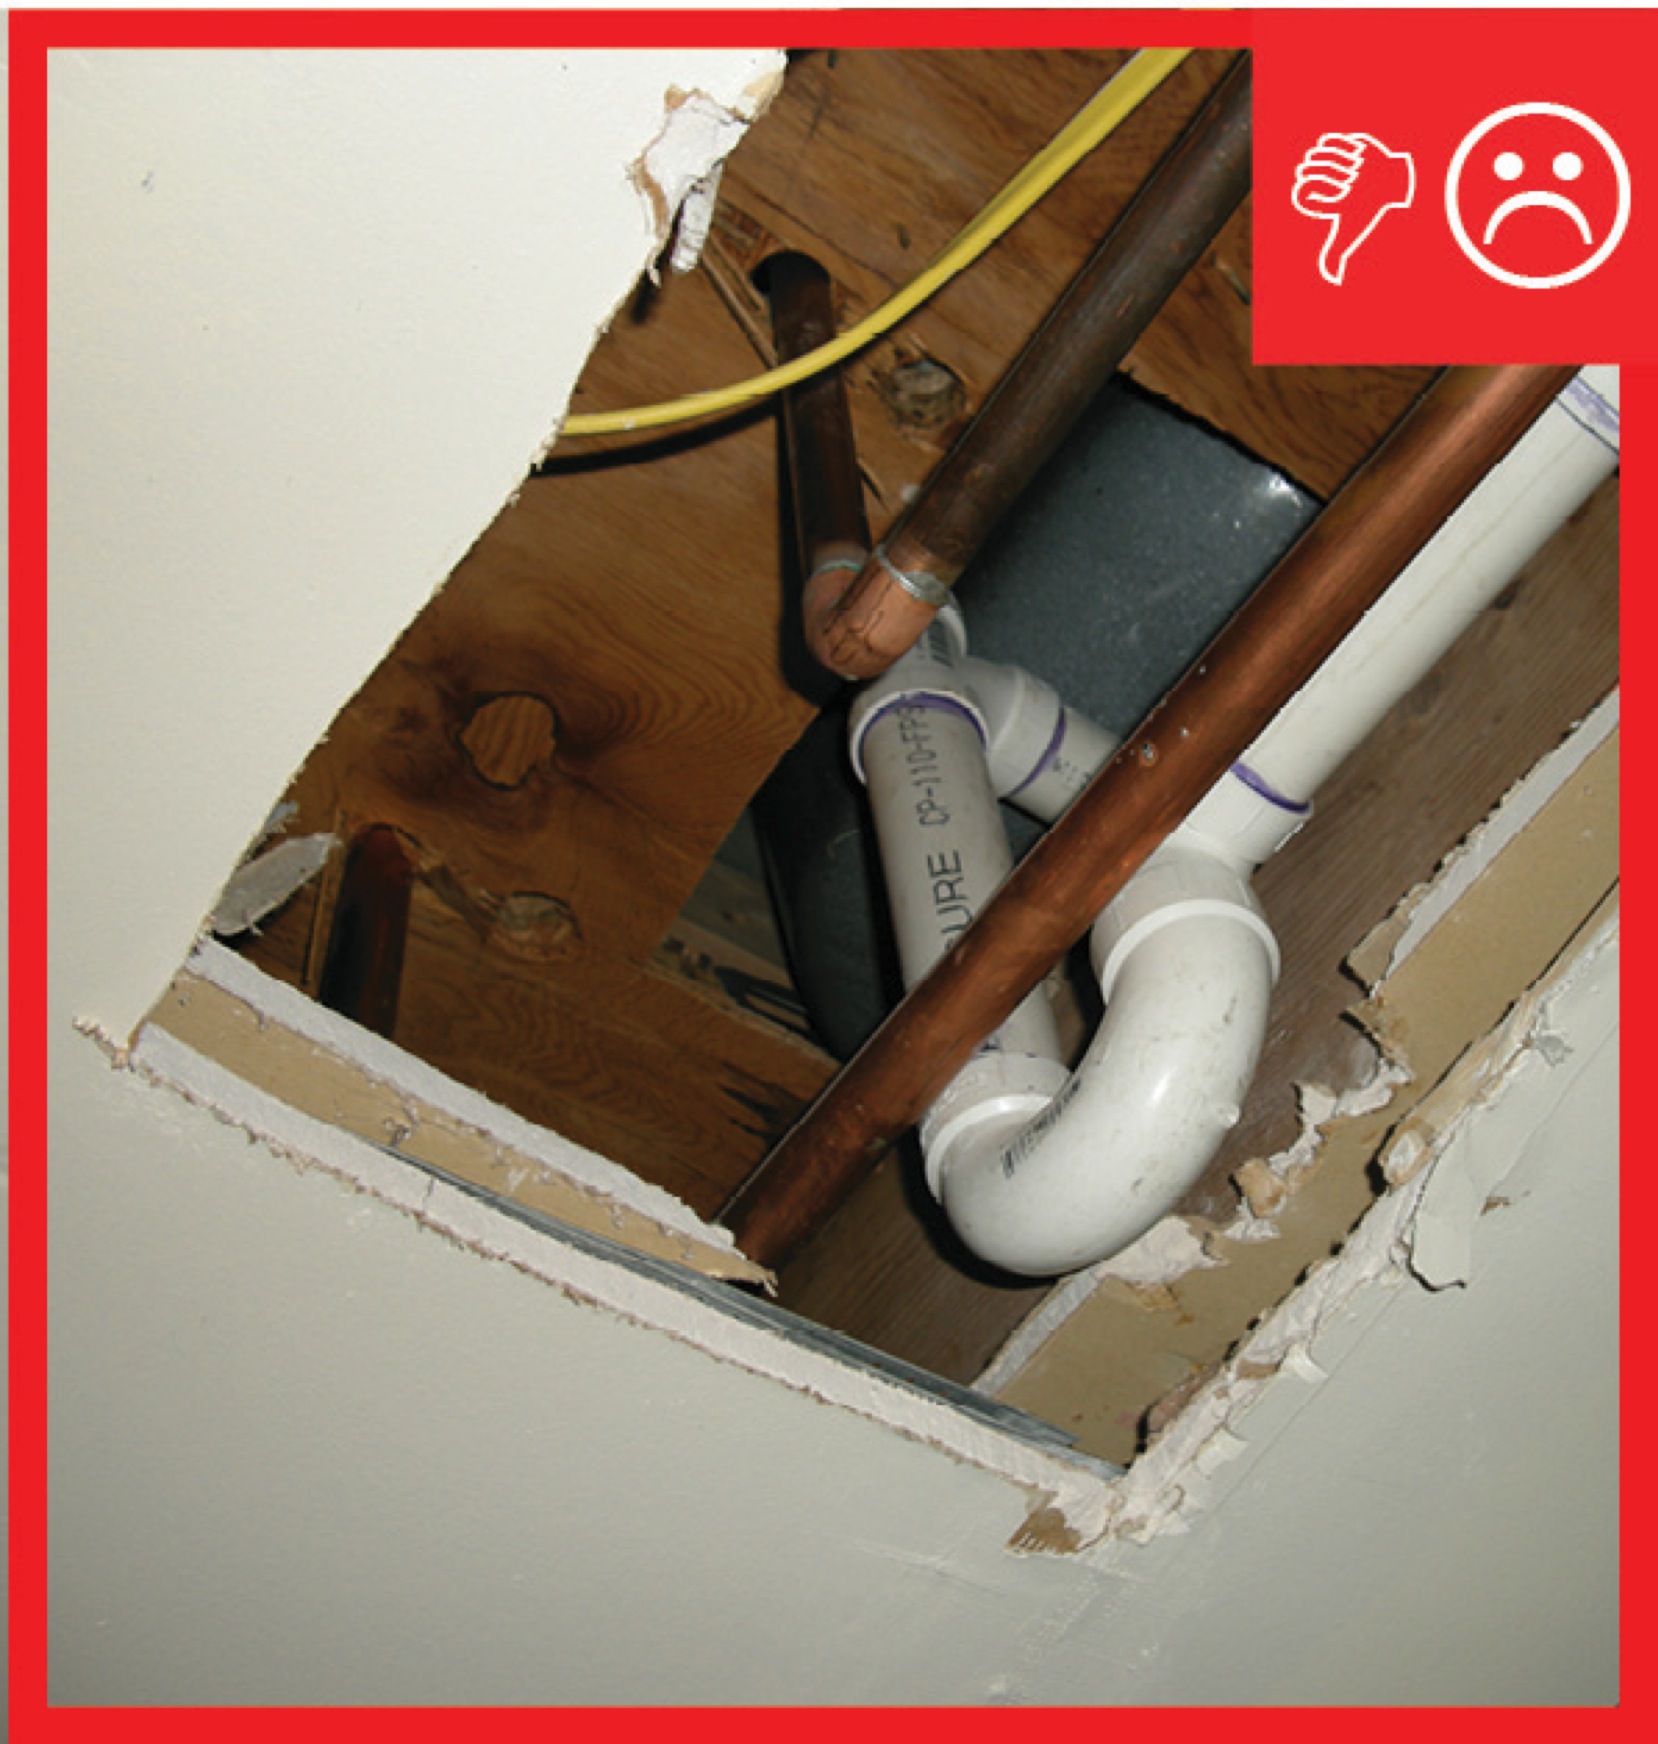
Generous holes are often cut through subflooring, walls, bottom plates, and top plates for plumbing pipes and vent stacks. These gaps are often hidden from view in under-sink cabinets, beneath tubs, behind shower enclosures, behind washing machines and dishwashers, or within wall cavities. If not properly sealed, large amounts of air can pass through these gaps, encouraged by pressure and temperature differences between conditioned and unconditioned spaces. These air leaks create energy losses. Additionally, they could potentially allow warm, moisture-laden air into wall cavities or attics where it can condense on cold surfaces, creating moisture problems. Conversely, air leaking into the house from unconditioned sources such as the garage or crawlspace can affect indoor air quality and cause drafts. Air barriers need to be continuous to be effective, so all penetrations in exterior walls and in walls and floors adjoining unconditioned spaces must be sealed.
Be sure to schedule sealing of plumbing holes after the pipes and plumbing have been installed and before the drywall is completed. Responsibility for sealing air leaks around plumbing should be included in the contract for the appropriate trade, depending on the workflow at a specific job site.
How to Air-Seal Holes around Plumbing
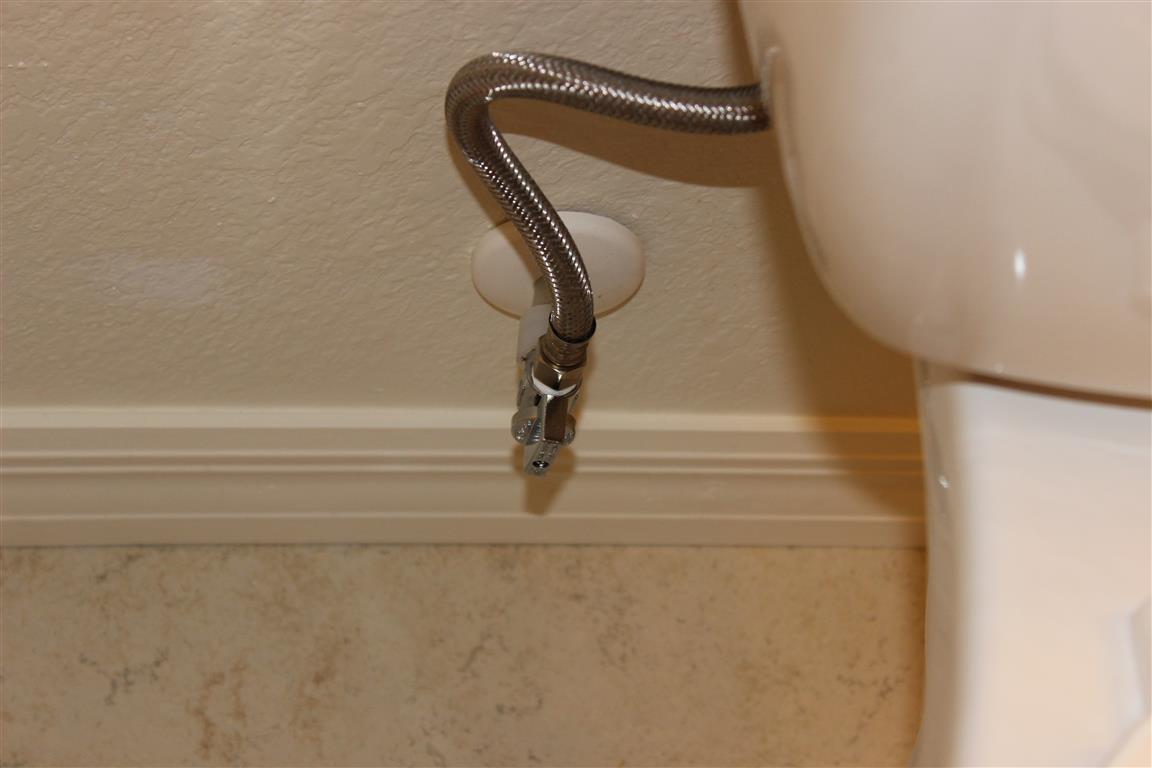
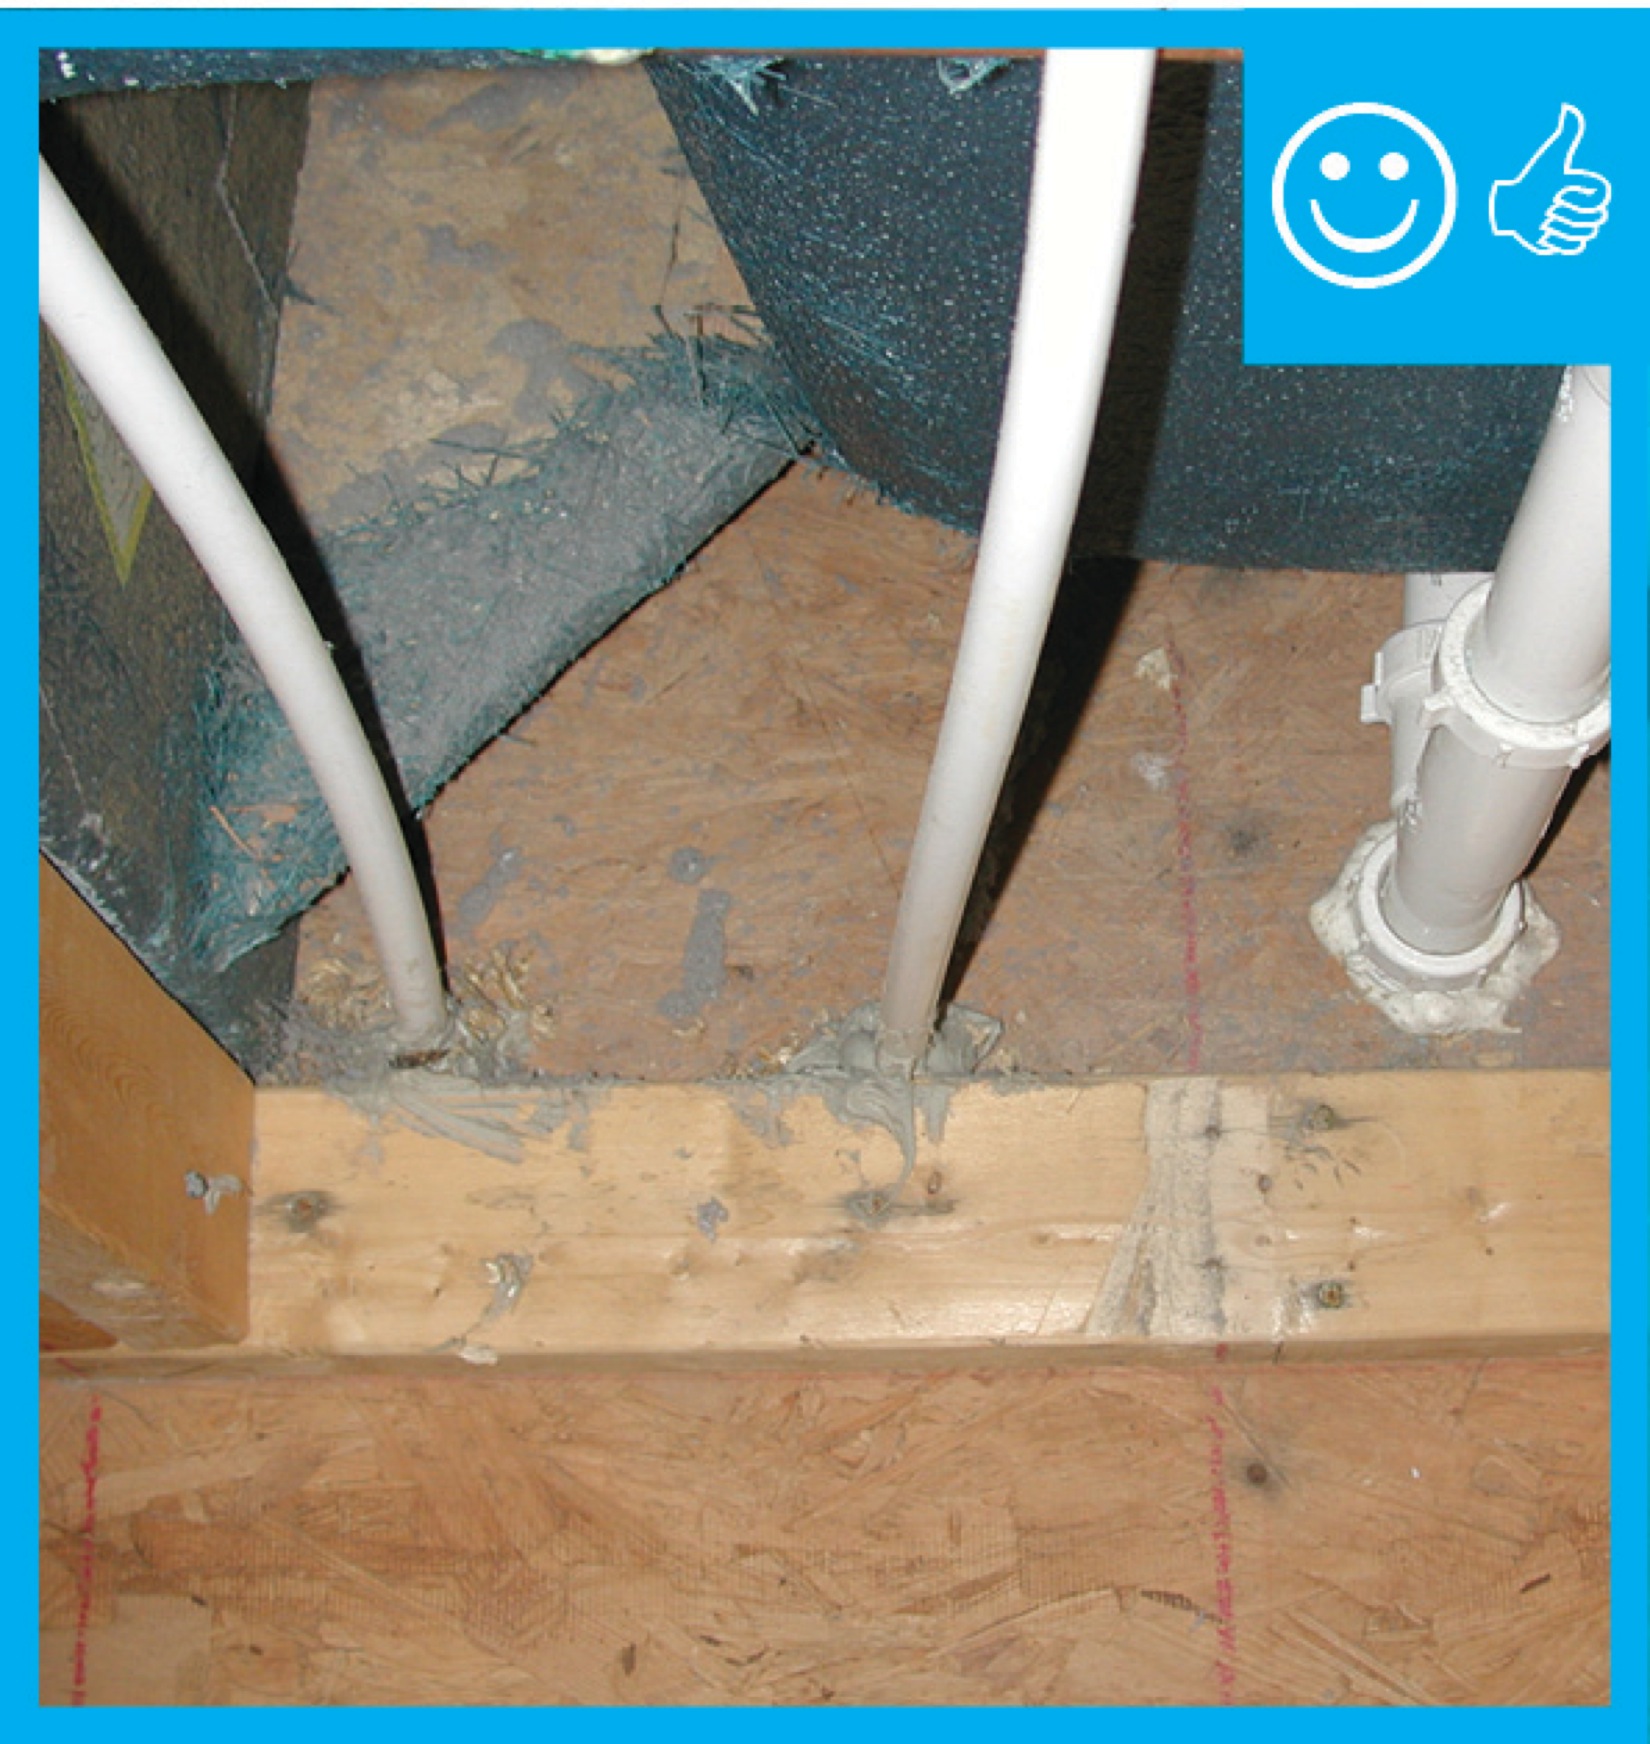
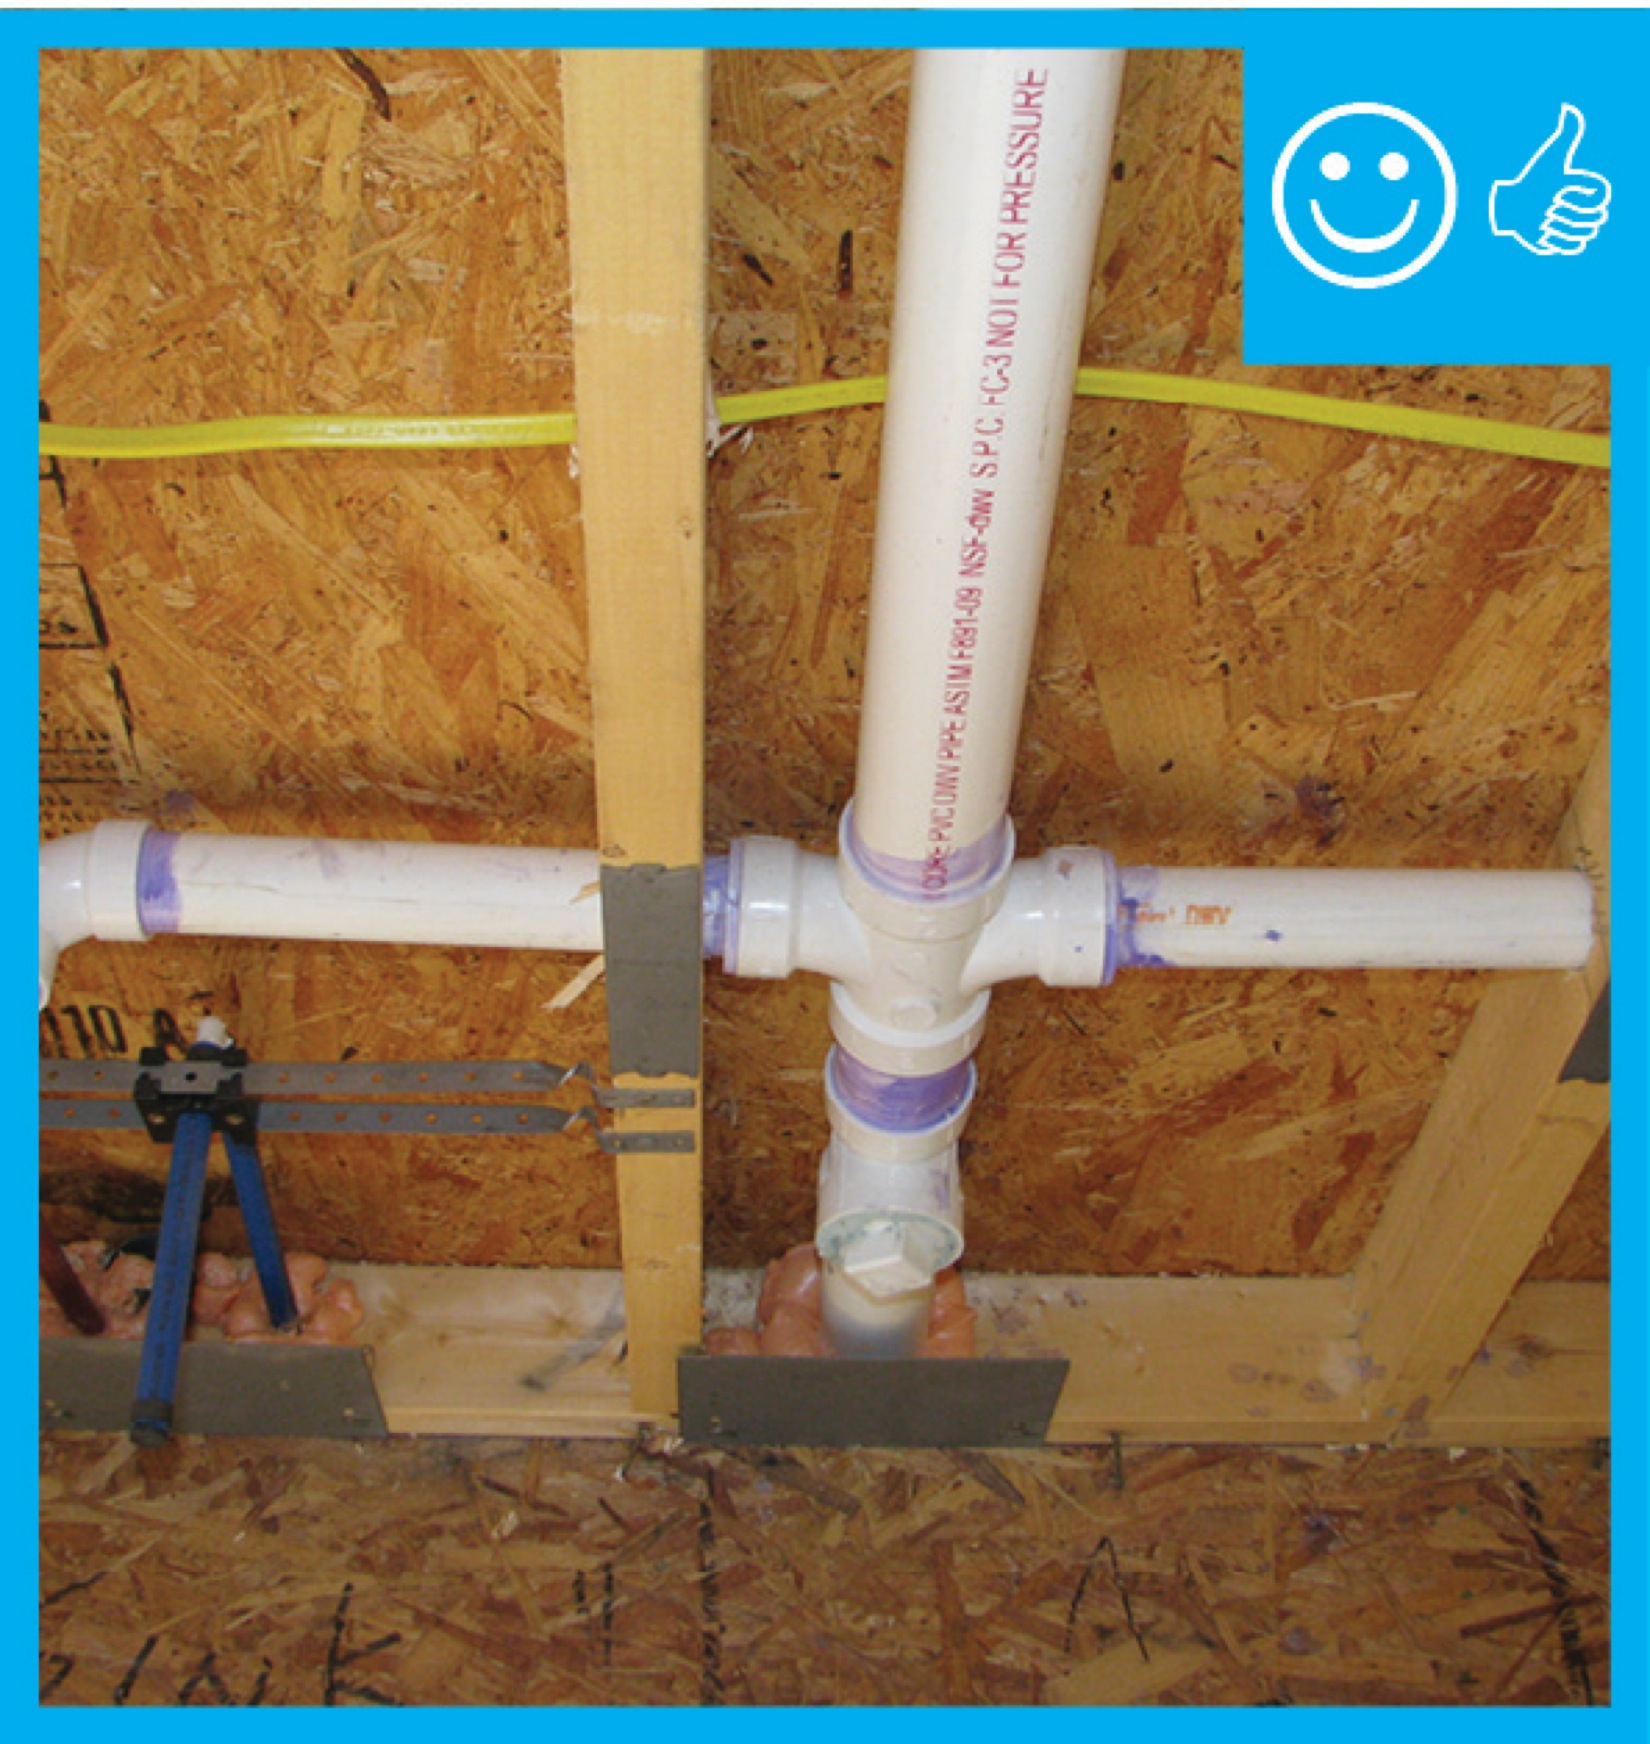
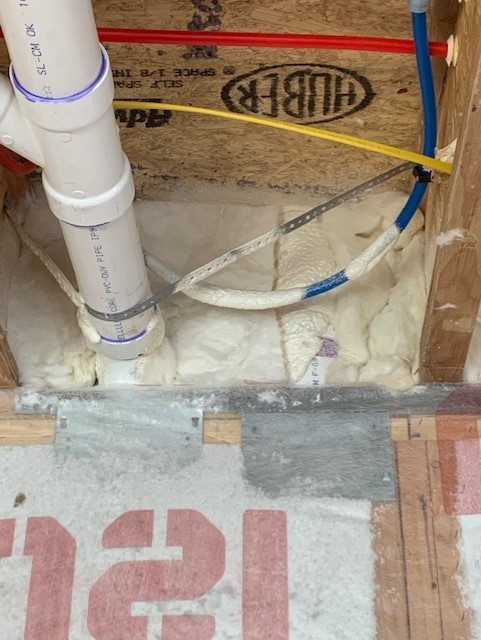
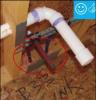
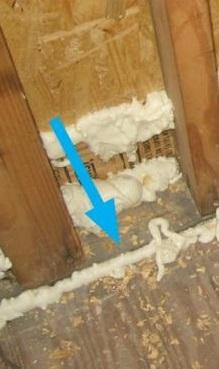
Use caulk or canned spray foam to seal piping holes through the top plates, bottom plates, and subfloor (Figure 1). Avoid running water pipes along exterior walls. Run piping next to floor joists in floors if insulating with batts to minimize disruption of cavity insulation. Water pipes in single-family homes and low-rise multifamily buildings should be insulated to R-3 (IECC 2021) even when they are installed in interior walls, to conserve the heat in hot water and to minimize the potential for condensation. For water pipe insulation requirements for mid-rise and high-rise multifamily buildings, see Section C404.4 and Table C403.12.3 in IECC 2021.
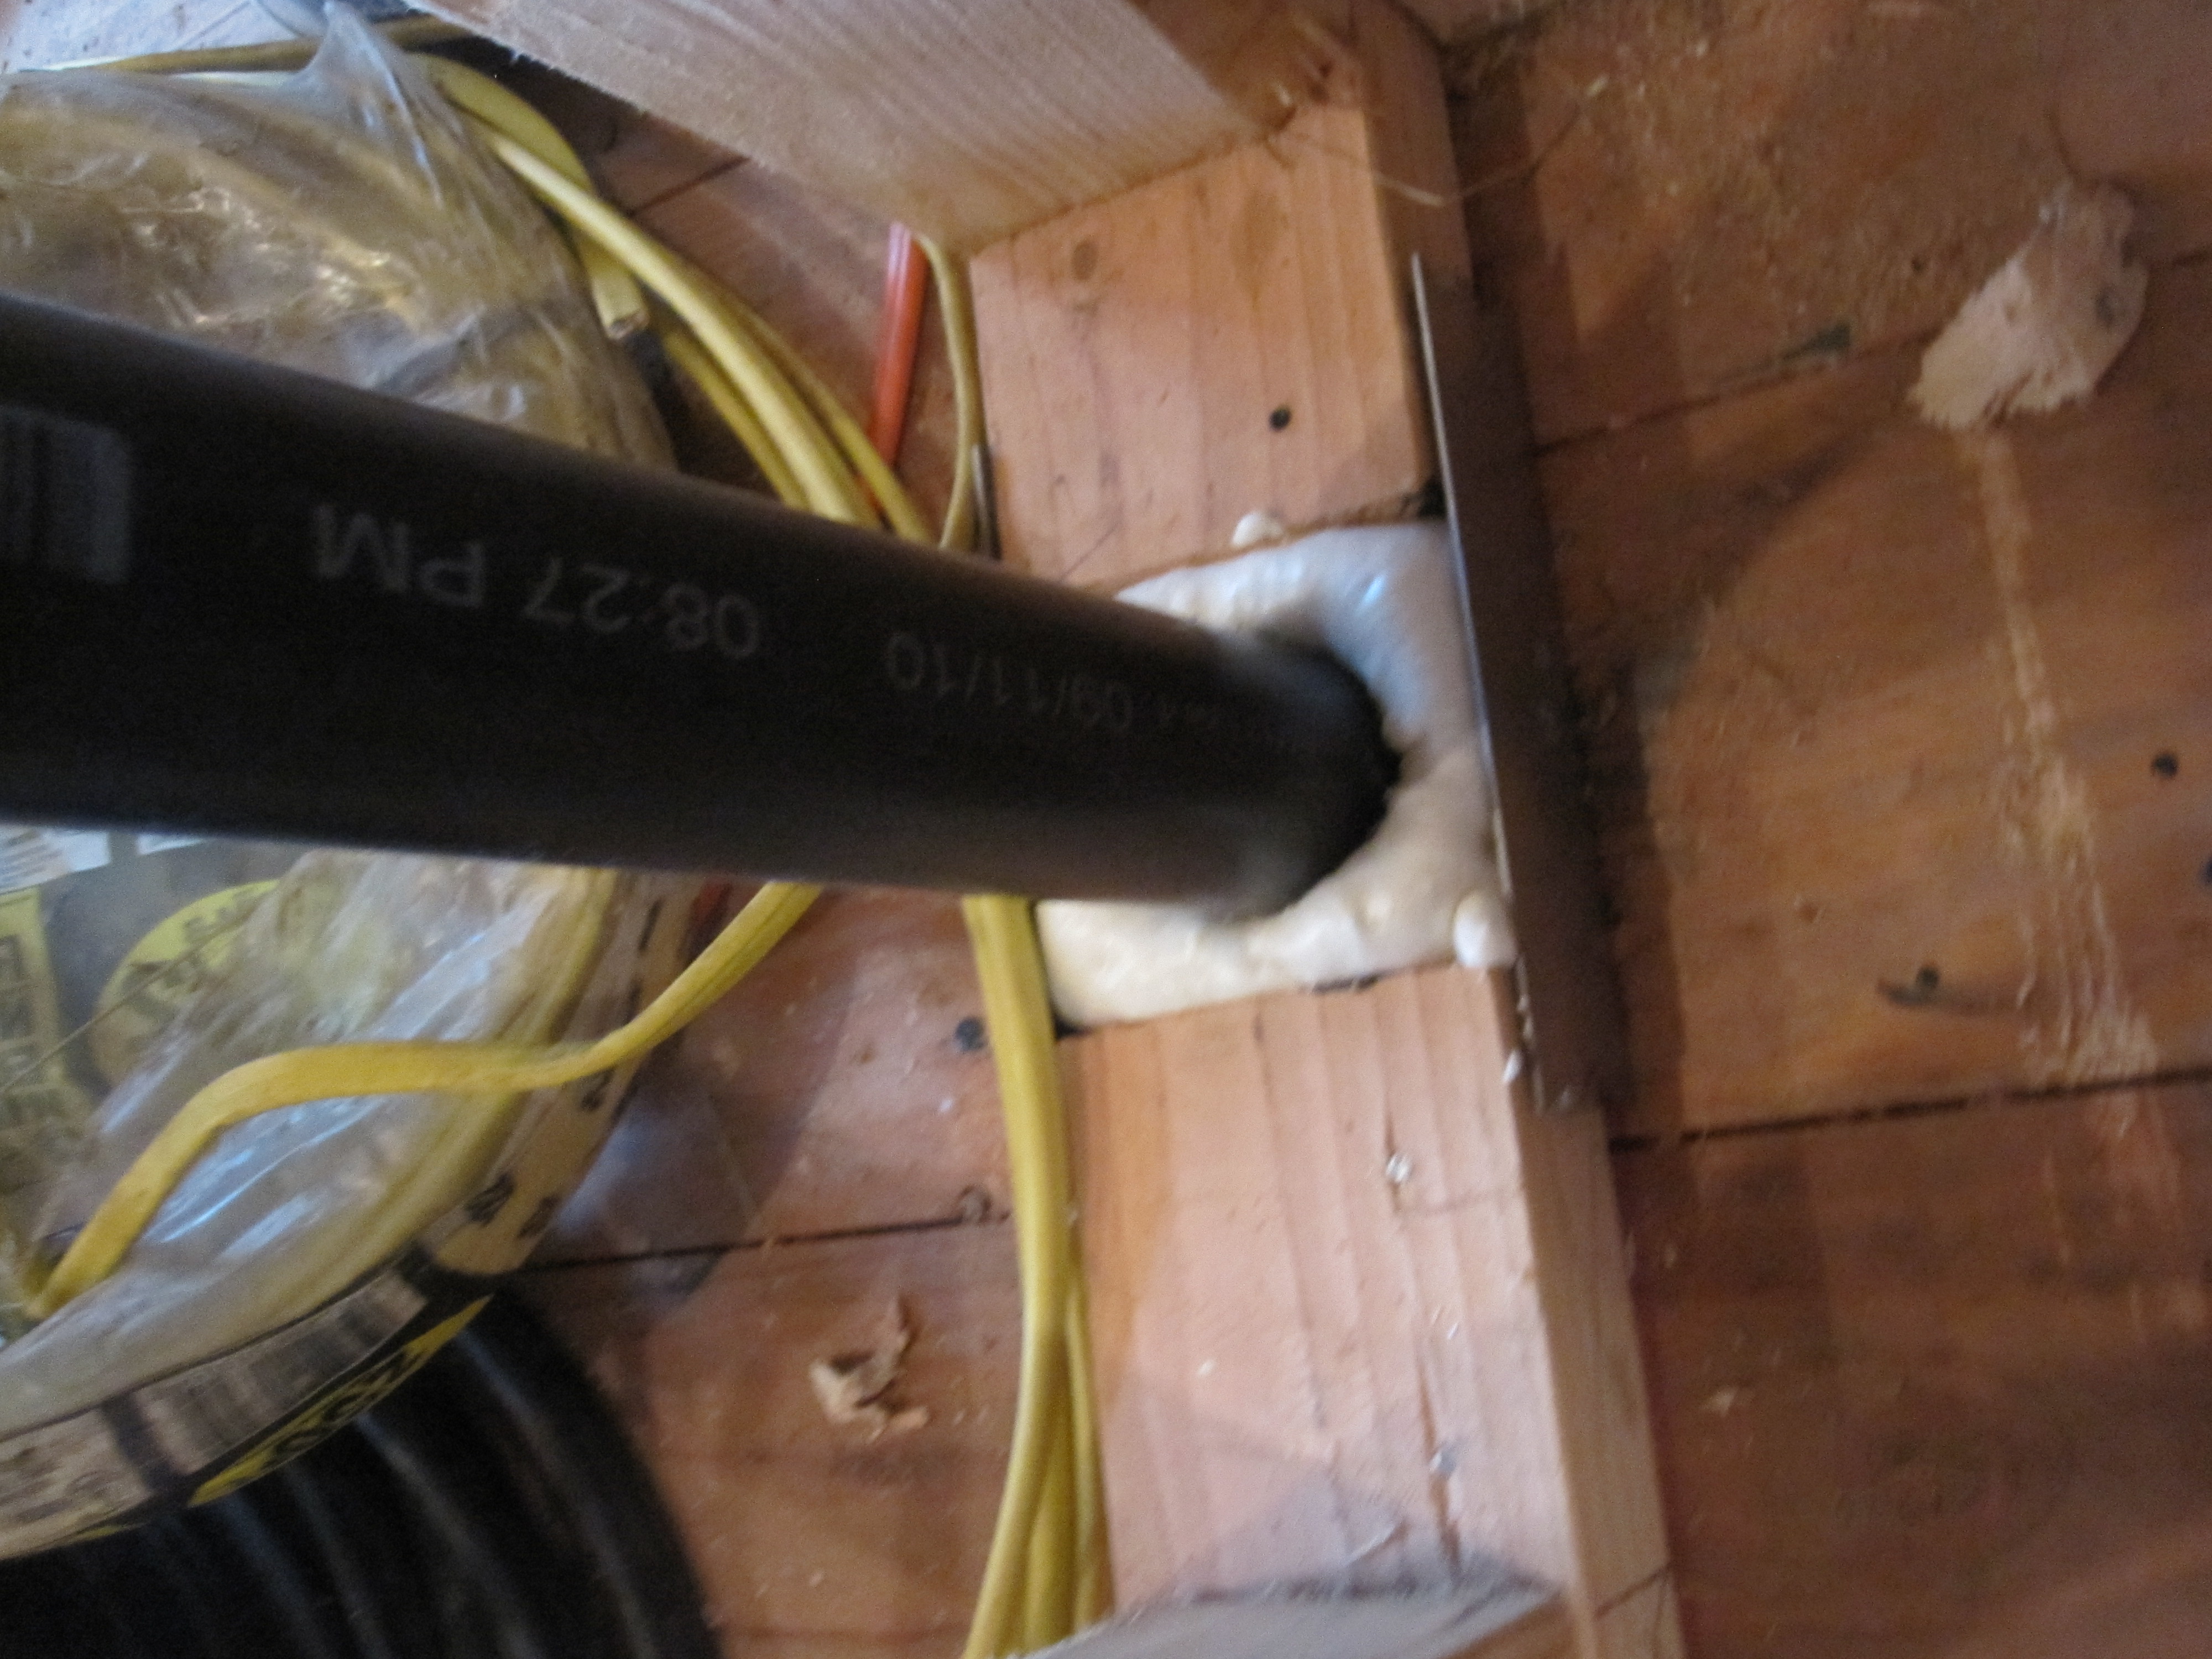
Figure 1. Apply spray foam to holes around plumbing in the top plate, sill plate, or subfloor (Source: Courtesy of PNNL). - For larger holes in the top or bottom plate, use a rubber gasket. Use of a flexible gasket allows some movement of the vent stack without loosening the air-seal (Lstiburek 2009).
- Cut a hole in the gasket just large enough to fit the width of the pipe.
- Apply caulk to the top plate.
- Fit the gasket over the pipe and press down to adhere the gasket to the caulk.
- Staple the gasket in place.
- Apply more caulk around the pipe.
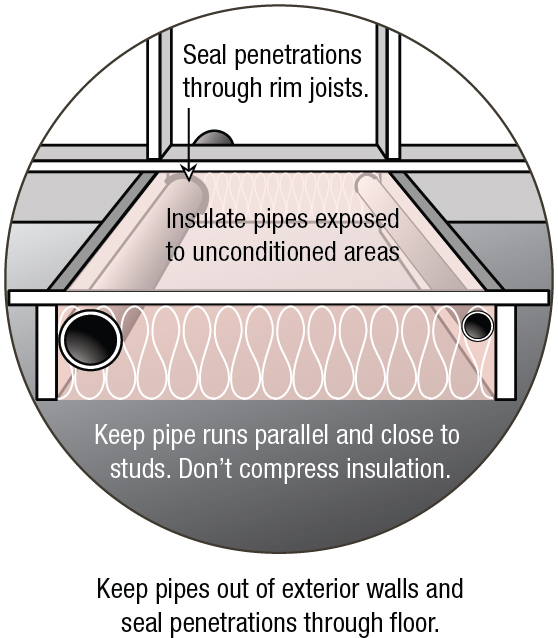
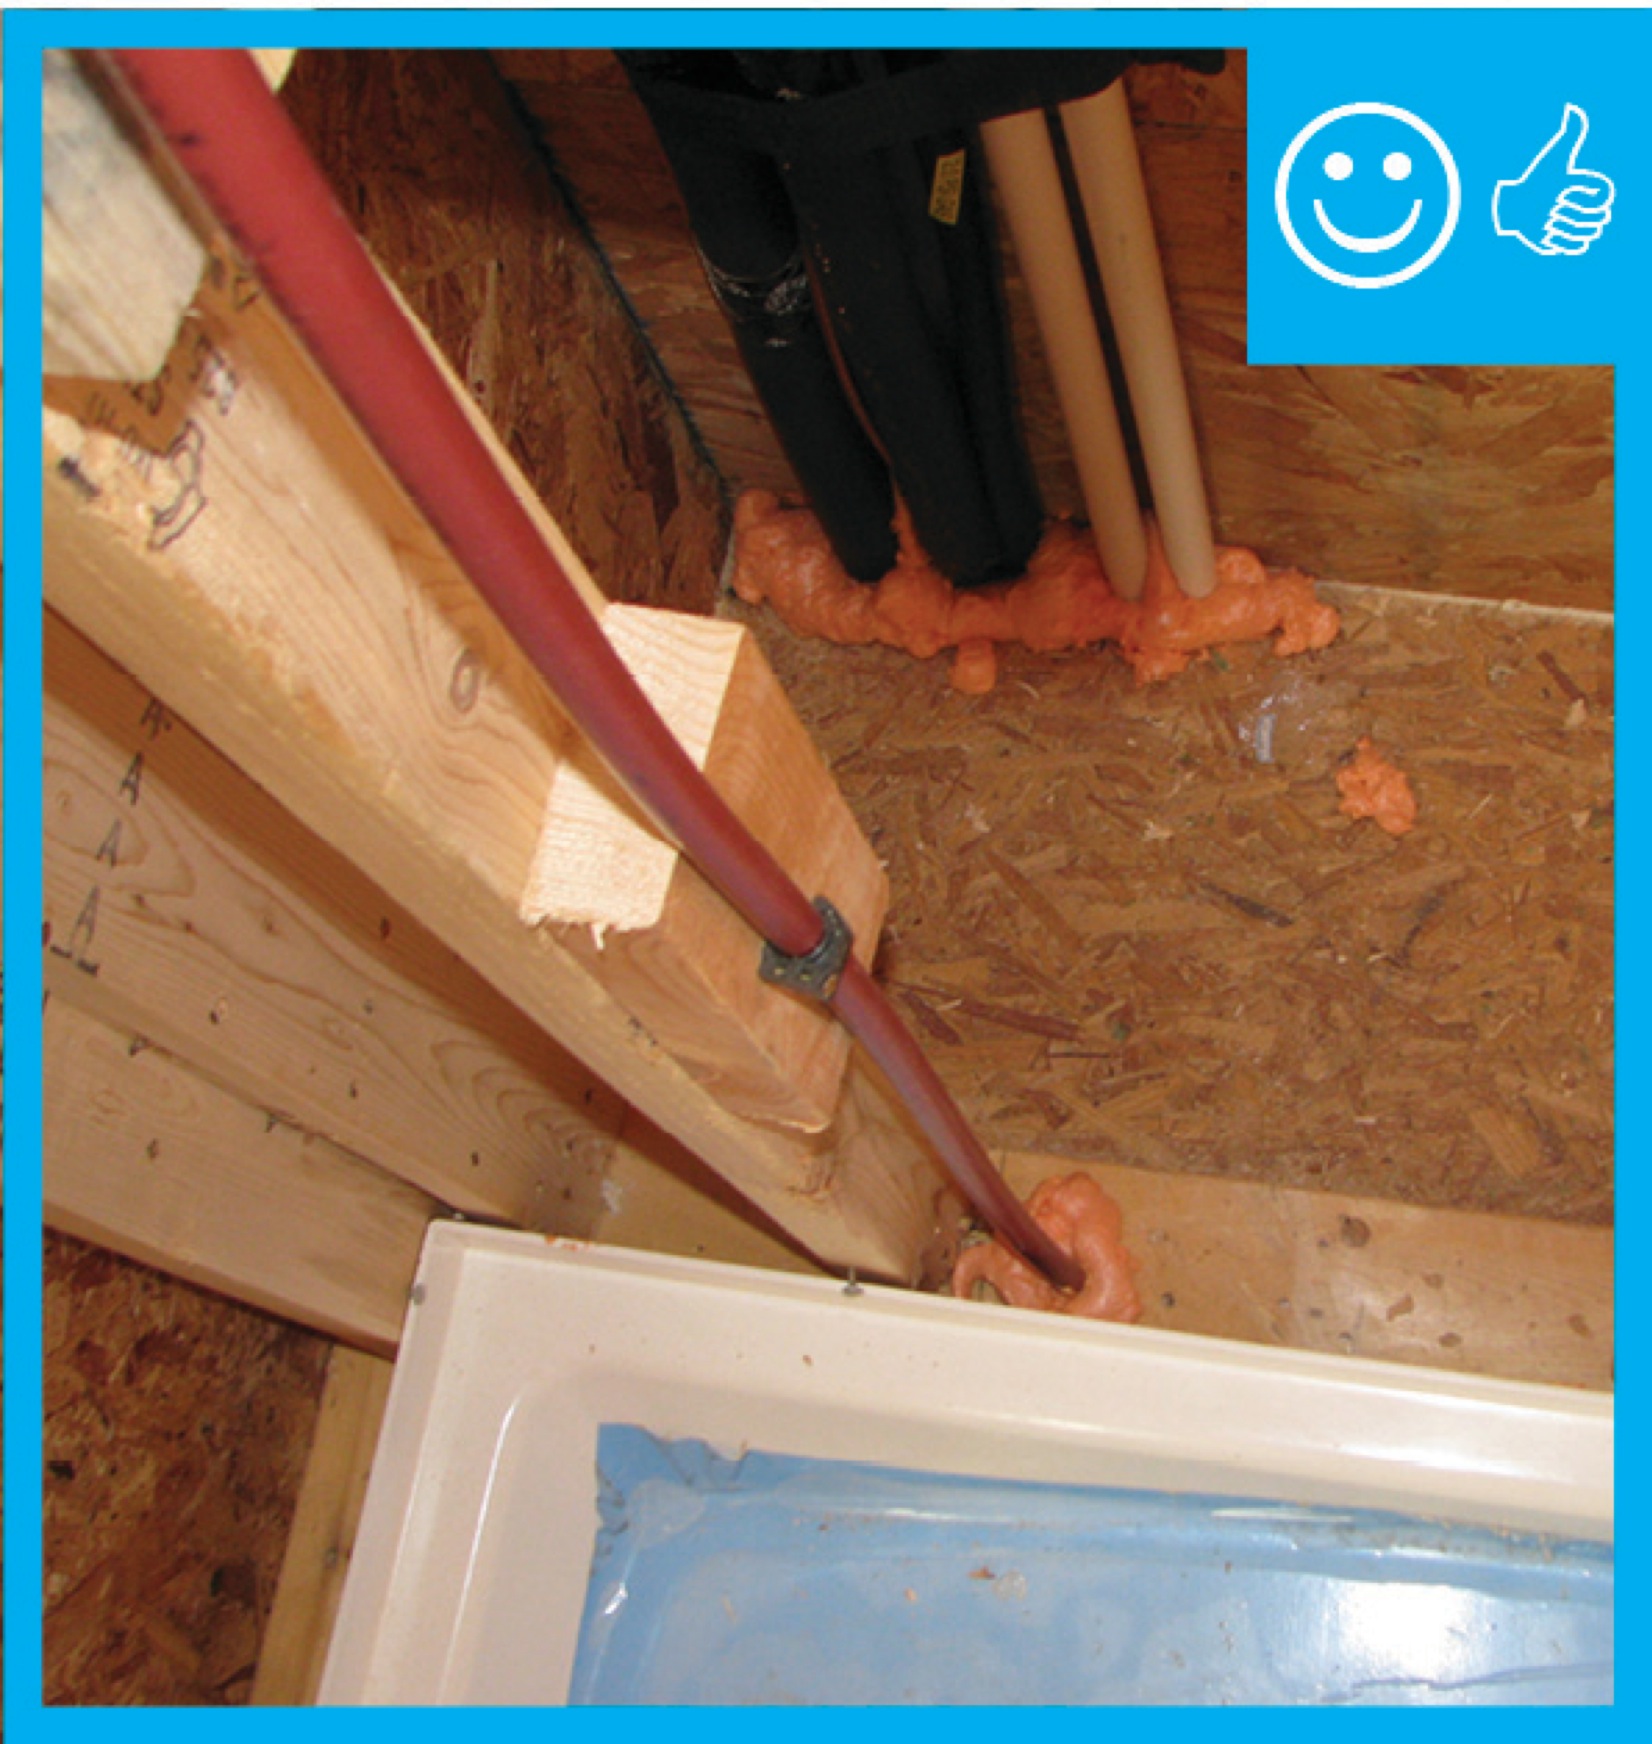
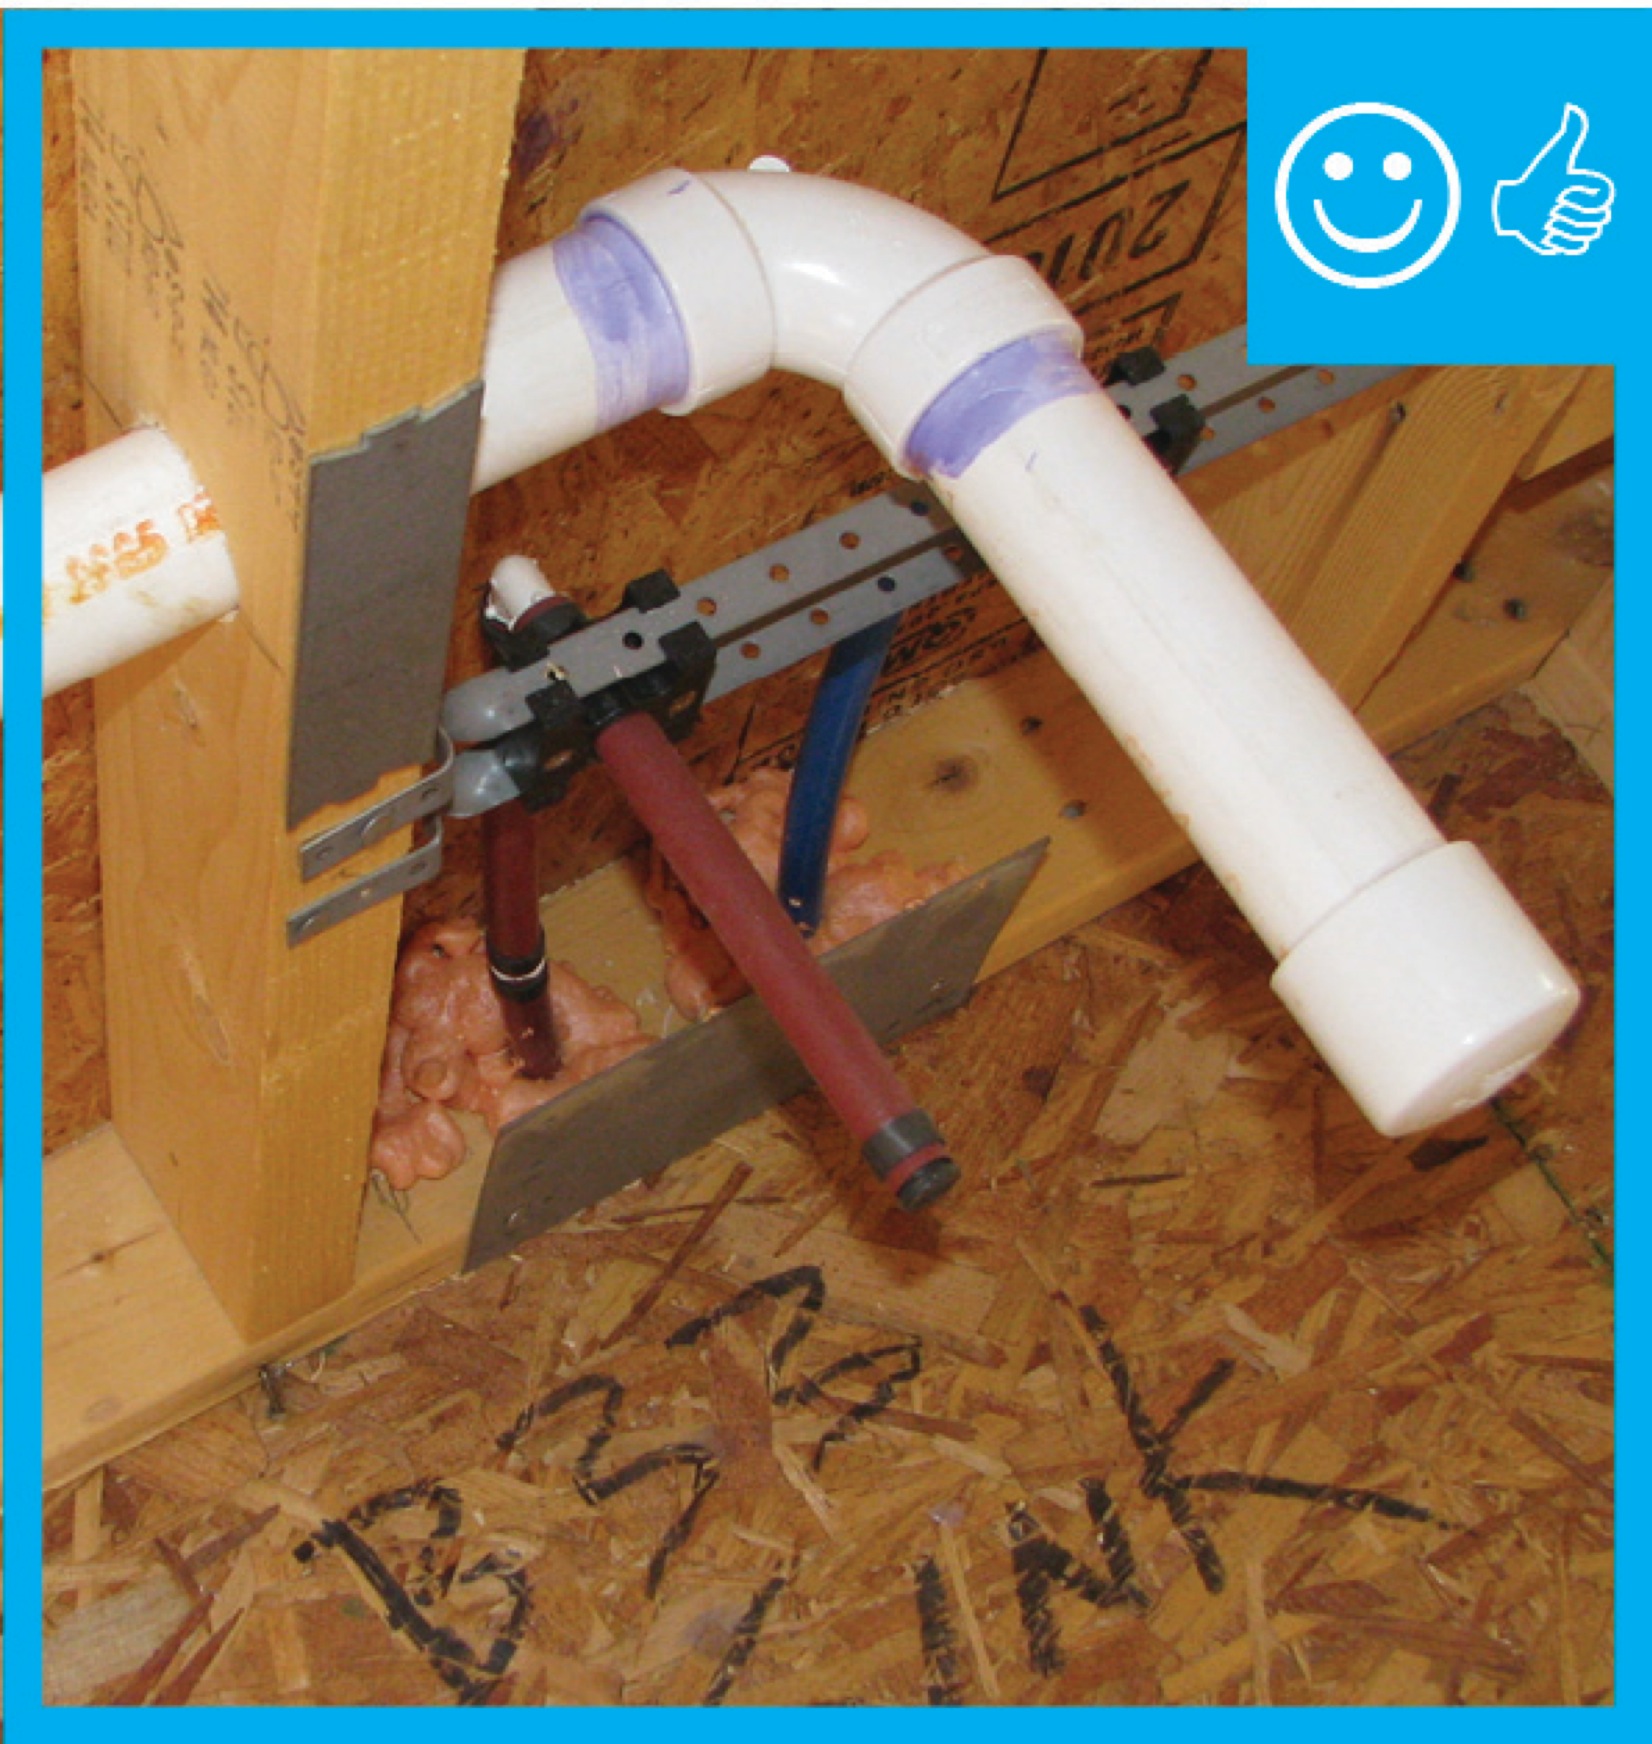
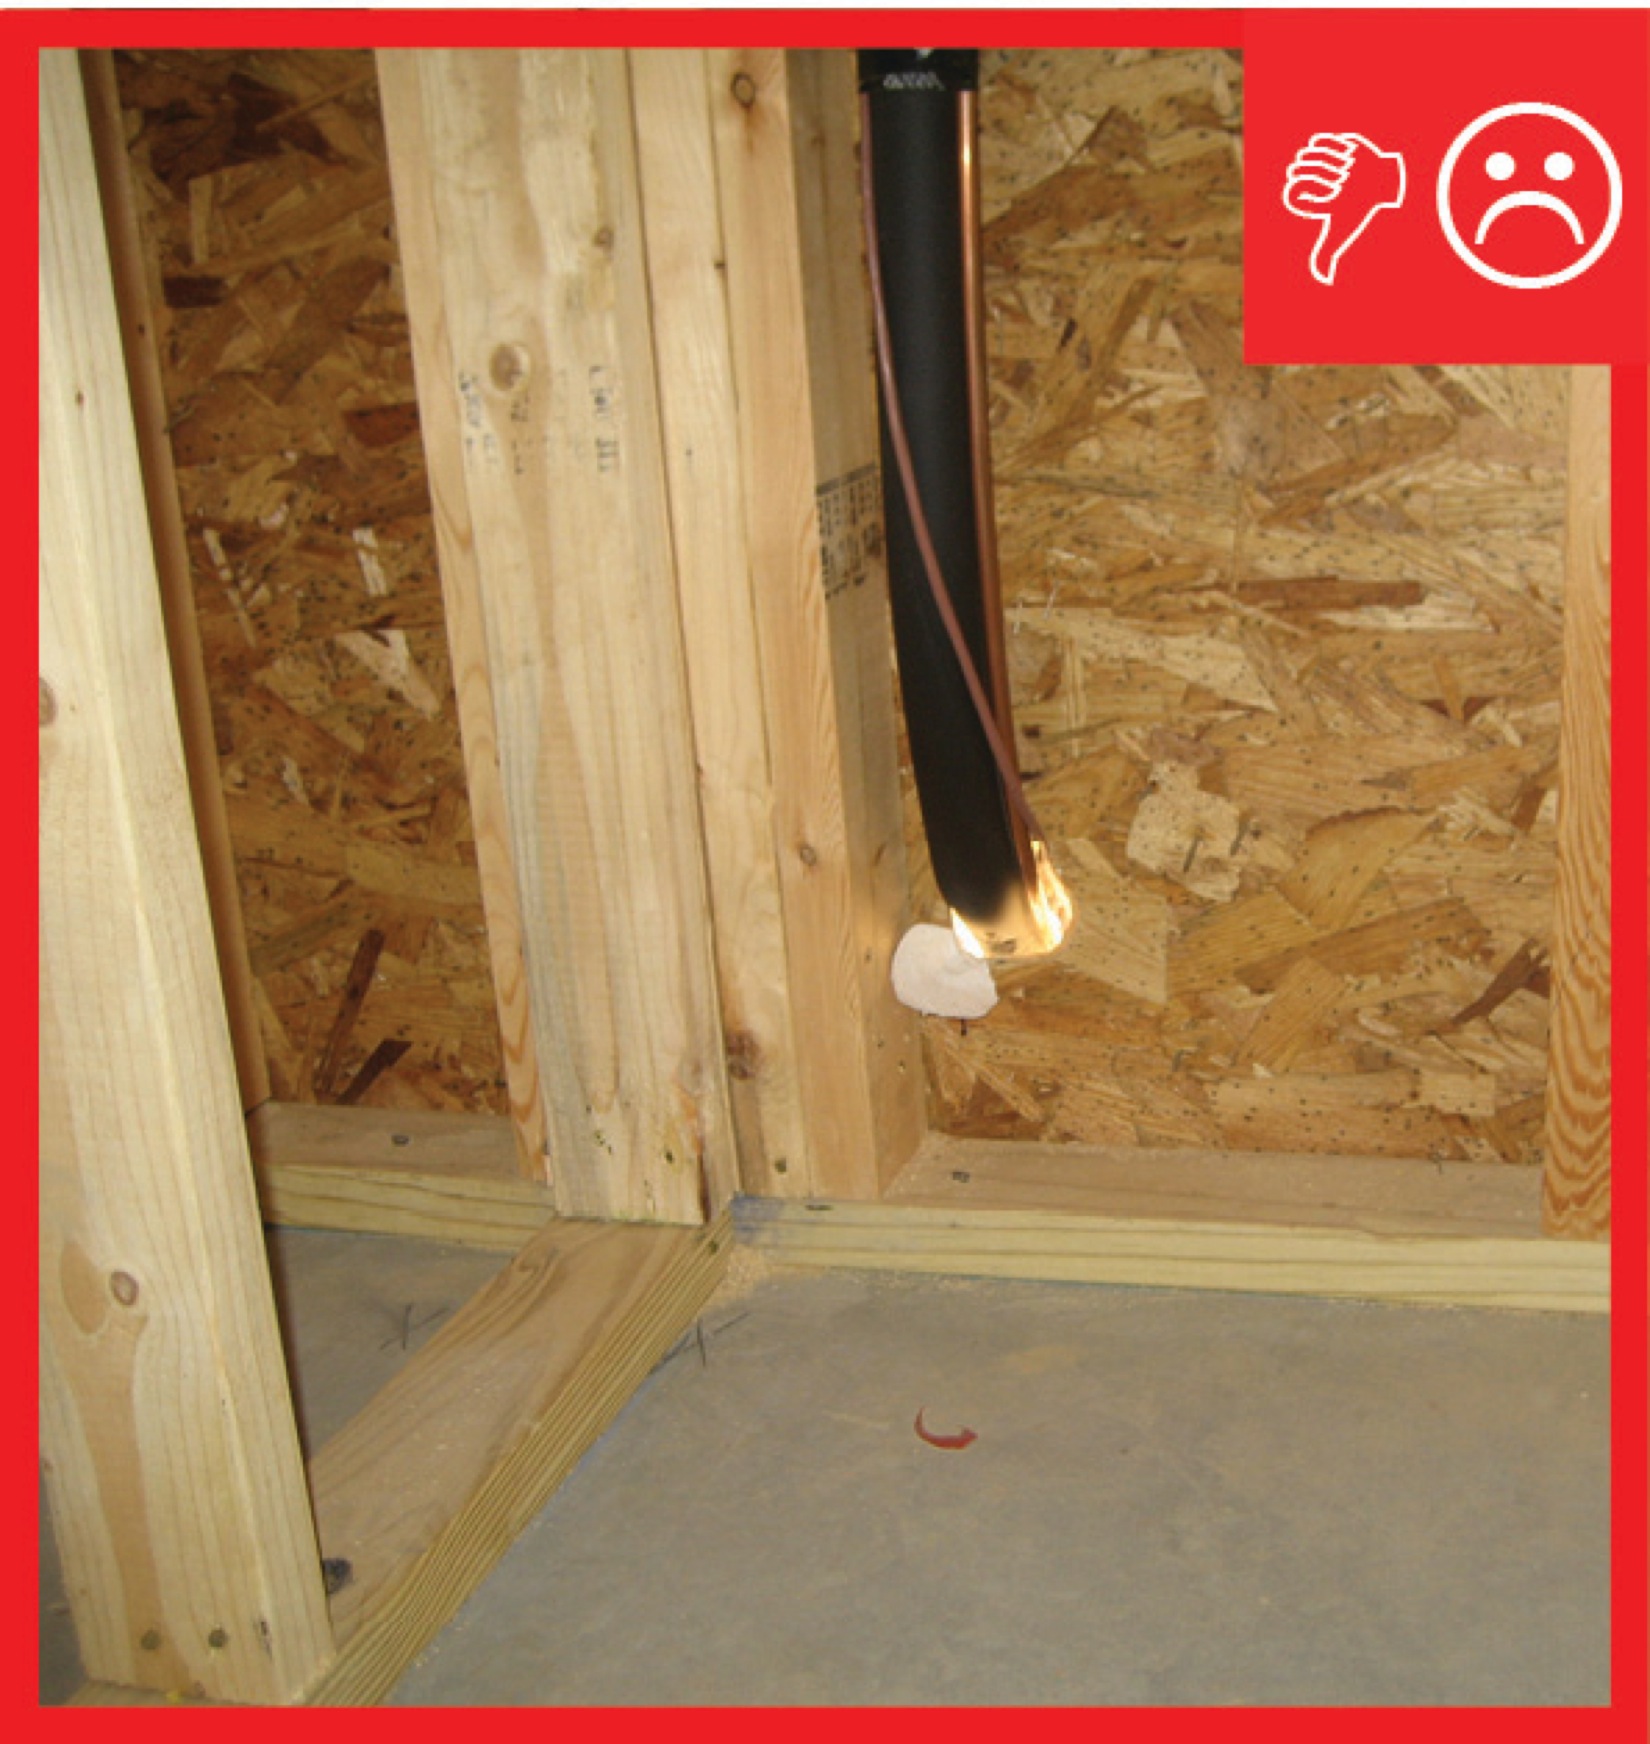
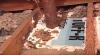
- Use caulk or canned spray foam to seal the holes made in rim joists for plumbing pipes. Keep the pipe runs close to the floor joists to avoid compressing the insulation (Figure 2).
Source
Guide describing measures that builders in the cold and very cold climates can take to build homes that have whole-house energy savings of 40% over the Building America benchmark with no added overall costs for consumers.
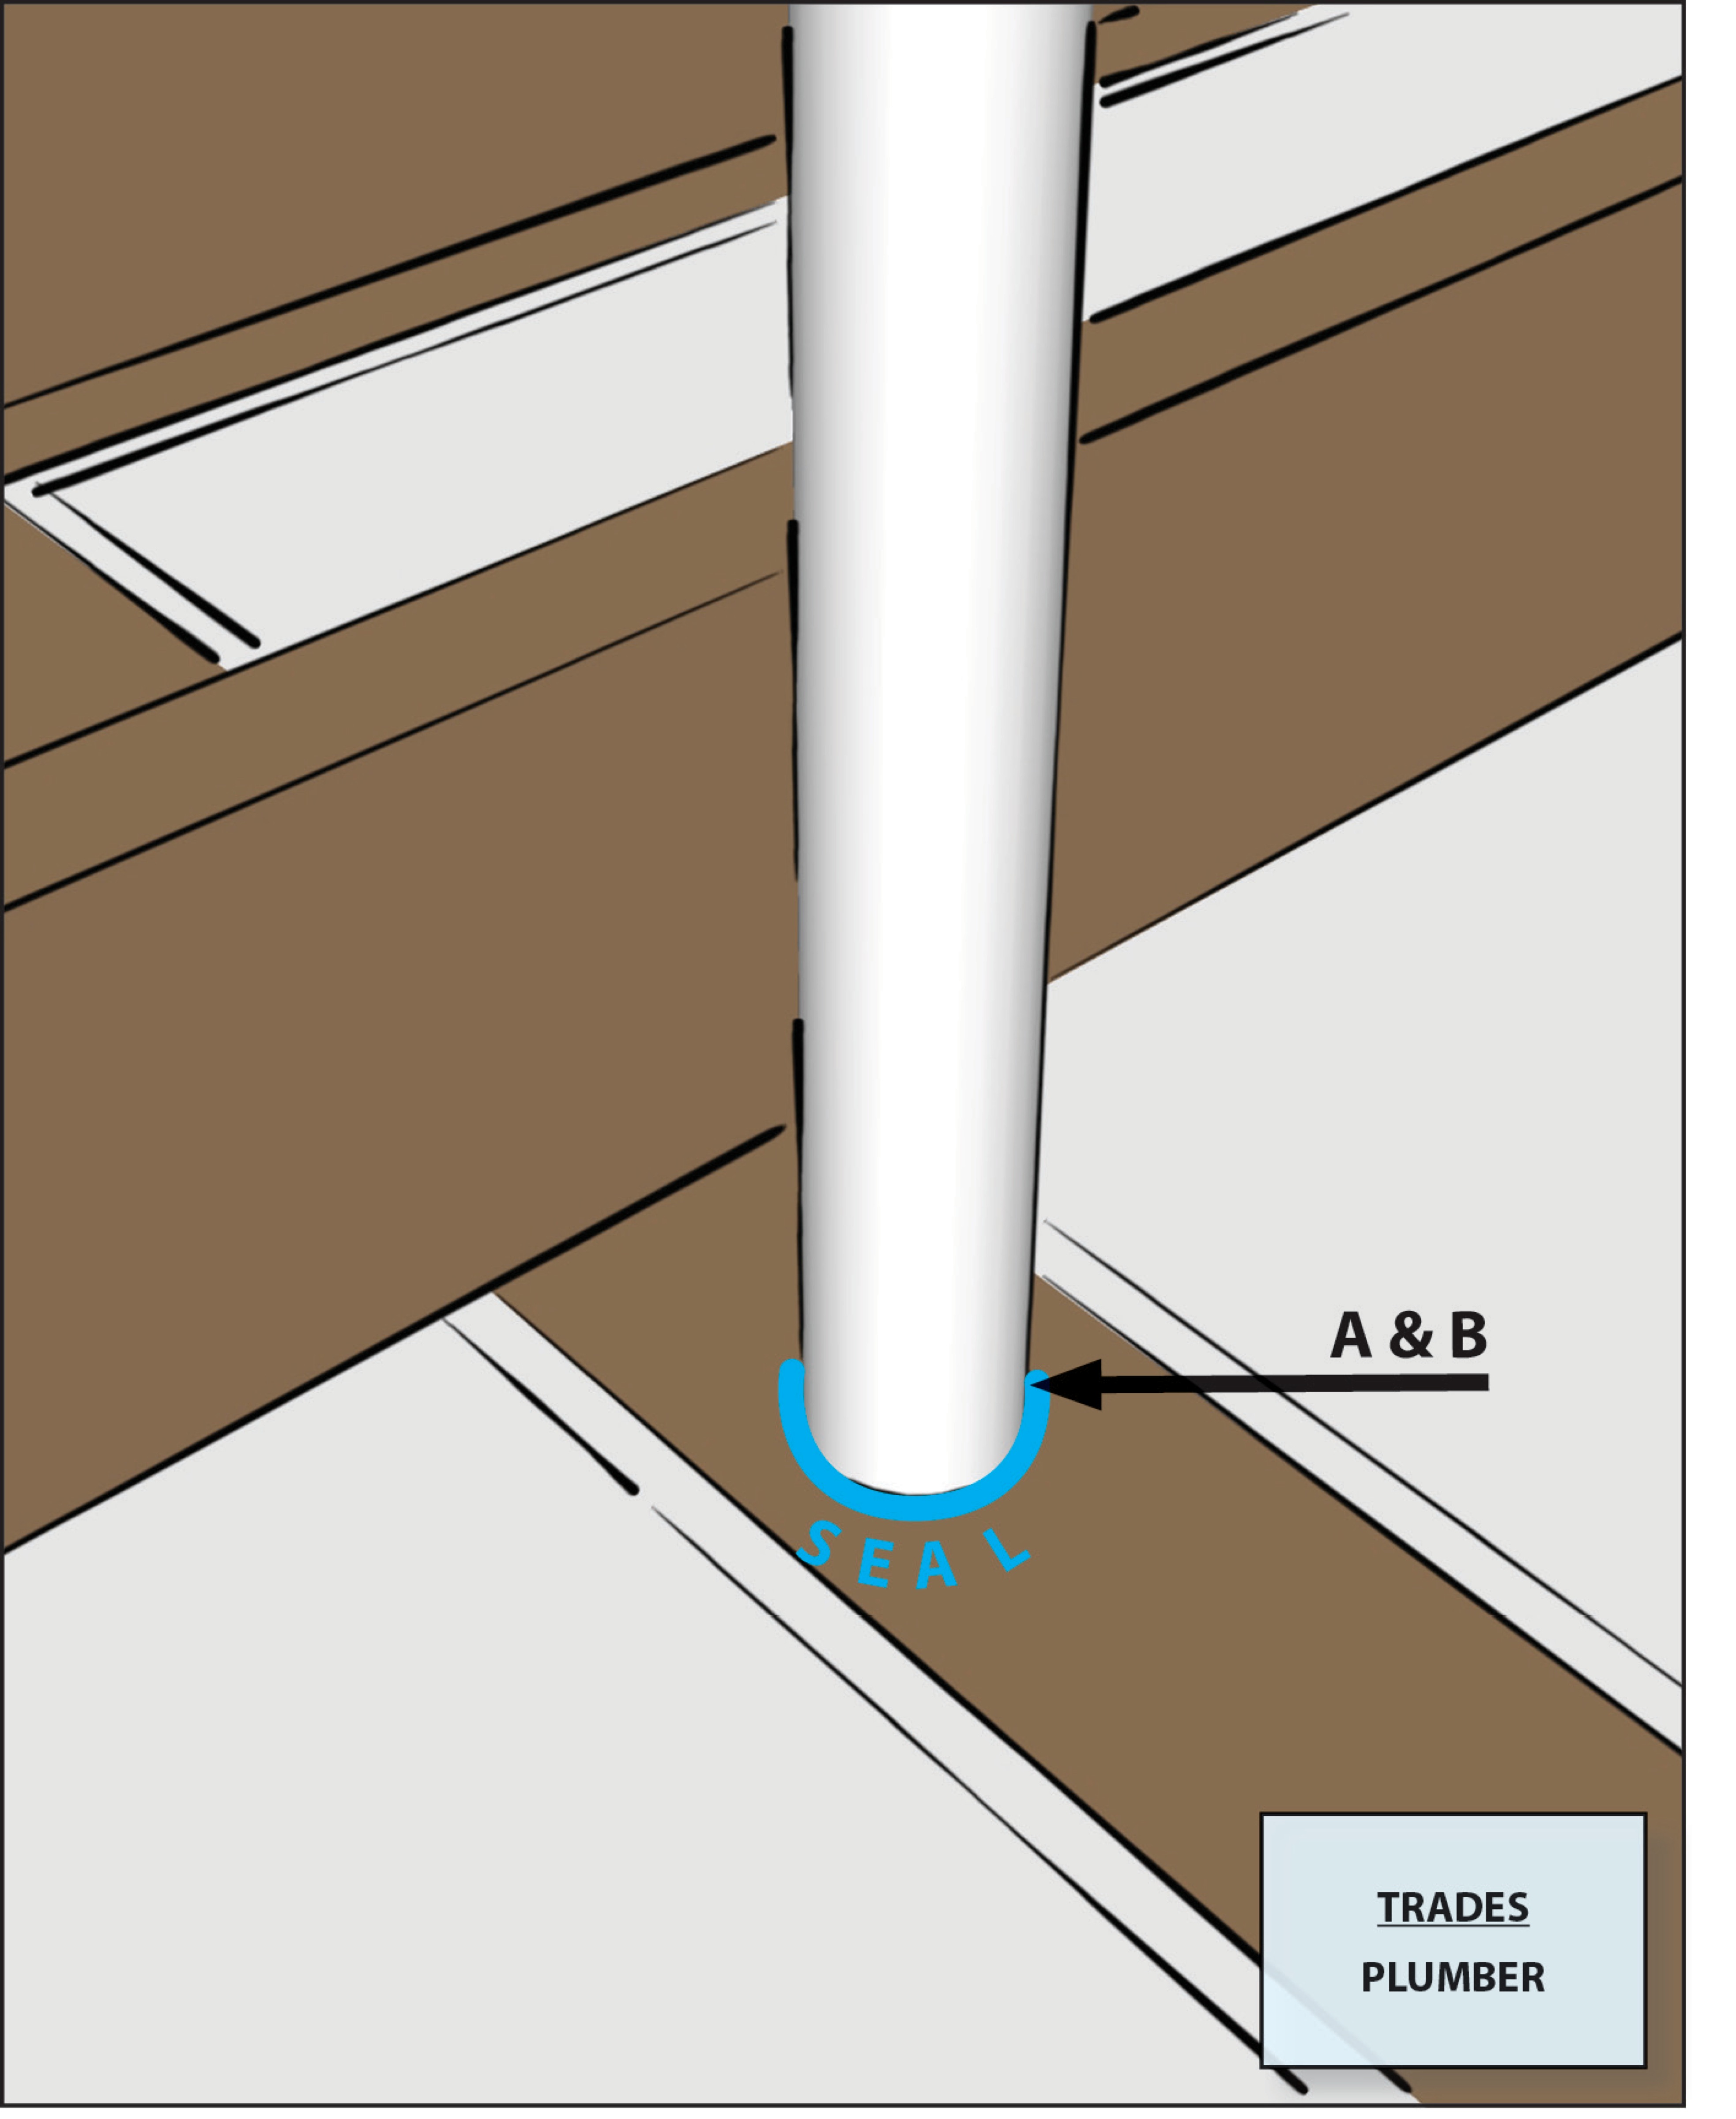
4. Use caulk or pre-fabricated gaskets to seal around the plumbing pipe penetrations in exterior walls (Figure 3). Make sure the gasket is properly integrated with the house wrap and that cuts in the house wrap around the gasket are taped or caulked.

Source
Guide describing measures that builders in the cold and very cold climates can take to build homes that have whole-house energy savings of 40% over the Building America benchmark with no added overall costs for consumers.
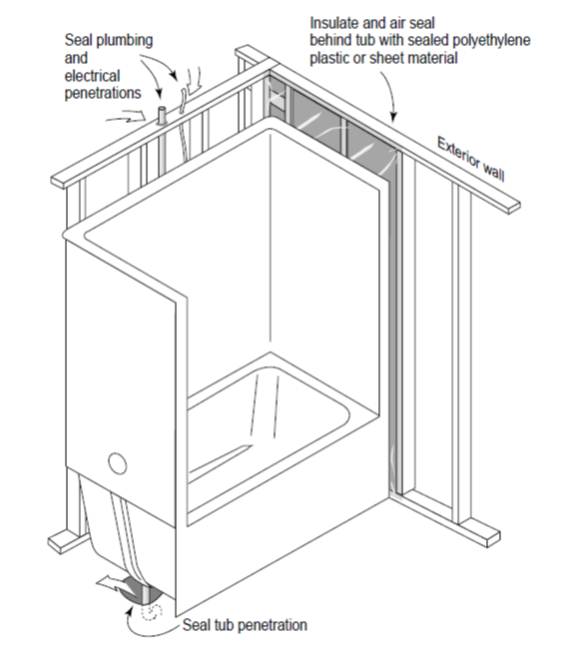
5. For bath tubs on outside walls, avoid running the water pipes along the exterior walls, if possible. Install piping, then air-seal any holes in the exterior wall framing or subfloor (Figure 4).
Source
Brochure describing the benefits of air-sealing for homeowners.
- If the tub or shower is installed on an exterior wall, insulate and air-seal the exterior wall behind the tub with sheet goods before the tub is installed. See the guide Walls Behind Showers and Tubs for more information on insulating and air-sealing exterior walls behind showers and tubs.
- After the drain is installed, seal the hole around the tub drain pipe with canned spray foam. For larger holes, seal the hole with pieces of water-resistant sheet goods such as rigid foam or cement backer board that is cut to fit around the pipe and caulked or foamed in place.
Ensuring Success
Holes around plumbing pipes should be visually checked to see if caulk, canned spray foam, and air blocking materials have been applied before insulation and drywall are installed. Blower door testing may help indicate whether holes for plumbing in exterior walls and floors have been successfully sealed.
Region
No climate specific information applies.
Training
Right and Wrong Images
Source
Source
Source

Source
Source
Guide describing details that serve as a visual reference for each of the line items in the Thermal Enclosure System Rater Checklist.
Source
Source
Source
Guide describing details that serve as a visual reference for each of the line items in the Thermal Enclosure System Rater Checklist.
Source
Guide describing details that serve as a visual reference for each of the line items in the Thermal Enclosure System Rater Checklist.
Source
Guide describing details that serve as a visual reference for each of the line items in the Thermal Enclosure System Rater Checklist.
Source
Guide describing details that serve as a visual reference for each of the line items in the Thermal Enclosure System Rater Checklist.
Source

Source

Source
Source

Source
Source
Guide describing details that serve as a visual reference for each of the line items in the Thermal Enclosure System Rater Checklist.
Source
Guide describing details that serve as a visual reference for each of the line items in the Thermal Enclosure System Rater Checklist.
Source
Guide describing details that serve as a visual reference for each of the line items in the Thermal Enclosure System Rater Checklist.
Source
Videos

CAD Files


Compliance
Retrofit
SCOPE
In existing homes, air seal around all plumbing and piping installed through walls, ceilings, and flooring to prevent air leakage and moisture movement between unconditioned and conditioned space. Sealant (e.g., caulk, fire-retardant caulk, fire-rated spray foam, etc.) should be compatible with all adjoining surfaces and meet the fire and air barrier specifications according to code.
- Air seal the following:
- service water heating supply and drain lines and other mechanical heating and cooling system piping
- piping vents
- all other plumbing penetrations (e.g., kitchen sink water lines and drains, dishwasher connections, bathroom sinks, toilet, washing machine lines).
- Seal all gaps and holes to unconditioned space with caulk or canned spray foam. For larger gaps, rigid blocking material can be cut to fit over the gap and sealed in place with caulk or spray foam.
See the U.S. Department of Energy’s Standard Work Specifications (SWS) for more on sealing penetrations. All global worker safety and health and safety air sealing specifications in DOE’s Standard Work Specifications (SWS) should be followed.
DESCRIPTION
How to Air Seal Holes around Plumbing
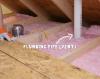
- Use caulk or canned spray foam to seal piping holes through the top plates, bottom plates, rim joists, and subfloor. In existing homes, these areas might not be easily accessible. Piping might be accessed from the attic, basement, or crawlspace depending on the construction of the home. These areas might also be accessed during bathroom and kitchen remodels.
- Use caulk to seal around the plumping pipe penetrations, and supply and drain lines in exterior and interior walls.
- Clear the area of any debris or dirt.
- Apply a layer of caulk and use a paint knife or spatula to smooth out the caulk; the caulk material should be flush with the dry wall with any gaps filled in (silicone caulk is suggested).
- For faucet pipes through exterior walls, install a rubber gasket or flashing around the pipe on the exterior wall, if possible, in addition to caulking. Integrate the gasket or flashing with the house wrap above the pipe.
- Check plumbing vent pipes for cracks and seal with caulk or acoustical sealant.
- For bath tubs, showers, and sinks, seal the hole around the drain pipe.
- Gain access from the basement or crawlspace if accessible, or during bathroom and kitchen remodels.
- Apply caulk or expanding foam around the hole.
- If the gap around the pipe is wider than an inch, use a solid material like sheet metal, plywood, or rigid foam to fill the hole. Fasten in place with adhesive or short screws and seal with caulk or spray foam.
See the Training Tab for a video on how to air seal attic plumbing pipes.
See Compliance tab.
More Info
References and Resources
*For non-dated media, such as websites, the date listed is the date accessed.
Contributors to this Guide
The following authors and organizations contributed to the content in this Guide.
Pacific Northwest National Laboratory
Building Science Corporation, lead for the Building Science Consortium (BSC), a DOE Building America Research Team
Sales
Tight Air Sealed Home = Comprehensive Draft Protection
Technical Description
Poorly air-sealed homes are less comfortable and cost more to maintain because they provide a pathway for drafts, cold spots, moisture, and insects into the home. Comprehensive draft protection includes a continuous air barrier around the whole house along with caulking and sealing in all holes and cracks. This includes around wiring, plumbing, ducts, and flues; where wall framing meets flooring; around windows; where drywall meets top plates and sill plates; where rim joists meet foundation walls and subfloors; etc. Spray foam insulation can be used at rim joists, floors above unconditioned space, and in attics to insulate and air seal at the same time.
Questions? Comments? Contact our webmaster.