Showing results 2401 - 2500 of 4973
Image
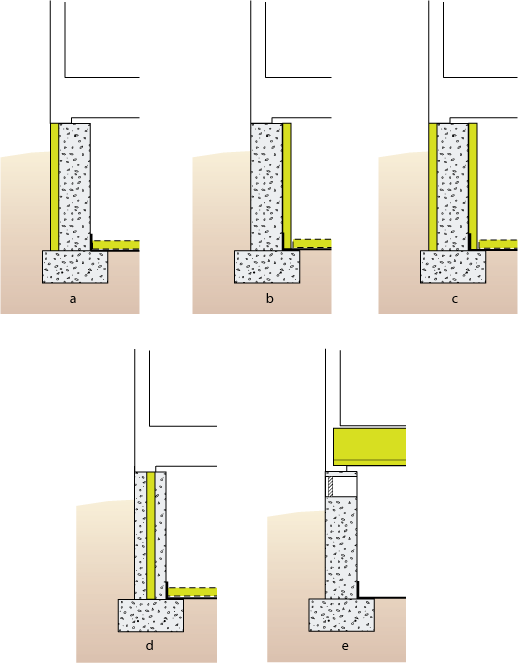
Right - Potential locations for crawlspace insulation: vapor sheeting should always cover the floor with insulation (a) outside walls, (b) inside walls, (c) both sides of walls, (d) sandwiched inside walls, or (e) under the first floor.
Image
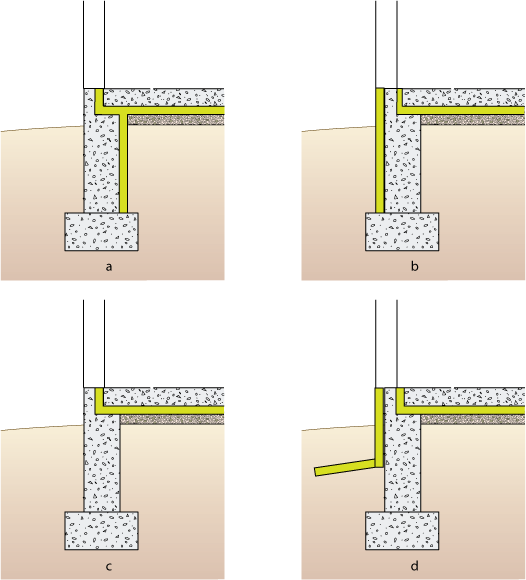
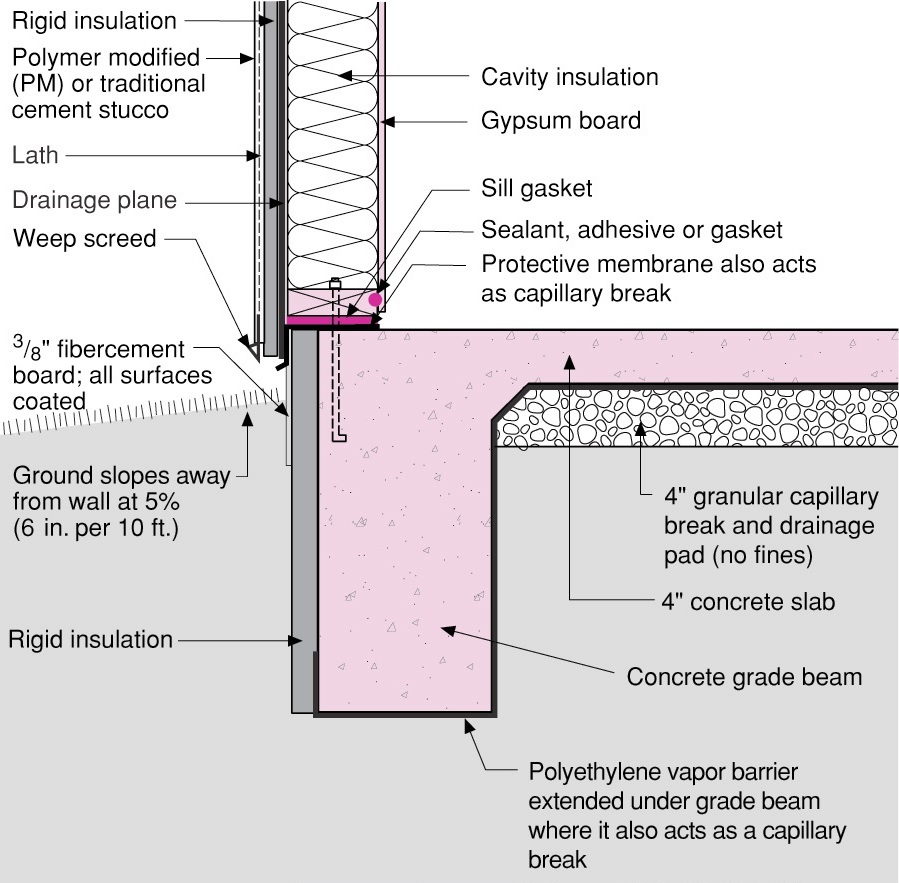
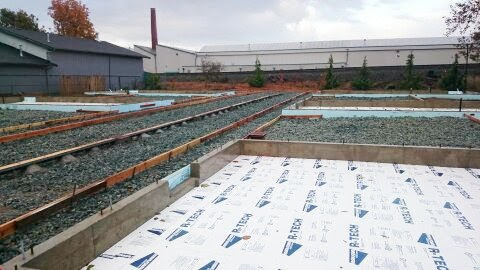
Right - Potential locations for slab-on-grade stem insulation in new construction: slab insulation should always be underneath, with stem walls insulated (a) inside, (b) outside, (c) not at all, or (d) outside with underground extension to repel moisture.
Image
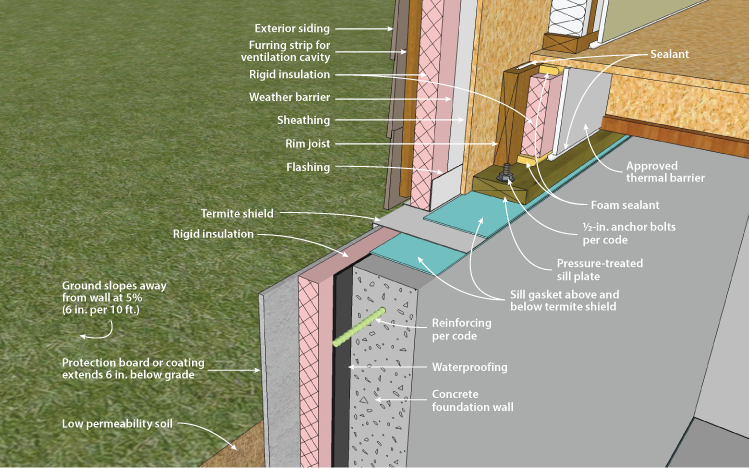
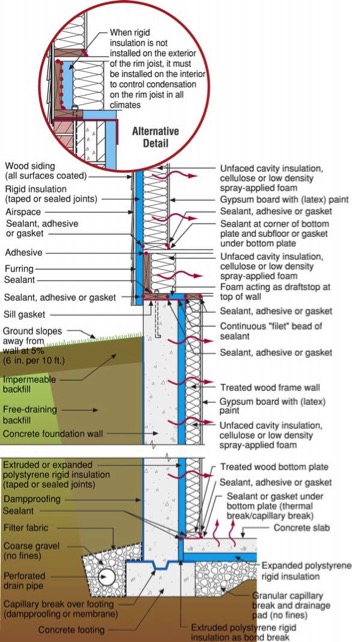
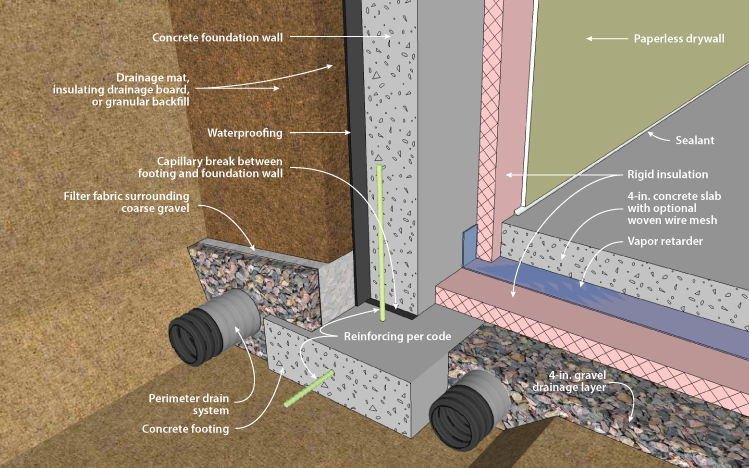
Right - Poured concrete basement wall showing exterior insulation and sill detail; above-grade wall has sheathing to the inside of the rigid foam.
Image
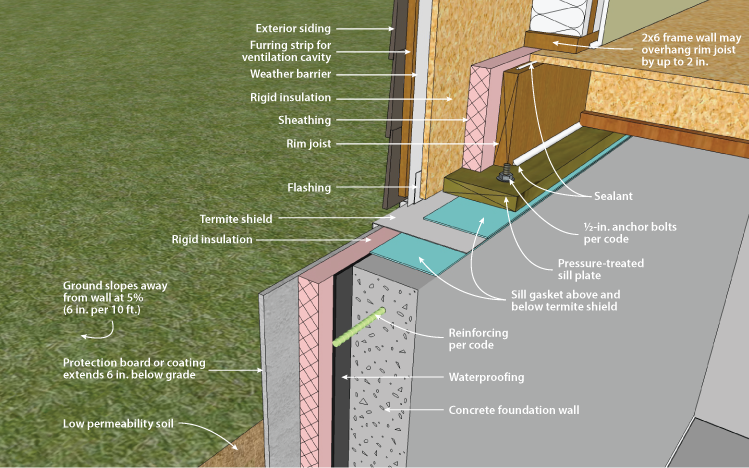
Right - Poured concrete basement wall showing exterior insulation and sill detail; above-grade wall has sheathing to the outside of the rigid foam.
Image
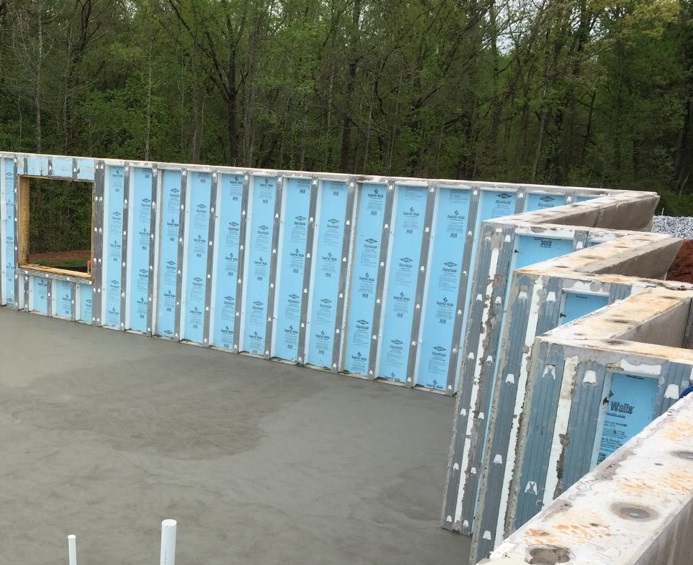
Right - Precast concrete basement walls come to the site with integrated rigid foam insulation and steel-faced concrete studs.
Image
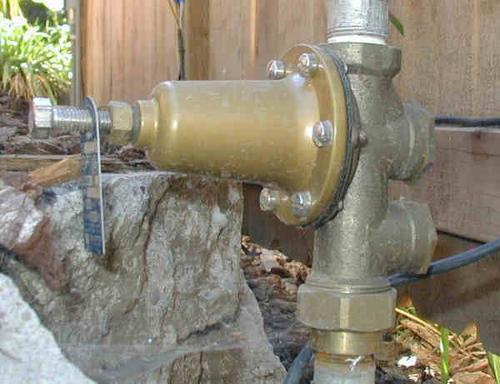
Right - Pressure reducing valves installed outside the home reduce water pressure before water is distributed to fixtures.
Image
Right - Prevent condensation in fibrous insulation-filled basement wall cavities by installing rigid or spray foam between the frame wall and the concrete foundation wall and by not installing a Class I vapor retarder over the framed wall.
Image
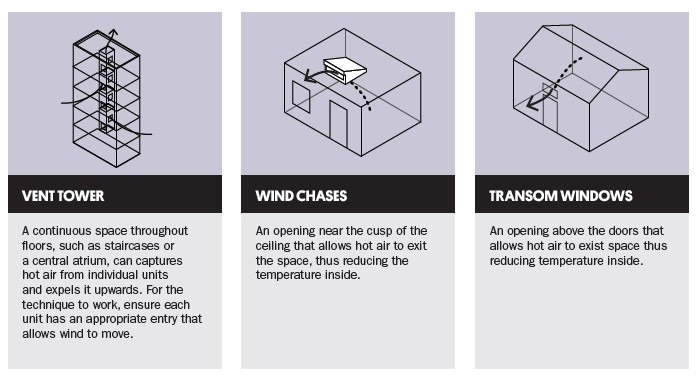
Right - Provide passive ventilation in hot climates by installing wind chases and vents.
Image

Image
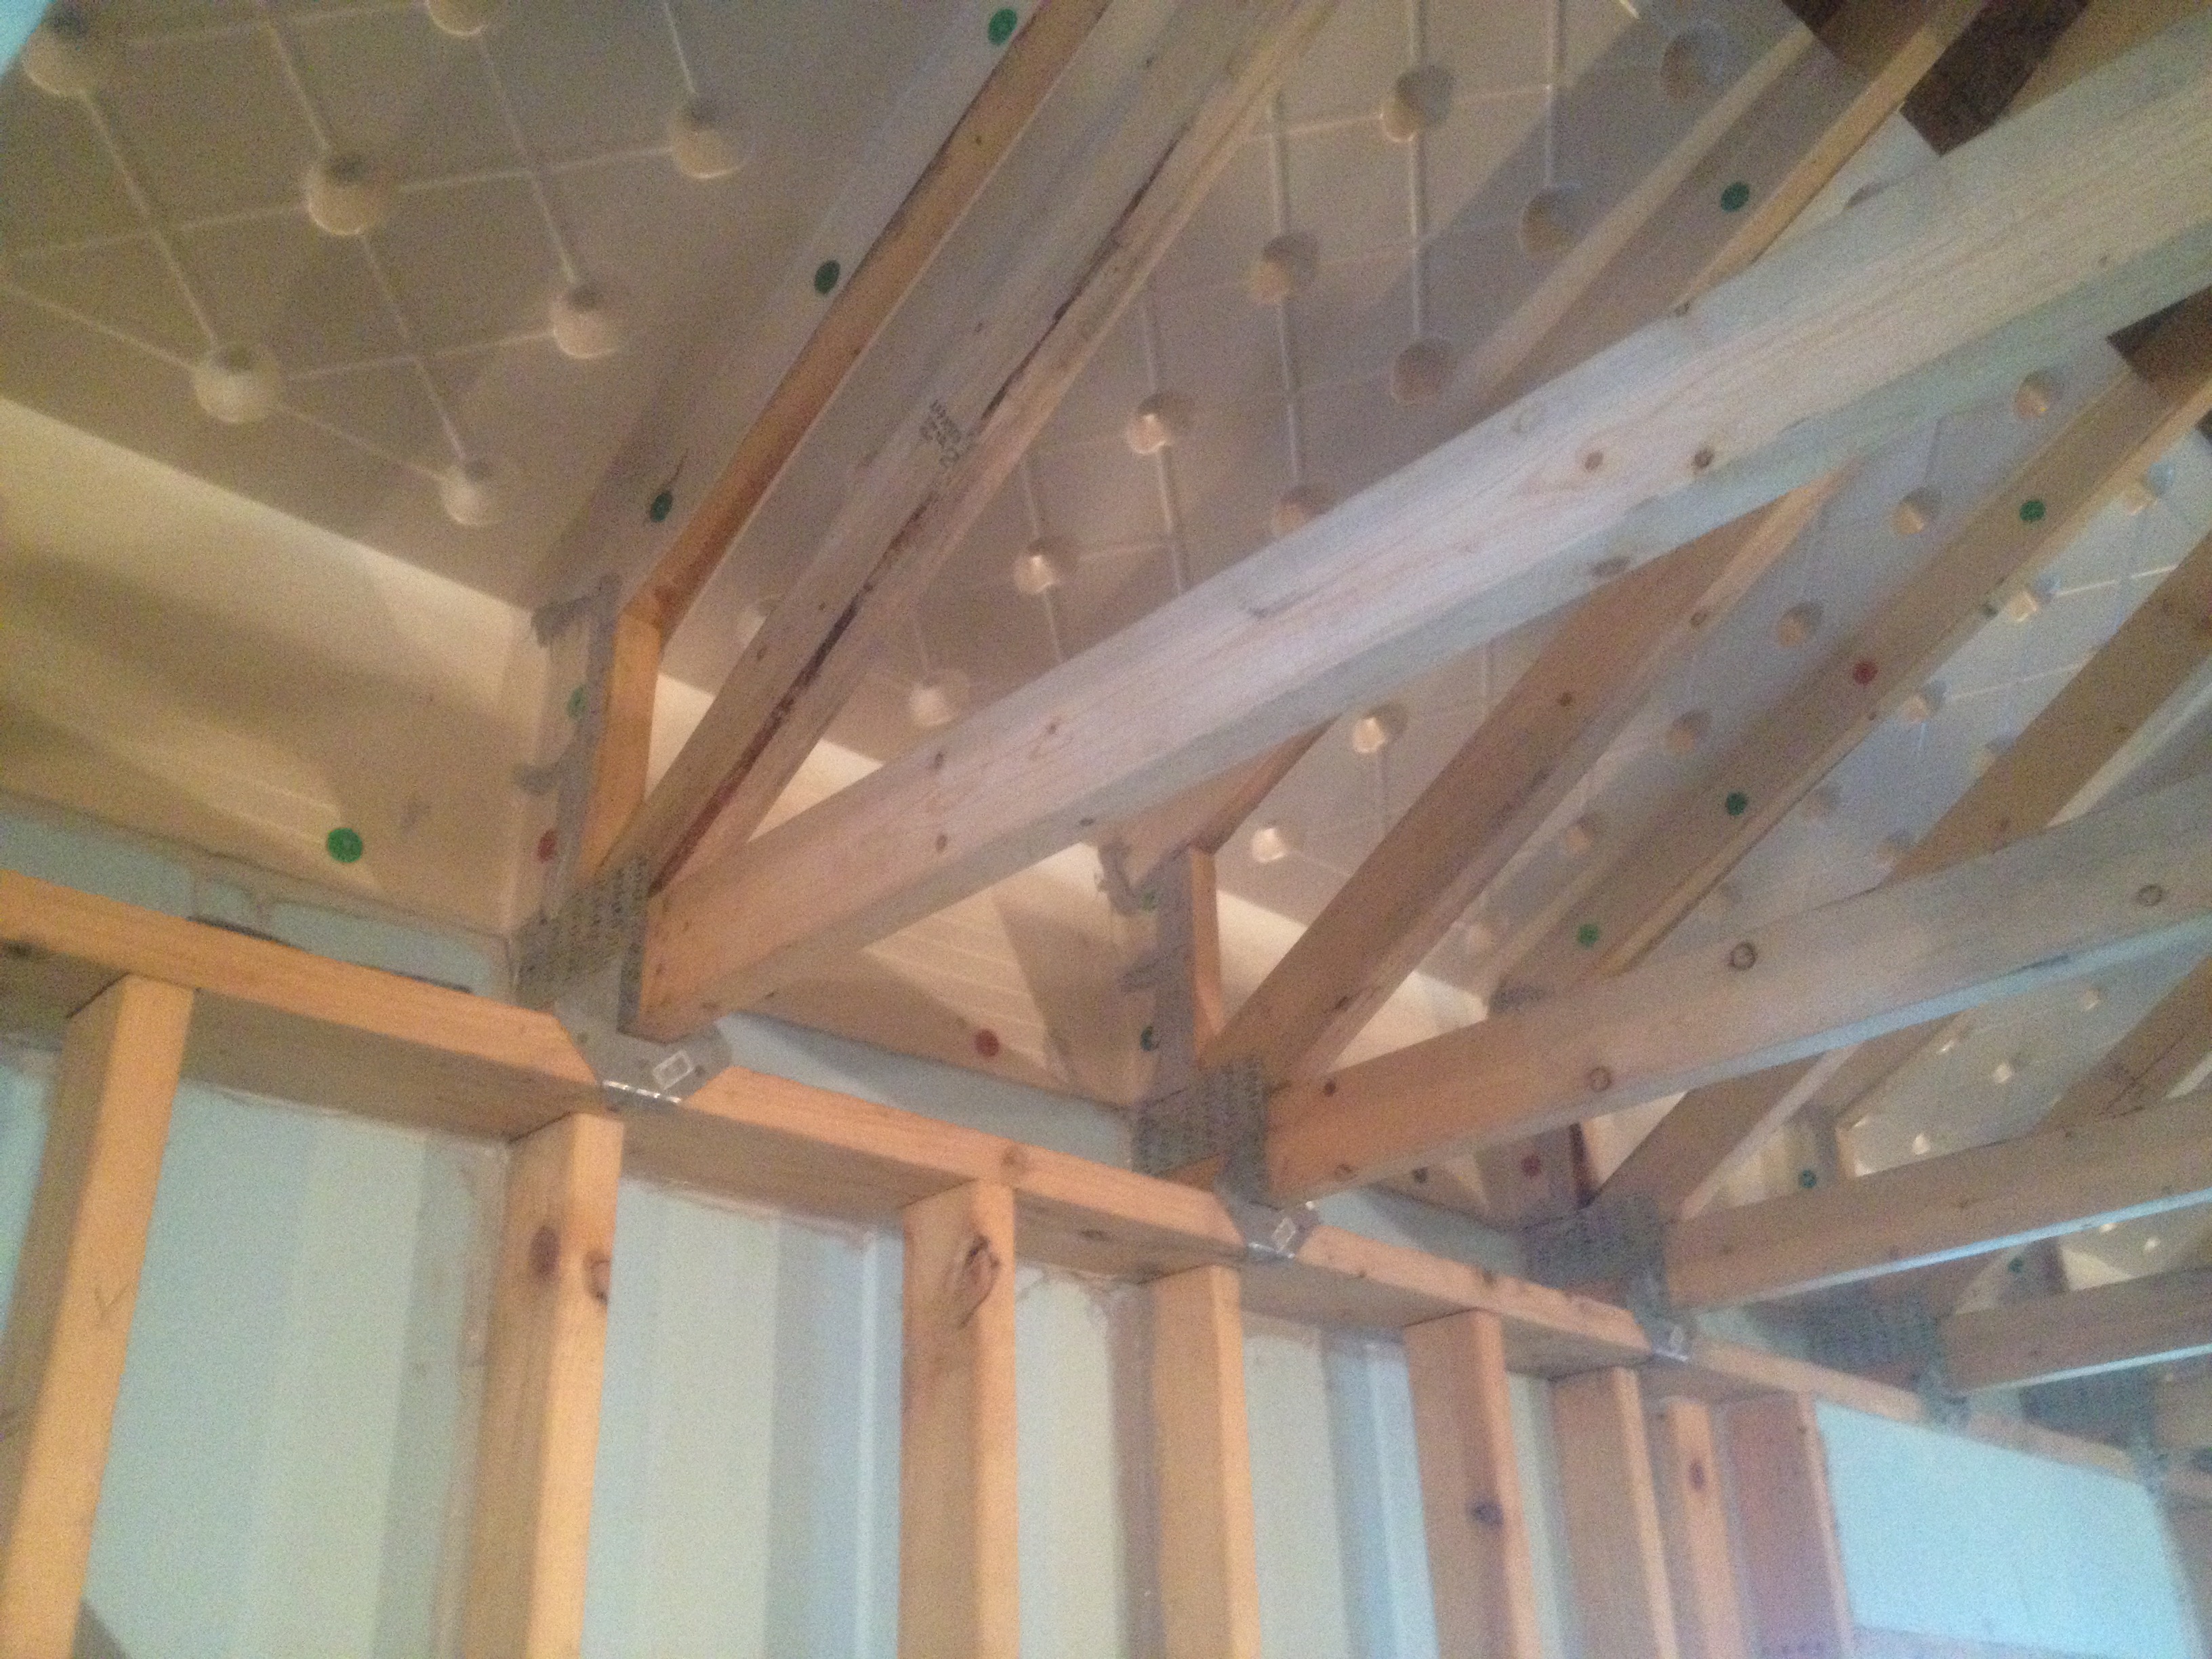
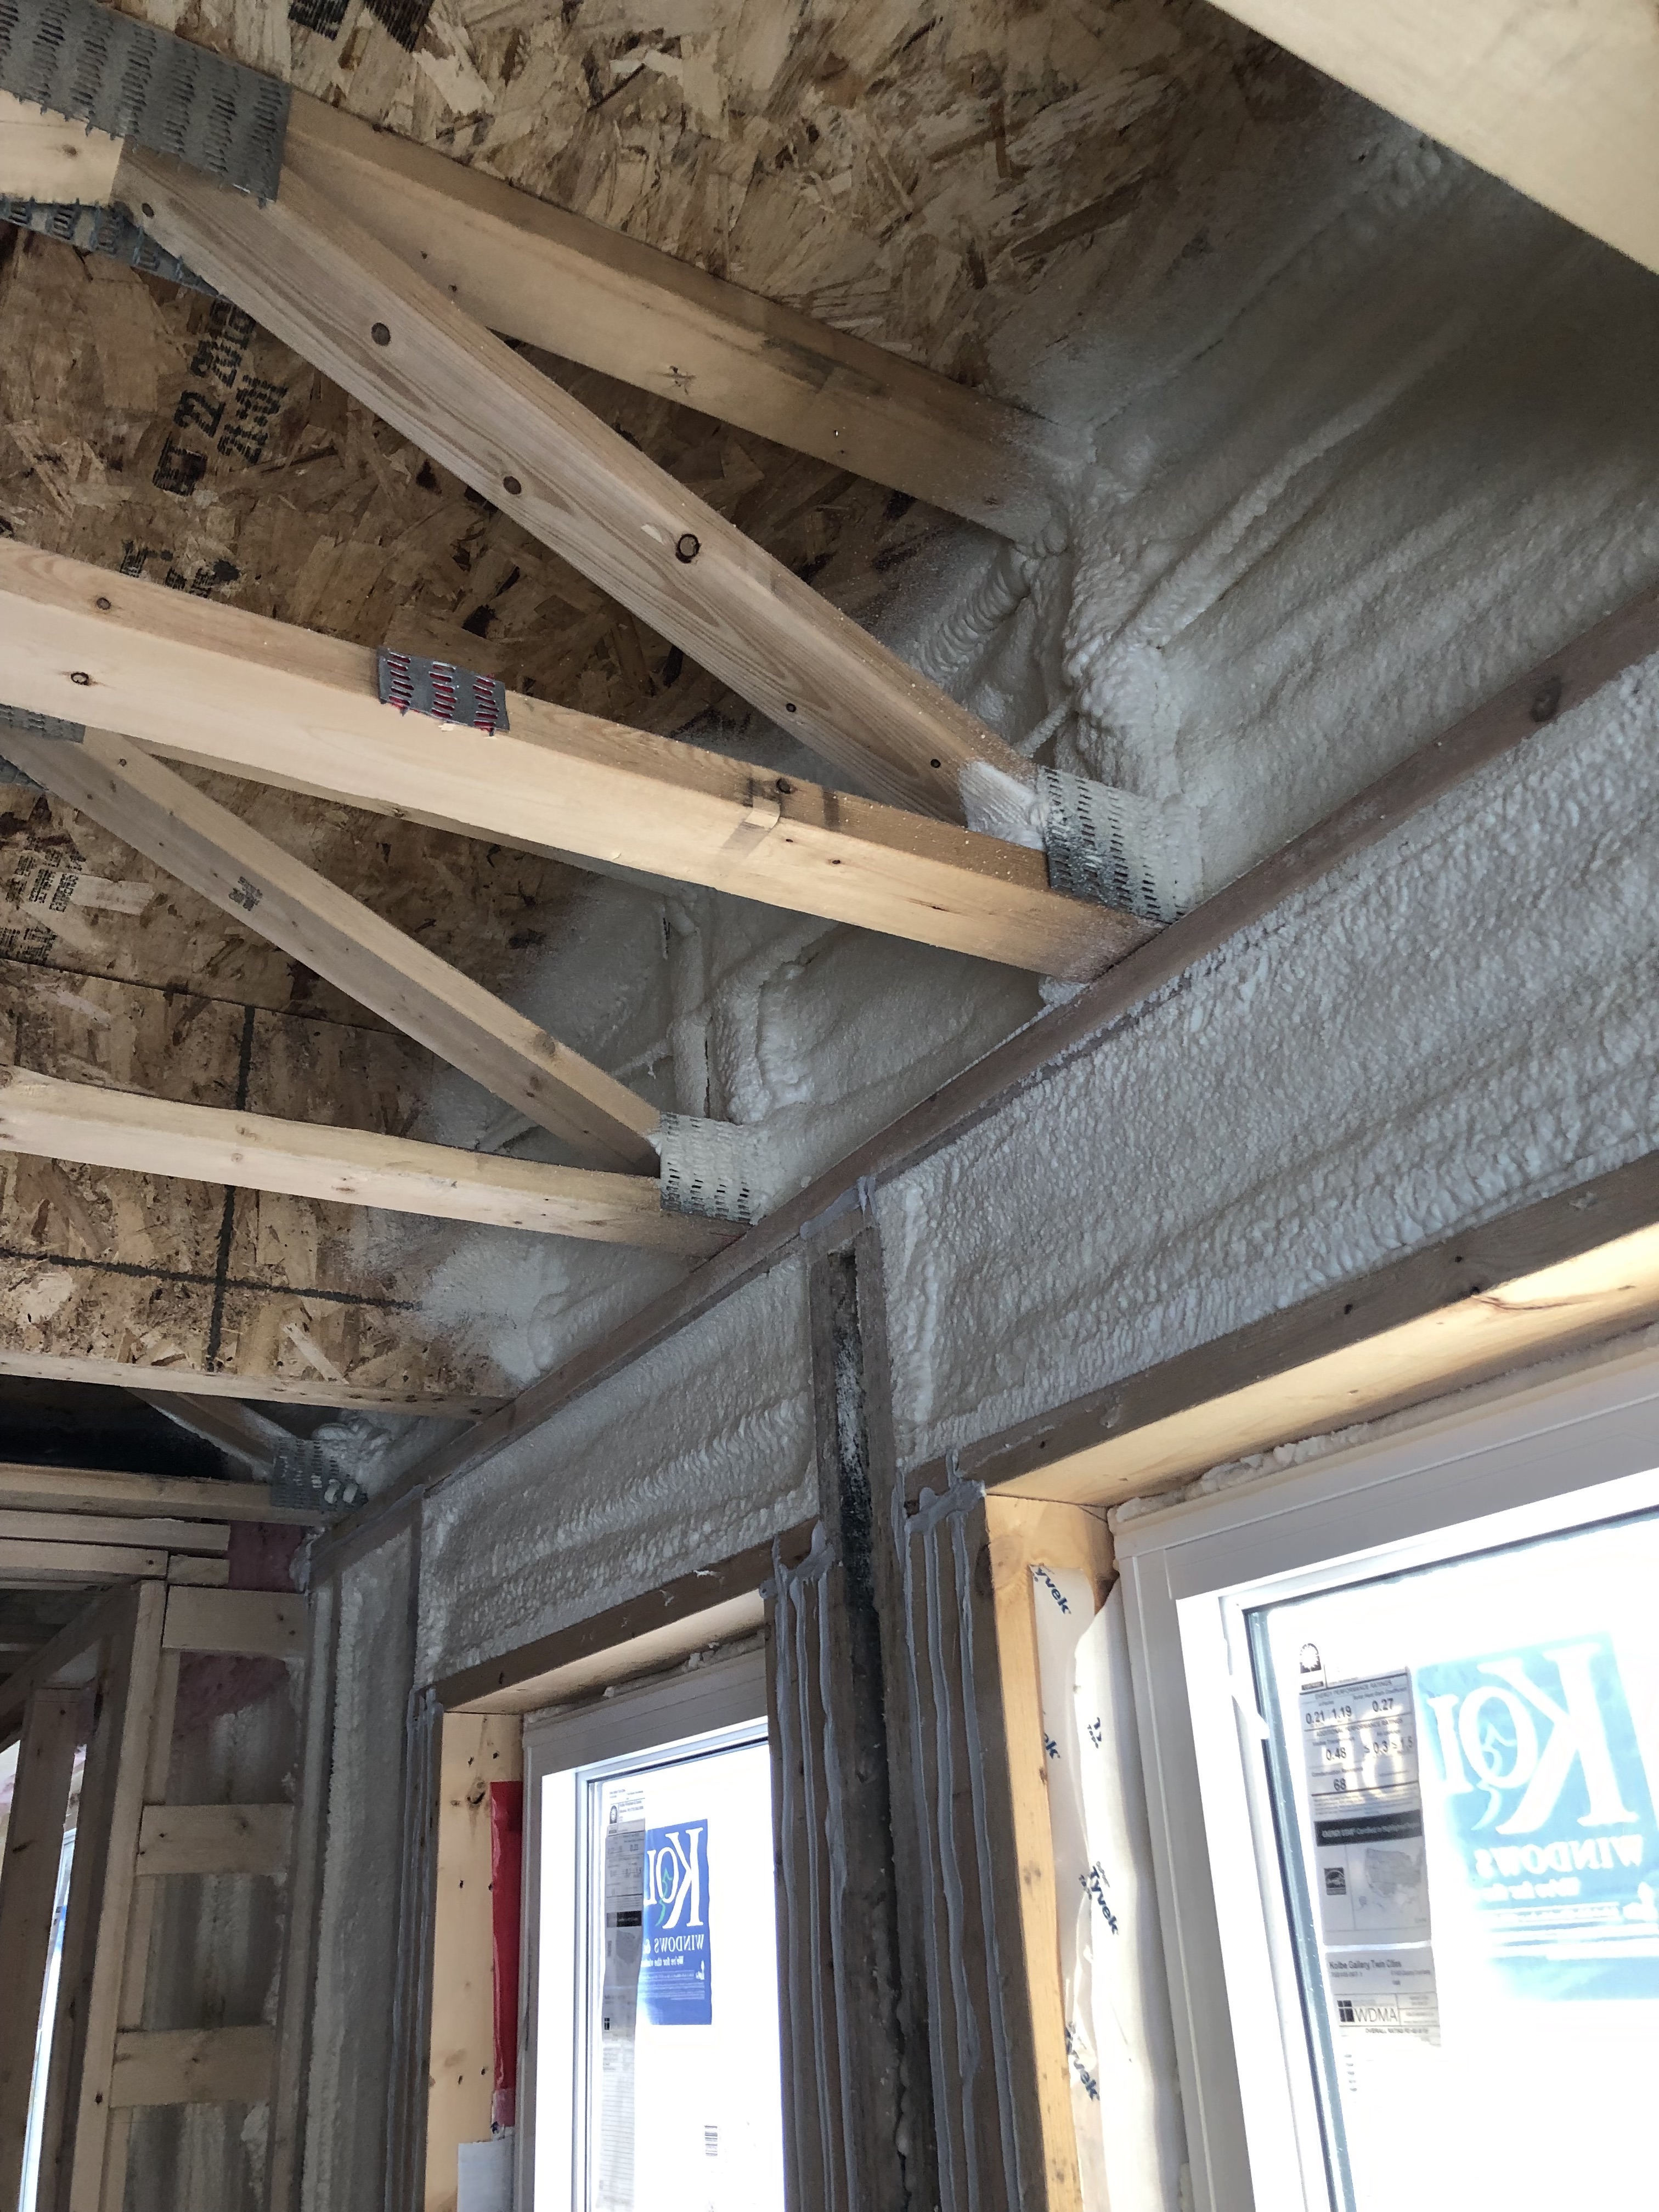
Right - Raised-heel roof trusses allow more room at the eaves for attic insulation.
Image

Right - Raised-heel trusses increase the roof height above the eaves allowing more space for insulation above exterior wall top plates; exterior wall sheathing extends up to keep wind from soffit vents from disrupting insulation.
Image
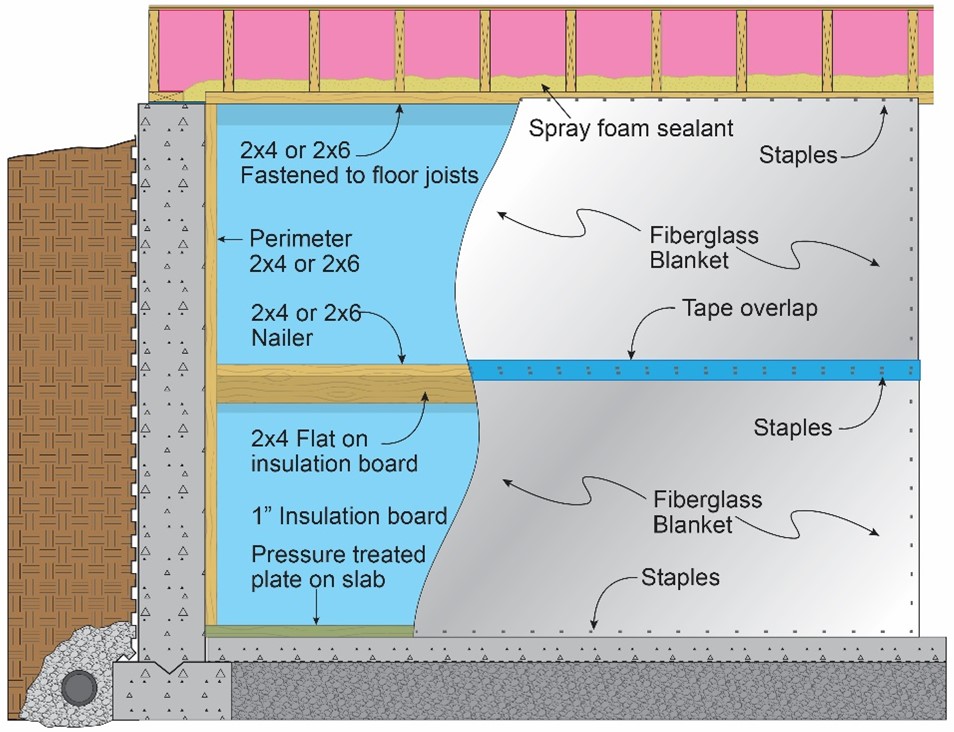
Right - Reduce condensation risks to blanket insulation by installing perforated vapor retarder covered fiberglass blankets over rigid foam that is air-sealed at all edges; staple the blanket to nailers and top/bottom plates and tape over the seams.
Image
Image
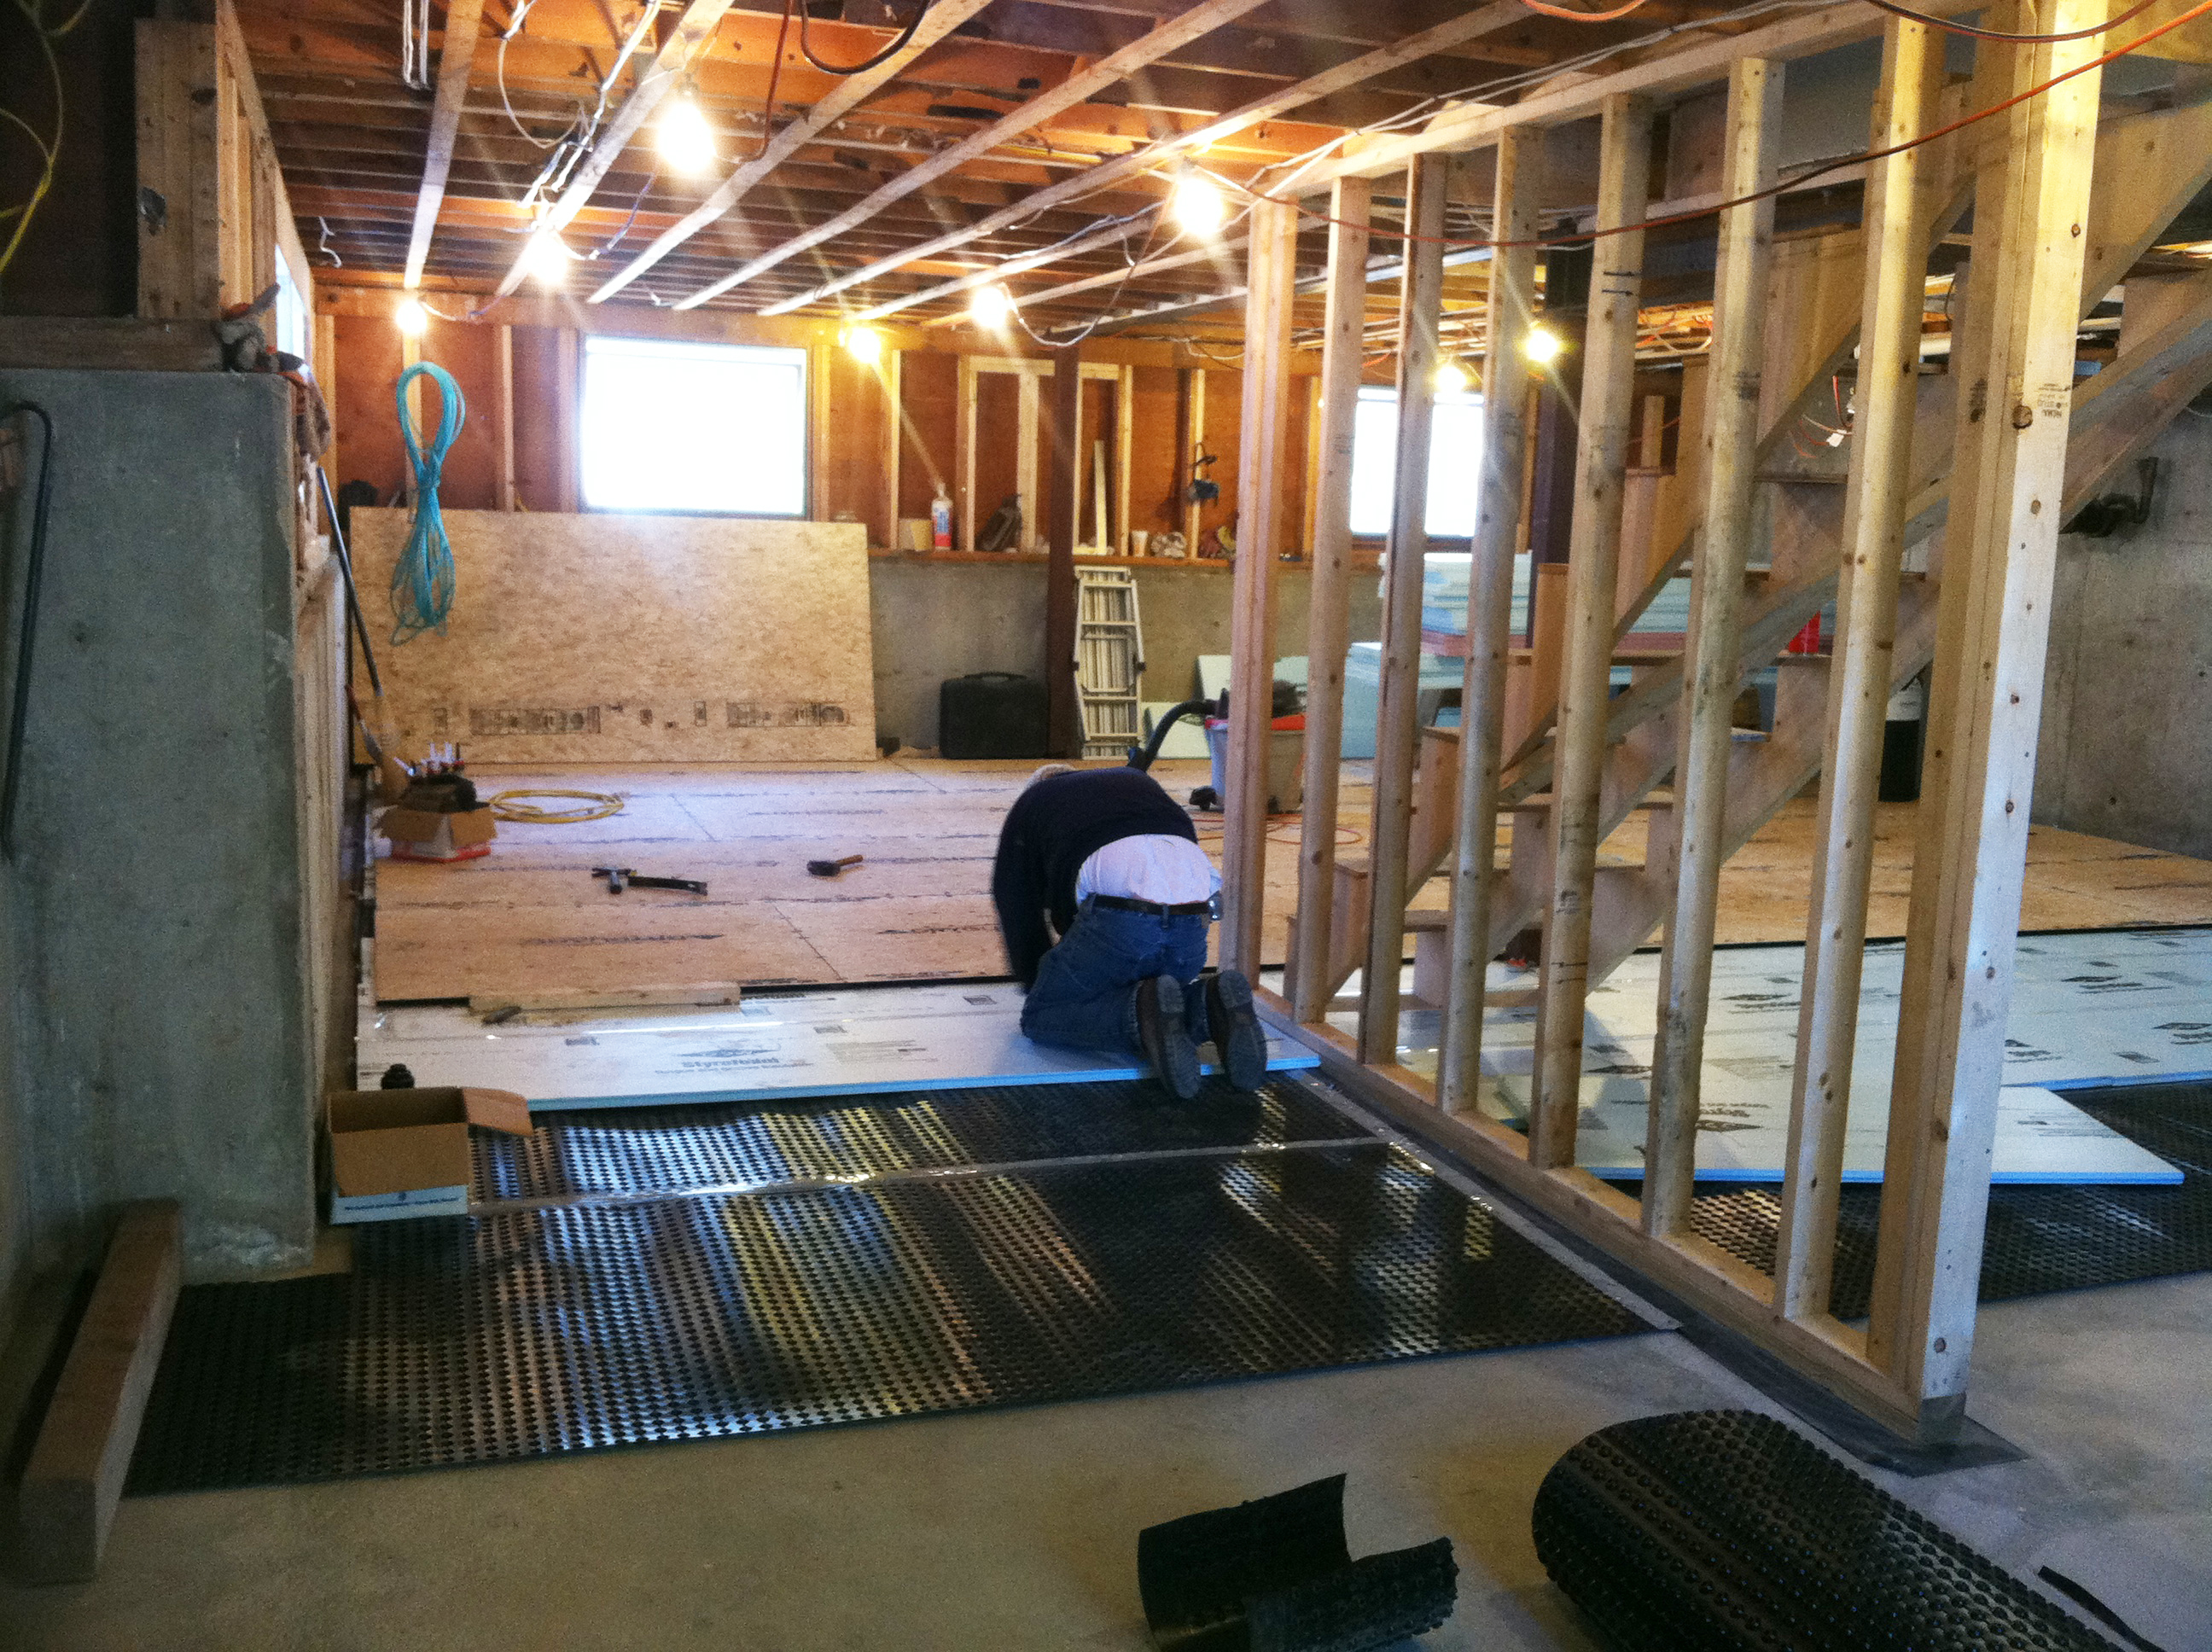
Right - Retrofit of an existing basement slab by adding dimple plastic mat, rigid foam insulation, and a floating subfloor.
Image
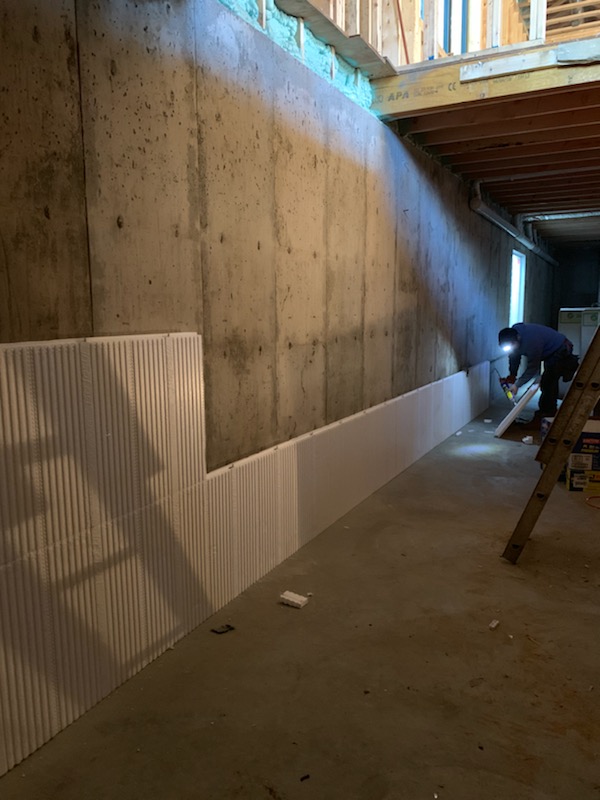
Right - Rigid foam board is attached to the interior surface of the basement walls.
Image
Right - Rigid foam insulation is installed along the exterior edge of an existing foundation slab.
Image
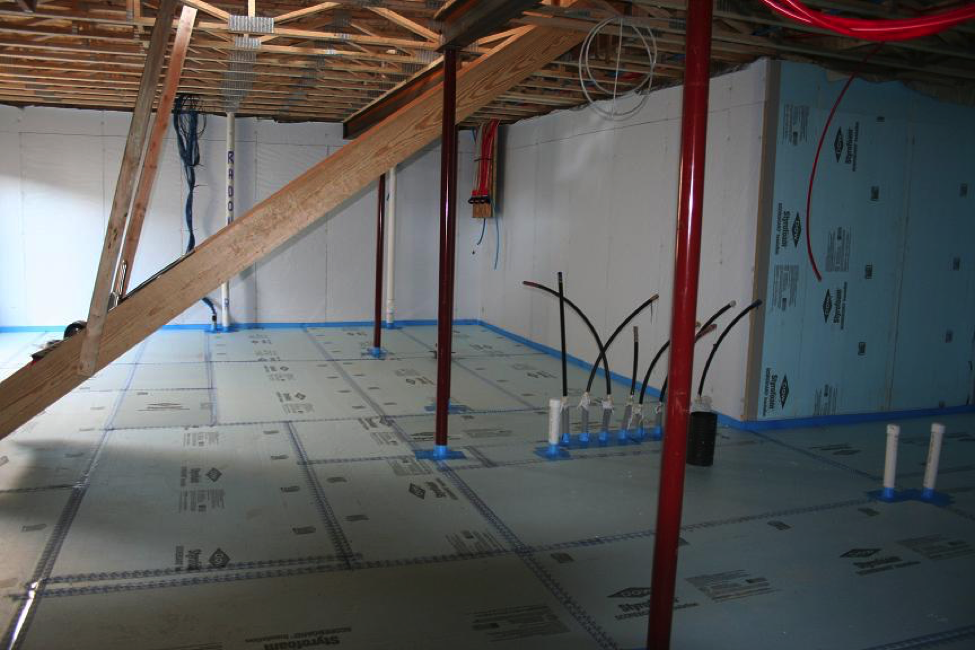
Right - Rigid foam insulation is taped at seams and installed over a drainage pad of aggregate to serve as a capillary break under the basement slab.
Image
Right - Rigid foam is installed over a waterproofing membrane that has been applied to the basement foundation walls.
Image
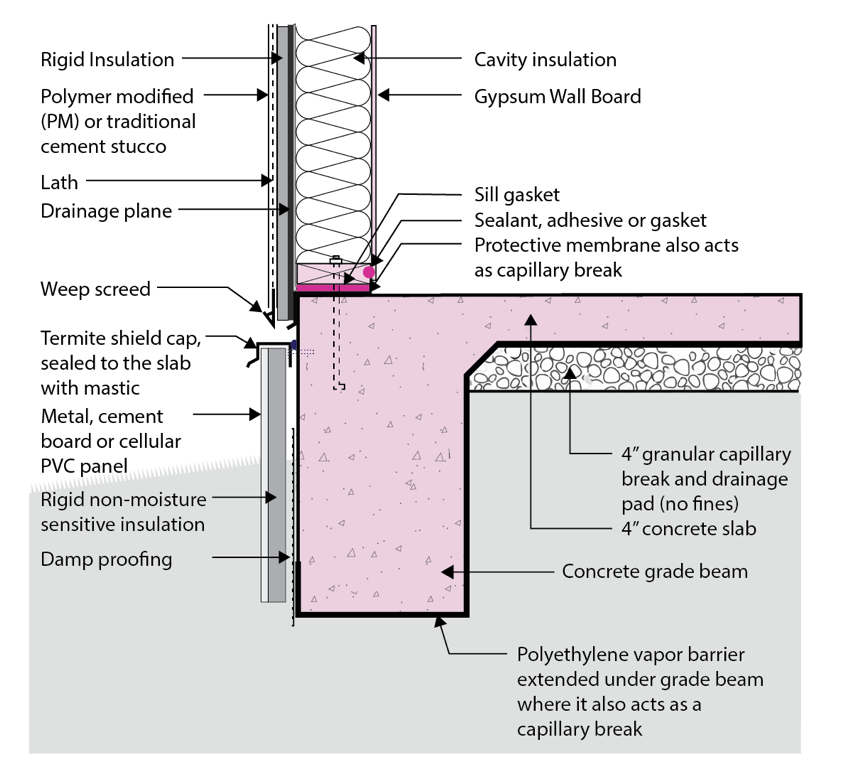
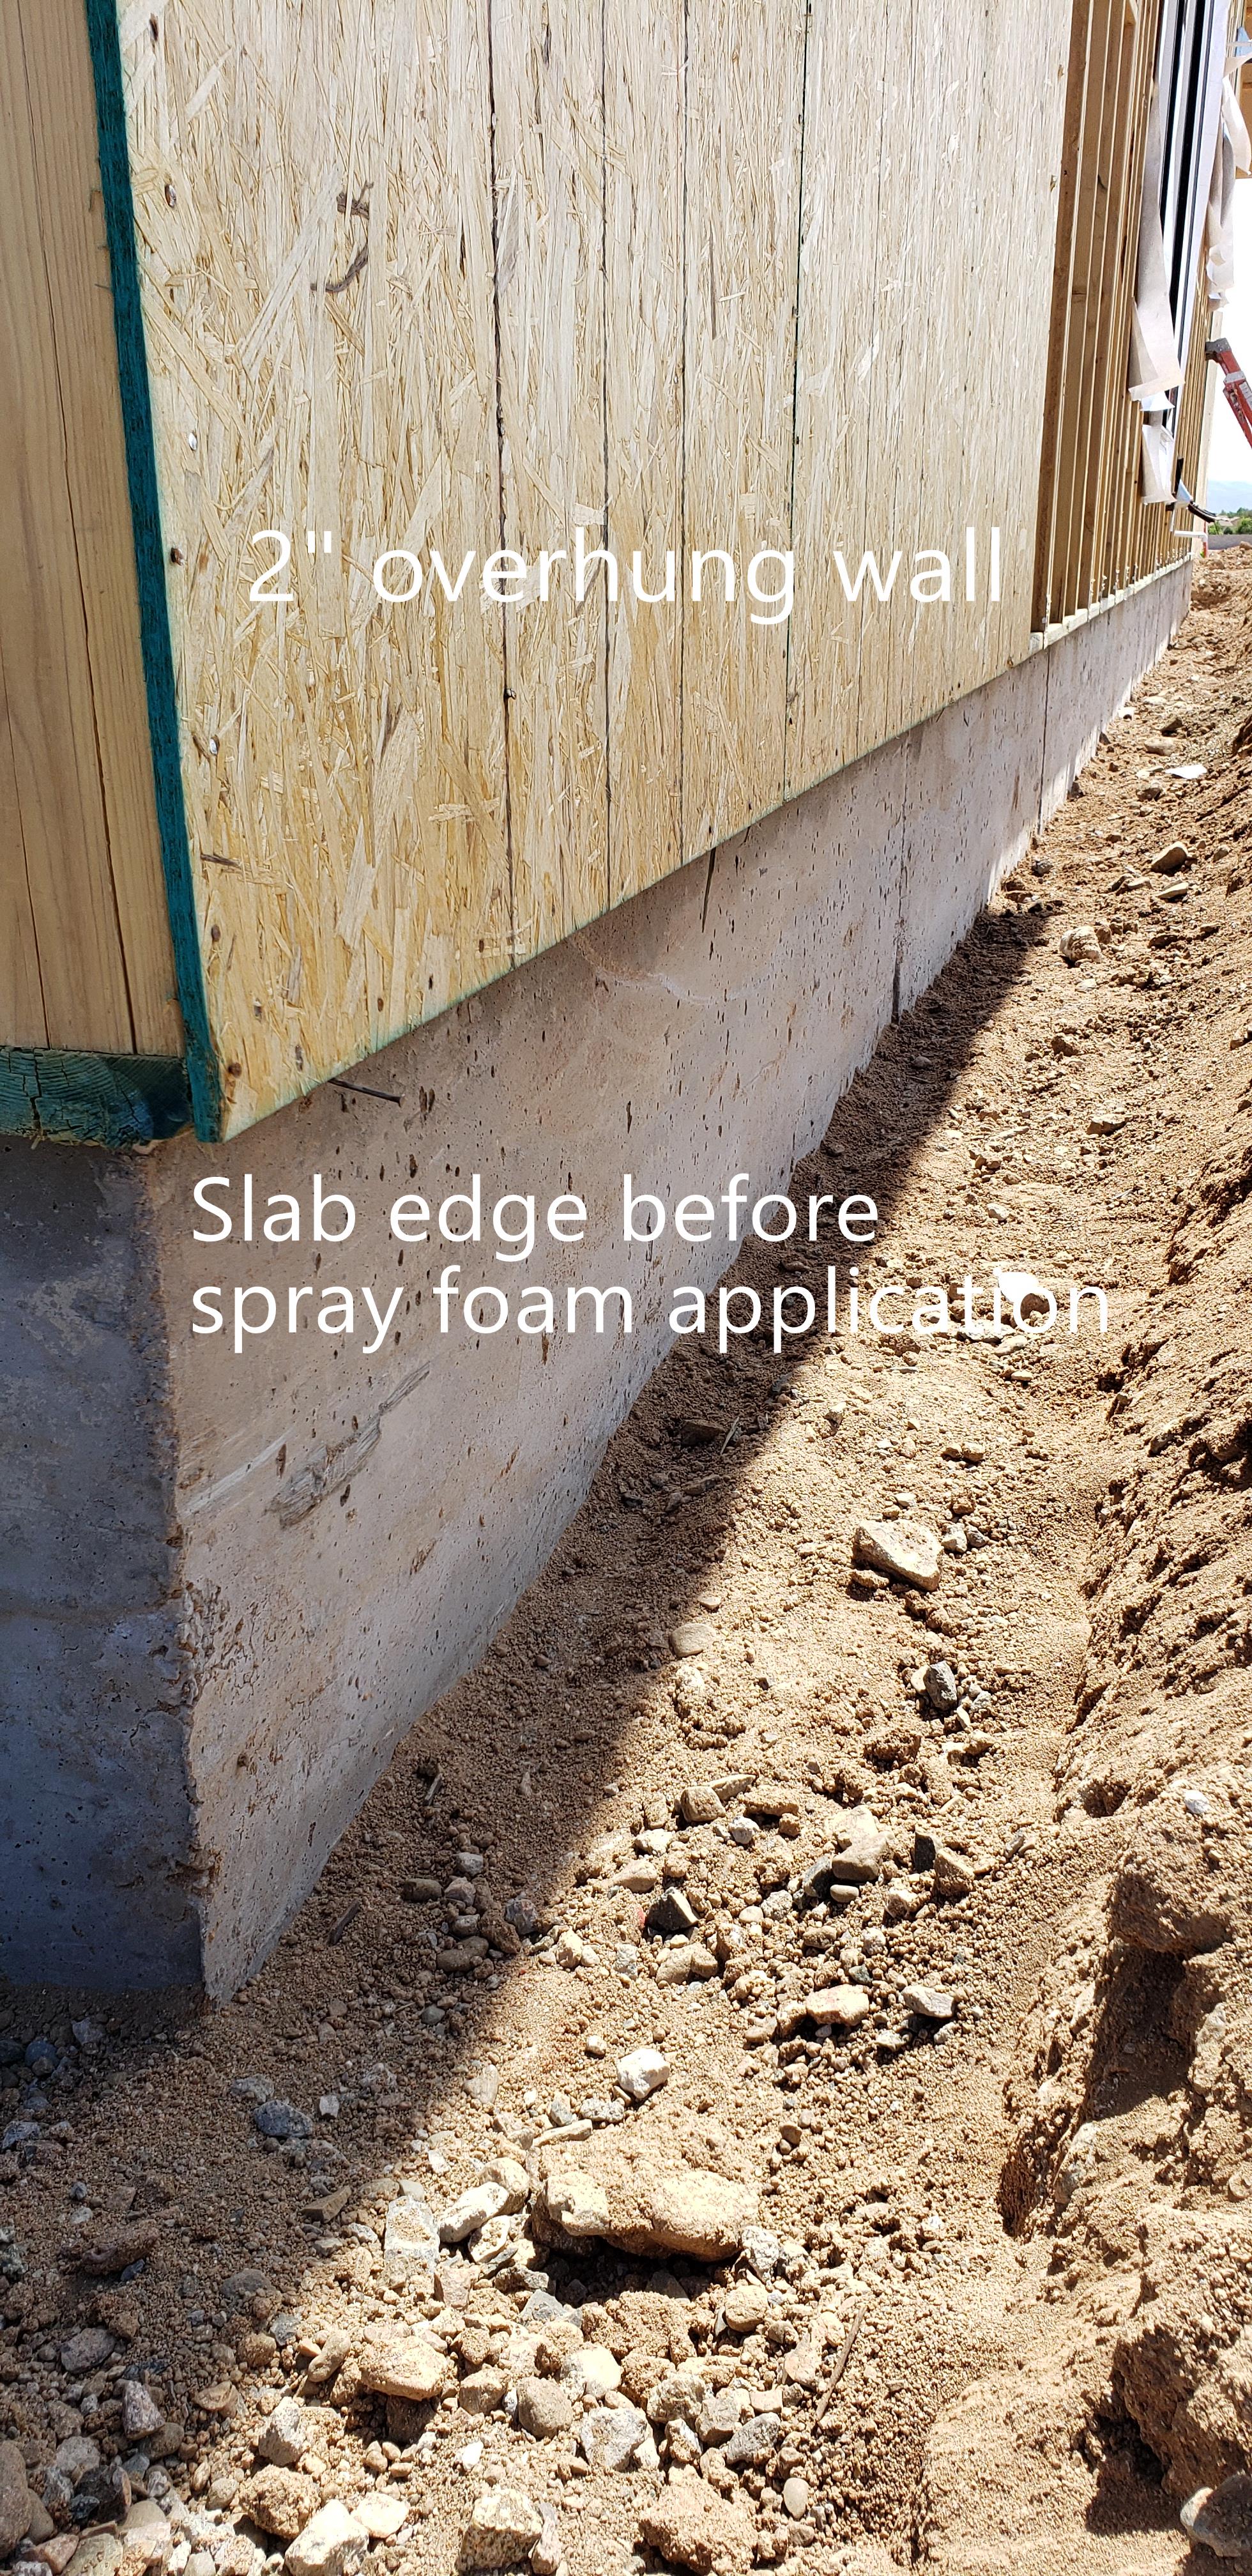
Right - Rigid foam slab edge insulation is installed along the exterior edge of a monolithic slab foundation.
Image

Right - Roofs with simple geometries are less susceptible to ignition from wind-borne embers getting lodged on the roof in a wildfire.
Image
Image
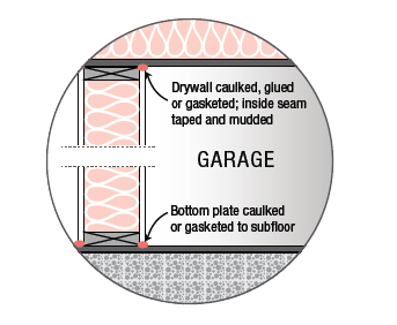
Right - Sealant is installed at the top and bottom plates of a gypsum covered wall separating a garage from the conditioned space of the home.
Image
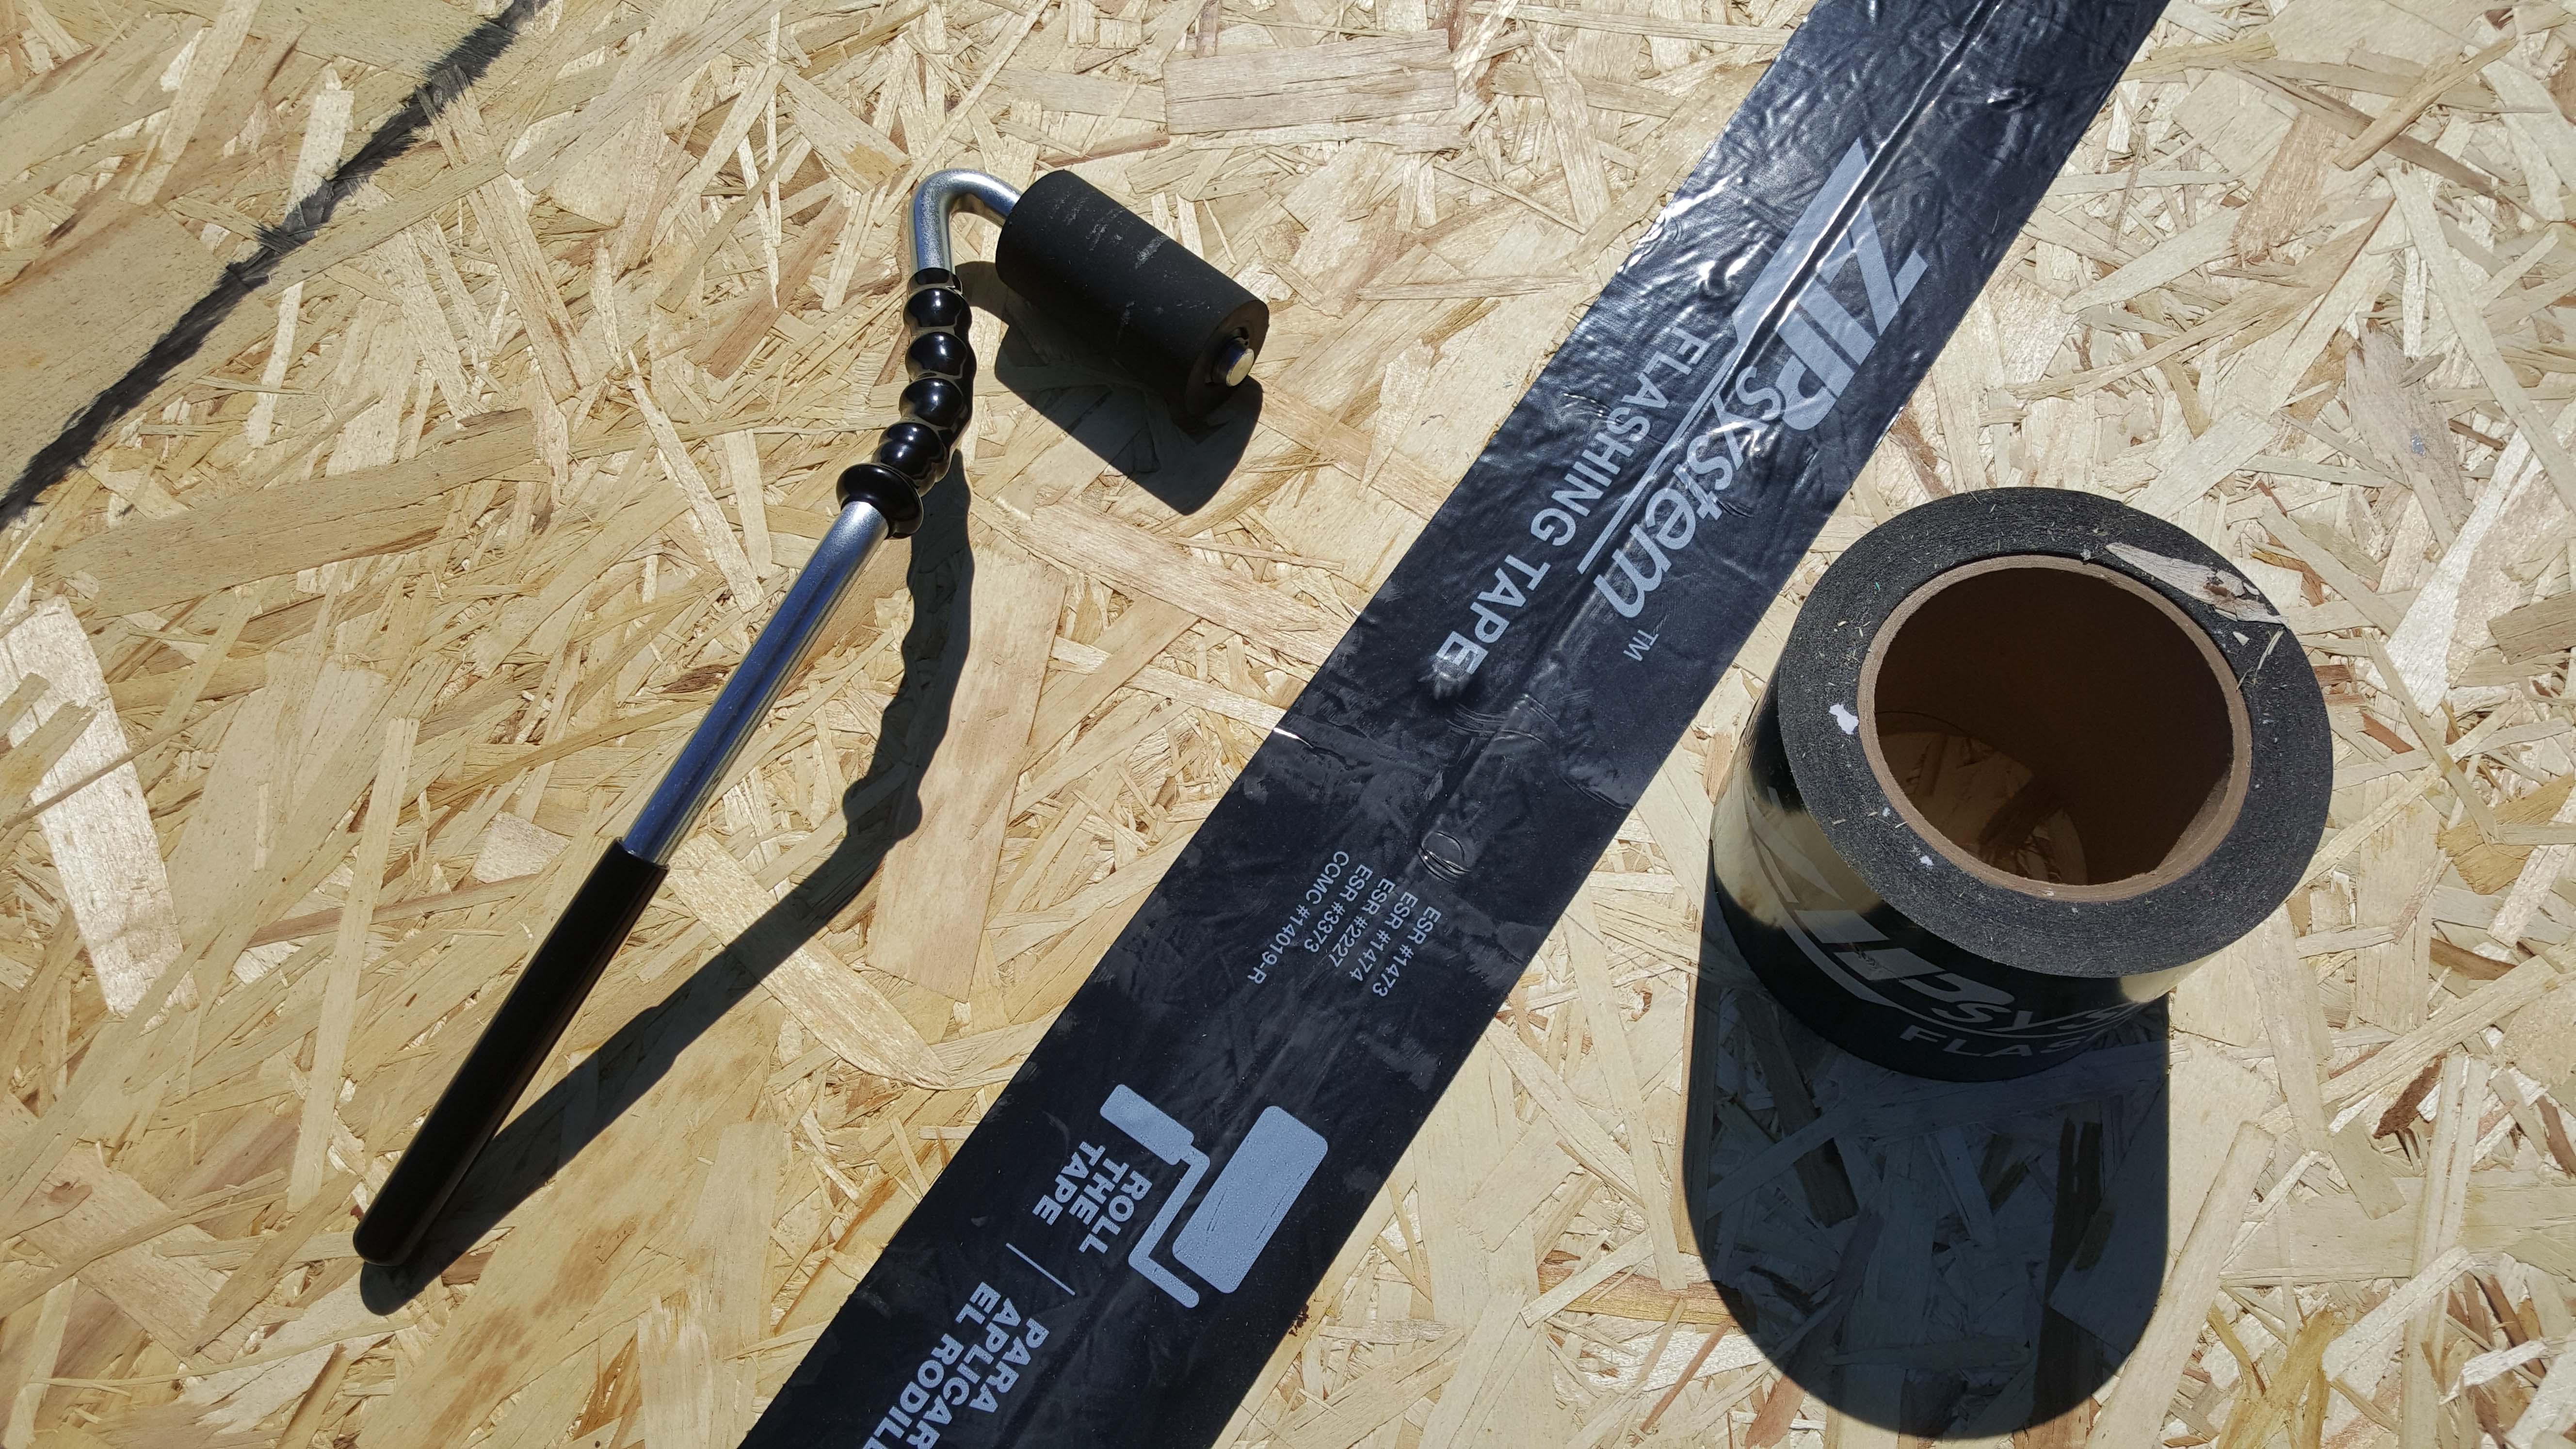
Right - Seam-sealing flashing tape is installed with roller to fully adhere to the OSB.
Image
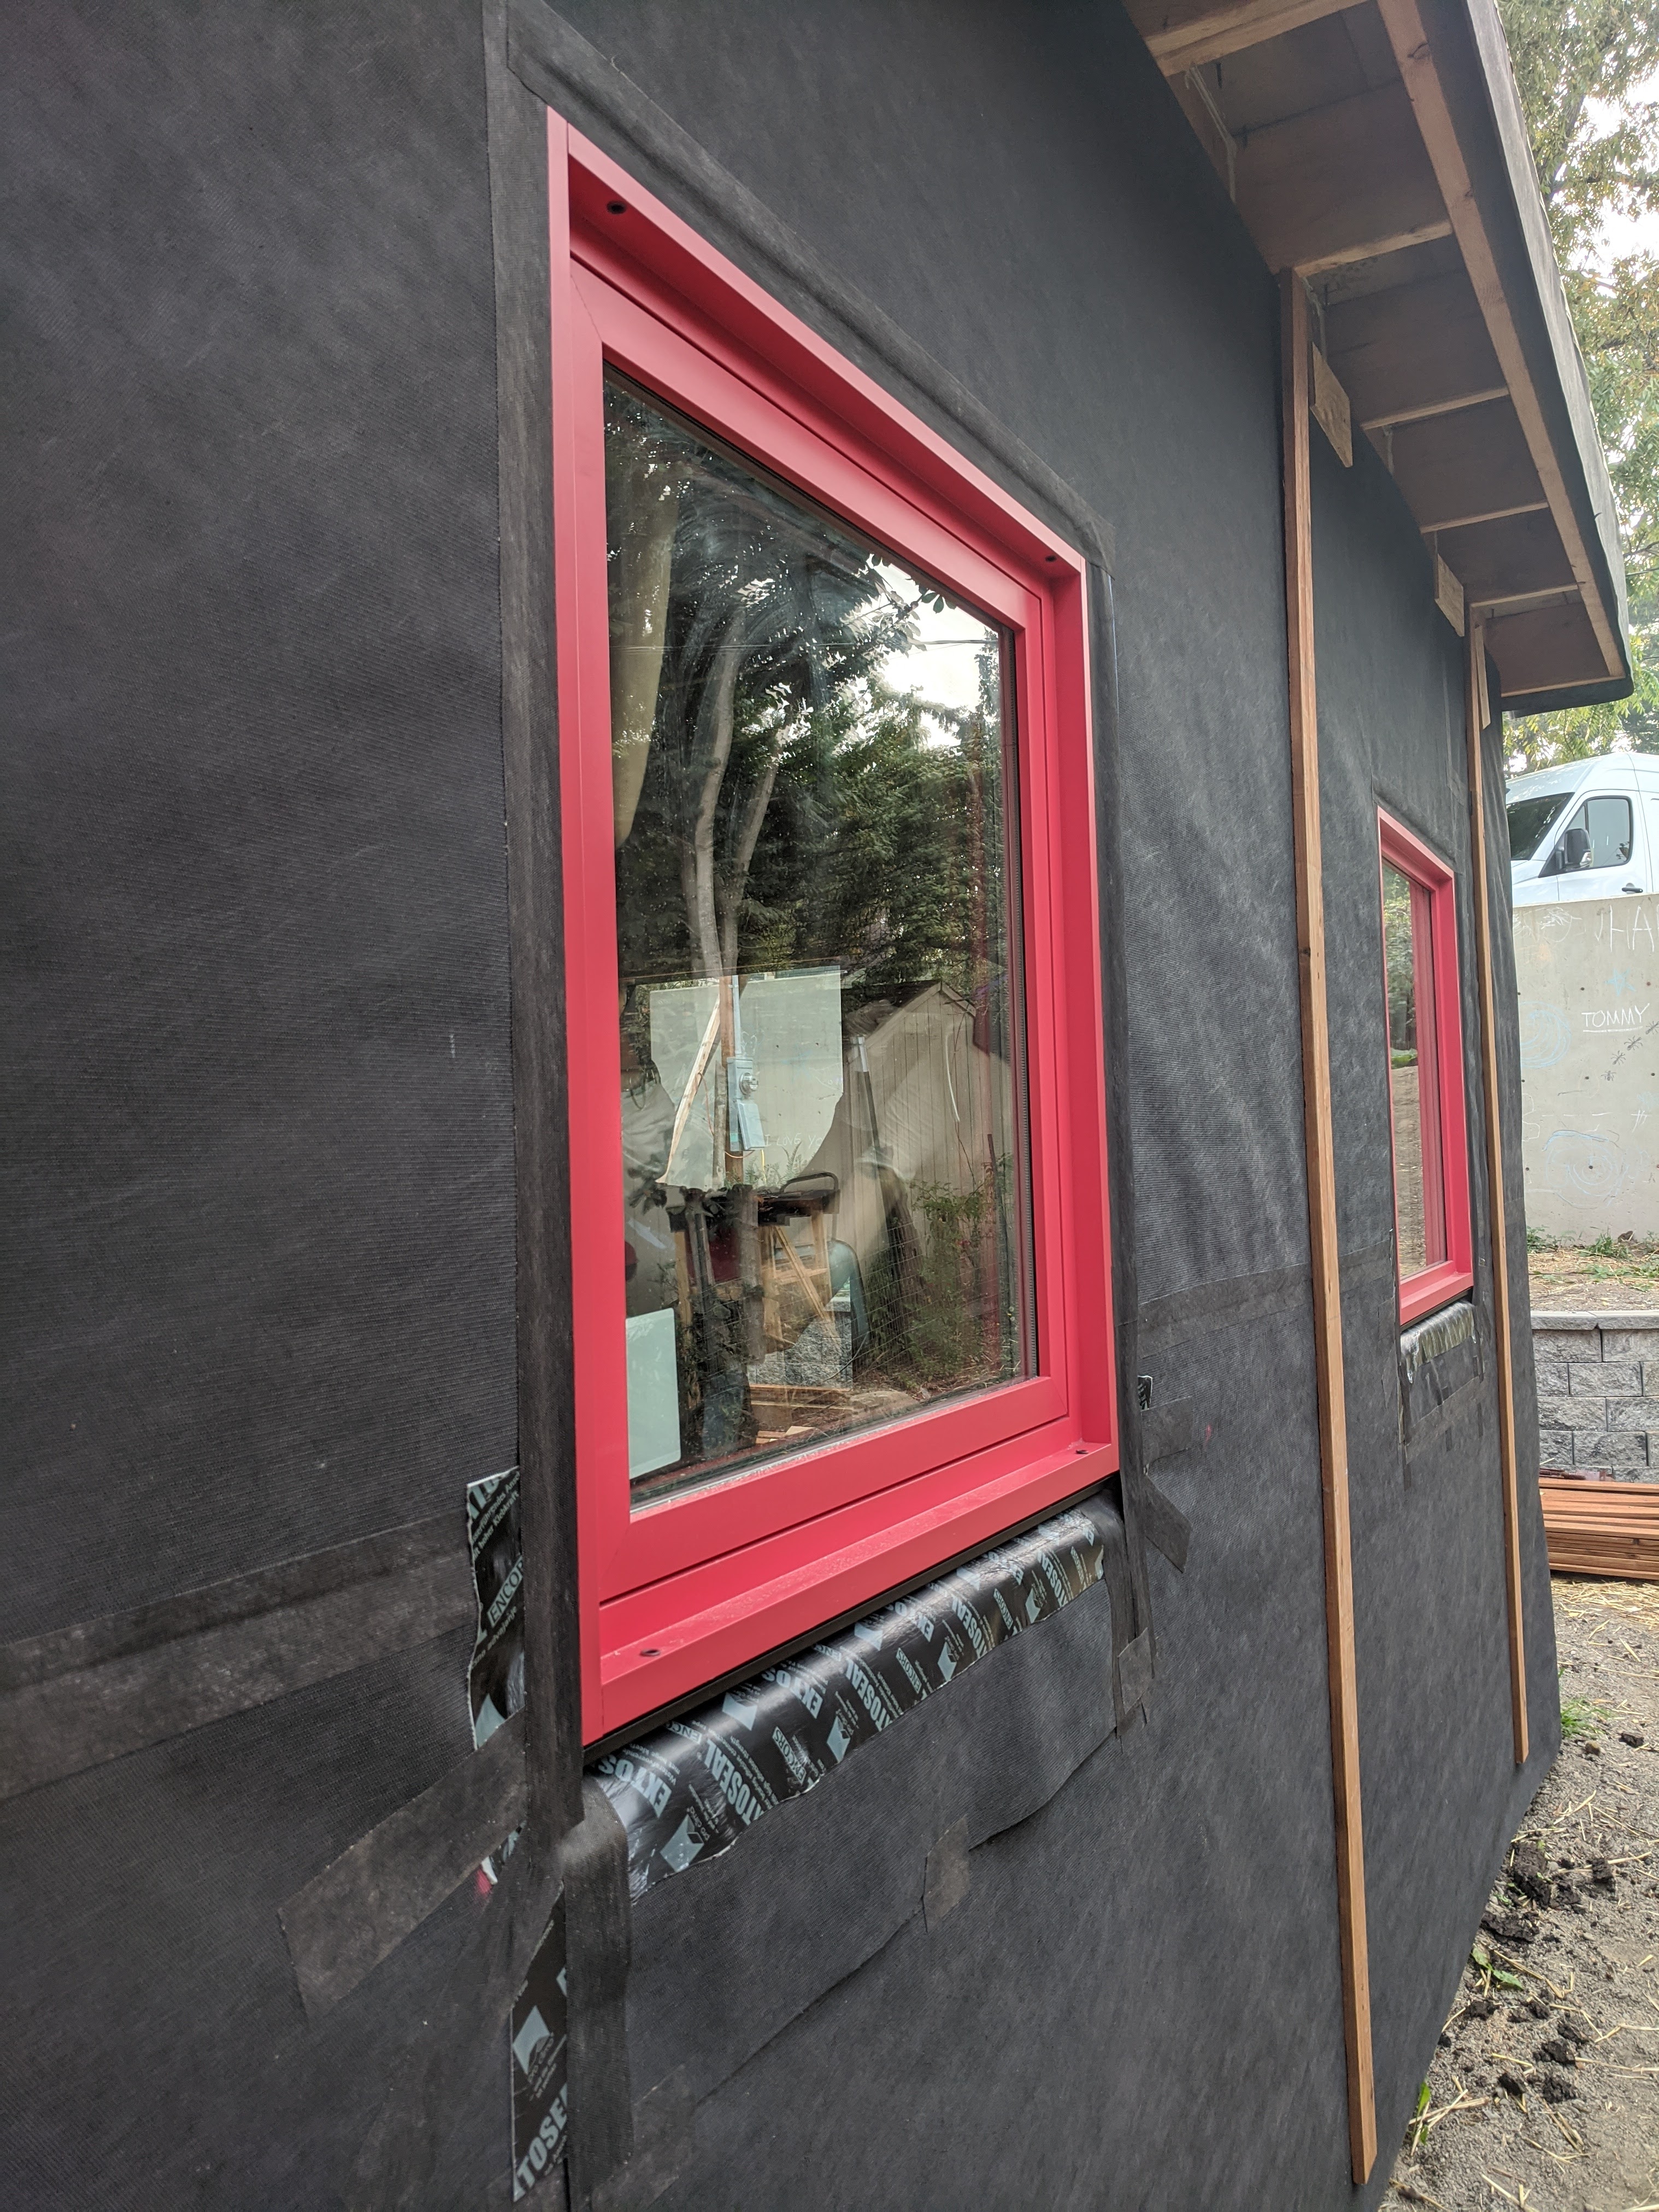
Right - Seams in coated sheathing and joints around window are properly sealed and flashed with tape and all nail holes are covered with paint-on sealant.
Image
Image
Image
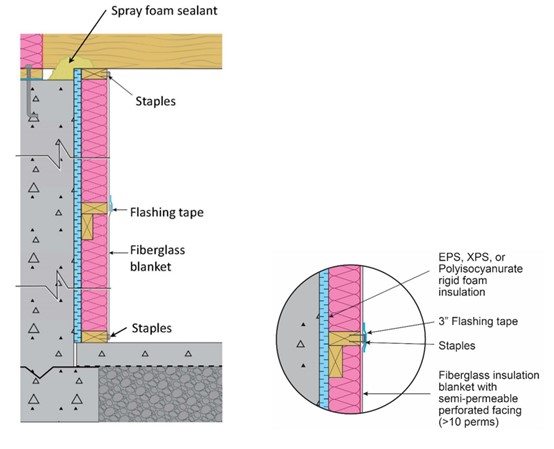
Right - Section view showing how to air-seal and insulate a basement wall with perforated blanket insulation by installing it over air-sealed rigid insulation board to reduce condensation risk in the fiberglass blanket.
Image
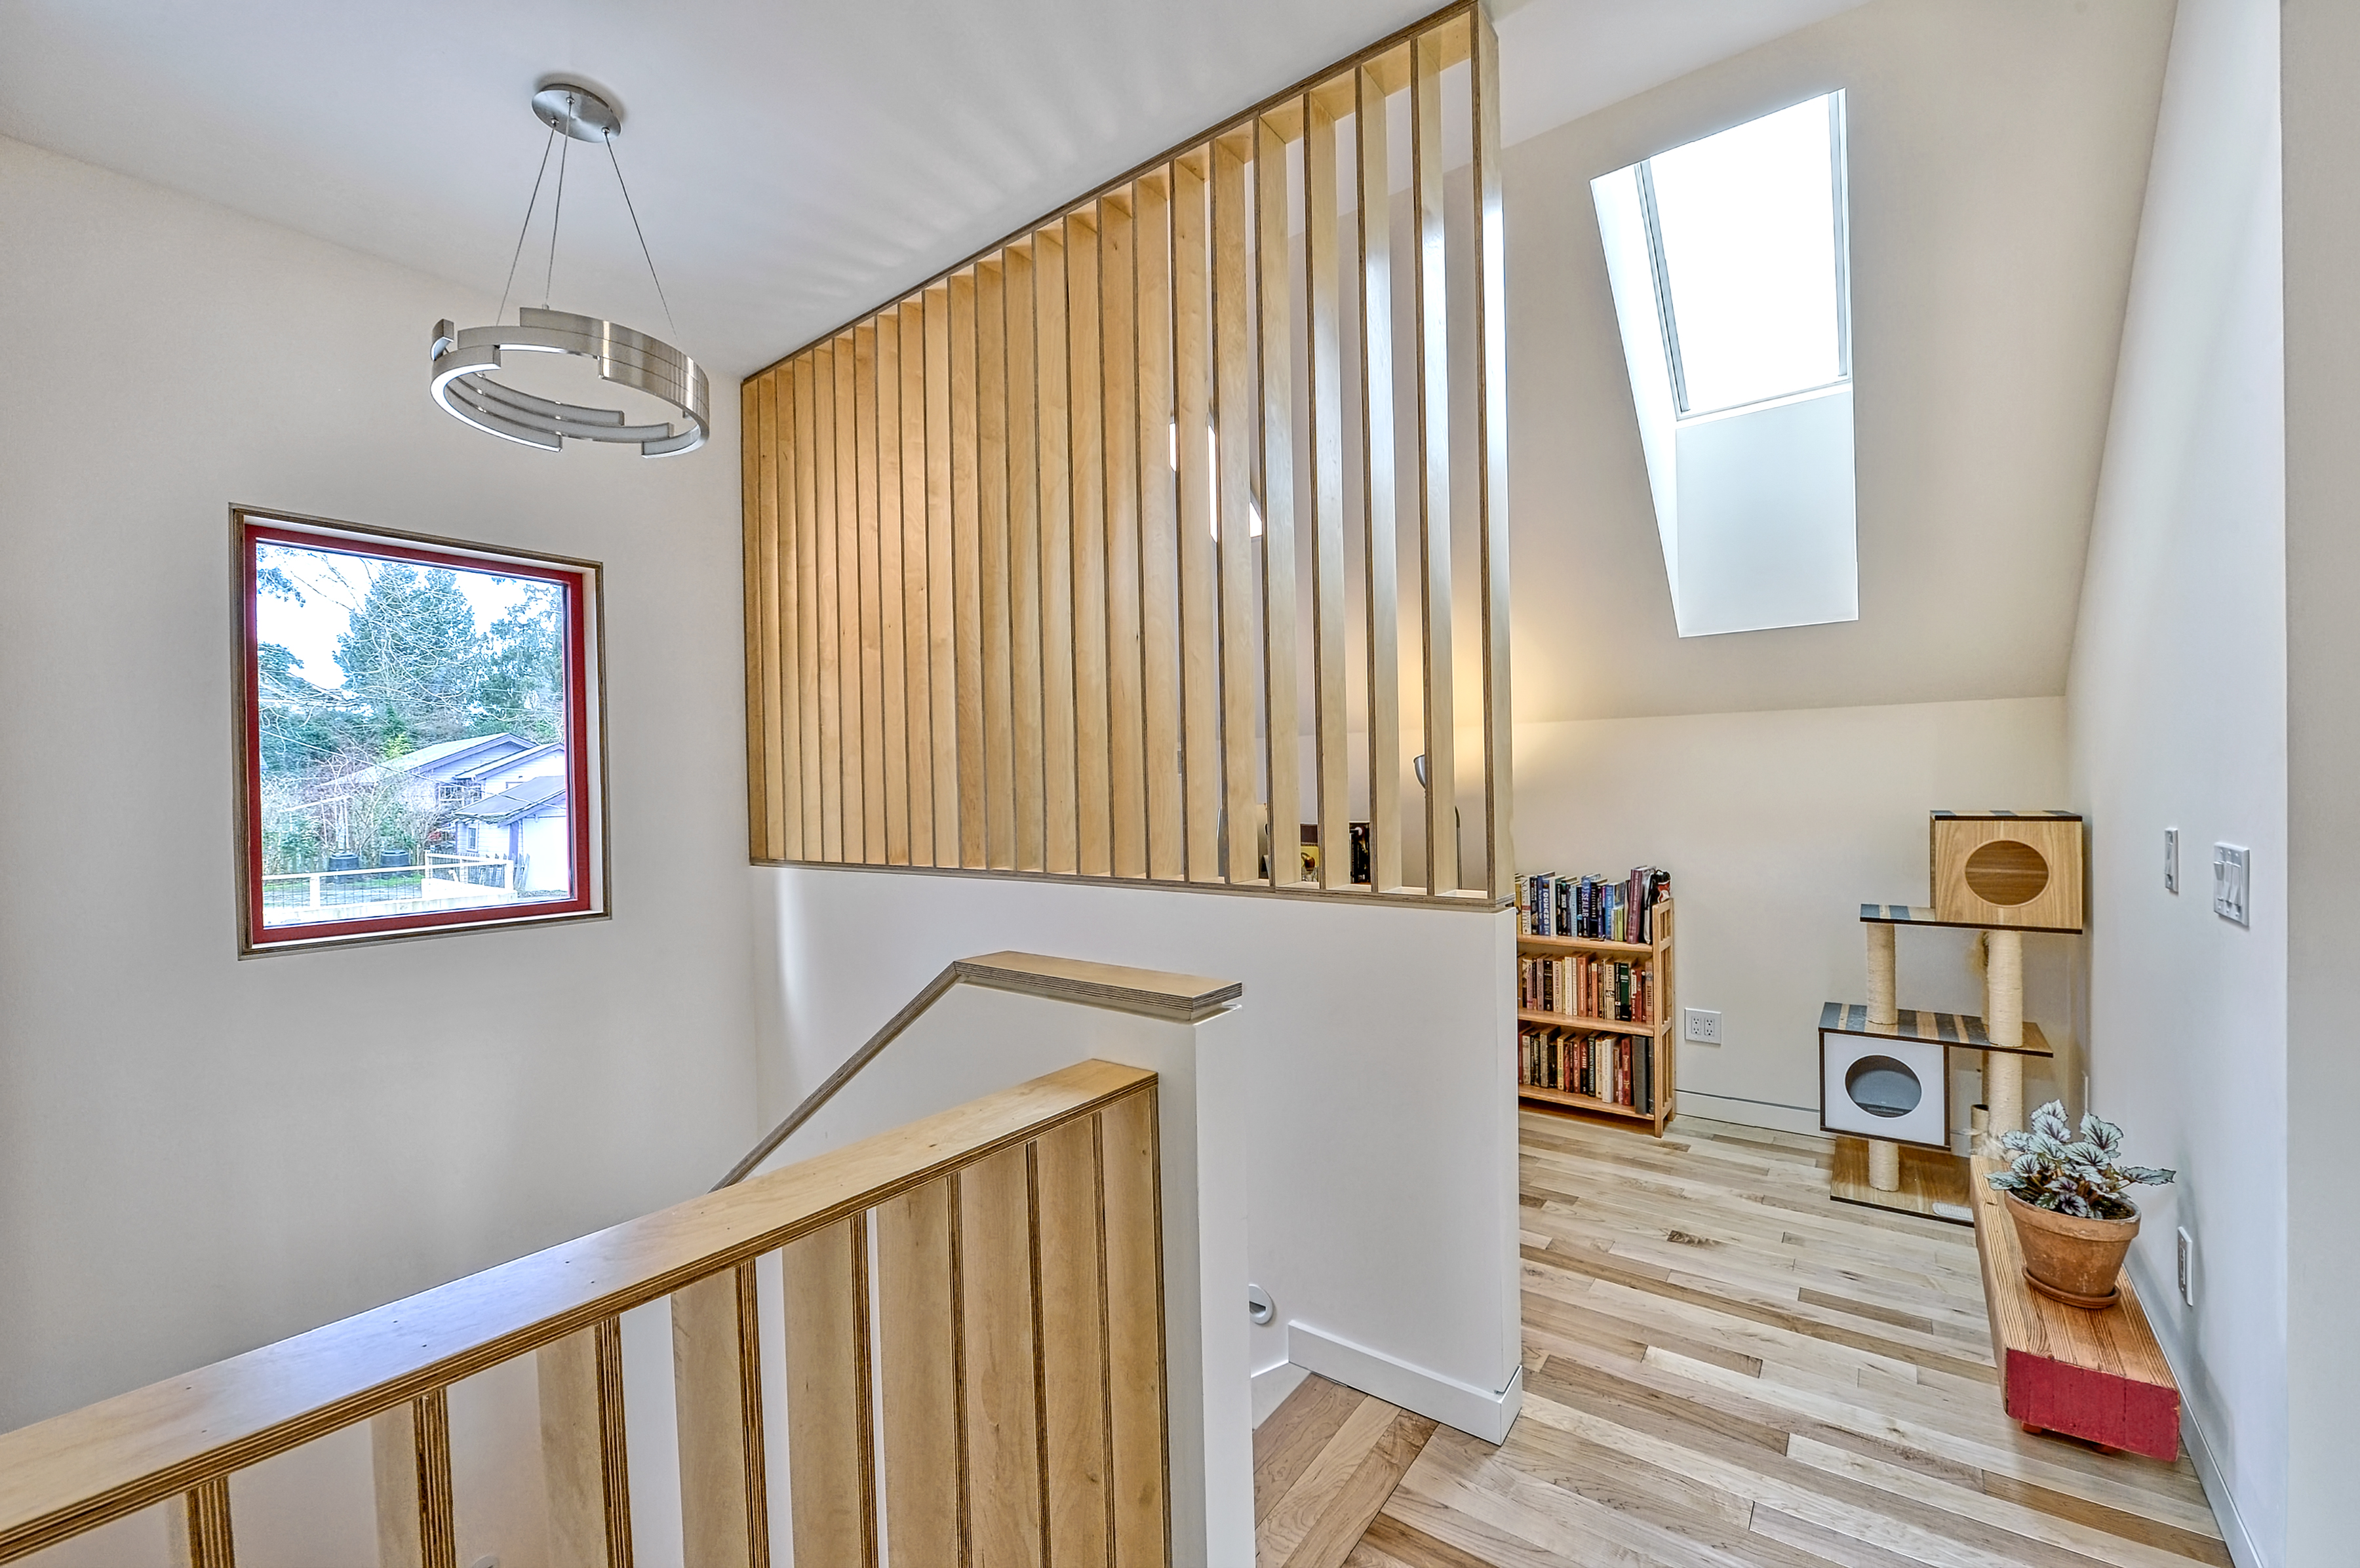
Right - Skylights can add natural light in rooms with limited wall space and if openable can provide desirable ventilation, especially when located at the top of stair wells.
Image
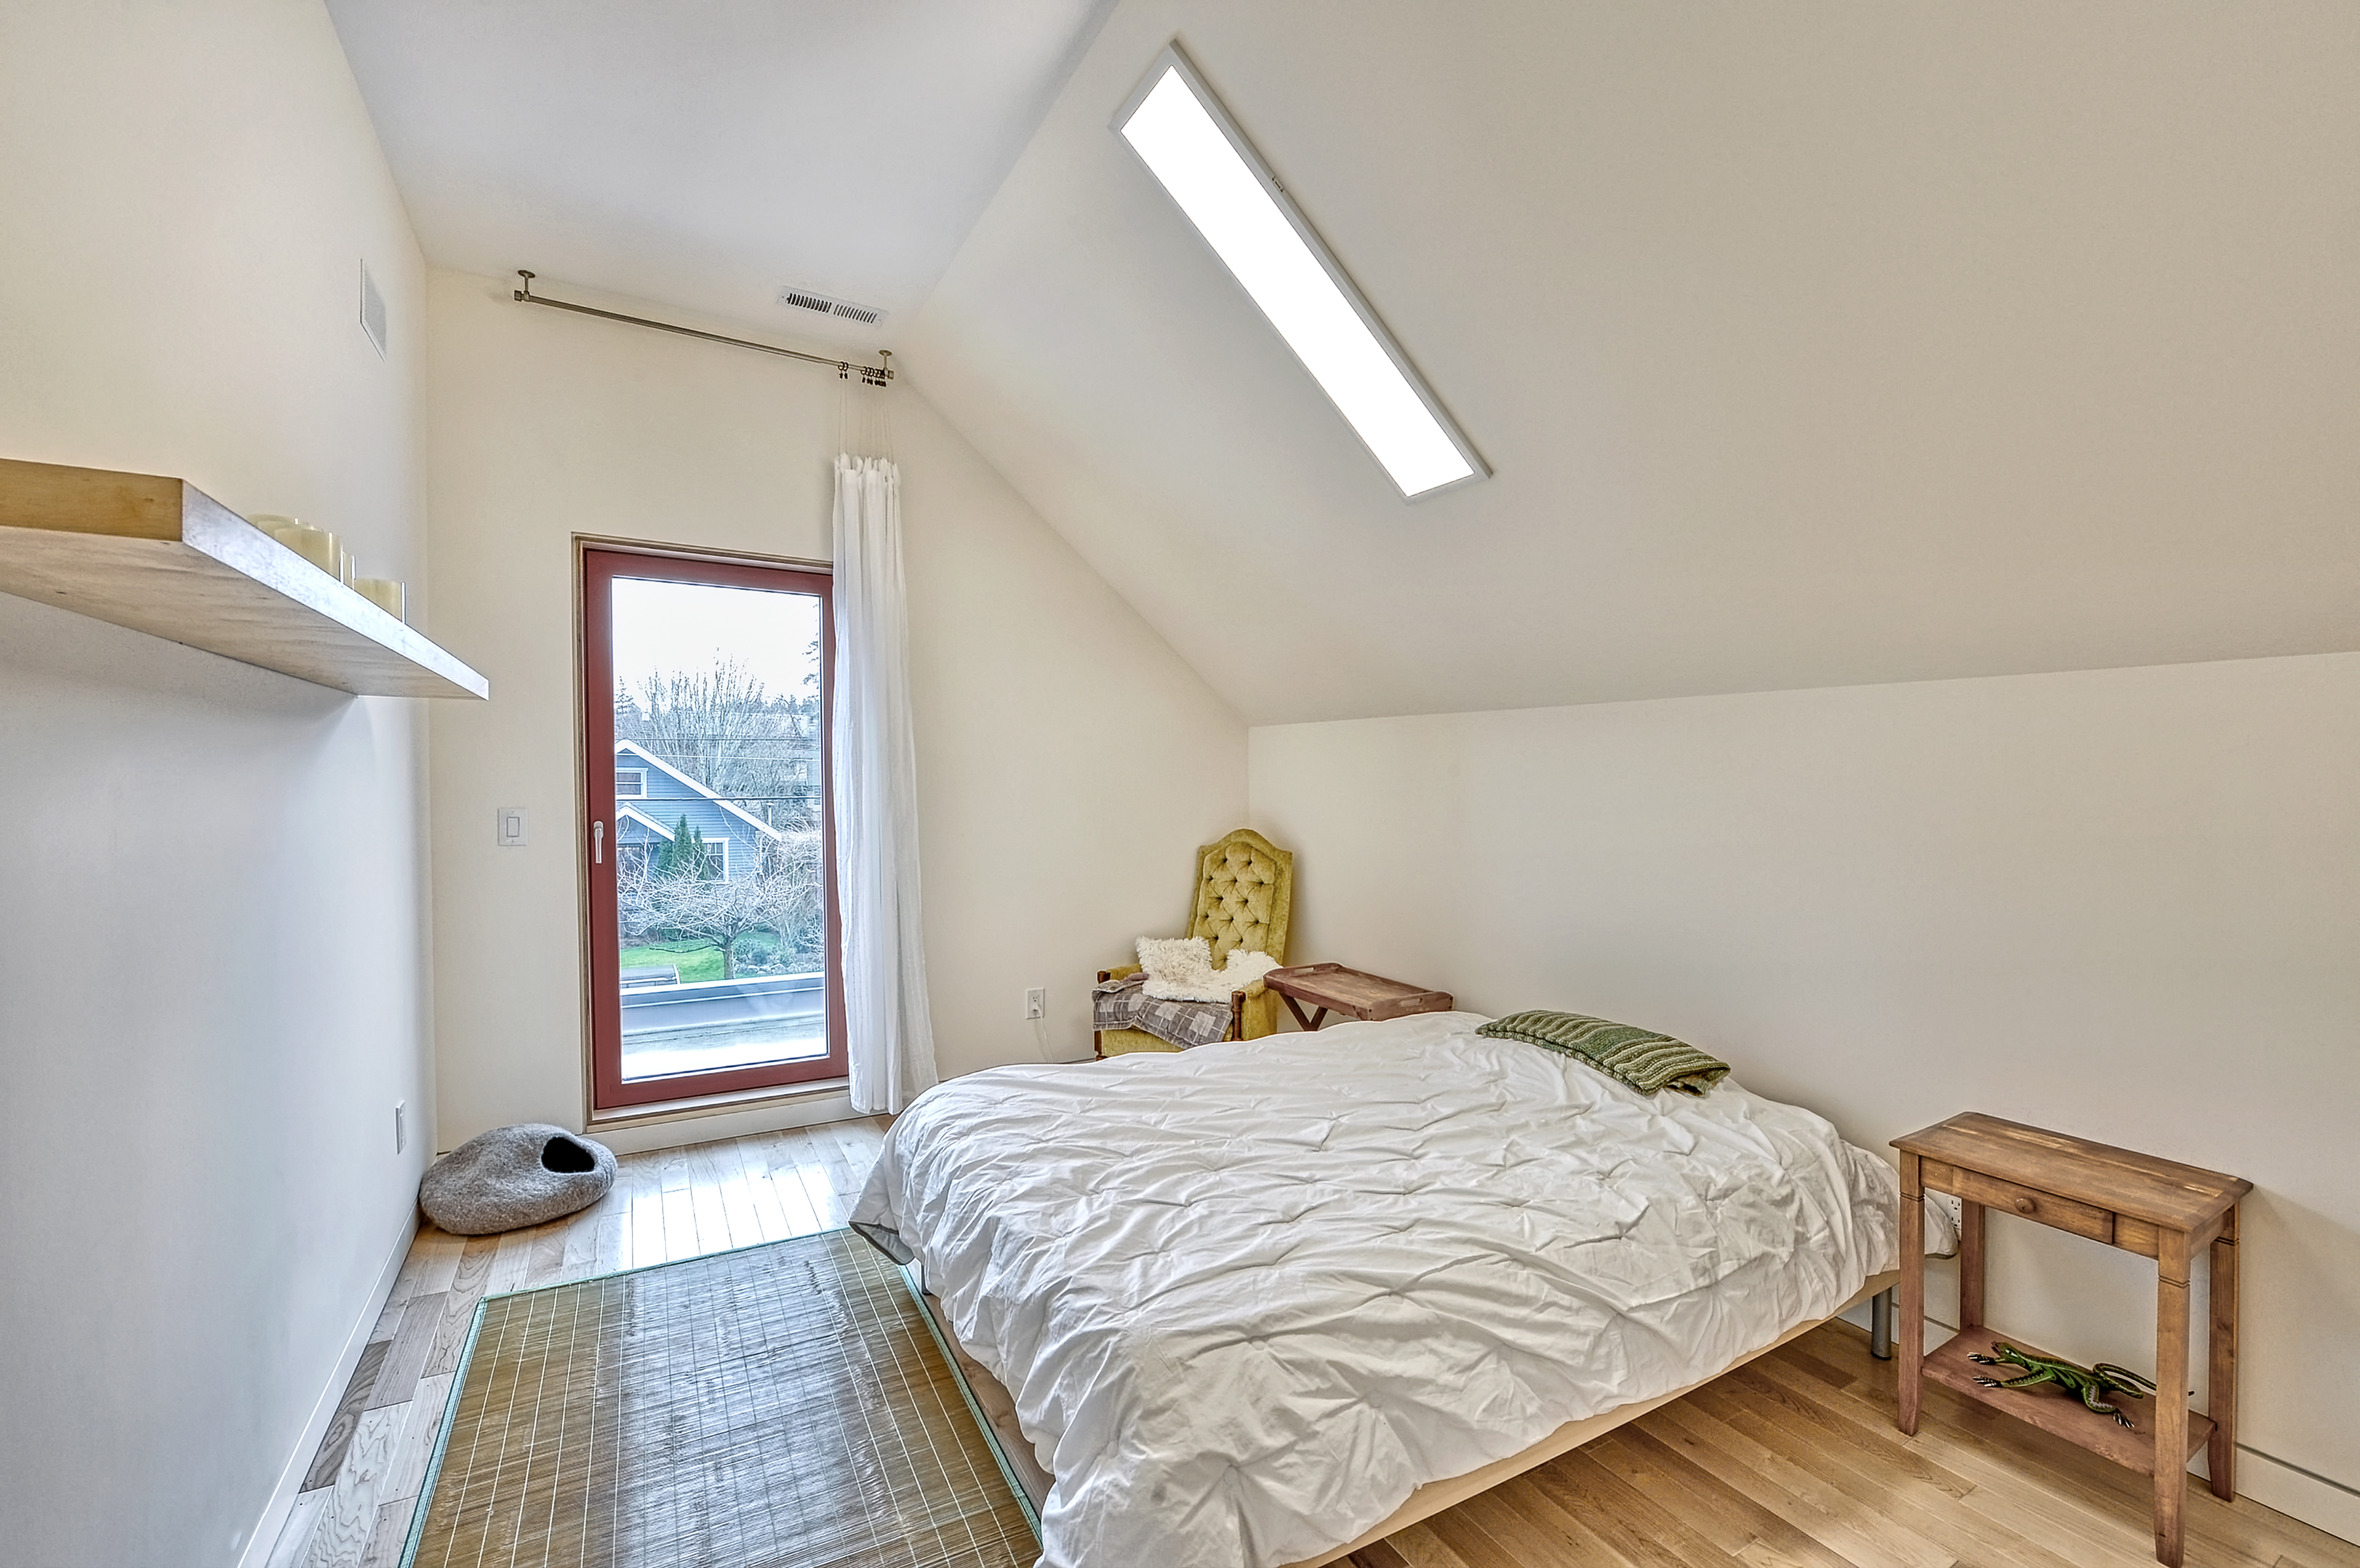
Right - Skylights provide natural light while maintaining privacy in a narrow second-story bedroom.
Image
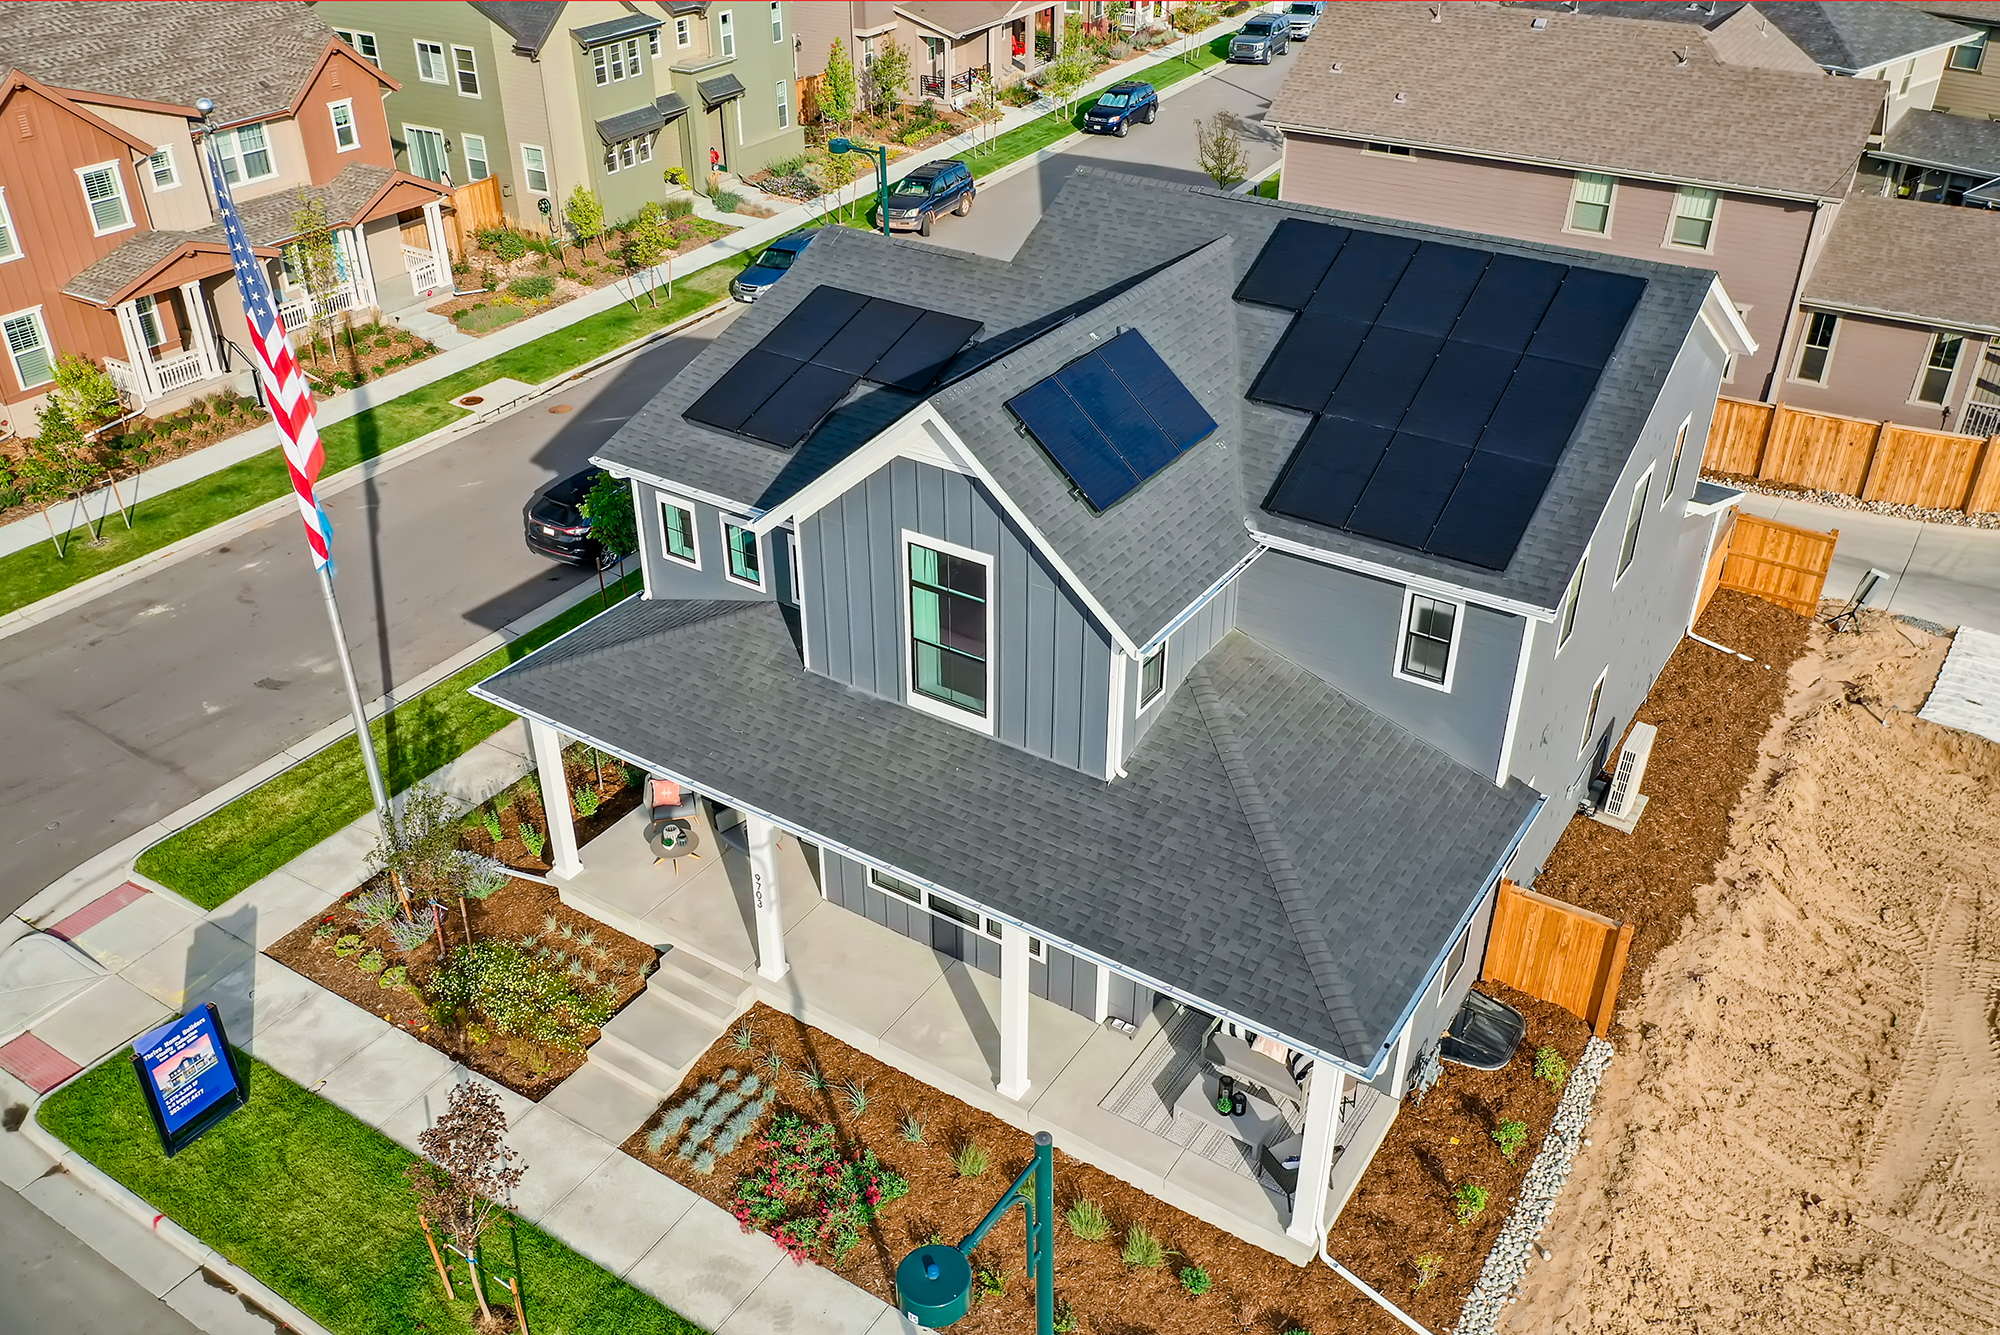
Right - Solar photovoltaic panels are installed on the highest parts of the roof to avoid being shaded by other parts of the house.
Image
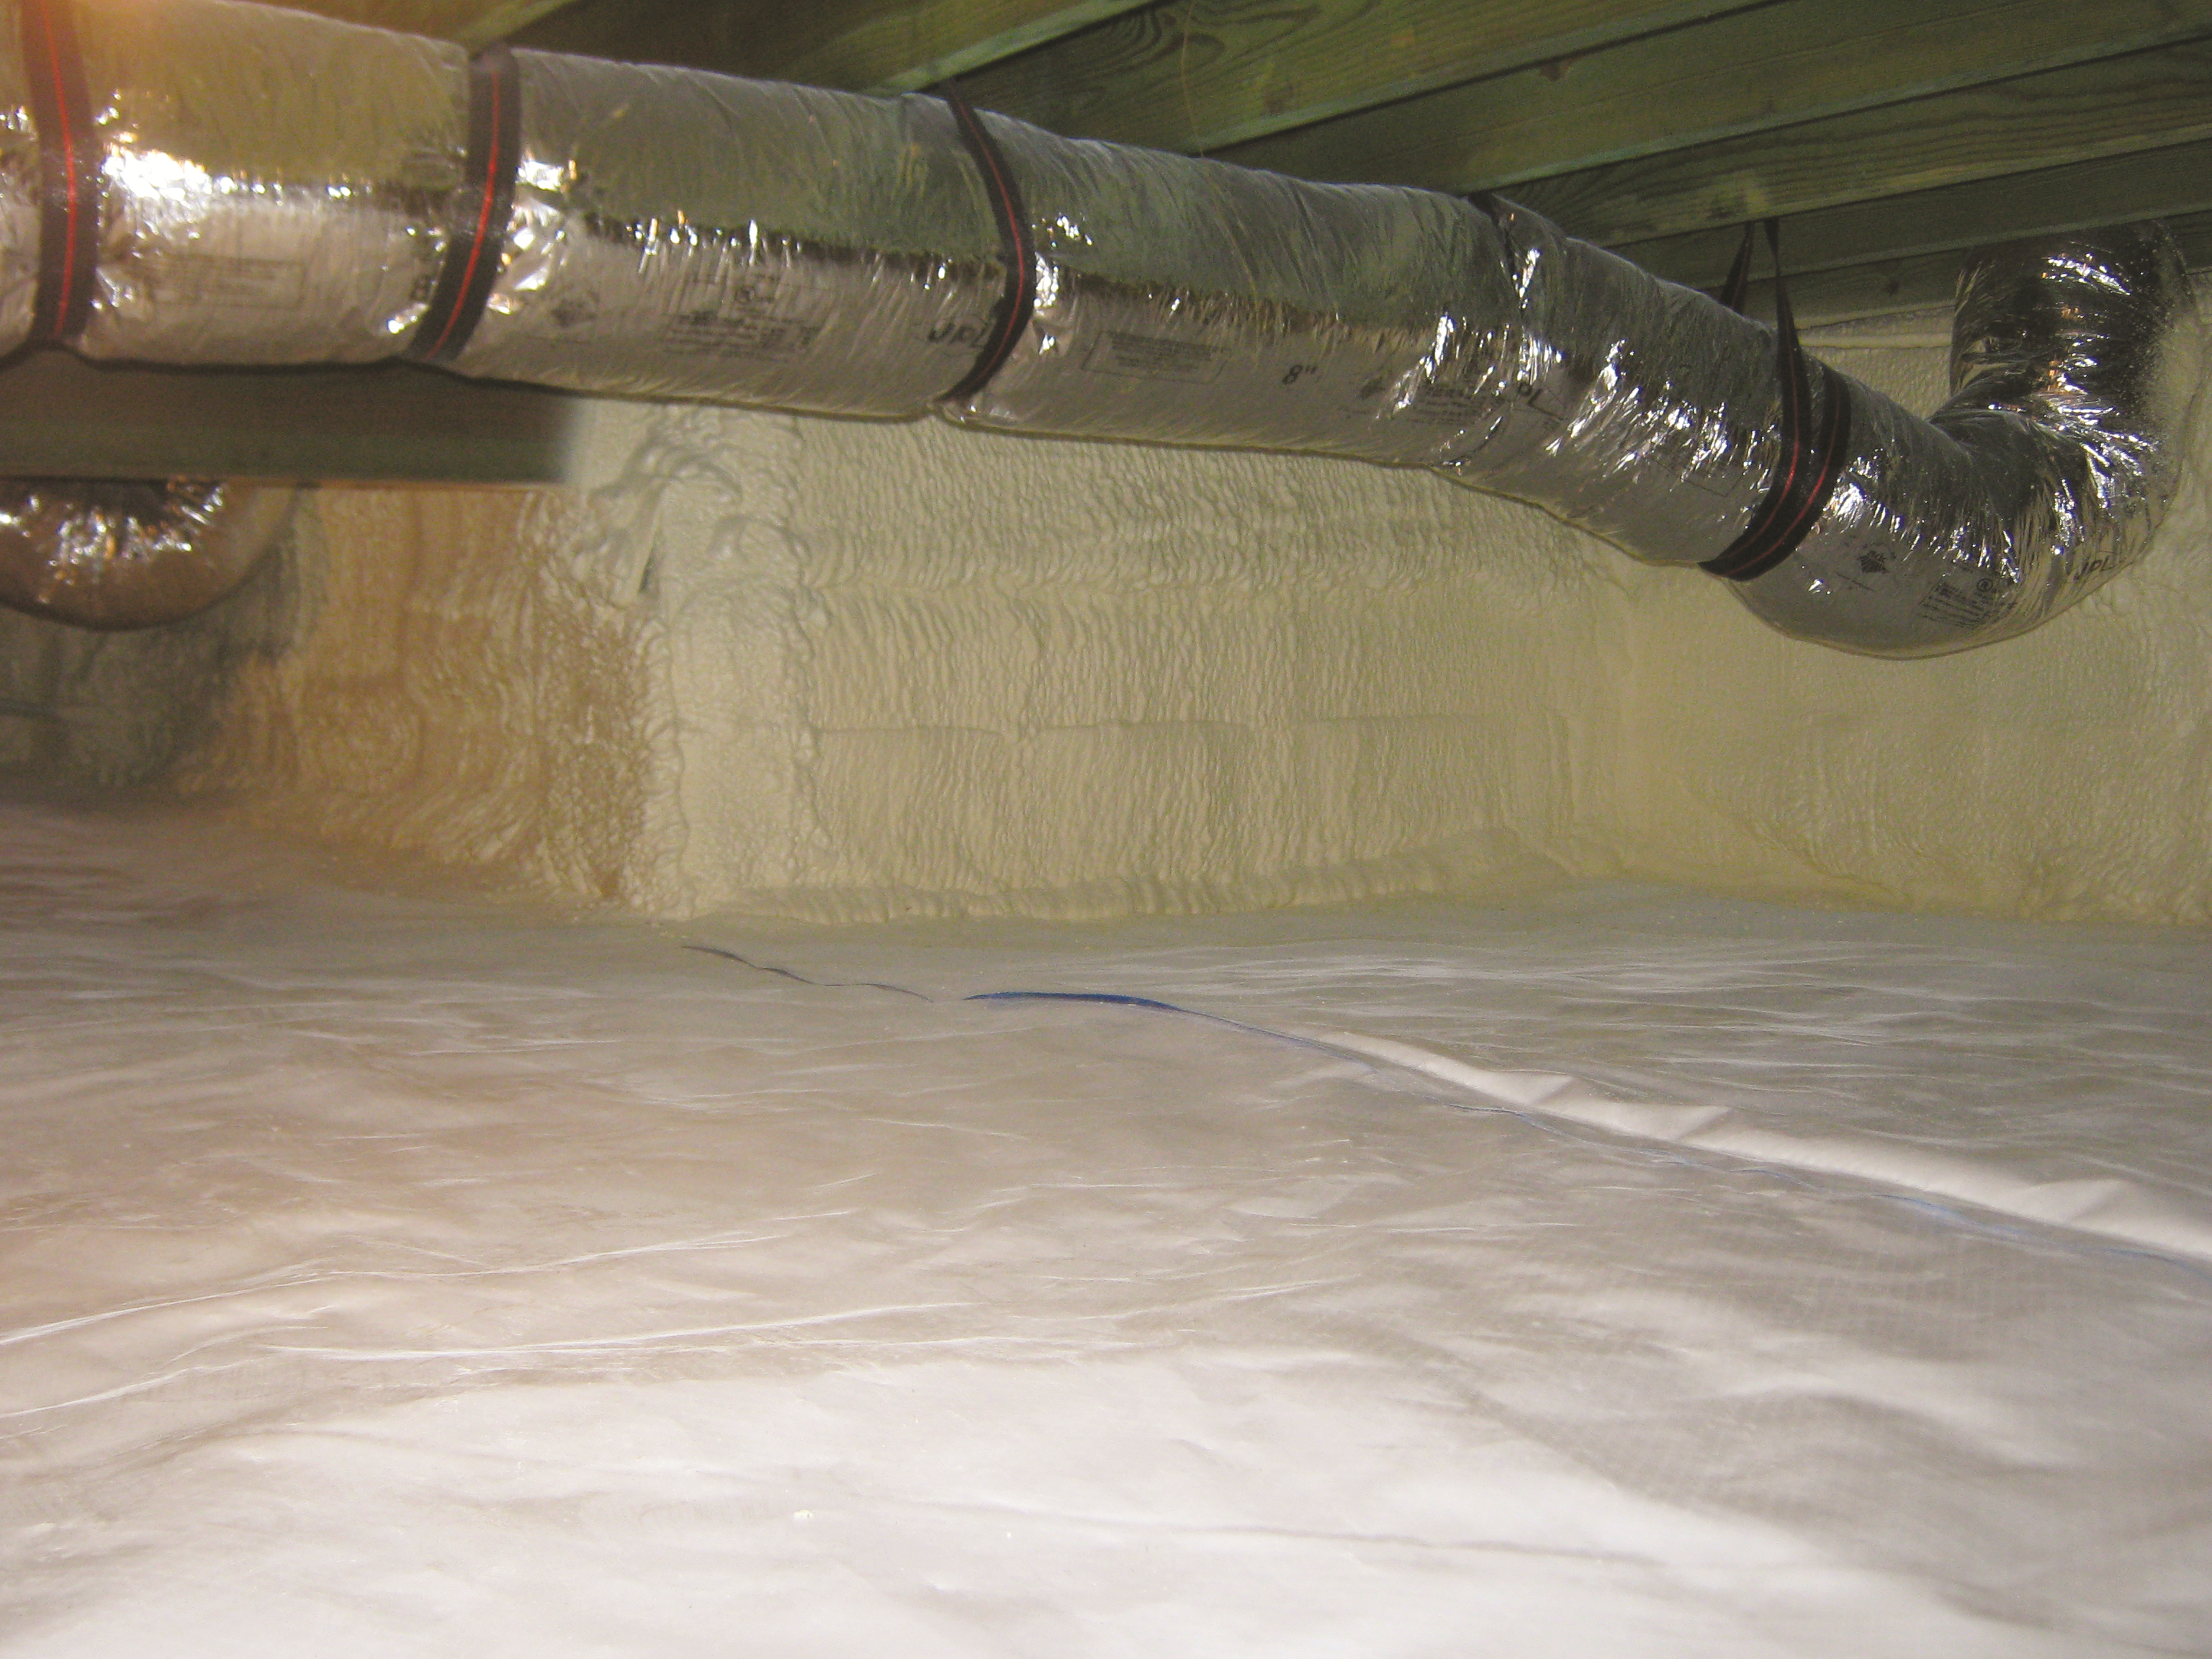
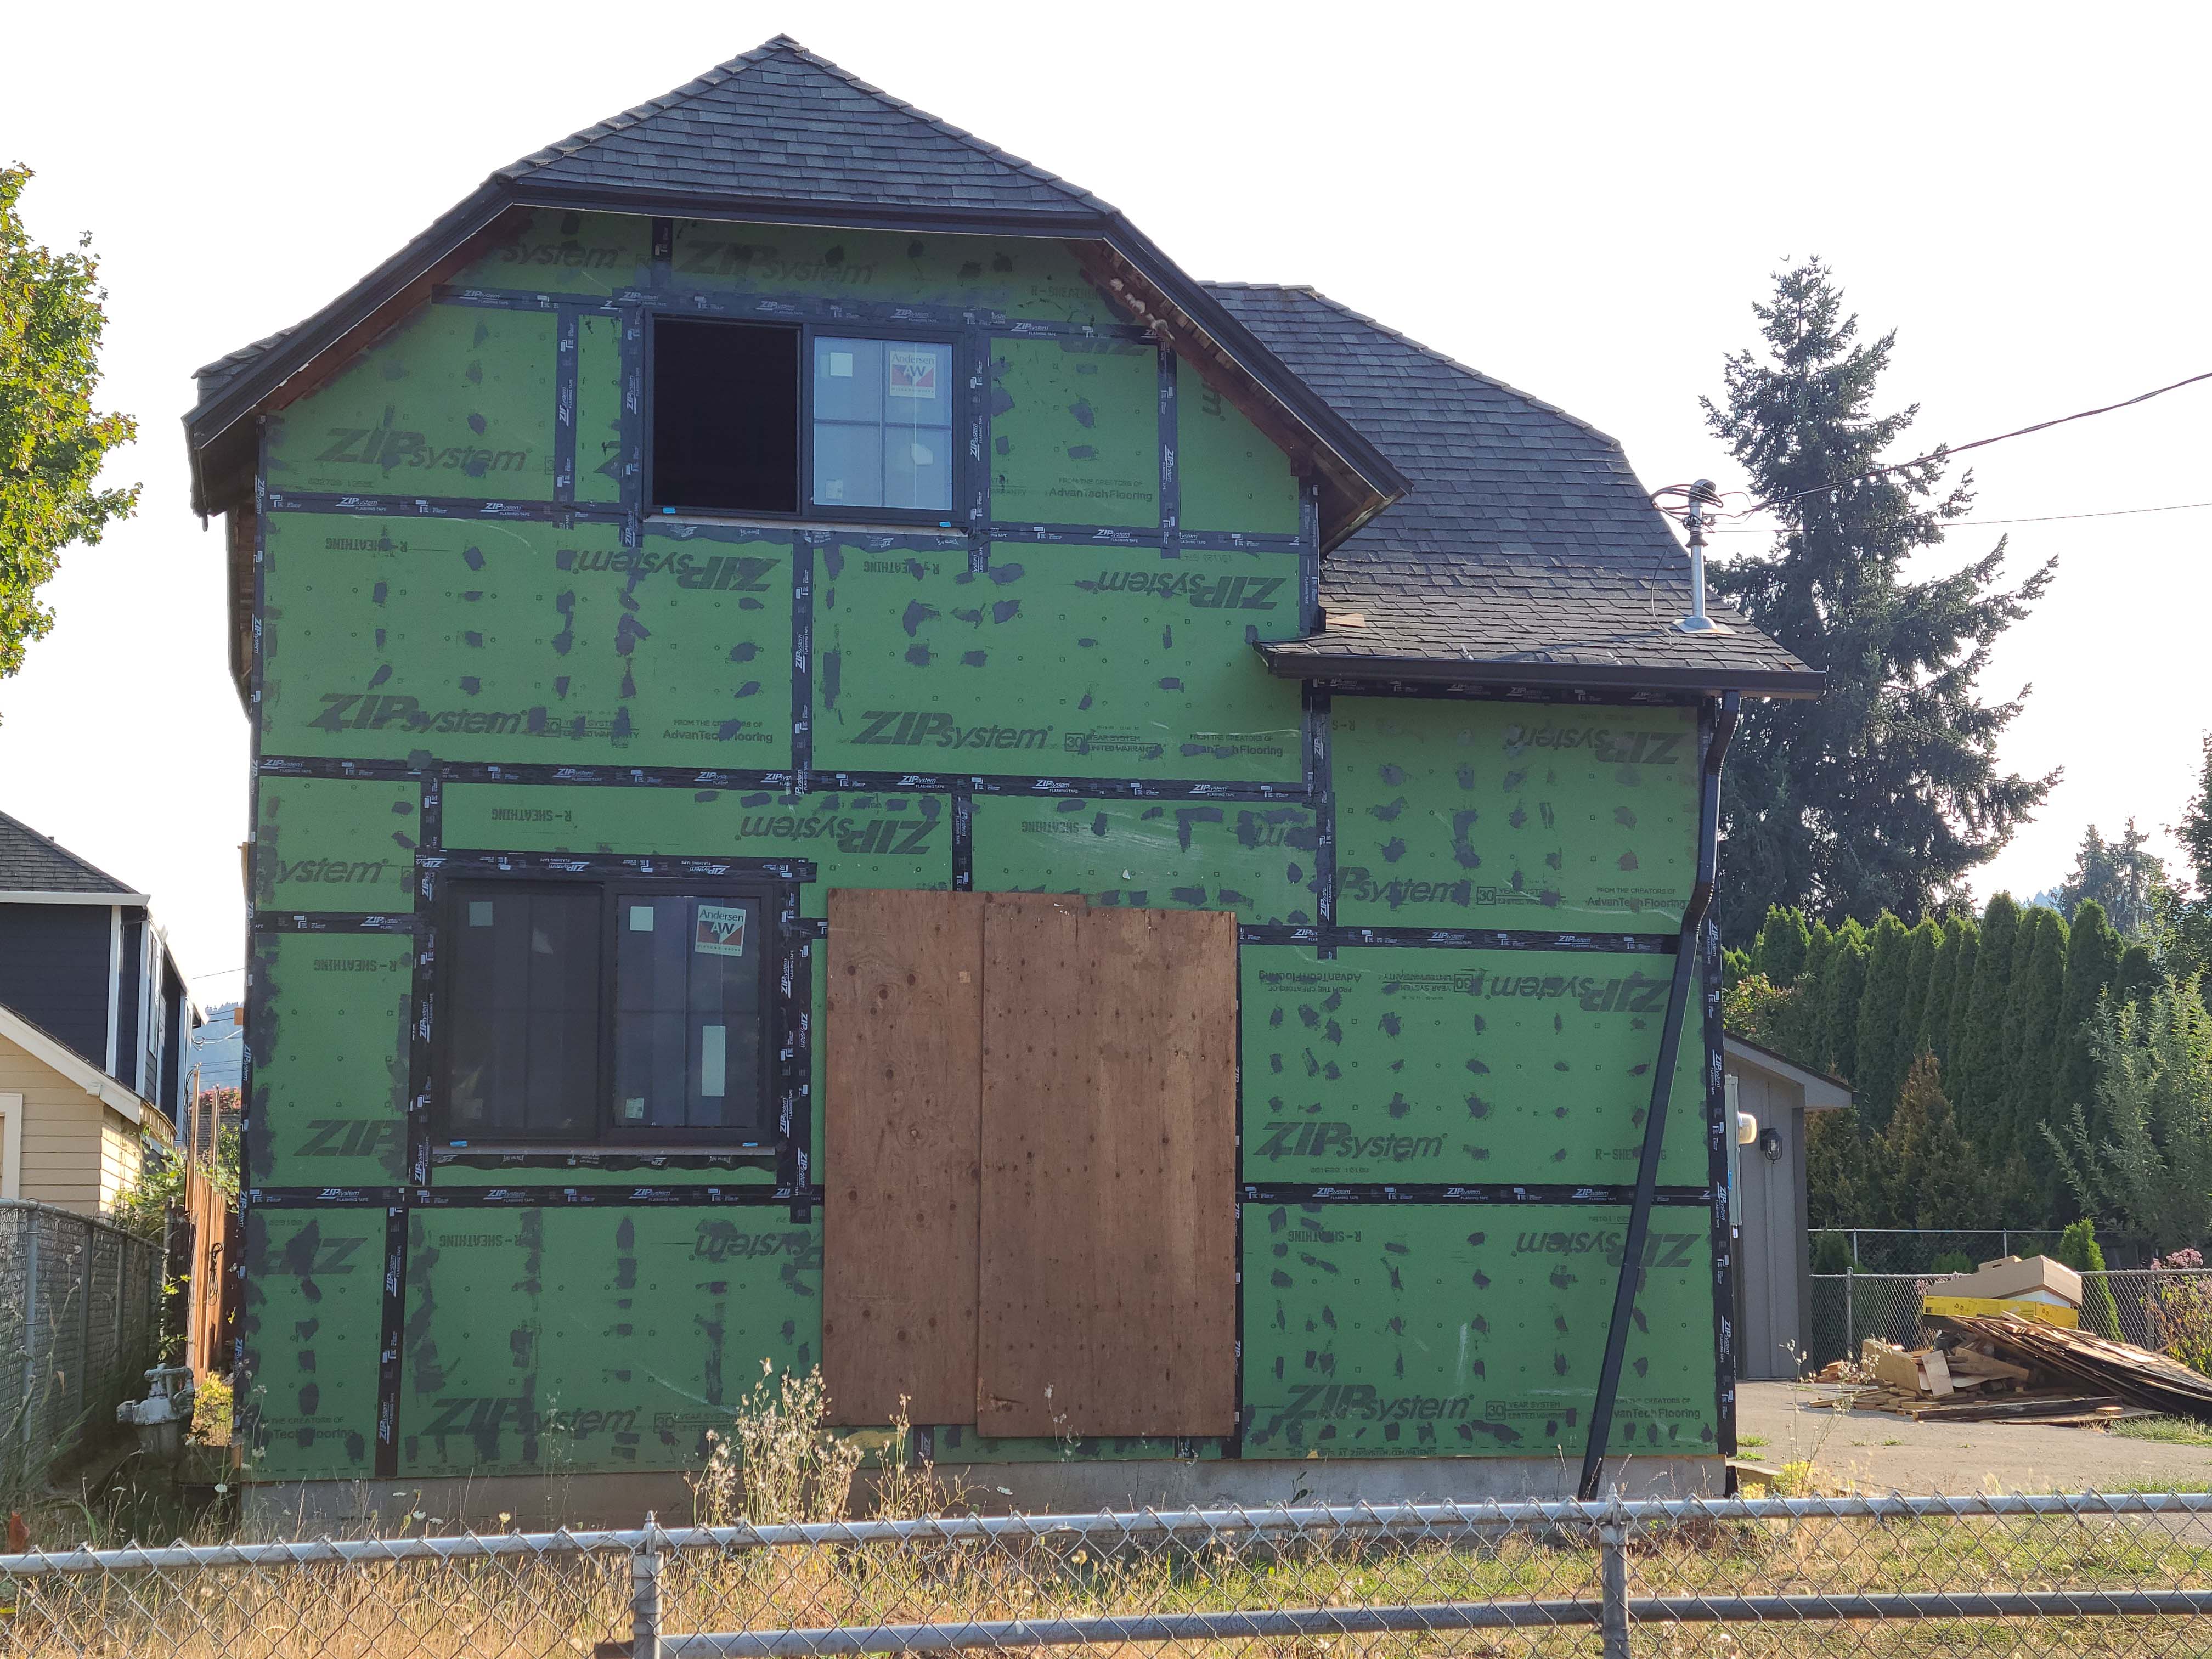
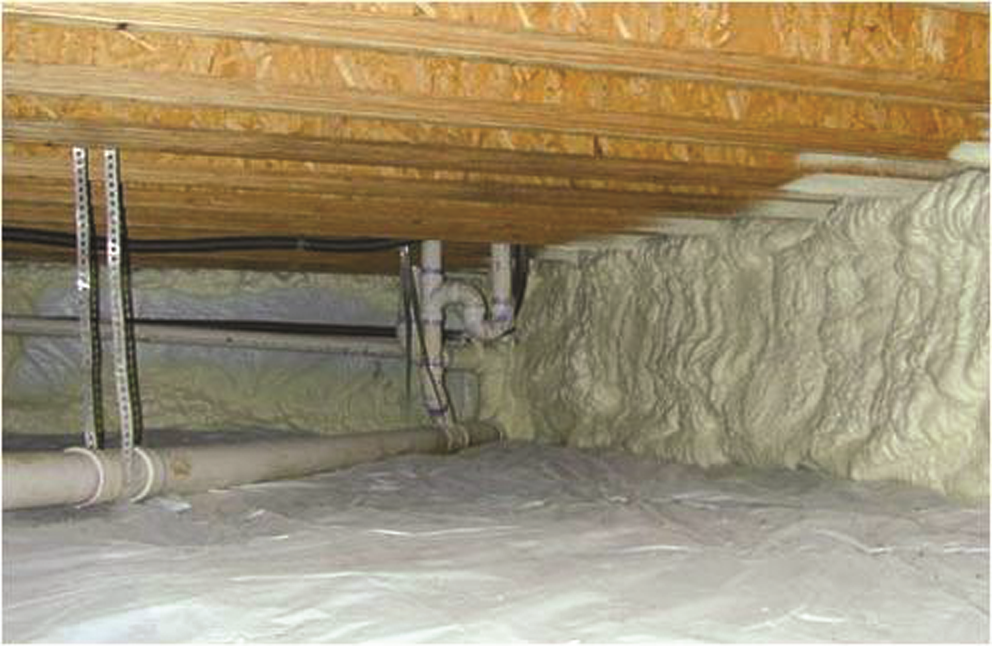
Right - Spray foam covers the walls and a sealed vapor retarder lines the floor of this unvented crawl space.
Image
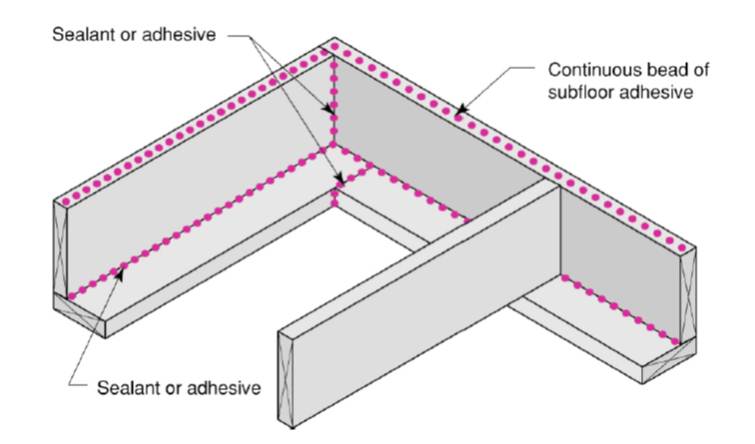
Right - Spray foam fills the walls and rim joists to air seal and insulate while caulk seals the framing joints.
Image
Right - Spray foam insulates and air-seals the stone walls of this unvented crawlspace.
Image
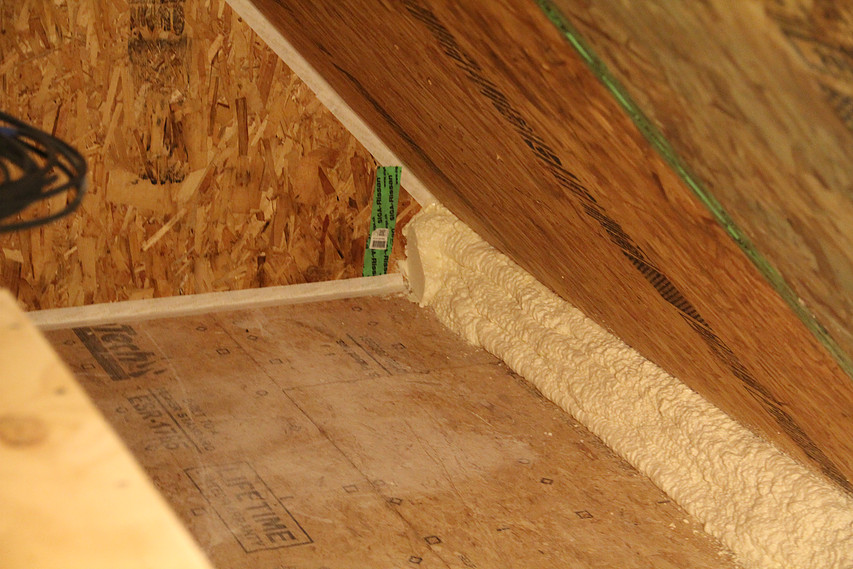
Right - Spray foam insulates the attic eave between the attic floor and the SIP roof panel.
Image
Right - Spray foam insulation air-seals the ceiling-to-drywall seams at the wall top plate.
Image
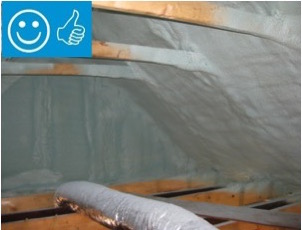
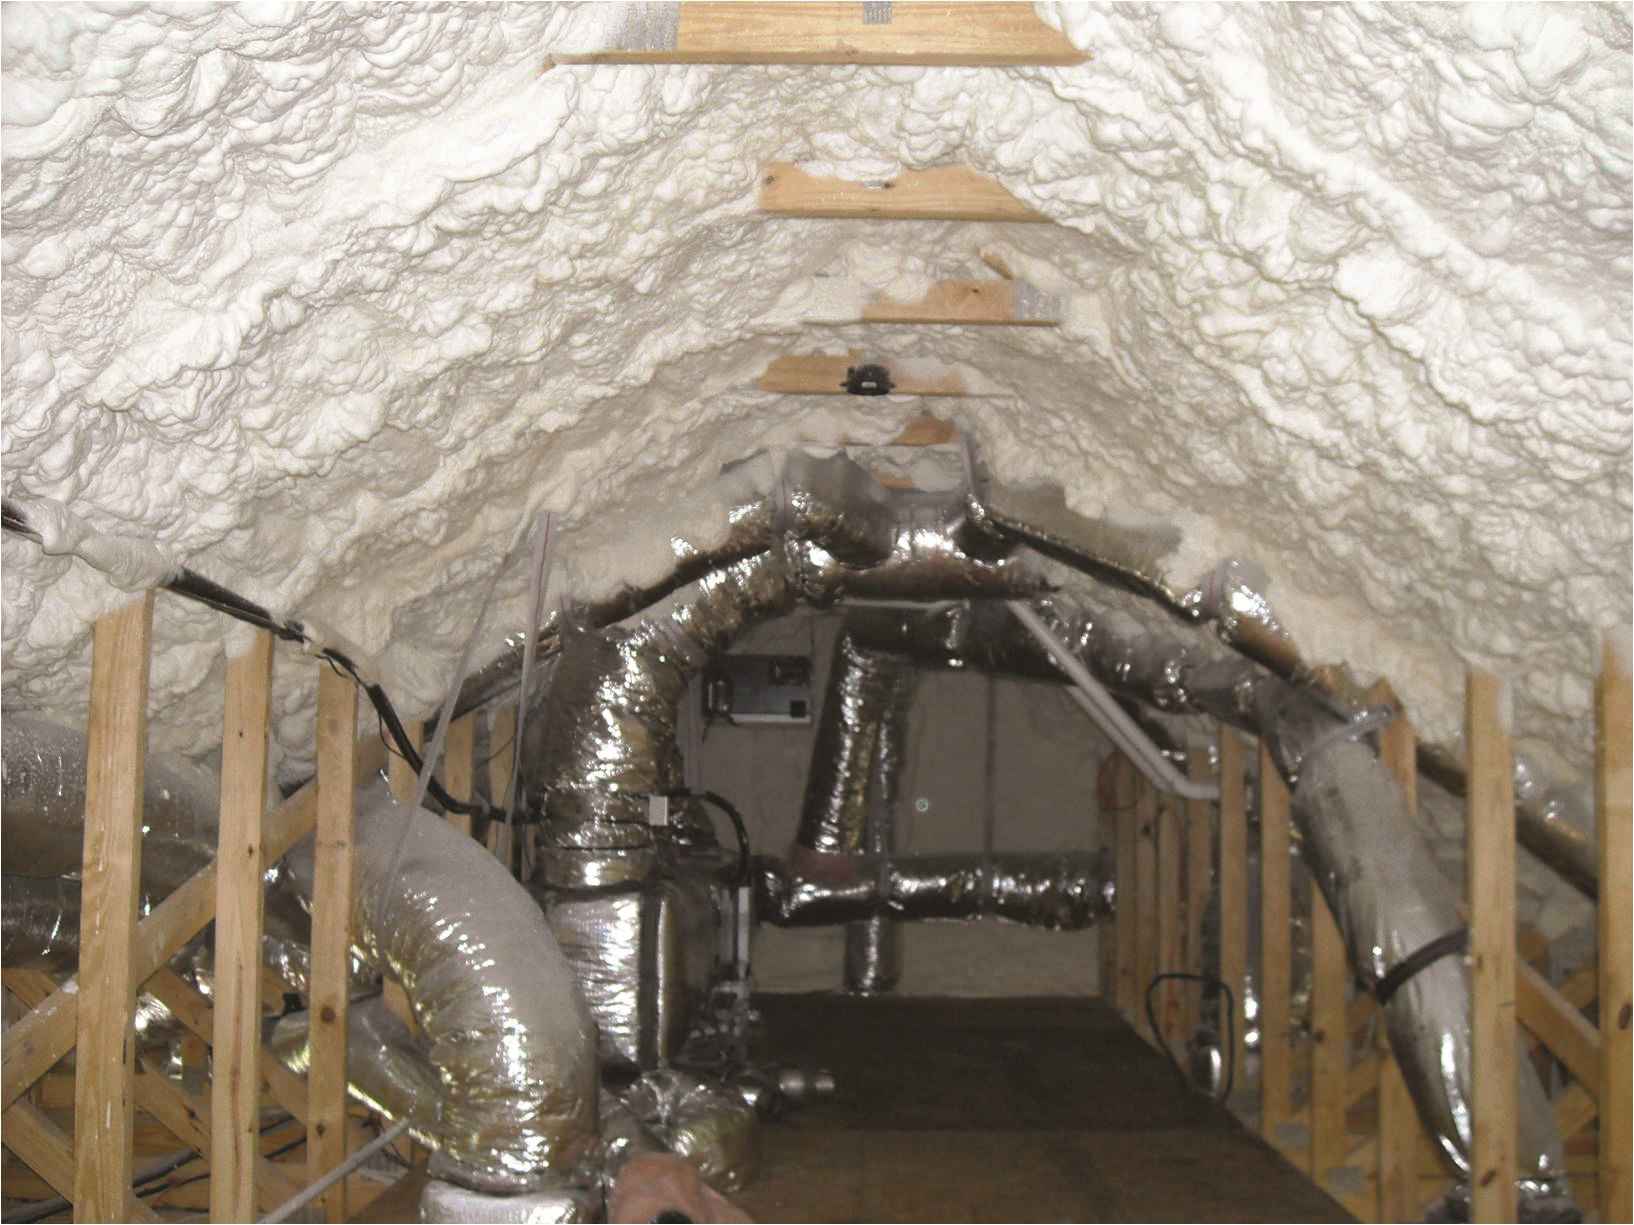
Right - Spray foam insulation has been sprayed onto the underside of the sloped roof and the gable end wall to provide a sealed, insulated attic for housing the HVAC ducts
Image
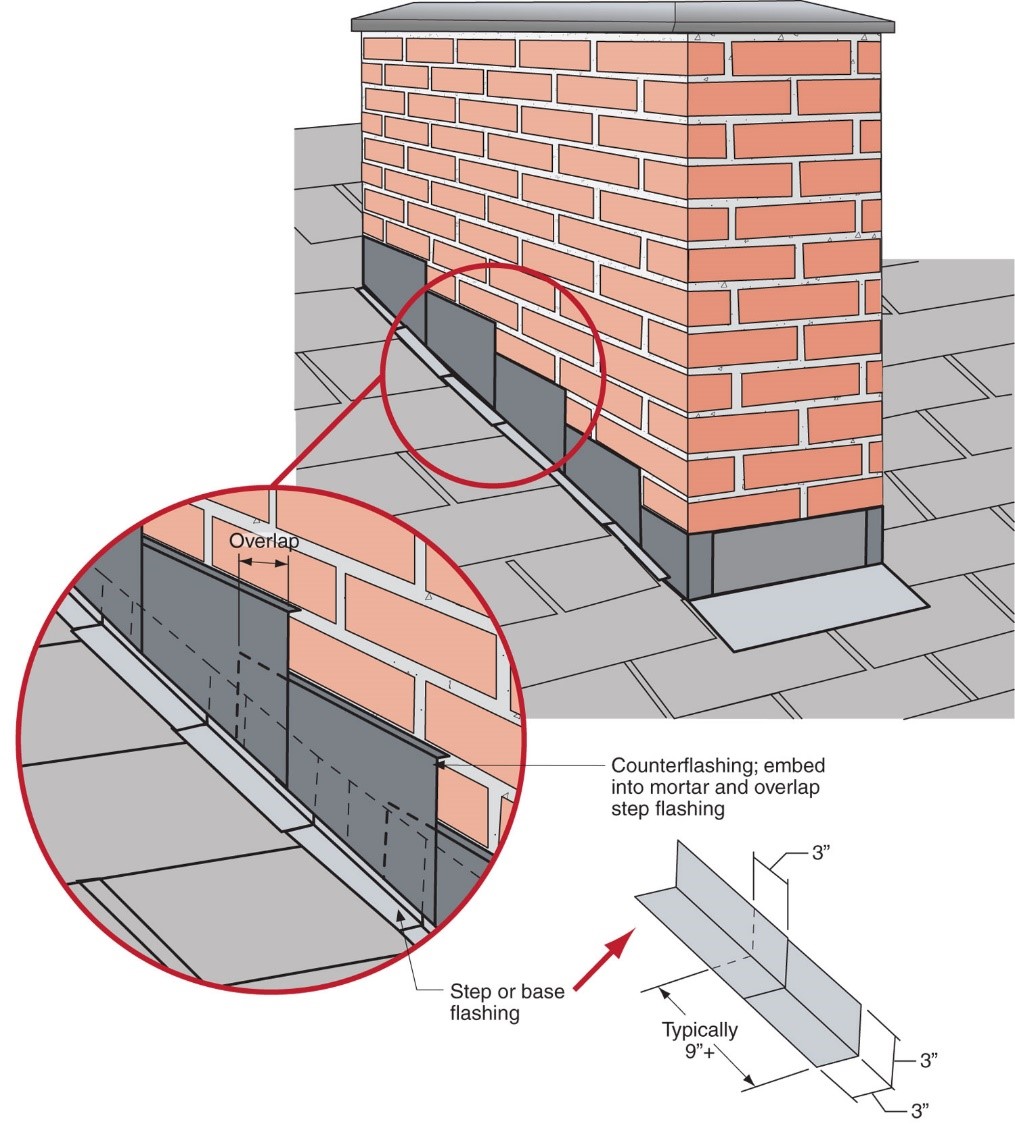
Right - Step flashing along a chimney is integrated in a layered manner with asphalt shingle roofing and topped with counterflashing that is embedded into brick mortar joint above
Image
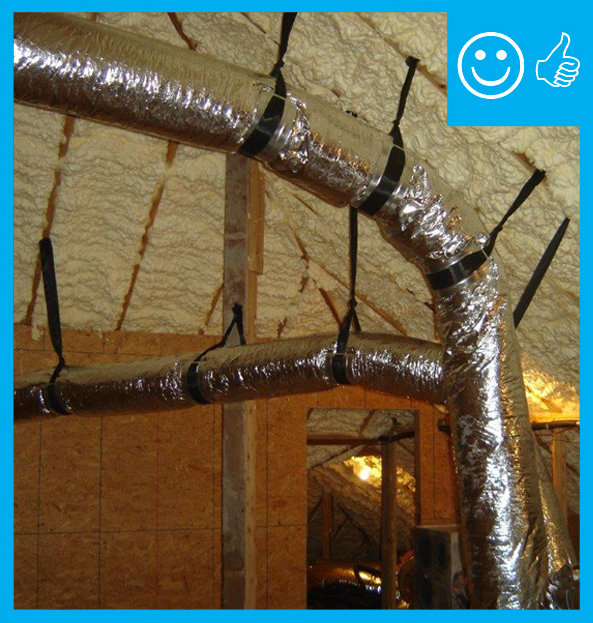
Right - Straps are spaced close enough together to provide adequate support of the flex duct
Image
Image
Right - Tape flashing keeps moisture out around and below the window; extra tape reinforces the corners to prevent tearing of the house wrap and to keep water out of this critical juncture.
Image

Right - Technicians use adhesive when installing the vapor barrier along the walls of this crawlspace.
Image
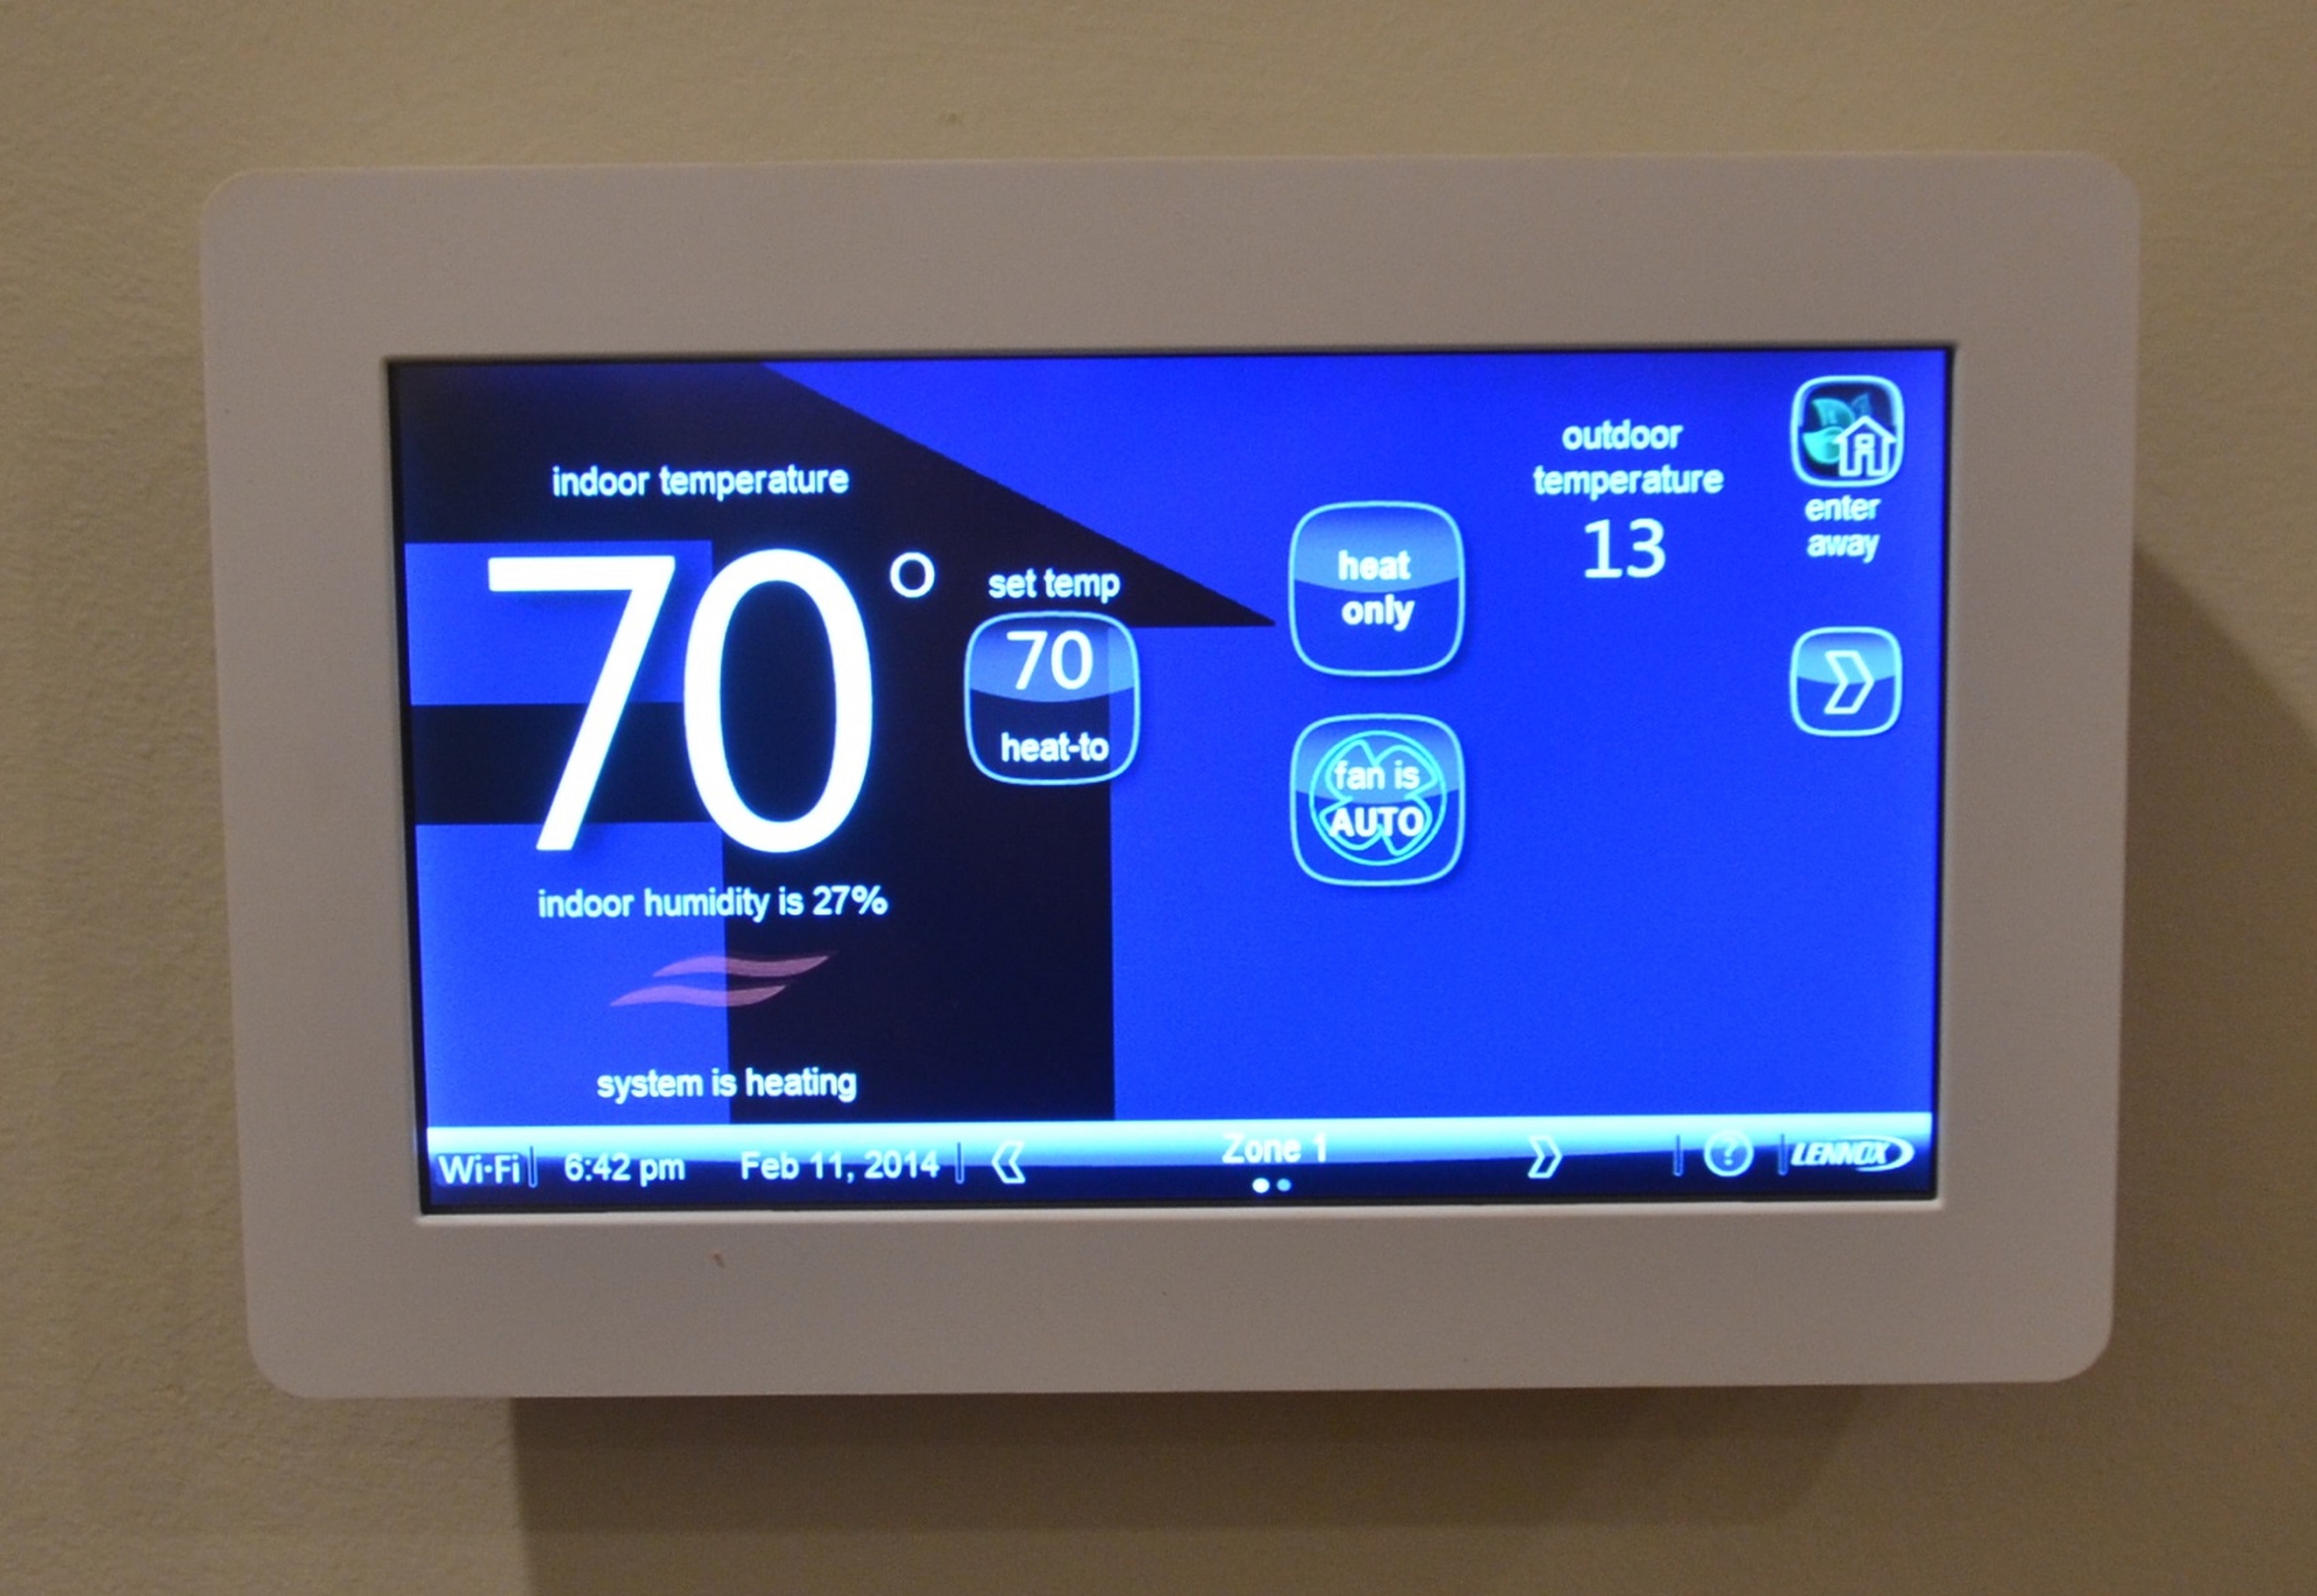
Right - The advanced controls in a programmable thermostat can be used to improve the efficiency of the home’s HVAC system.
Image
Right - The air control membrane installed over the roof sheathing is continuous. It connects to the air control of the wall around the entire perimeter without interruption. The roof overhangs have been cut off to make this connection continuous
Image
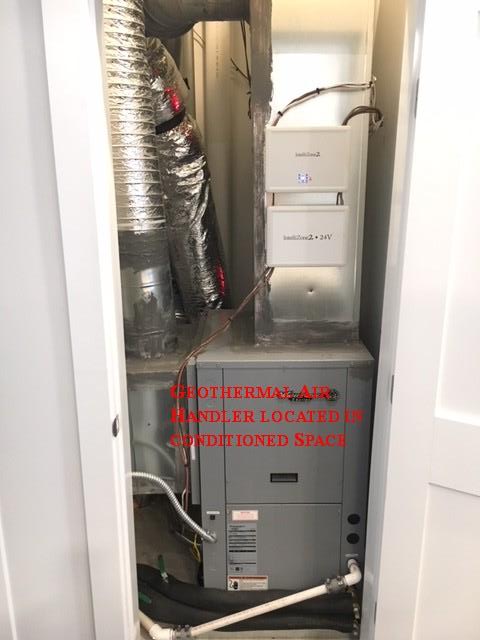
Right - The air handler for this geothermal heat pump is located in conditioned space.
Image
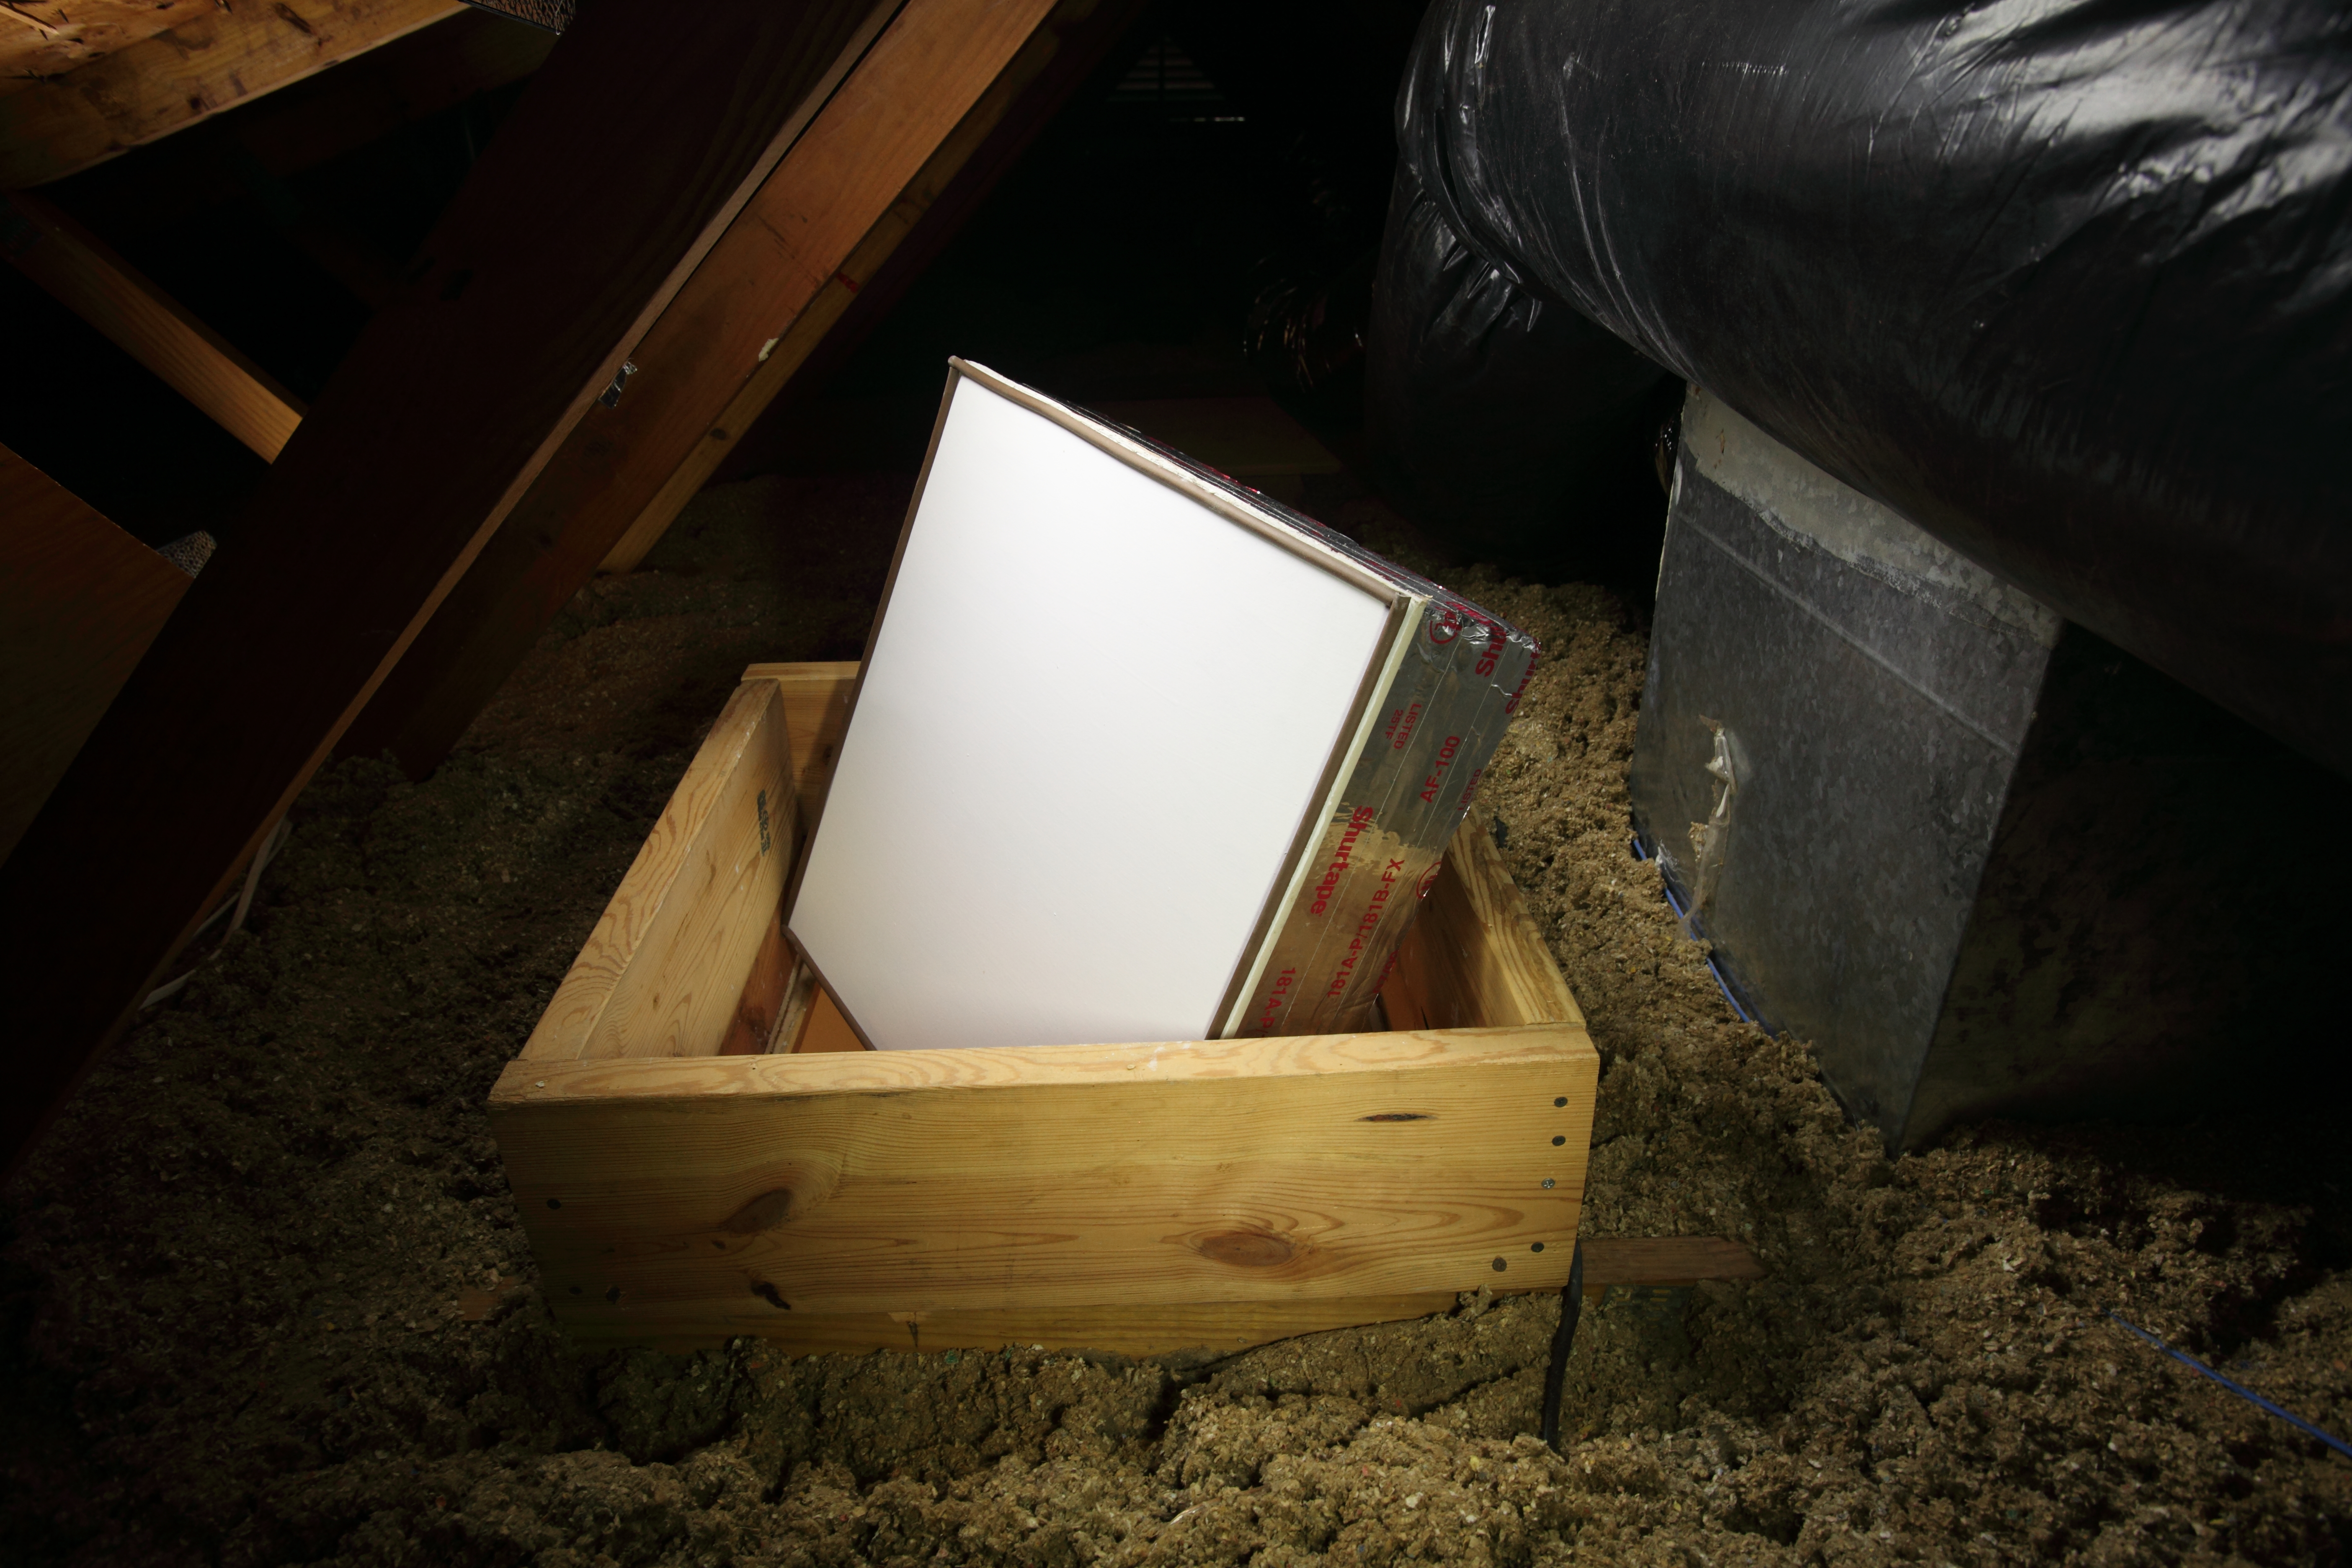
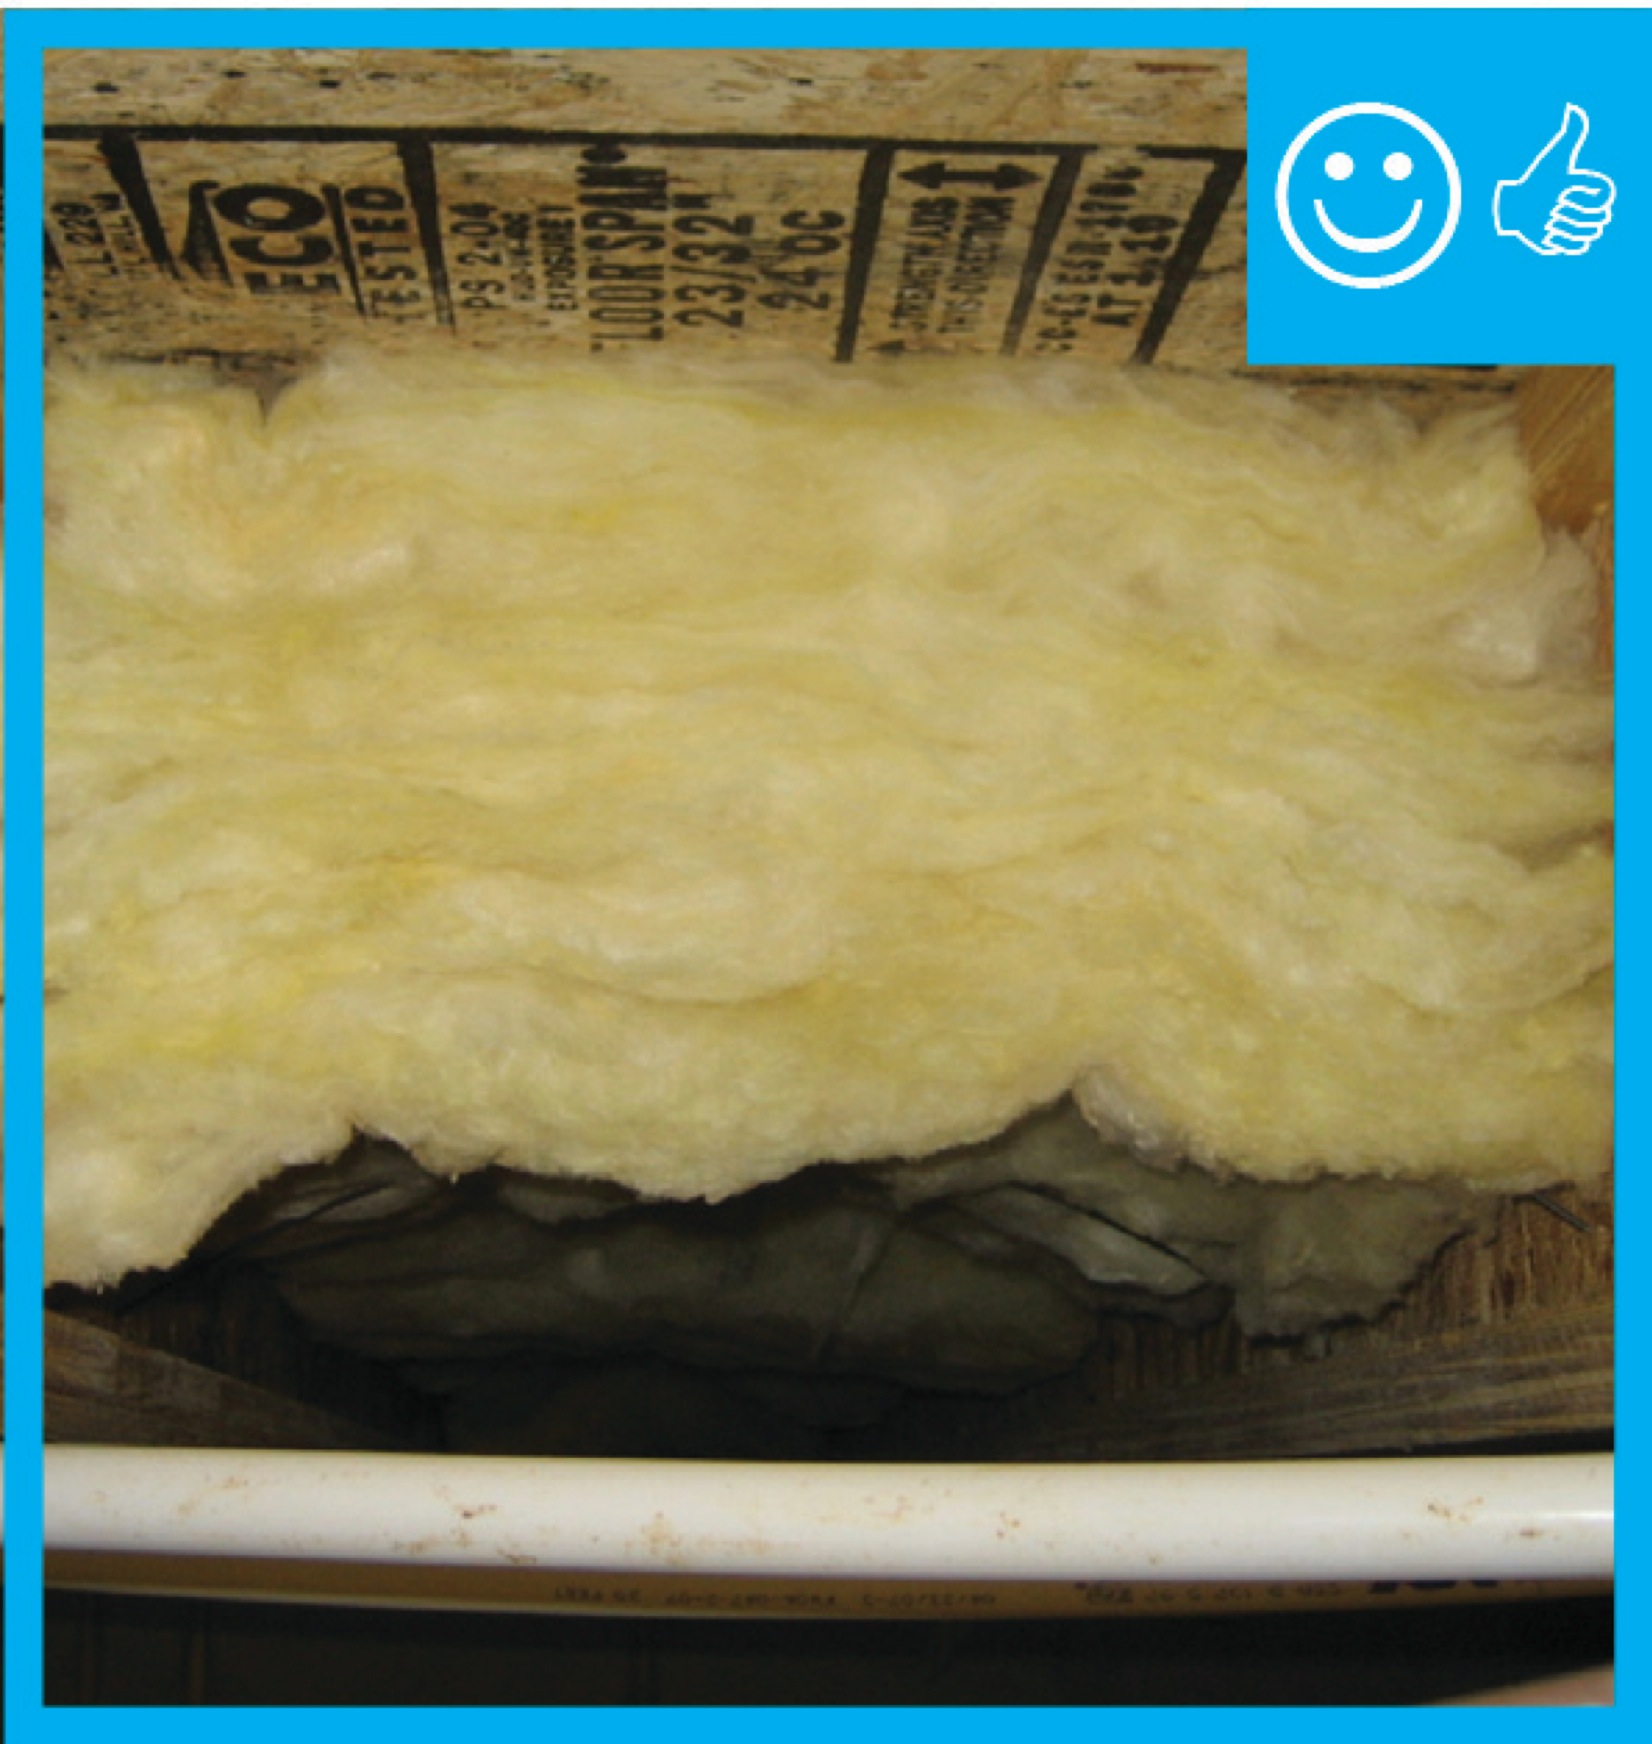
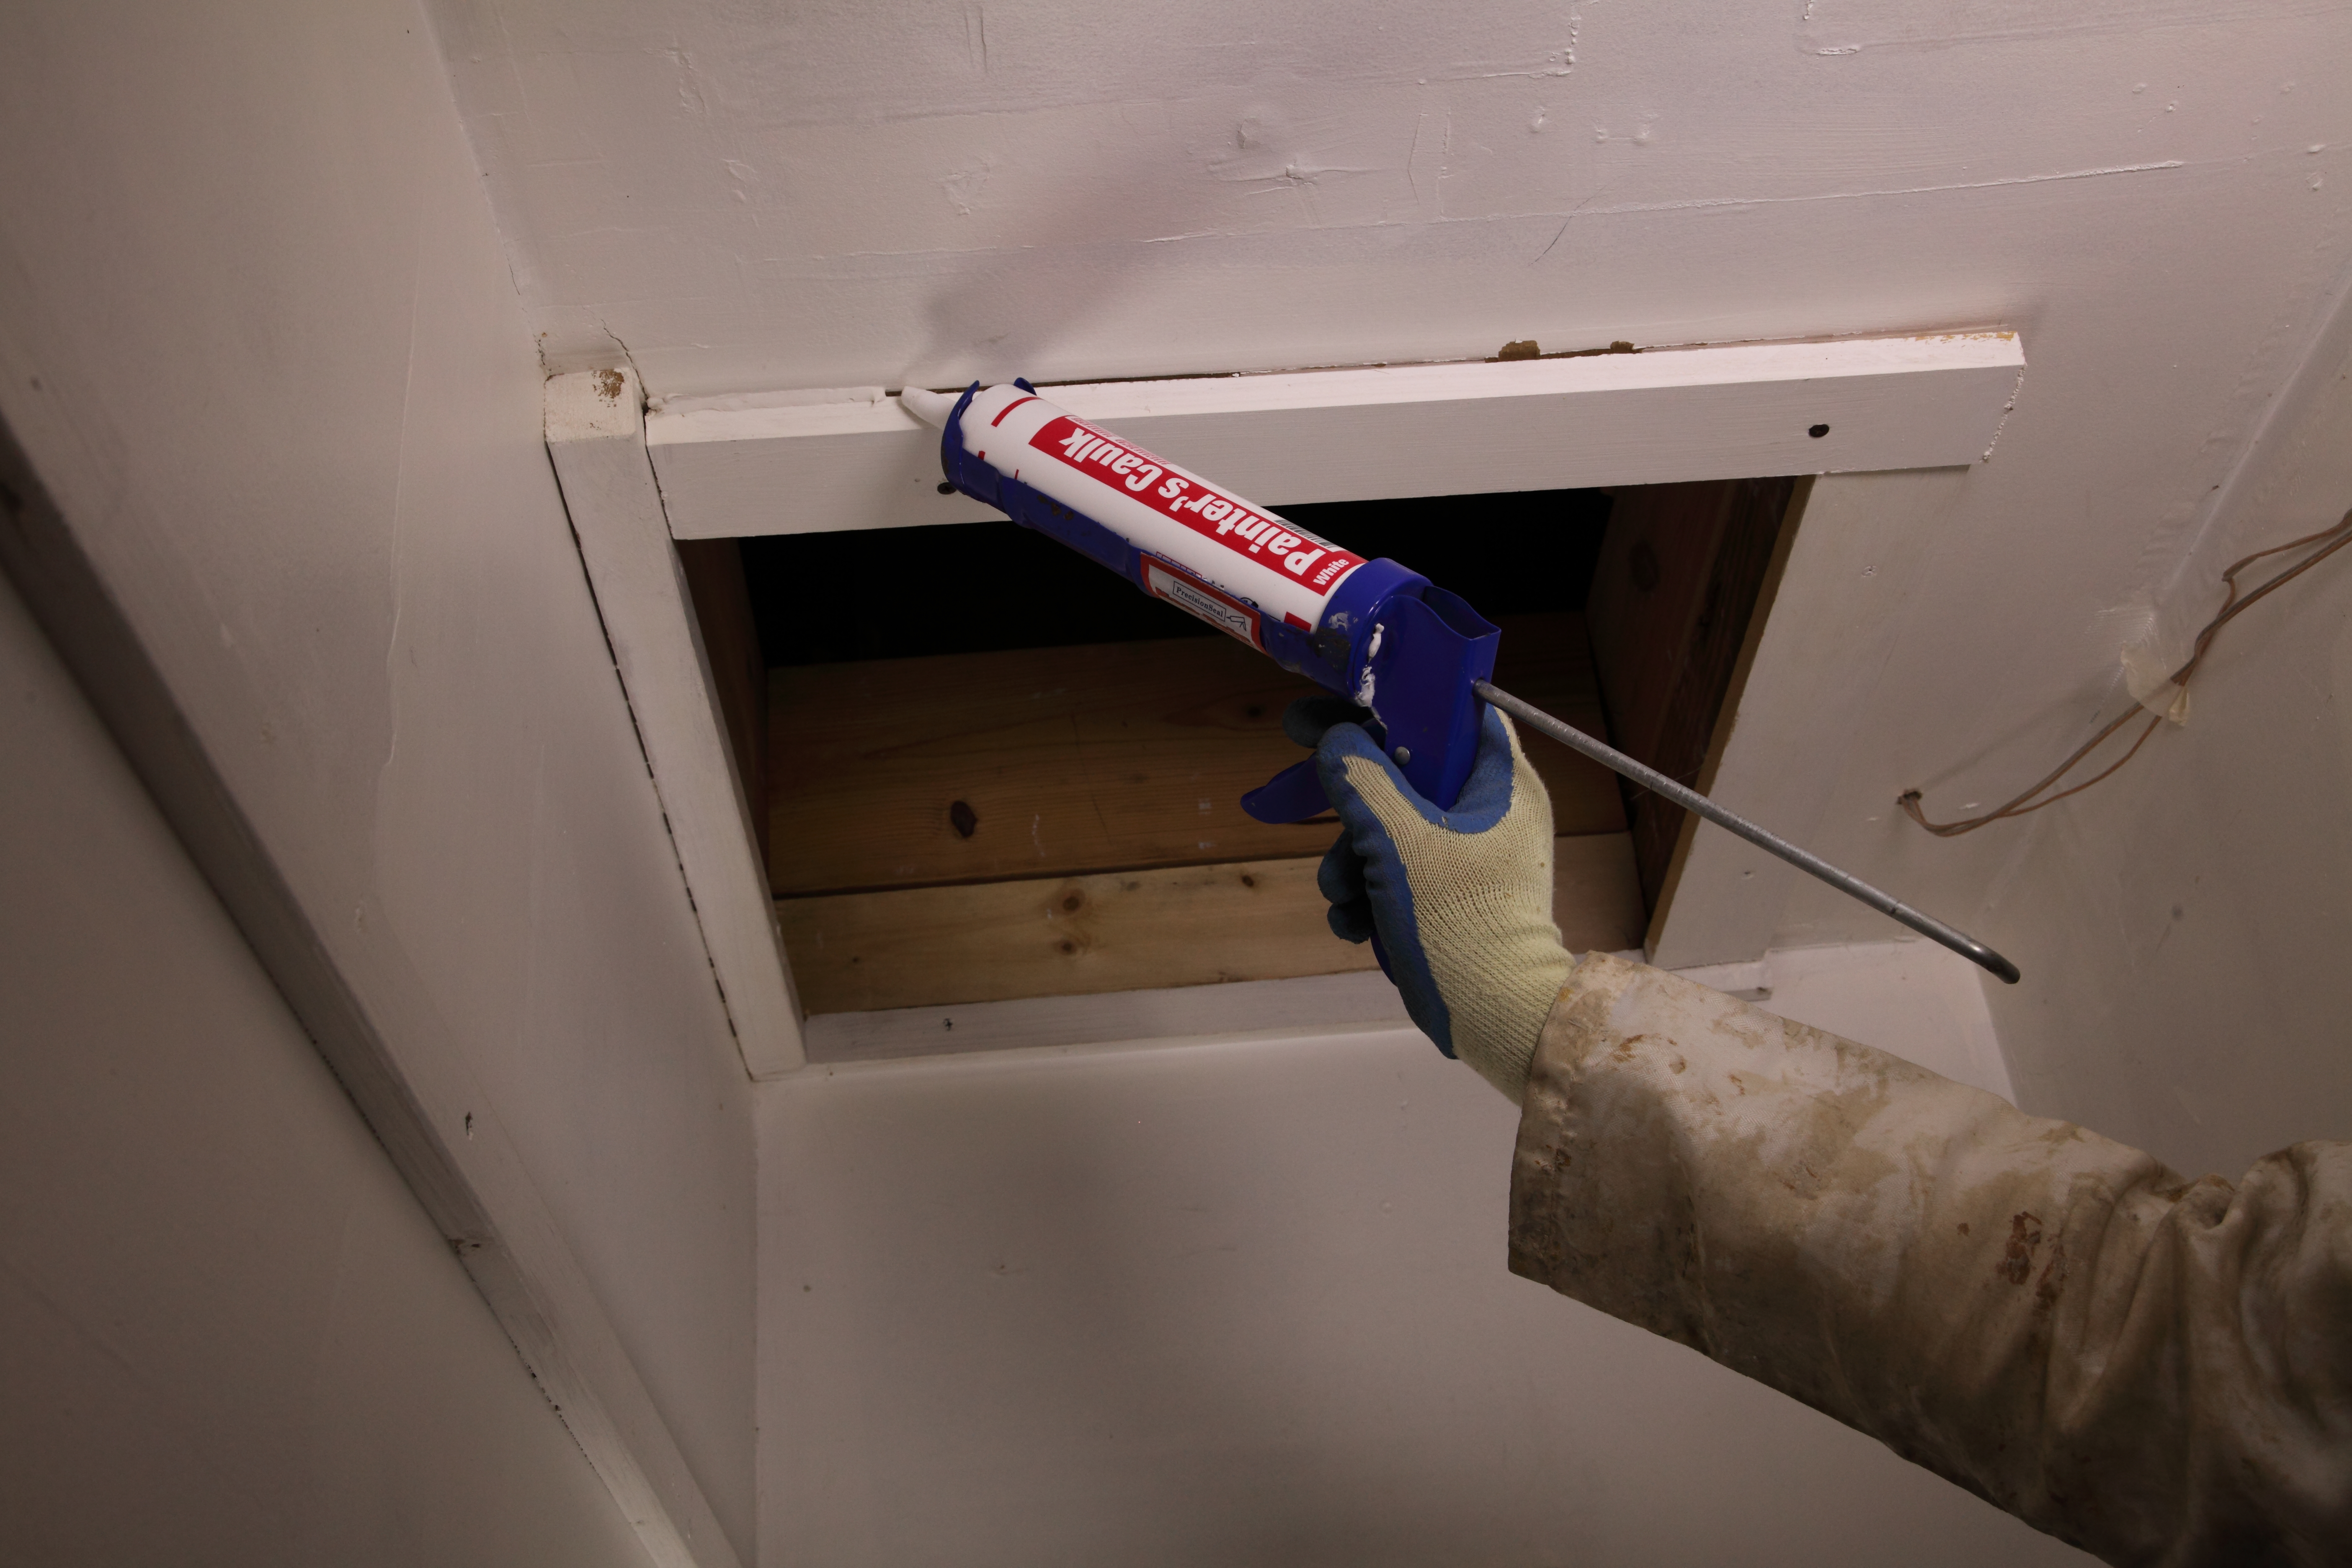
Right - The attic access panel is insulated and weather stripped and a dam is built to hold back the blown attic floor insulation
Image
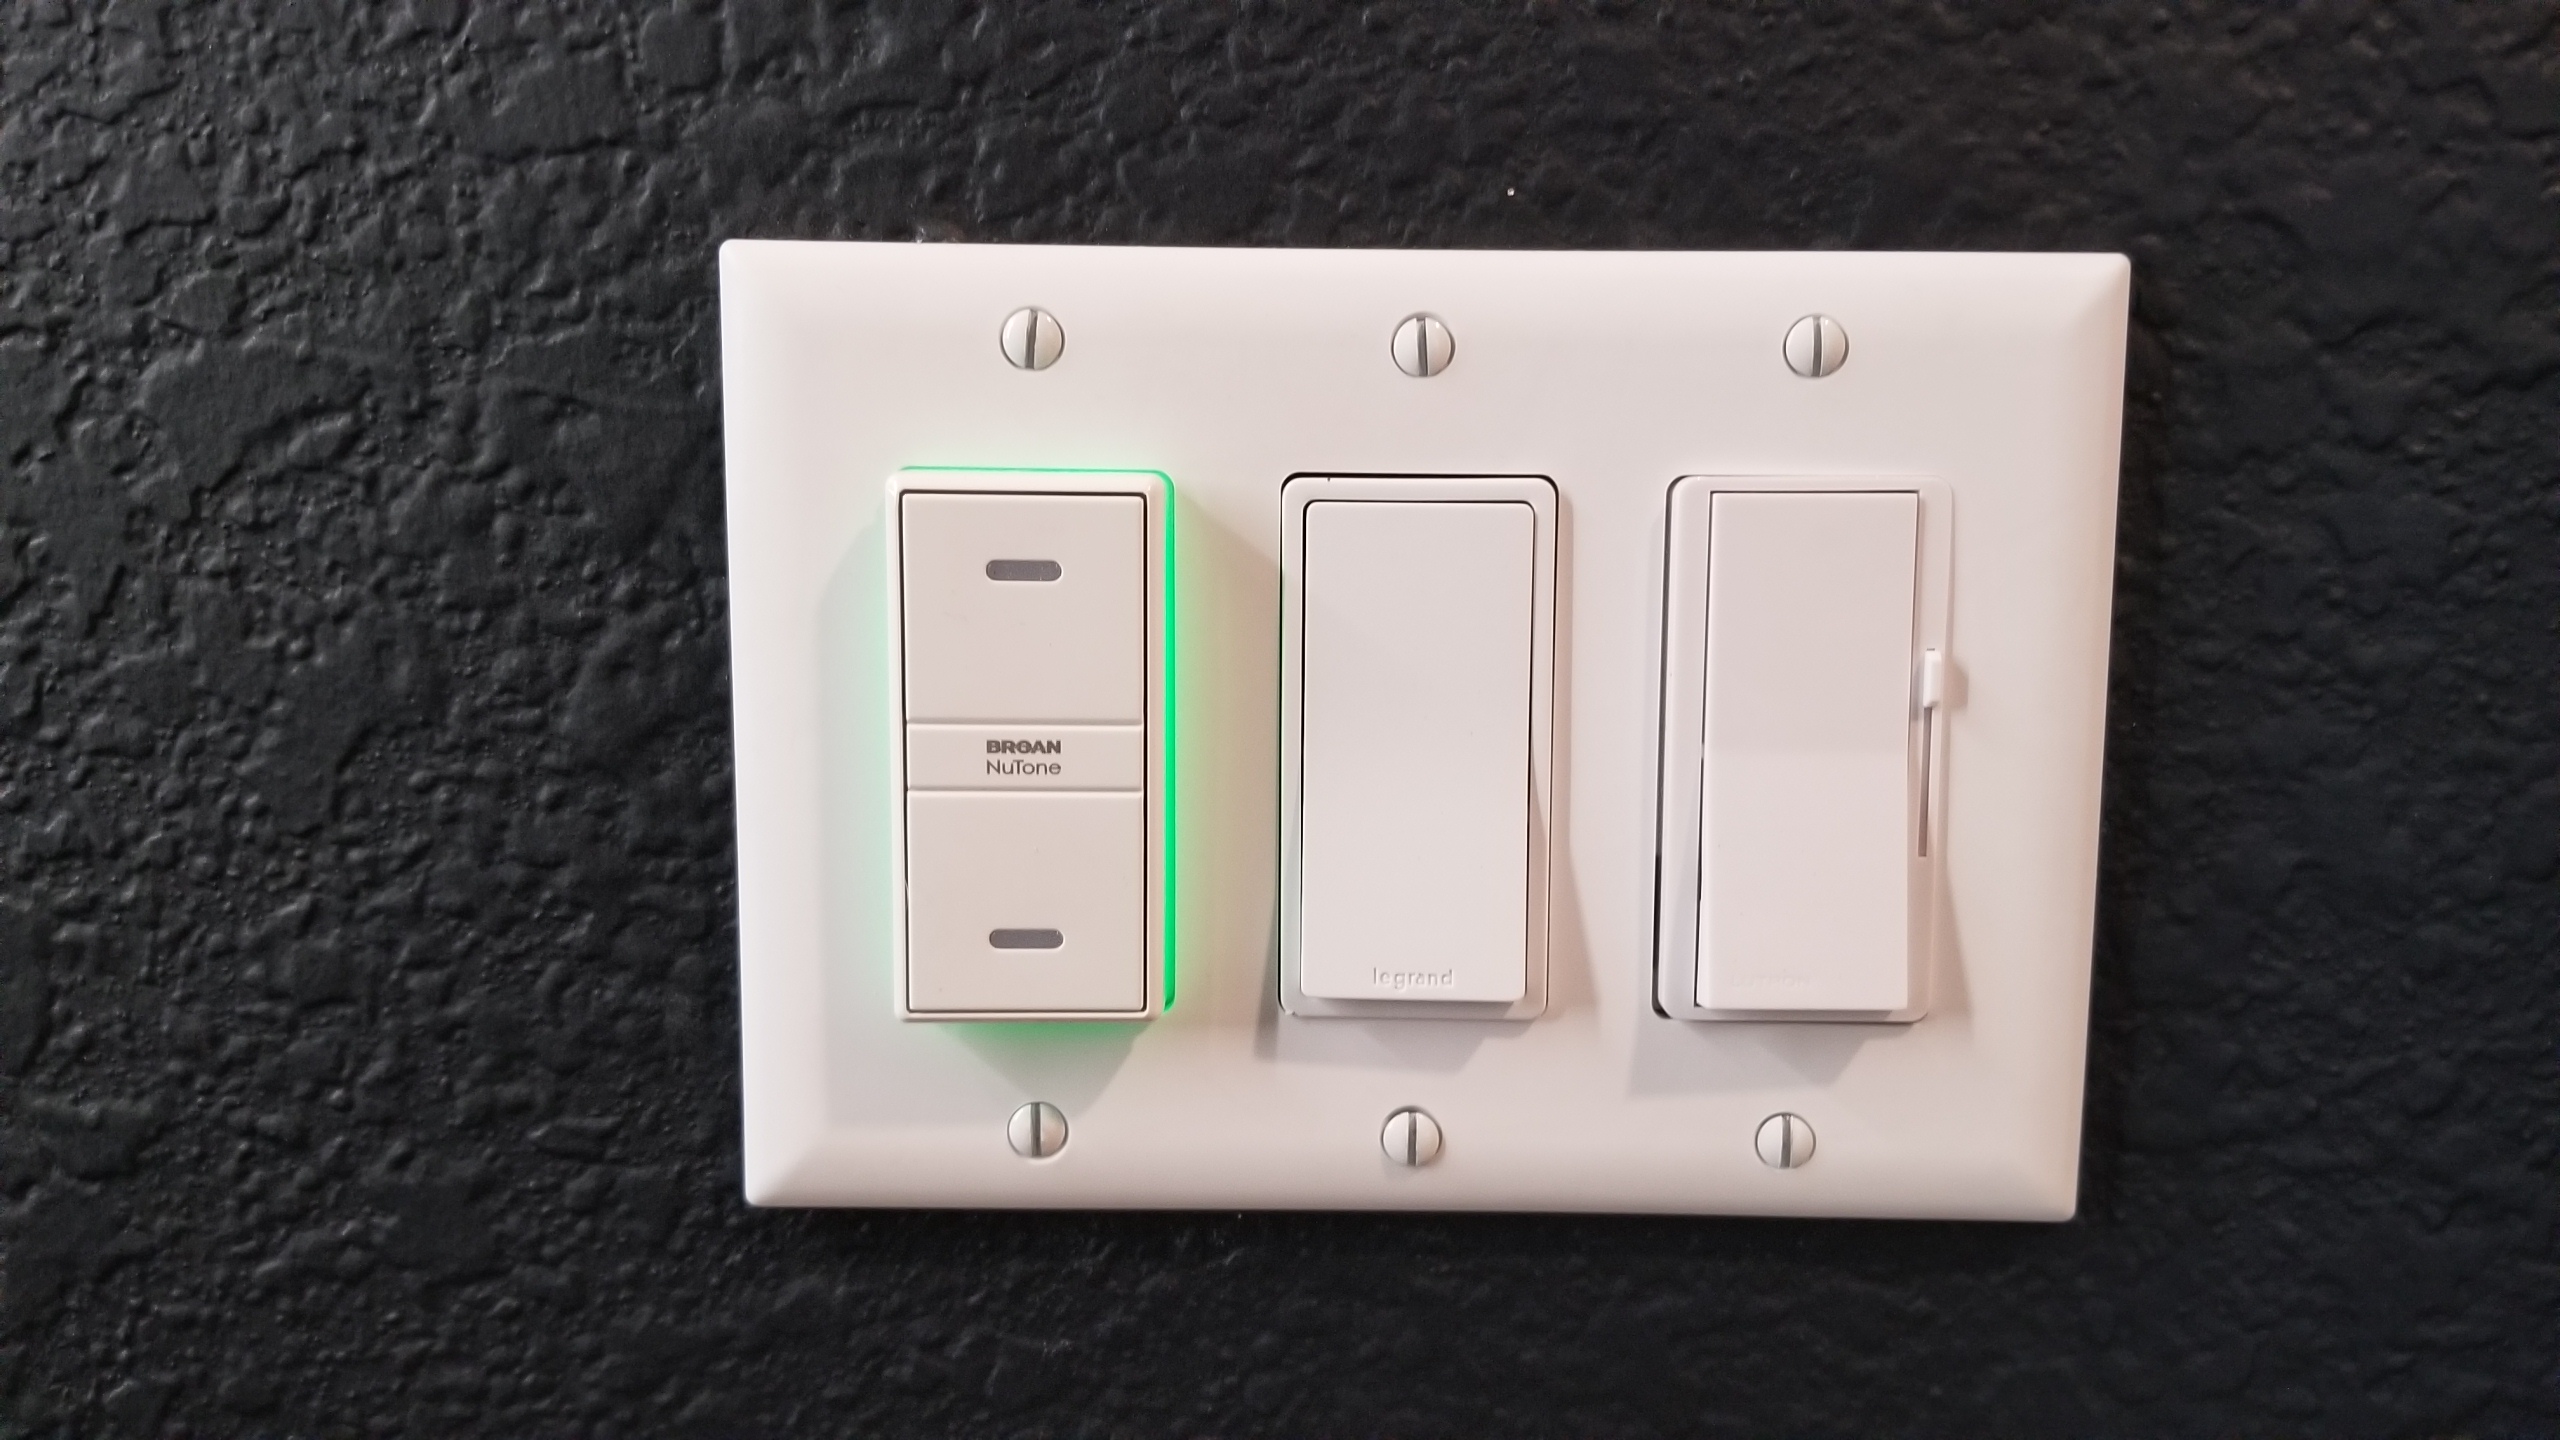
Right - The automated ventilation system has a sensor built in switch that can detect indoor air pollution; if it senses a rise in humidity, VOCs, smoke, carbon dioxide, or small particulates, the system will turn on the nearest fan to eliminate pollution
Image
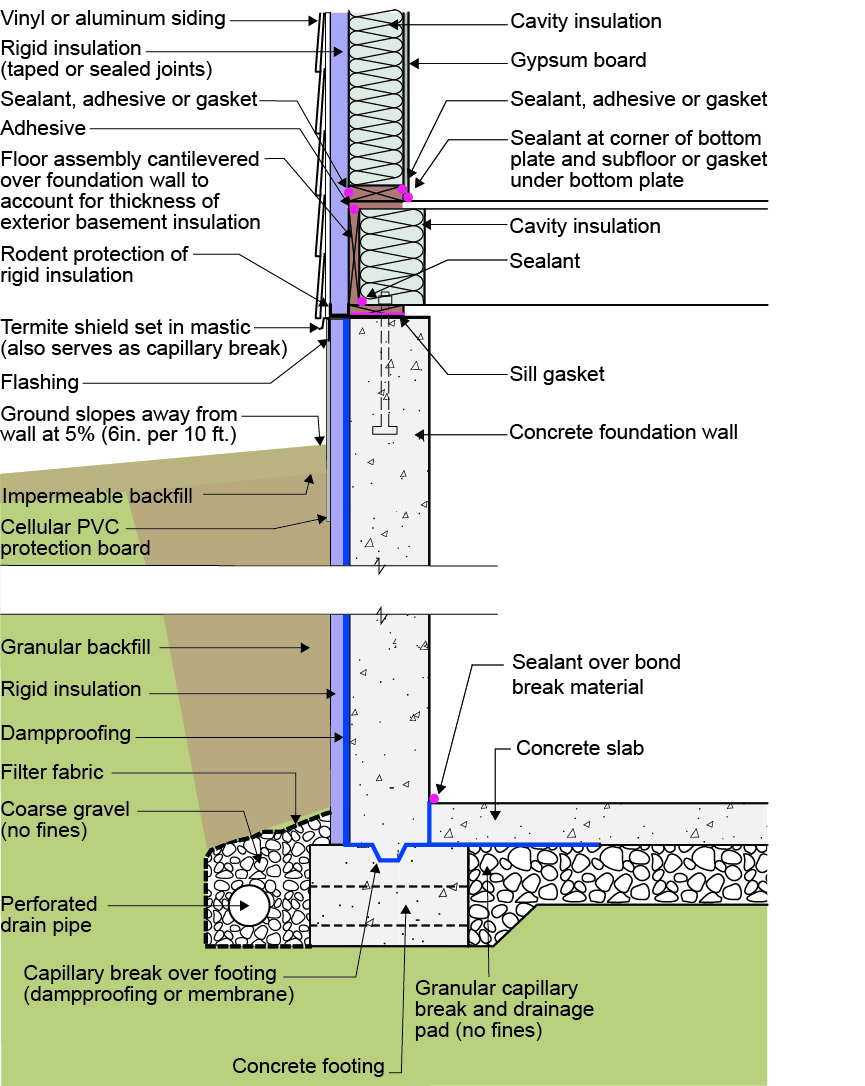
Right - The basement foundation is insulated on the exterior and termite shield extends out past the top of the insulation.
Image

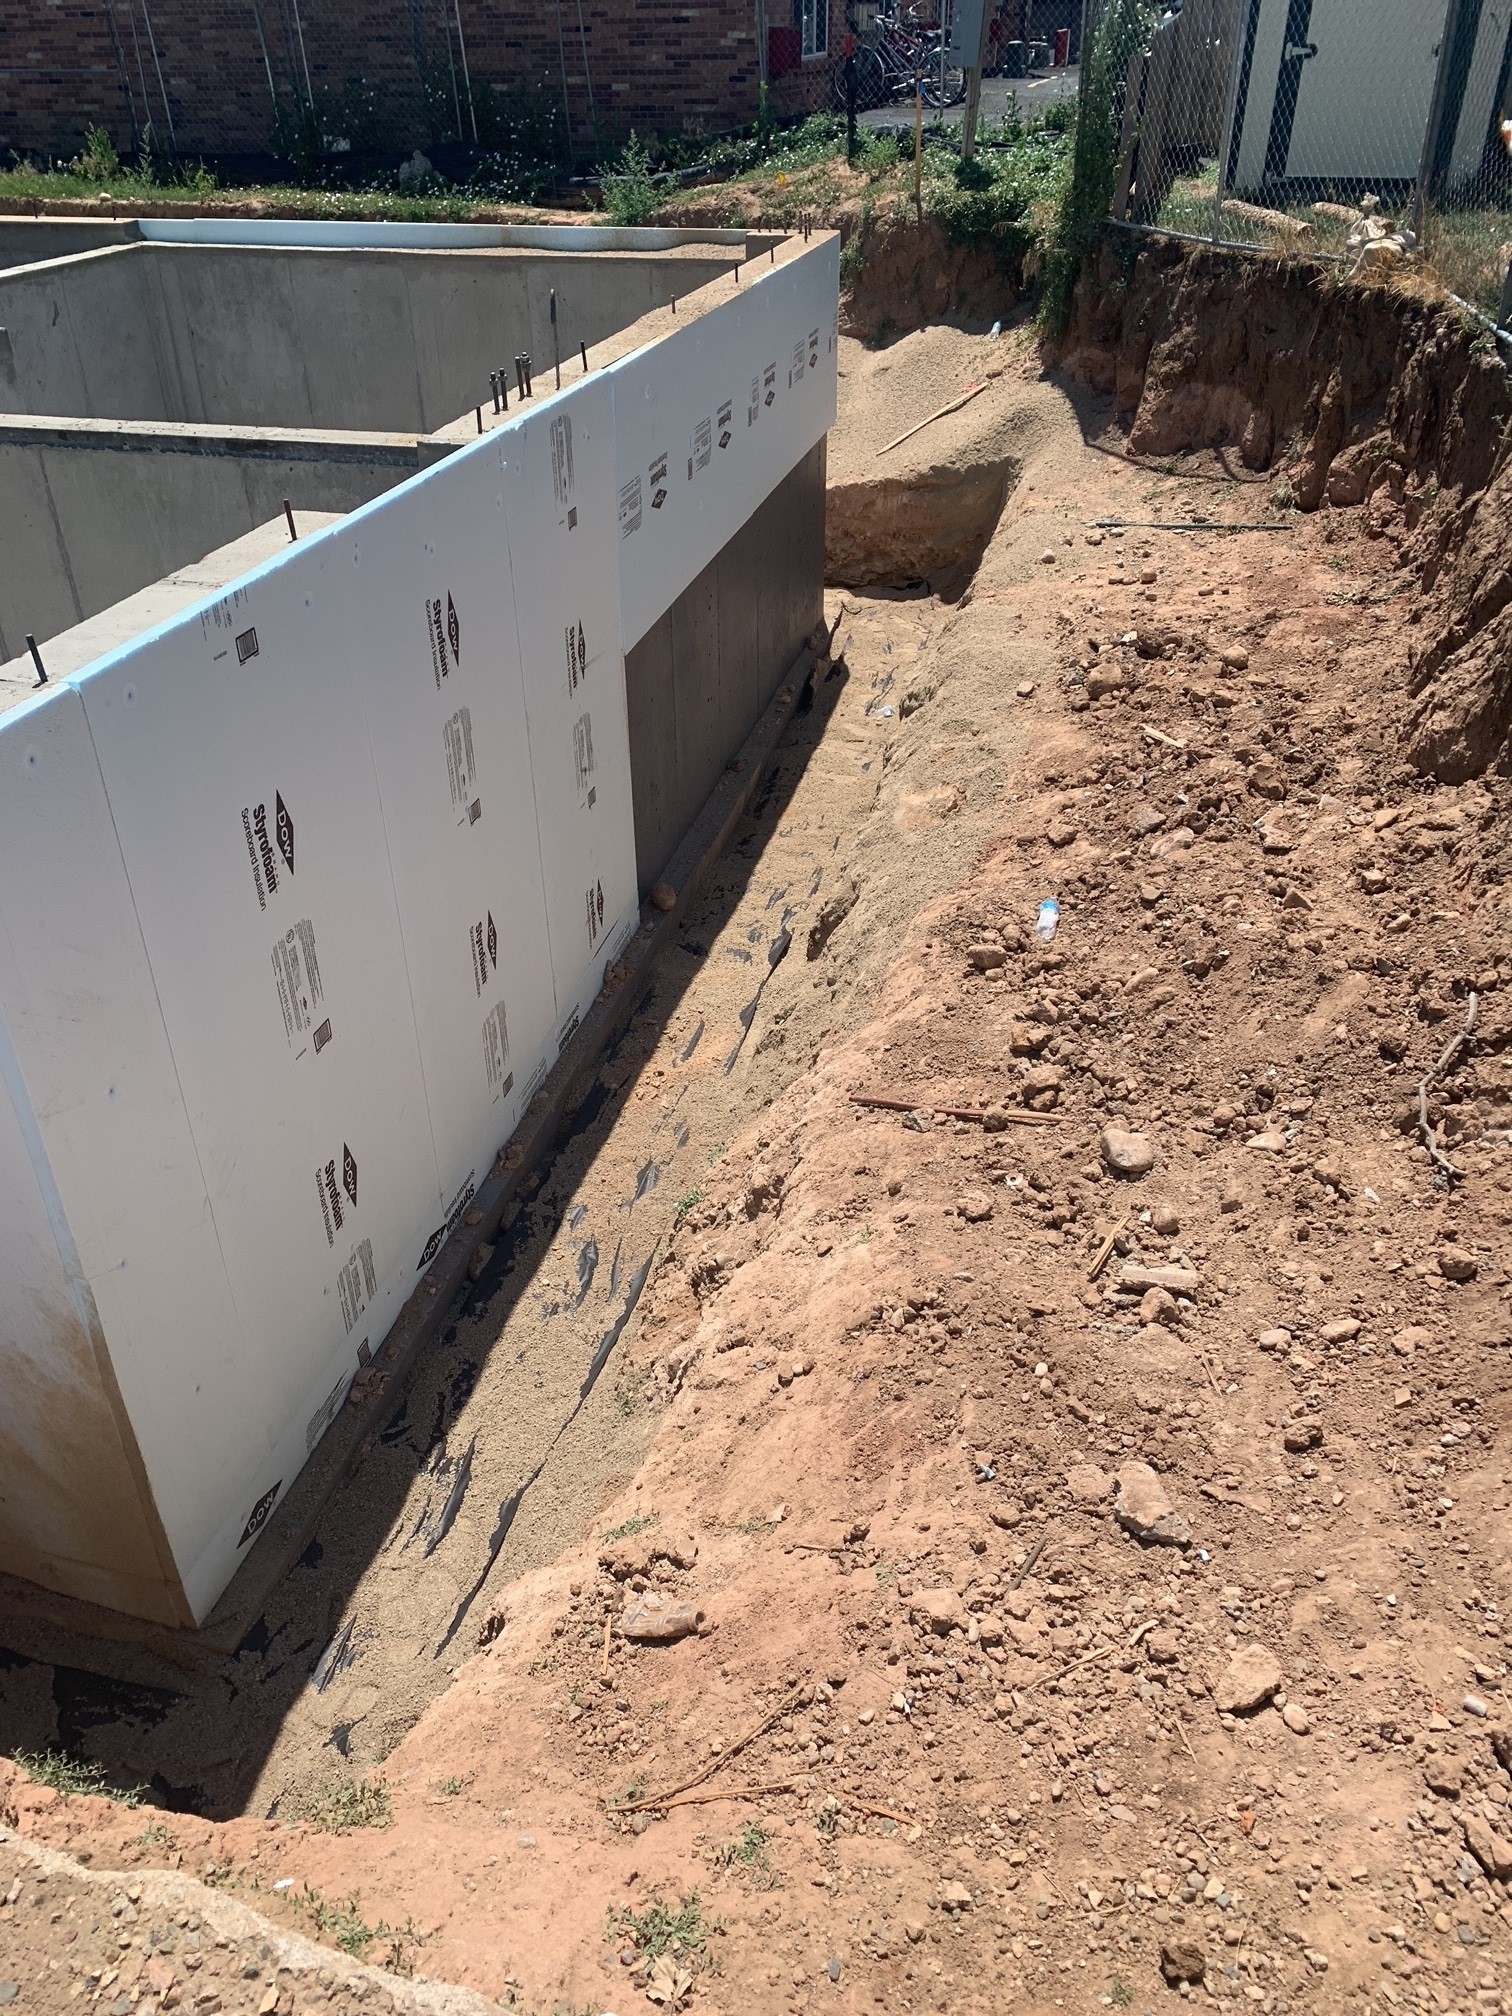
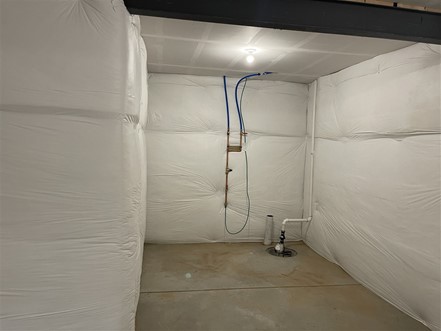
Right - The basement walls are wrapped with 3 inches of XPS rigid foam that will be taped at the seams then covered with a dimpled plastic water barrier.
Image
Right - The blanket fiberglass insulation is installed over a continuous layer of rigid foam insulation; the fiberglass is covered with a vapor retarder that is tape sealed at the seams.
Image
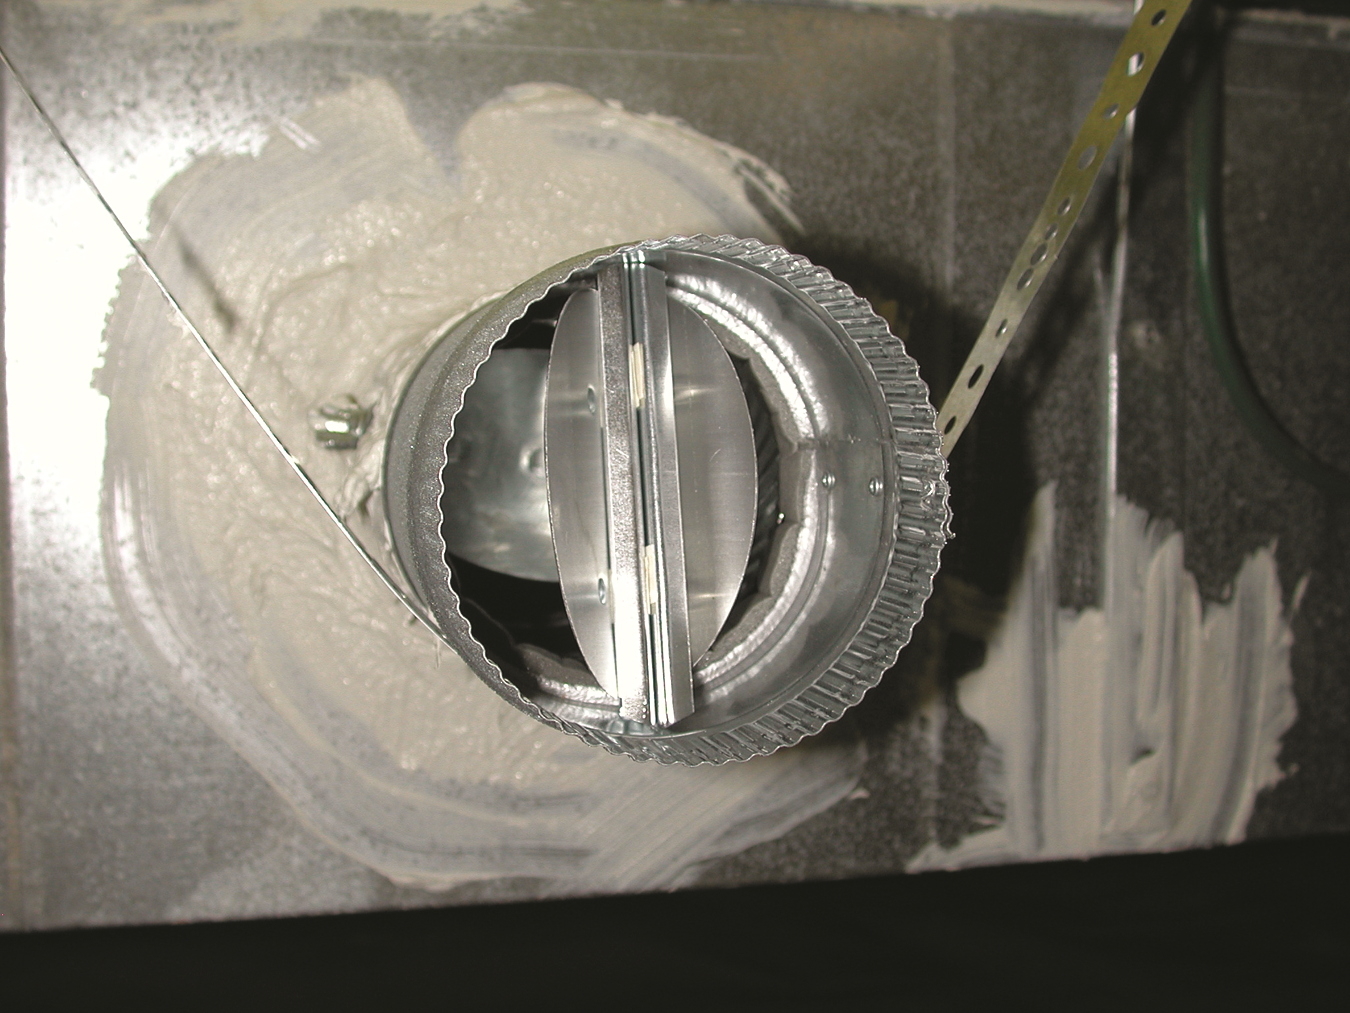
Right - The butterfly damper of this crawlspace supply register opens when the HVAC fan is running; the damper duct is sealed with mastic and supported by strapping.
Image
Right - The ceiling above the garage is air-sealed and insulated with spray foam.
Image
Right - The ceiling above the garage is insulated and air-sealed with open-cell spray foam to keep garage fumes out of the living space above.
Image
Right - The concrete basement wall is insulated on the interior with rigid foam; the footing detail is shown.
Image
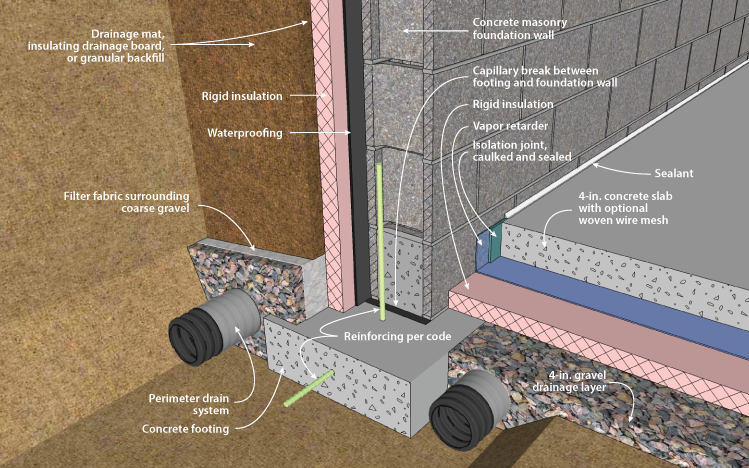
Right - The concrete masonry unit (CMU) basement wall has exterior insulation; the footing details include interior and exterior footing drain pipe.
Image
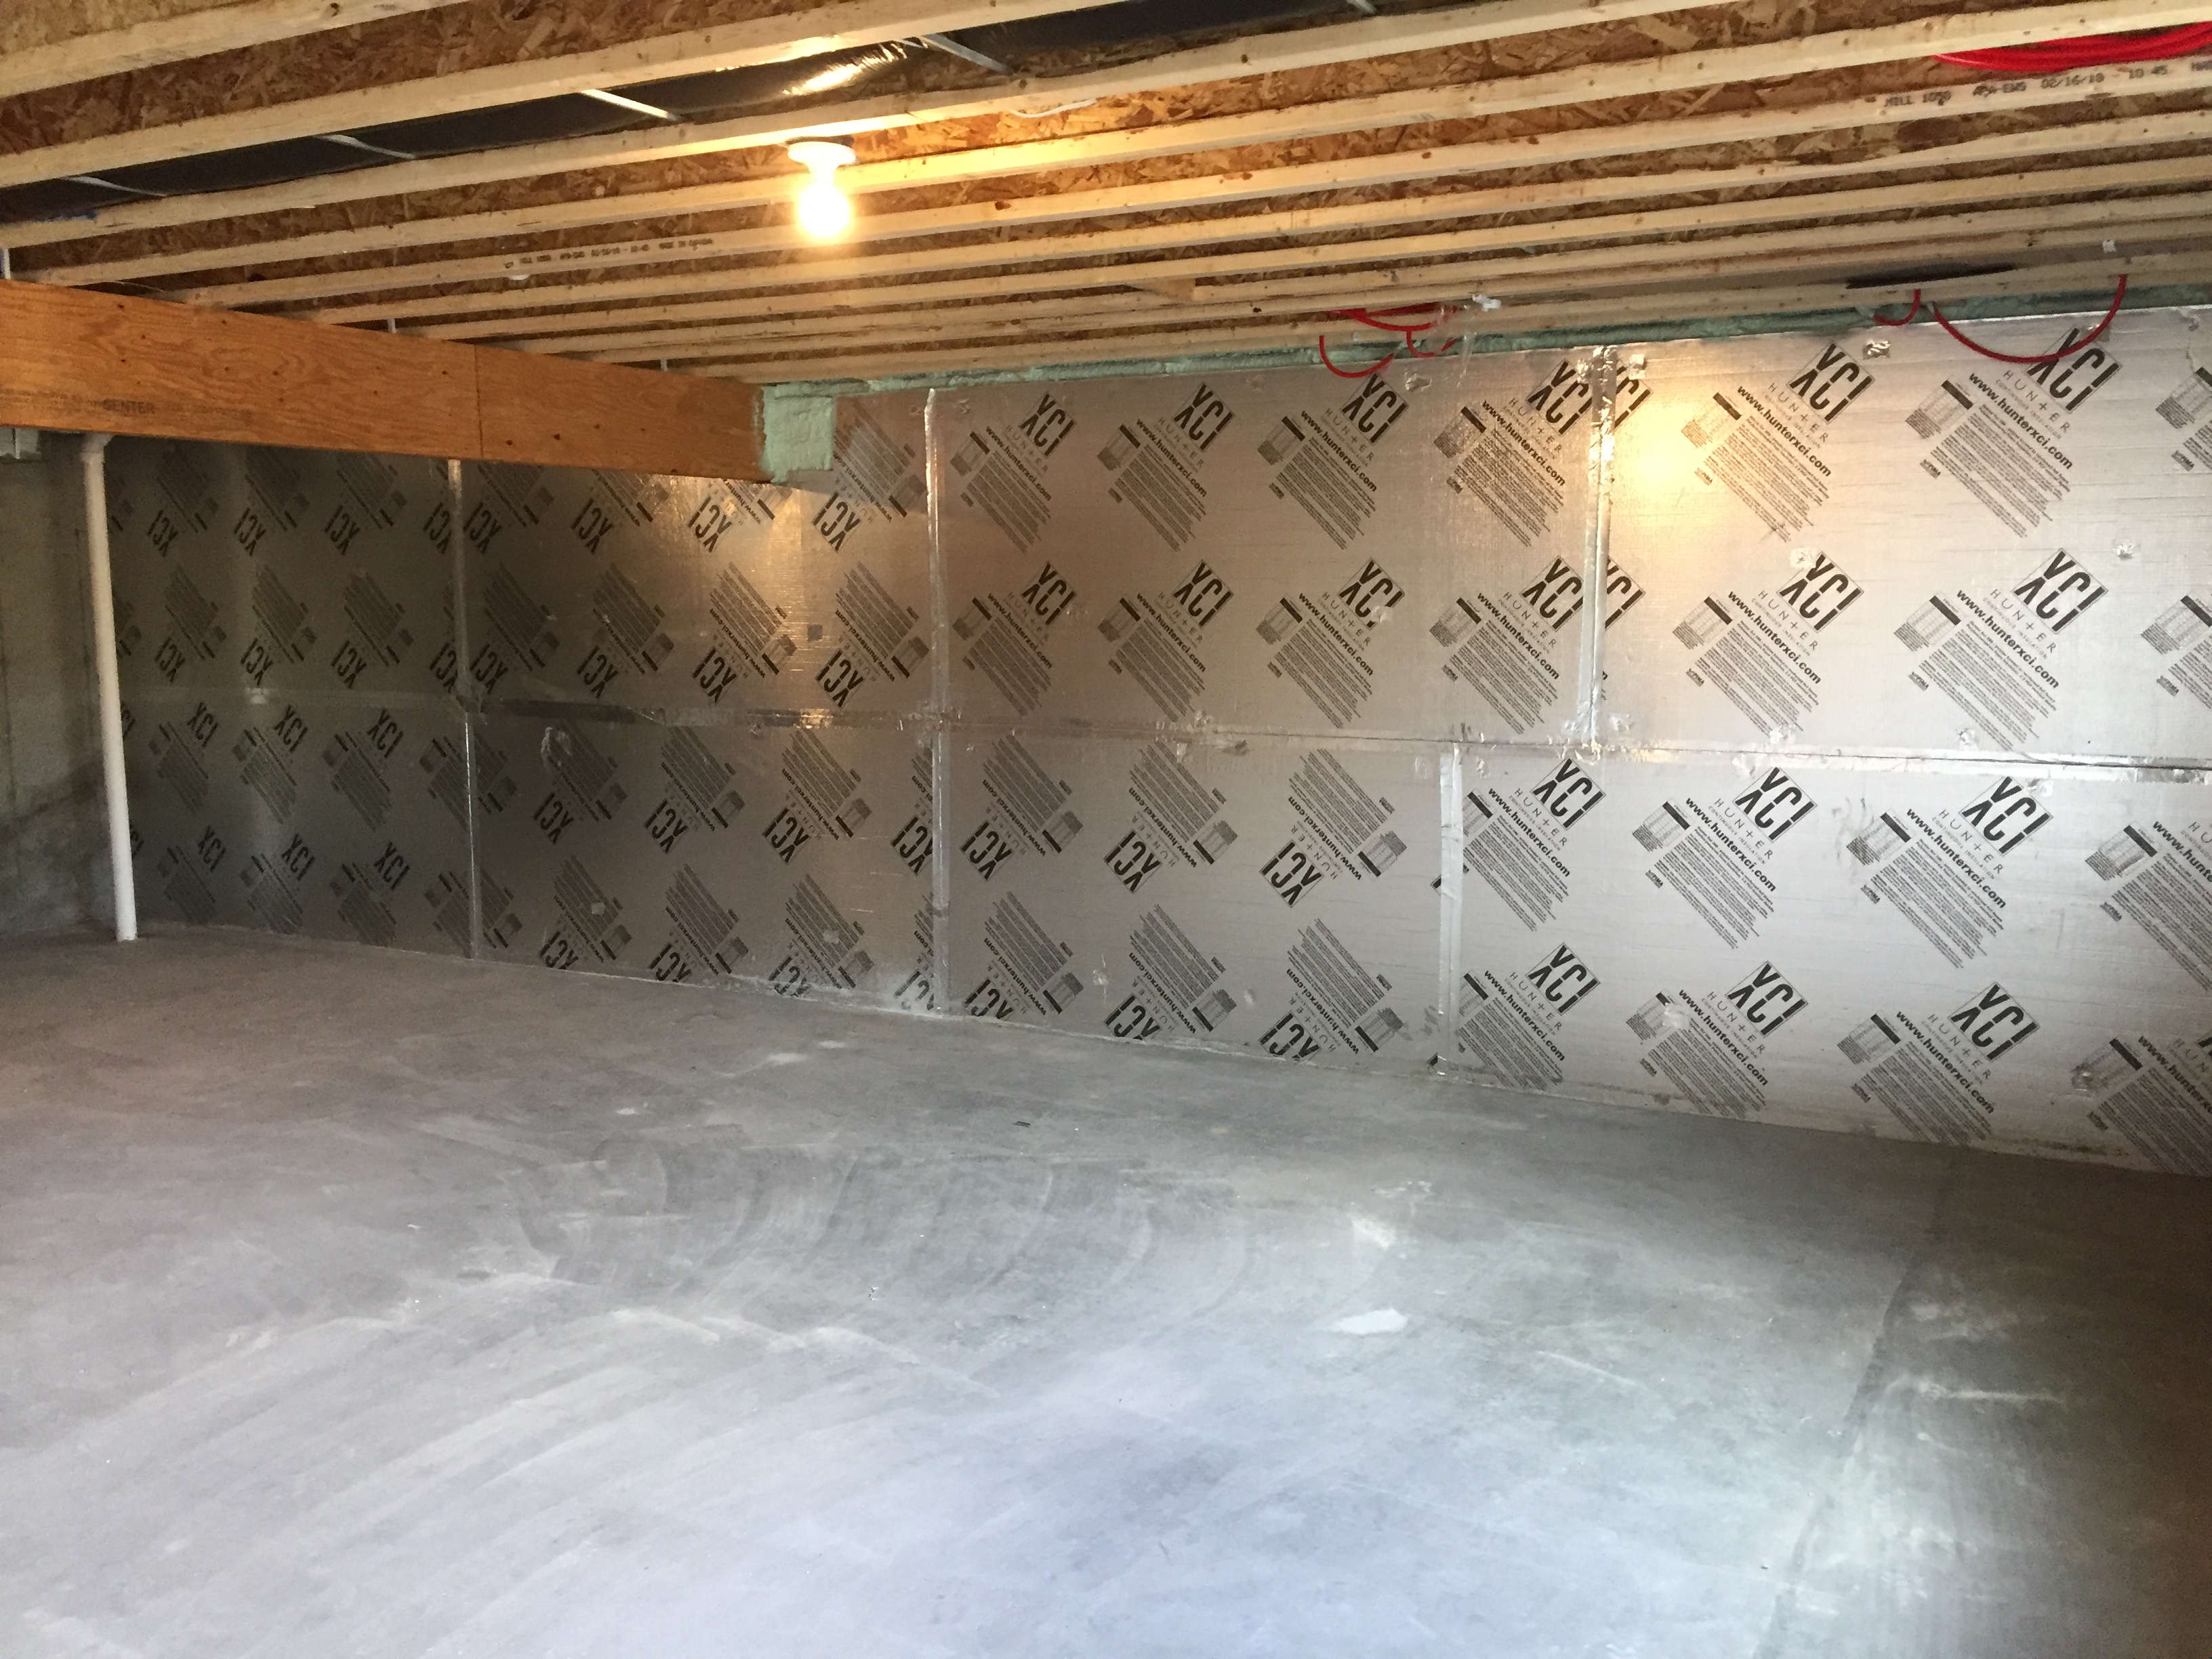
Right - The conditioned basement is insulated on the interior with 1 inch of polyiso R-6.3 rigid insulation.
Image
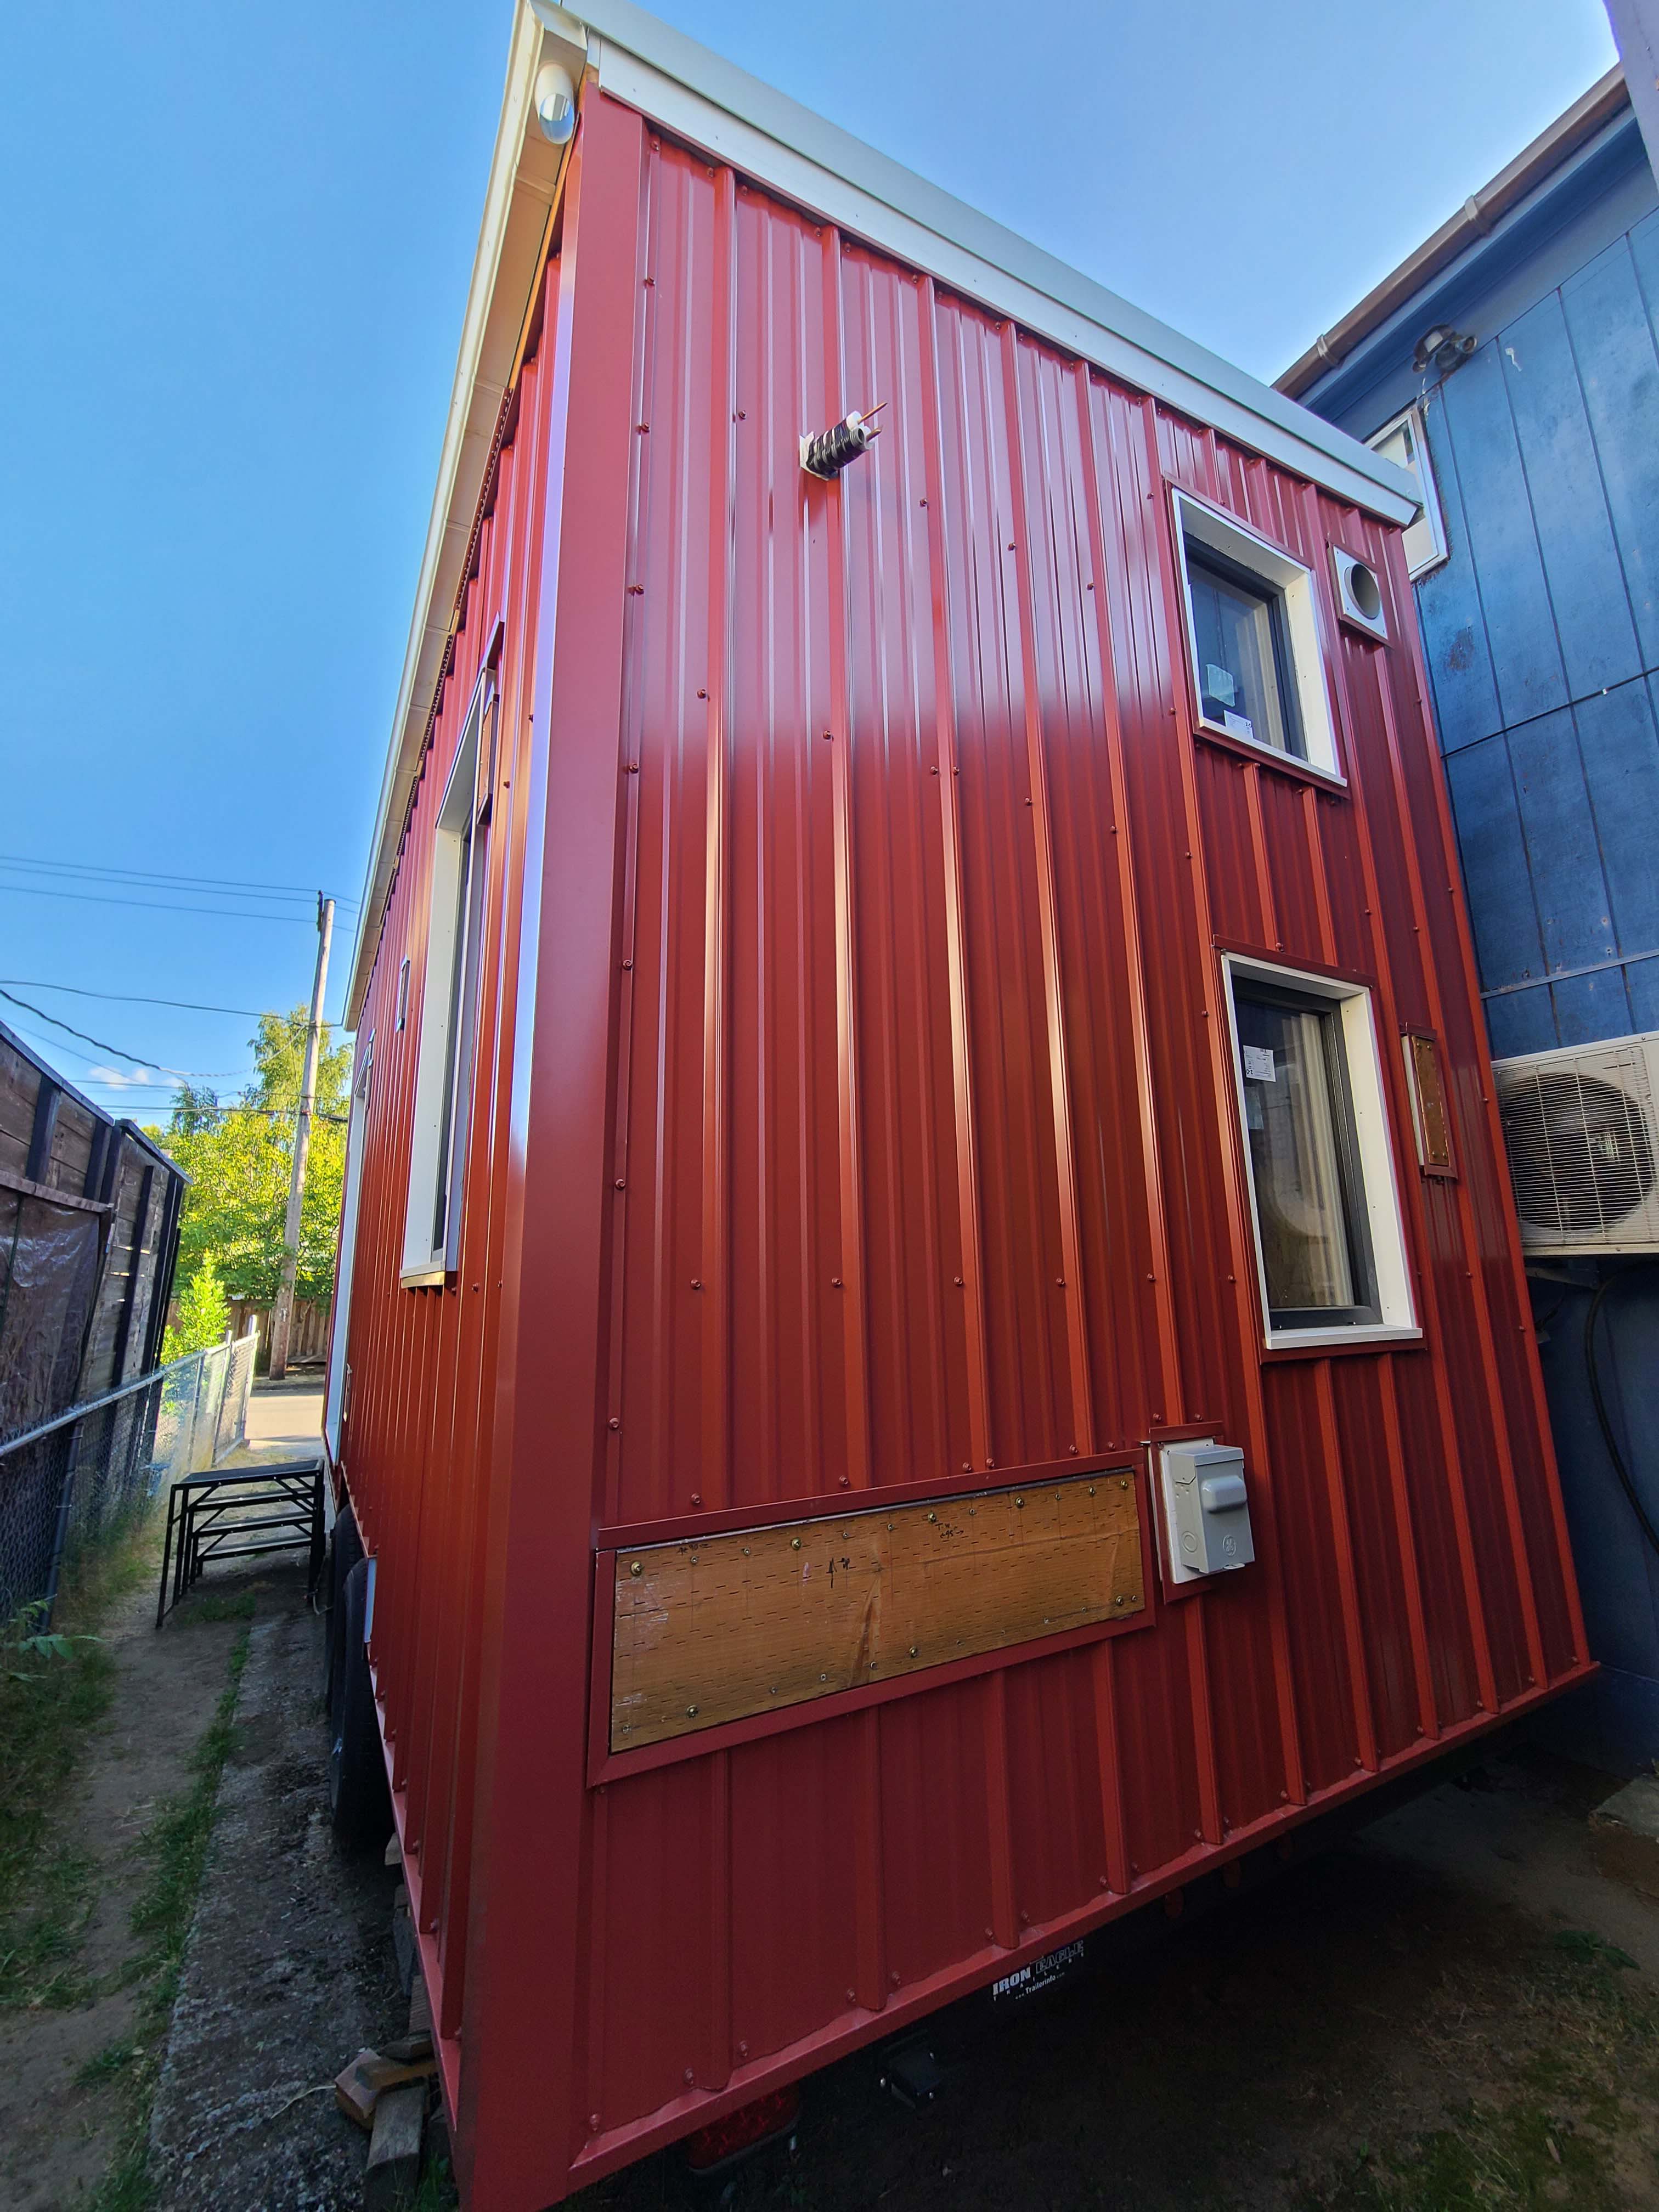
Right - The corrosion-resistant metal siding on this tiny house is fire resistant.
Image
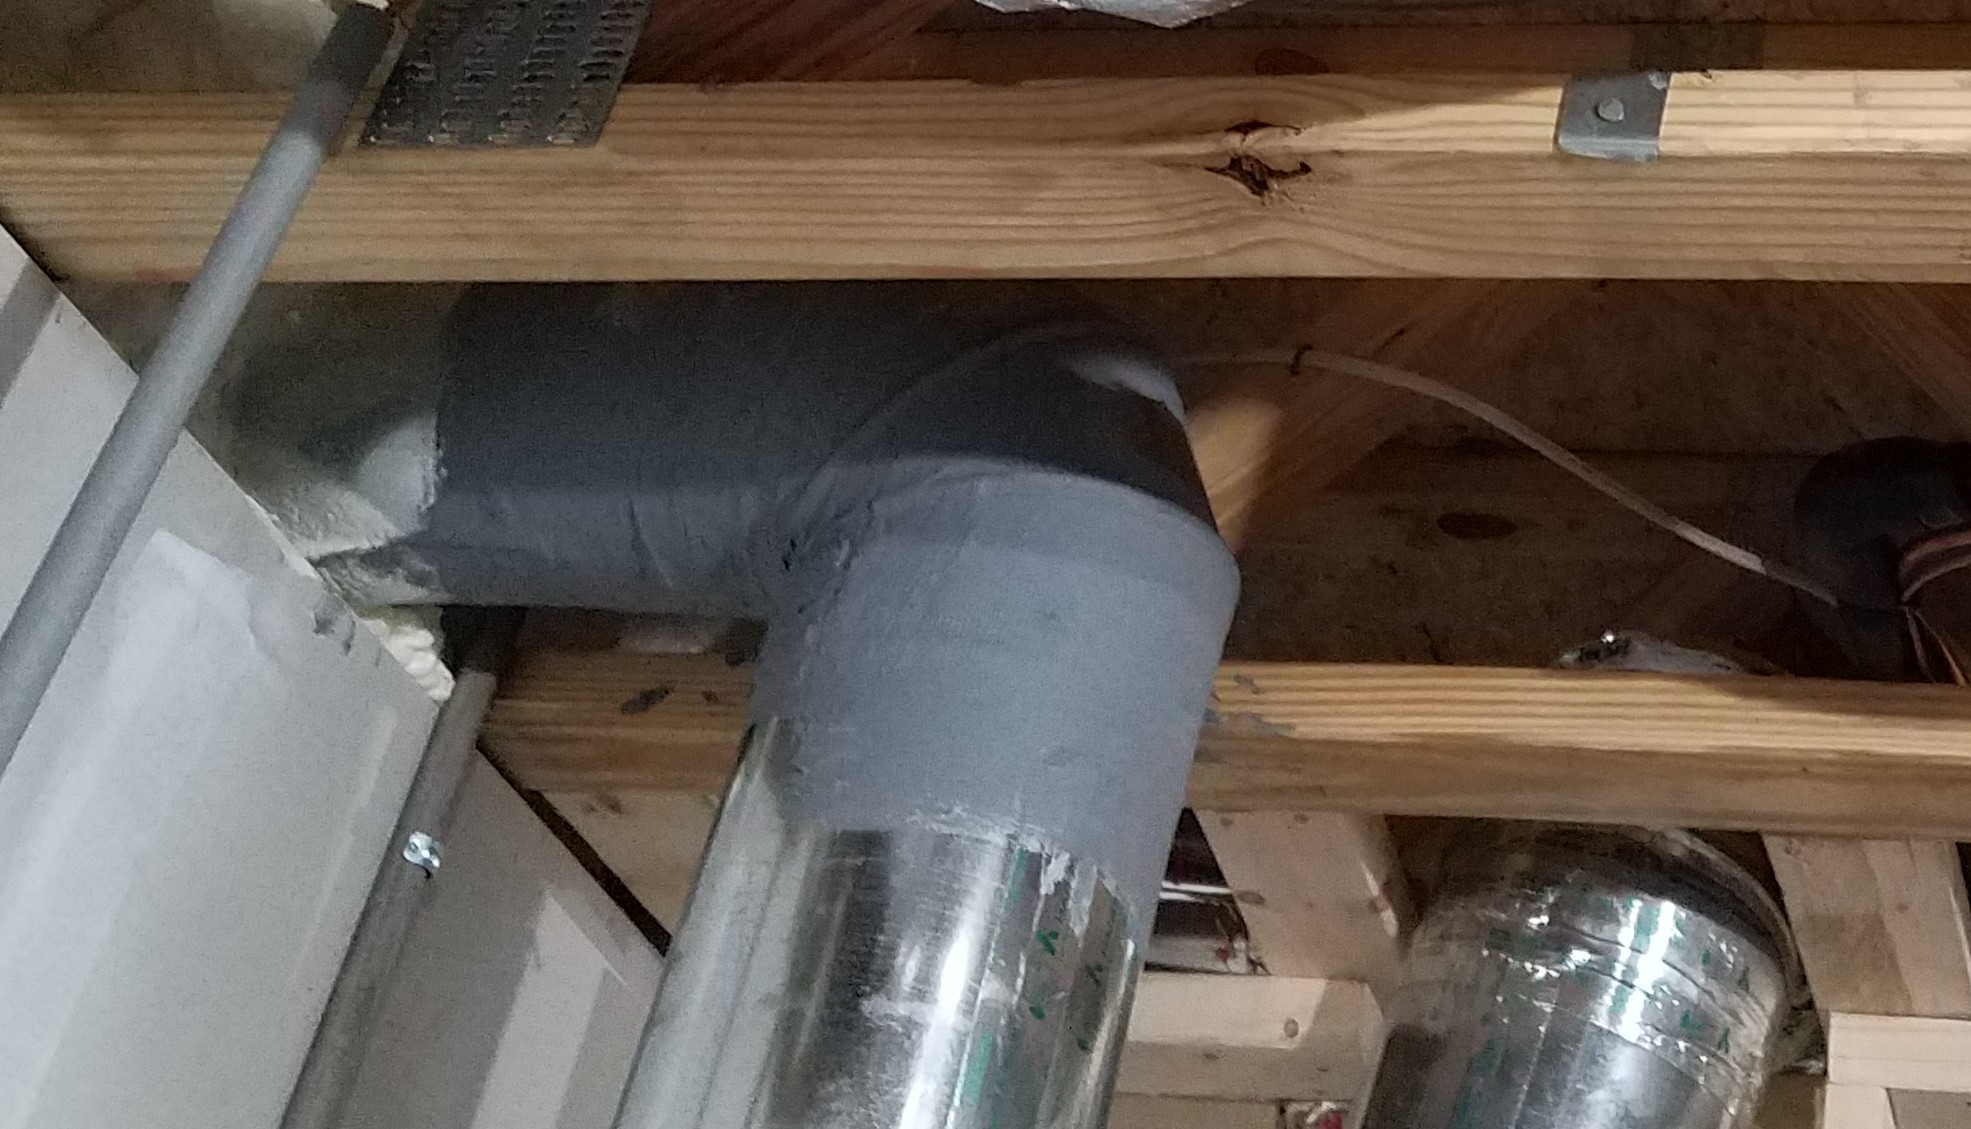
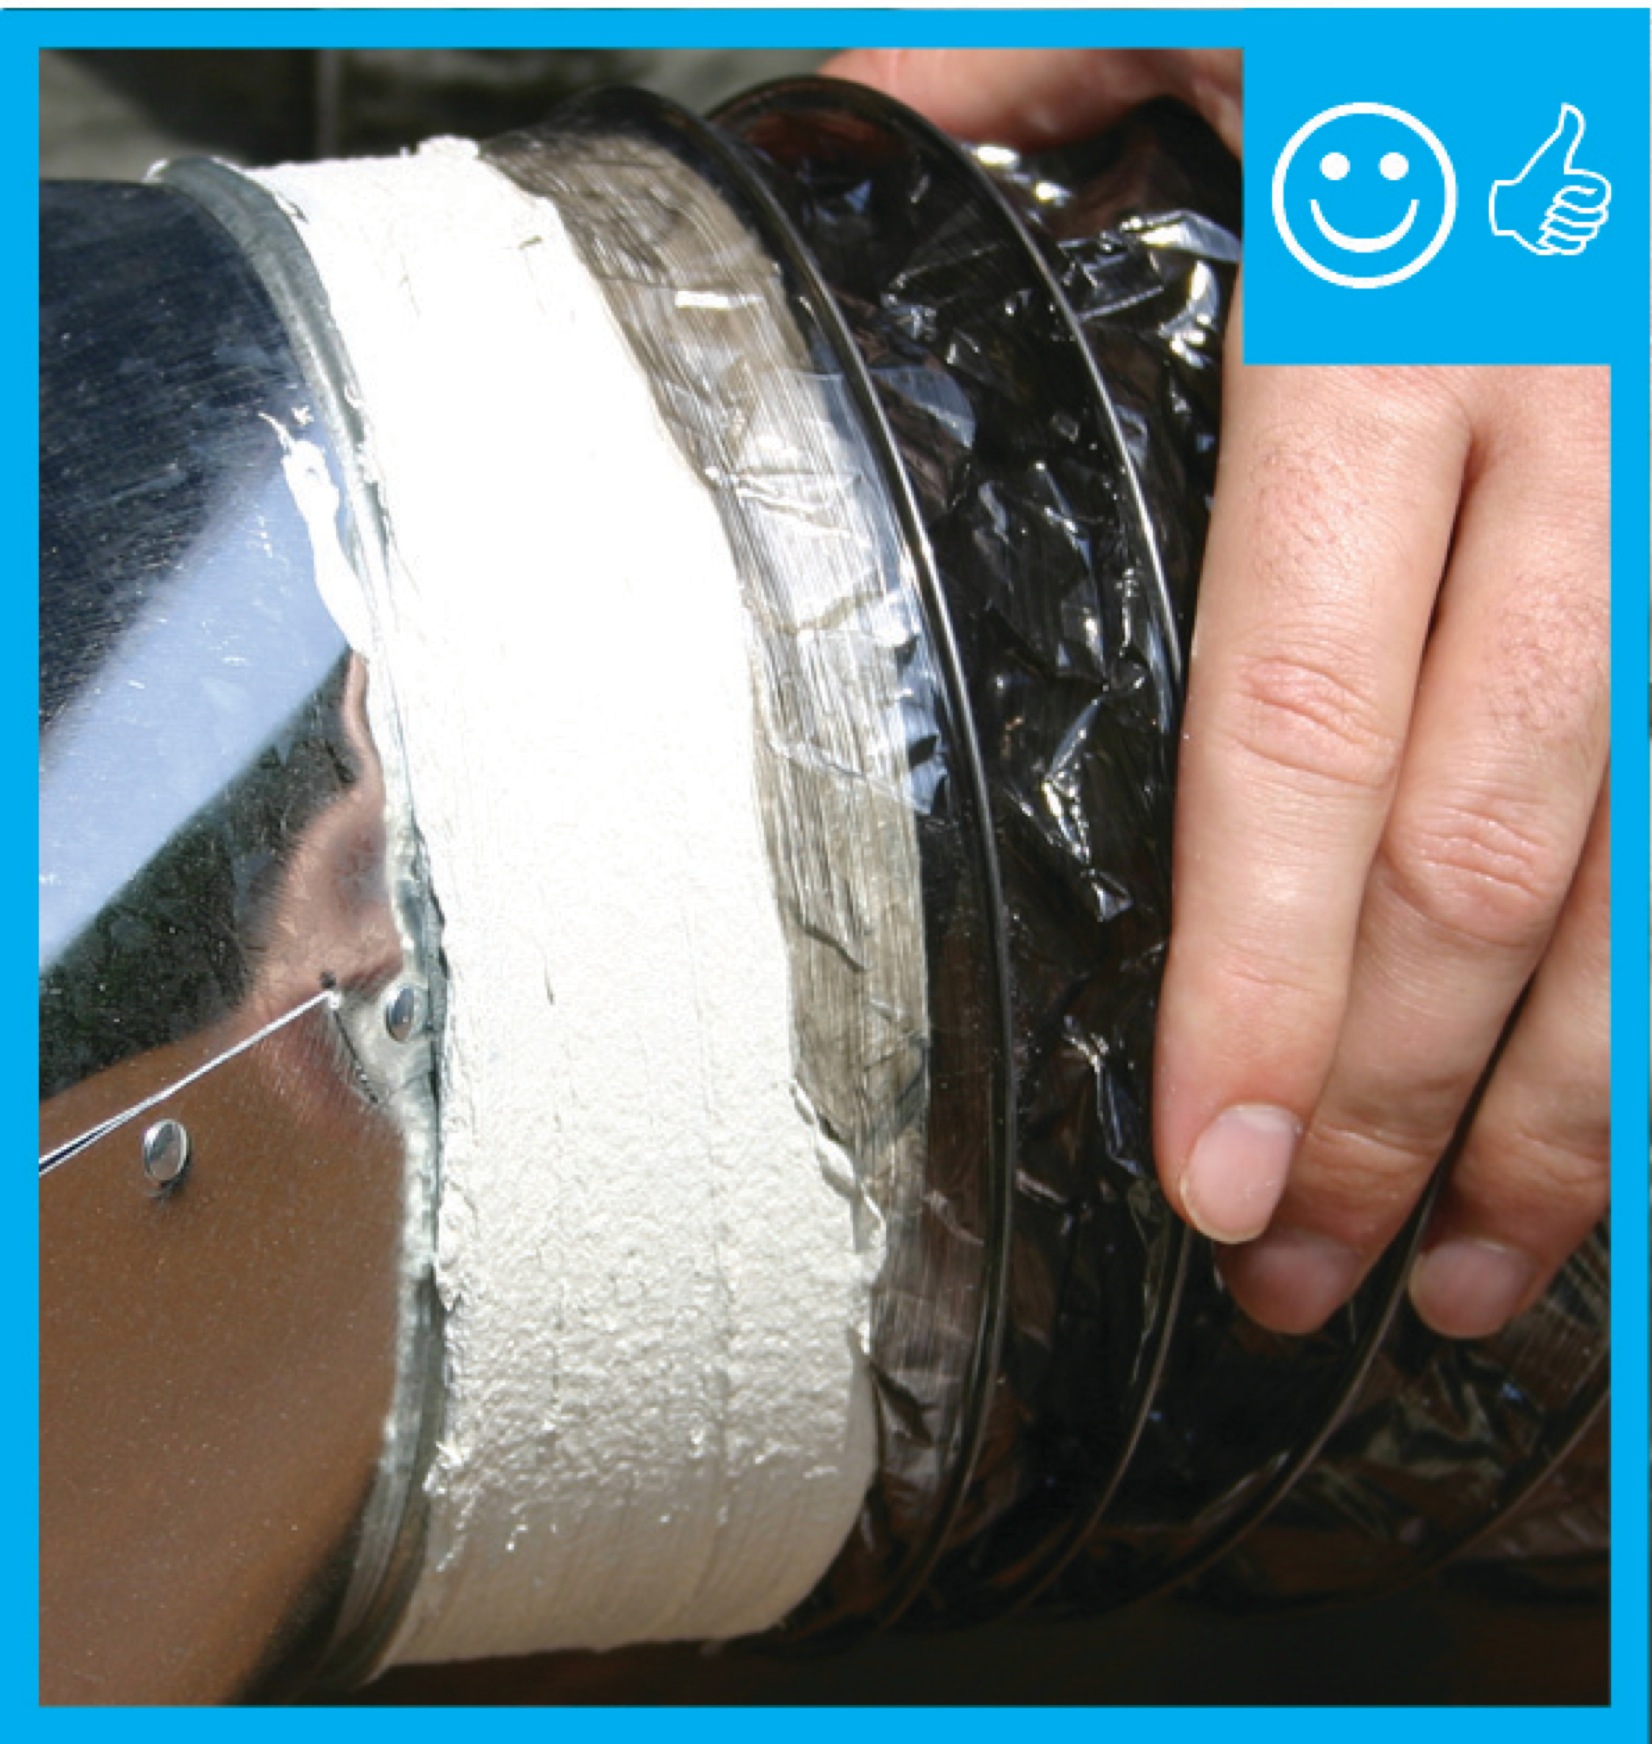
Right - The duct shows redundant sealing including the caulk, tape, and flashing
Image
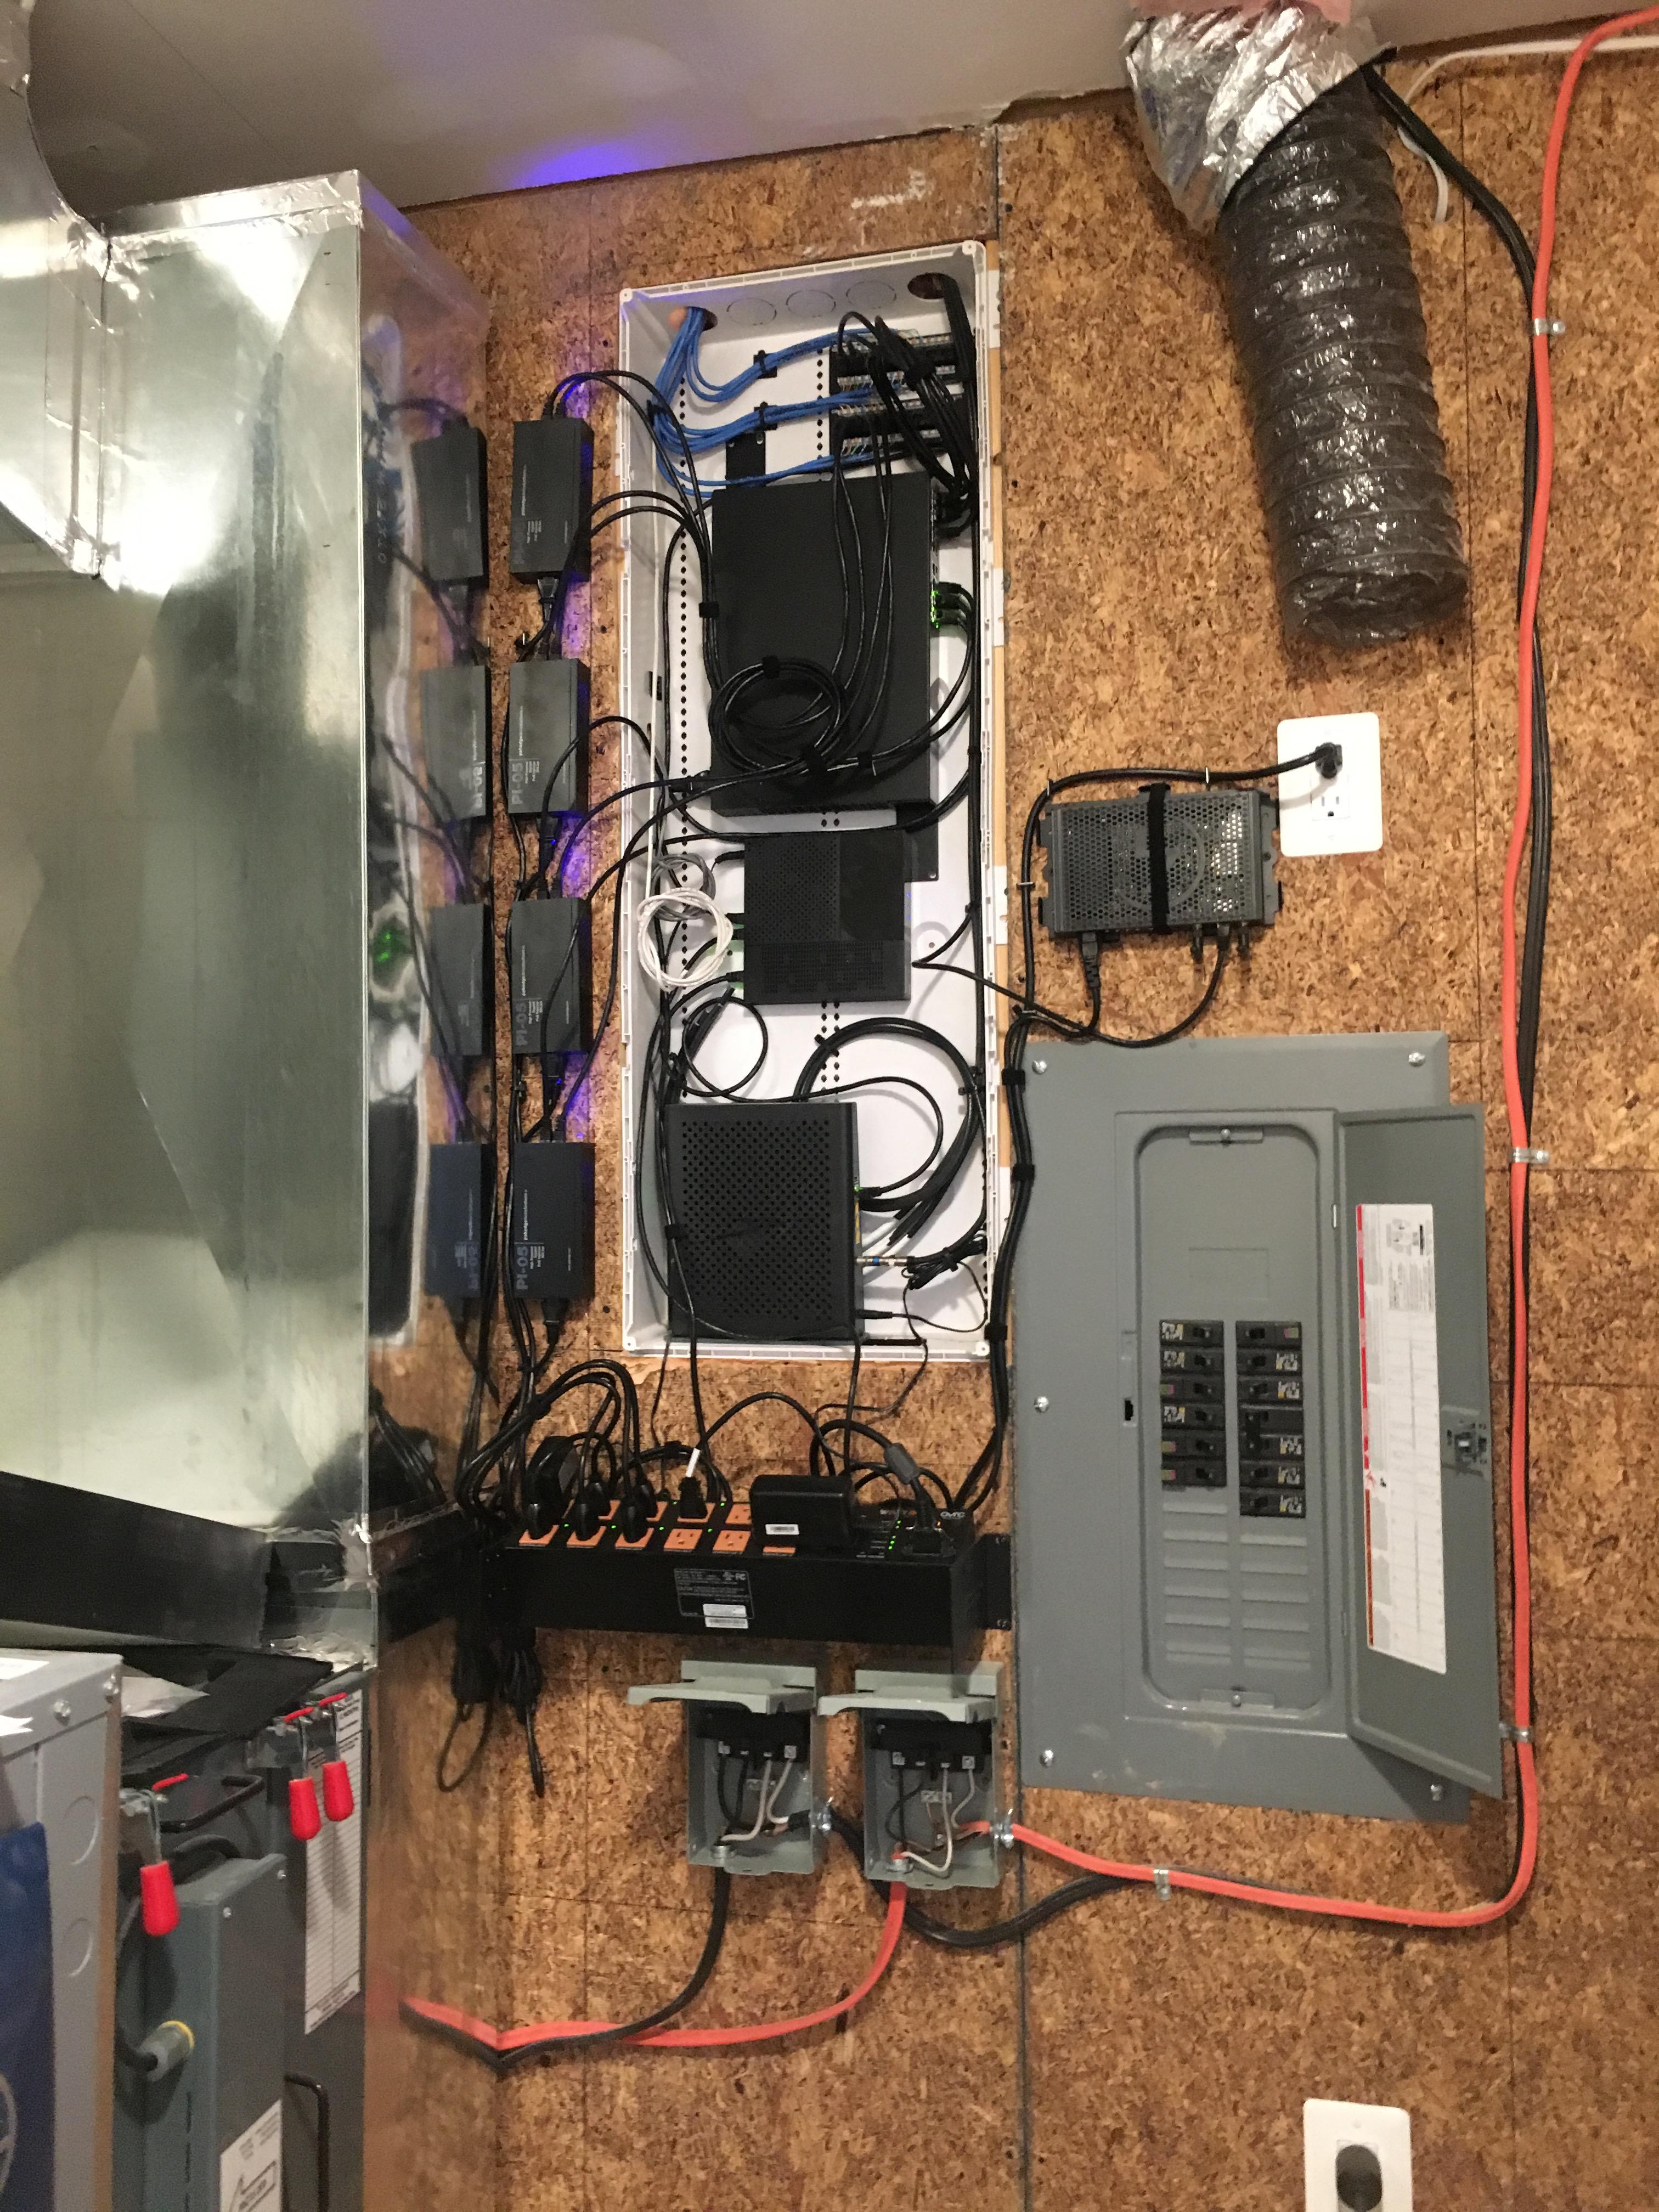
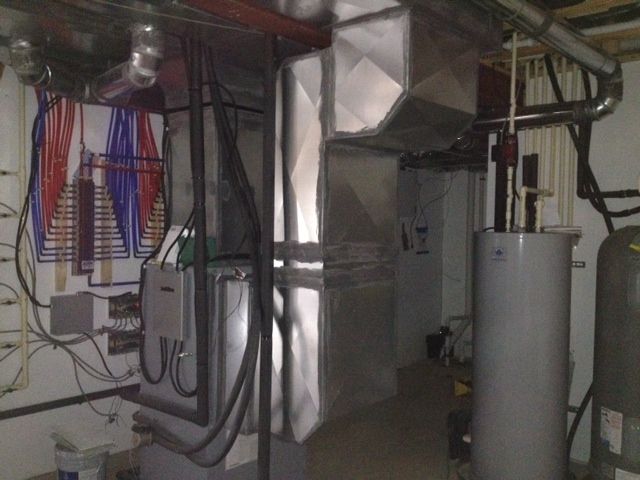
Right - The electronics for this home’s smart home system, including a Wi-Fi router, and controls for lighting, HVAC, security, energy production and tracking are housed together with the electrical panel and HVAC equipment in the home’s utility room.
Image
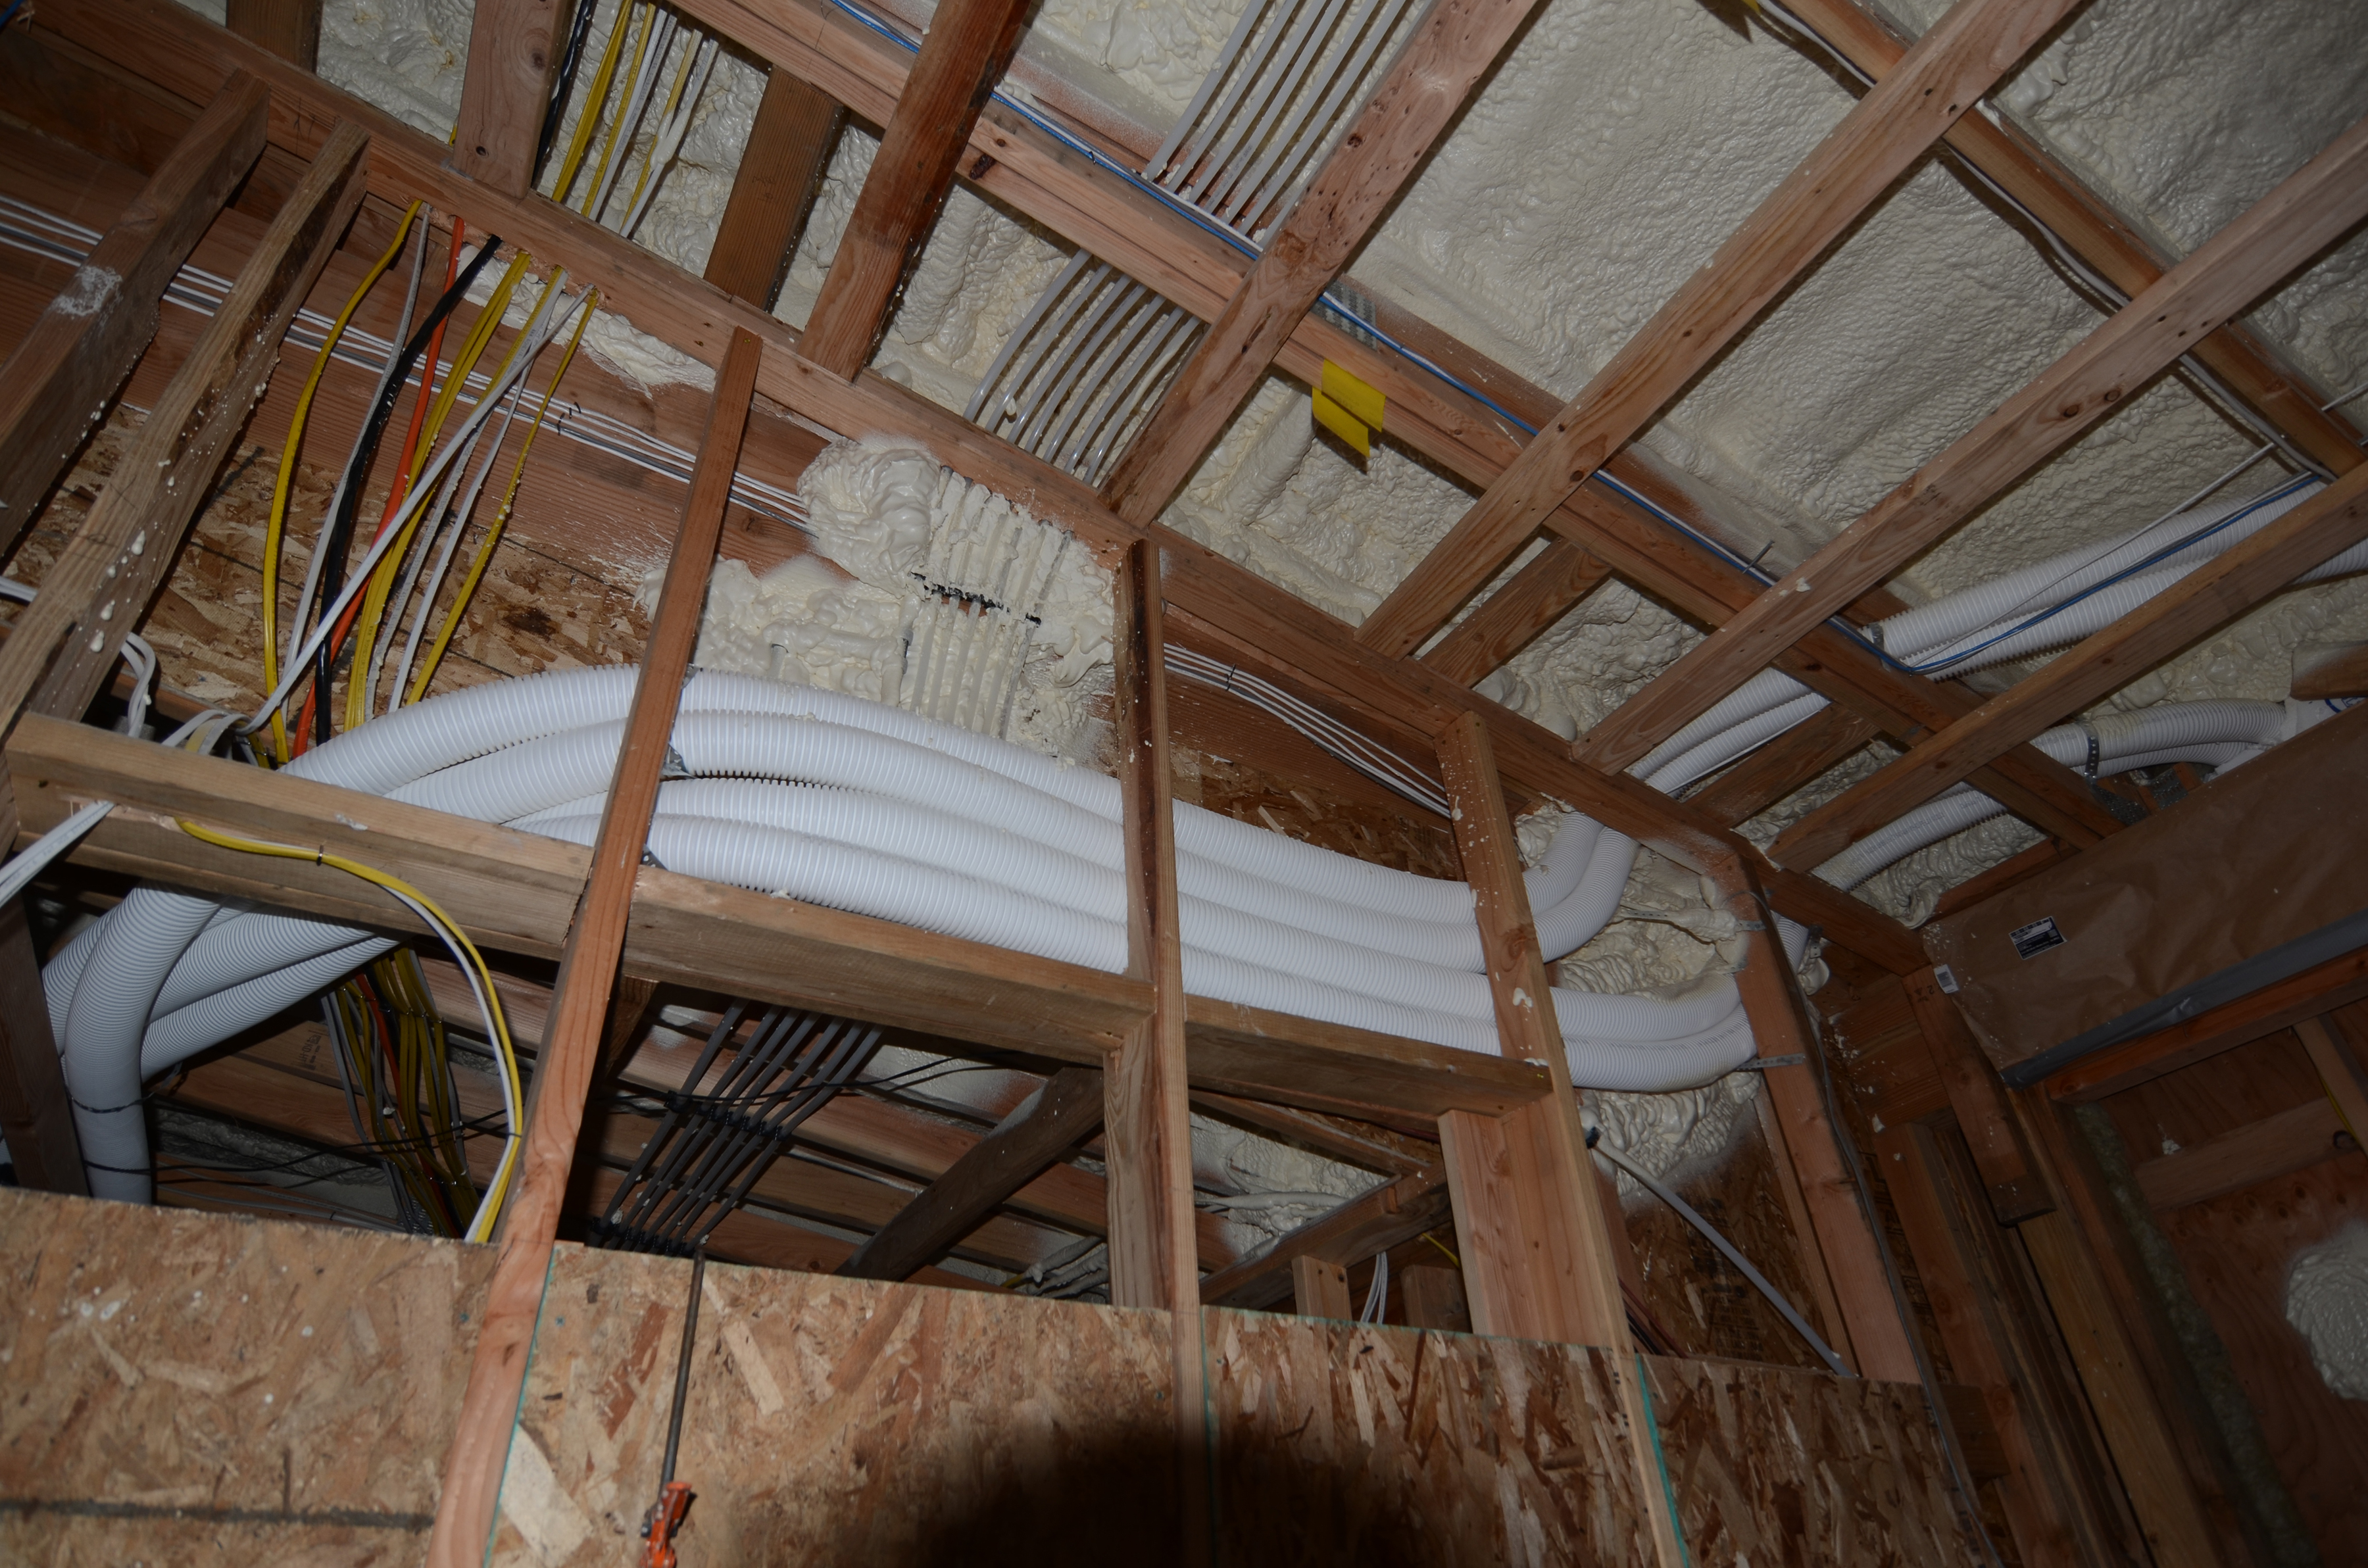
Right - The energy recovery ventilator ducts supply filtered outside air to multiple locations in the home and continuously exhaust stale air to provide clean, balanced ventilation.
Image
Right - The exhaust duct has been mechanically fastened and sealed with mastic.
Image
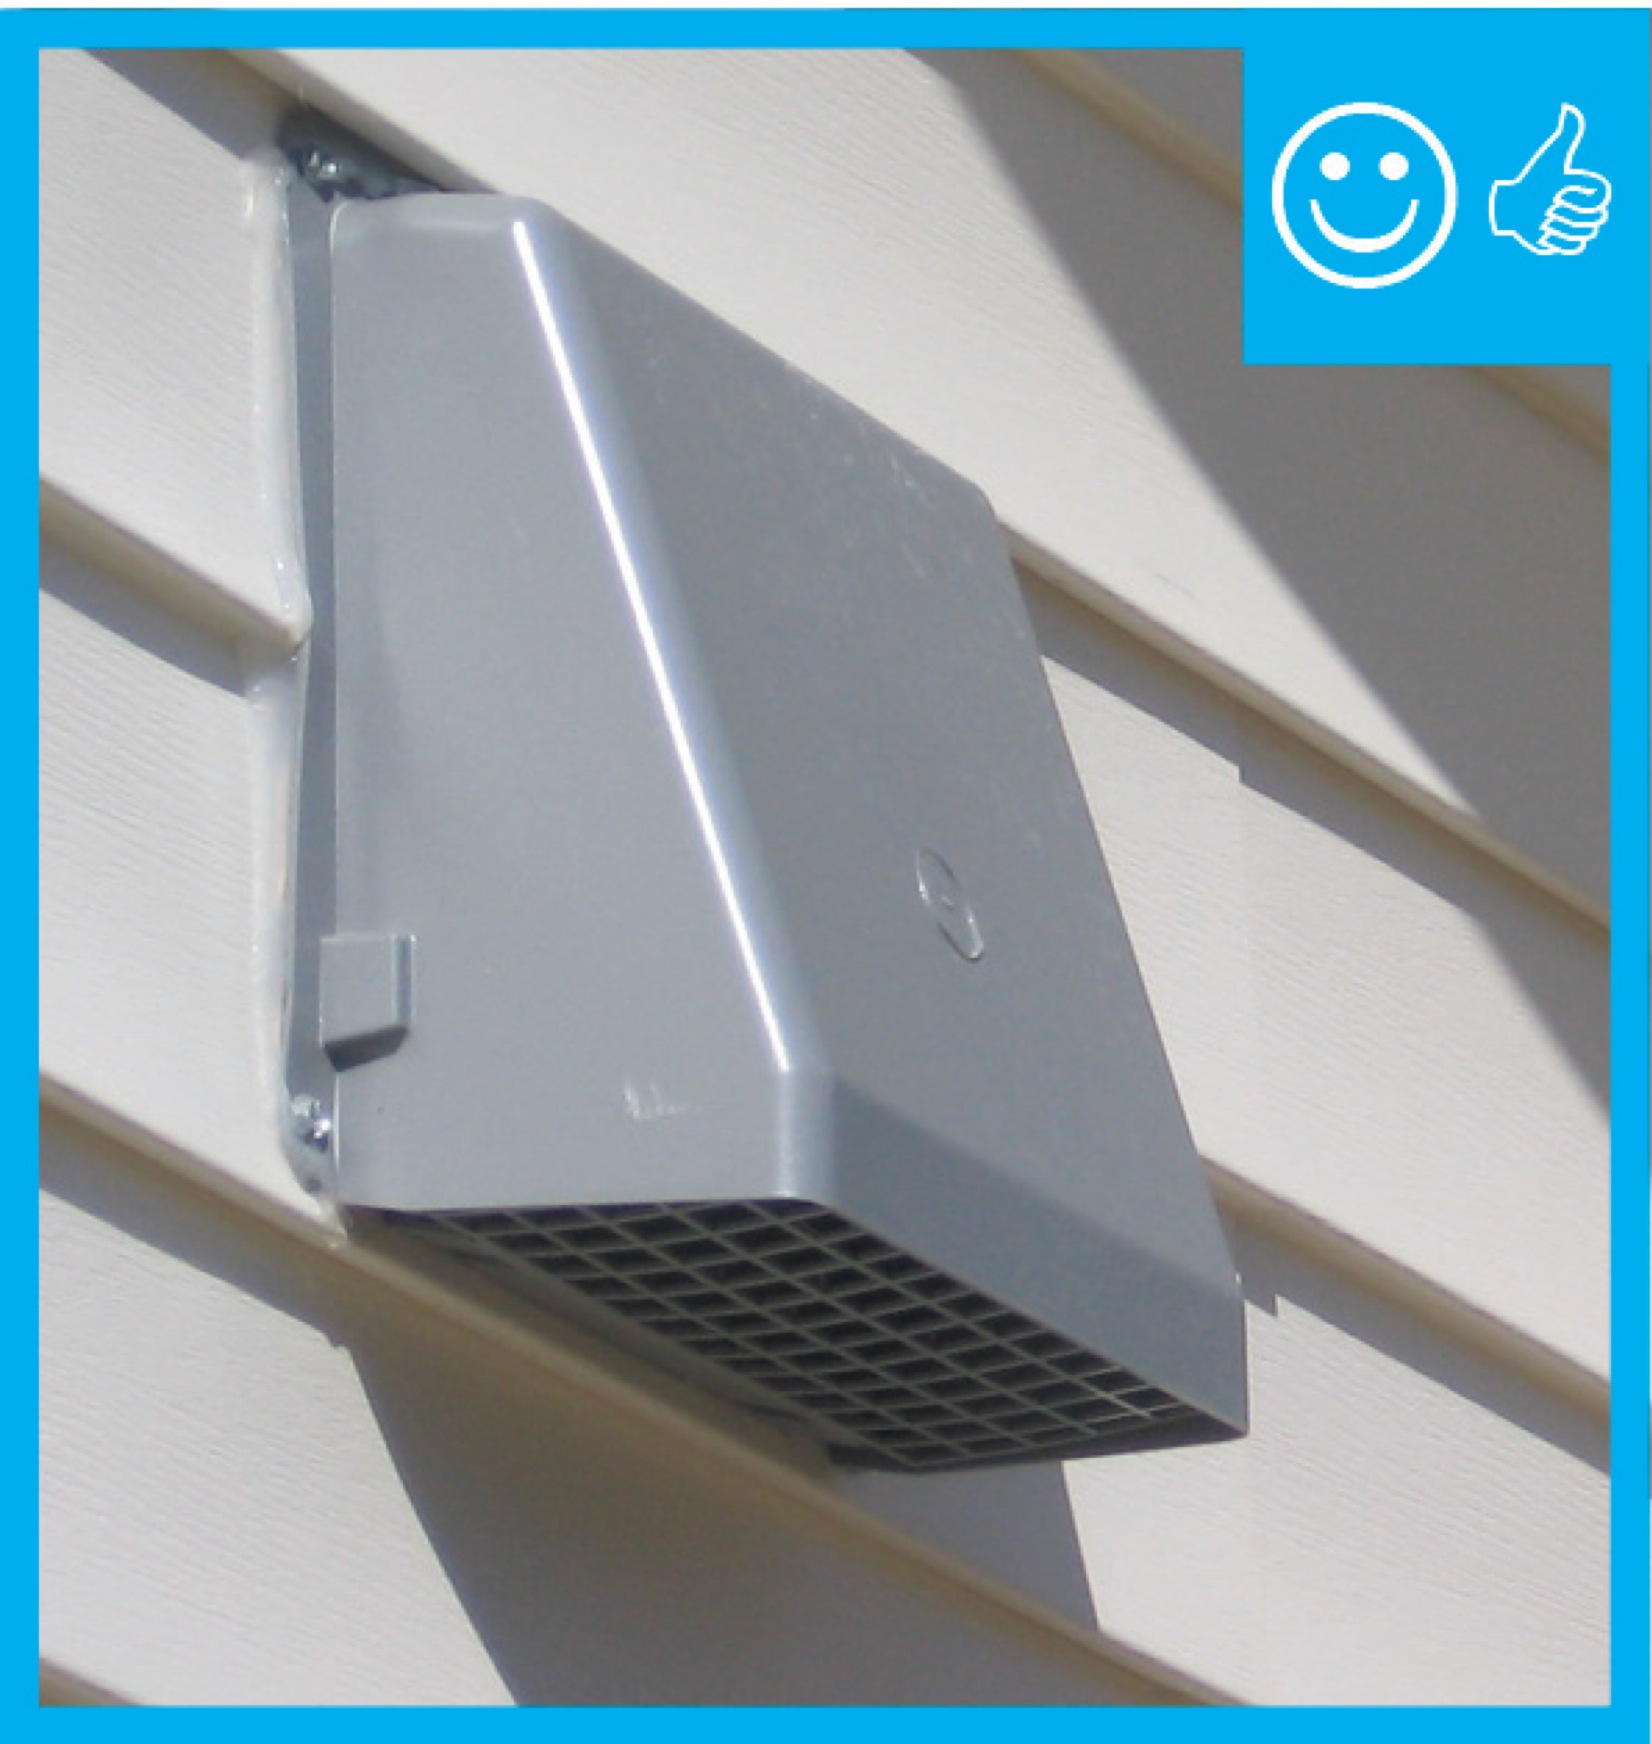
Right - The exhaust vent duct terminates to the outdoors with a vent cover that has been properly caulked and covered with a metal pest screen.
Image
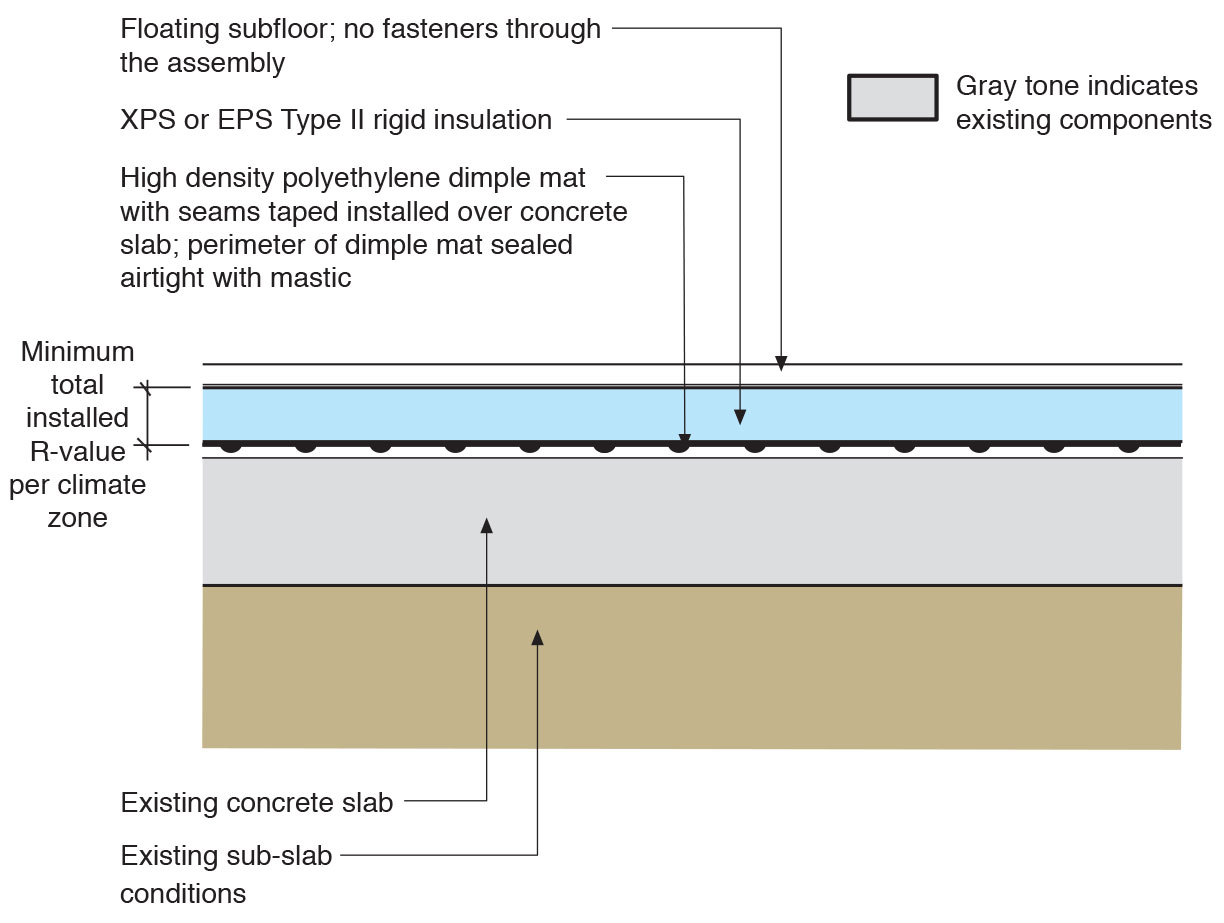
Right - The existing basement slab is retrofitted by installing a dimple plastic drainage mat, rigid foam insulation, and a floating subfloor.
Image
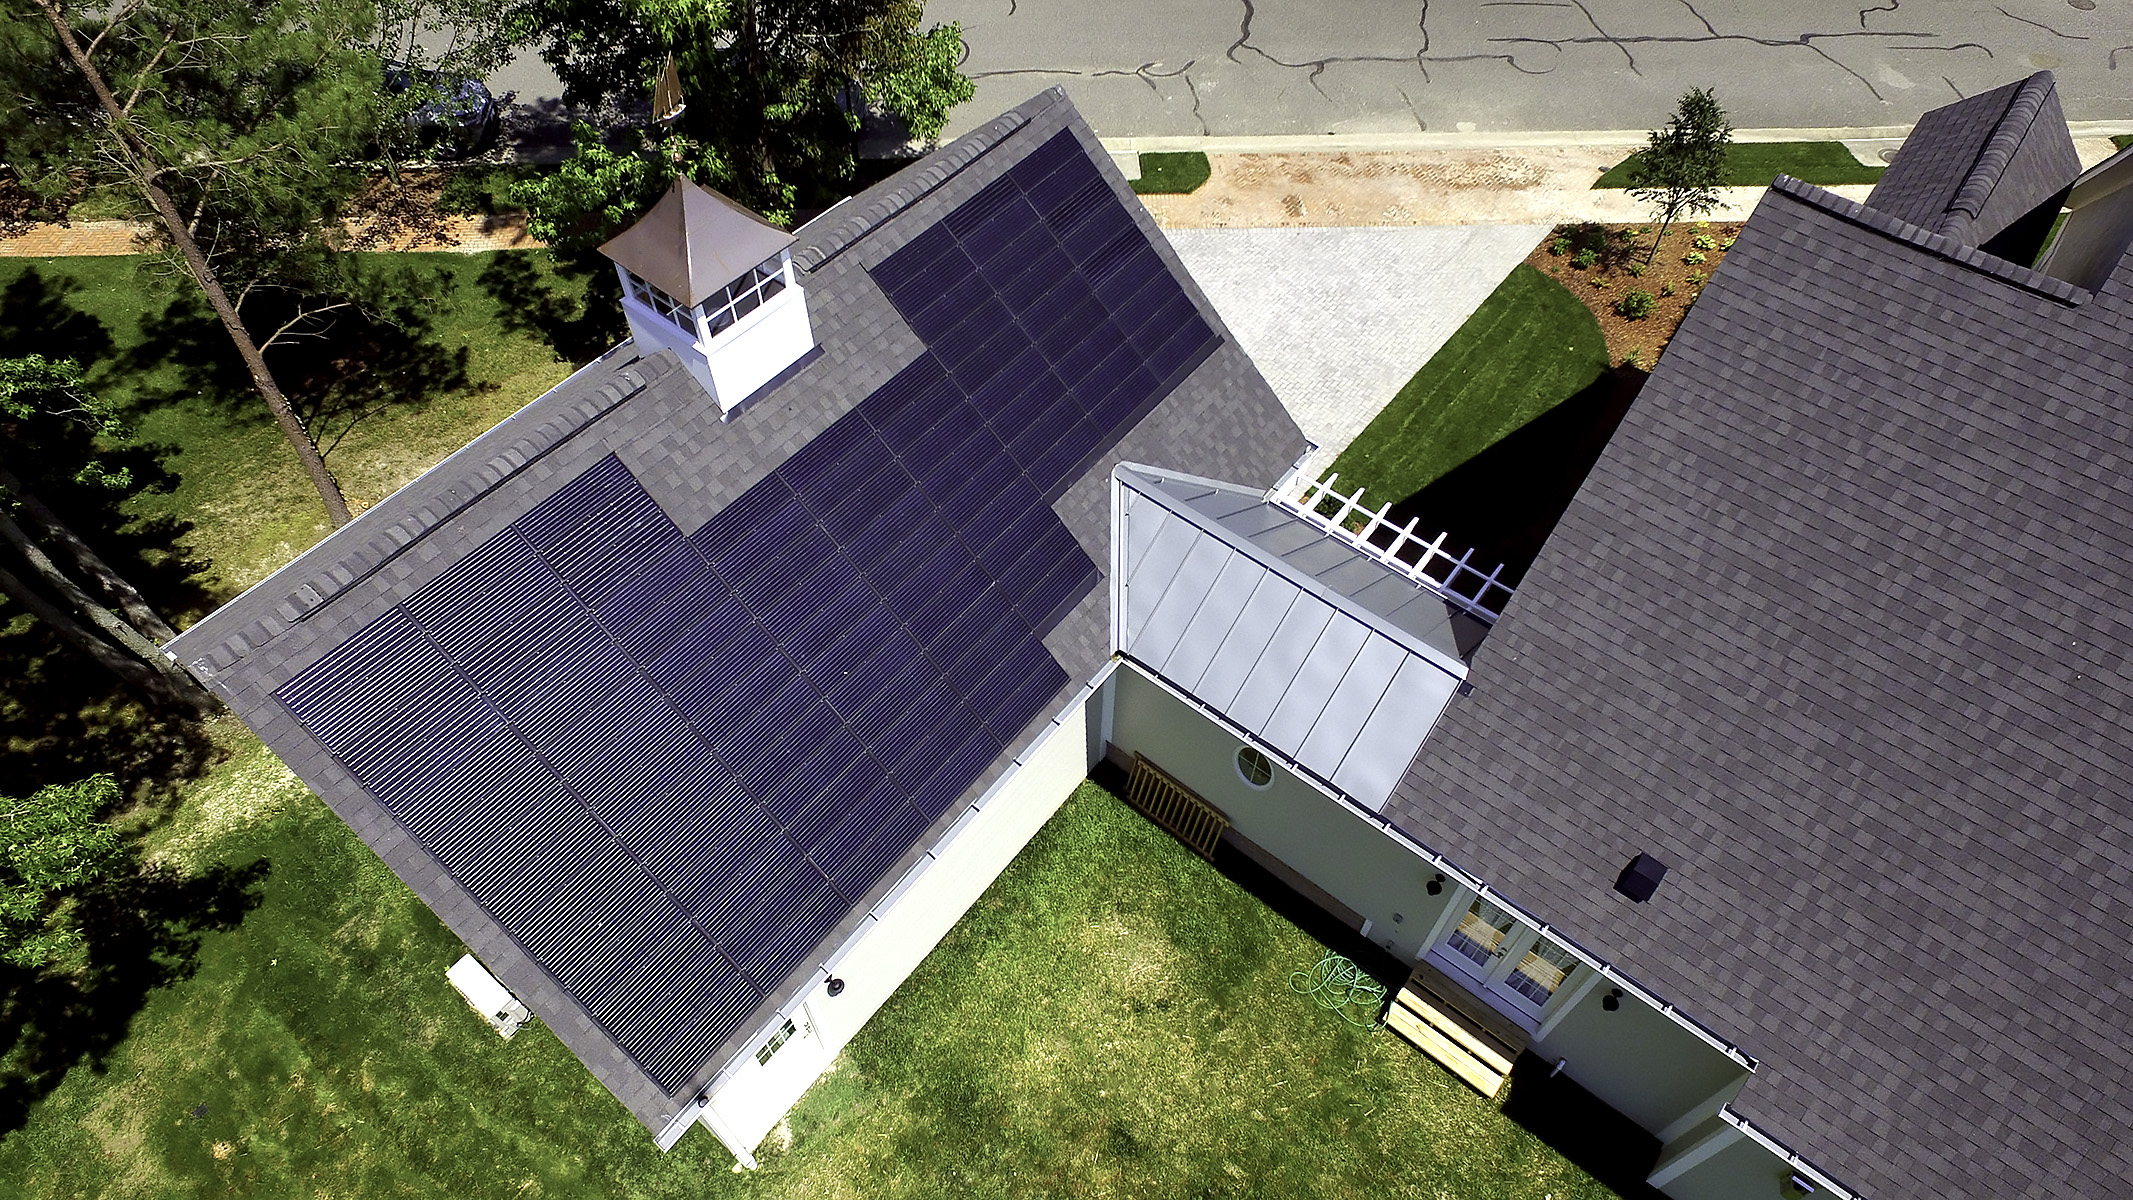
Right - The garage roof is correctly oriented for the home’s solar shingle system.
Image
Right - The geothermal heat pump provides hot water for radiant floor heating, domestic hot water, and the air handler for space conditioning upstairs.
Image
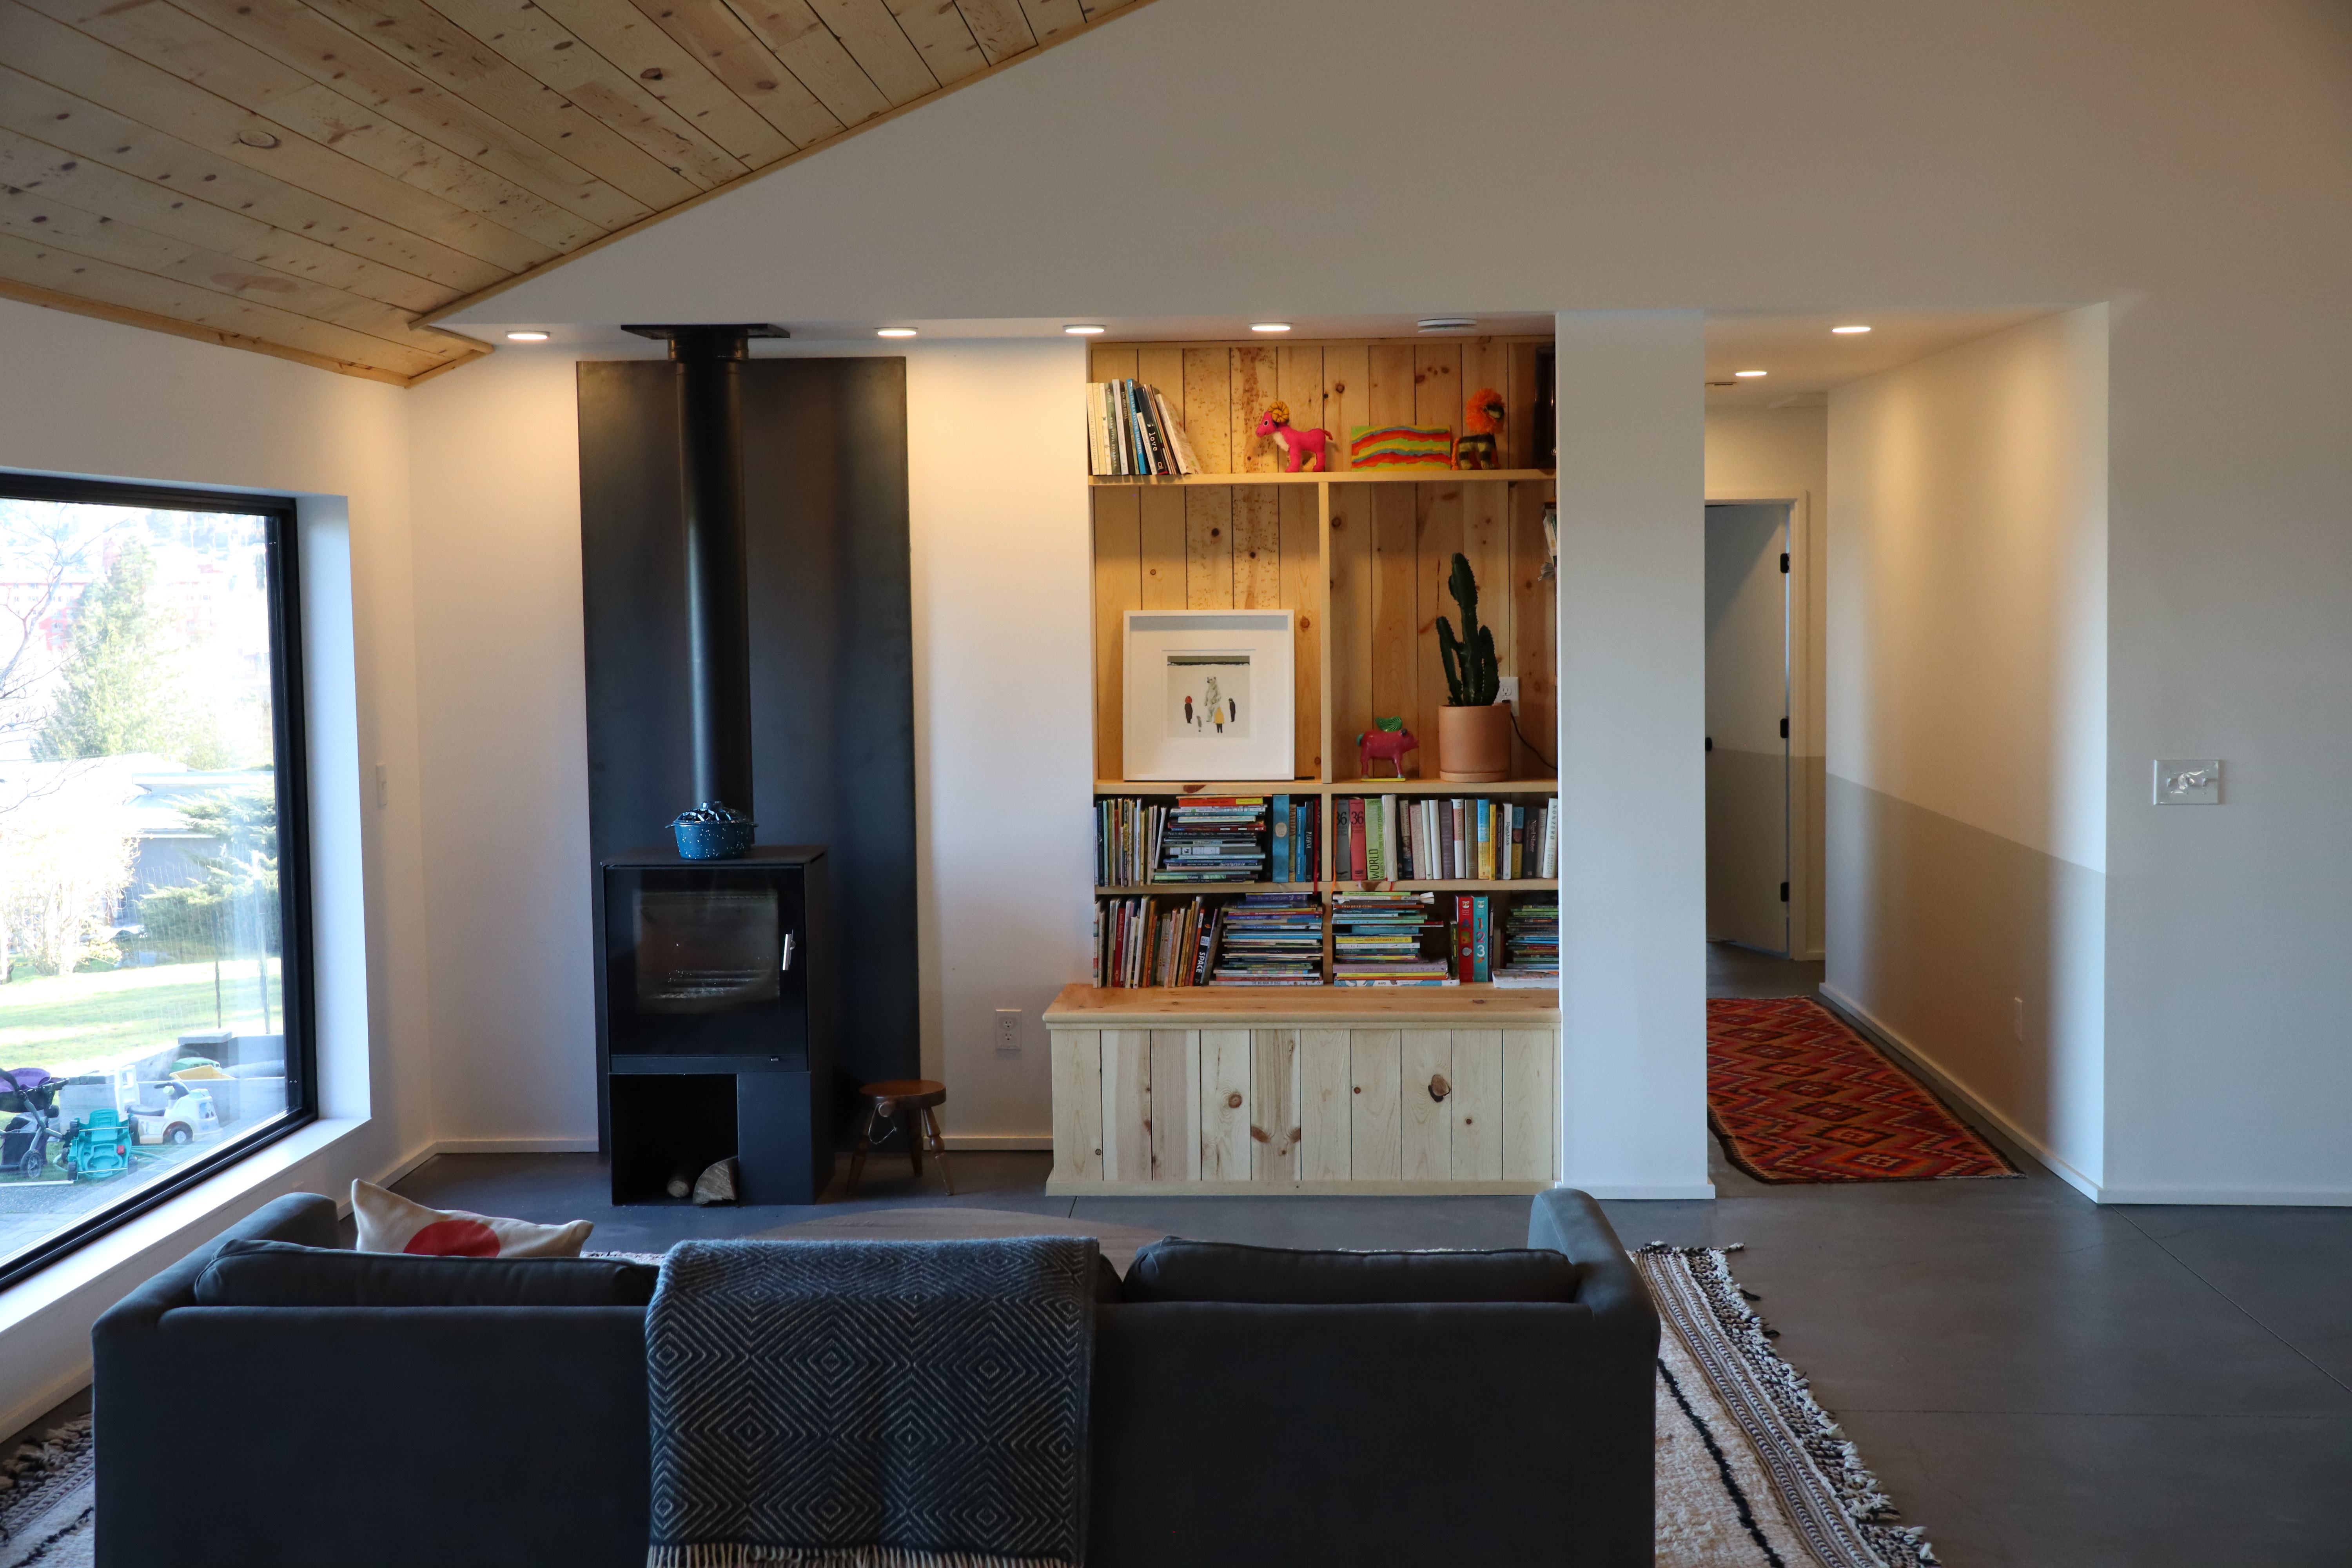
Right - The high-efficiency wood stove is located on an interior wall in this home to provide a secondary heating source in cold climates.
Image
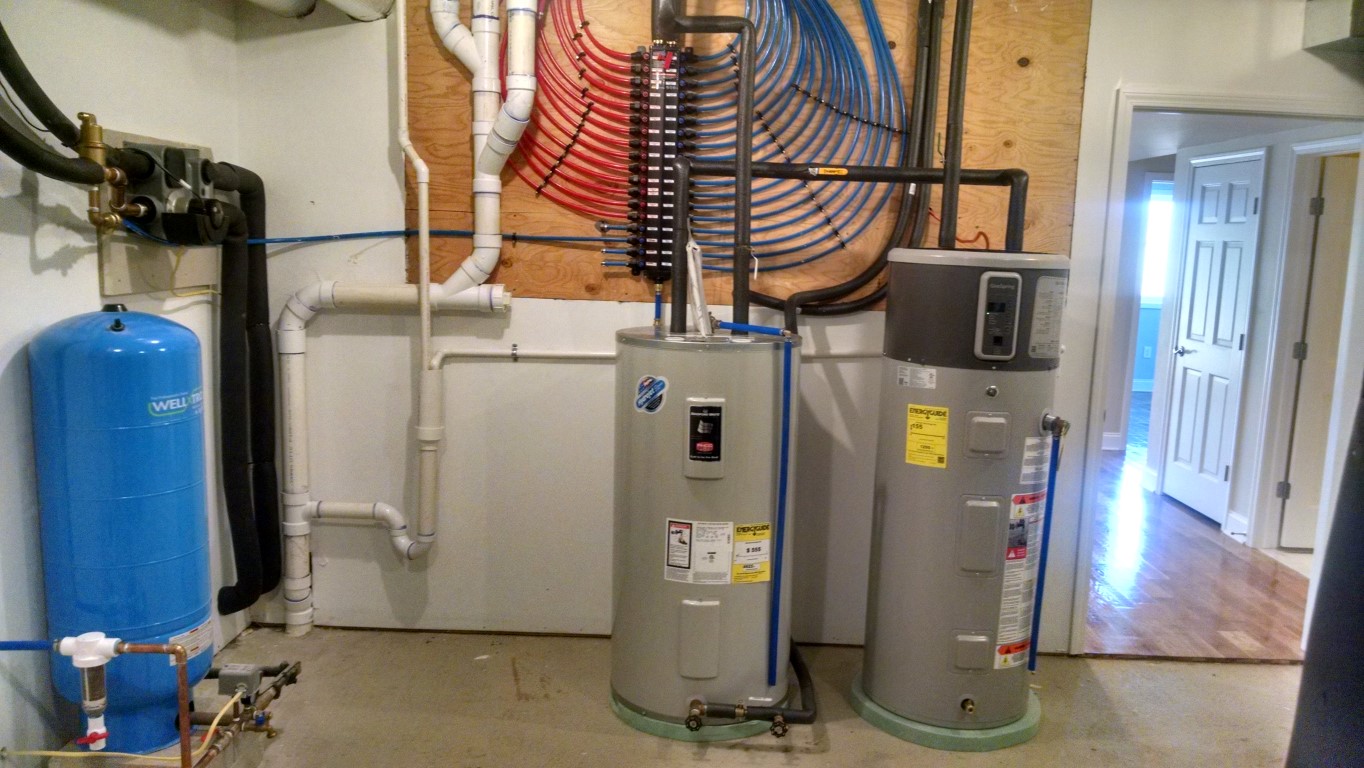
Right - The home’s ground source heat pump preheats water for the air source heat pump water heater.
Image
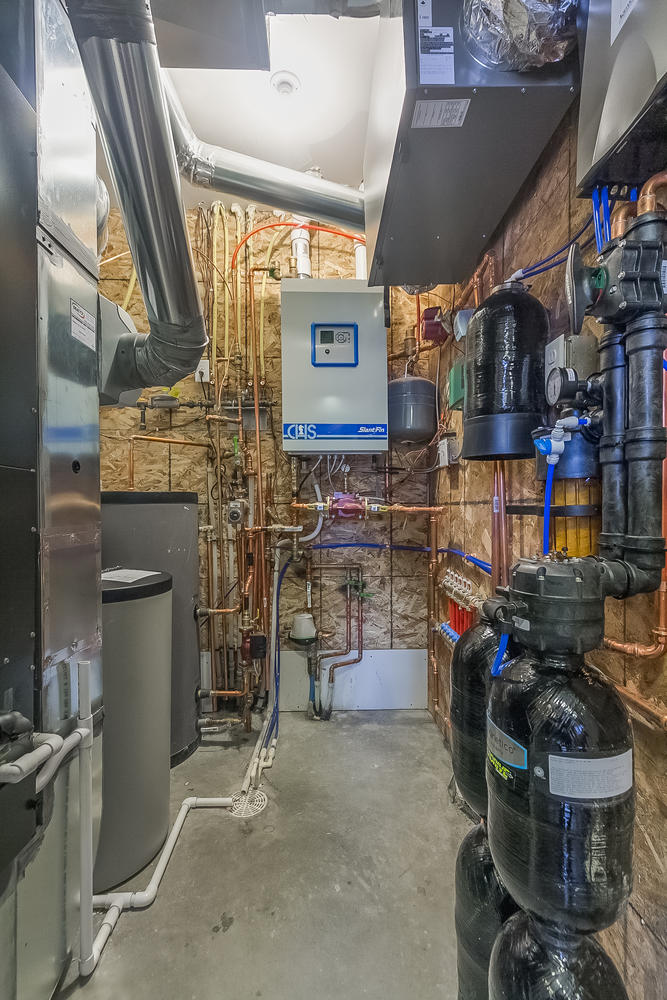
Right - The home’s high-efficiency gas boiler provides domestic hot water as well as in-floor radiant heat, while a high-efficiency heat pump provides cooling and a secondary source of heating.
Image
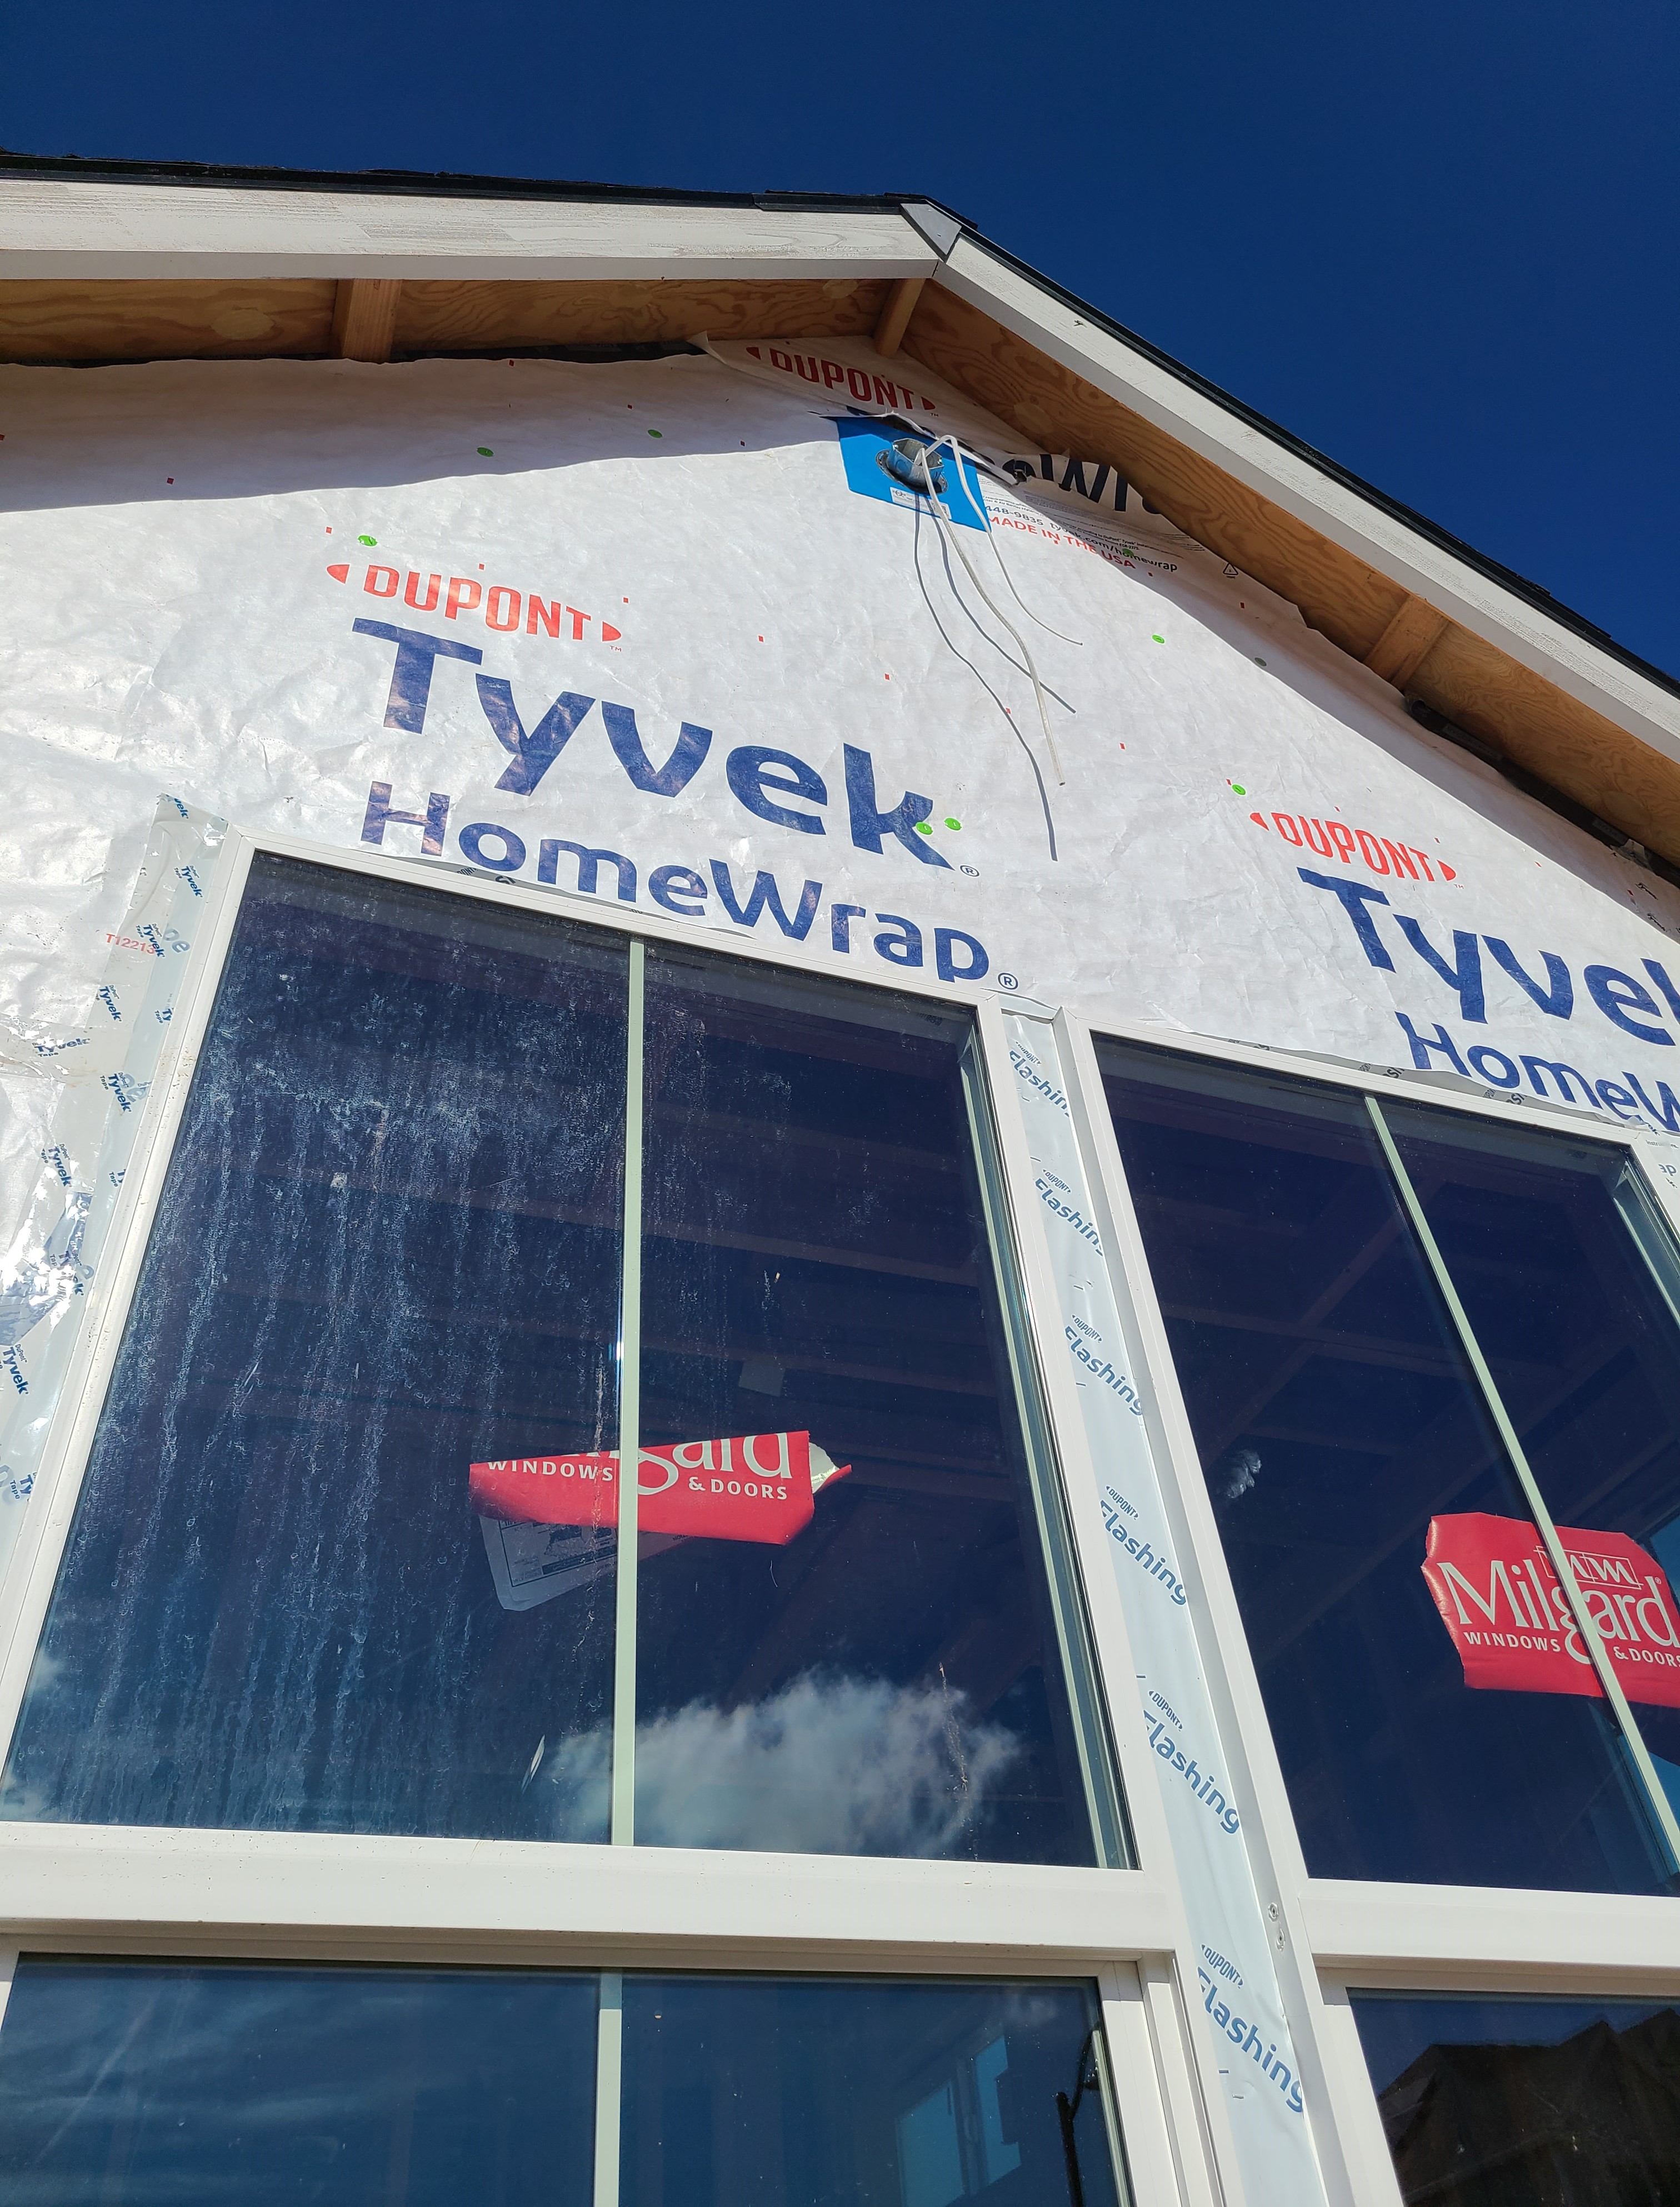
Right - The house wrap is properly flashed and taped, and all penetrations are properly flashed.
Image
Image
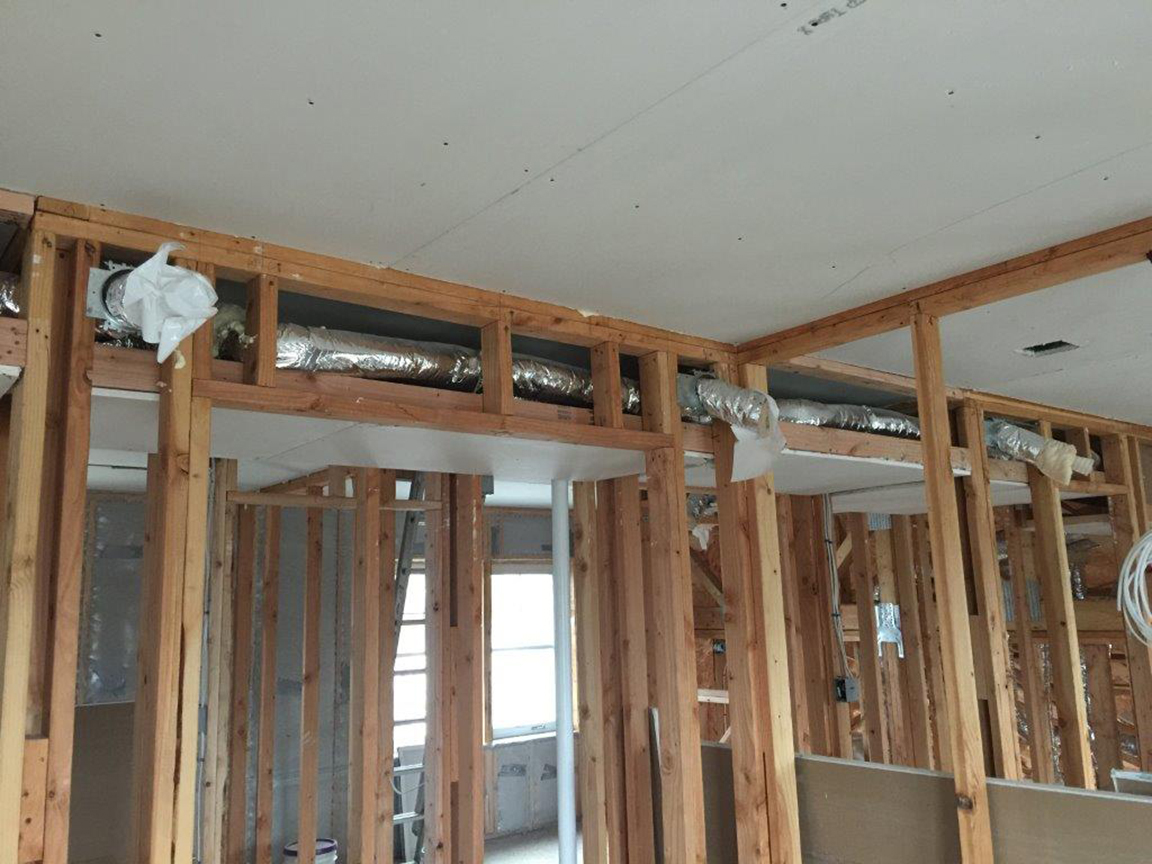
Right - The HVAC ducts are located in conditioned space in a dropped hallway ceiling with very short duct runs for more efficient delivery.
Image
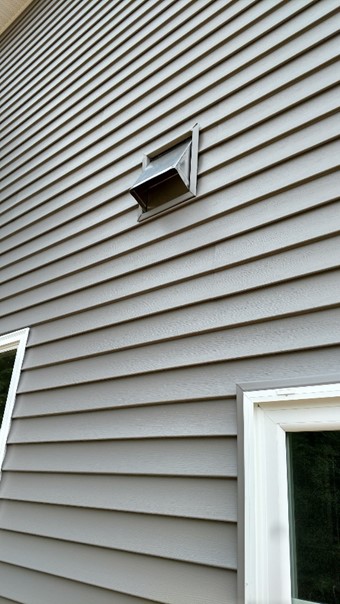
Right - The kitchen exhaust duct termination is integrated aesthetically and functionally with the exterior cladding; however, the opening should be screened to keep out pests.
Image

Image
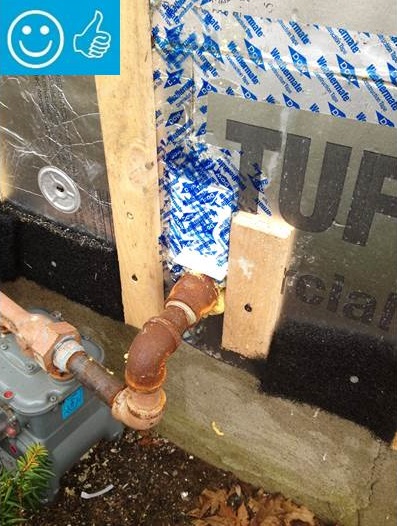
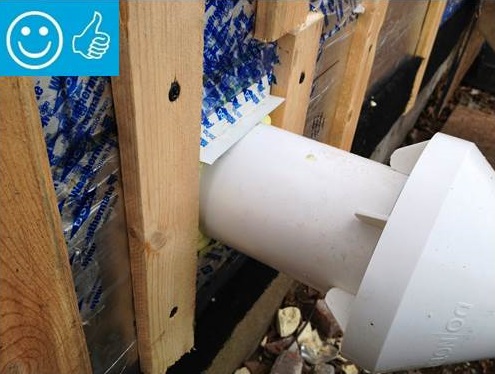
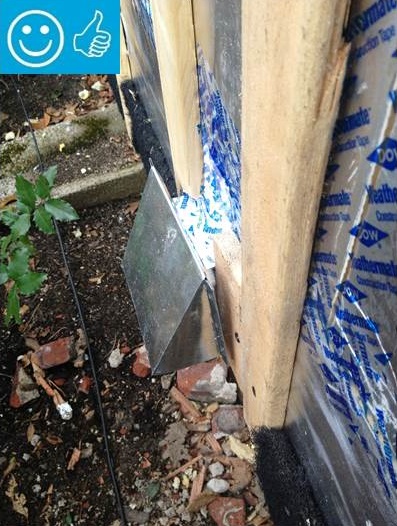
Right - The pipe penetration is properly flashed and furring strips are installed on each side in preparation for installing cladding
Image

Image

Right - The posts and floor of this crawlspace are covered with a heavy sheet of vapor retarder that is sealed to the post, the walls, and at all seams.
Image
Right - The poured concrete basement walls are insulated along the inside with 2.5 inches of extruded polystyrene insulation.
Image
Right - The precast insulated concrete walls of the basement provide a conditioned space for the high-efficiency (18 SEER, 9.5 HSPF) air-source heat pump, with its variable-speed fan, five-stage compressor, and MERV 11 filter.
Image
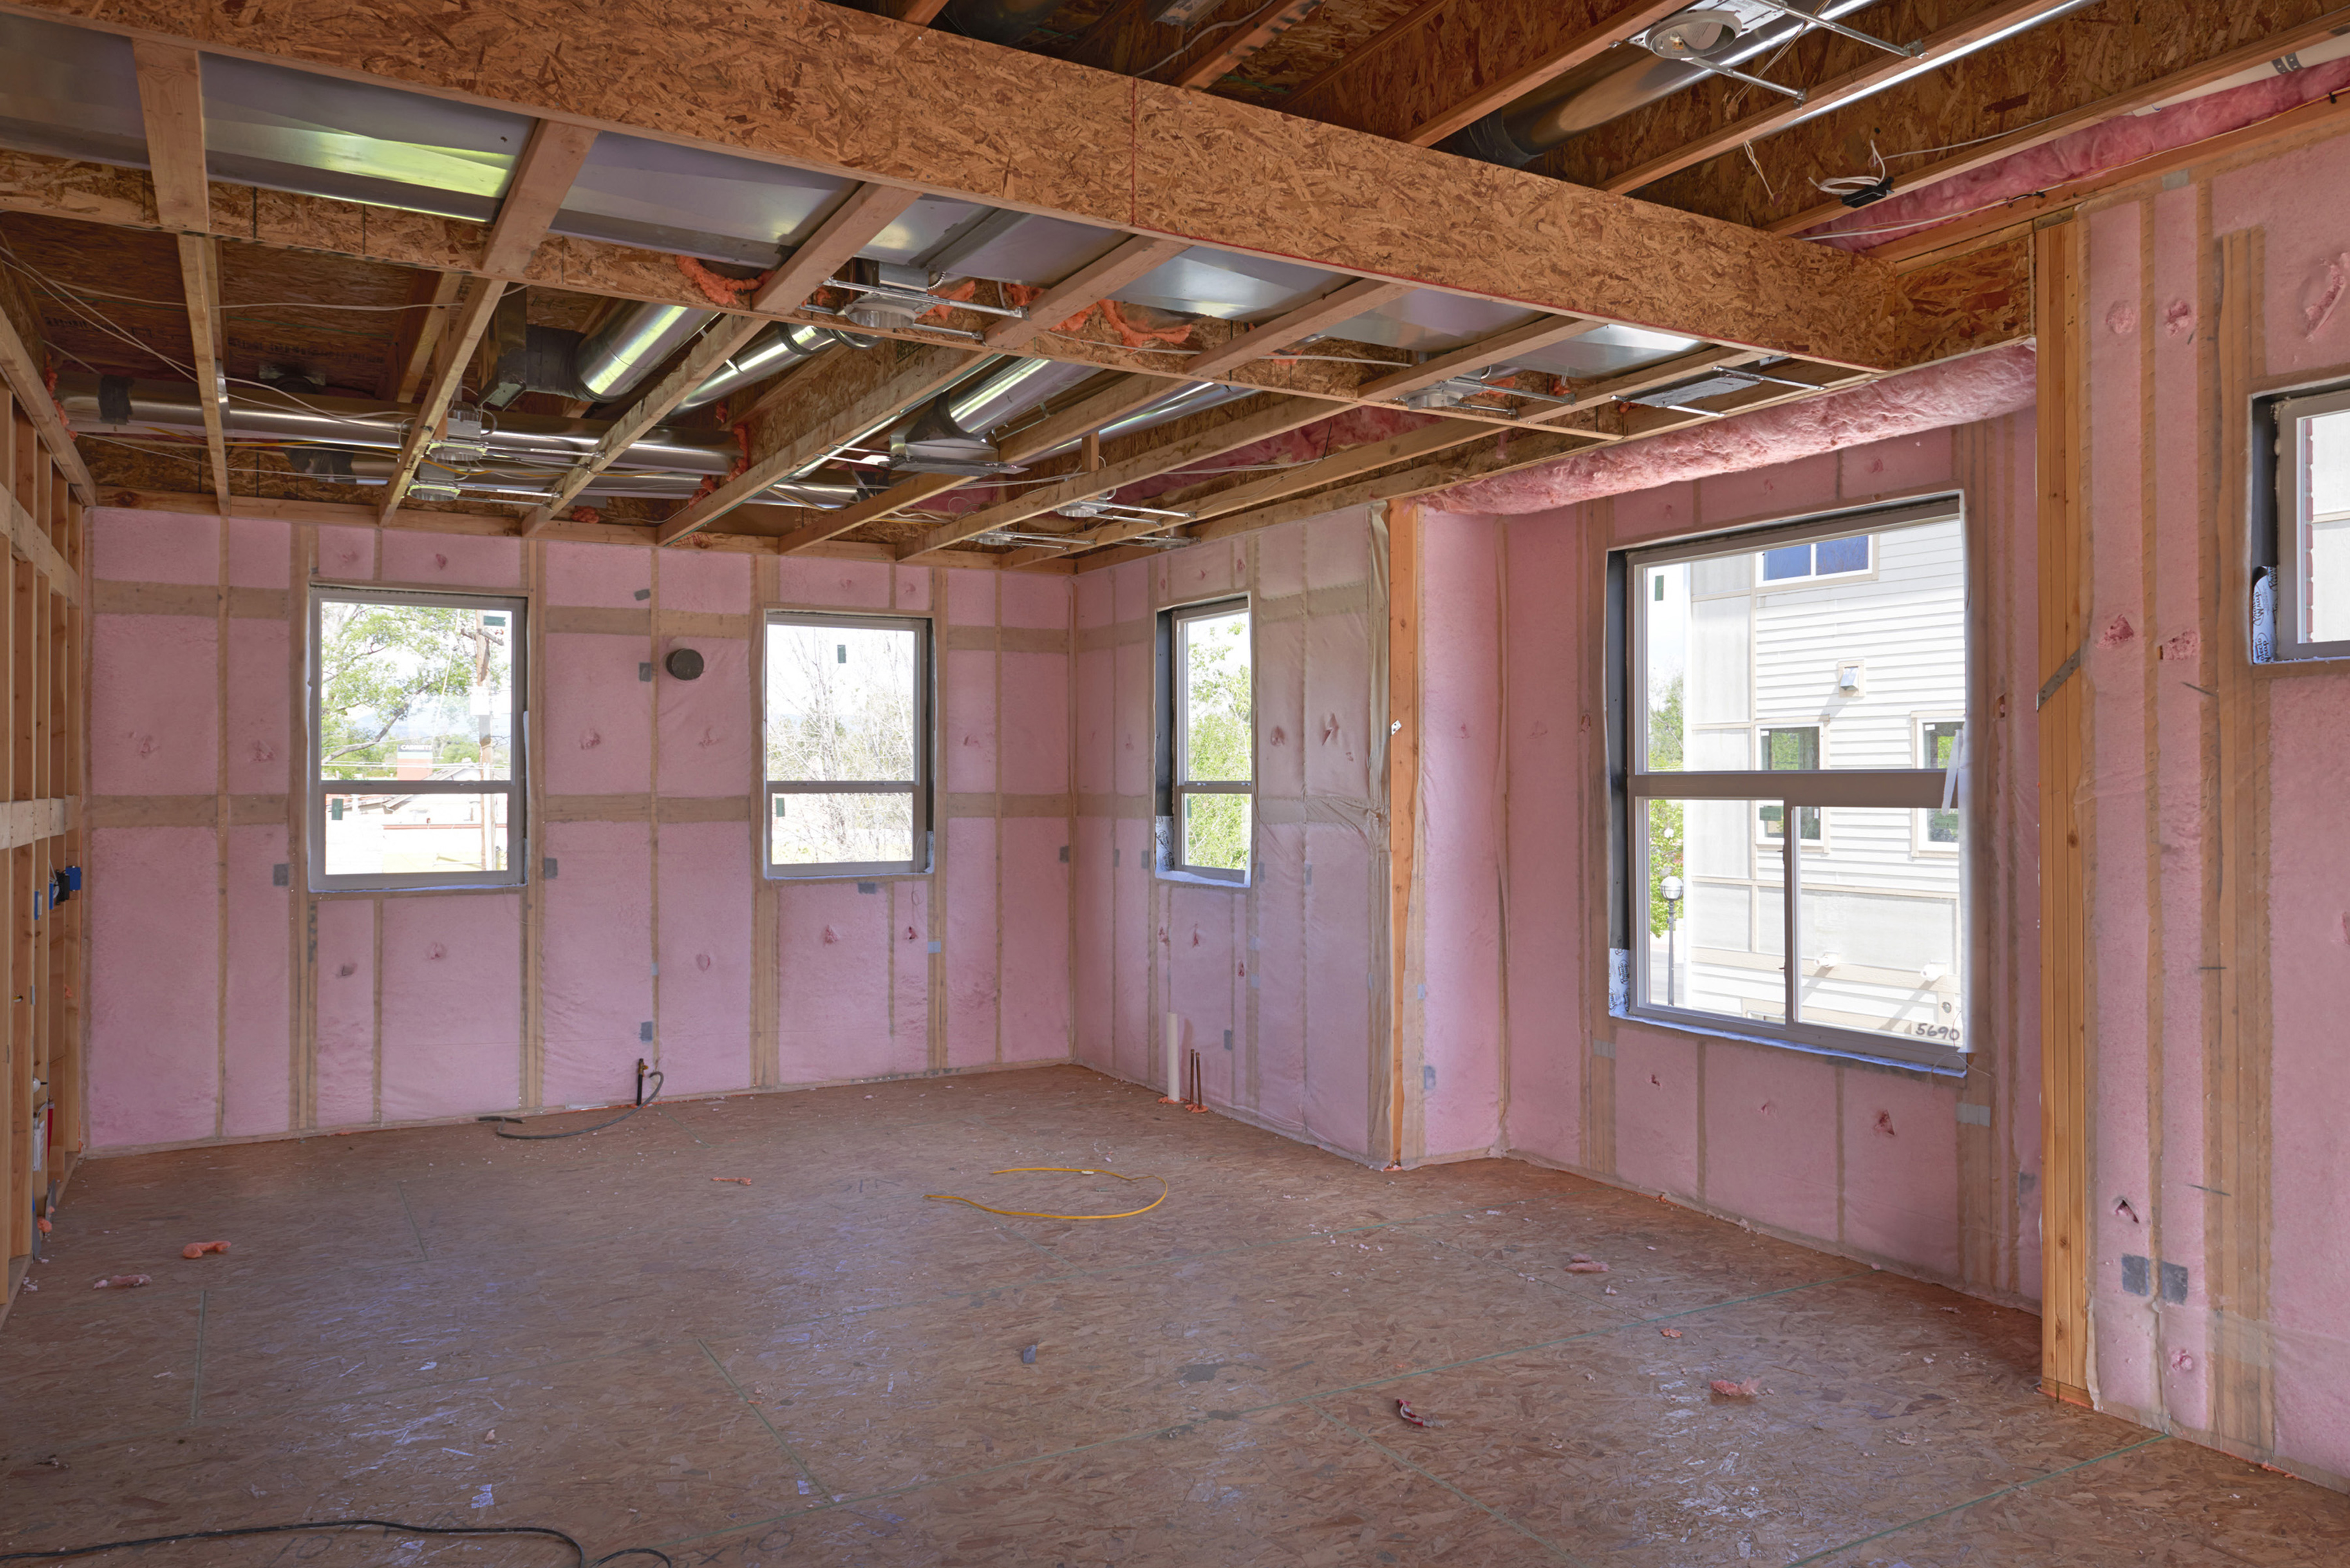
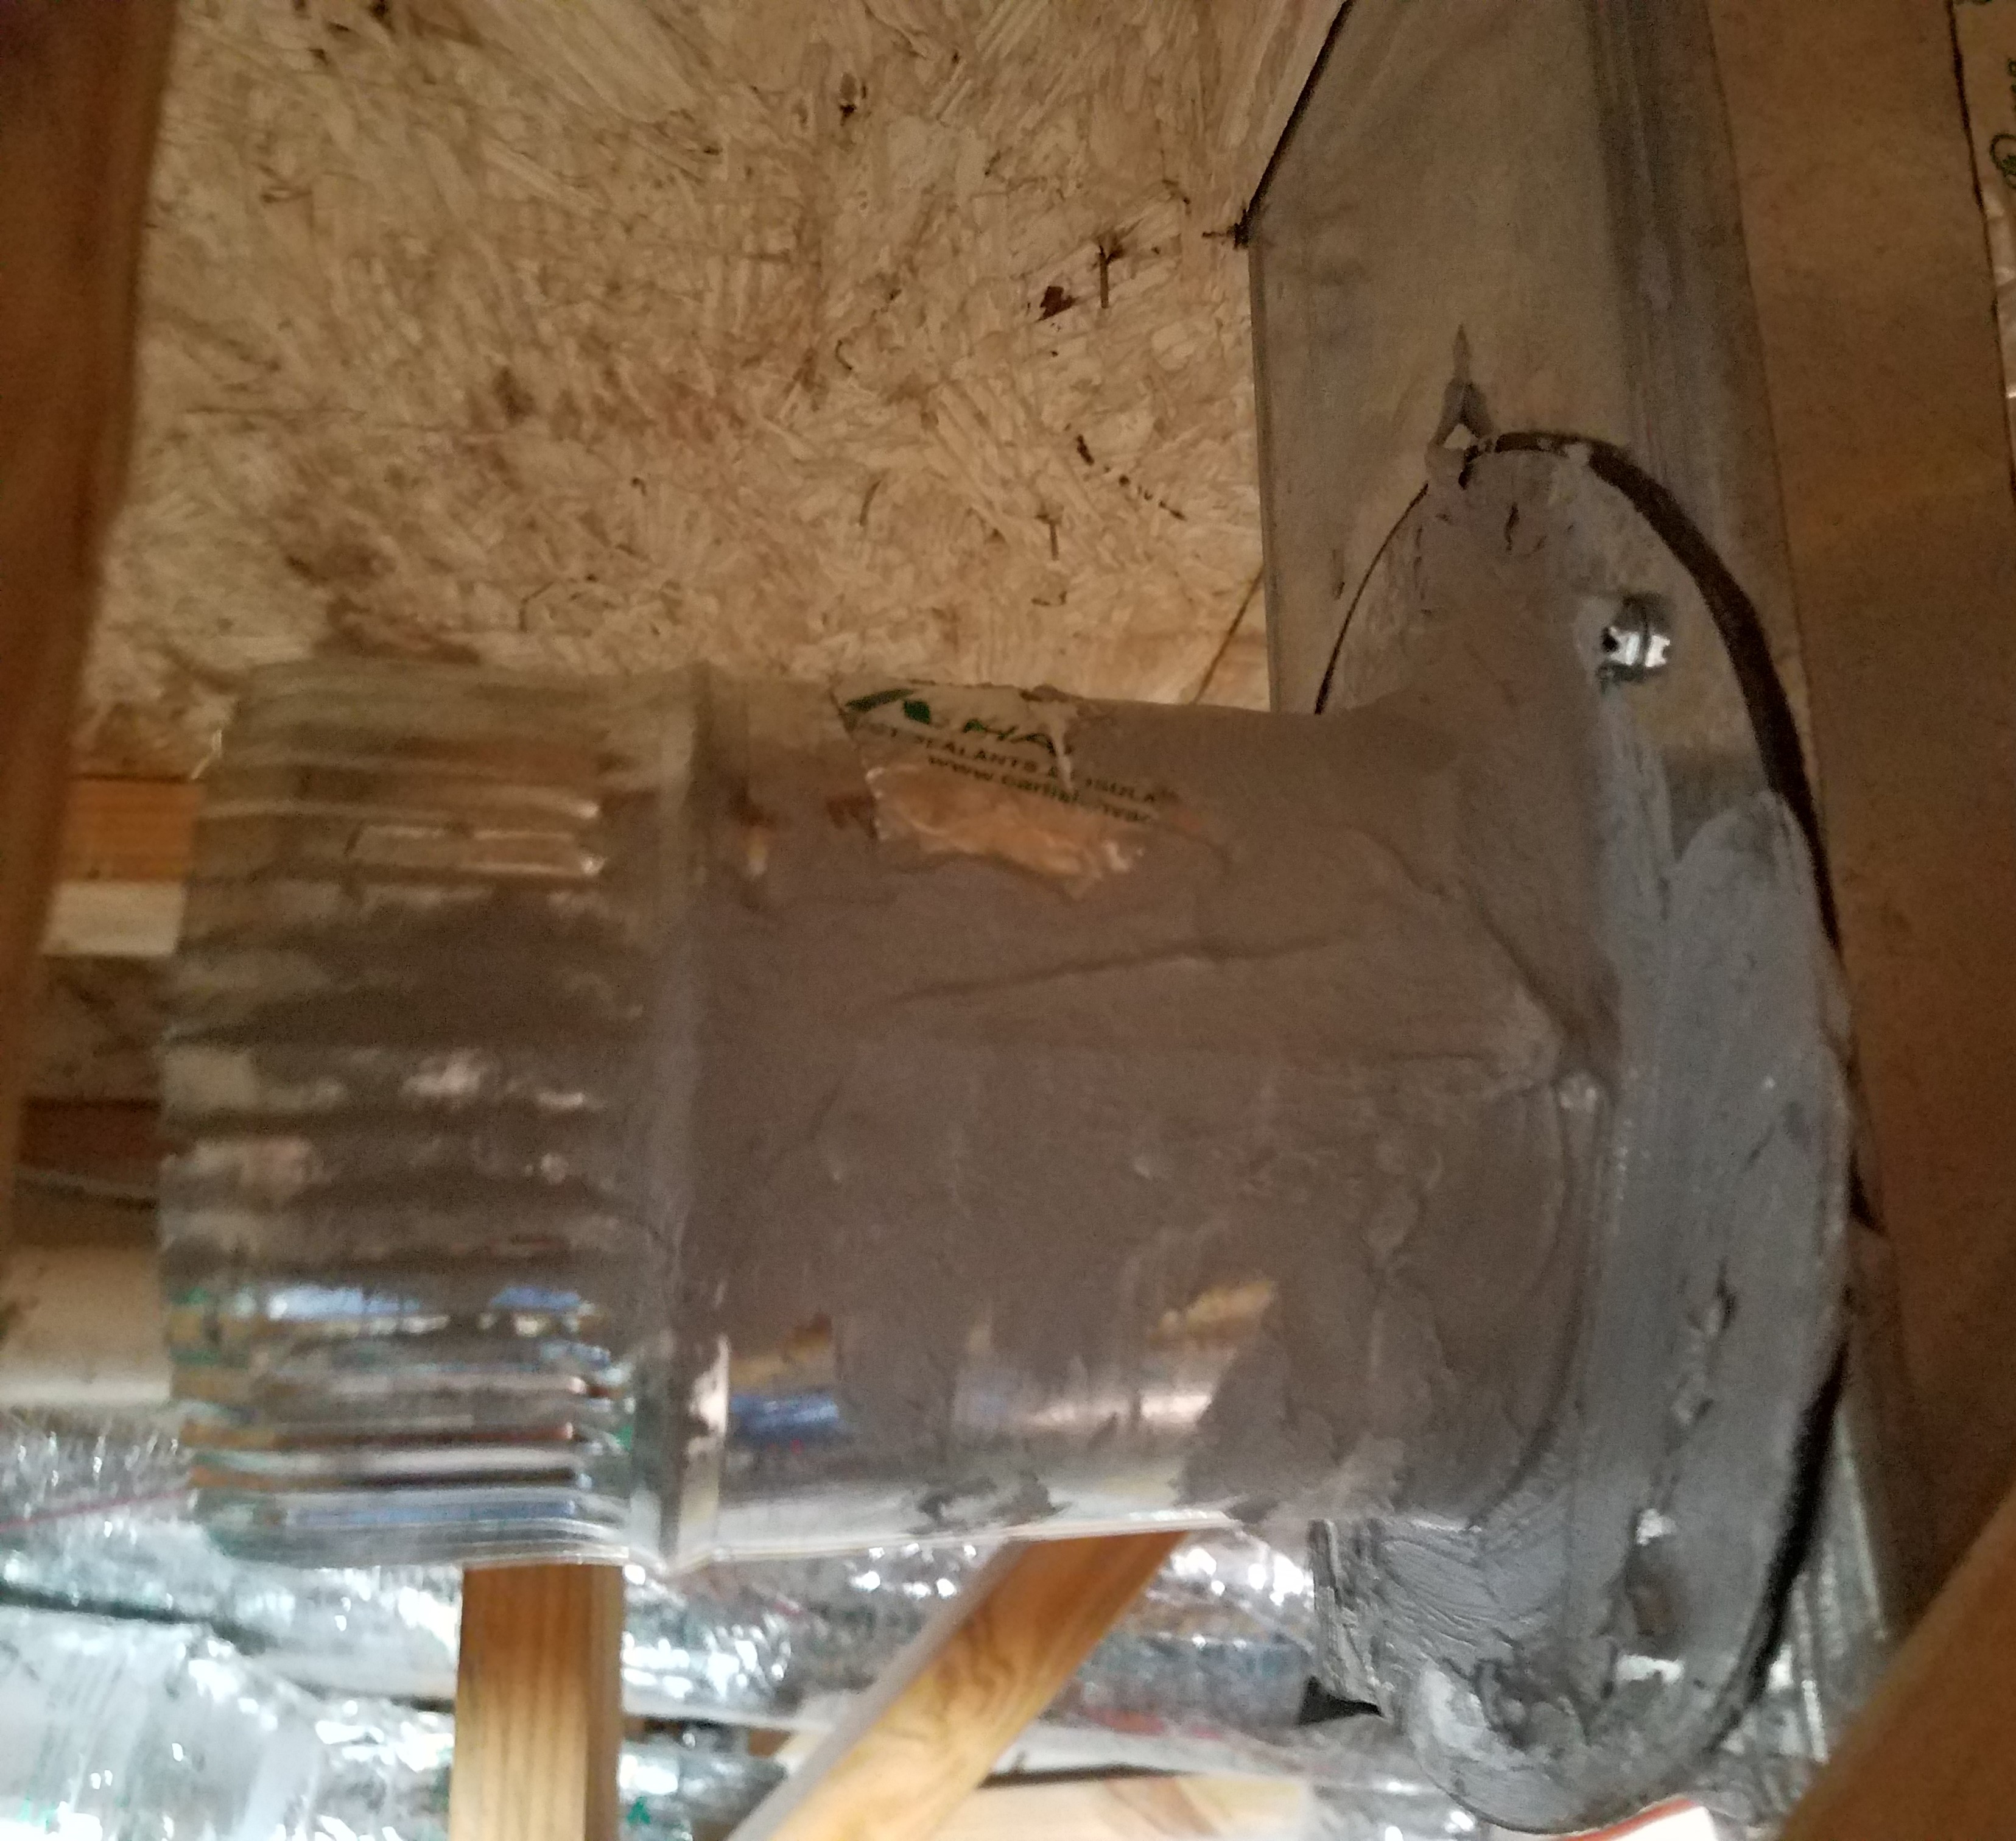
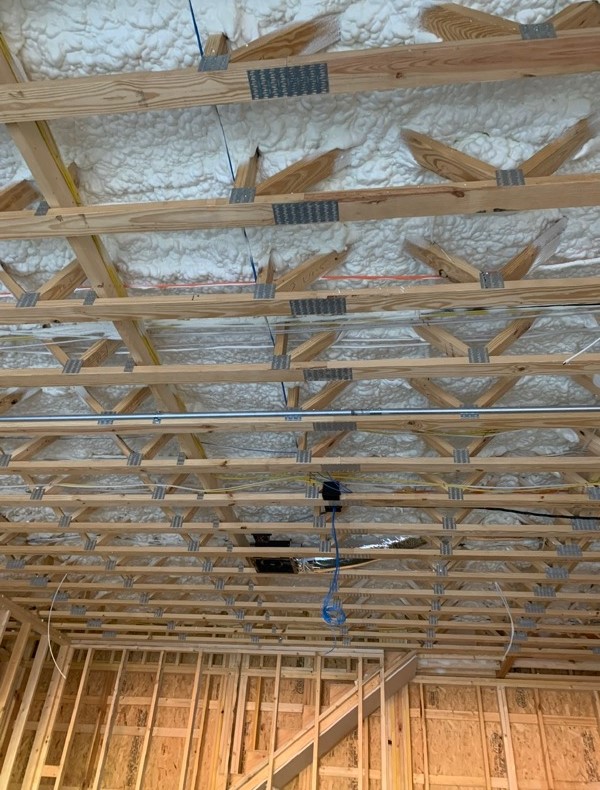
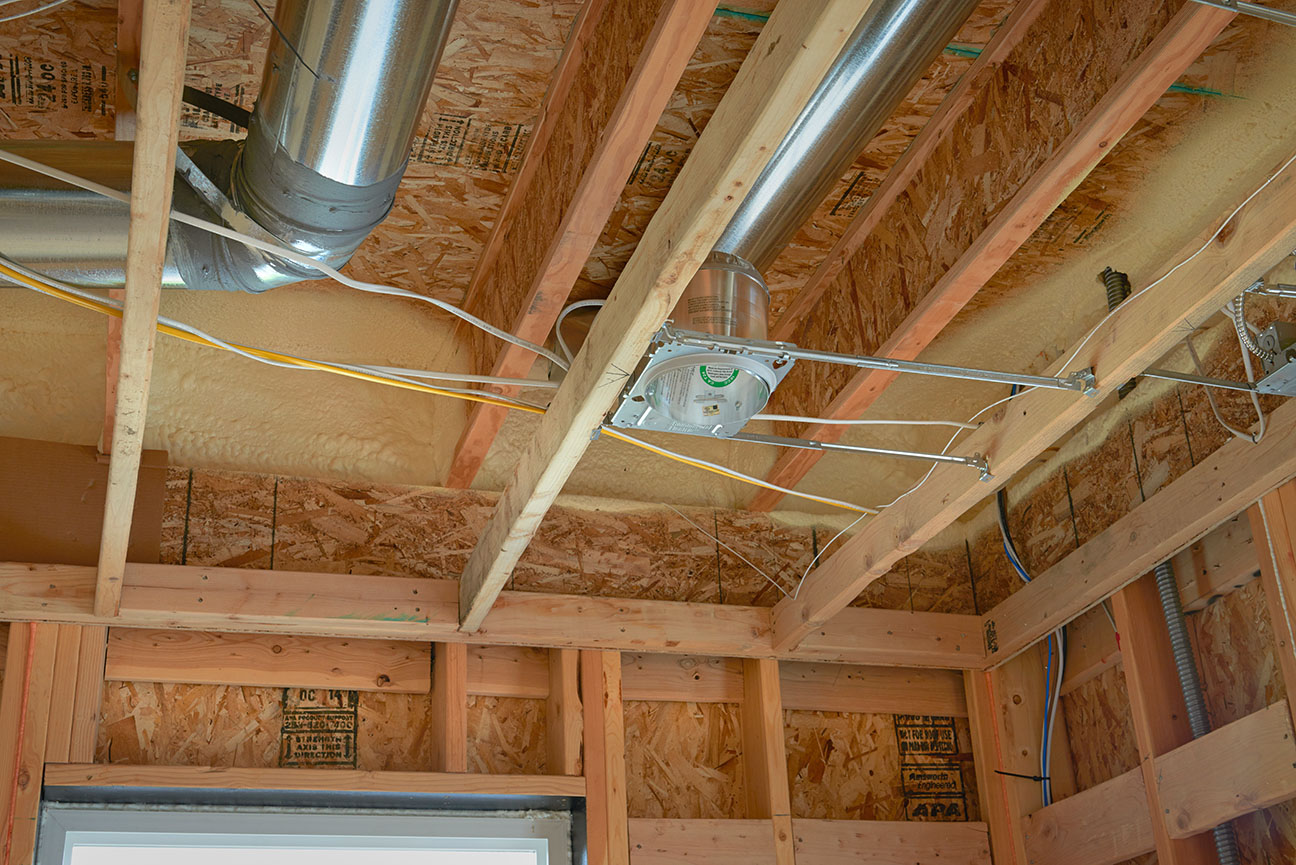
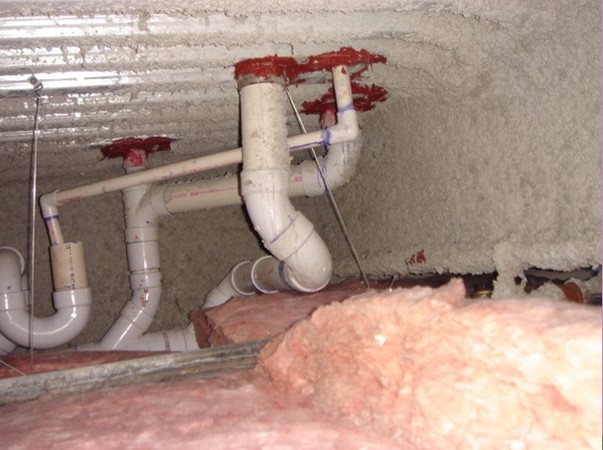
Right - The rigid metal HVAC ducting is installed between the floor joists rather than in an unconditioned attic or crawl space to minimize heat loss.
Image
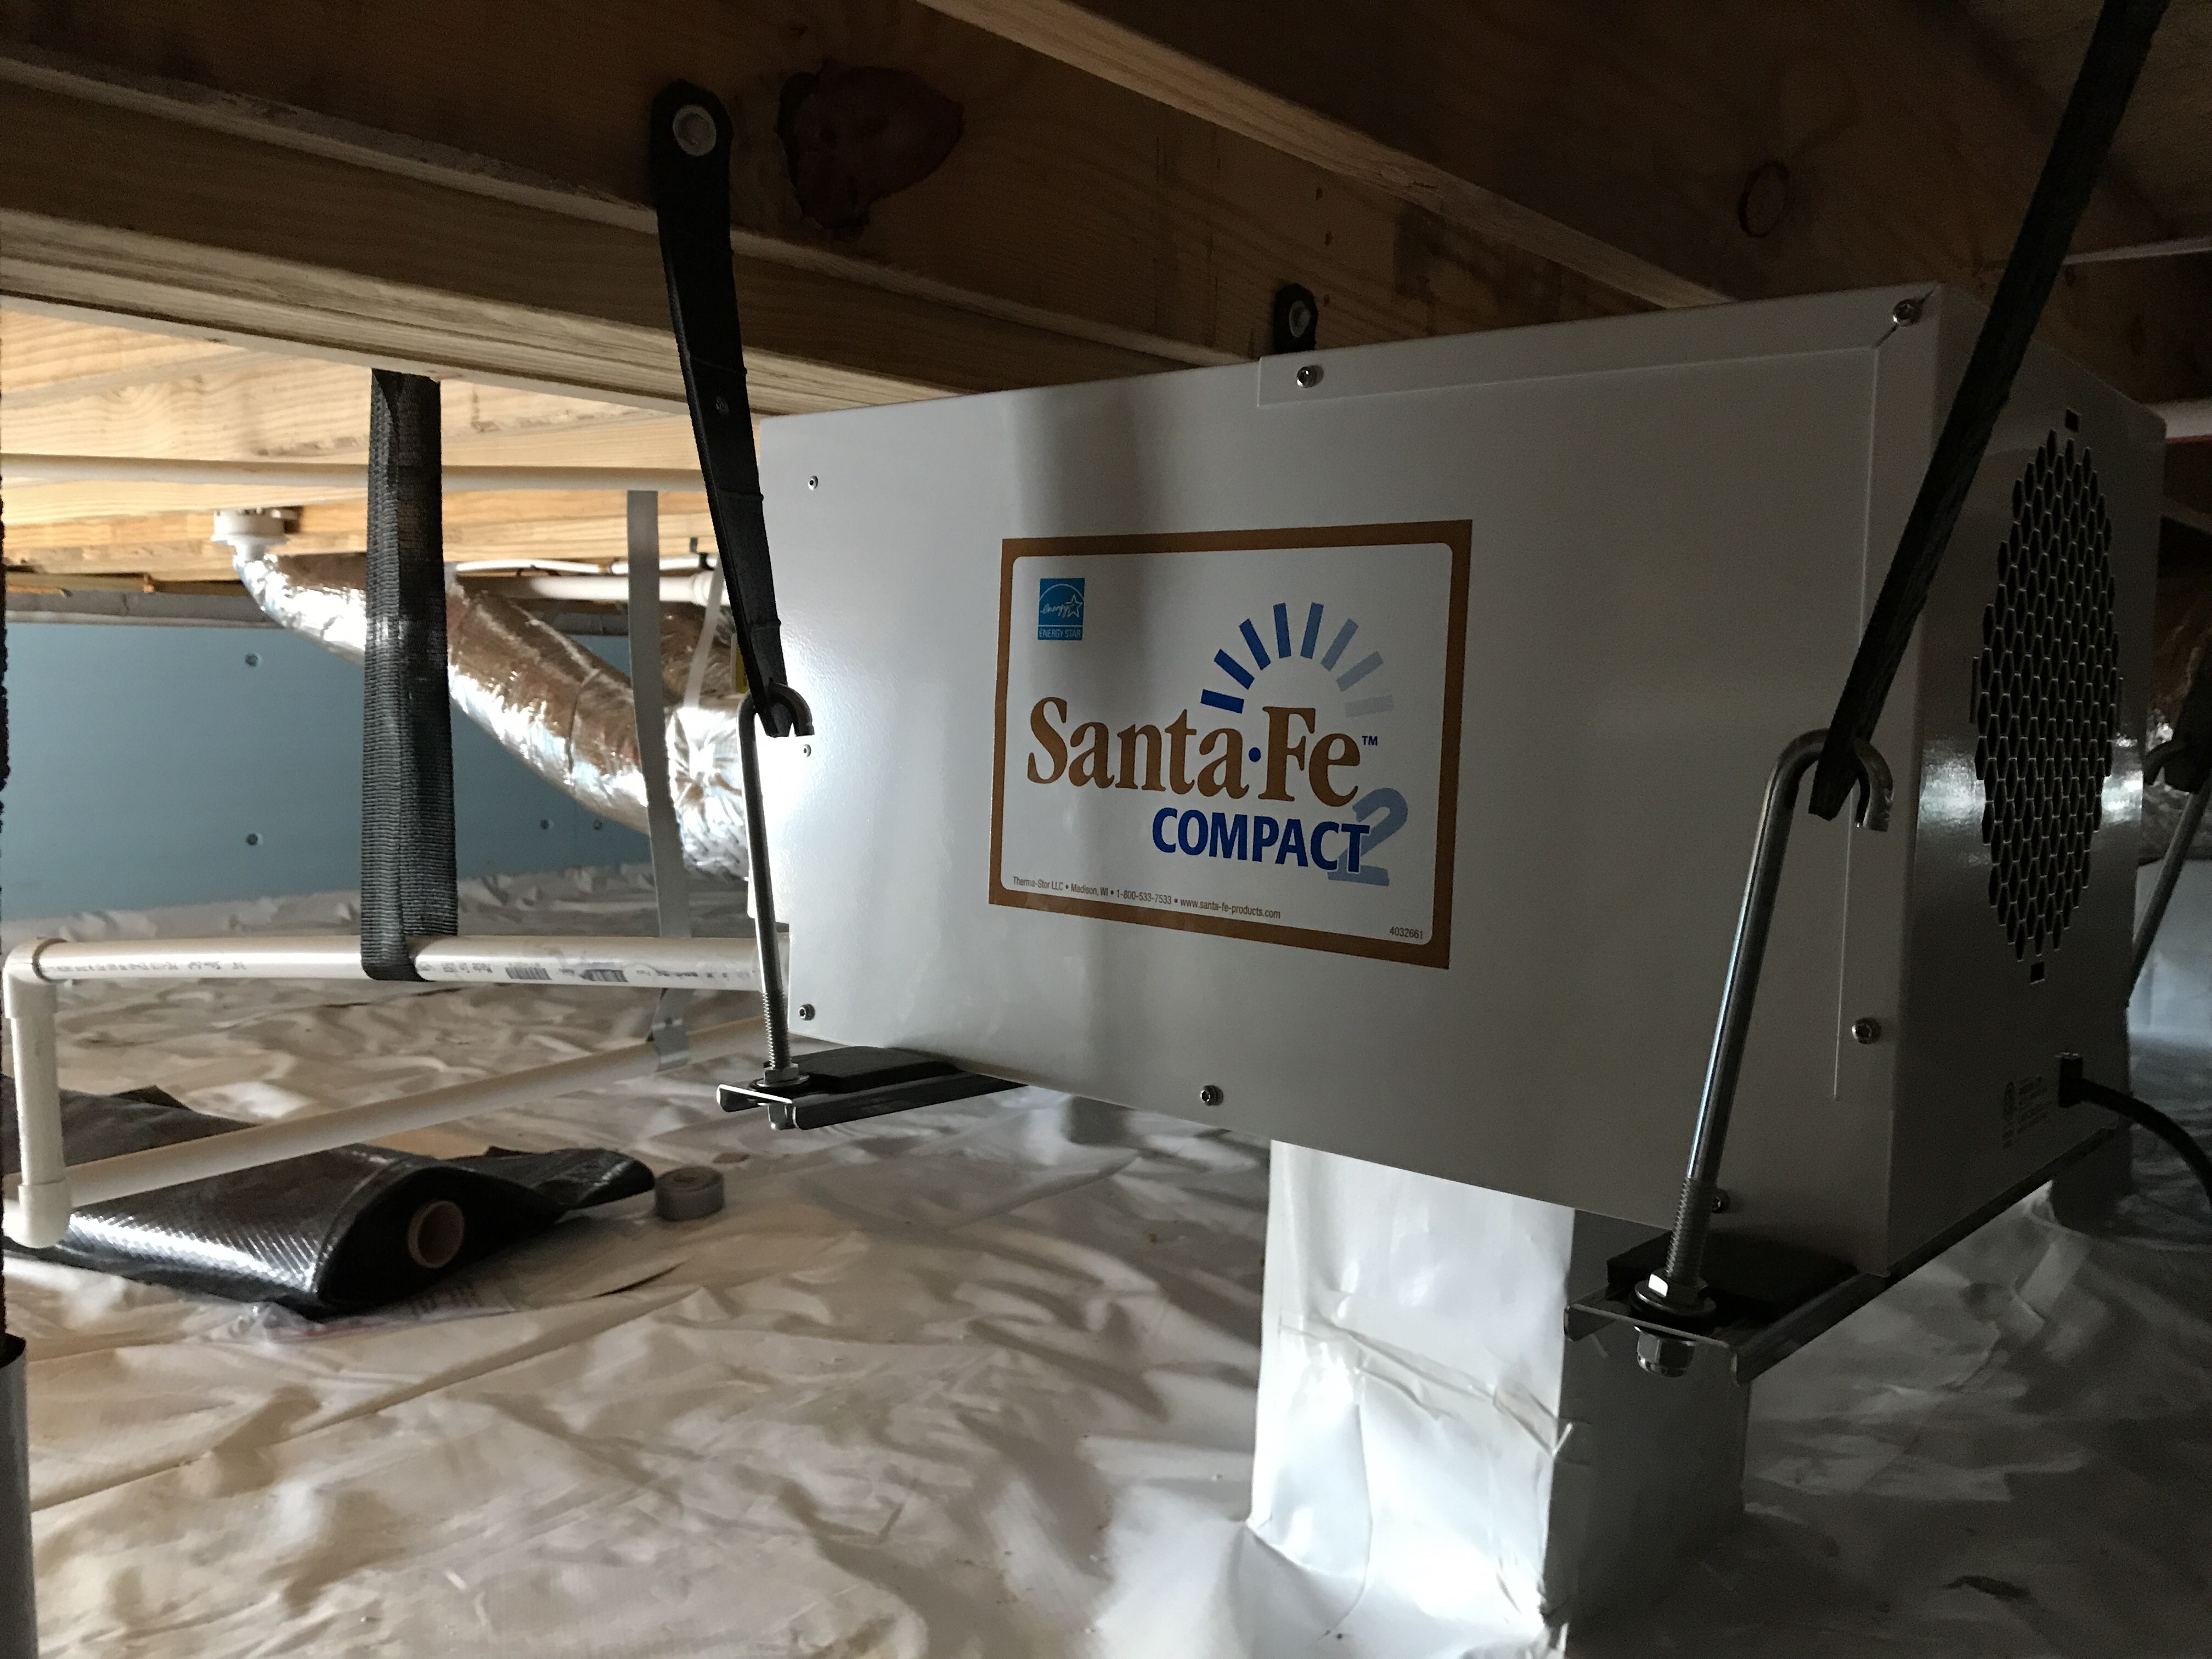
Right - The sealed conditioned crawlspace provides a clean, dry, and temperate environment for the home’s supplemental dehumidifier.
Image
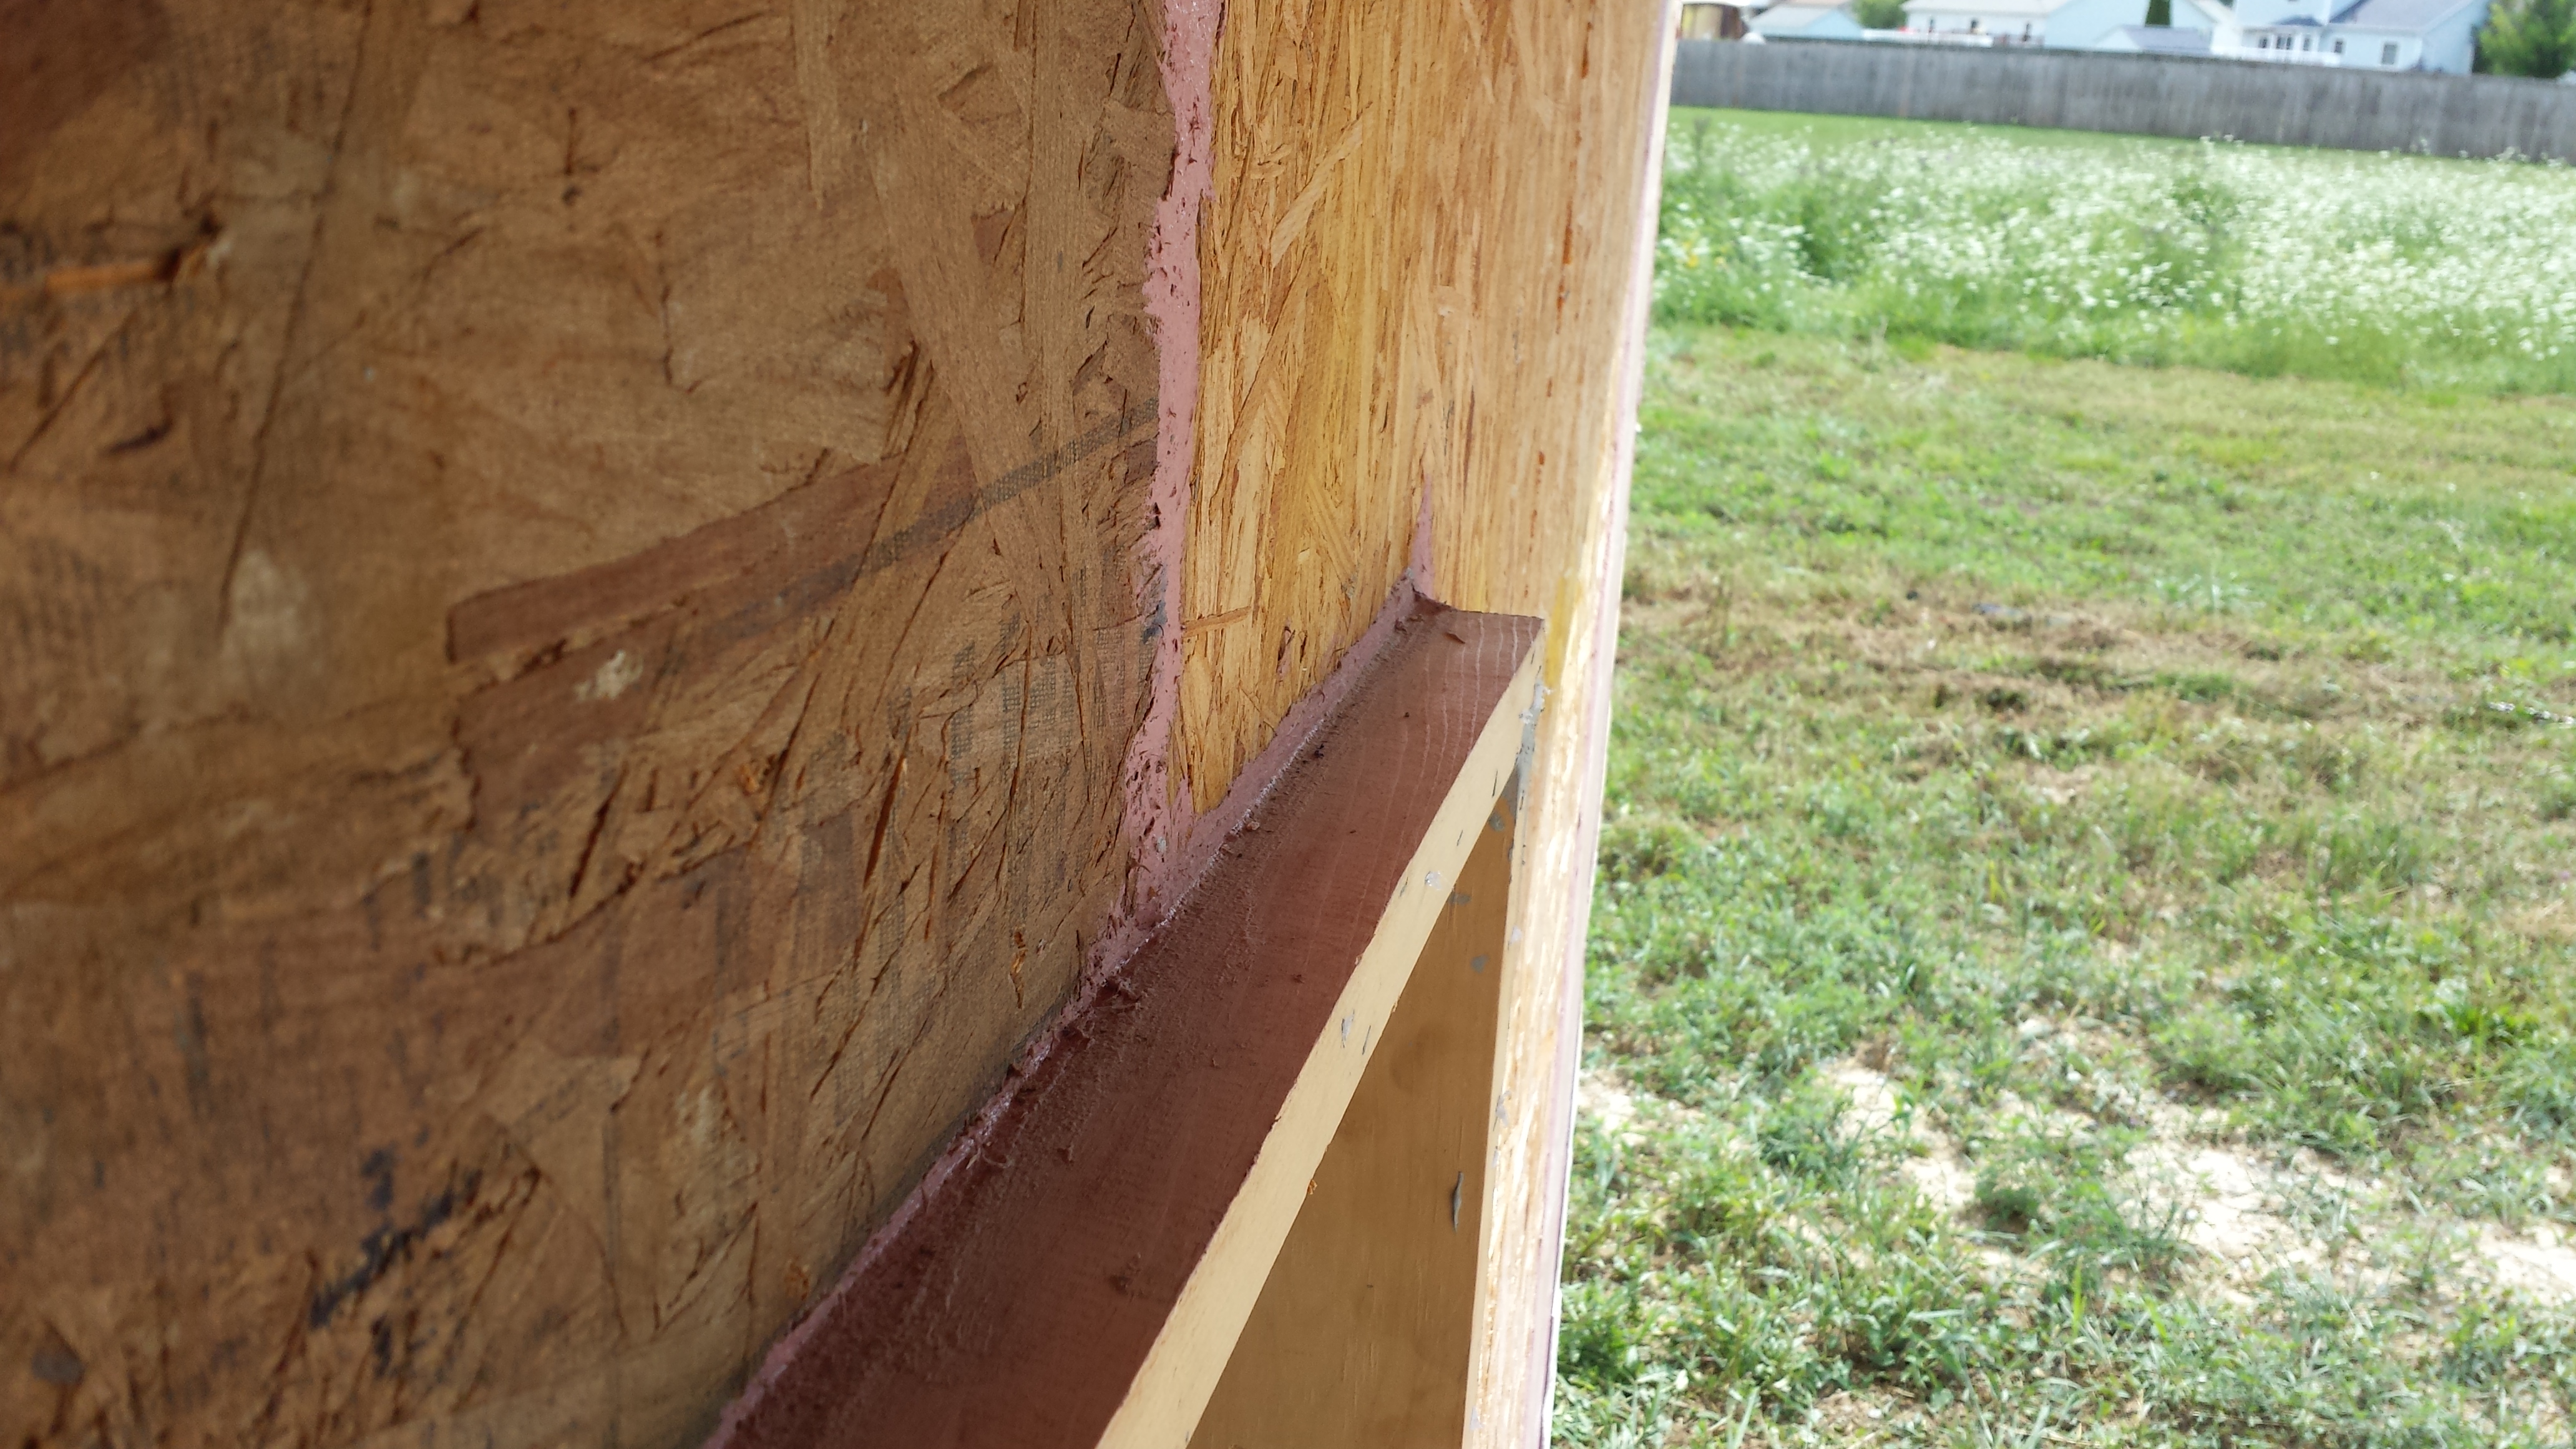
Right - The seams in the OSB sheathing are sealed with a sprayer-applied sealant.
Image
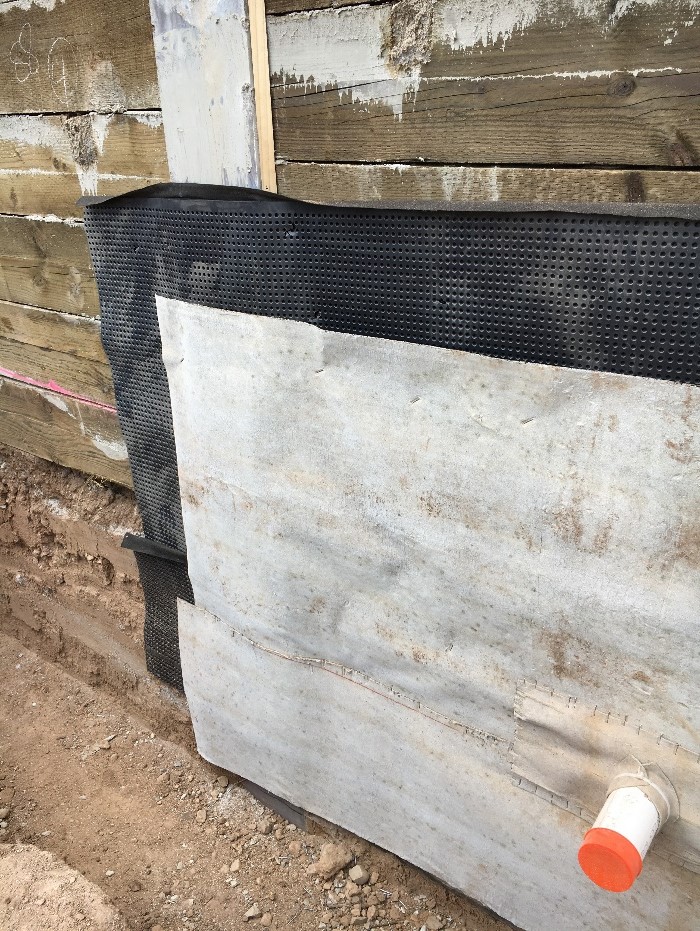
Right - The service penetration in the waterproofing membrane is well-sealed, and there is a drainage mat acting as a protective layer on the interior of the soldier piles and wood lagging.
Image
Right - The service penetrations through the structural slab in this garage plenum are air sealed.
Image
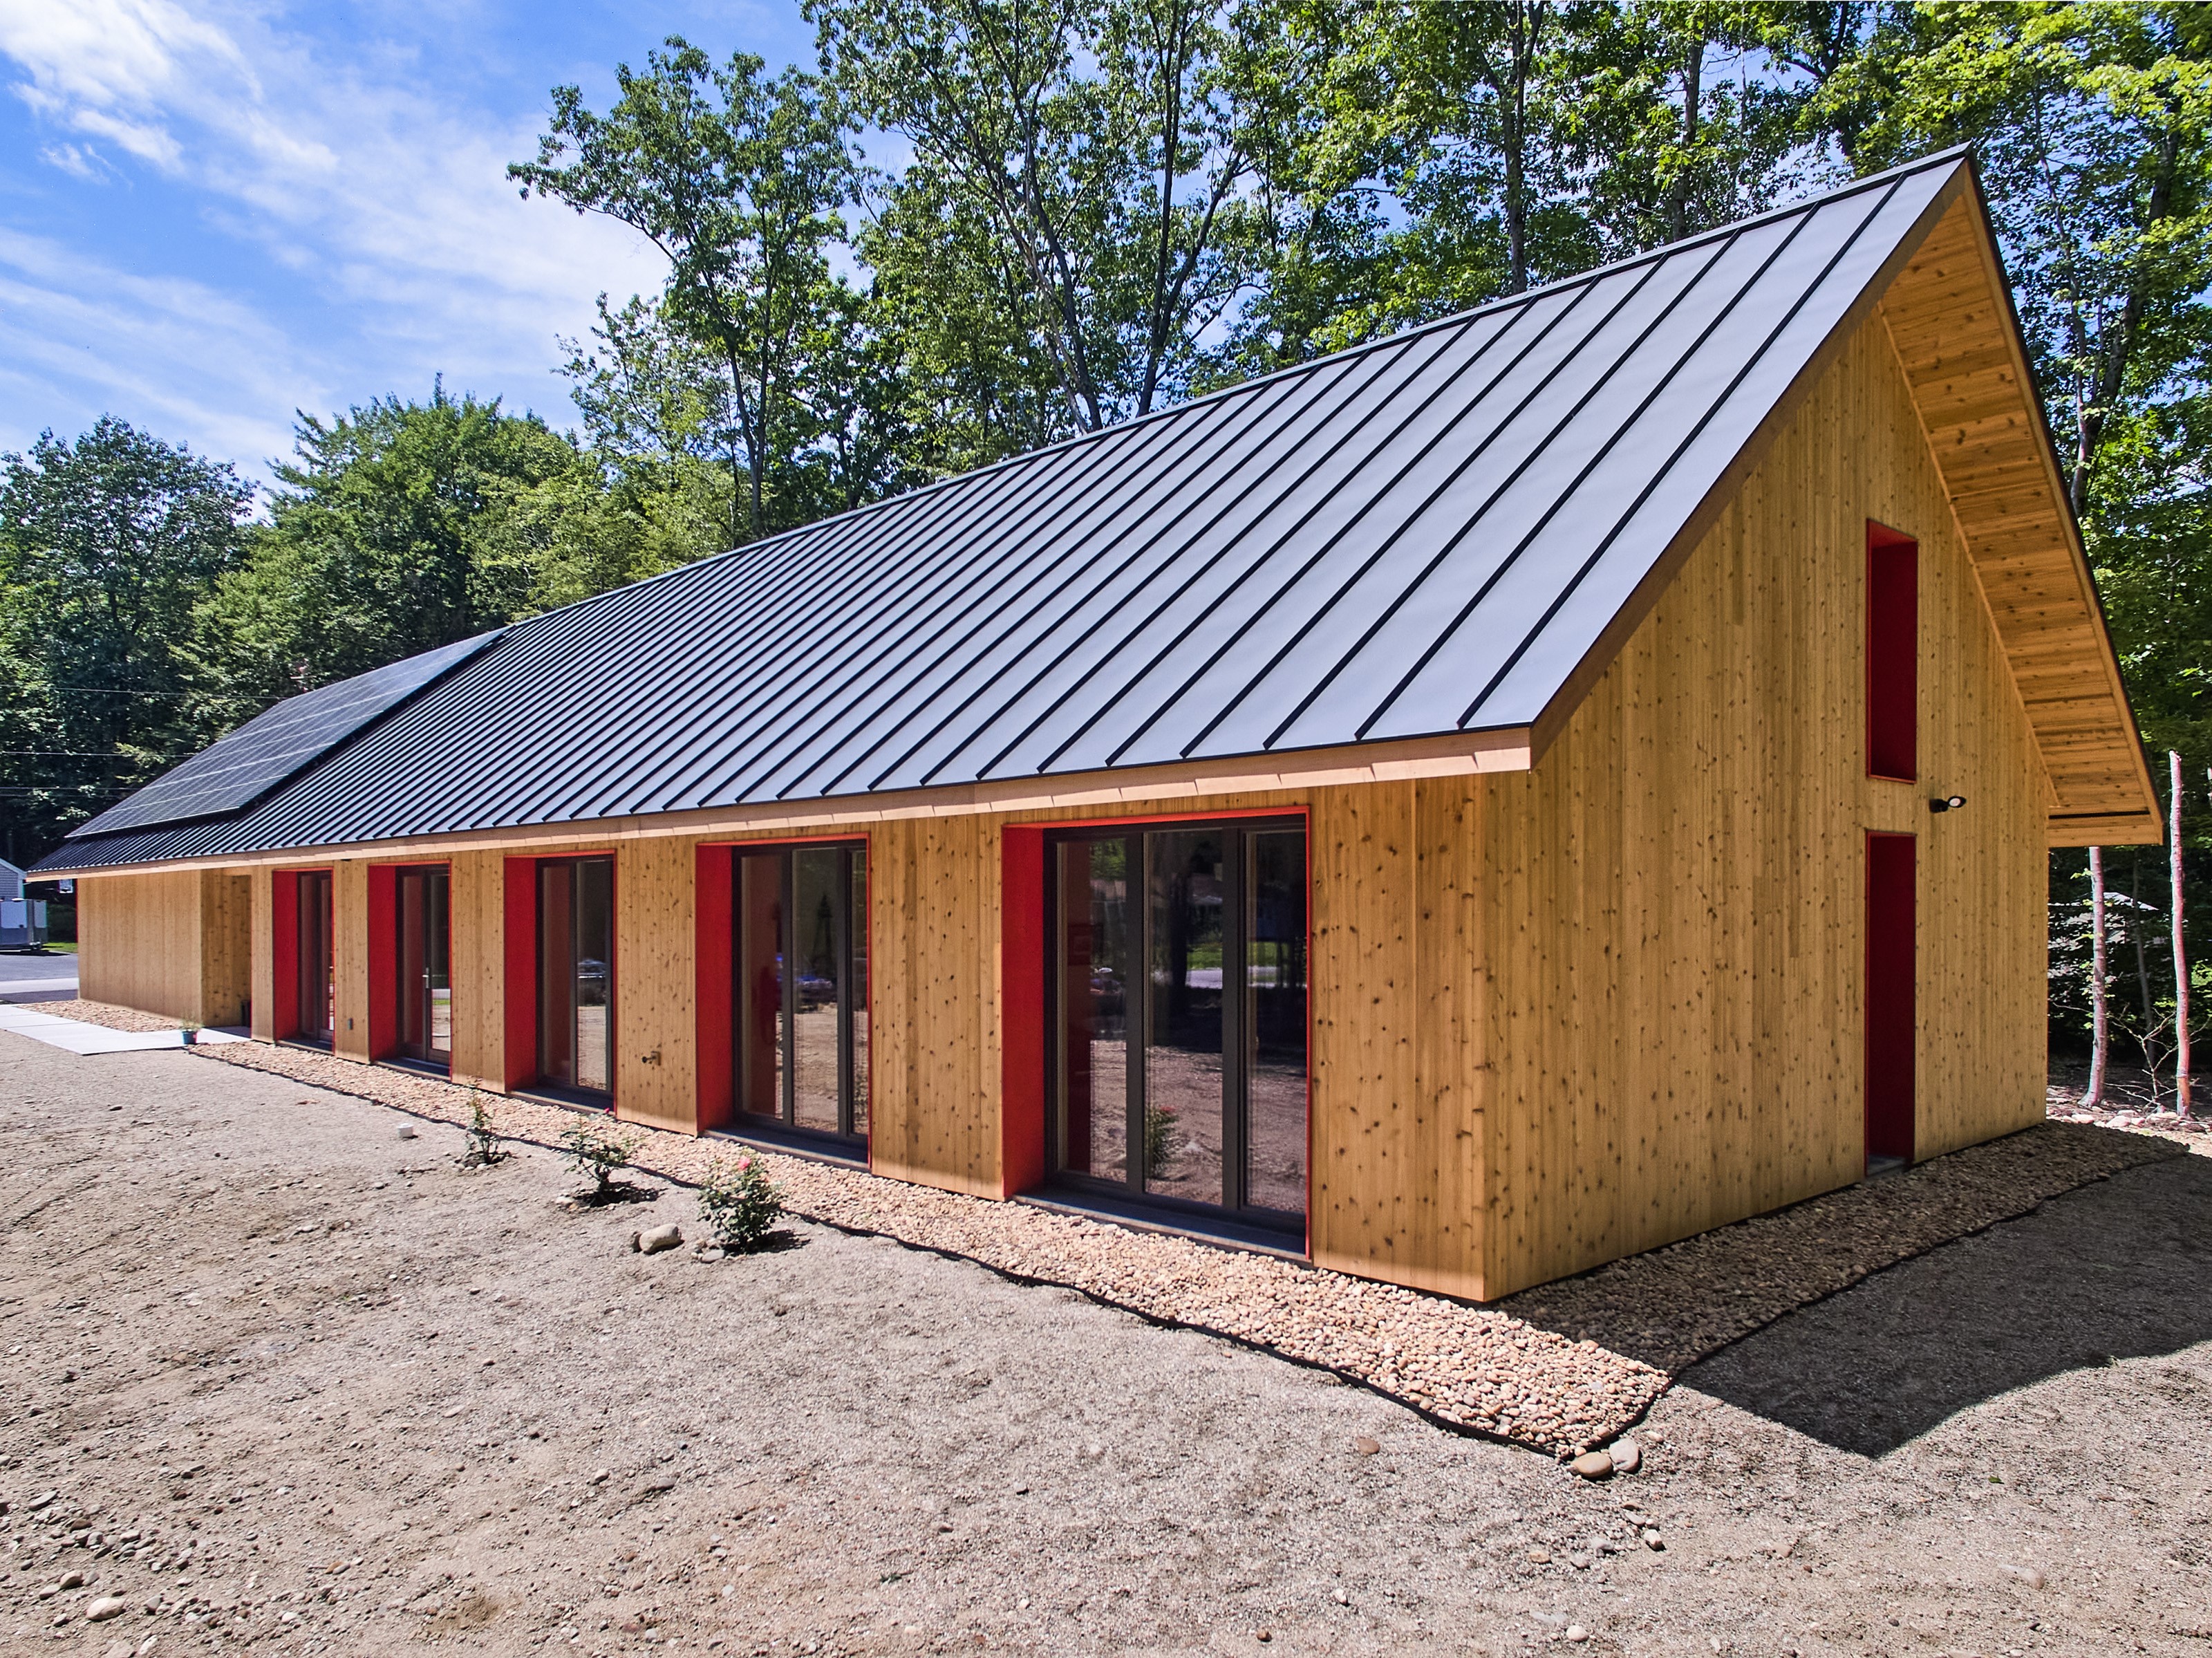
Right - The simple rectangular design of this home provides a large expanse of roof for solar panels.
Image
Image
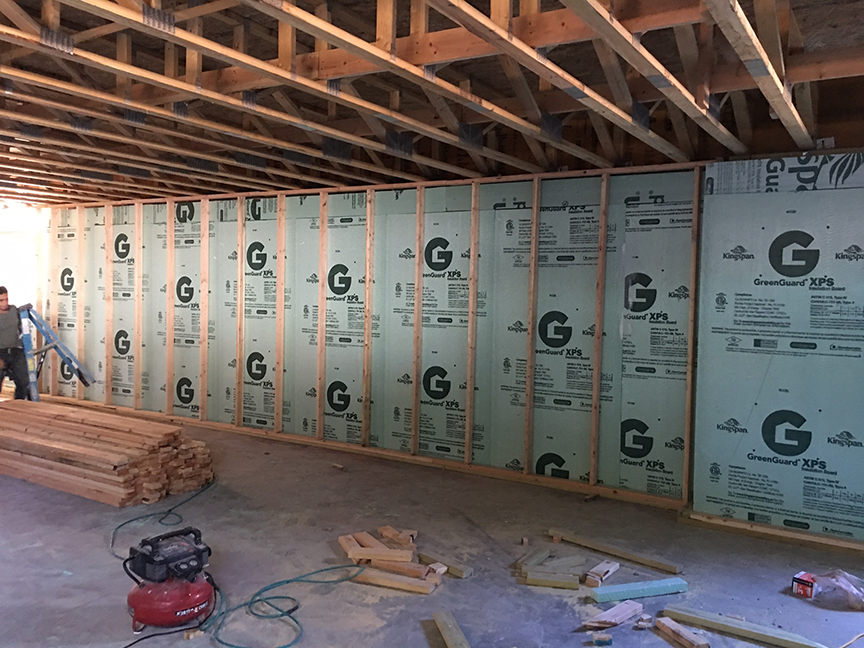
Right - The slab-on-grade foundation is insulated with two layers (R-20) of XPS foam under the-slab and R-10 on the exterior of the stem walls.
Image
Image
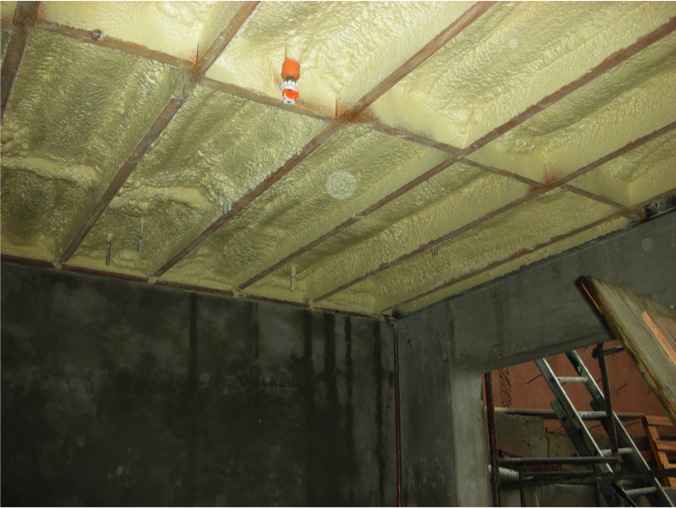
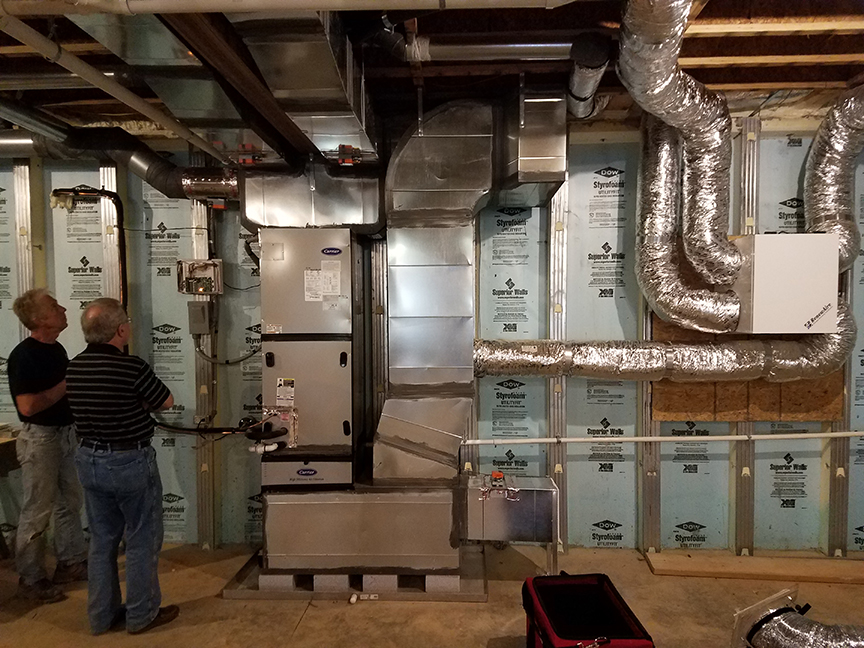
Right - The underside of the attic roof deck is insulated with open-cell spray foam to provide an insulated space for HVAC equipment.
Image
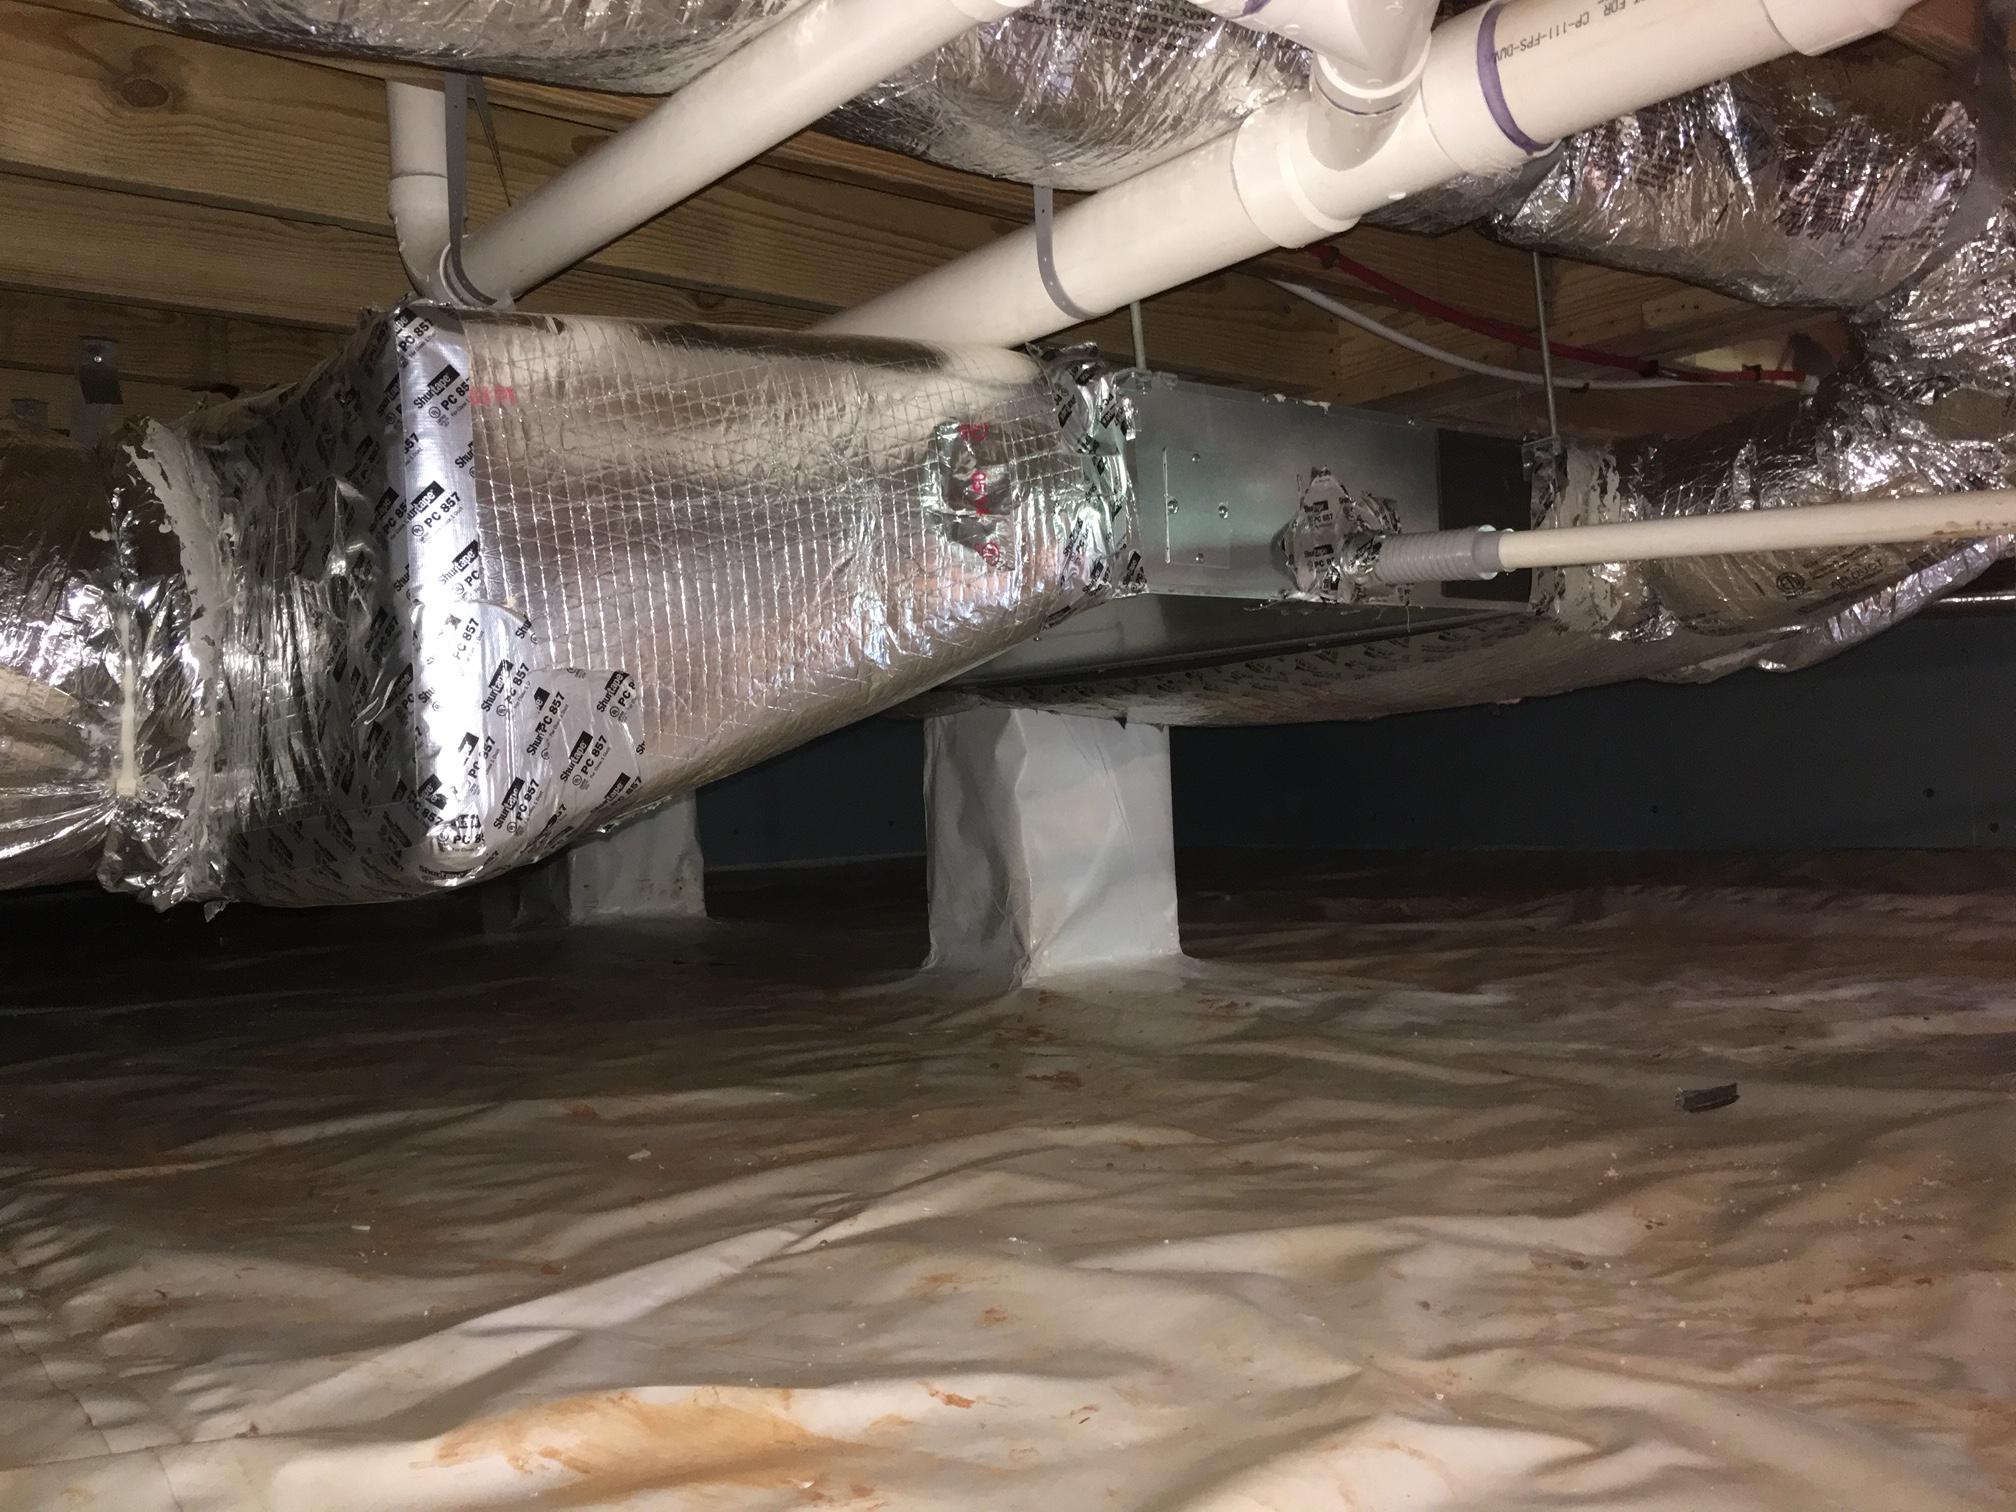
Right - the vapor barrier is extended up the sides of the piers in this crawlspace, which is sealed and insulated to house the HVAC ducts.
Image
Image

Right - The wall framing is connected to roof framing with metal ties for hurricane-resistant construction.
Image

Right - The wall top plates are sealed with foam before installing insulation on the ceiling deck.
Image
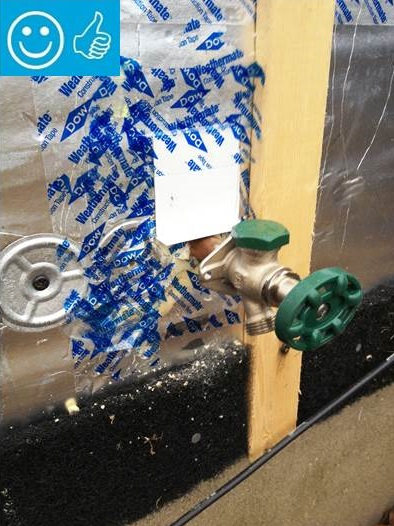
Right - The water and air control layers are properly integrated around the hose bib
Image
Right - These attic knee walls are insulated with rigid foam and sealed with spray foam to form a continuous air barrier at the gable end of this cathedral ceiling.
Image
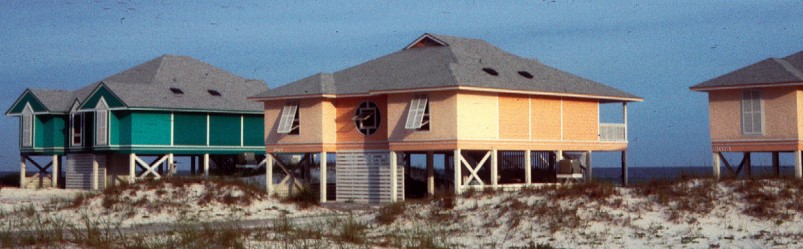
Right - These homes have hurricane shutters to protect against high winds and to provide solar control.
Image
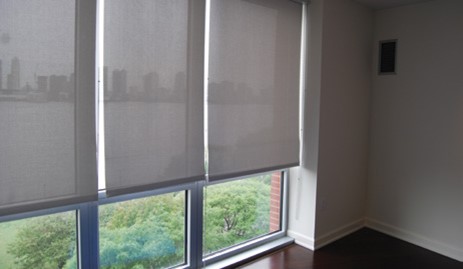
Right - These interior solar screens help control glare and solar heat gain while maintaining view to the outside.
Image

Right - These inverters convert the power from the home’s 6.8-kW of photovoltaic panels from DC to AC for connection to the grid; the inverters can also be connected to batteries for backup power storage.
Image
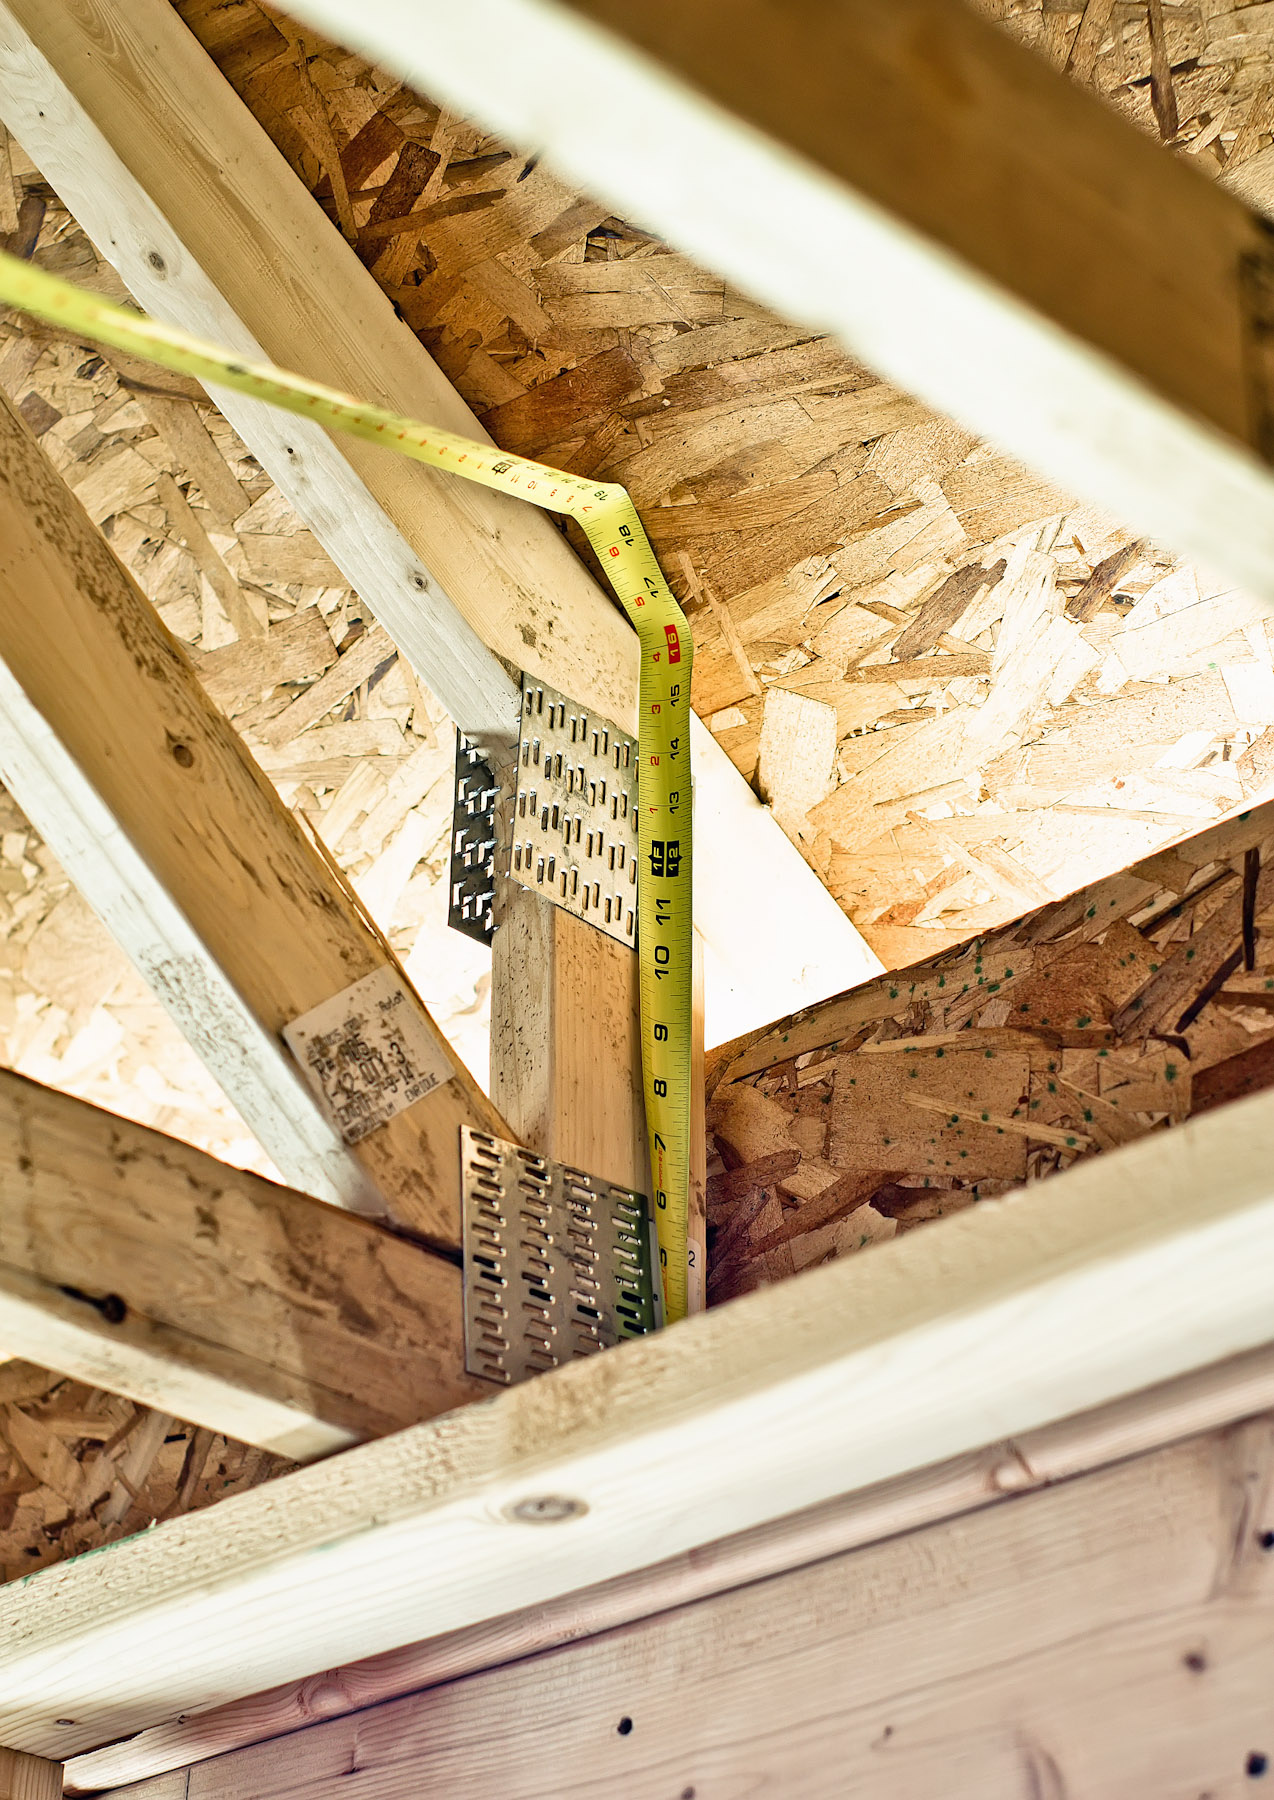
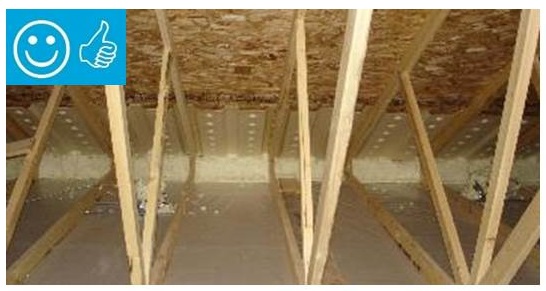
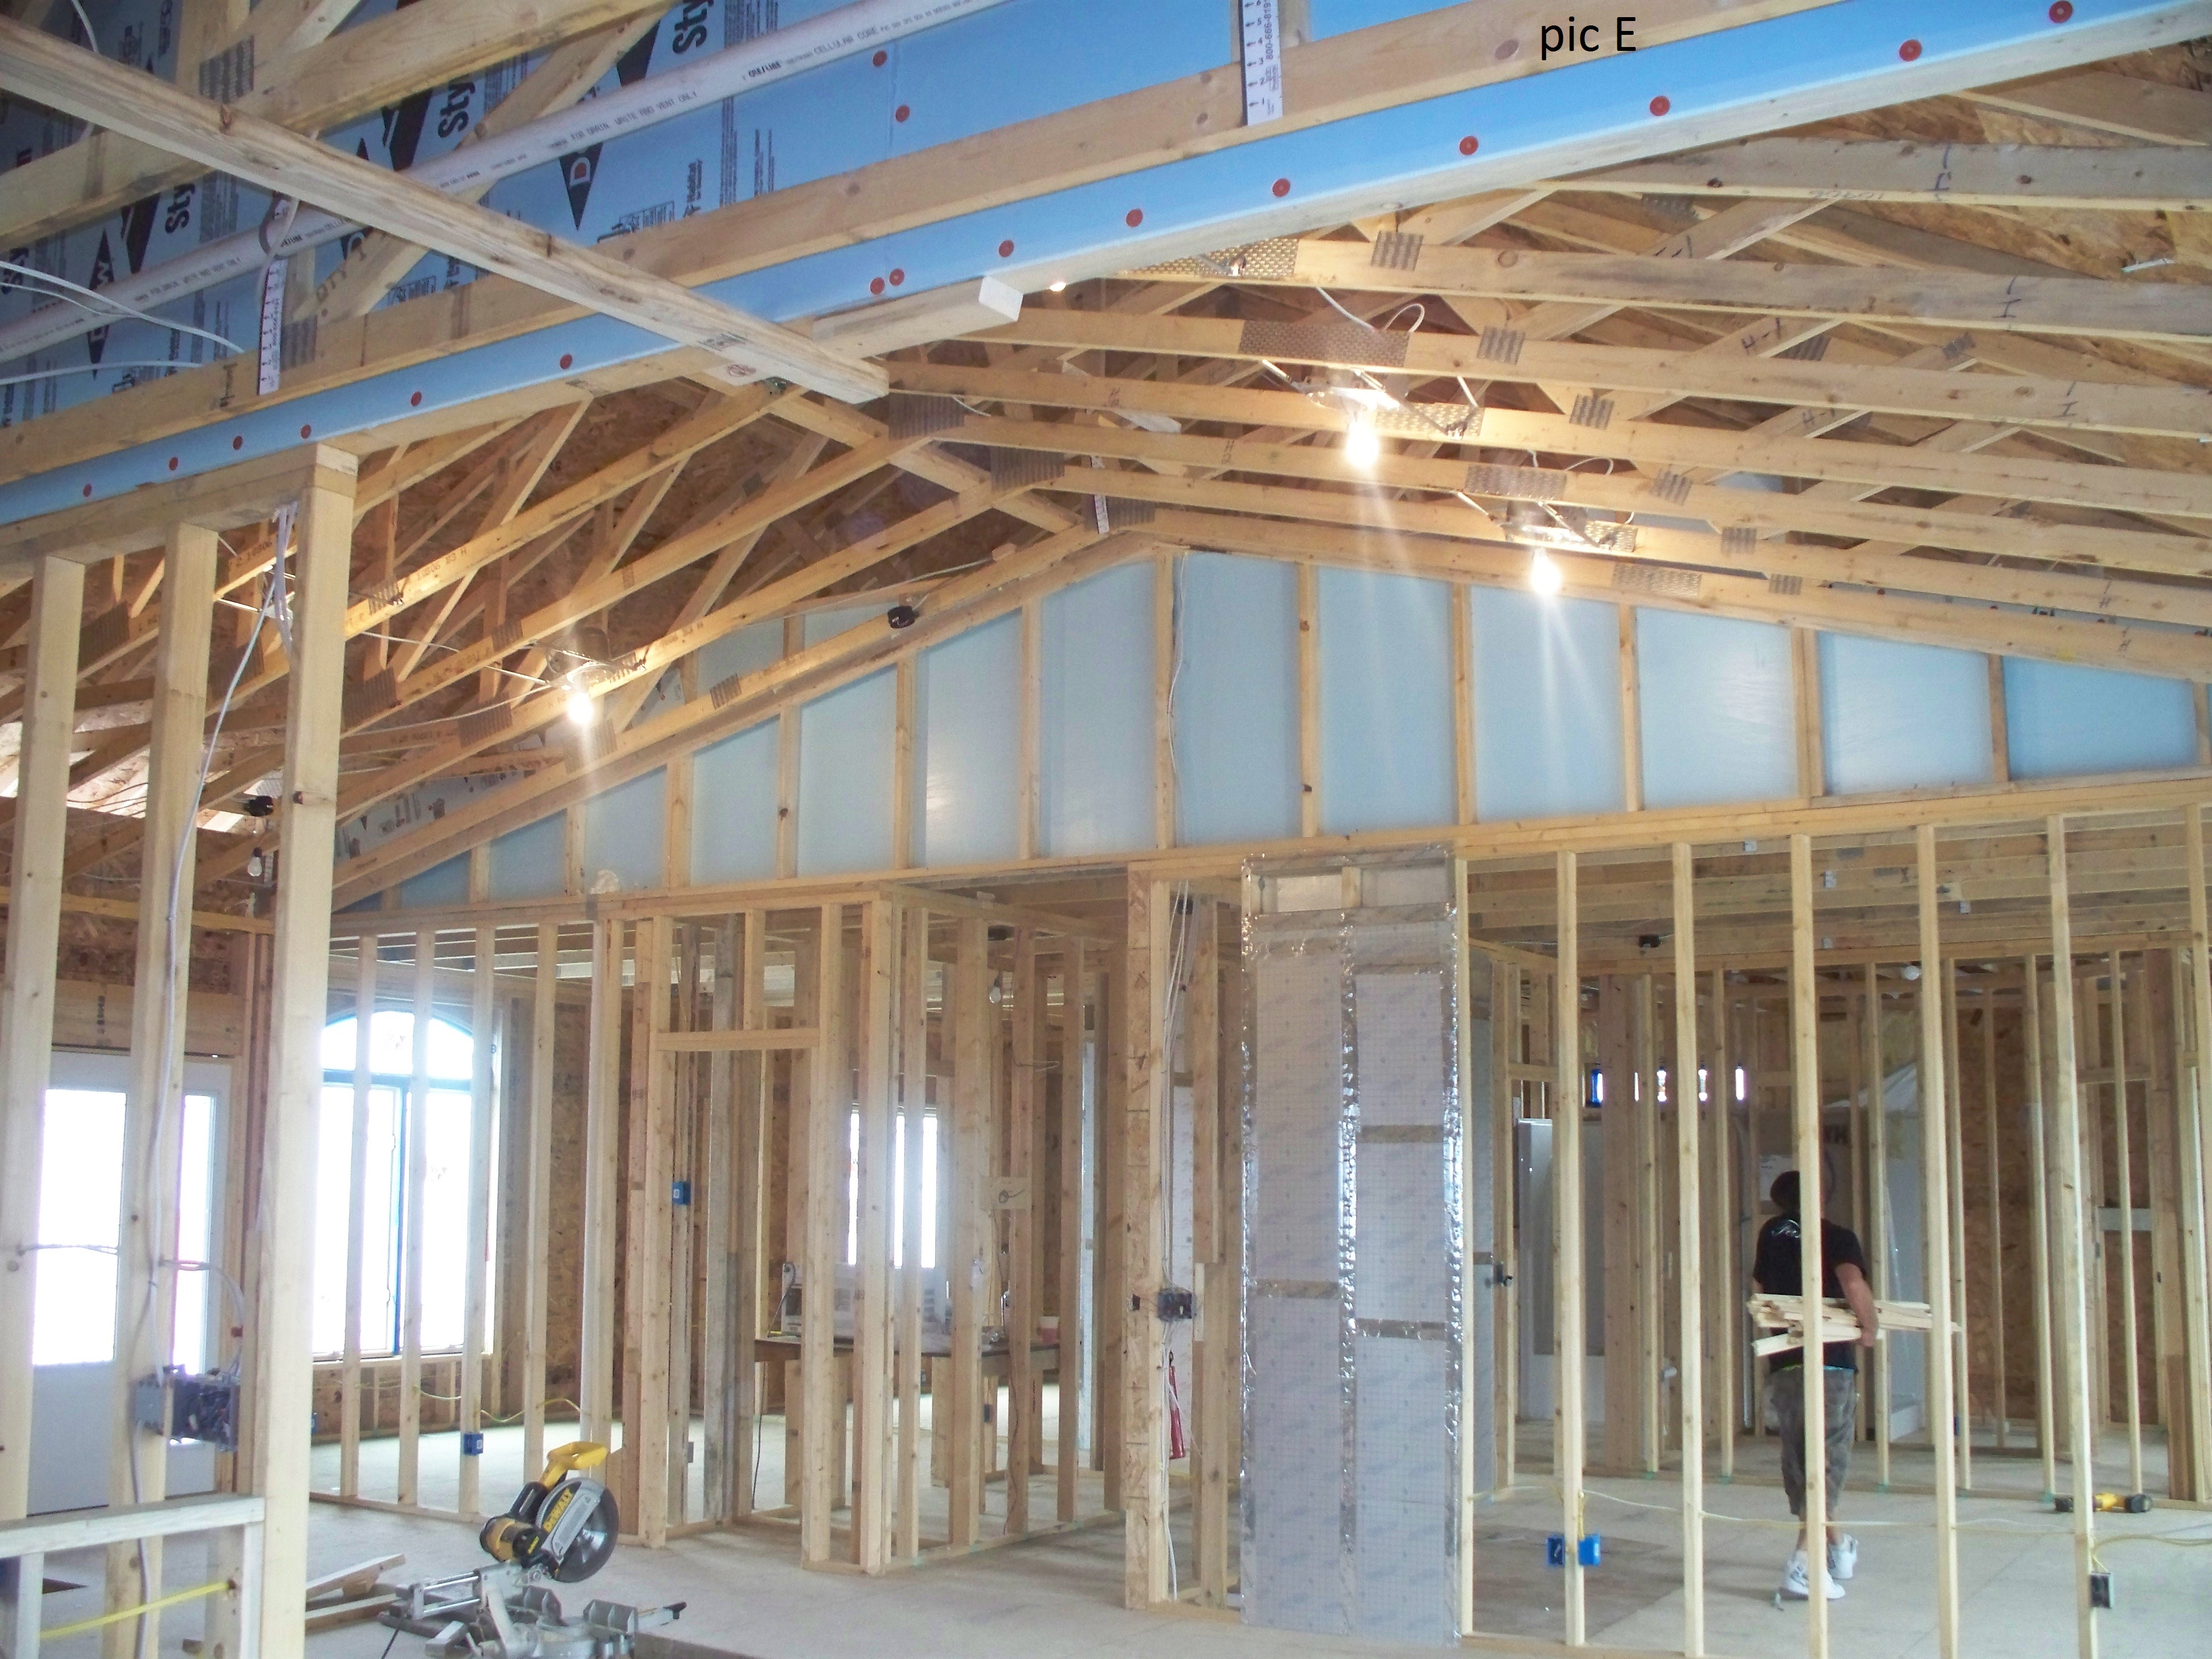
Right - These raised heel roof trusses provide 16 inches of space over the outer walls for full insulation coverage at the attic perimeter.
Image
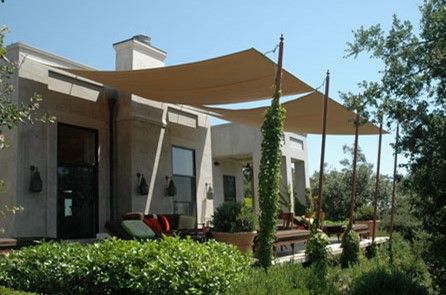
Right - These removeable awnings provide ample shade to windows and patio space, reducing heat gain to the home.
Image
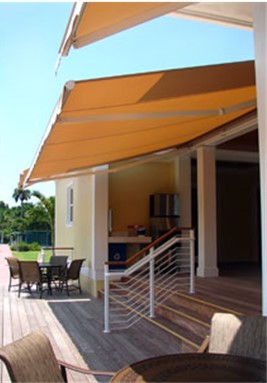
Right - These retractable awnings provide shade to this outdoor living space and reduce heat gain and glare within the home.
Image
Right - These roof insulation panels are installed in multiple layers with joints offset both vertically and horizontally. The plywood nail base fastened to the roof framing holds the insulation layers together snuggly thus minimizing gaps