Showing results 301 - 400 of 578
Image
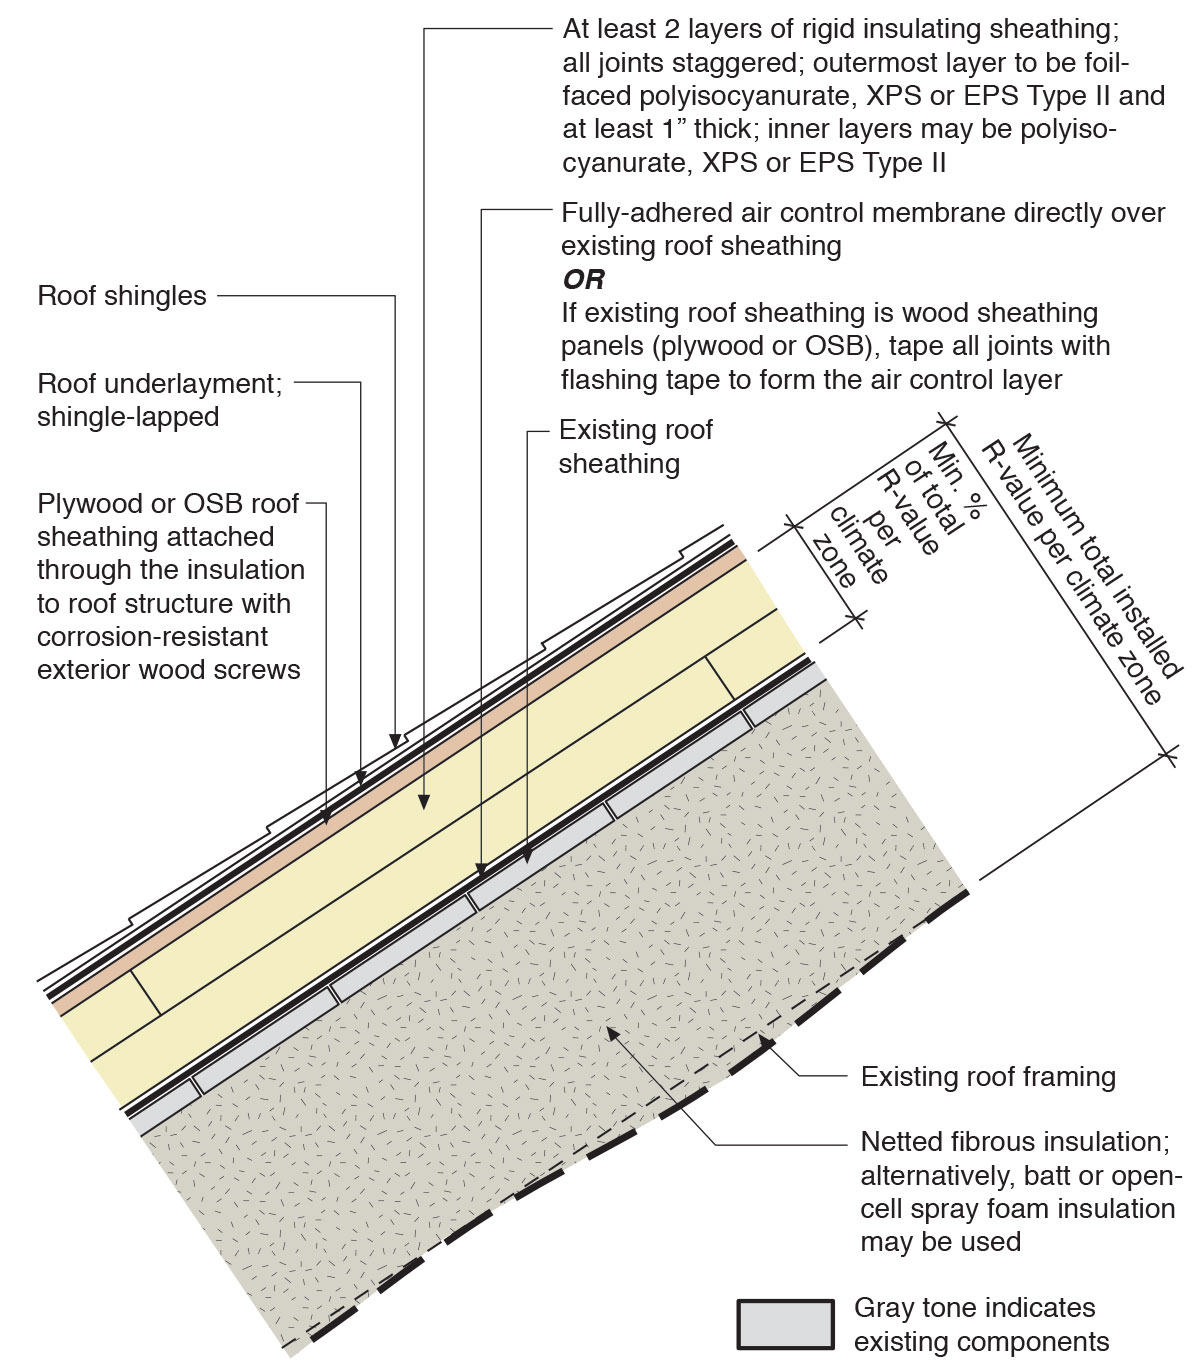
Retrofit an existing roof by installing rigid foam, new moisture and air control layers, new sheathing, and new cladding plus cavity insulation in the roof rafters to create an unvented attic
Image

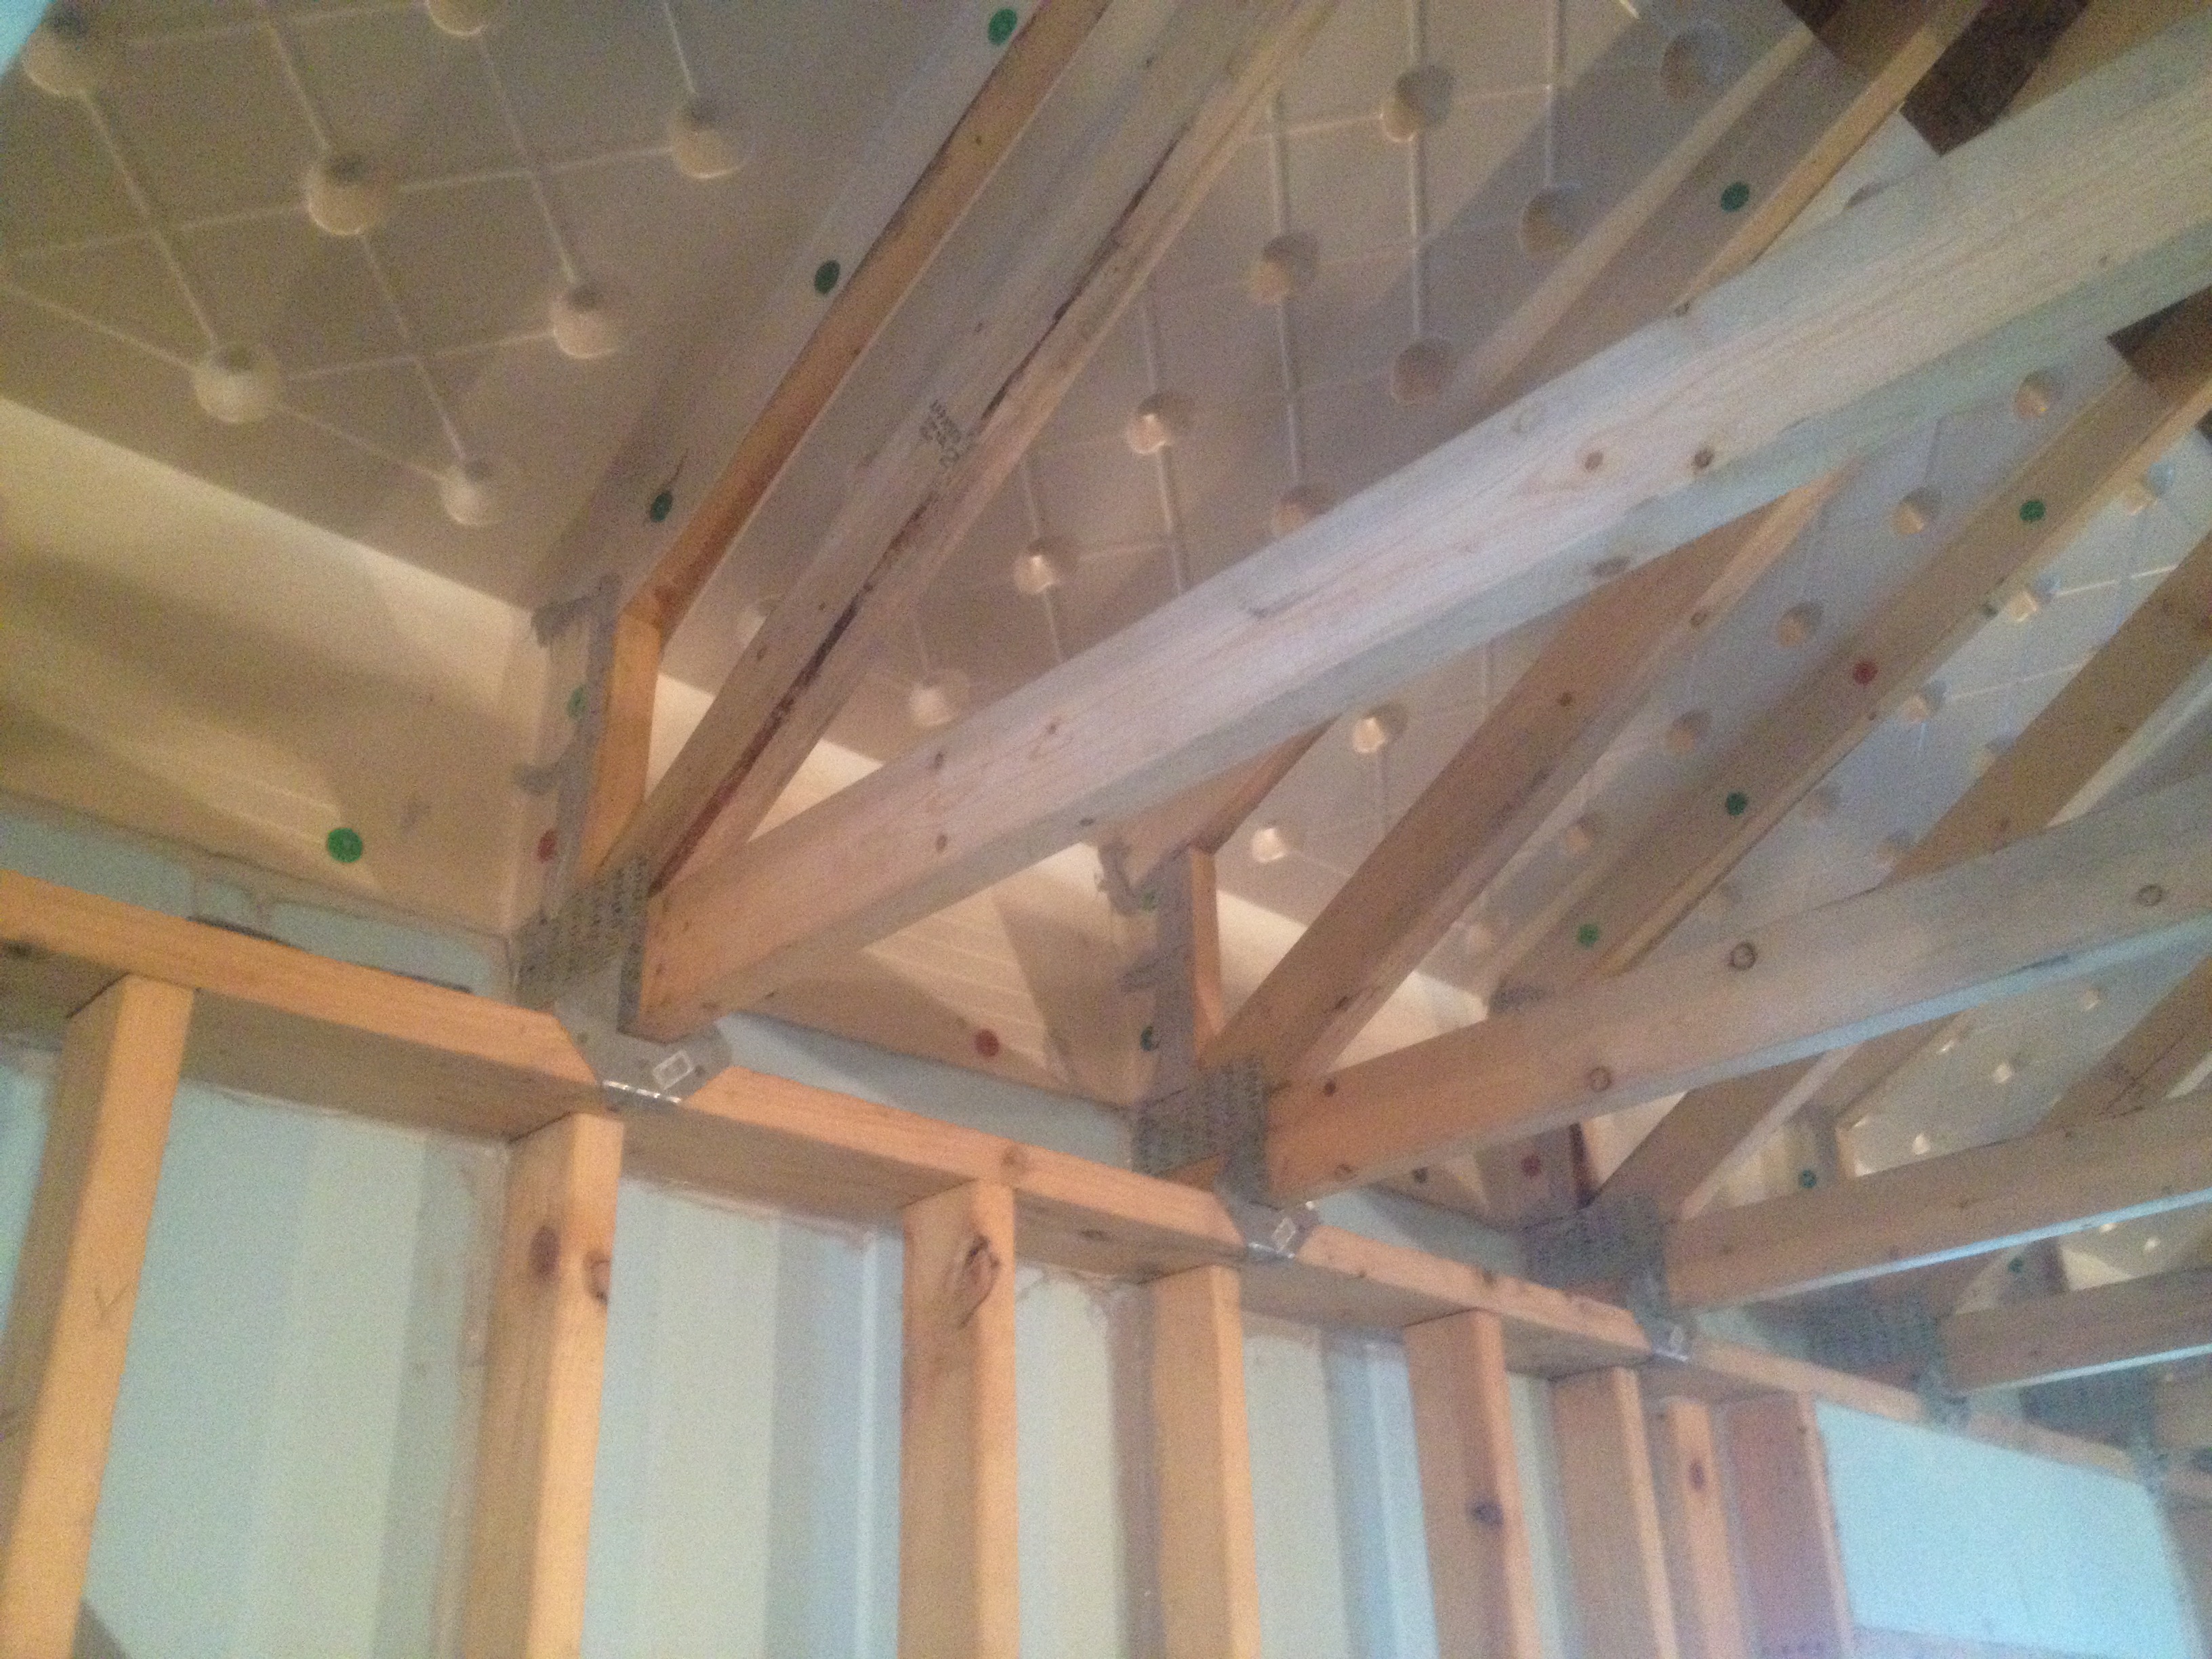
Right - A continuous load path connects the roof and wall framing to the foundation.
Image
Right - A lattice of 1X4 furring strips provides a ventilation gap between the decking and metal roofing for this shed roof.
Image
Right - An unvented attic with no soffit vents, borate-treated fascia board, metal drip edge, and concrete block construction on this south Florida home help make it resistant to hurricanes, pests, and wind-born wildfire embers.
Image
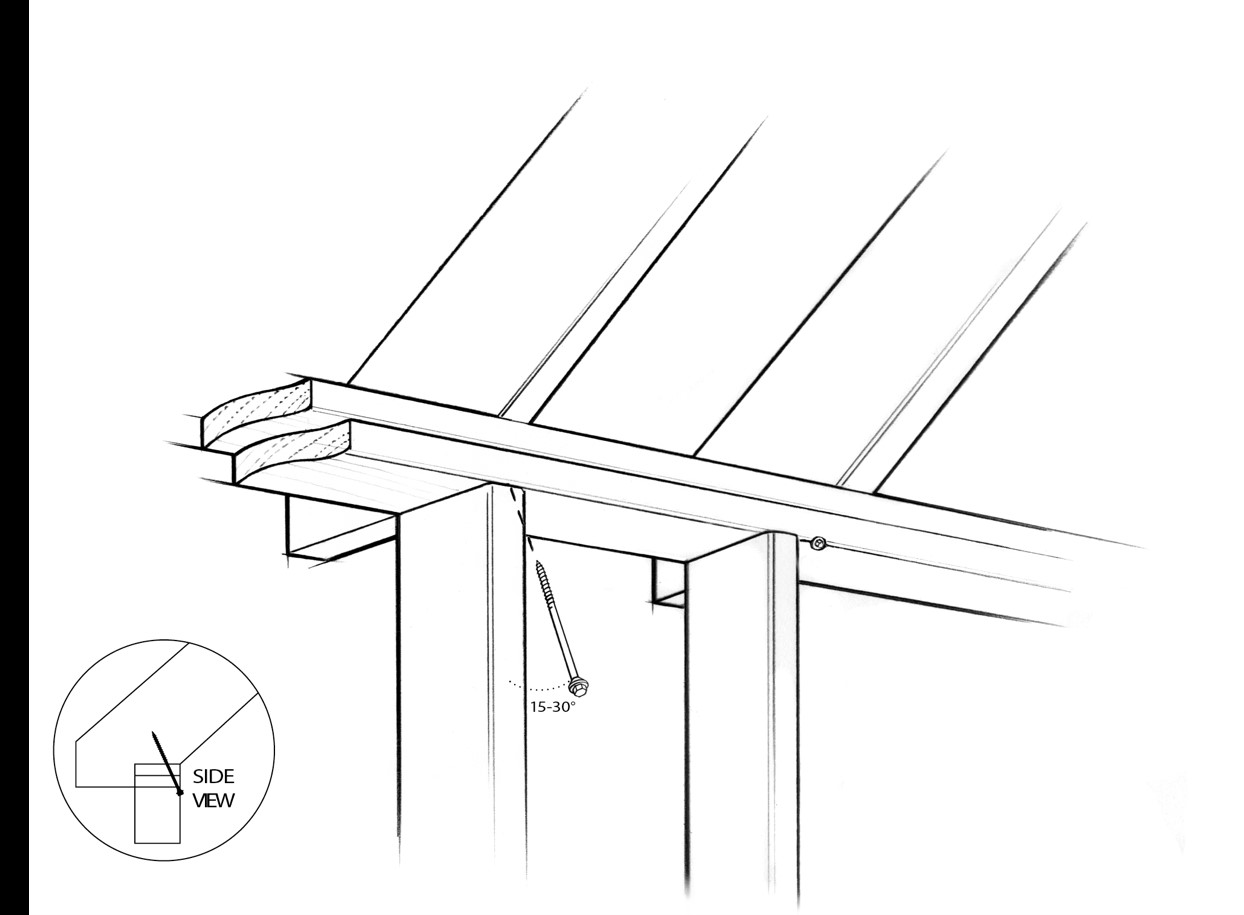
Right - Correct angle for installing an engineered structural screw to secure a rafter to a wall for hurricane resistance.
Image
Right - Counterflashing tops a layer of step flashing which comes down above the asphalt shingle and a layer of L-shaped base flashing which comes down and extends below the shingle; the base flashing is adhered to the roof underlayment with mastic, shown
Image
Image
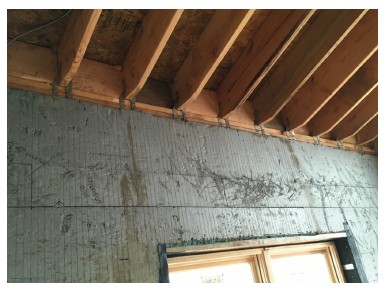
Right - Here, air control is established by taping the seams of the plywood panel sheathing. The roof sheathing is also trimmed flush with the wall sheathing to allow a simple and airtight connection between the roof and wall assemblies
Image
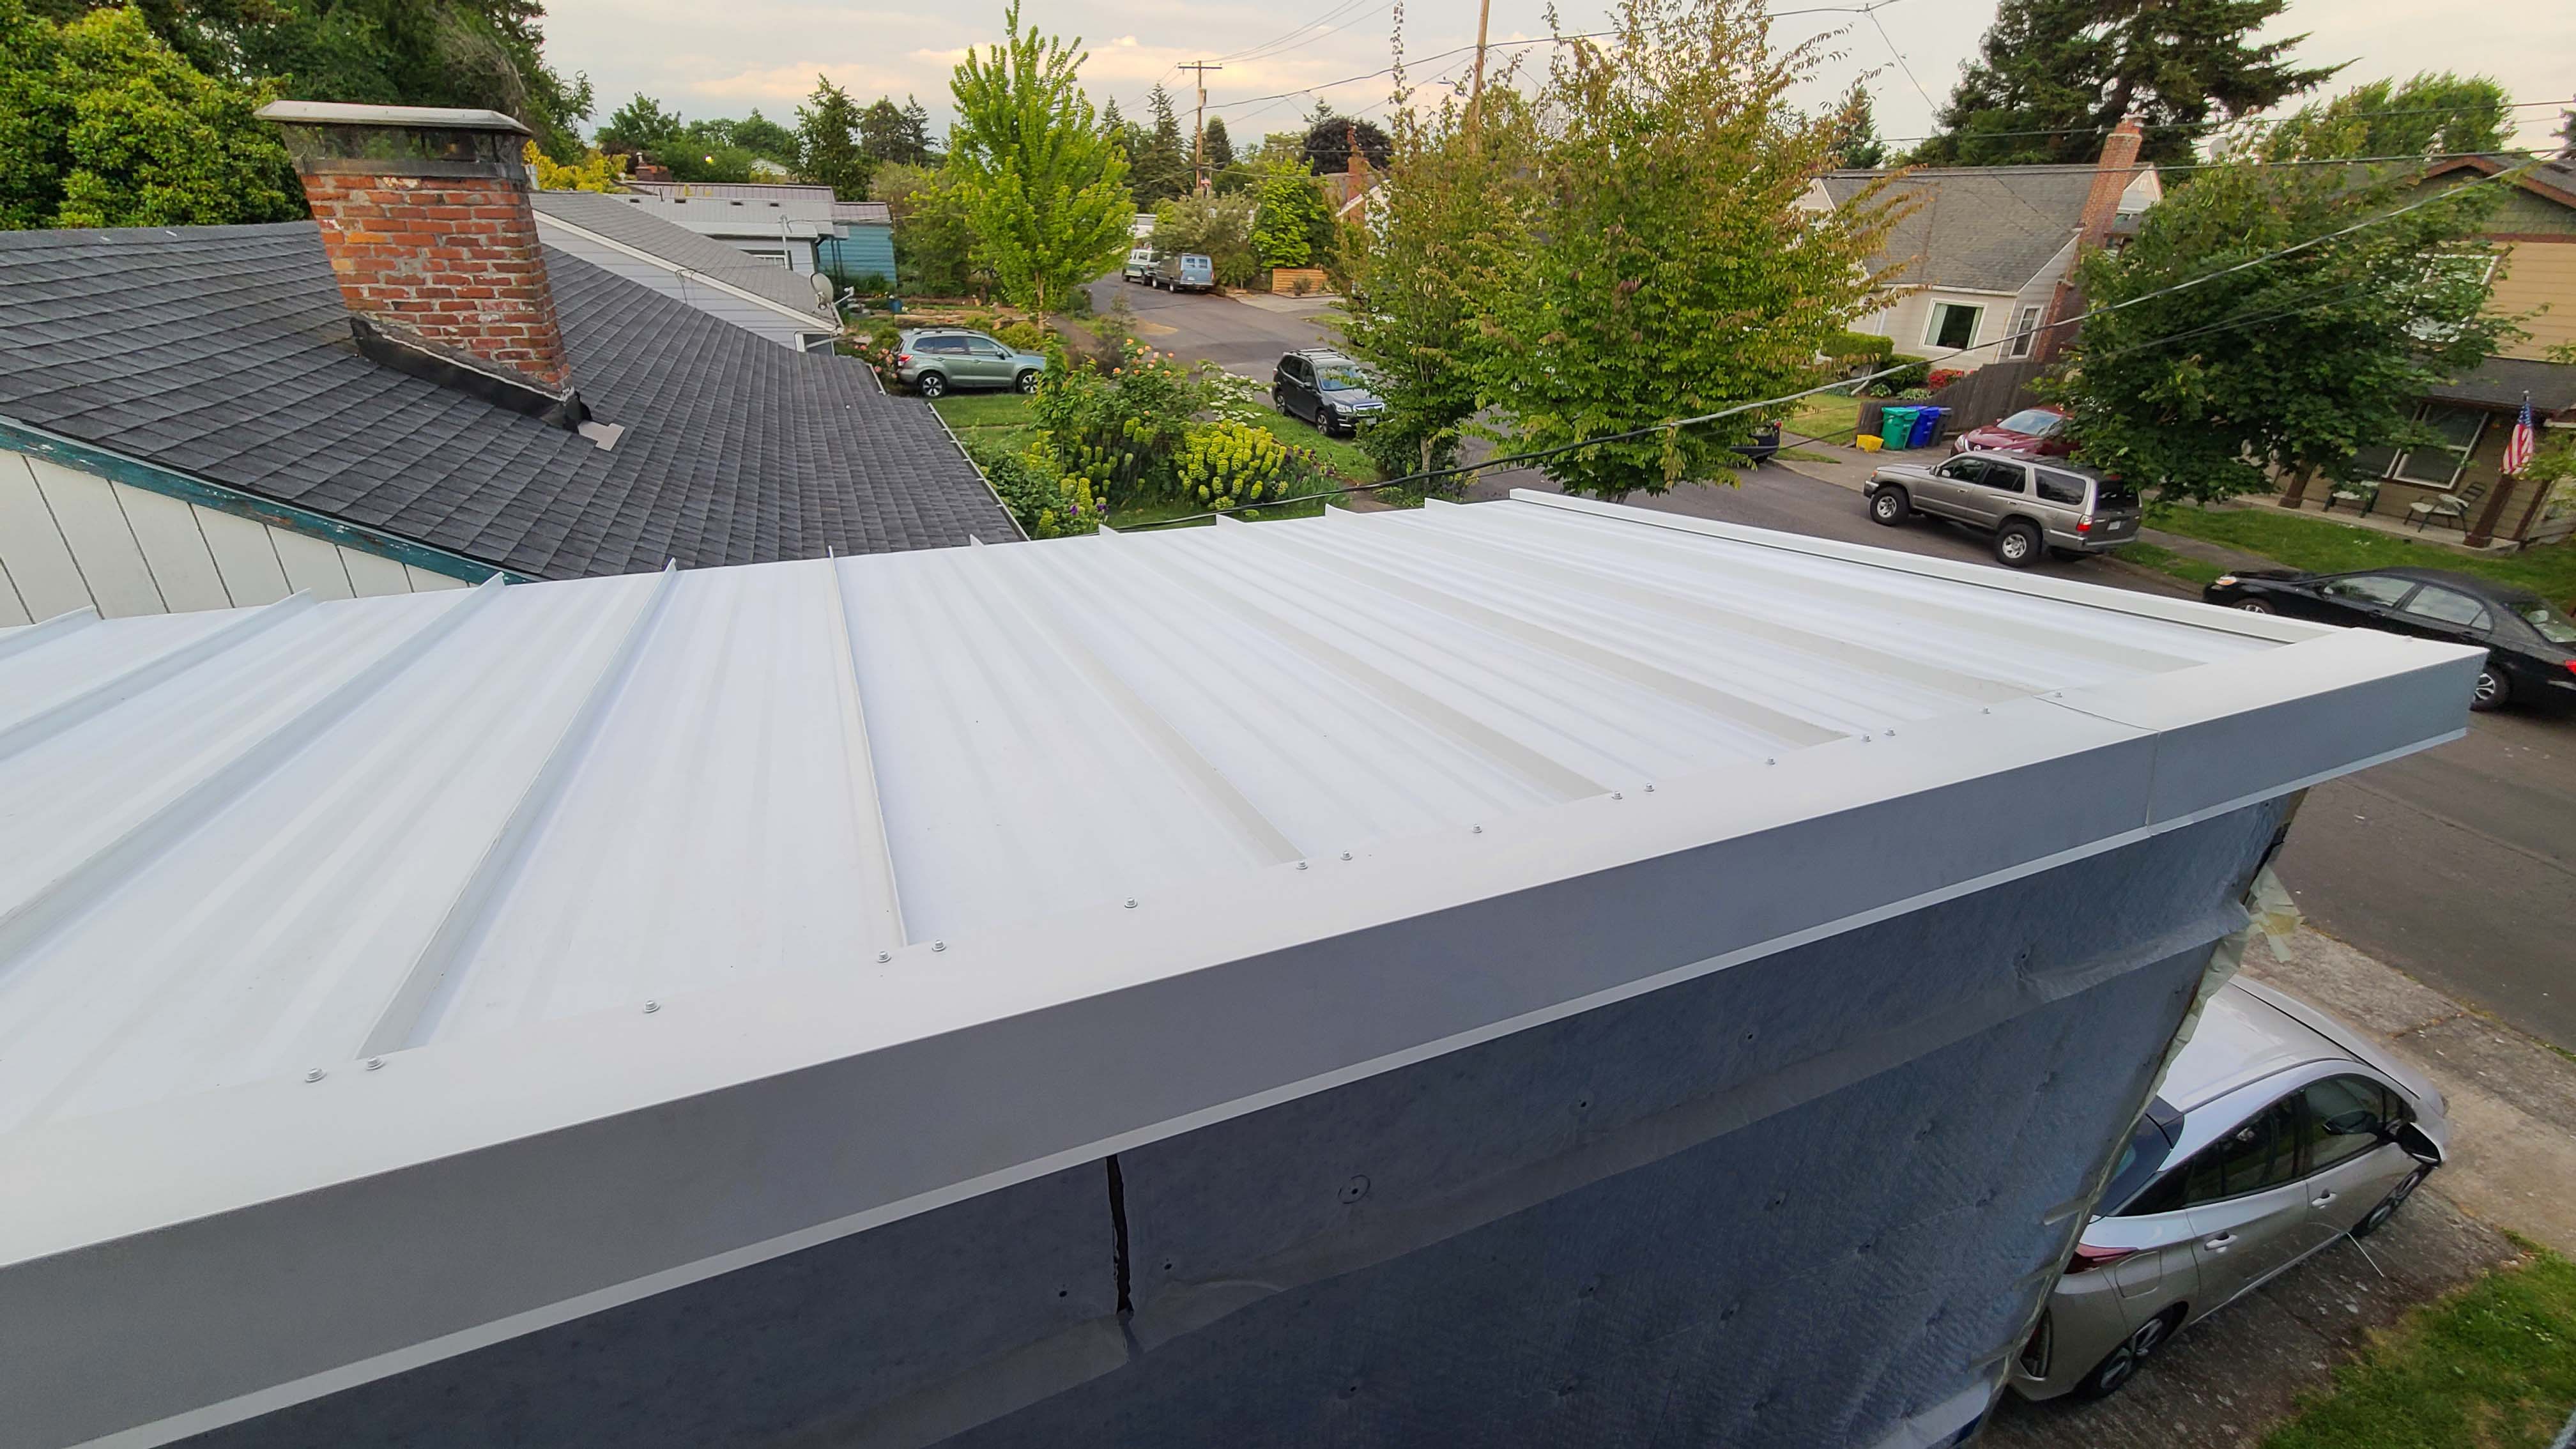
Right - In hot climates, paint flat roofs light colors to reflect solar heat gain.
Image
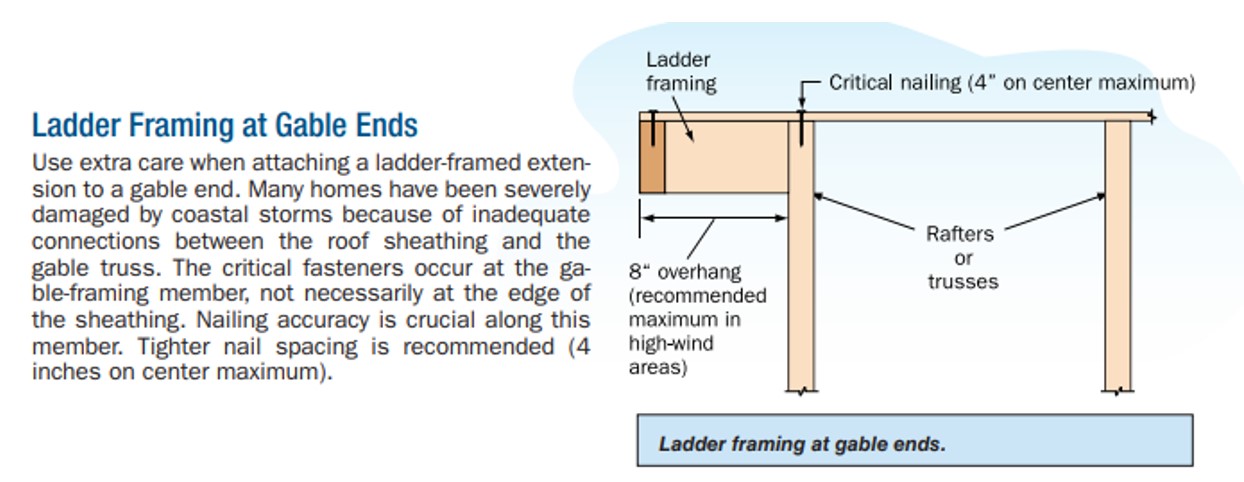
Right - Installation steps for the L-bent strap method of bracing a gable end wall
Image
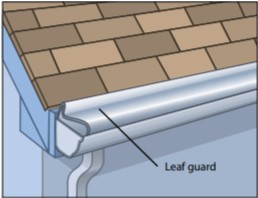
Right - Leaf guards allow rainwater into the gutter but keep combustible debris out, increasing the home's resistance to wildfires.
Image
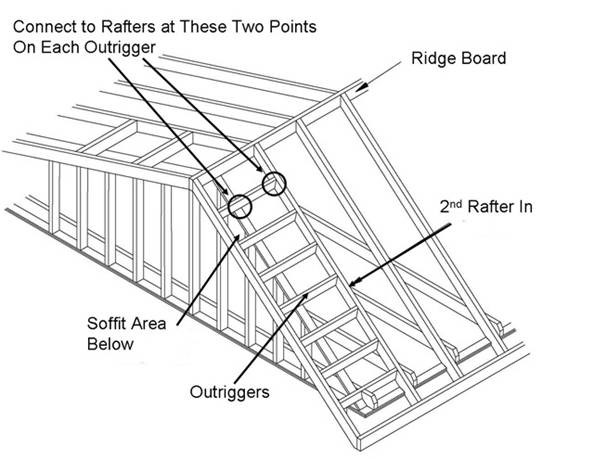
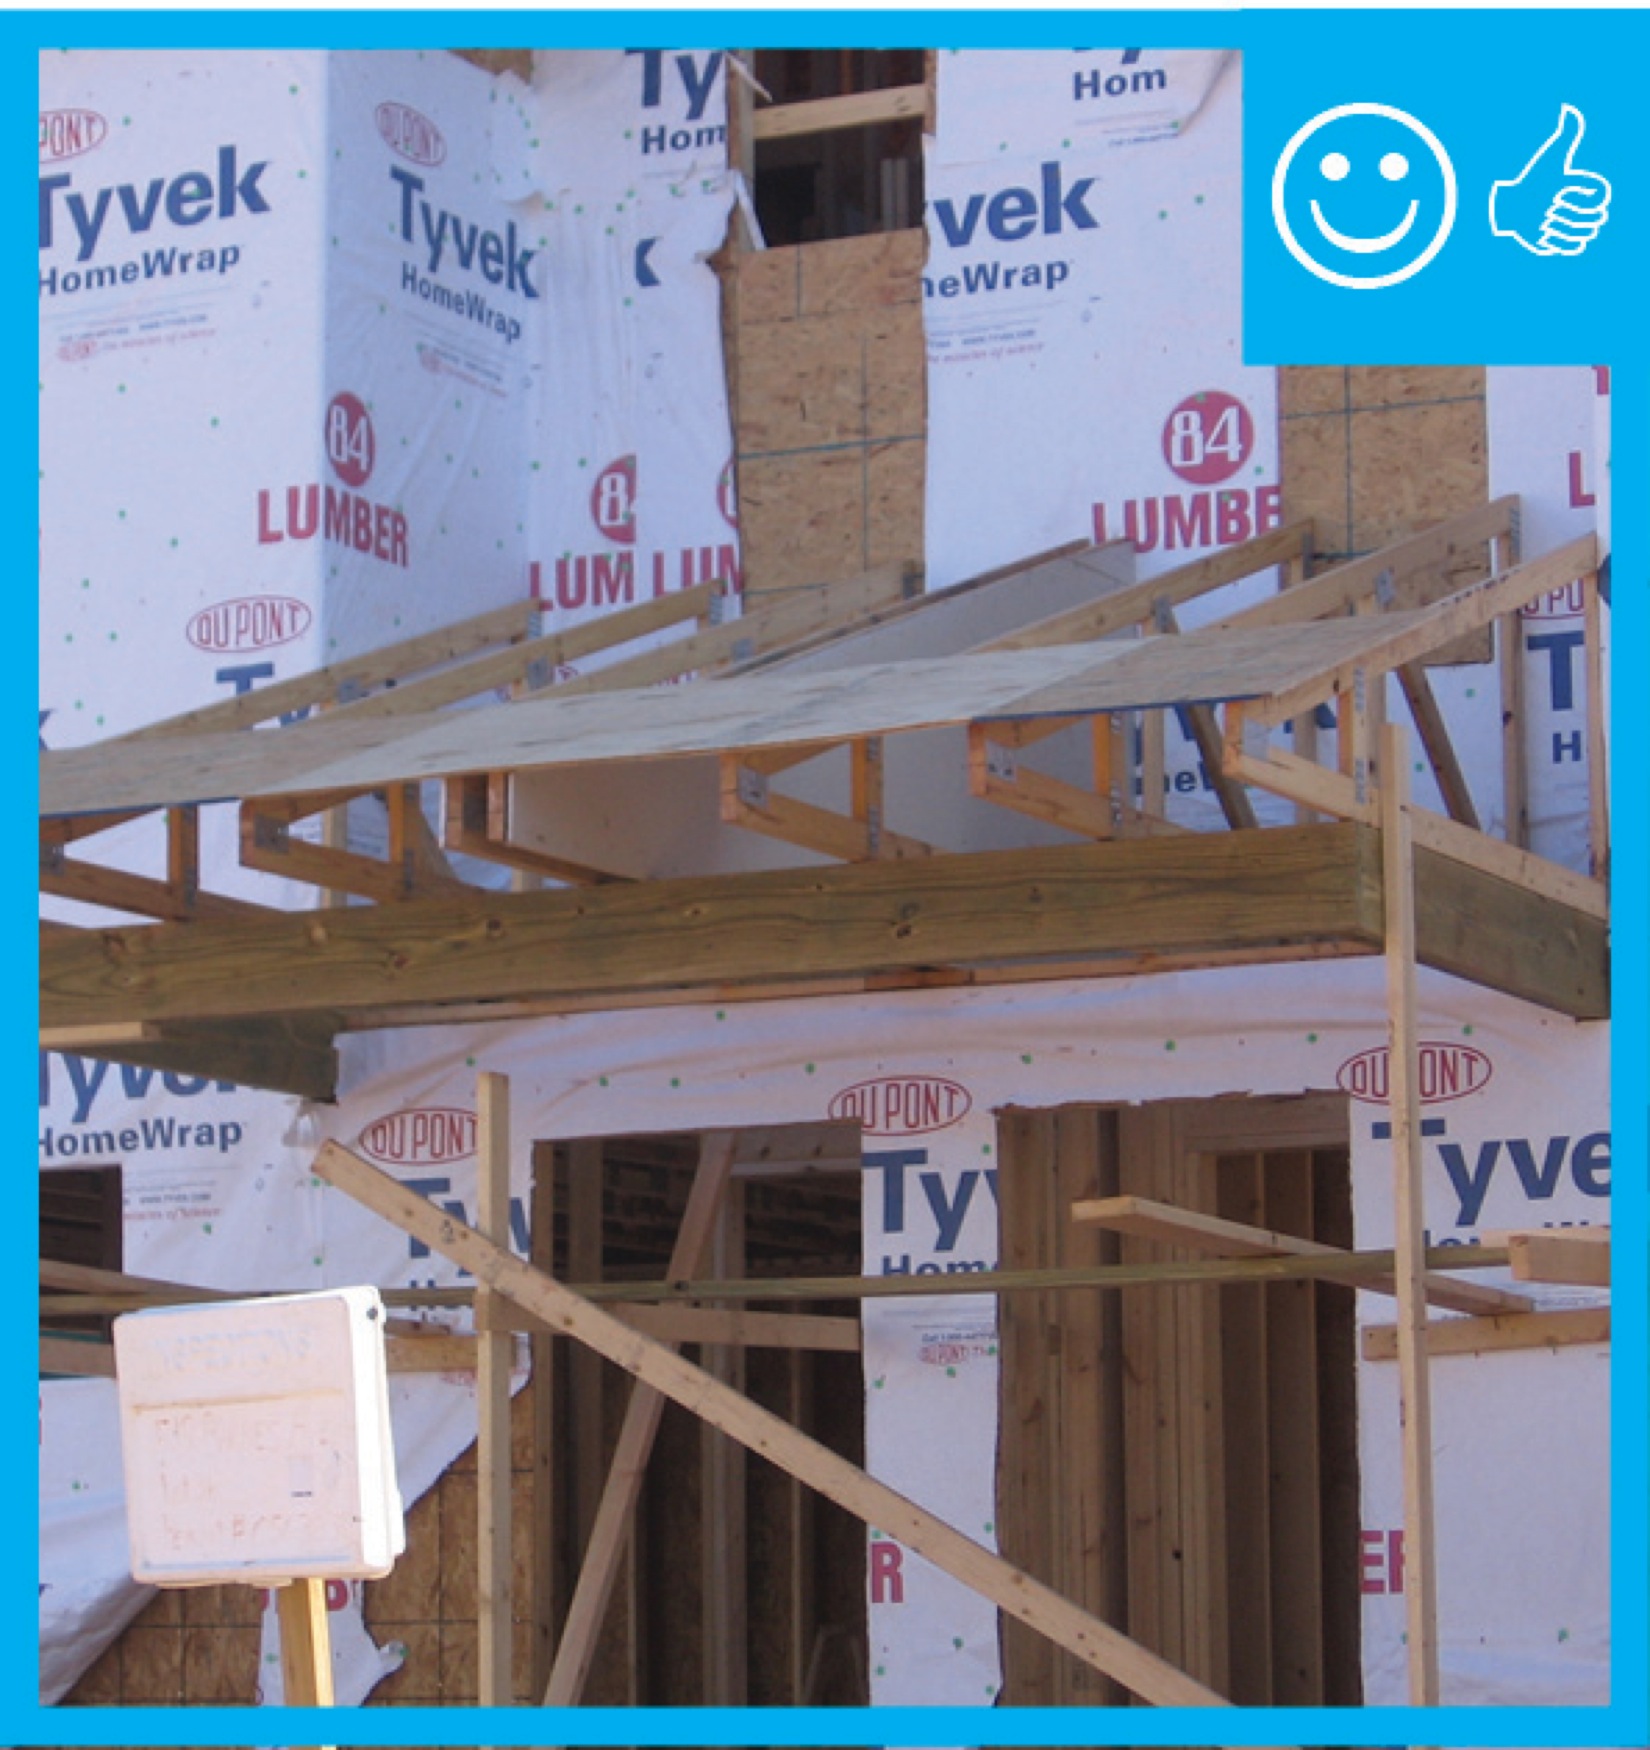
Right - Lookout or outrigger framing for a gable overhang provides two points at each outrigger to add metal connectors to strengthen the overhang against wind uplift.
Image
Right - Metal drip edge on this south Florida CMU home protects the top of the fascia and edge of the roof deck from water, wind-blown rain and embers, and insects.
Image
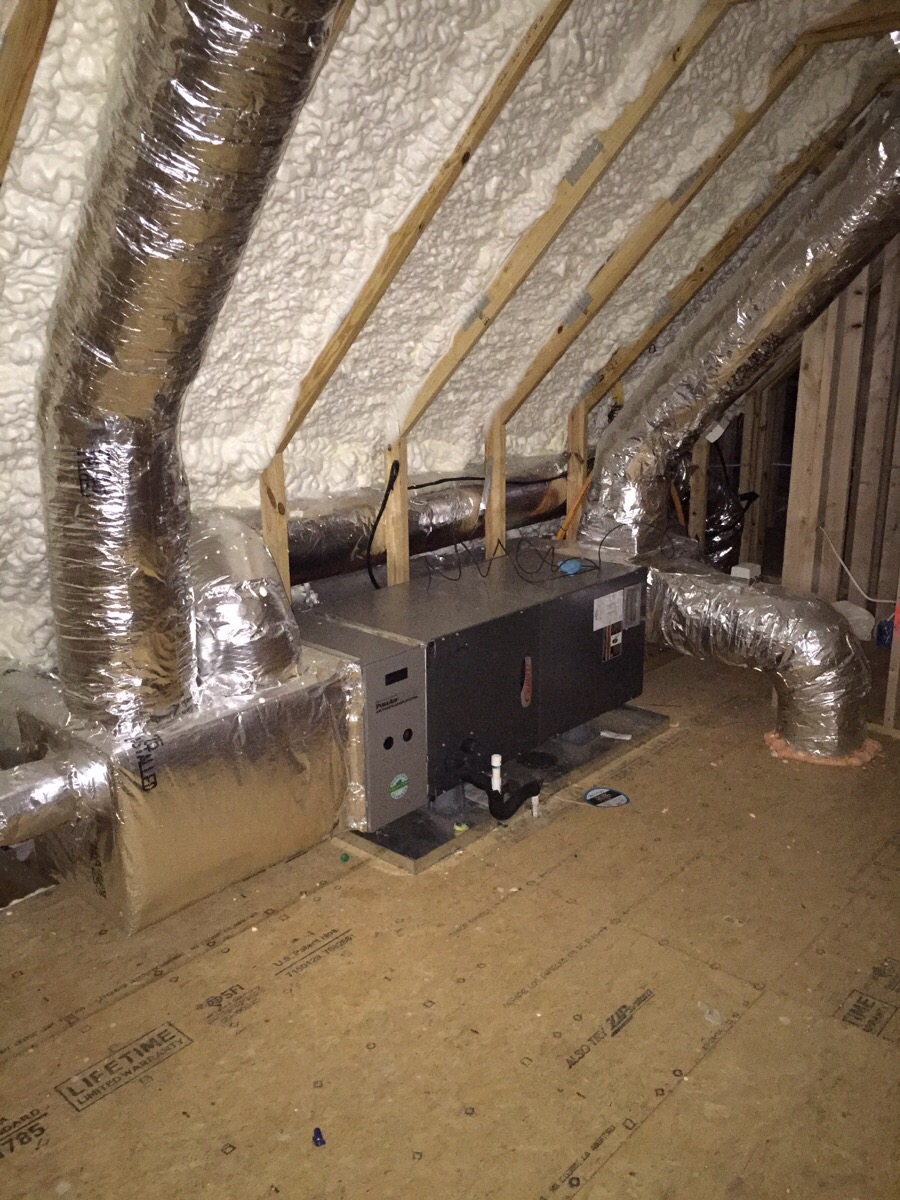
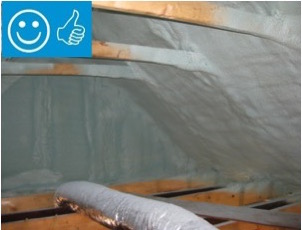
Right - Open-cell polyurethane spray foam to R-28 on underside of roof turns new attic into conditioned space for HVAC.
Image
Right - Pieces of metal flashing are installed under each tile course along the valley centerline to prevent debris accumulation between and below concrete roof tiles.
Image
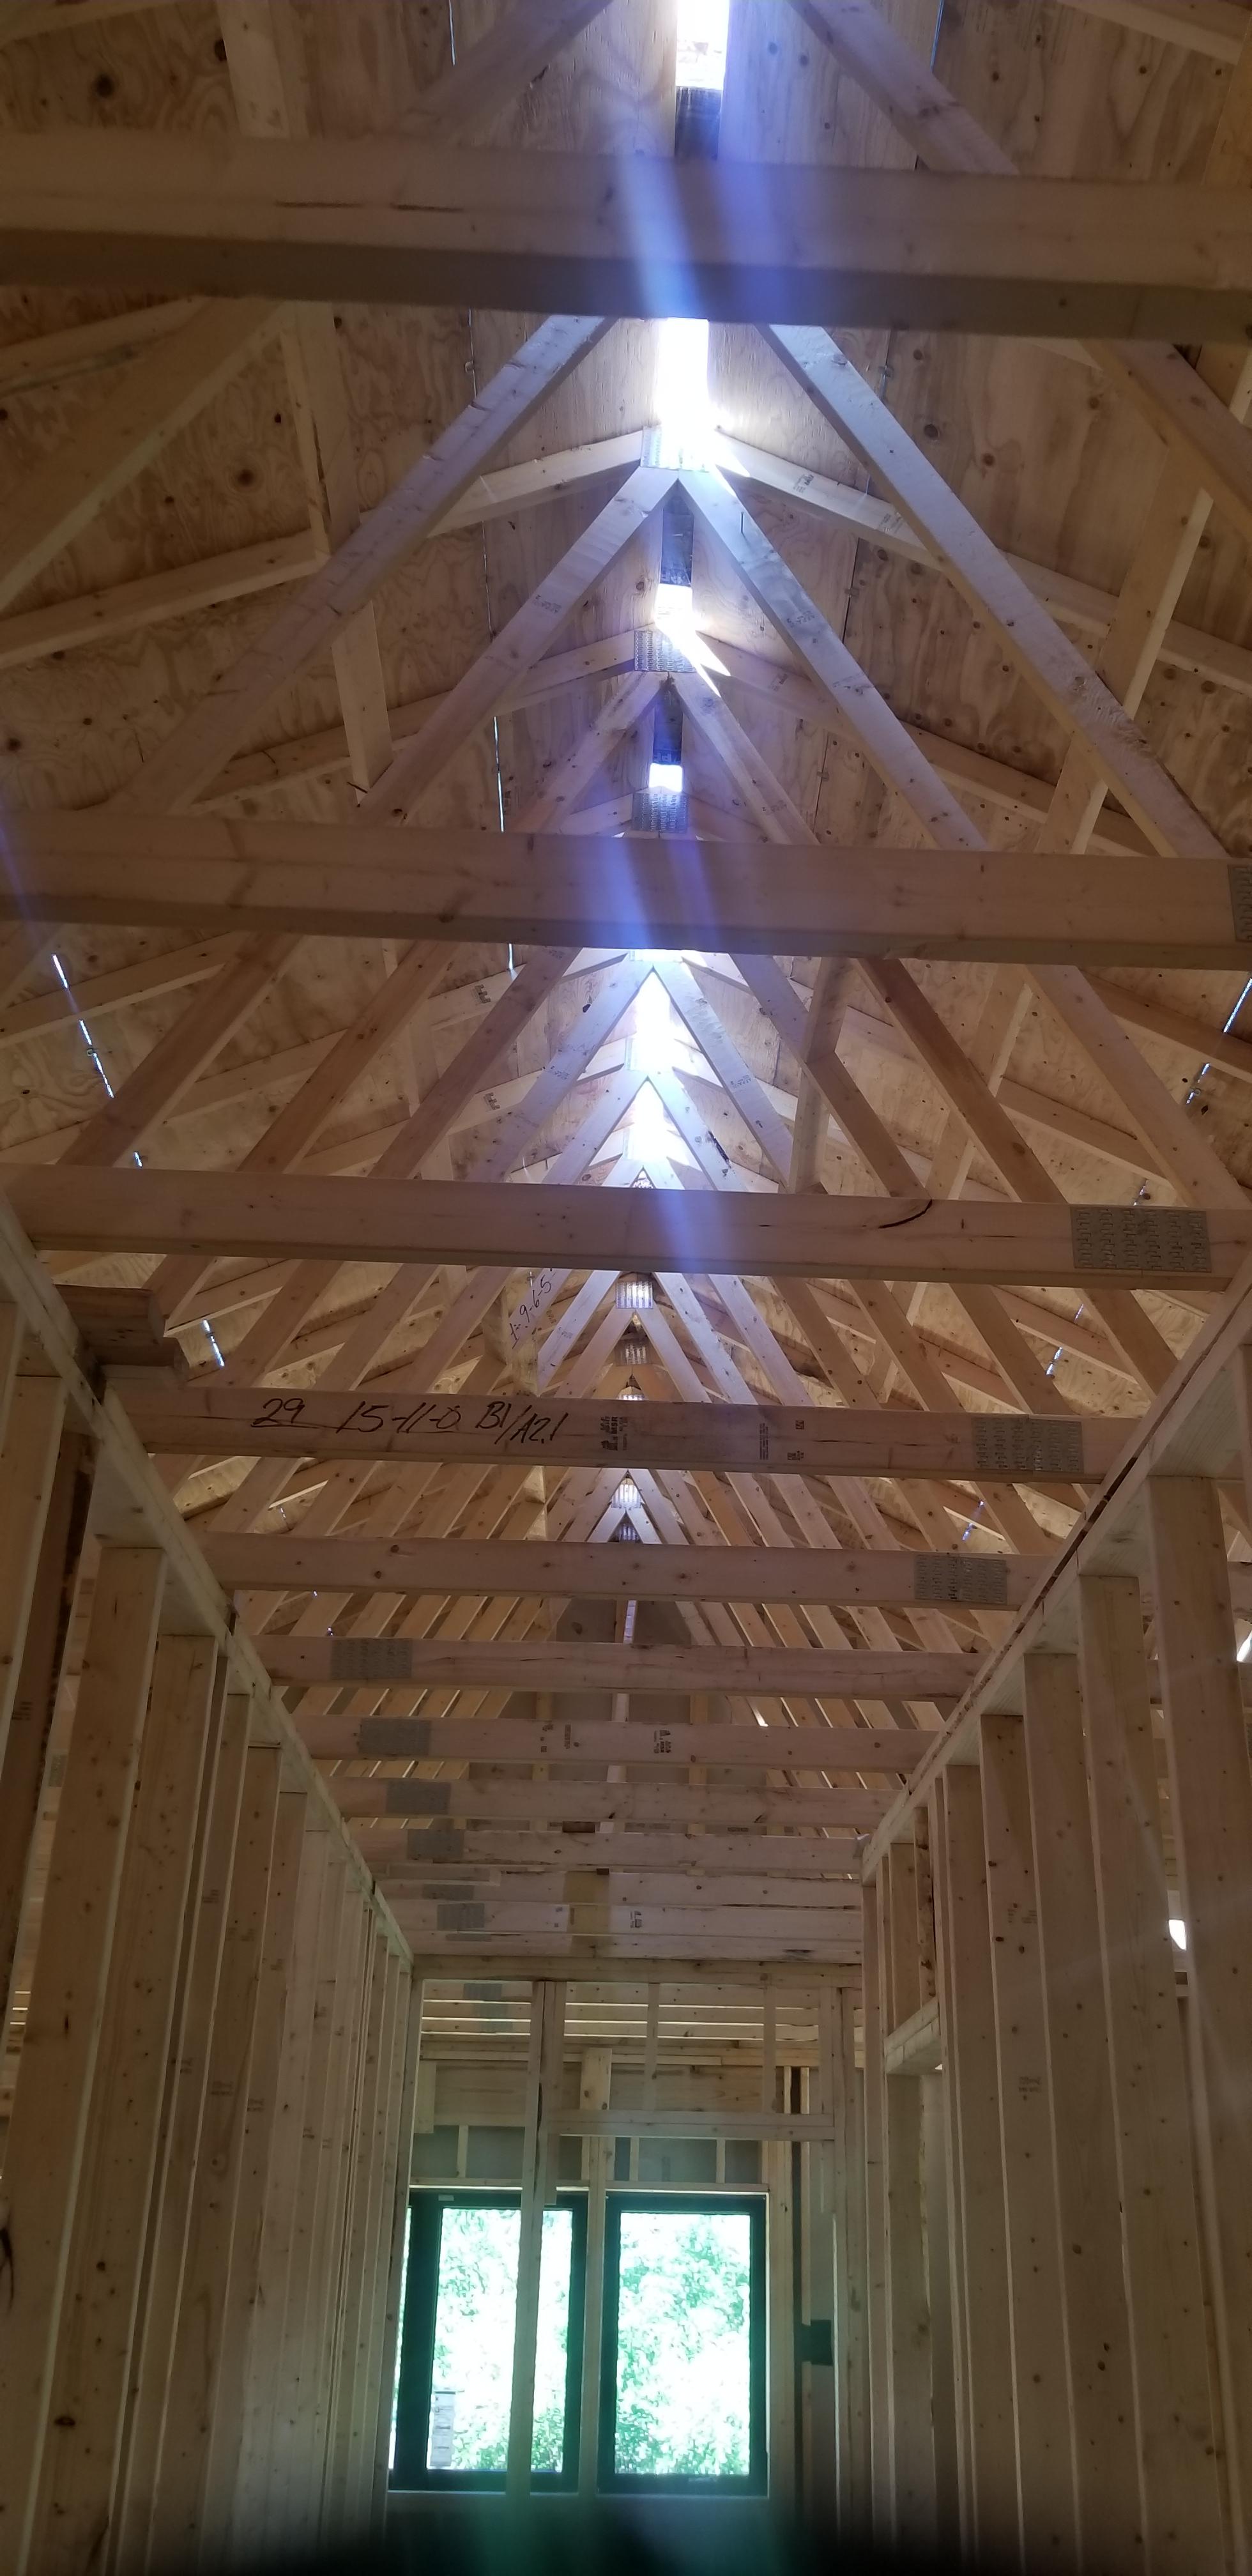
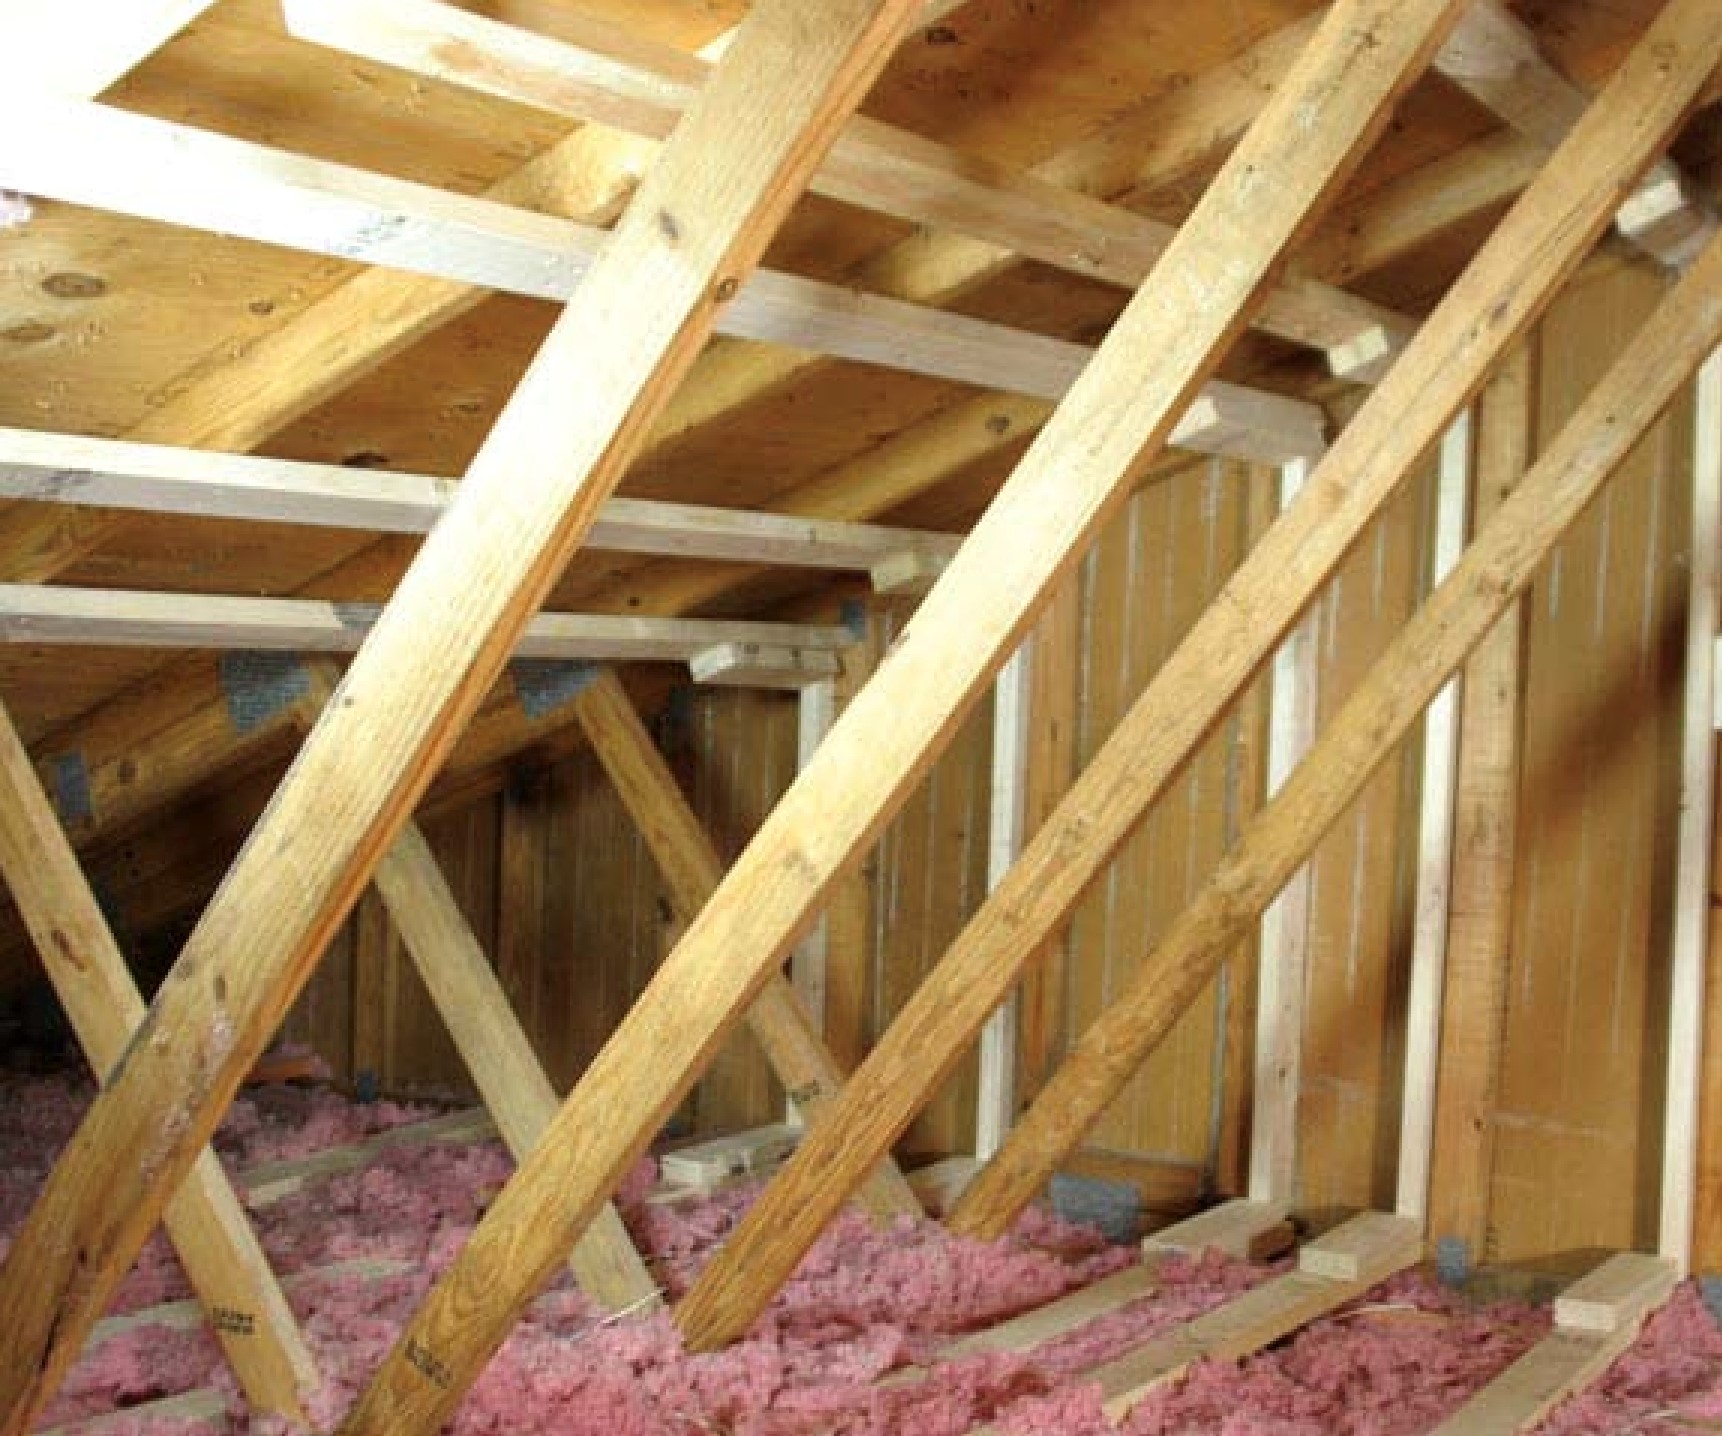
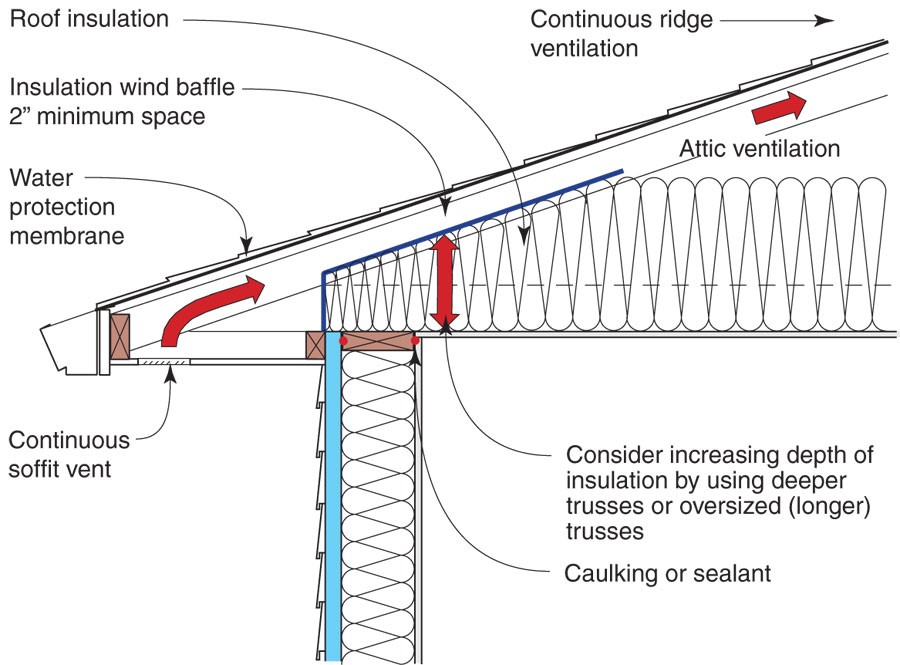
Right - Raised-heel roof trusses allow more room at the eaves for attic insulation.
Image

Right - Raised-heel trusses increase the roof height above the eaves allowing more space for insulation above exterior wall top plates; exterior wall sheathing extends up to keep wind from soffit vents from disrupting insulation.
Image

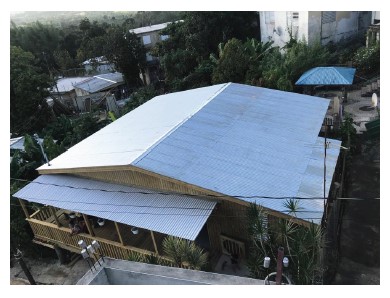
Right - Roofs with simple geometries are less susceptible to ignition from wind-borne embers getting lodged on the roof in a wildfire.
Image
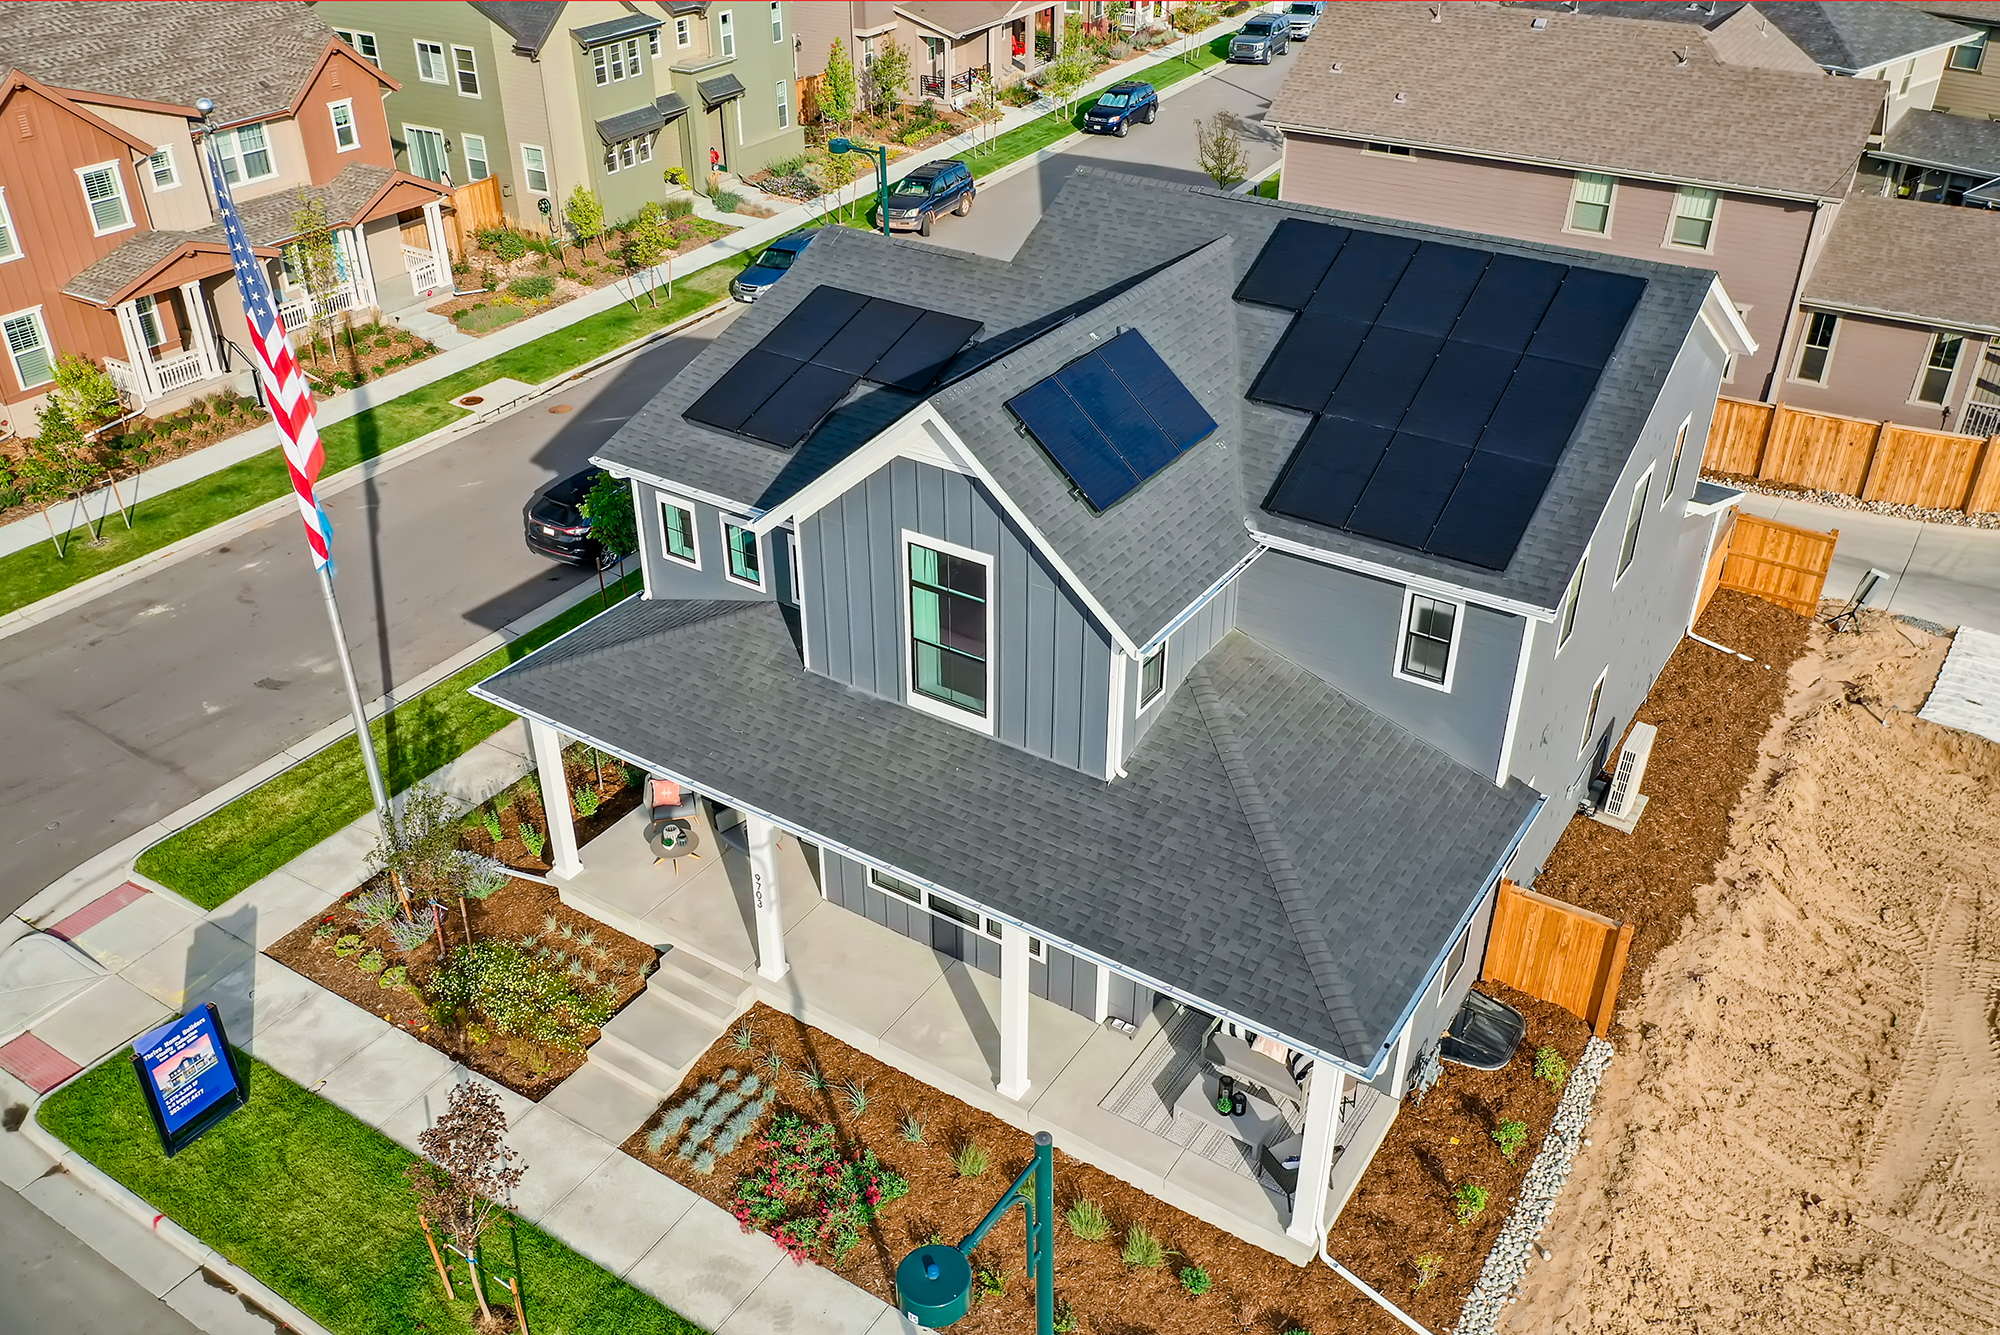
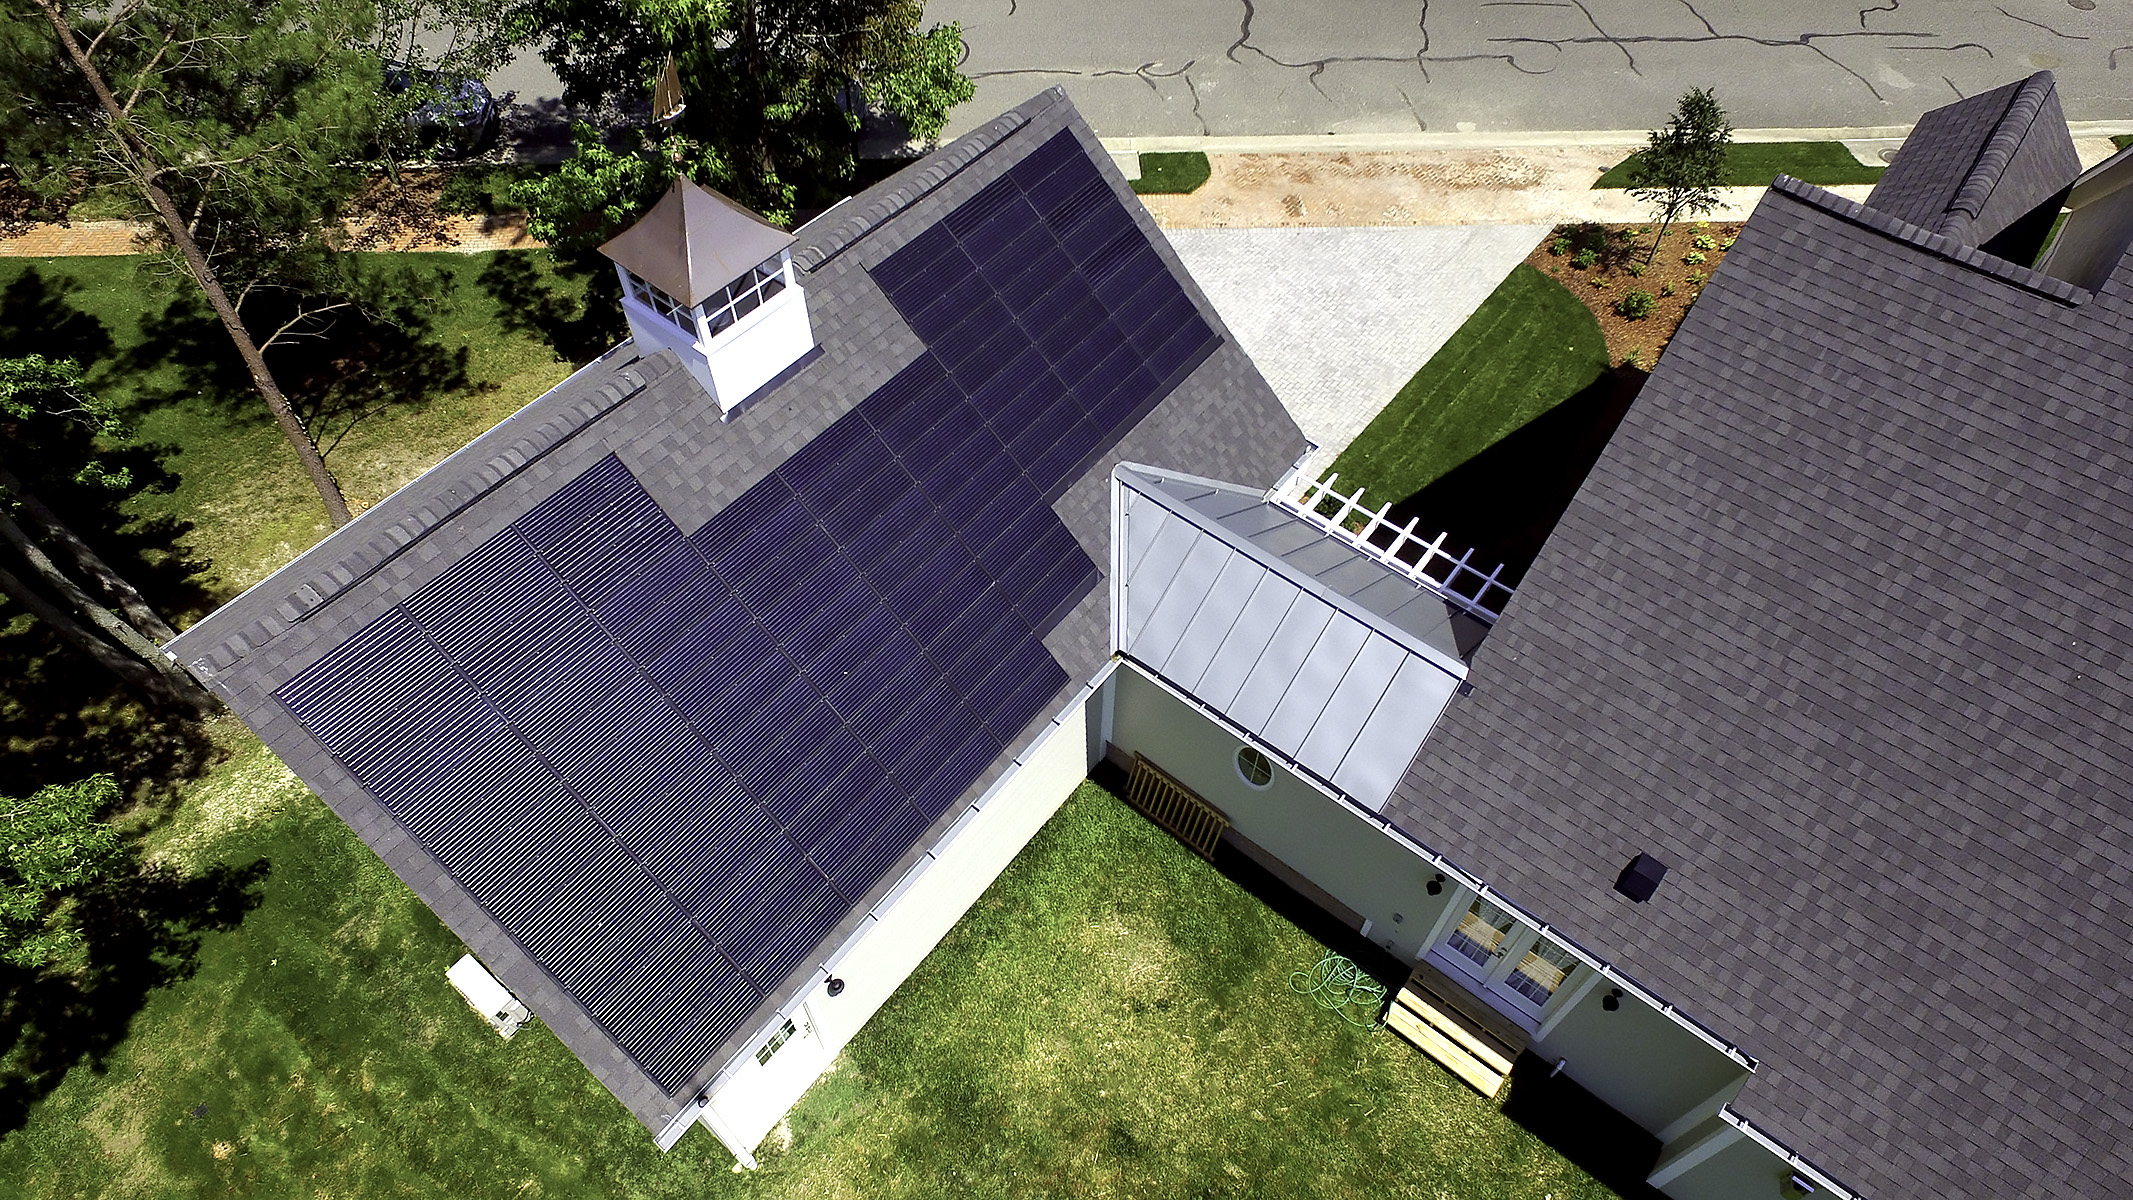
Right - Solar photovoltaic panels are installed on the highest parts of the roof to avoid being shaded by other parts of the house.
Image
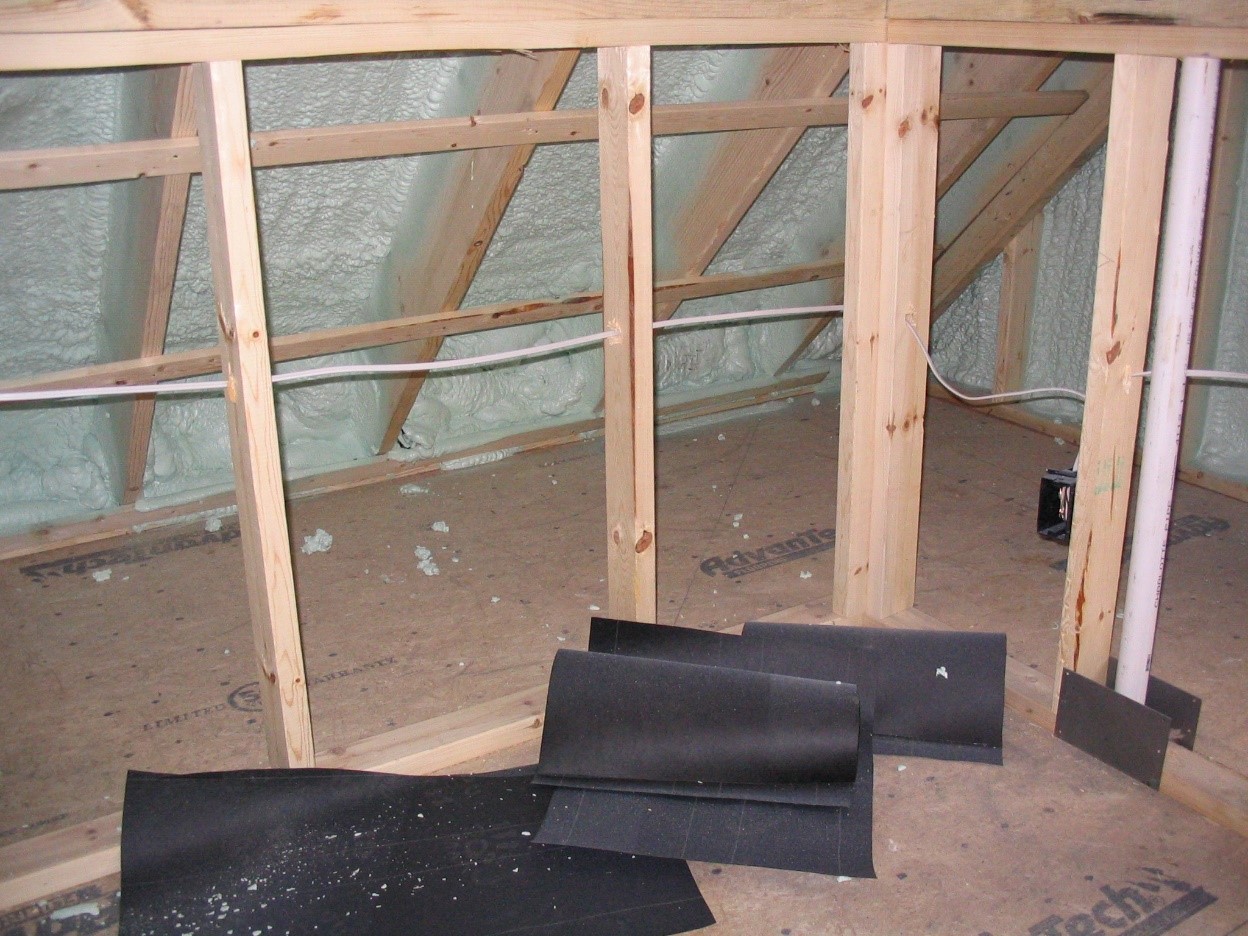
Right - Spray foam insulation has been sprayed onto the underside of the sloped roof and the gable end wall to provide a sealed, insulated attic for housing the HVAC ducts
Image
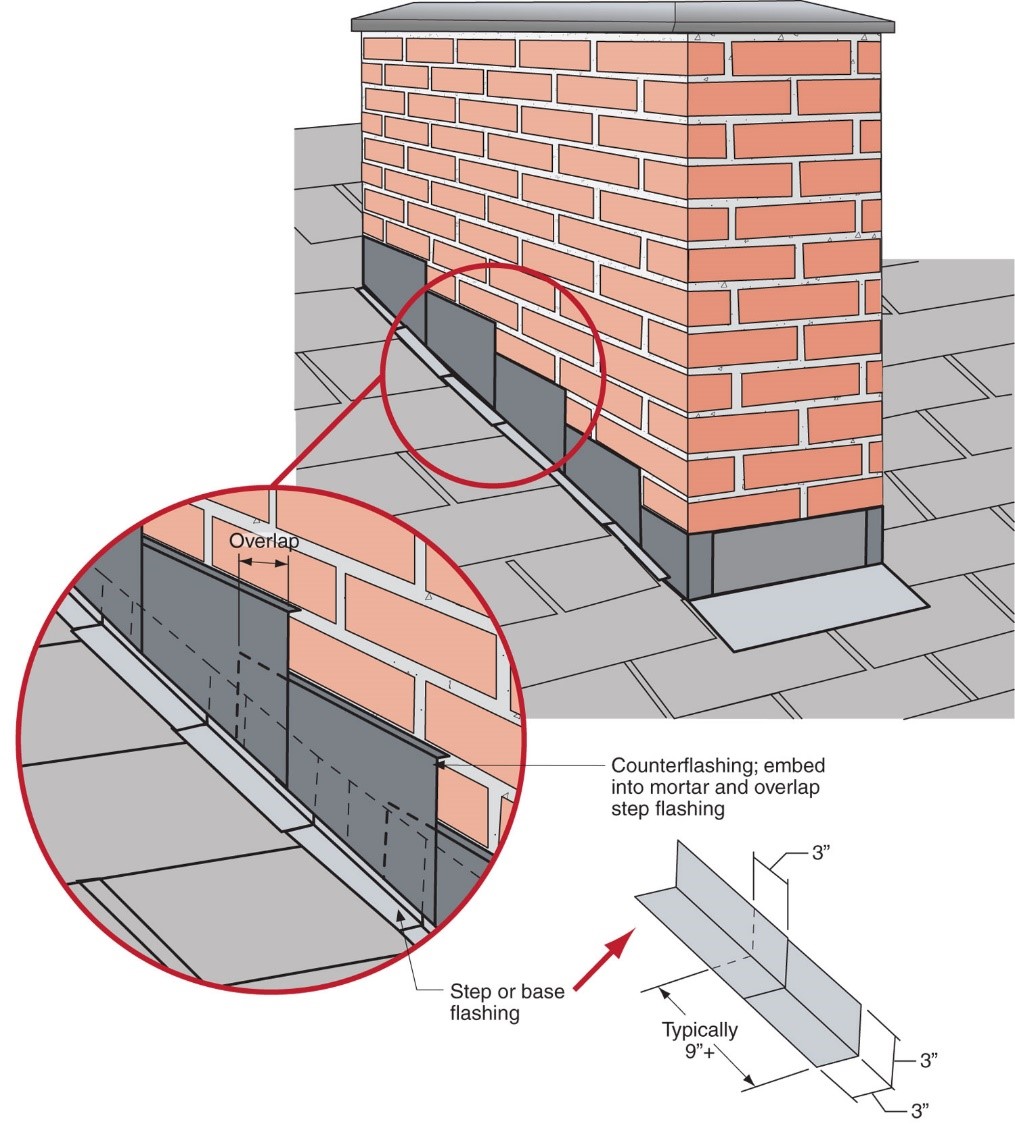
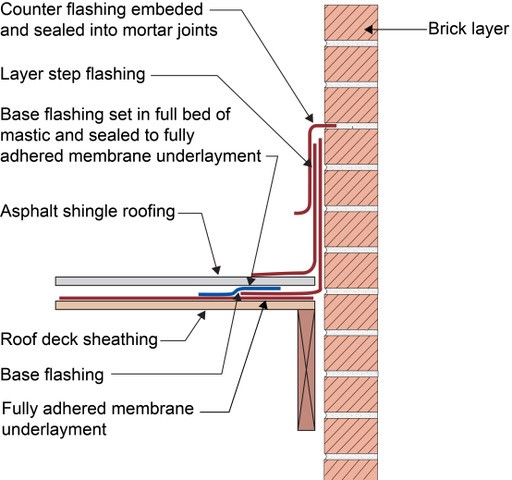
Right - Step flashing along a chimney is integrated in a layered manner with asphalt shingle roofing and topped with counterflashing that is embedded into brick mortar joint above
Image
Right - The air control membrane installed over the roof sheathing is continuous. It connects to the air control of the wall around the entire perimeter without interruption. The roof overhangs have been cut off to make this connection continuous
Image
Right - The garage roof is correctly oriented for the home’s solar shingle system.
Image
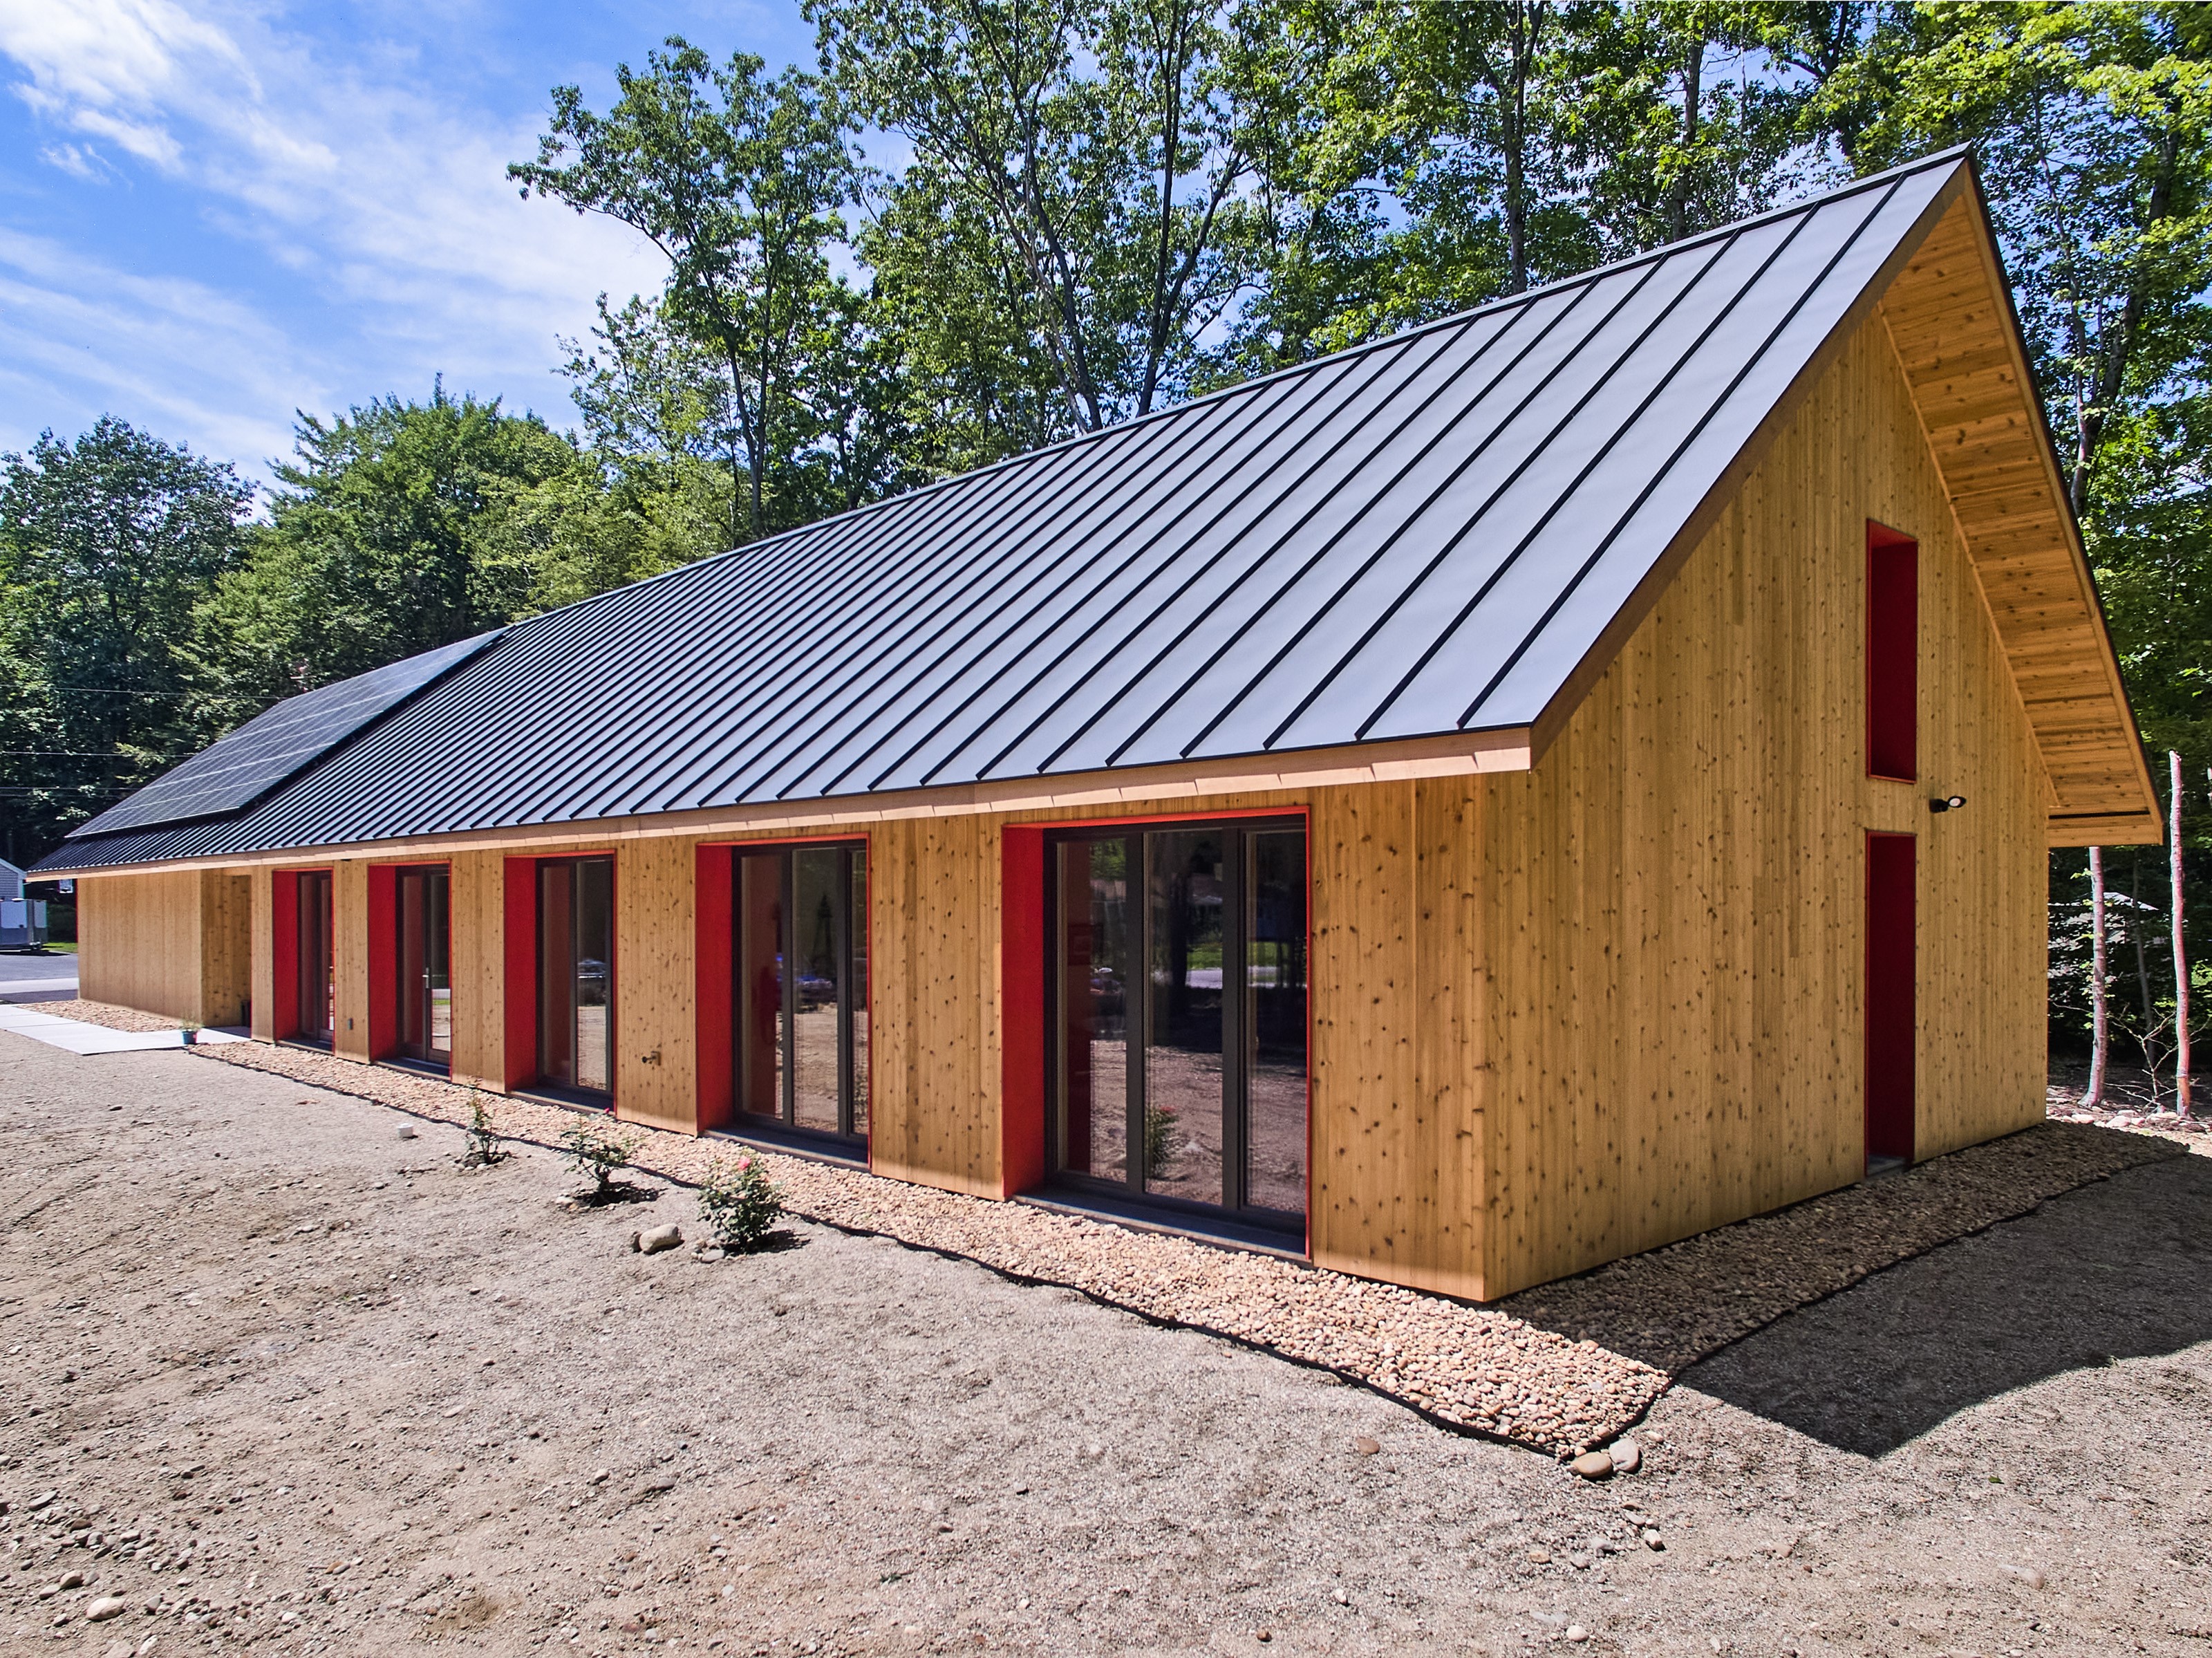
Right - The simple rectangular design of this home provides a large expanse of roof for solar panels.
Image

Right - The wall framing is connected to roof framing with metal ties for hurricane-resistant construction.
Image
Right - These raised heel roof trusses provide 16 inches of space over the outer walls for full insulation coverage at the attic perimeter.
Image
Right - These roof insulation panels are installed in multiple layers with joints offset both vertically and horizontally. The plywood nail base fastened to the roof framing holds the insulation layers together snuggly thus minimizing gaps
Image
Right - This concrete roof is properly attached and reinforced to withstand hurricane winds.
Image
Right - This roof has a low gable and is secured to the wall framing to resist wind uplift.
Image
Right - This shed roof is constructed with 1X4 furring strips installed over the decking and underlayment for ventilation beneath the metal roofing.
Image
Right - This tiny house has a mono-sloped shed roof angled toward the sun to provide maximum space for solar panels.
Image
Image
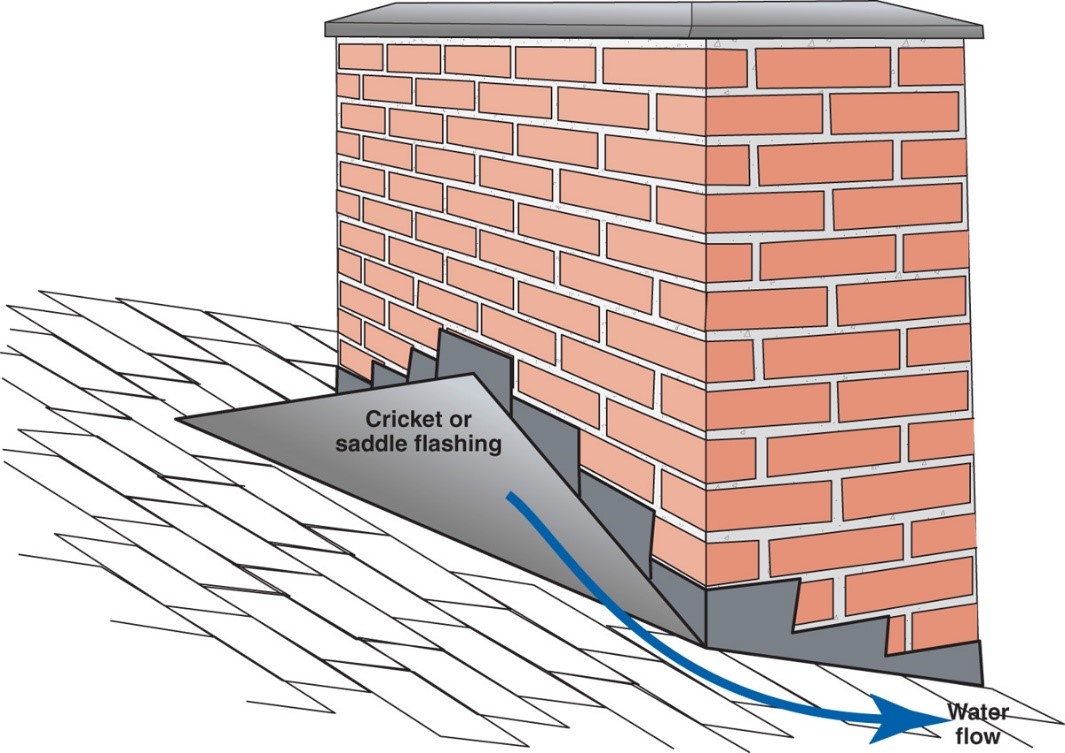
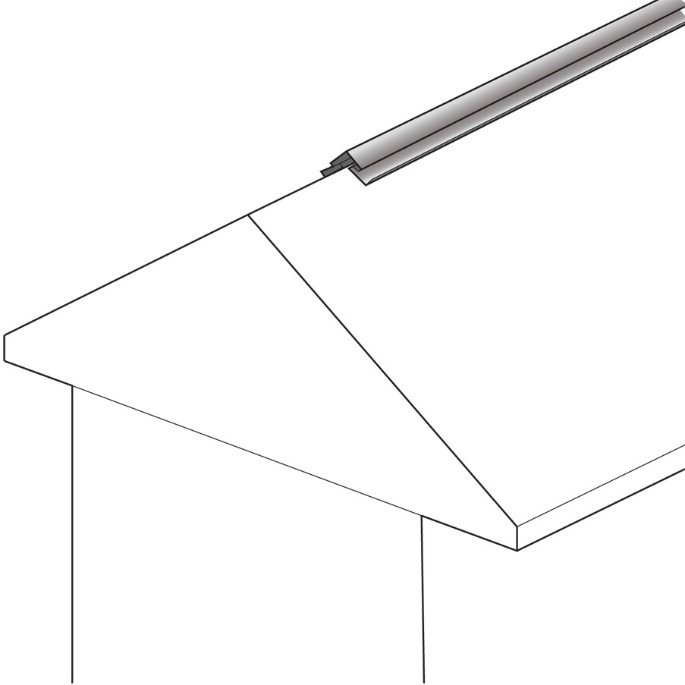
Right – A chimney cricket is installed and flashed to direct rainwater around the chimney
Image
Image
Image
Right – A double bead of sealant seals the seams between the SIP panel and spline.
Image
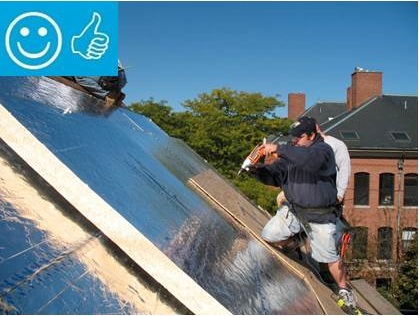
Right – A fully adhered roof membrane provides thorough water and wind protection in this mountain top location.
Image
Right – A protective membrane has been installed in the valleys and at the eaves of this roof before installing underlayment.
Image

Right – A radon pipe provides a path for radon to vent to the roof rather than seeping into the home.
Image
Image
Right – Air barrier and penetrations sealed between porch attic and conditioned space
Image
Image
Image

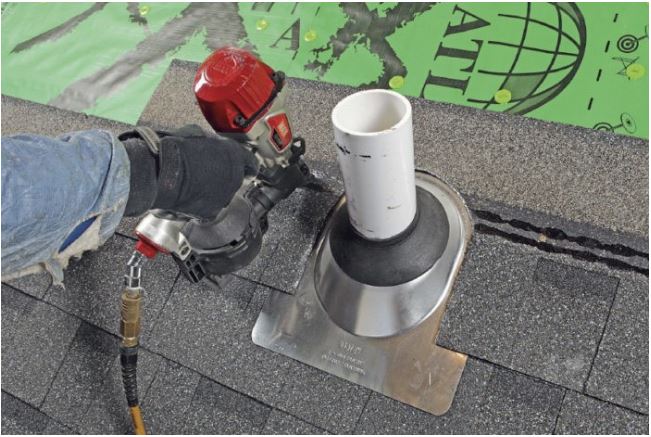
Right – All penetrations through the roof decking are sealed with paint-on flashing.
Image
Image
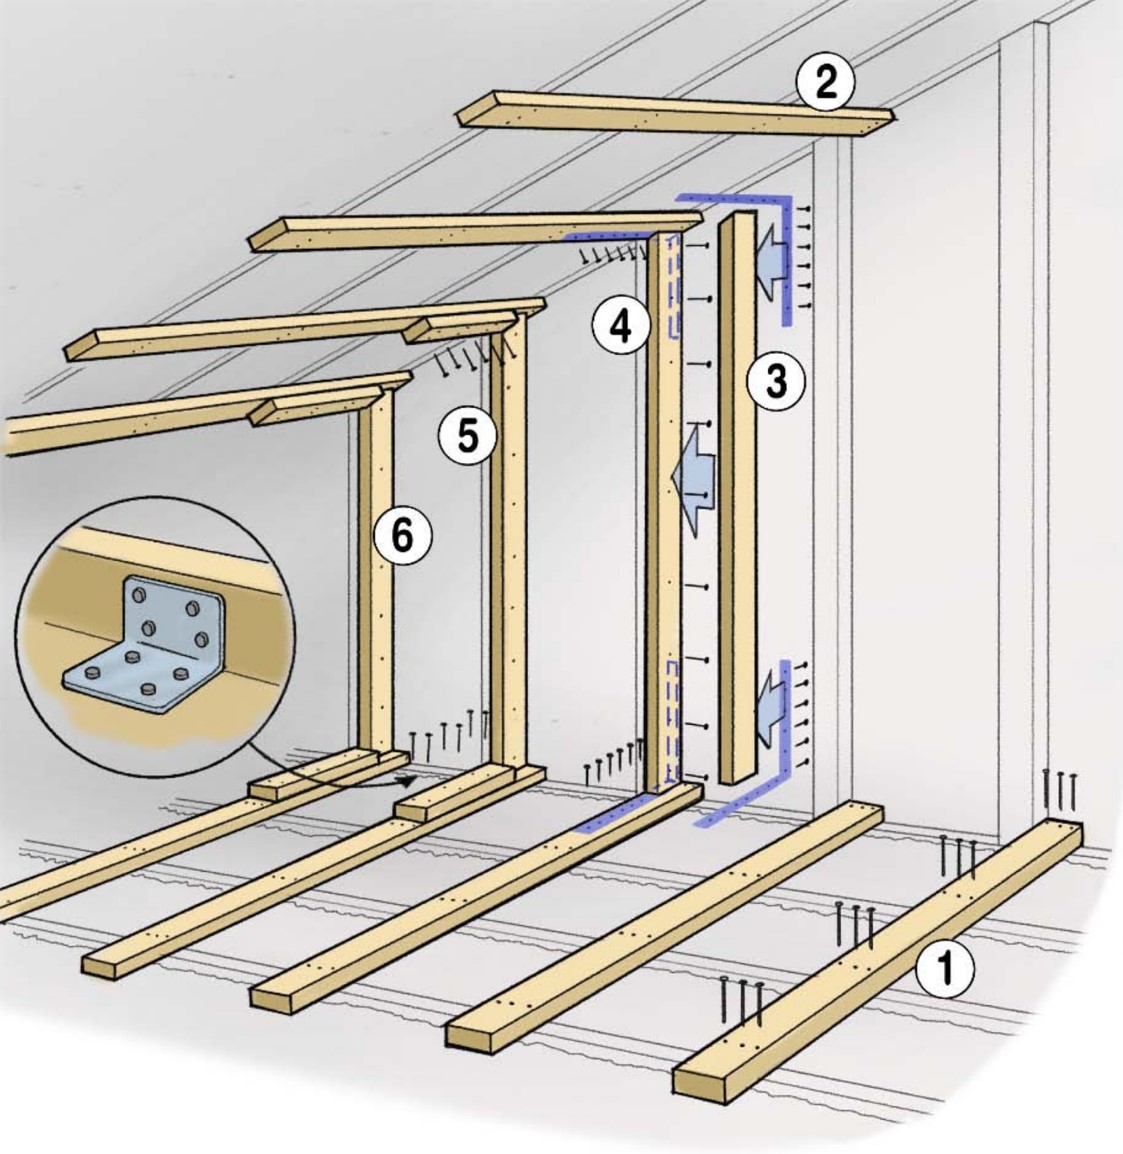
Right – An existing gable wall is reinforced with horizontal braces that butt up to the gable end wall and connect back to multiple trusses; retrofit studs make full contact with the wall and the compression blocks and are connected to the horizontal brac
Image

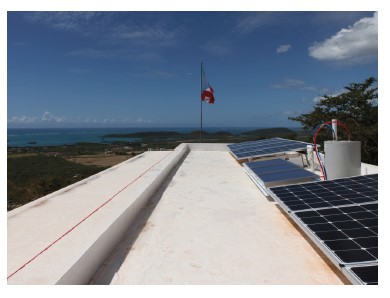
Right – Angled racks are used for the photovoltaic panel installation on this flat roof.
Image
Image
Right – Battens are installed above the cork insulation to provide a ventilating layer between the insulation and the roof sheathing and cladding.
Image

Right – Battens were installed above the cork insulation to provide a ventilating layer between the insulation and the roof sheathing on this “hot roof” design.
Image
Image

Right – Closed-cell polyurethane foam is sprayed on the underside of the roof deck to provide structural connections and seal seams in the sheathing to increase wind resistance
Image
Image
Image
Image
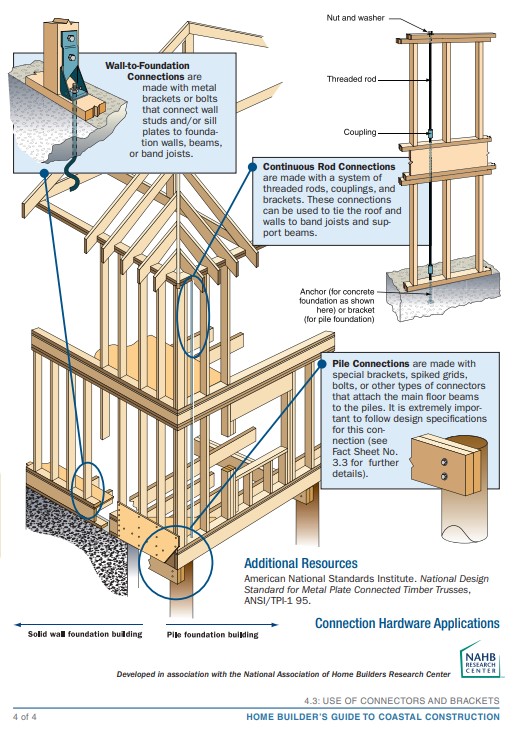
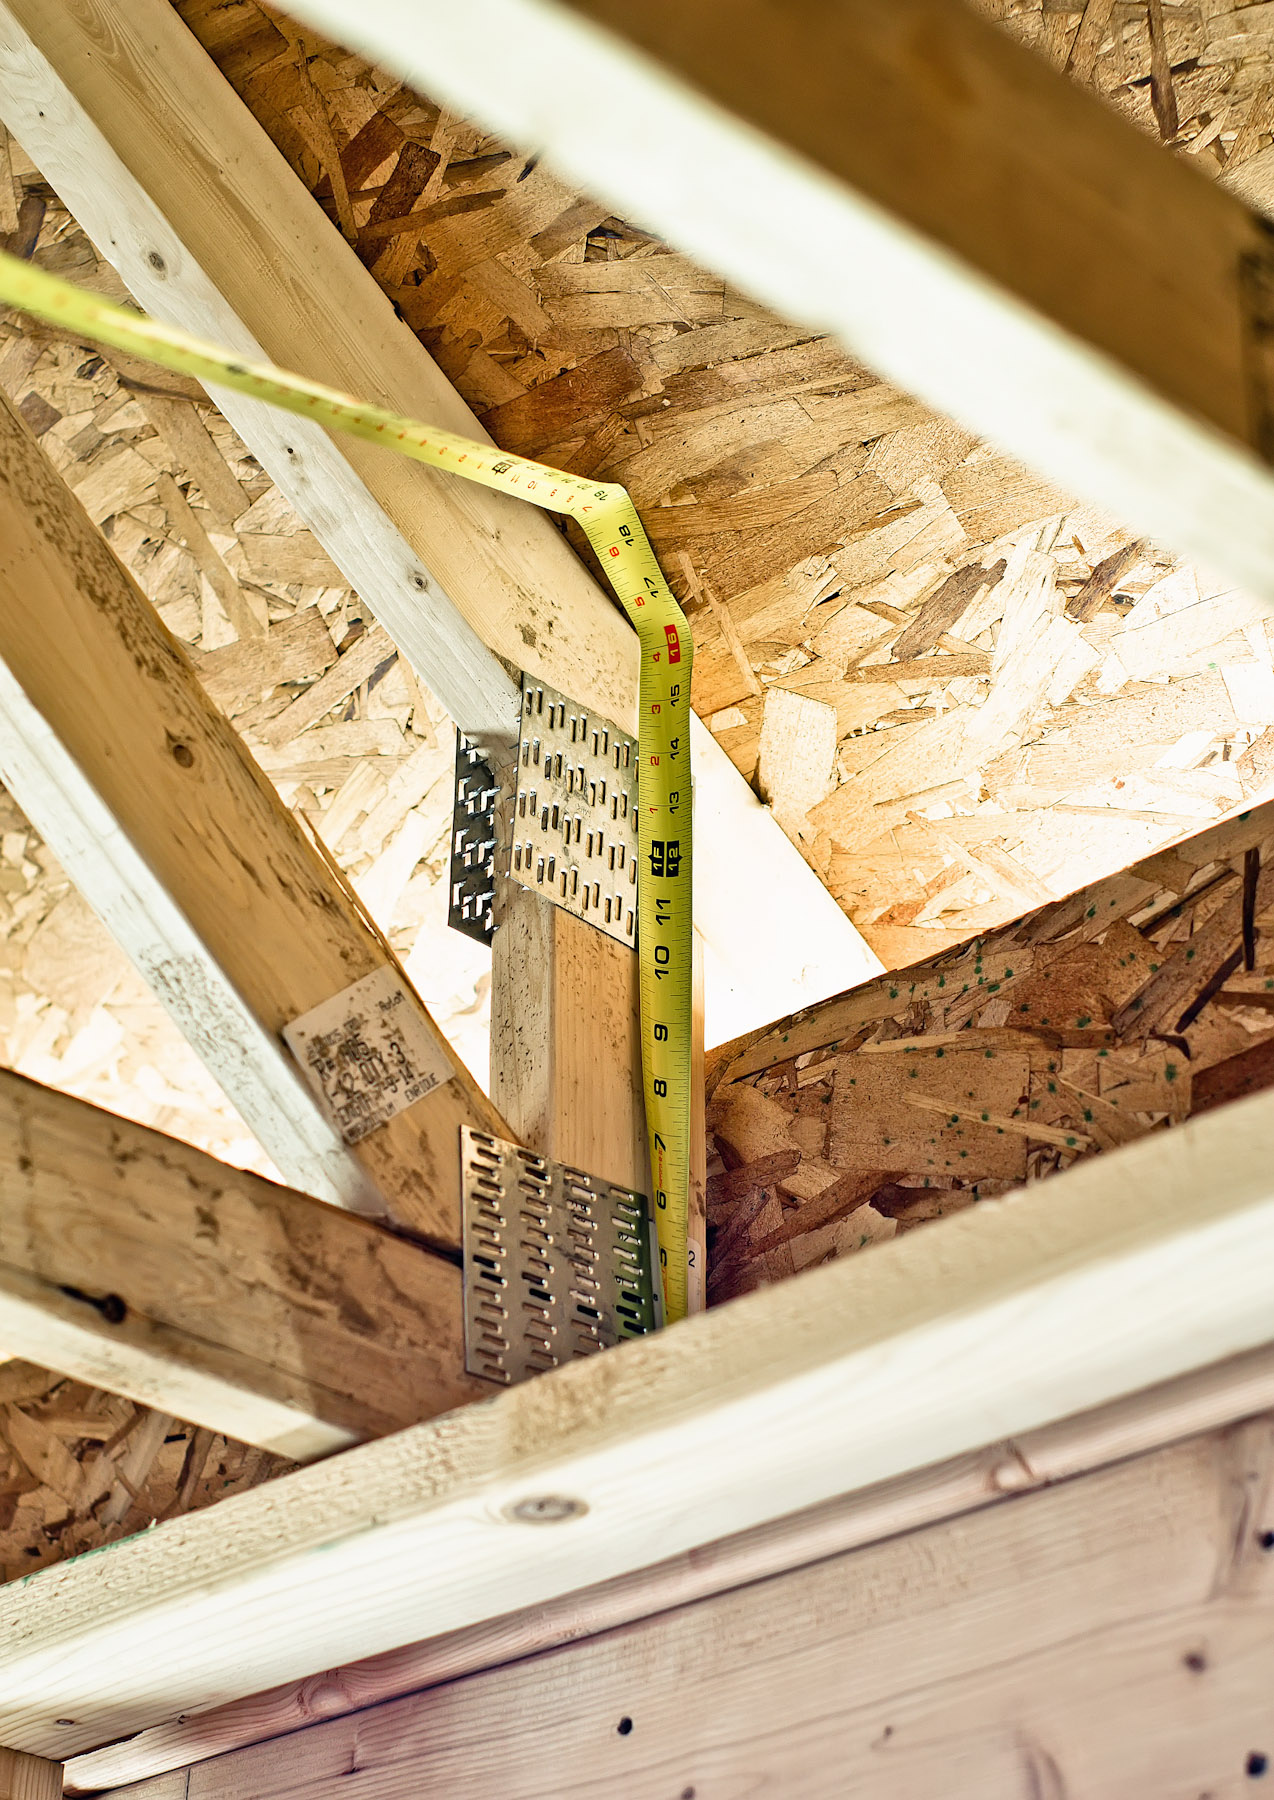
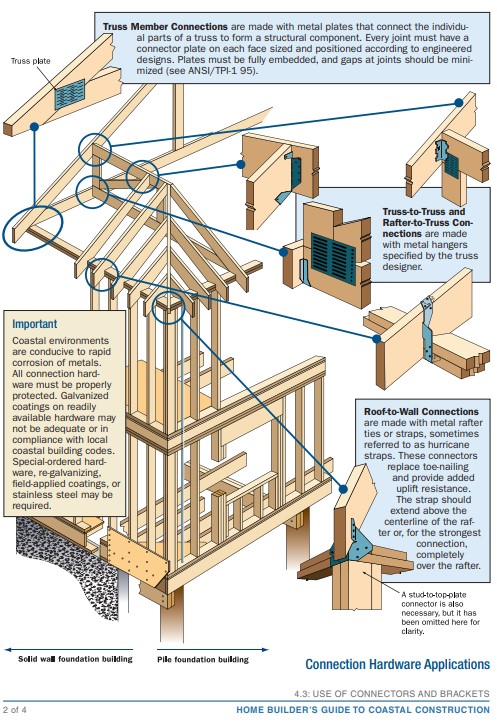
Right – Examples of wall stud to sill plate and foundation and wall rod connectors and brackets.
Image
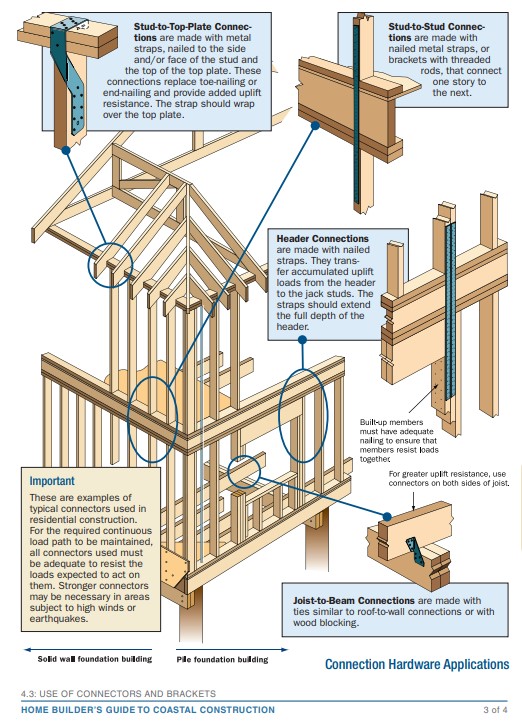
Right – Examples of wall stud to top plate and stud to rim joist framing connectors and brackets.
Image
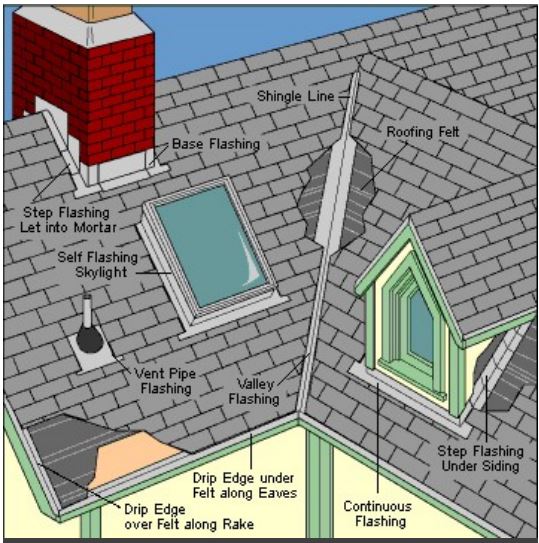
Right – Flashing is installed around chimney, skylight, vents, dormers, in valleys and at eaves
Image
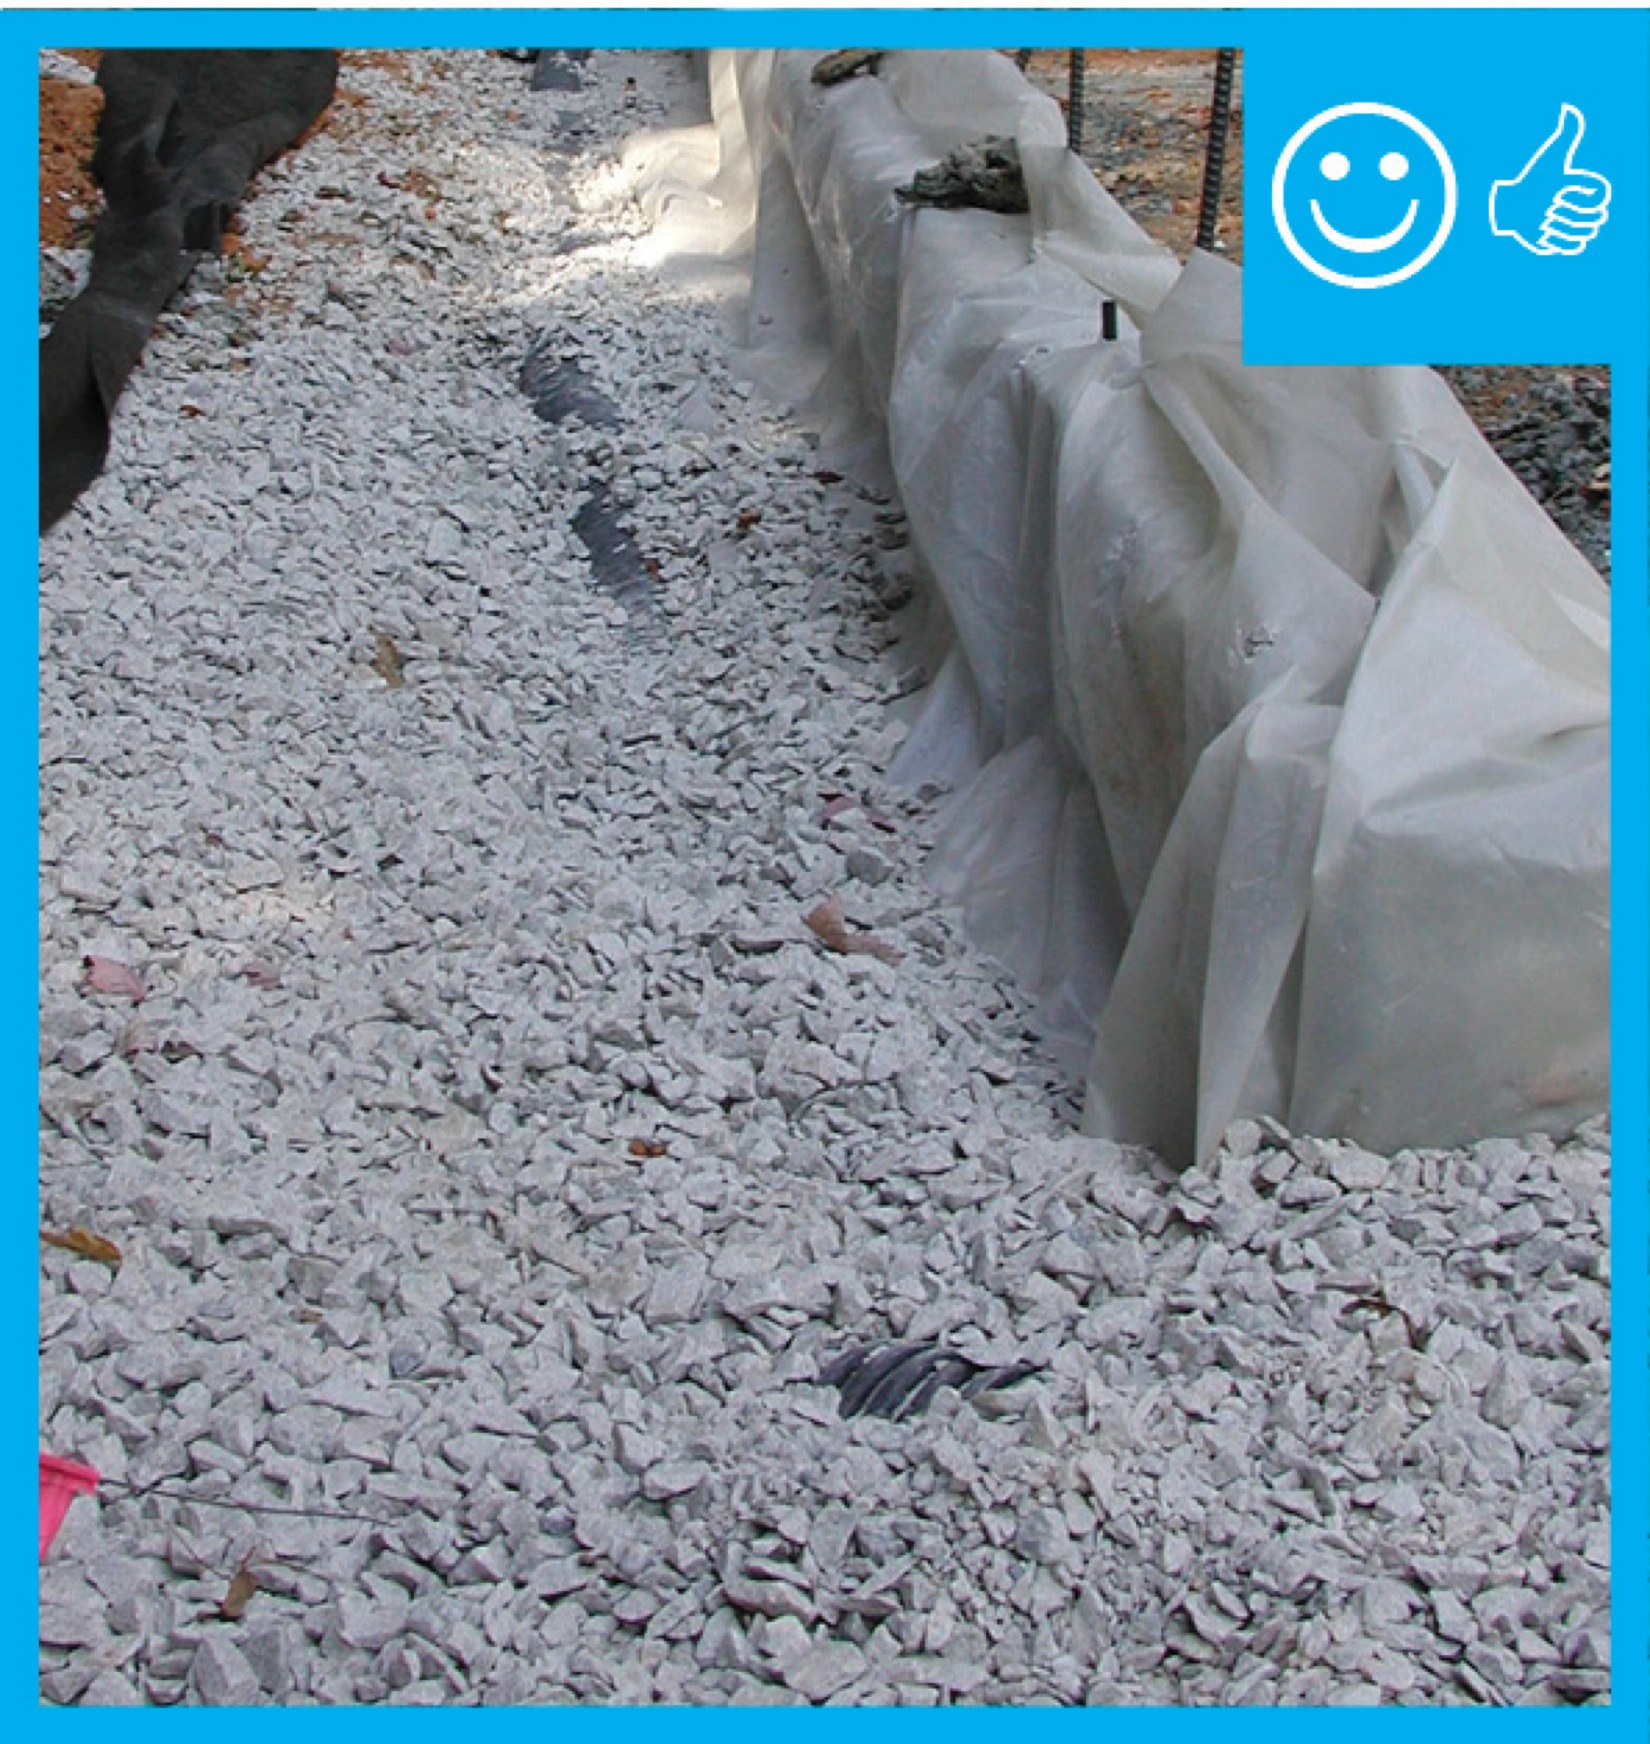
Right – House without gutters has waterproof liner, drain tile, and gravel bed extending more than 5 feet from foundation
Image
Image
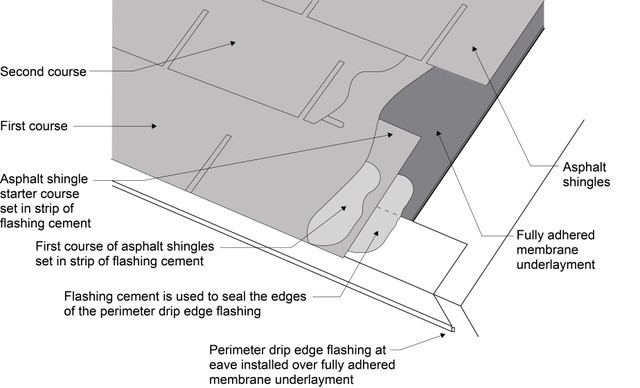
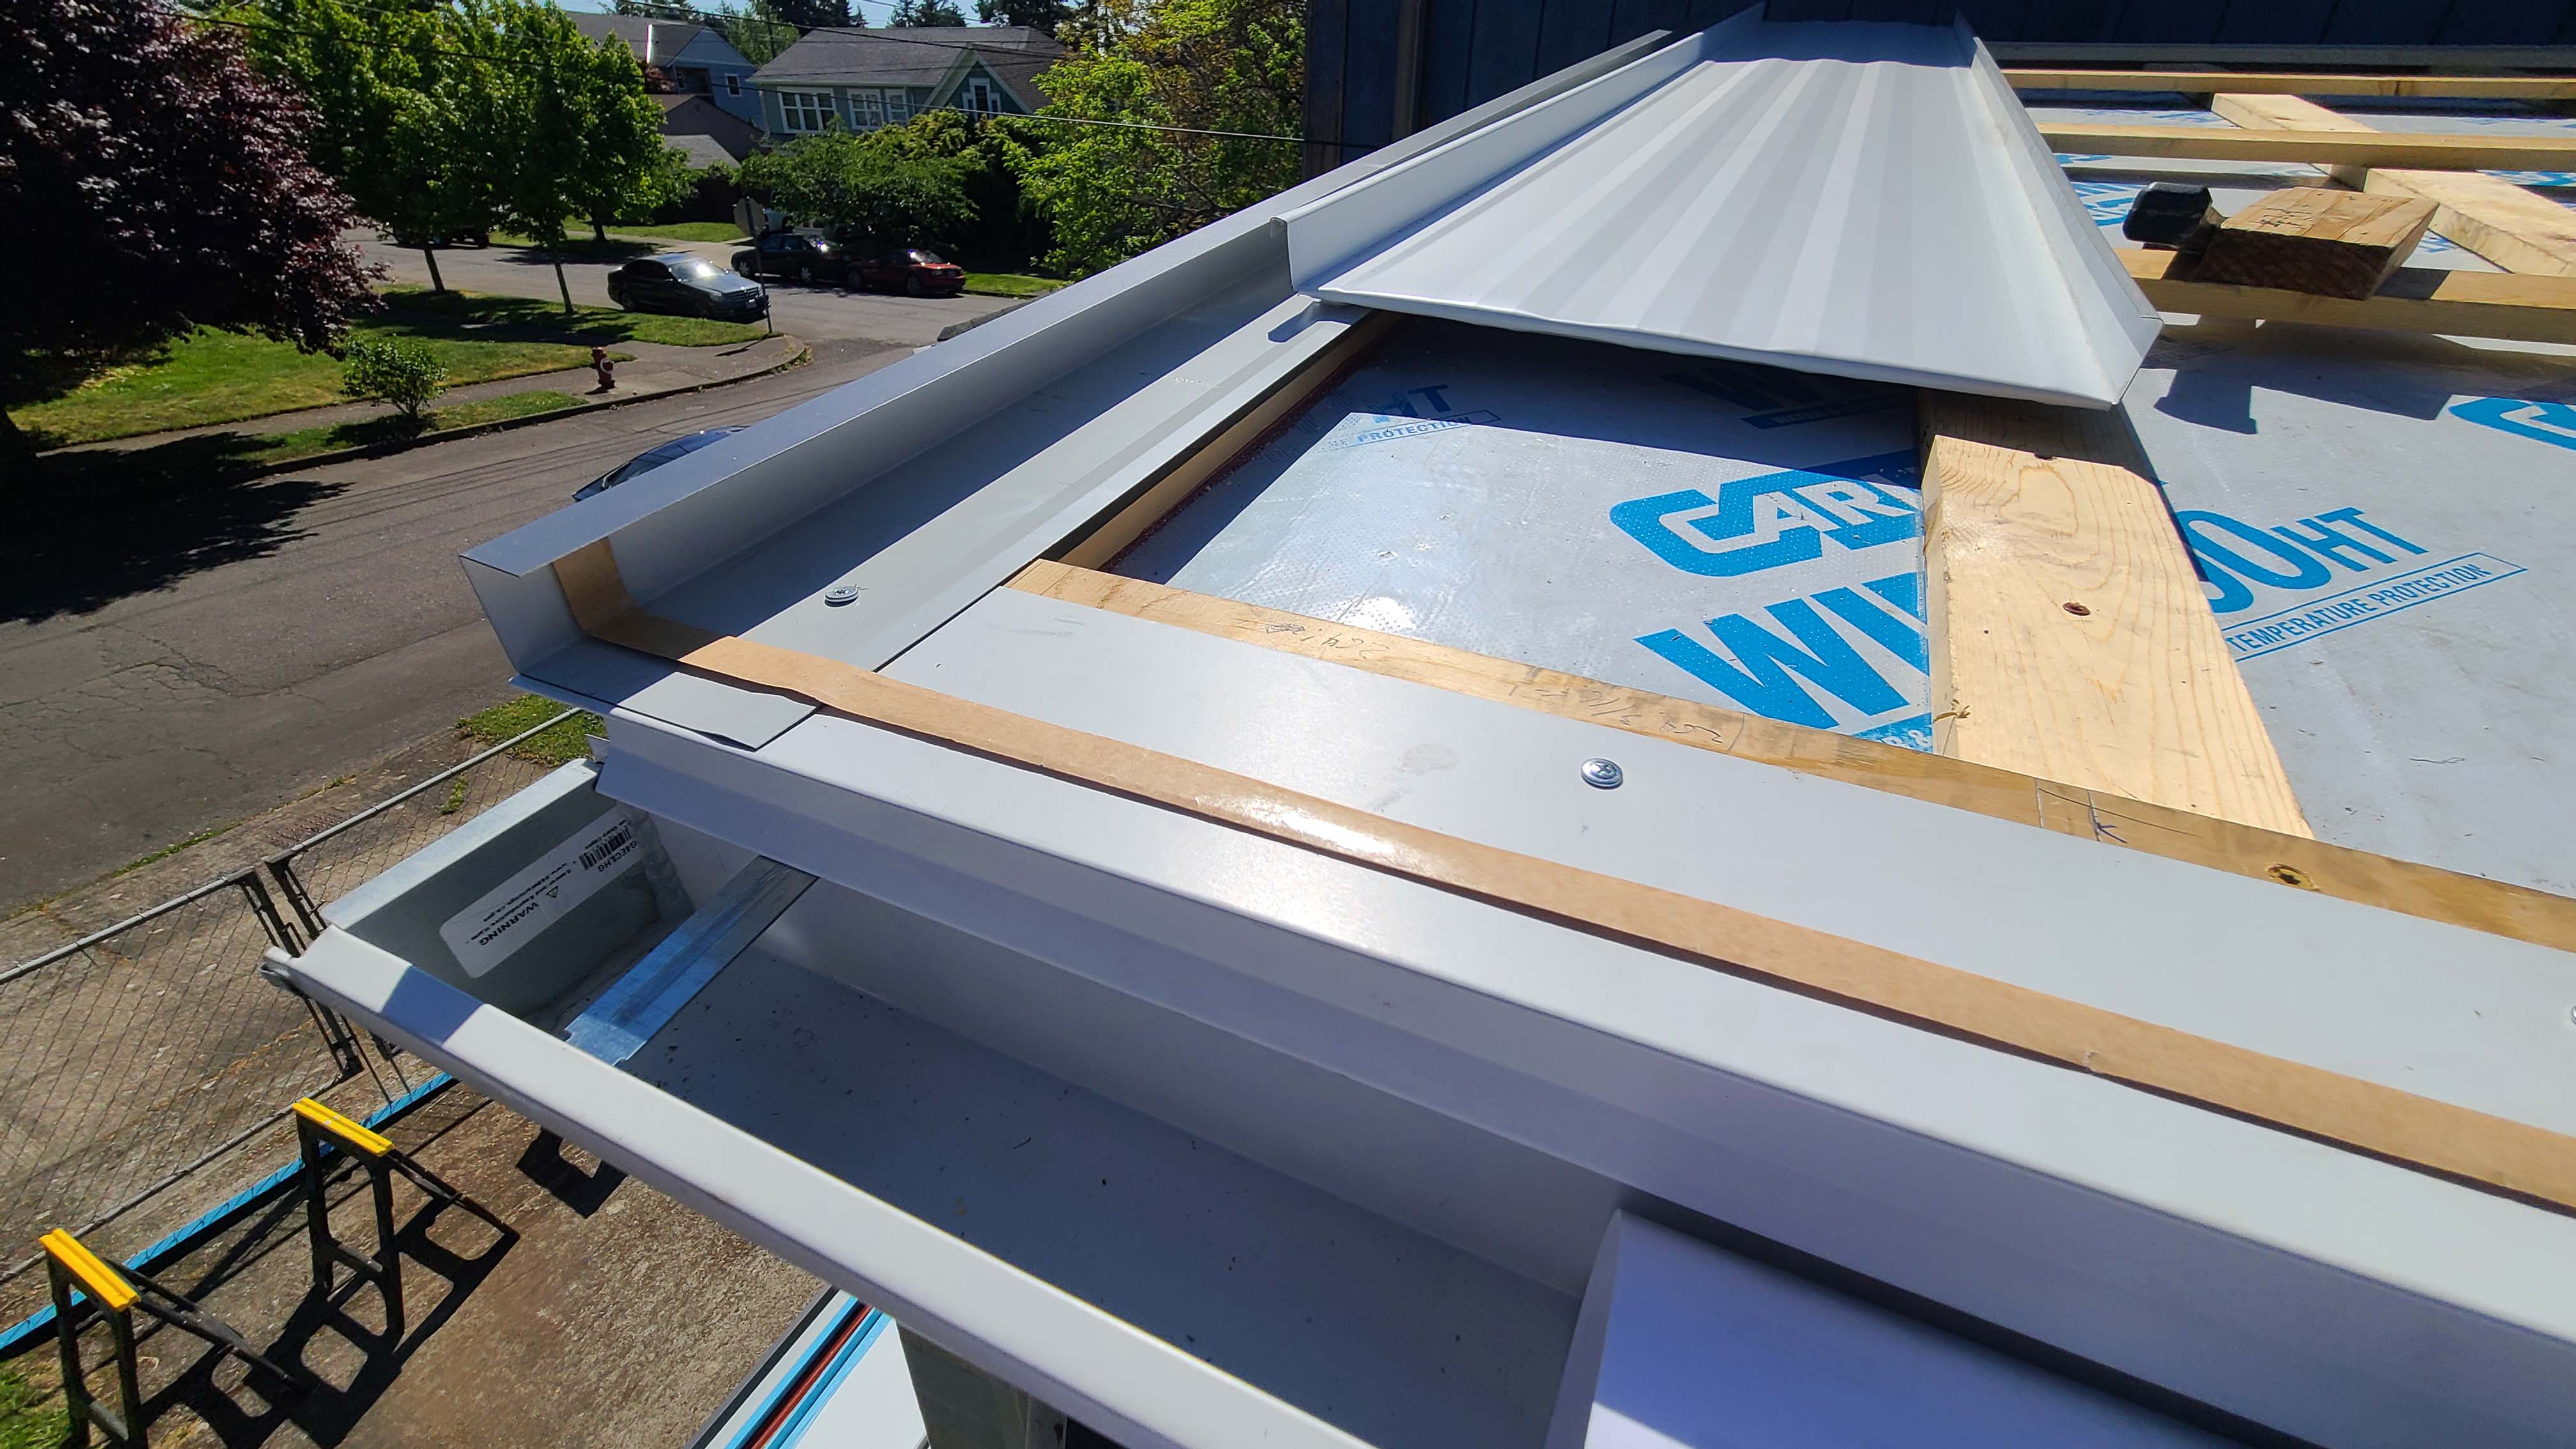
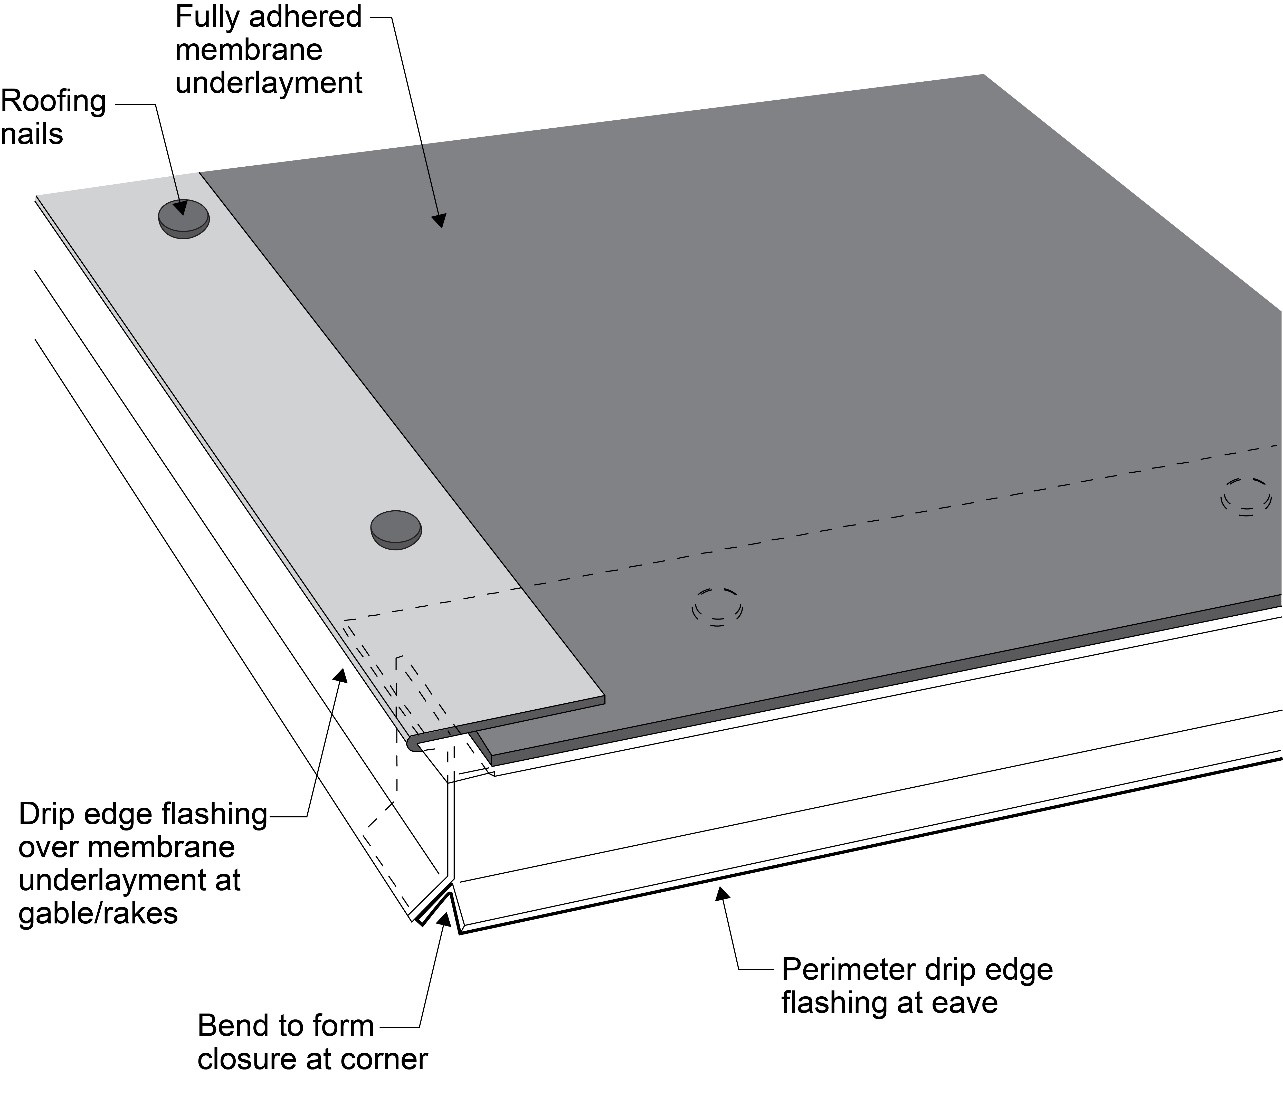
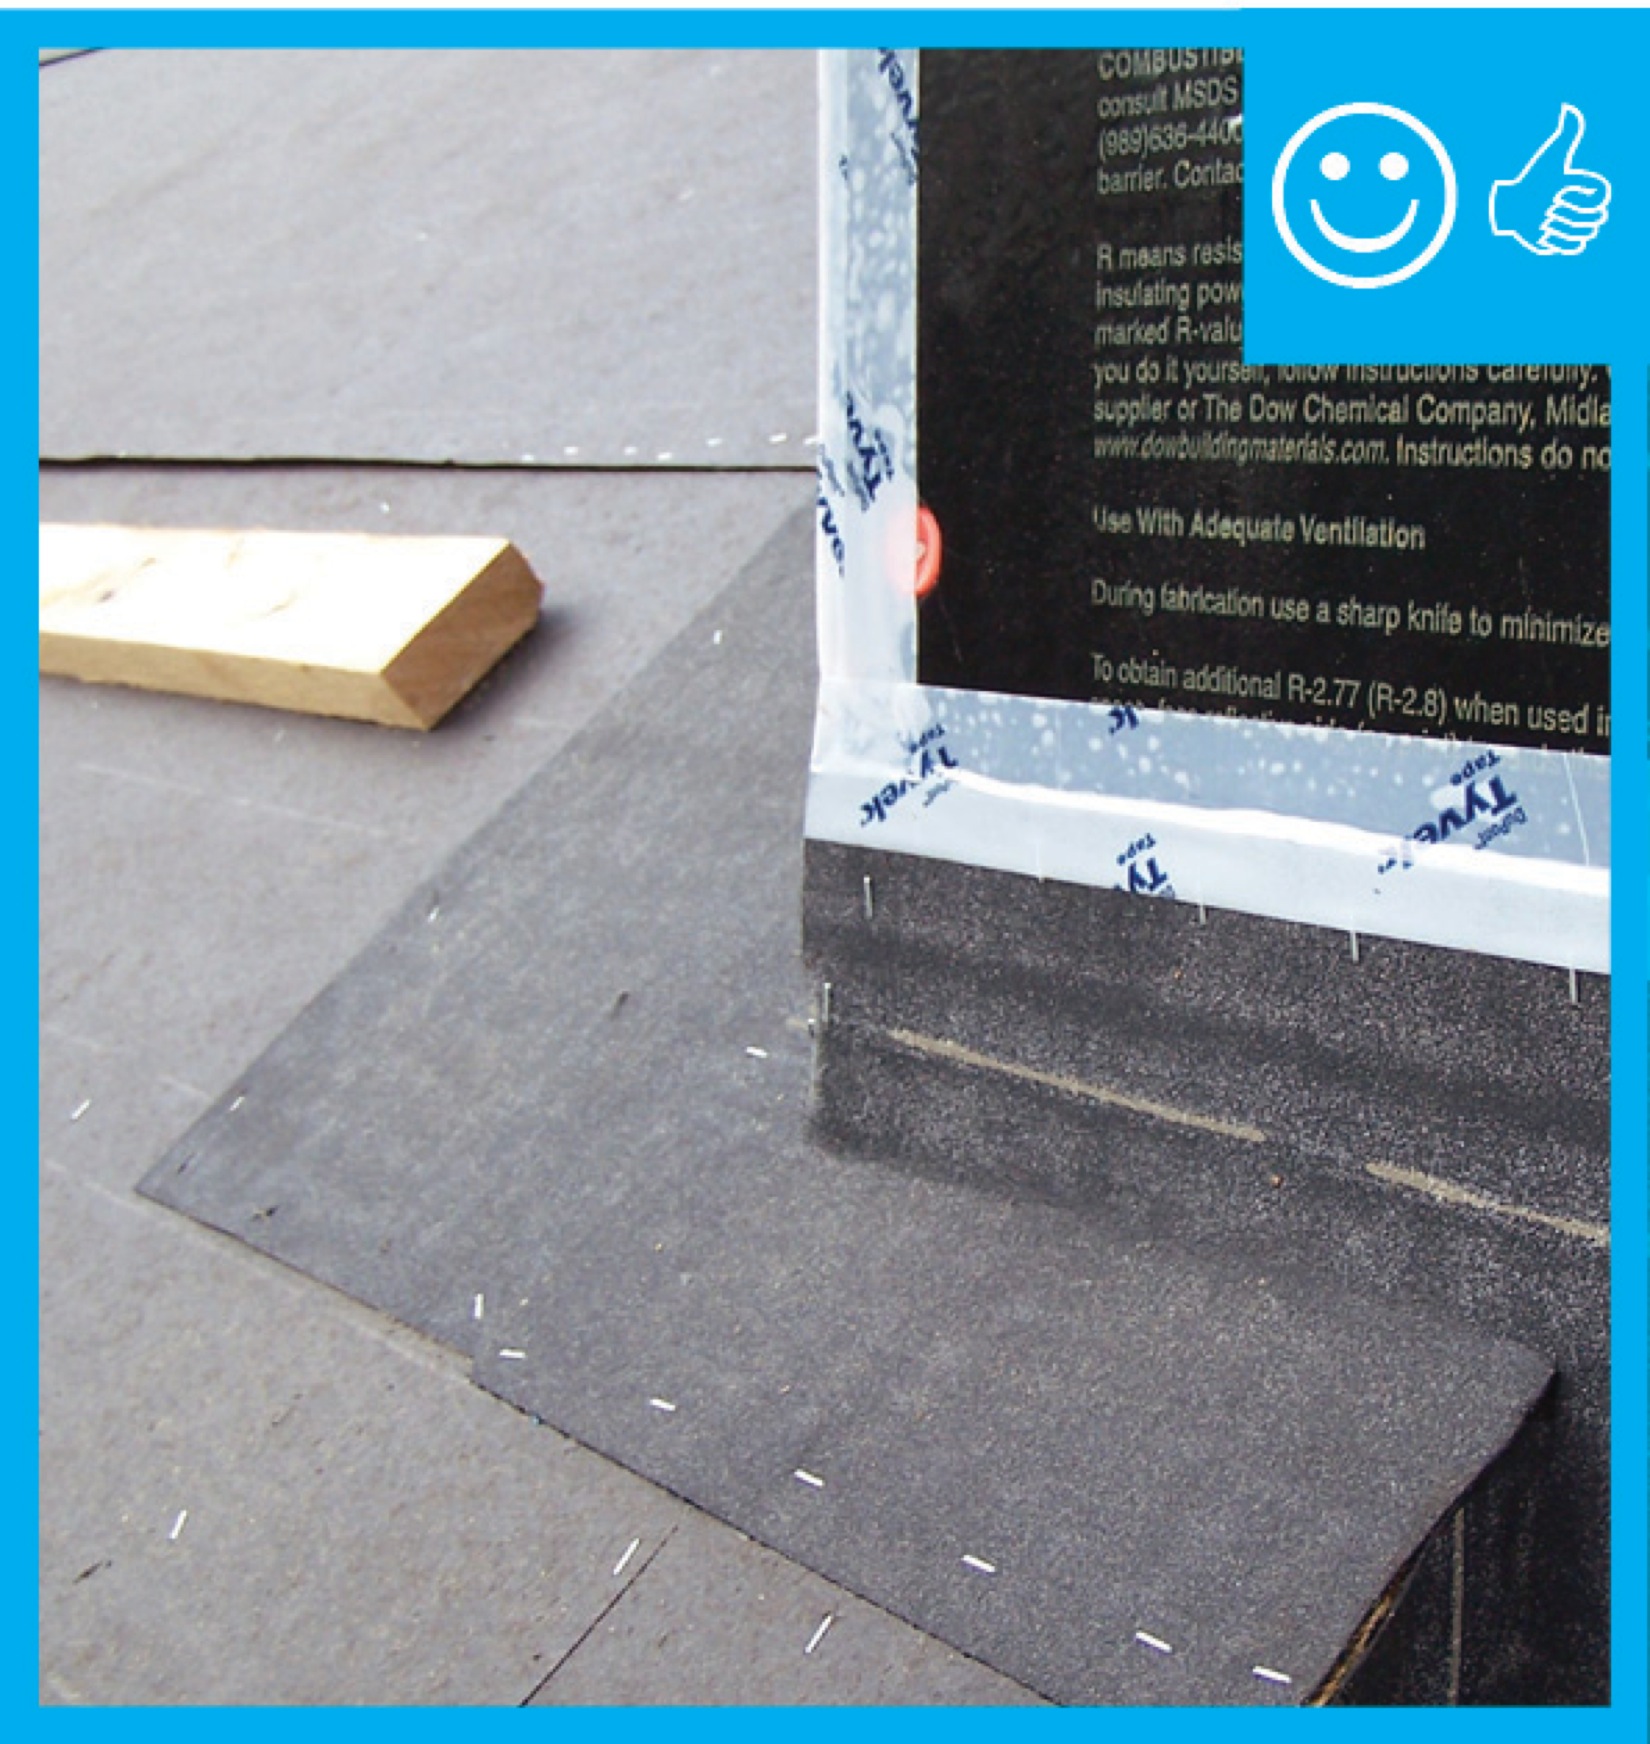
Right – If drip edge flashing is installed over fully adhered roof membrane at eaves, use flashing cement to seal the upper edge of the flashing
Image
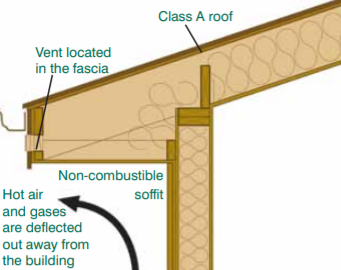
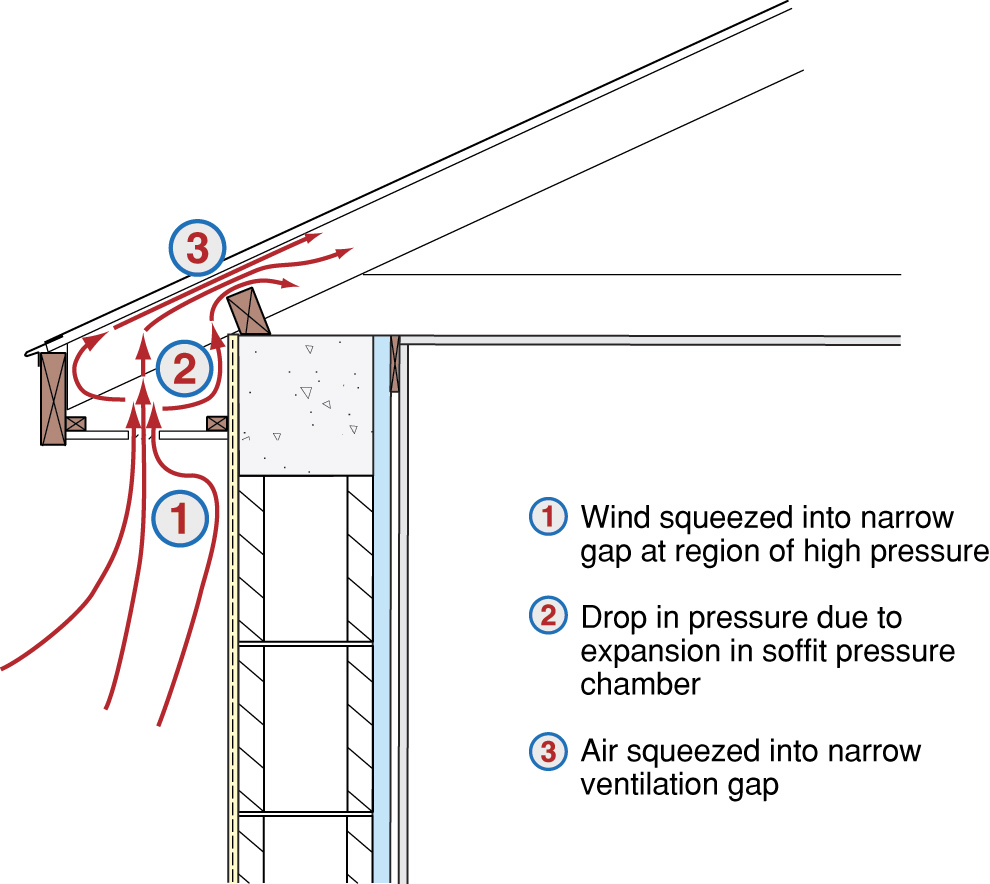
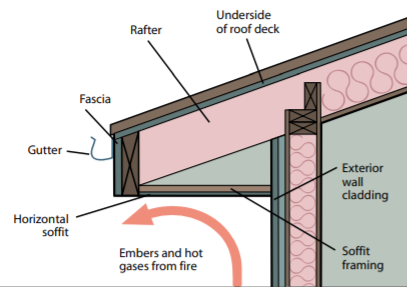
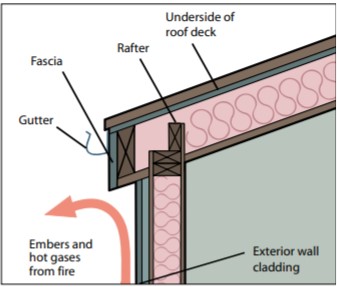
Right – In wildfire prone areas, using a flat soffit with venting on the fascia instead of an angled soffit with down-facing venting reduces the risk of catching rising embers.
Image
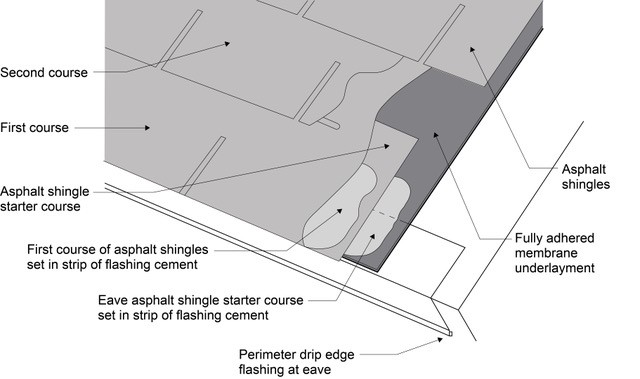
Right – Install asphalt shingles over a starter strip set in an 8-inch strip of flashing cement
Image
Image
Image
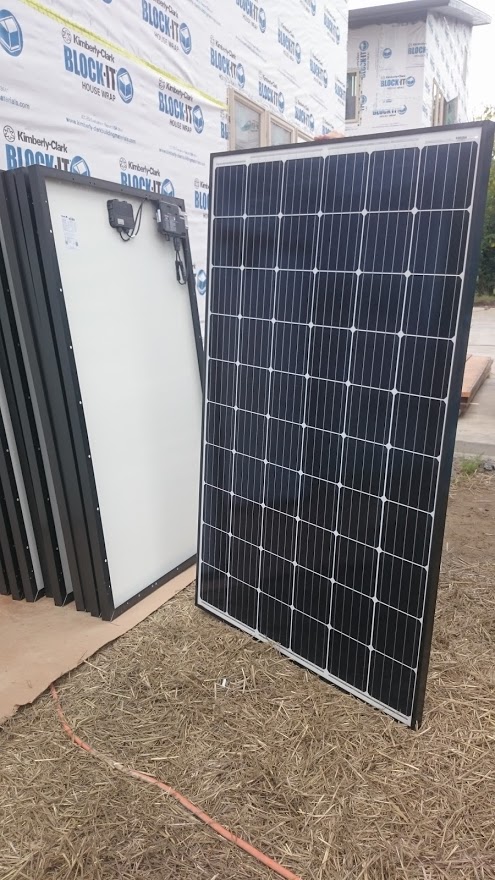
Right – Photovoltaic solar panels are ready for installation on the roof of a DOE Zero Energy Ready certified home.
Image
Image
Image
Image
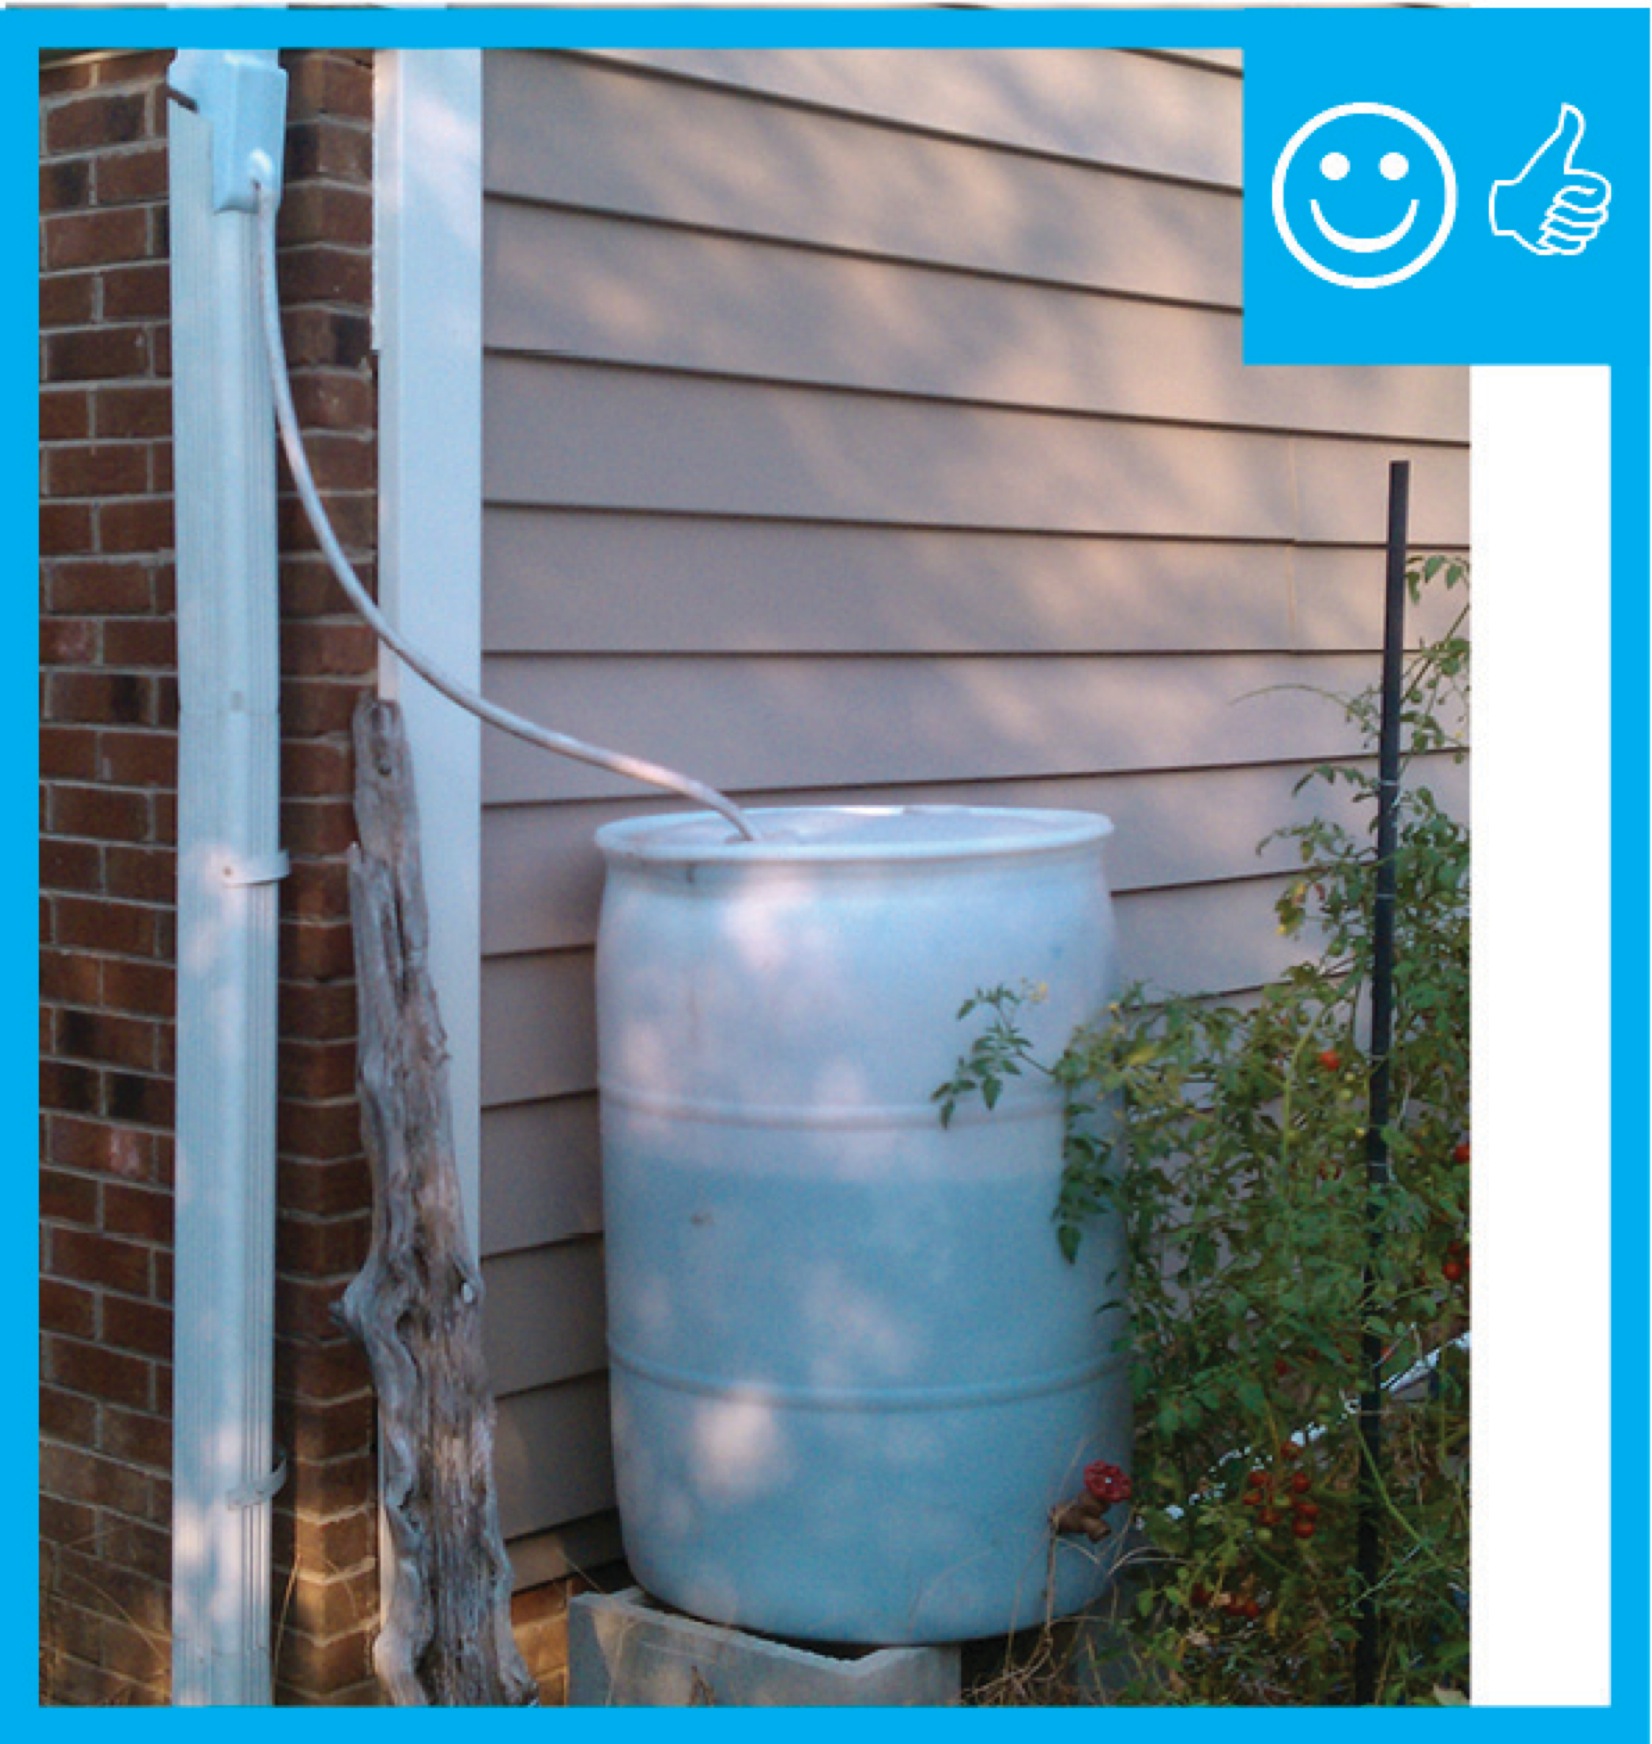
Right – Rain barrel installed with an overflow spout terminating at least 5 feet from foundation
Image
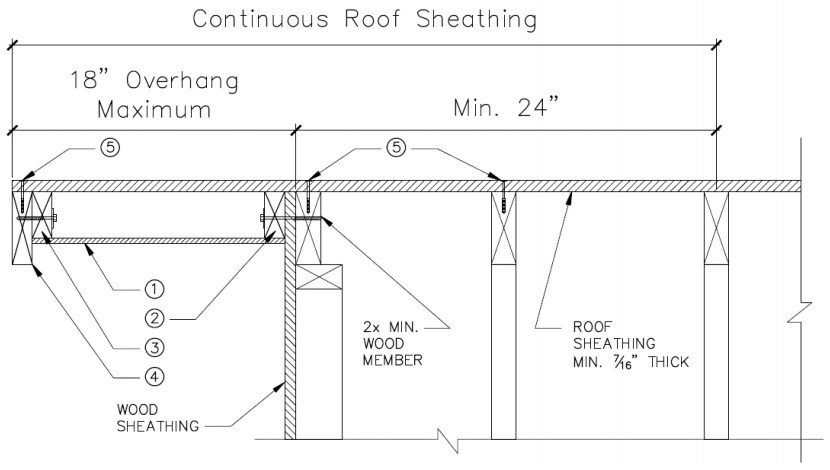
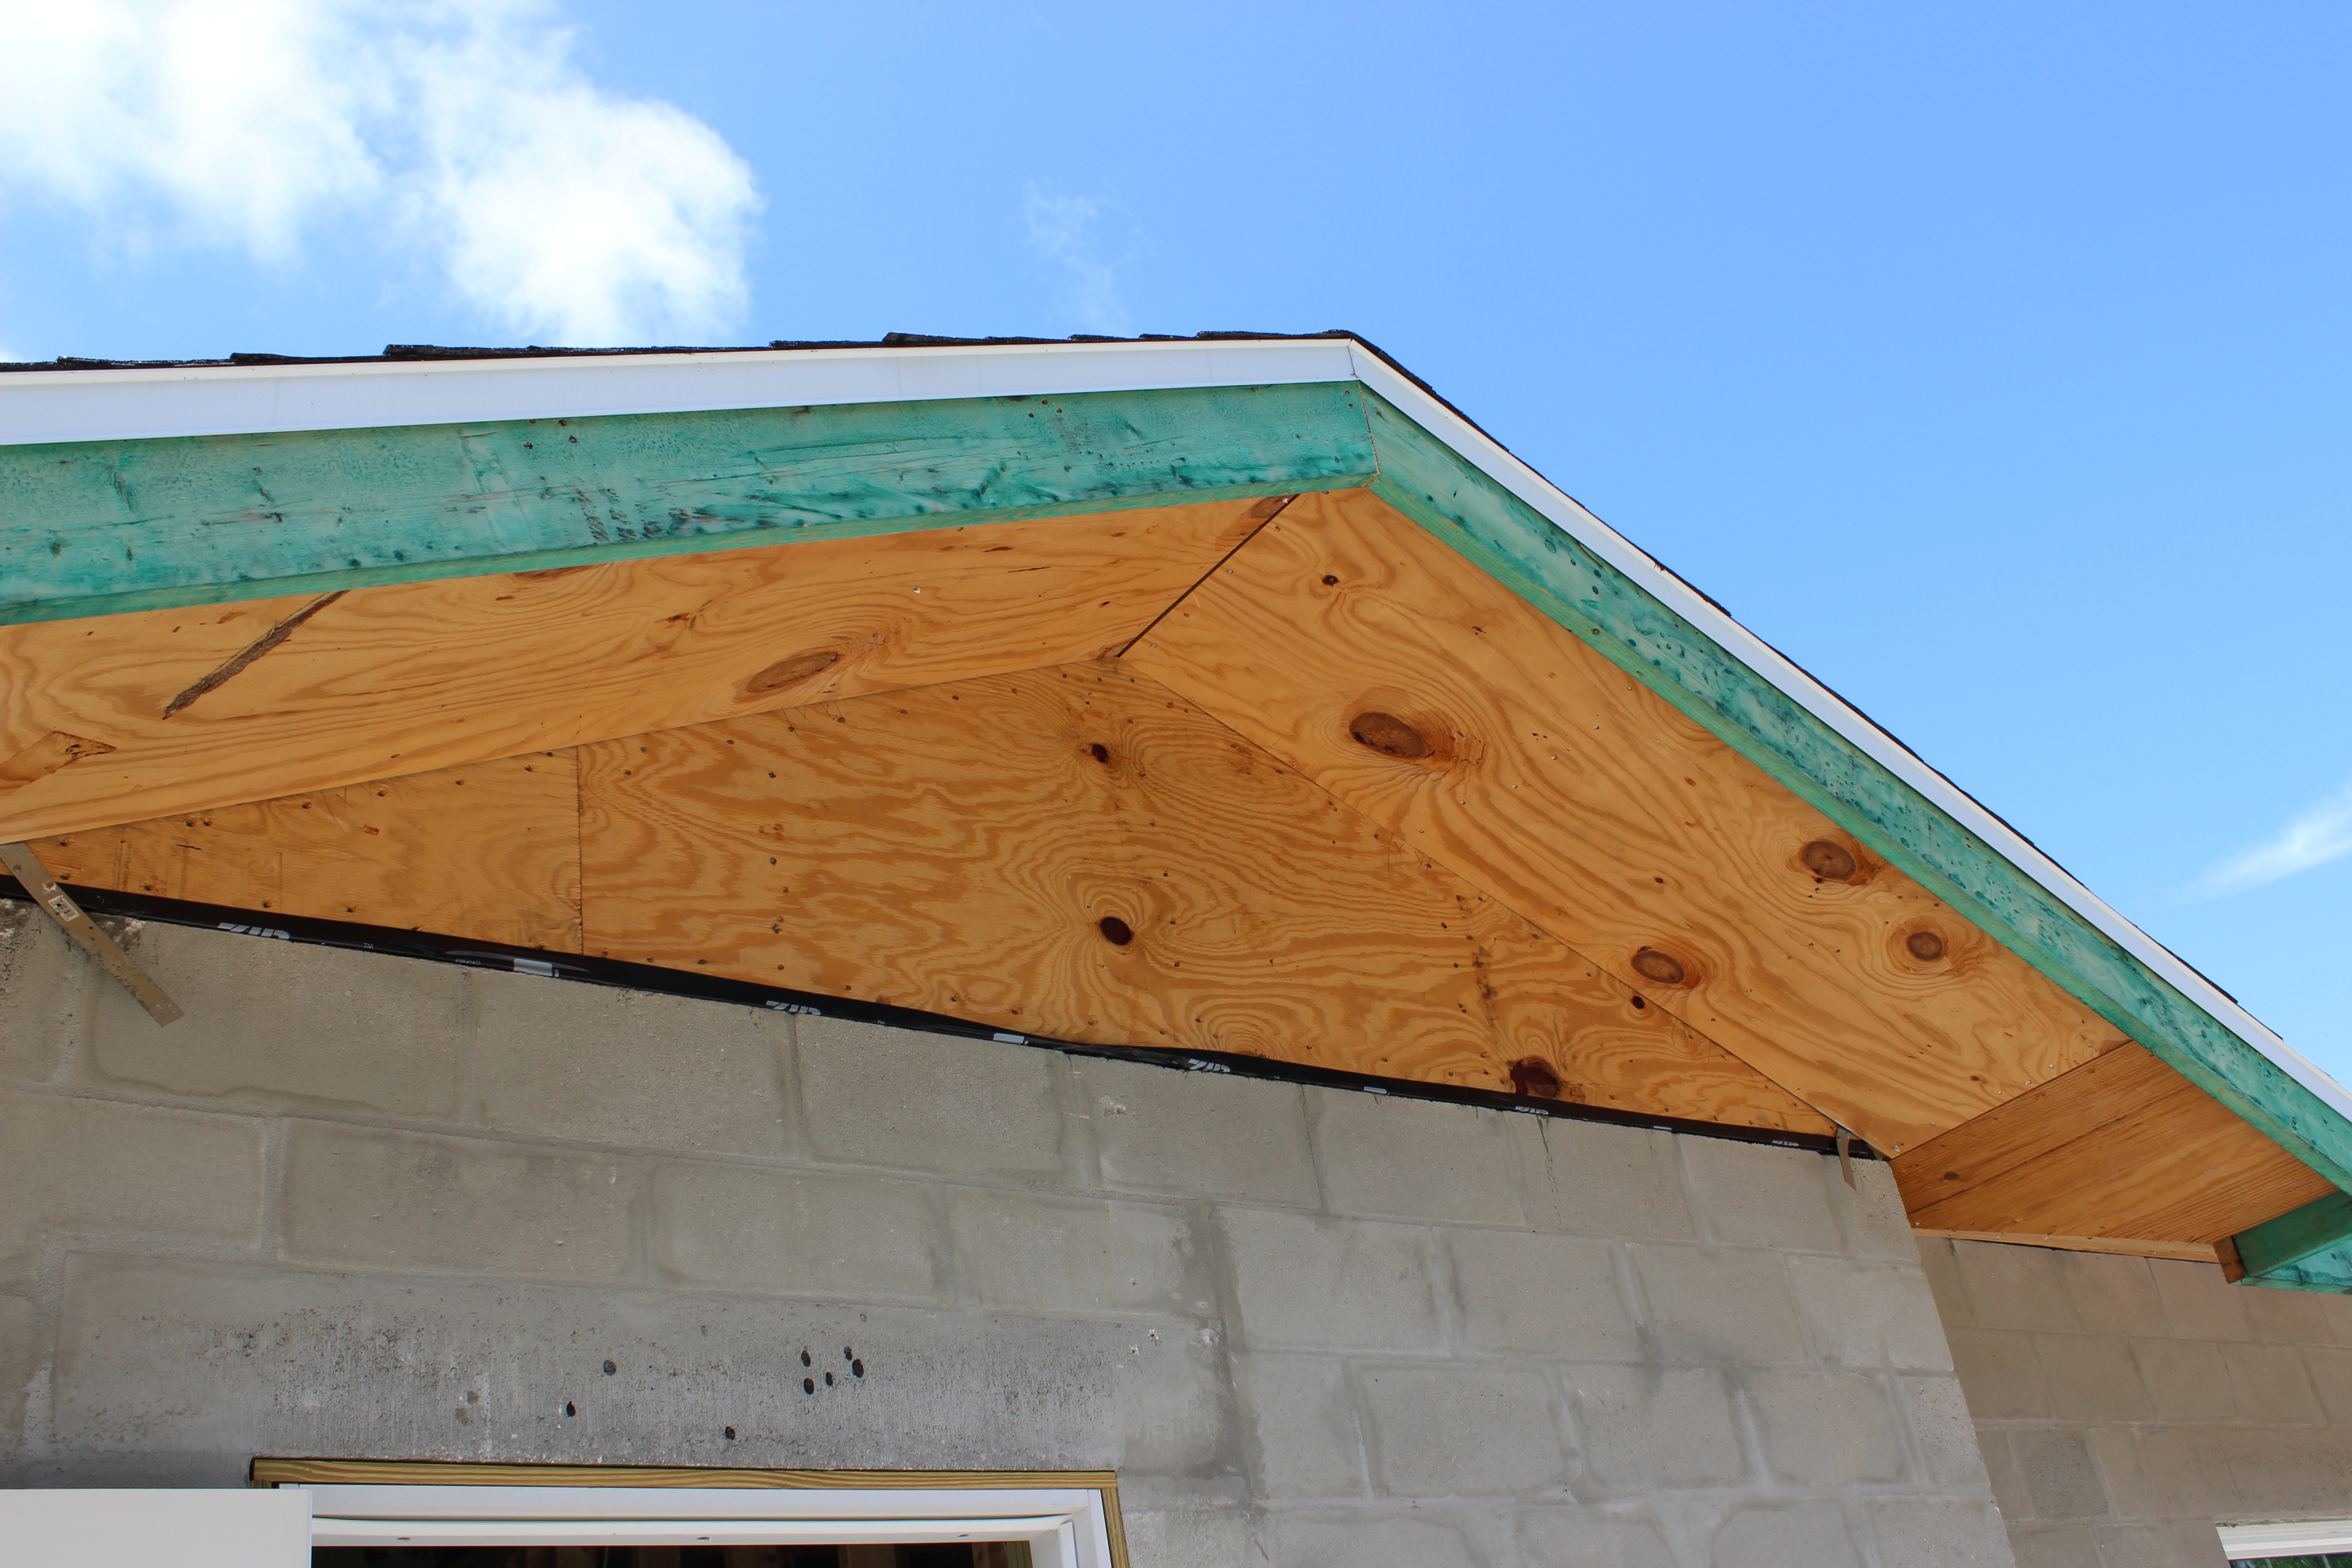
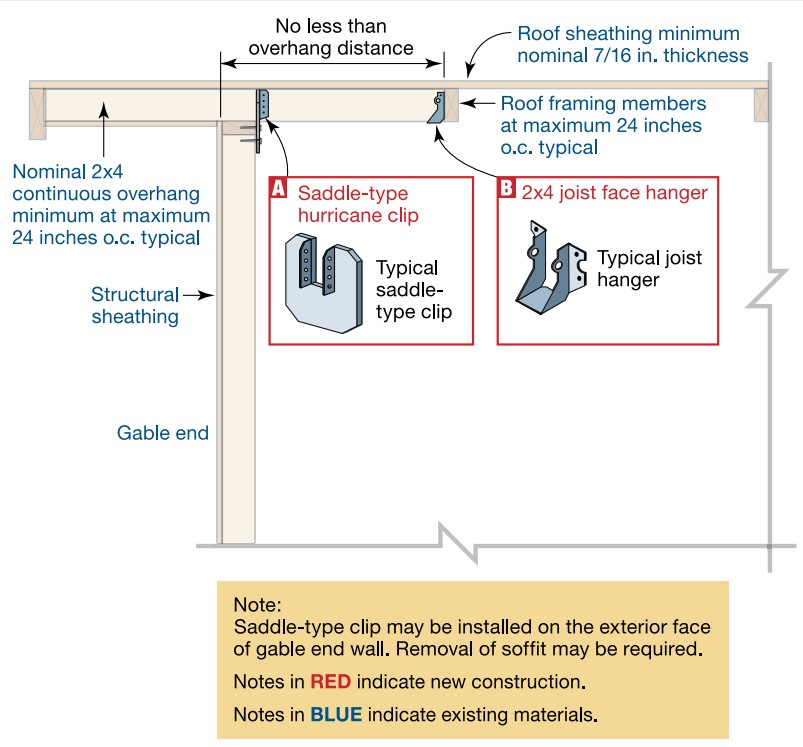
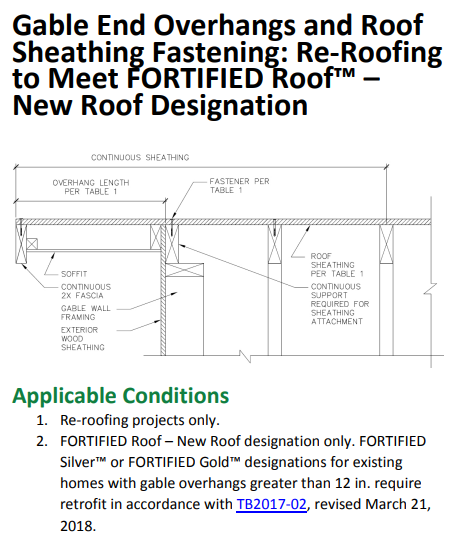
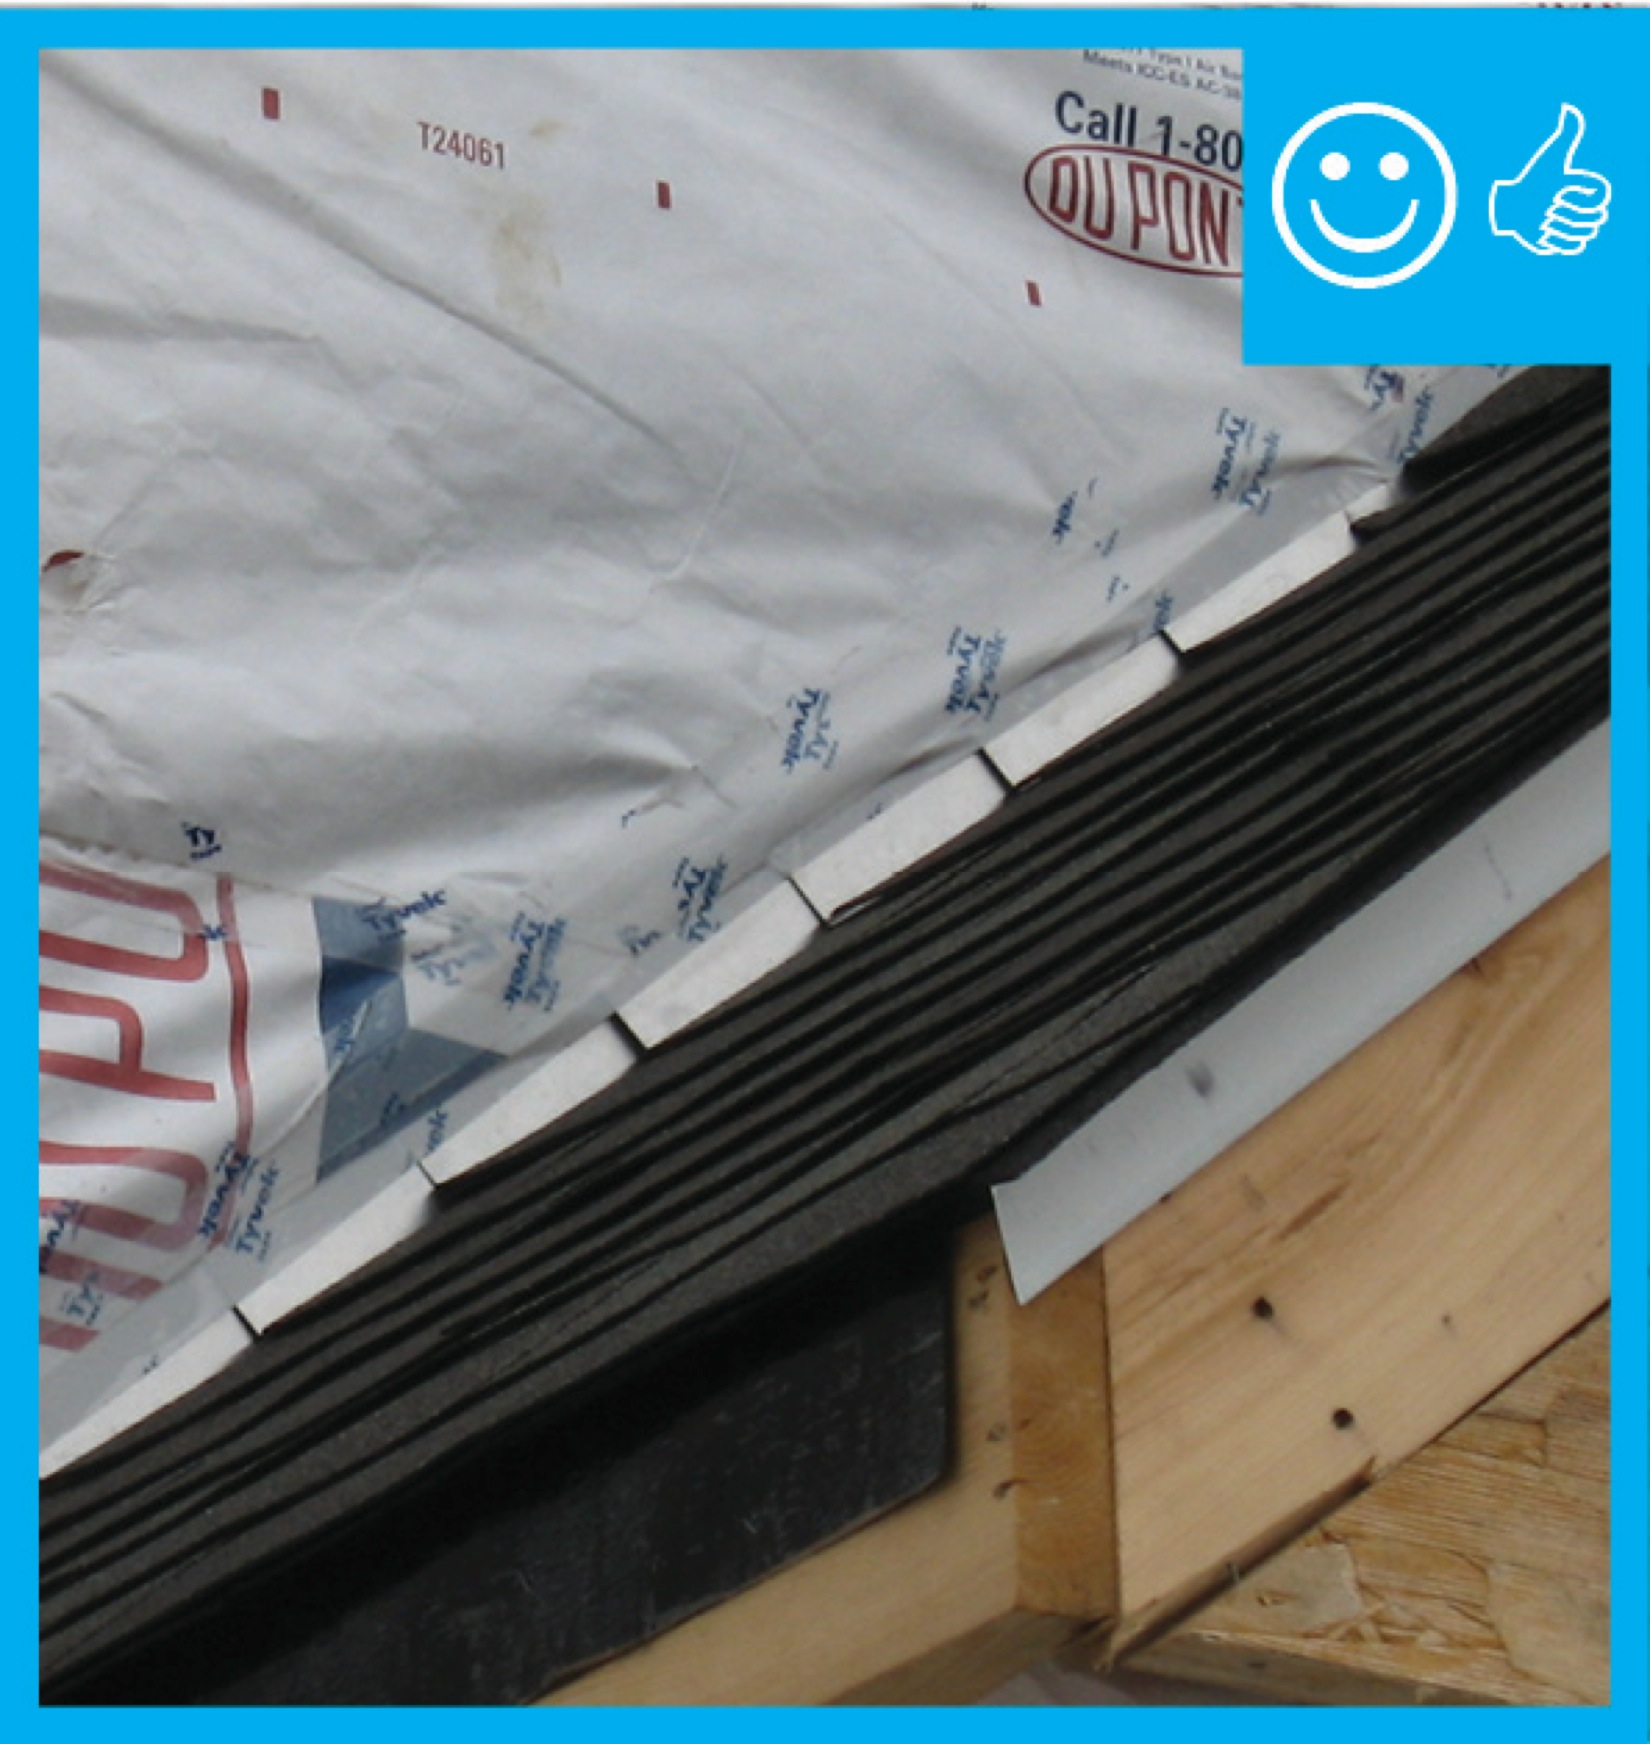
Right – Retrofit Specification for installing roof sheathing an 18-inch gable end overhang
Image

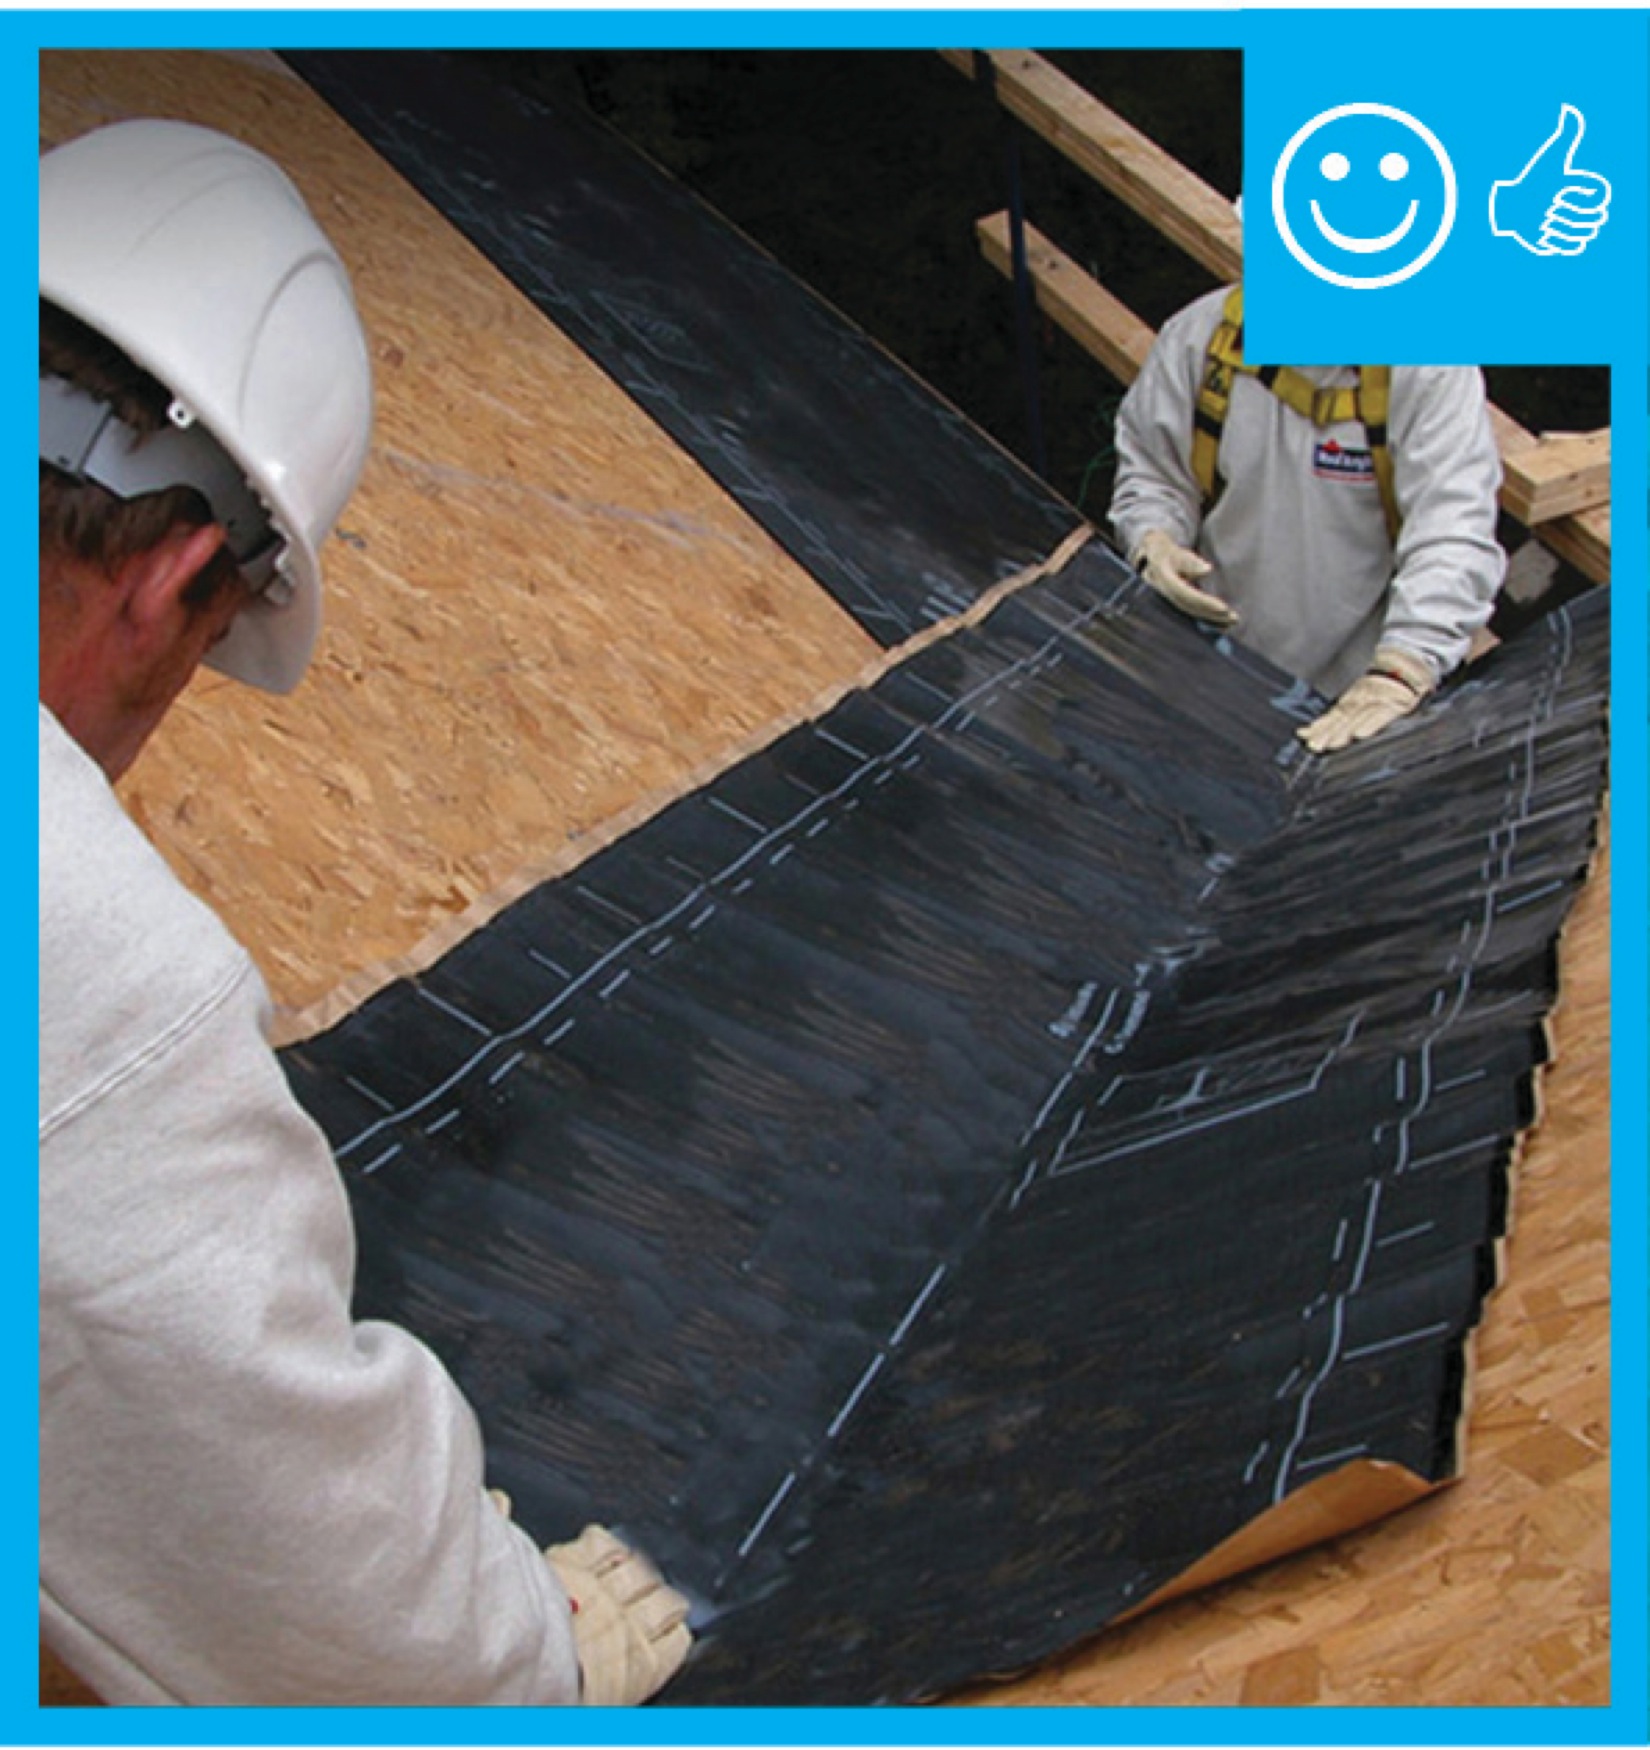
Right – Roof underlayment is fully adhered and roof deck seams are sealed so roof is resistant to high-wind events
Image
Right – Roof underlayment is fully adhered and roof deck seams are sealed so roof is resistant to high-wind events
Image
Image

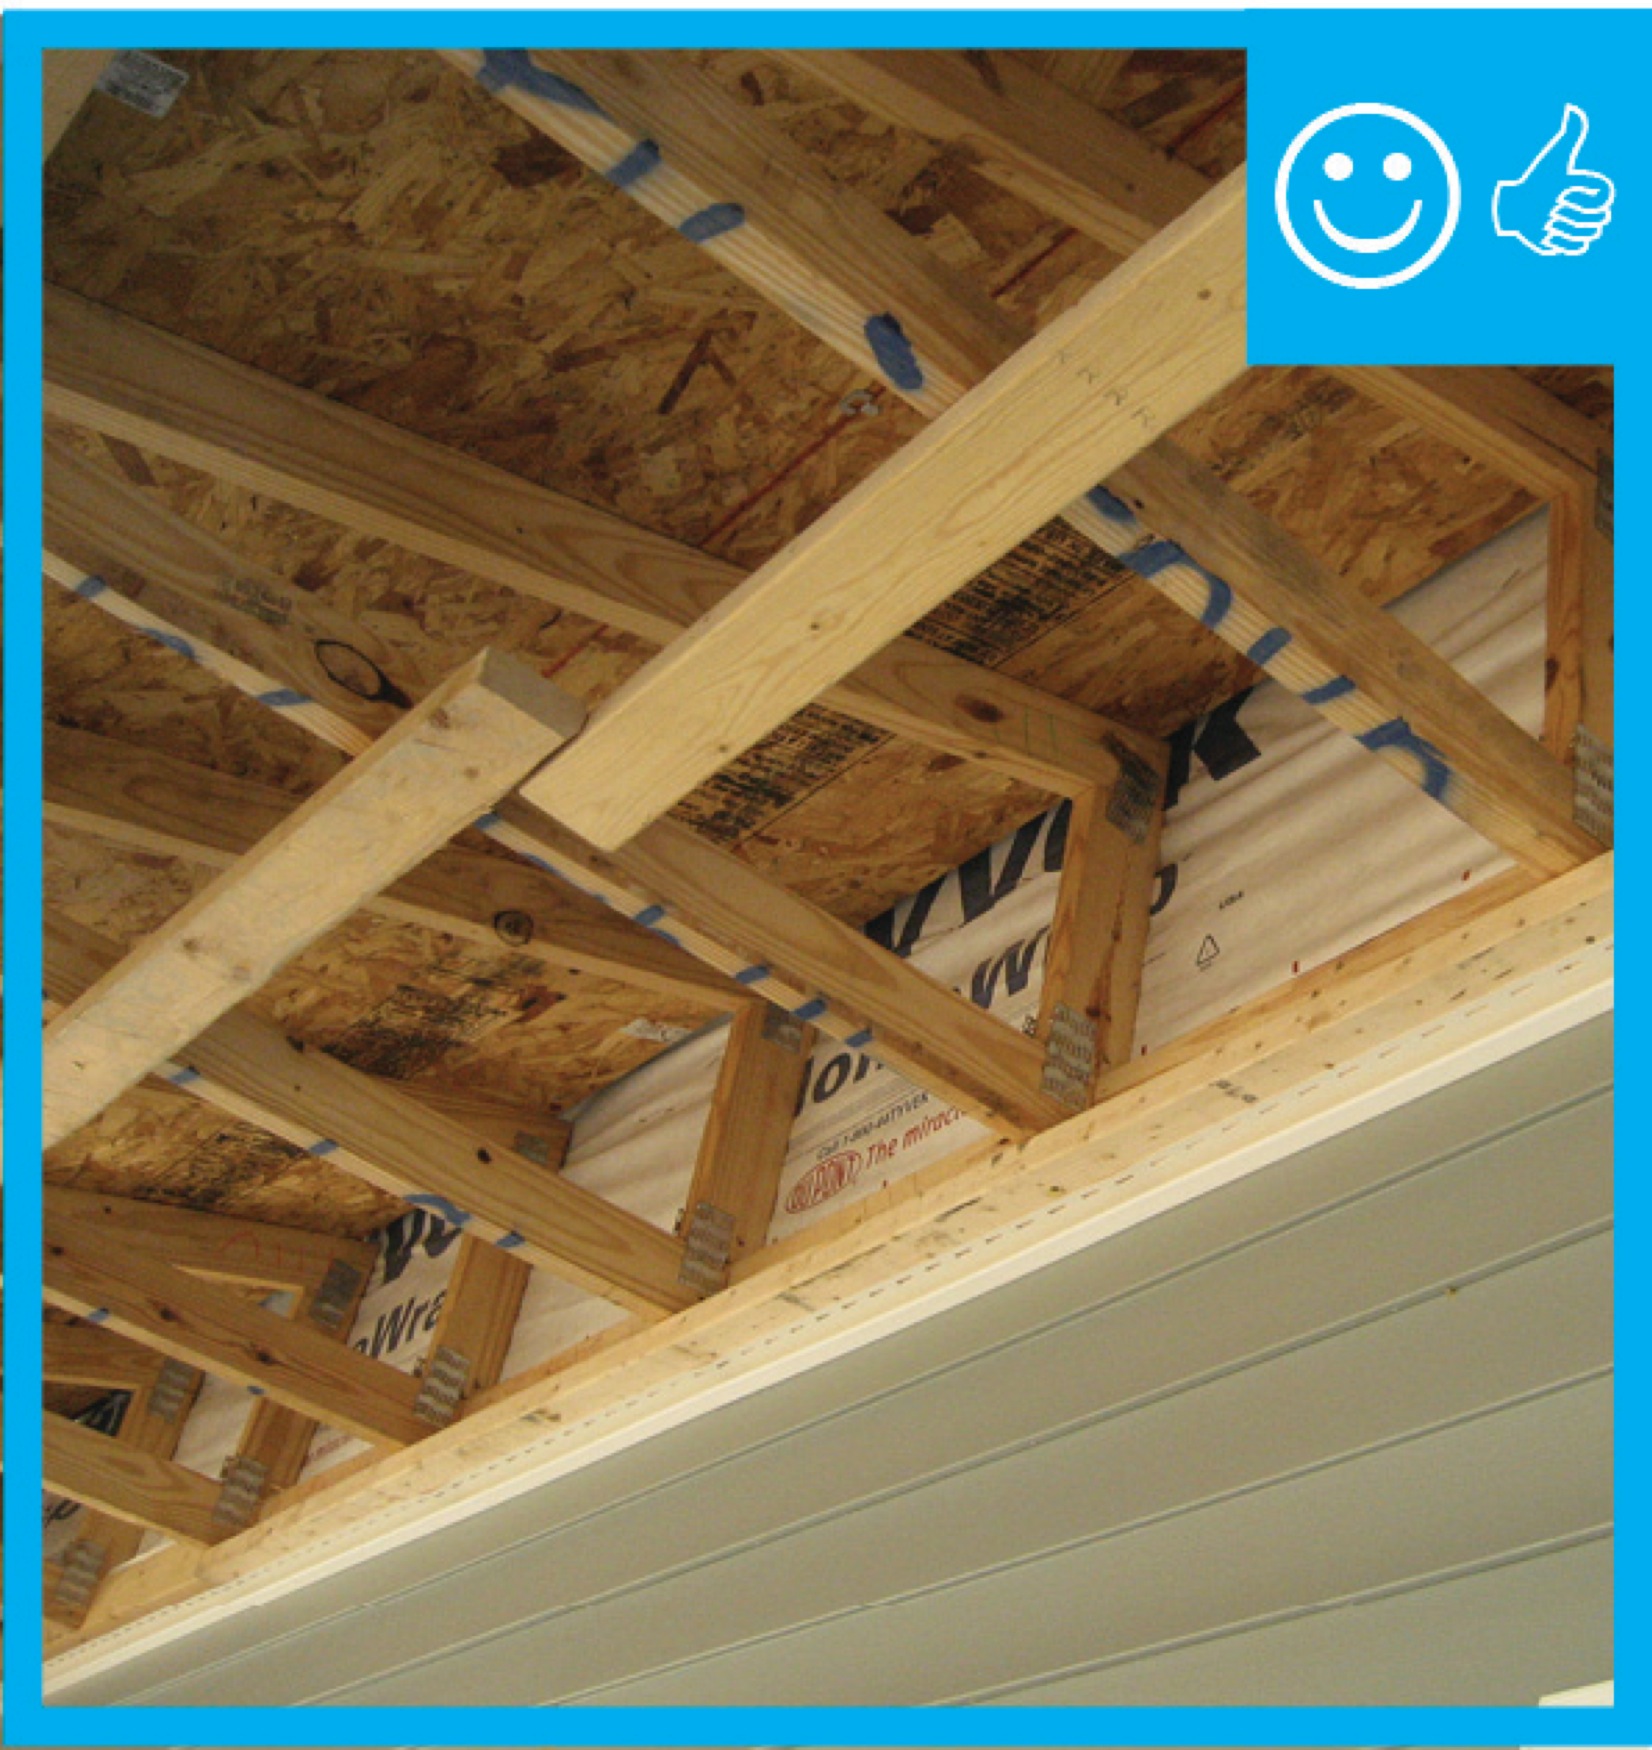
Right – Sheathing extends to rafters adding strength to soffit, baffles keep attic insulation from vent to maintain air flow
Image

Right – Start asphalt shingle installation with a starter strip set in an 8-inch strip of flashing cement
Image
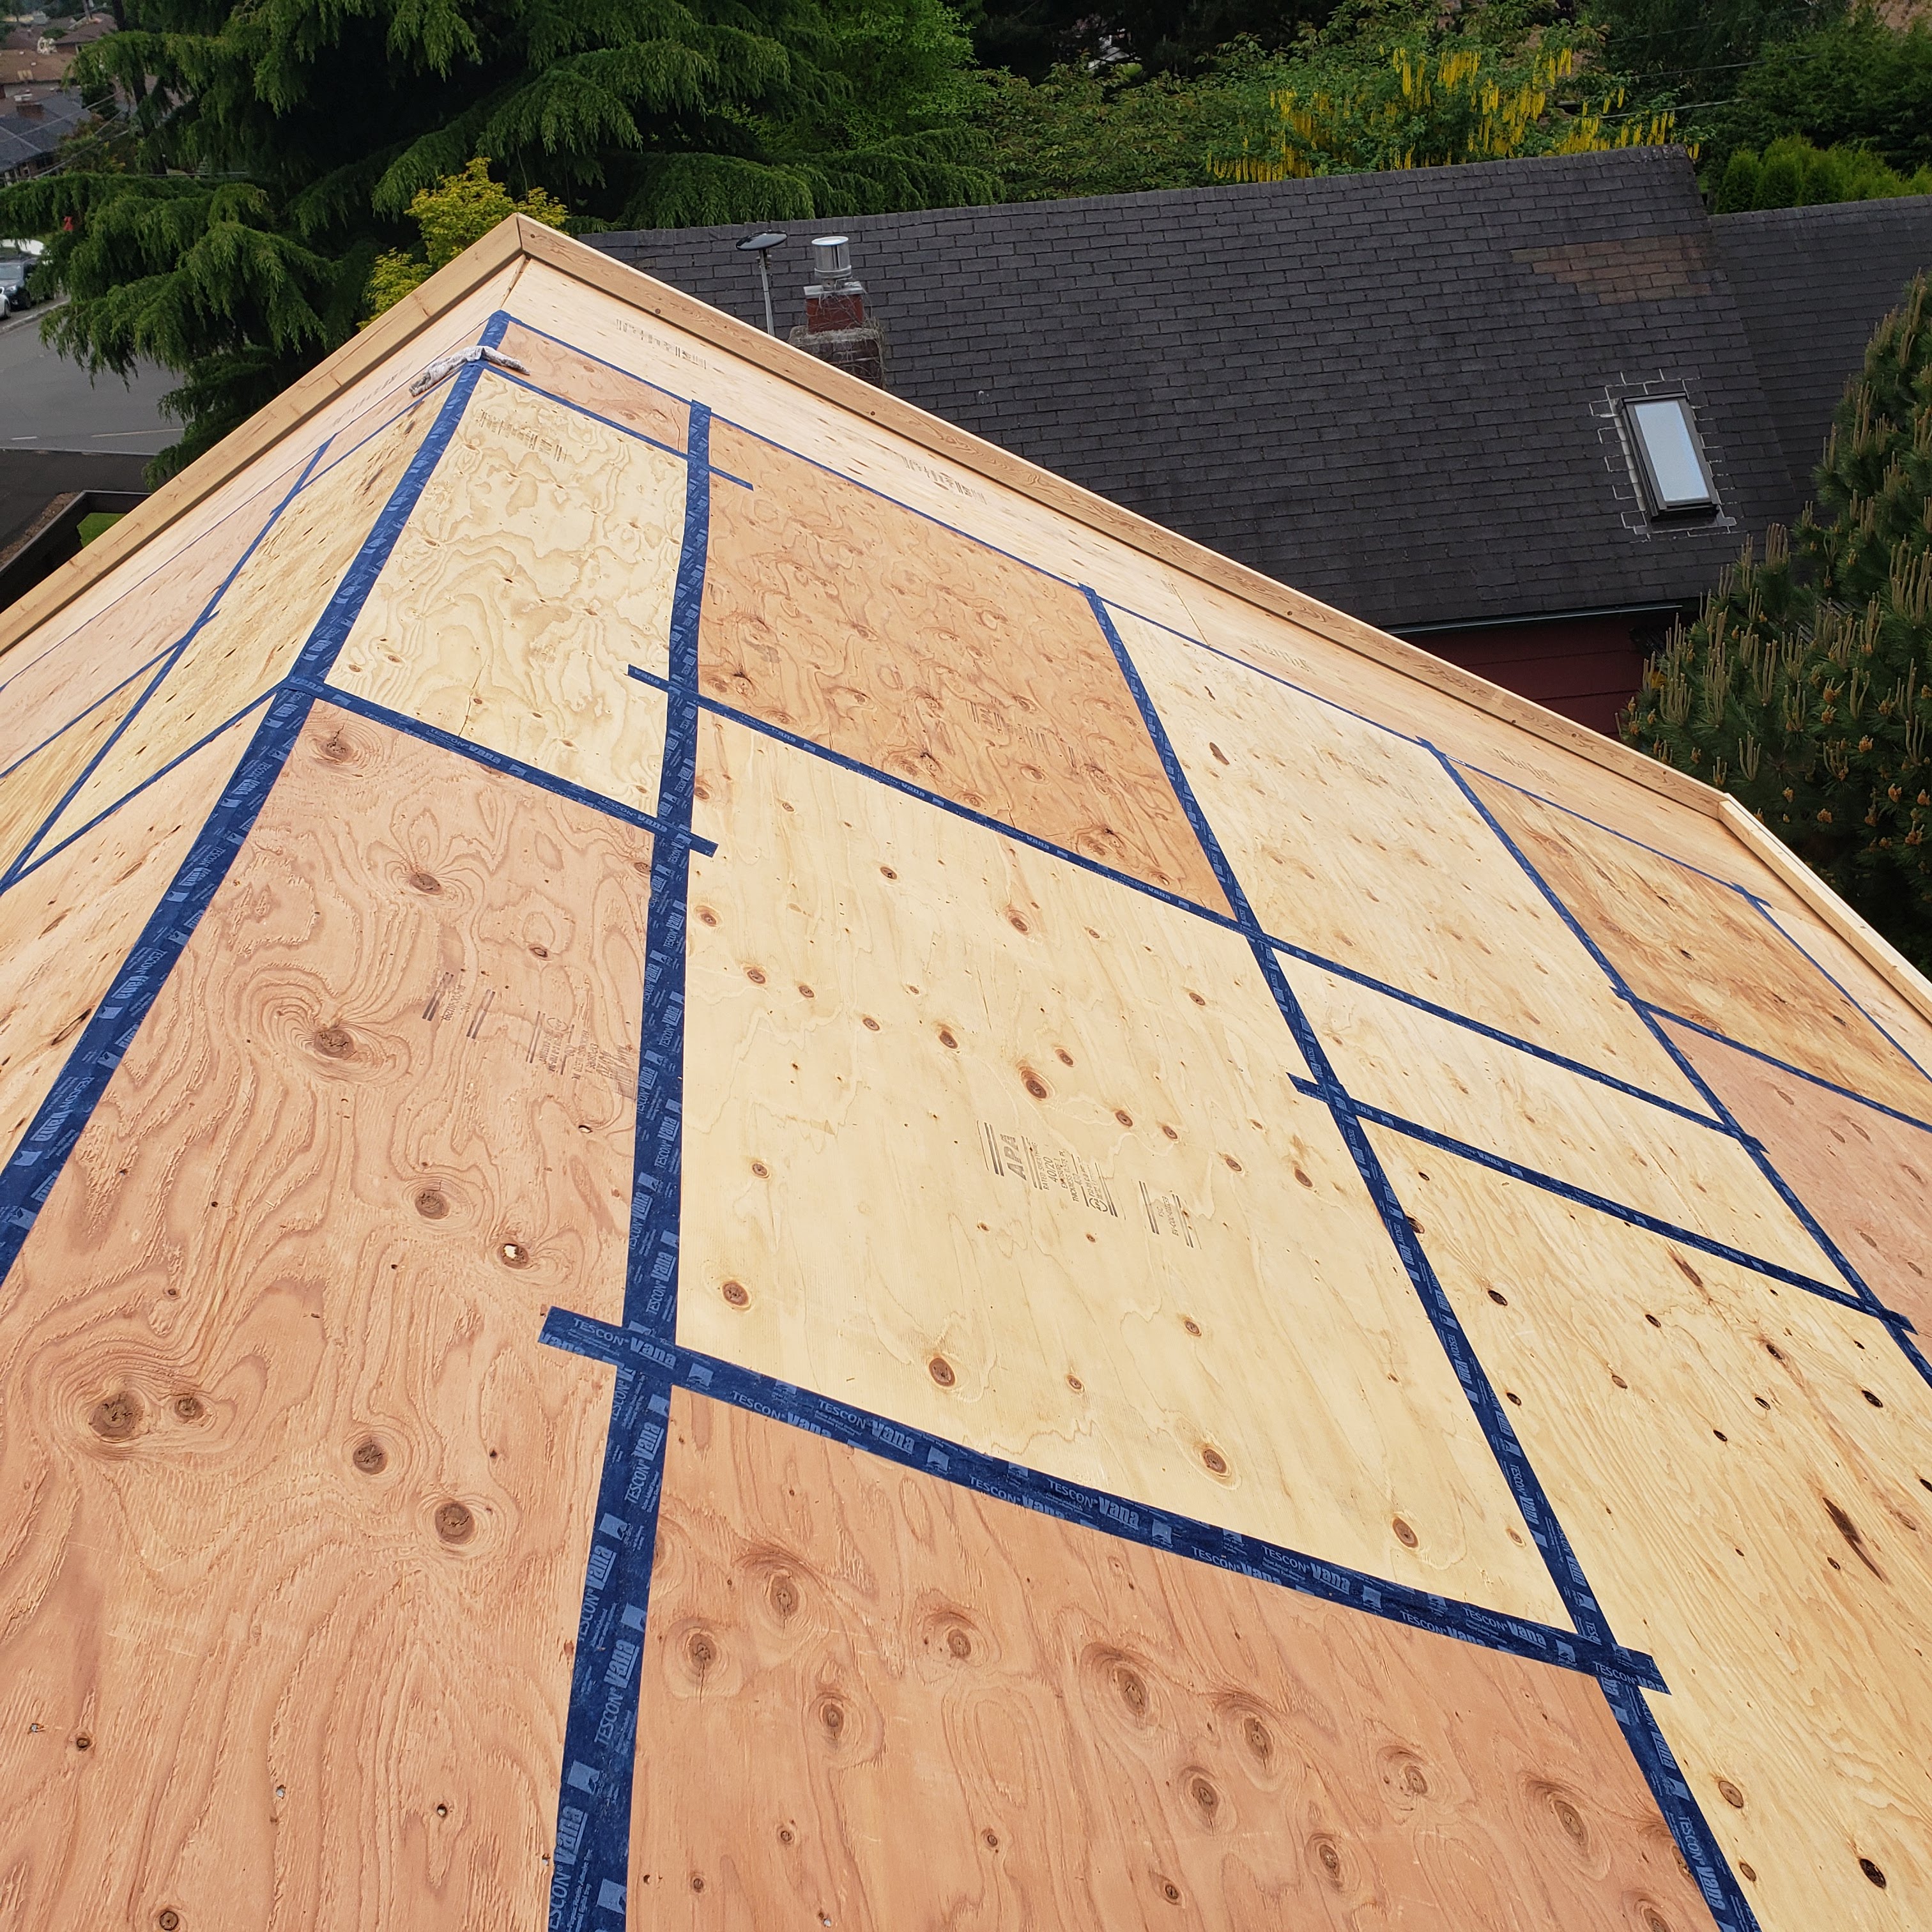
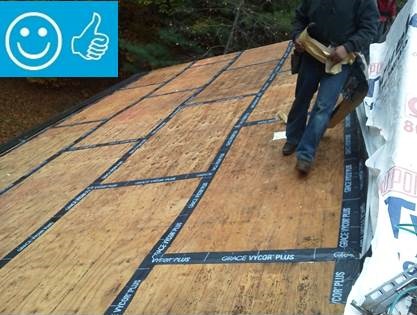
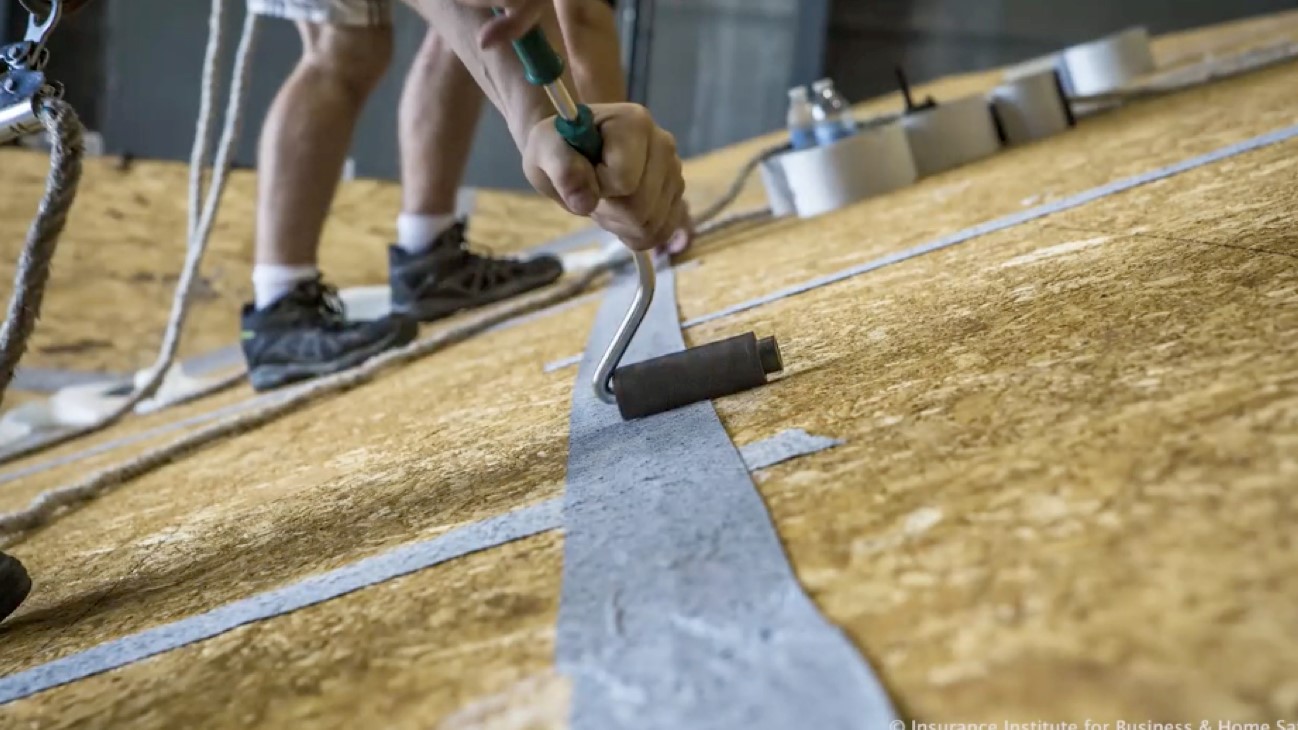
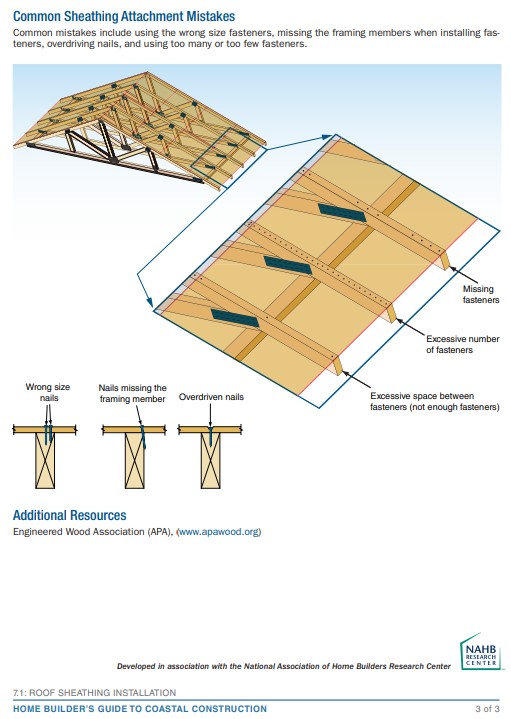
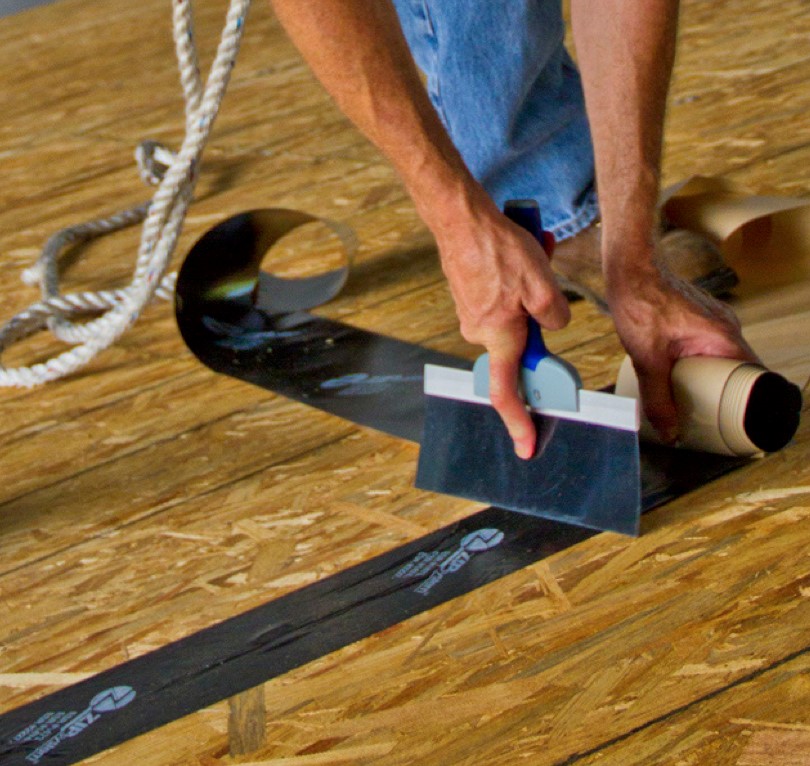
Right – Taping the roof sheathing seams can greatly decrease the likelihood of water infiltration into a home in the event of a hurricane.
Image
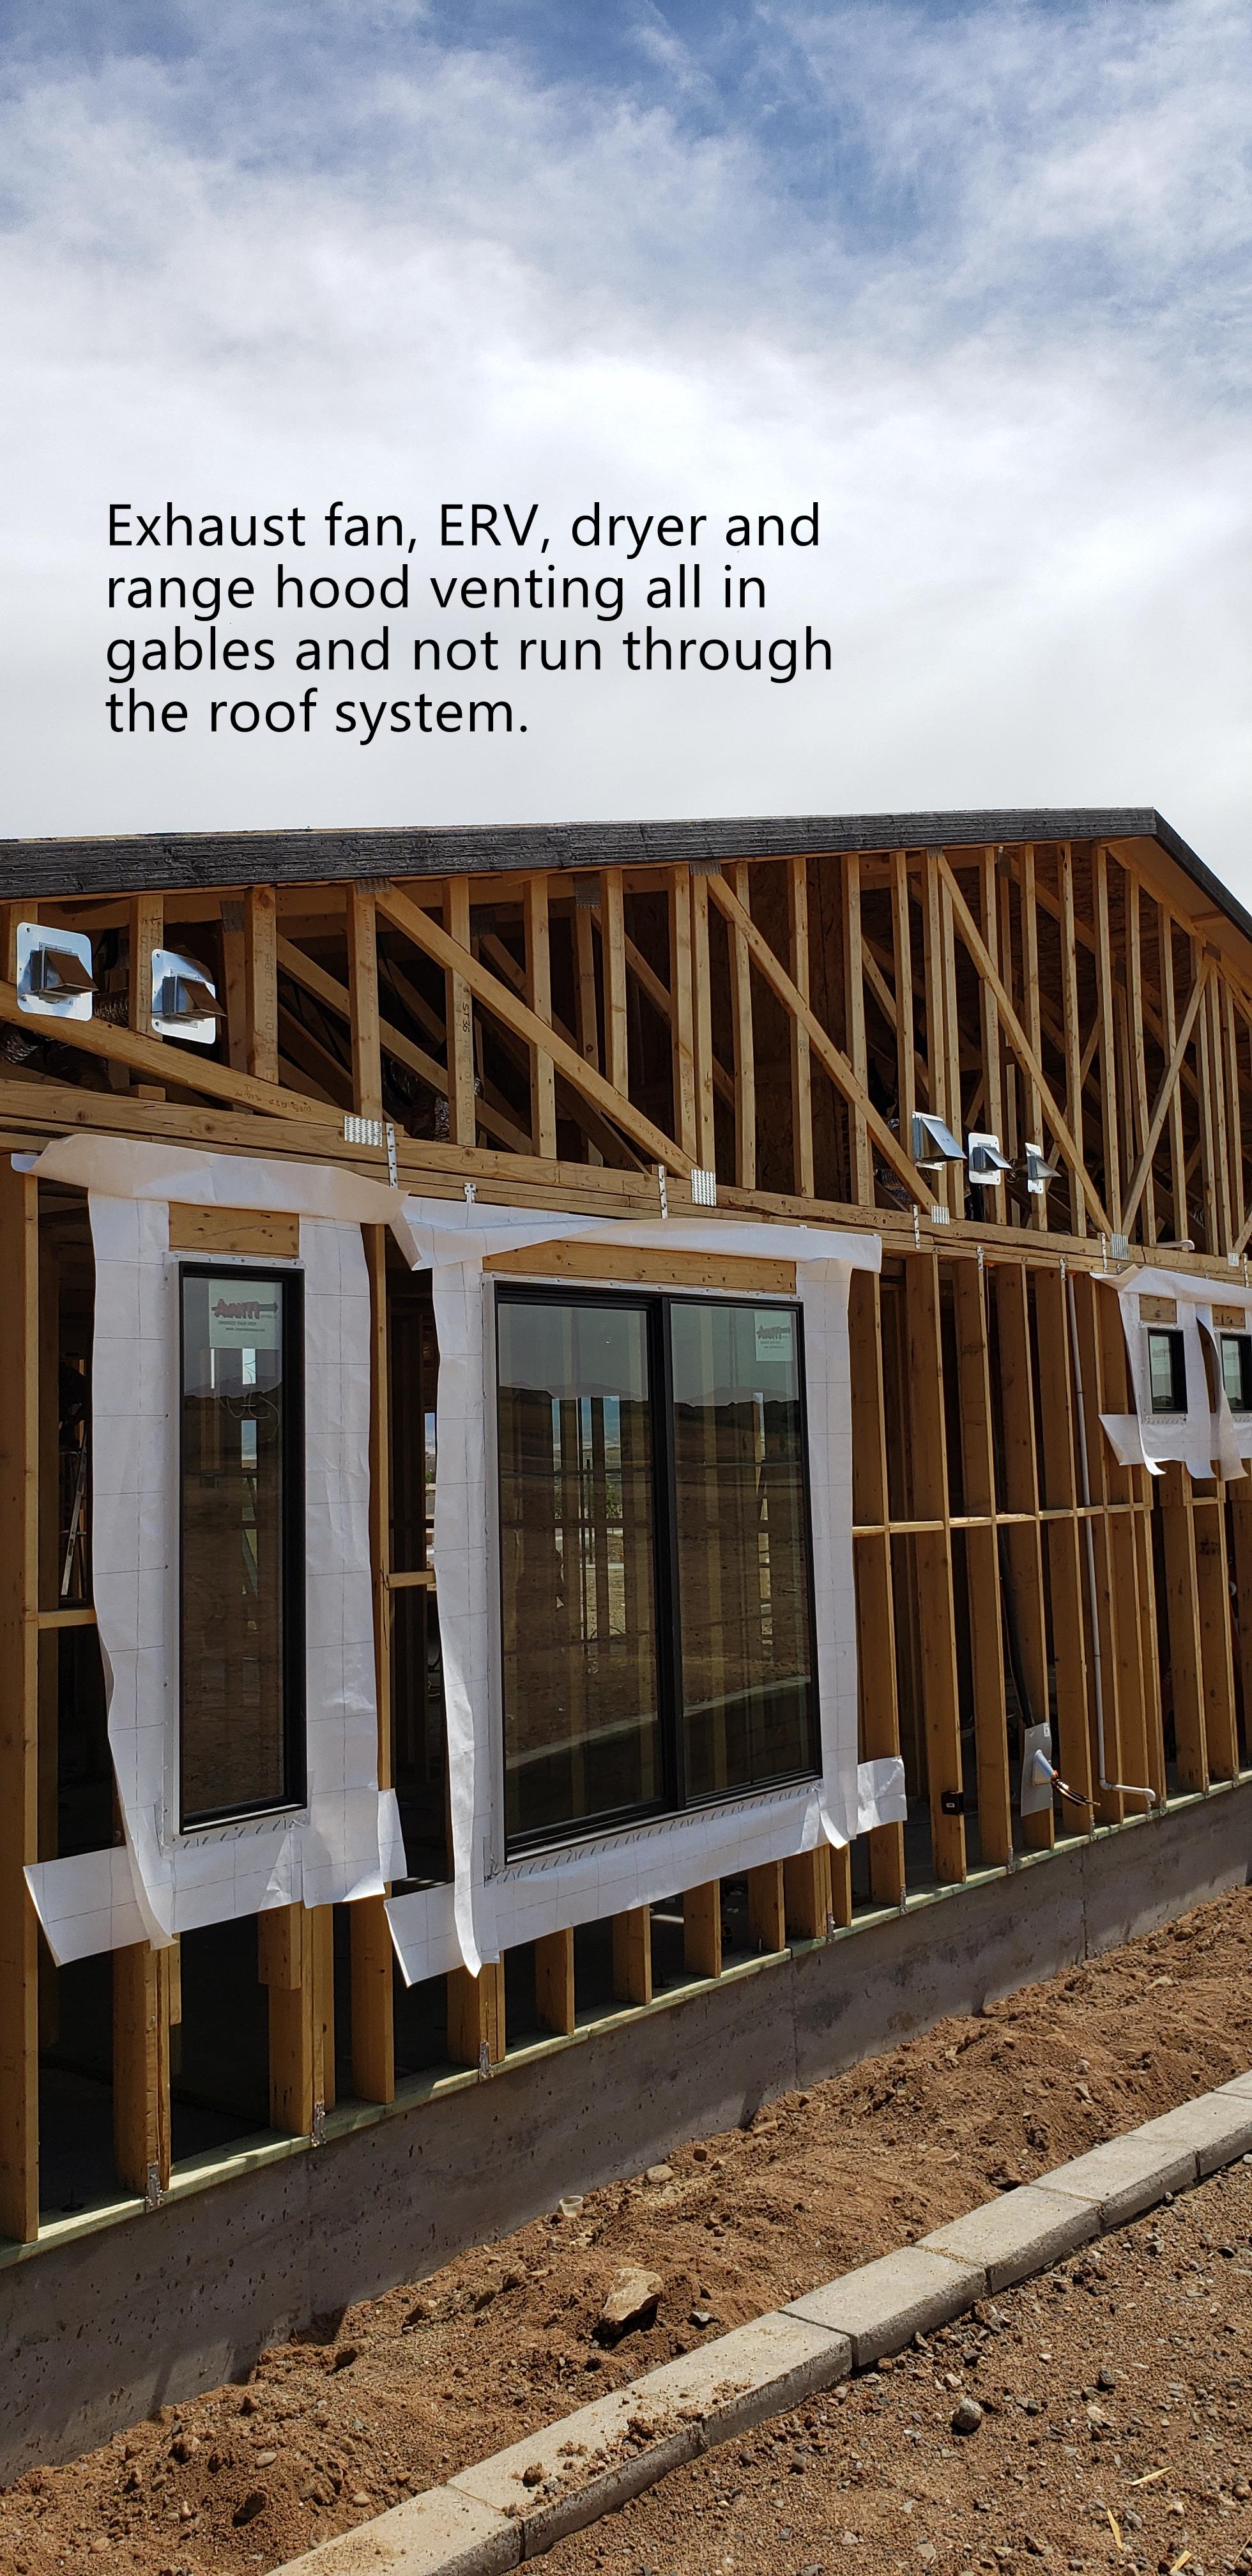
Right – The builder routed all vents through side walls to avoid holes in the roof.
Image
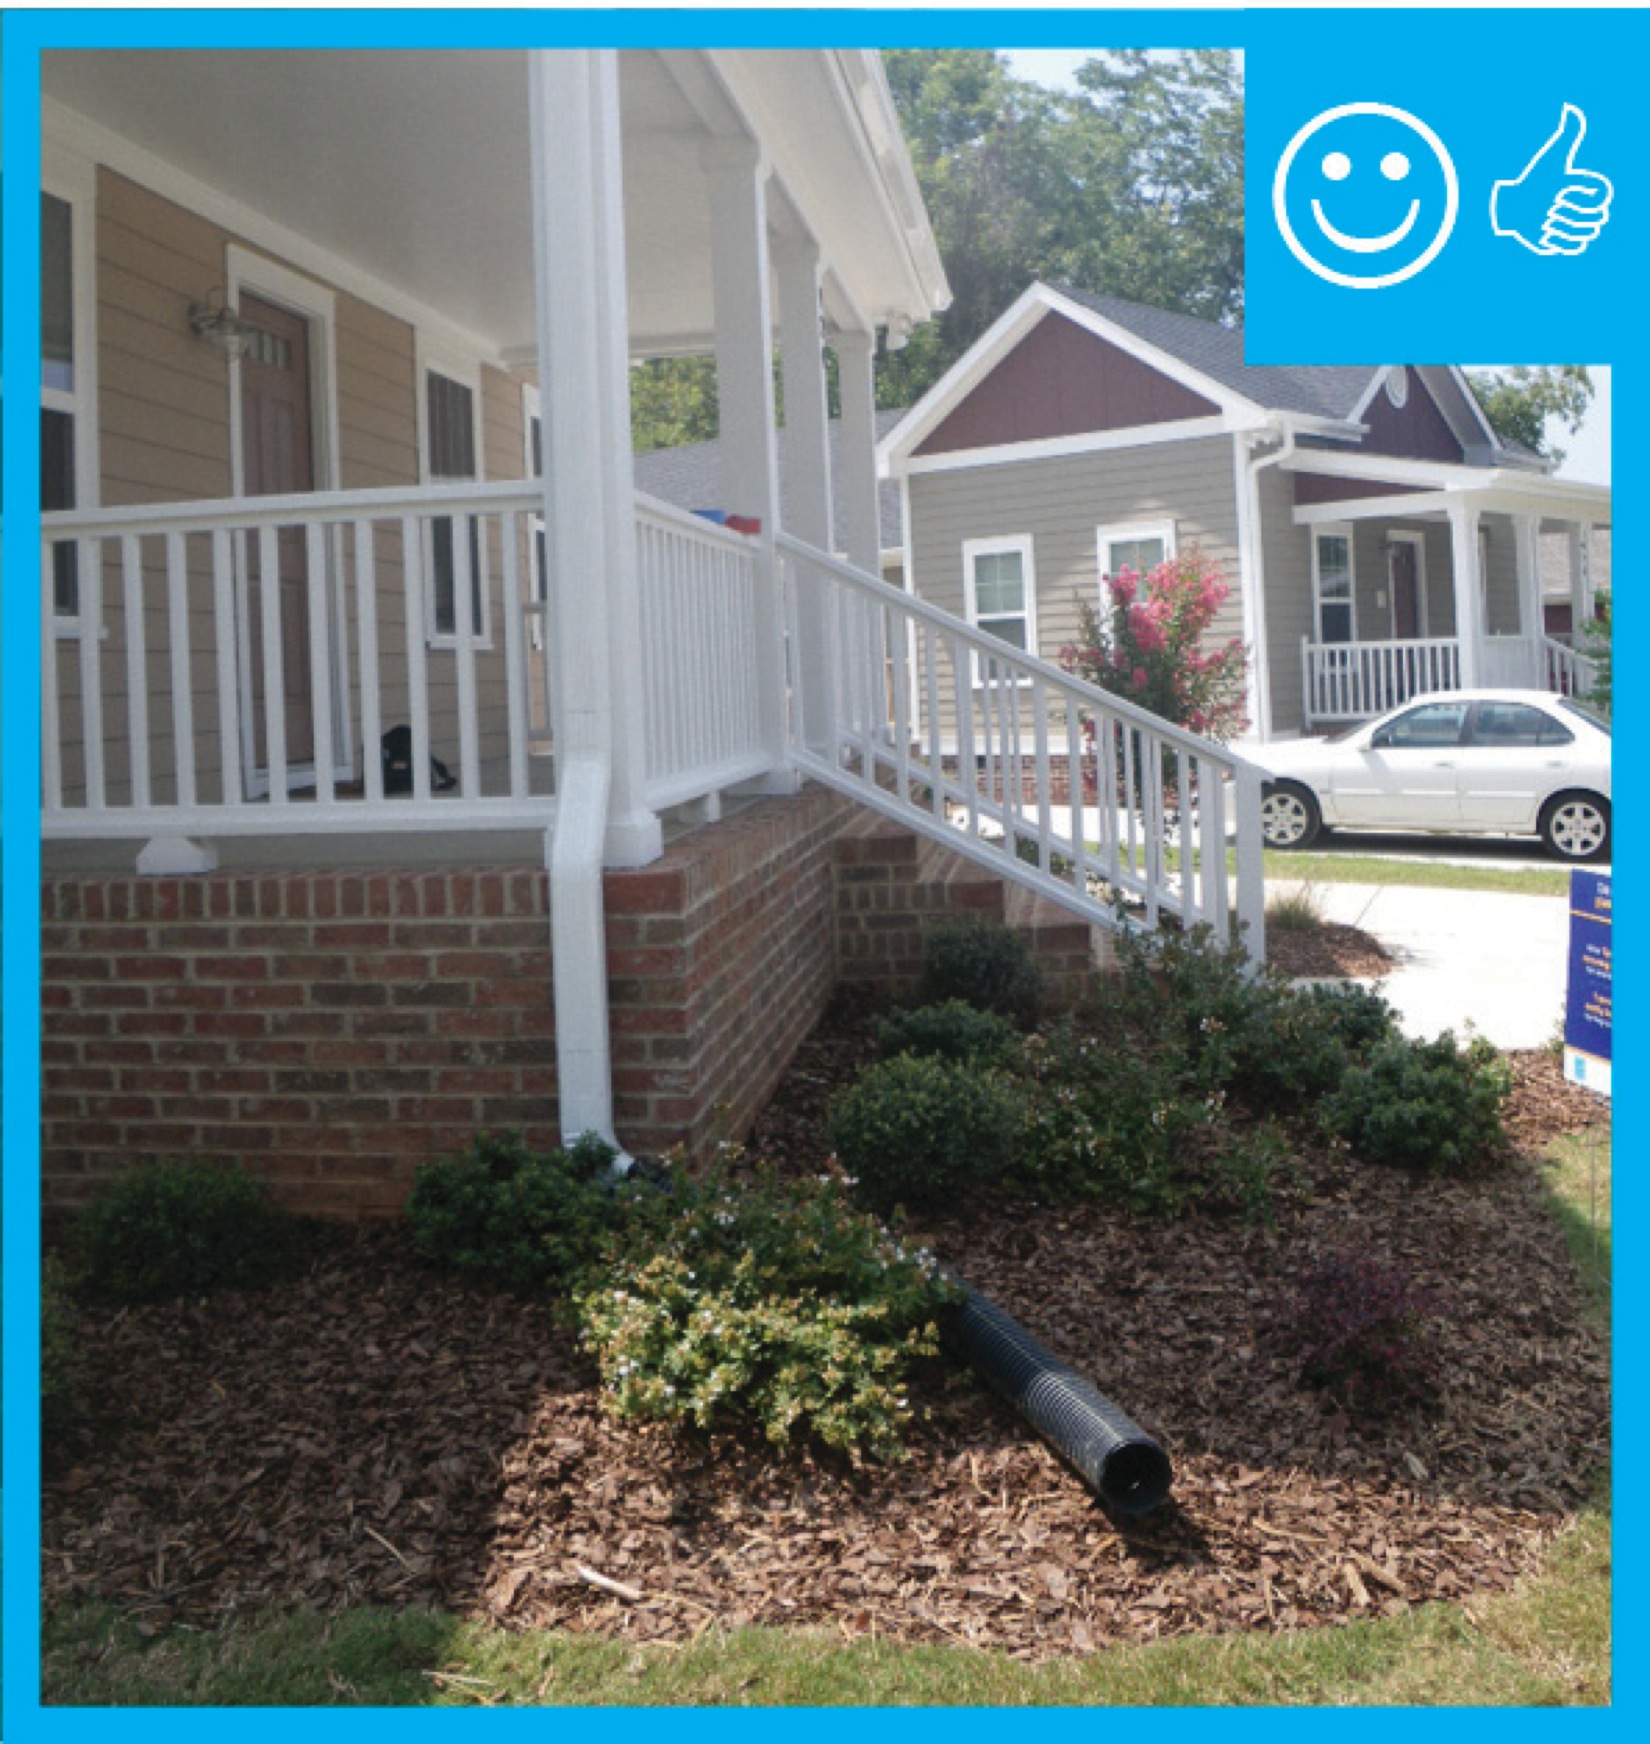
Right – The downspout pipe is far enough away from the foundation to prevent moisture problems
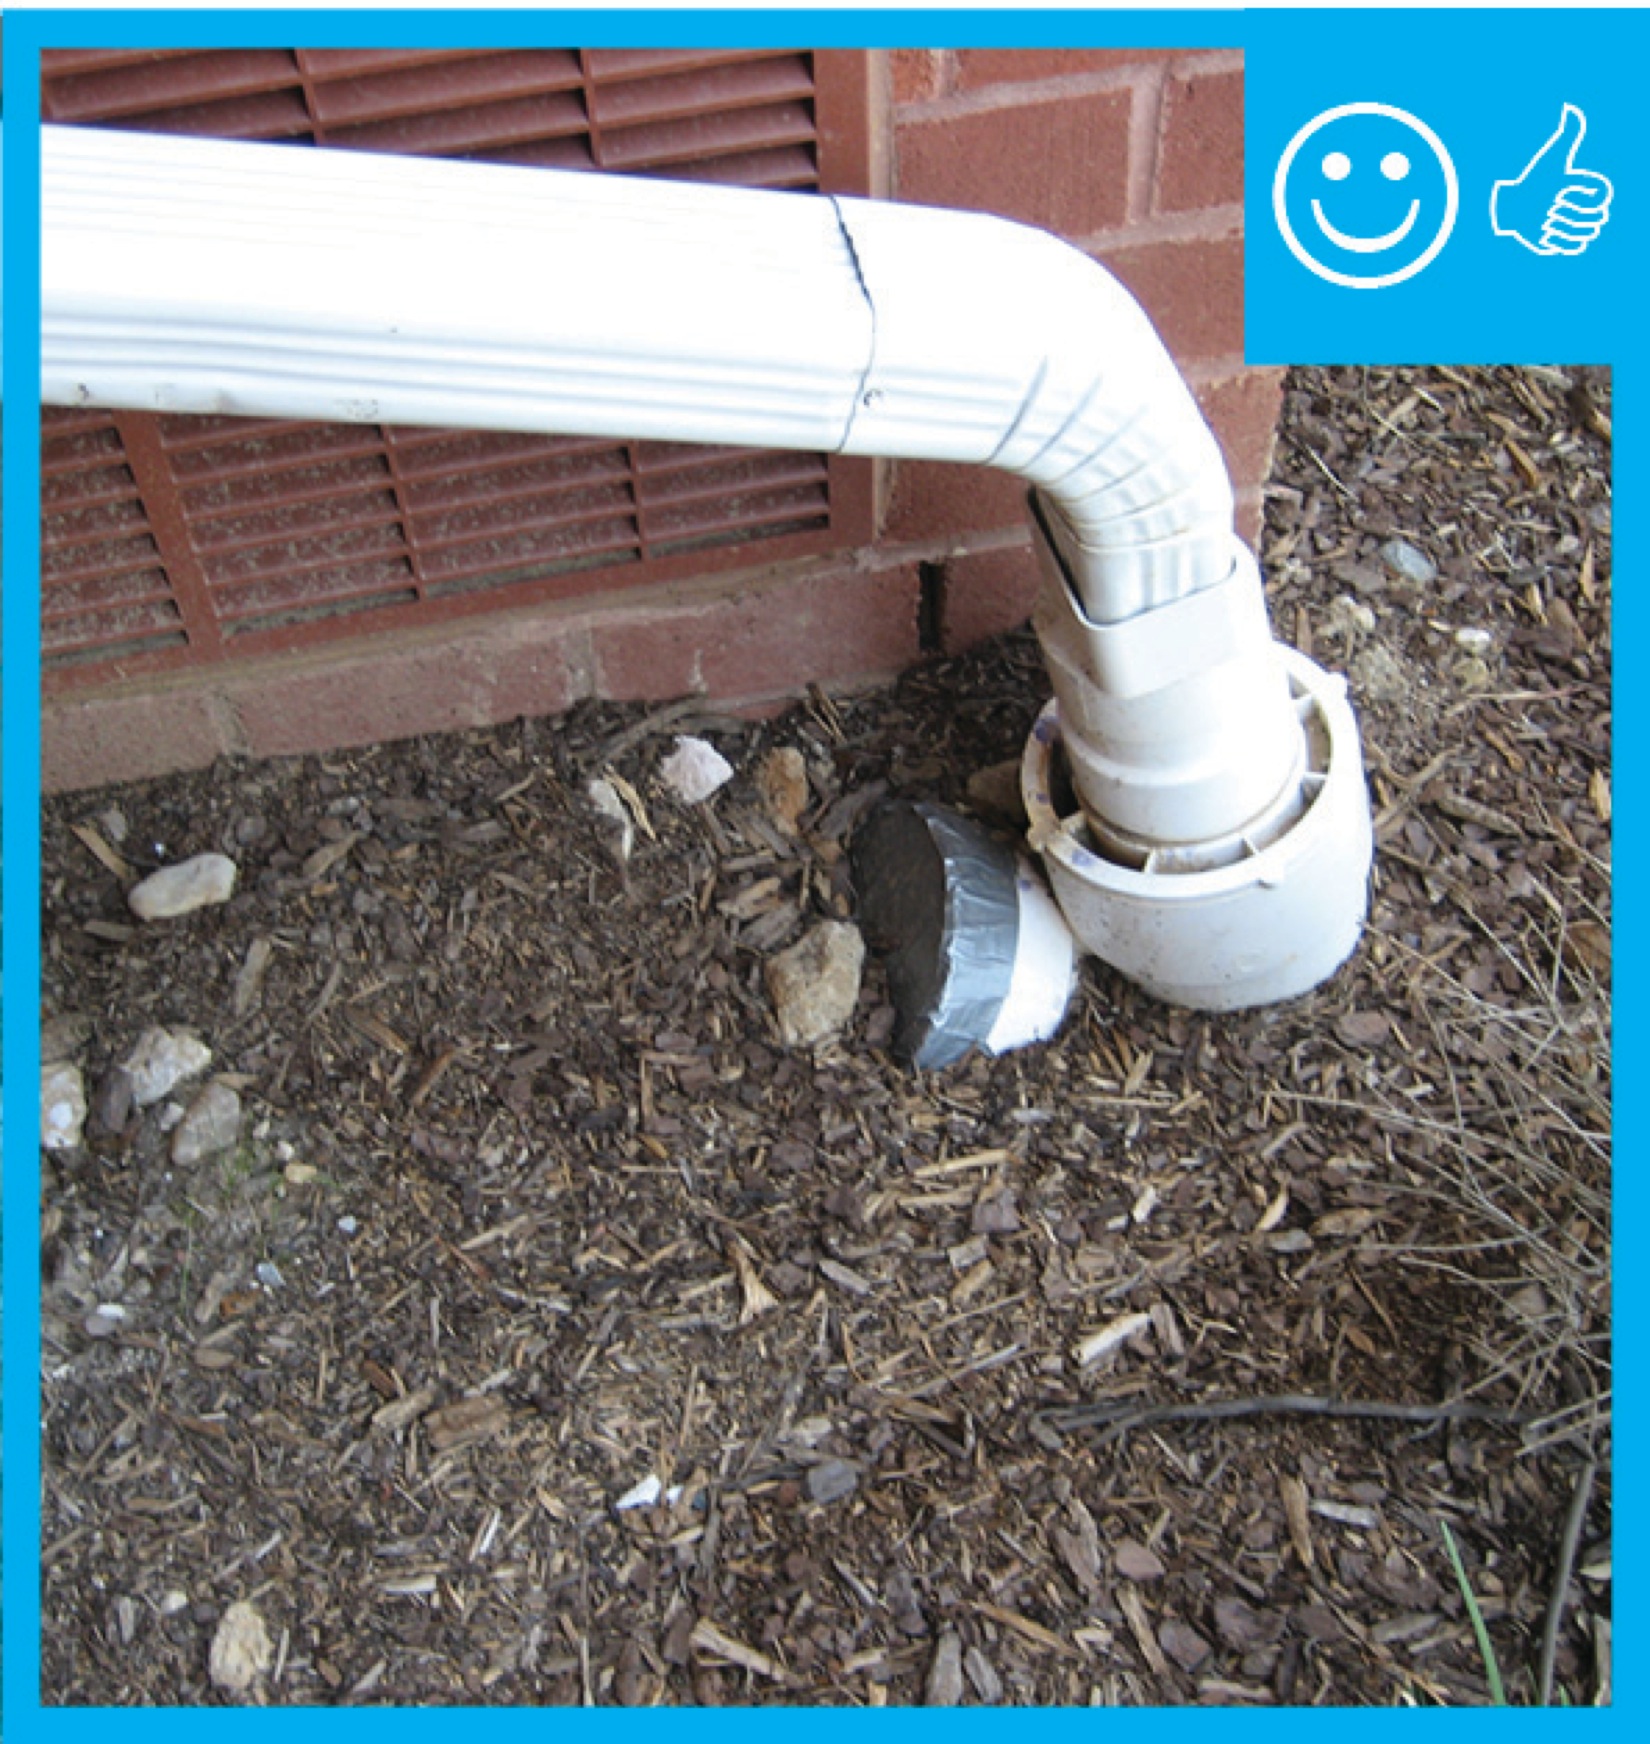
Image
Right – The downspout terminates into a catchment system that moves water away from the foundation of the house
Image
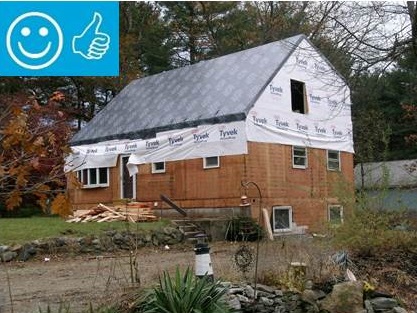
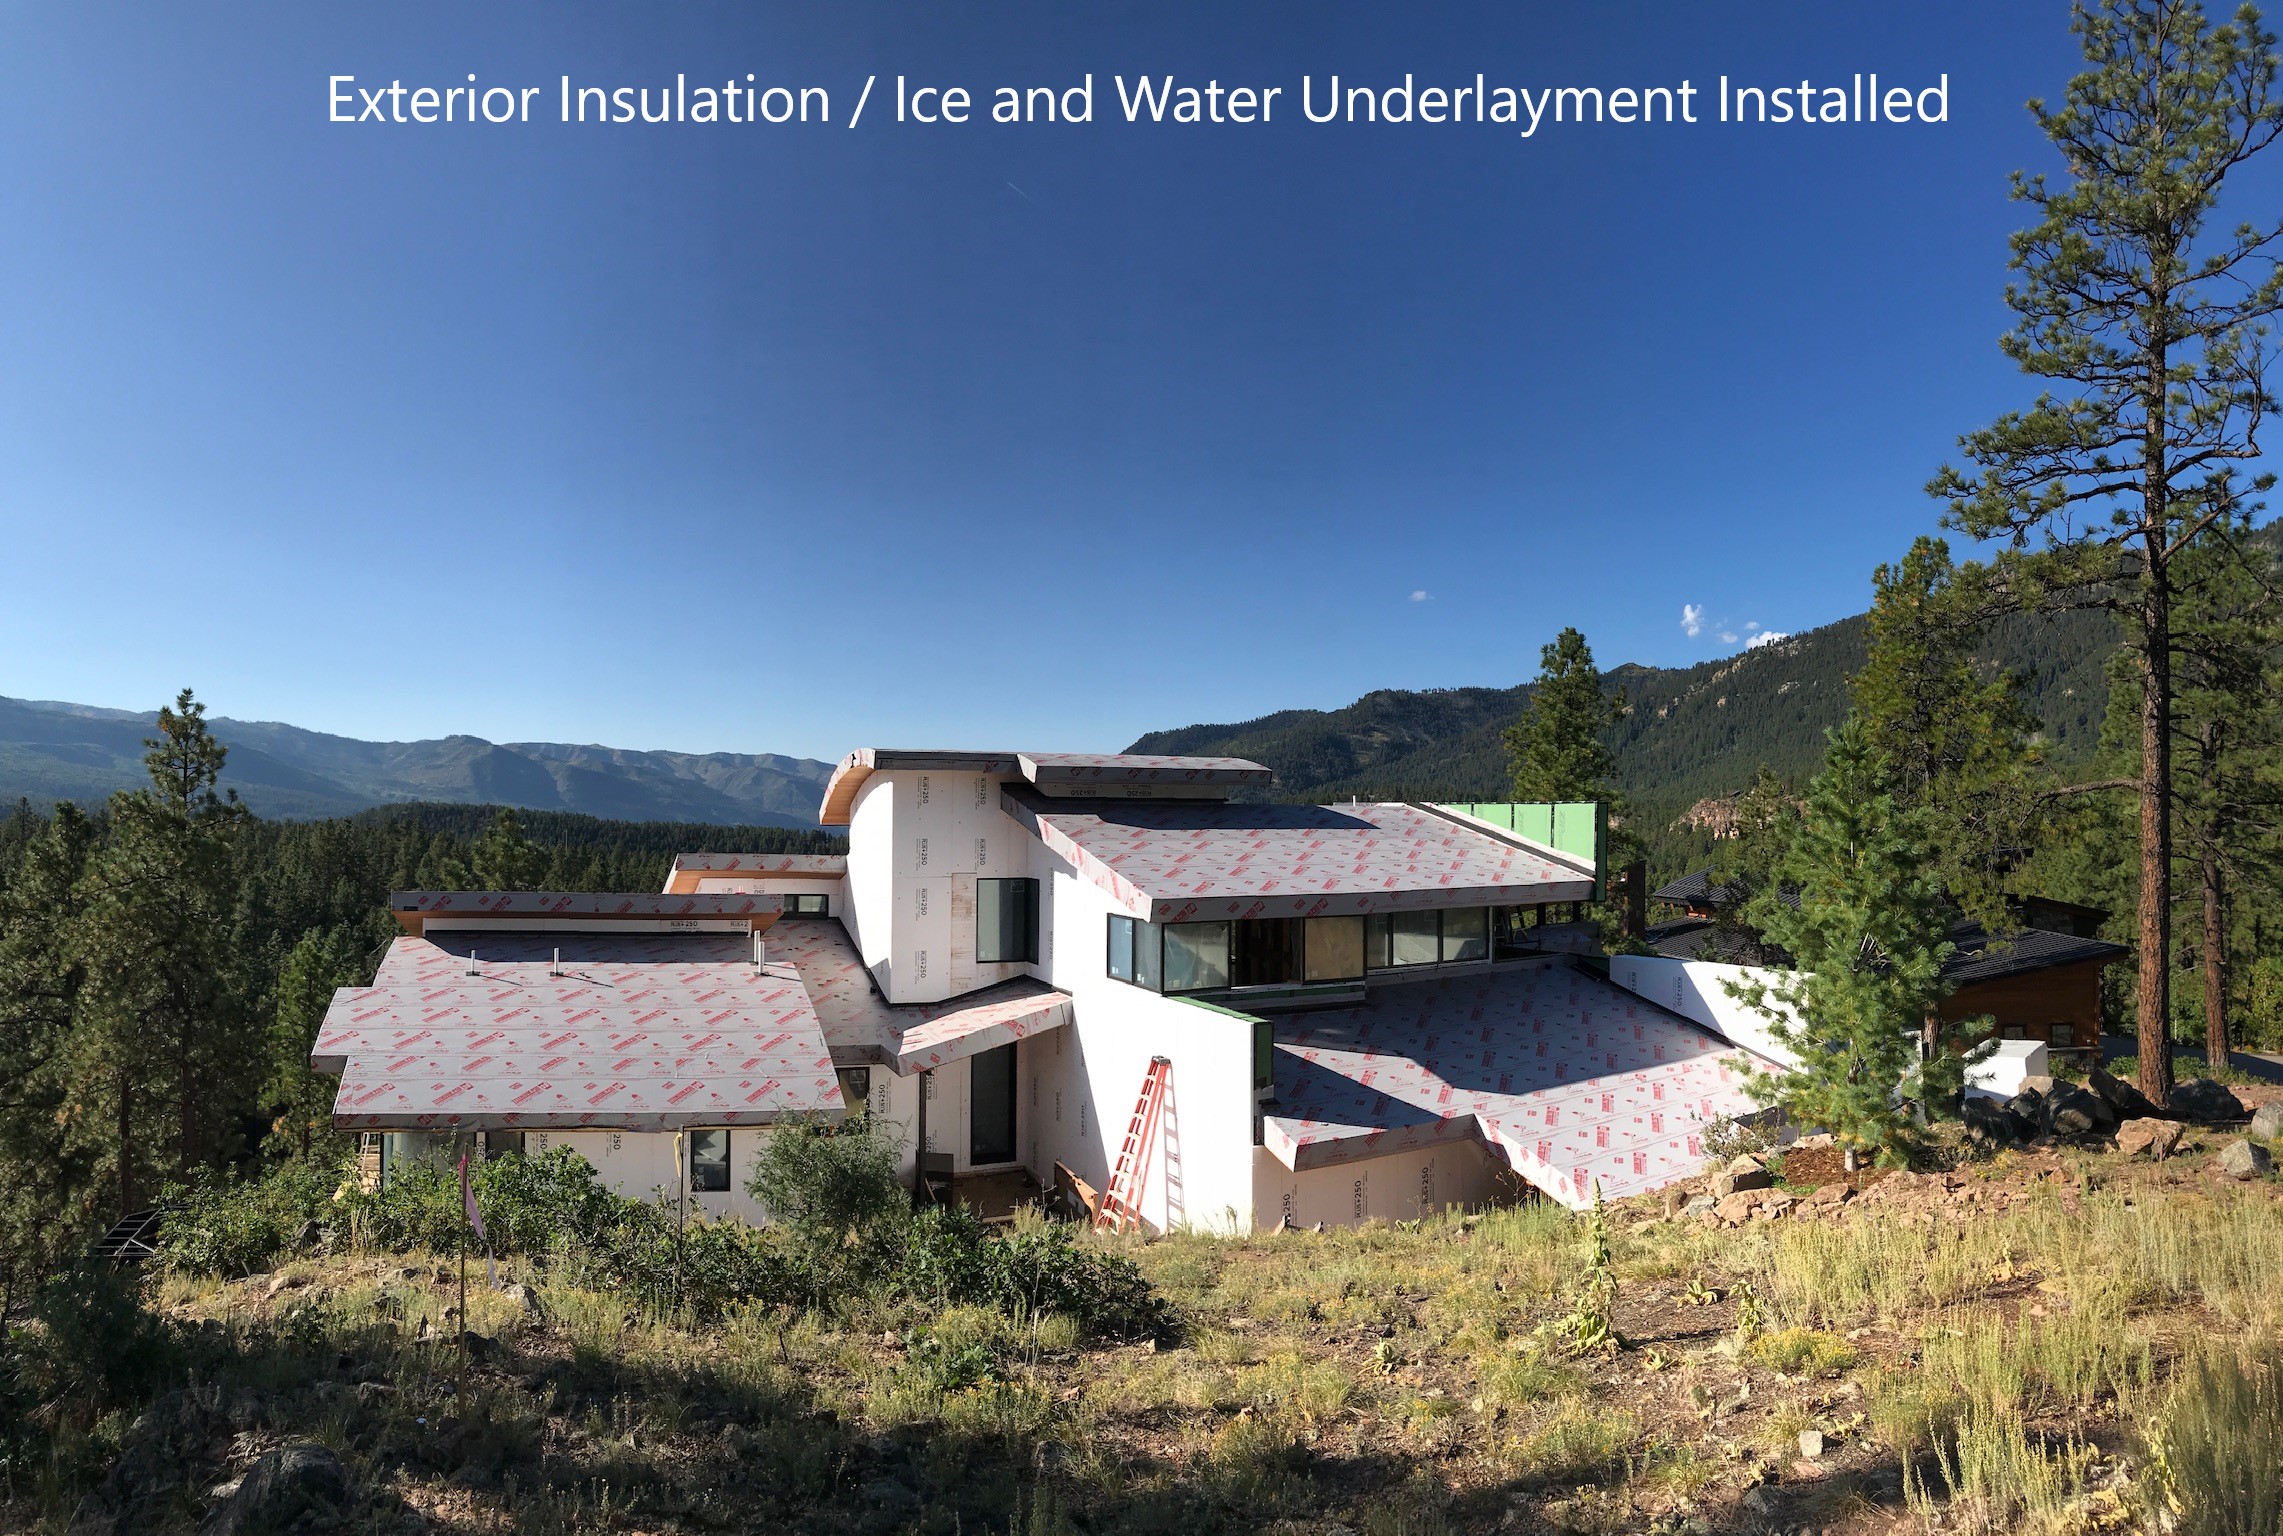
Right – The heavy roof underlayment was wrapped over the edges and down onto the walls, providing a continuous air barrier at this critical juncture; the second story will have narrow overhangs, matching the existing architecture style in the neighborhood
Image
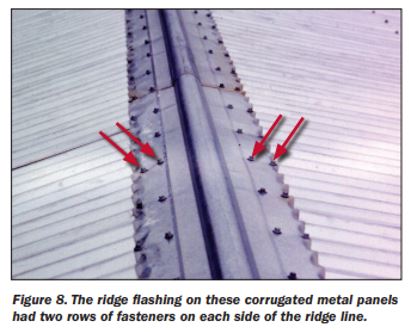
Right – The ridge flashing is secured with two rows of fasteners on each side of the ridge line
Image
Right – The roof membrane is fully adhered and deck seams are sealed so the membrane will not flutter and fail due to negative pressure from high winds
Image

Image
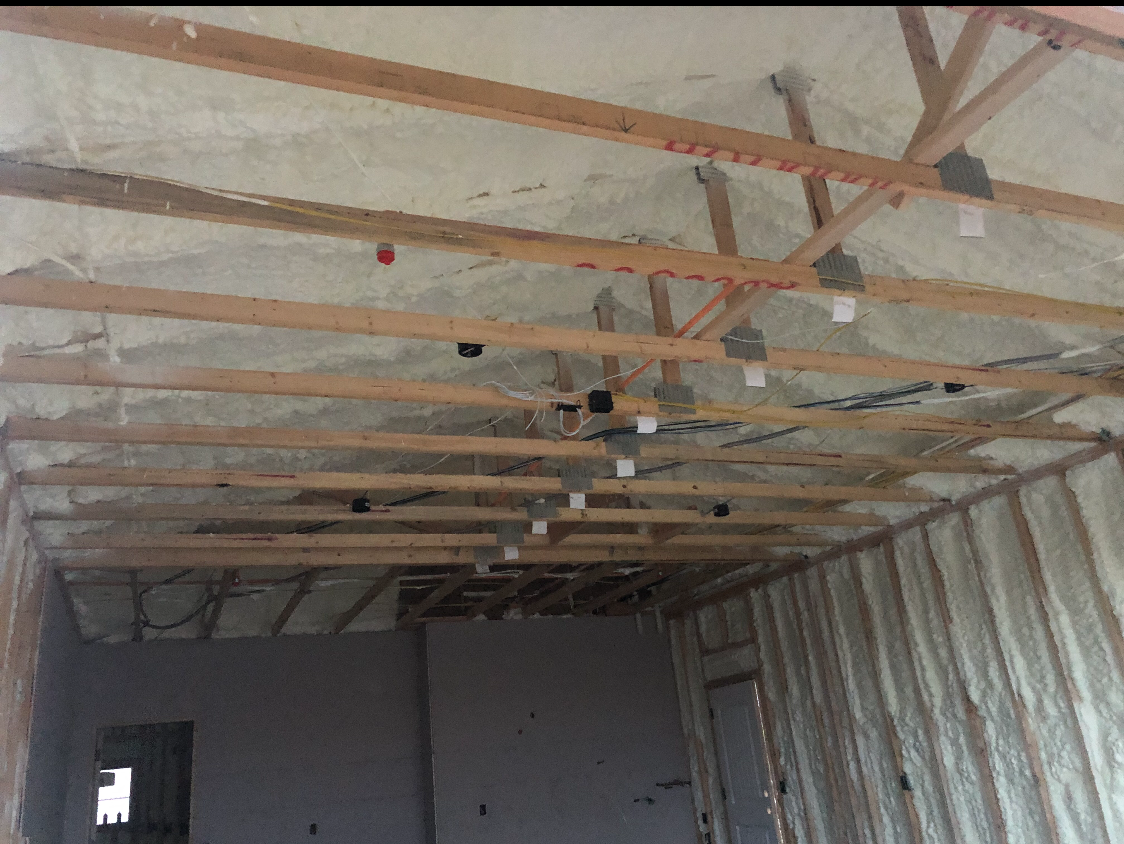
Right – The underside of this low-sloped roof is insulated with open-cell spray foam in this dry climate to achieve the code-required R-value; the builder used the same foam to insulate exterior walls.
Image
Right – The water-resistant barrier is layered over the step flashing to provide a complete drainage system
Image
Right – There is a properly installed and layered self-sealing bituminous membrane at the roof penetration
Image
Right – There is a self-sealing bituminous membrane installed at the valley of the roof prior to the roof felt
Image
Right – This fire-rated wall assembly uses exterior gypsum board and an exterior siding of fiber-cement or metal to increase fire resistance.
Image
Image
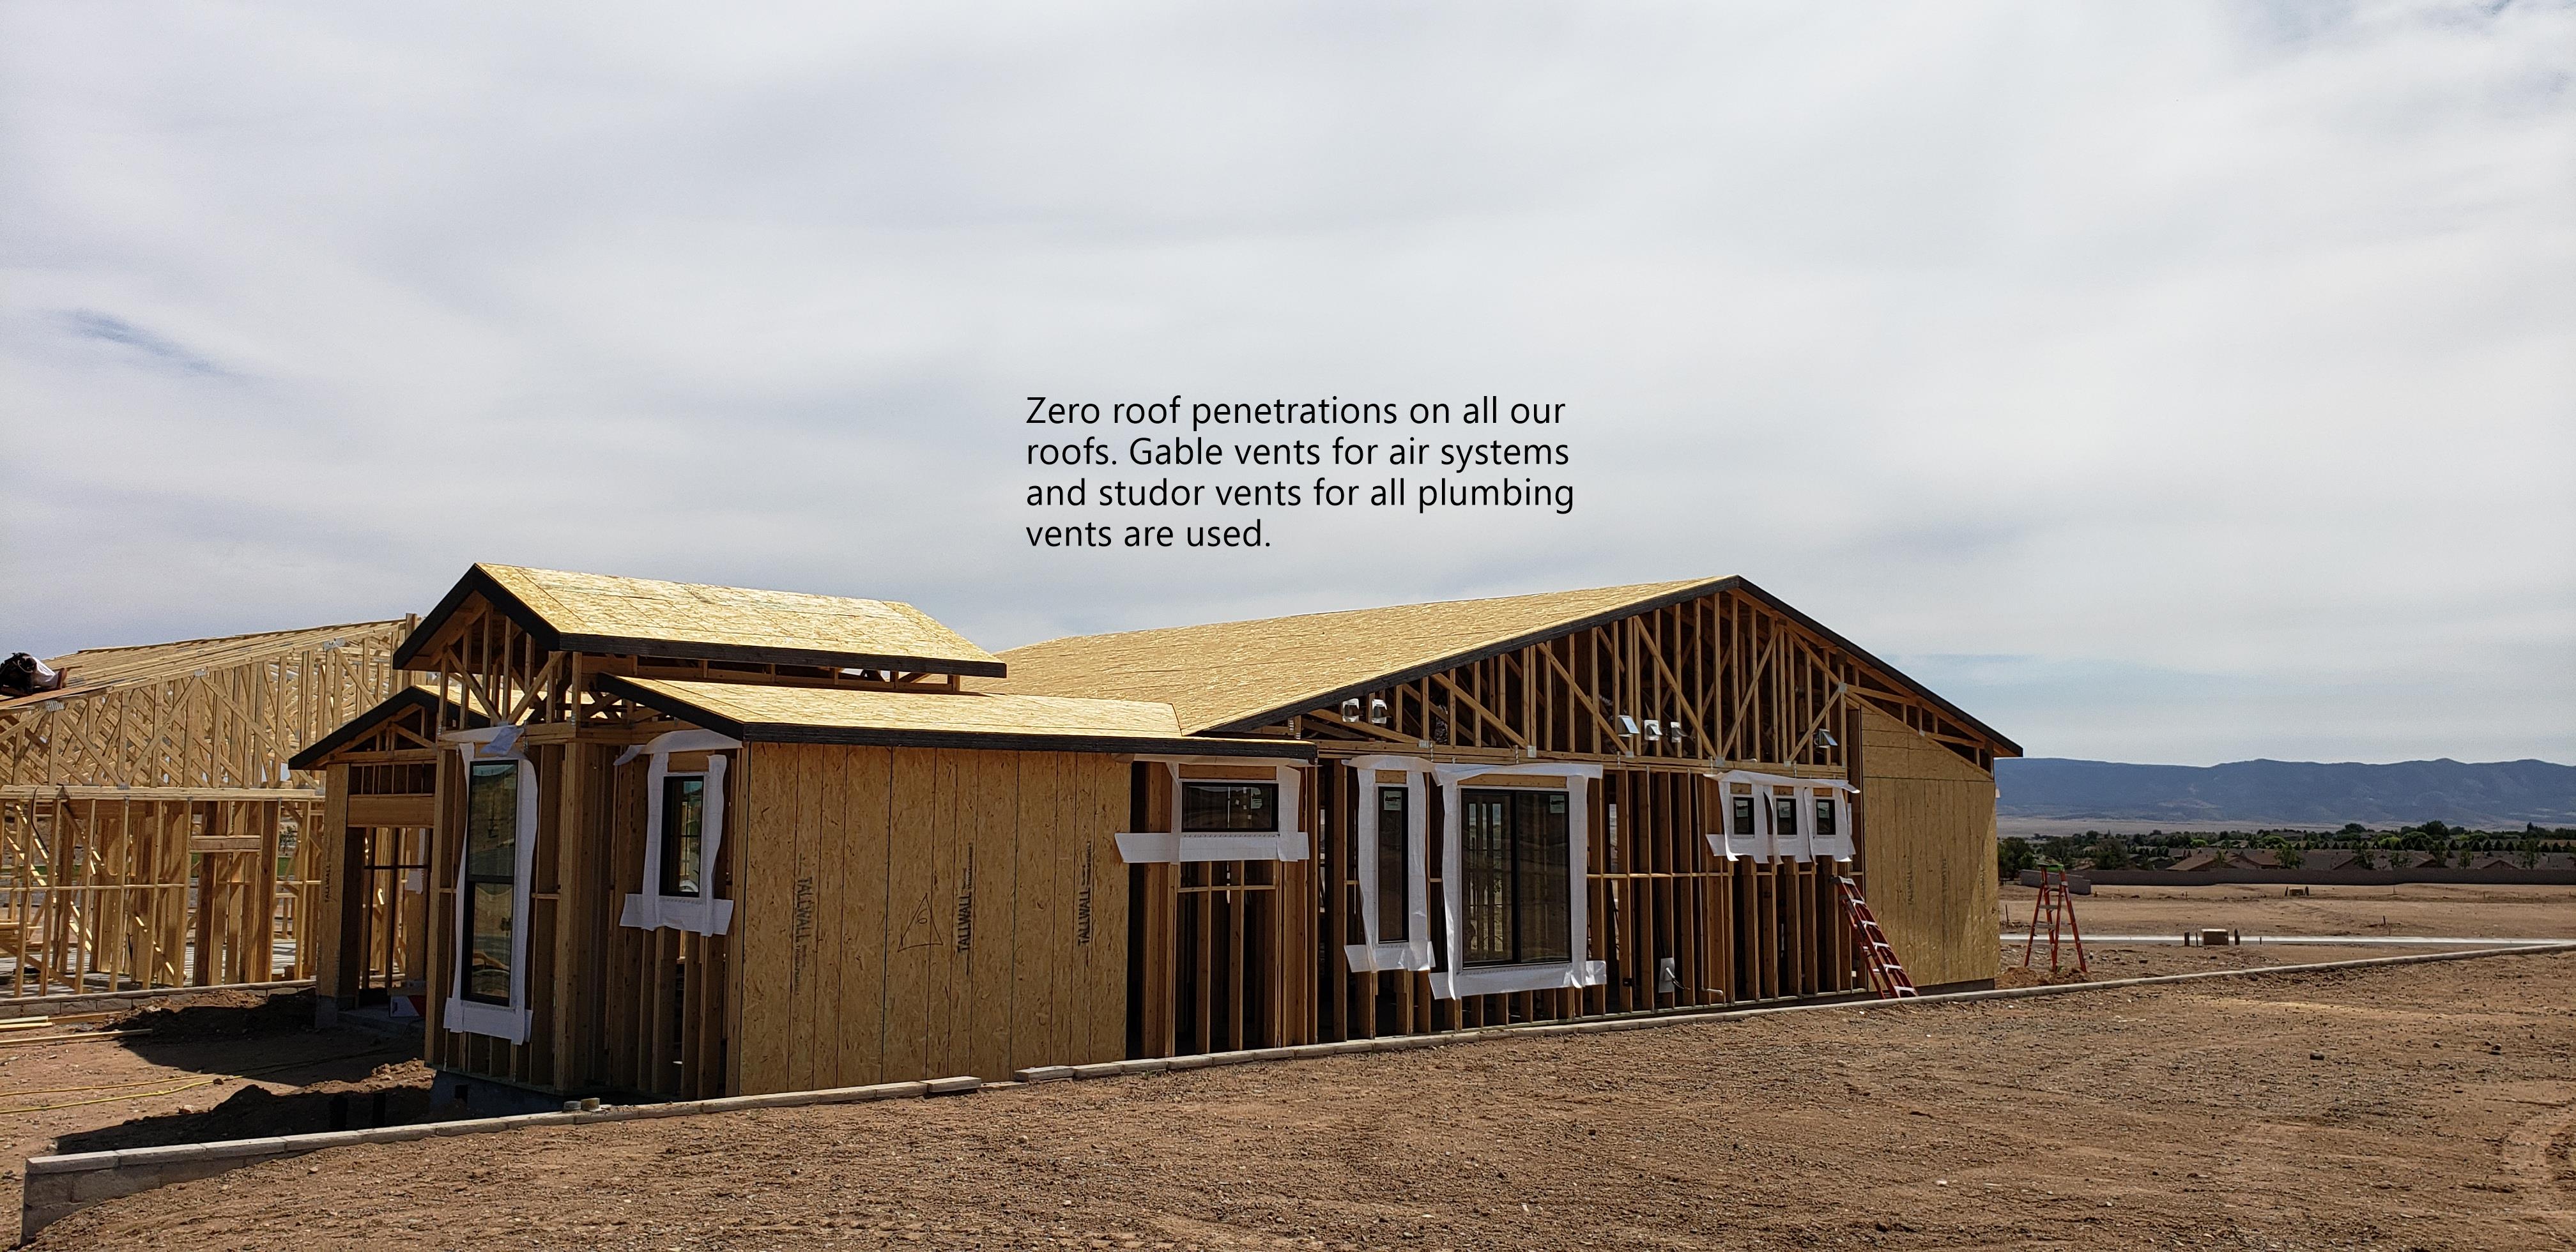
Right – This home’s roof has zero penetrations because all venting is routed to gable walls.
Image

Right – This hot-humid climate home employs several hurricane- and termite-resistant features including concrete block construction, borate-treated framing, a hip roof design with metal drip edge, impact-rated windows, and an unvented attic.
Image
Right – This hot-humid climate home is constructed with concrete block that is insulated on the inside with rigid foam; the framing is borate-treated lumber; the roof design is a high-wind-resistant hip roof with only one small gable over the entry.
Image
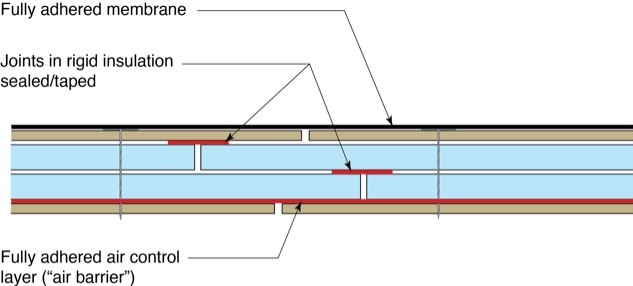
Right – This low-slope flat roof assembly has continuity of both the air and water barriers
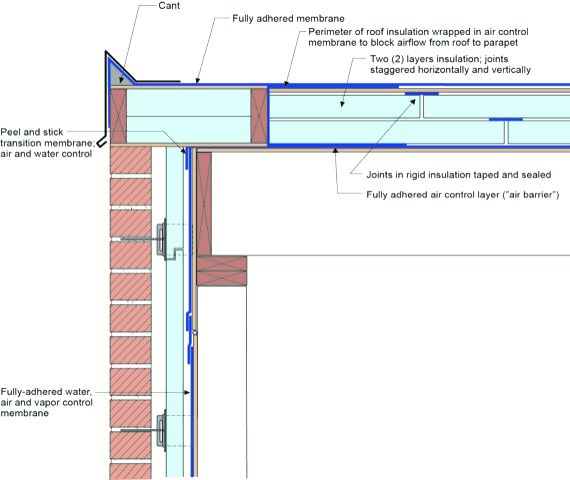
Image

Right – This low-slope roof and parapet assembly has continuity of both the air and water barriers
Image
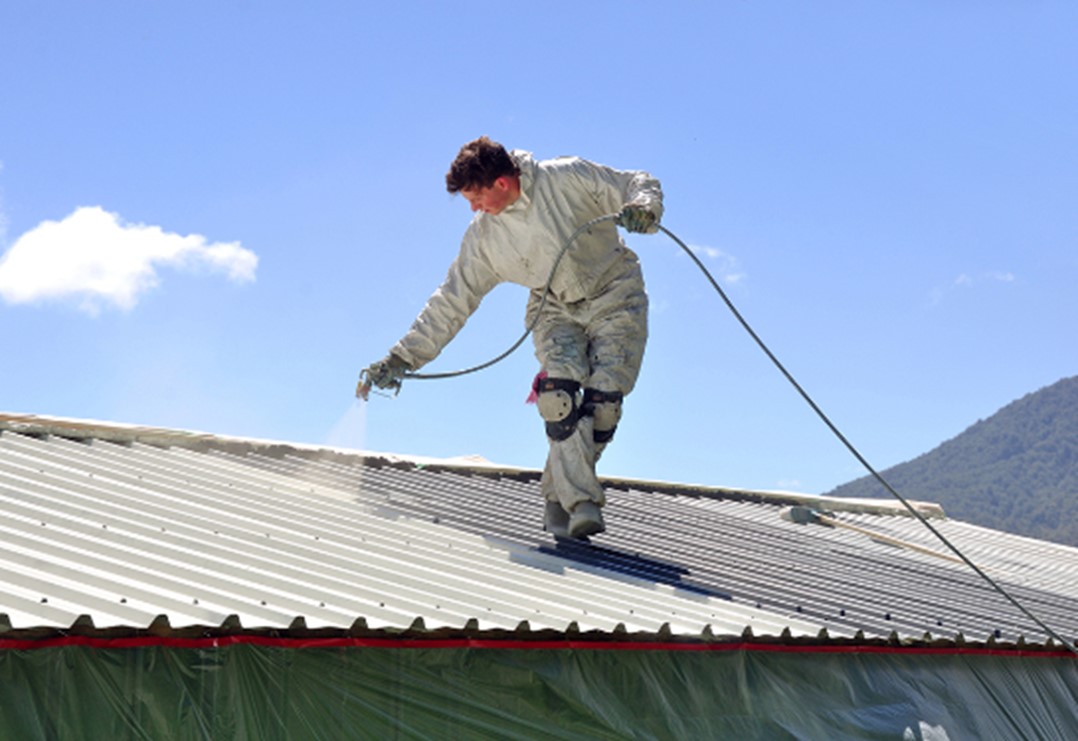
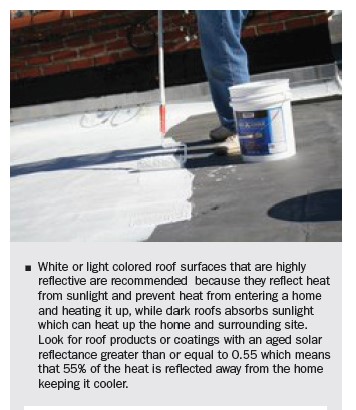
Right – This metal roof is being coated with a cool (high SRI) coating to reduce solar heat gain
Image
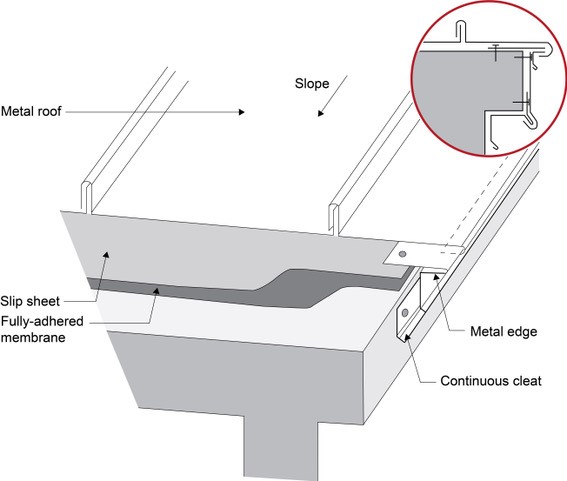
Right – Under metal roofing, sheathing is protected by metal edging over a fully adhered membrane and a slip sheet of loose laid building paper
Image
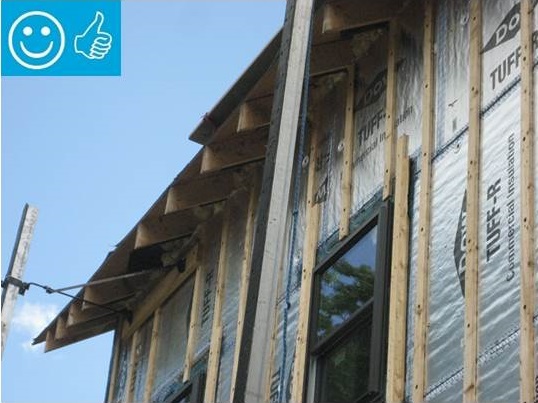
Right-Wall-insulating sheathing is extended up to roof rafters and sealed around the framing with spray foam
Image
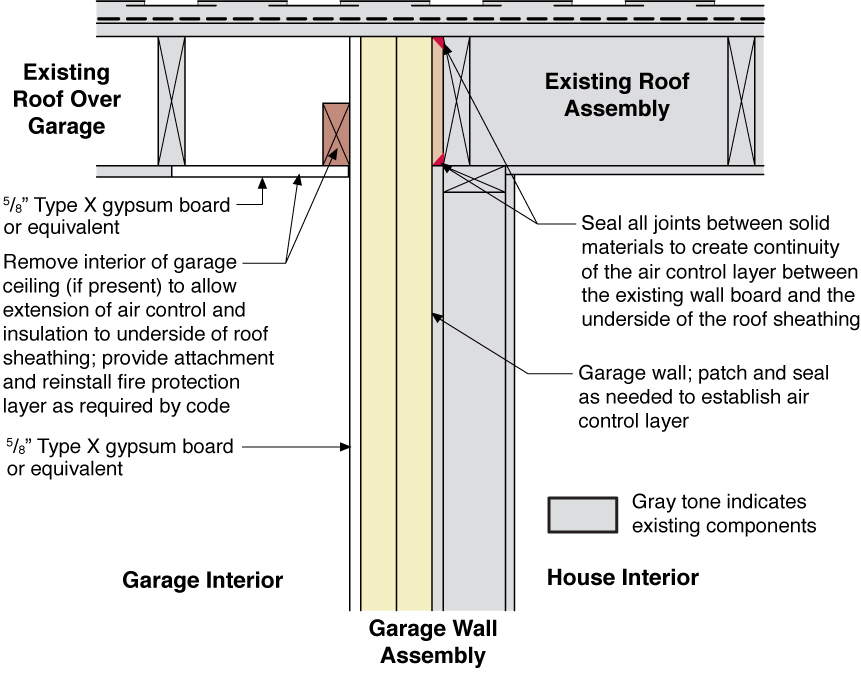
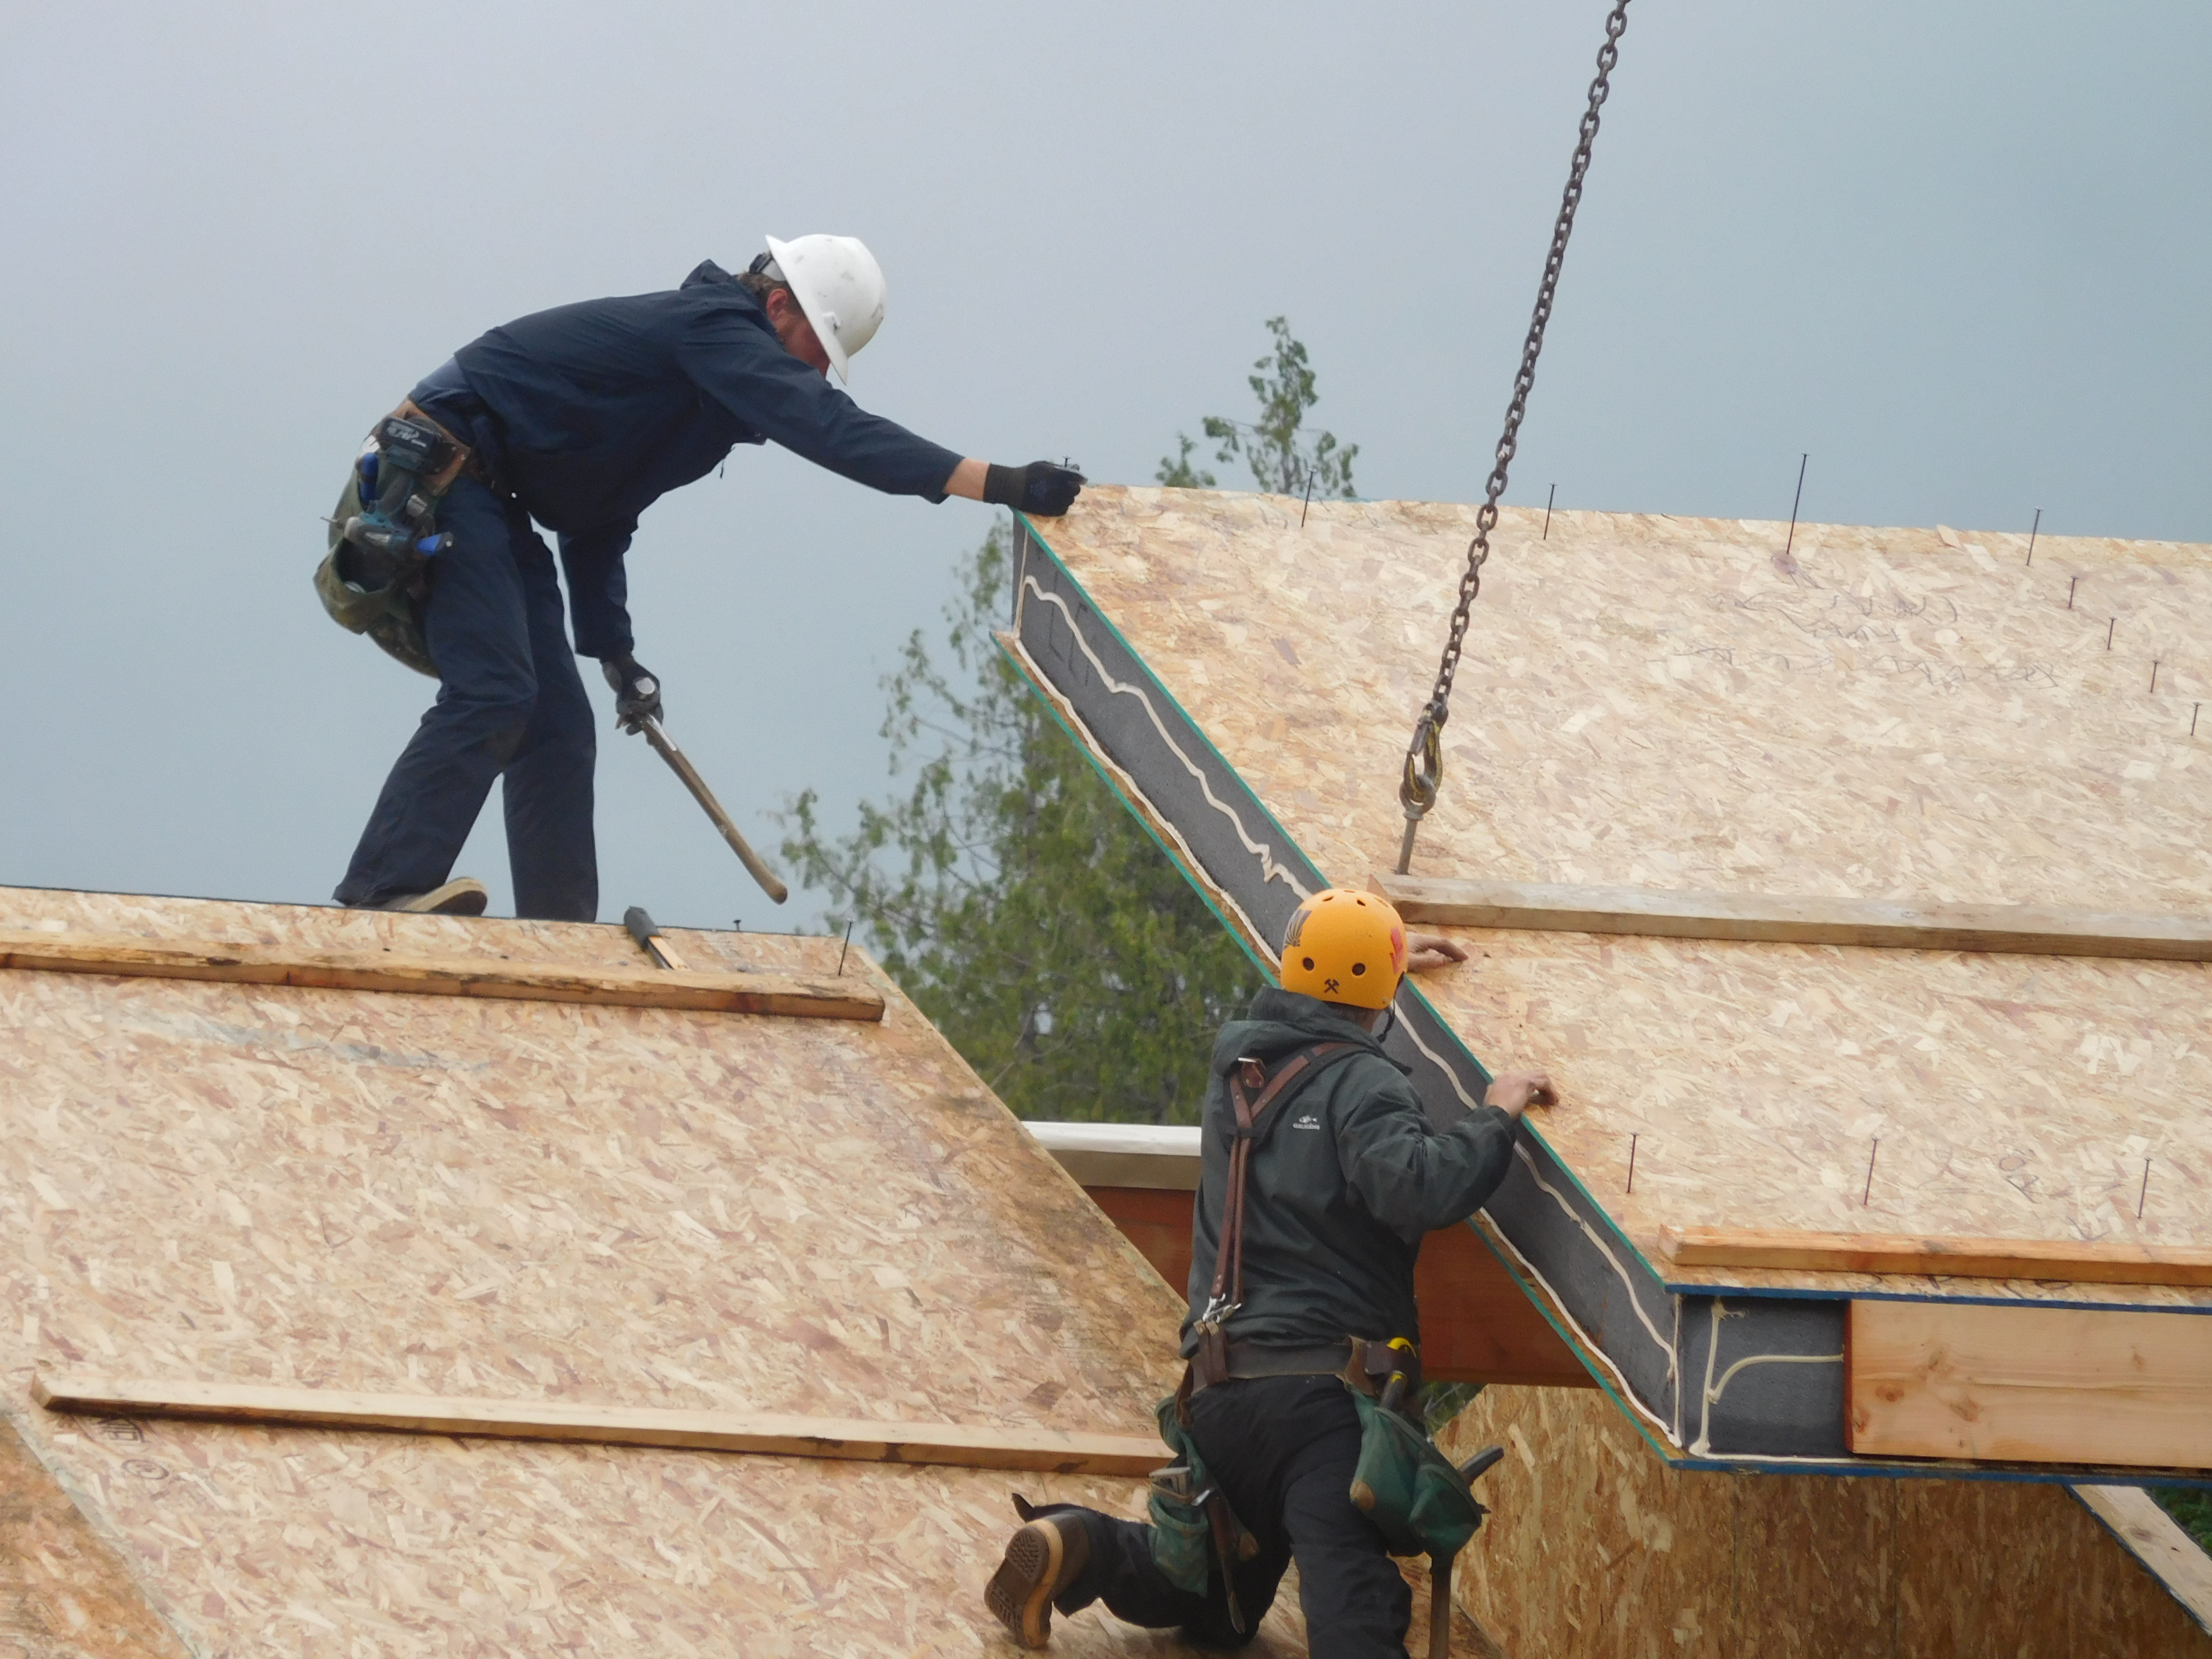
Rigid foam insulation is installed on the garage side of the shared garage wall and roof of an existing home
Image
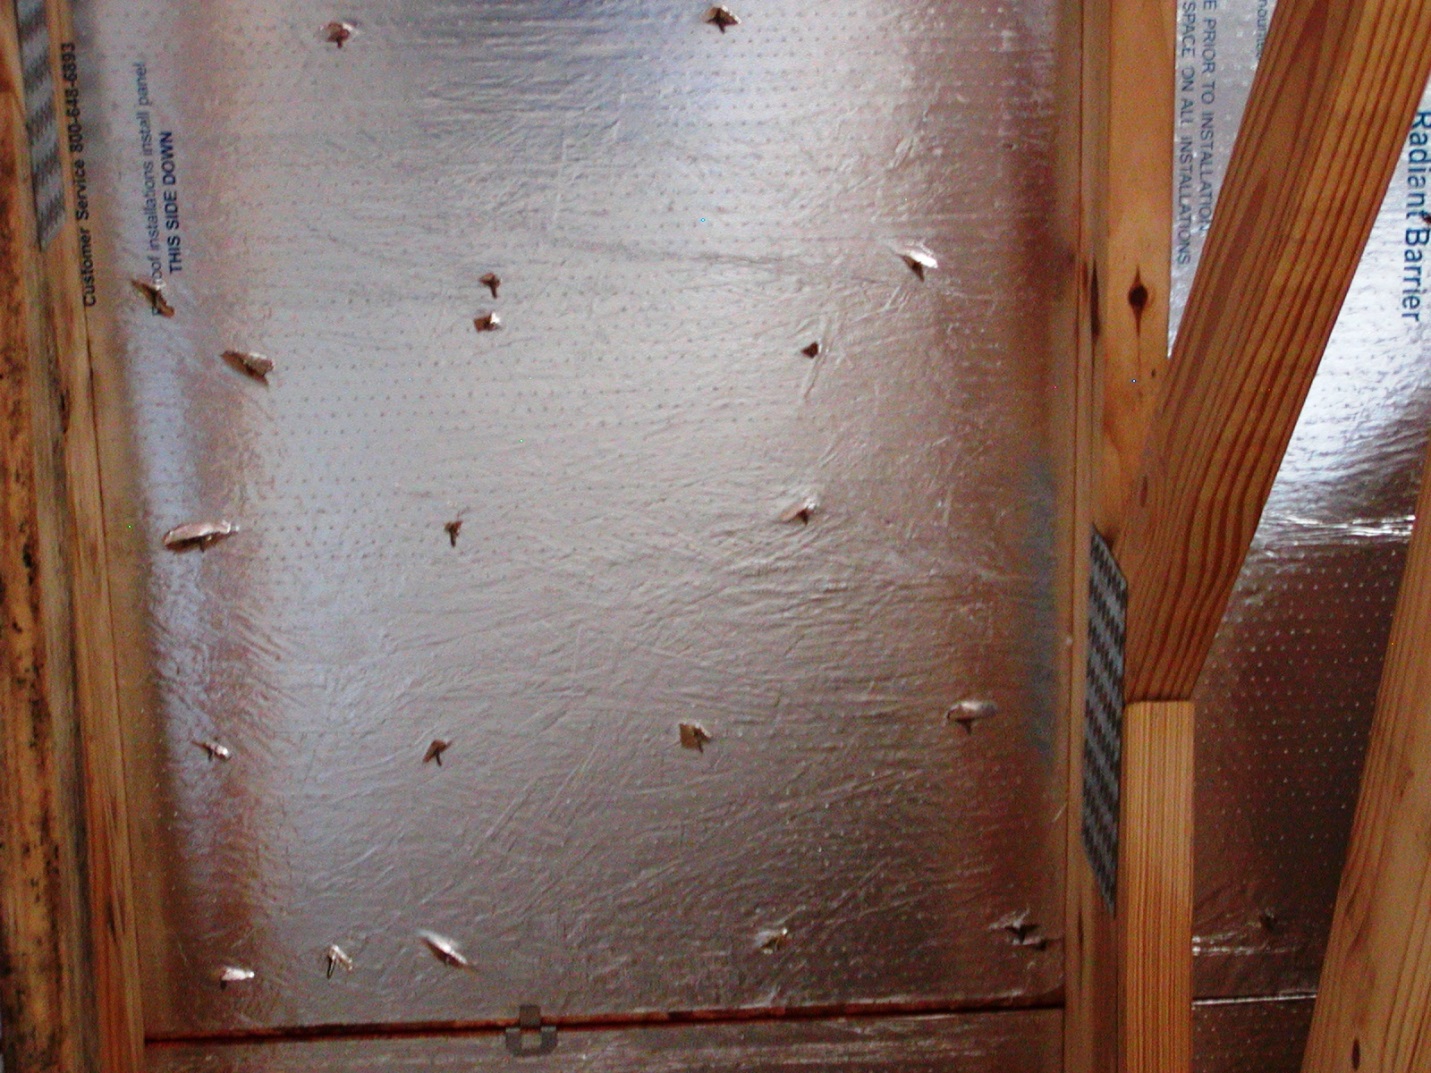
Roof decking has adhered radiant barrier that is perforated, in addition to the nail holes