

Scope
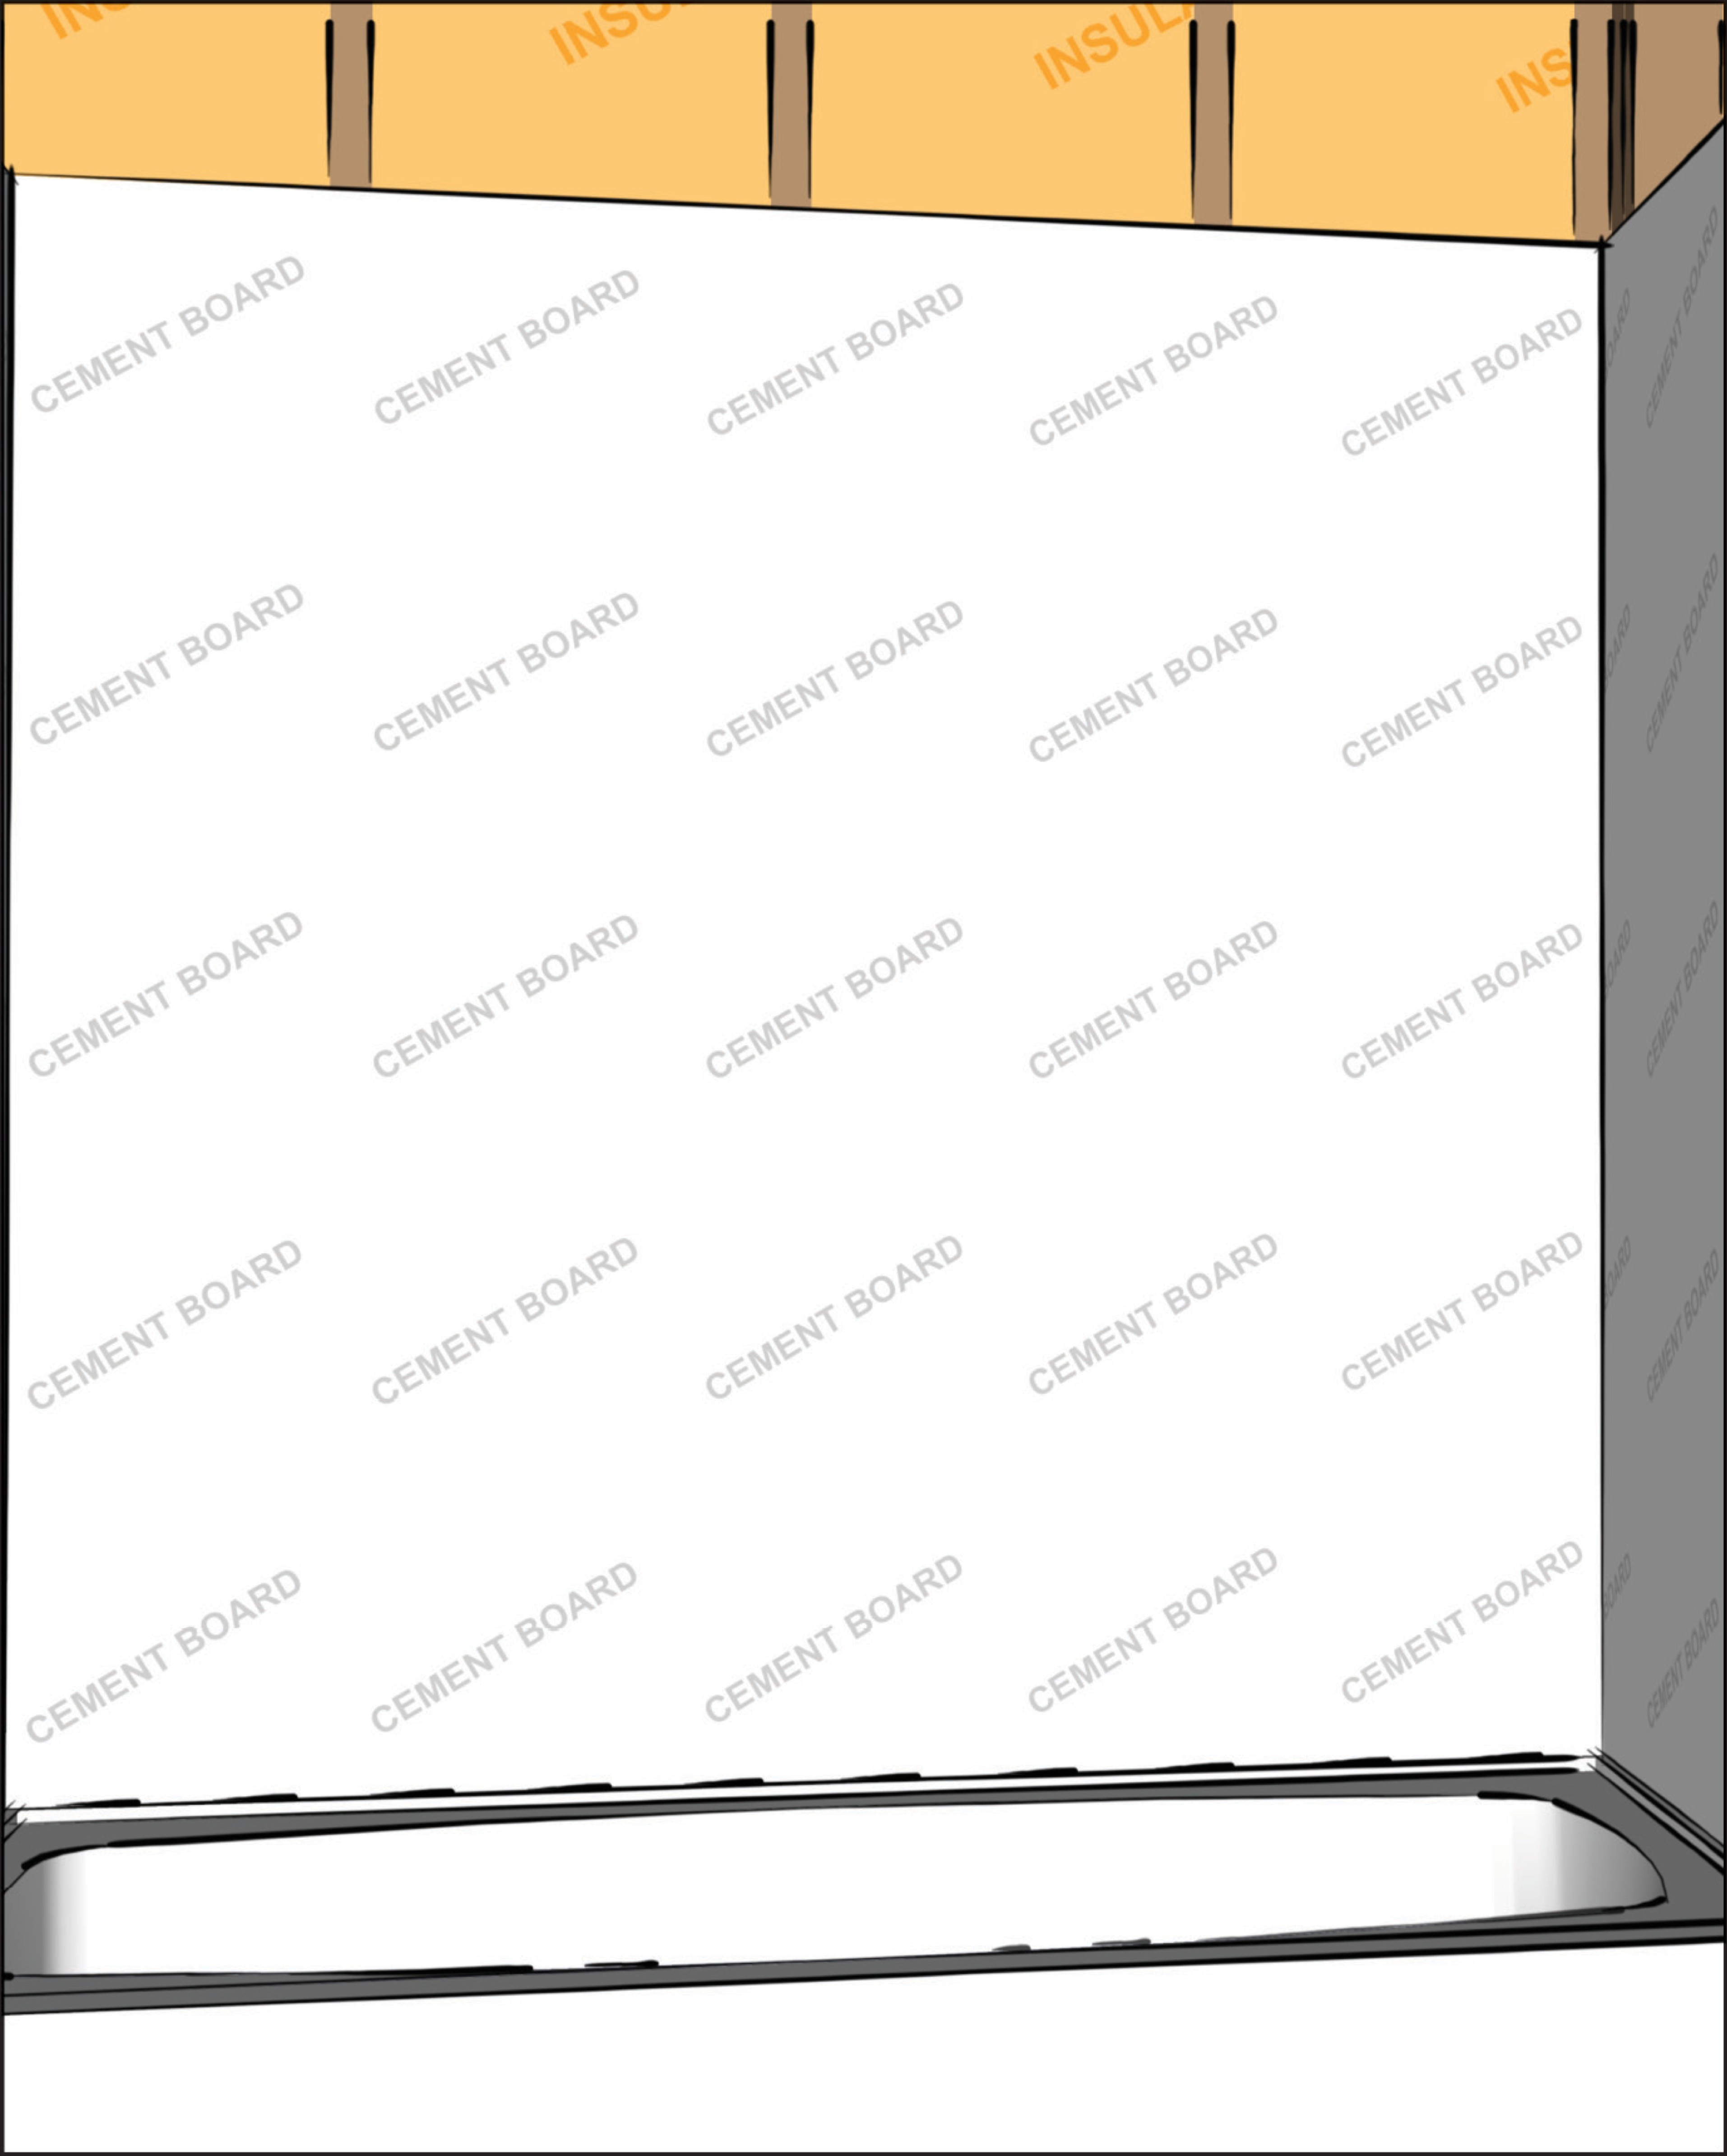
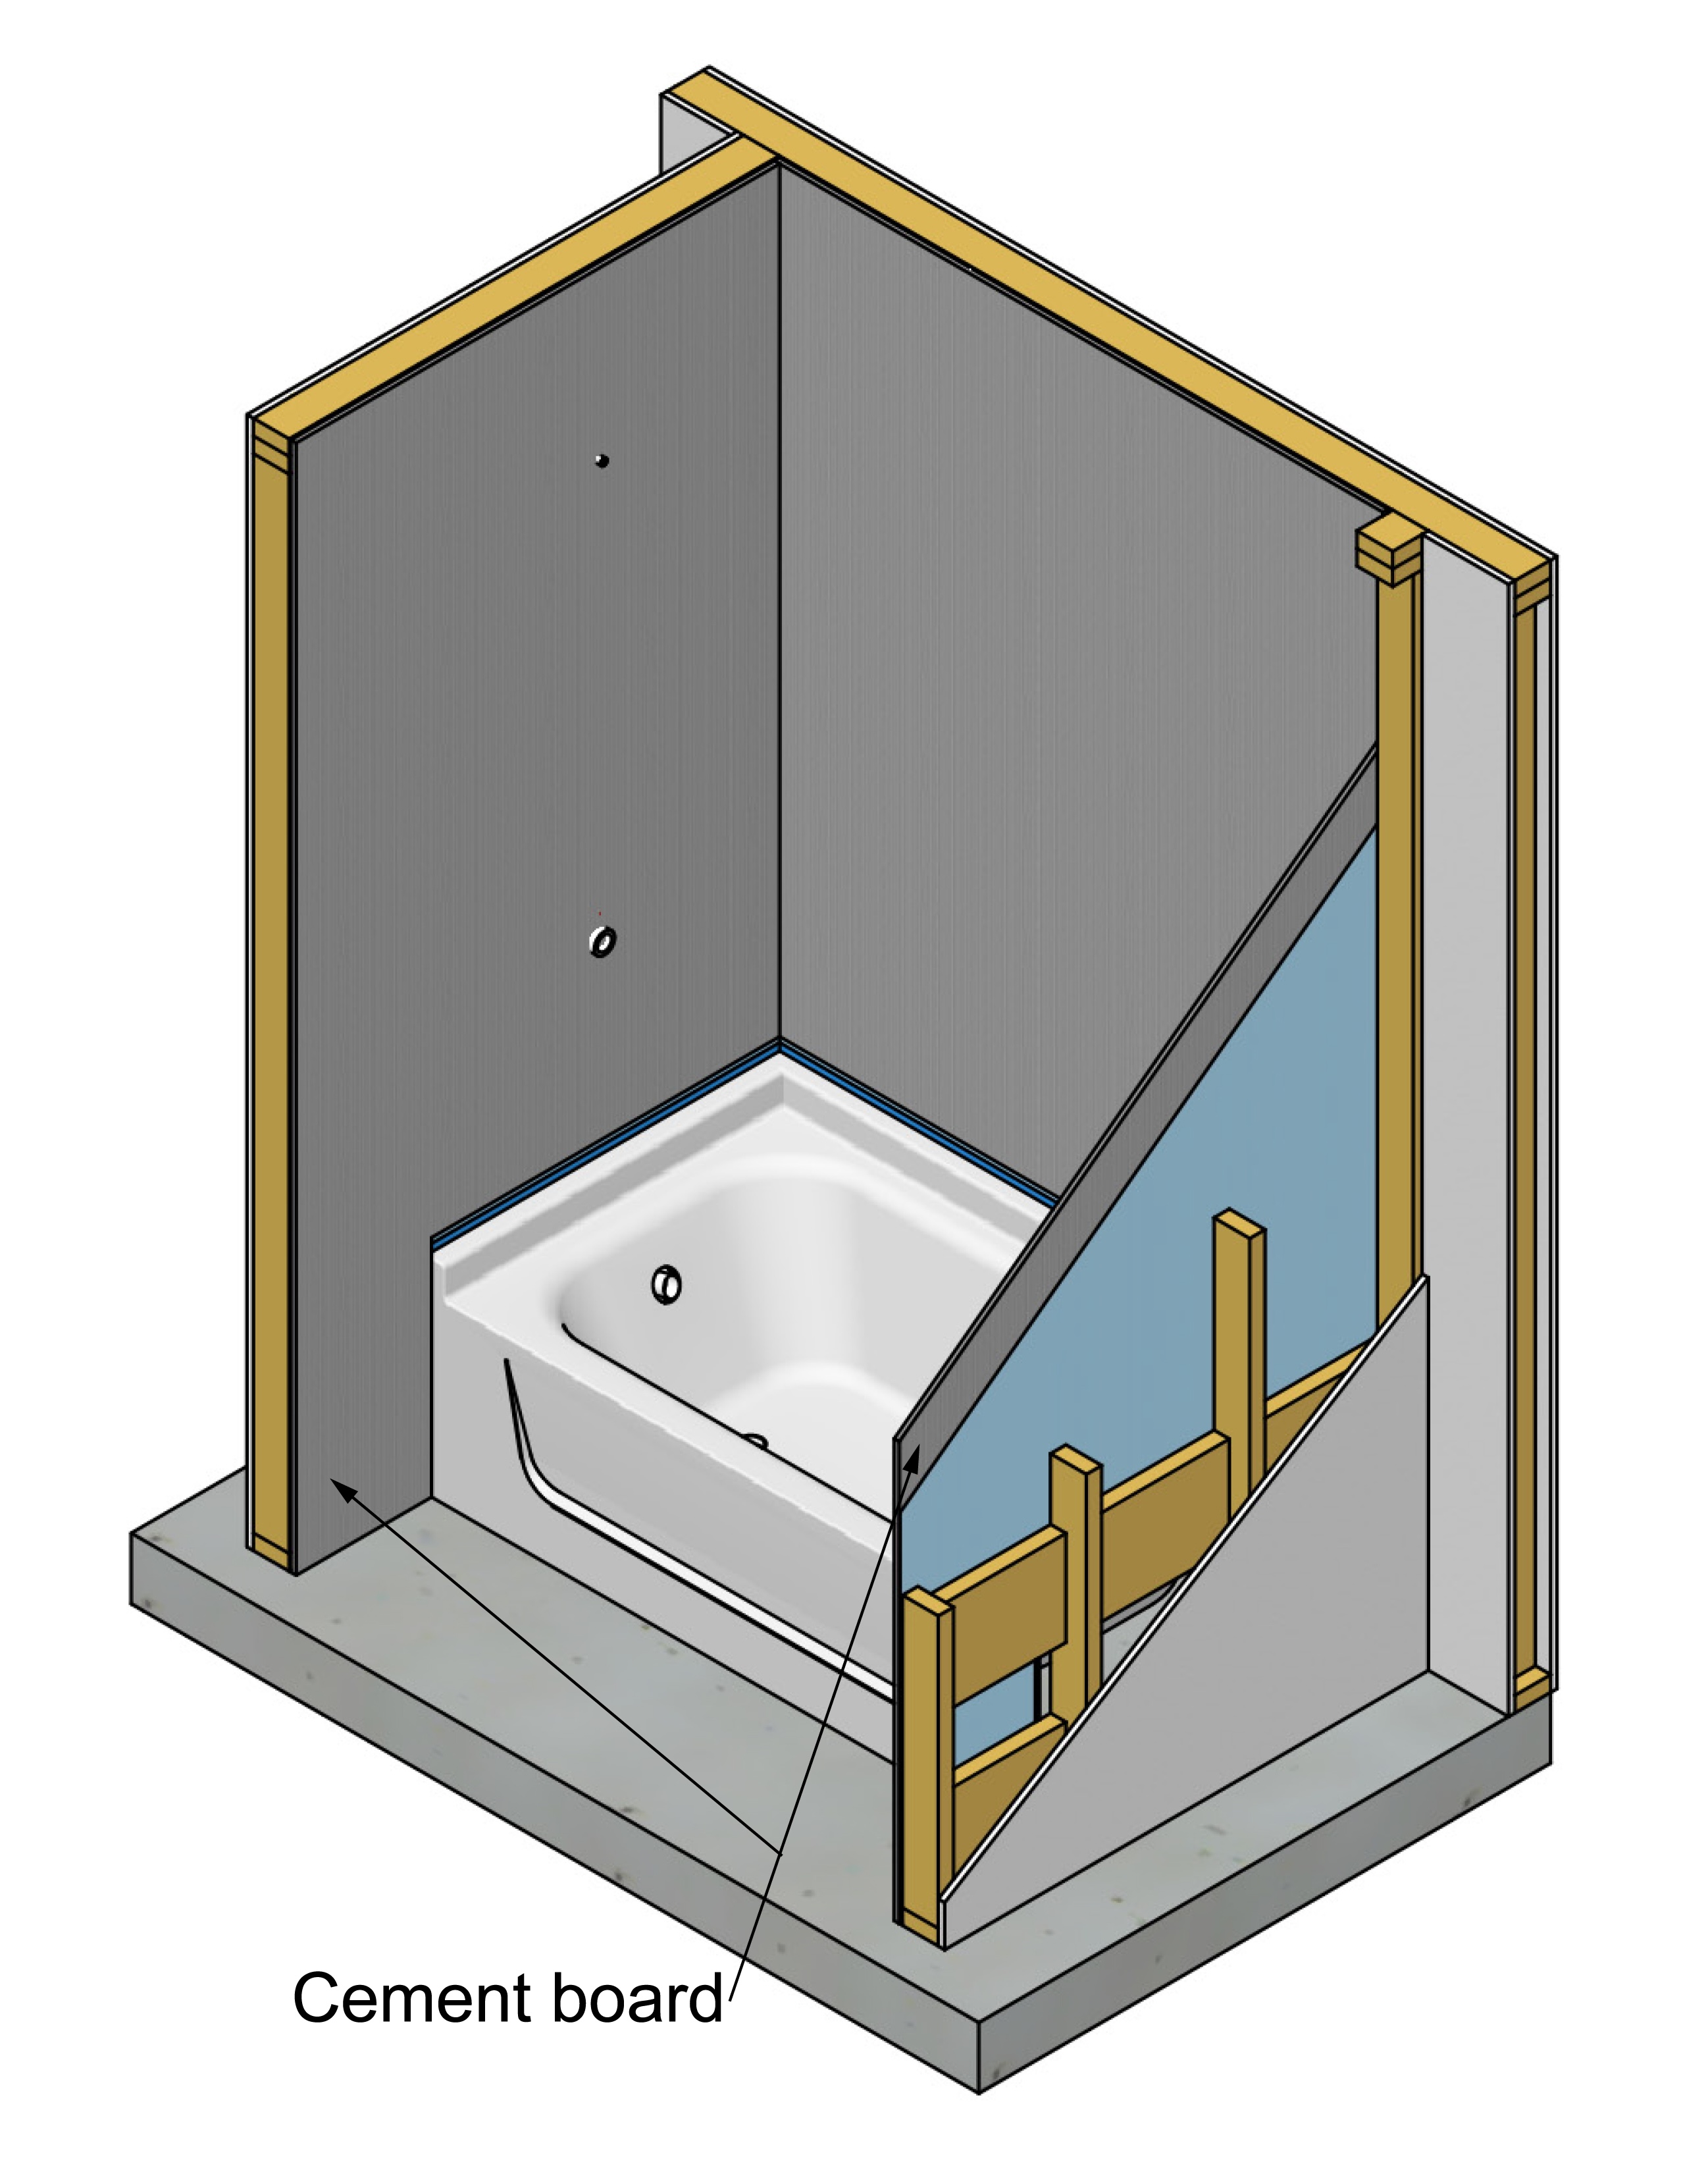
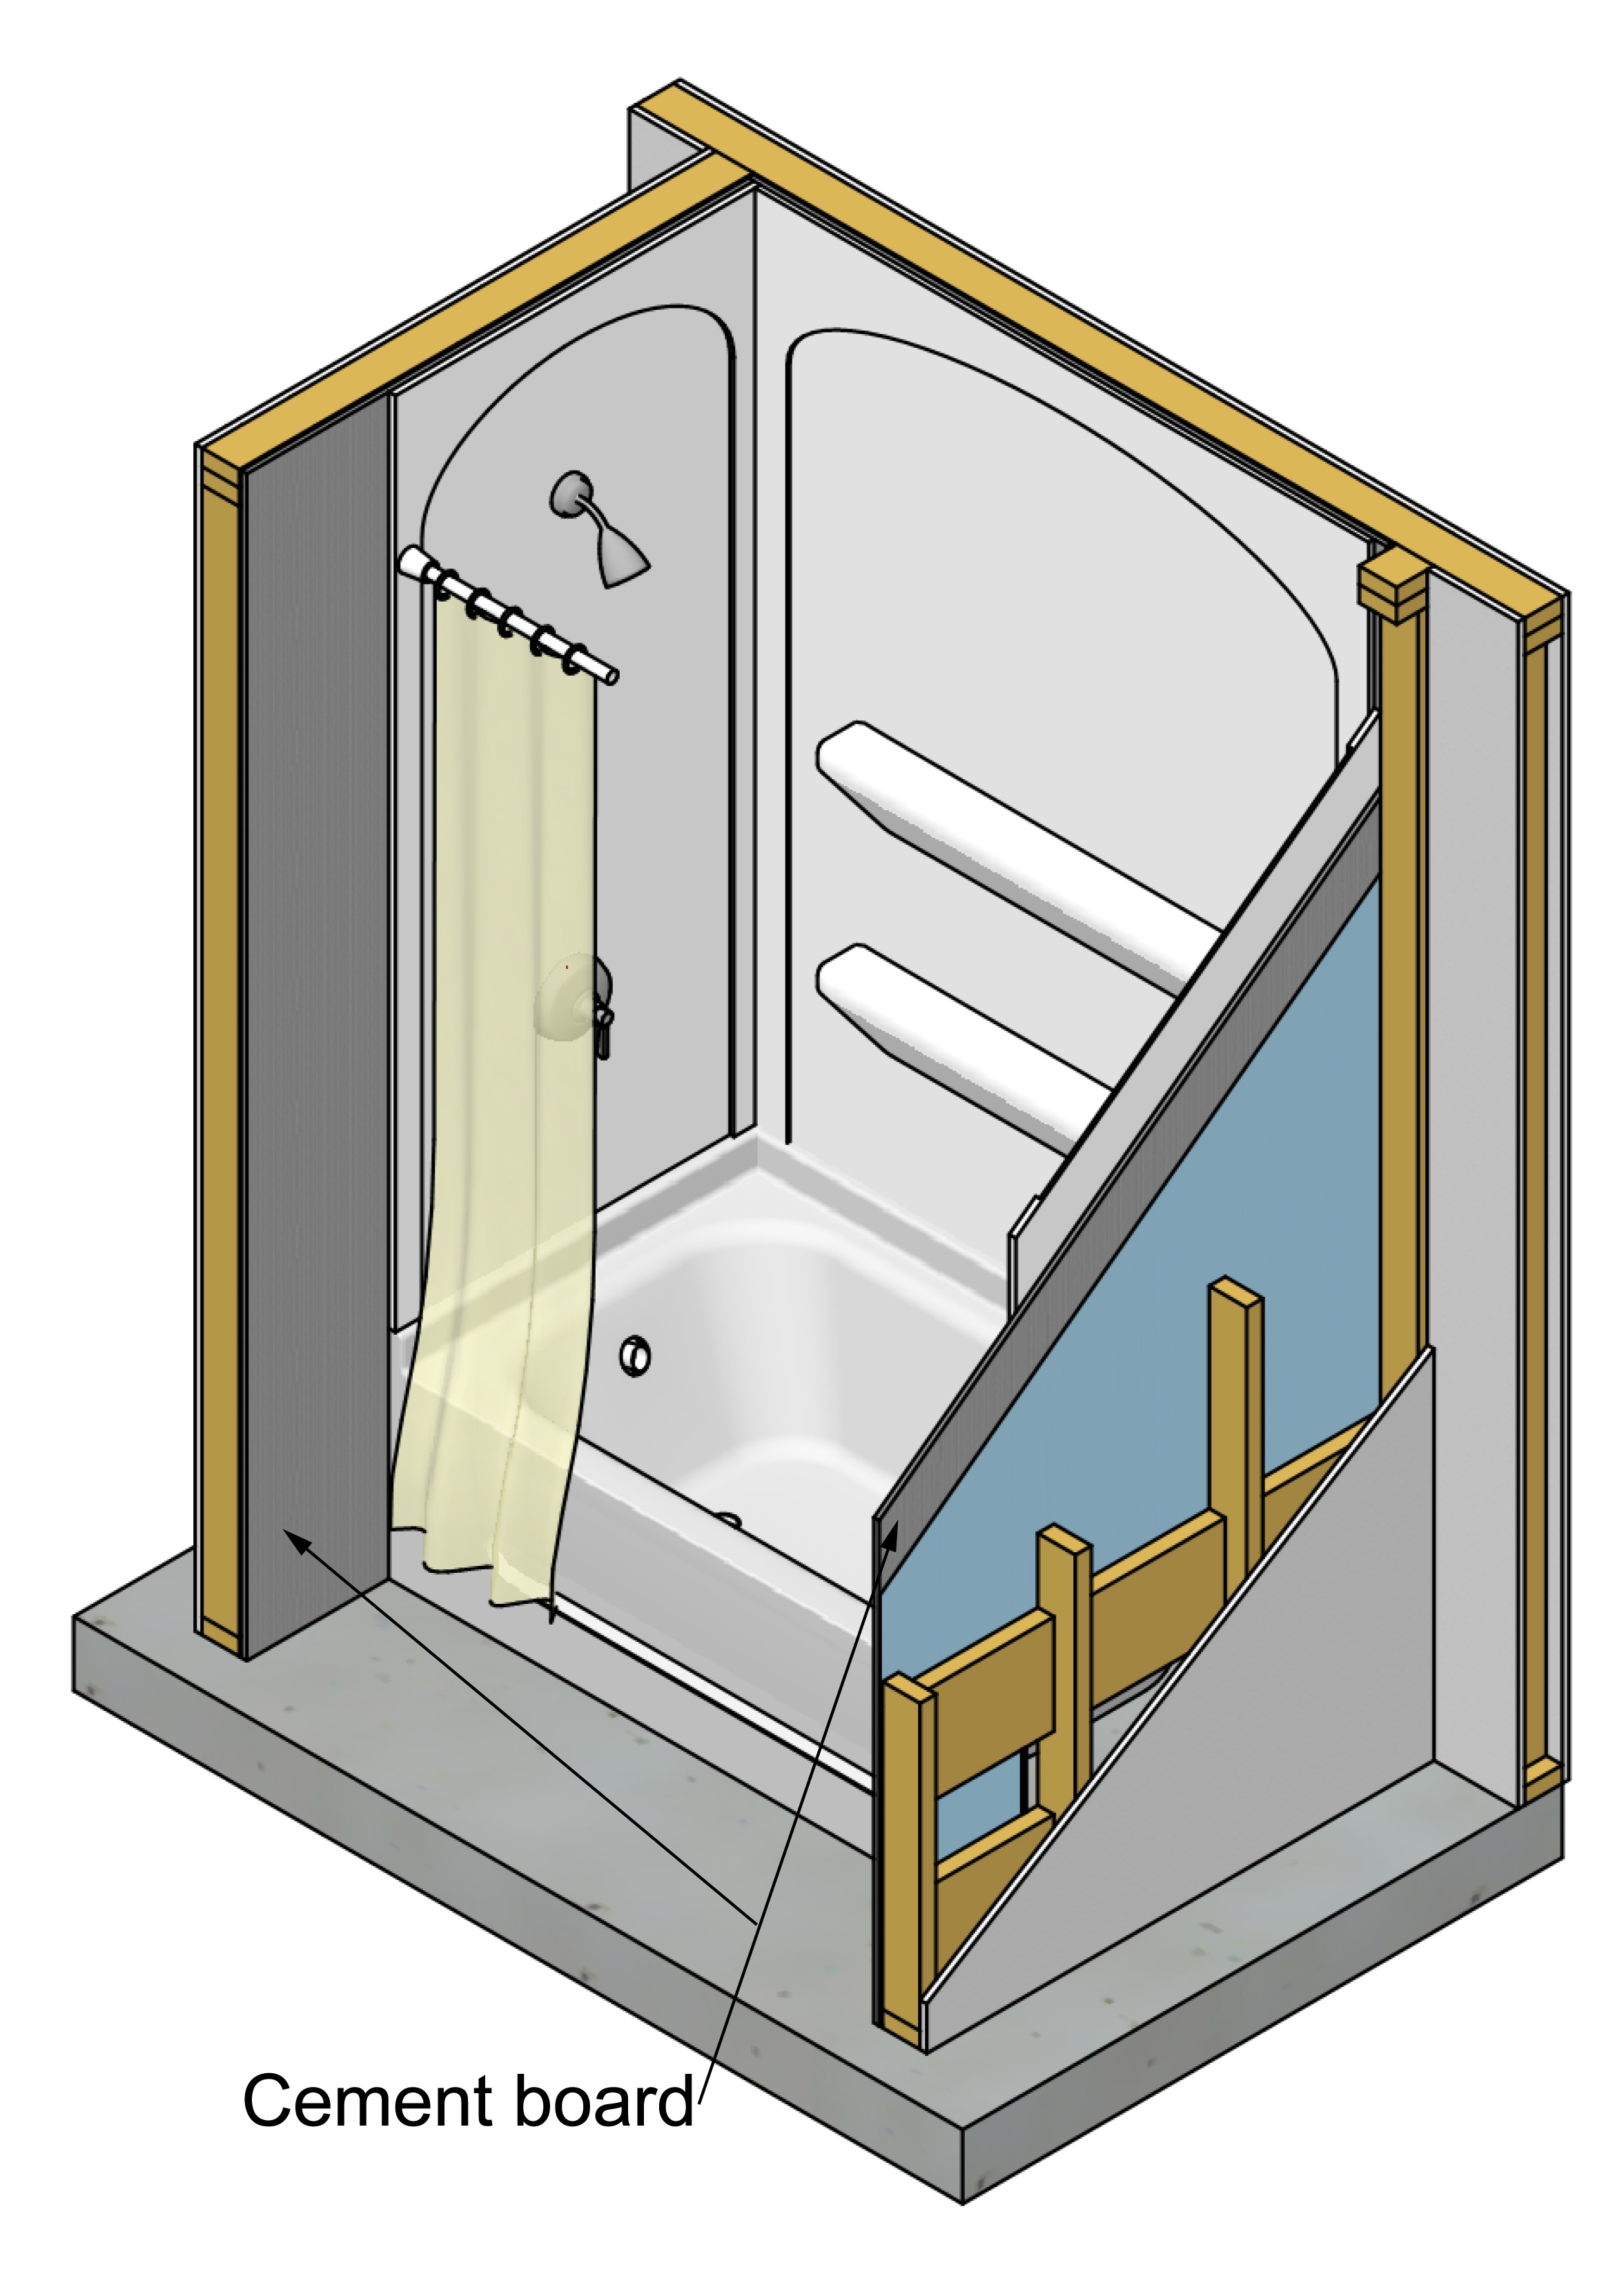
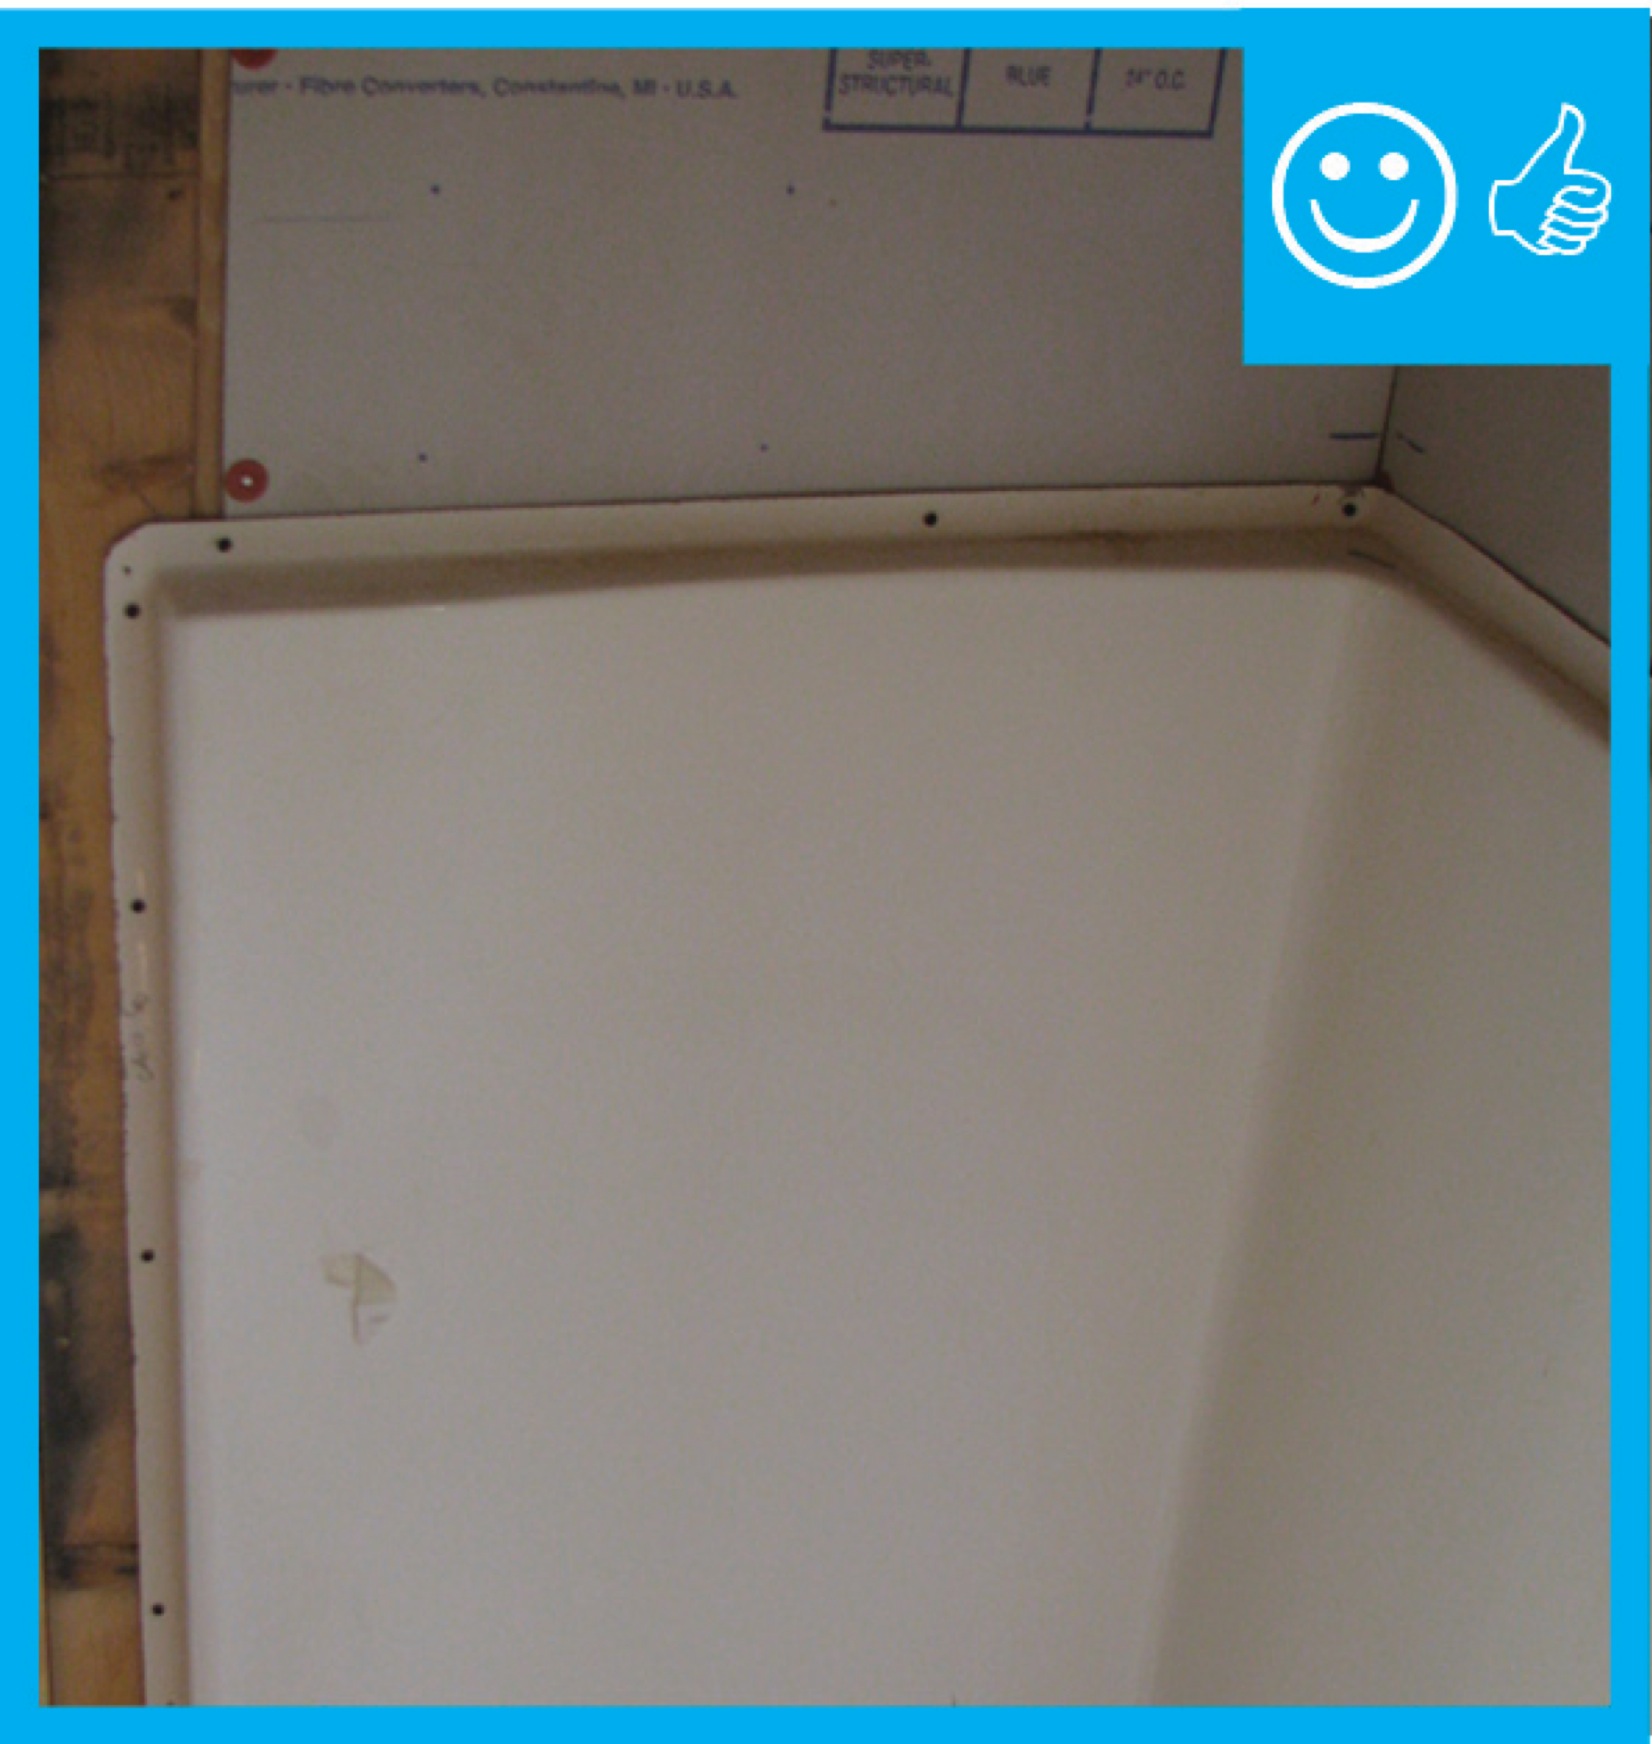
Install cement board or an equivalent moisture-resistant backing material on walls behind tub and shower enclosures composed of tile or panel assemblies with caulked joints.
- Don't use paper-faced backer board, i.e., paper-faced drywall, behind seamed tub and shower enclosures. Instead, use an alternate approved product such as fiber-cement, fiber-reinforced gypsum, glass mat gypsum, or fiber mat-reinforced cementitious backer panels.
- If a monolithic tub and shower enclosure (e.g., fiberglass with no seams) is used, a paper-faced backer board can be acceptable if it meets ASTM mold-resistant standards (ENERGY STAR).
- Air seal and insulate the walls behind the shower or tub enclosure to prevent thermal bypass which can result in moisture getting into the walls and cold tubs.
See the Compliance Tab for links to related codes and standards and voluntary federal energy-efficiency program requirements.
Description
Moisture management is often thought of in terms of keeping exterior moisture outside of the building envelope. However, interior moisture management is just as important, with many of the same consequences if it fails. As with water seeping in from outside, unmanaged water inside the home or dwelling unit can lead to a host of problems including mold, mildew, air quality issues, and even structural damage. Complicating matters are areas where water is intentionally brought into the home, such as bathrooms and kitchens.
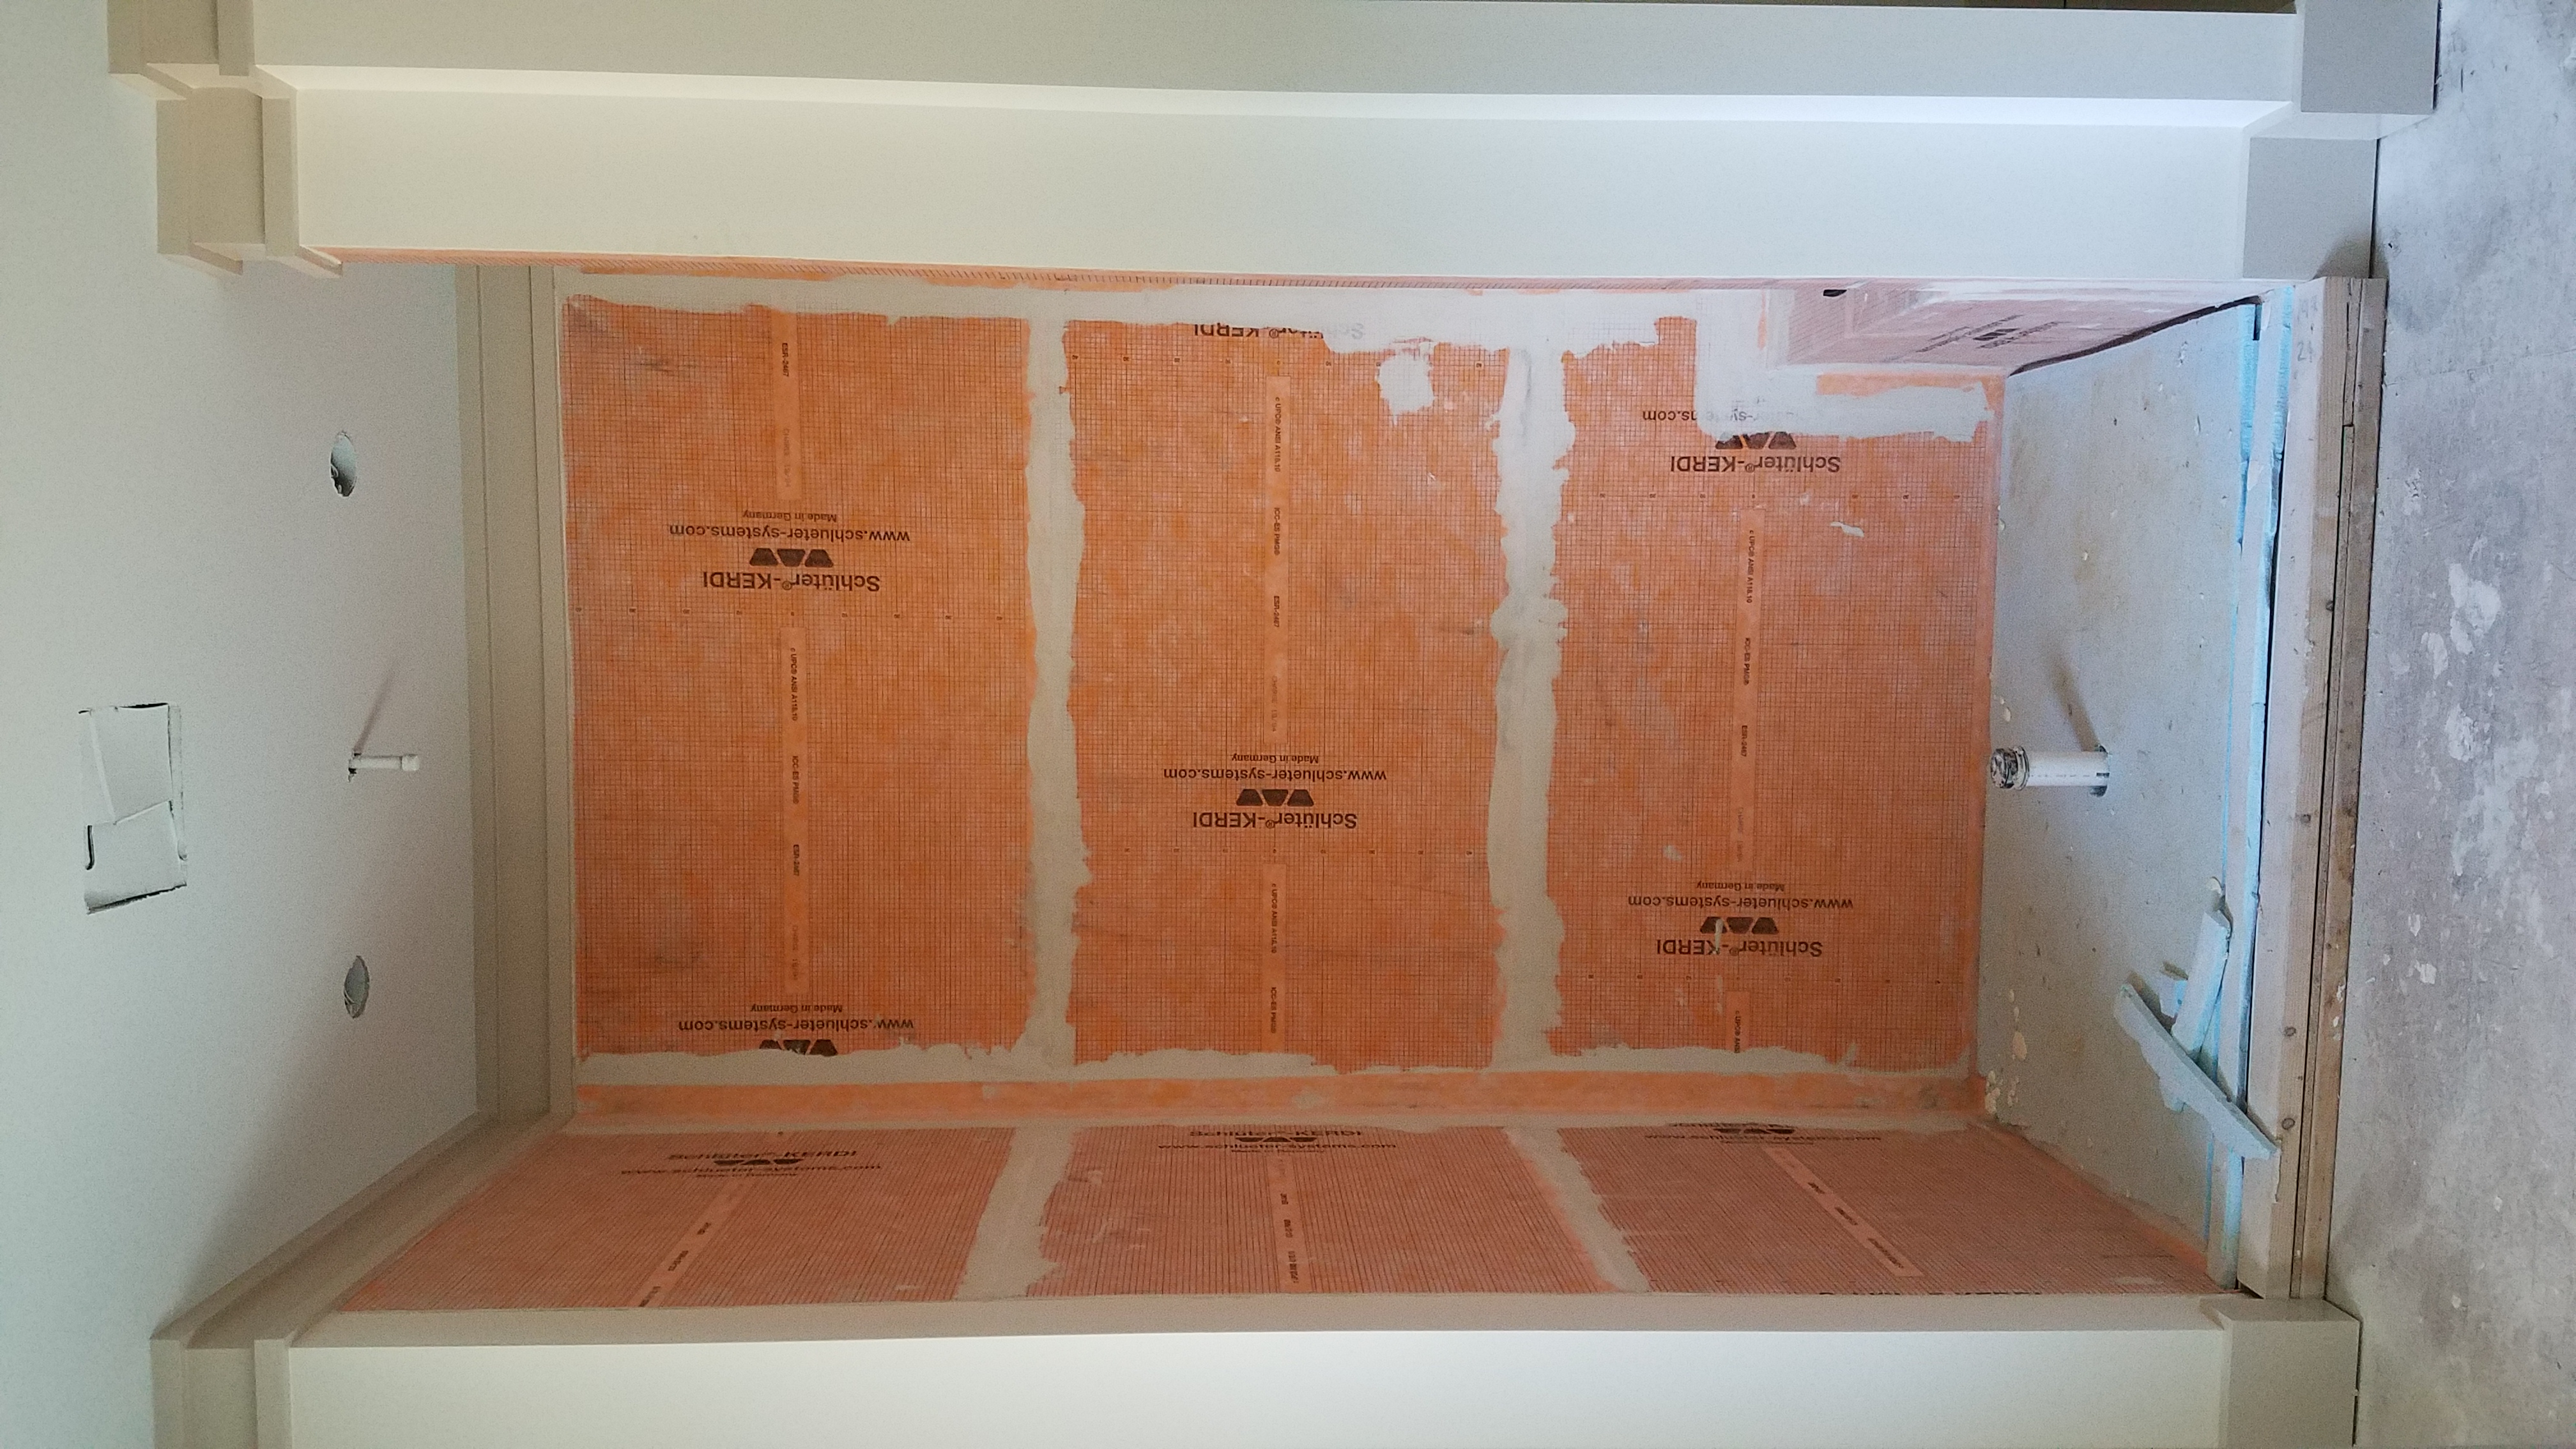
Special protection is needed behind showers and tubs to prevent moisture from seeping into the wall structure. Use an appropriate waterproof or moisture-resistant backing material behind grouted tile or stone or segmented plastic or fiberglass tub and shower surrounds. Appropriate materials include cement board which has a cementitious core and glass mats on both sides to strengthen the board. Equivalent materials include coated glass mat which has a gypsum core with glass fibers sandwiched between fiberglass surface mats and fiber cement which is reinforced with wood fibers. Cement board comes in the same standard sheet sizes as regular gypsum board: both are 5 feet wide, which is also the width of a standard tub surround. Unless specifically manufactured as a waterproof product, cement board is water resistant but not waterproof. You must coat it with a fluid-applied waterproofing or apply a water-resistant barrier behind it that drains (BSC 2009b). Paper-faced gypsum board will not prevent moisture penetration and should not be used in wet areas (BSC 2009a). Non-paper-faced fiber-reinforced gypsum board, moisture-resistant gypsum board, or “green board” products are also not recommended behind tub surrounds (BSC 2009a).
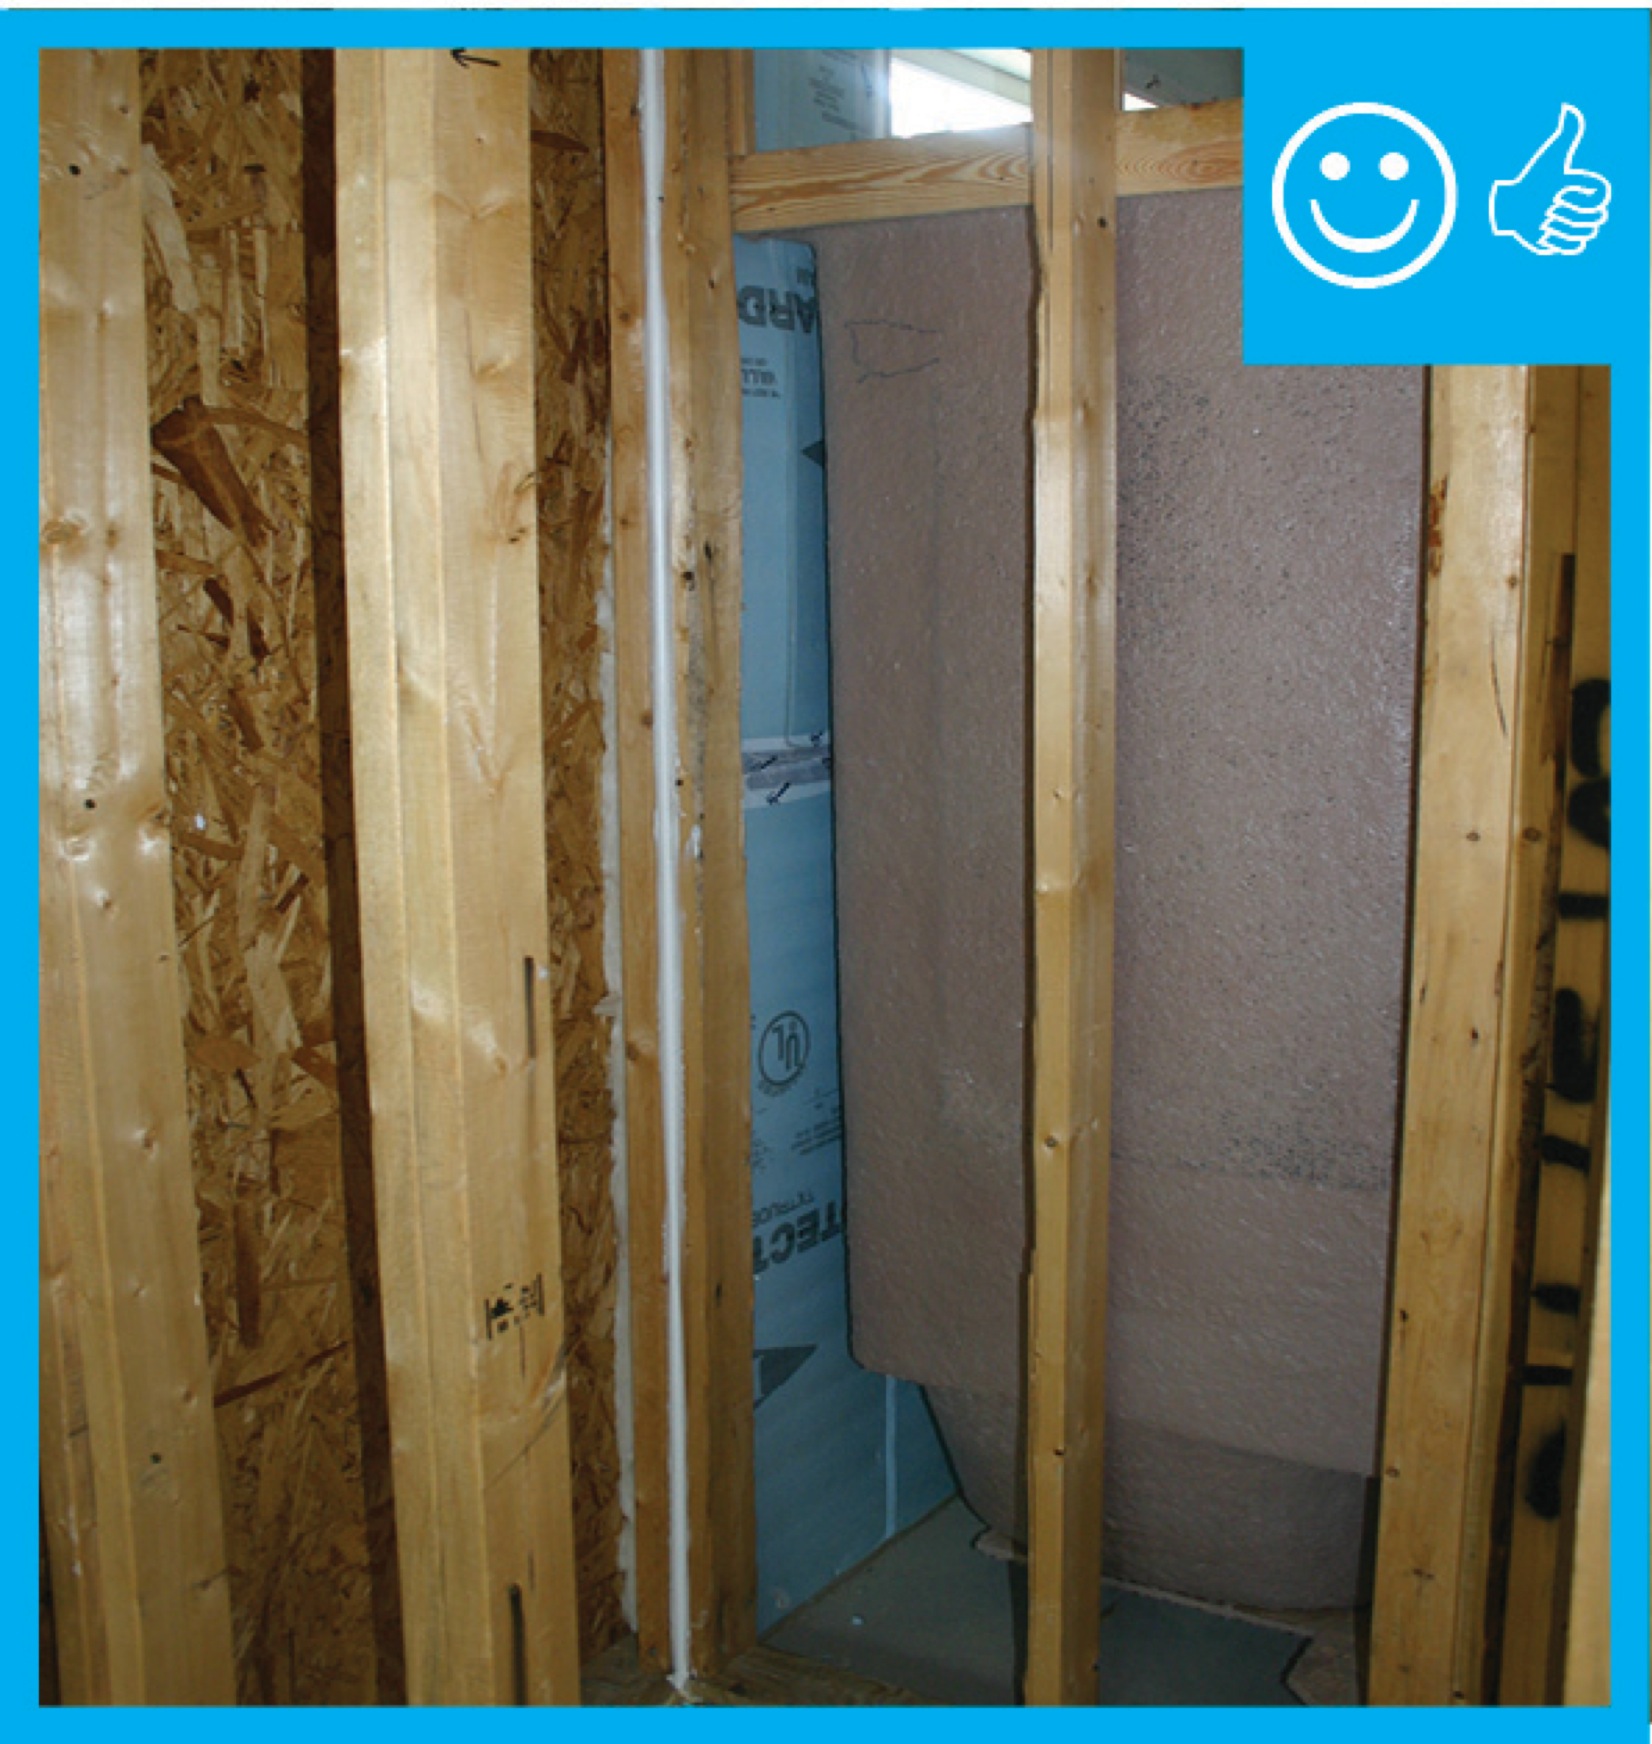
When installing a shower or tub on an exterior wall, it is essential to air seal and insulate the wall cavity behind the shower and tub enclosure to prevent thermal bypasses that can result in moisture getting into the walls and cold tubs. The guide Walls Behind Showers and Tubs provides information on how to air seal and insulate behind a shower or tub.
How to Install Cement Board Behind Tub and Shower Enclosures
- Check to make sure the wall frames are plumb. This will ensure that the cement board is plumb and that the ceramic tile or other surface finish will install correctly.
- If the tub or shower is on an exterior wall, make sure that any piping or wiring penetrations through the walls behind the tub and enclosure are air sealed and that the wall cavities are insulated before installing cement board or equivalent. See Walls Behind Showers and Tubs for air sealing and insulating guidance.
- Measure the area for the tub or shower surround.
- Trim the cement board to fit the measured space. Use a circular saw fitted with an abrasive blade or a hand tool specific to the job and fitted with a carbide tip. Apply a fluid-applied waterproofing to the board including the edges.
- If the tub or shower is on an exterior wall and the cement board will serve as an air barrier over the insulation, apply a thick bead of caulk to the surface of the exposed studs, wood blocking, and top and bottom plates. Nail or screw the thin-profile air barrier material to the studs.
- Tape and mud any seams per manufacturer’s specifications.
Source
Report covering the fundamental waterproofing strategies for tub and shower assemblies.
Source
Report covering the fundamental waterproofing strategies for tub and shower assemblies.
Ensuring Success
When installing a shower or tub on an exterior wall, it is essential to air seal and insulate the wall cavities behind the shower and tub enclosure to prevent thermal bypasses that can result in moisture, heating, and cooling problems. The guide Walls Behind Showers and Tubs provides information about how to air seal and insulate behind a shower or tub.
Cutting cement board requires tools different than those used for standard gypsum board; use abrasive saw blades or carbide-tipped cutters. Be sure that the framing is level and plumb before installing backer board to avoid alignment issues with premanufactured tub surrounds or tile.
Region
No climate-specific information applies.
Training
Right and Wrong Images

Source
Guide describing details that serve as a visual reference for each of the line items in the Water Management System Builder Checklist.
Source
Guide describing details that serve as a visual reference for each of the line items in the Water Management System Builder Checklist.
Source
Guide describing details that serve as a visual reference for each of the line items in the Water Management System Builder Checklist.
Source
Compliance
Retrofit
Installing new tubs and showers and replacing the tub and shower surround are popular bathroom remodeling projects. When conducting these projects, install a new layer of cement board or an equivalent moisture-resistant backing material behind the tub or shower, as described in the Scope and Description tabs of this guide.
See Compliance tab.
More Info
References and Resources
*For non-dated media, such as websites, the date listed is the date accessed.
Contributors to this Guide
The following authors and organizations contributed to the content in this Guide.
Building Science Corporation, lead for the Building Science Consortium (BSC), a DOE Building America Research Team
Questions? Comments? Contact our webmaster.