Showing results 251 - 500 of 733
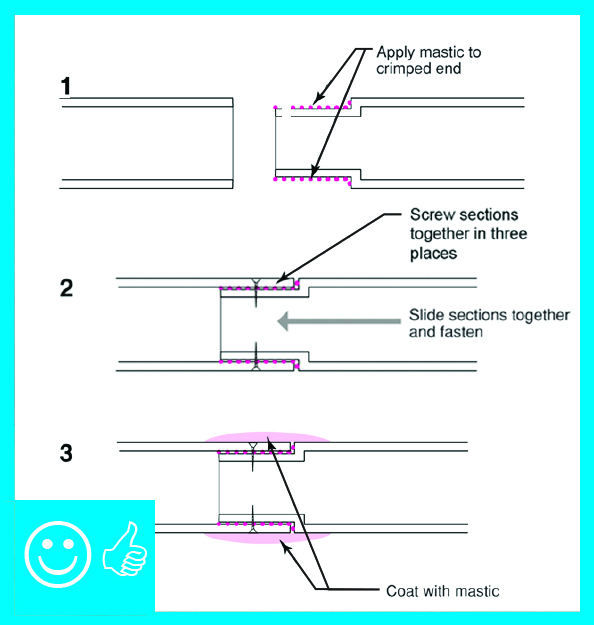
Image
Image
Image
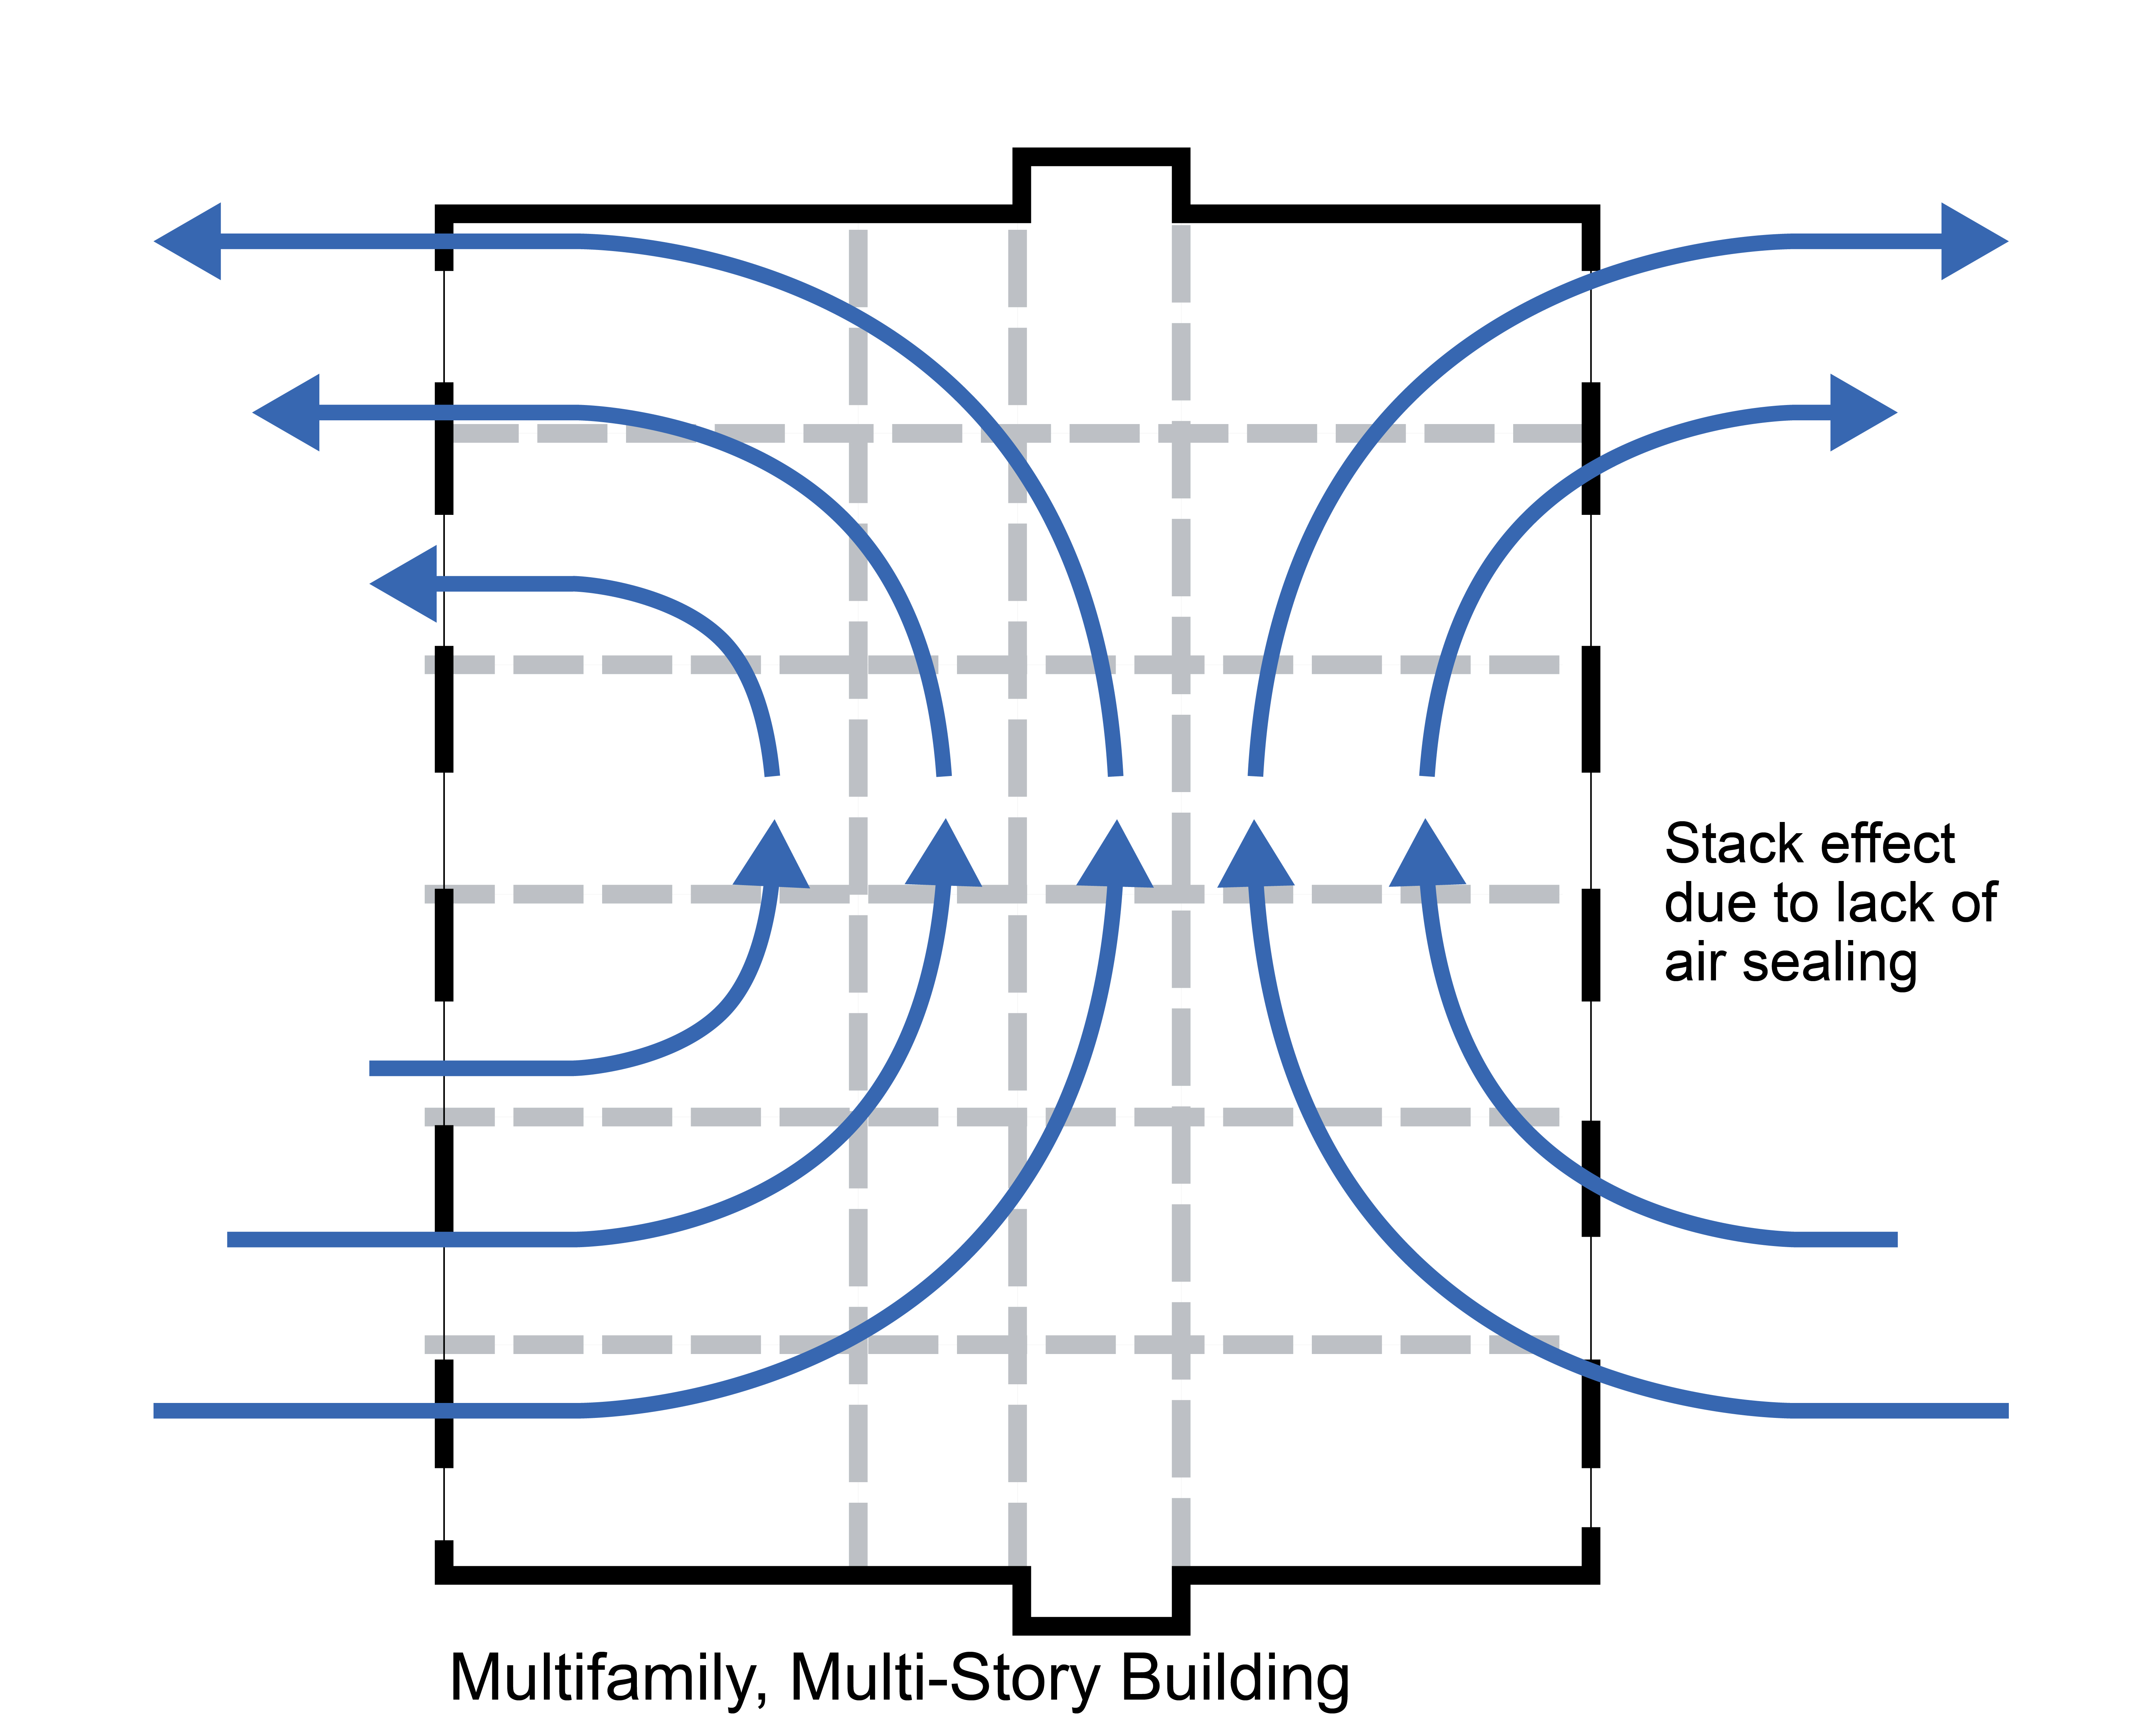
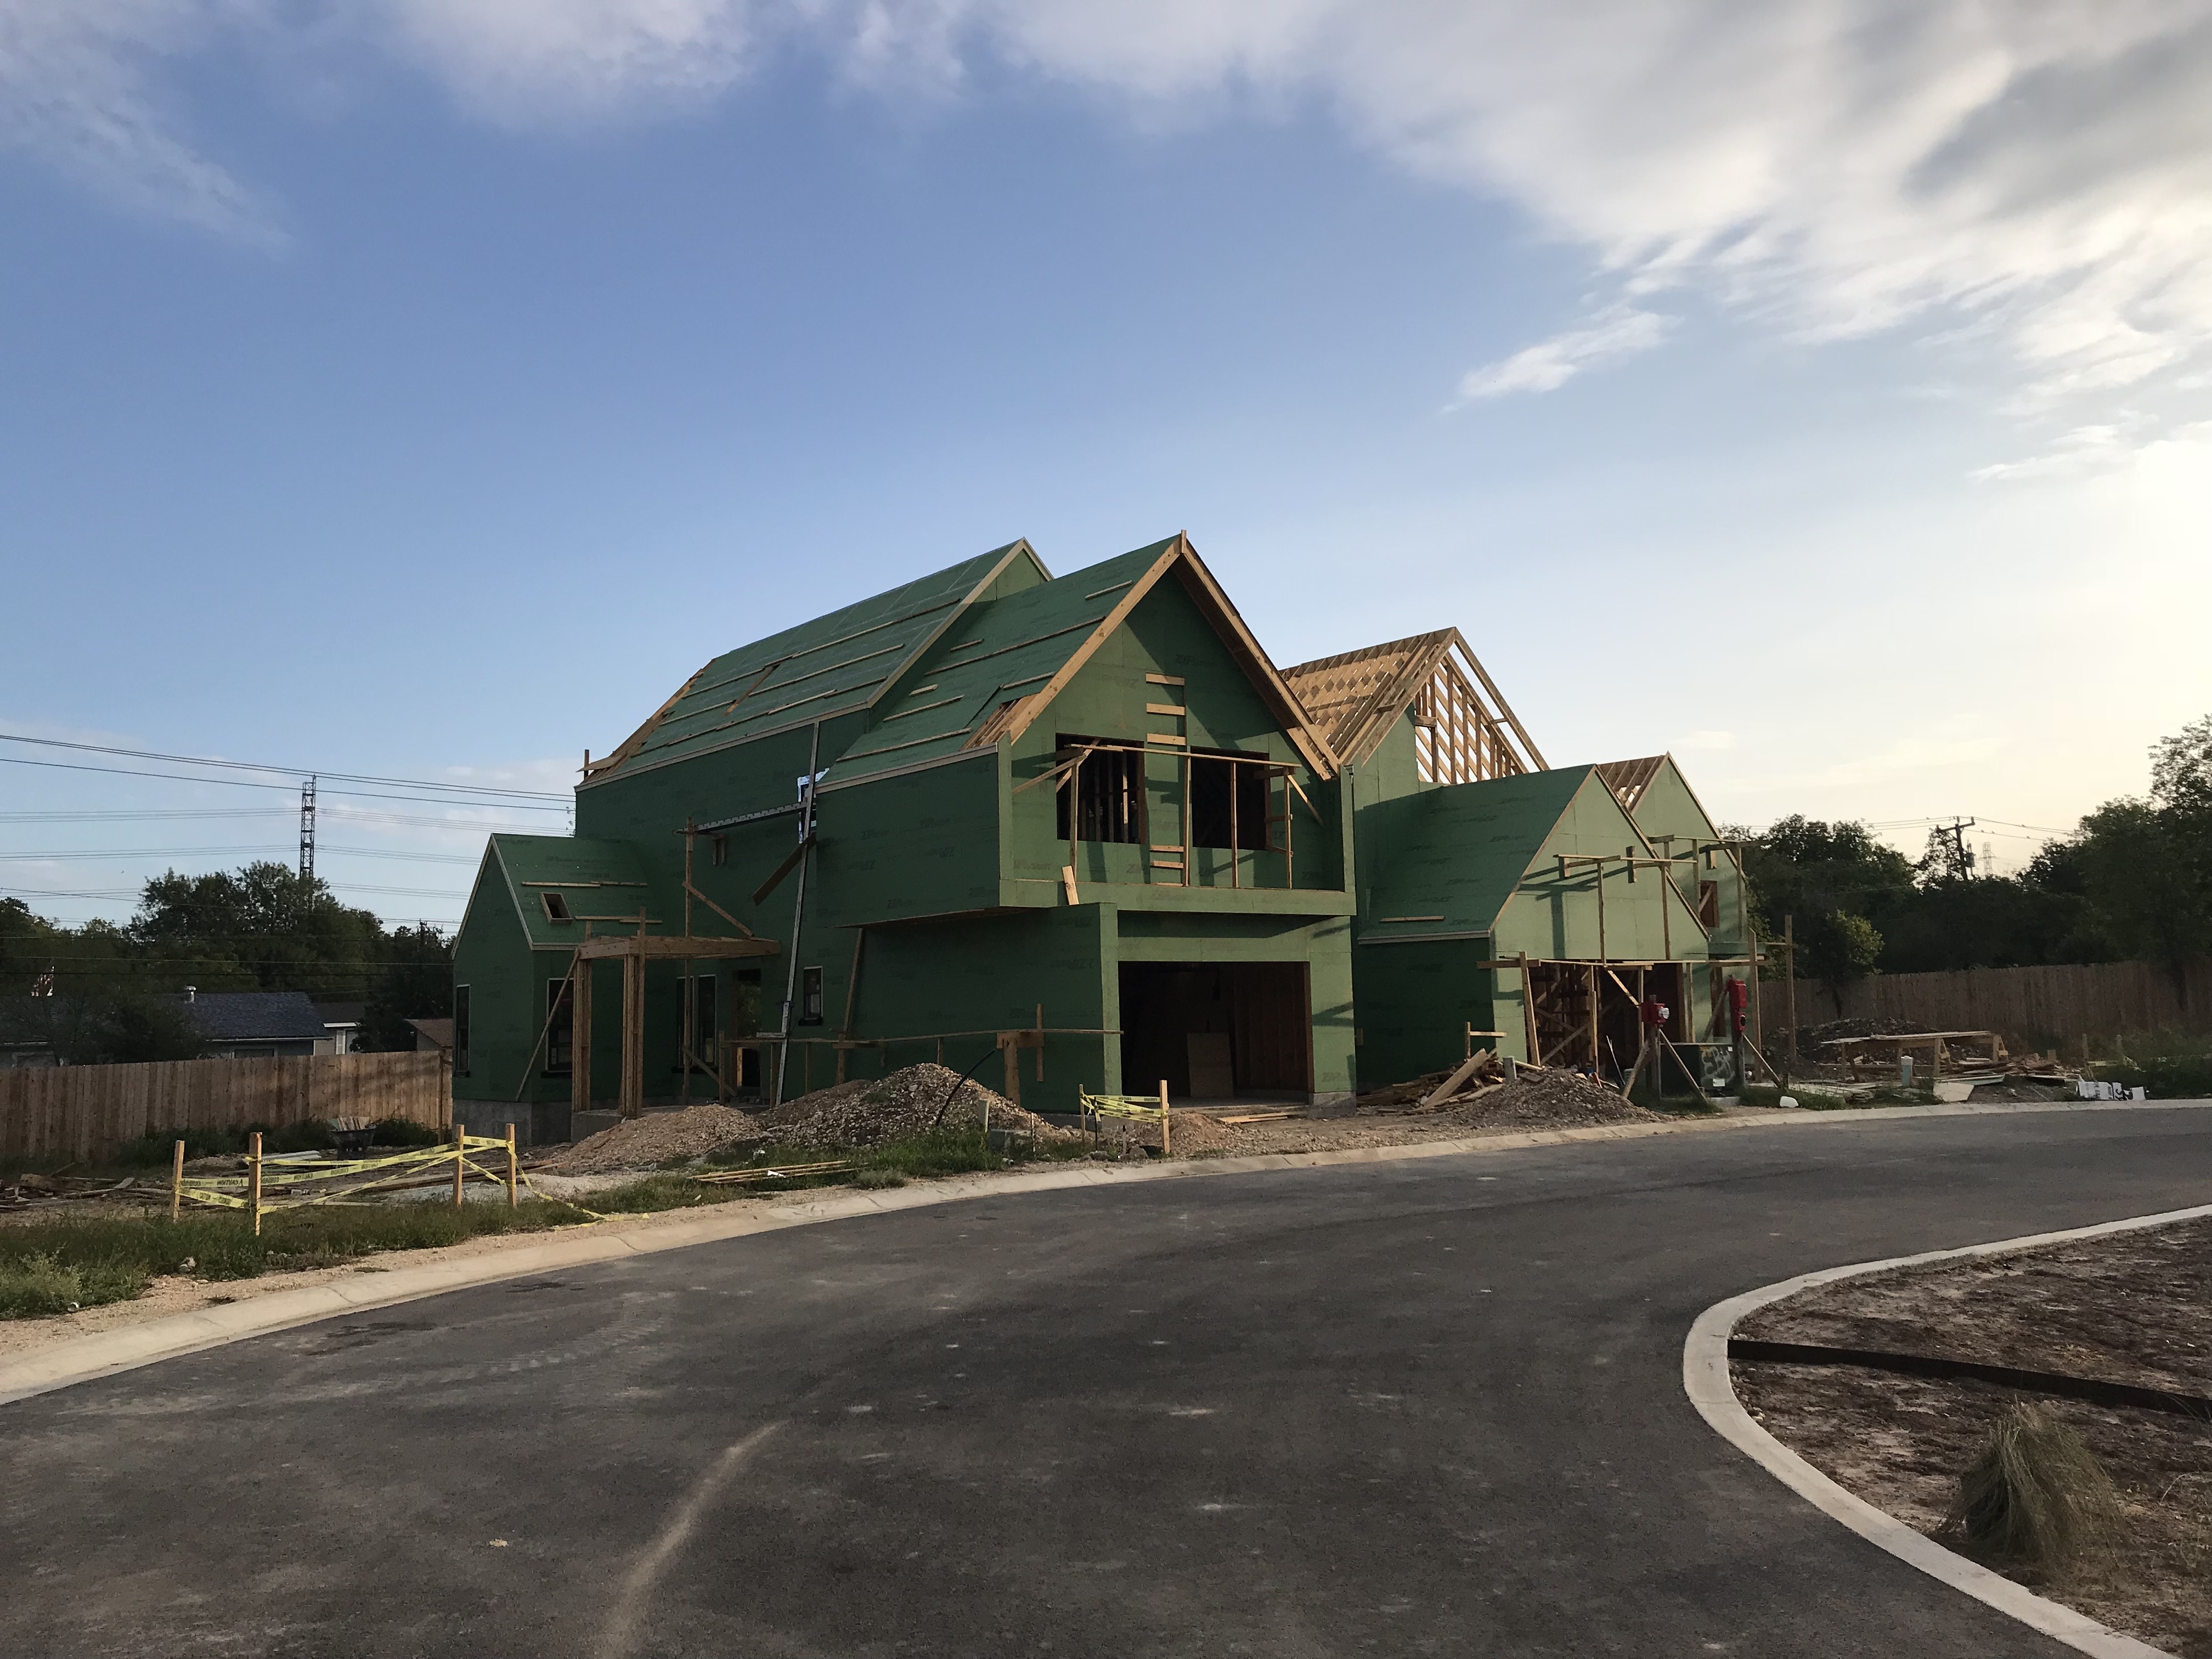
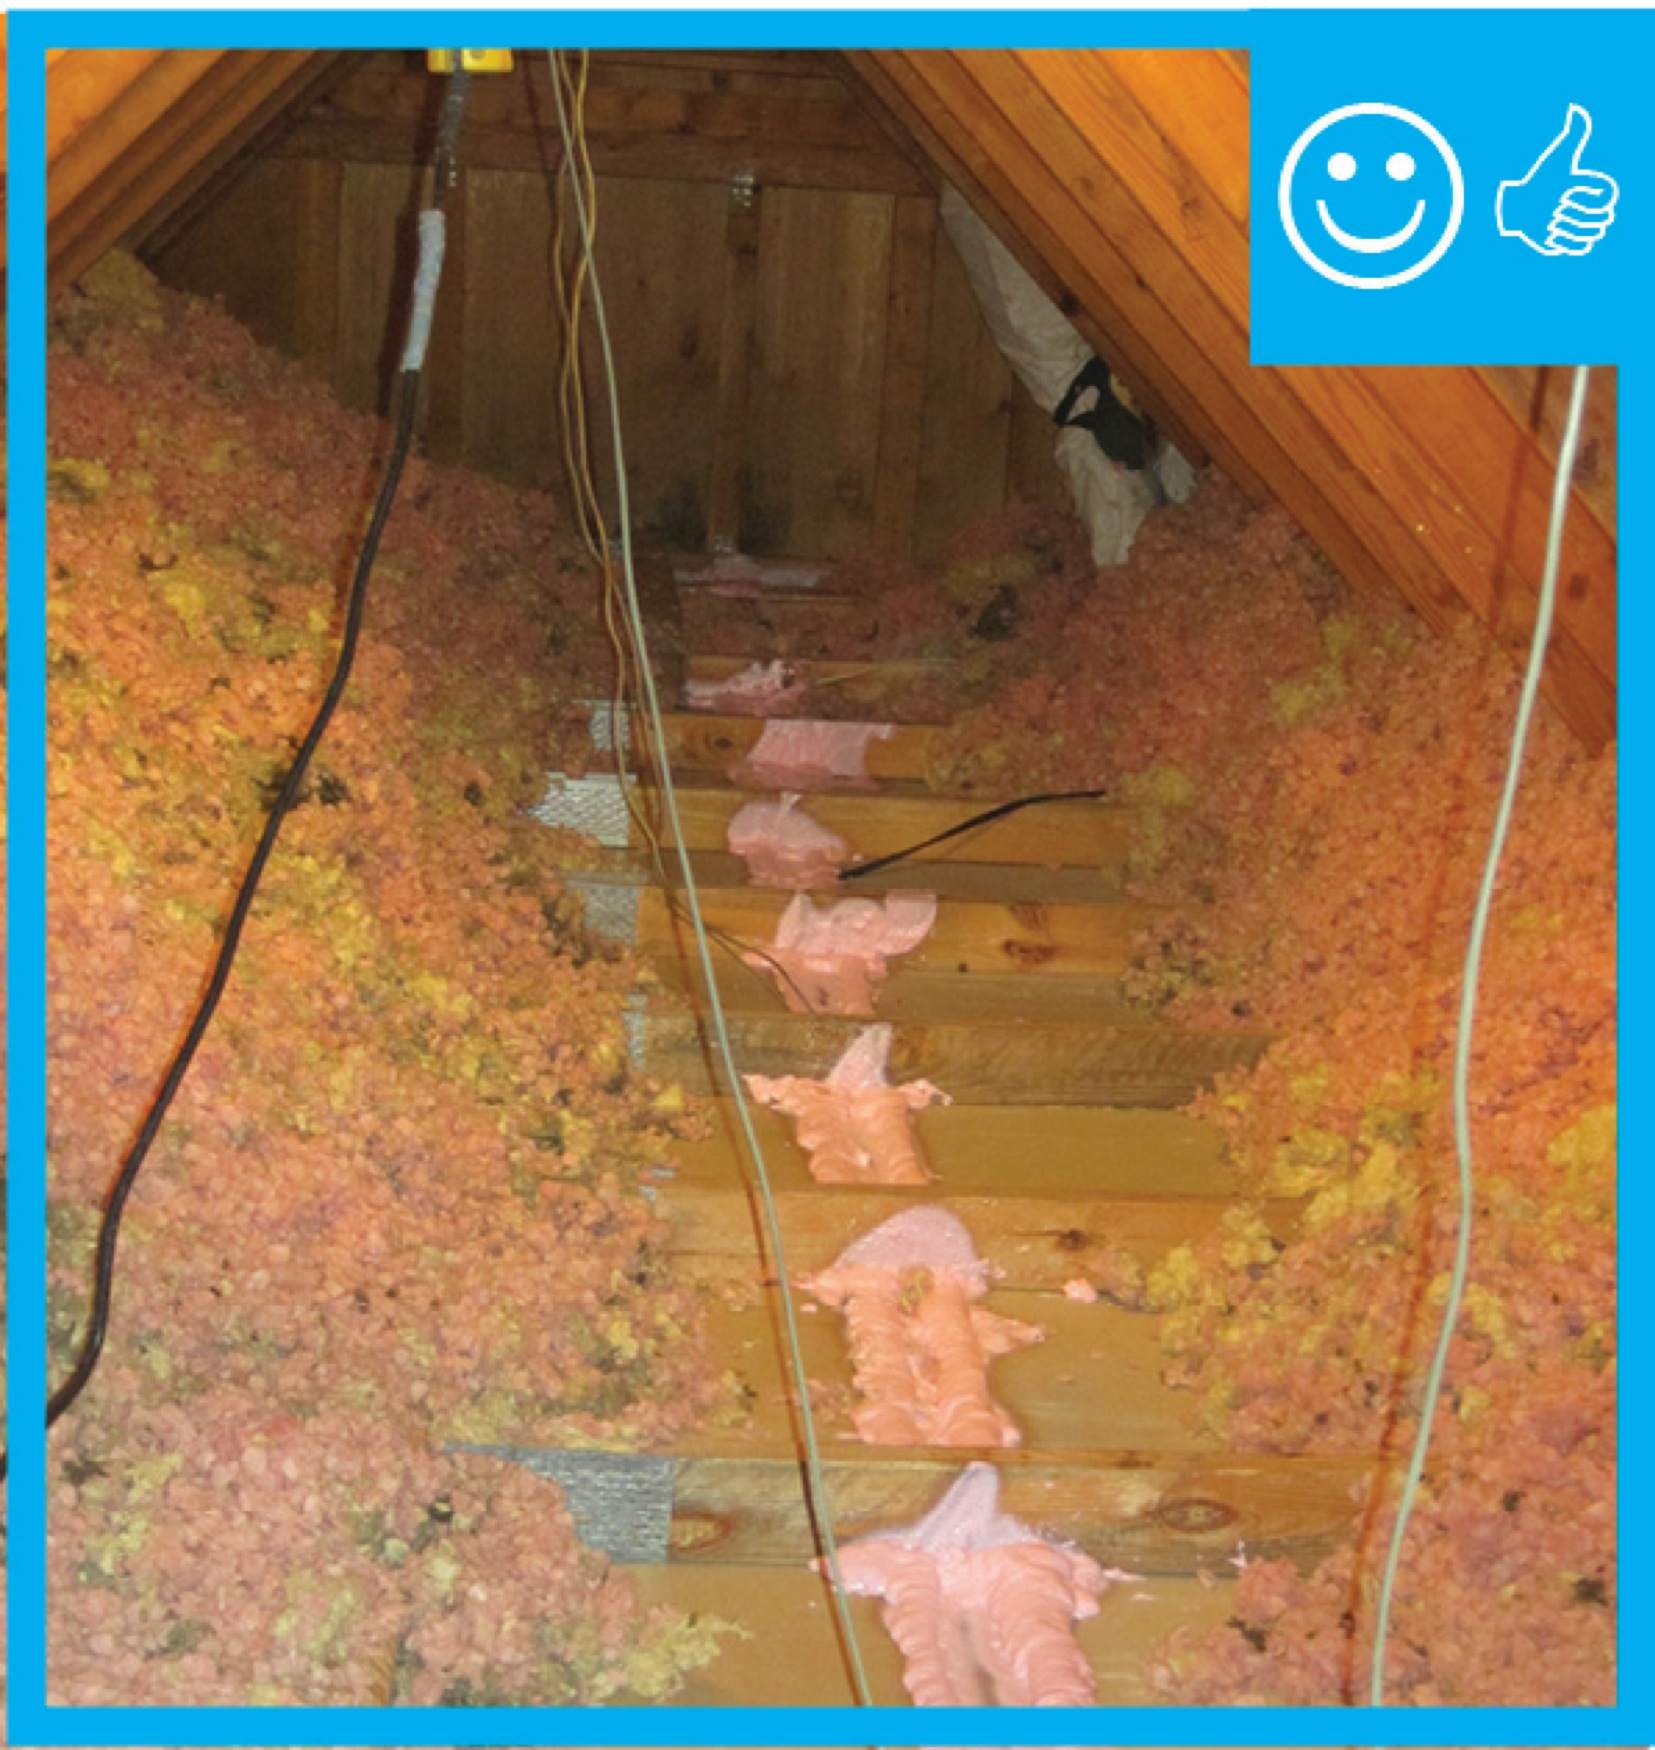
In a non-compartmentalized multistory multifamily building, the stack effect can pull outside air in through leaks at lower floors and push air out through leaks in the upper envelope.
Image
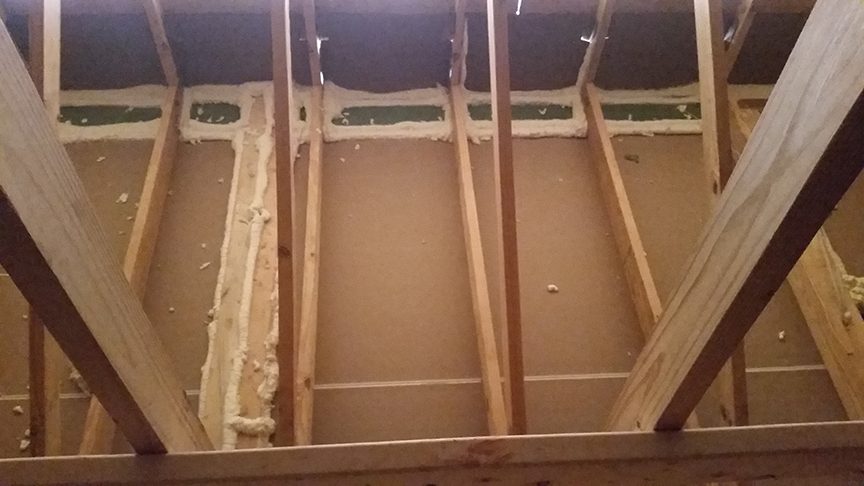
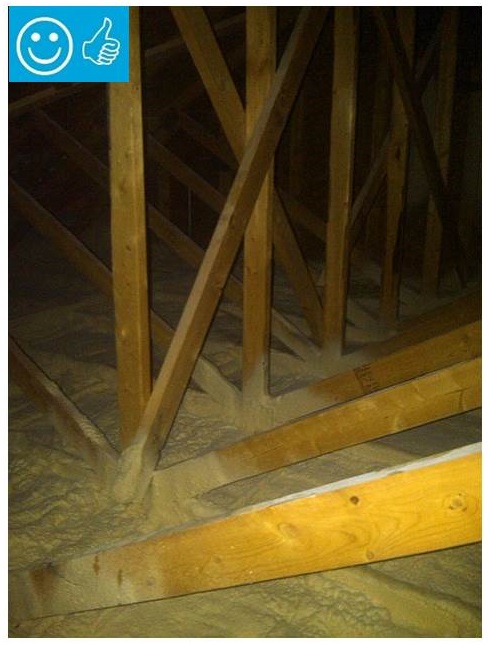
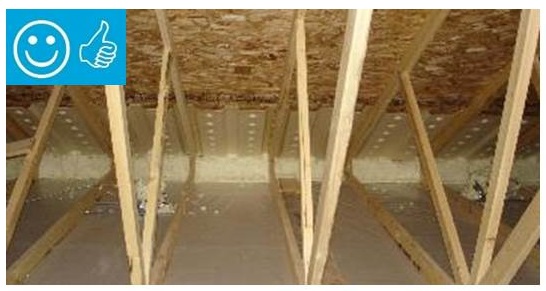
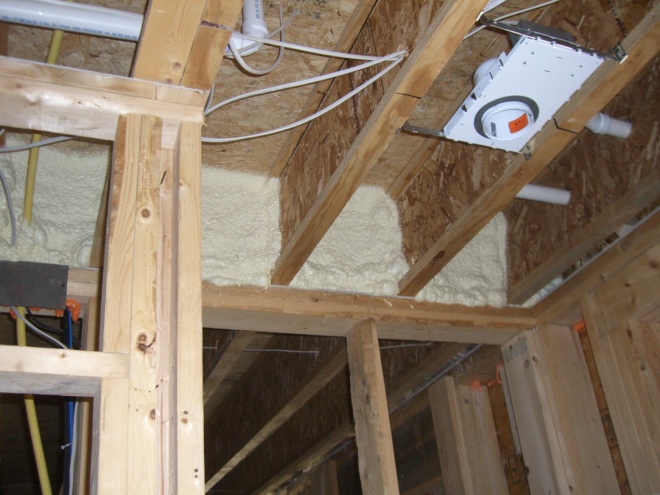
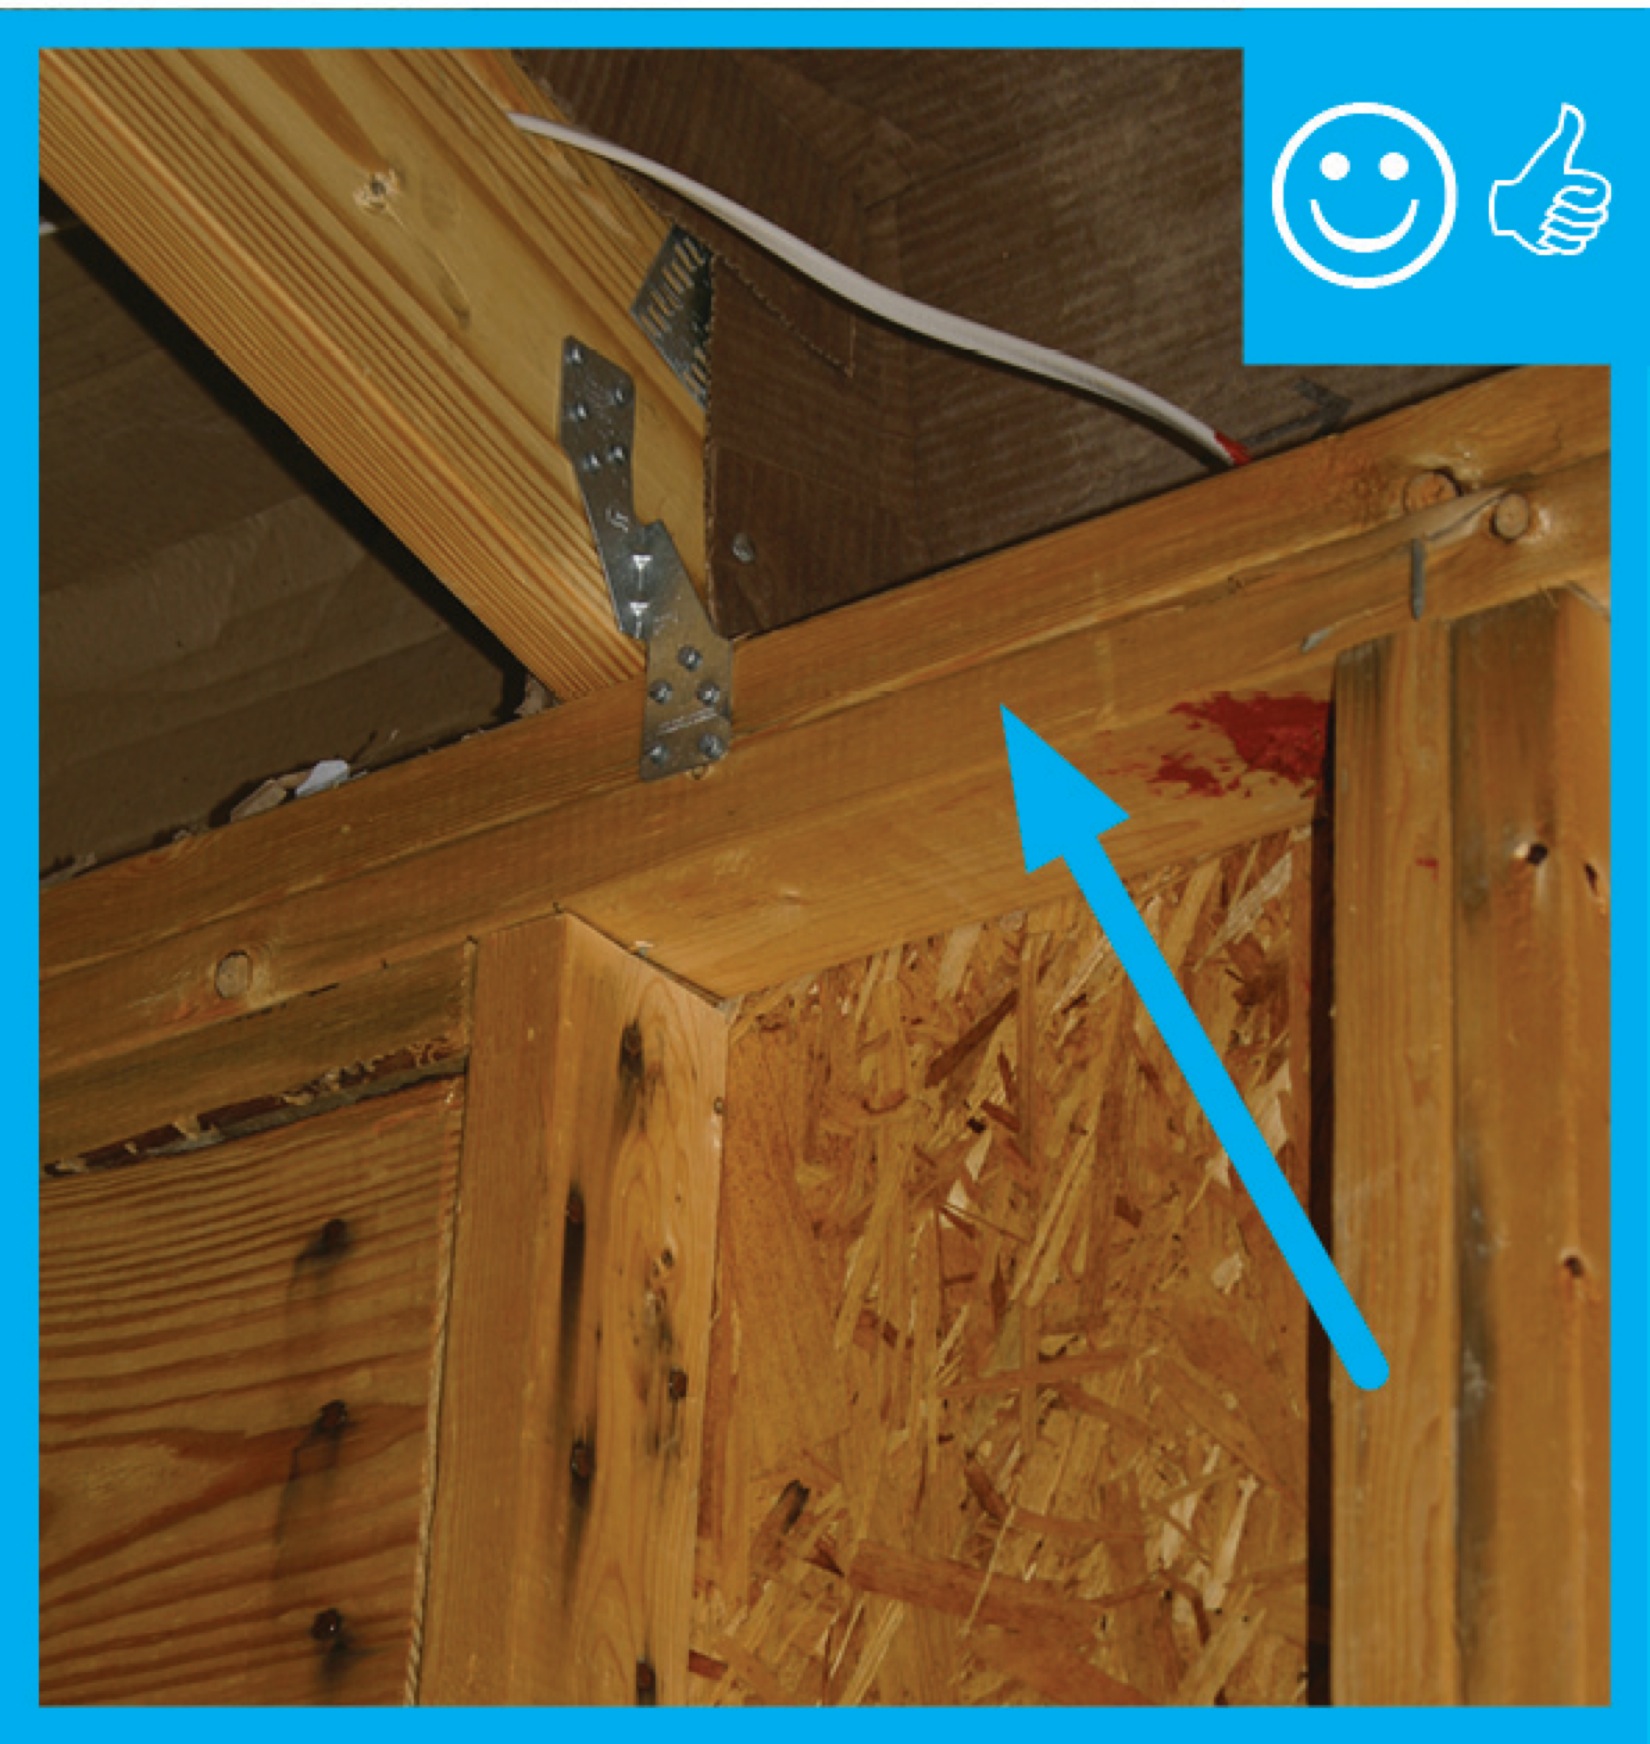
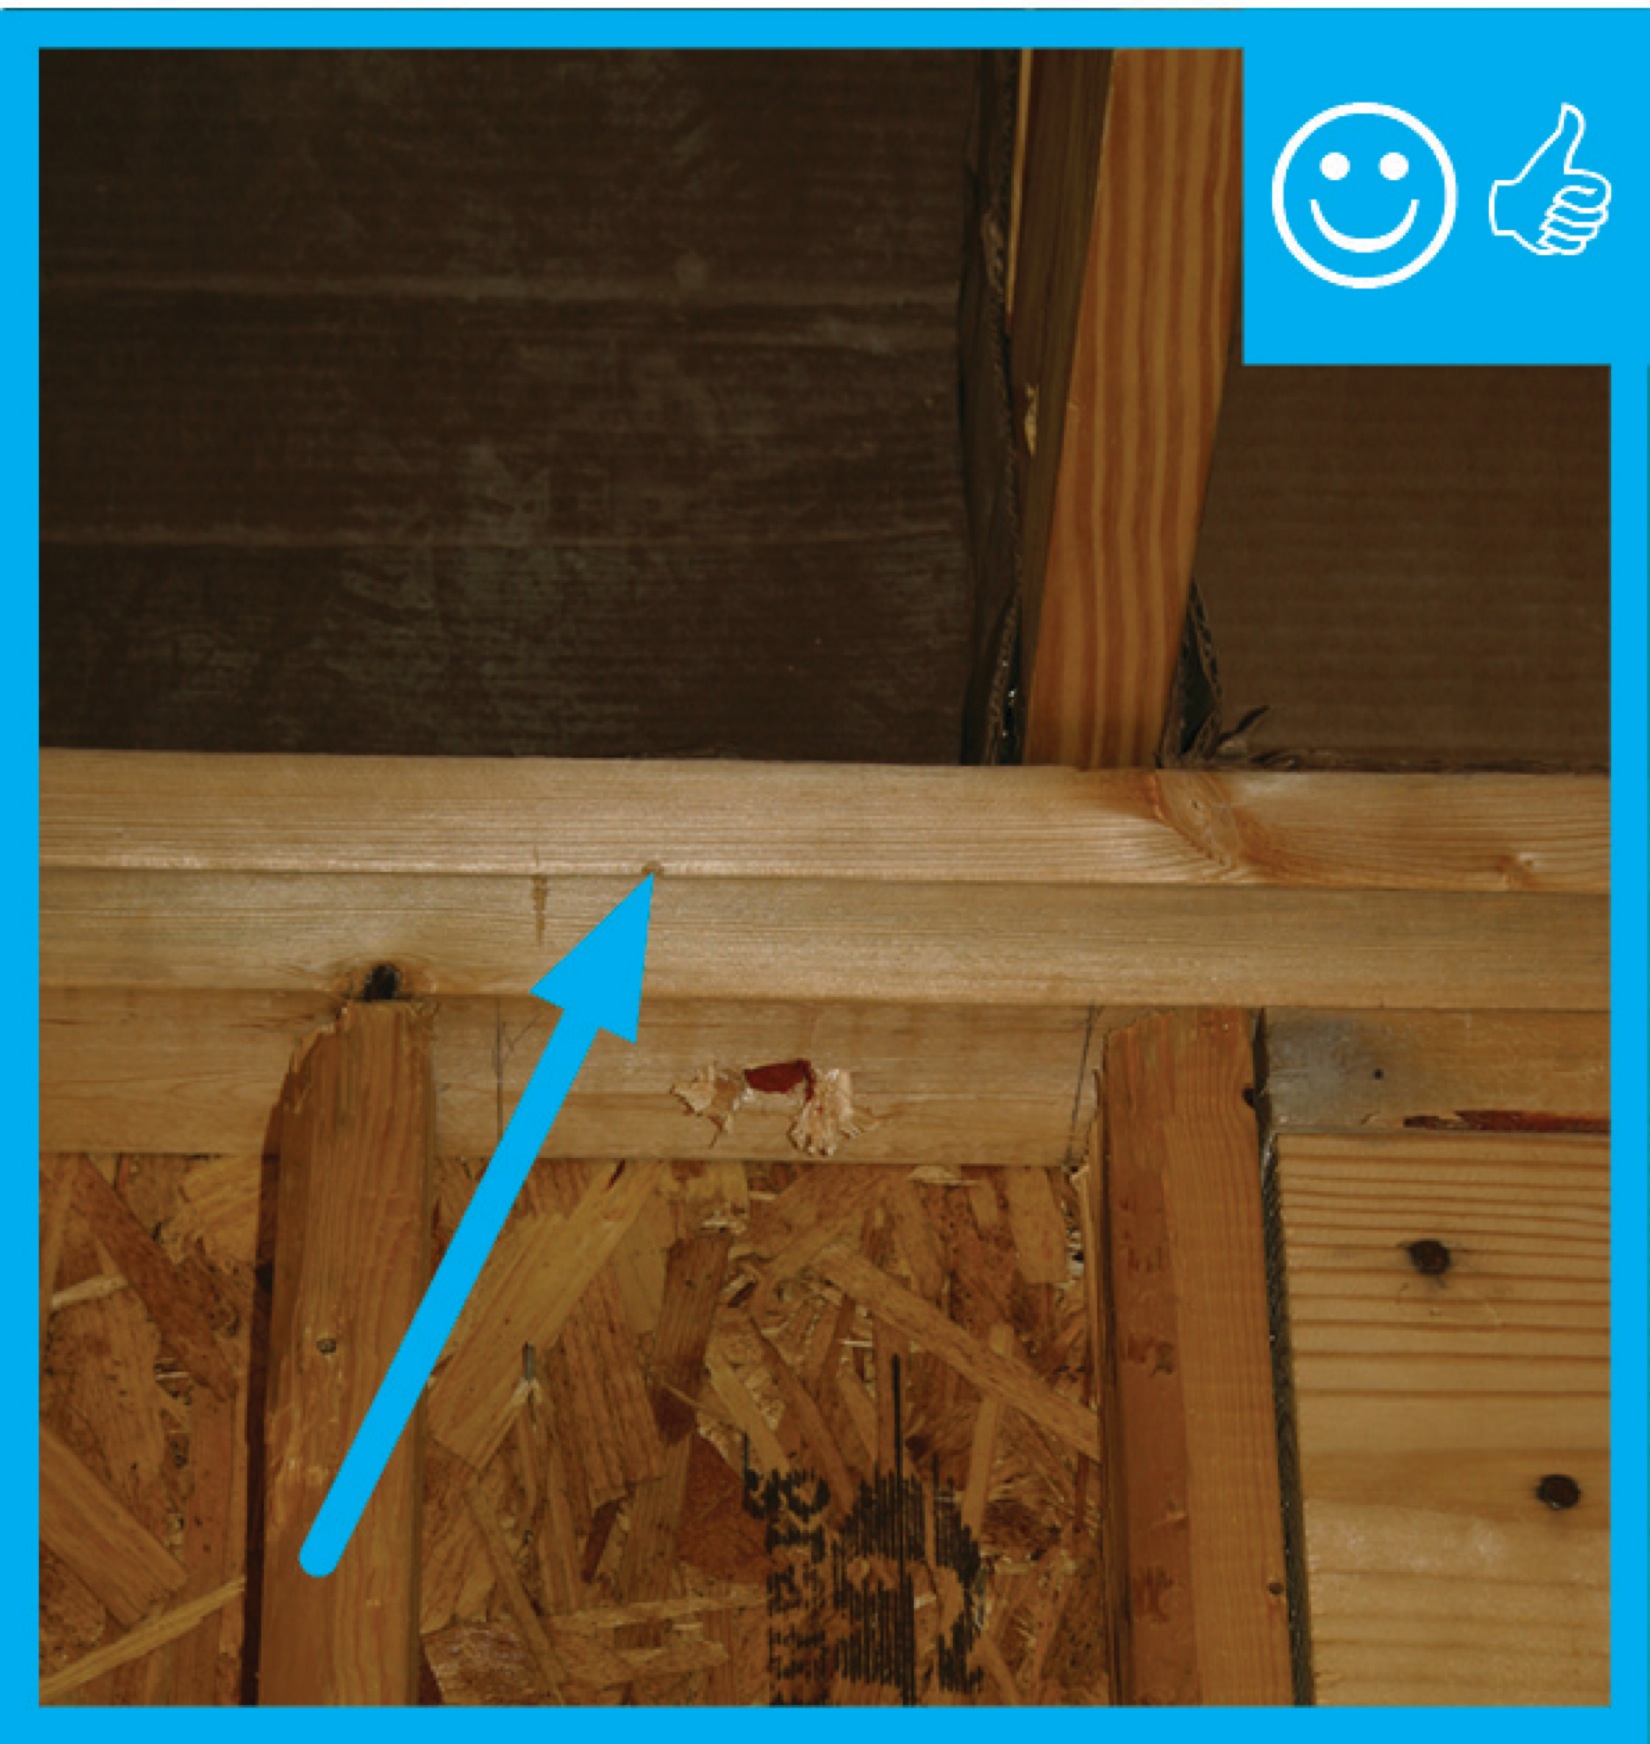
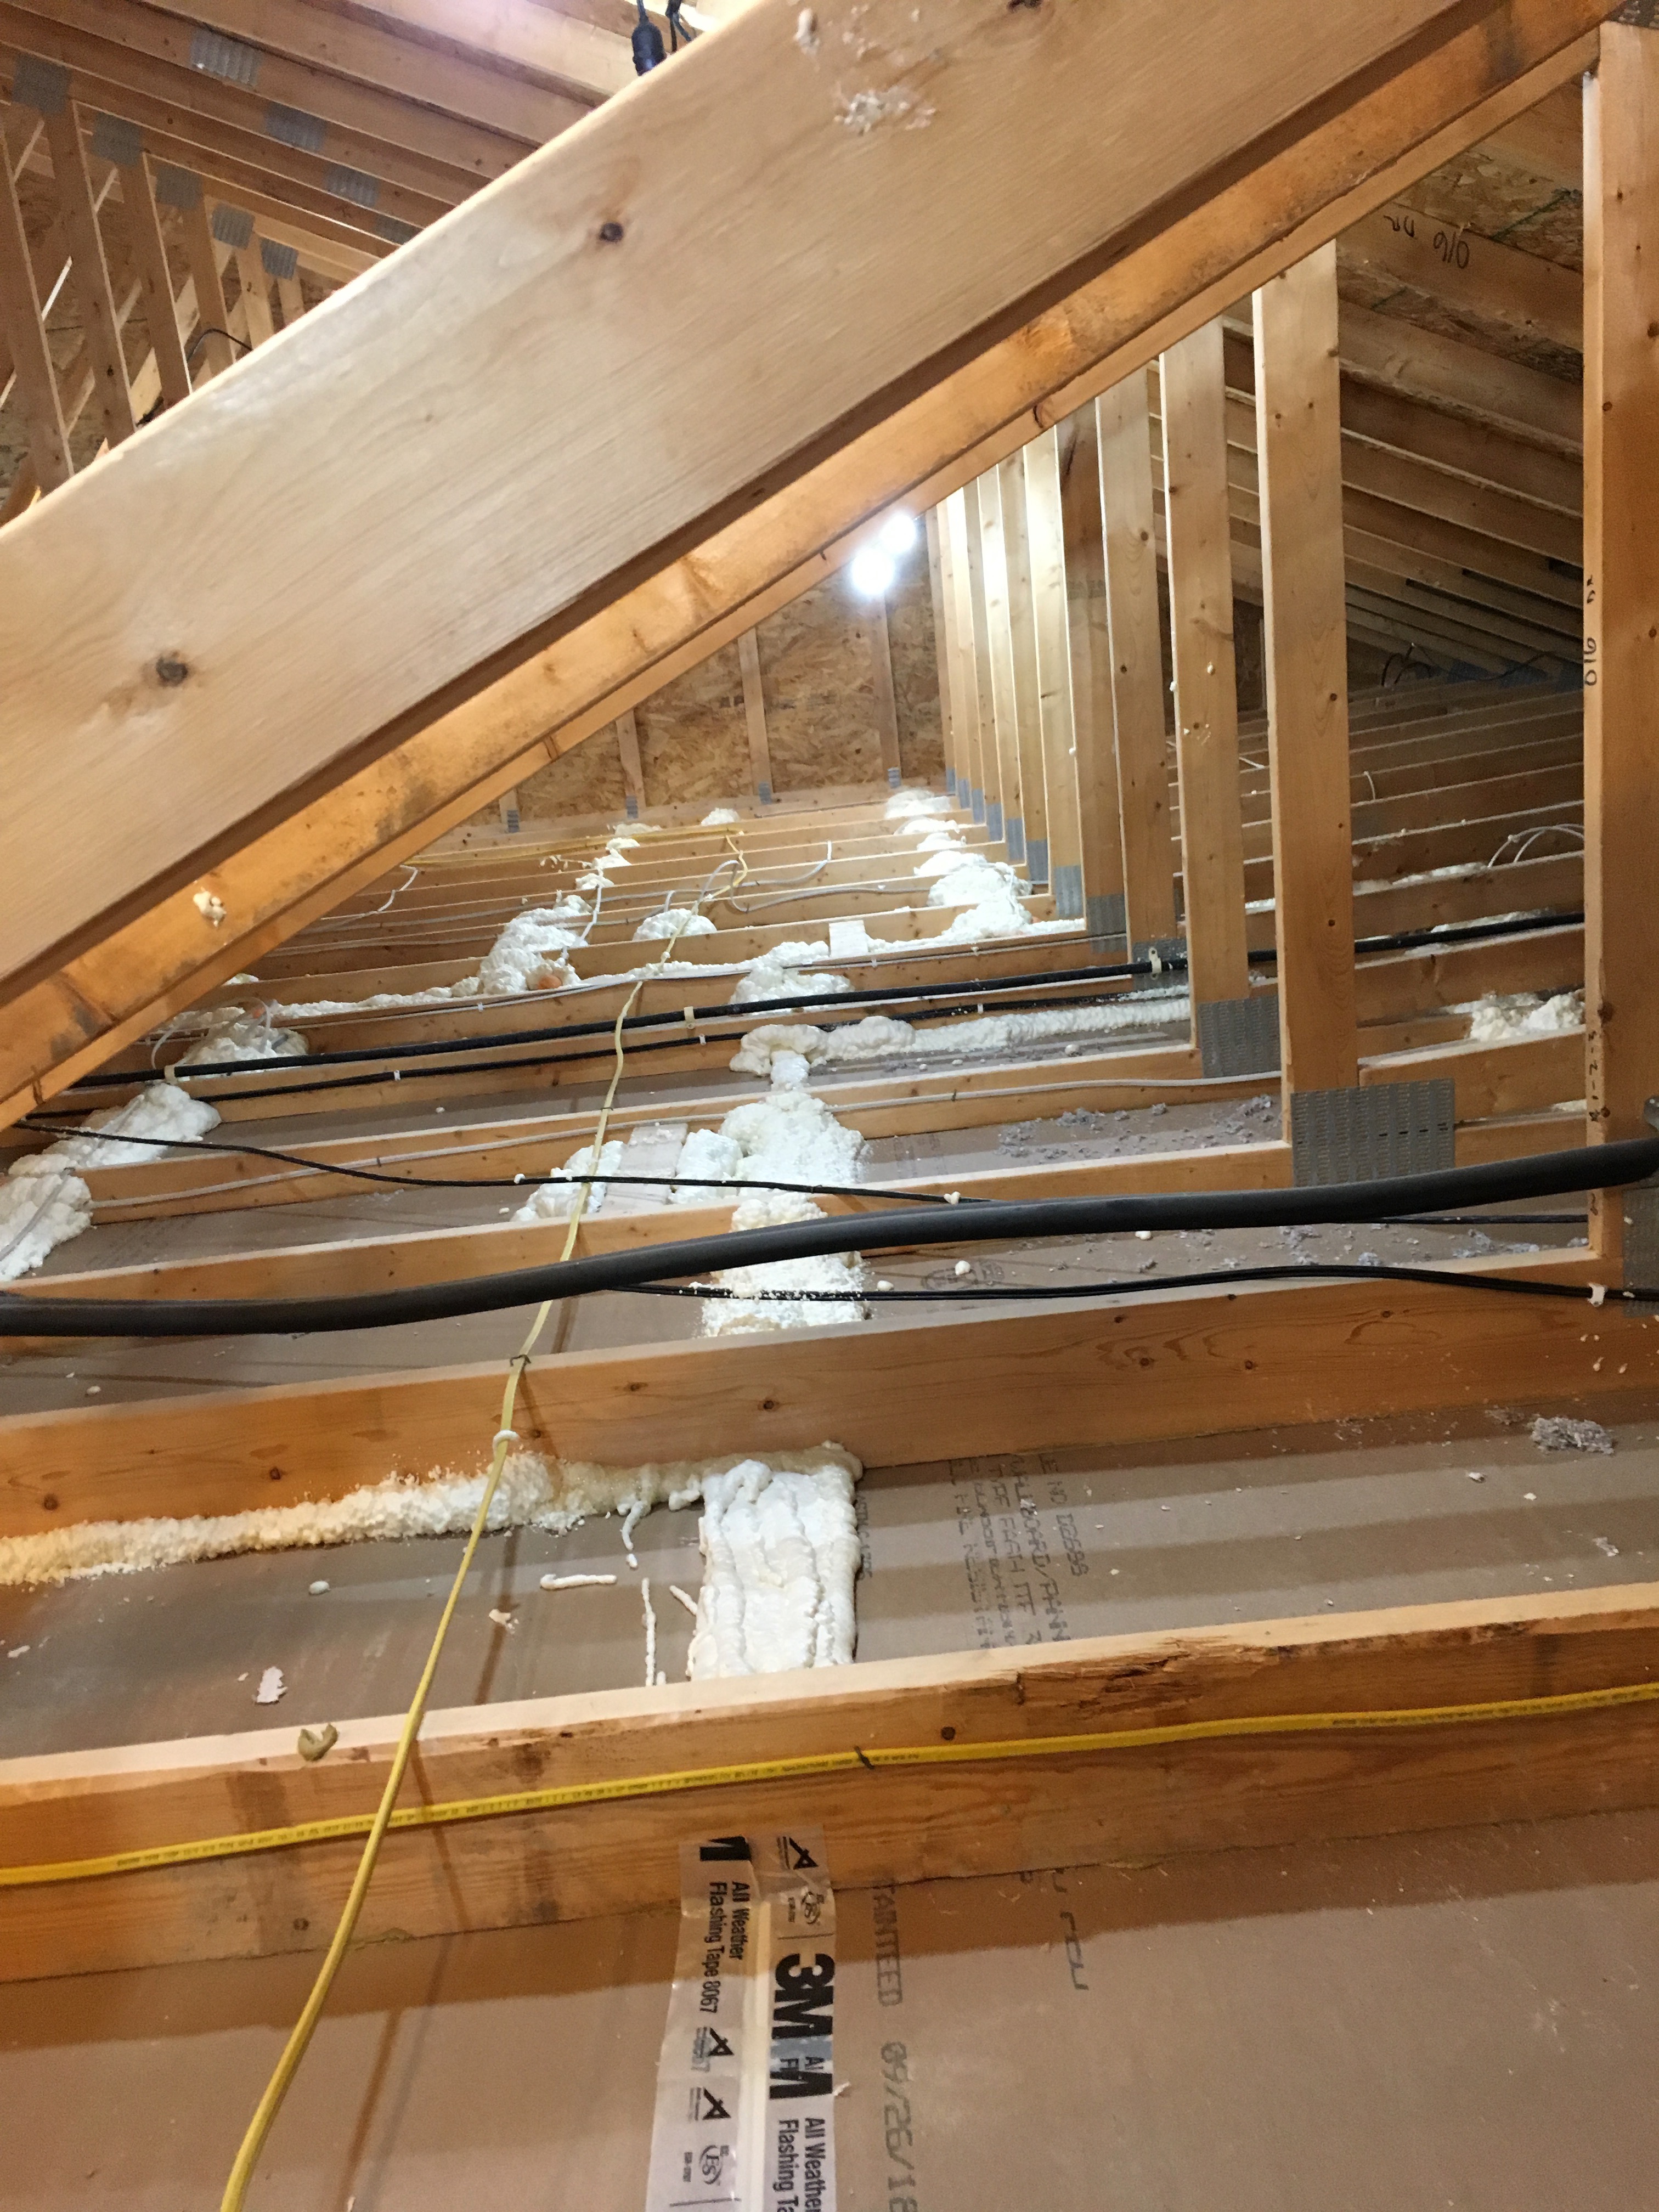
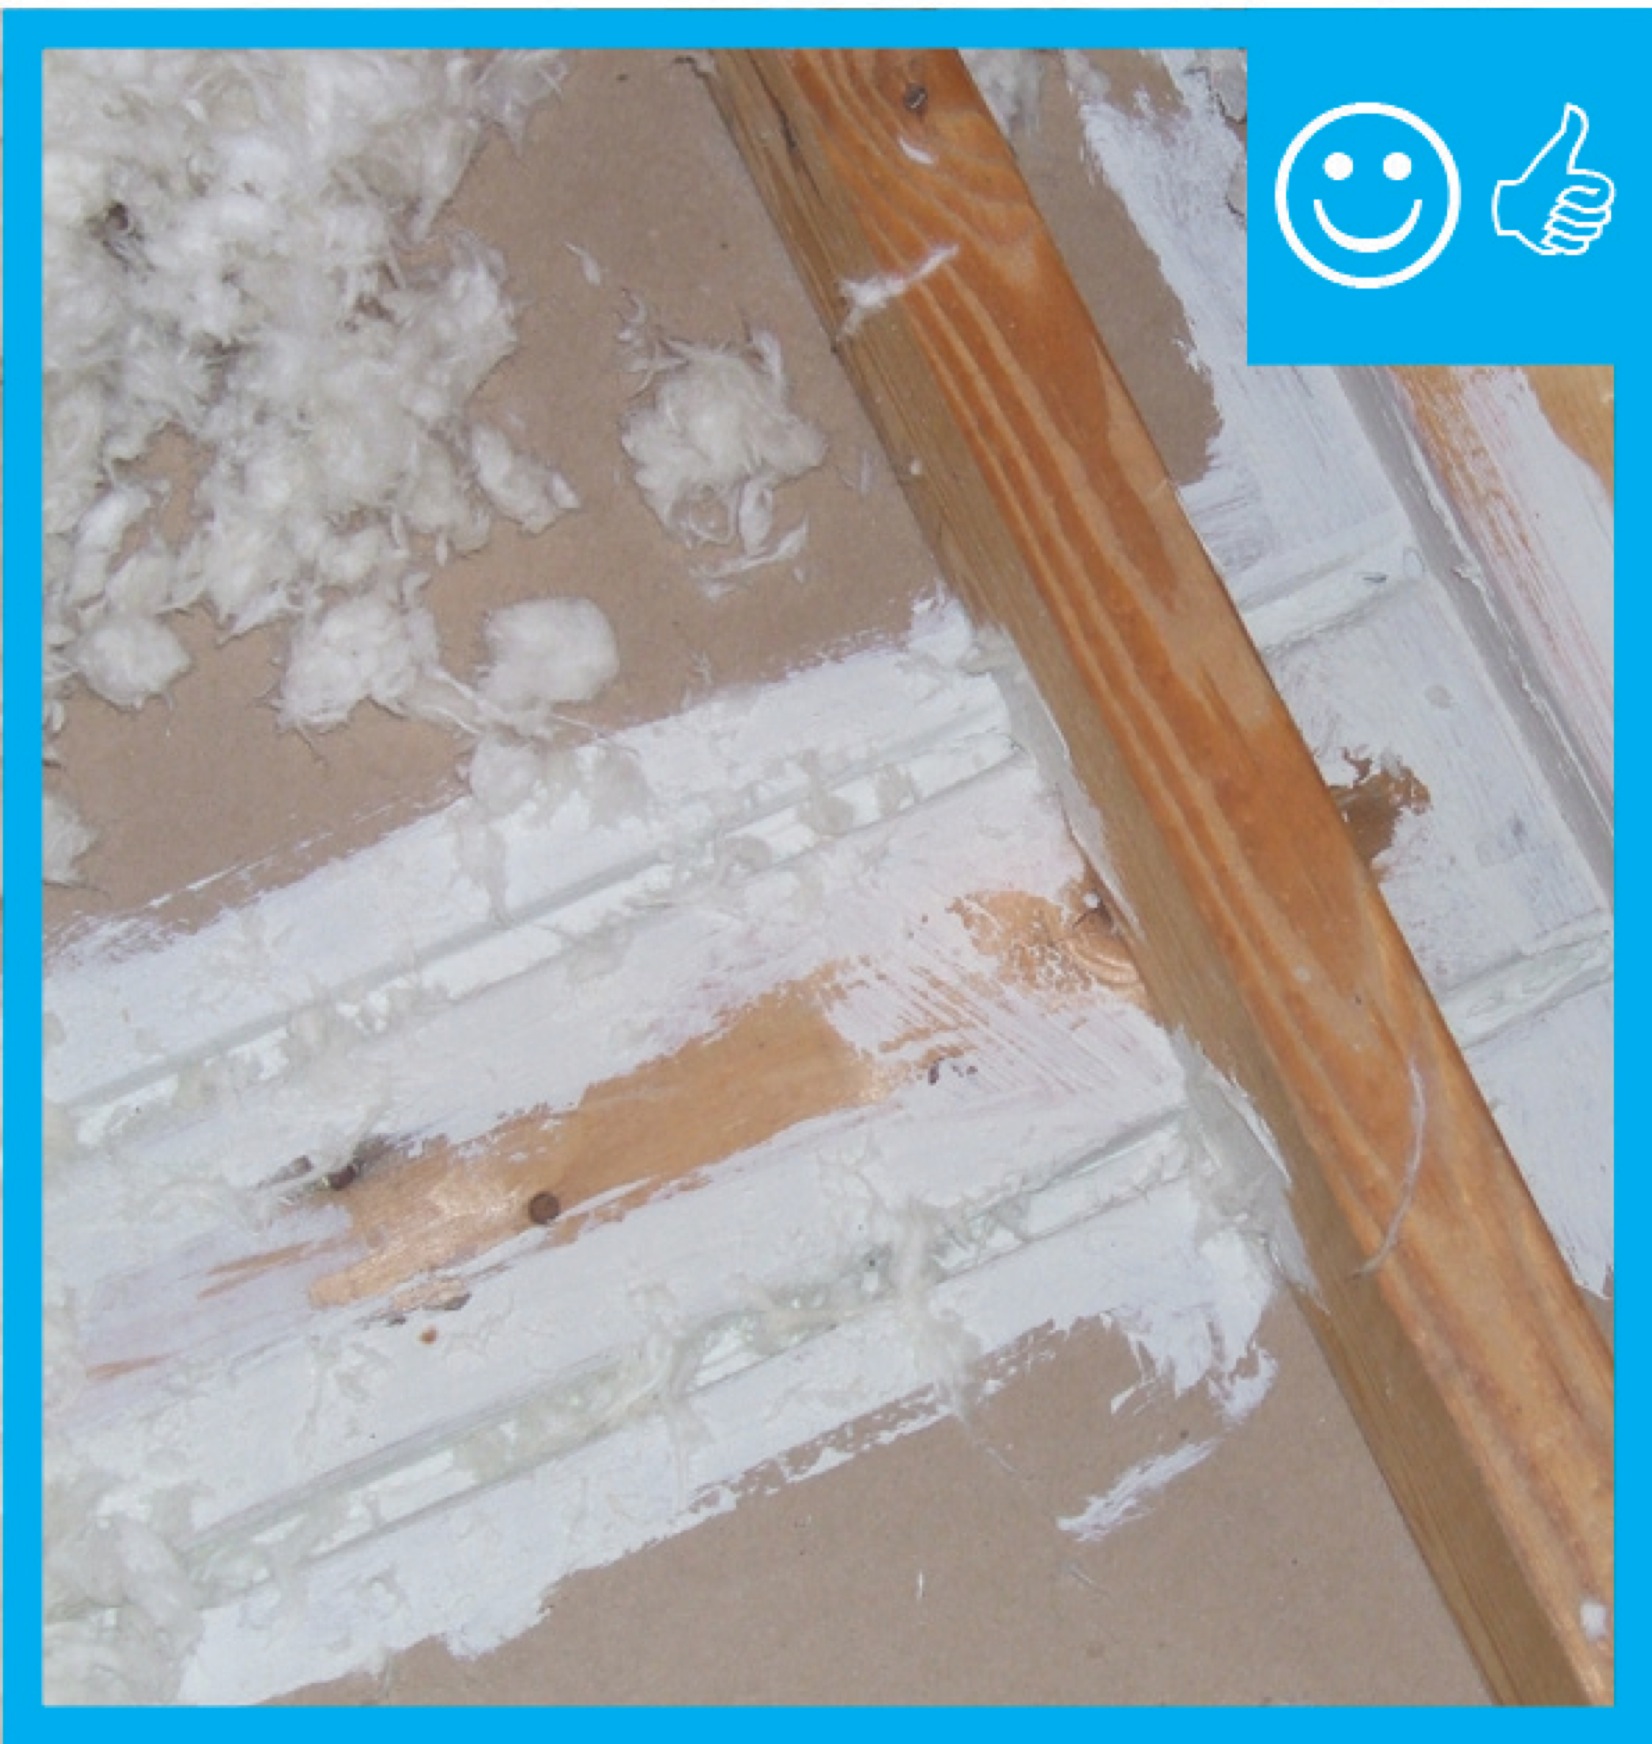
In the attic, all of the top plate seams are sealed with canned spray foam before covering the ceiling deck with blown fiberglass.
Image
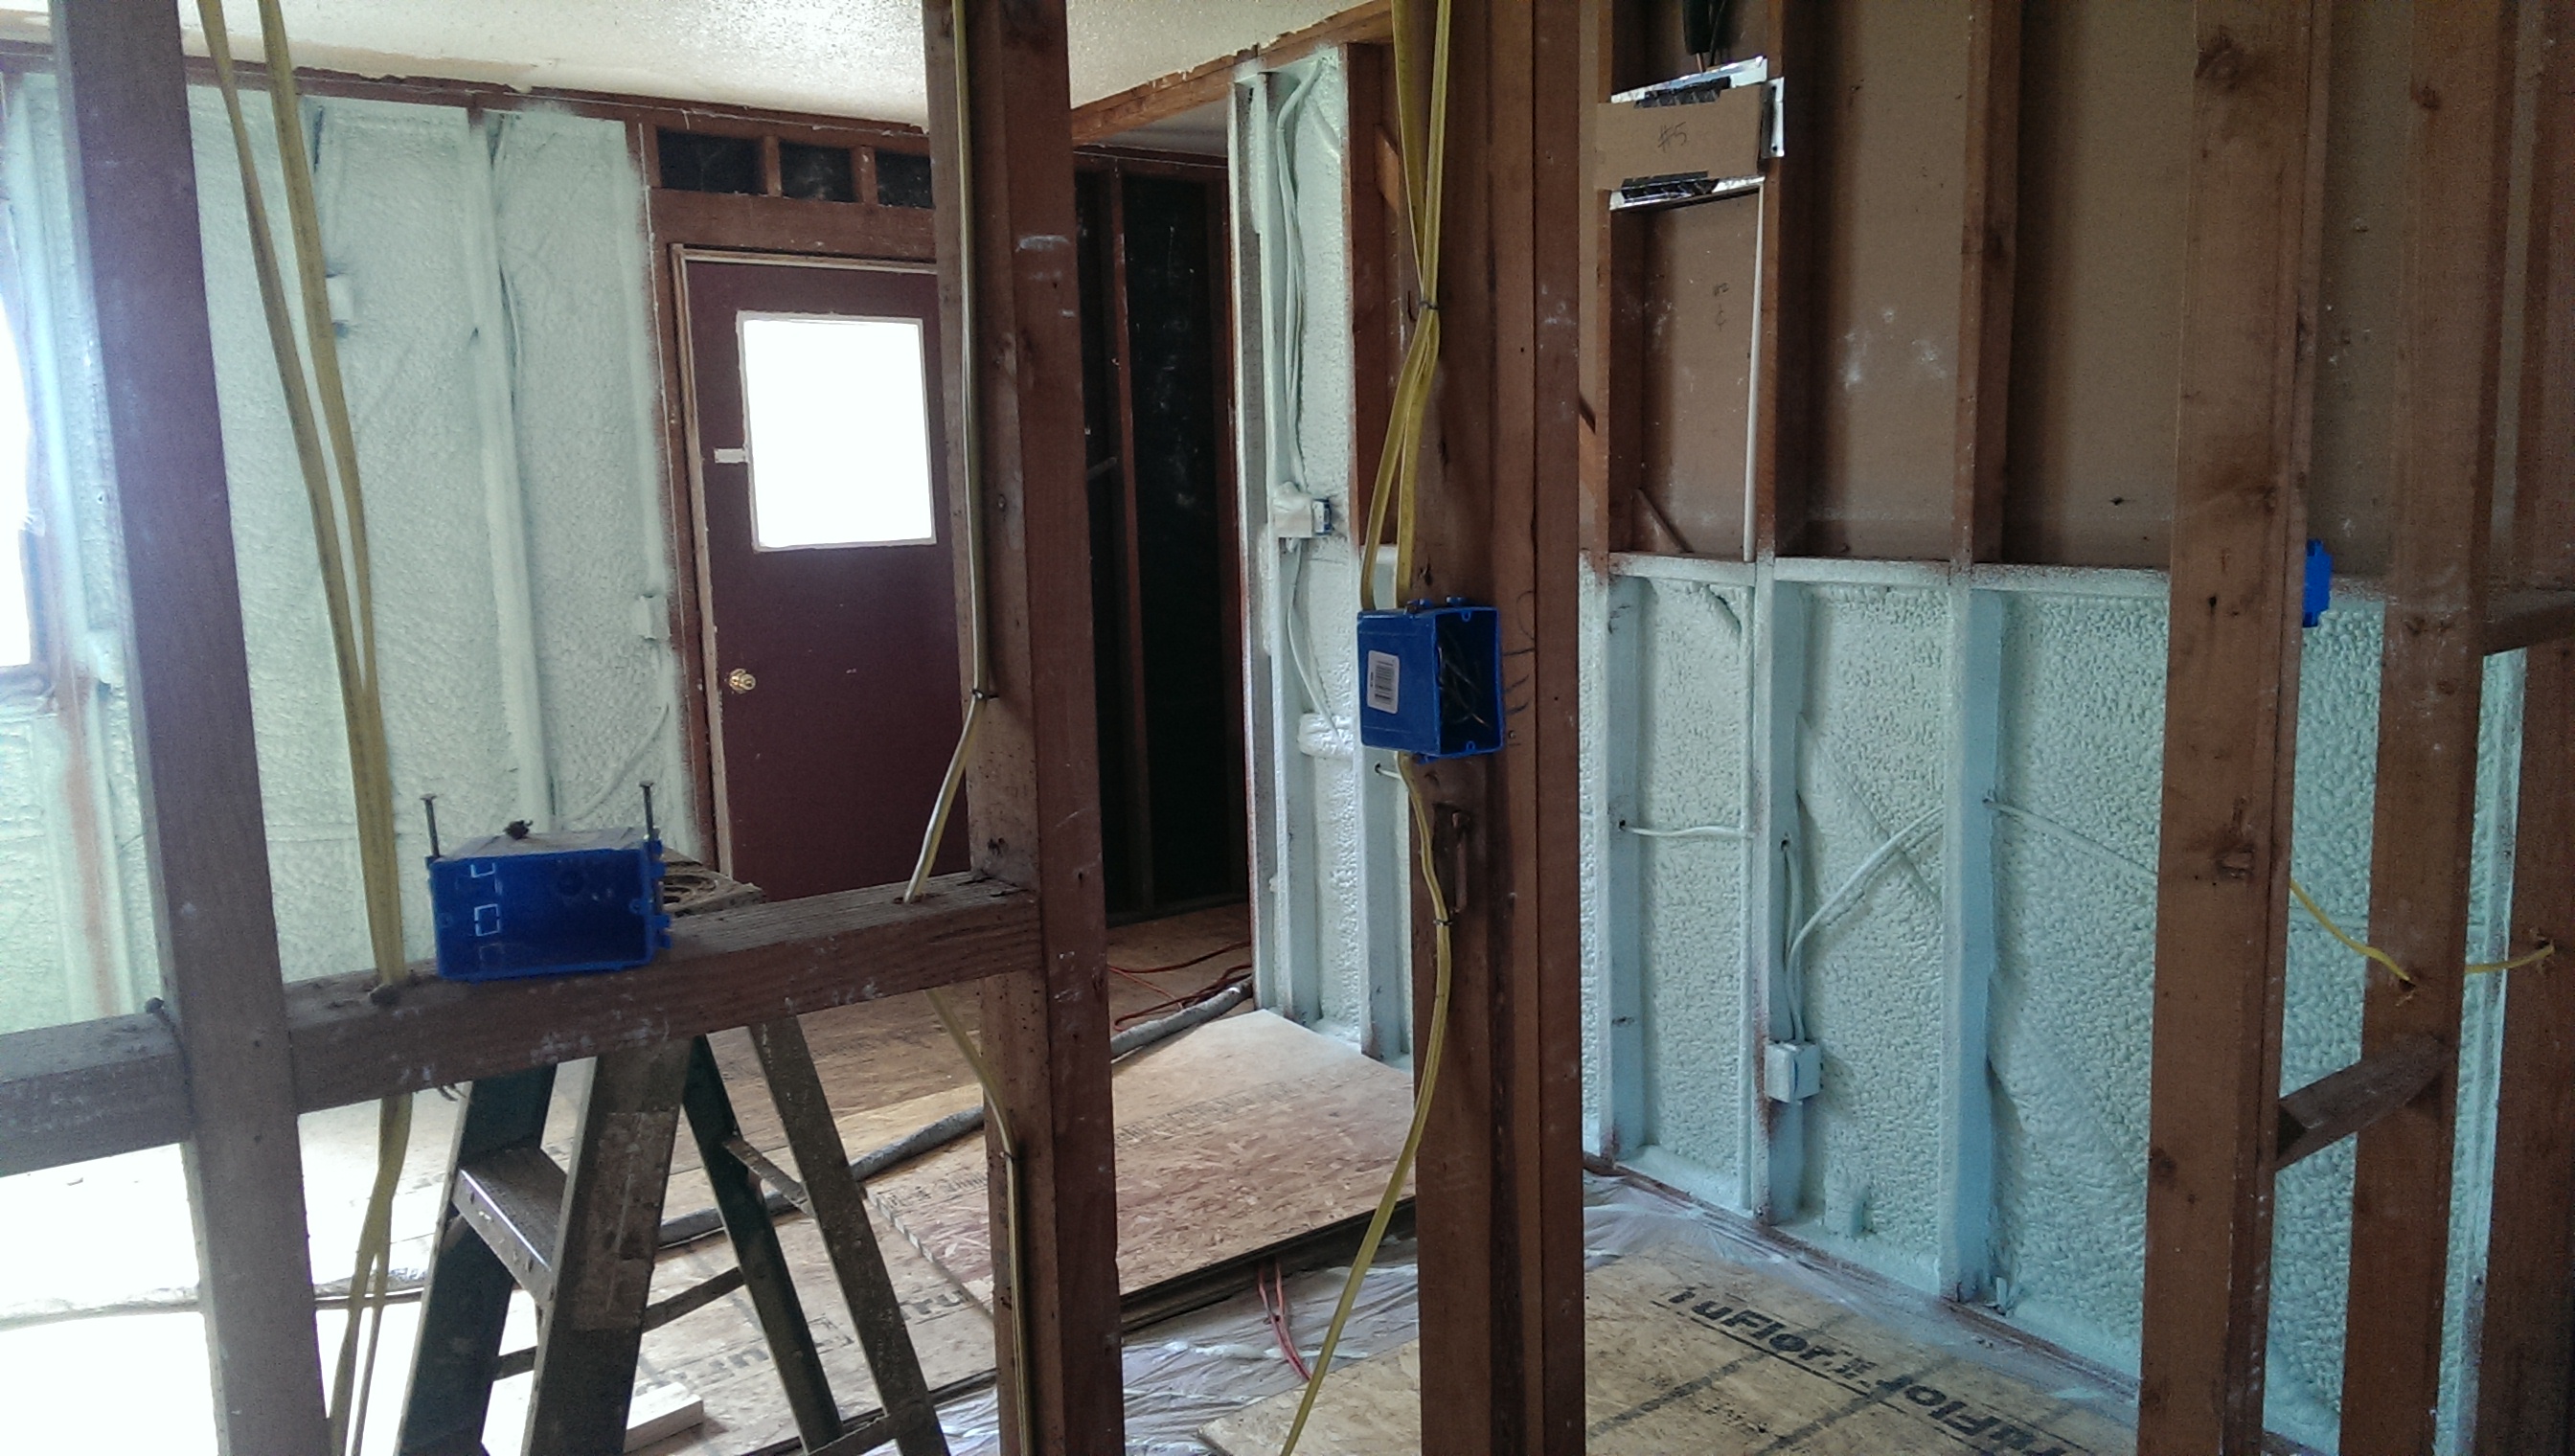
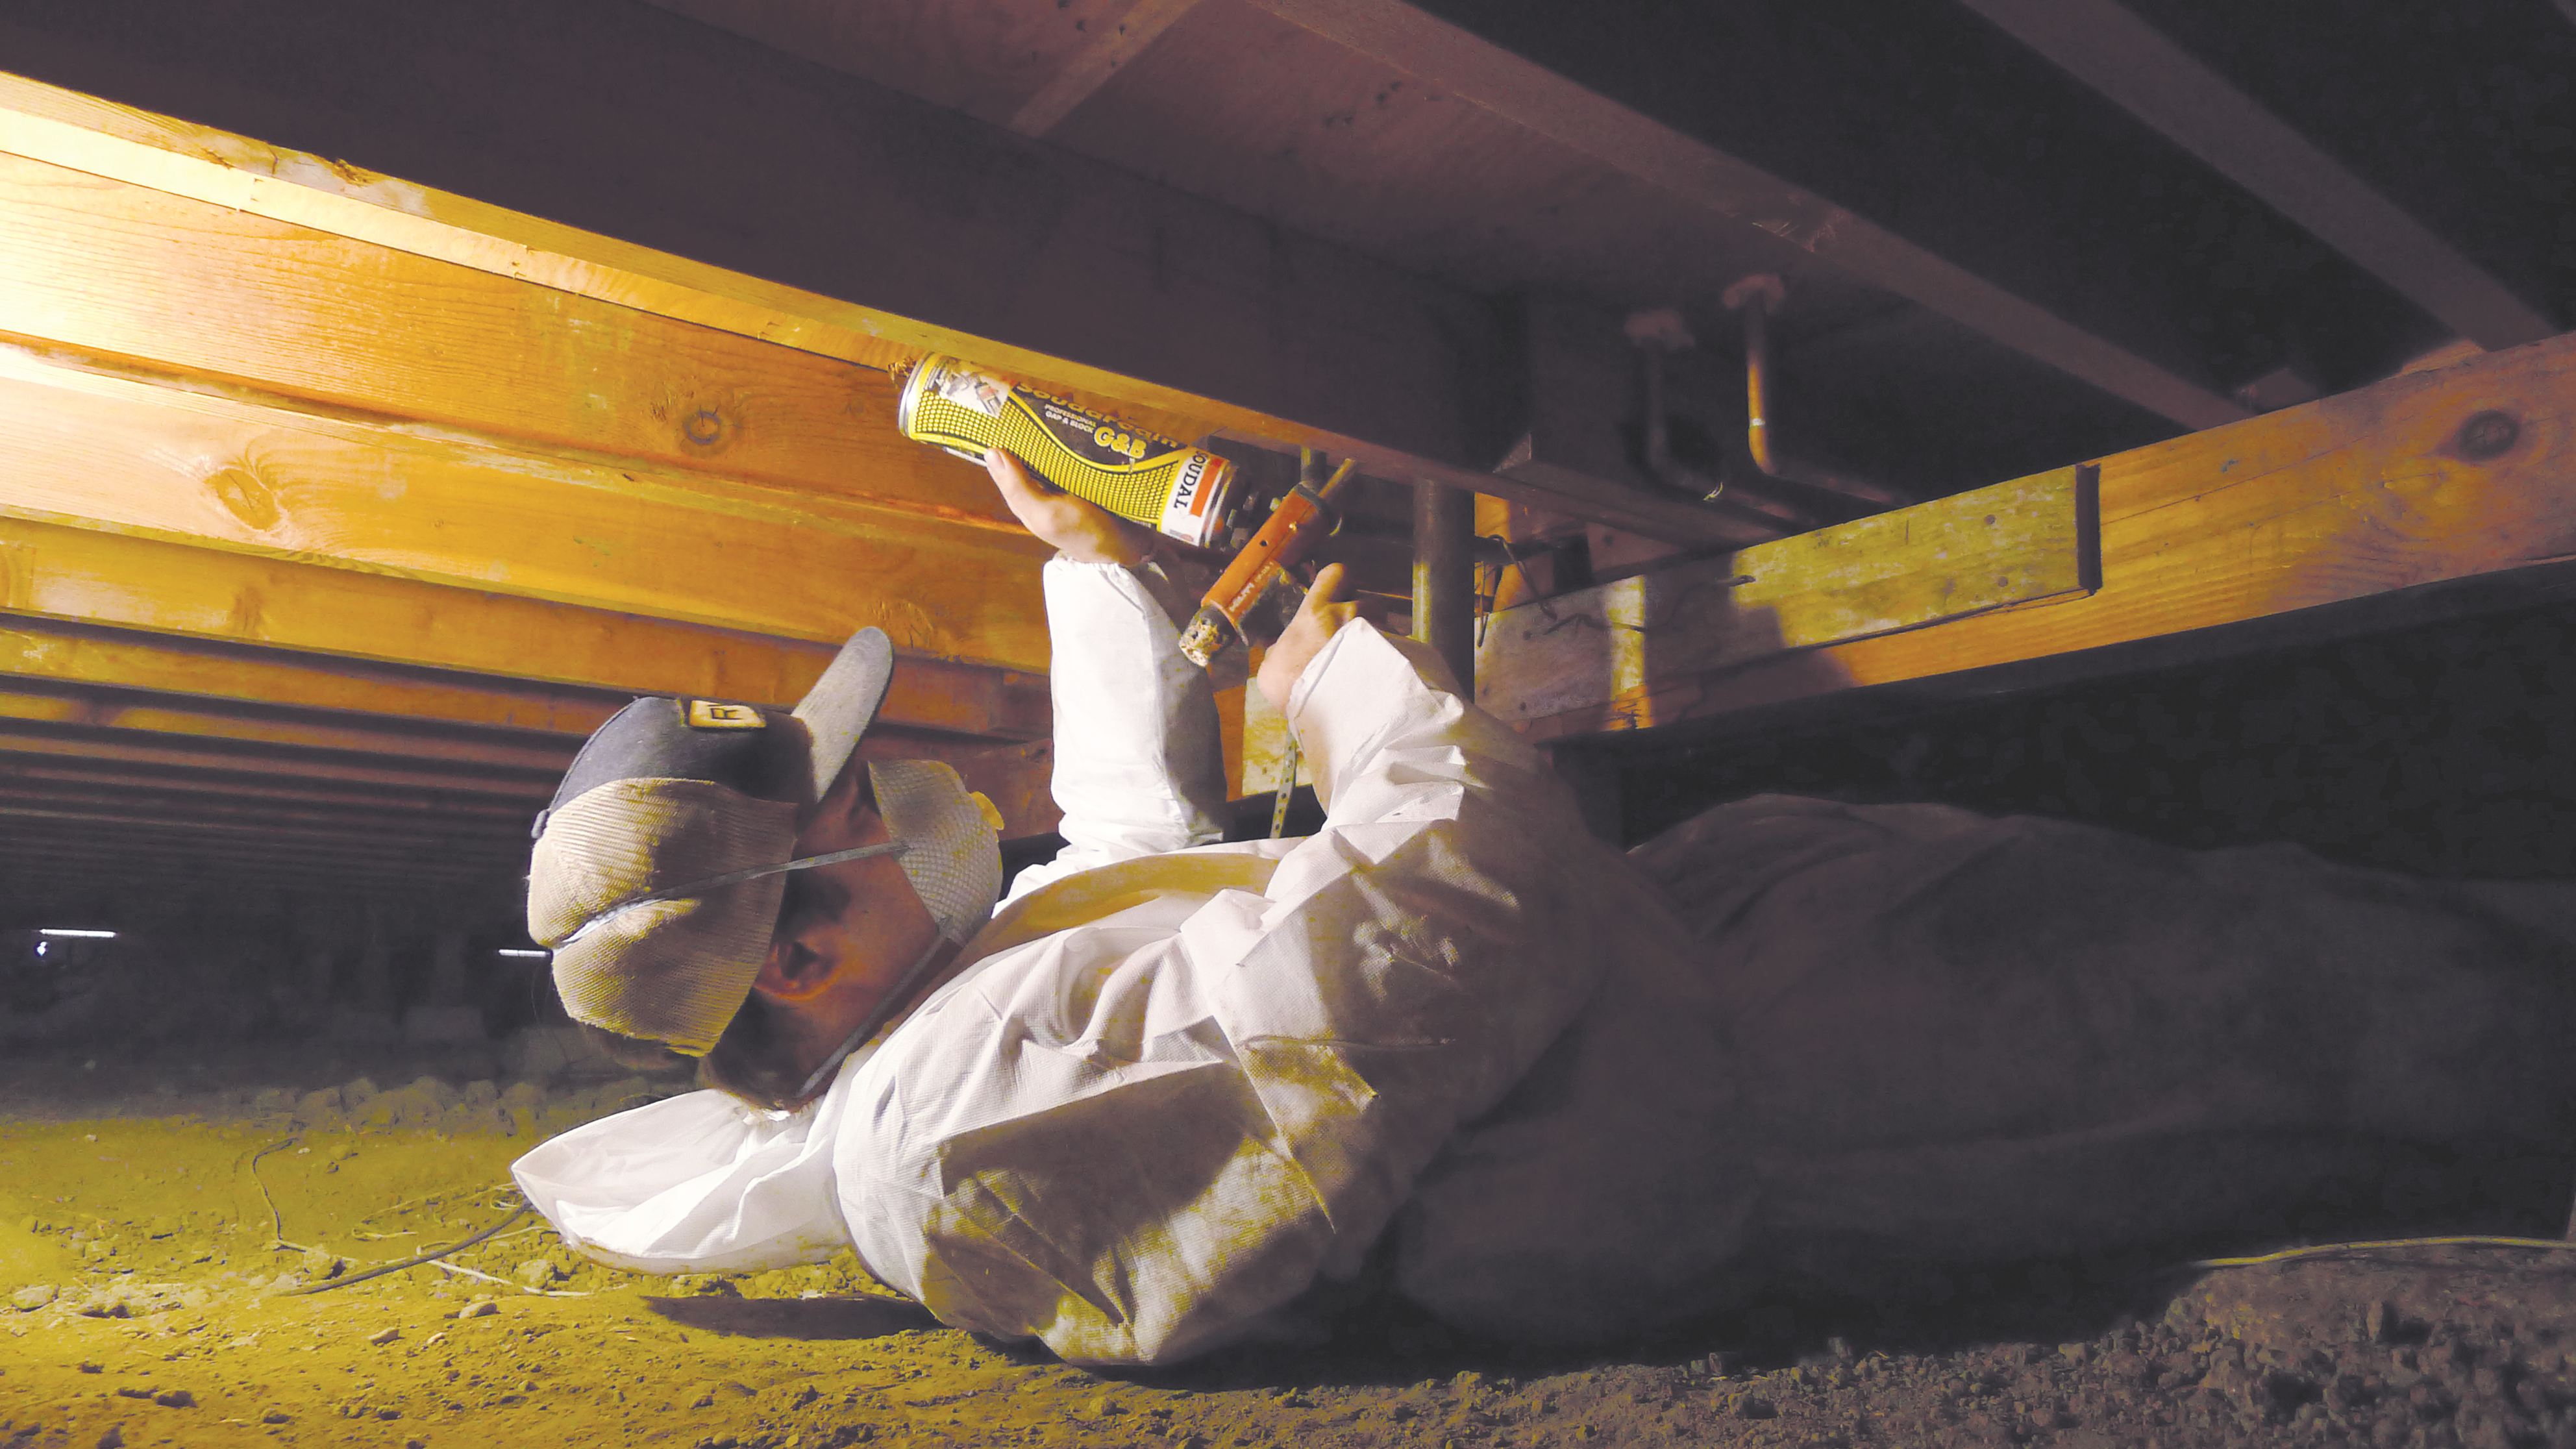
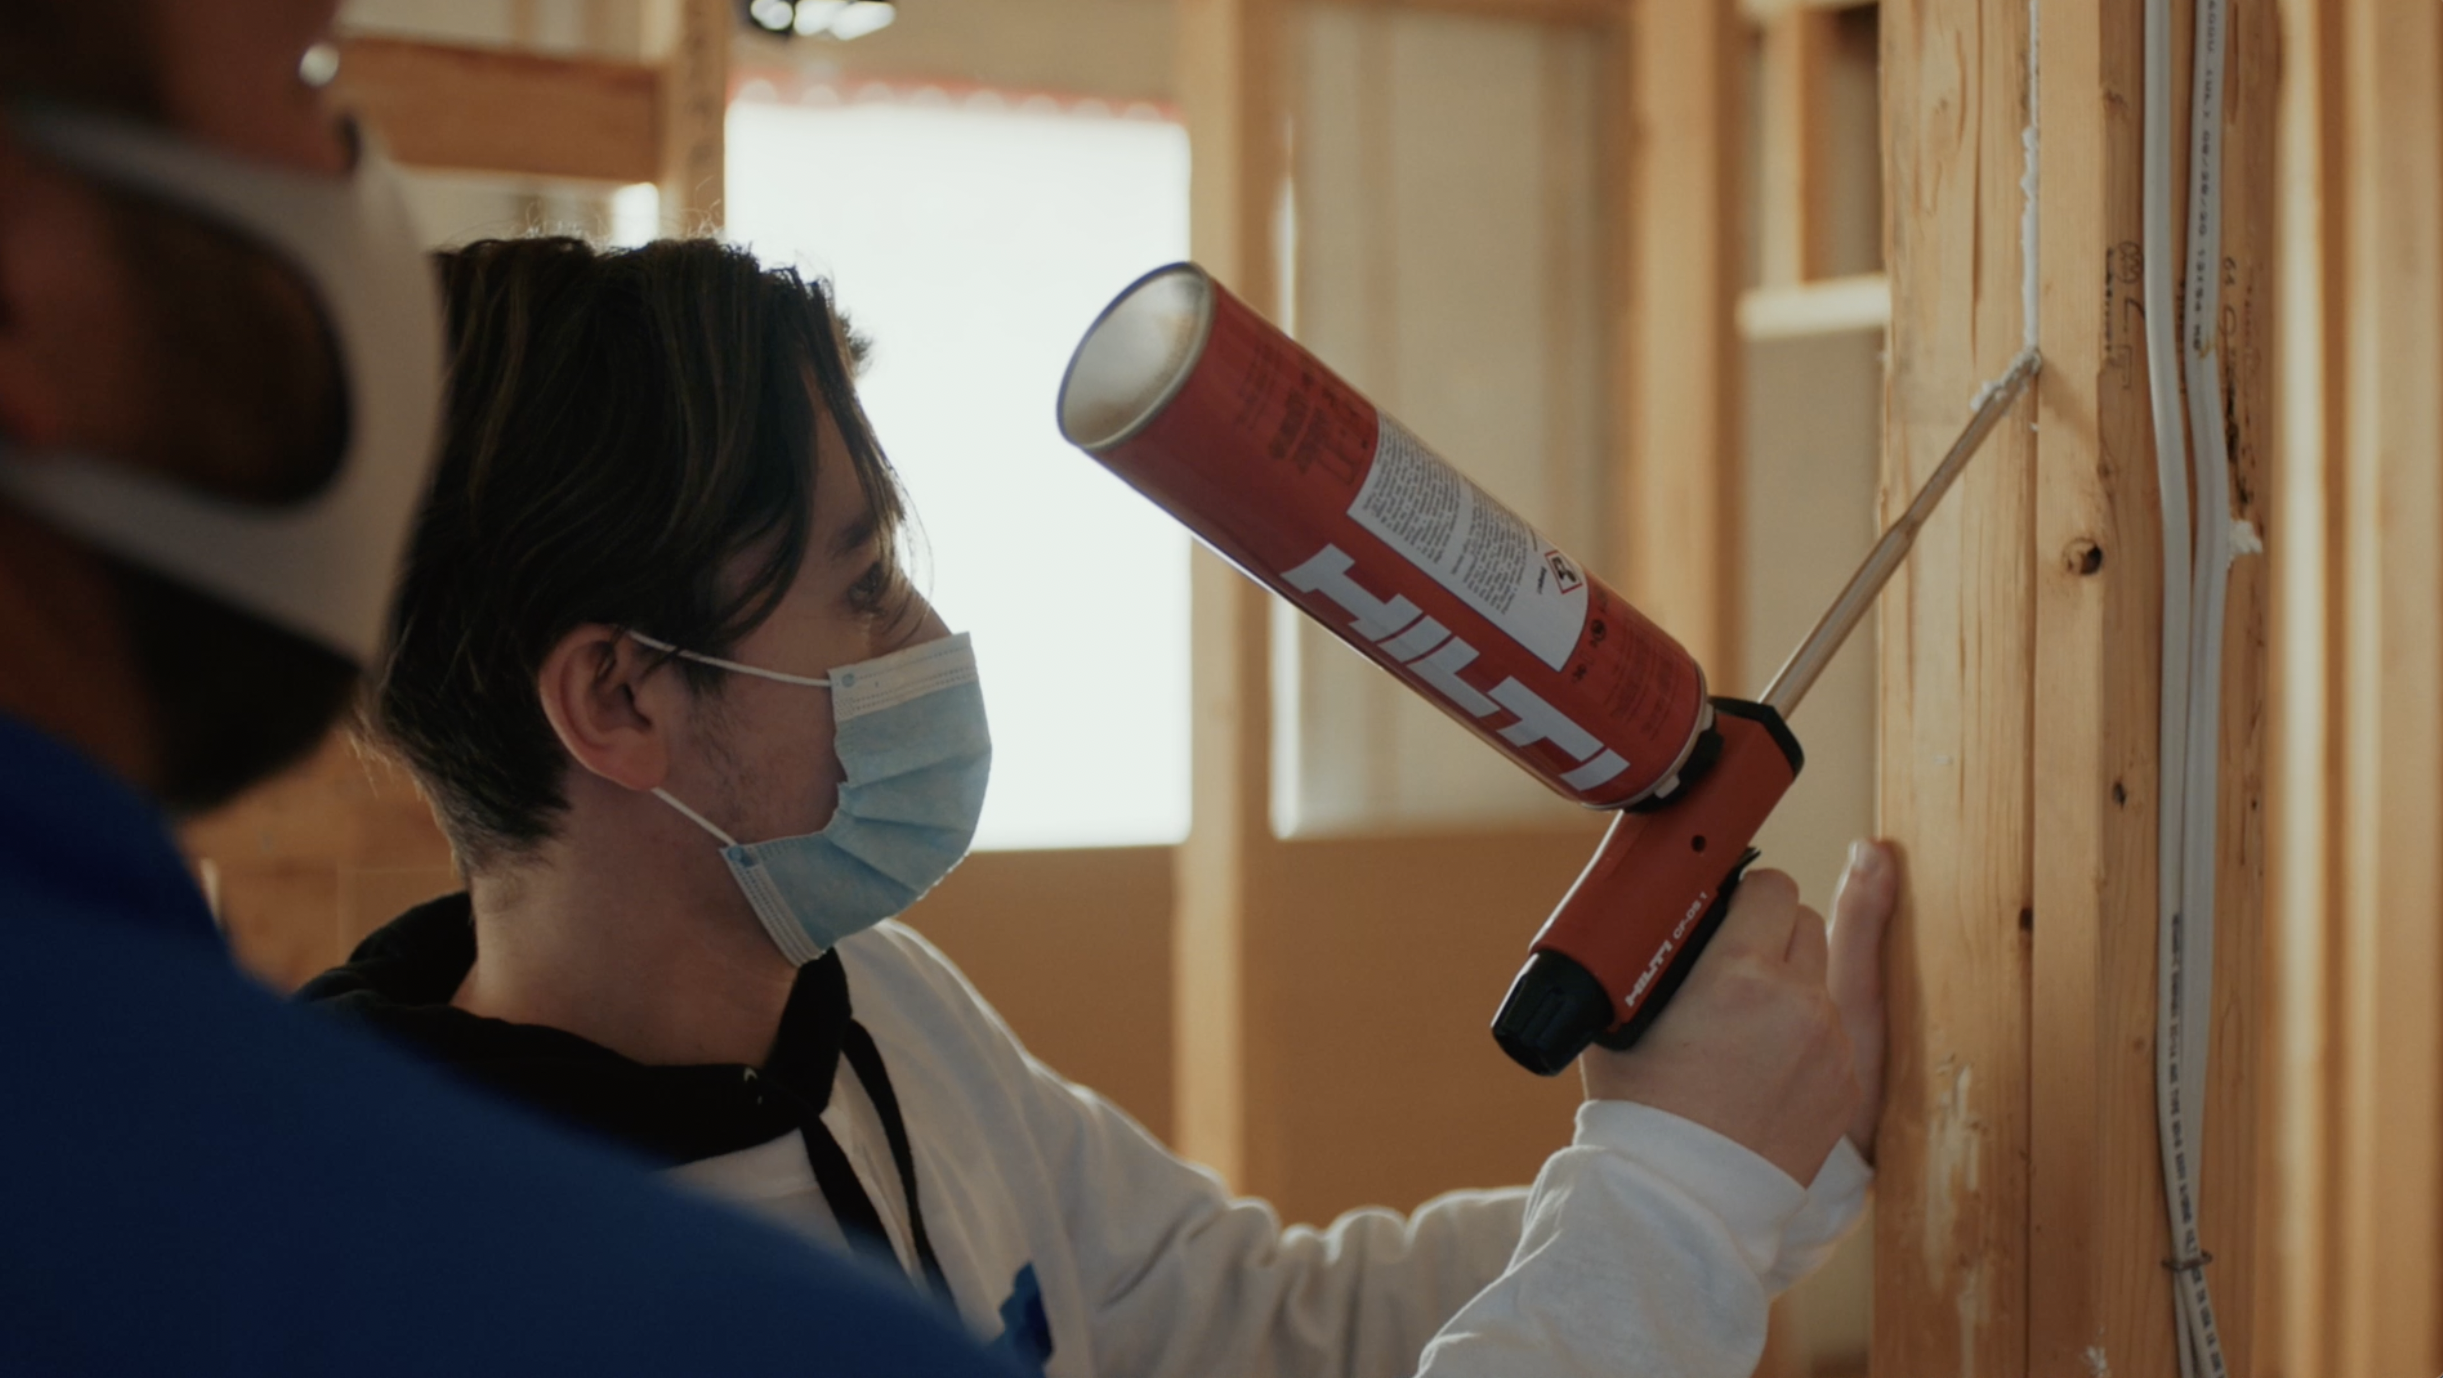
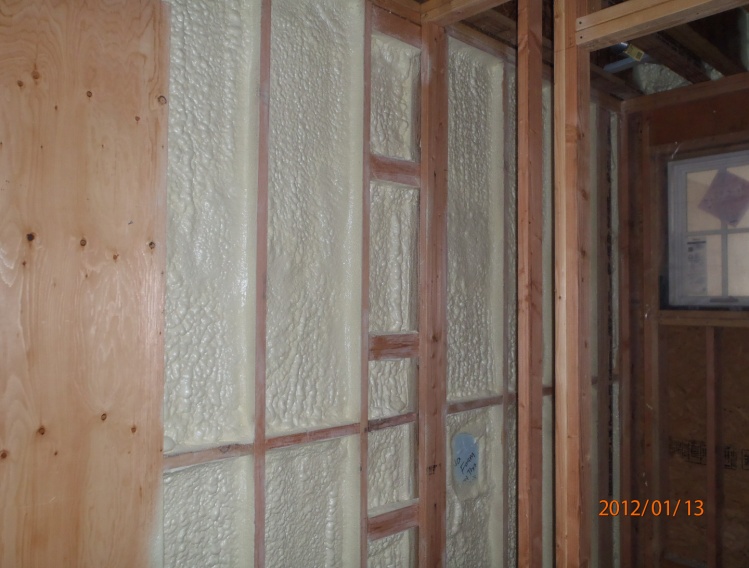
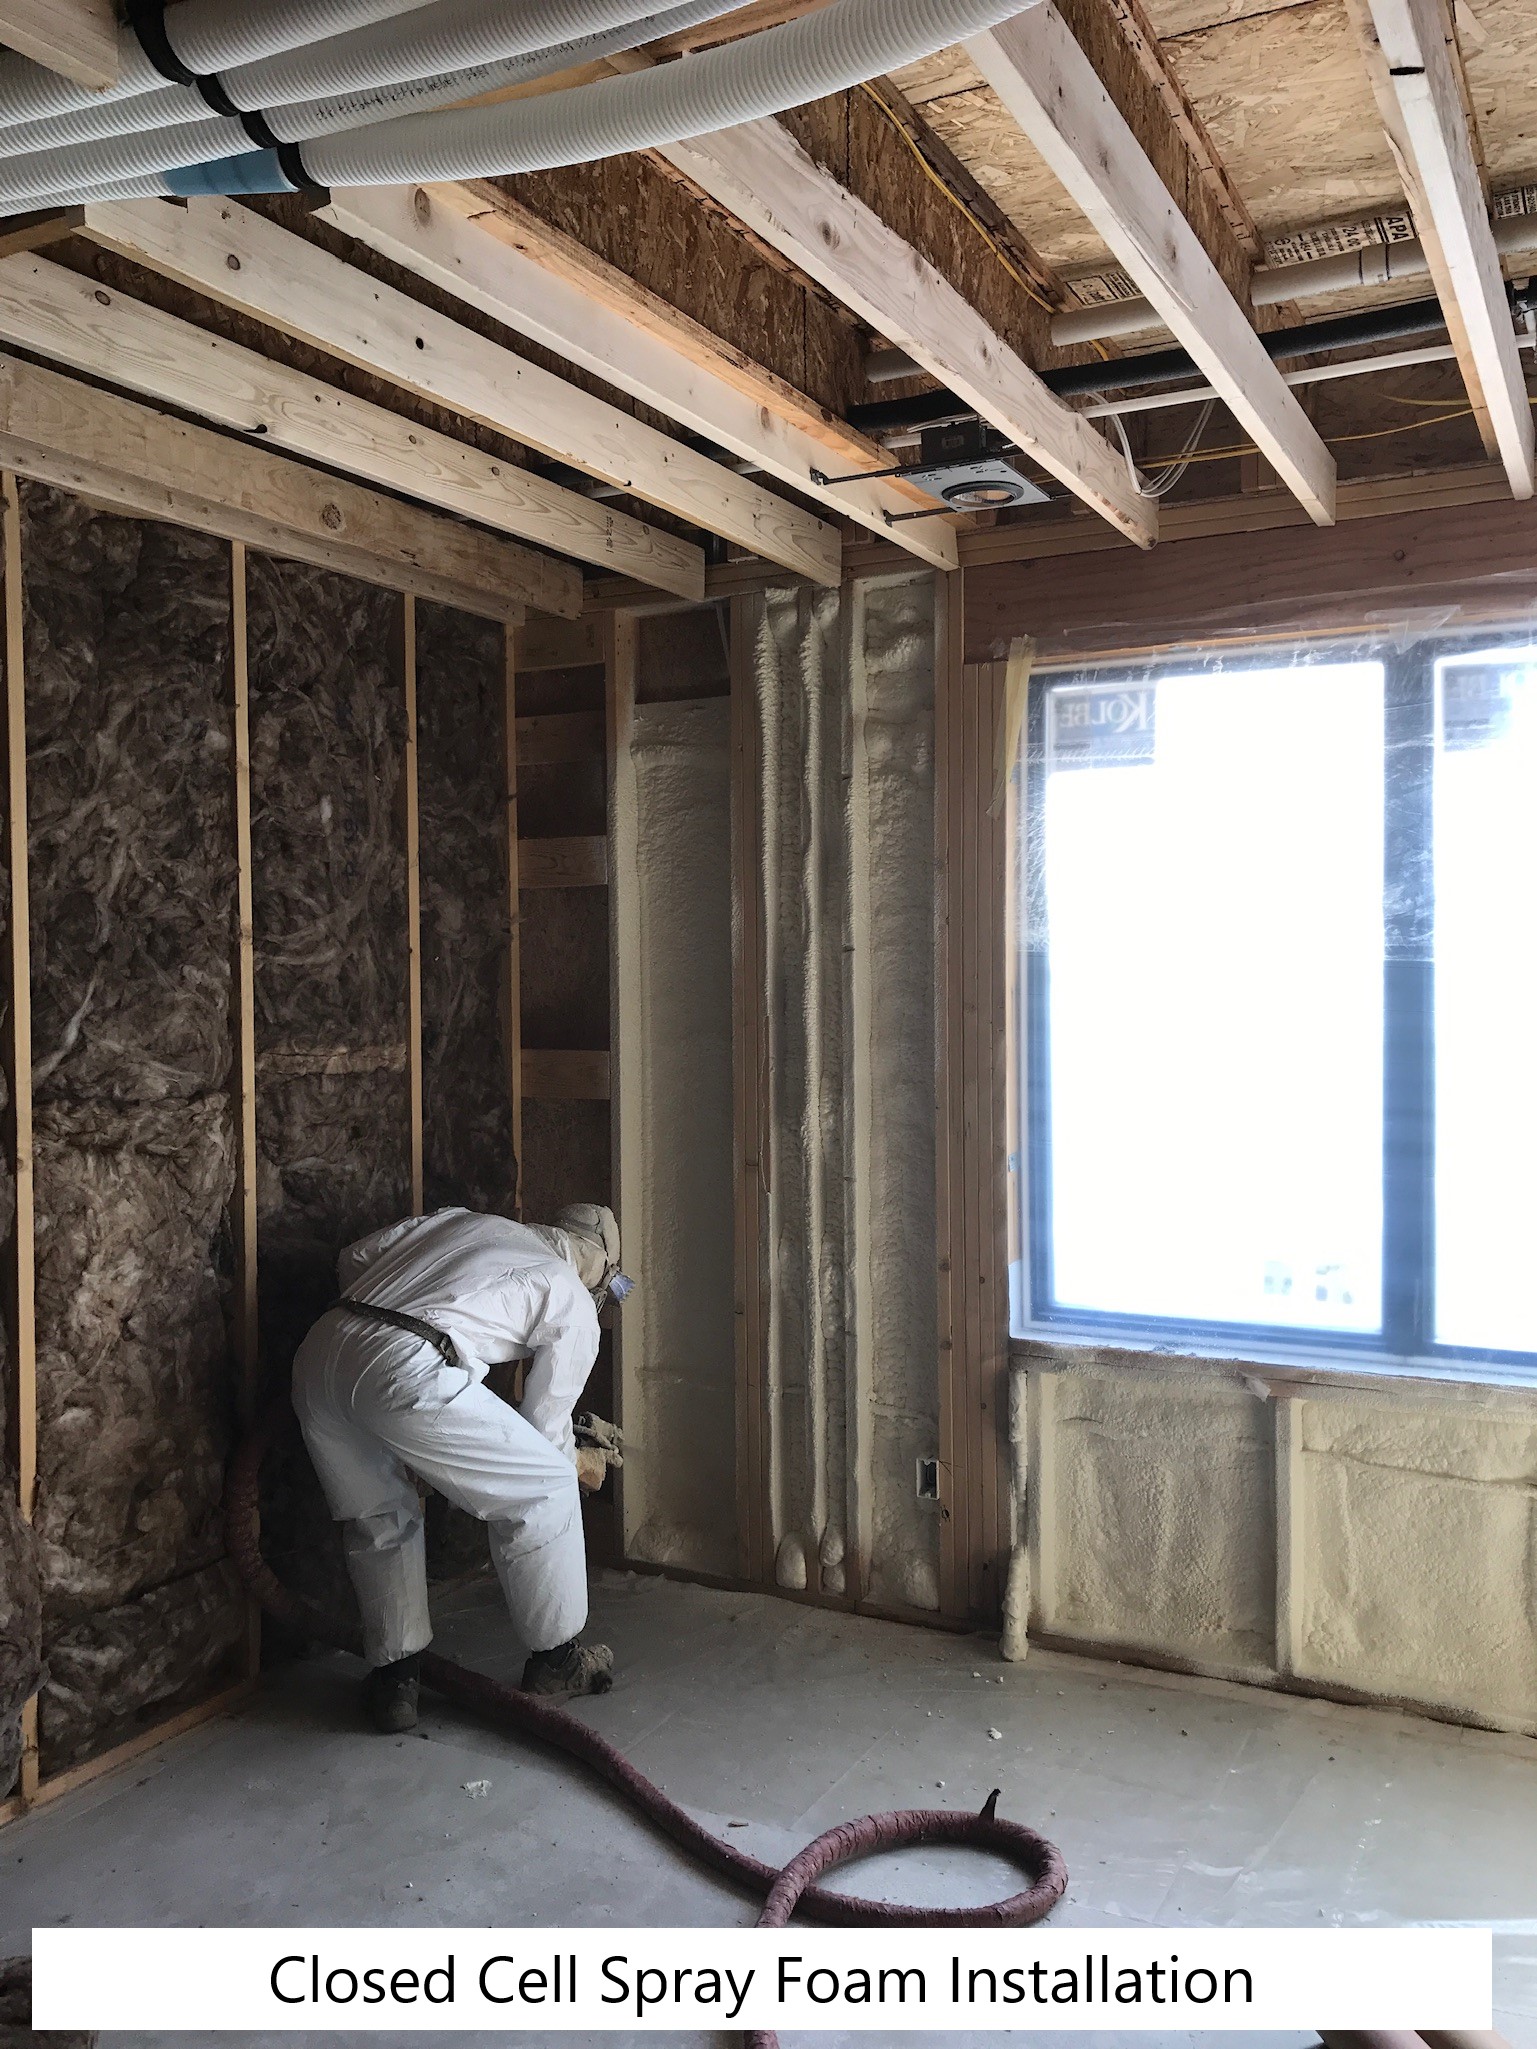
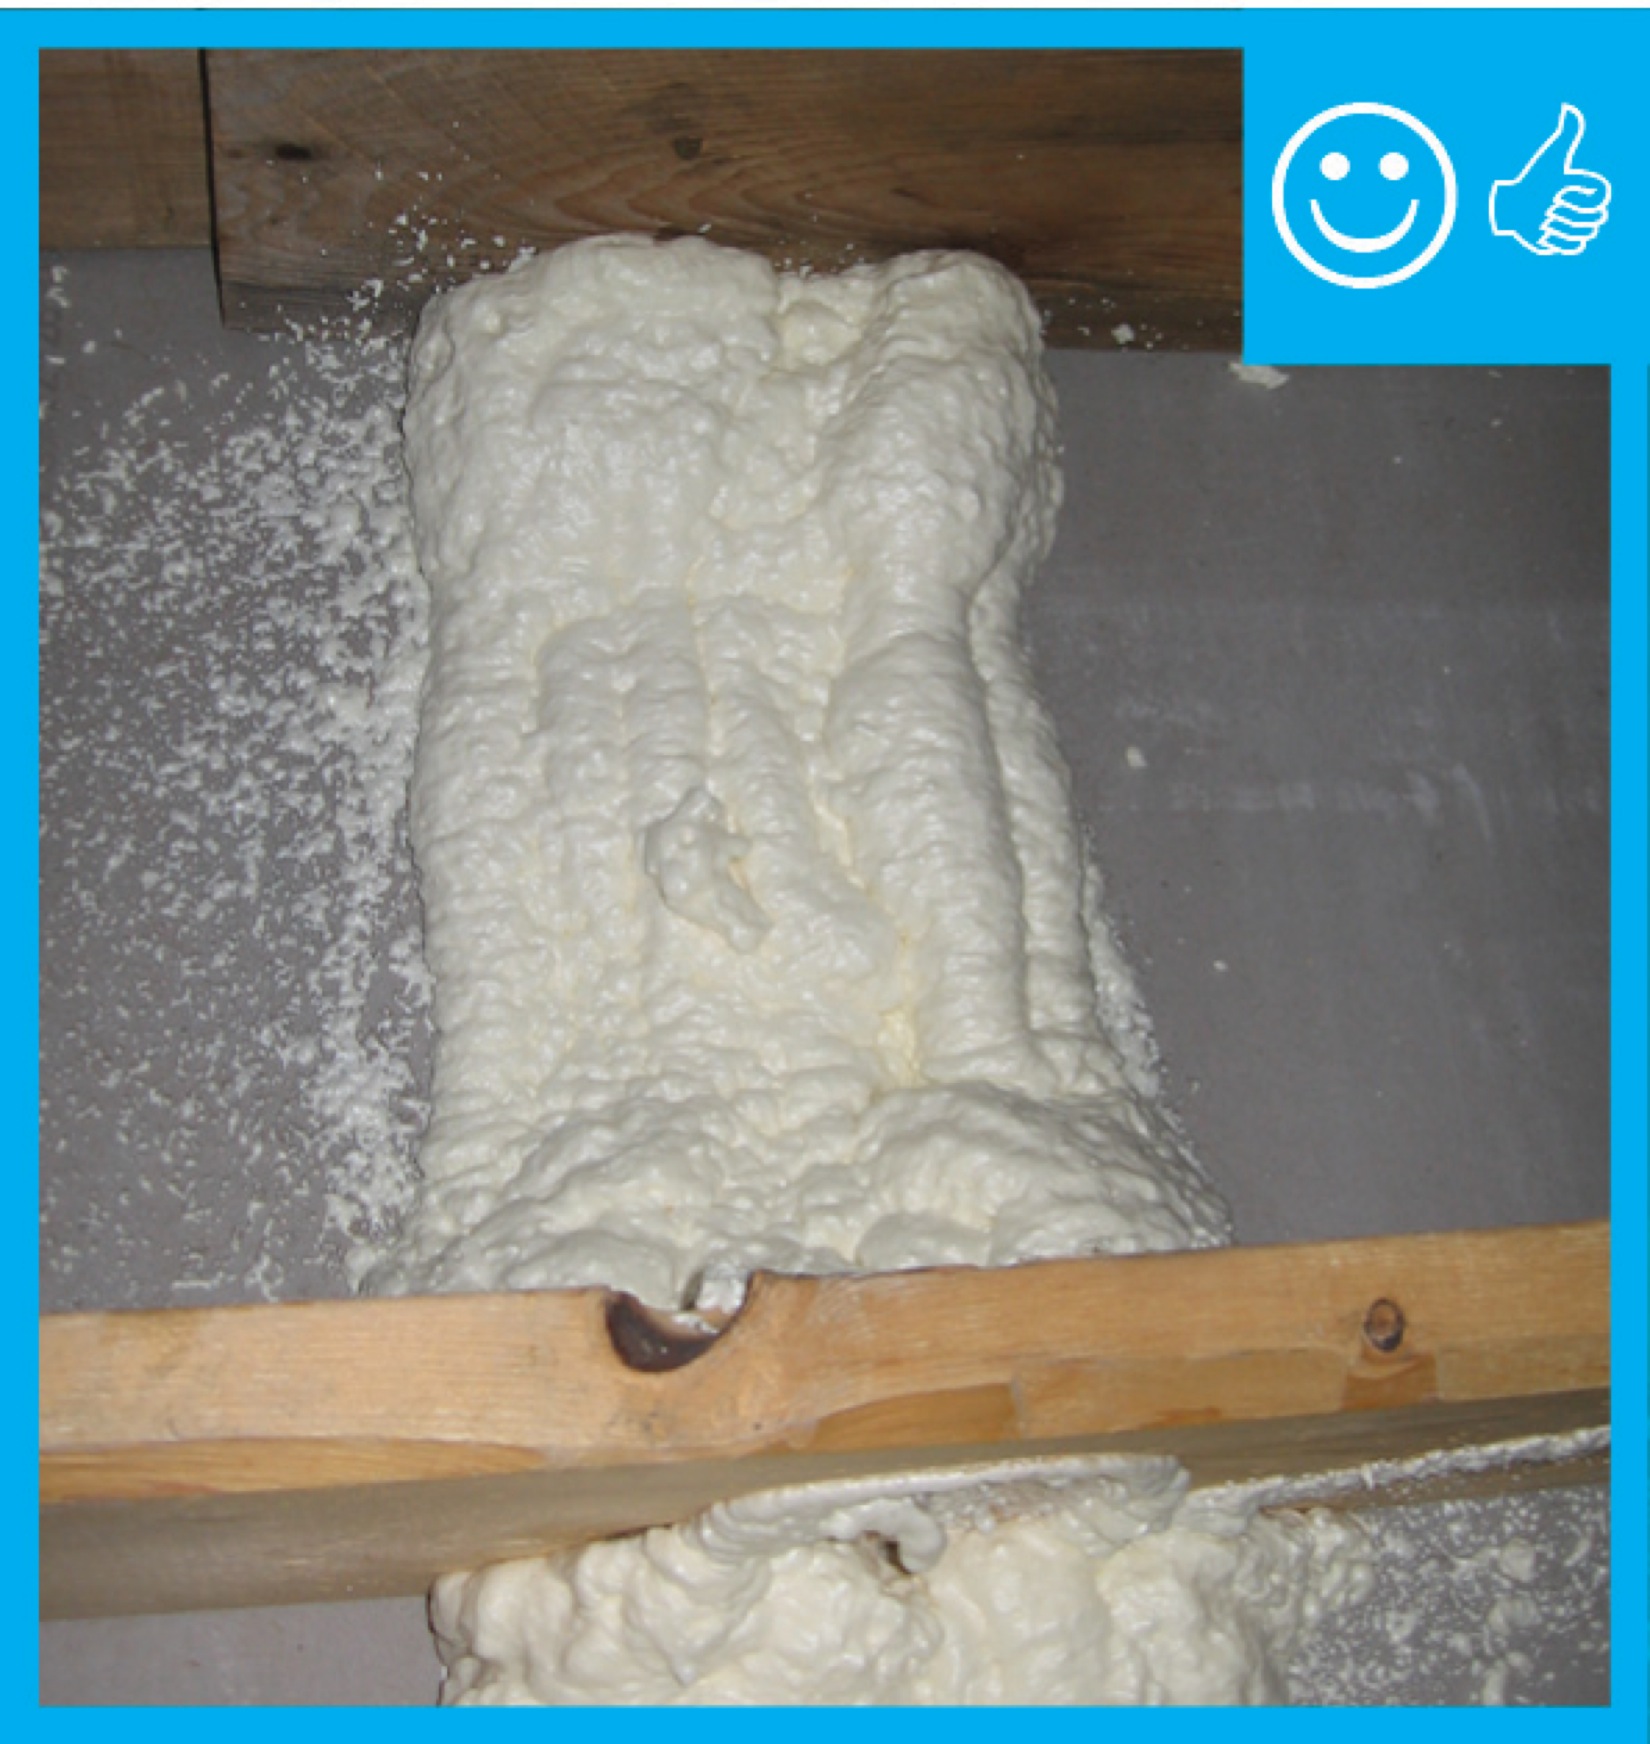
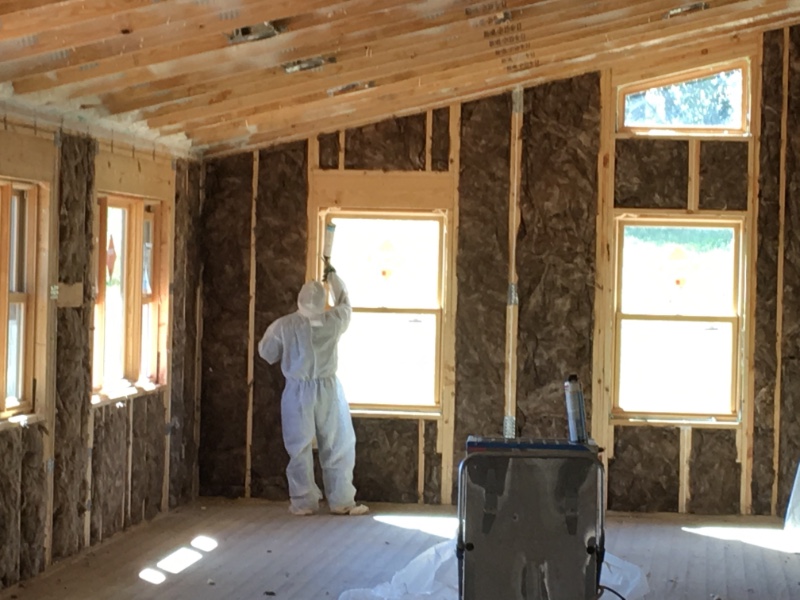
In this gut rehab, drywall was removed then a sprayer-applied sealant was used to seal all large cracks and seams and then the 2x4 walls were filled with spray foam.
Image
Image
Install a foam gasket along top plates before installing drywall
Image
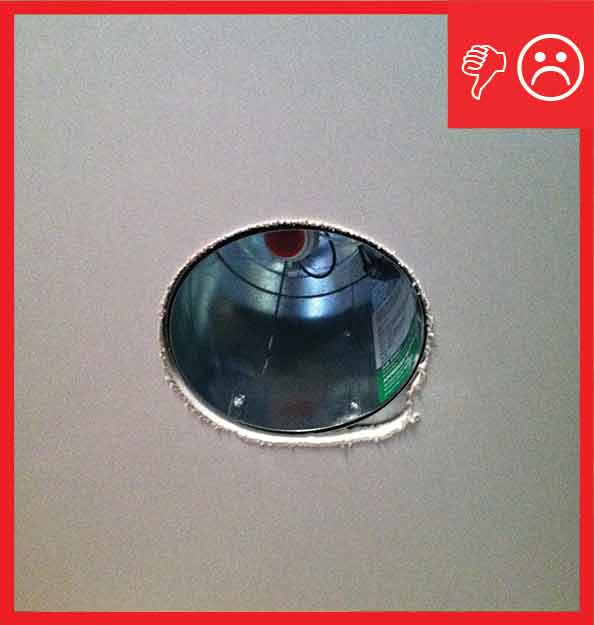
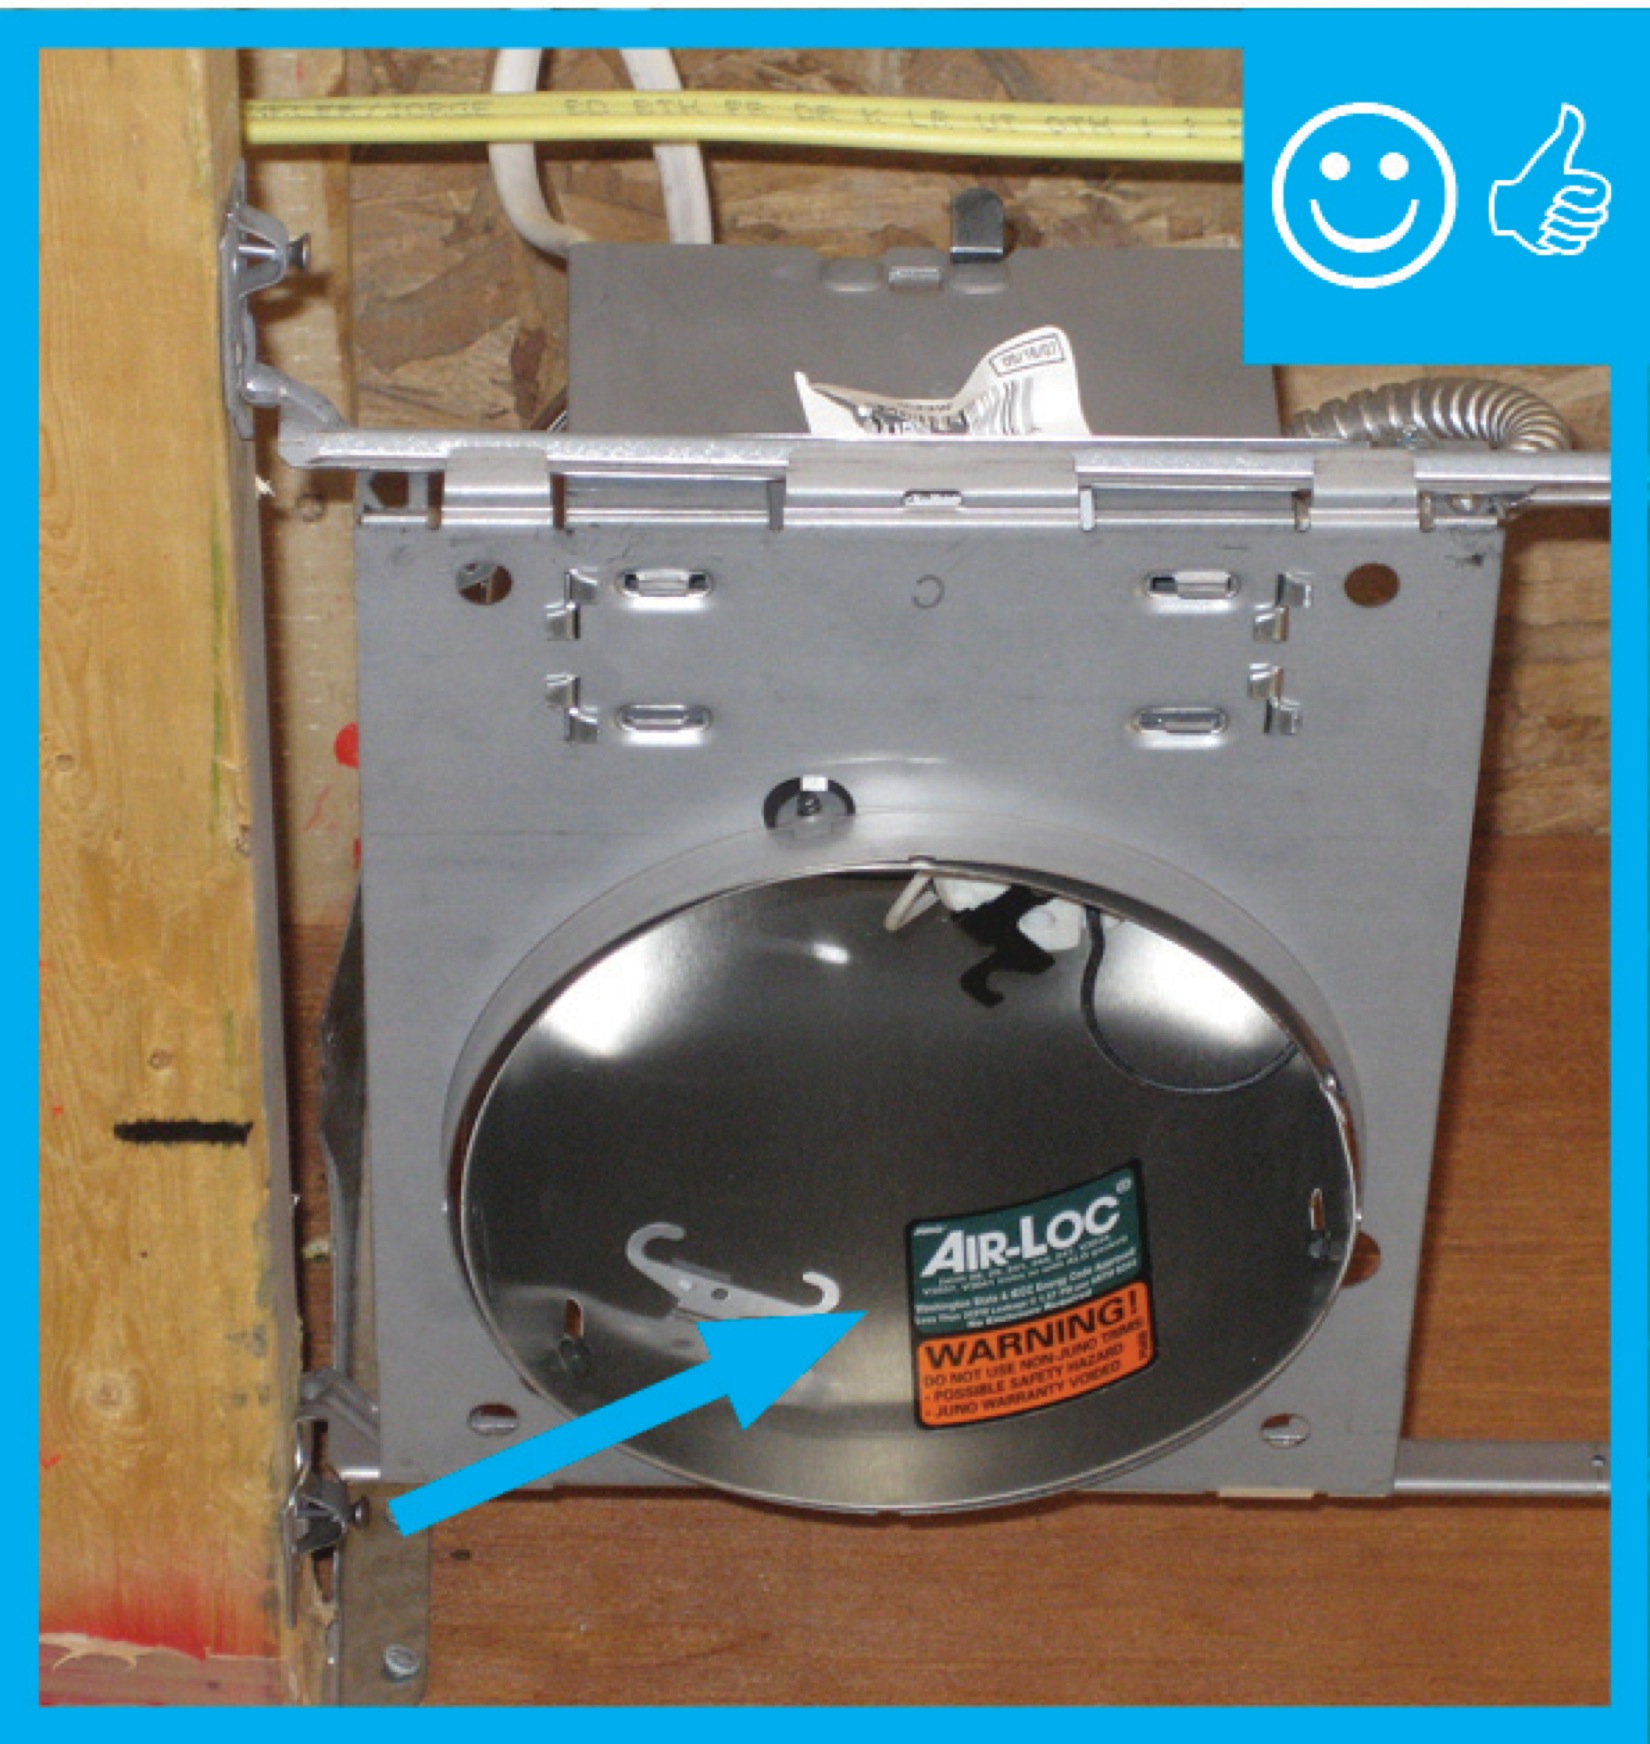
Install a sealed enclosure over a non-IC rated recessed light fixture to air-seal the can and to prevent insulation from touching the recessed can light.
Image
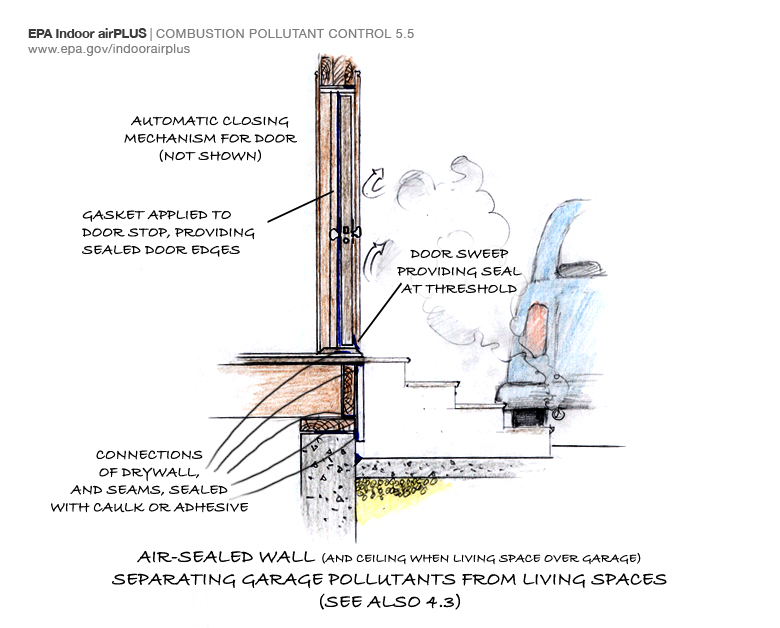
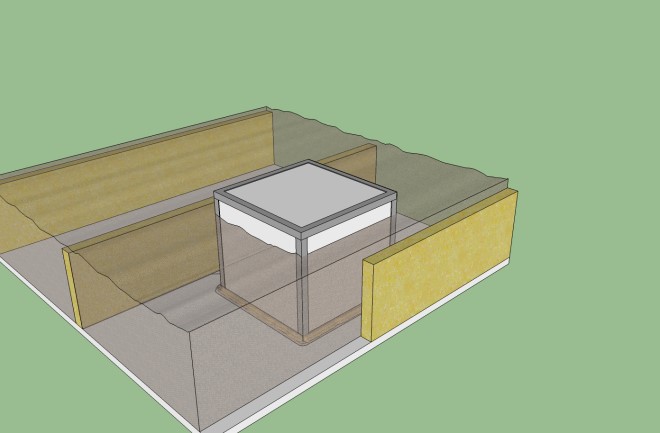
Install a self-closing door with weatherstripping and thoroughly air-seal the shared house-garage walls to help keep automobile exhaust and other pollutants out of the home.
Image
Image
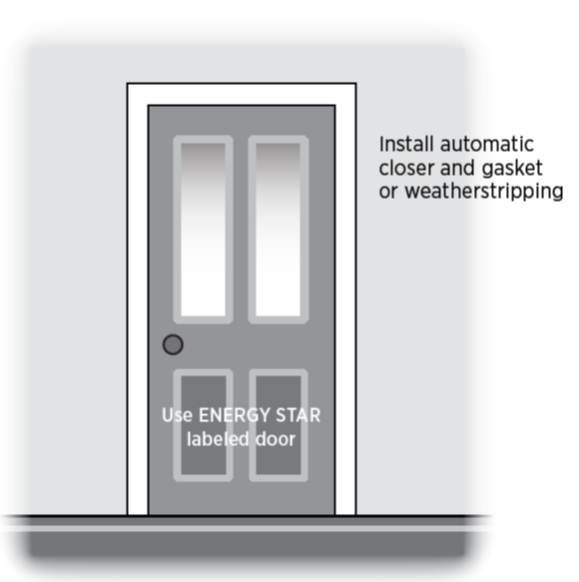
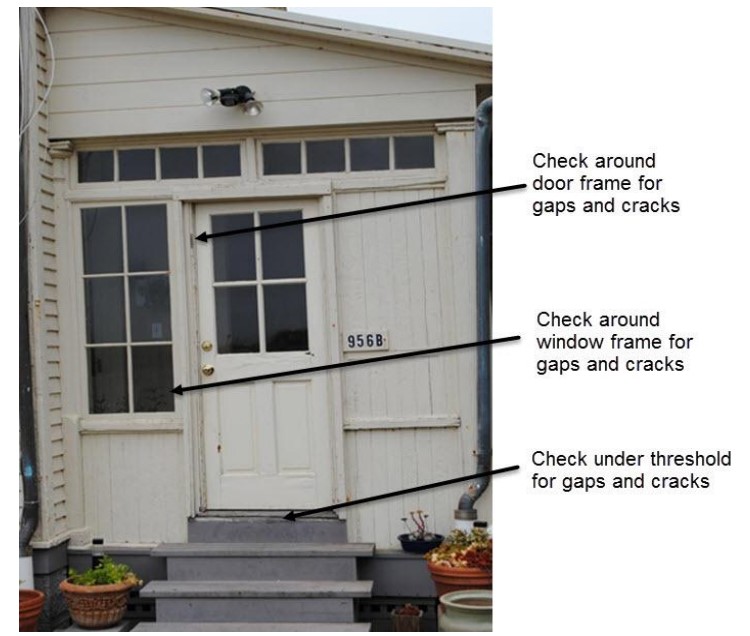
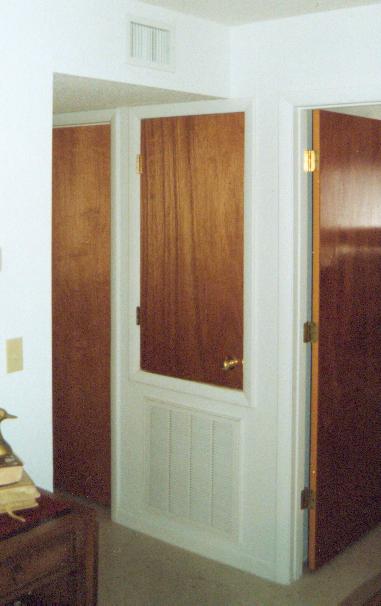
Install an ENERGY STAR labeled insulated door with an automatic closer. Weather strip the door frame
Image
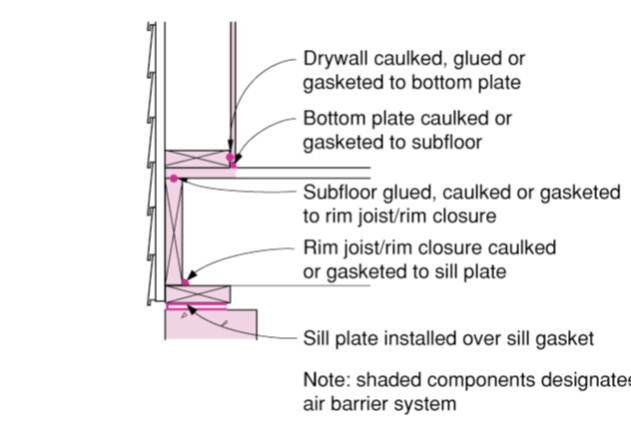
Install continuous top plates or blocking at the tops of walls adjacent to conditioned space to minimize air leakage.
Image
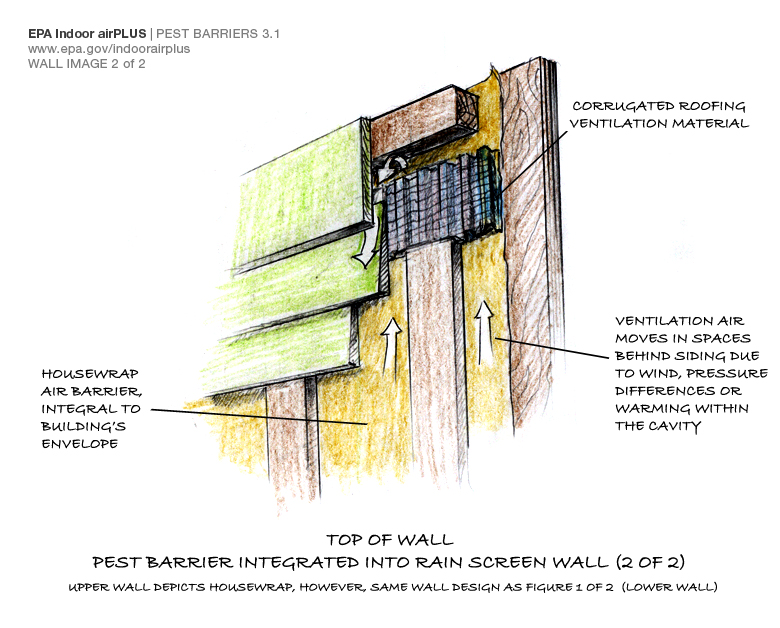
Install mesh insect barrier along the tops and bottoms of the rain screen behind the exterior cladding of above-grade walls.
Image
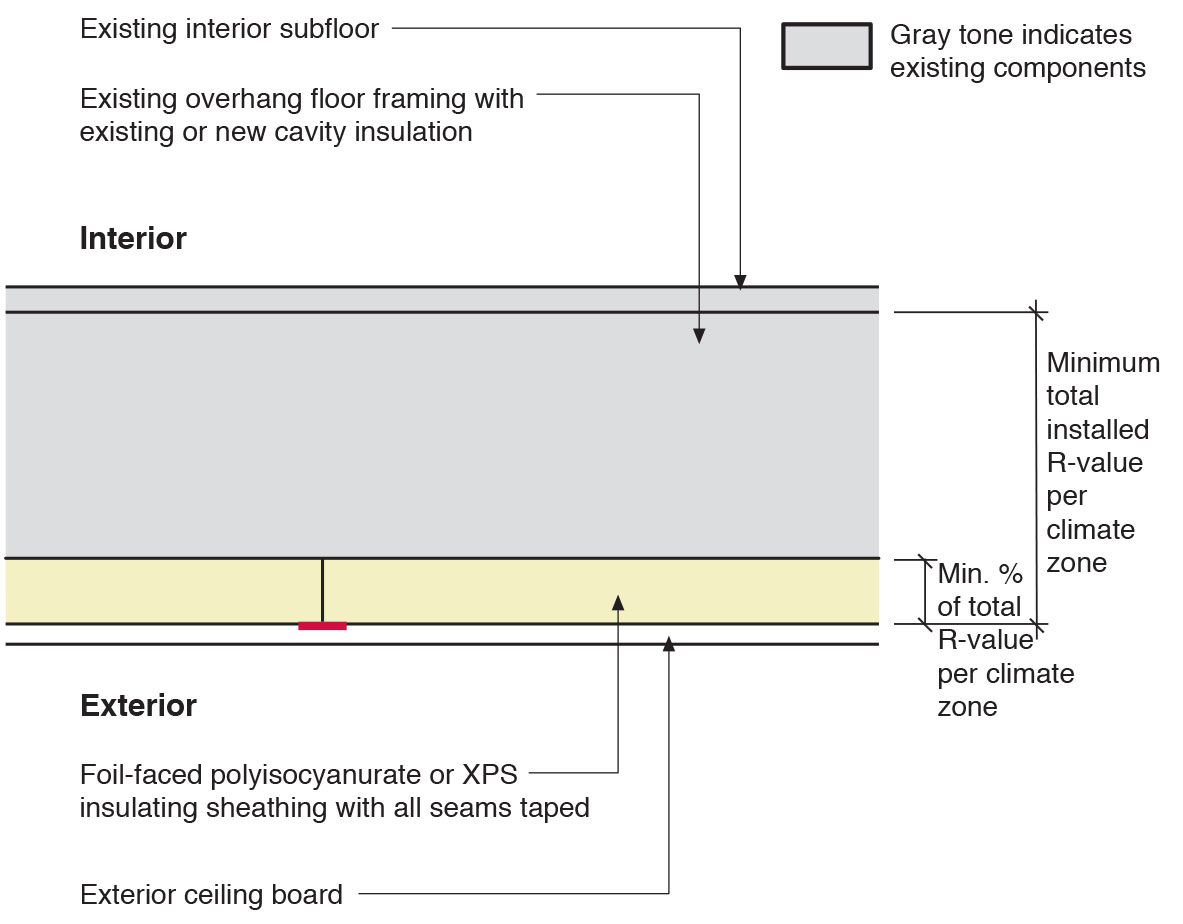
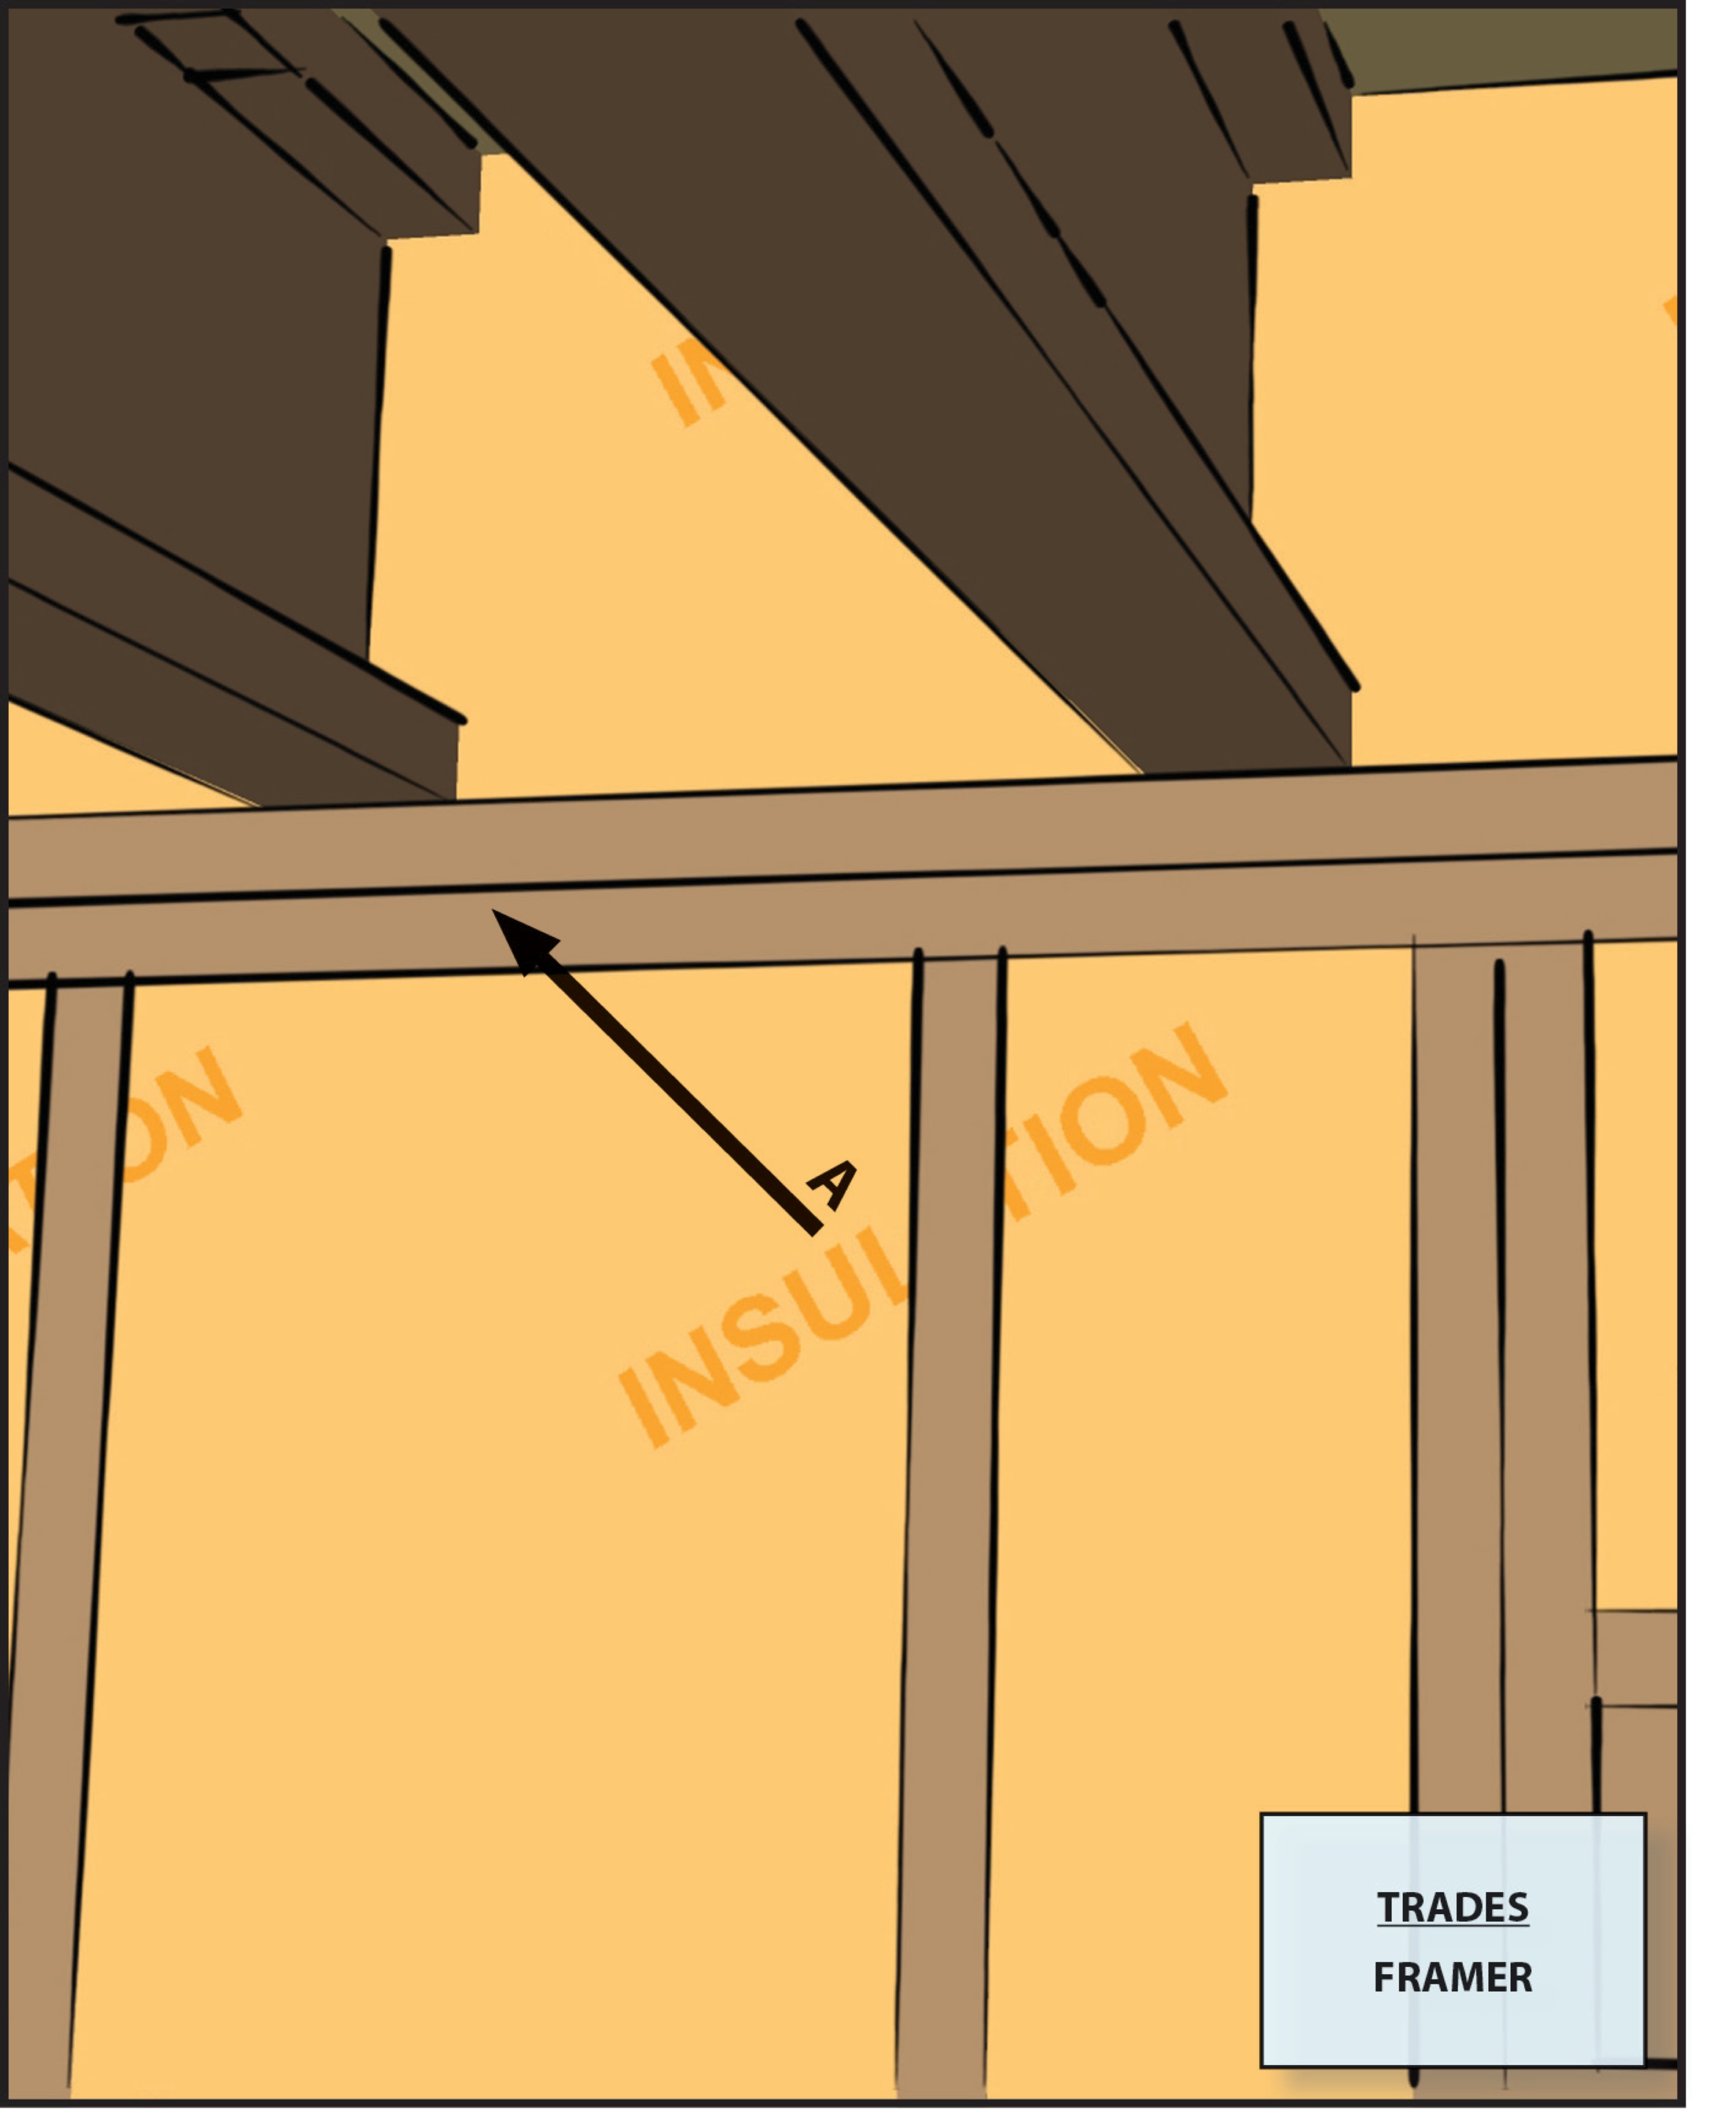
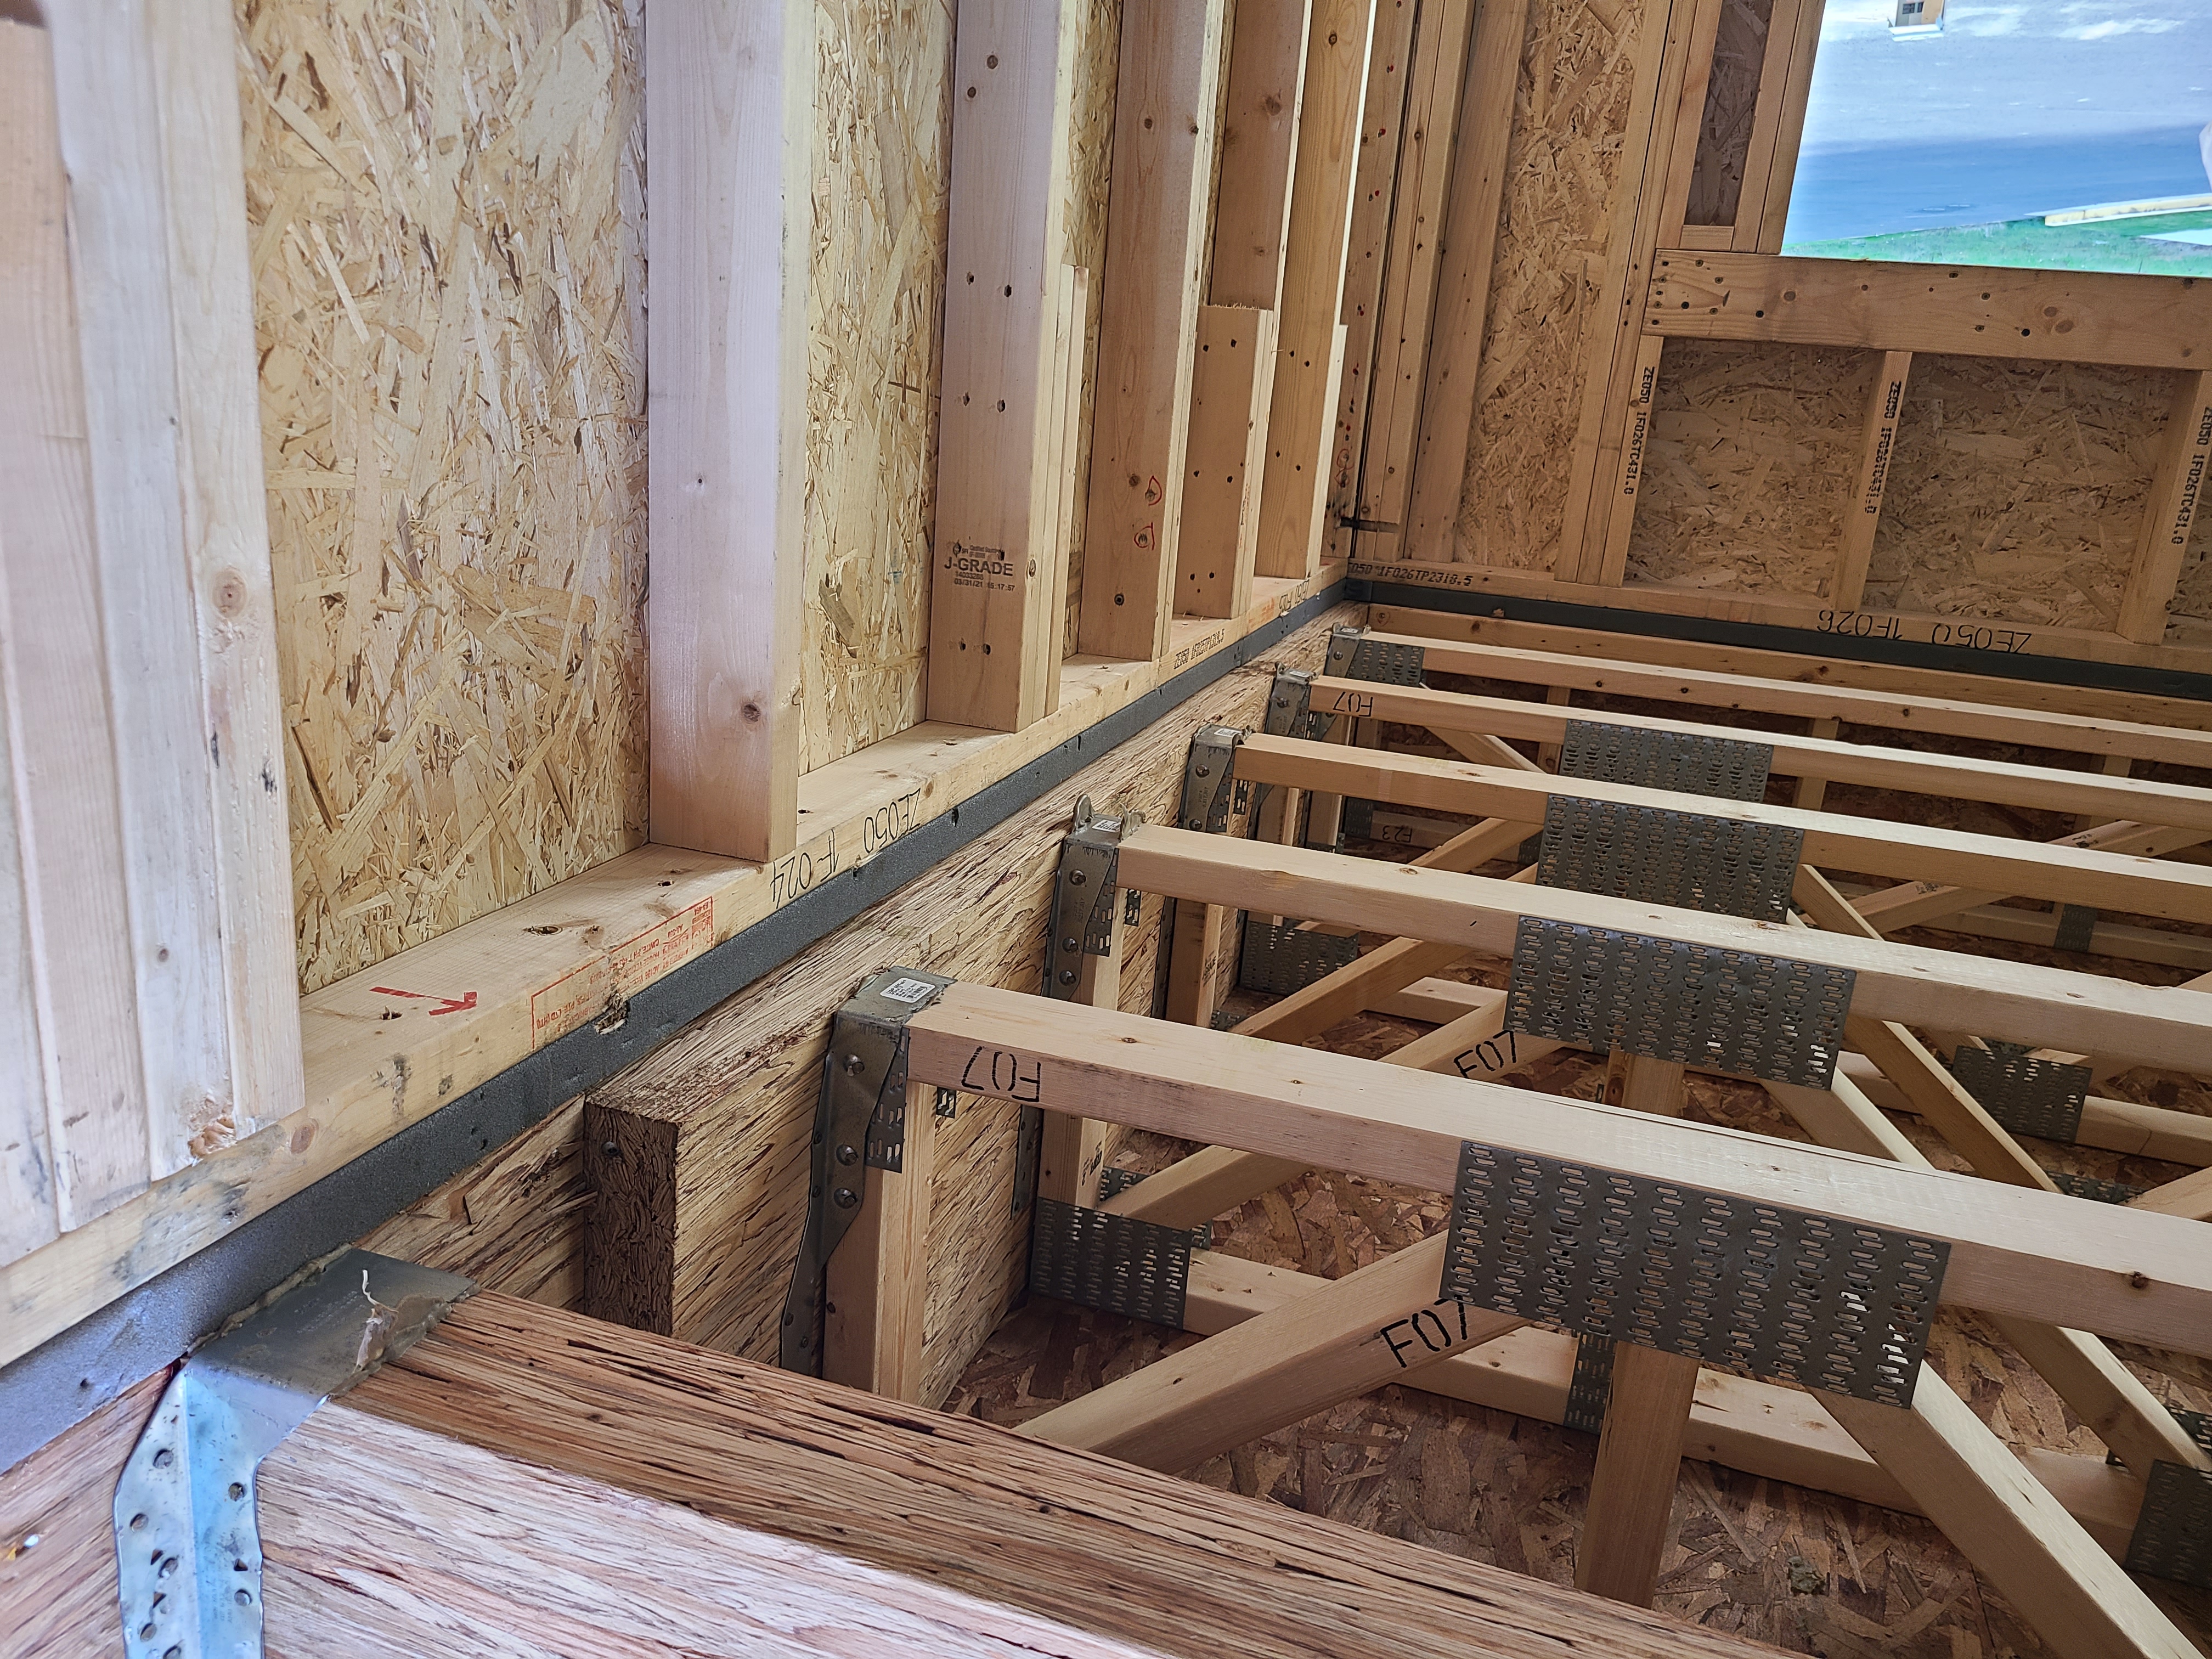
Install rigid insulation and finish material below the framing and cavity insulation of a building overhang
Image
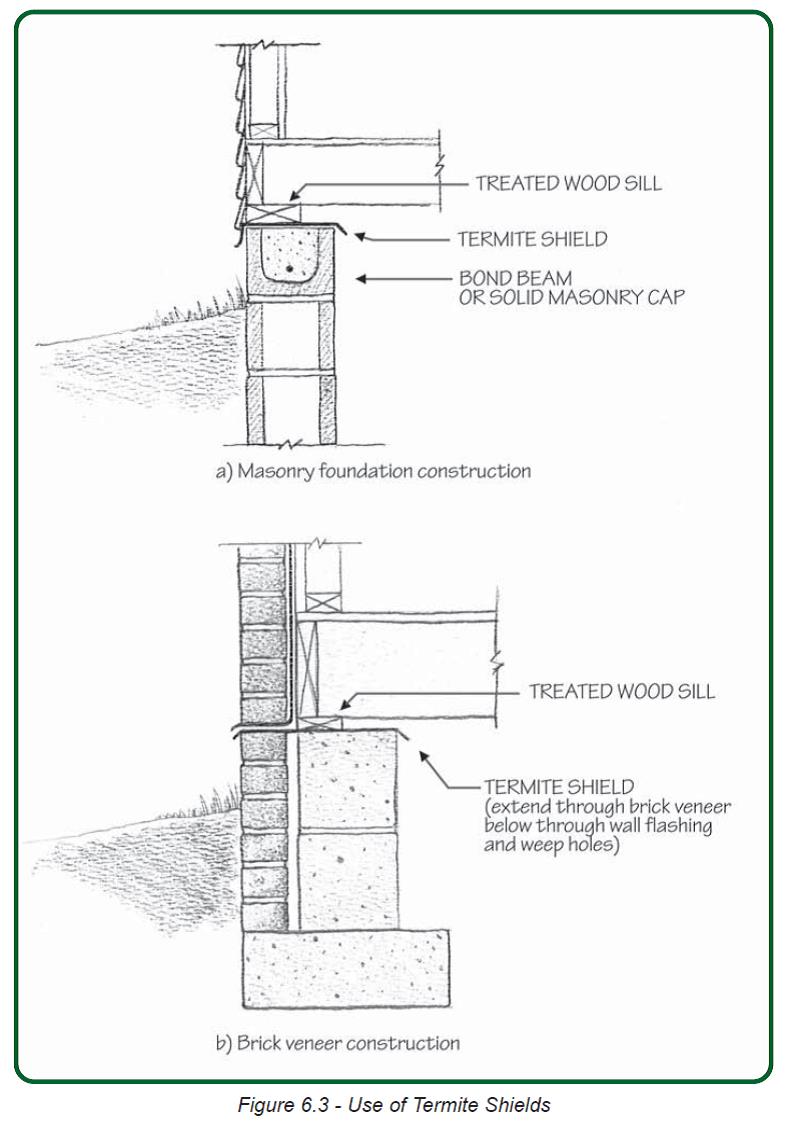
Install termite shields and use solid concrete or filled concrete block for the top of foundation walls to deter termites and other pests
Image
Image

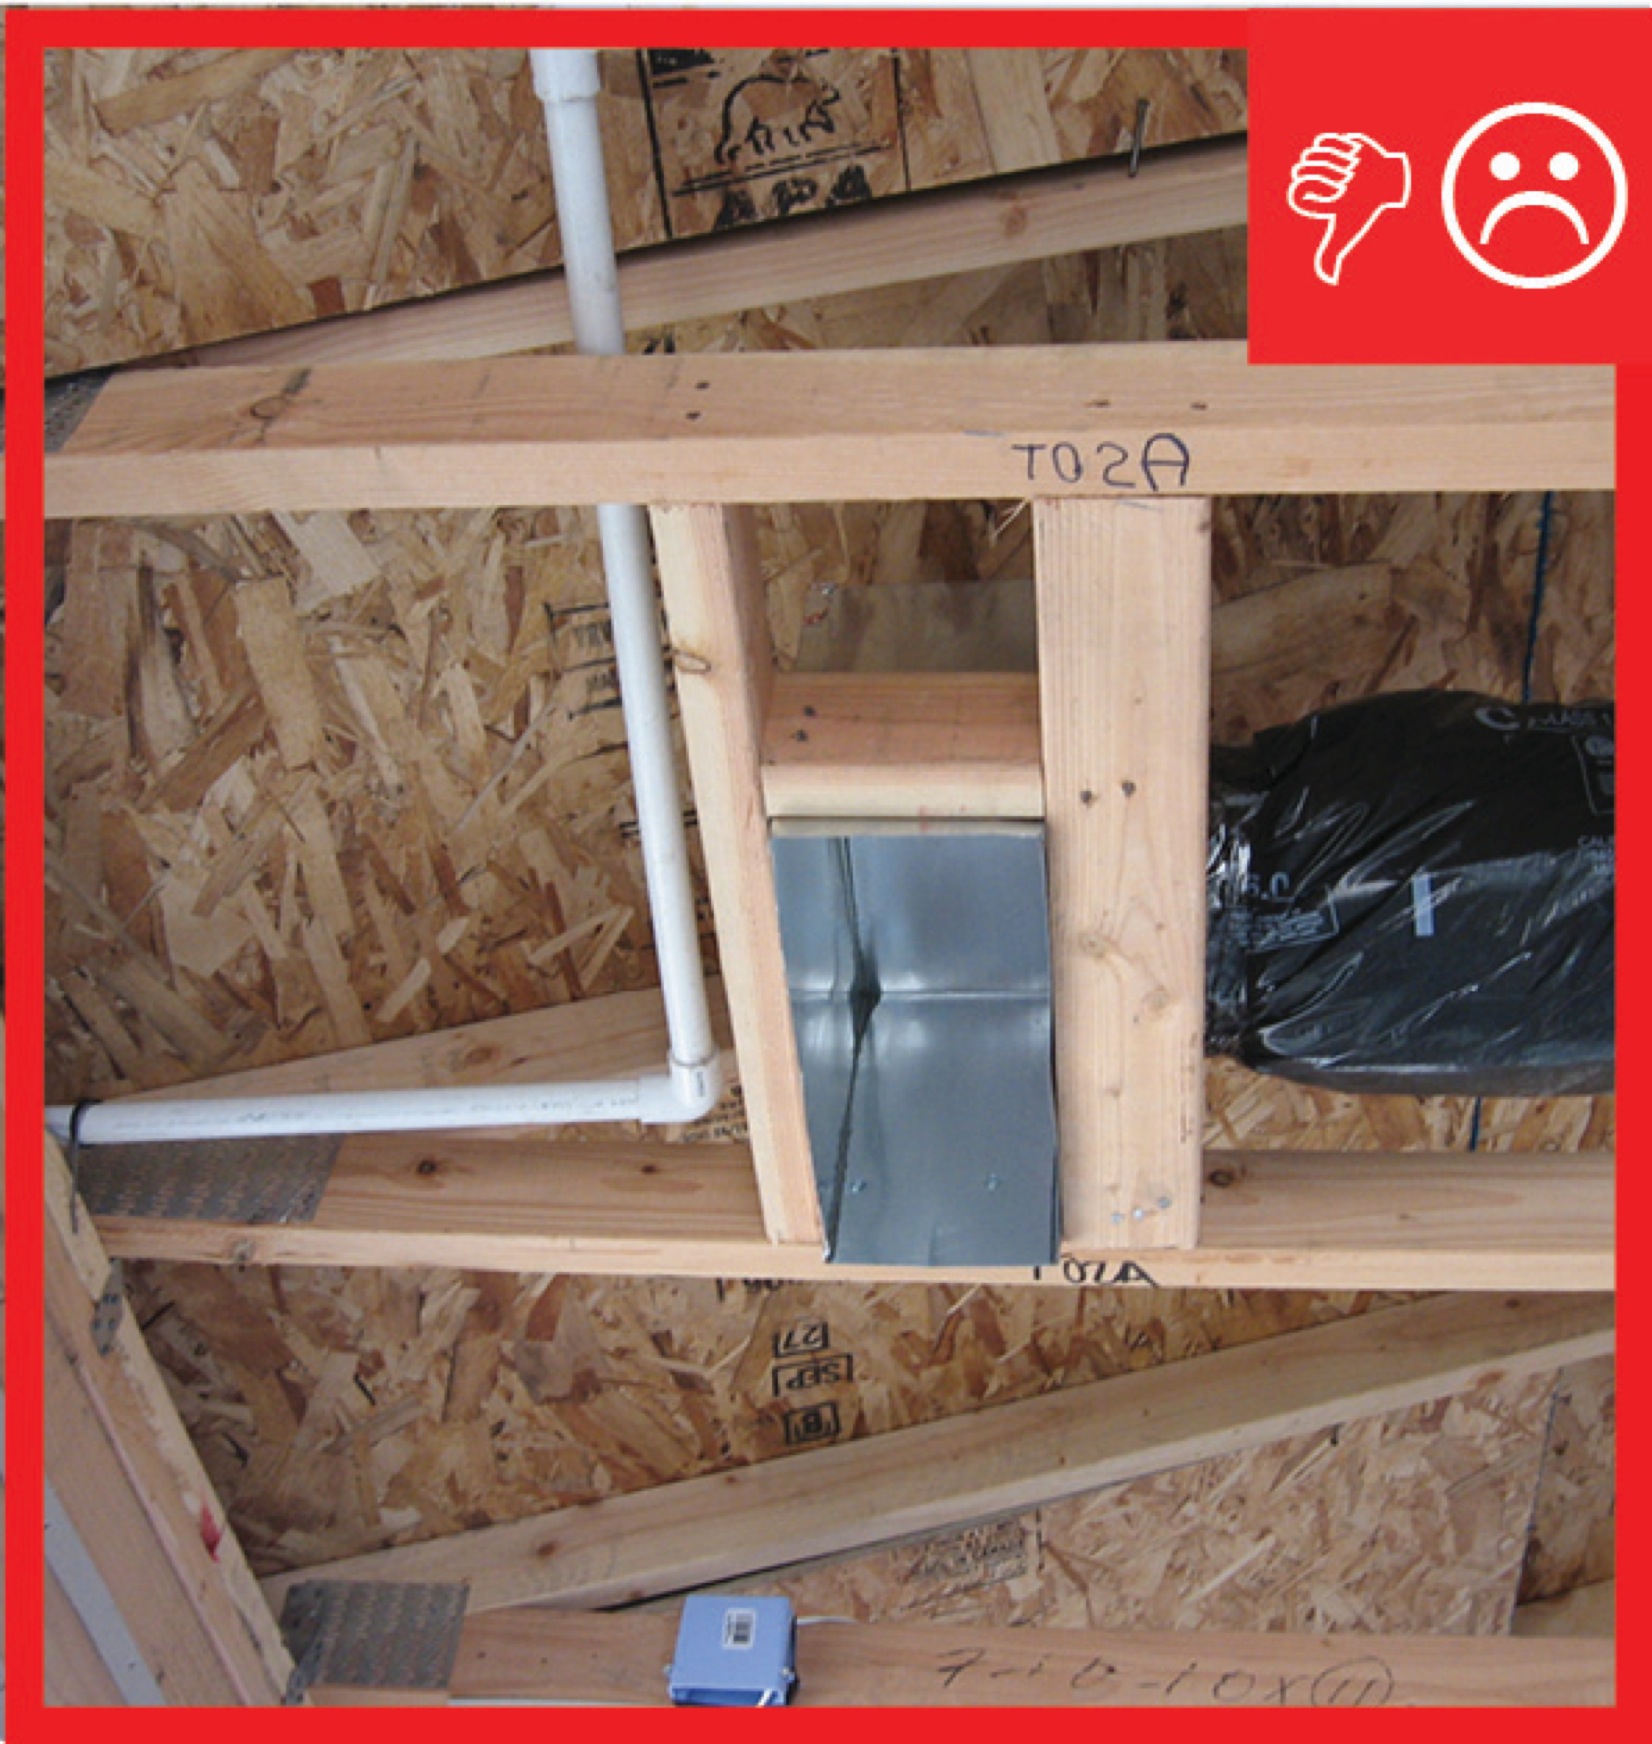
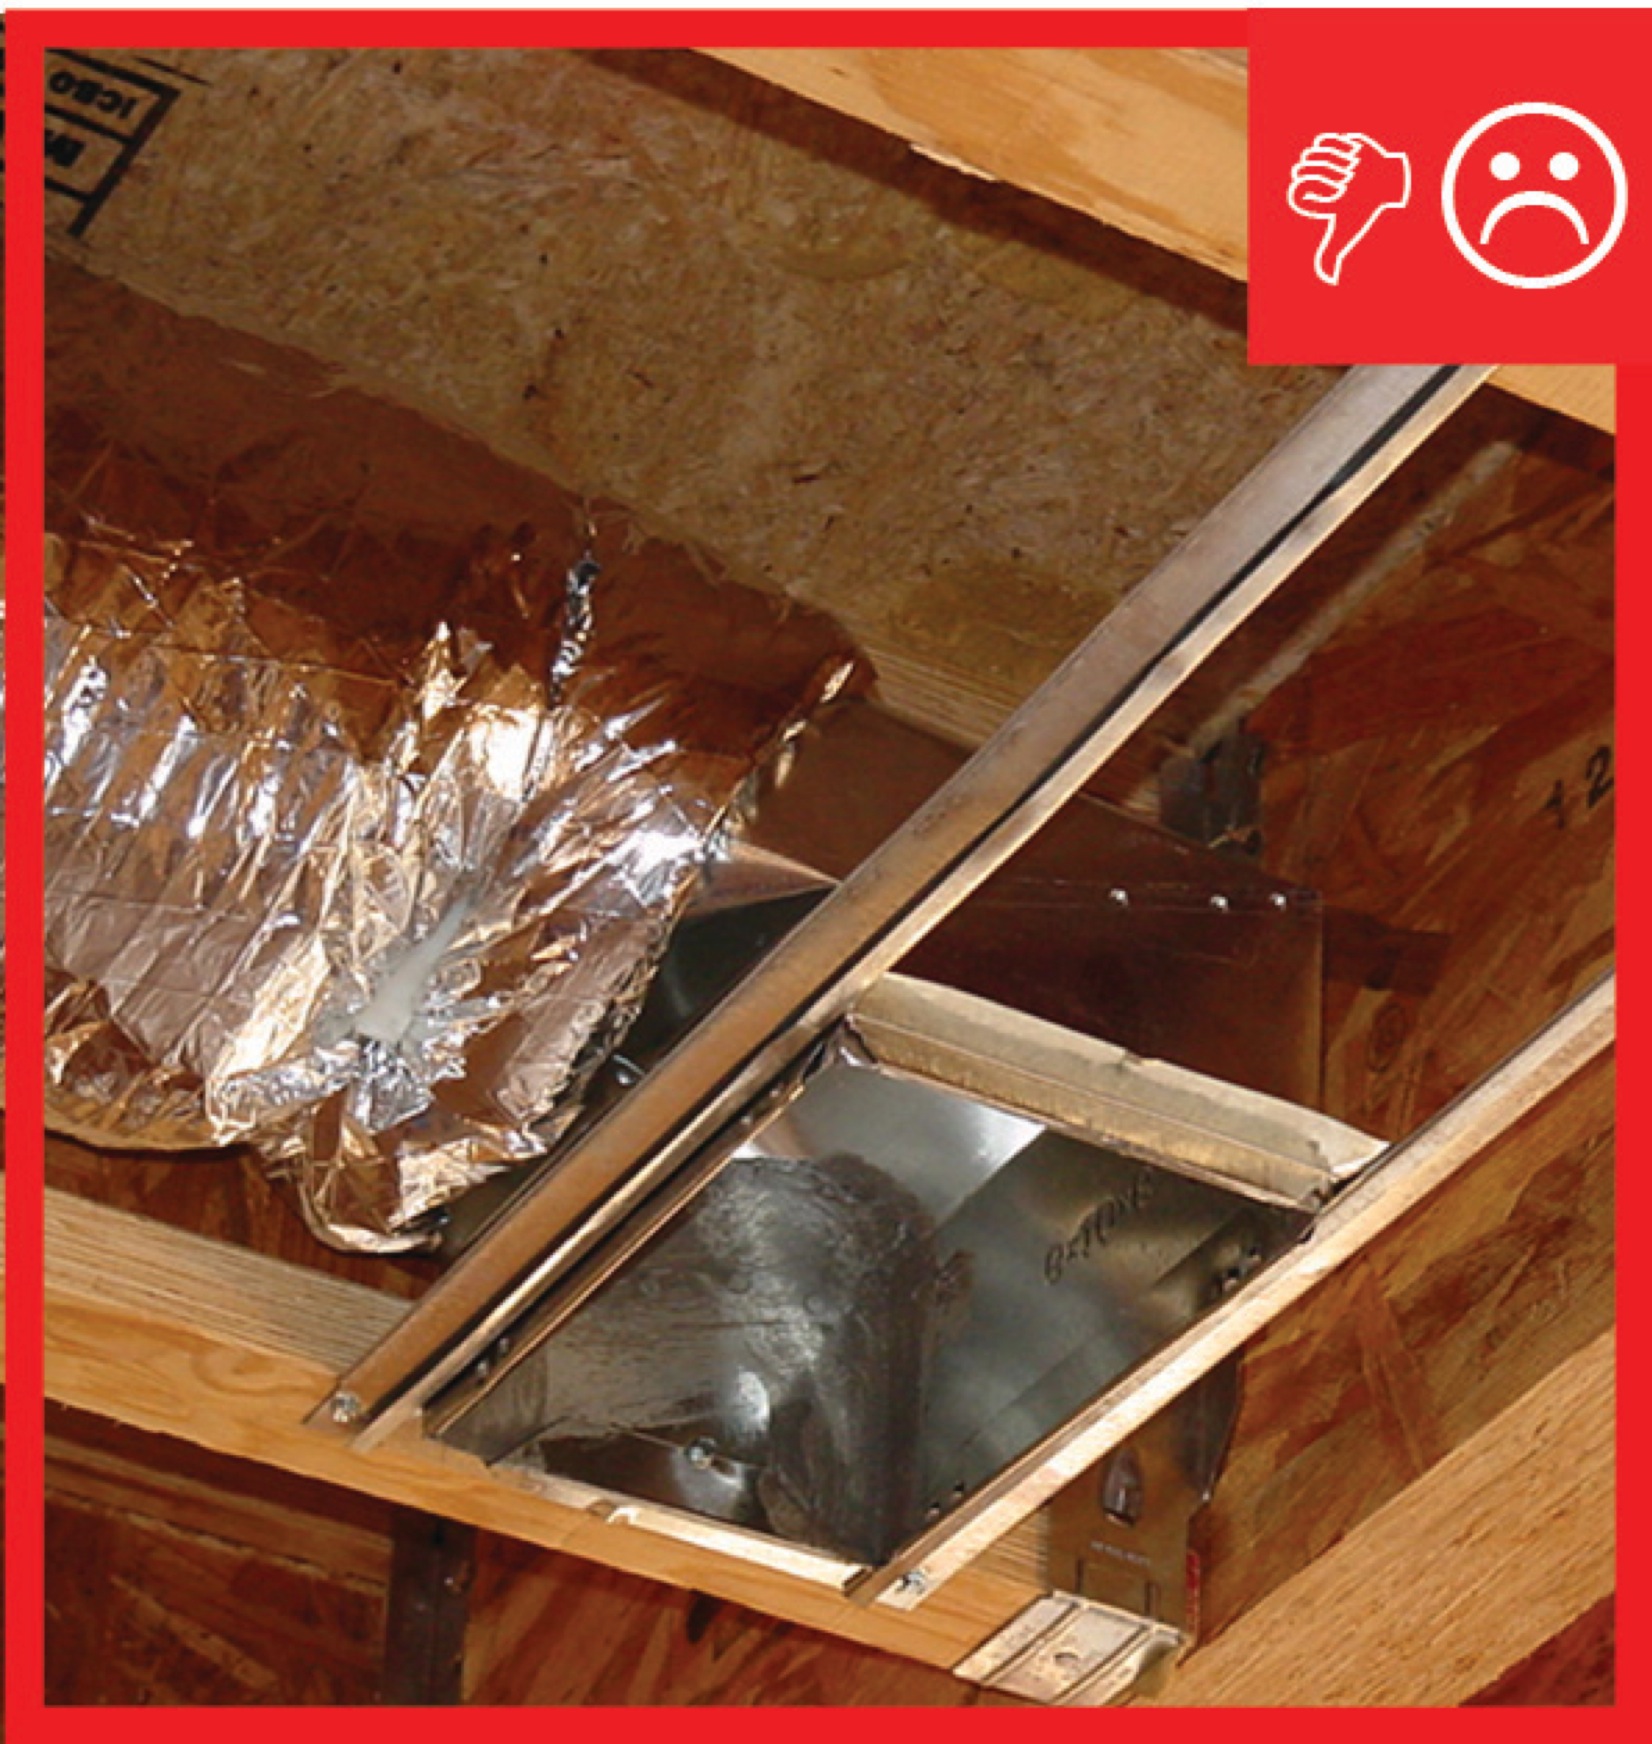
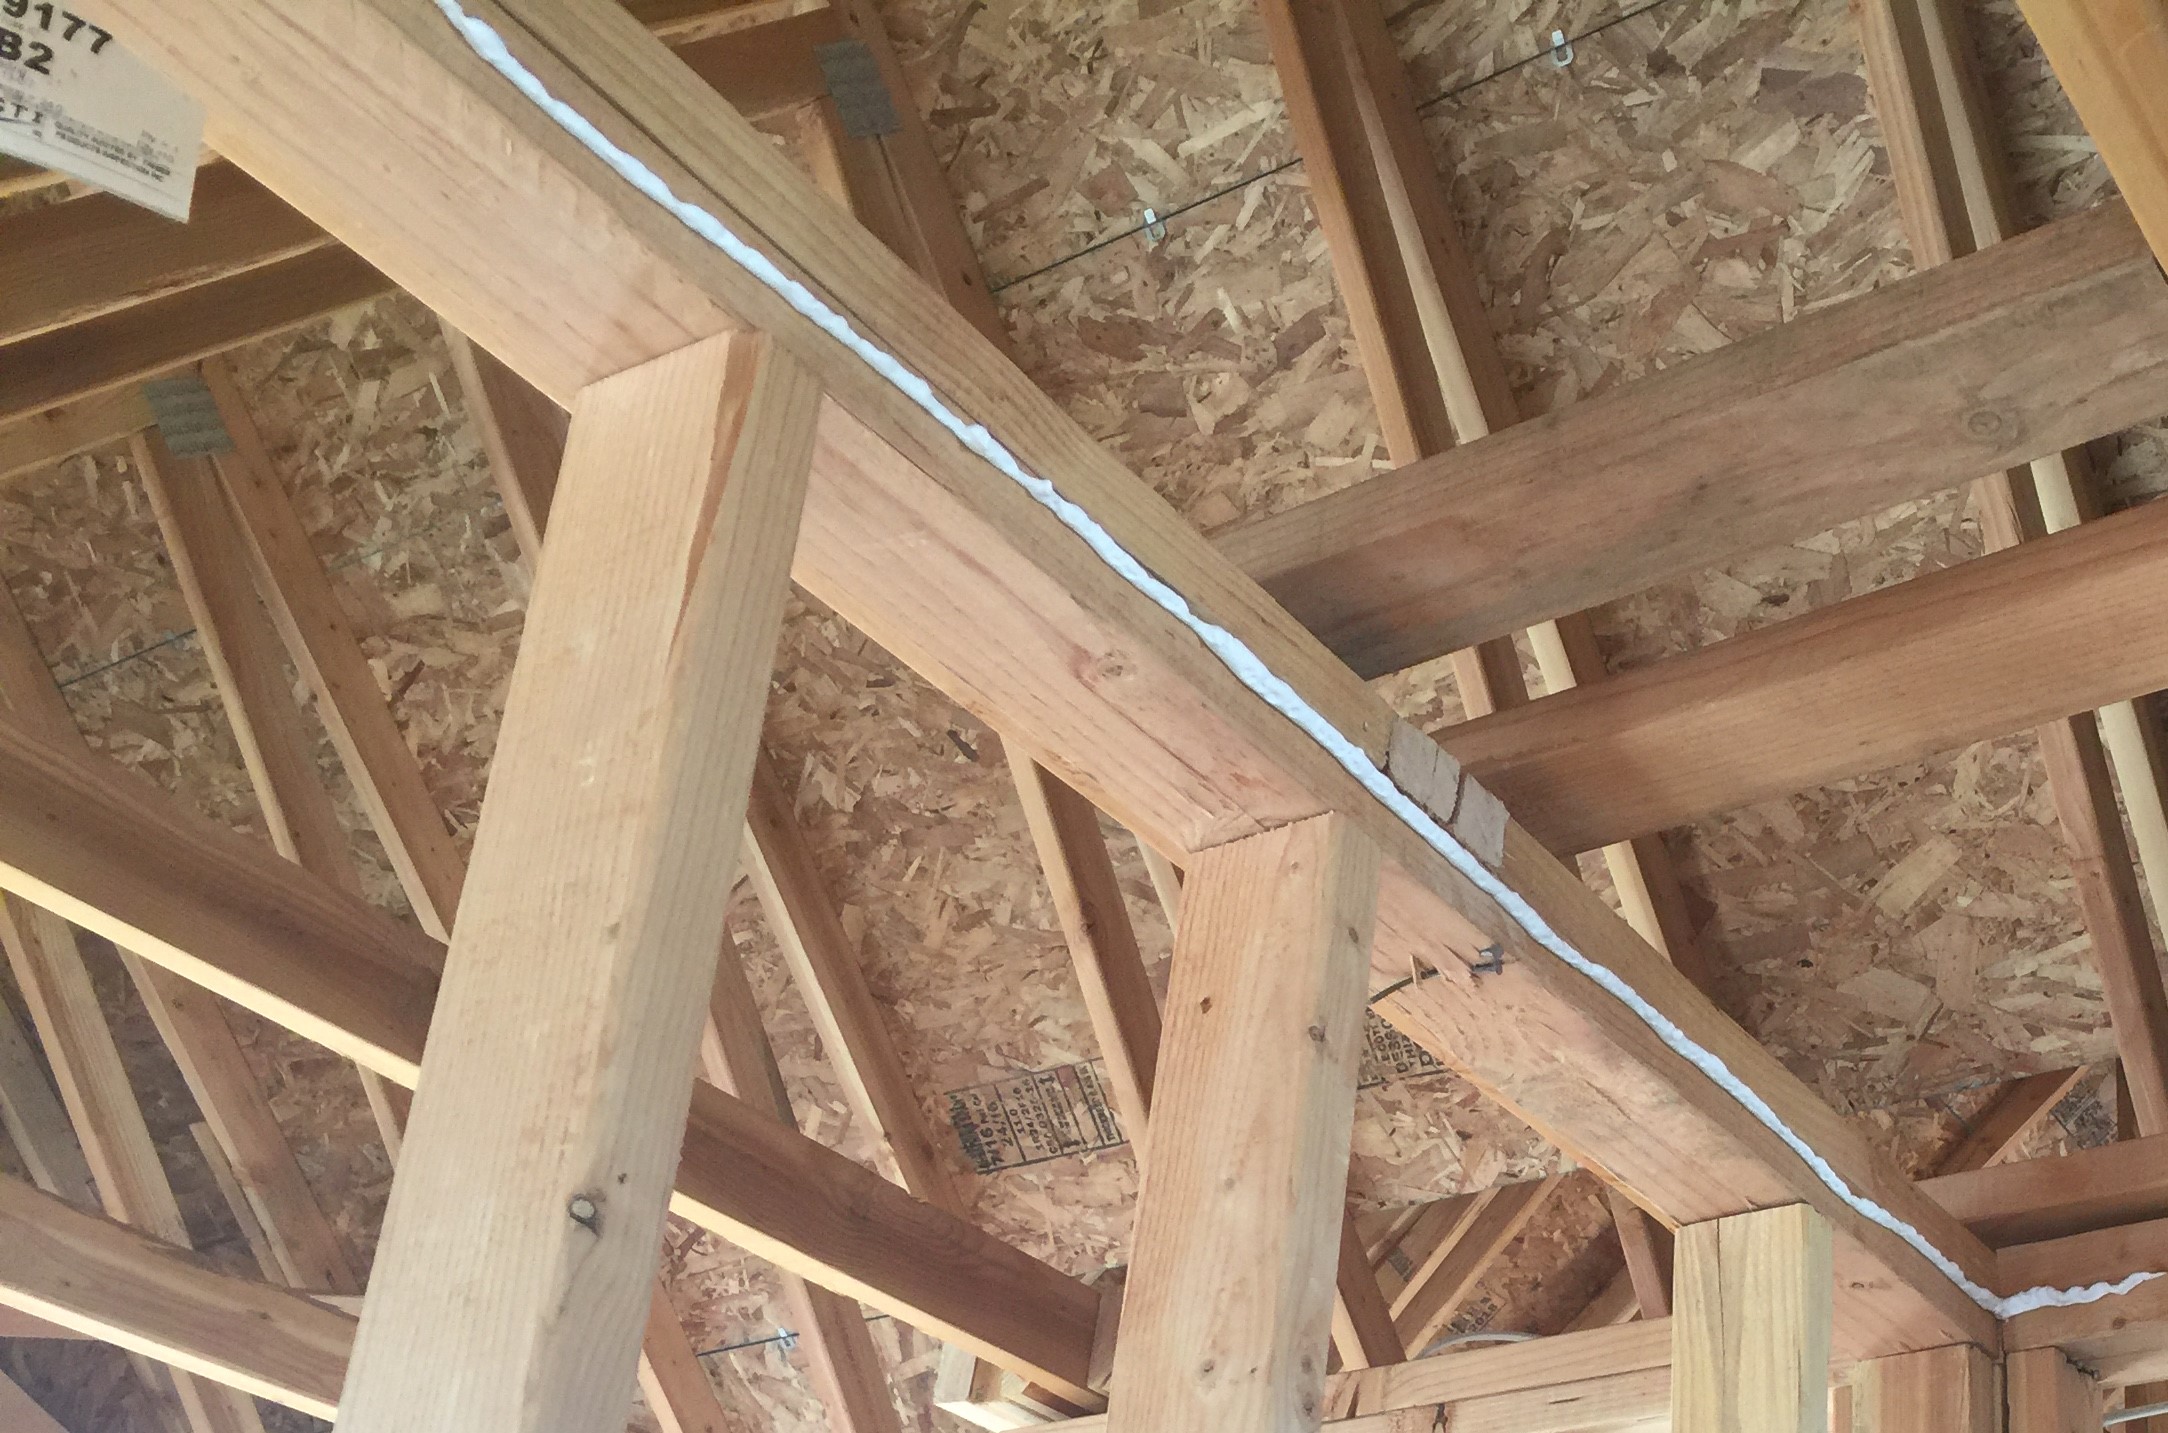
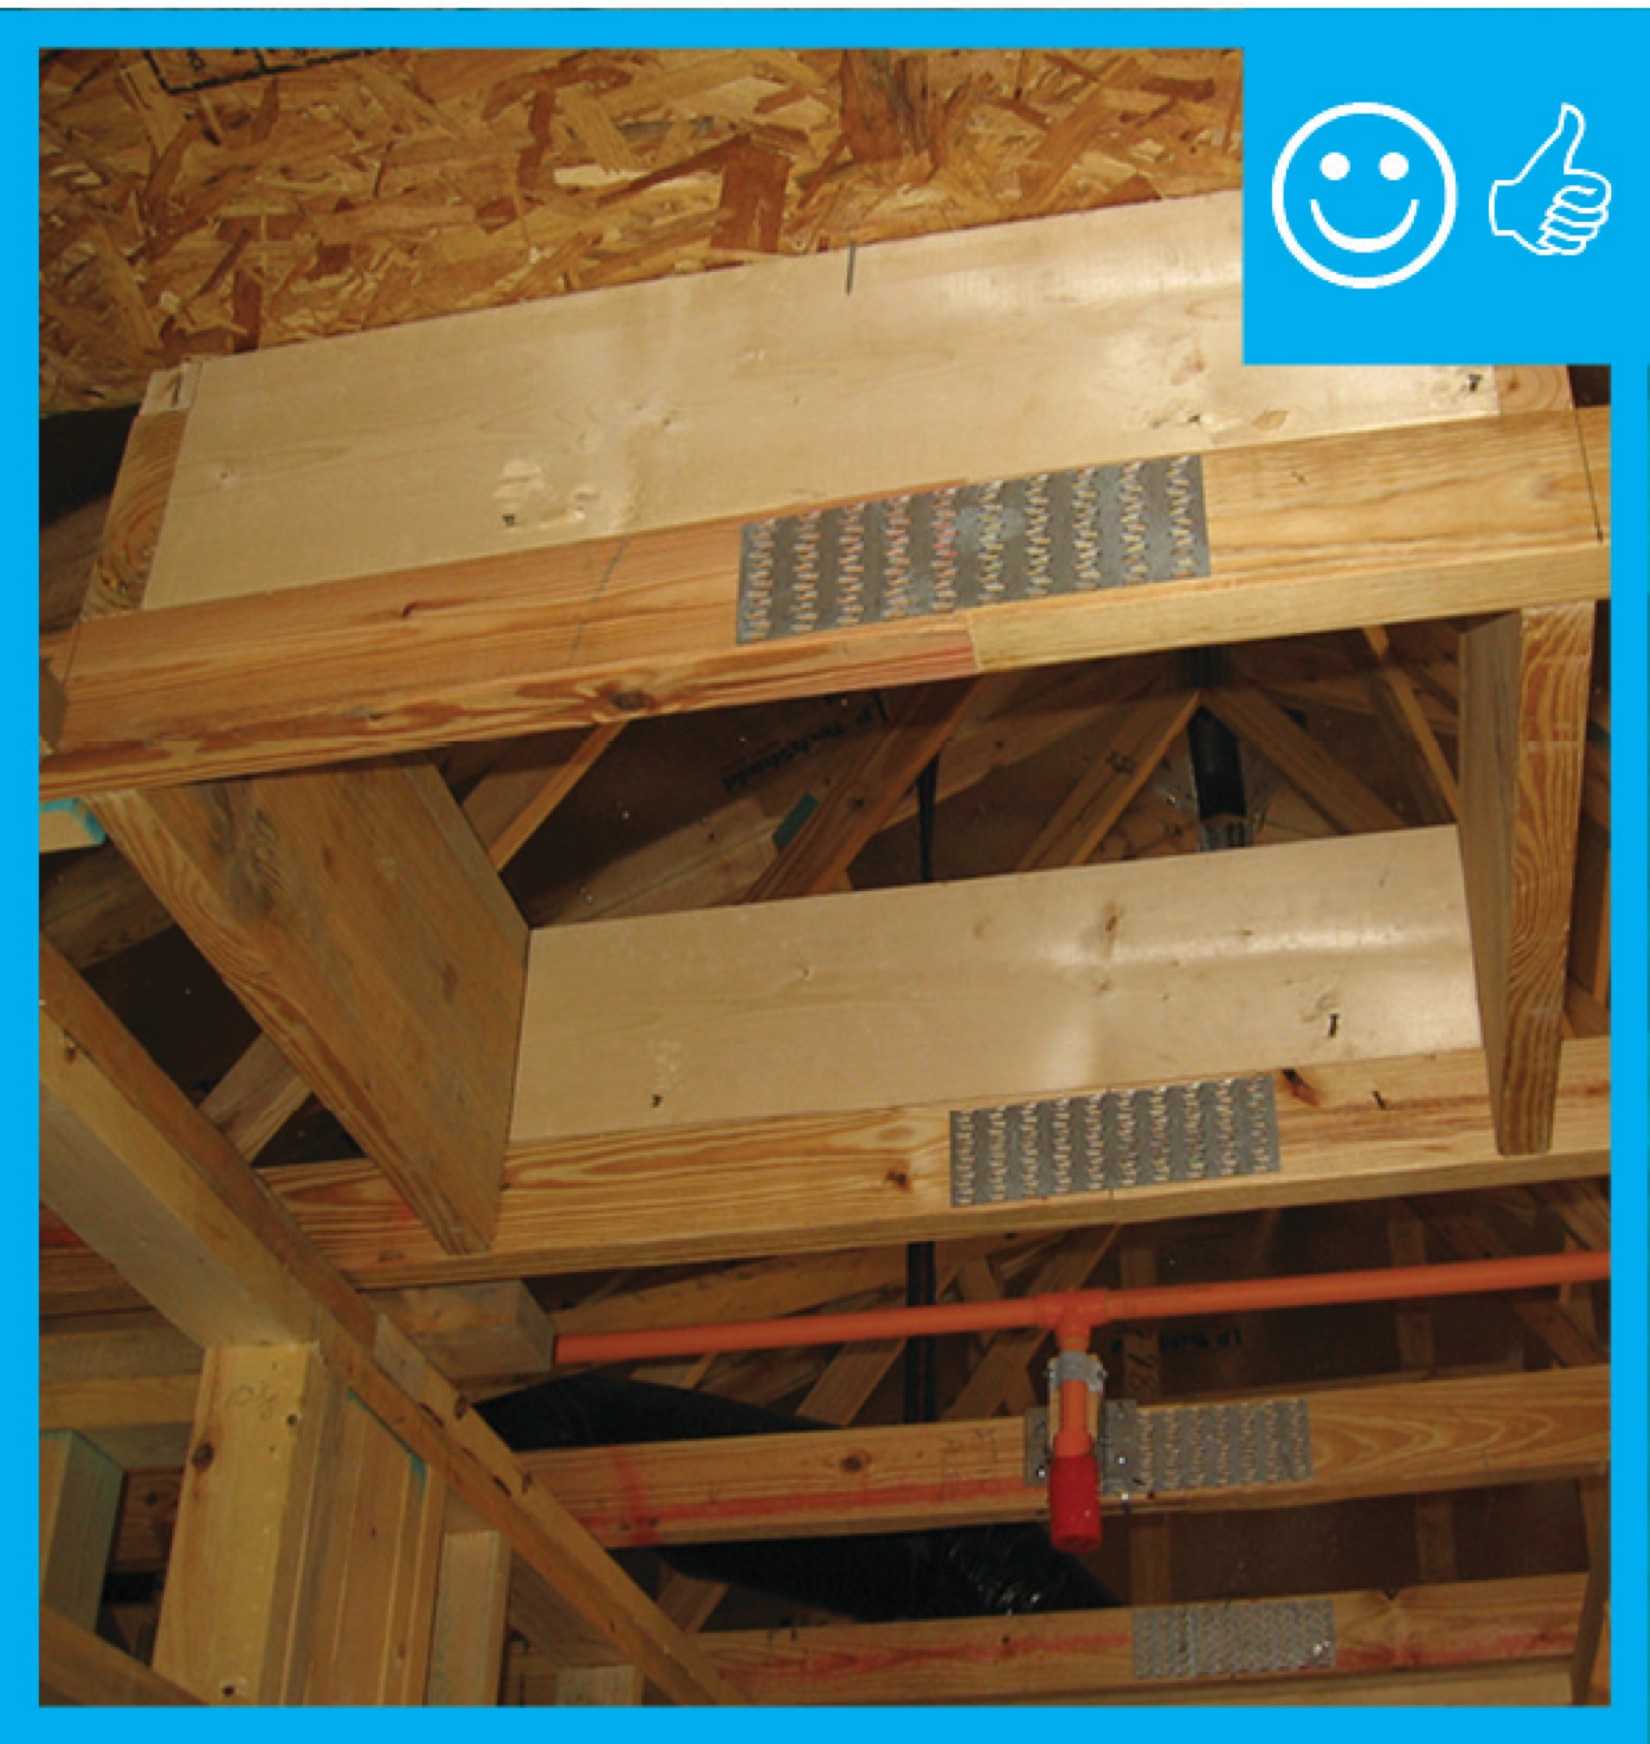
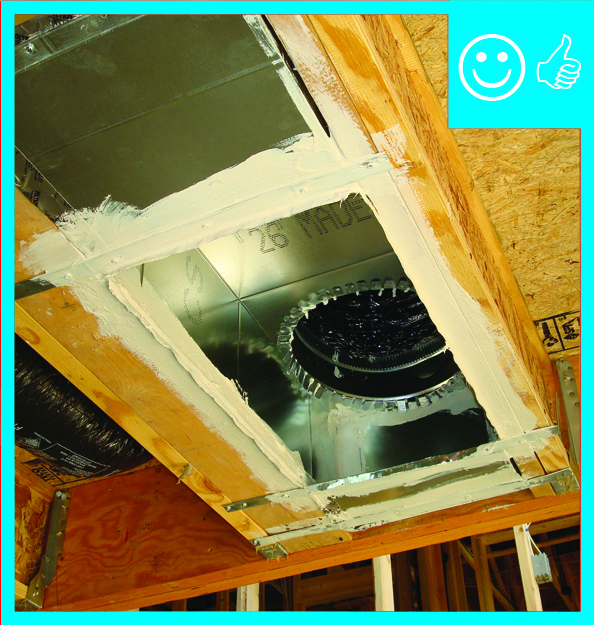
Install wood framing cross pieces in the attic rafter bays on each side of the duct chase
Image
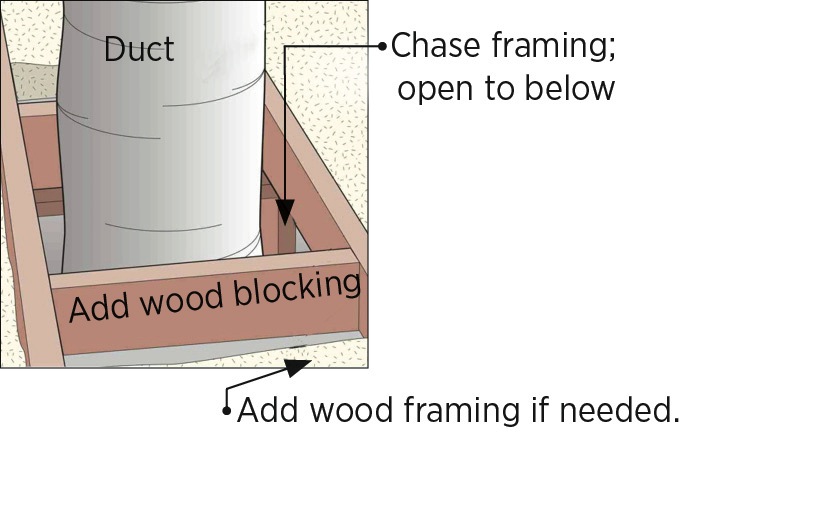
Install wood framing cross pieces in the attic rafter bays on each side of the duct chase
Image

Image
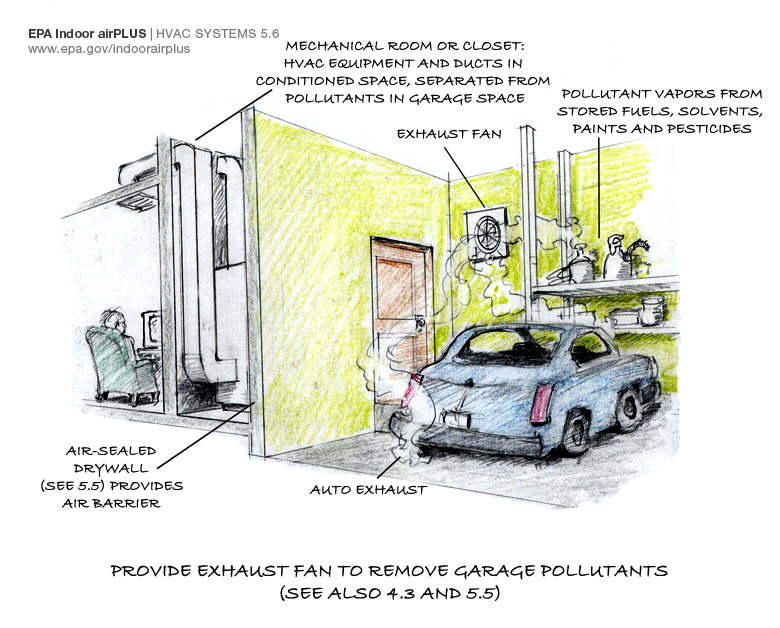
Installing a garage exhaust fan is one important step in keeping auto exhaust and other pollutants out of the home
Image
Image
Insulating sheathing is extended up to the roof rafters and sealed around the framing with spray foam as part of this exterior wall retrofit
Image
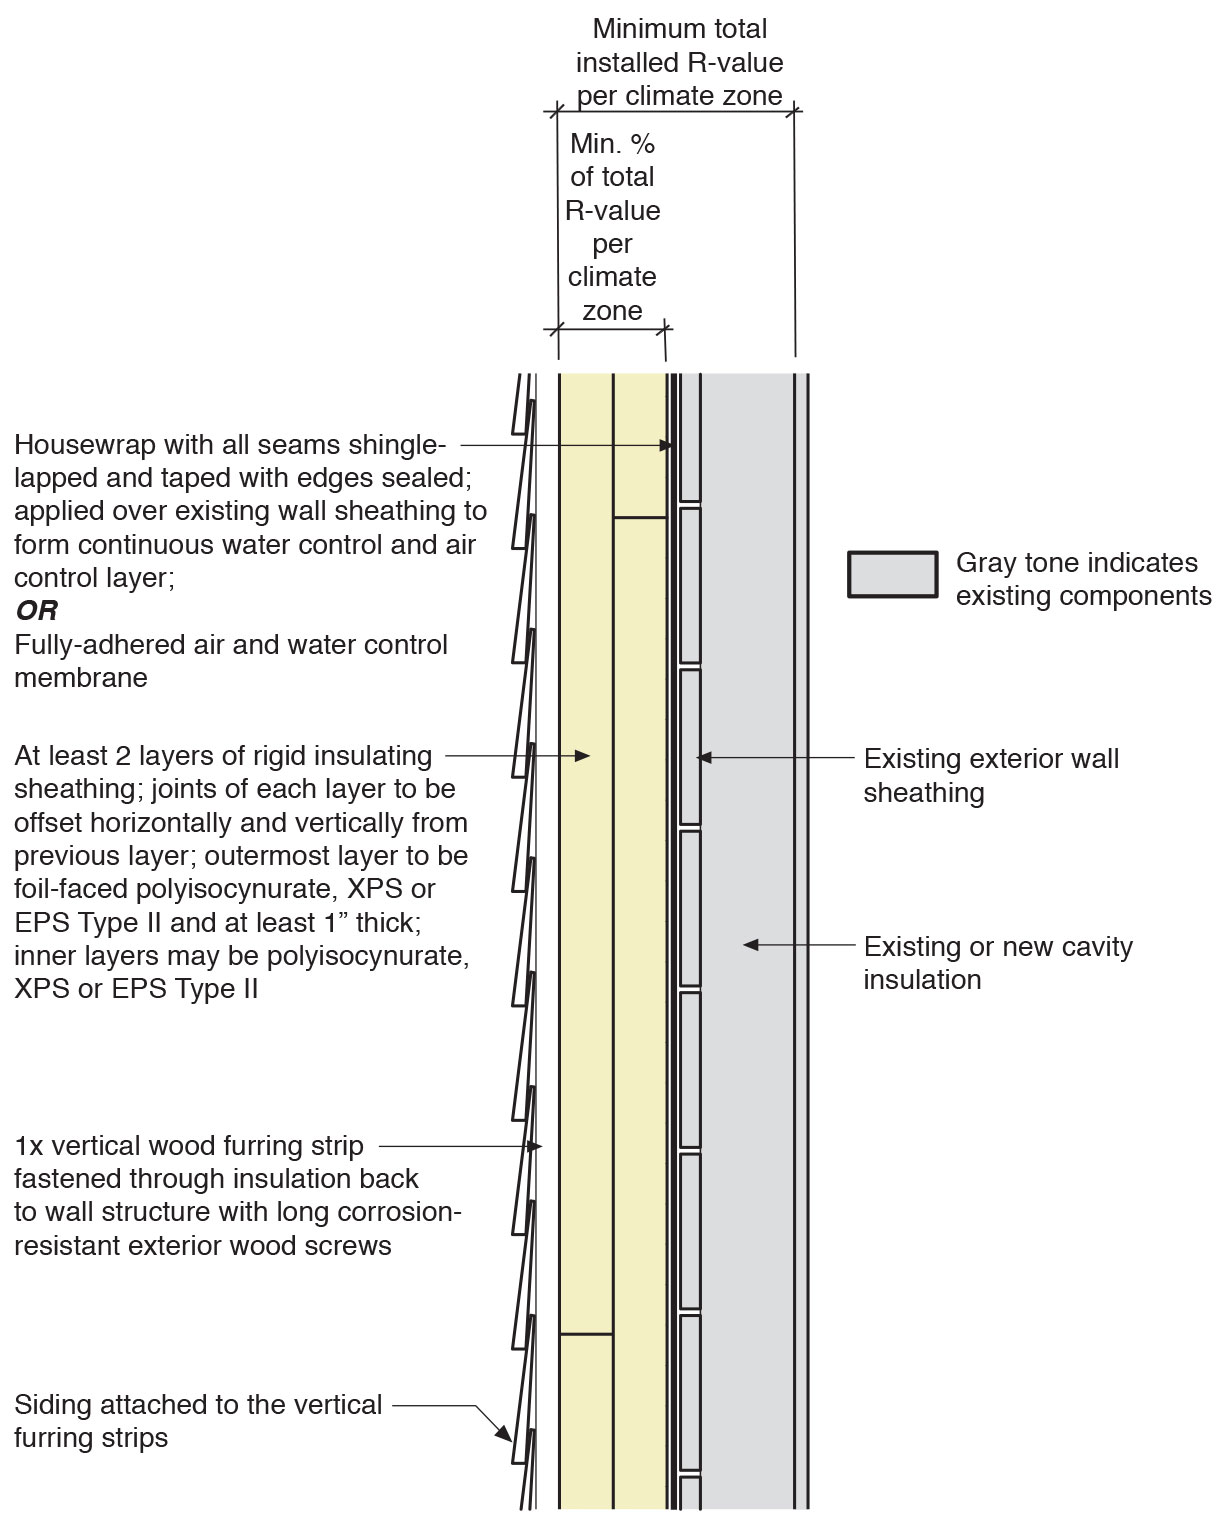
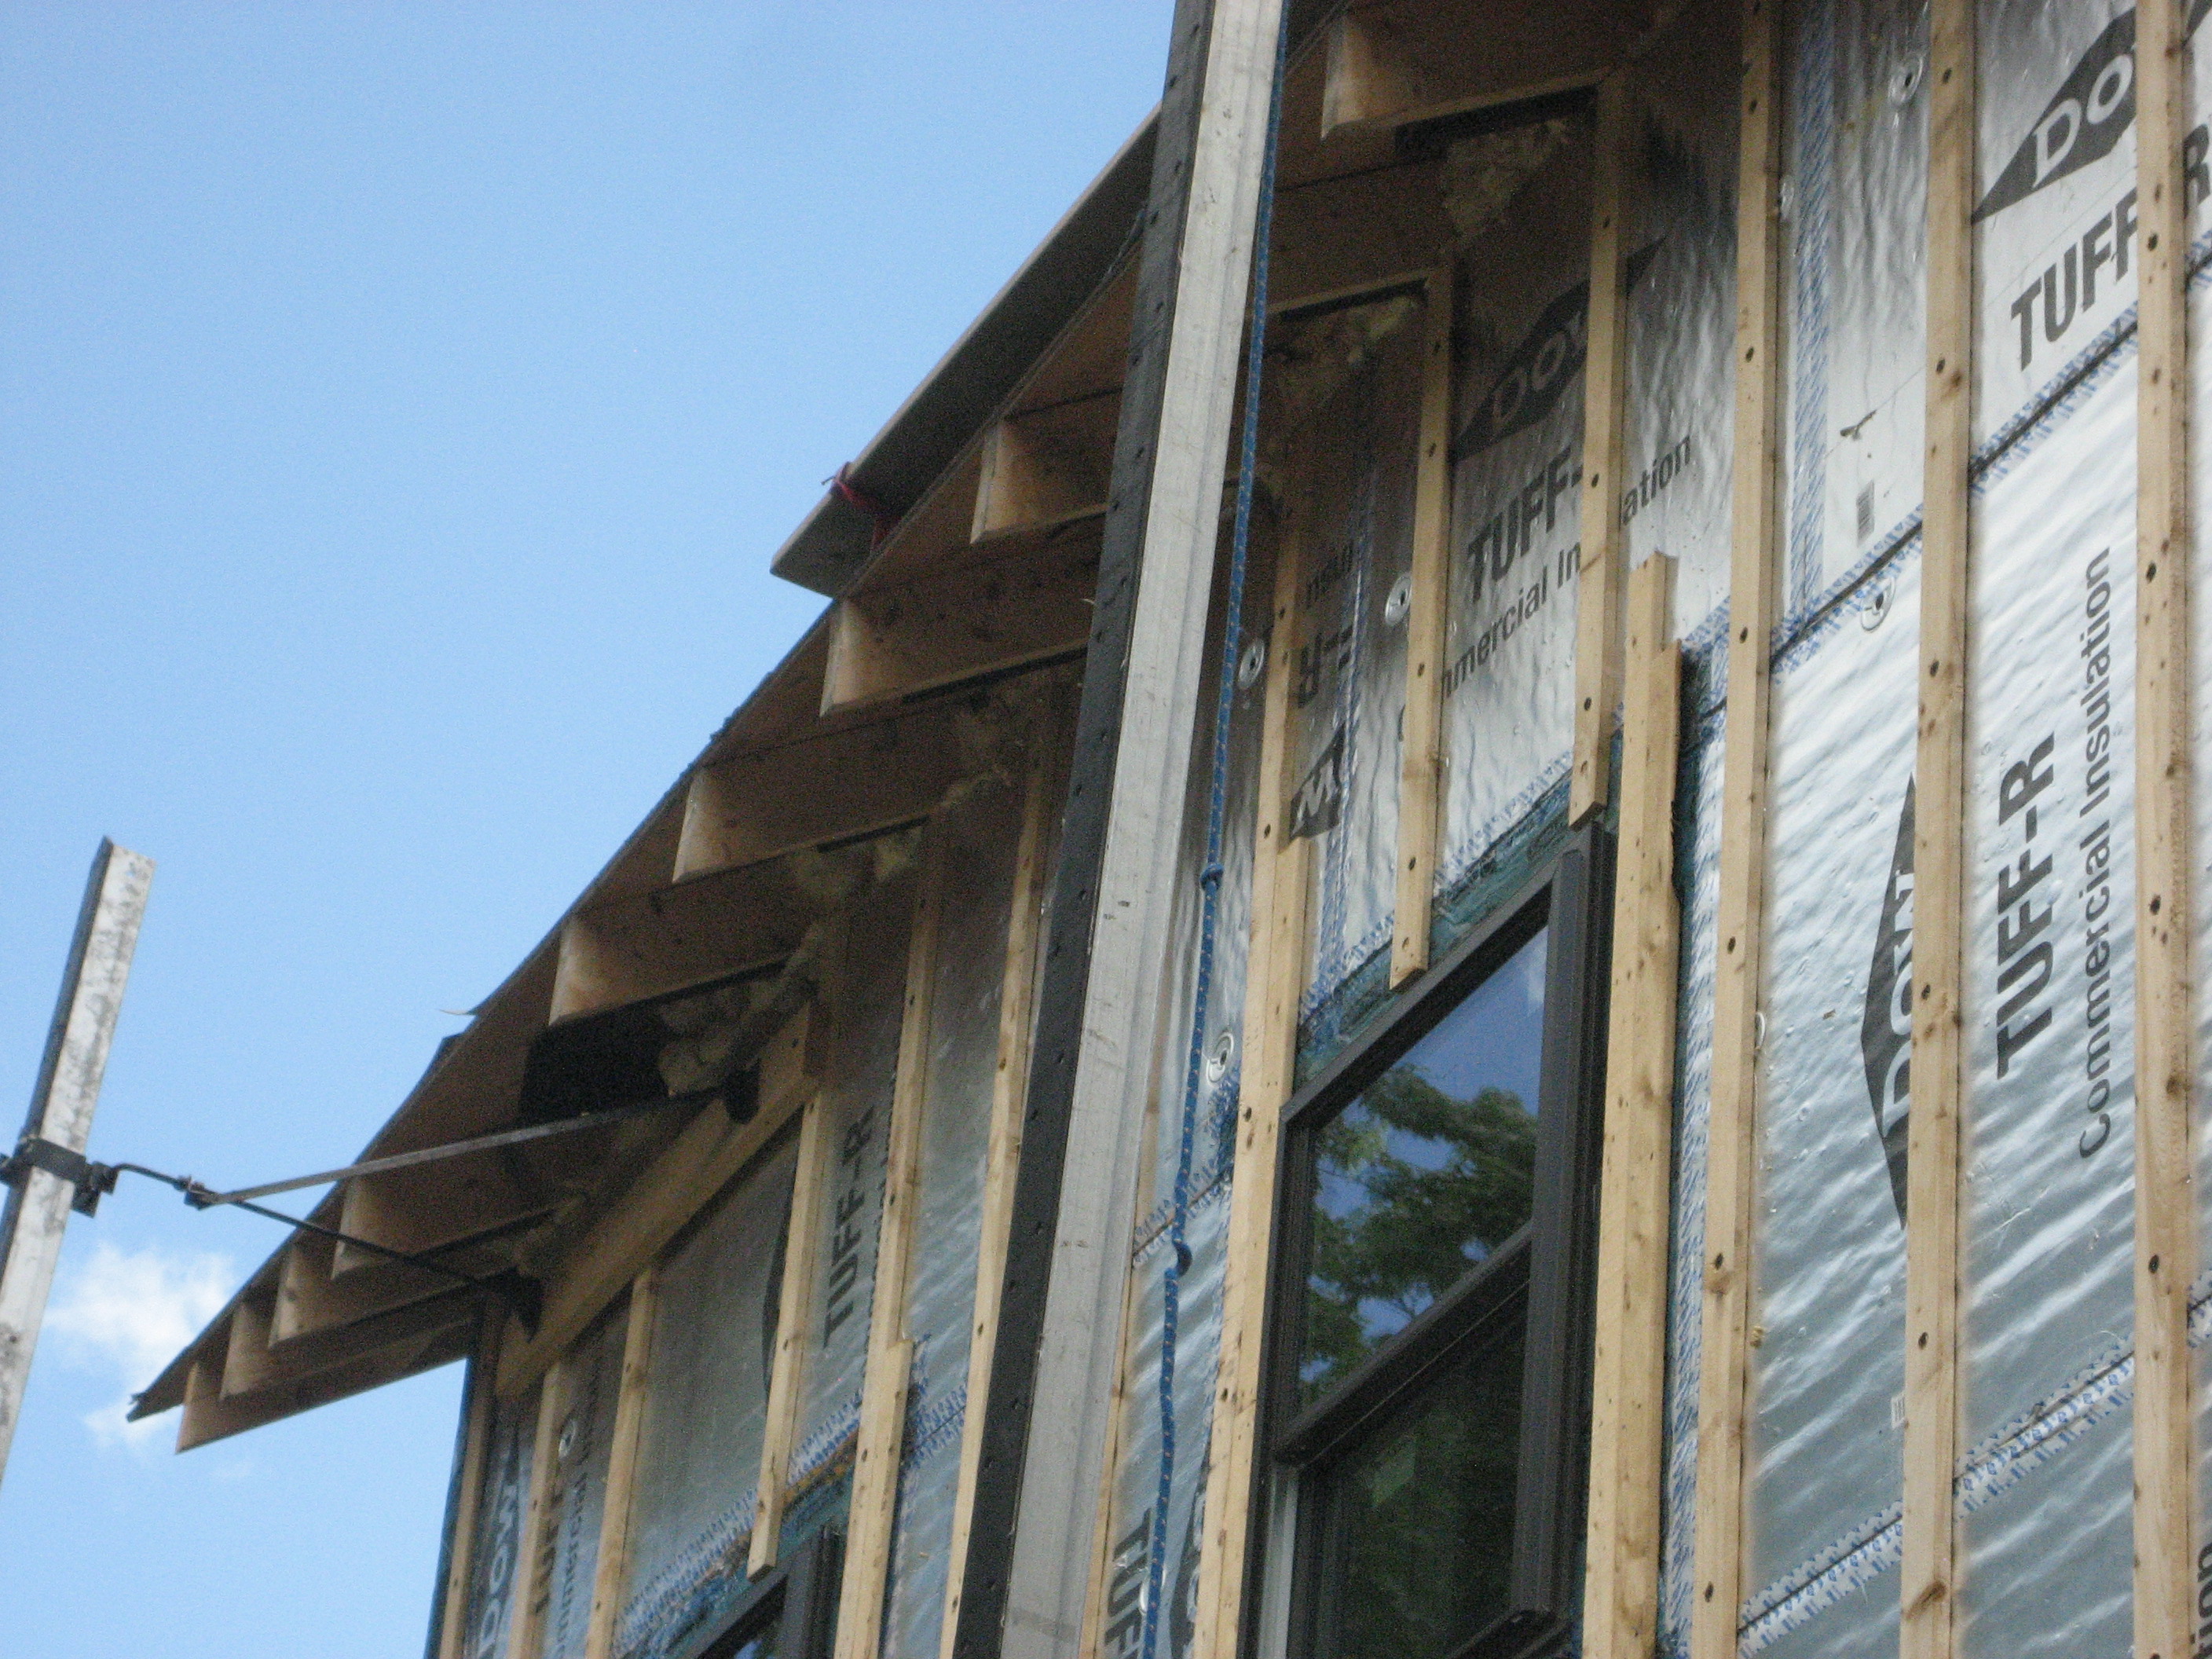
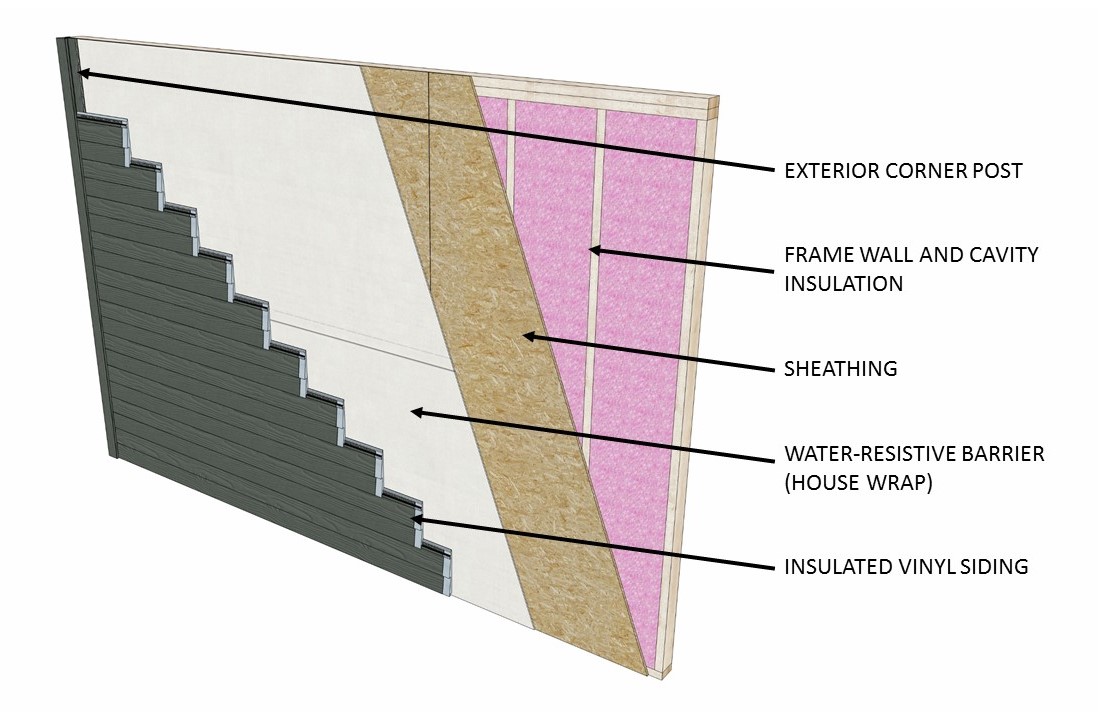
Insulating sheathing is installed on exterior of an existing framed wall with water control between existing sheathing and insulating sheathing
Image
Image
Image
Image
Image
Image
Image

Light tubes adjacent to unconditioned space include lens separating unconditioned and conditioned space and are fully gasketed
Image
Image
Image
Image
Image
Image
Image

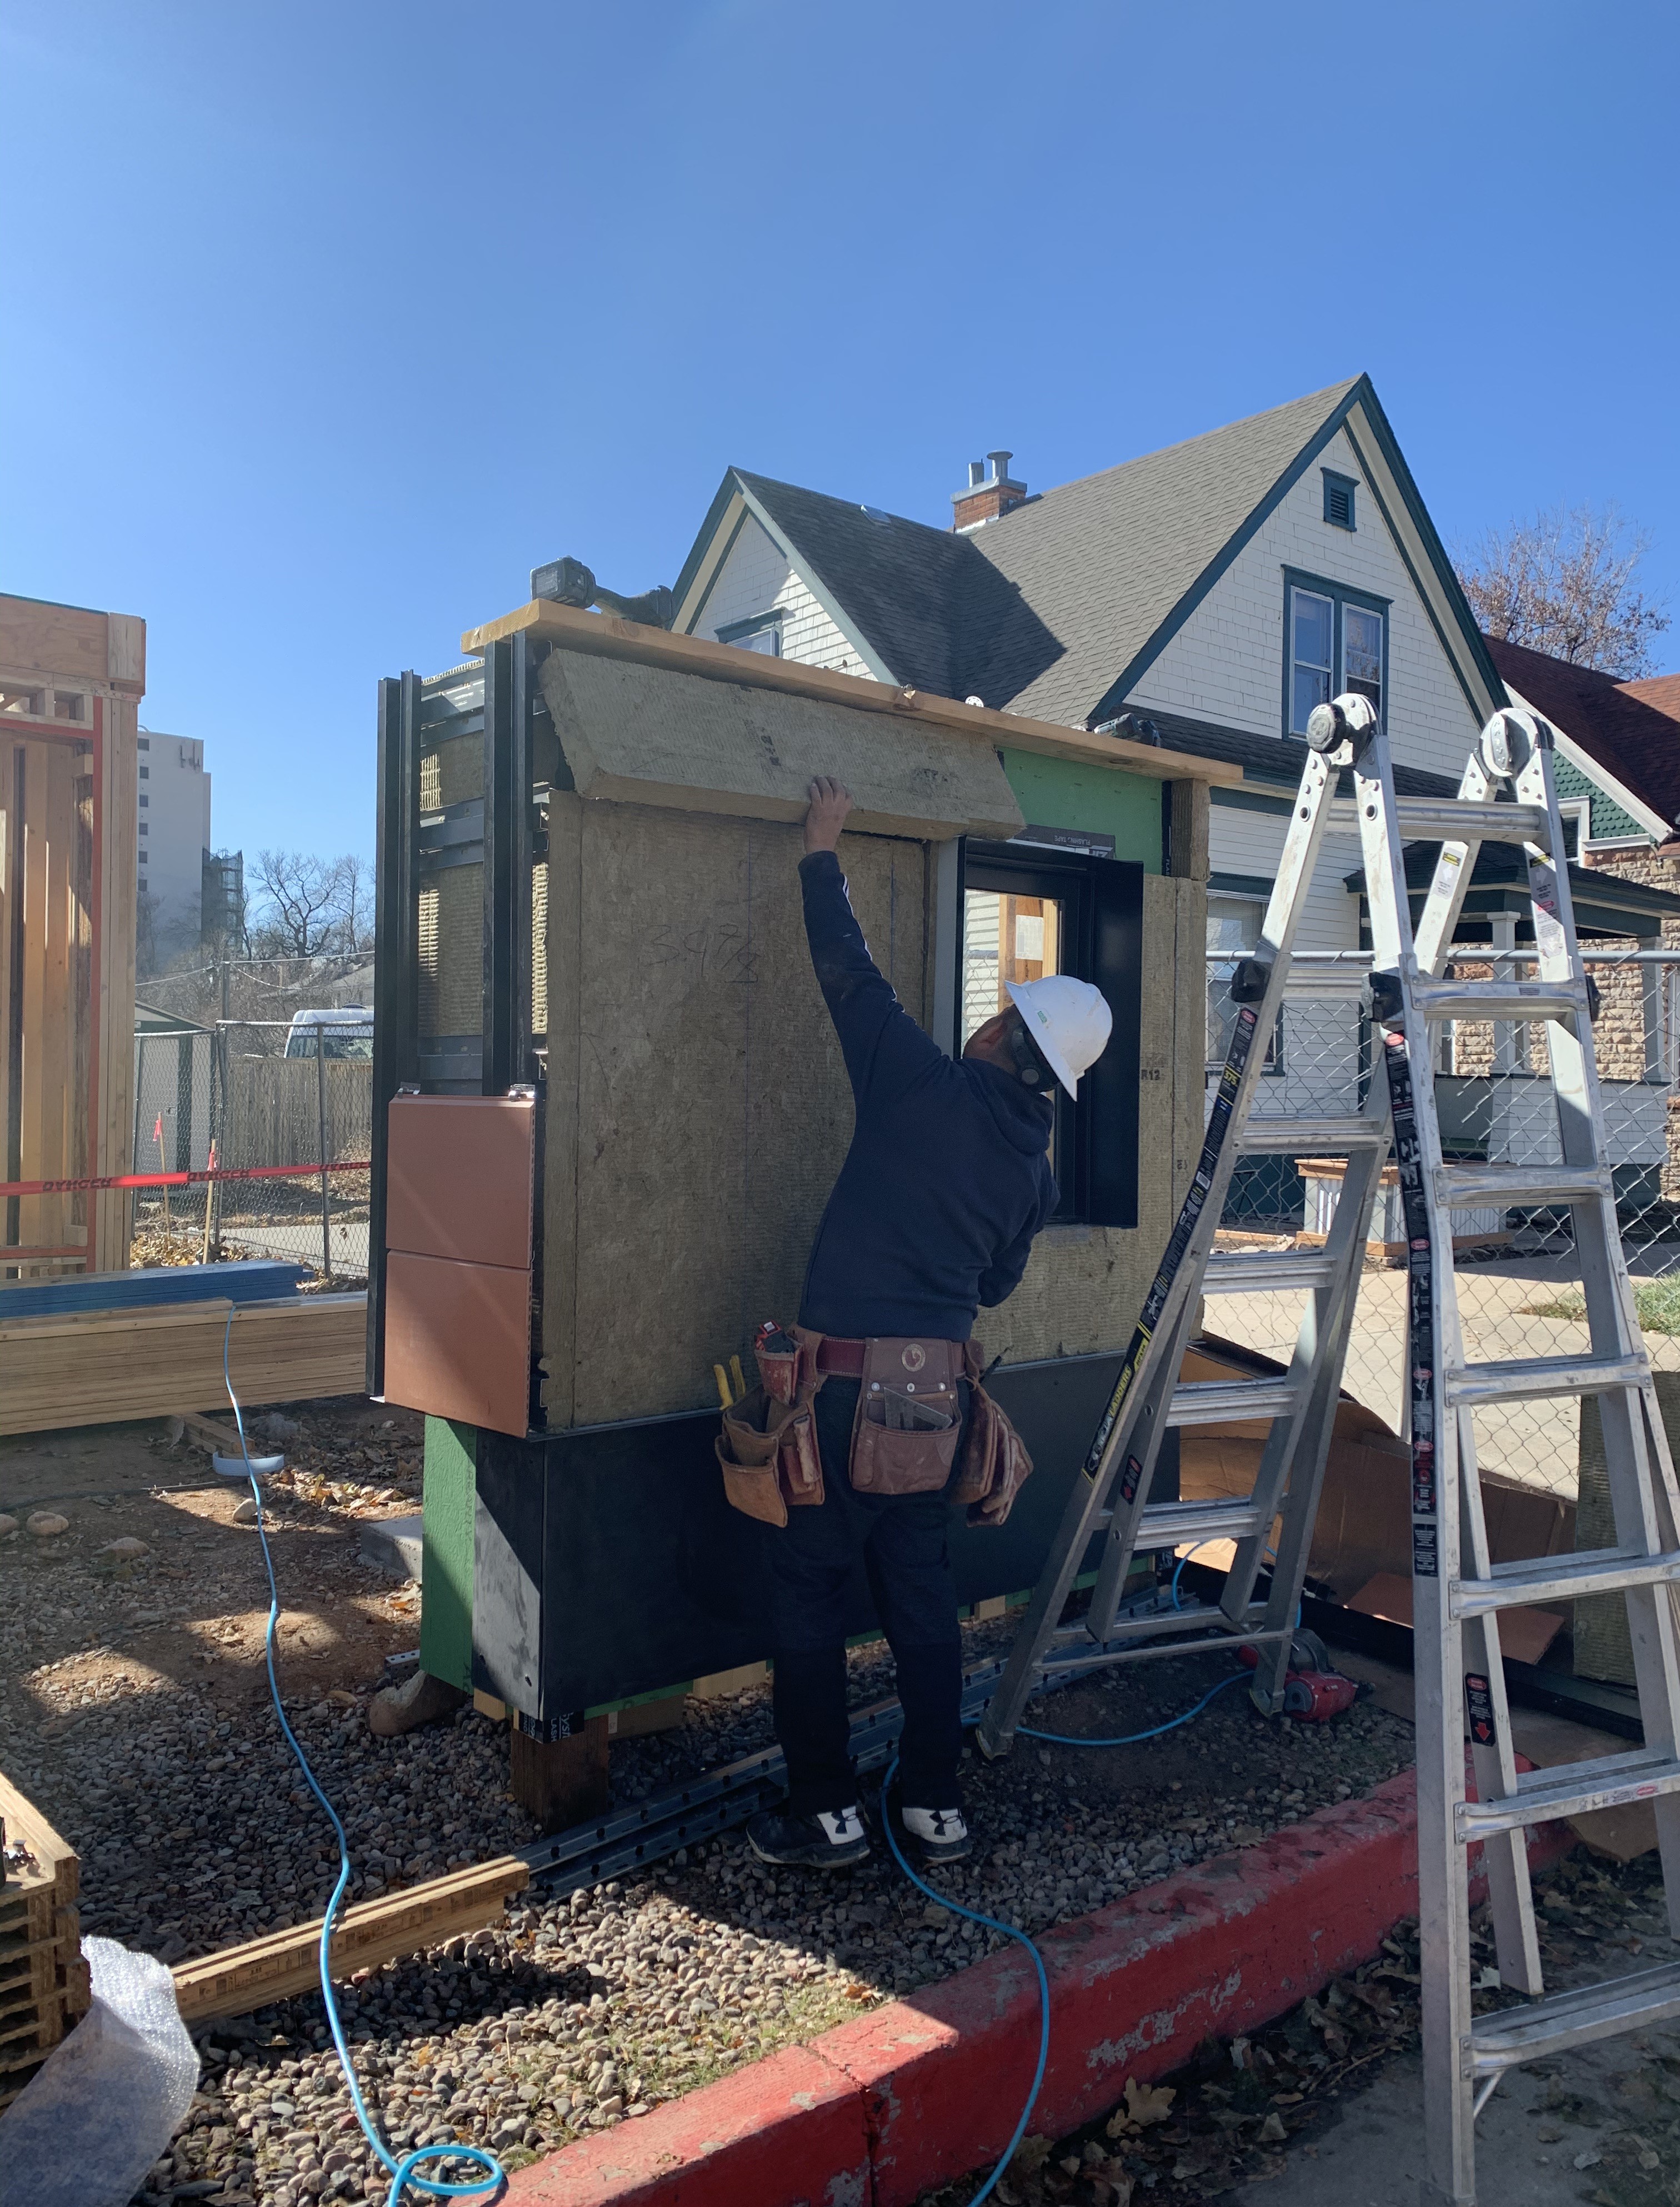
Marriage joints between modular home modules at all exterior boundary conditions fully sealed with gasket and foam
Image
Image
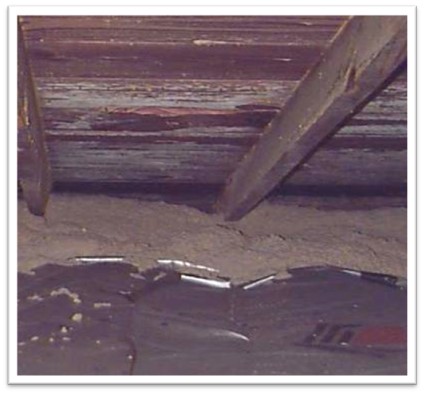
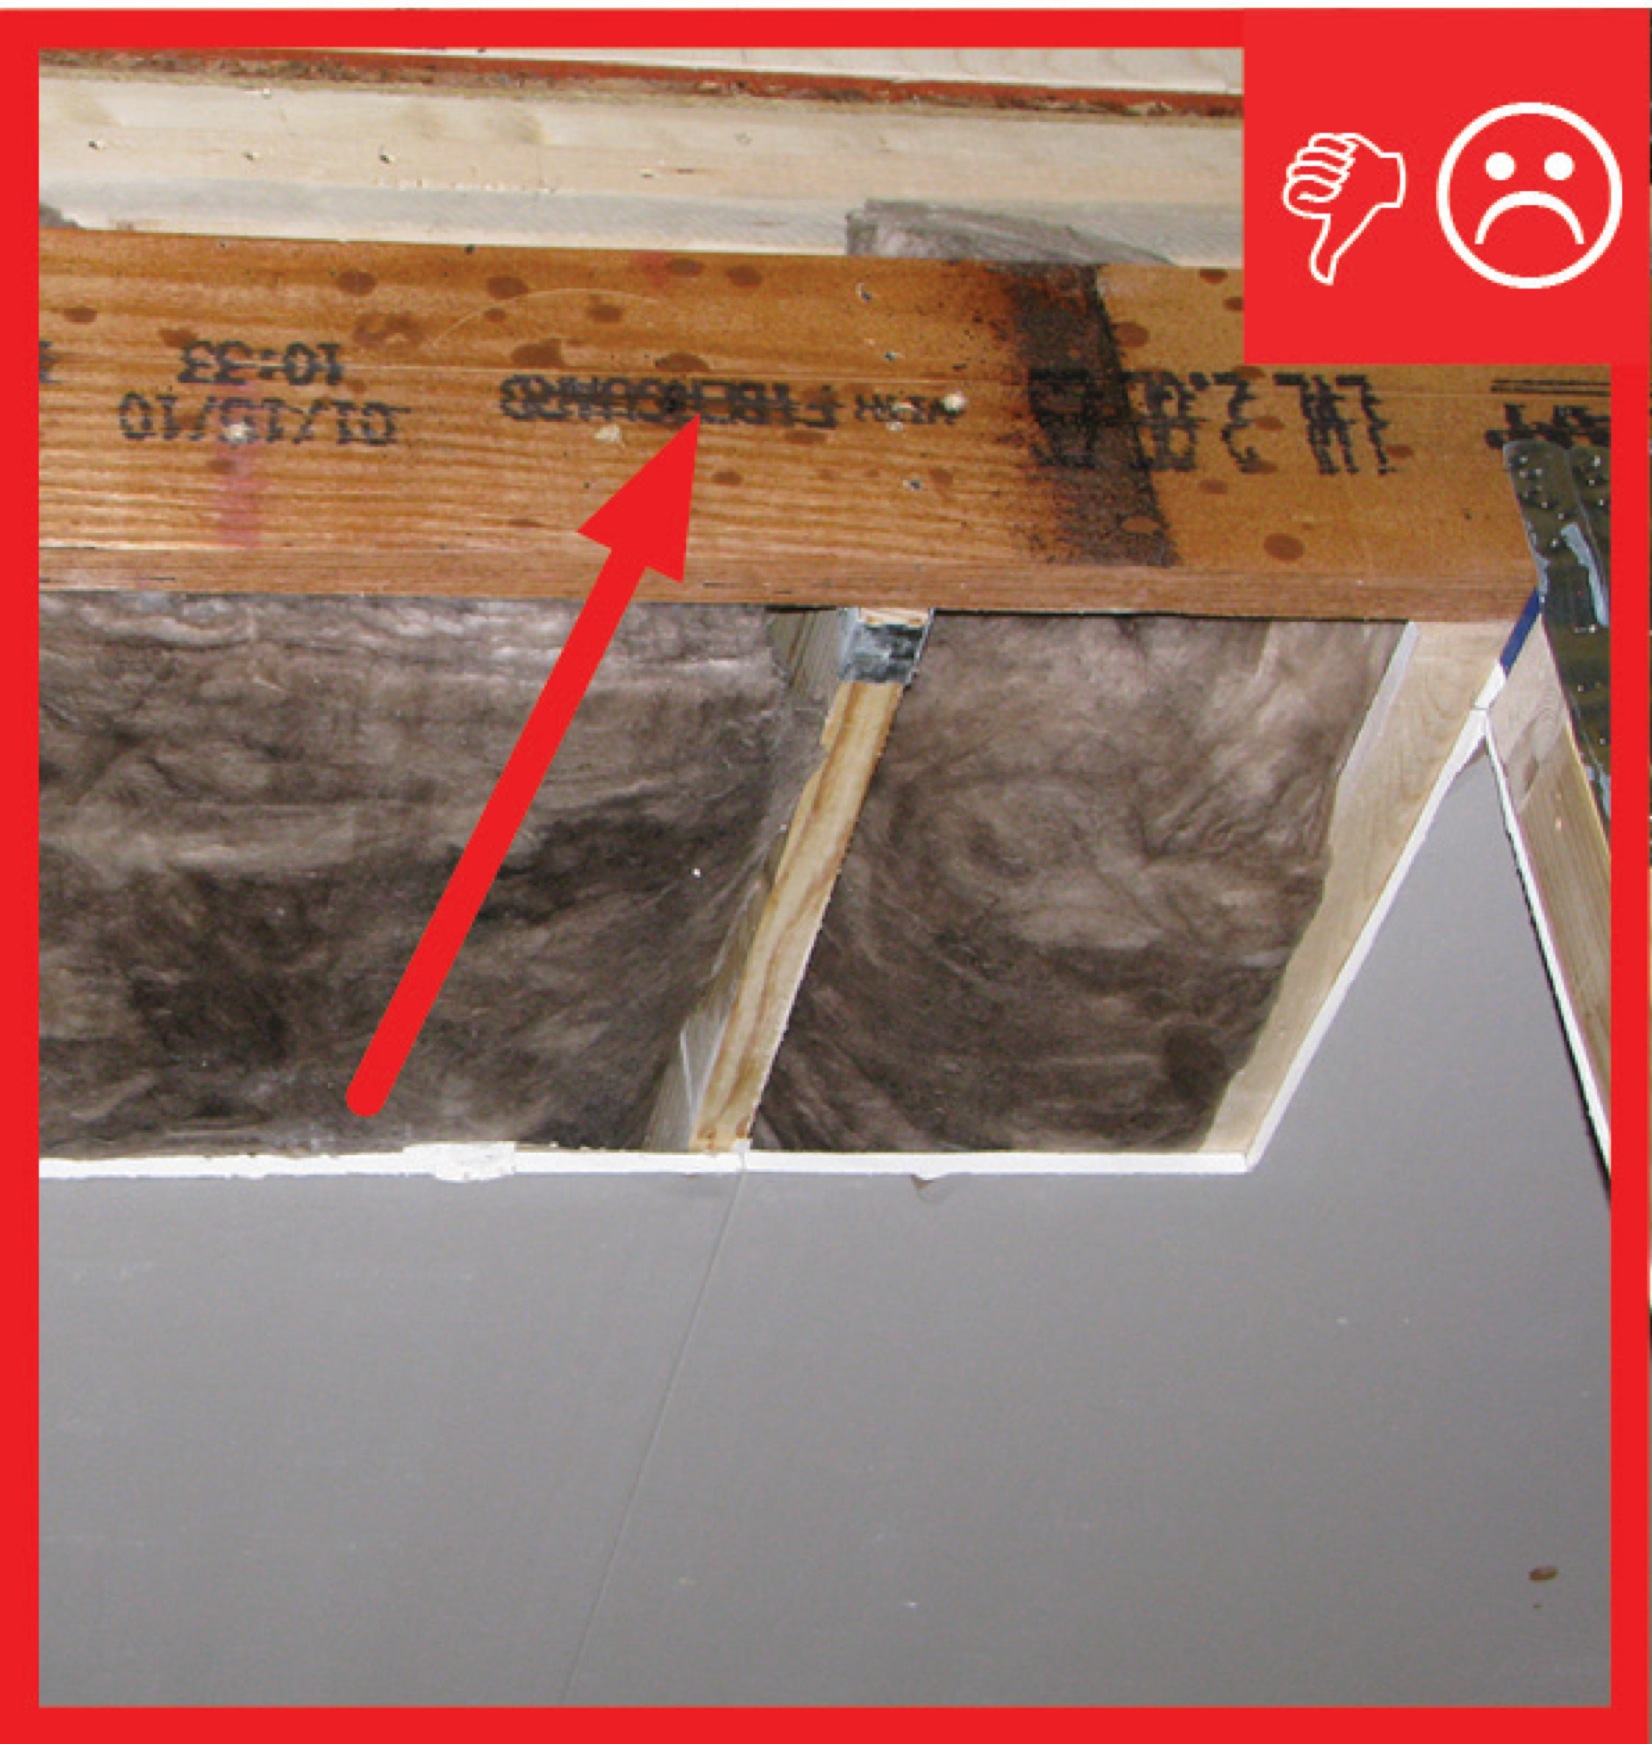
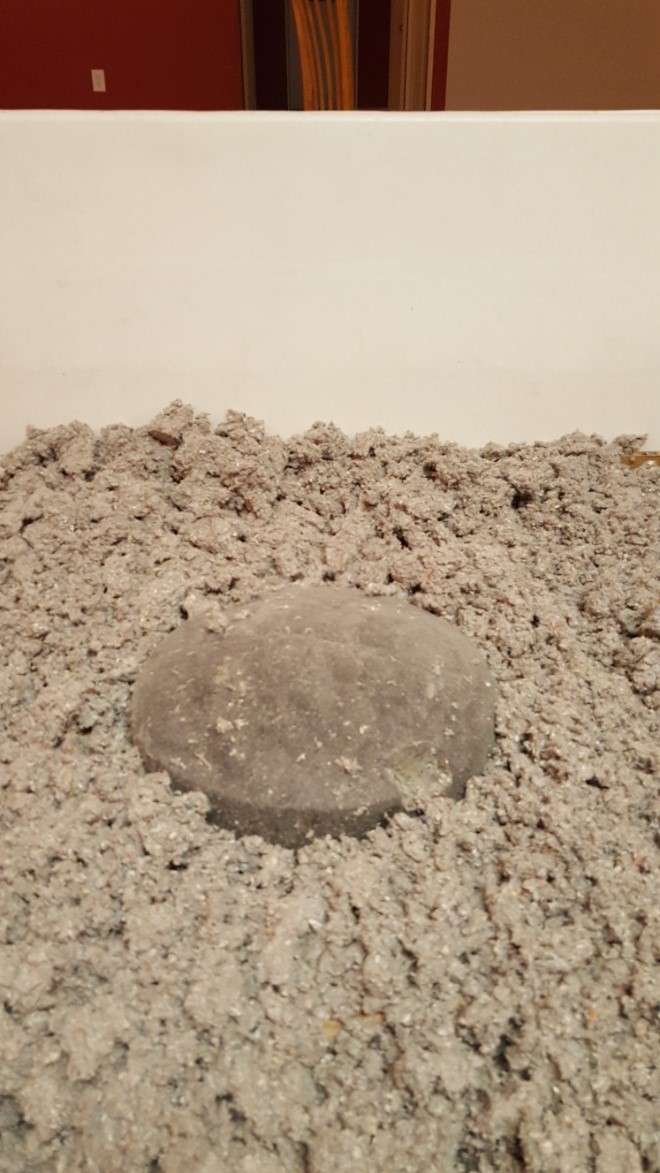
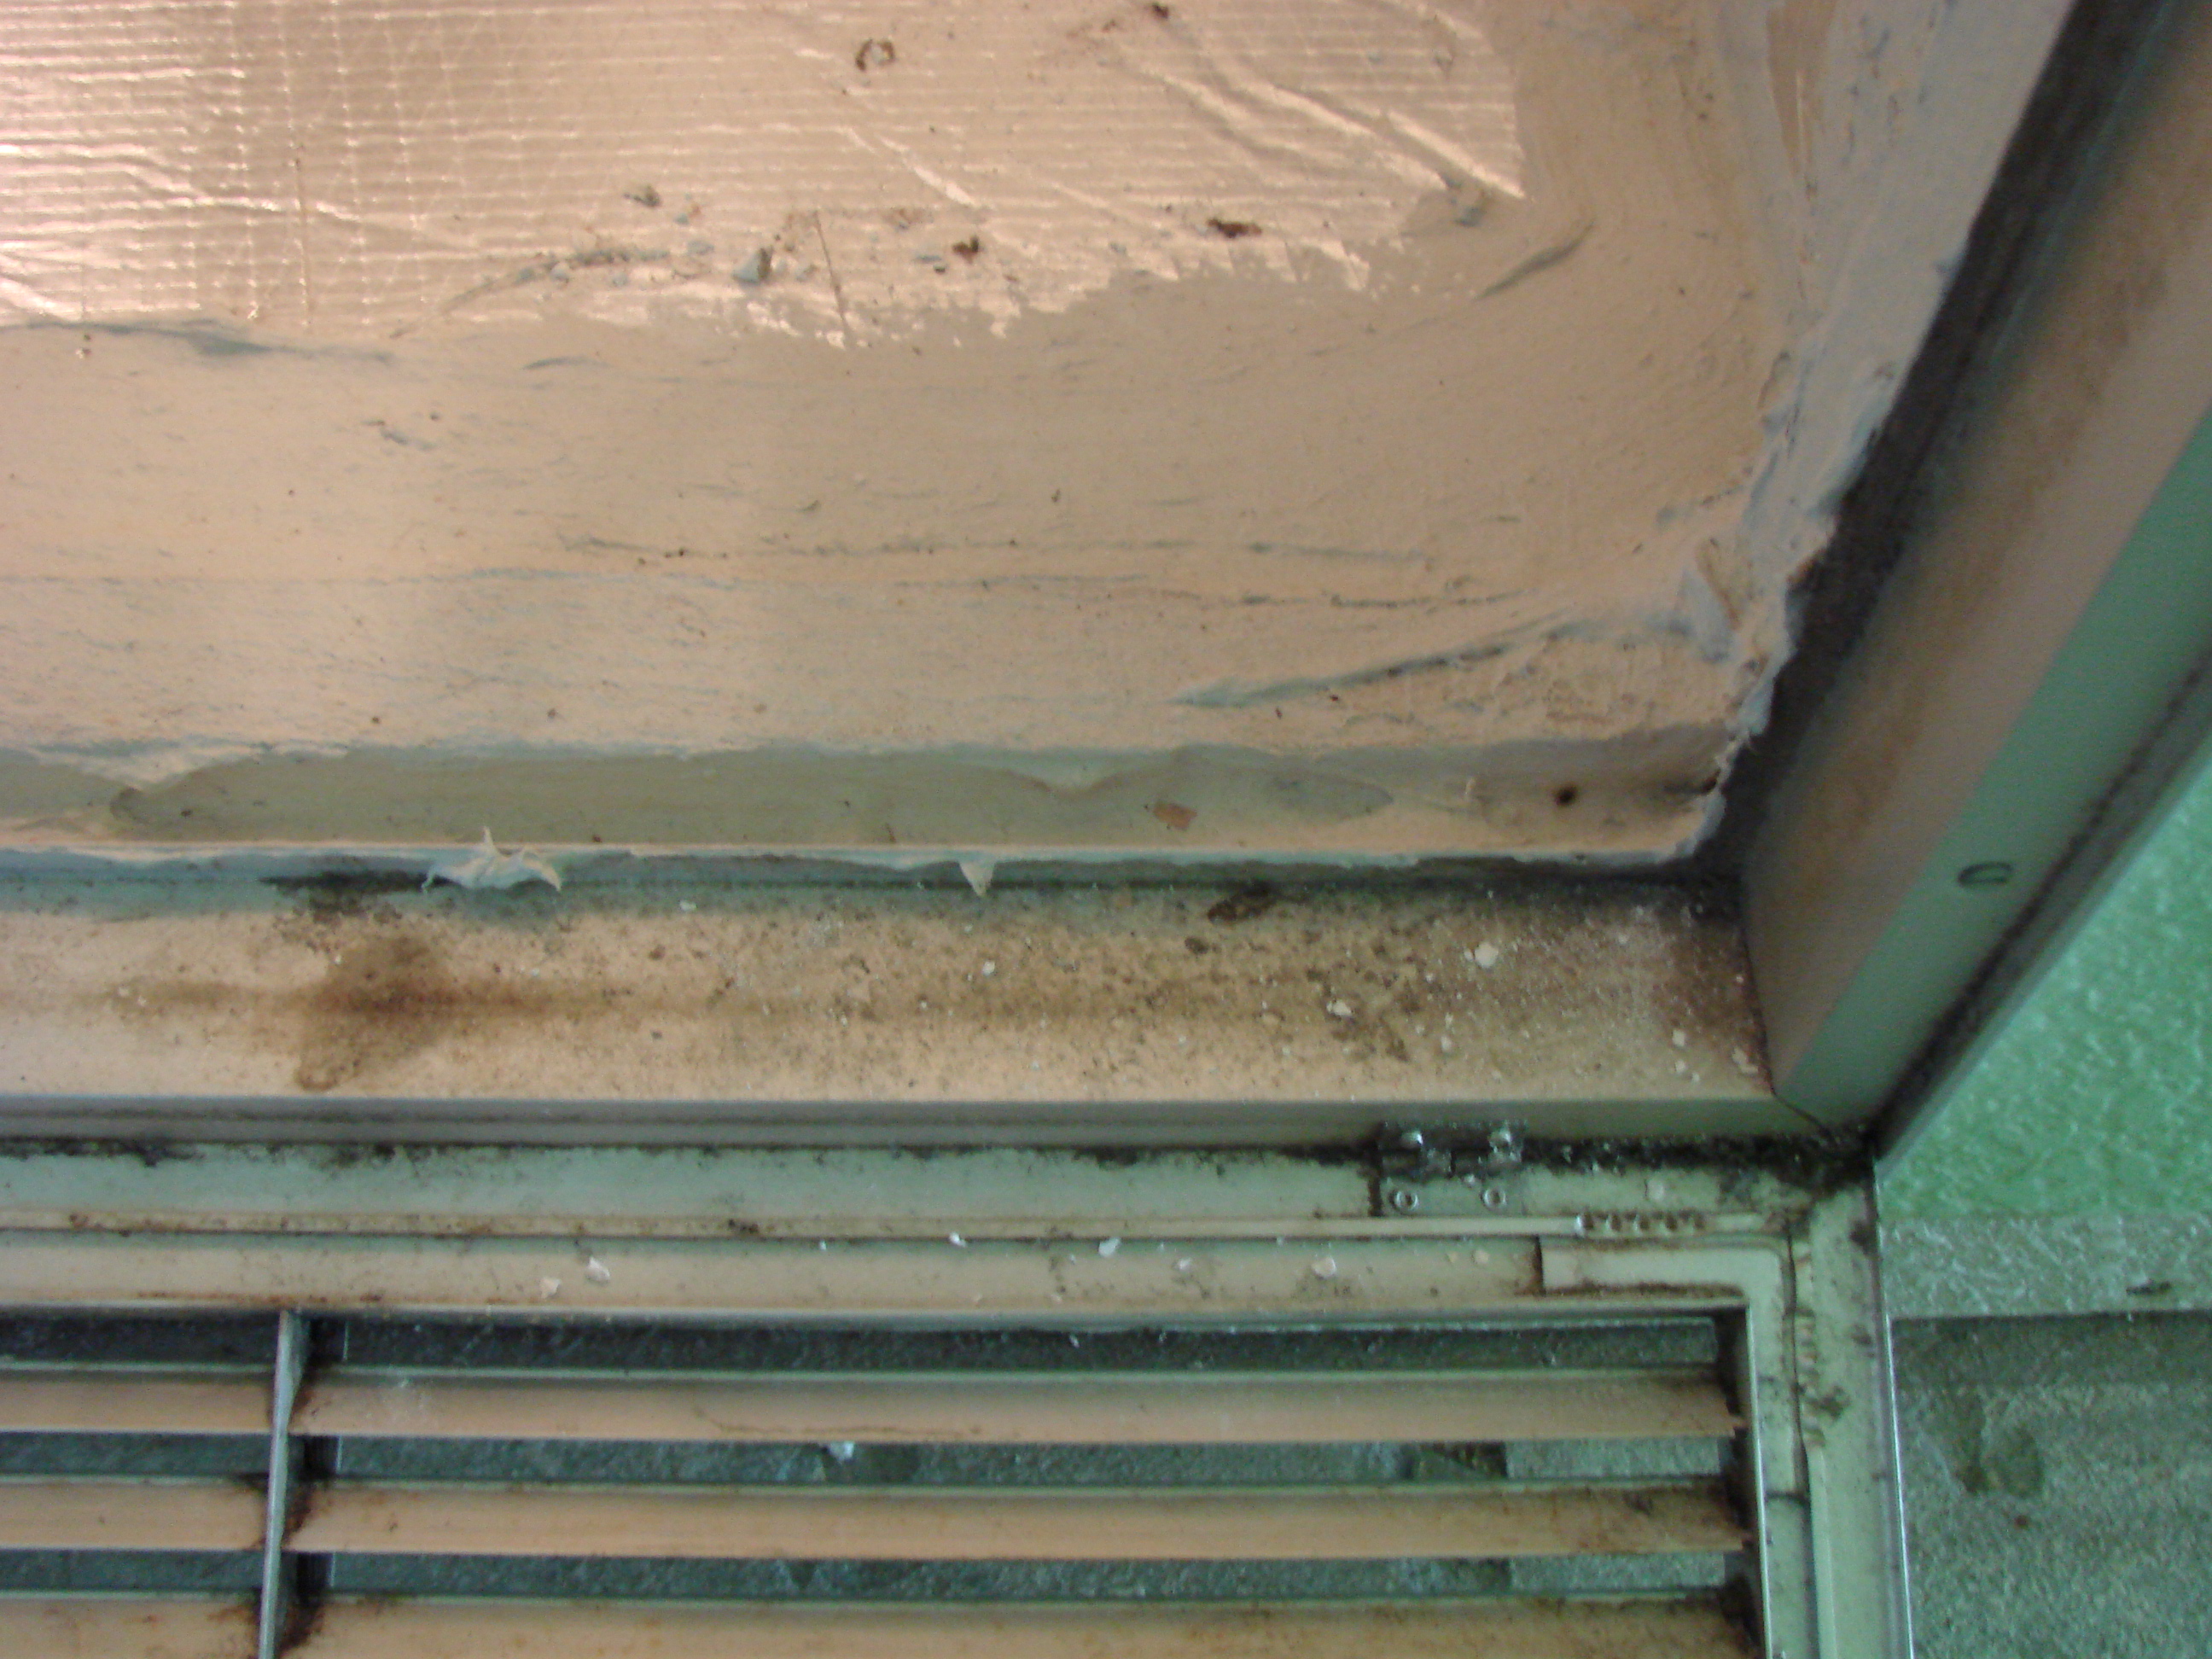
Mold on the sheathing in this attic occurred after attic ventilation was increased
Image
Image
Image
Image
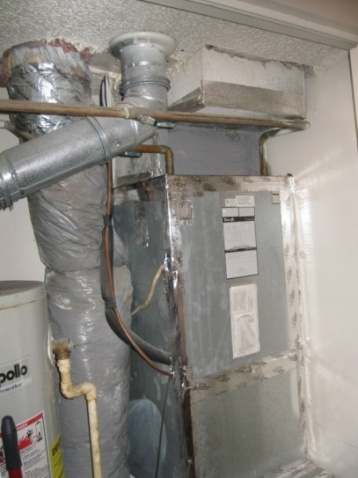
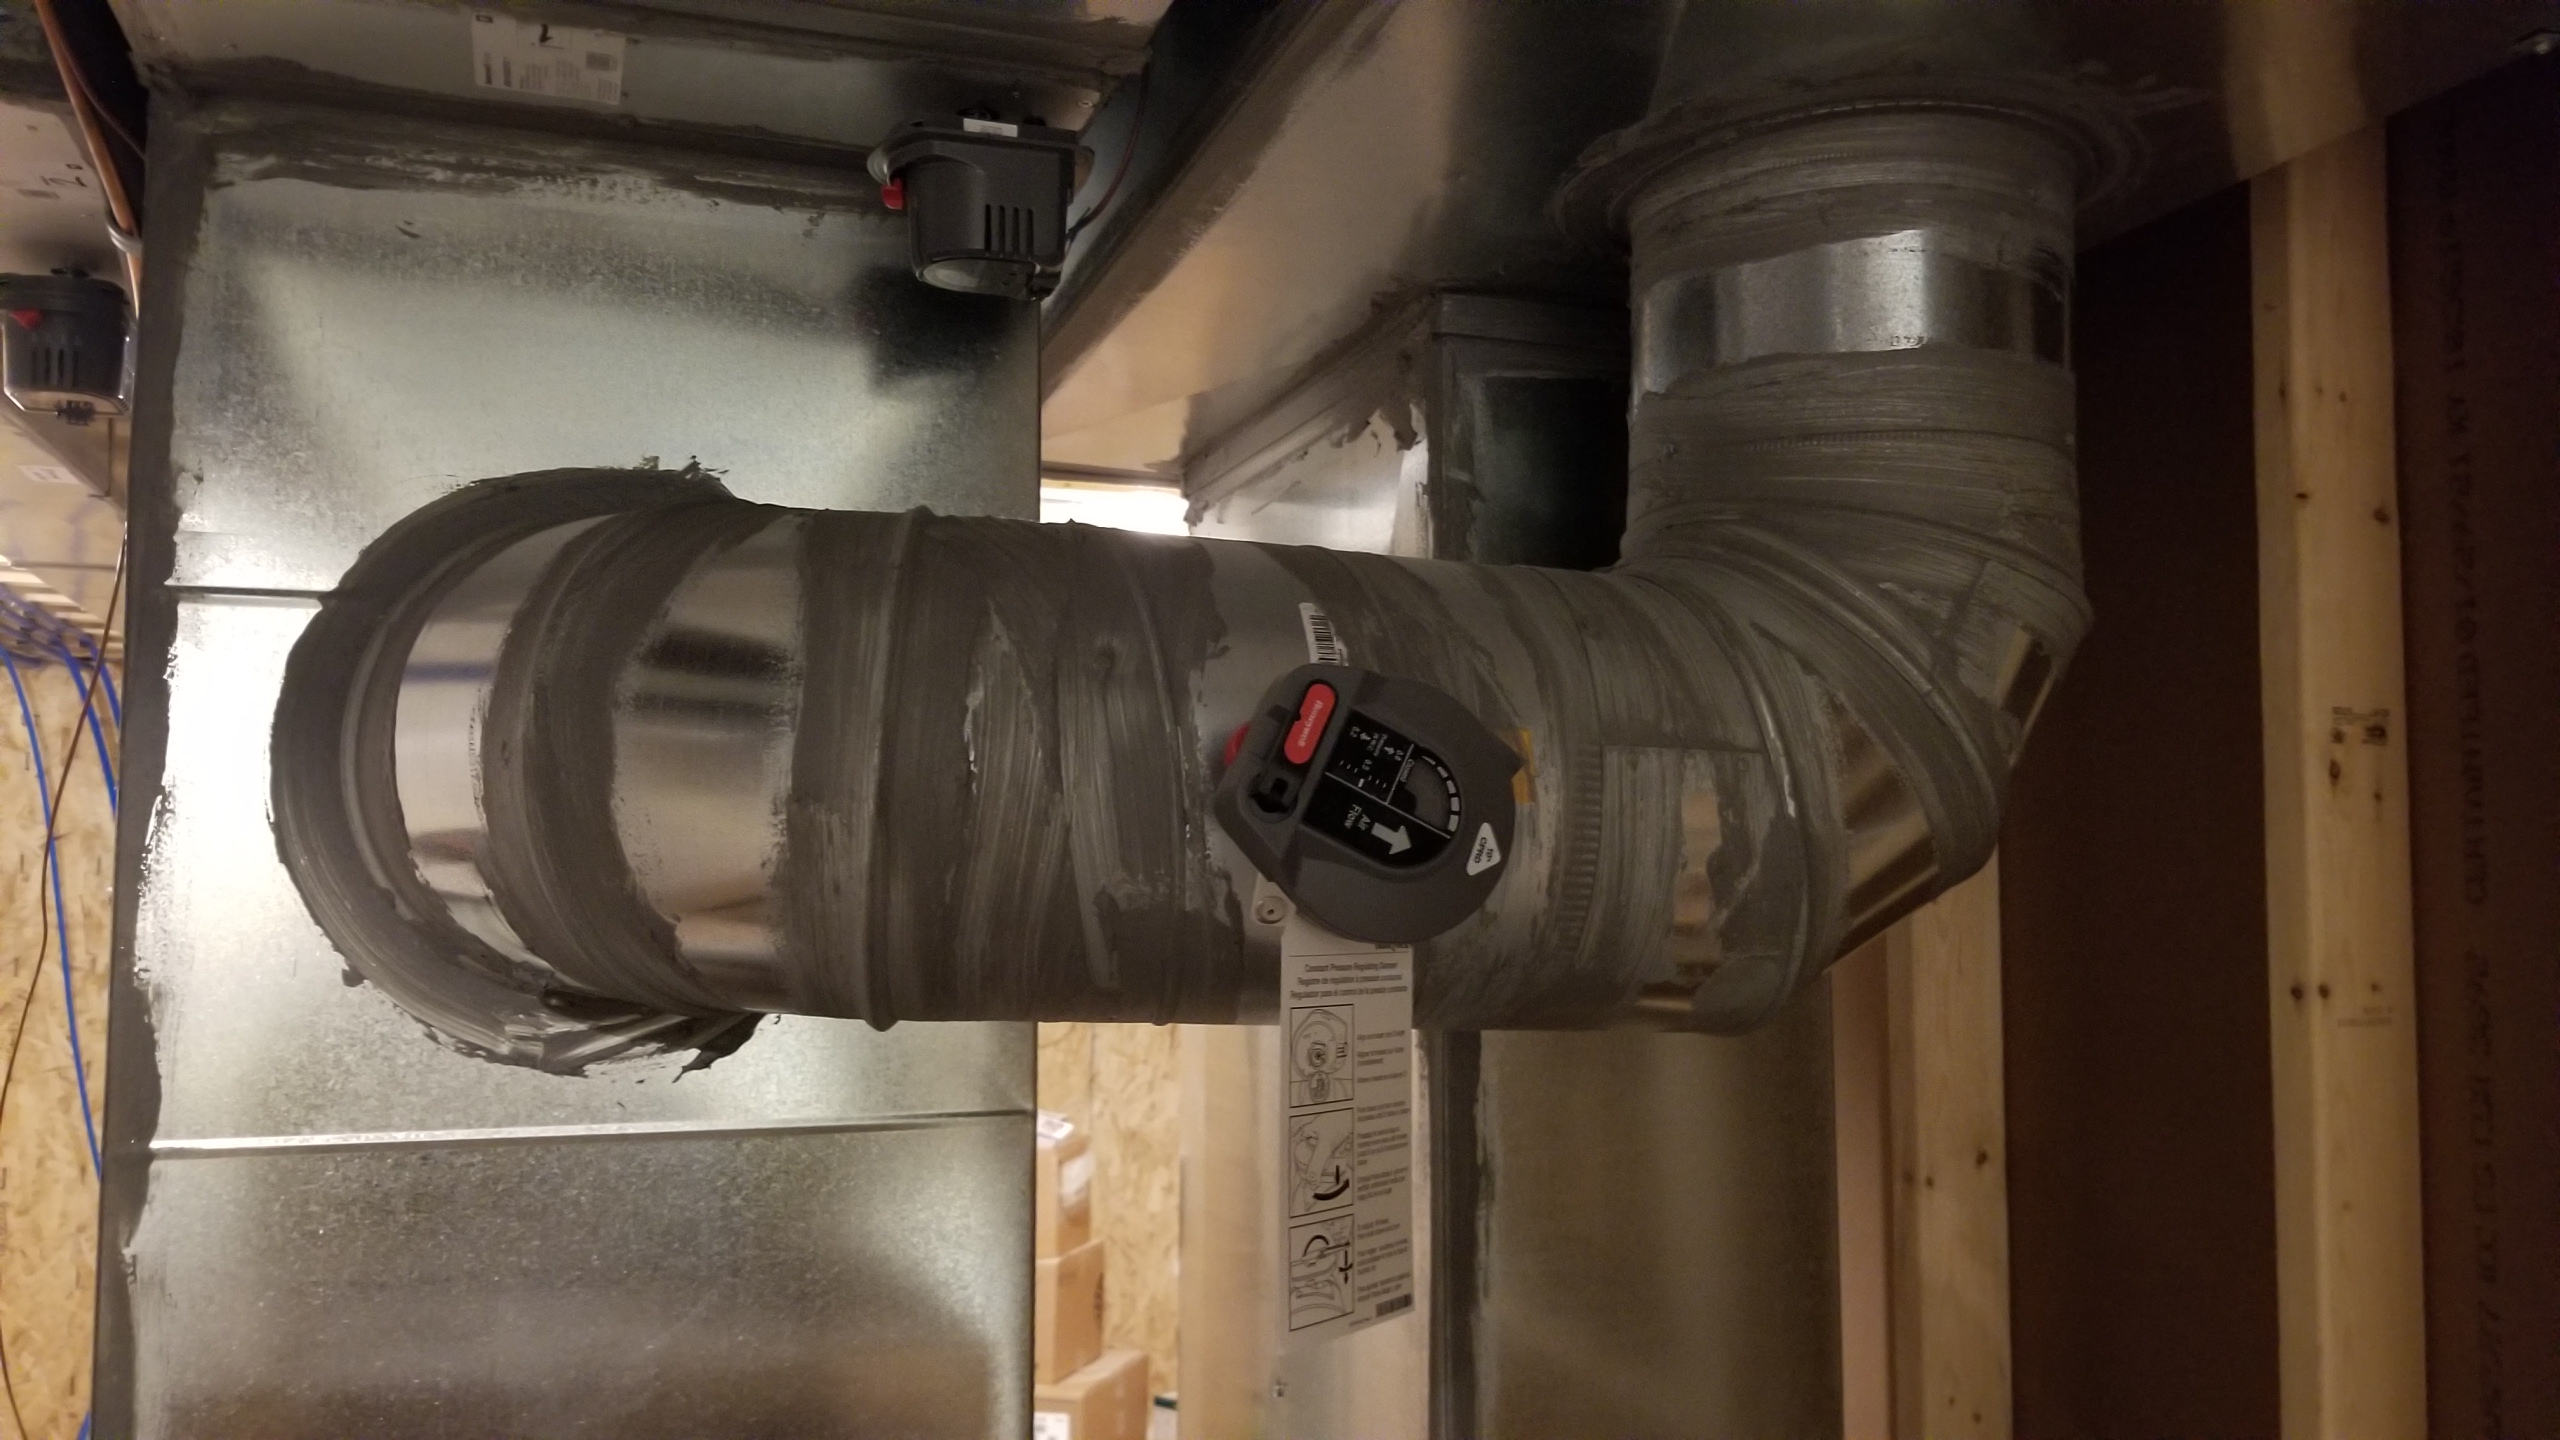
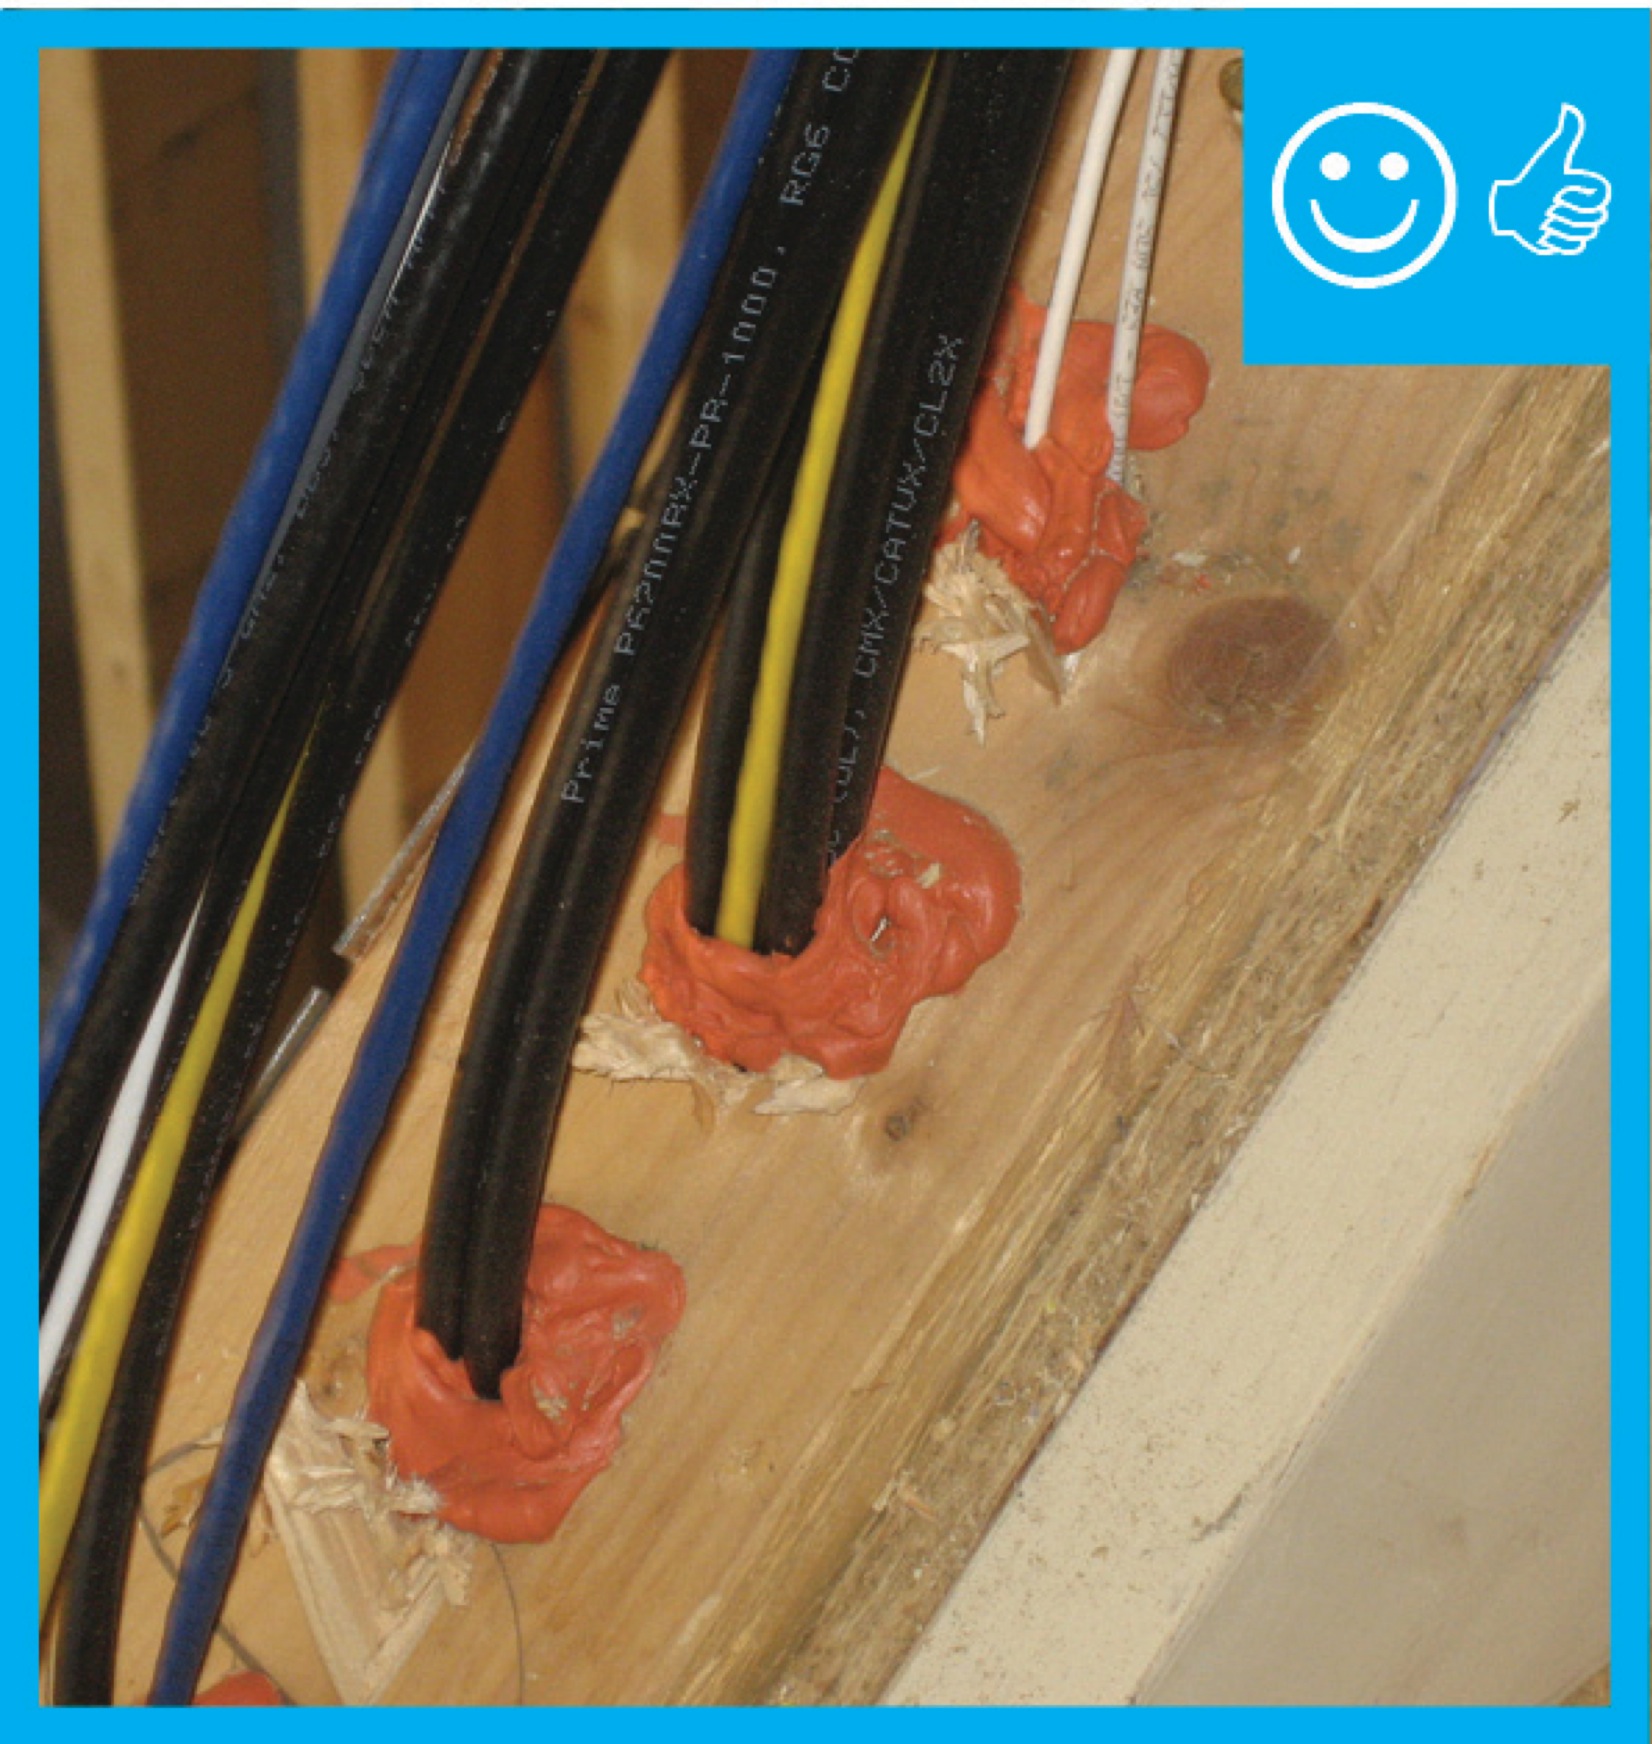
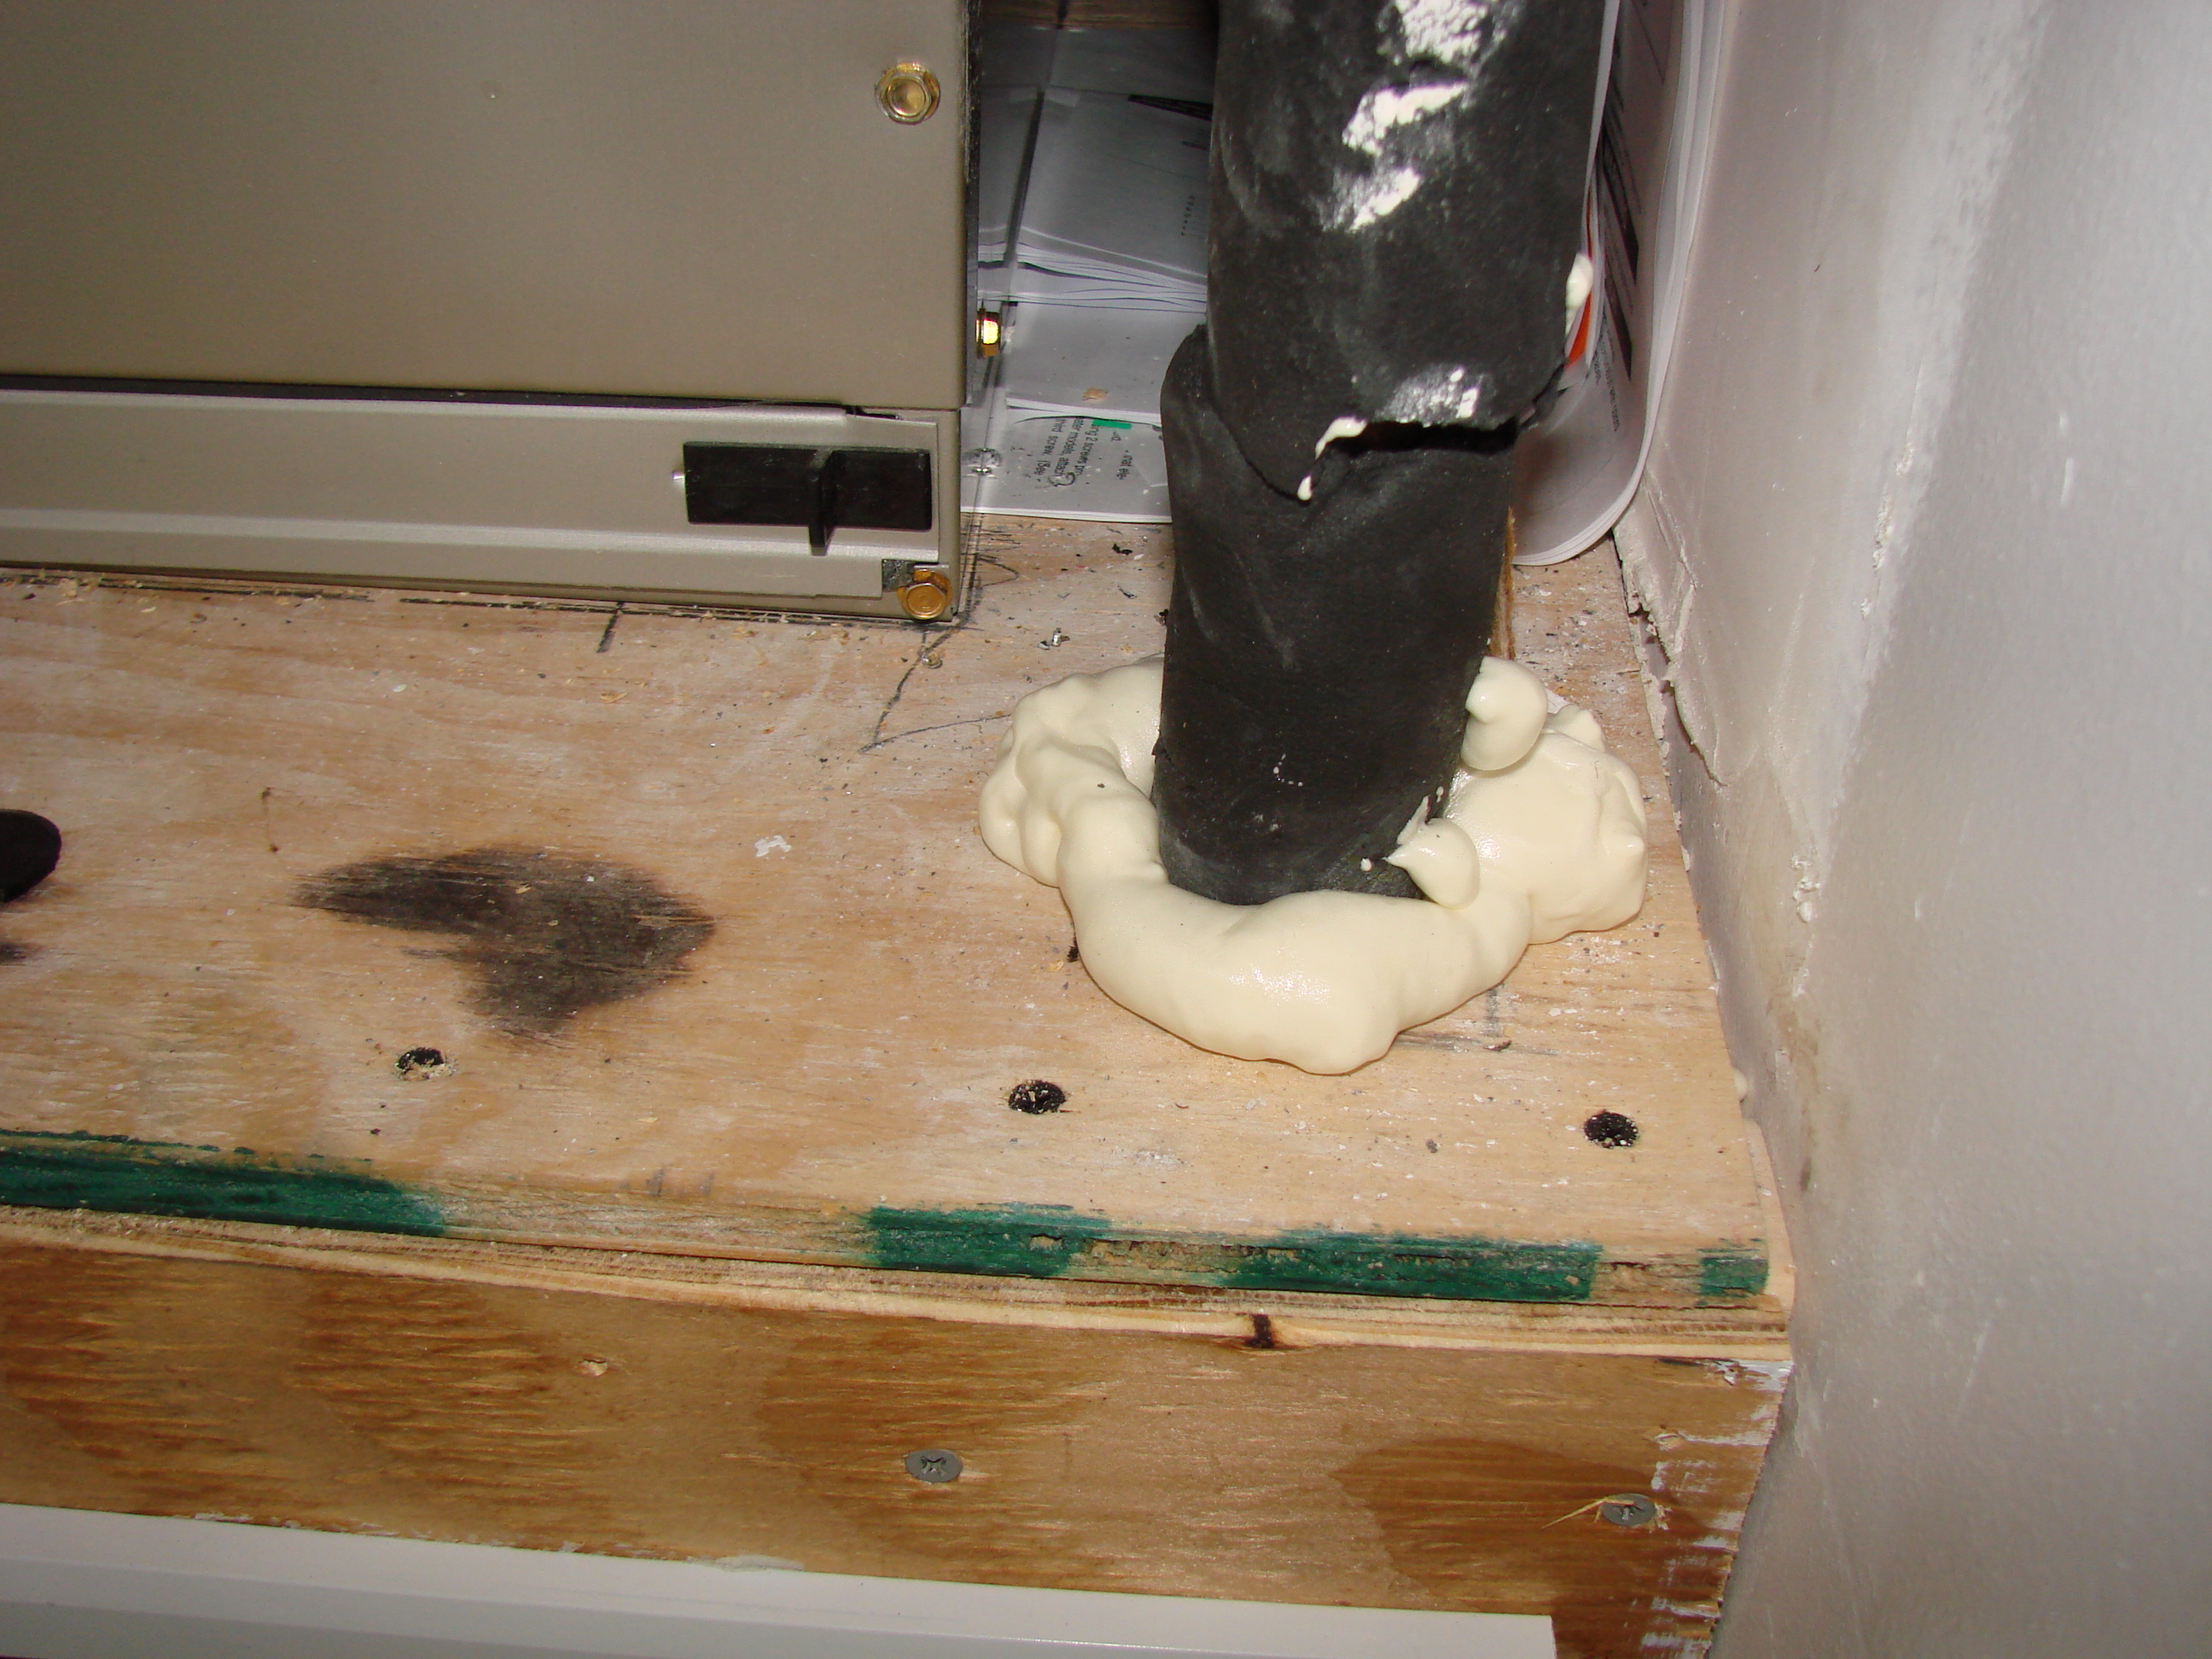
Non-hardening removable putty can be used to seal around wiring holes in the HVAC cabinet
Image
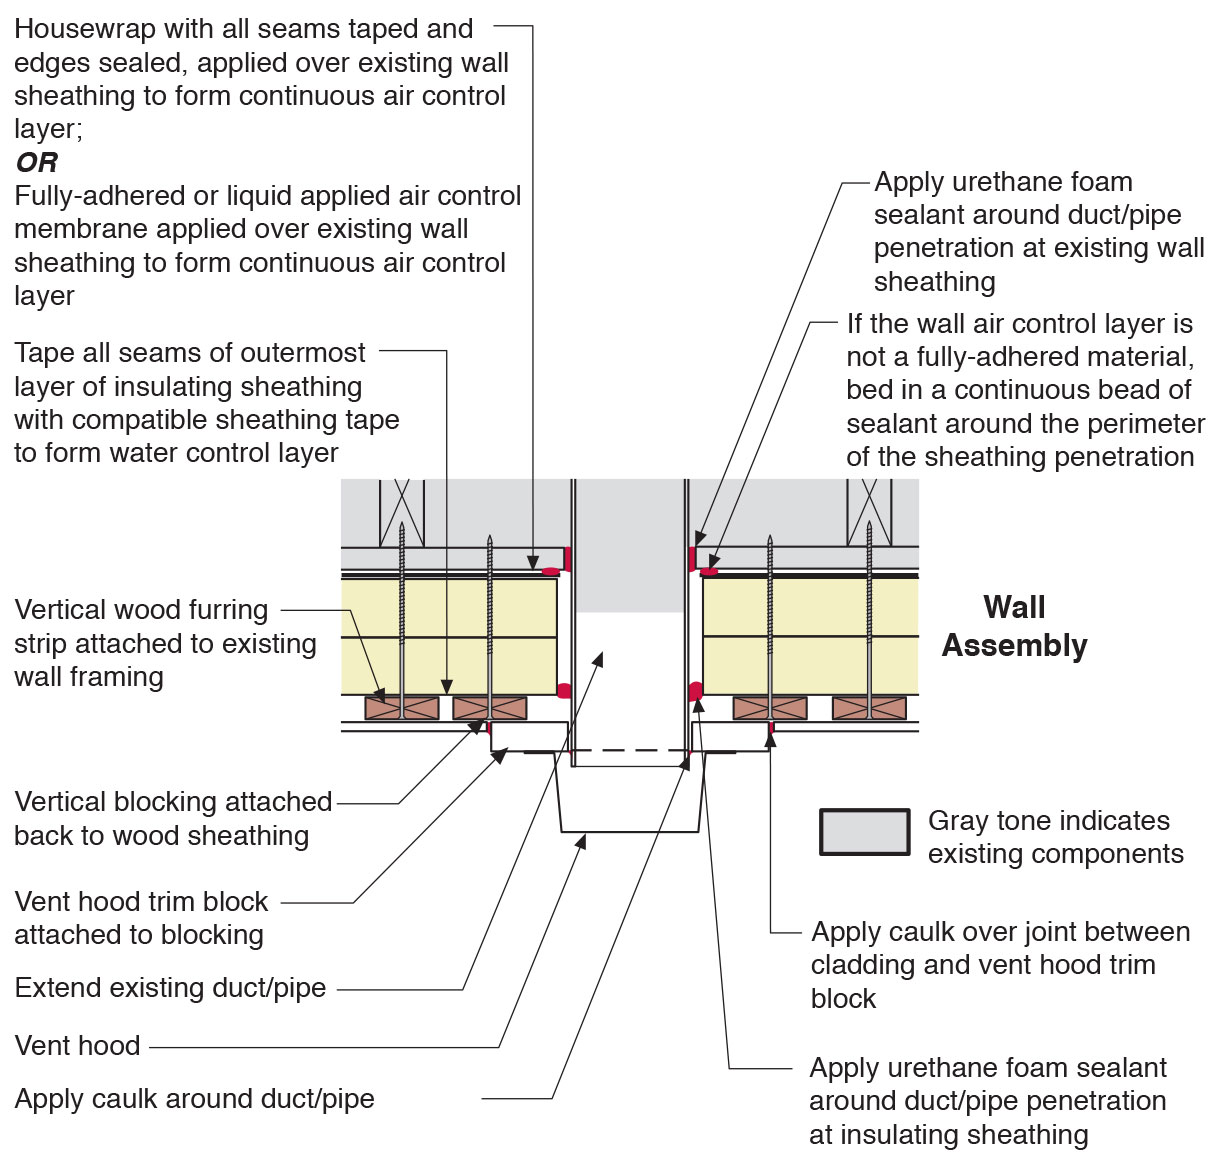
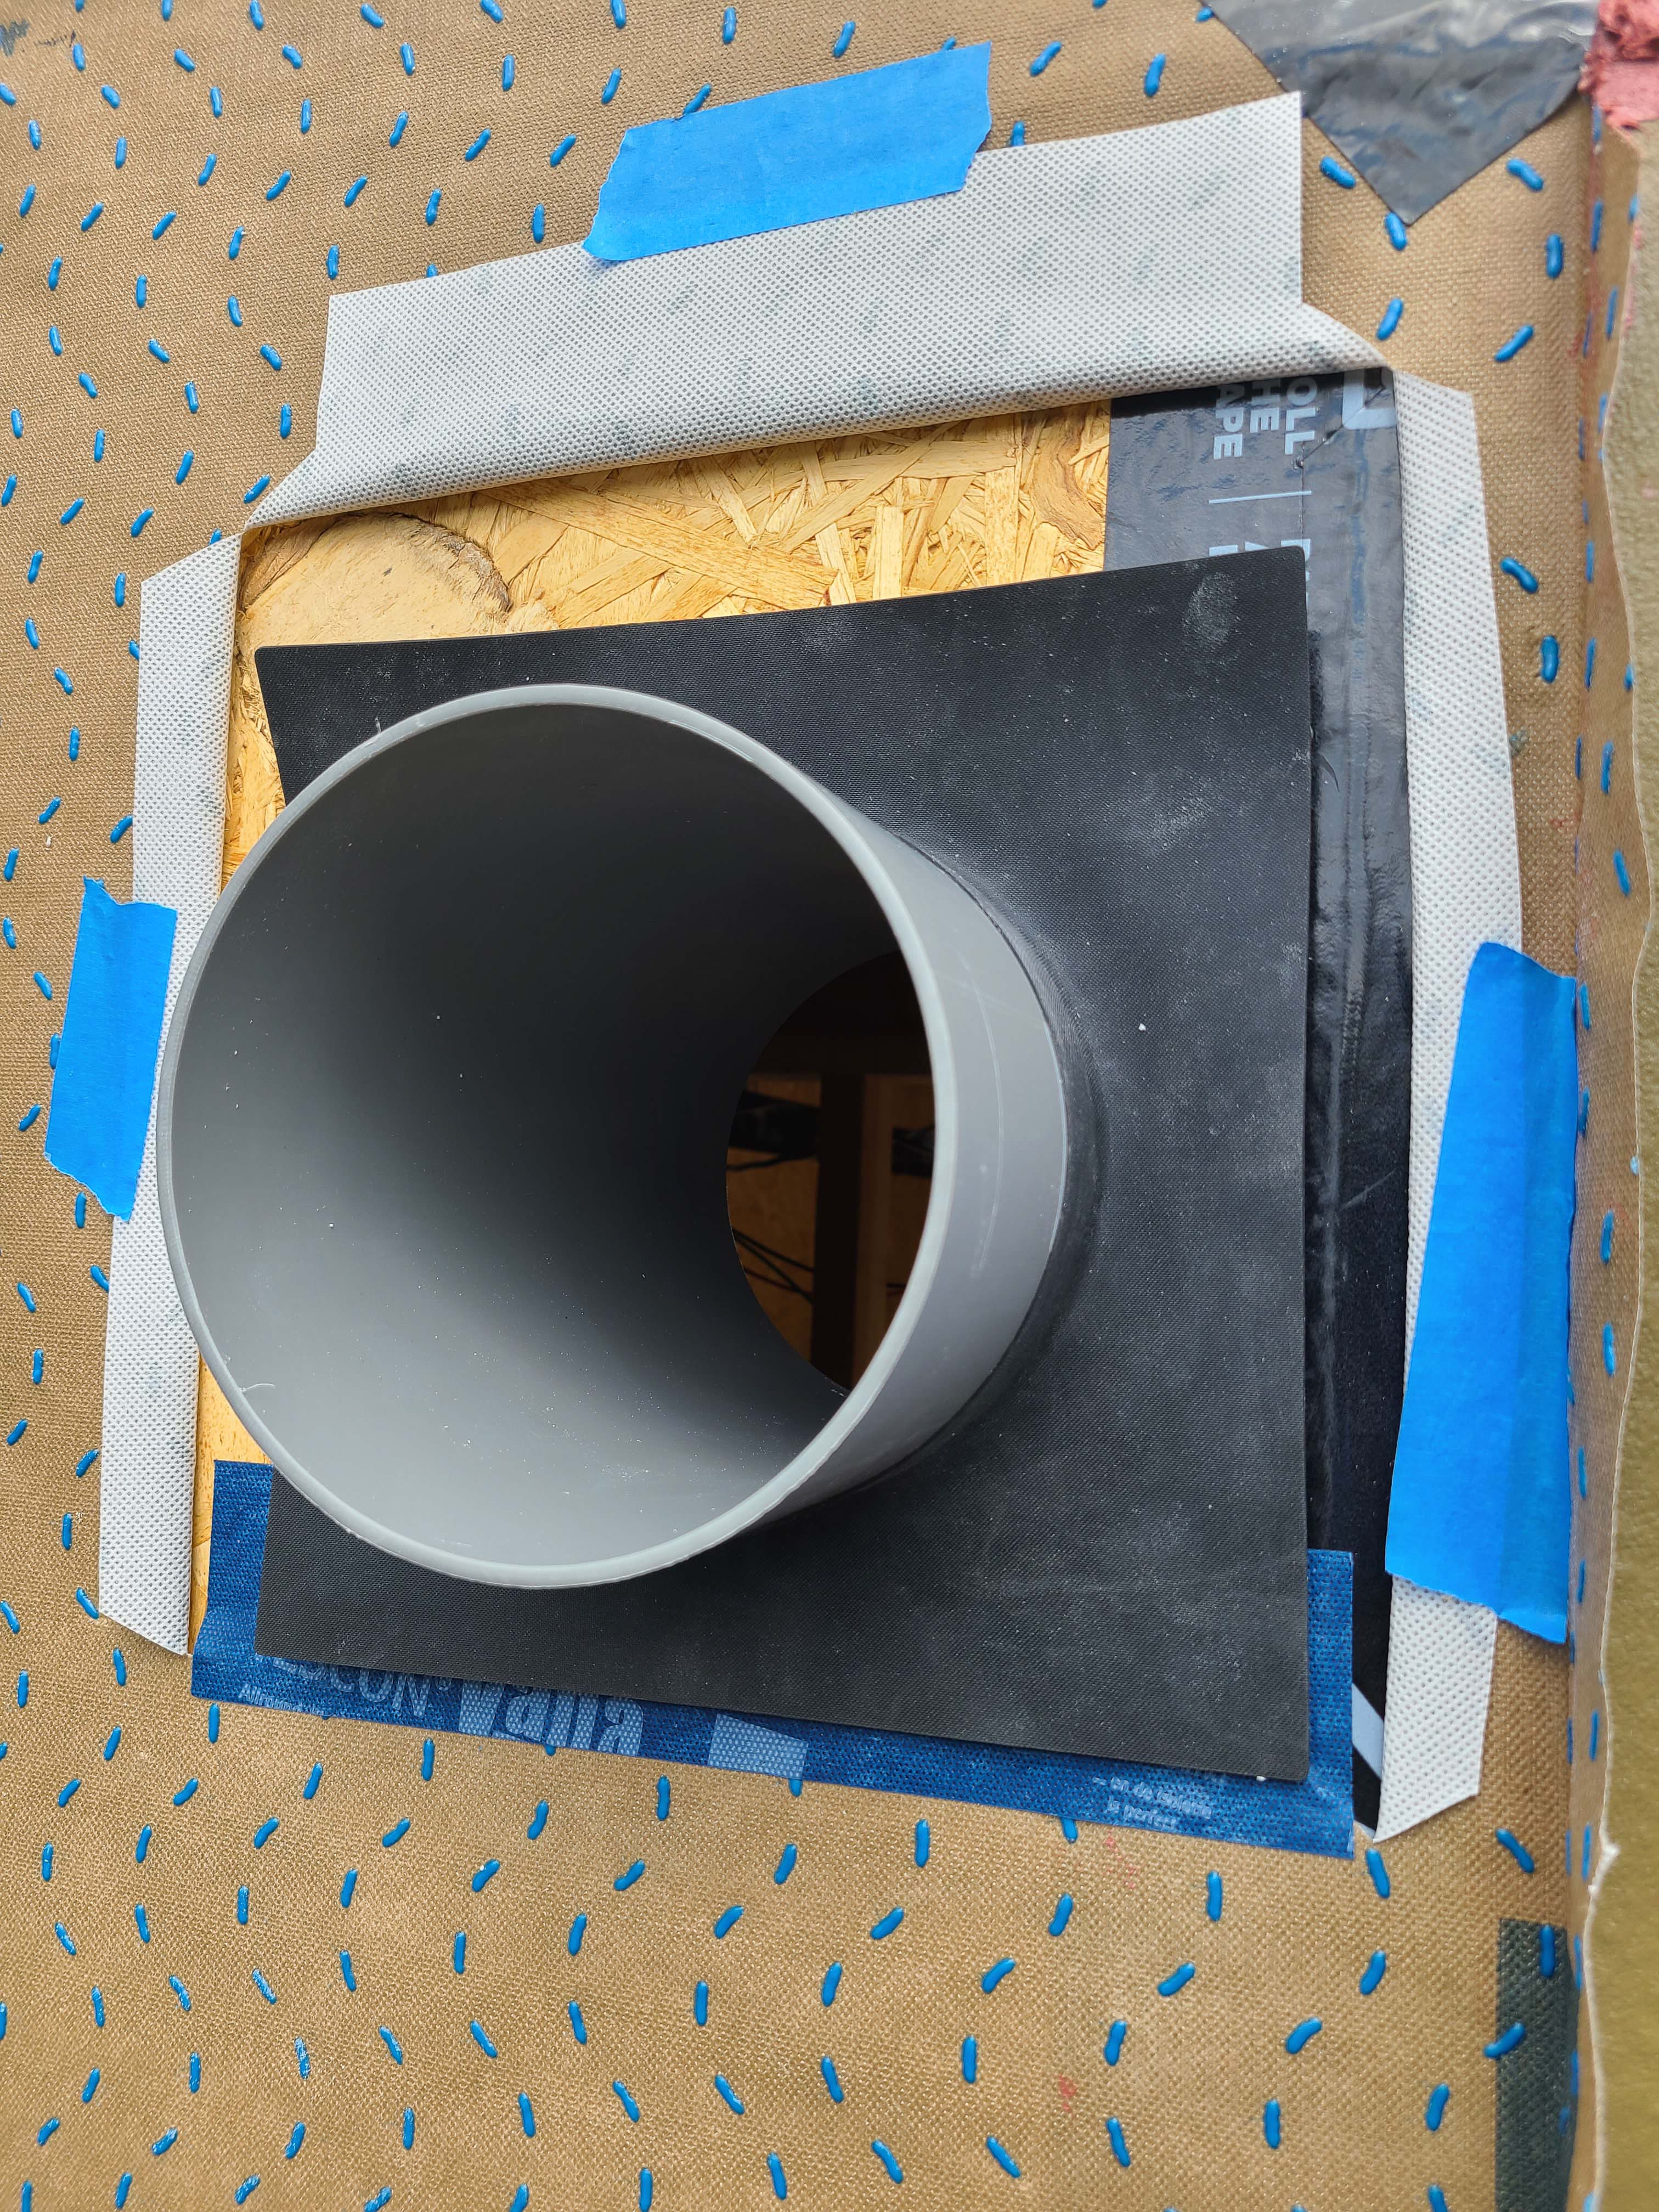
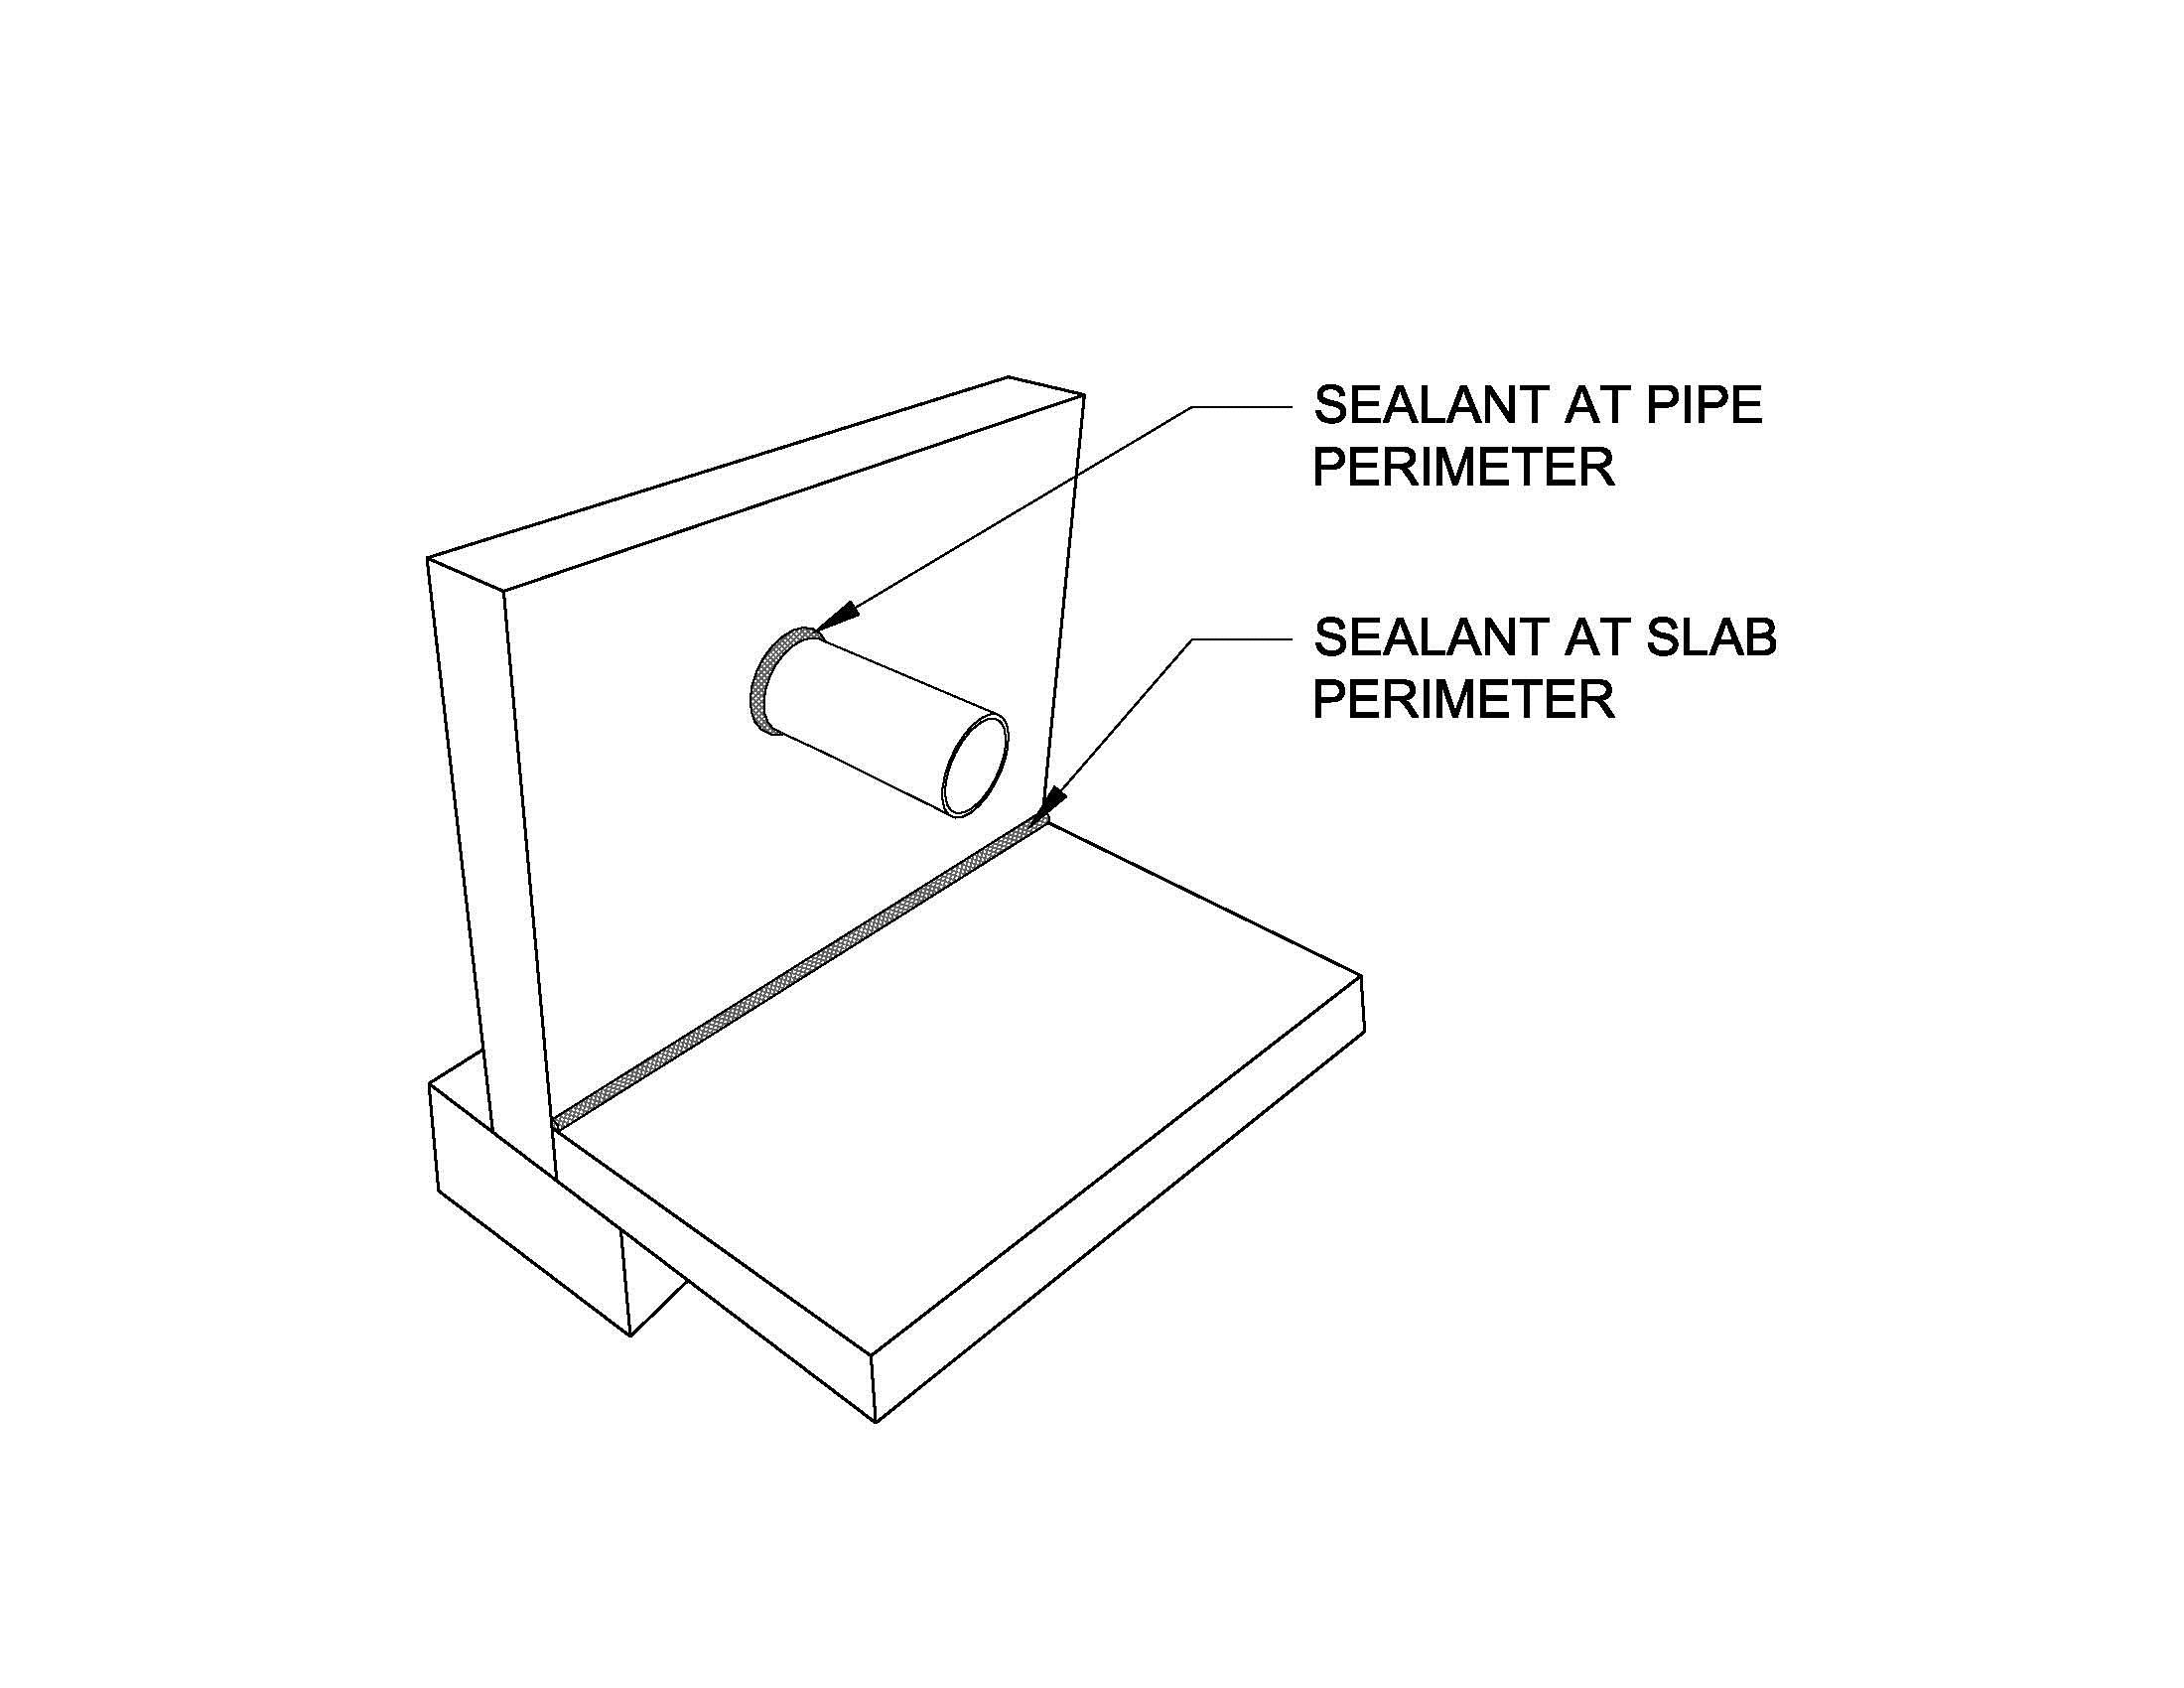
Plan view of duct or pipe penetration through exterior wall showing flashing and air sealing details
Image
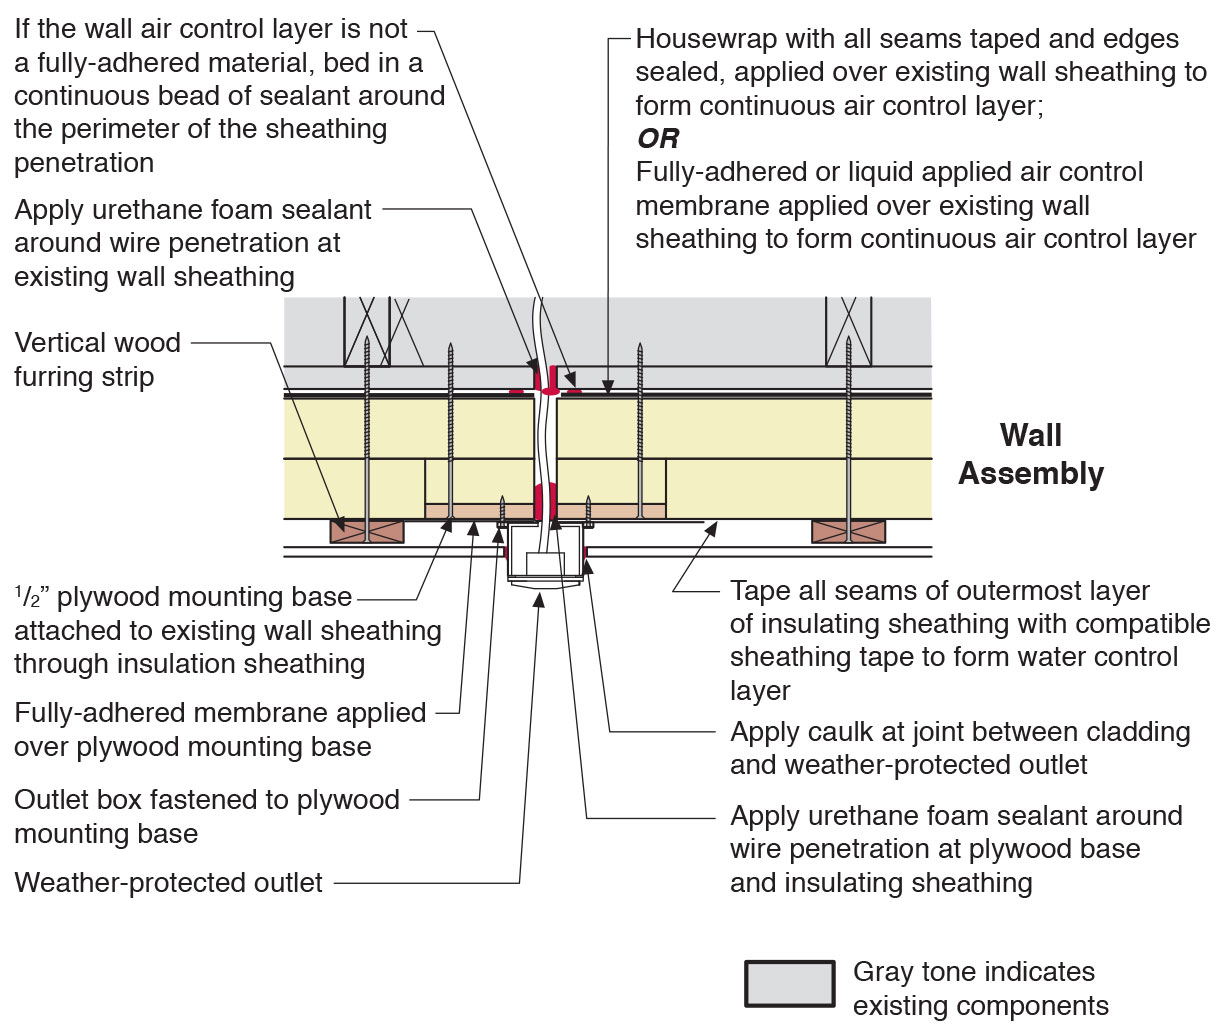
Plan view of electric box installation in exterior wall showing flashing and air sealing details
Image
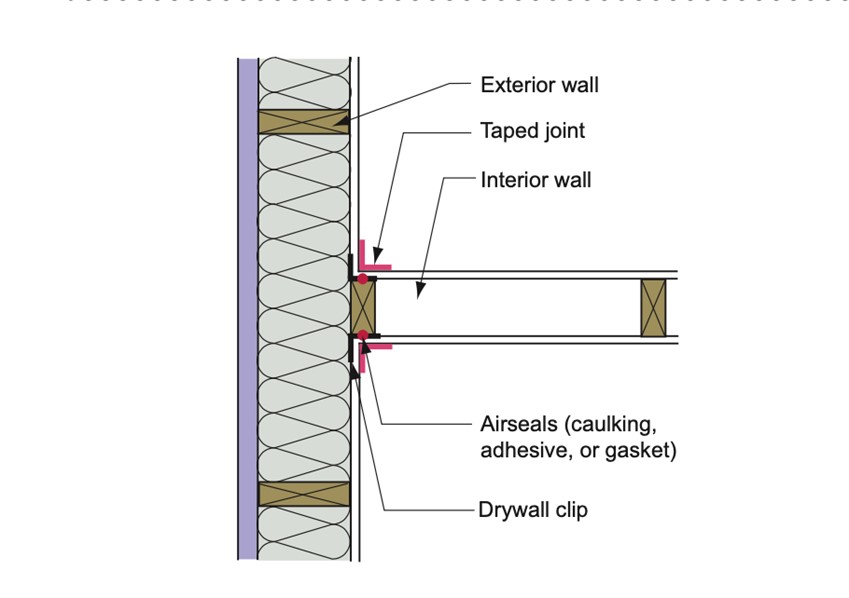
Plan view showing air sealing between exterior walls and intersecting interior walls
Image
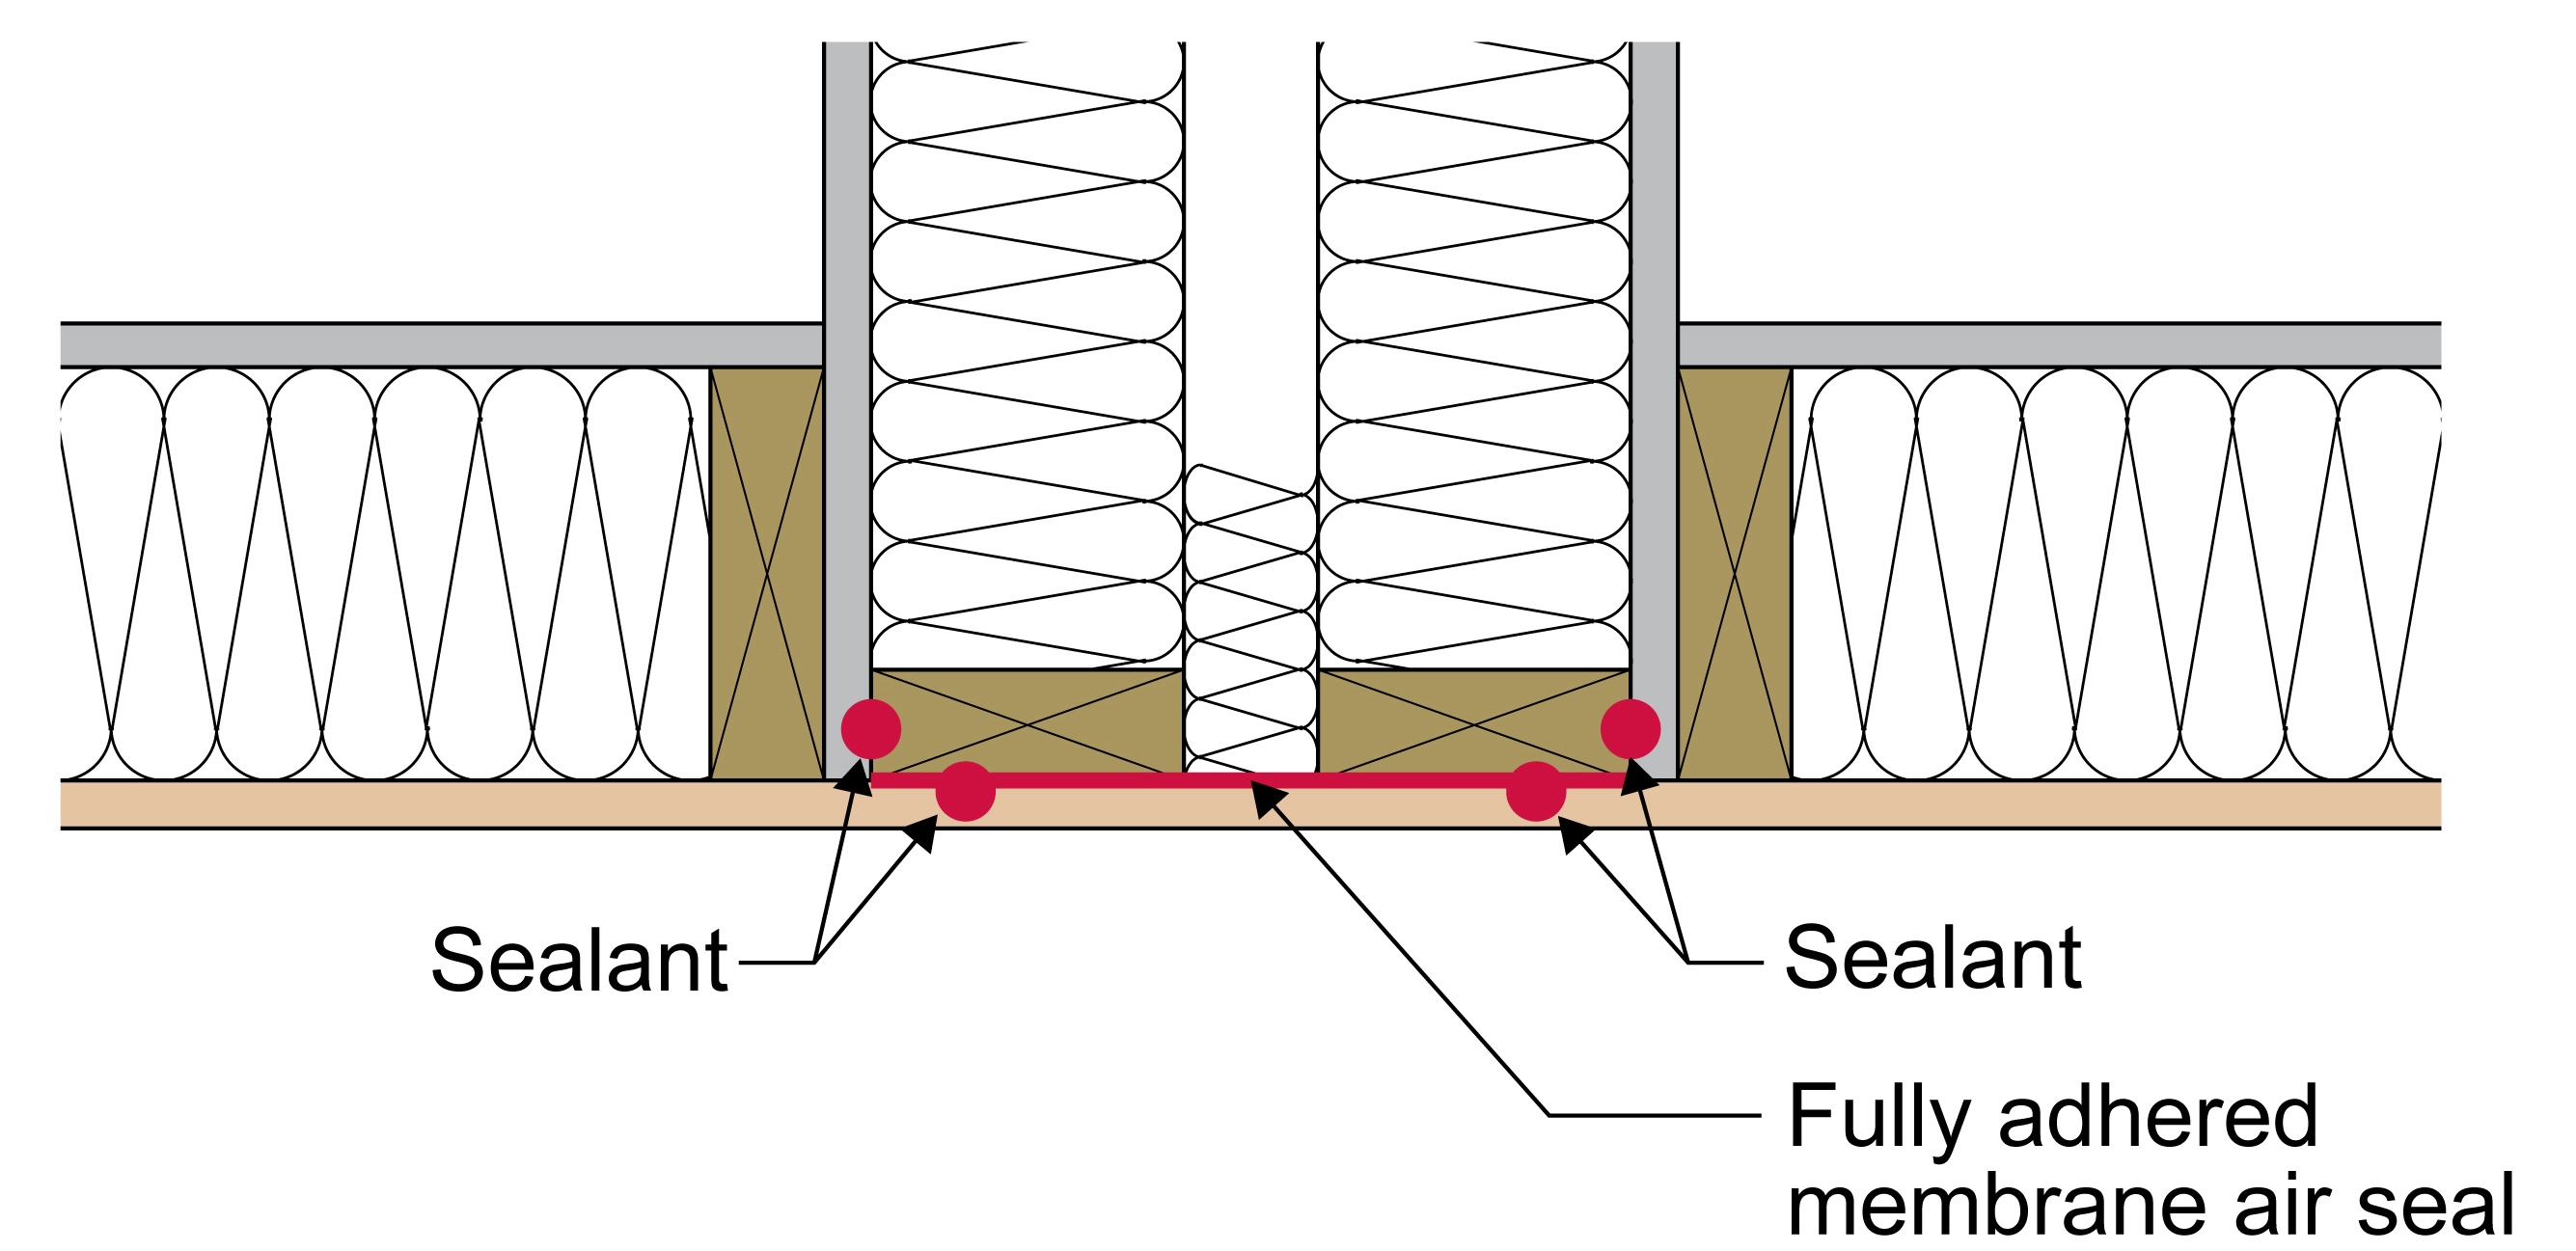
Plan view showing fully adhered membrane and sealant installed to air seal partition wall junction with the exterior wall of a multifamily building
Image
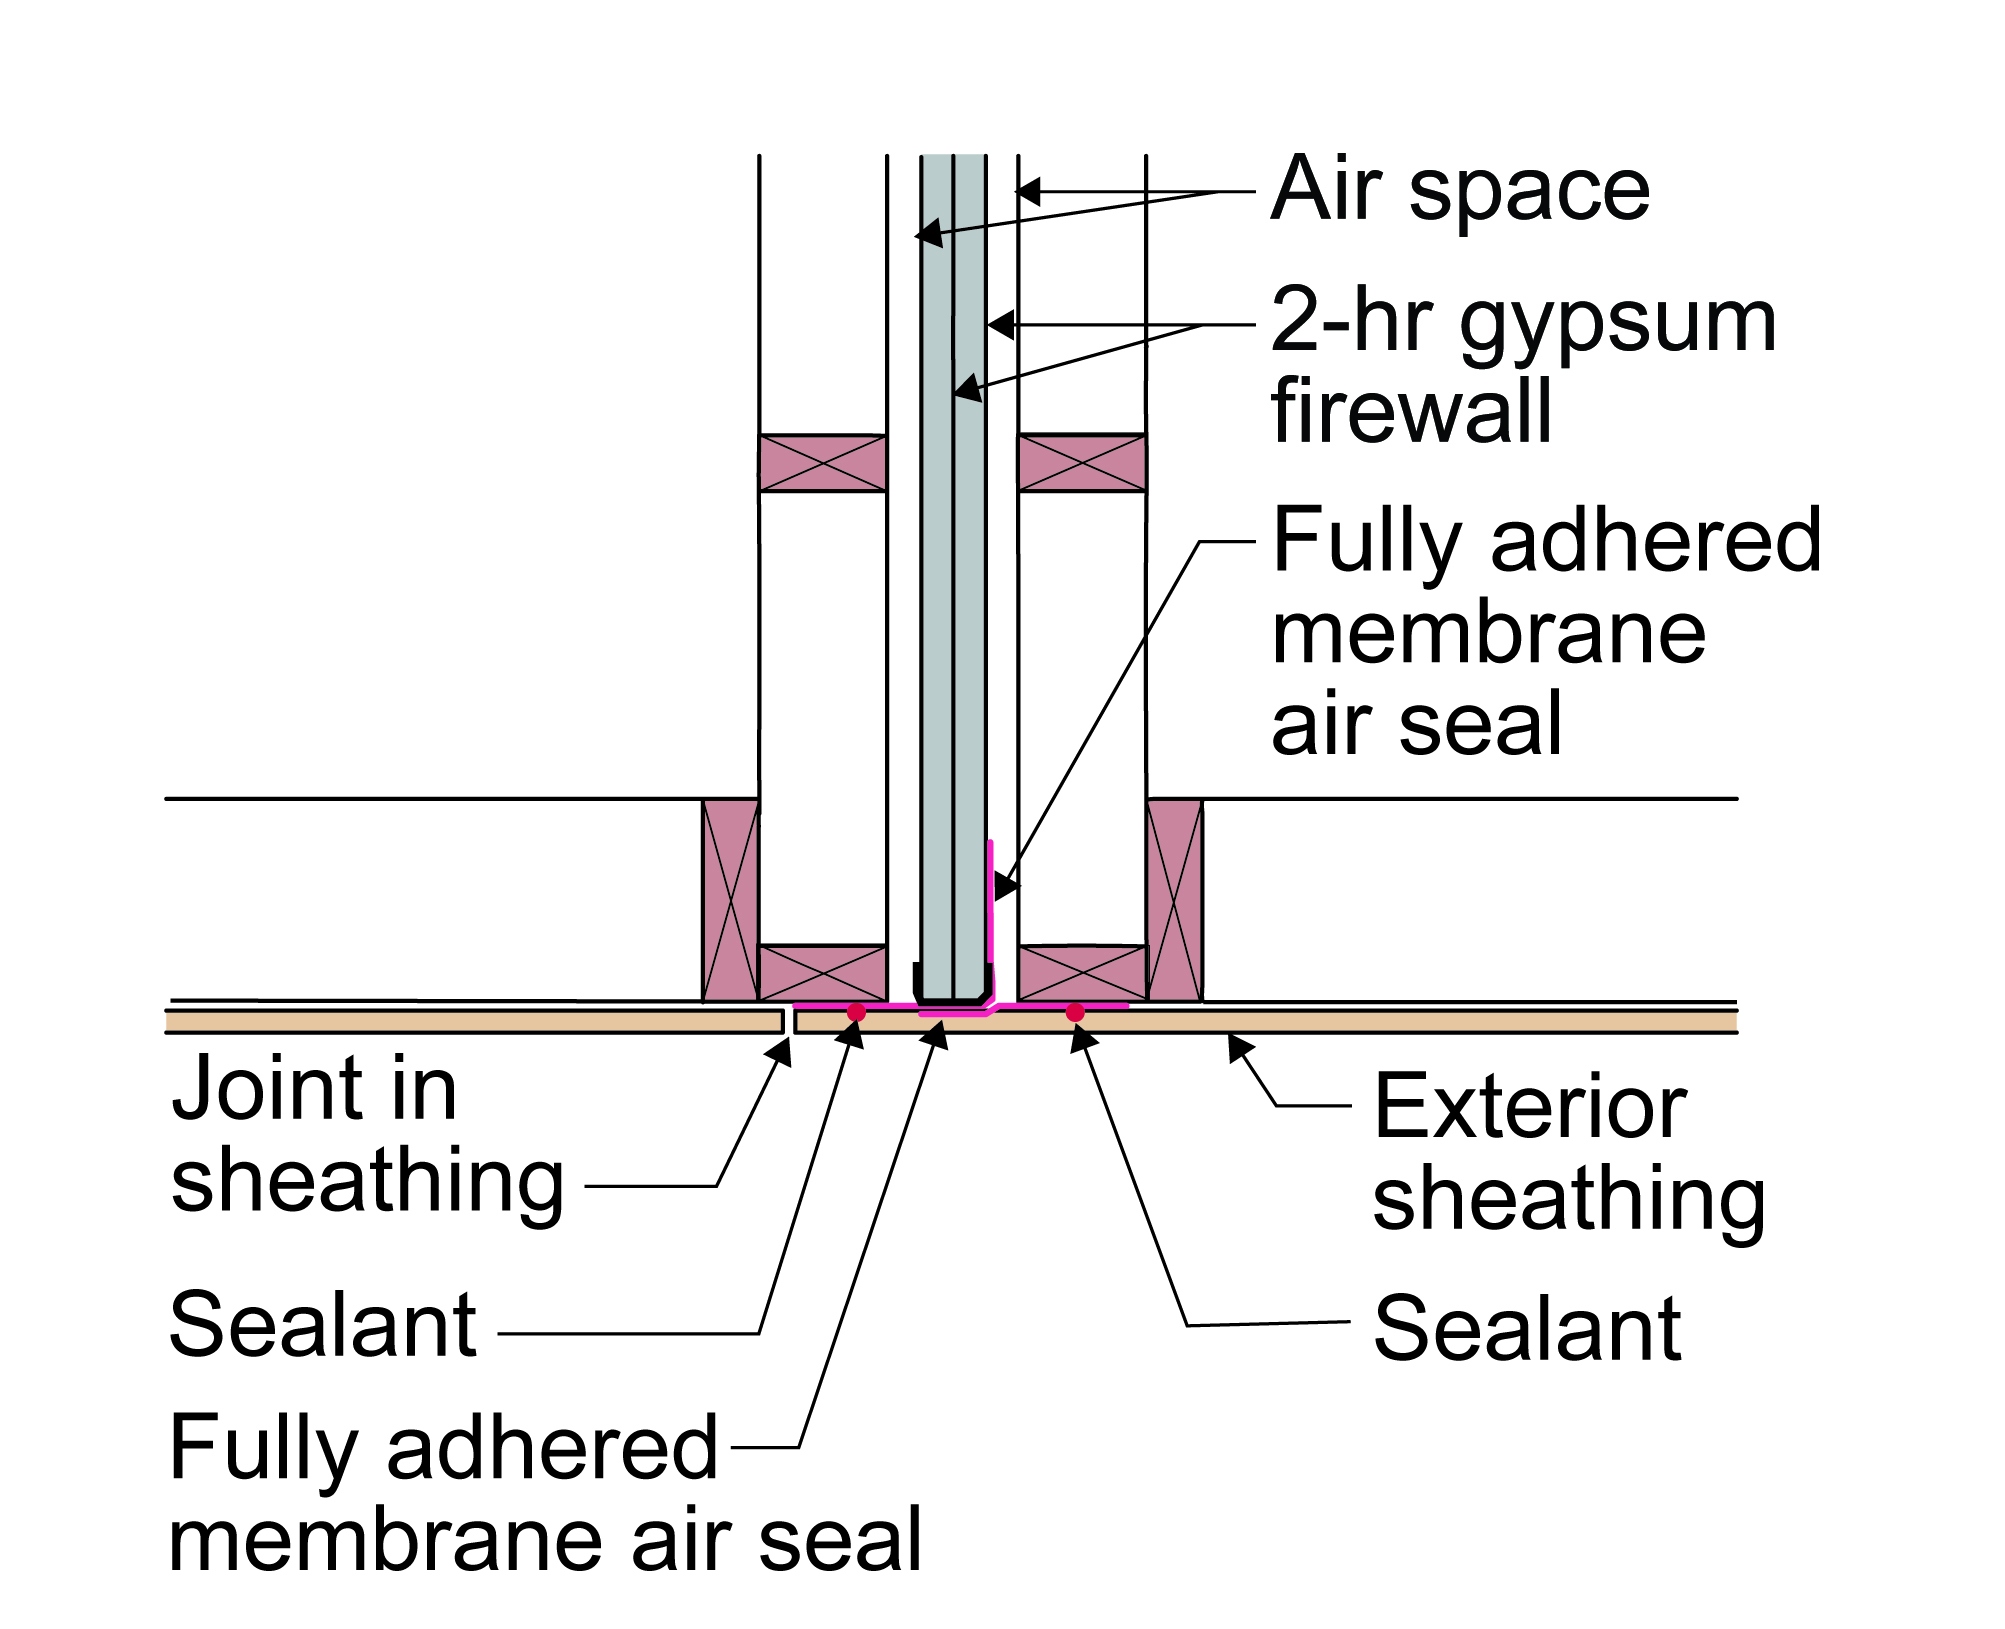
Plan view showing how fully adhered membrane is used to air seal the party wall where it connects to the exterior wall
Image
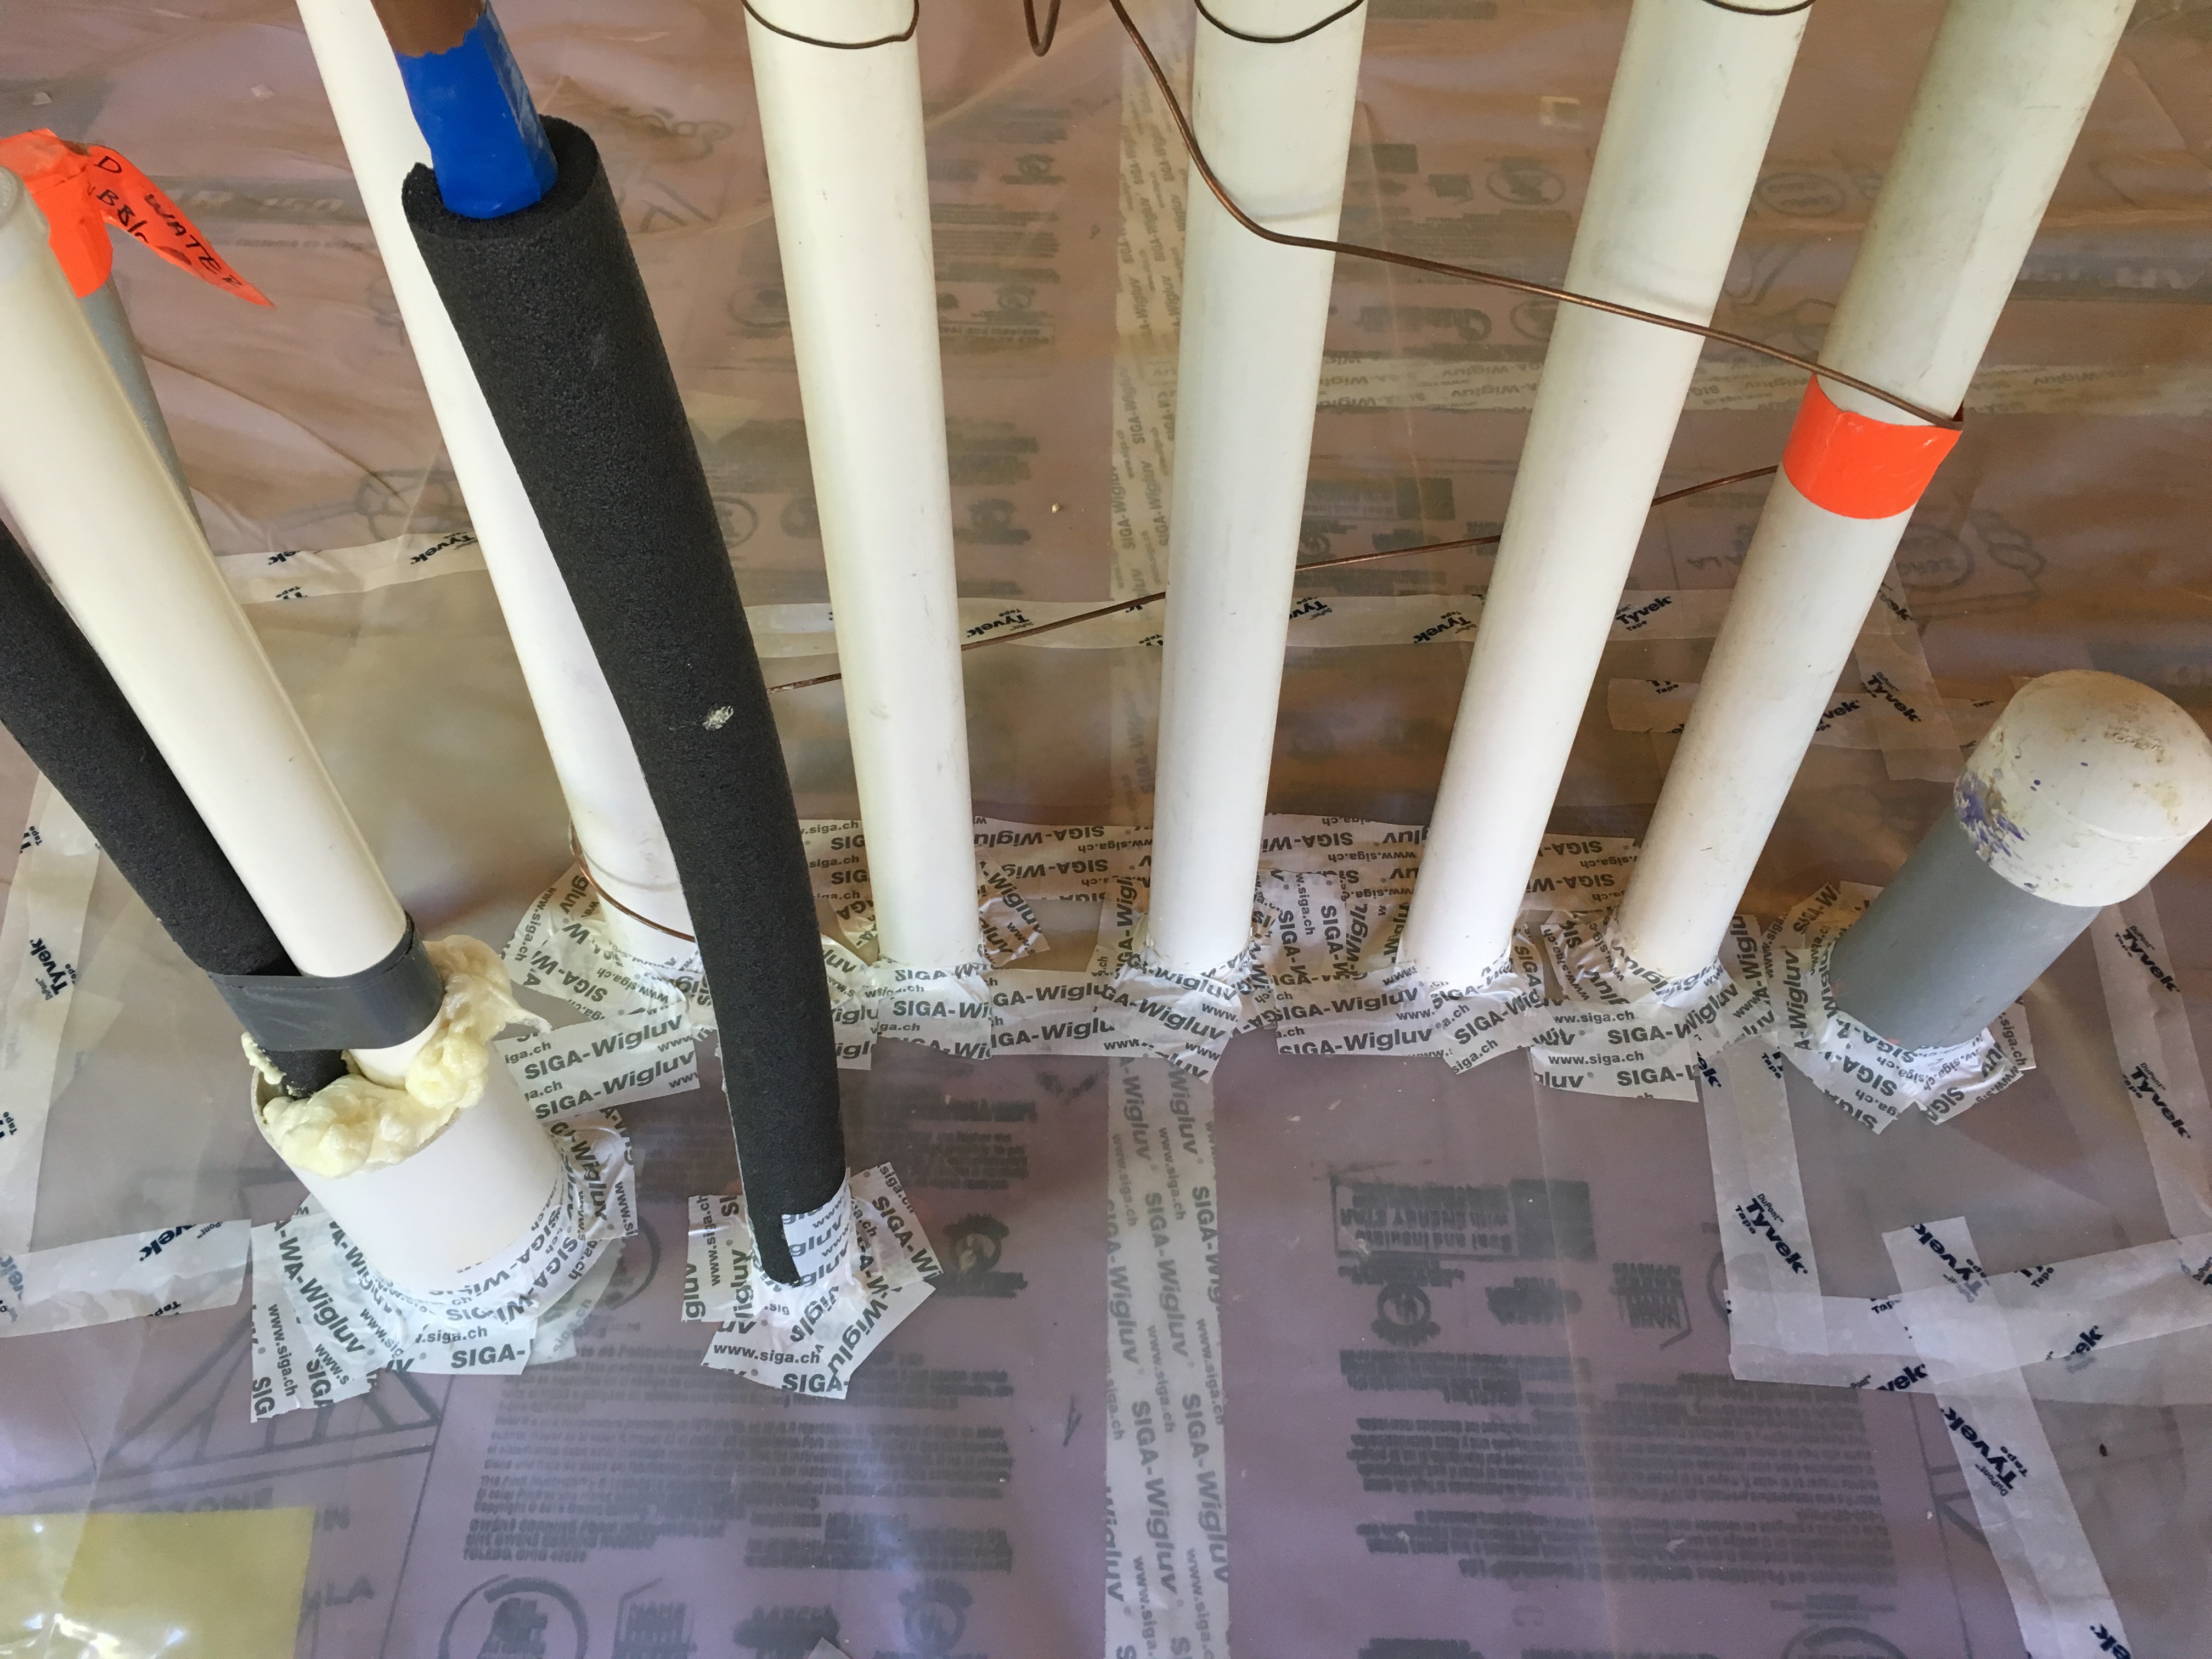
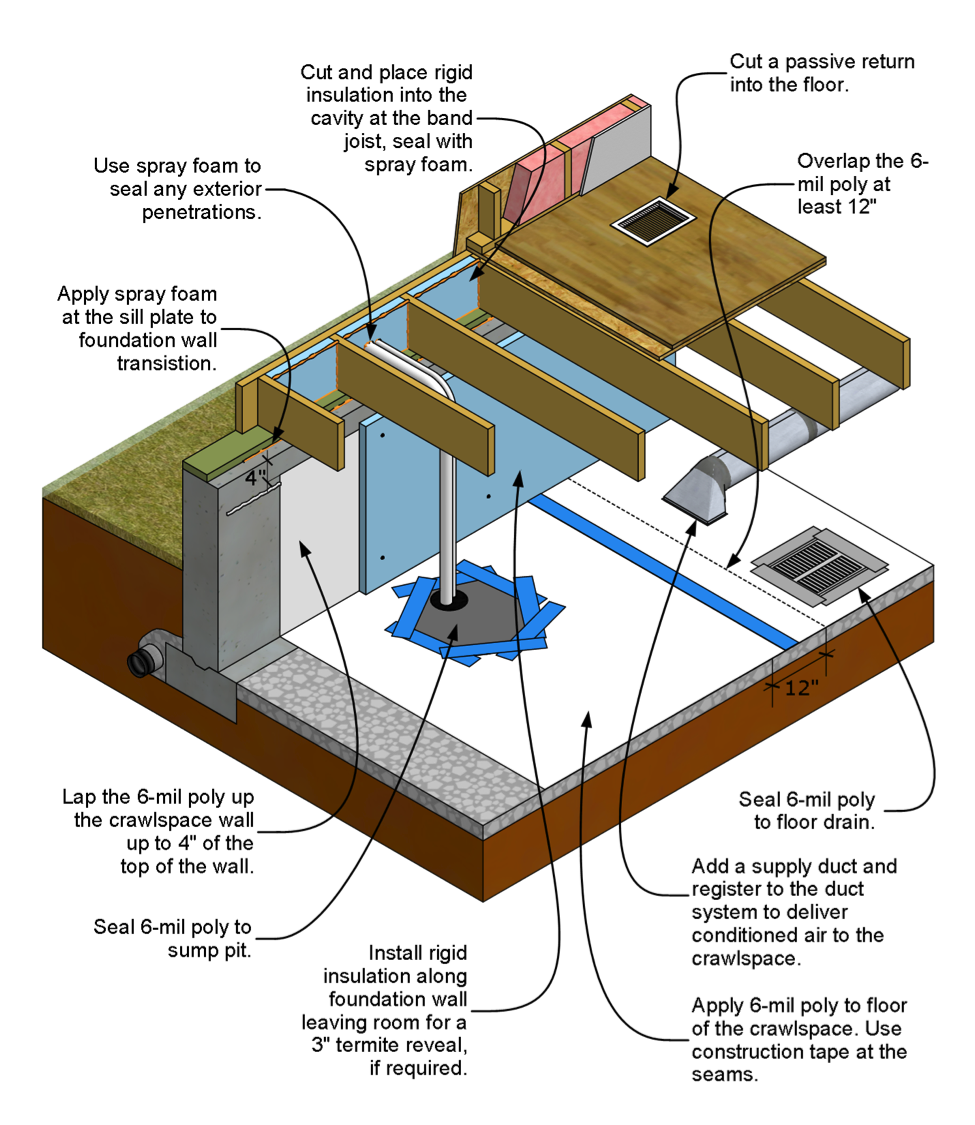
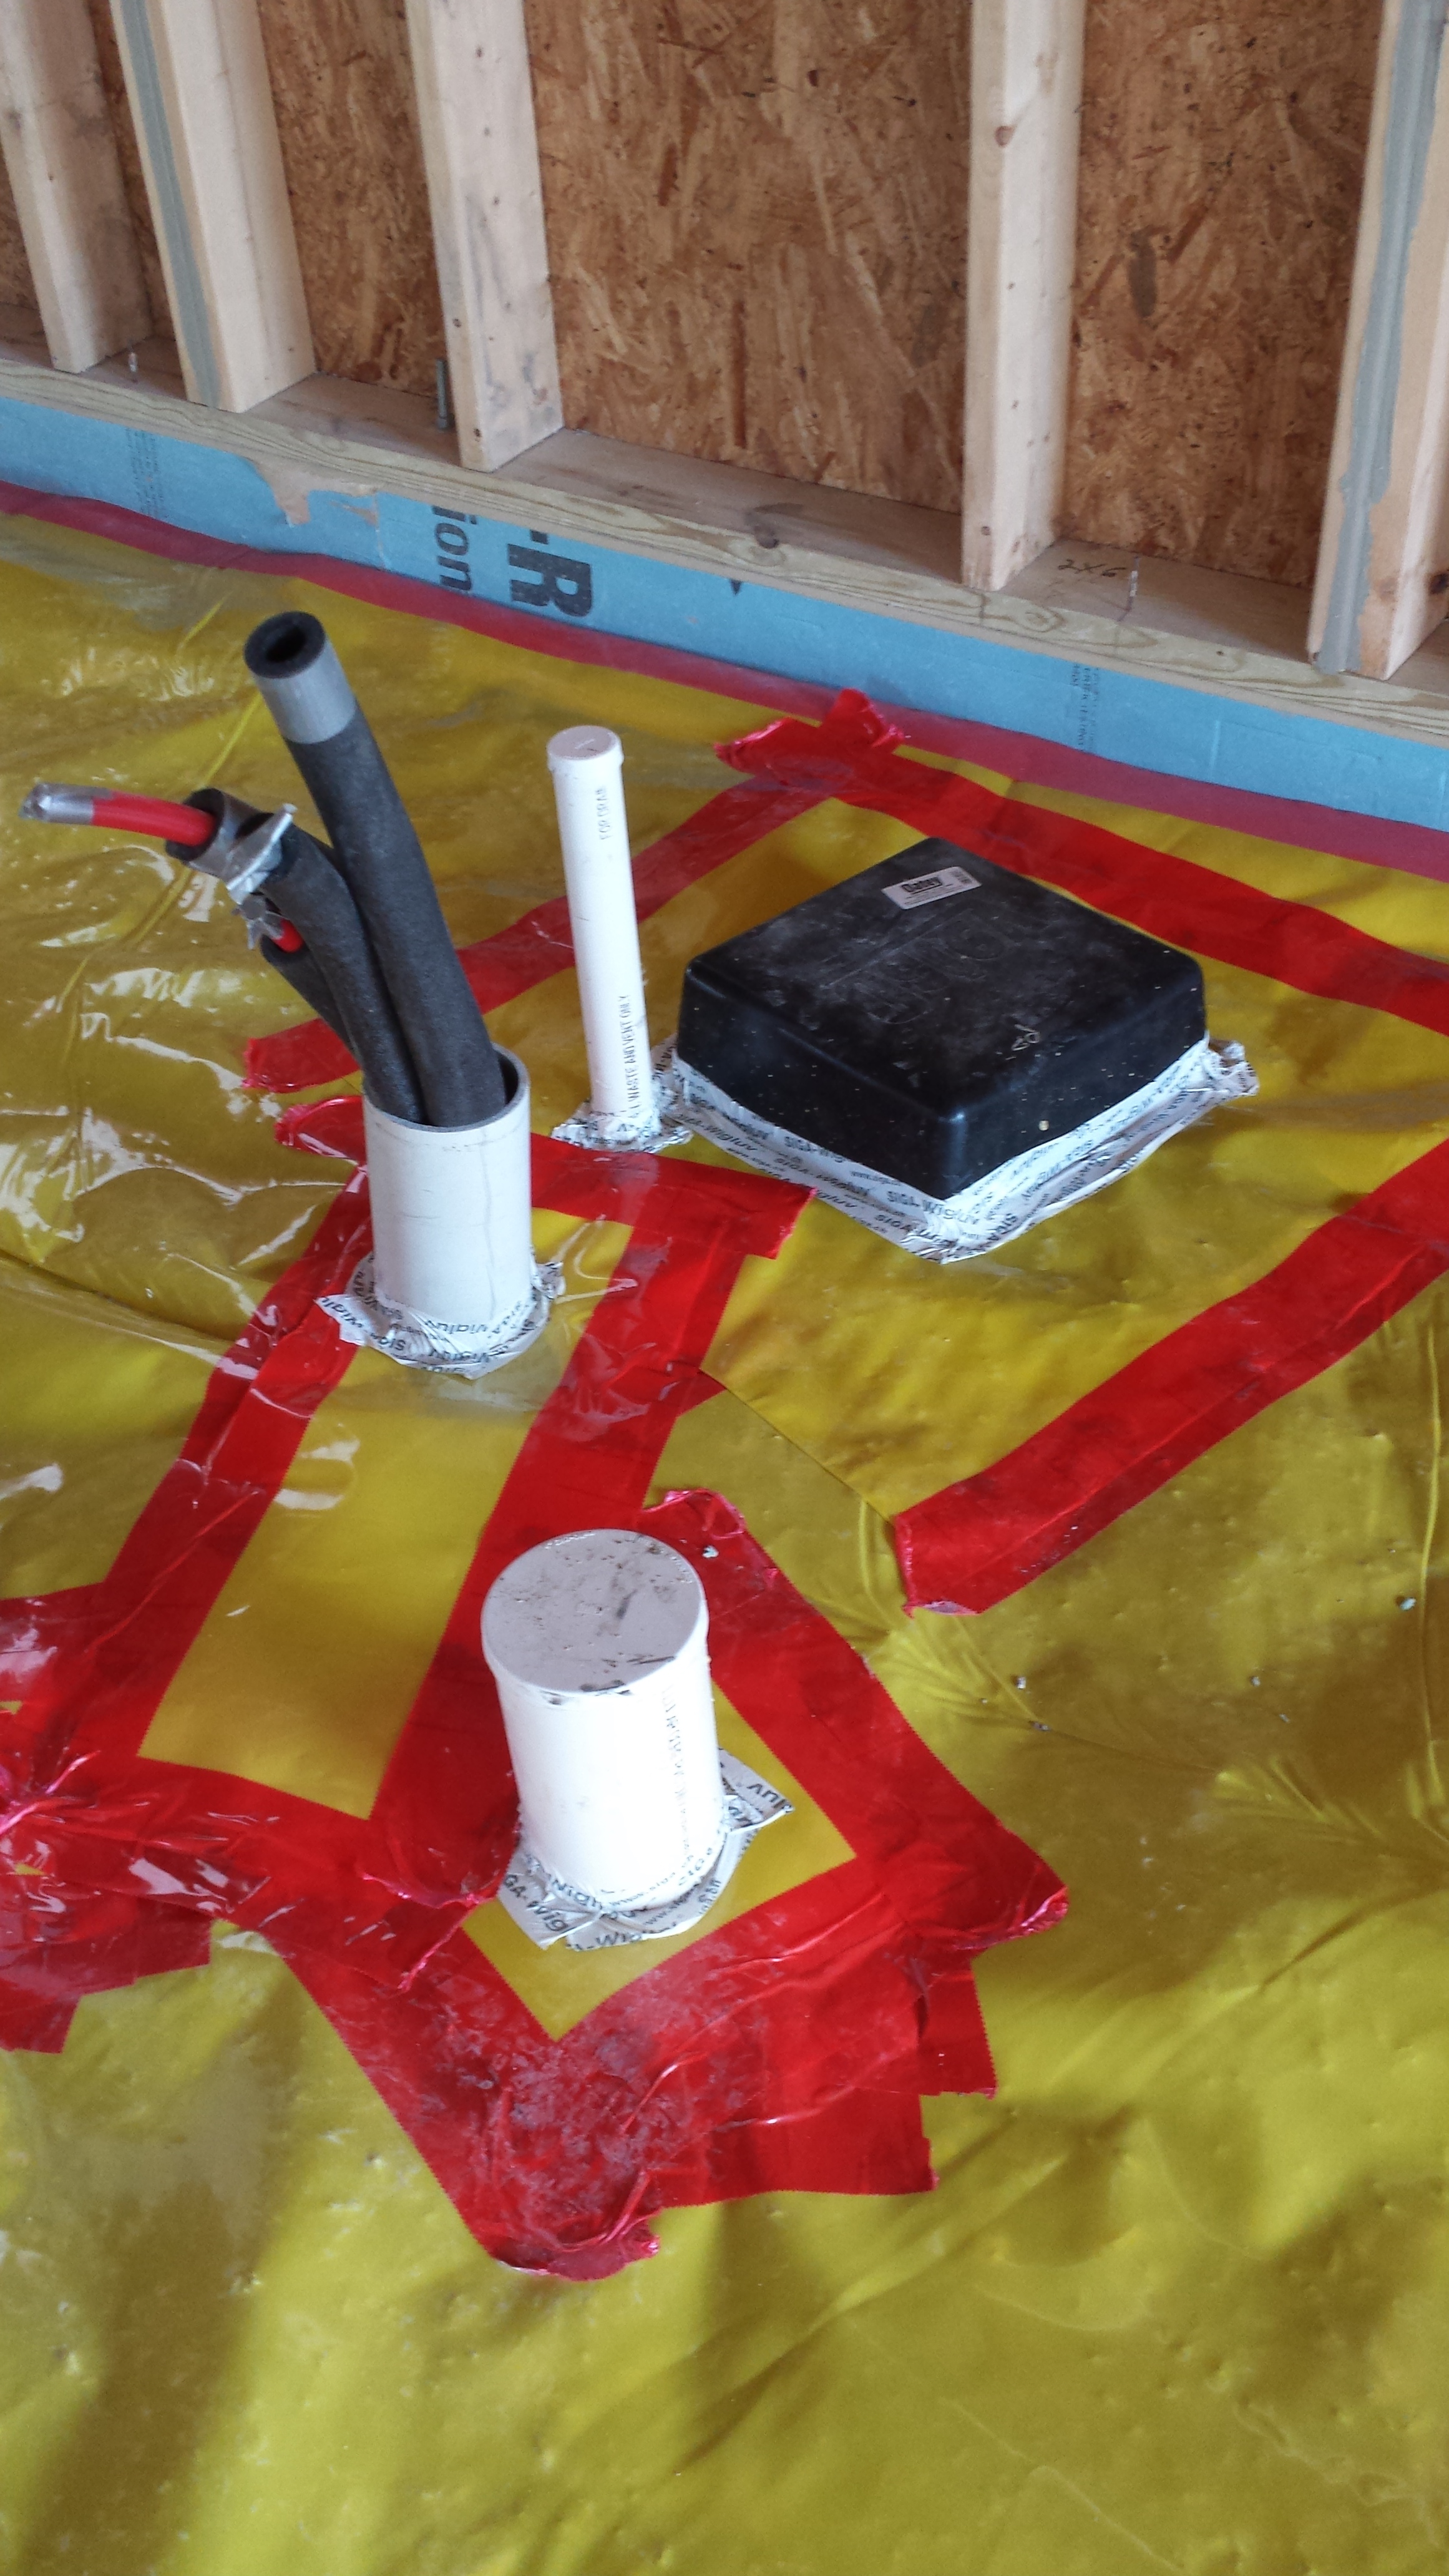
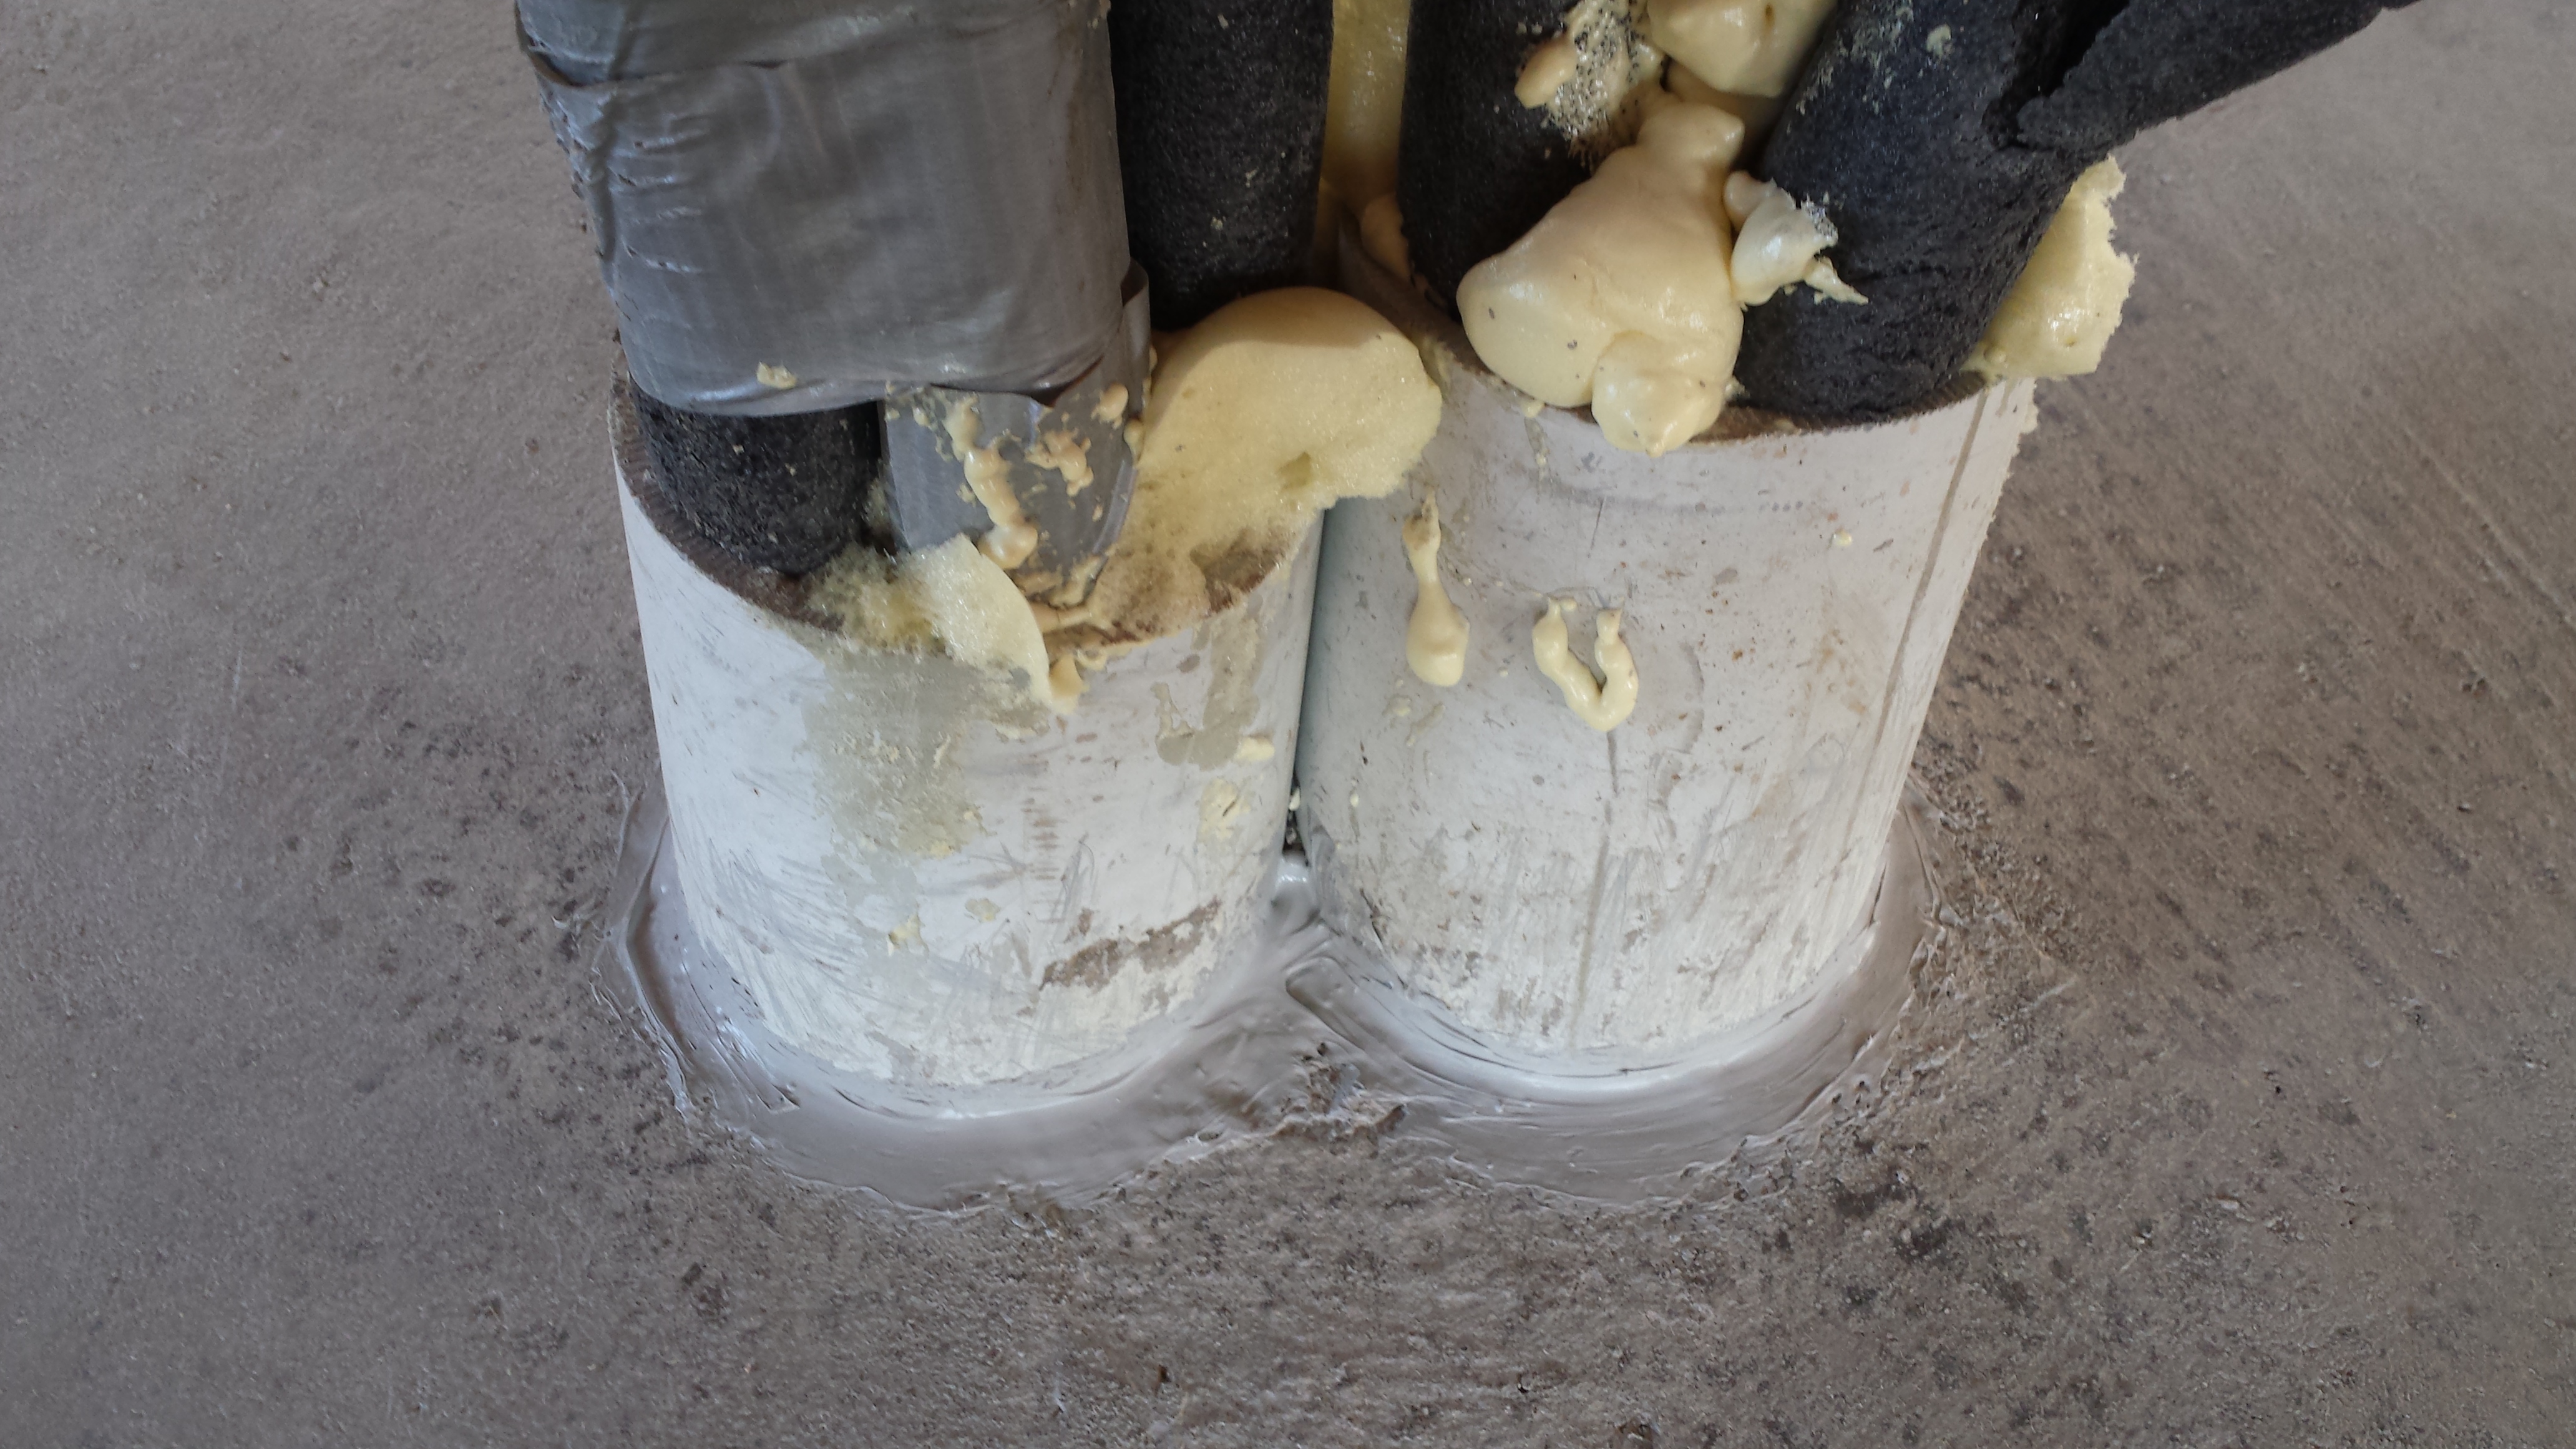
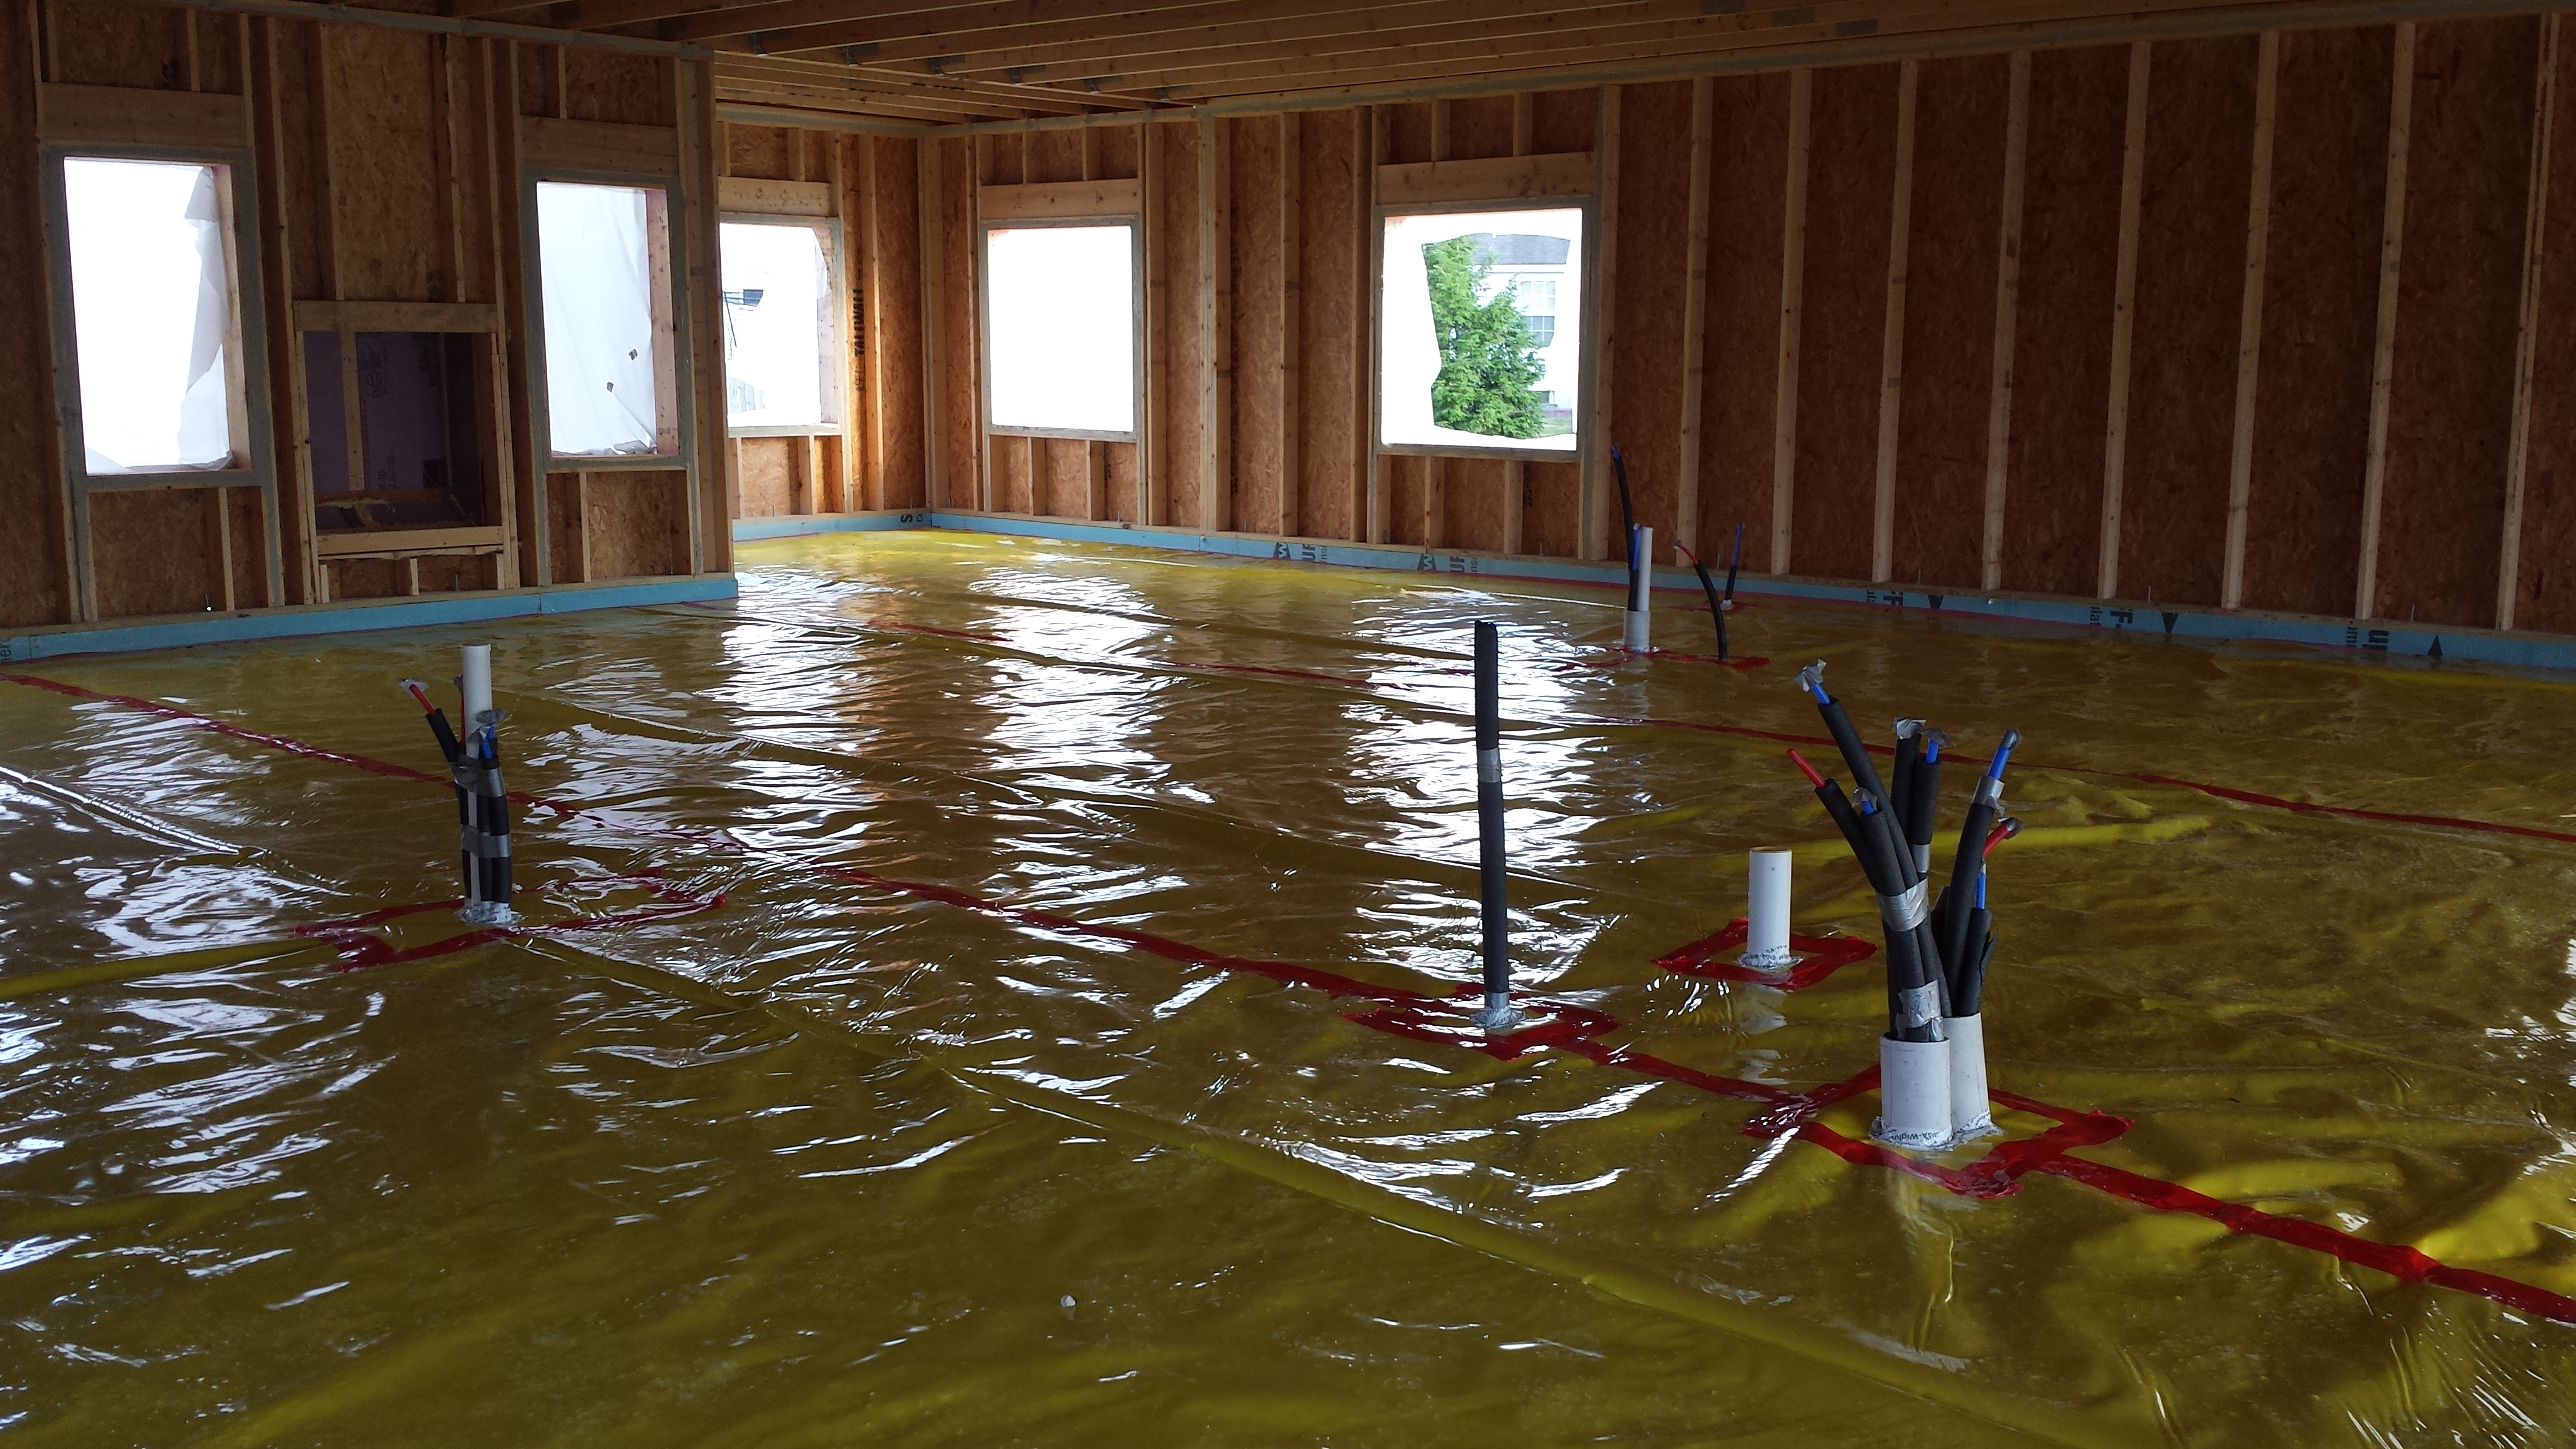
Plumbing penetrations through the below slab insulation are sealed with tape and spray foam.
Image
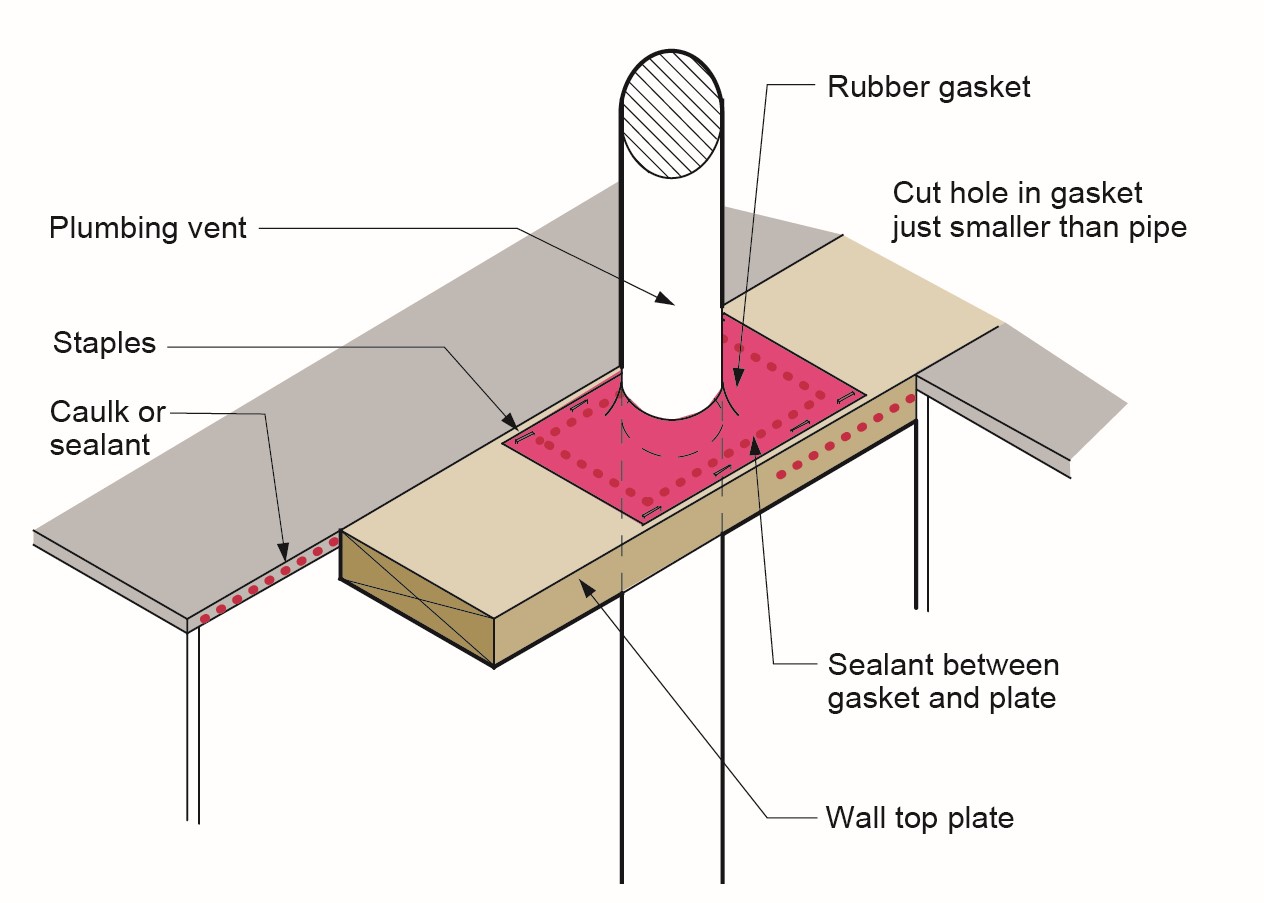
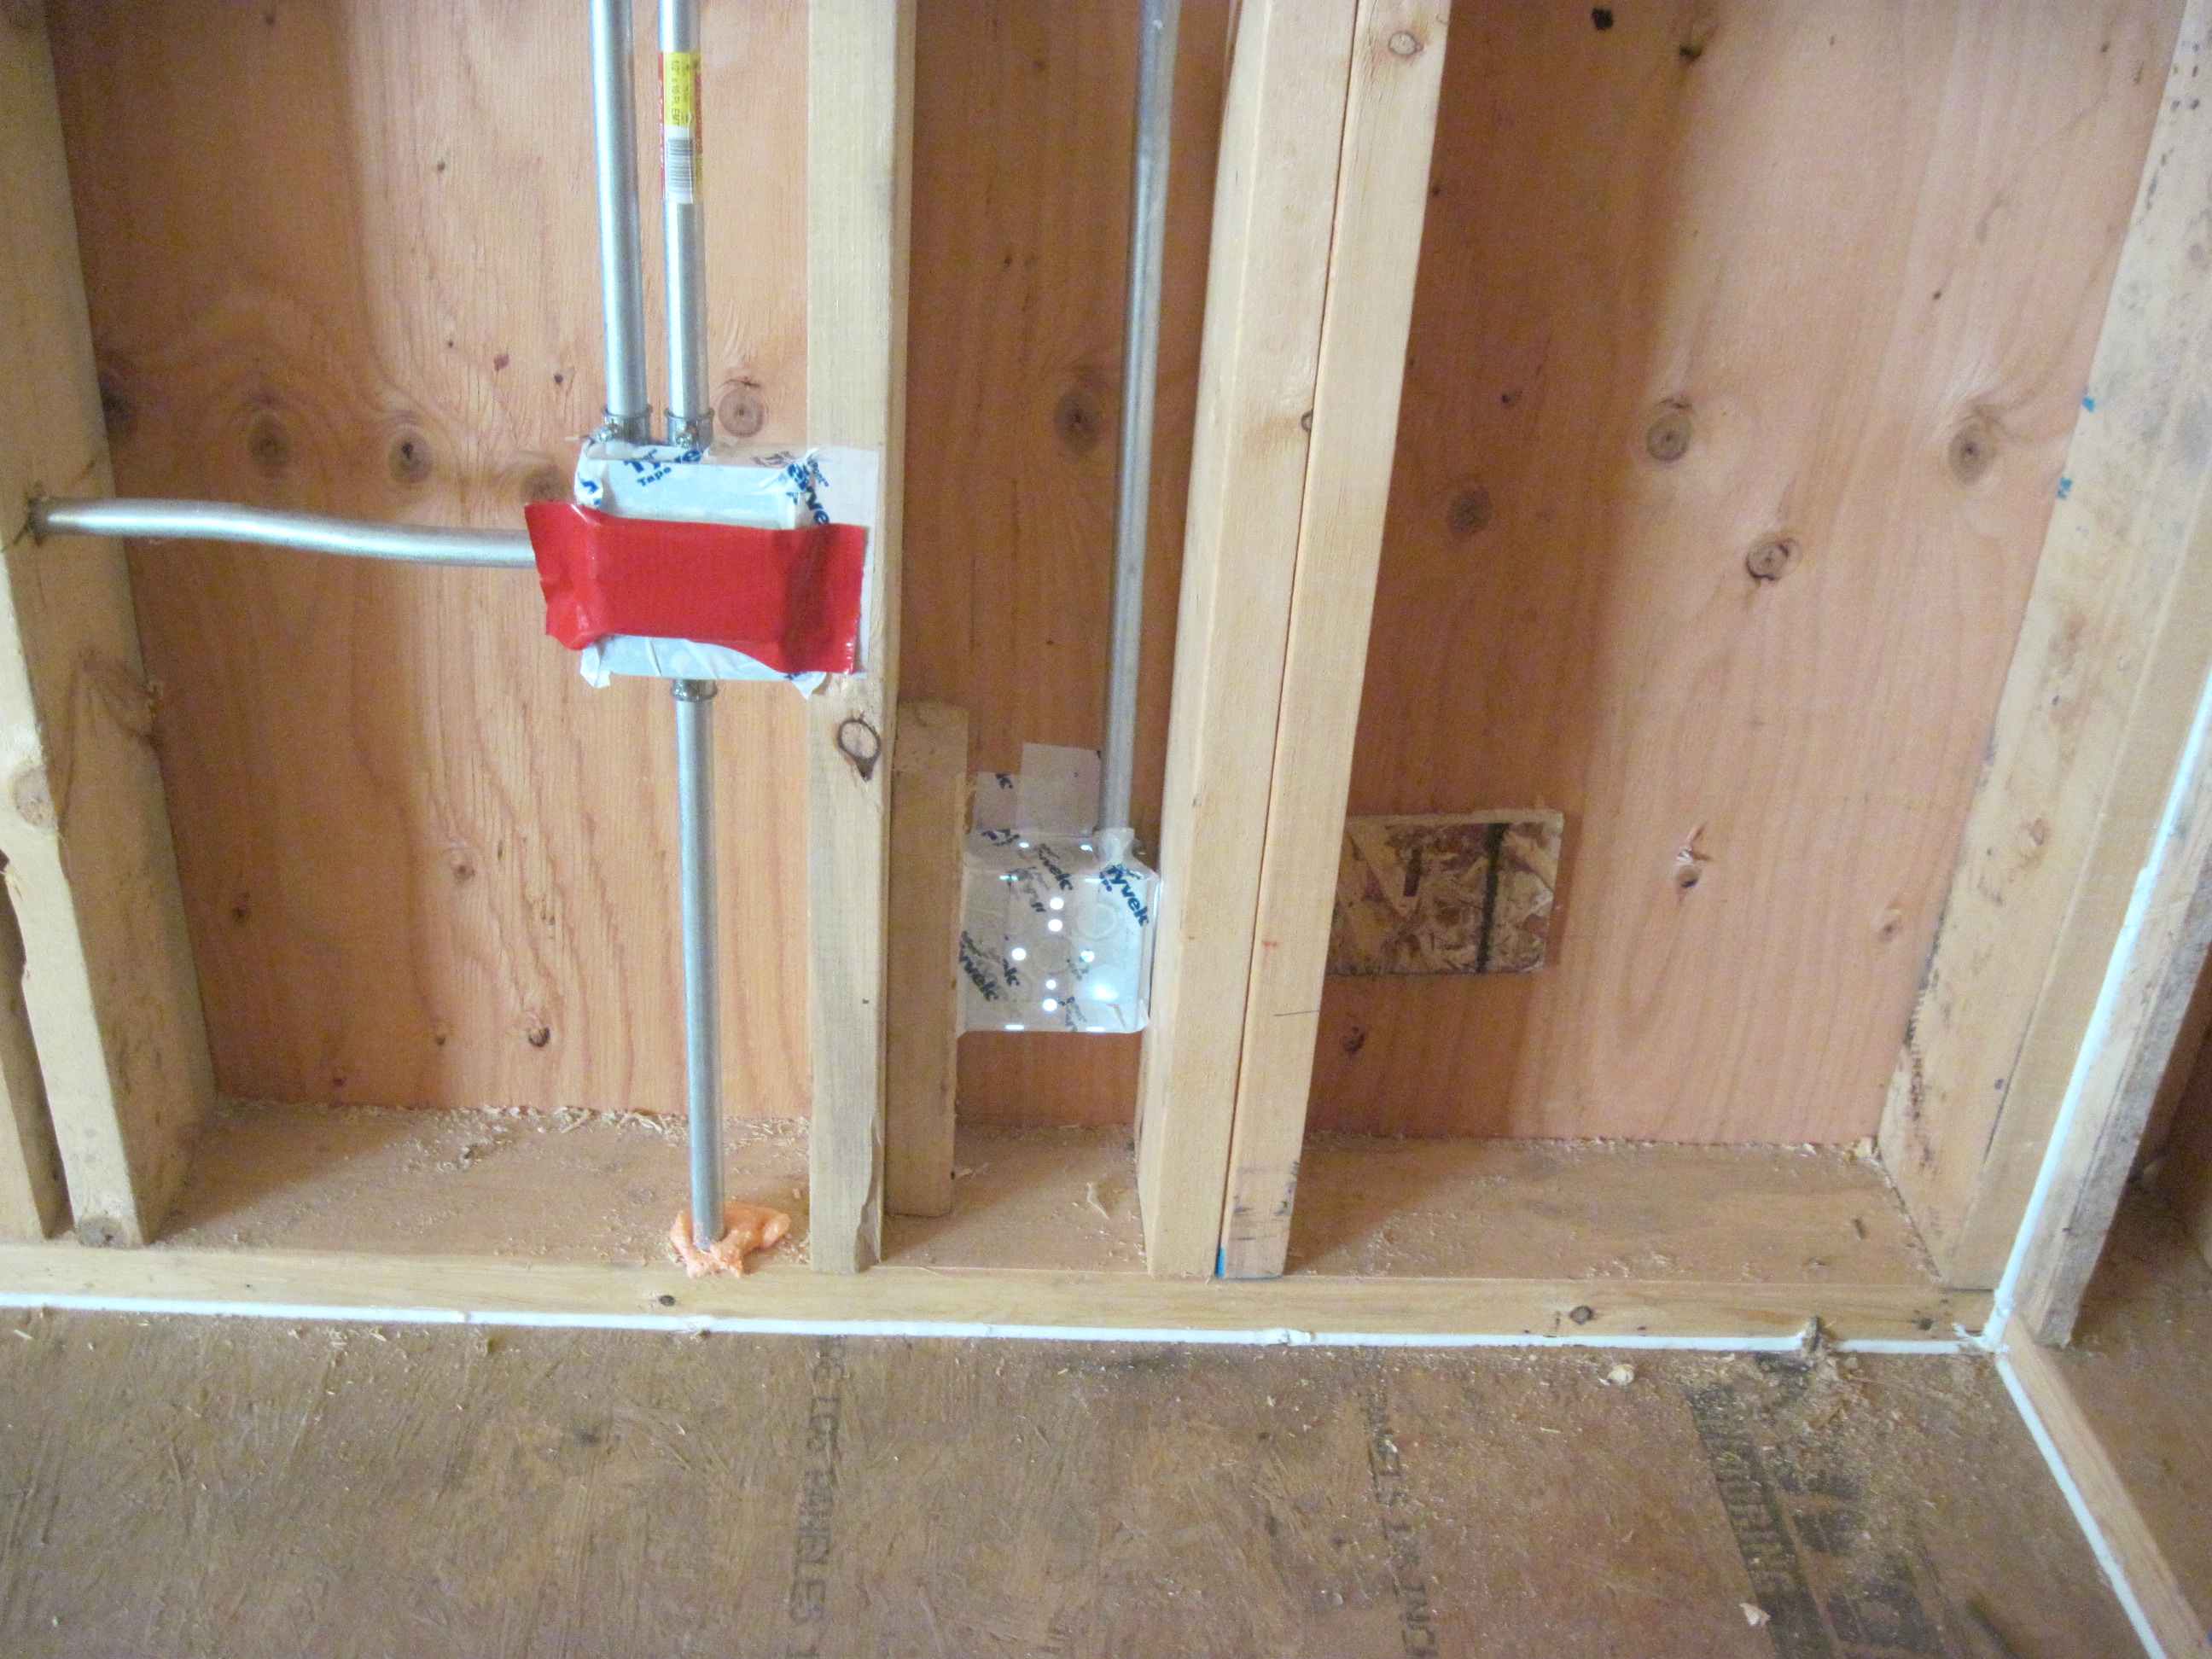
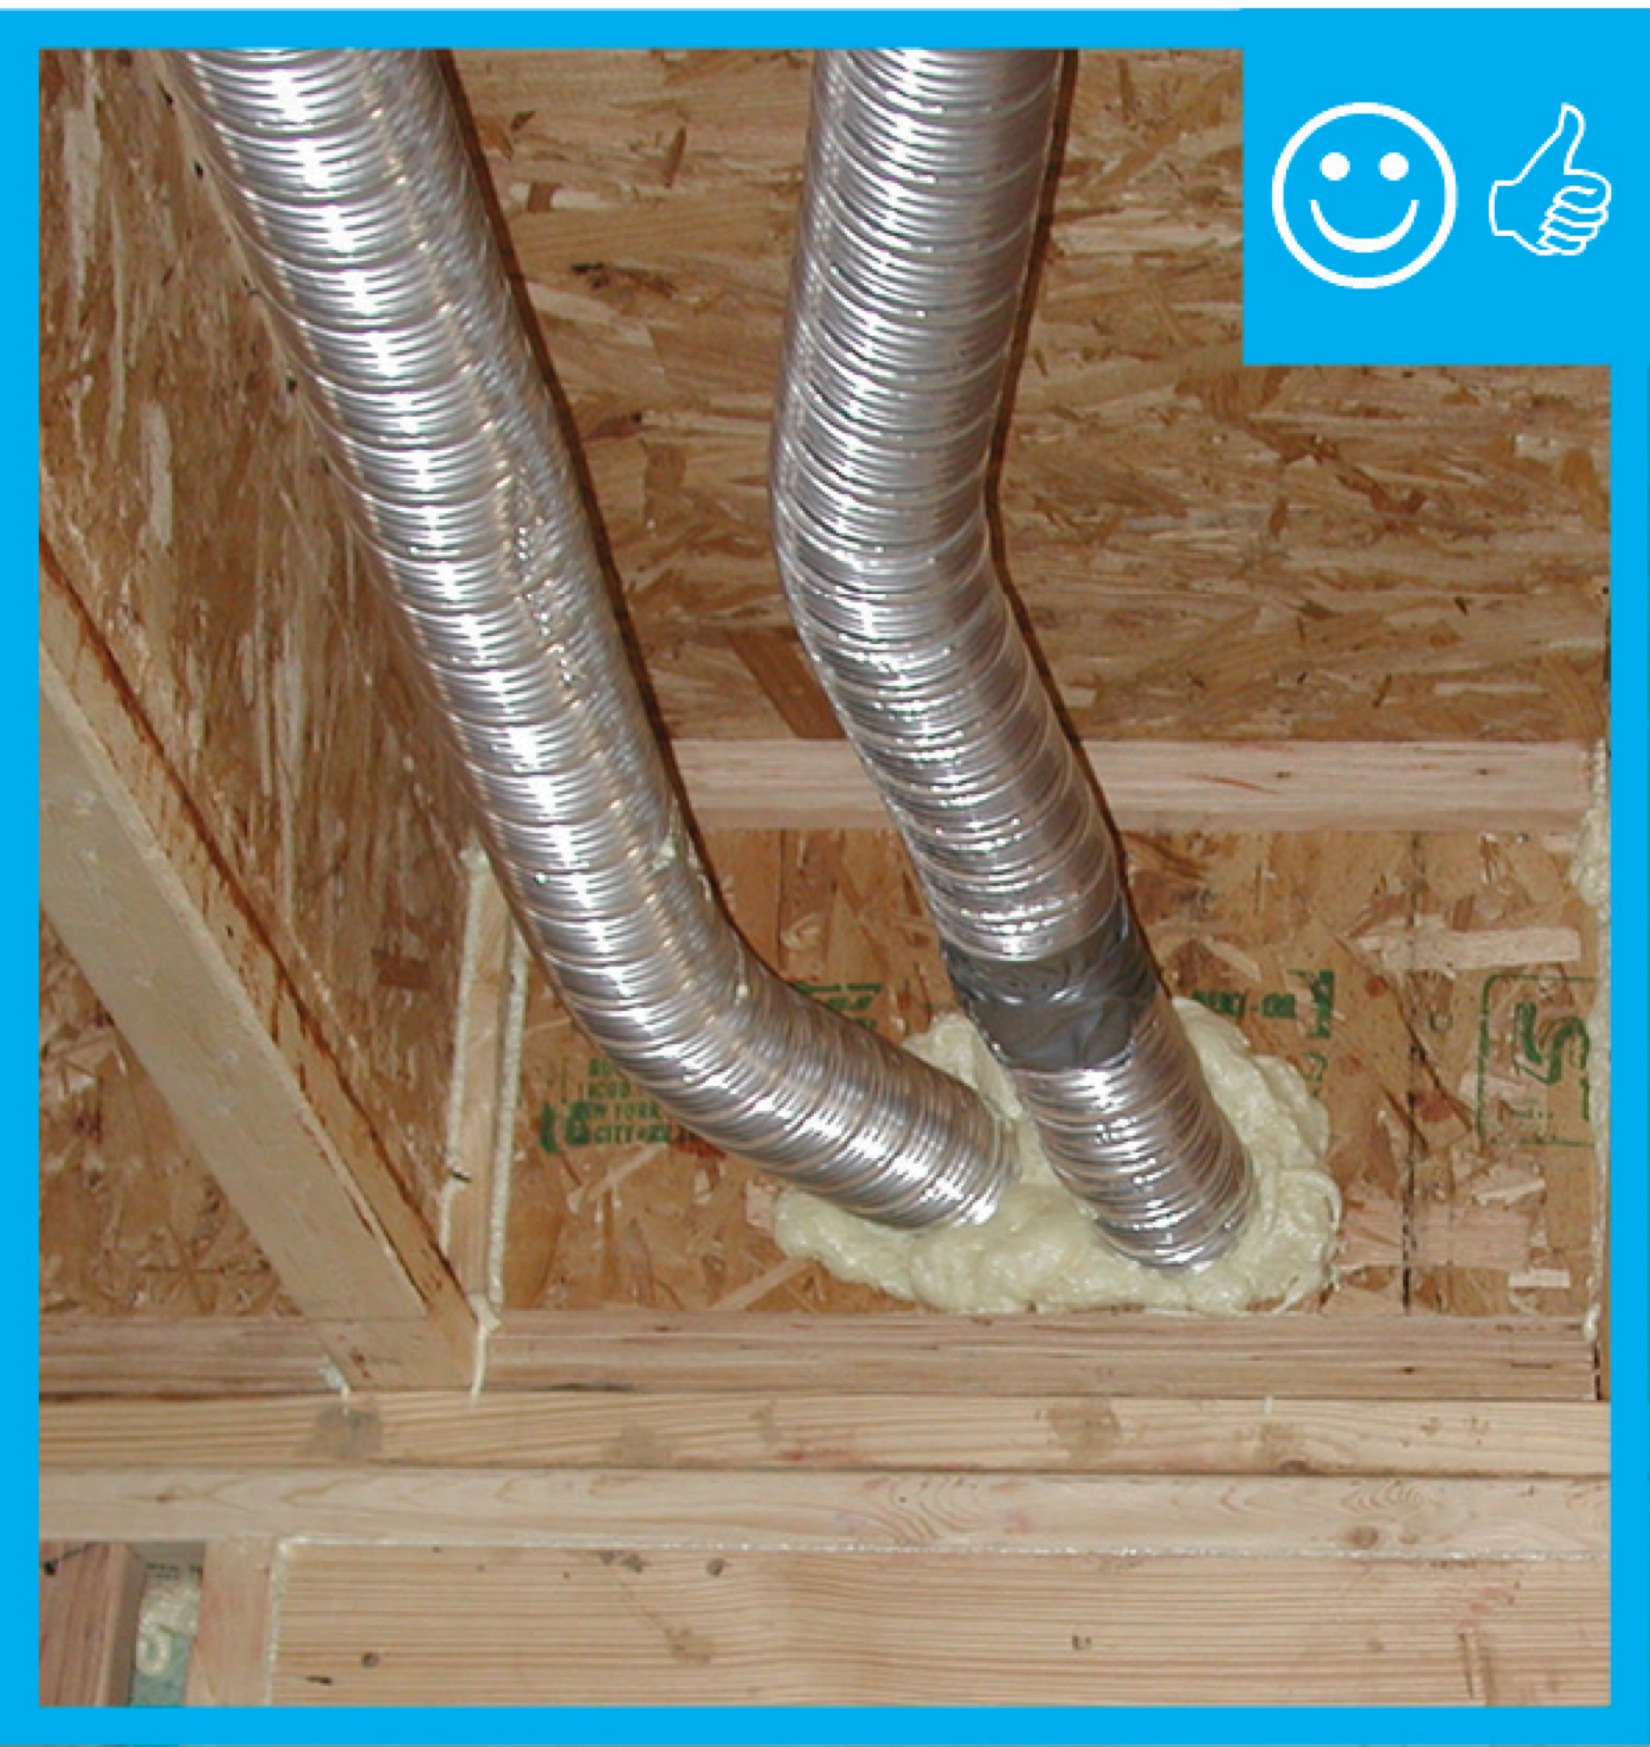
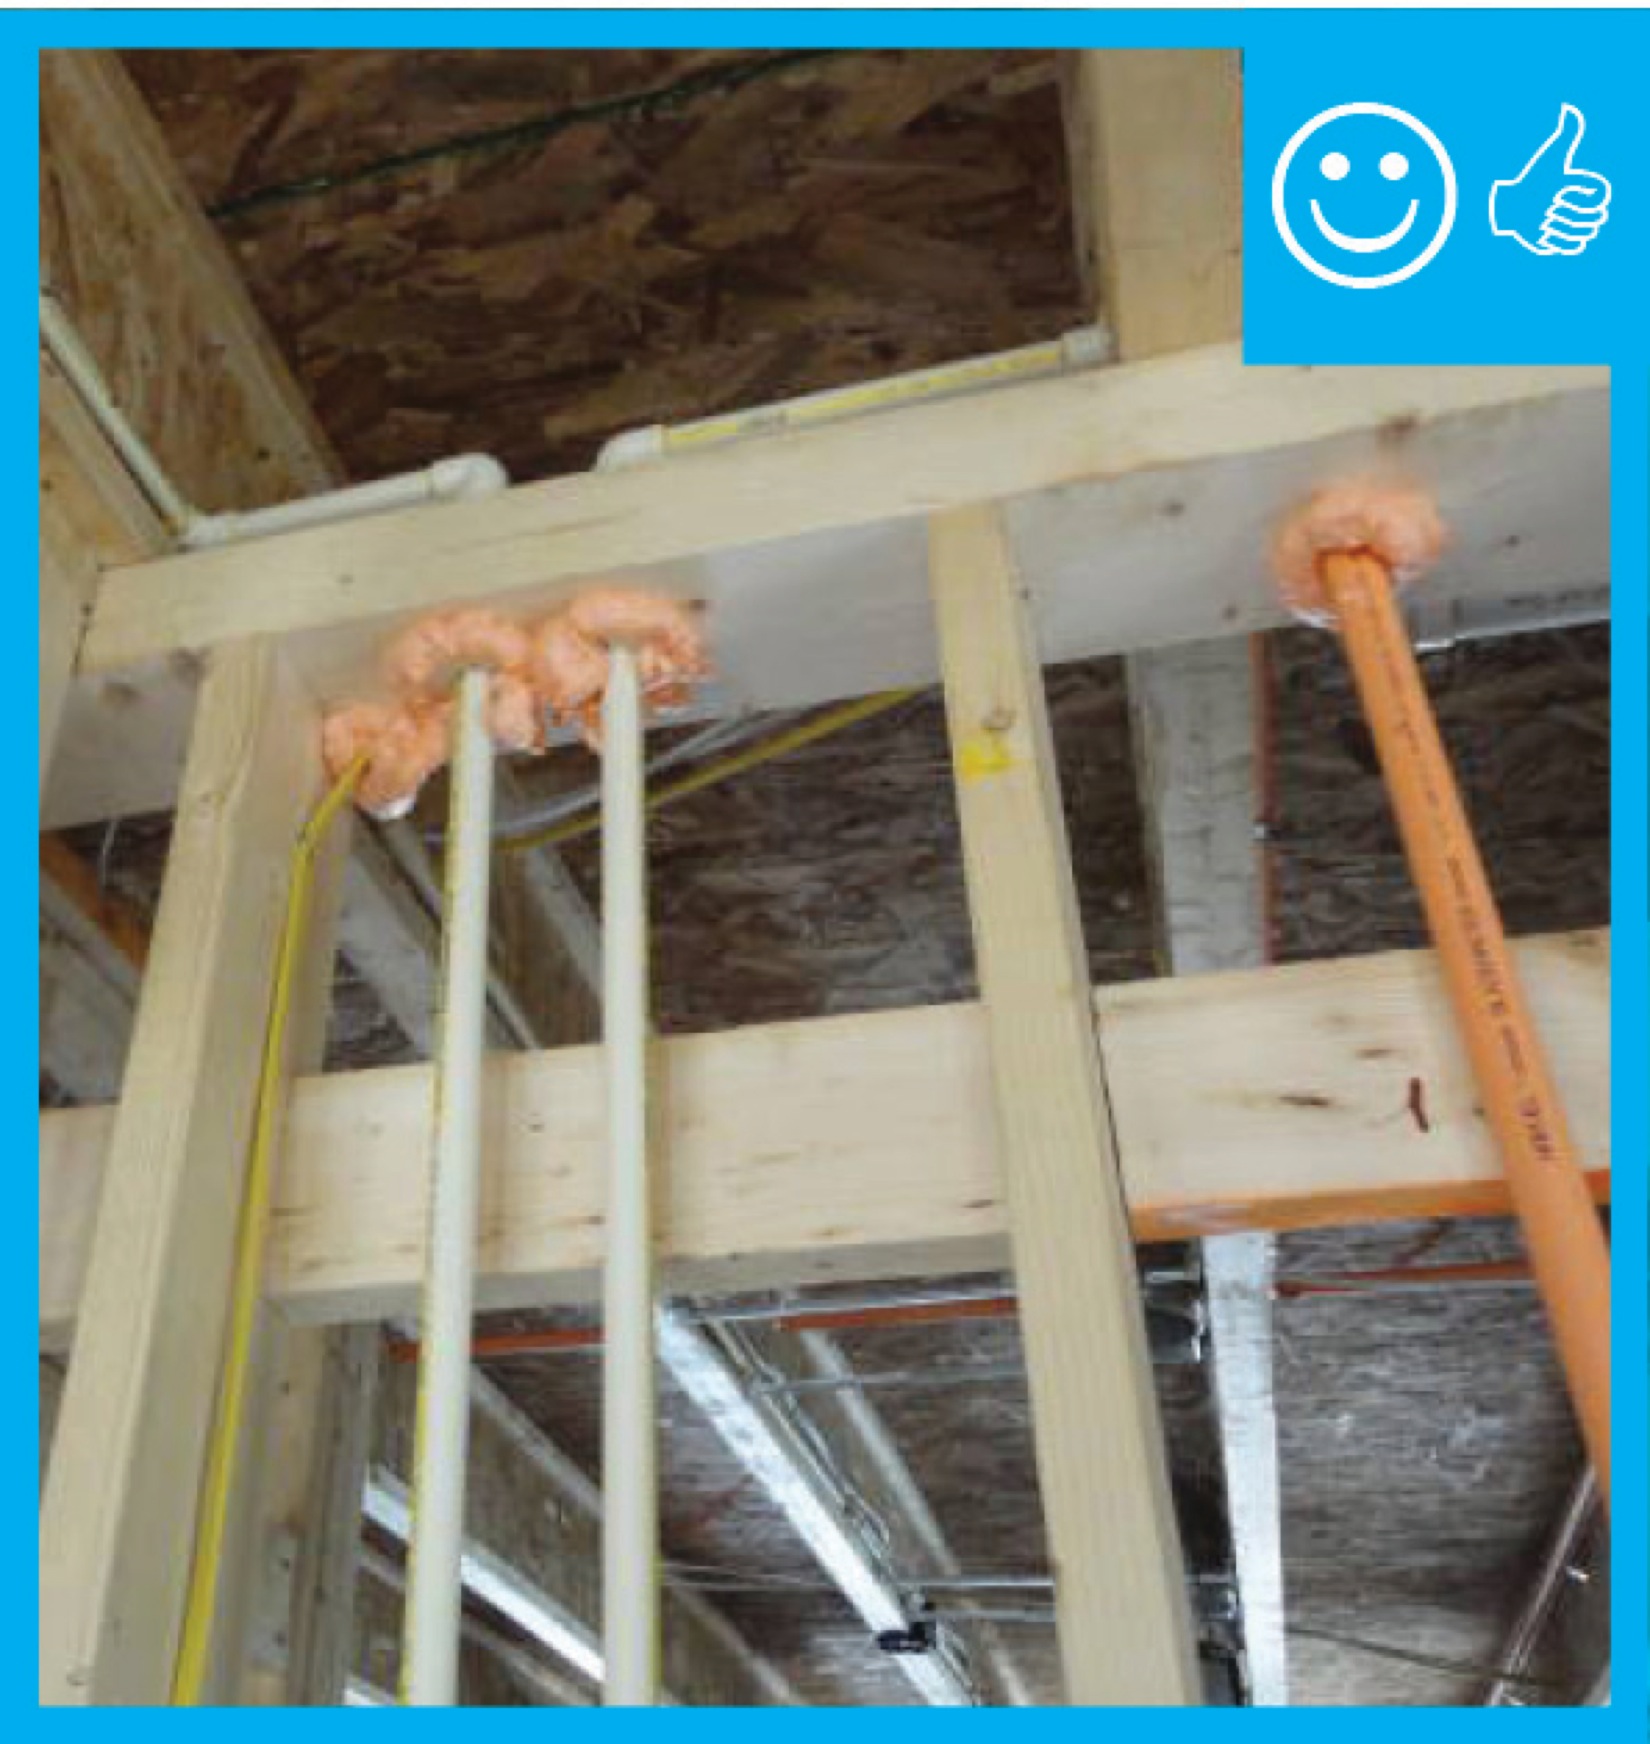
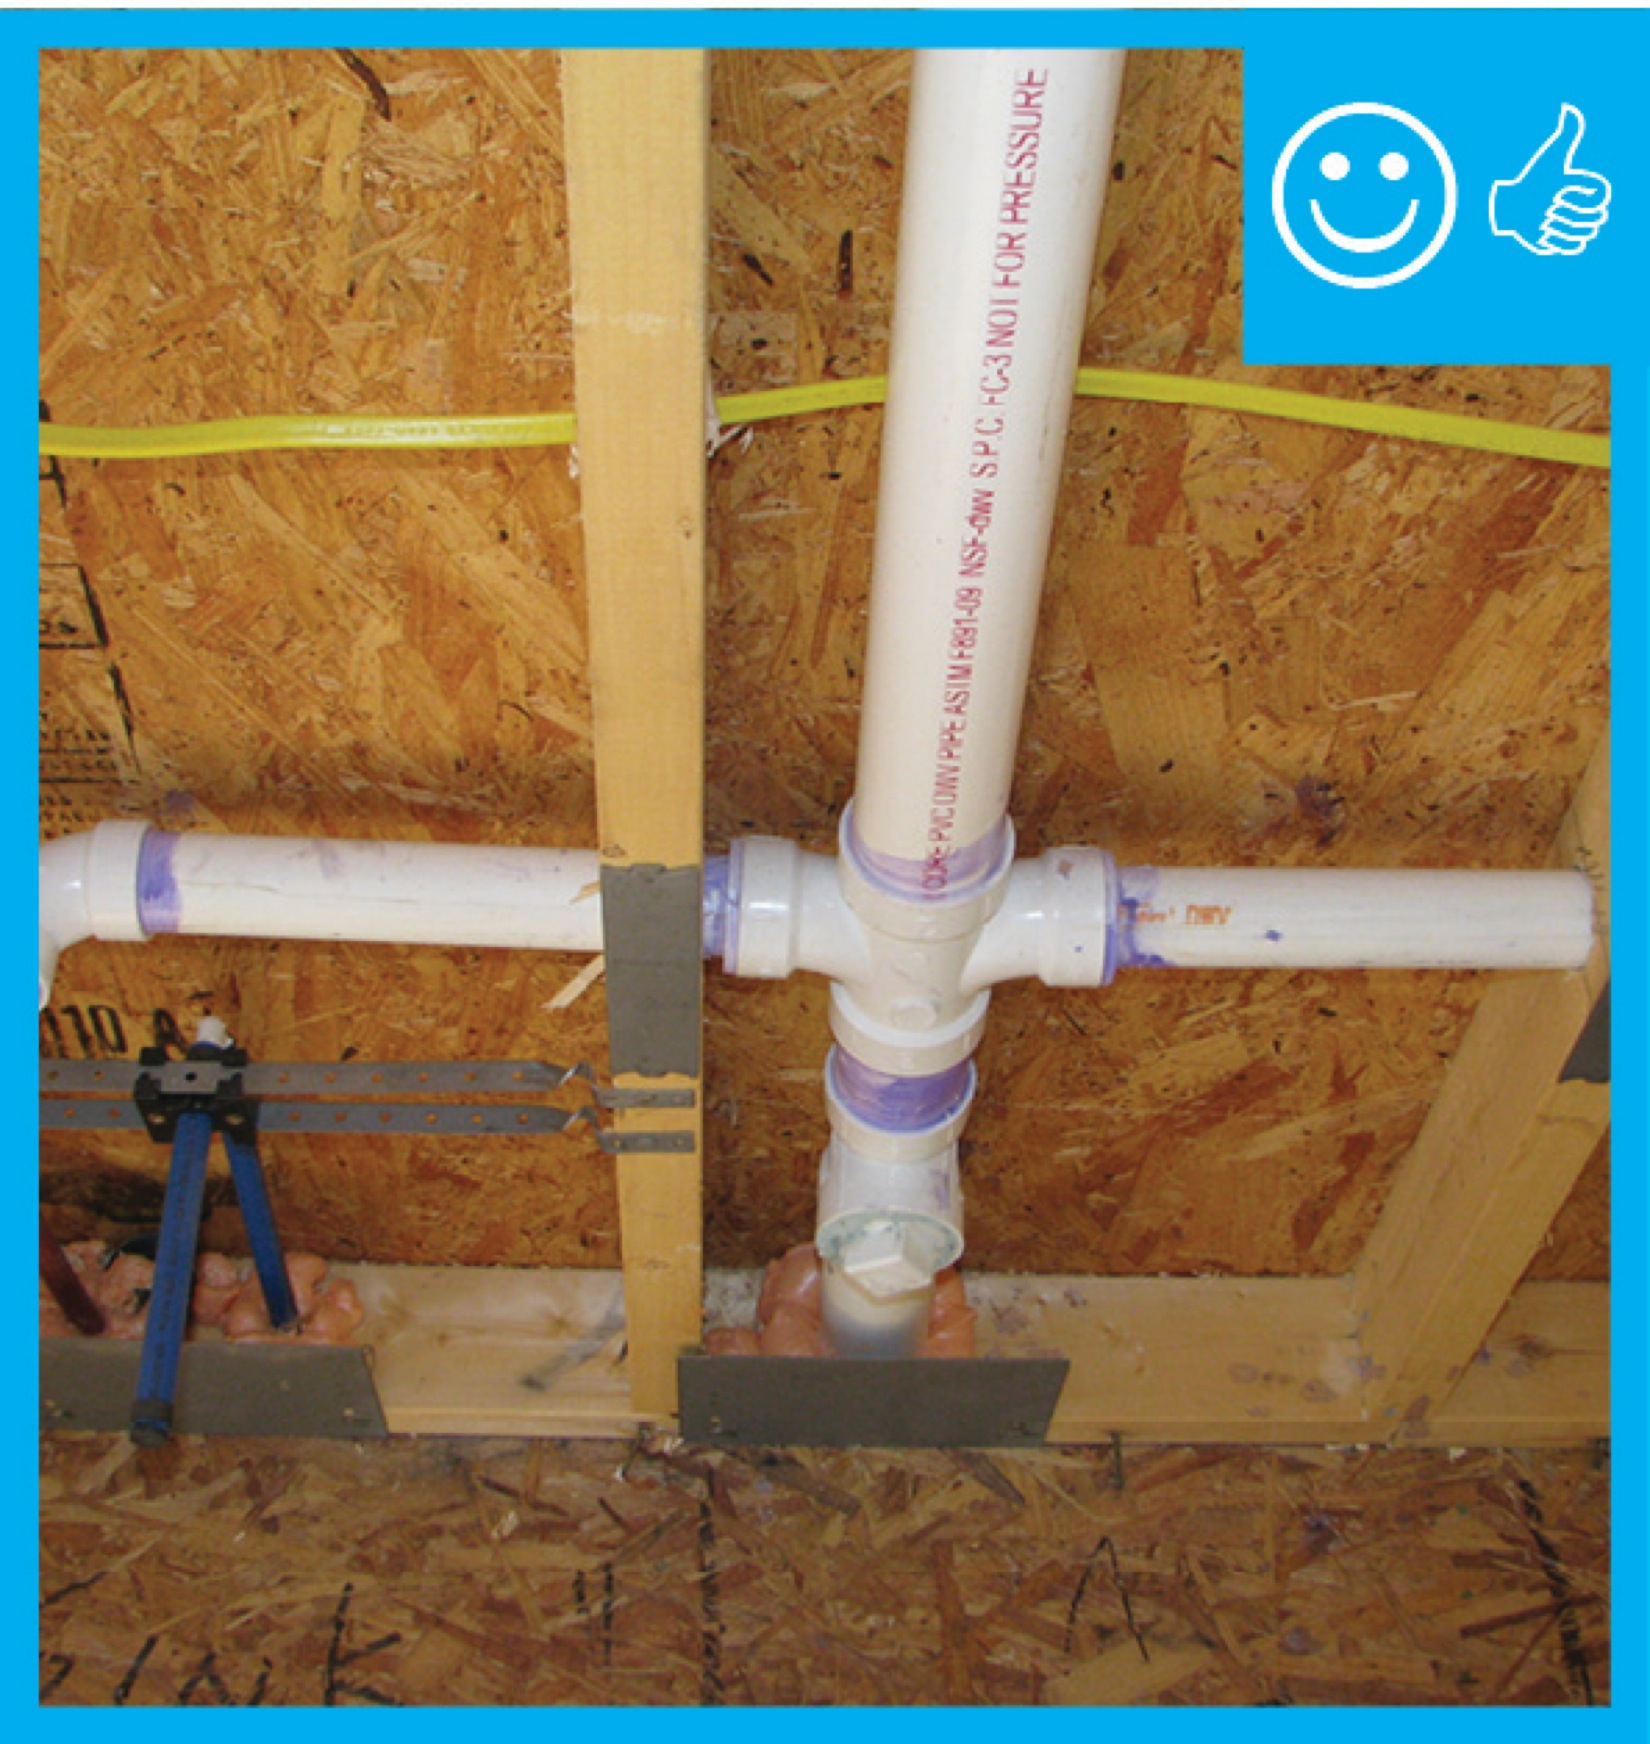
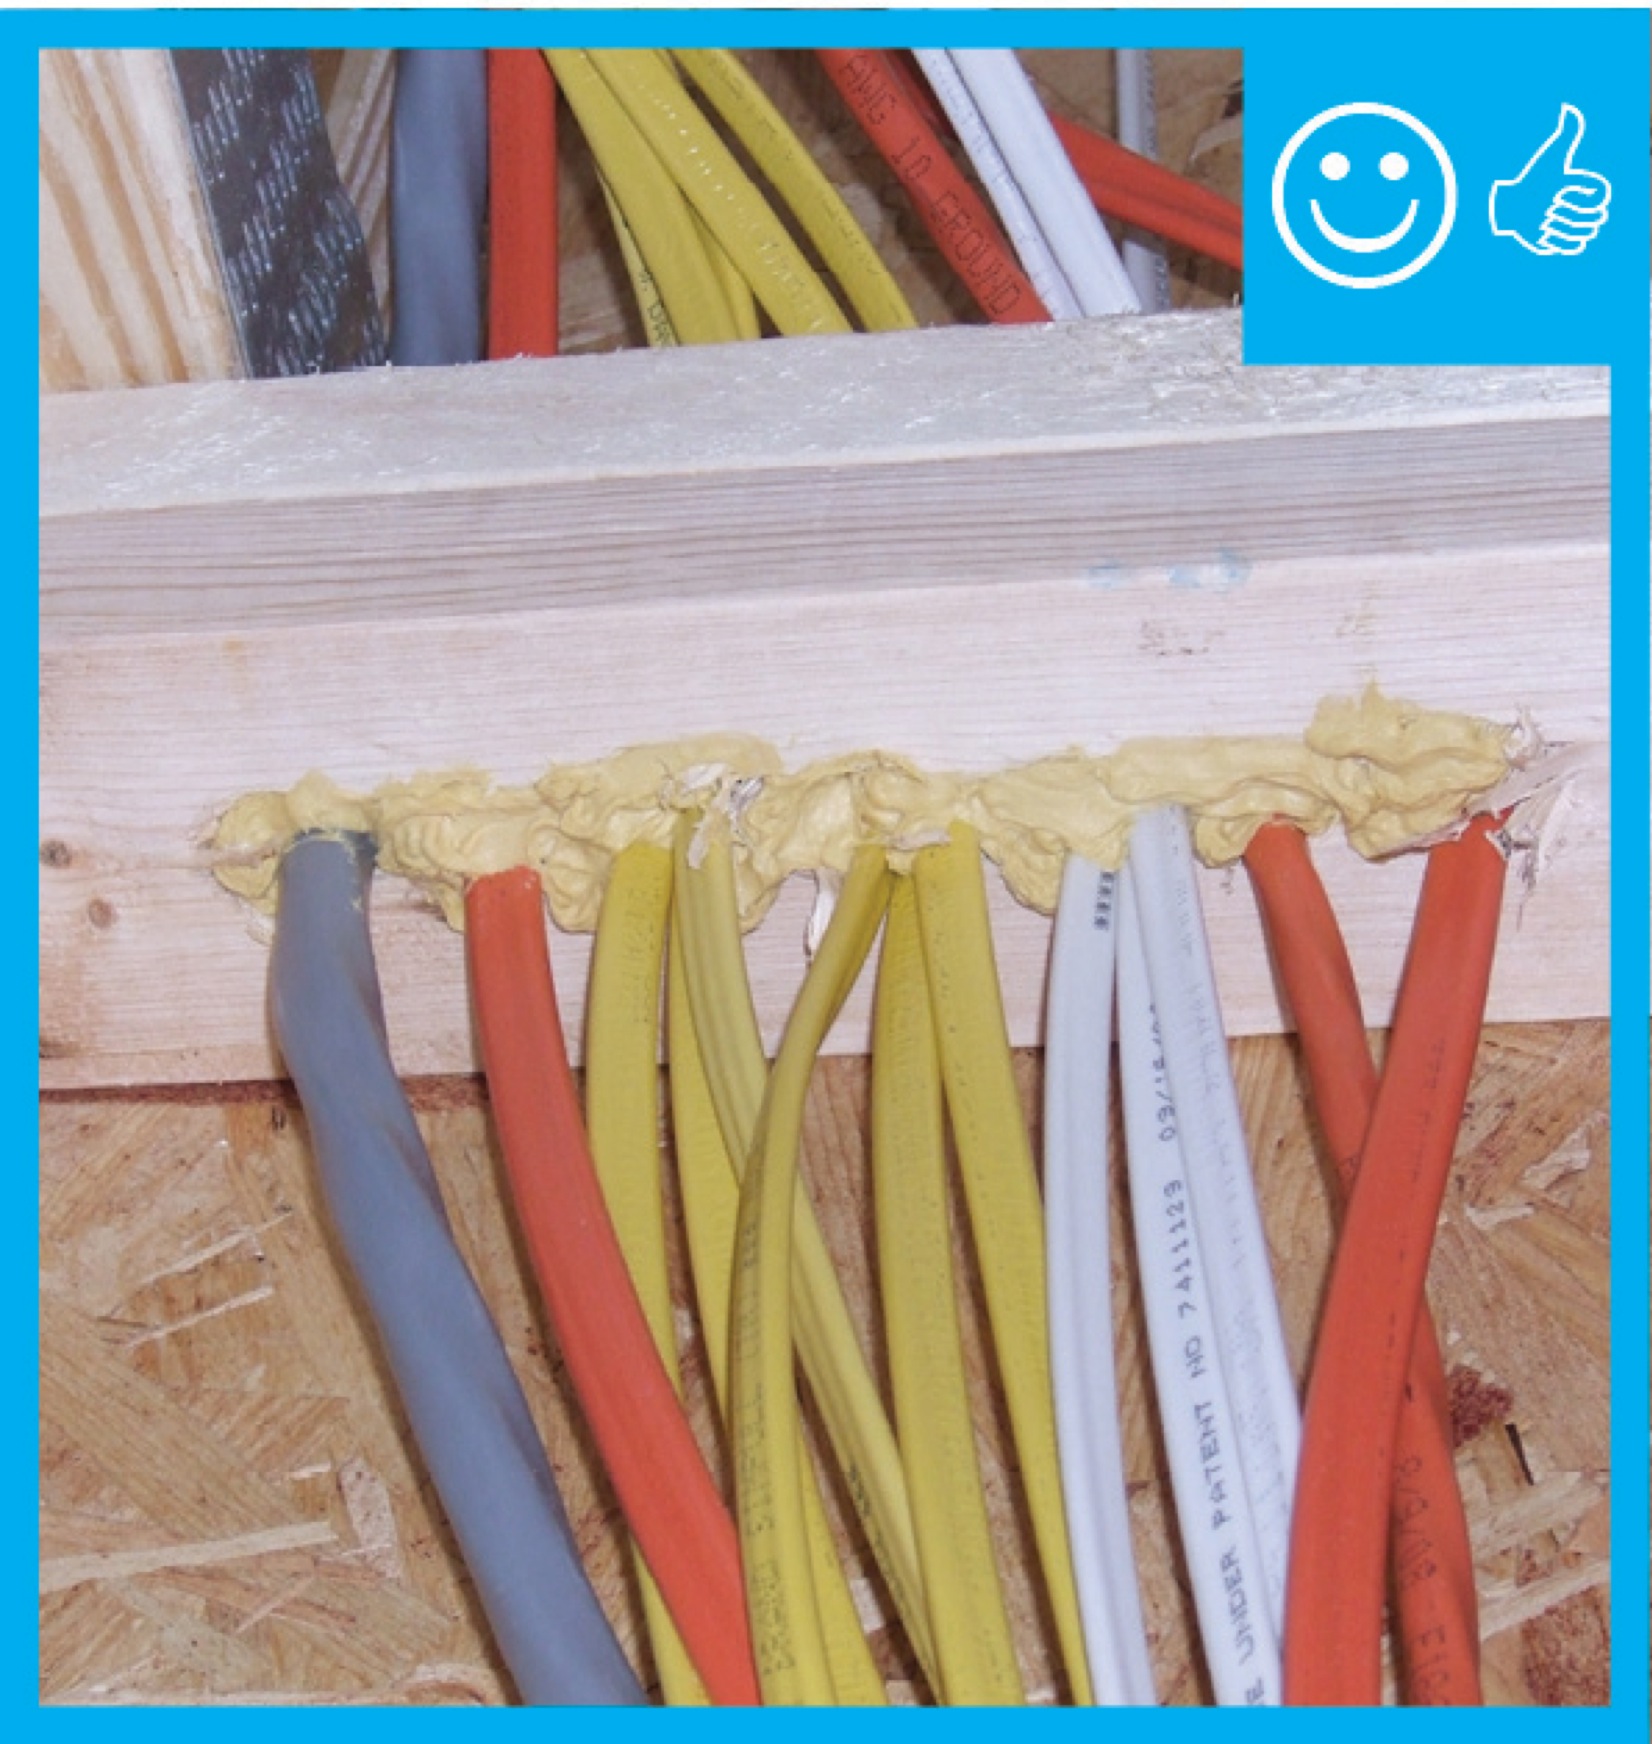
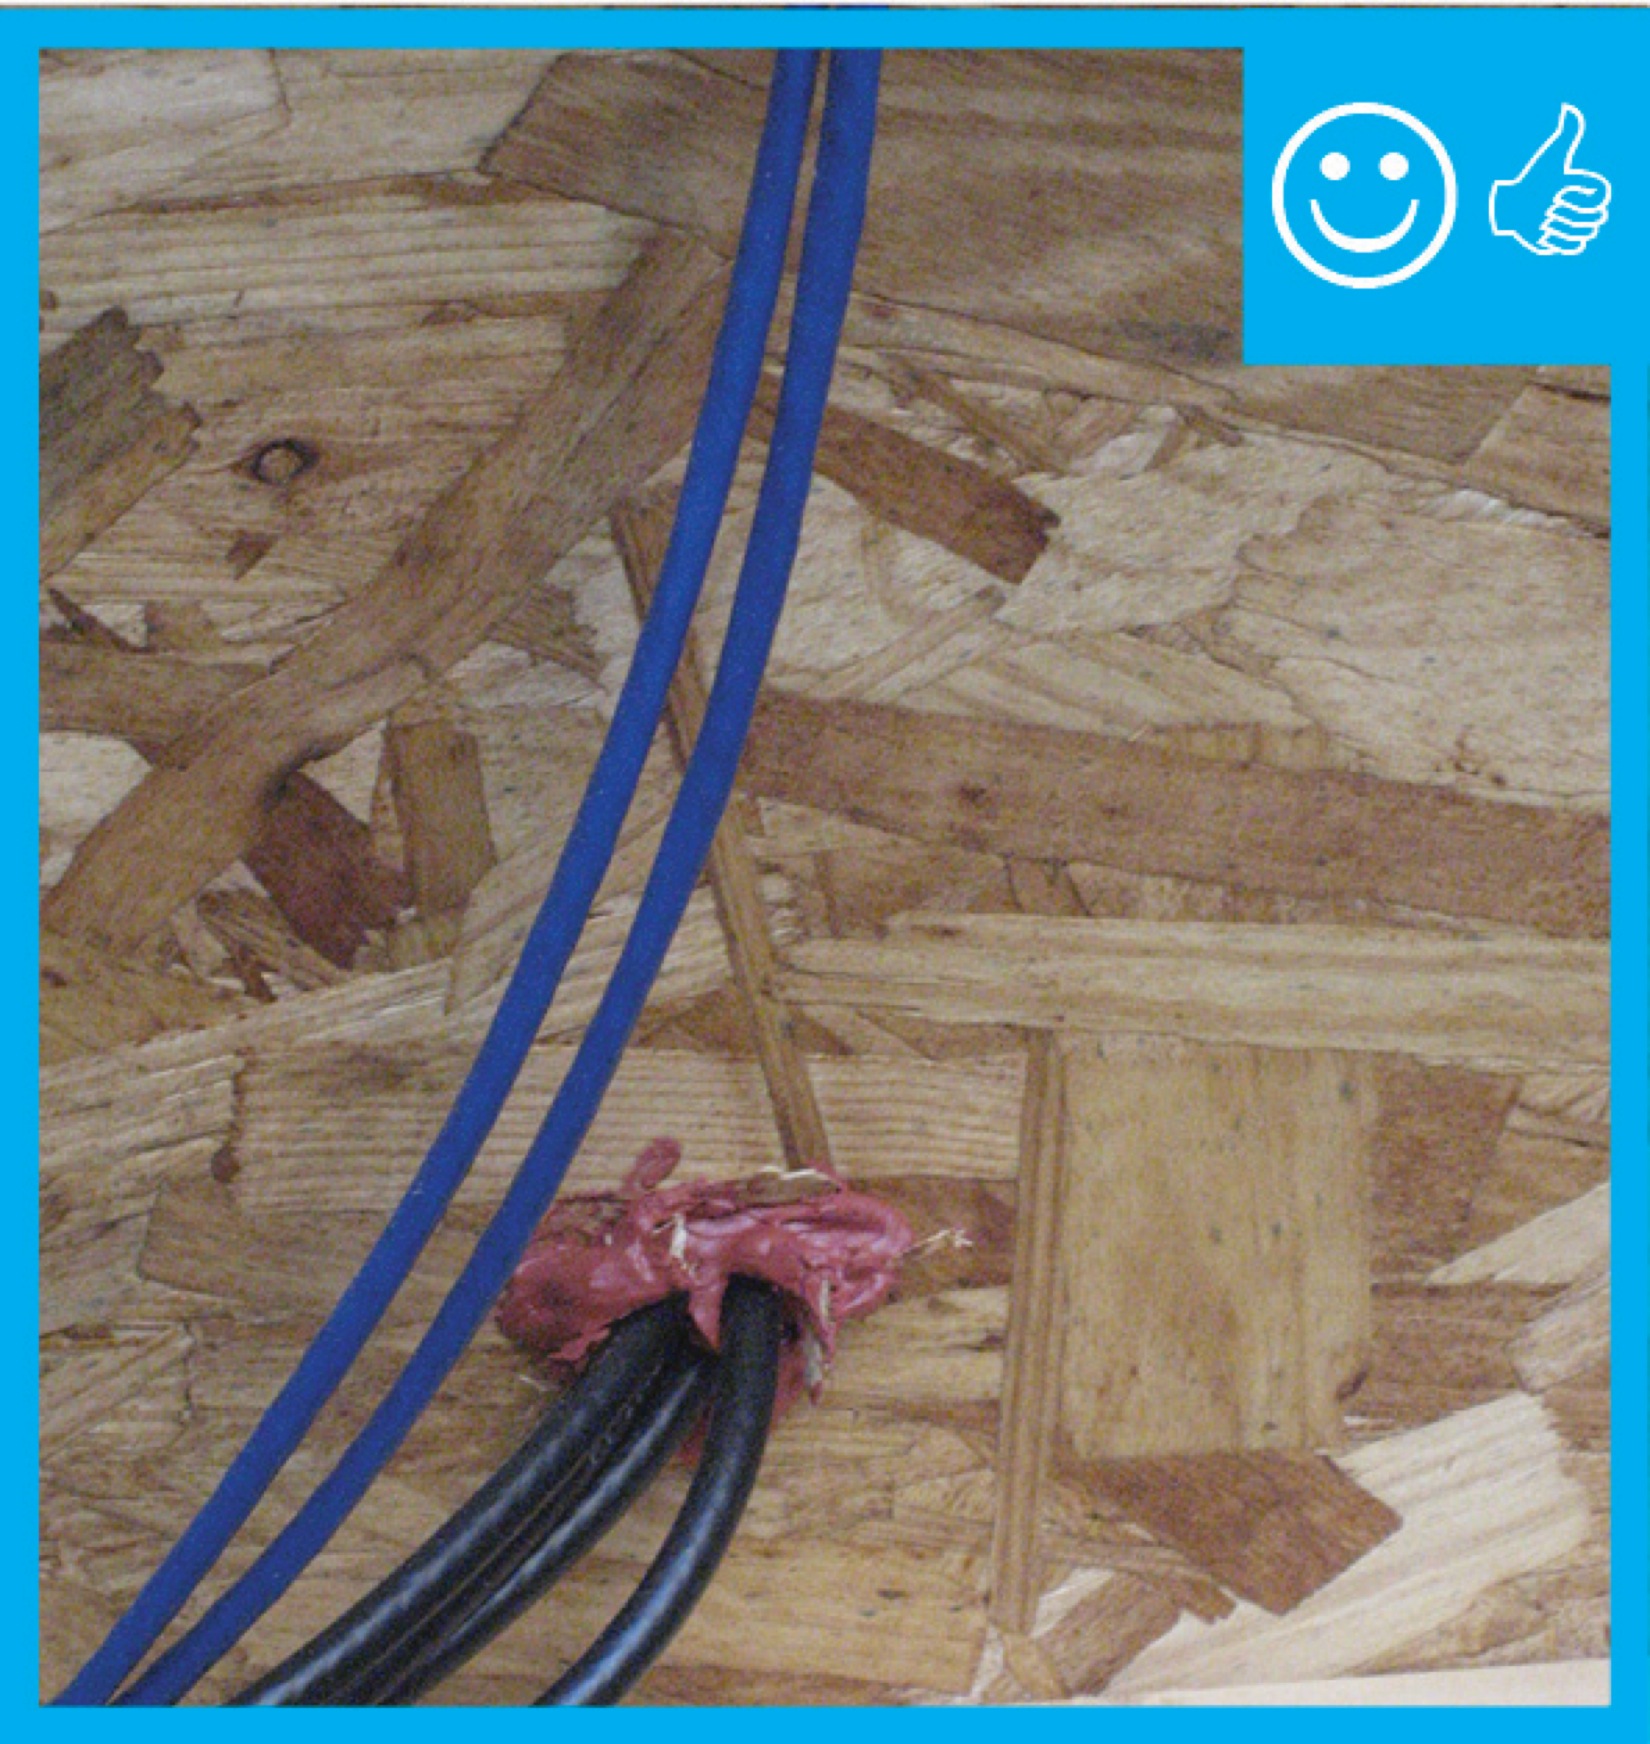
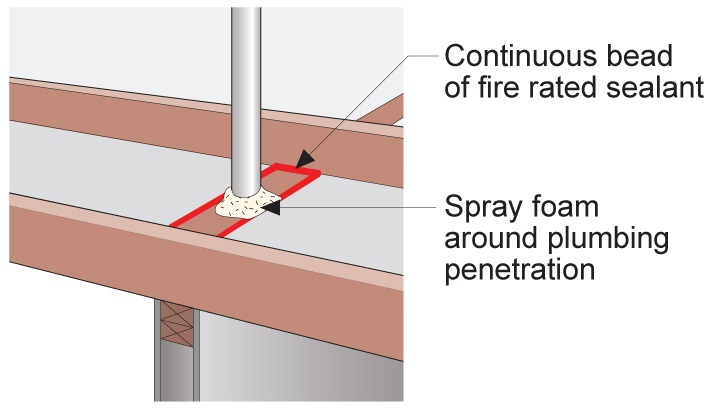
Plumbing pipes that pass through top plates can be air-sealed with a gasket material cut slightly smaller than the pipe diameter.
Image
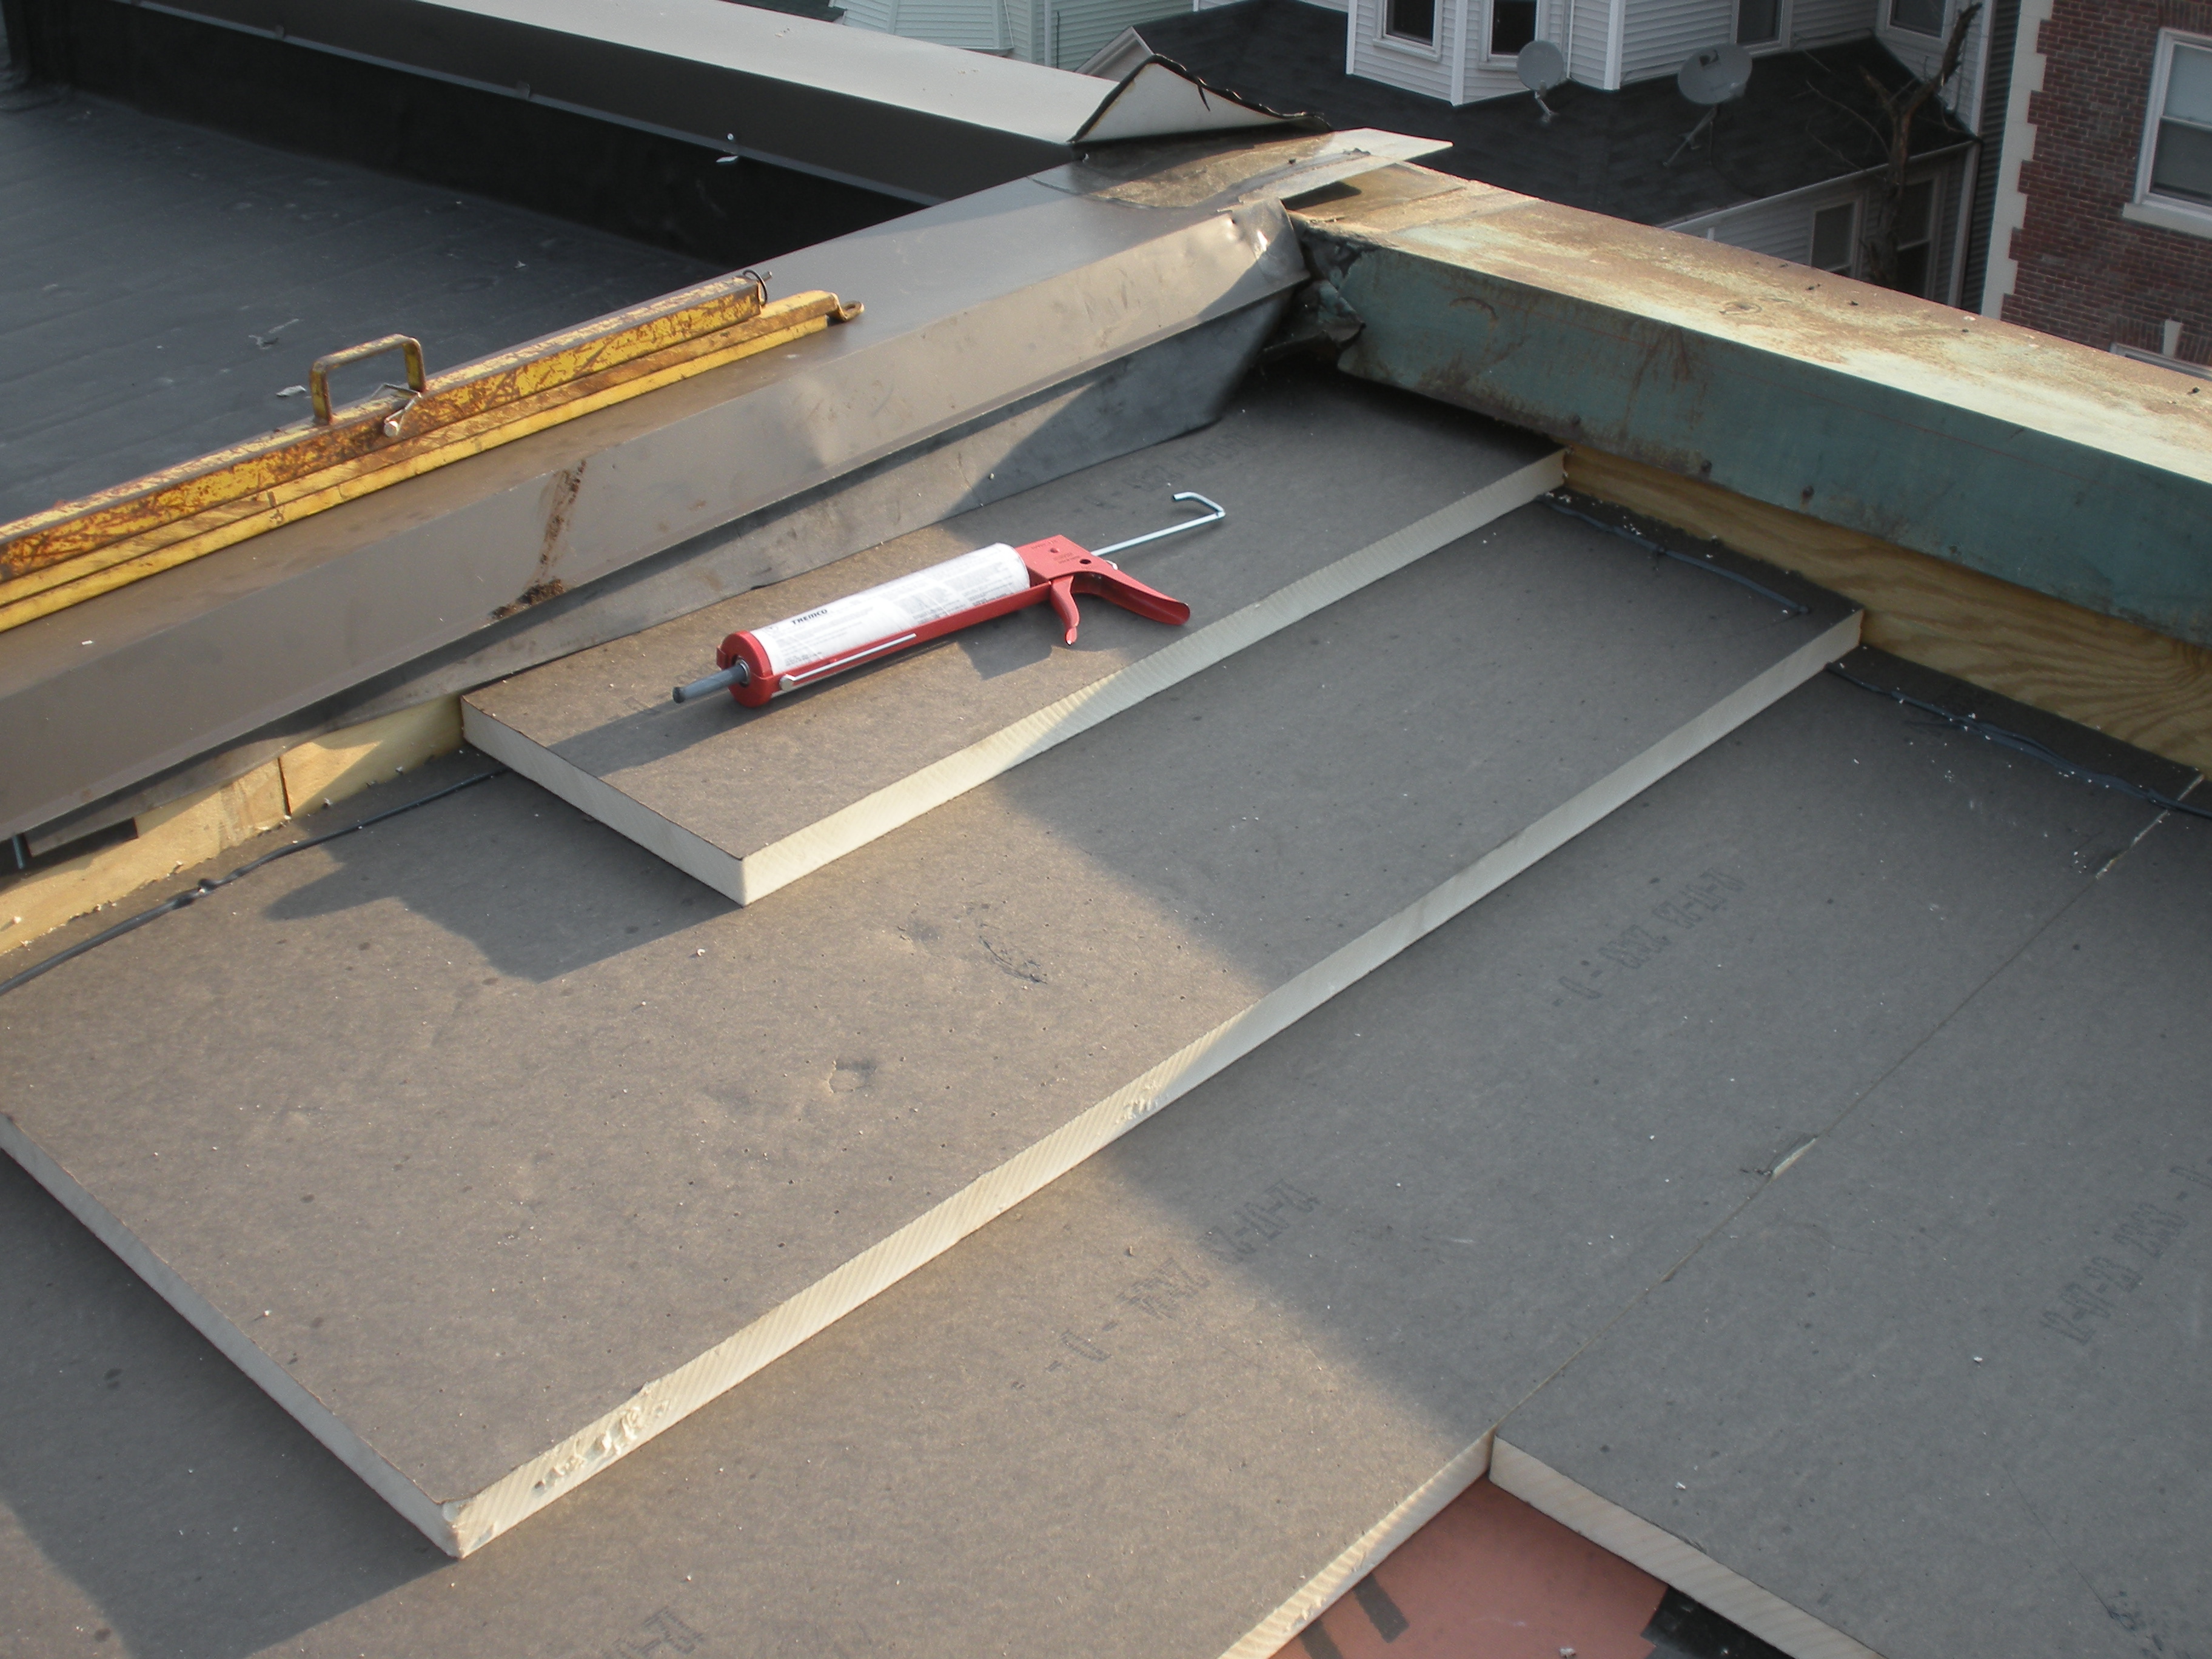
Polyisocyanurate rigid foam insulation is installed in multiple layers with staggered, taped seams over the flat roof
Image

Prepare chase with adhesive for bottom insulation
Image
Raised ceiling chase sealed with drywall mud
Image
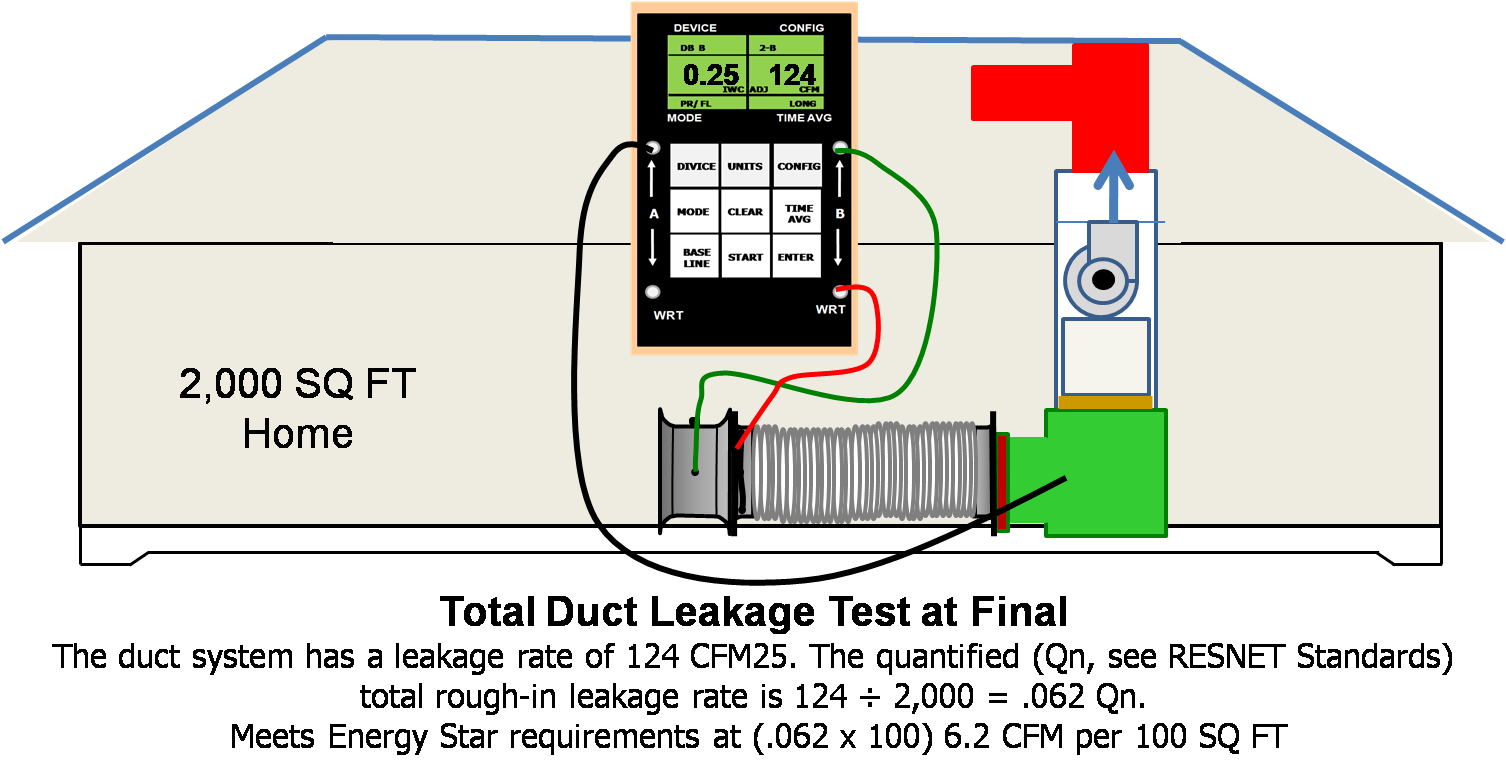
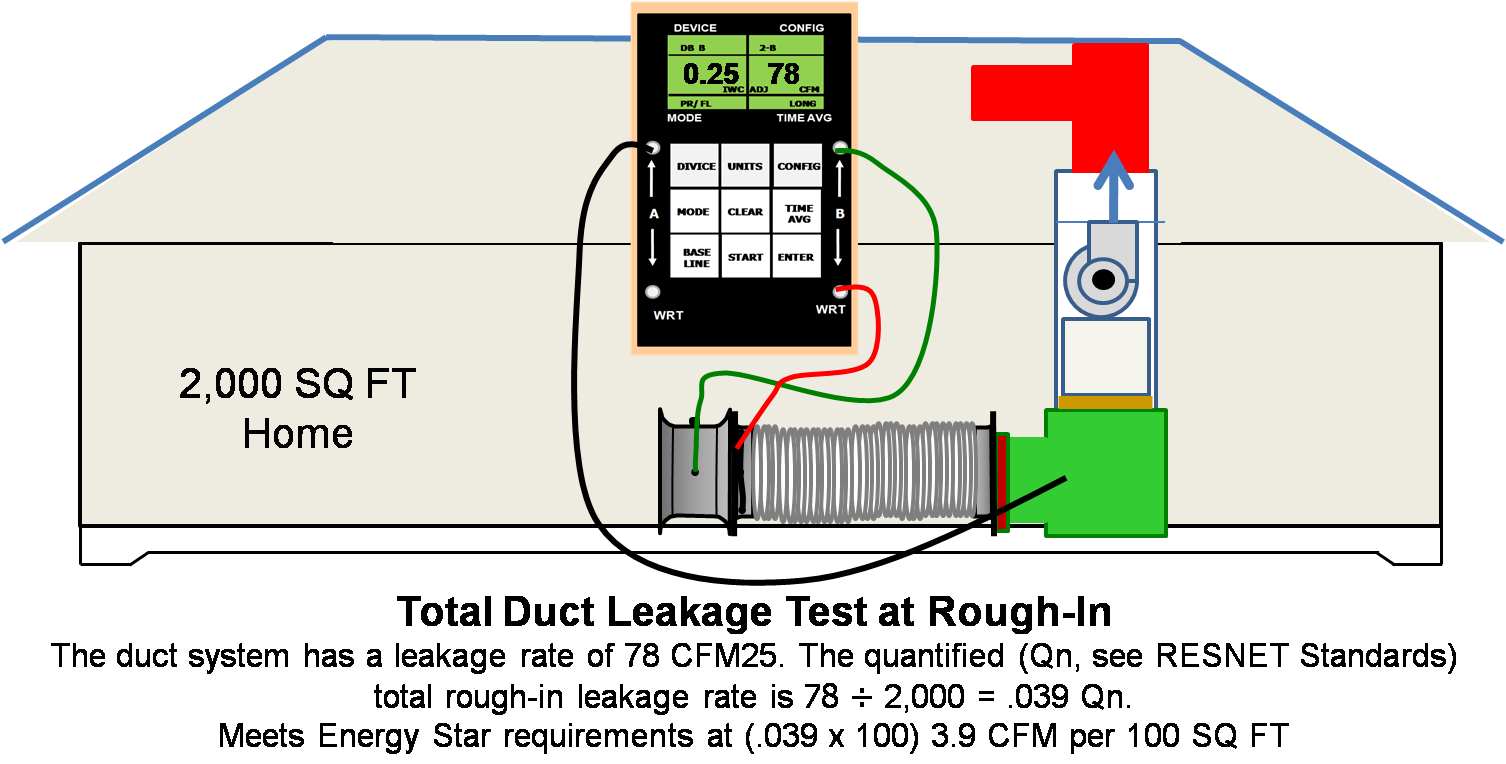
Rater-measured duct leakage to outdoors ≤ 4 CFM25 per 100 sq. ft. of conditioned floor area
Image
Image
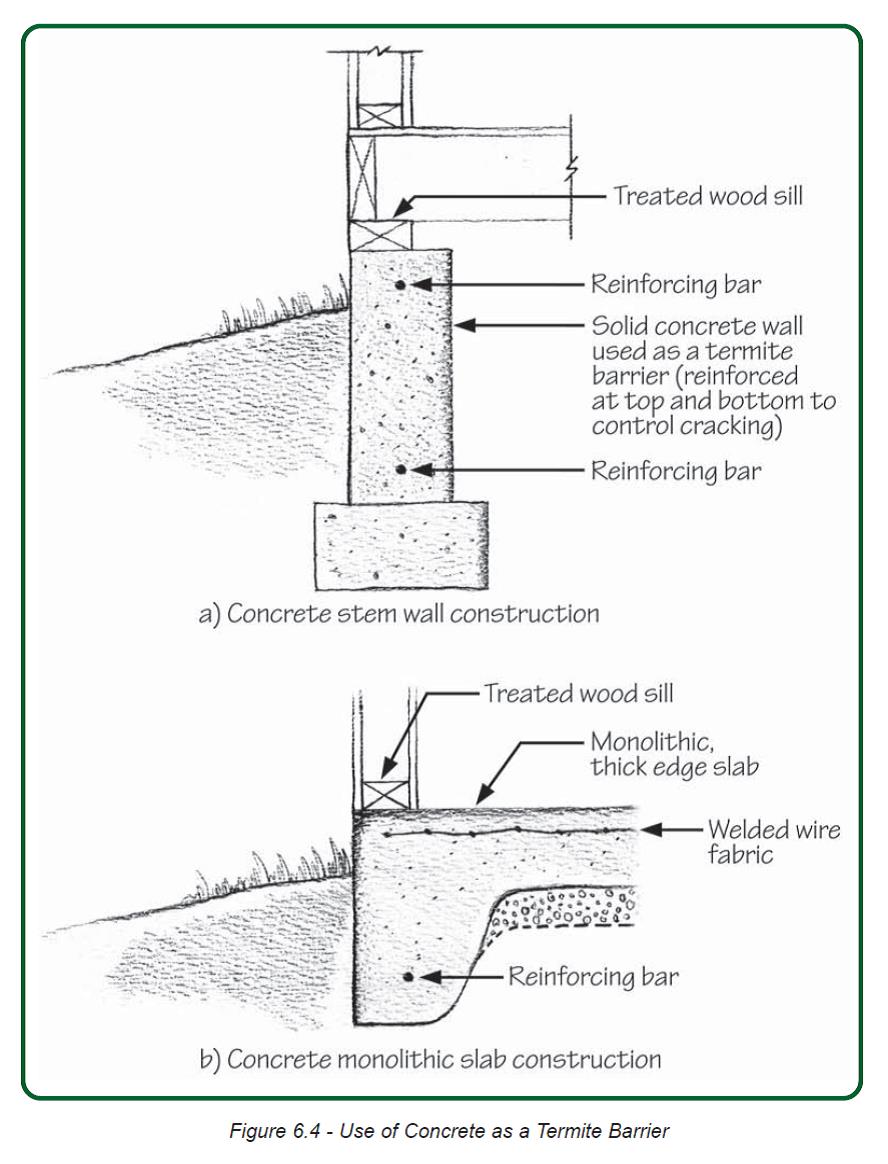
Reinforce concrete slab and foundation walls to minimize future cracks that could let in pests
Image
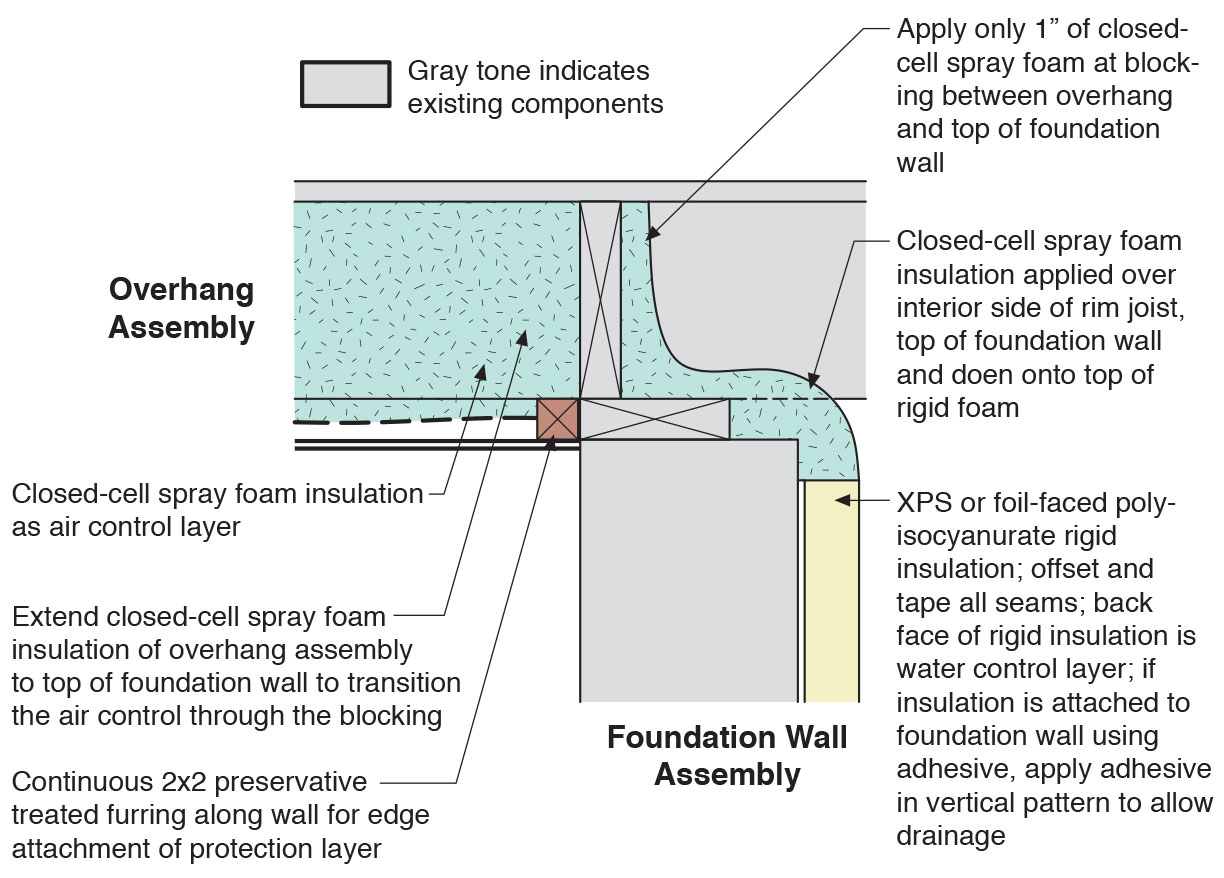
Retrofit of cantilevered foundation wall showing details at the inside corner for installing closed-cell spray foam in the wall and overhanging floor
Image
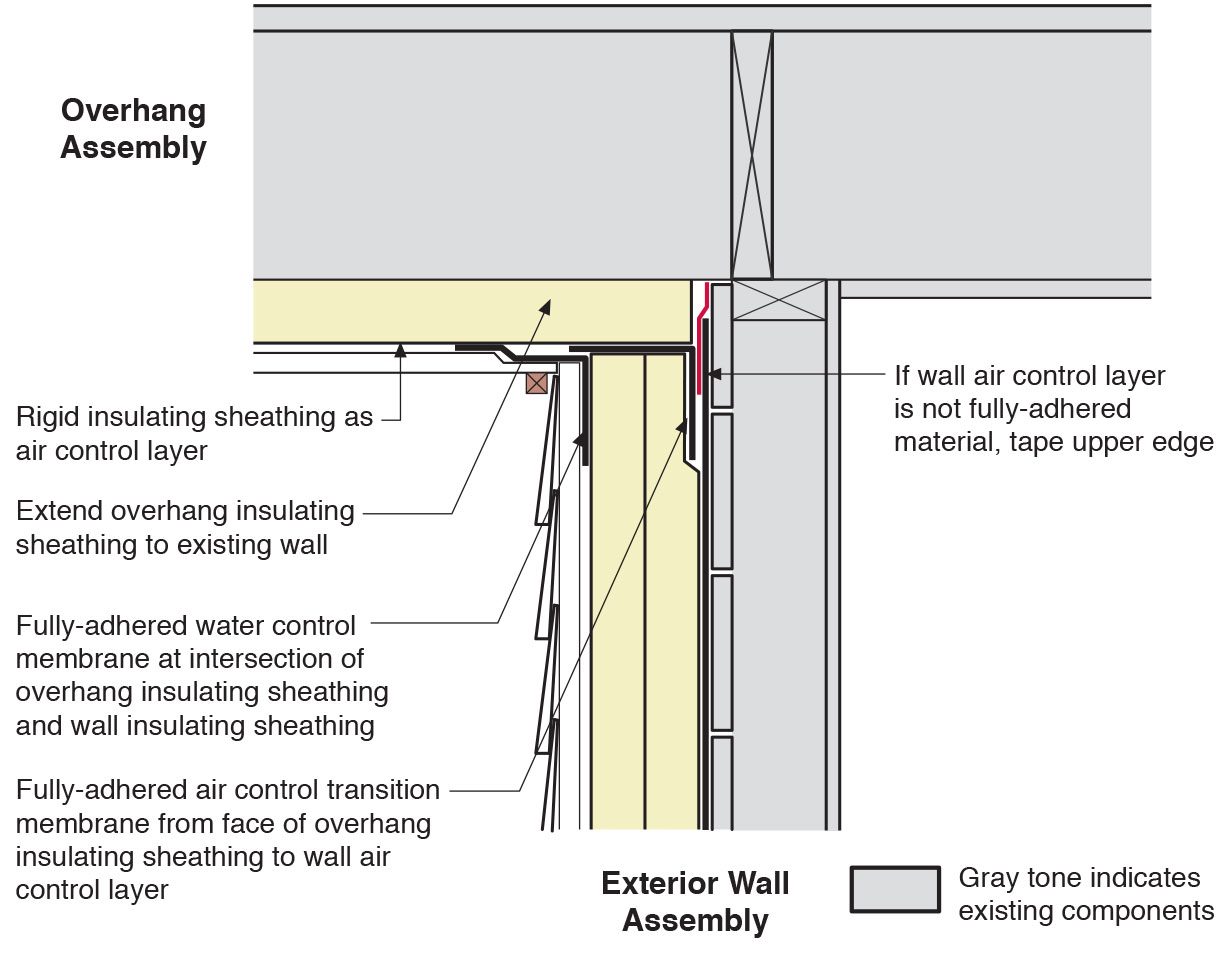
Retrofit of cantilevered wall showing details at the inside corner for installing air sealing and rigid foam insulation in the wall and overhanging floor
Image
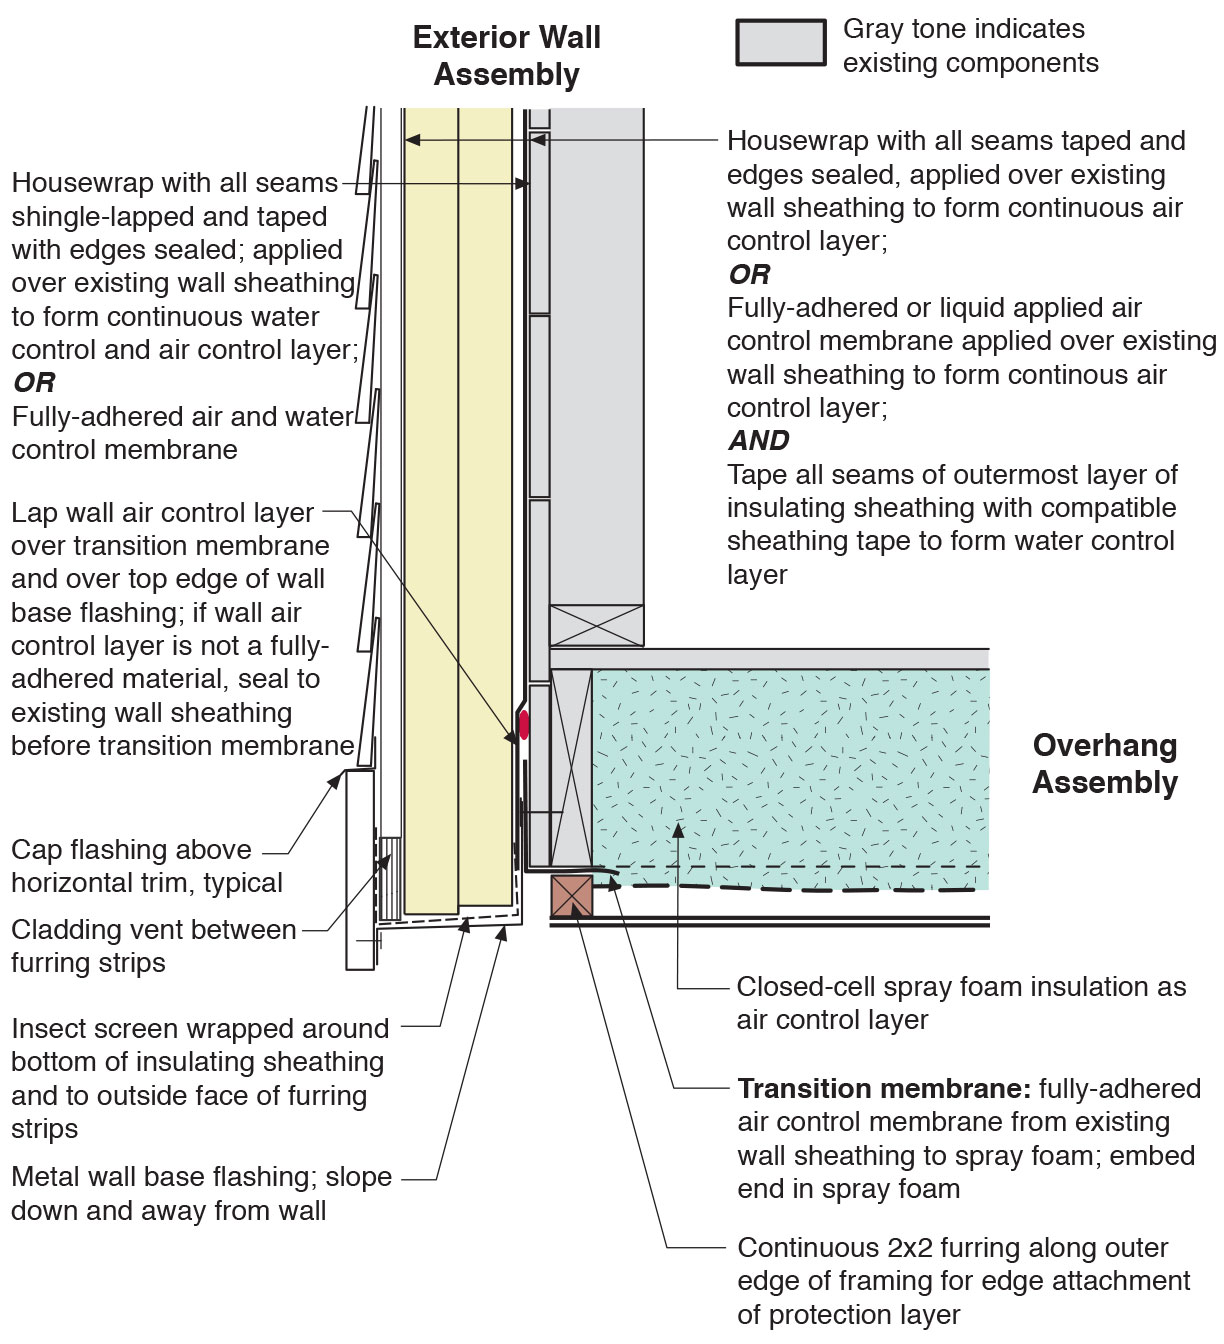
Retrofit of cantilevered wall showing details at the outside corner for installing air sealing and rigid foam insulation in the wall and closed-cell spray foam in the overhanging floor
Image
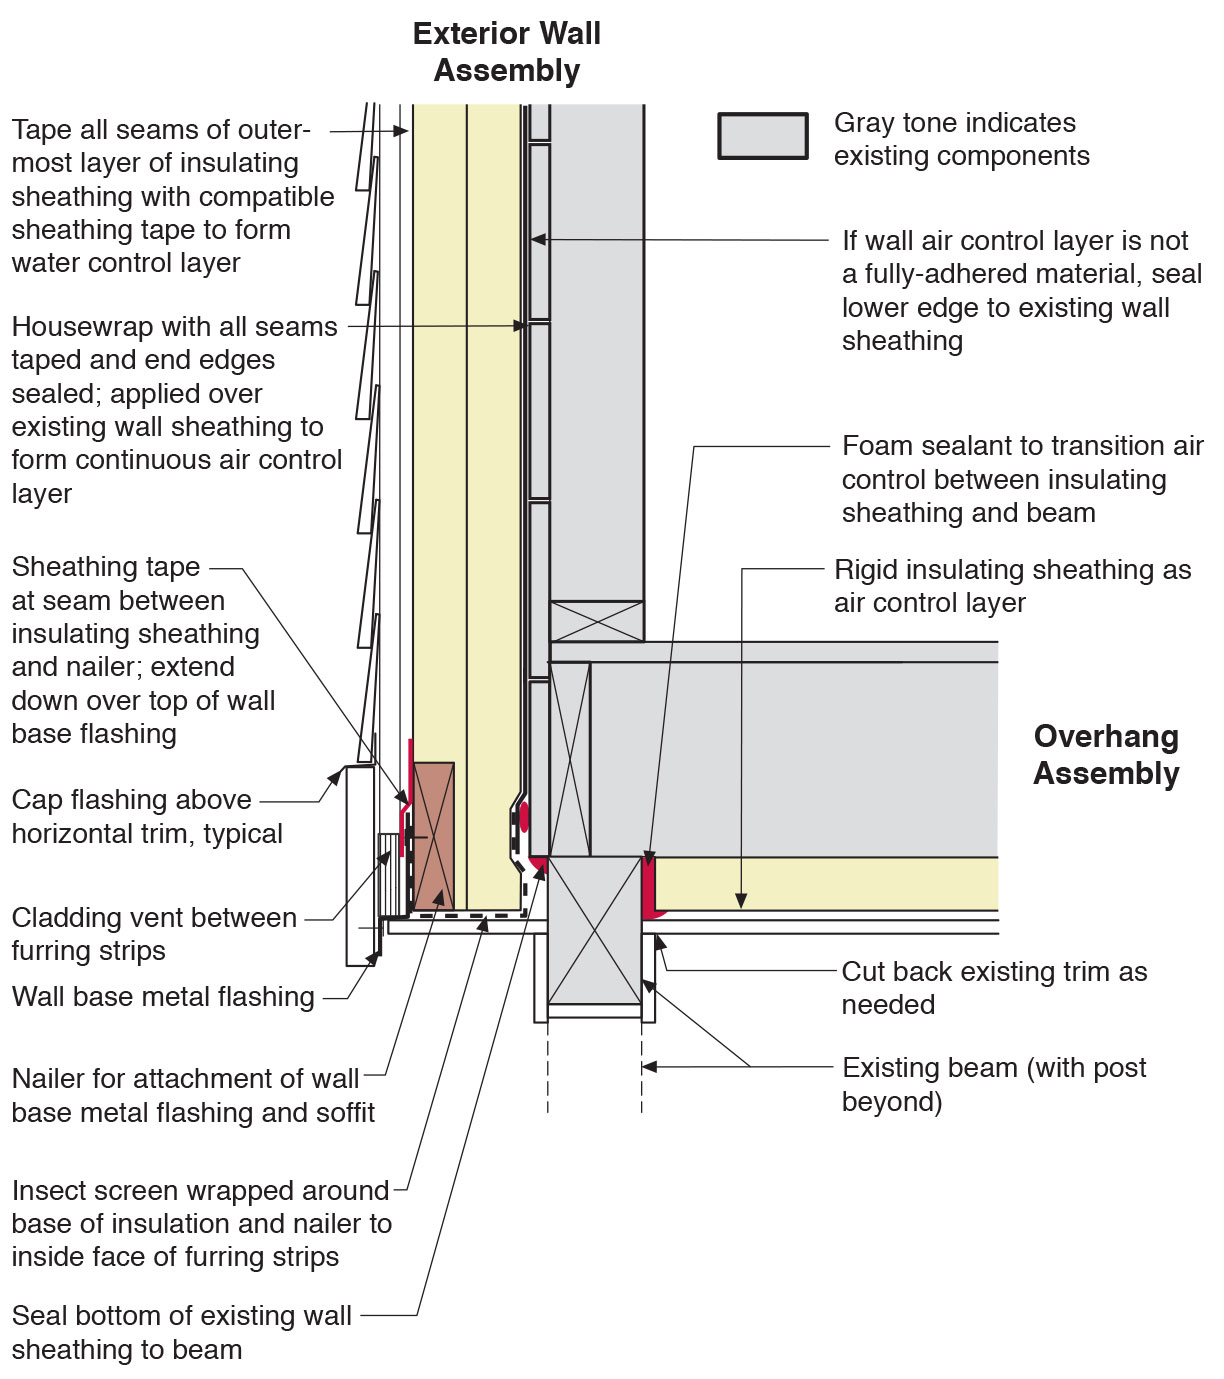
Retrofit of cantilevered wall with beam showing details at the outside corner for installing air sealing and rigid foam insulation in the wall and overhanging floor
Image
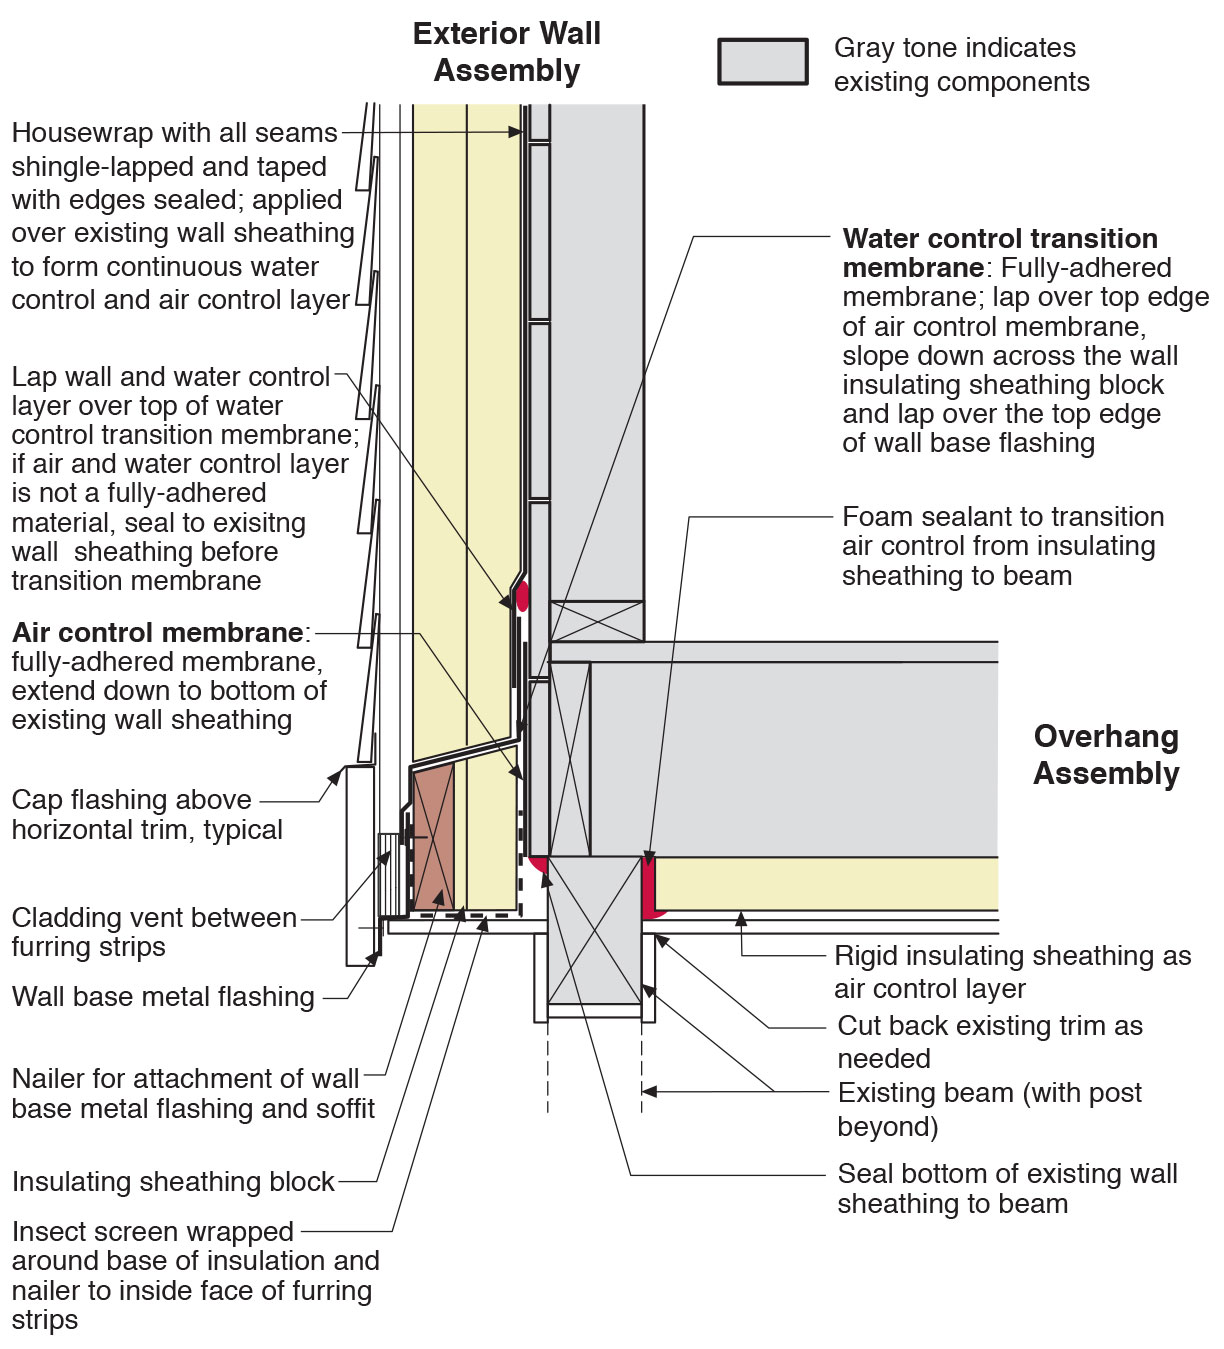
Retrofit of cantilevered wall with beam showing details at the outside corner for installing air sealing and rigid foam insulation plus water control membrane in the wall and overhanging floor
Image
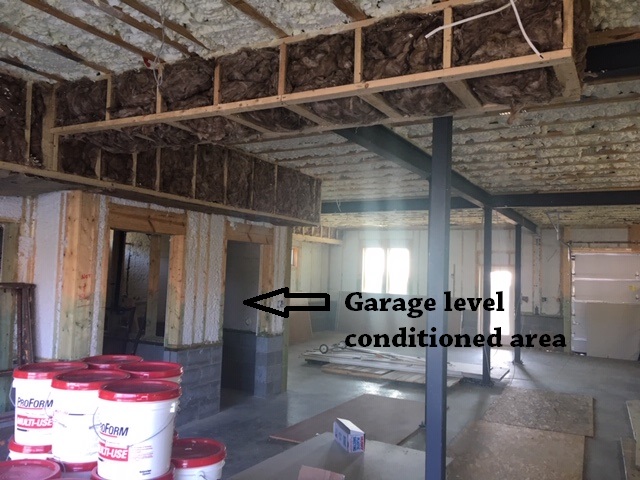
Right - A “flash” seal approach with spray foam provides a continuous air barrier between the ceiling and walls of the garage and the living space.
Image
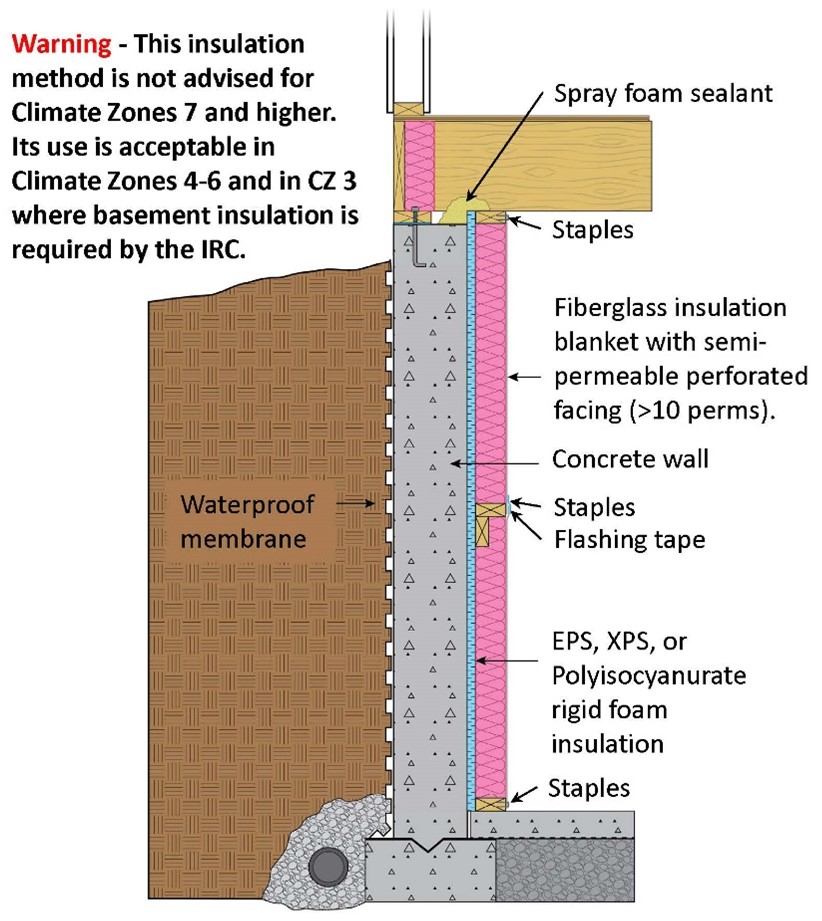
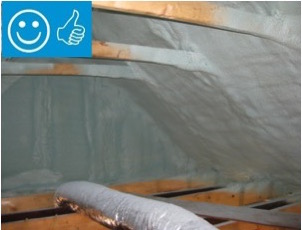
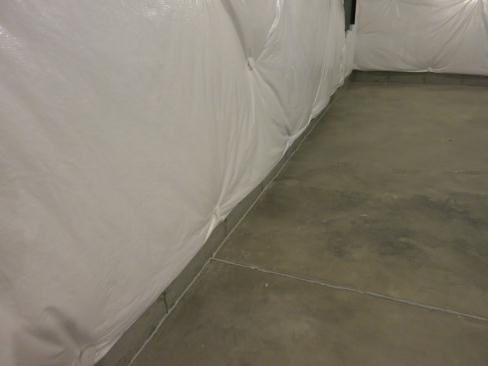
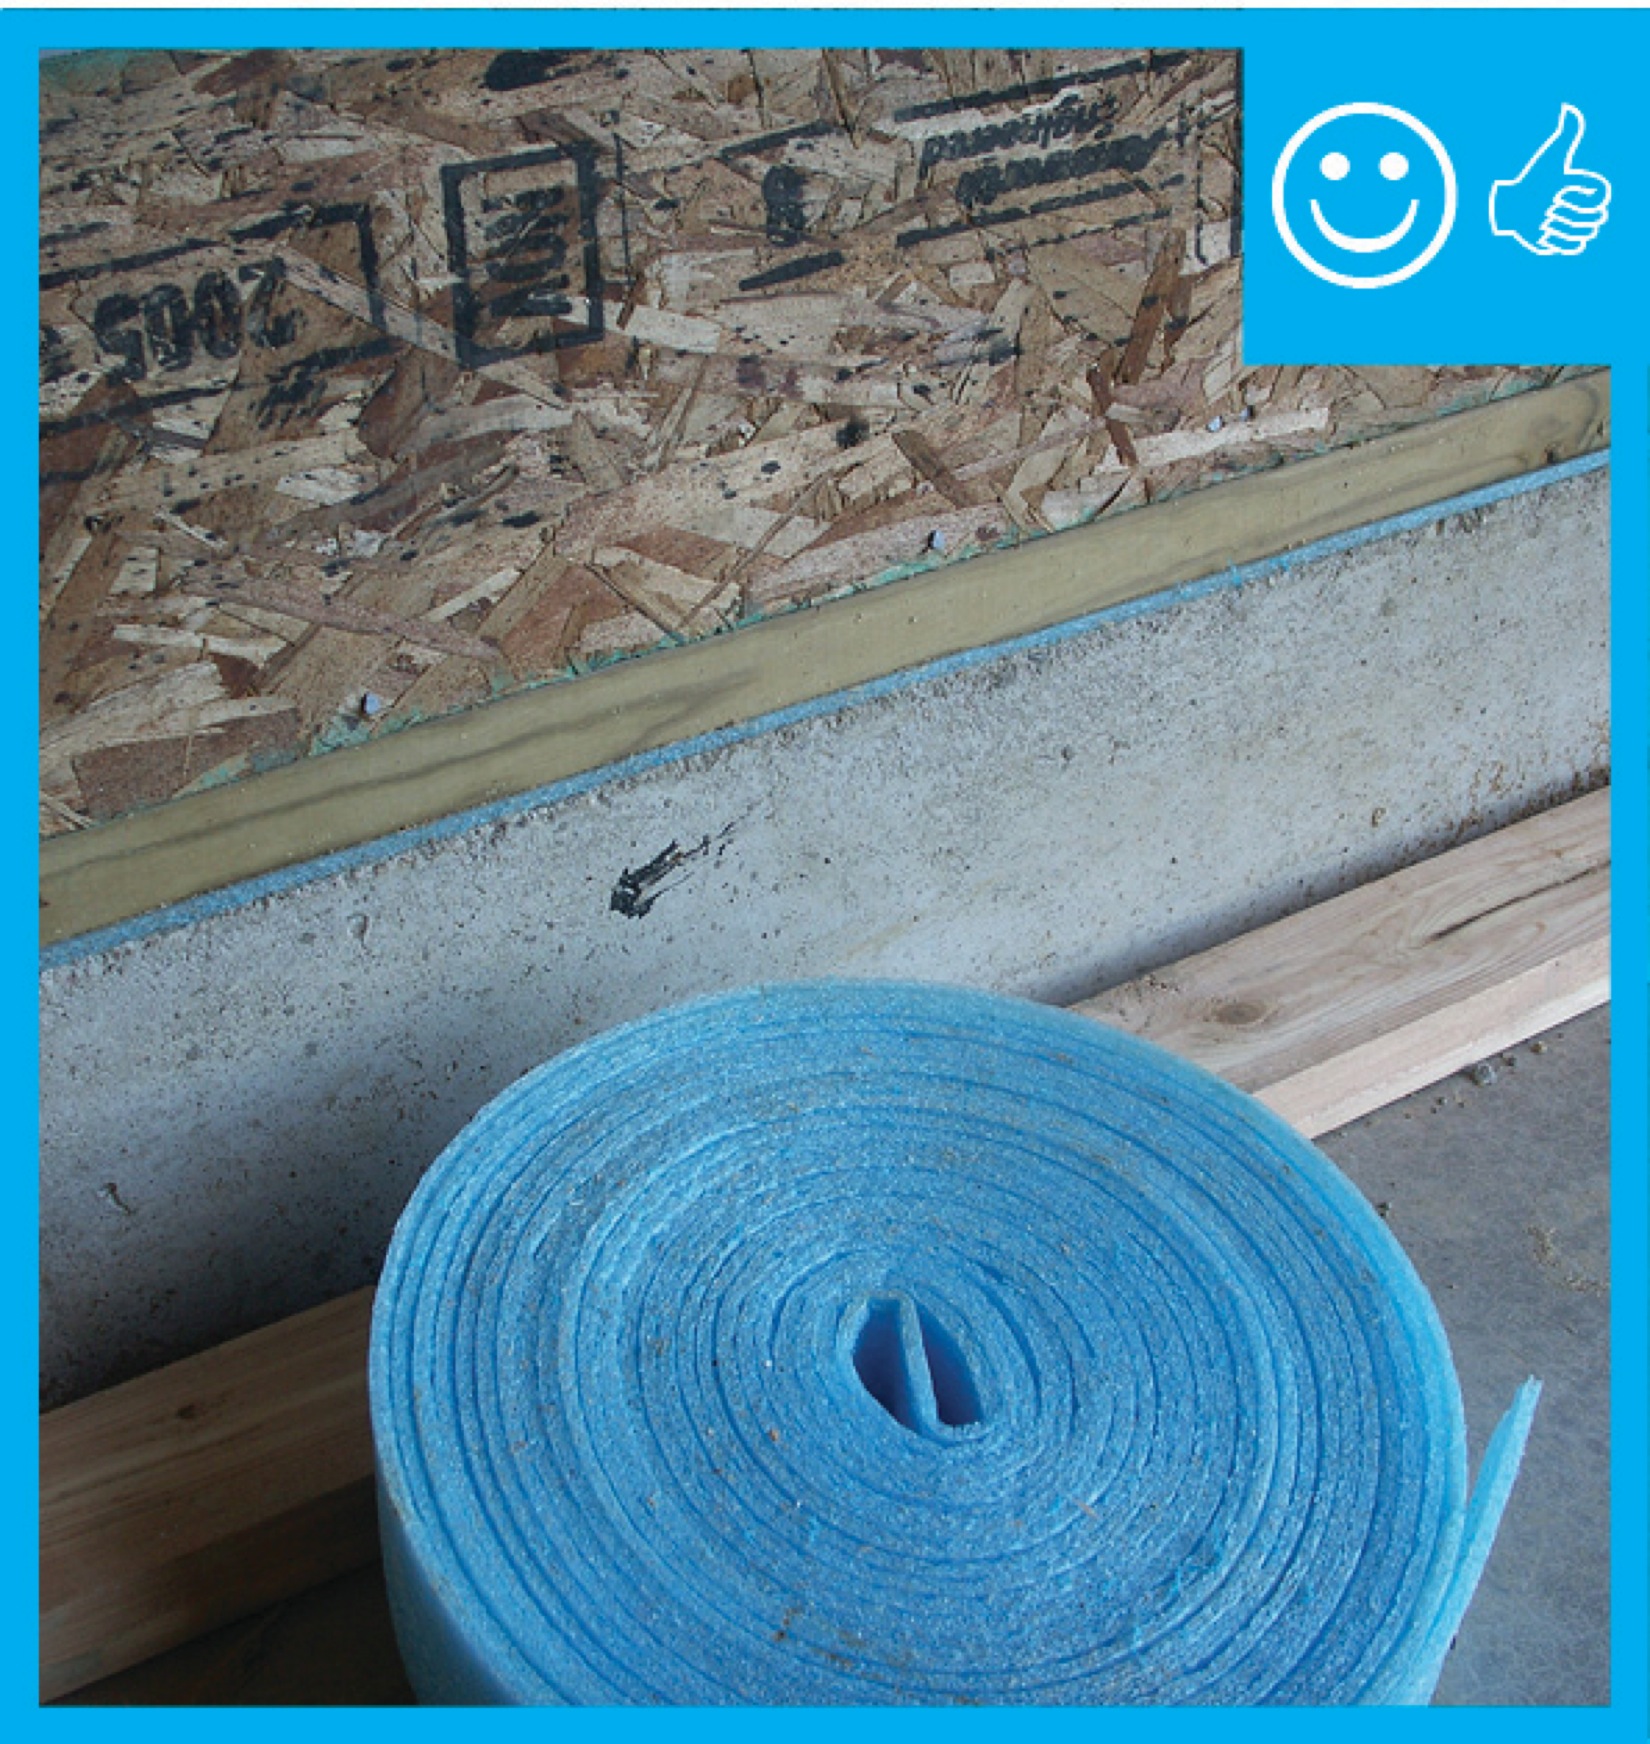
Right - A continuous layer of rigid foam insulation is installed against the foundation, and the perforated fiberglass insulation blanket is installed over that and covered with a semipermeable facing.
Image
Right - A drywall gasket is installed along the top plate before installed drywall.
Image

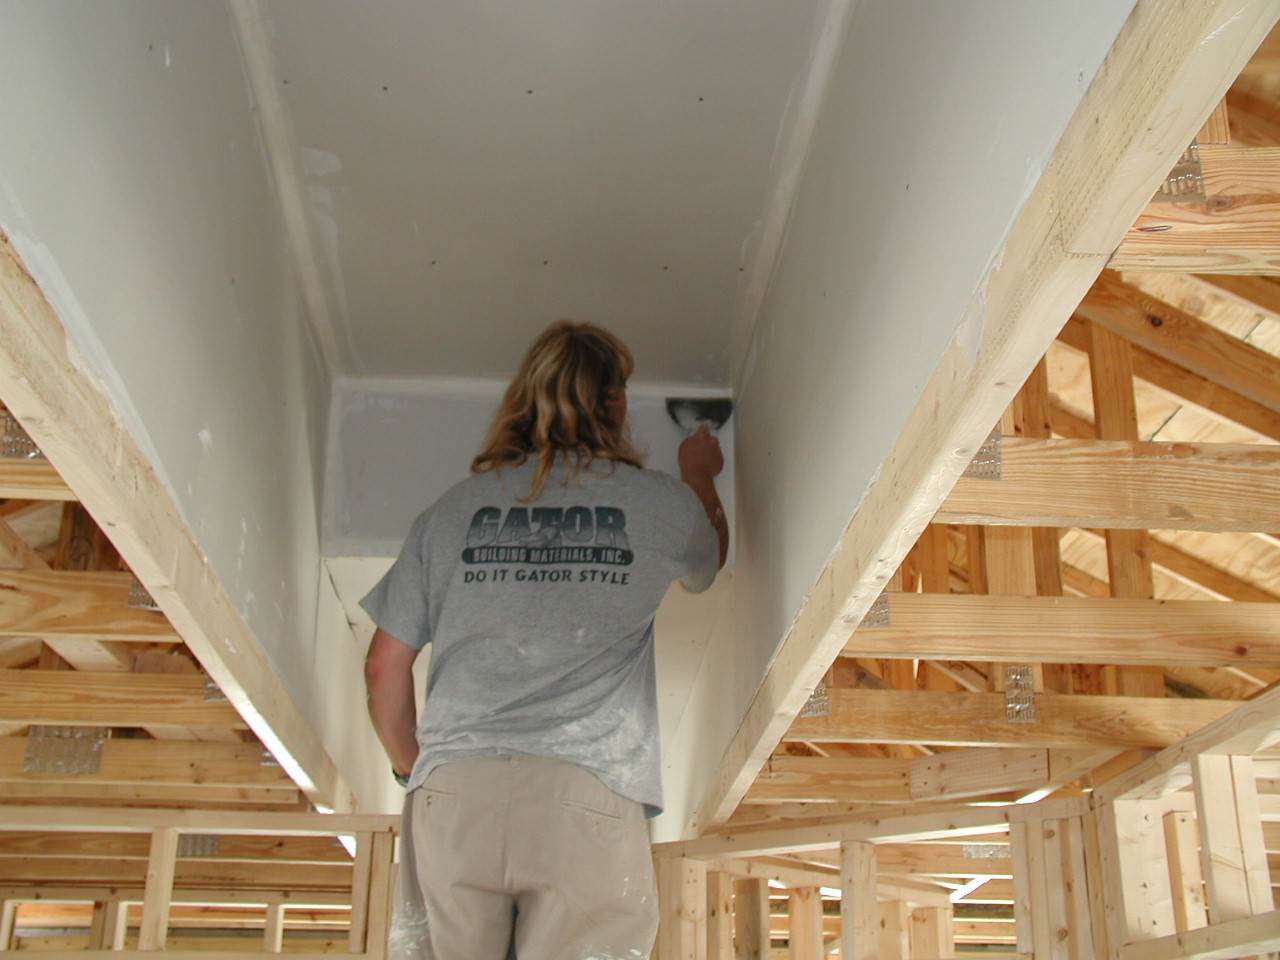
Right - A technician applies a thin layer of closed-cell foam to air-seal an unvented attic assembly before filling the ceiling joists with batt or blown insulation.
Image
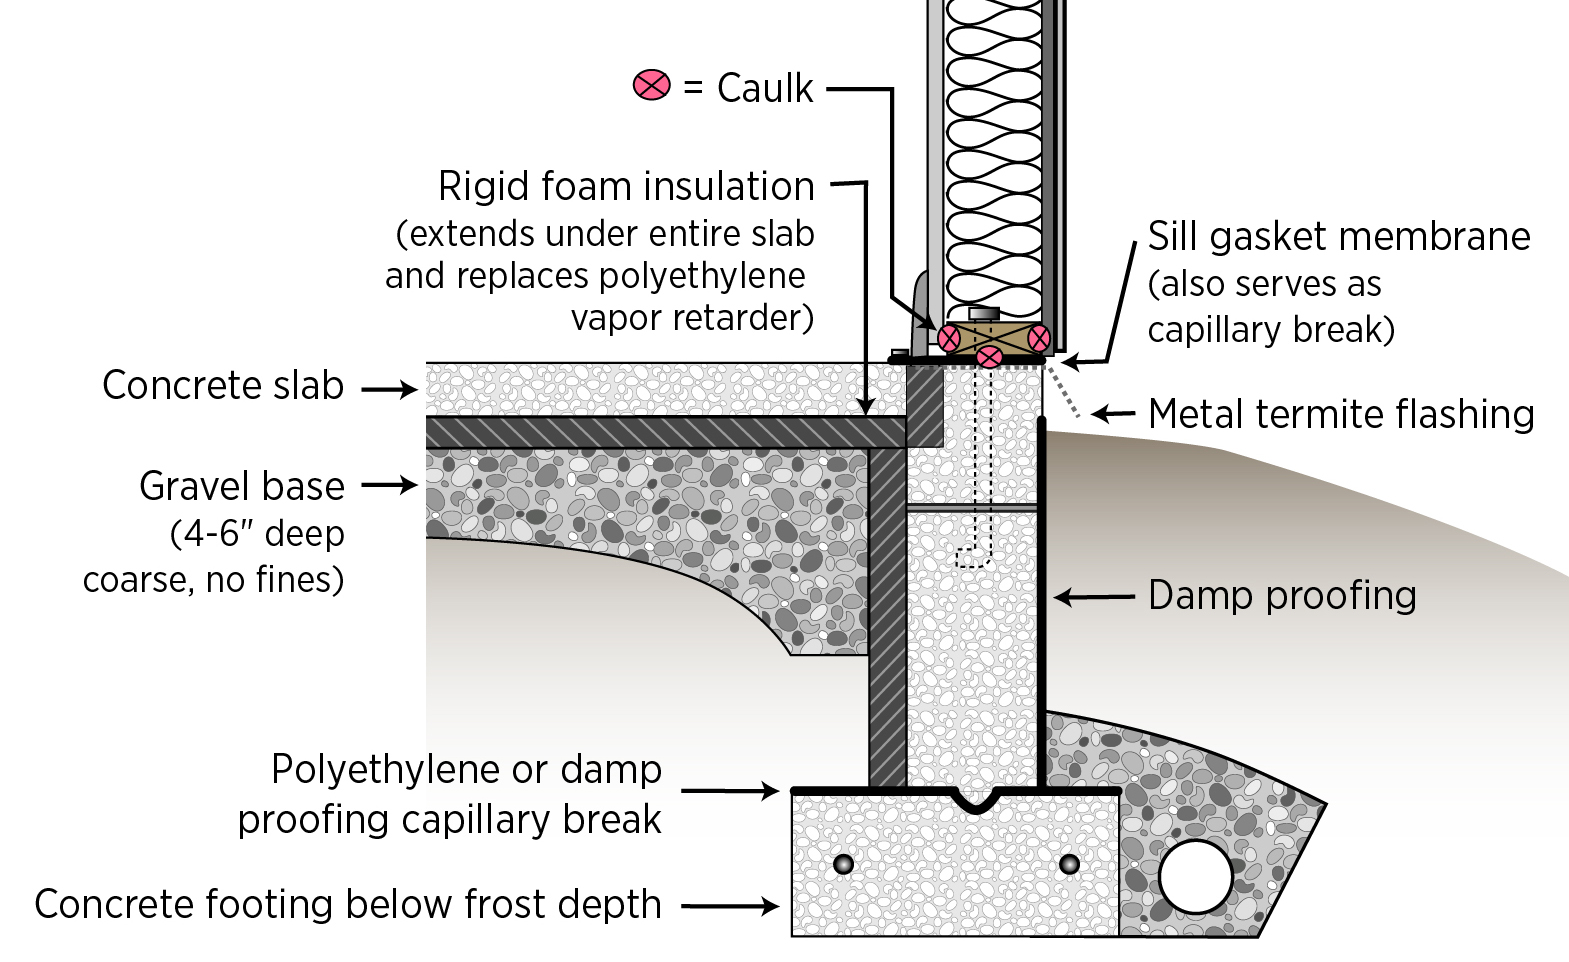
Right - A termite shield and a sill gasket are installed between the sill plate and the foundation on a raised slab foundation.
Image
Image
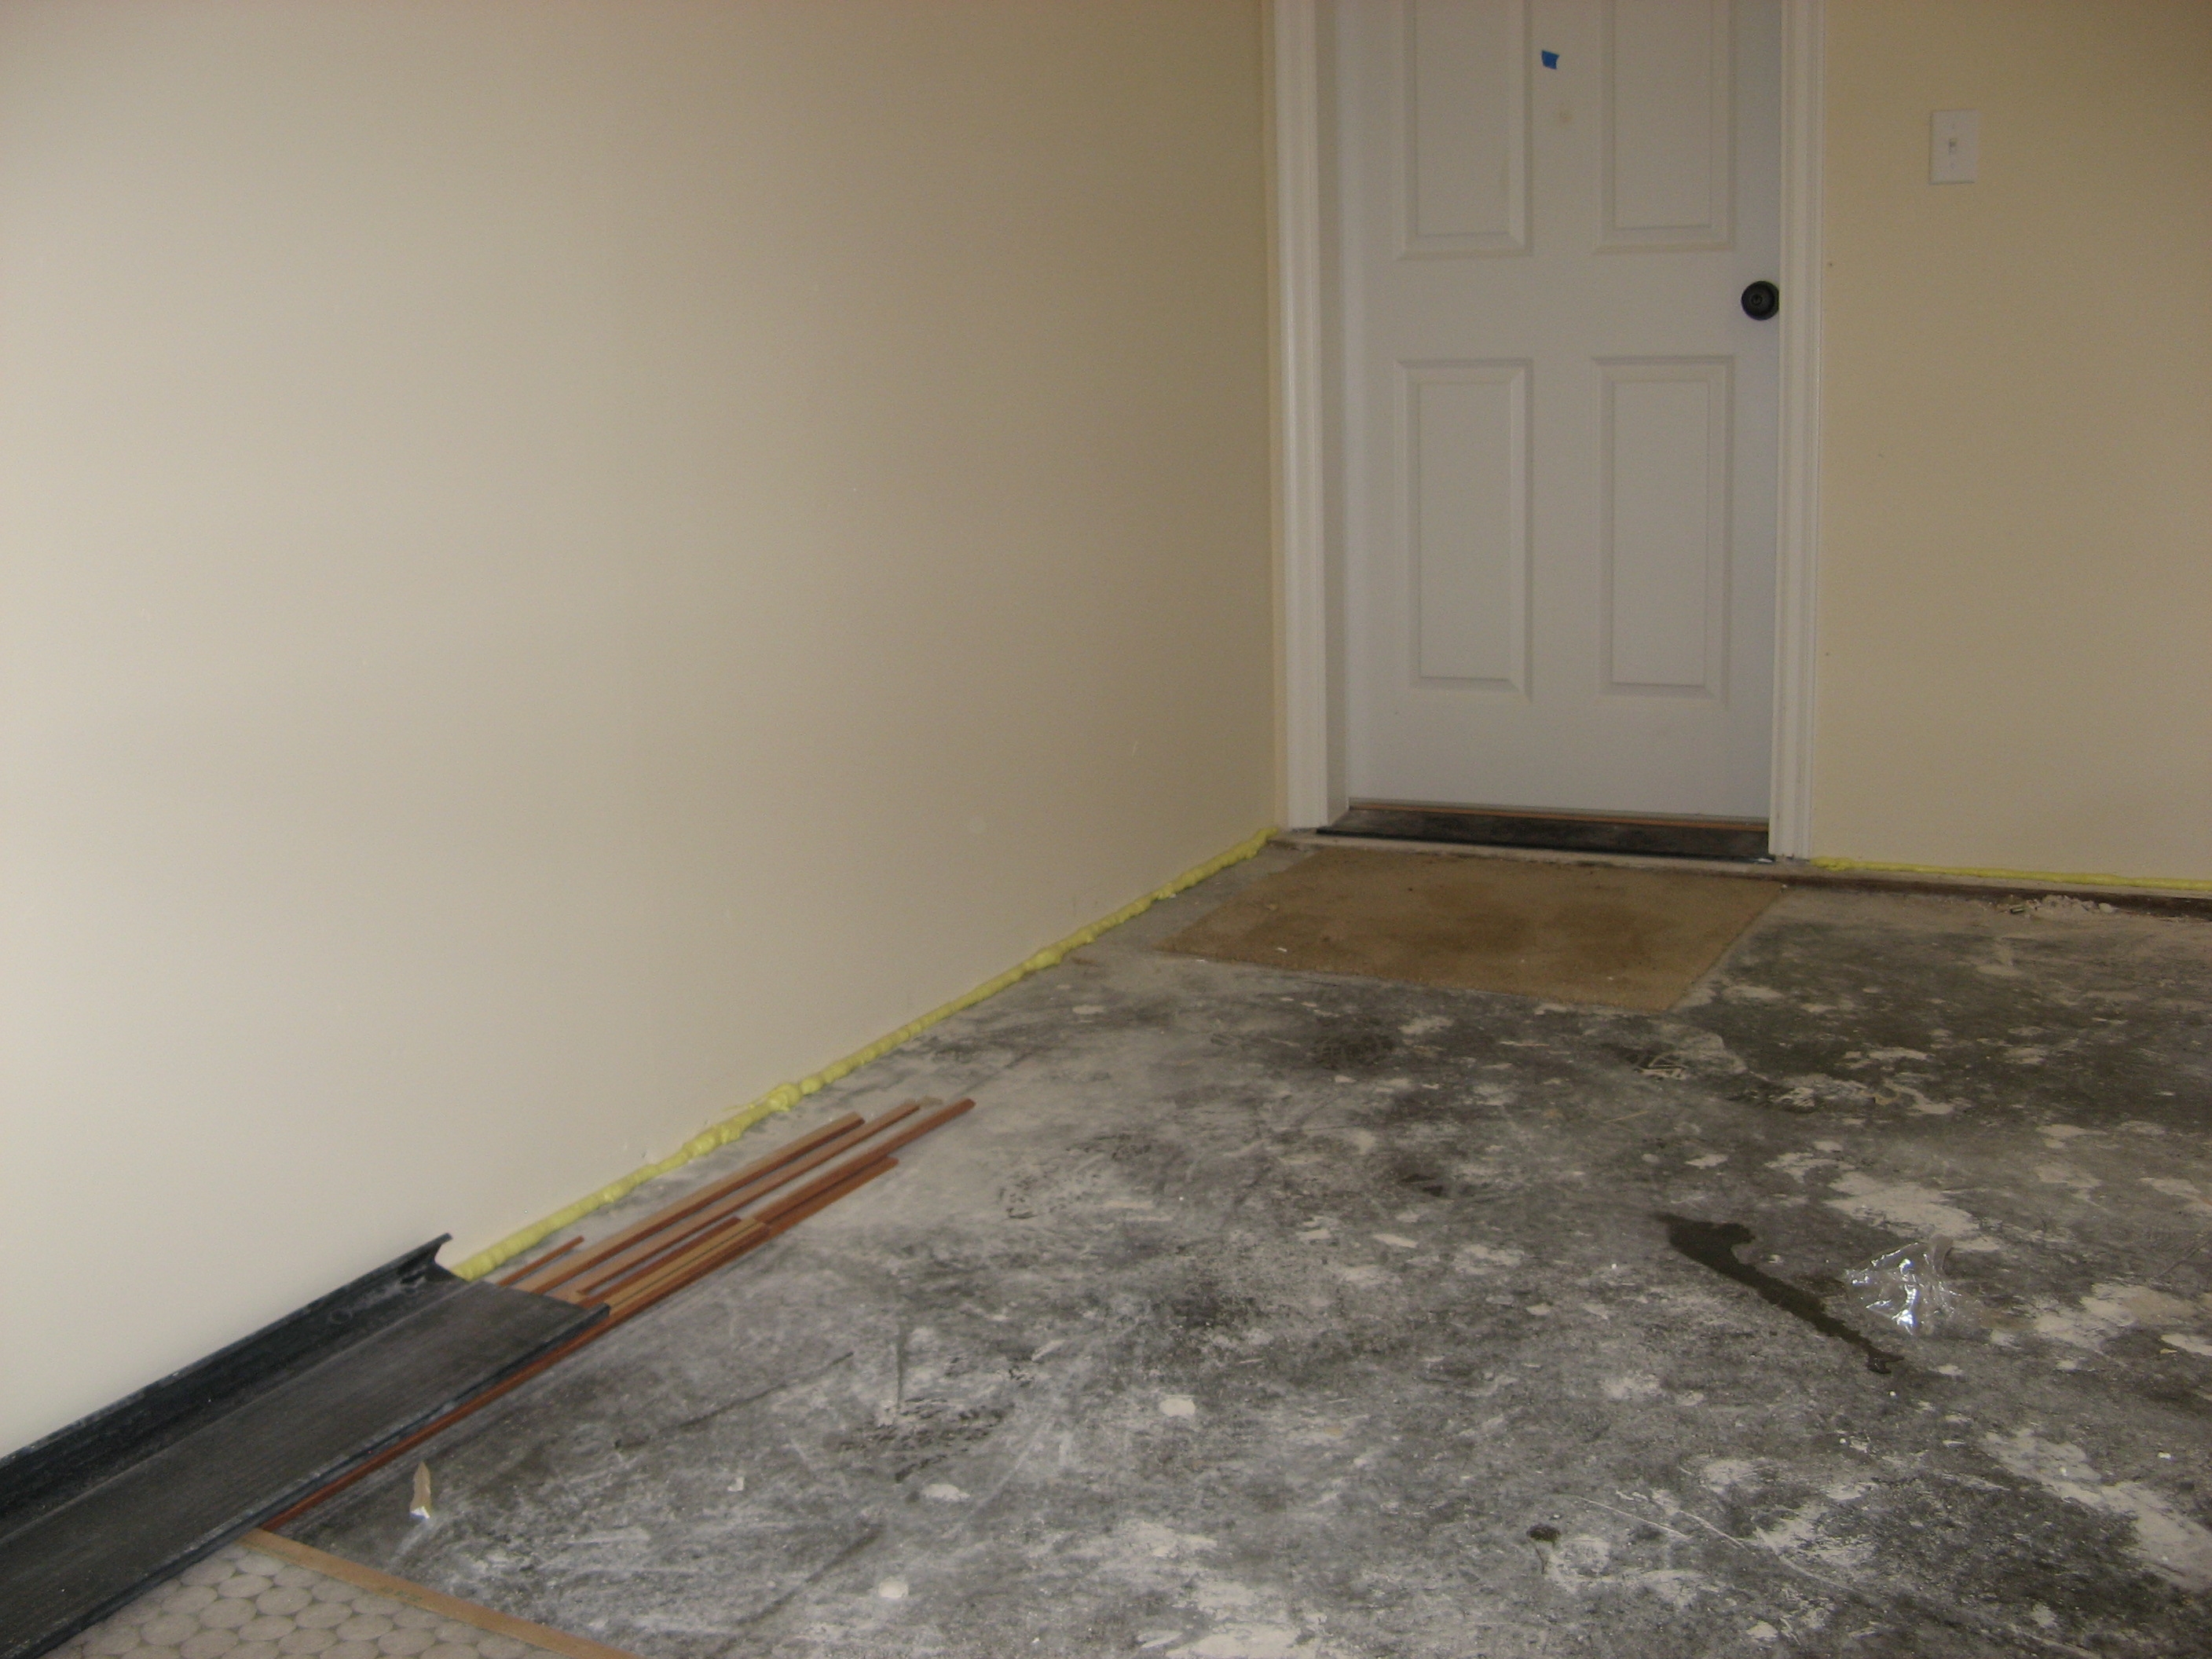
Right - Air-sealing the wall between the garage and the home is vital for occupant health and safety.
Image

Image
Right - An EPDM gasket is installed around an HRV duct installed in an exterior wall; 9 of 14.
Image
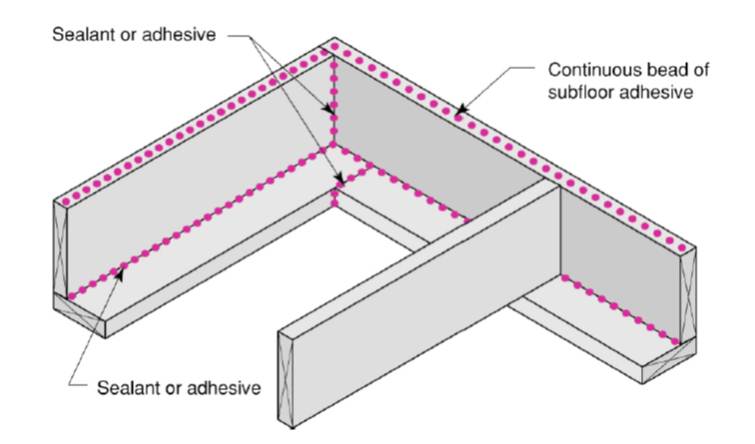
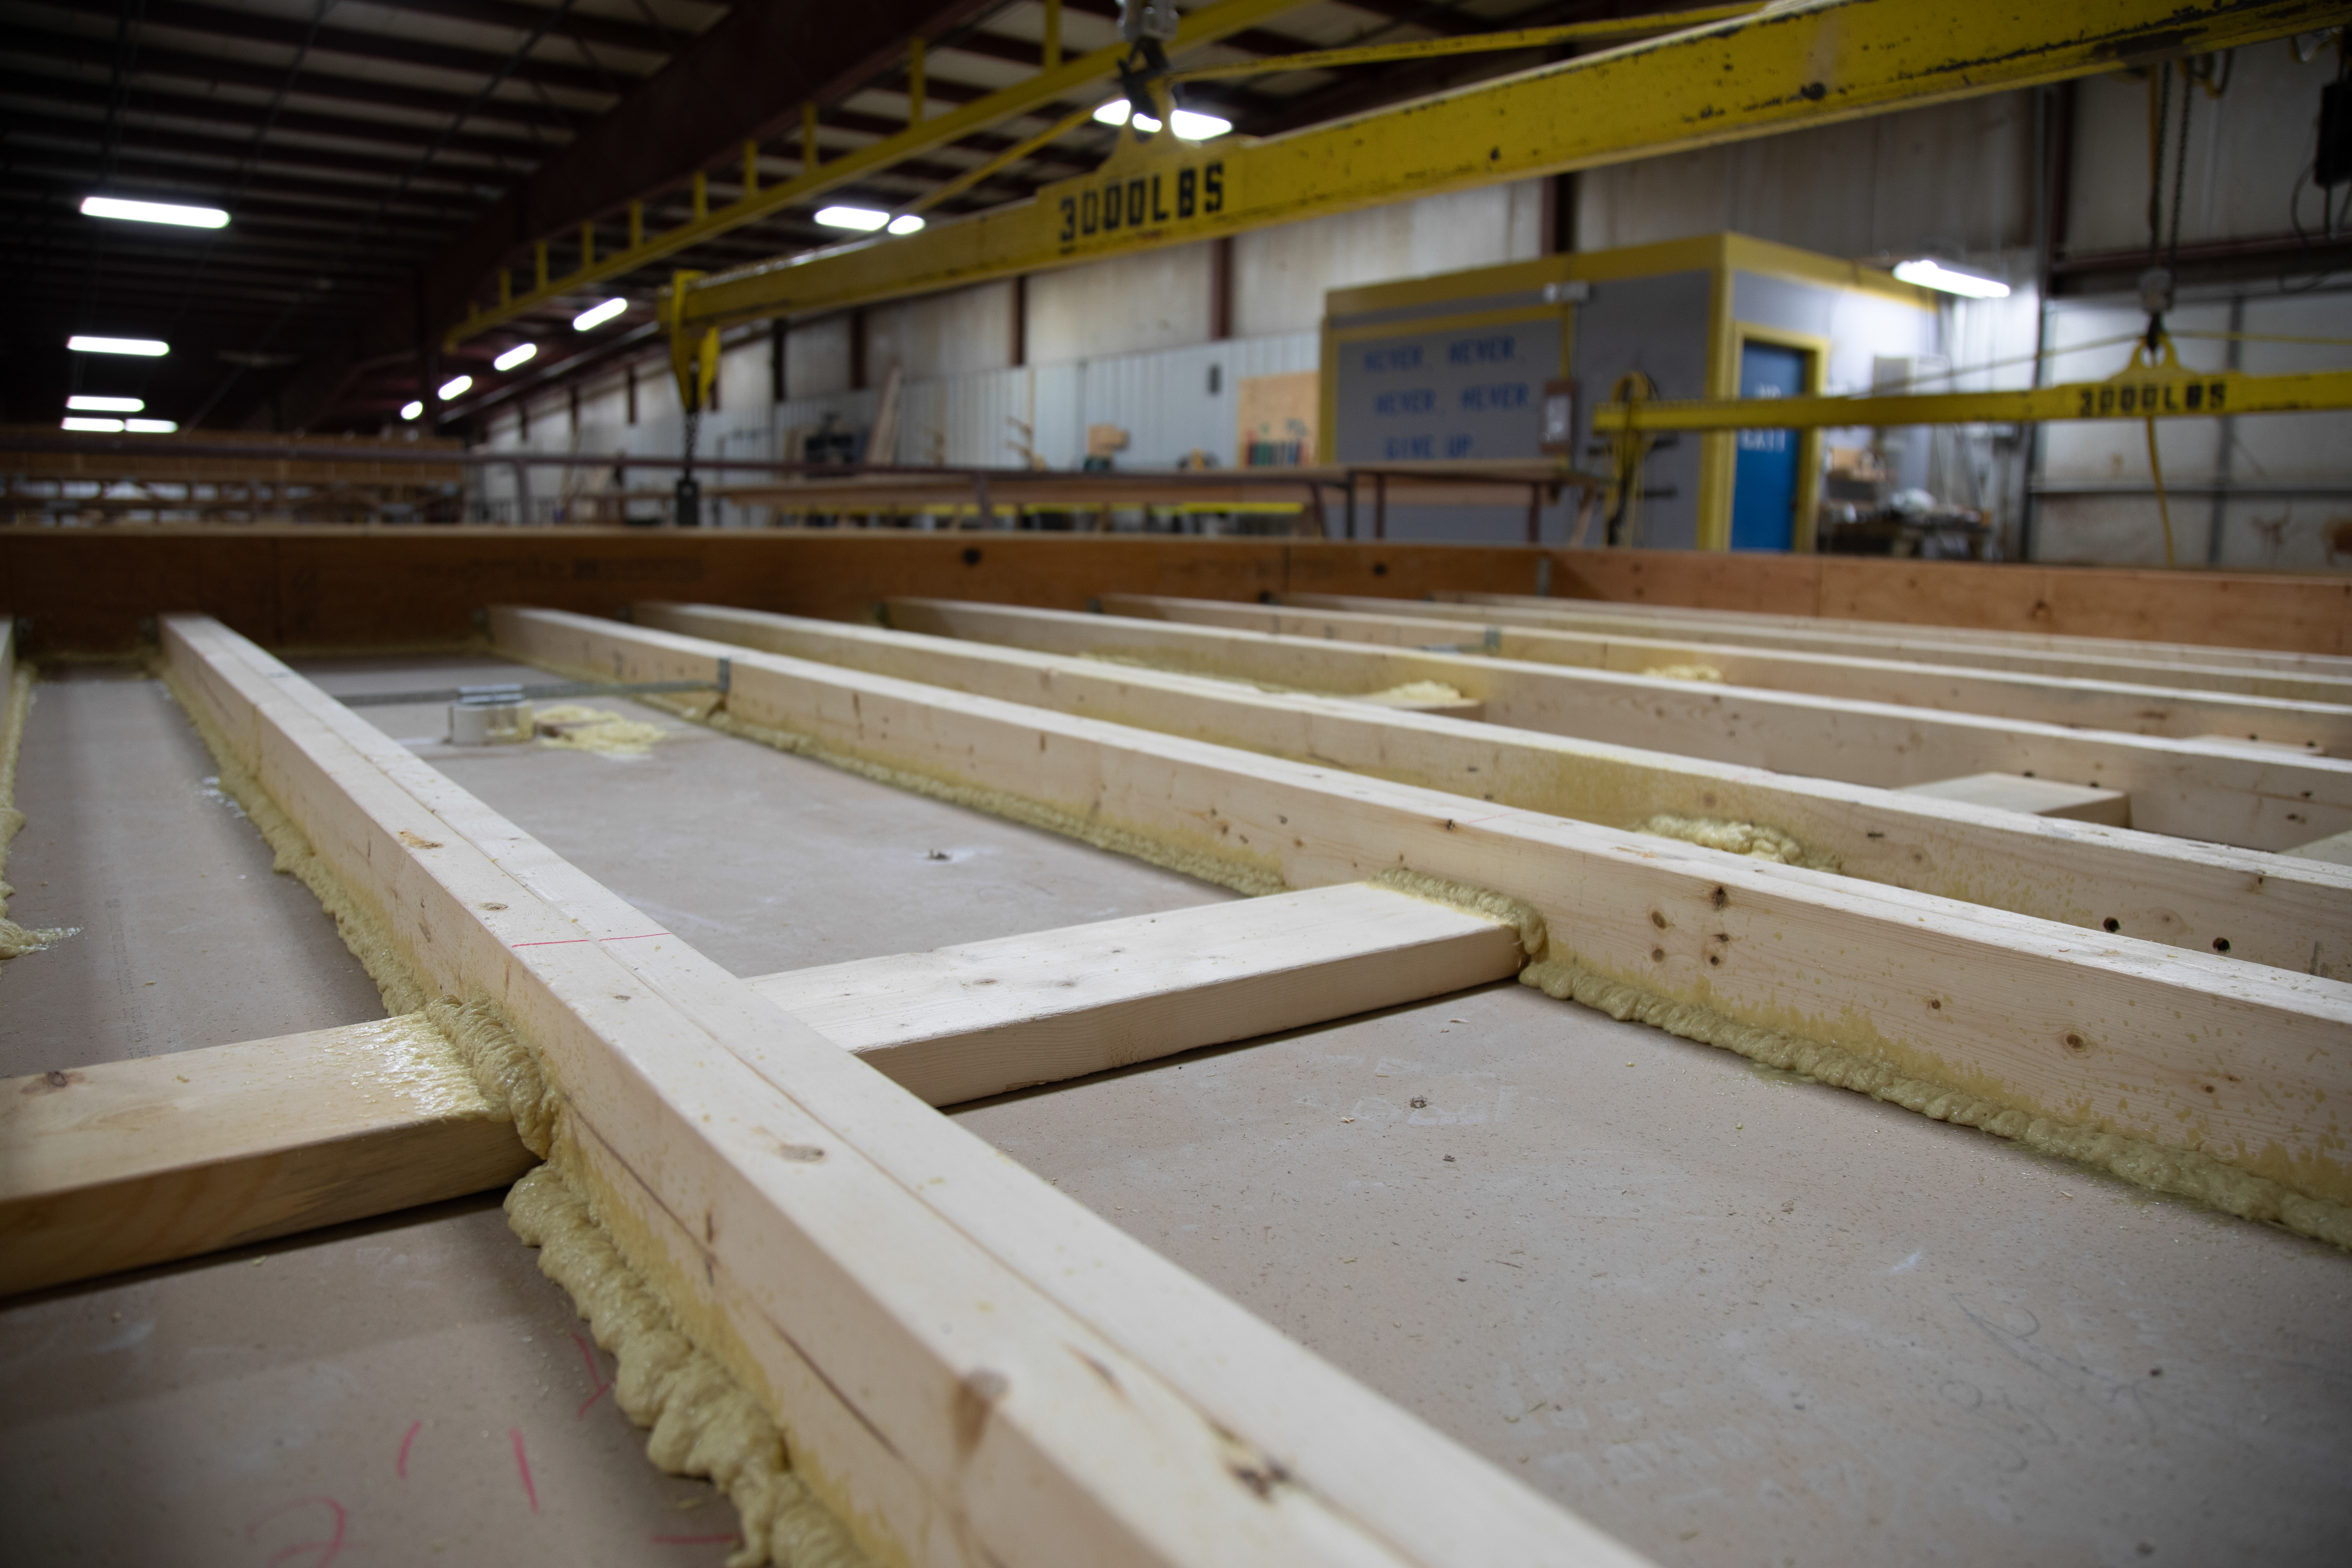
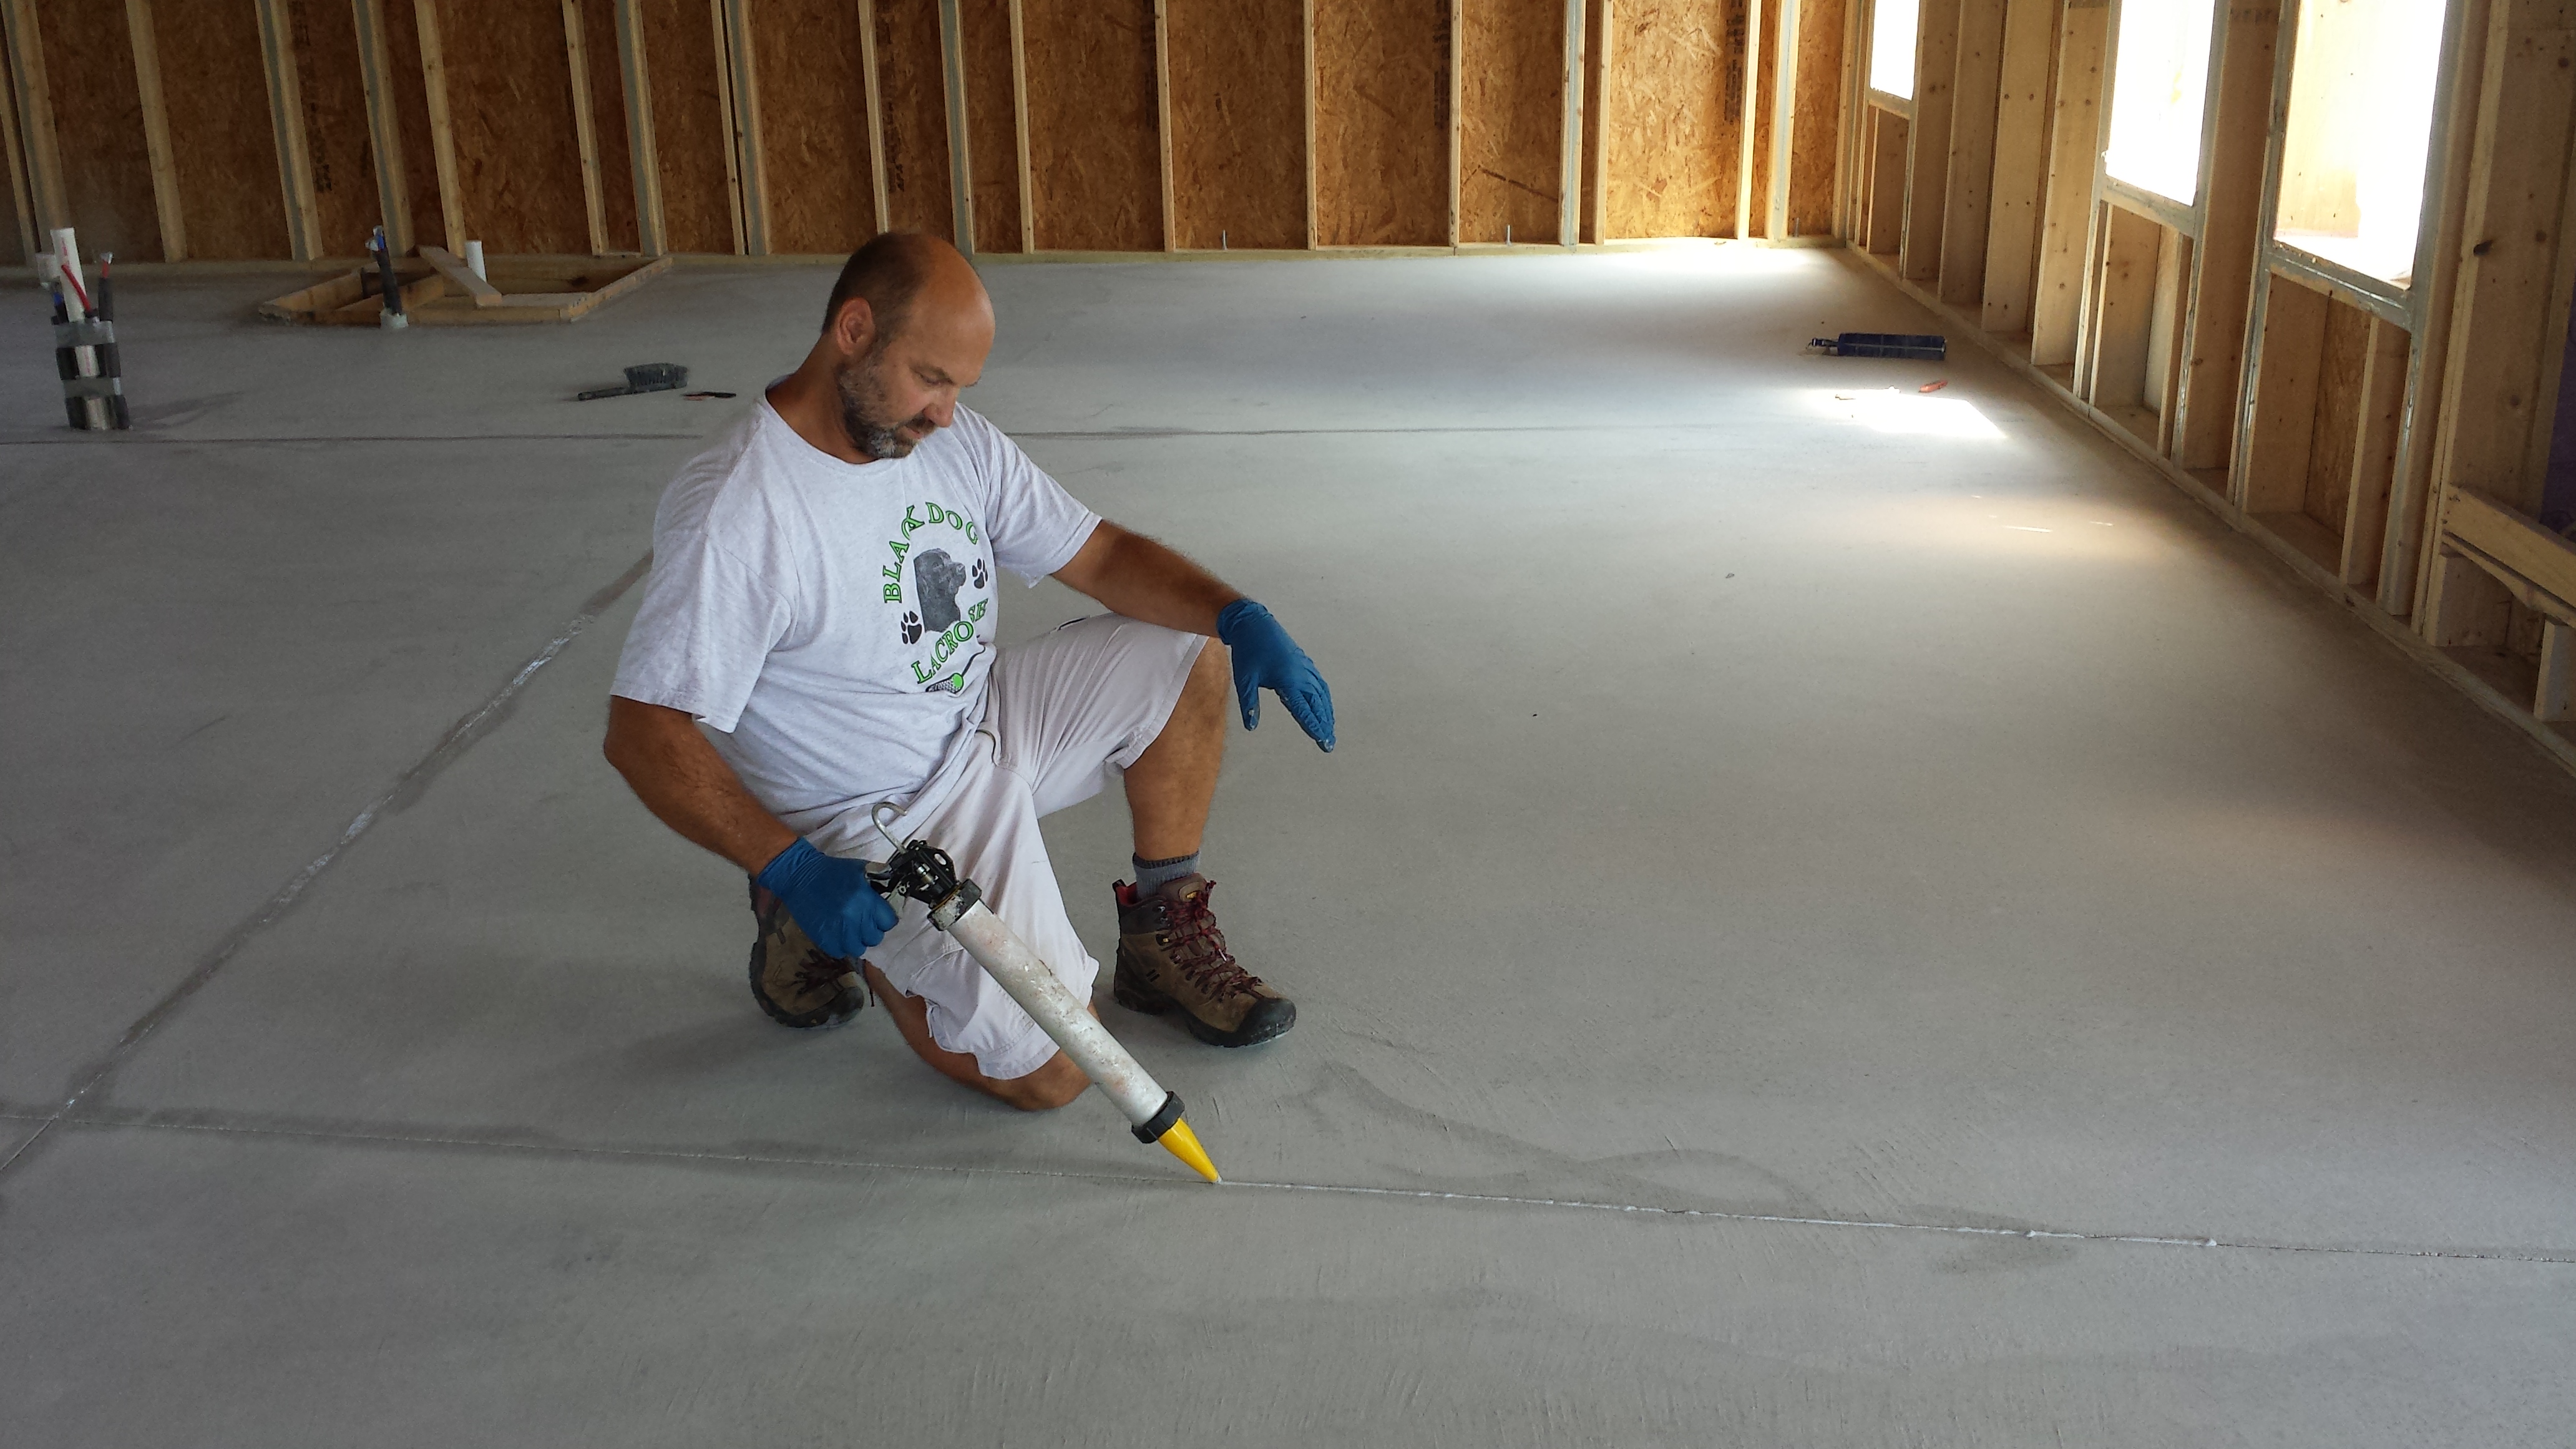
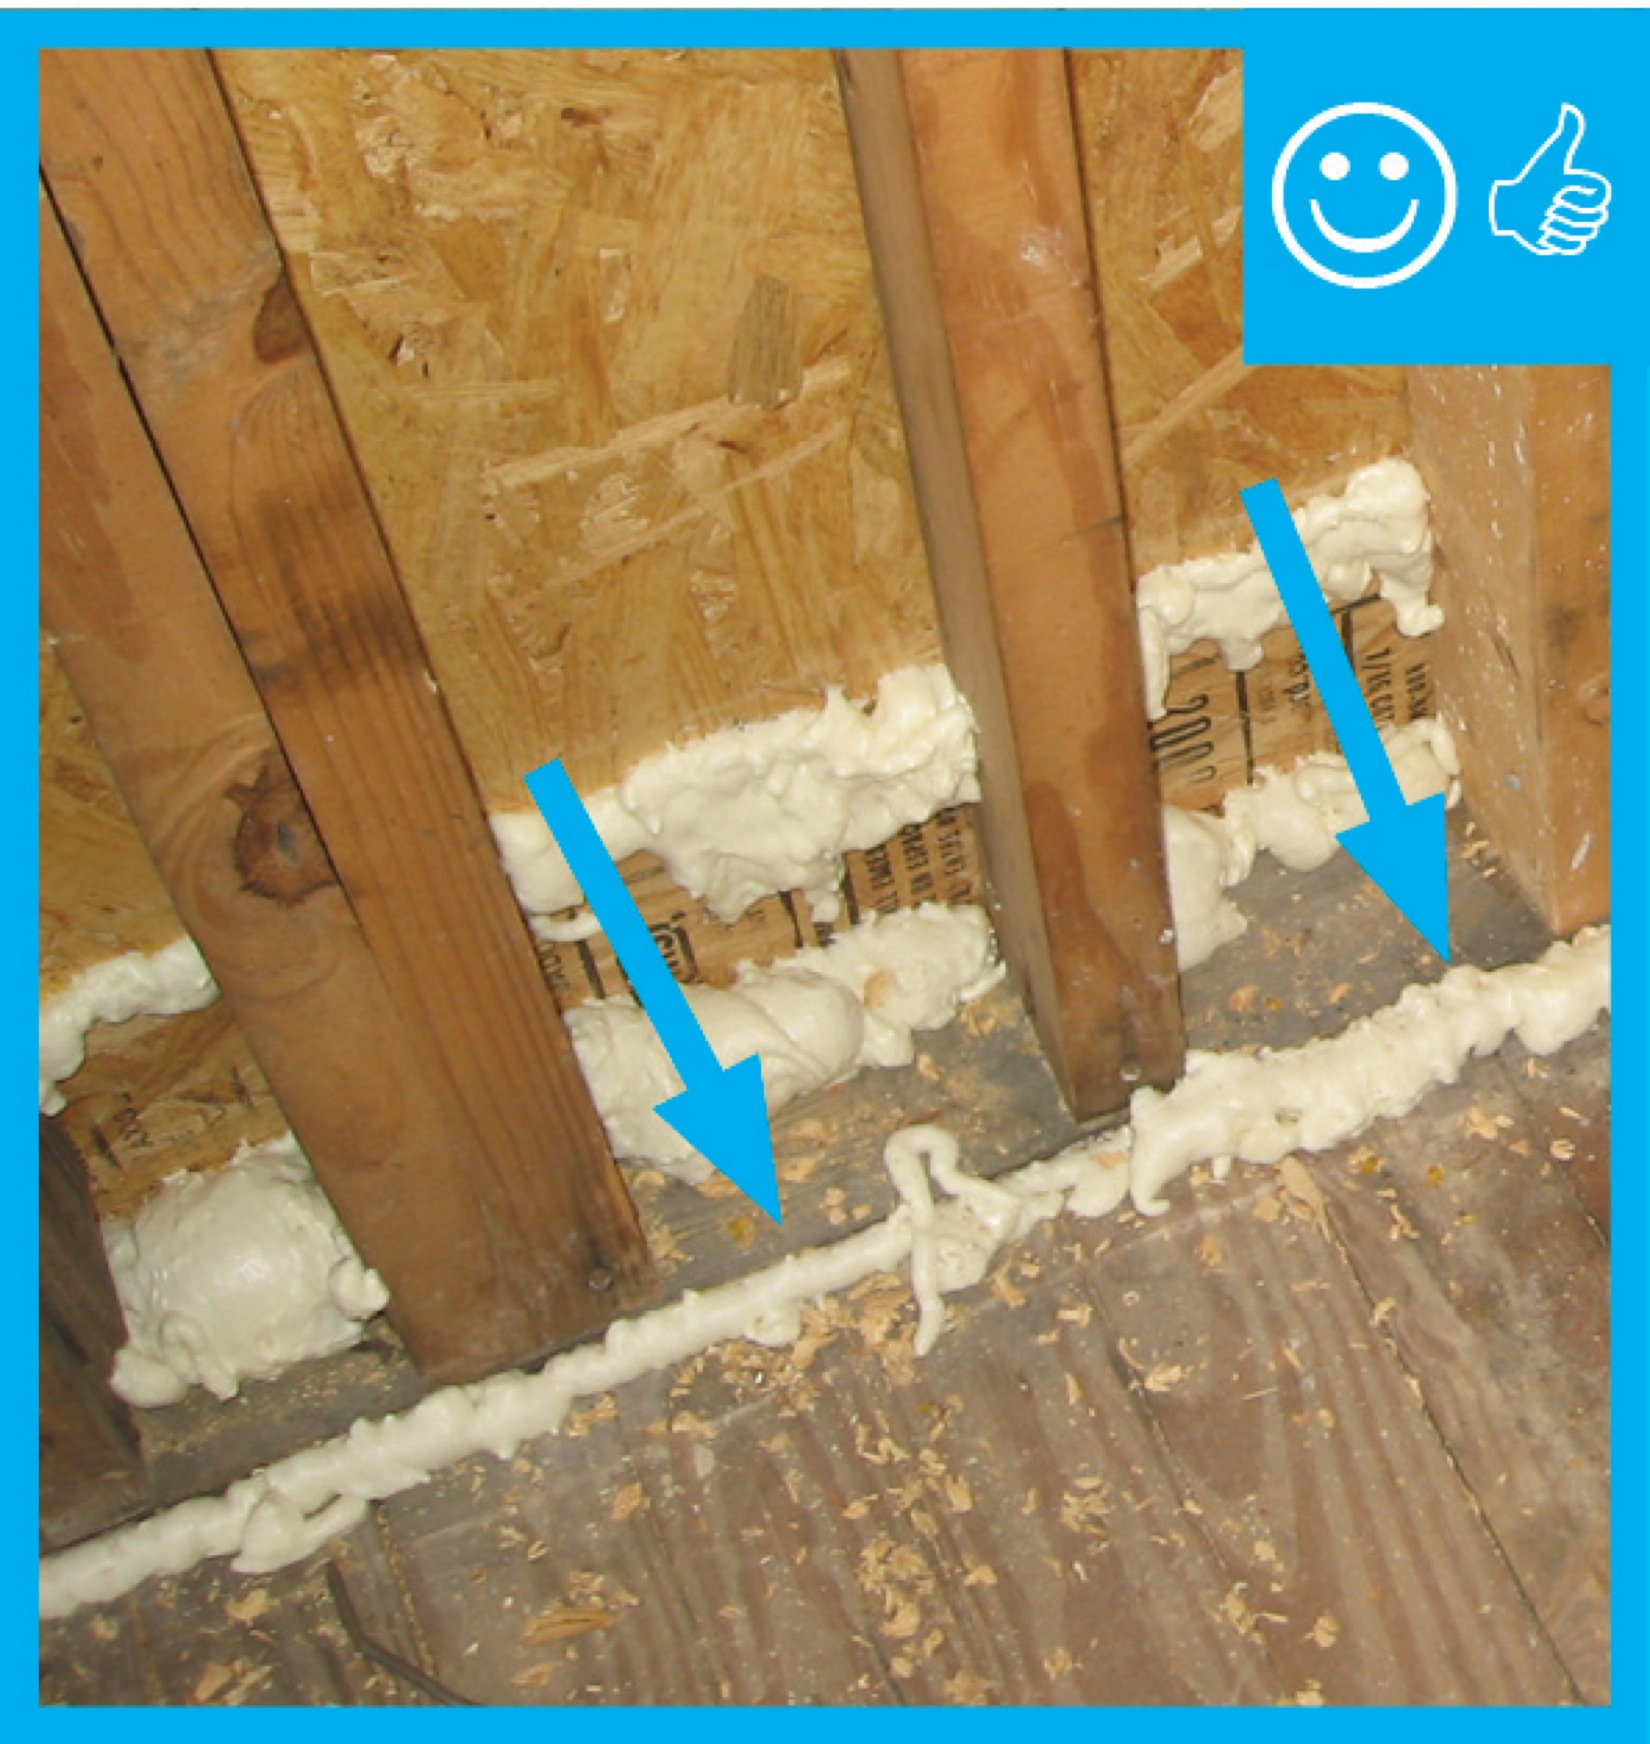
Right - An installer uses canned spray foam to air seal joints in an existing subfloor.
Image
Image
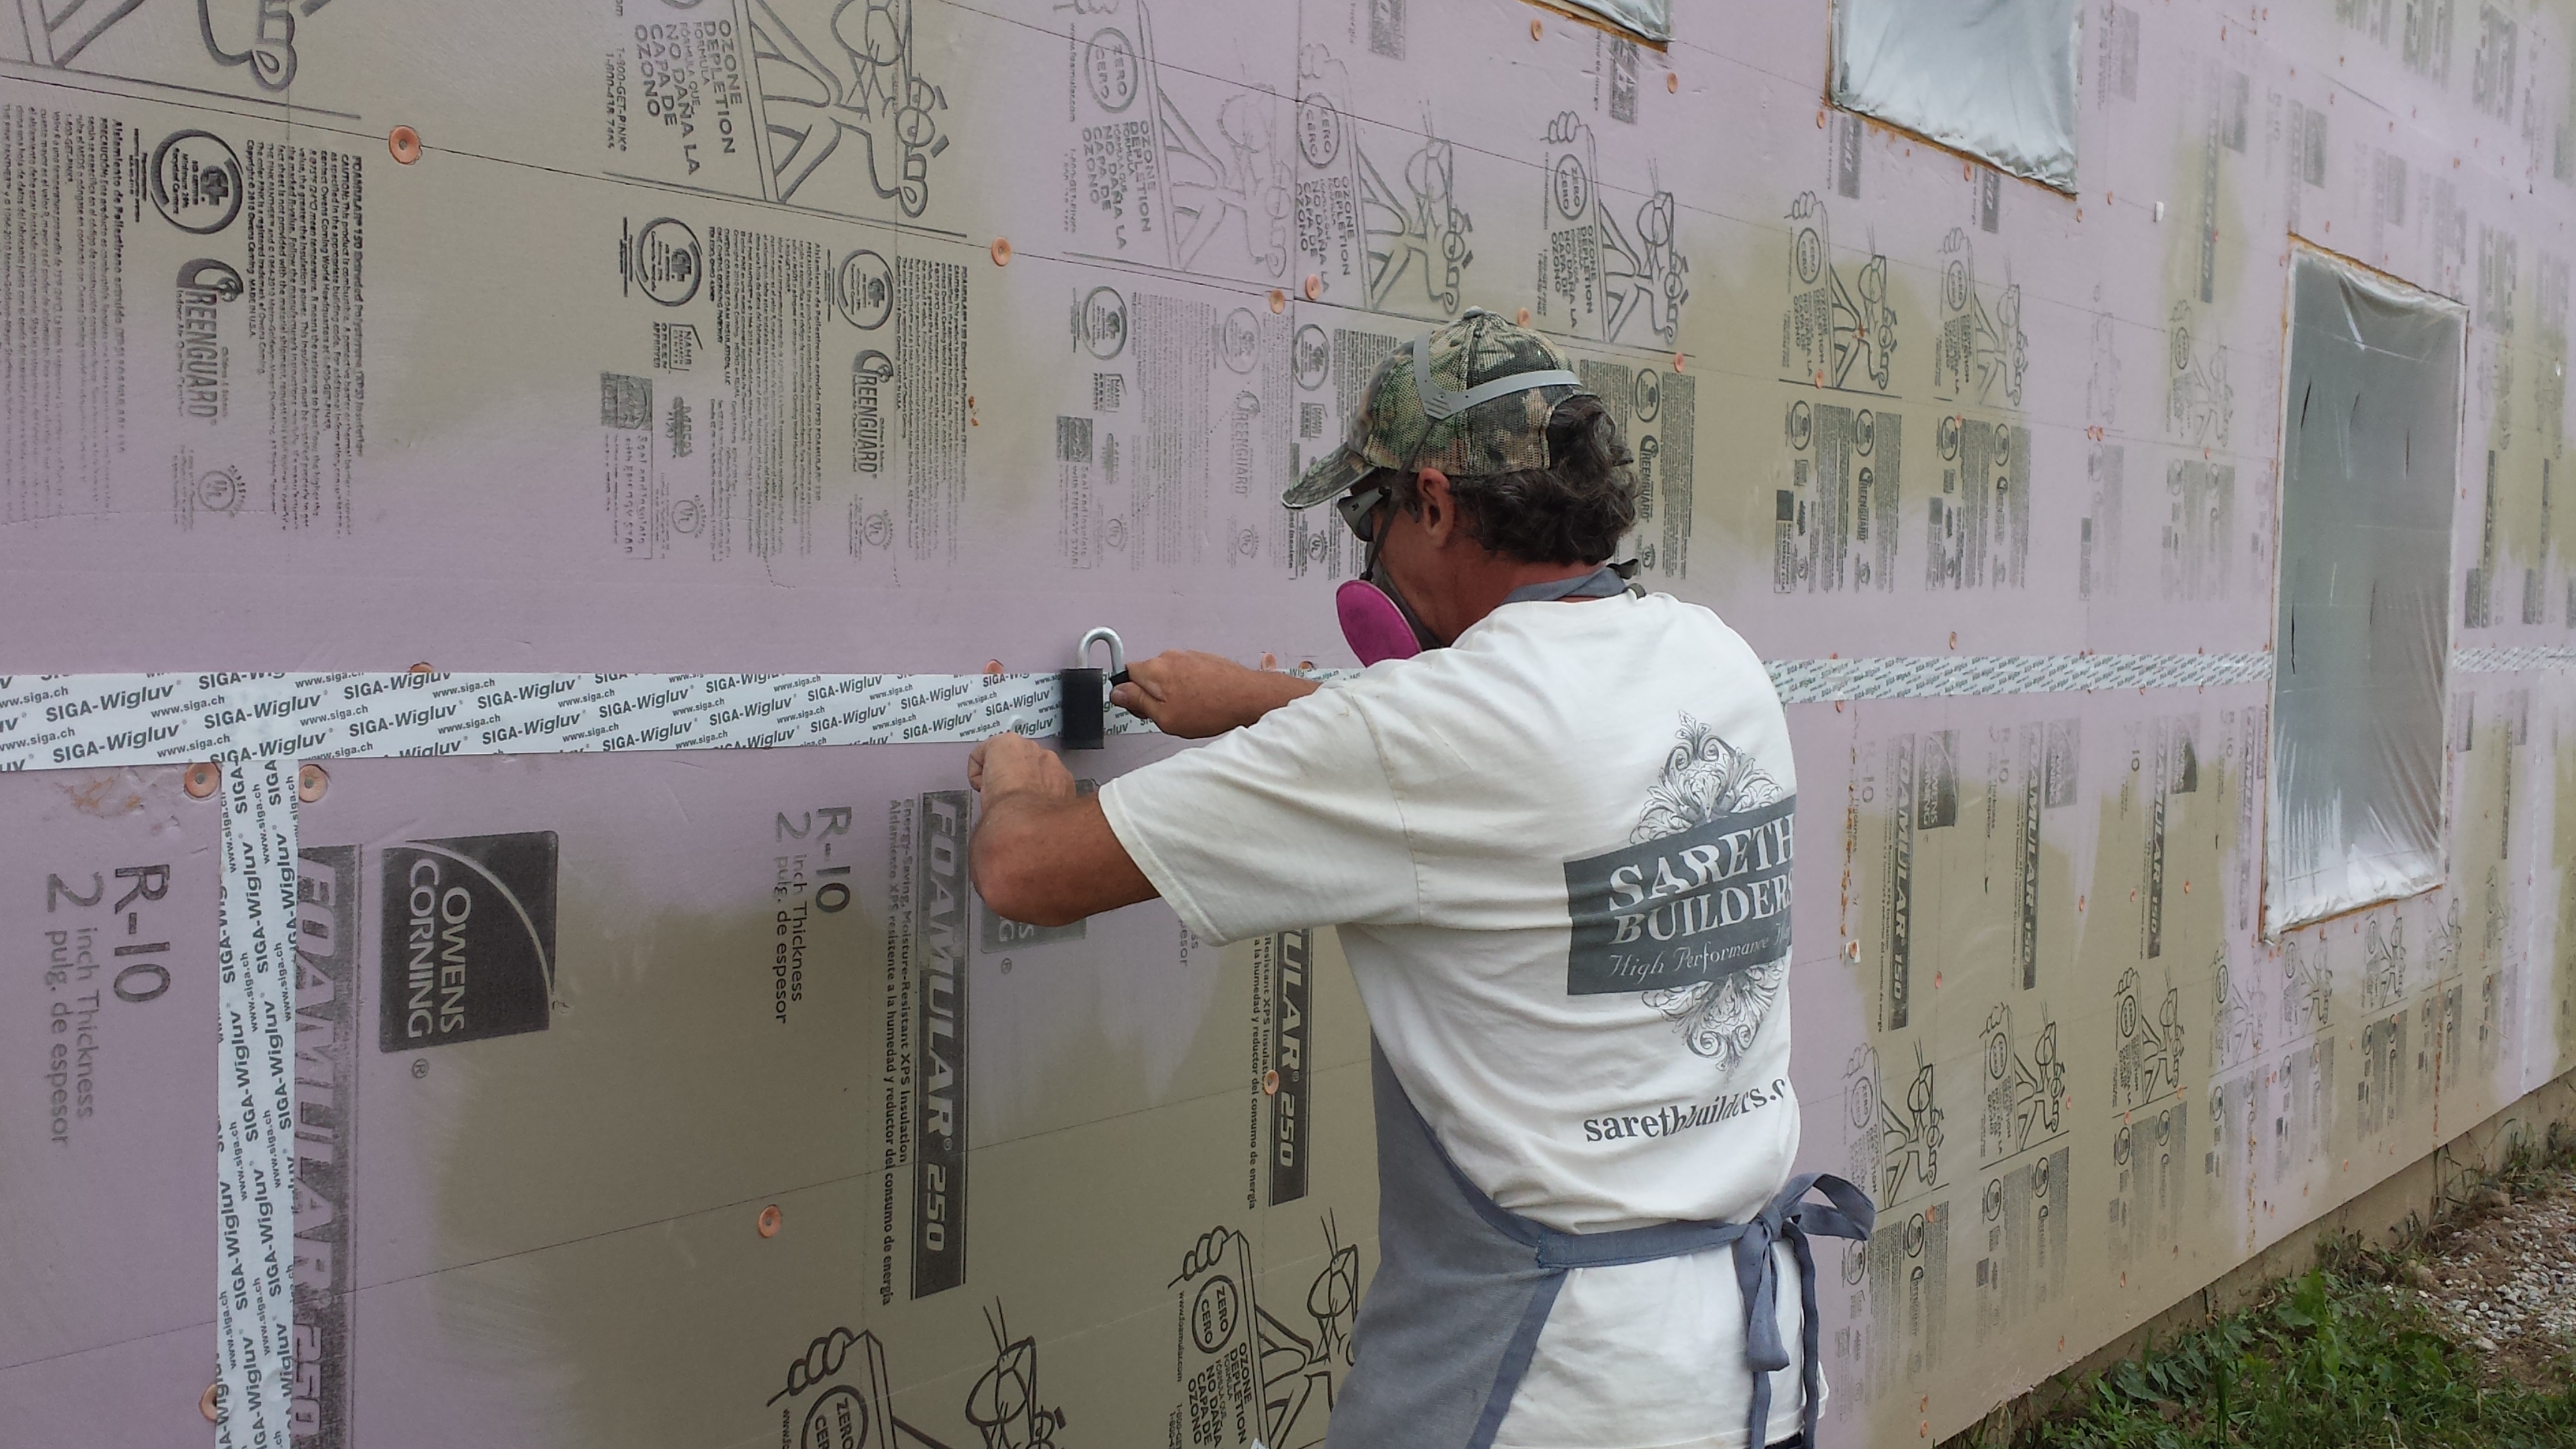
Right - Attach exterior insulation with insulation washers and tape the seams of the insulation is used as an air barrier.
Image
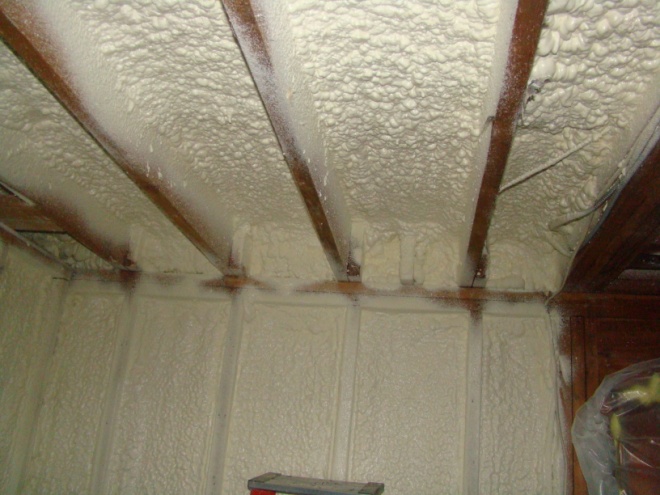
Right - Closed-cell spray foam covers the ceiling and joists to insulate and air-seal the ceiling deck.
Image

Right - Closed-cell spray foam insulation fills the wall cavities of the exterior walls in this home retrofit
Image
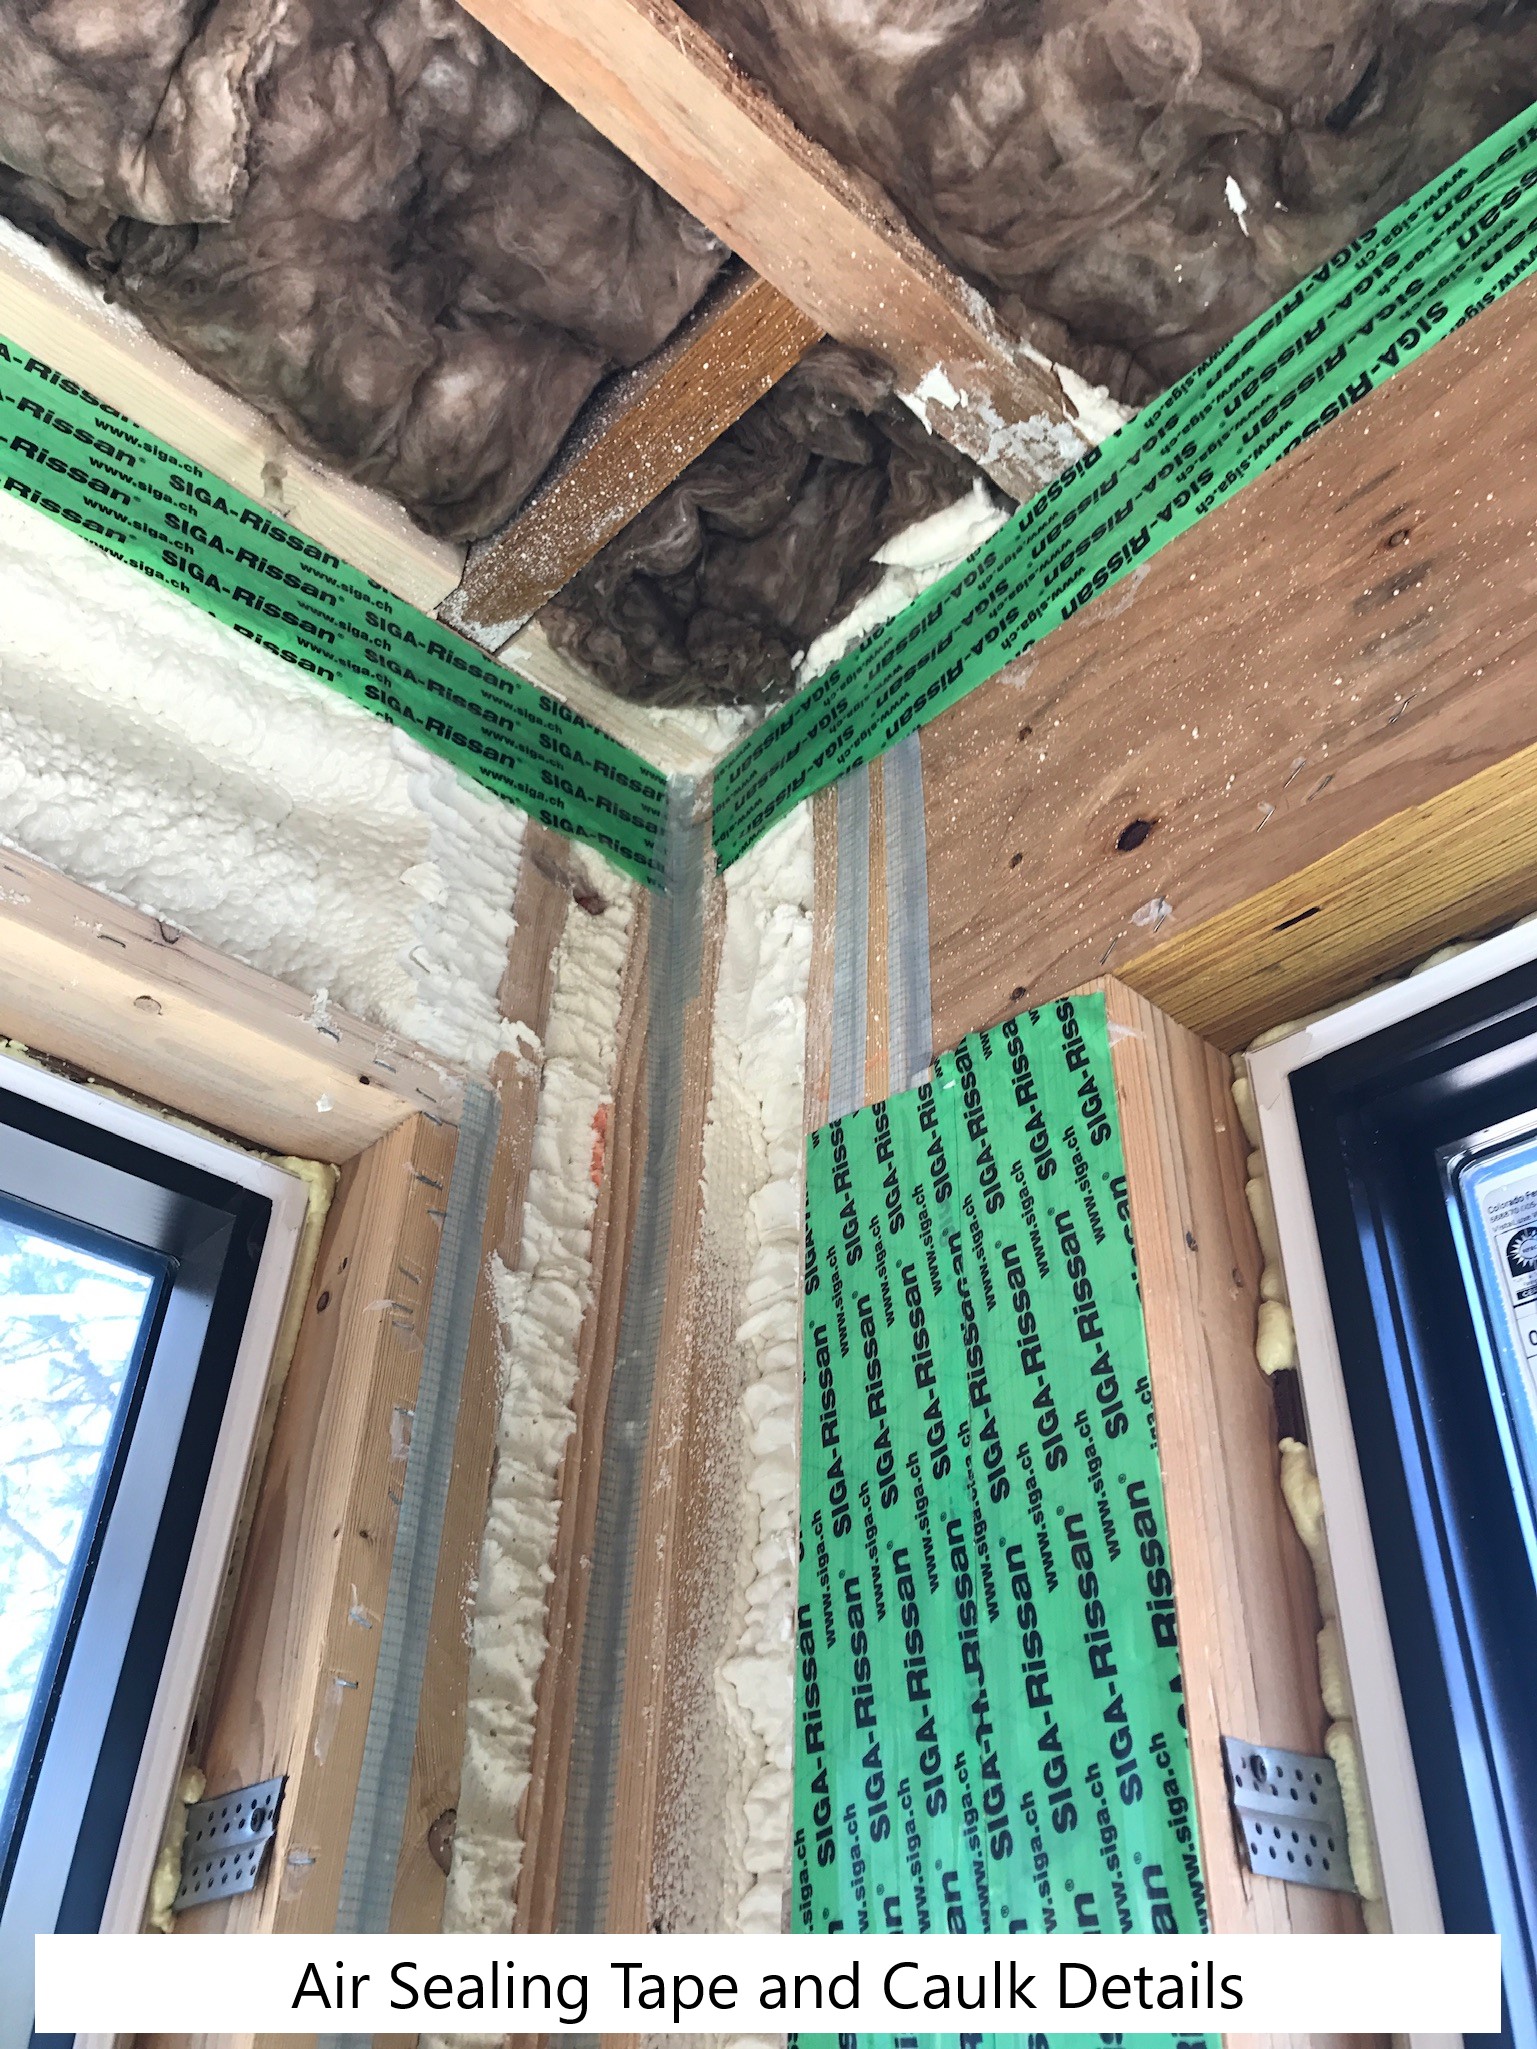
Right - Comprehensive air sealing of the walls includes caulking of the subfloor-sill plate seams and corner seams, taping of electrical boxes, and spray foaming around pipe penetrations.
Image
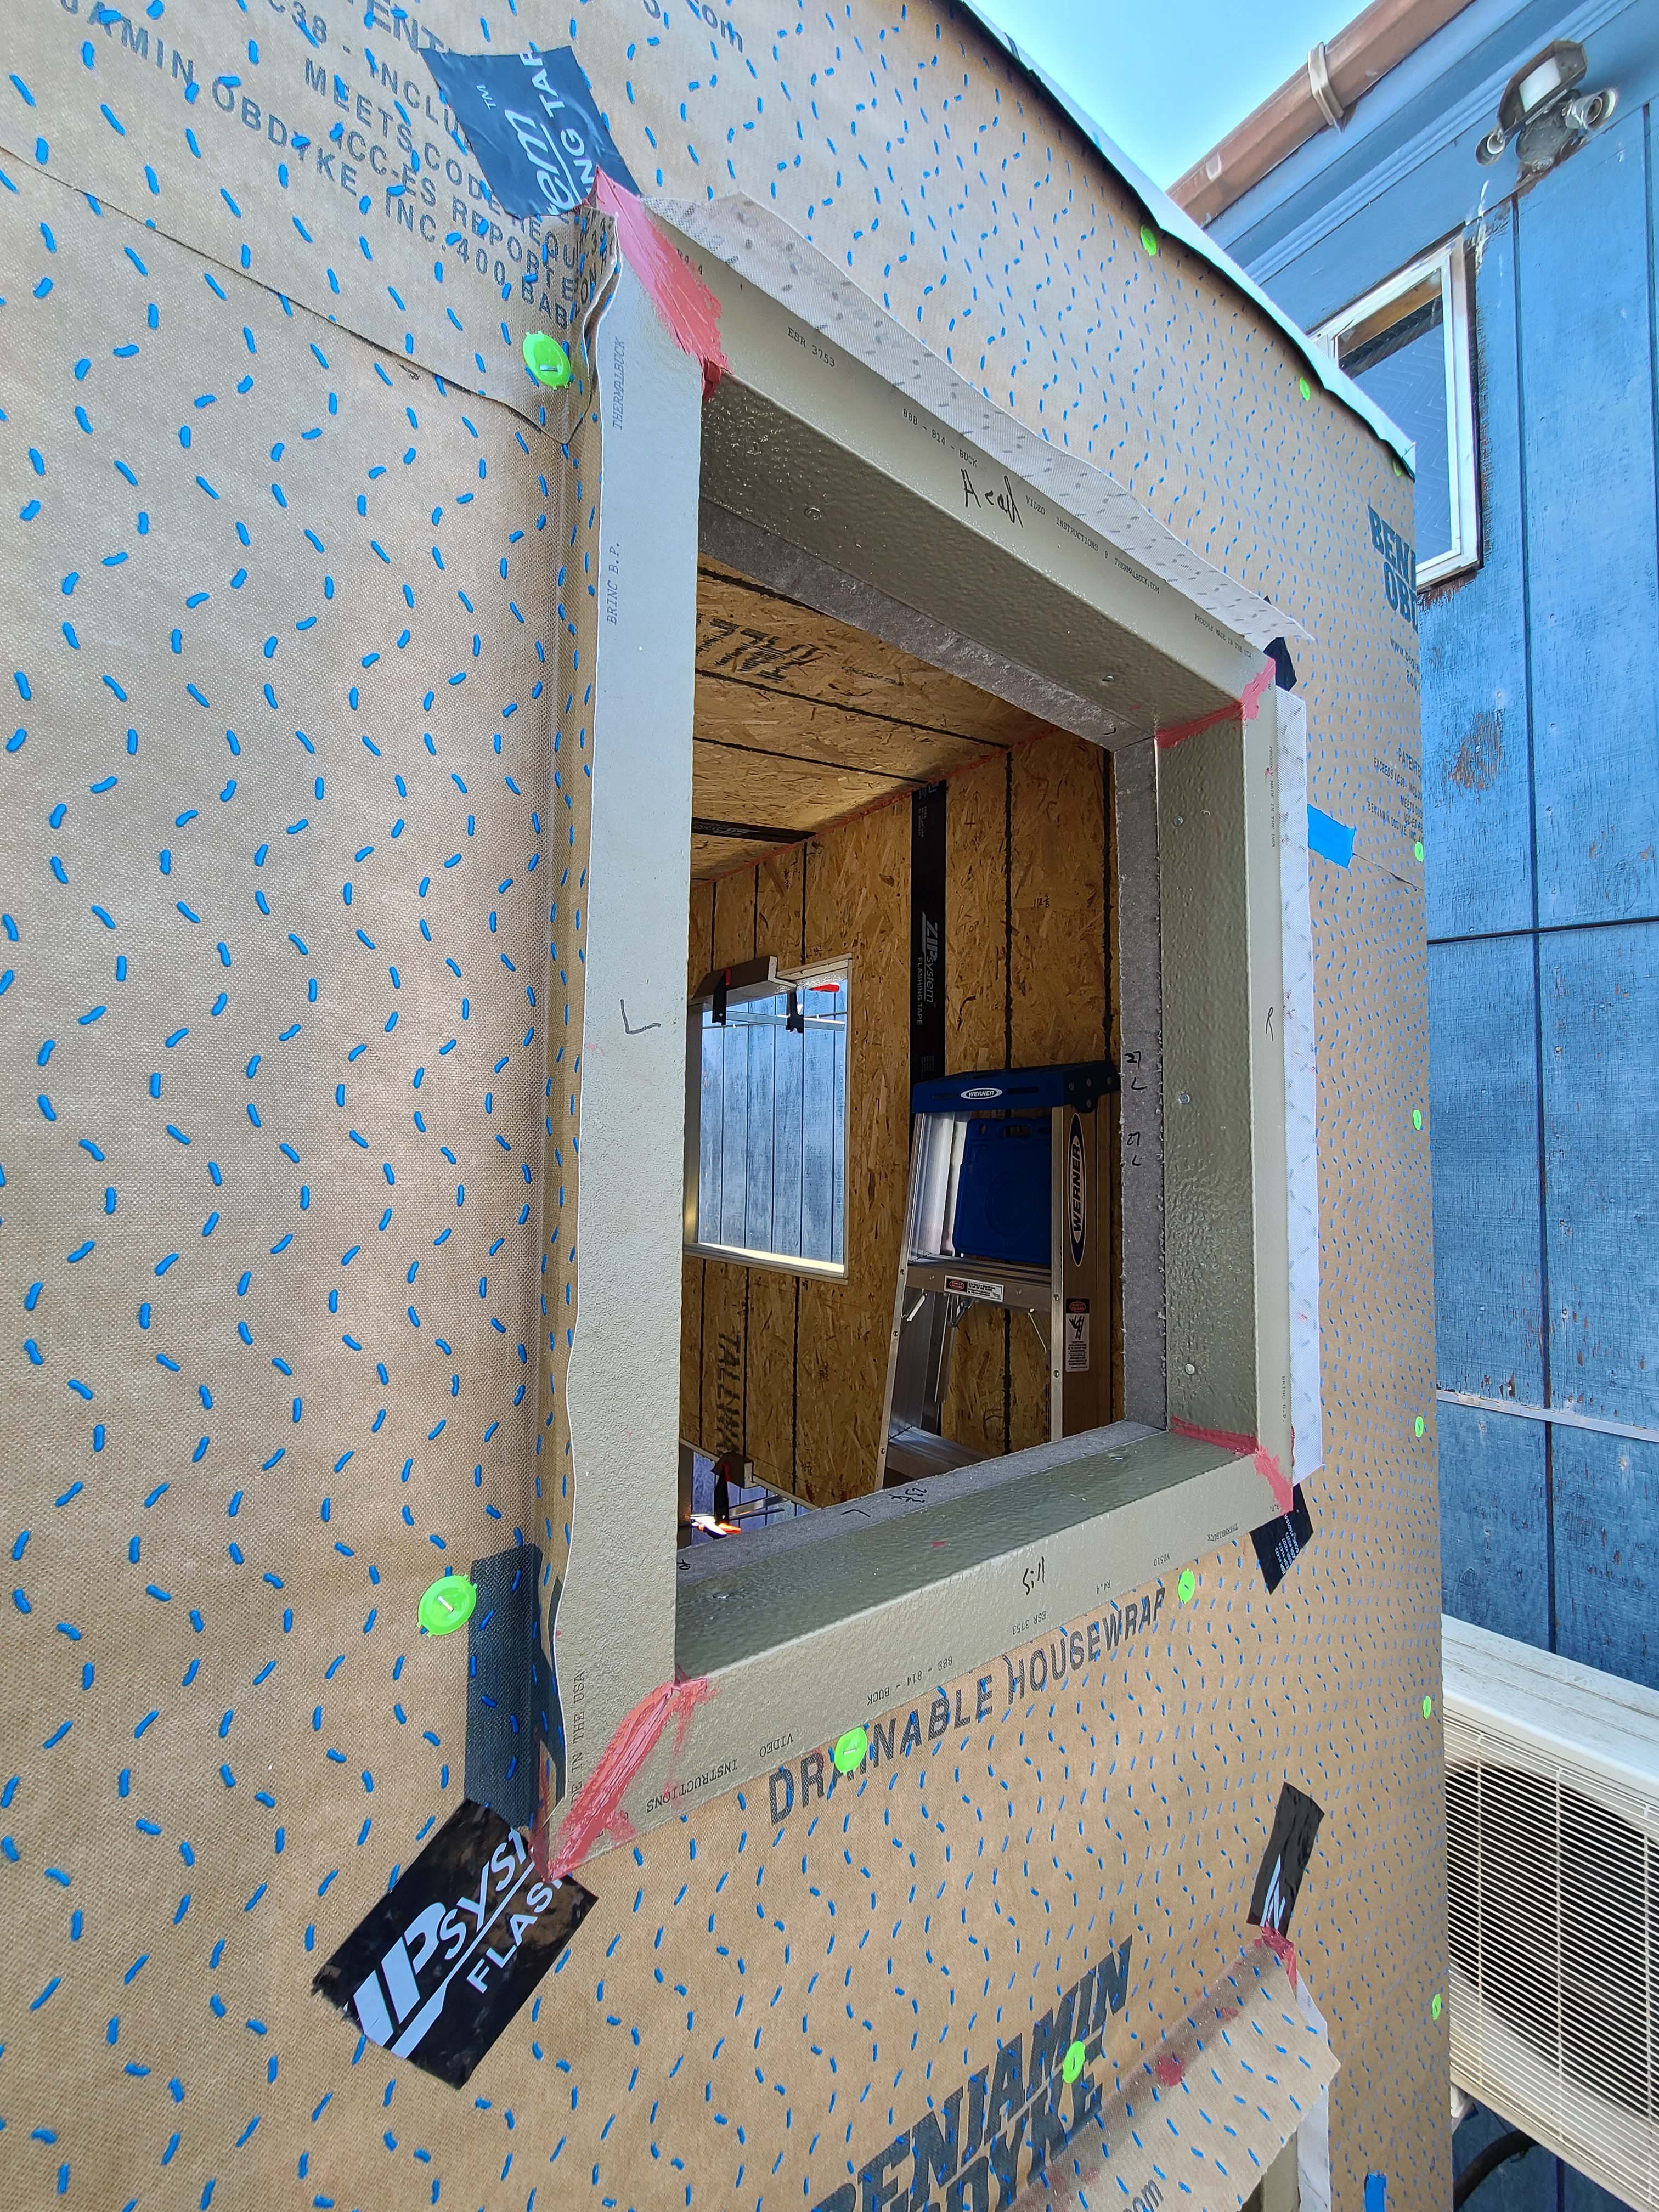
Right - Corners of window are protected with draining house wrap that laps onto the sides of the window trim, paint-on flashing at window trim corners, and self-adhered flashing to reinforce corners.
Image
Image
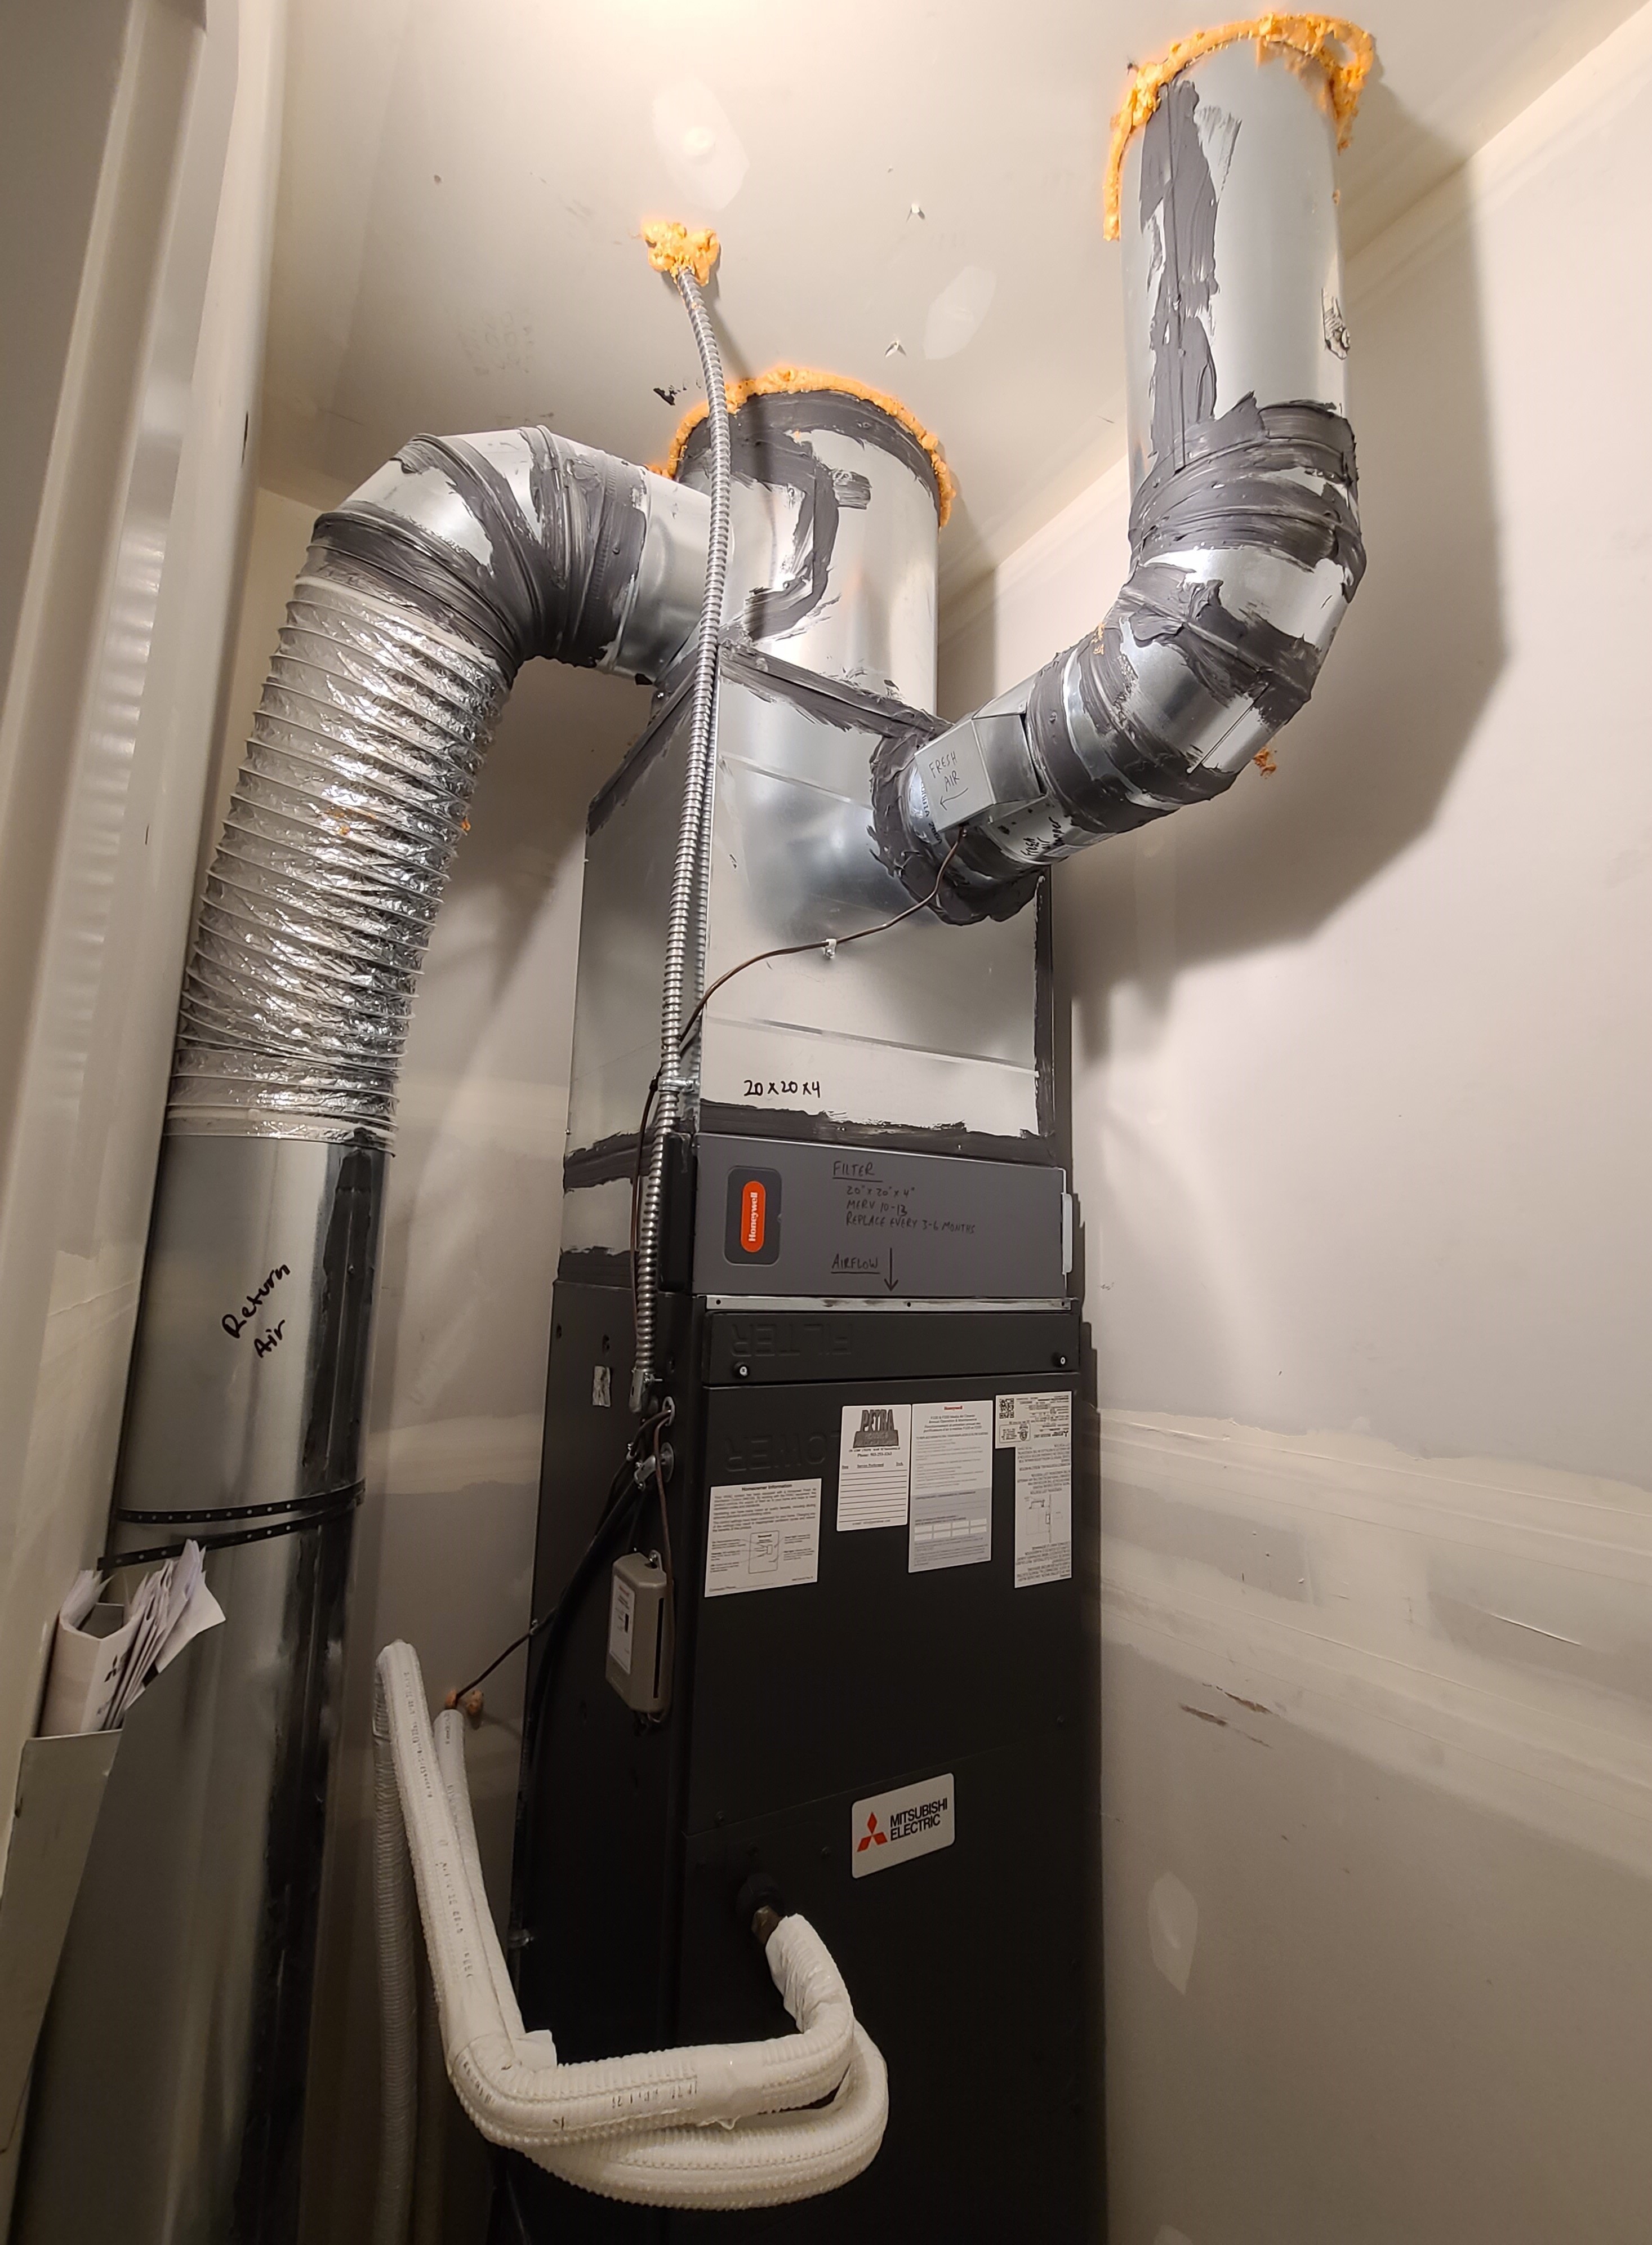
Right - Ducts and heat pump cabinet are properly sealed with mastic, high MERV filter is installed, and duct and refrigerant lines are air sealed at ceiling.
Image
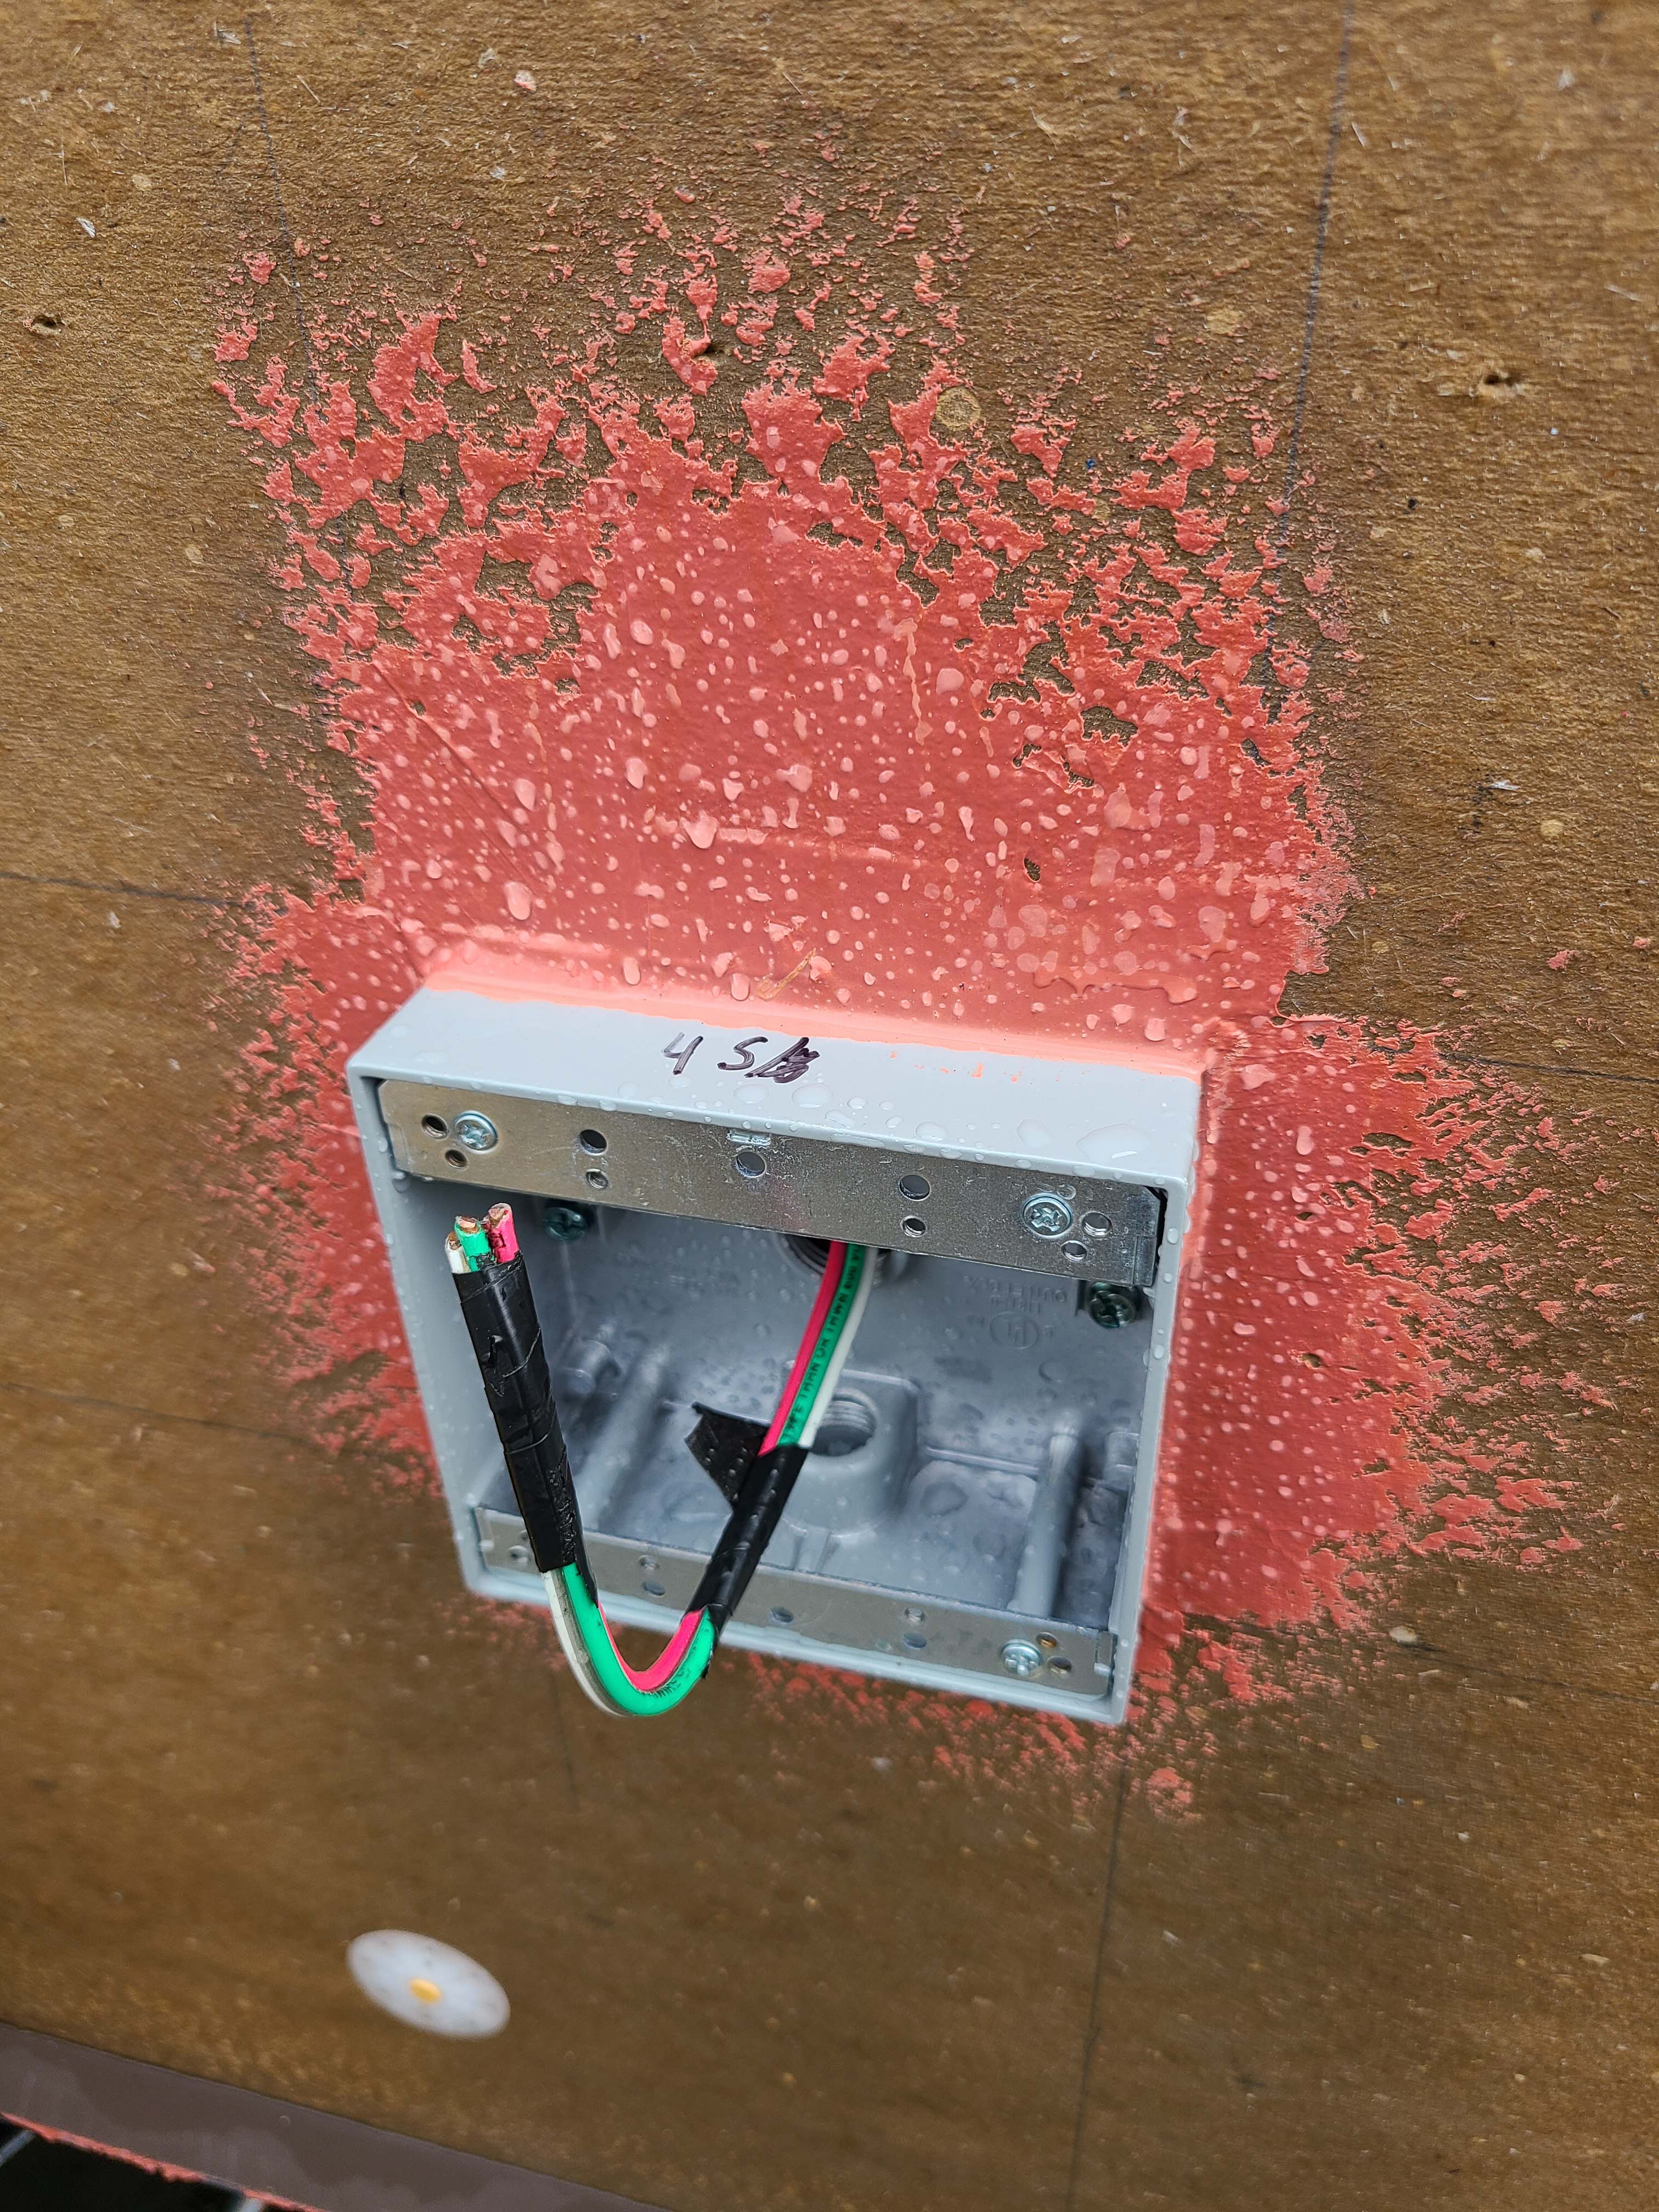
Right - Electrical box in exterior wall is completely sealed with liquid flashing.
Image
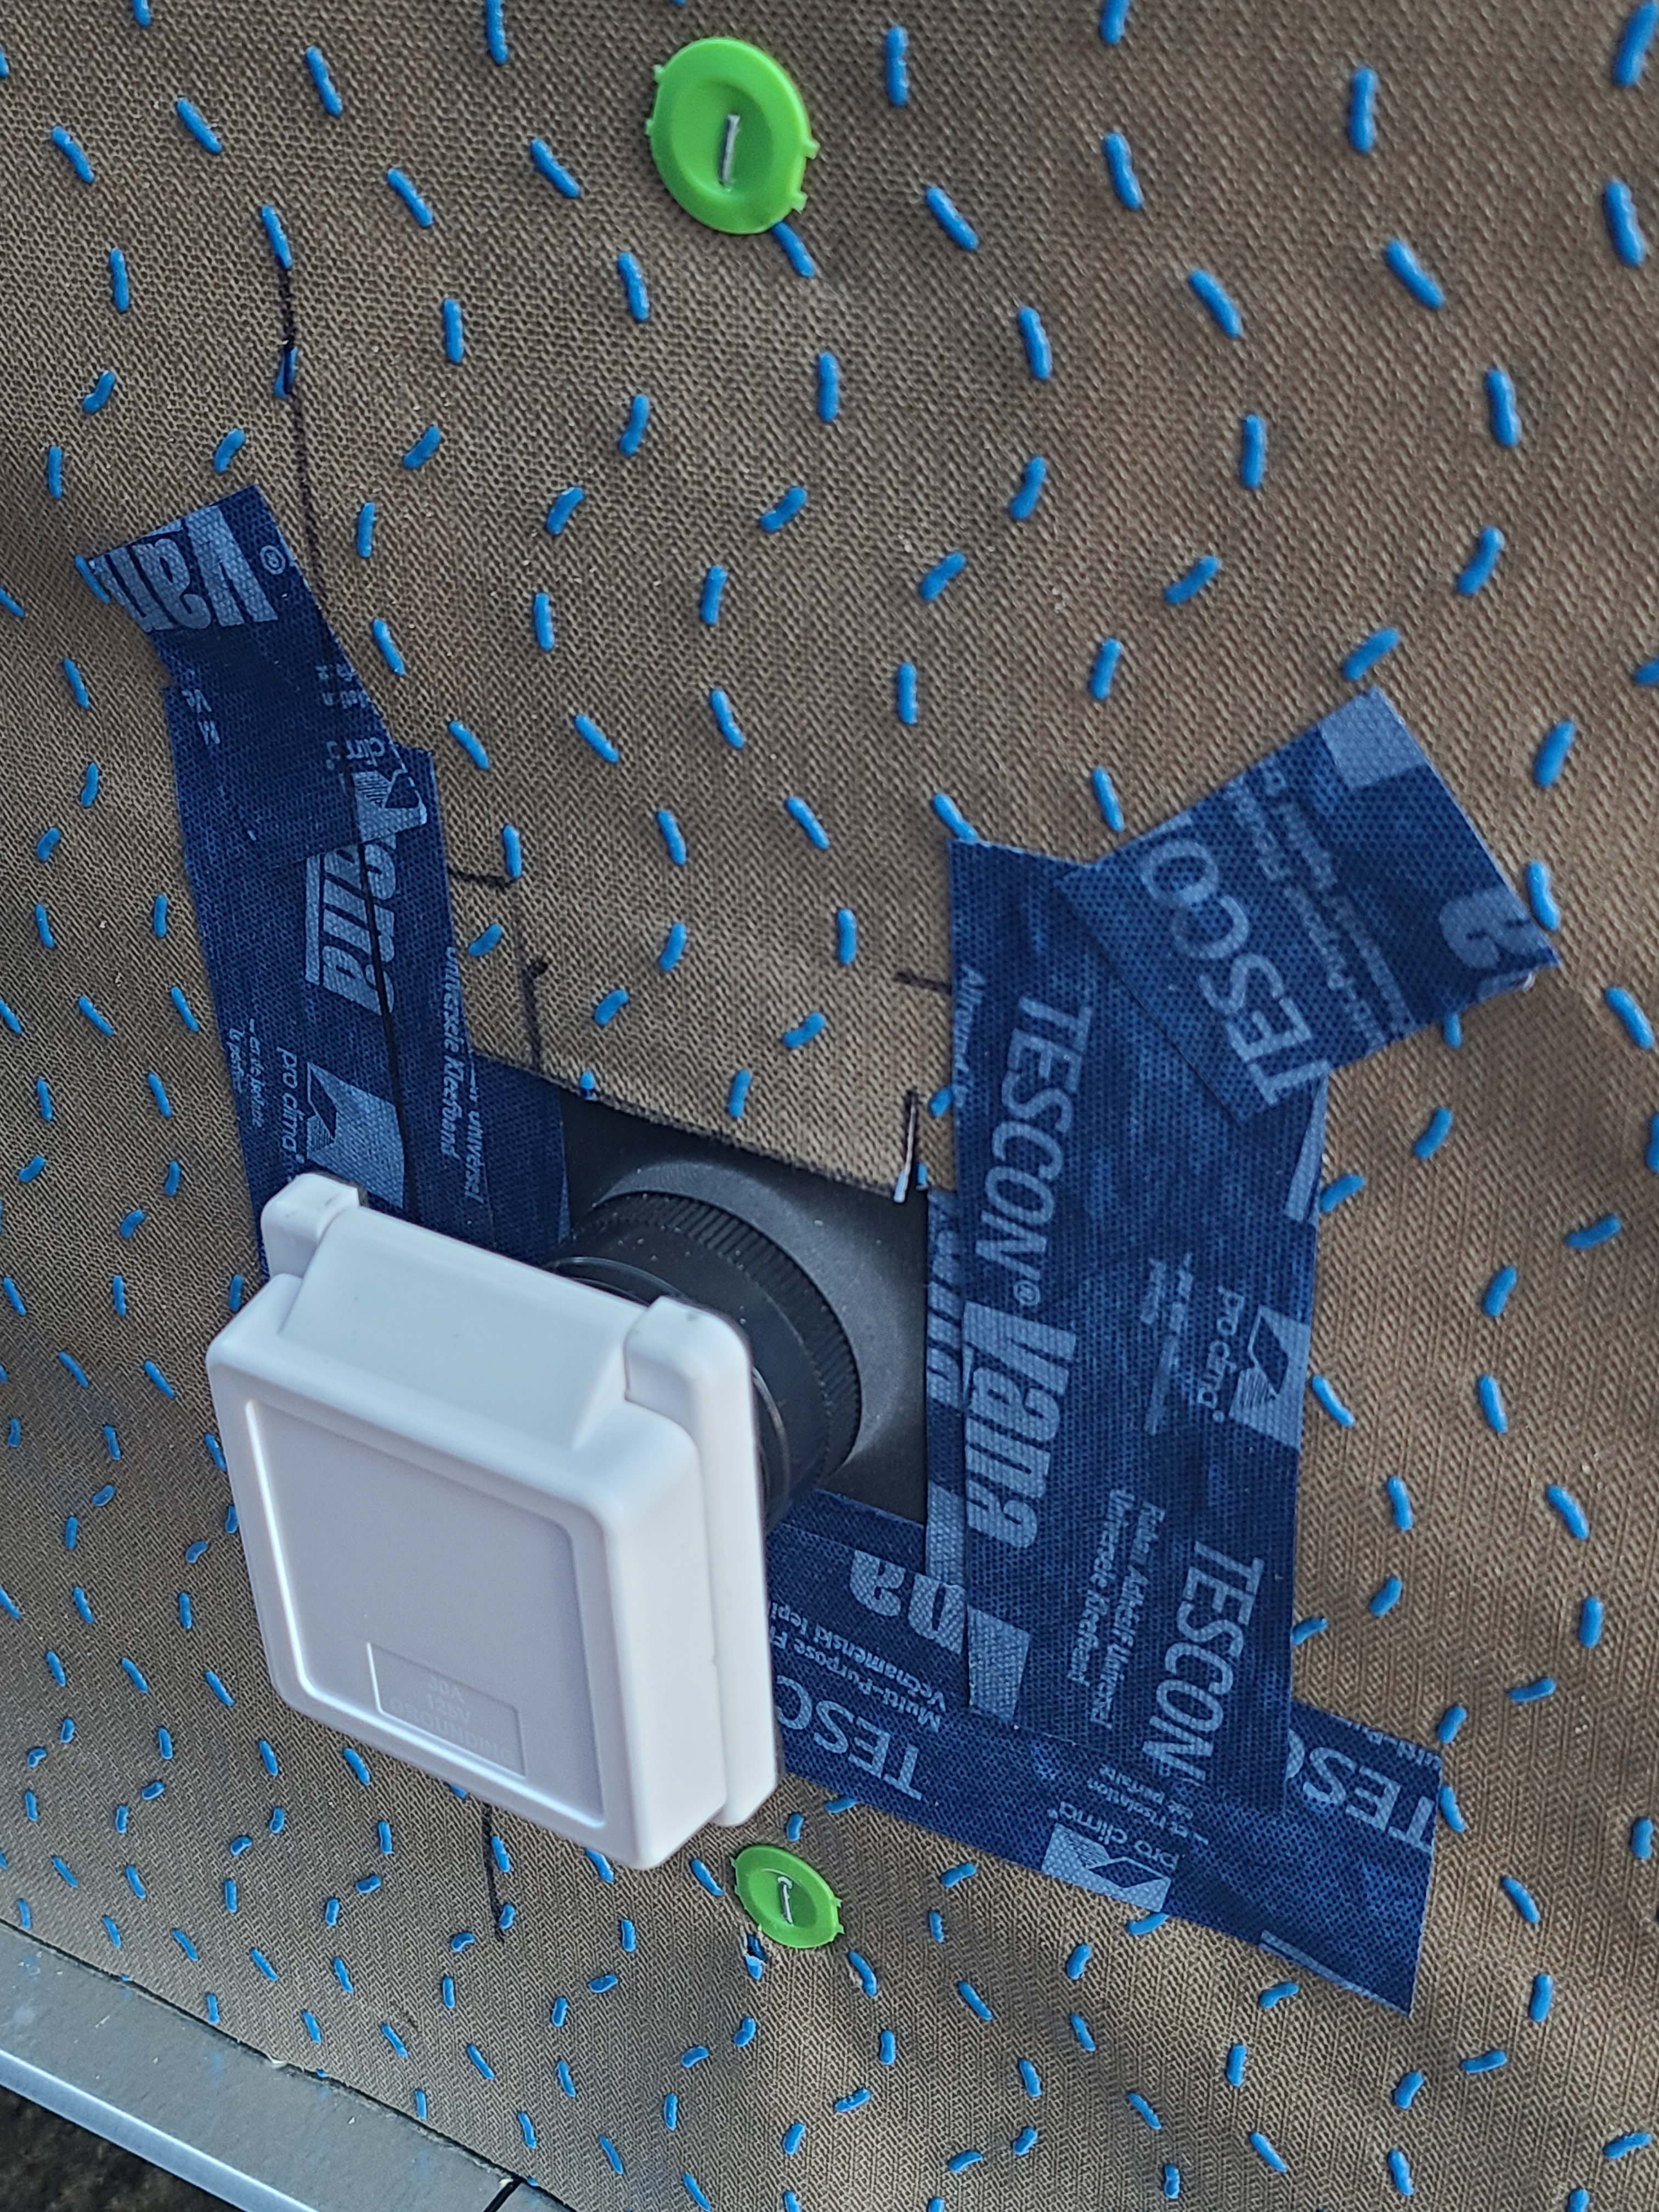
Right - External outlet wall penetration is flashed with tape that is properly layered with house wrap.
Image

Image
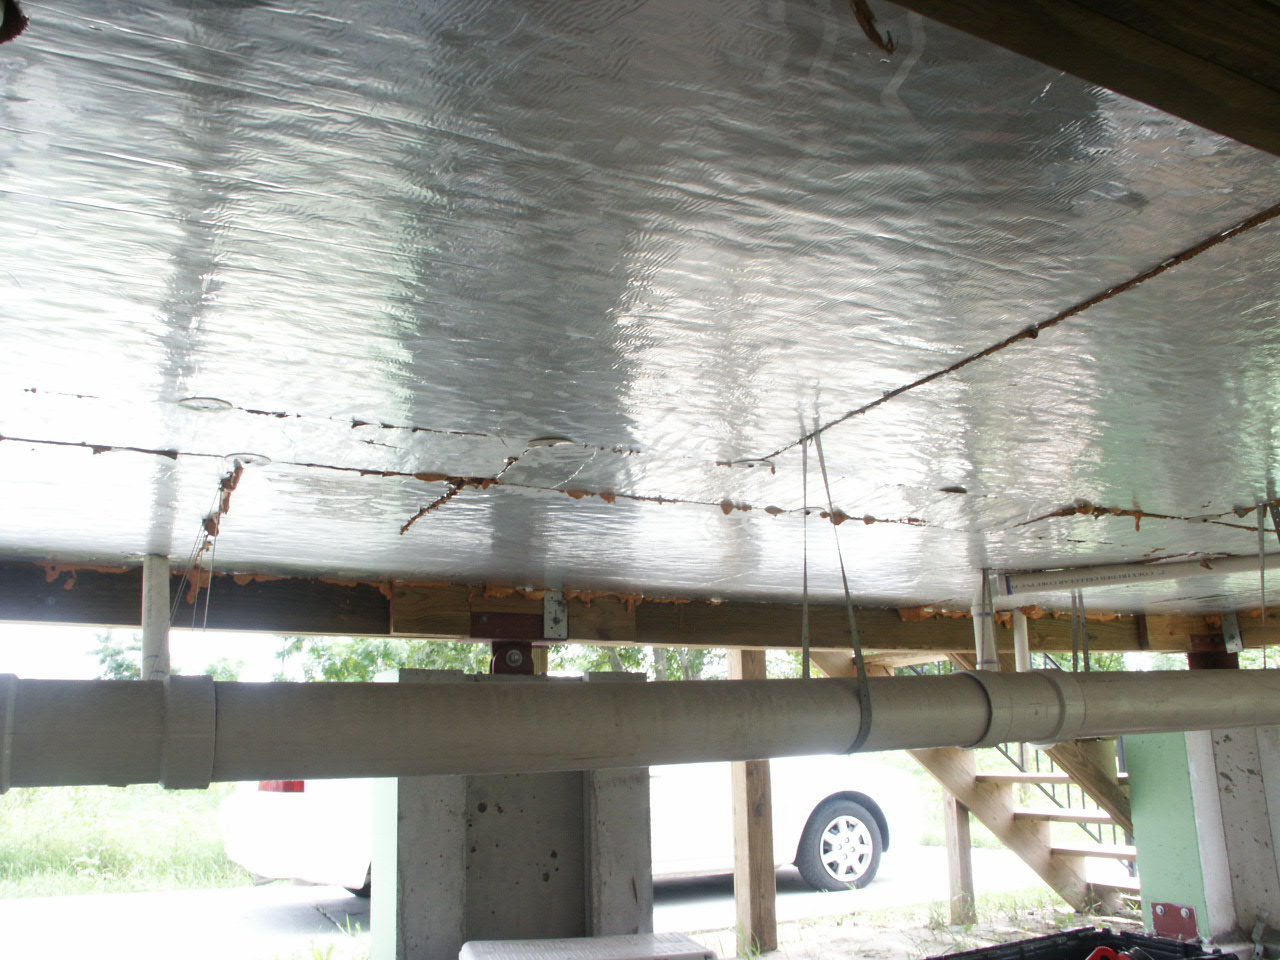
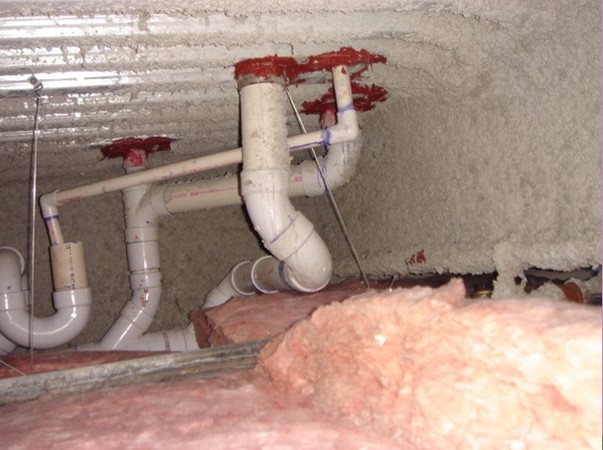
Right - Foil-faced polyisocyanurate insulating rigid foam sheathing is installed below the floor framing of this house built on piers; however, the seams should be sealed with metal taped and the plumbing elevated and protected.
Image

Right - Foil-faced polyisocyanurate insulating rigid foam sheathing is installed rather than fibrous insulation below the floor framing of this house built on piers
Image
Right - Gasket installed at marriage wall connection prior to assembling modules
Image
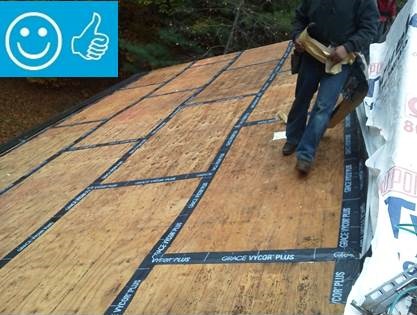
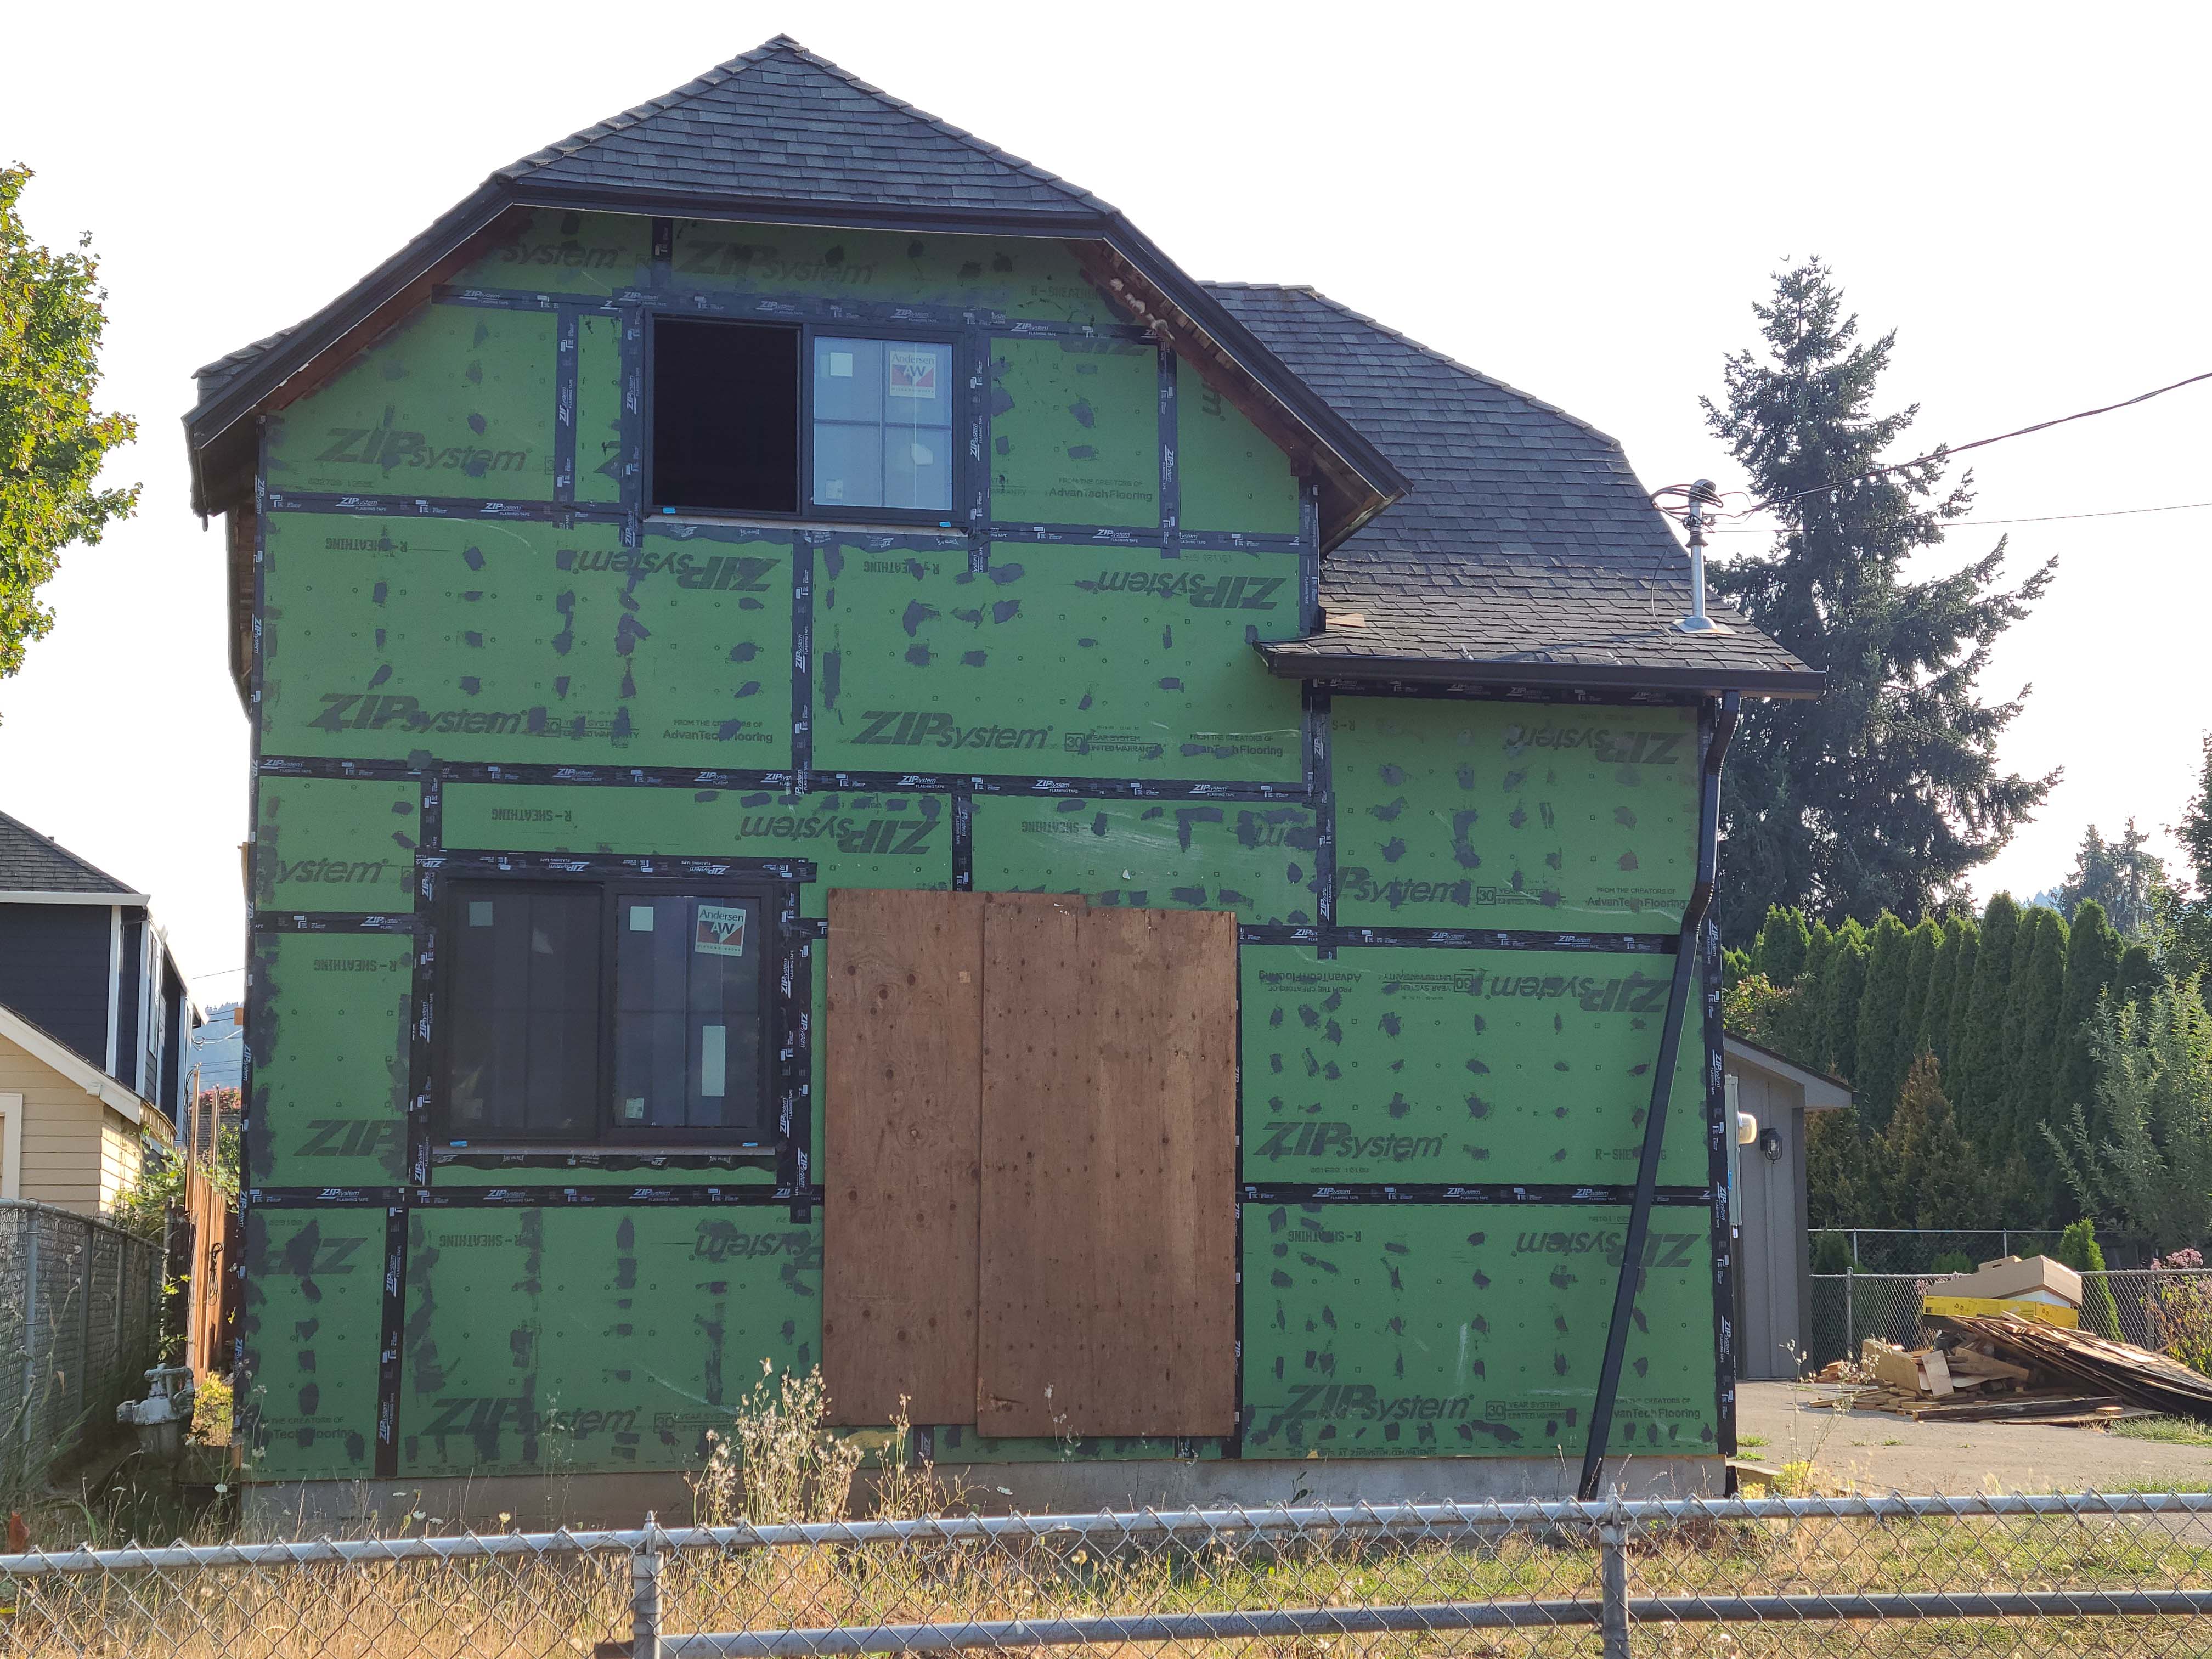
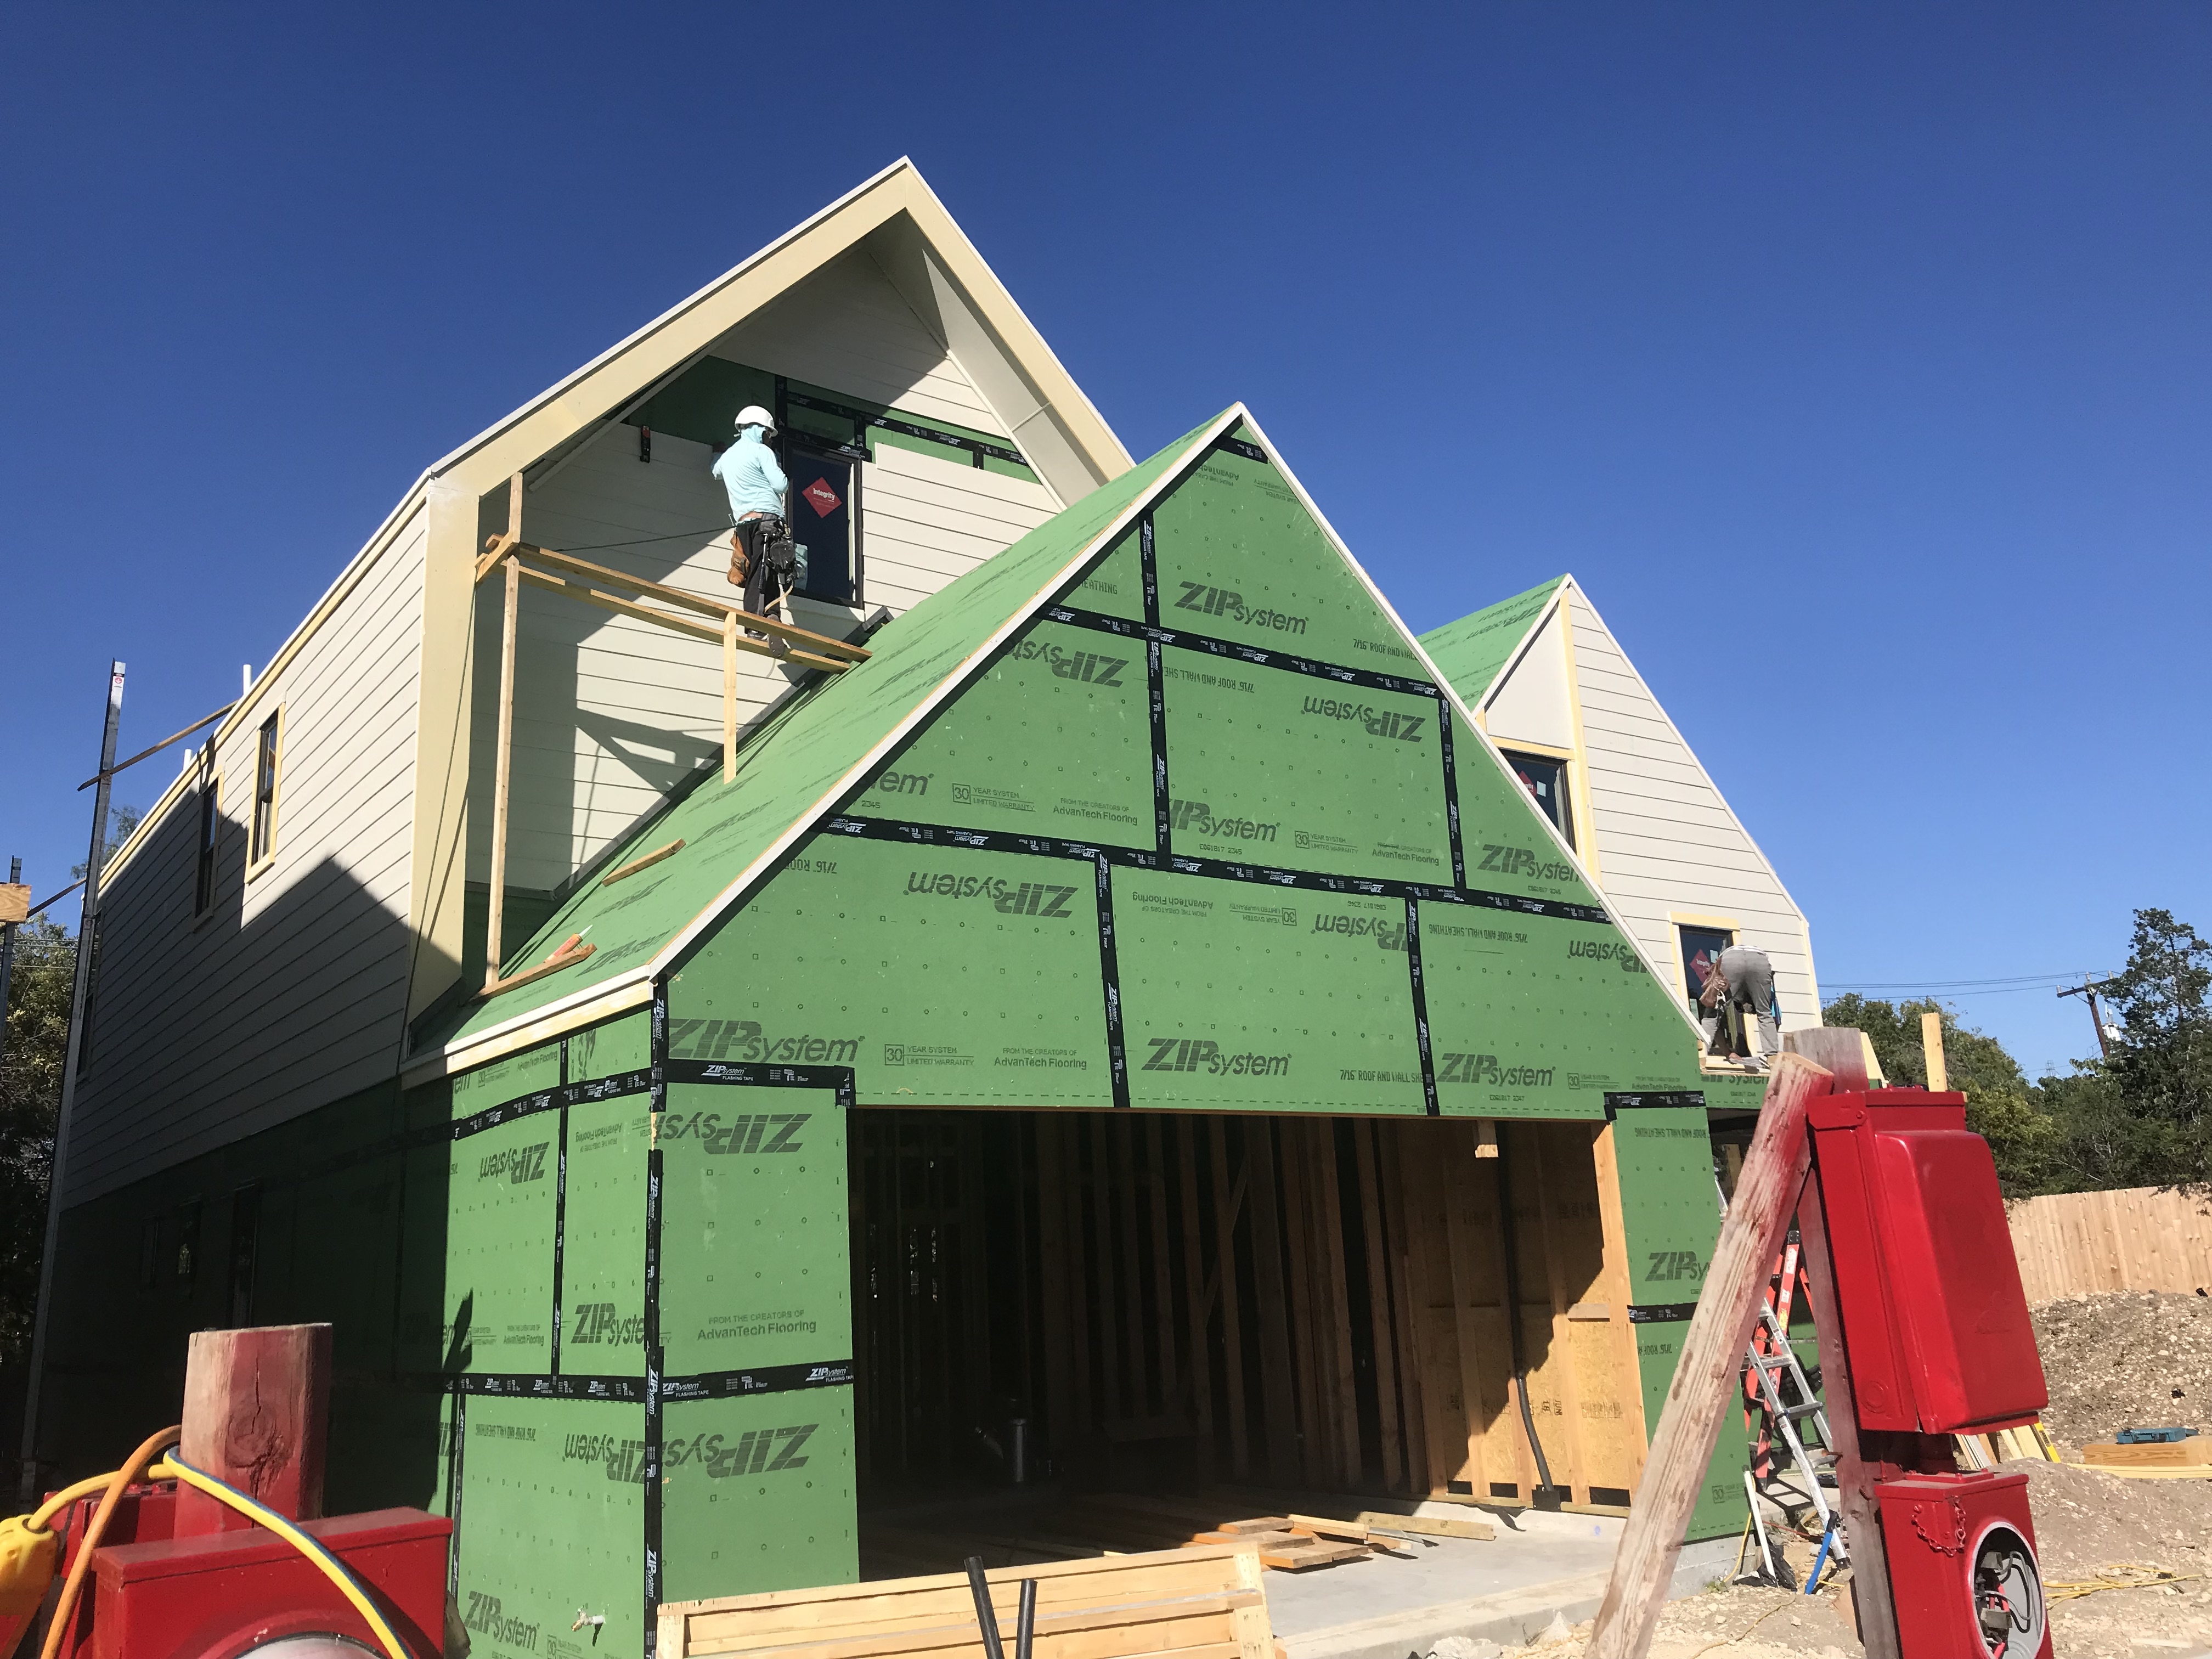
Right - Here, air control is established by taping the seams of the plywood panel sheathing. The roof sheathing is also trimmed flush with the wall sheathing to allow a simple and airtight connection between the roof and wall assemblies
Image
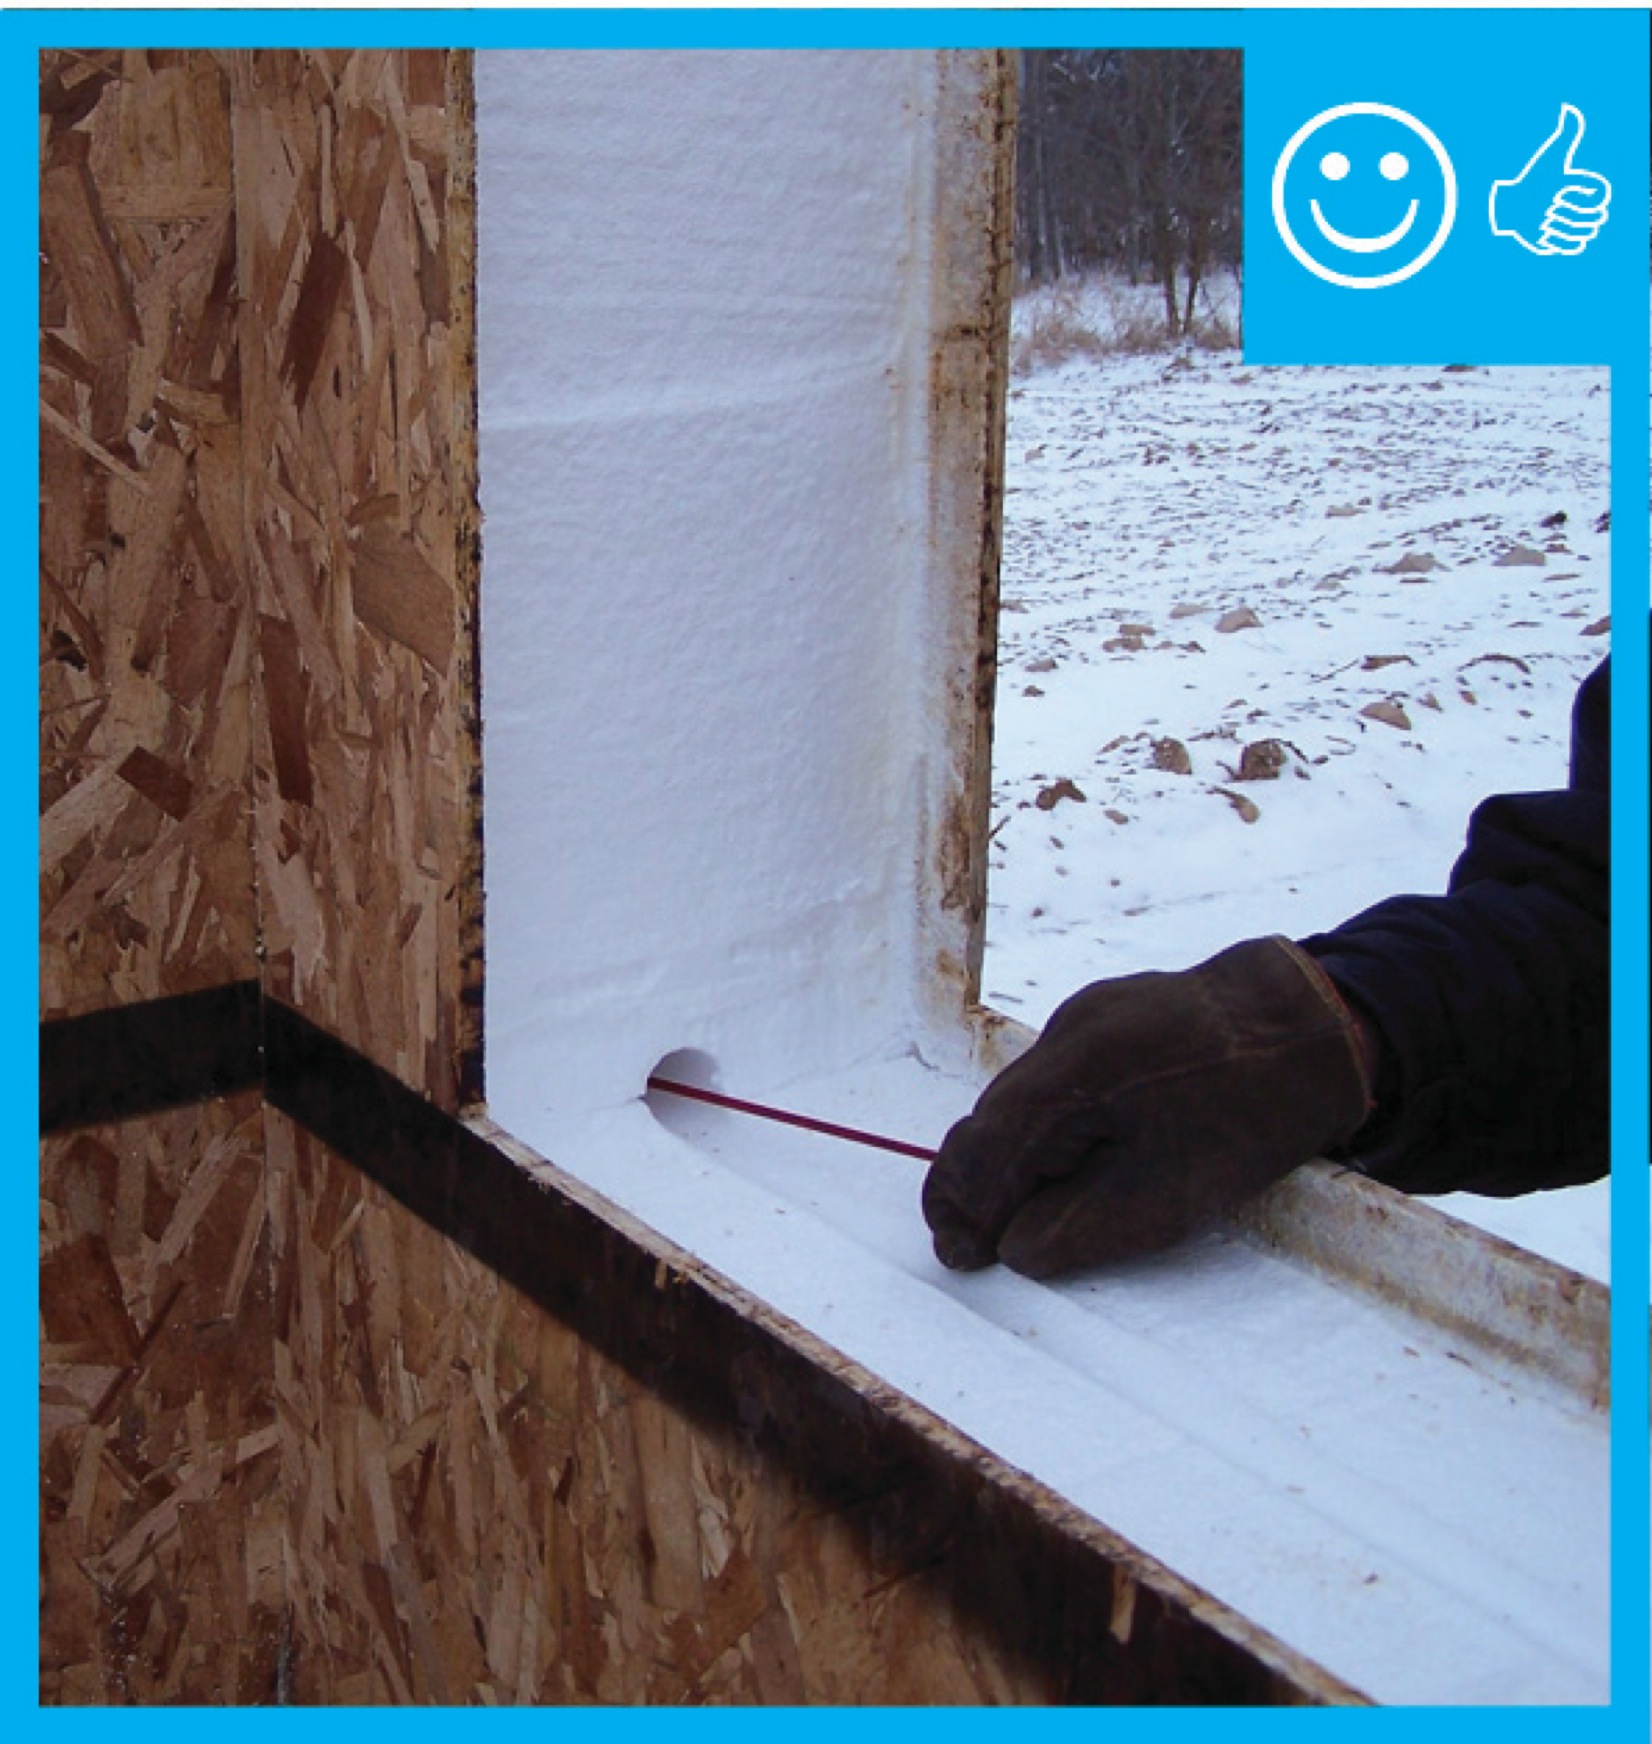
Right - Hole drilled to verify sealant is present - Hole will be sealed after verification
Image
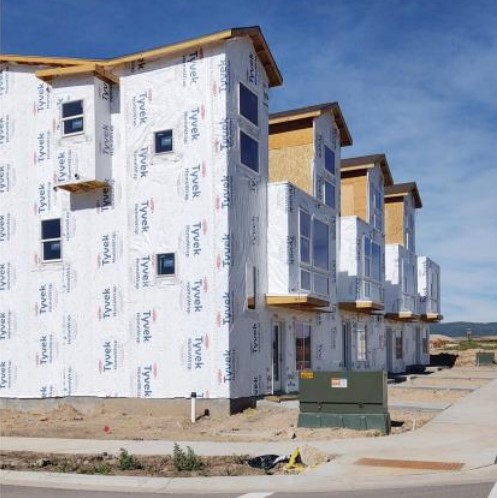
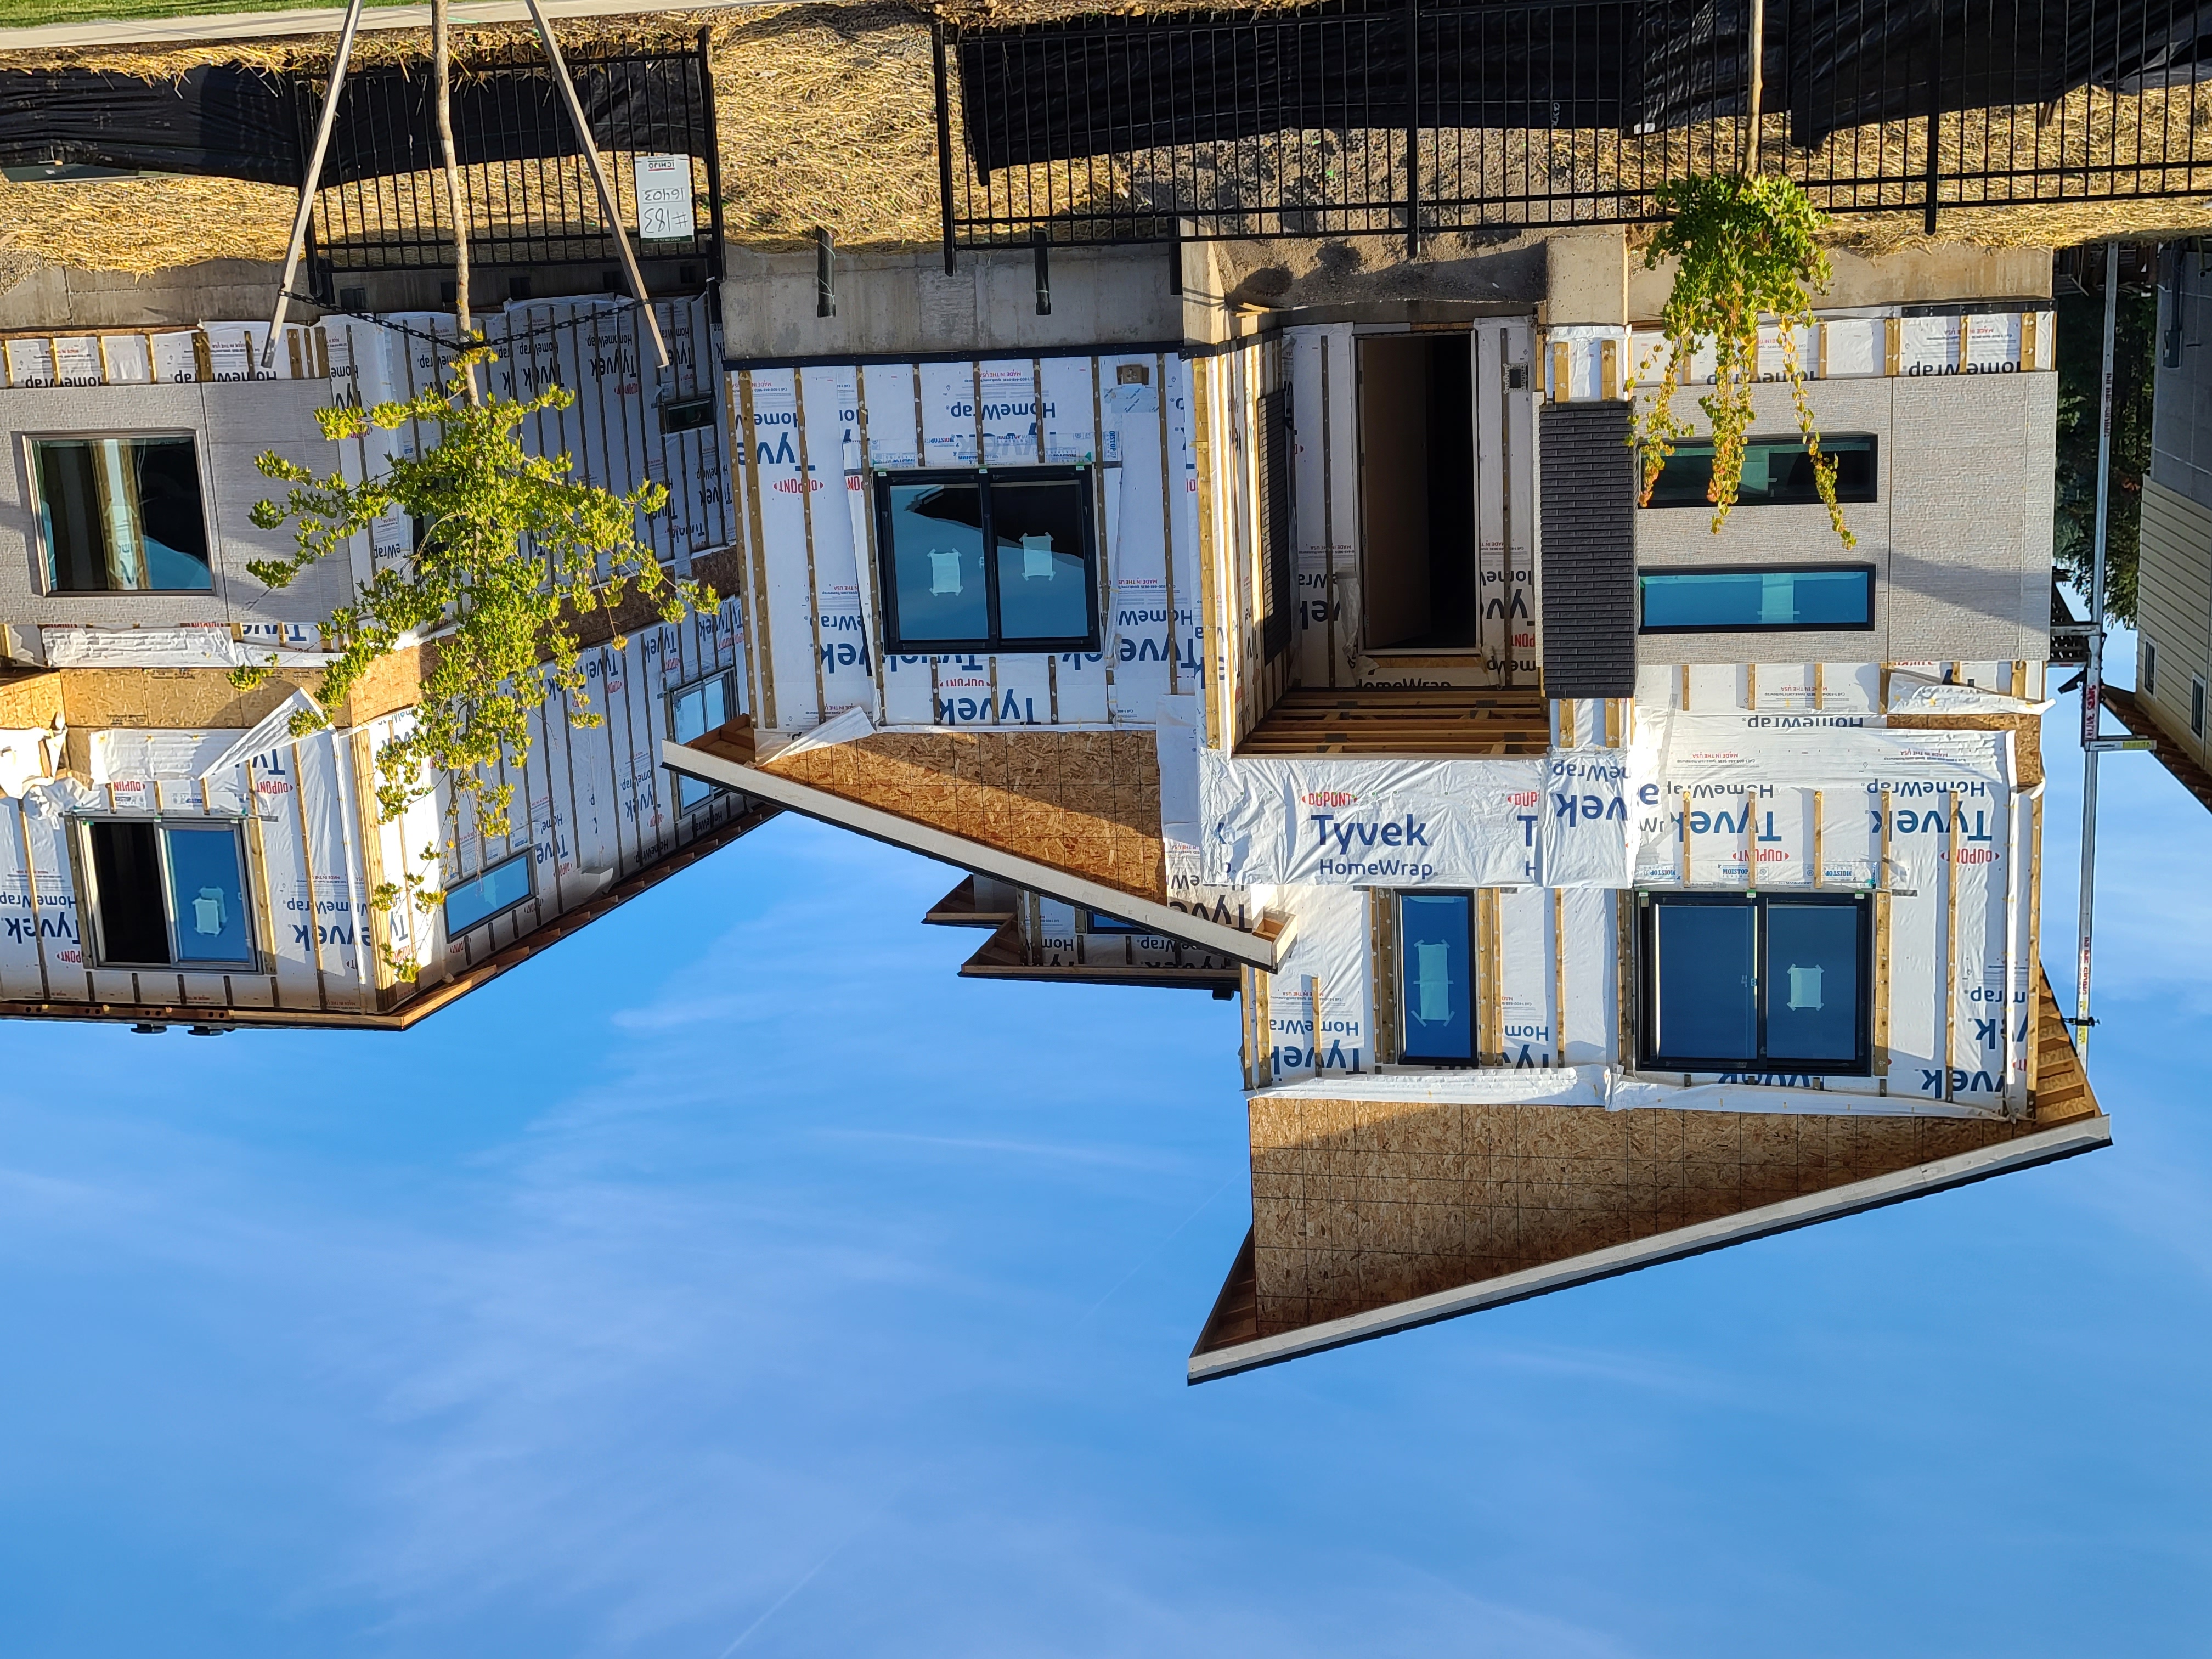
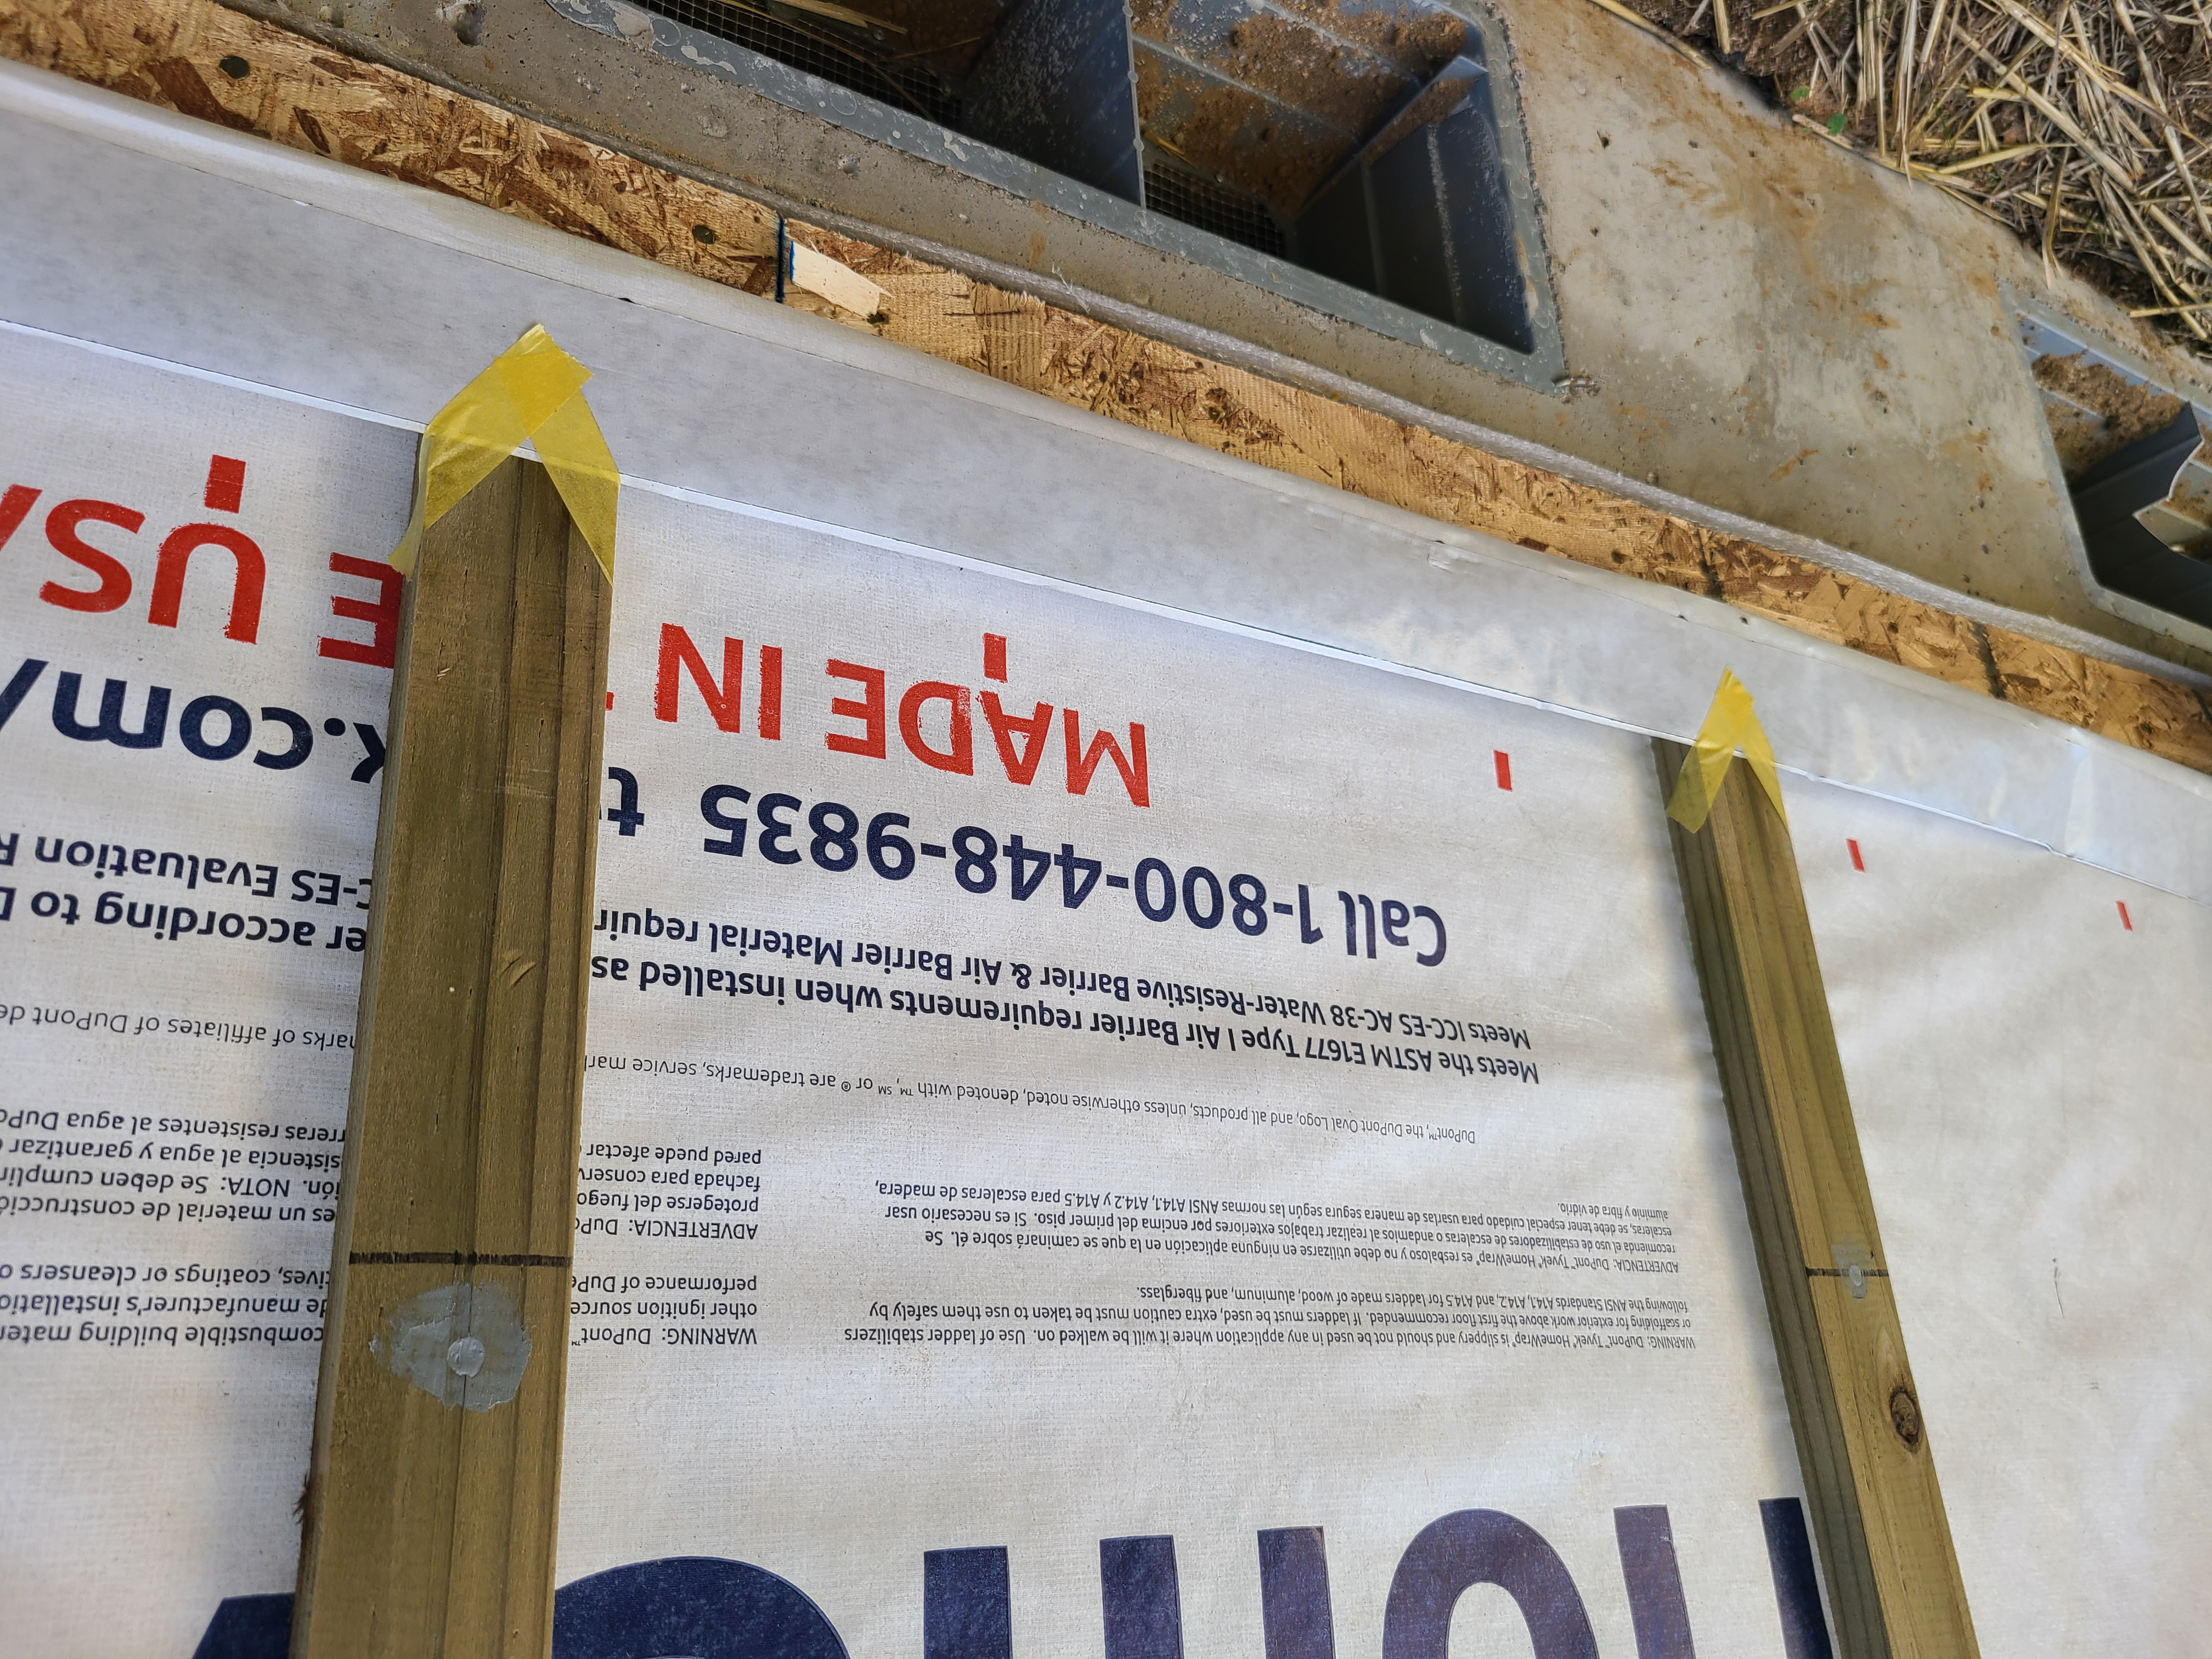
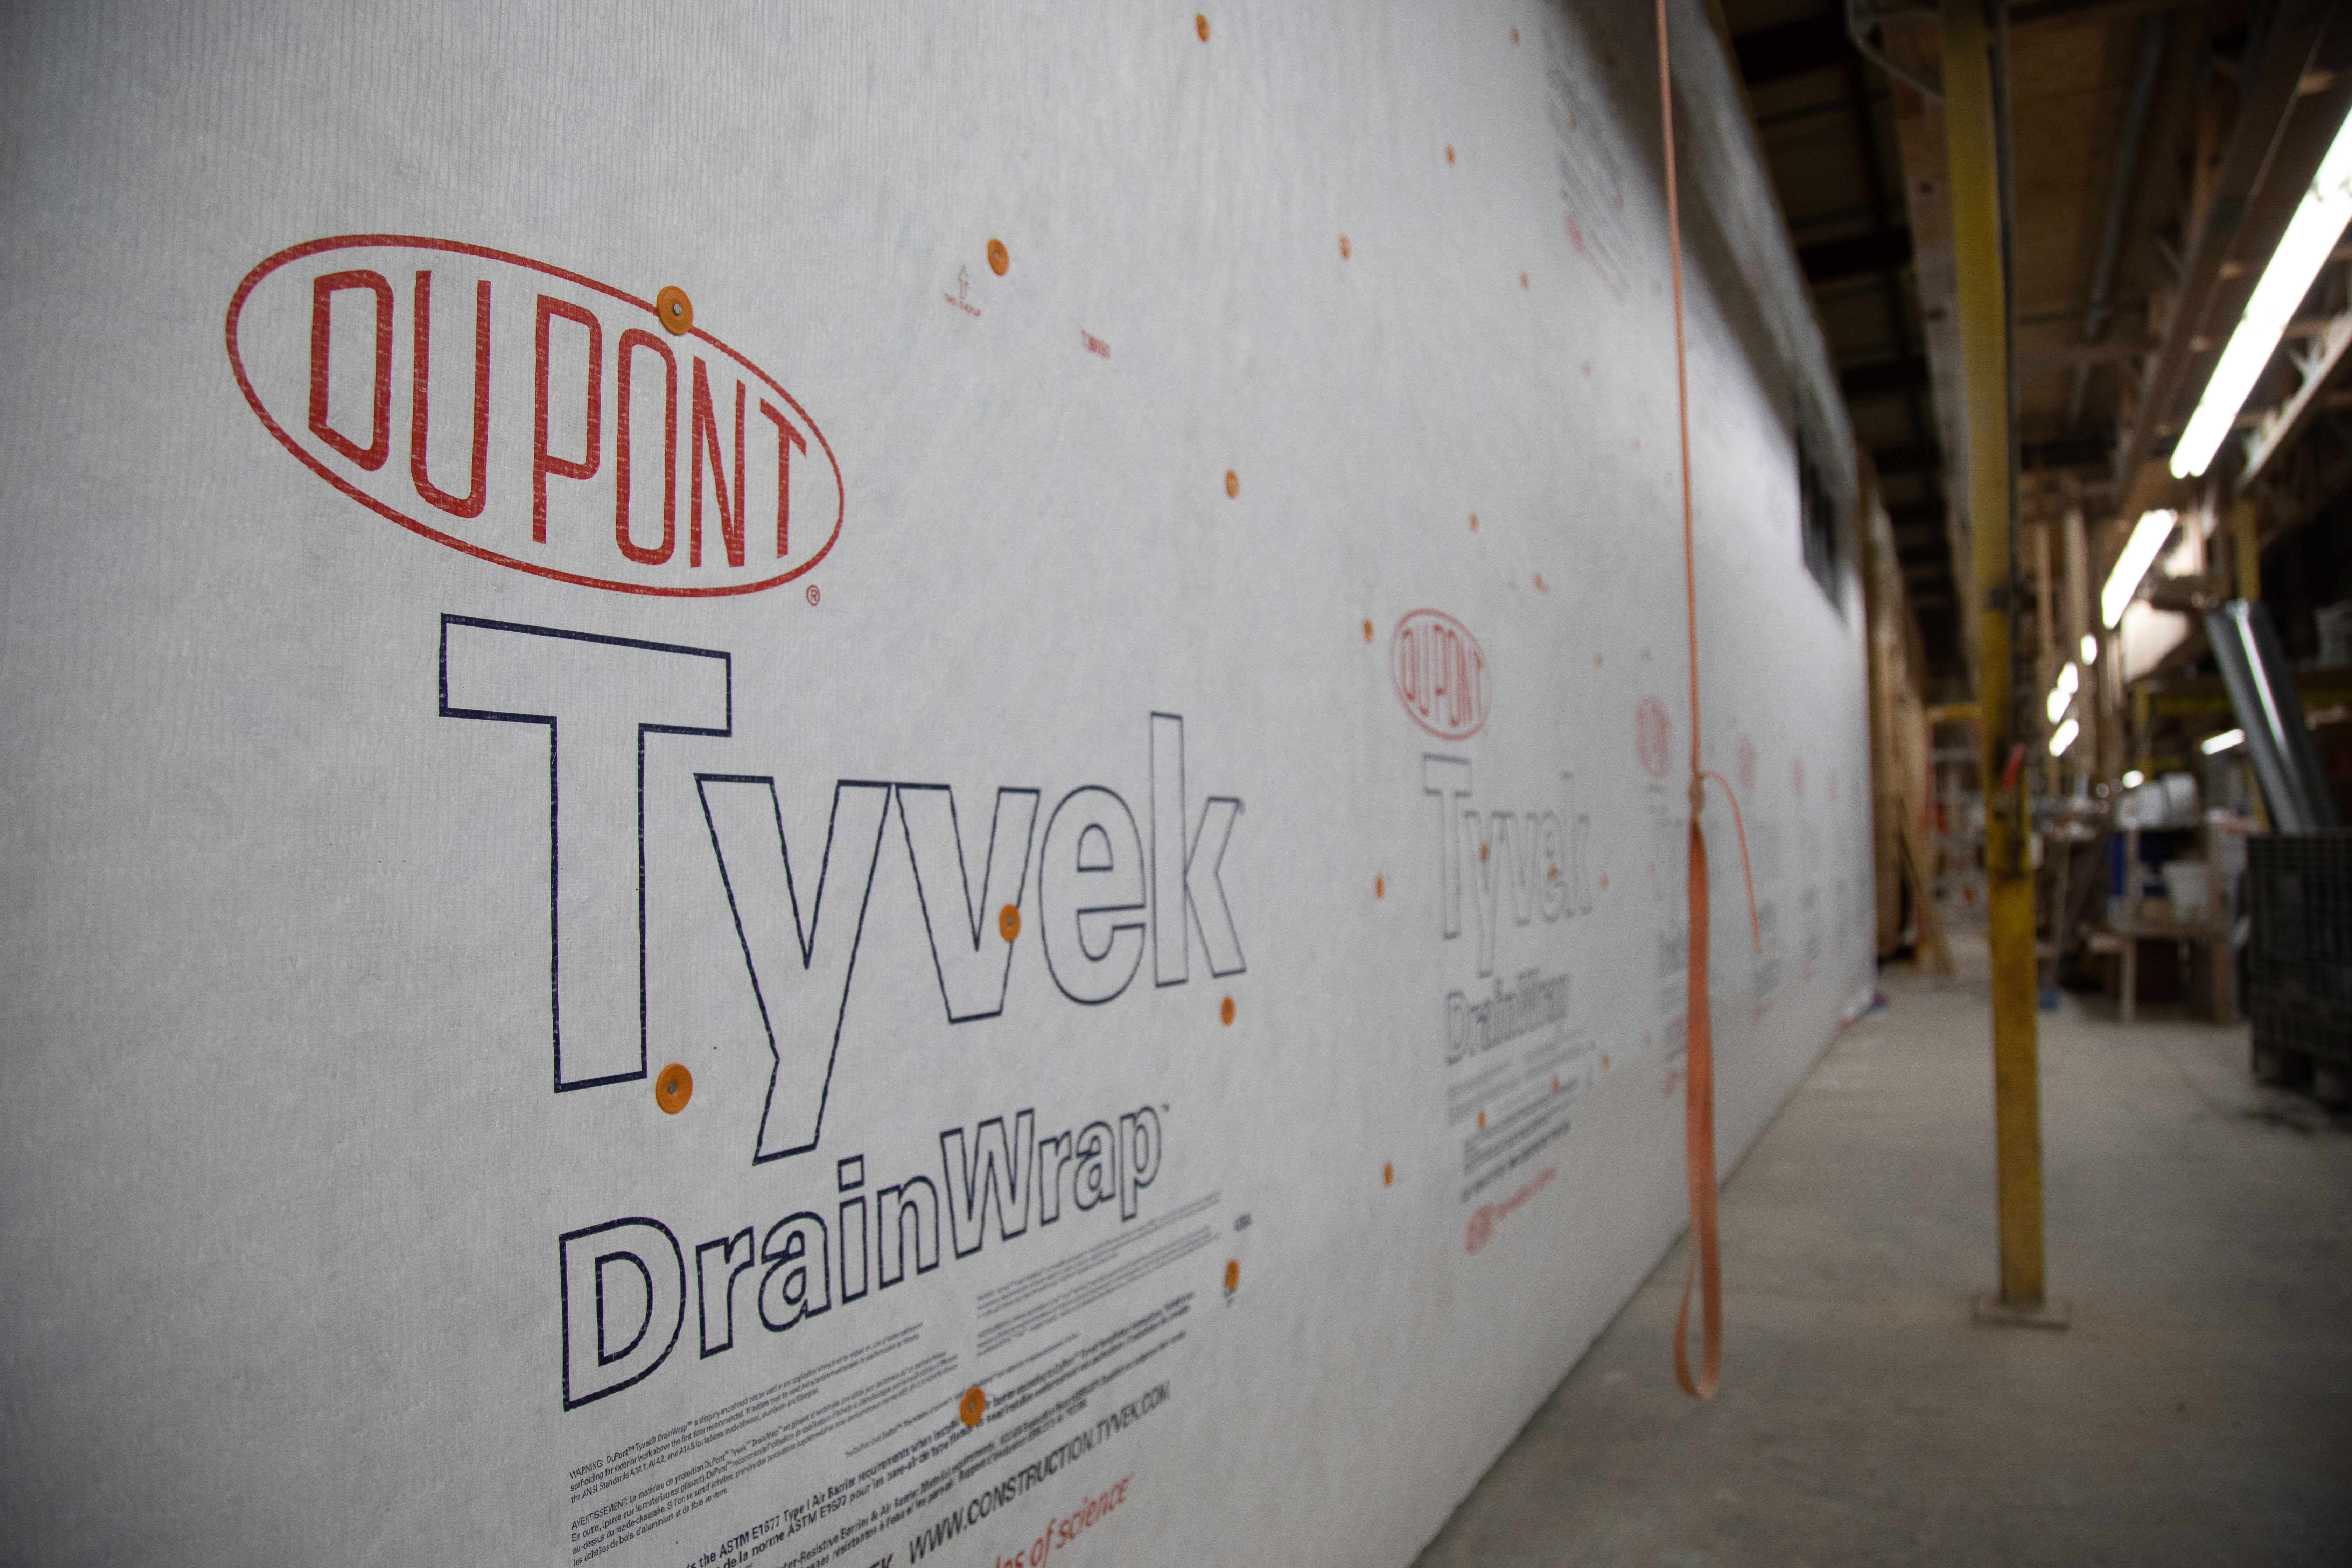
Right - House wrap is carefully installed from the top of the roof line to the foundation; seams are overlapped and taped to provide a continuous air- and weather-resistant barrier
Image

Image
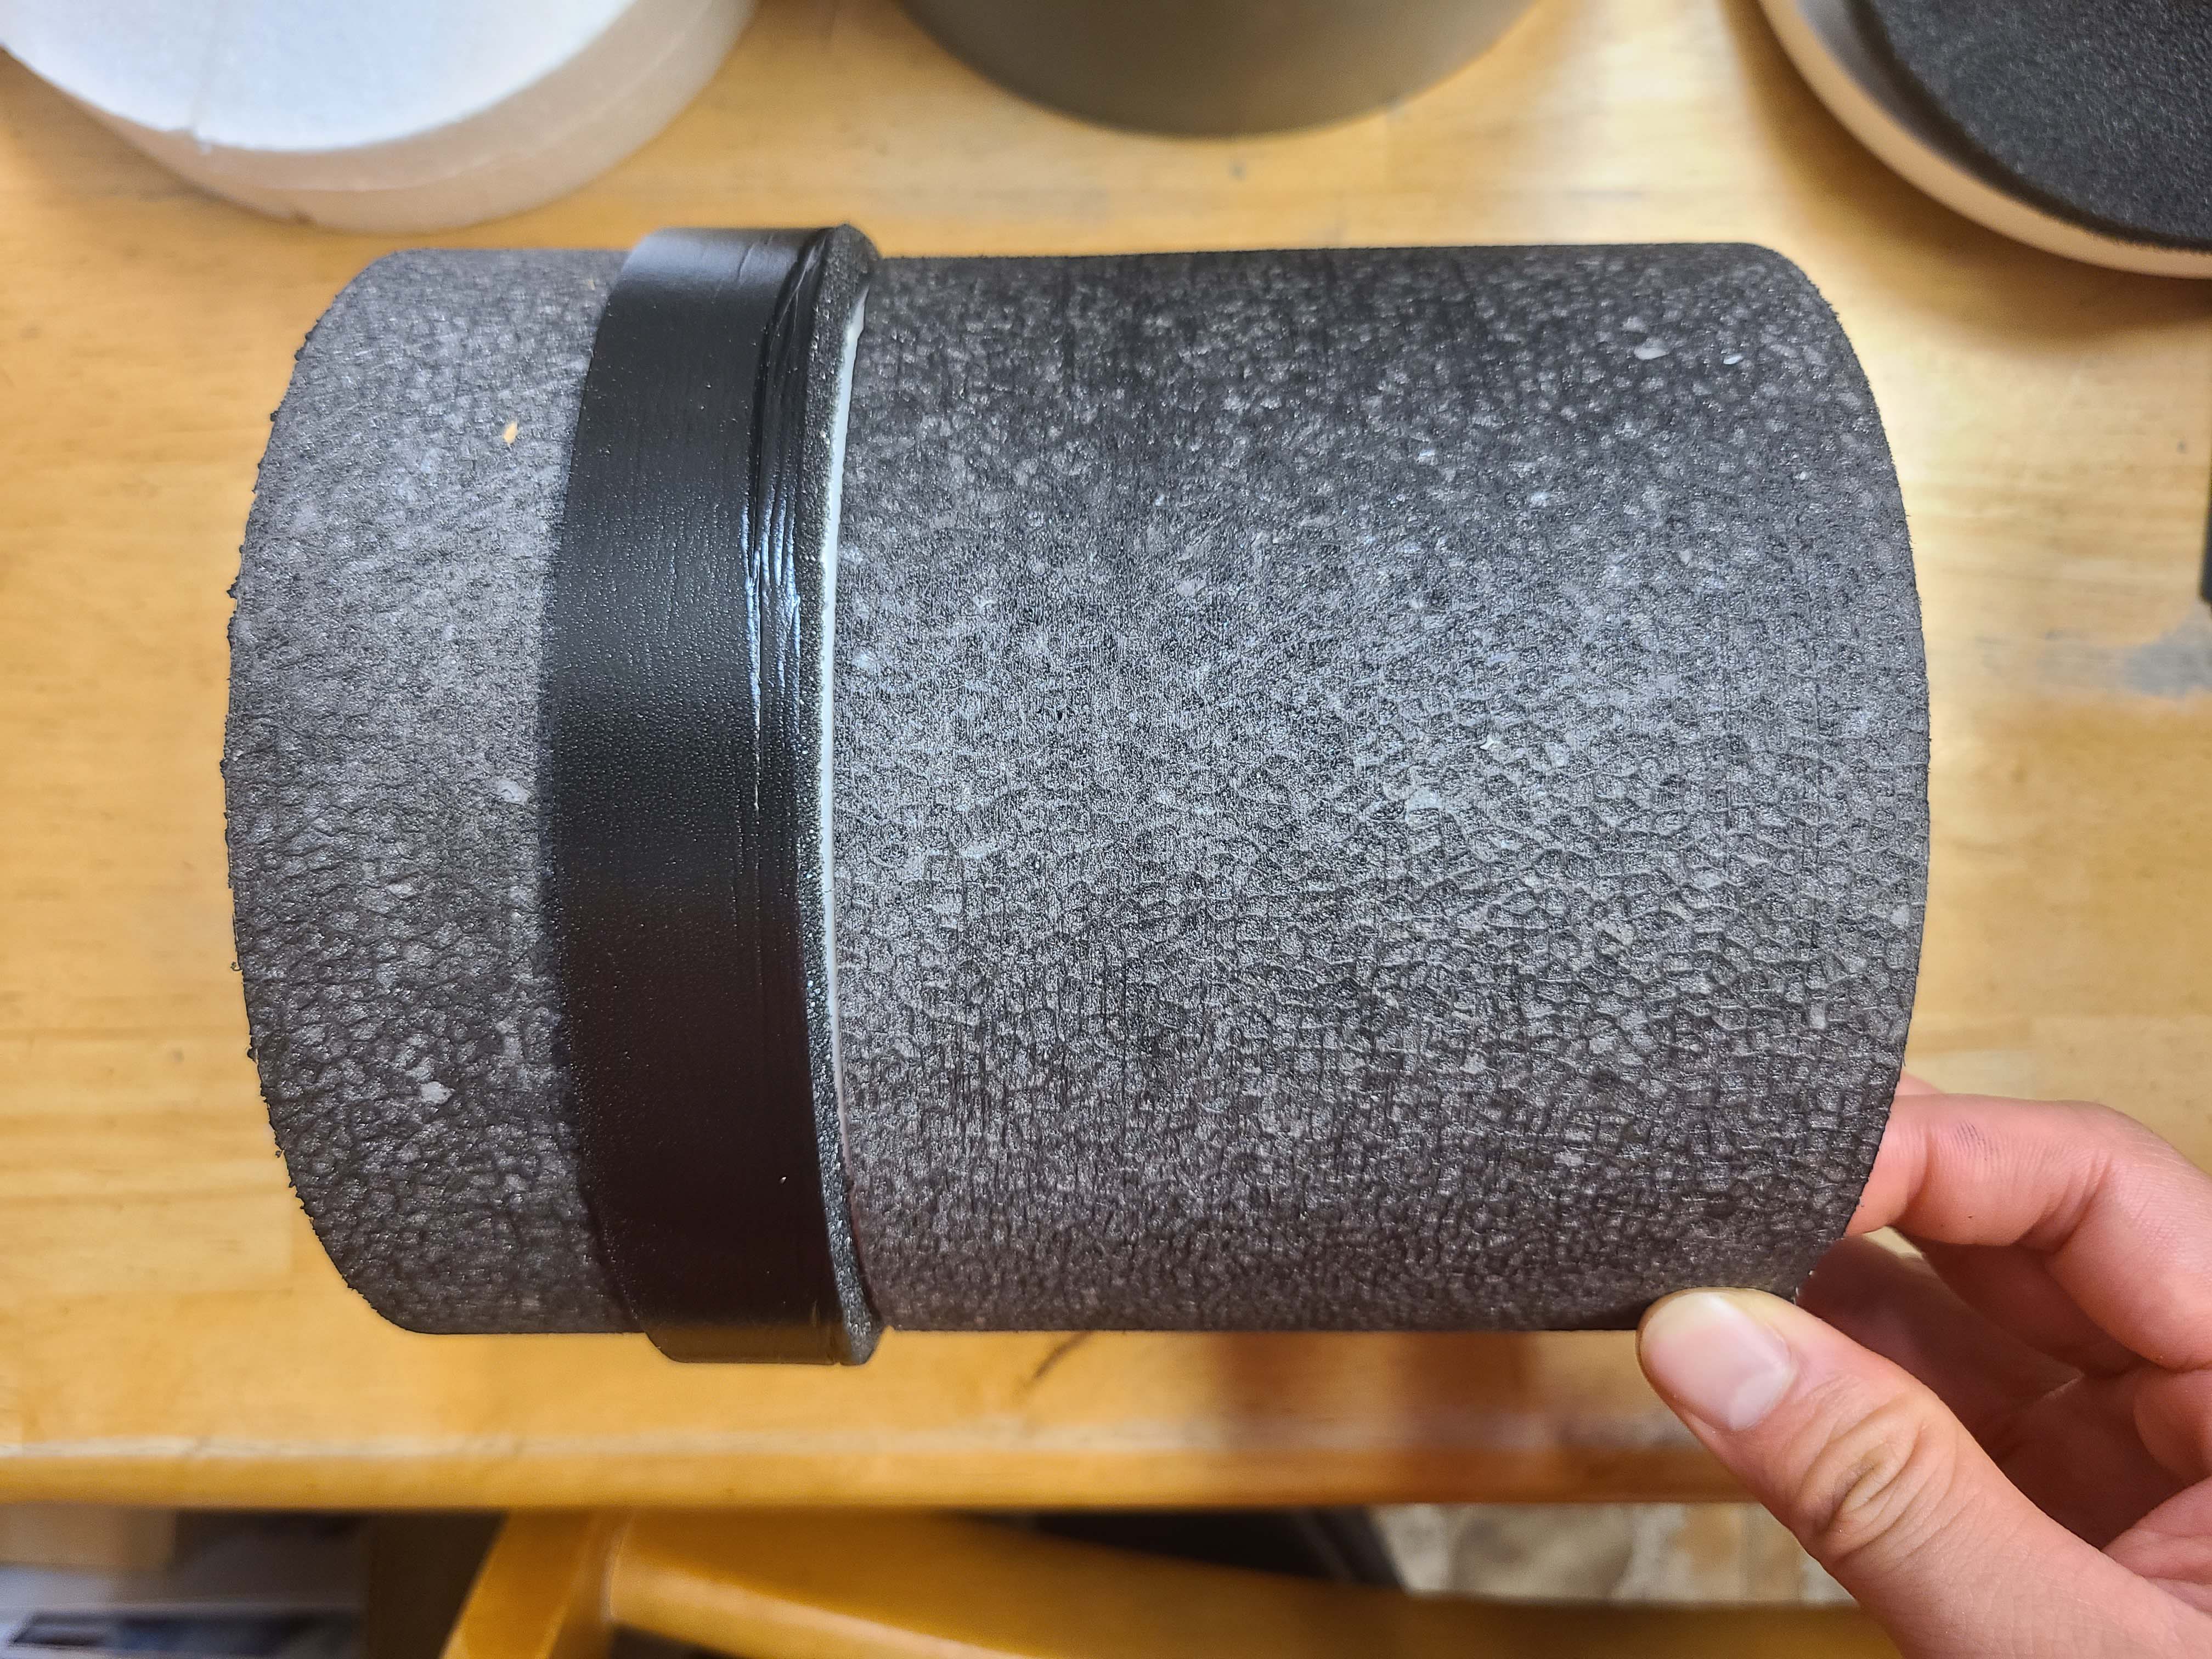
Right - Insulating sleeve for small through-the-wall HRV unit with sealing gasket; 3 of 14.
Image
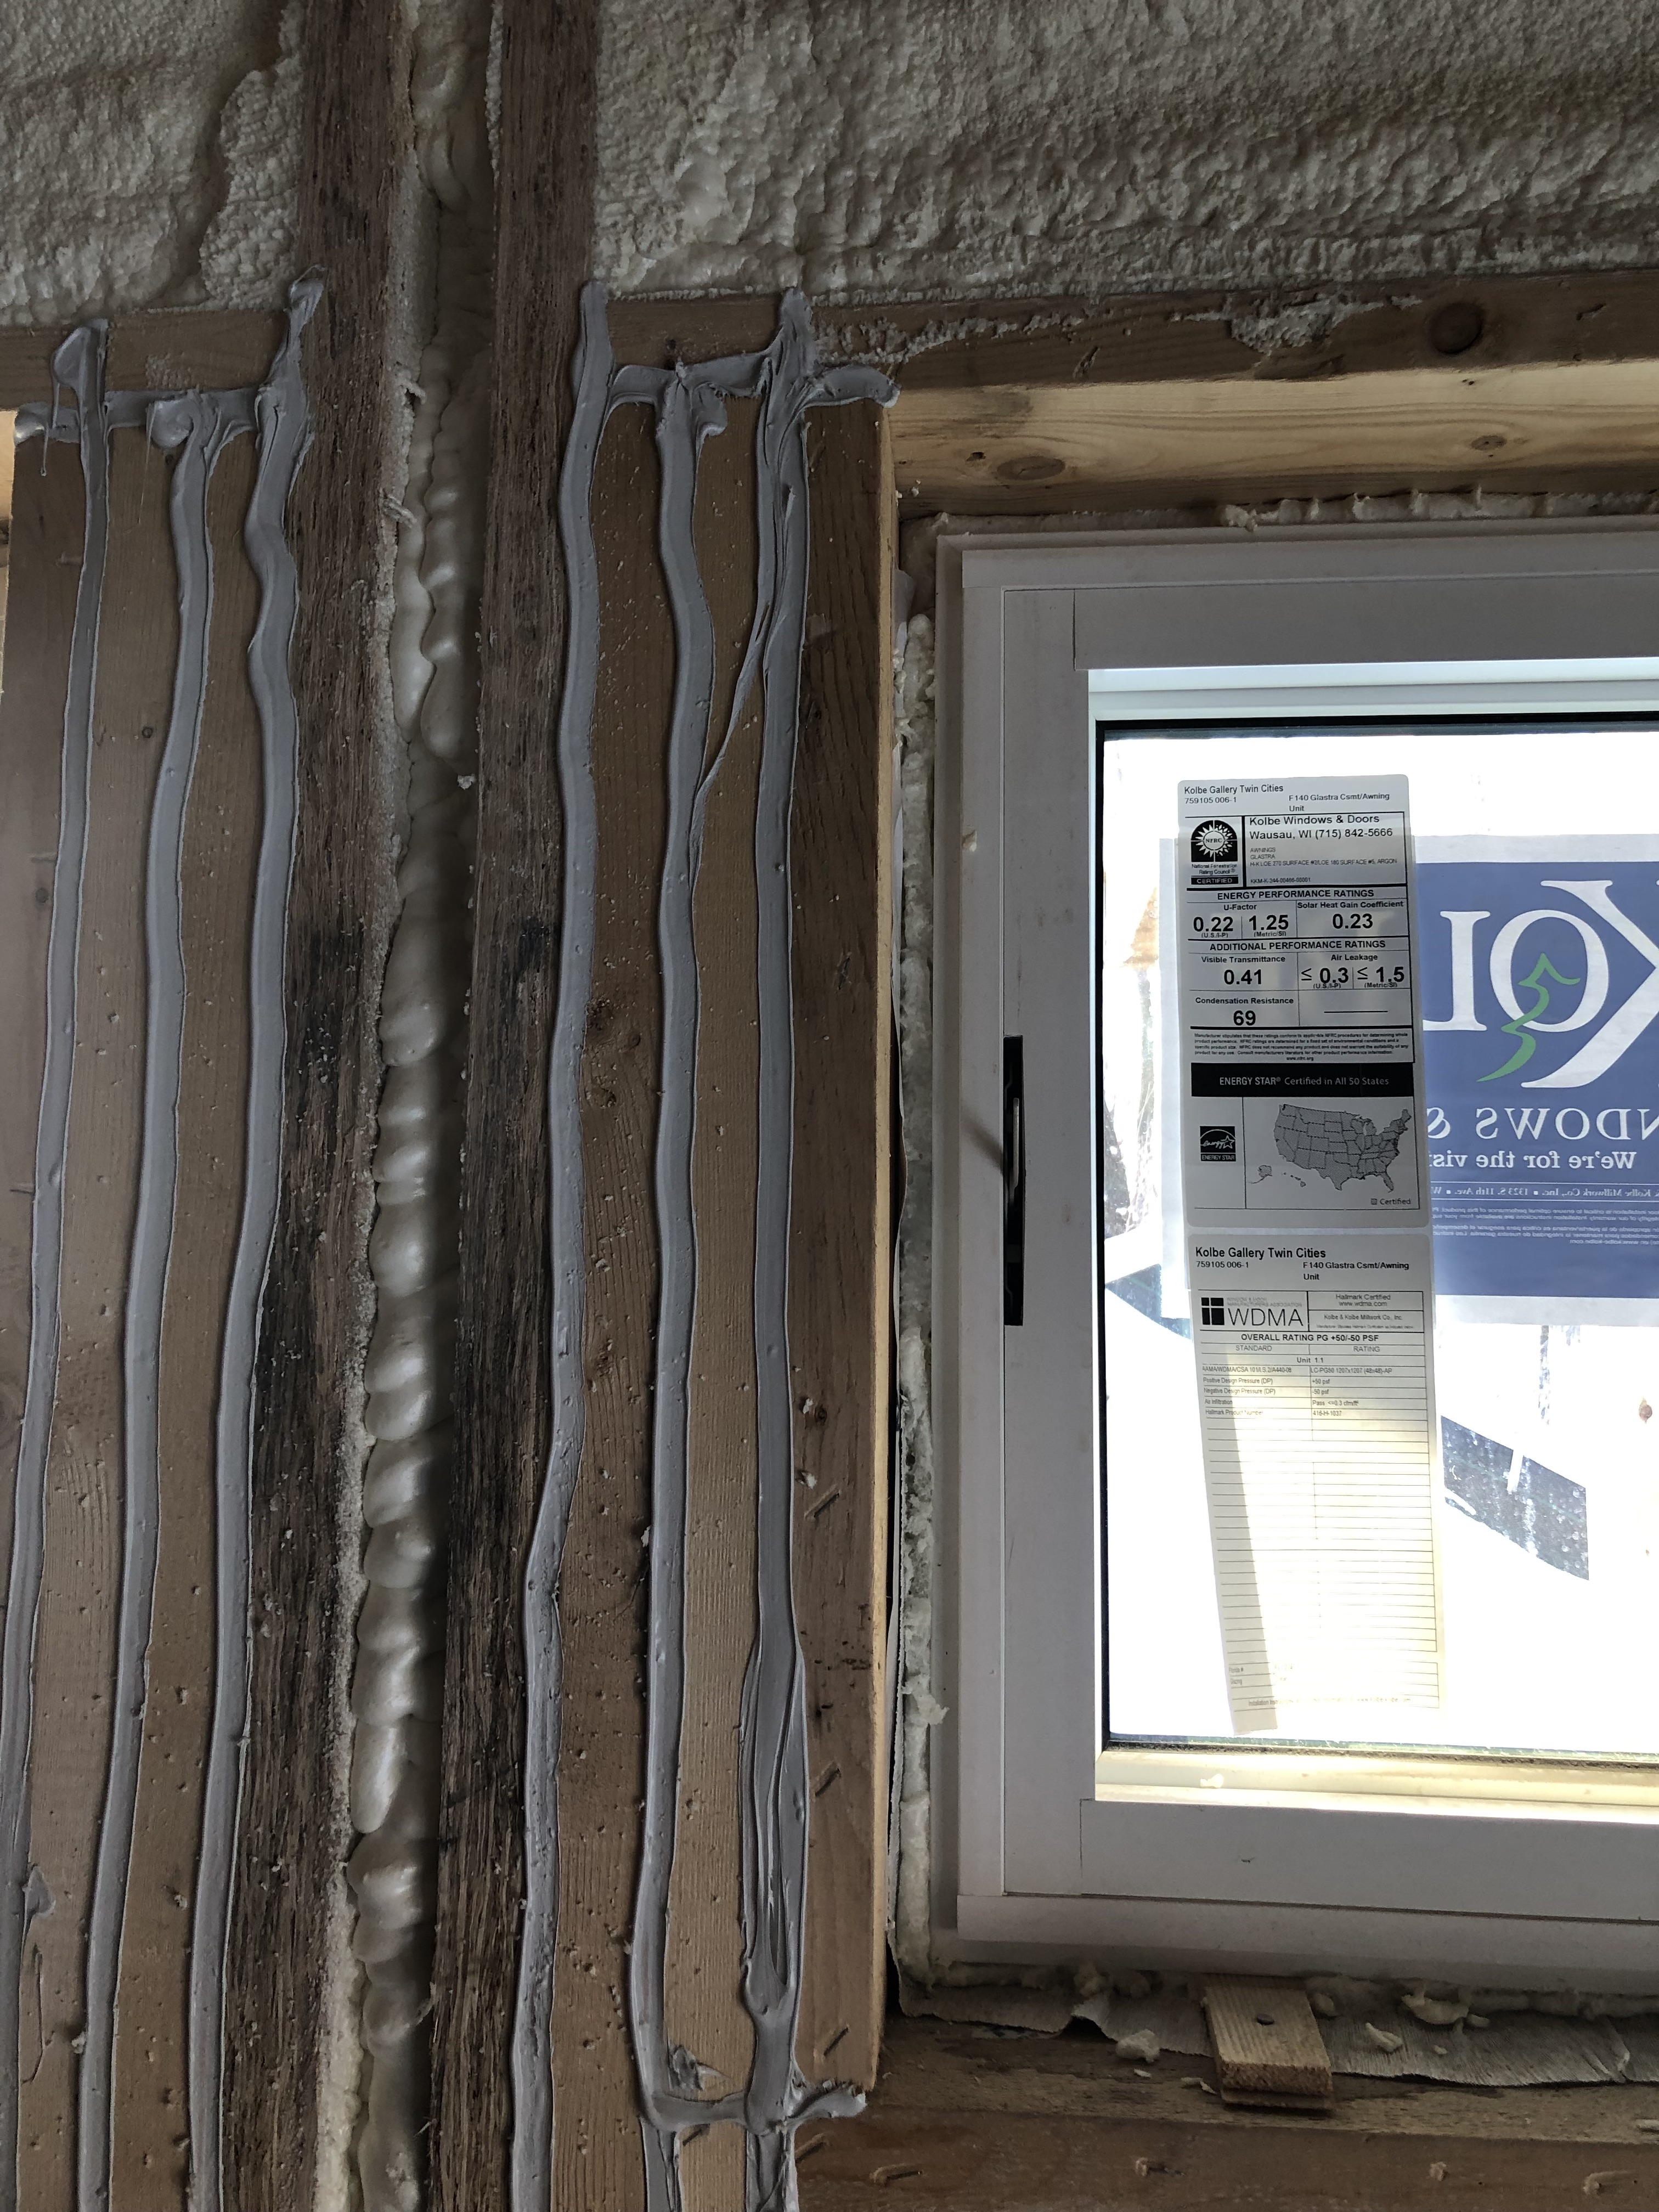
Right - Mastic is being installed to air seal the wood-to-wood joints in this wall.
Image
Image
Right - New flashing has been installed to complete the air and water control layers at the window openings of this wall retrofit that includes insulating the wall cavities with spray foam
Image
Right - Panelized walls came to site with house wrap and furring strips pre-installed; seams will be overlapped and taped on site.
Image
Right - Panelized walls came to site with house wrap pre-installed and ready to unfurl to cover foundation-to-sheathing seam.
Image

Right - Permeable rigid mineral wool insulation and appropriate water-management flashing details are integrated with new rigid foam siding to keep water away from the sill beam above the foundation wall
Image
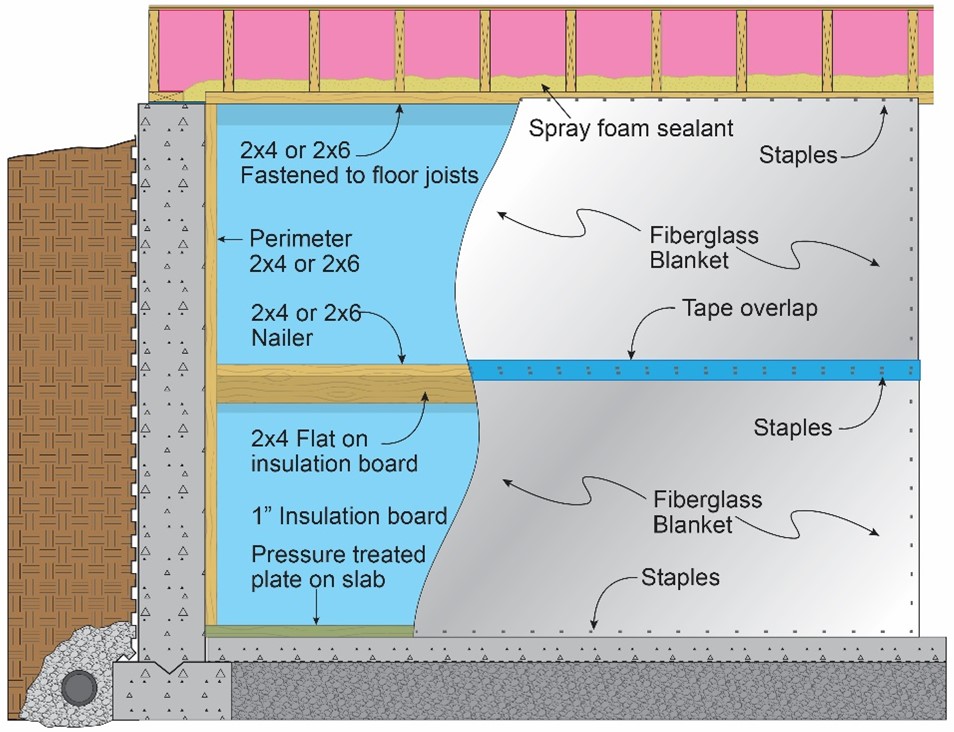
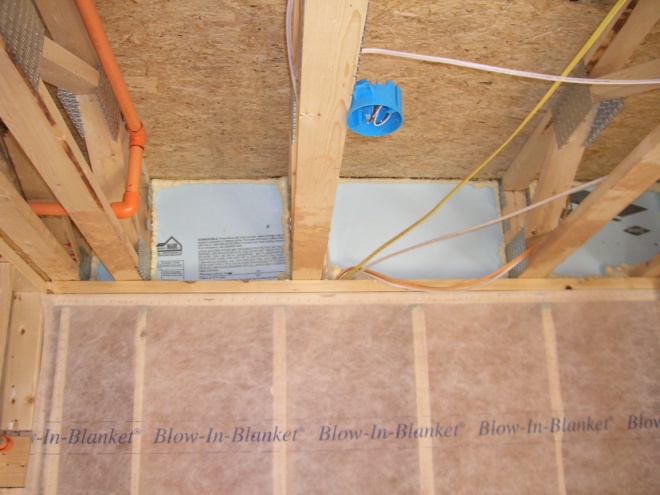
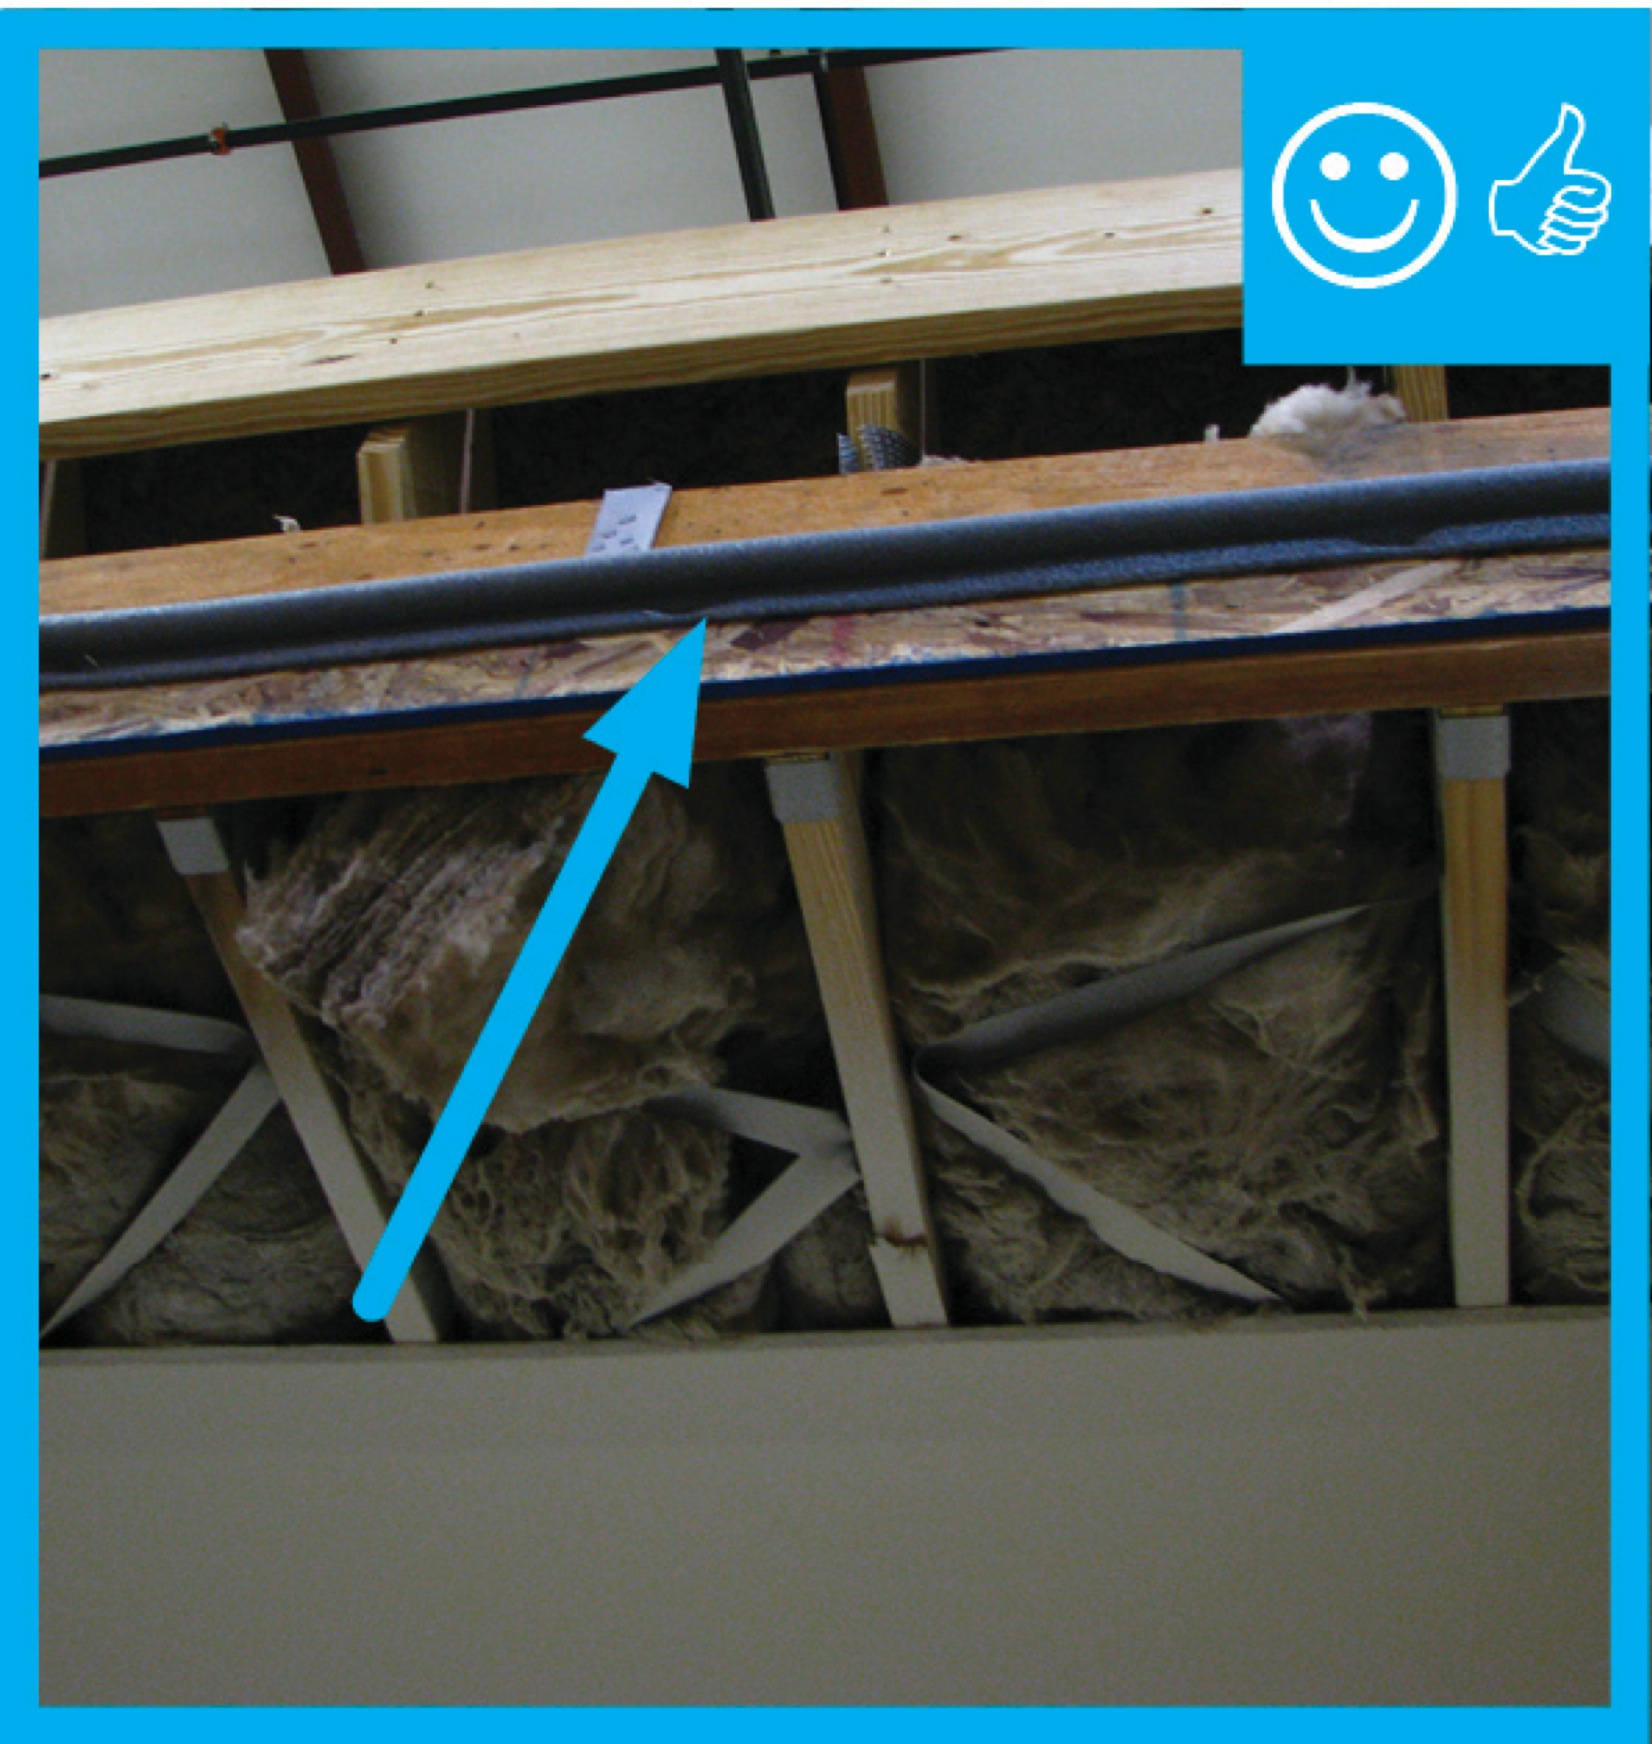
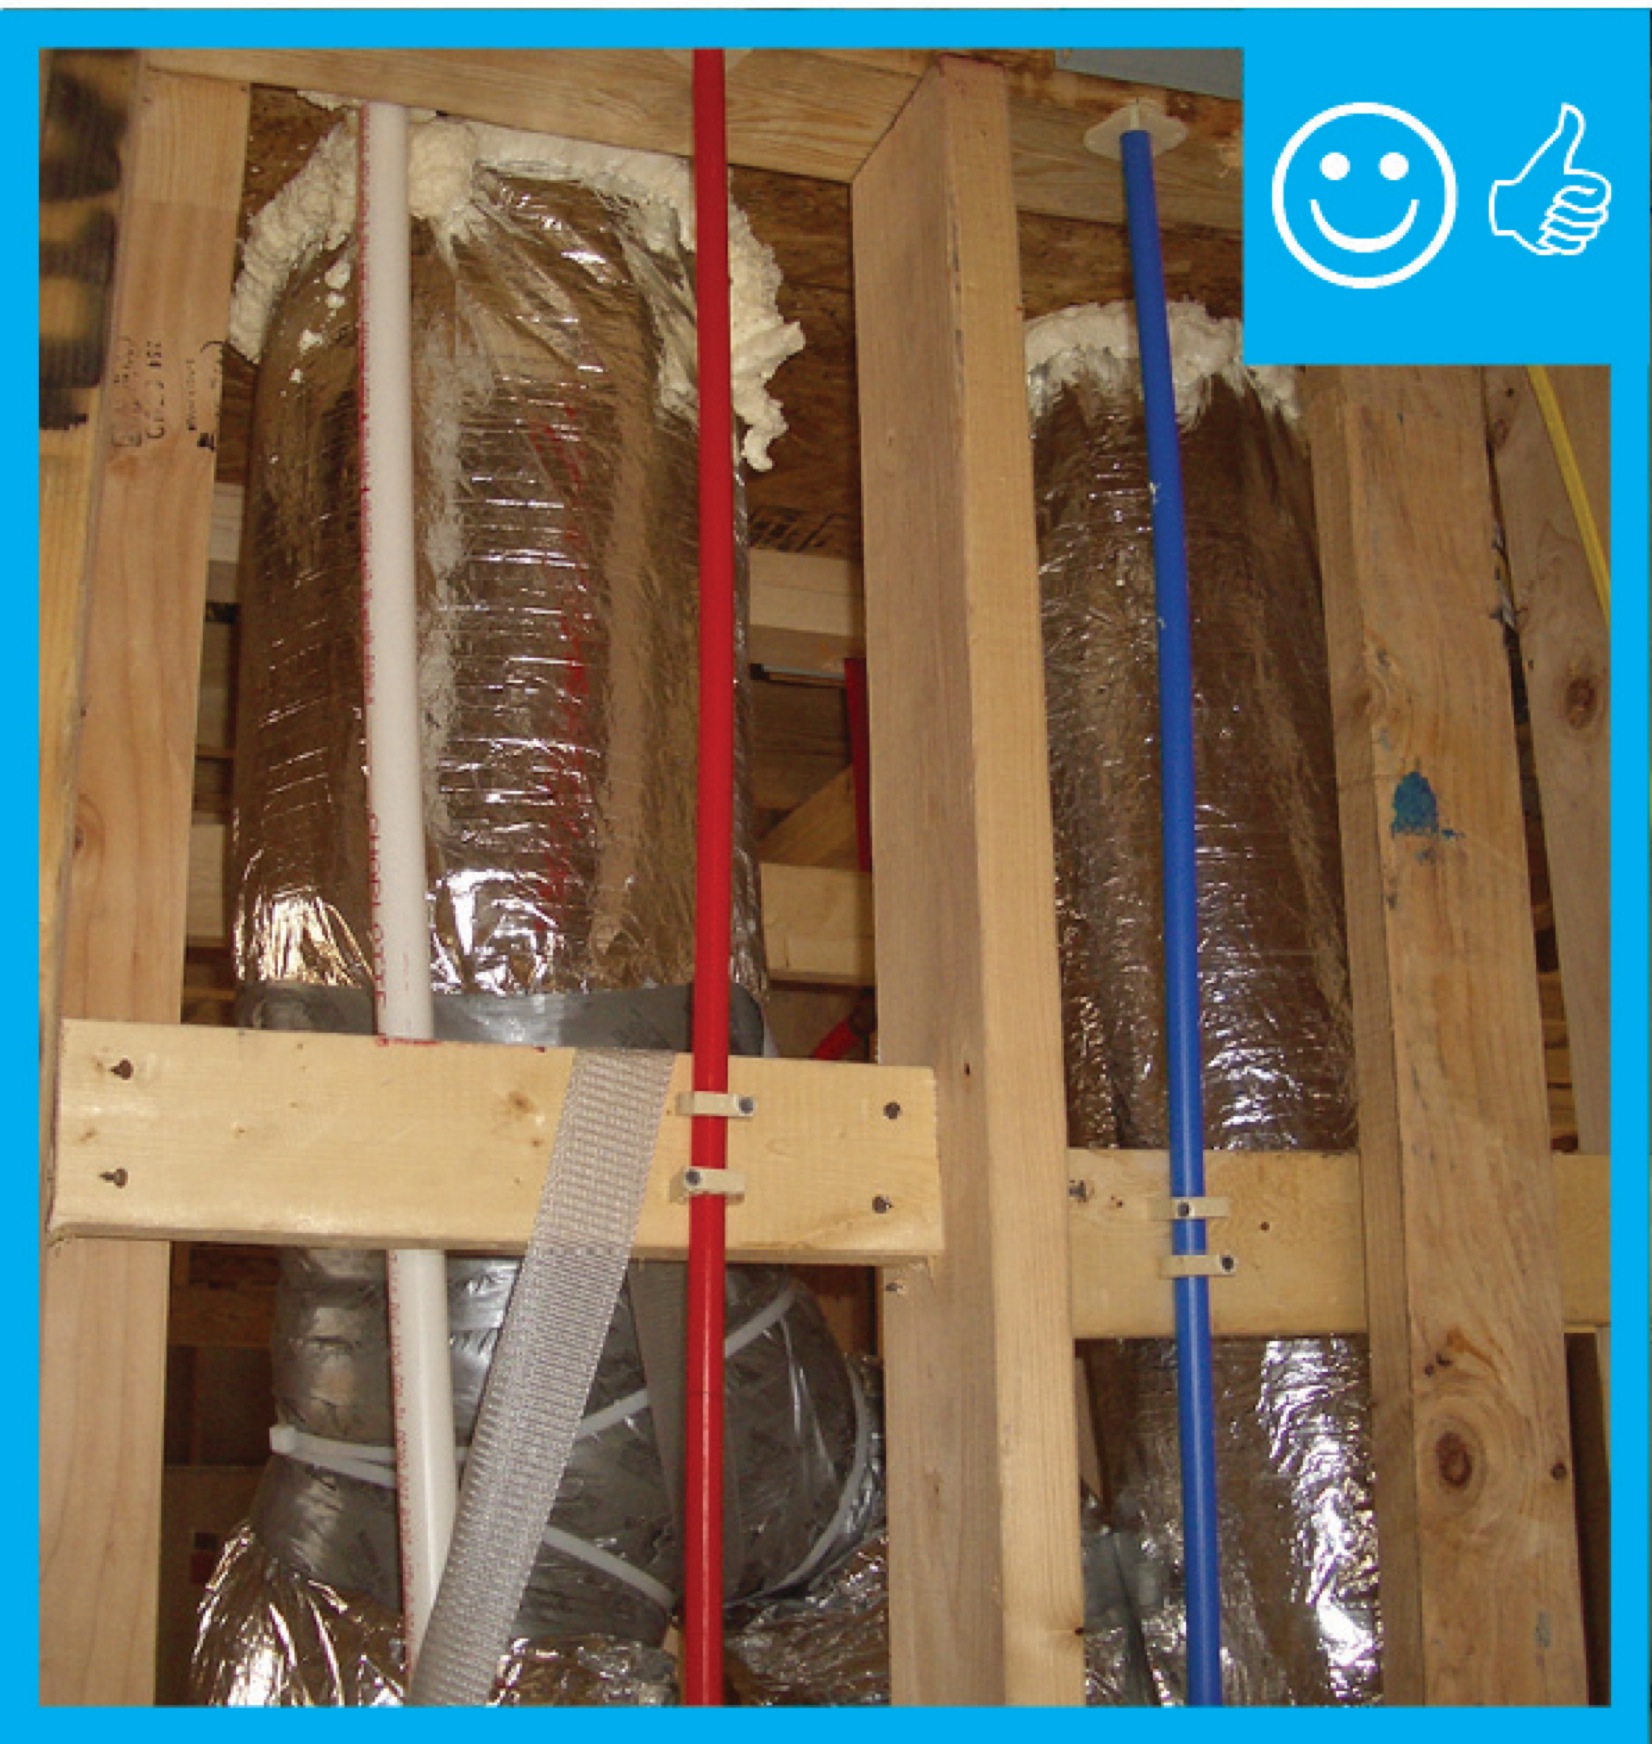
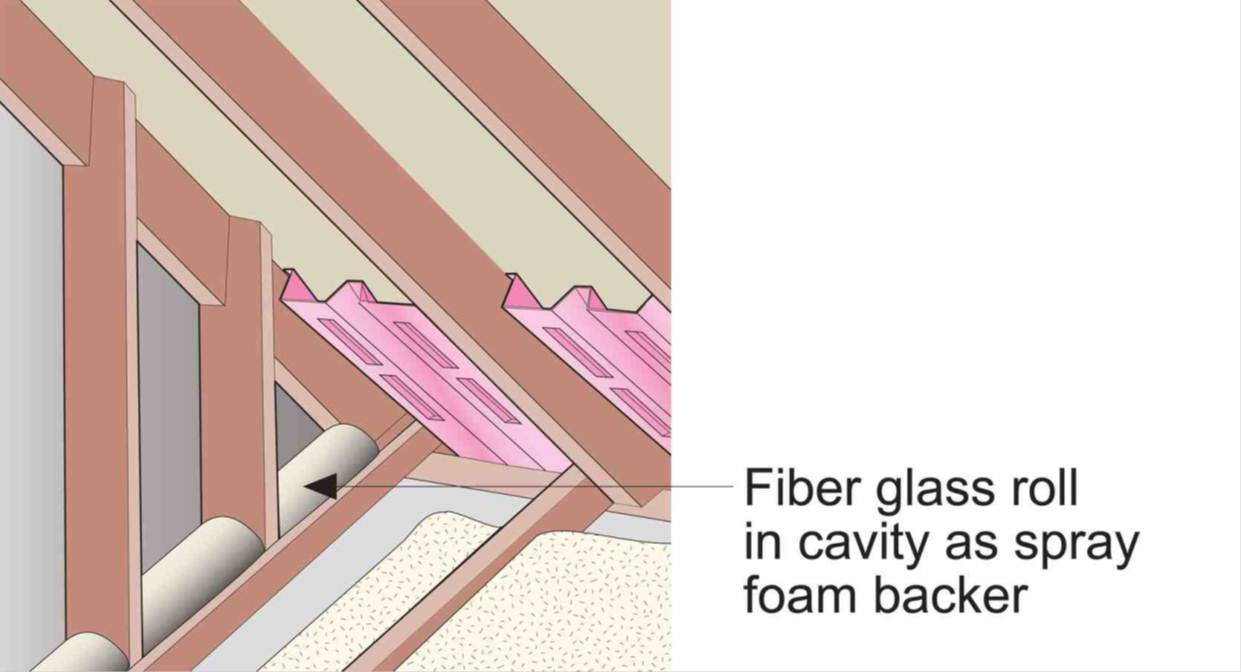
Right - Reduce condensation risks to blanket insulation by installing perforated vapor retarder covered fiberglass blankets over rigid foam that is air-sealed at all edges; staple the blanket to nailers and top/bottom plates and tape over the seams.
Image
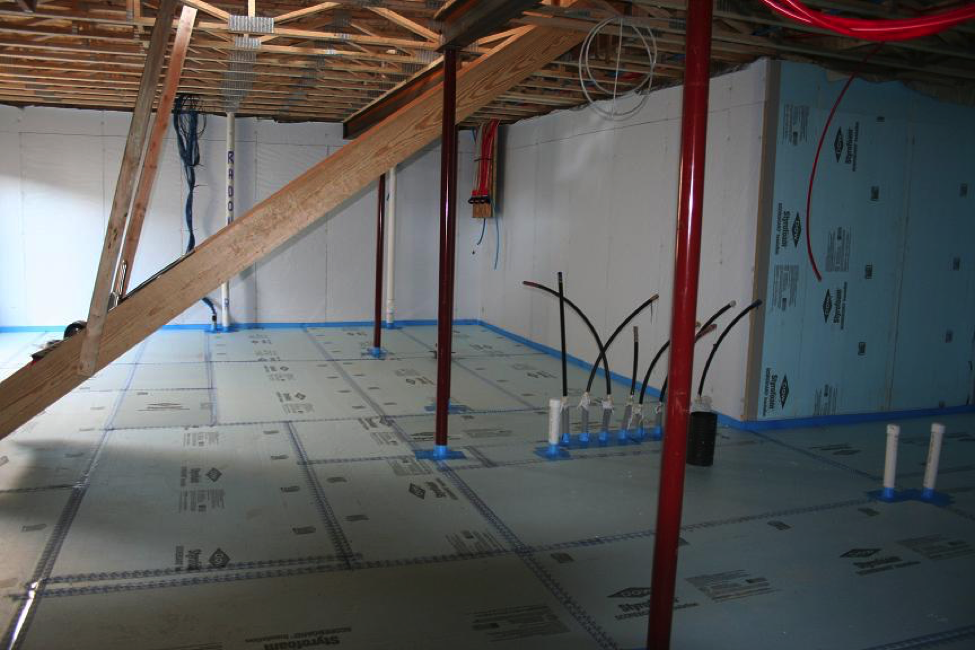
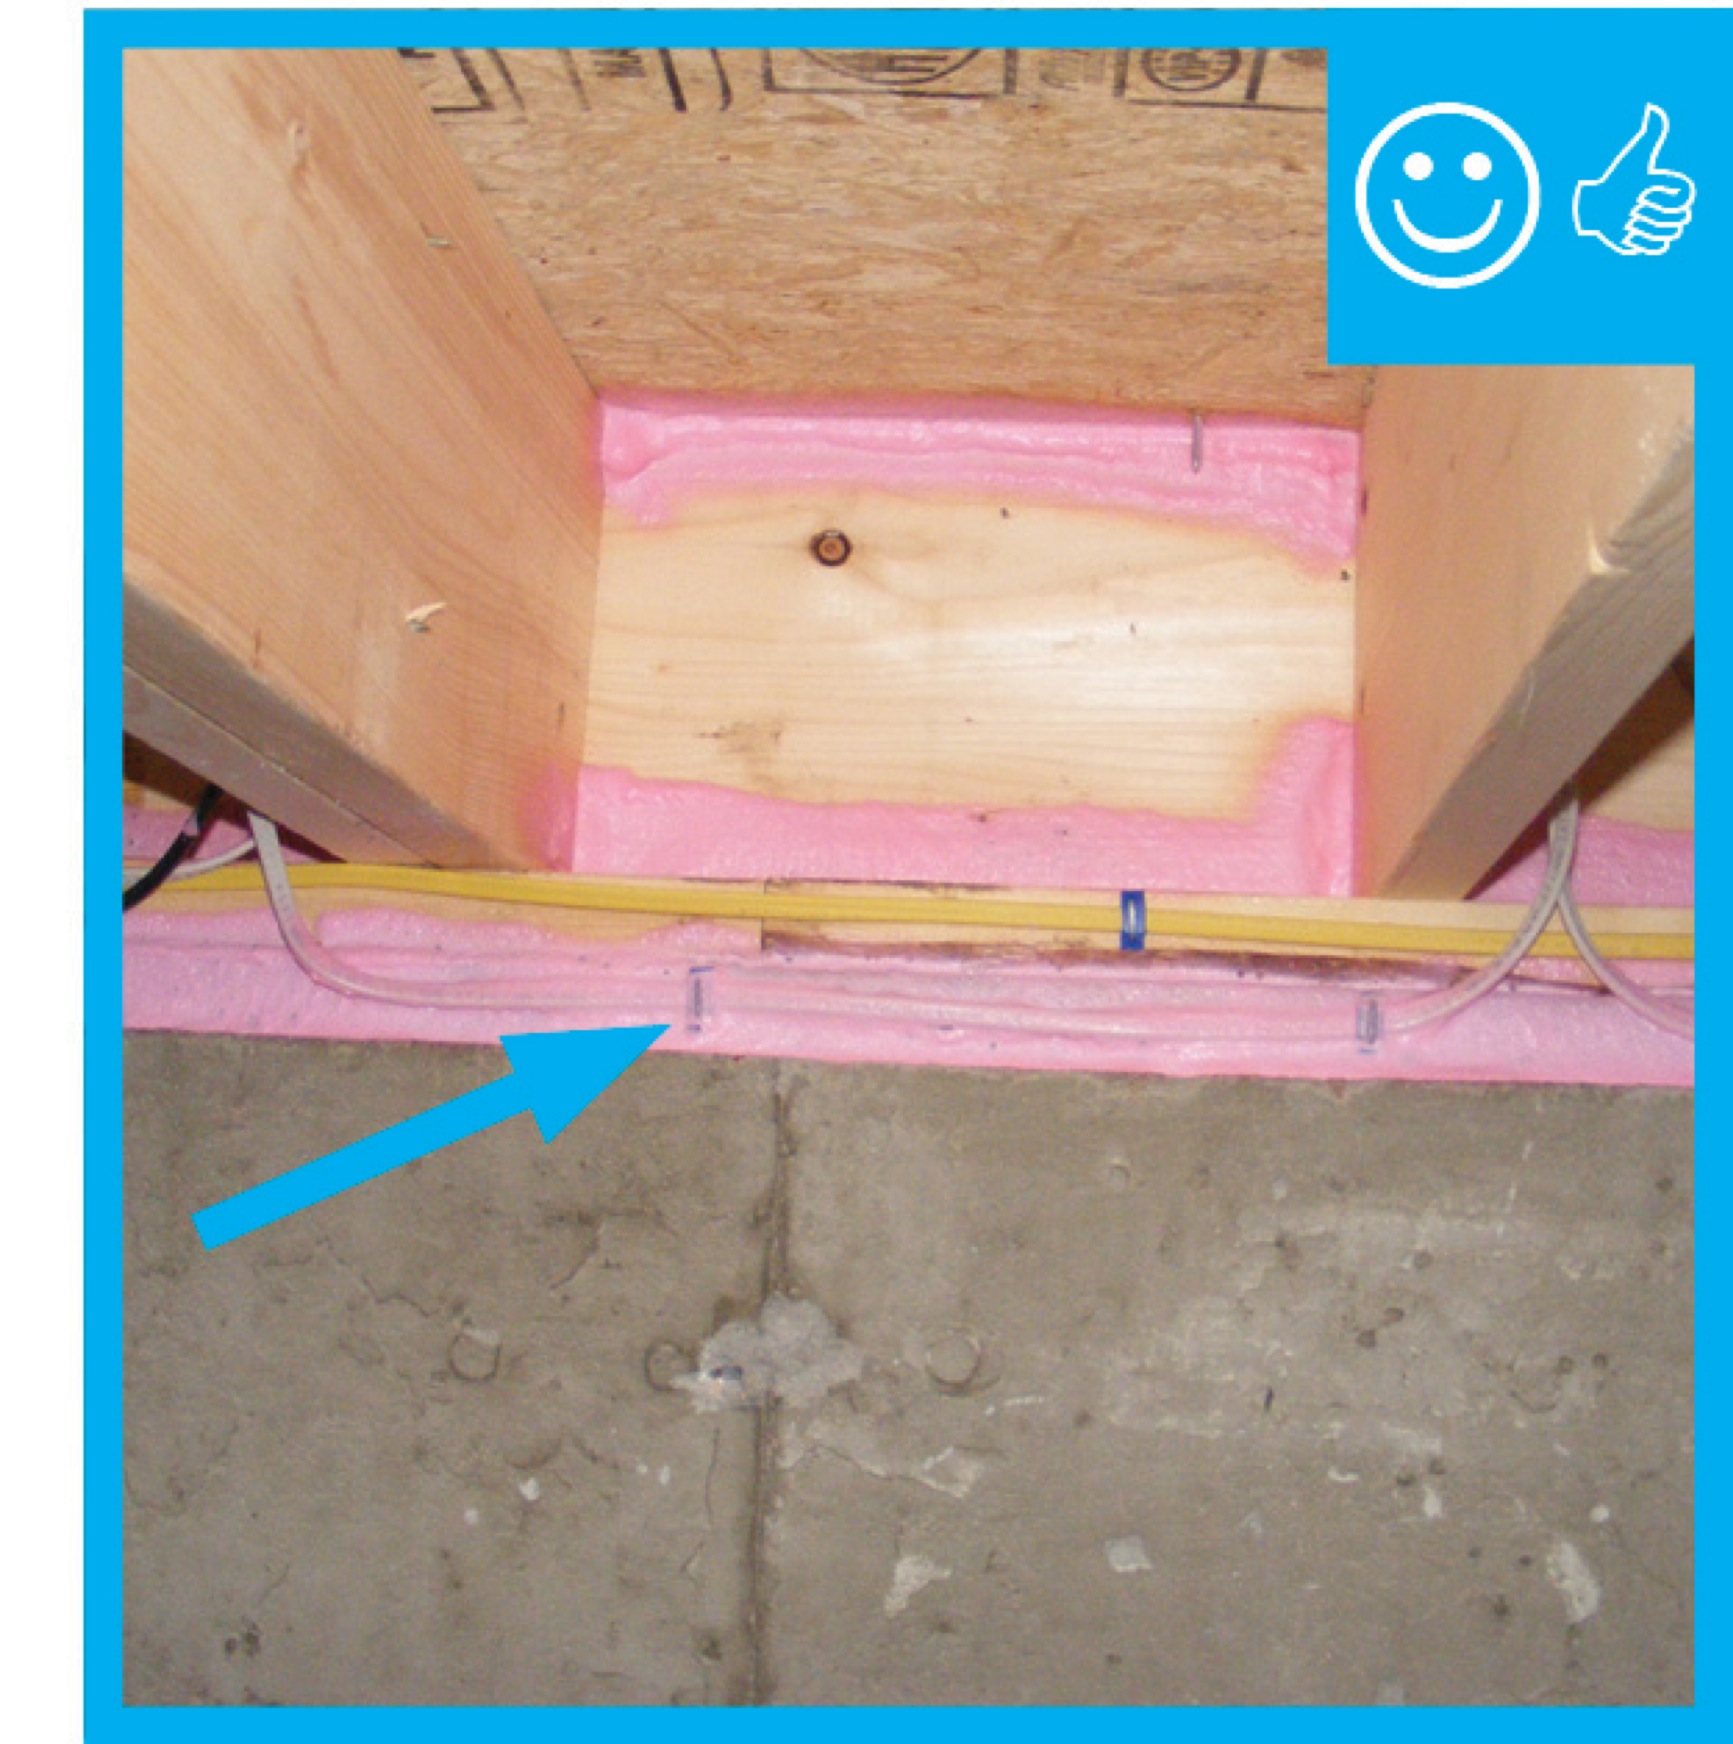
Right - Rigid foam insulation is taped at seams and installed over a drainage pad of aggregate to serve as a capillary break under the basement slab.
Image
Image
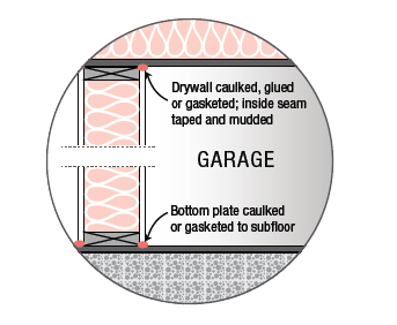
Right - Sealant is installed at the top and bottom plates of a gypsum covered wall separating a garage from the conditioned space of the home.
Image
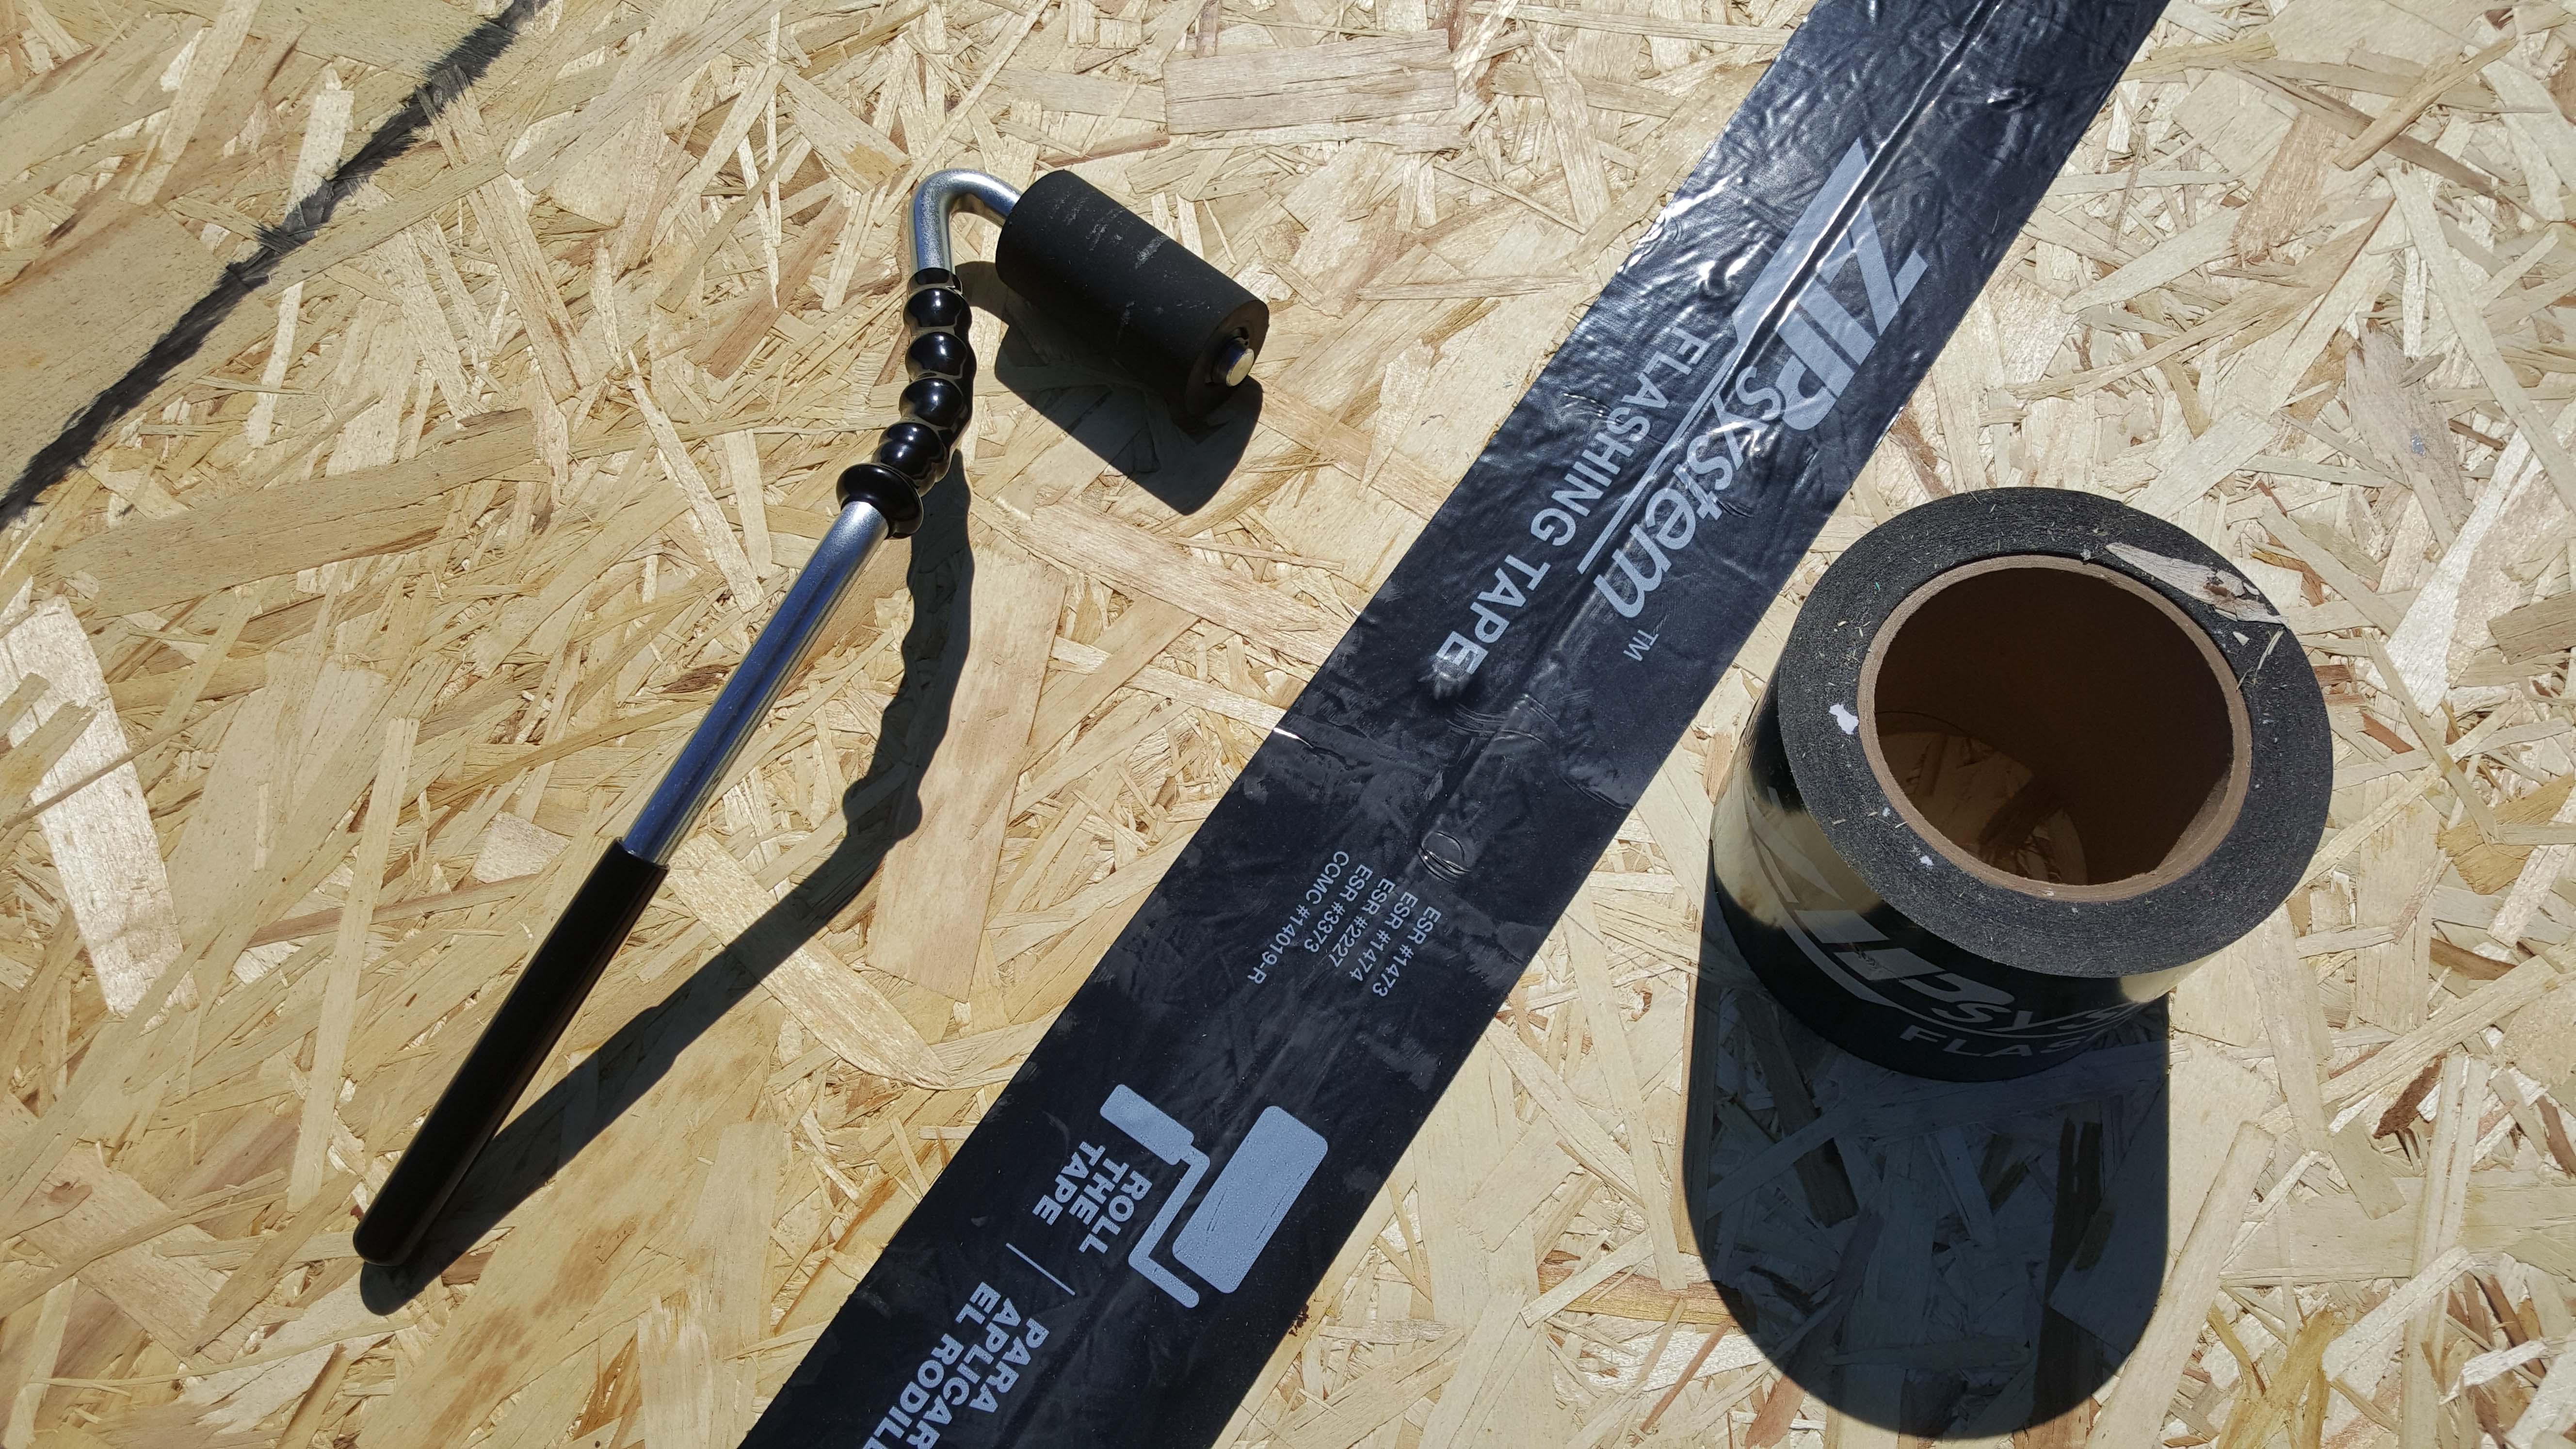
Right - Seam-sealing flashing tape is installed with roller to fully adhere to the OSB.
Image
Right - Seams in coated sheathing and joints around window are properly sealed and flashed with tape and all nail holes are covered with paint-on sealant.
Image
Image
Image
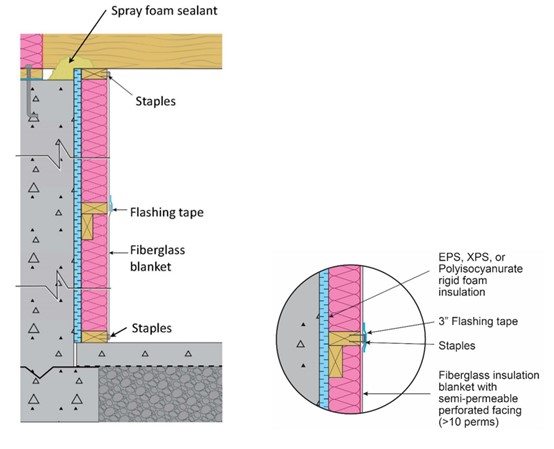
Right - Section view showing how to air-seal and insulate a basement wall with perforated blanket insulation by installing it over air-sealed rigid insulation board to reduce condensation risk in the fiberglass blanket.
Image
Right - Spray foam fills the walls and rim joists to air seal and insulate while caulk seals the framing joints.
Image
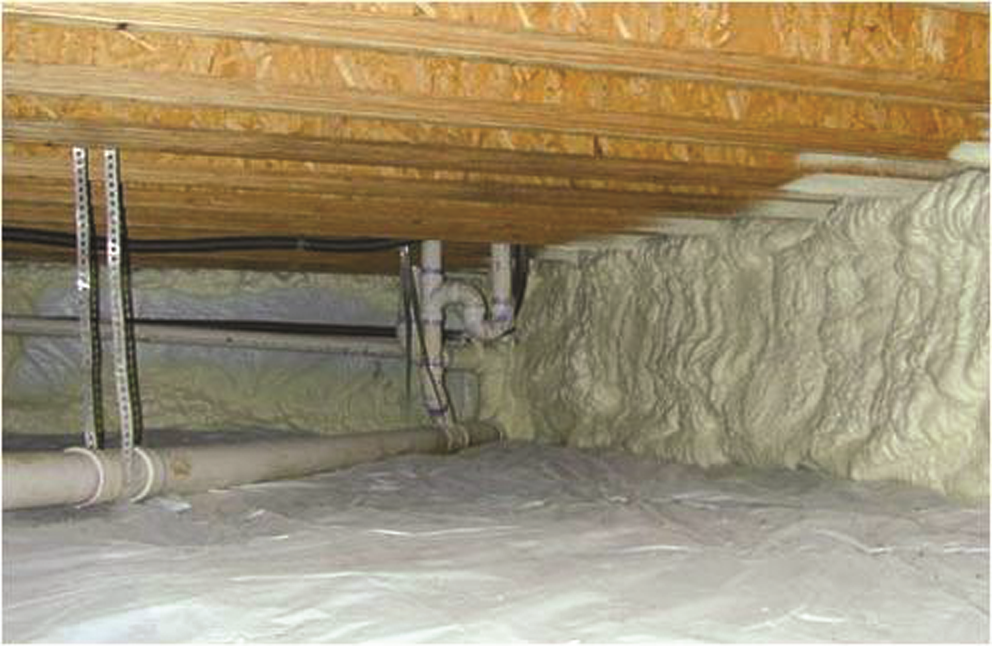
Right - Spray foam insulates and air-seals the stone walls of this unvented crawlspace.
Image
Right - Spray foam insulation air-seals the ceiling-to-drywall seams at the wall top plate.
Image
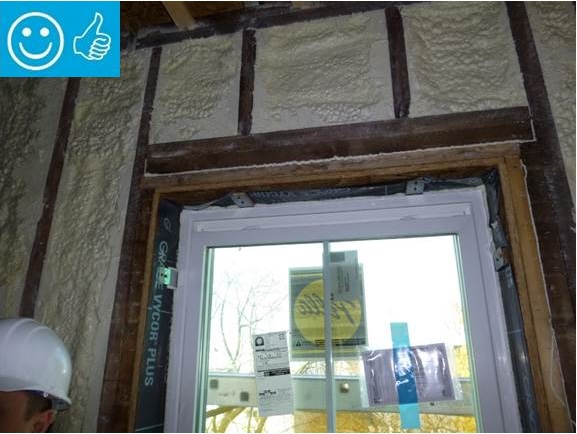
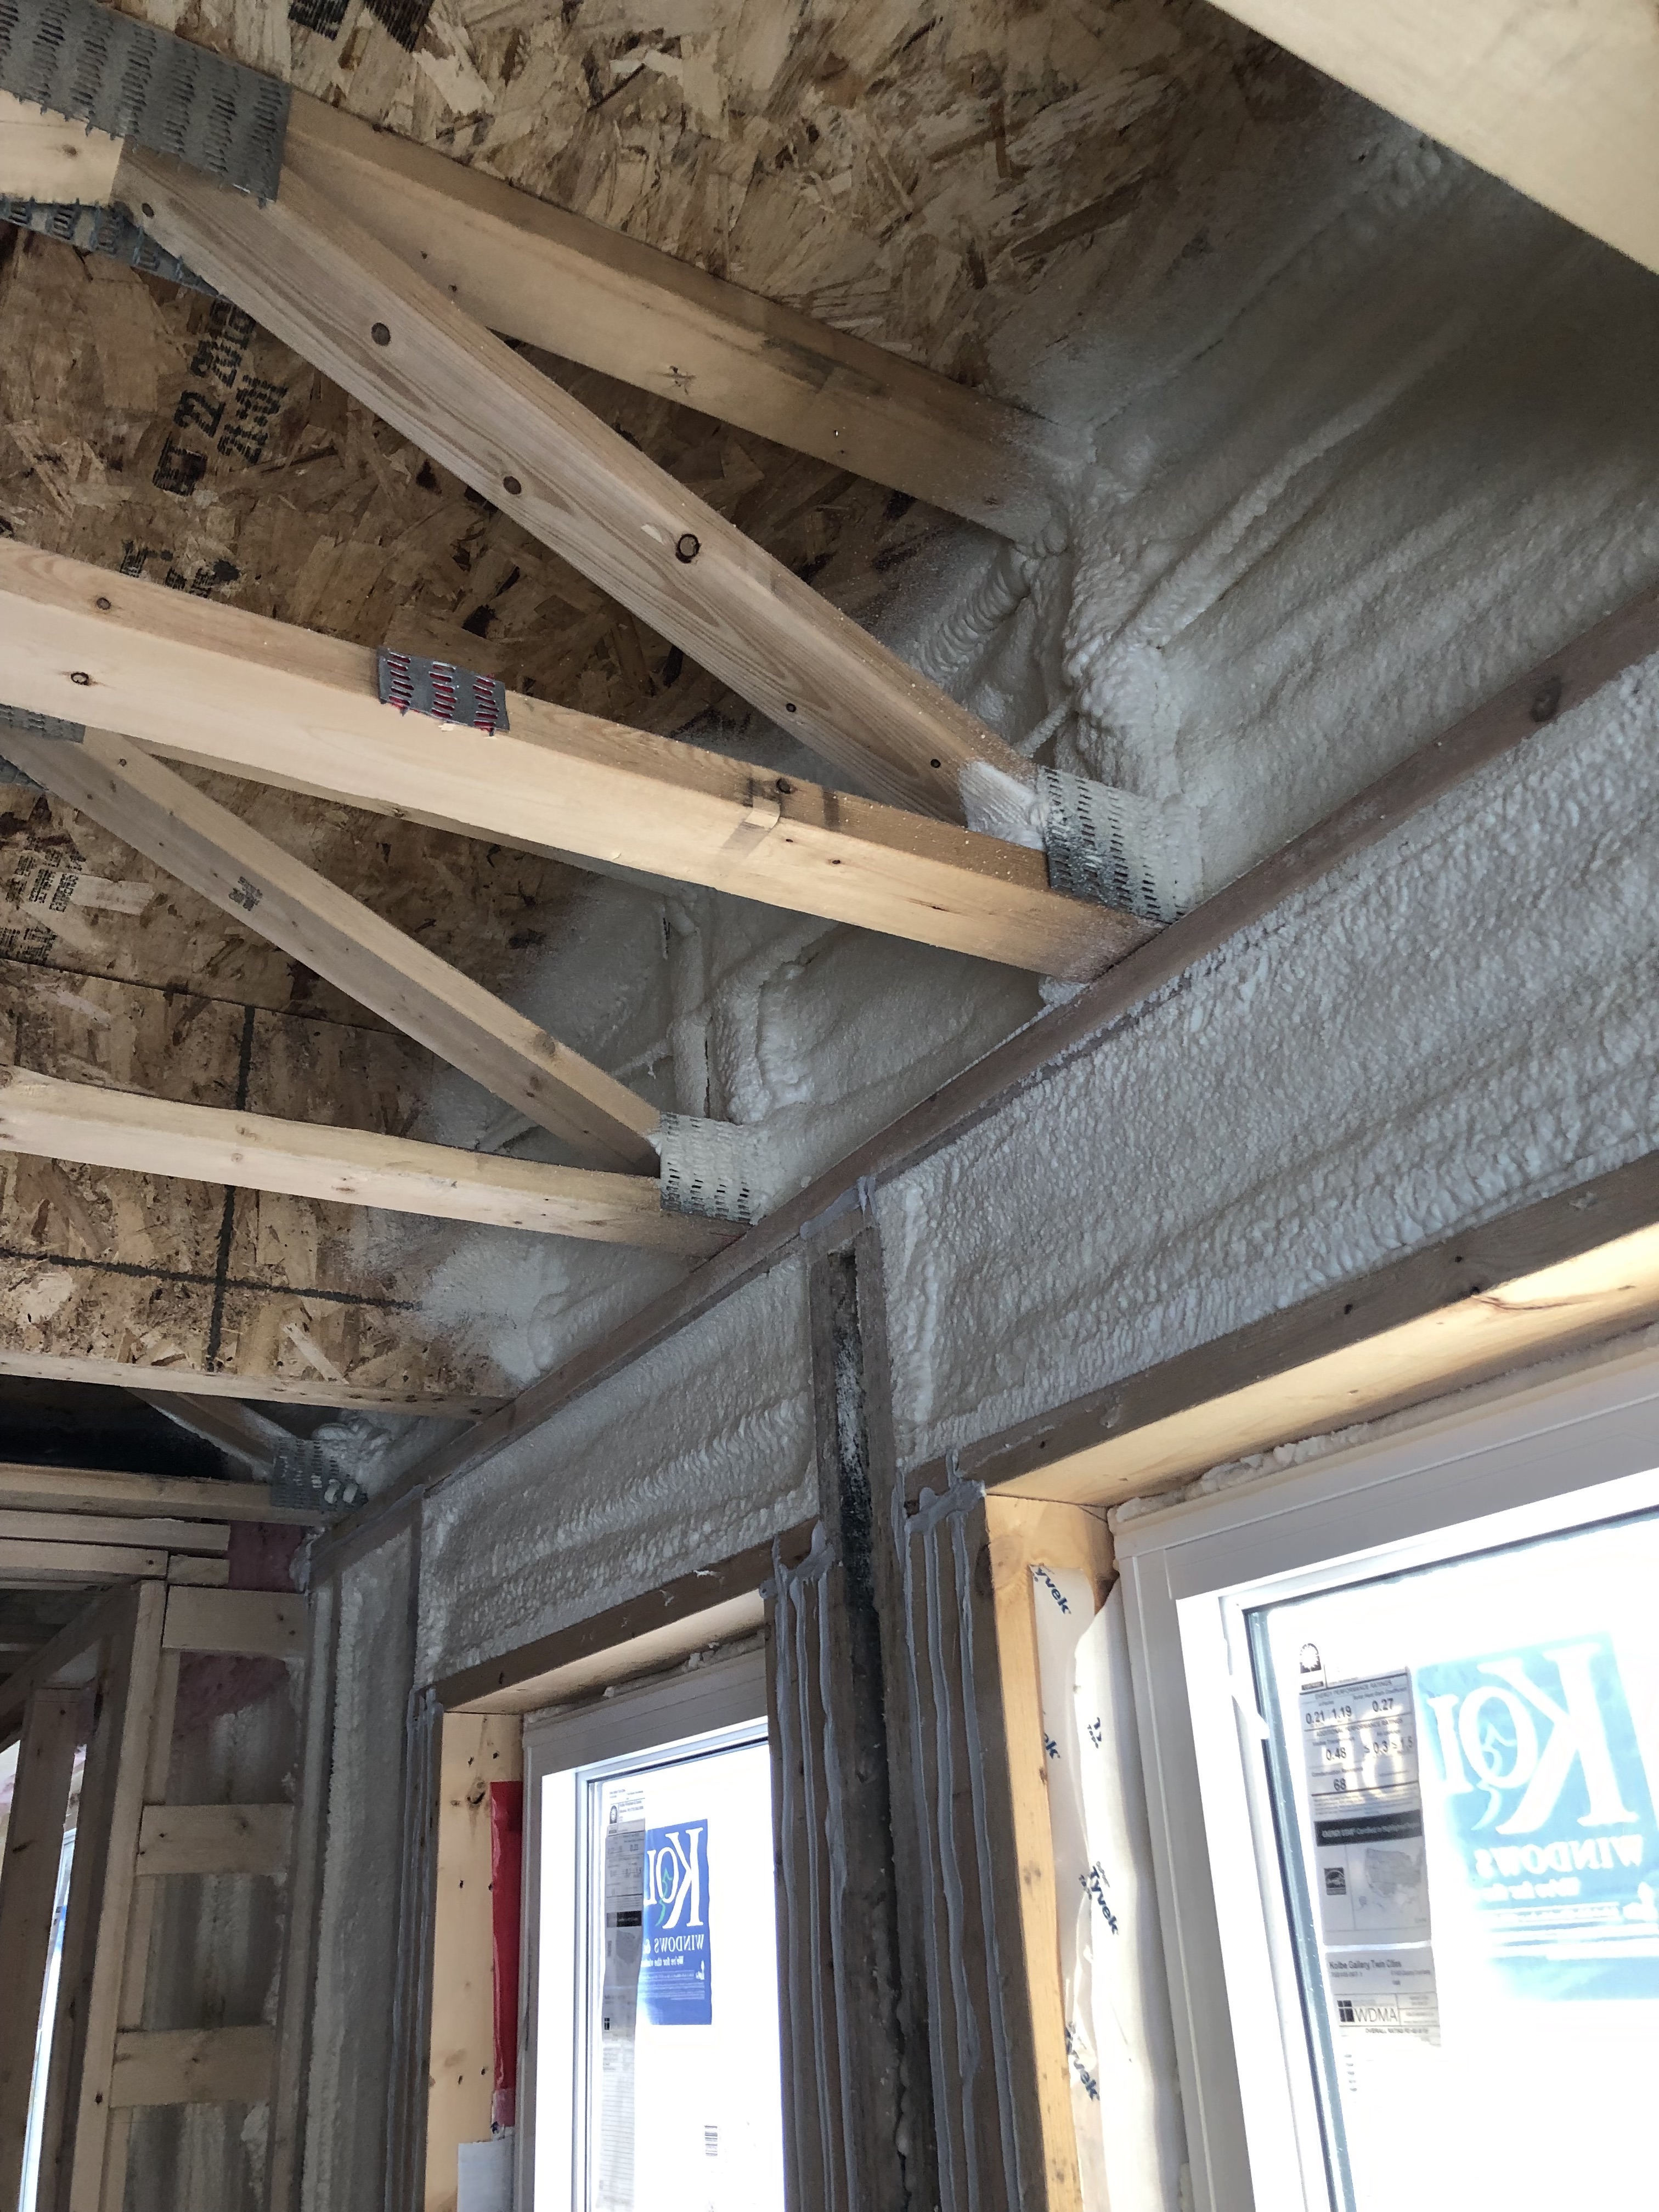
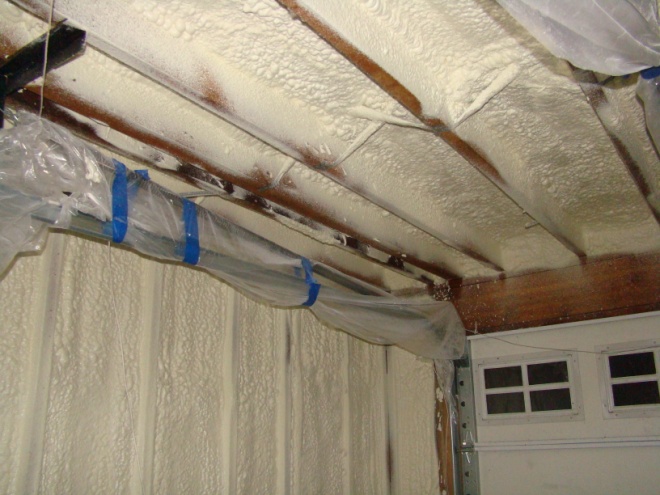
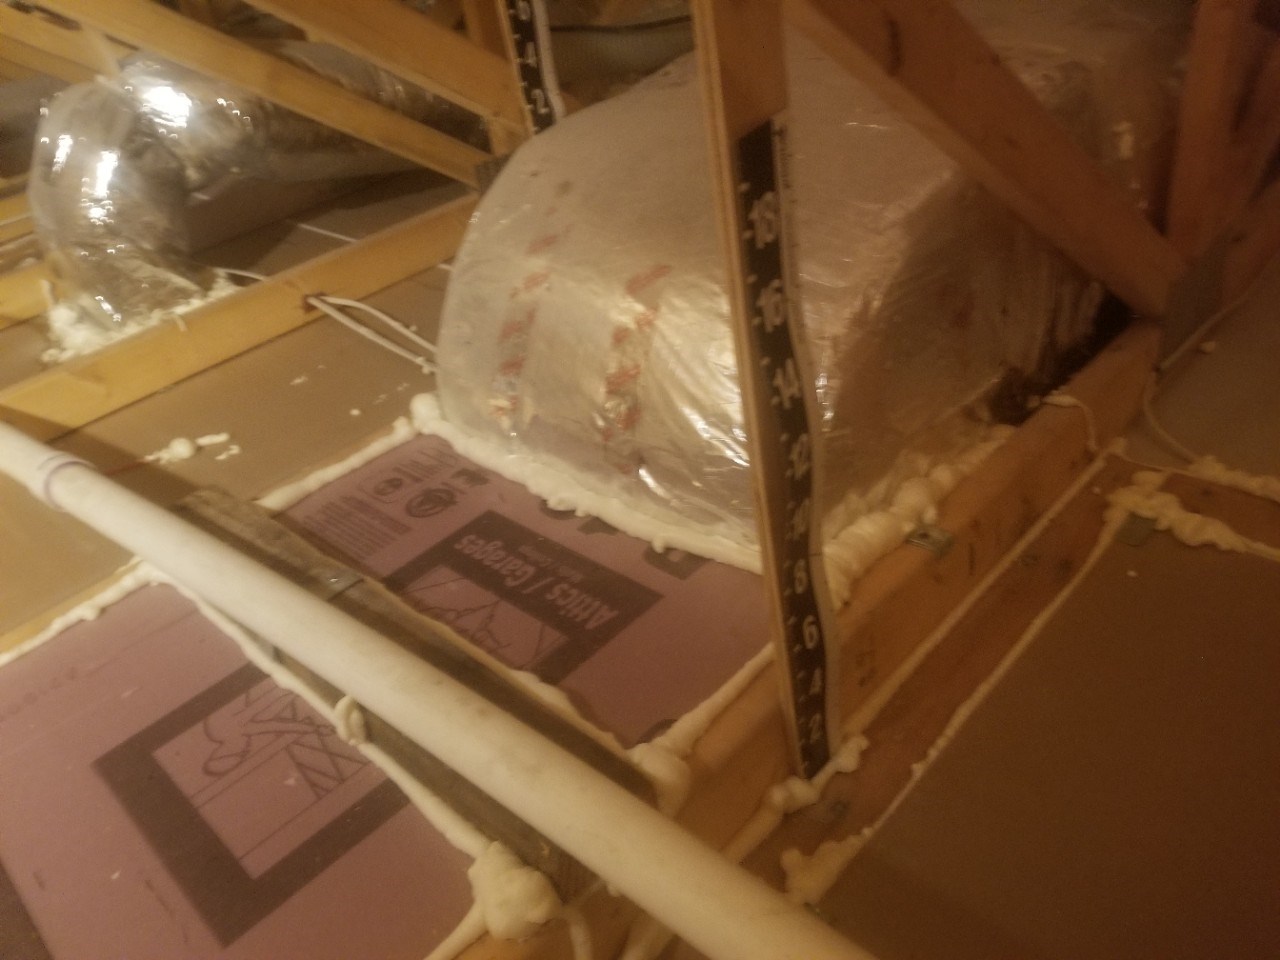
Right - Spray foam insulation has been sprayed onto the underside of the sloped roof and the gable end wall to provide a sealed, insulated attic for housing the HVAC ducts
Image
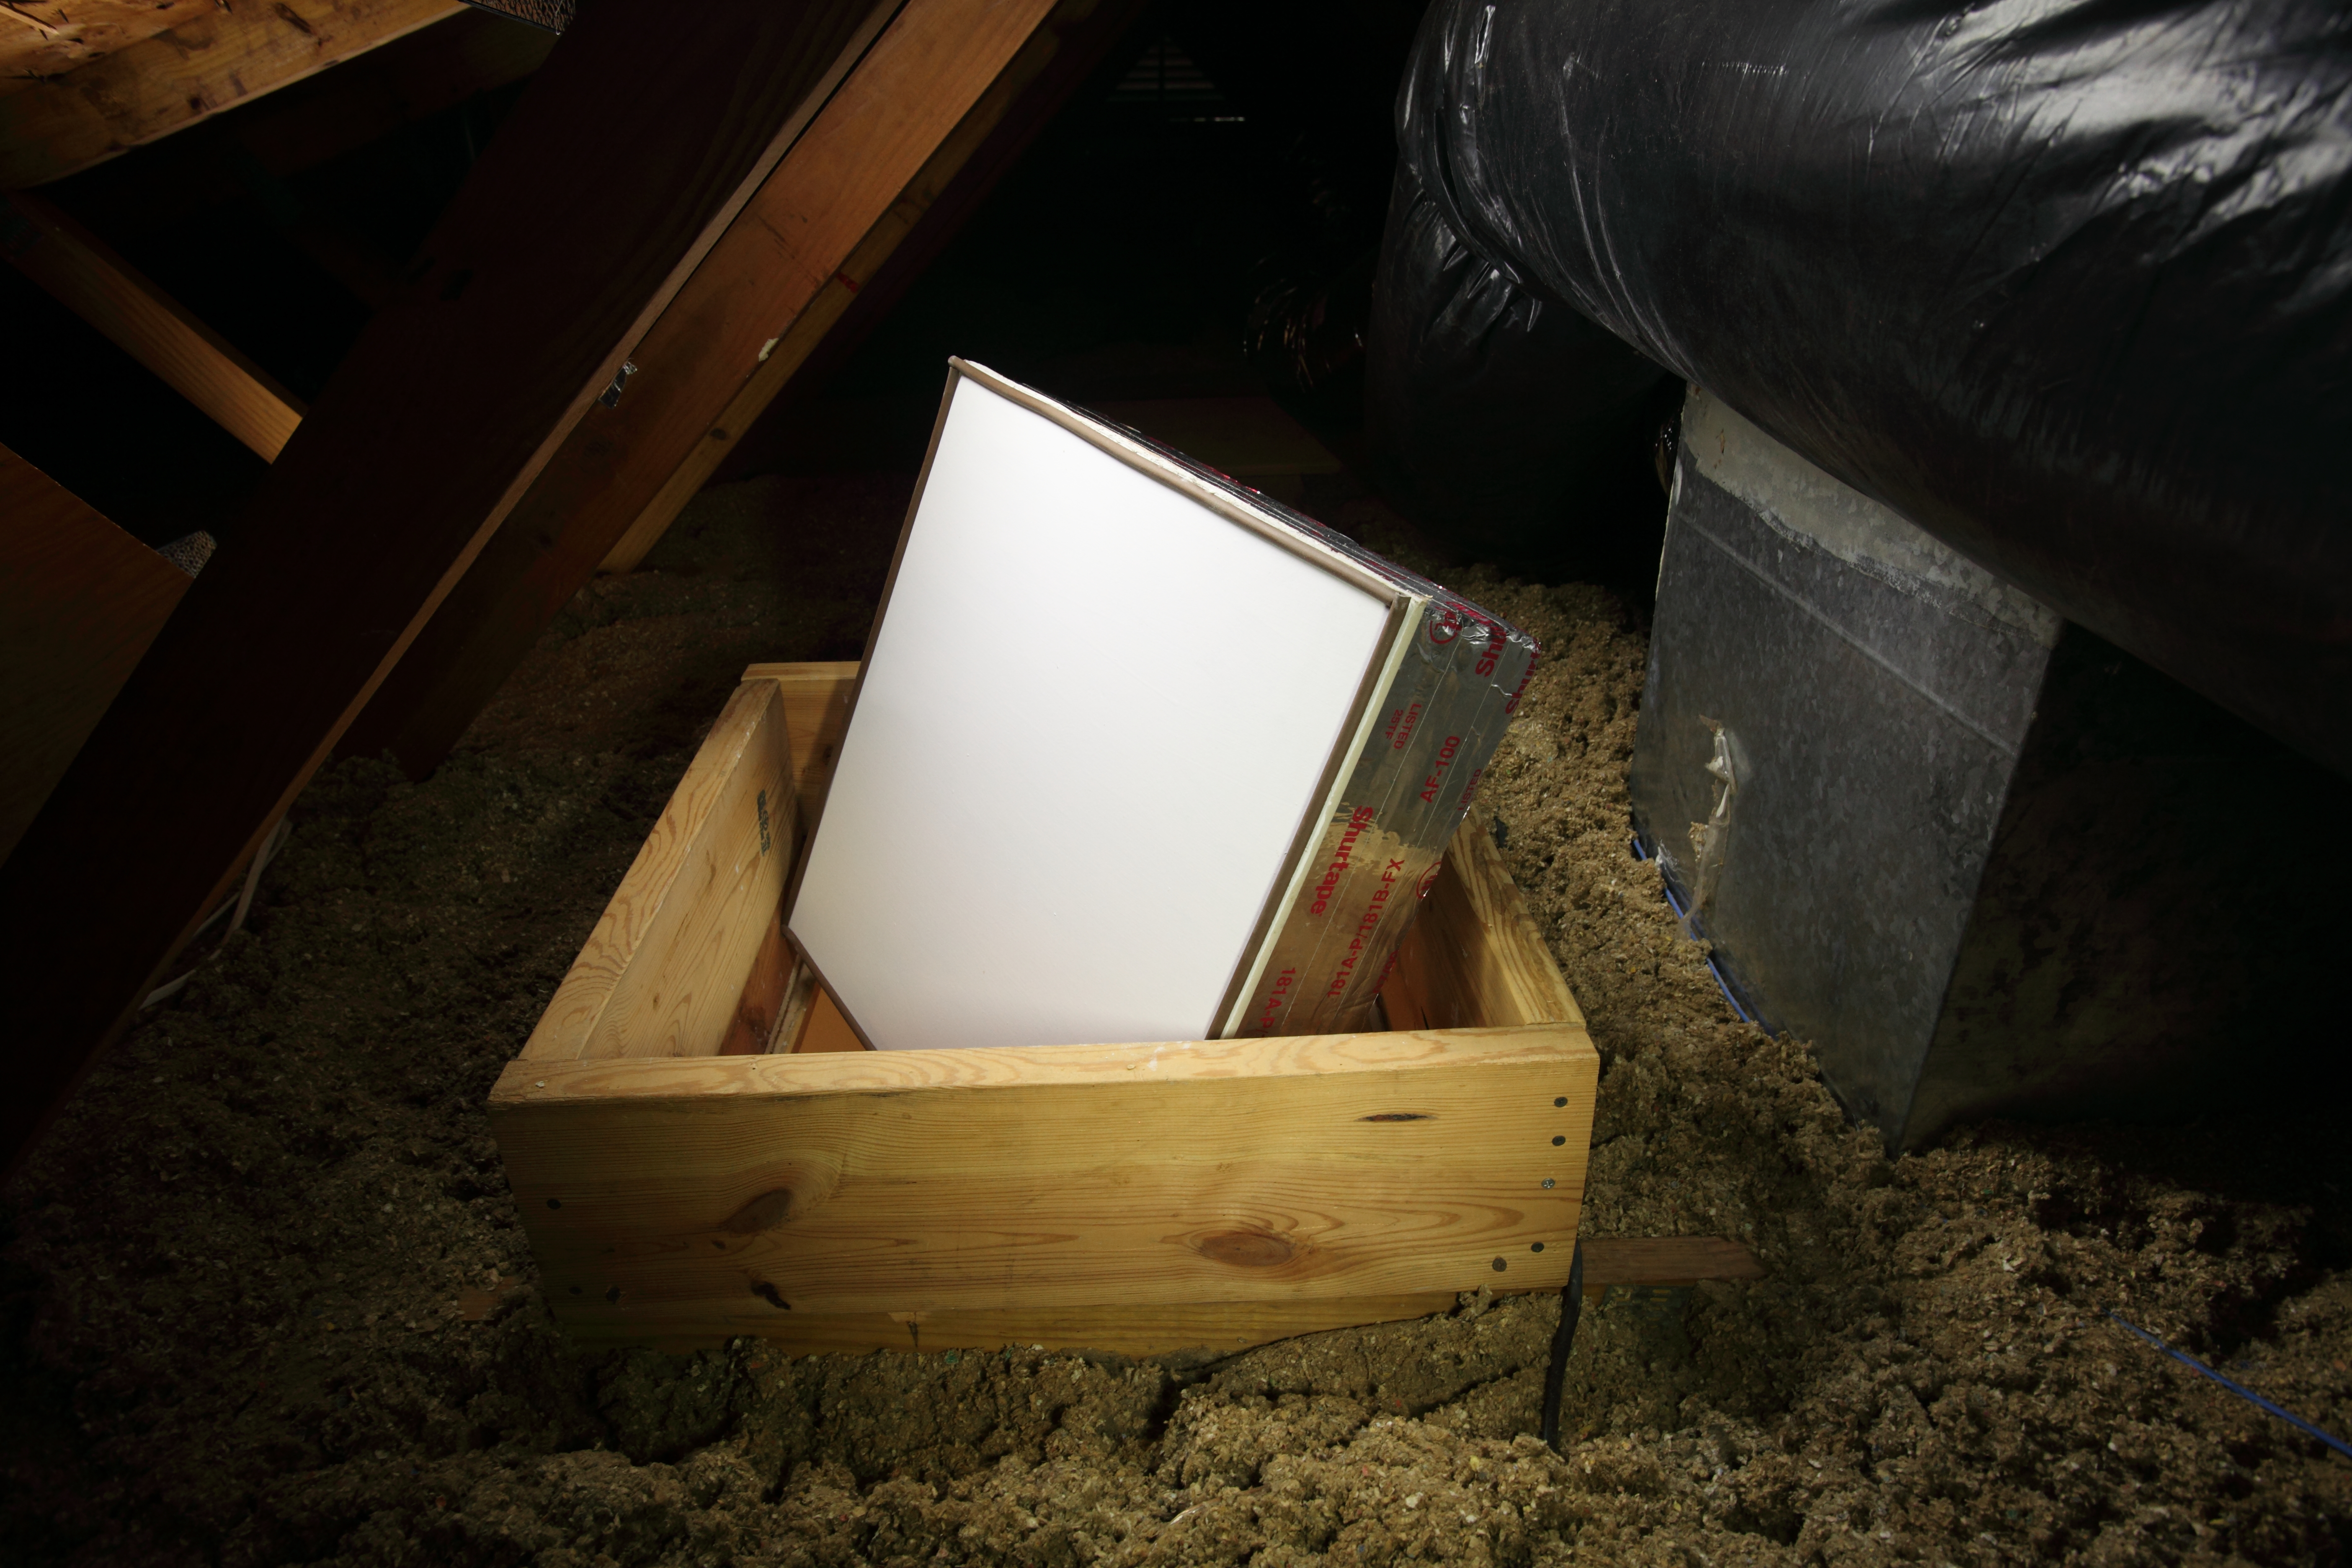
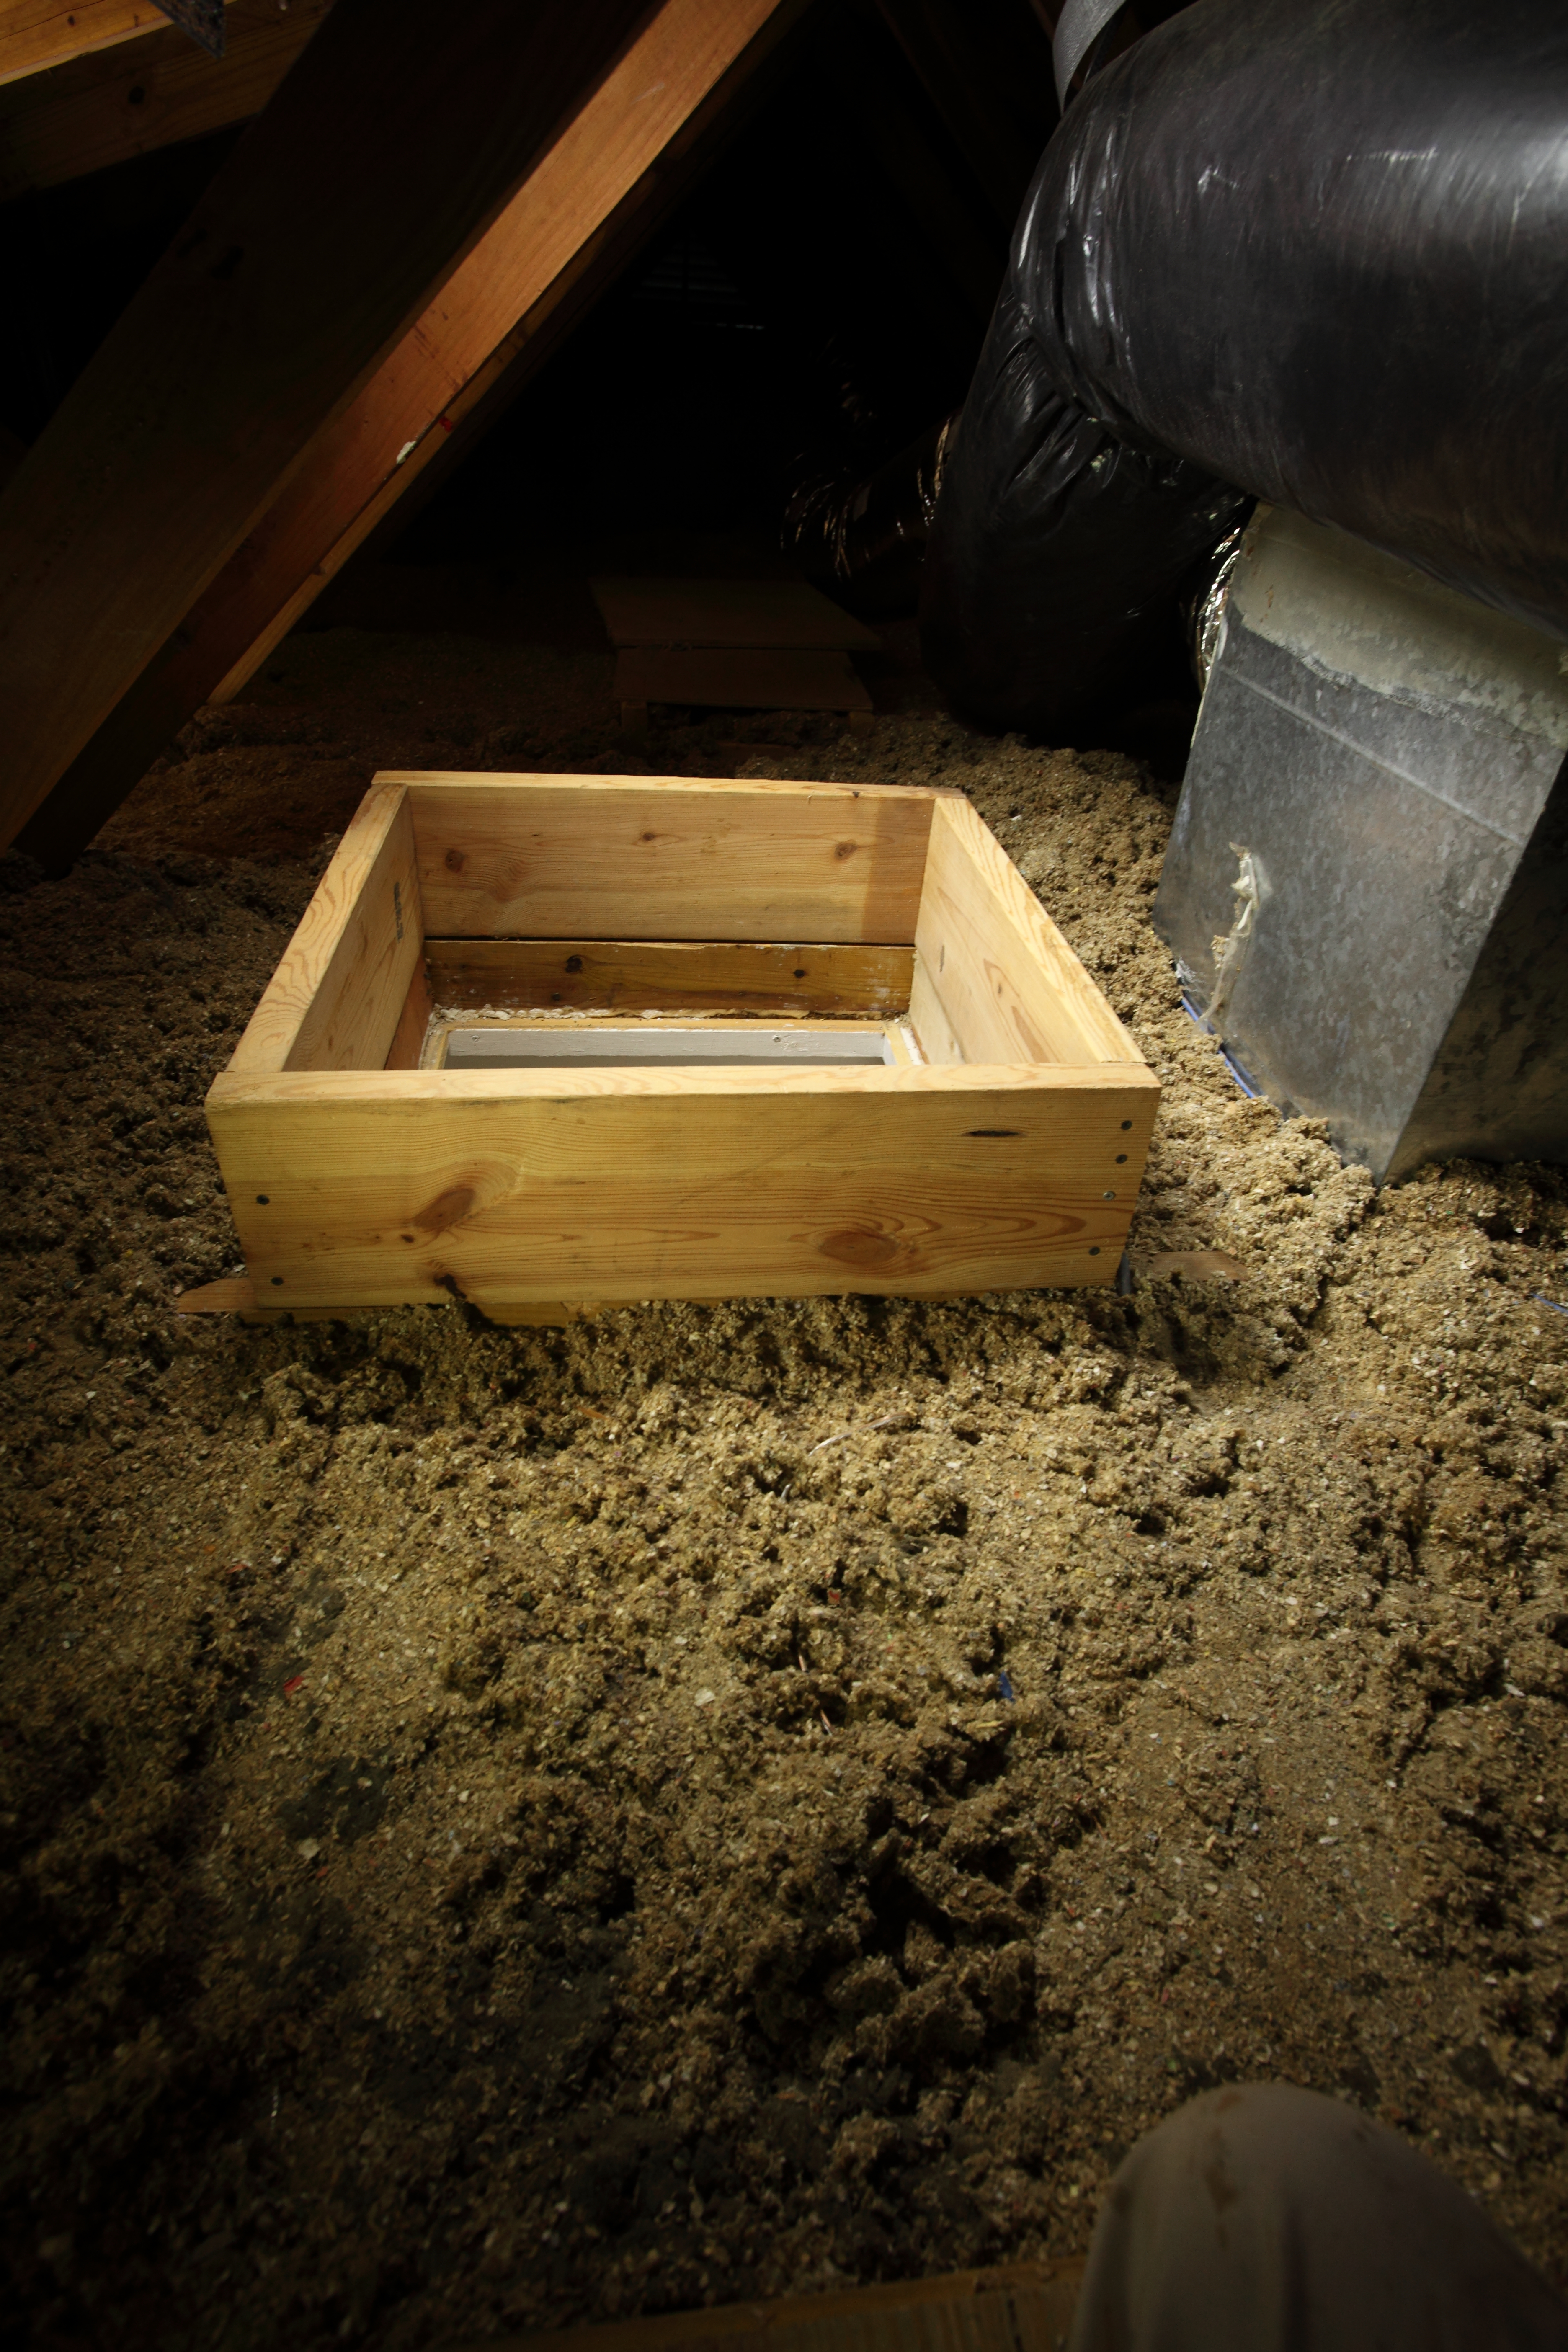
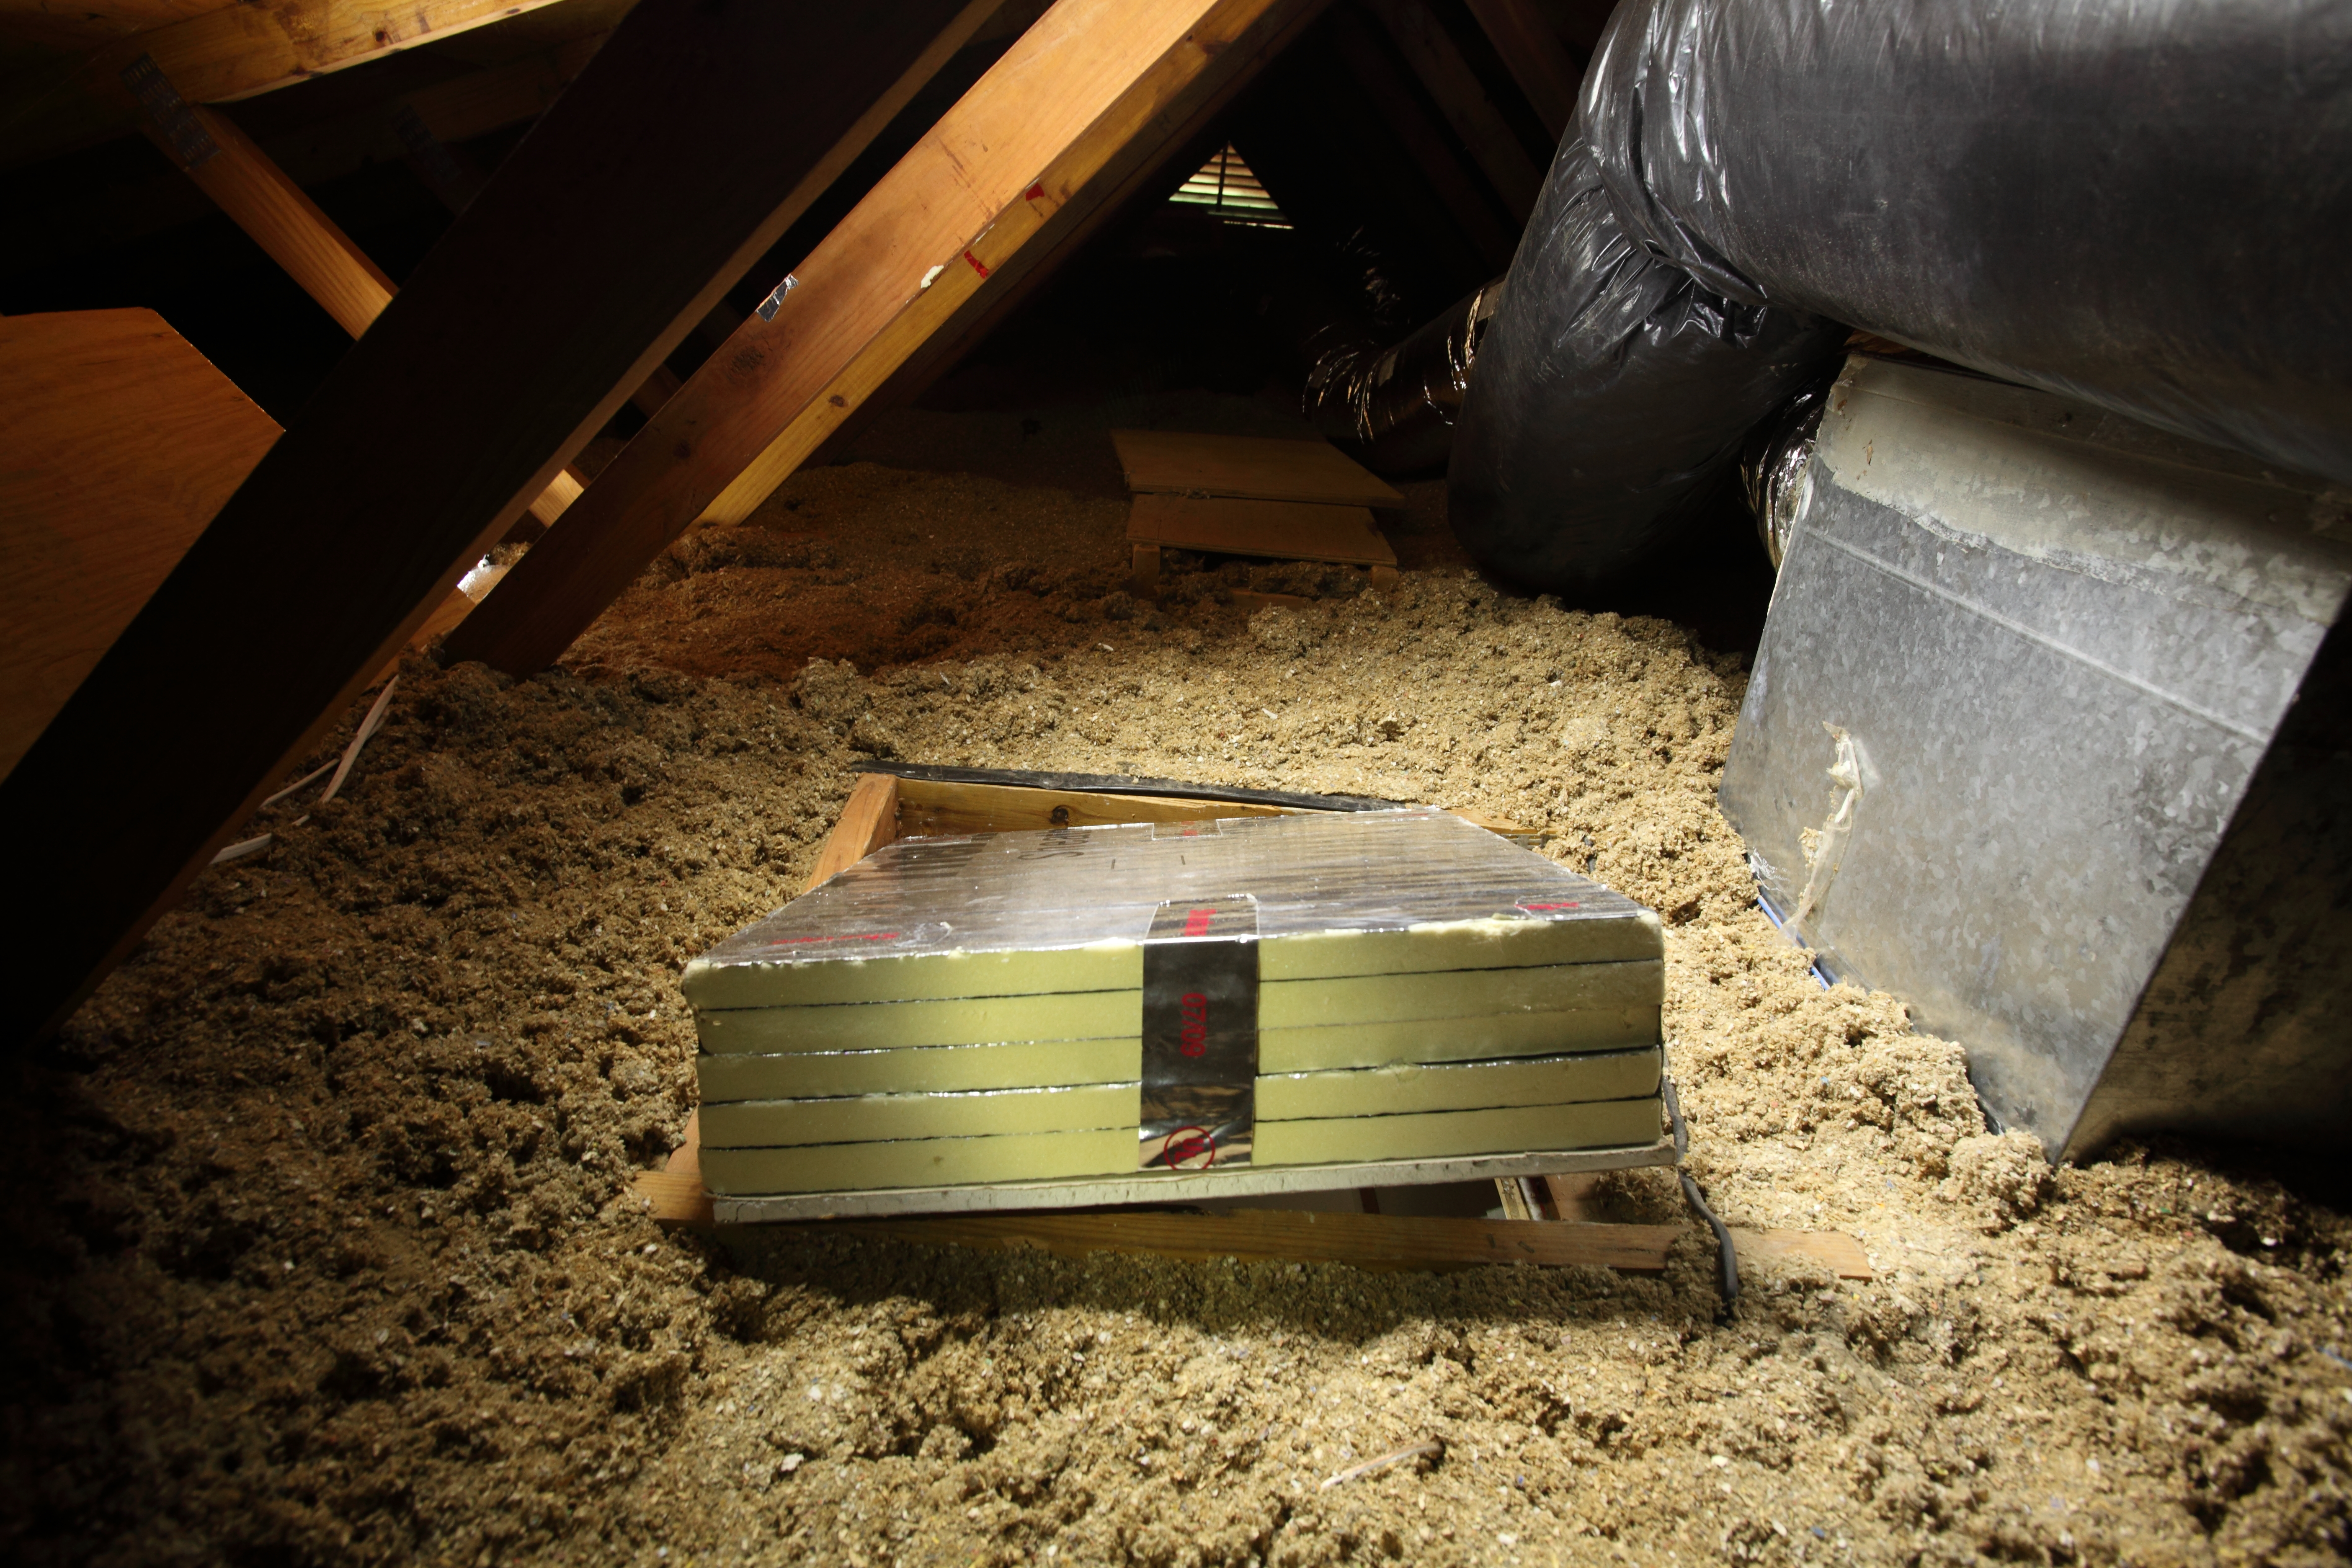
Right - The attic access panel is insulated and weather stripped and a dam is built to hold back the blown attic floor insulation
Image
Right - The duct shows redundant sealing including the caulk, tape, and flashing
Image

Image
Right - The pipe penetration is properly flashed and furring strips are installed on each side in preparation for installing cladding
Image
Right - The seams in the OSB sheathing are sealed with a sprayer-applied sealant.
Image
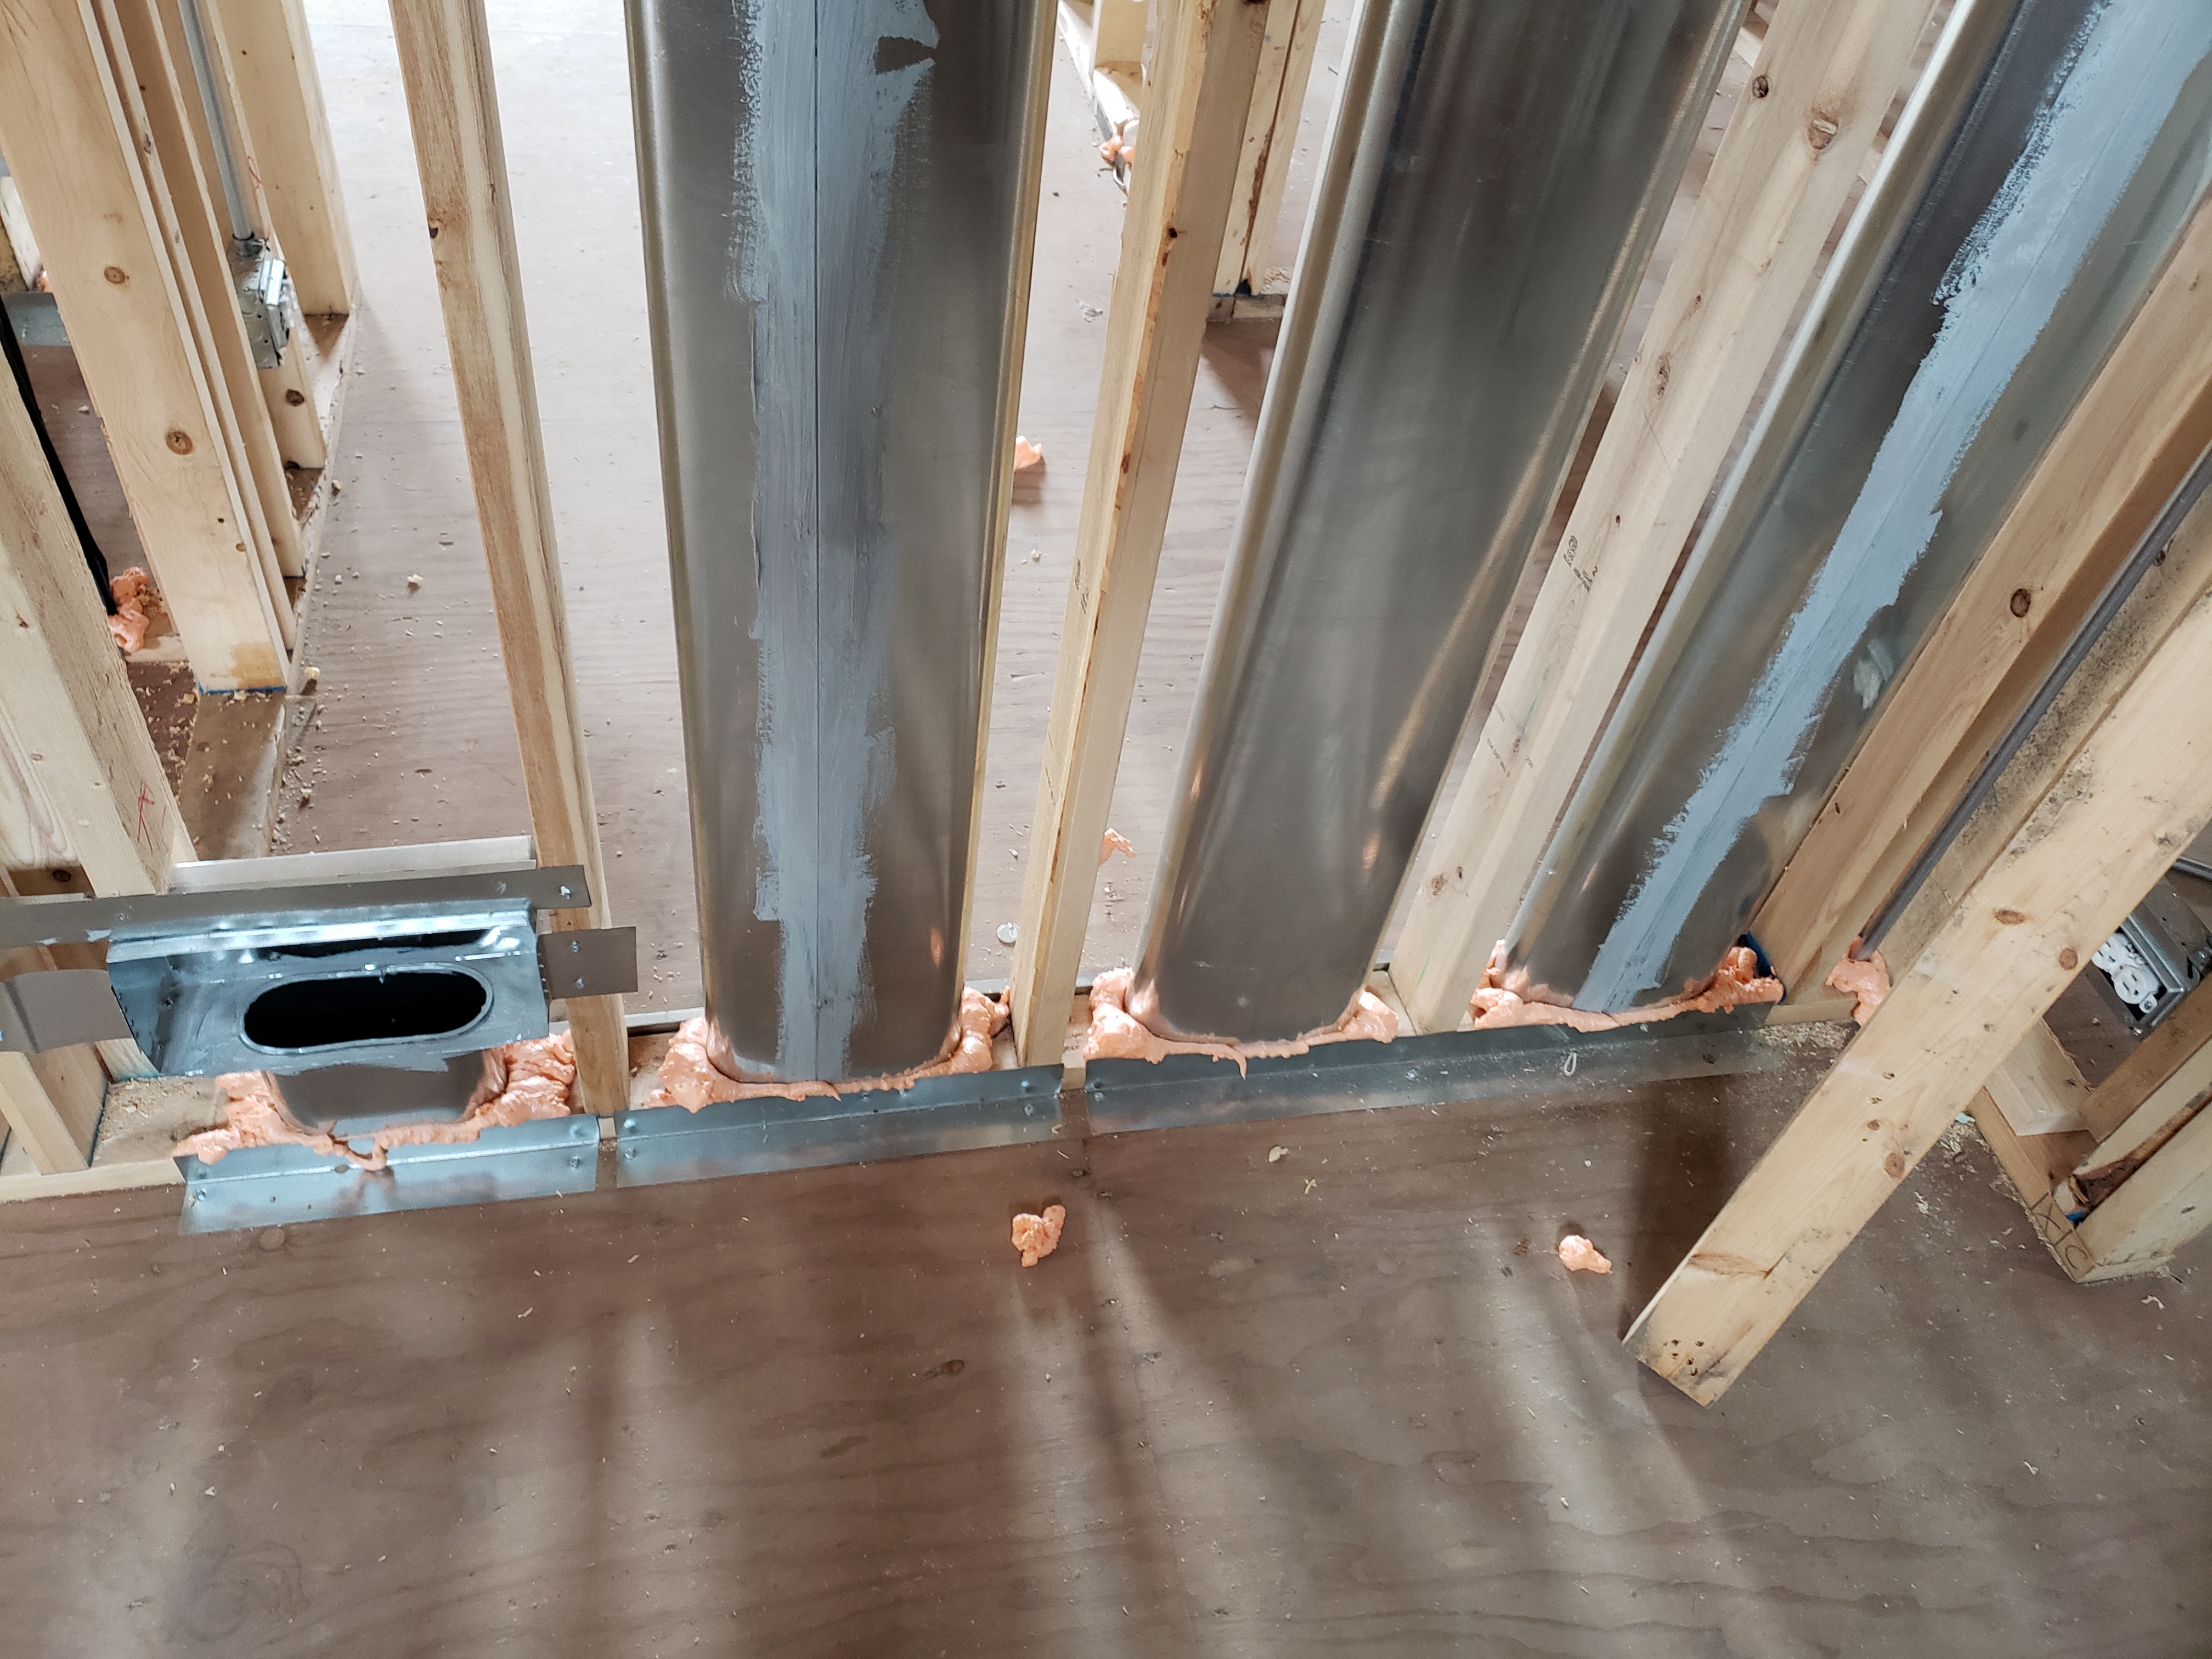
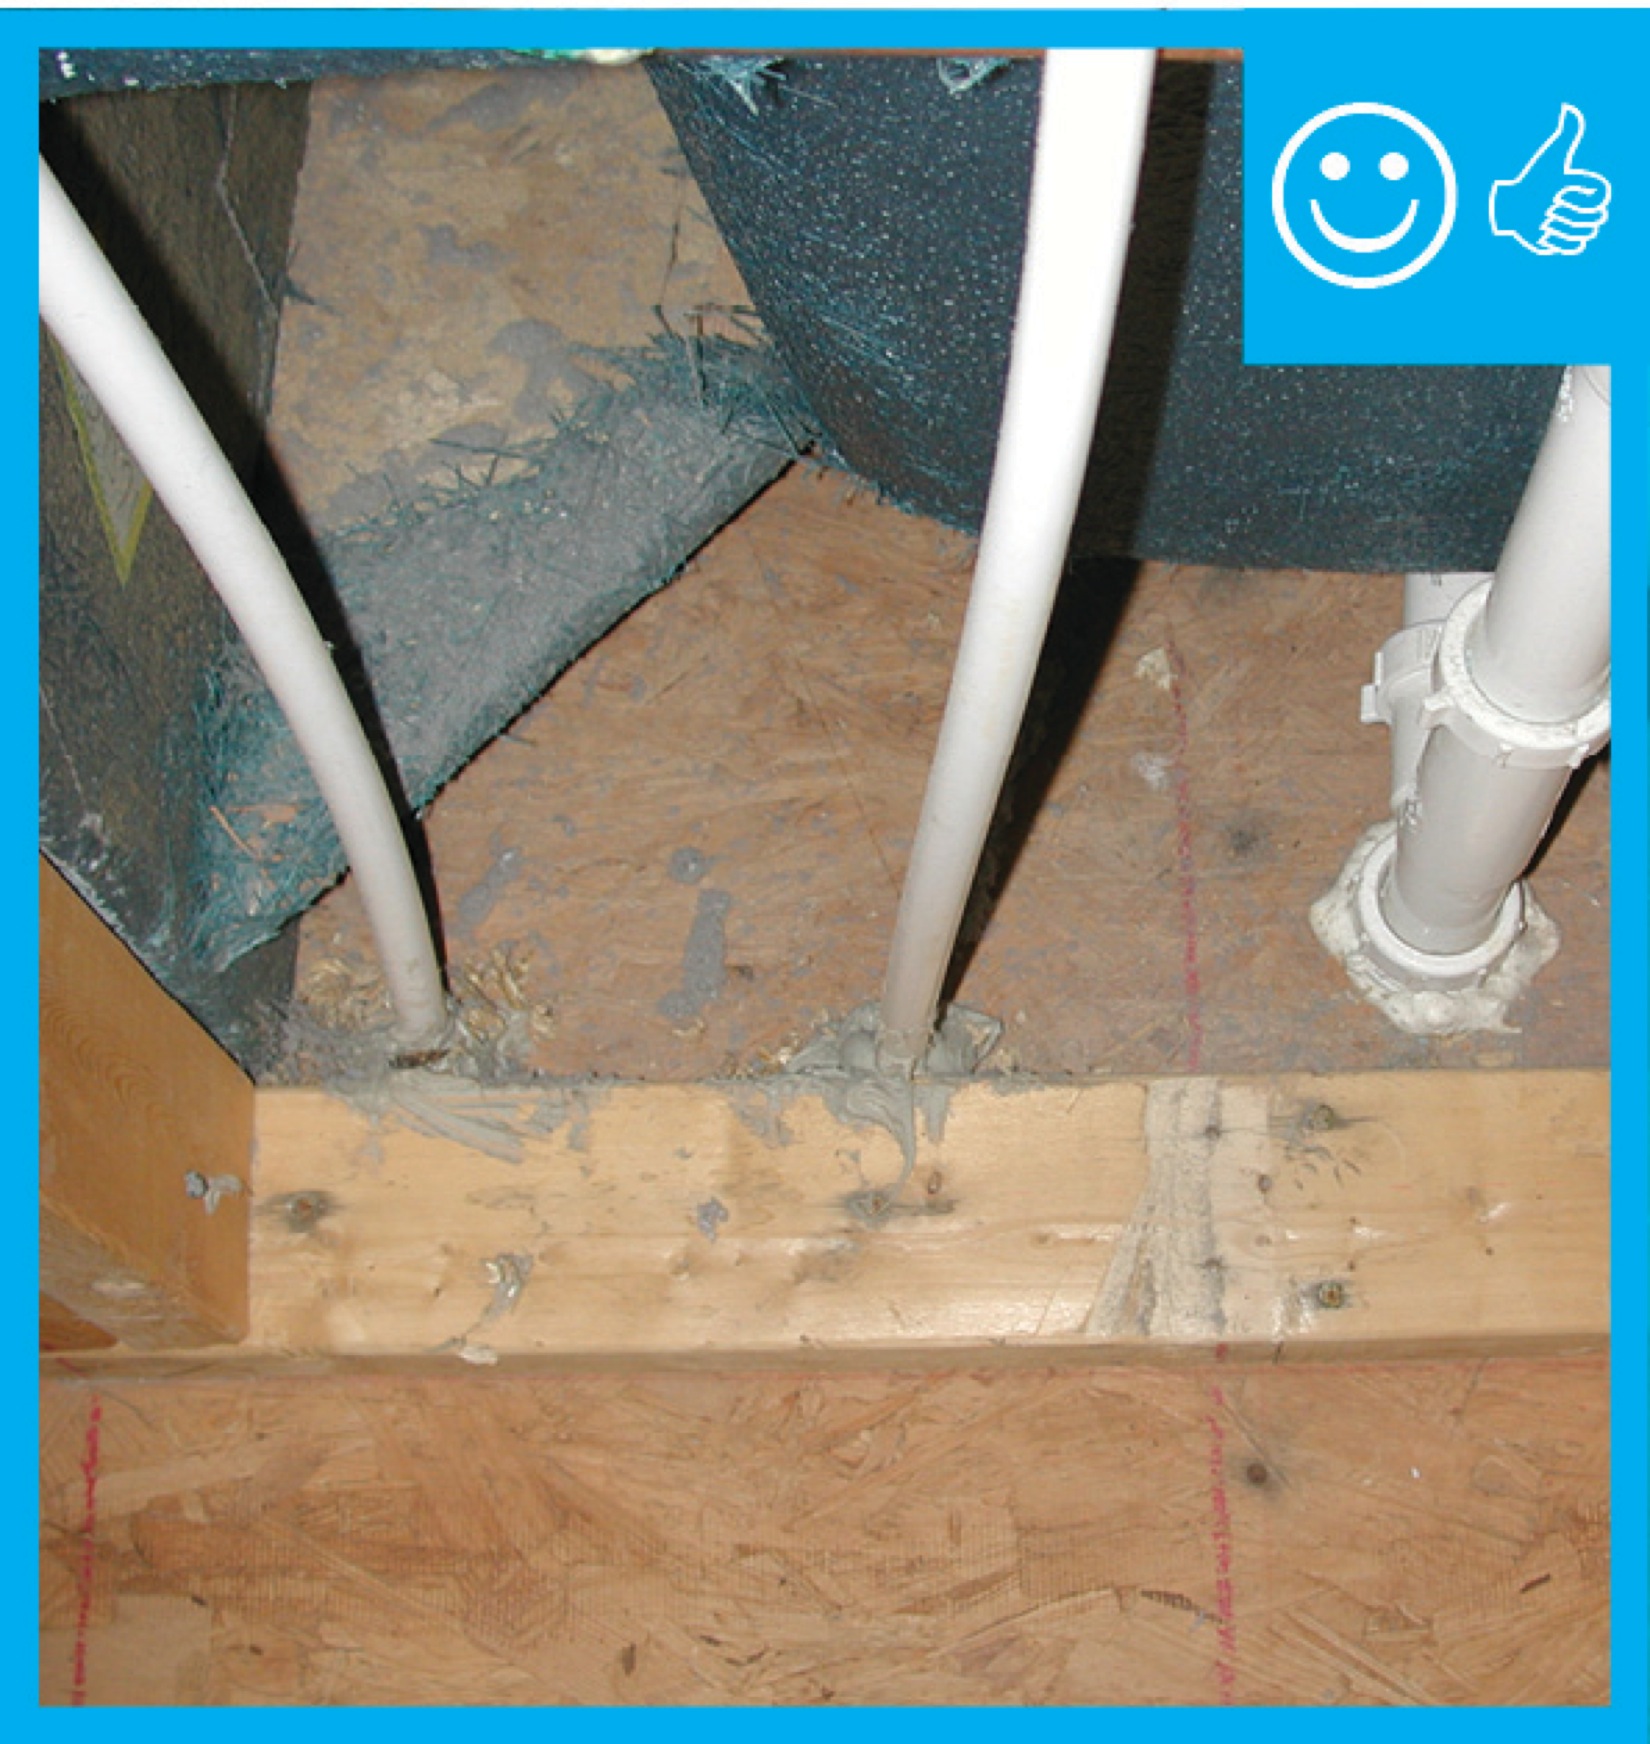
Right - The service penetrations through the structural slab in this garage plenum are air sealed.
Image
Image
Image
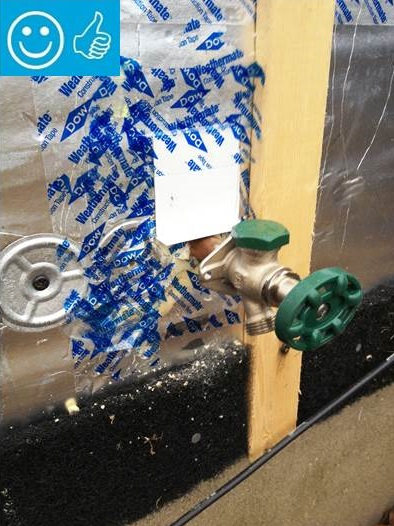
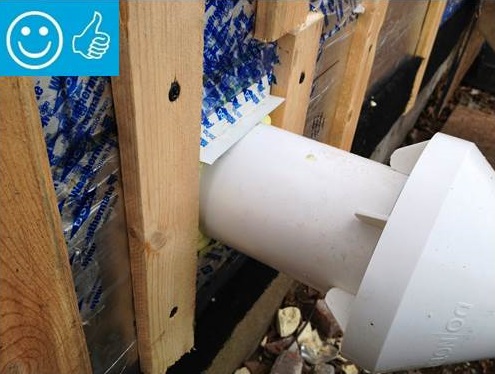
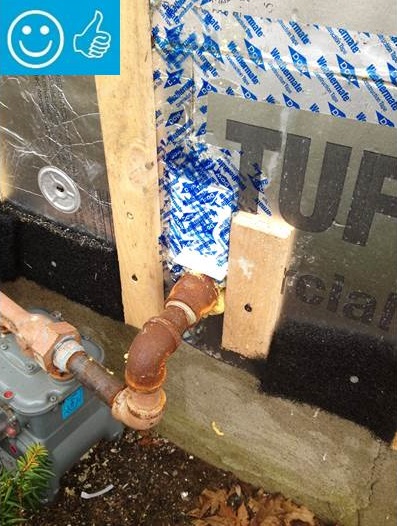
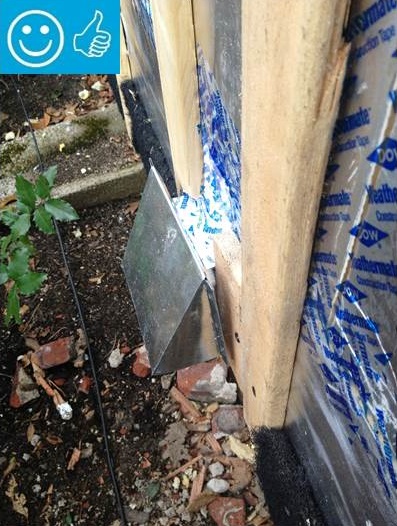
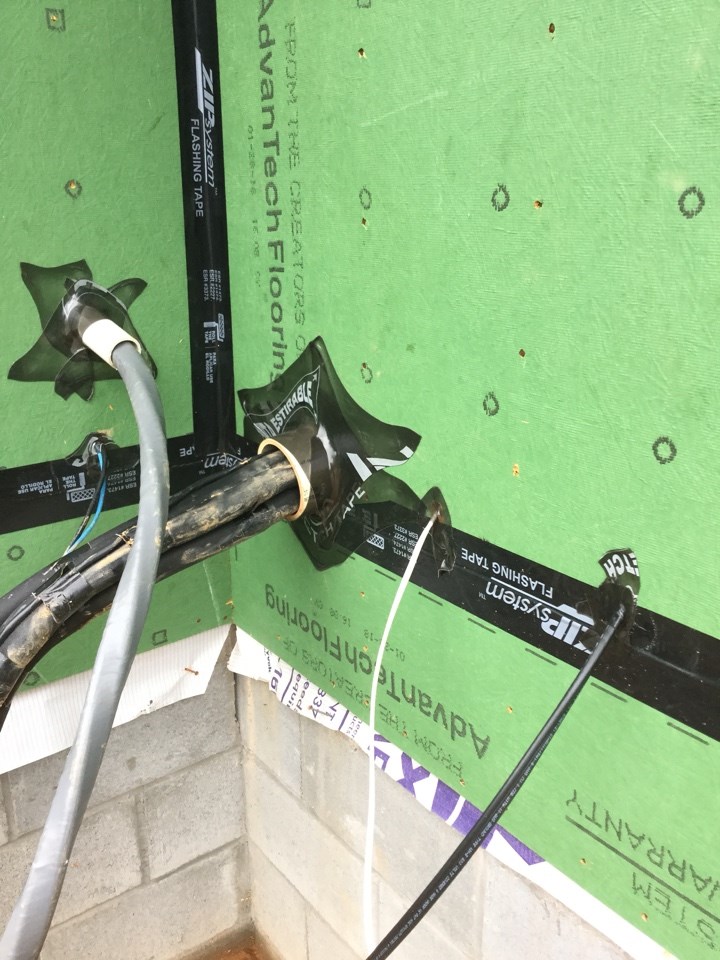
Right - The water and air control layers are properly integrated around the hose bib
Image
Image
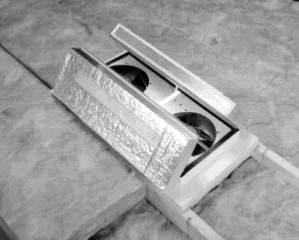
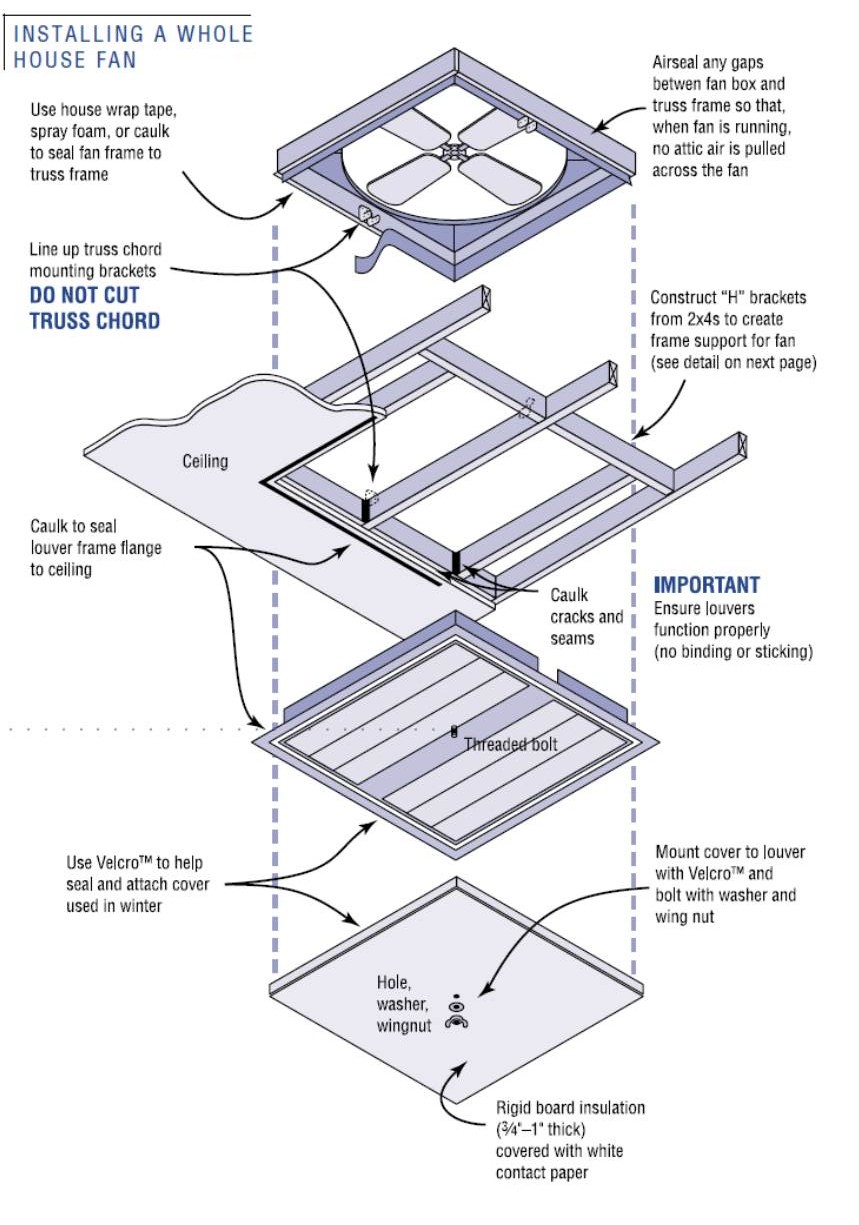
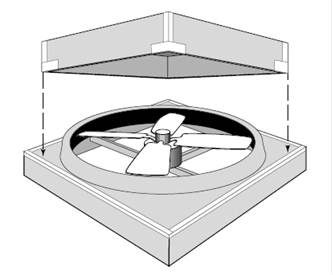
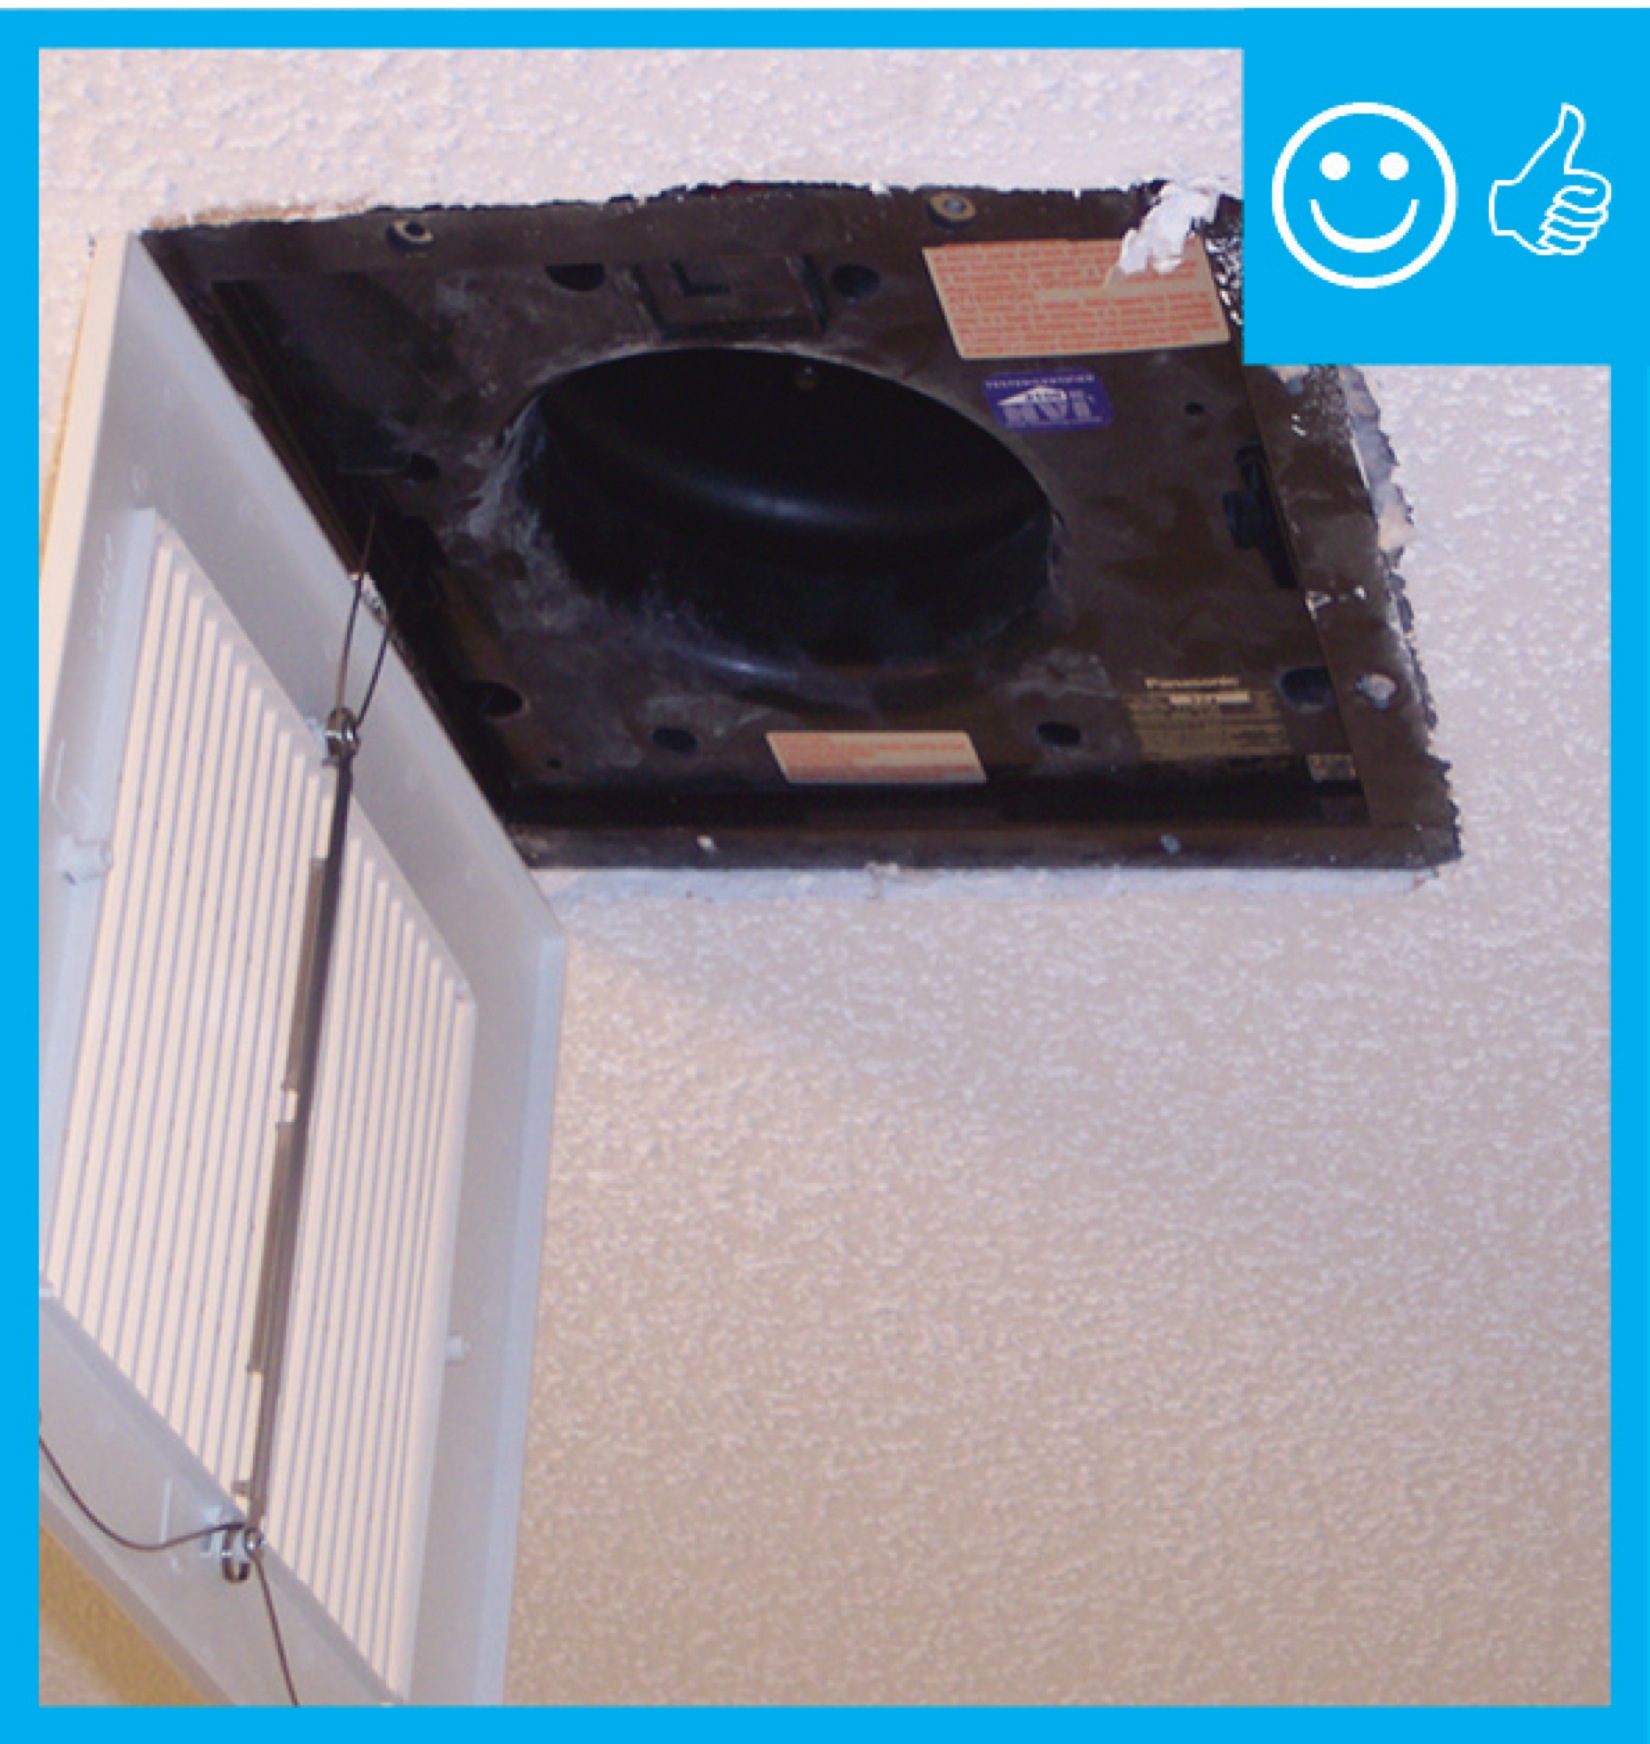
Right - This ceiling-mounted mini whole-house fan has built-in insulated covers to reduce heat loss when the fan is not in use
Image

Right - This duct penetration is properly flashed and integrated with the taped, foil-faced foam sheathing layer, which serves as the air and water barrier
Image
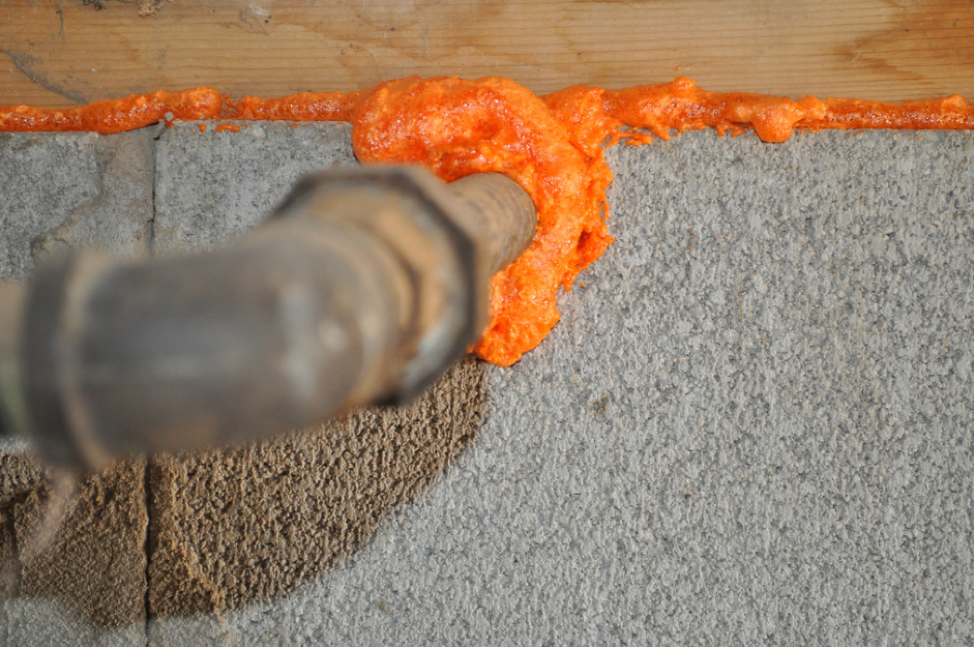
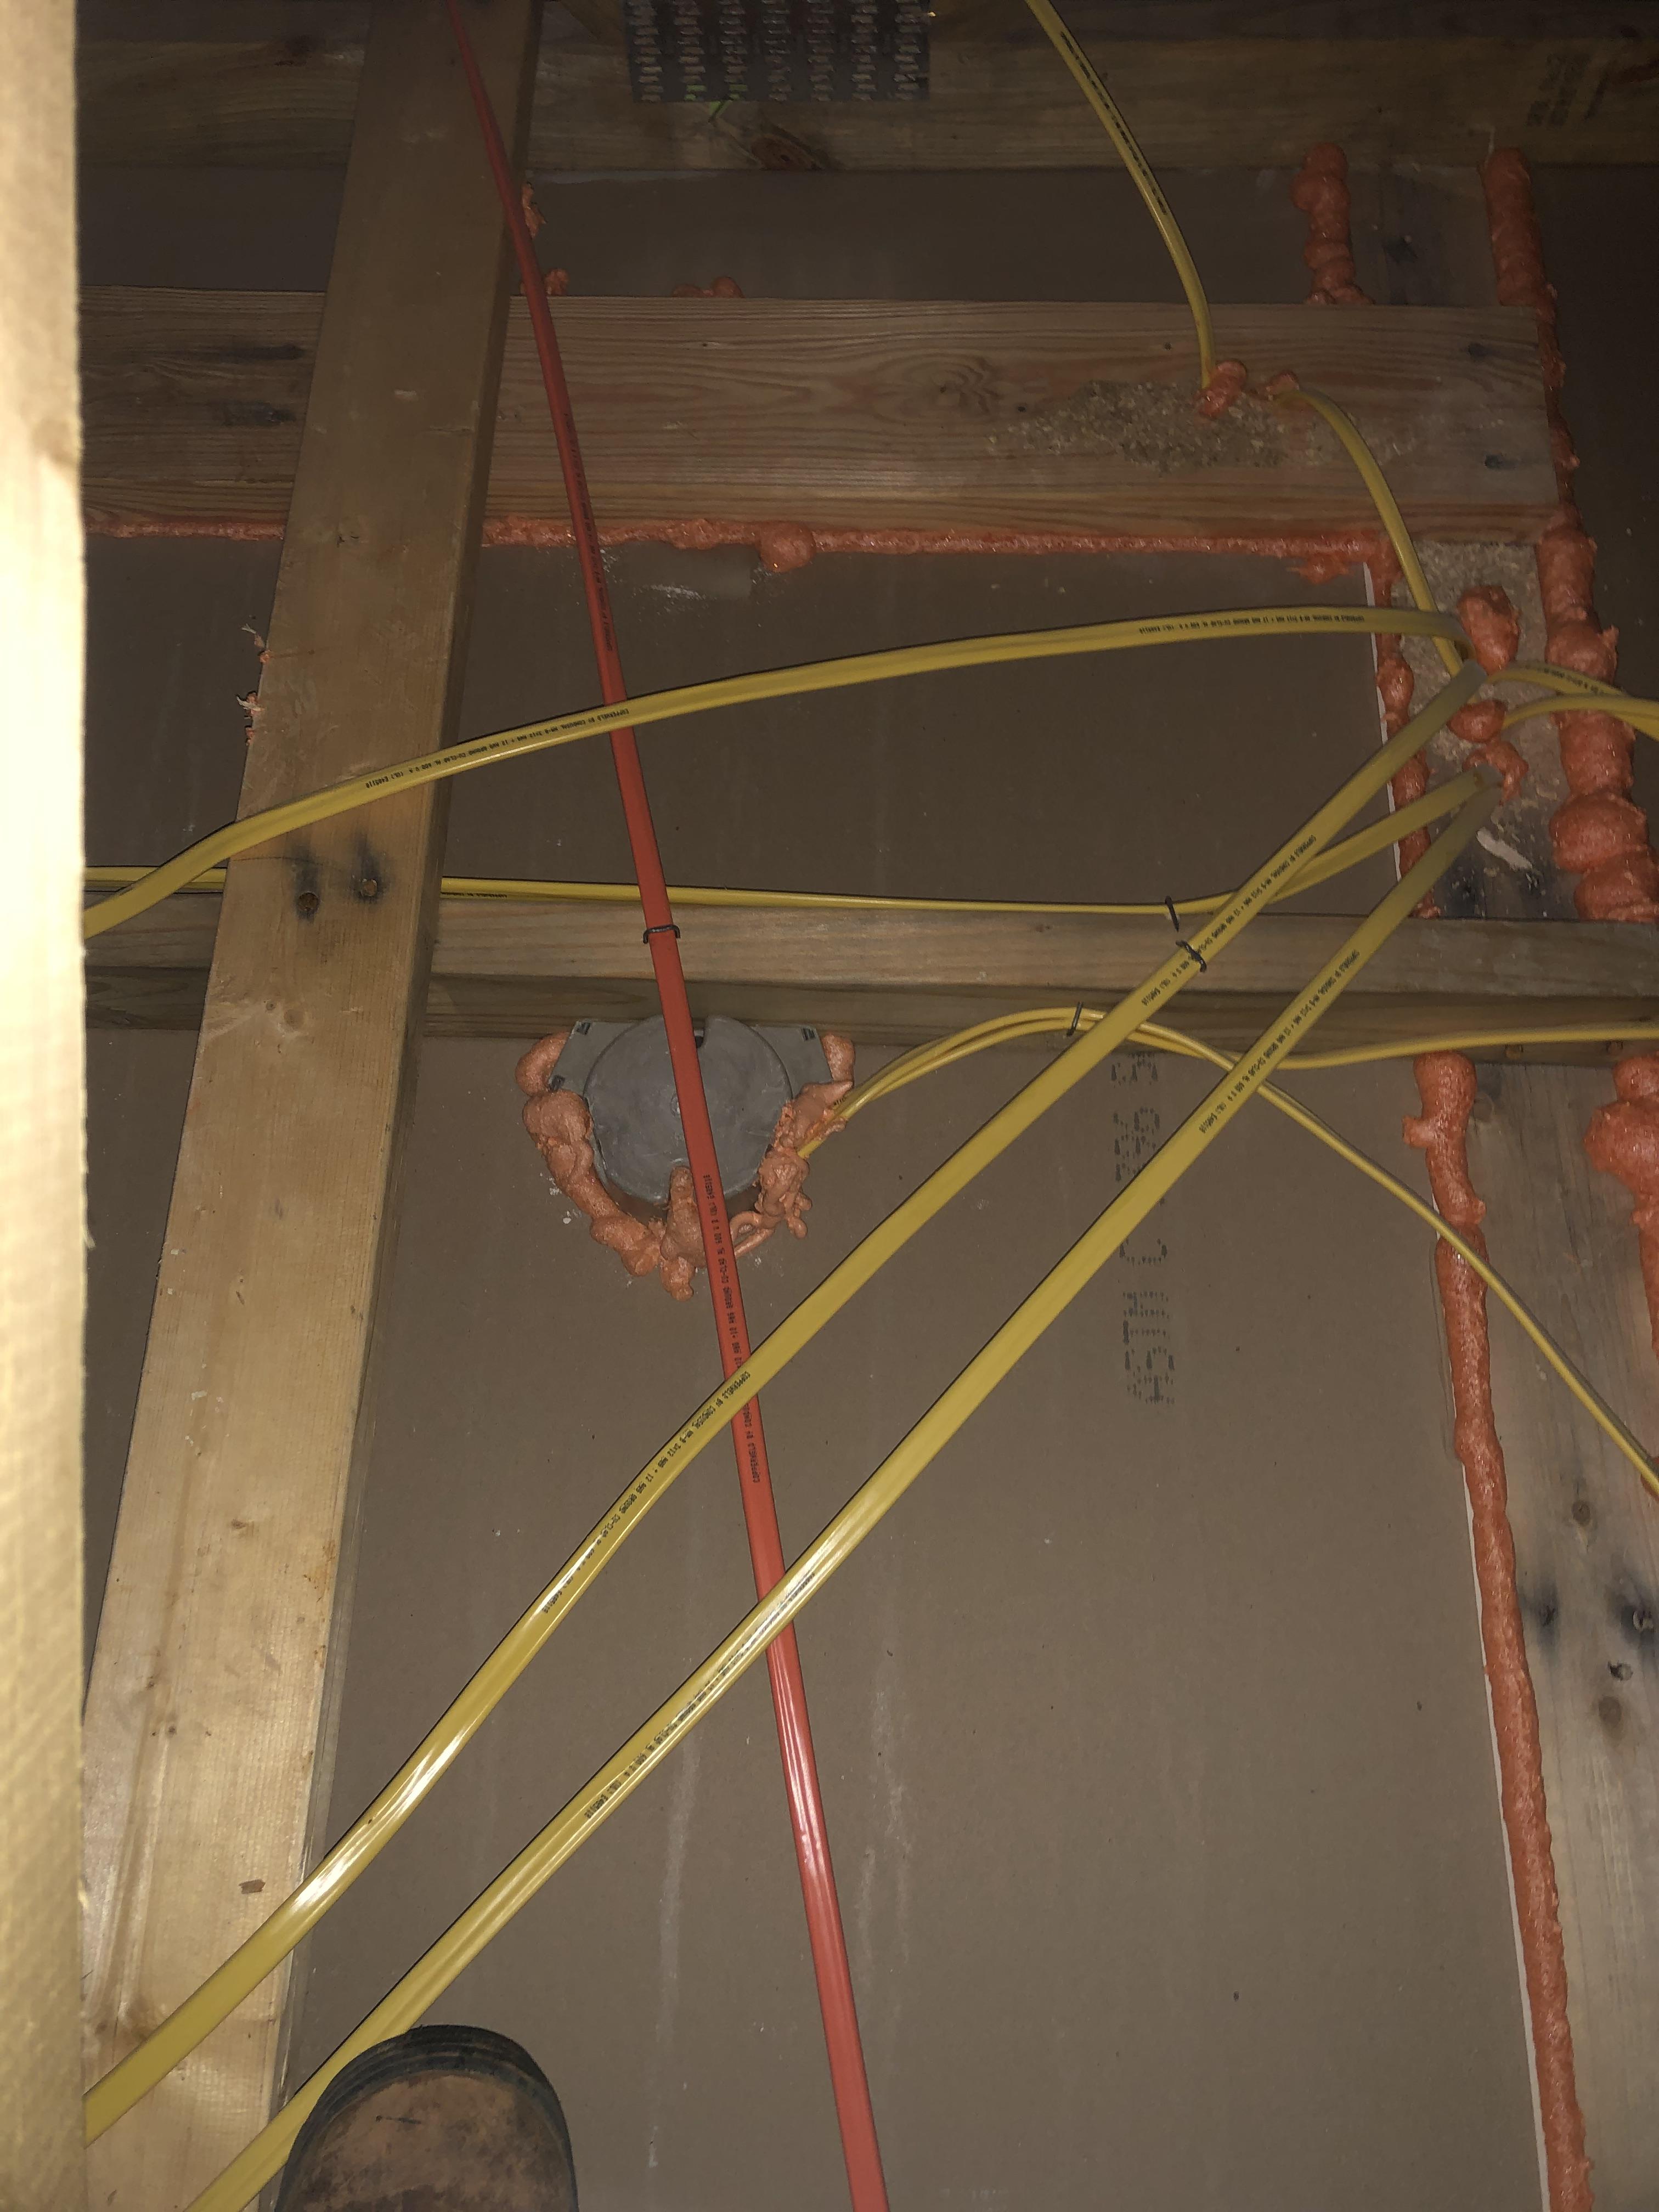
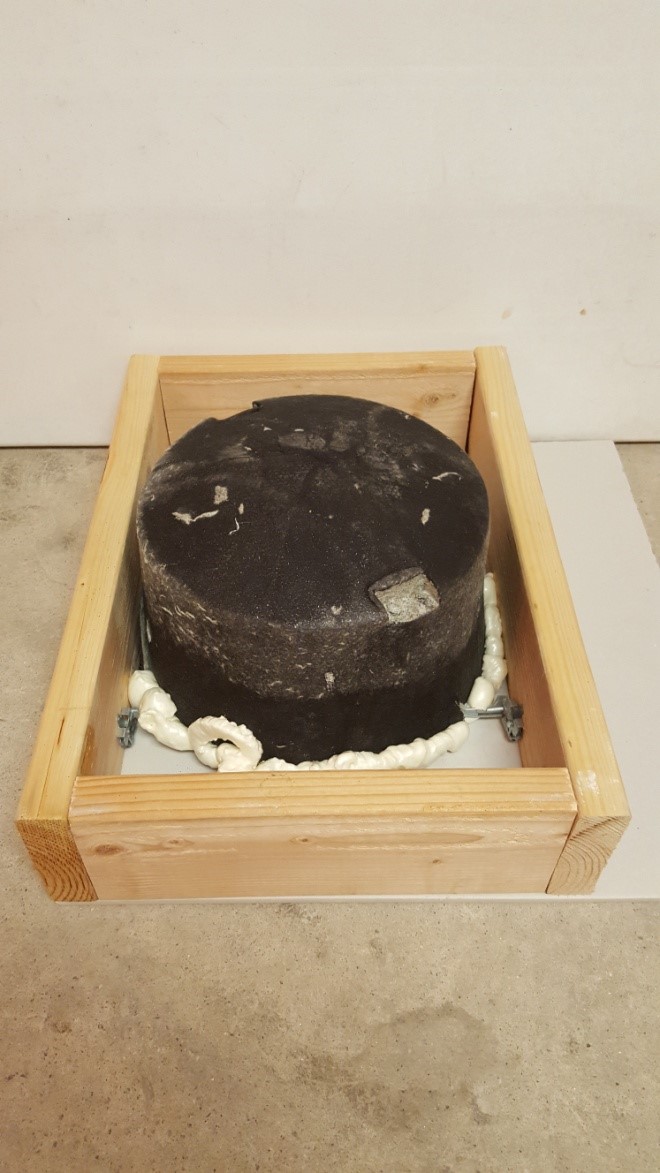
Right - This opening in the foundation wall around this pipe was filled with wire mesh then sealed with spray foam to prevent rodent and insect entry
Image
Right - Walls and ceilings shared by the garage and living space must be air sealed and insulated.
Image
Image
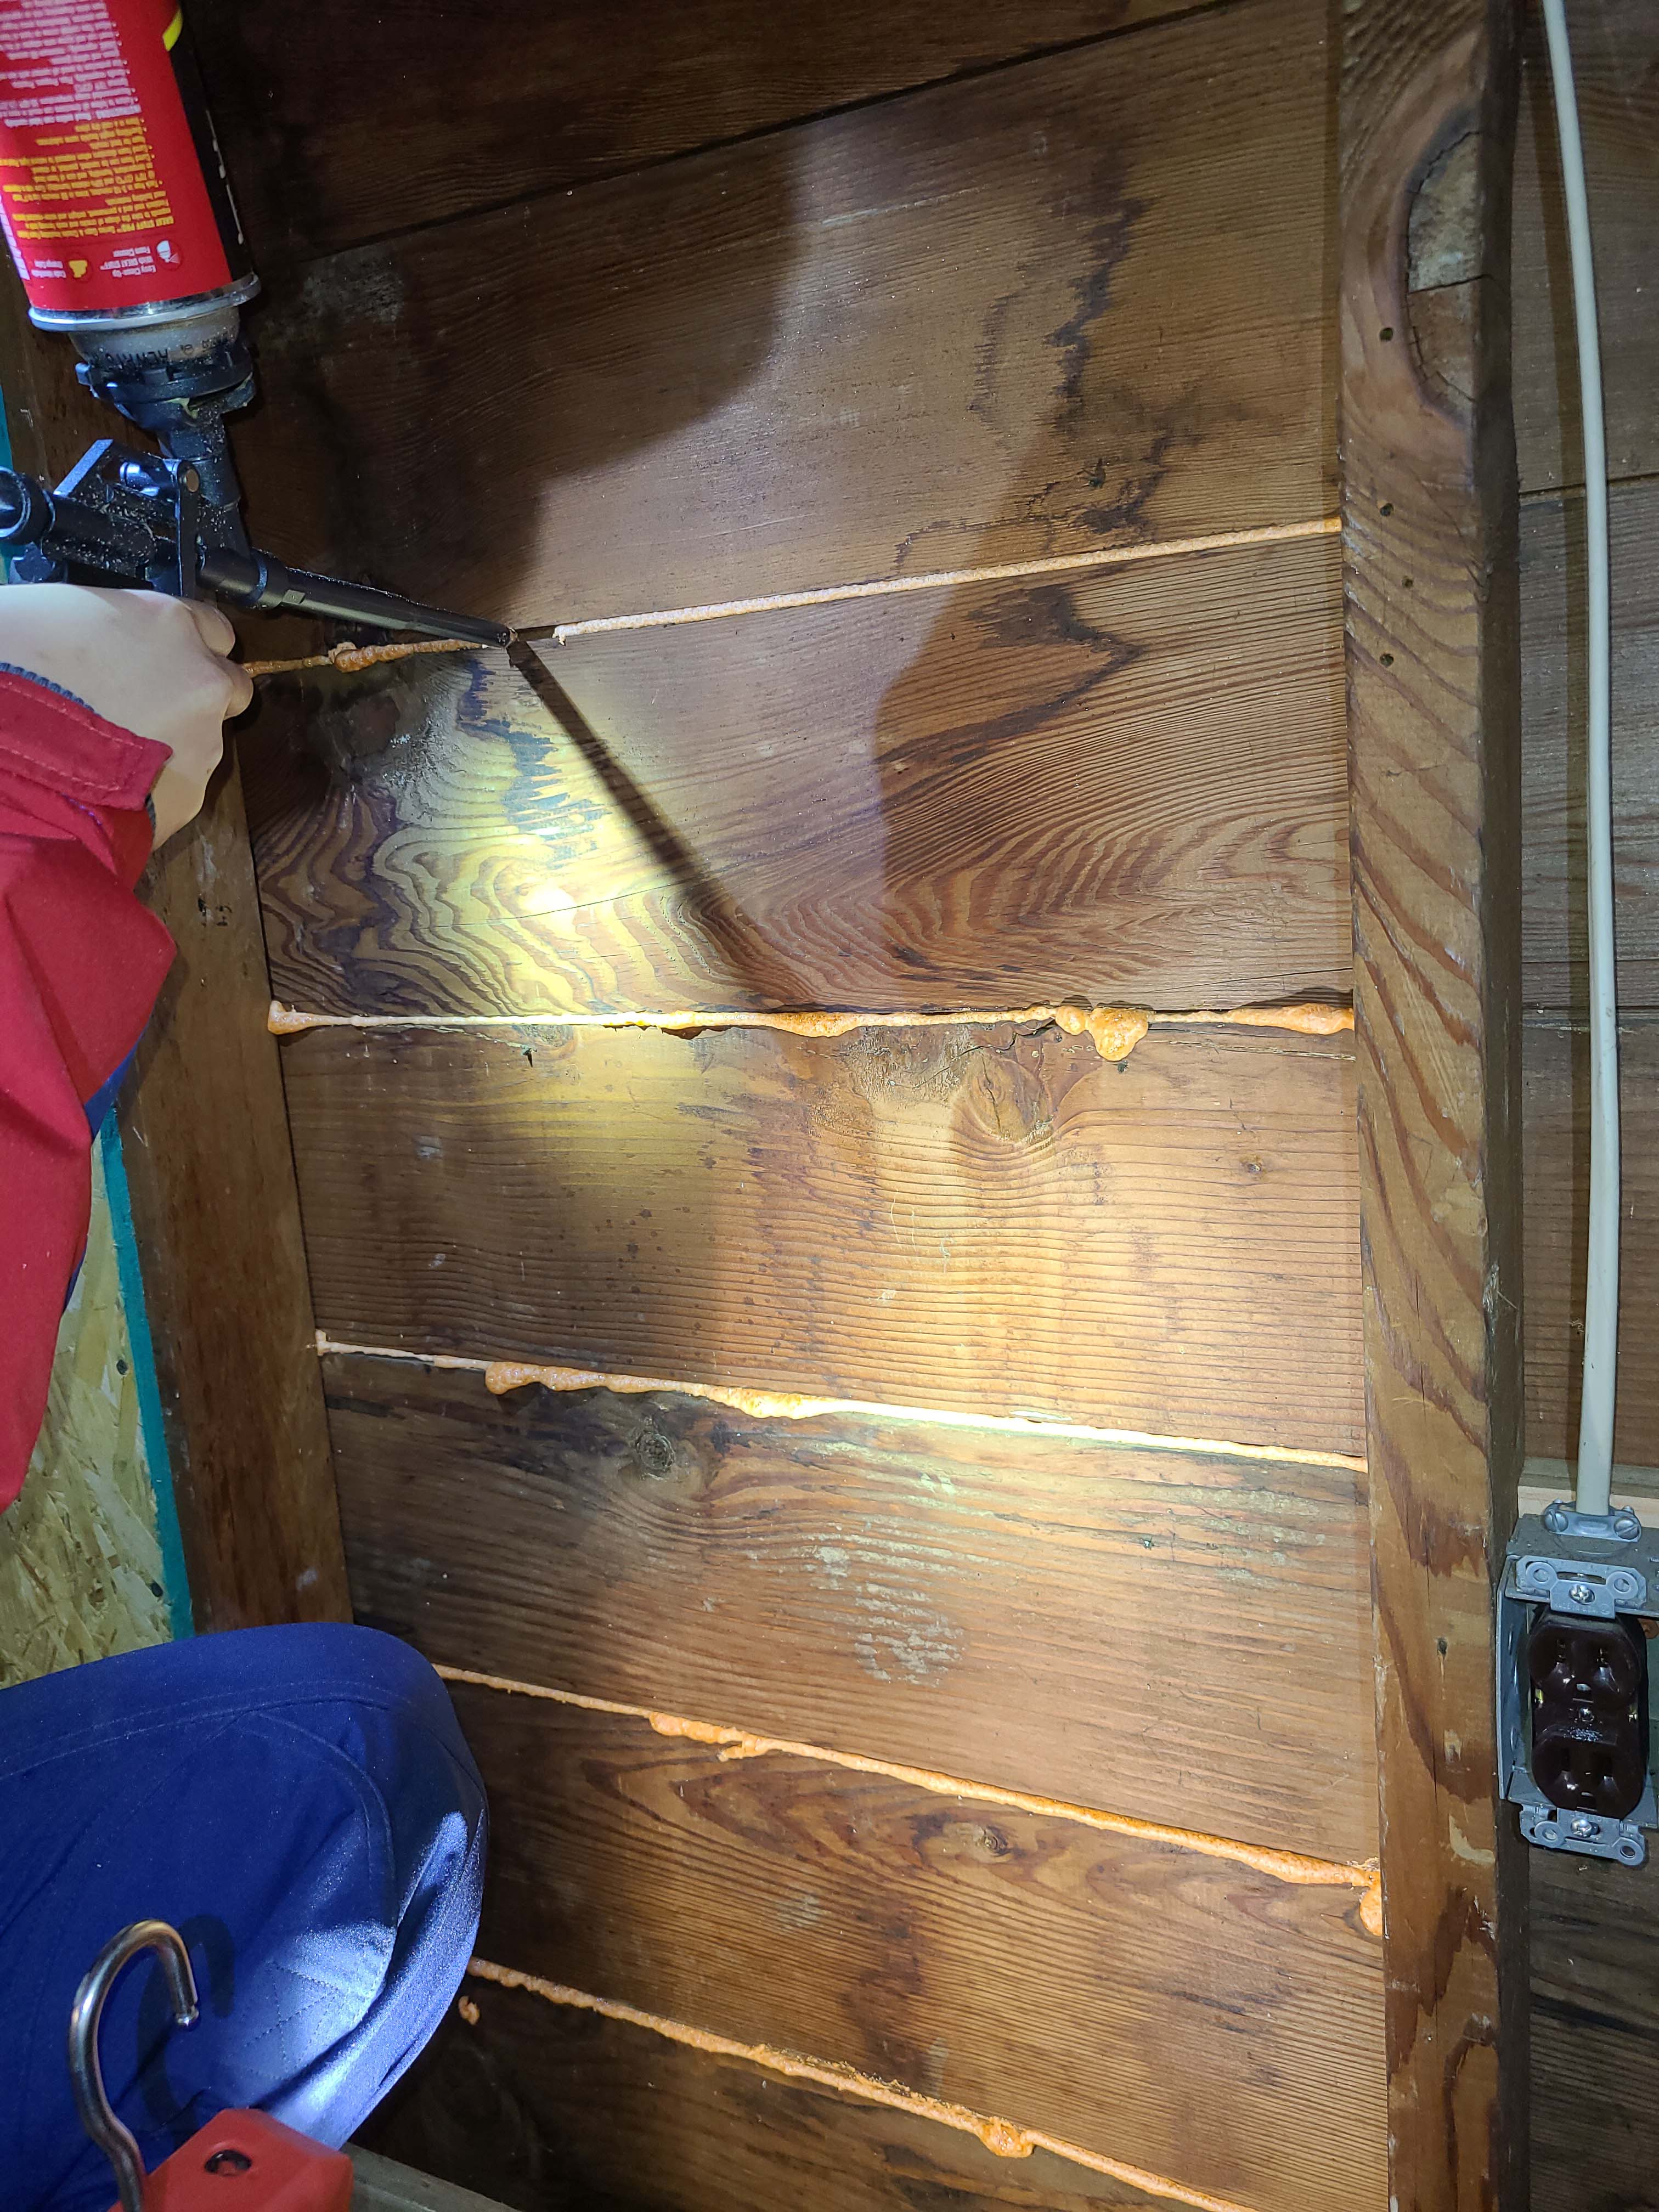
Right - Wood board sheathing seams are being sealed with low-expanding spray foam.
Image

Right – Attic access hatch has been properly insulated by attaching a fiberglass batt, gasketed, and opening has blocking
Image
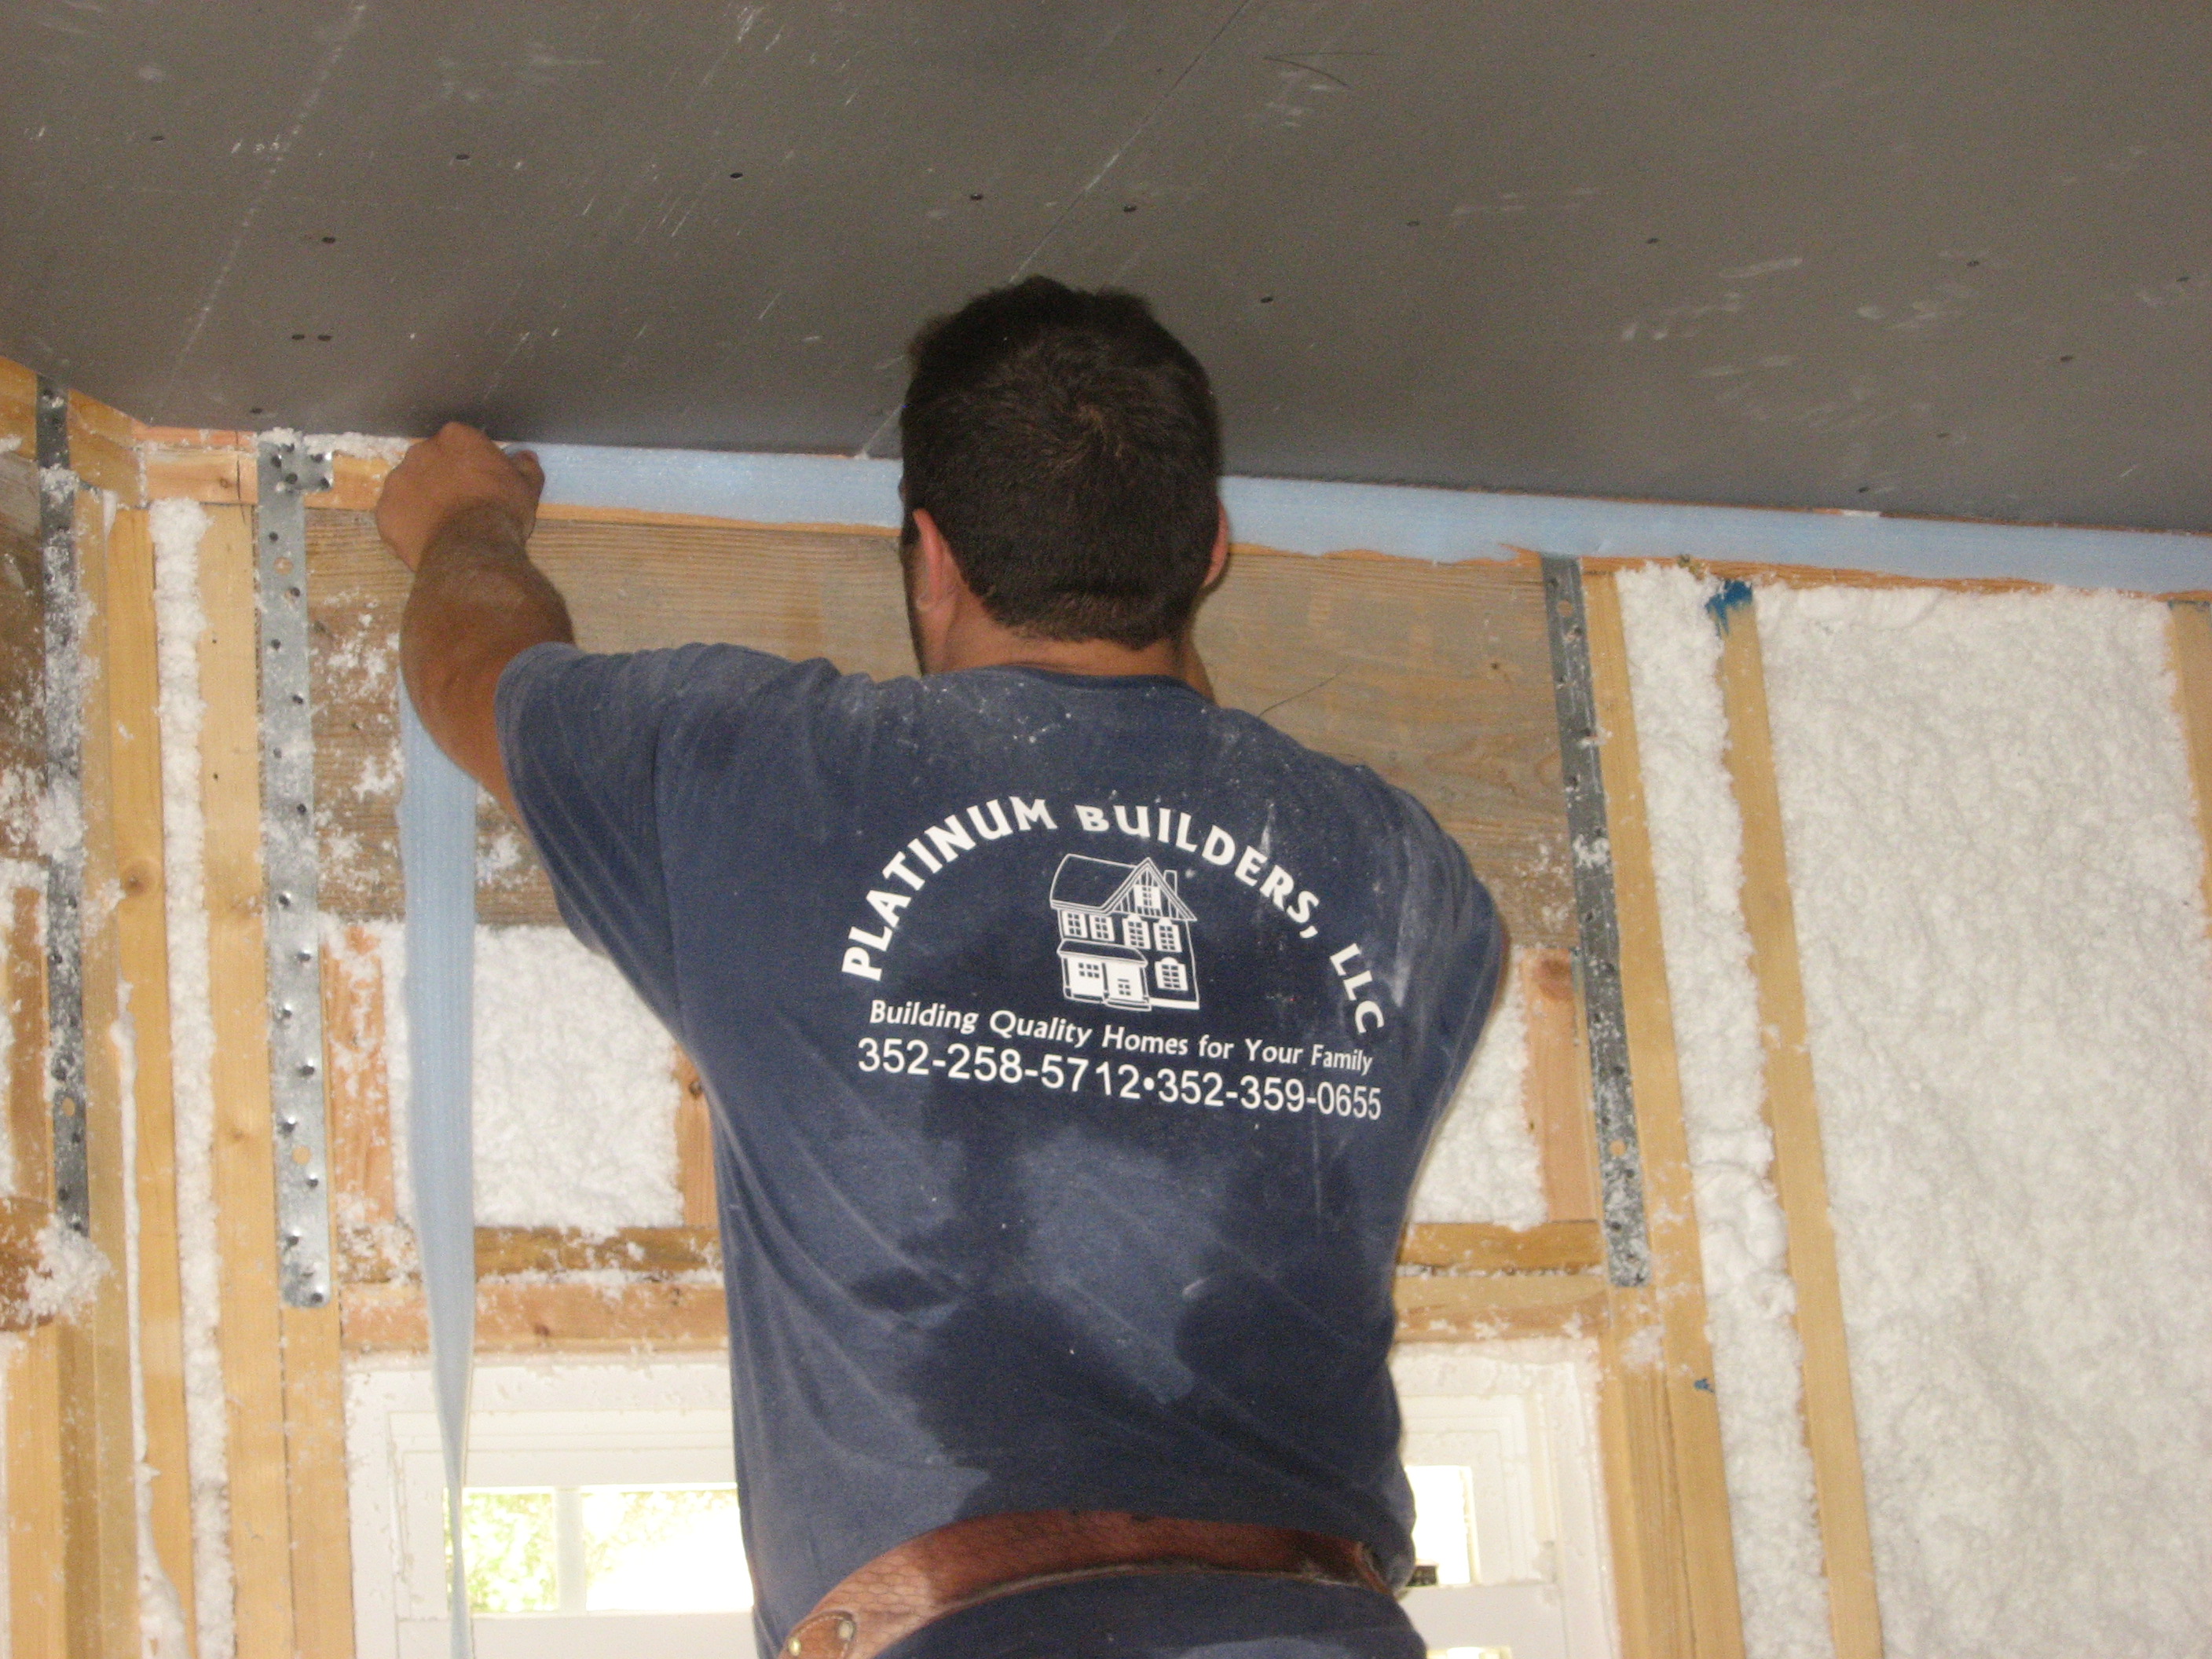
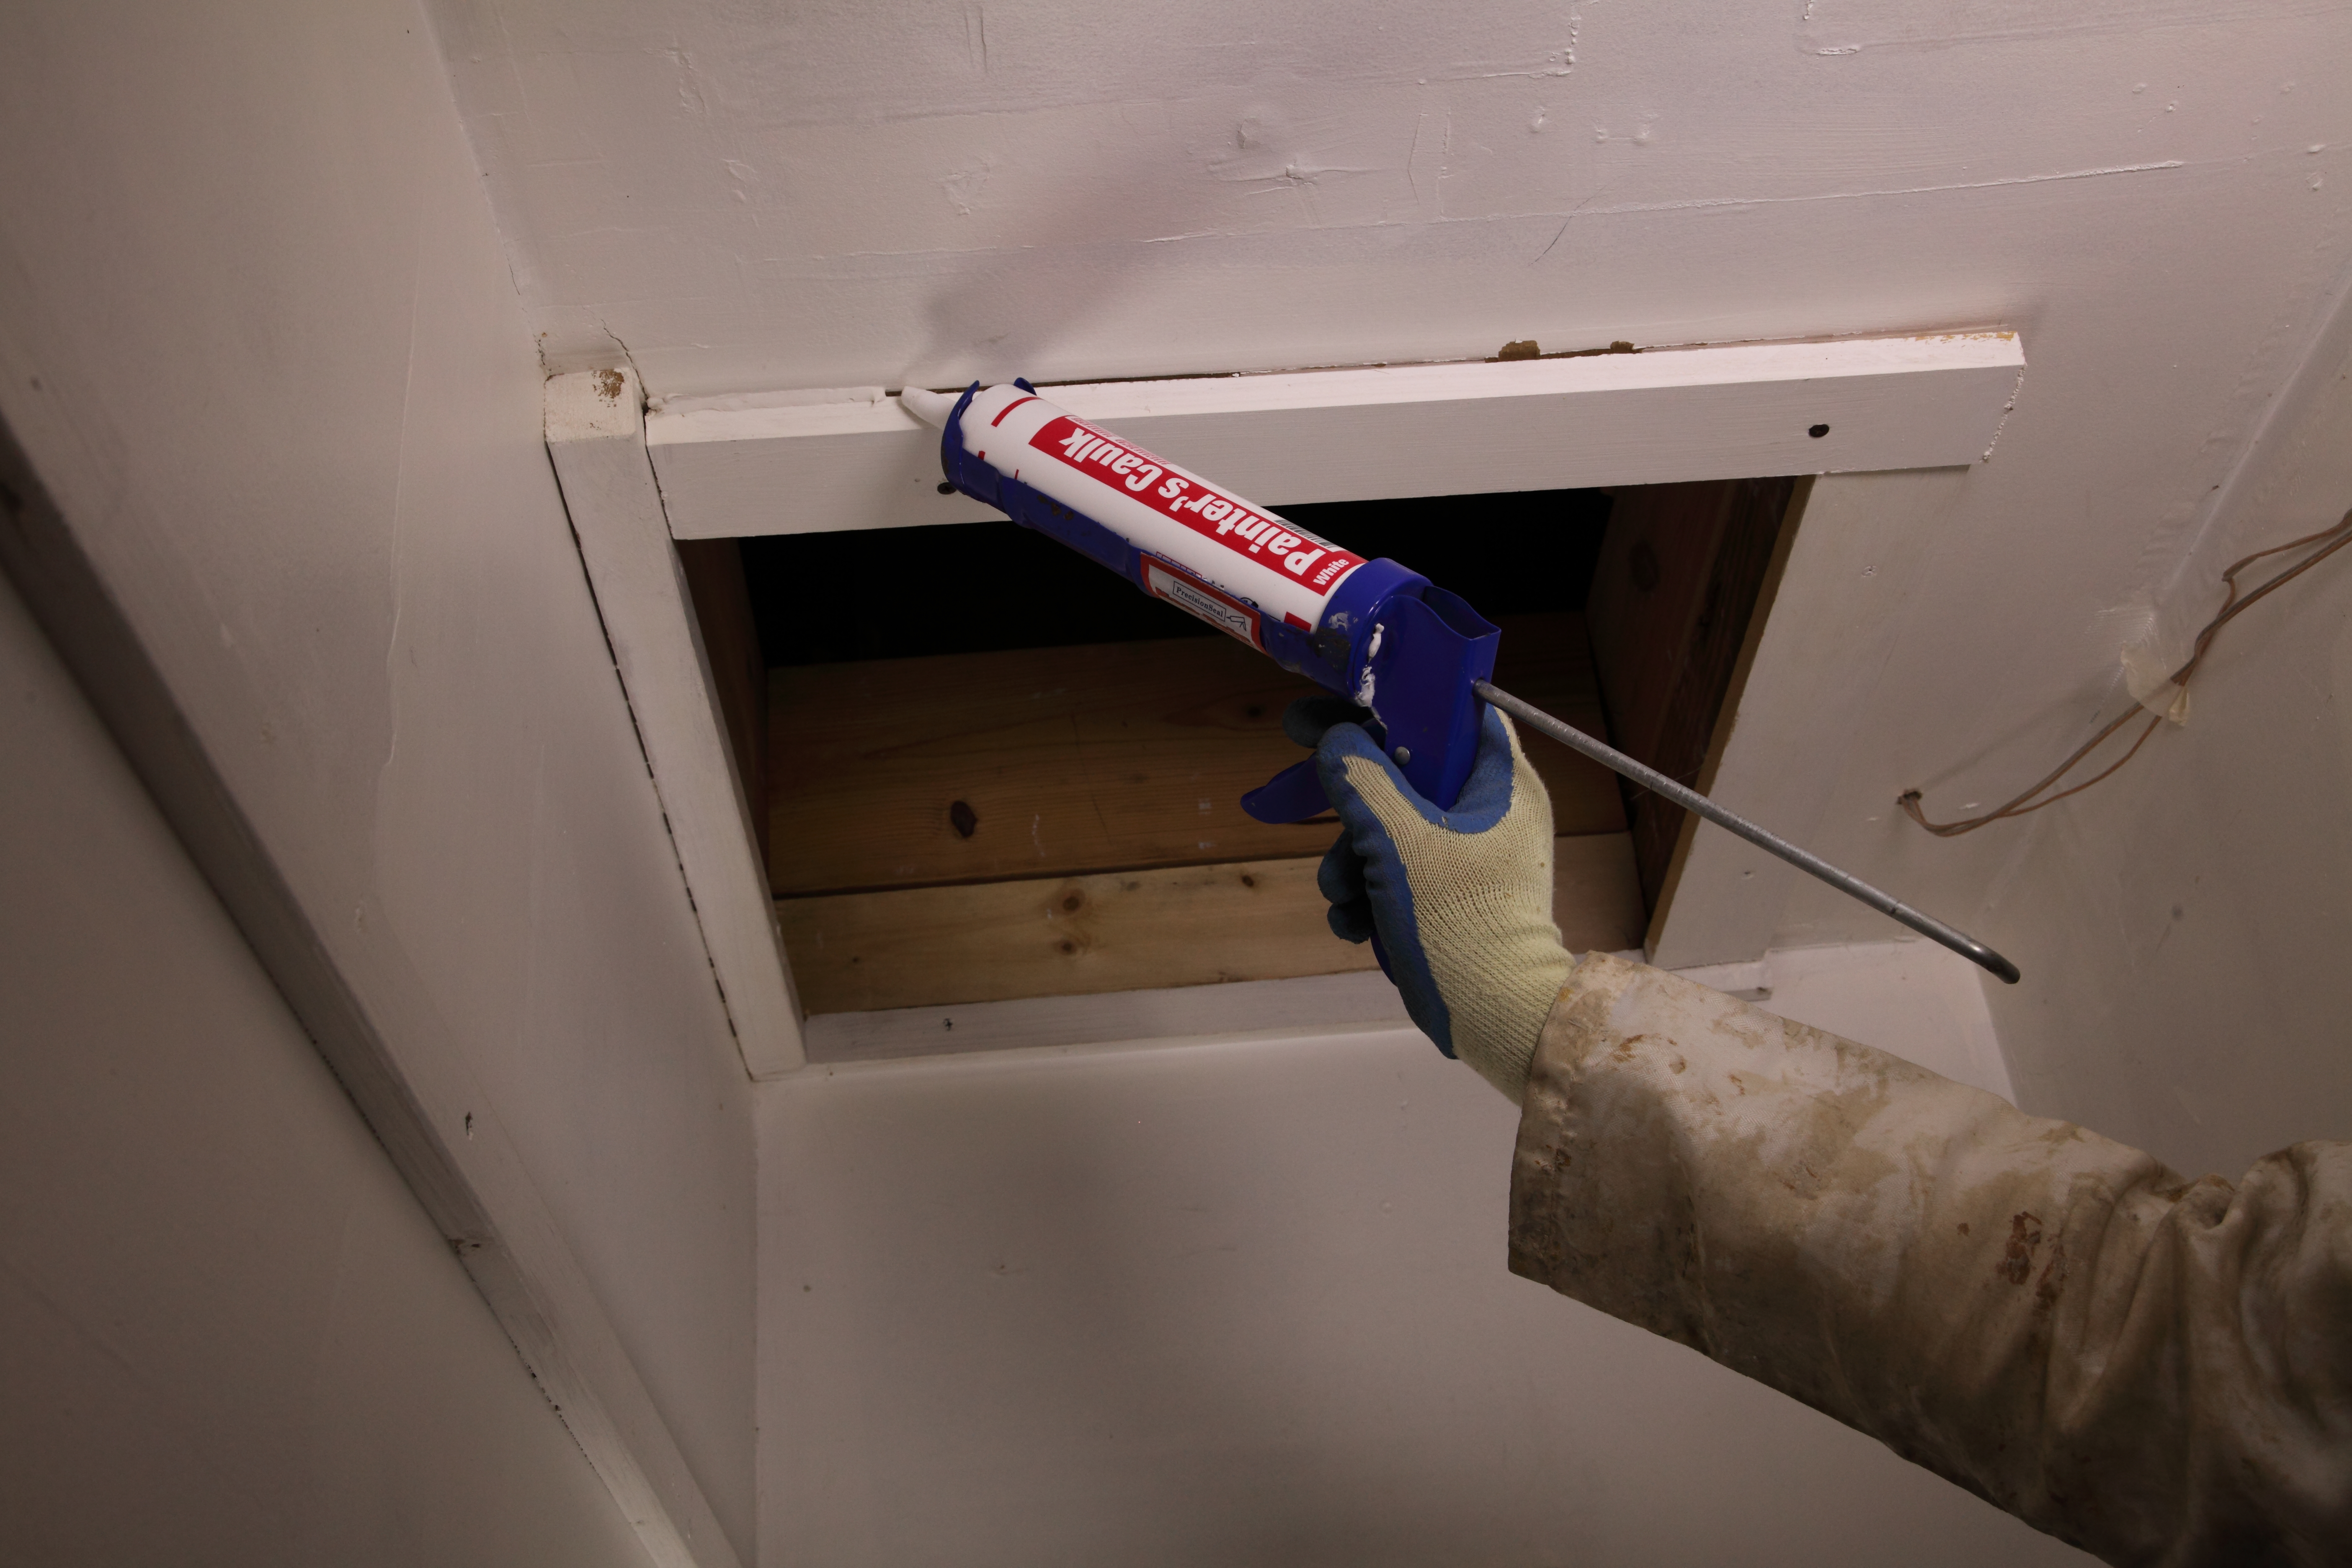
Right – A bead of sealant will form an airtight gasket between the top plate and drywall.
Image
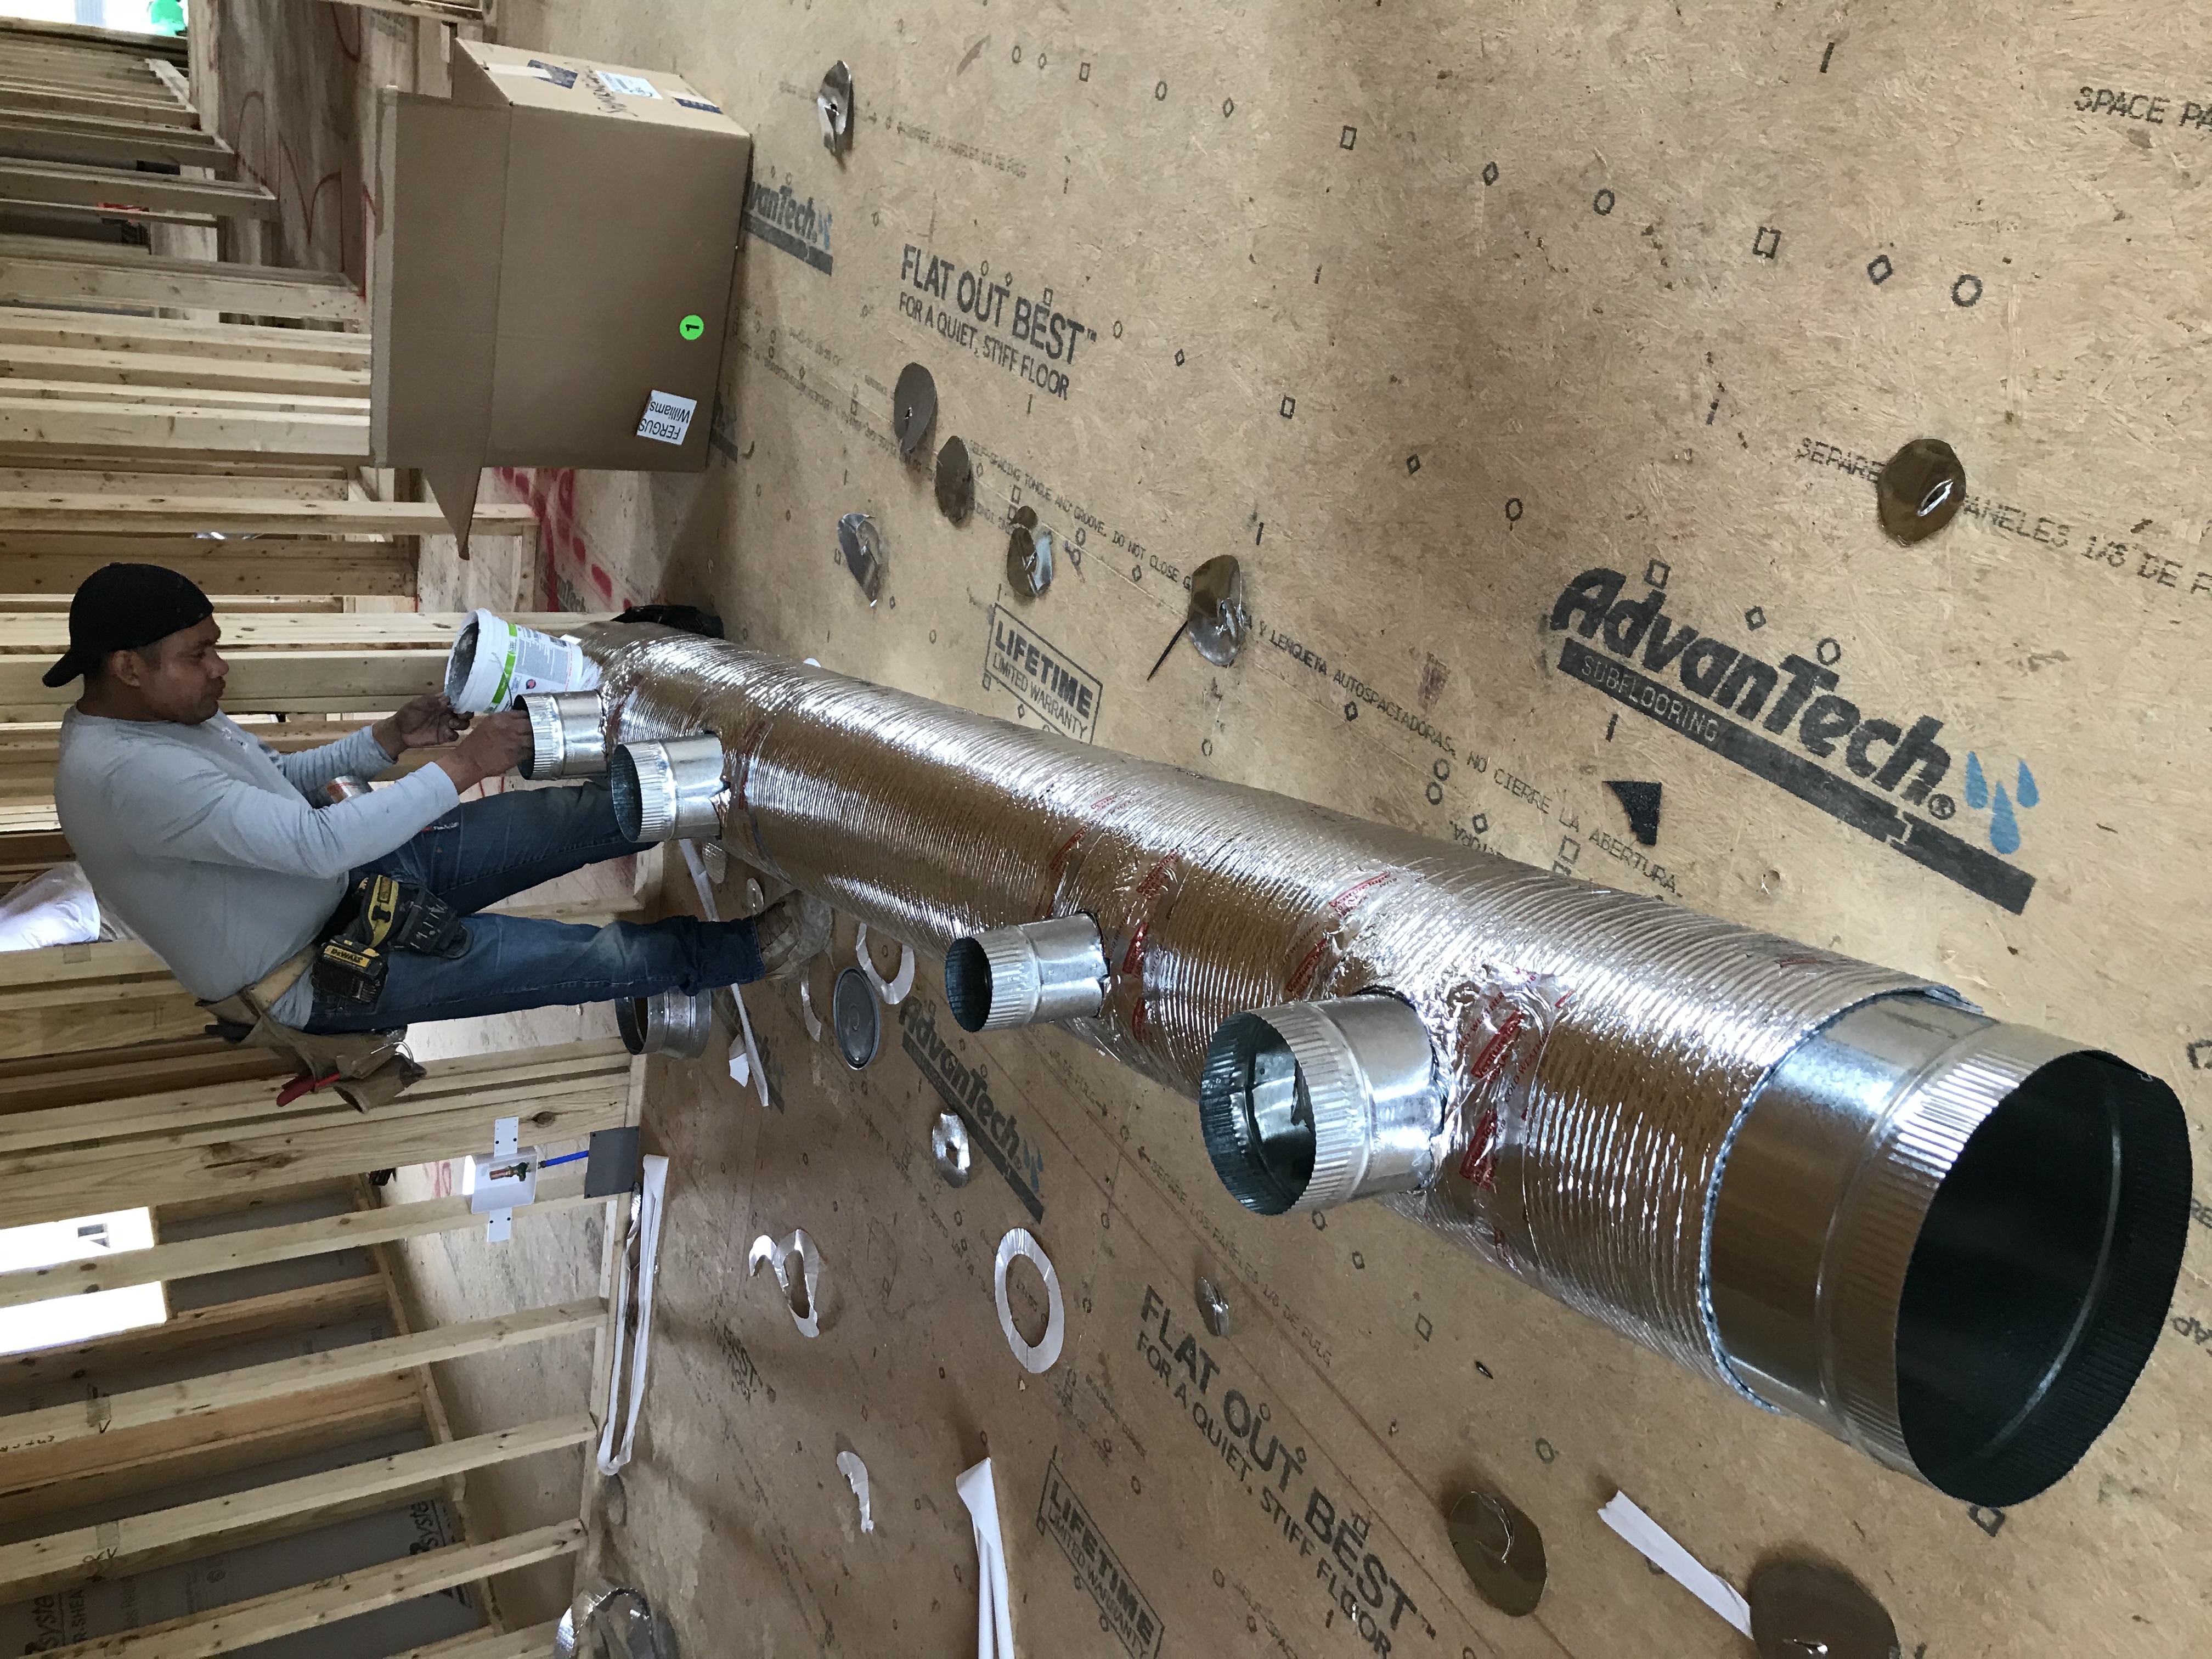
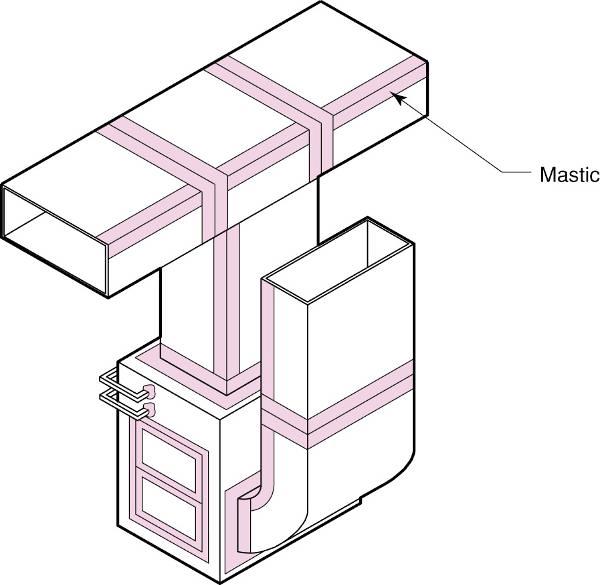
Right – A contractor installs mastic in branch duct take offs to air seal the seams where they attach to the trunk duct.
Image
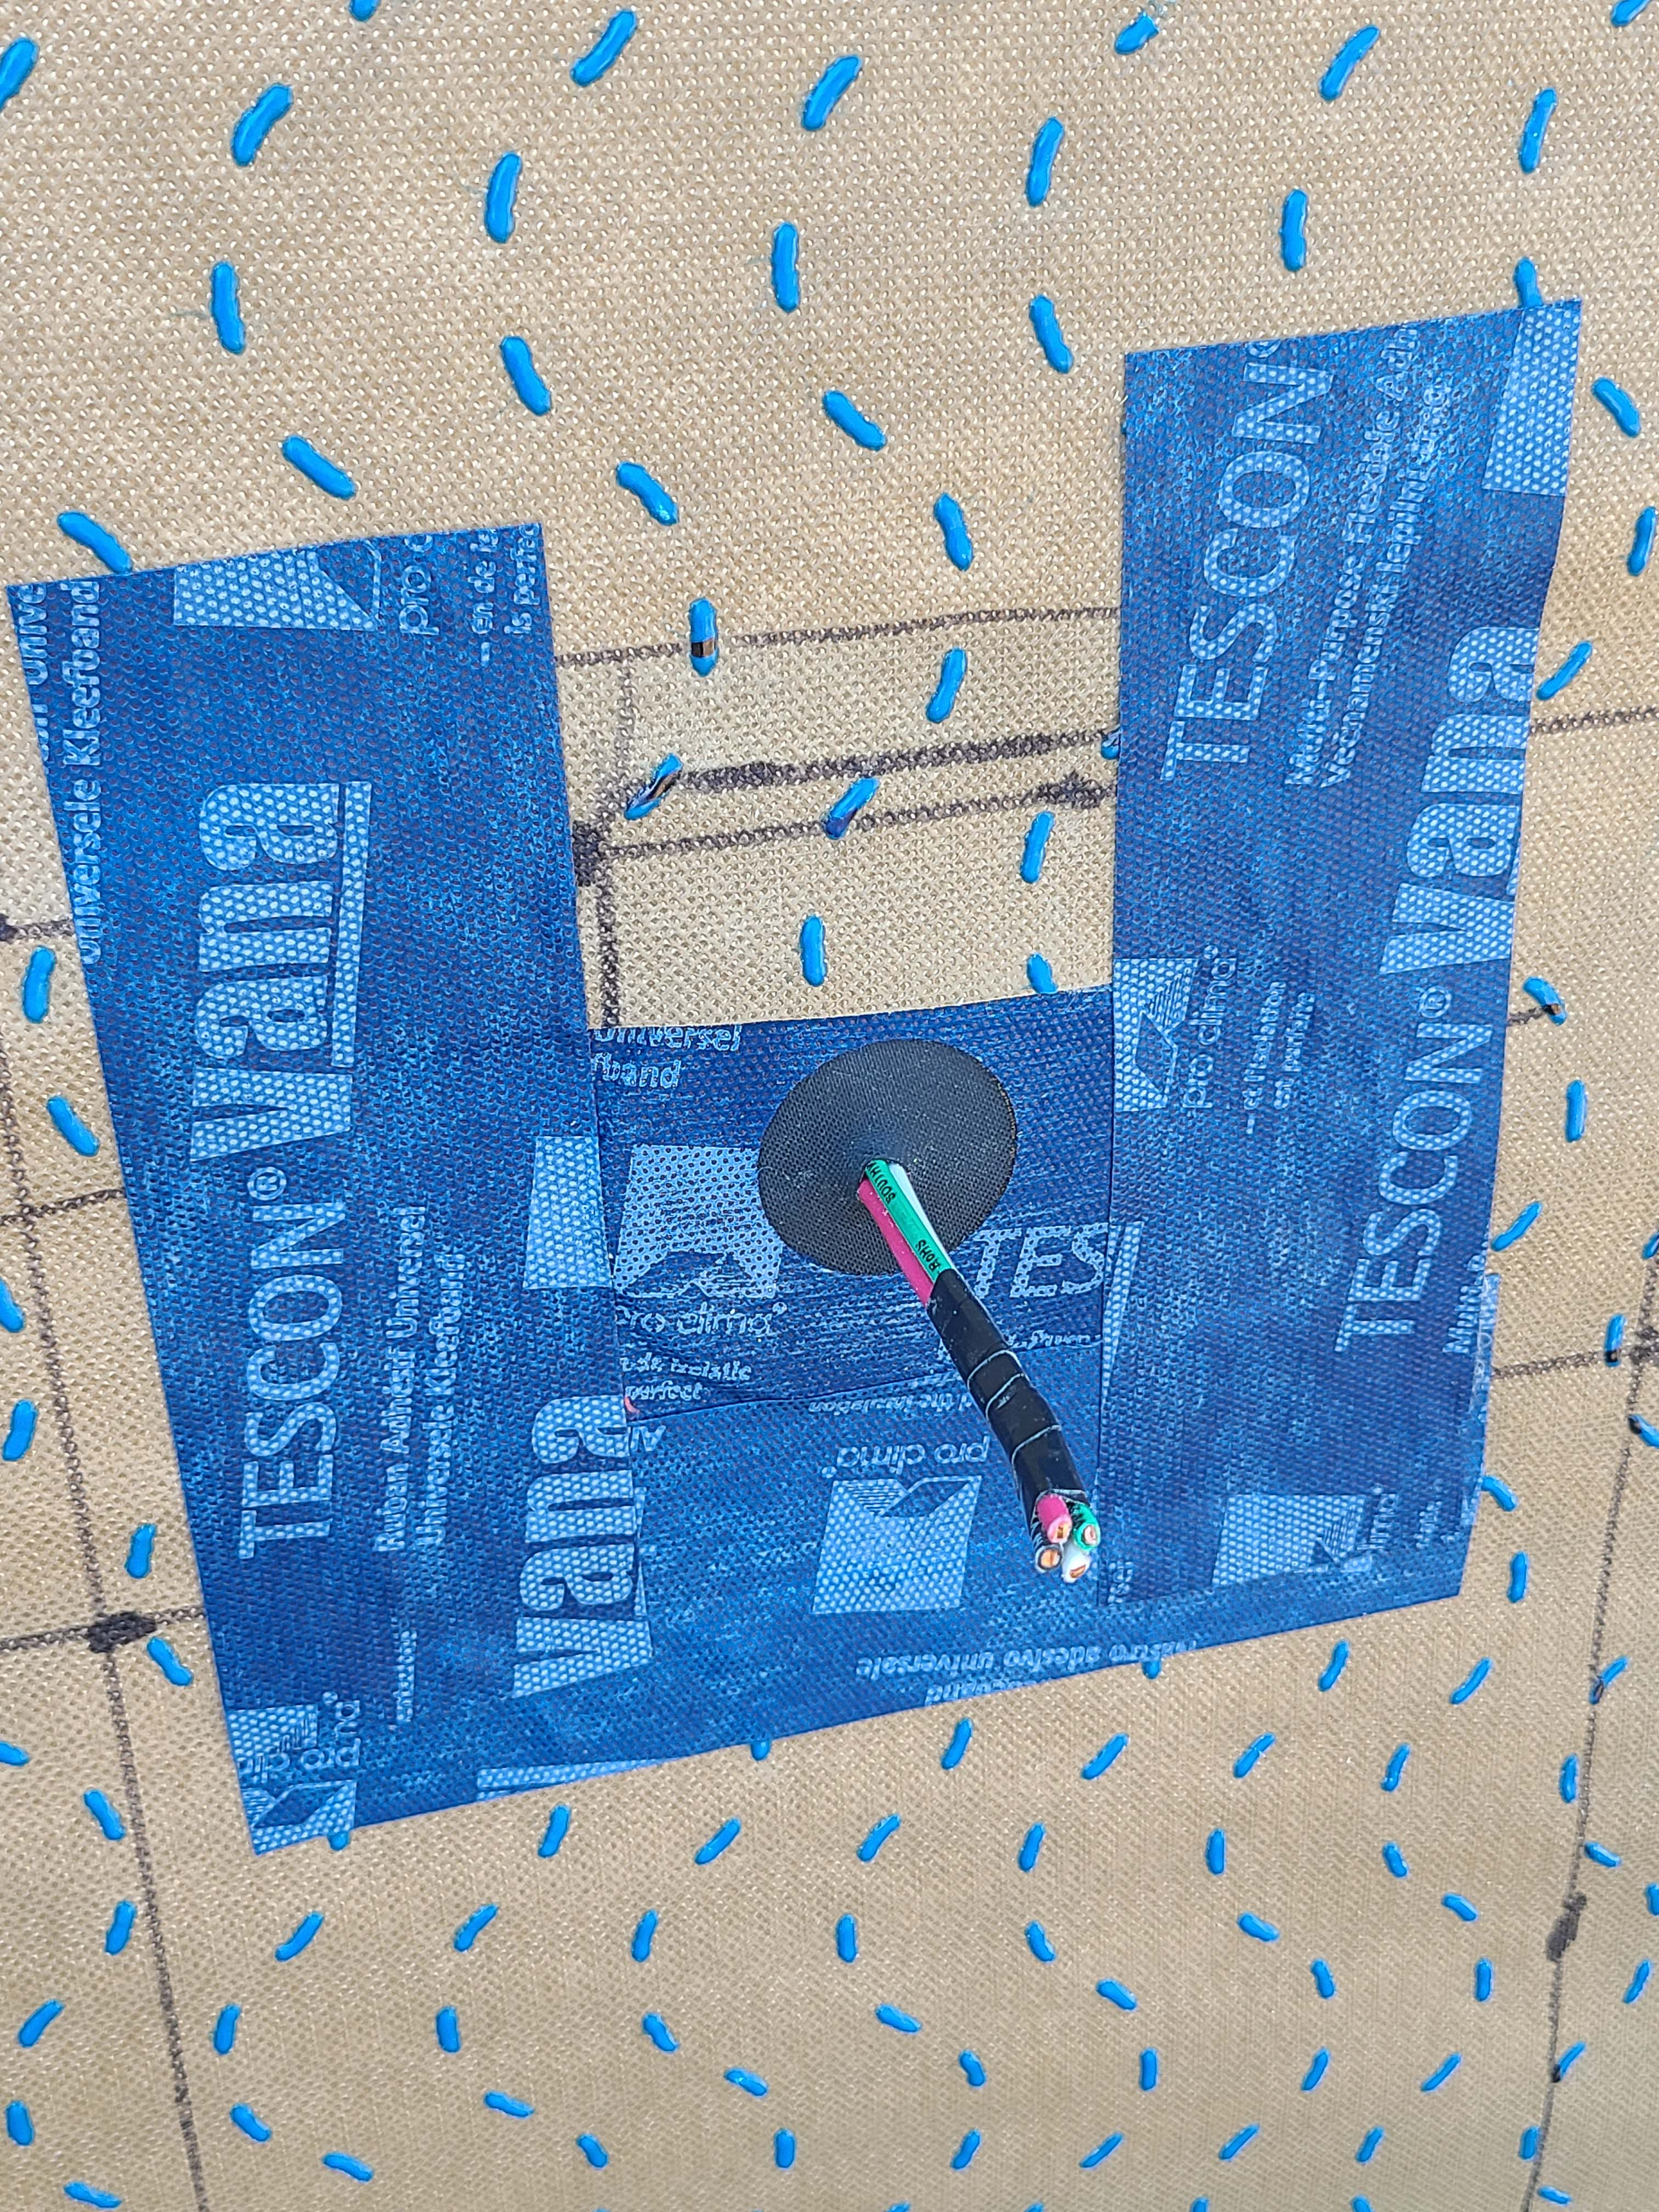
Right – A flexible tape is used to air-seal around wiring holes in the coated sheathing.
Image
Right – A layer of sealant covers the wood-to-foam layer seams in the insulated header.
Image

Right – A strip of foam fabric is installed along the wall top plate to serve as an air sealing gasket when the drywall is installed.
Image
Image
Image
Right – All electrical boxes are carefully sealed as are all top plate-to-drywall seams.
Image
Right – All of the cabinet seams in this HVAC air furnace are sealed with an approved metal tape.
Image
Image
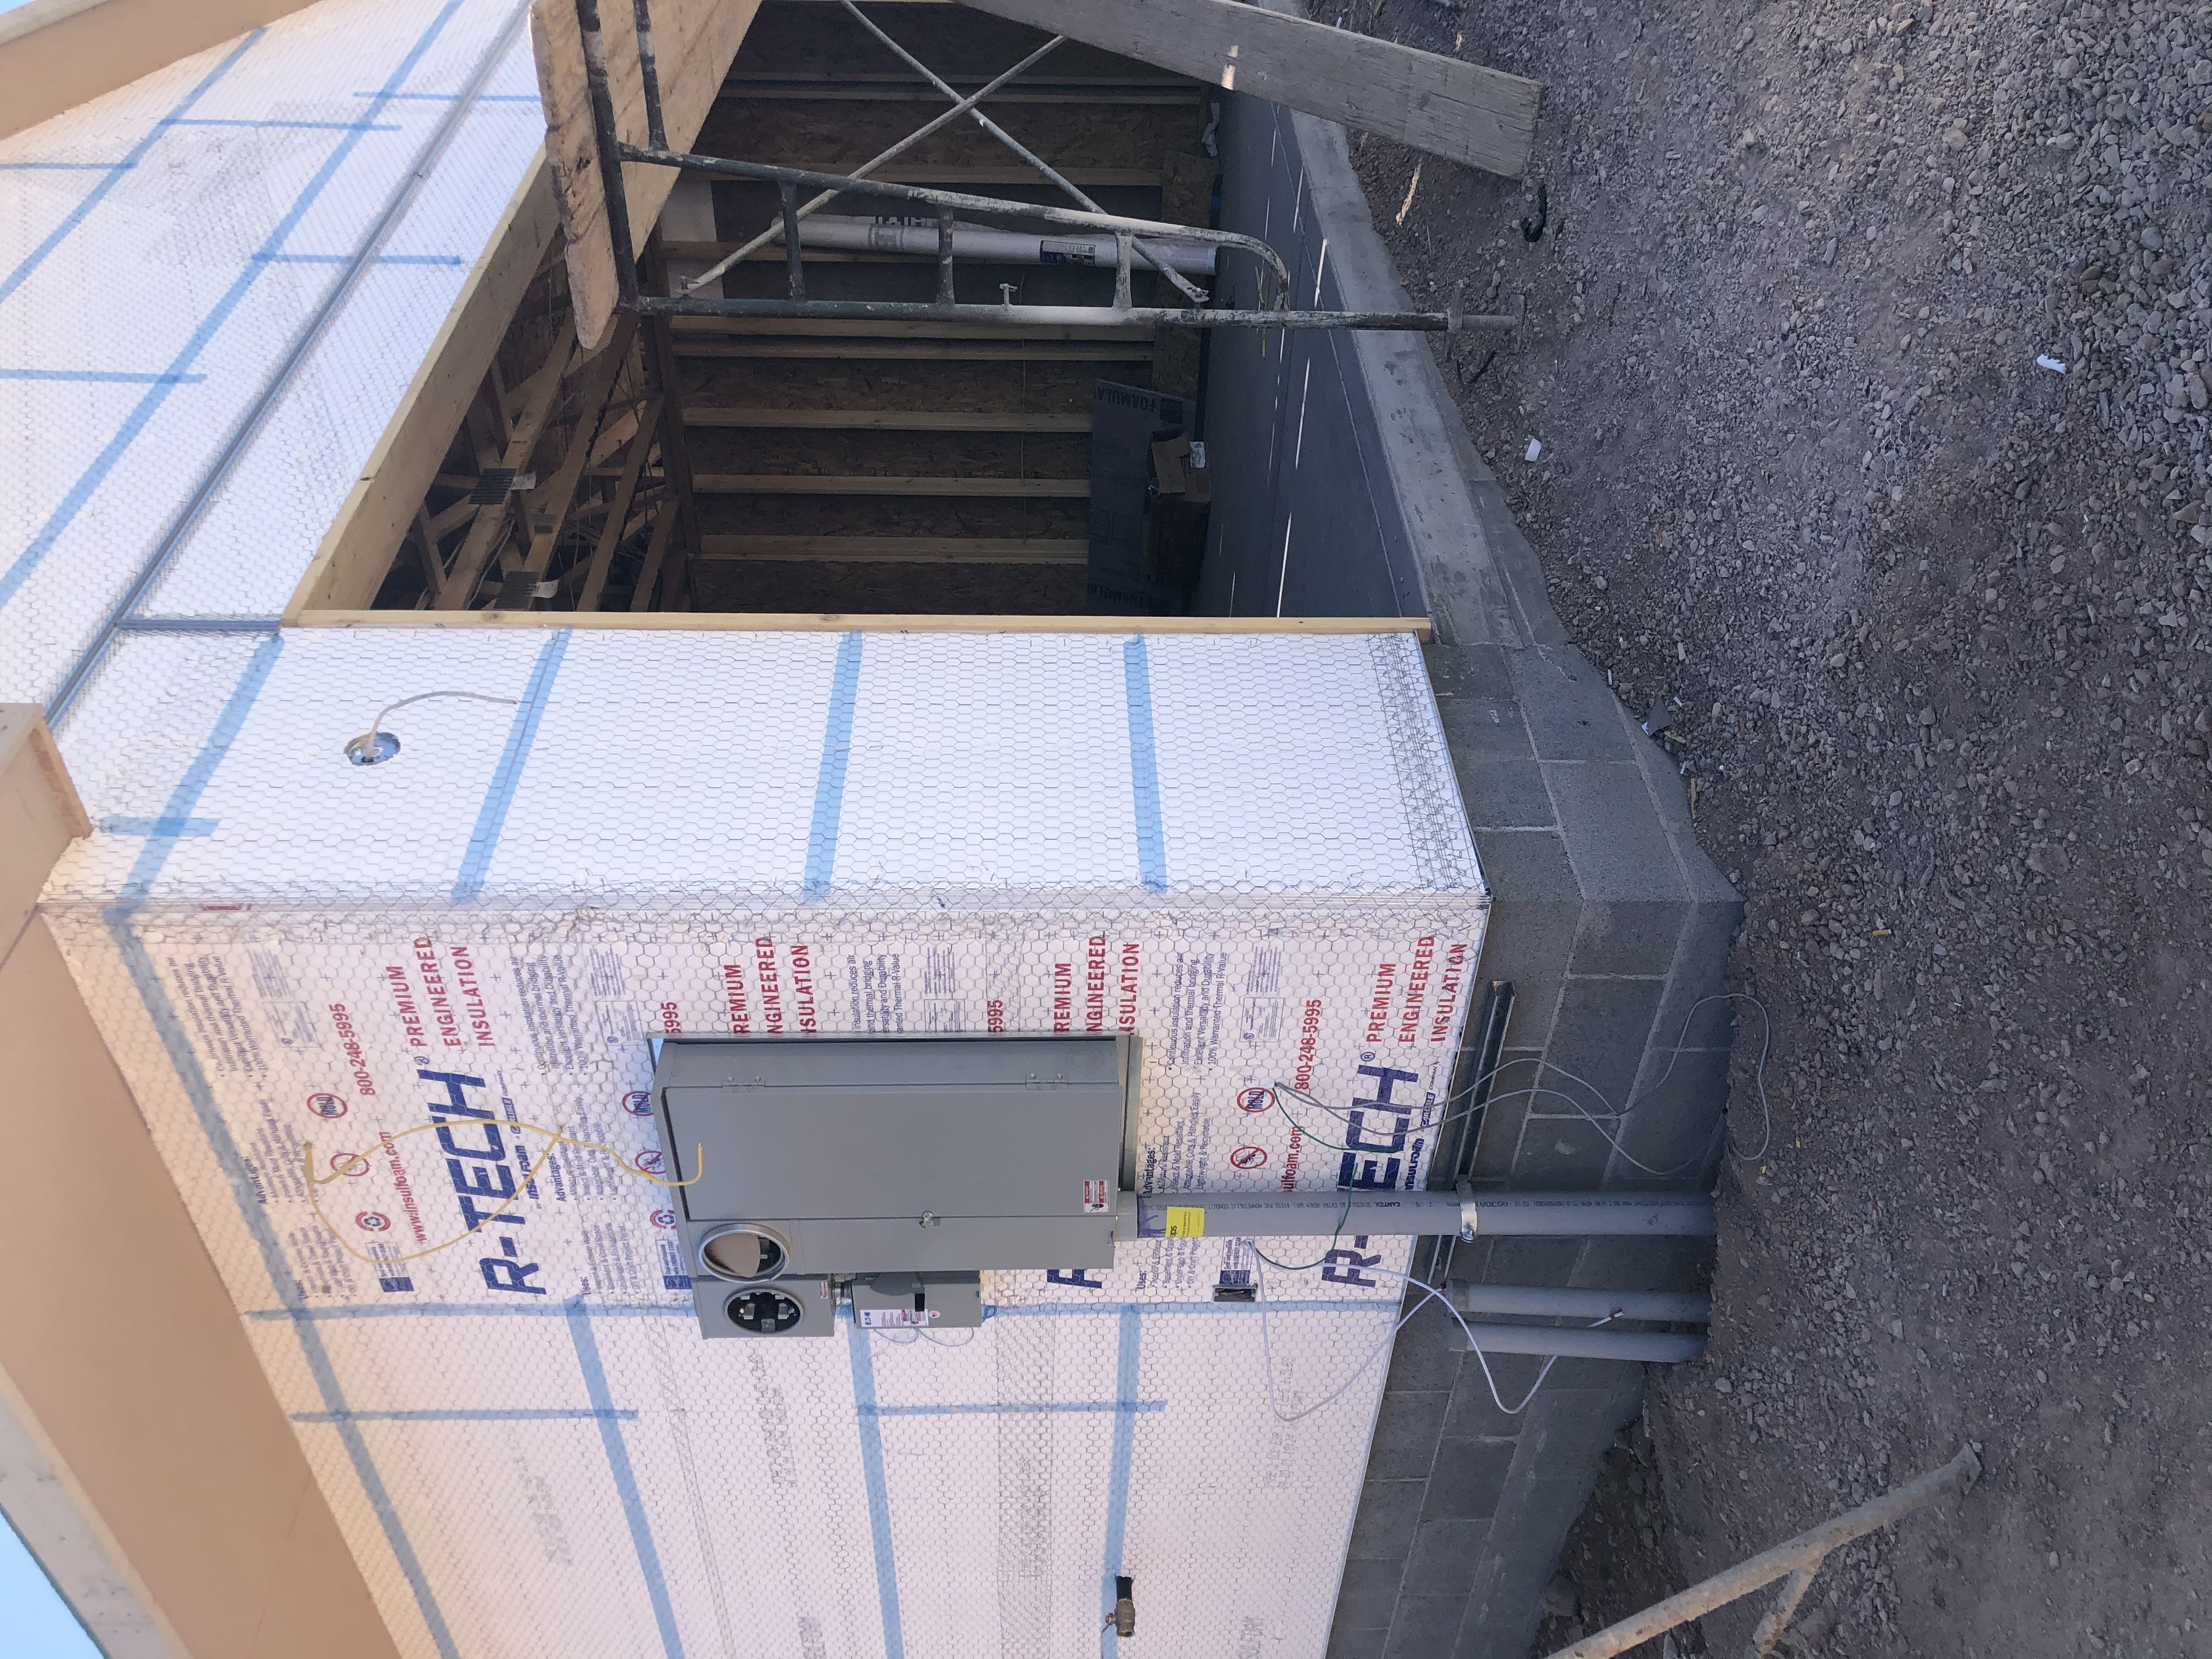
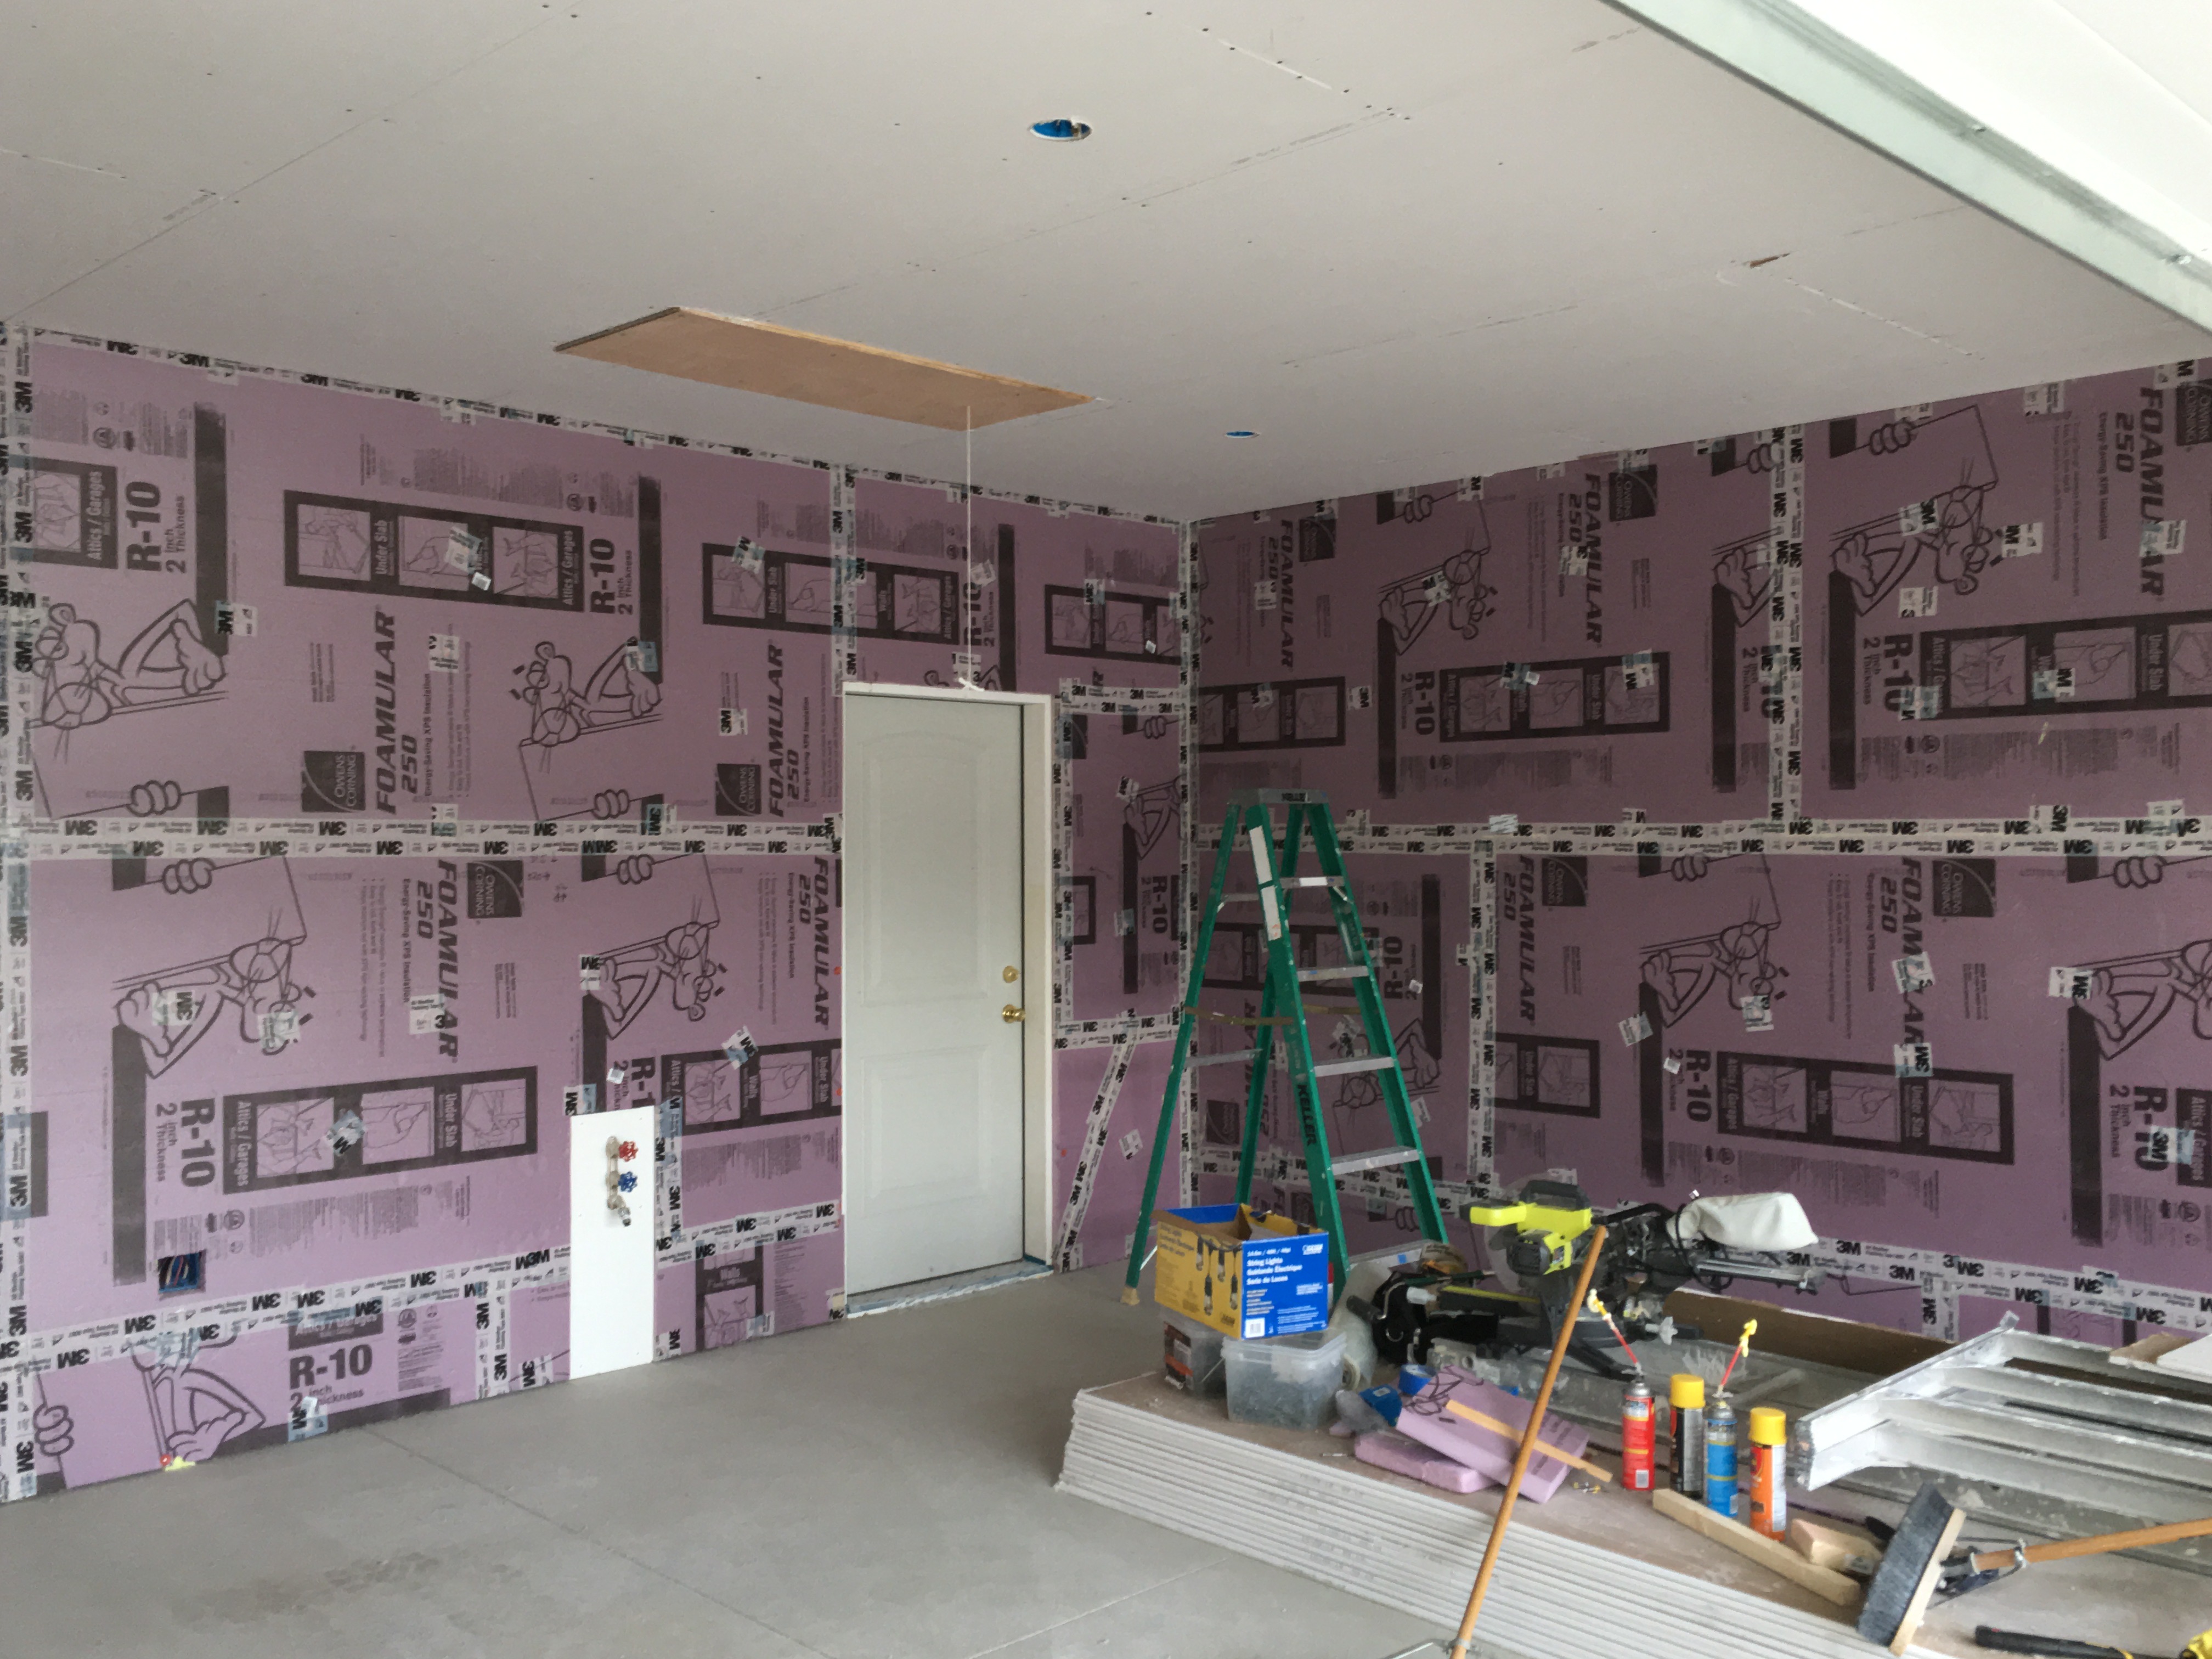
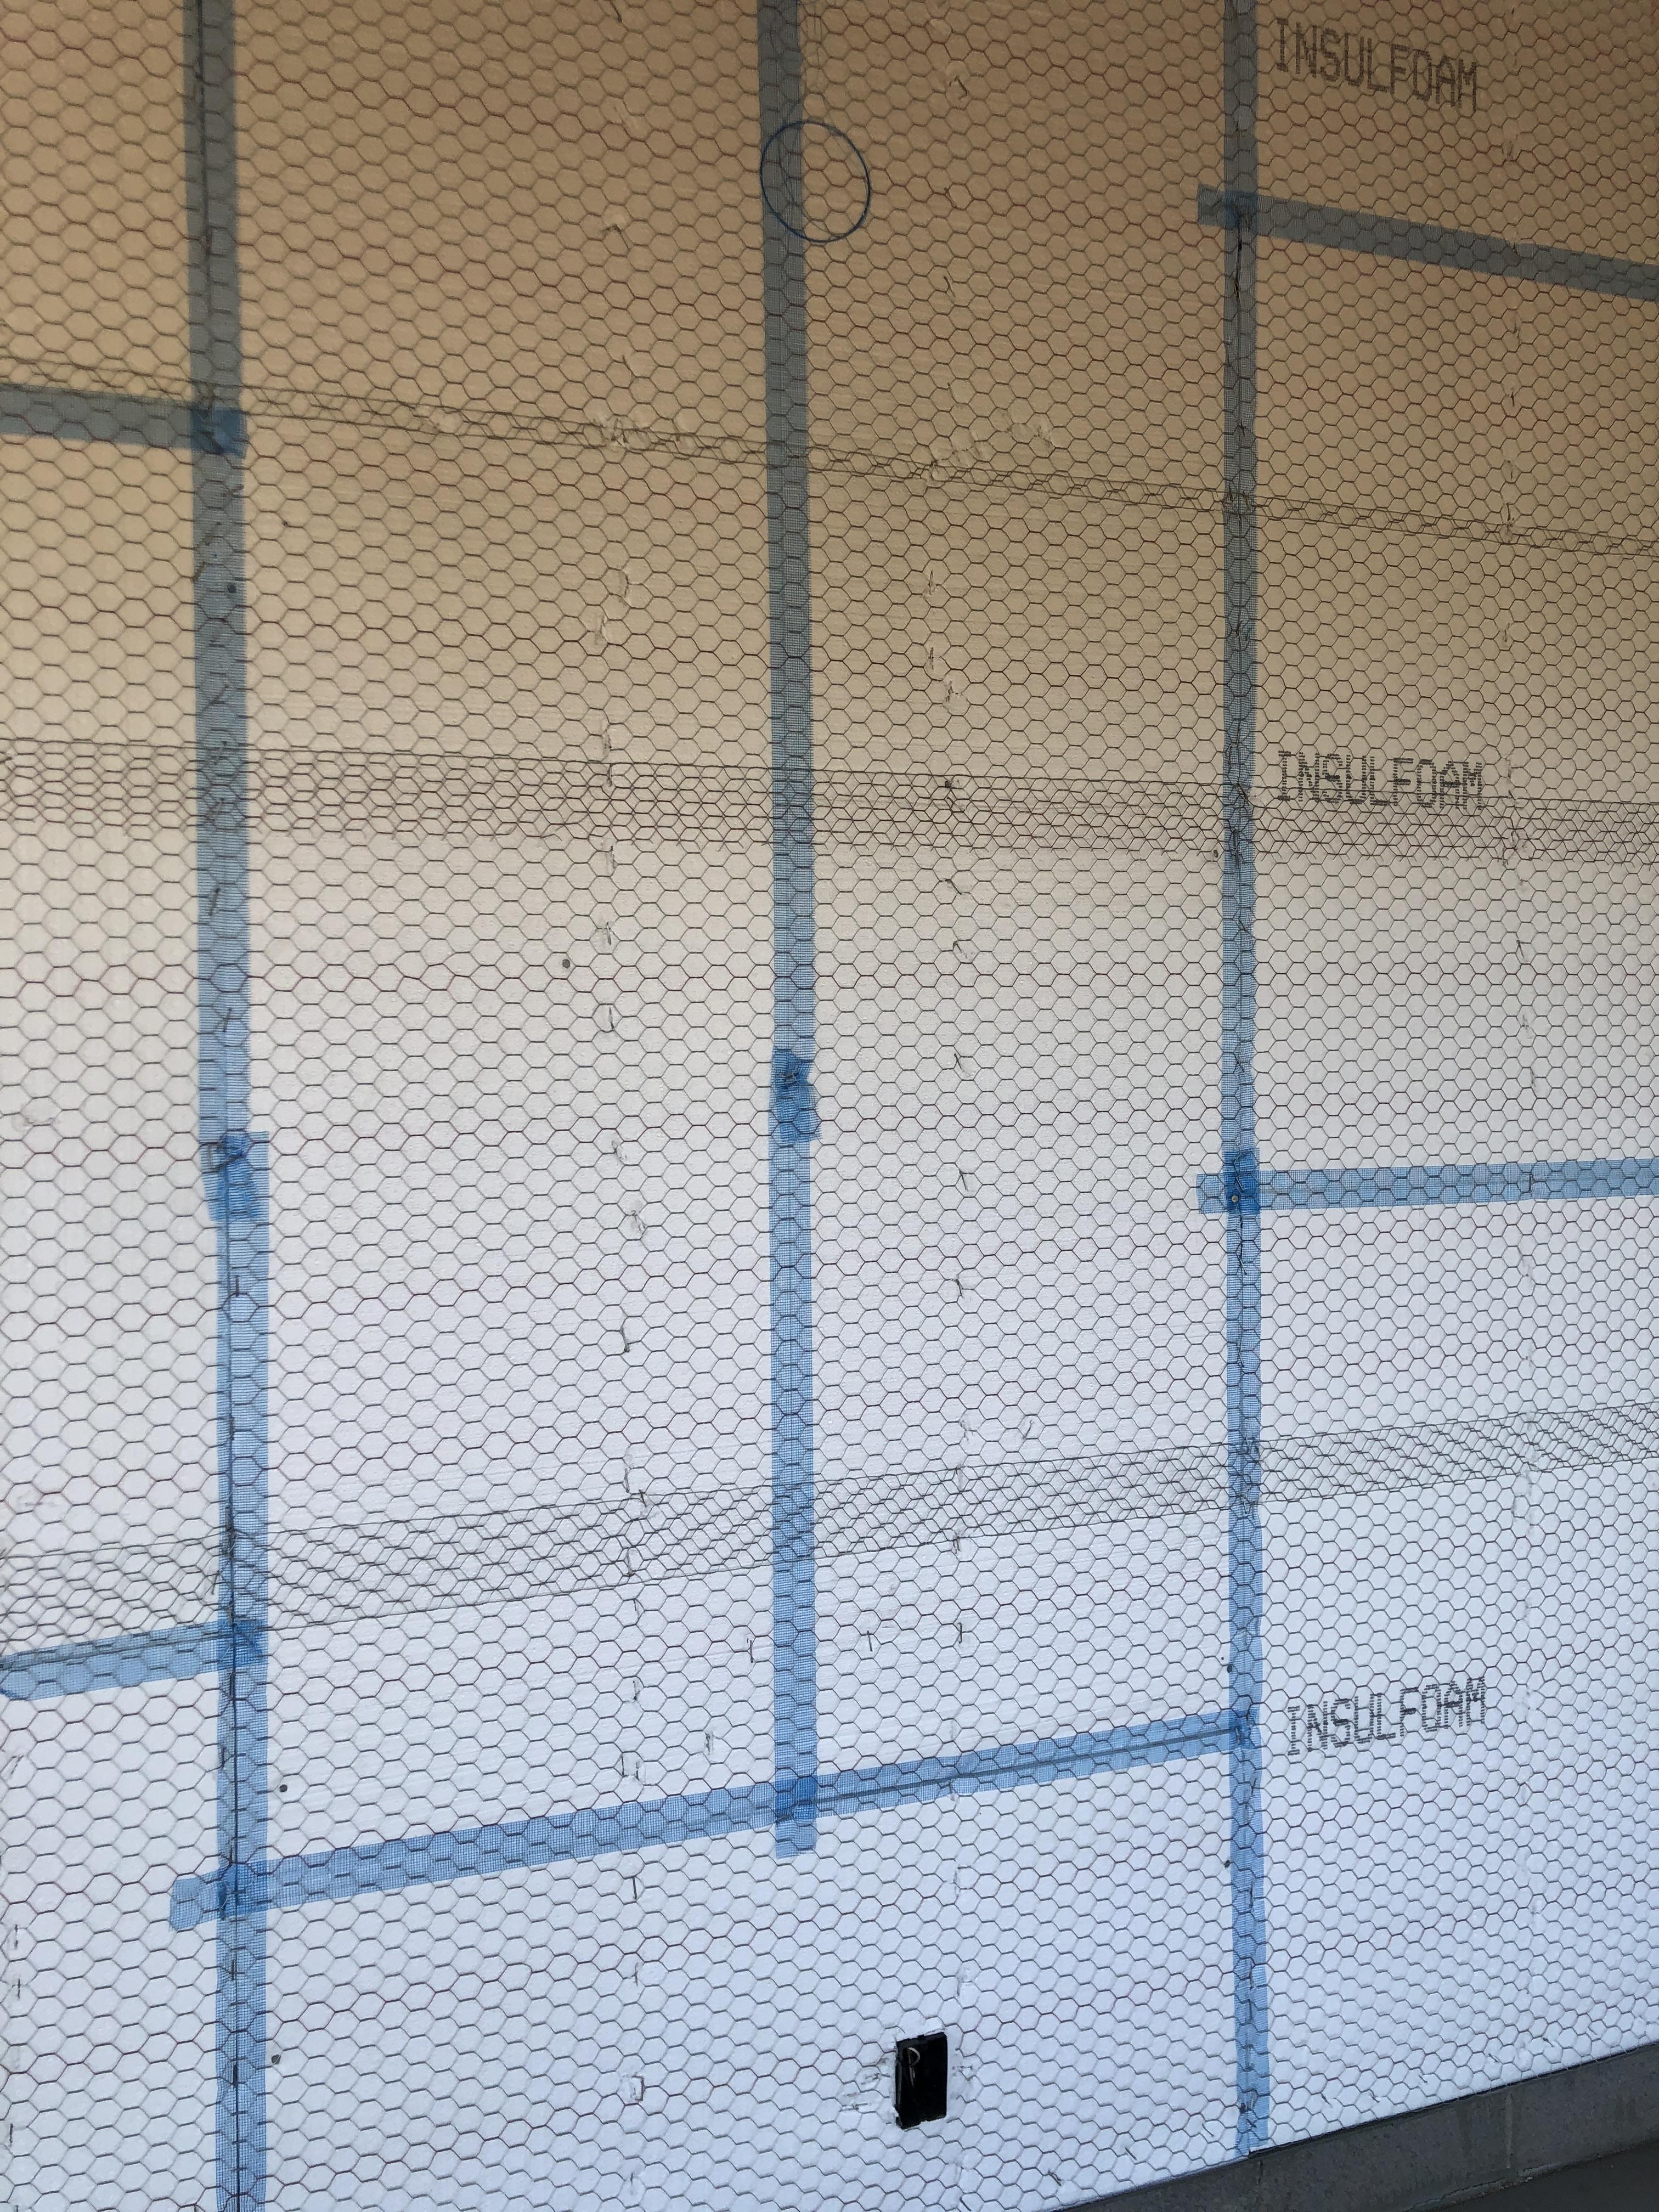
Right – all seams in the rigid foam were sealed with tape before installing the wire lathe for stucco.
Image
Image
Image
Image
Image
Image
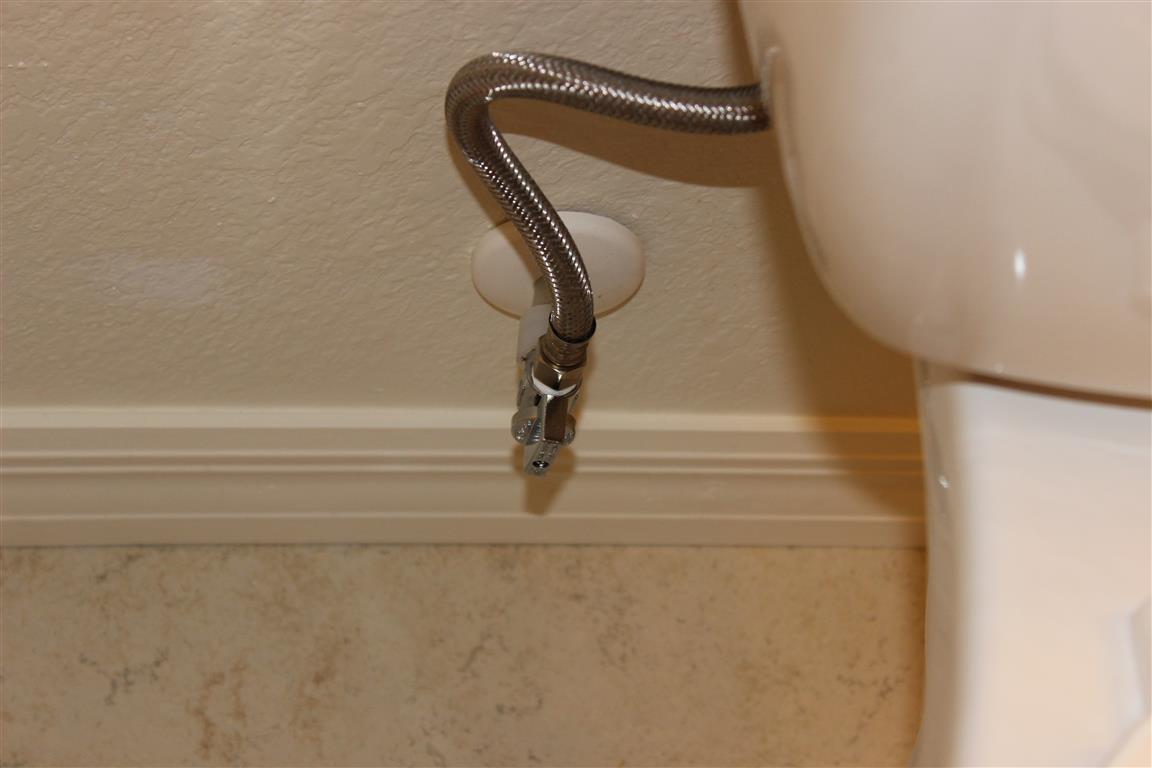
Right – An escutcheon is installed on this toilet tank pipe to help air seal around the pipe and prevent pest entry.
Image
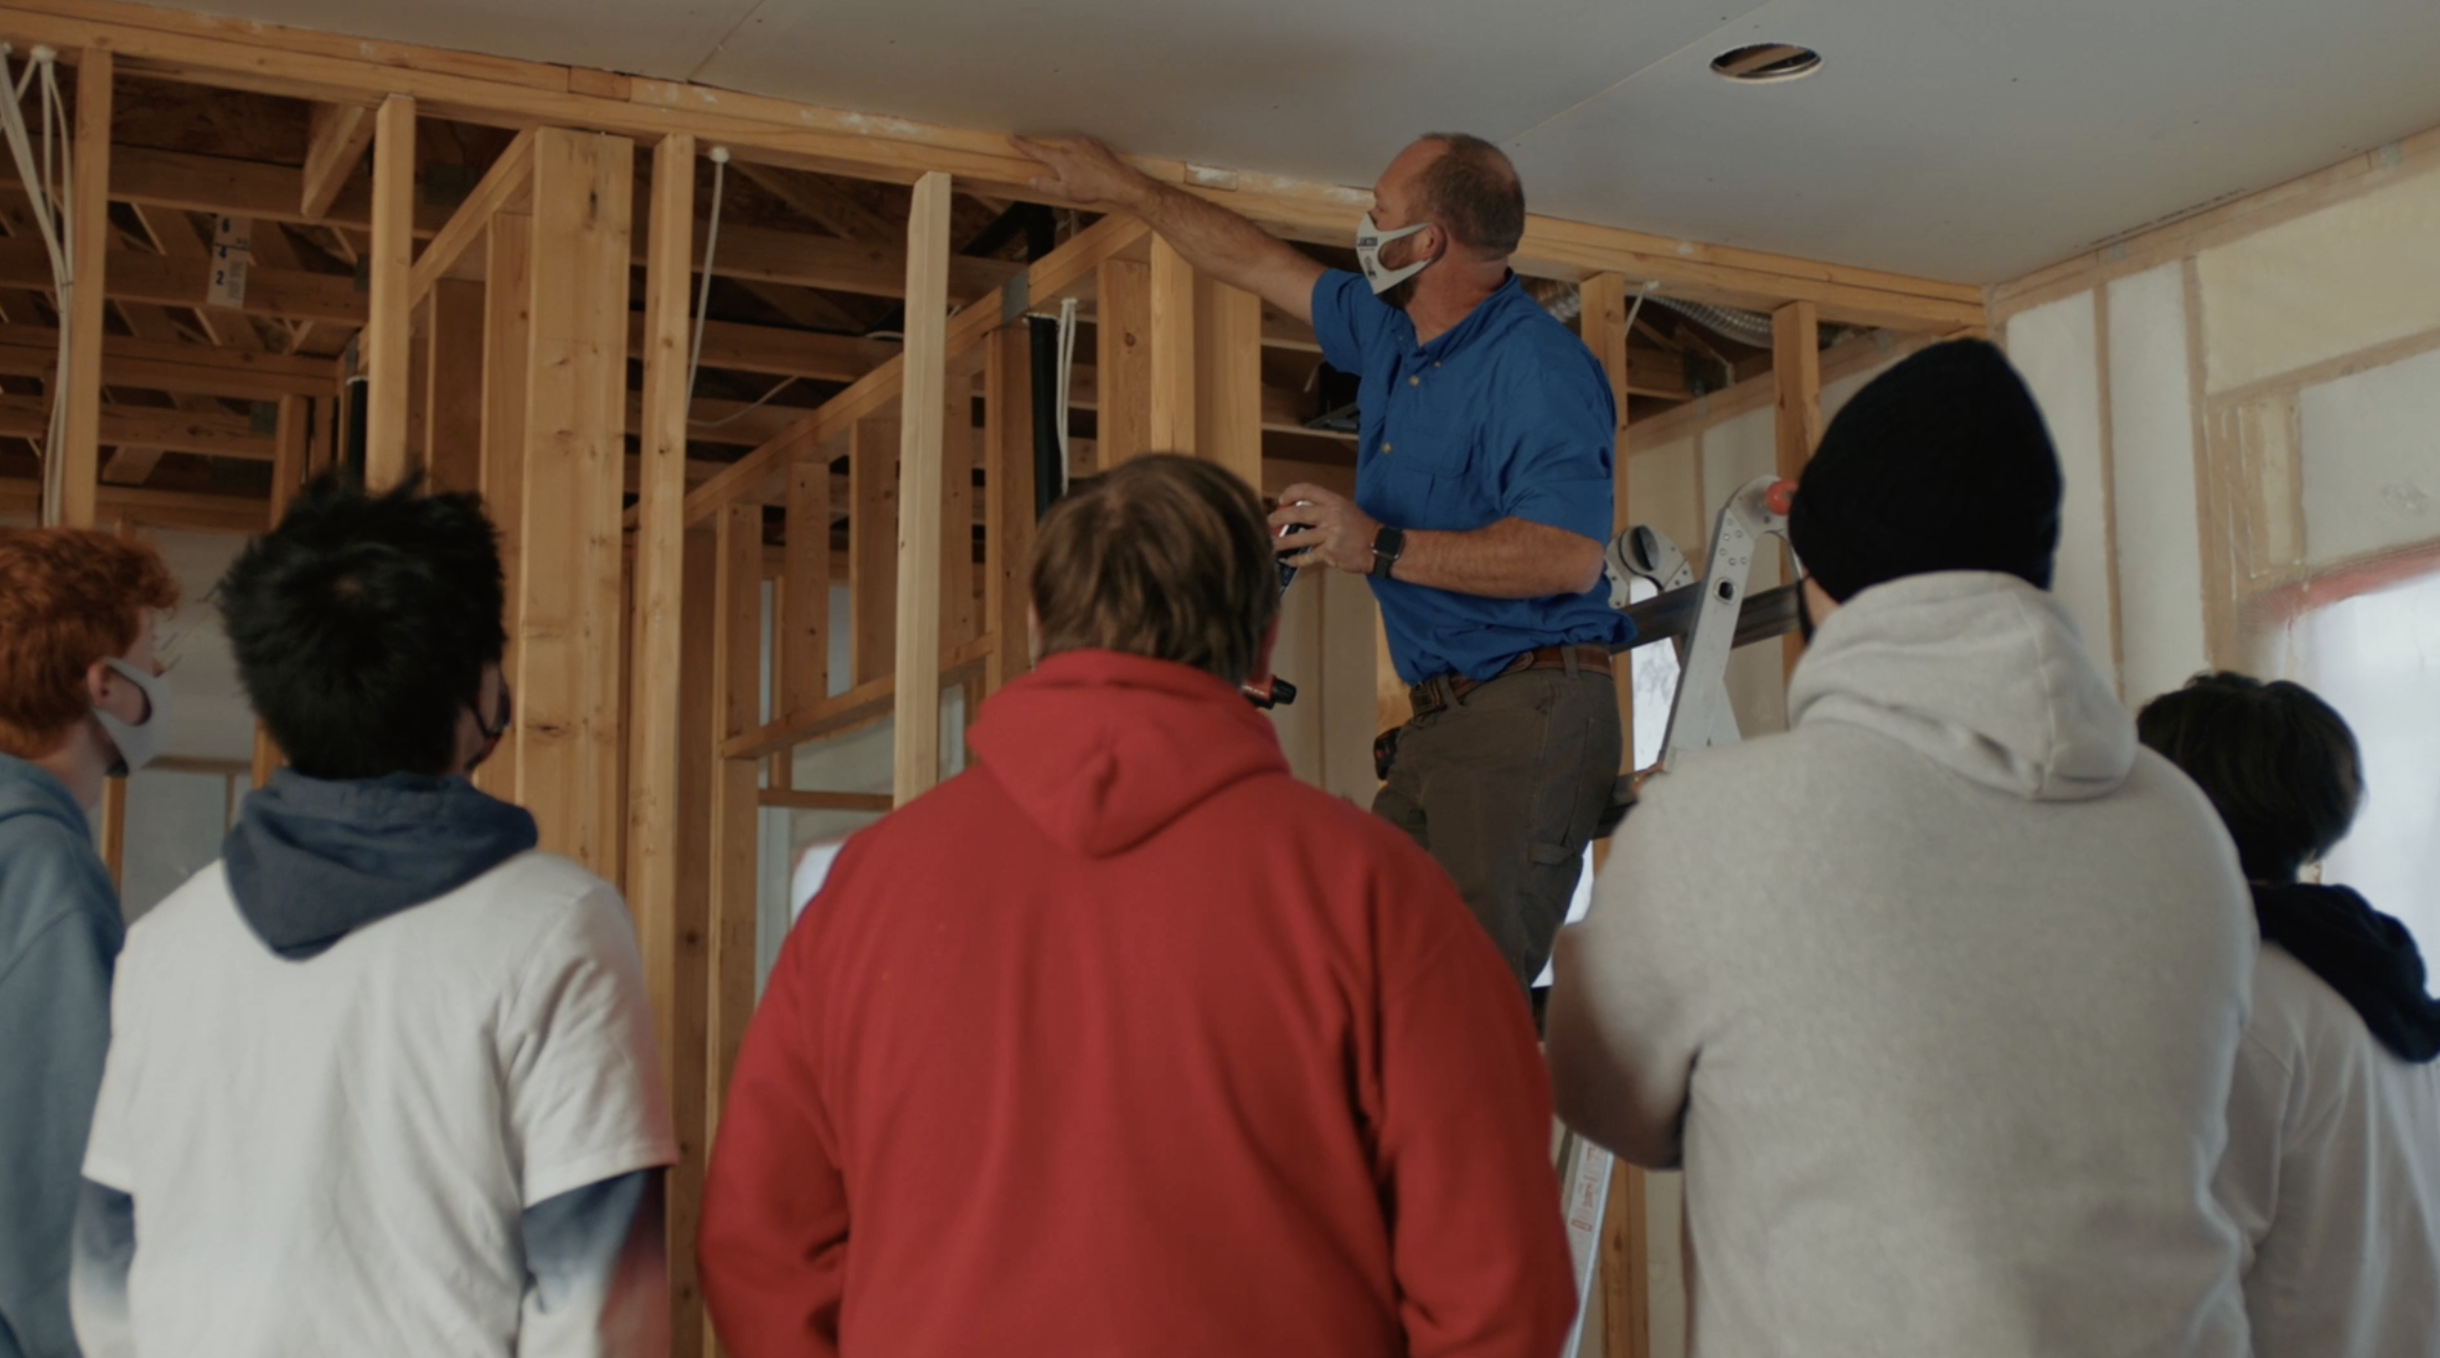
Right – An instructor shows students how to caulk the top plates of interior walls.
Image
Image
Right – Apply sealant around penetrations through foundation walls and along foundation wall seams
Image
Right – Attic access door has foam and rubber weatherstripping installed that remains in contact when closed.
Image
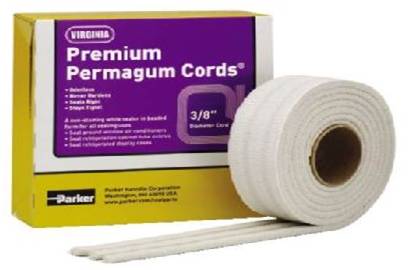
Right – Backer-rod is a foam product available in various diameters that can be used to air-seal openings around doors and windows.
Image
Right – Blocking has been installed around the perimeter of this attic access to prevent insulation falling into the house
Image

Image
Image
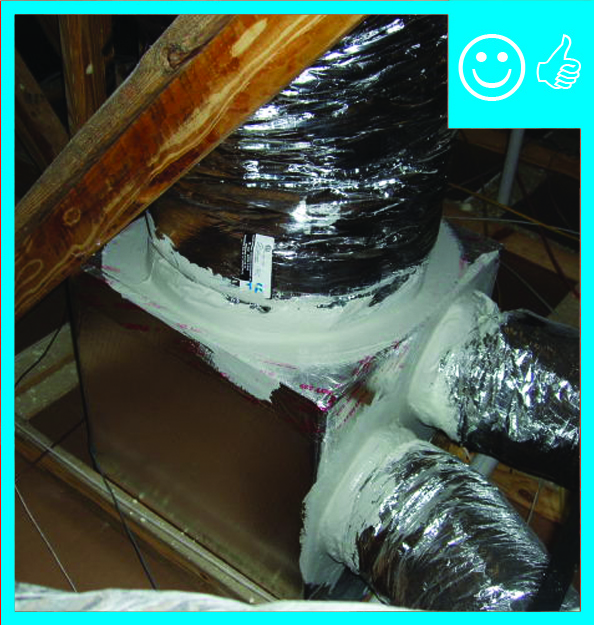
Right – Chase capped with rigid air barrier and duct work penetrations properly sealed
Image
Image
Image
Right – Closed-cell spray foam insulates and air-seals the rim joist above a shared wall between the garage and living space.
Image
Right – Closed-cell spray foam insulation in the shared wall between the garage and living space helps to air-seal the wall and protect occupants from garage pollutants.
Image
Image
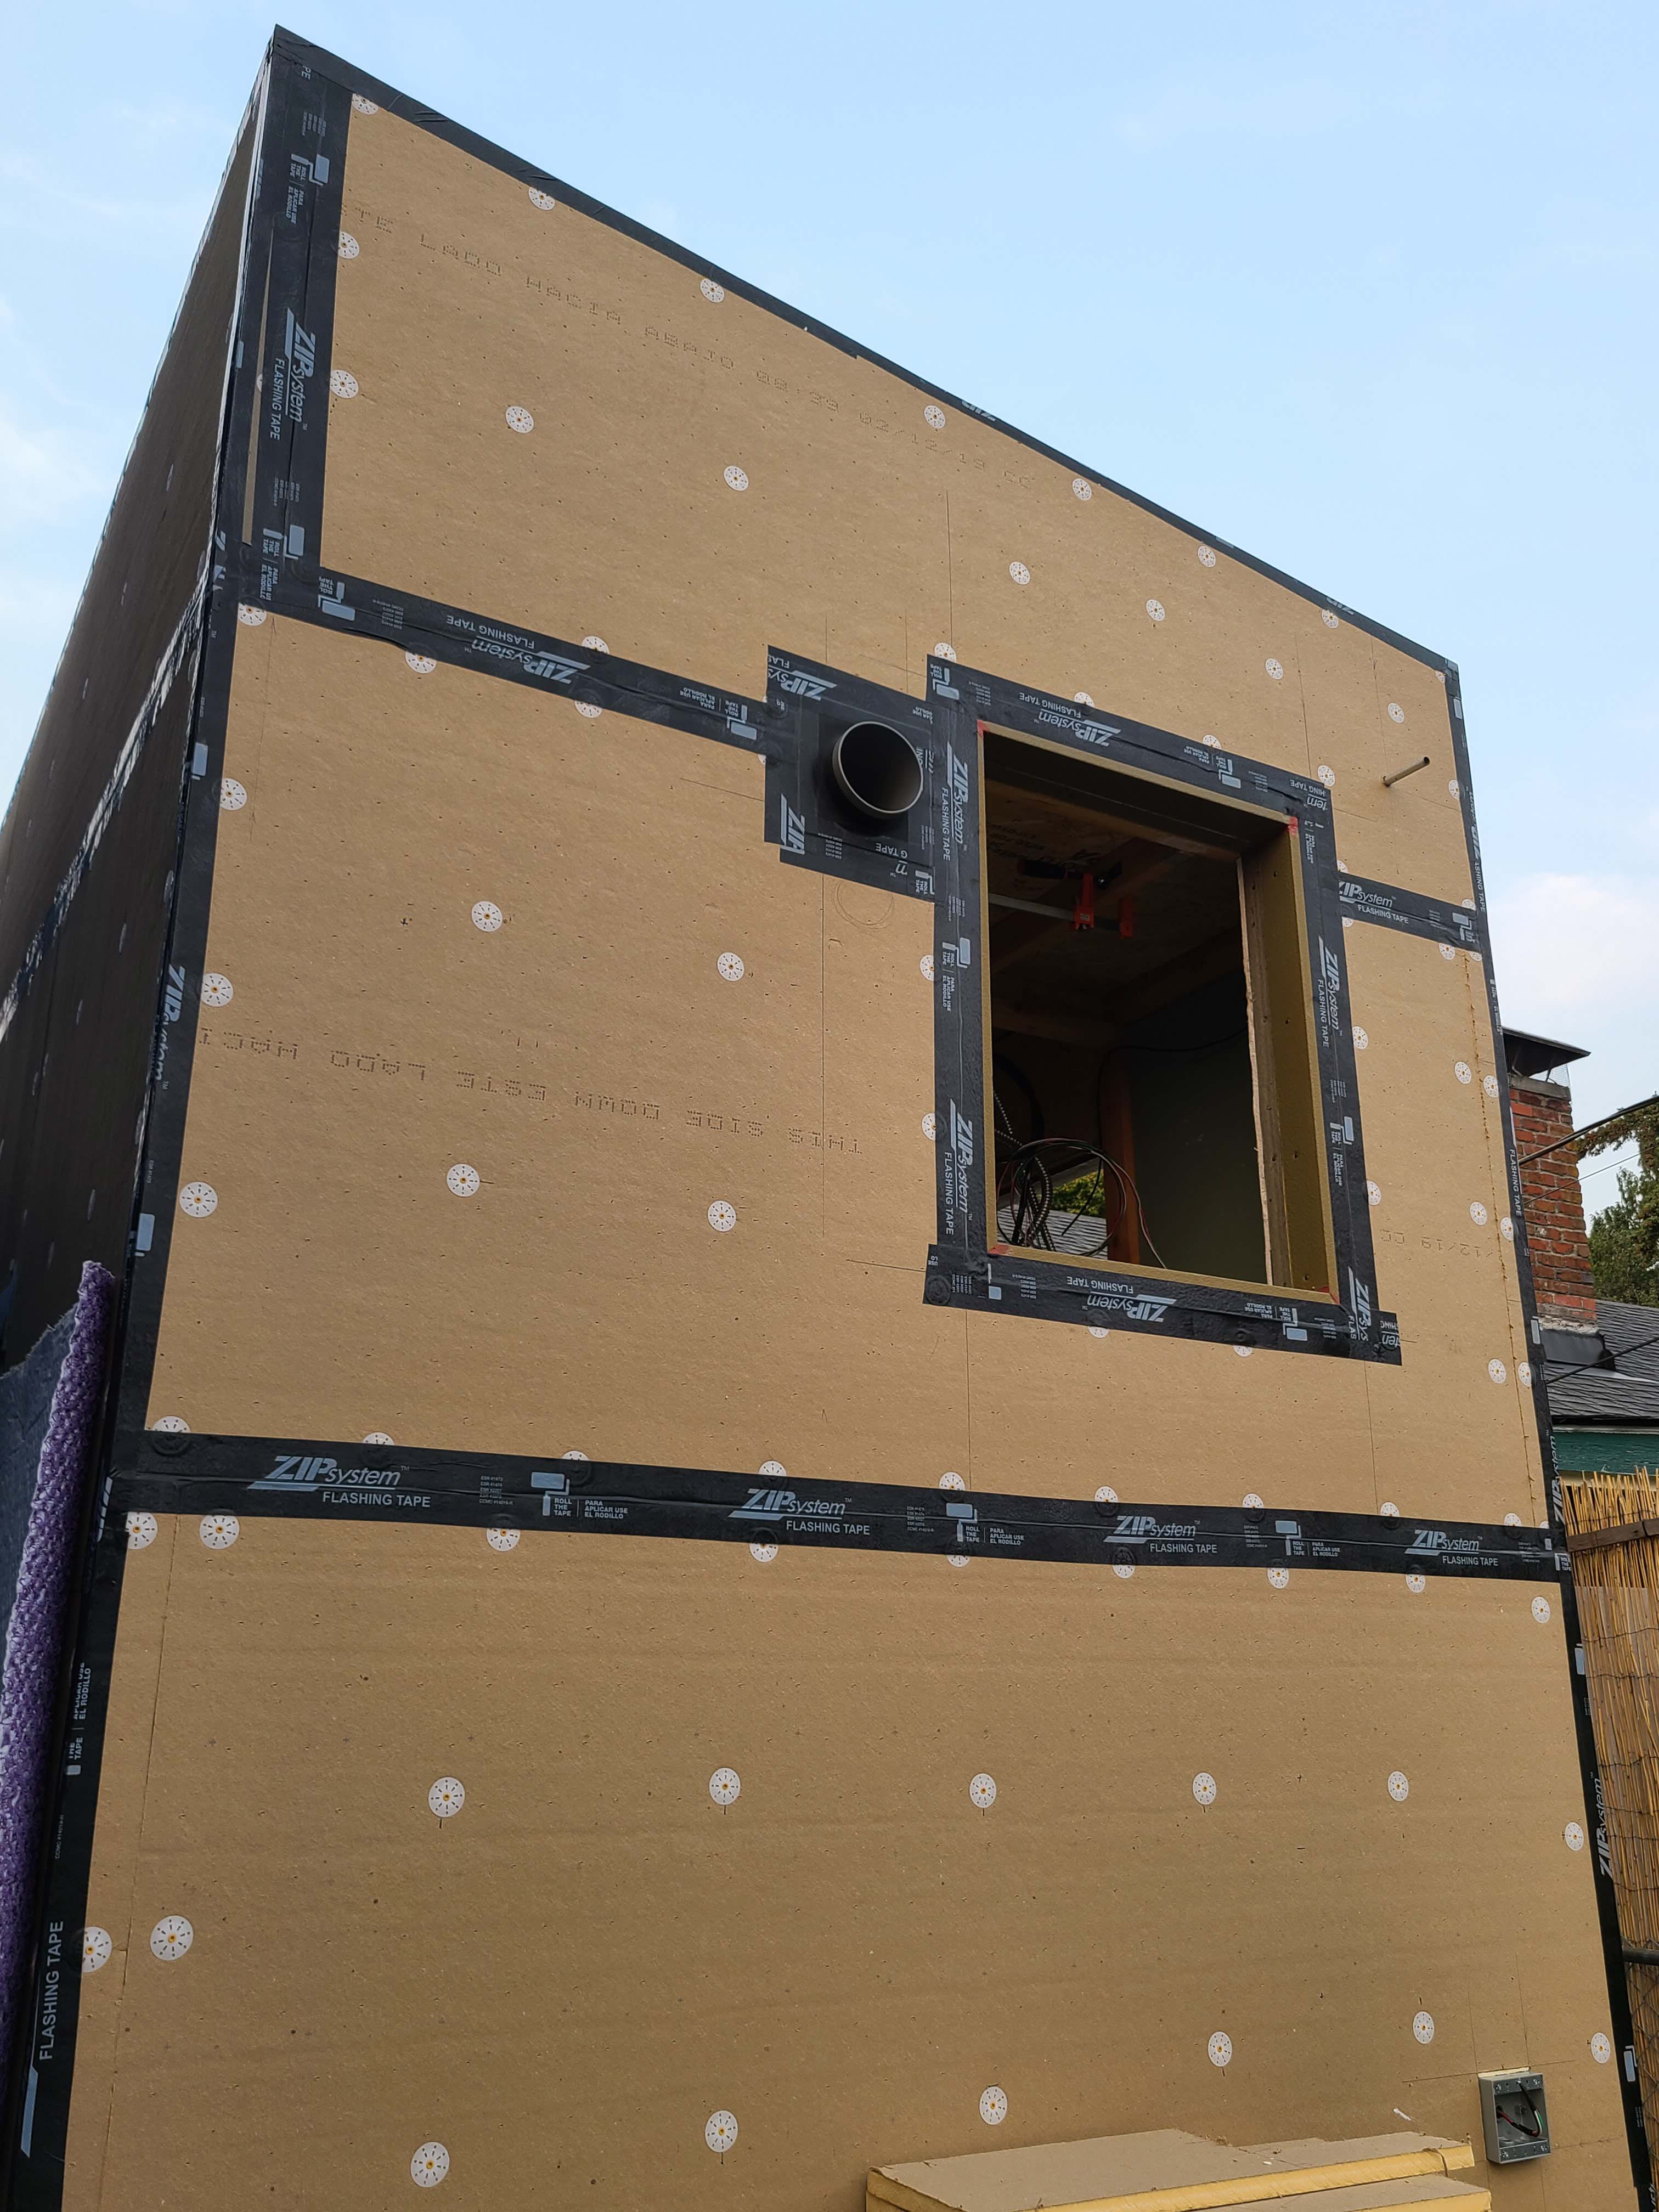
Right – Coated OSB provides a weather-resistant air barrier for this envelope of this home.
Image
Image
Image
Image
Right – Even house wrap is installed in the factory for these modular homes where each floor is factory assembled.
Image
Right – Every seam and nail hole in these garage-to-house walls is sealed with tape.
Image
Image

Right – Fan with a cleanly cut and properly sized hole has been air sealed to drywall
Image
Image
Image

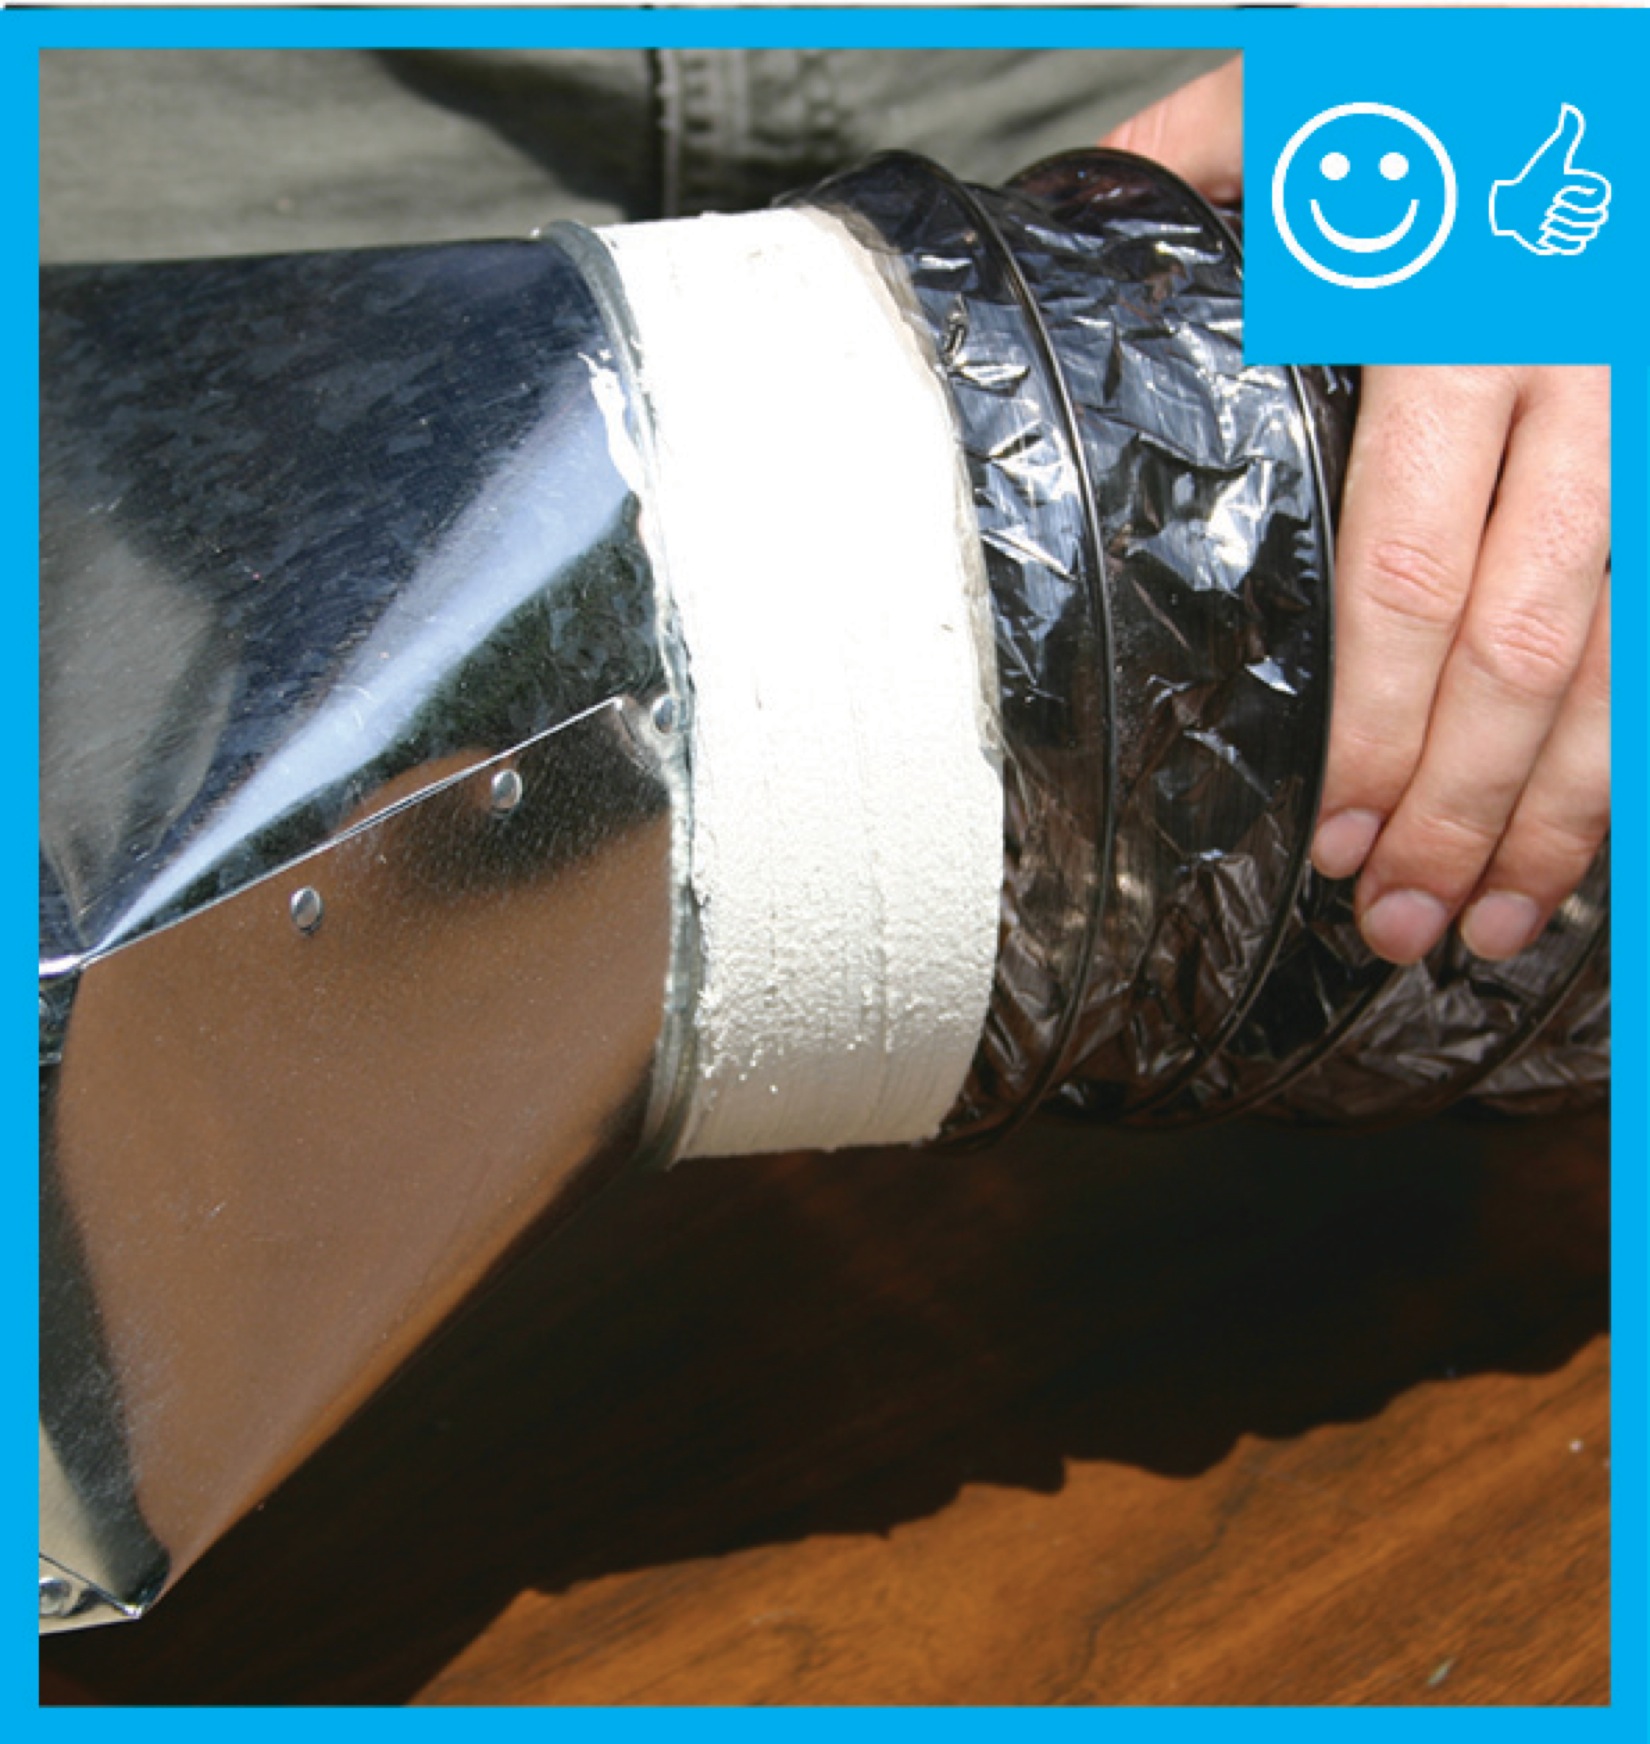
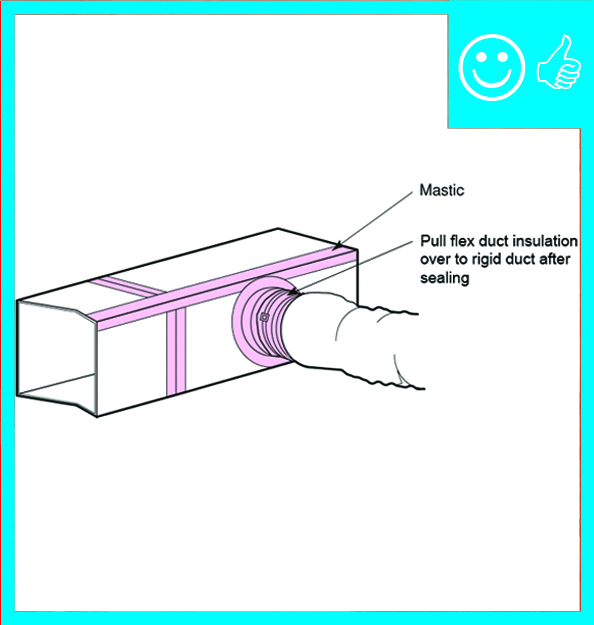
Right – Flex duct is properly connected to metal duct with a duct tie and connection is mastic sealed
Image
Image
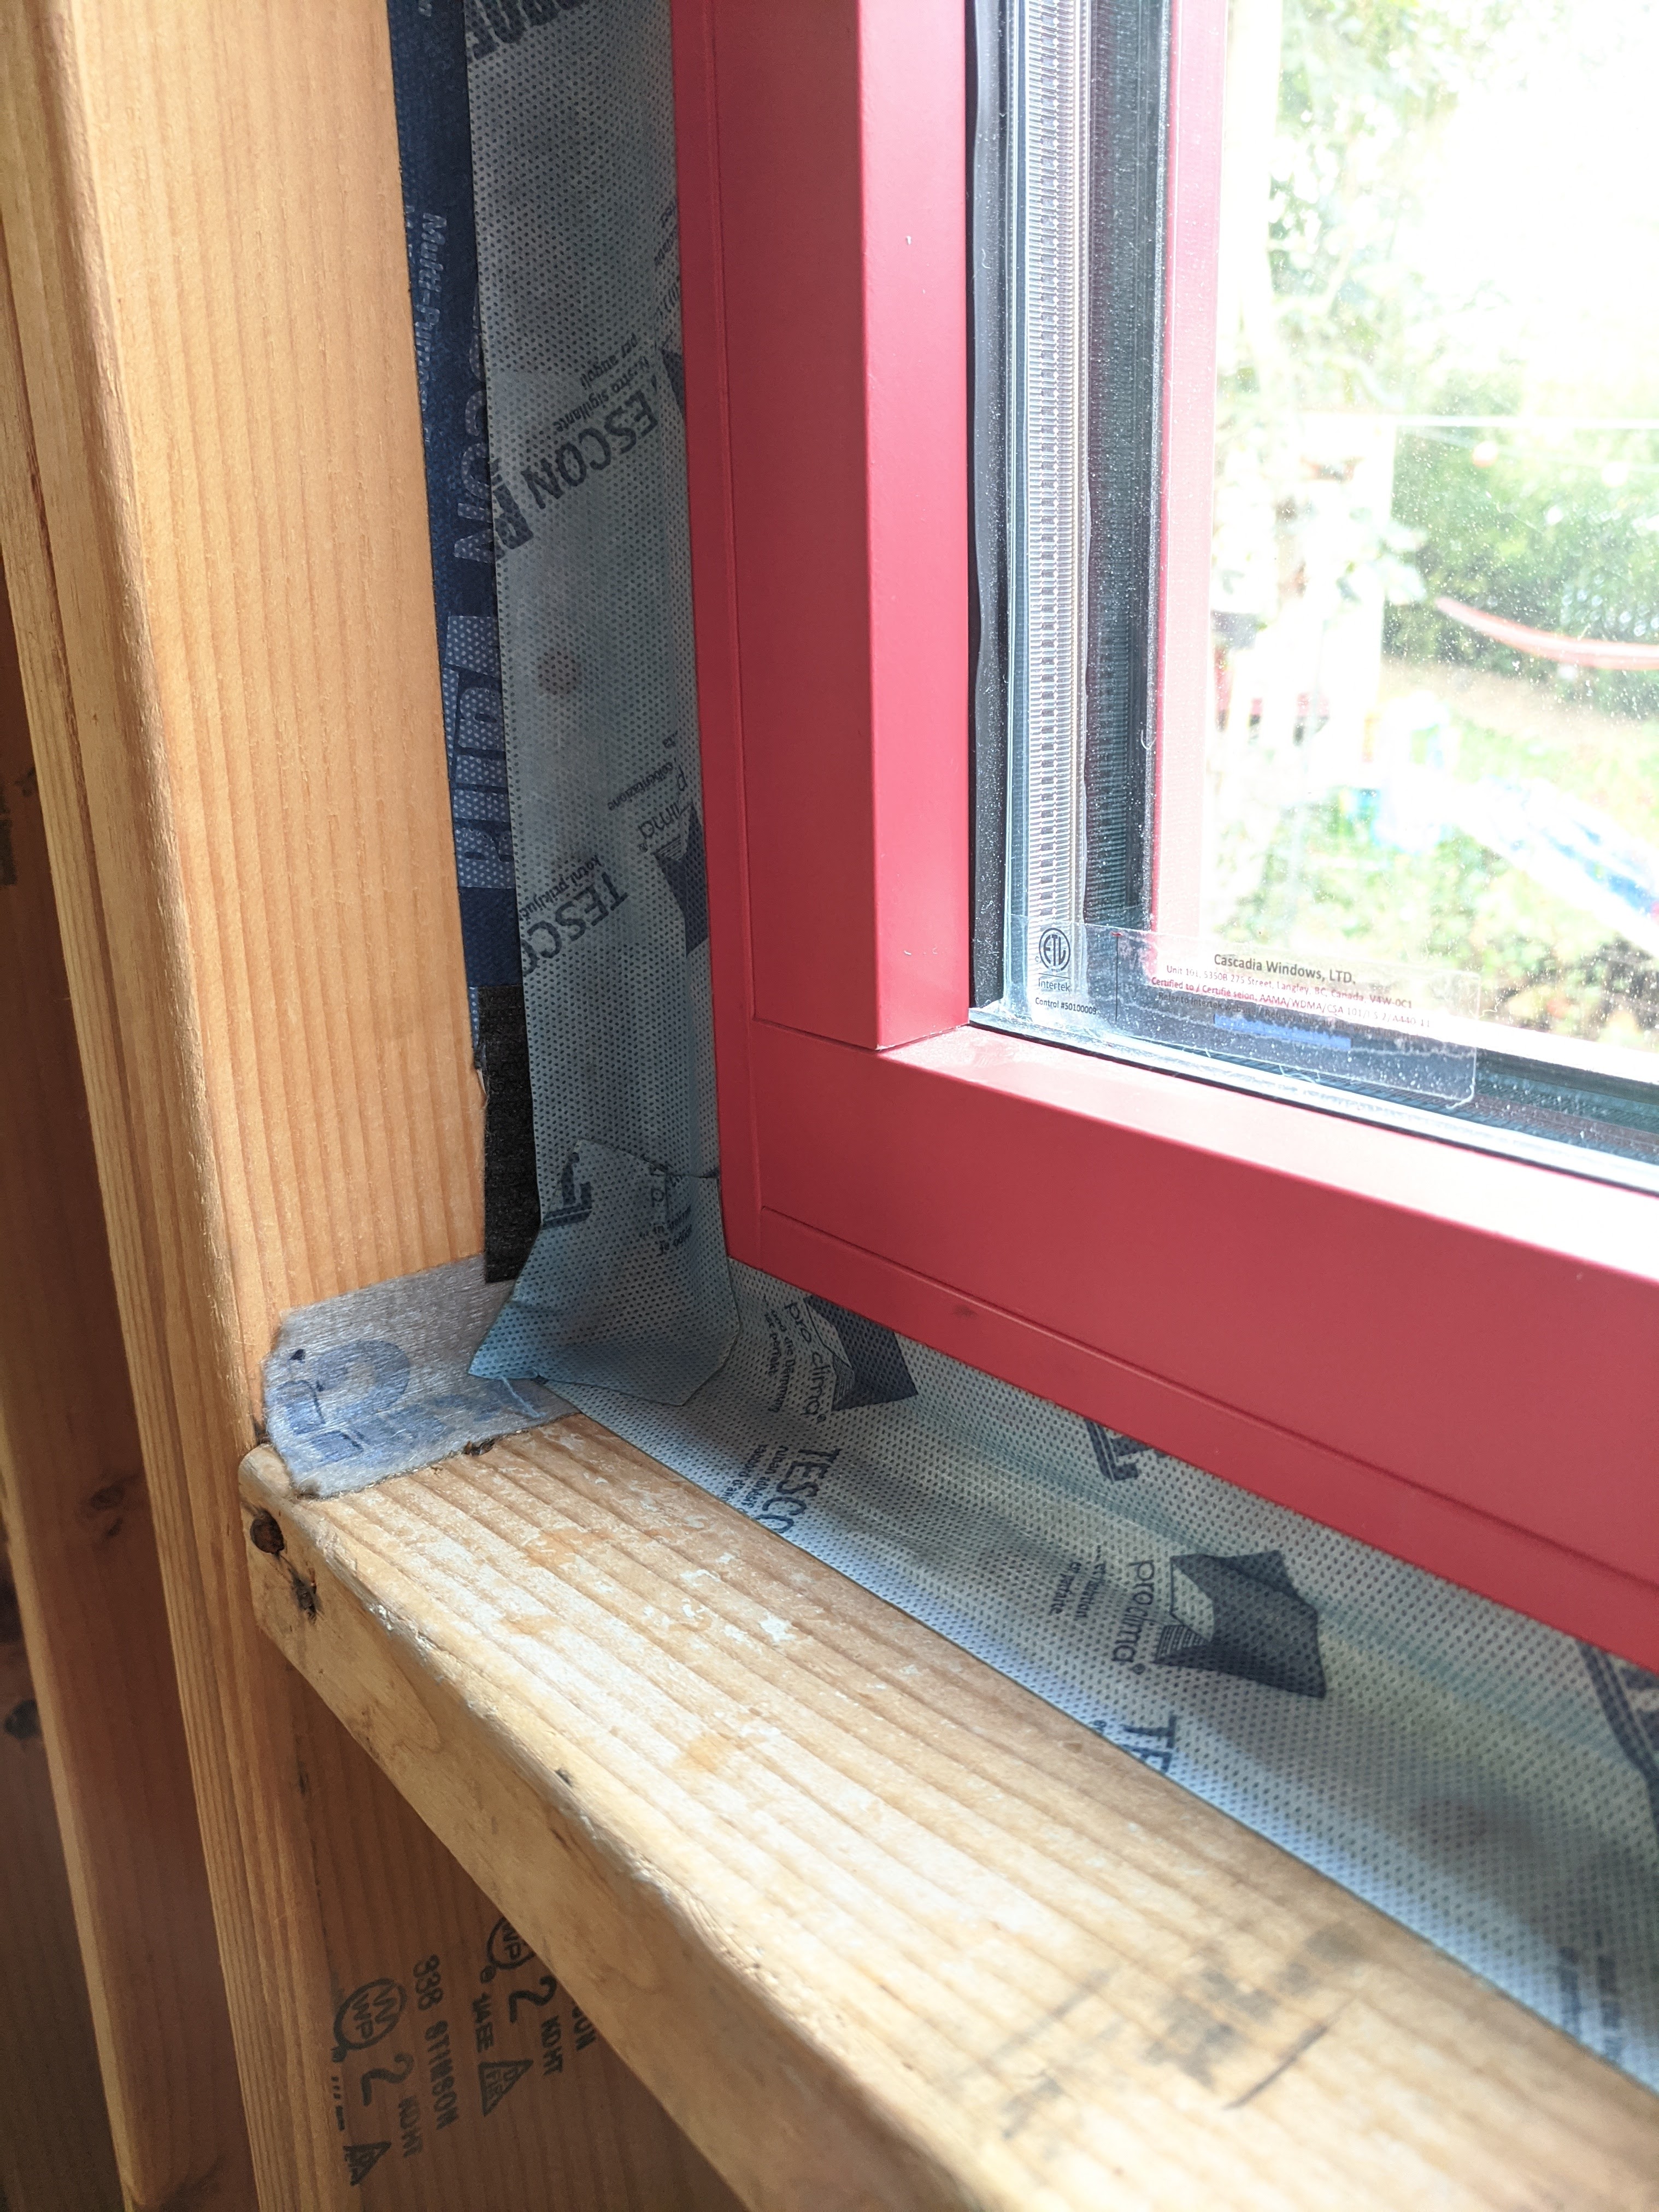
Right – Interior wood-to-wood seams around a window are sealed with tape to prevent air leakage.
Image
Right – Joists between floors are air sealed to the ceiling drywall with canned spray foam along each joist-to-drywall-seam.
Image
Image

Image
Image

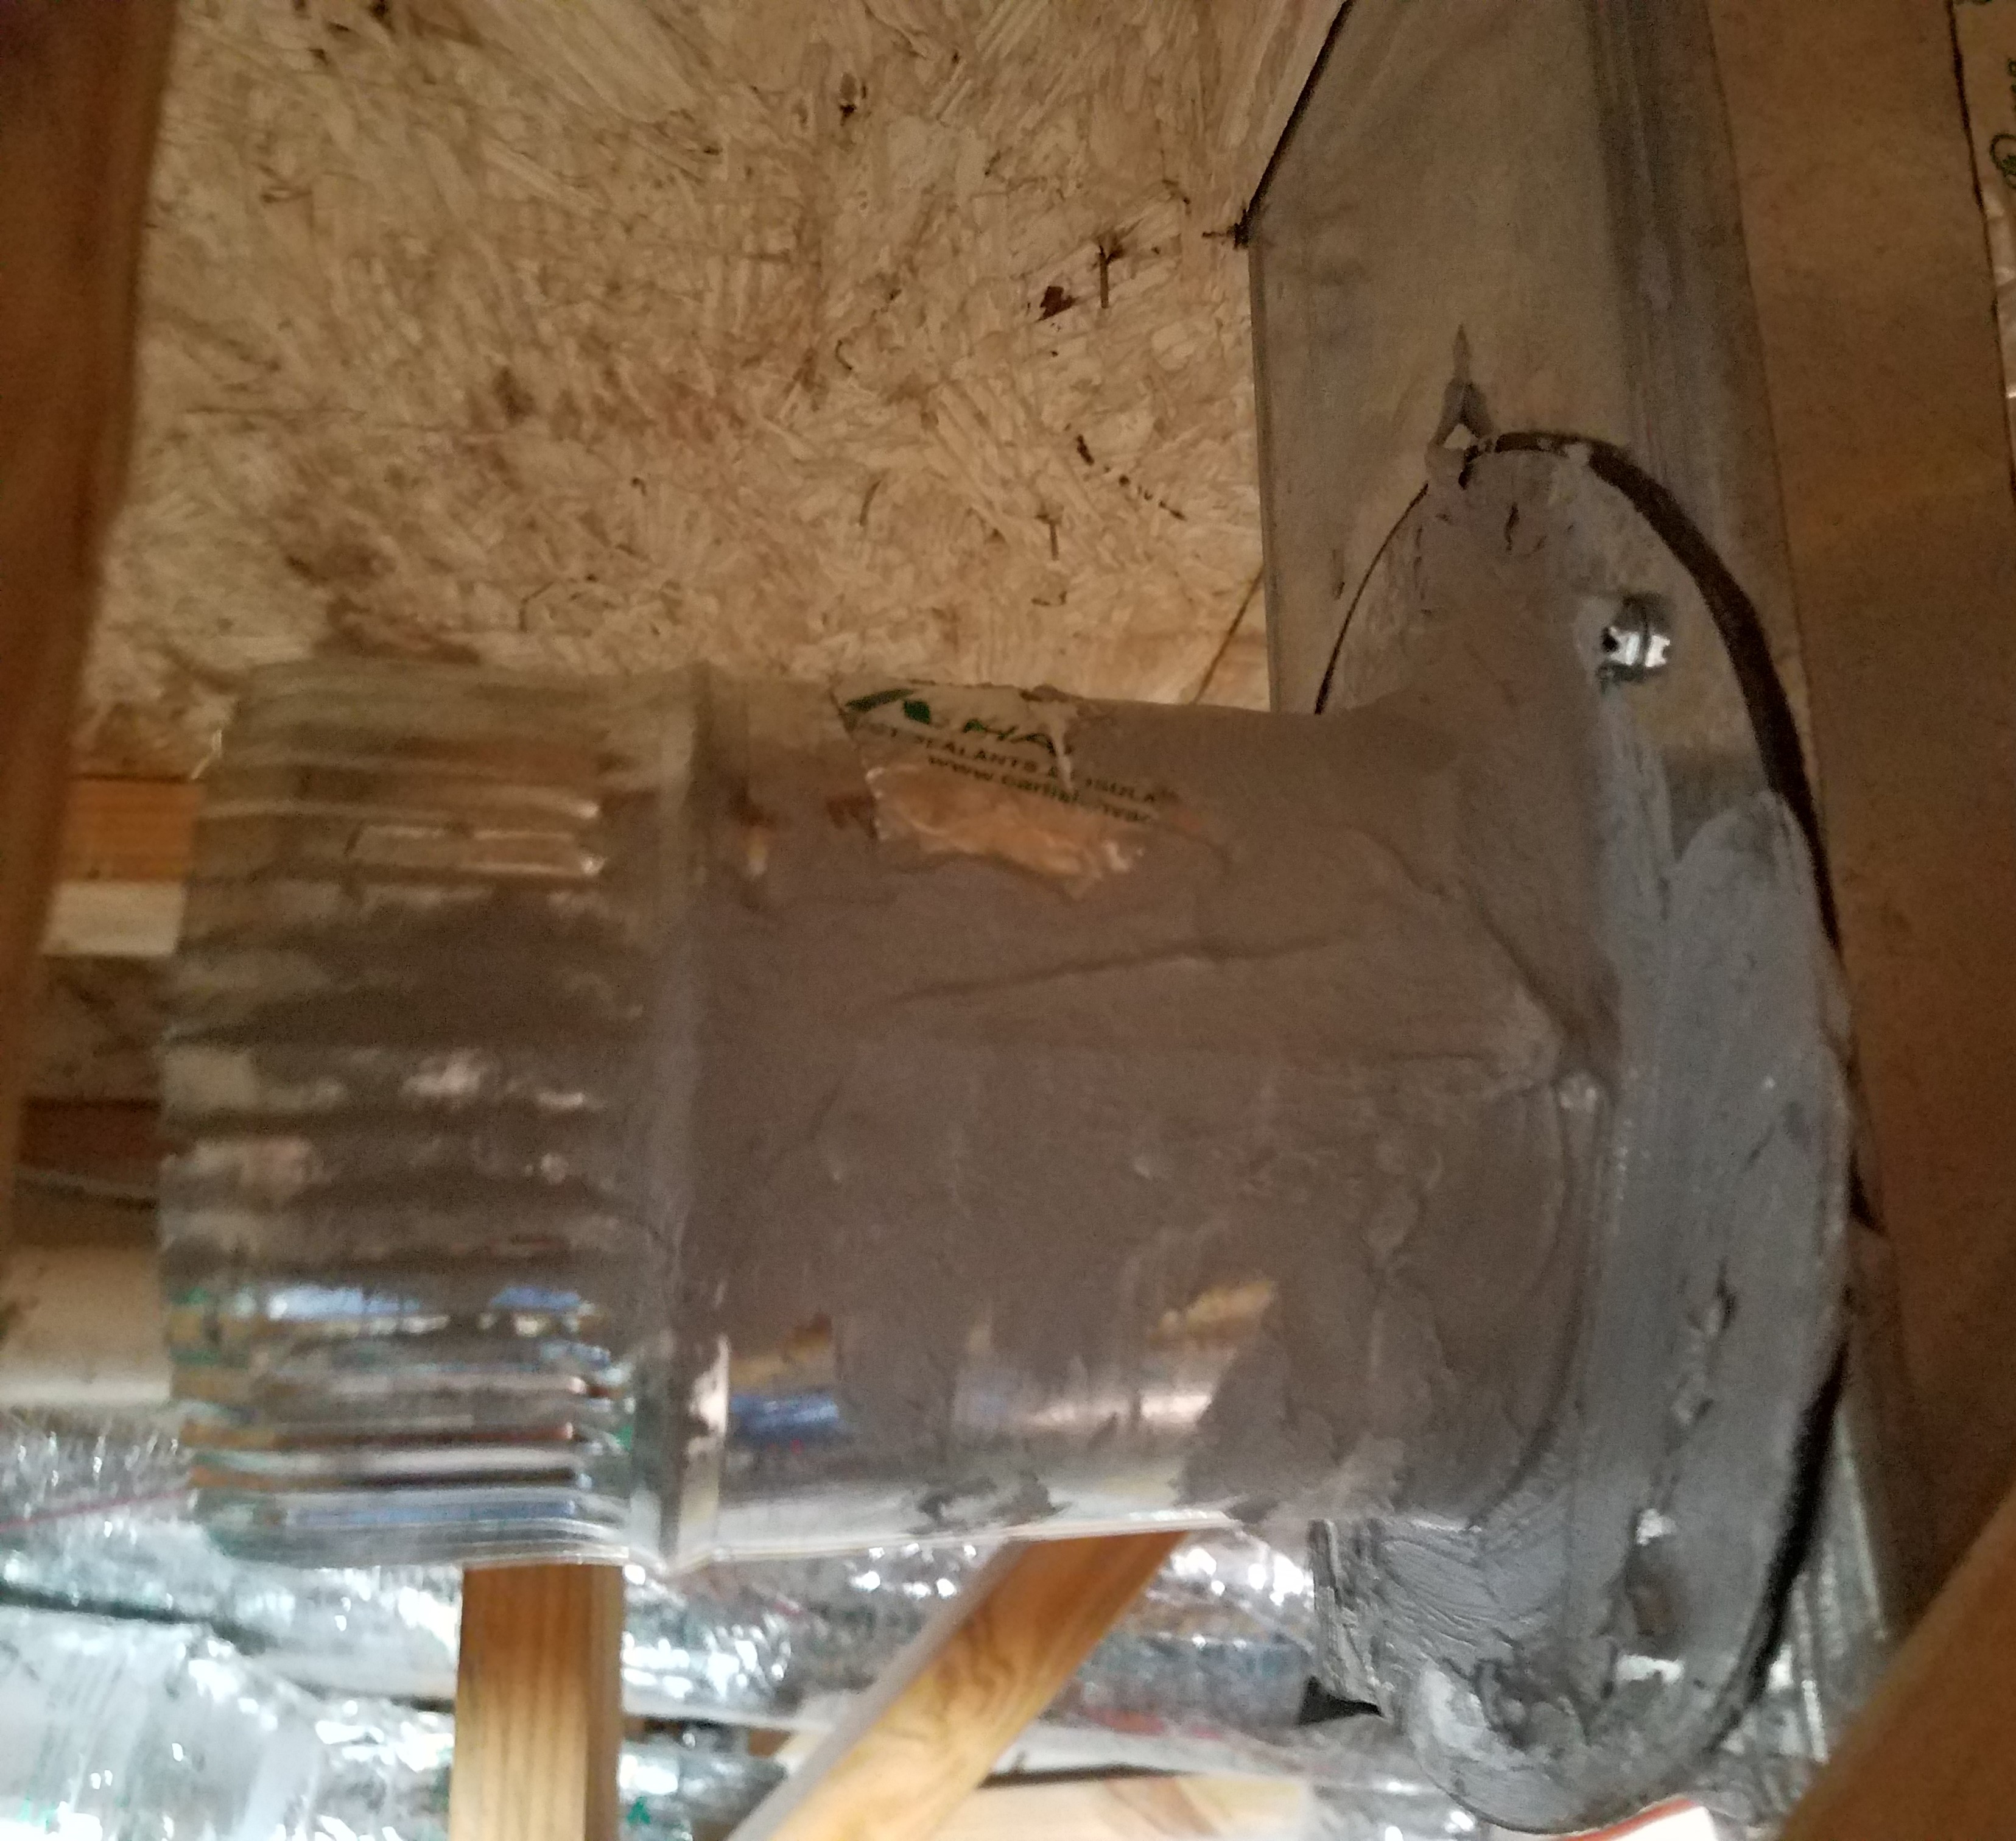
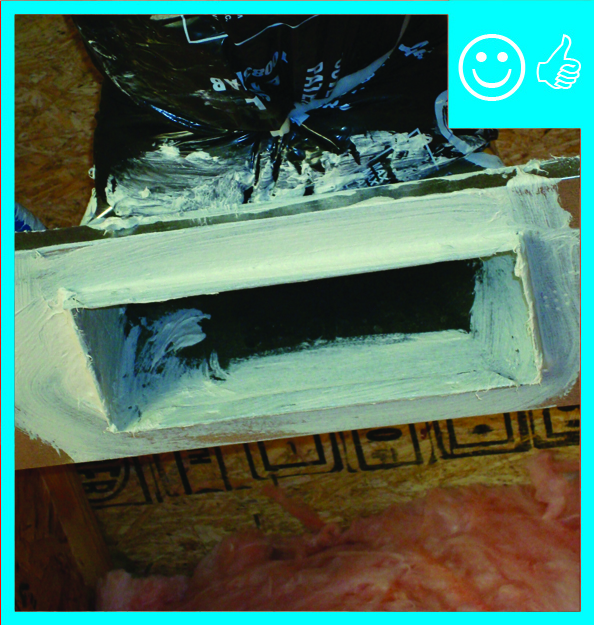
Right – Metal or fiberboard duct is mastic sealed at junction with duct register box
Image
Image
Image
Image
Image
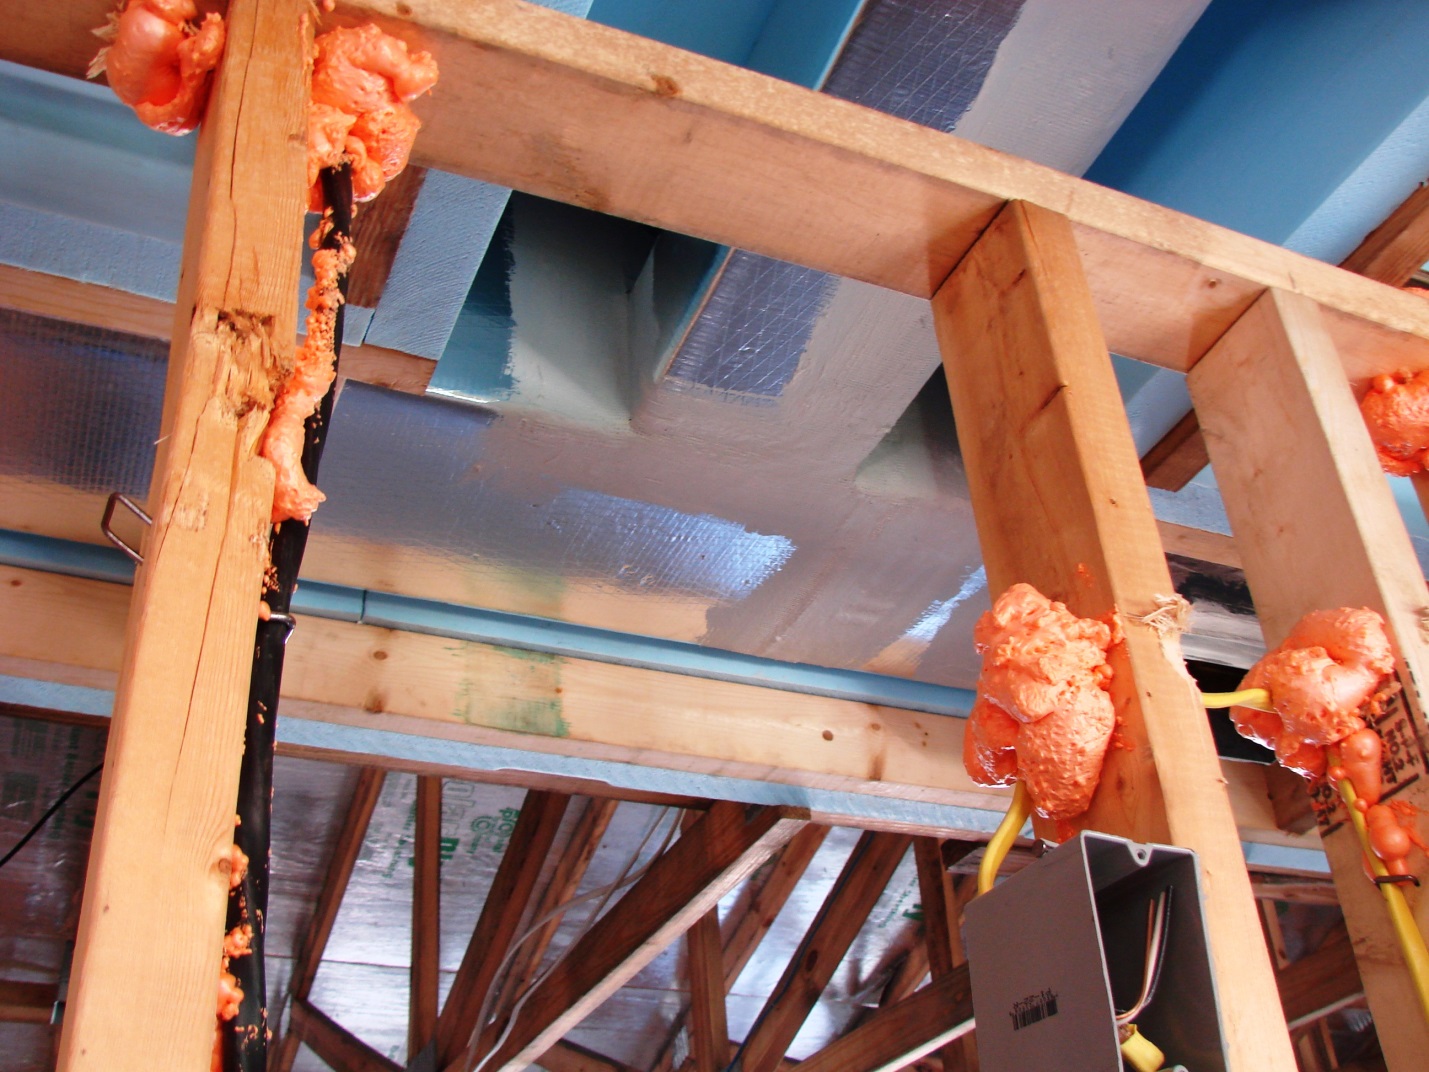
Right – Several potential sources of air leakage into the attic have been air sealed; canned spray foam was used to seal around duct boots, along seams in the drywall, and along top plates.
Image
Image
Right – Some tape is pressure sensitive; a roller is used to apply even pressure to ensure full adhesion.
Image
Right – Spray foam insulates the walls and ceilings separating the garage from the home.
Image
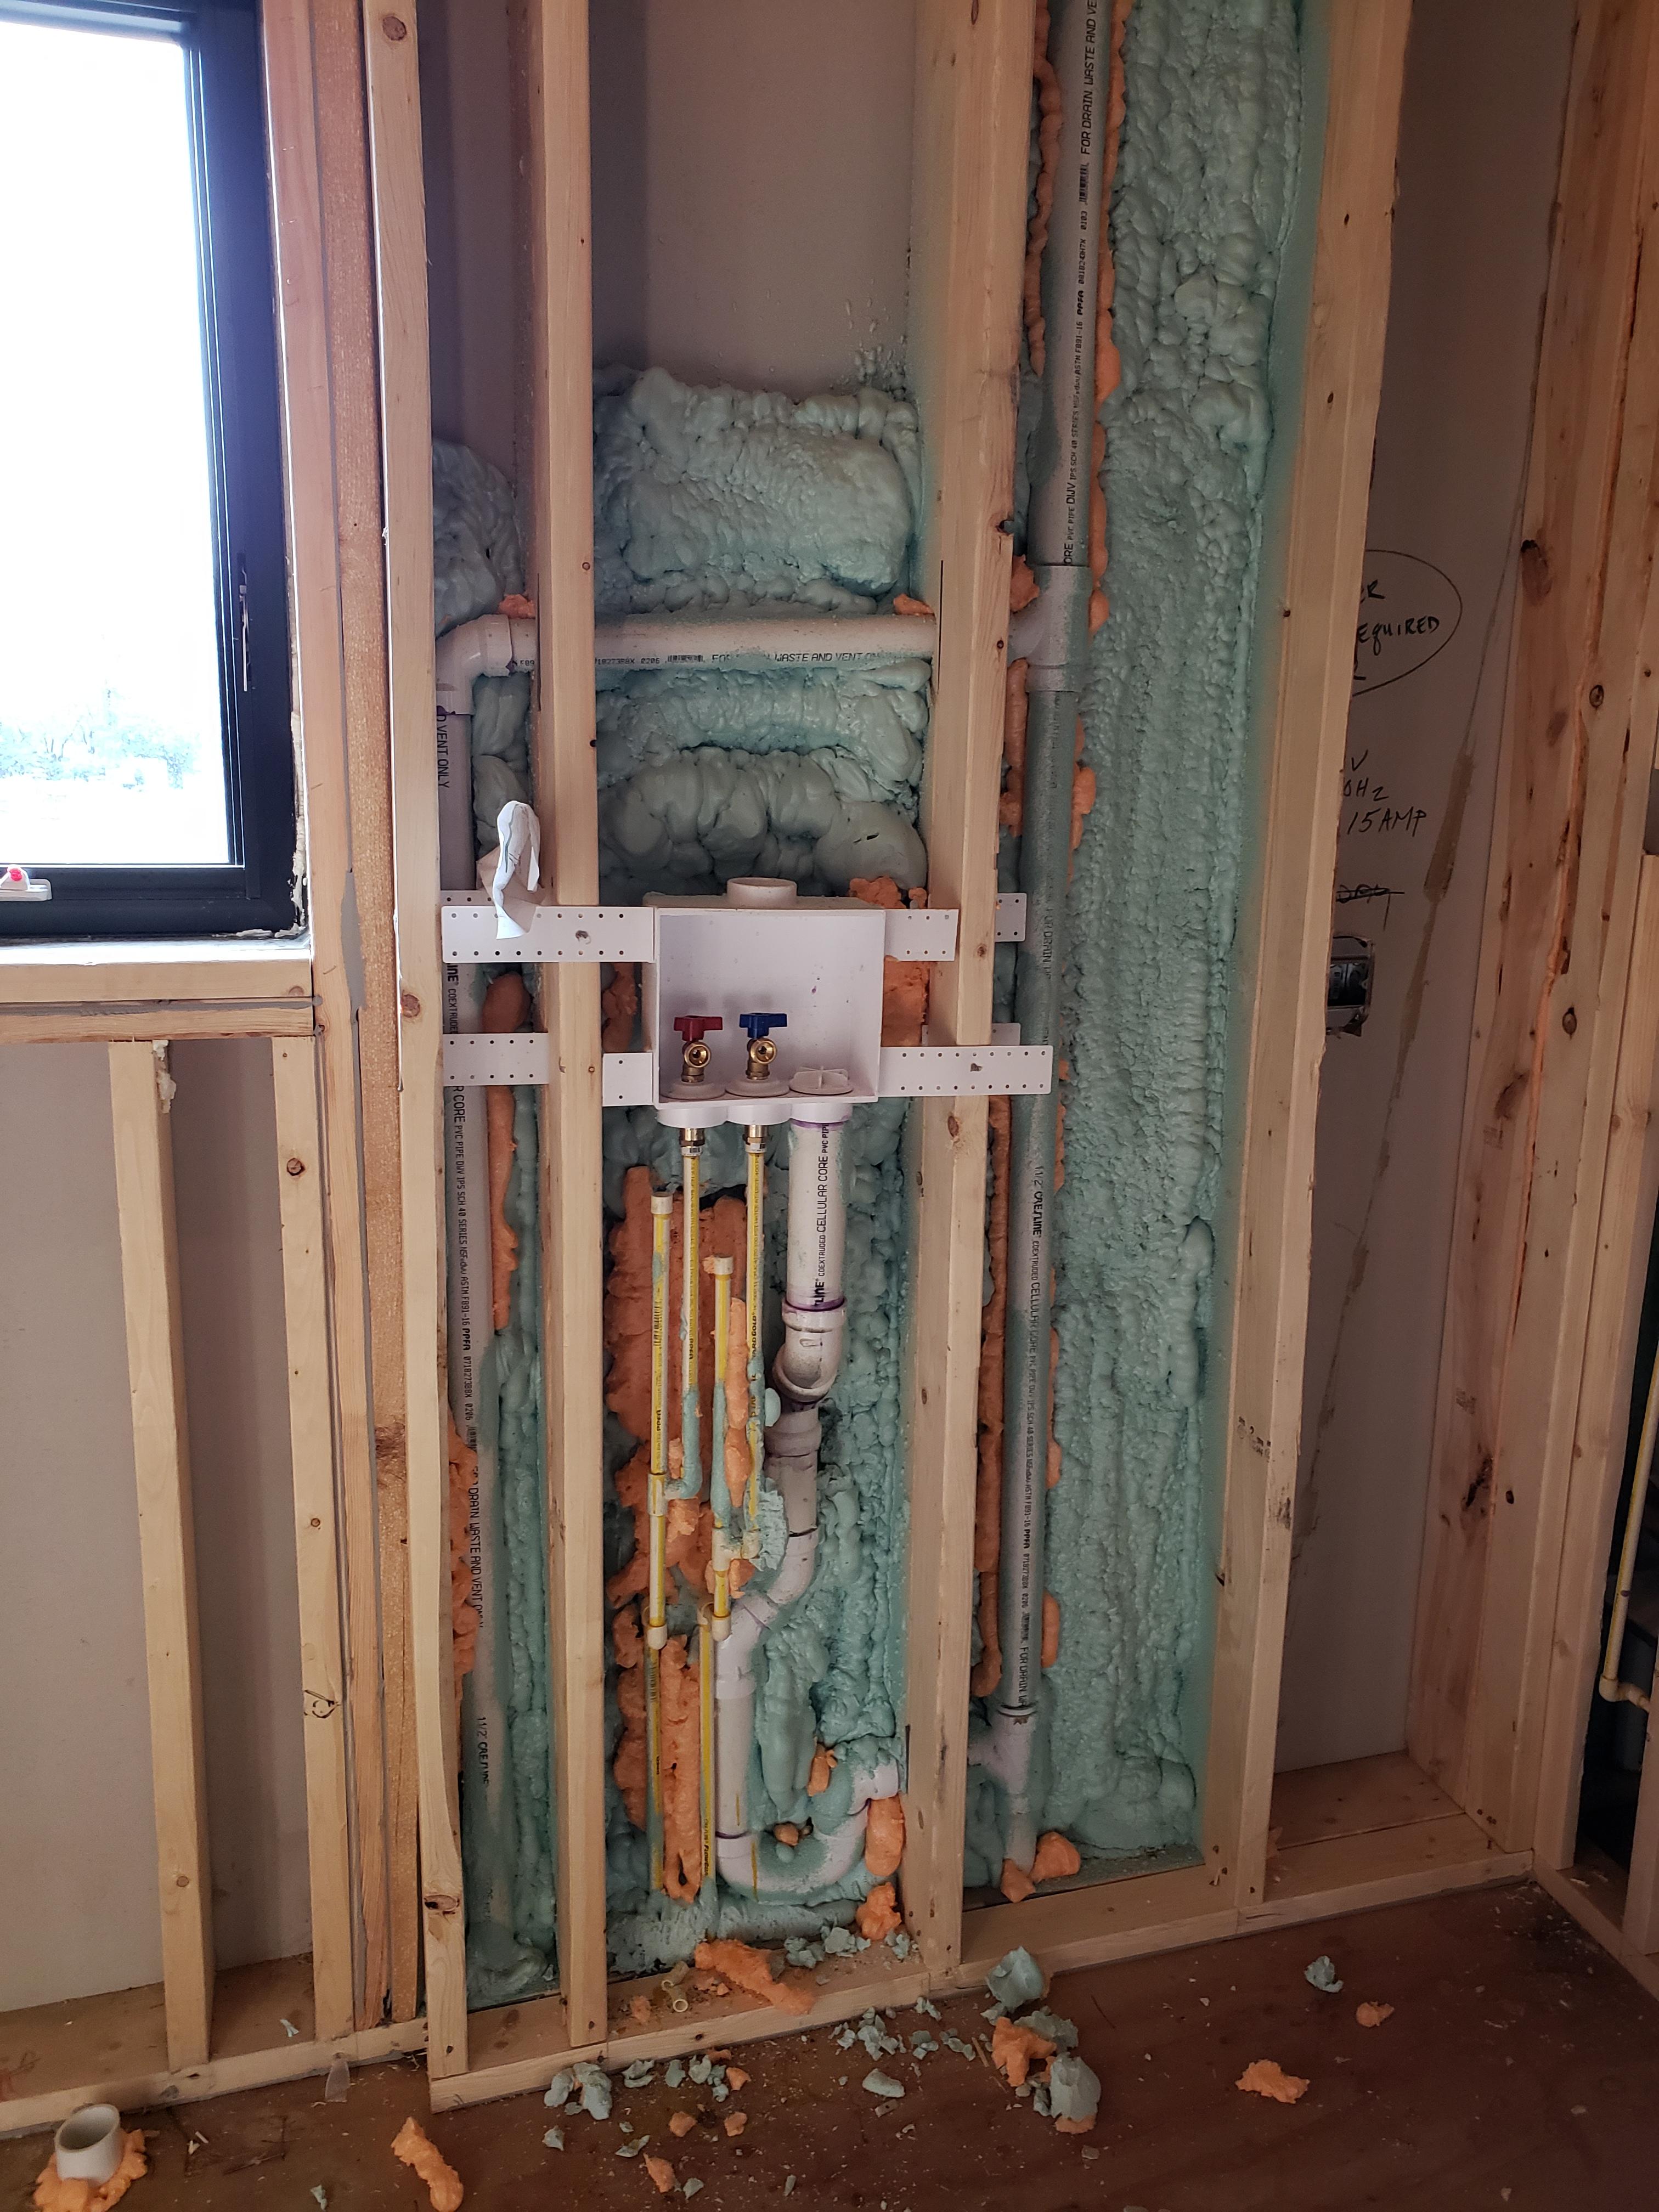
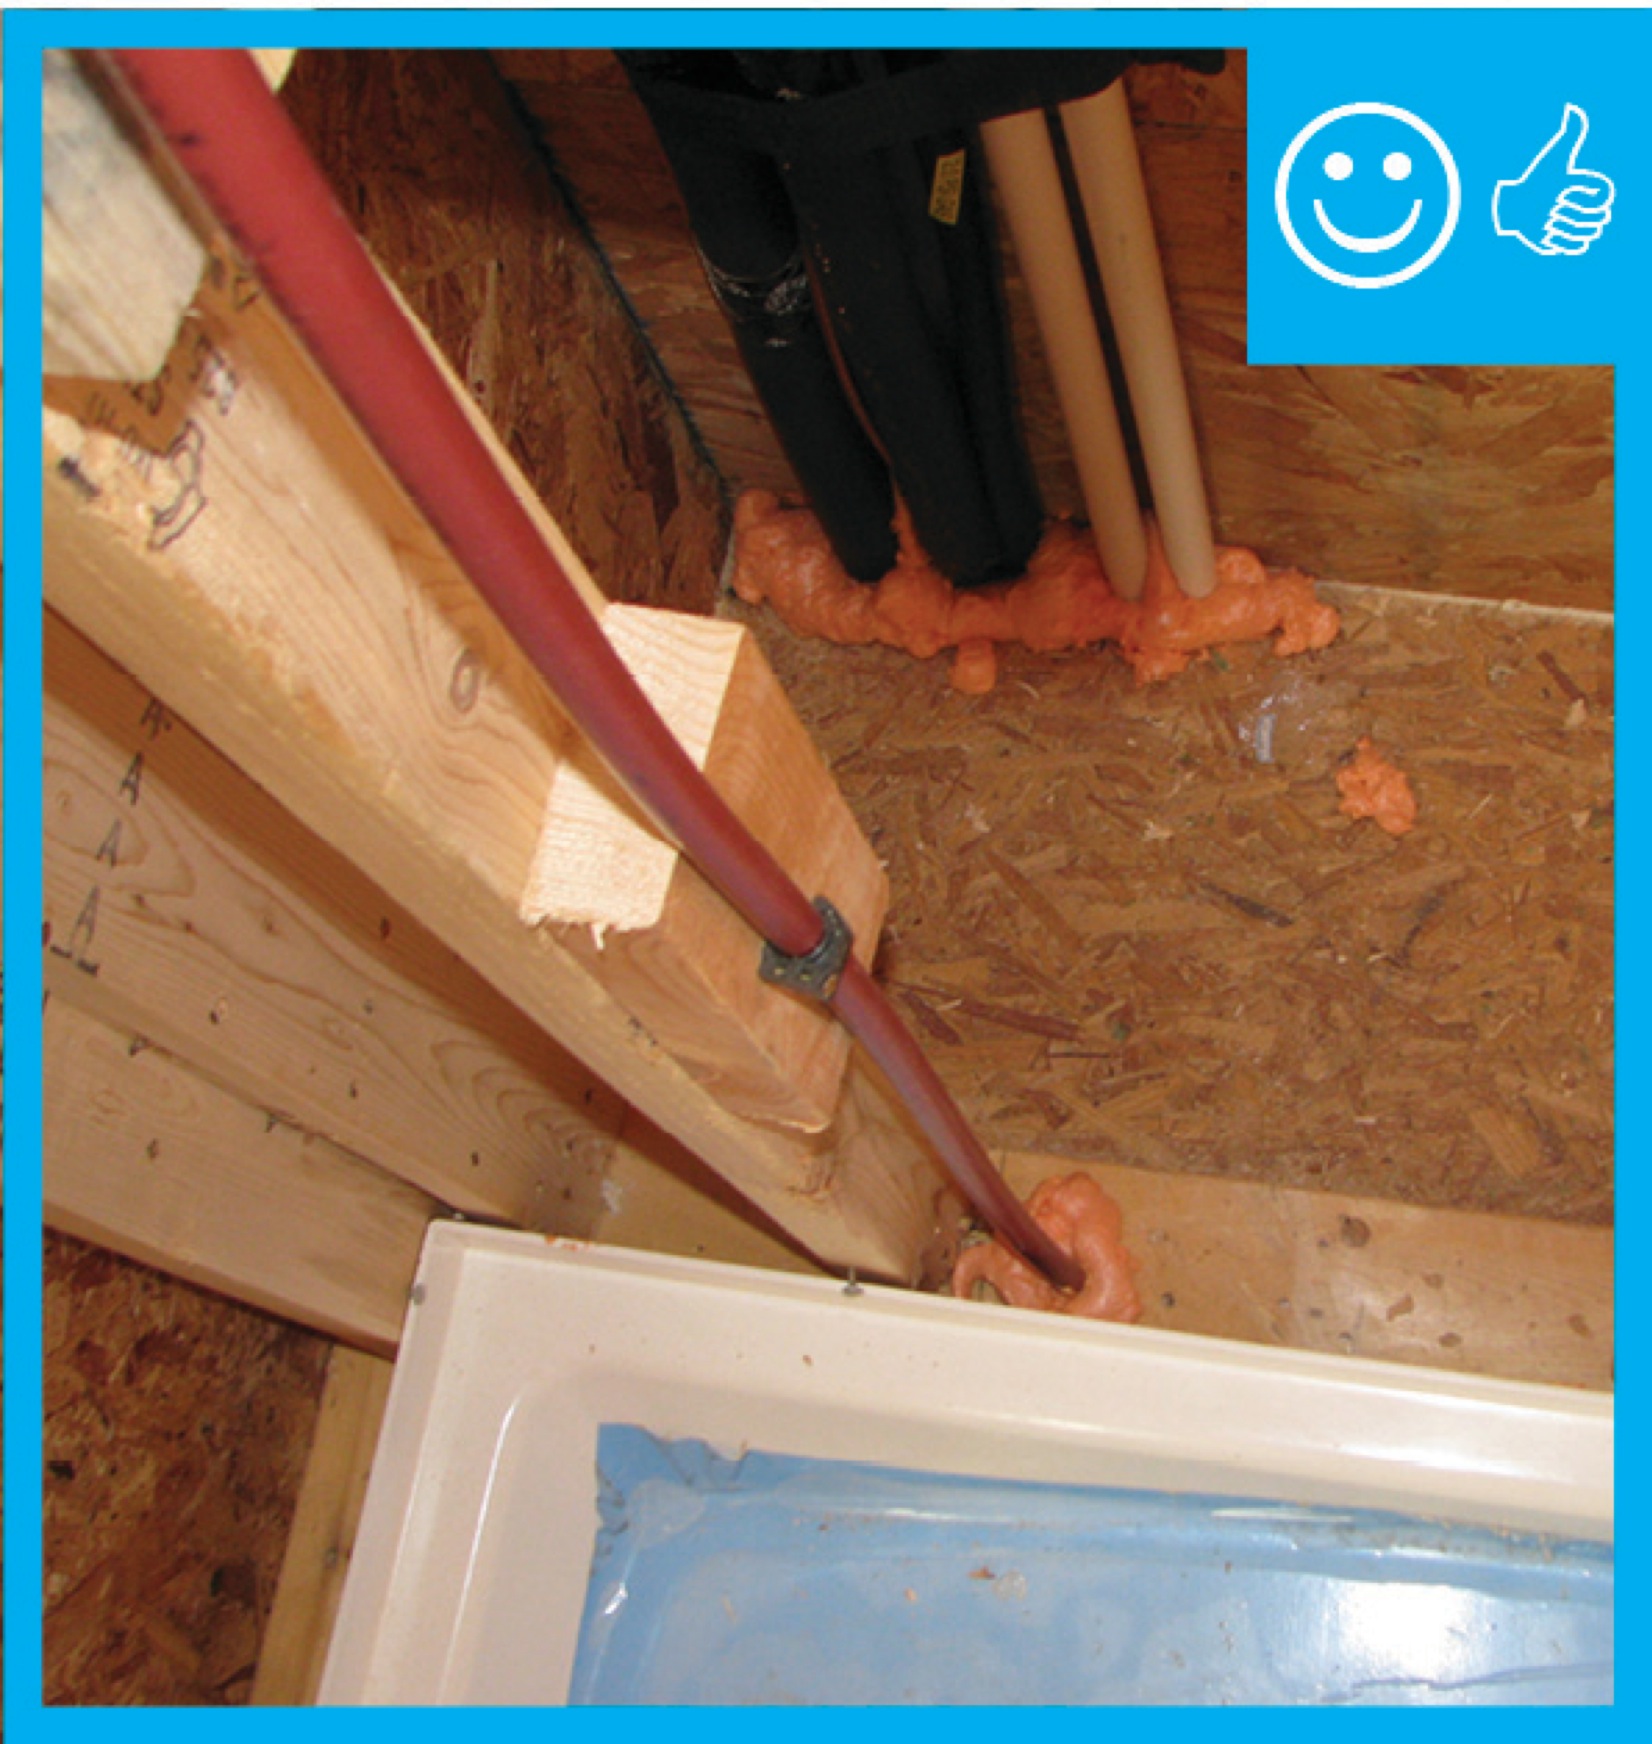
Right – Spray foam is used to carefully seal behind plumbing that was installed in an exterior wall.
Image
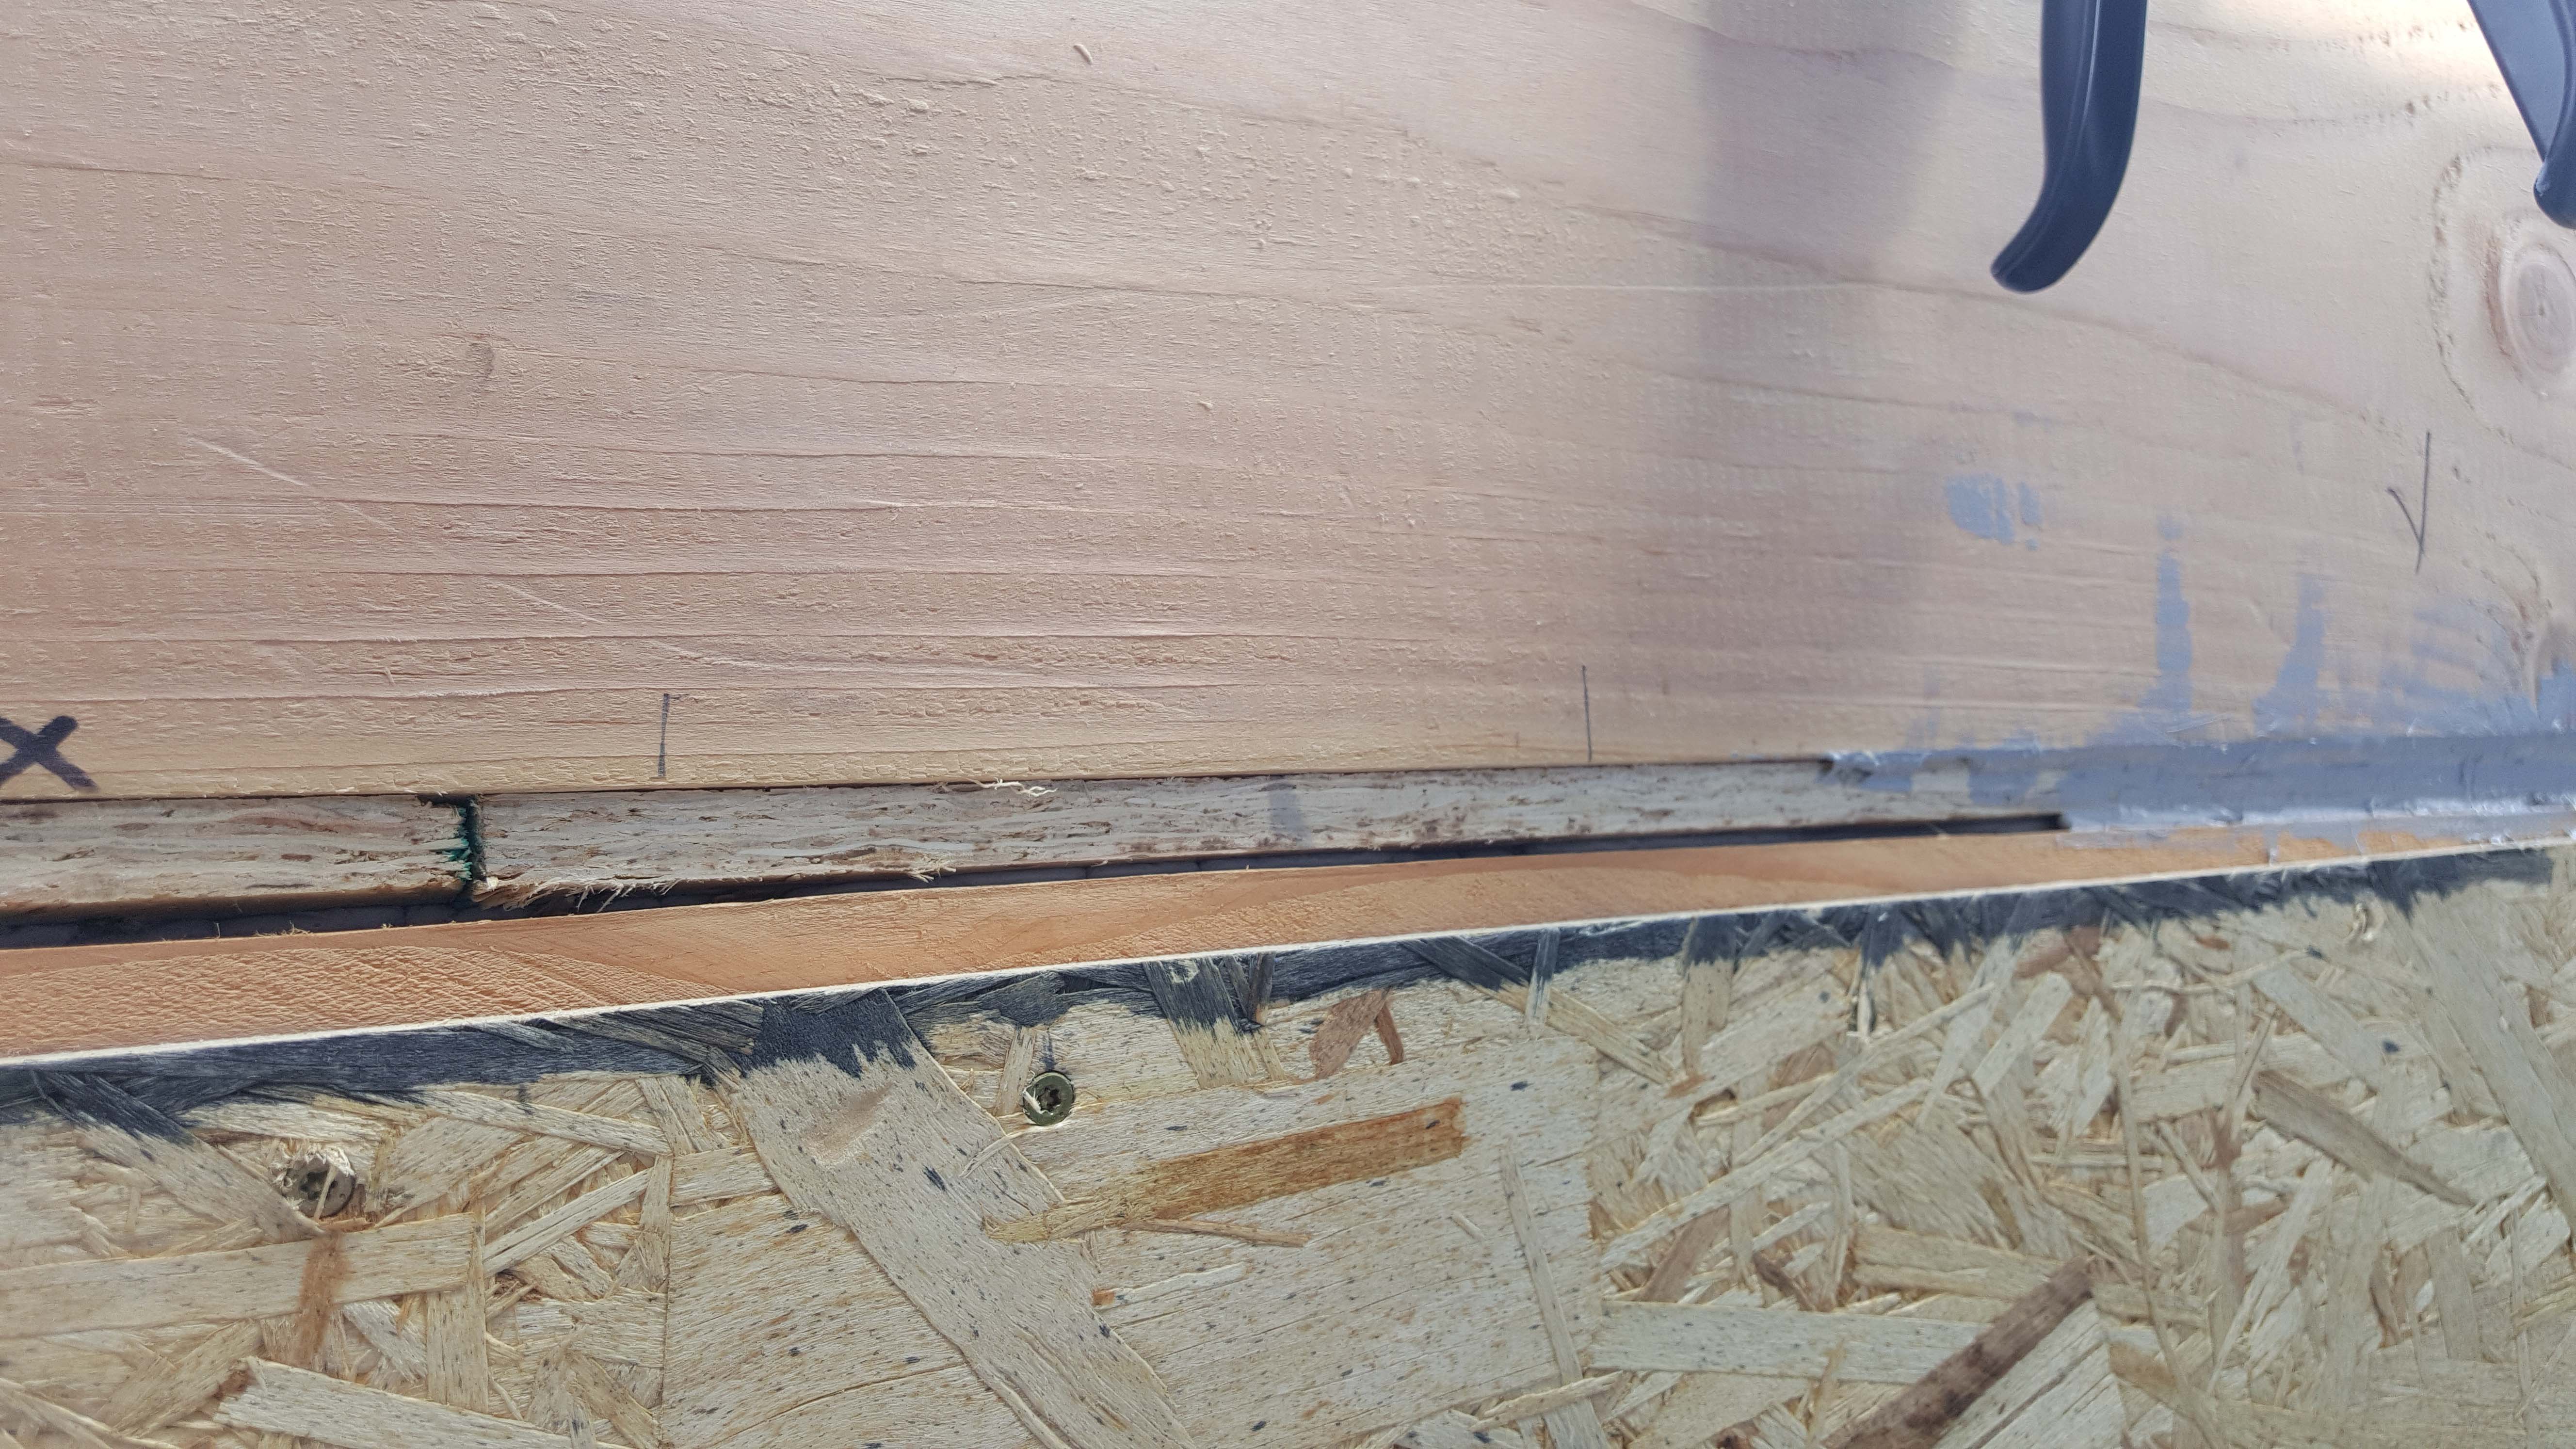
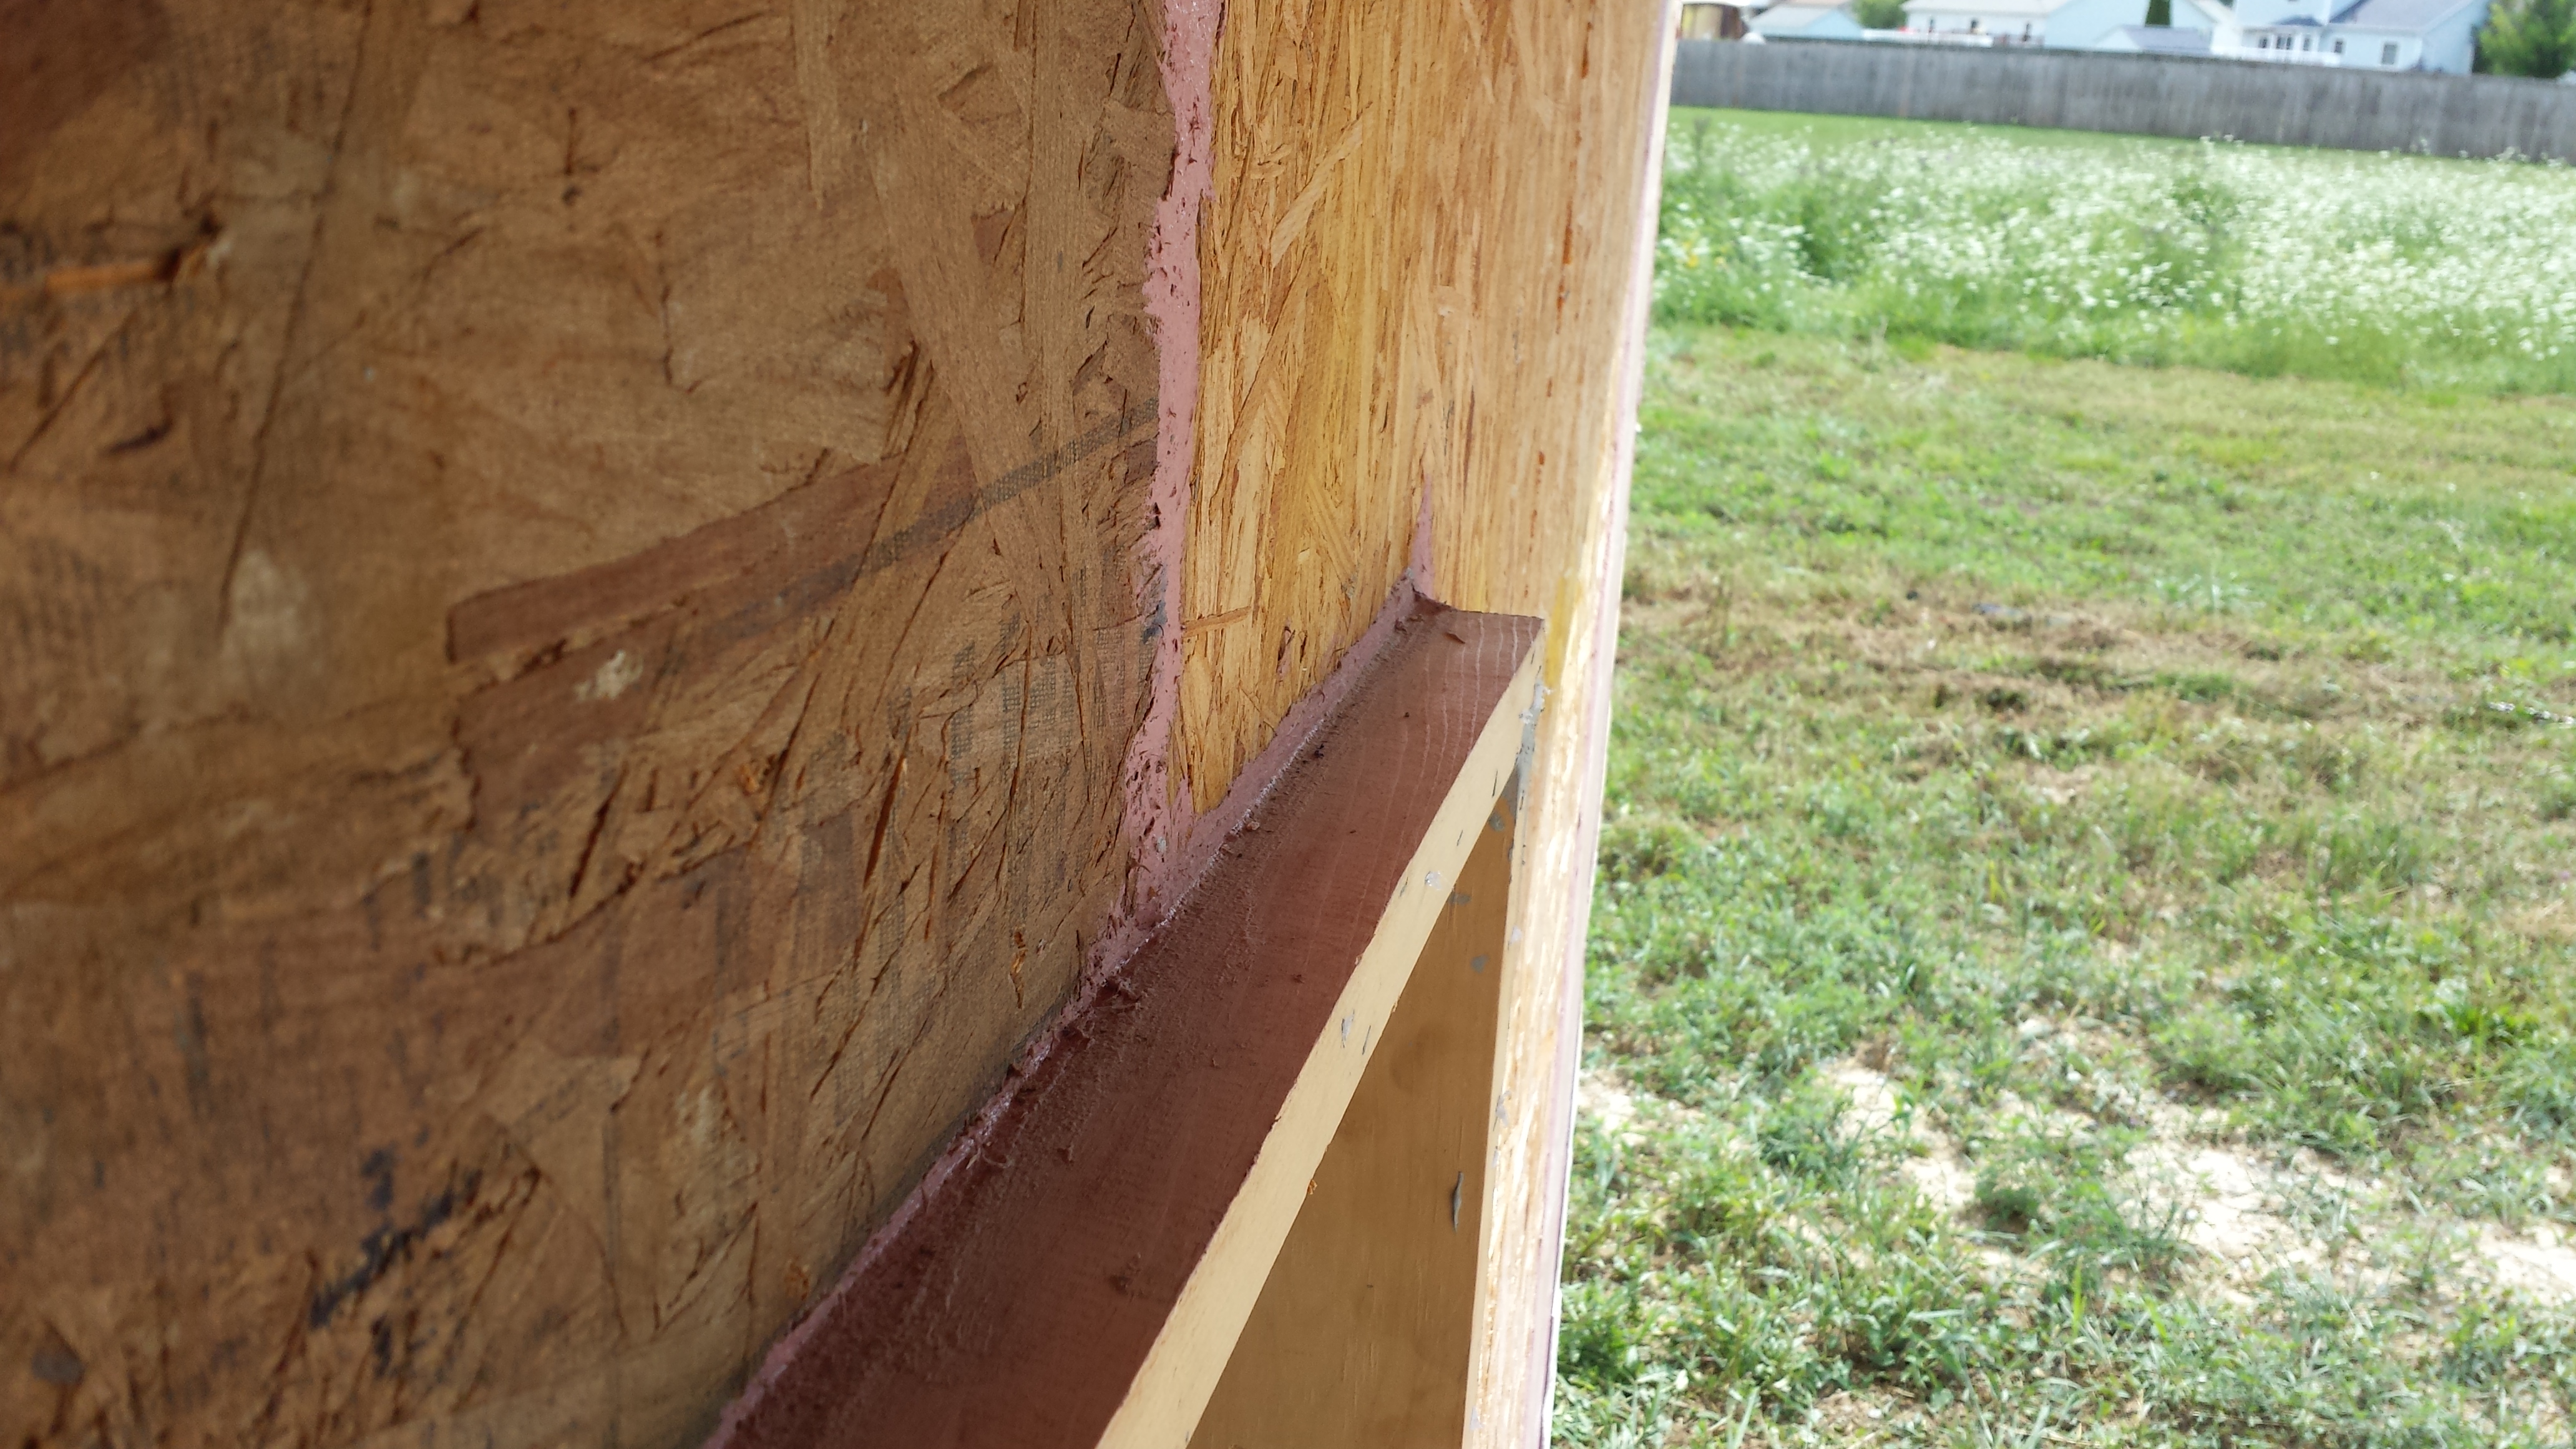
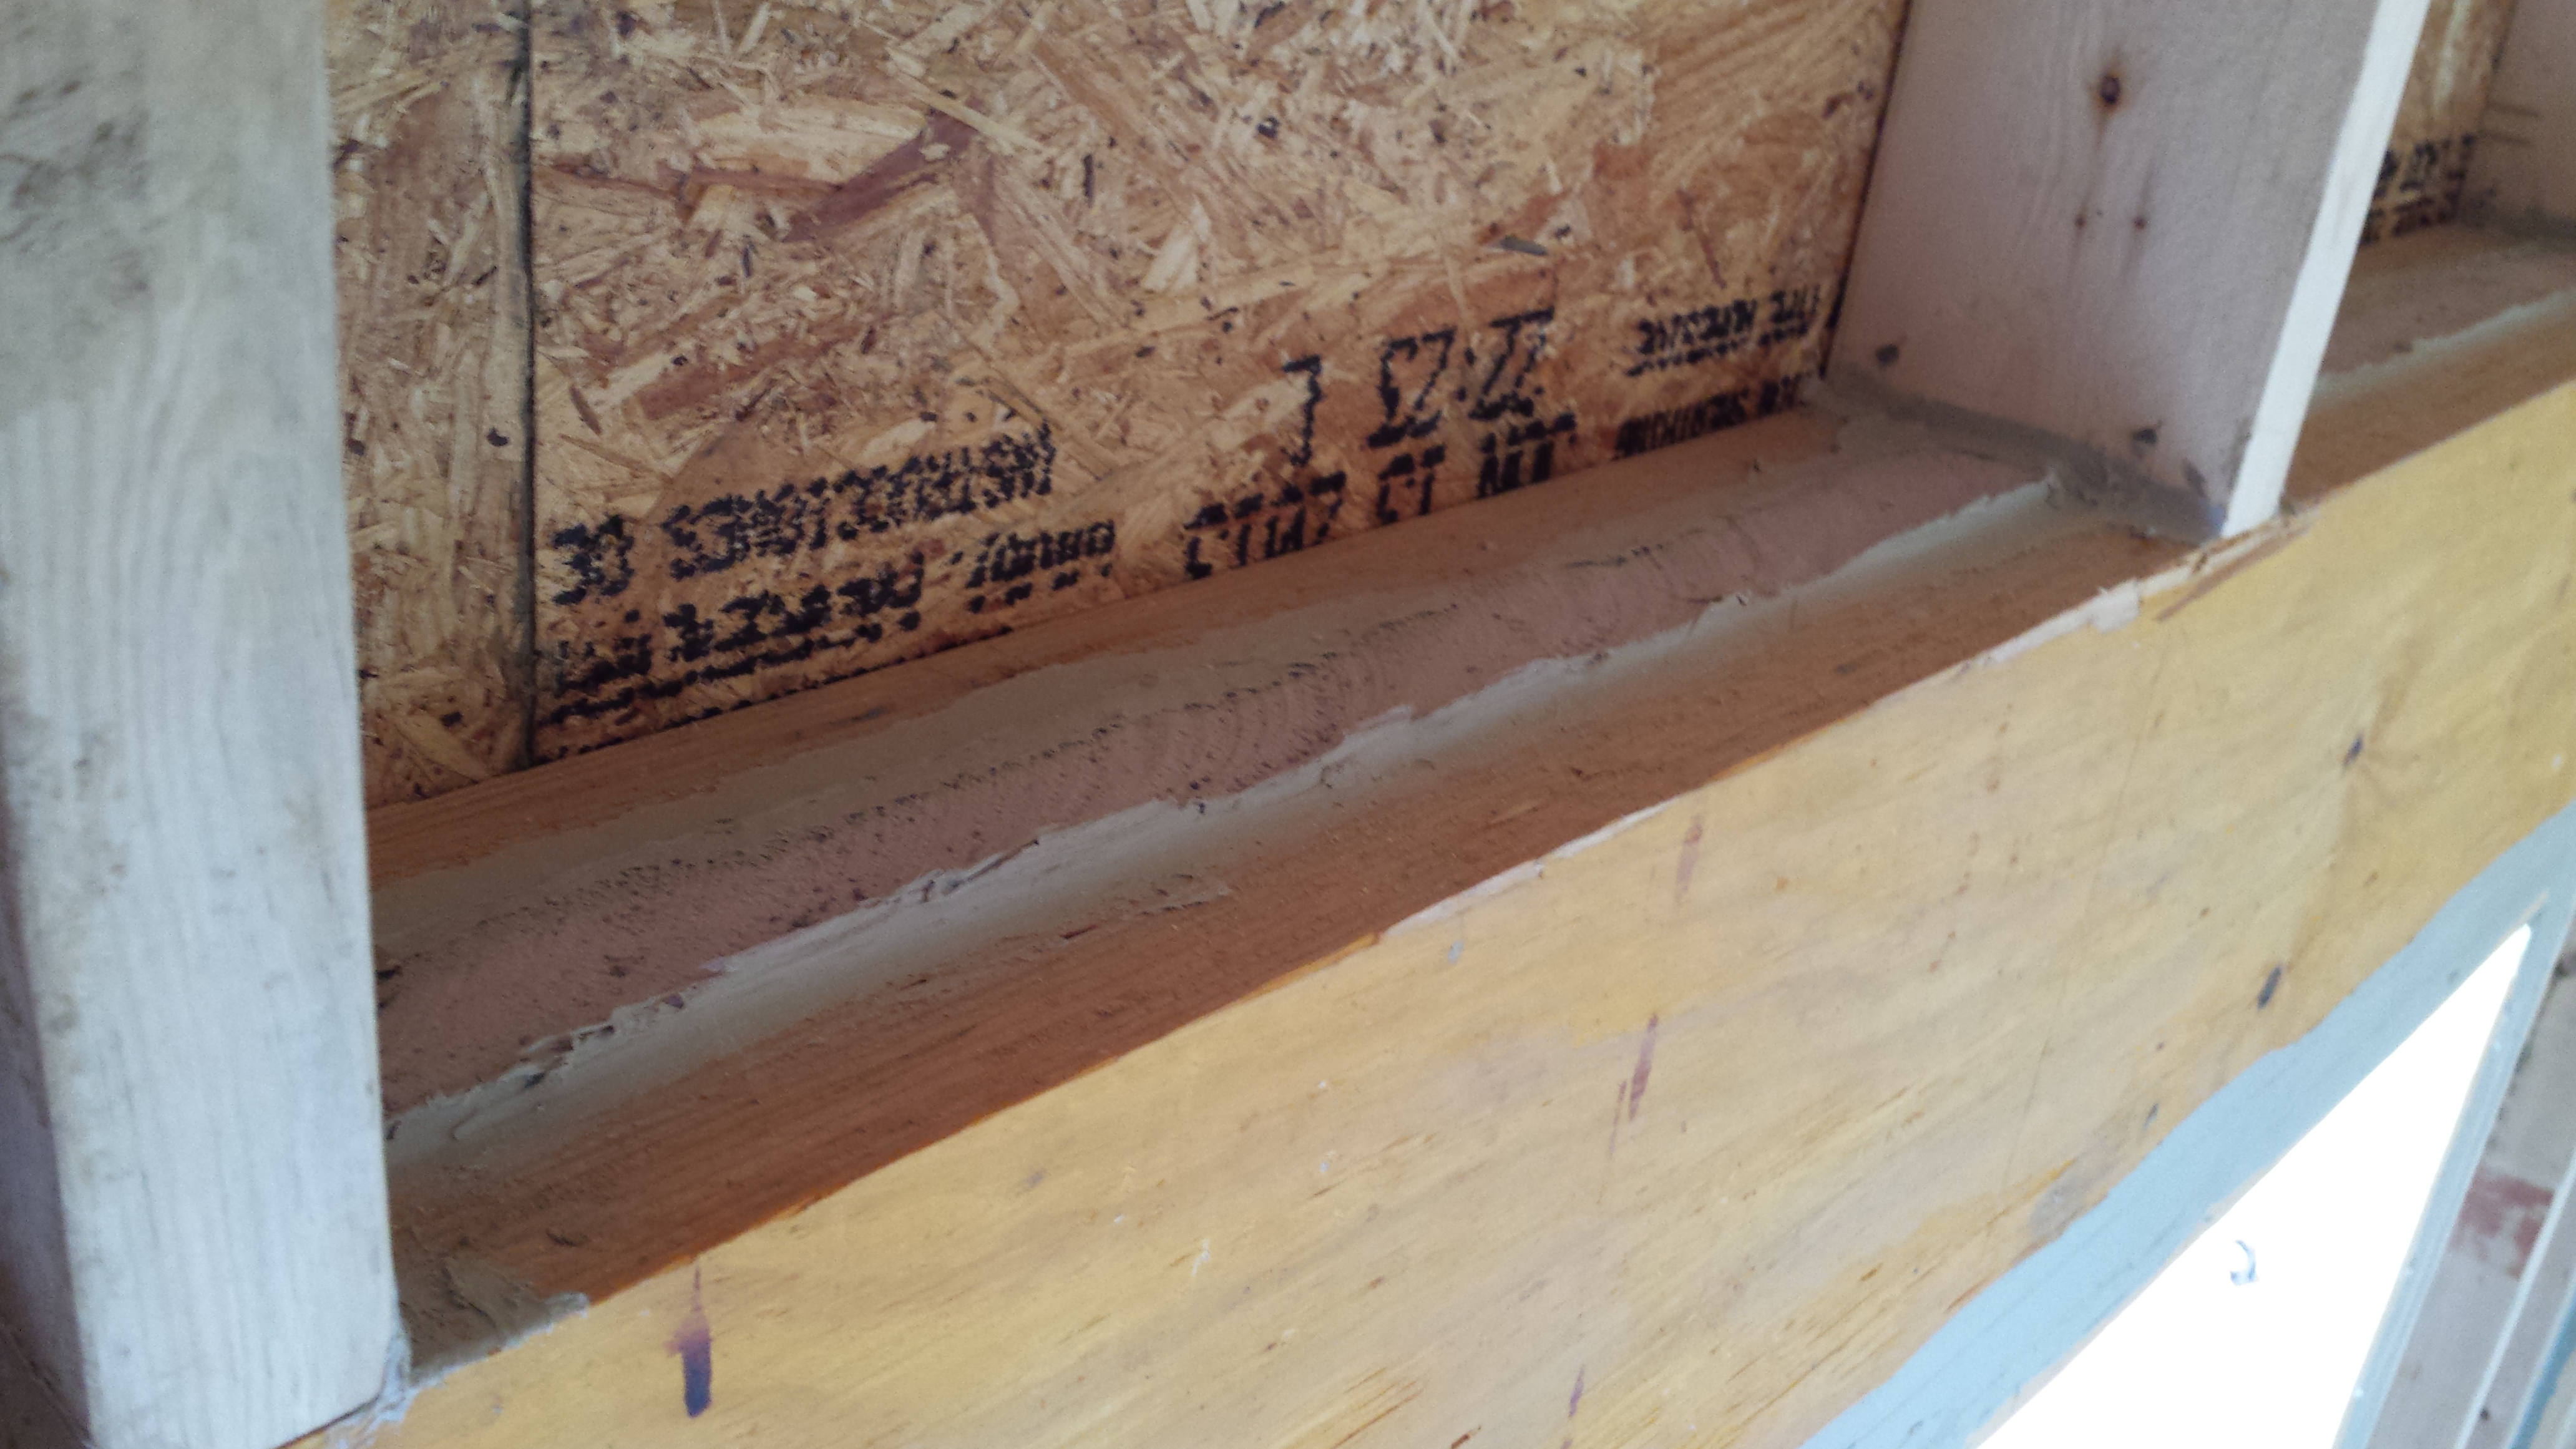
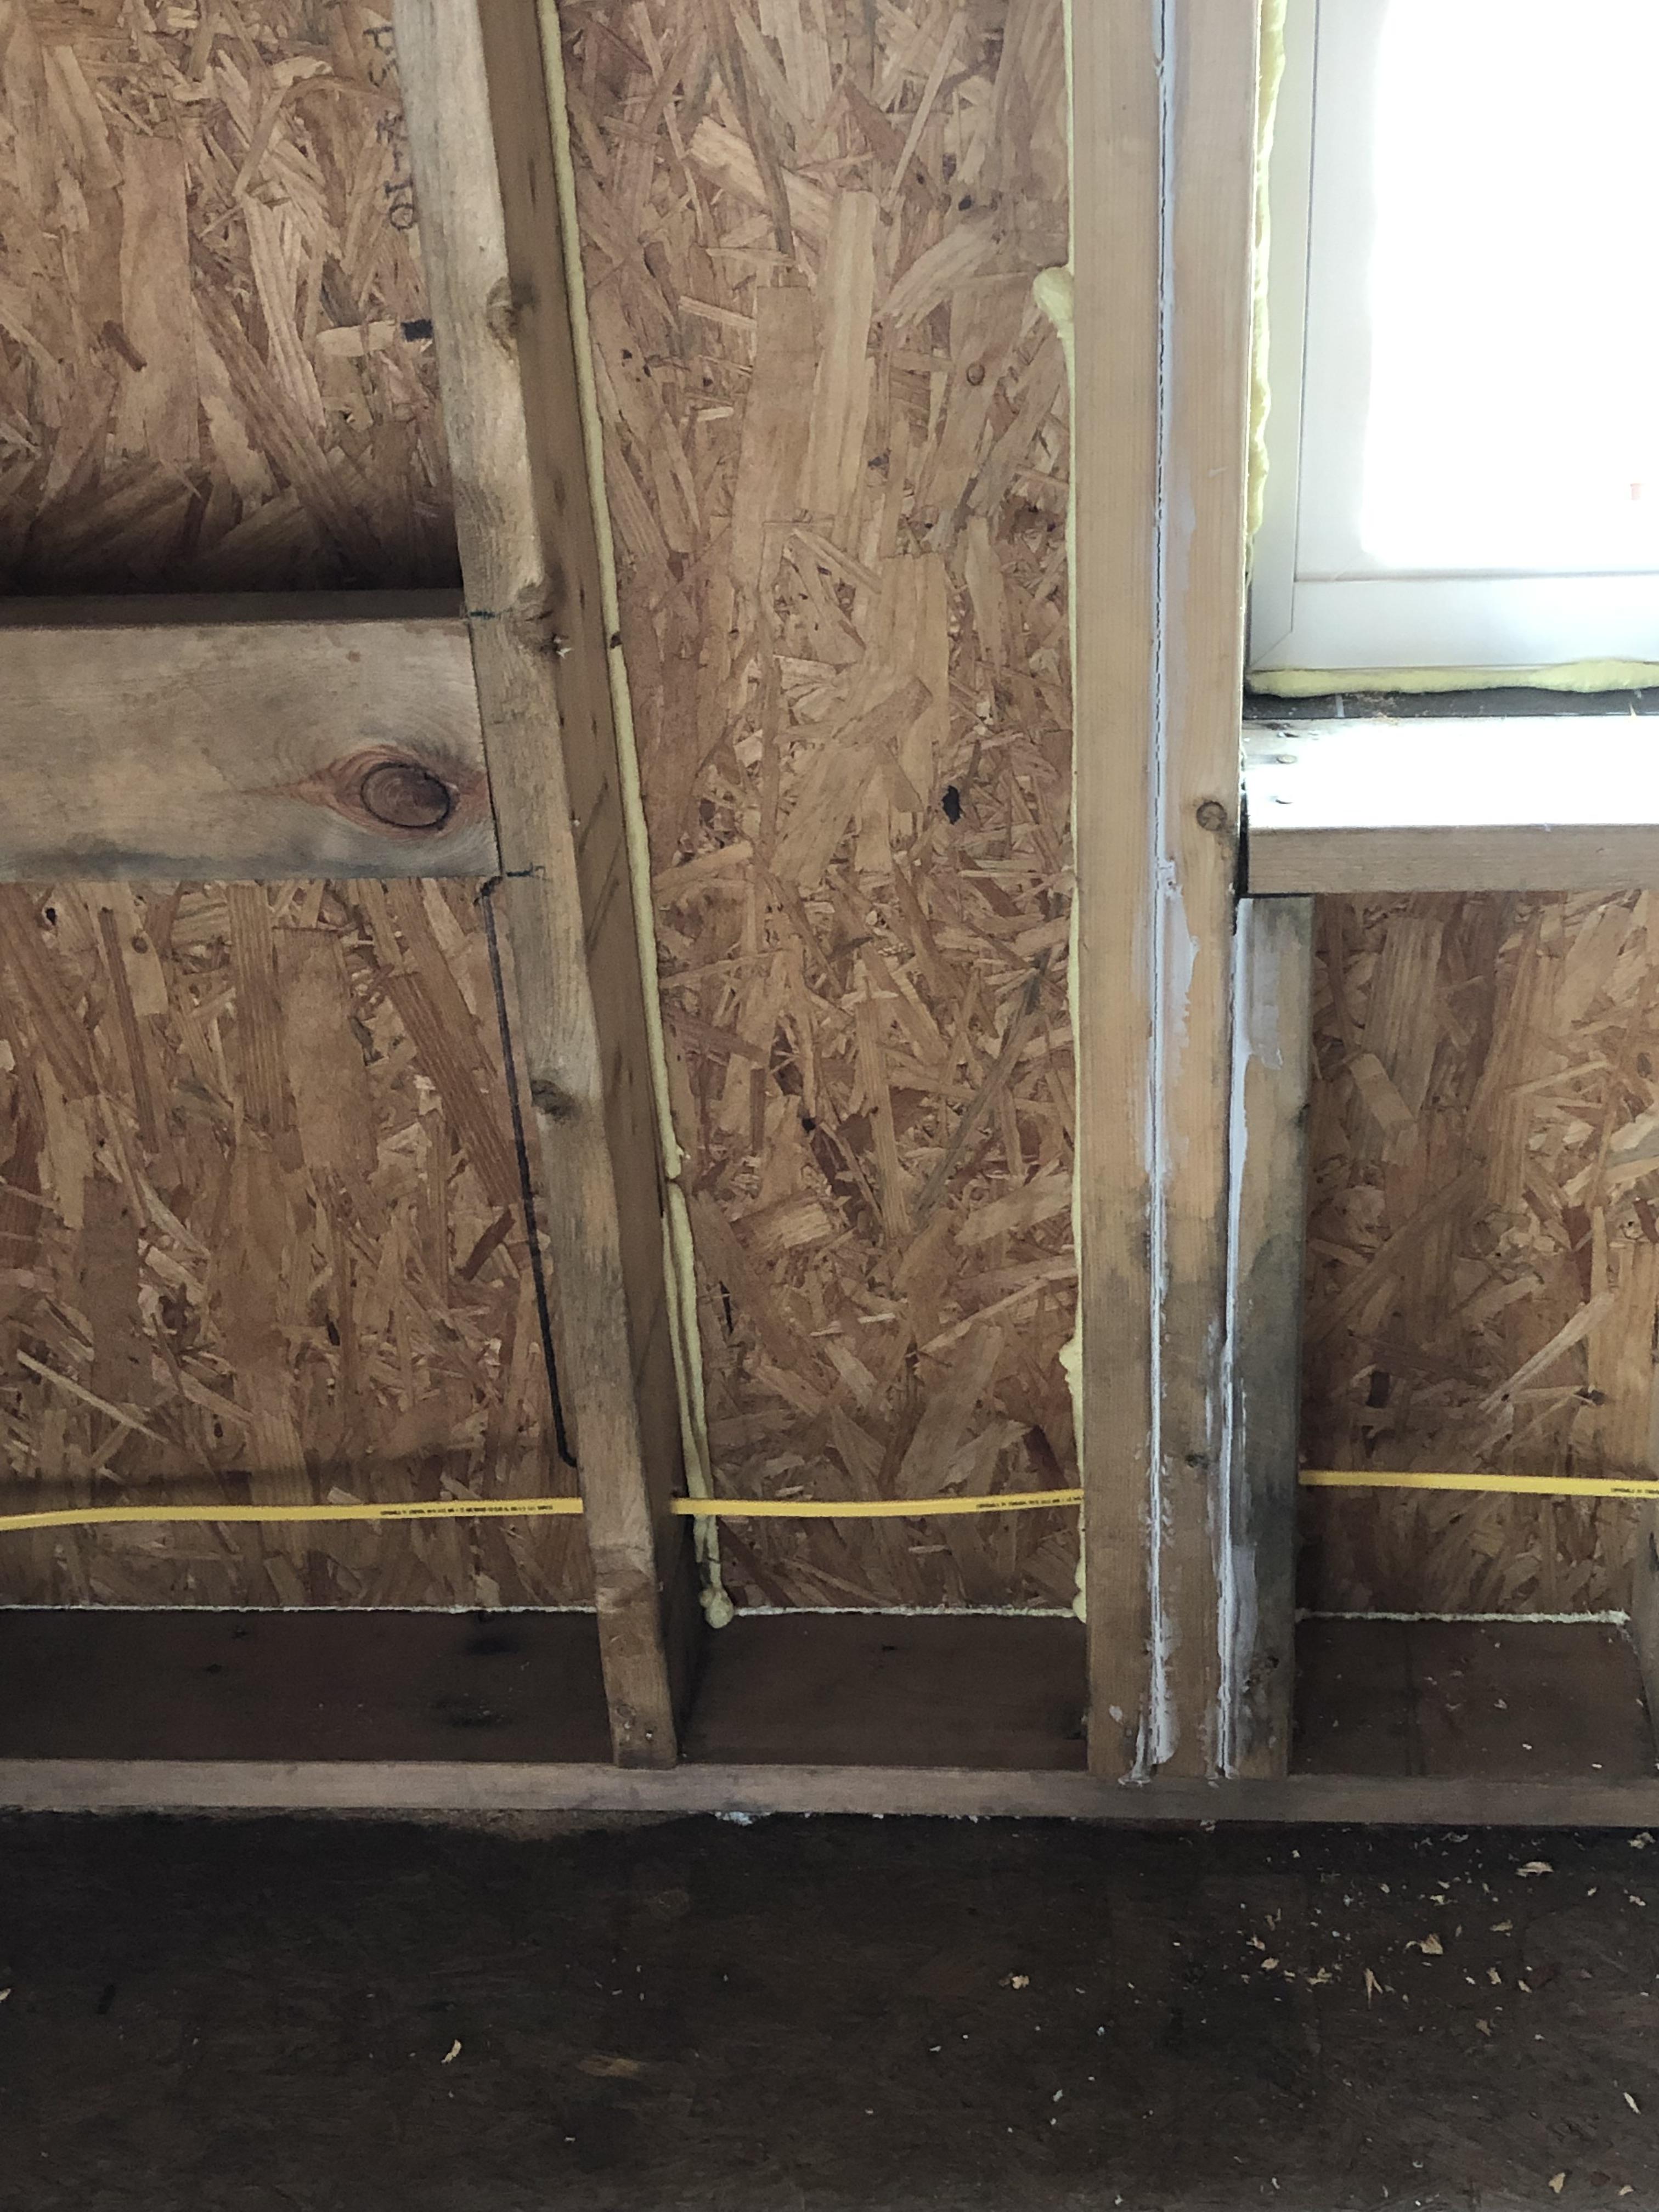
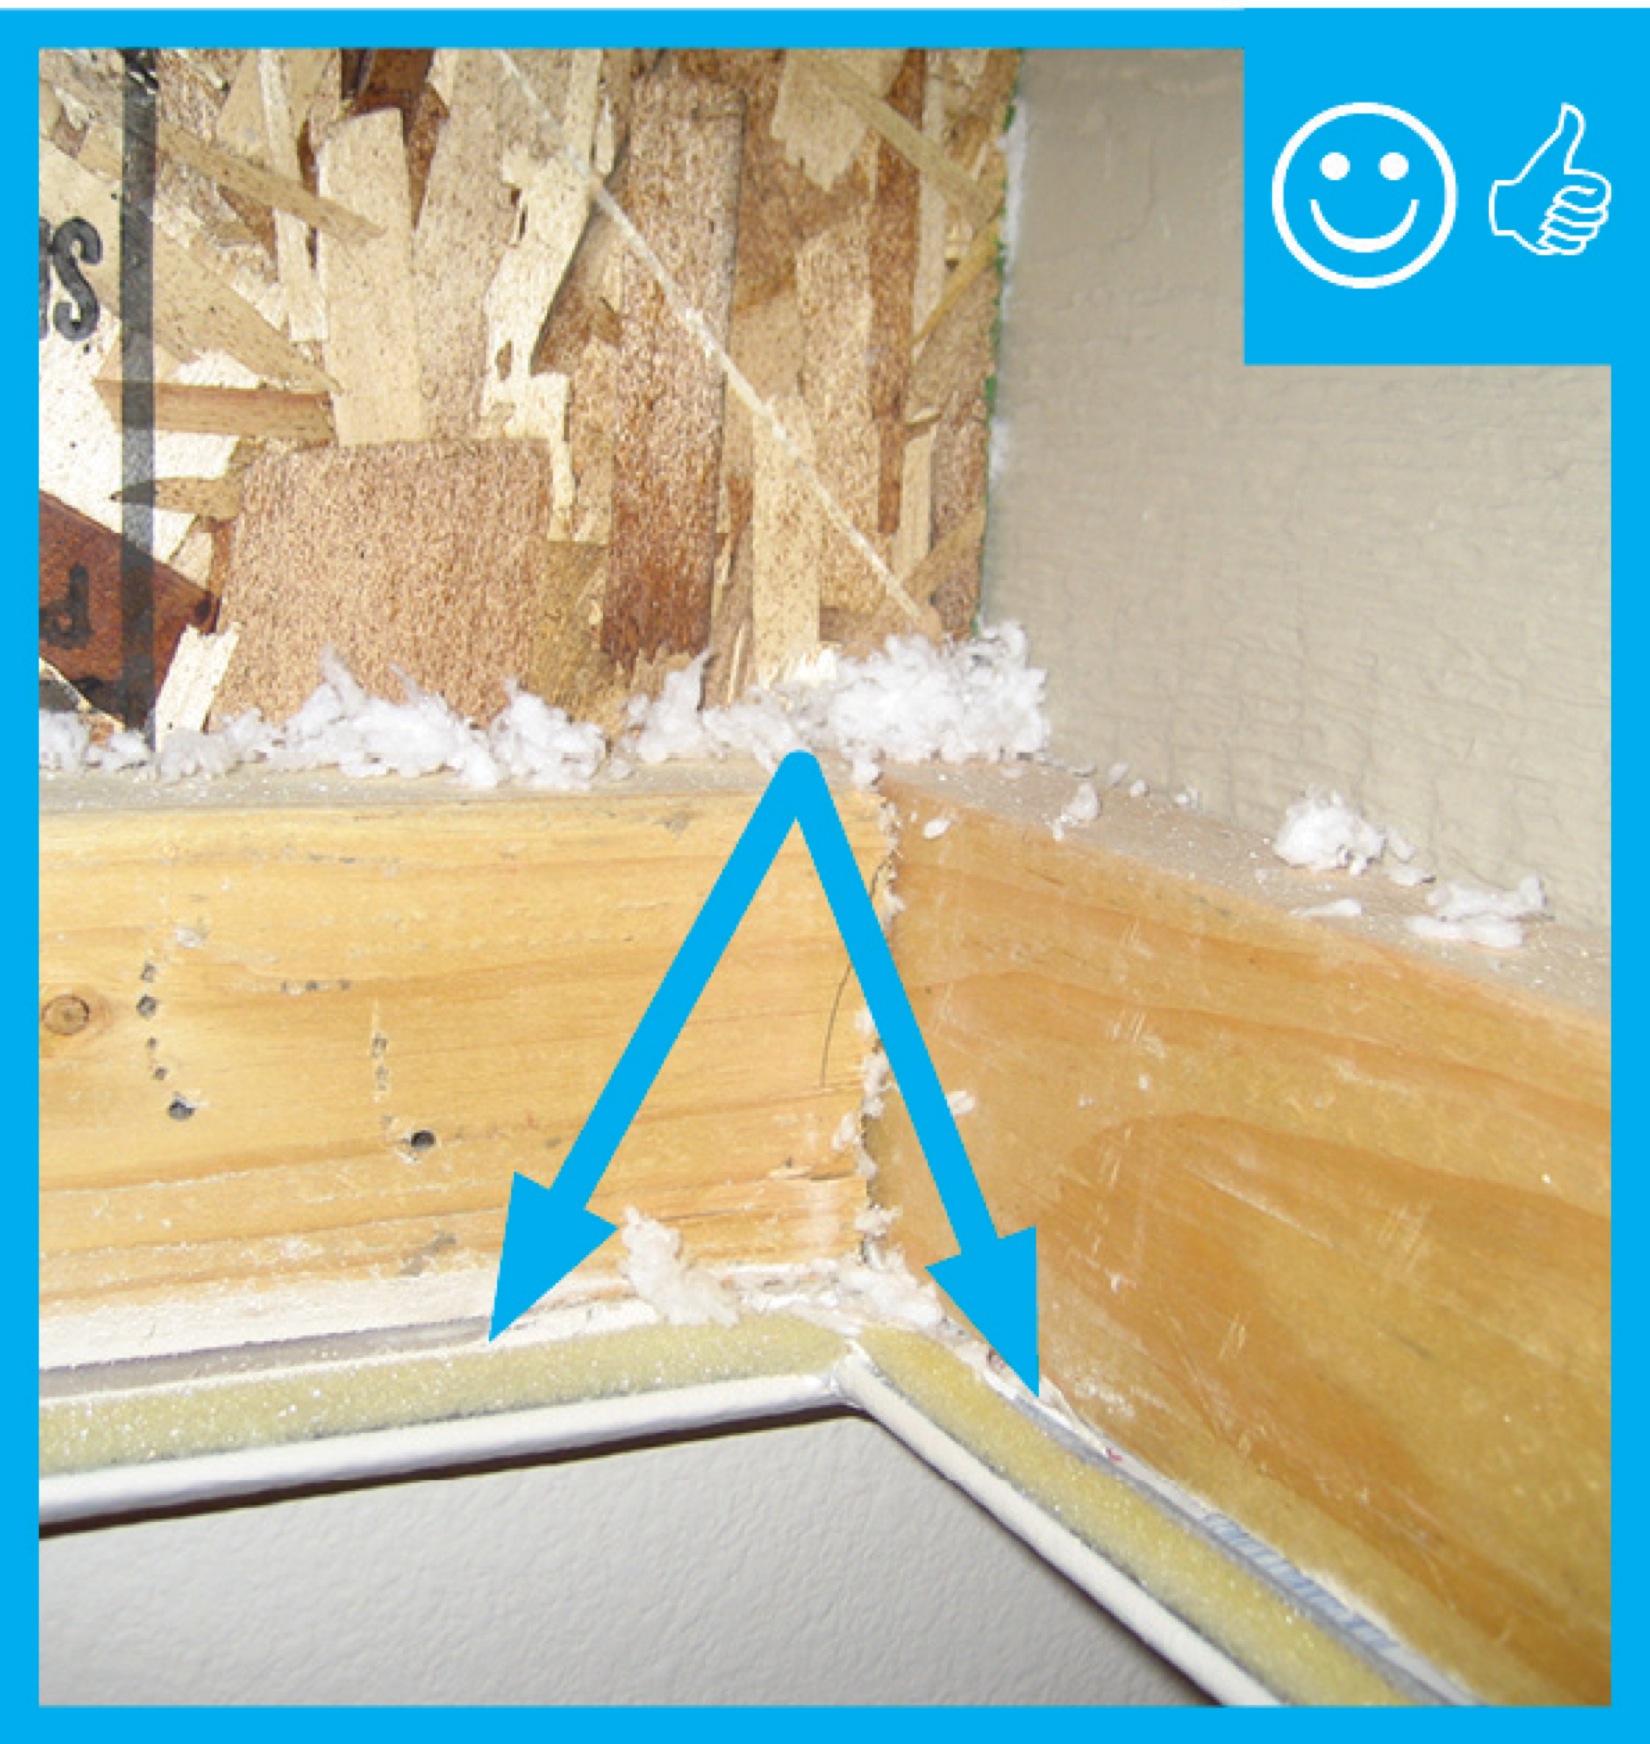
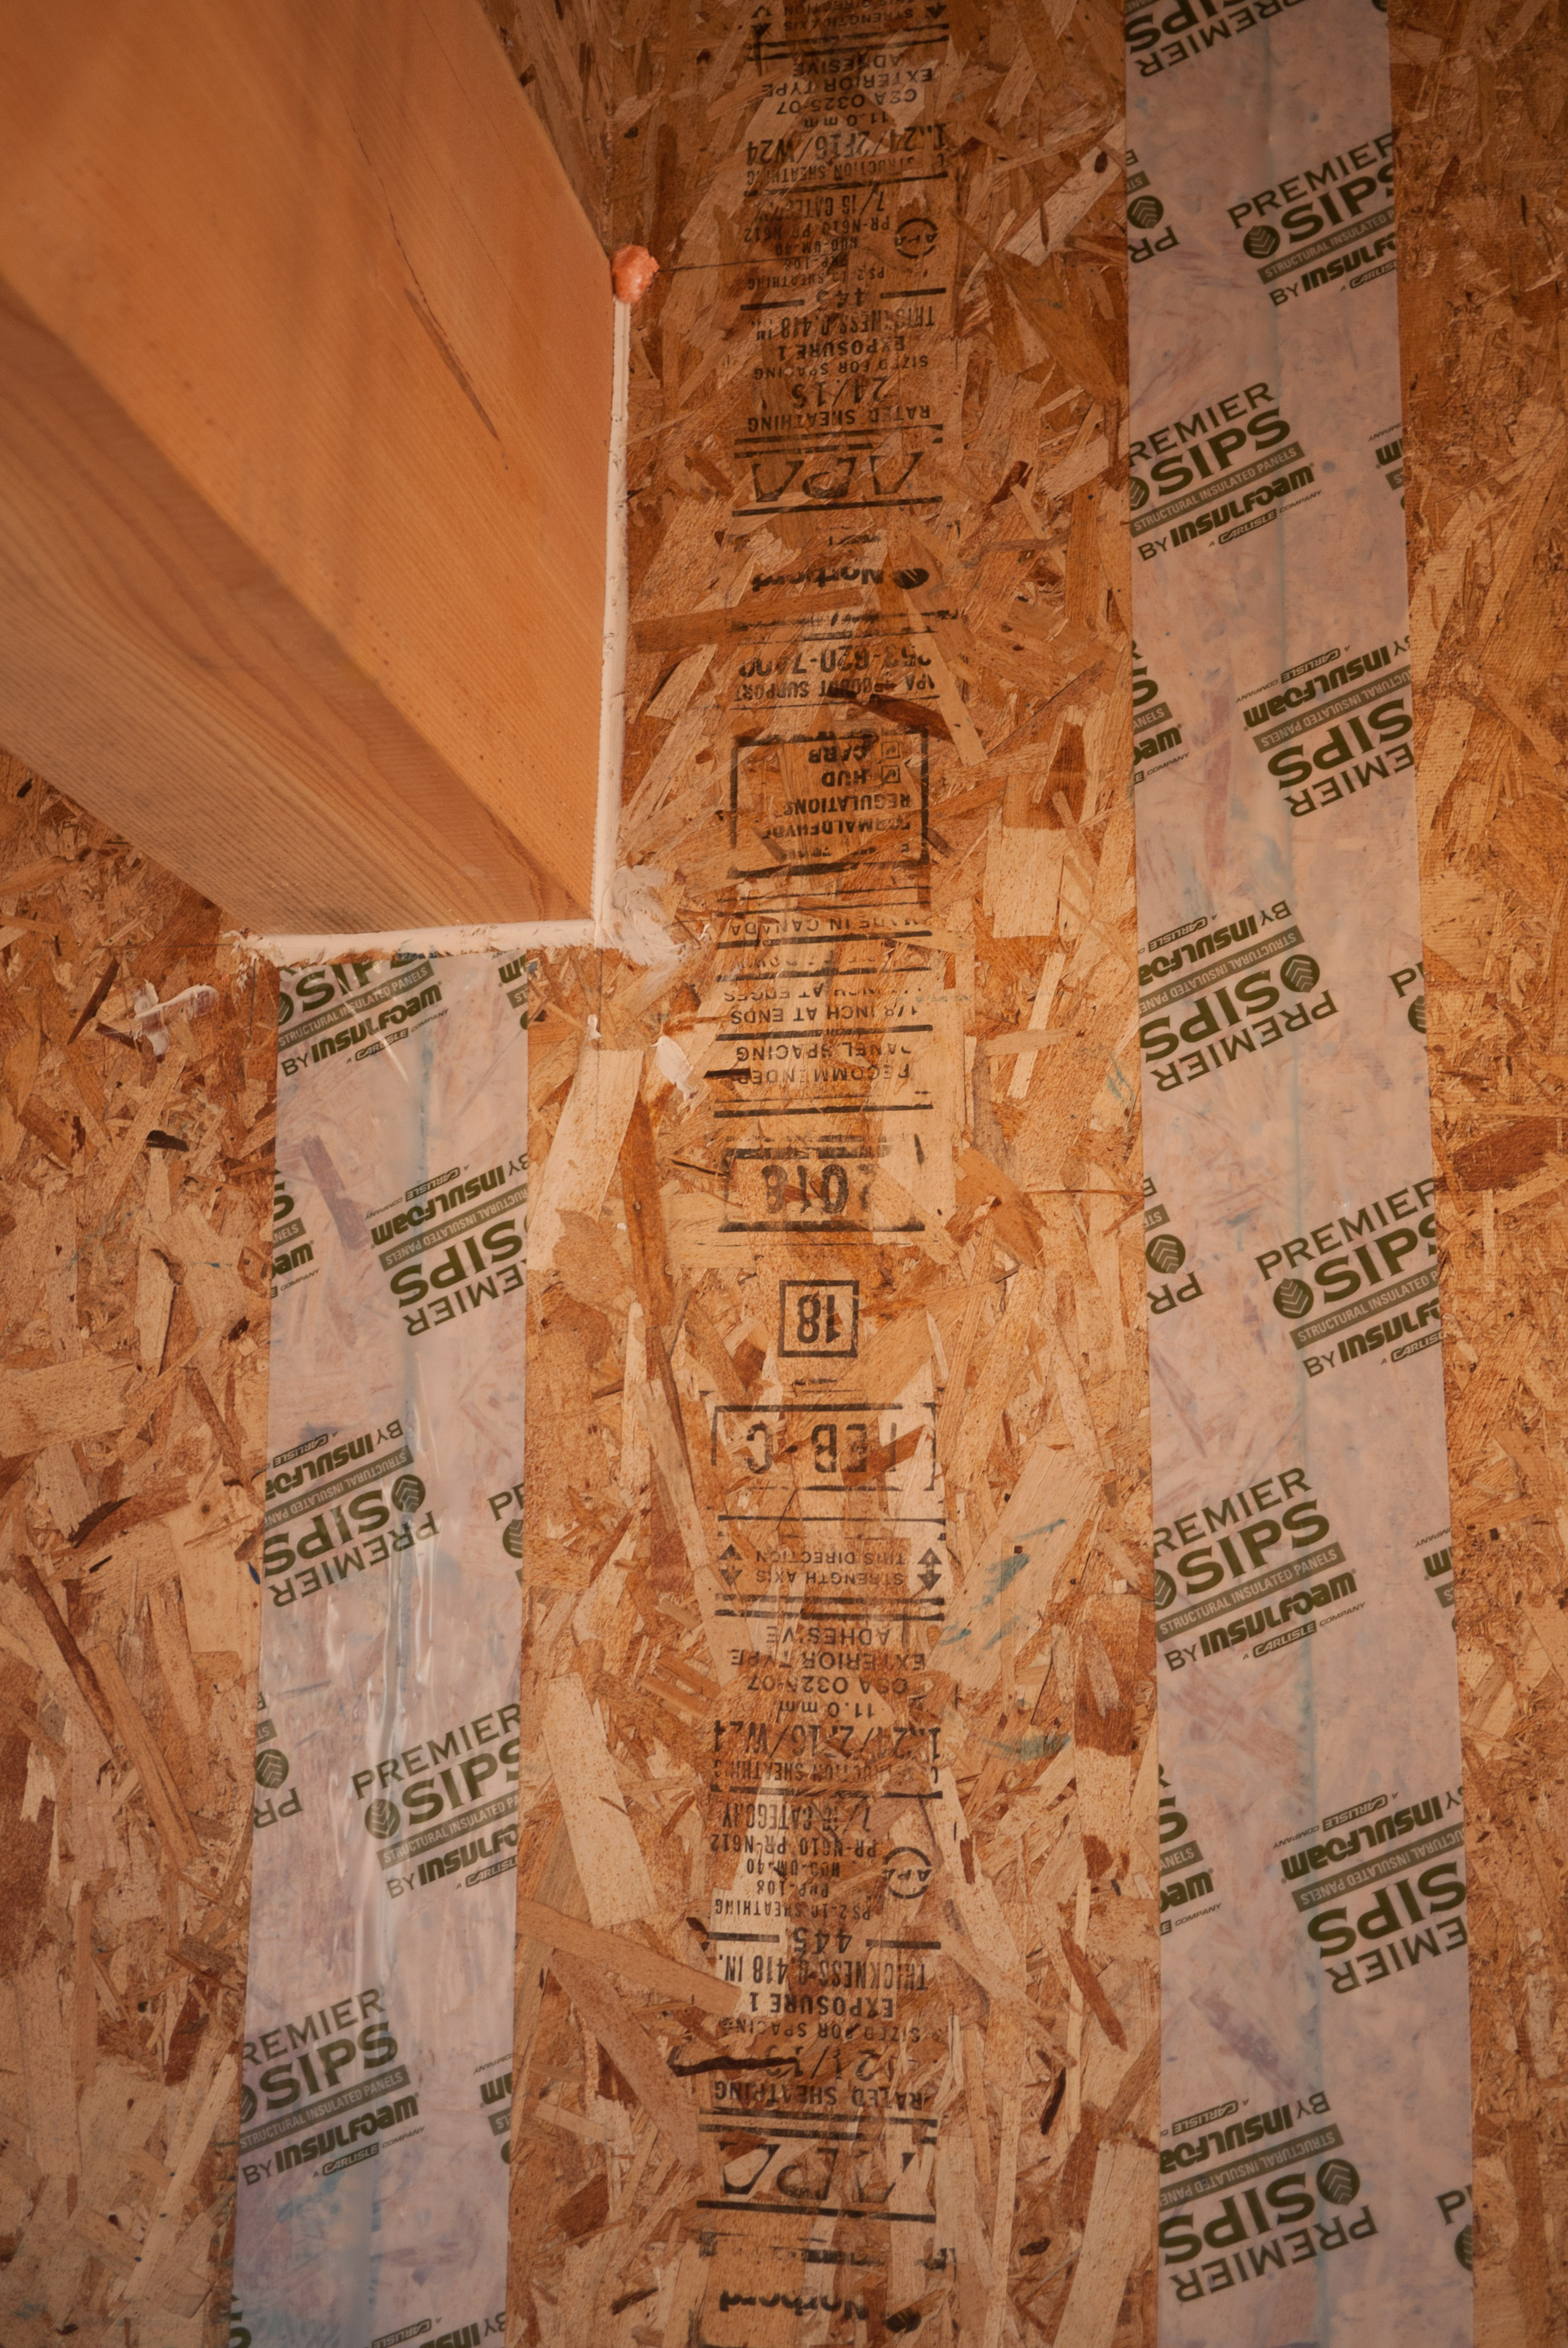
Right – Spray foam was installed at the sheathing intersection as well as the sill plate to sub-floor connection.
Image

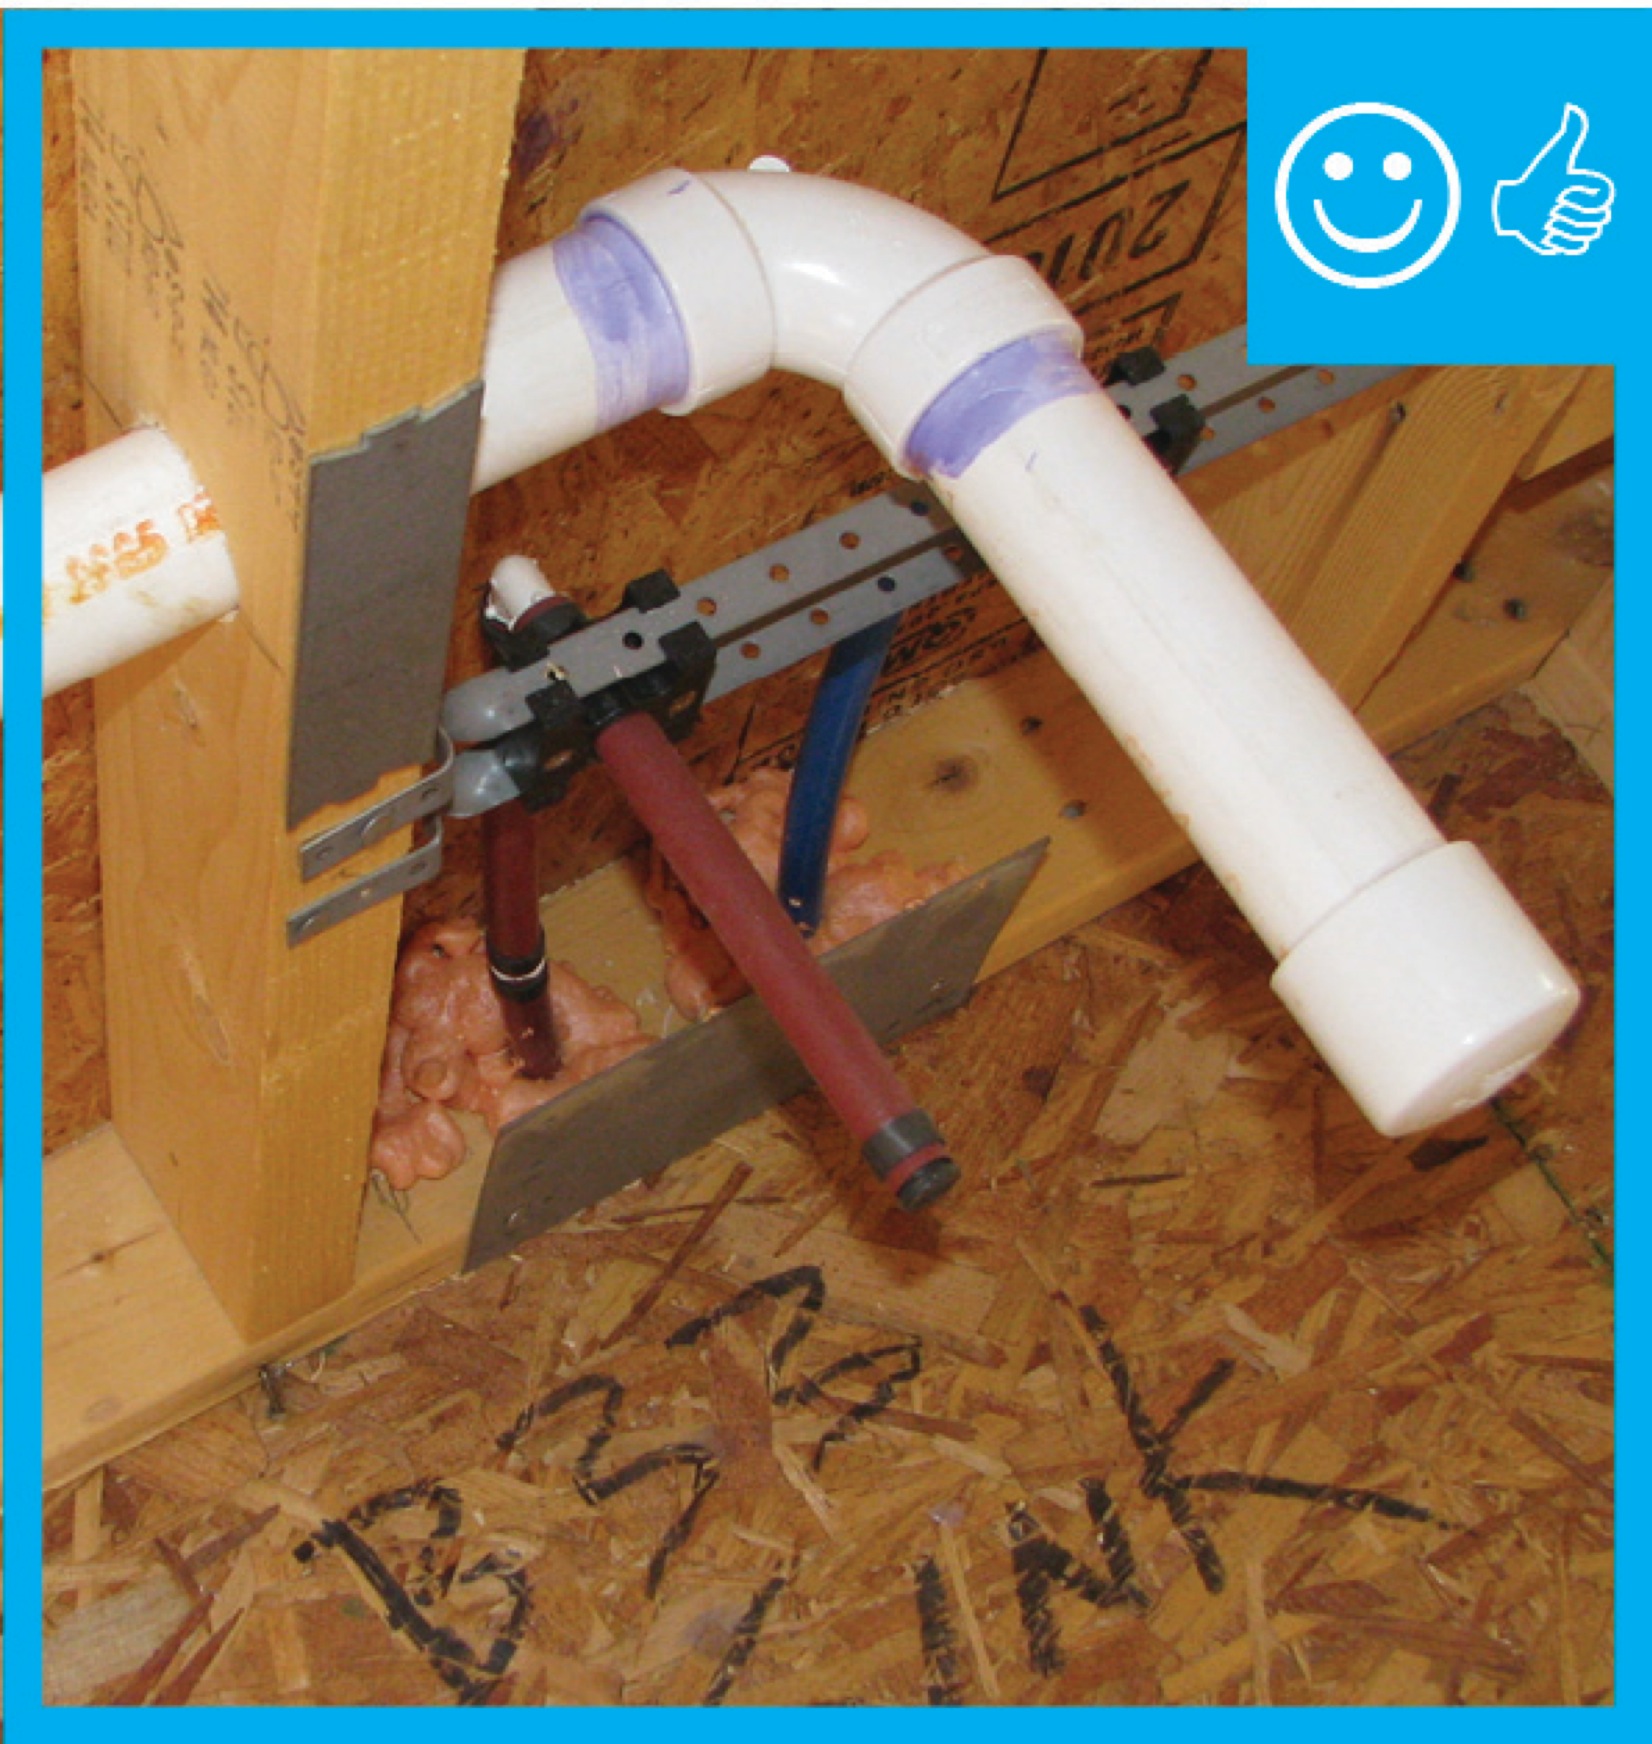
Right – Tape and spray foam are used to air seal around pipes that extend through exterior walls.
Image
Image
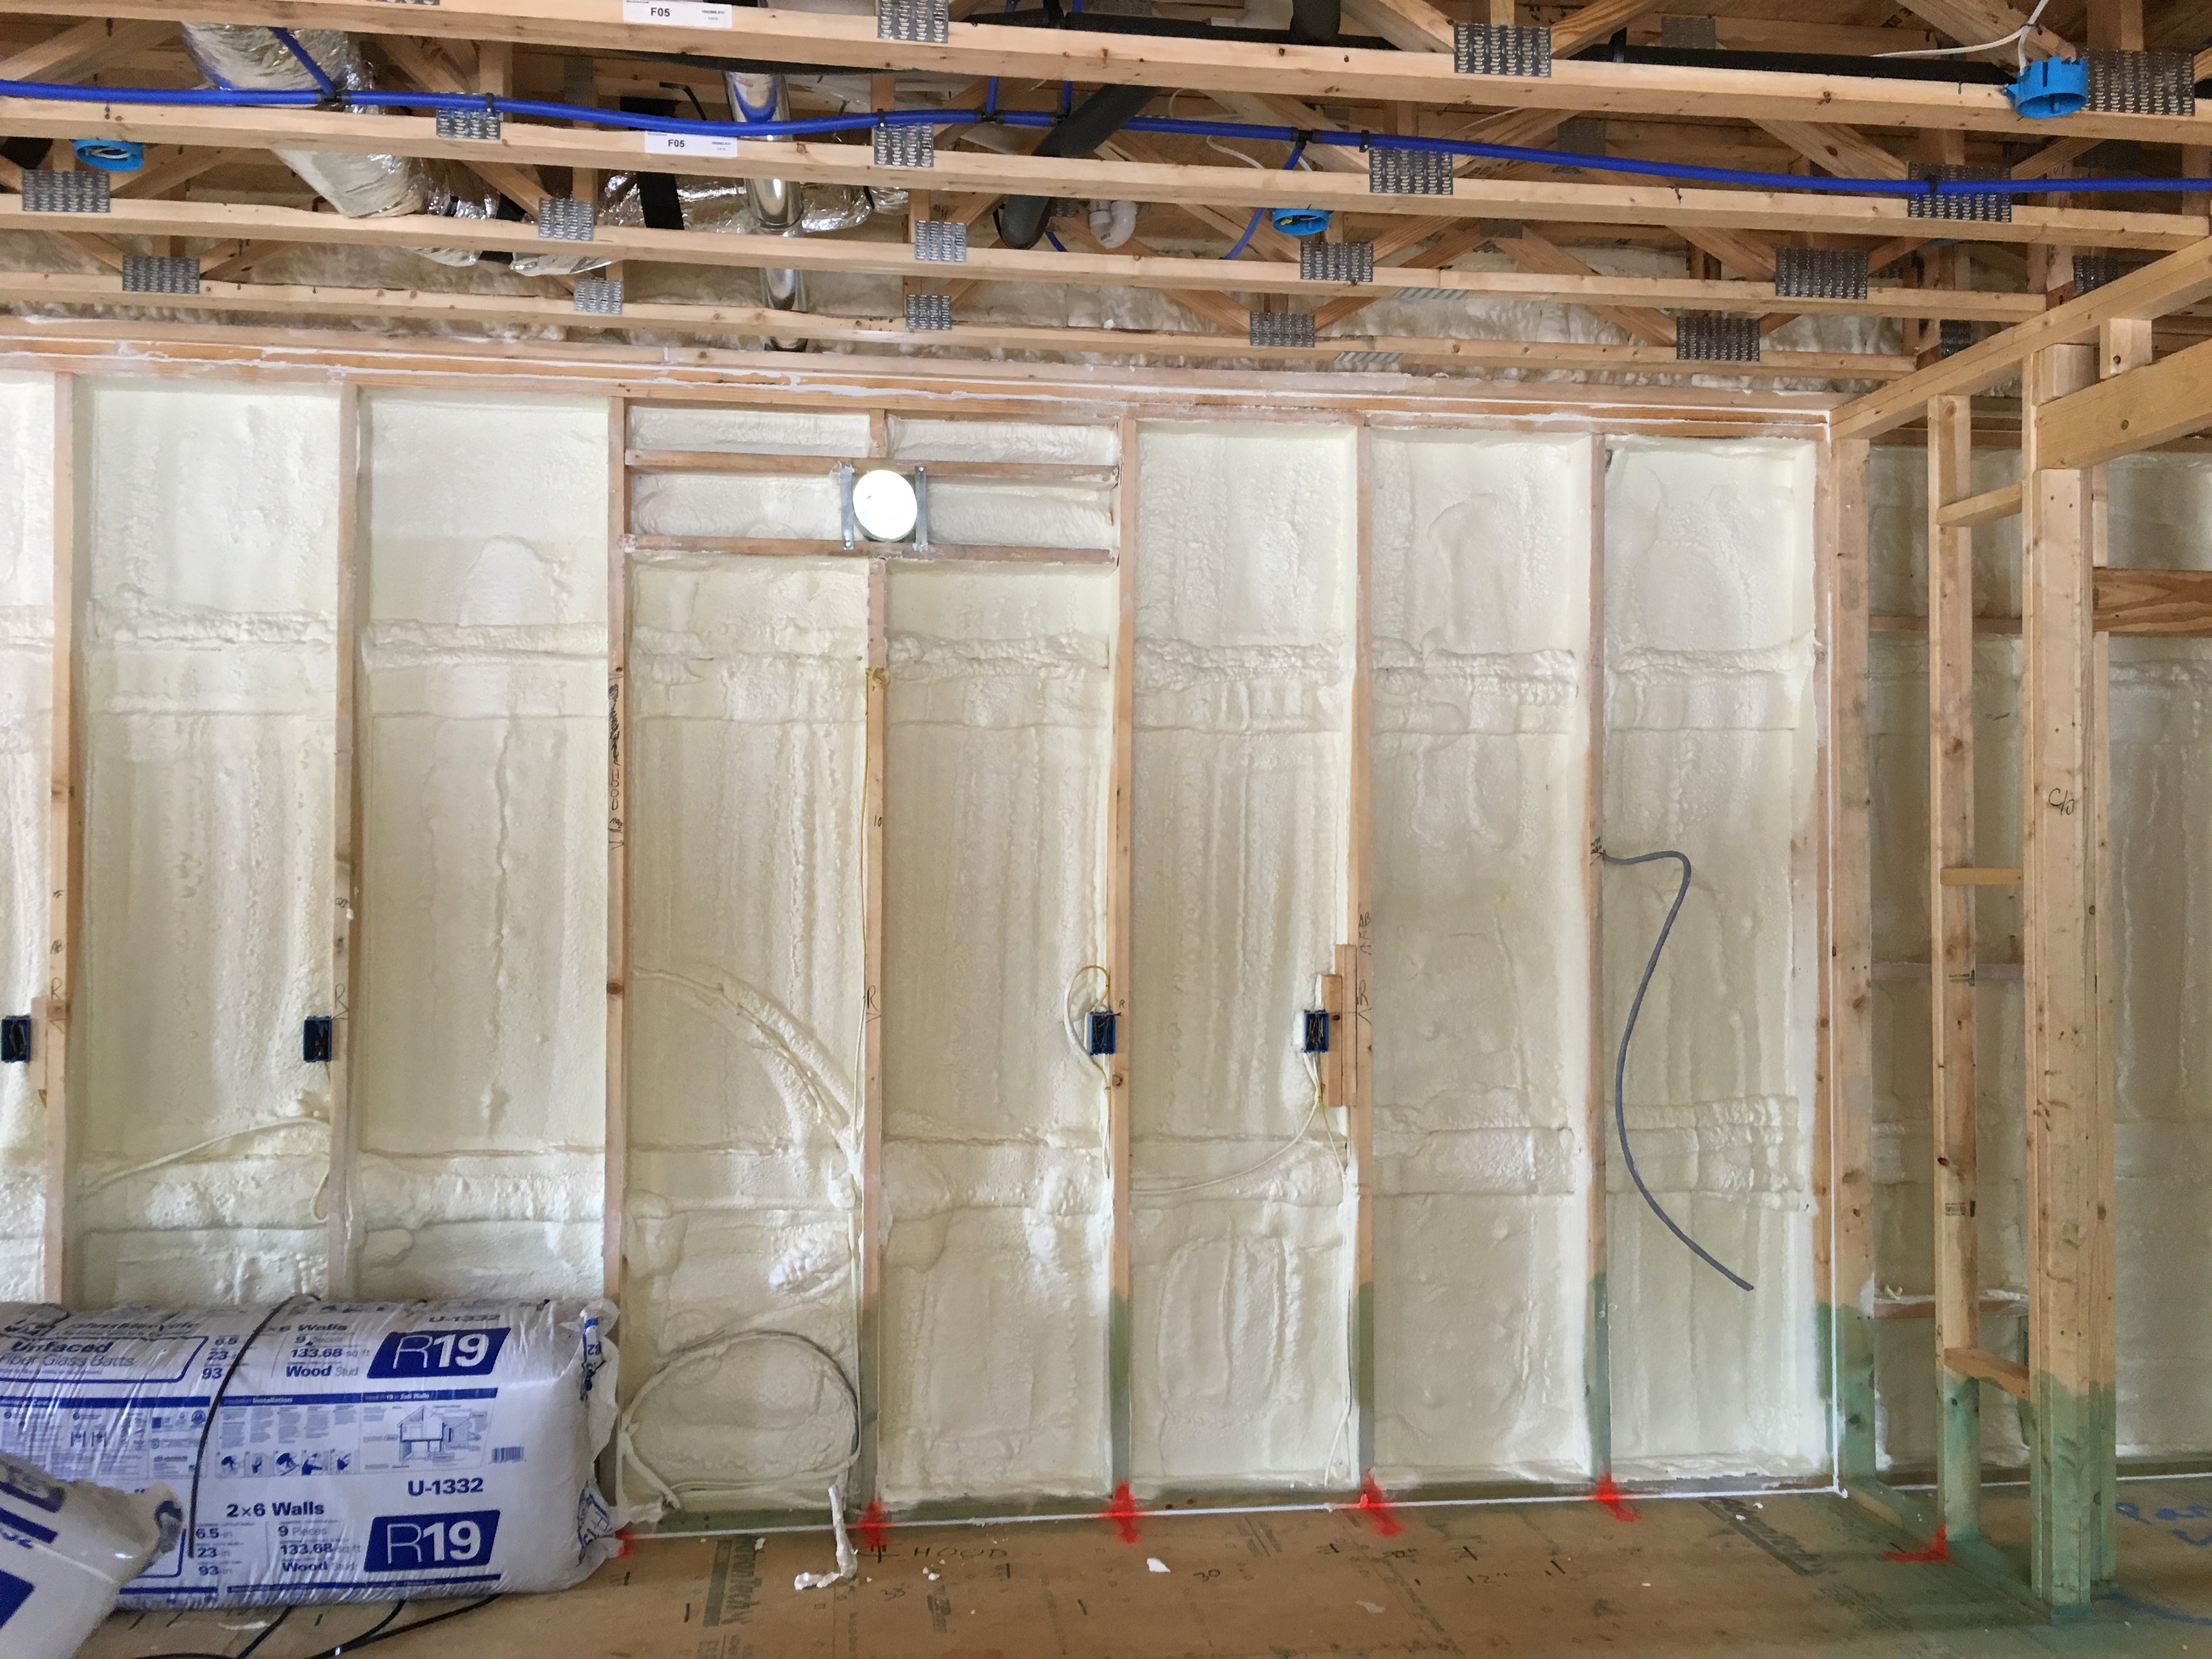
Right – the 2x6 walls are insulated with a flash-and-batt approach that includes spraying the wall cavities with one inch of open-cell foam to seal the sheathing to the framing then filling the wall cavities with R-19 fiberglass batts that are compressed
Image
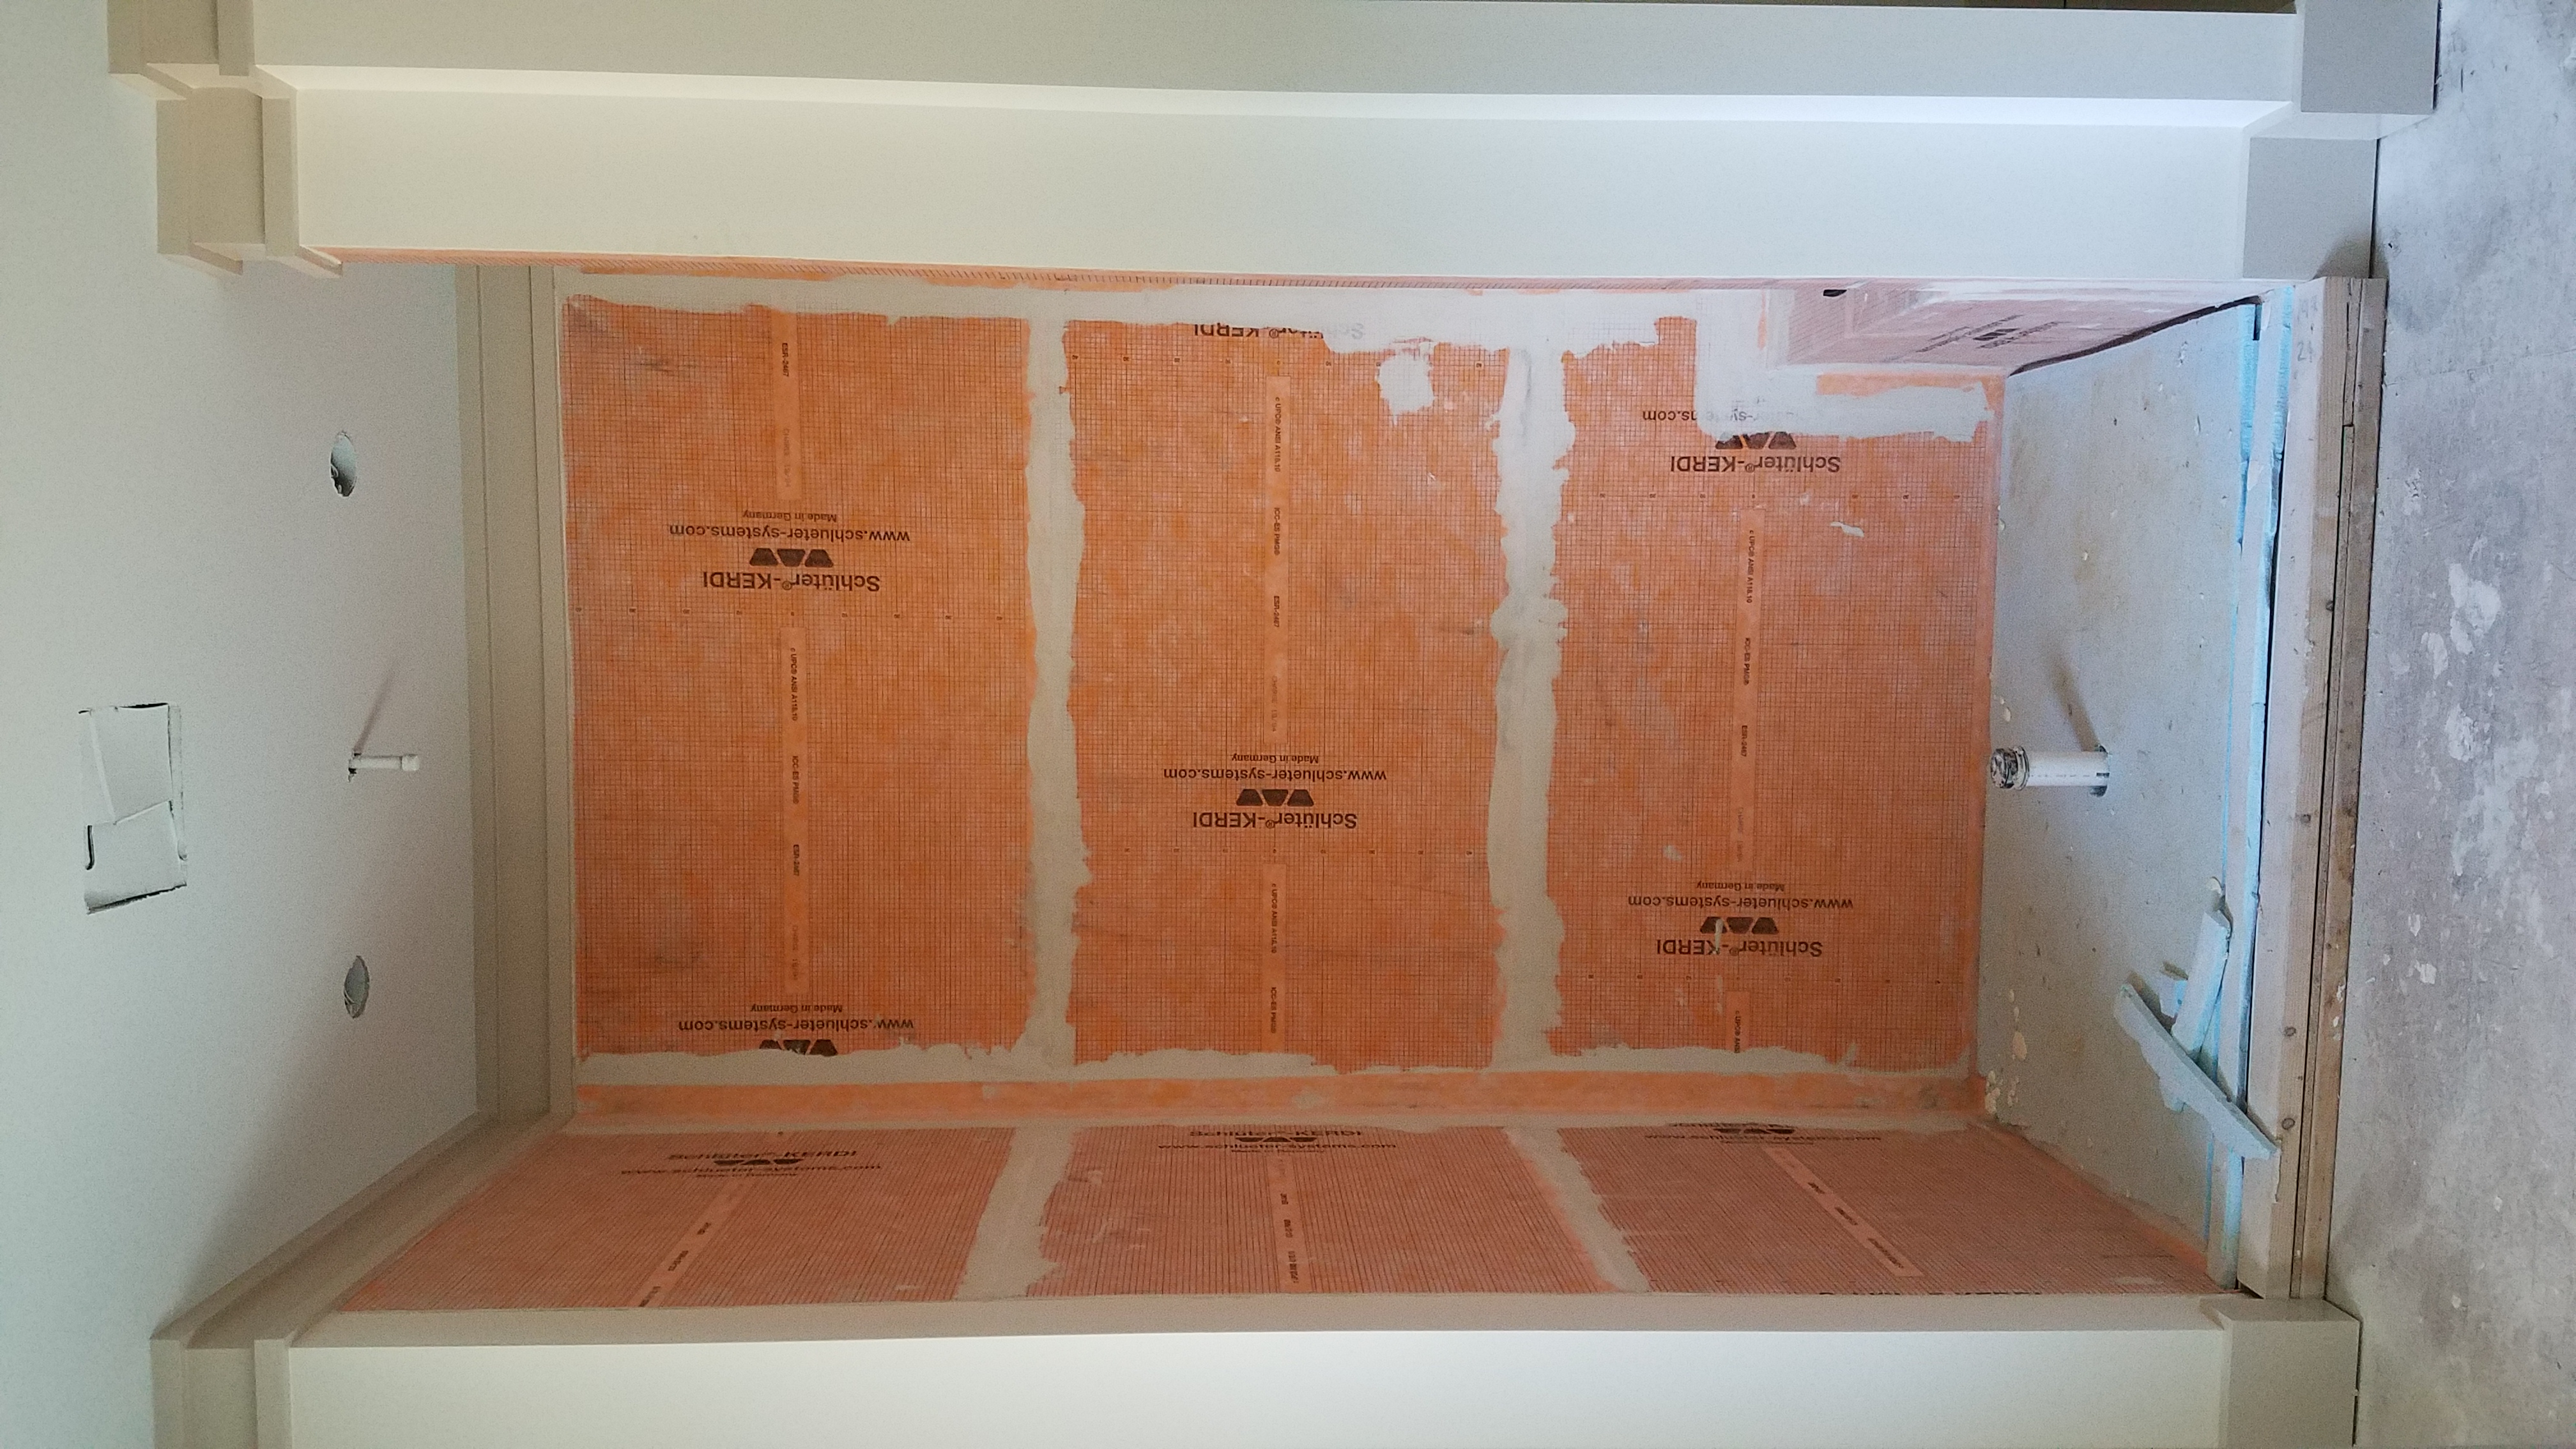
Right – The air- and water-barrier material lining the shower stall is mastic sealed to prevent leakage and rigid foam insulation is installed on the floor of the shower.
Image

Right – The base of the wall is water proofed and the seam between the base of the wall and the sidewalk is air sealed.
Image
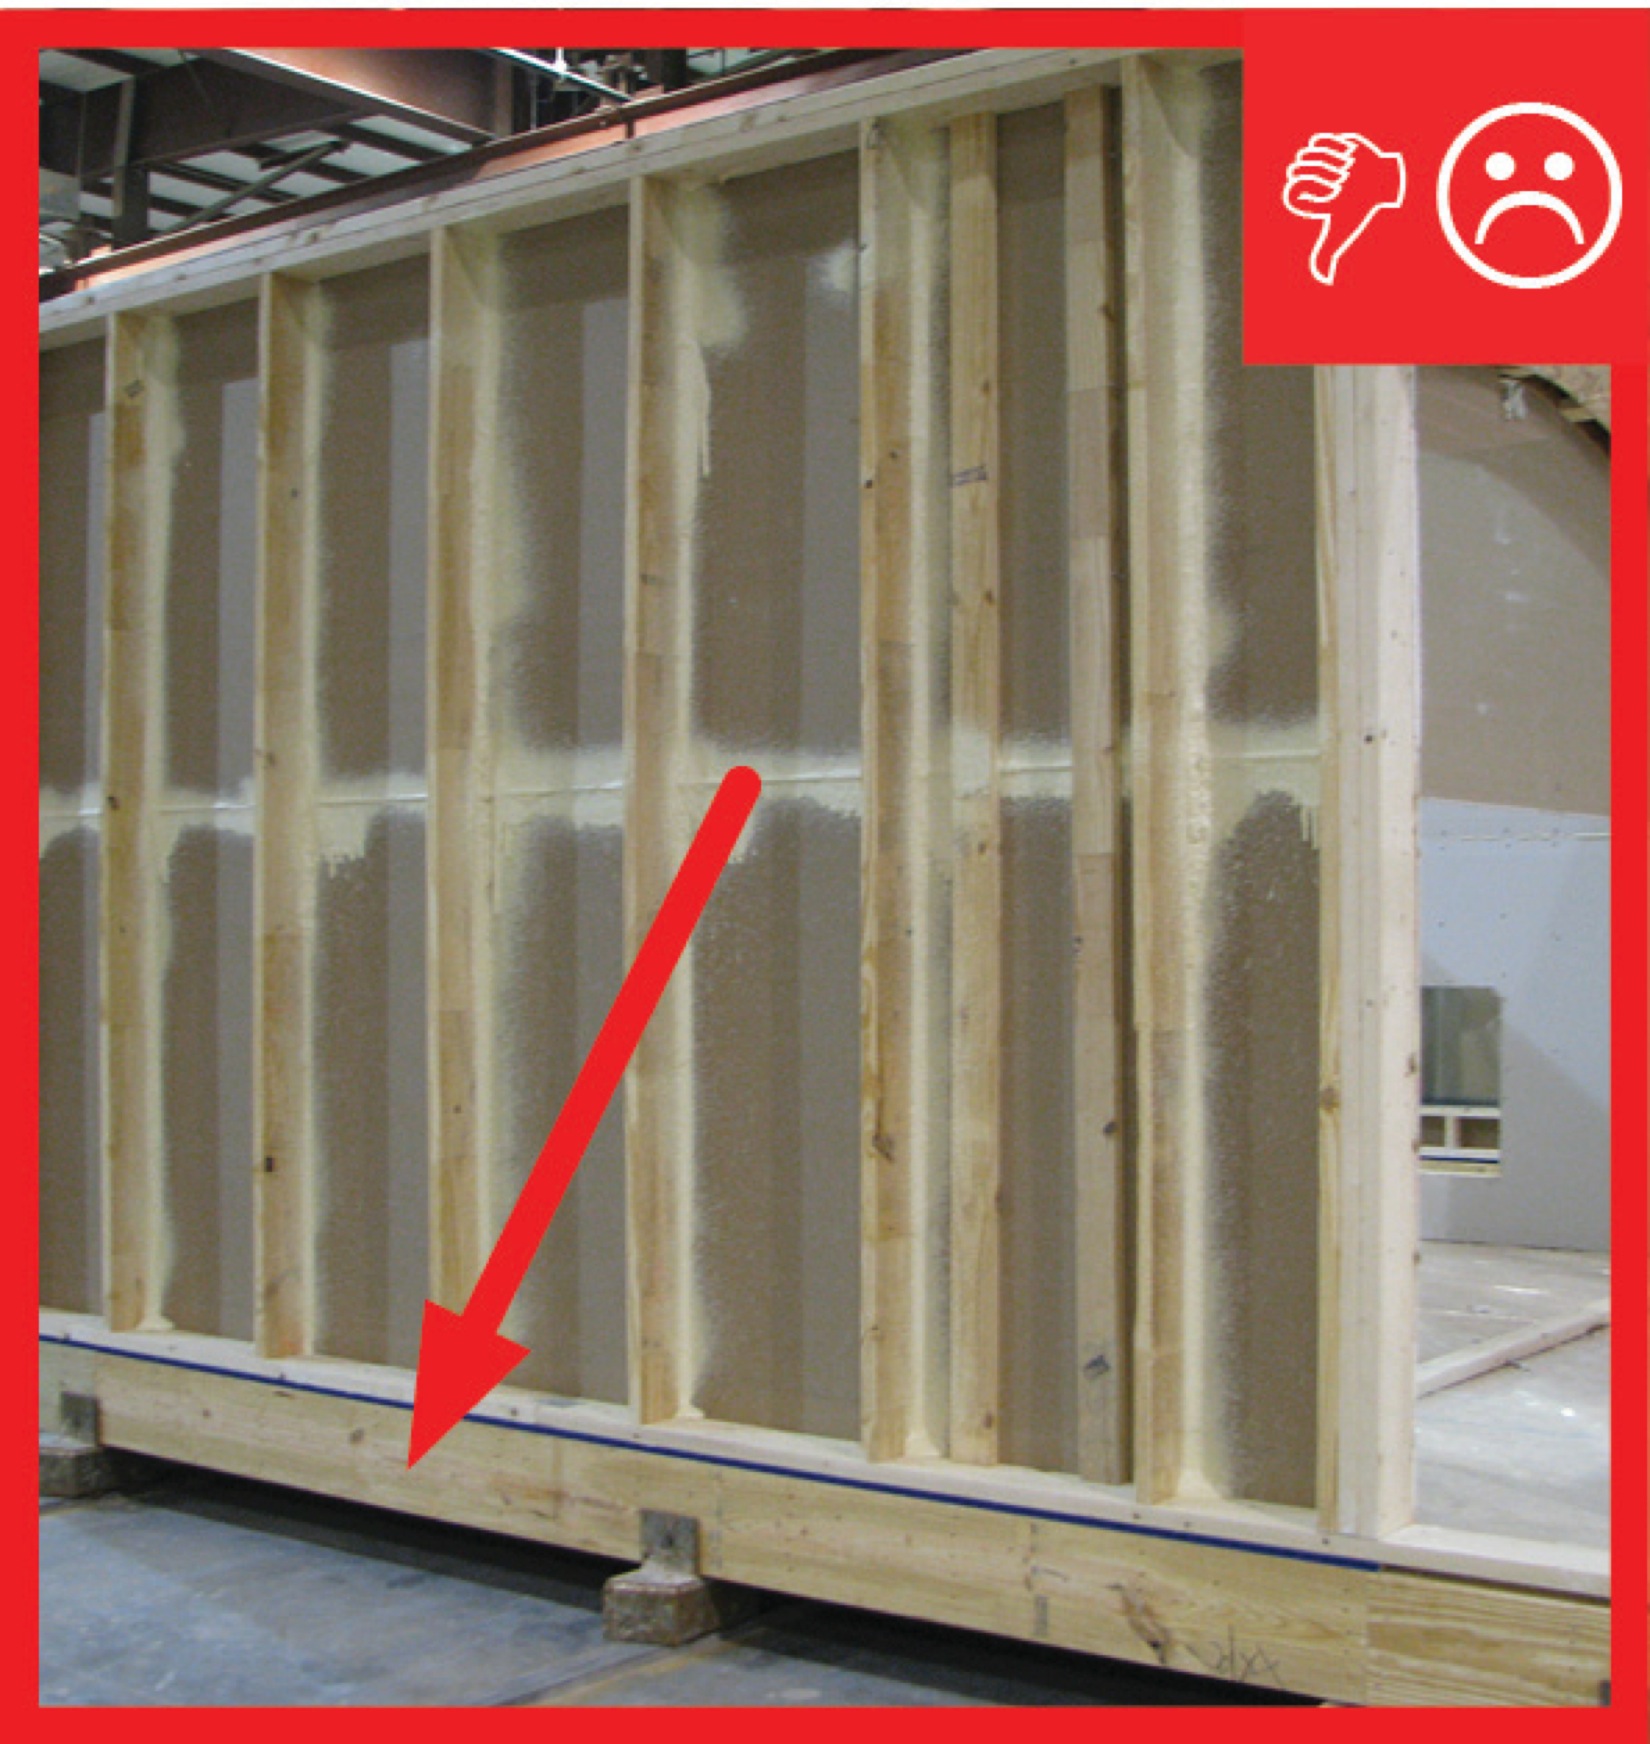
Right – The builder constructed a mock up of the wall assembly for this multi-family building.
Image

Right – The energy rater used a window to test whole-house air leakage with this blower door testing equipment.
Image
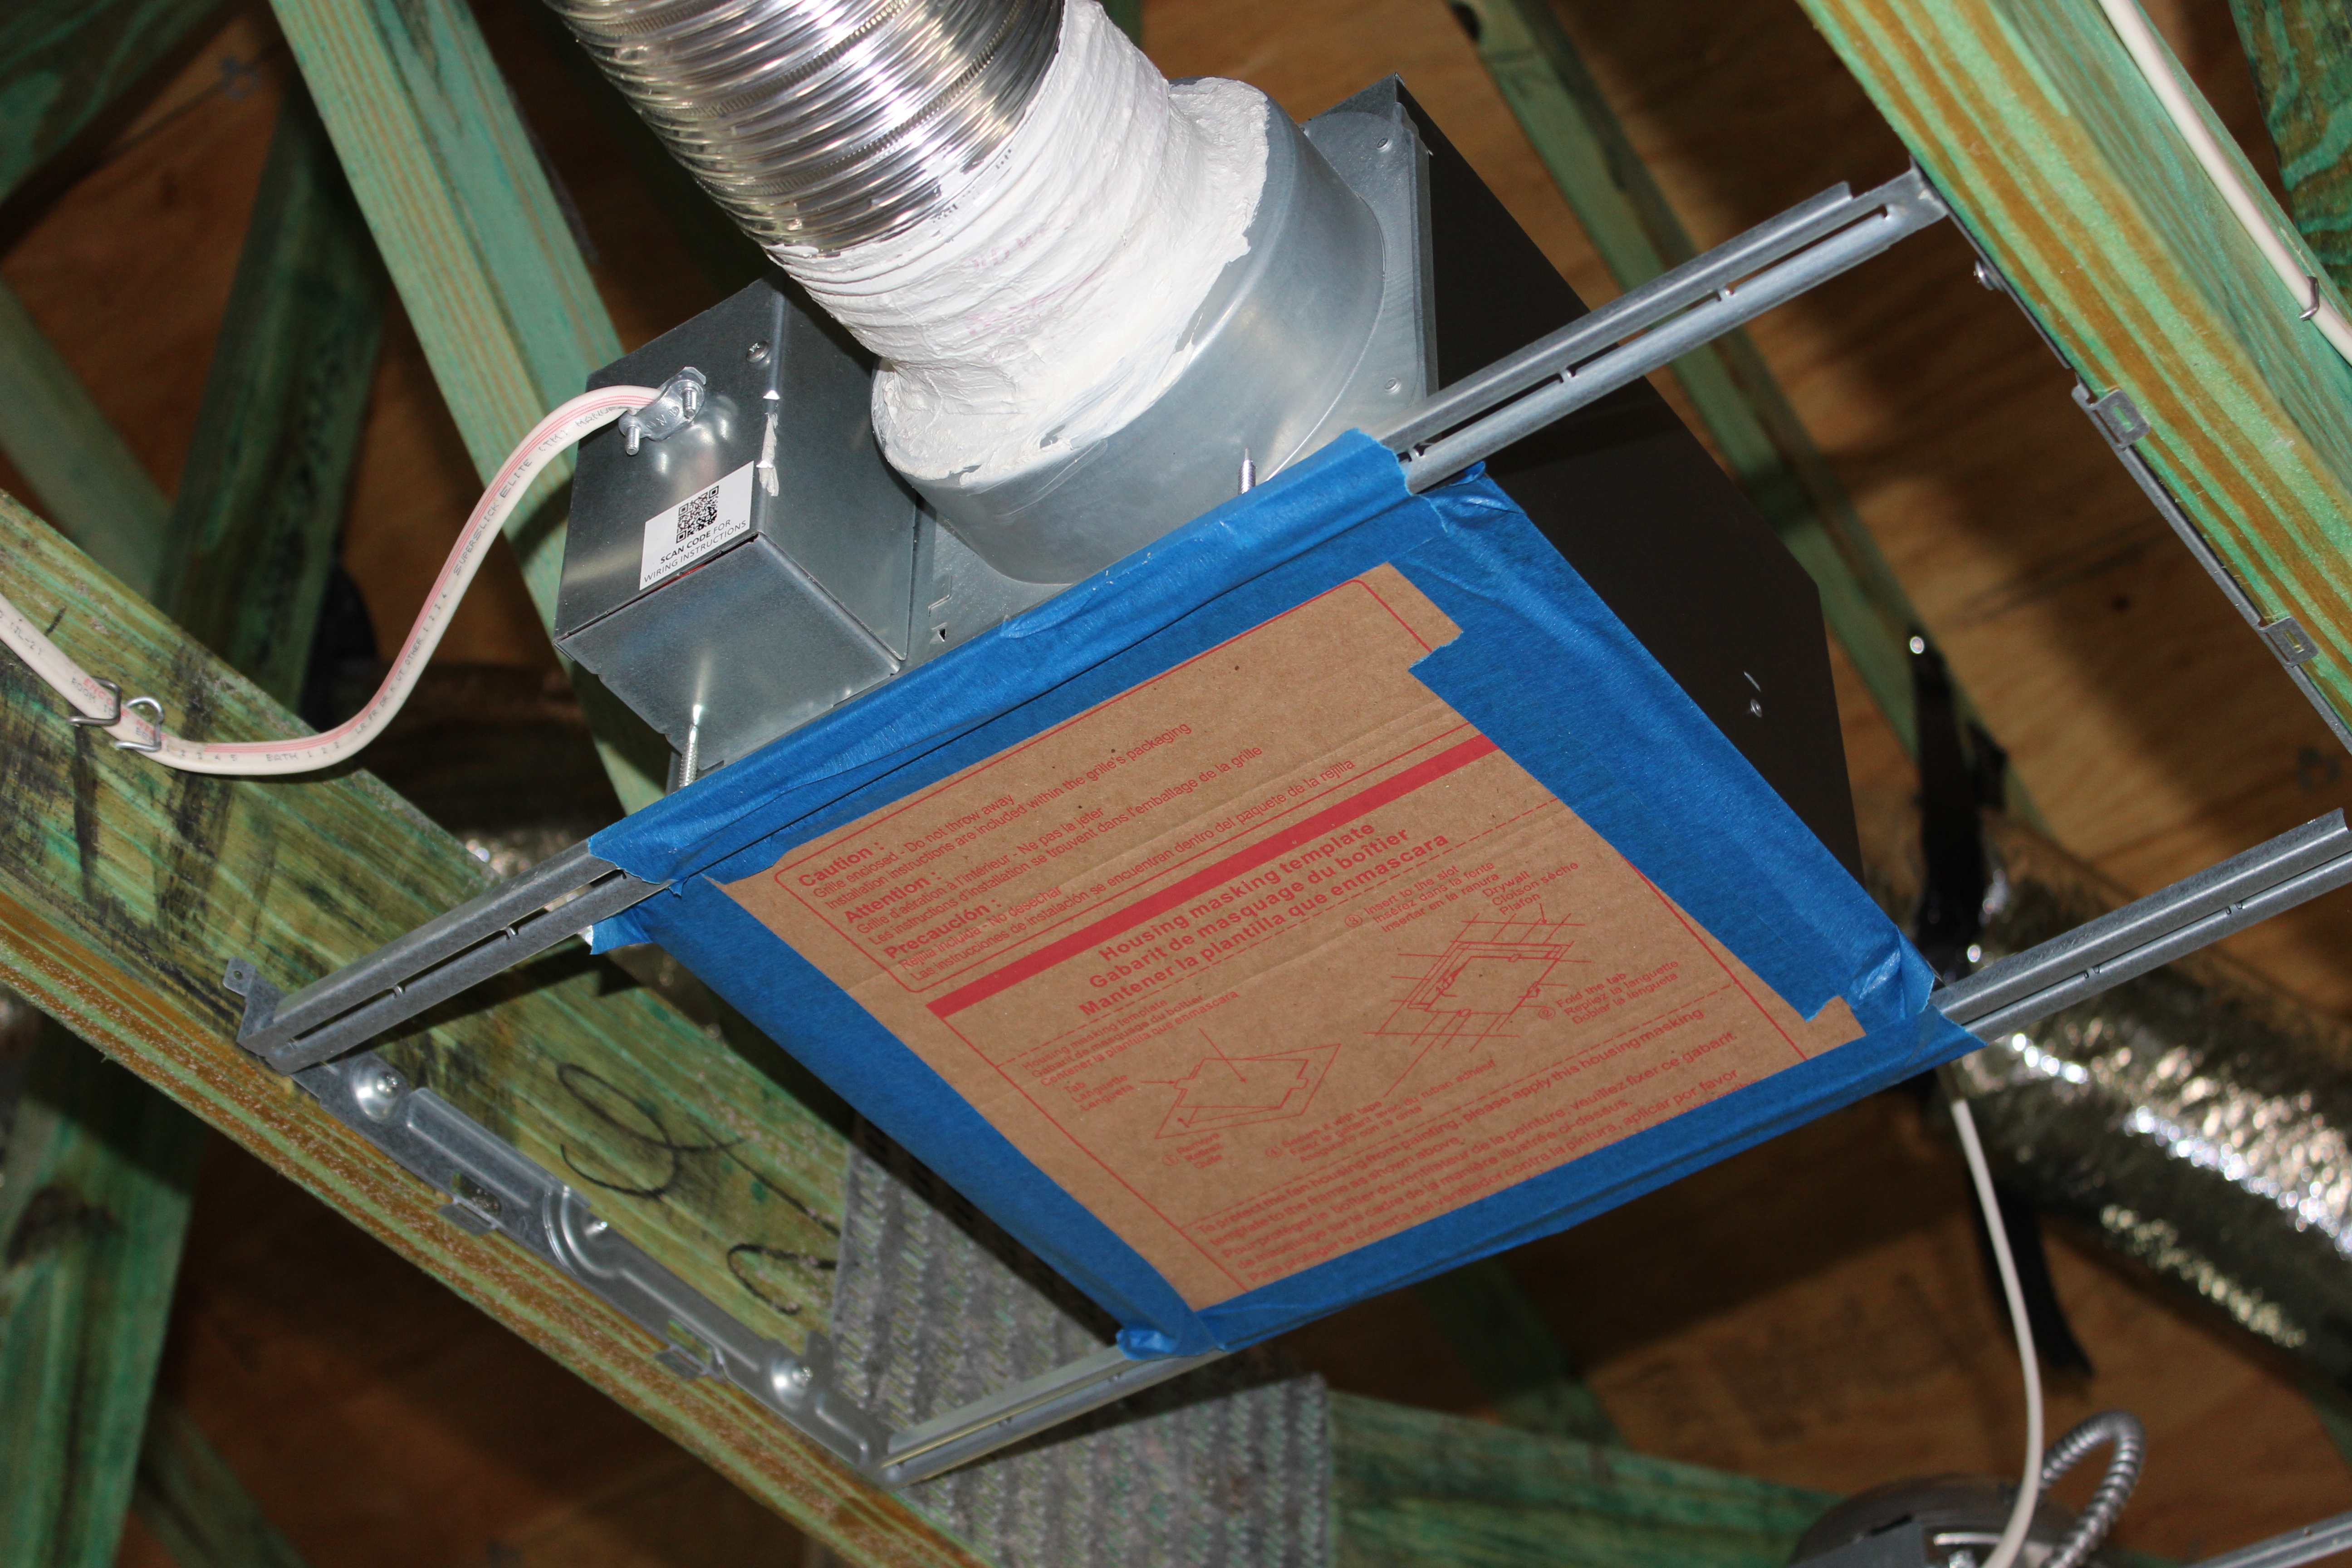
Right – The exhaust fan duct is sealed to the fan with mastic and the fan opening is covered with cardboard to keep out dust during construction.
Image

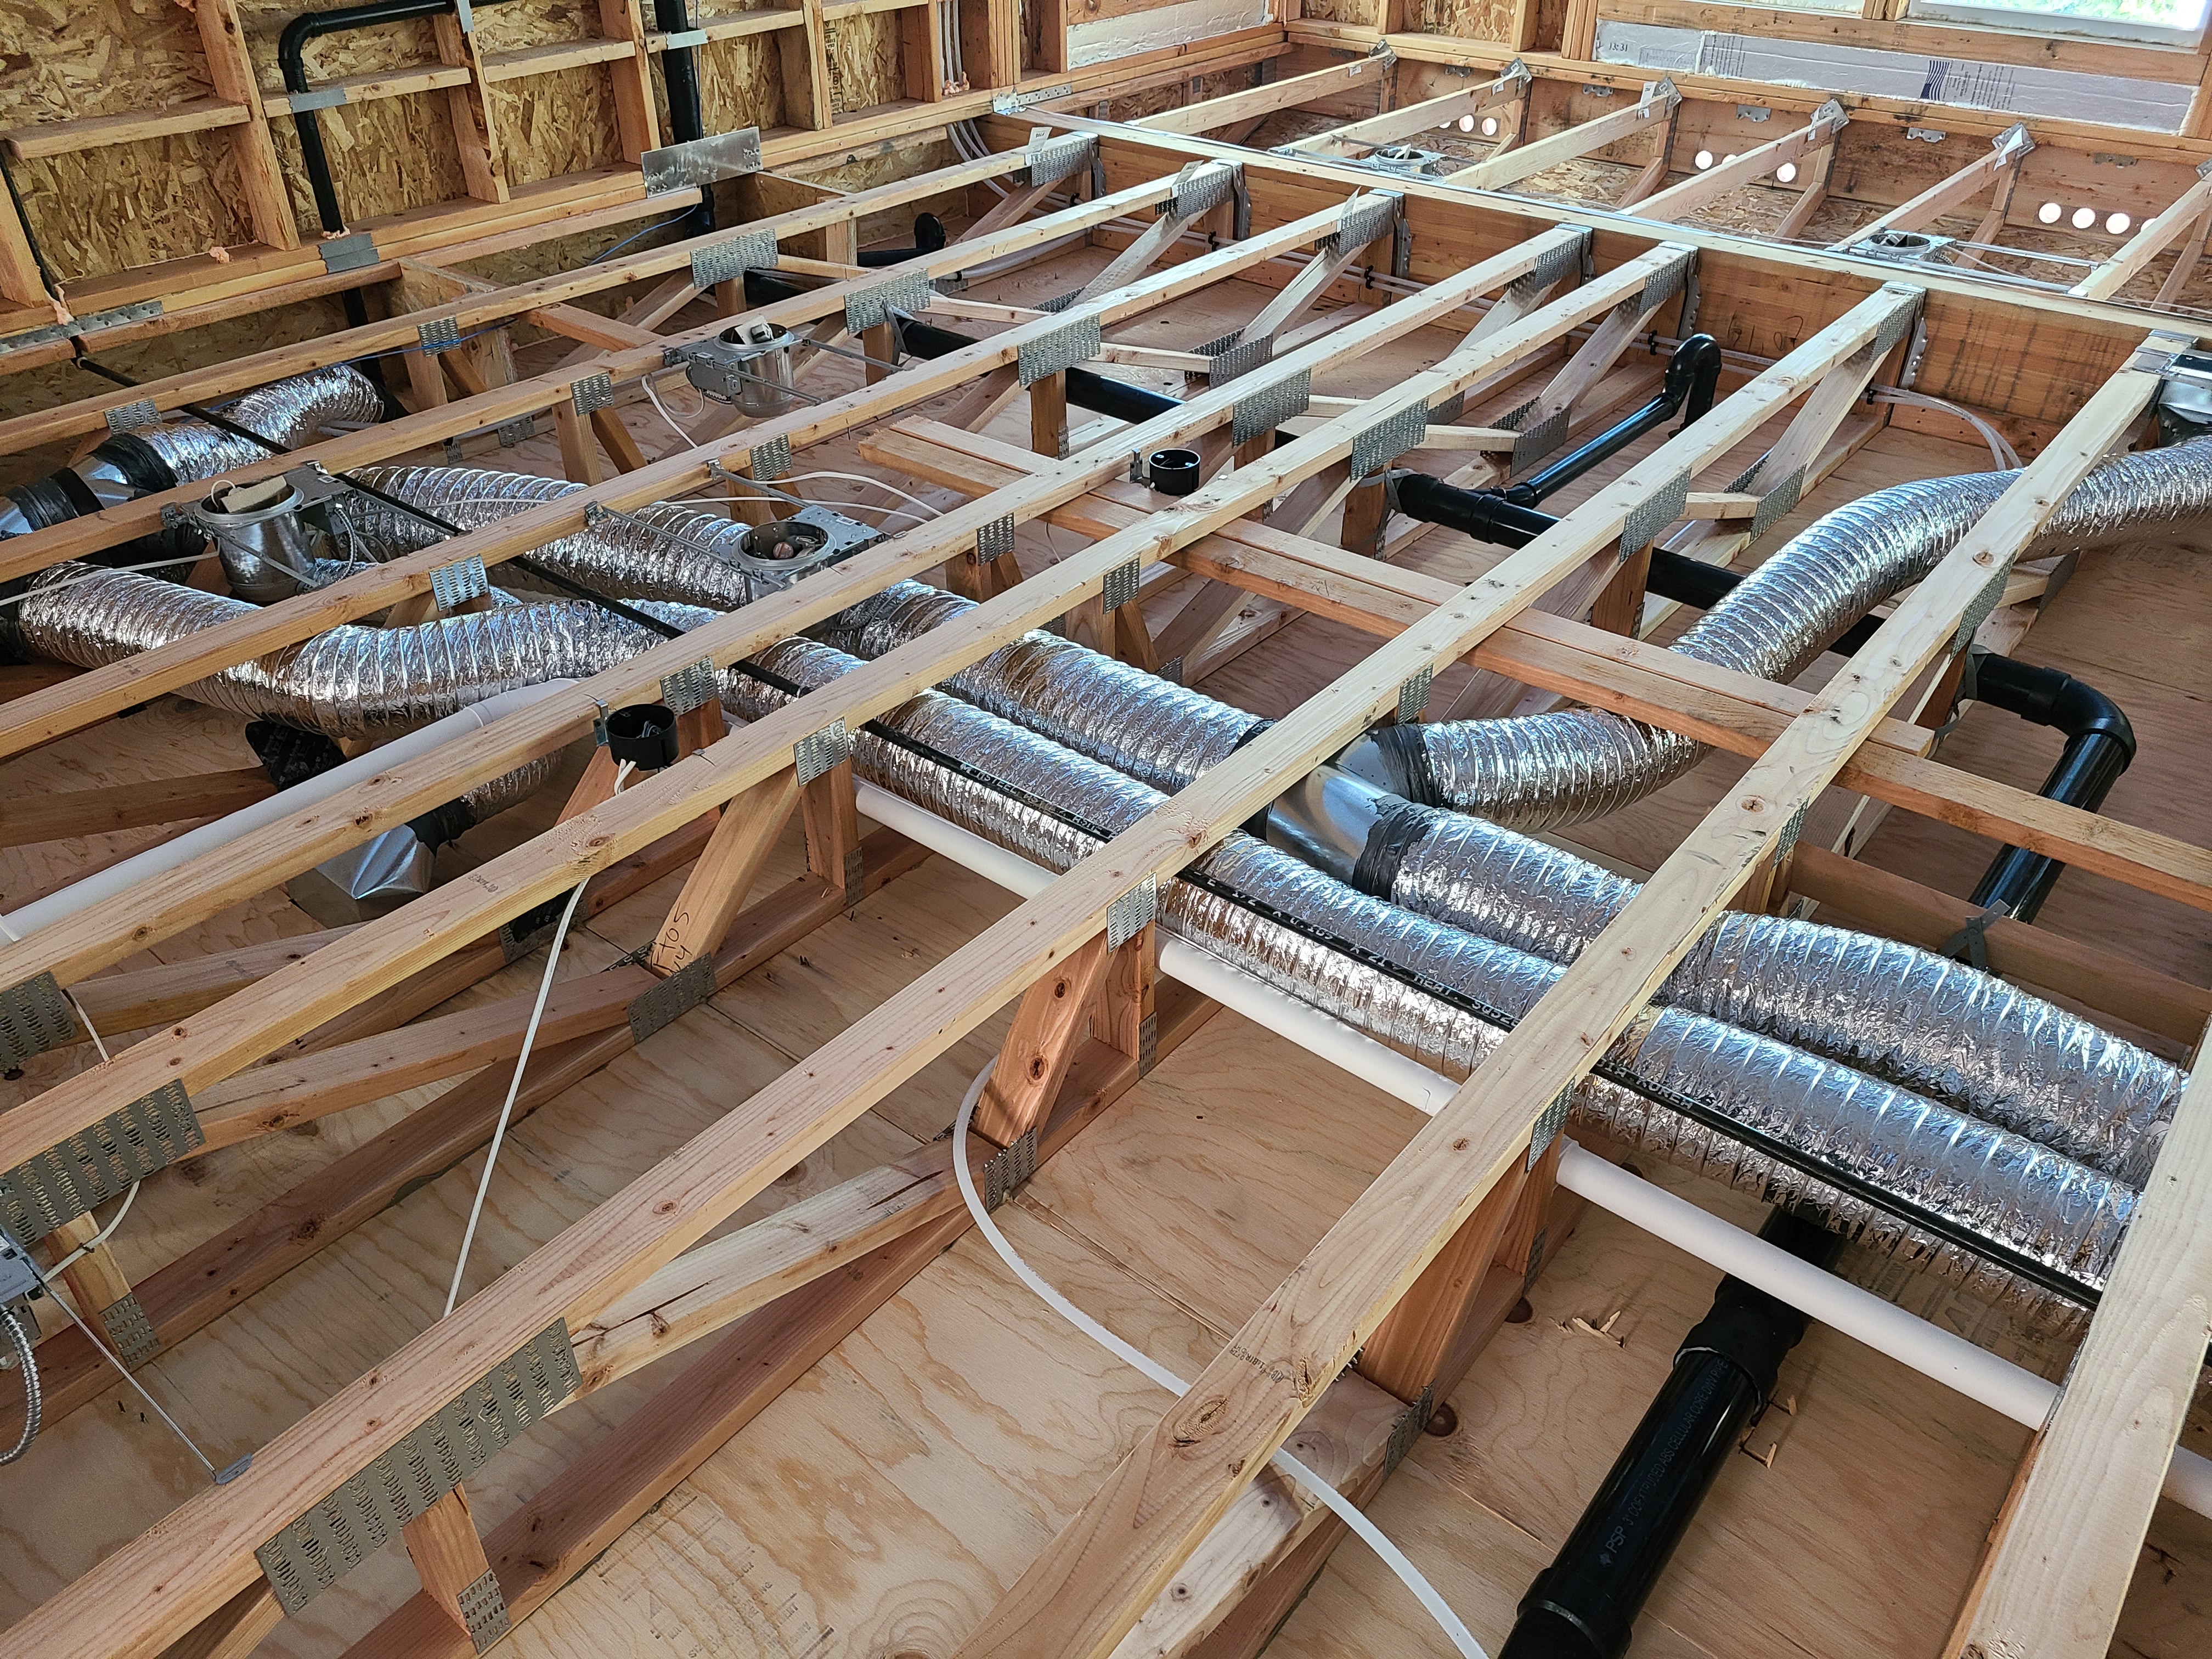
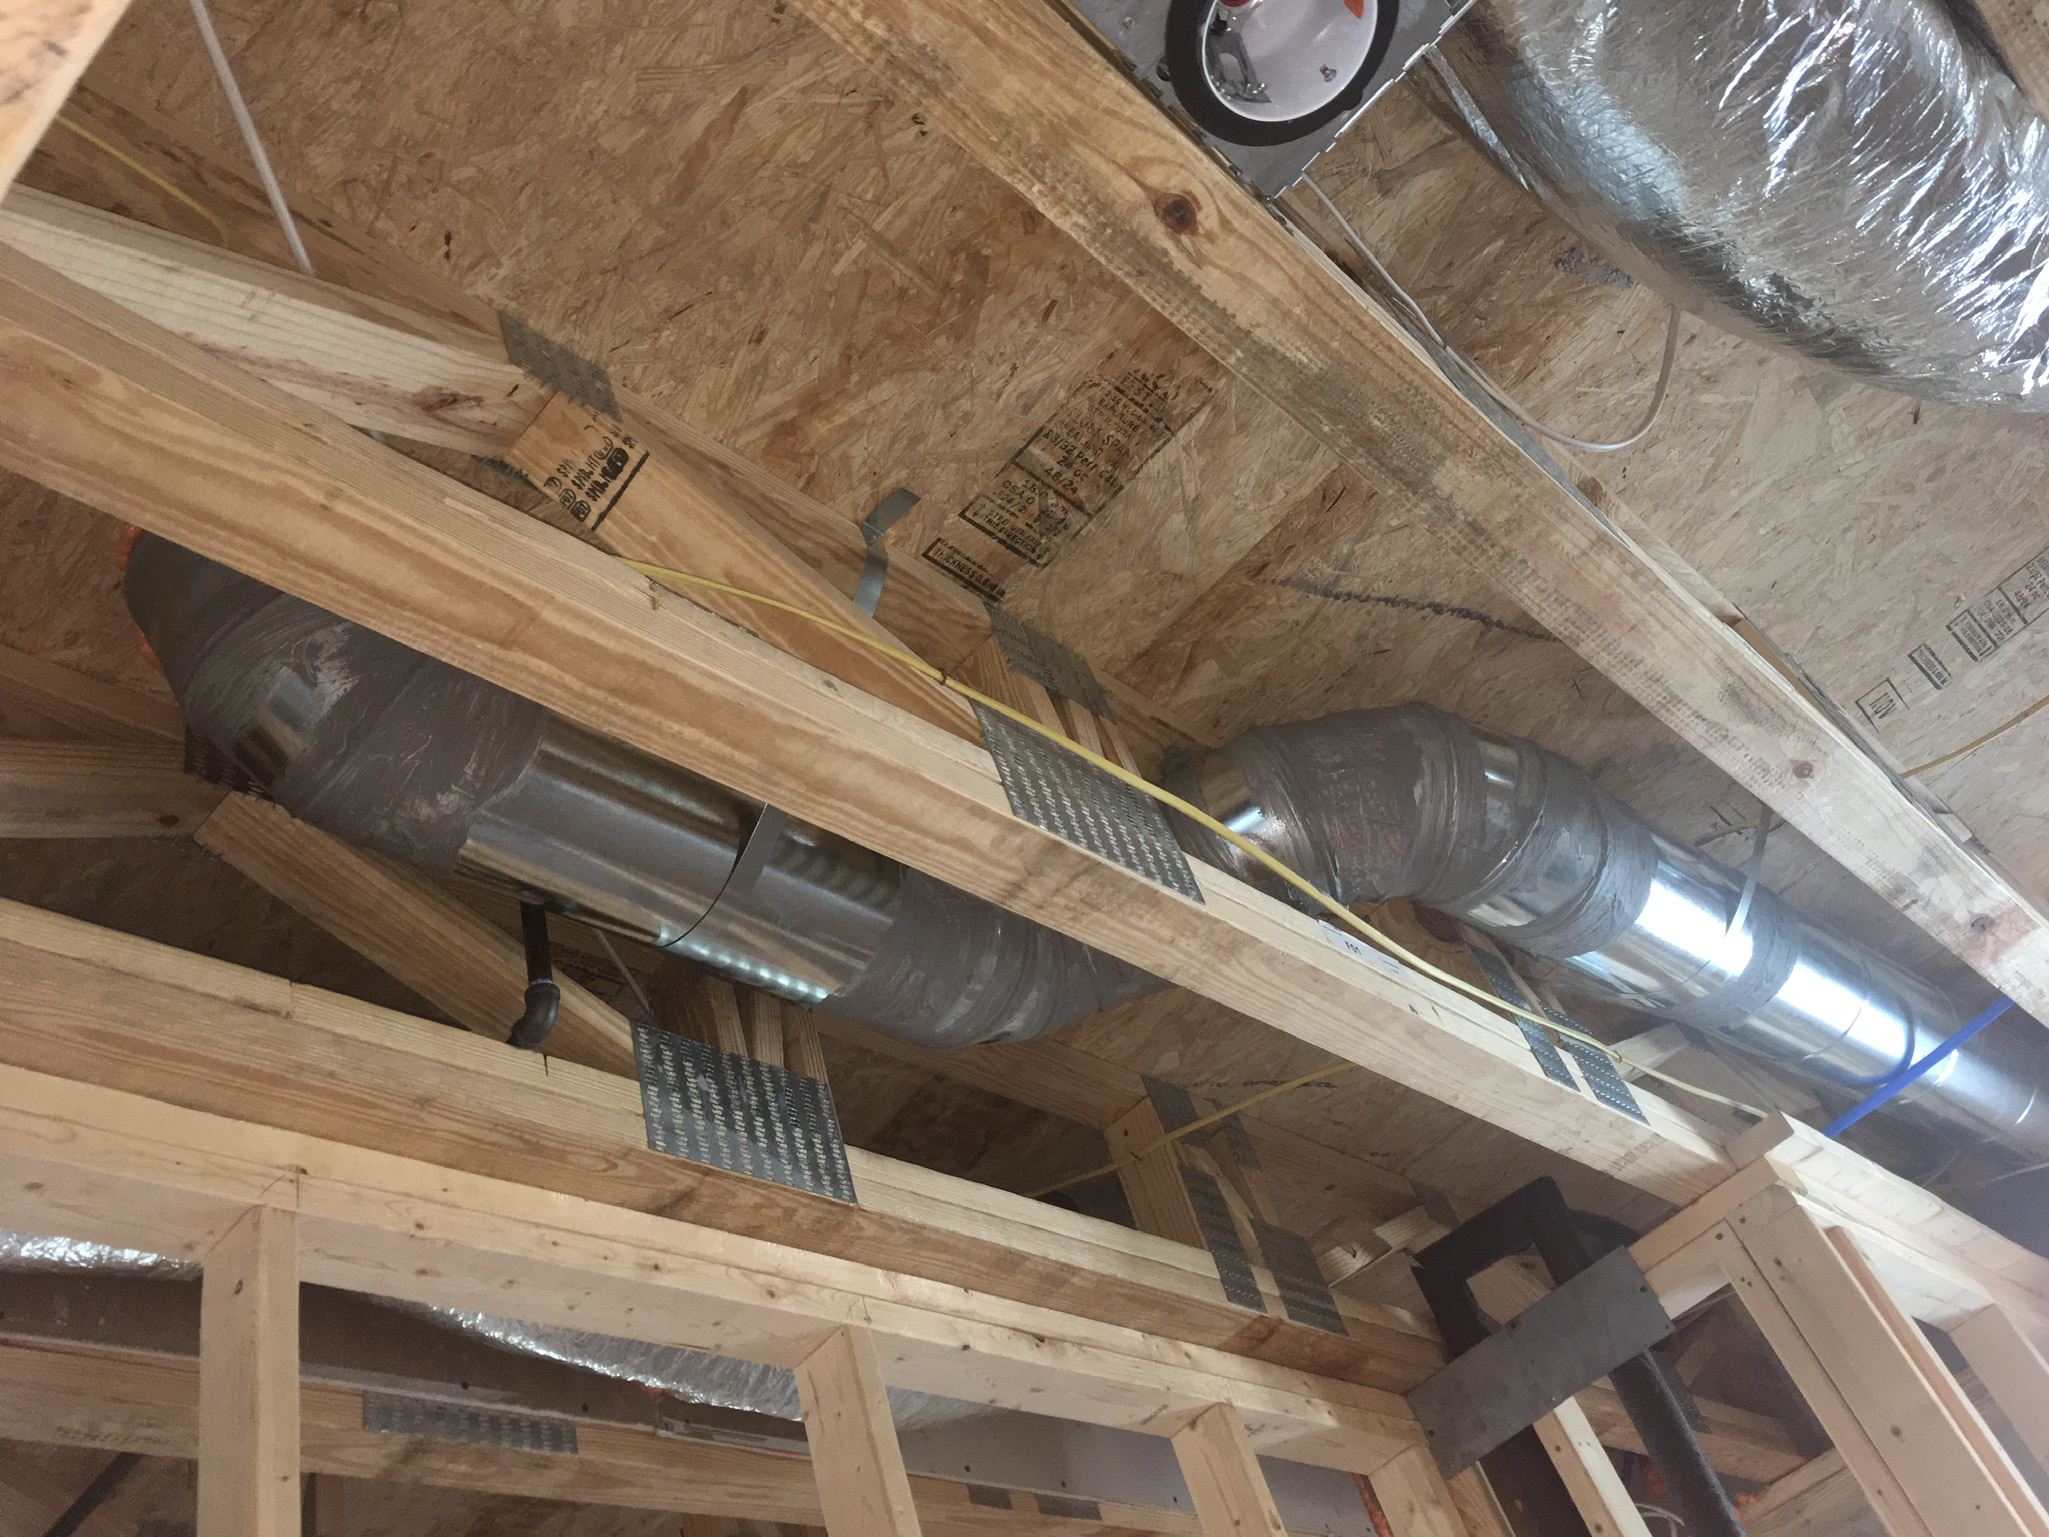
Right – The hard metal ducts are located in conditioned space between floor joists and all seams are sealed with approved metal tape.
Image
Image
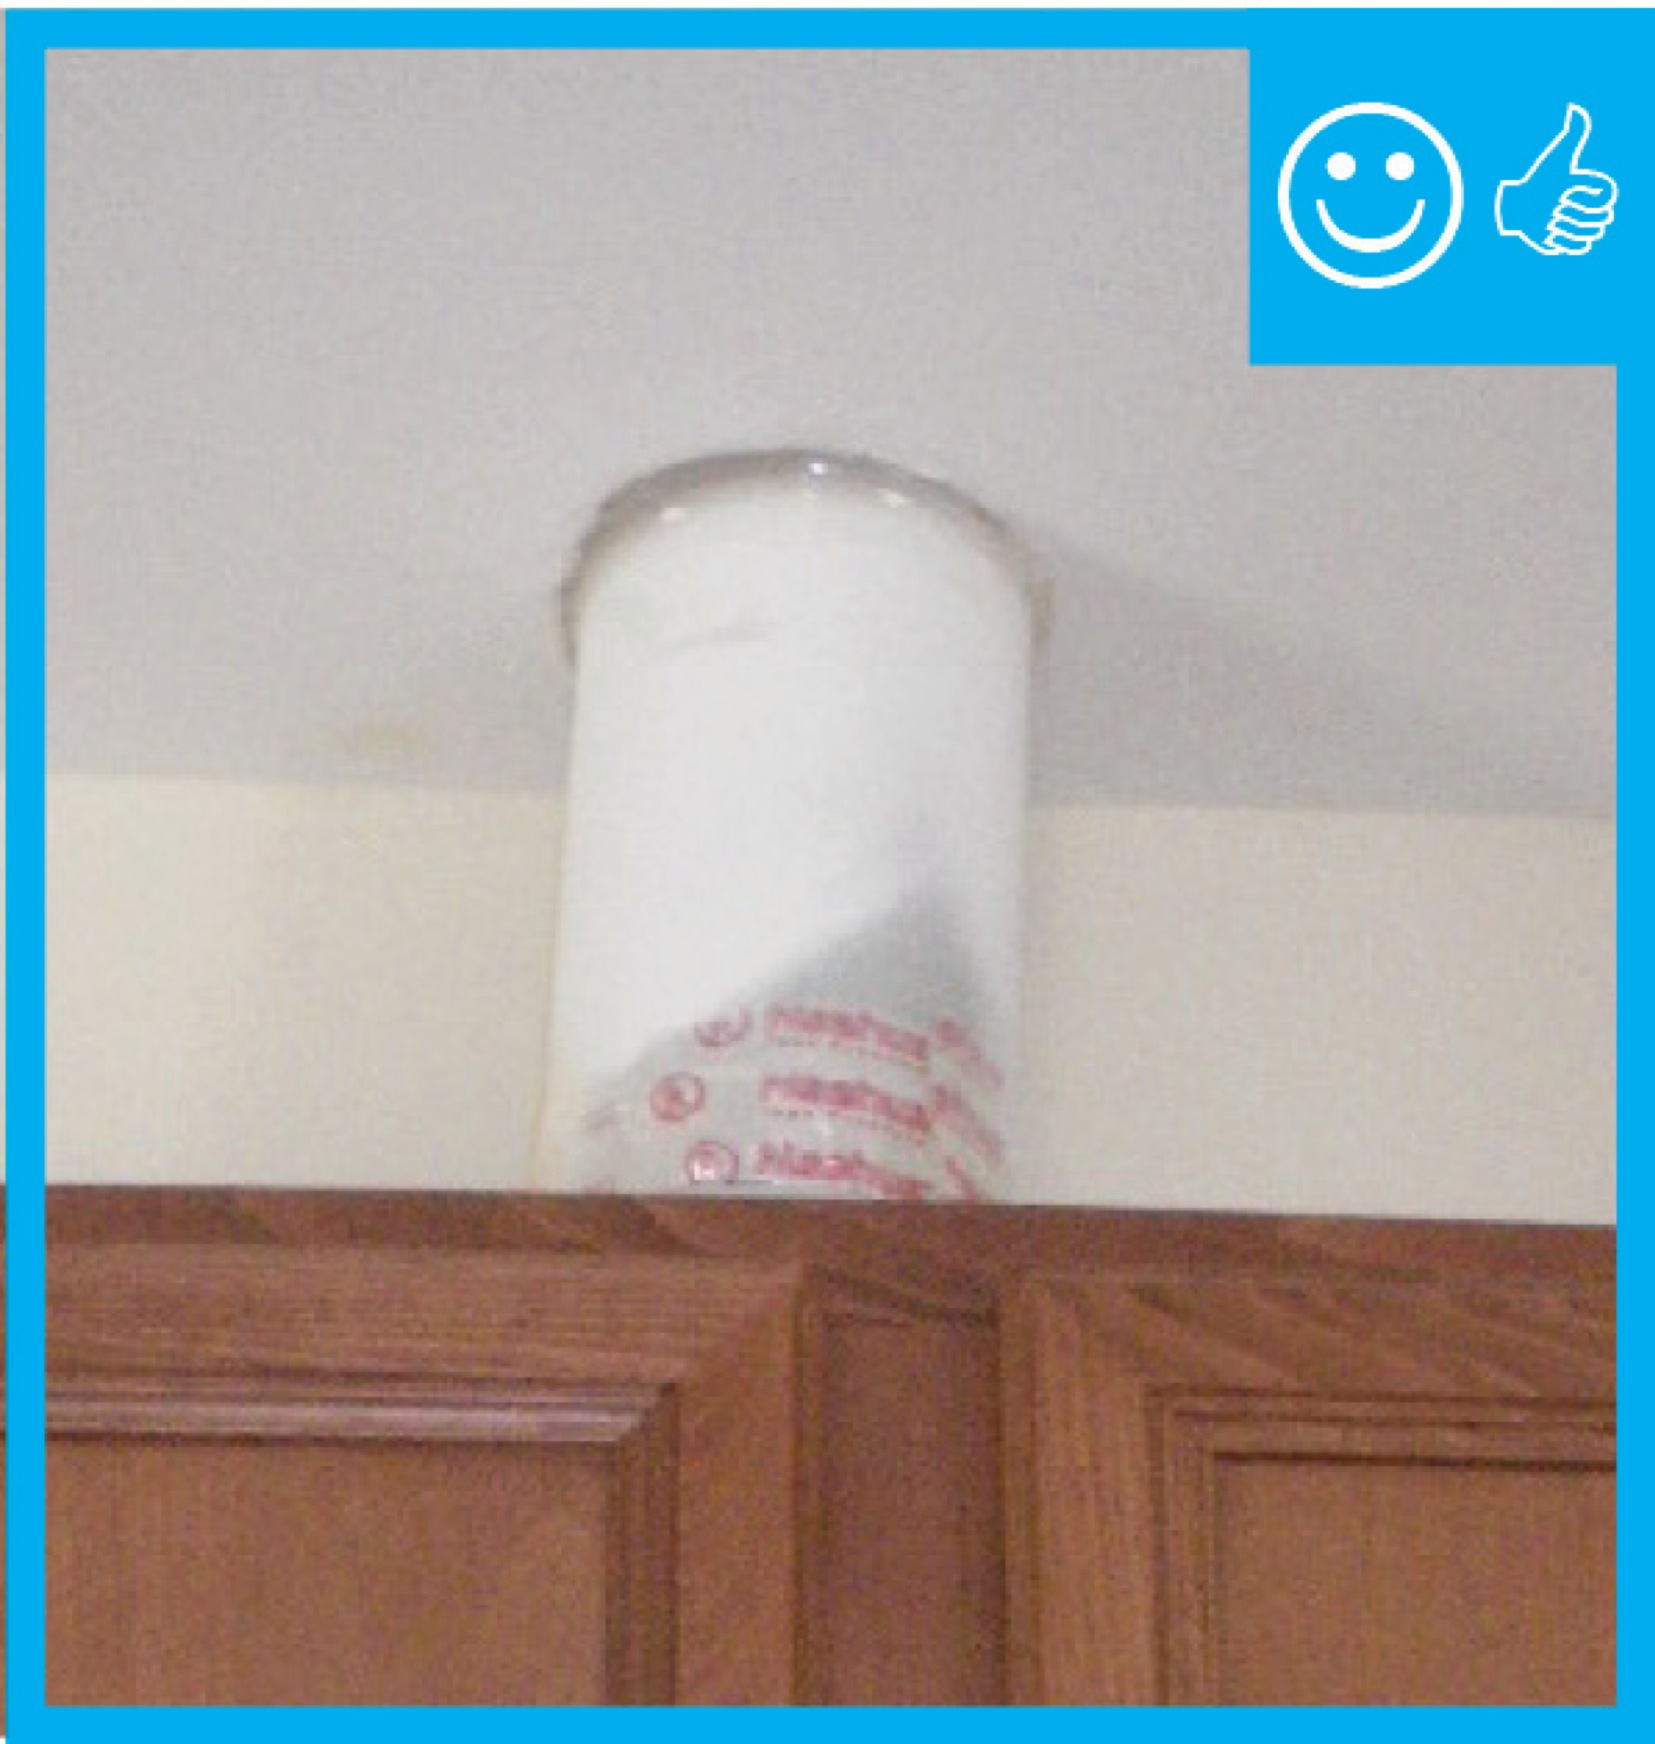
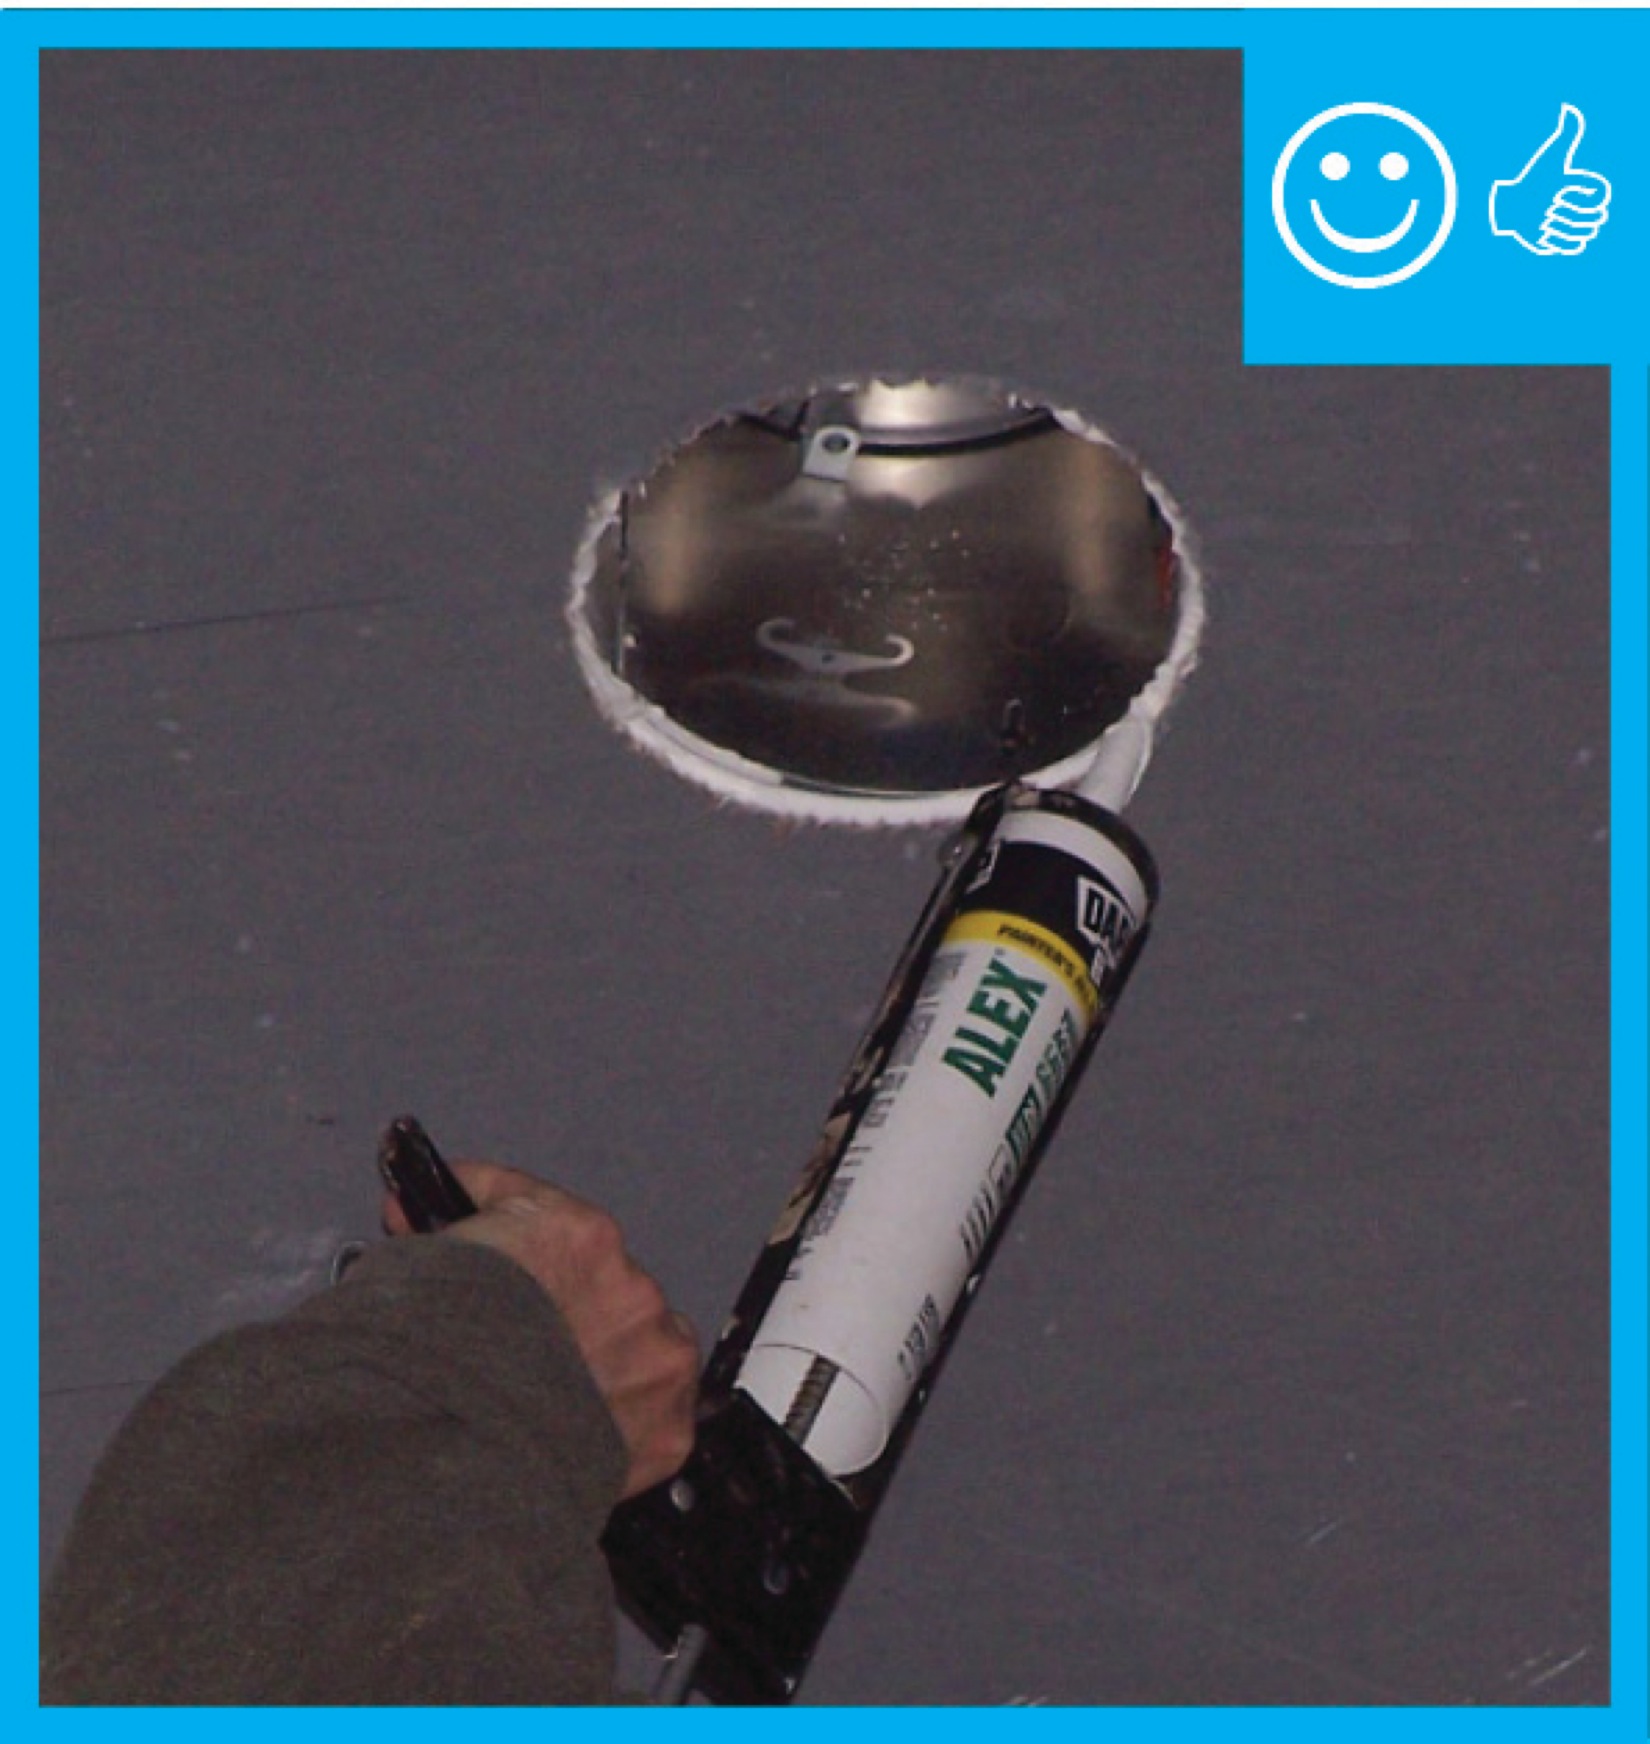
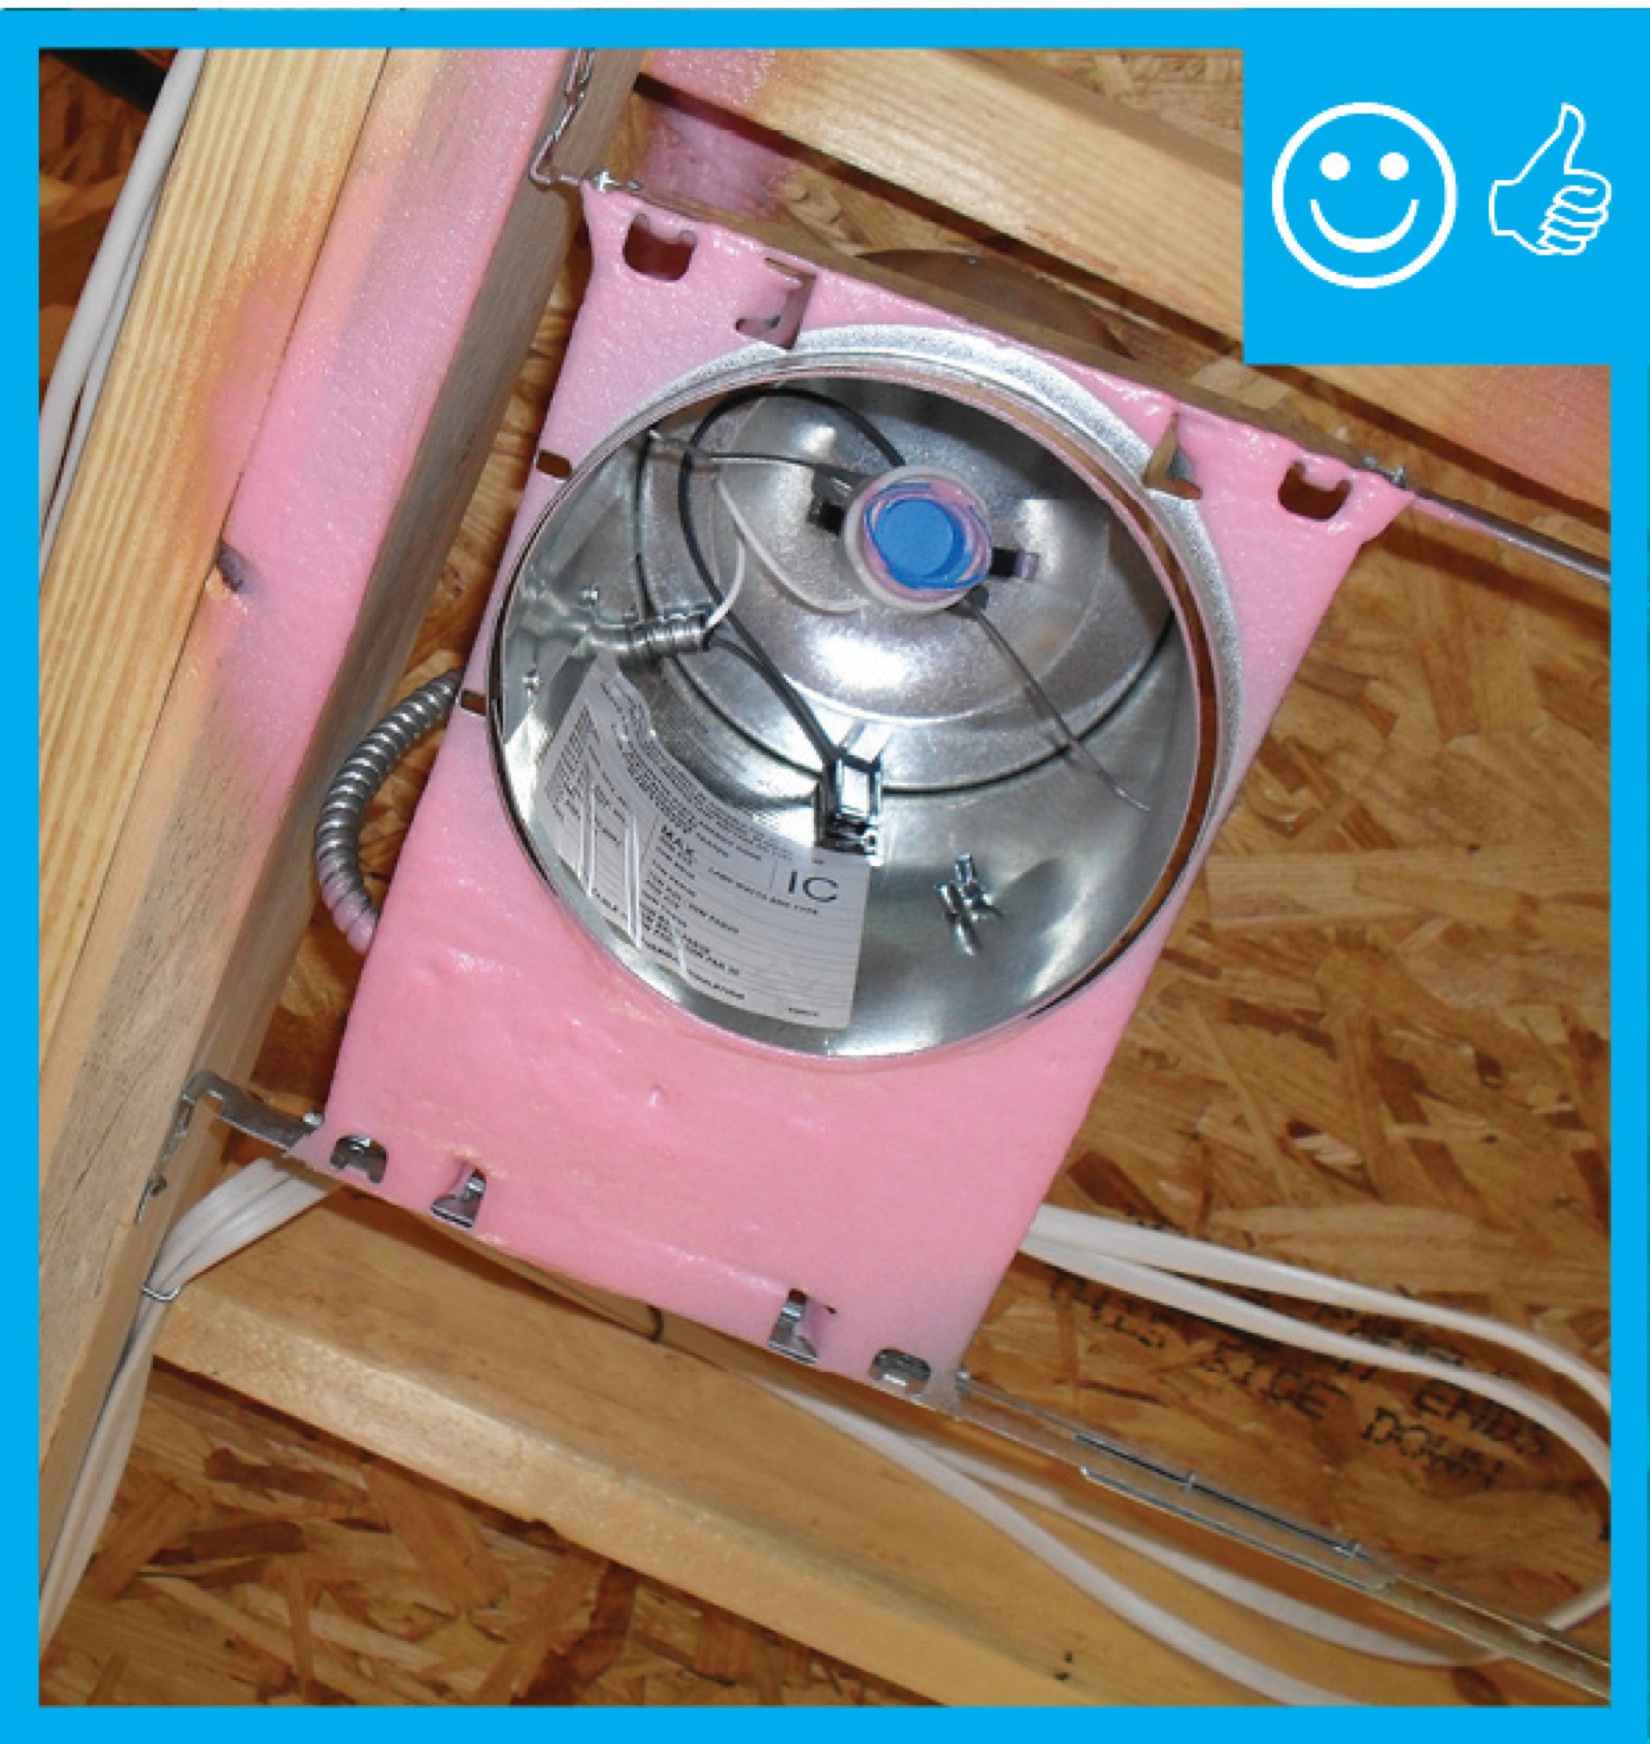
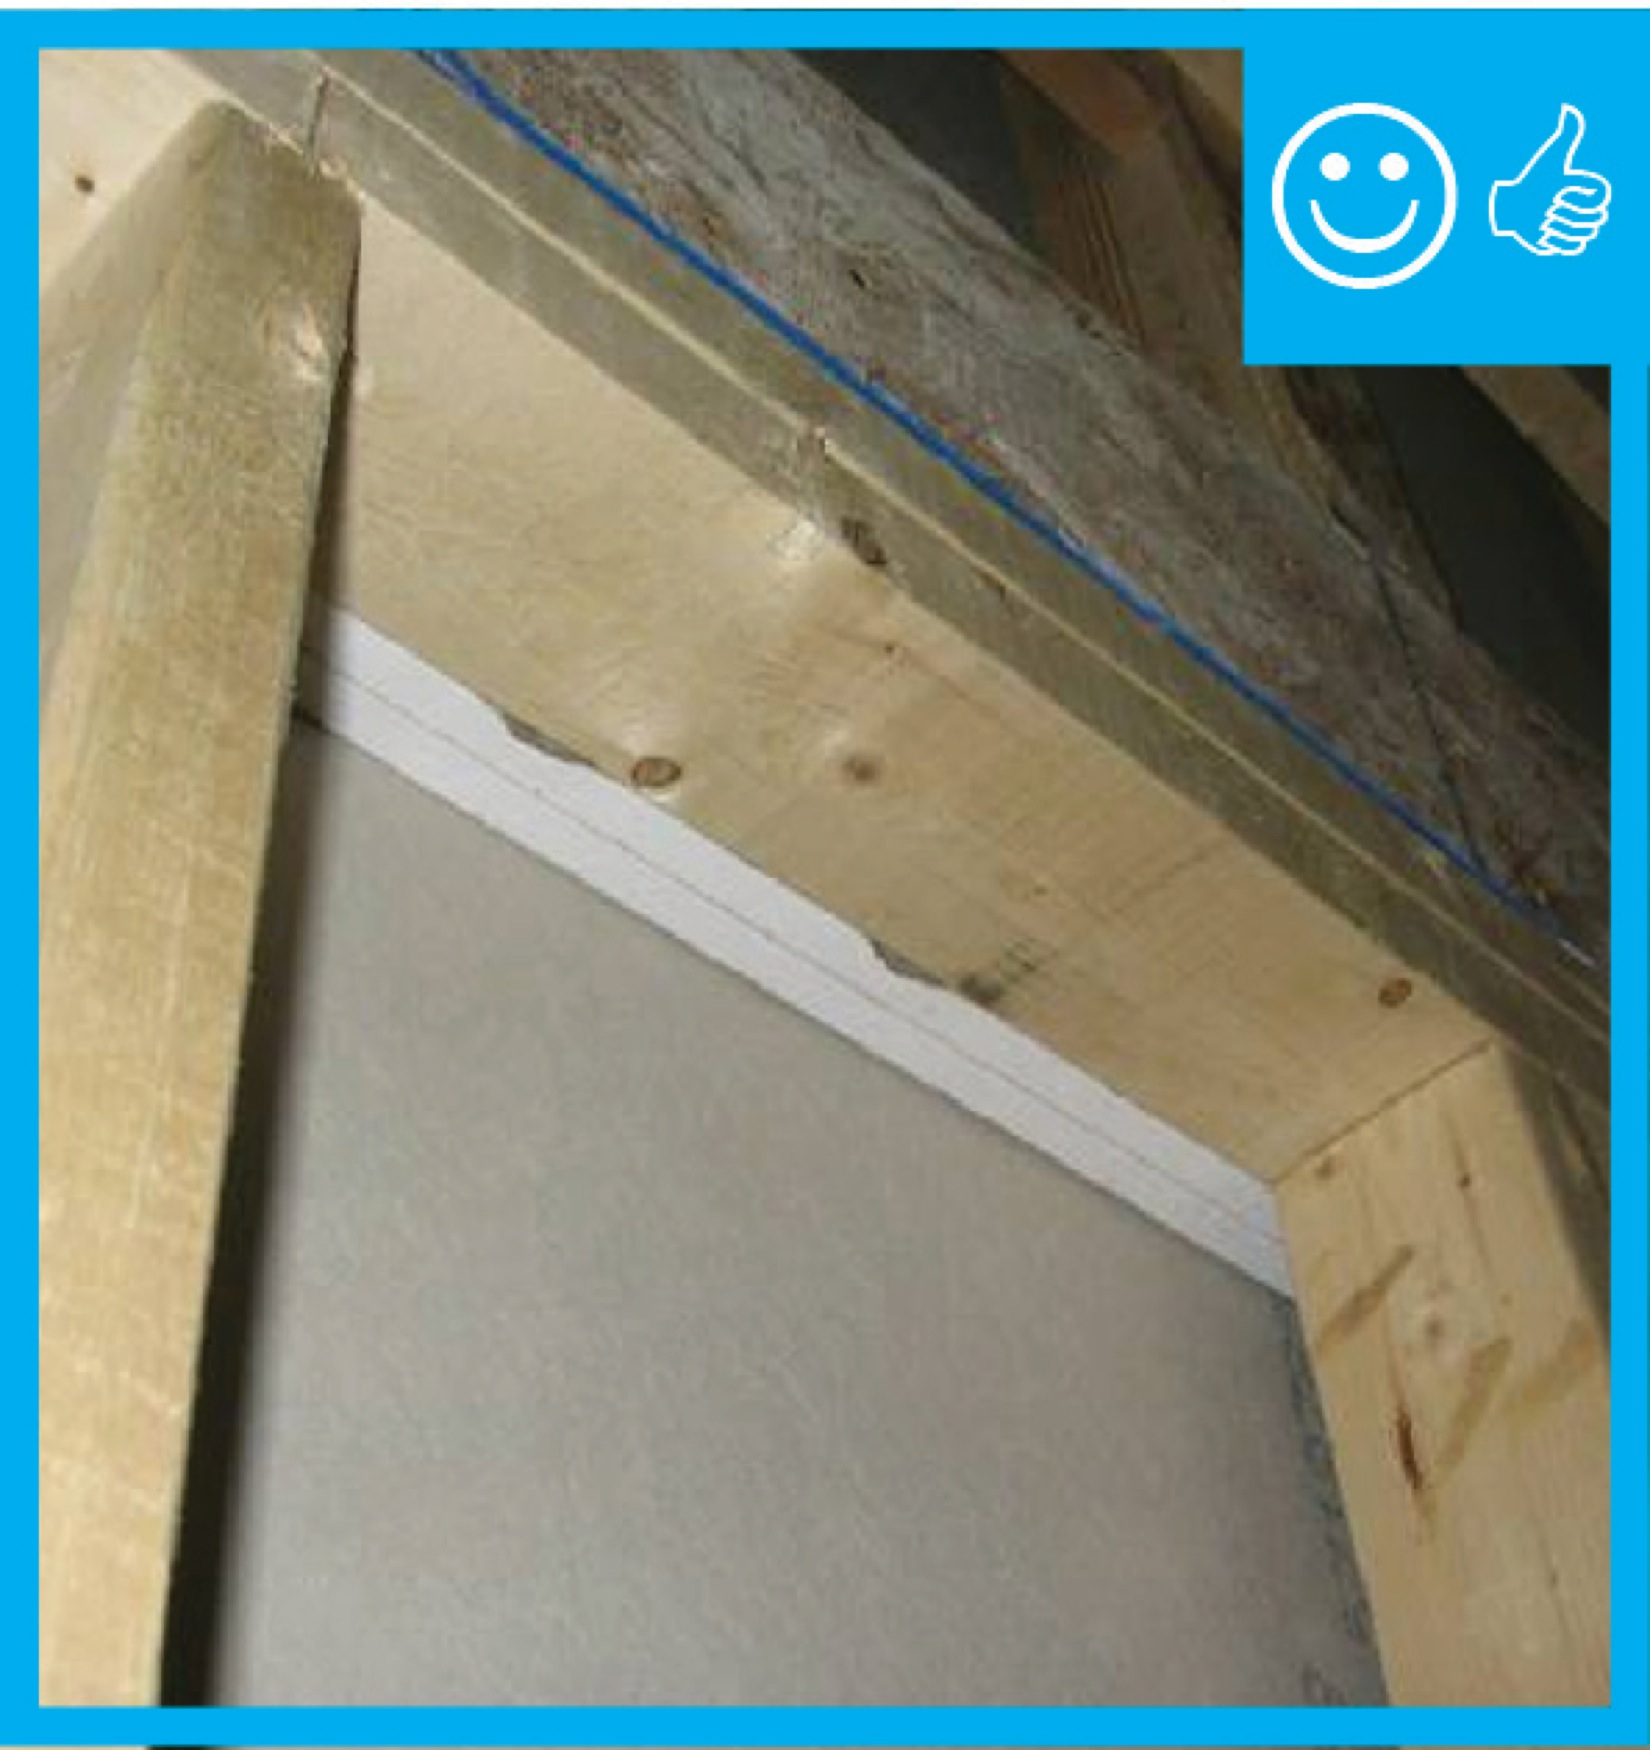
Right – The insulating enclosure over this non-IC rated recessed light fixture is centered and air sealed
Image
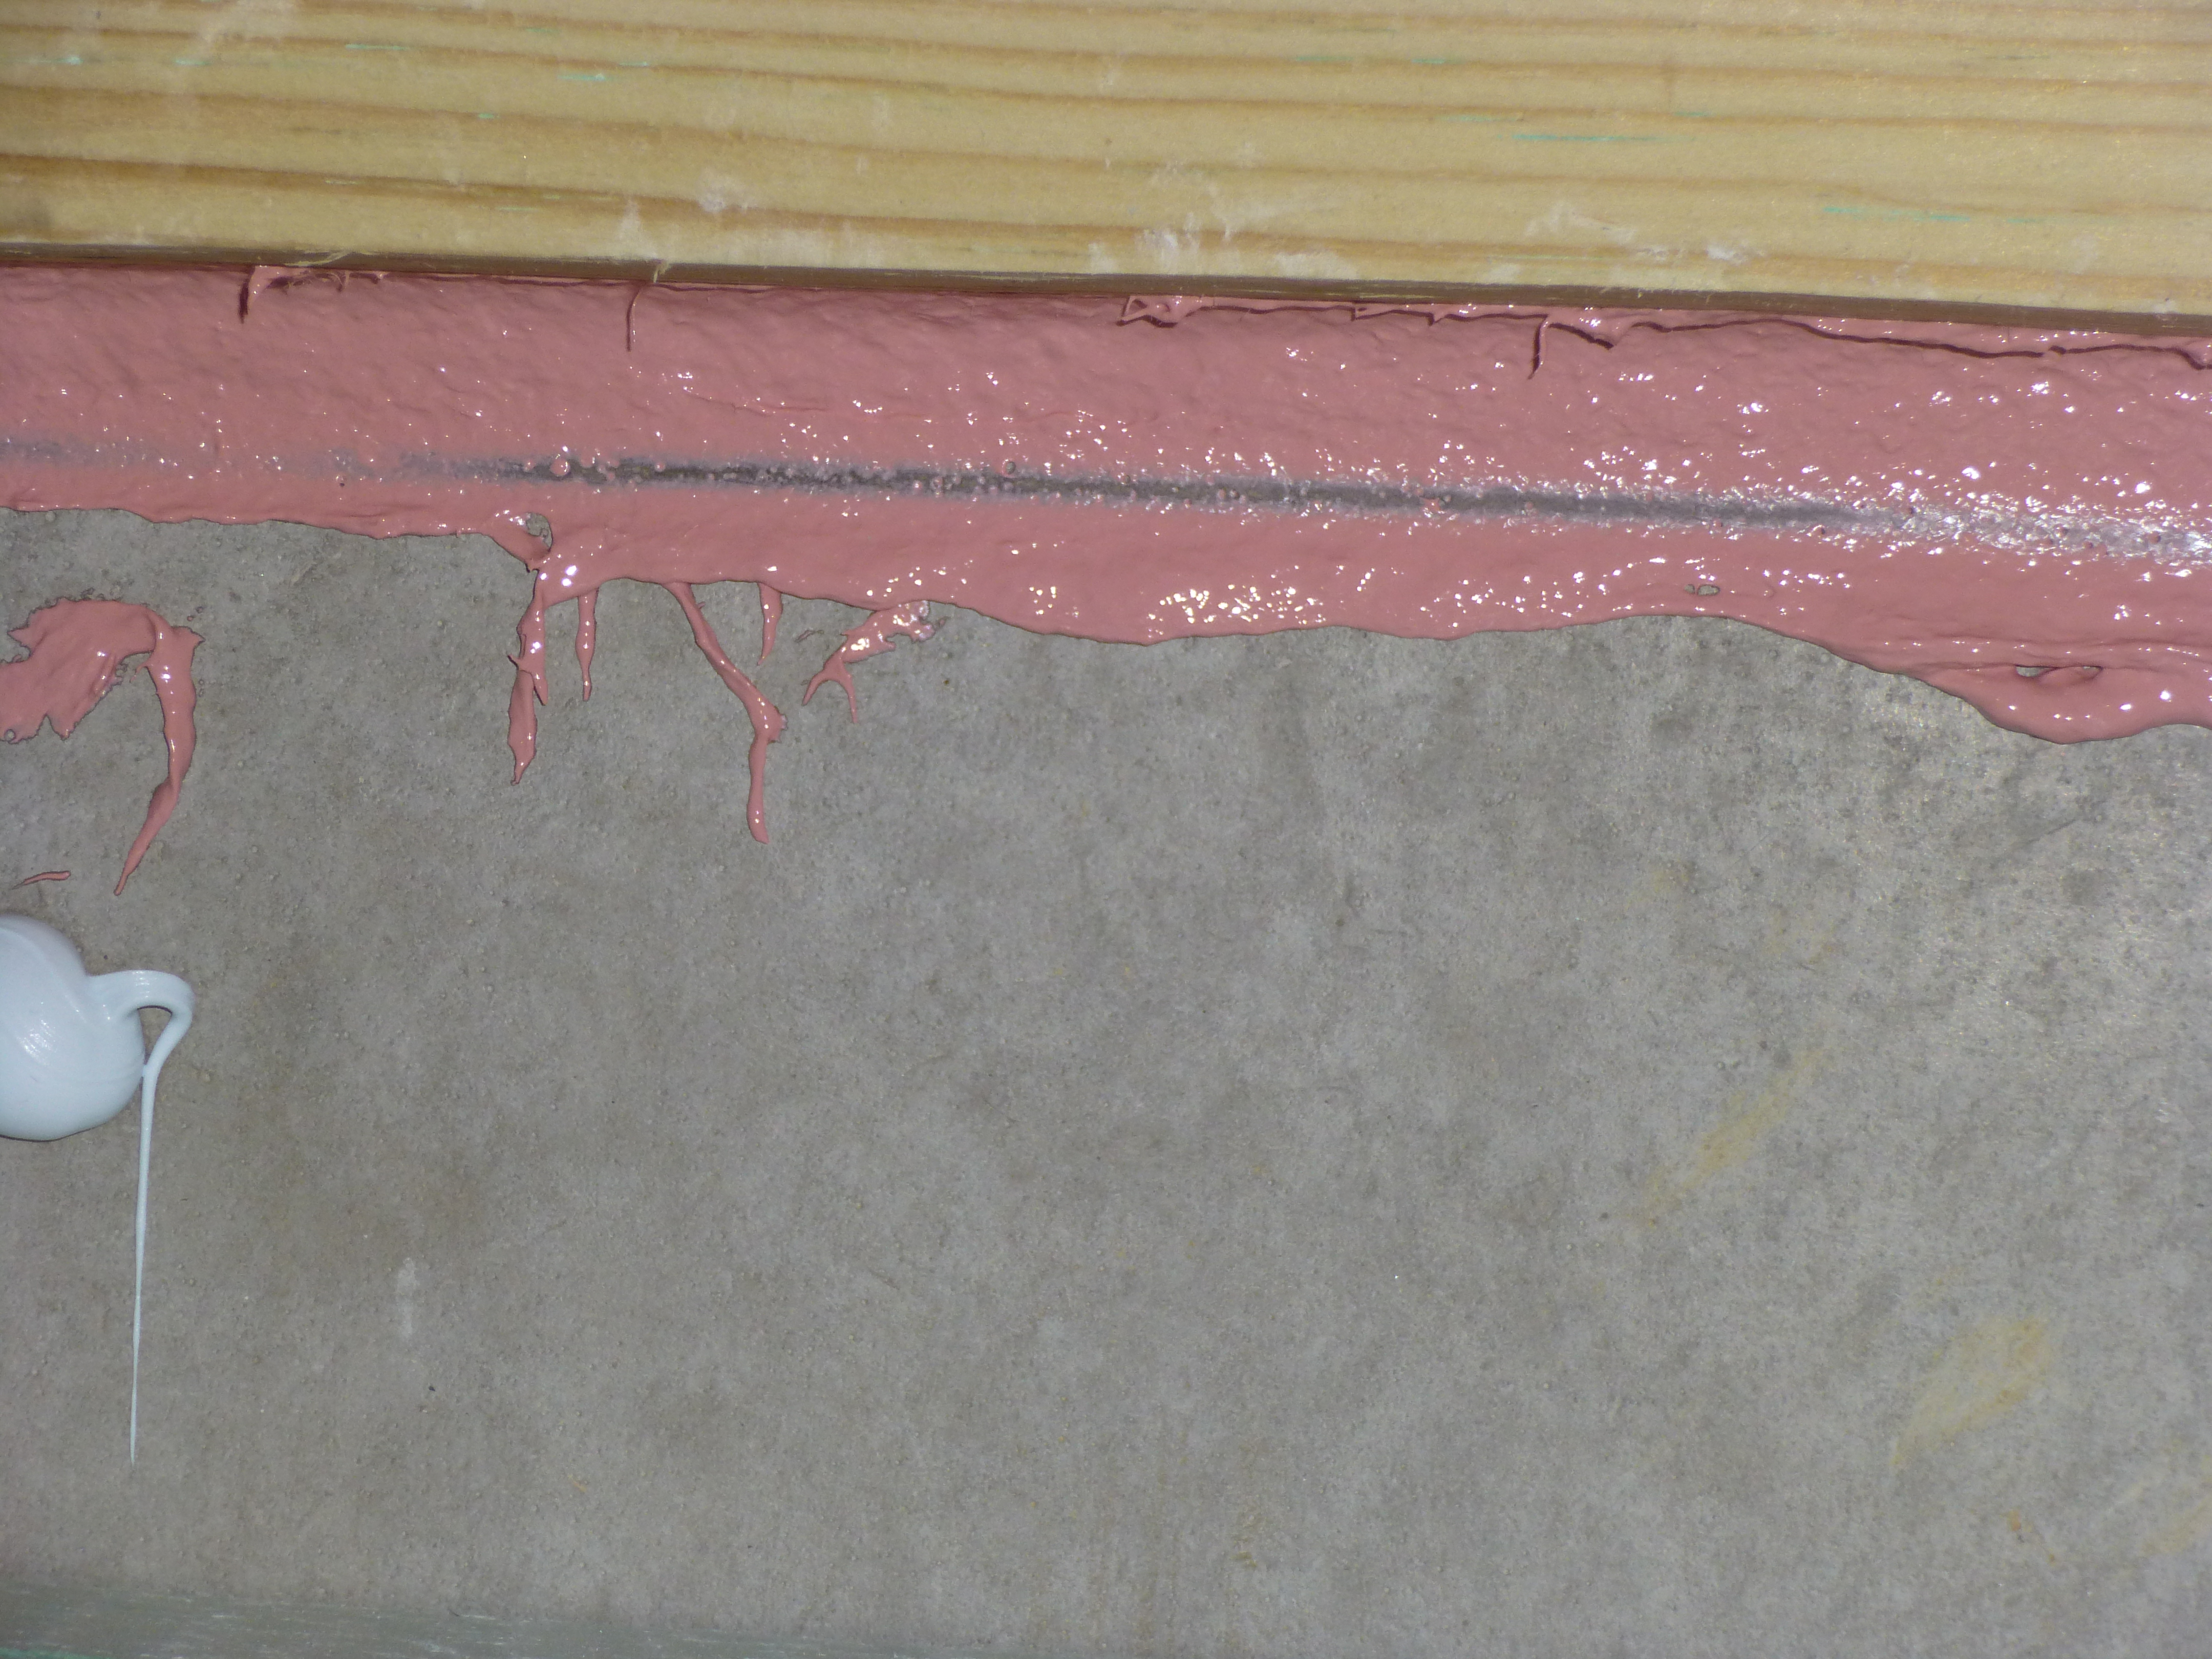
Right – The joint between the foundation wall and the mud sill is thoroughly sealed with a liquid-applied sealant.
Image
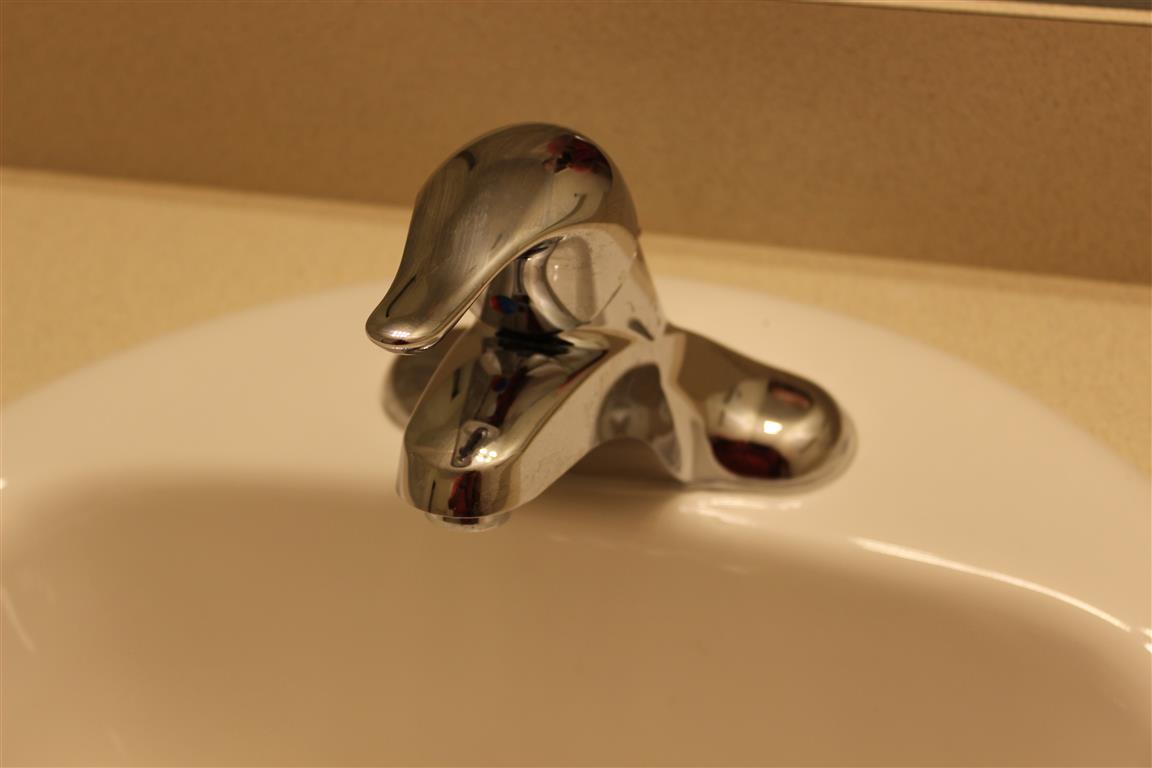
Right – The PEX piping and sink drain of this bathroom sink are fitted with escutcheons that help to air seal around the pipes and prevent pest entry.
Image
Image
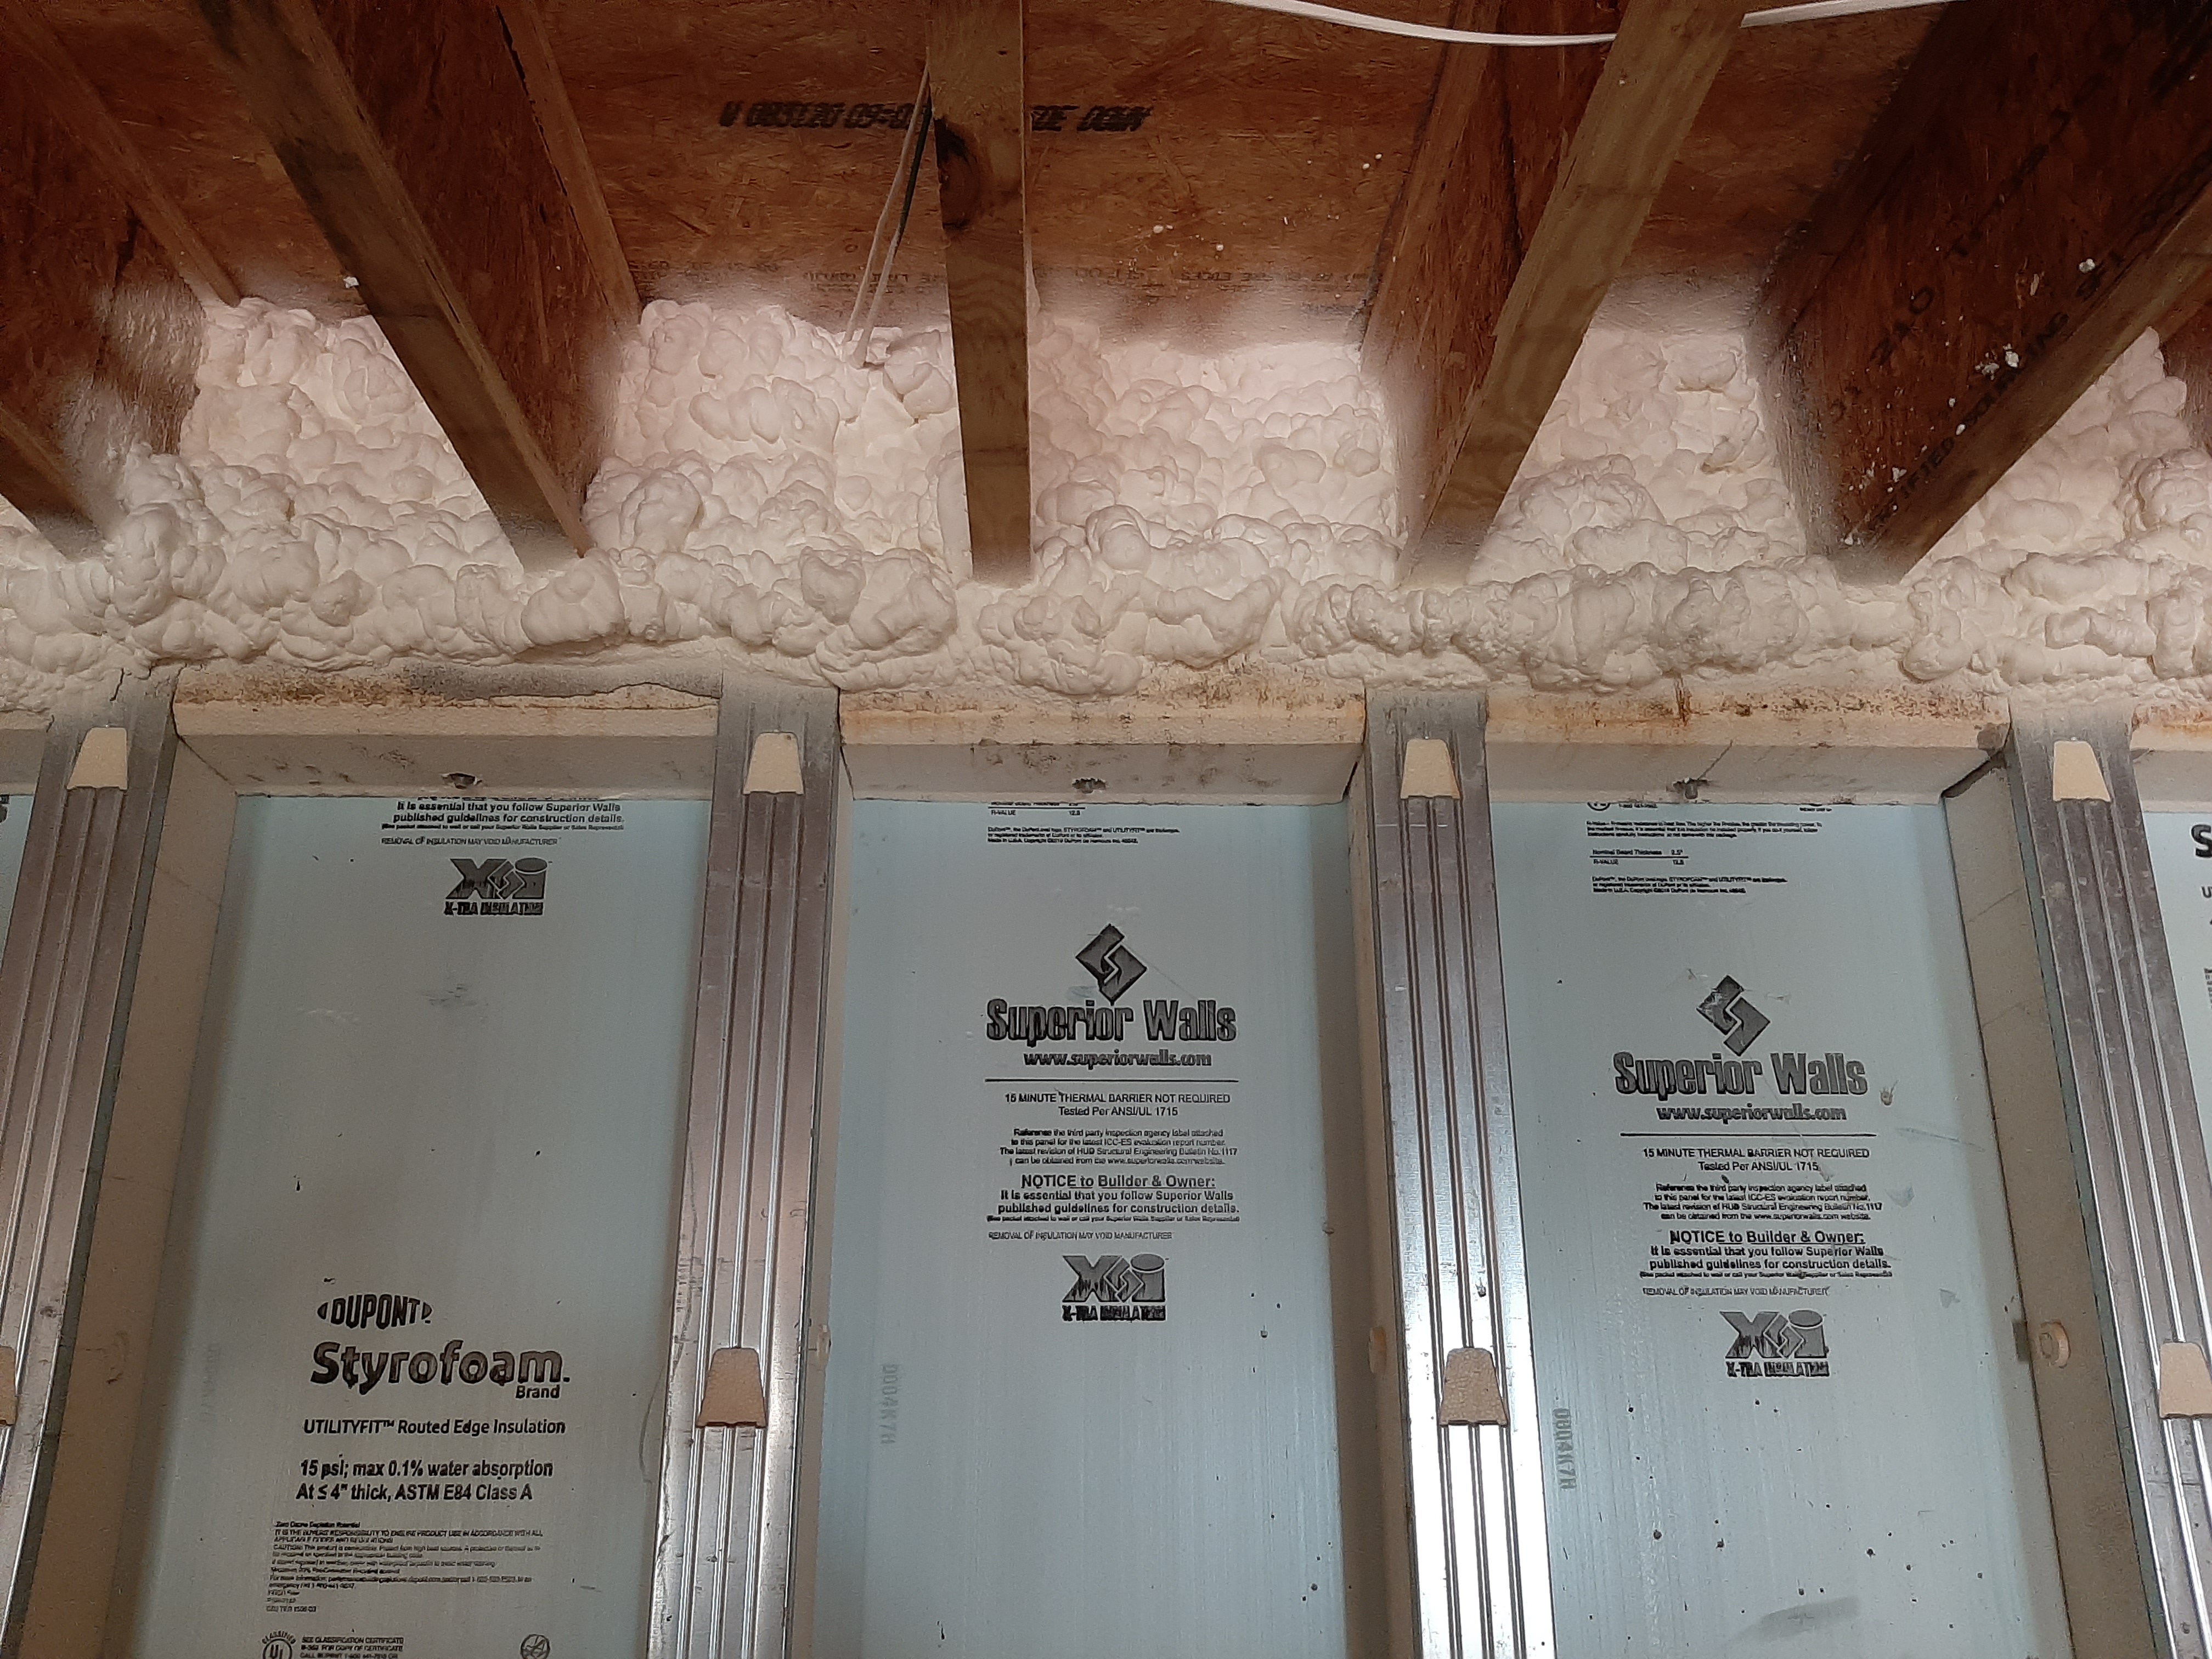
Right – The rim joists above the pre-insulated basement walls are sealed and insulated with spray foam to prevent air leakage at this juncture in the building envelope.
Image
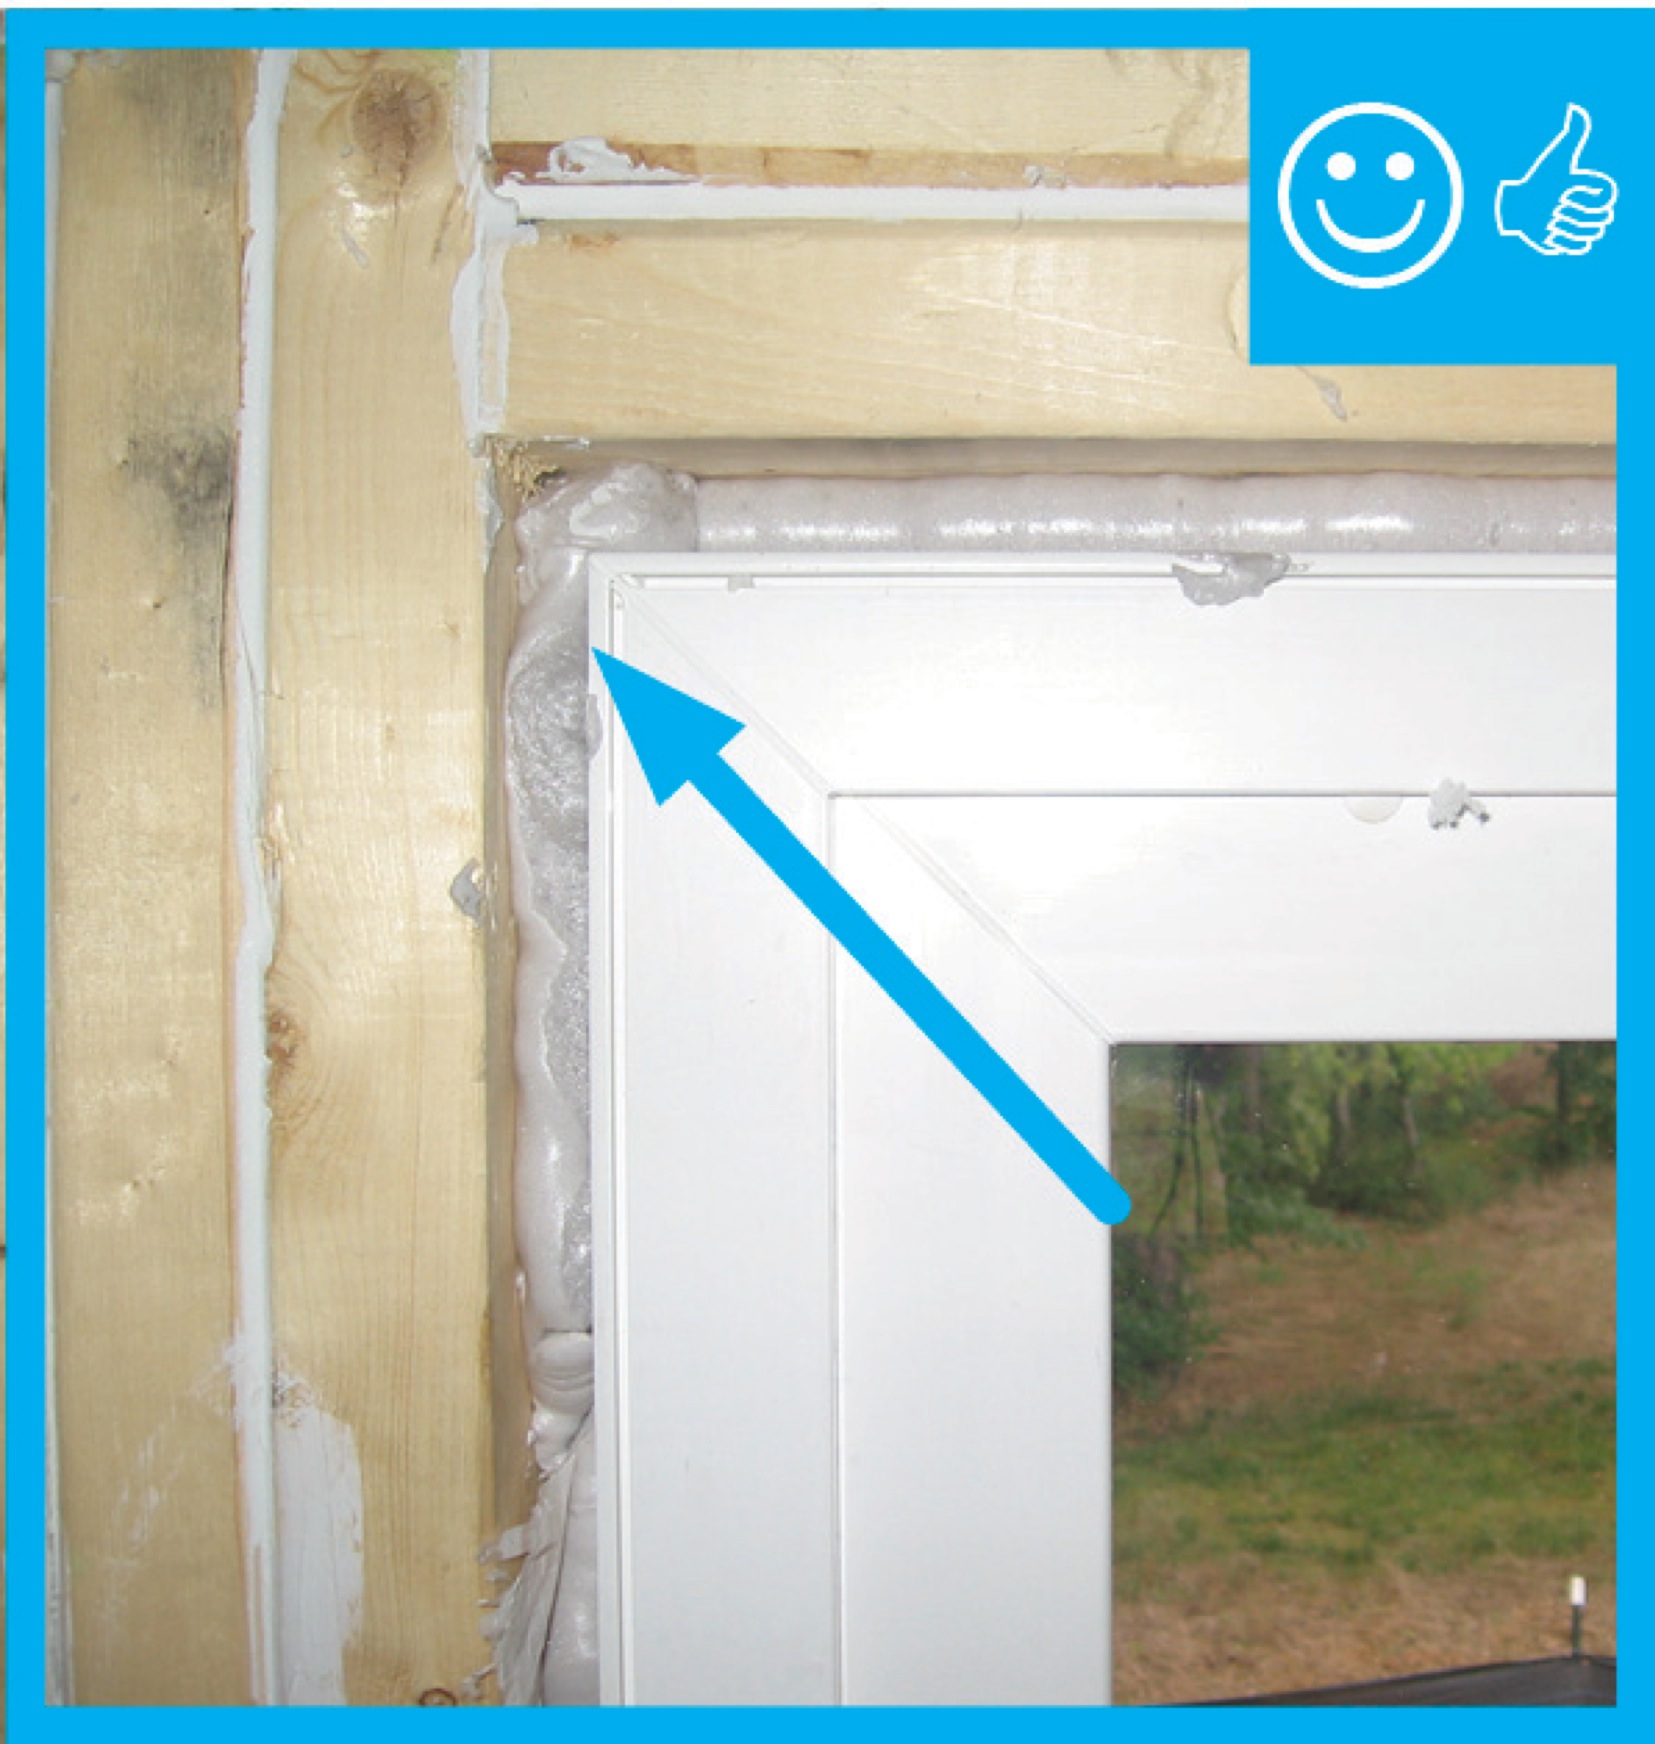
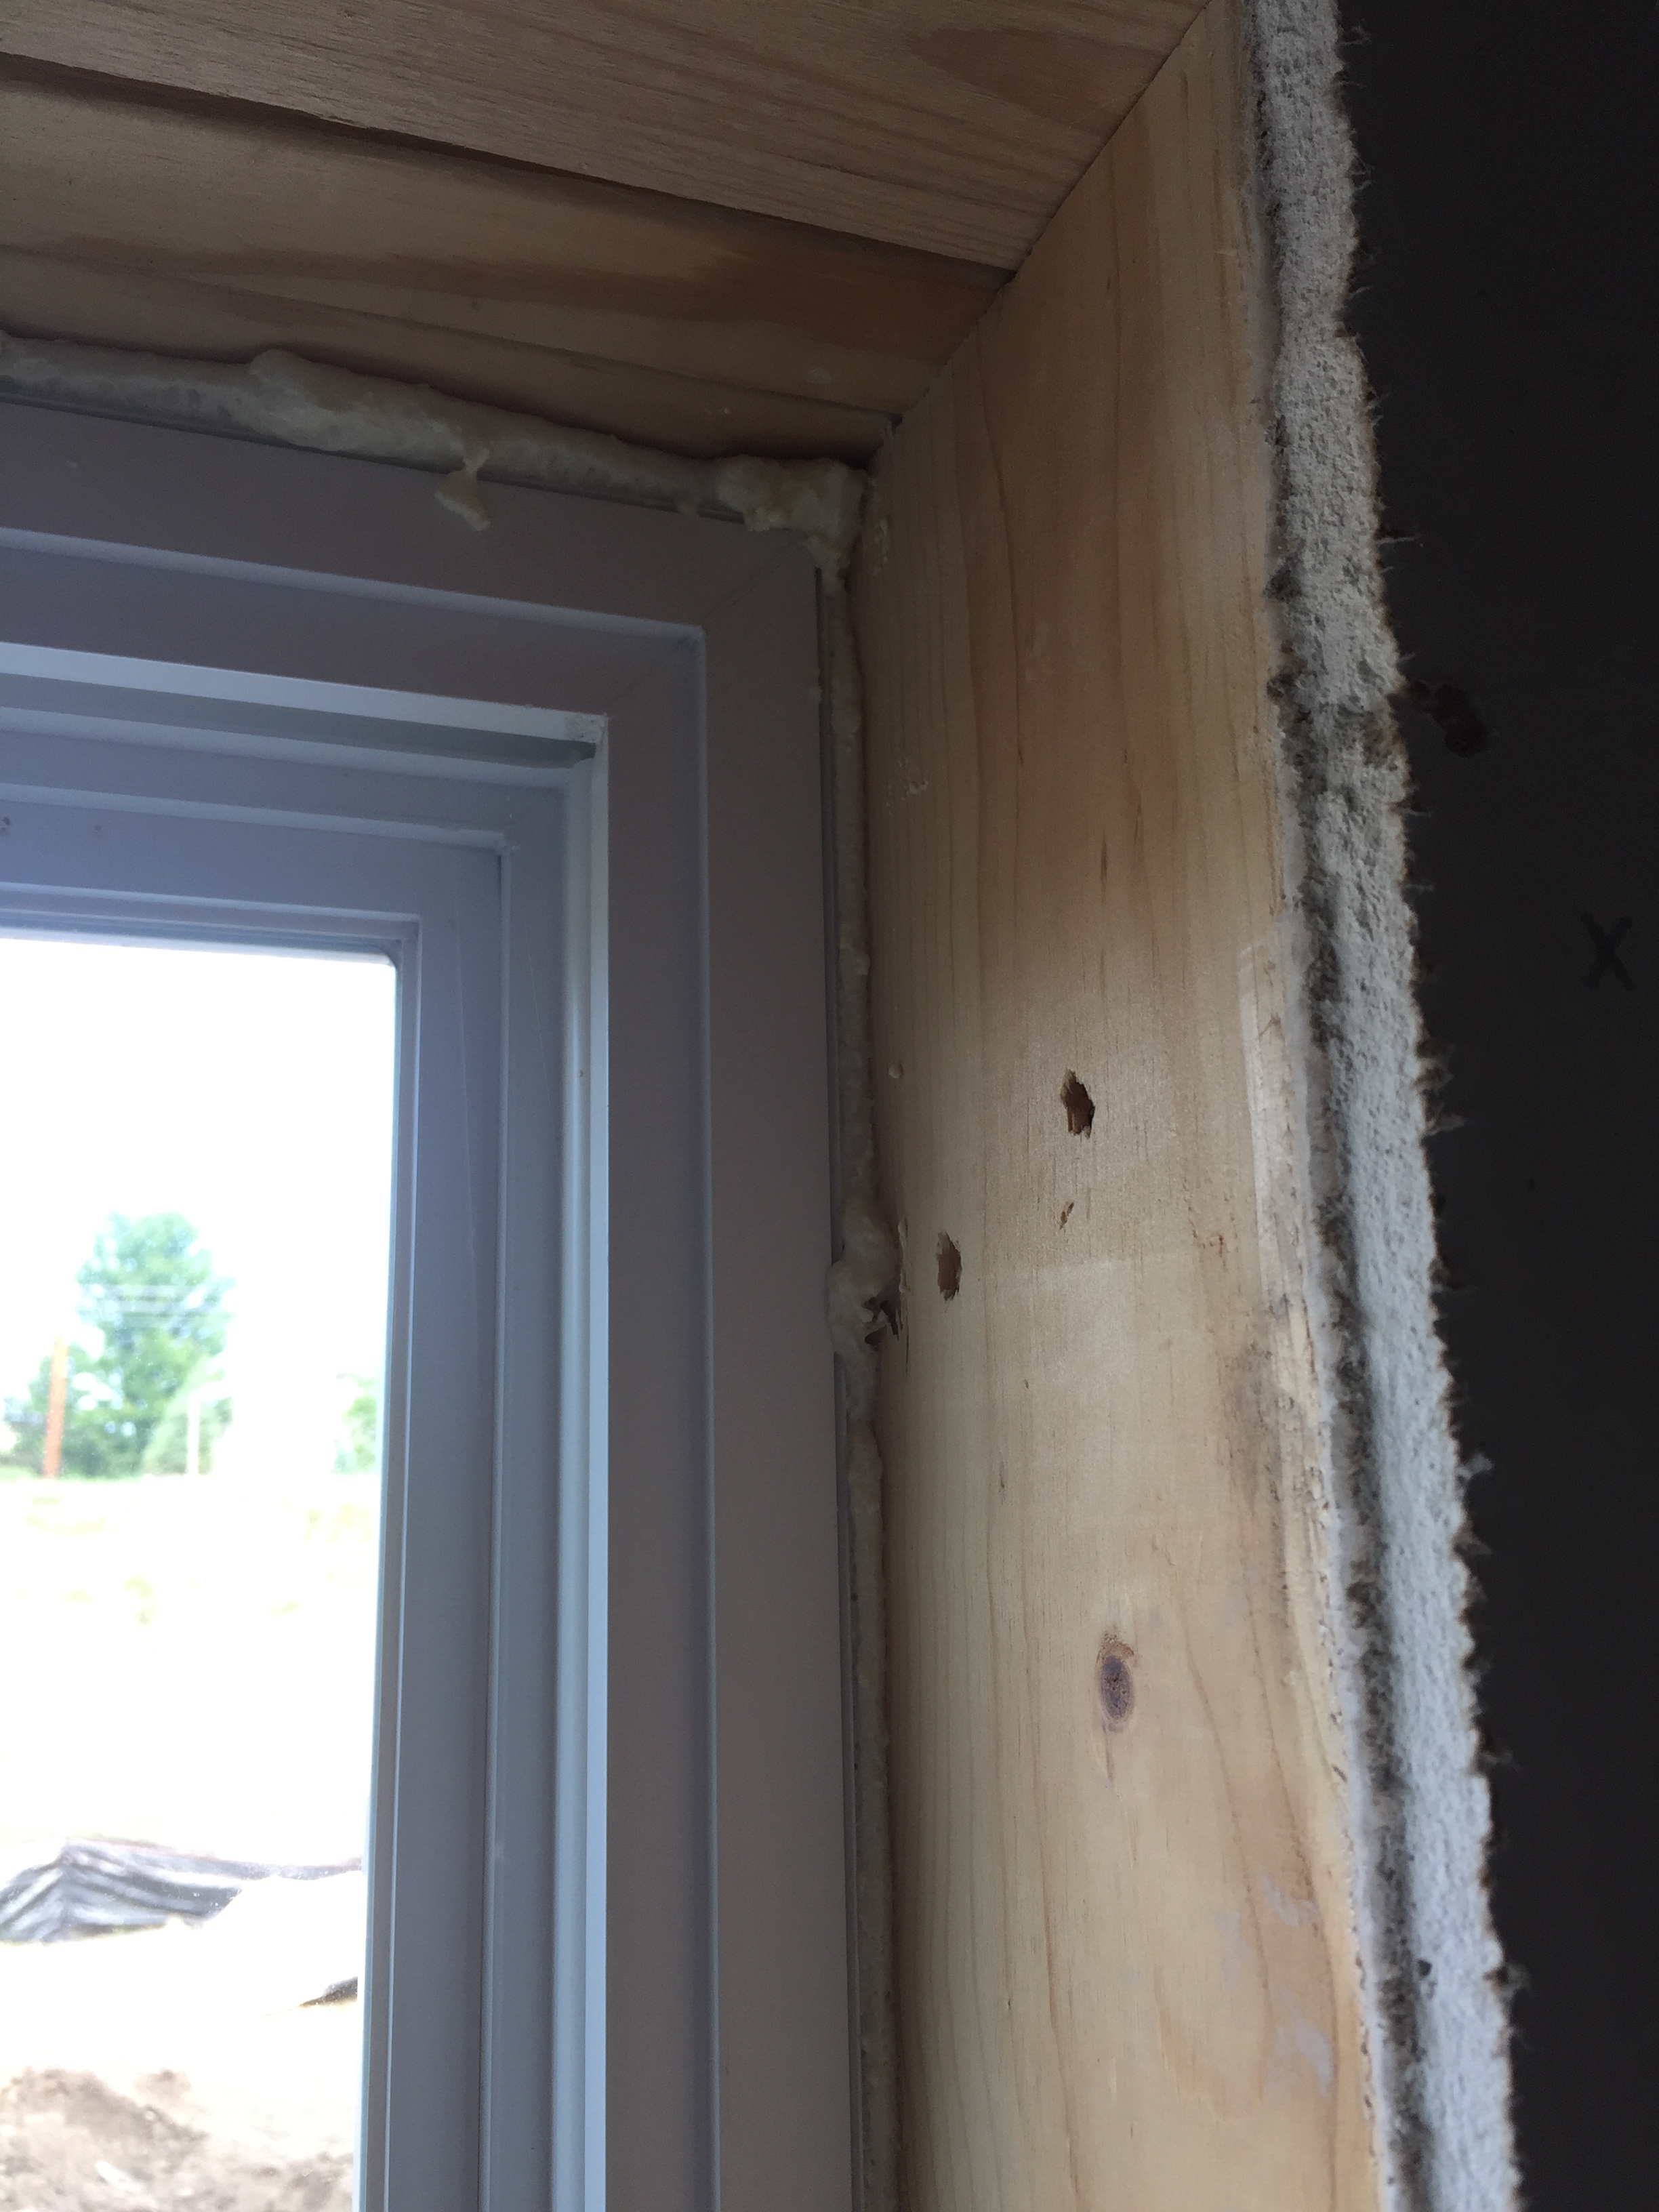
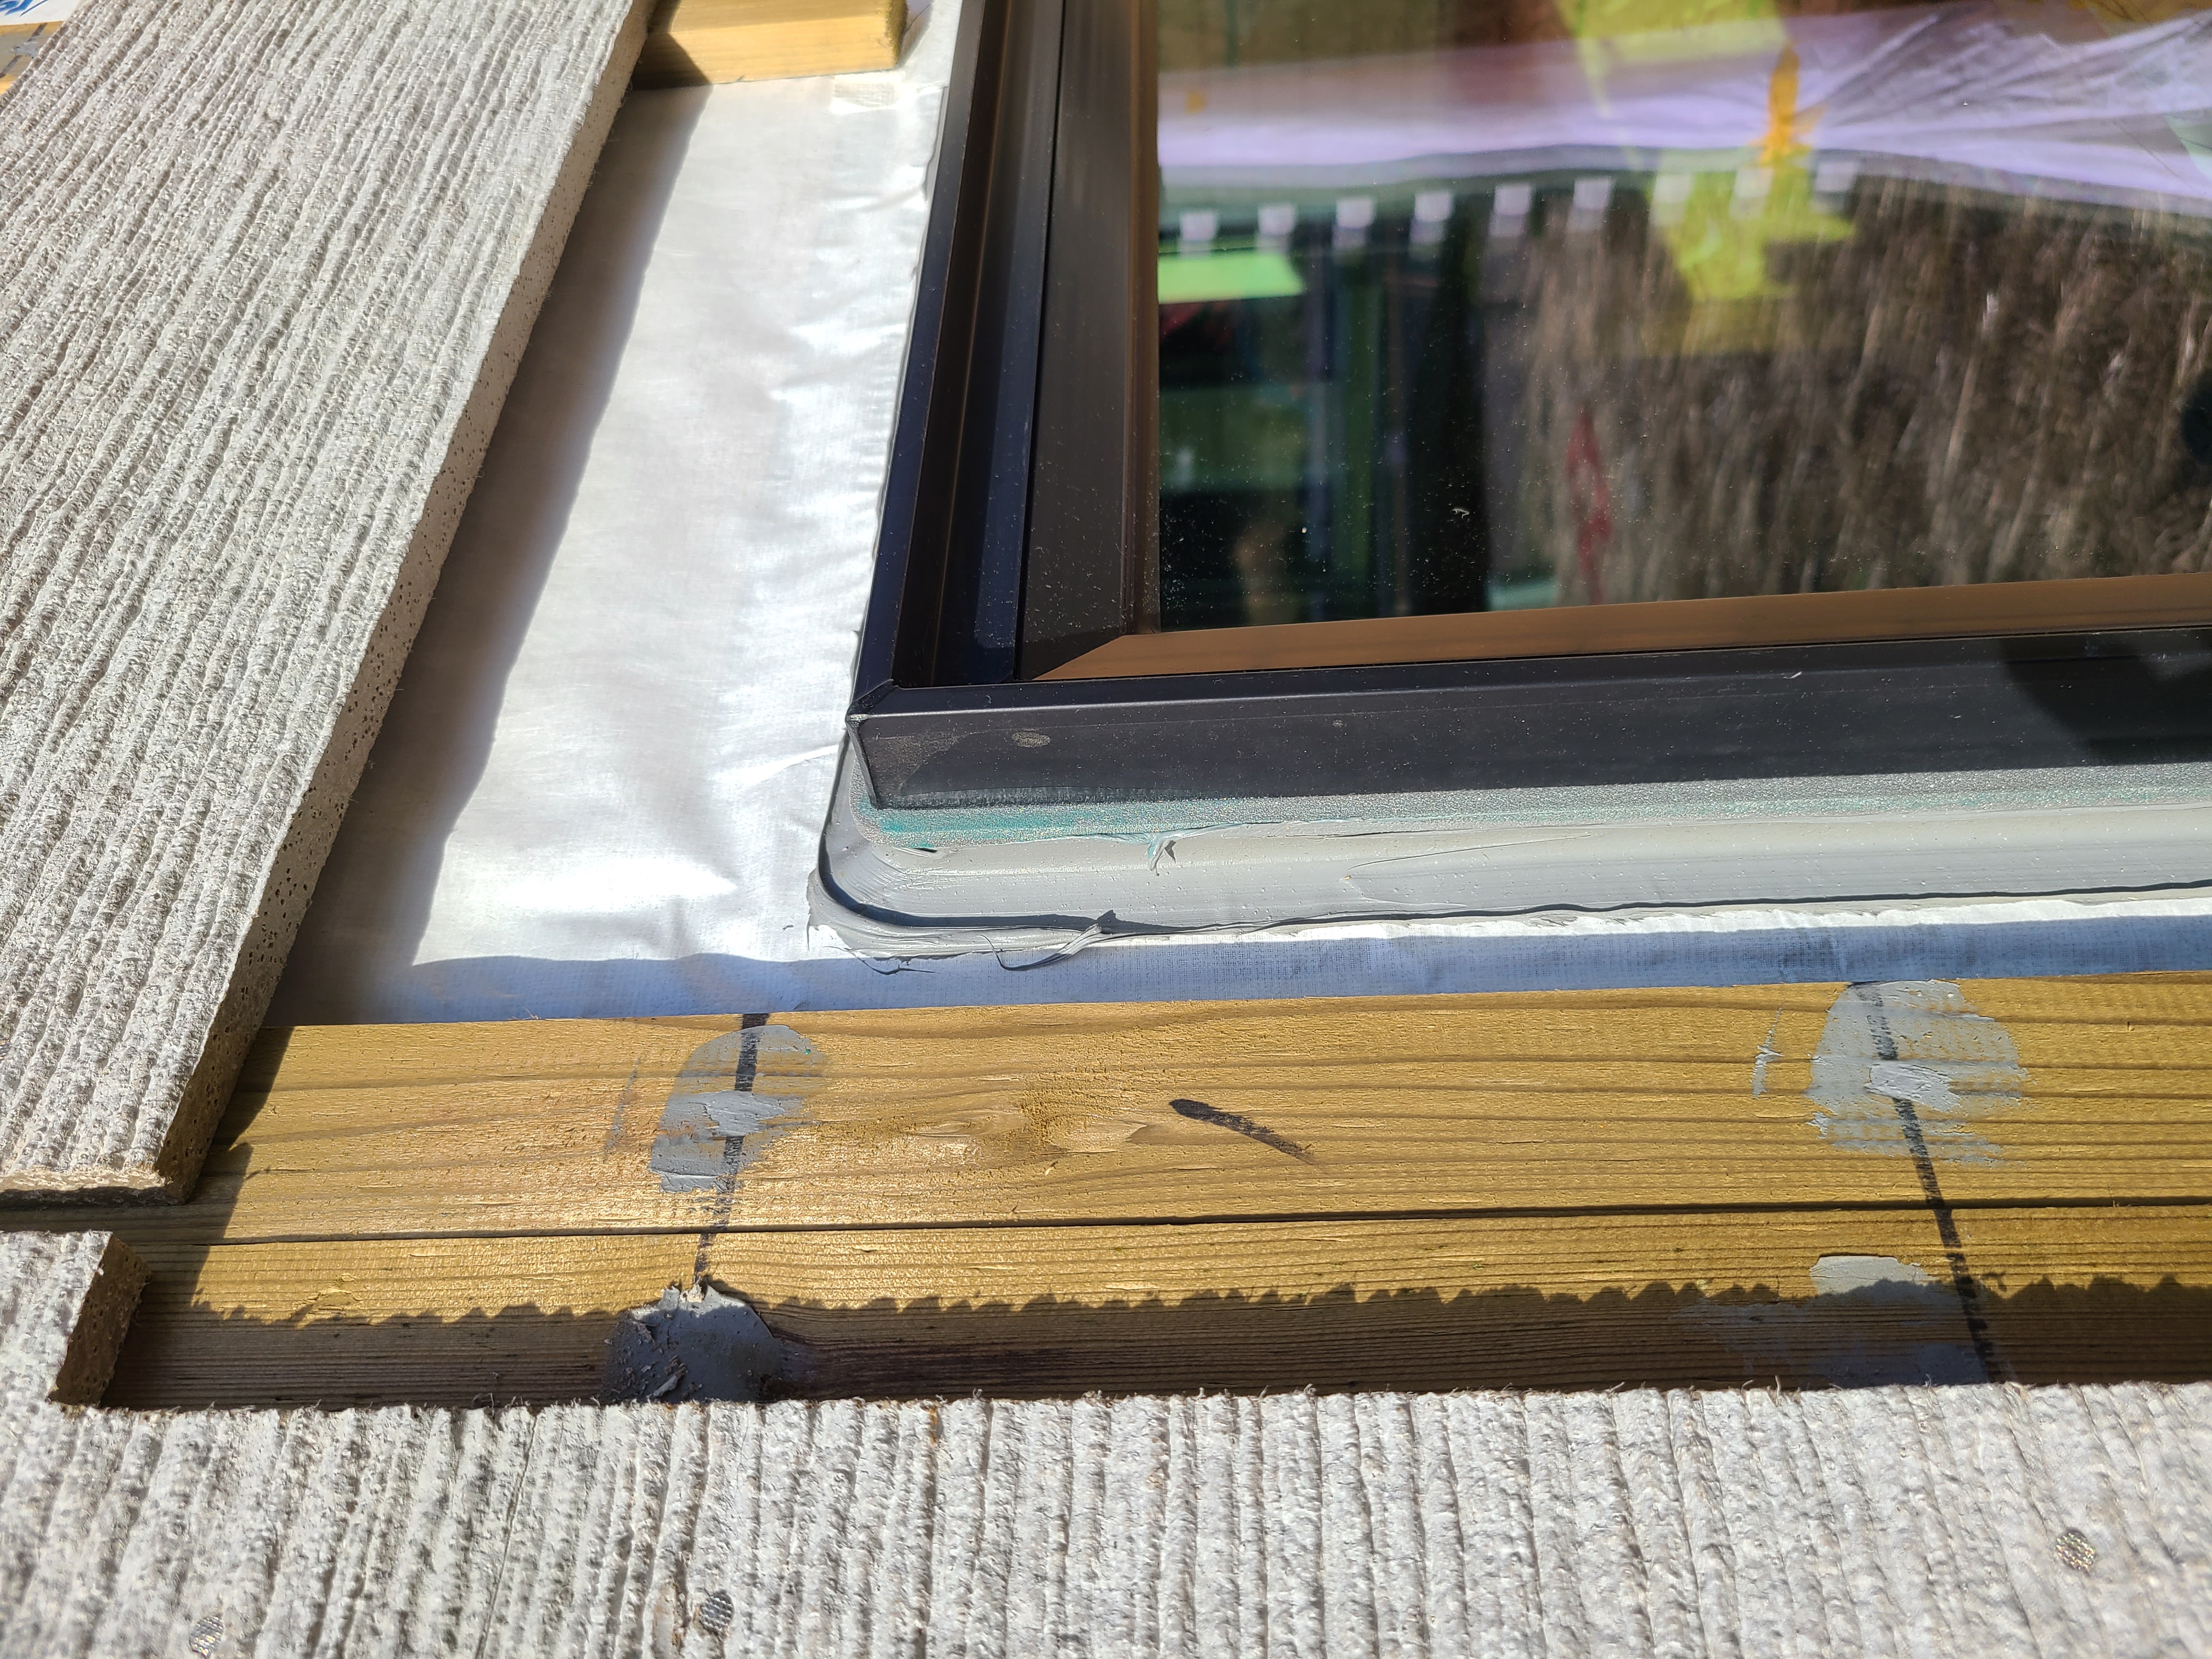
Right – The rough opening around the window has been filled with low-expansion foam to air seal.
Image

Right – The rough opening around window has been filled with backer-rod to air seal.
Image
Image
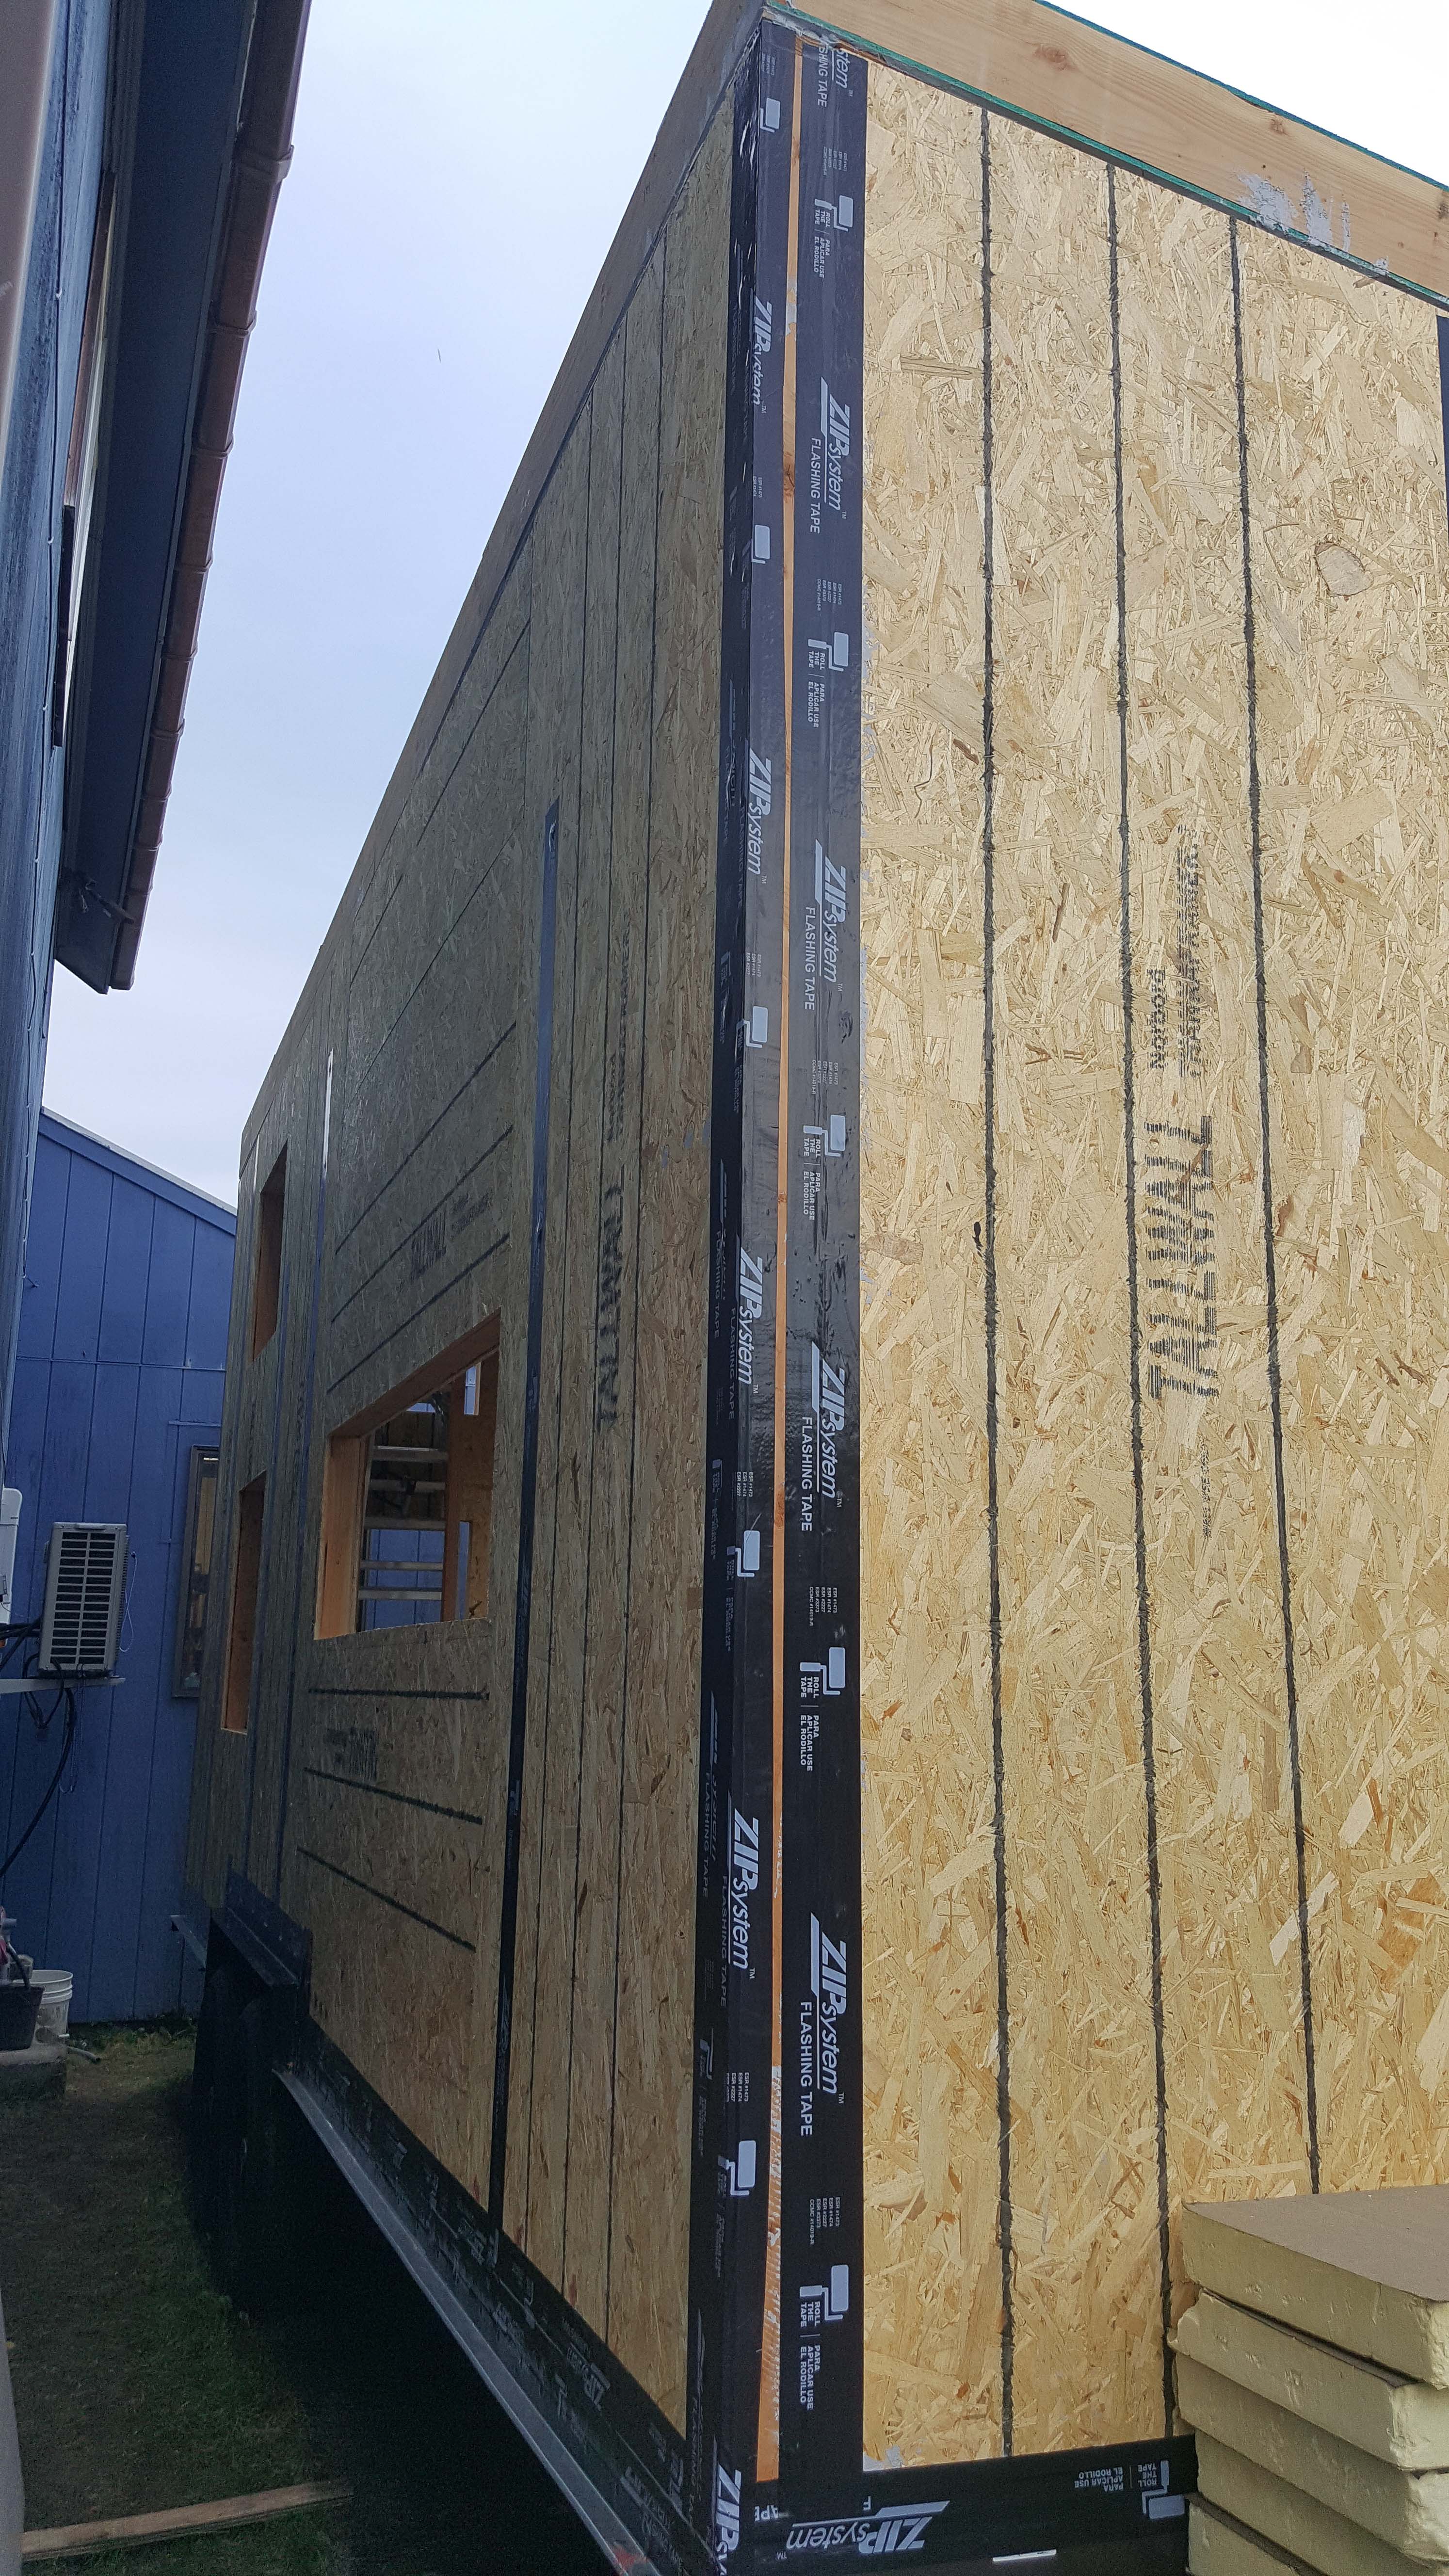
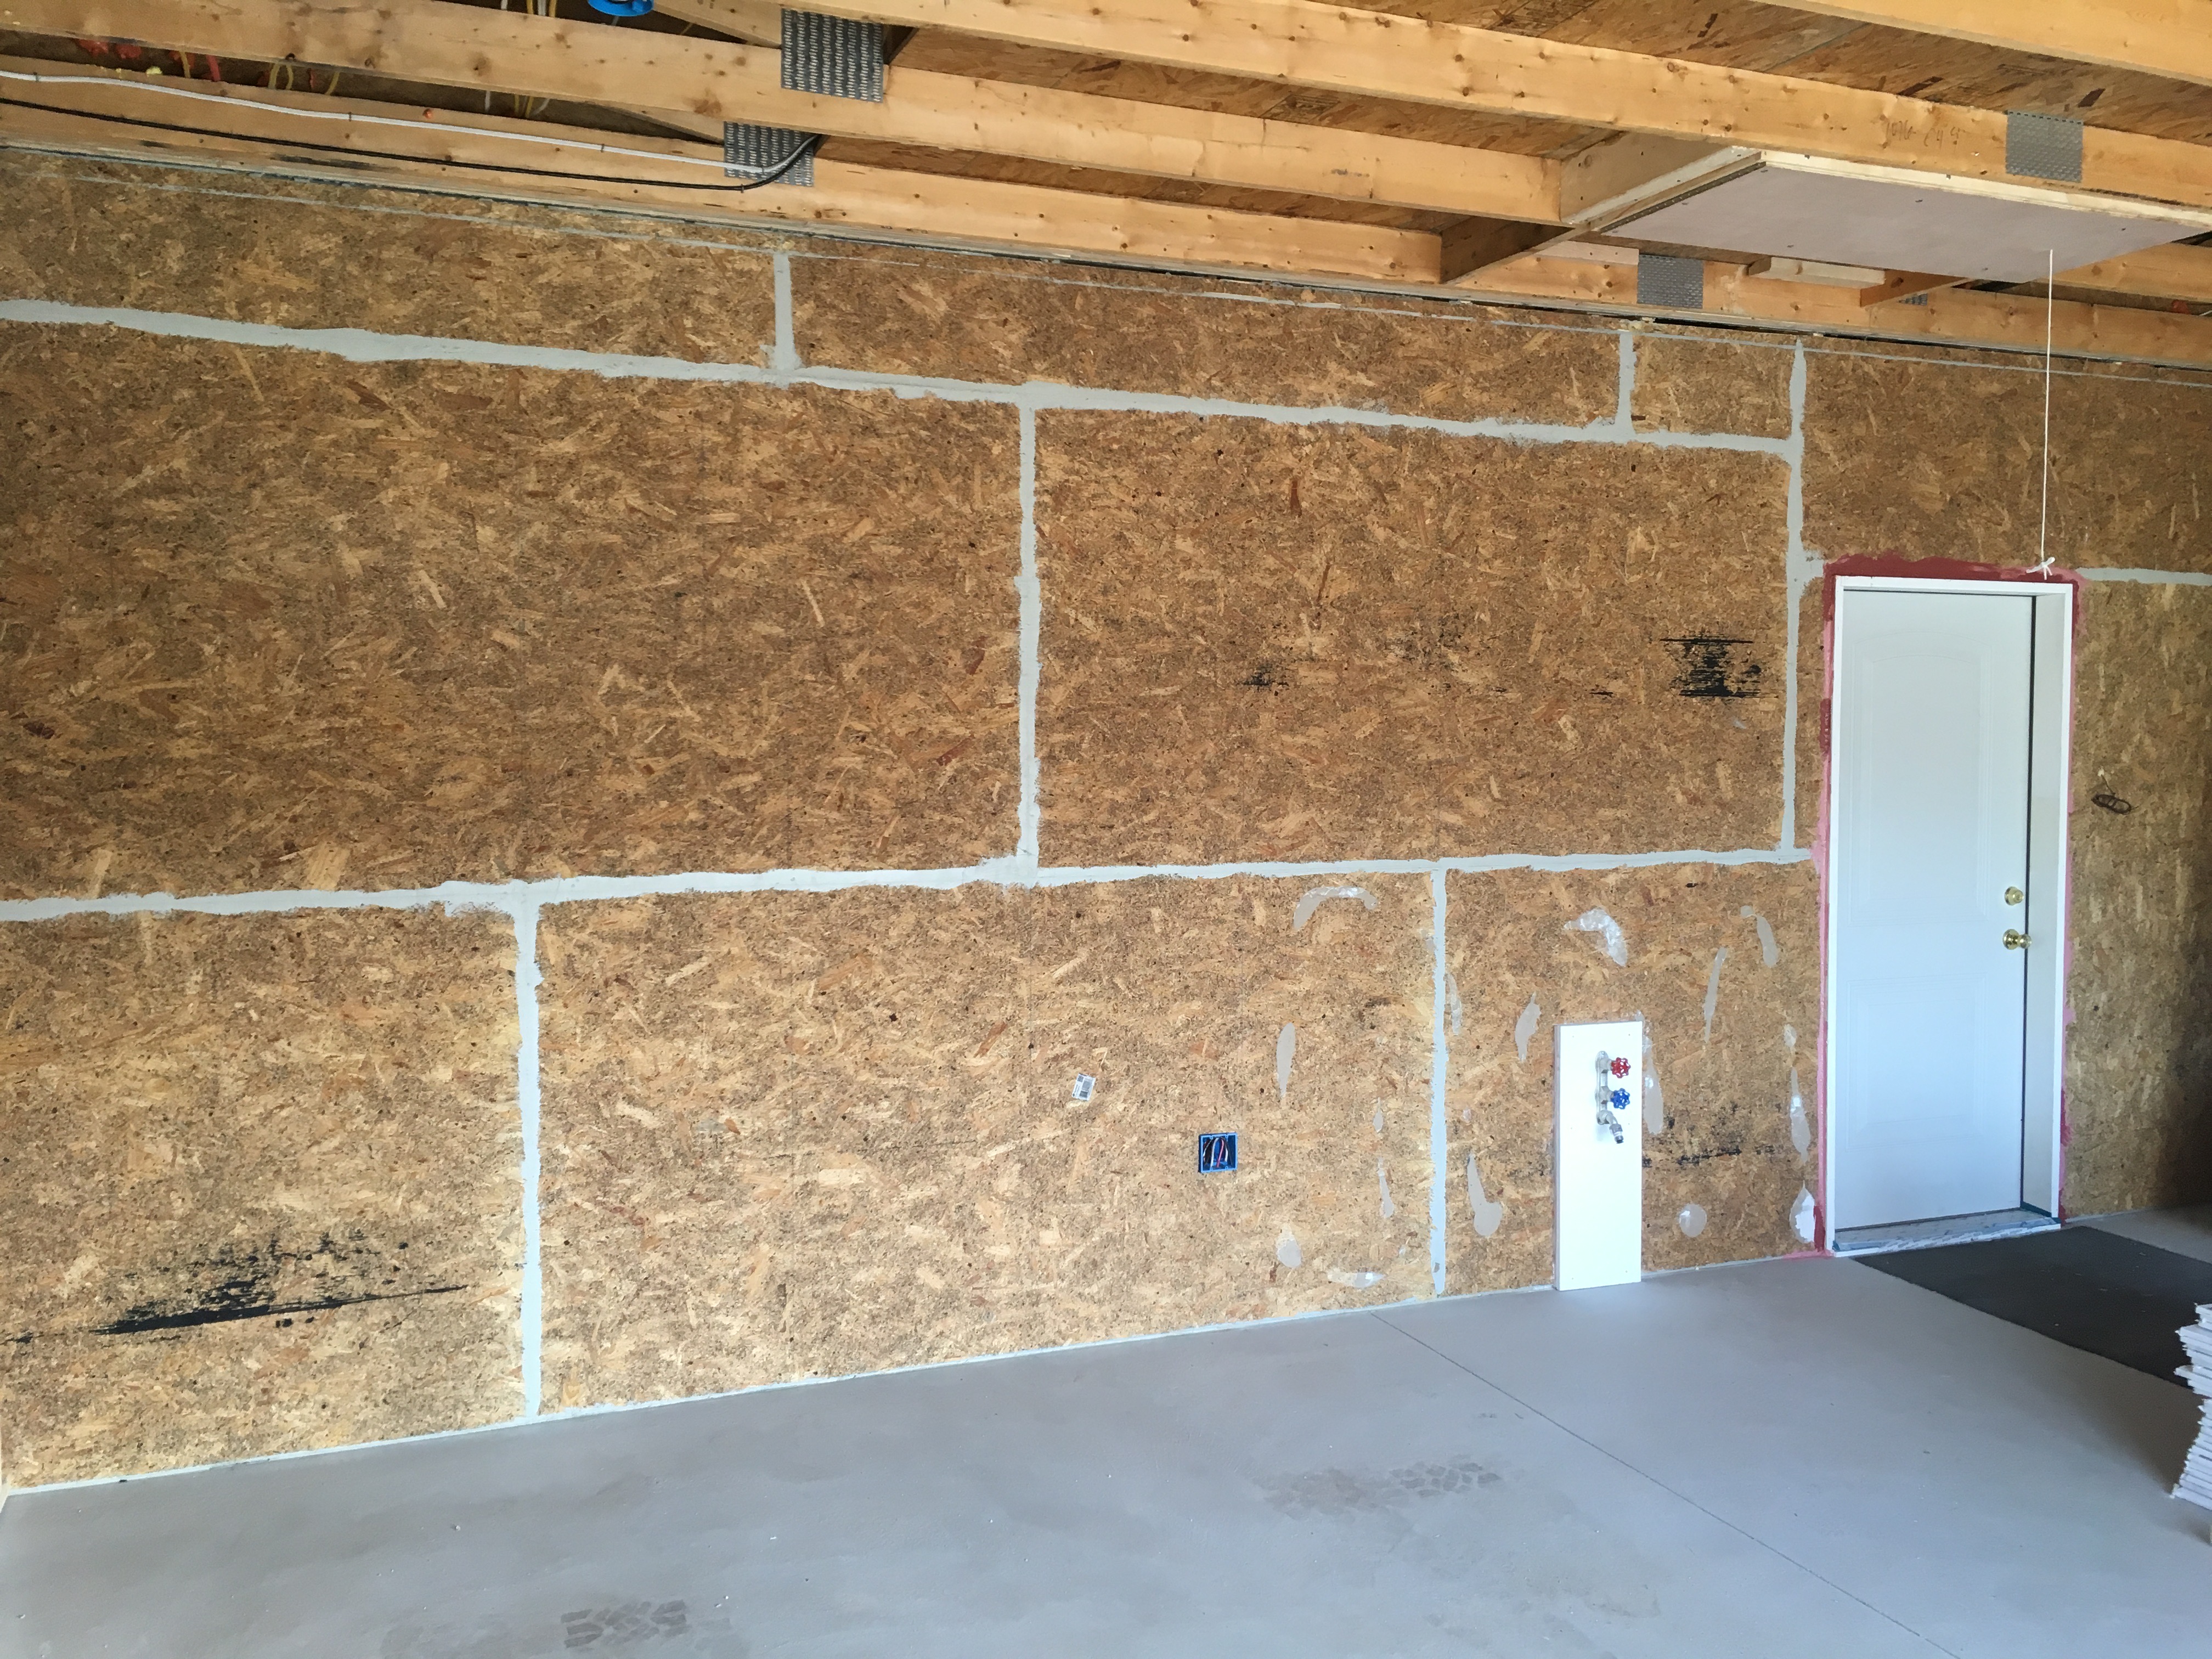
Right – The seams are taped on the coated OSB sheathing of this home to provide a complete air barrier.
Image
Right – The sill plate was sprayed with foam prior to installation atop foundation.
Image
Right – The top of the enclosure over this recessed can light remains clear of attic insulation
Image
Right – The top plate-to-dry wall seams of the interior walls are sealed from the attic.
Image
Image
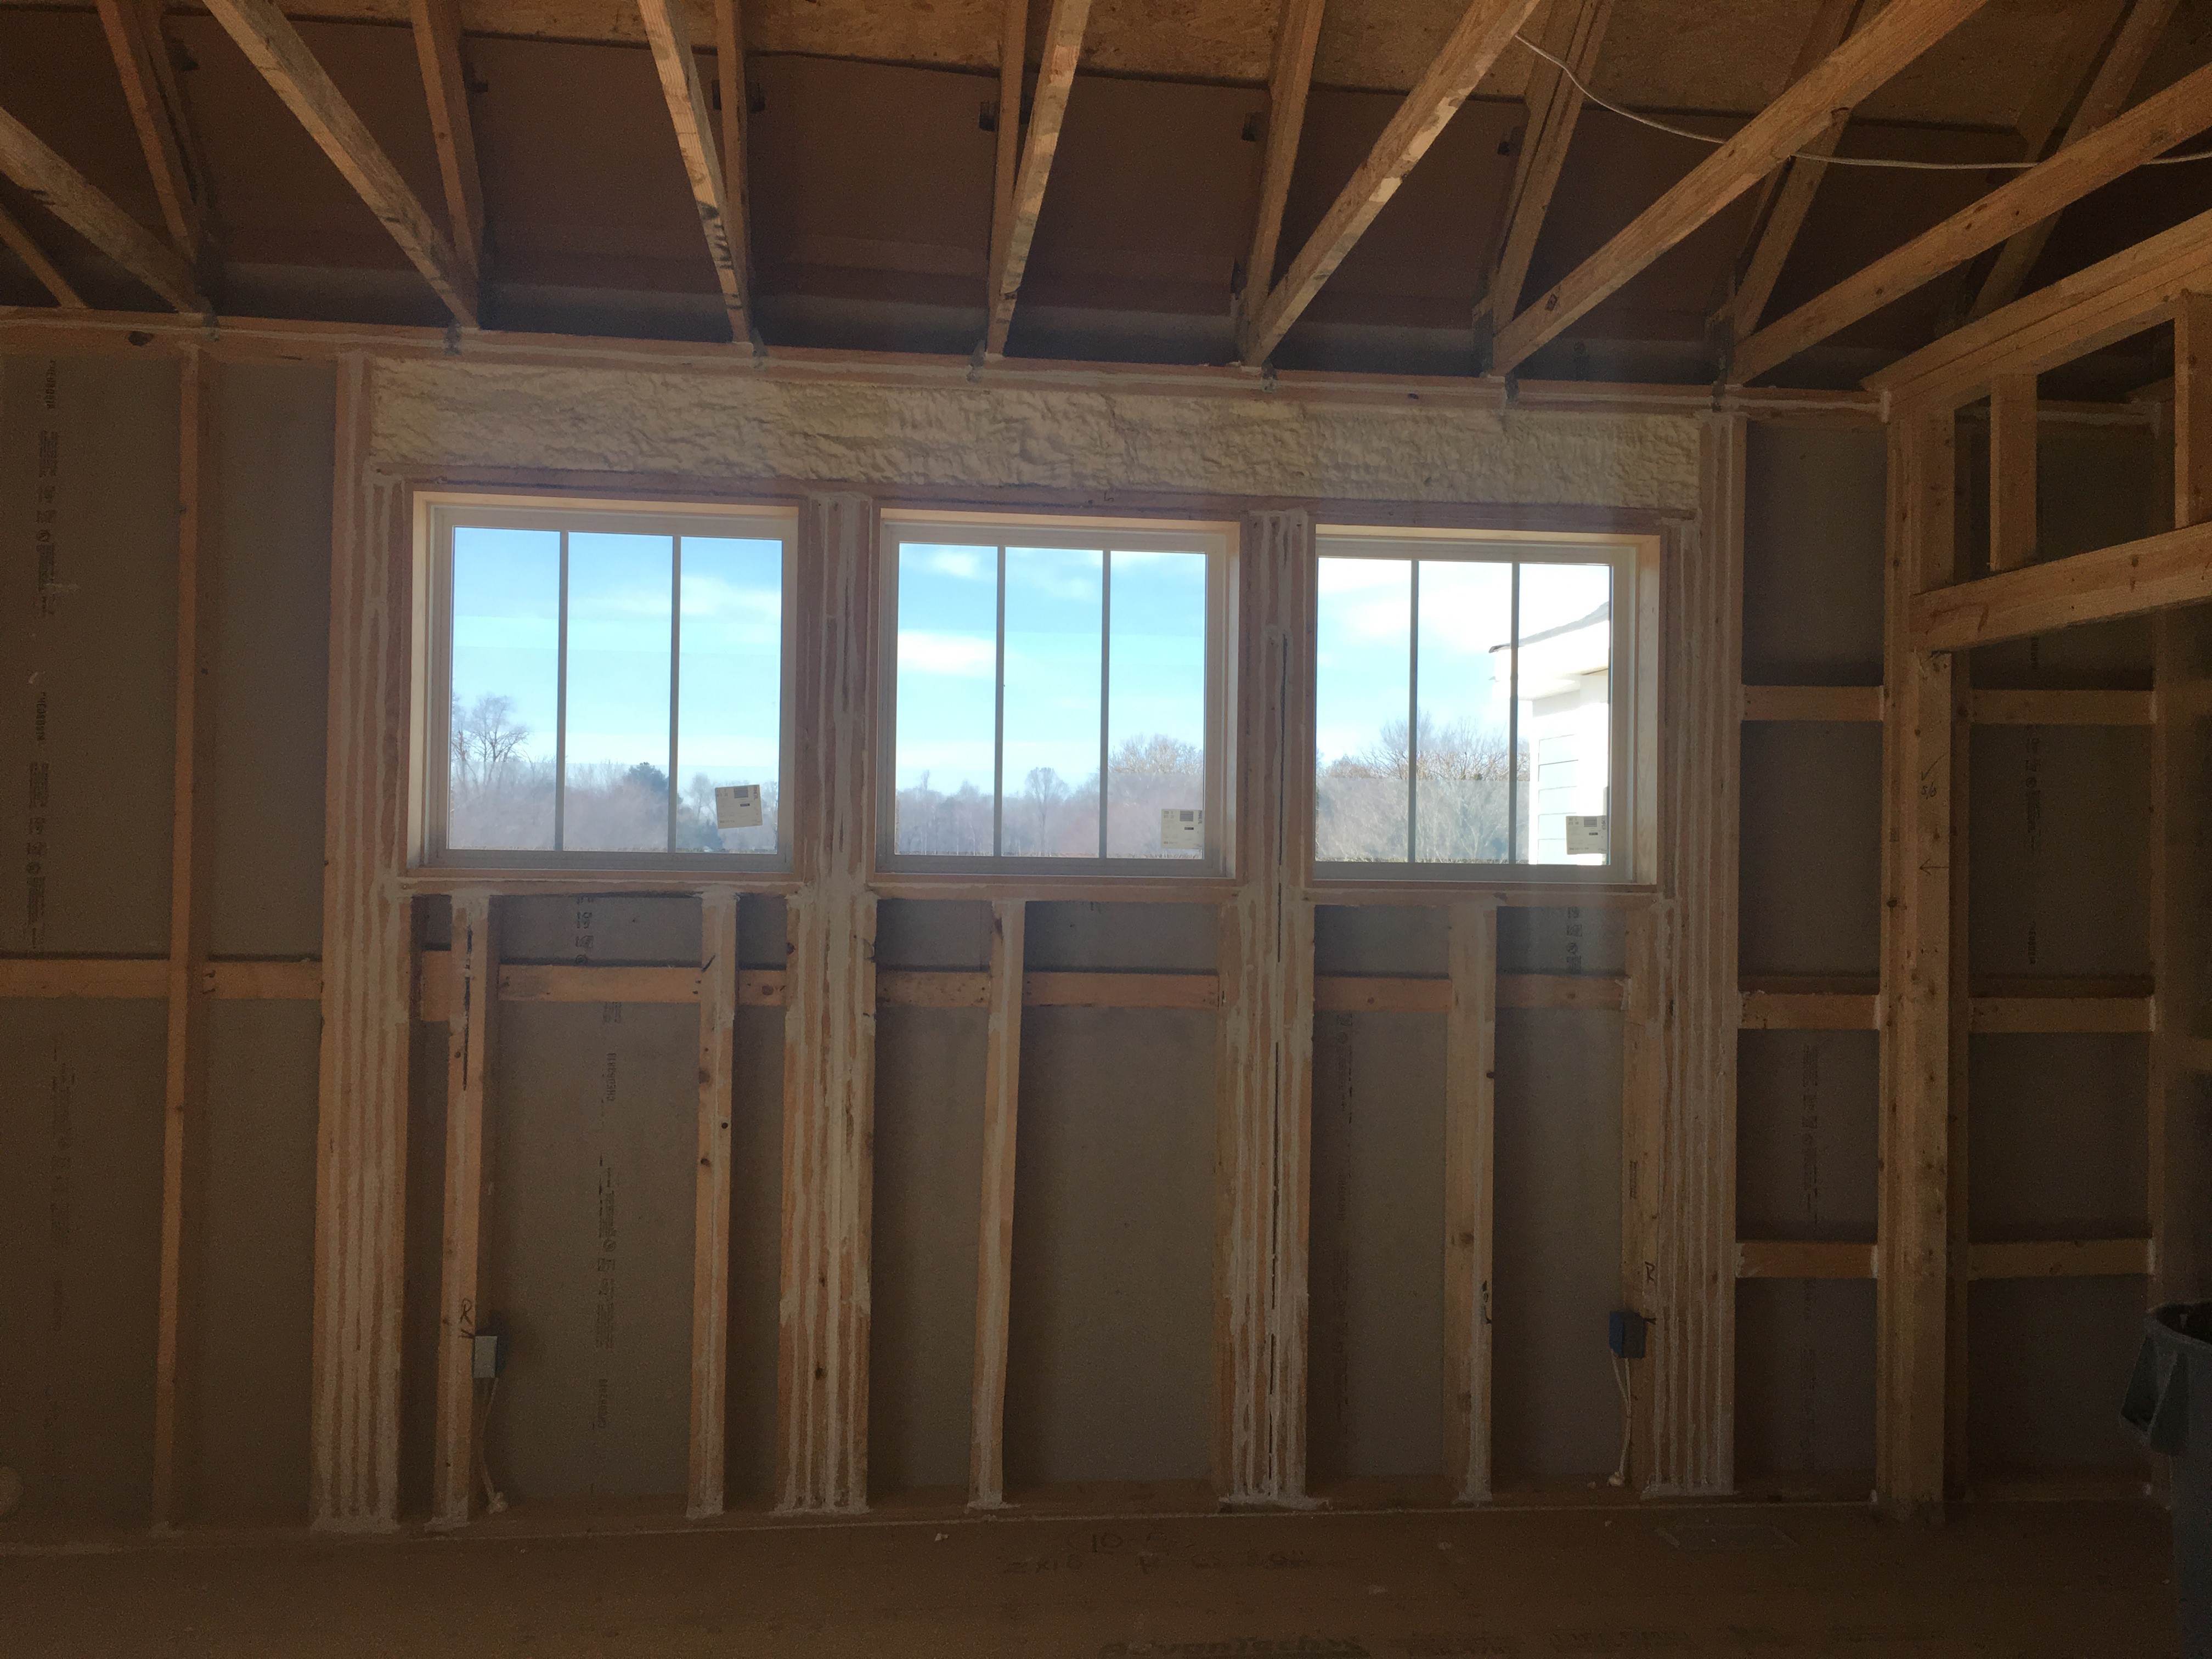
Right – The window header is filled with spray foam and sealant is used to air seal wood-to-wood seams; however, it would be preferable to design the wall to avoid so many stacked studs around the windows because they prevent wall insulation installation.
Image
Image
Image

Right – This attic knee wall and the floor joist cavity openings beneath it are being sealed and insulated with spray foam.
Image

Image
Image
Right – This ICAT recessed light is sprayed with foam to act as gasket against the drywall.
Image
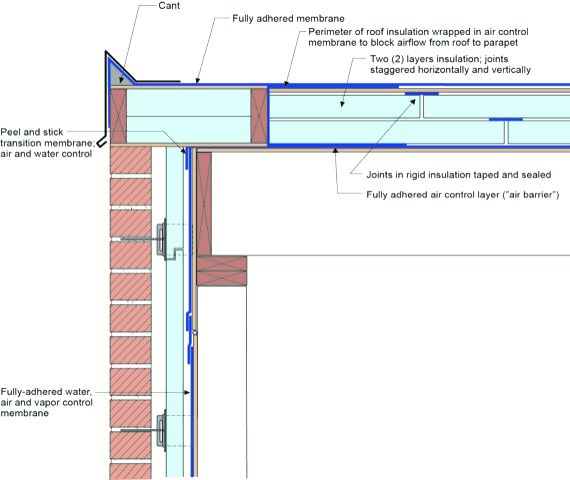
Right – This low-slope flat roof assembly has continuity of both the air and water barriers
Image

Right – This low-slope roof and parapet assembly has continuity of both the air and water barriers
Image
Image
Image

Image
Image
Right – This supply duct is thoroughly sealed at all joints with mastic to prevent air leakage and the duct is equipped with a damper to provide zoned heating and cooling along with other trunk ducts.
Image
Image
Image
Image

Right – Weatherstripping has been installed and remains in contact when the door is closed.
Image
Image
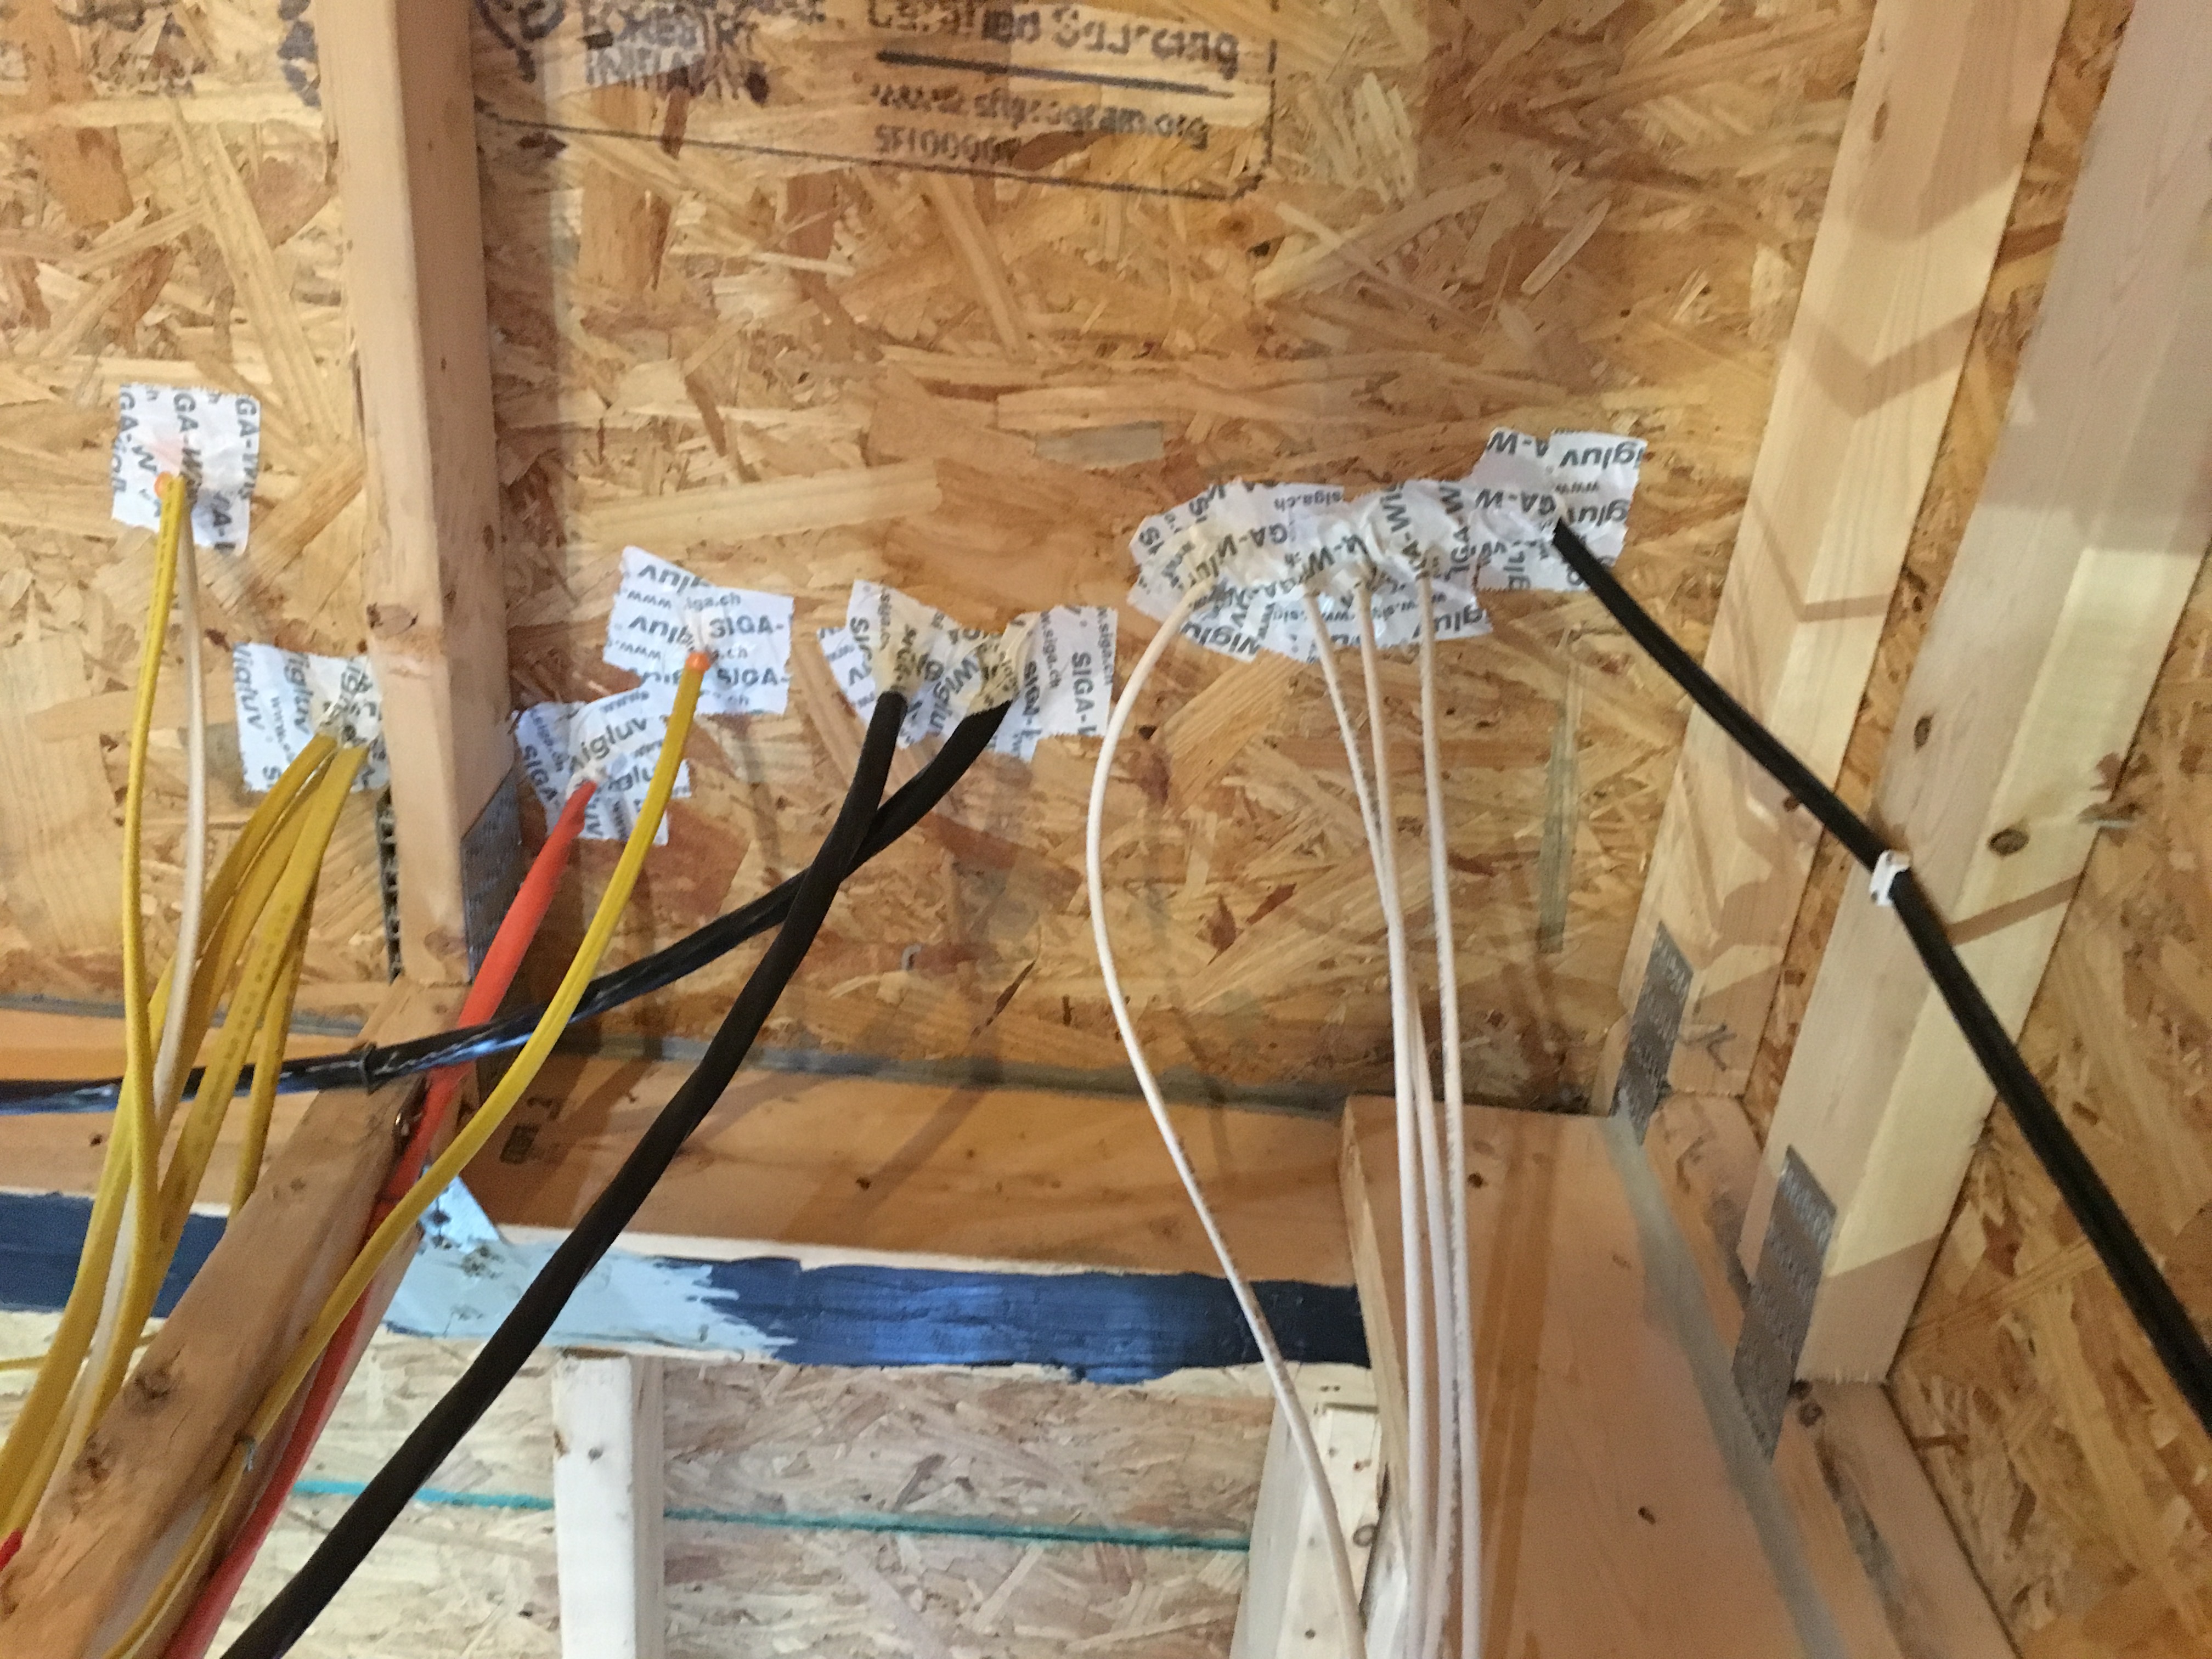
Right – Wiring holes in the exterior walls are sealed with canned spray foam to prevent air leakage into or out of the home.
Image
Image
Image
Image
Right- The rigid foam sheathing is taped at all seams before installing the metal lathe for stucco cladding.
Image
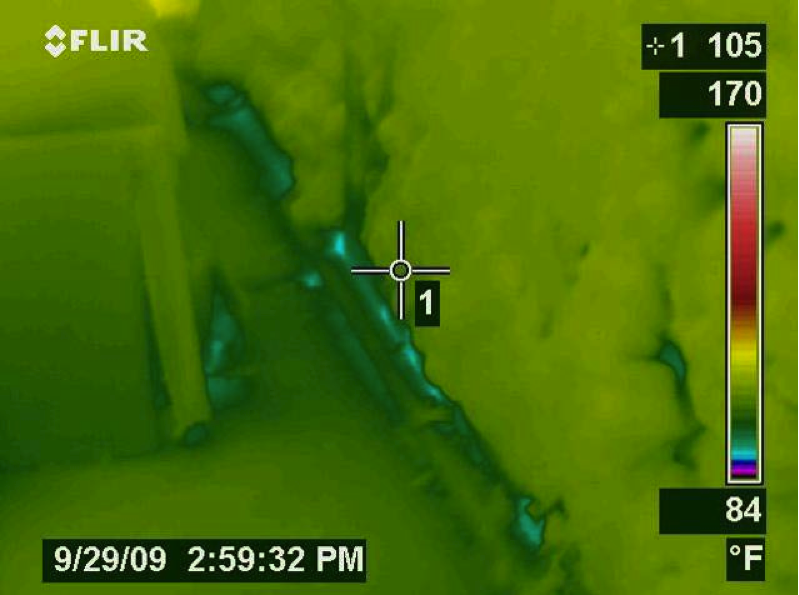
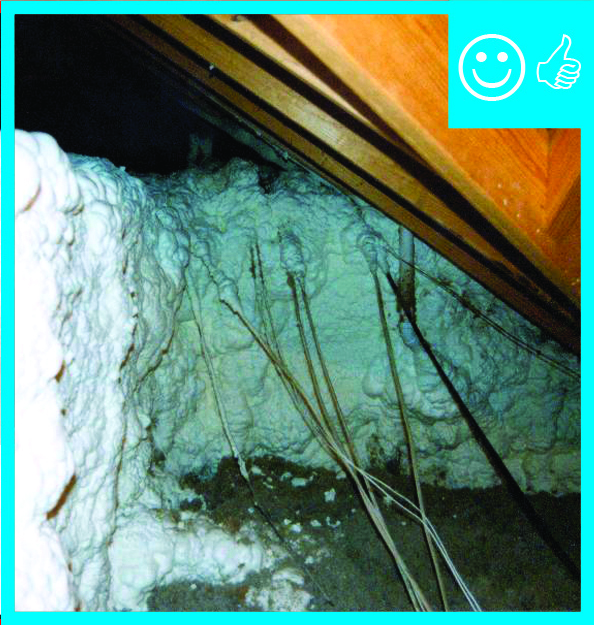
Right-- IR photo shows how effectively spray foam insulated/air sealed attic kneewall and the floor cavities under kneewall
Image
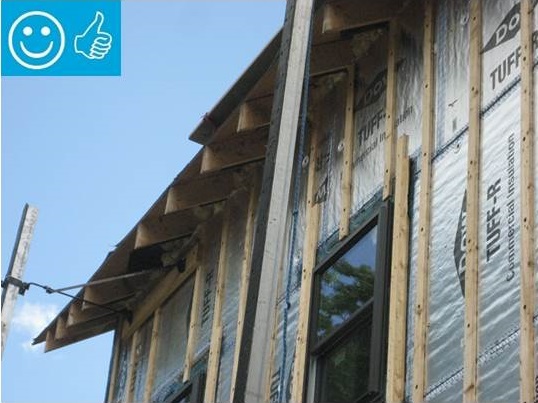
Right-Wall-insulating sheathing is extended up to roof rafters and sealed around the framing with spray foam
Image
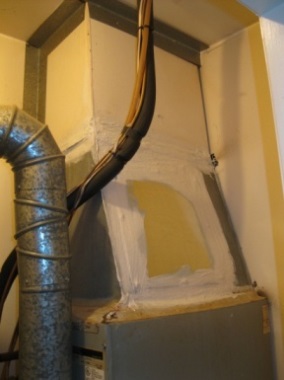
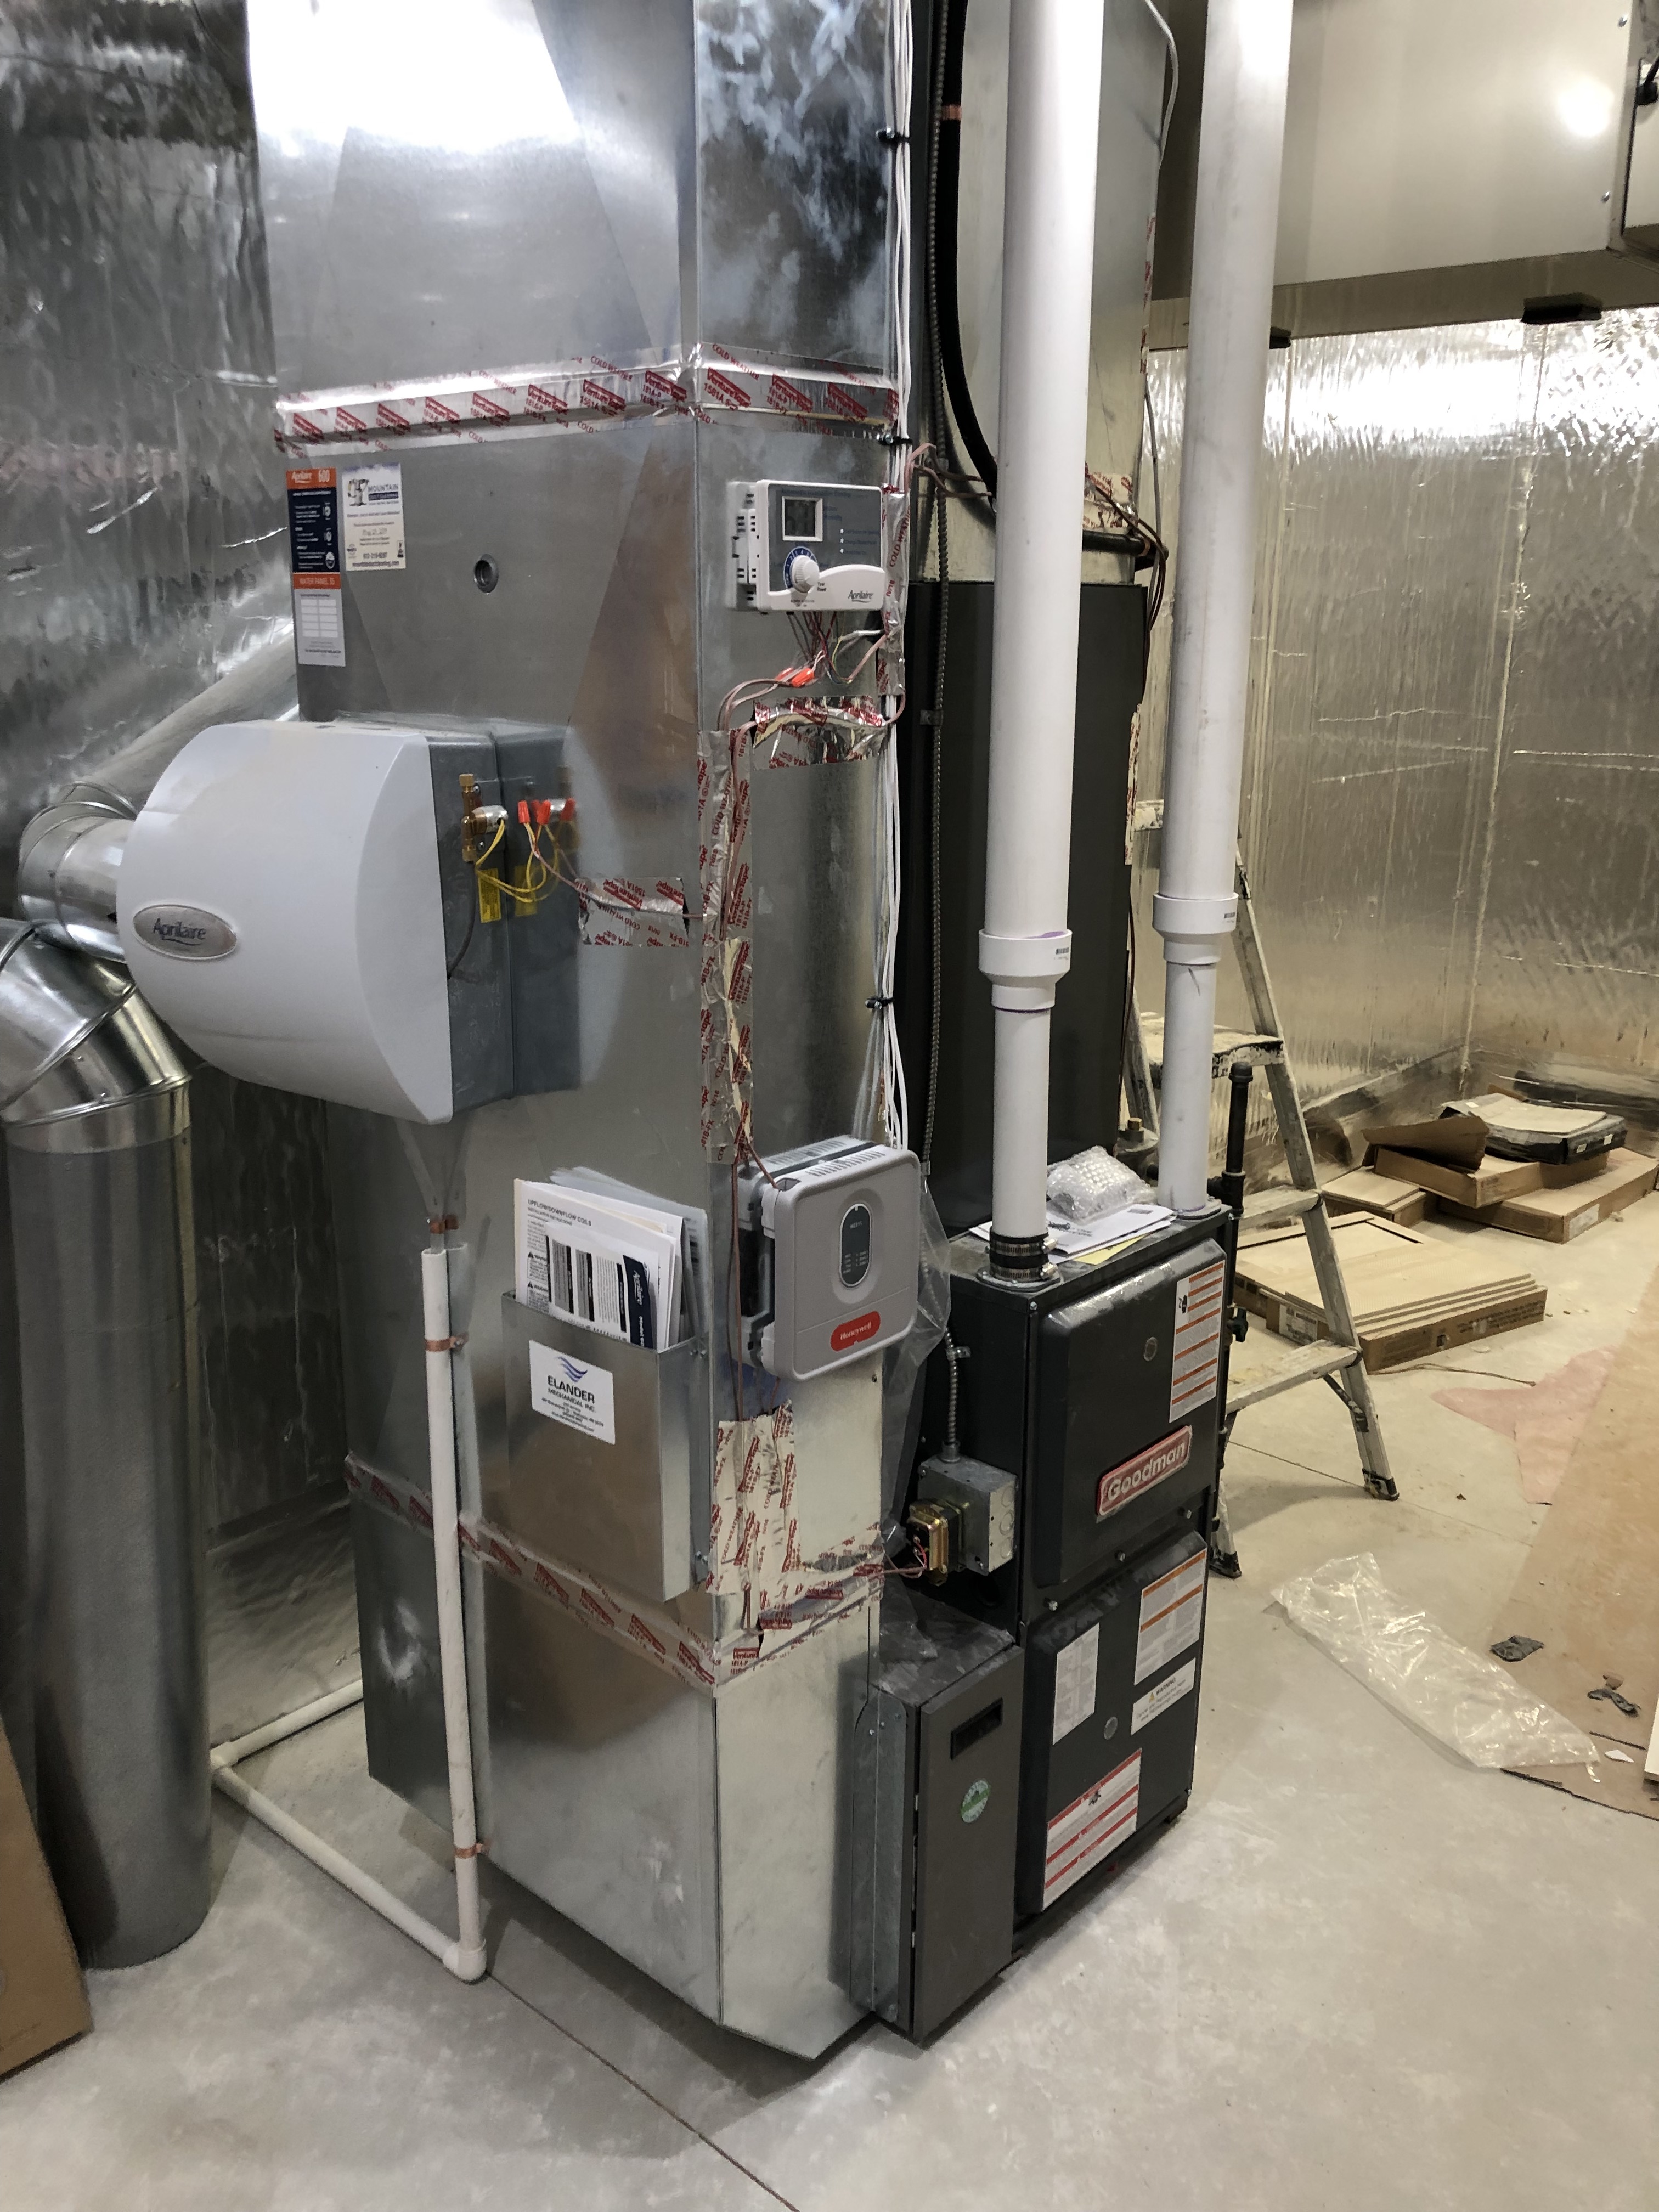
Right: A well-constructed air handler closet
Image

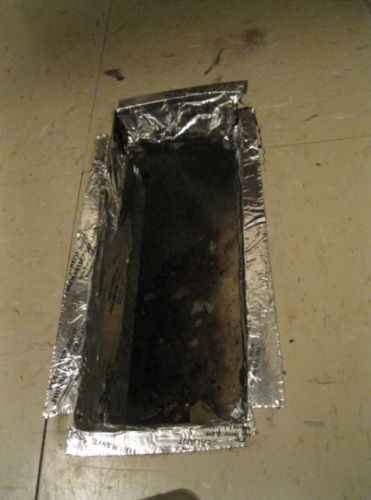
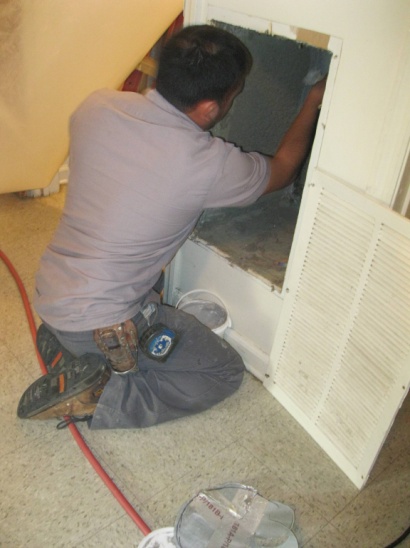
Right: Air seal all seams in the return air plenum before installing a new air handler
Image
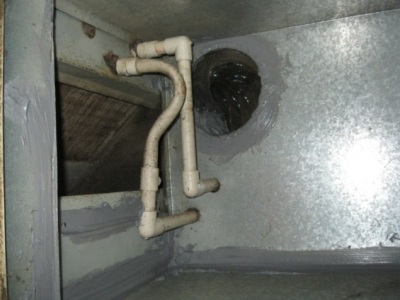
Right: Refrigerant piping is sealed where it exits the return plenum
Image
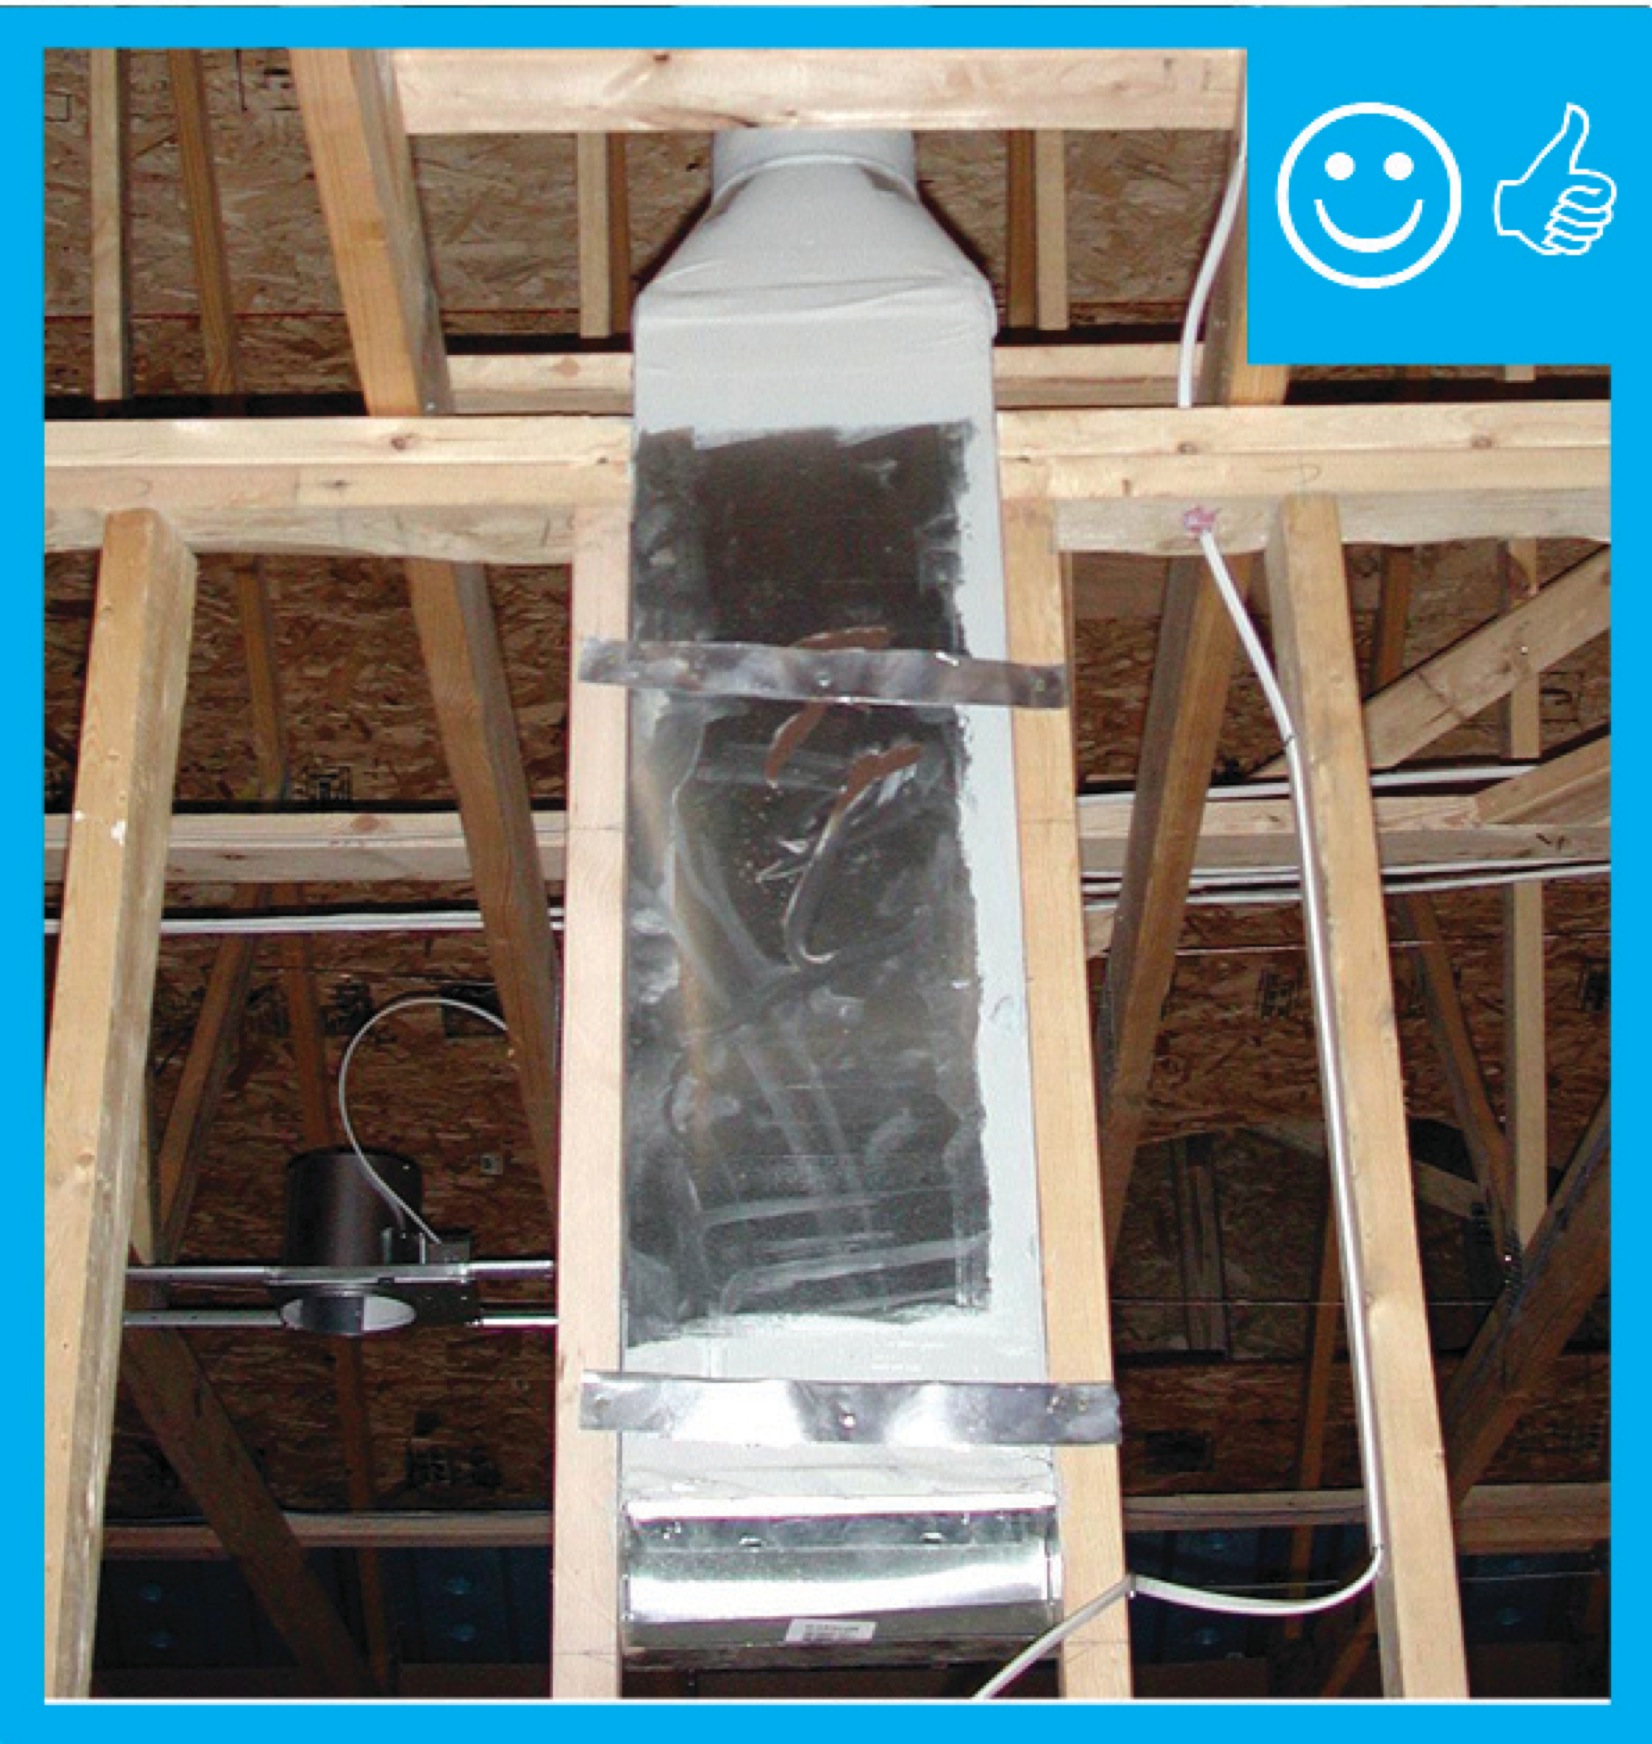
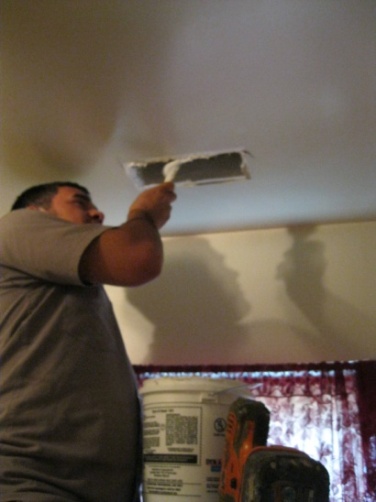
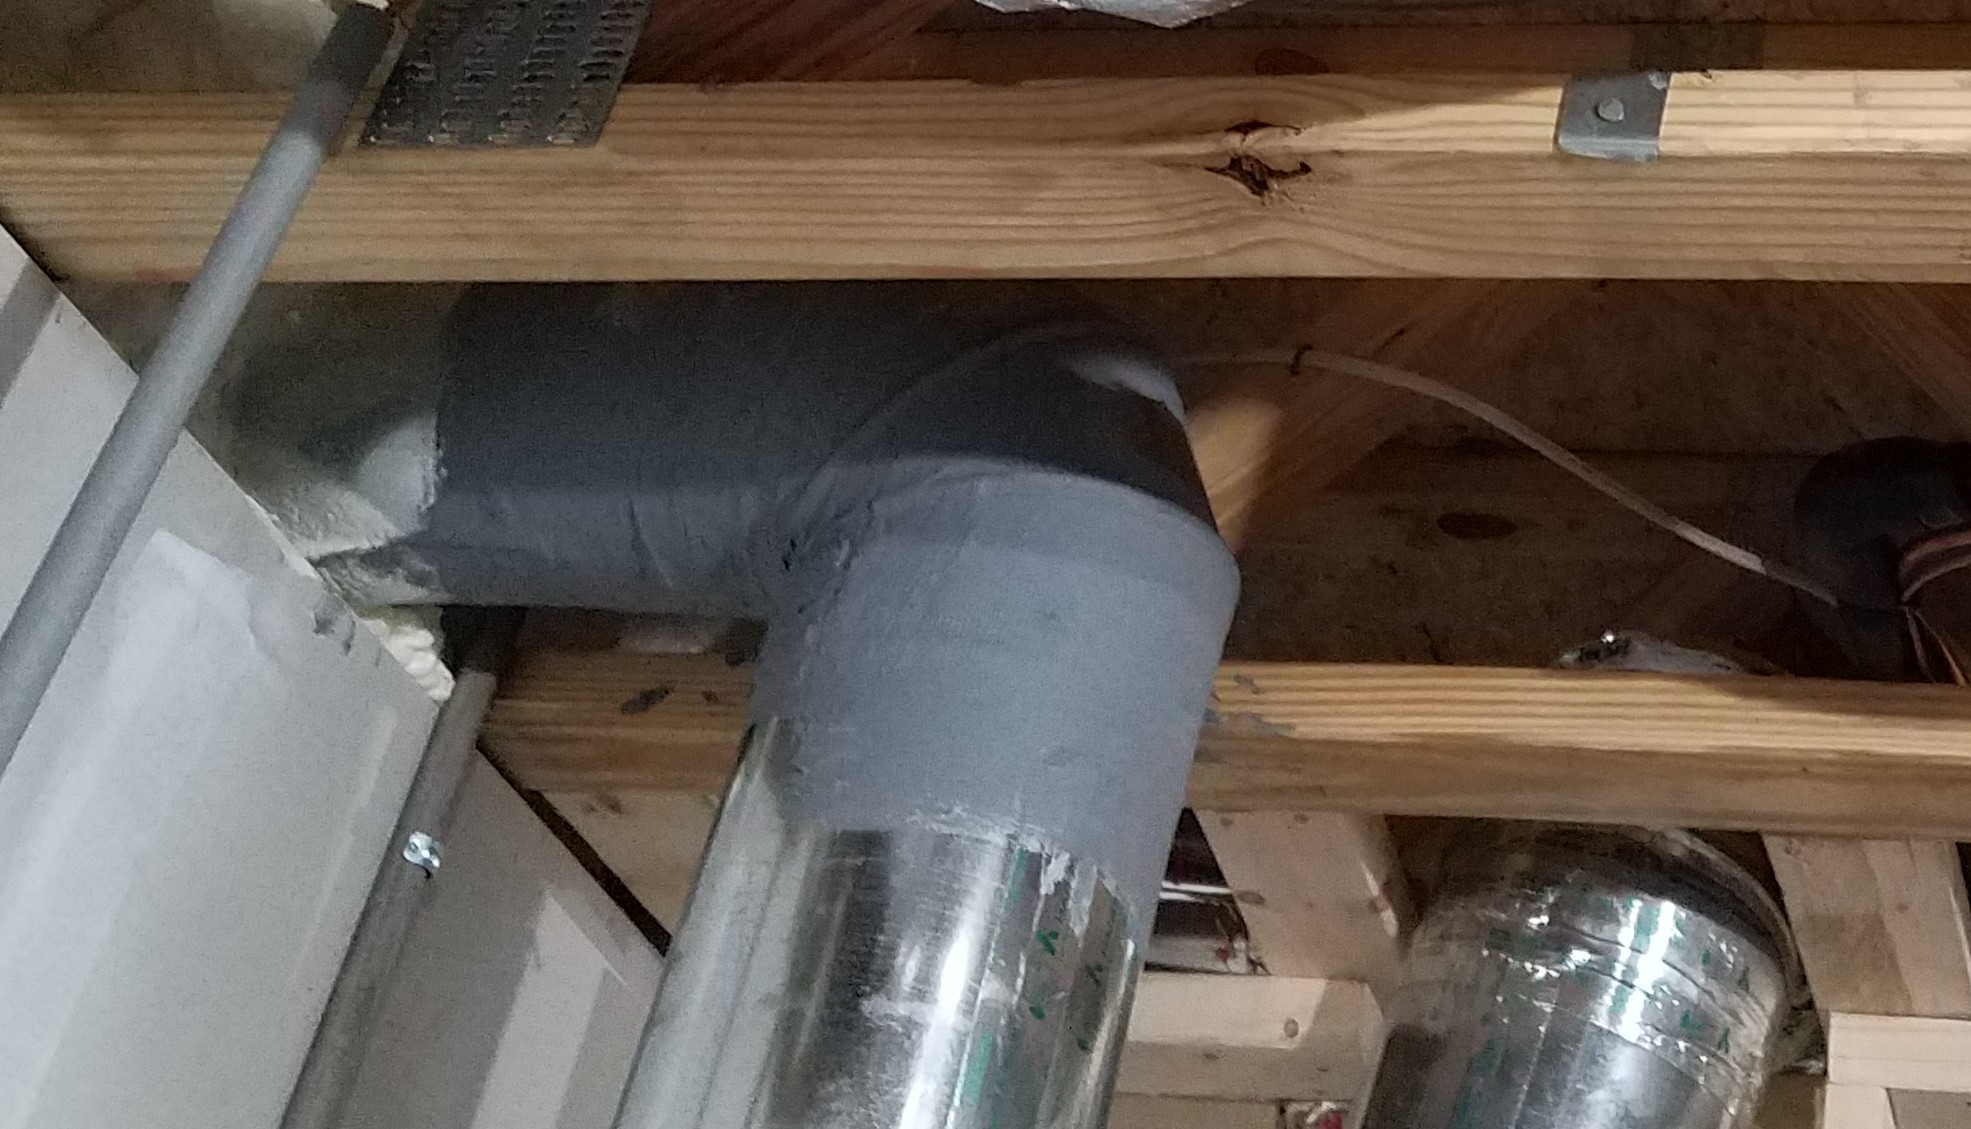
Right: Spray foam air seals and insulates raised ceiling duct chase
Image

Right: The bottom of the air handler cabinet is well sealed to the return platform
Image
Right: The plenum liner is well sealed to the filter-backed grille
Image
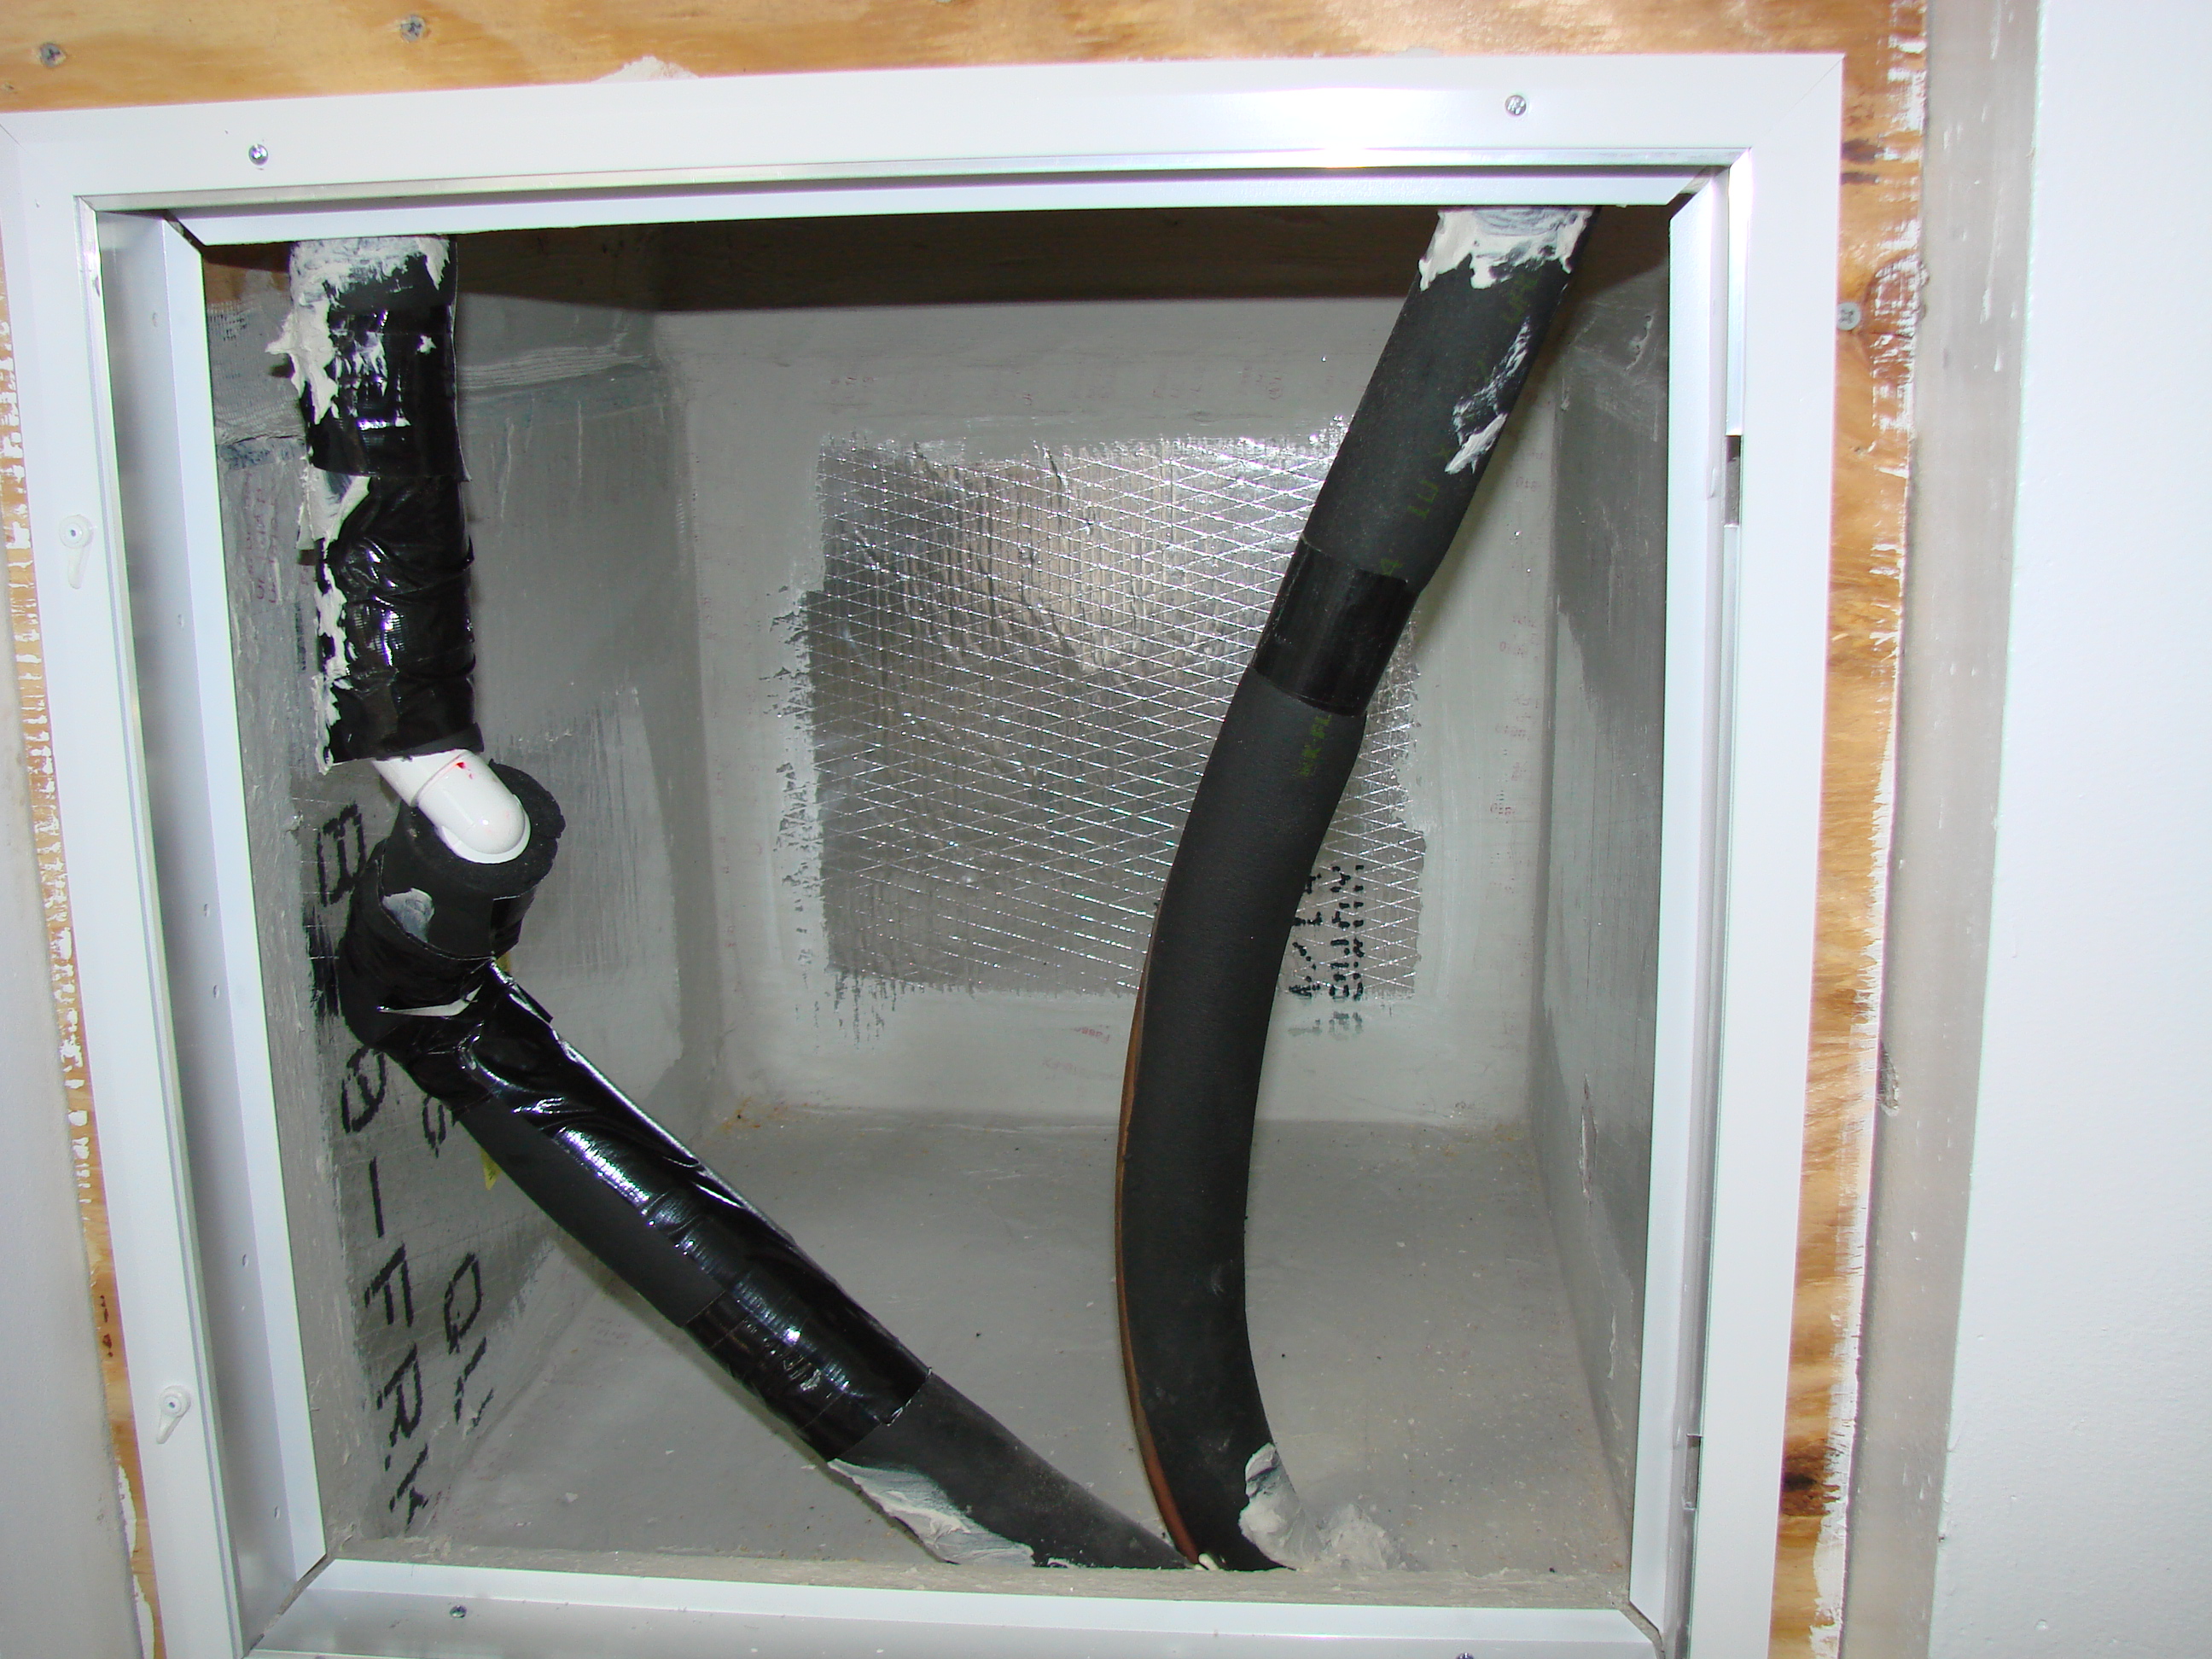
Right: Use mastic to air seal the return air plenum and to seal around refrigerant lines coming from the slab in the floor of the return
Image
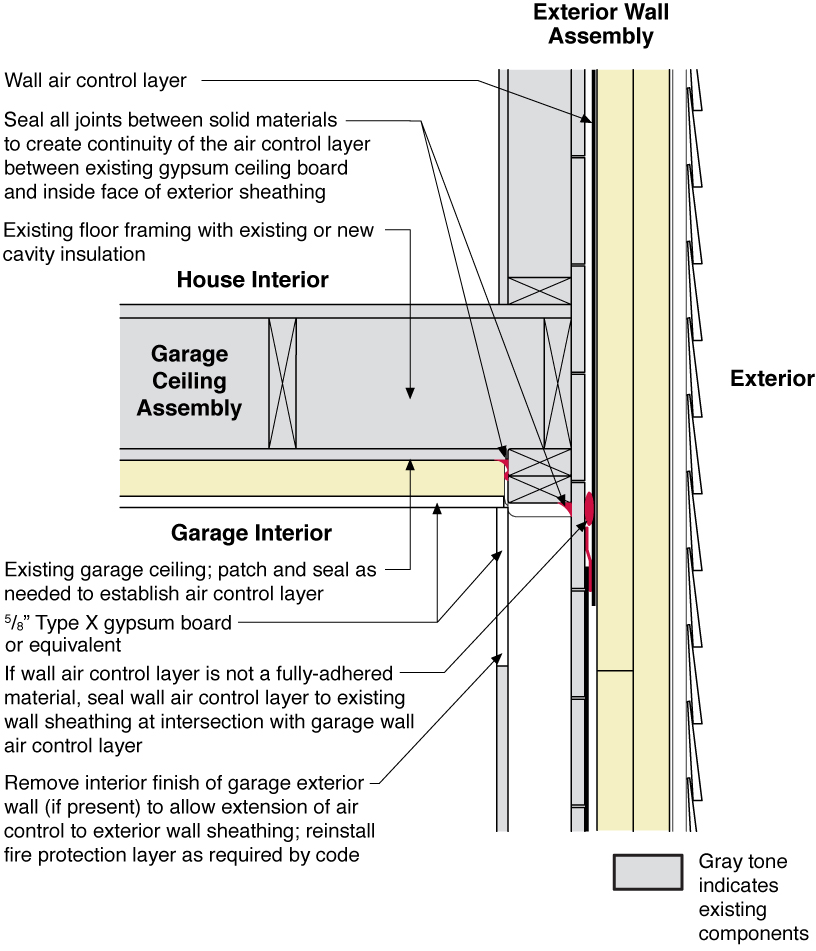
Rigid foam insulating sheathing installed over an existing garage ceiling with retrofits to air seal exterior wall before adding exterior wall insulating sheathing
Image

Rigid foam insulating sheathing is installed on existing garage ceiling and covered with a new gypsum board fire protection layer installed over the foam.
Image
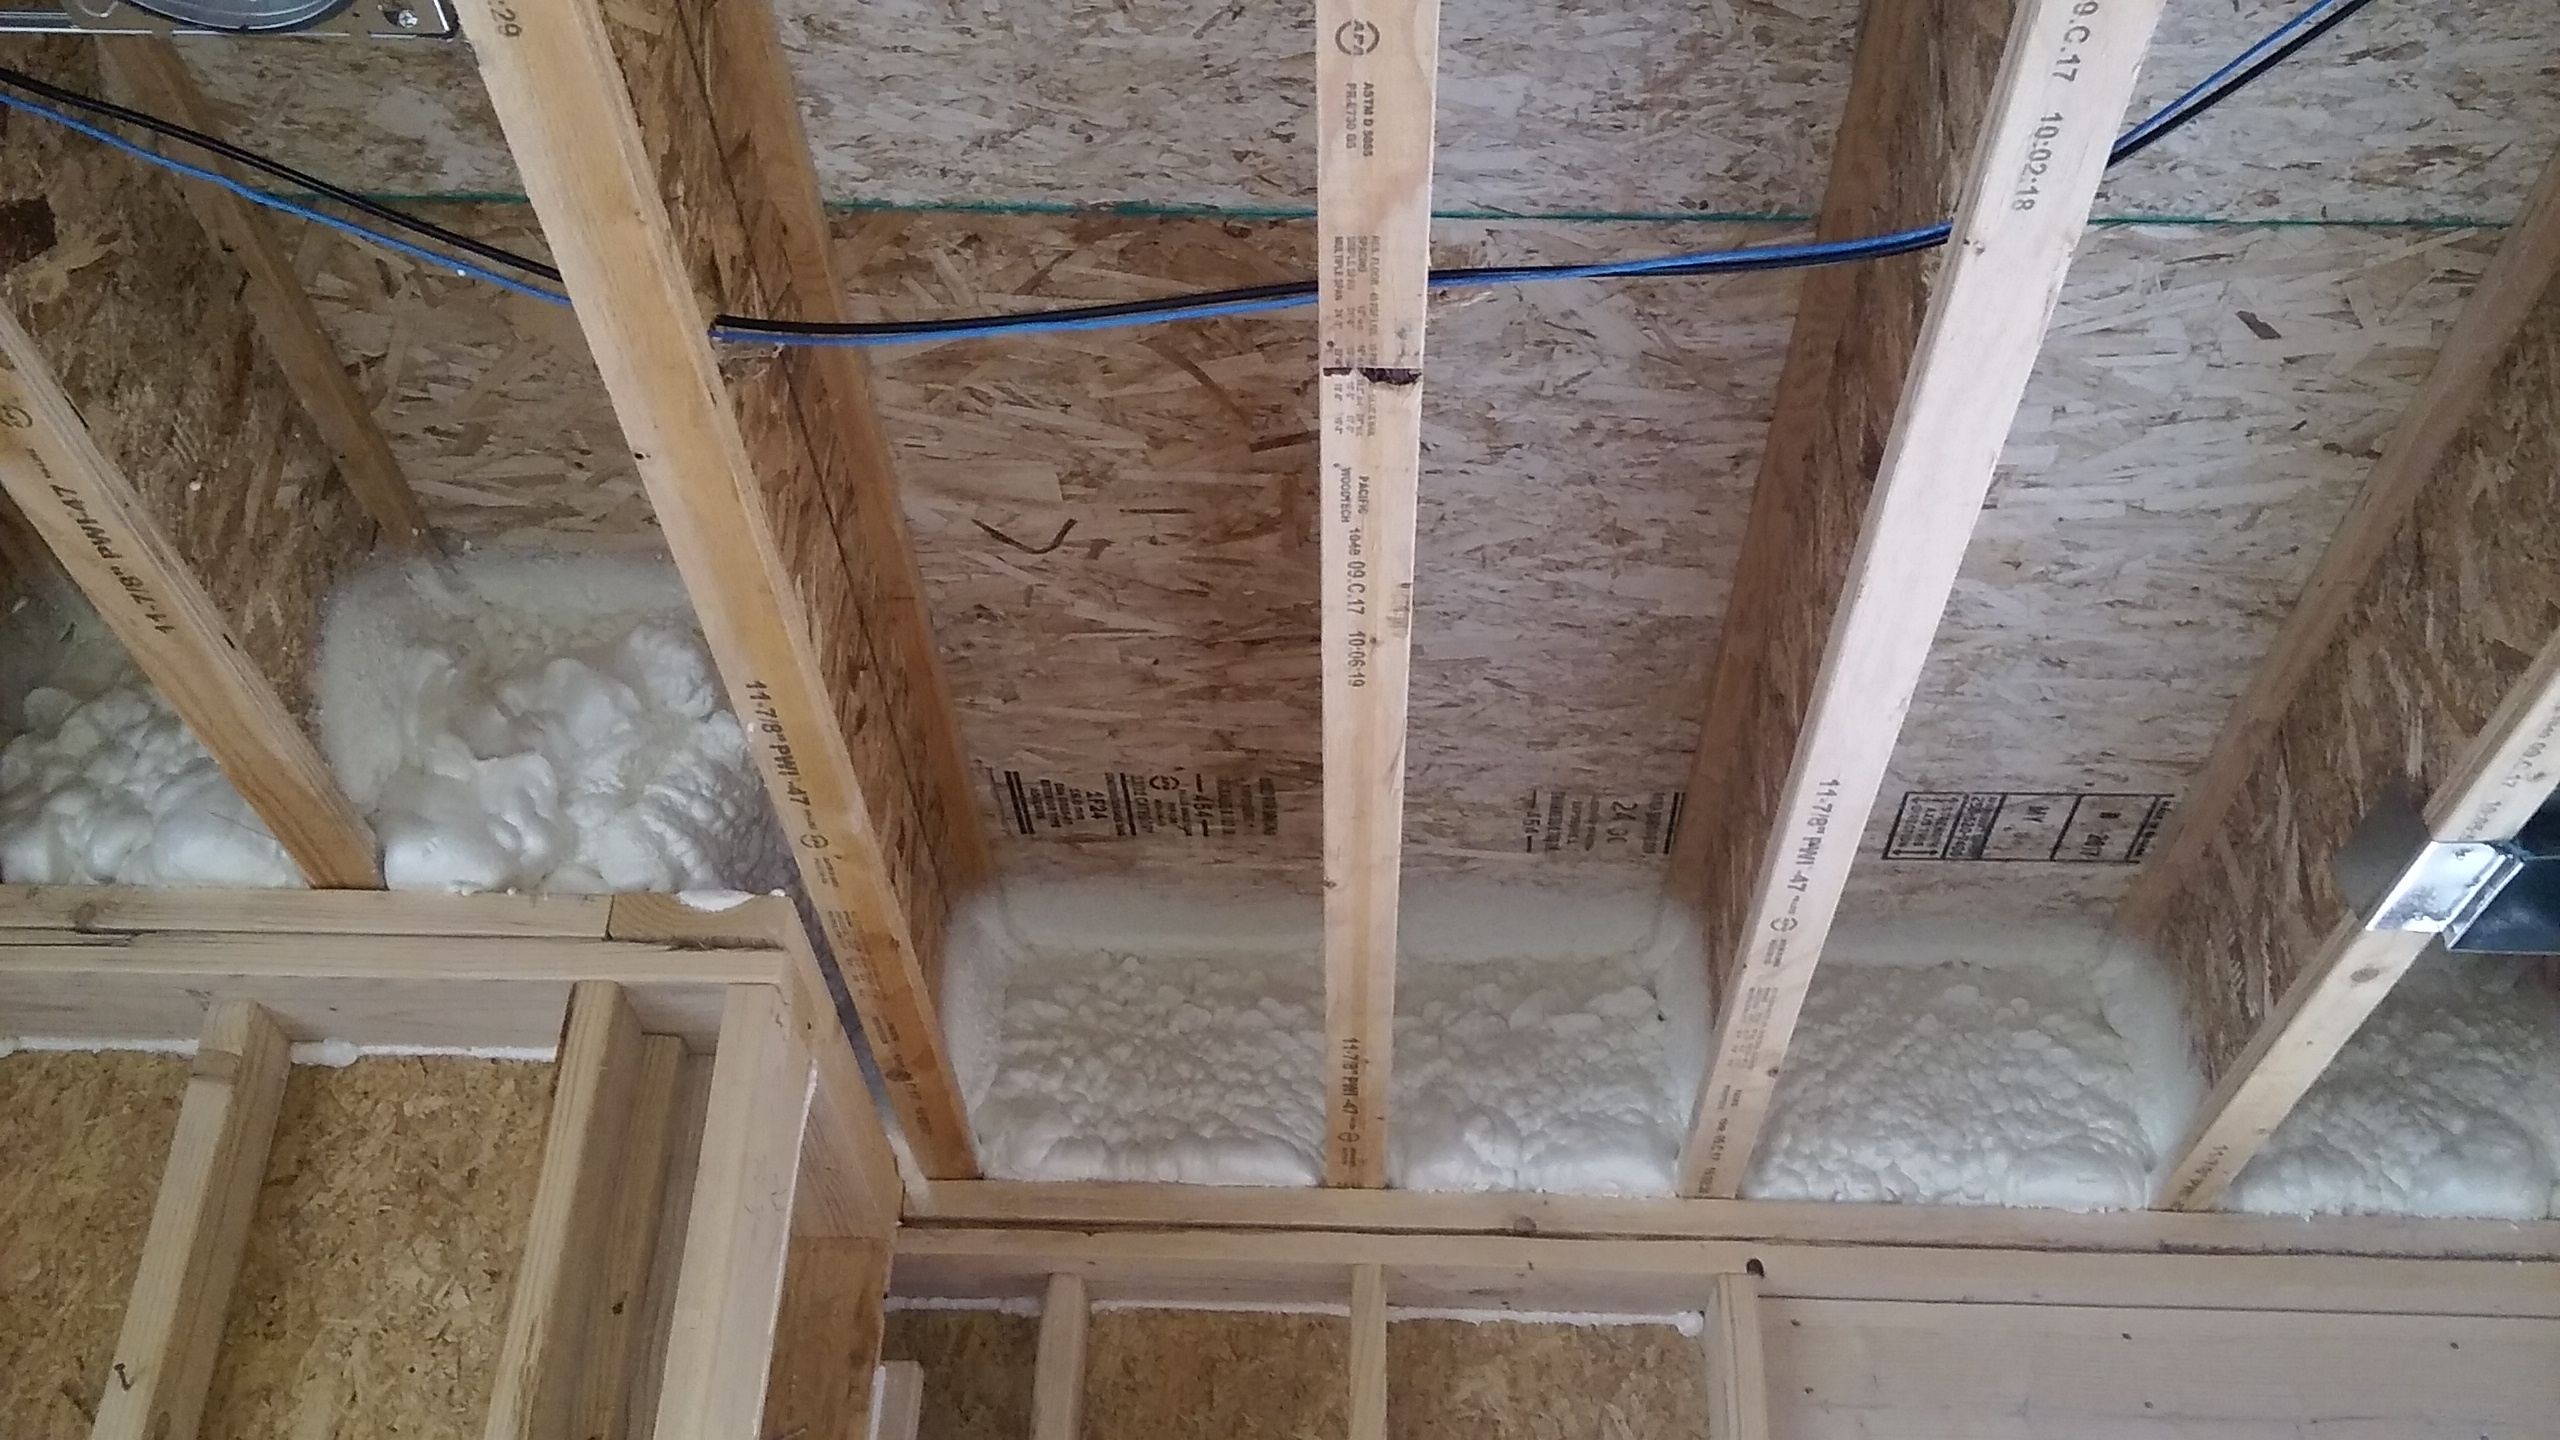
Rim joists are insulated with R-20 of open-cell spray foam which is air sealing and insulating but vapor permeable.
Image
Image
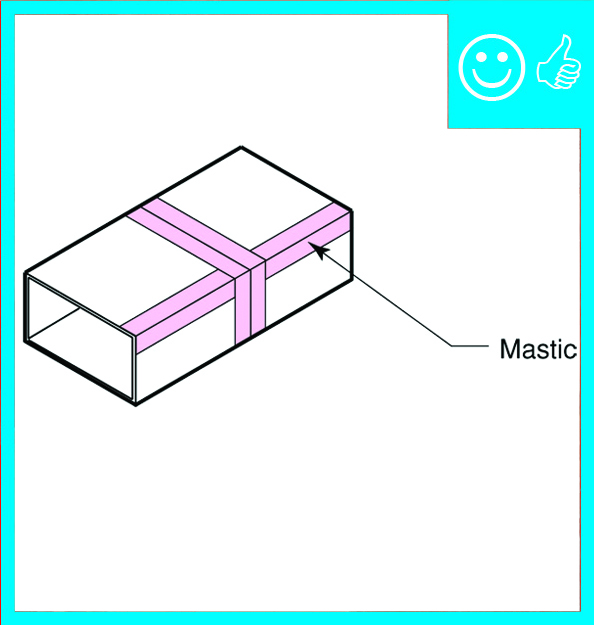
Run-out duct is sealed with mastic
Image
Image
Image
Image