Showing results 1 - 50 of 68
Image
Image
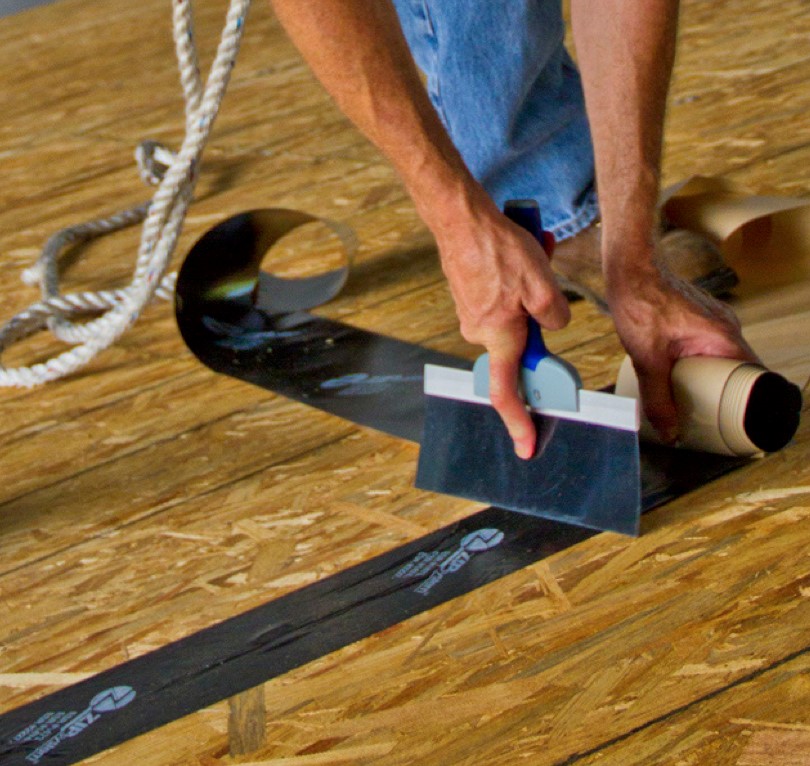
Apply self-adhesive flashing over top edge of the wall flashing, diverter, and housewrap
Image
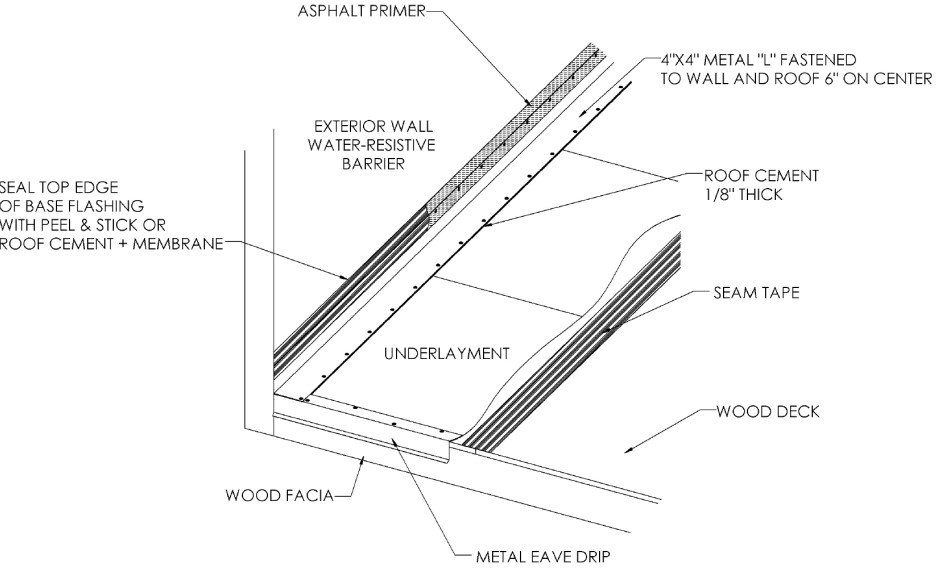
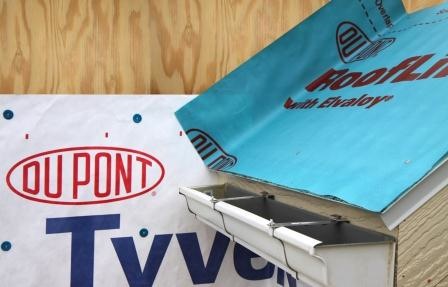
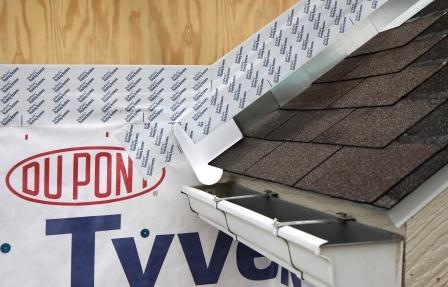
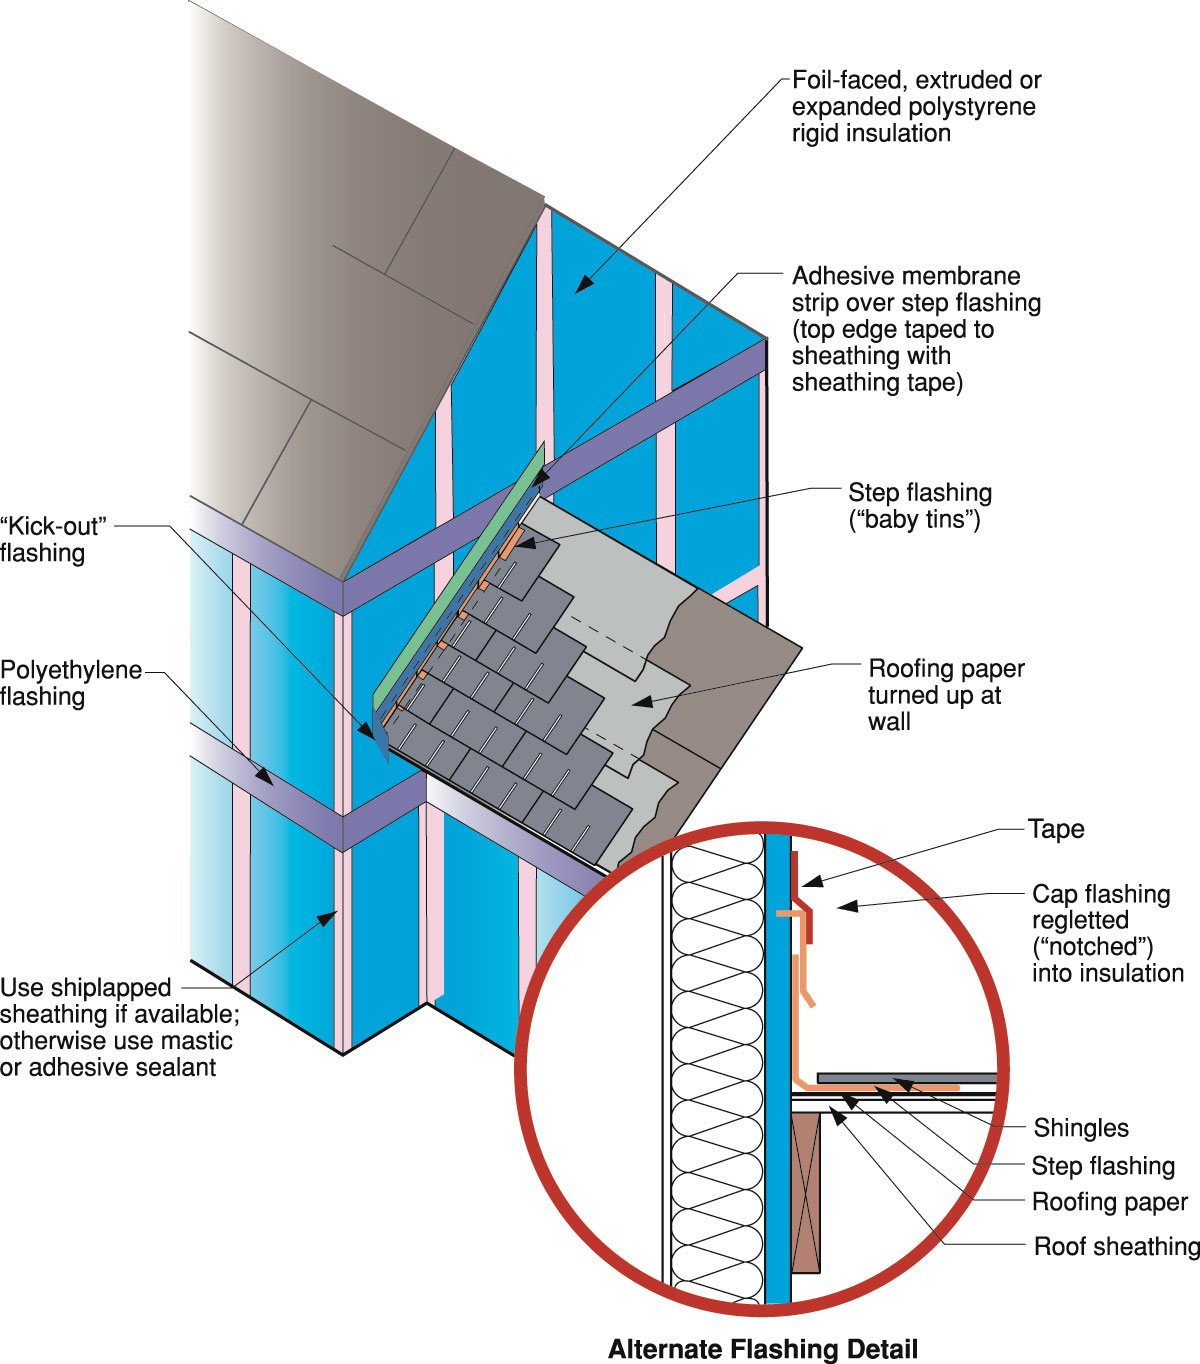
Continuous L-metal flashing integrated with underlayment at roof-wall intersections
Image
Image
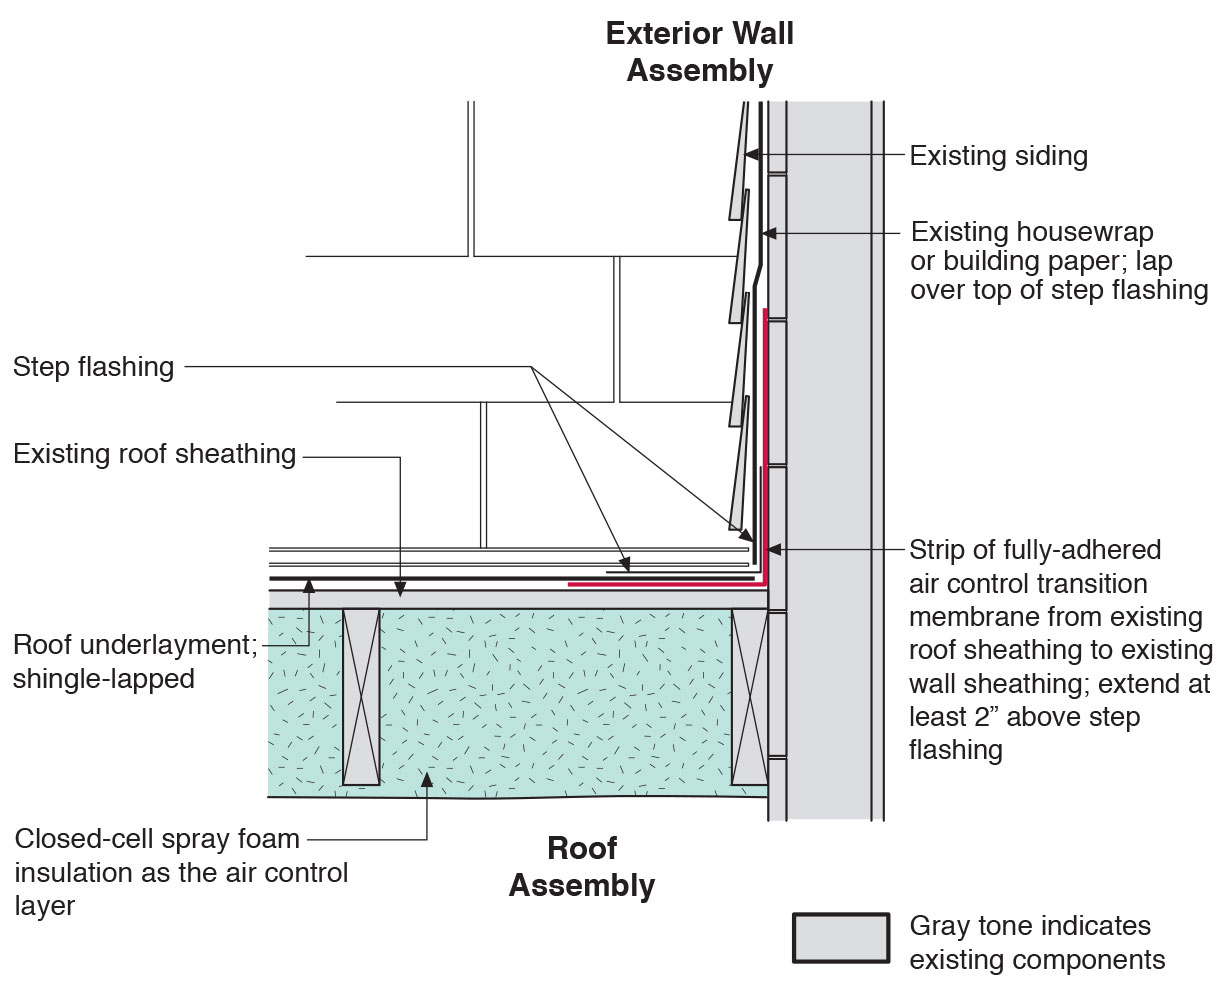
Existing wall-to-lower roof transition retrofitted with a new strip of fully adhered air control transition membrane, new step flashing, new roof underlayment, and new cladding
Image
Existing wall-to-lower roof transition with a new strip of fully adhered air control transition membrane, new step flashing, new roof underlayment, and new cladding – view from eave
Image
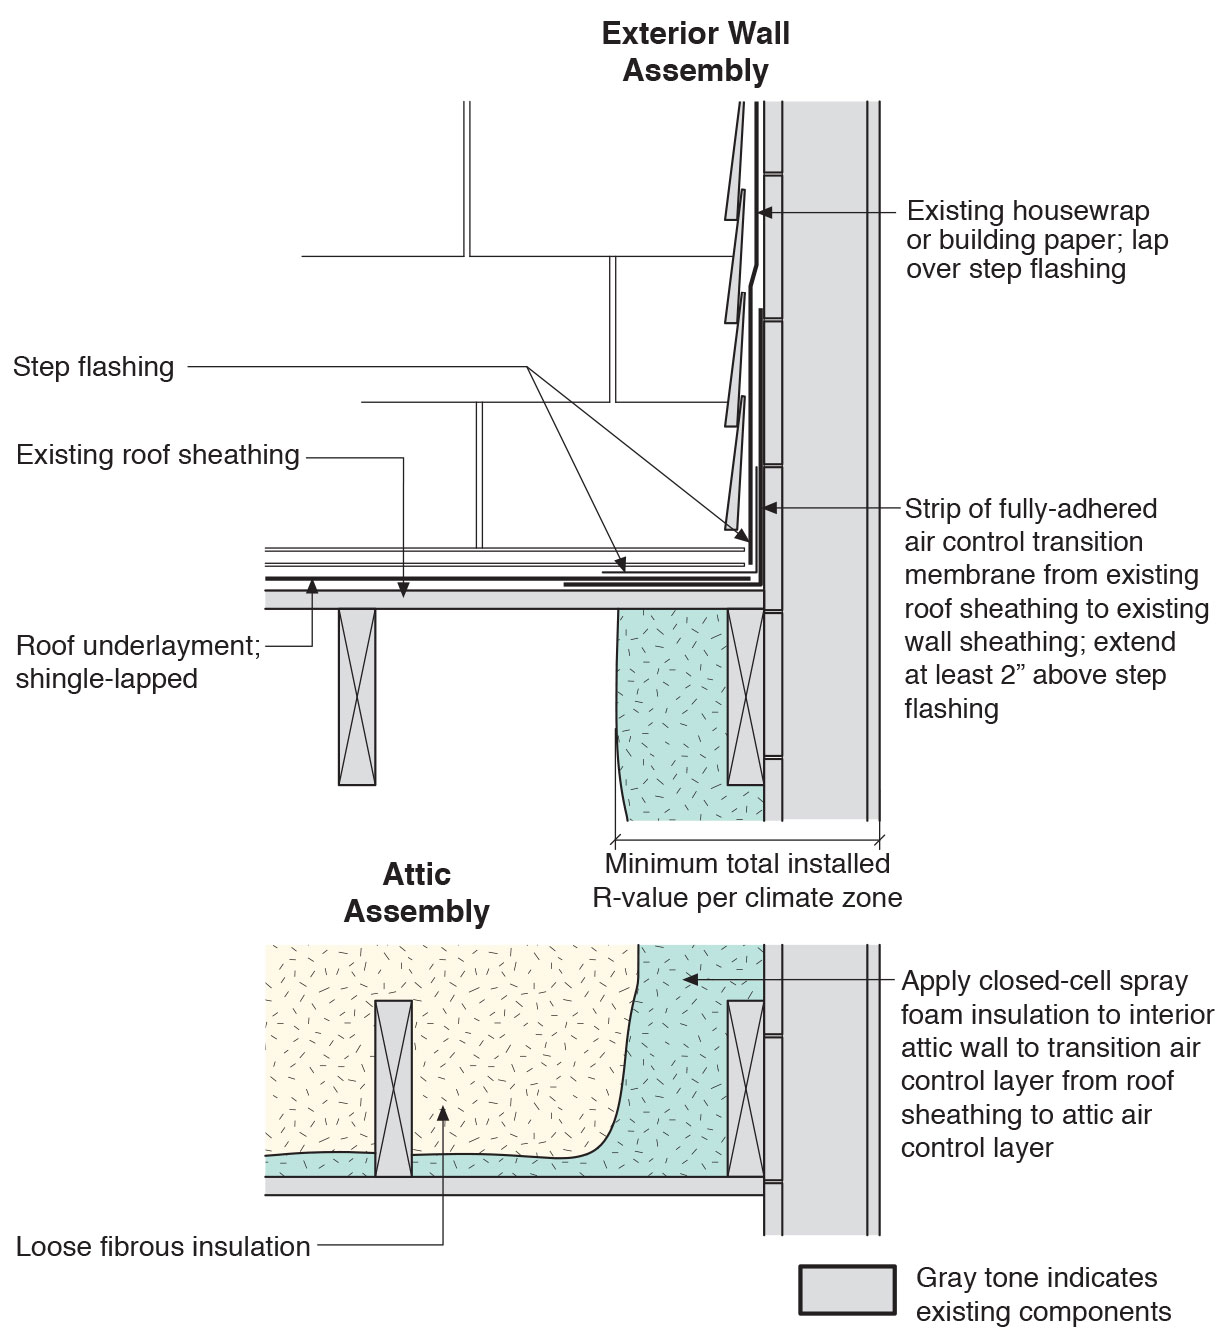
Existing wall-to-lower roof with attic transition with a new strip of fully adhered air control transition membrane, new step flashing, new roof underlayment, and new cladding – view from eave
Image
Image
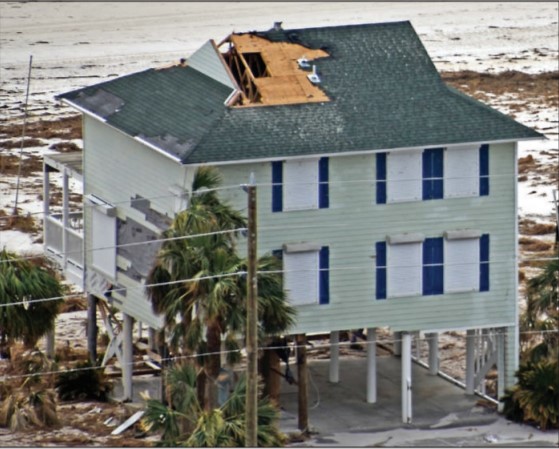
High winds pulled the asphalt shingles and sheathing panels off this coastal home, although storm shutters protected the windows
Image
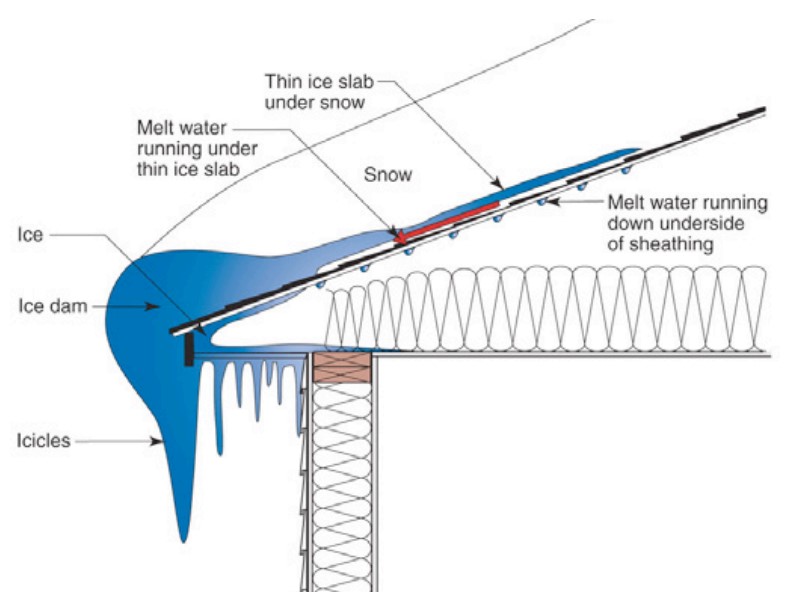
Ice dams form when warmth from the attic causes roof snow to melt and flow to roof eaves where it refreezes at the colder overhang and forms a buildup of ice causing more snowmelt to puddle where it can wick back through shingles and leak into the attic
Image
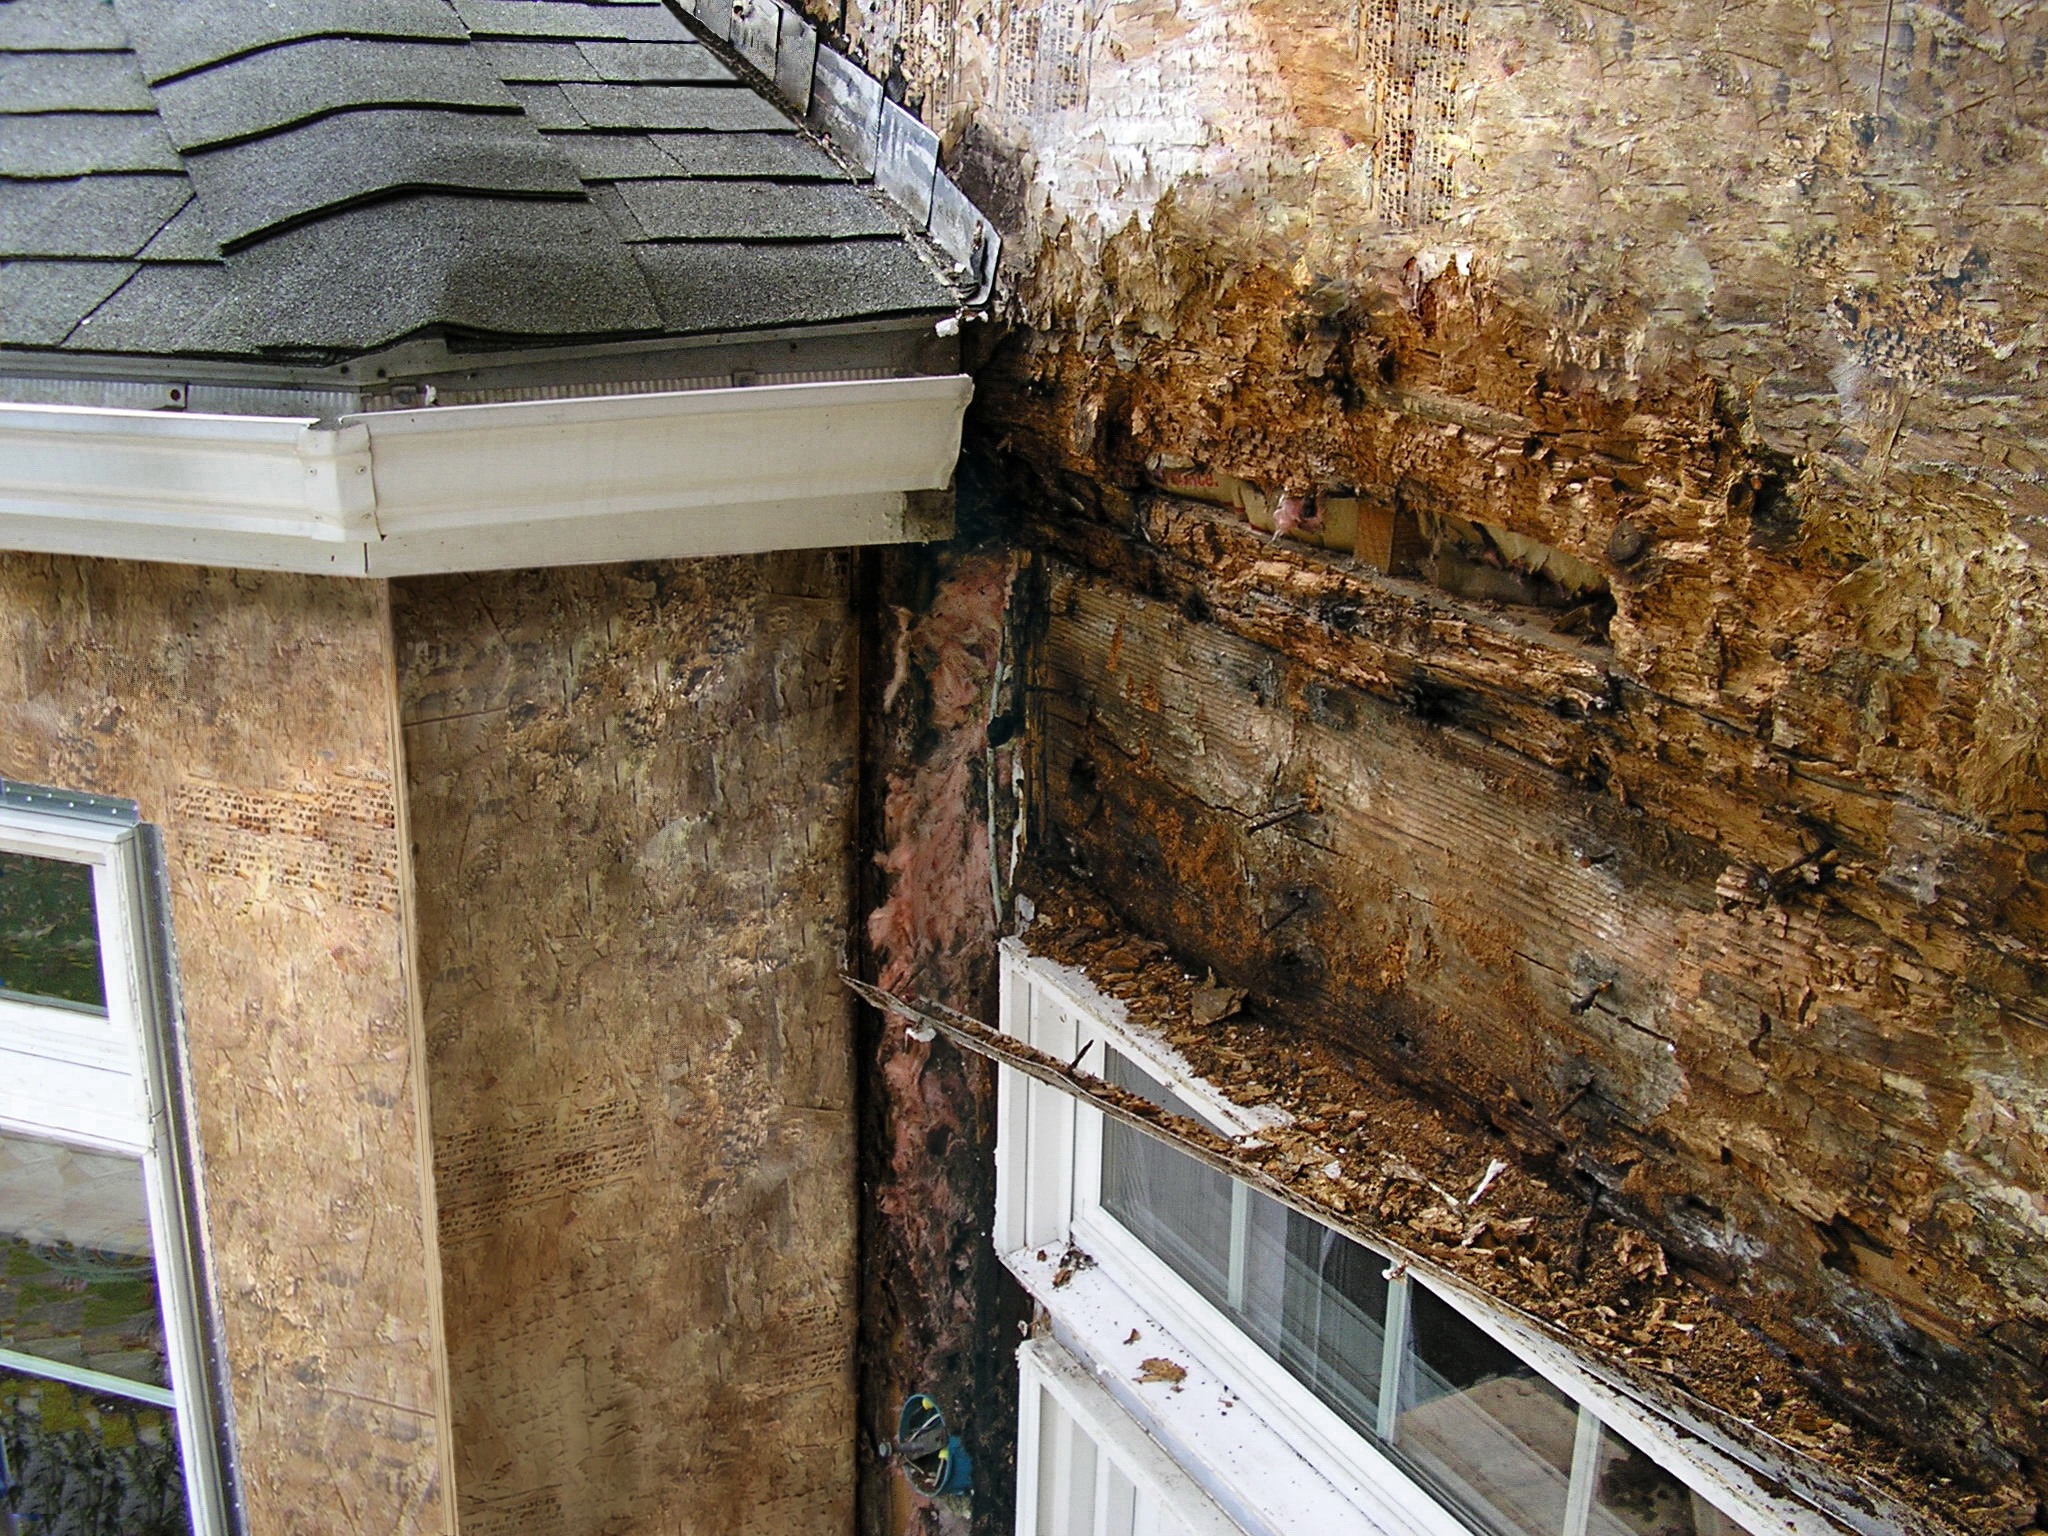
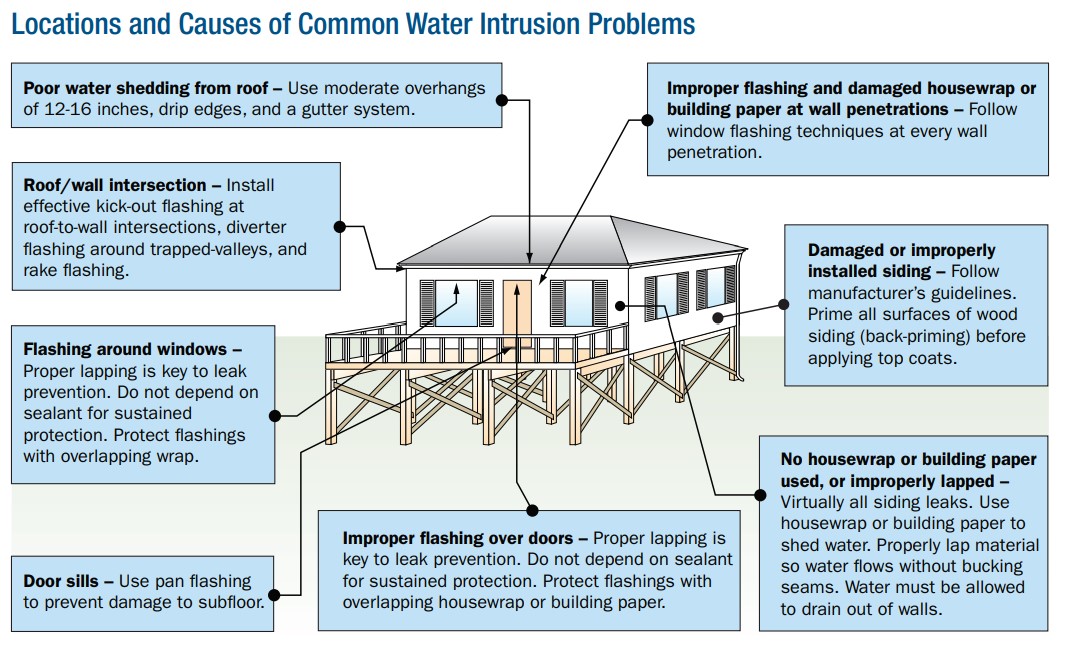
Improper flashing can allow rain water into walls, causing significant damage
Image

Image
Image
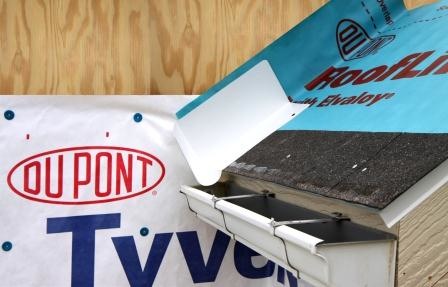
Install shingle starter strip then kick-out diverter; attach to roof deck but not sidewall
Image

Image
Image
Image
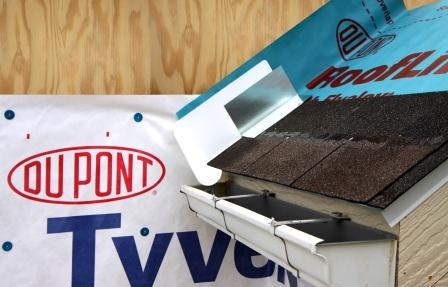
Place first shingle and next section of sidewall flashing over upper edge of diverter
Image
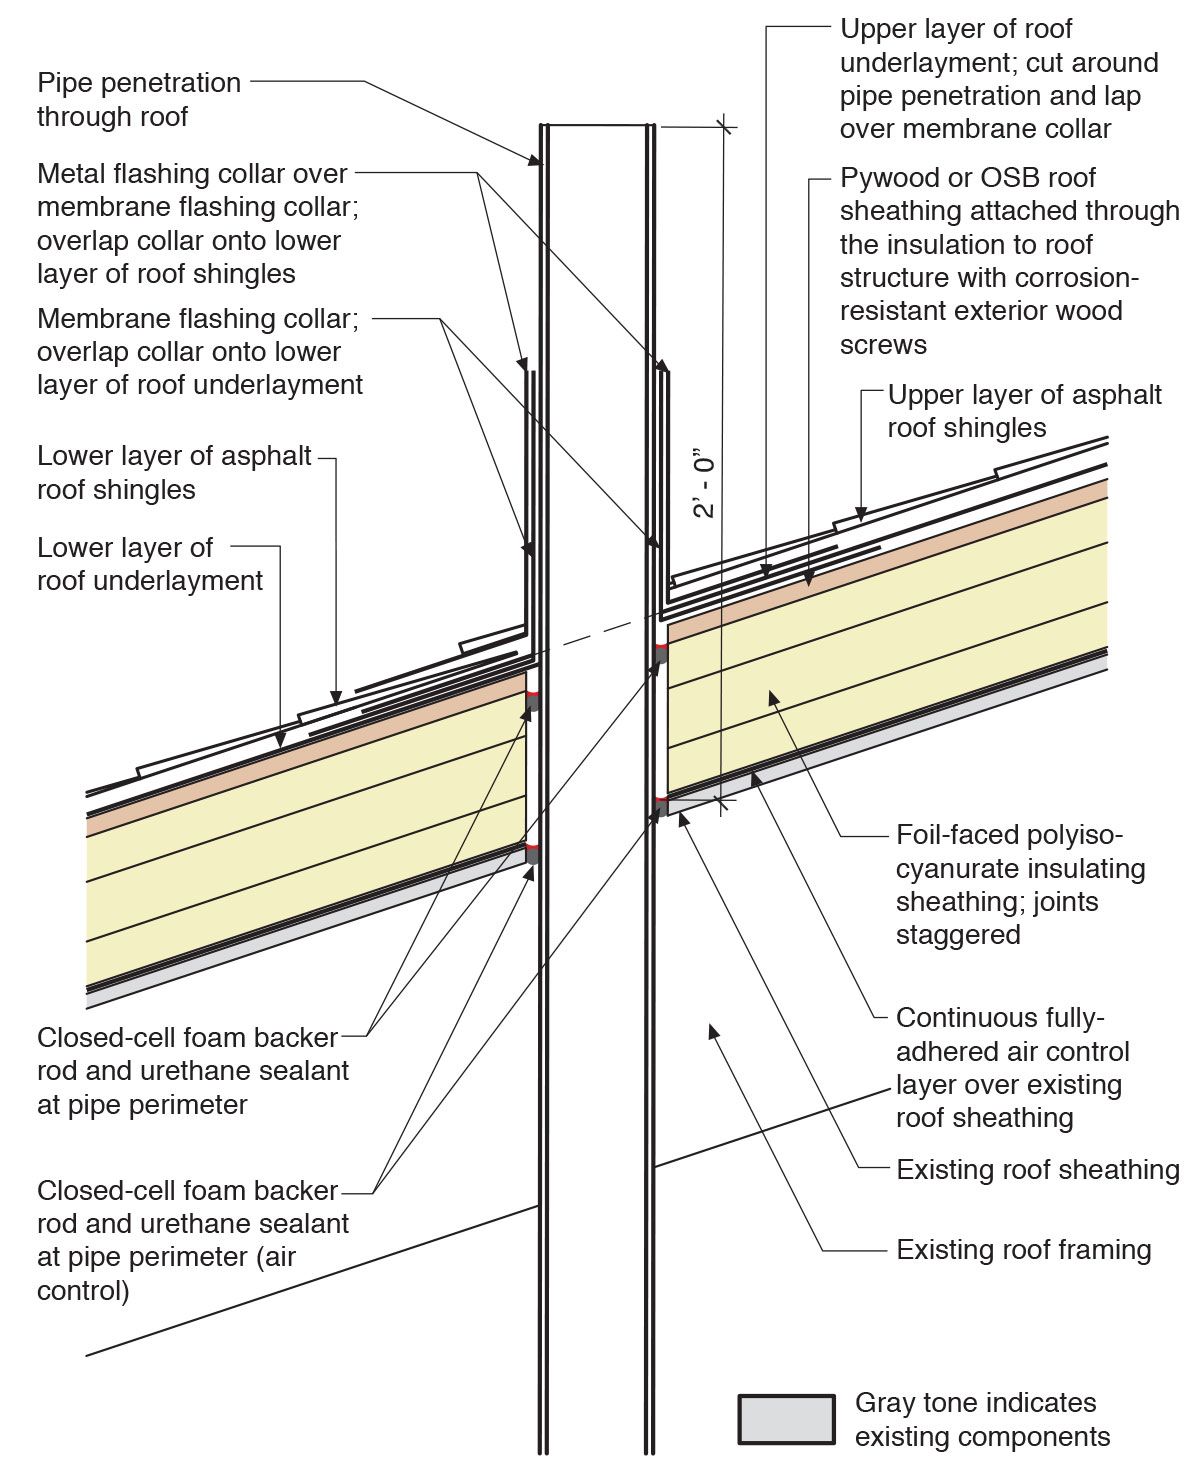
Provide flashing and sealing integrated with the air and water control layers for vents and other roof penetrations
Image
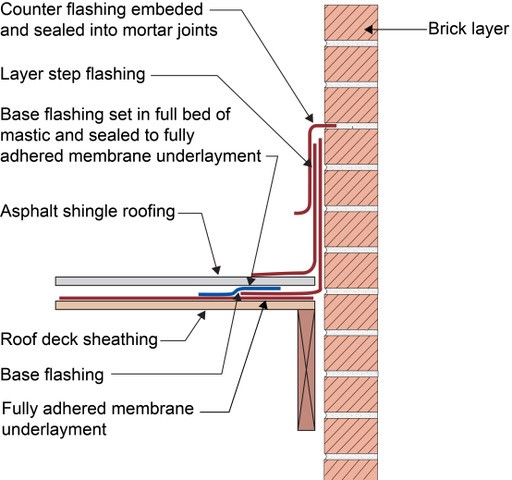
Right - Counterflashing tops a layer of step flashing which comes down above the asphalt shingle and a layer of L-shaped base flashing which comes down and extends below the shingle; the base flashing is adhered to the roof underlayment with mastic, shown
Image
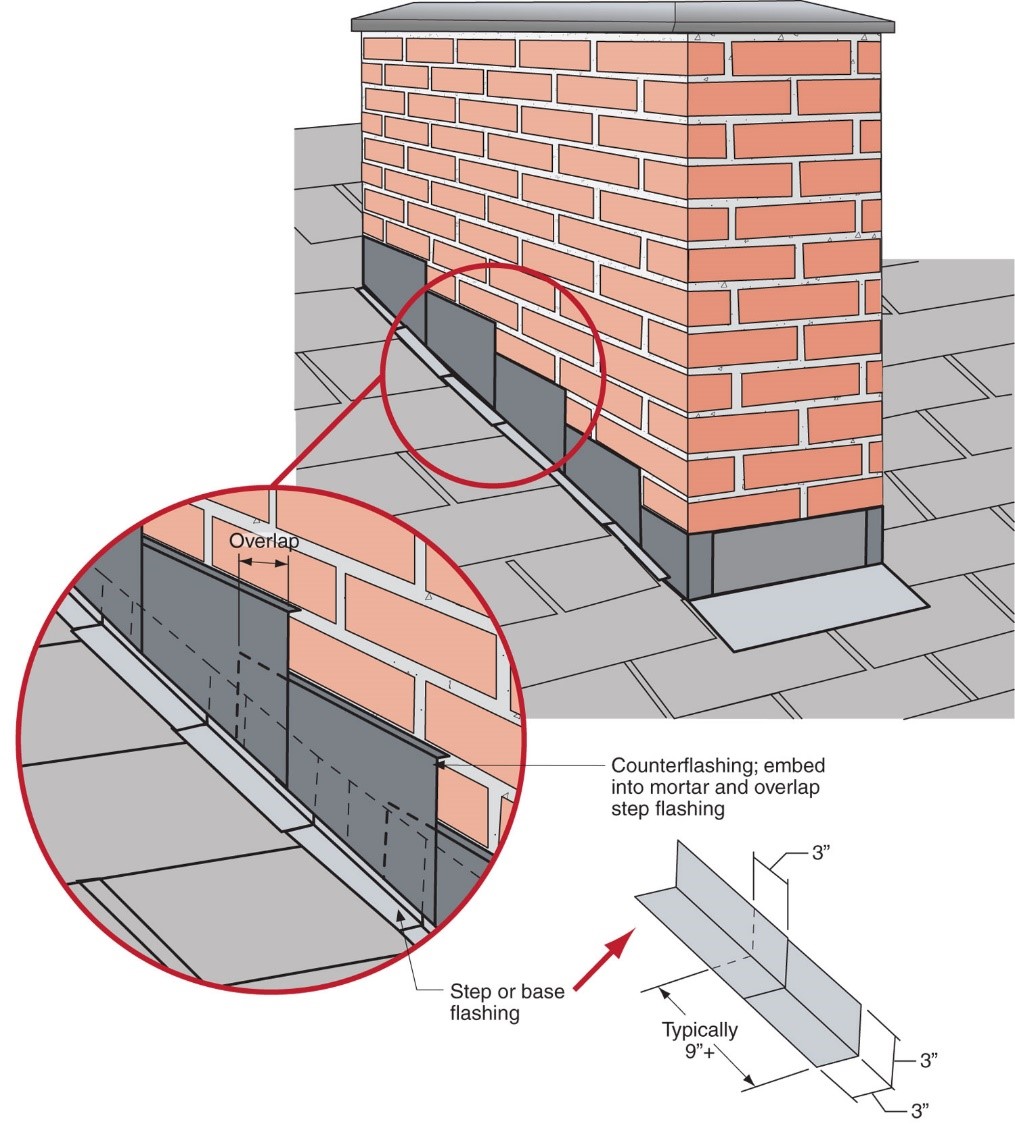
Right - Step flashing along a chimney is integrated in a layered manner with asphalt shingle roofing and topped with counterflashing that is embedded into brick mortar joint above
Image
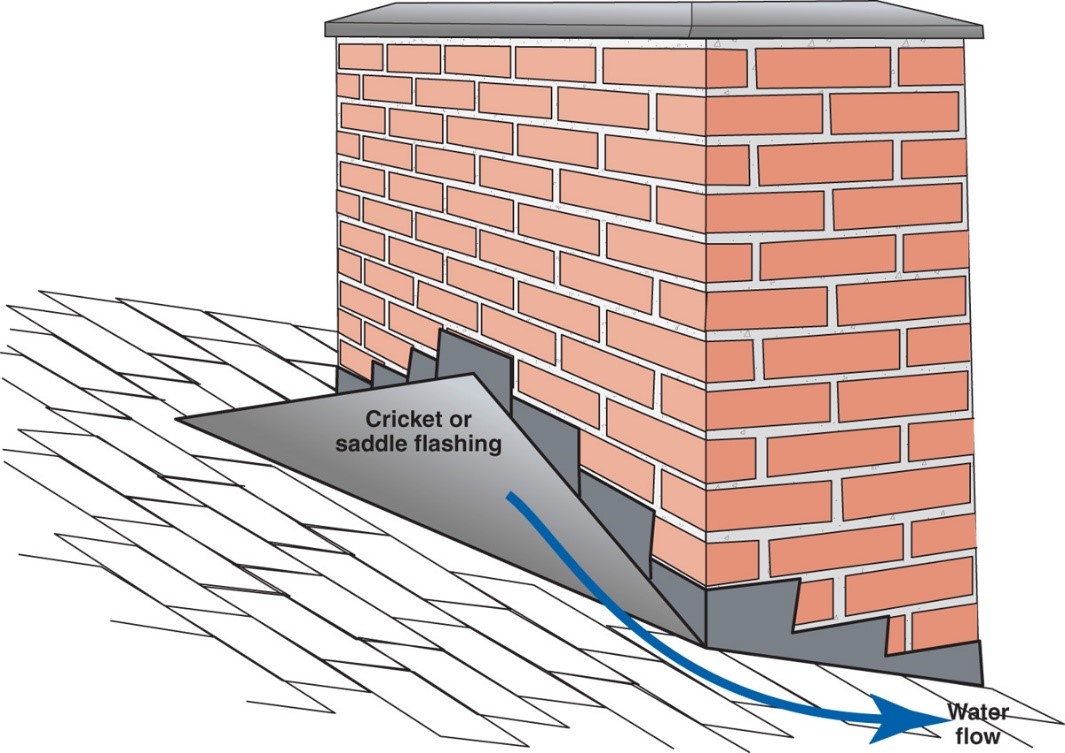
Right – A chimney cricket is installed and flashed to direct rainwater around the chimney
Image
Image
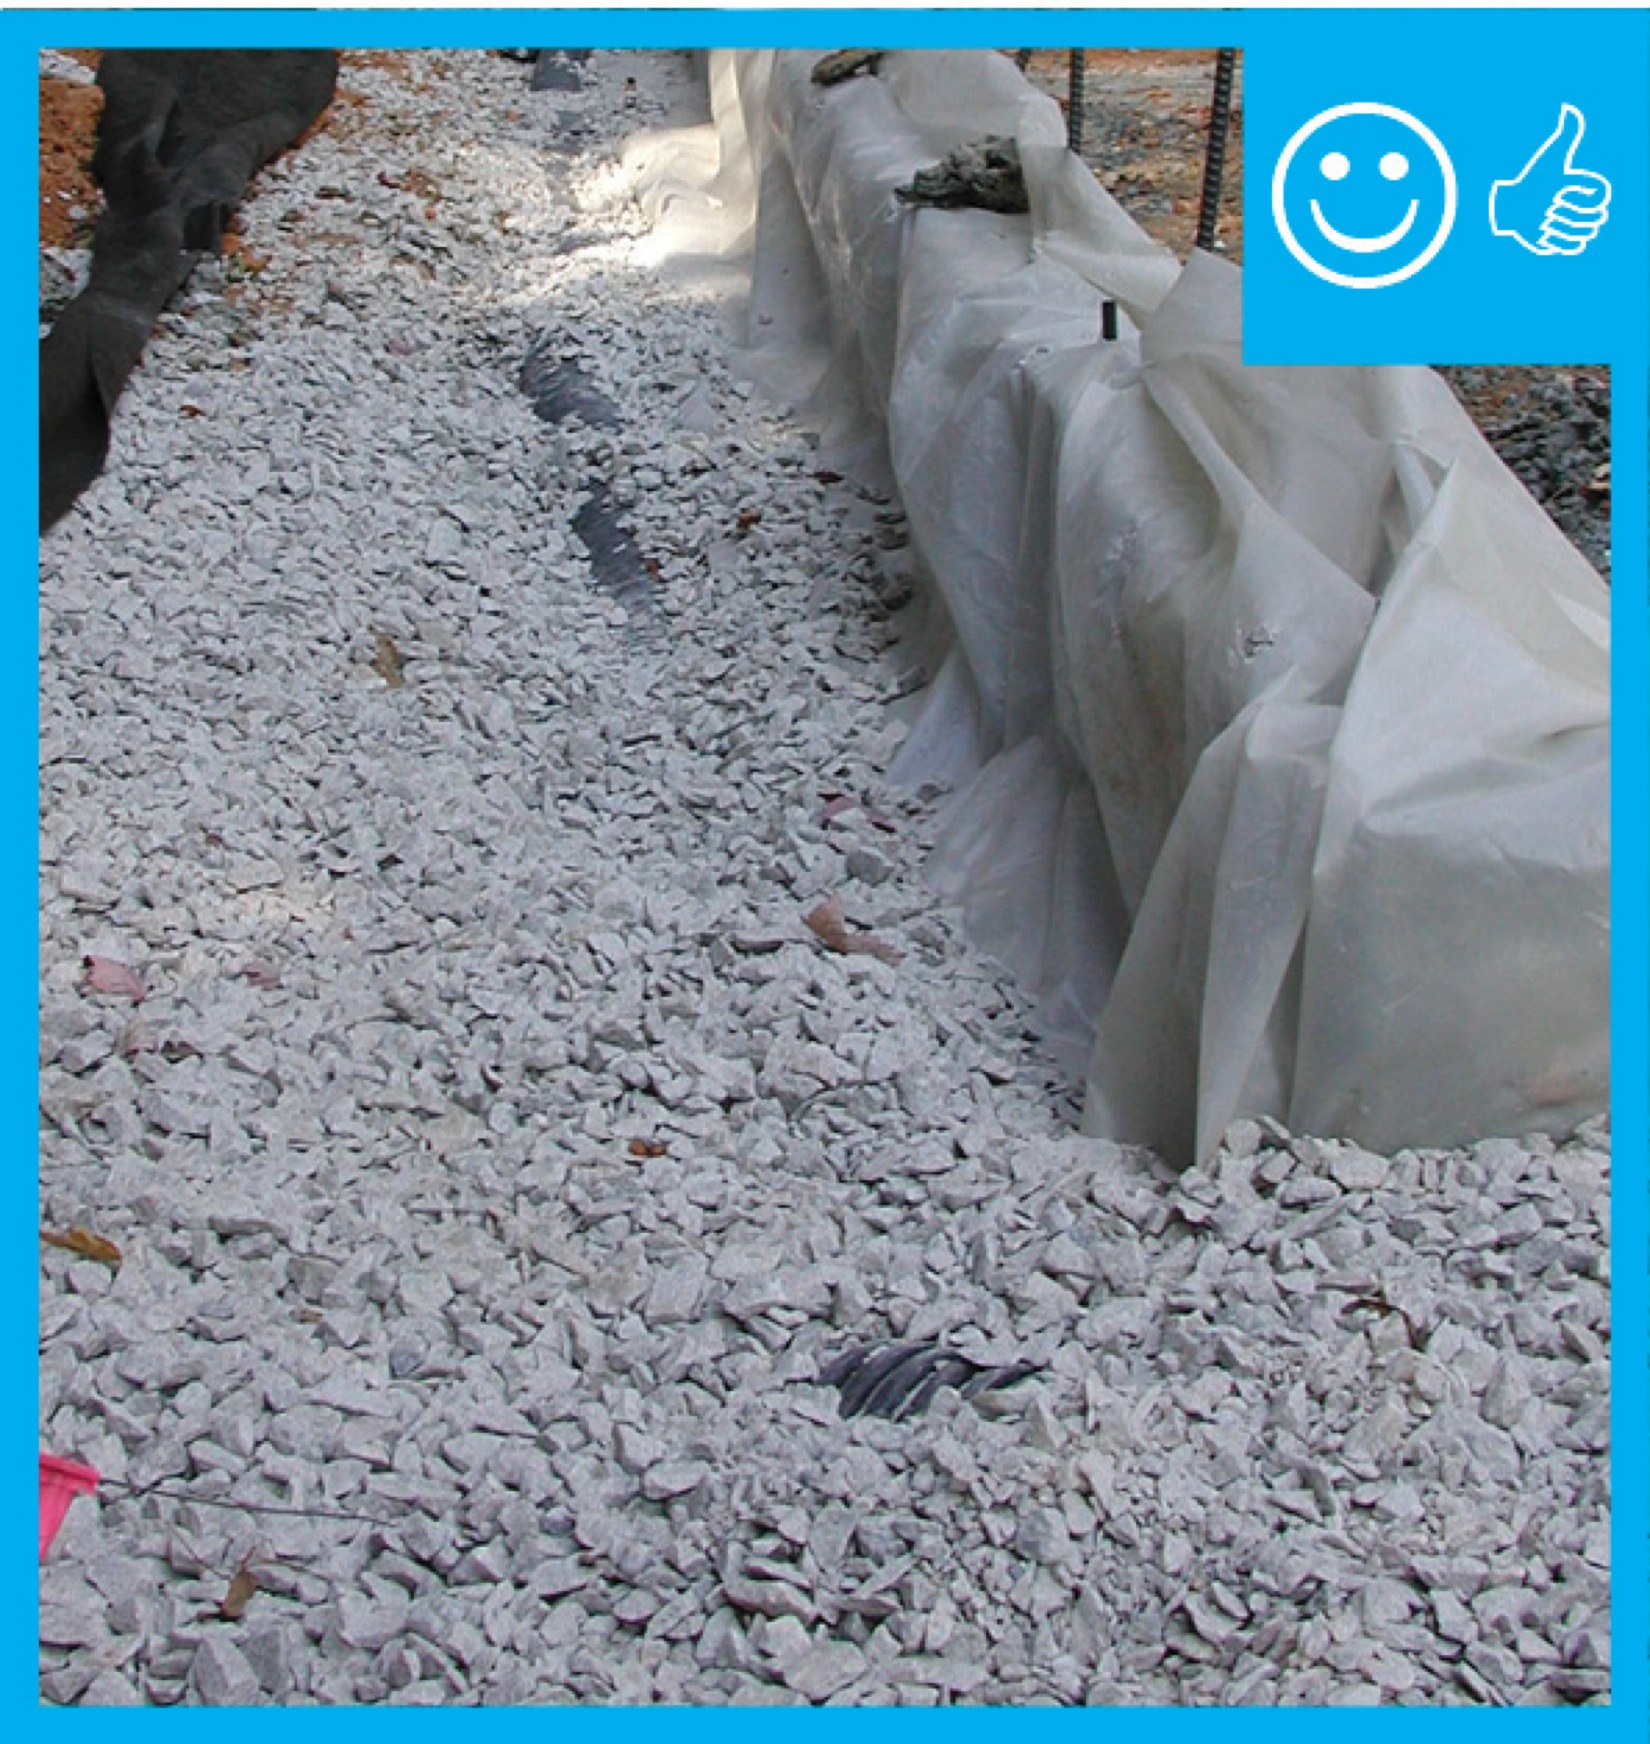
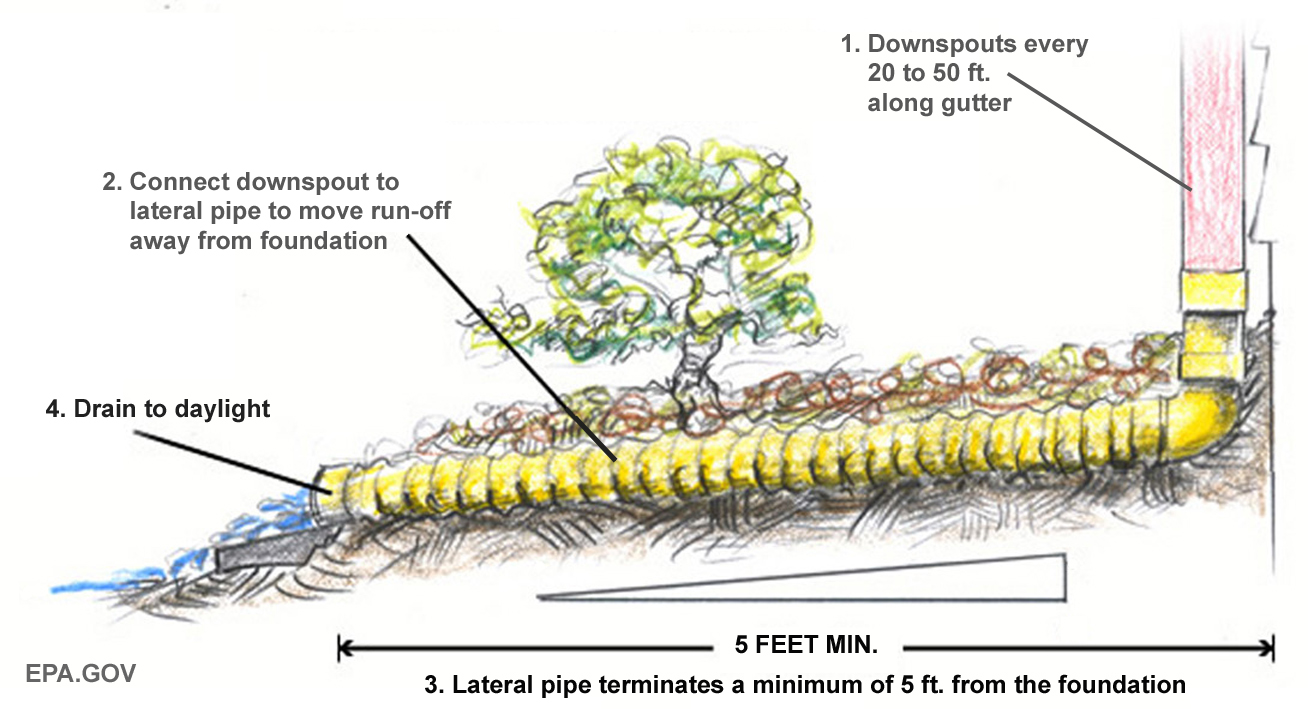
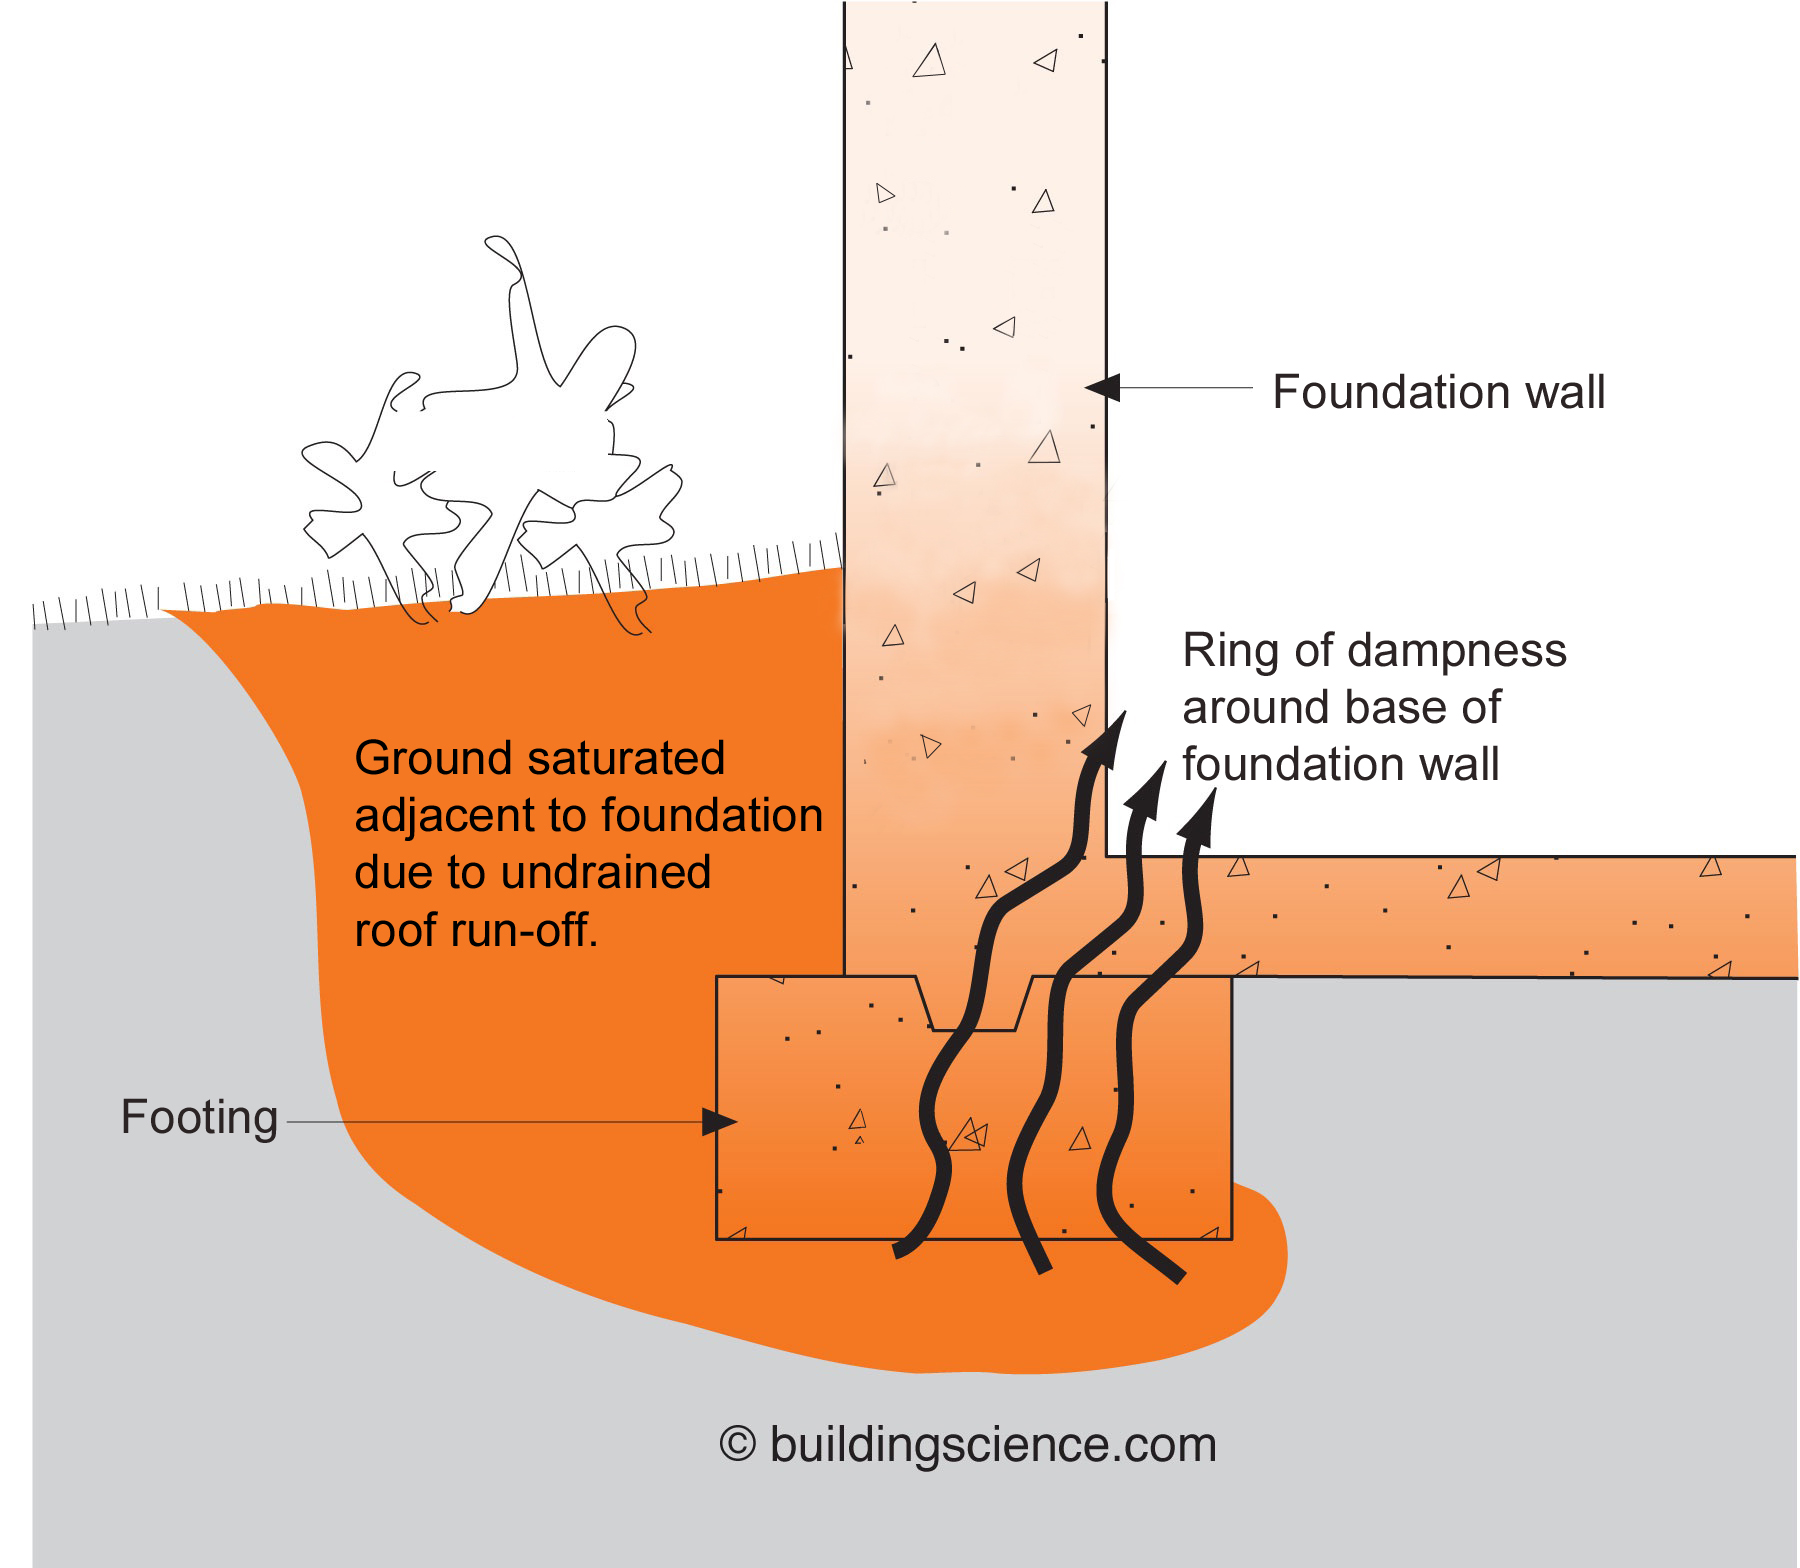
Right – House without gutters has waterproof liner, drain tile, and gravel bed extending more than 5 feet from foundation
Image
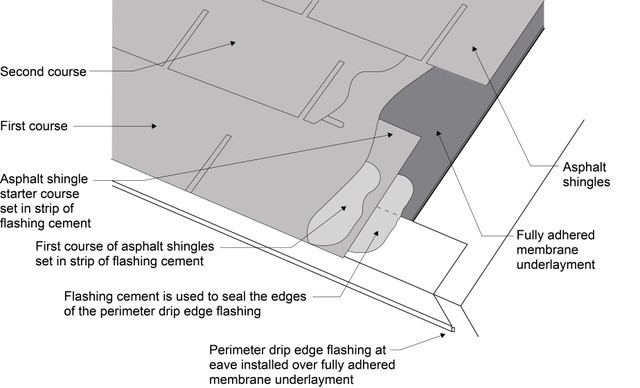
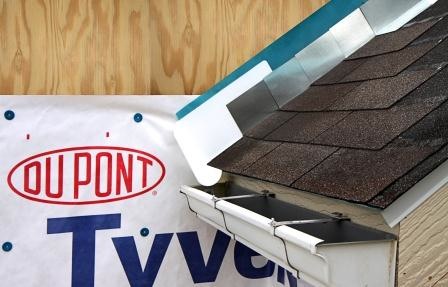
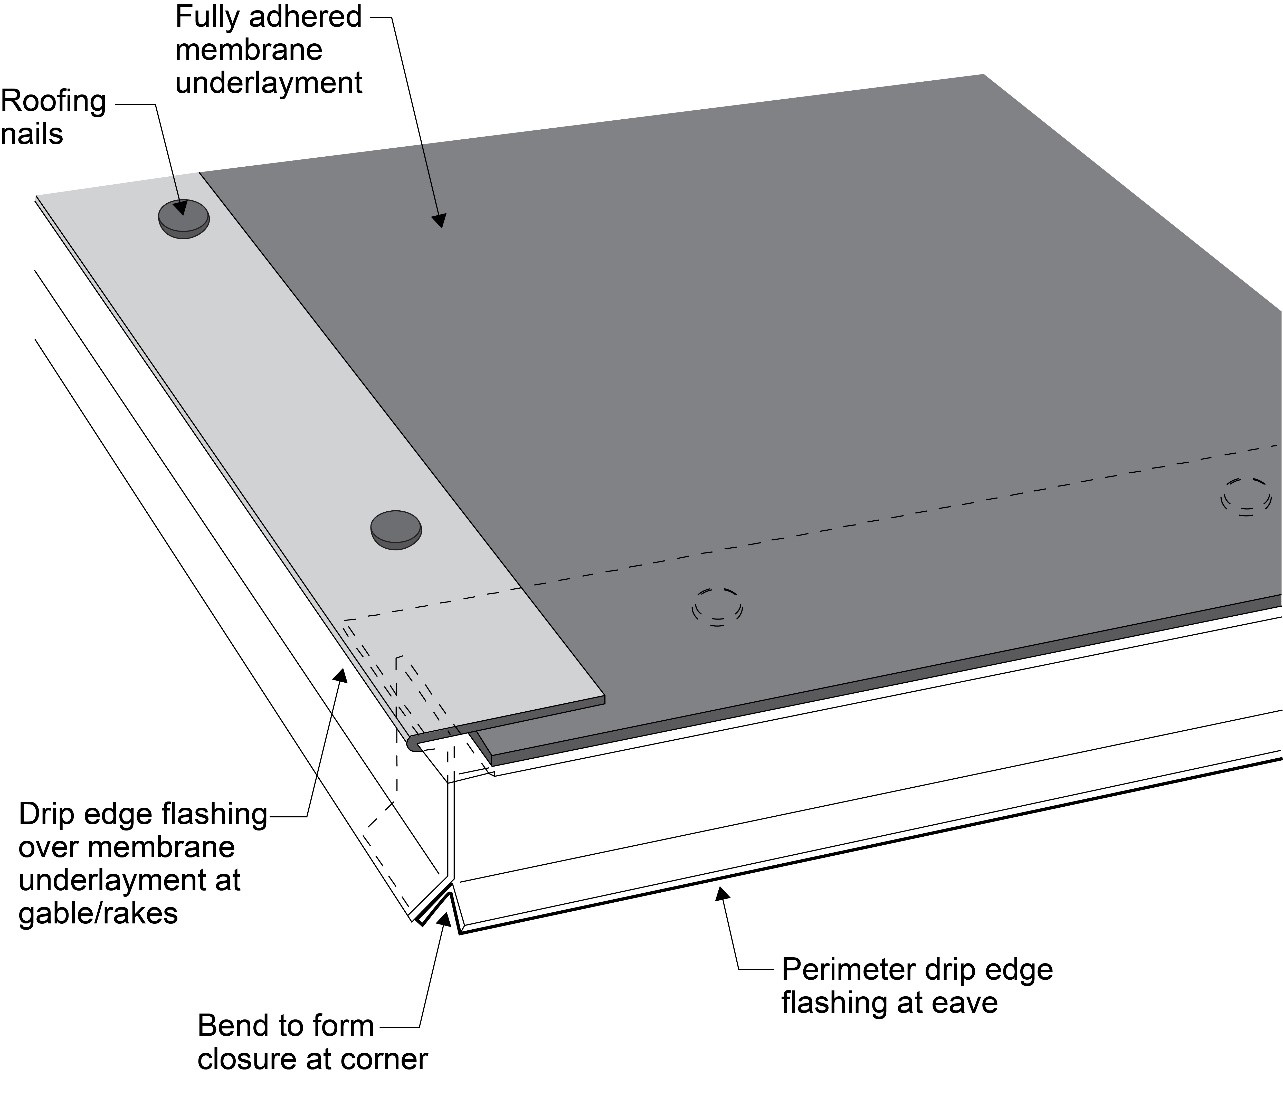
Right – If drip edge flashing is installed over fully adhered roof membrane at eaves, use flashing cement to seal the upper edge of the flashing
Image
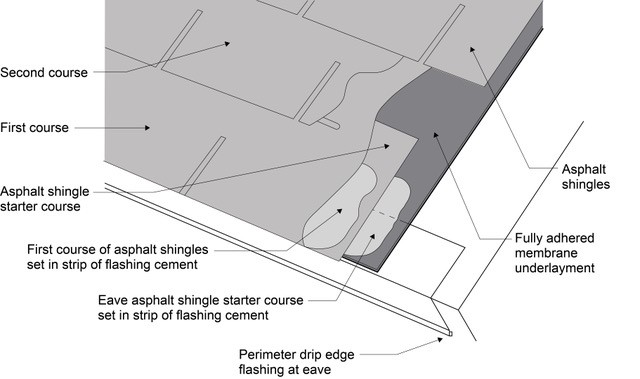
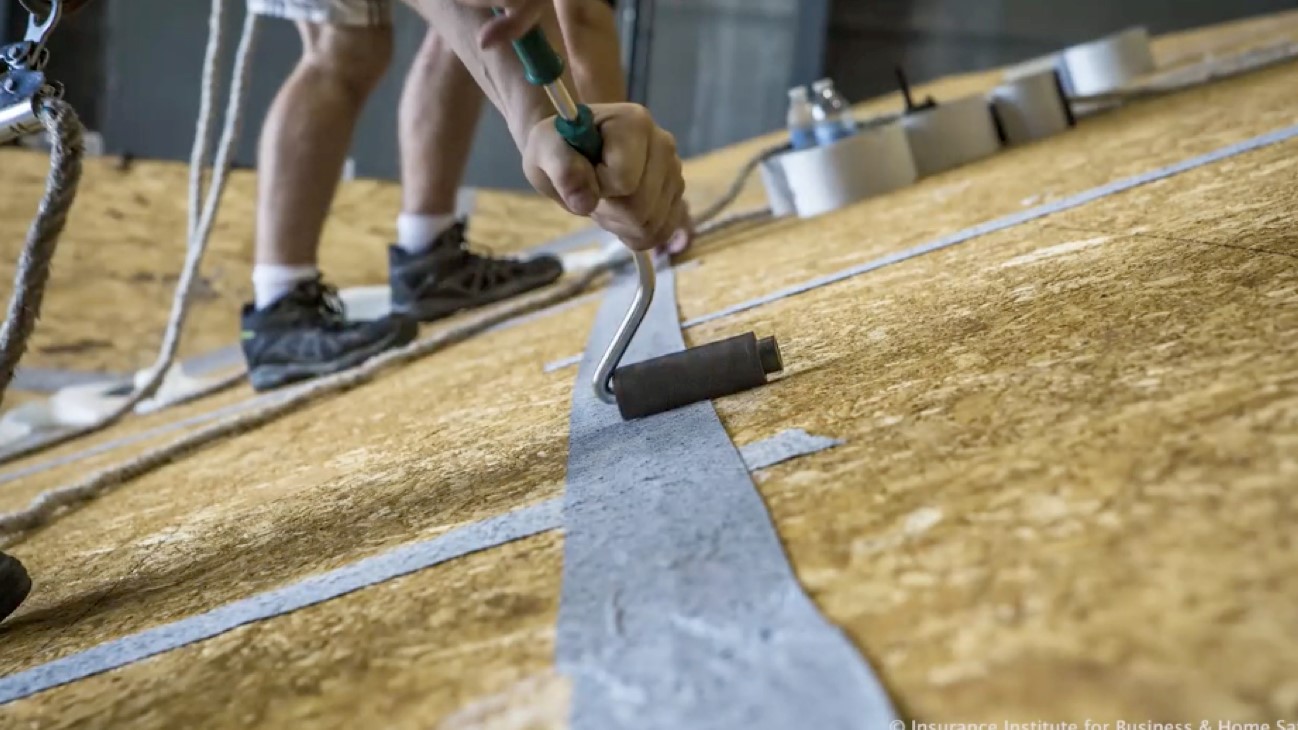
Right – Install asphalt shingles over a starter strip set in an 8-inch strip of flashing cement
Image
Image
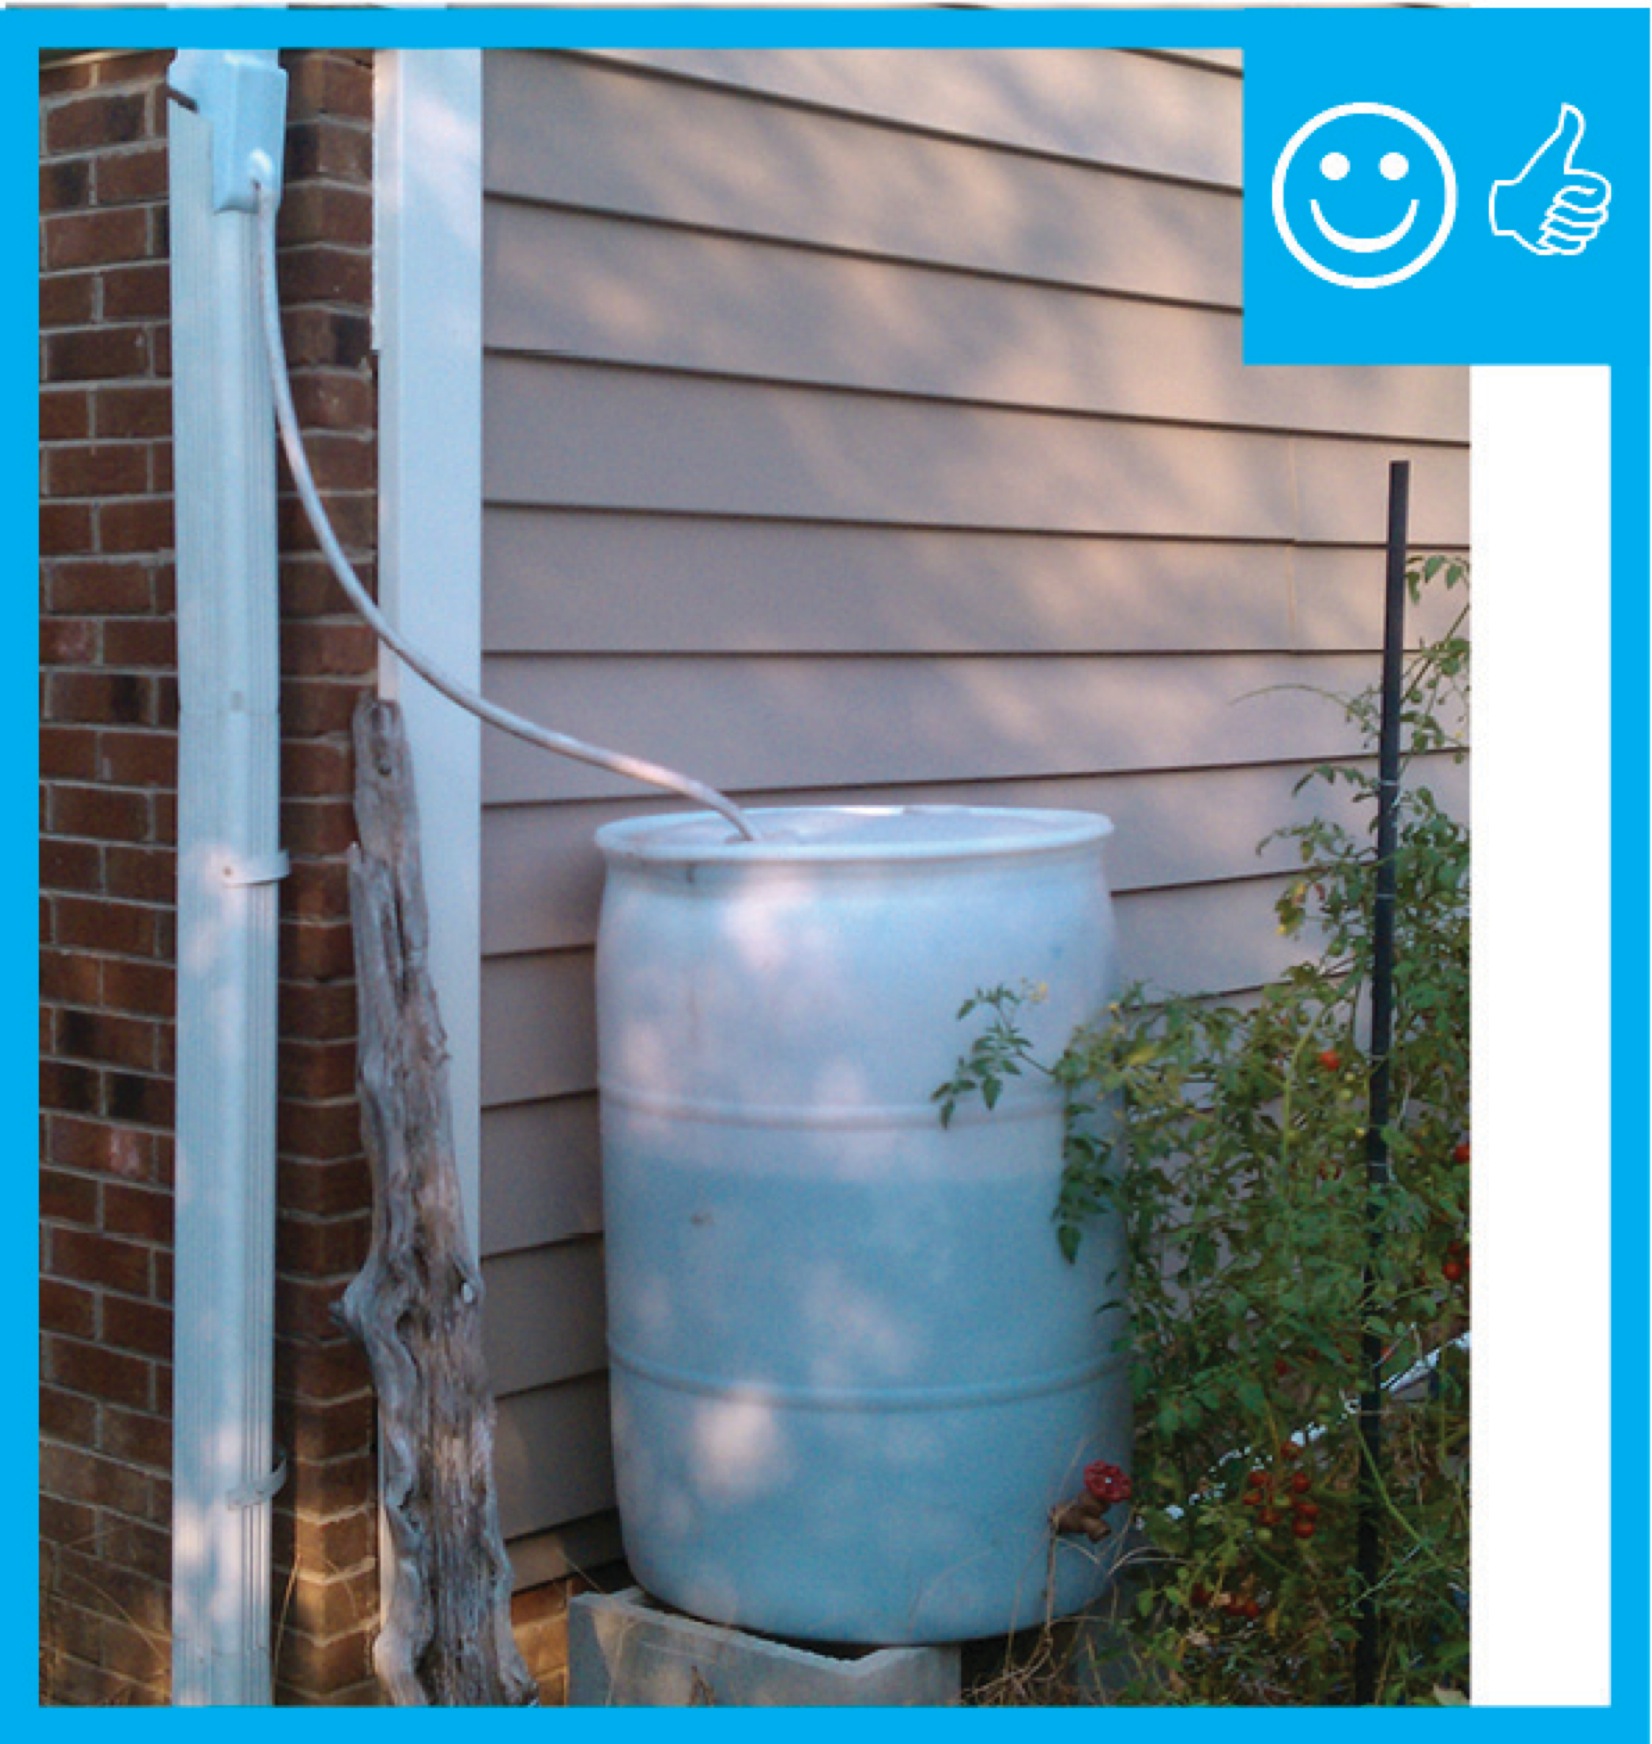
Right – Rain barrel installed with an overflow spout terminating at least 5 feet from foundation
Image
Image

Right – Start asphalt shingle installation with a starter strip set in an 8-inch strip of flashing cement
Image
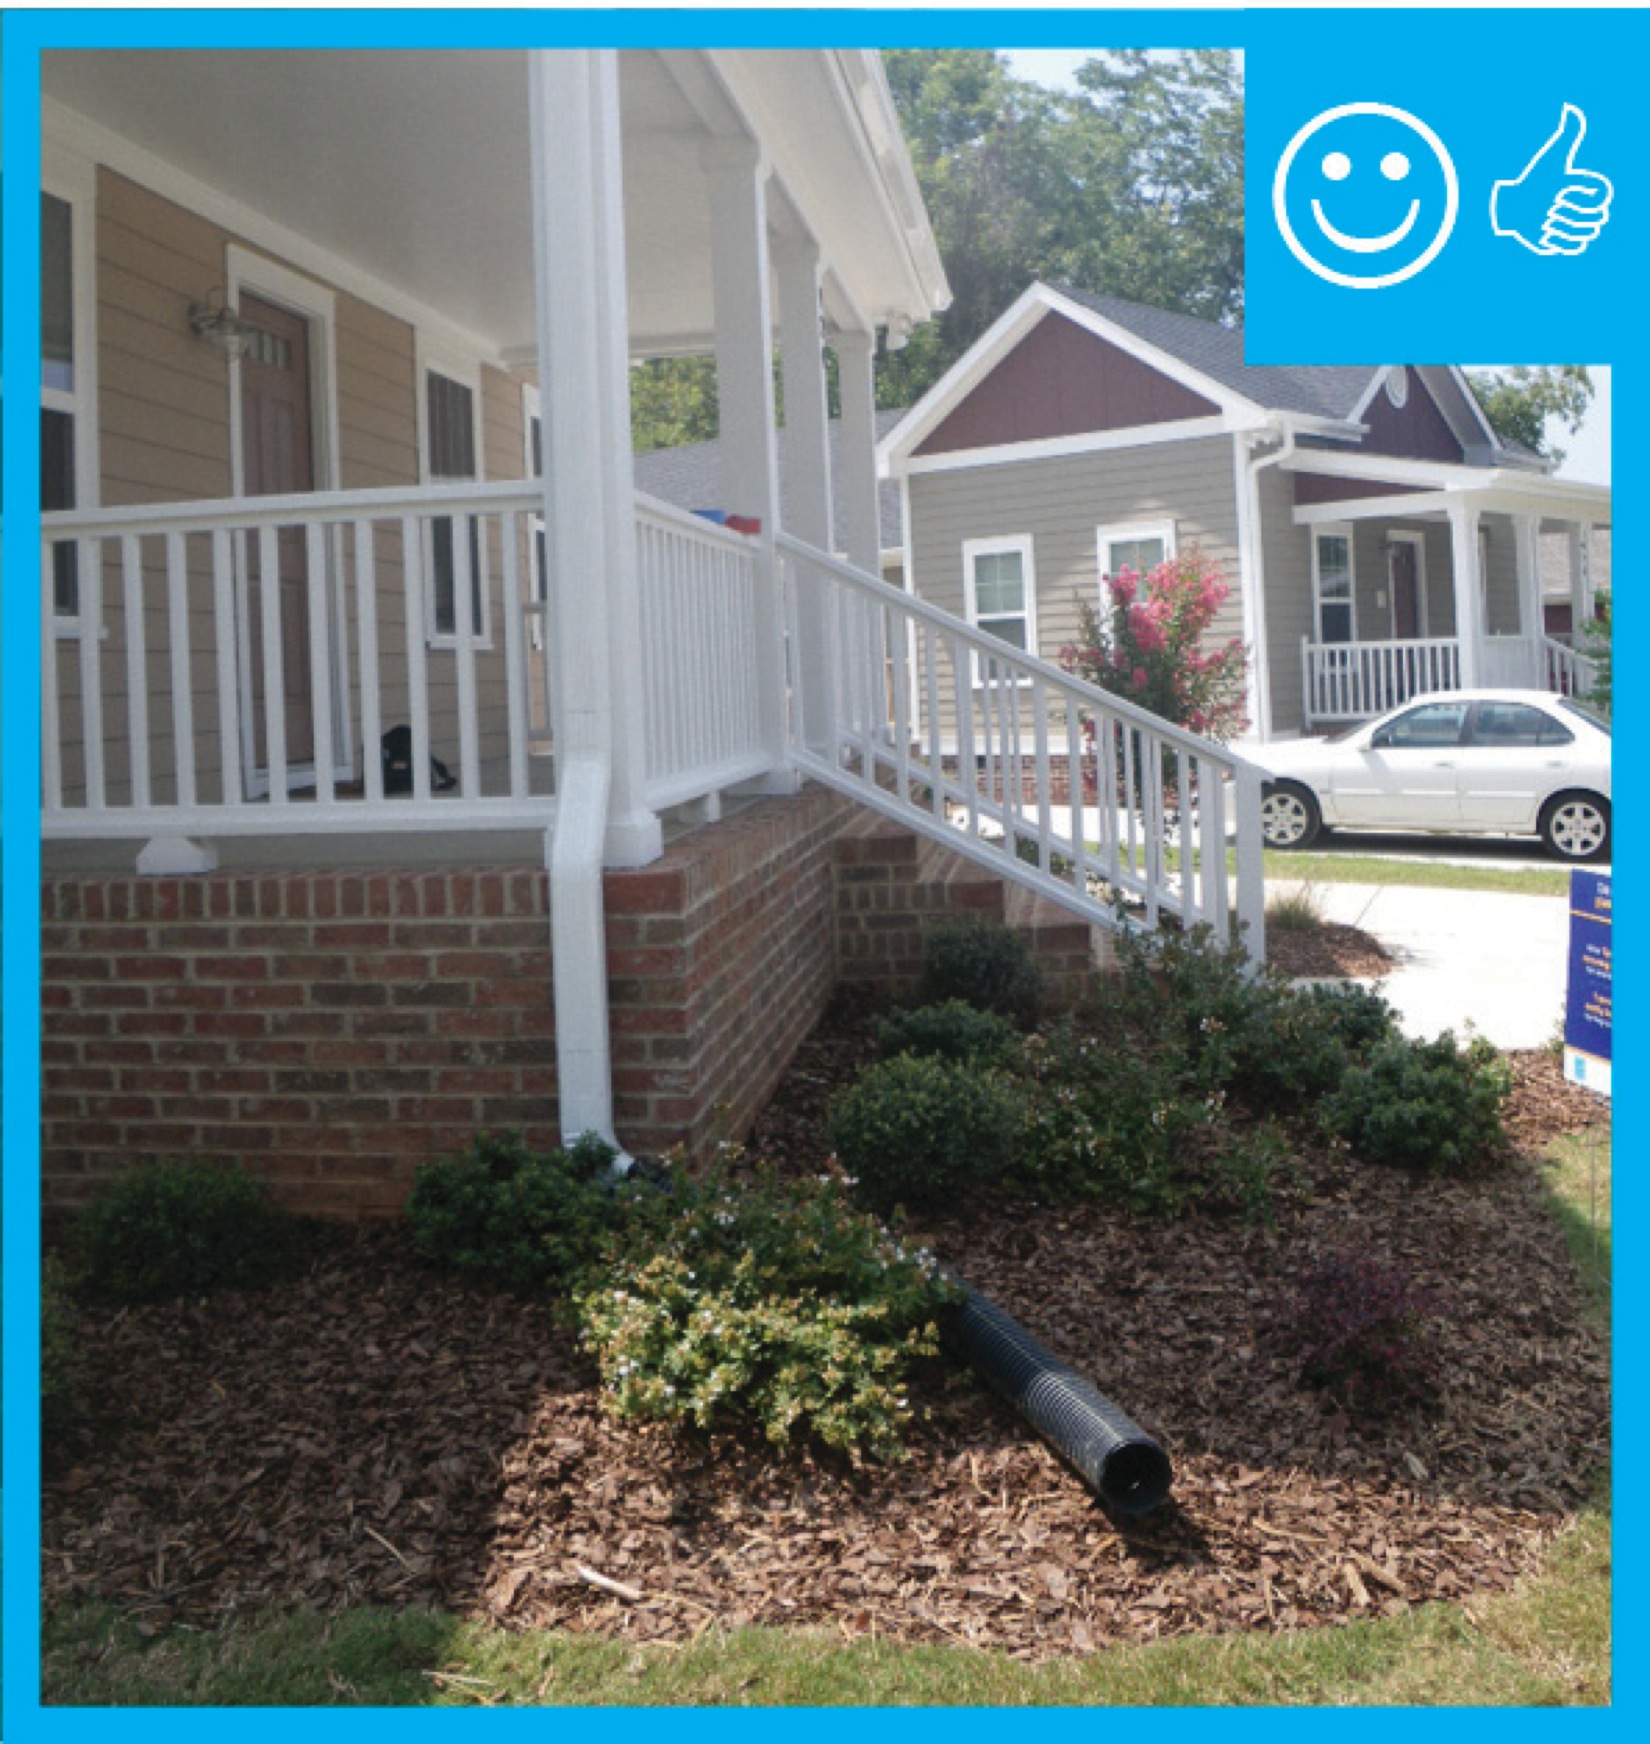
Right – The downspout pipe is far enough away from the foundation to prevent moisture problems
Image
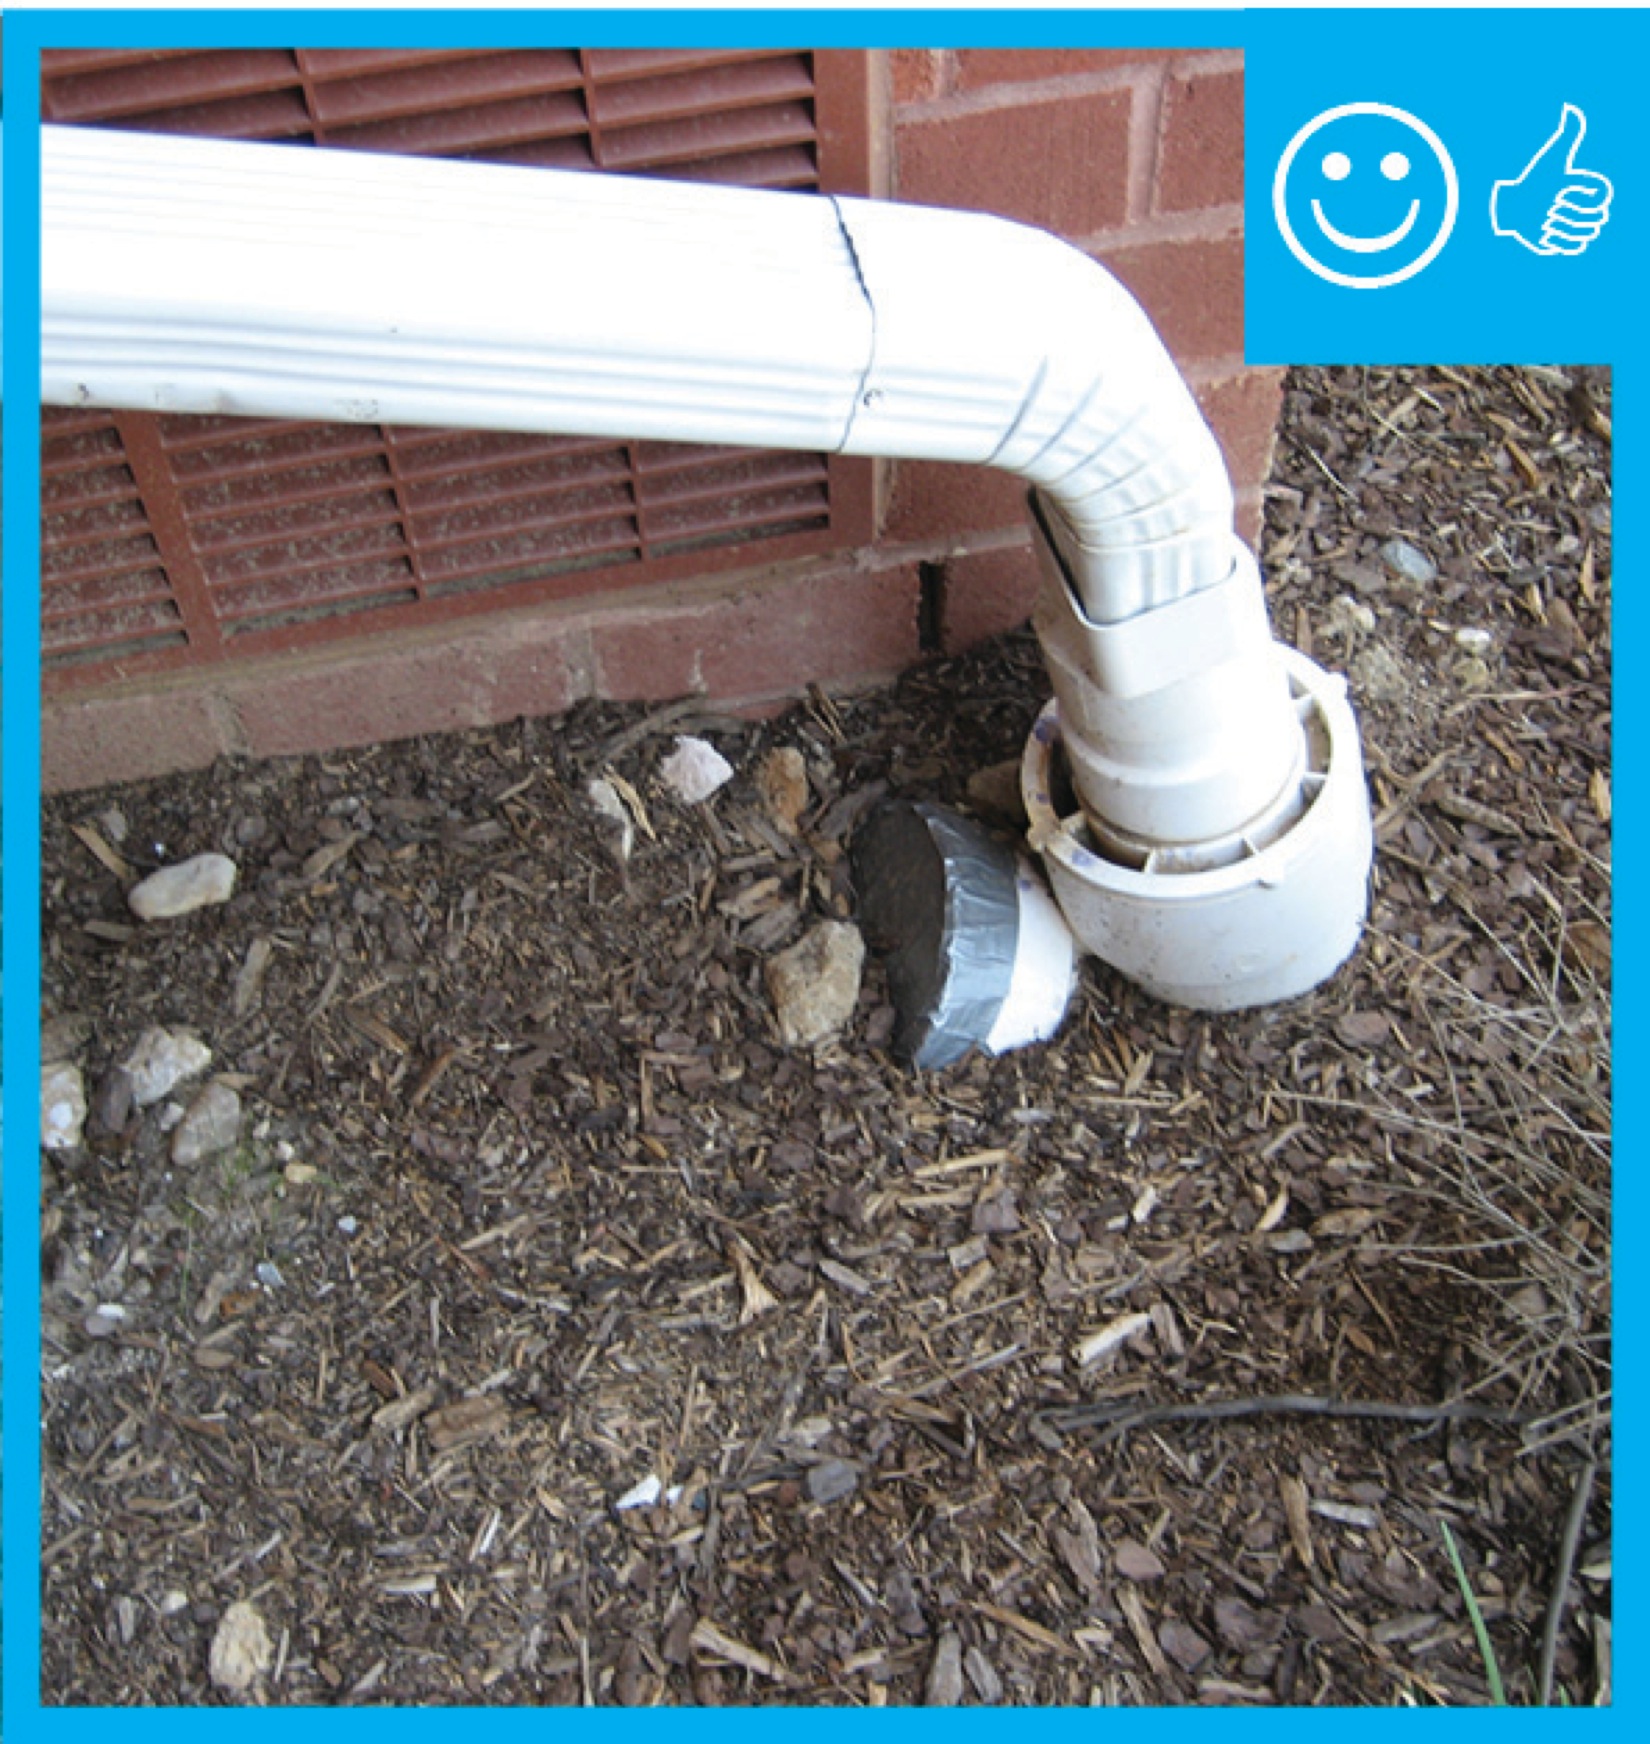
Right – The downspout terminates into a catchment system that moves water away from the foundation of the house
Image
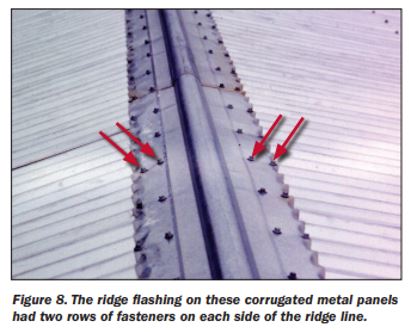
Right – The ridge flashing is secured with two rows of fasteners on each side of the ridge line
Image

Image
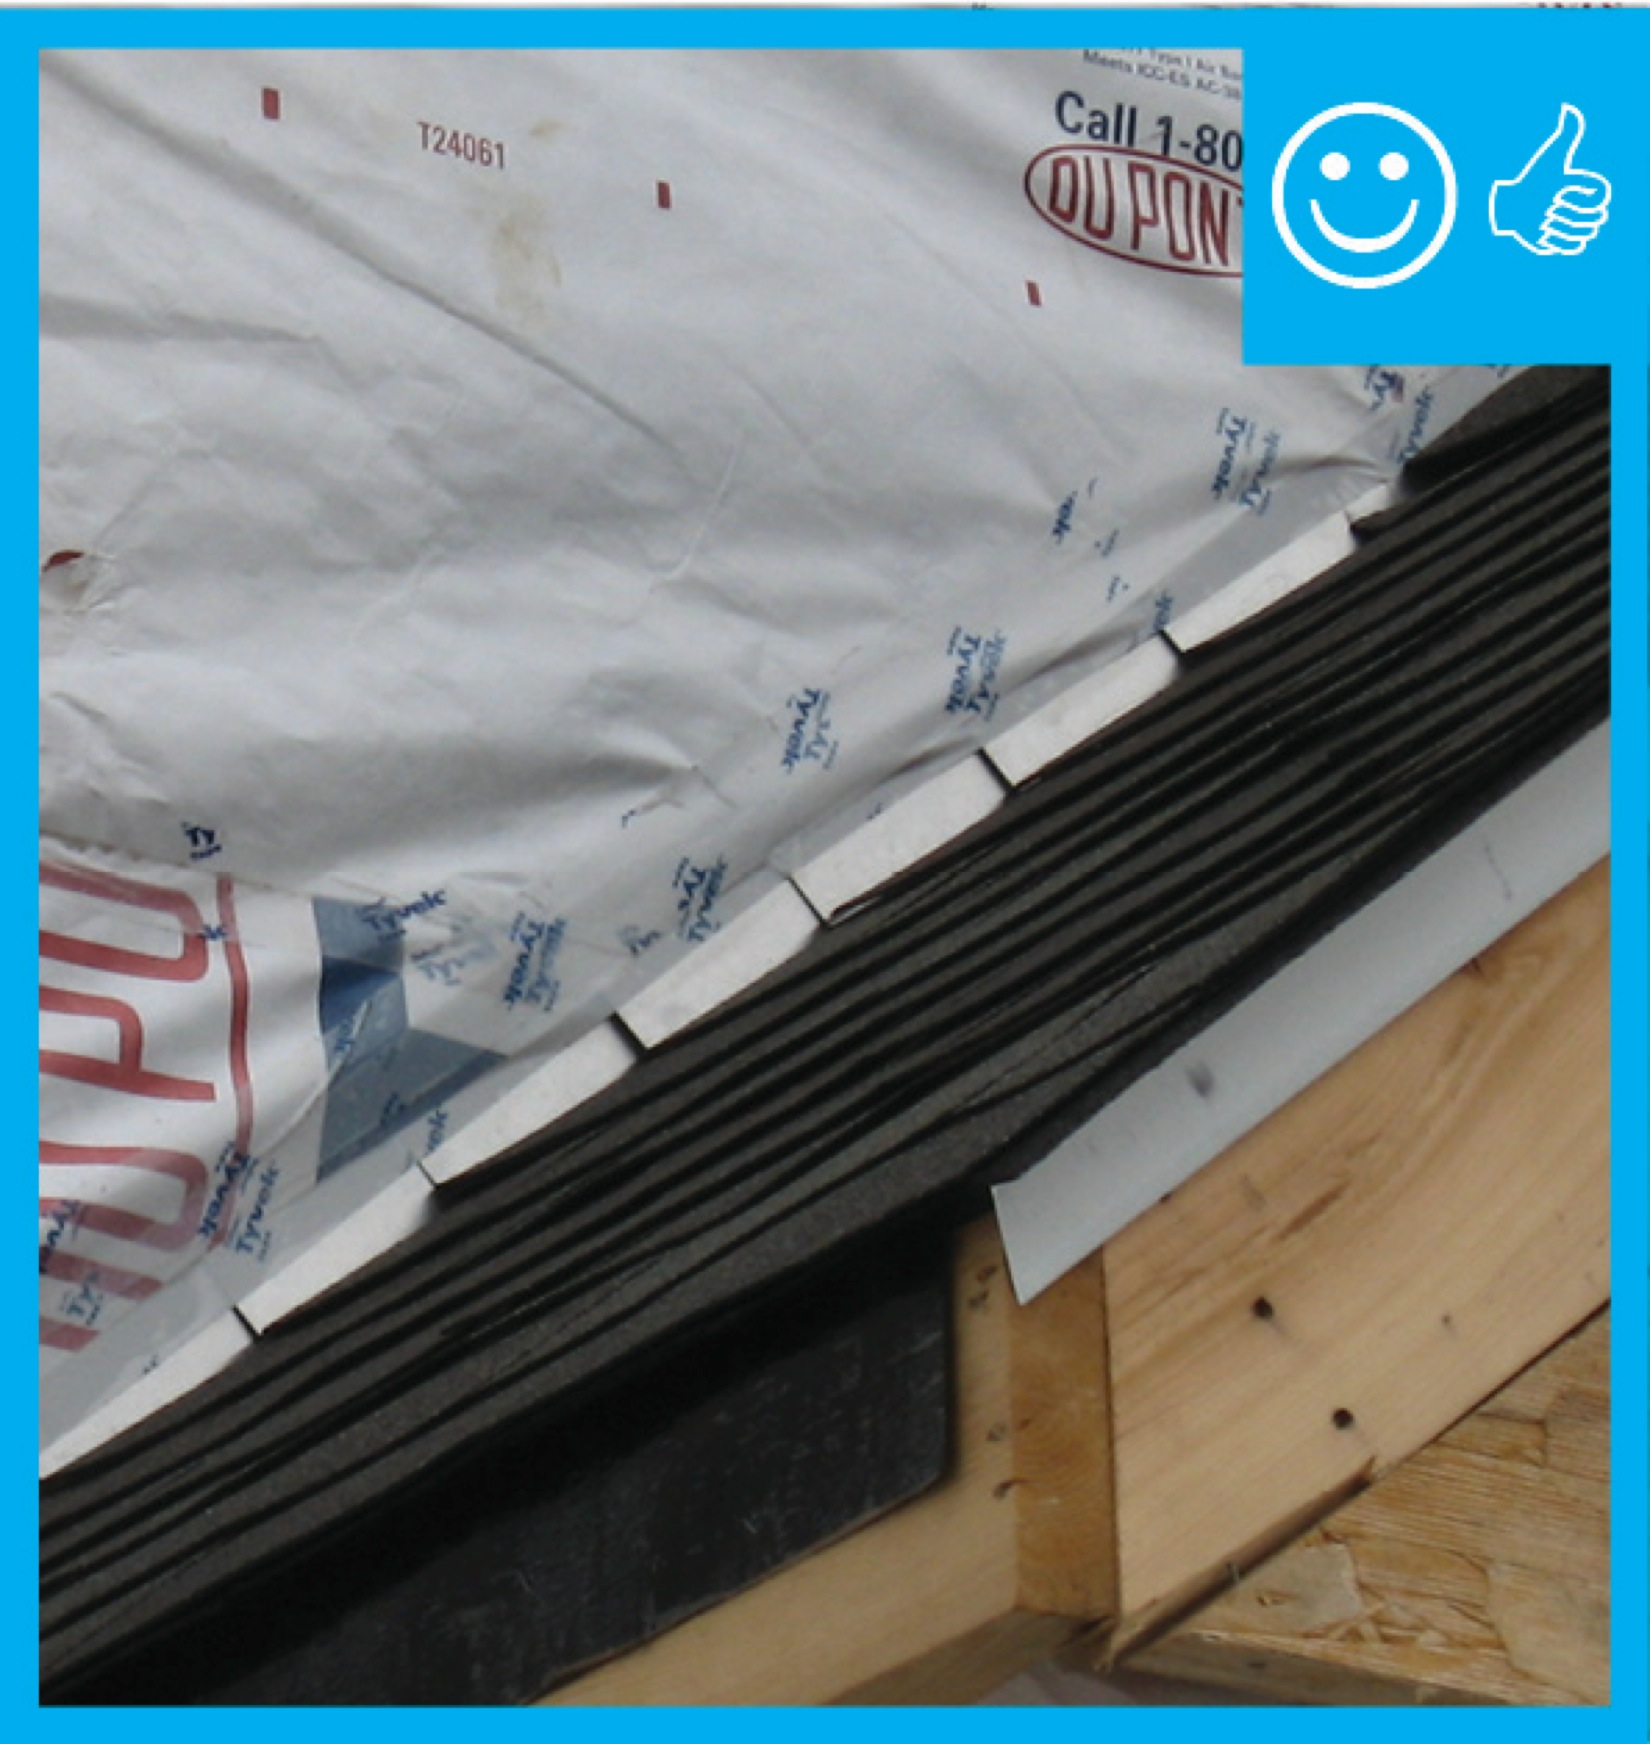
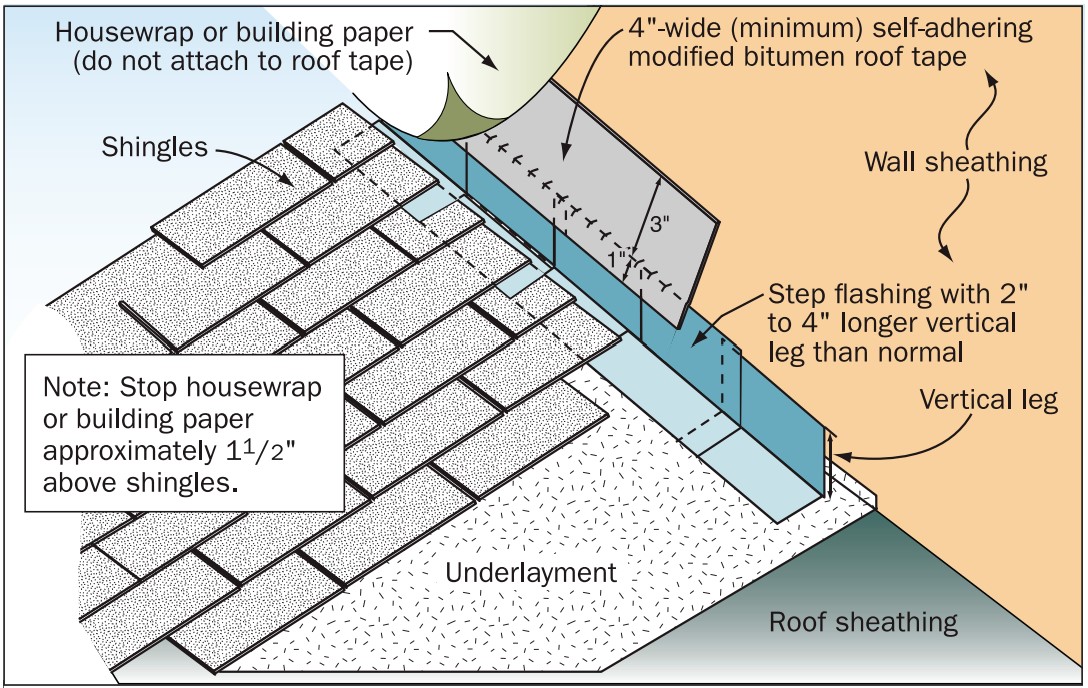
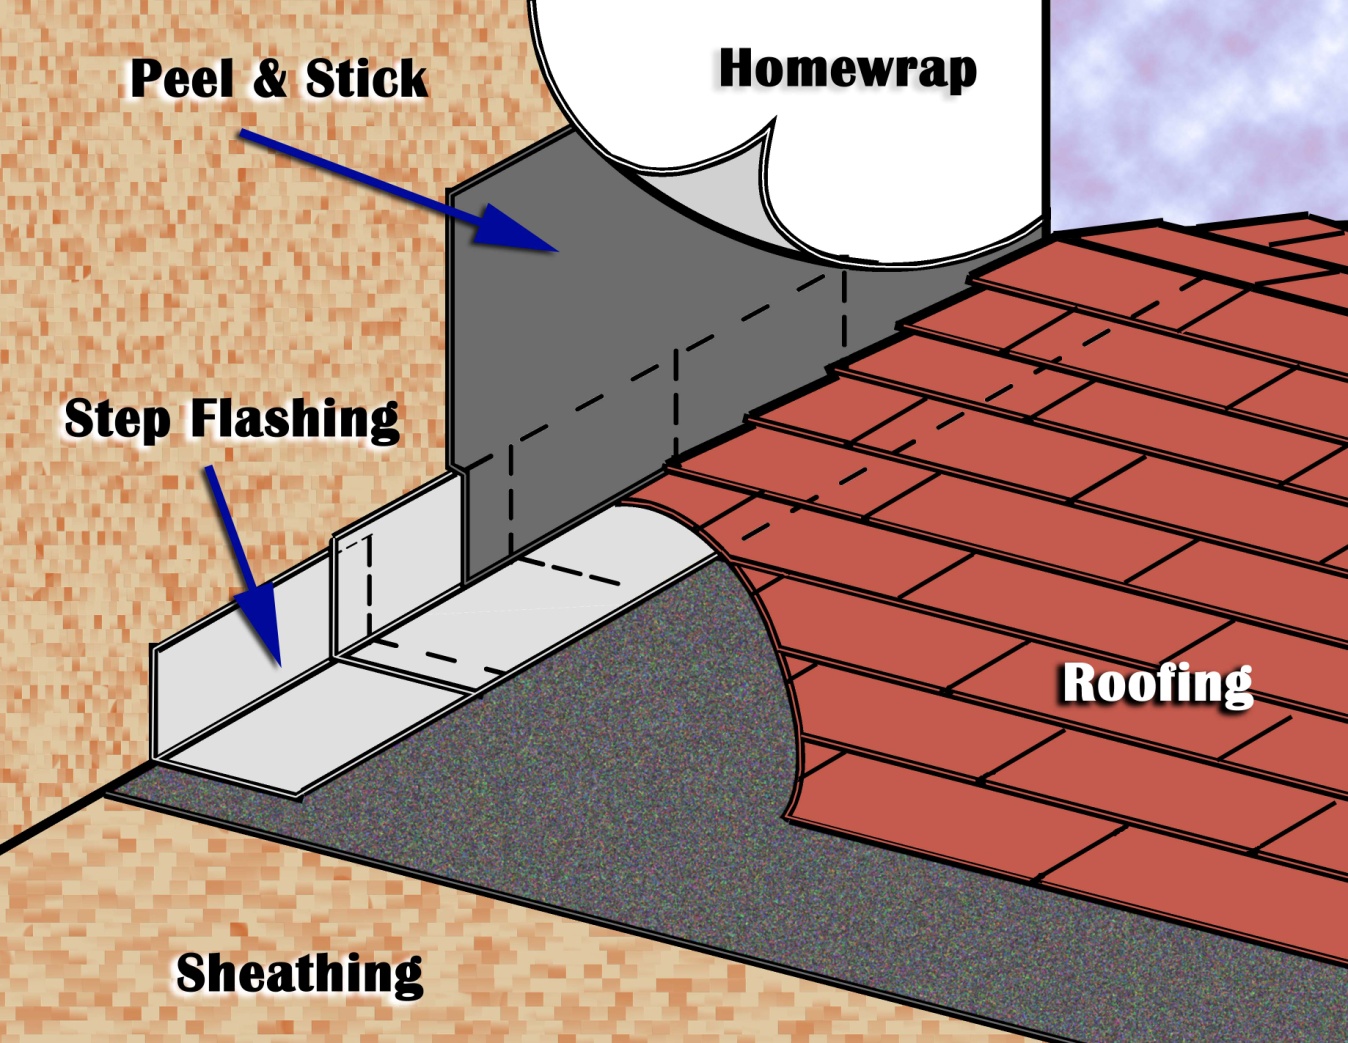
Right – The water-resistant barrier is layered over the step flashing to provide a complete drainage system
Image
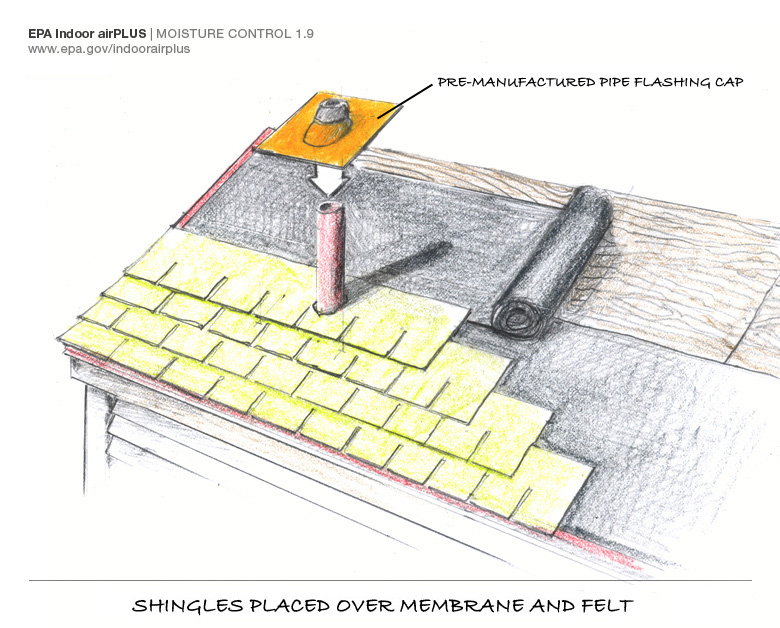
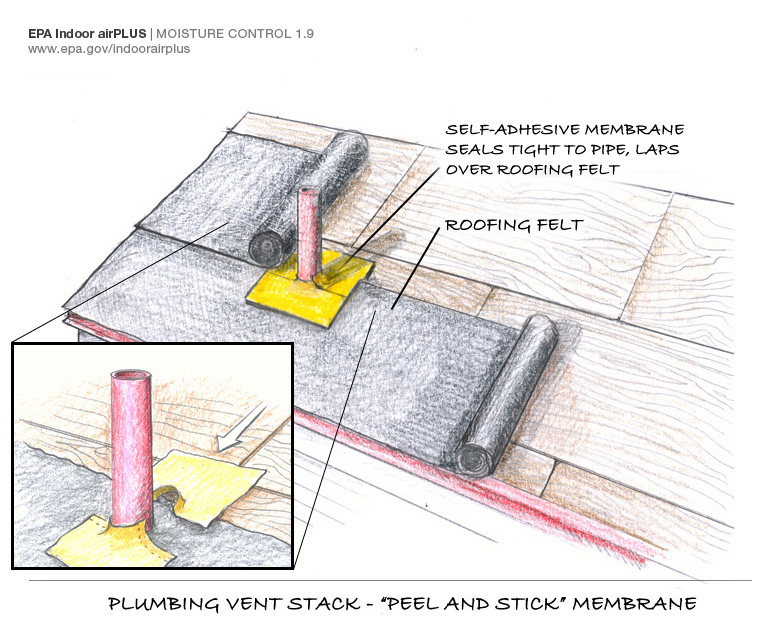
Right – There is a properly installed and layered self-sealing bituminous membrane at the roof penetration
Image
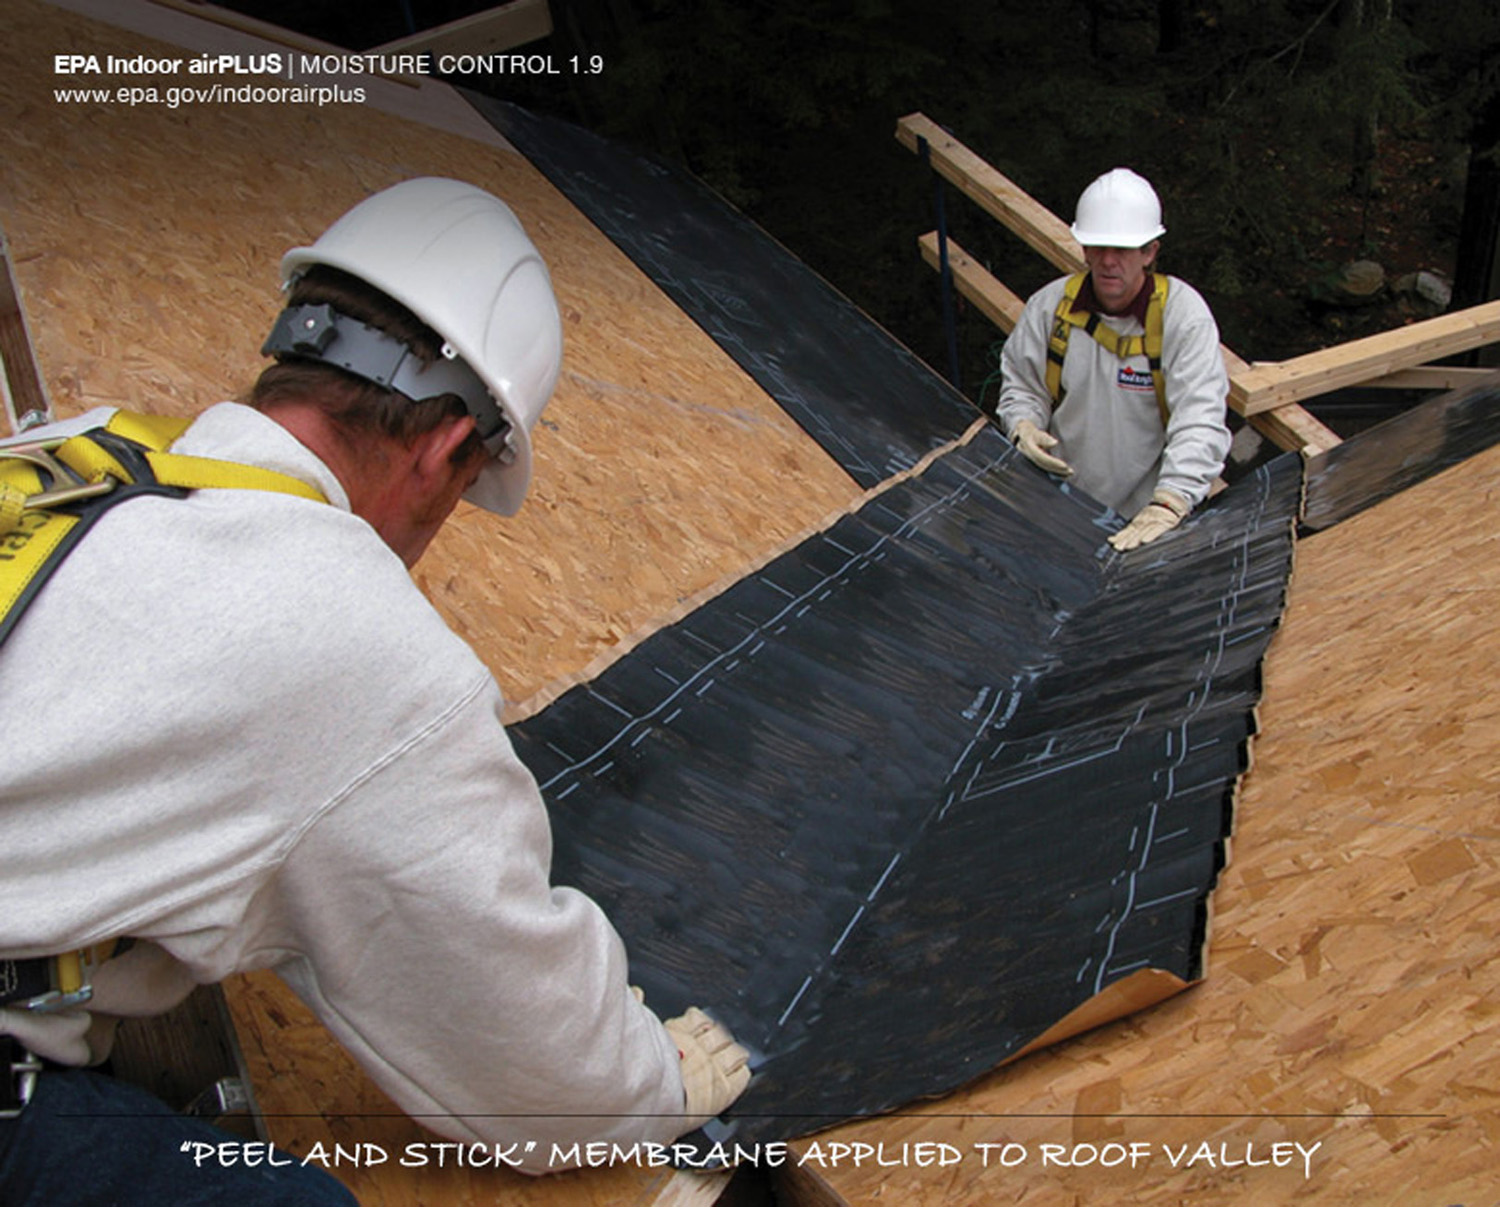
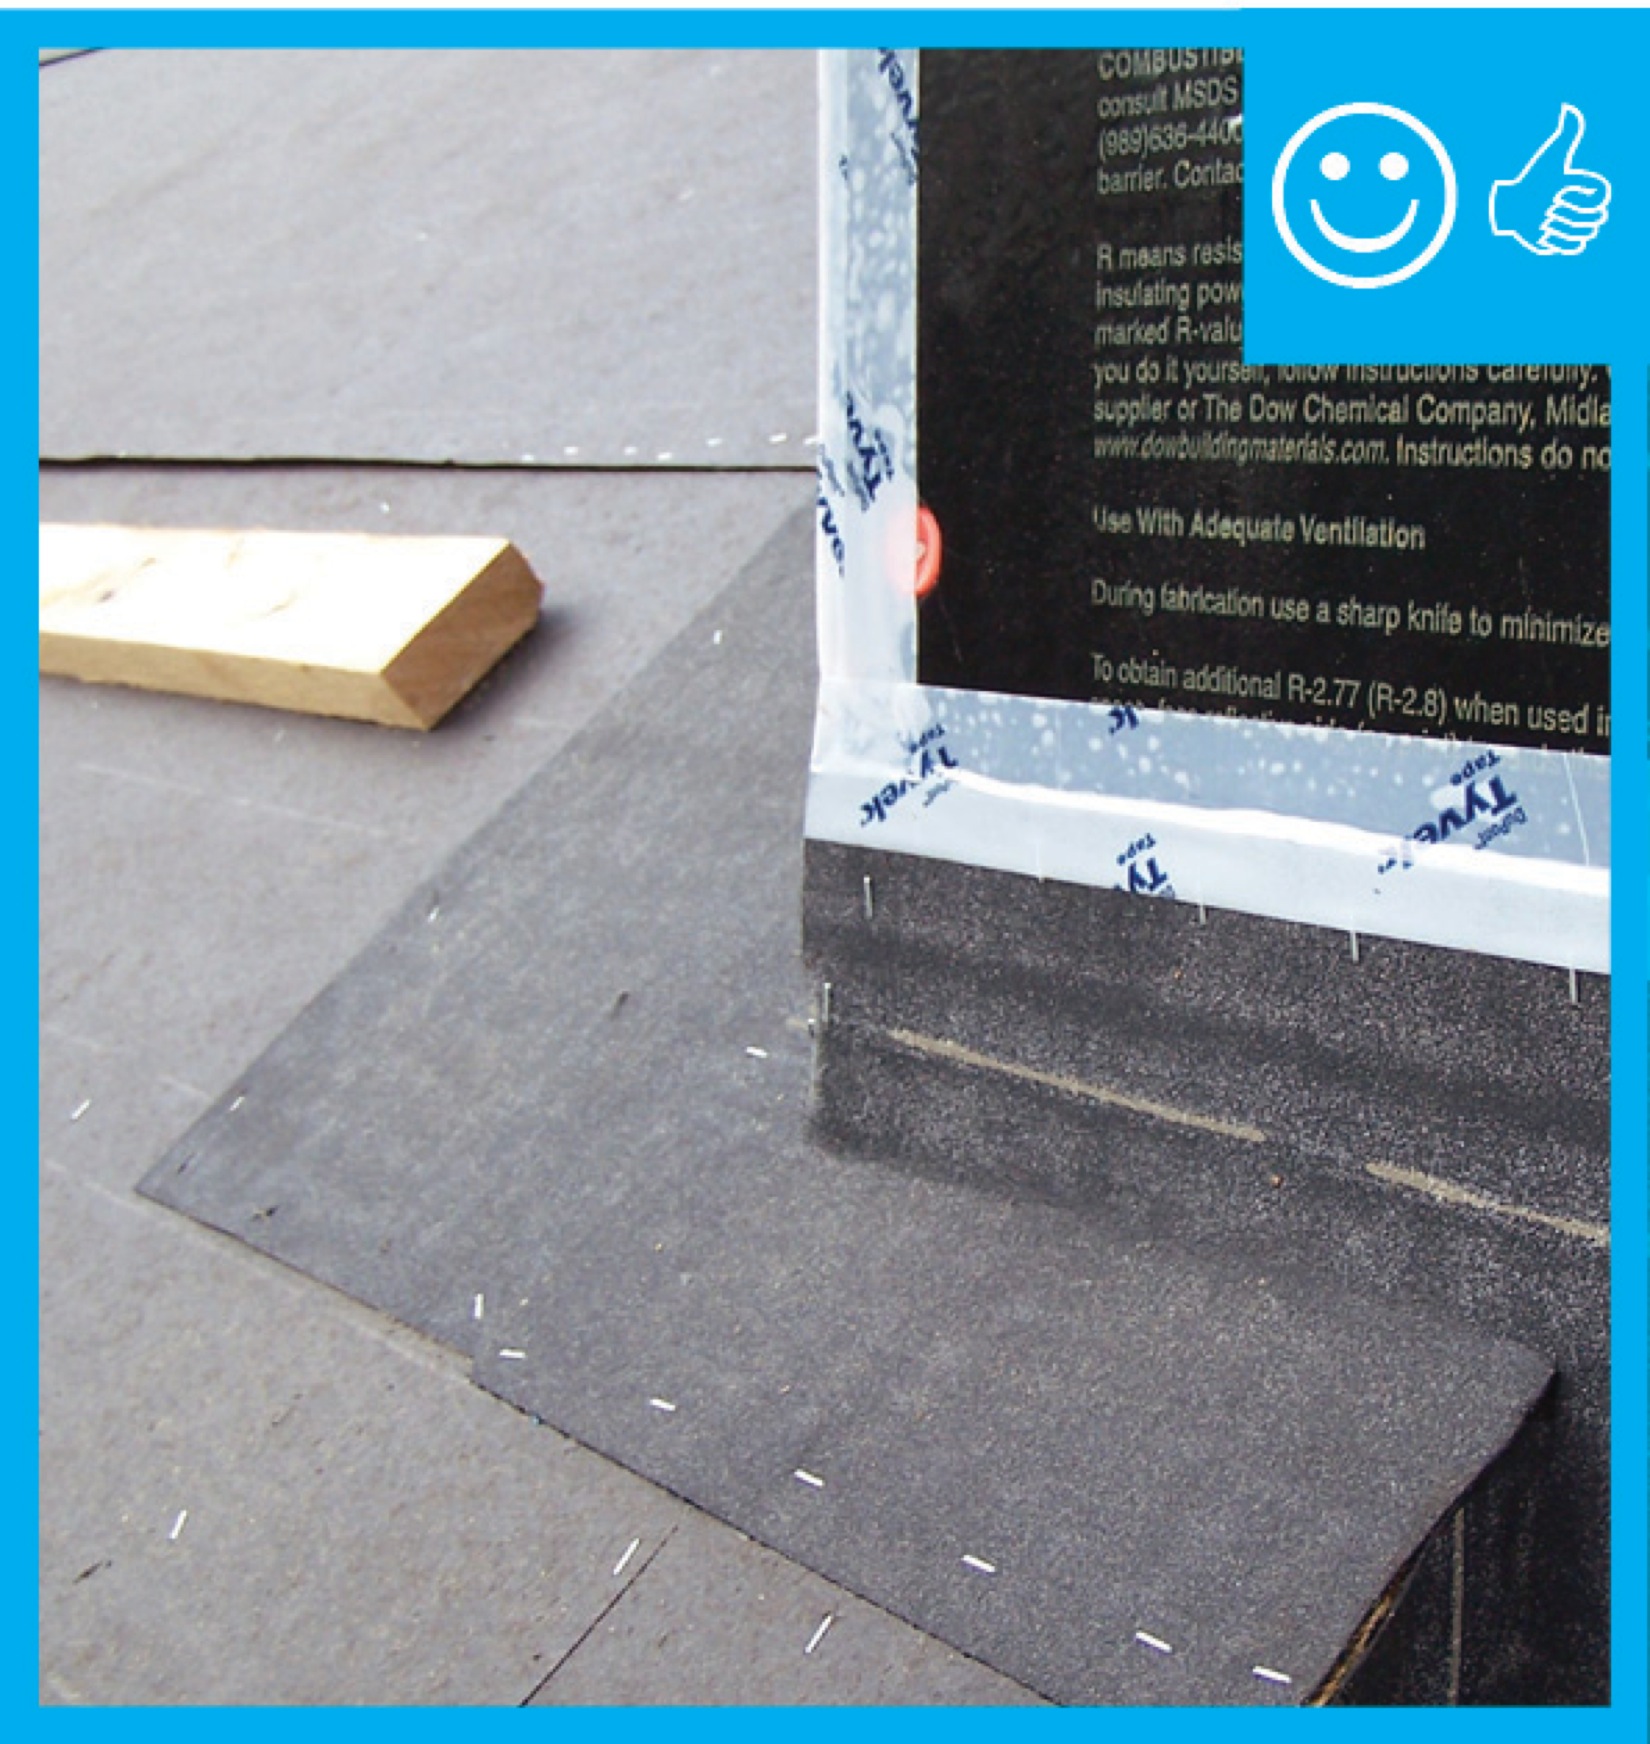
Right – There is a self-sealing bituminous membrane installed at the valley of the roof prior to the roof felt
Image
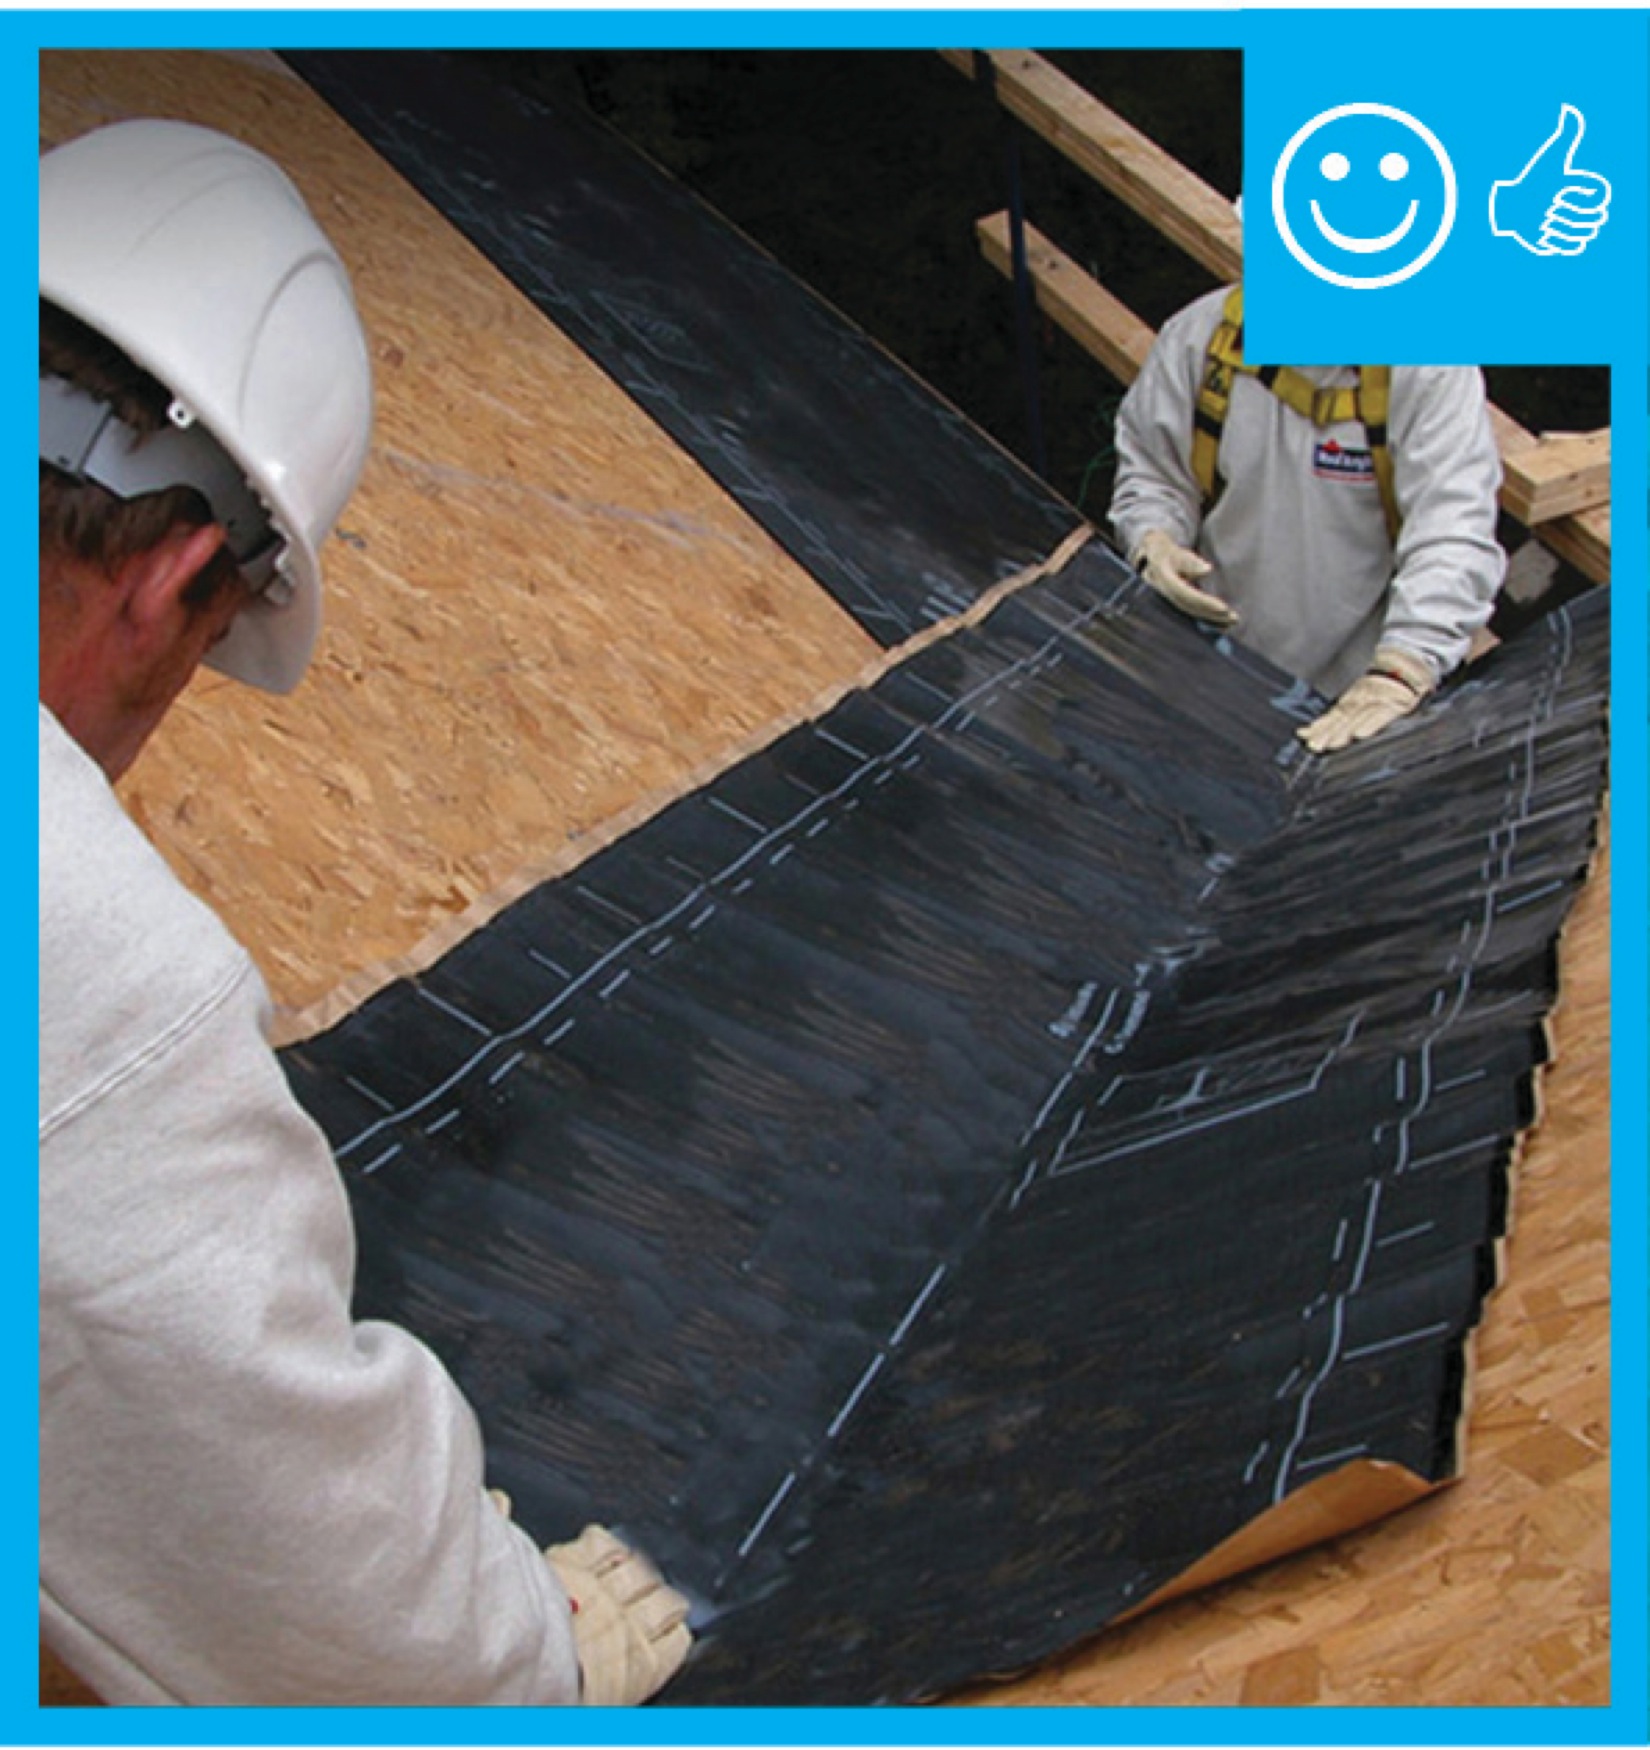
Right – This low-slope flat roof assembly has continuity of both the air and water barriers
Image

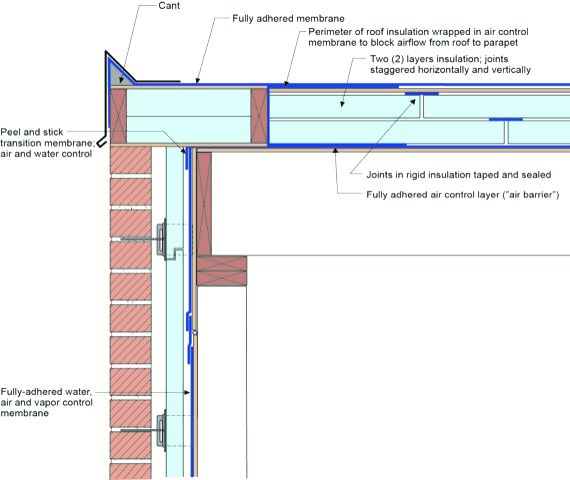
Right – This low-slope roof and parapet assembly has continuity of both the air and water barriers
Image
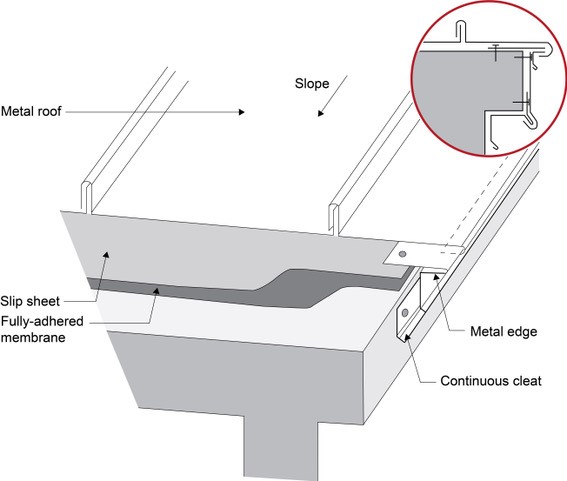
Right – Under metal roofing, sheathing is protected by metal edging over a fully adhered membrane and a slip sheet of loose laid building paper
Image

Image
Image
Image
Image
Image
Image
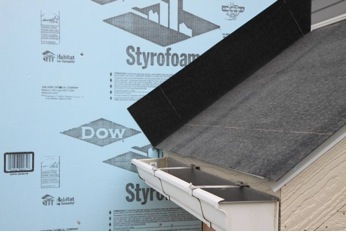
Step 1. Apply roof underlayment over roof deck and up the sidewall over the rigid foam insulation
Image
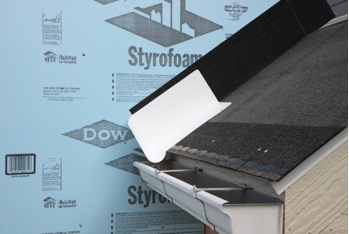
Step 2. Install shingle starter strip then kick-out diverter as first piece of step flashing.
Image

Step 4. Install remaining sidewall flashing, appropriate counter flashing, and shingles
Image
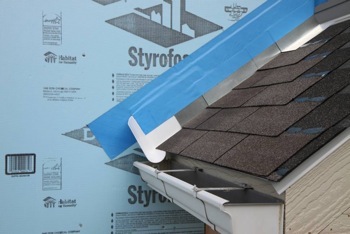
Step 5. Apply self-adhesive flashing over top edge of the wall flashing, diverter, and rigid foam insulation