Showing results 1 - 50 of 50
Image
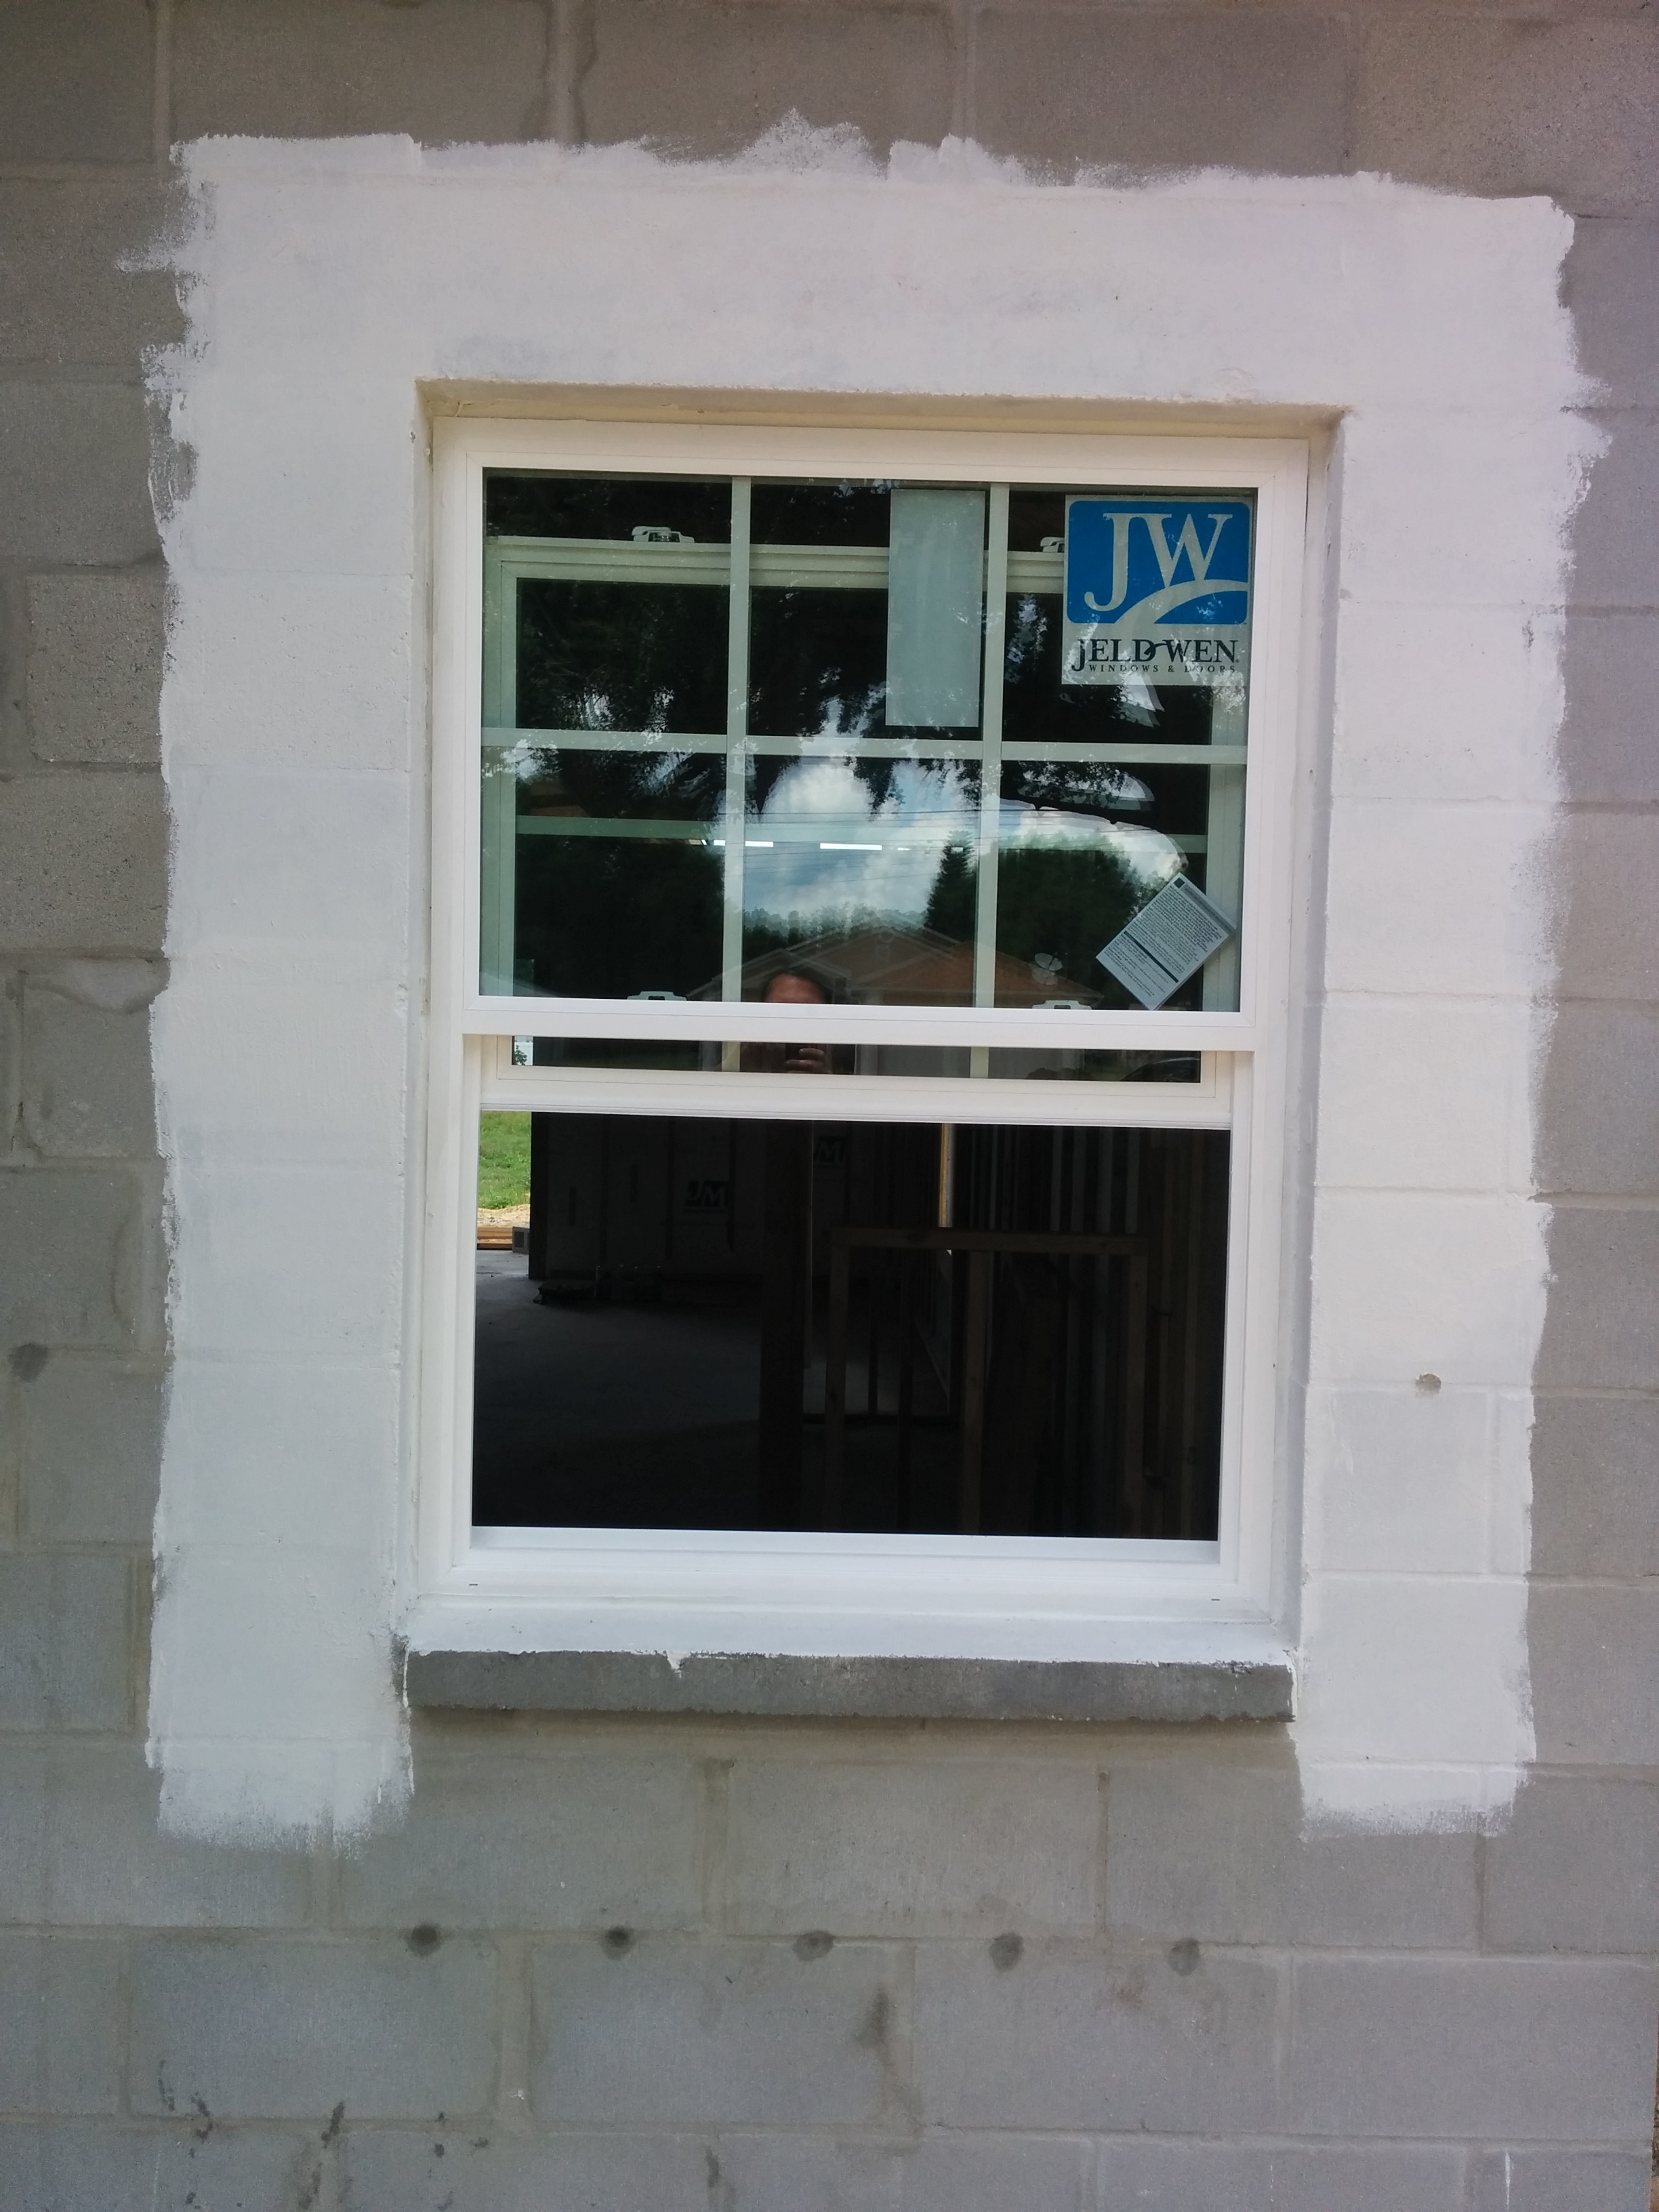
A paint-on flashing is used around the windows and doors for seamless water protection.
Image
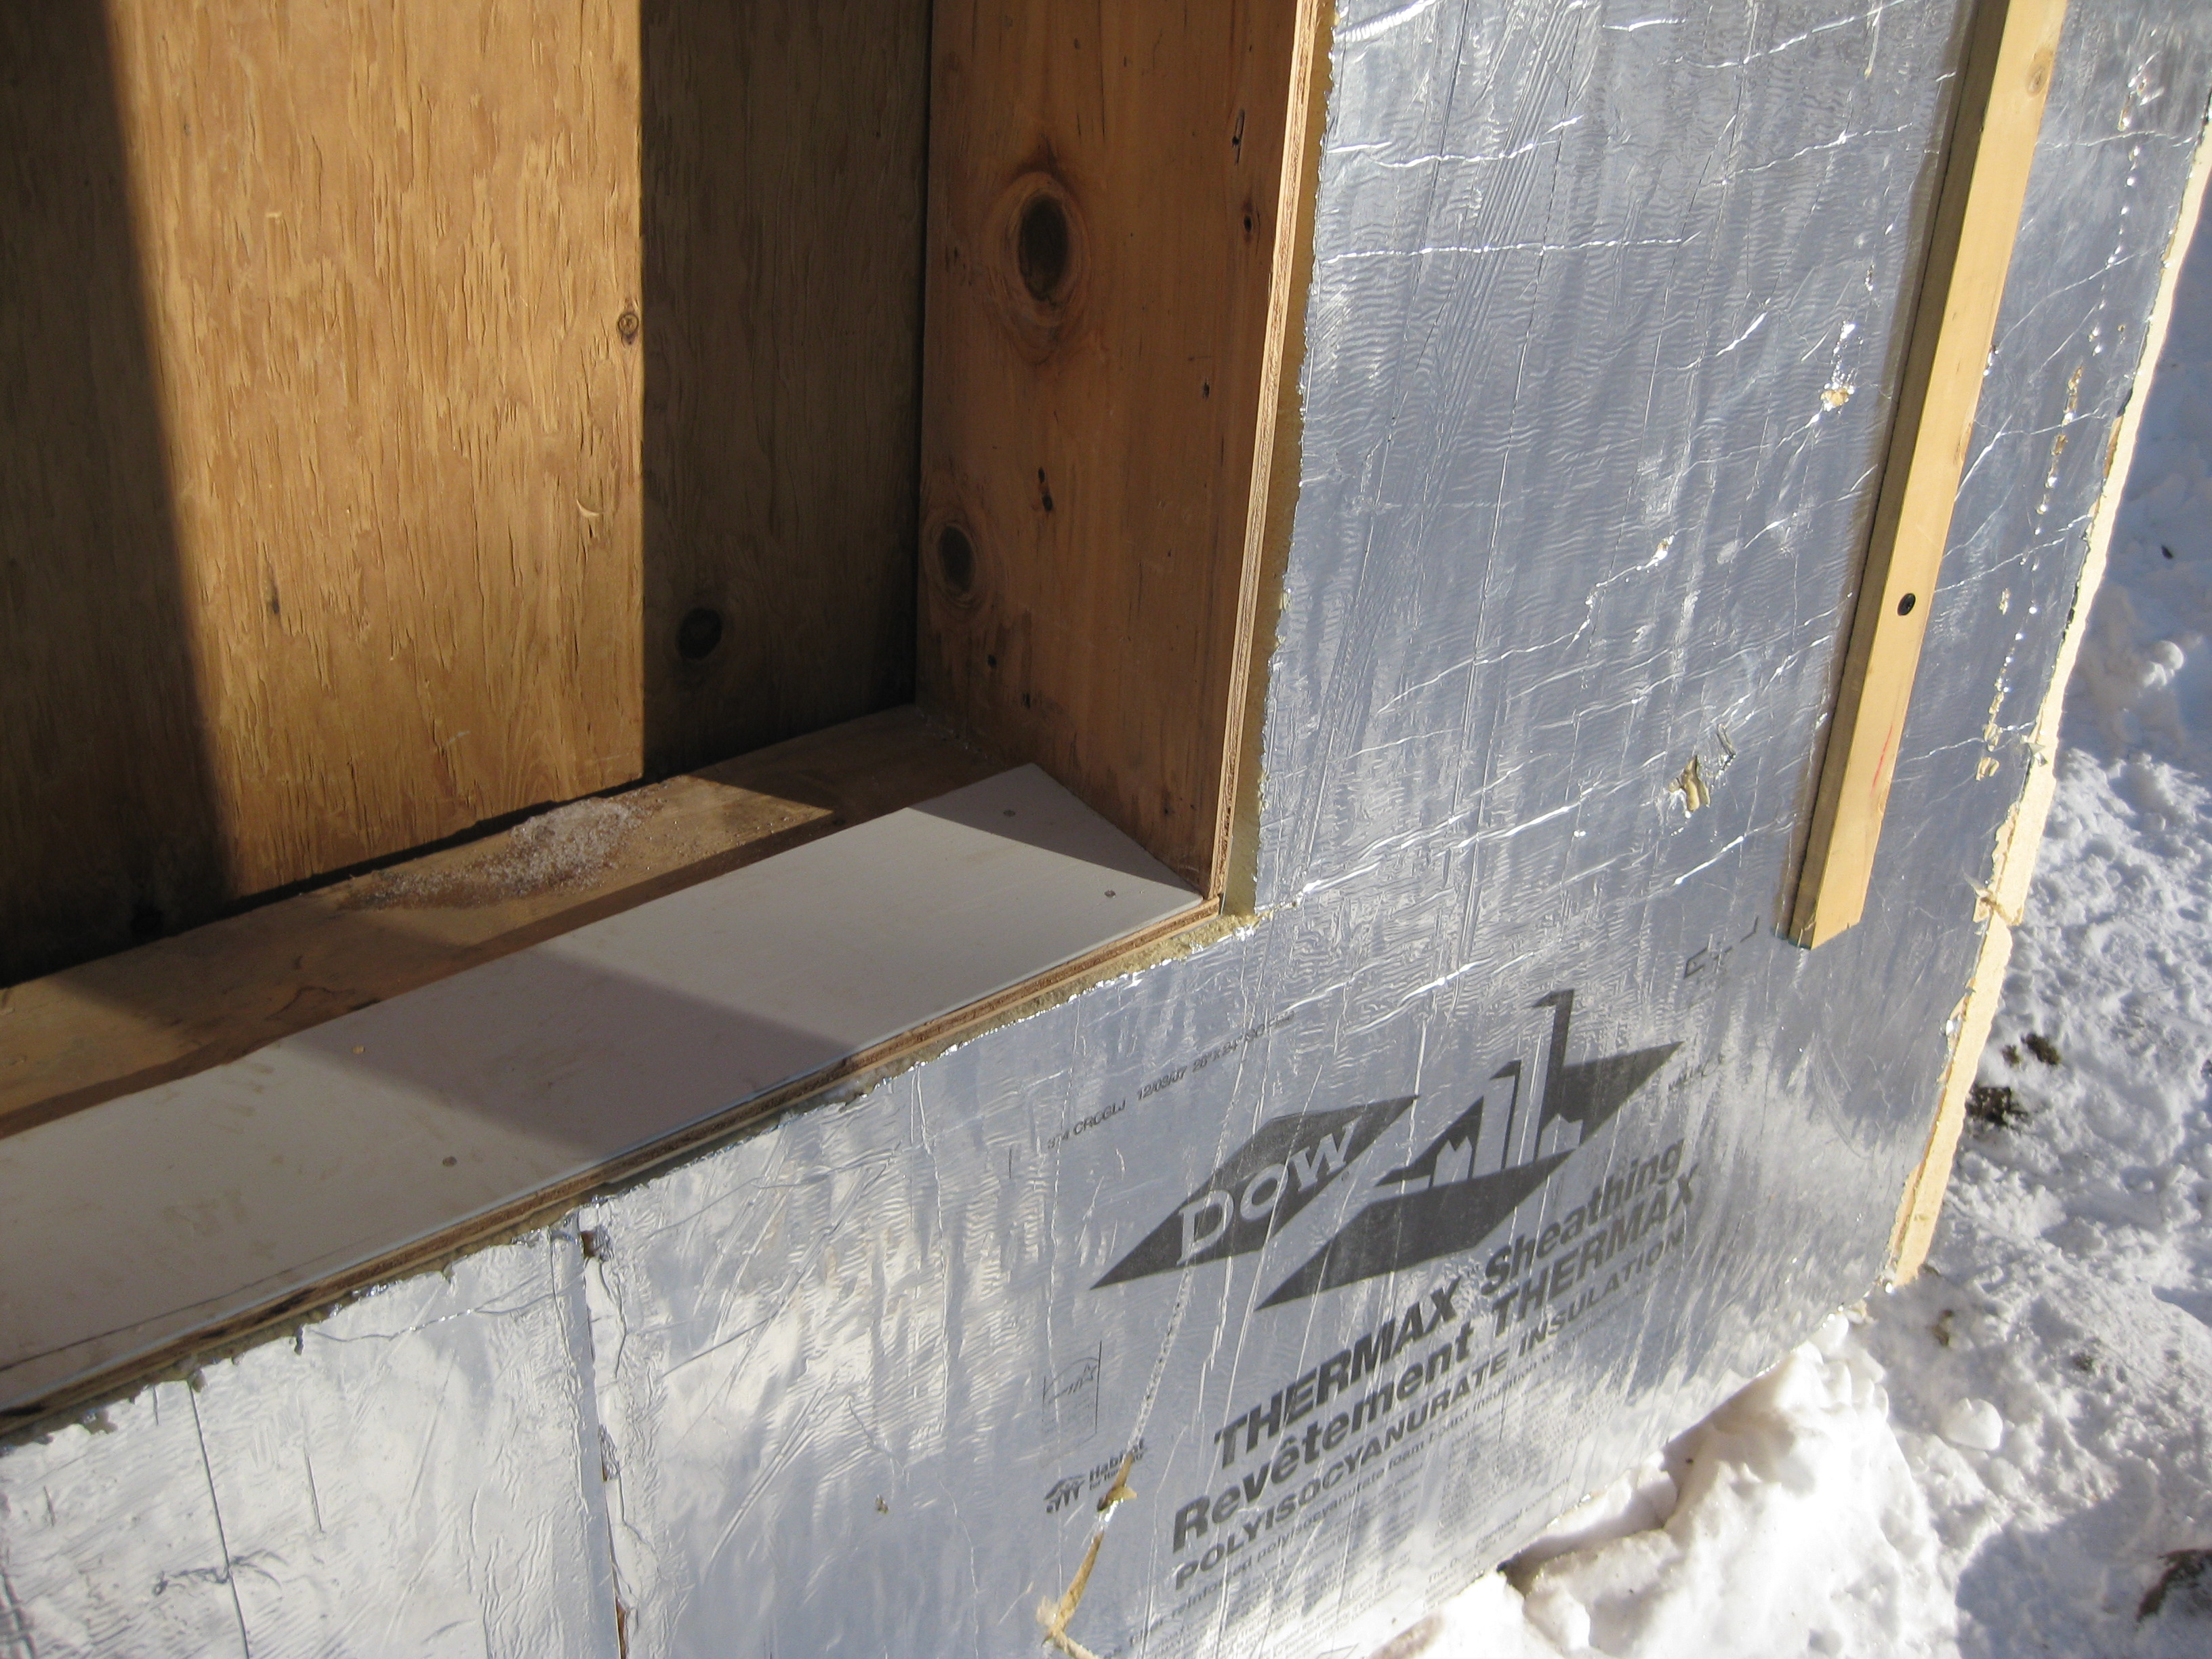
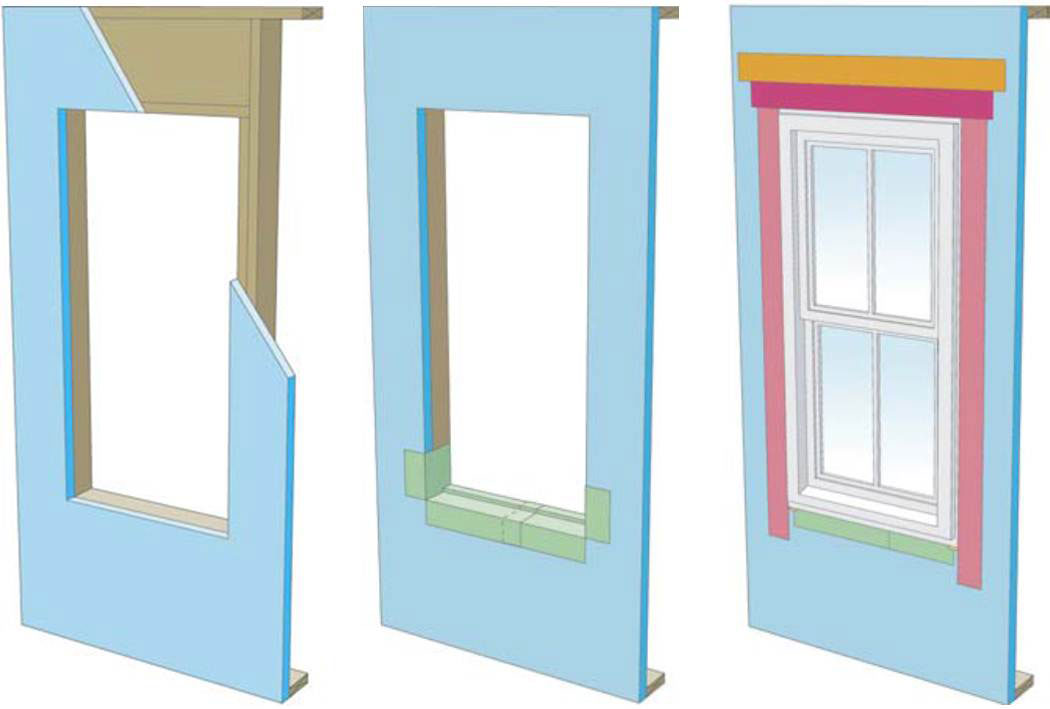
A piece of siding is used as sill extension and to provide slope in the opening for the window, which is deeper because exterior rigid foam has been added
Image
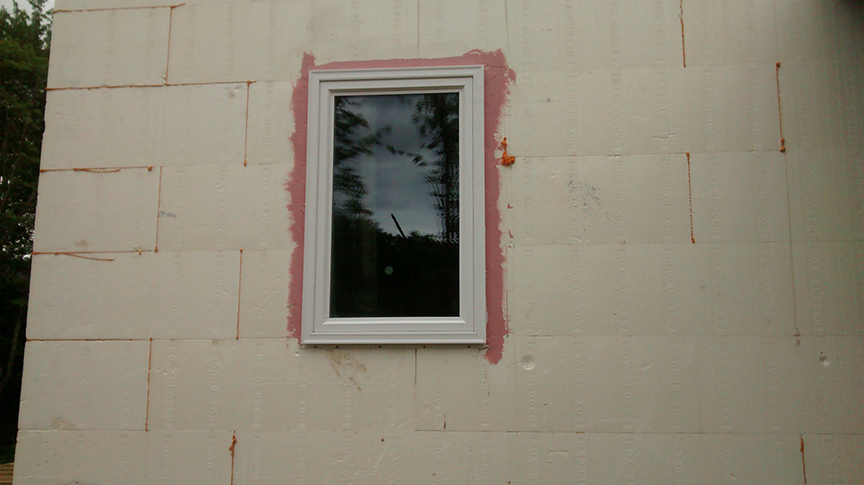
Before installing the windows, the window rough openings are sealed with a liquid-applied flashing that provides a seamless moisture and air barrier to protect the wall from water intrusion.
Image
Image

Image
Proper flashing around windows is especially important when the rigid foam serves as the drainage plane in the wall
Image
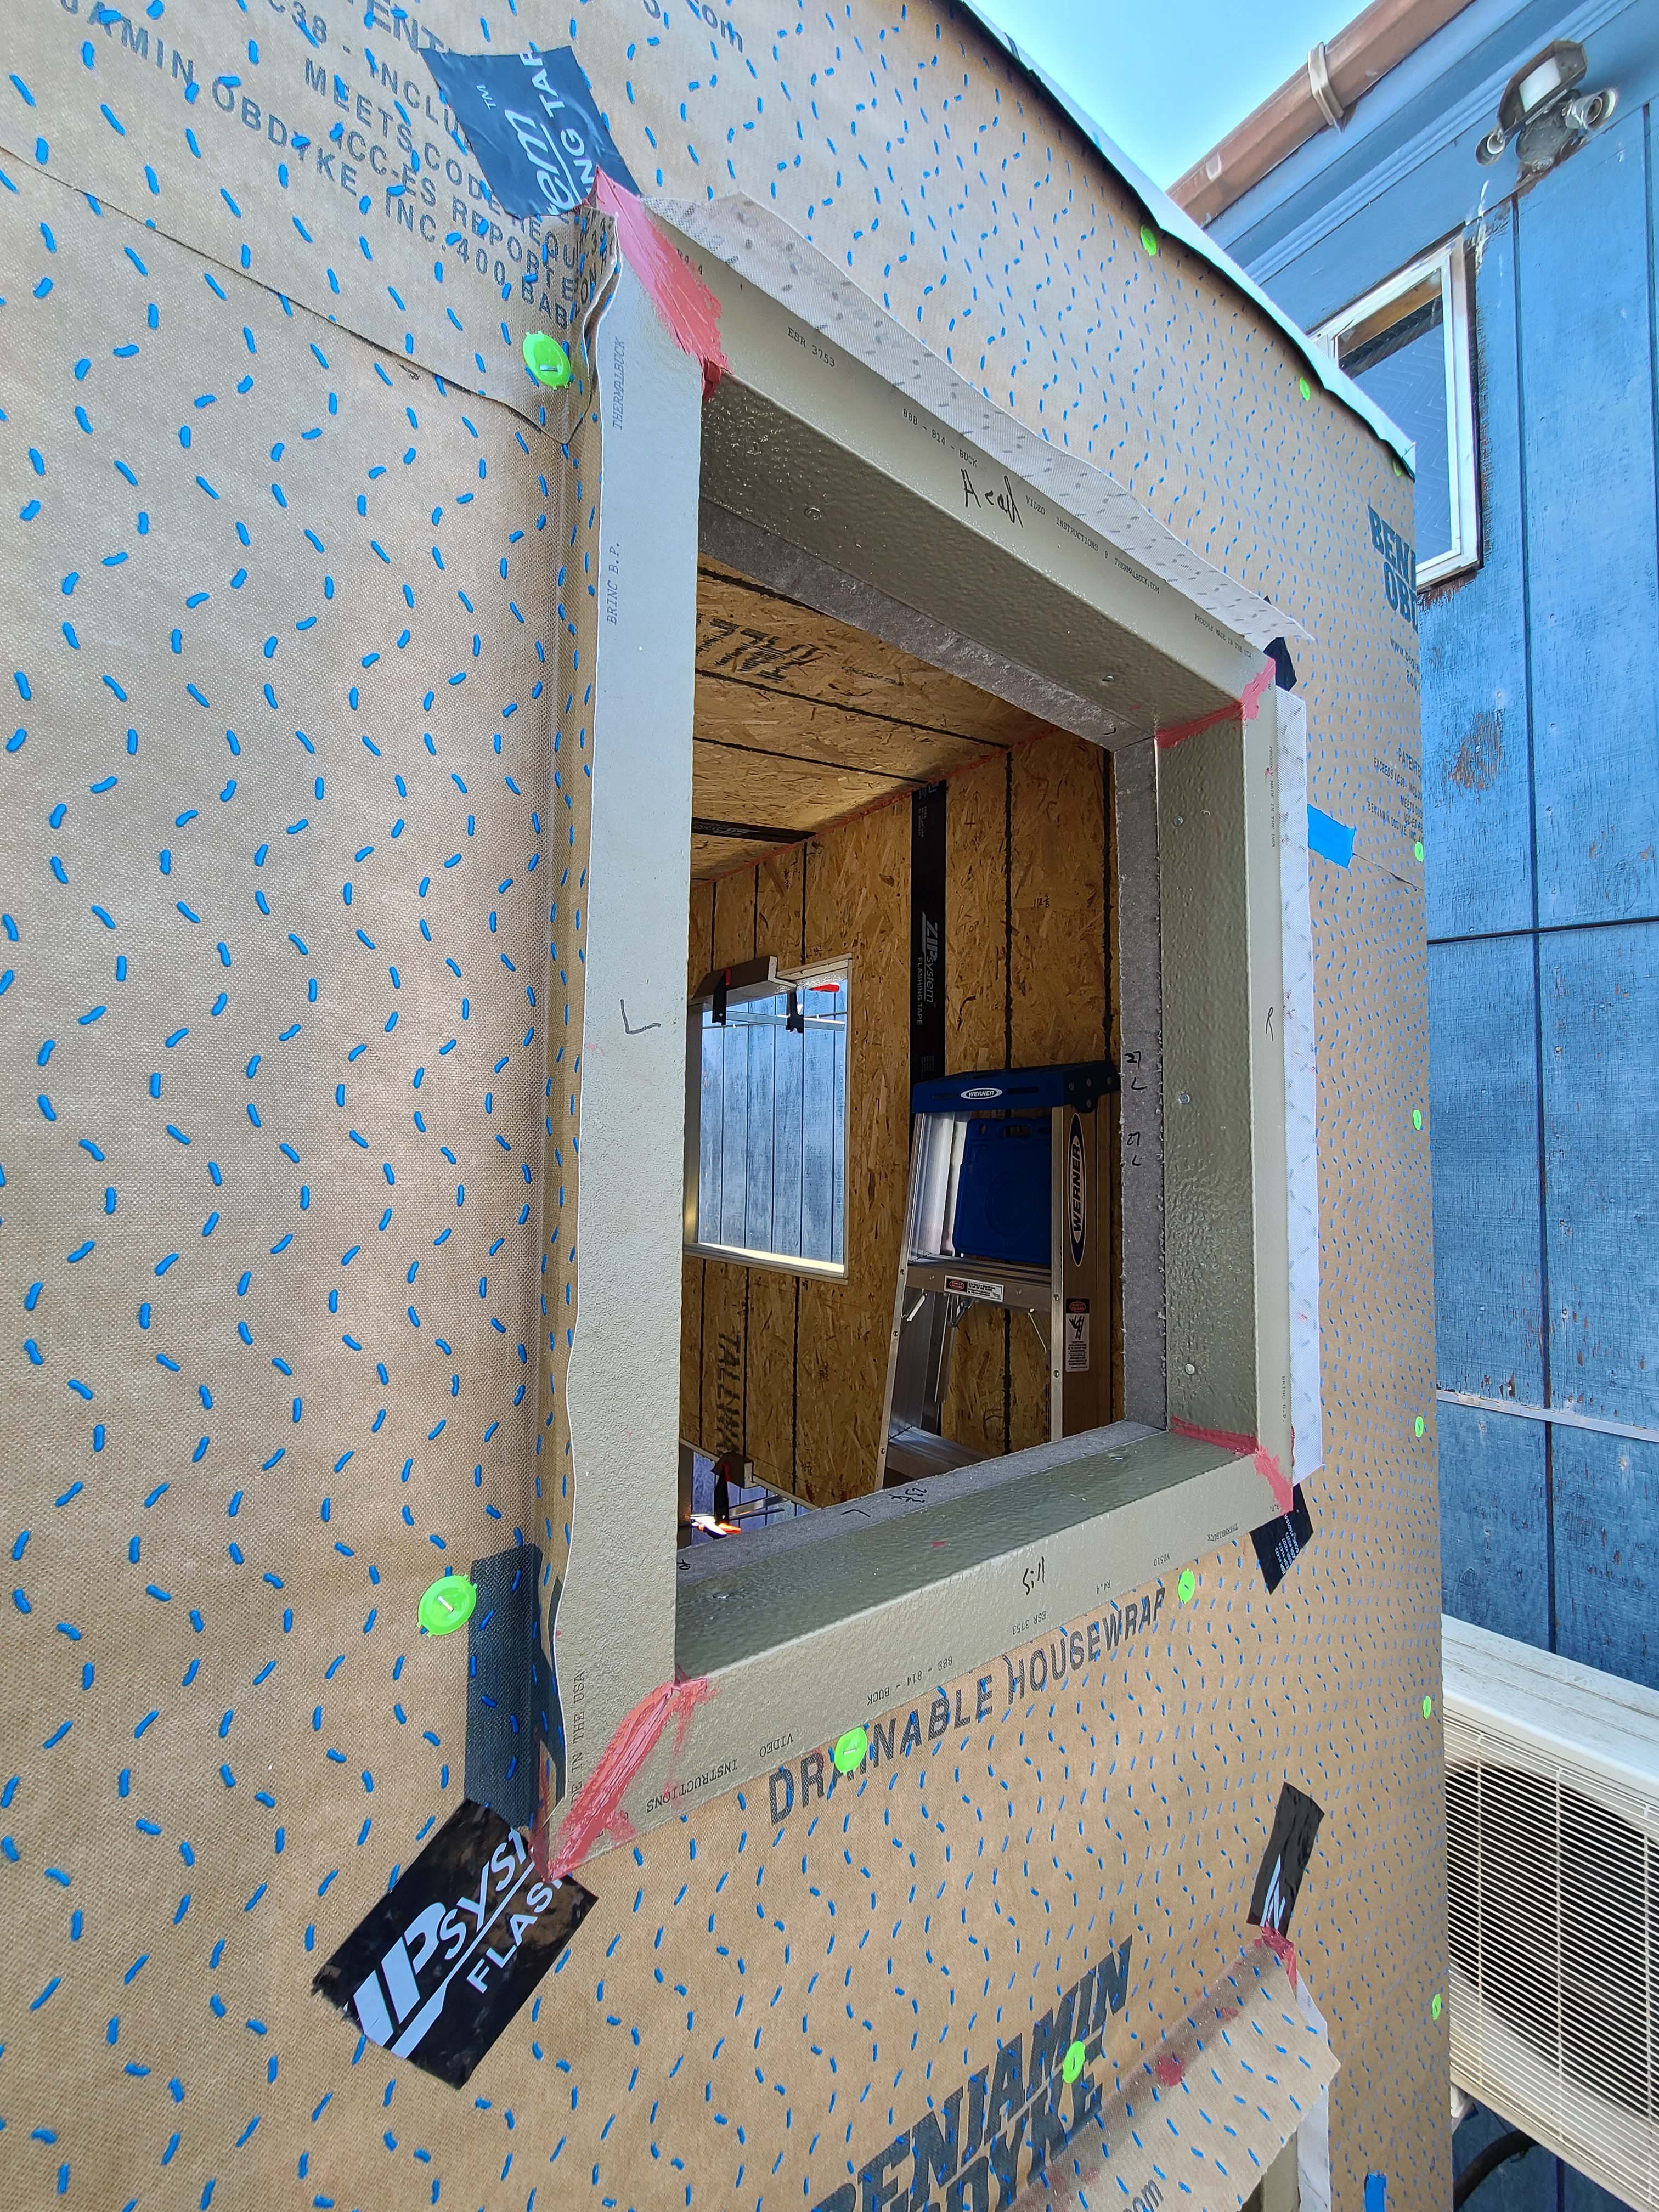
Right - Corners of window are protected with draining house wrap that laps onto the sides of the window trim, paint-on flashing at window trim corners, and self-adhered flashing to reinforce corners.
Image
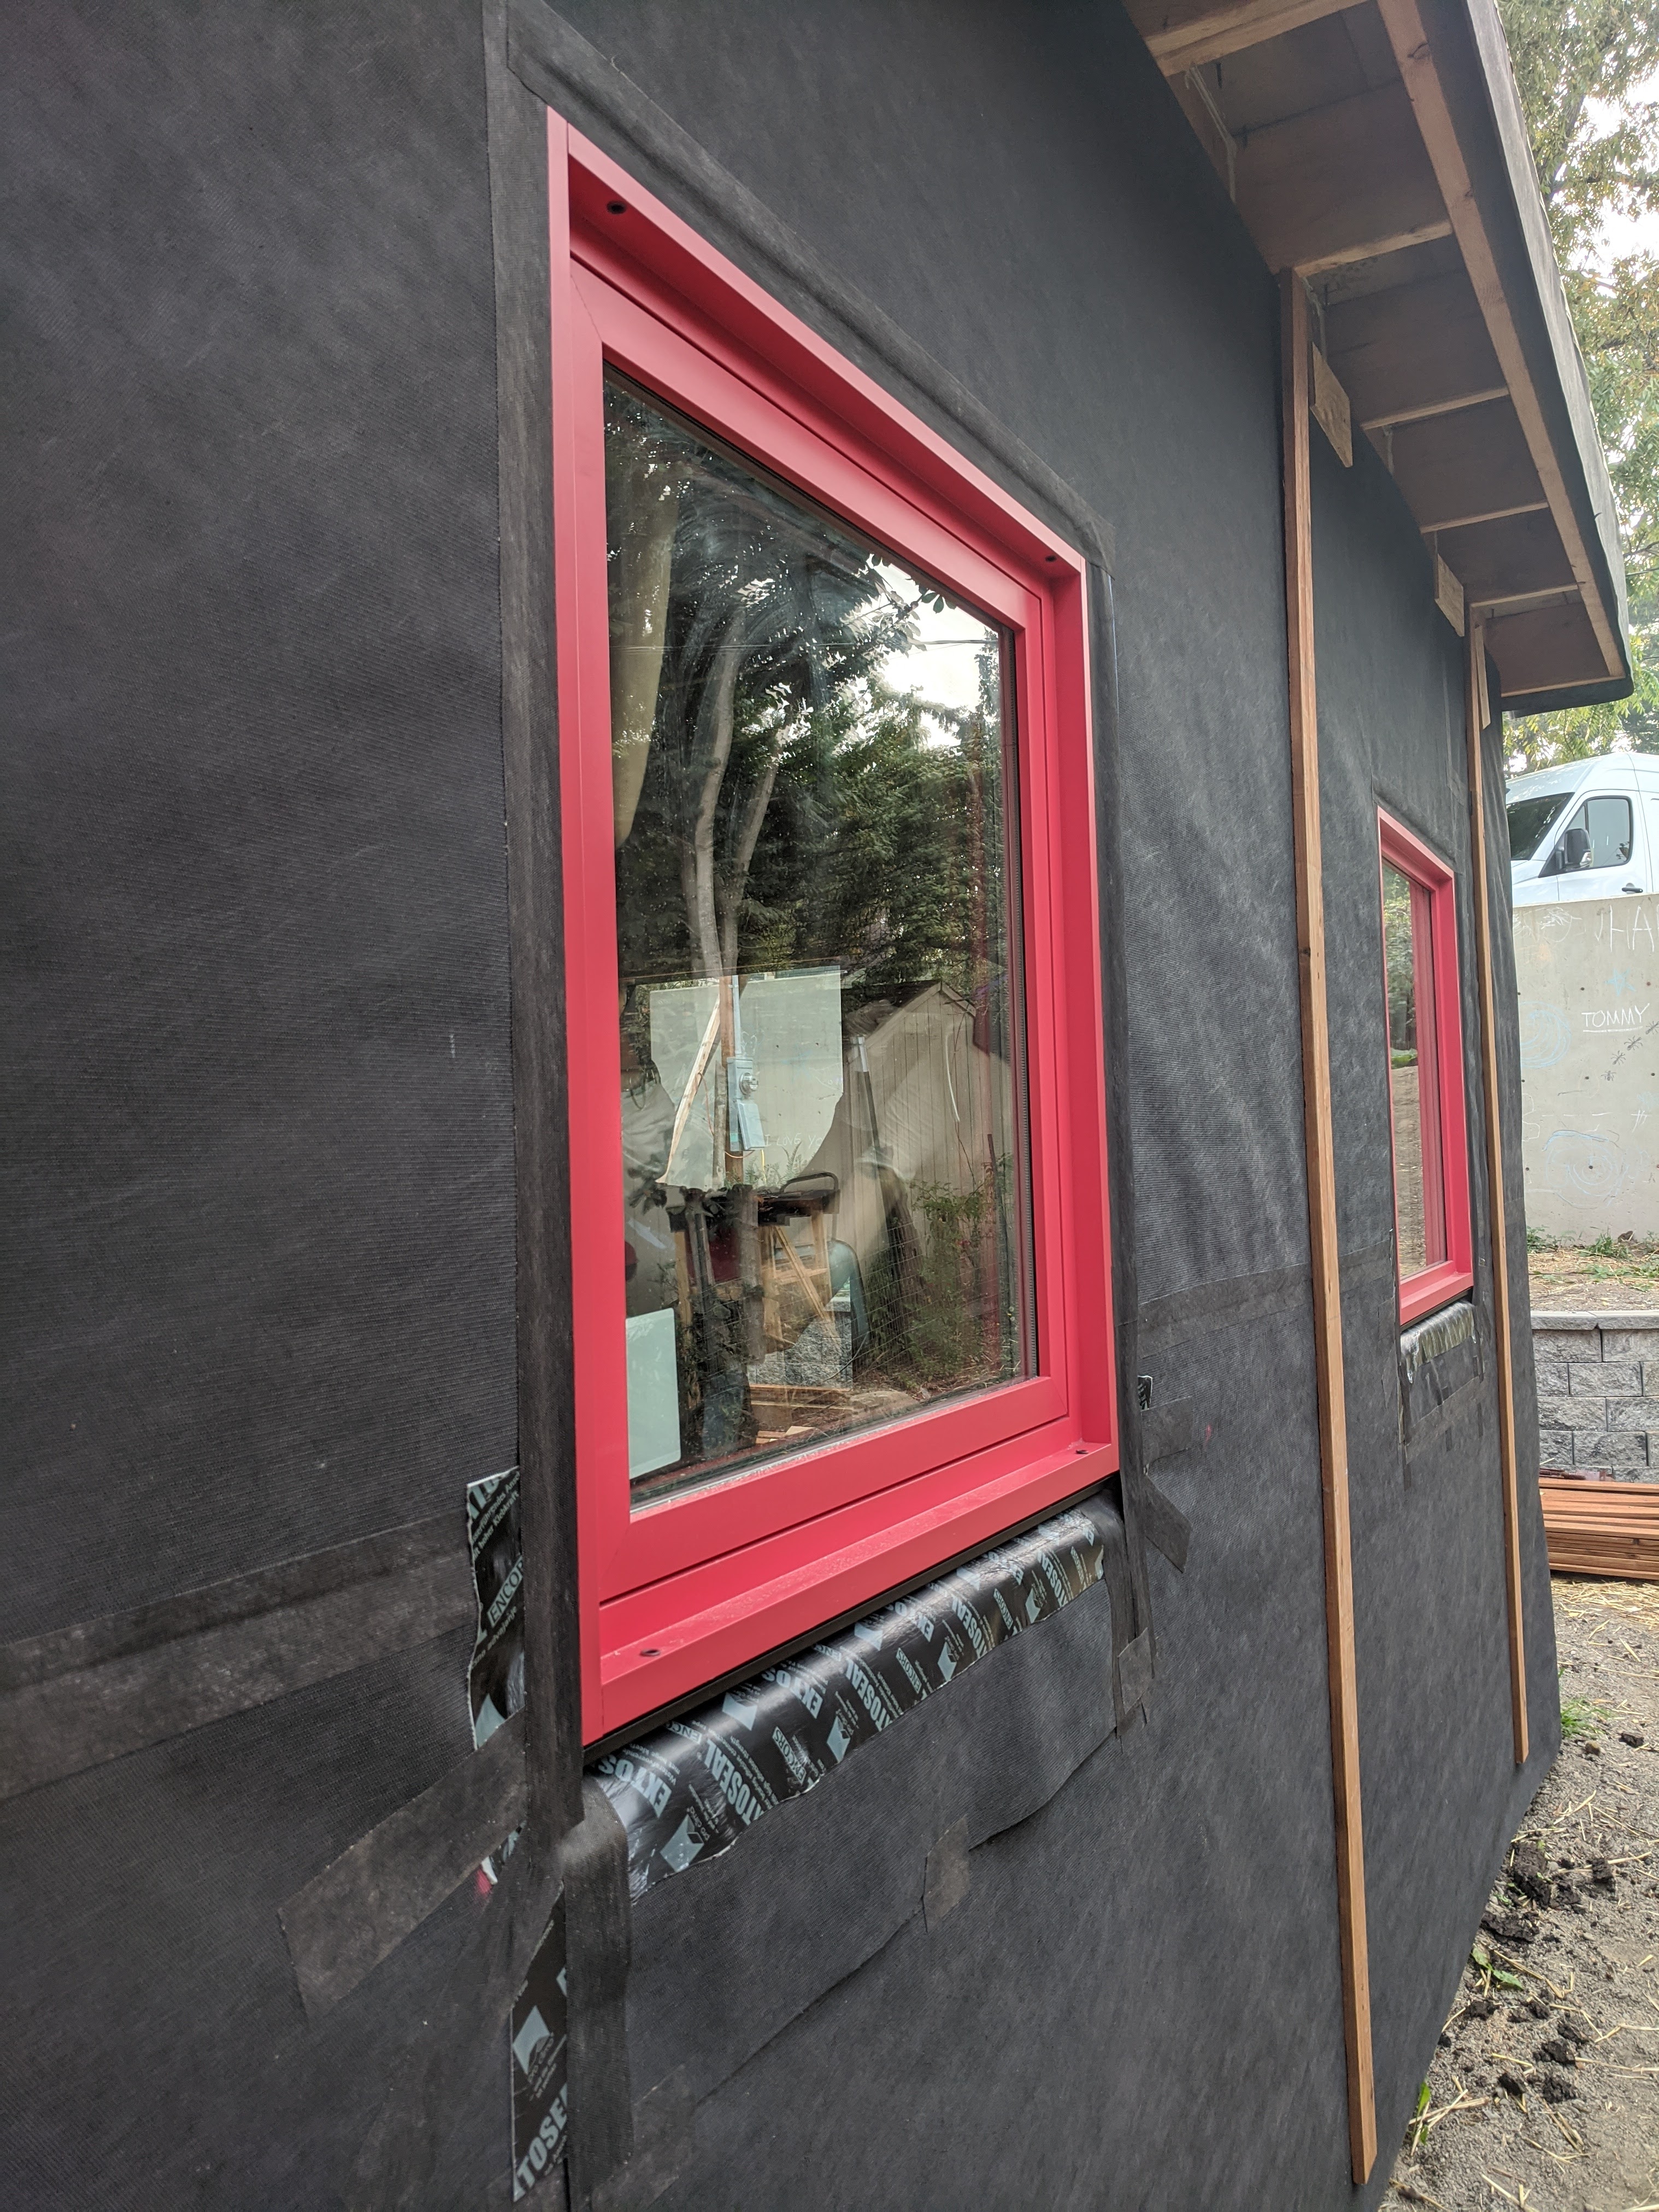
Right - Tape flashing keeps moisture out around and below the window; extra tape reinforces the corners to prevent tearing of the house wrap and to keep water out of this critical juncture.
Image
Right – A flexible flashing product is installed around the corners of the window sill before installing the windows.
Image
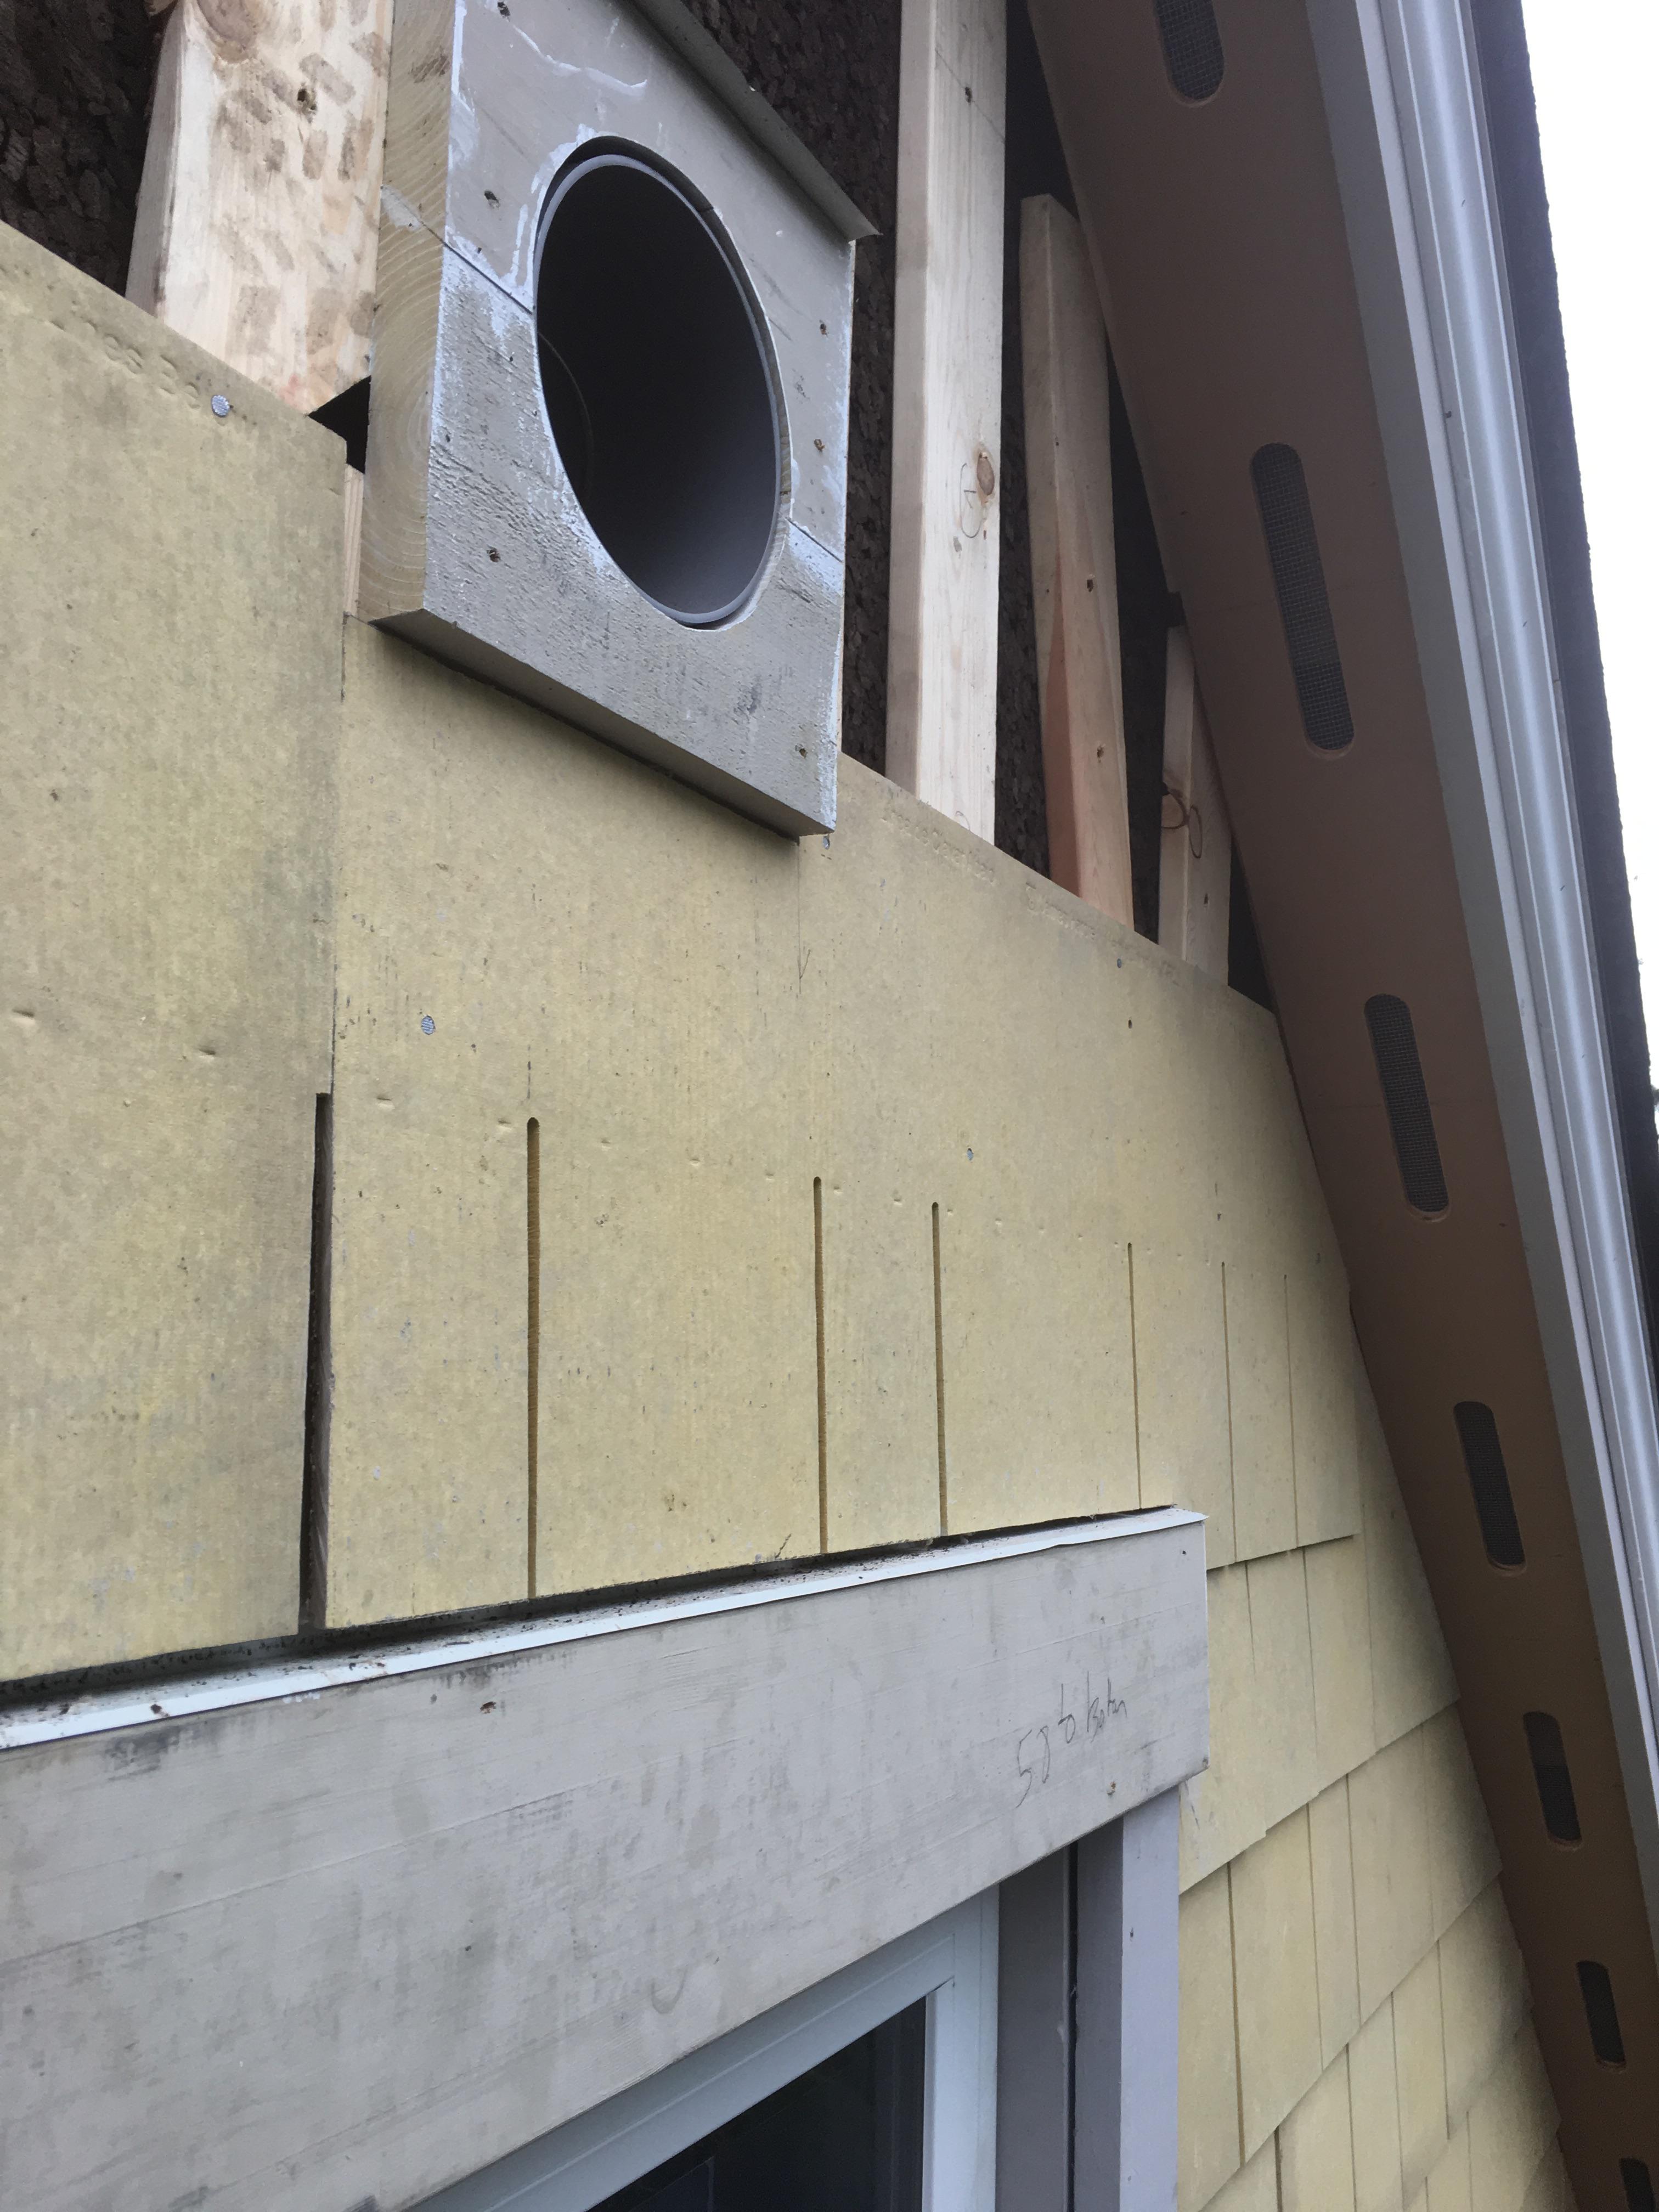
Right – A metal flashing was installed behind the first row of siding above the windows to guide water over the trim.
Image

Image

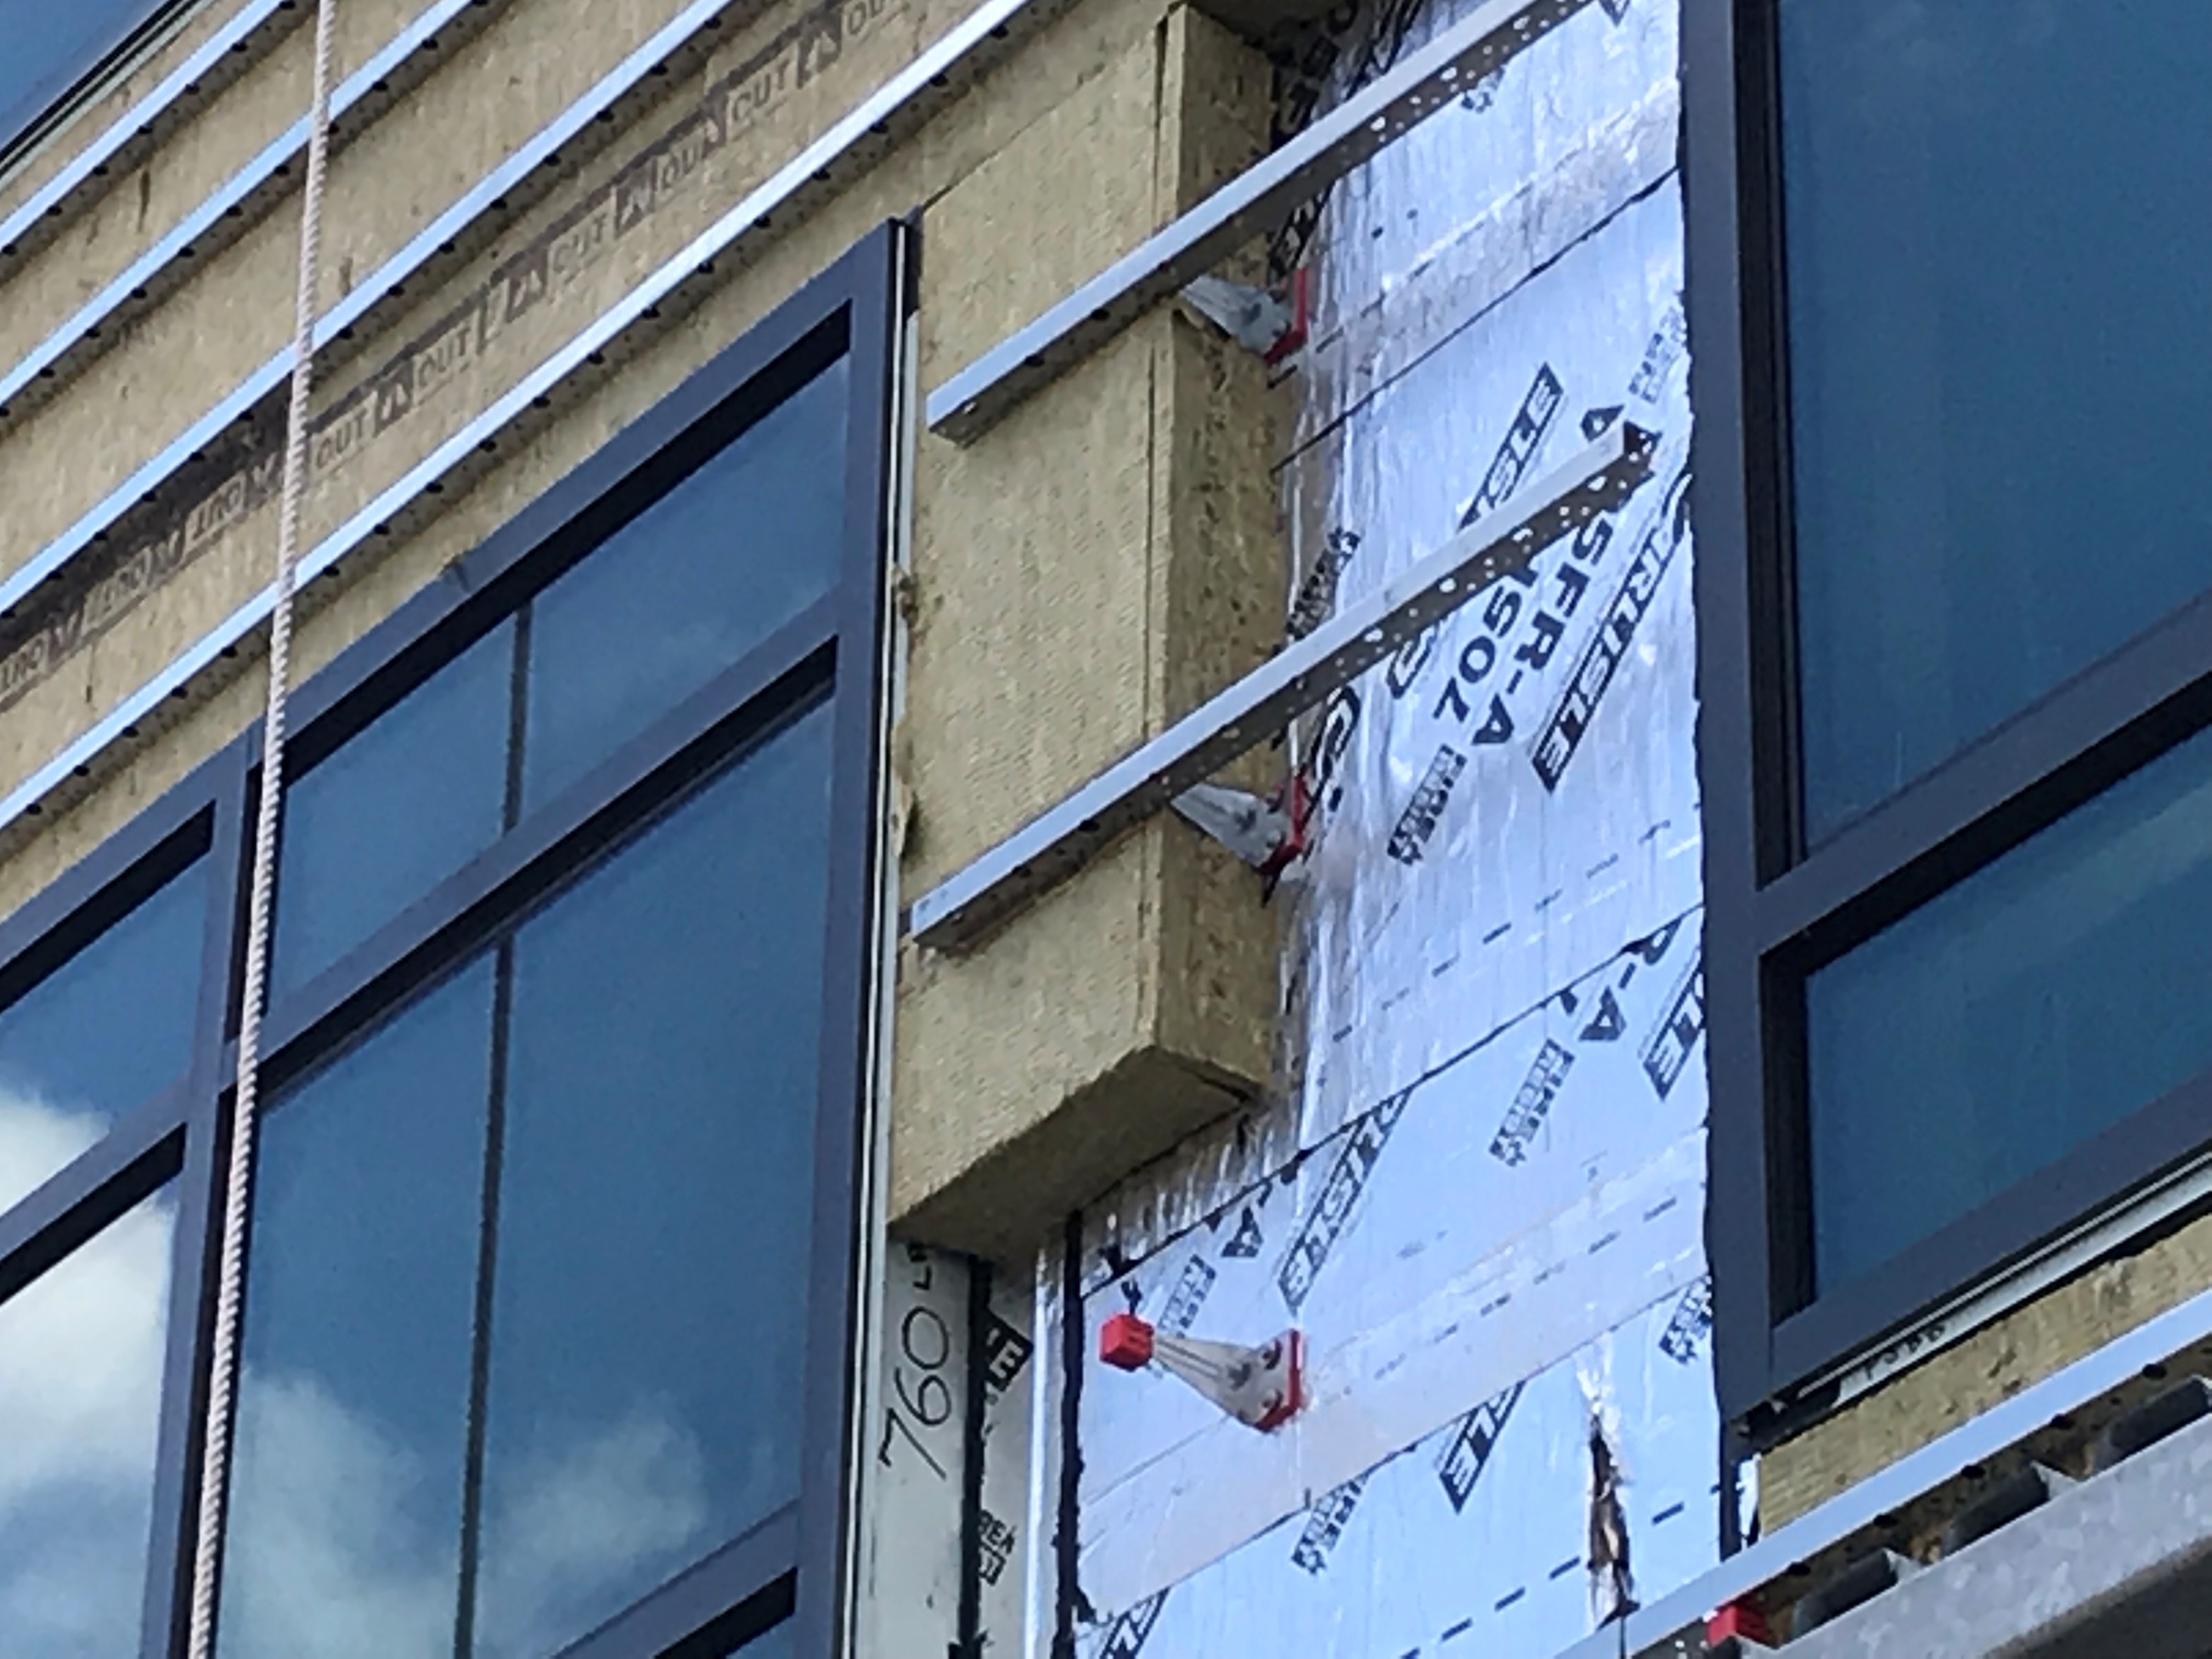
Right – The flashing is properly installed to create a complete drainage system with continuous rigid insulation sheathing/siding
Image

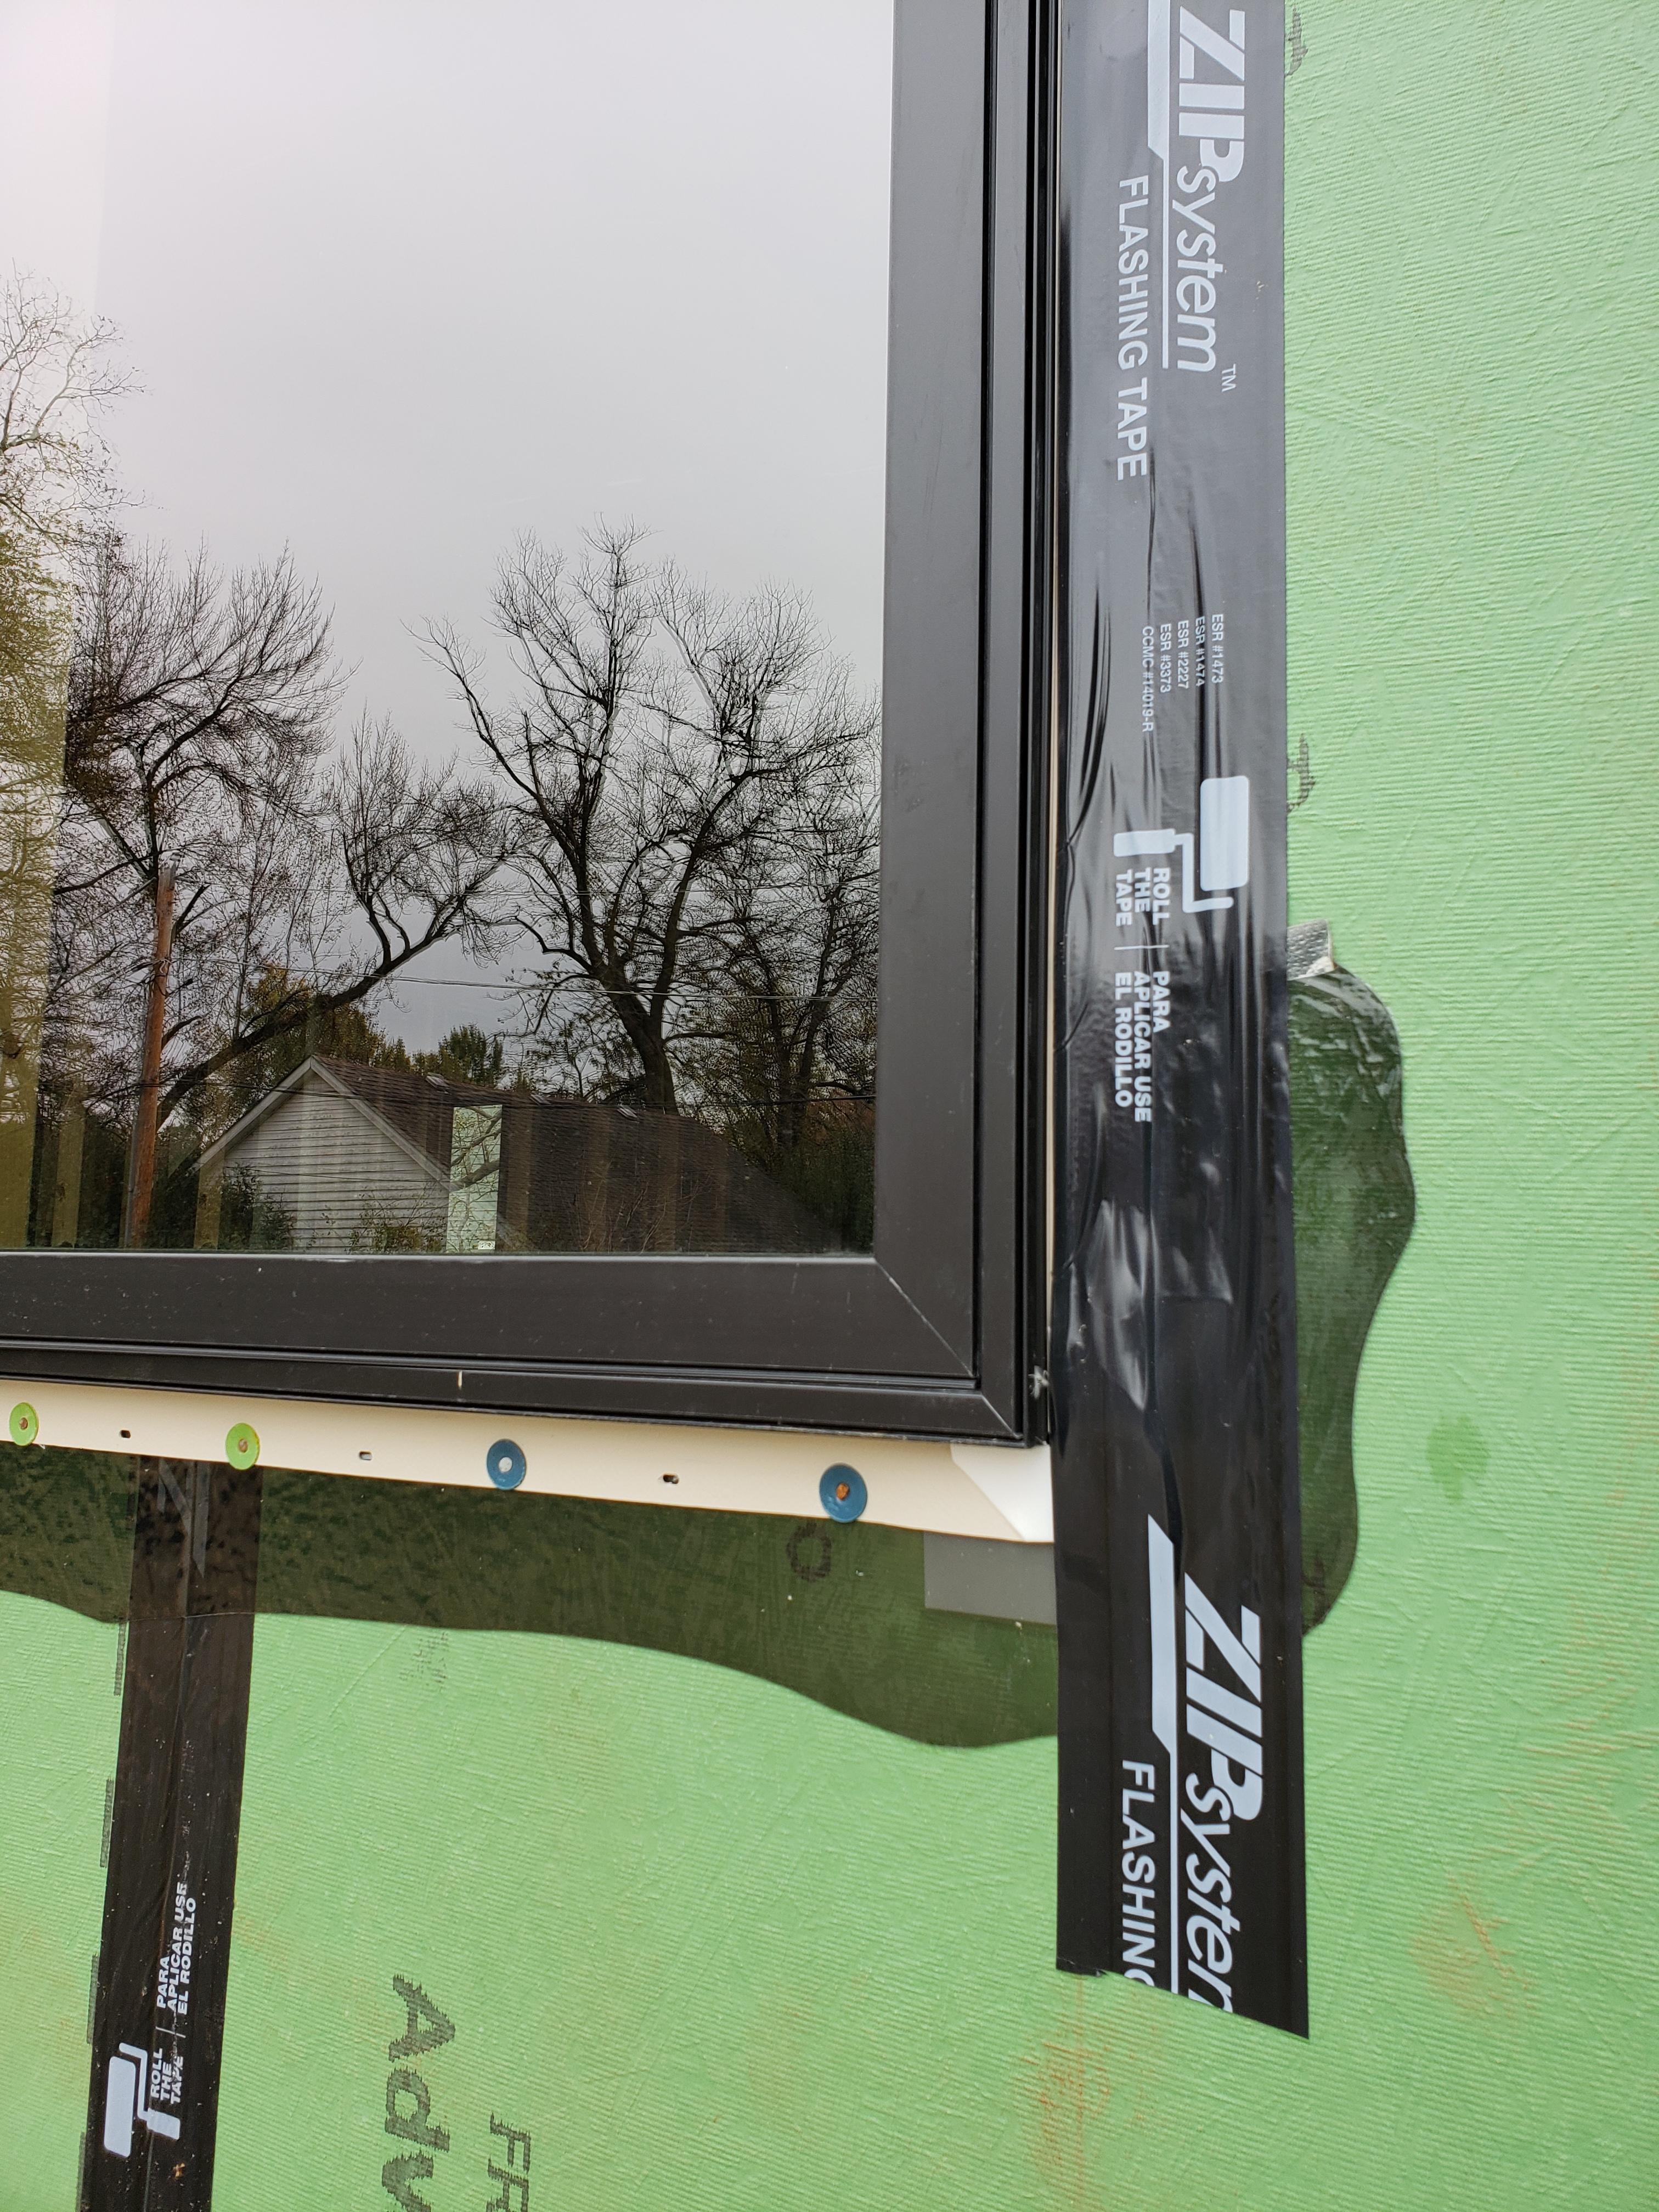
Right – There is flashing installed along the top of the window and the water-resistant barrier is layered over to create a complete drainage system
Image

Right – Windows are installed and flashed in the factory for these modular homes.
Image
Image

The fluid-applied asphalt coating provides a weather-resistant, moisture resistant layer around the house, serving as a continuous drainage plane and flashing for window and door openings.
Image

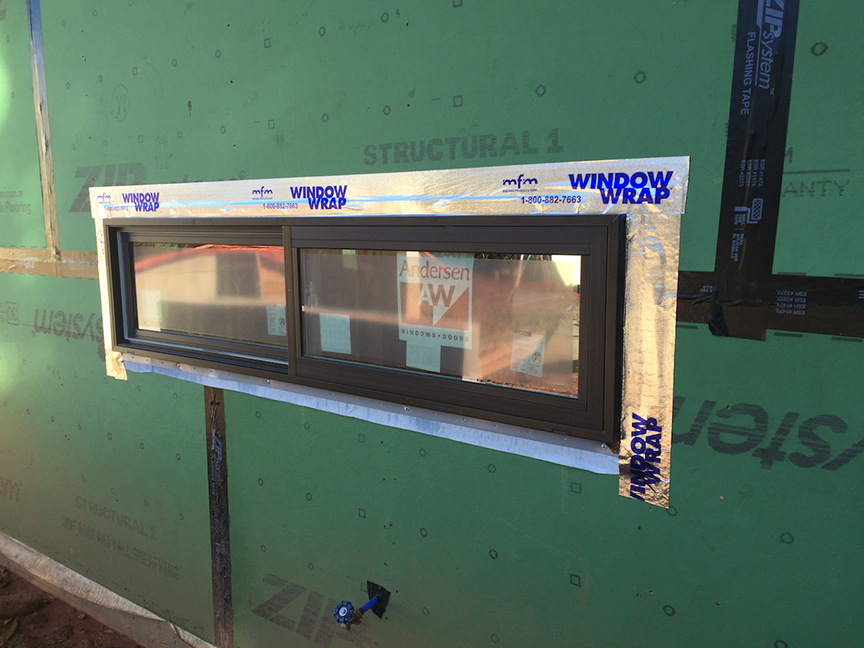
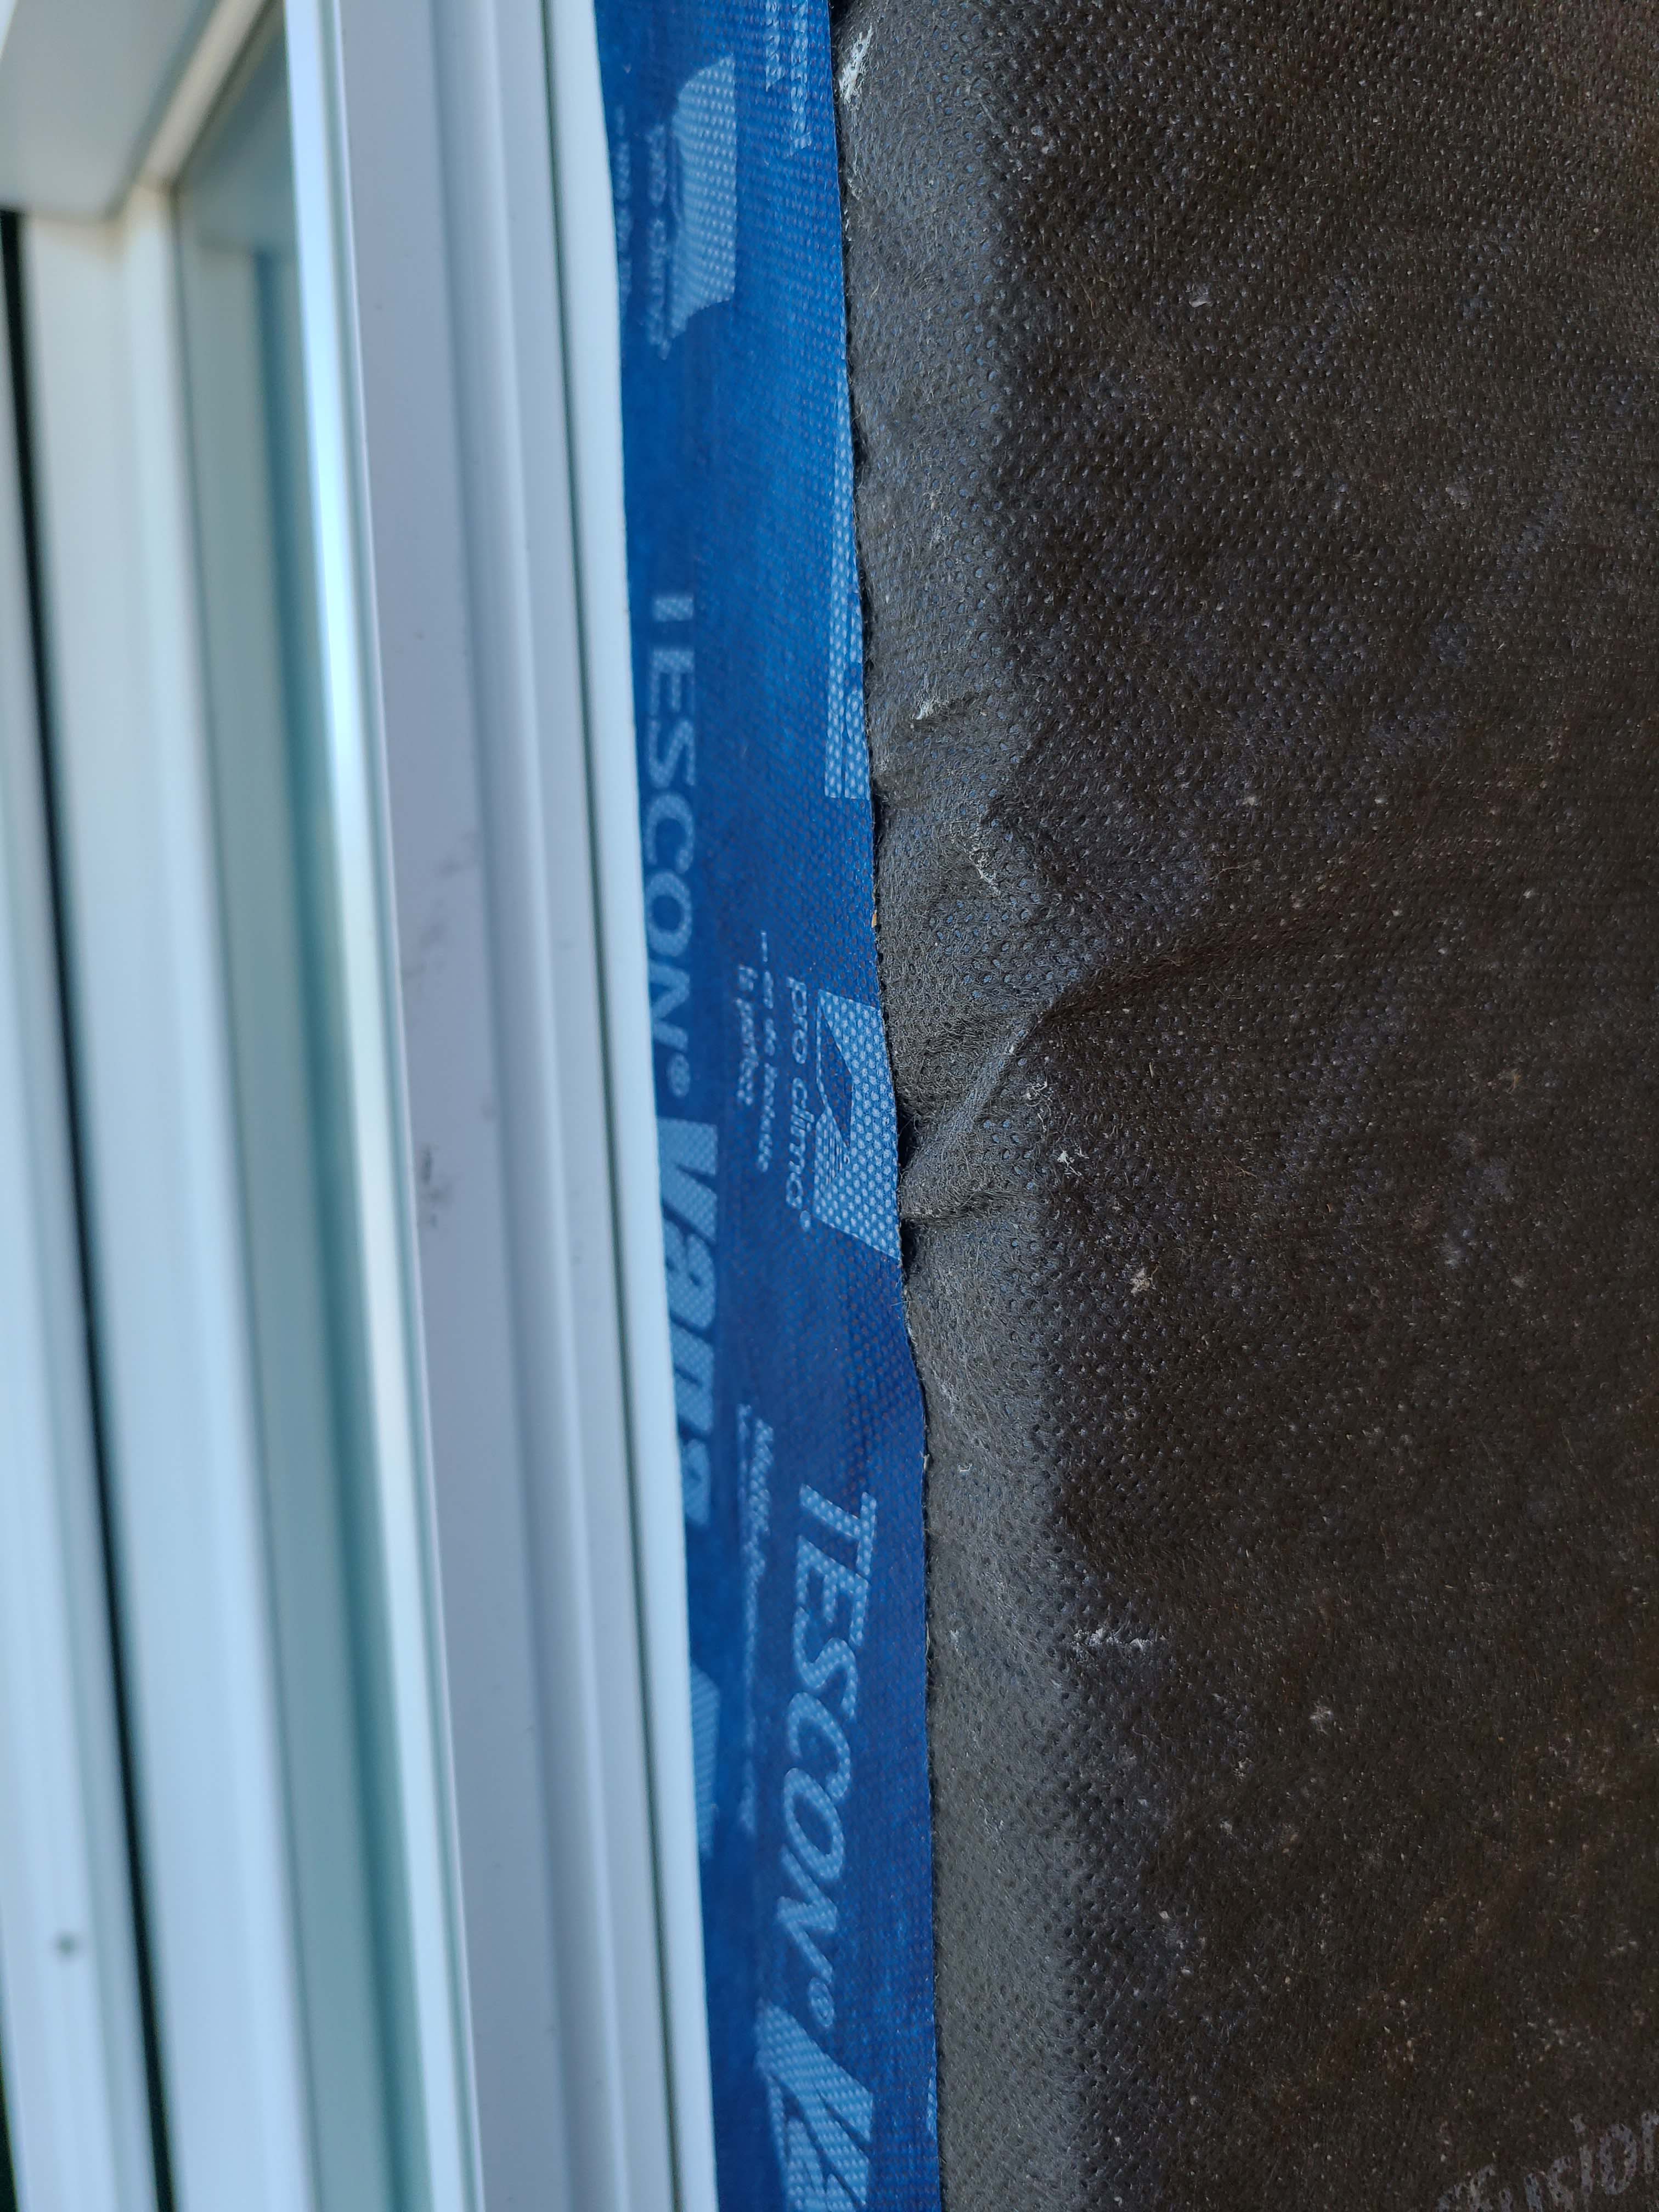
The tape window flashing here is integrated with the roller-applied weather-resistant barrier.
Image

The windows in this building are connected to the fully adhered water and air control layer using fluid-applied flashing
Image
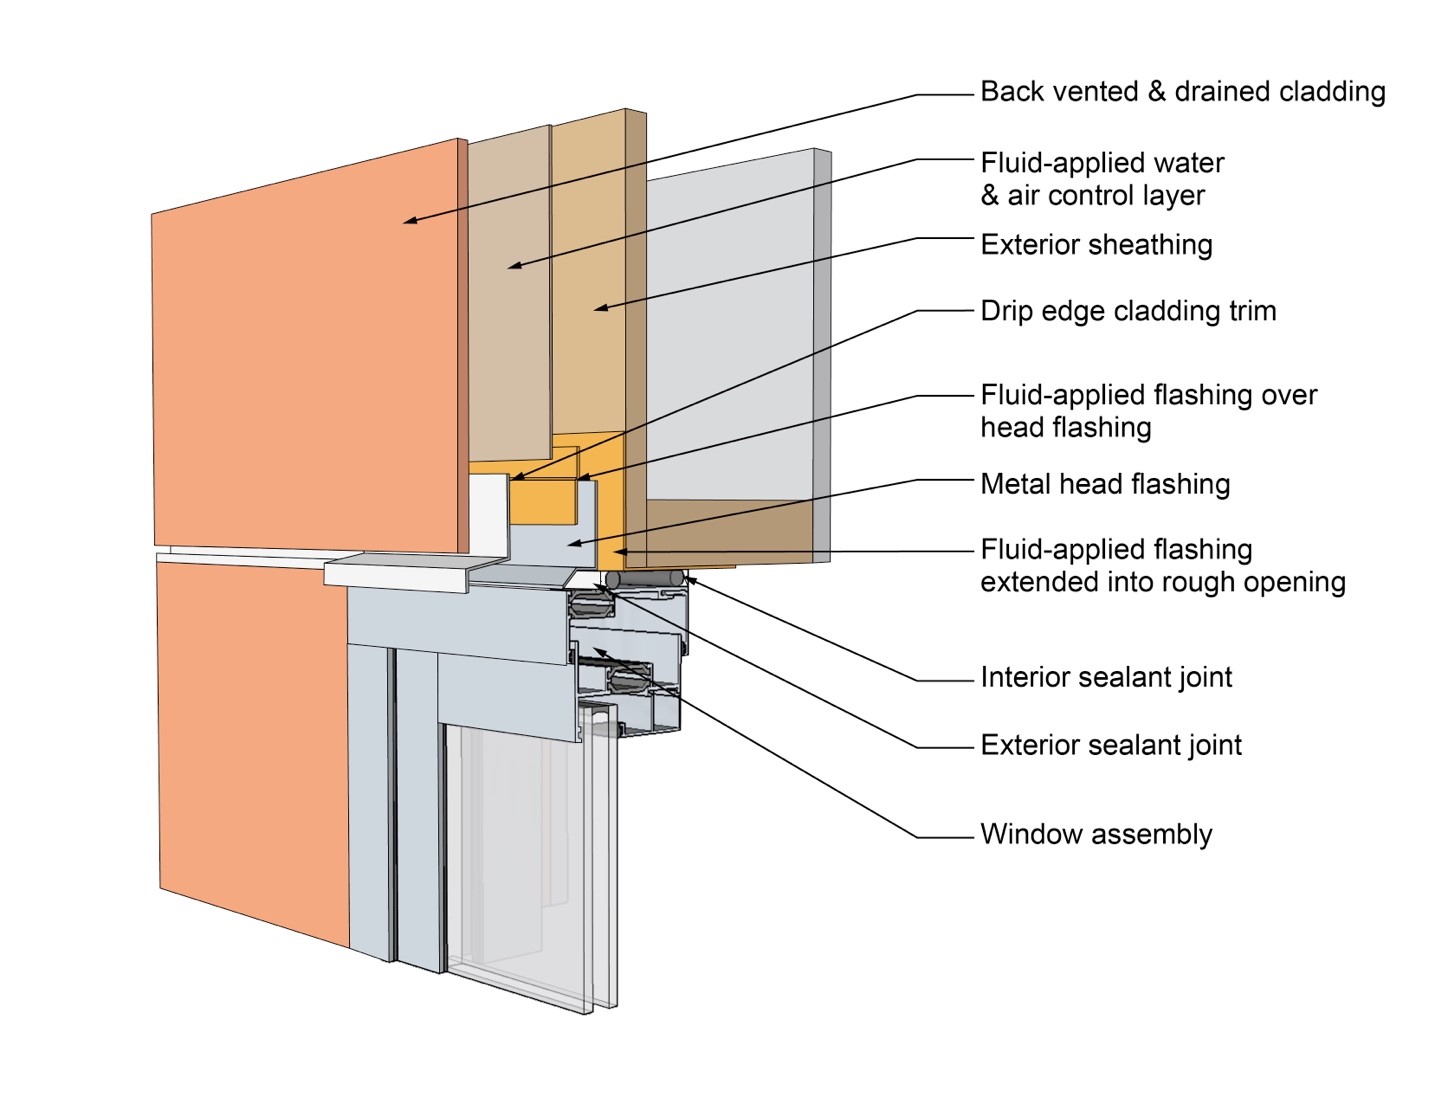
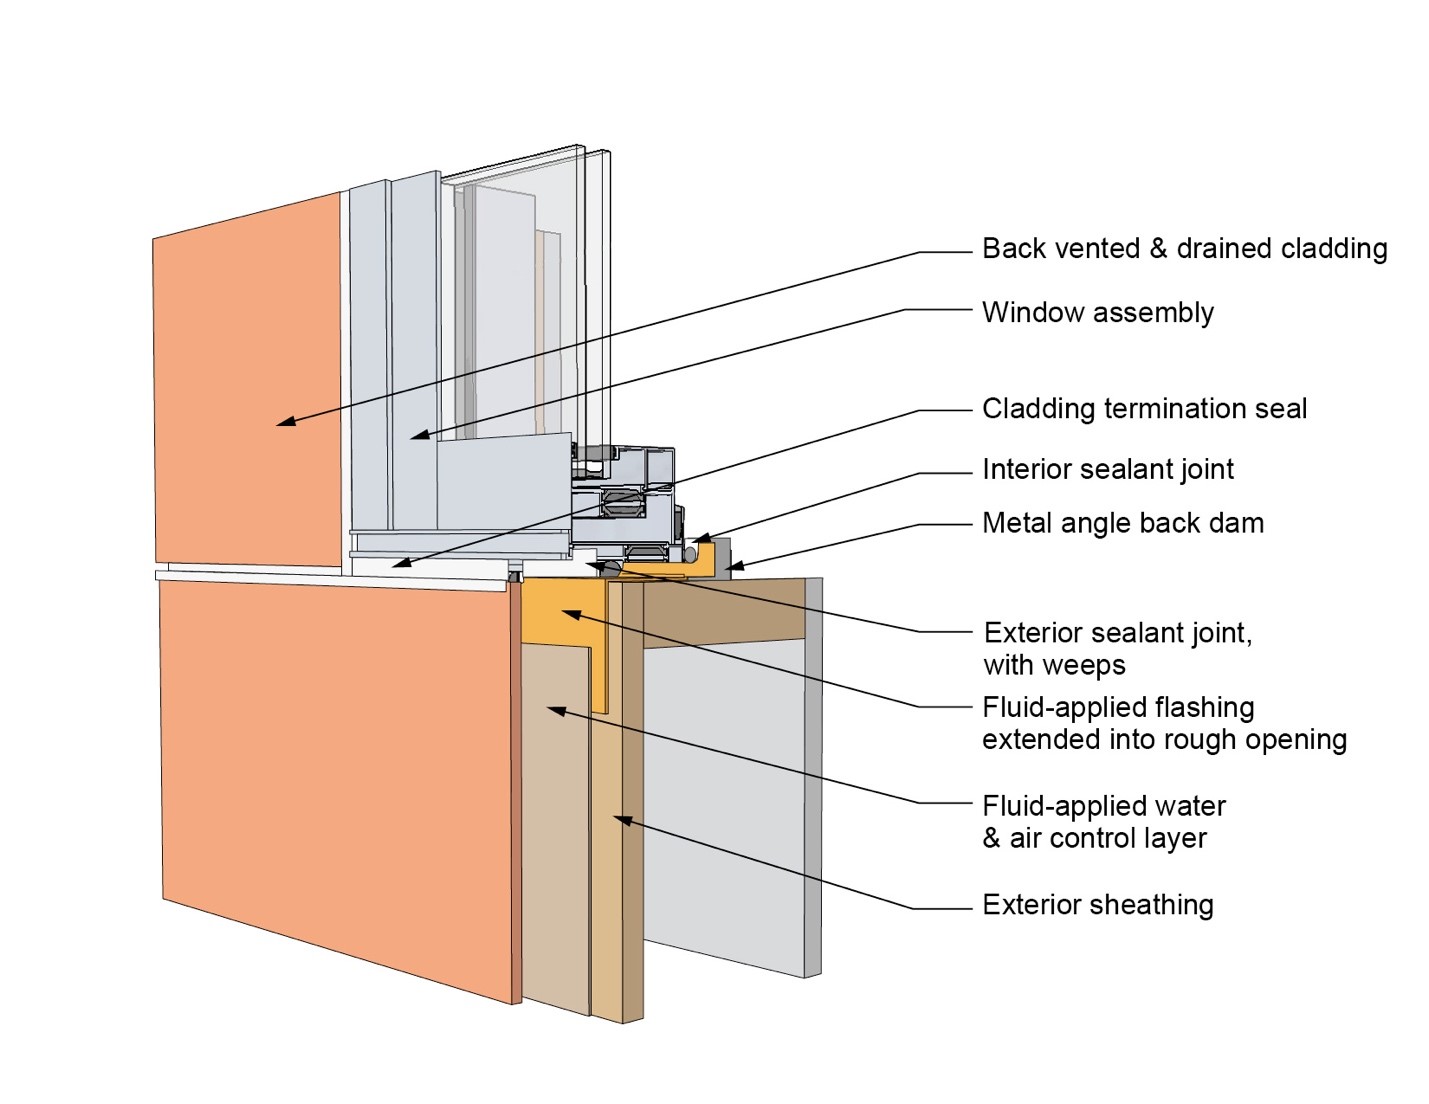
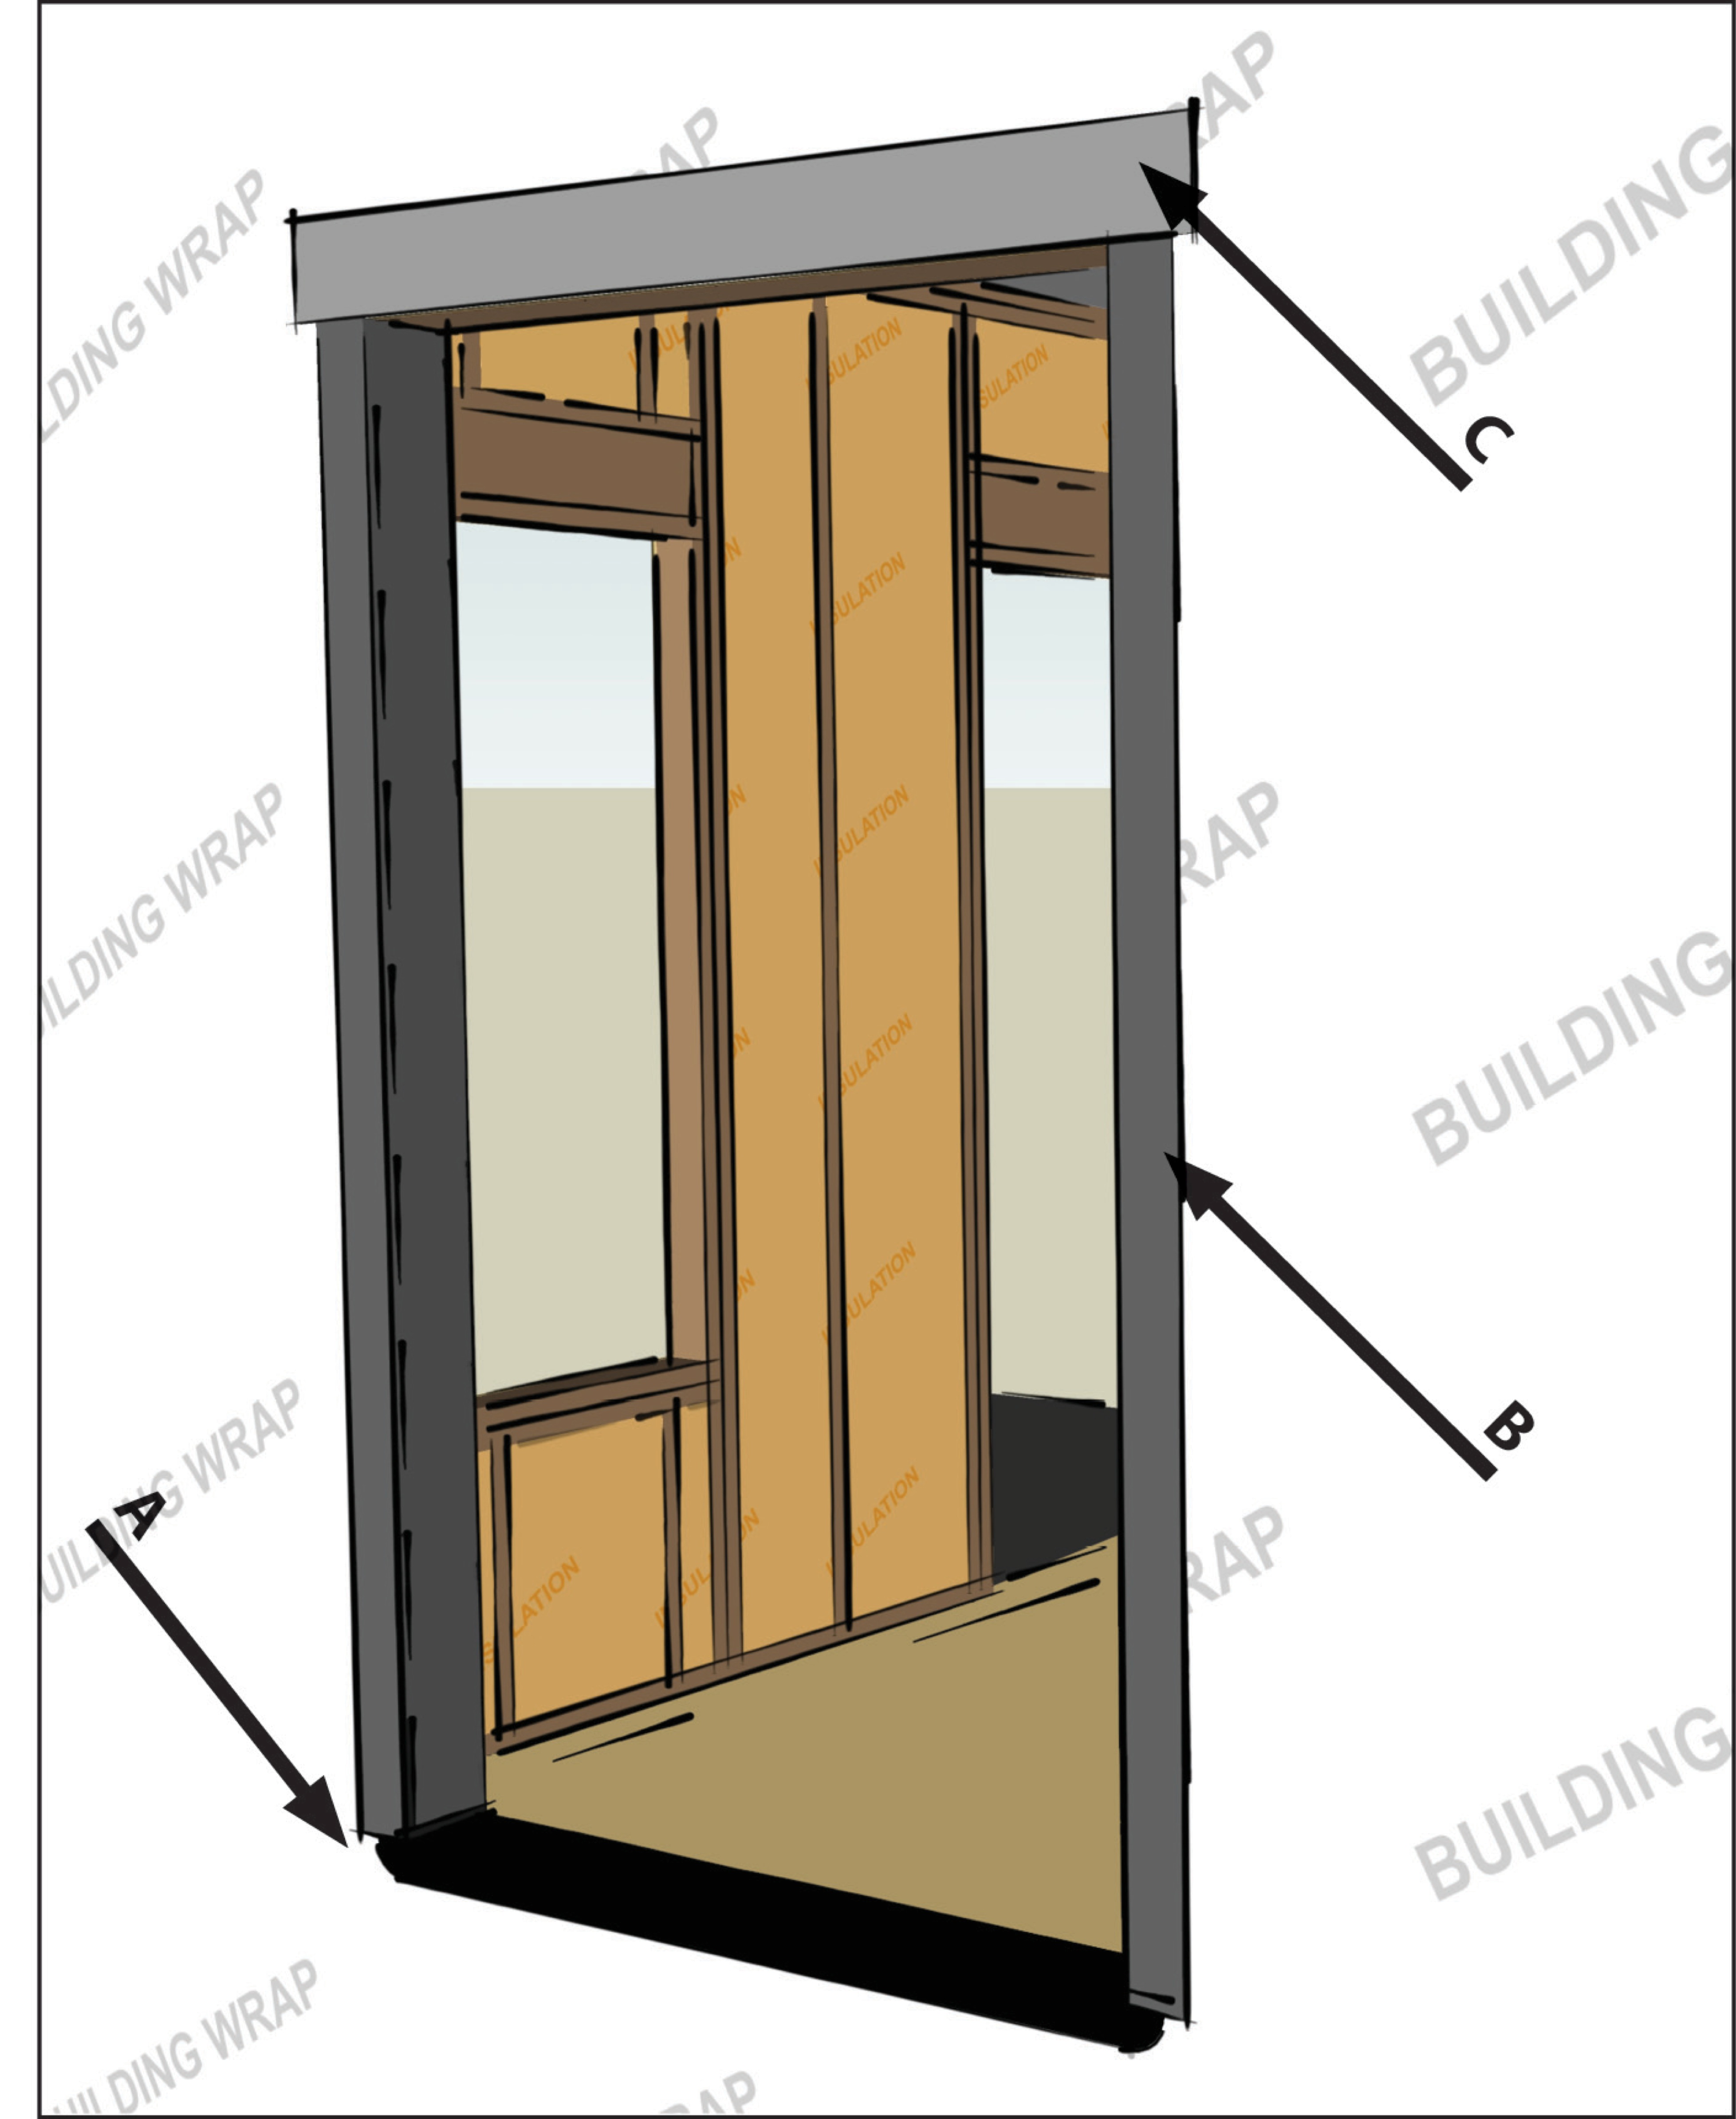
This drawing shows key head details for a window installation using a fluid-applied flashing on a wall with a fluid-applied water and air control layer
Image
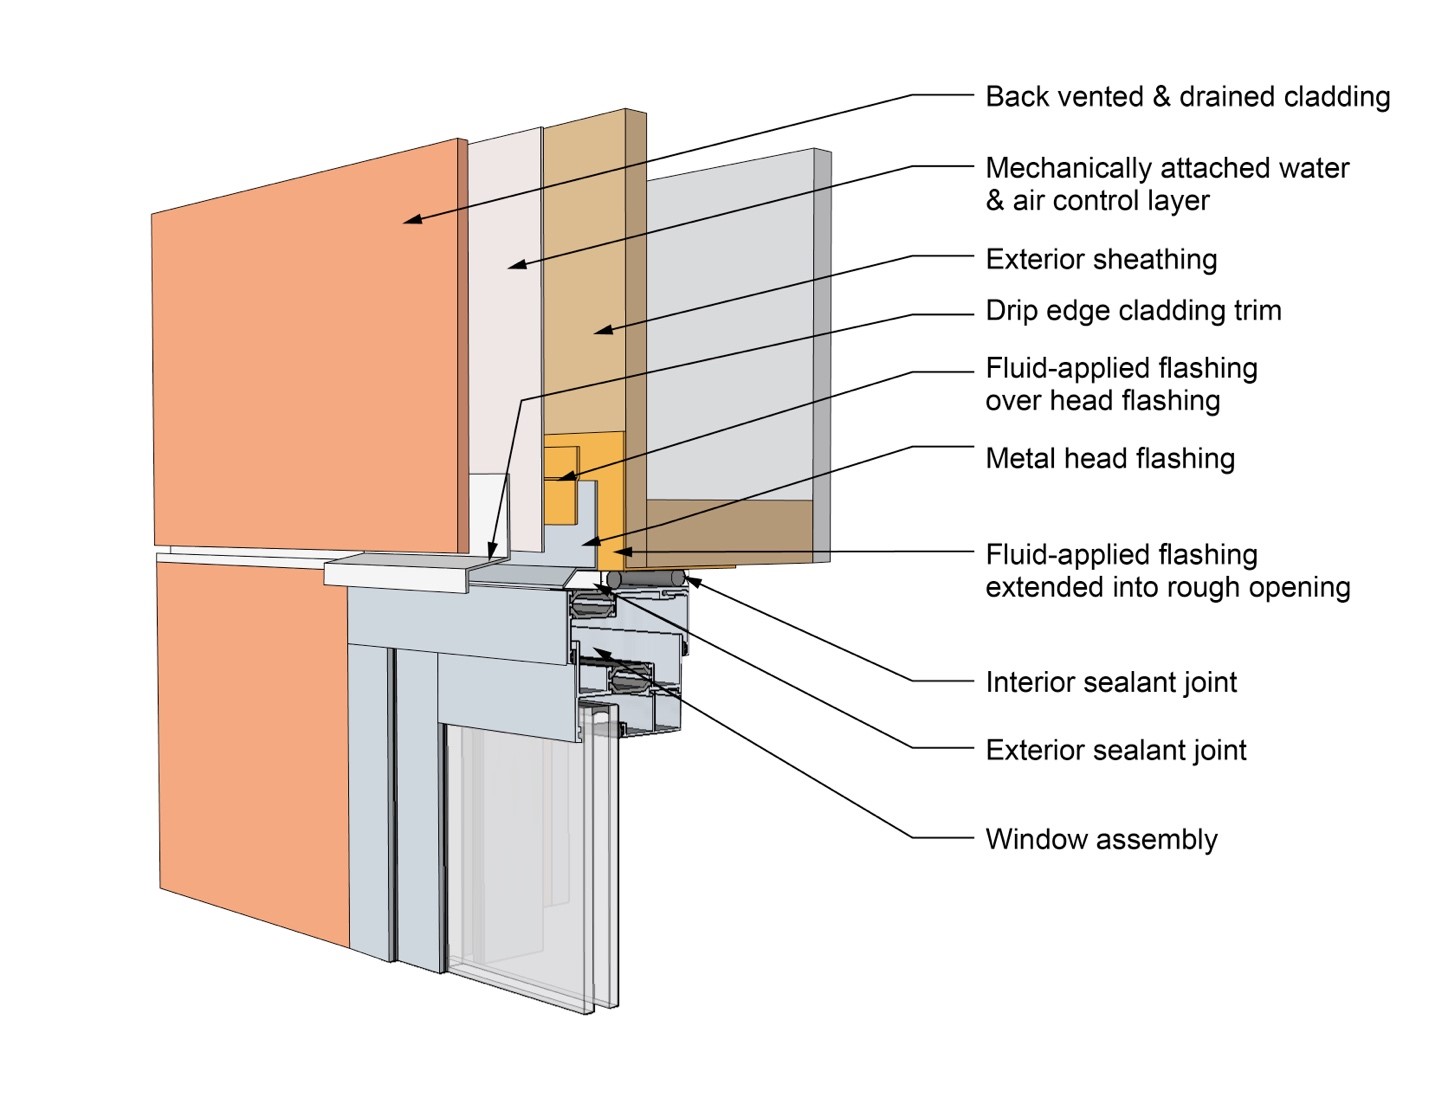
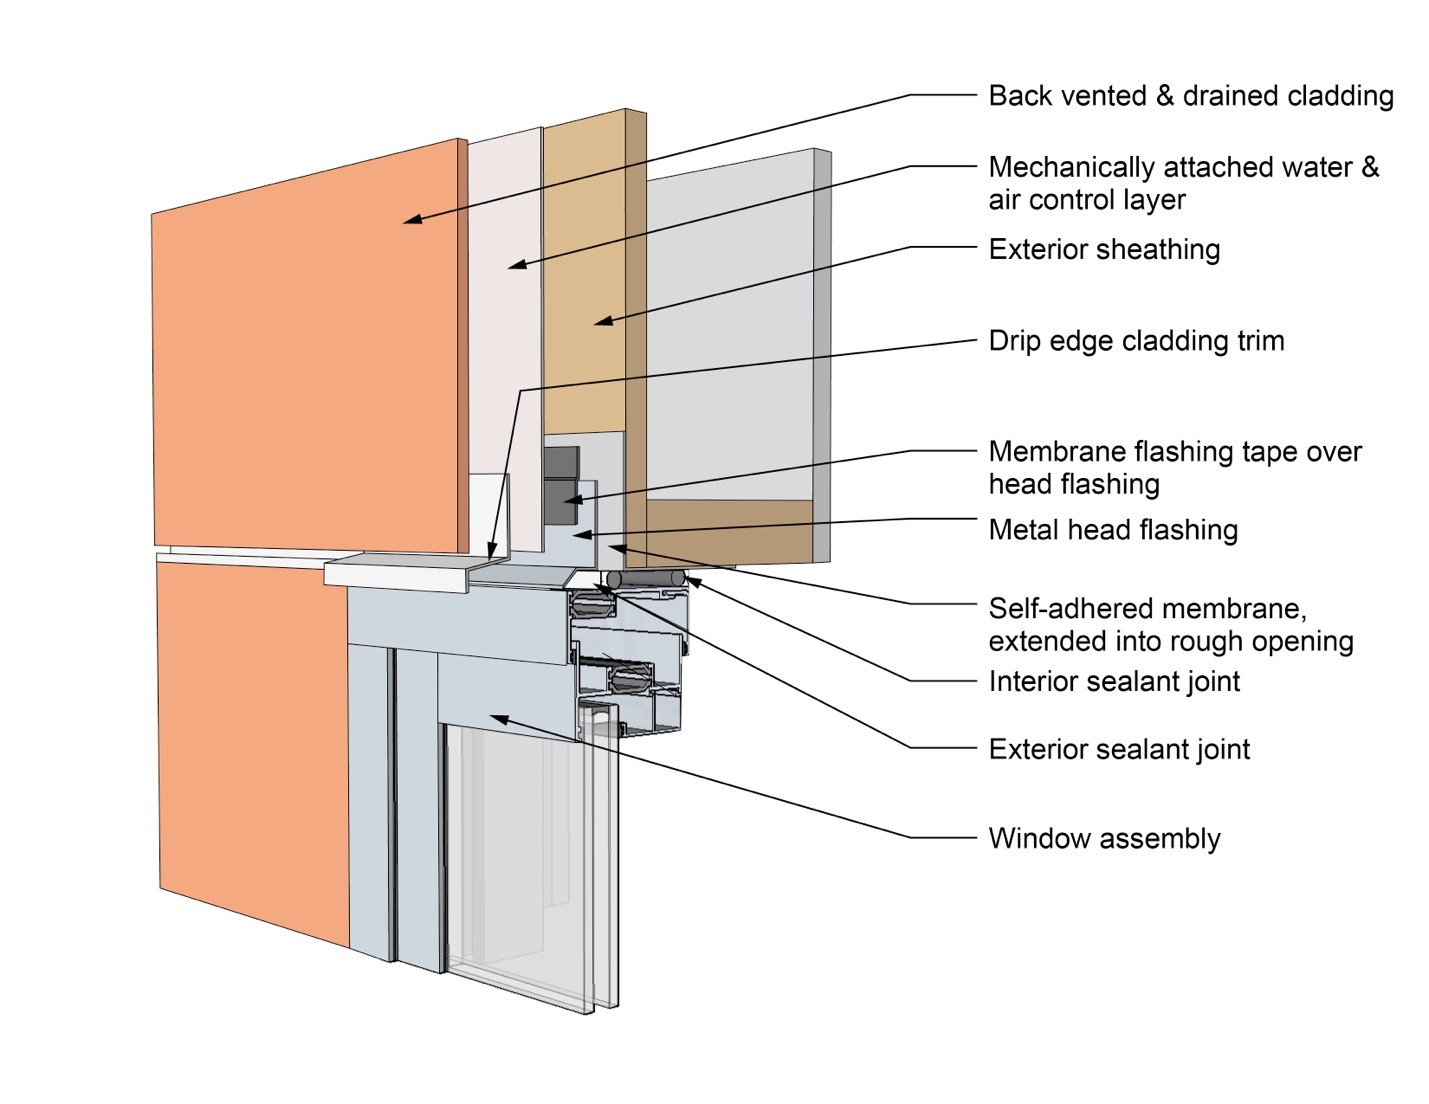
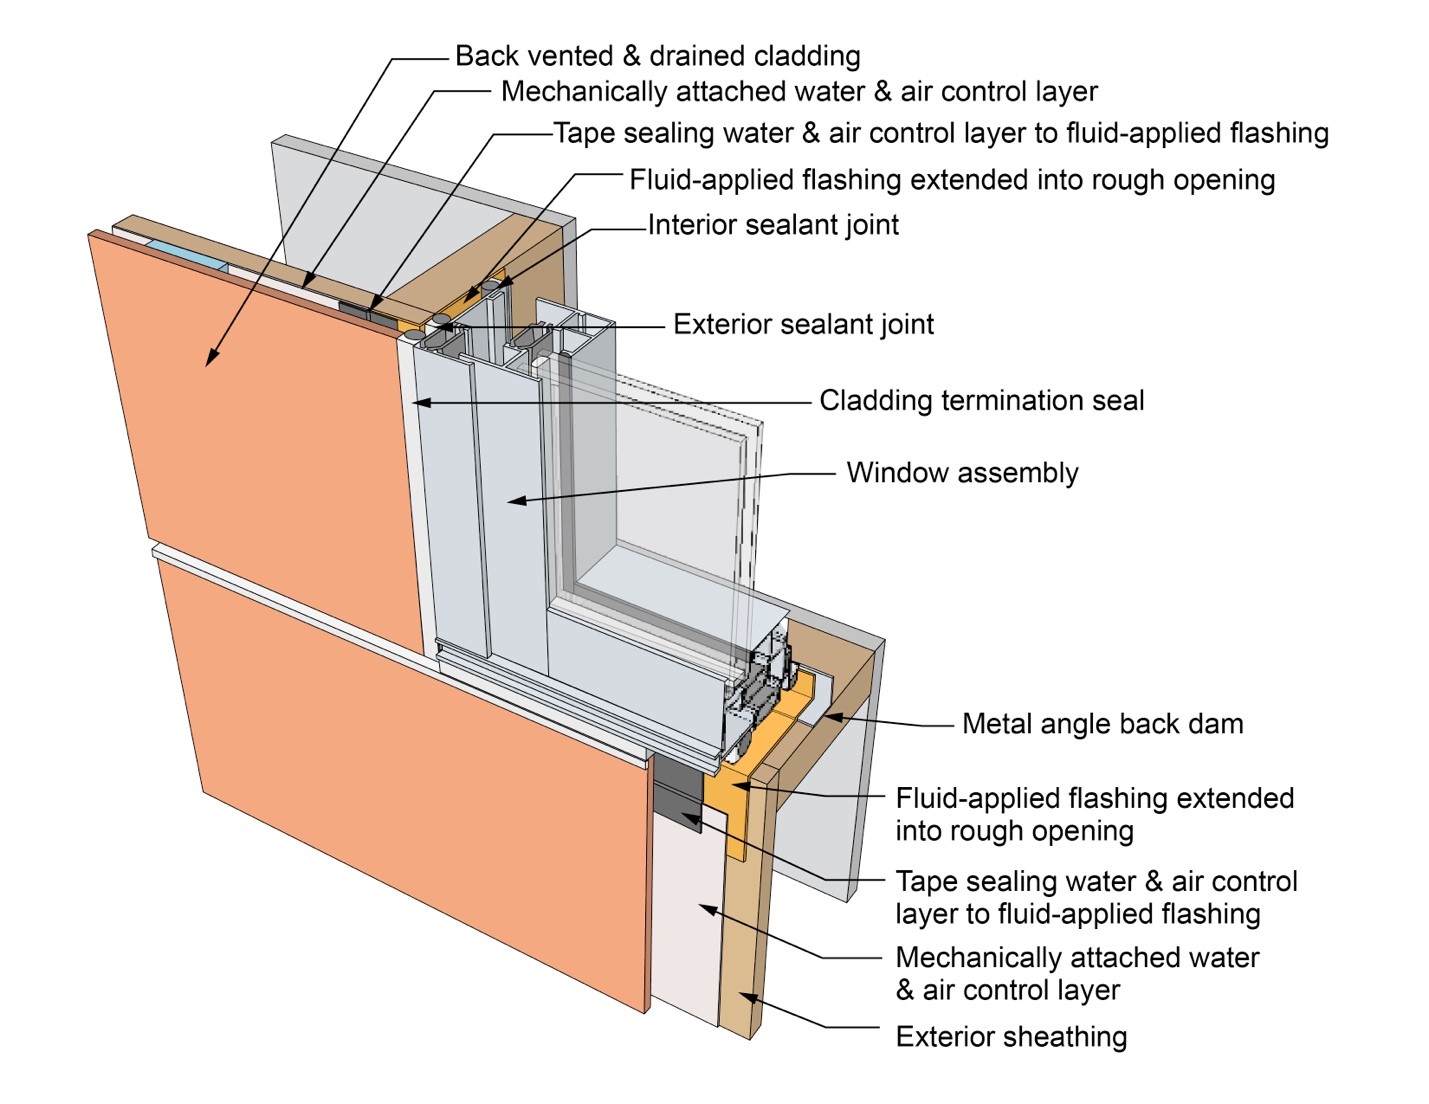
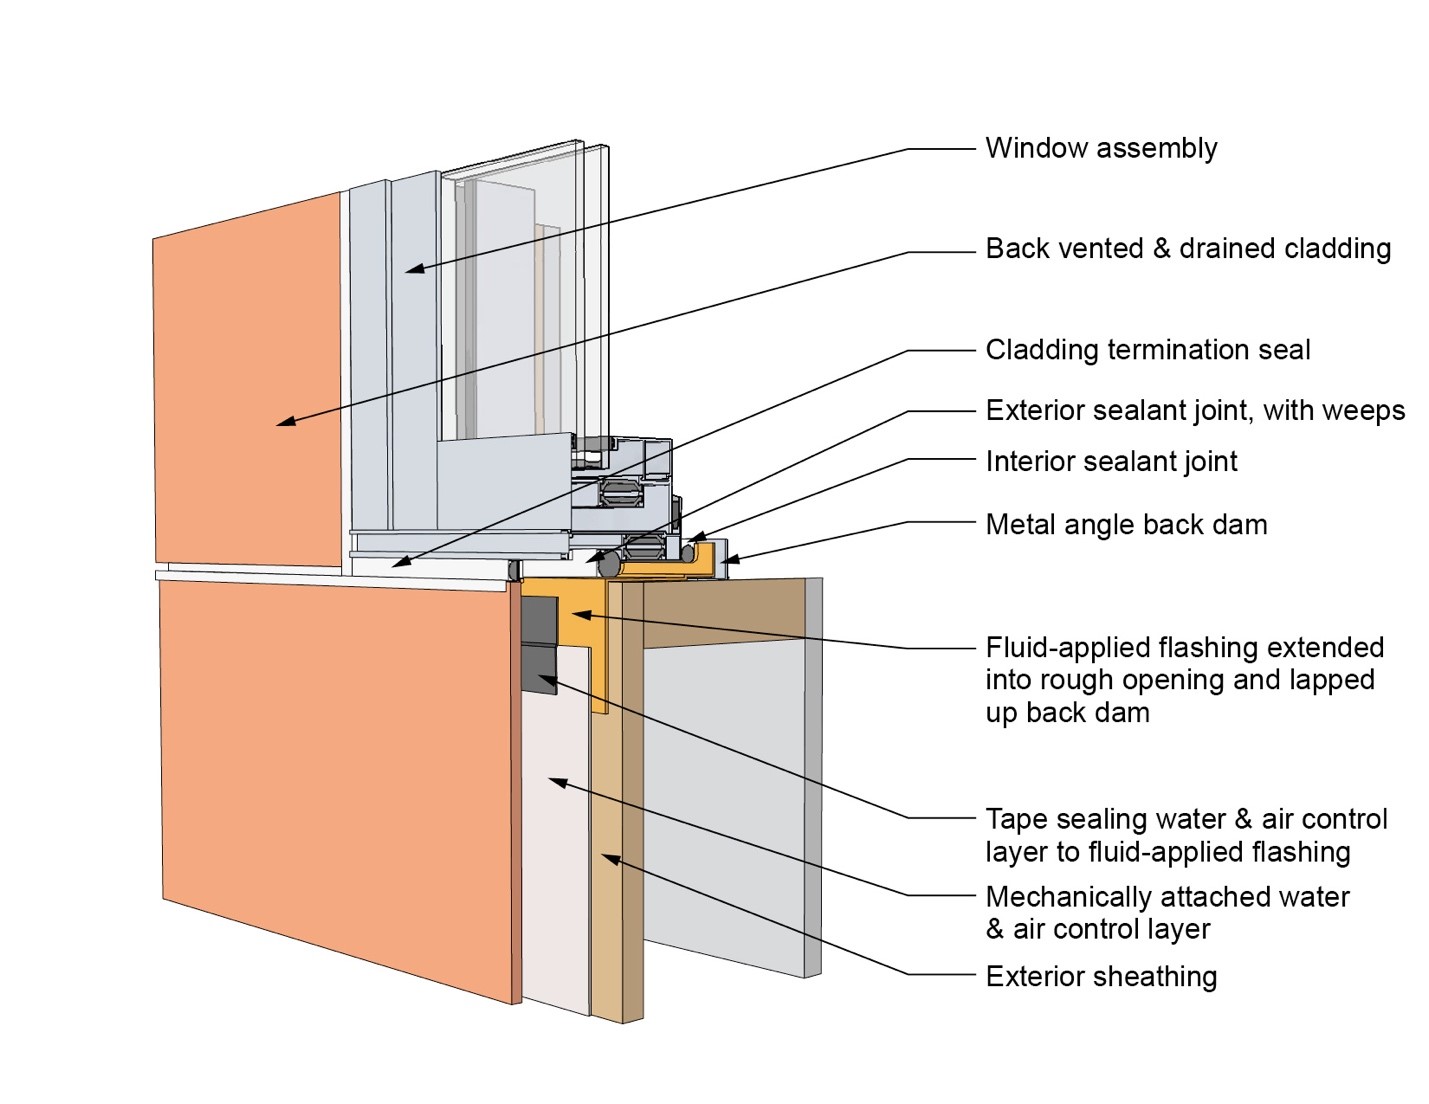
This drawing shows key head details for a window installation using a fluid-applied flashing on a wall with a mechanically attached water and air control layer
Image
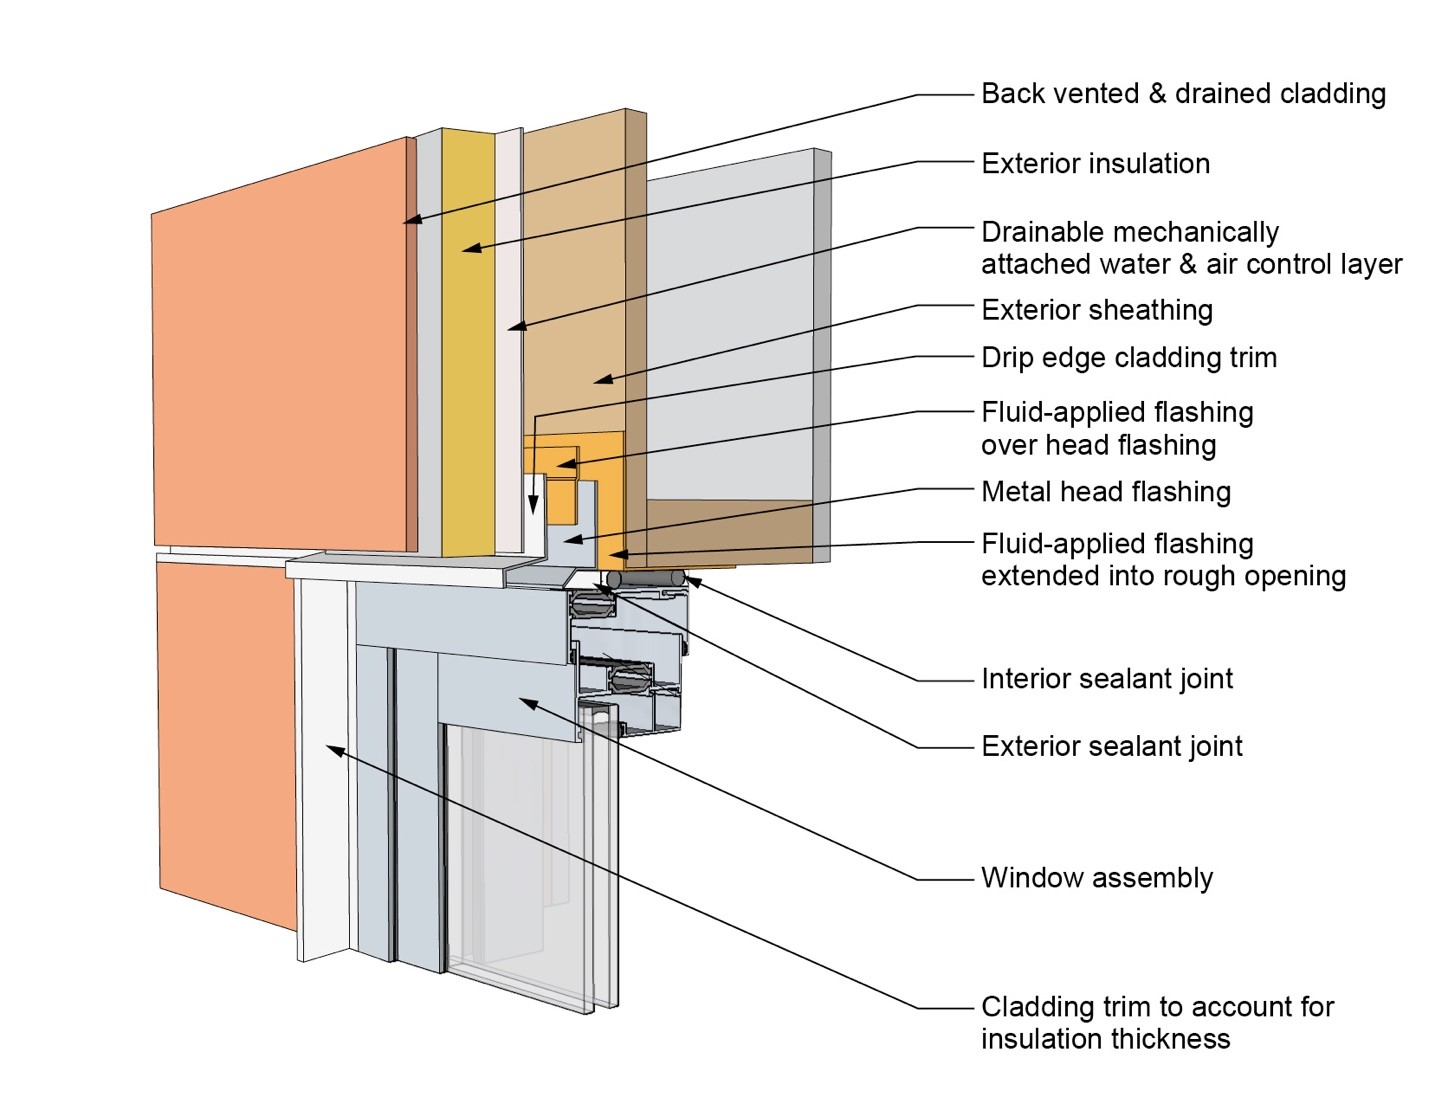
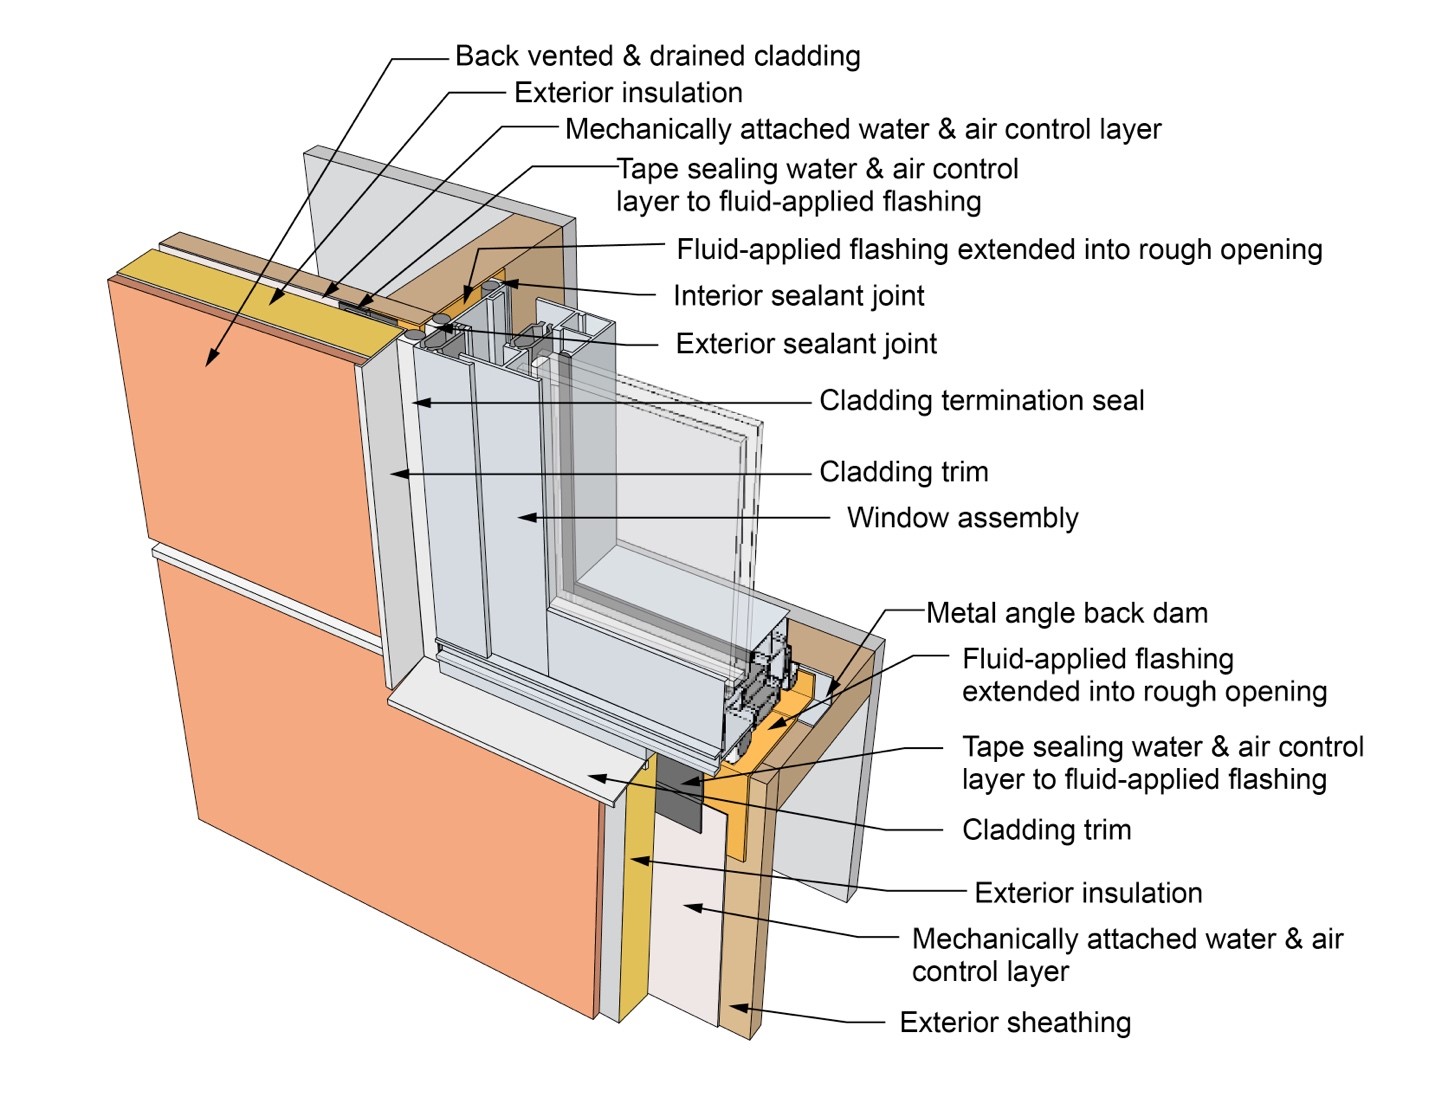
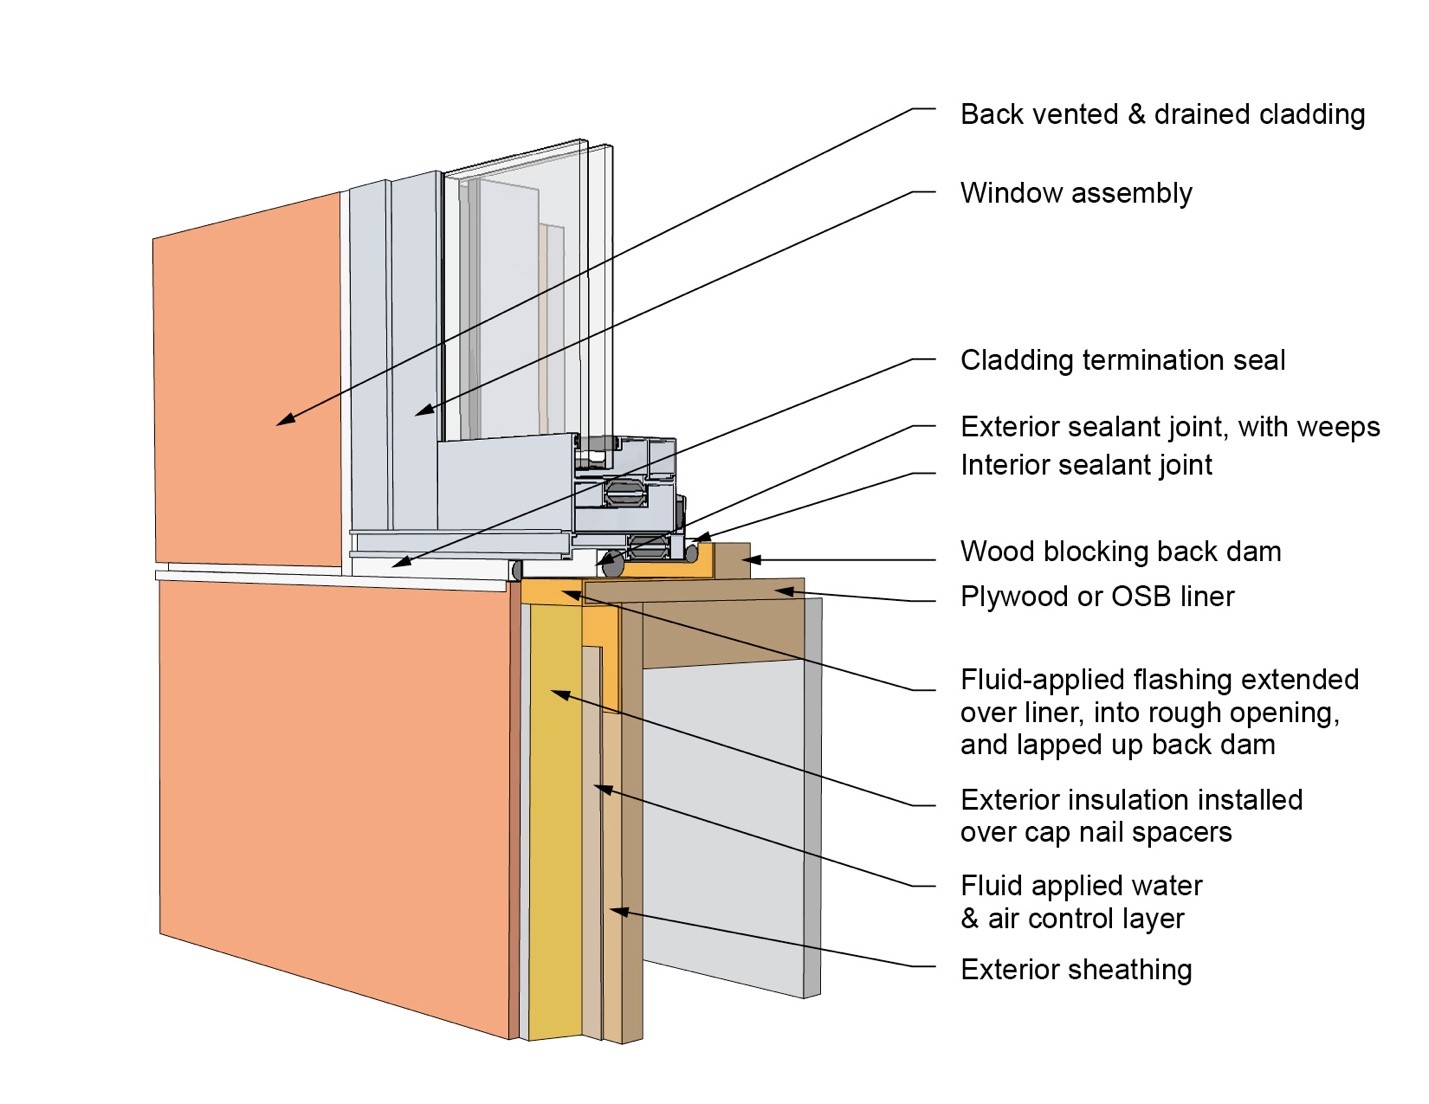
This drawing shows key head details for a window installation using a fluid-applied flashing on a wall with a mechanically attached water and air control layer and continuous insulation
Image
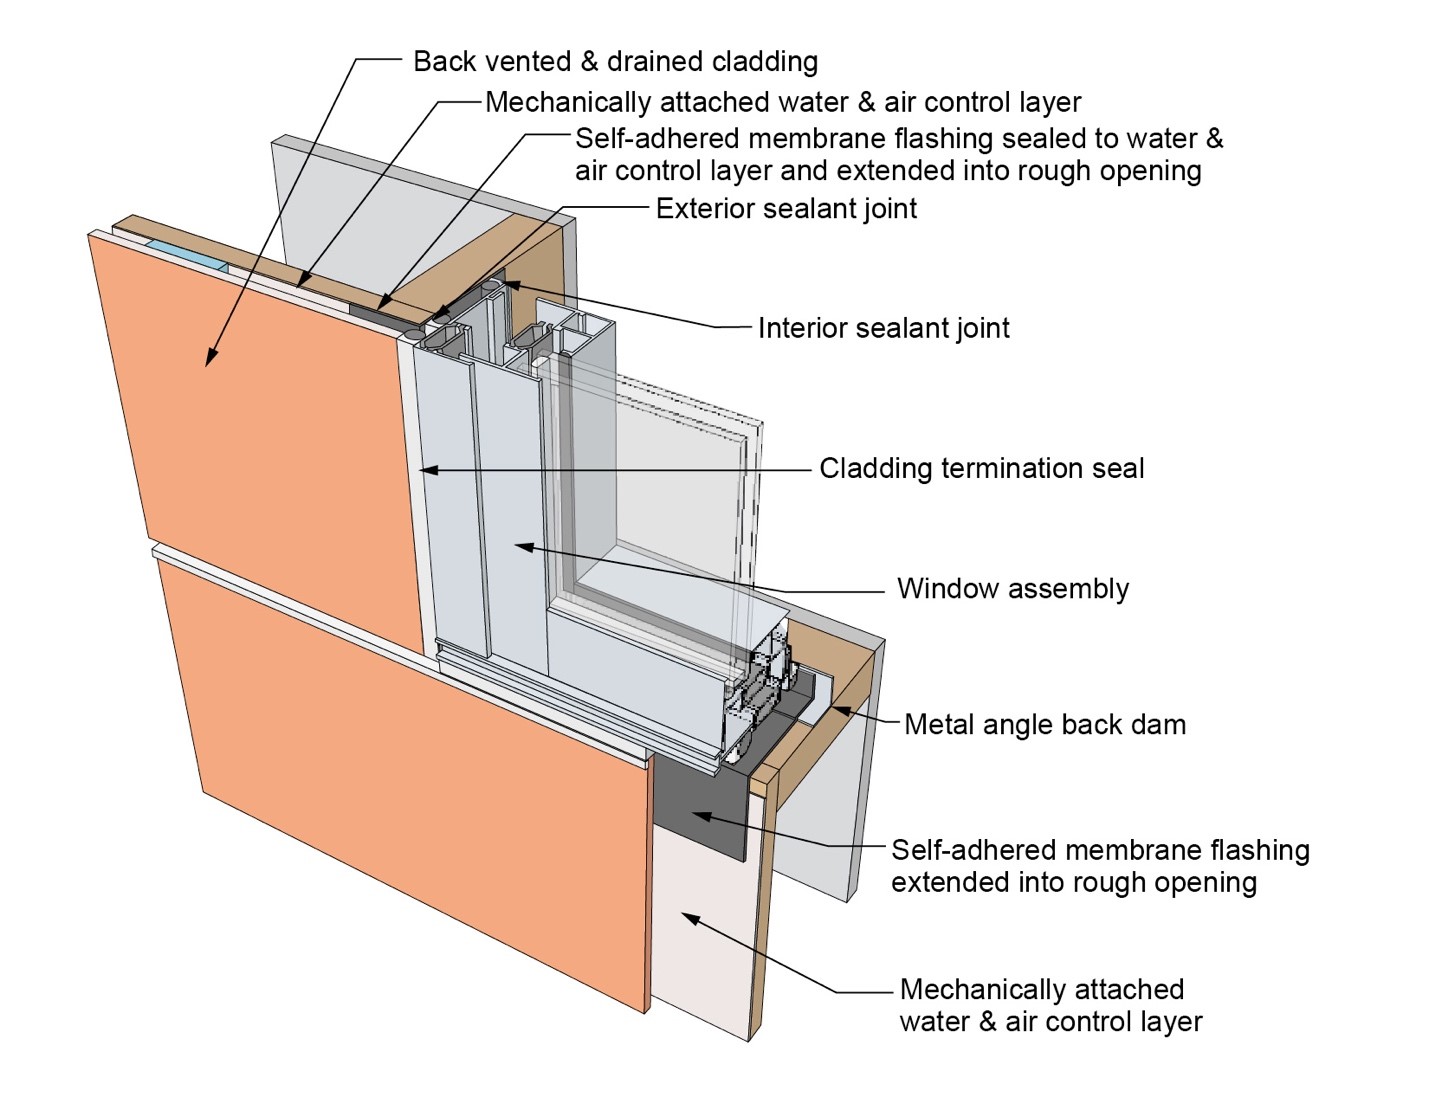
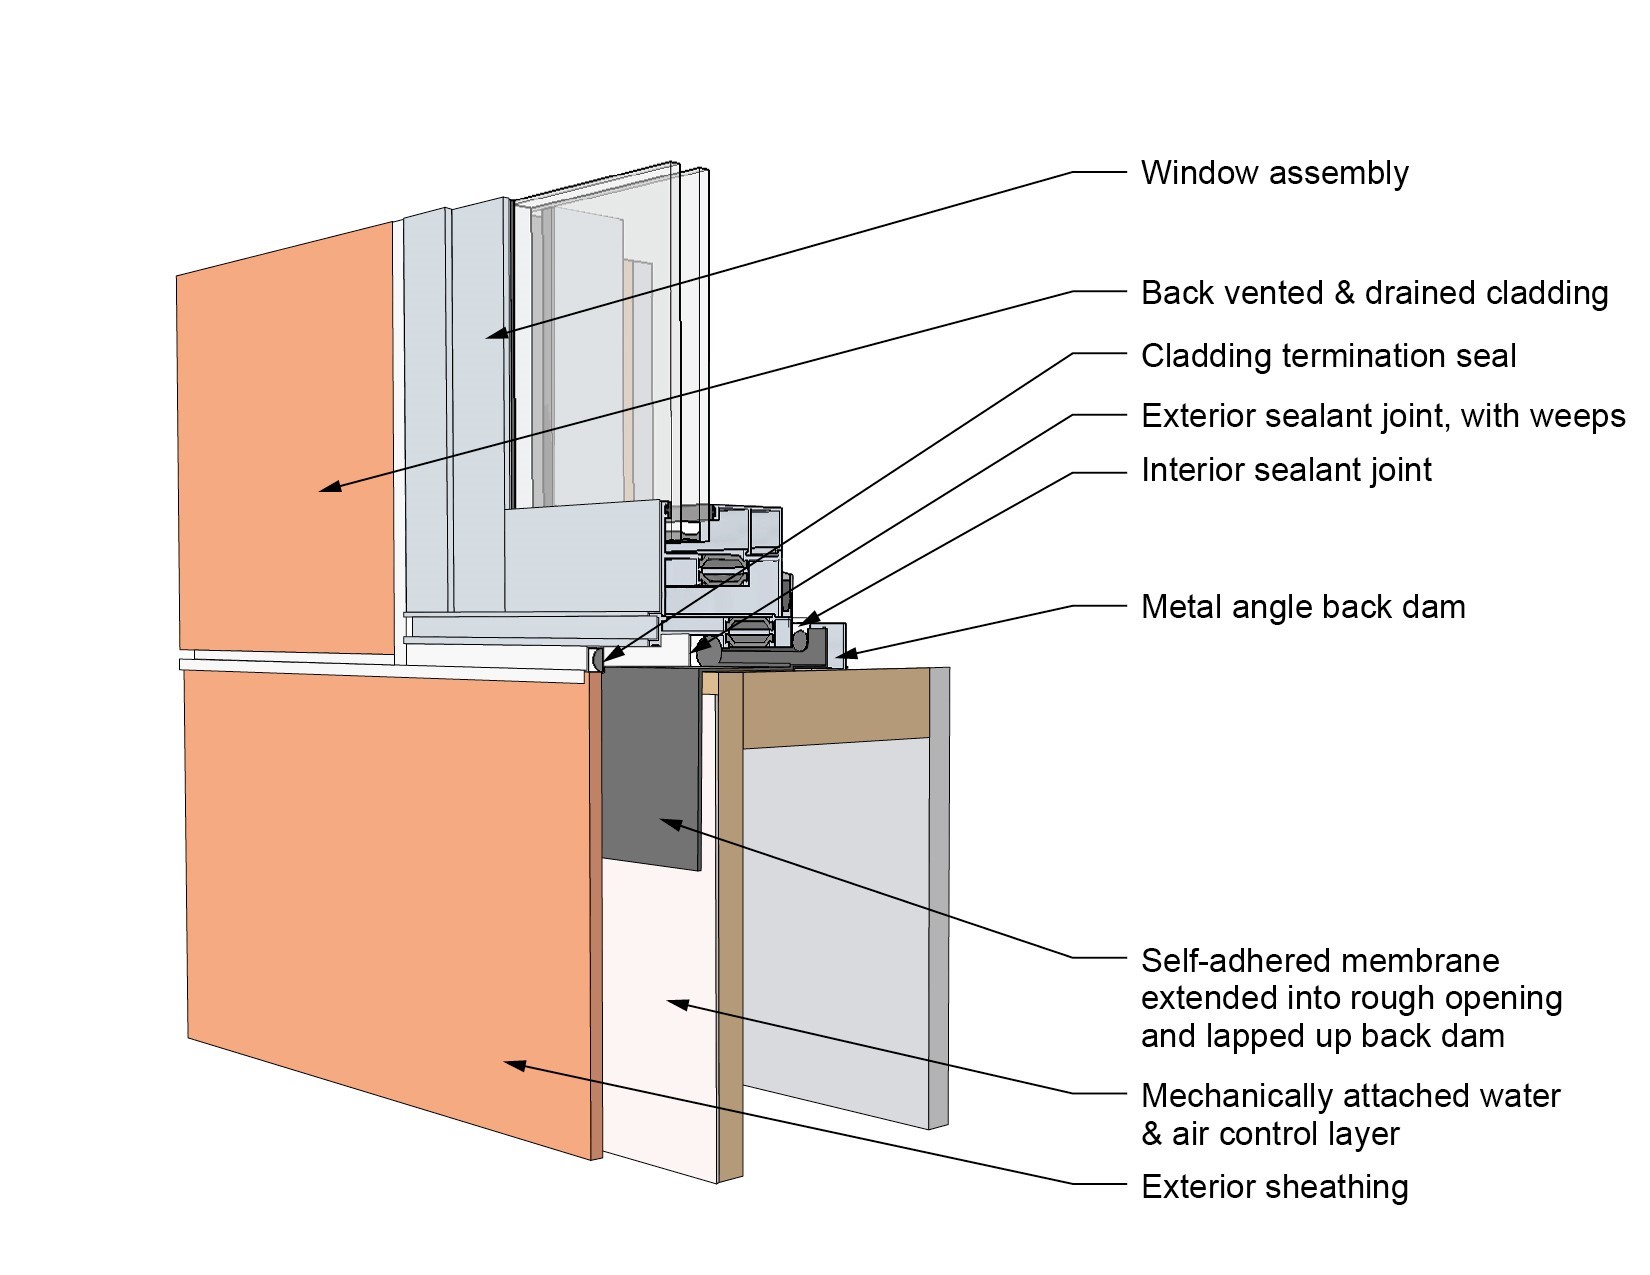
This drawing shows key head details for a window installation using a self-adhered membrane tape flashing on a wall with a mechanically attached water and air control layer
Image
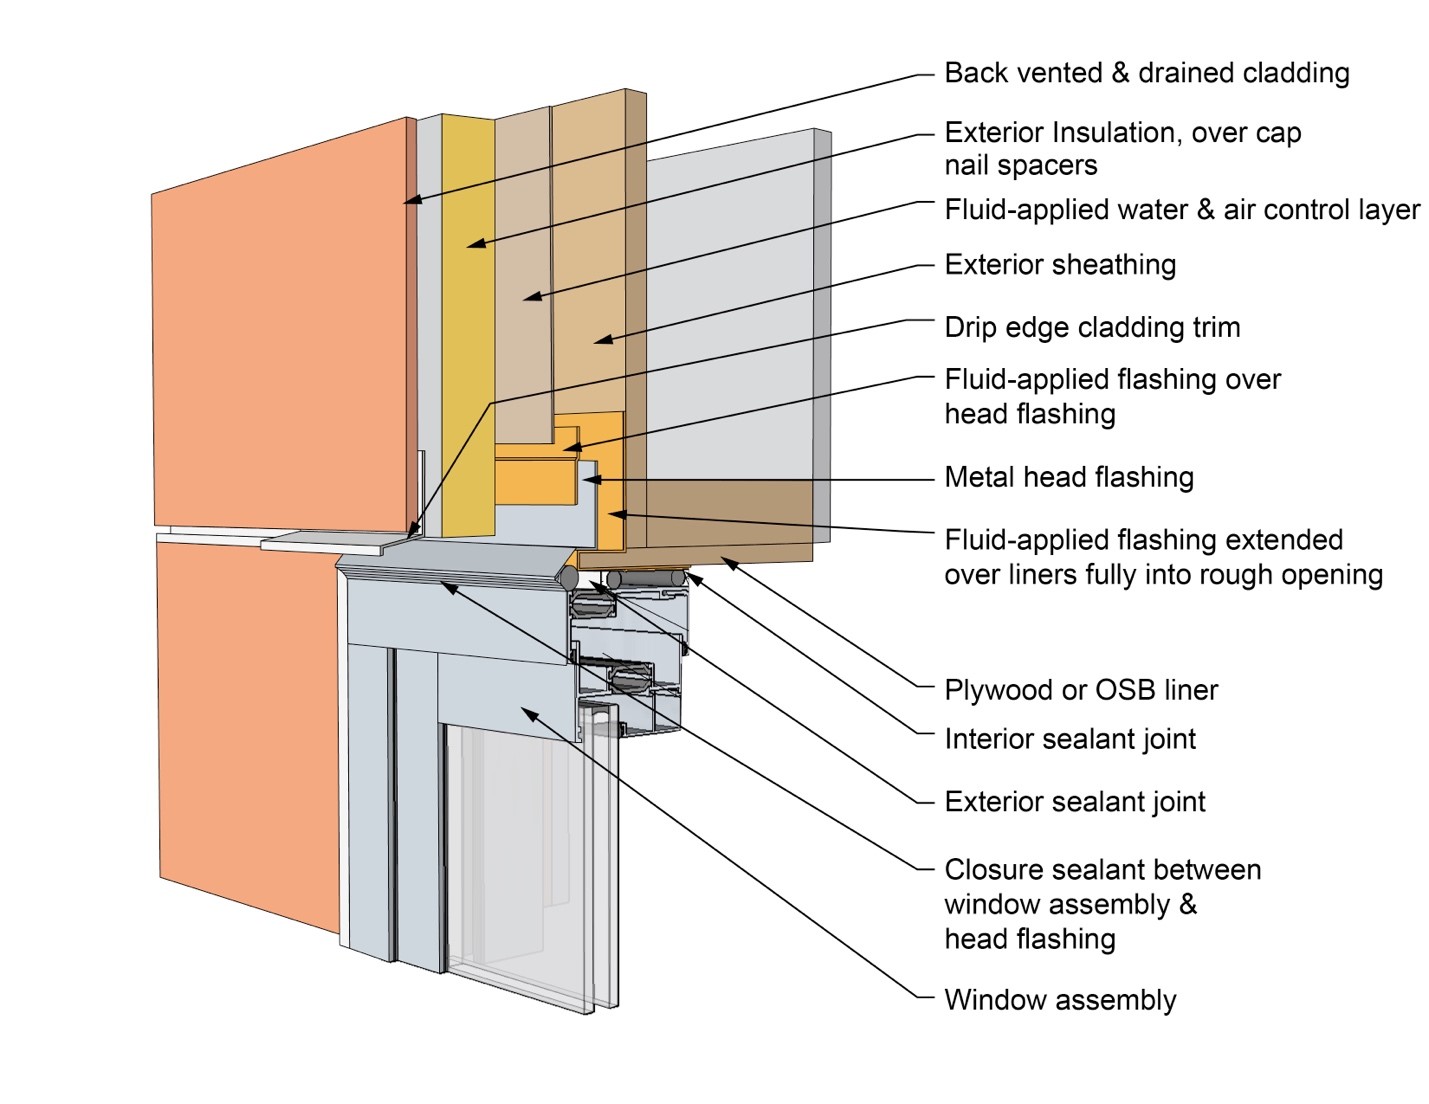
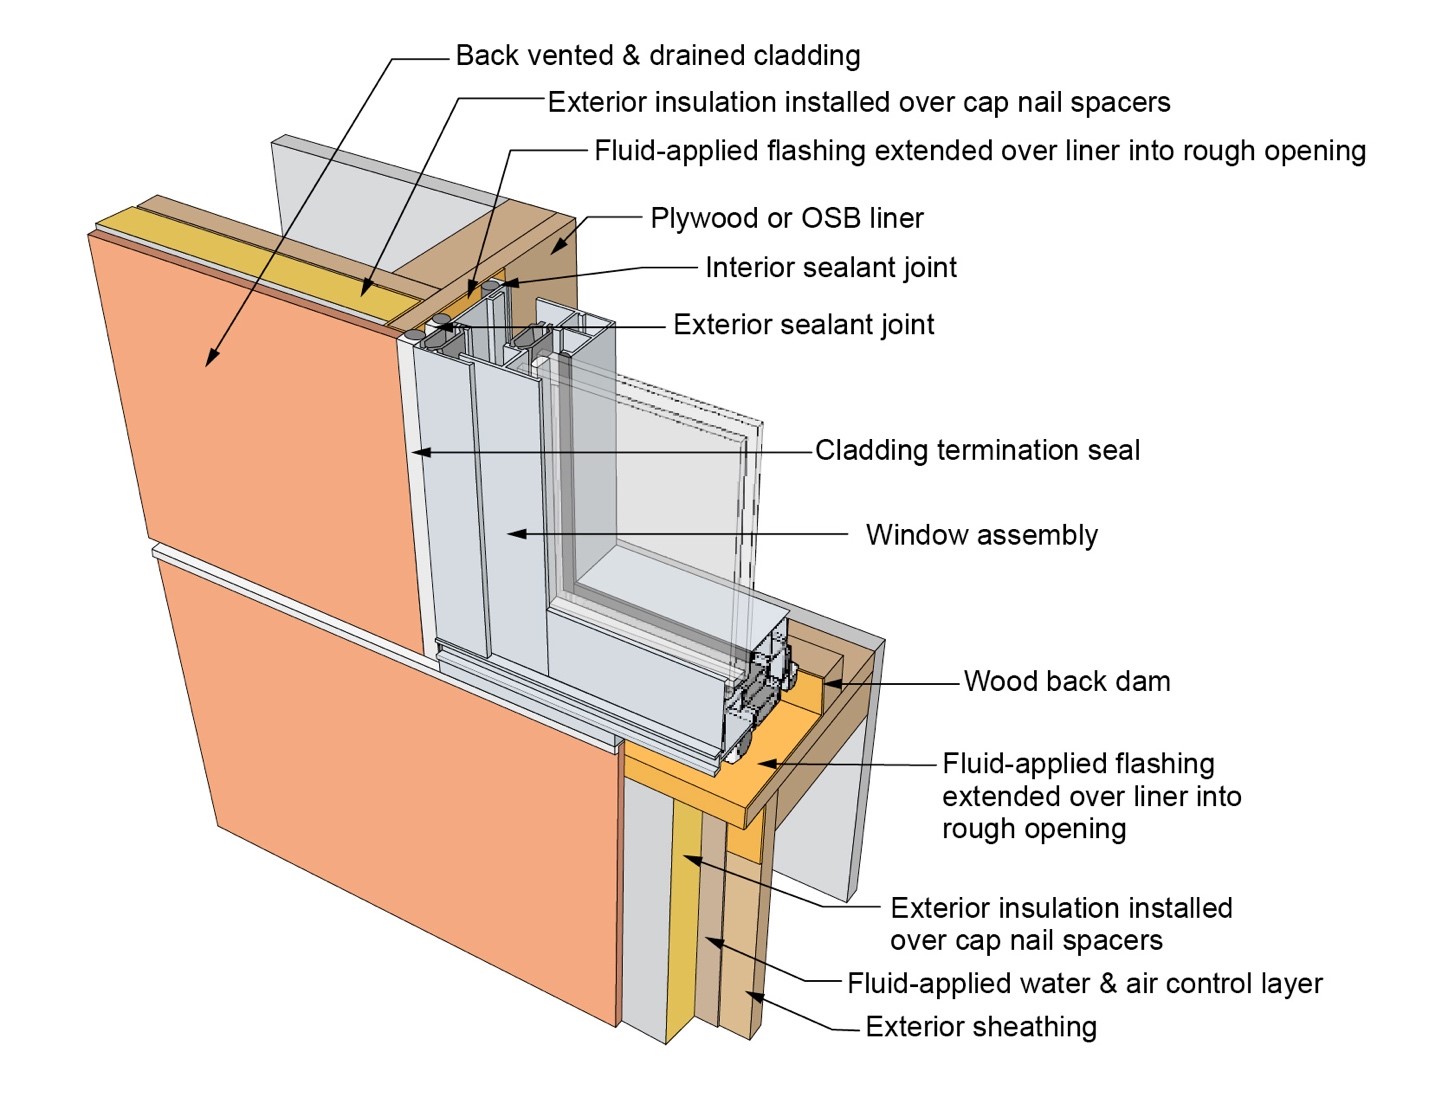
This drawing shows key head details for an “outie” window installation using a fluid-applied flashing on a wall with a fluid-applied water and air control layer and continuous insulation
Image
This drawing shows key jamb details for a window installation using a fluid-applied flashing on a wall with a fluid-applied water and air control layer
Image
This drawing shows key jamb details for a window installation using a fluid-applied flashing on a wall with a mechanically attached water and air control layer
Image
This drawing shows key jamb details for a window installation using a fluid-applied flashing on a wall with a mechanically attached water and air control layer and continuous insulation
Image
This drawing shows key jamb details for a window installation using a self-adhered membrane tape flashing on a wall with a mechanically attached water and air control layer
Image
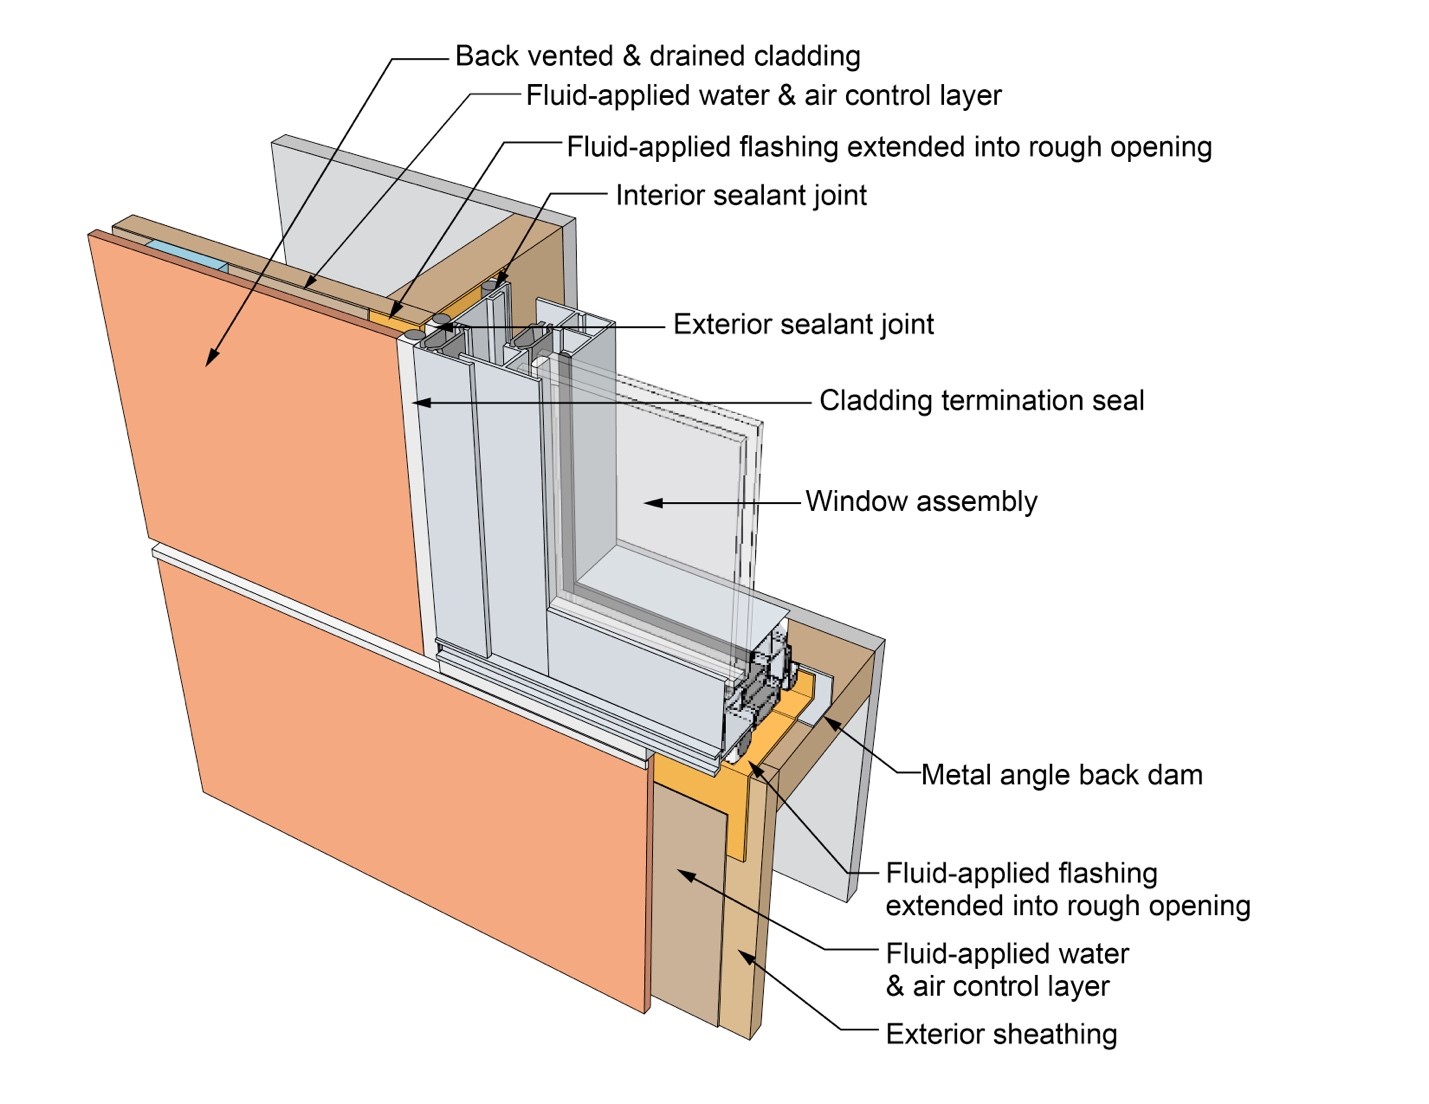
This drawing shows key jamb details for an “outie” window installation using a fluid-applied flashing on a wall with a fluid-applied water and air control layer and continuous insulation
Image
This drawing shows key sill details for a window installation using a fluid-applied flashing on a wall with a fluid-applied water and air control layer
Image
This drawing shows key sill details for a window installation using a fluid-applied flashing on a wall with a mechanically attached water and air control layer
Image

This drawing shows key sill details for a window installation using a fluid-applied flashing on a wall with a mechanically attached water and air control layer and continuous insulation
Image
This drawing shows key sill details for a window installation using a self-adhered membrane tape flashing on a wall with a mechanically attached water and air control layer
Image
This drawing shows key sill details for an “outie” window installation using a fluid-applied flashing on a wall with a fluid-applied water and air control layer and continuous insulation
Image
Image

Image
Windows are installed as “outies” in this wall assembly using a self-adhered membrane water and air control layer with continuous exterior insulation
Image

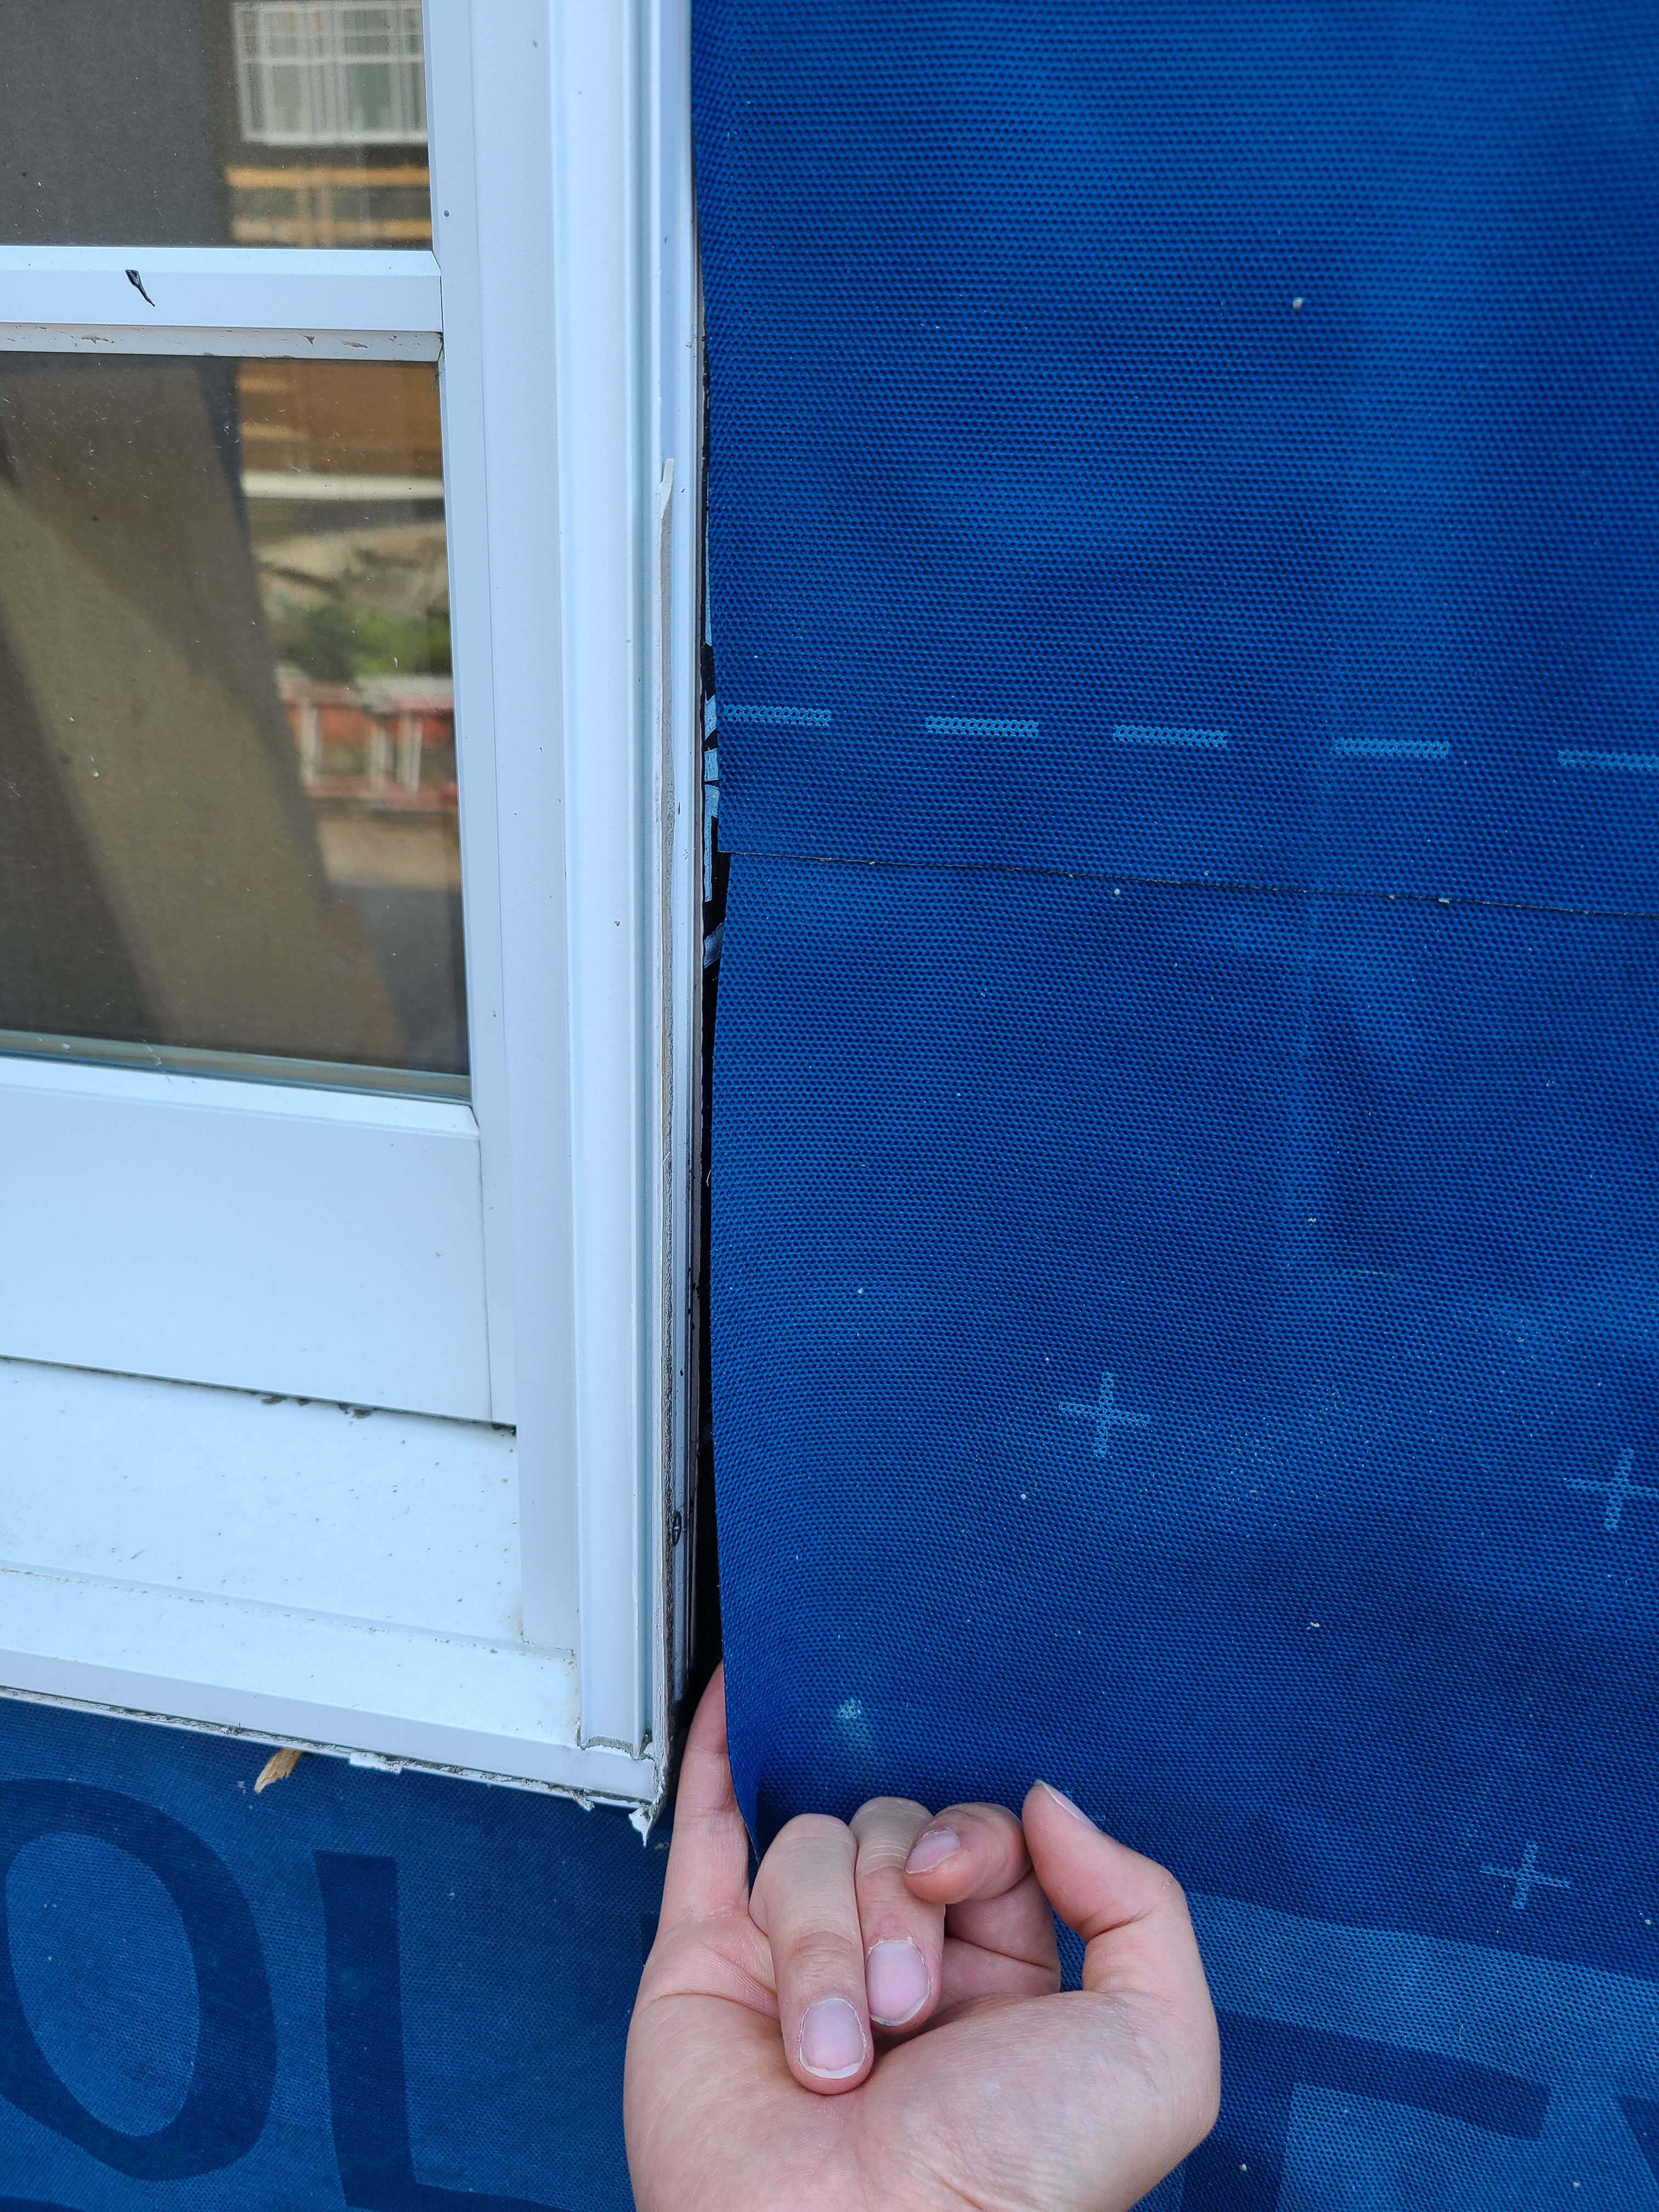
Wrong - House wrap was poorly installed, seams were not taped, and flashing tape was not installed around windows.
Image
Wrong - House wrap and flashing tape are poorly installed allowing water to get into the gaps behind flashing tape.
Image

Wrong - House wrap tape is not fully adhered at seam and flashing tape is missing from window head, jamb, and corner above window.
Image

Image
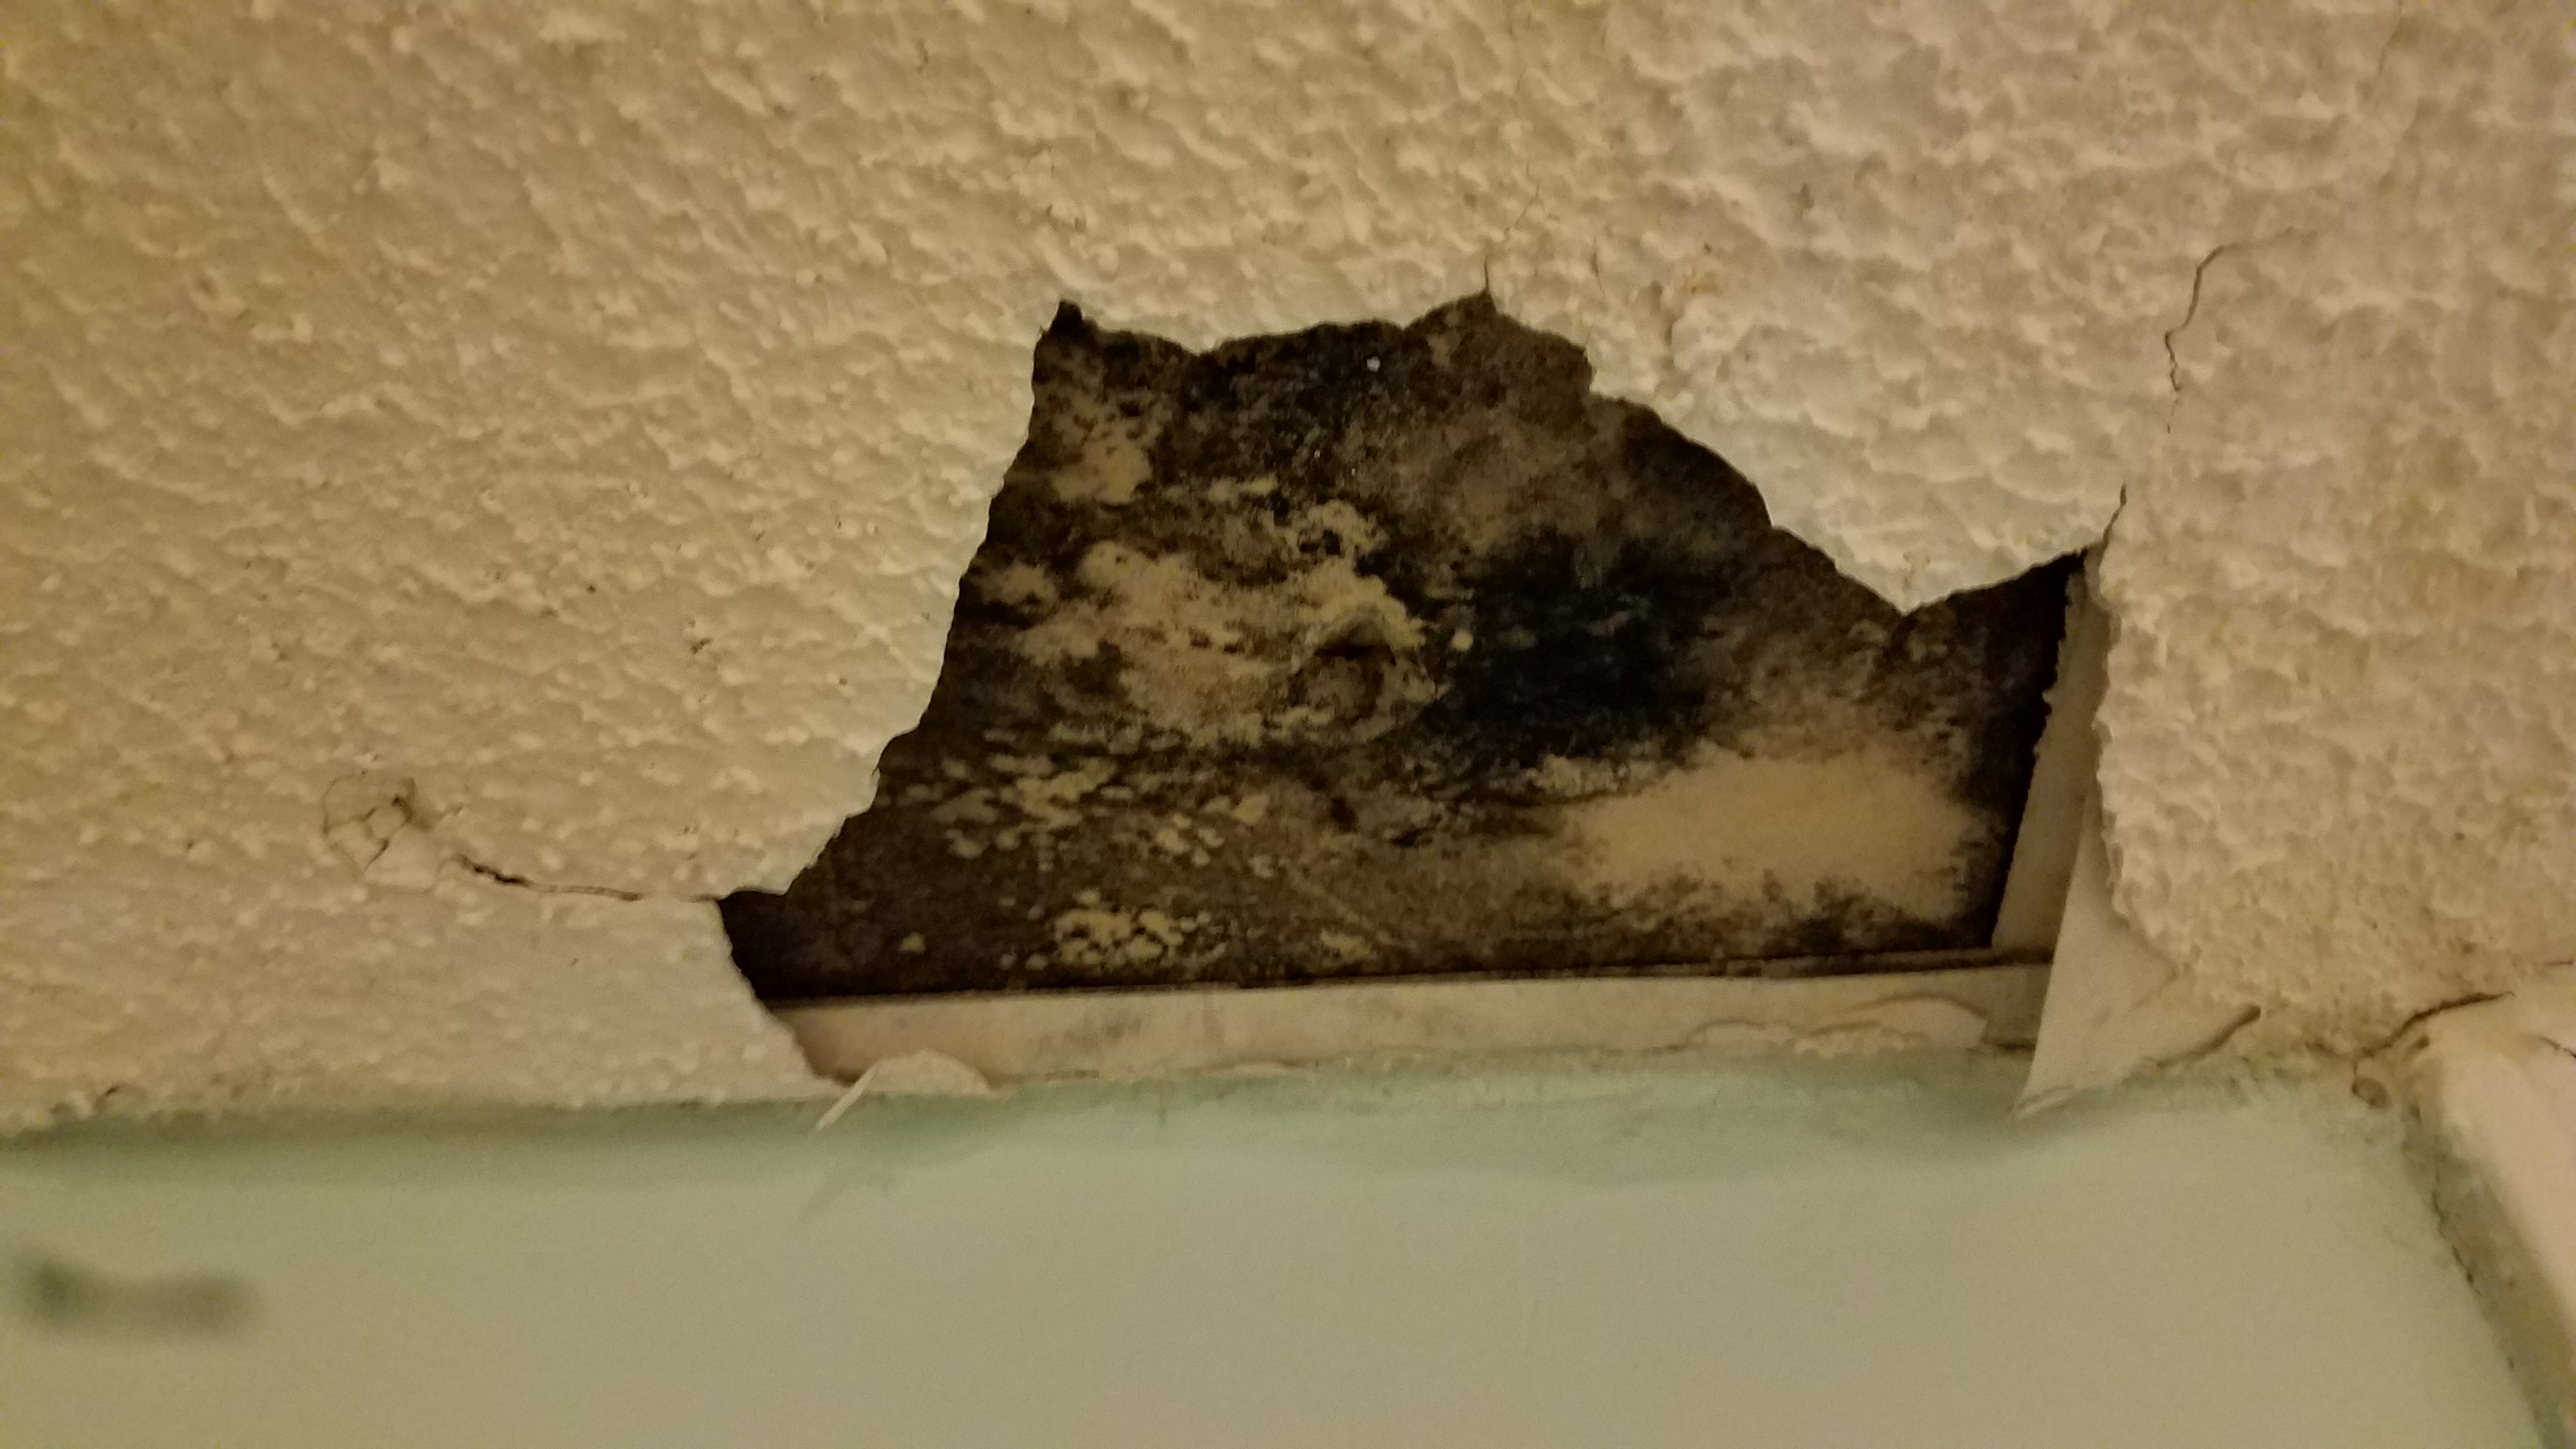
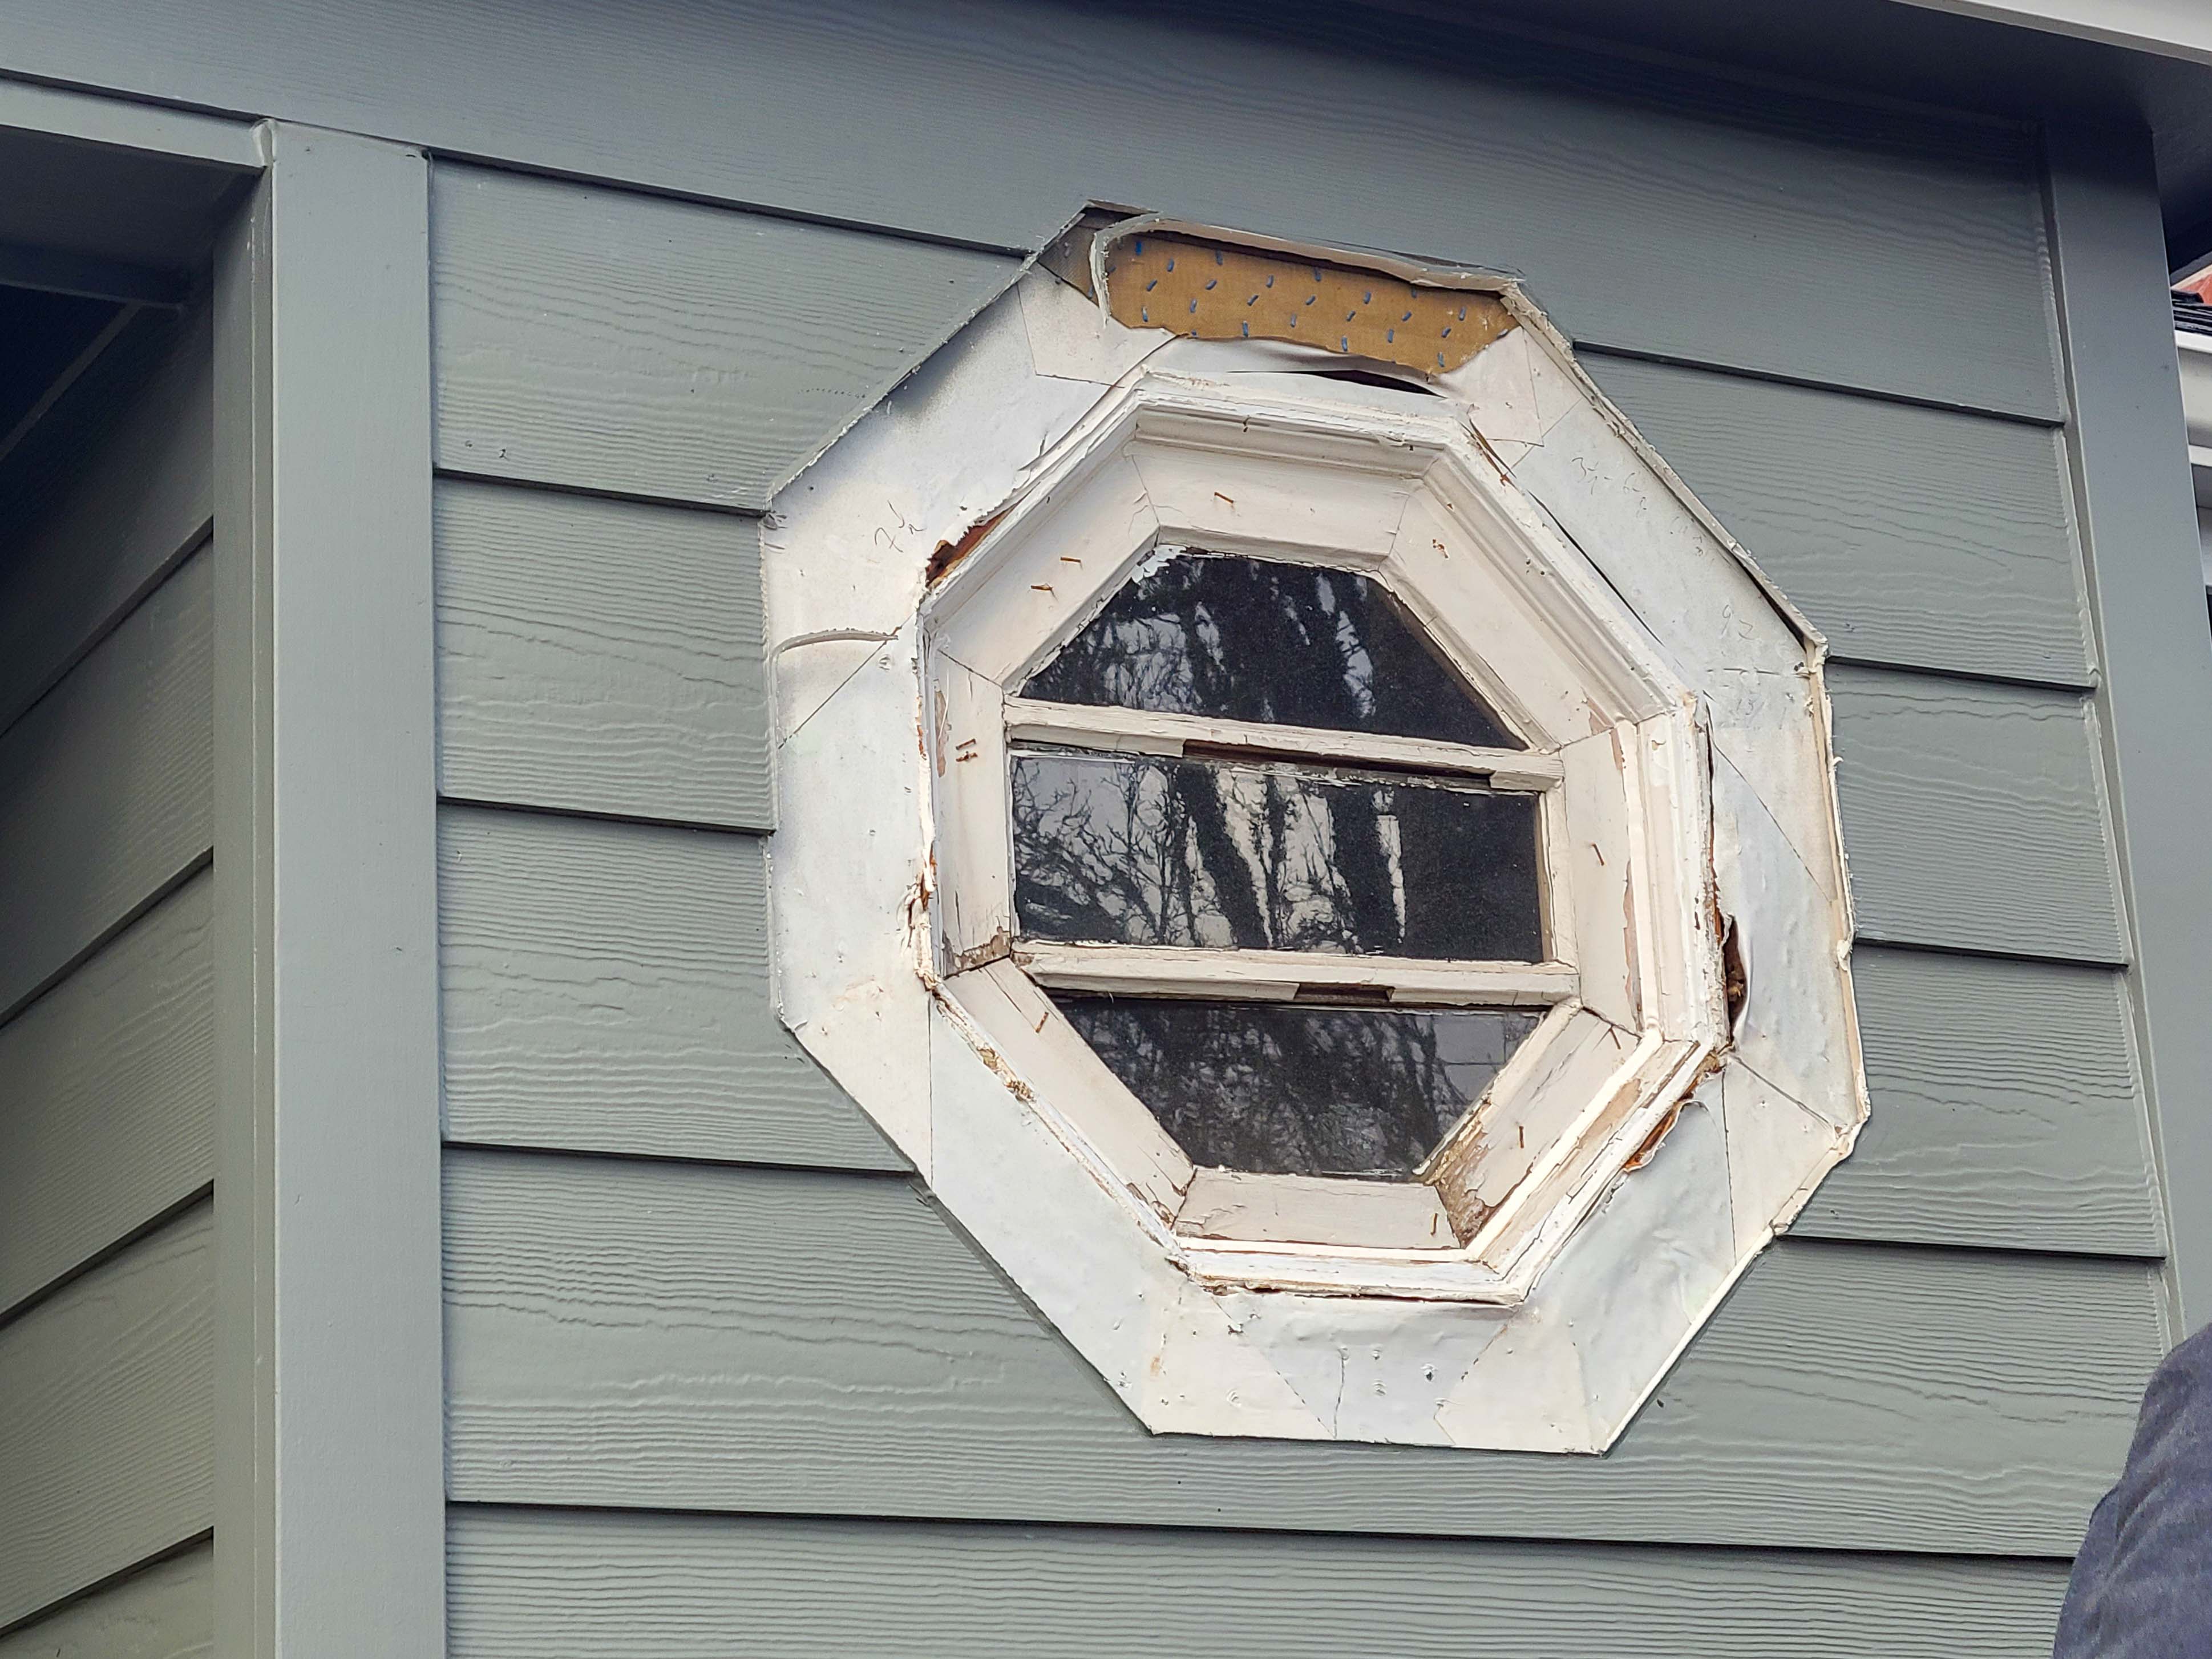
Wrong - Stucco has rotted and cracked above a window because of water damage due to lack of proper flashing and drainage.
Image
Image
Image

Image

Wrong - There is no step flashing along the base of the gable and the right window is missing sill trim.
Image
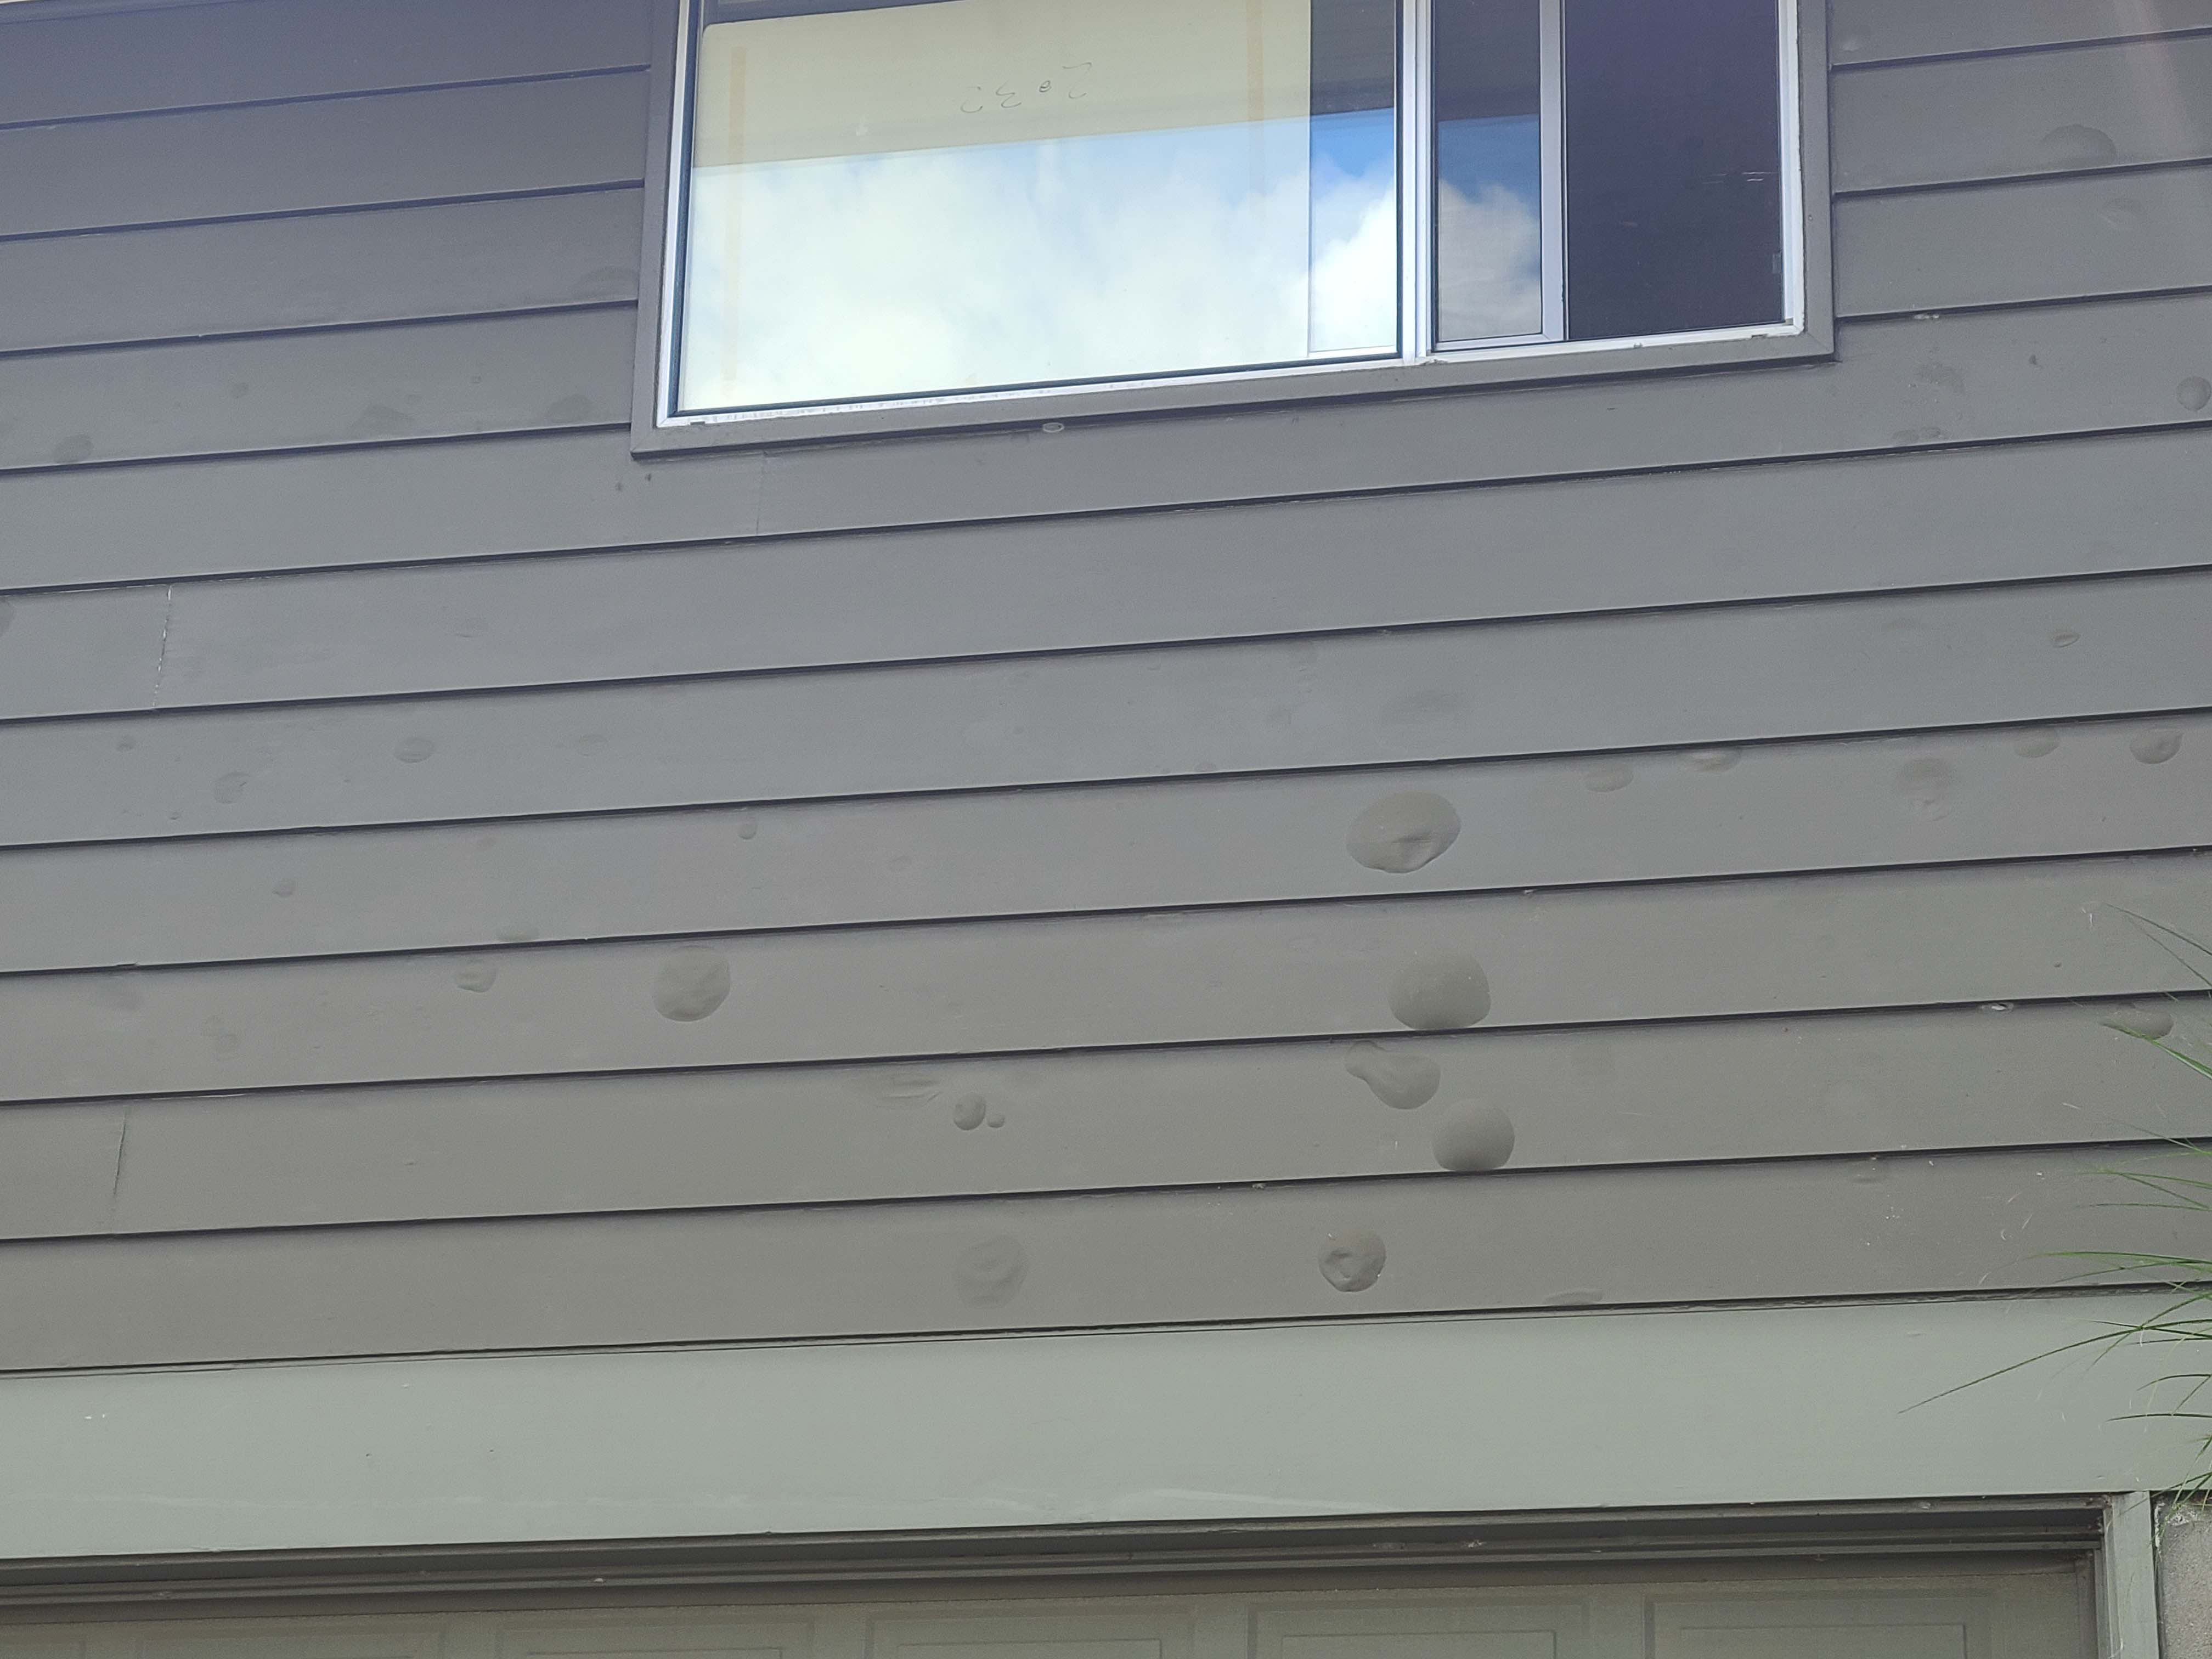
Wrong - Water has gotten behind the paint, possibly due to lack of window flashing, leading to blistering.
Image
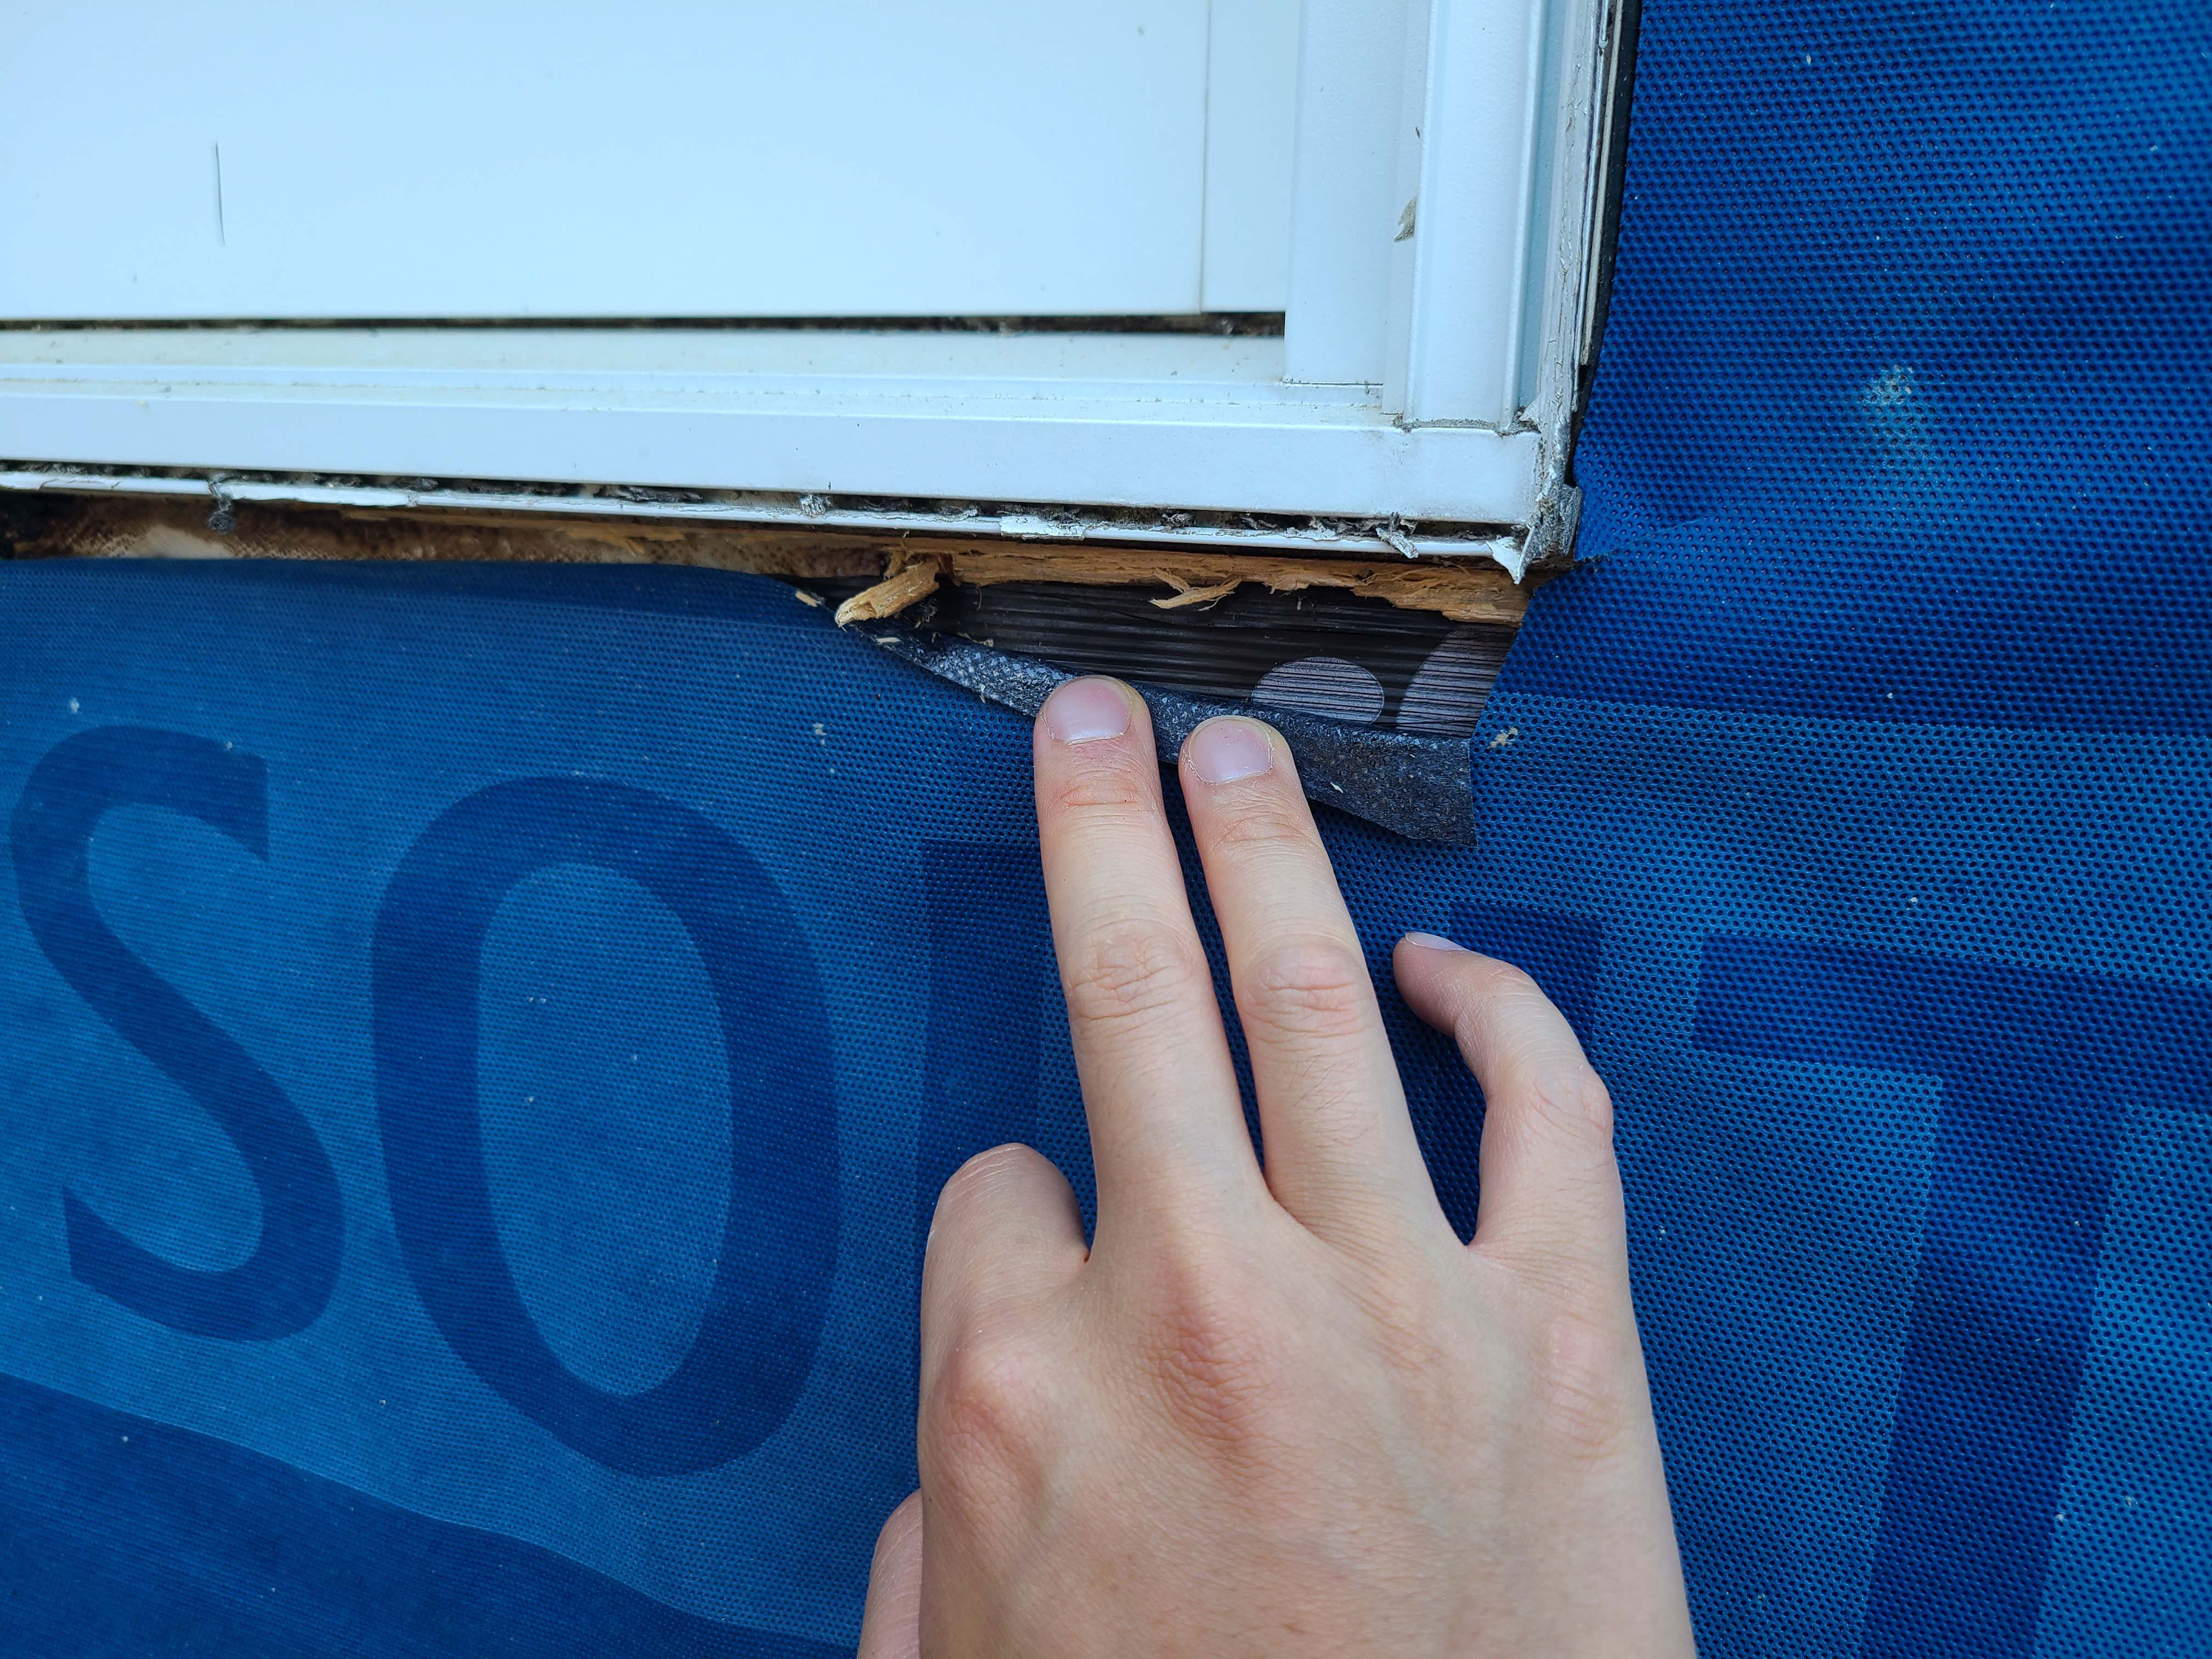
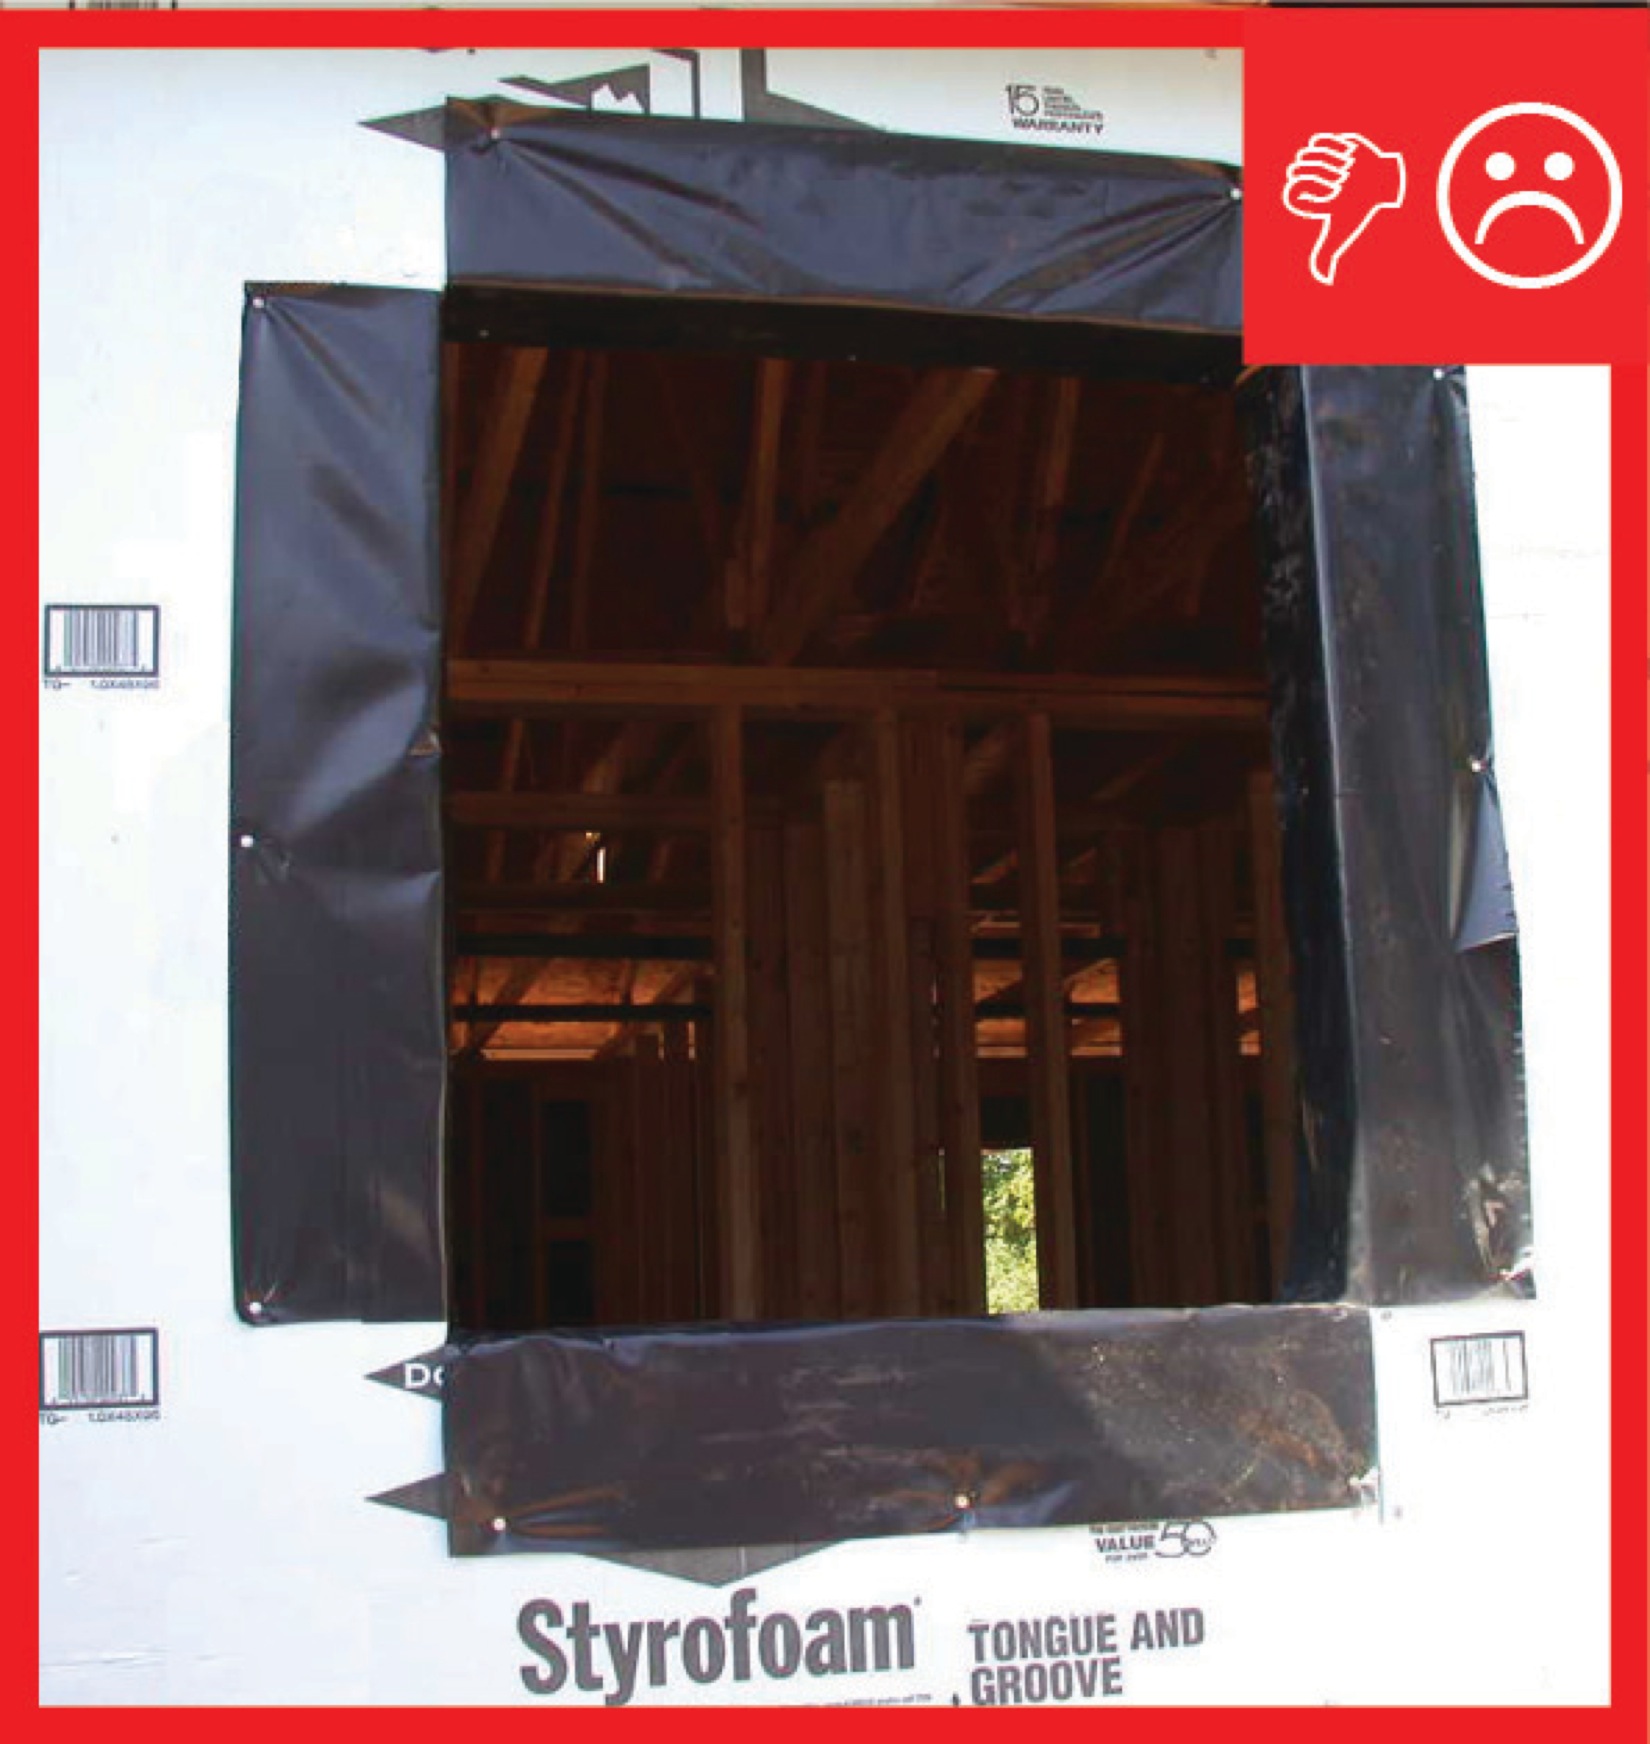
Wrong - Window is missing pan flashing under sill and tape flashing at jamb end sill.
Image
Wrong – The corners are not properly flashed, leaving a vulnerable area in the drainage system
Image

Image