

Scope
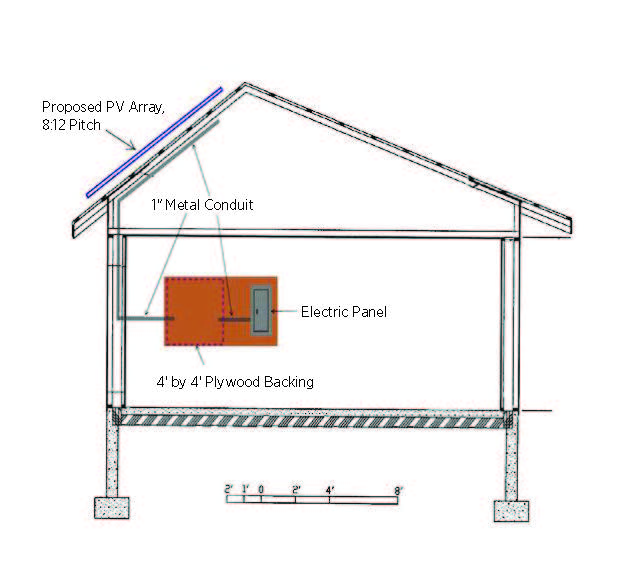
During construction, add a 1 inch metal conduit from the Photovoltaic array to the designated inverter location, and add a second 1 inch metal conduit from the inverter location to the electrical service panel.
See the Compliance Tab for links to related codes and standards and voluntary federal energy-efficiency program requirements.
Description
A conduit is intended to protect the wiring leading from the PV array to the inverter and from the inverter to the electrical service panel. The ends of the conduit should be clearly labeled, particularly if the intent is to install the PV system at a later date. In areas subject to environmental concerns or hazards, the stub outs should be properly sealed and/or capped to prevent contamination.
To meet the requirements of the DOE Zero Energy Ready Home program, install a 1-inch metal conduit from the designated array location to the designated inverter location with the end of the conduit clearly labeled as a Renewable Energy Ready Home component and indicating its purpose and intended use. The conduit run should be identified on electrical and architectural diagrams to be provided to the homeowner.
How to Install a Wiring Conduit for a Future Solar Photovoltaic System:
- Designate a proposed location for the solar photovoltaic system on the roof.
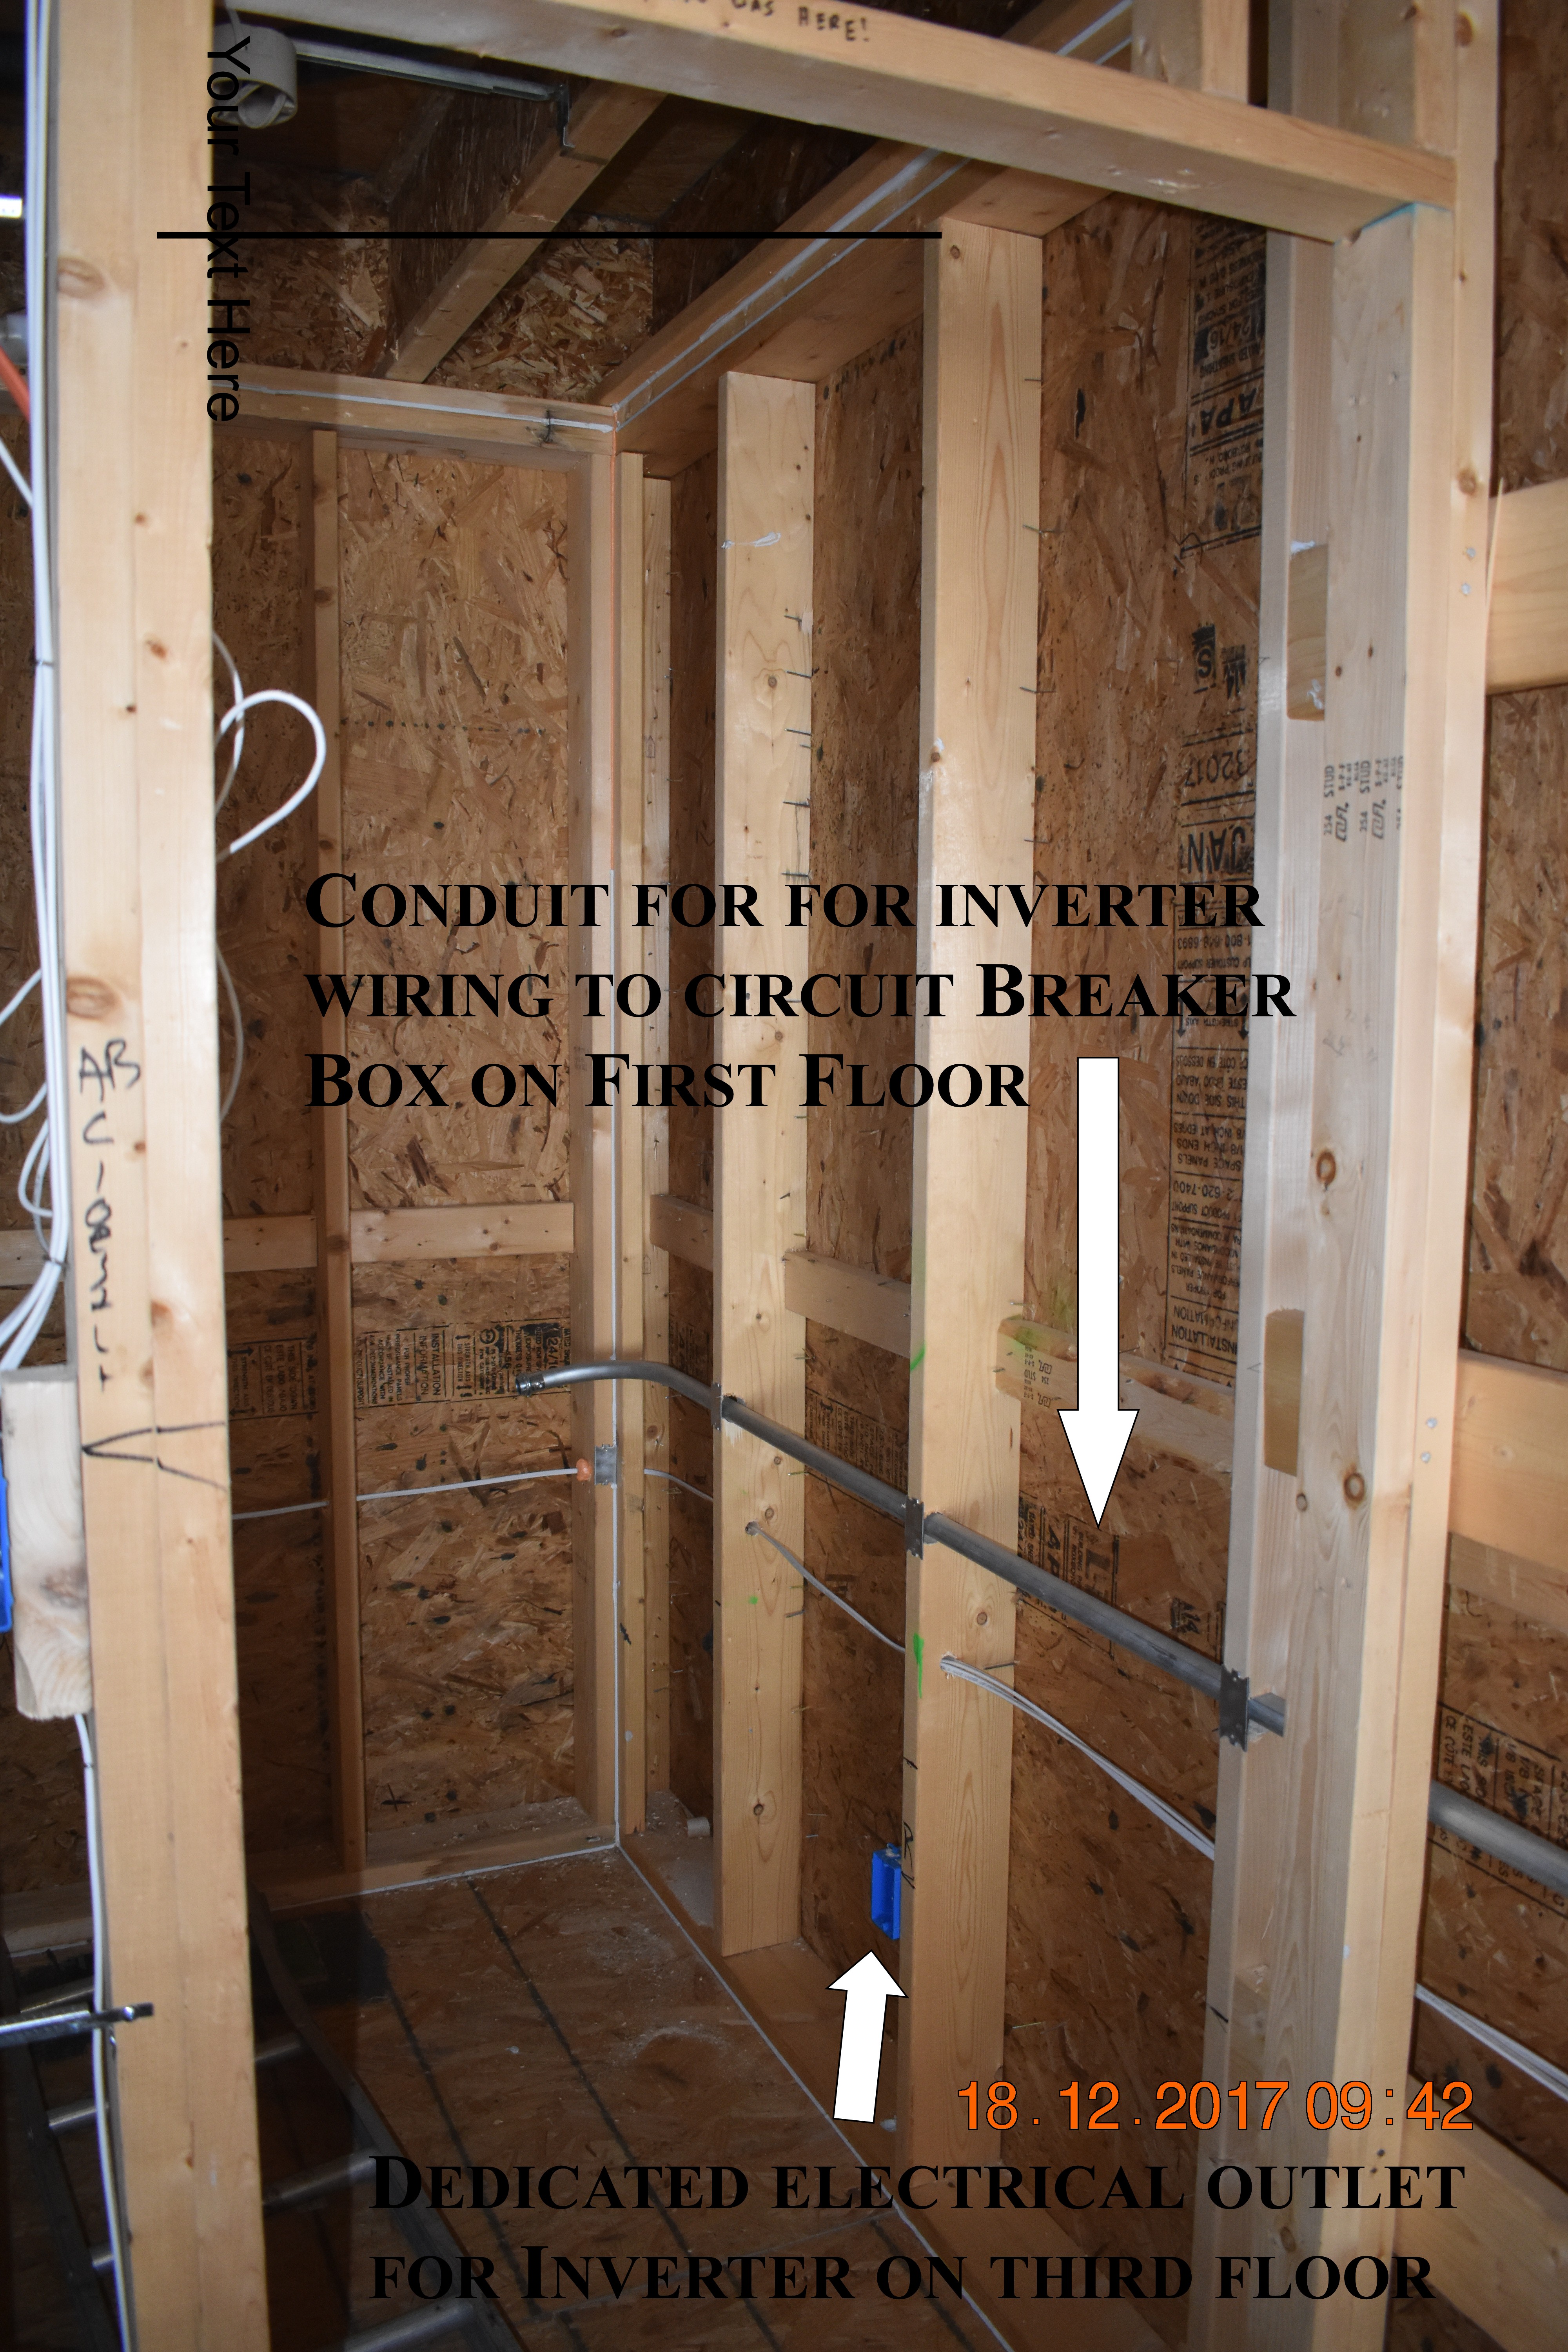
- Install a 1-inch metal conduit from the attic to the future location of the inverter.
- Begin conduit about 6 inches above the finished insulation depth directly below the designated array location in the attic. Ensure the conduit location in the attic provides at least 18-in. of space below the roof deck and is easily accessible for the future solar installer.
- Run the wiring conduit through the home so that the overall length of the conduit is minimized.
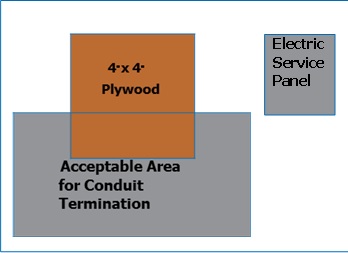
- Ensure there are three or fewer 90-degree turns from the attic to the designated 4 ftx 4 ft plywood area or provide for accessible pull boxes, as required by the National Electric Code.
- Terminate the conduit at the bottom edge of the 4 ft x 4 ft plywood backing for a future inverter. (Optional) For aesthetic reasons, terminate into a flush mount junction or pull box near the bottom edge of the plywood area.
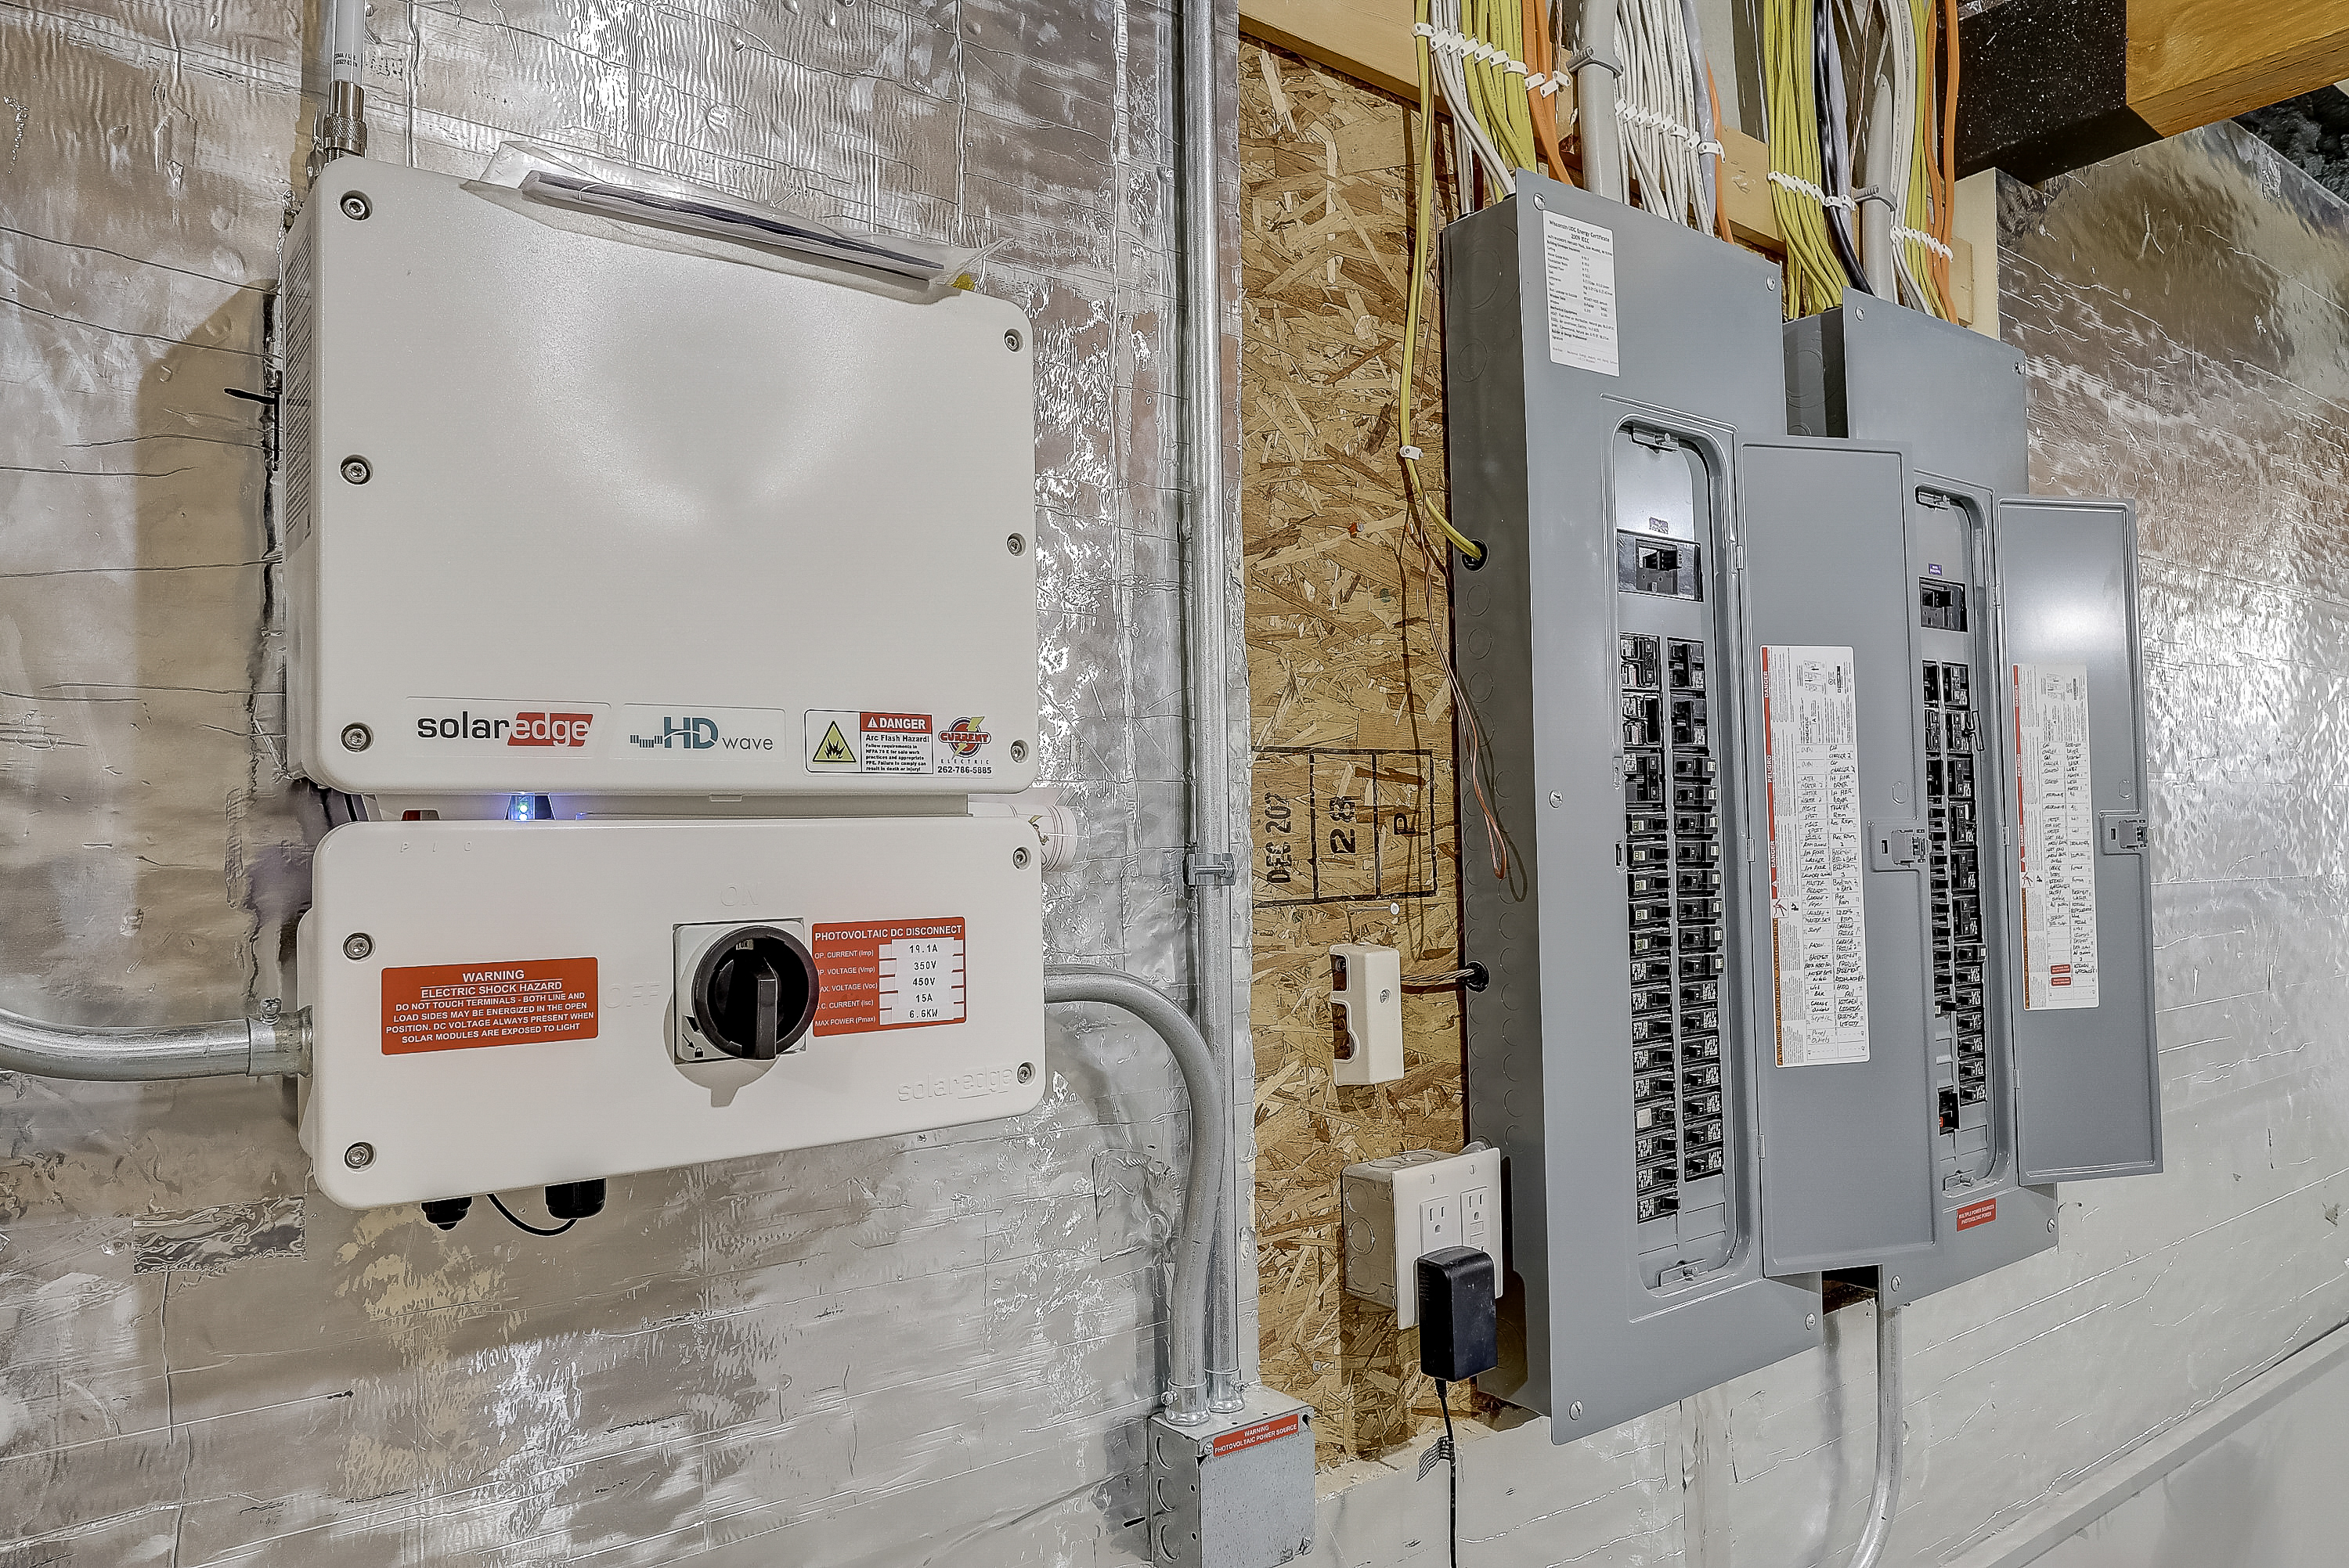
- Install a 1-inch metal conduit from the designated inverter location to the electrical service panel.
- To facilitate the wiring of the solar PV system at a later date, the builder may also want to include a pull line in the conduit, particularly if the overall conduit run is lengthy or has multiple bends.
- Cap and label both ends of both conduit runs so the text is visible and upright (if possible). The label should read, “Renewable Energy Ready Home – Solar Photovoltaic Wiring Conduit.”
Ensuring Success
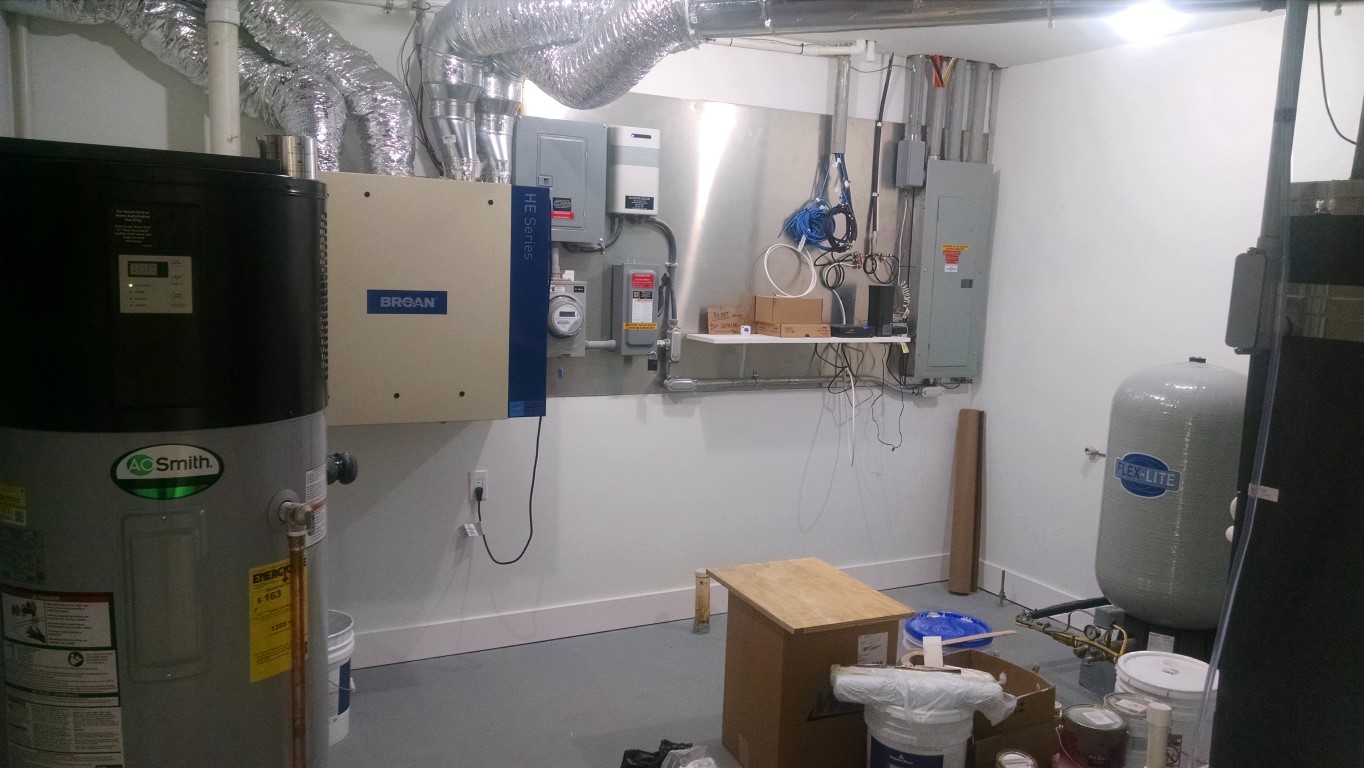
Ensure adequate utility room size and location for the solar water heating and photovoltaic system components early in the house design process.
Confirm with local code officials early in the design process what steps are needed to guarantee that installation of PV panels will meet with local codes, homeowner's association covenants, and historic district regulations.
Protect the electrical and mechanical components of the solar photovoltaic system from bulk moisture, high temperatures, and direct sunlight. The utility room should be properly ventilated and maintain average indoor temperatures.
Region
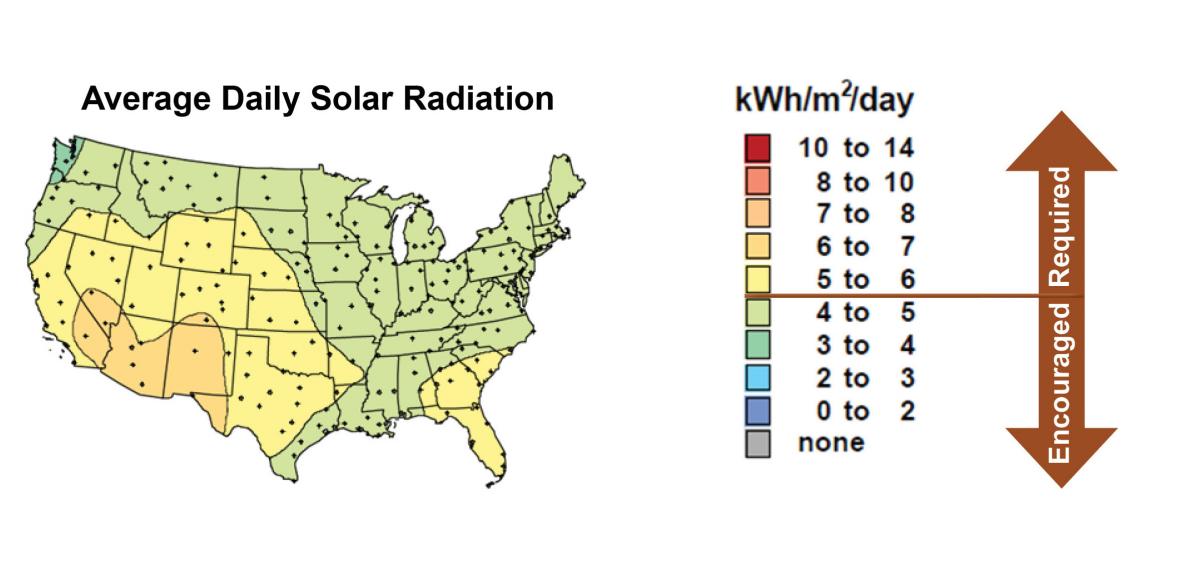
The DOE Zero Energy Ready Home PV-Ready Checklist (Revision 07) is required only under the following condition related to climate (See the Compliance Tab for other exceptions):
- Location, based on zip code, has at least 5 kWh/m2/day average daily solar radiation based on annual solar insolation using the PVWatts online tool. See map below.
Training
Right and Wrong Images
Source
Source
Source
Presentations

Compliance
More Info
References and Resources
*For non-dated media, such as websites, the date listed is the date accessed.
Contributors to this Guide
The following authors and organizations contributed to the content in this Guide.
Building Science Corporation, lead for the Building Science Consortium (BSC), a DOE Building America Research Team
Sales
Solar Electric Ready Home = Solar Electric Ready Home

Technical Description
As solar photovoltaic (PV) panels have significantly come down in price, many homeowners are installing them to produce clean power and reduce their electric bills. Many more homeowners are likely to want this option for the future. Solar electric-ready homes make this possible with minimal to no disruption or cost penalty using simple no-cost/low-cost details and best practices integrated during construction. This includes ensuring adequate unshaded roof space for the PV panels, installing conduit from the attic to the electric service panel, securing documentation that the roof is designed to support the extra weight of the PV array, and providing adequate space near the electrical panel for balance of system components.
Questions? Comments? Contact our webmaster.