Showing results 101 - 150 of 199
Image
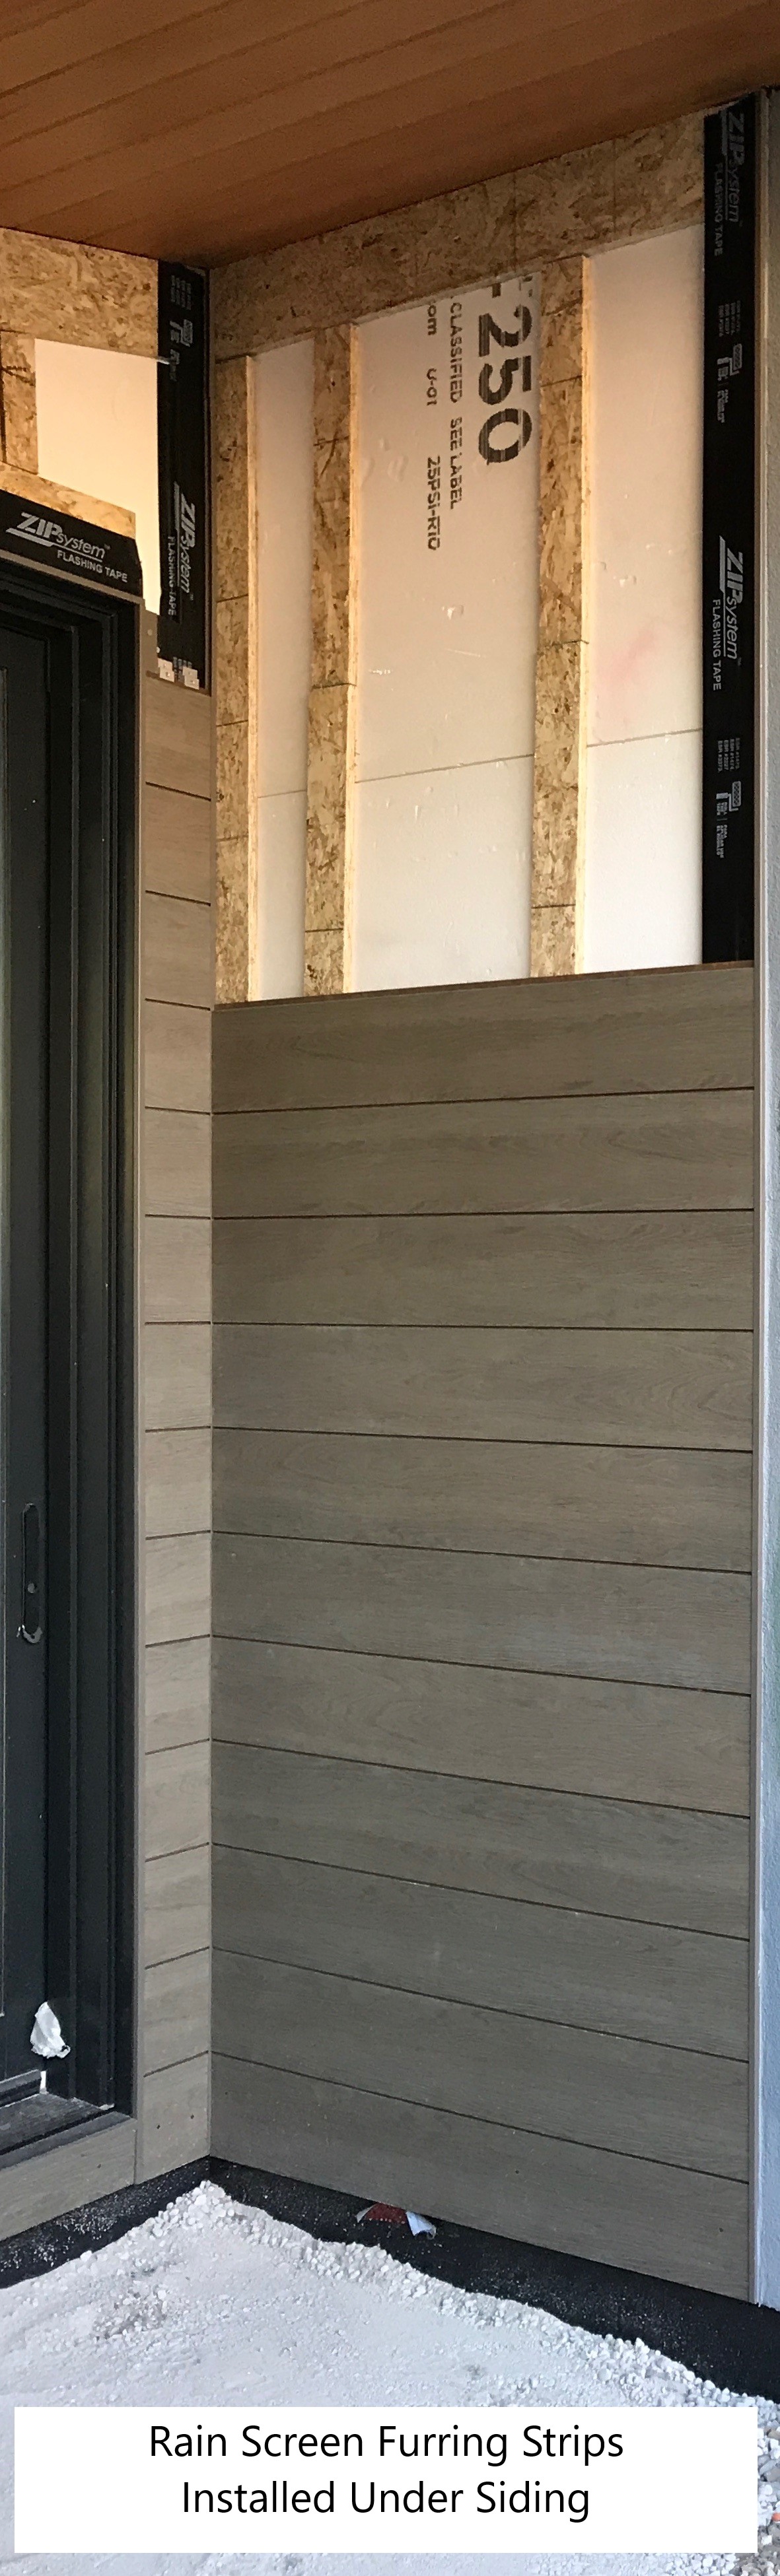
Right – Ripped OSB provides furring strips for a ventilation gap behind the wood siding.
Image
Image

Right – Start asphalt shingle installation with a starter strip set in an 8-inch strip of flashing cement
Image
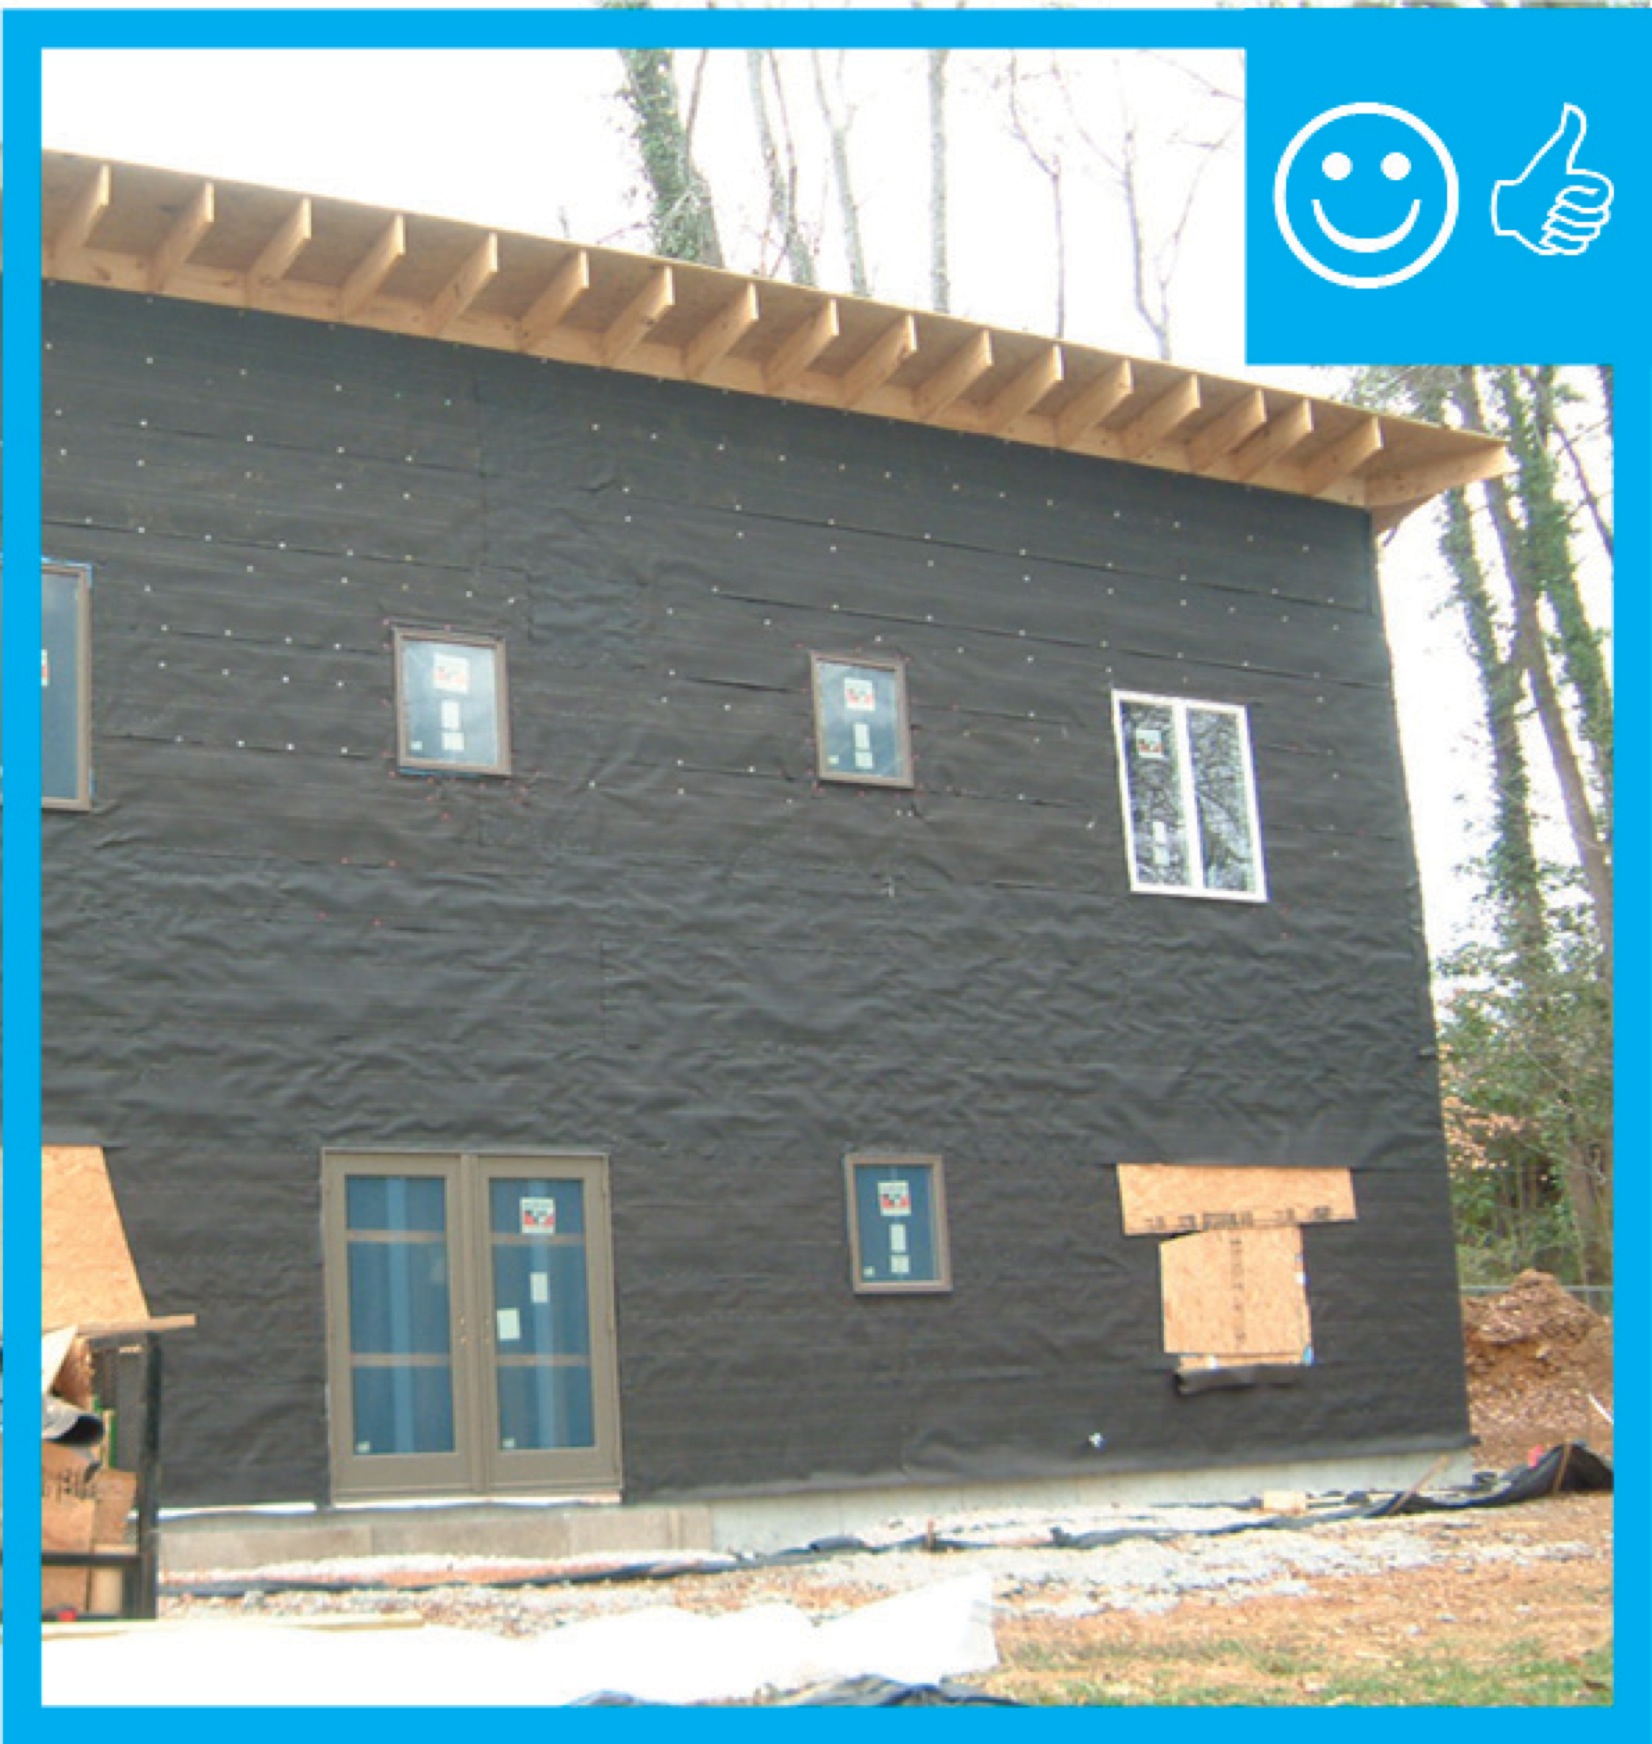
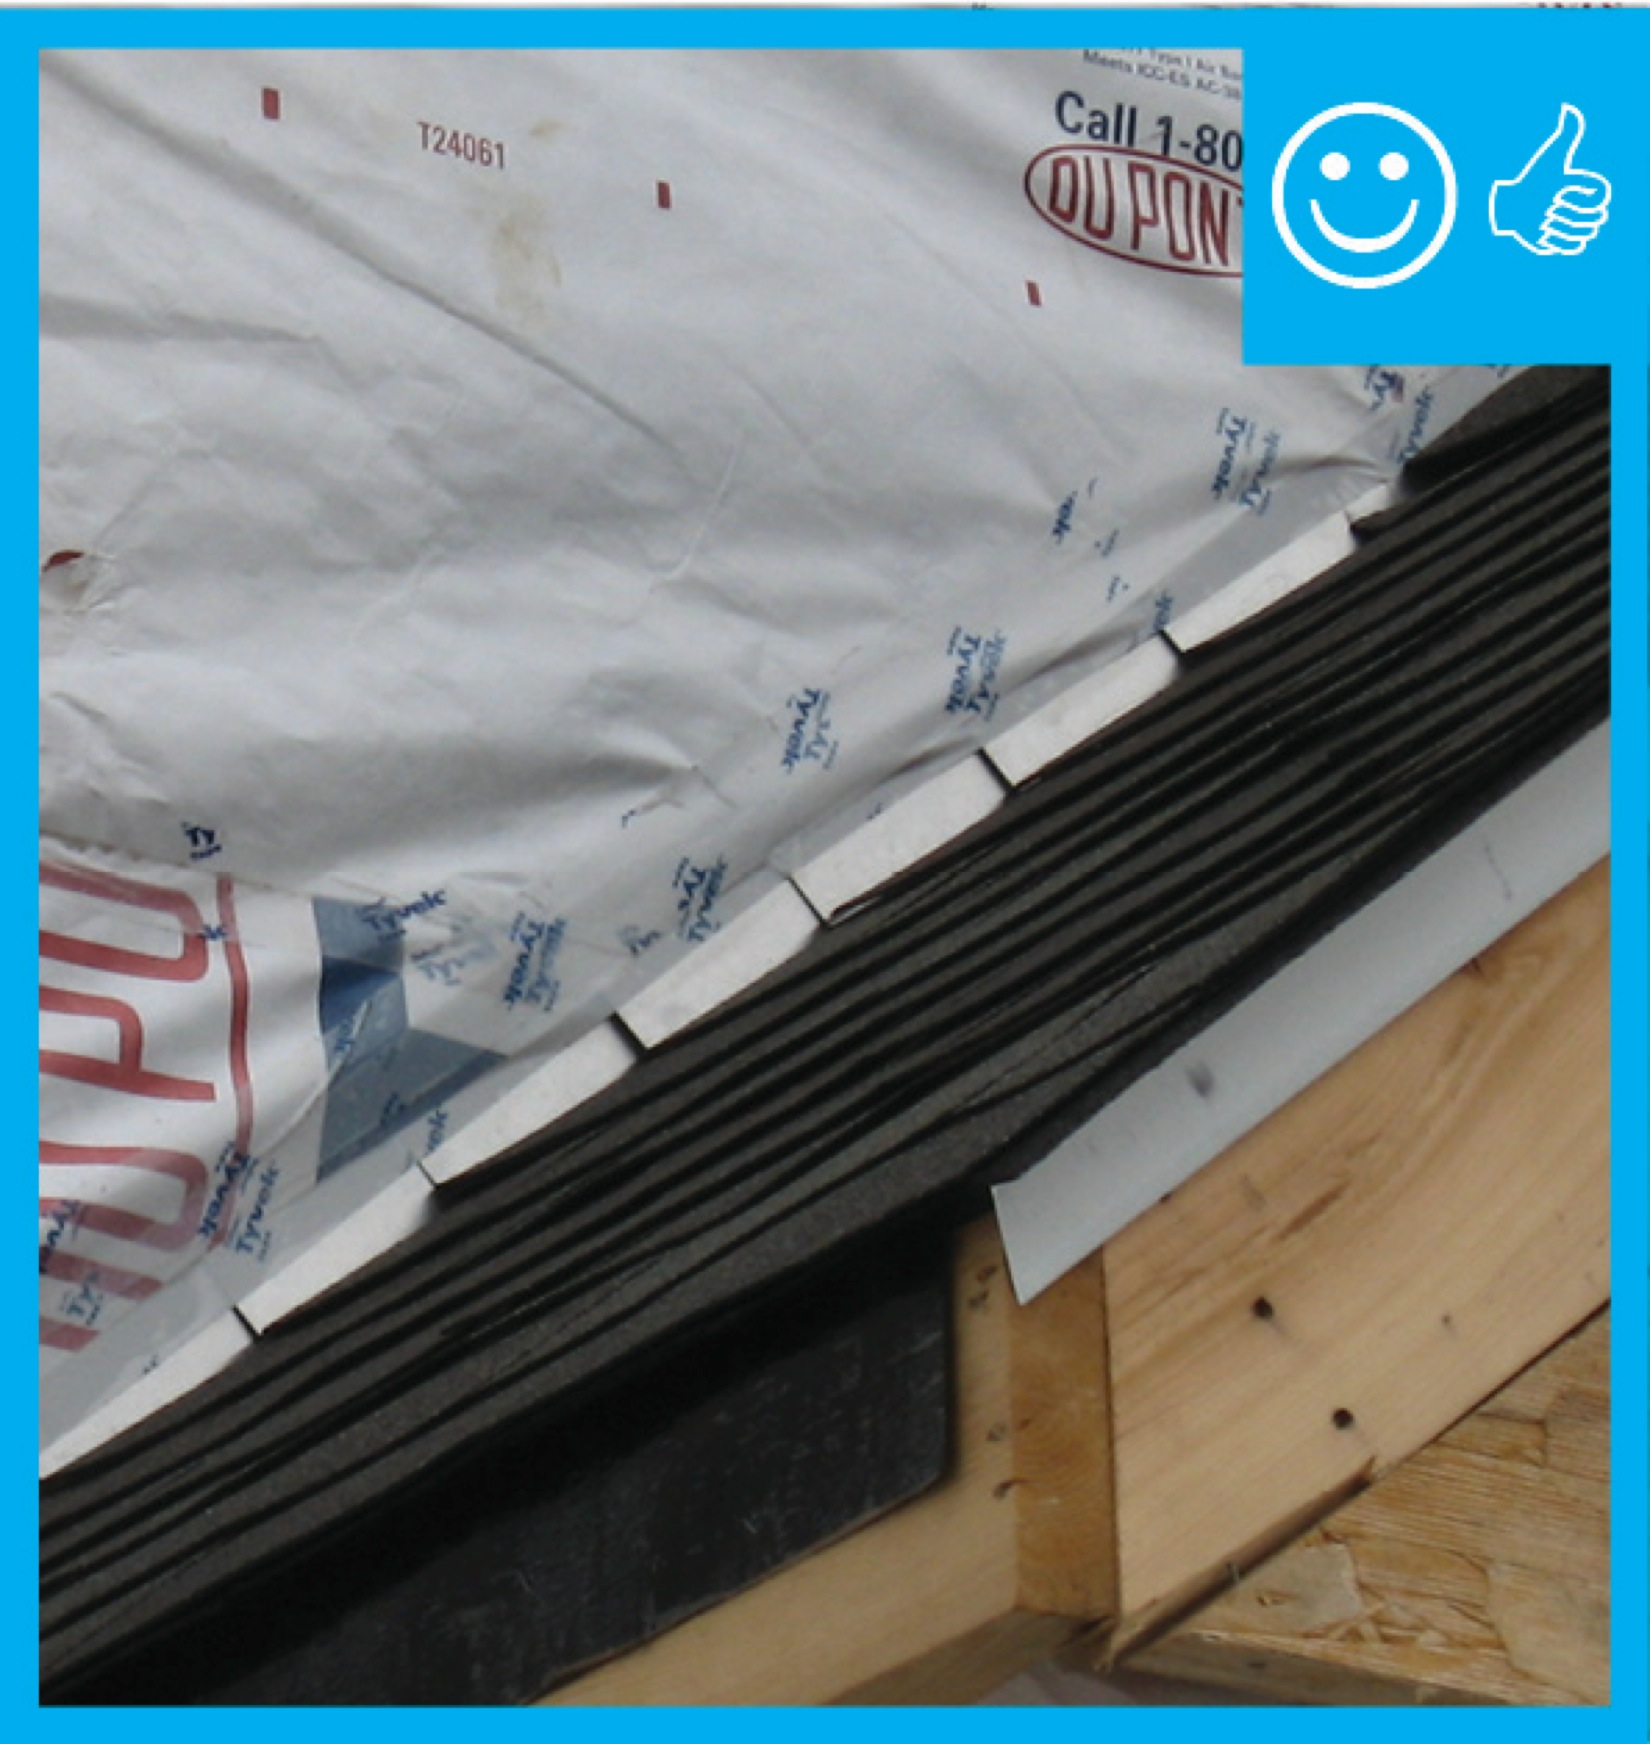
Right – The building felt is installed on all exterior walls and provides a complete drainage system
Image
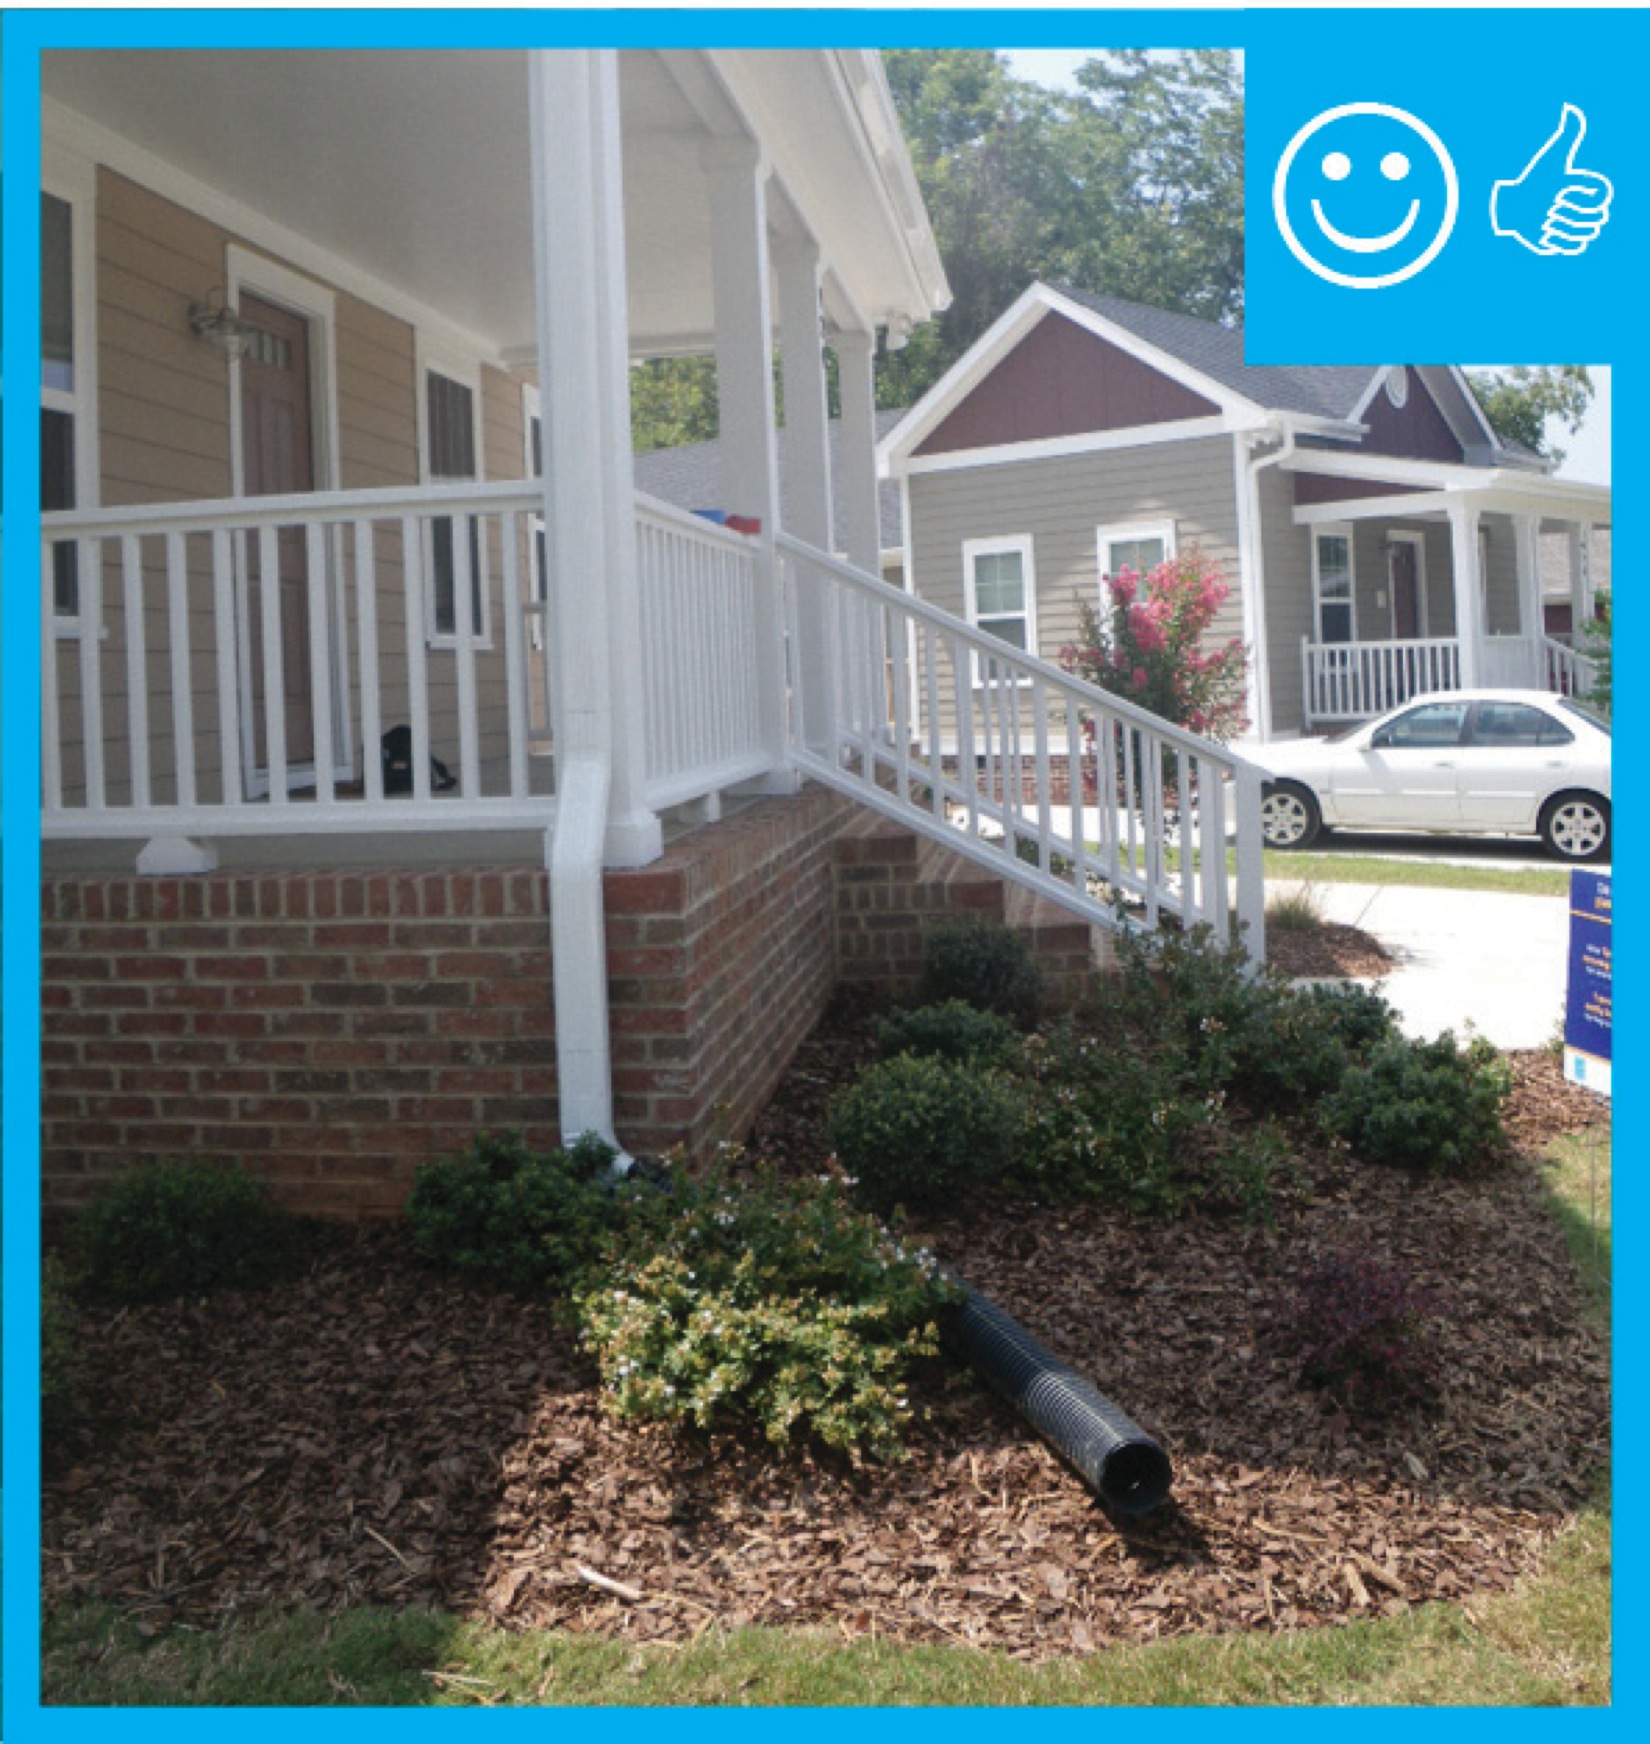
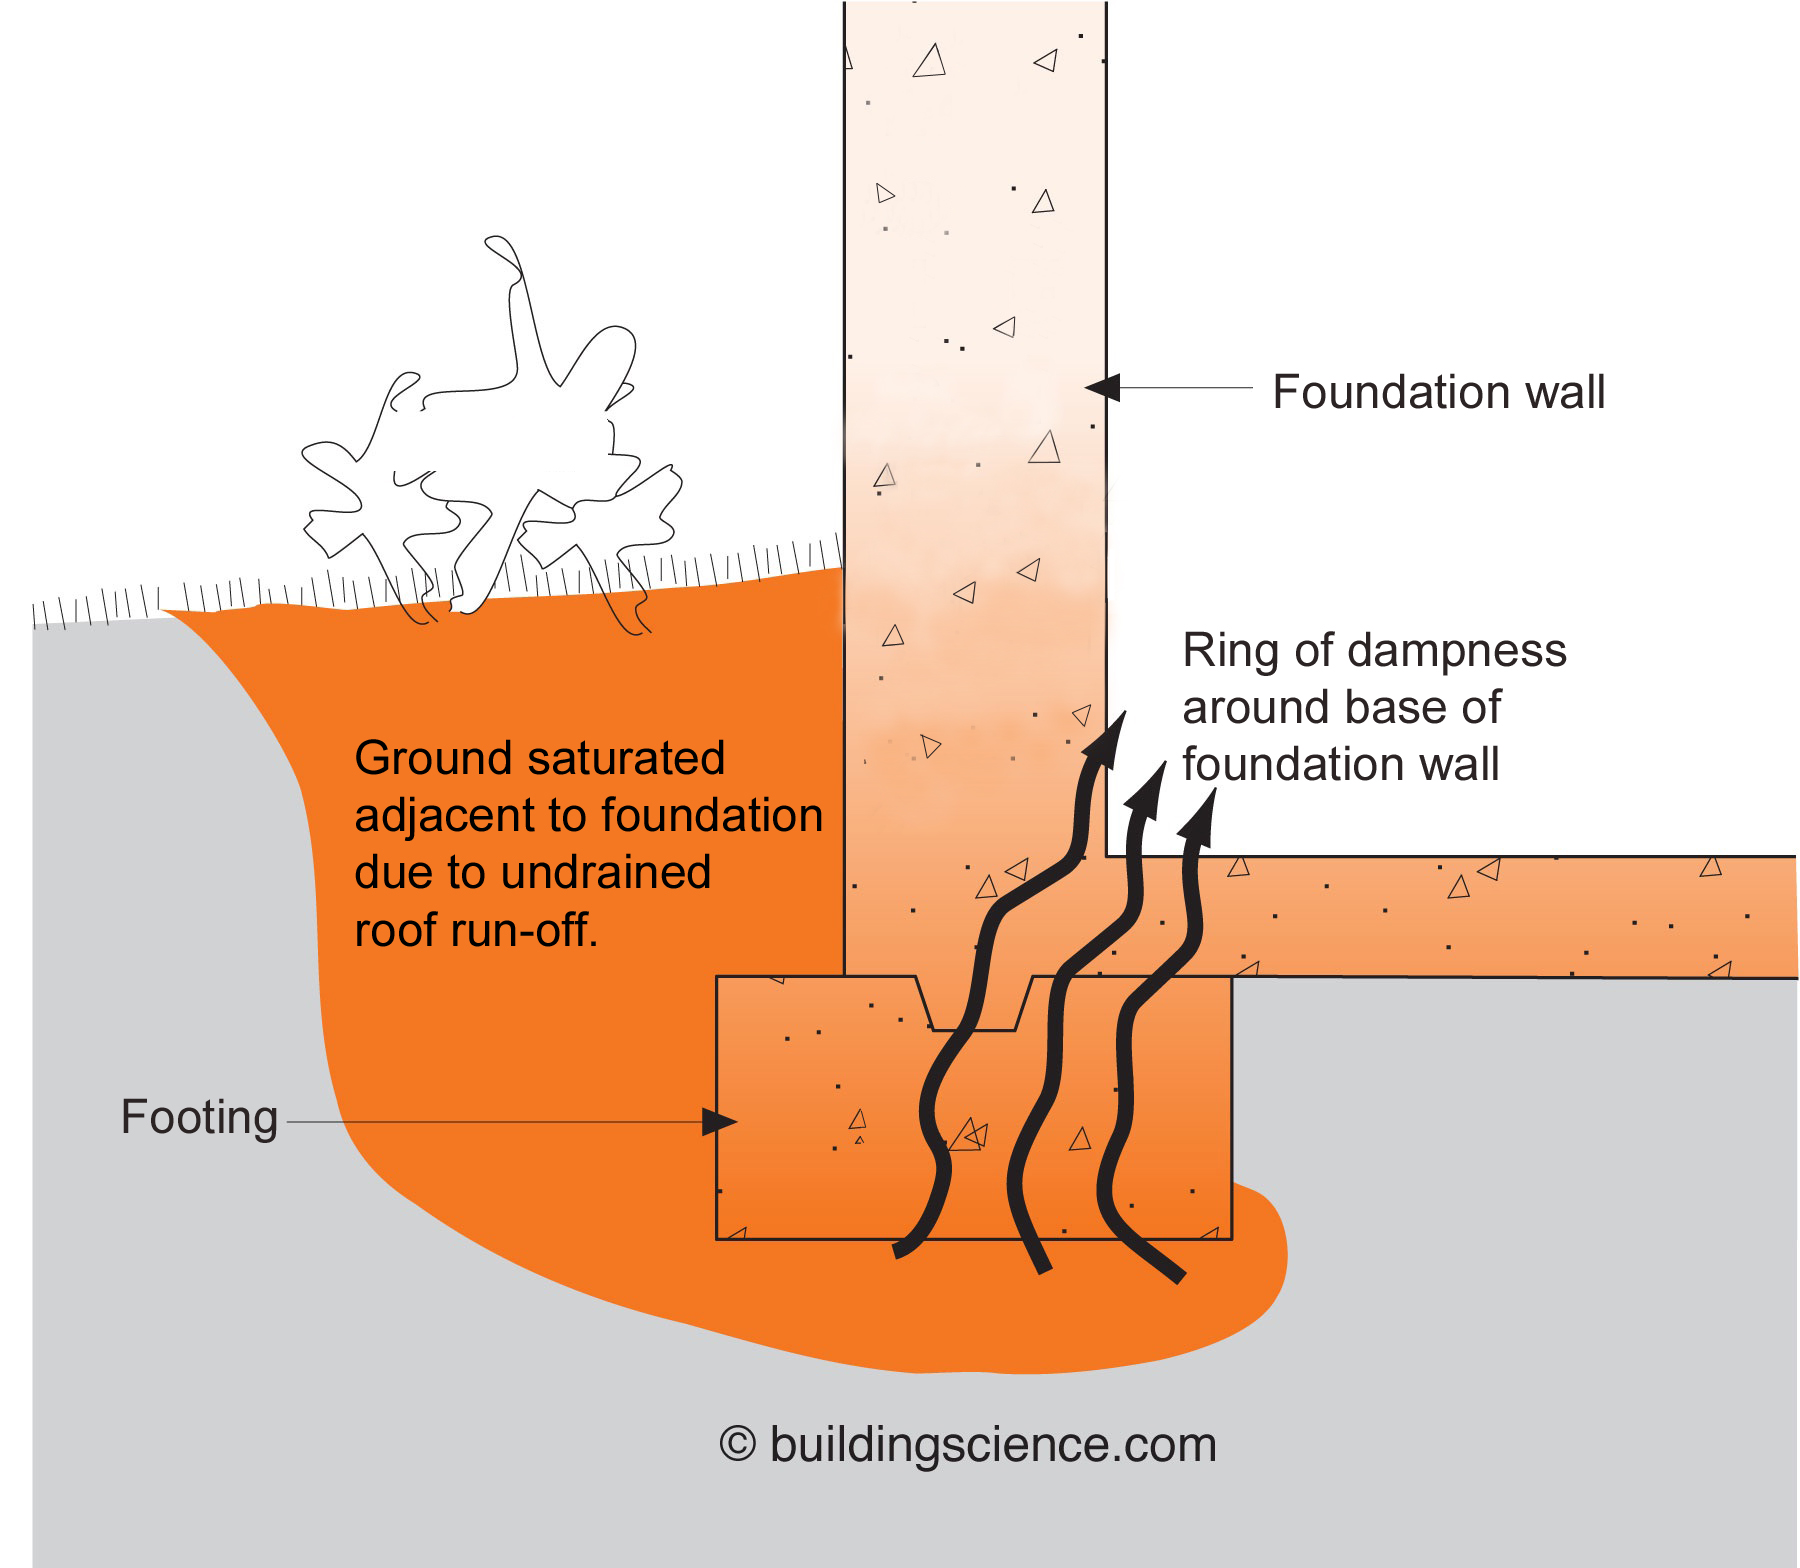
Right – The downspout pipe is far enough away from the foundation to prevent moisture problems
Image
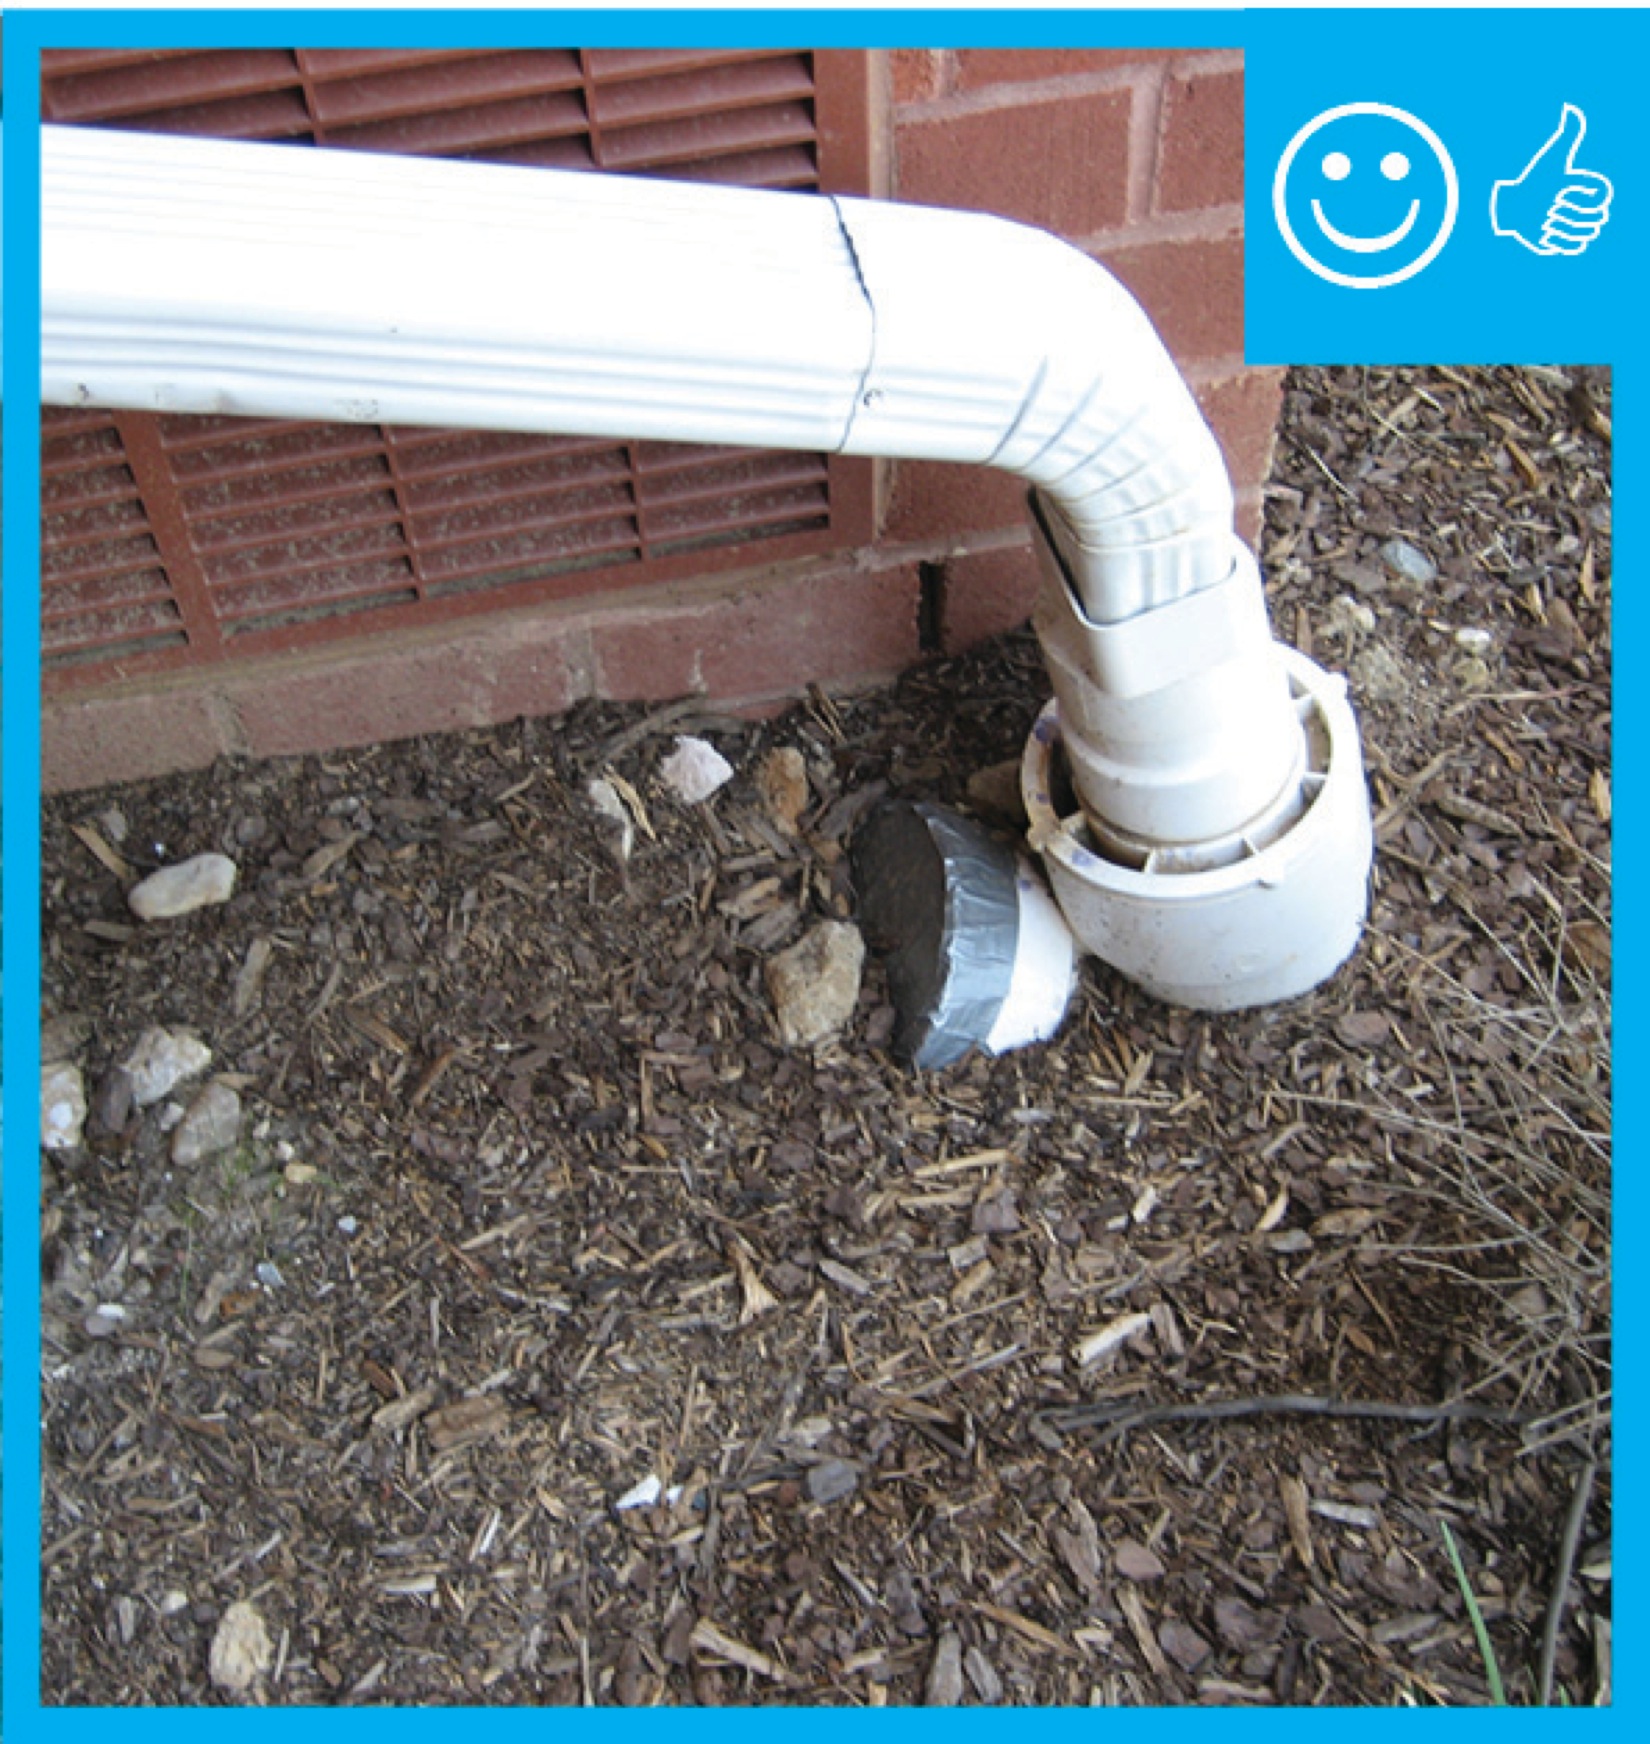
Right – The downspout terminates into a catchment system that moves water away from the foundation of the house
Image
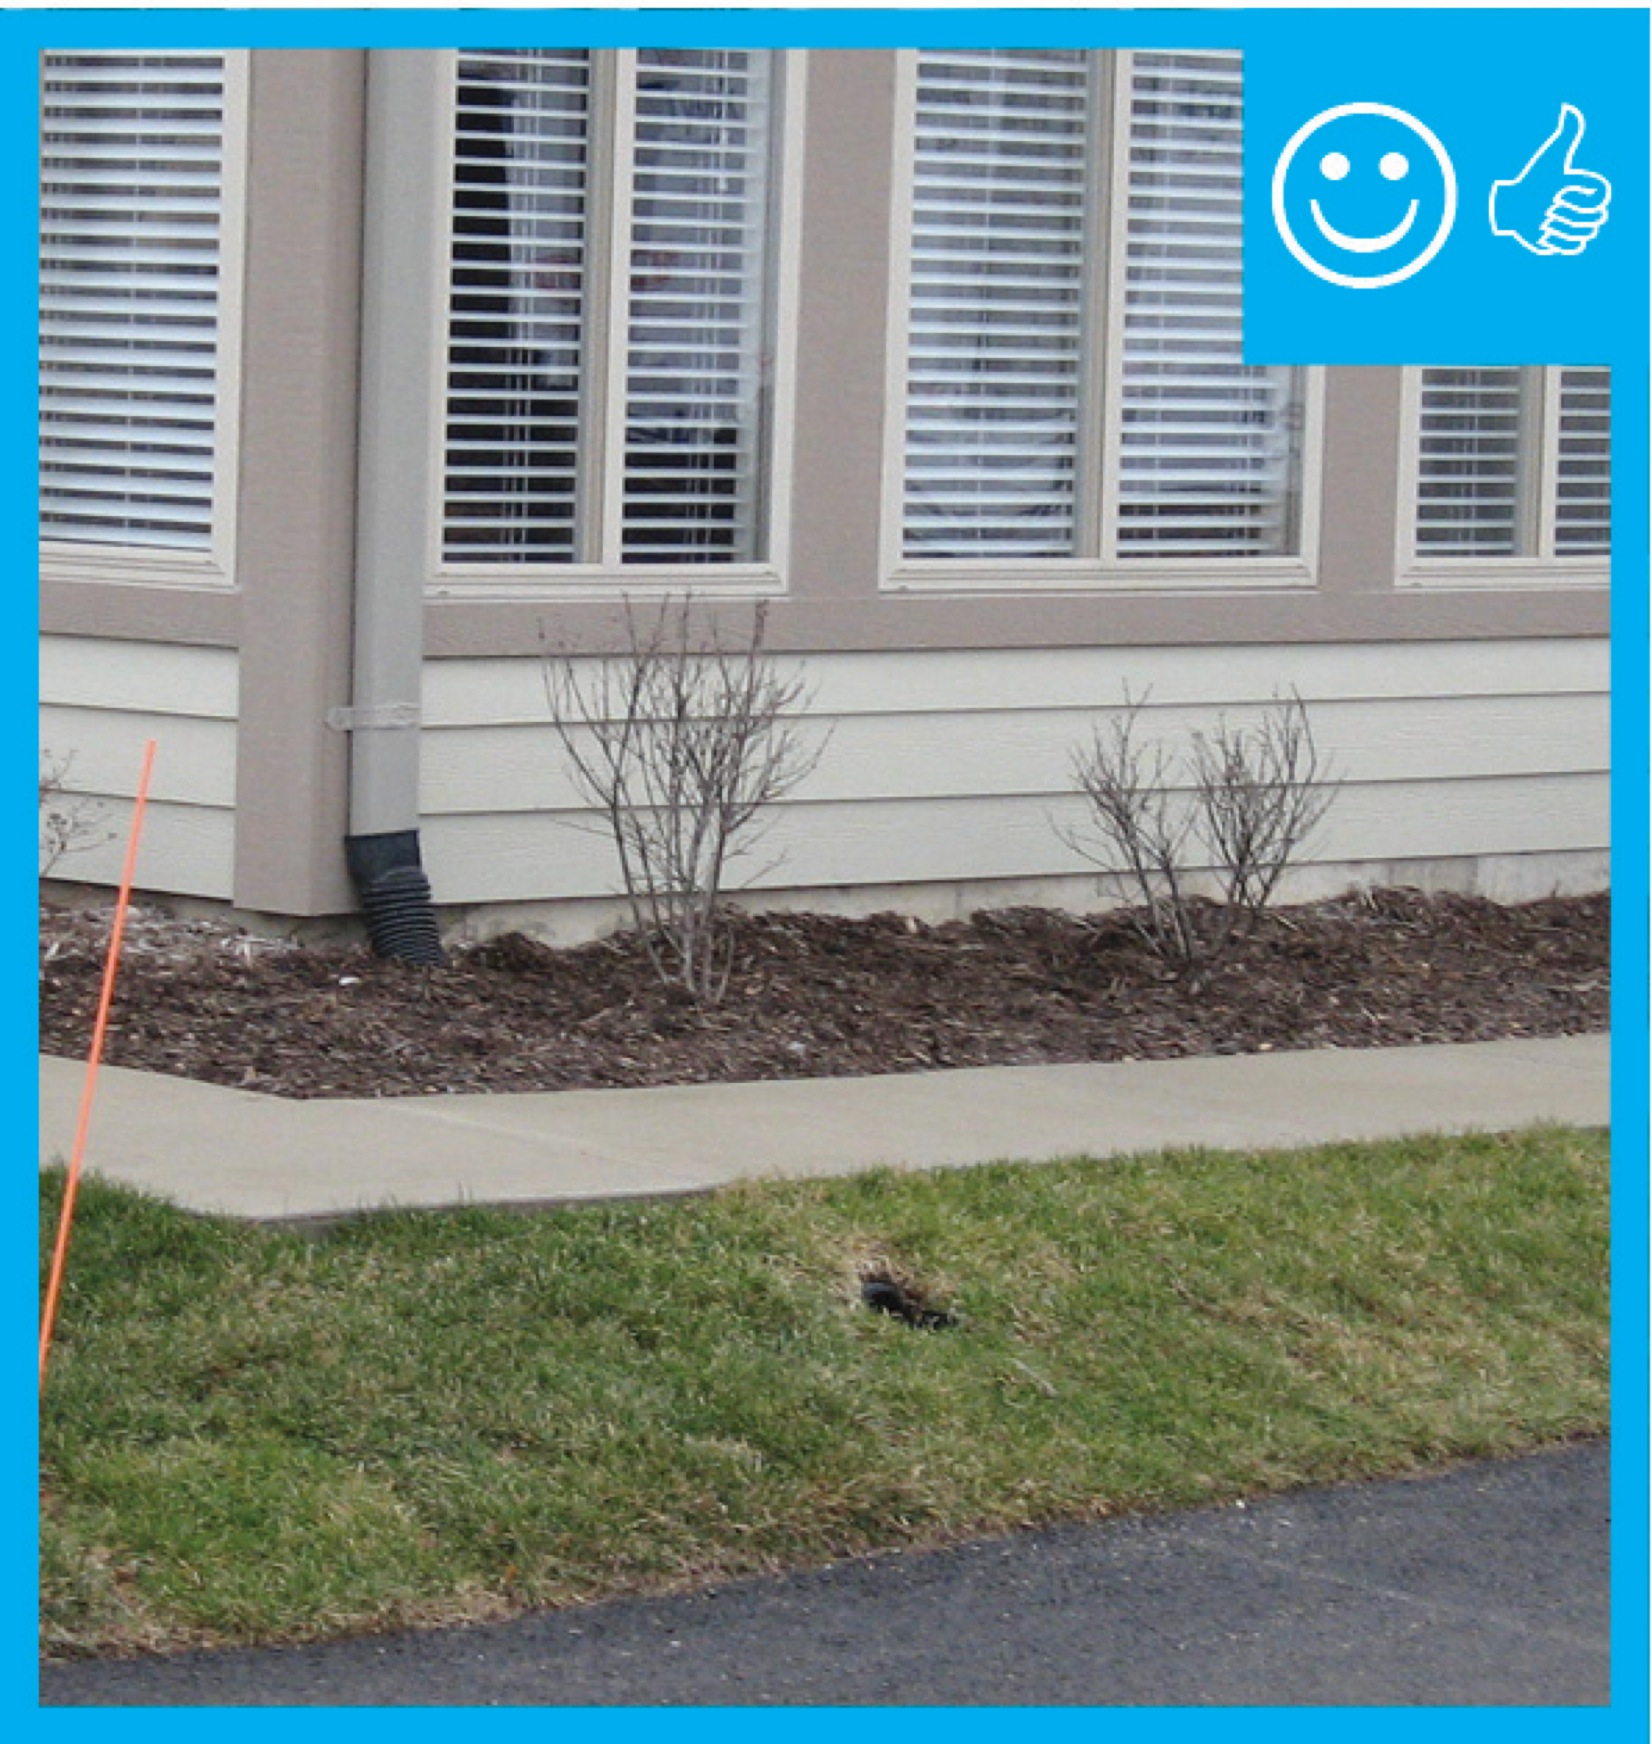
Right – The drain slopes away from the foundation and terminates at the proper distance
Image

Image
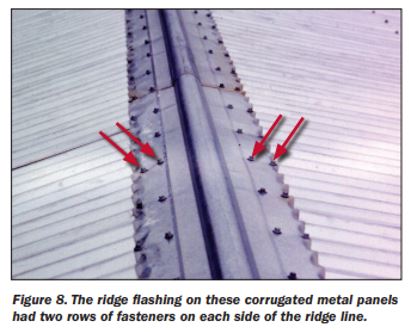
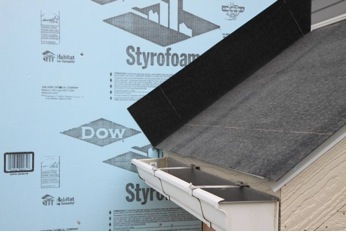
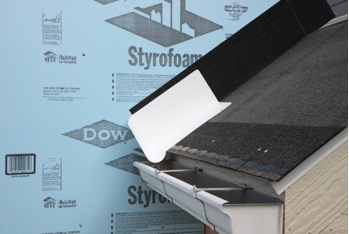
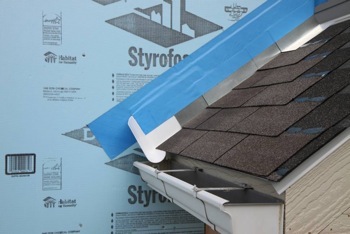
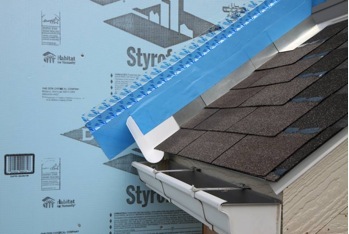
Right – The ridge flashing is secured with two rows of fasteners on each side of the ridge line
Image
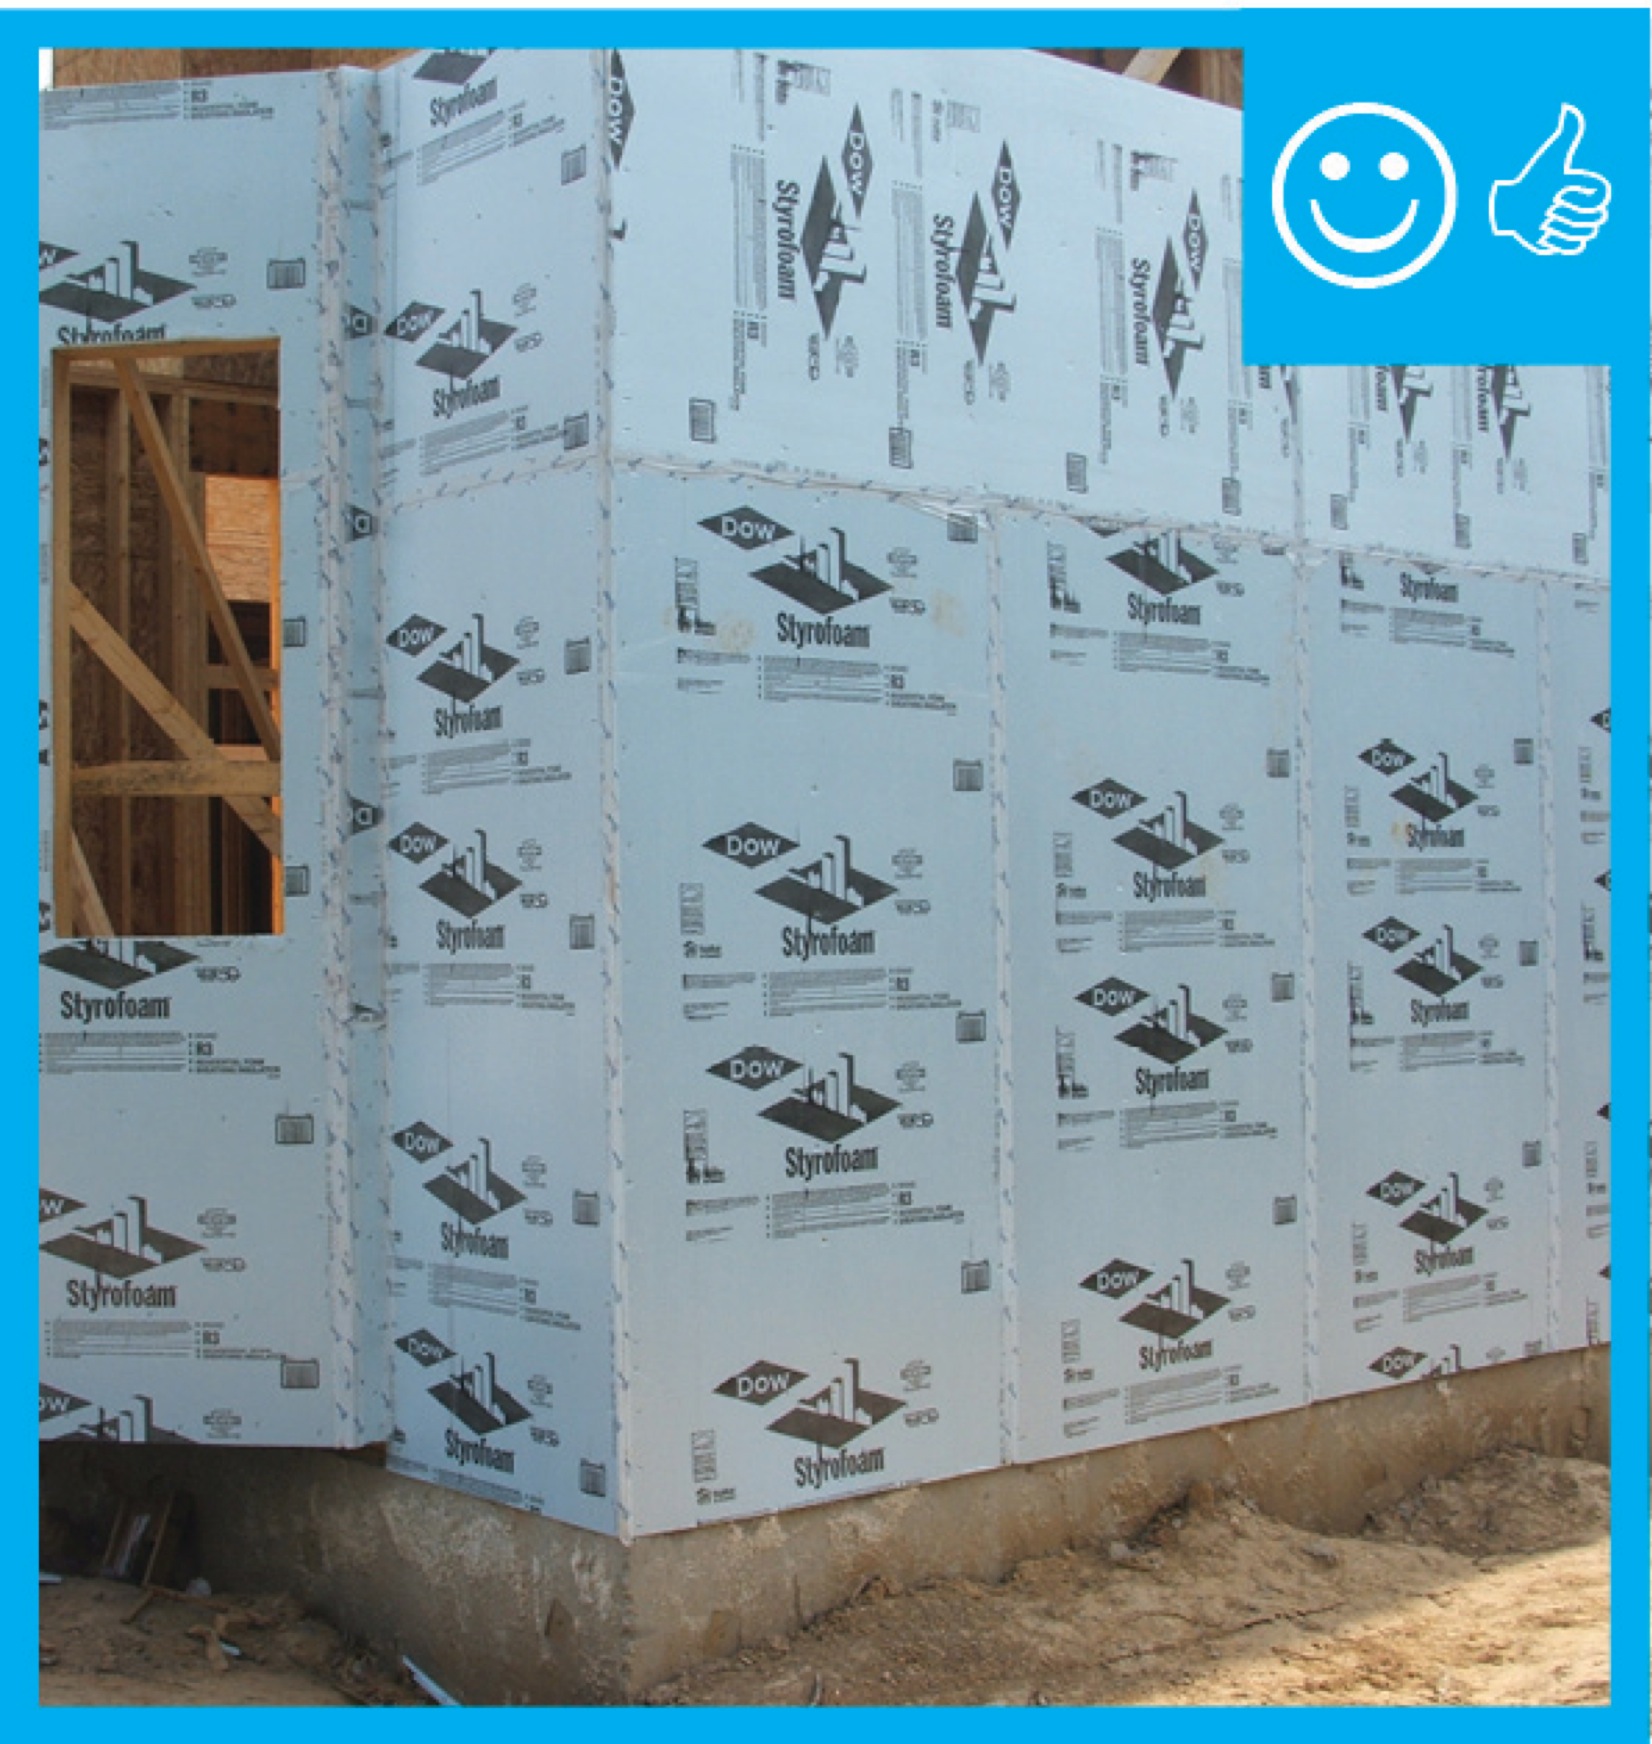
Right – The rigid insulation covers all exterior walls and all seams are taped to provide a complete drainage system
Image

Image
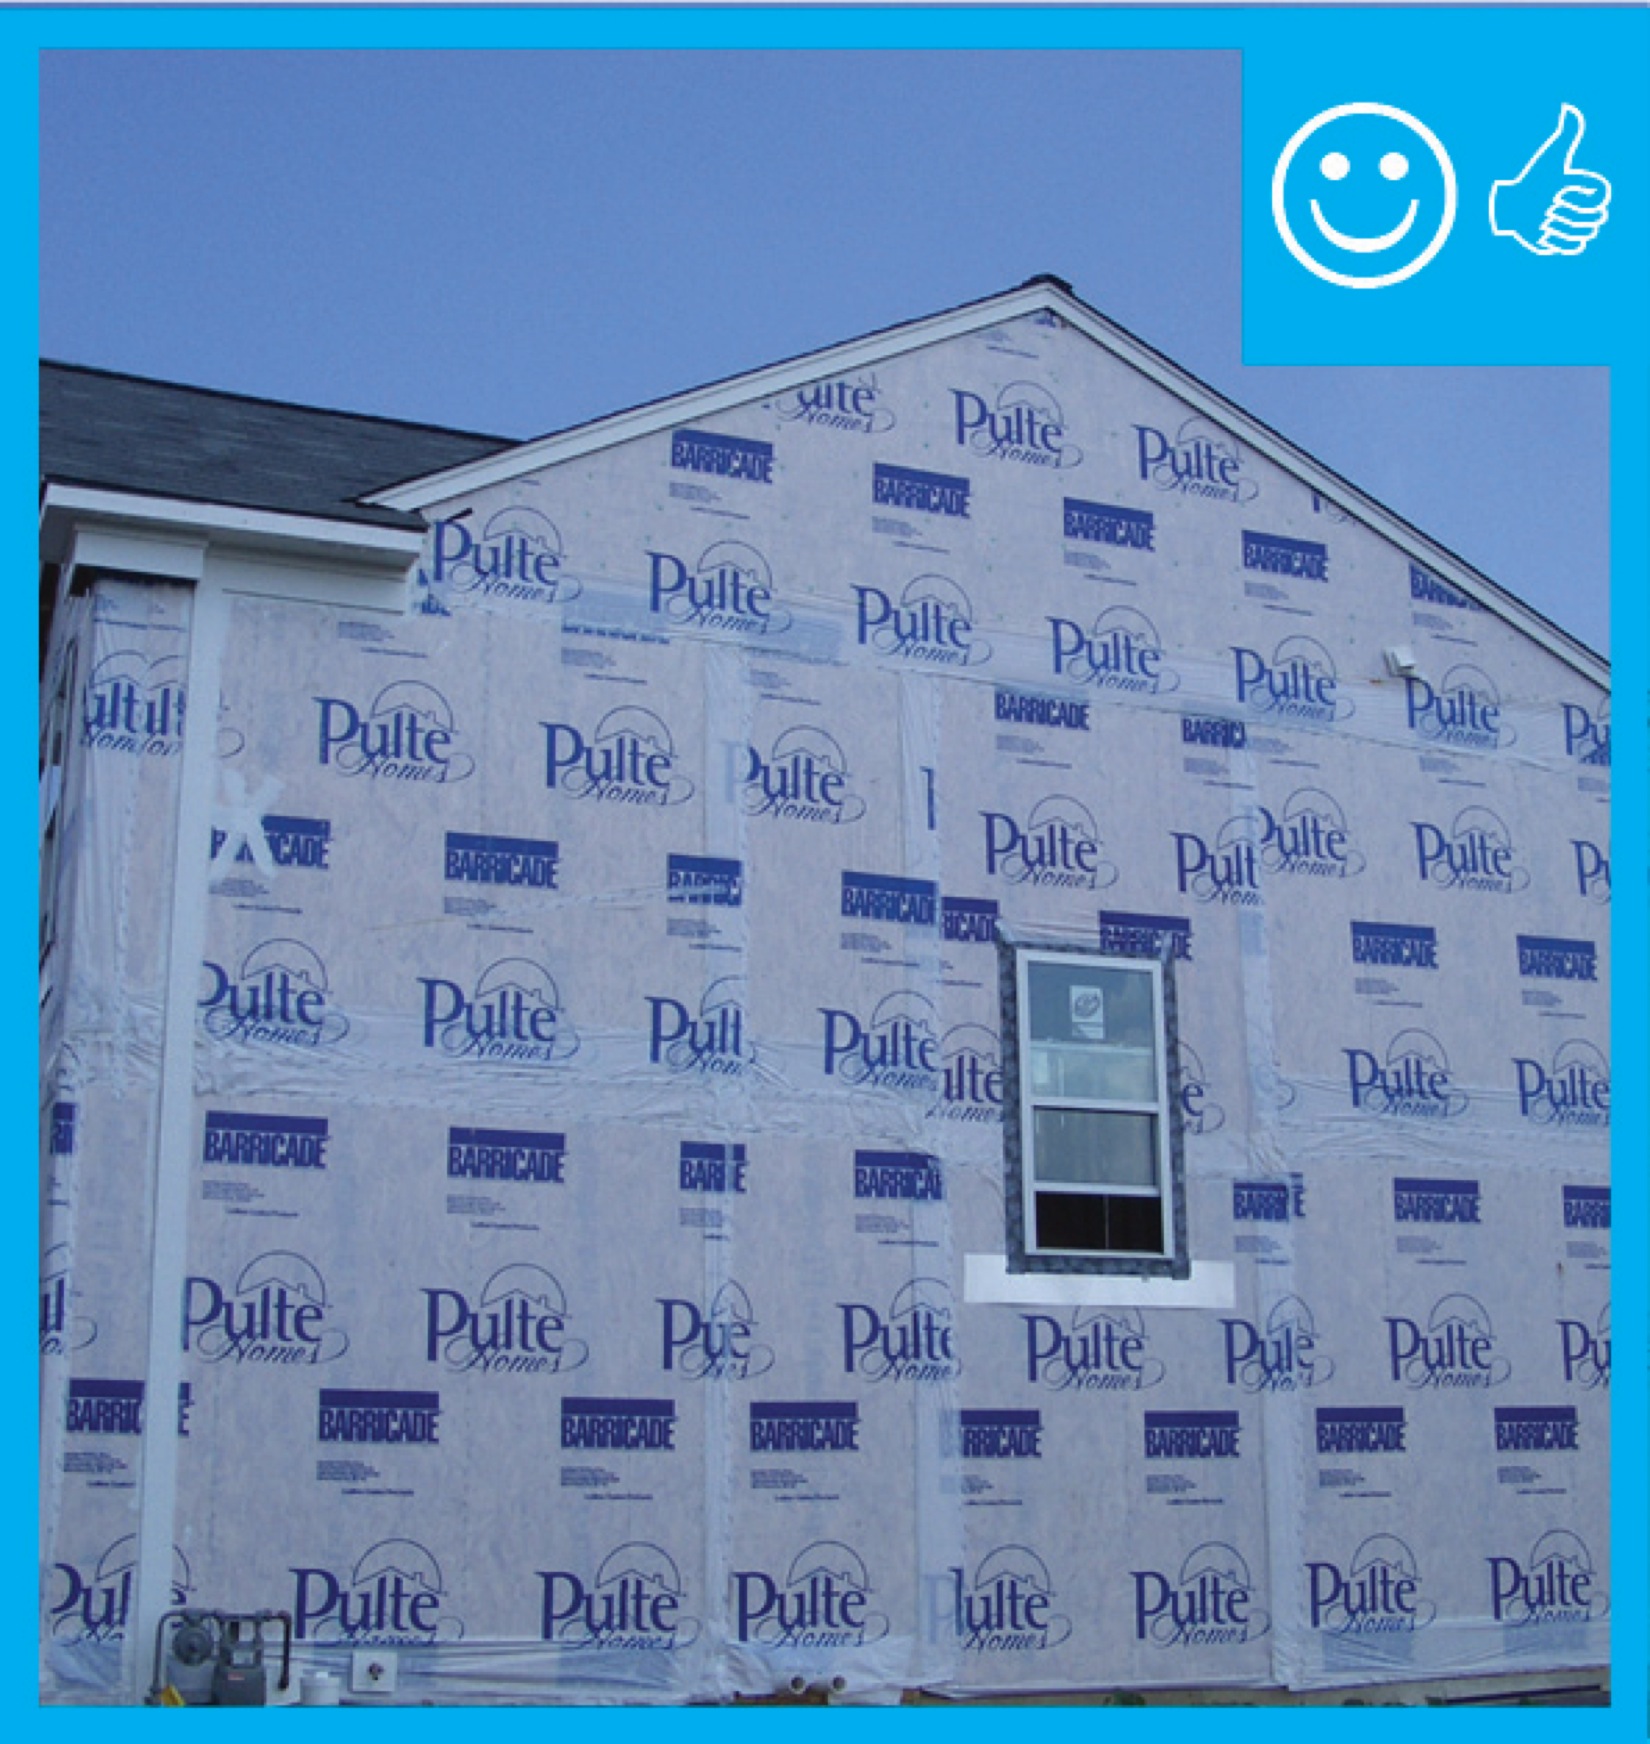
Right – The water-resistant barrier covers the entire house and the seams are taped to provide a complete drainage system
Image
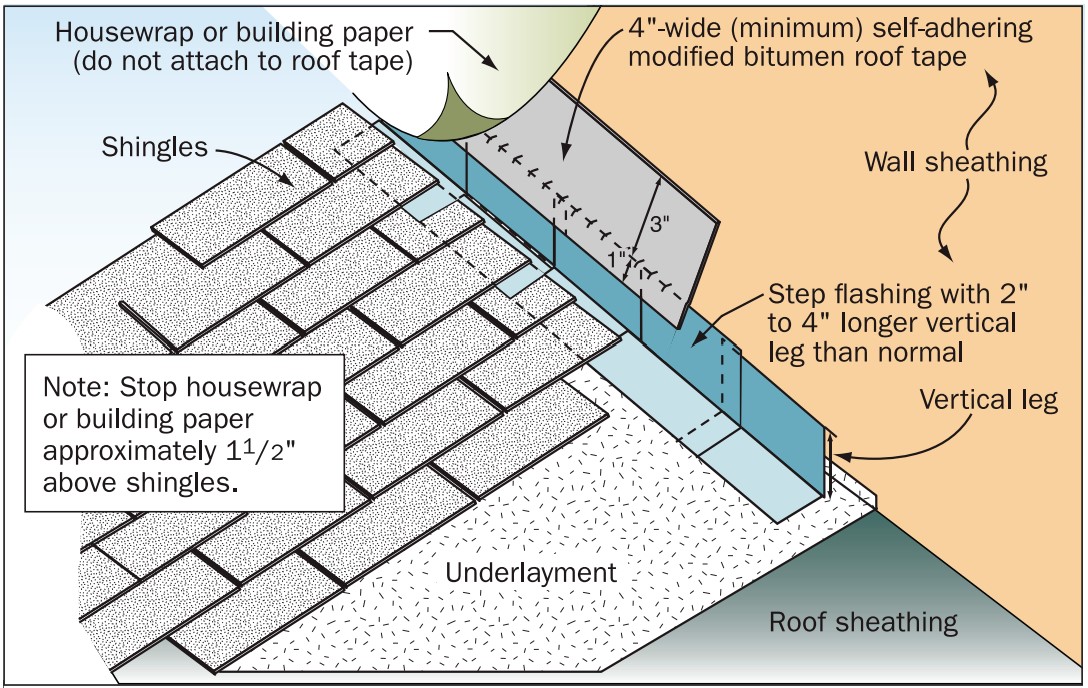
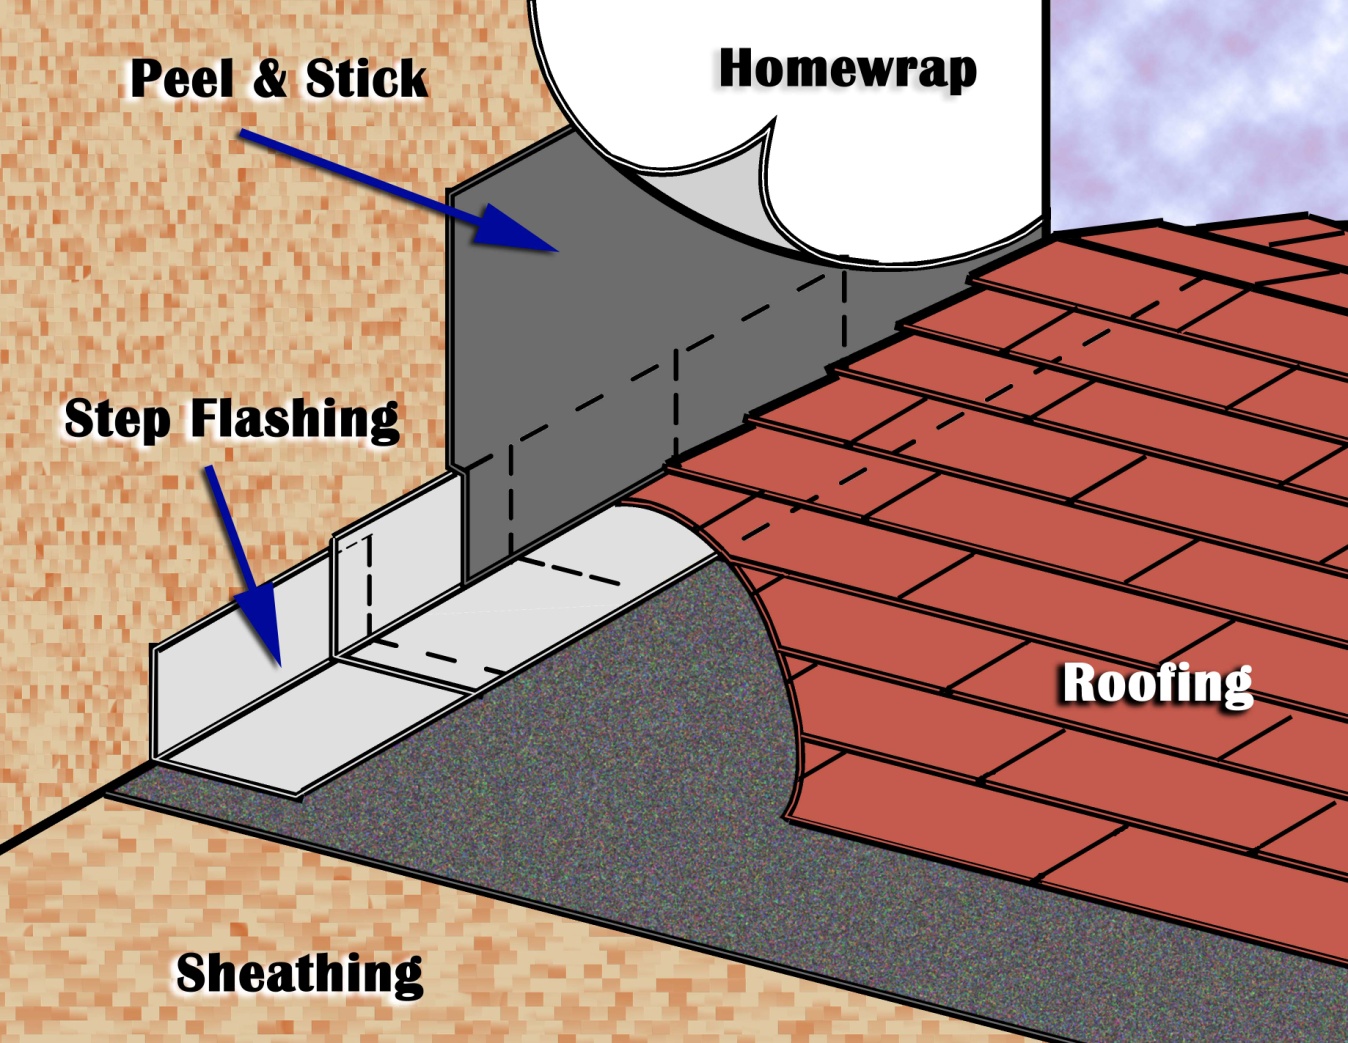
Right – The water-resistant barrier is layered over the step flashing to provide a complete drainage system
Image
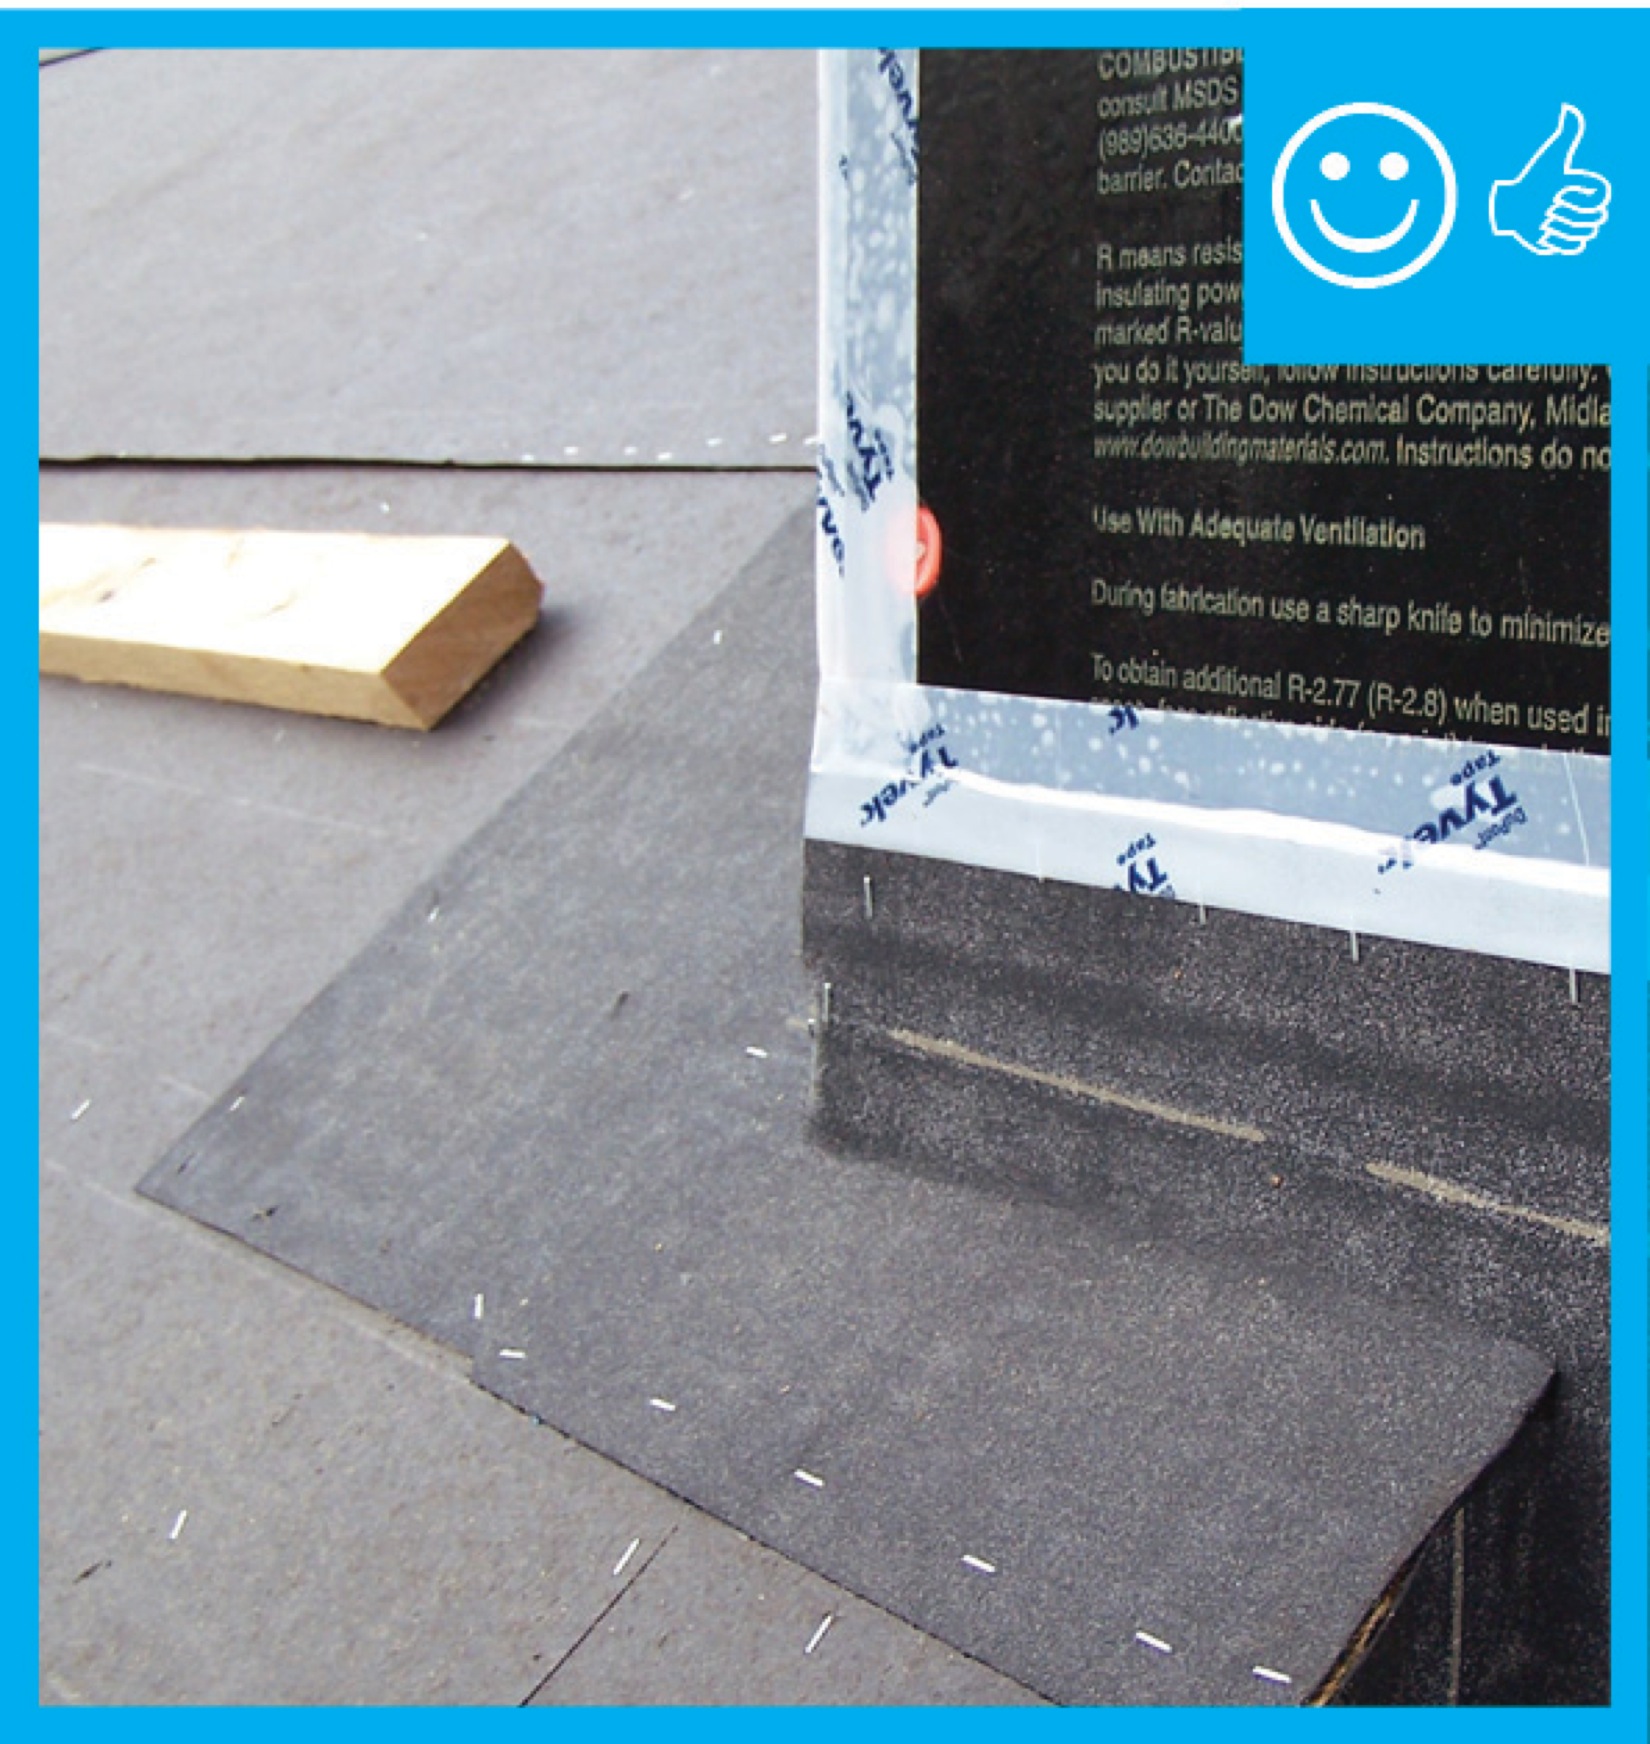
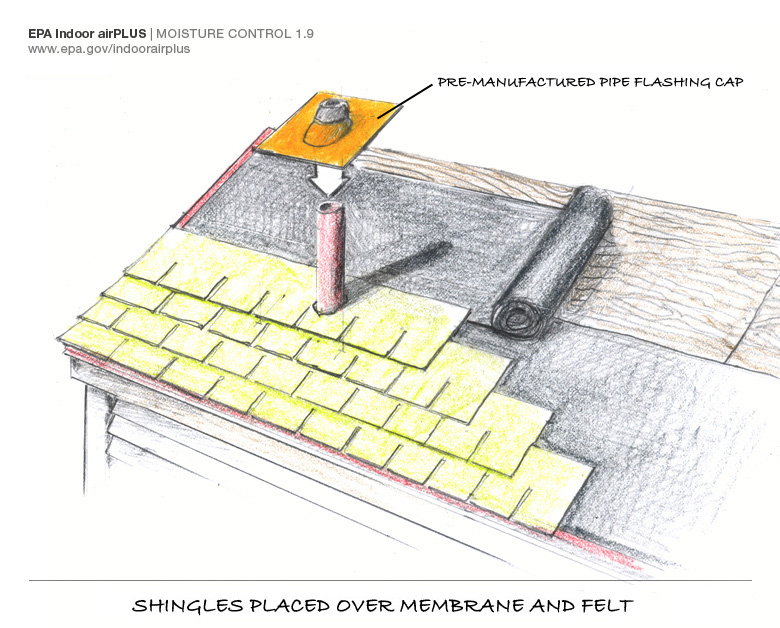
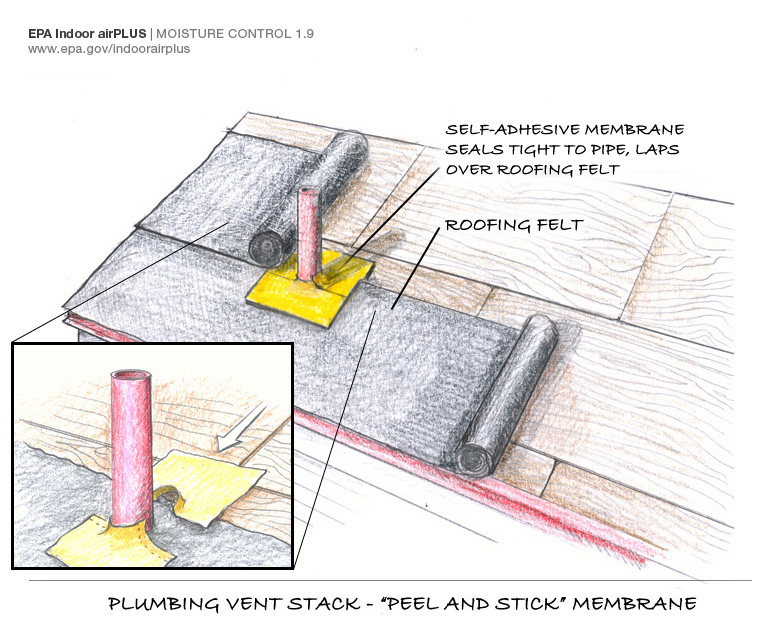
Right – There is a properly installed and layered self-sealing bituminous membrane at the roof penetration
Image
Right – There is a self-sealing bituminous membrane installed at the valley of the roof prior to the roof felt
Image
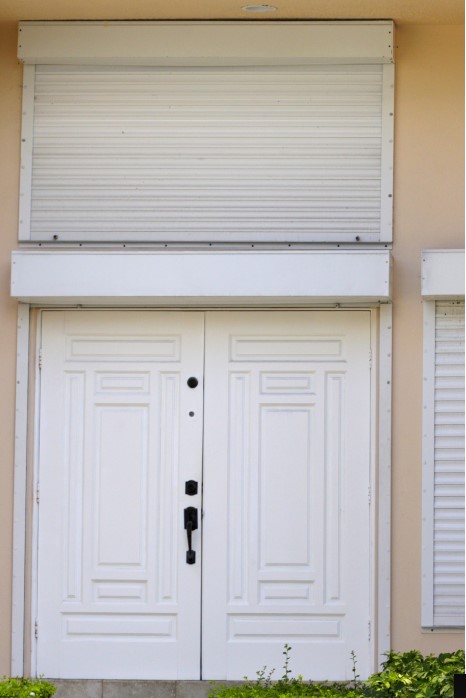
Right – This exterior door is installed to swing out and has storm protection shutters.
Image
Right – This low-slope flat roof assembly has continuity of both the air and water barriers
Image

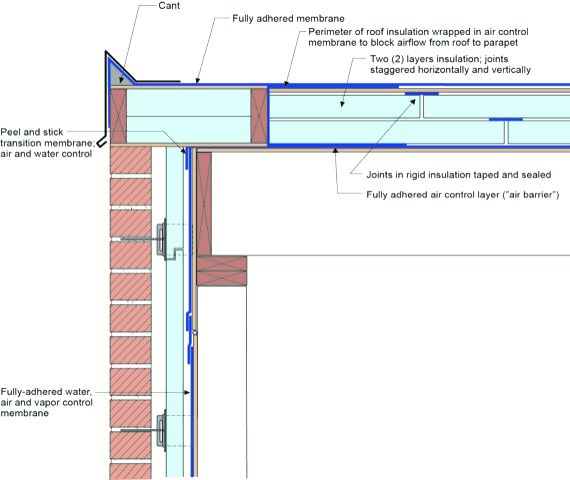
Right – This low-slope roof and parapet assembly has continuity of both the air and water barriers
Image
Right – This metal panel window shutter is installed in a track permanently mounted above and below the window frame and is secured with wing nuts to studs mounted on the track.
Image
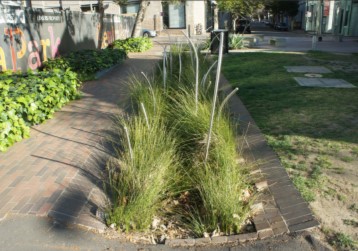
Right – This swale has sloped sides with appropriate vegetation to filter rainwater.
Image
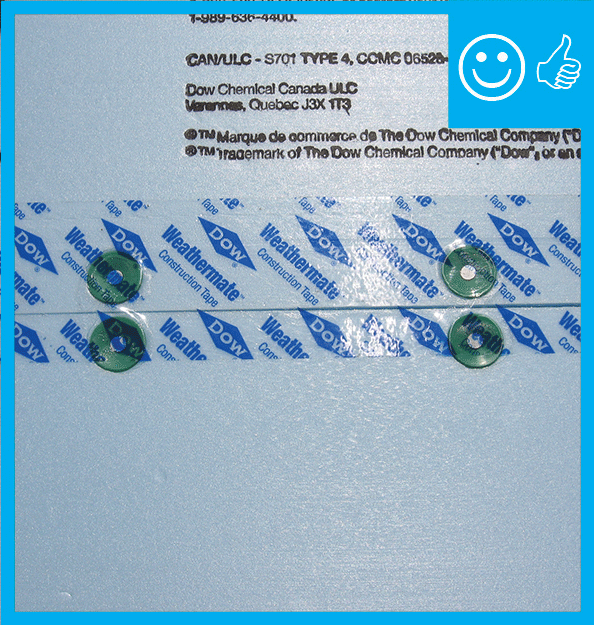
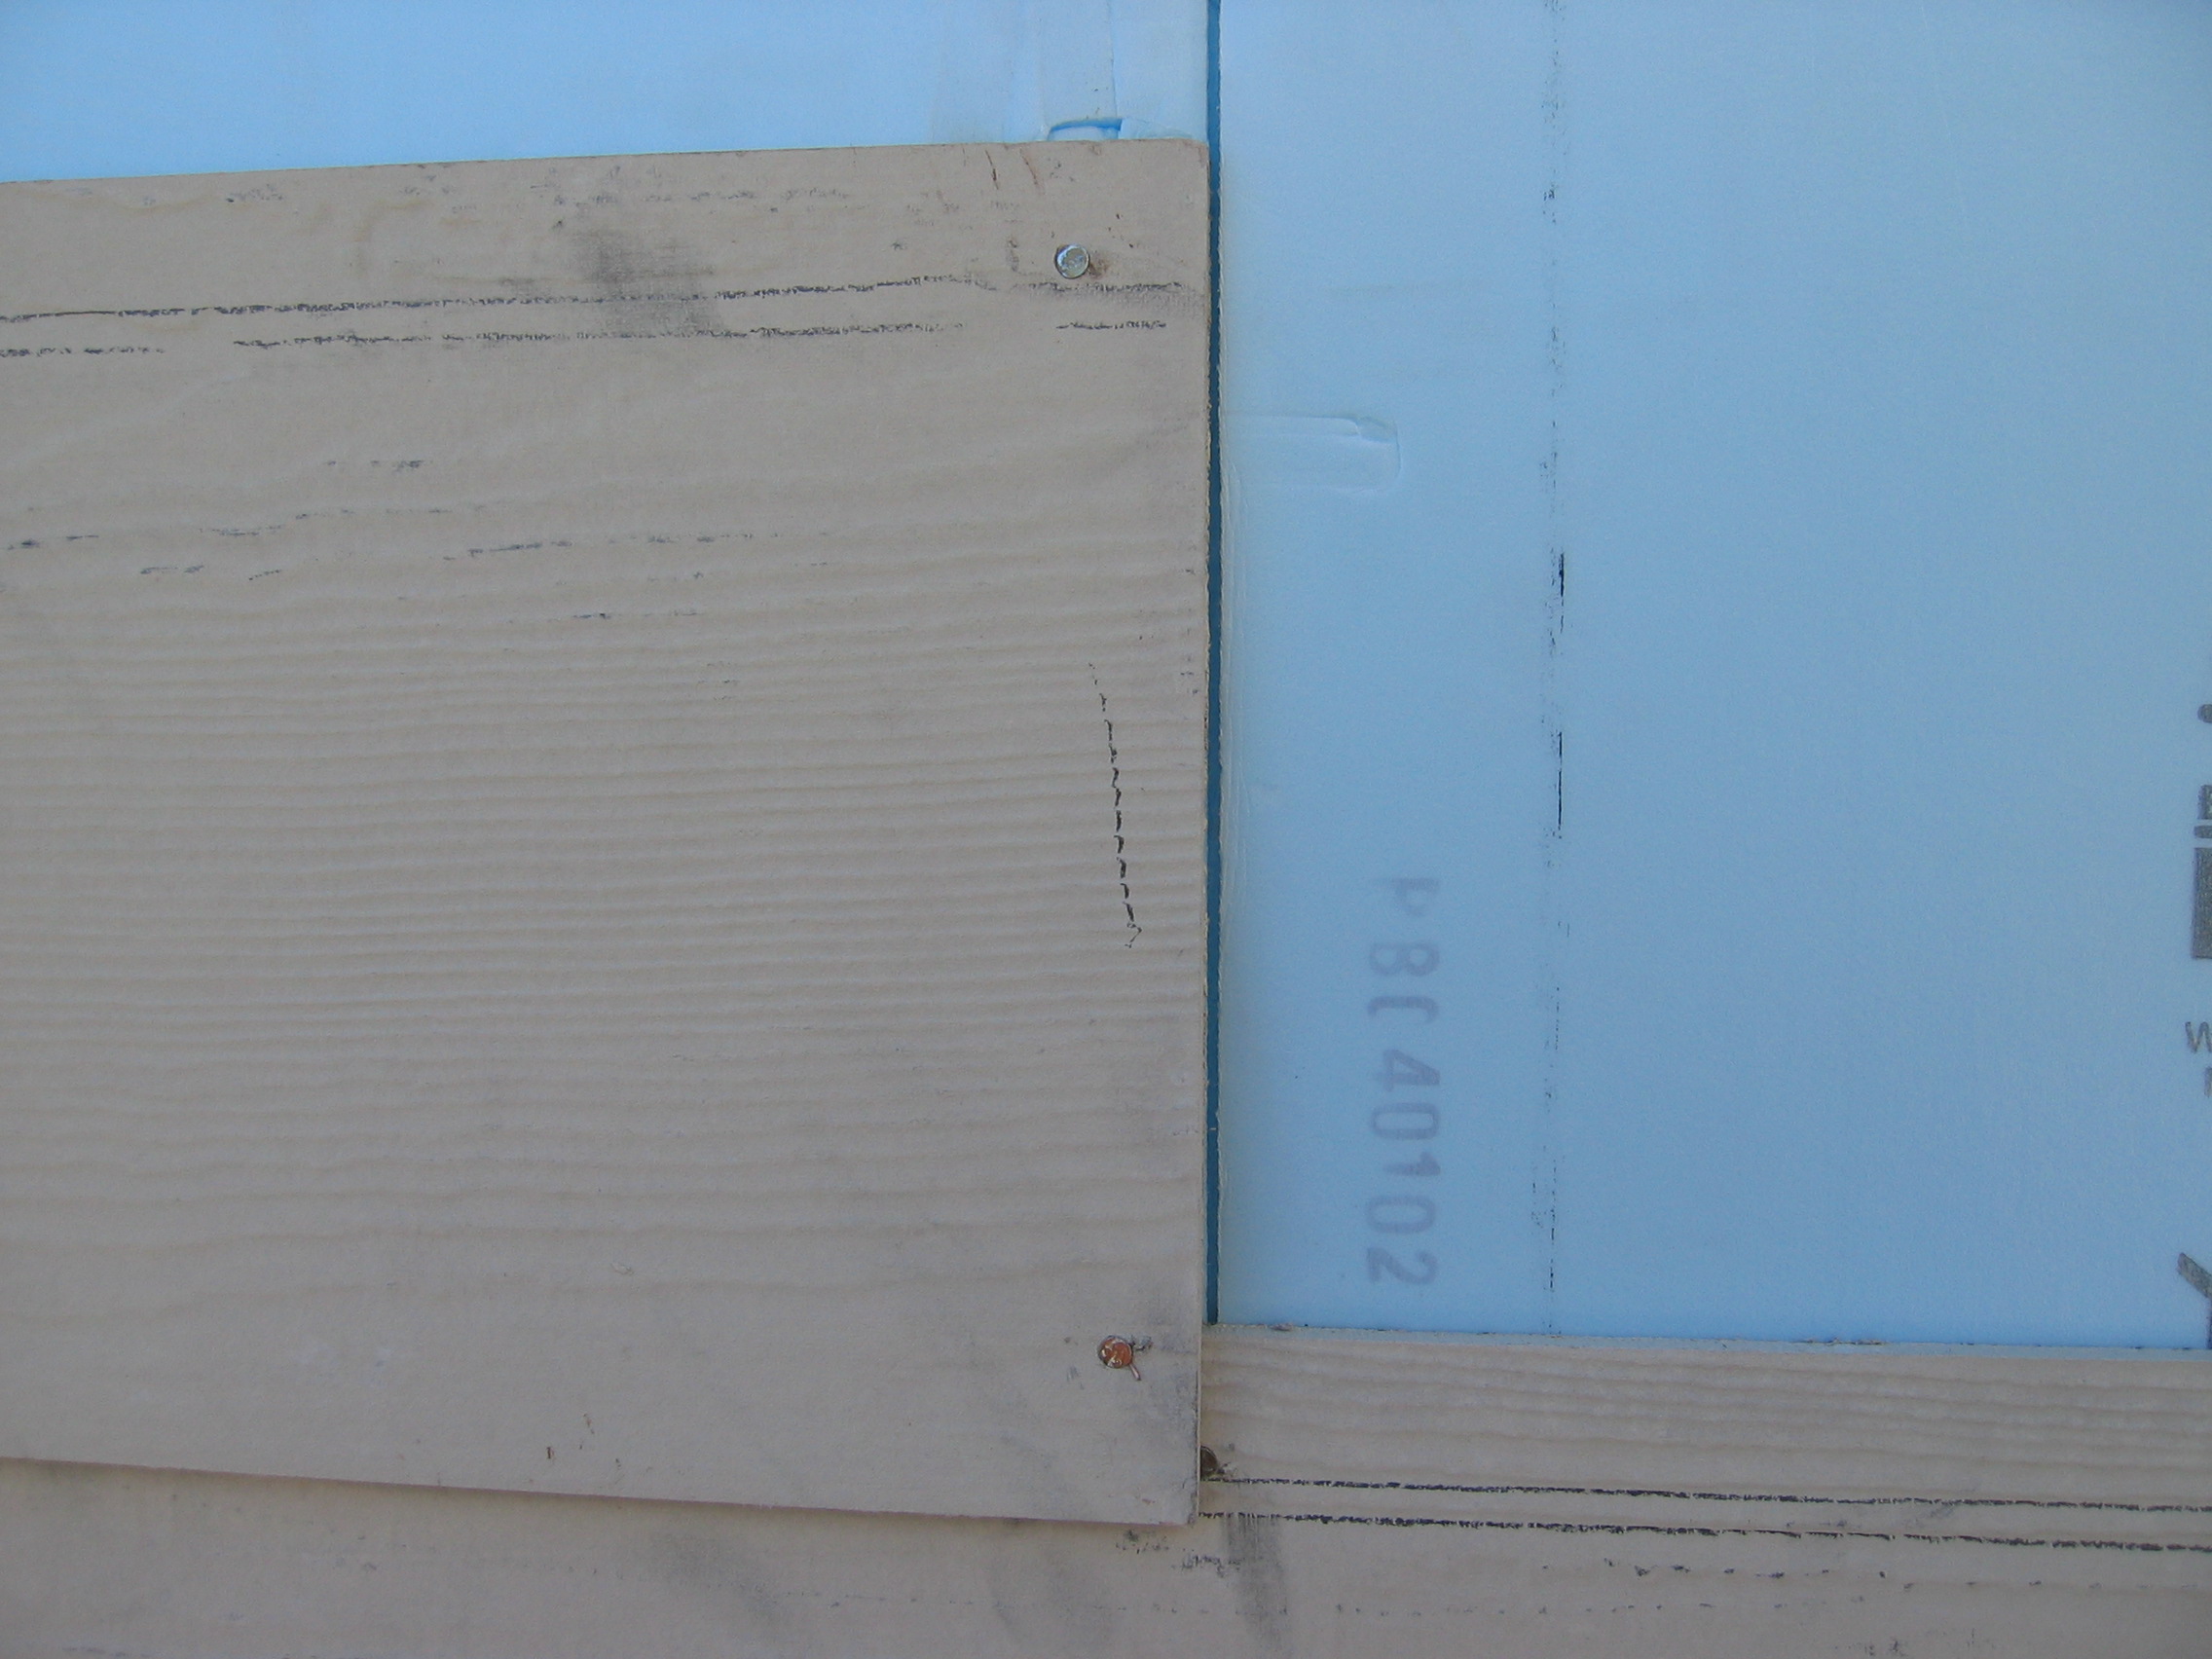
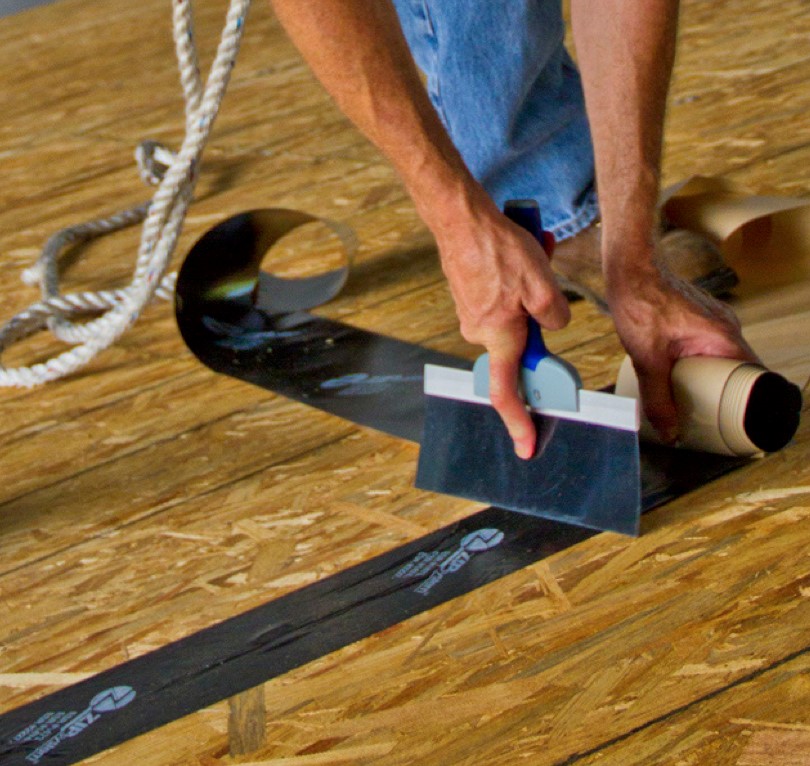
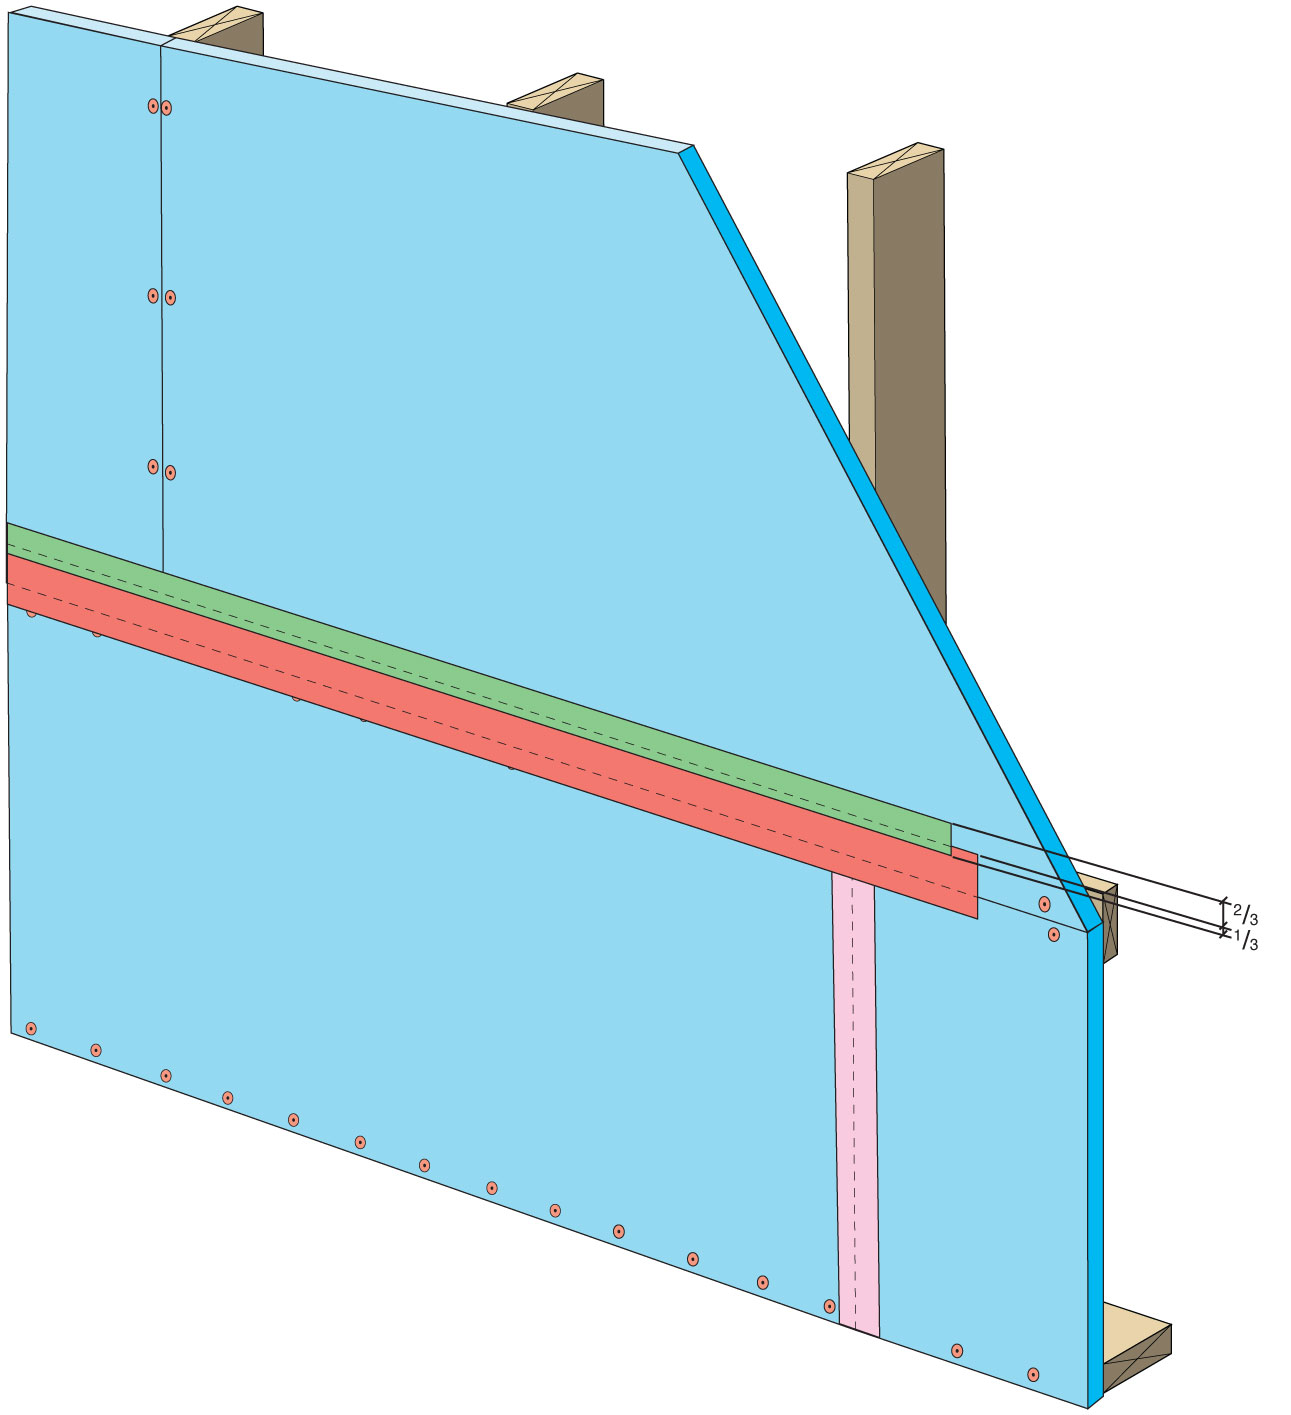
Right – Two-thirds of acrylic tape is offset above the joint and over and above the fasteners
Image
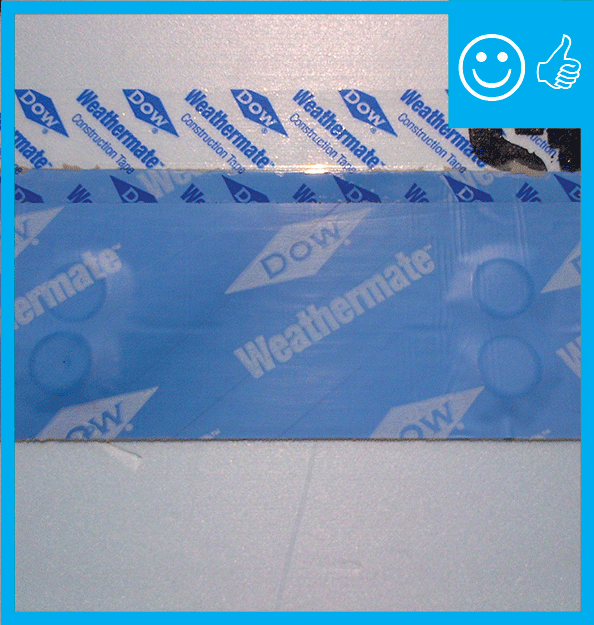
Right – two-thirds of the blue butyl flashing tape is above the sheathing seam; the top edge of the butyl flashing tape is covered with clear sheathing tape that is also offset so two-thirds is above the top edge of the butyl flashing.
Image
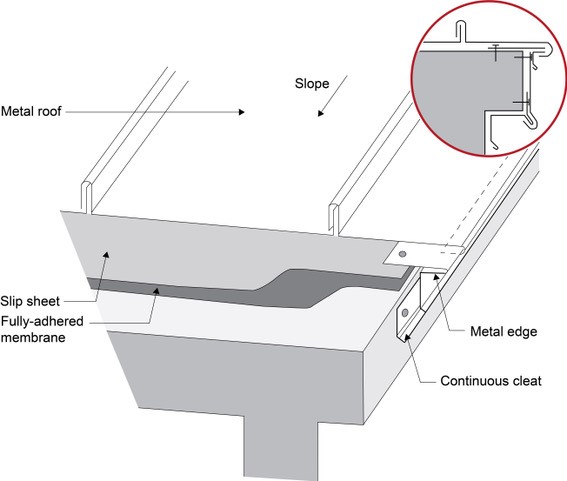
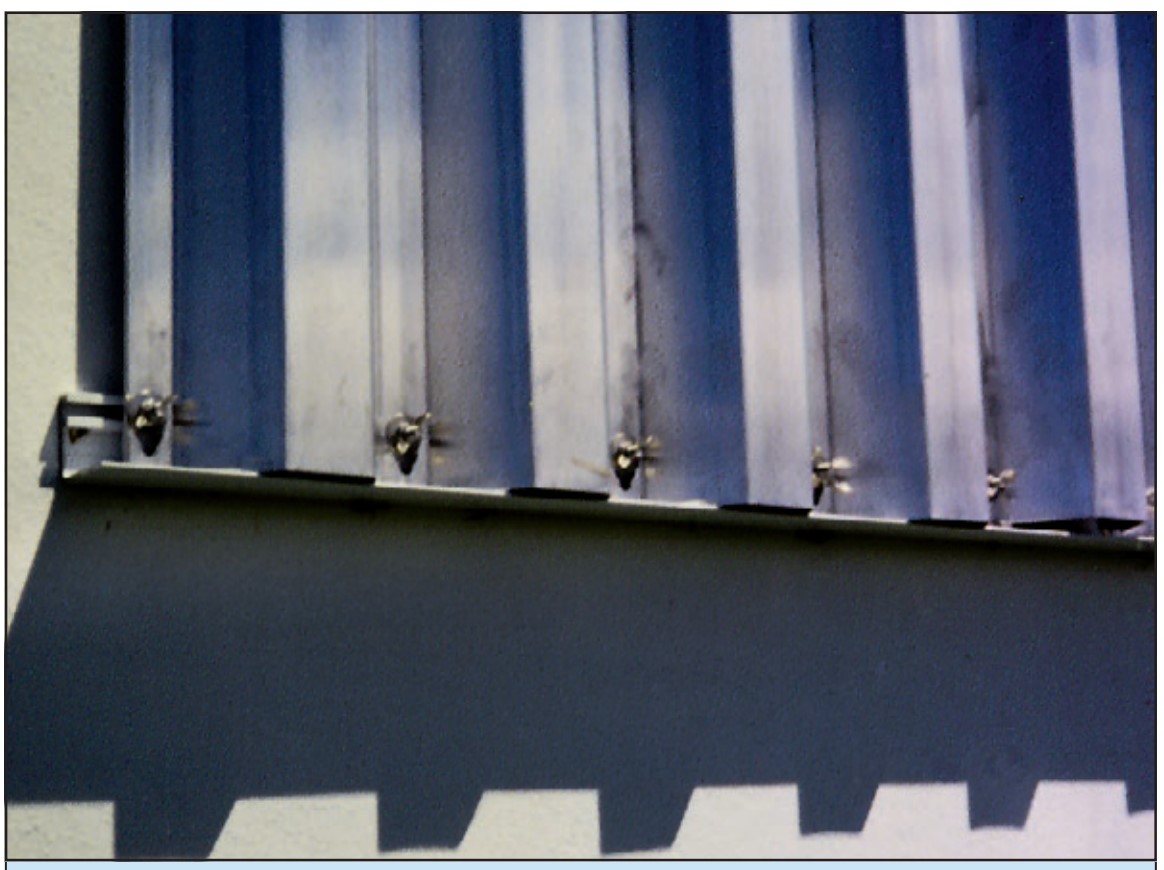
Right – Under metal roofing, sheathing is protected by metal edging over a fully adhered membrane and a slip sheet of loose laid building paper
Image
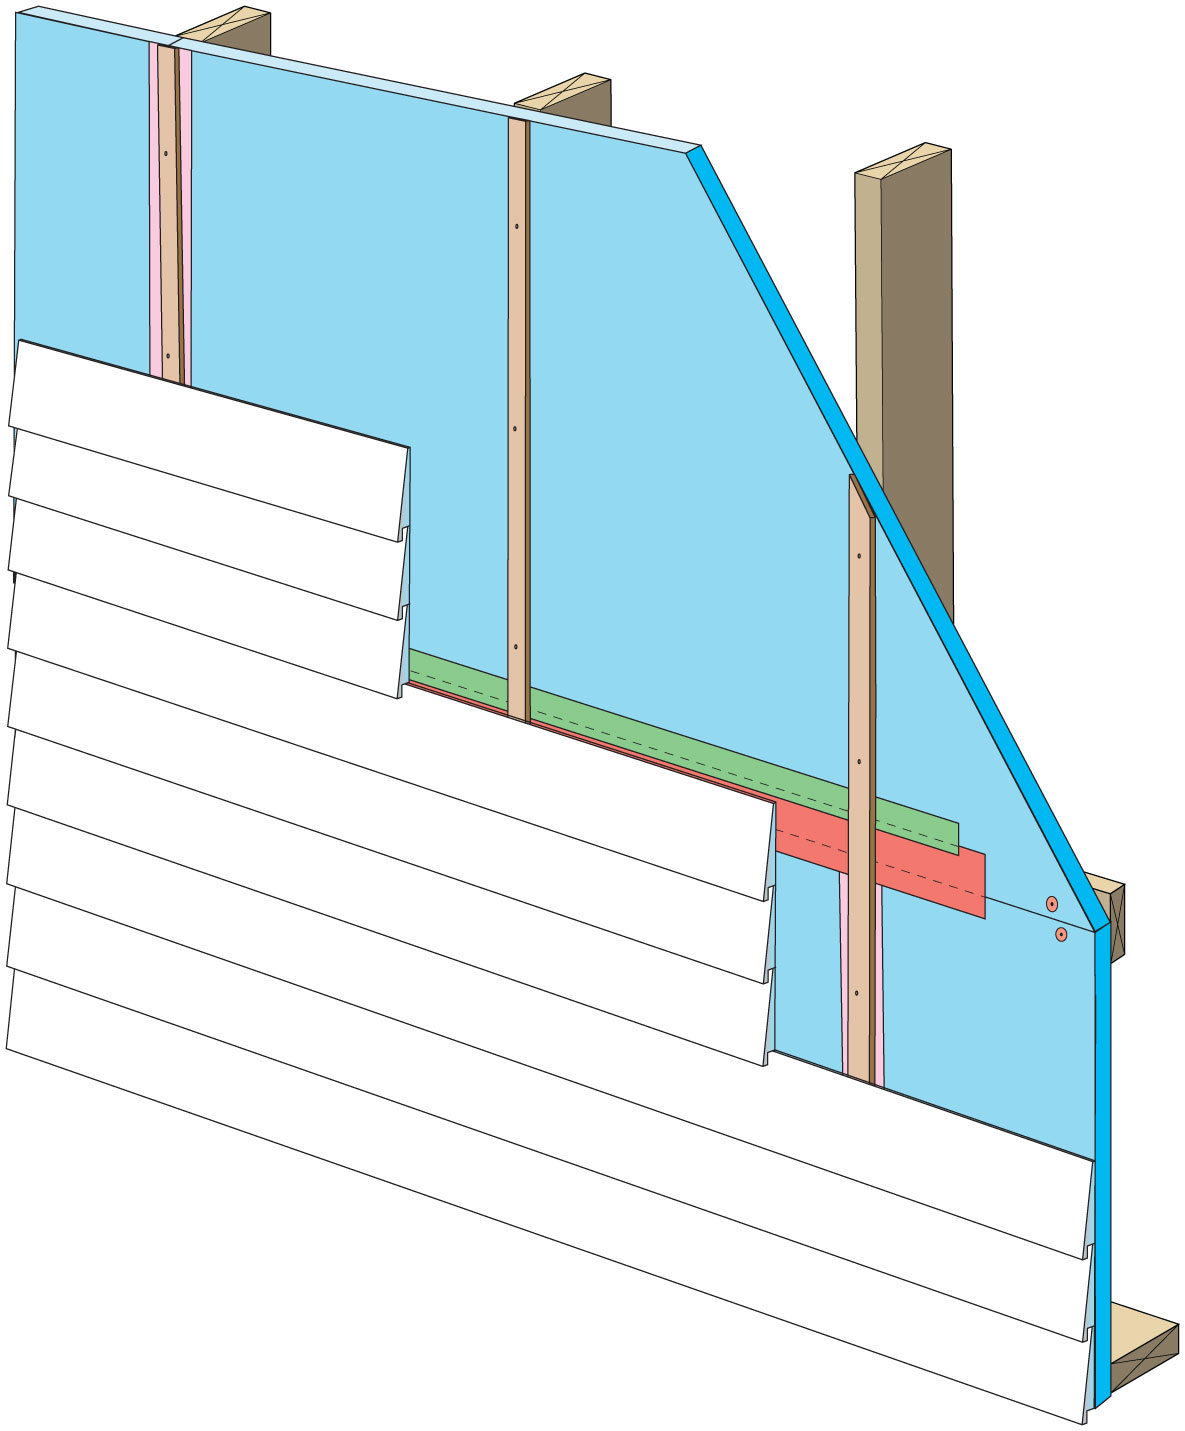
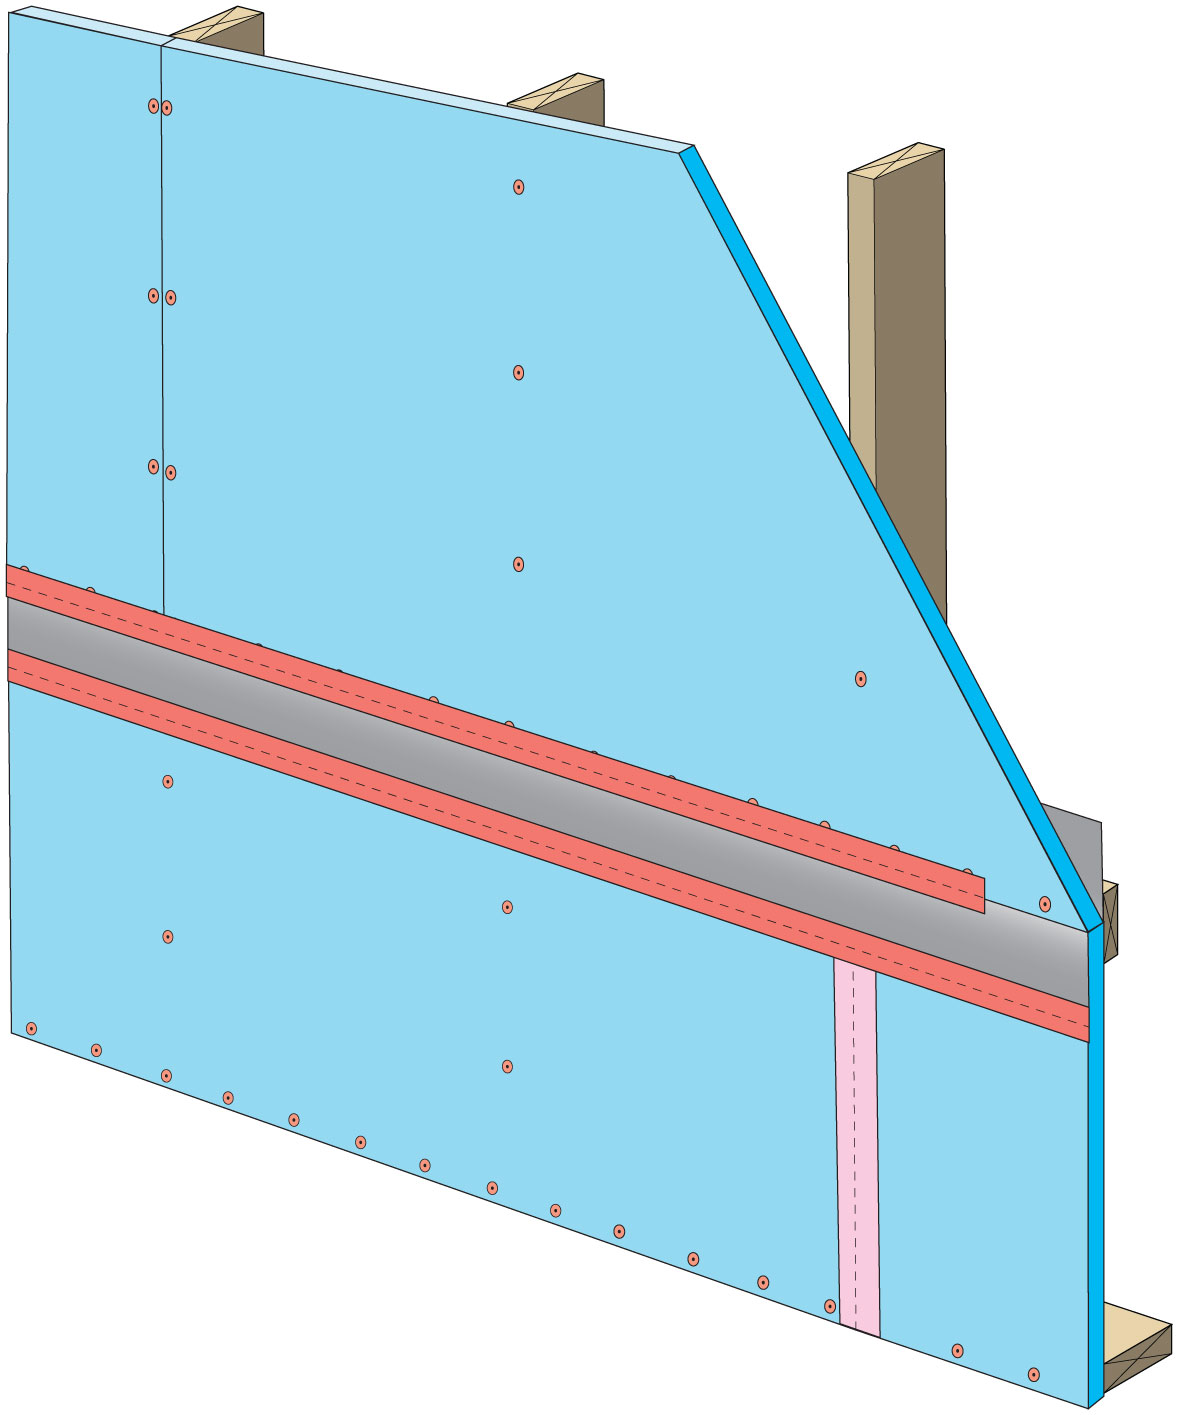
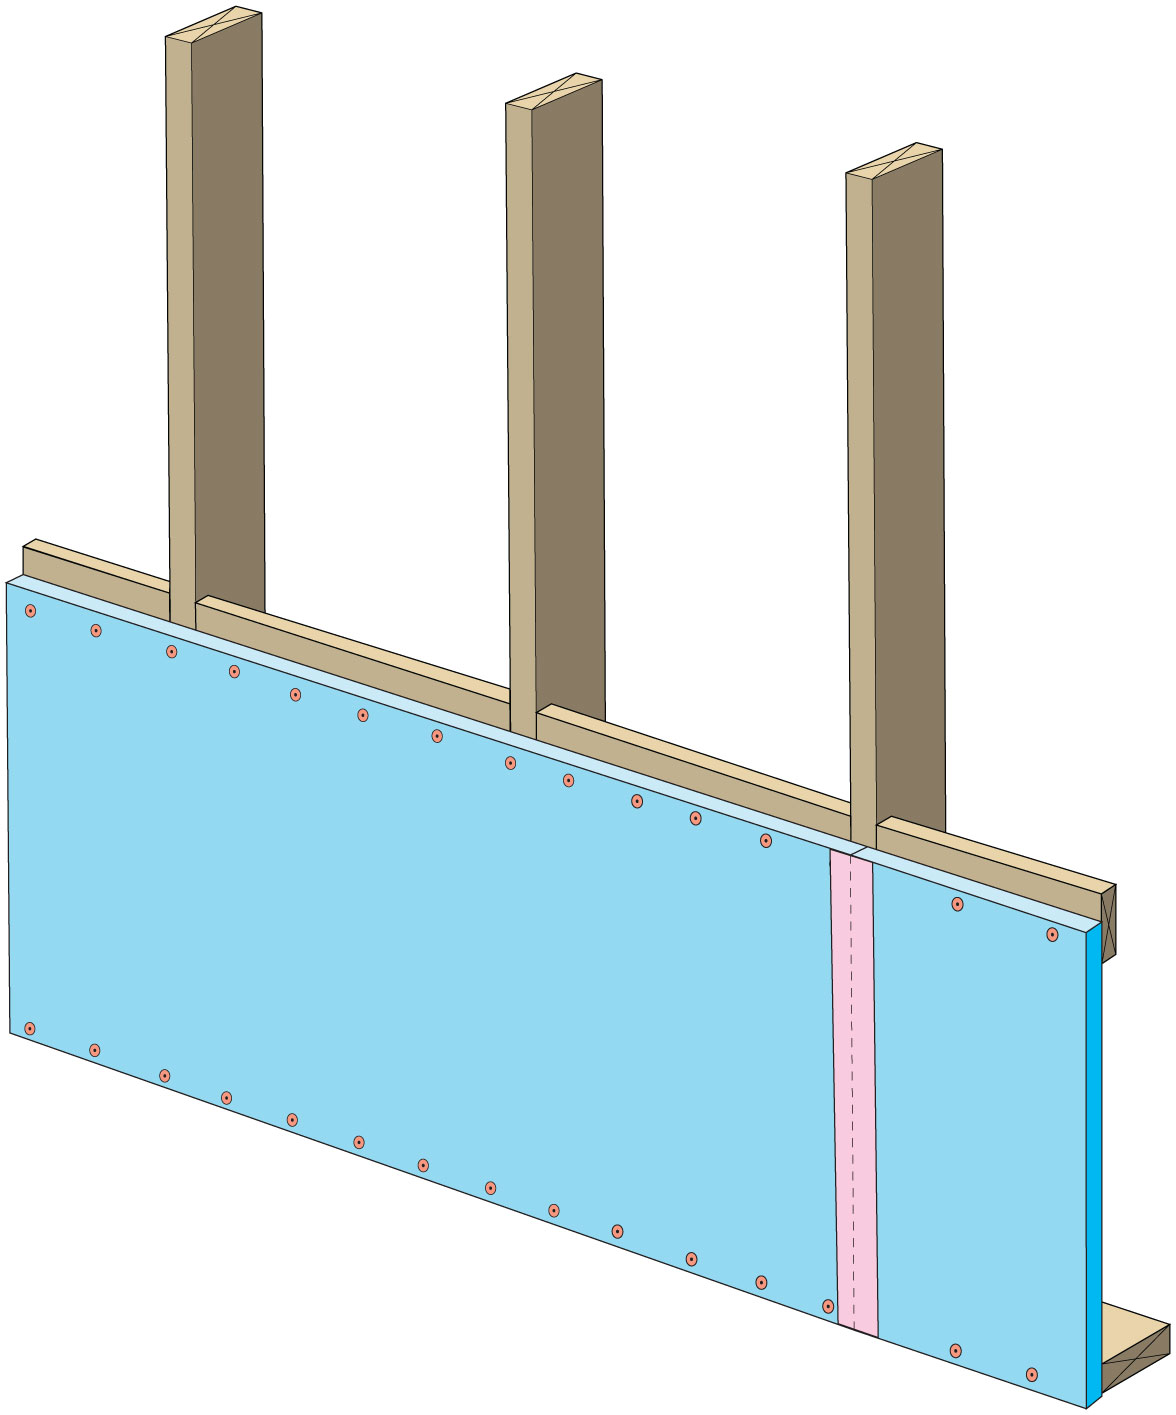
Rigid foam insulation can serve as the drainage plane when all seams are taped. Furring strips provide an air gap behind the cladding.
Image

Image
Image
Image
Image
Image
Image
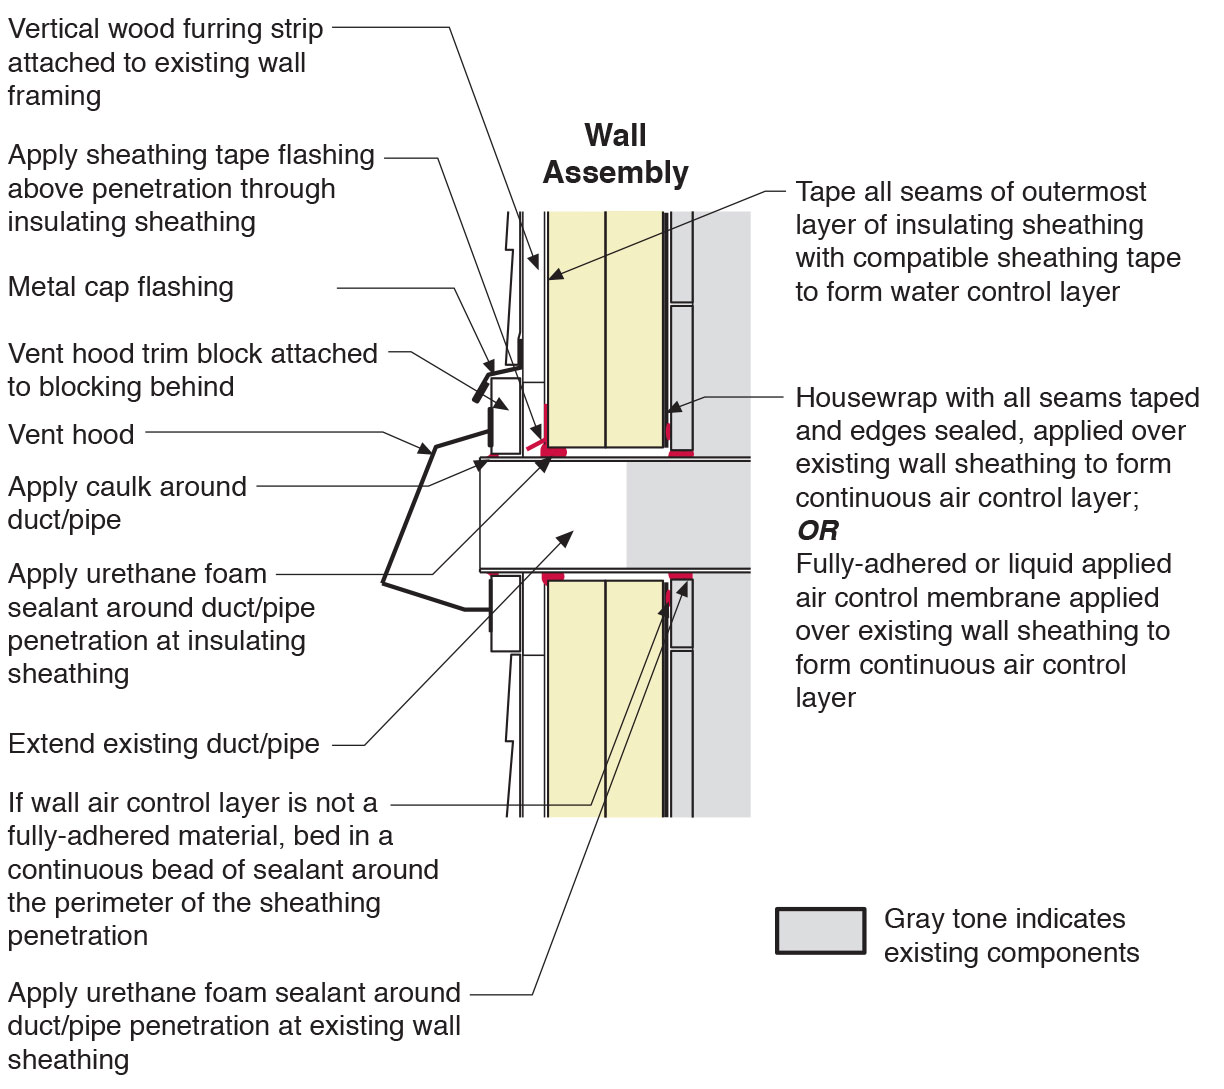
Section view of duct or pipe penetration through exterior wall showing flashing and air sealing details
Image
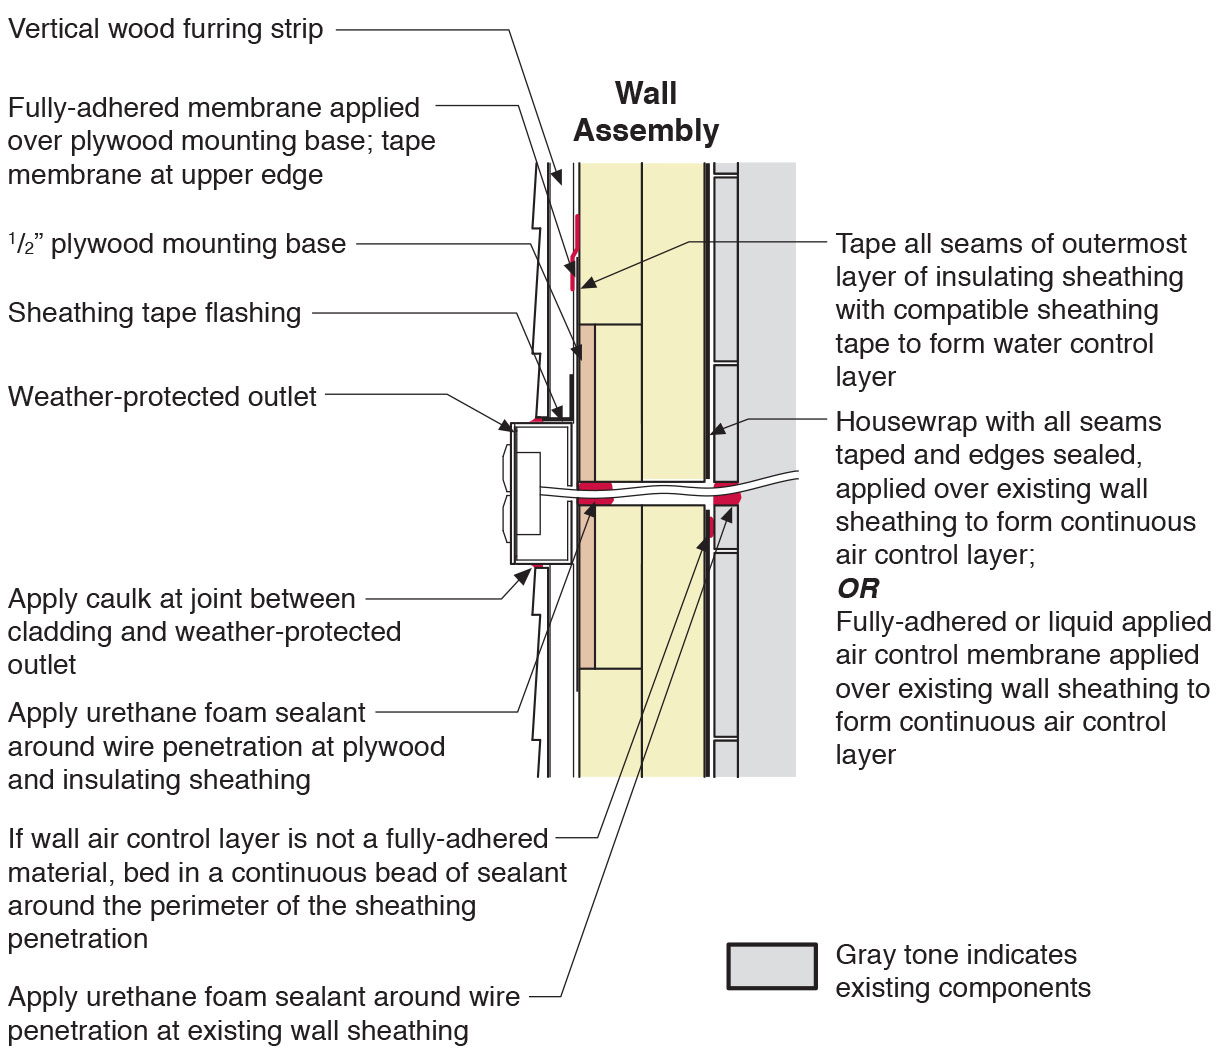
Section view of electric box installation in exterior wall showing flashing and air sealing details
Image

Shrubs, trees, and herbs create a tight network of roots and stems that bind the soil and slow the flow of water down hillsides.
Image

Soil types include sand, silt, and clay- the more sand, the more quickly the soil drains.
Image
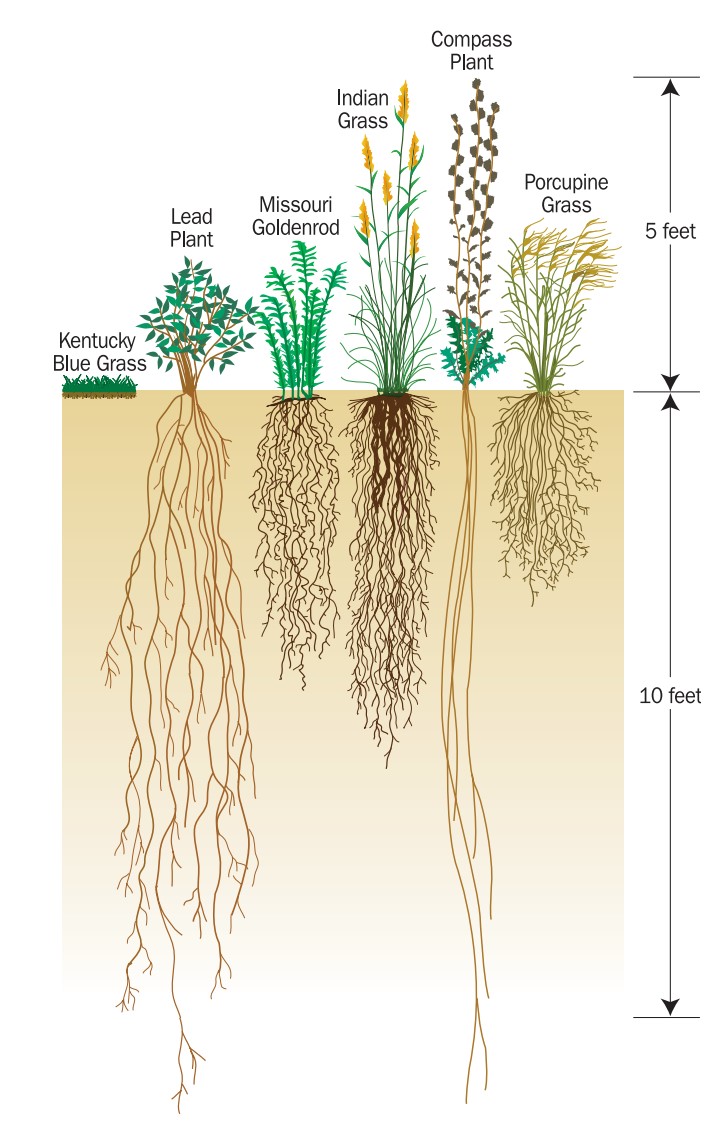
Some species of native prairie plants have much deeper root systems than Kentucky blue grass, increasing the ability of those plants to retain and filter stormwater
Image
Step 1. Apply roof underlayment over roof deck and up the sidewall over the rigid foam insulation
Image
Step 2. Install shingle starter strip then kick-out diverter as first piece of step flashing.
Image

Step 4. Install remaining sidewall flashing, appropriate counter flashing, and shingles
Image
Step 5. Apply self-adhesive flashing over top edge of the wall flashing, diverter, and rigid foam insulation
Image
Image
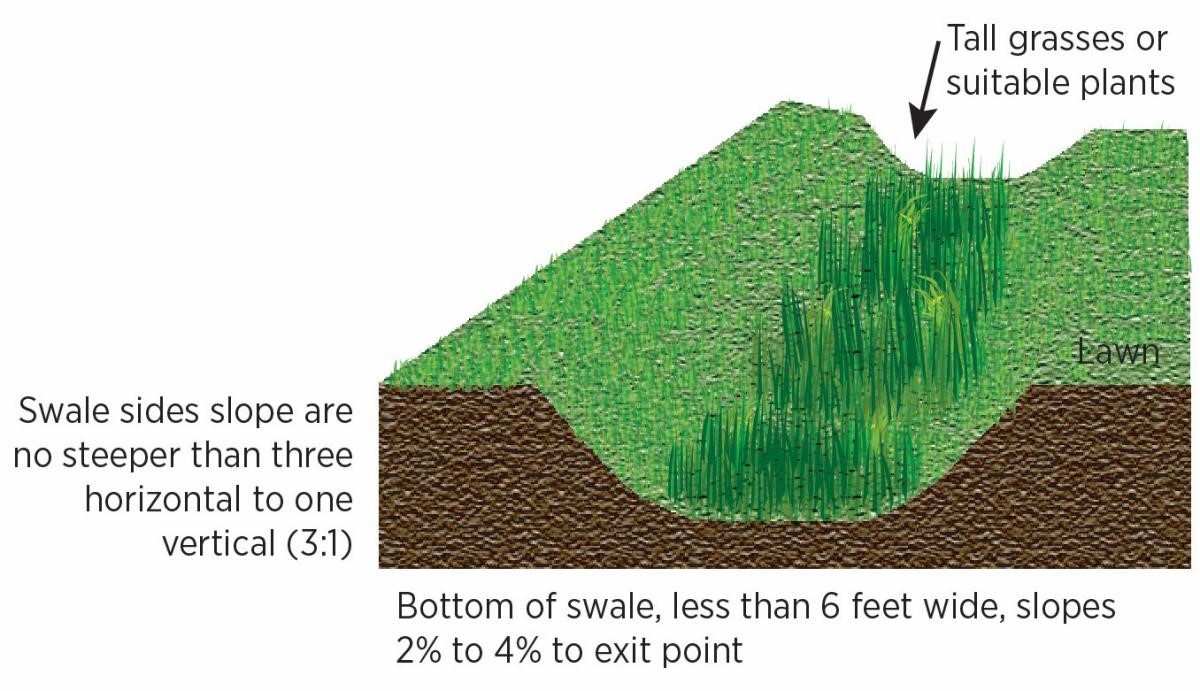
Swales are trapezoidal channels dug to receive storm-water overflow, with specific vegetation planted to improve aesthetics, filter stormwater runoff, and prevent erosion.
Image

Swales are troughs that collect site stormwater and filter it with vegetation, soil, and gravel layers.
Image

Image

Tape horizontal joint with minimum 3" wide tape placing tape offset high on the joint, adhearing to the upper sheet without wrinkles
Image
Tape the joint between the top insulation sheet and the Z-flashing with 2" wide tape to improve air tightness
Image
Image
Terminate 4" tape with 2" wide tape placing tape offset high on the joint, 2/3 of the tape should be adhered to the sheet of insulation
Image
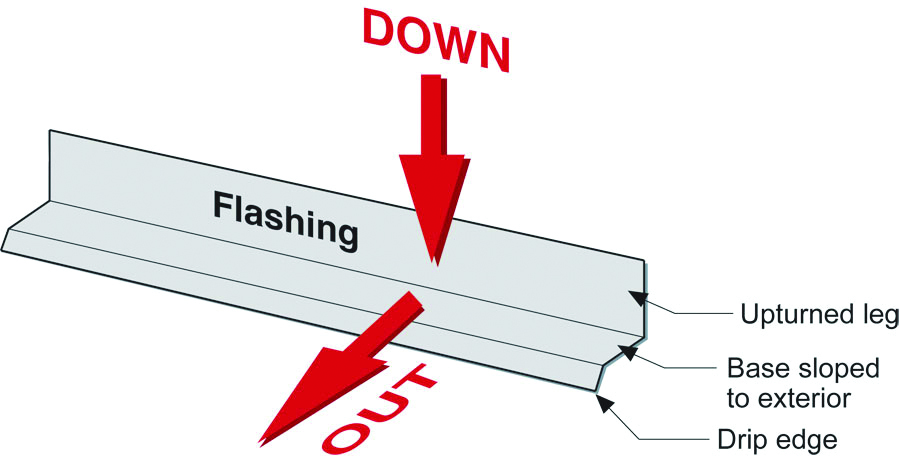
The “down” and “out” approach to flashing – metal flashing directs water down and out of building assemblies
Image
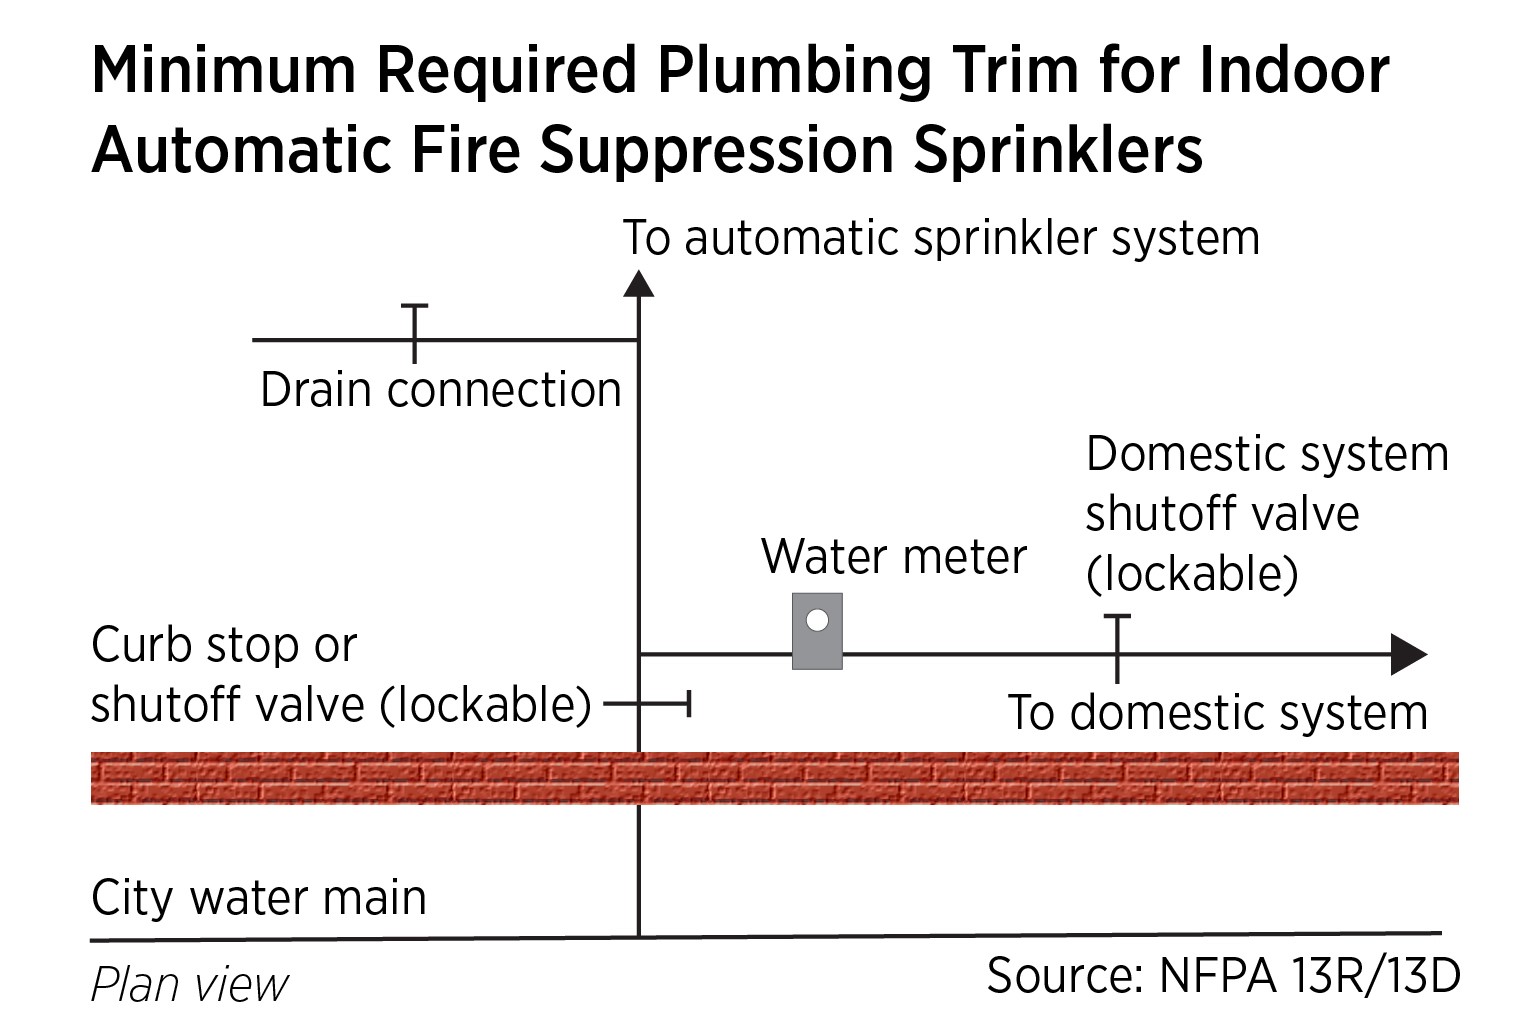
The minimum required plumbing connections and trim for fire sprinkler connection to municipal water with a standalone wet sprinkler system.
Image