Showing results 751 - 1000 of 1073
Image
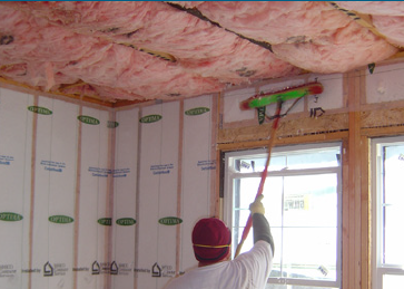
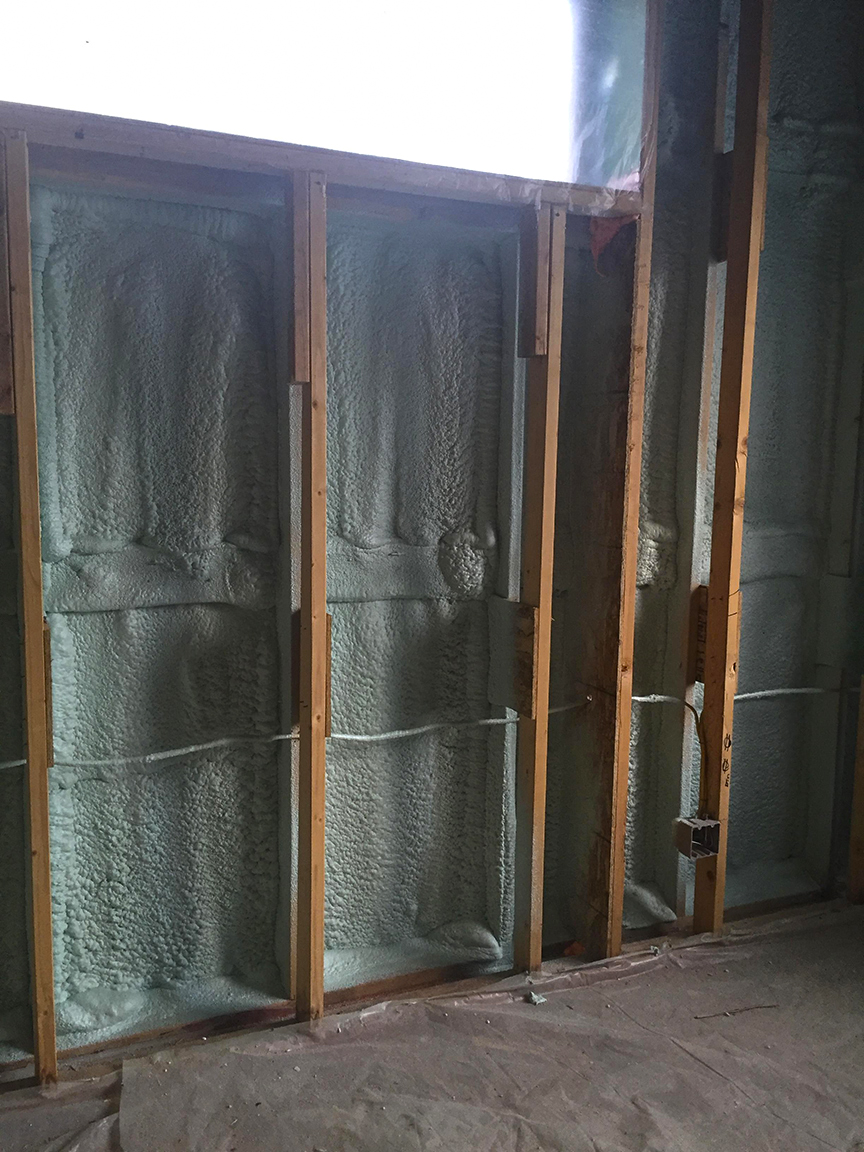
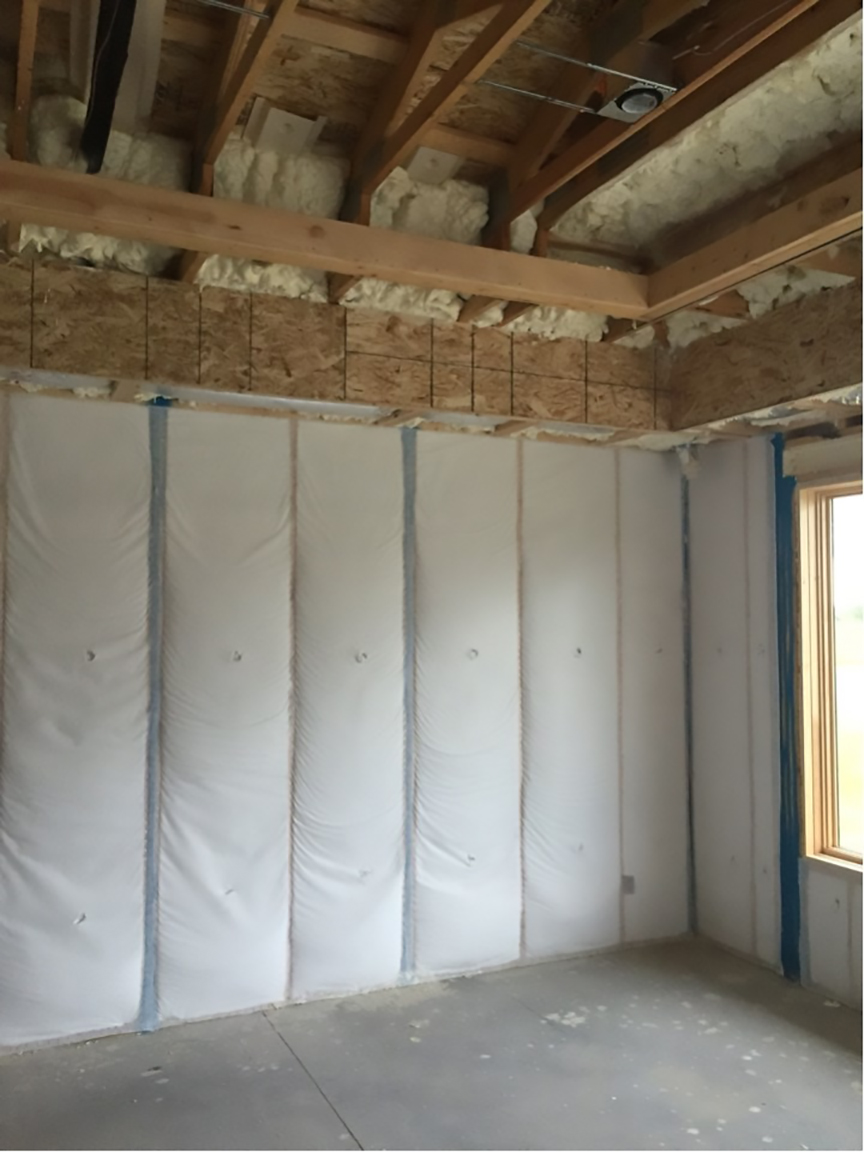
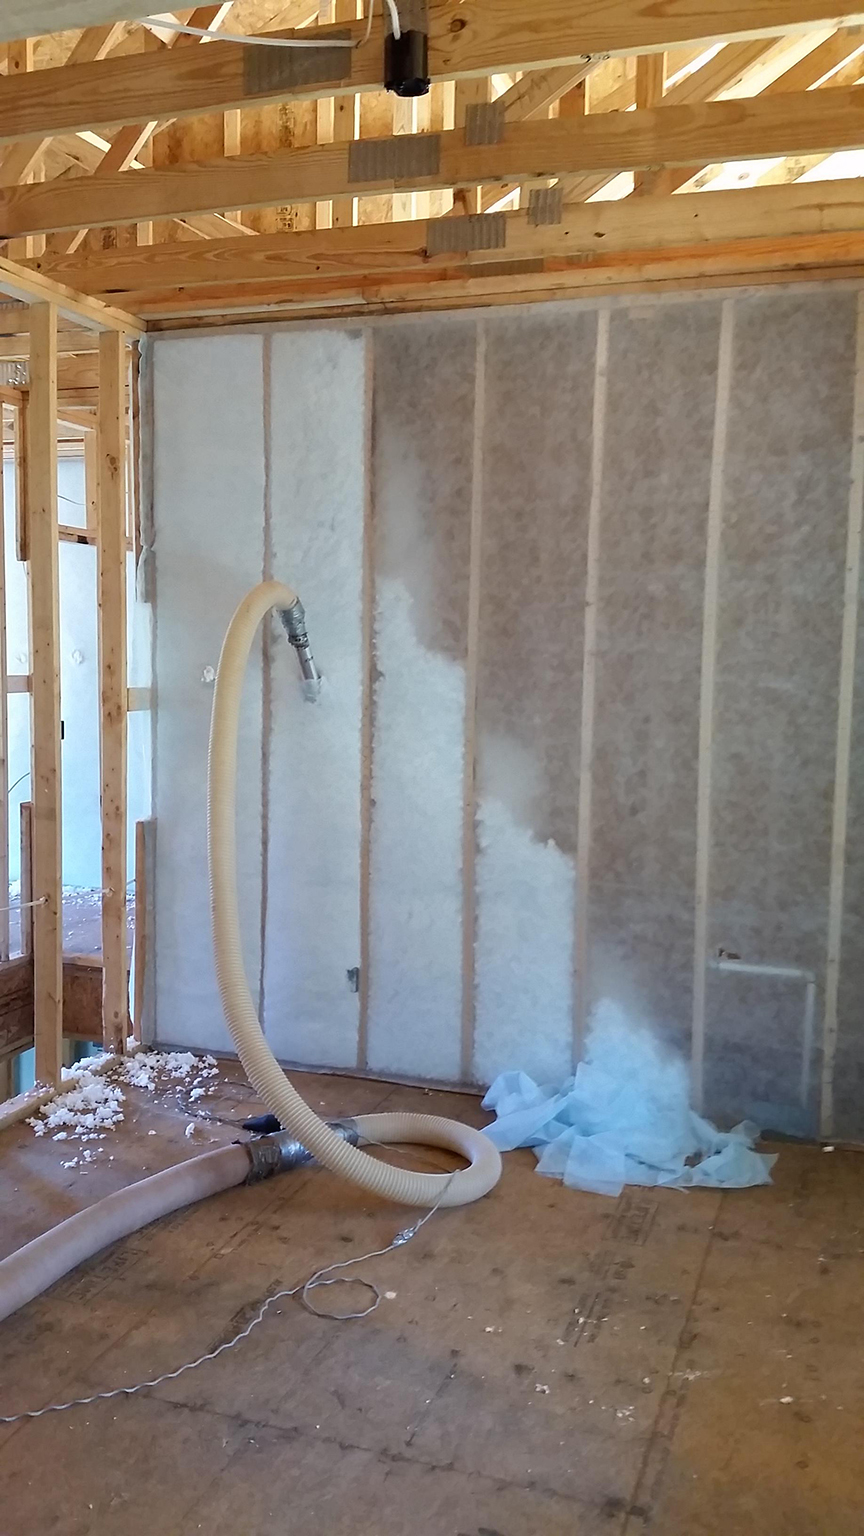
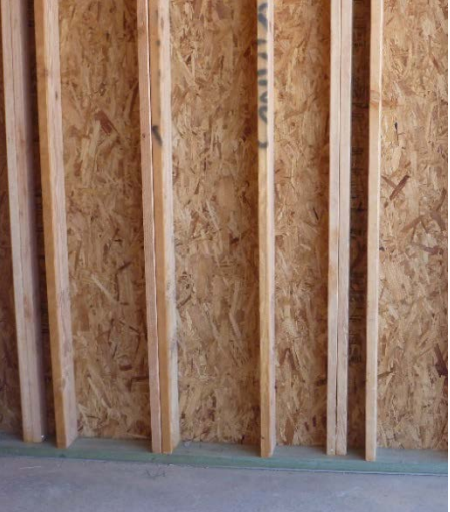
The advance-framed 2x6 24-inch on-center walls are covered with netting then filled with R-23 blown fiberglass.
Image
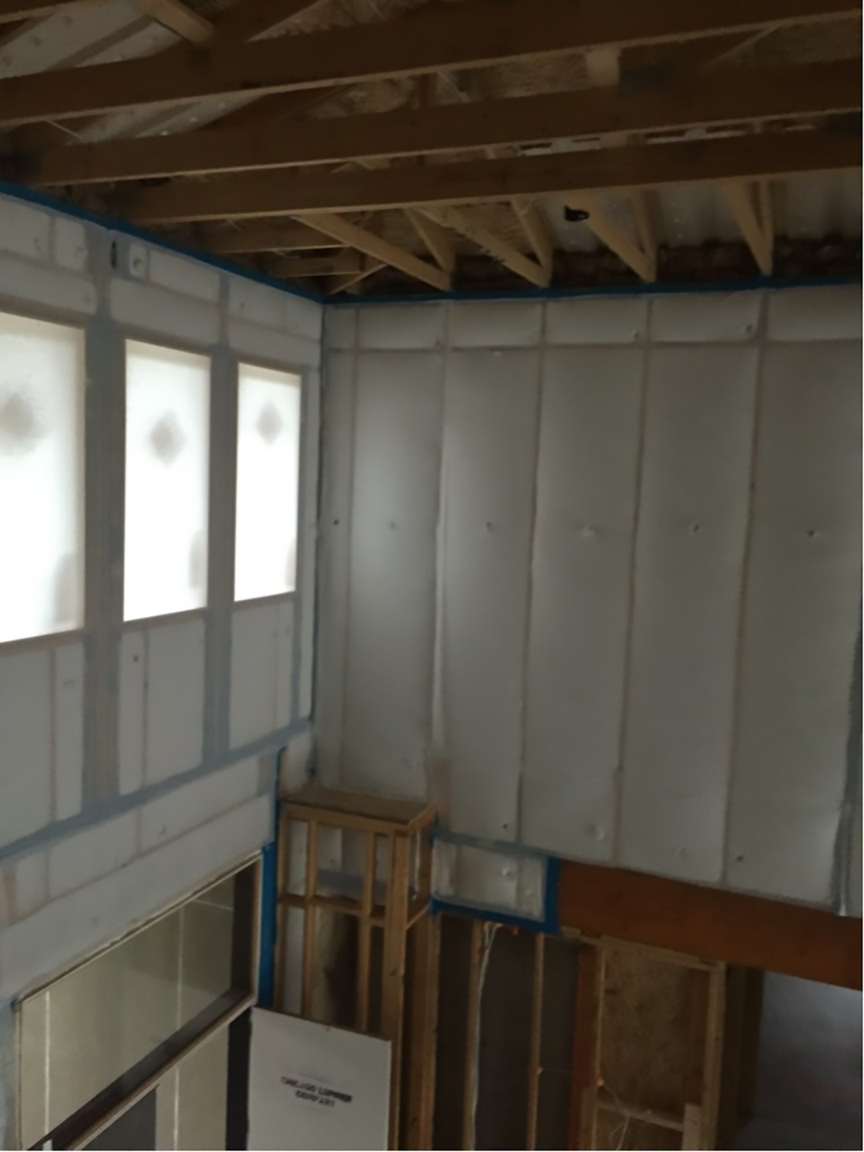
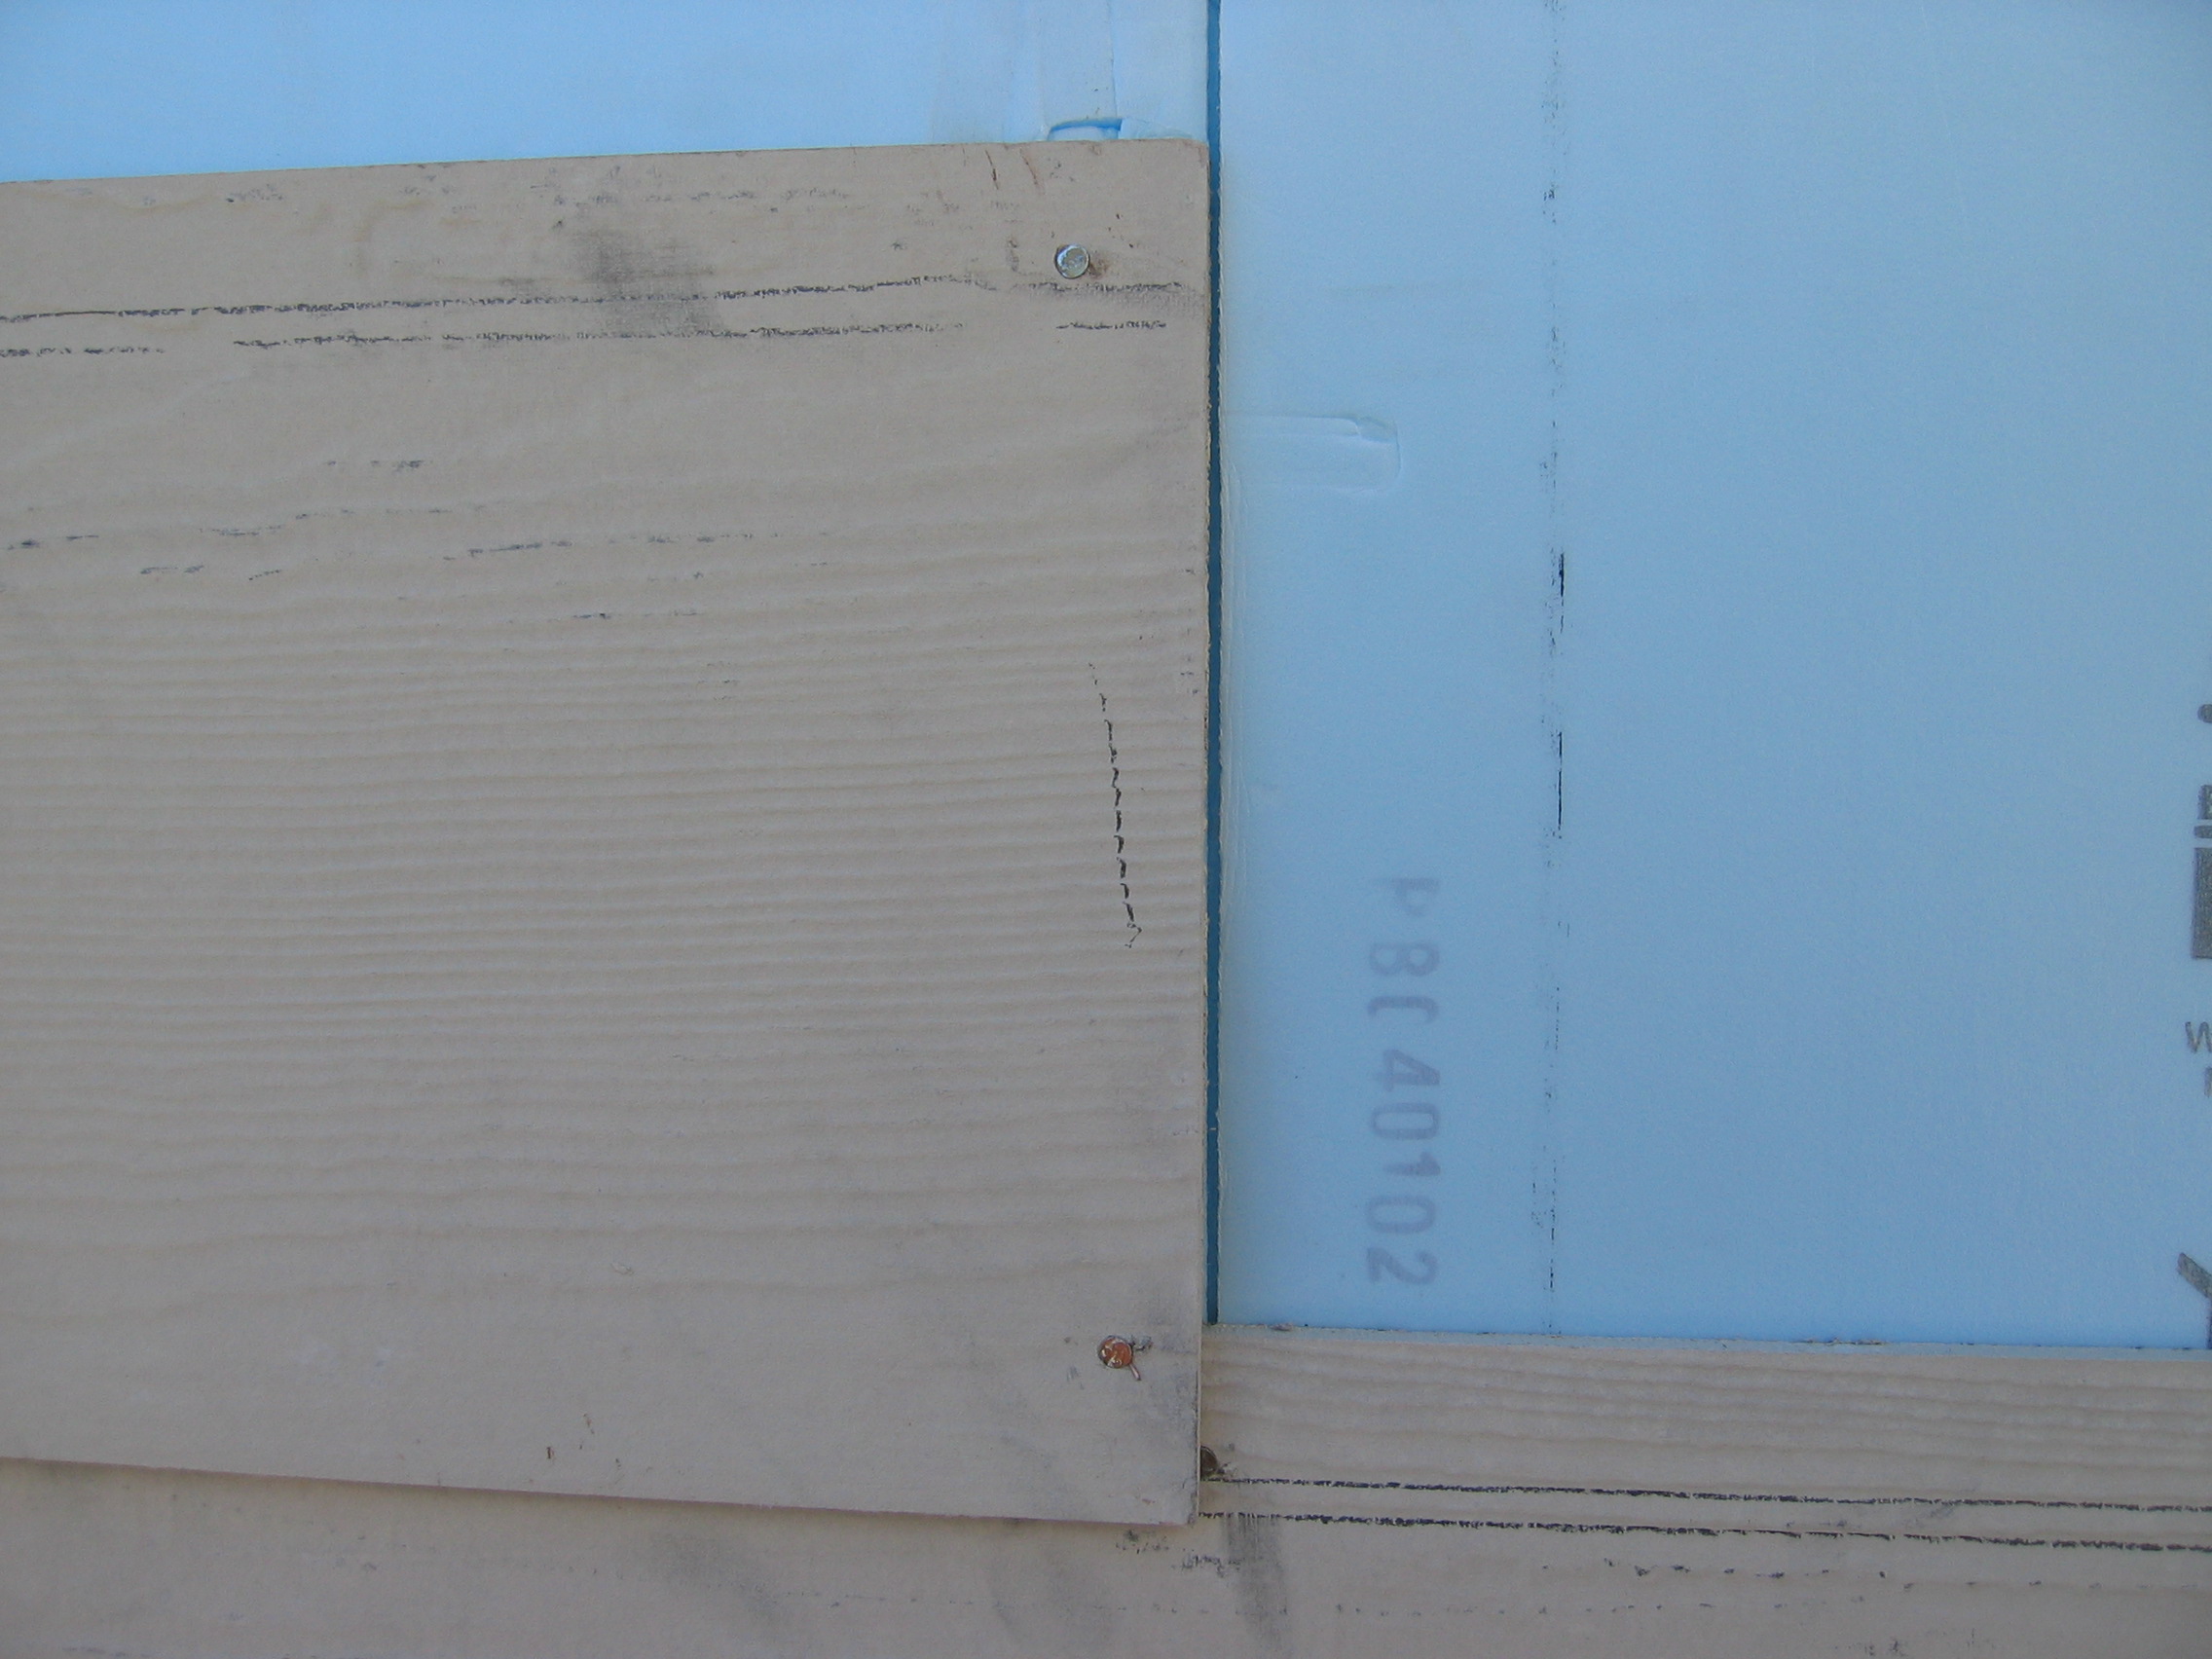
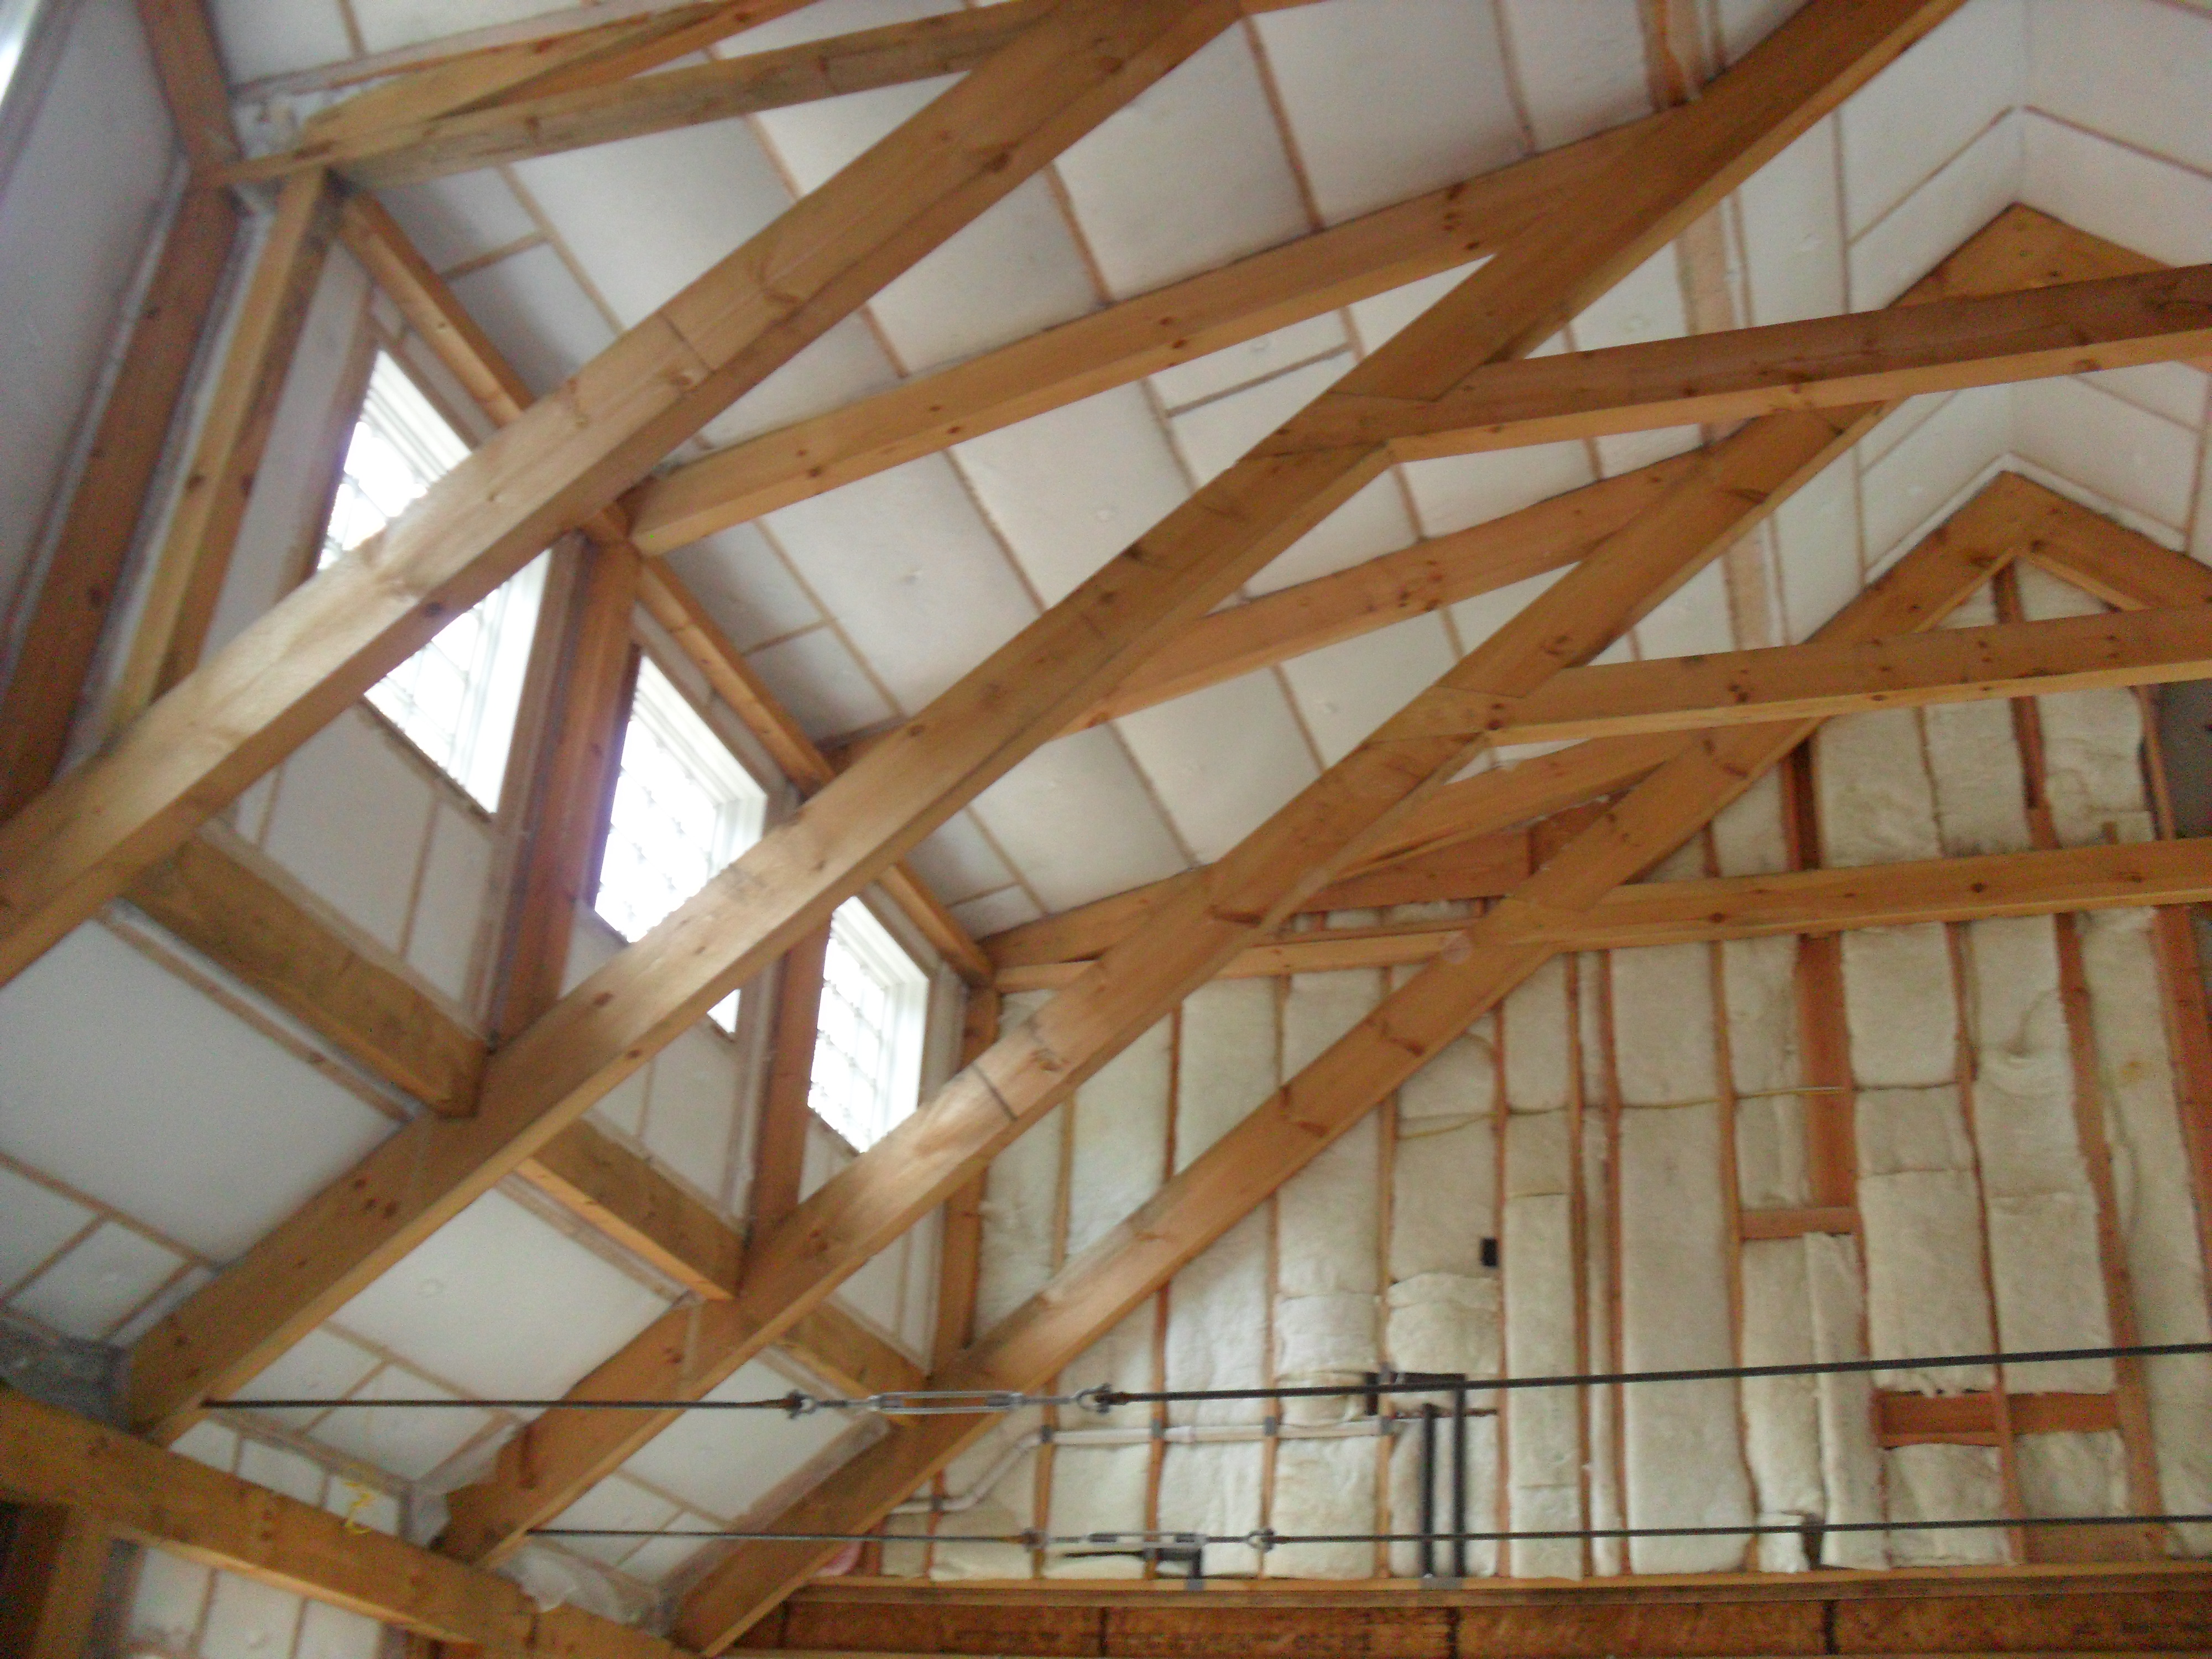
The attic knee walls were constructed from 2x6s and insulated with R-19 batt, backed with 1 inch of XPS foam board with taped joints to provide a solid air barrier over the insulated surfaces.
Image
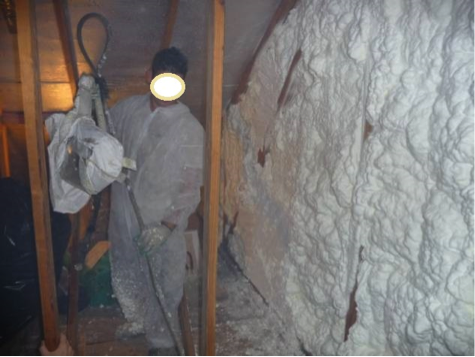
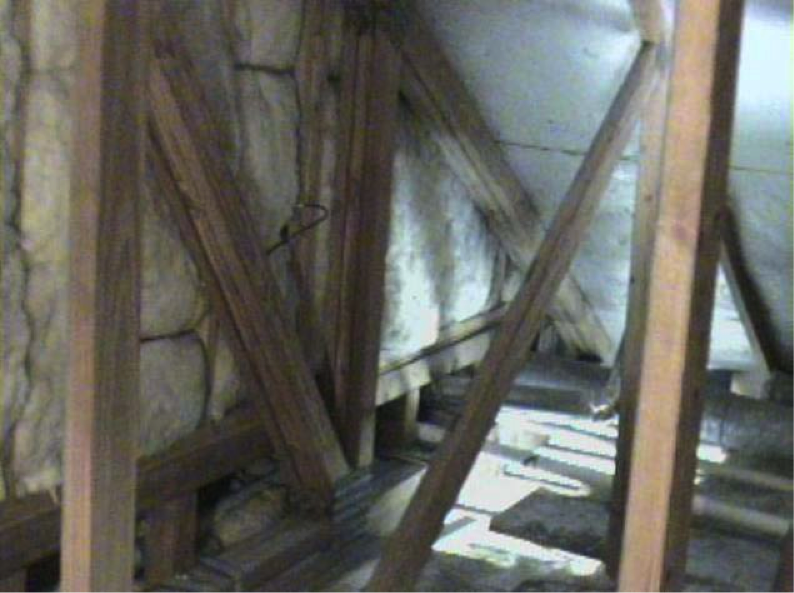
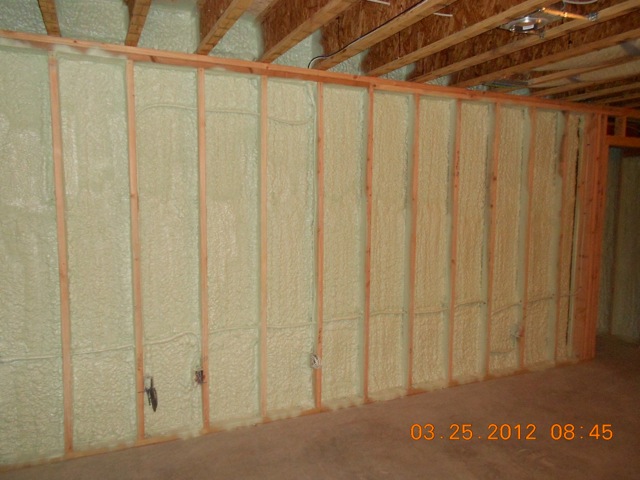
The attic kneewall and the open floor cavities under kneewall are both sealed and insulated in one step with spray foam insulation
Image
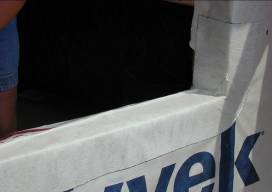
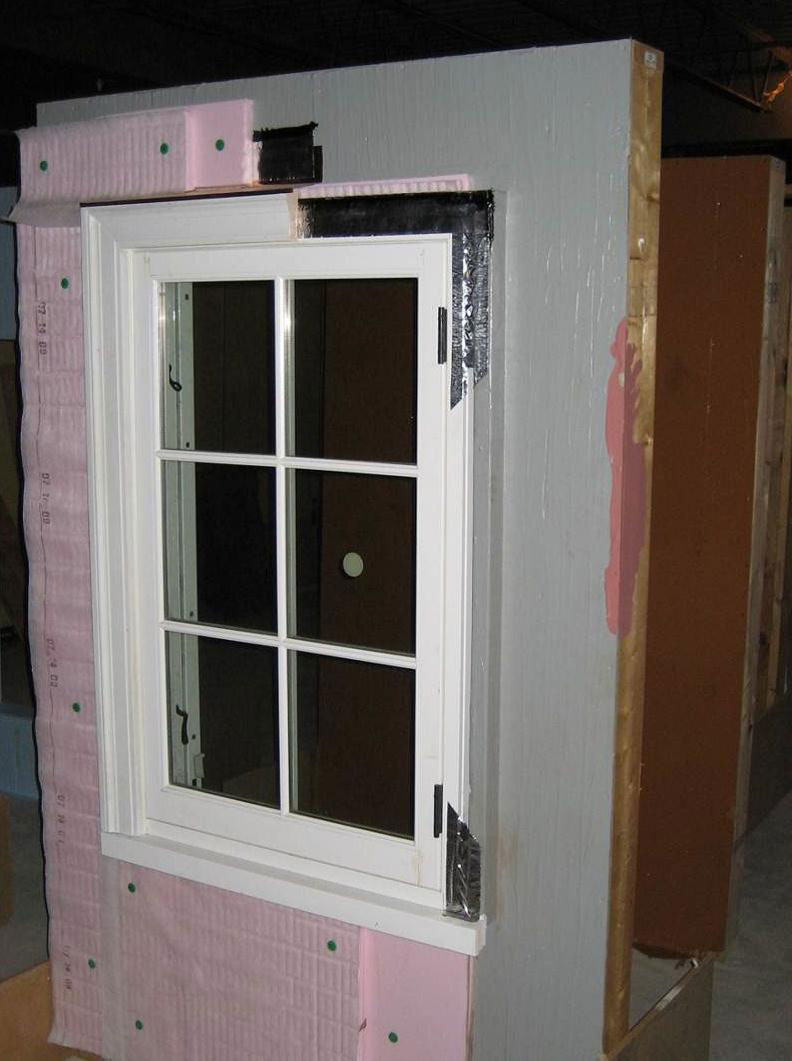
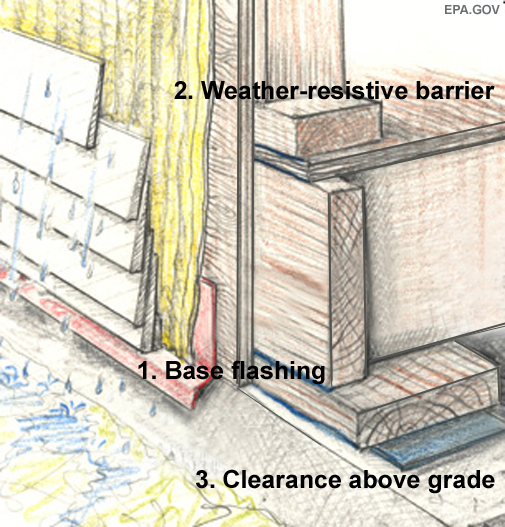
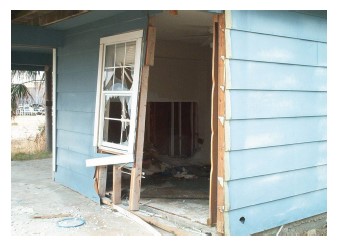
The back dam of the window sill will force water out
Image
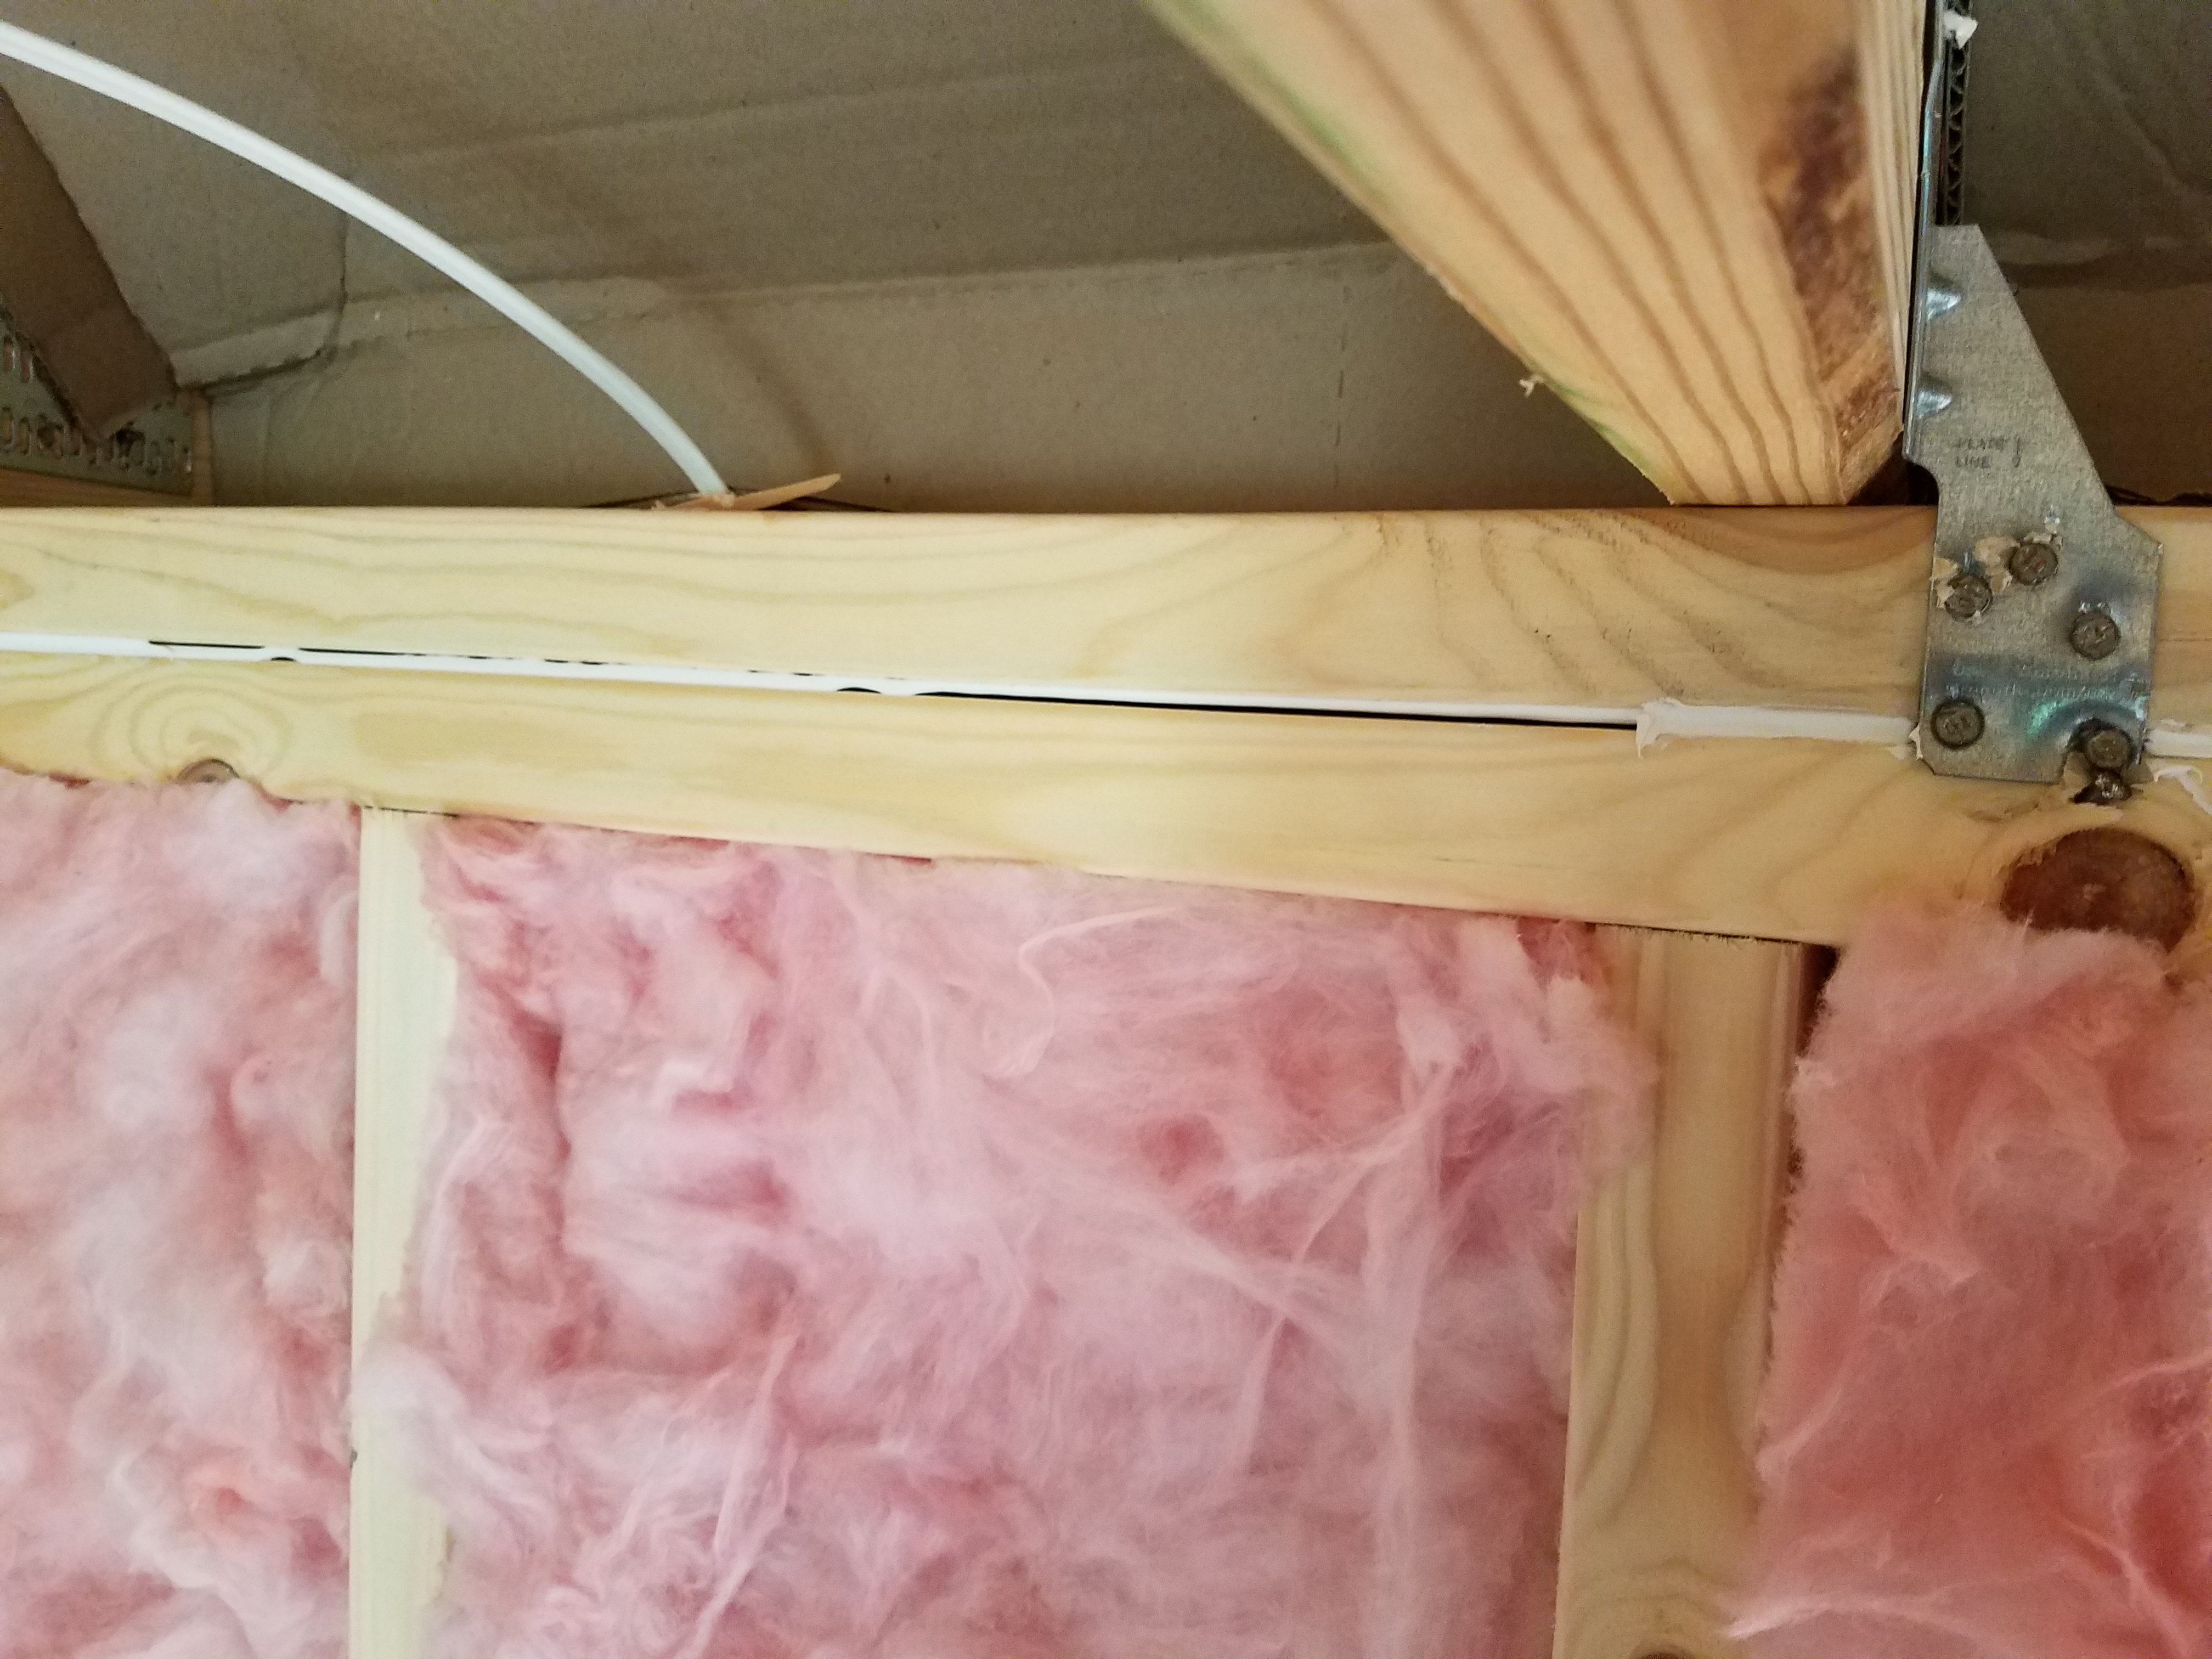
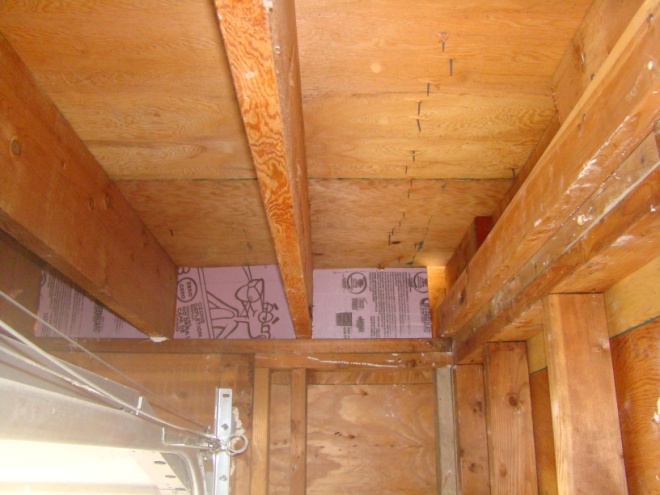
The batt insulation shown here was properly installed to fill the ceiling cavities.
Image
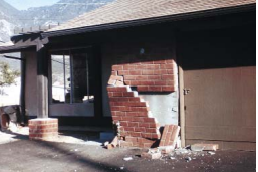
The brick veneer lacked adequate ties to keep the brick from peeling off the wall in an earthquake.
Image
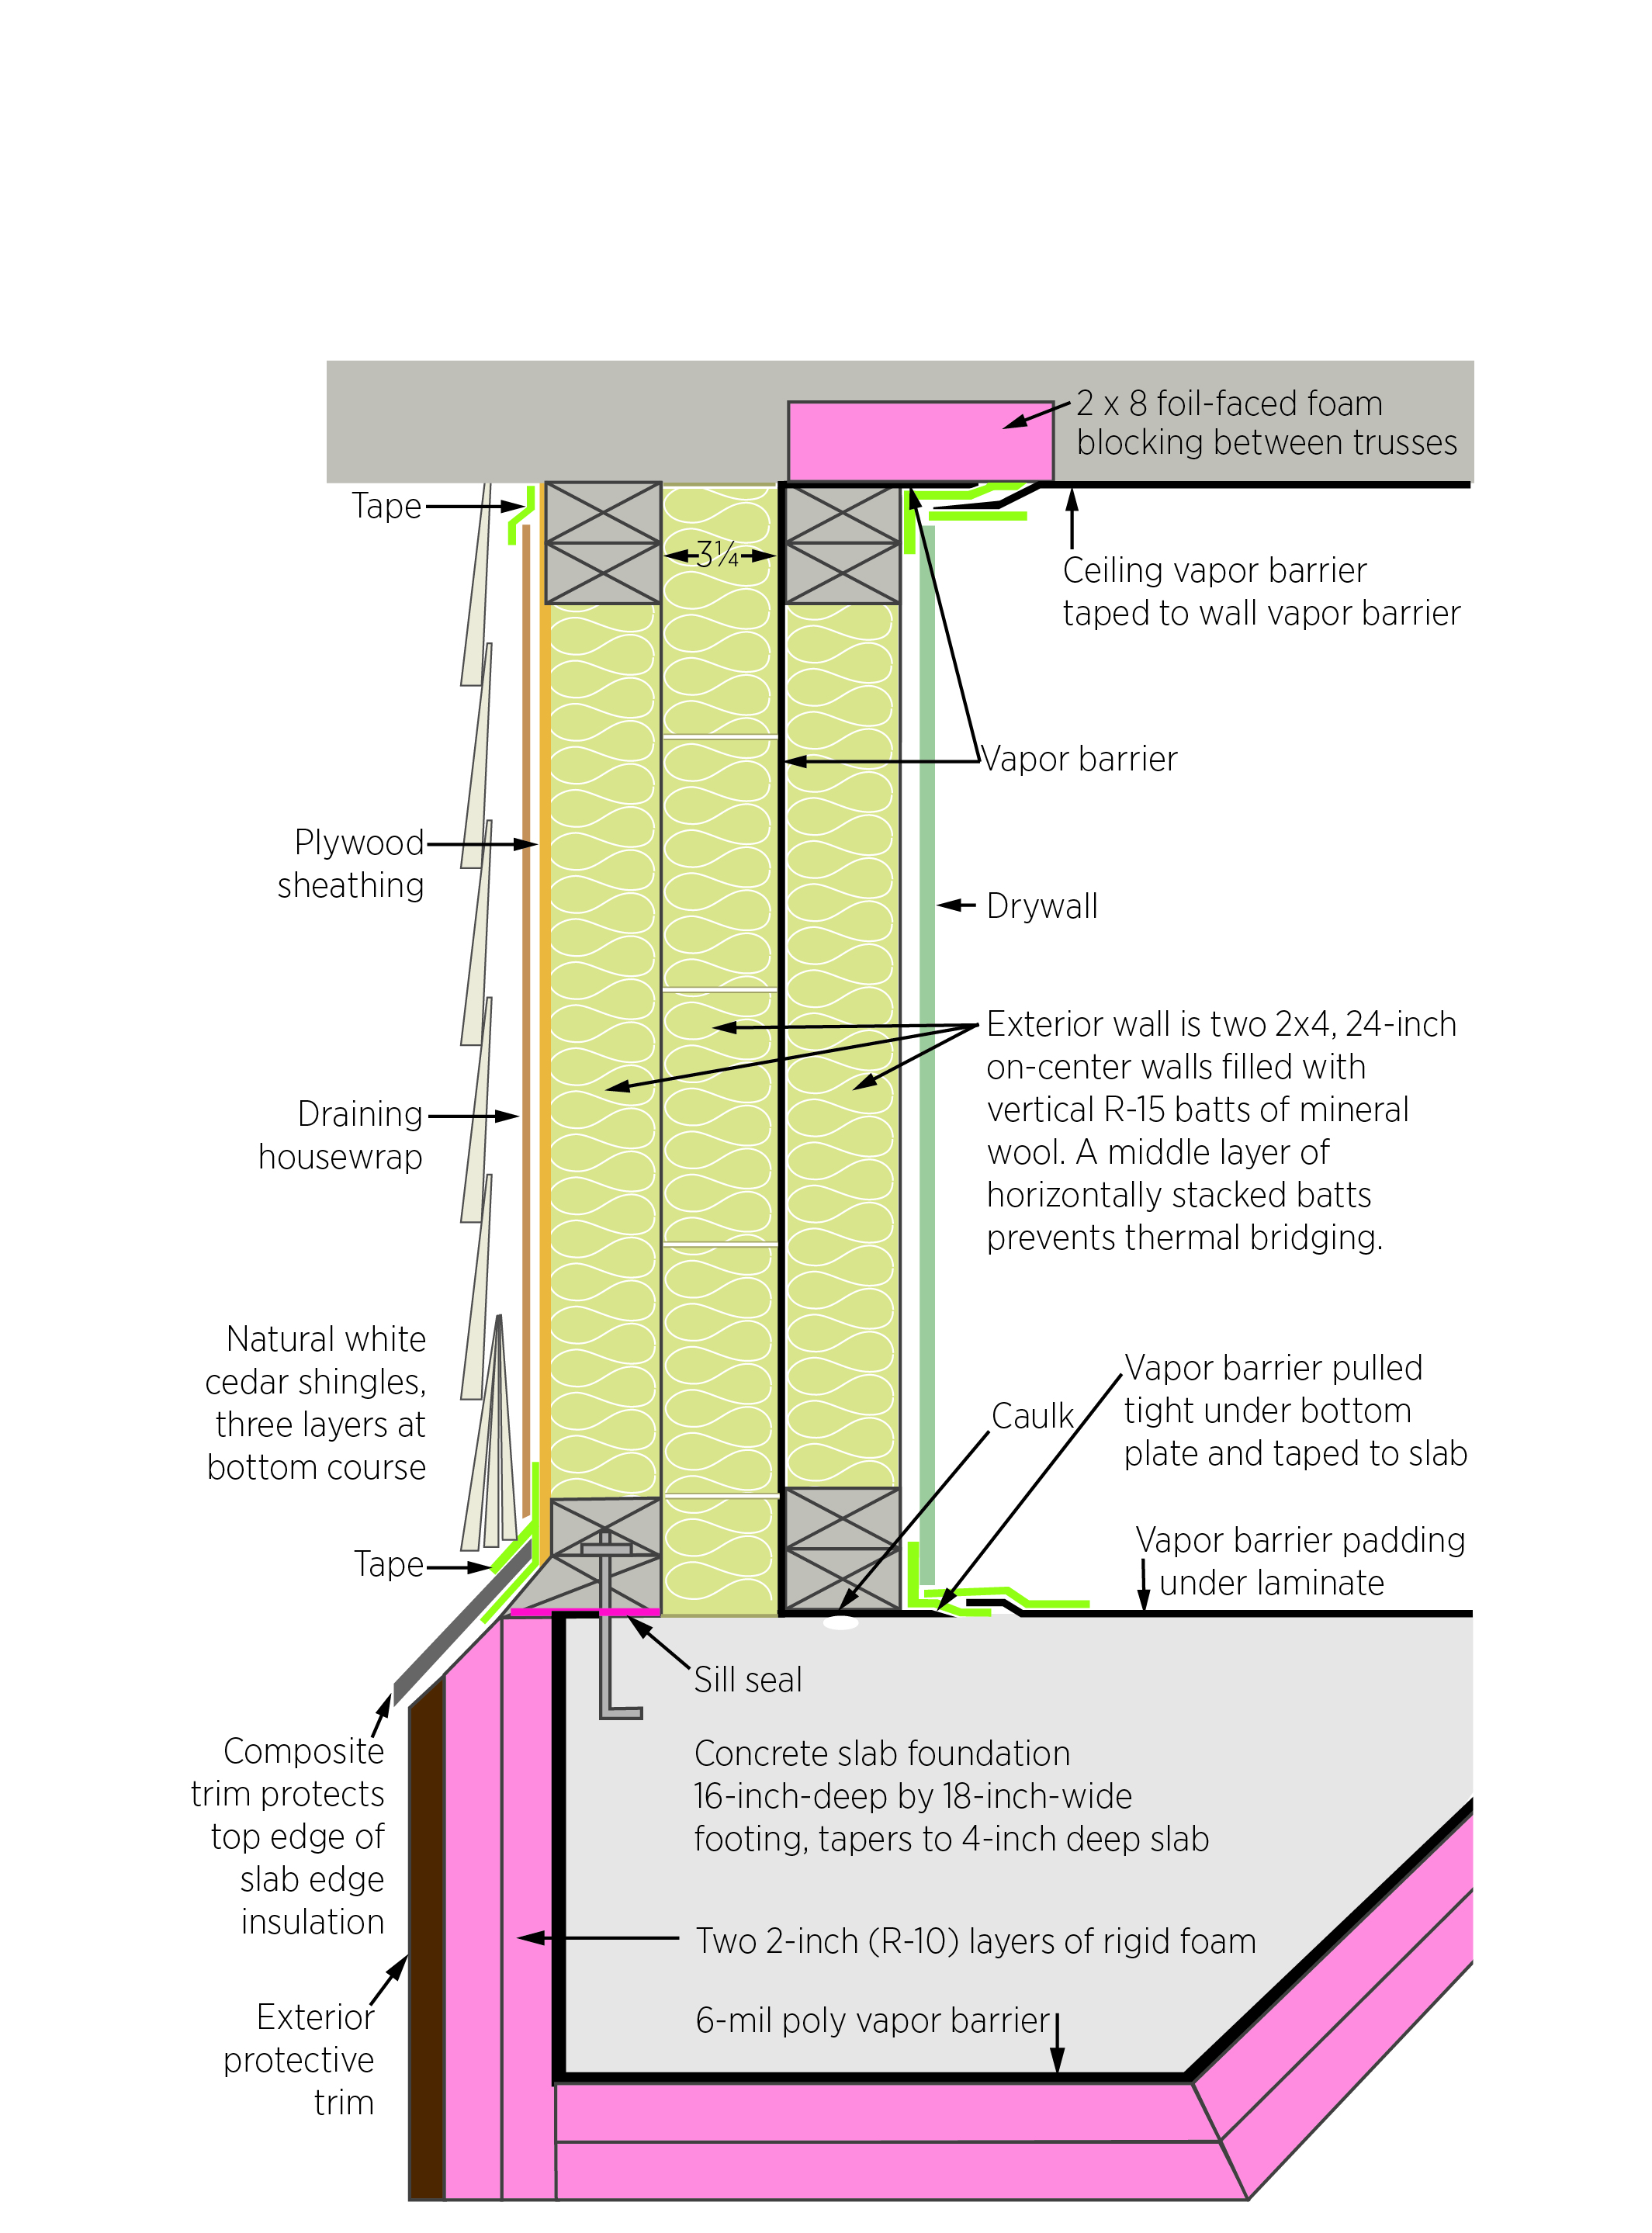
The builder in this very cold climate installed three layers of unfaced mineral wool batt in the double wall with a code-required vapor barrier between the middle and inner layers of wall insulation that is taped to barriers in the ceiling and floor.
Image
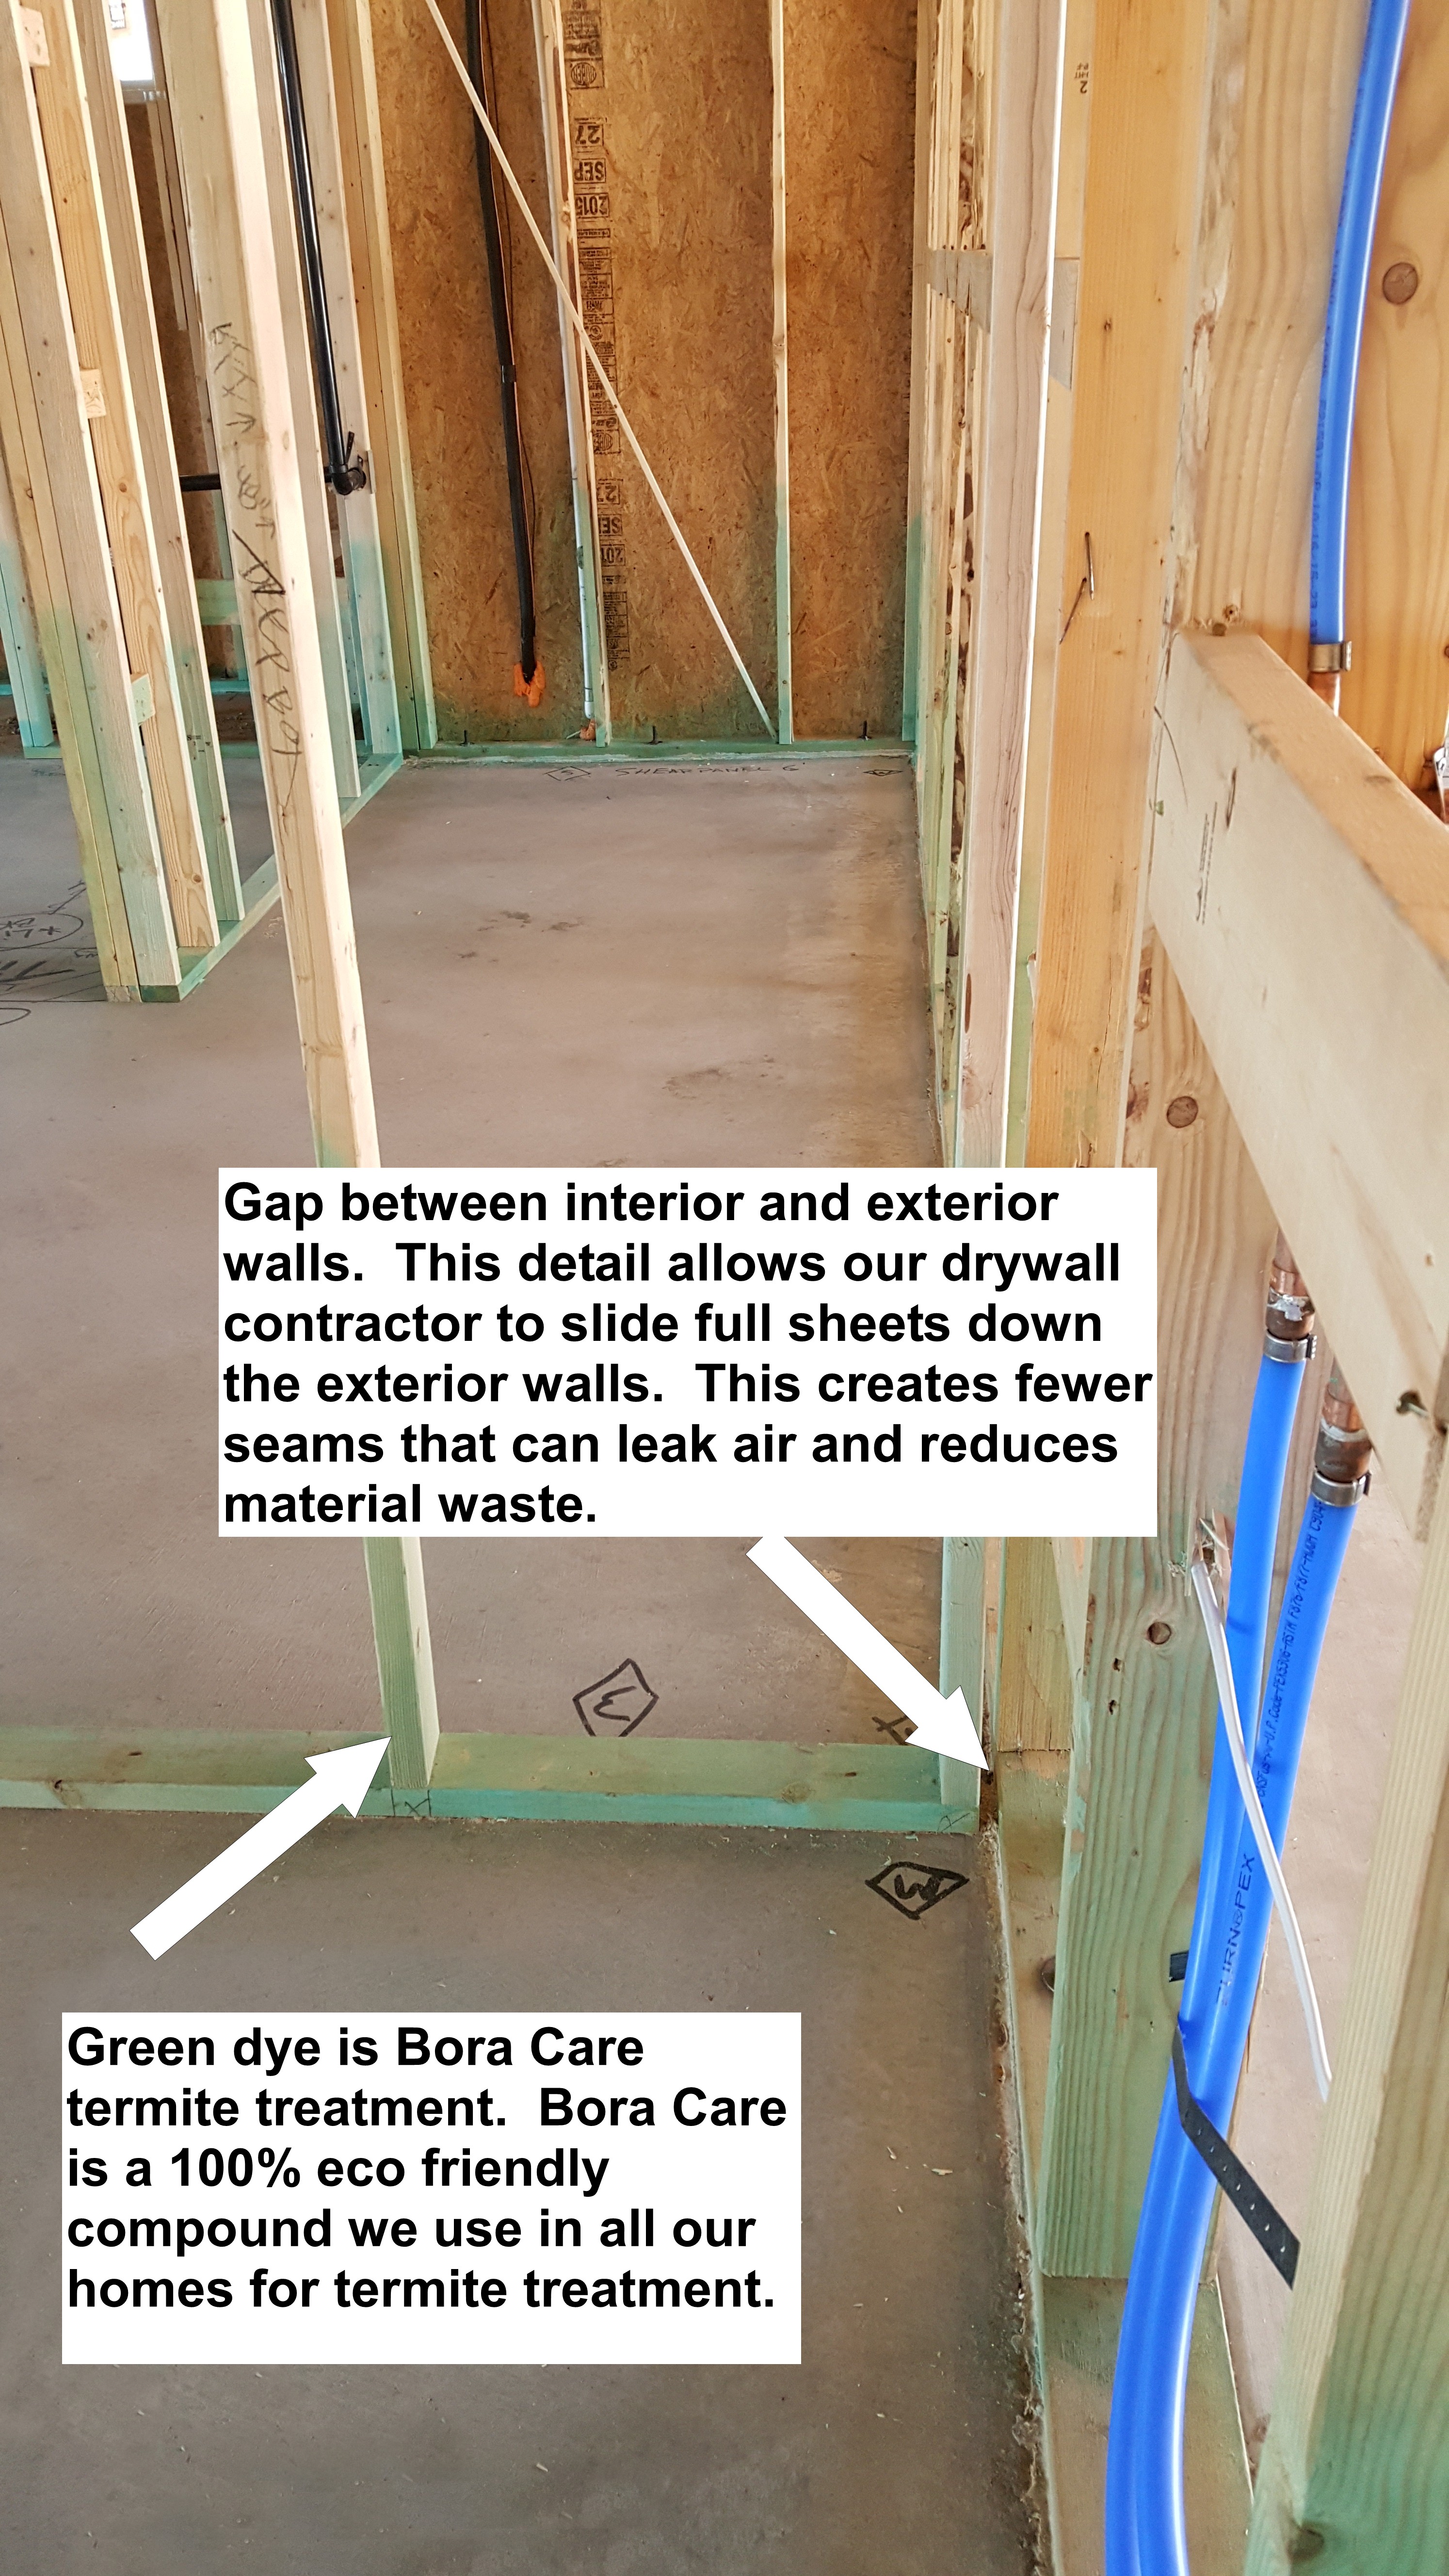
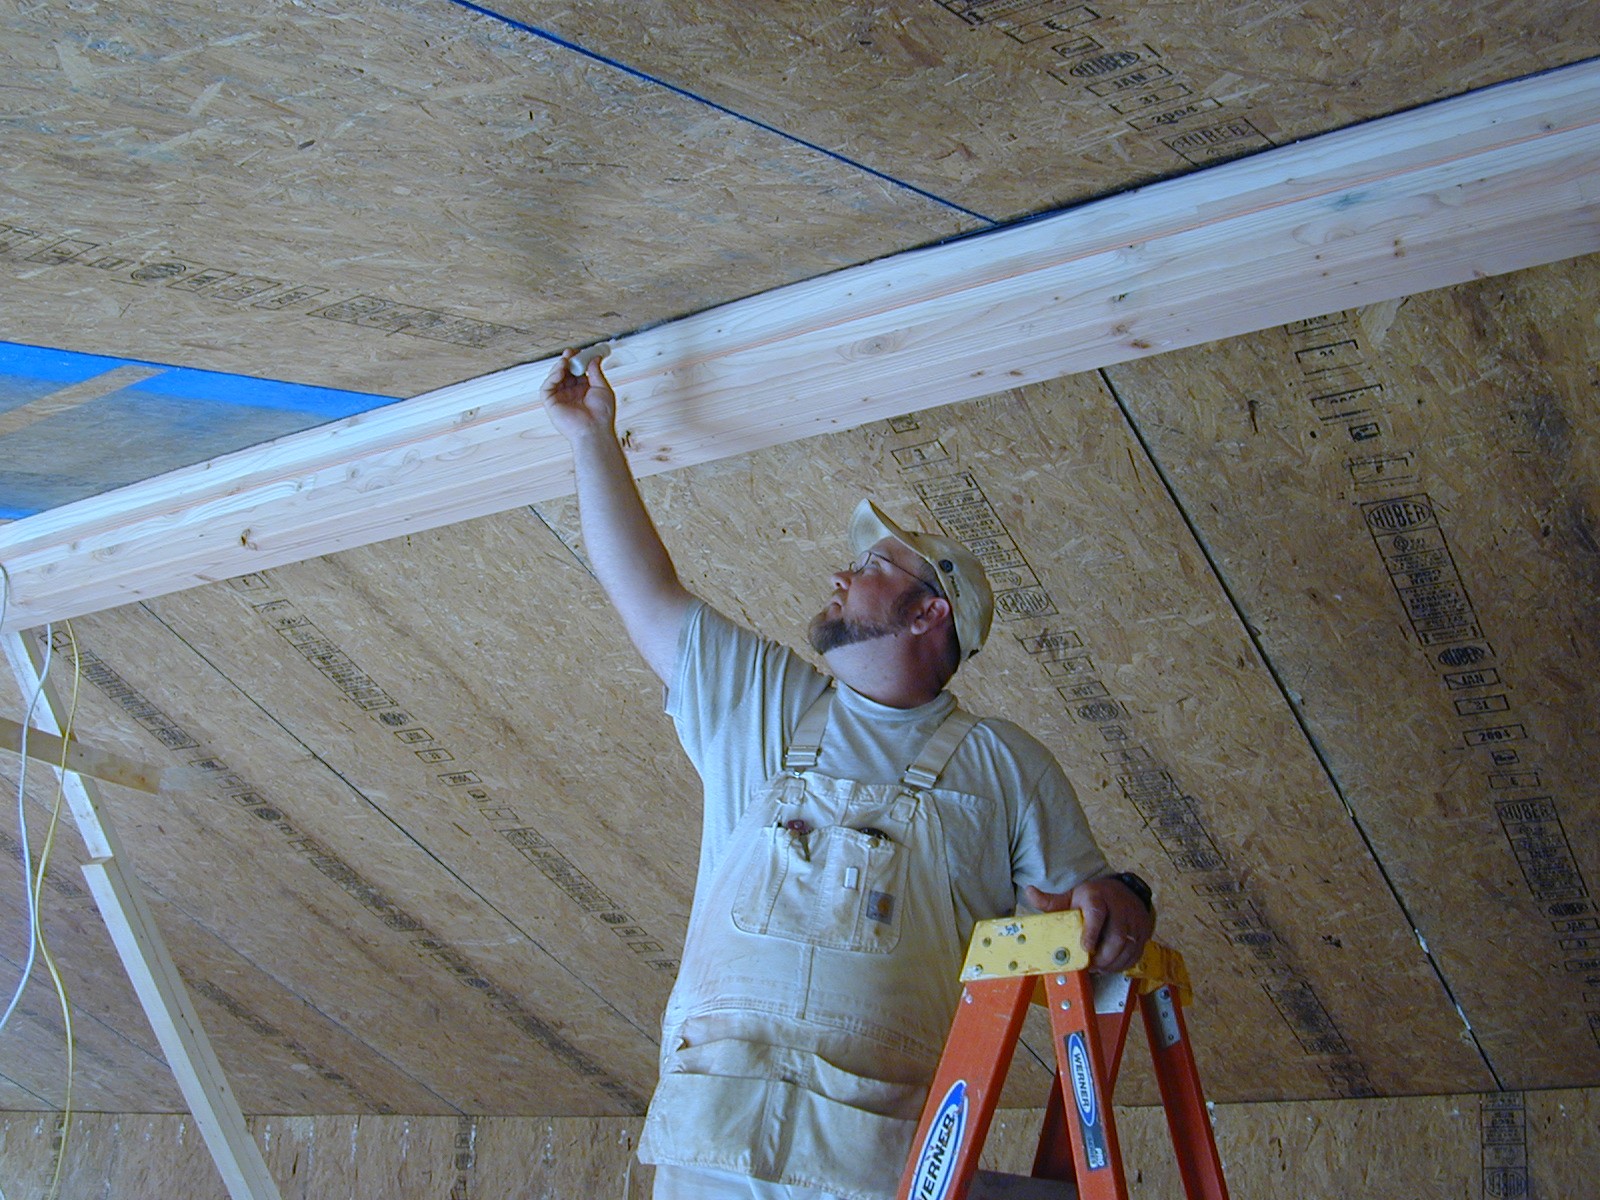
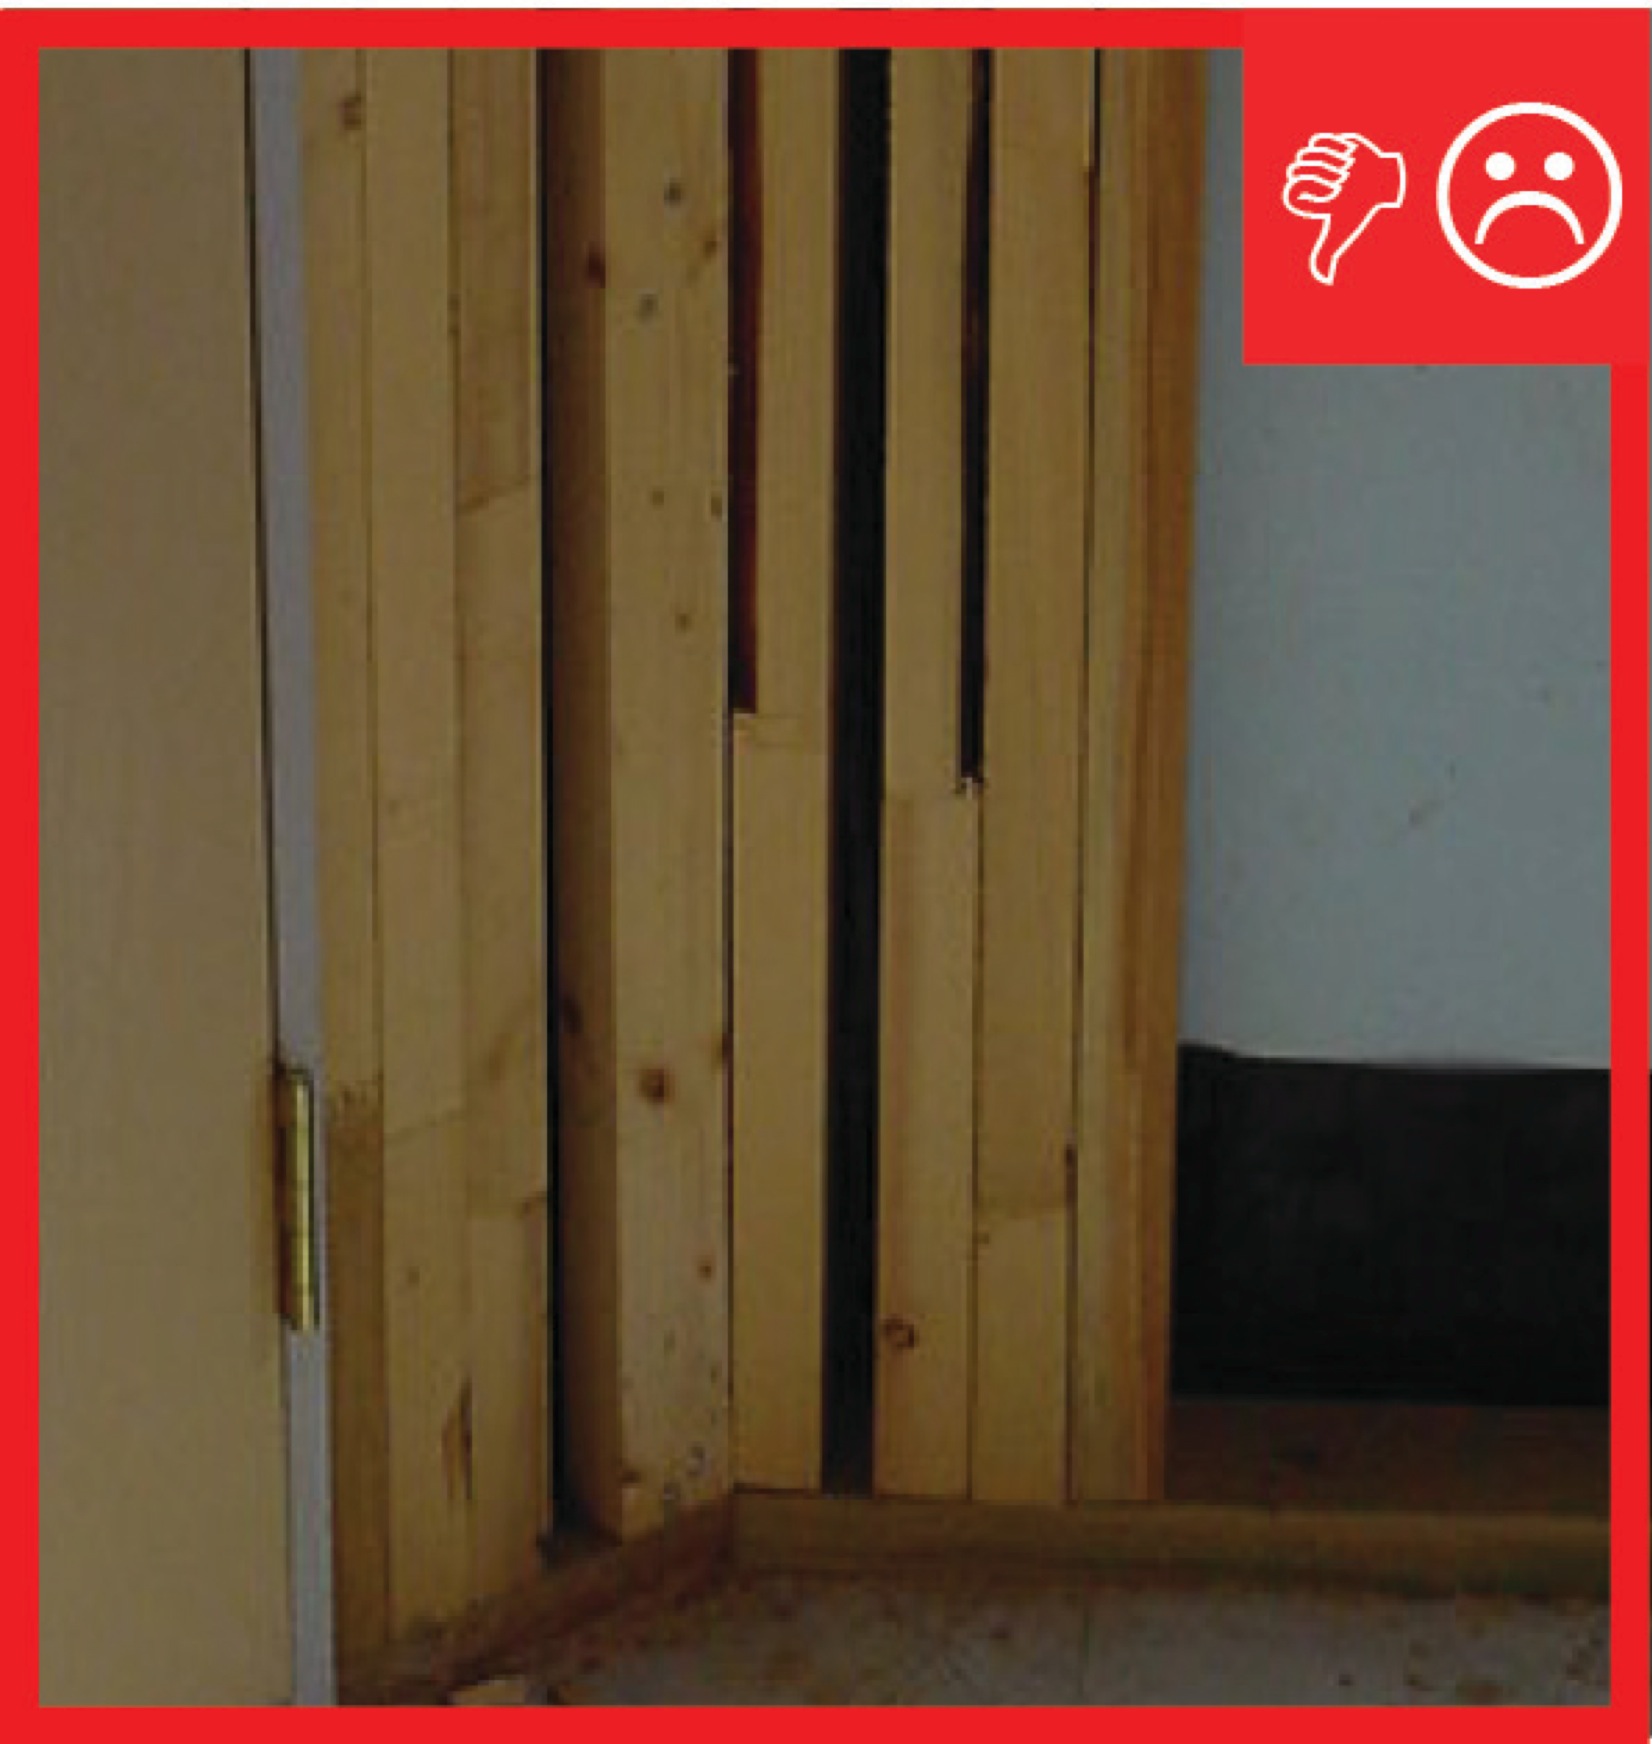
The builder leaves a half inch gap between the exterior and interior walls so drywall can be slid between the two.
Image
The builder staggers 2x4 studs on 2x6 top and bottom plates which provides gaps to fill in insulation around the framing for a continuous blanket of insulation.
Image
The builder was able to pack R-41 of blown fiberglass into the wall cavity formed by the double stud walls.
Image
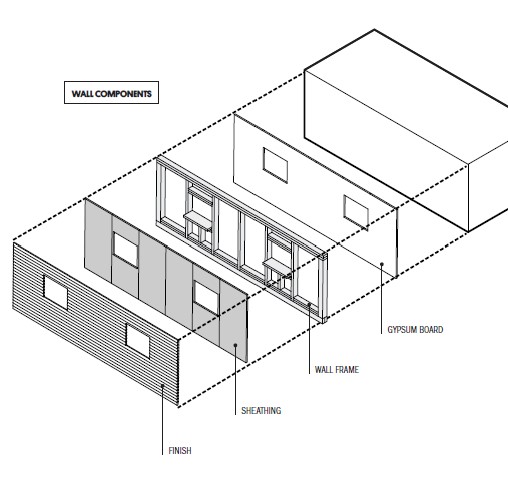
The components of a framed wall include from inside to out: gypsum, wood studs, OSB or plywood sheathing, and siding.
Image

The cripple wall hiding the post-and-pier foundation of this wood framed house toppled when the house was shifted partially off its piers by an earthquake
Image
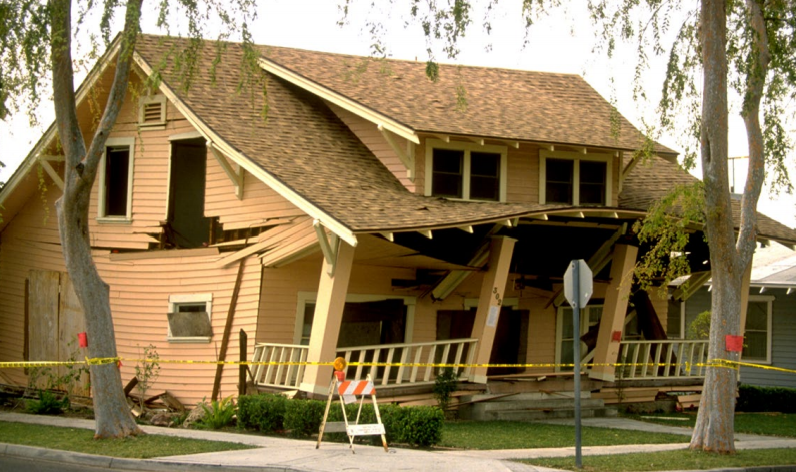
The cripple walls in this home gave way in the 1994 Northridge Earthquake, causing the walls to partially collapse.
Image
The double walls form a 12-inch cavity that was sheathed with a coated OSB then coated with 3 inches of closed-cell spray foam; they will be filled with 9 inches of blown fiberglass.
Image

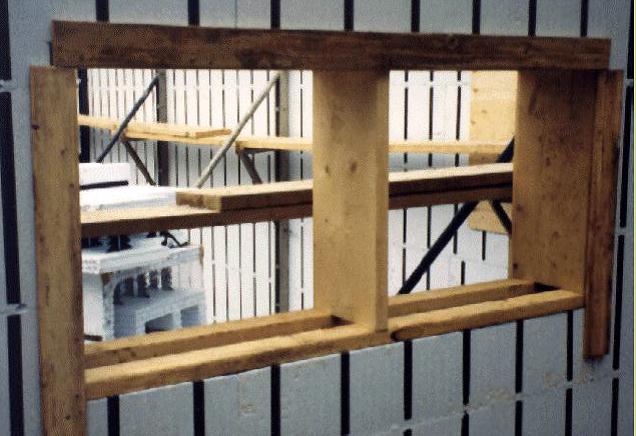
The double-wall construction results in thick window sills which builder market as an architectural feature.
Image
The energy-saving double wall construction uses two side-by-side stud walls, providing an extra-thick wall cavity that can be filled with more than twice as much insulation as a 2x6 wall.
Image

The exterior walls are double walls consisting of two 2x4 stud walls set 3 inches apart to form a 10-inch-thick wall cavity that is filled with blown-in fiberglass to provide a continuous R-40 blanket of insulation around the home.
Image
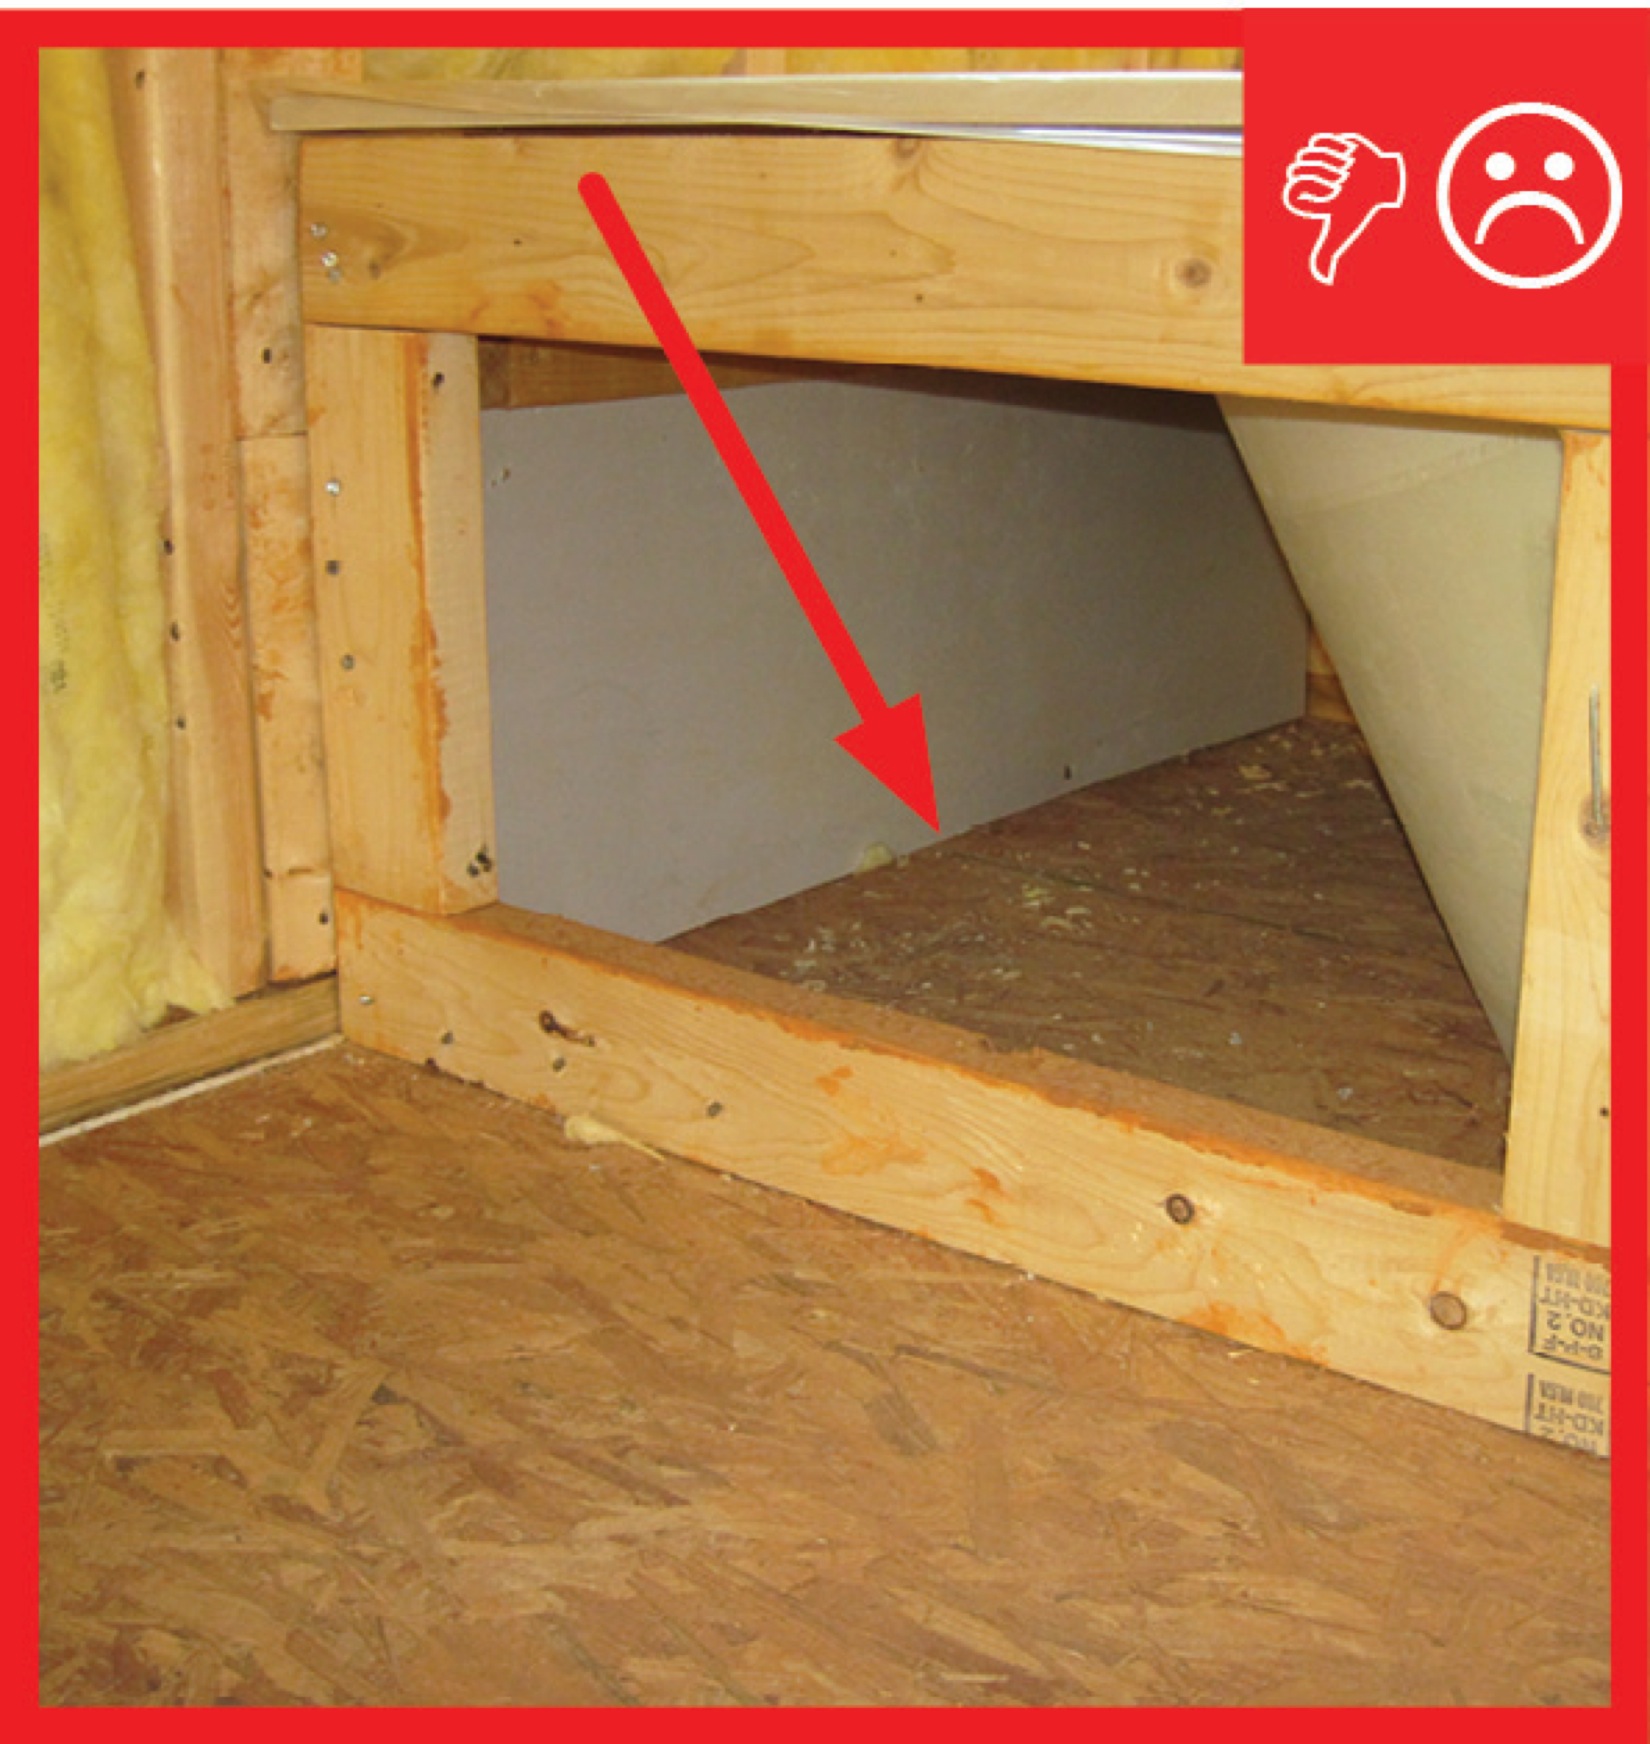
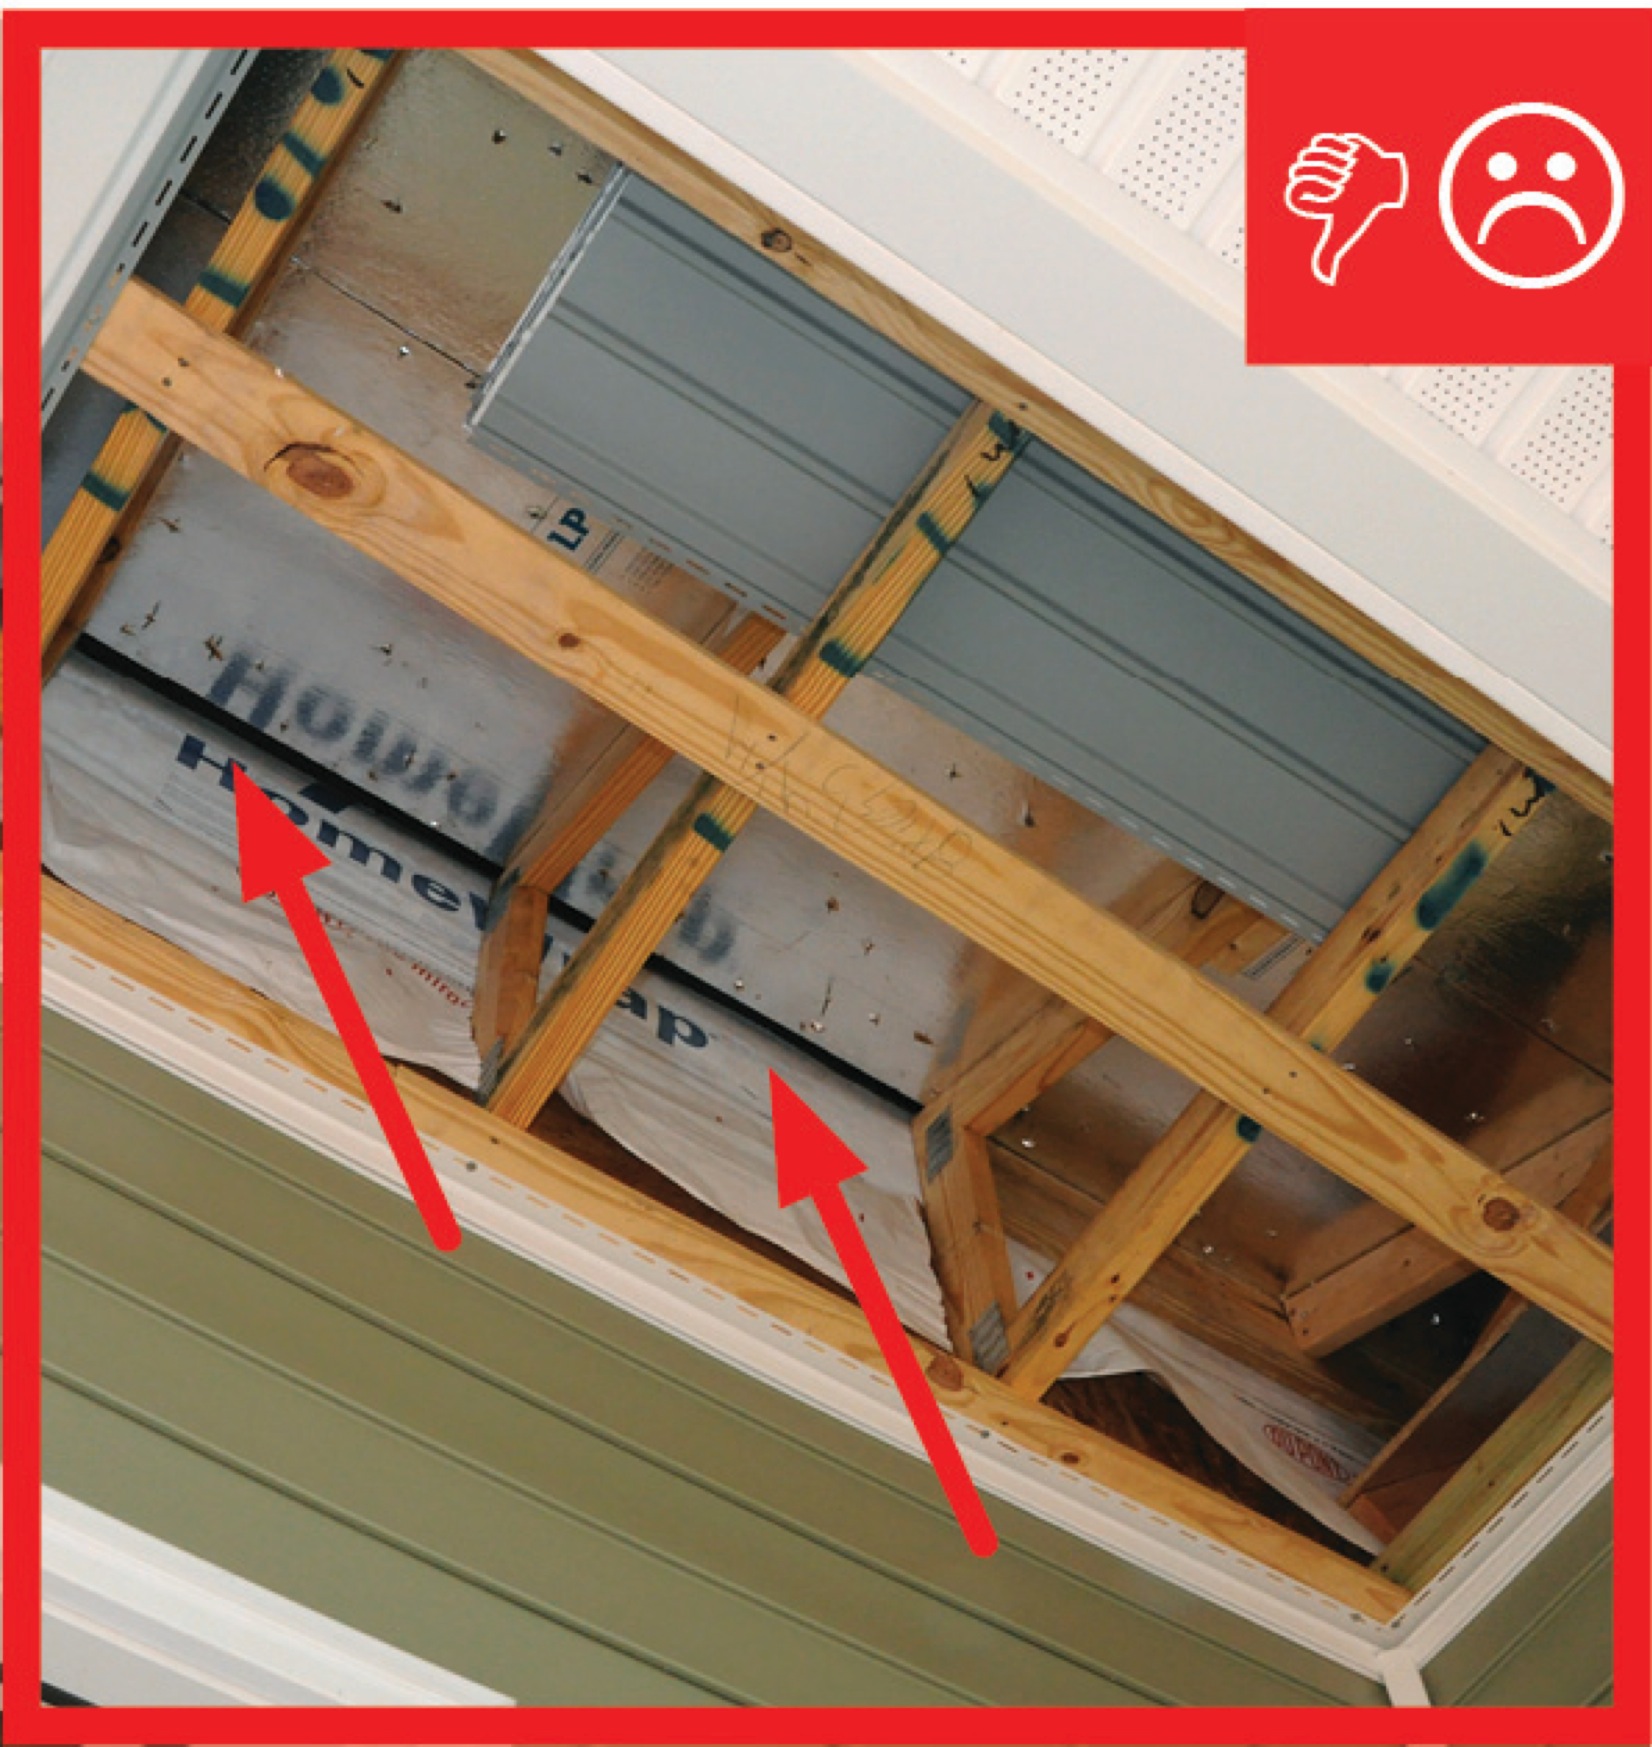
The floor cavities under this attic kneewall are completely open to the unconditioned attic space and a prime target for wind washing
Image
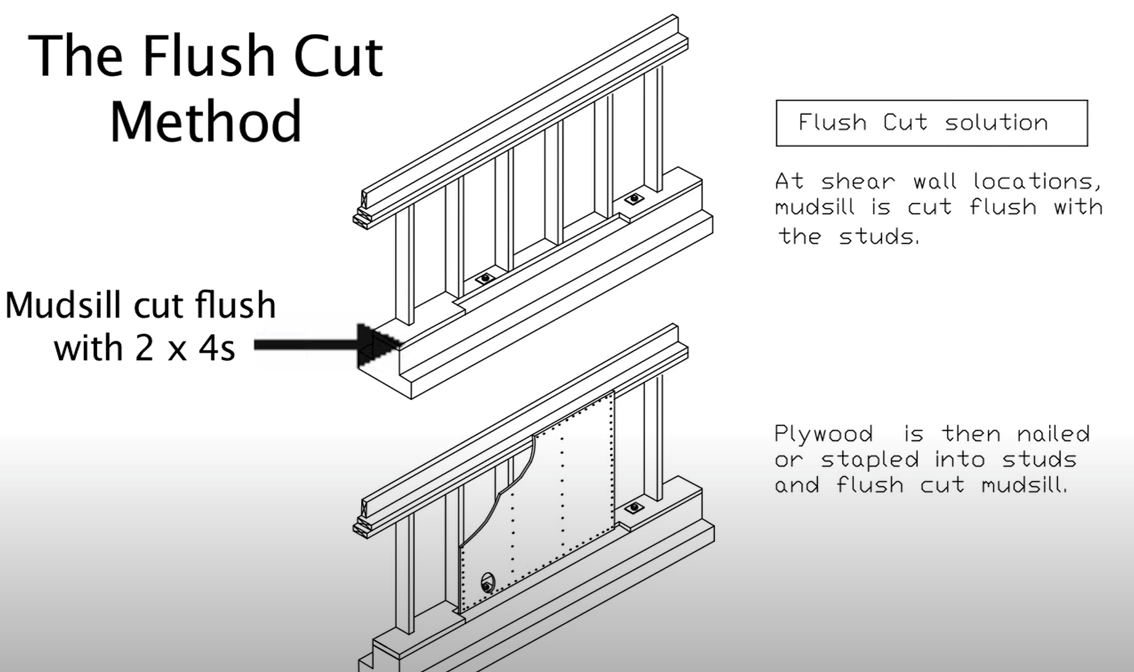
The flush cut method for seismic retrofit bracing of a cripple wall allows the plywood sheathing to be attached directly to both the cripple studs and the notched section of the mudsill
Image
The foam-filled concrete block walls are lined on the interior side with foil-faced rigid foam then topped with furring strips for attaching drywall.
Image

The Habitat affiliate makes its own “ICF” foundation walls with rigid foam held in place with wood spacers.
Image
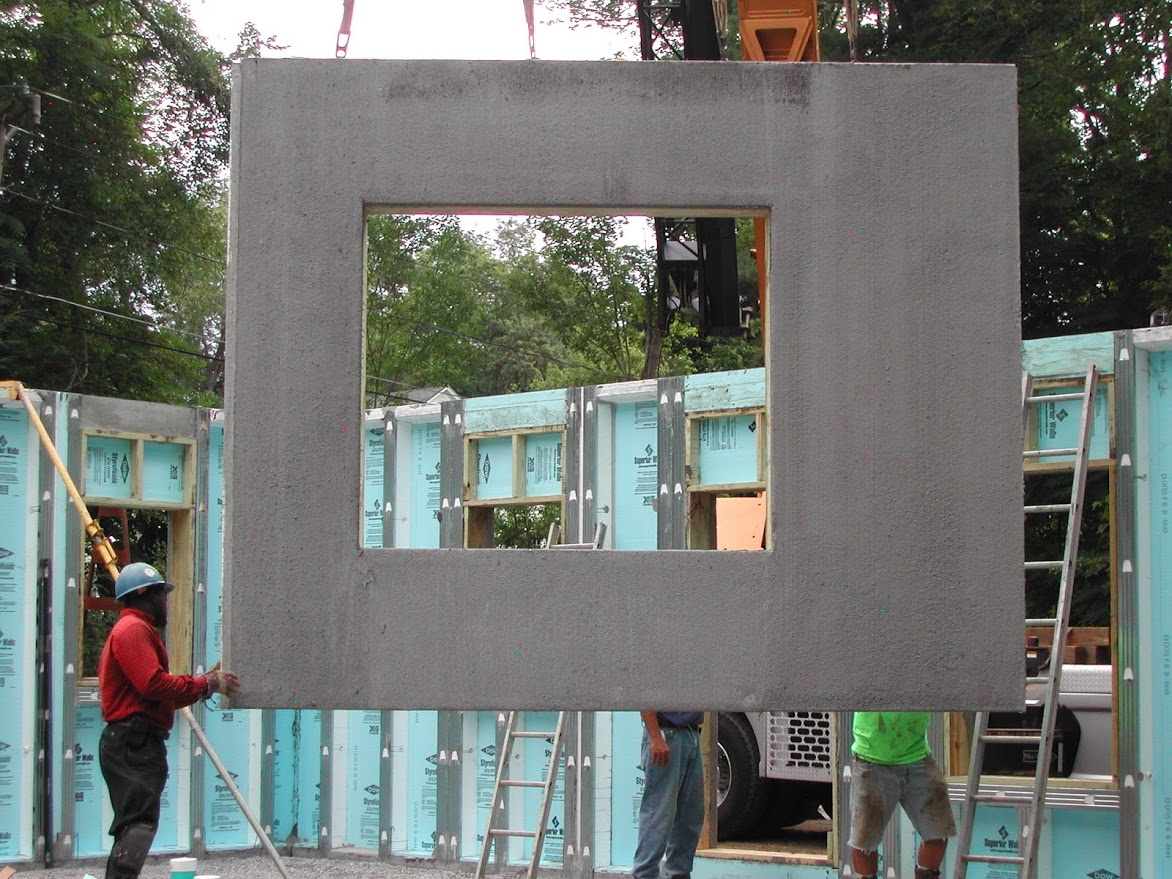
The home’s first-floor walls are constructed of insulated precast concrete panels that are set in place on a gravel bed.
Image
The I-joist is continuous along the shared wall and serves as a natural air barrier between the garage and the house
Image

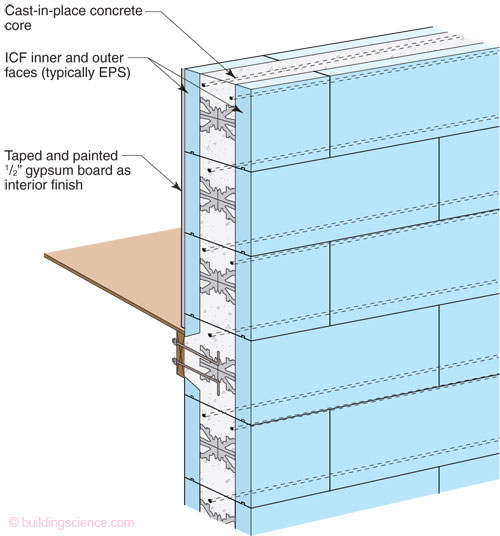
The ICF consists of foam forms that are held in place with plastic or metal spacers and reinforced with metal rebar
Image
Image

The Larsen-truss 9-inch wall cavities were covered with a smart vapor membrane that was fastened to the trusses with furring strips, which also provide an air gap behind the wood siding; each truss cavity is then filled with blown cellulose.
Image
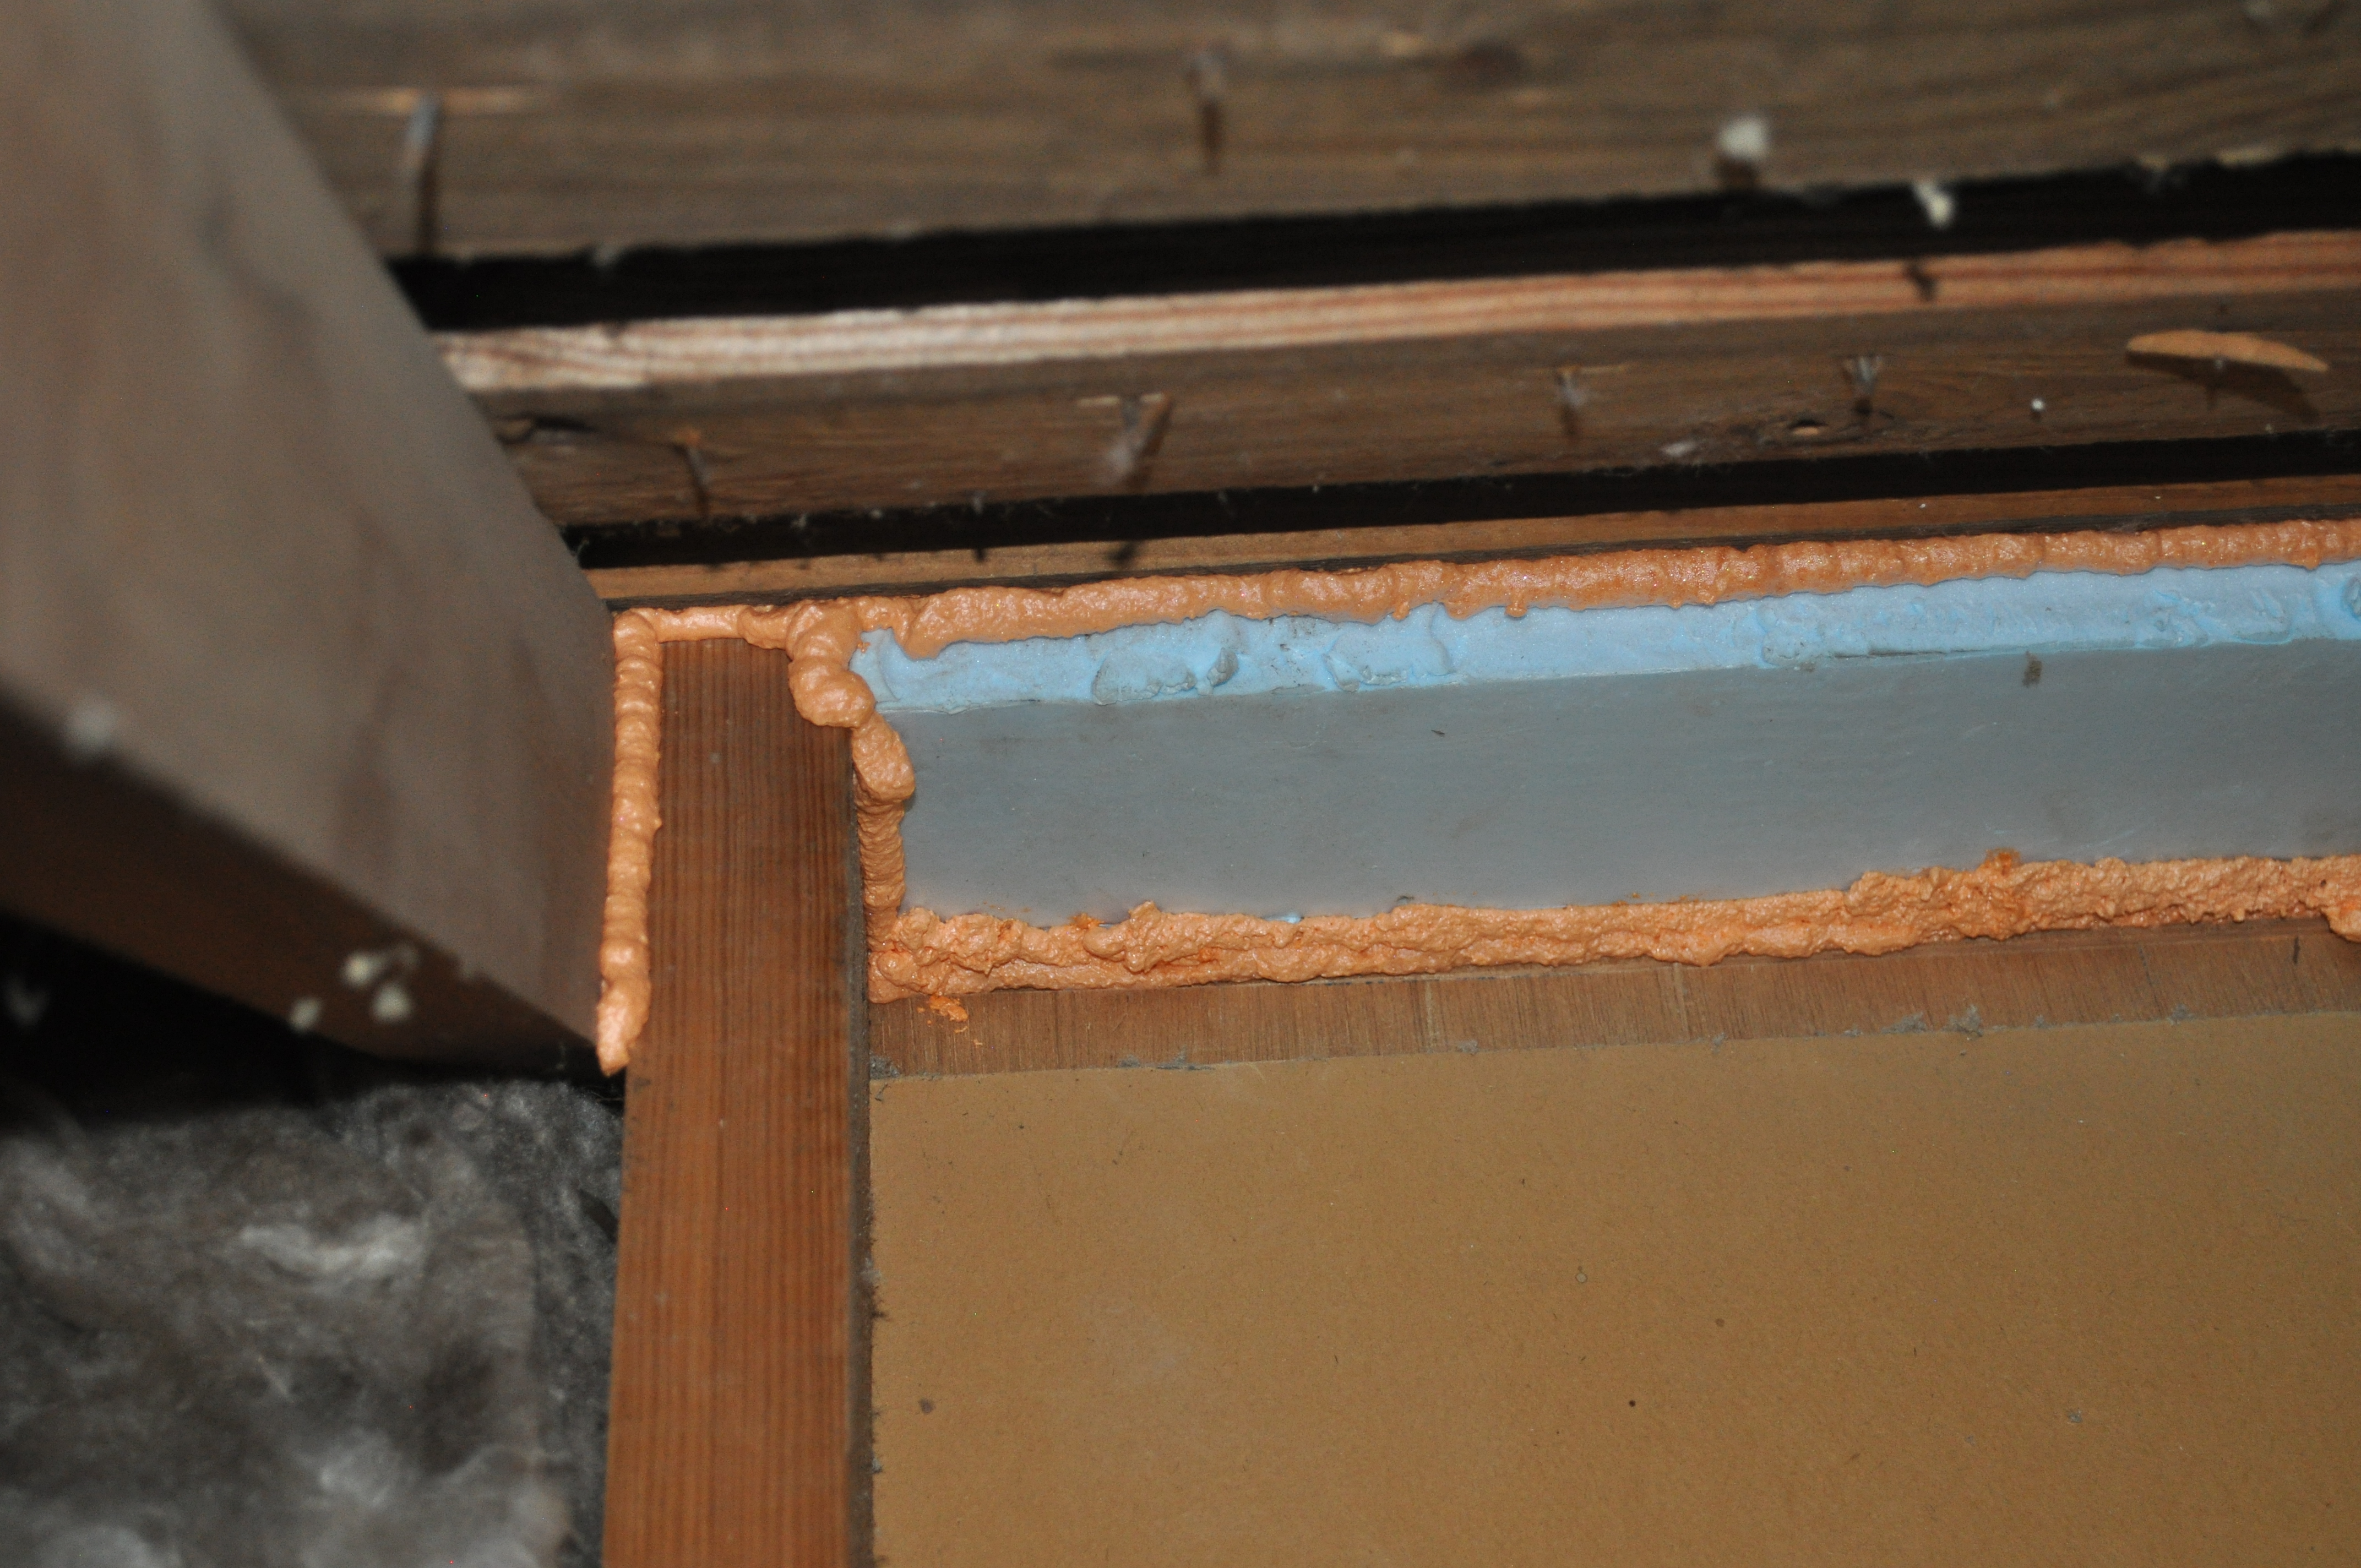
The missing top plate in a kneewall was covered with lumber and rigid foam insulation and then sealed with spray foam
Image
Image
Image
Image
The OSB roof decking product comes with an adhered radiant foil barrier which helps to prevent heat transfer in or out of the vented attic, while R-13 unfaced fiberglass fills the advanced-framed 2x6 walls.
Image
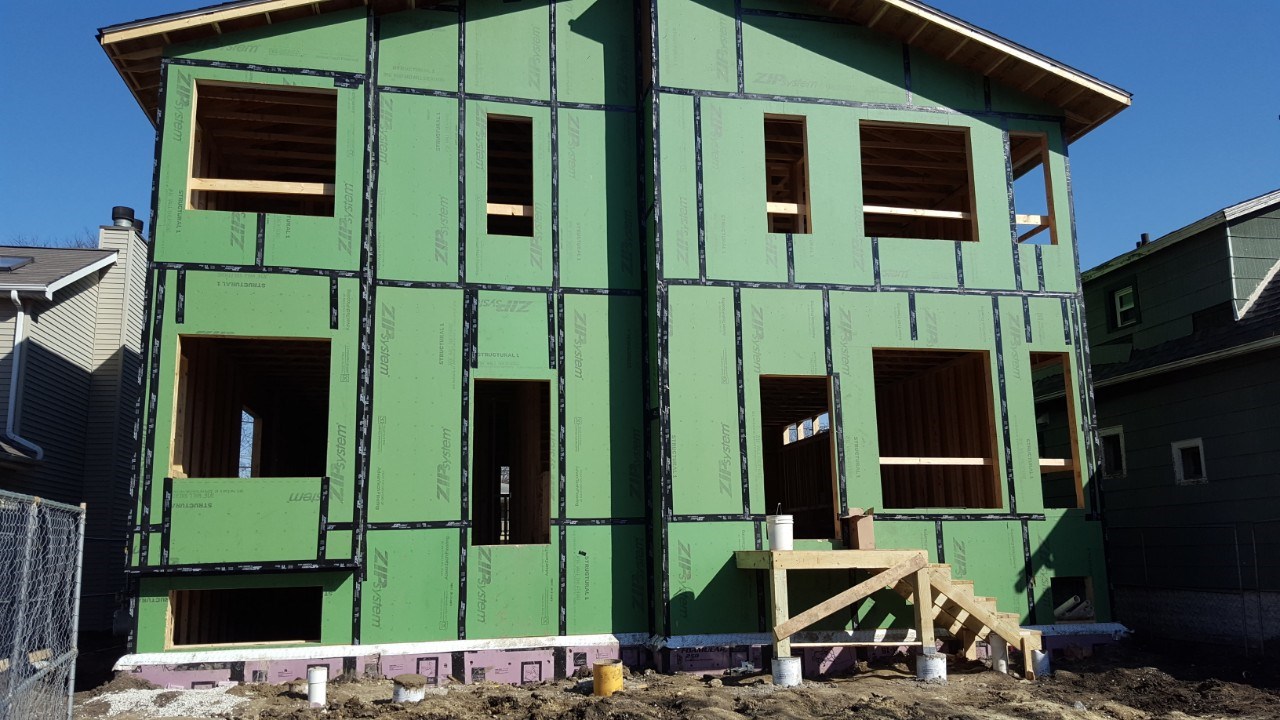
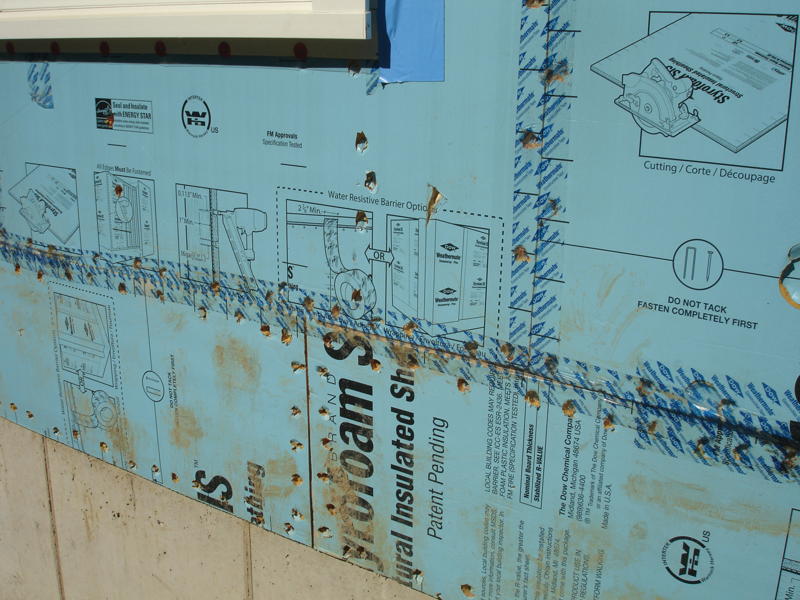
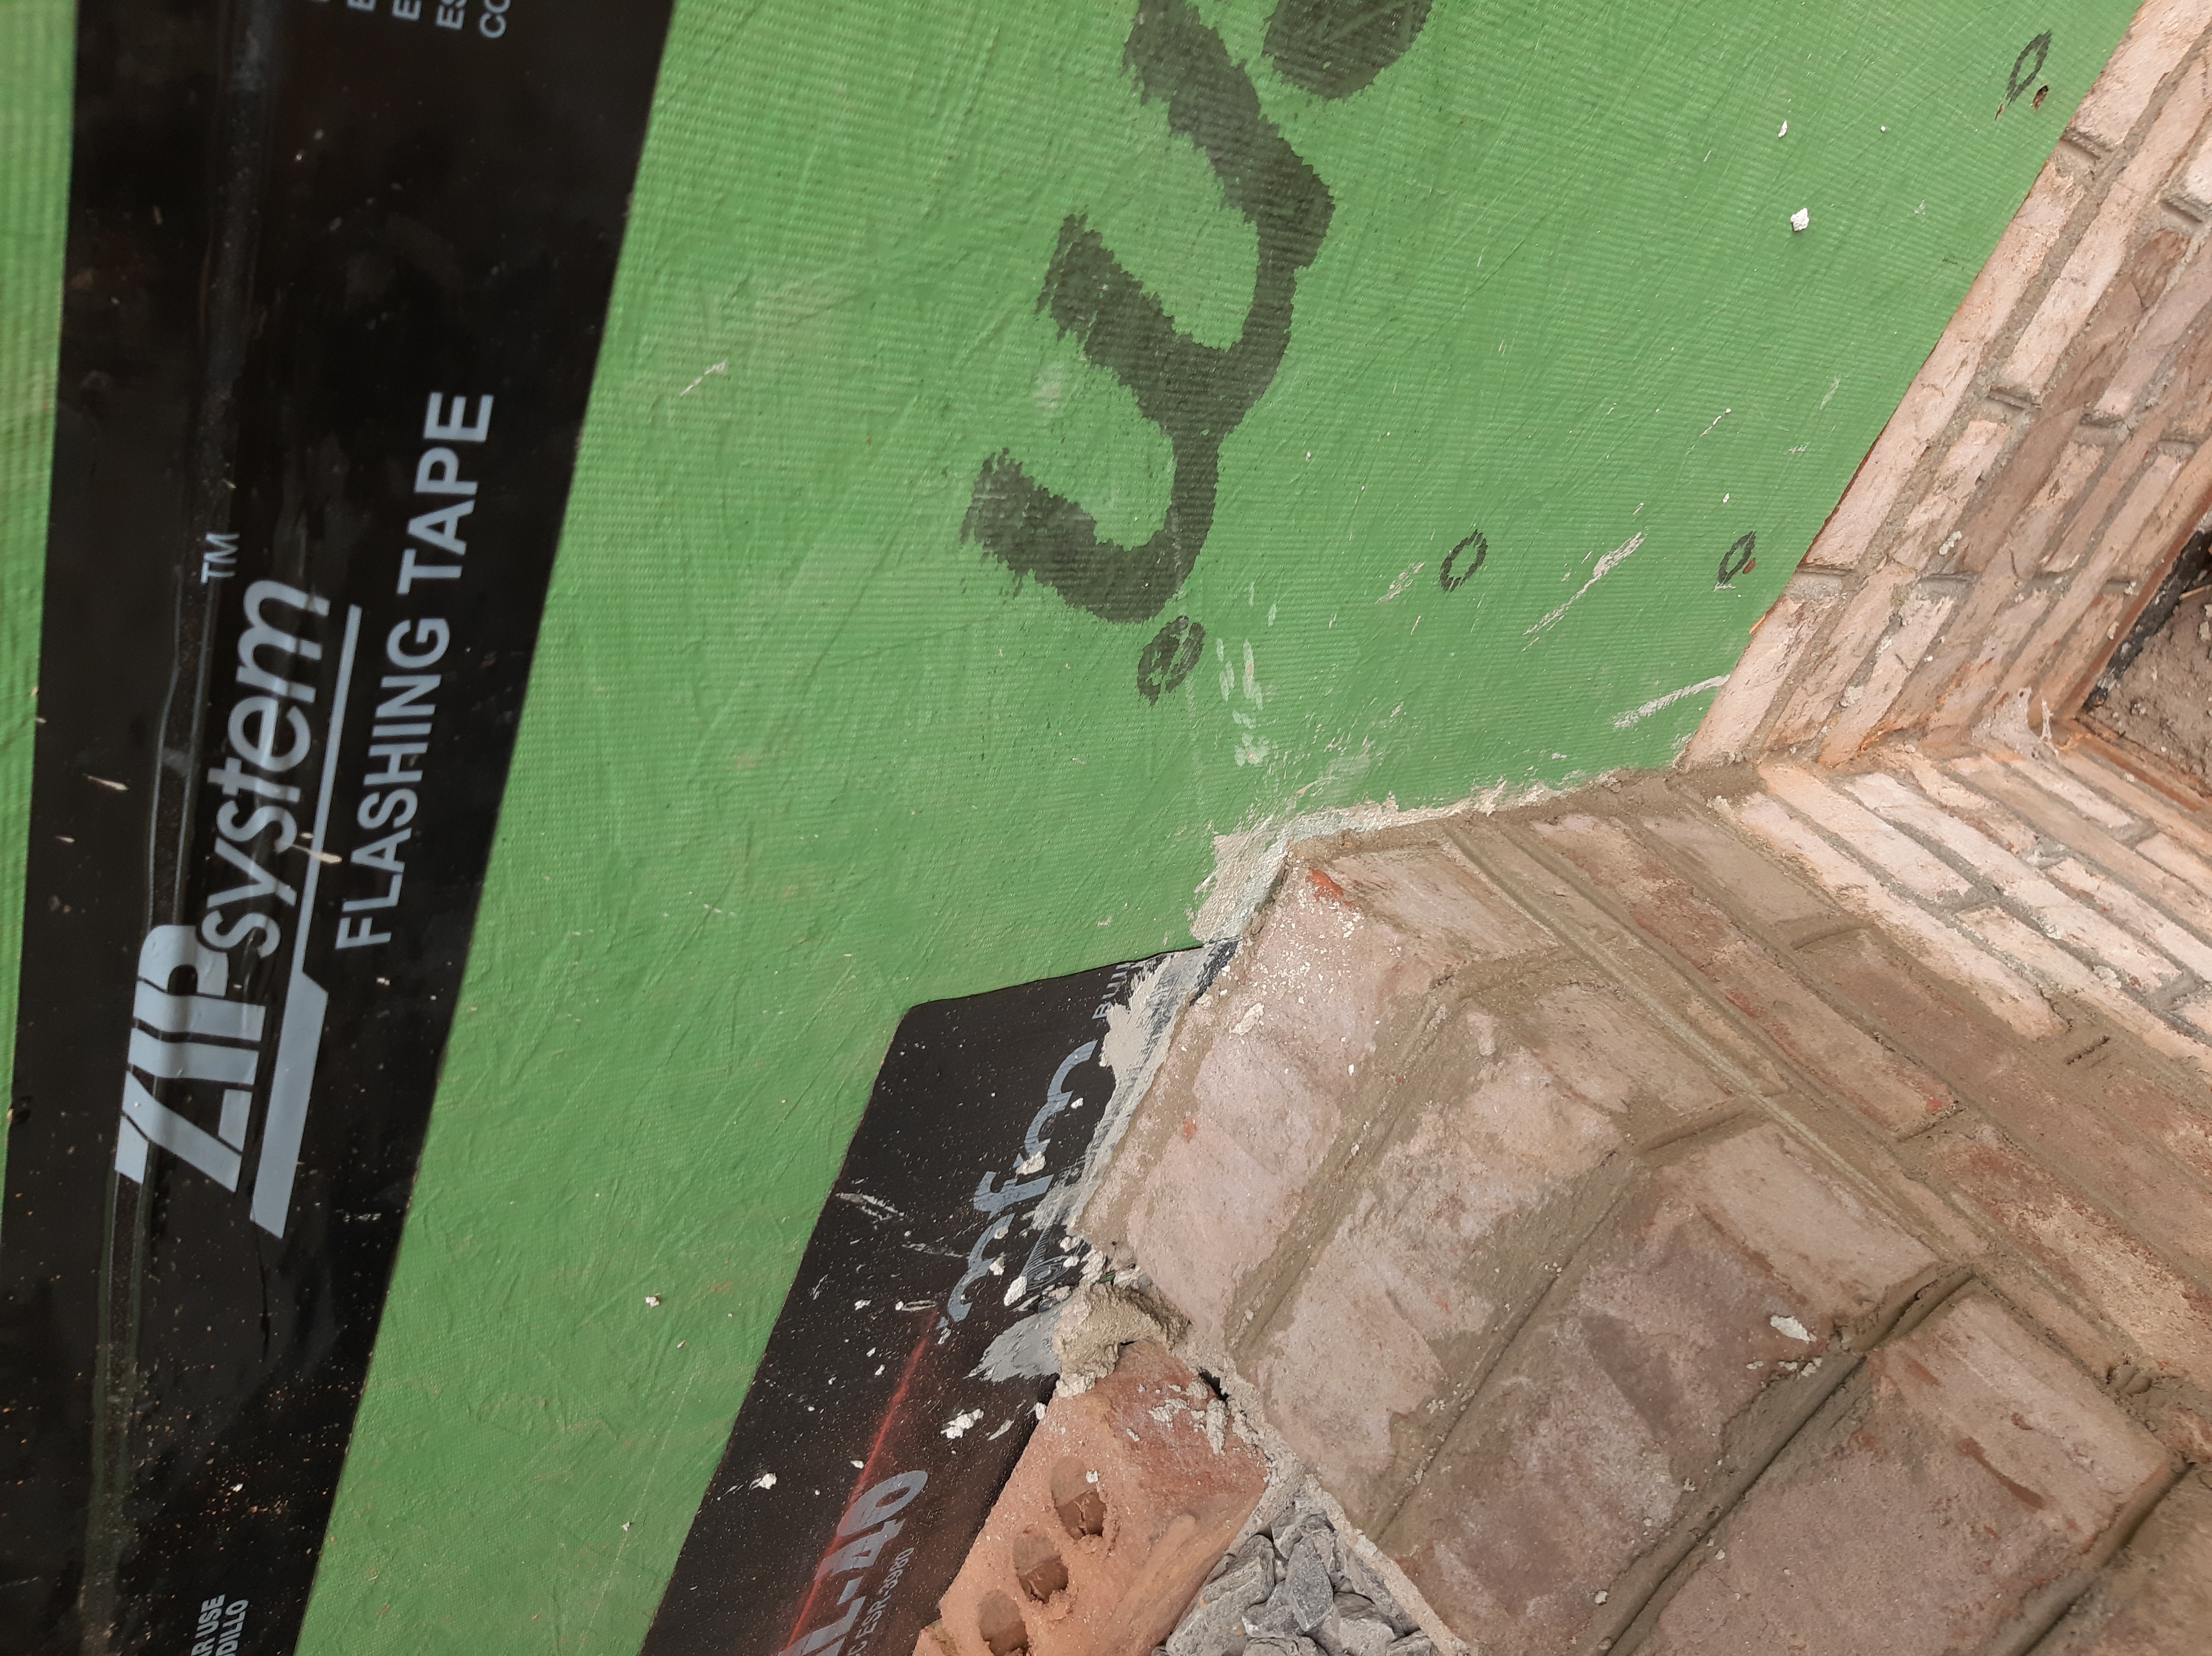
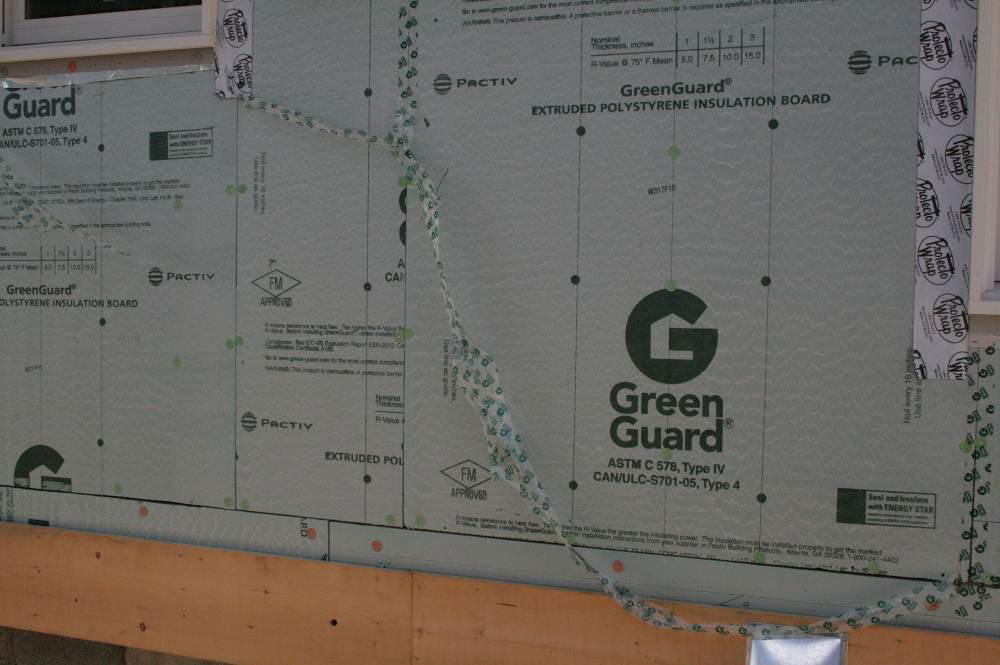
The OSB sheathing is coated and taped at the seams to provide a weather-resistant barrier that can take the place of house wrap.
Image
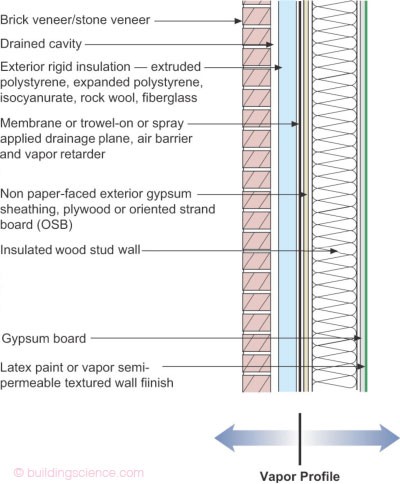
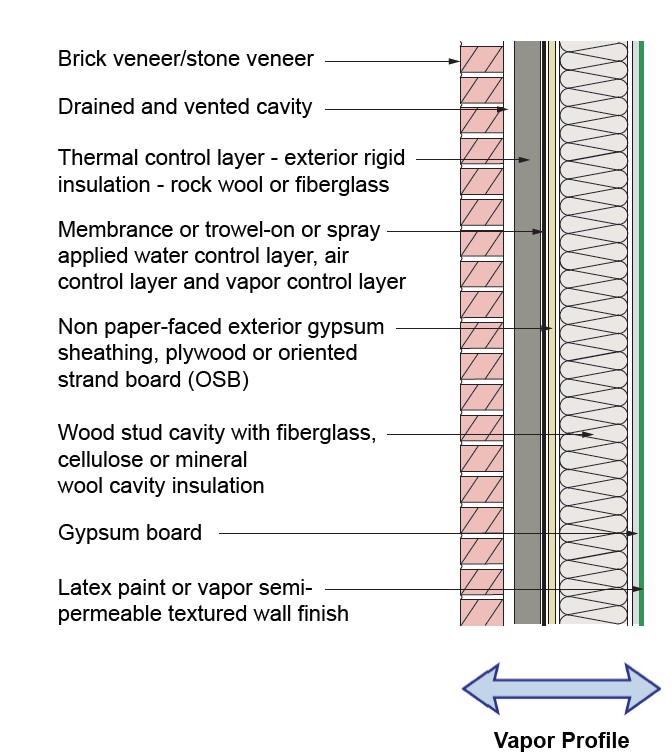
The Perfect Wall includes water, air, thermal, and vapor layers with continuous insulation exterior of the sheathing to reduce the condensation potential in the wall.
Image
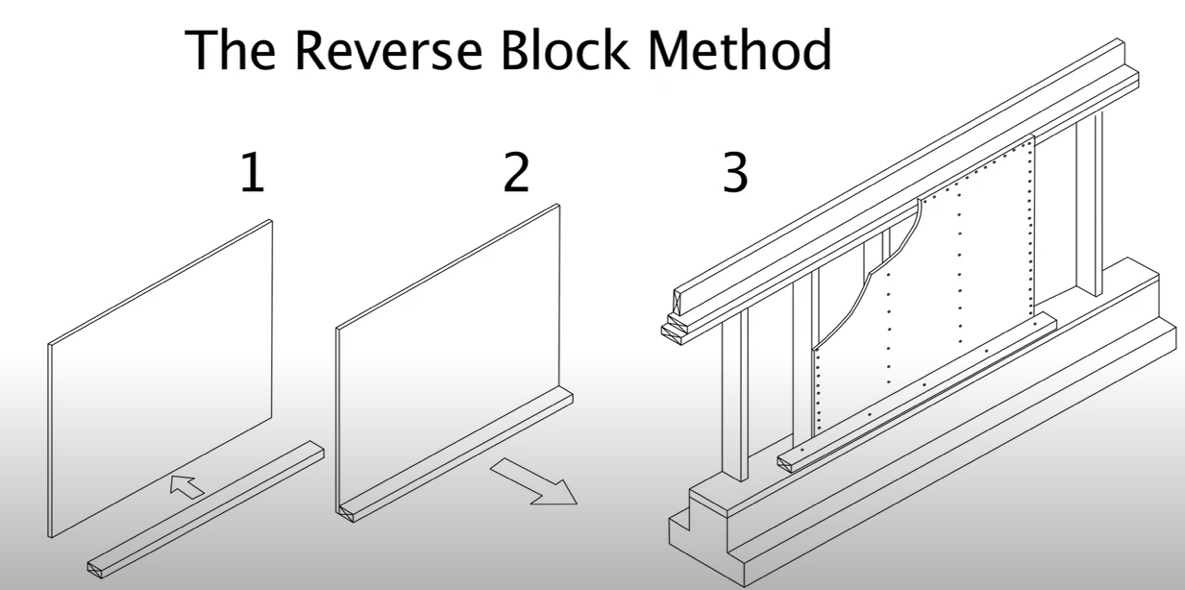
The reverse block method for seismic retrofit bracing of a cripple wall uses a 2x4 attached to the sill plate to provide a means to attach the plywood cripple wall sheathing to the sill plate
Image

The rim band connecting the insulated precast concrete basement walls to the floor joists above is spray foamed to provide air-sealing and insulation in this hard-to-seal juncture.
Image
The rim joists and top plates are air sealed and insulated with open-cell spray foam while the walls are filled with blown fiberglass.
Image
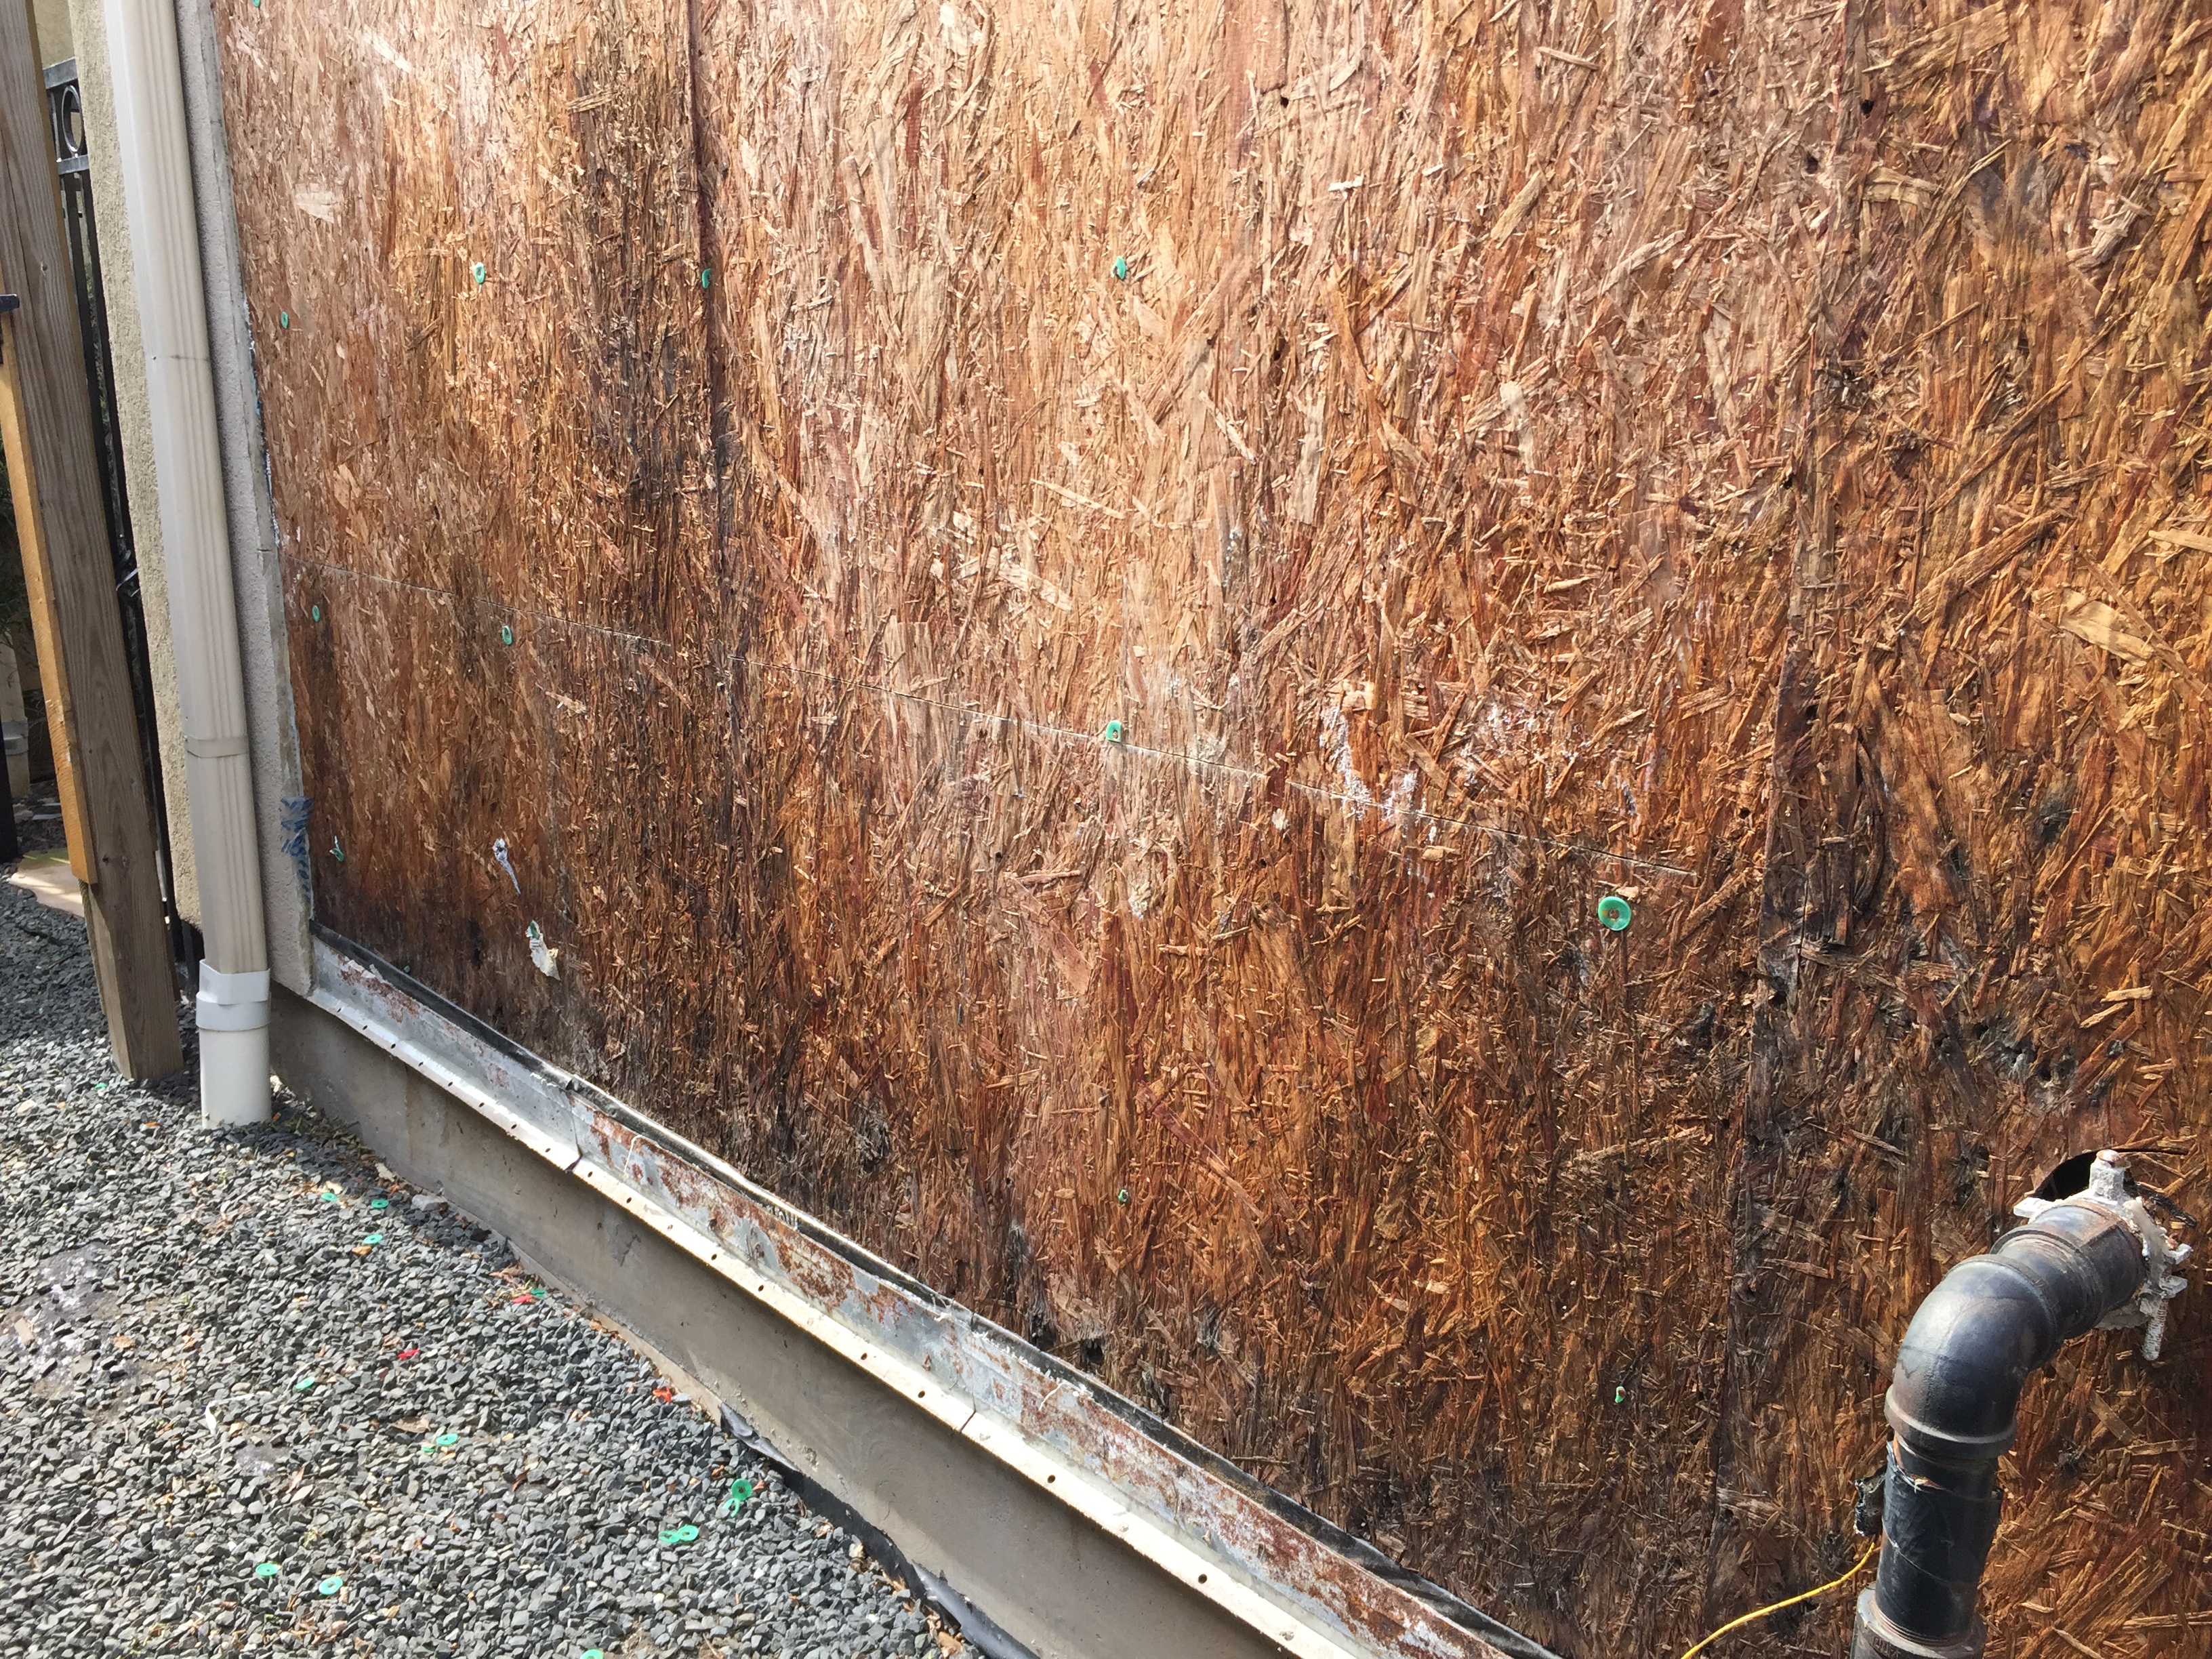
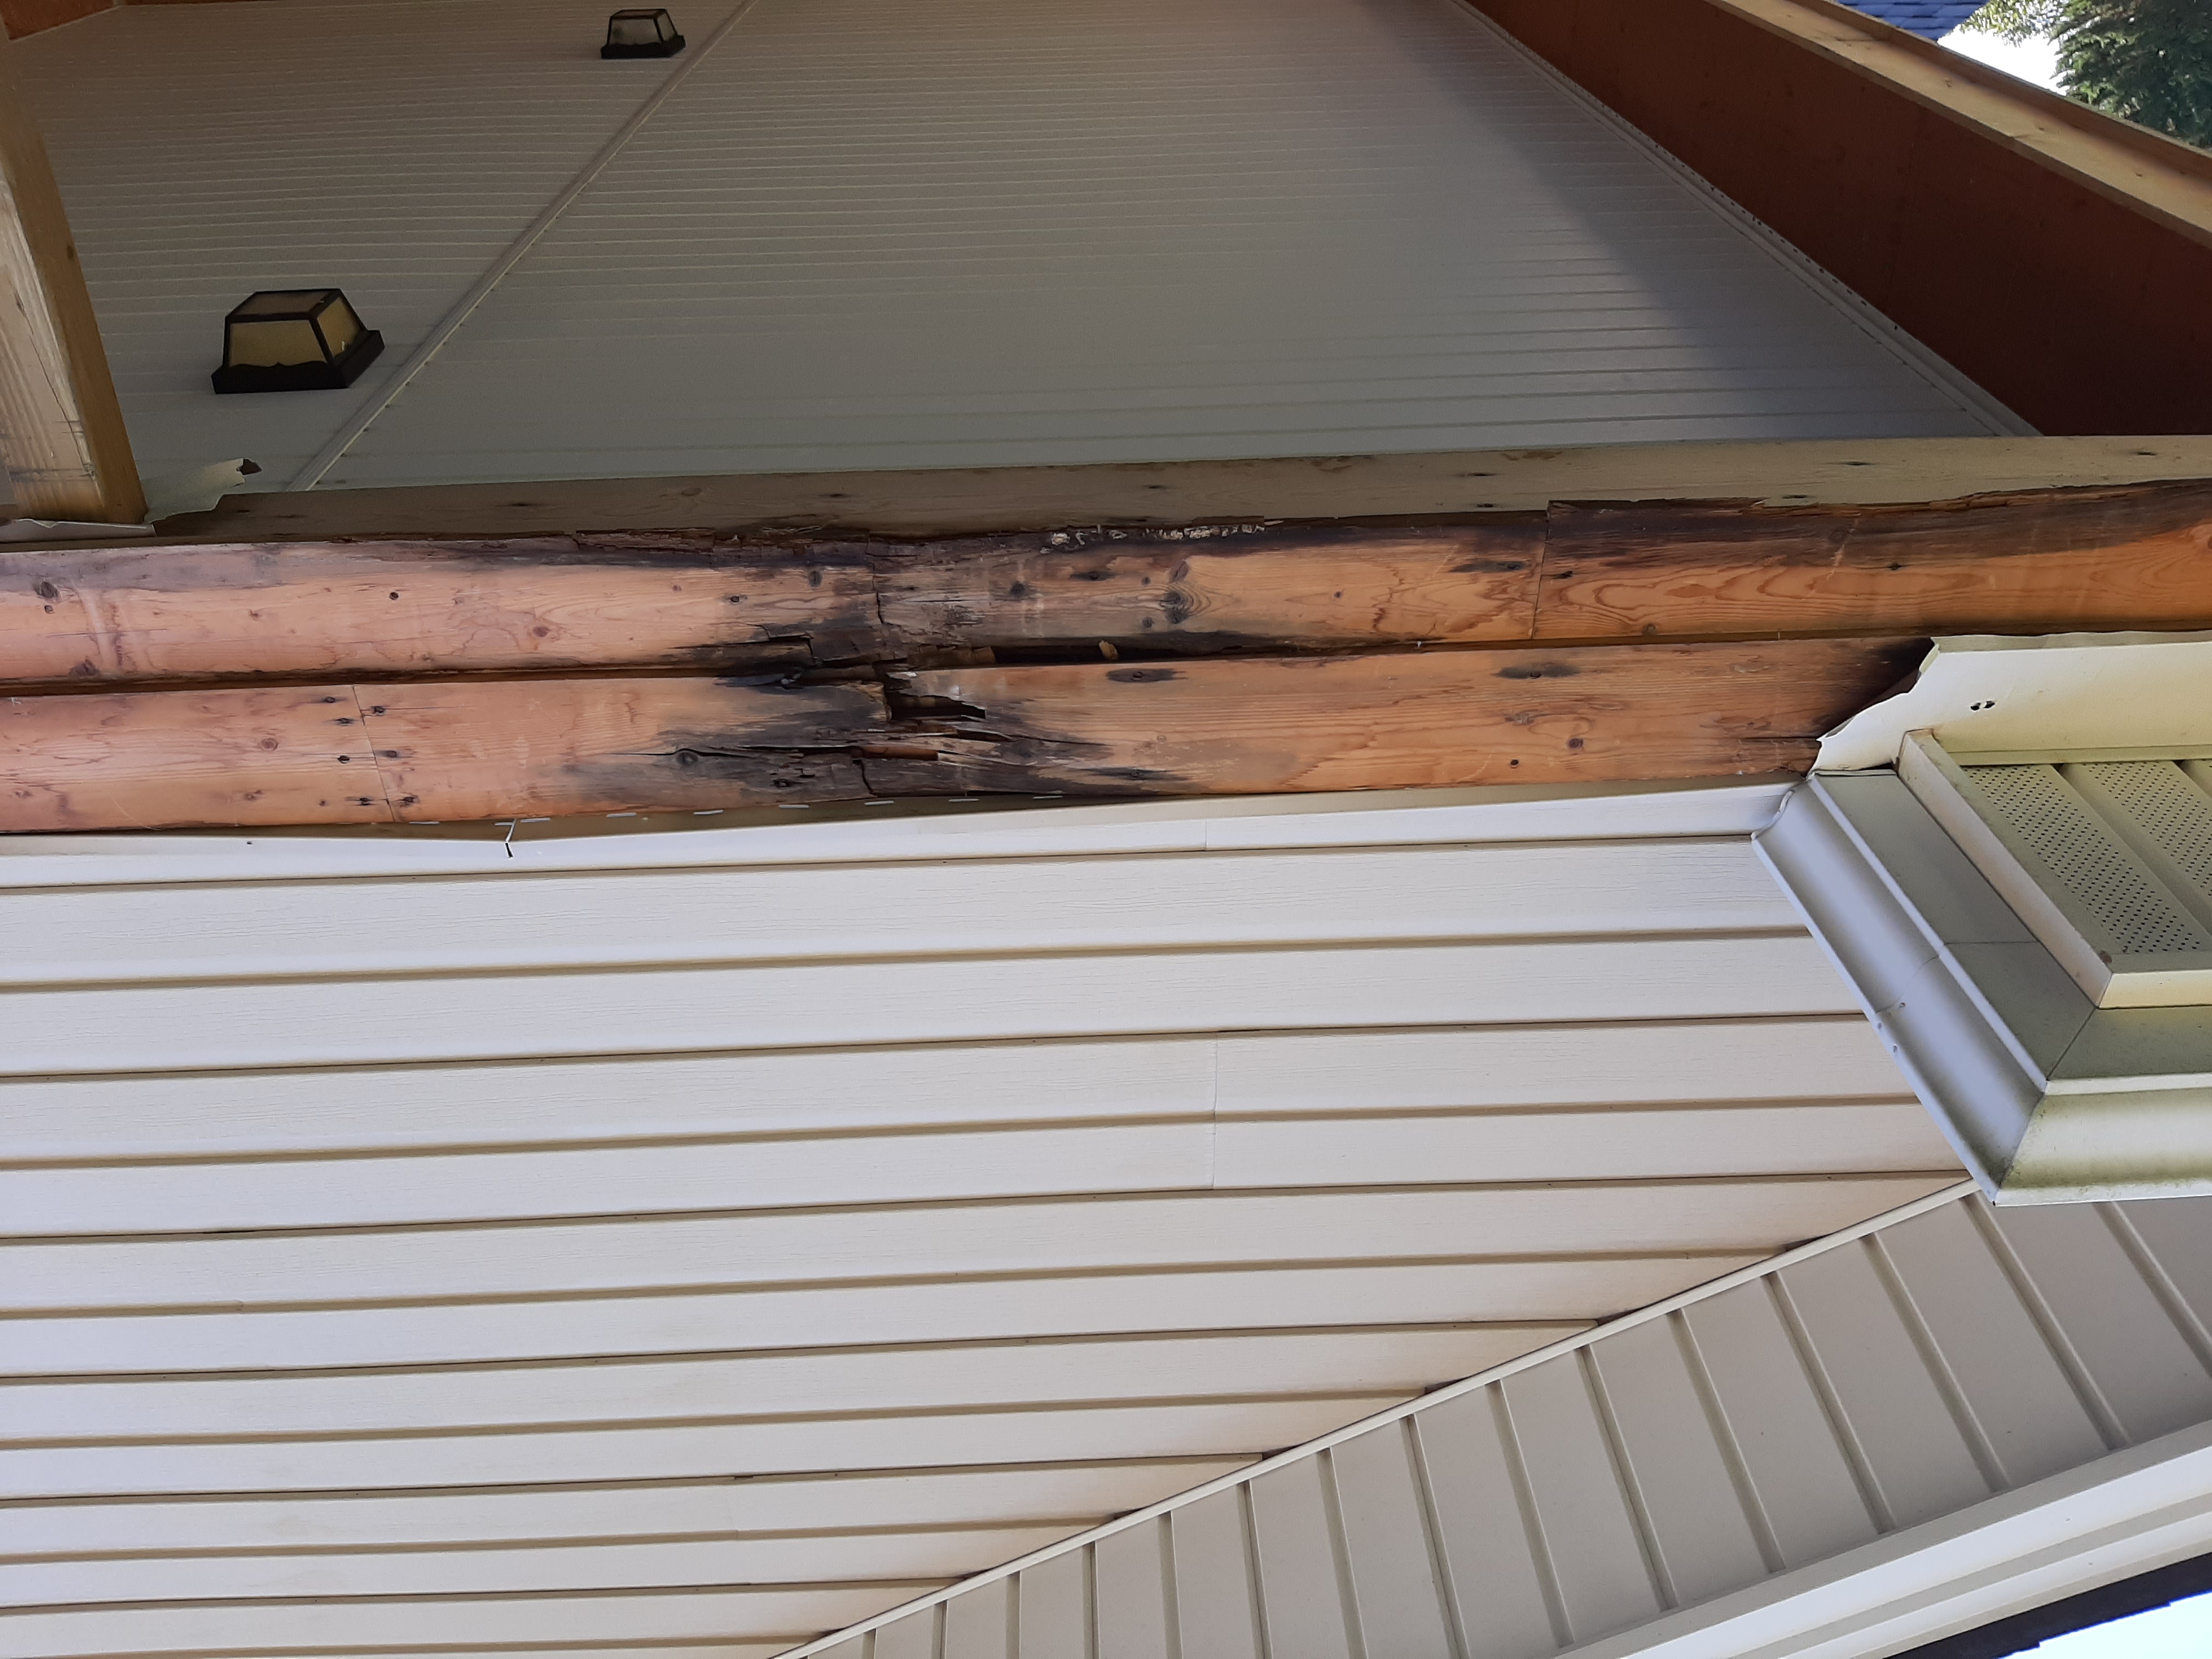
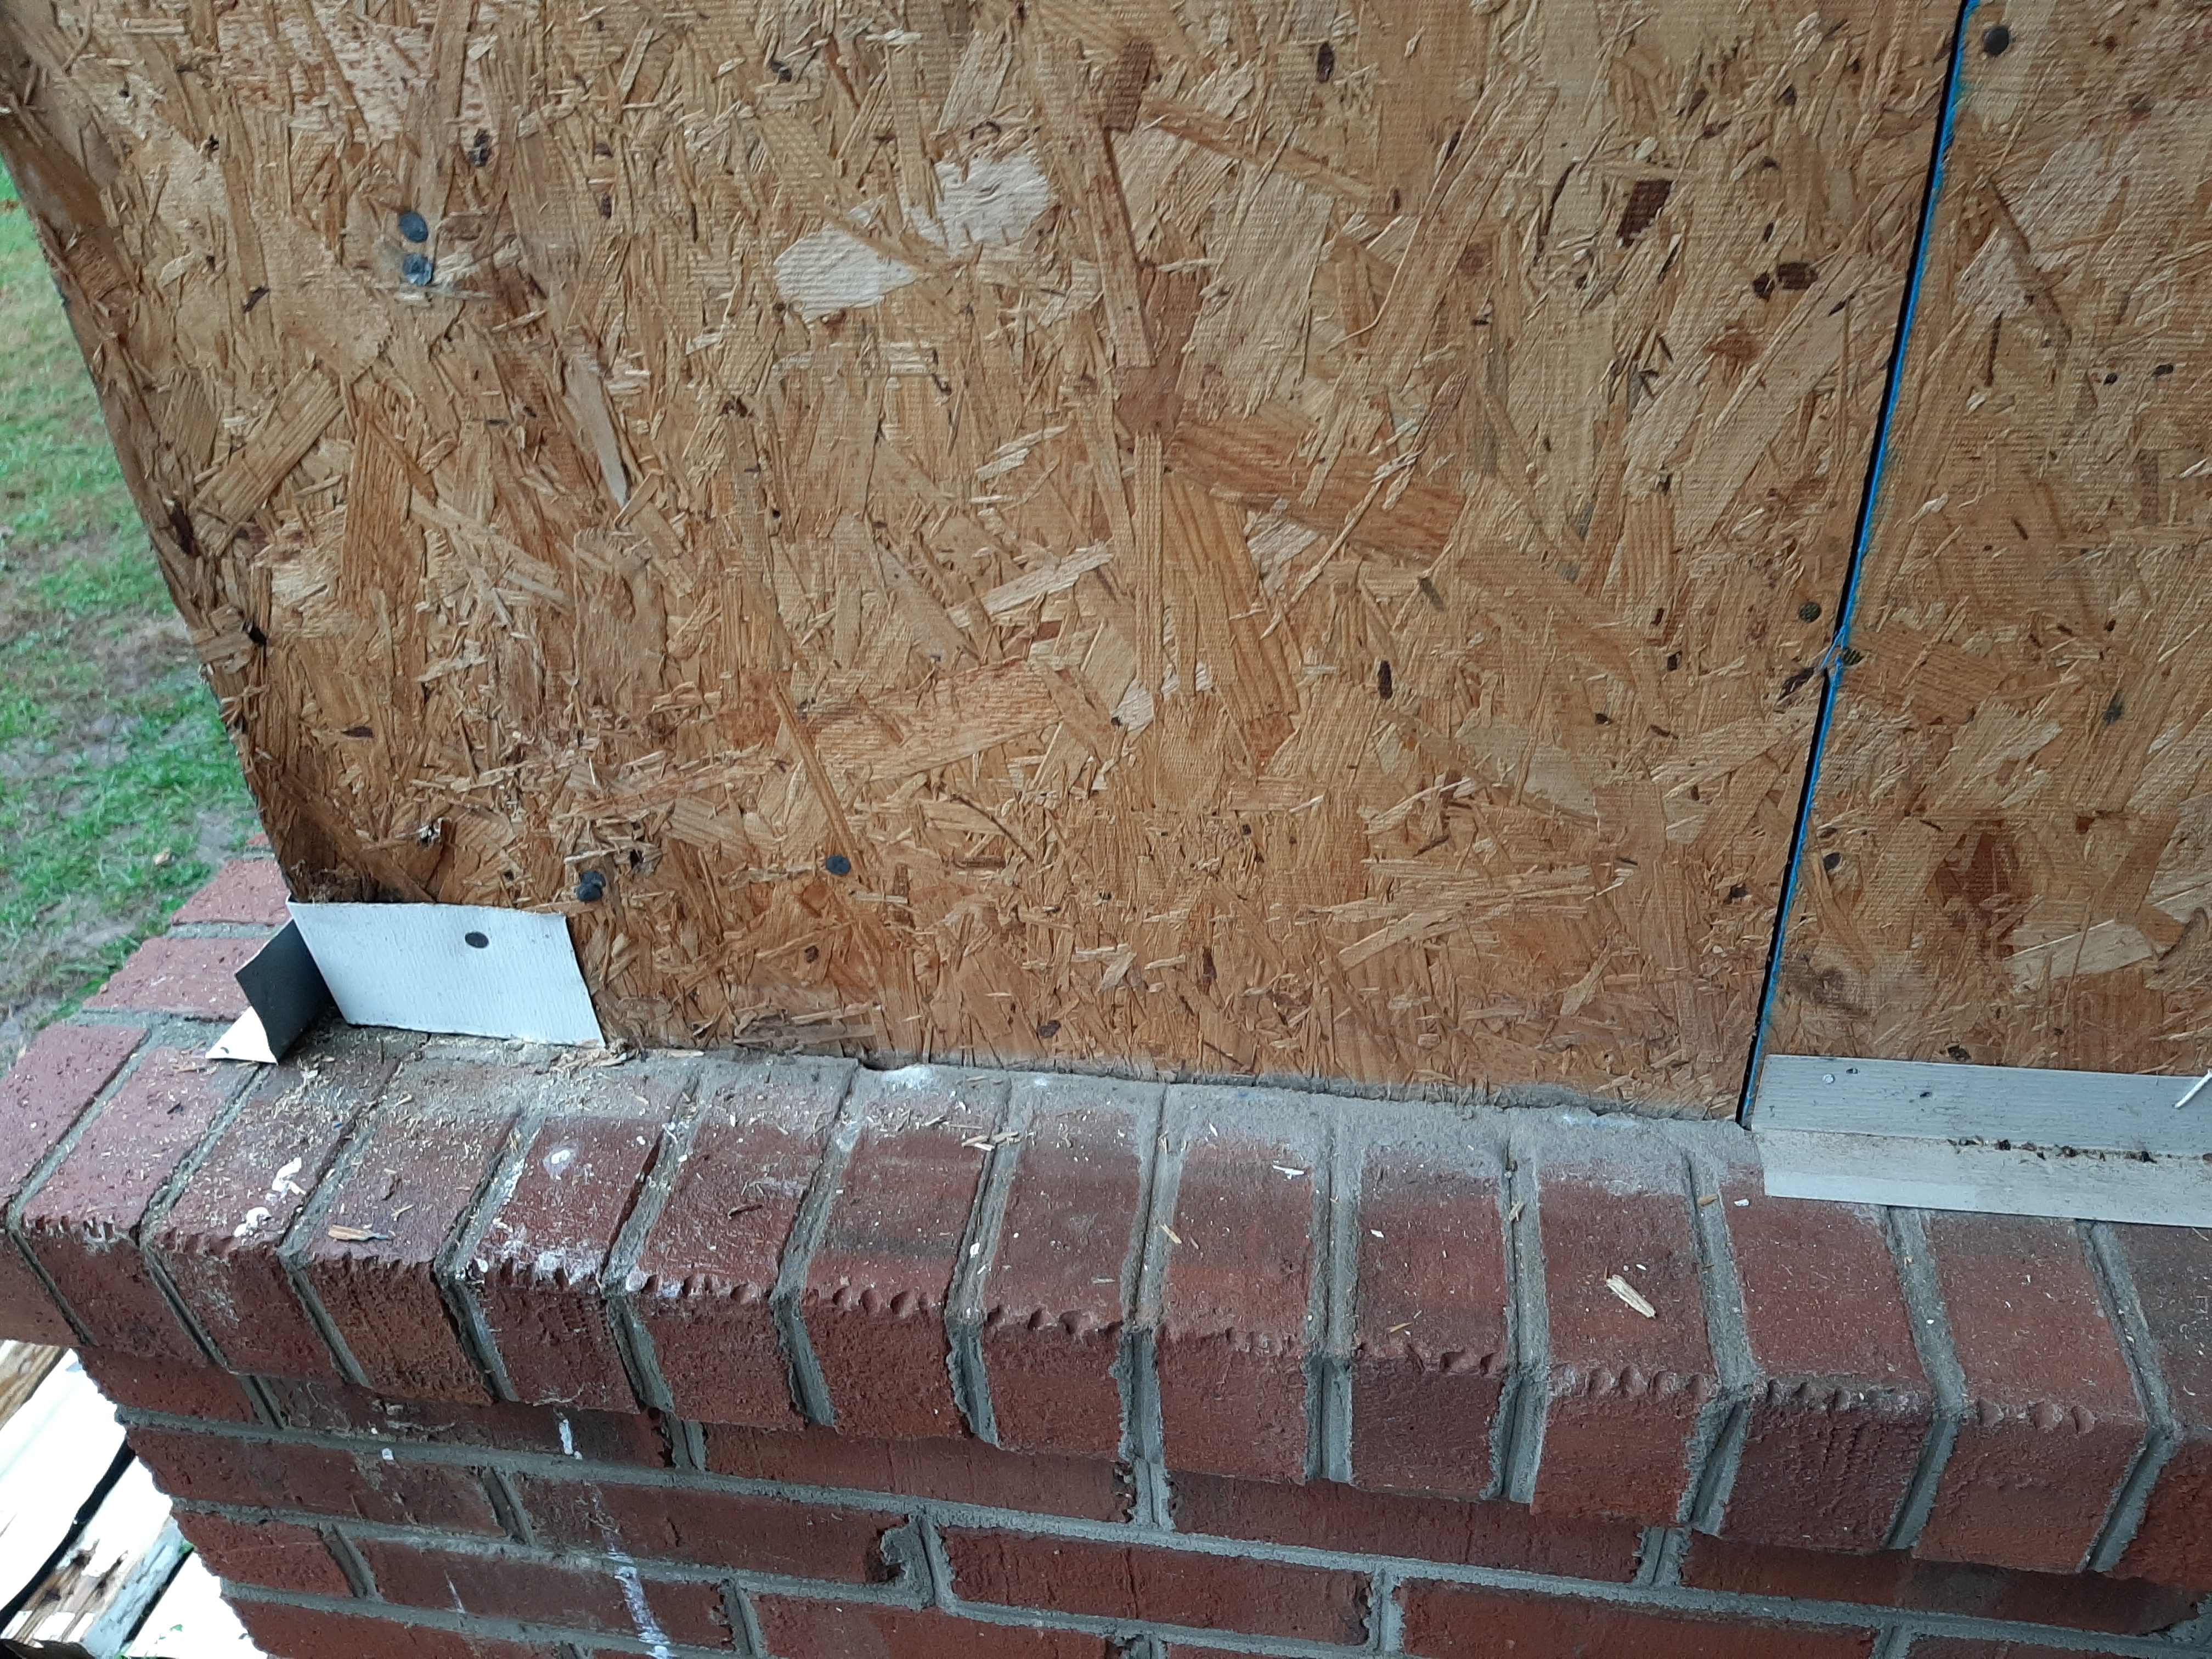
The sheathing has rotted because there was not a sufficient drainage gap behind the stucco cladding
Image
Image
The use of blown-in fiberglass insulation allows the double wall cavity to be filled in completely with no voids that could create cold spots in the walls.
Image
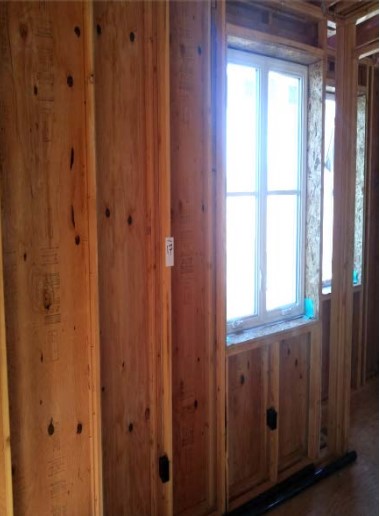
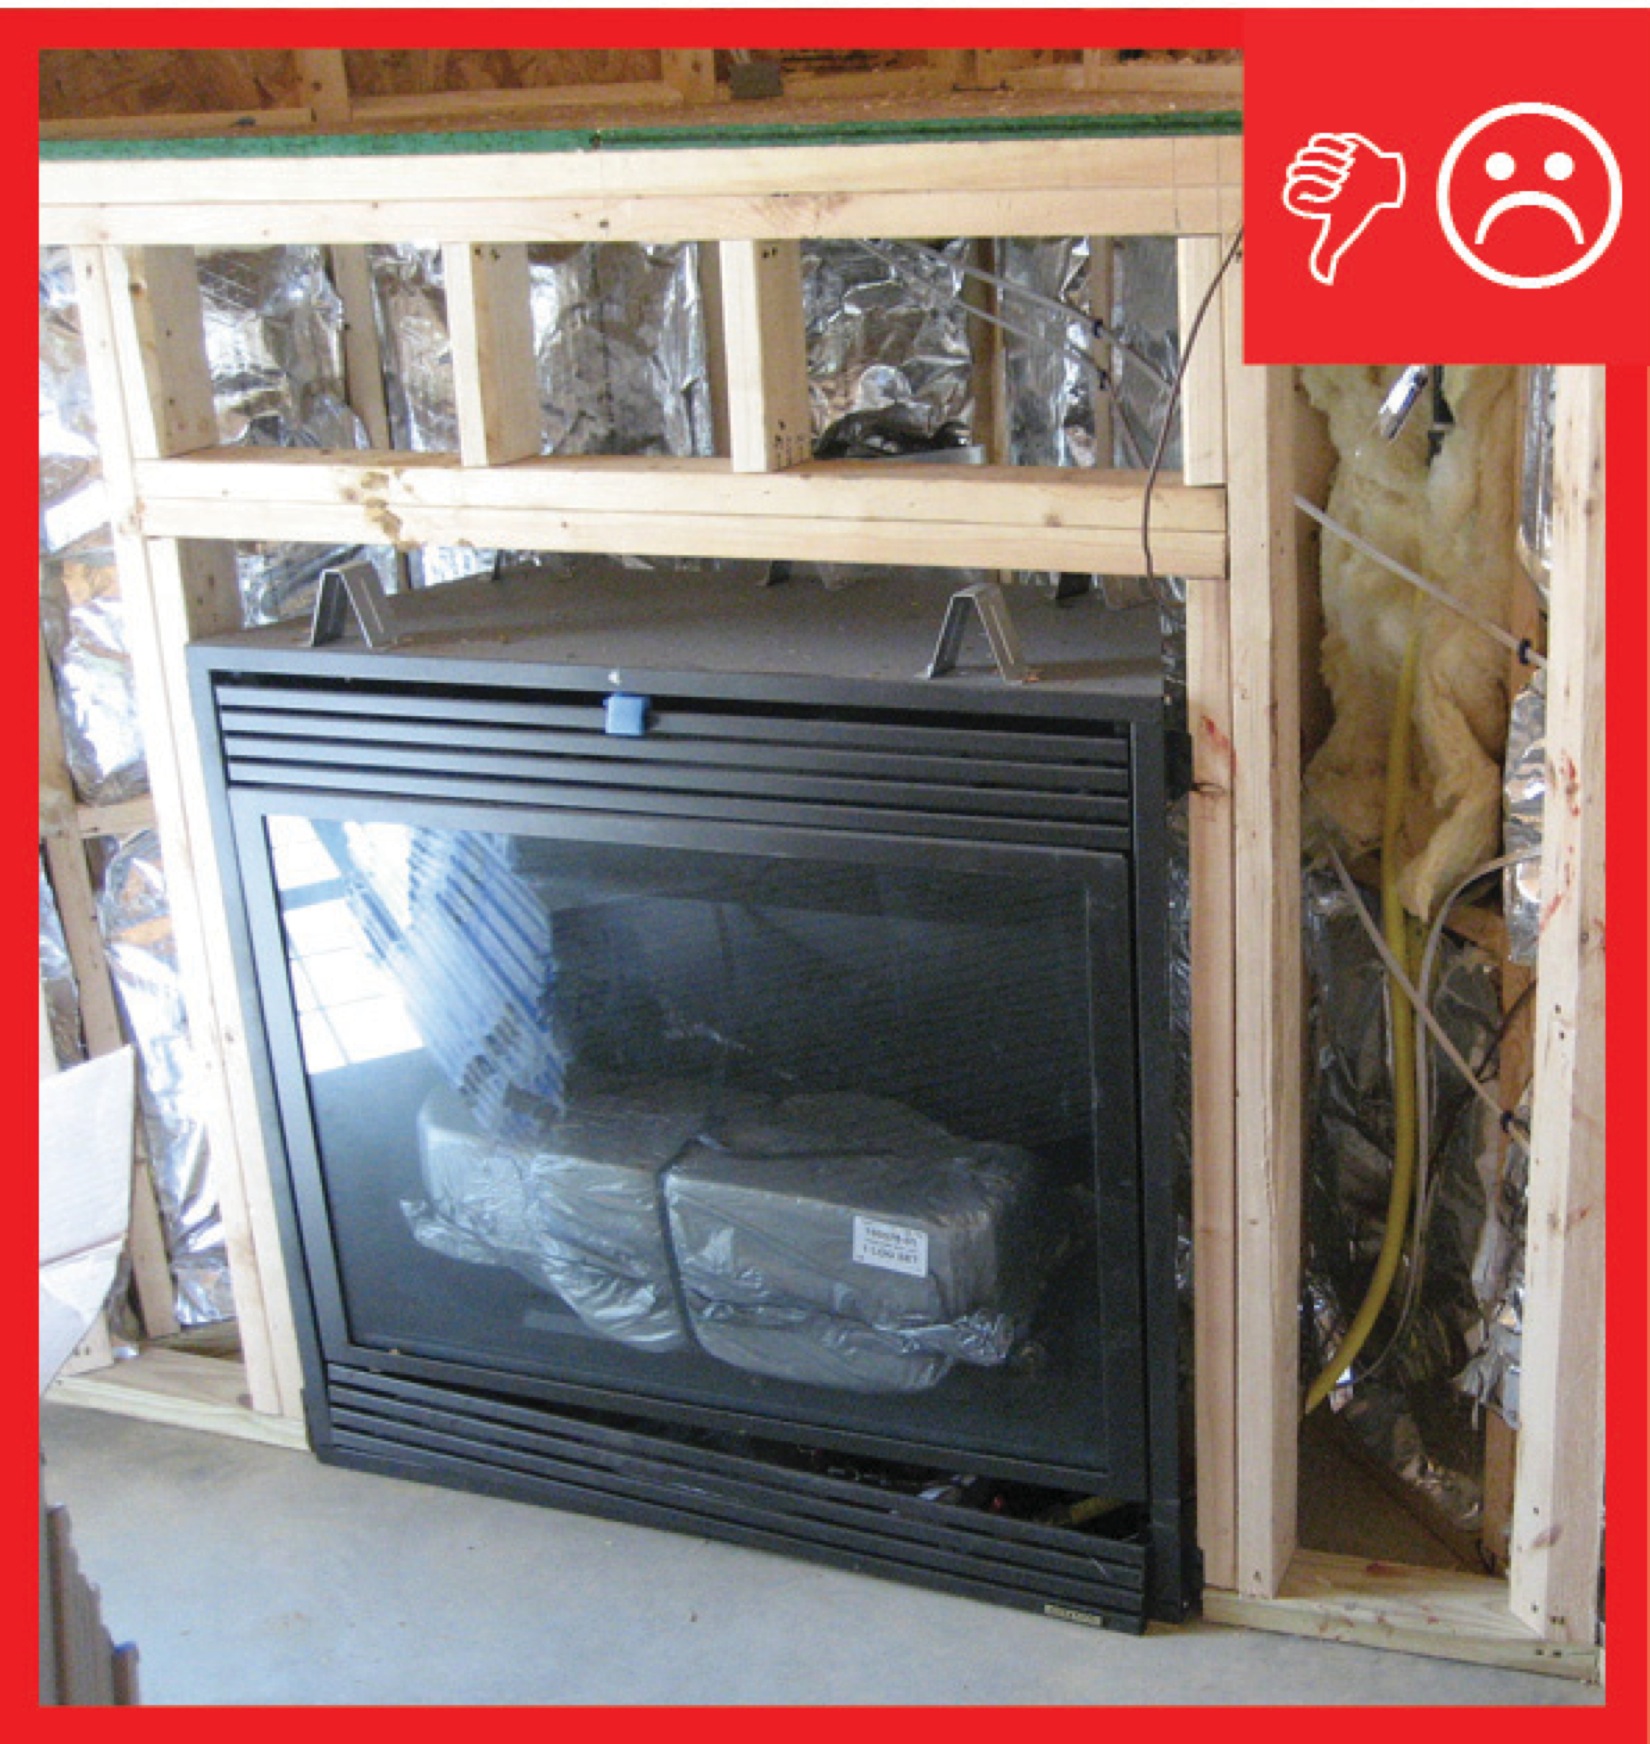
The wall behind the fireplace is an exterior wall and requires a thermal barrier that is continuous with the rest of the wall’s insulation
Image
The wall’s concrete blocks are filled with foam and covered with an interior continuous thermal blanket of rigid foam insulation.
Image
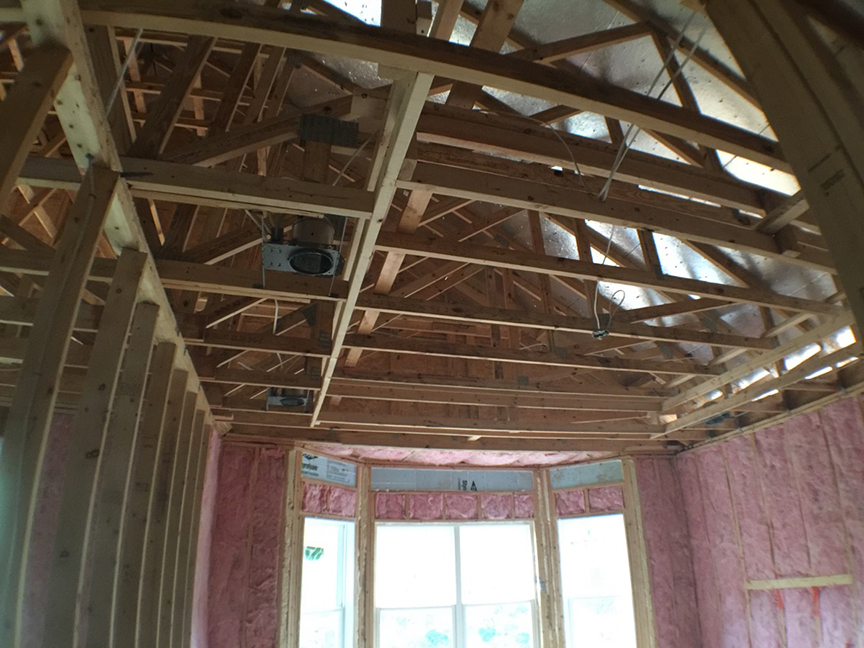
The walls and ceilings of this post-and-beam home are filled with netted blown fiberglass.
Image
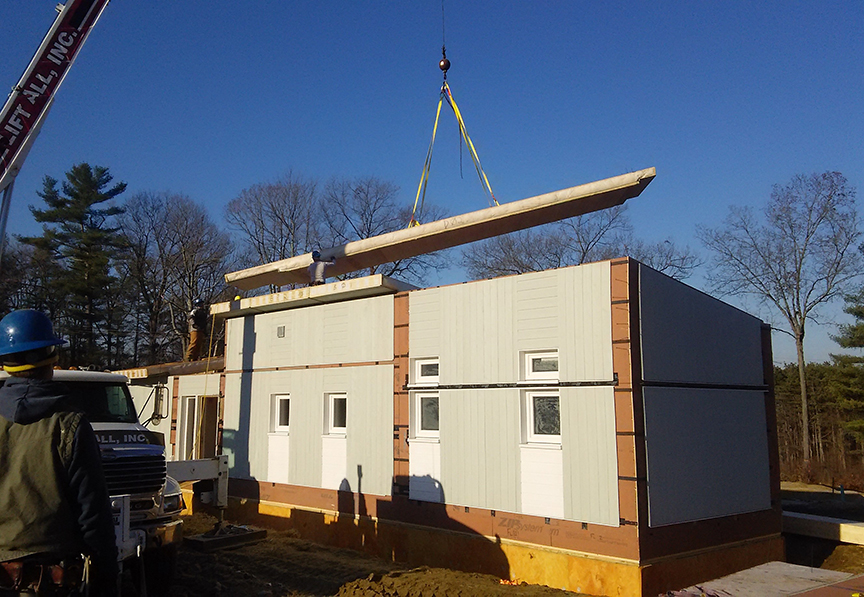
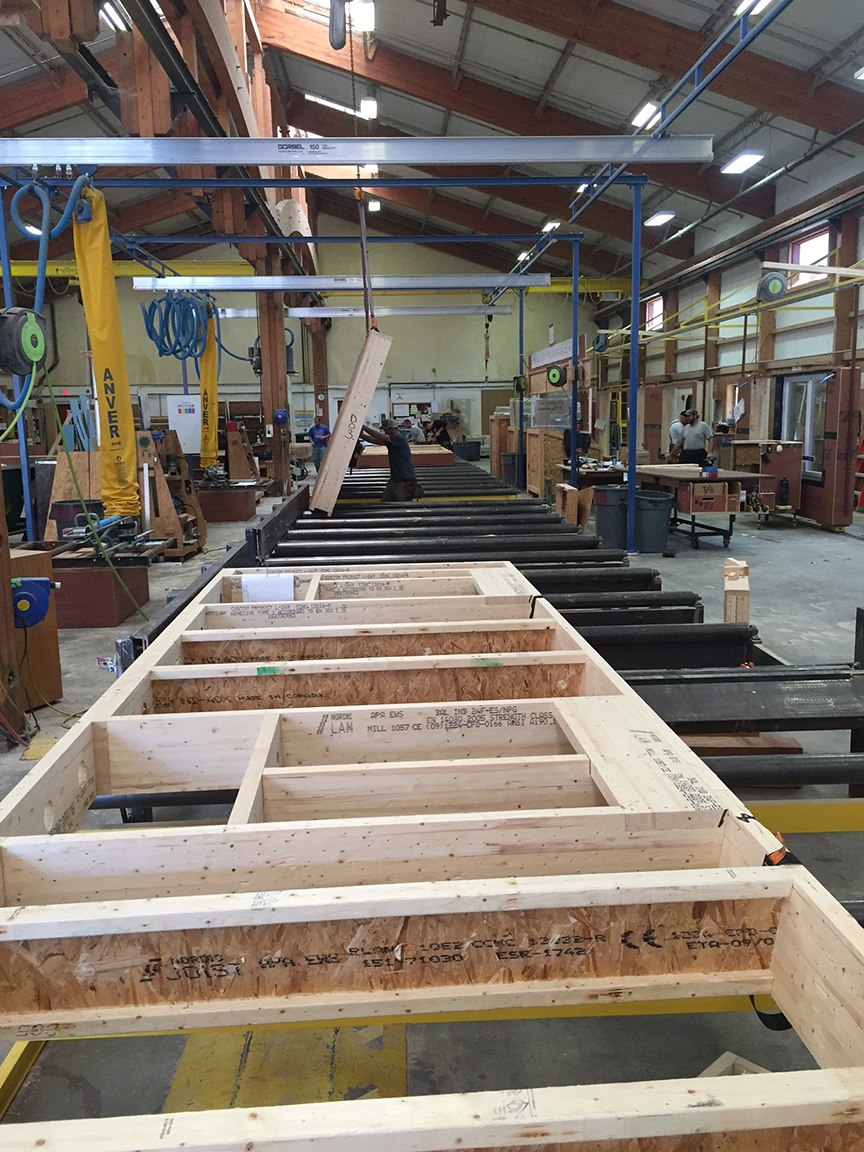
The walls and floors of this modular home were constructed in a factory and are brought to the site already insulated and ready for quick assembly.
Image
Image
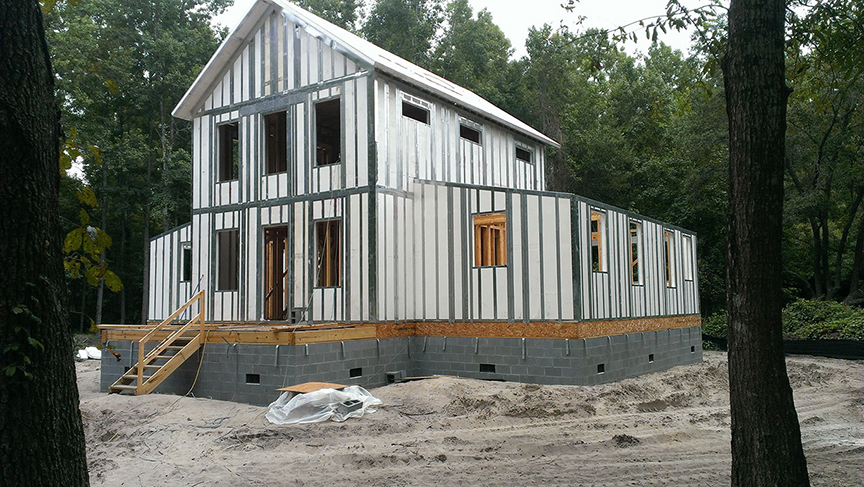
The walls of this mixed-humid location home are constructed with moisture-resistant steel-framed expanded polystyrene R-34 wall panels that are designed to withstand winds up to 200 mph and level D seismic forces.
Image

Image

The water-resistant barrier, weep screed, and stucco lathe are not properly layered
Image
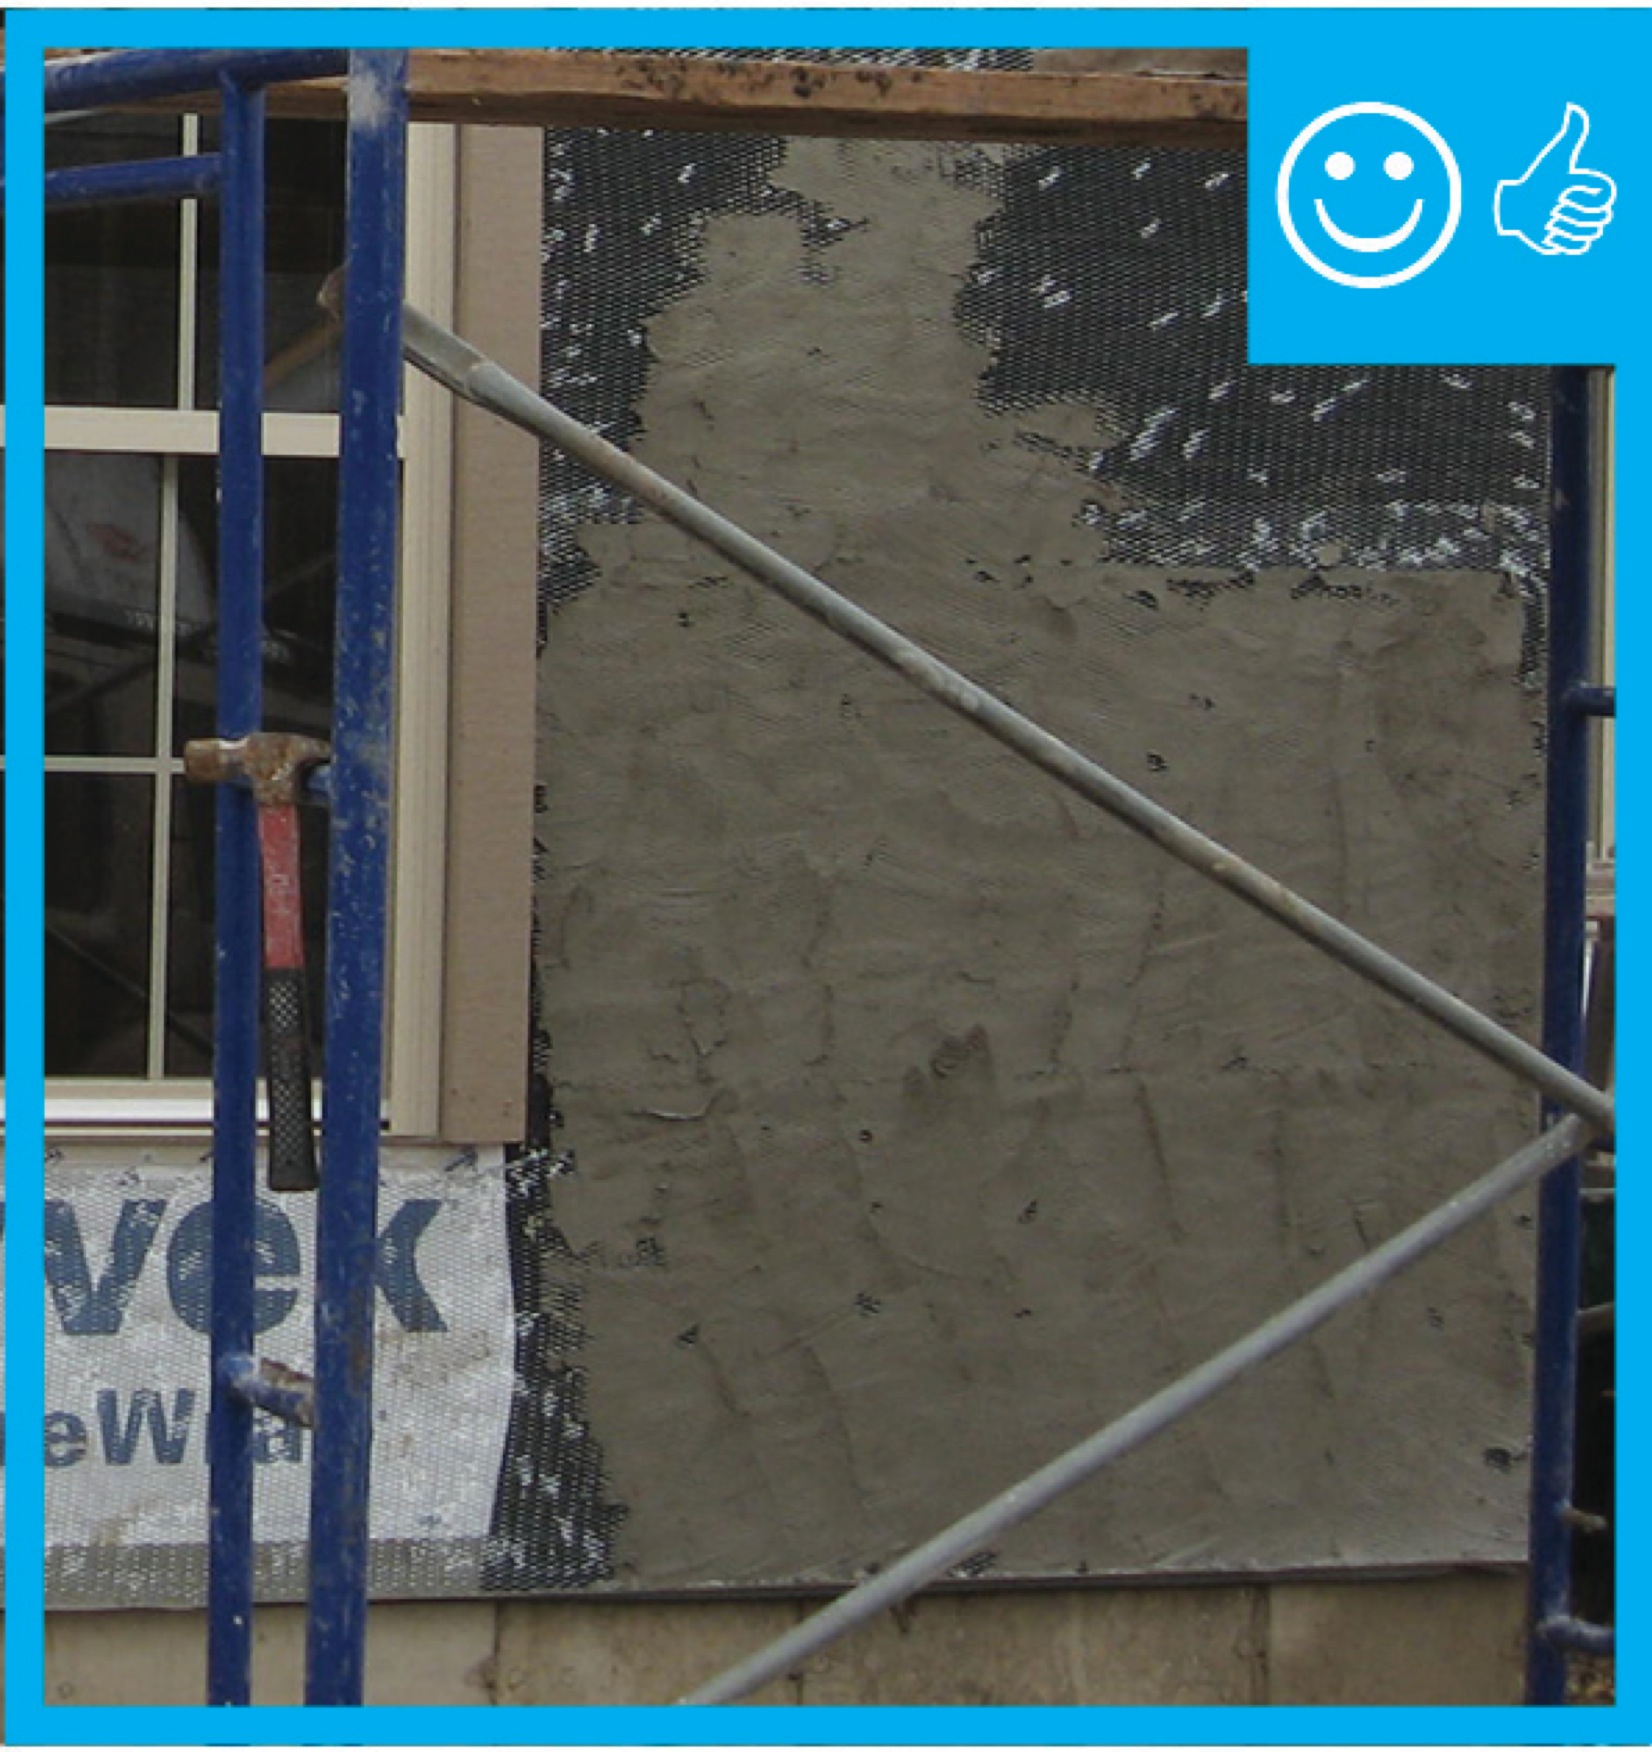
The water-resistant barrier, weep screed, and stucco lathe are properly layered and will create a complete drainage system
Image
Image
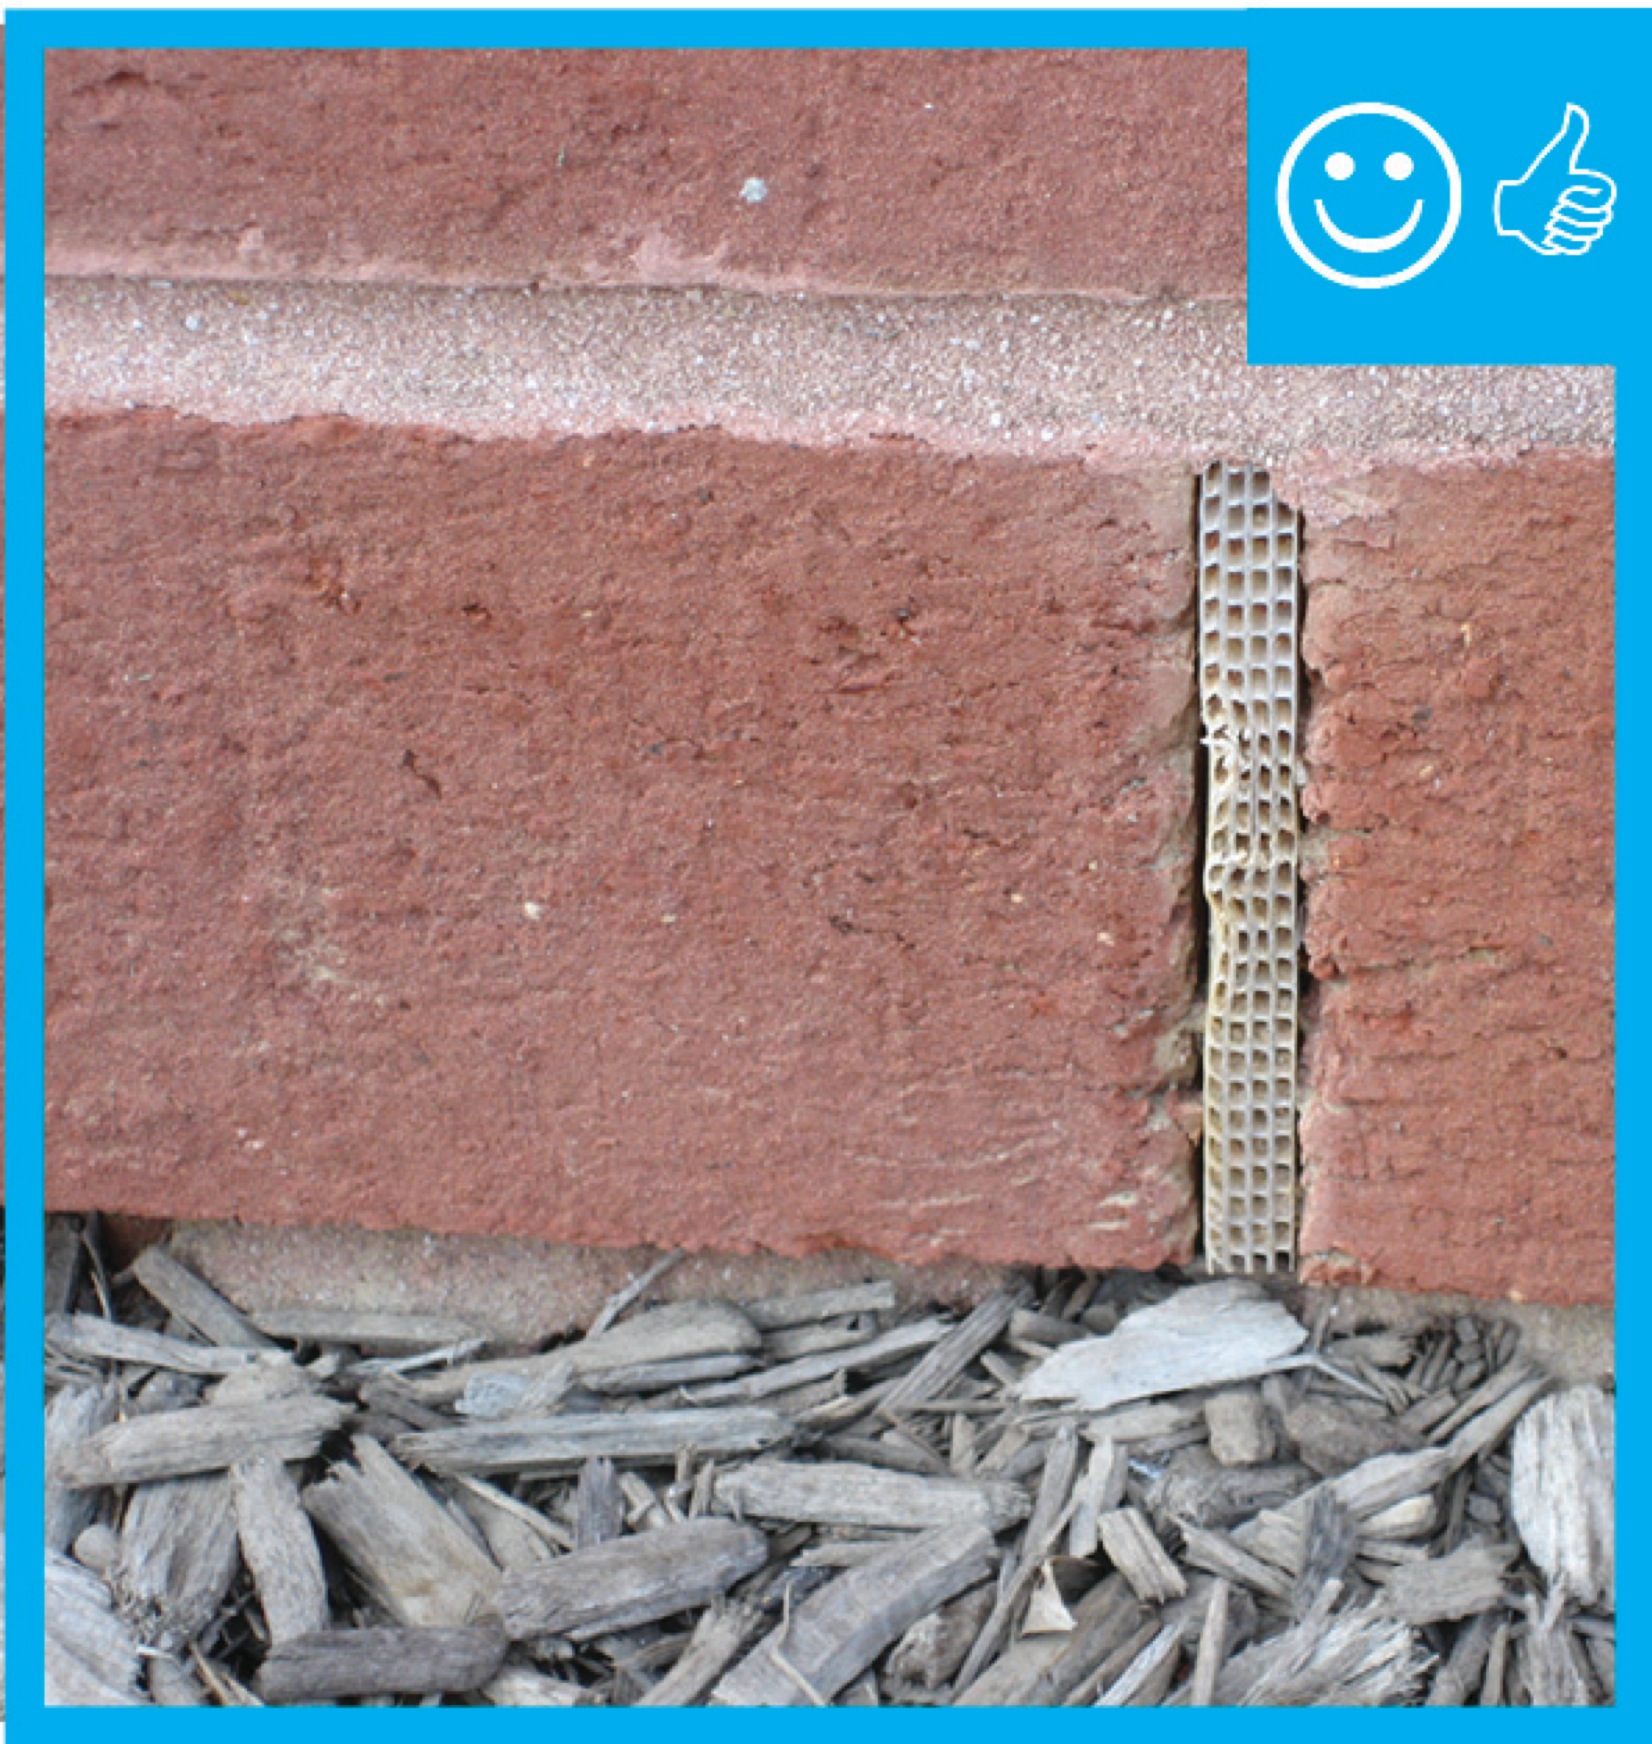
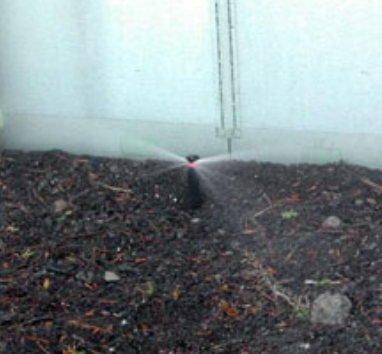
The weep holes are spaced at the correct distance to provide a complete drainage system
Image

Image
Image

Image
Image
Image
Image
Image
Thermal bridging is eliminated at the rim joist with the use of joist ledgers that are anchored in the wall
Image
These factory-built walls consist of 9.5-inch I-studs sheathed with coated OSB, faced with OSB, and dense-packed with cellulose; a second interior surface of drywall is added to provide a 1.5-inch cavity for electrical wiring.
Image
These walls are made of autoclaved aerated concrete blocks that are lightweight, easy to cut, bug-resistant, moisture-resistant, fire-resistant and steel-reinforced to form structurally solid, air-tight, thermally resistant walls.
Image

This 2x6 wall is advanced framed and filled with dense-packed cellulose insulation.
Image

This basement is insulated on the exterior with rigid foam over dampproofing, with granular backfill and footing drains to facilitate drainage away from the foundation, a termite shield to protect from pests, and cellular PVC to protect the rigid foam.
Image
This building has a south facing Trombe wall to take advantage of passive solar heating.
Image
This close-up of an exterior wall retrofit of a masonry brick home shows the fluid-applied water and air control layer (white), 2x4 furring strips and two layers of rigid foam insulation (pink), then 1x4 furring which provides a ventilation gap
Image
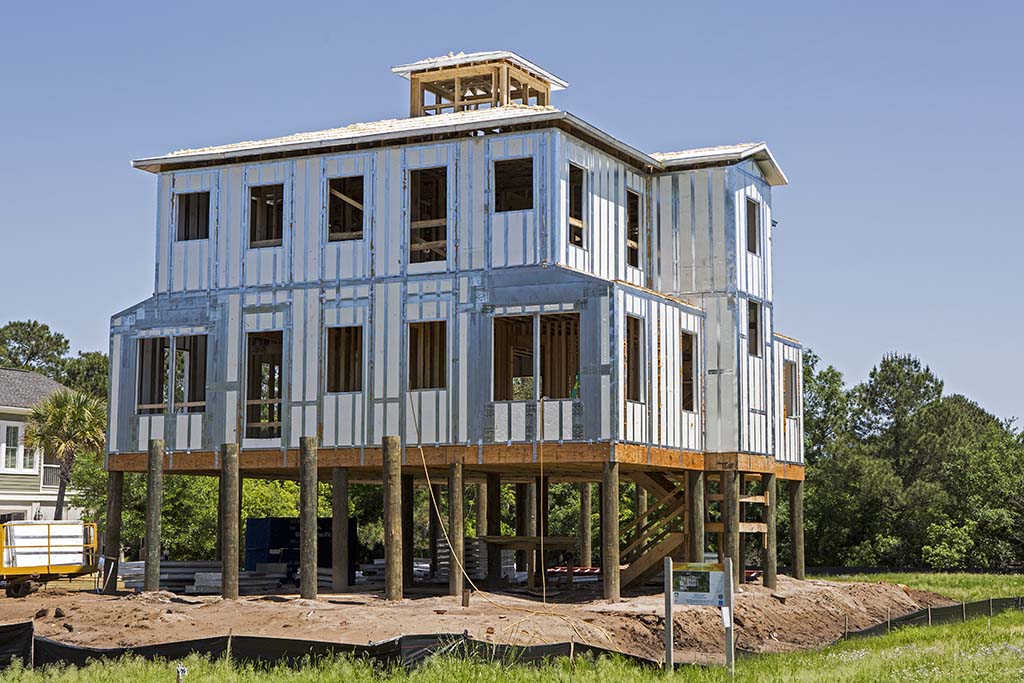
This coastal home was built on a flood-resistant pier foundation using hurricane- and moisture-resistant expanded polystyrene and steel wall panels and hurricane strapping.
Image
This community of production homes in central New York state was built with insulated concrete forms (ICFs), which provide a highly insulated, airtight structure that is fire-, pest-, wind-, and earthquake-resistant.
Image
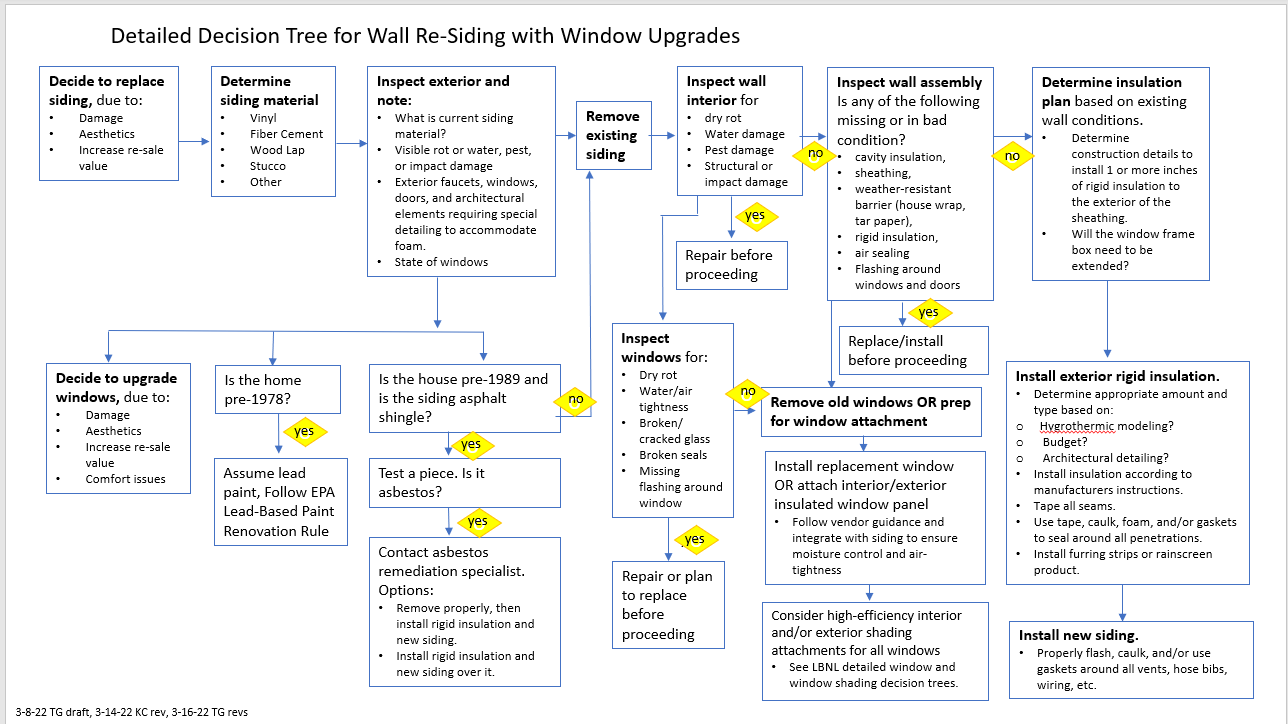
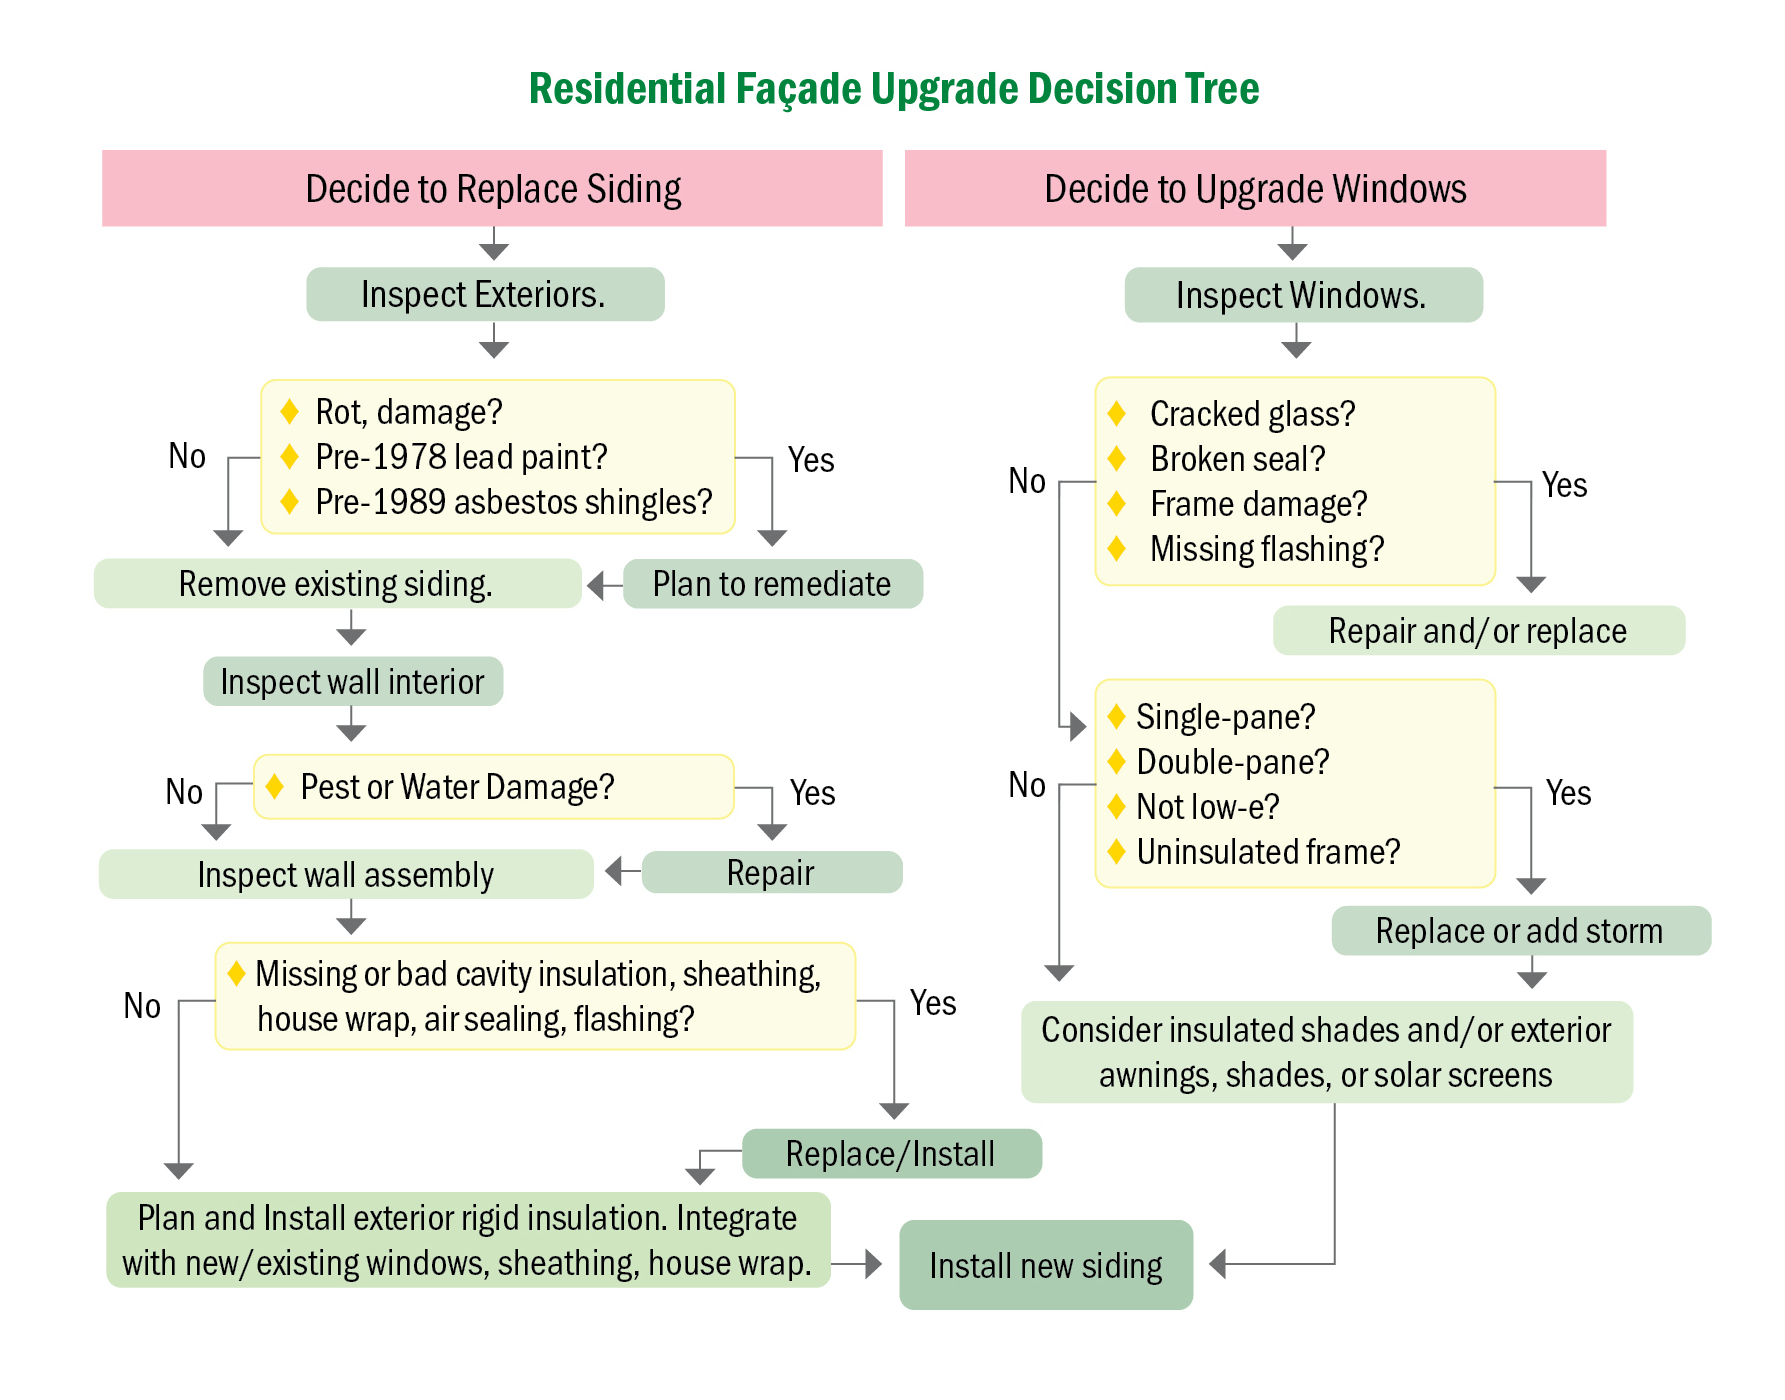
This detailed decision tree can help homeowners and contractors make decisions about re-siding a home and upgrading windows
Image
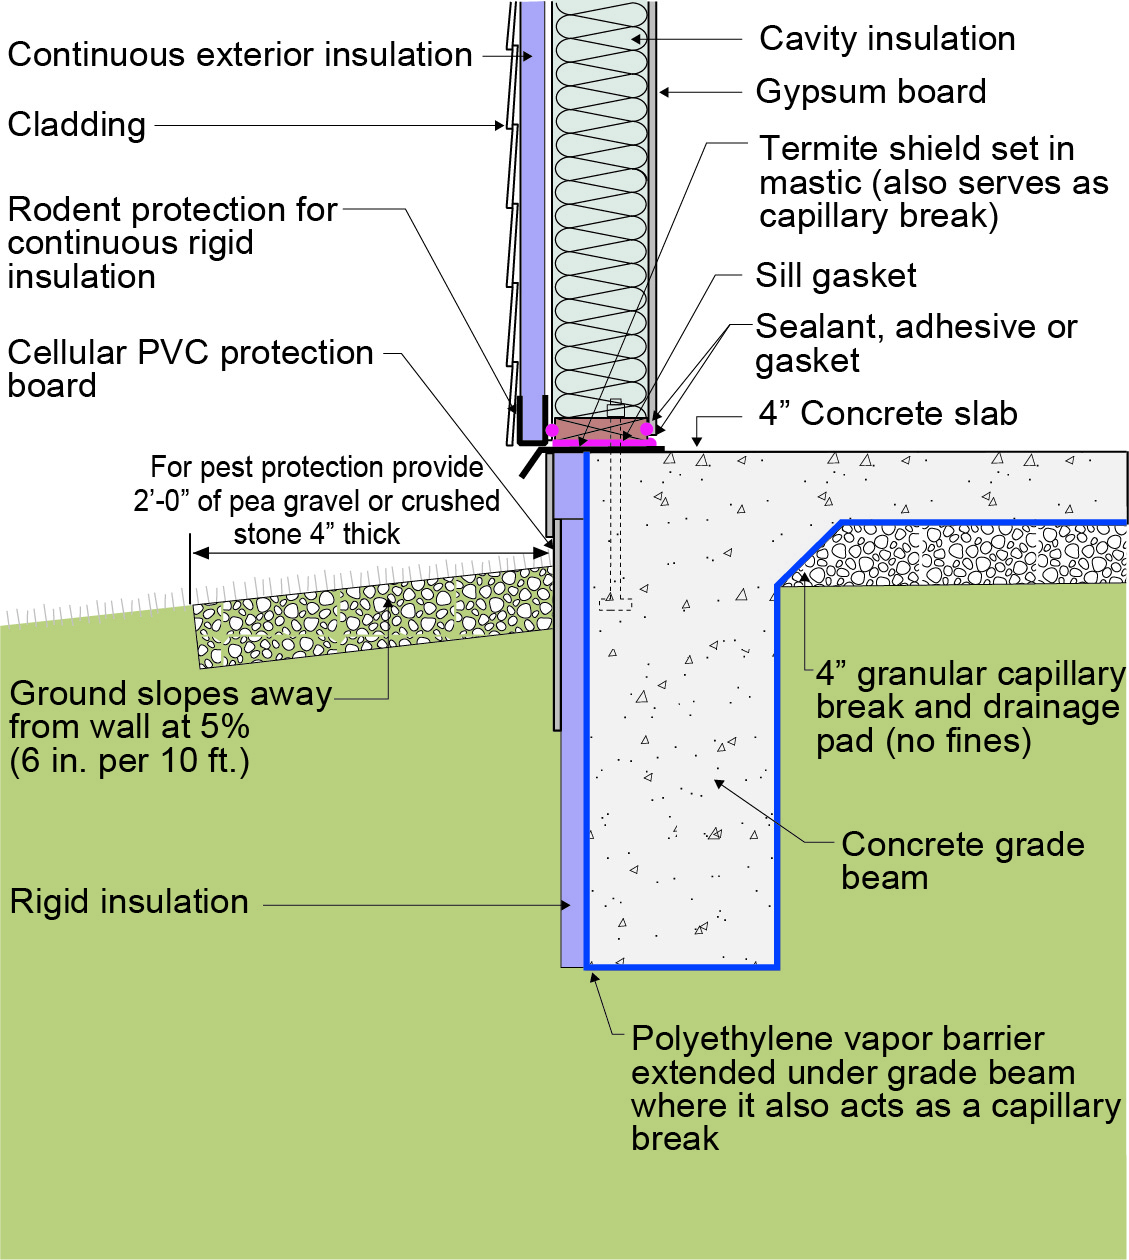
This exterior insulated slab-on-grade monolithic grade beam foundation is protected from pests by termite shield at the sill plate, borate-treated framing, flashing at end of wall insulation, brick veneer over slab-edge insulation, and rock ground cover.
Image
This exterior wall retrofit permits drying to the exterior of a sill plate installed on an untreated flat foundation wall
Image
This exterior wall retrofit permits drying to the exterior of a sill plate installed on an untreated irregular foundation wall
Image
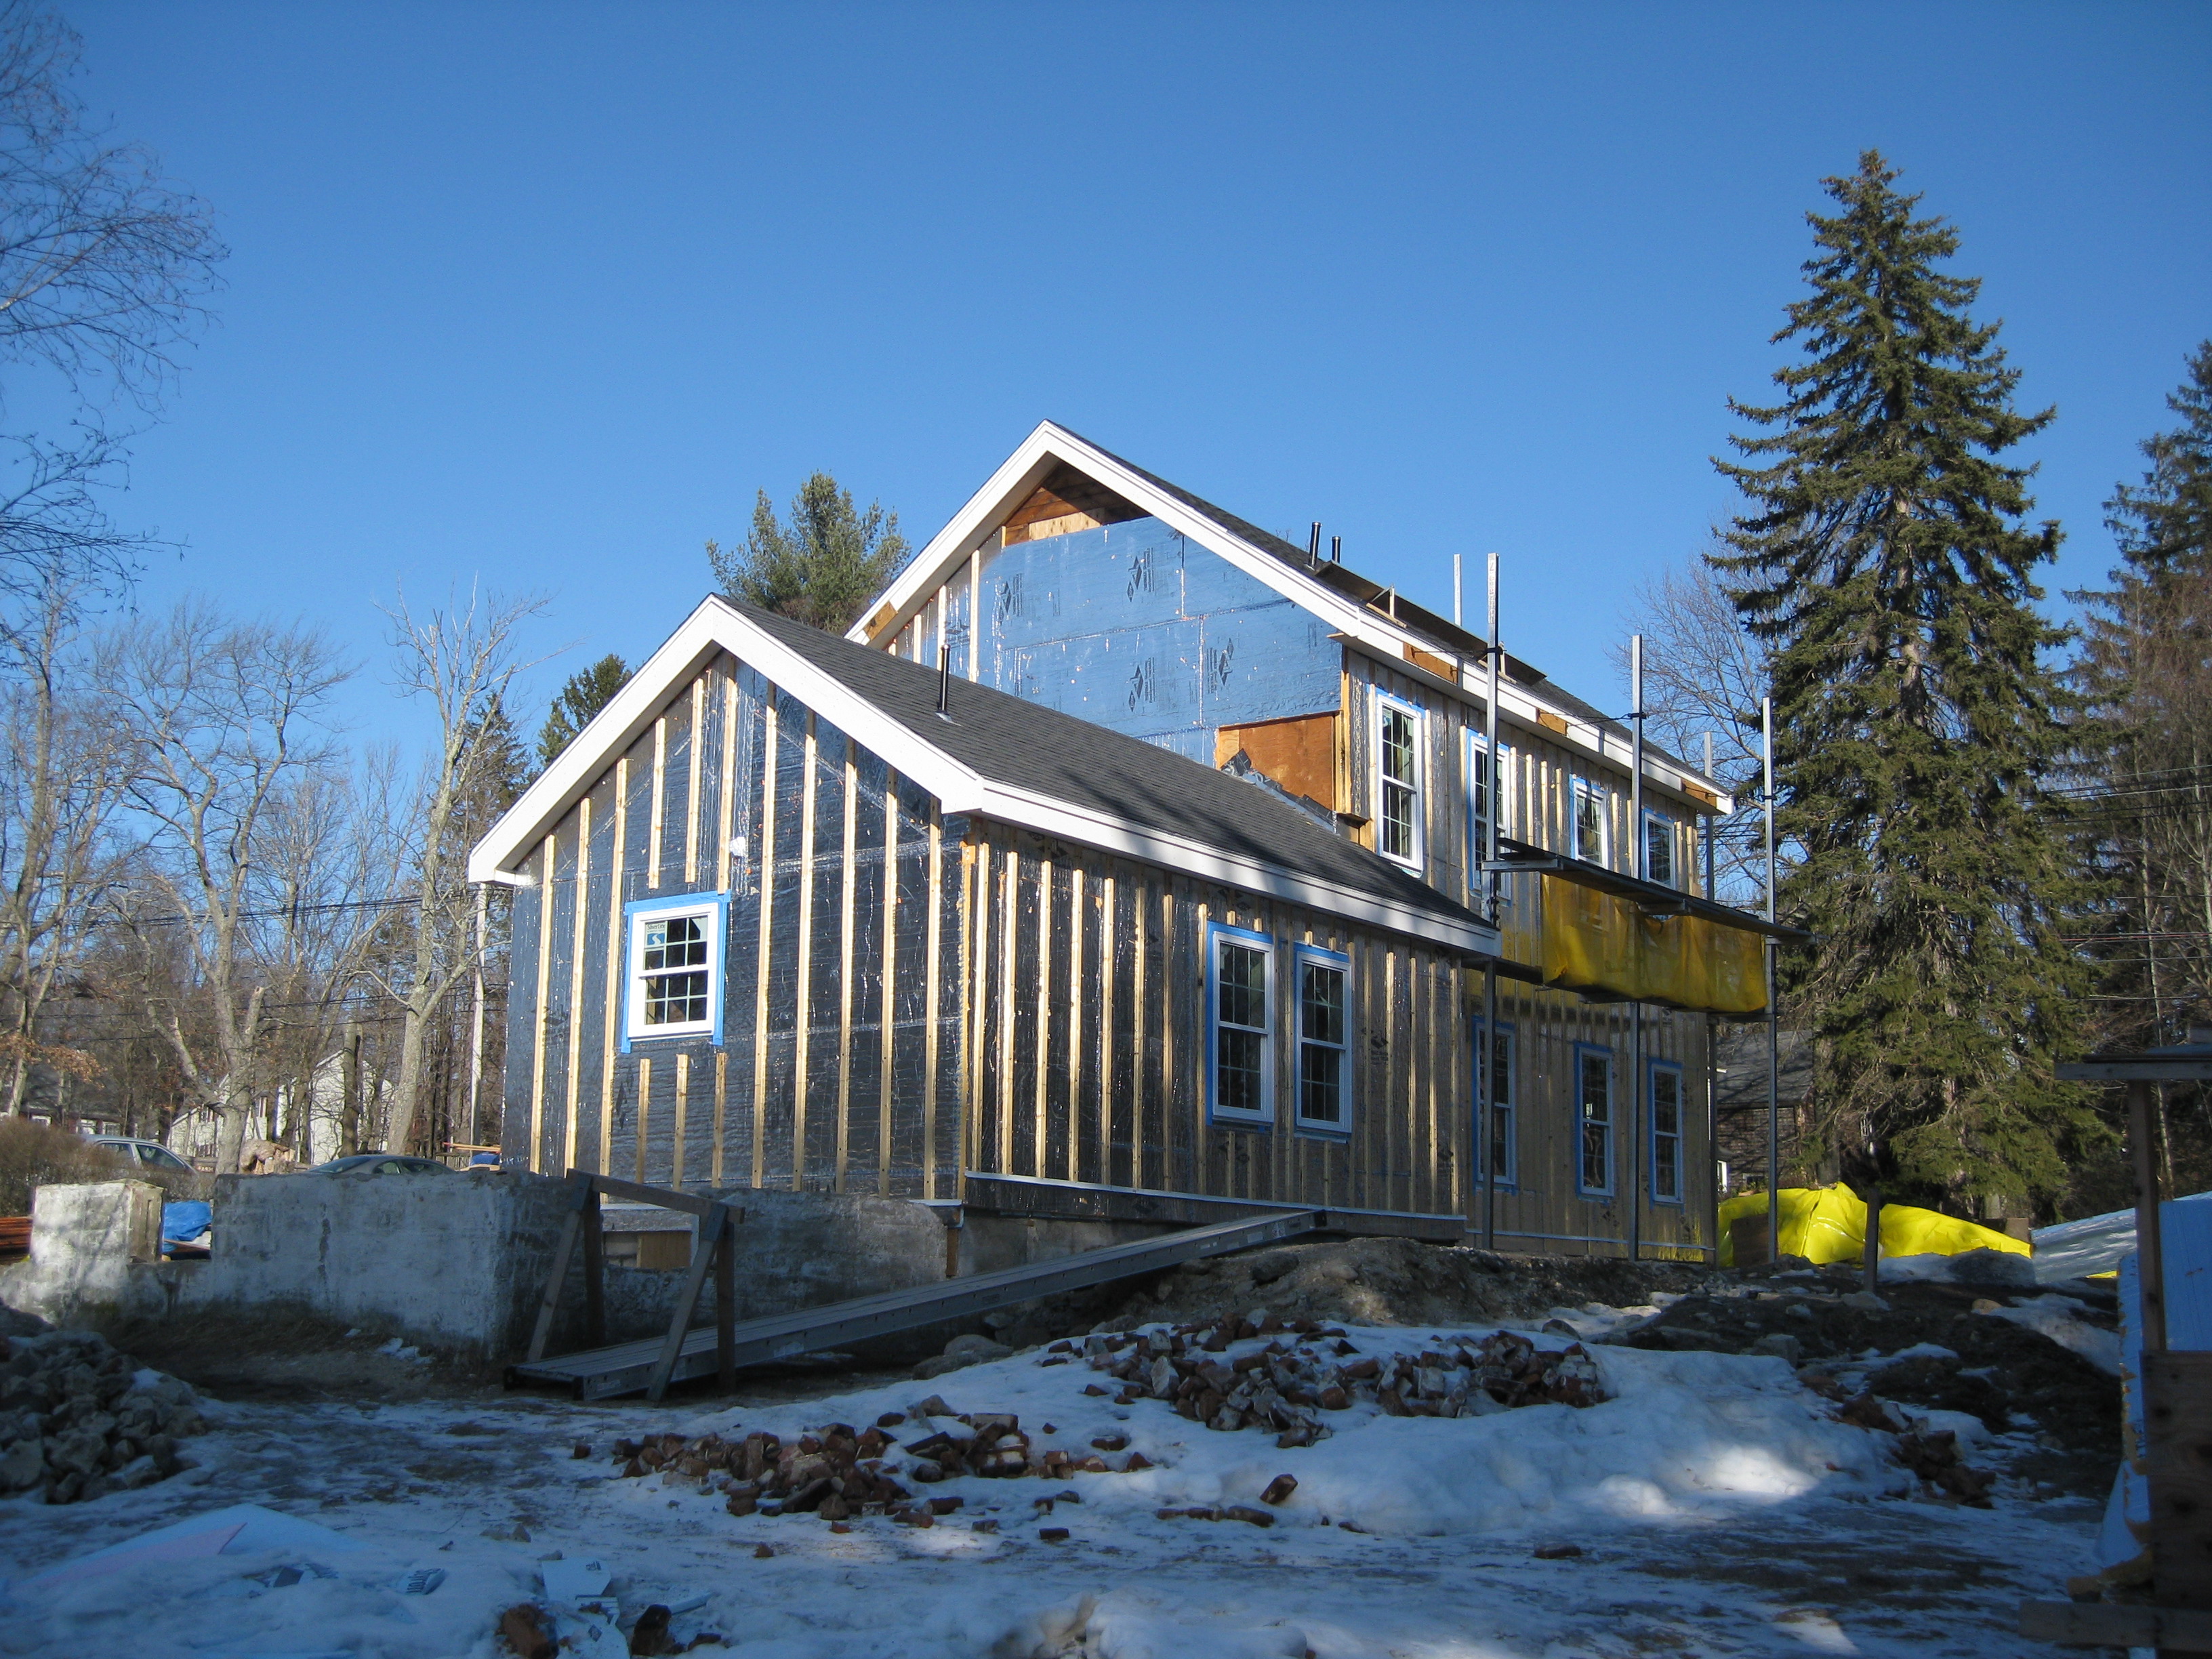
This farmhouse was retrofit by removing the existing siding and adding taped insulated sheathing and battens before installing new siding
Image

This fiberglass batt insulation has a kraft paper facing that is correctly stapled to the face rather than the sides of the wall studs to minimize compression.
Image
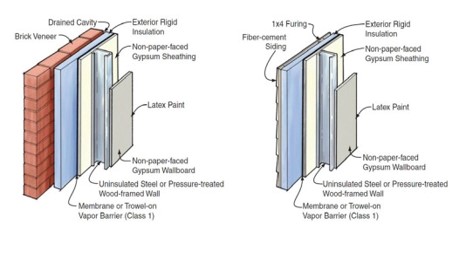
This flood-resistant exterior wall with brick or fiber-cement siding will limit moisture damage in exterior walls.
Image
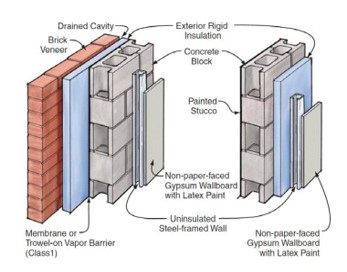
This flood-resistant masonry wall design with metal framing and rigid foam insulation will limit moisture damage in exterior walls.
Image
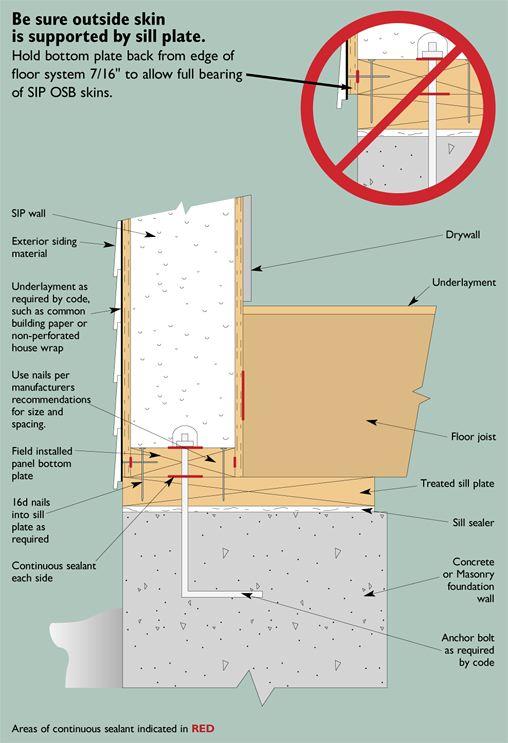
This foundation/floor/SIP wall detail shows recommended support of SIP wall panel at the sill plate
Image
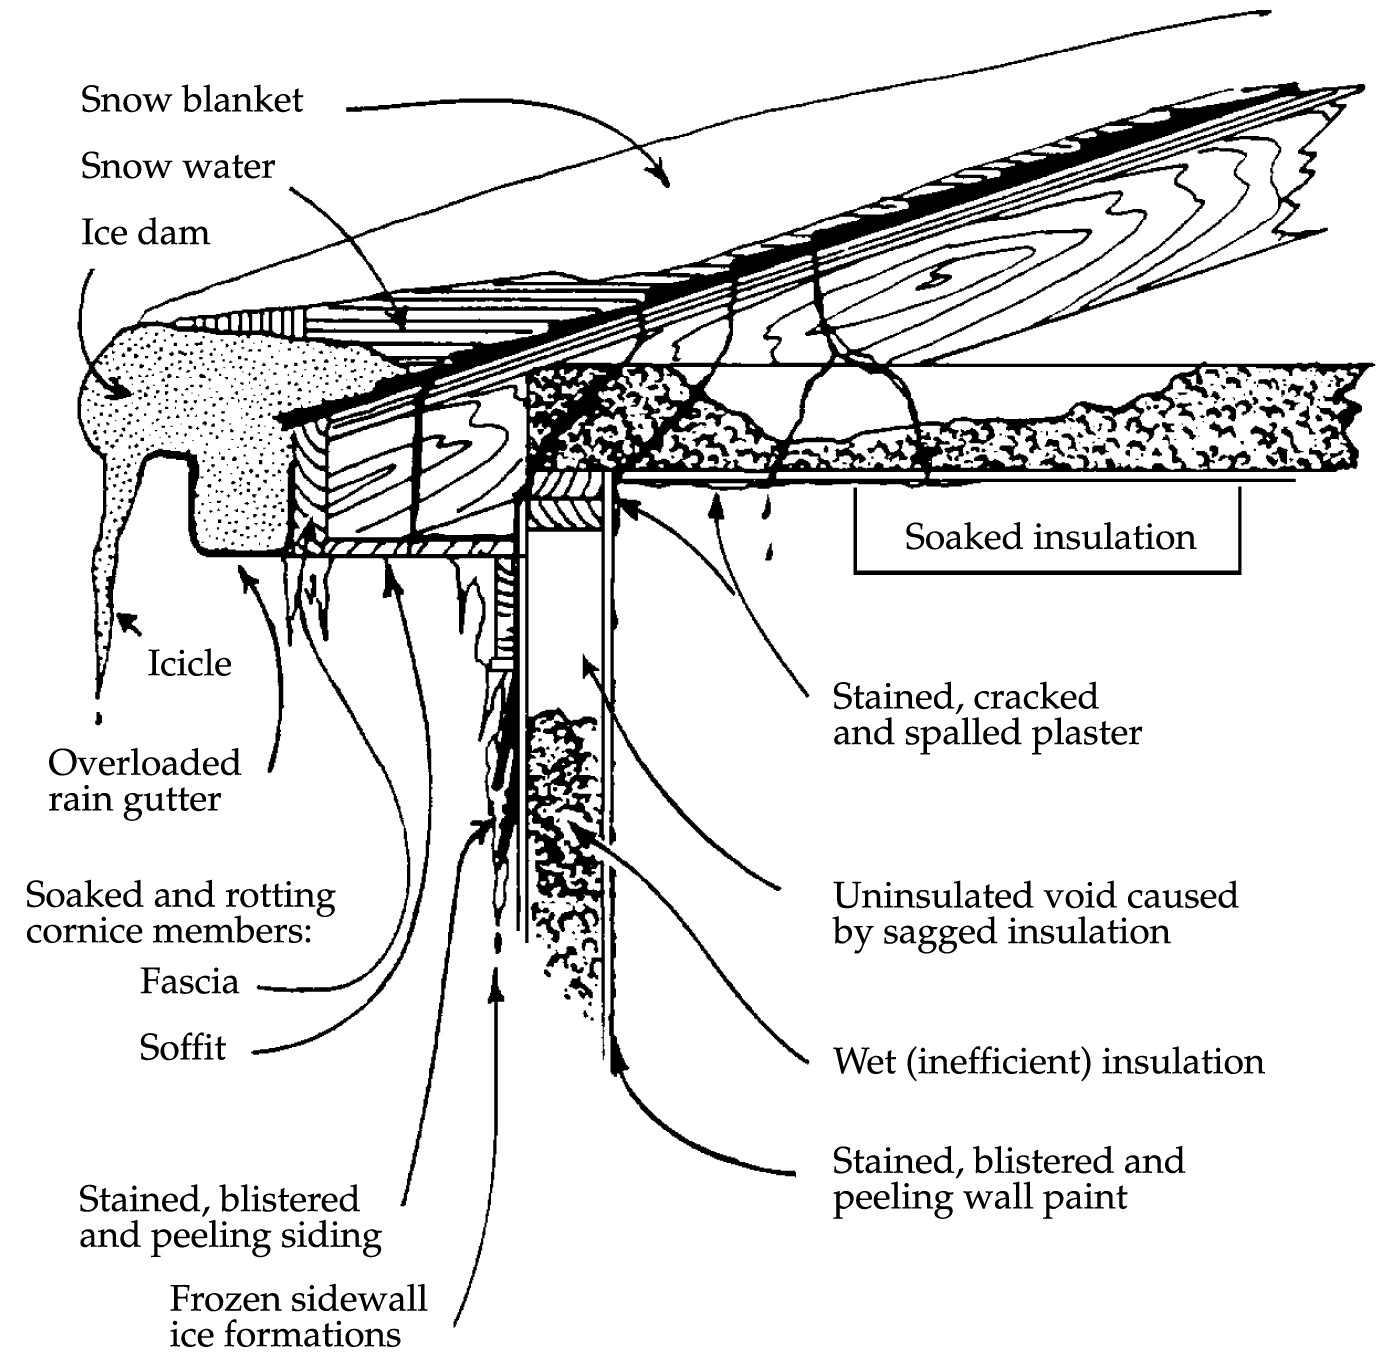
This home has heat loss through the roof, leading to ice dam formation and structural issues during winter months.
Image

This home uses light-colored standard paints and finishes on siding and roofing materials to reduce cooling loads without adding material cost.
Image
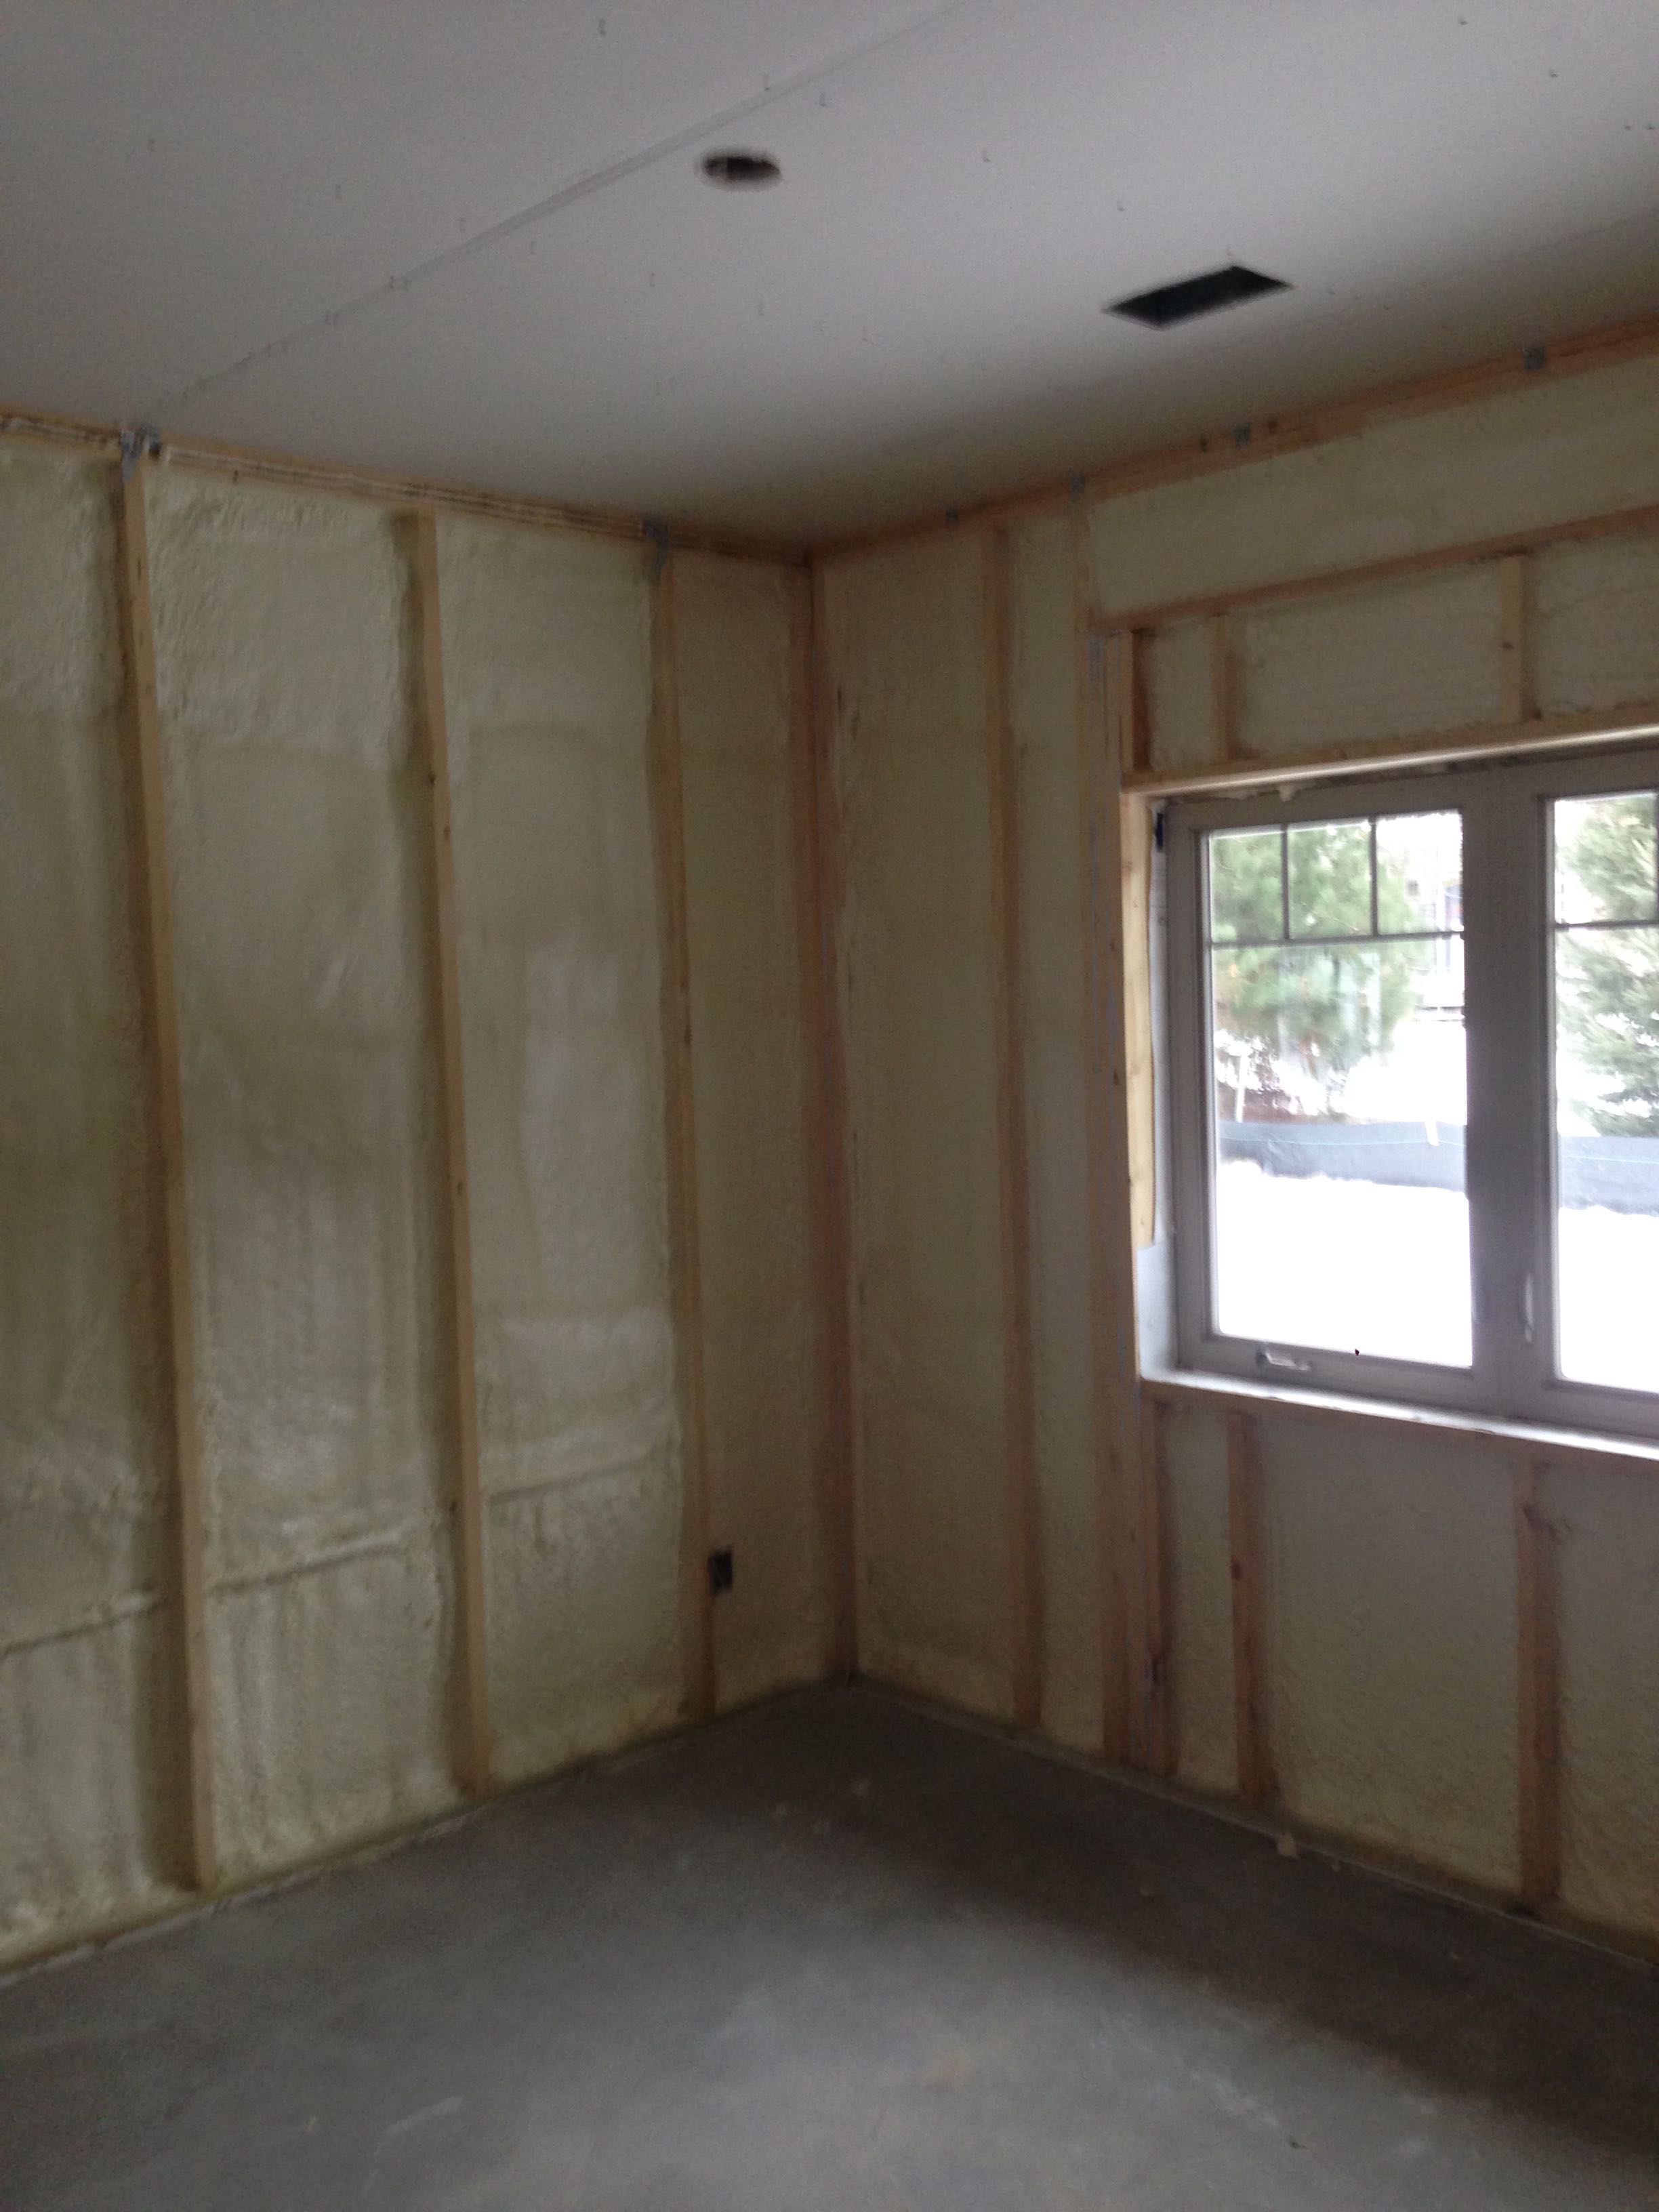
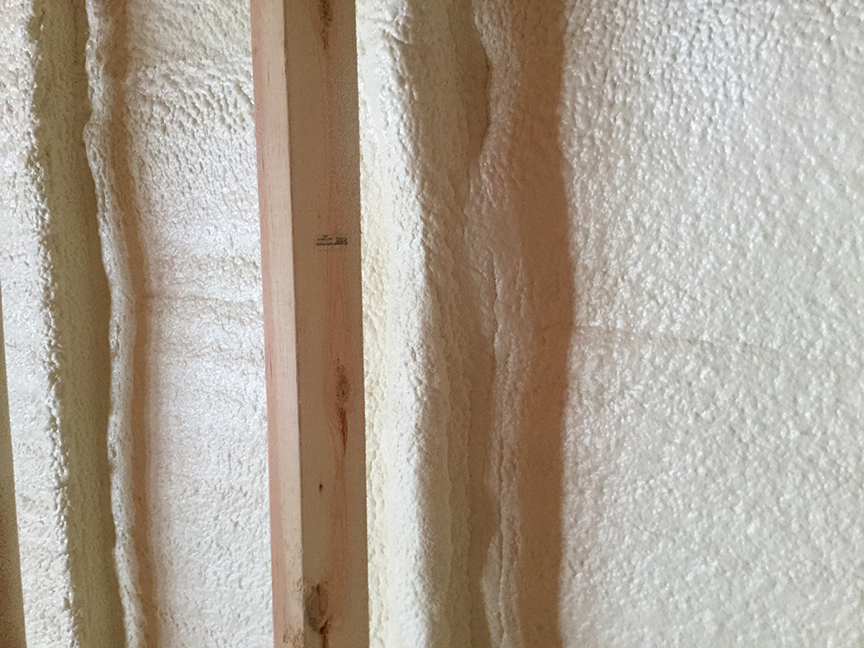
This home’s 2x6 advanced framed walls are insulated and air sealed with 3 inches of closed-cell spray foam.
Image

This home’s double-wall construction provides a 9-inch wall cavity for insulation.
Image
This home’s exterior walls consist of two 2x4 walls; the R-49 double wall cavity is filled with 2 inches of closed-cell spray foam plus dense-packed cellulose.
Image
This home’s exterior walls include Larsen trusses, 9-inch I-joists attached through exterior sheathing to wall studs creating a 9-inch wall cavity that was filled with blown insulation and forms extra deep windowsills.
Image
This hot climate zone home uses high quality batt insulation between studs to insulate this connecting garage wall.
Image
This hot climate zone home uses high quality batt insulation to insulate truss-joist headers.
Image
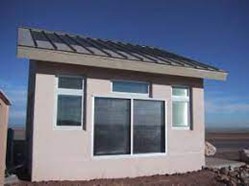
This house design in the Hot-Humid climate uses a slab foundation, masonry walls, and an Exterior Insulation Finish System (EIFS) cladding.
Image
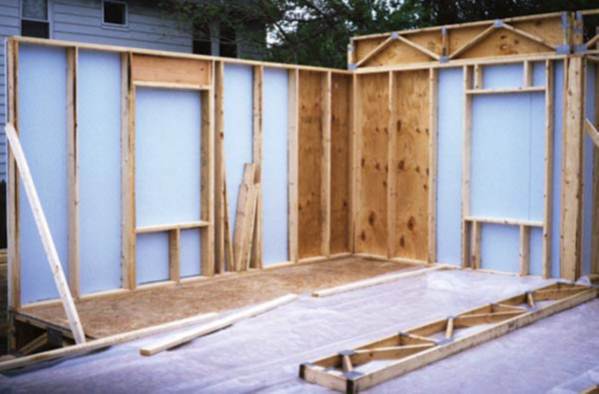
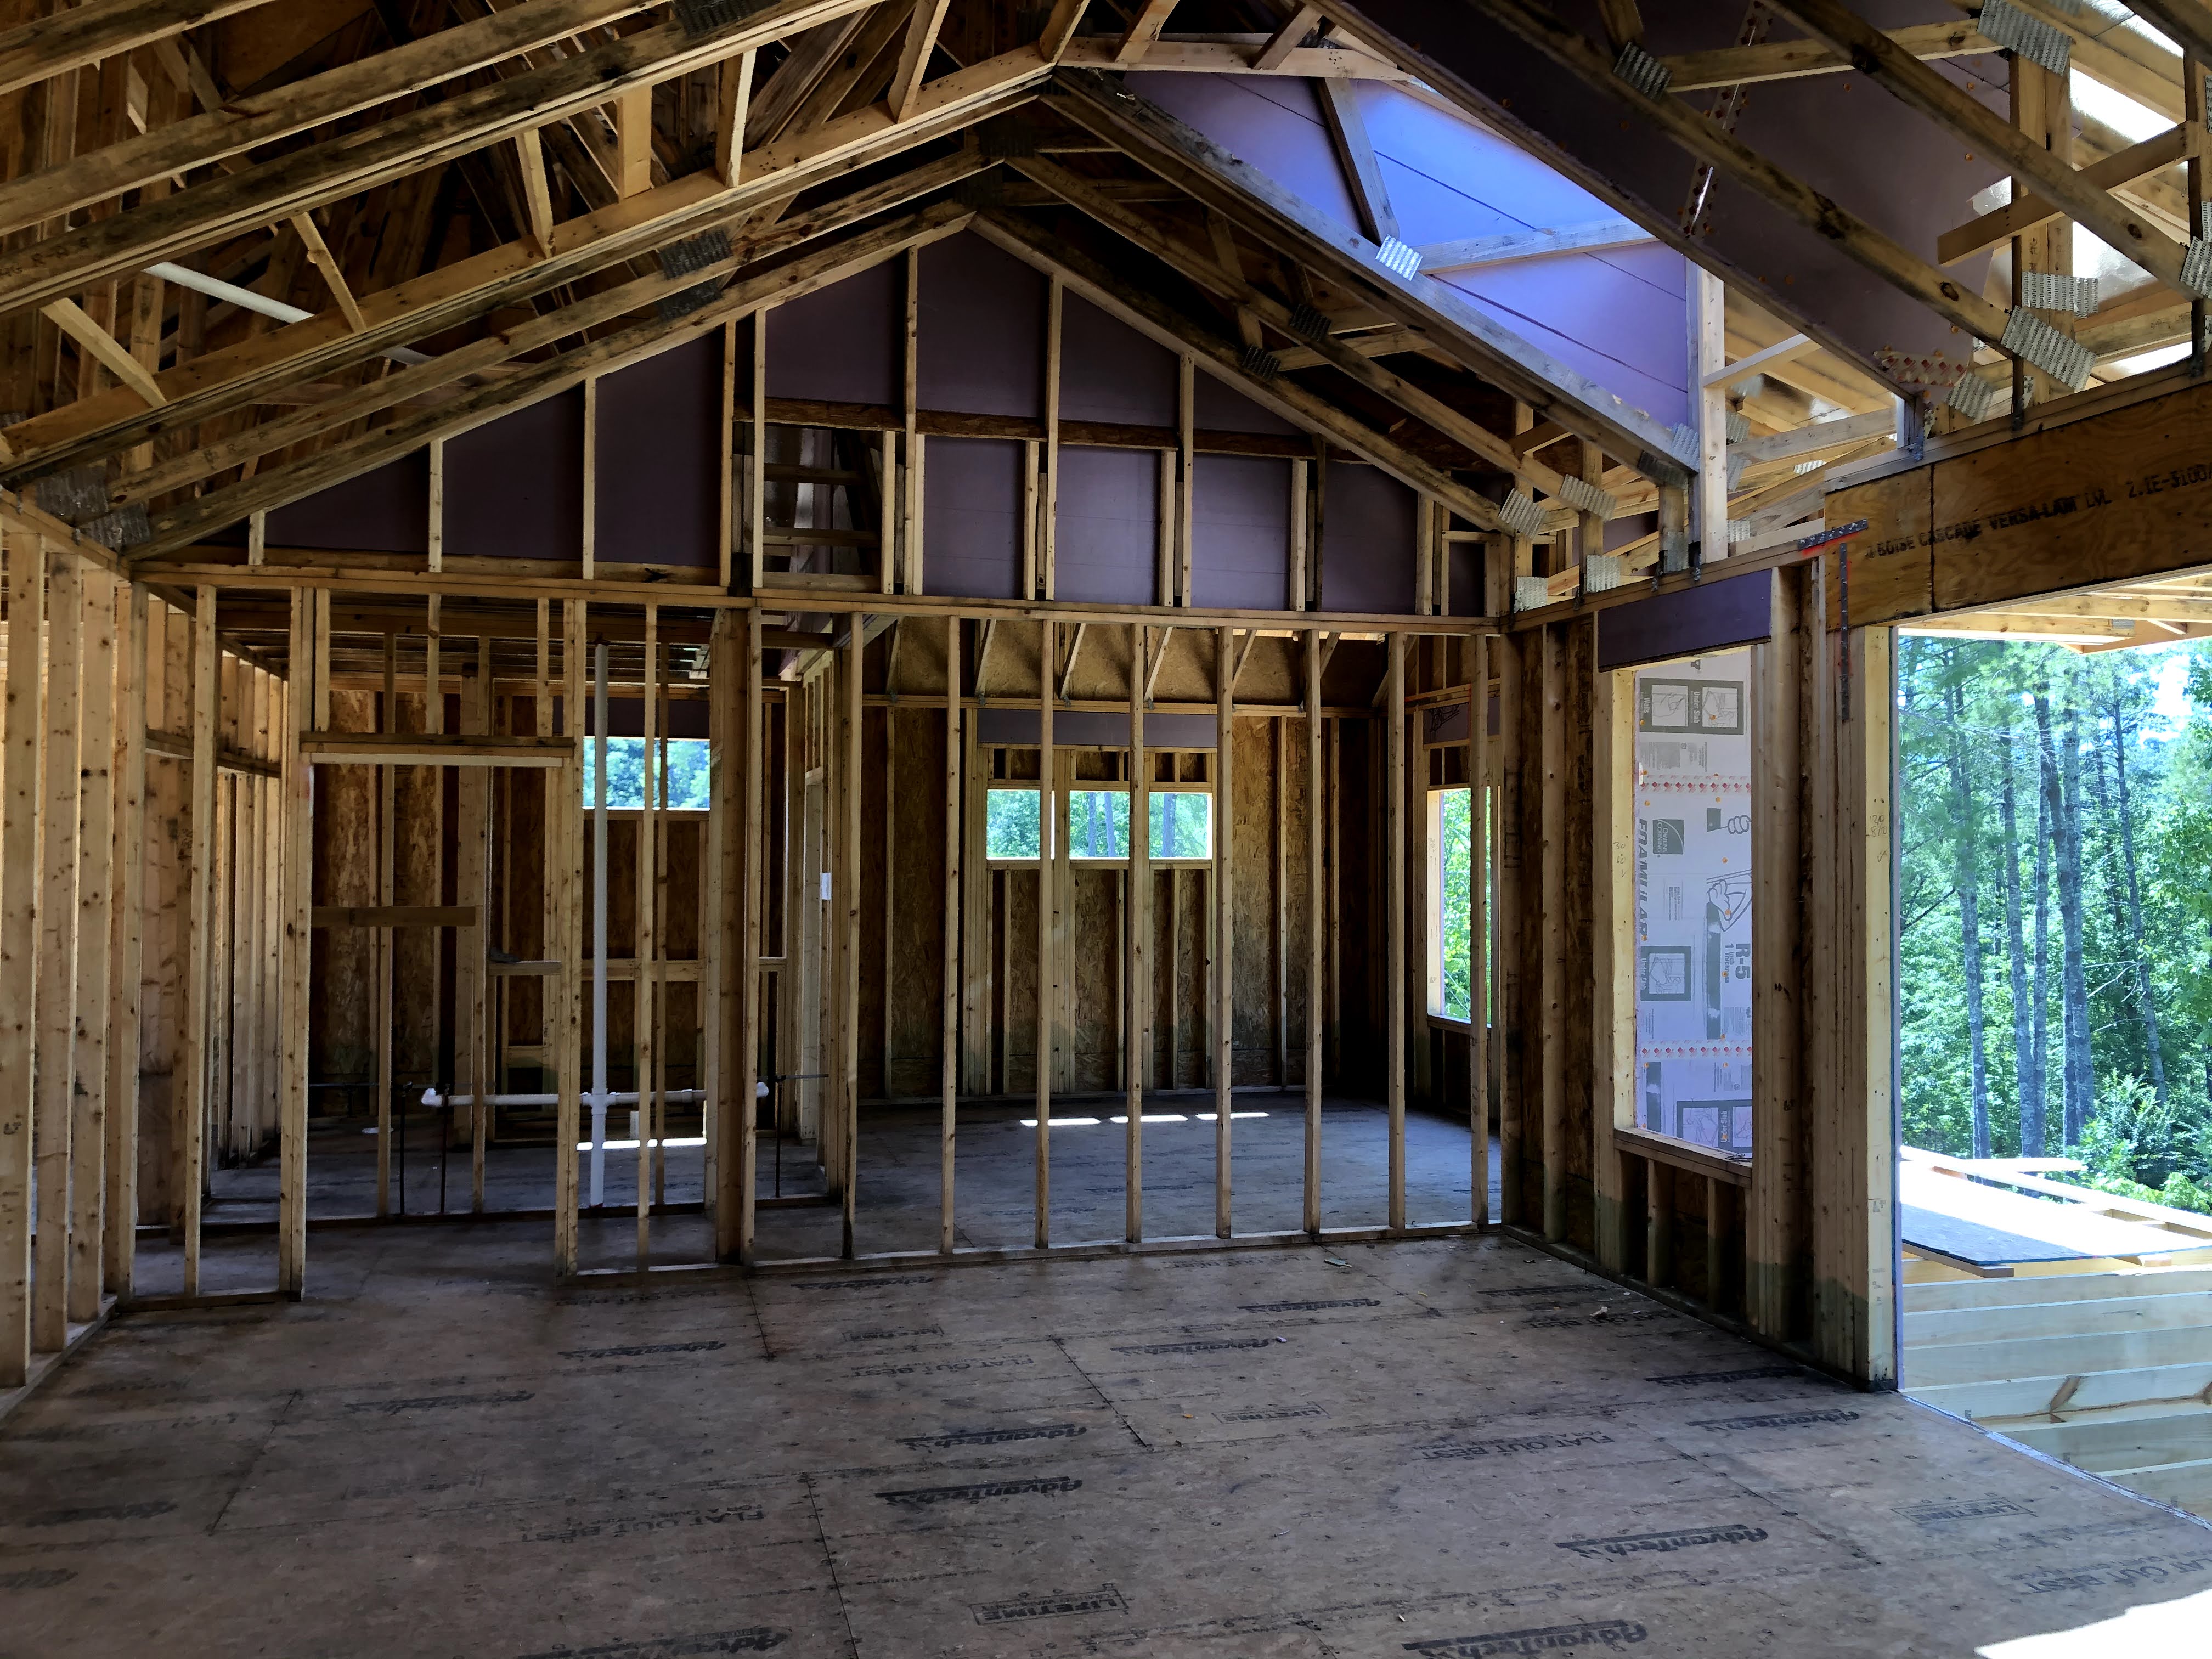
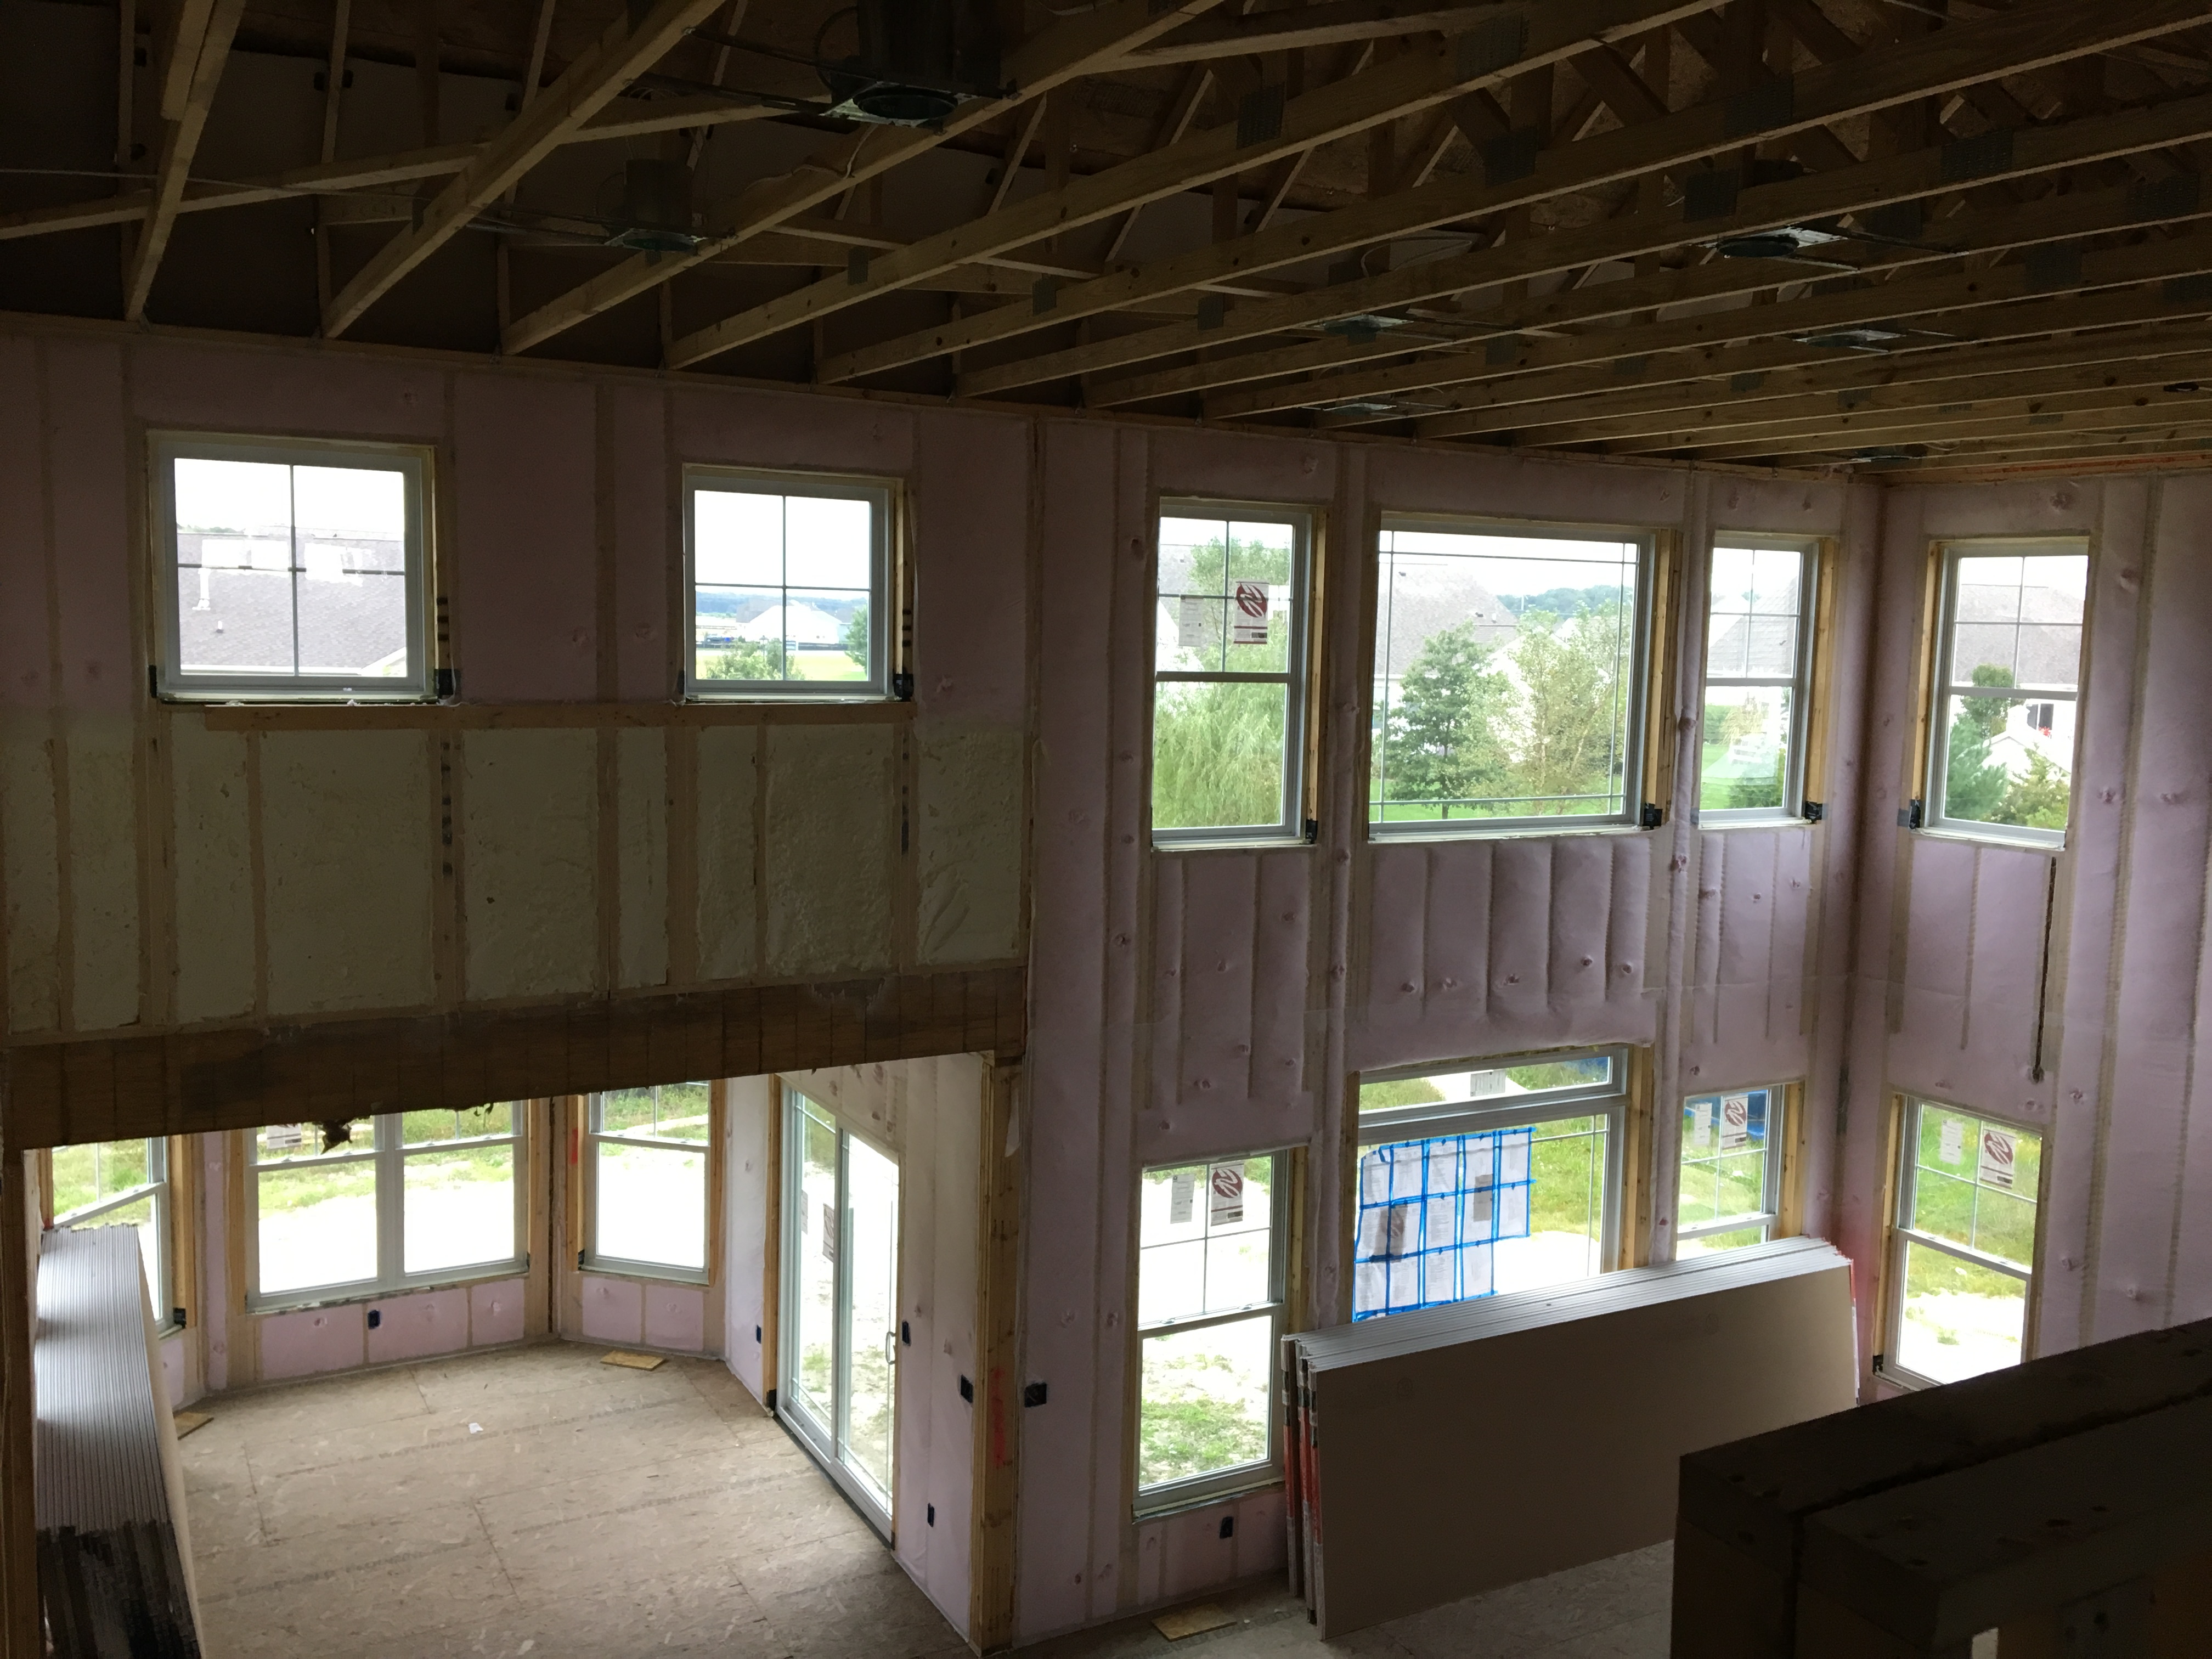
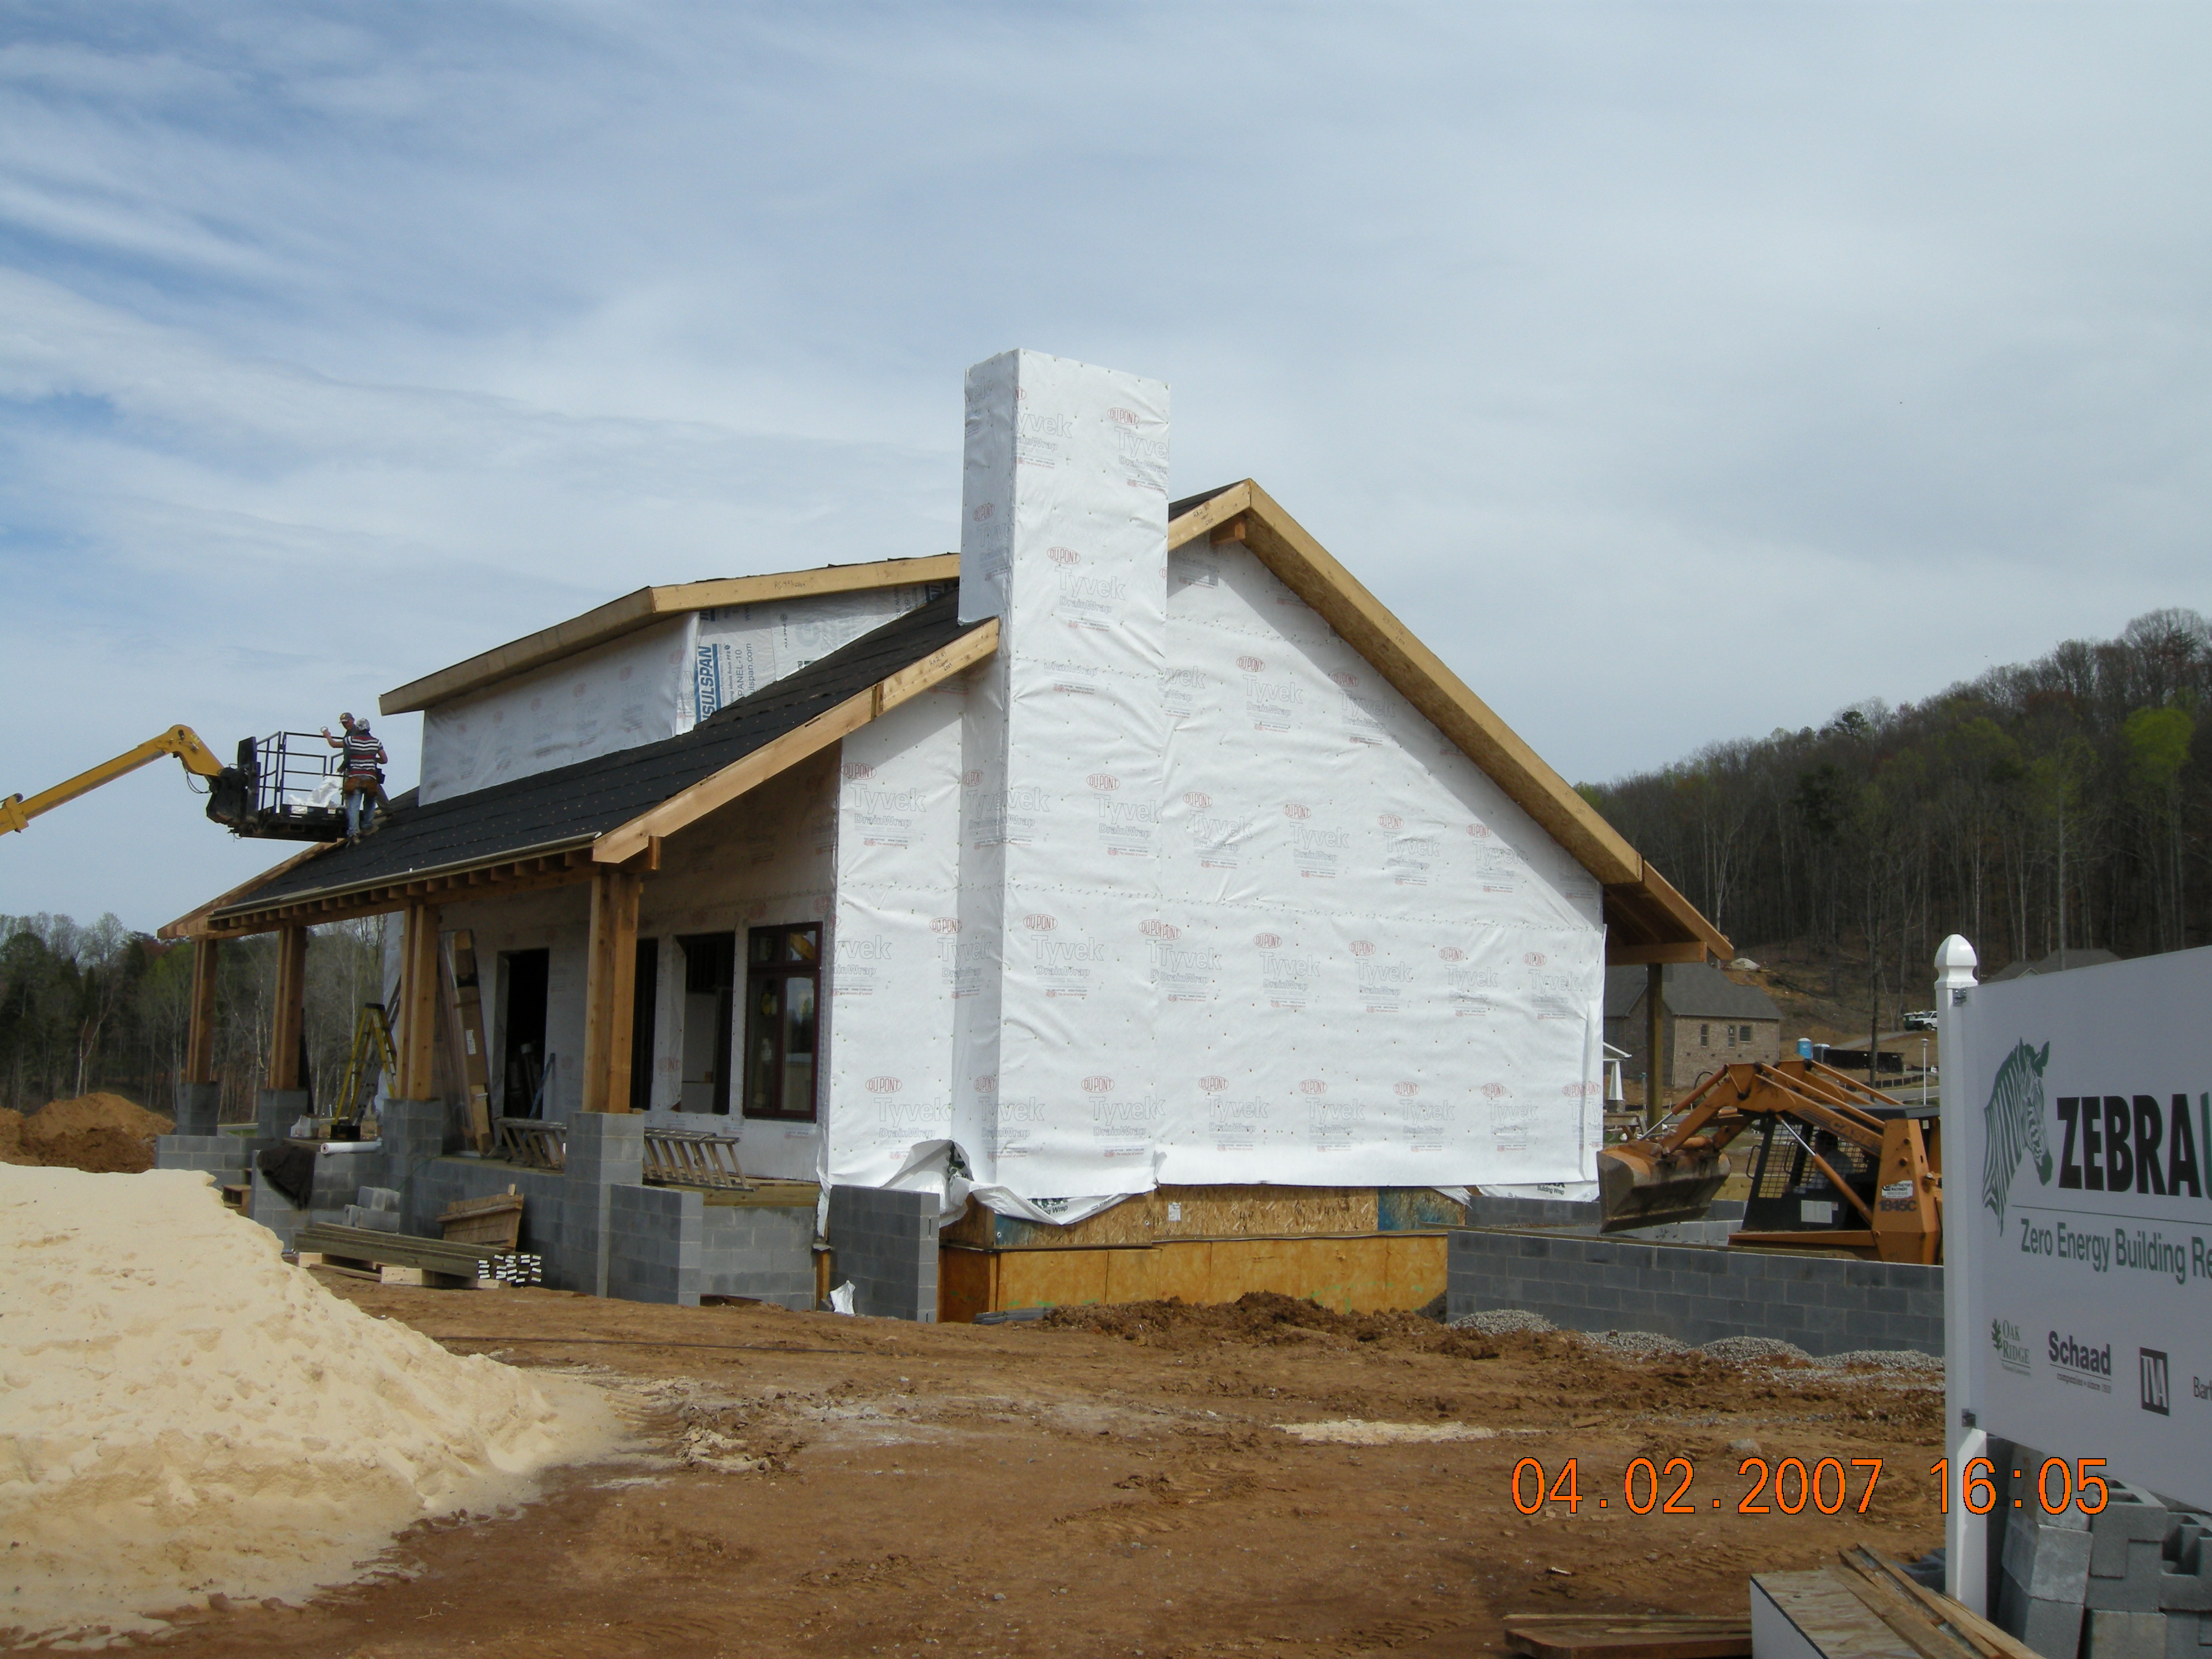
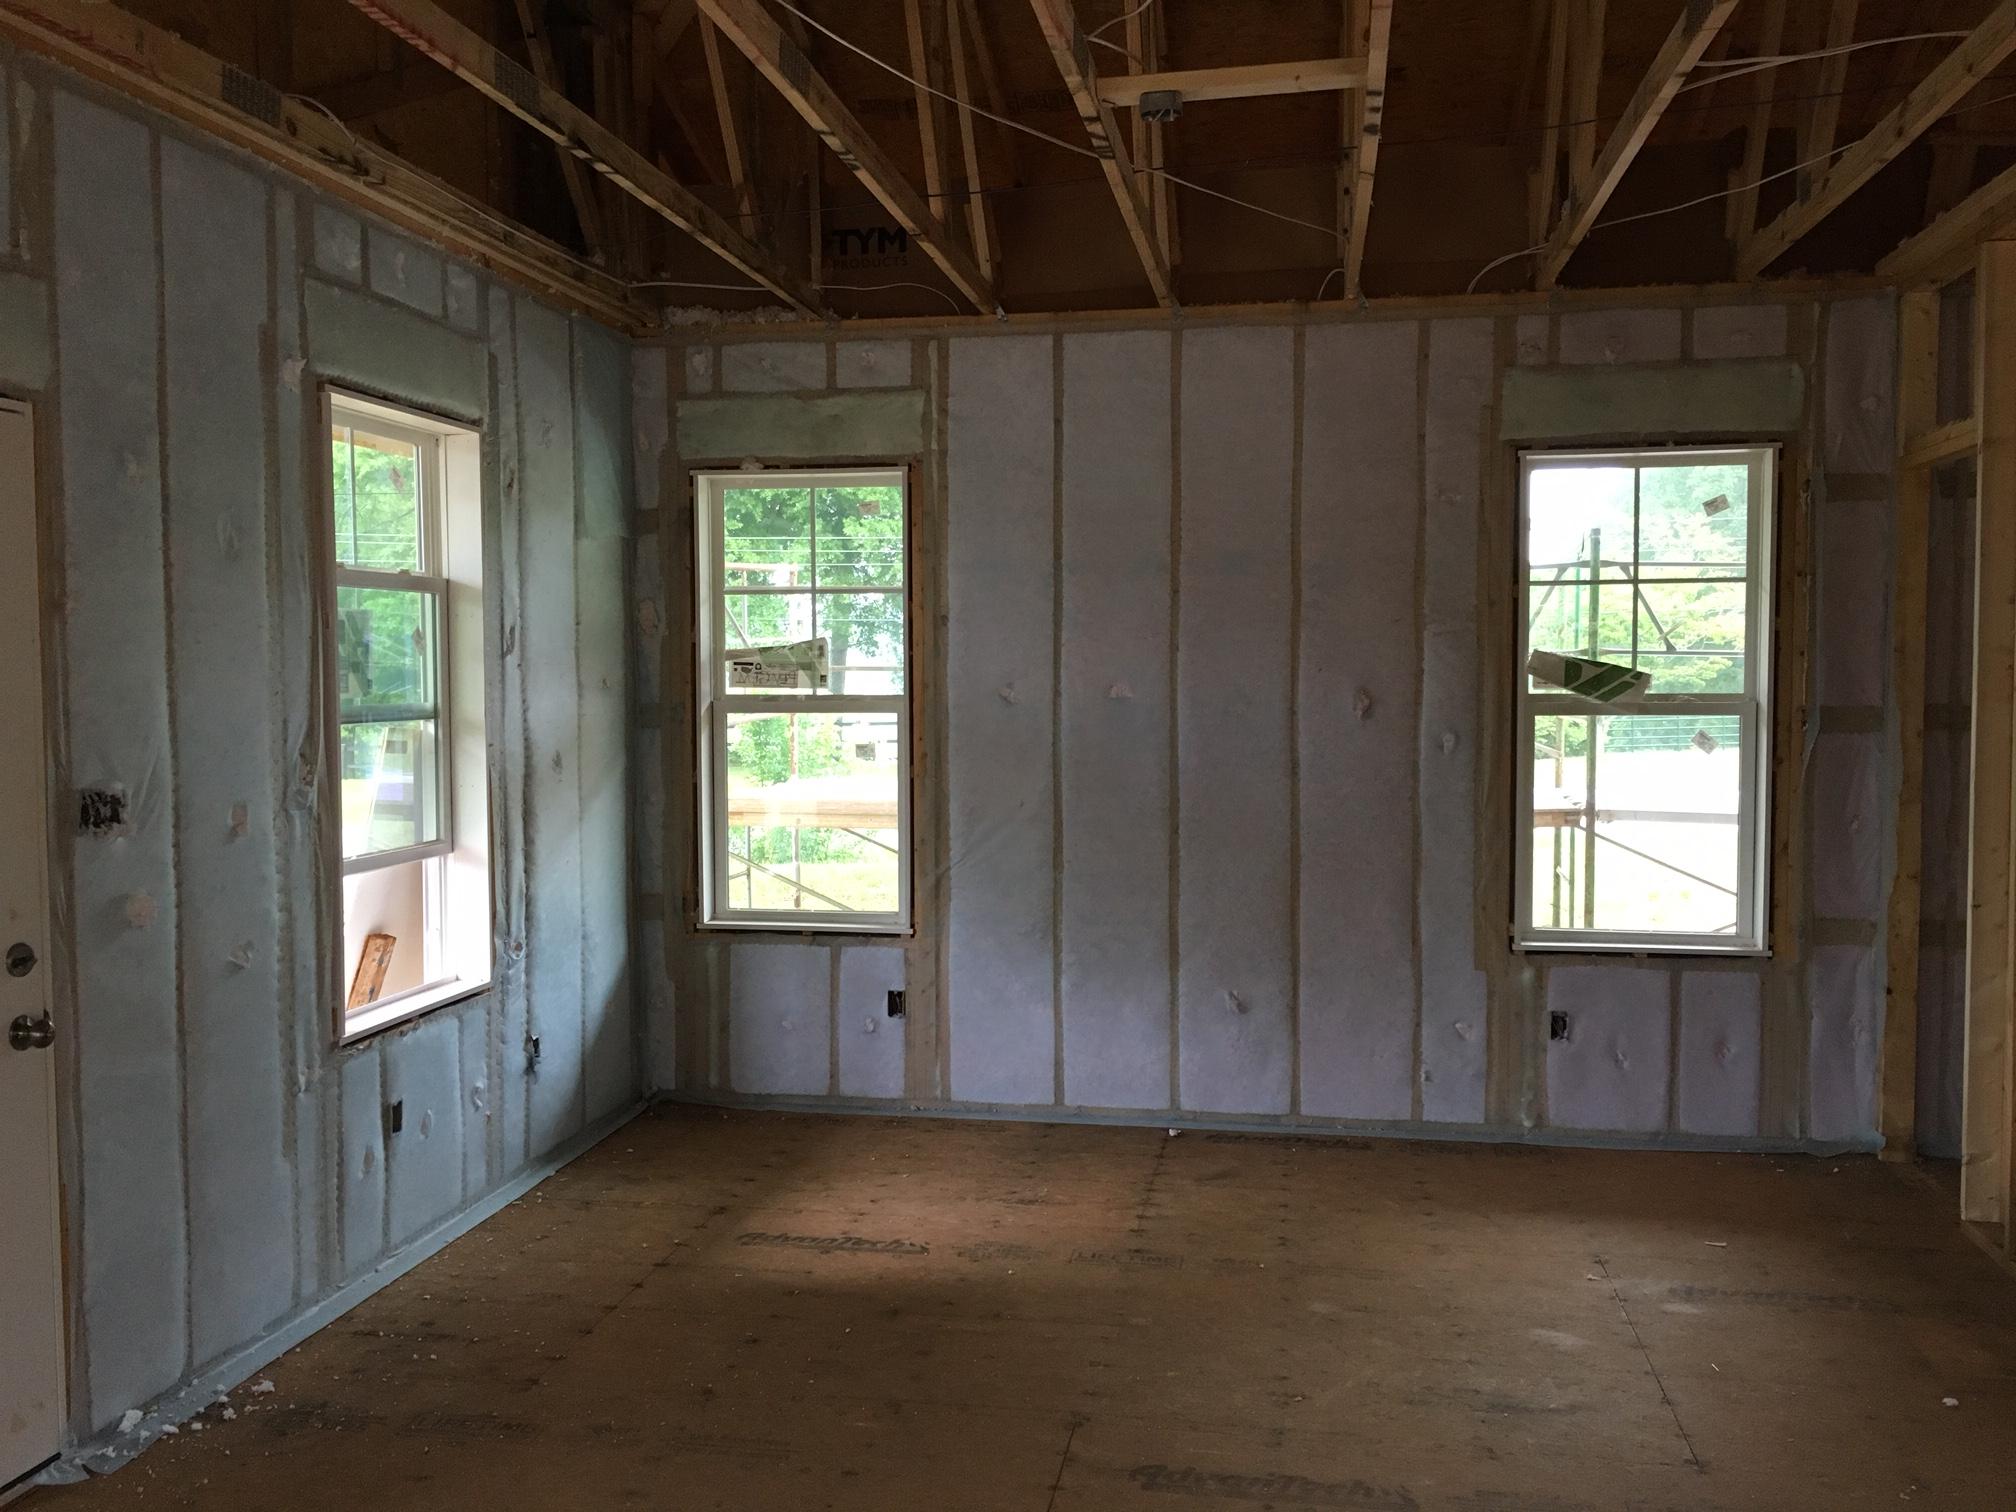
This house is being built with advanced framing techniques including 2x6 24-inch on-center wall framing
Image
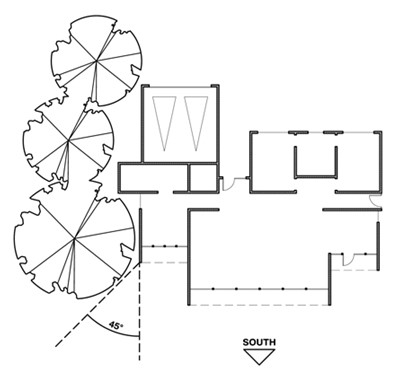
This house is sited so the existing trees will shade the west-facing walls to minimize summertime heat gain
Image
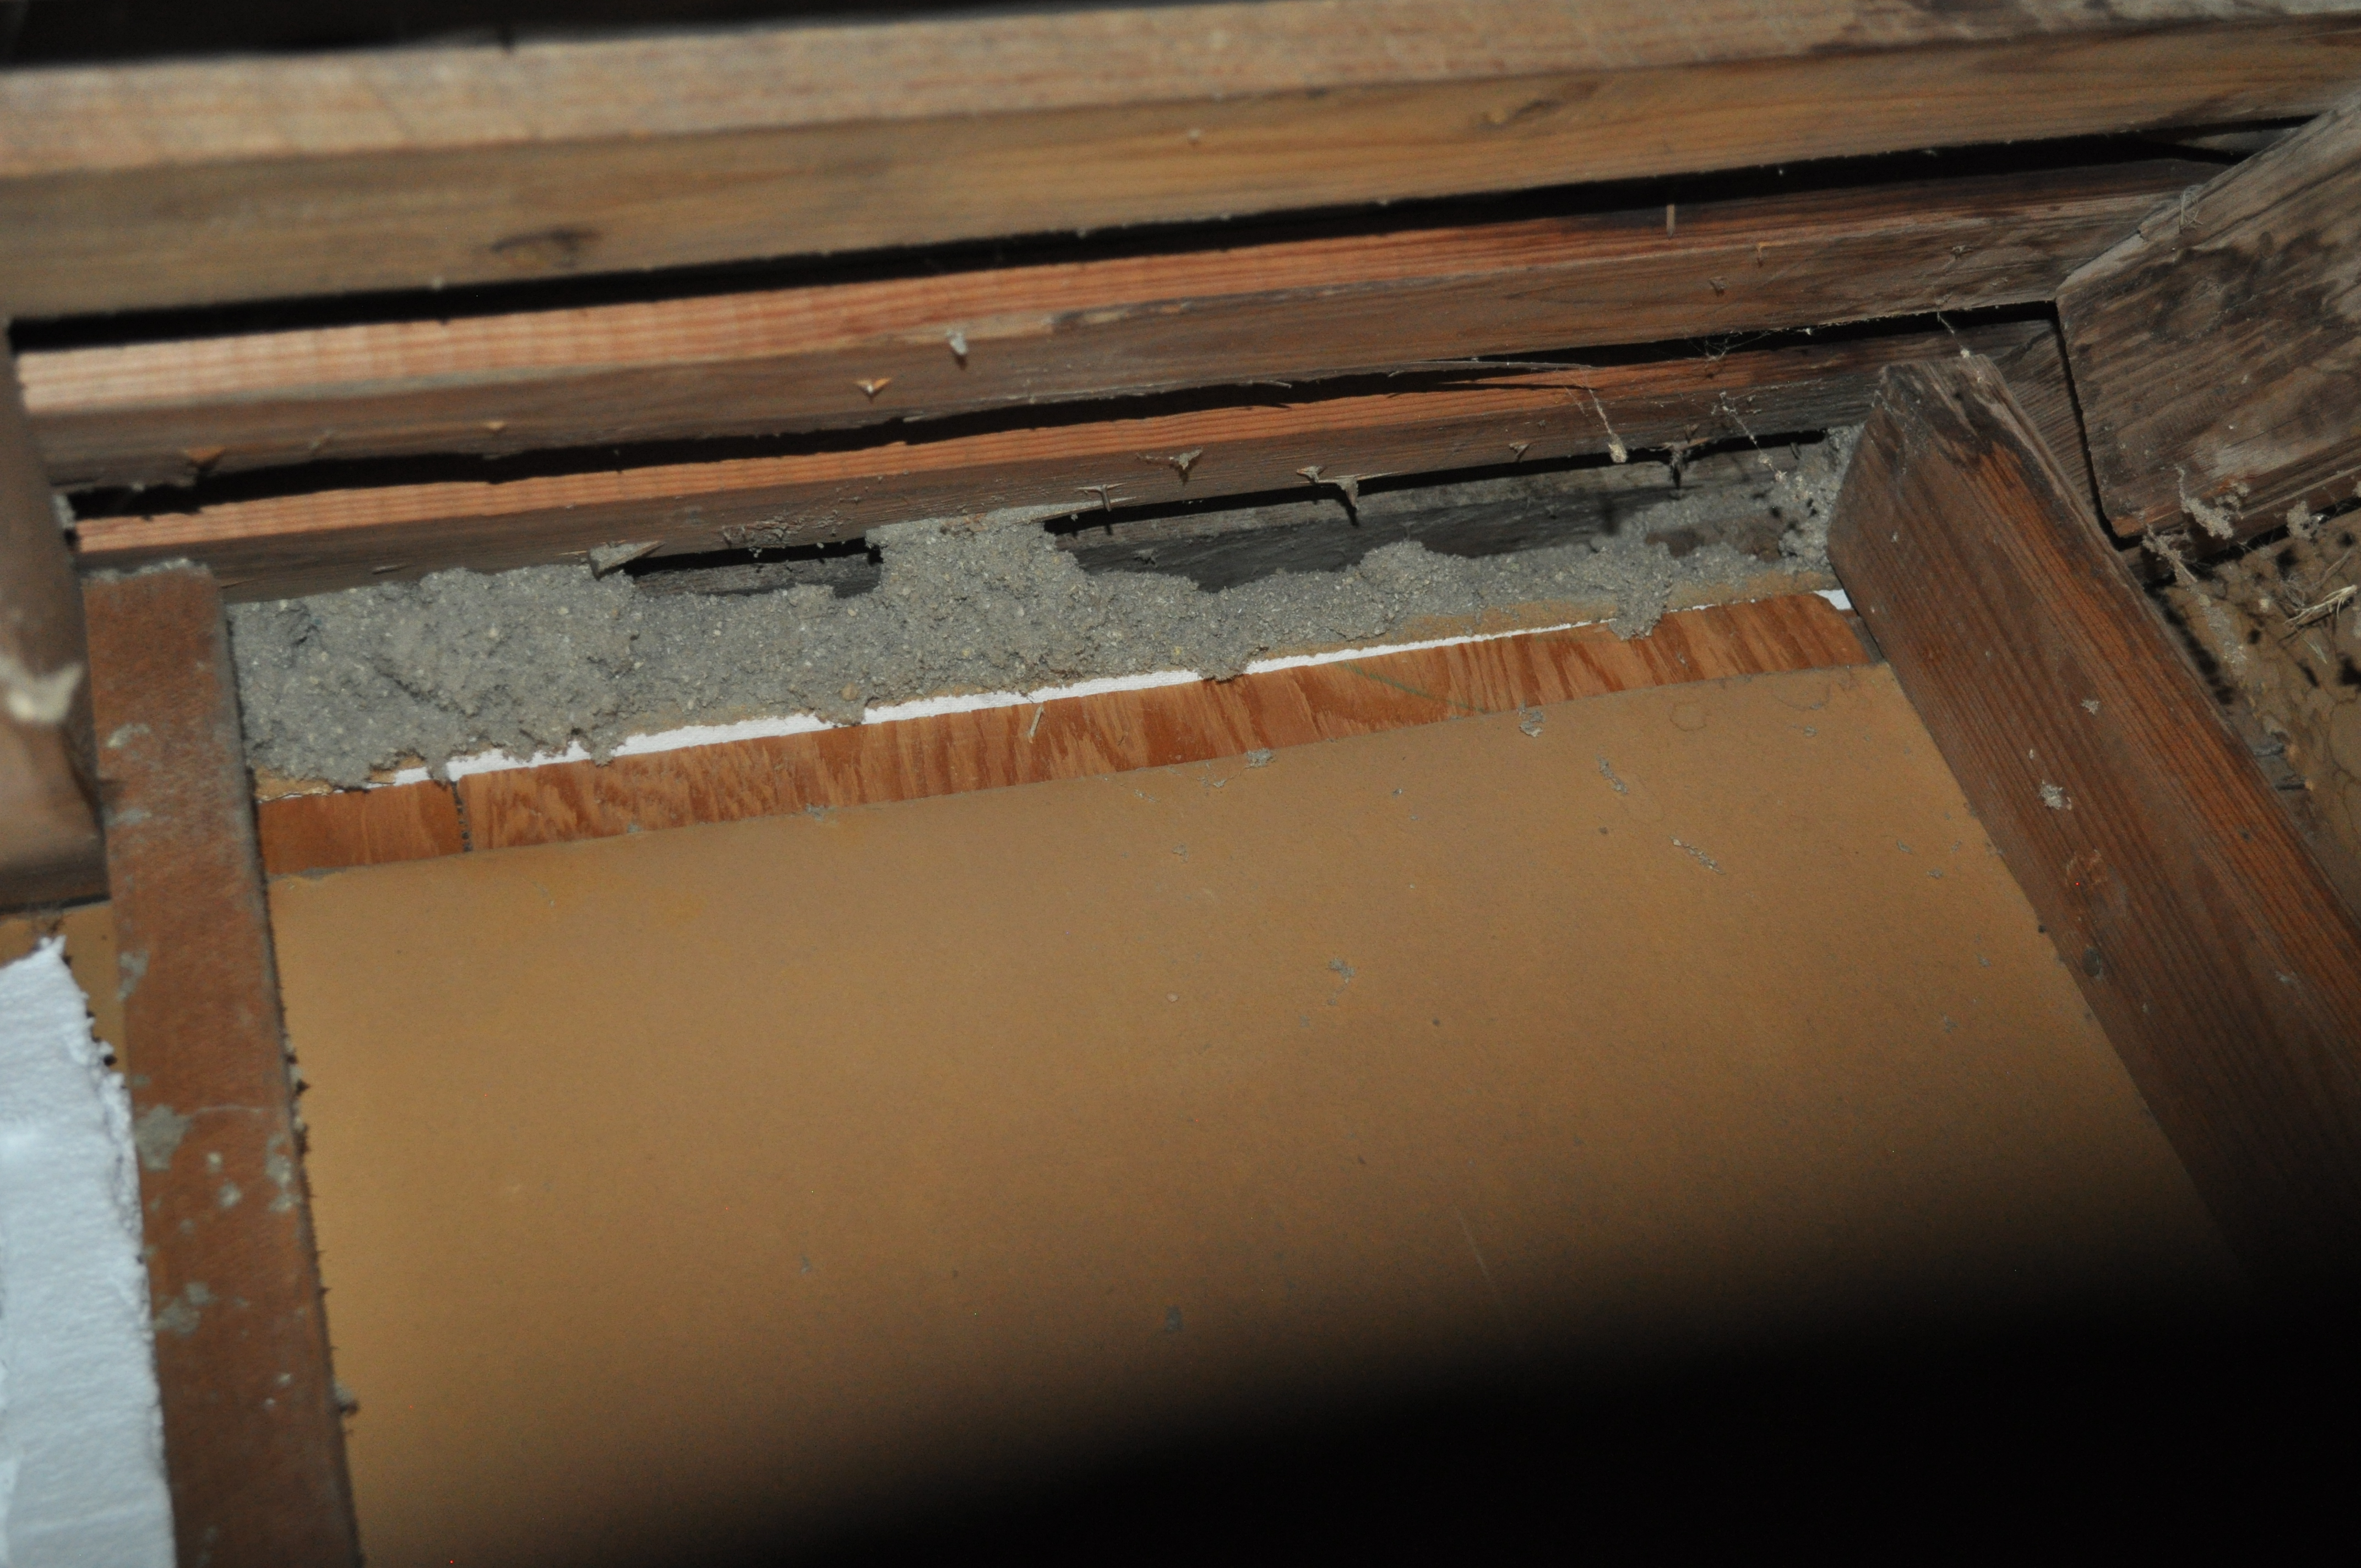
This kneewall has no top plate and the resulting gap provides a wide-open pathway for air and vapor to travel between the living space and the attic
Image
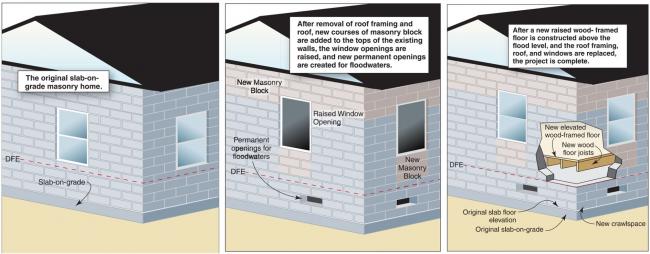
This left-to-right sequence shows the method of wall extension to flood-proof a masonry house on a slab foundation. Here the new, raised floor is wood-framed over a wet-floodproofed crawlspace, but using fill to create a new raised slab is also an option.
Image
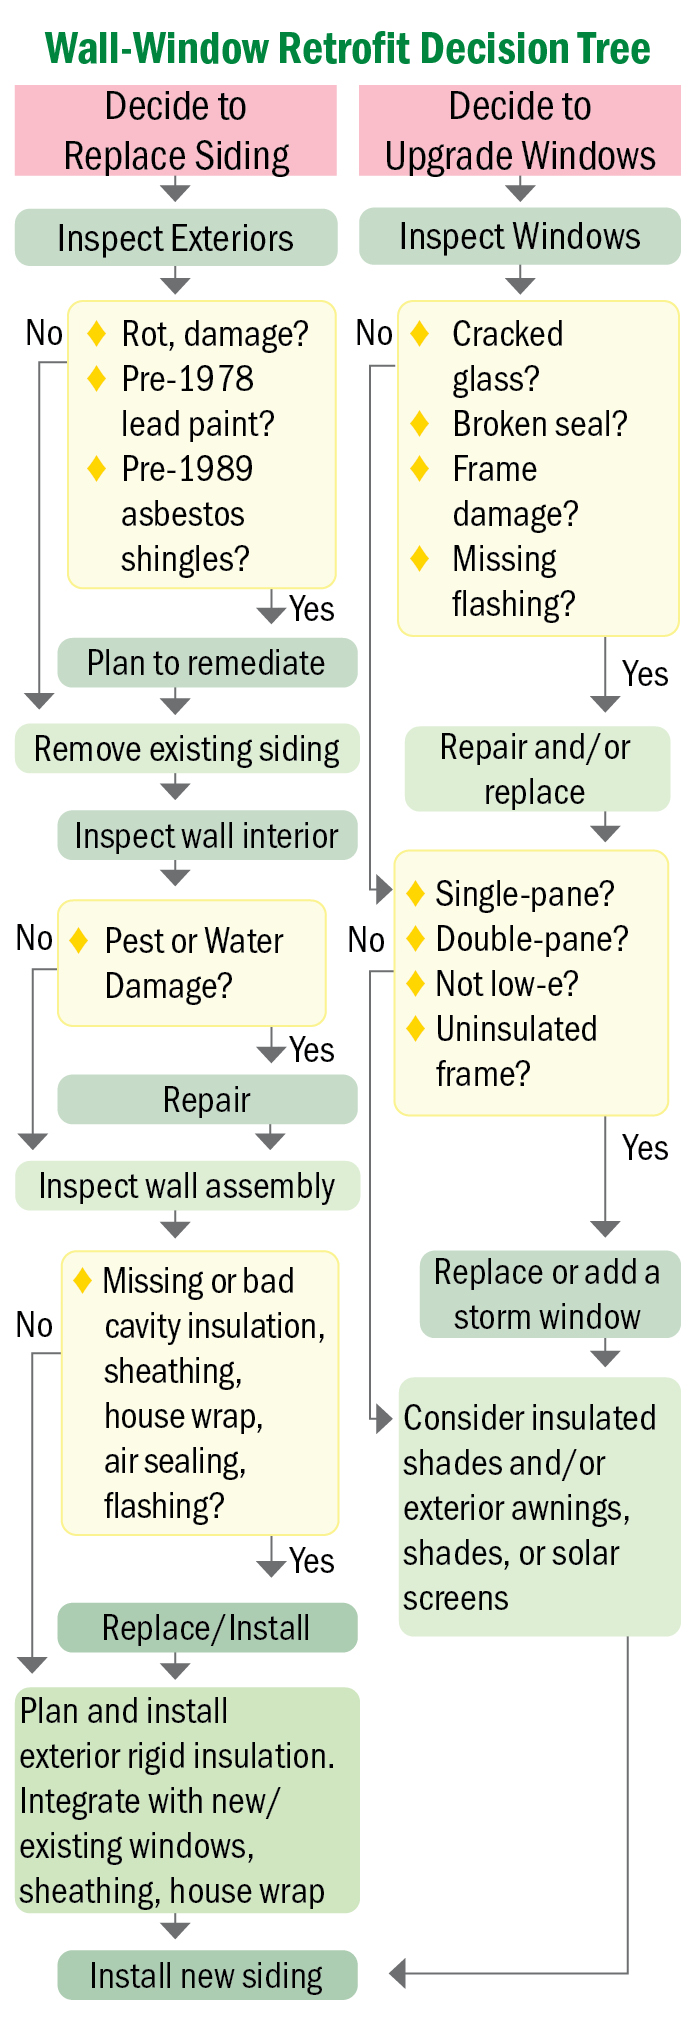
This simple decision tree can help homeowners and contractors determine options about wall and window upgrades when re-siding a home
Image
This simple decision tree can help homeowners and contractors make decisions about re-siding a home and upgrading windows
Image
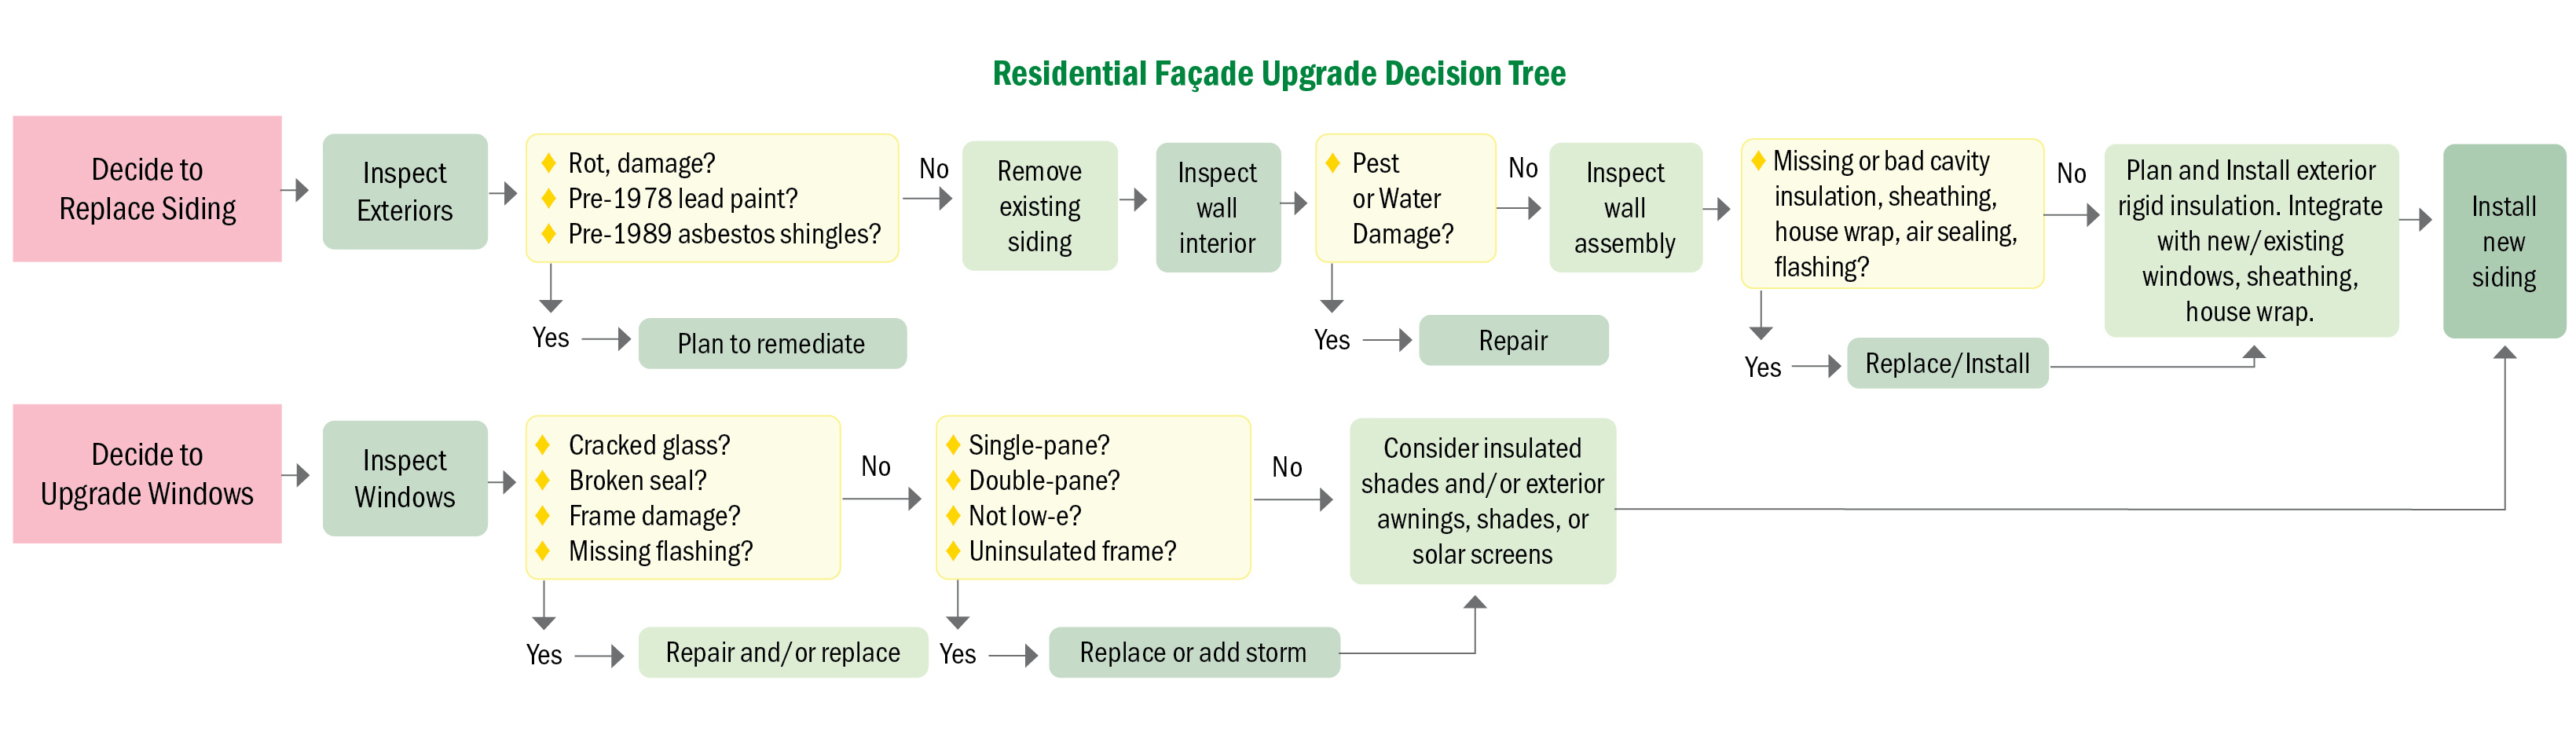
This simple decision tree can help homeowners and contractors make decisions about wall and window upgrades when re-siding a home
Image
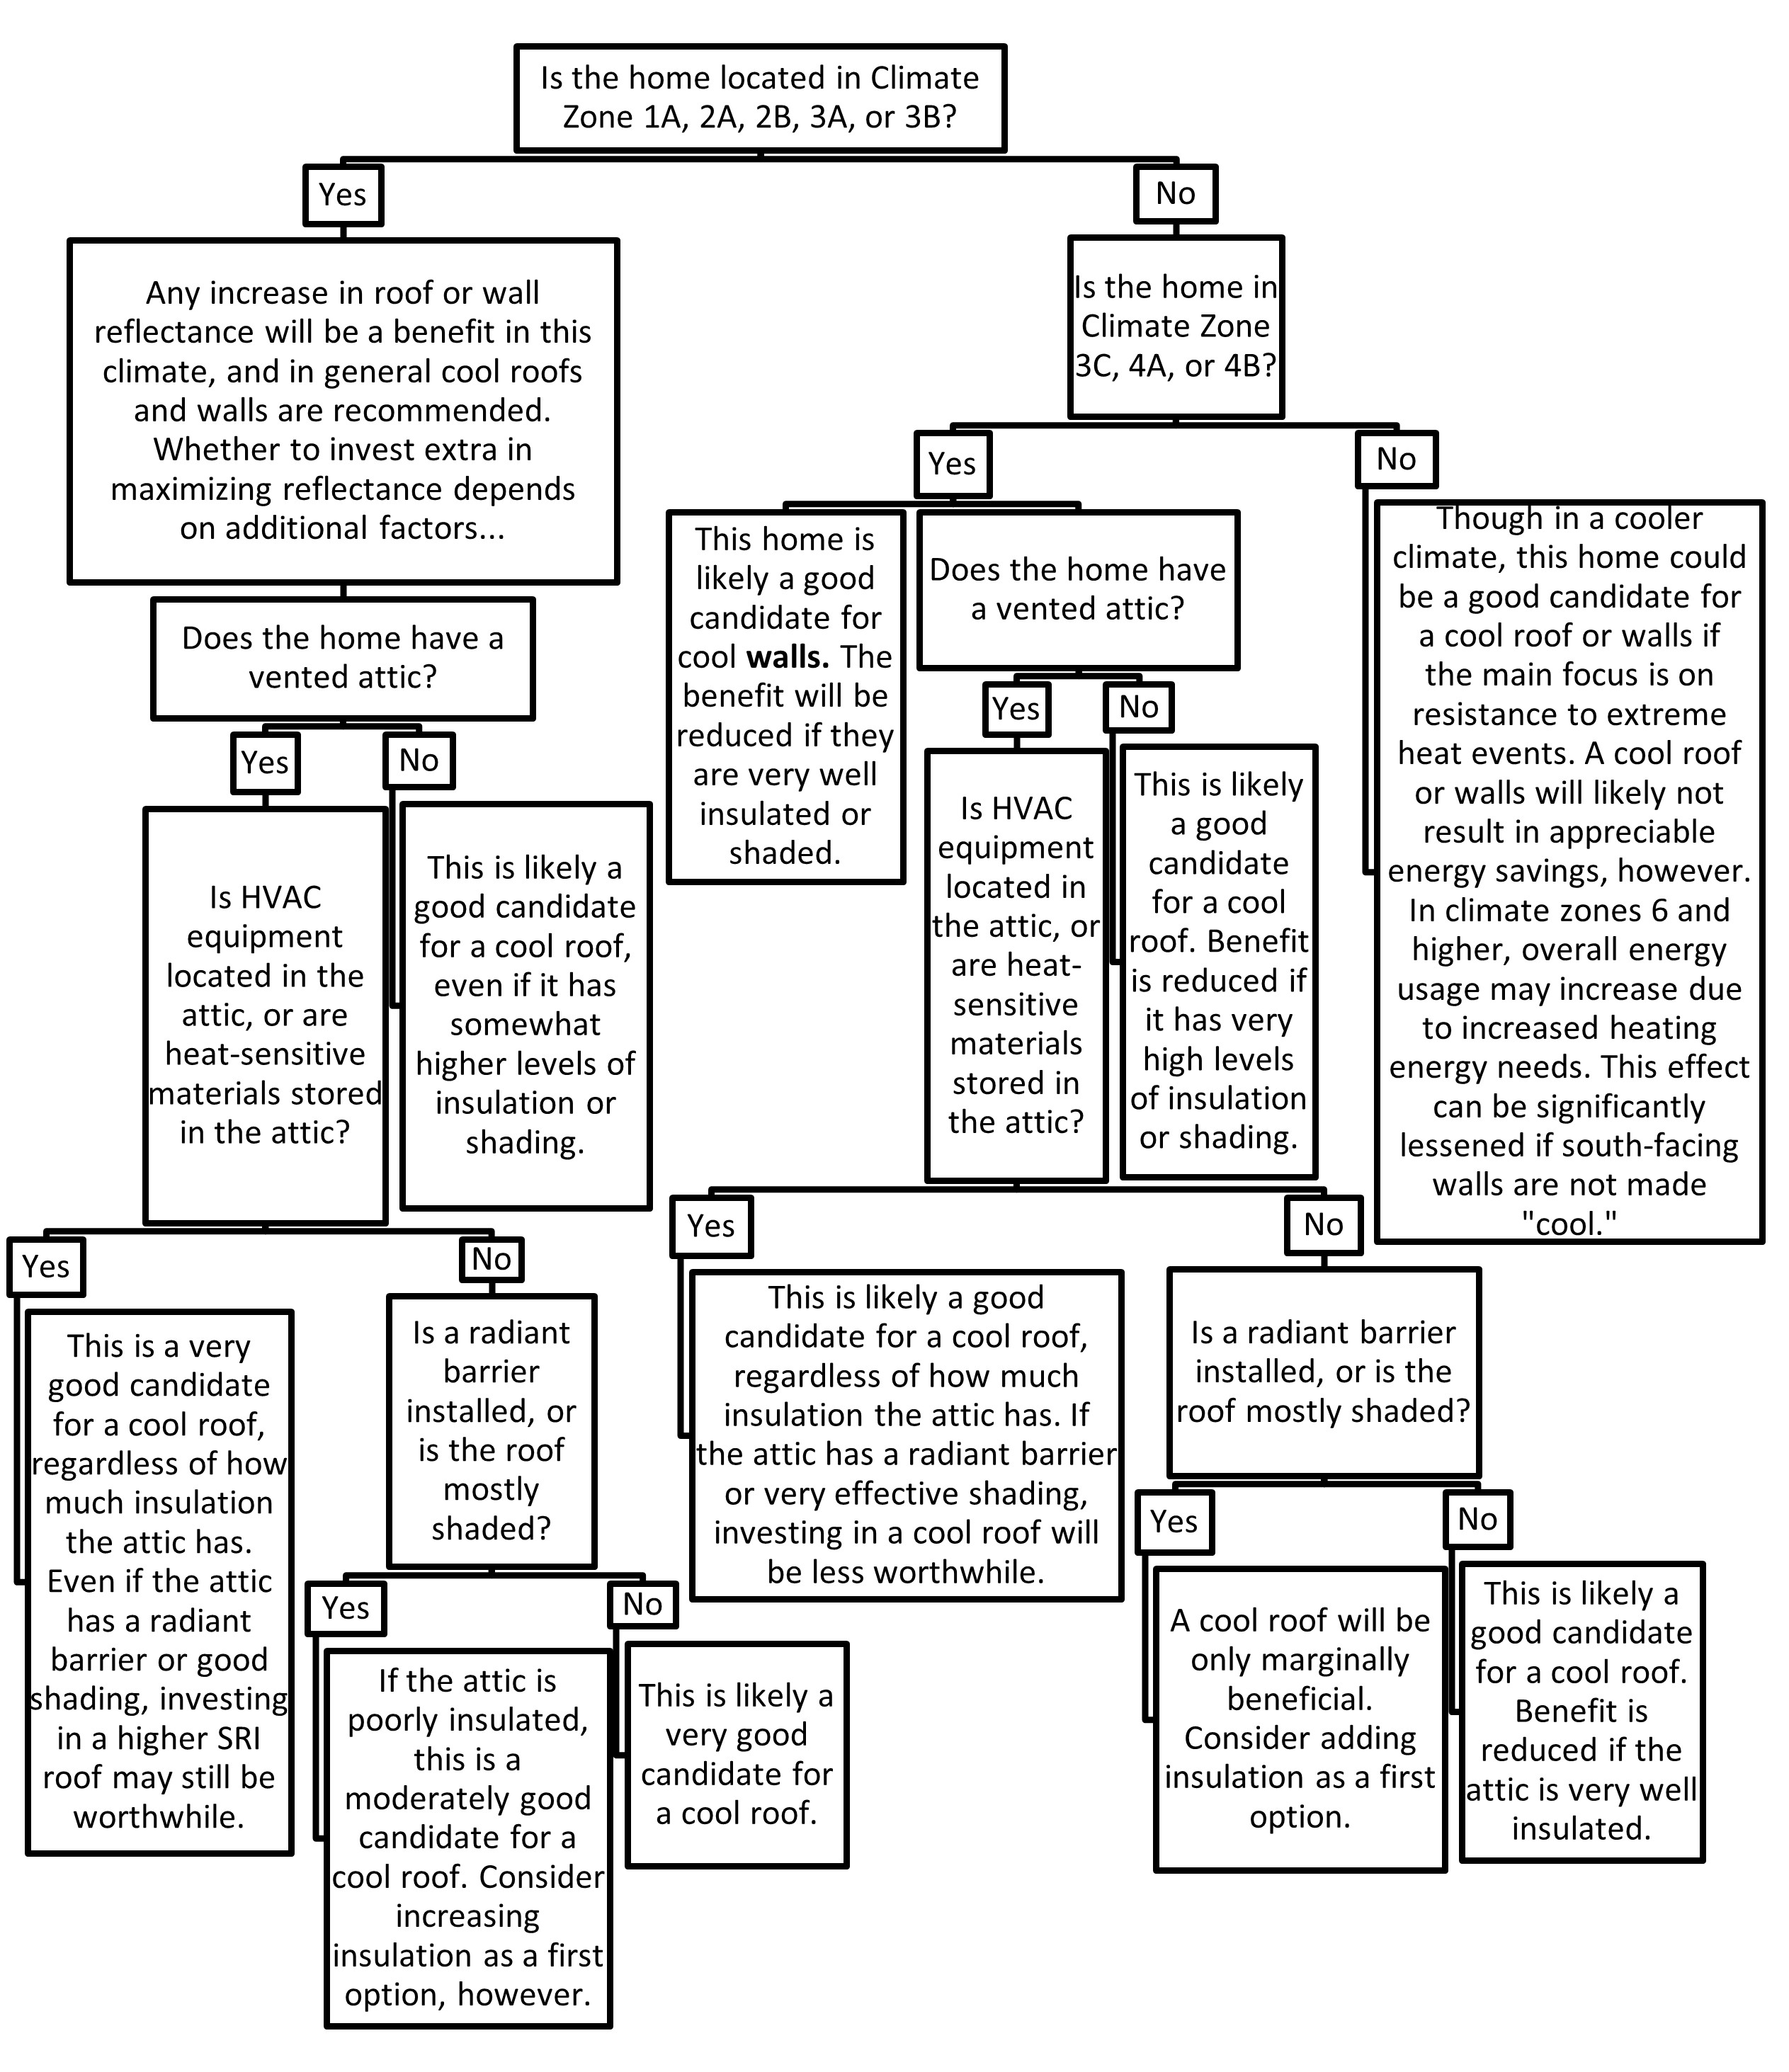
This simplified decision tree can help a homeowner or contractor assess how appropriate a cool roof or wall will be for a particular home
Image
Image
This technique for installing electrical wiring avoids the need to cut into the SIP panel
Image

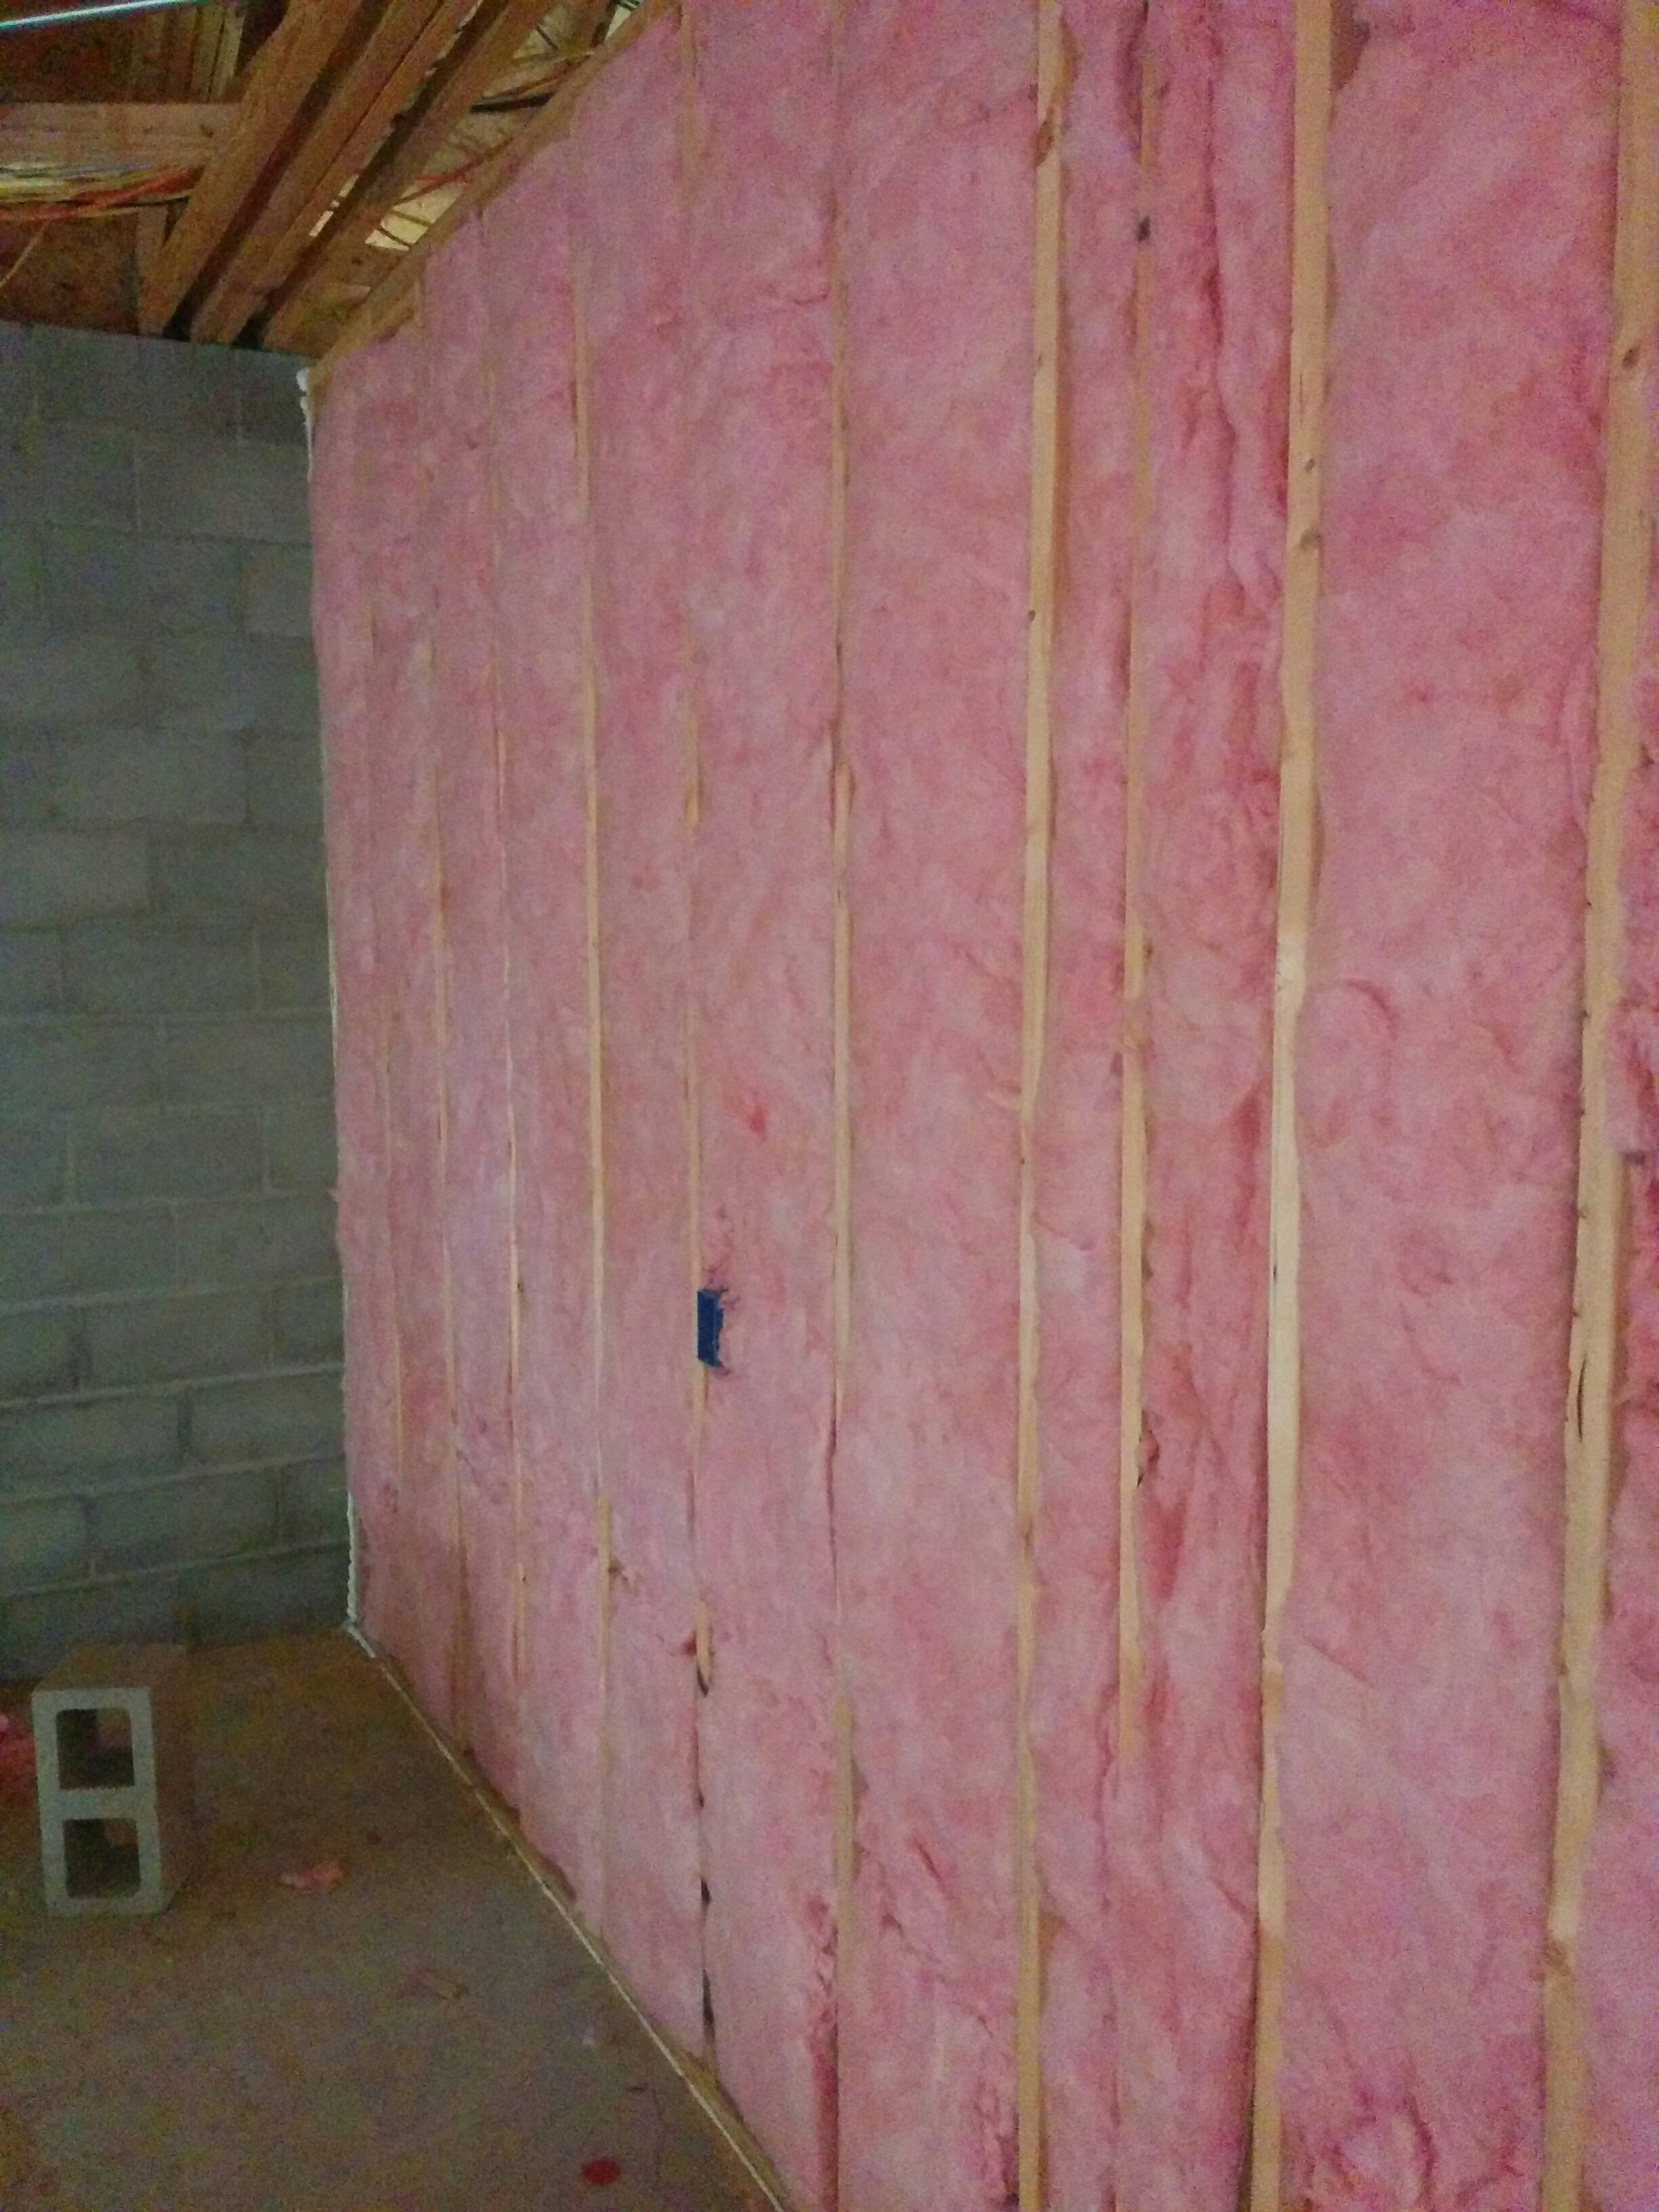
This unfaced fiberglass completely fills the wall cavities, with RESNET Grade 1 insulation.
Image
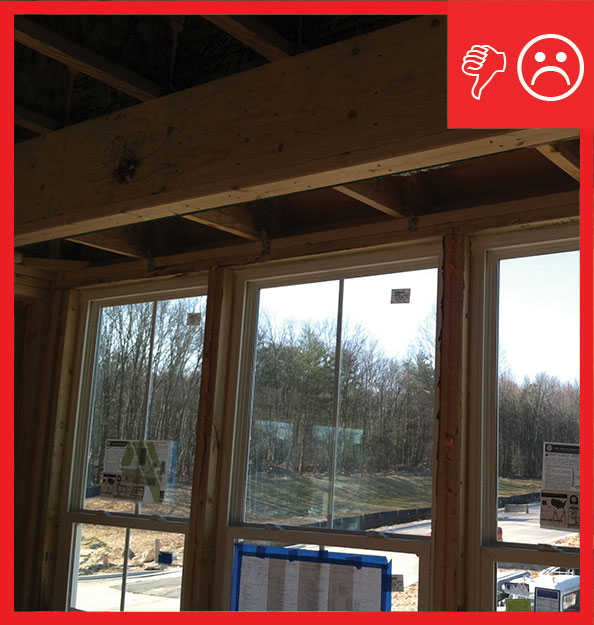
This wall and window assembly has excessive framing around the windows, which can lead to heat gain in how climate zones.
Image
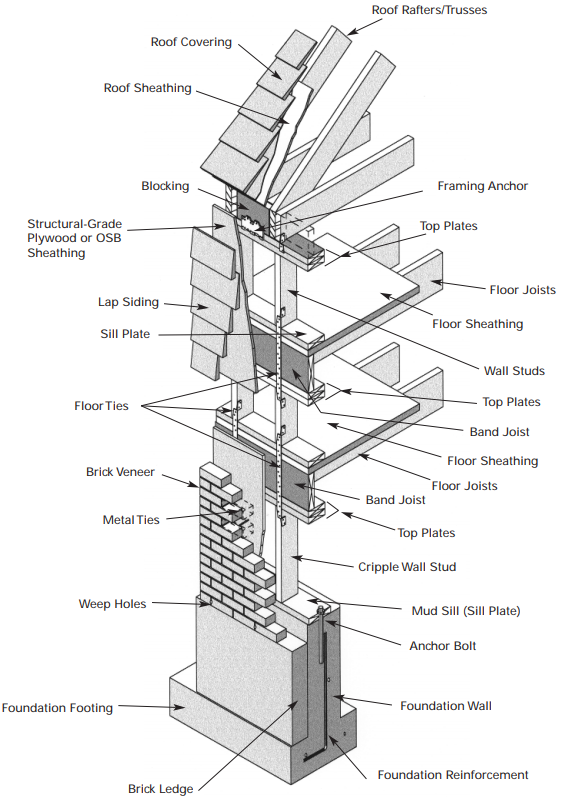
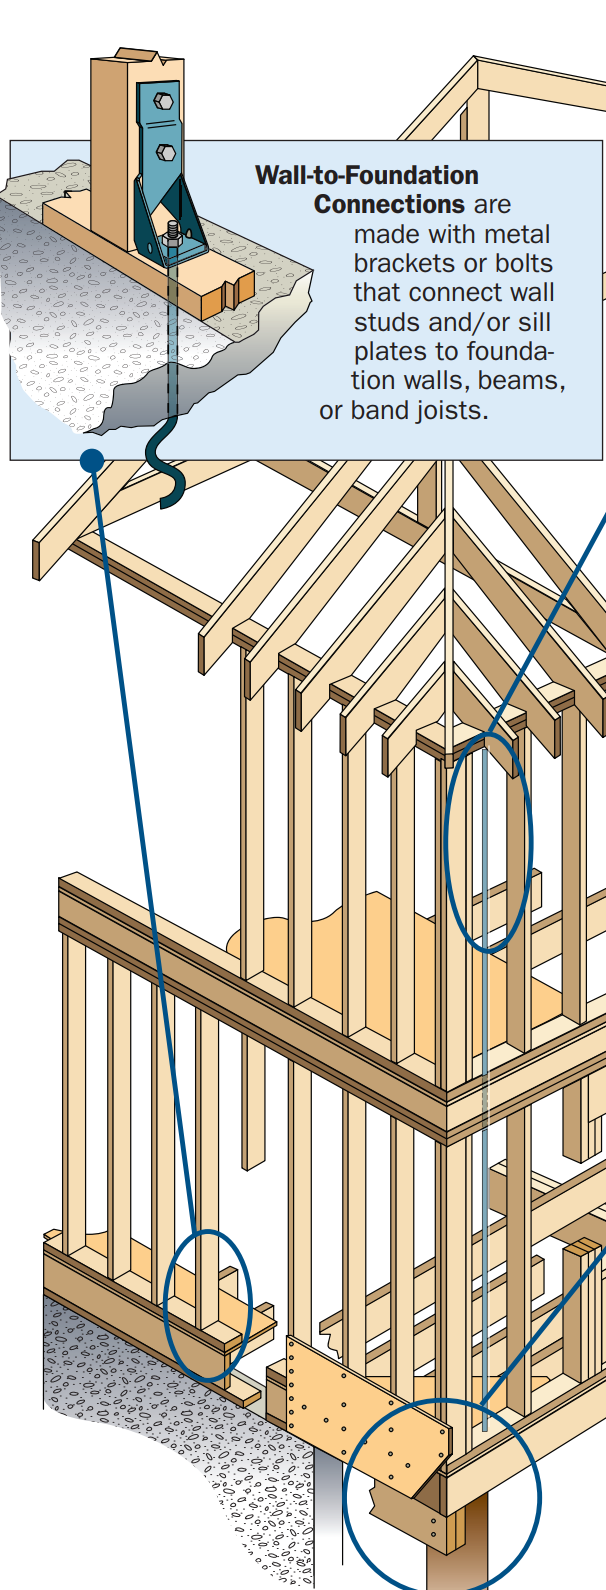
This wood-framed wall is connected with framing anchors, metal strapping and ties, and anchor bolts to secure the roof to the walls and walls to the foundation
Image
Thorough air sealing is one way the Habitat for Humanity affiliate in Loudon County, FL, improves the efficiency and weather resistance of its homes.
Image
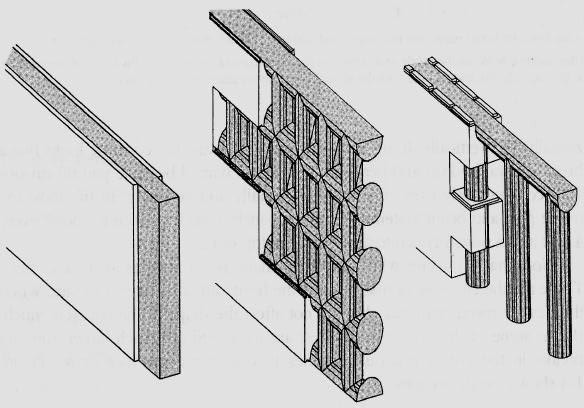
Three common ICF wall systems: the flat wall, the waffle wall, and the post-and-beam wall
Image

Three types of foundation walls: Stem-plus-wood stud cripple wall, reinforced concrete wall, and reinforced concrete block/masonry wall
Image
To ensure a complete air barrier between the garage and the house, the wall between the garage and the house was insulated and air-sealed with four inches of high-density spray foam.
Image
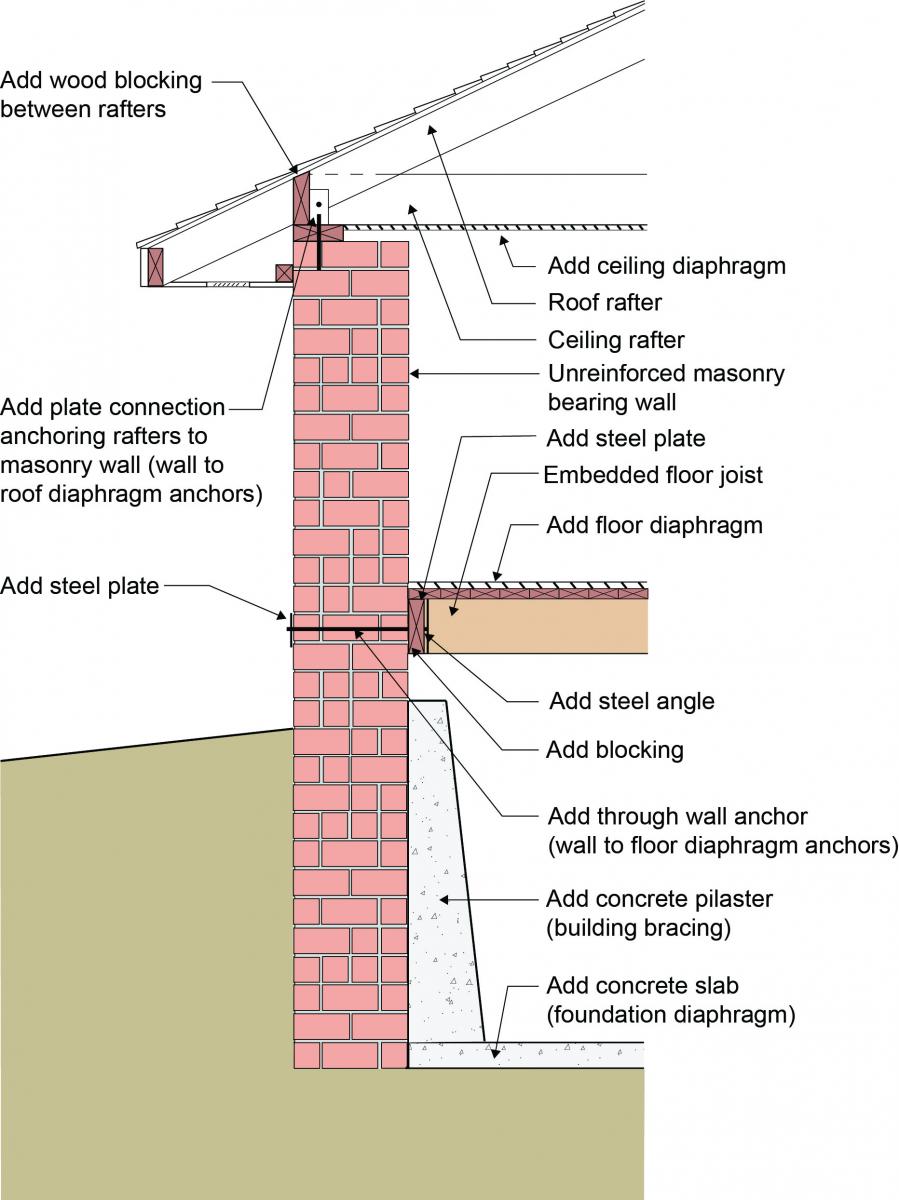
To increase a masonry-walled home’s resistance to seismic forces, solid wood blocking is added between the roof rafters, anchors are added to connect the brick wall to the rafters and floor joists, building diaphragms are added, foundation braced
Image
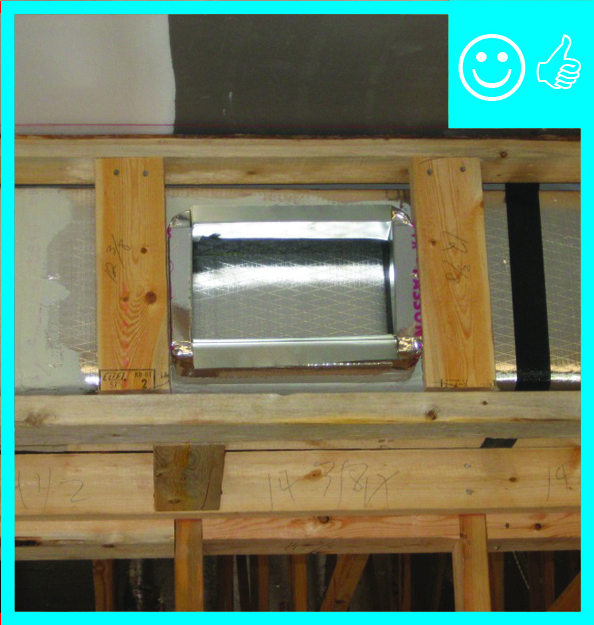
To keep chase width to a minimum, use flat sheet metal as opposed to a collar and flex duct for supplies into rooms where the chase is located
Image
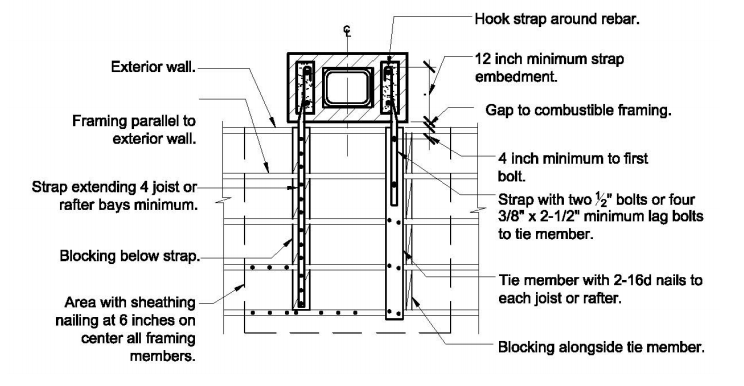
Top view showing how the chimney is attached to at least four ceiling joists running parallel to the exterior wall.
Image
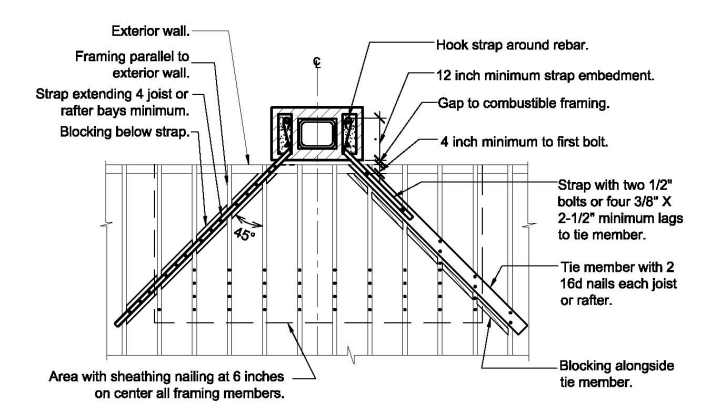
Top view showing how the chimney is attached to ceiling joists that run perpendicular to the exterior wall.
Image
Image
Two layers of high-permeability house wrap are installed to provide a drainage layer between the SIPS and the homes external cladding
Image
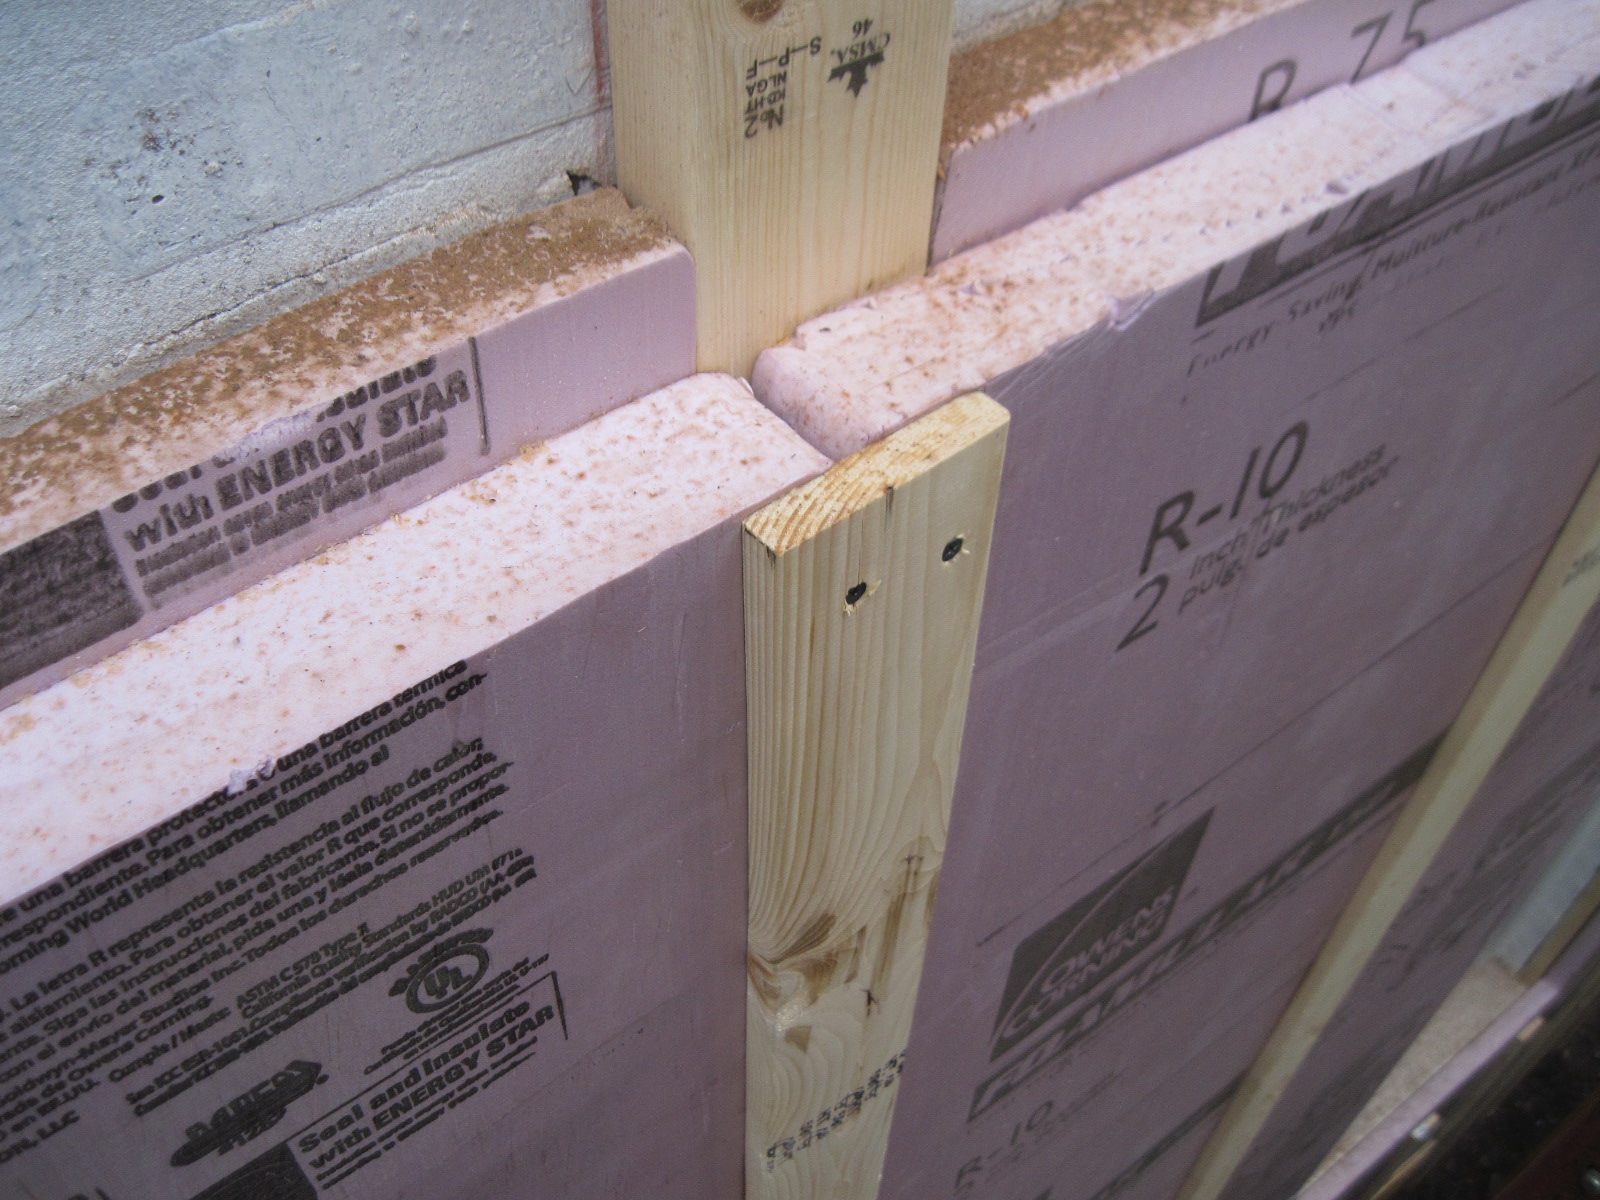
Two layers of XPS are installed with staggered seams over a liquid-applied membrane on the structural sheathing
Image
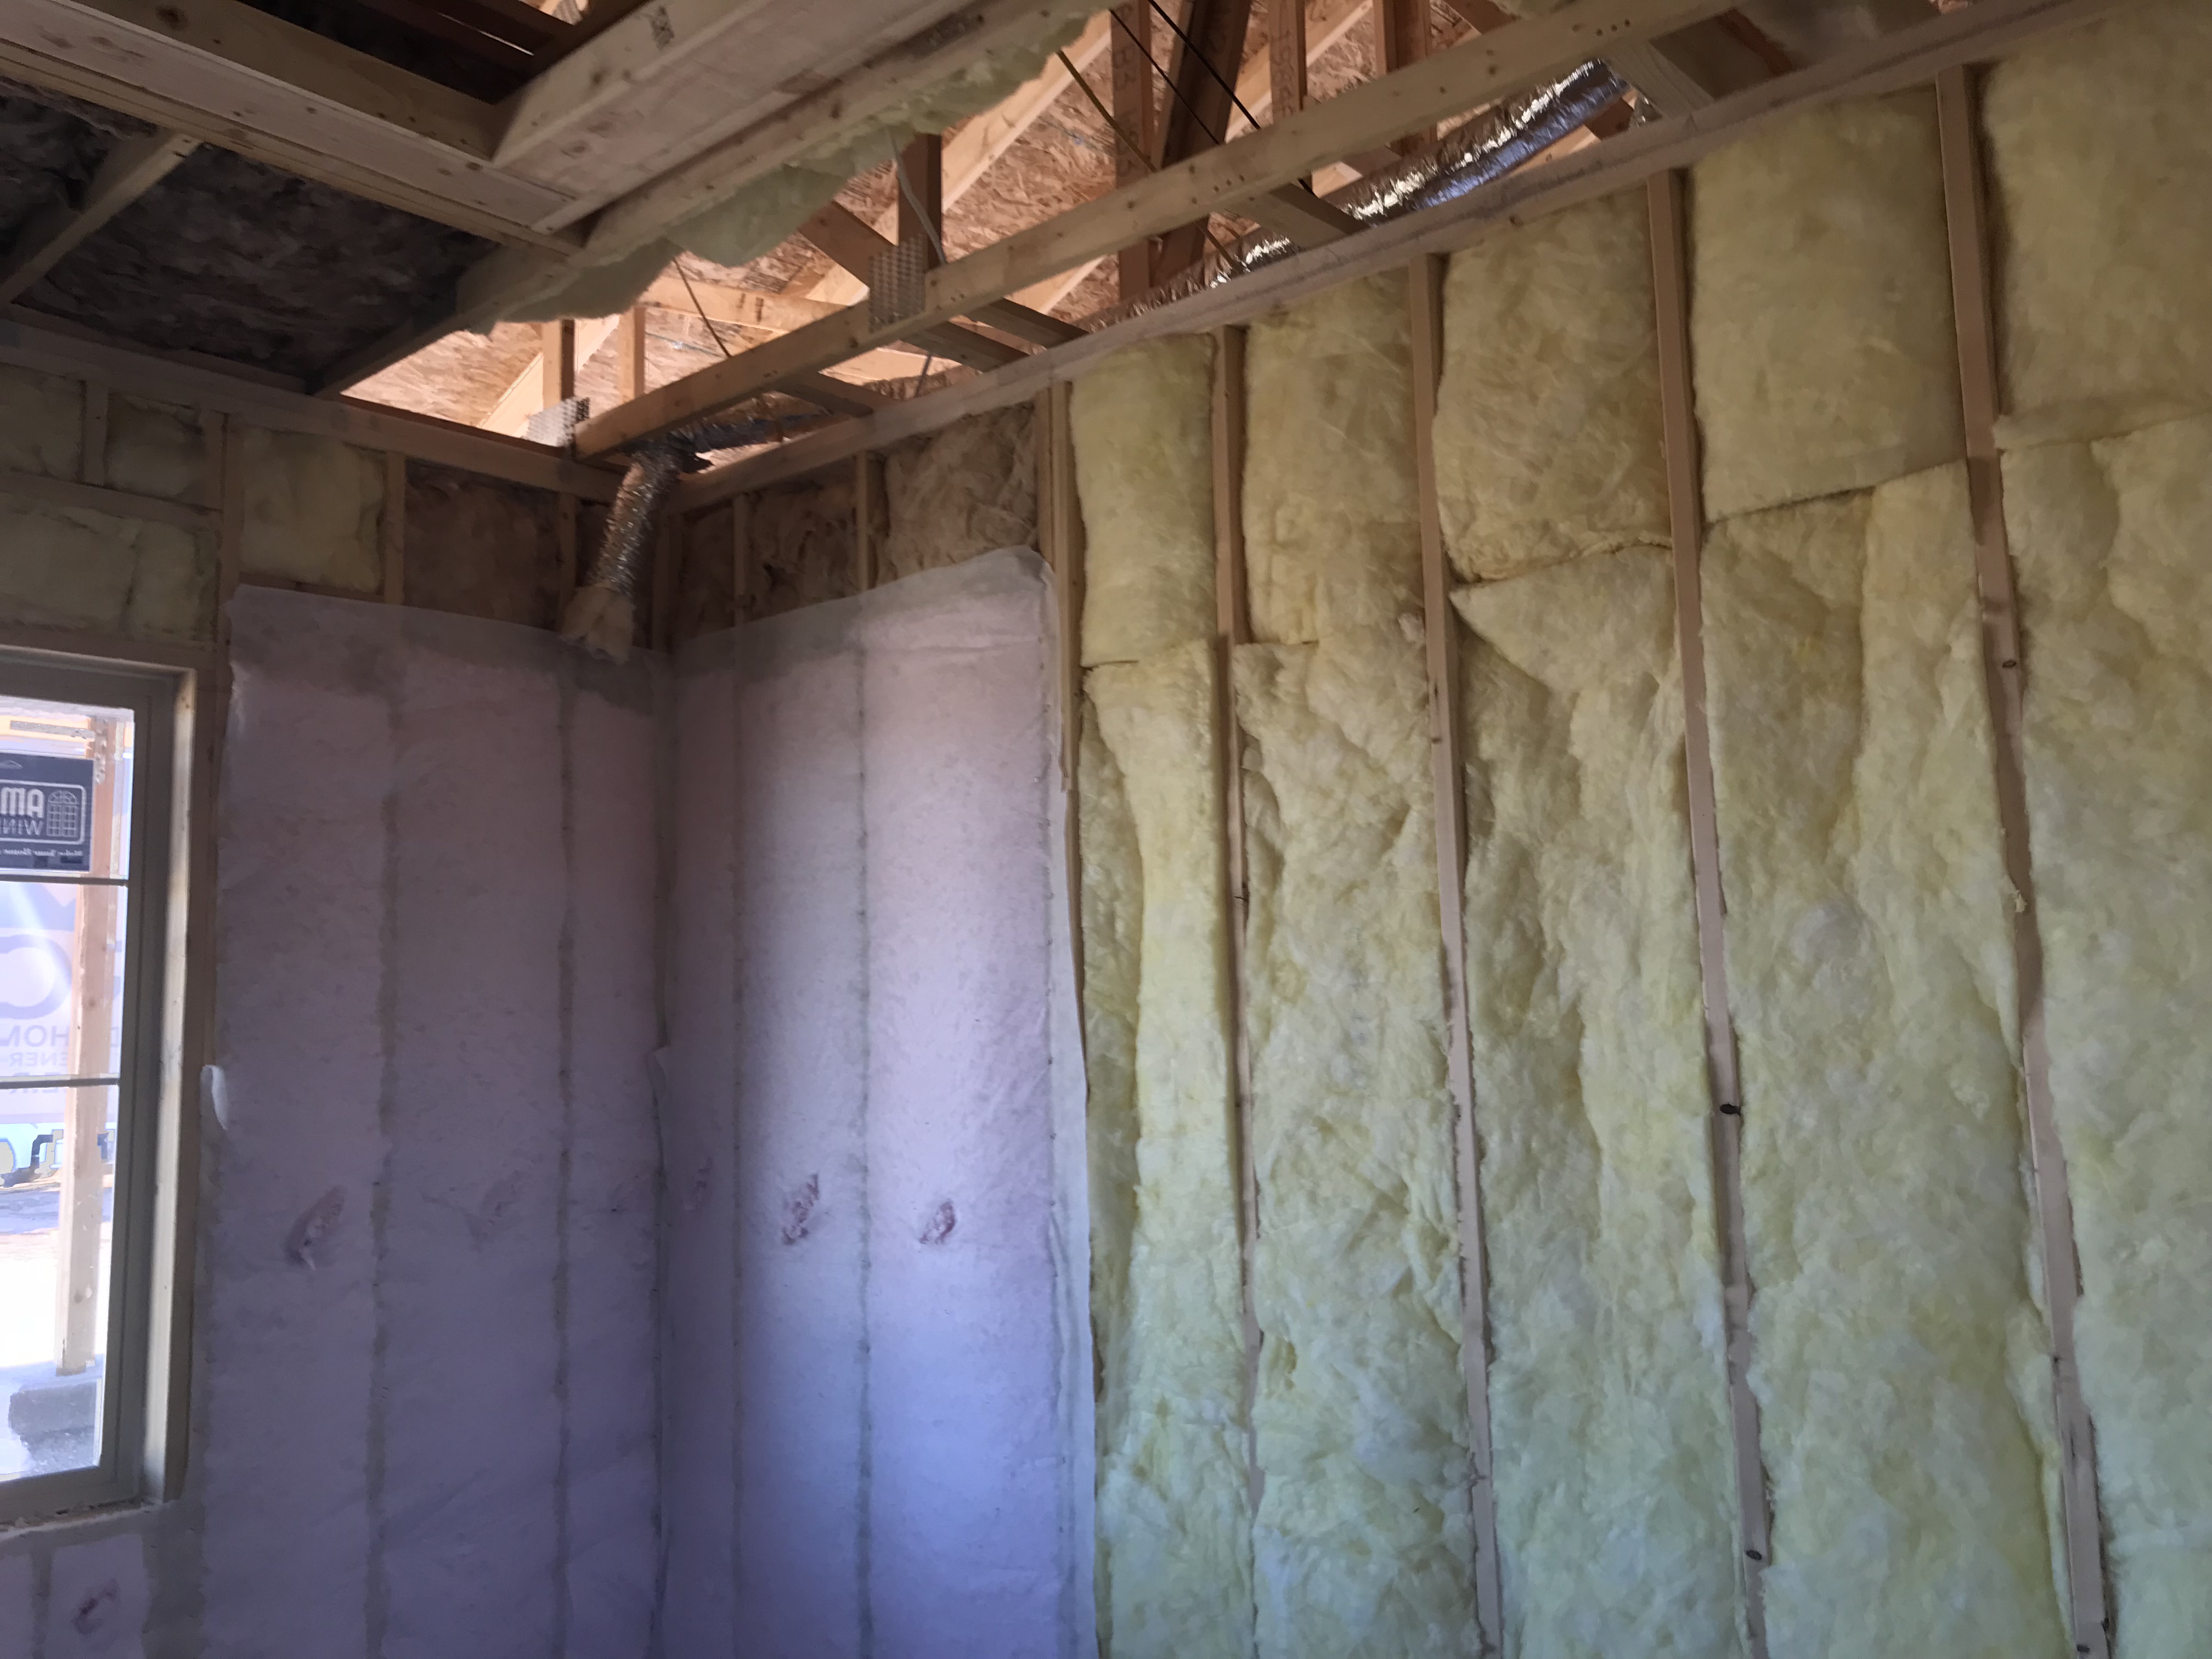
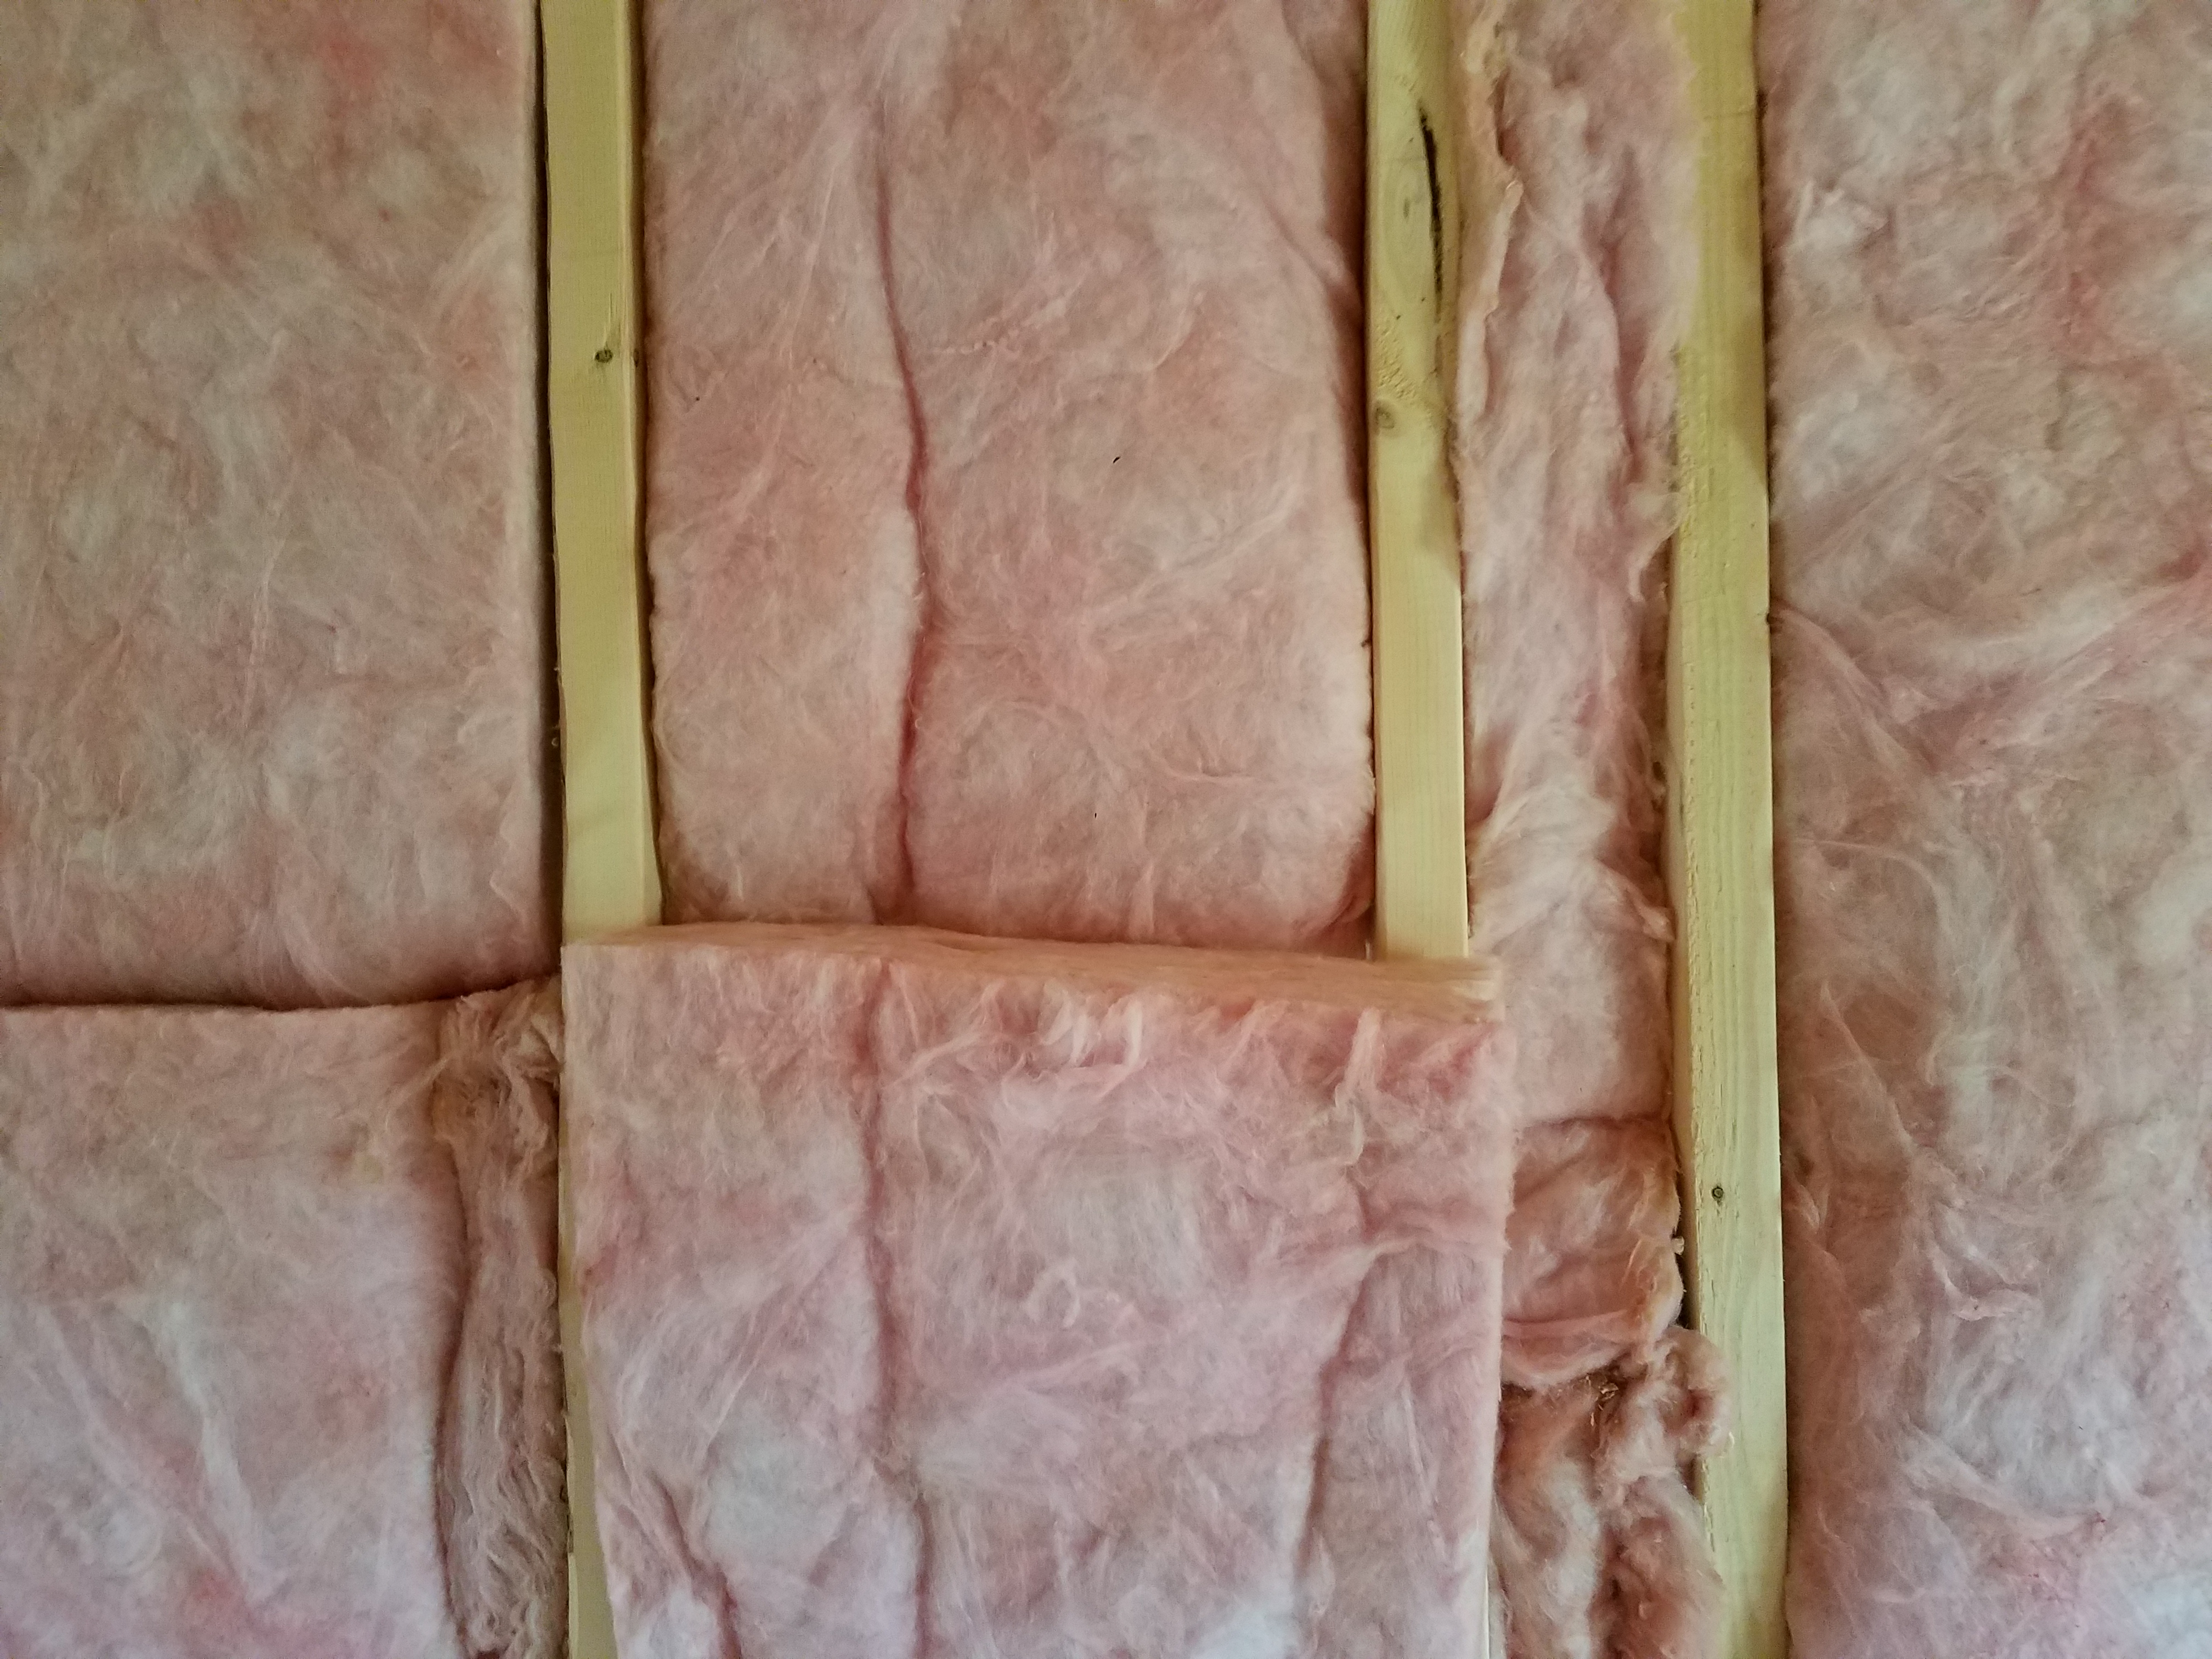
Unfaced batt and blown fiberglass wall insulation are installed to RESENET Grade 1 standards with no gaps or voids.
Image
Image
Image
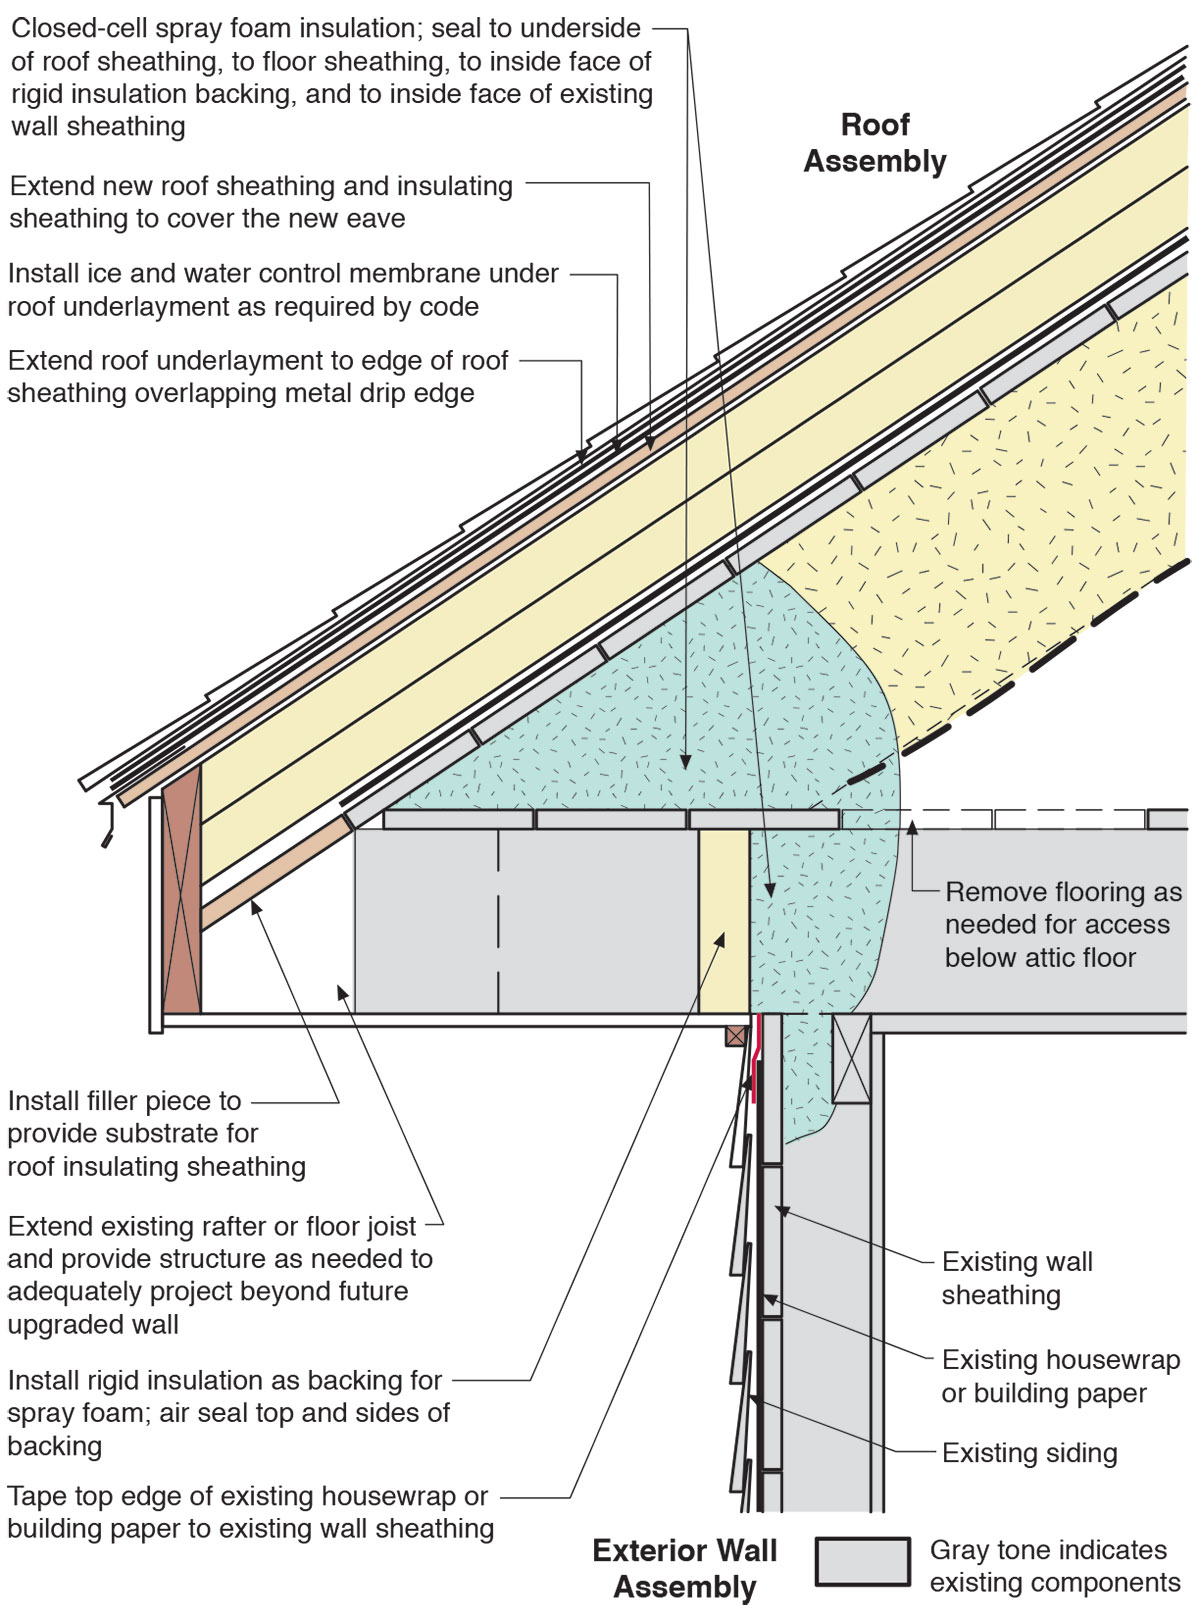
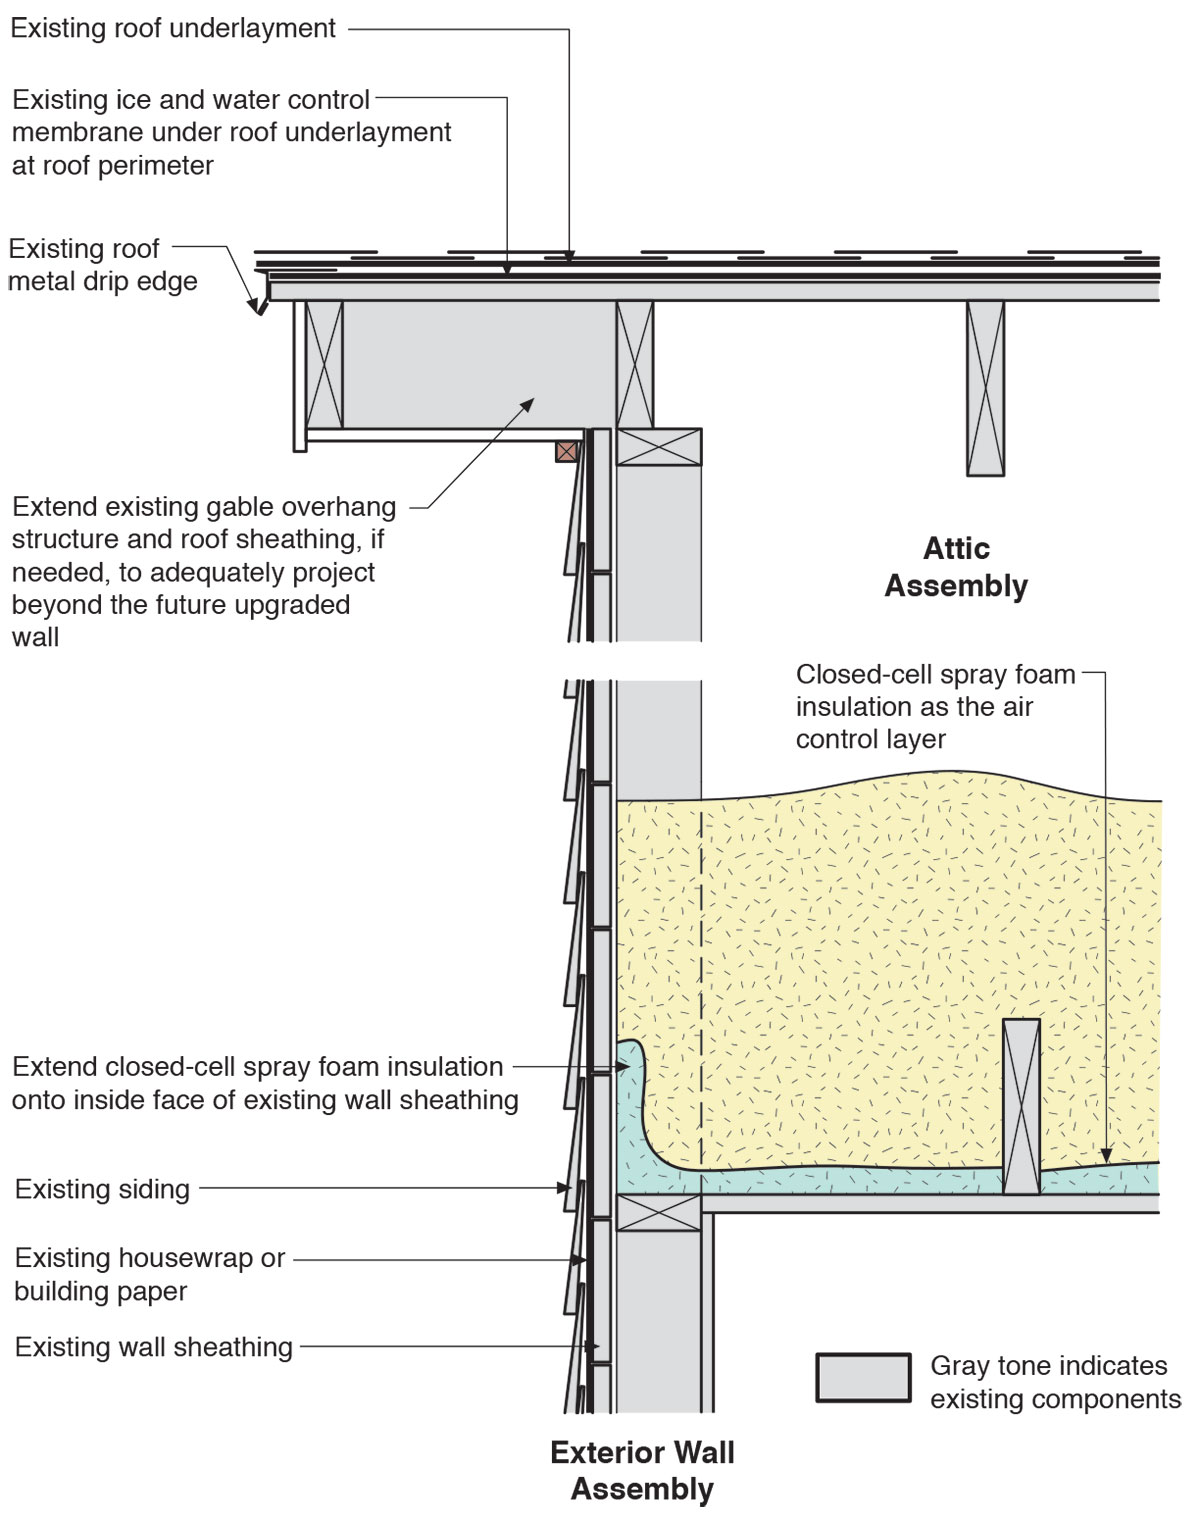
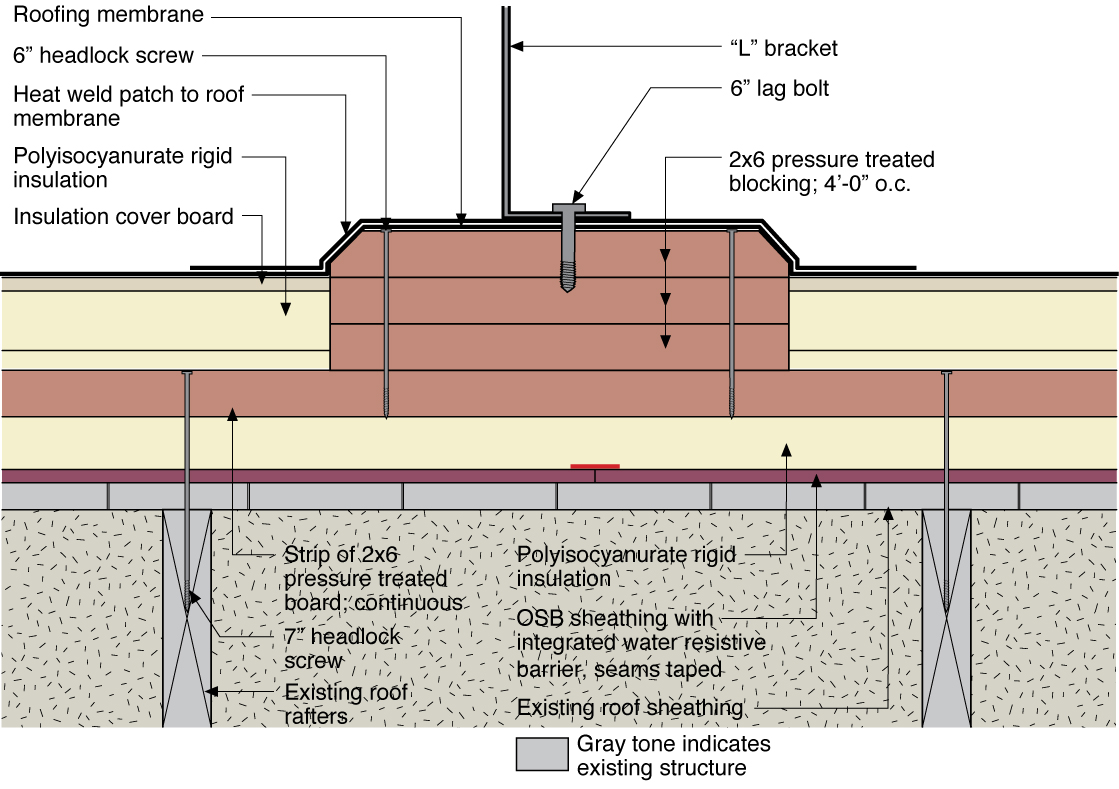
Unvented roof assembly at eave retrofitted with rigid foam, spray foam, and a fully adhered membrane seal at the top of wall-to-roof transition
Image
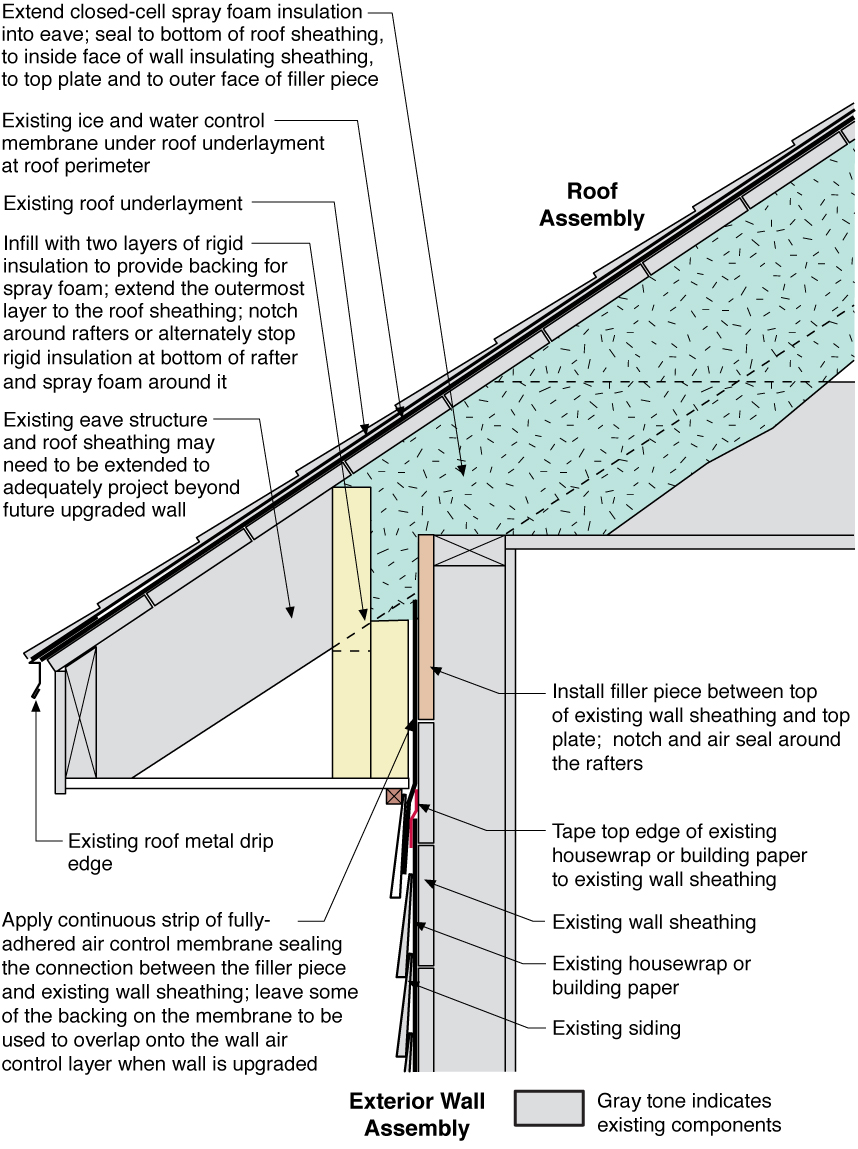
Unvented roof assembly at eave retrofitted with rigid foam, spray foam, and taped top edge of existing house wrap or building paper
Image
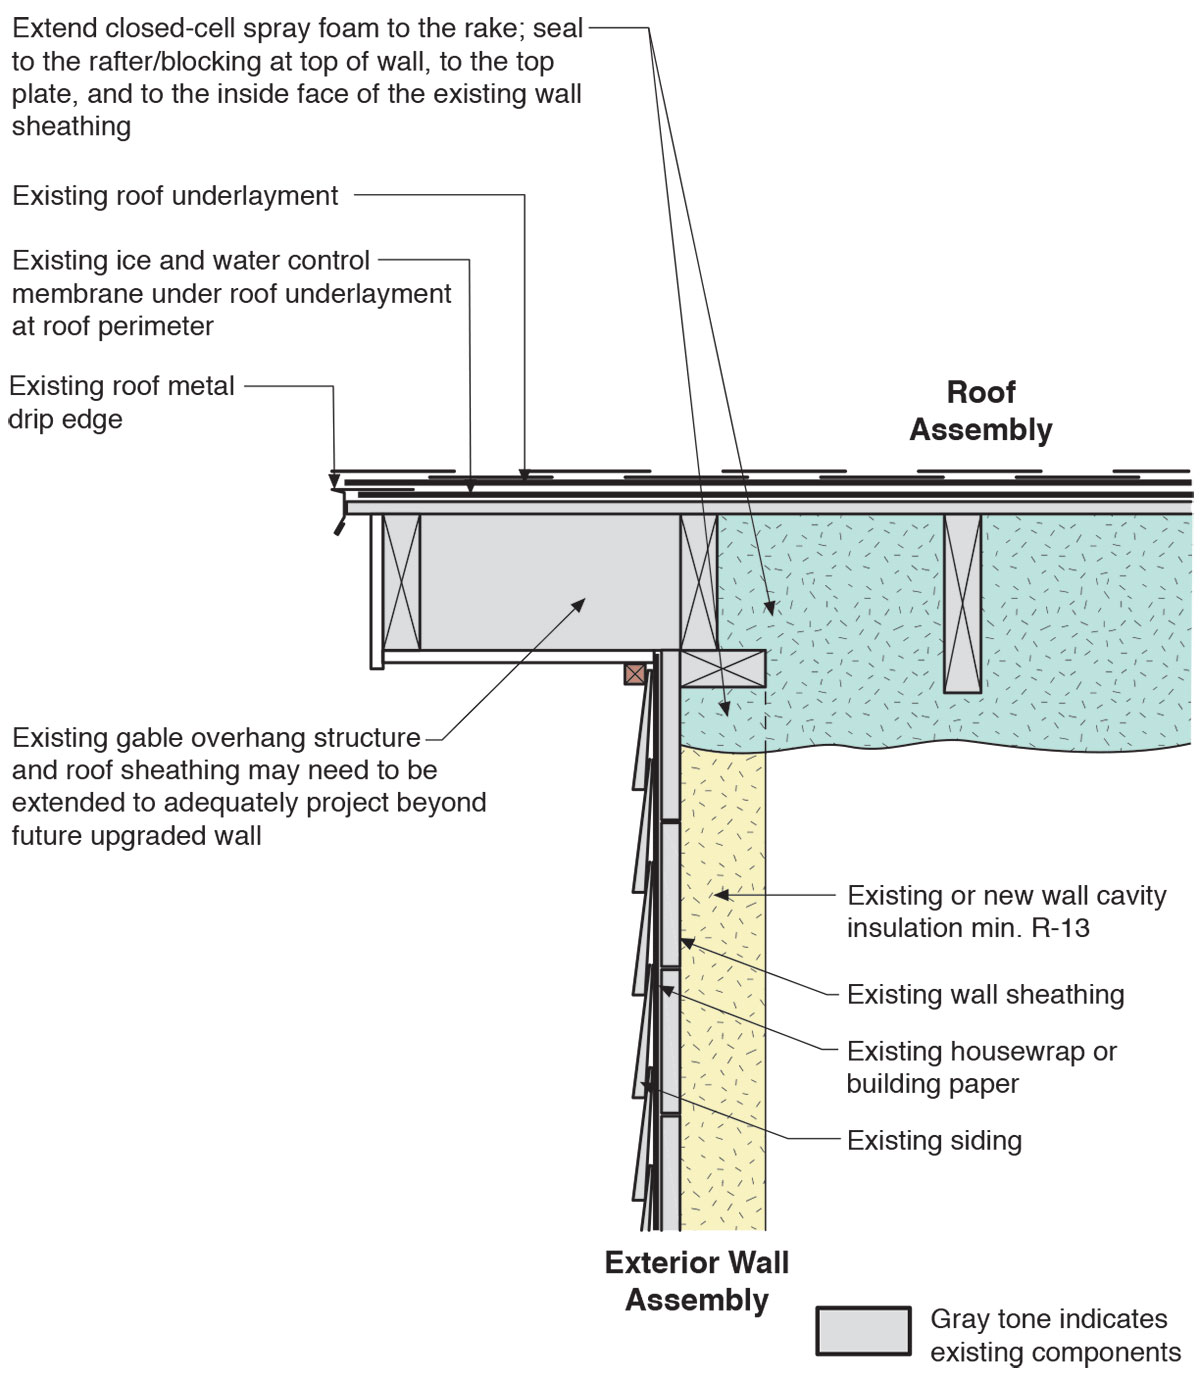
Unvented roof assembly at rake retrofitted with spray foam installed along the underside of the roof deck and extended to the rake edge to insulate and air seal the attic
Image
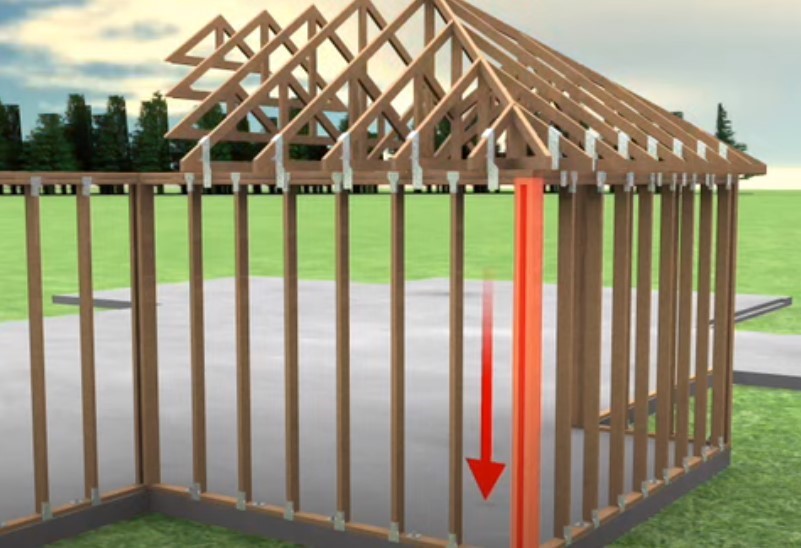
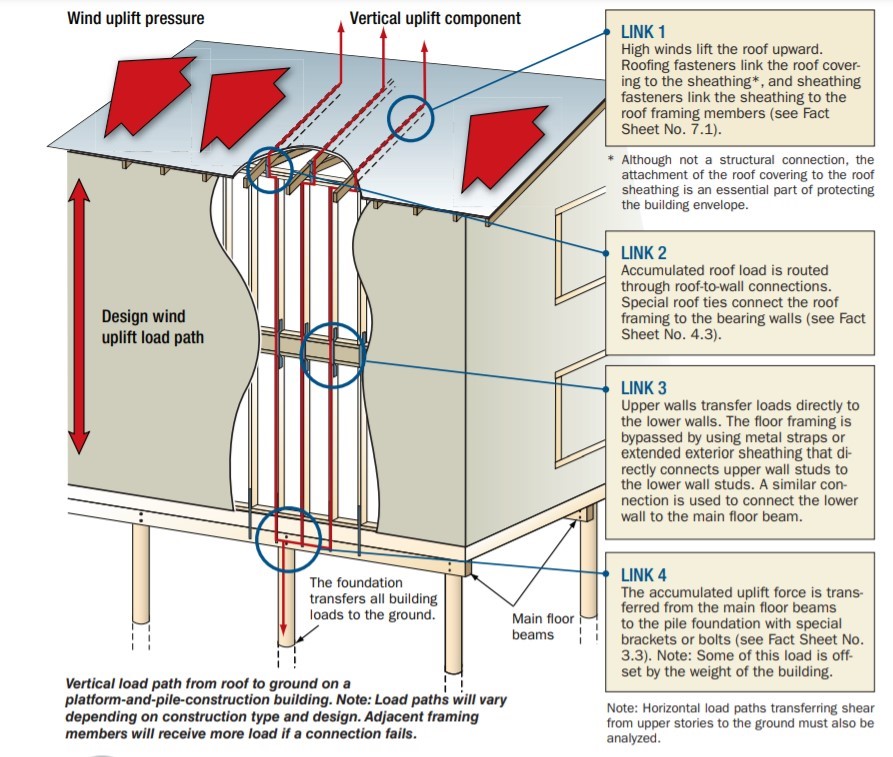
Uplift forces acting on the roof are met with roof-wall connections that distribute the forces down the walls and into the foundation along the continuous load path.
Image
Image
Image
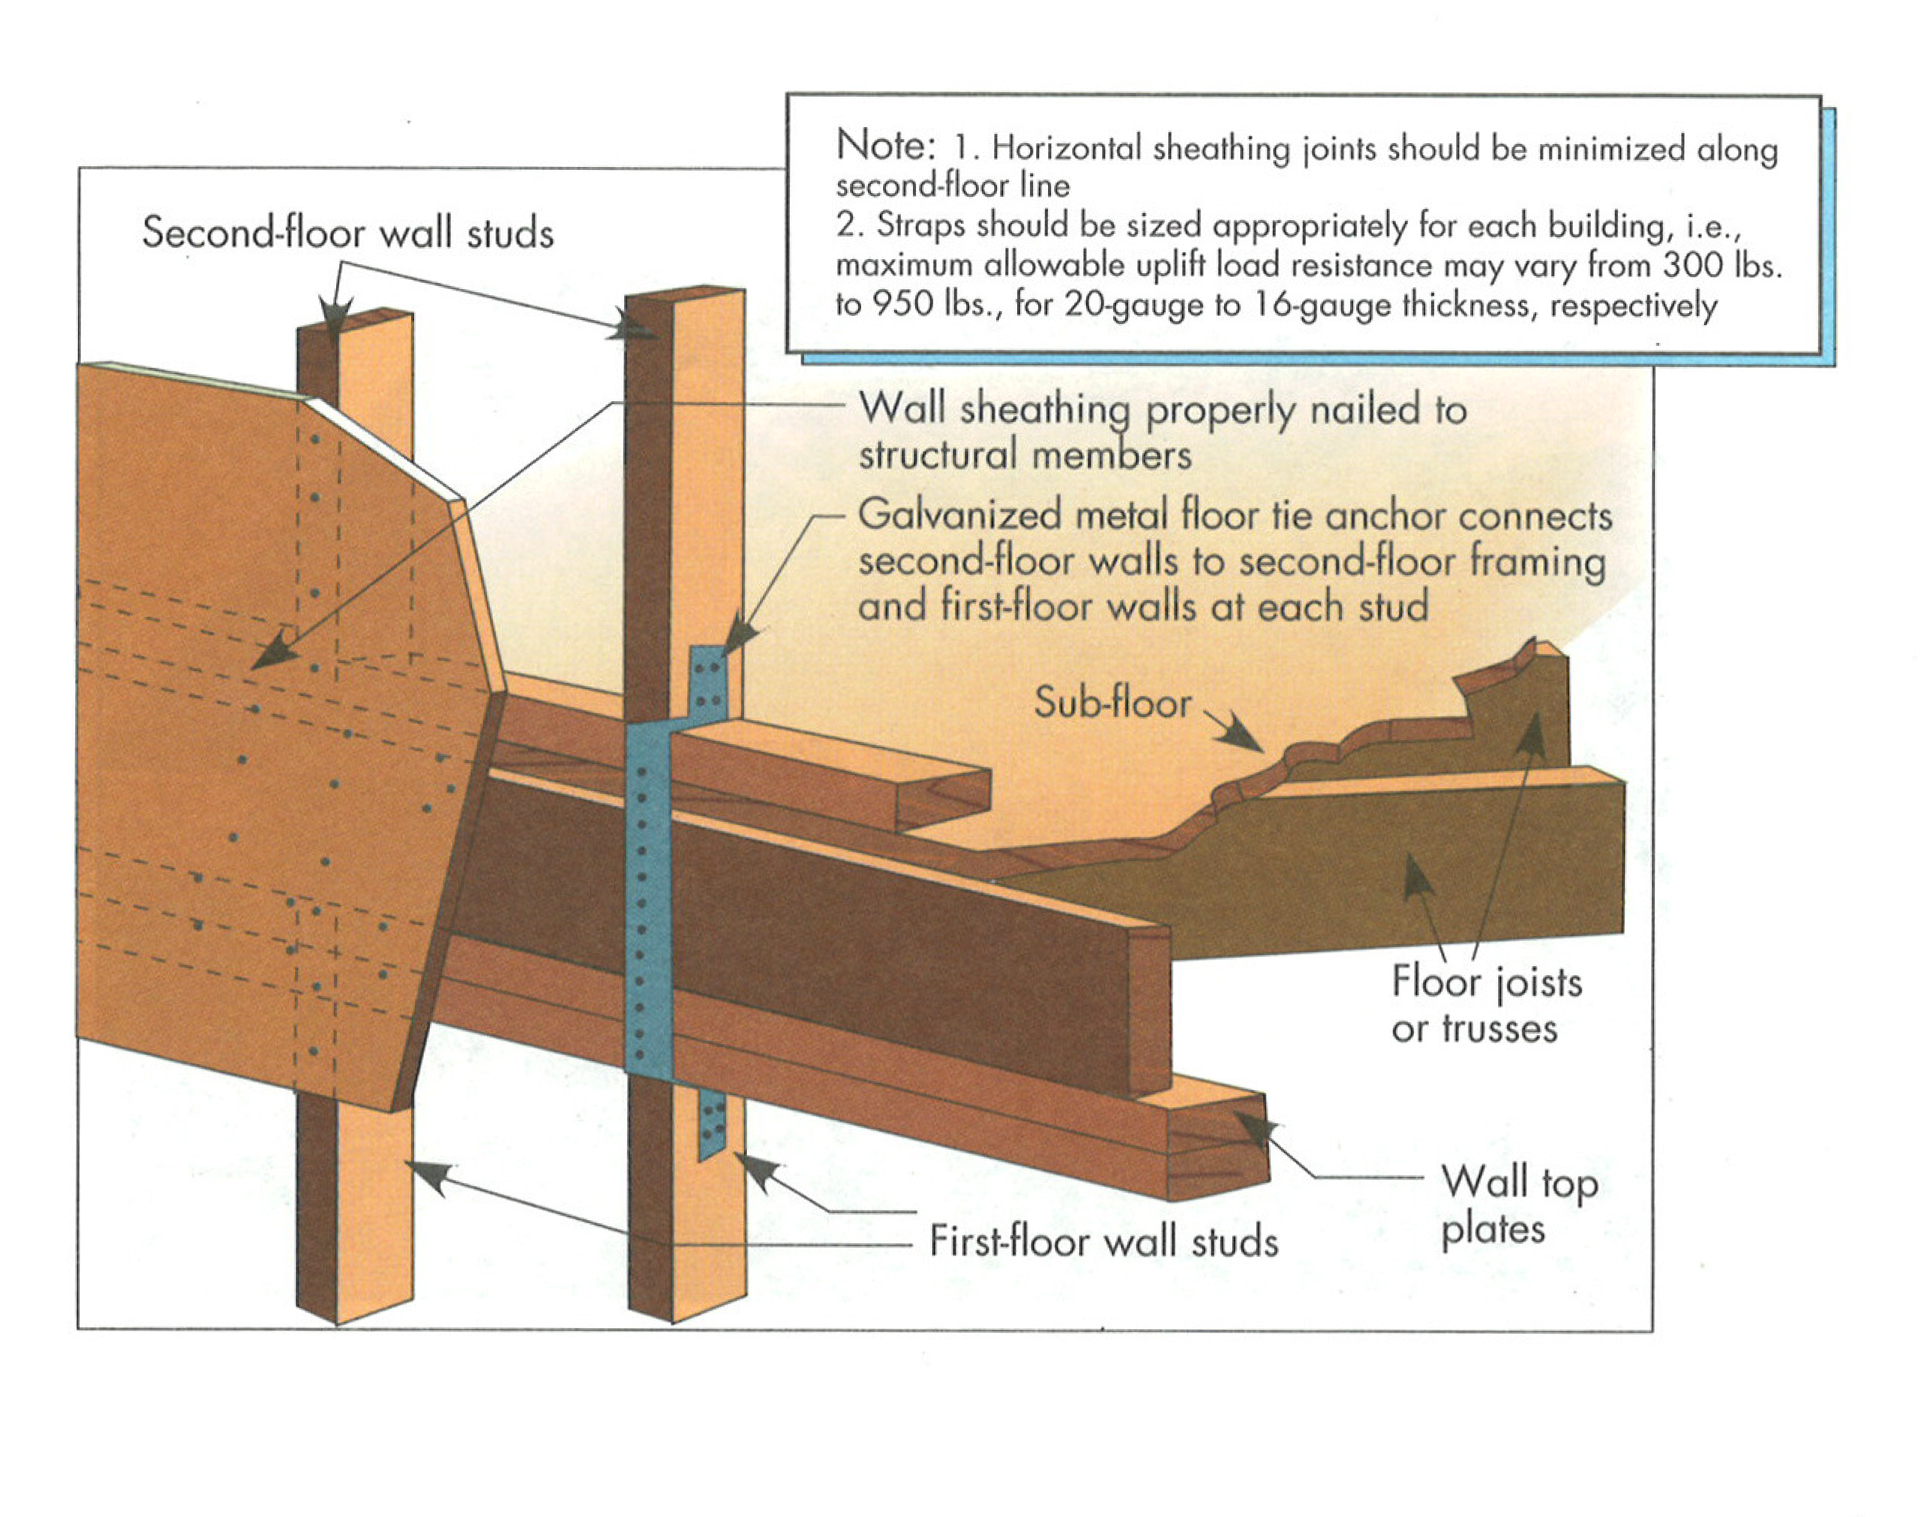
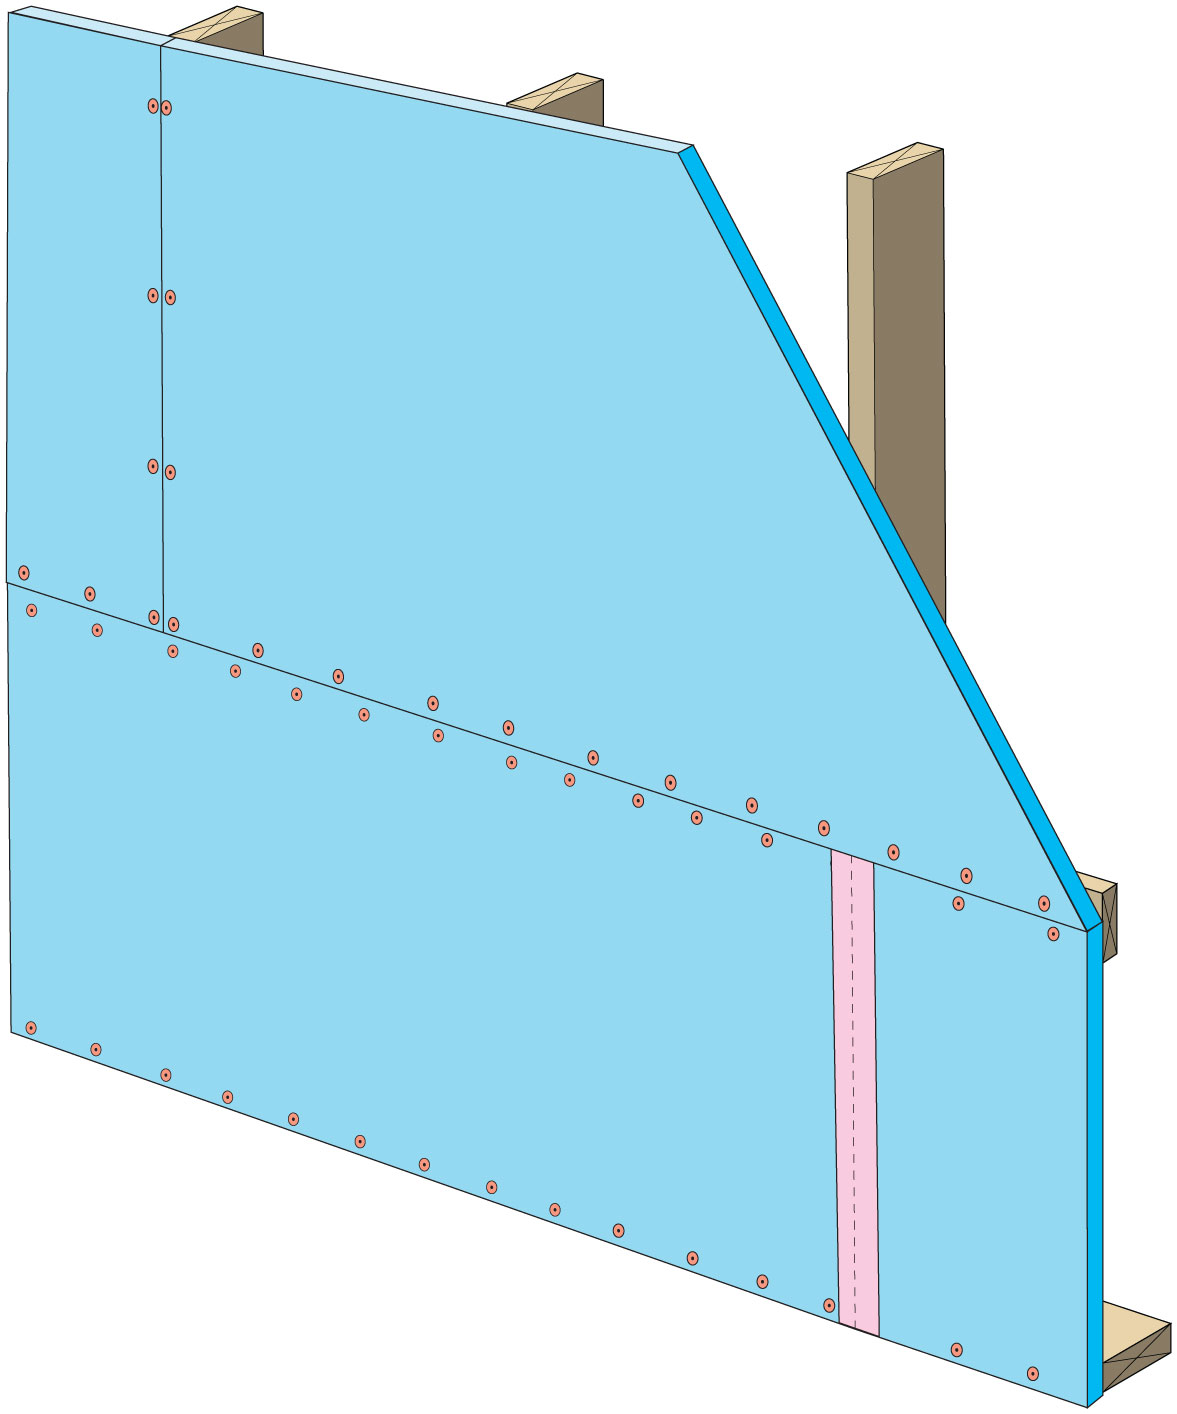
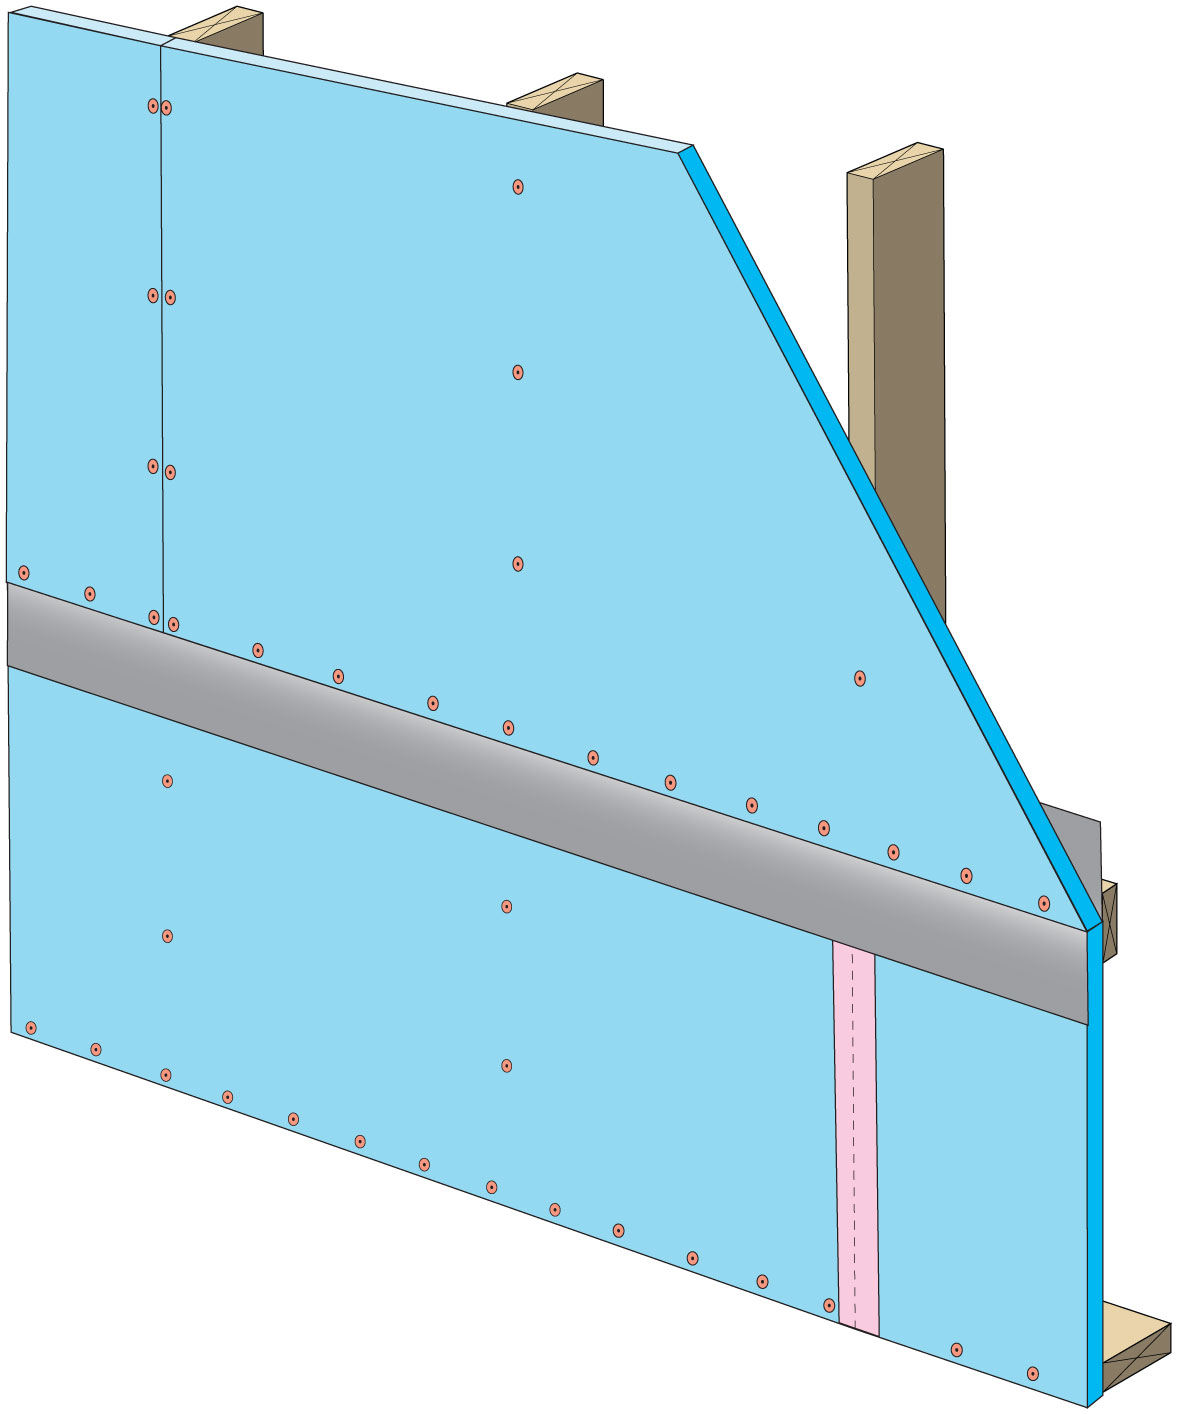
Upper-floor tie to lower floor for two-story building. Floor tie anchor and nailed wall sheathing.
Image
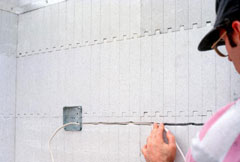
Use a smoke pencil to check for air leaks at SIP panel seams, especially along the ridge beam
Image
Use a truss joist header assembly as shown here to reduce thermal bridging in hot climate zones.
Image
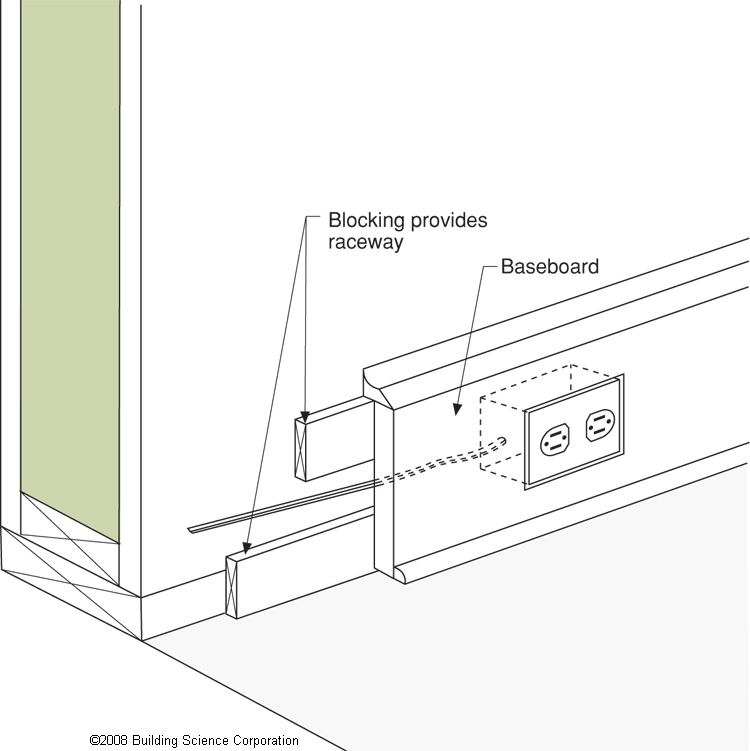
Use caulk or spray foam to air-seal all four edges of the blocking material in each joist bay.
Image
Image
Image
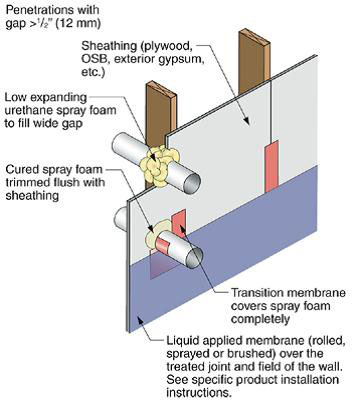
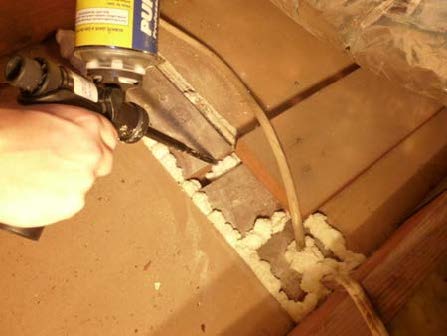
Use flashing tape to seal around any pipes or vents that penetrate through the foam
Image
Image
Image
Image
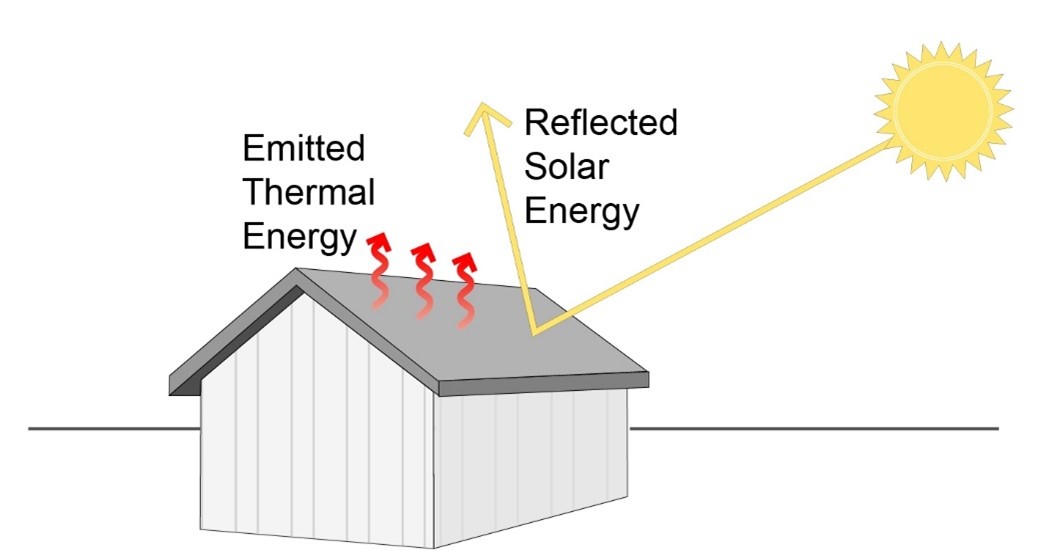
Using roof and wall materials with a high Solar Reflectance Index (SRI) will reduce heat gains.
Image
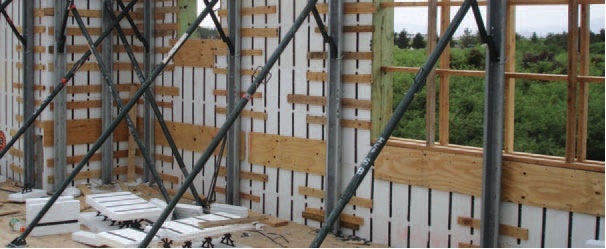
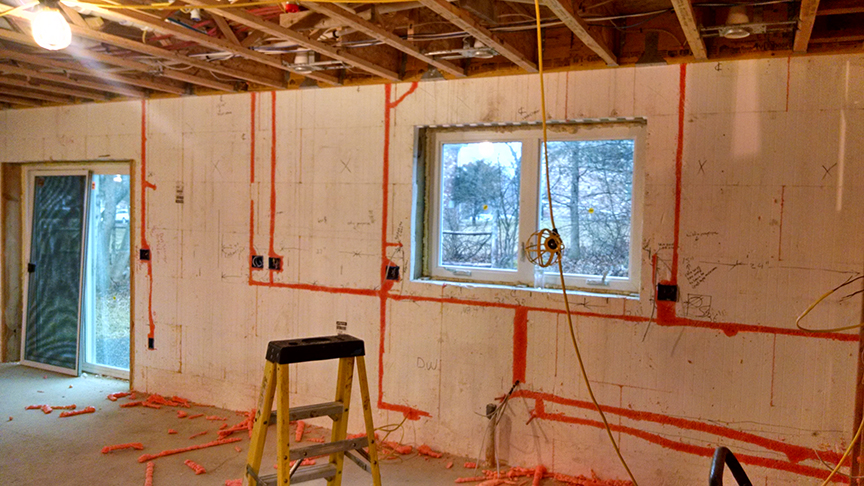
Utilities are commonly recessed into cutouts in the foam after concrete has been poured
Image

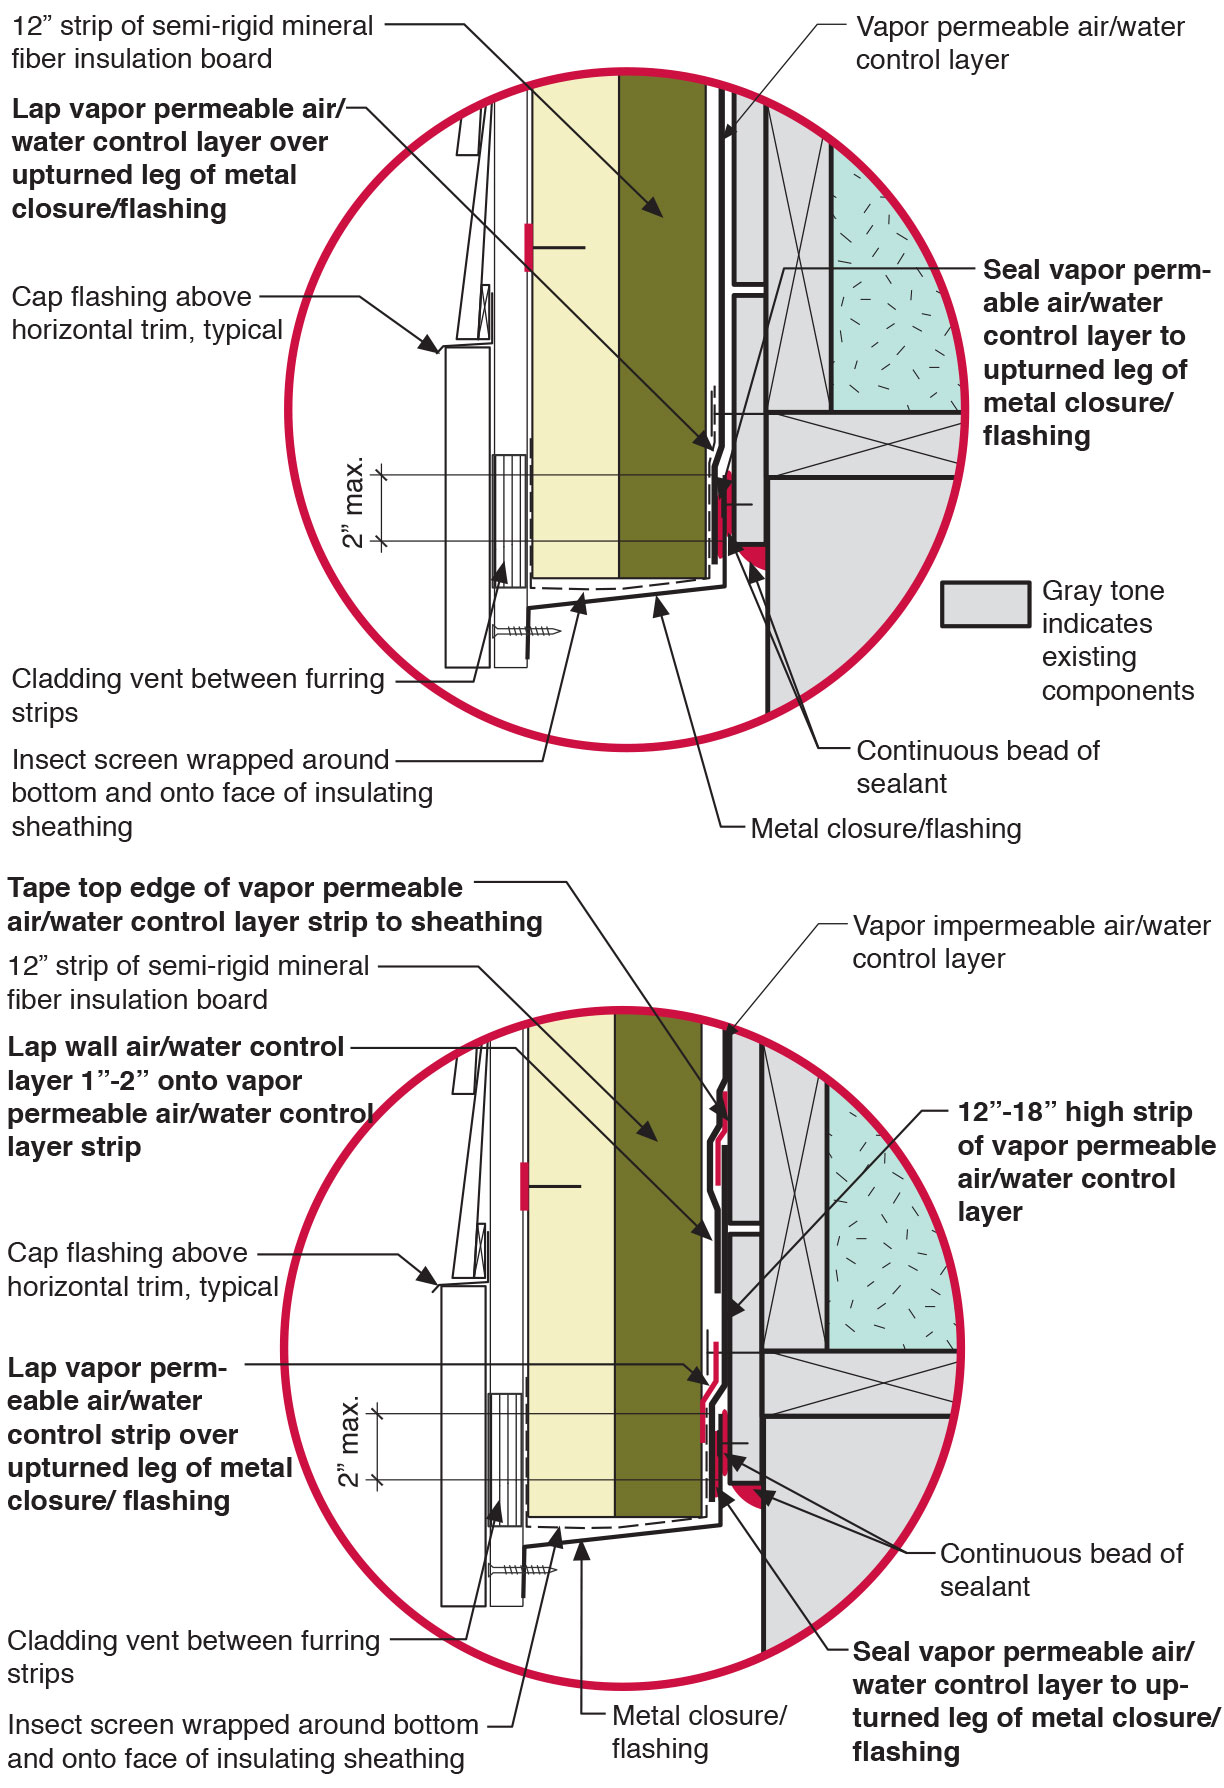
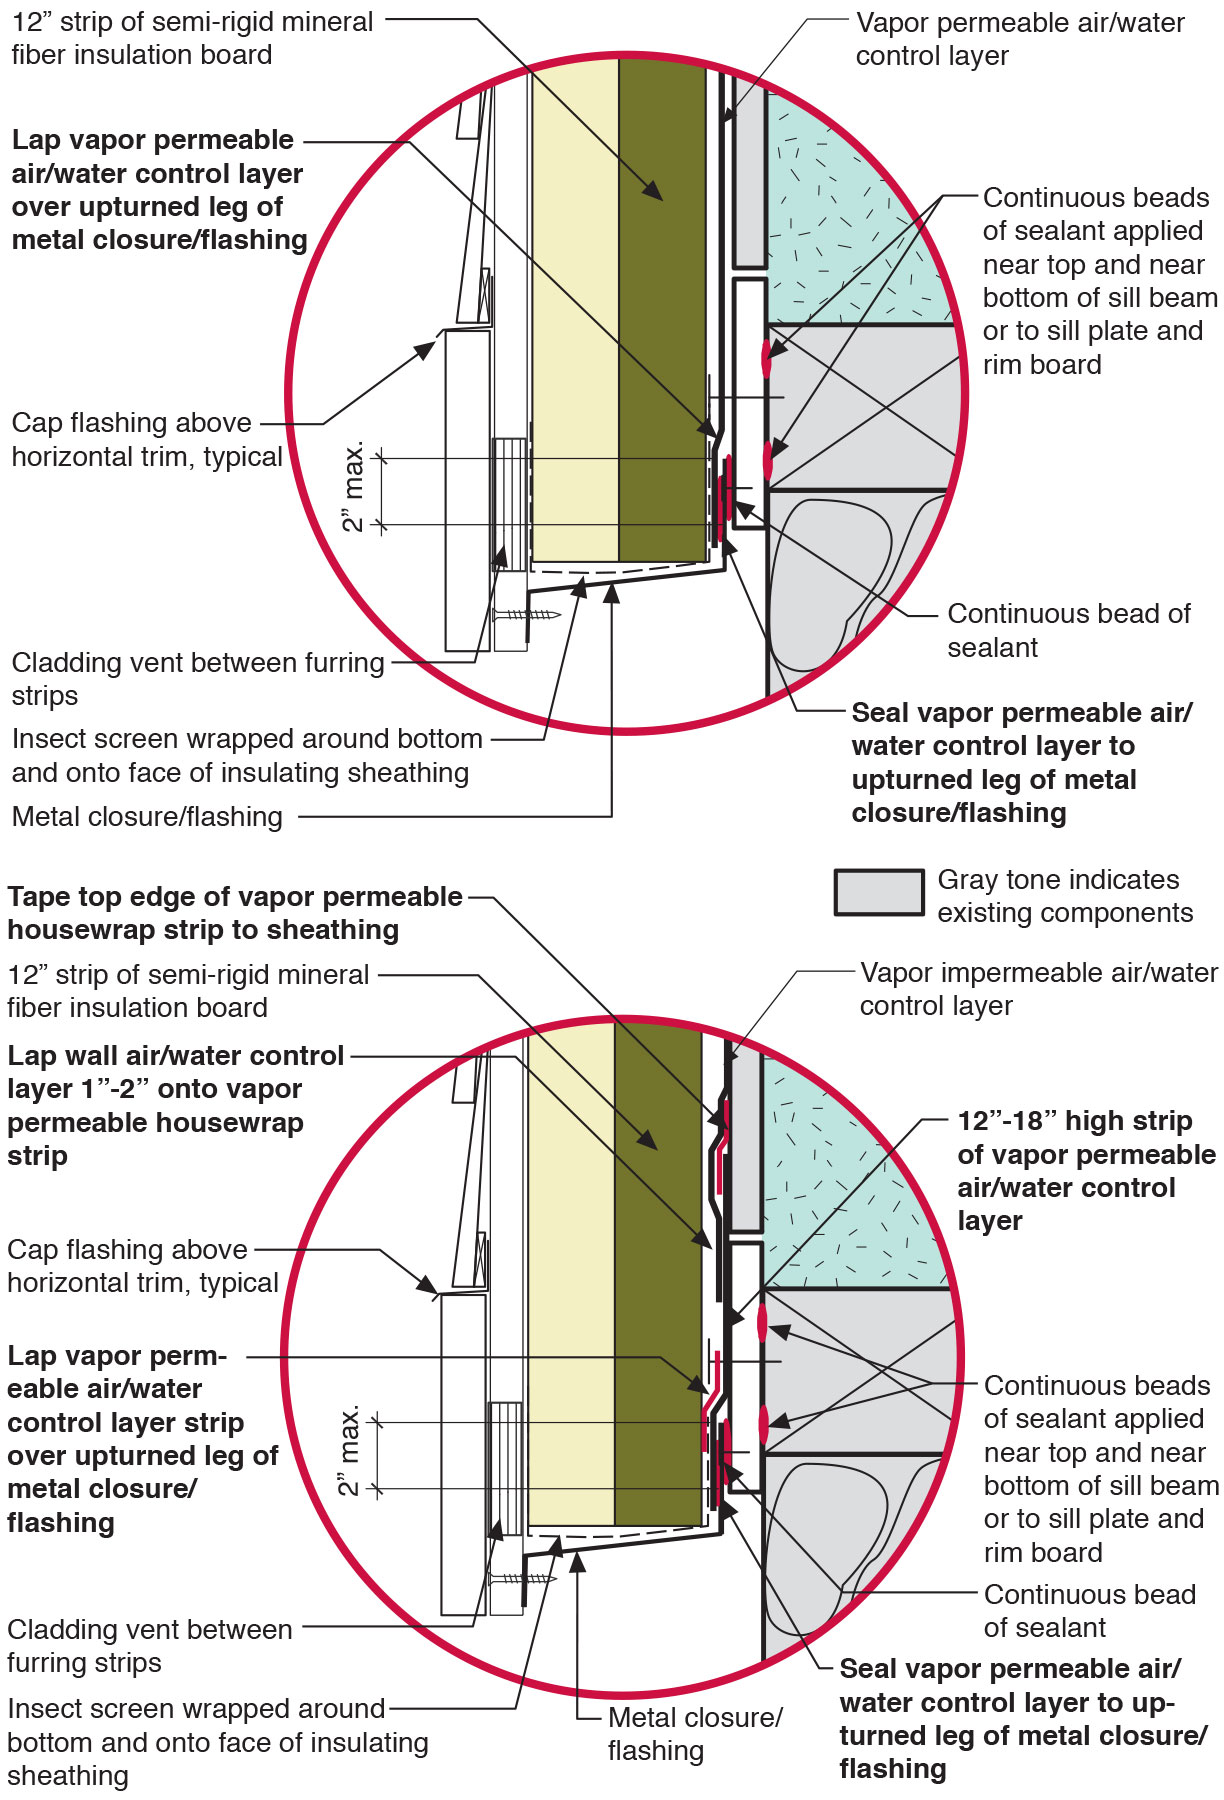
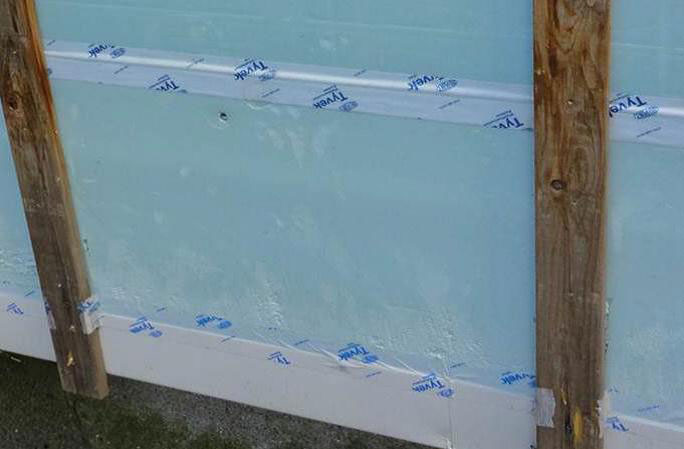
Vapor-permeable mineral wool insulation is installed on the exterior side of the sill beam during an exterior wall retrofit to allow the sill beam to dry to the outside
Image

Vented roof assembly at eave retrofitted with rigid foam, spray foam, and fully adhered membrane to air seal the top of wall-to-roof transition
Image
Vented roof assembly at rake retrofitted with spray foam and additional insulation installed at the attic floor and extended to the rake edge
Image
Image
Image

Wall surfaces having high solar reflectance and high thermal emittance will remain cooler when exposed to direct sunlight.
Image
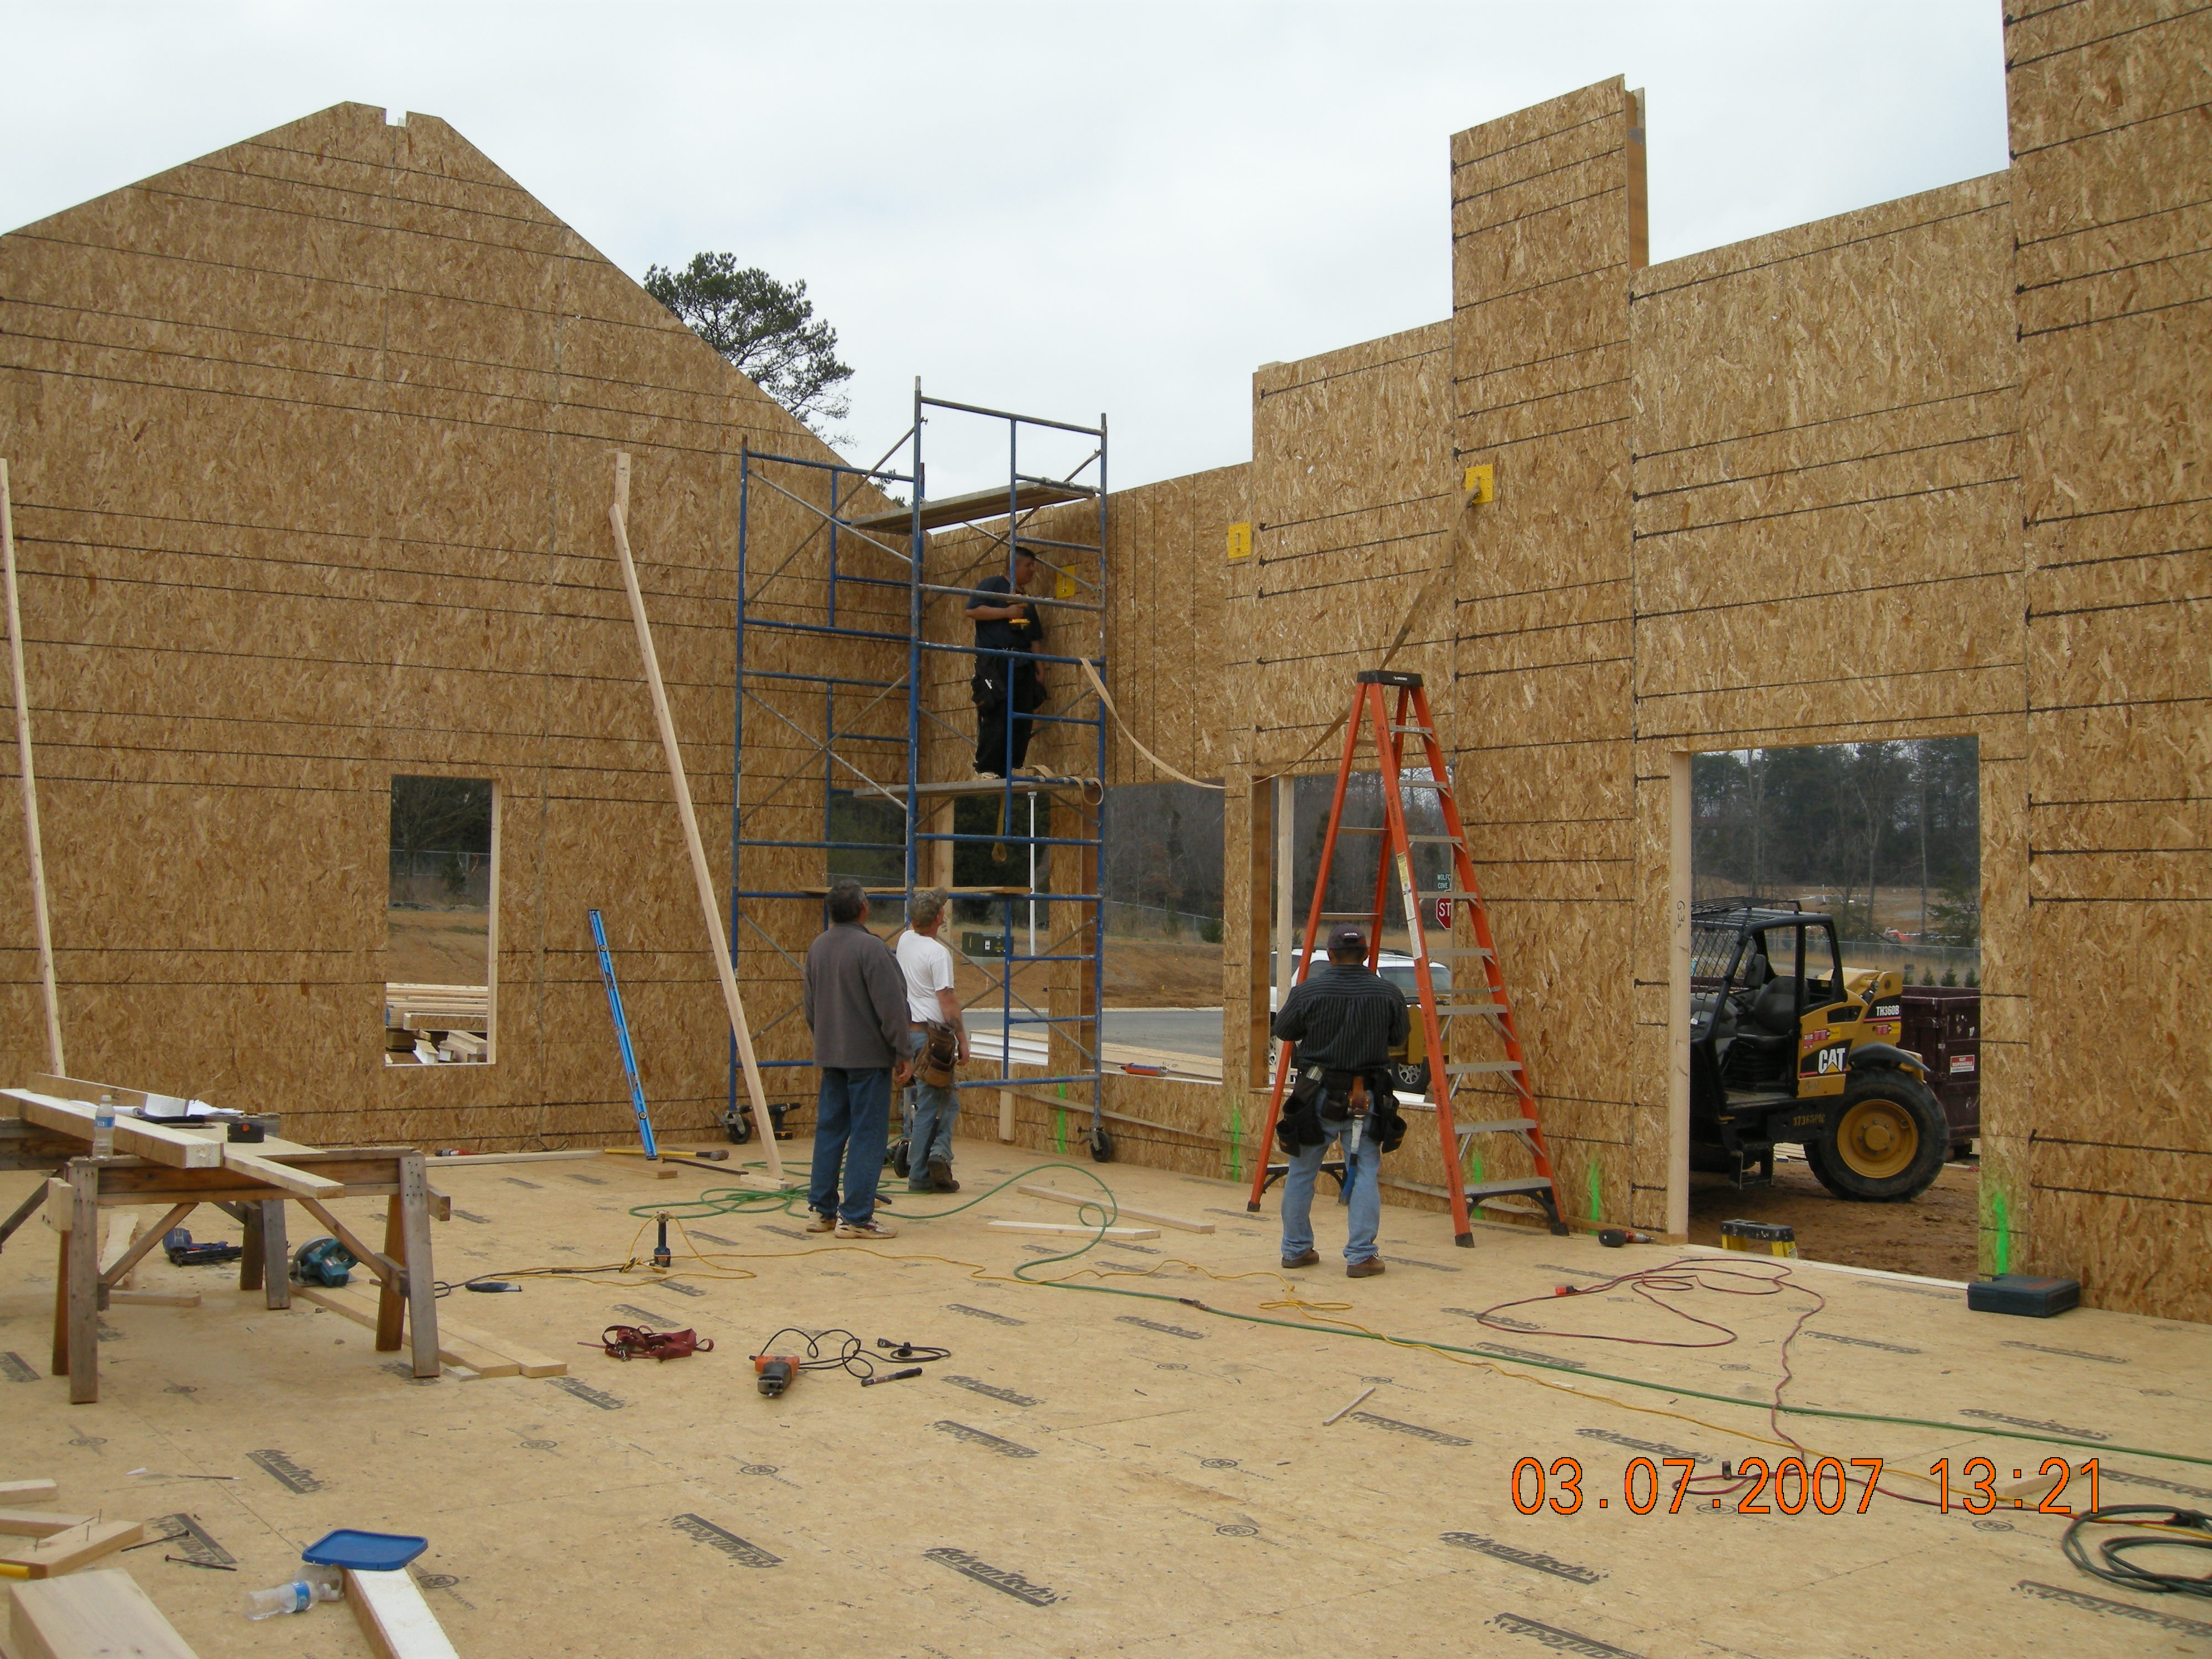
Walls are being assembled at this SIP house
Image
Walls in cold climates with a Class 3 vapor retarder (latex paint) and a vapor-open continuous insulation like mineral wool allow drying to the interior or the exterior
Image
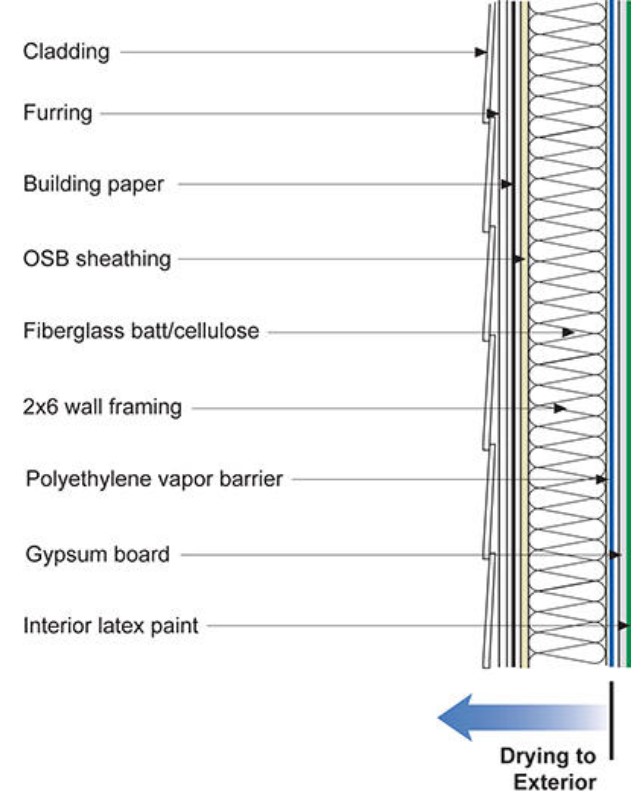
Walls in cold climates with a polyethylene vapor barrier interior of the wall cavity should have either no exterior insulation or a vapor-open continuous insulation like mineral wool that allows drying to the exterior
Image
Image
Water management detail for a solar panel rack mounting block installed in rigid foam that was installed over an existing roof
Image

Weep holes: Rope inserted in the head joist between bricks will allow water to weep out of the base of the wall assembly
Image

Wet Floodproofing Equal Rates of Rise and Fall to Eliminate Hydrostatic Pressure Differences
Image
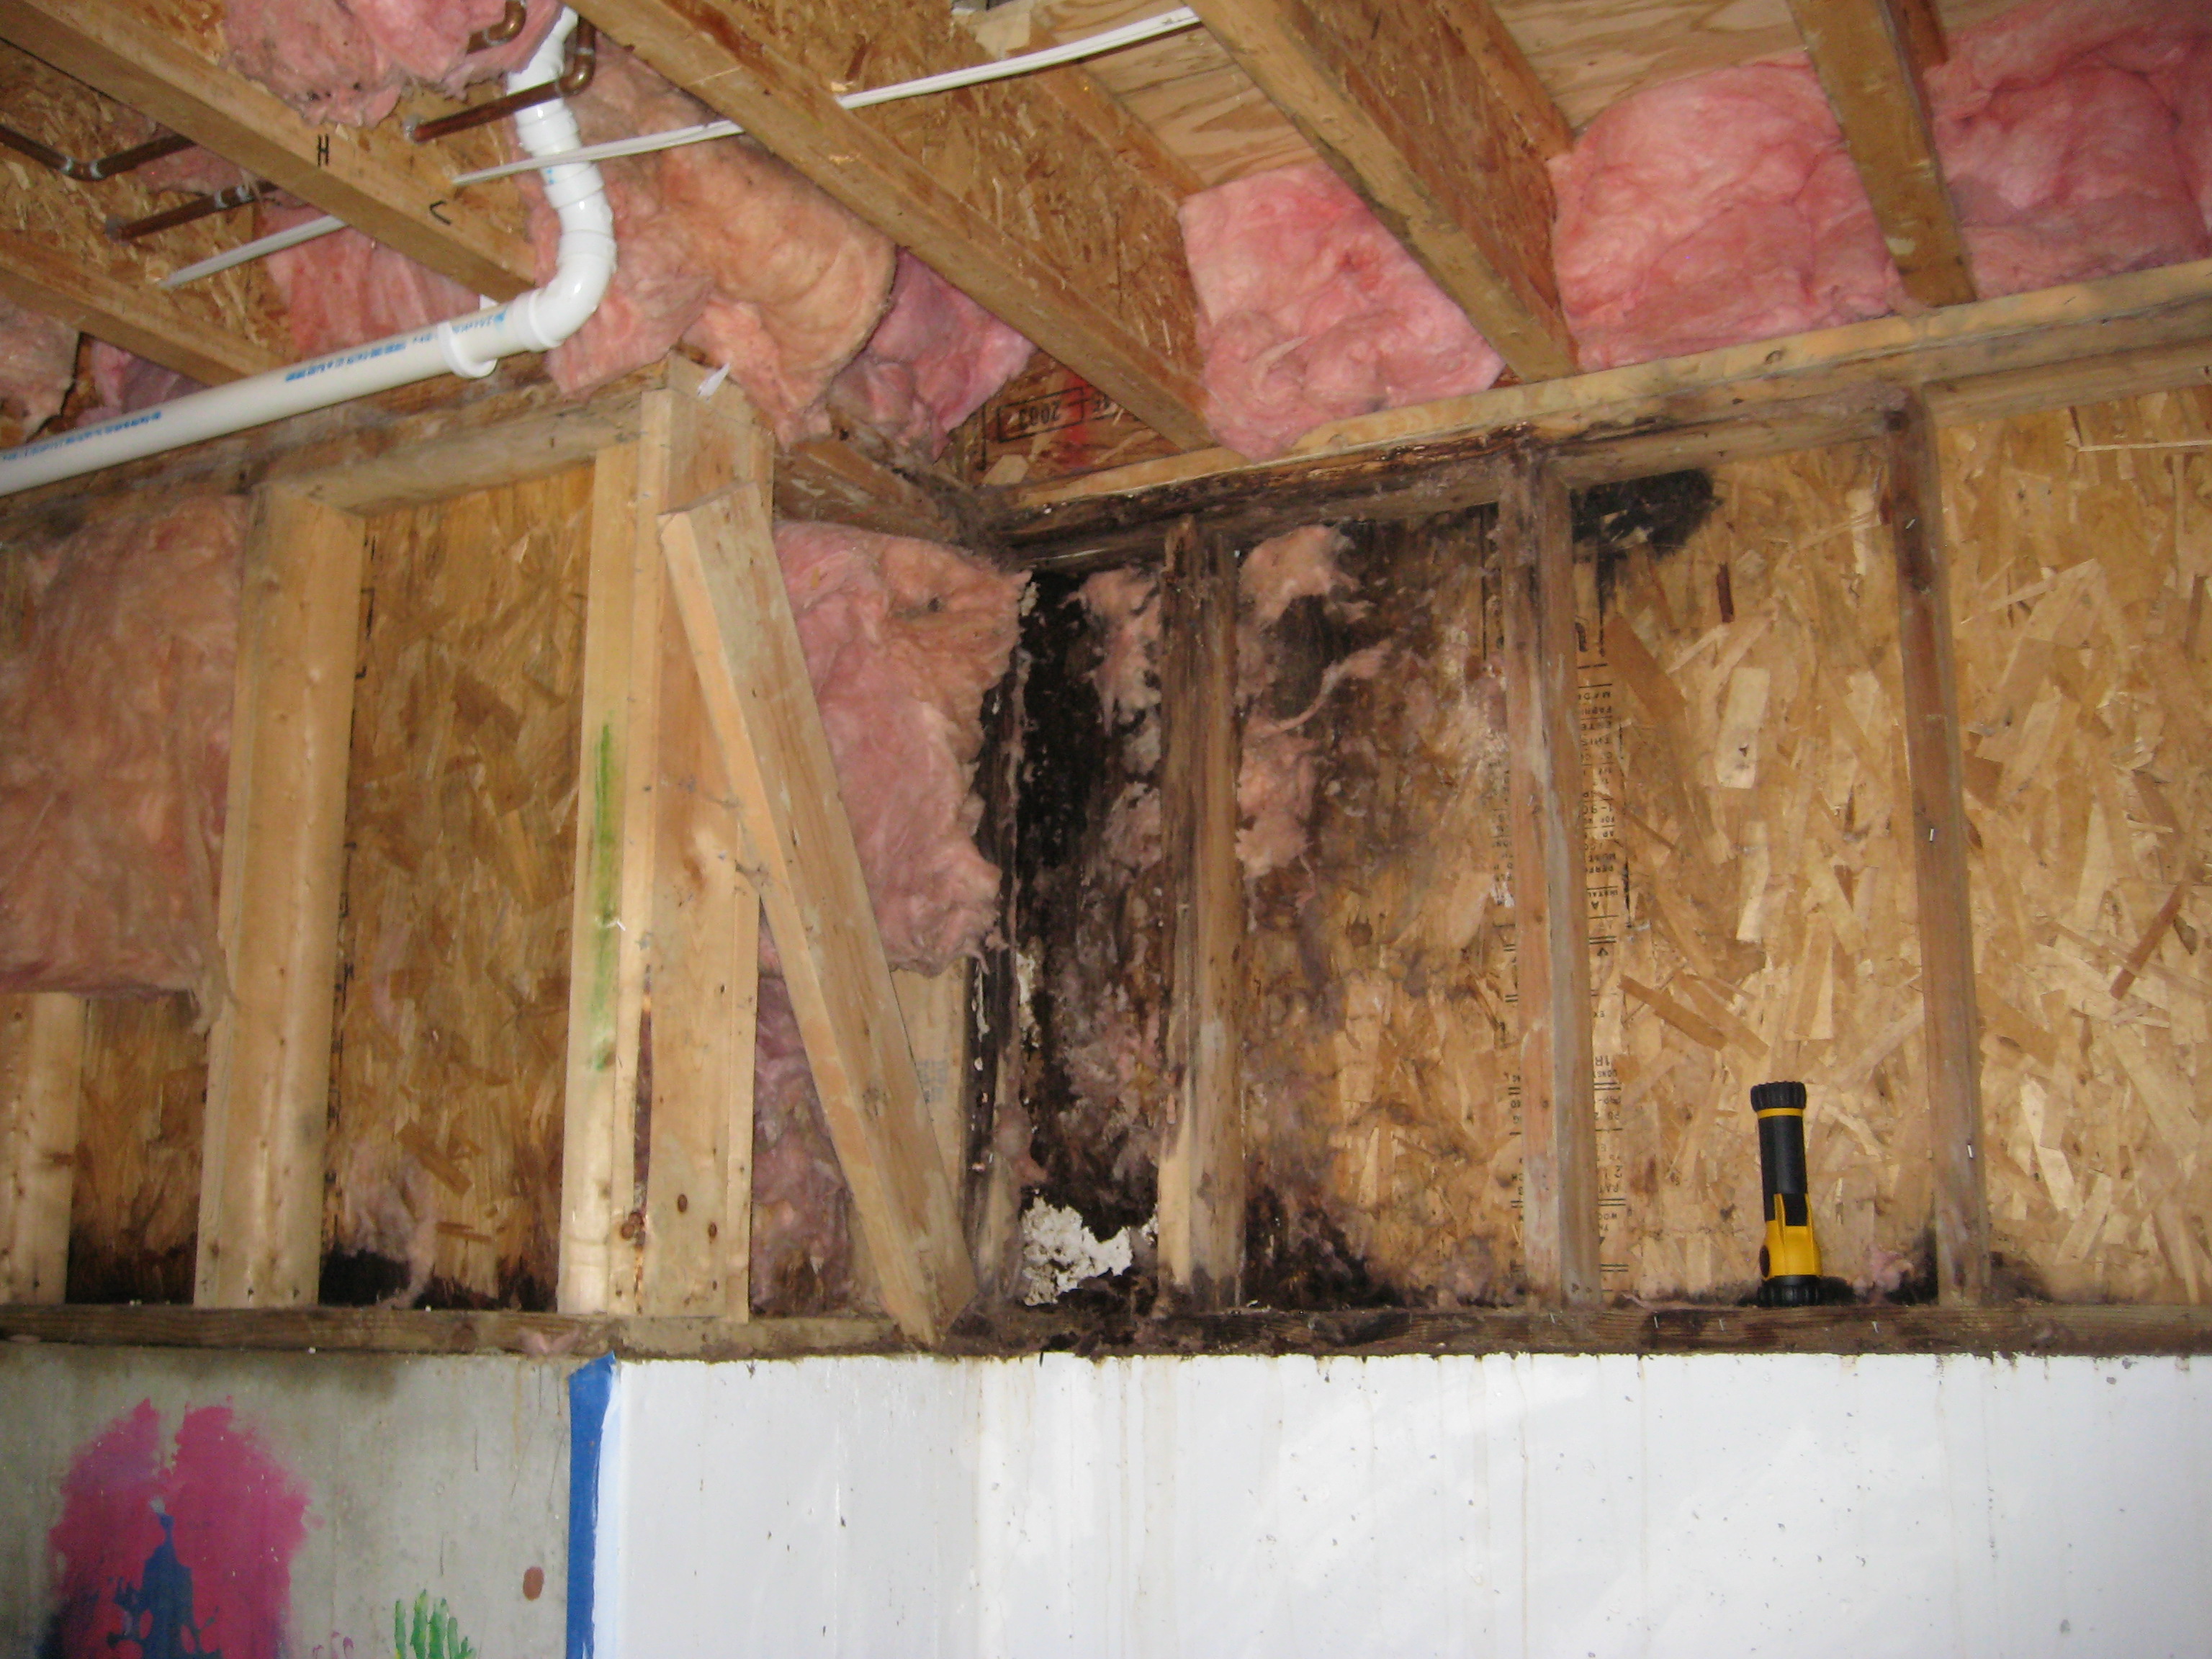
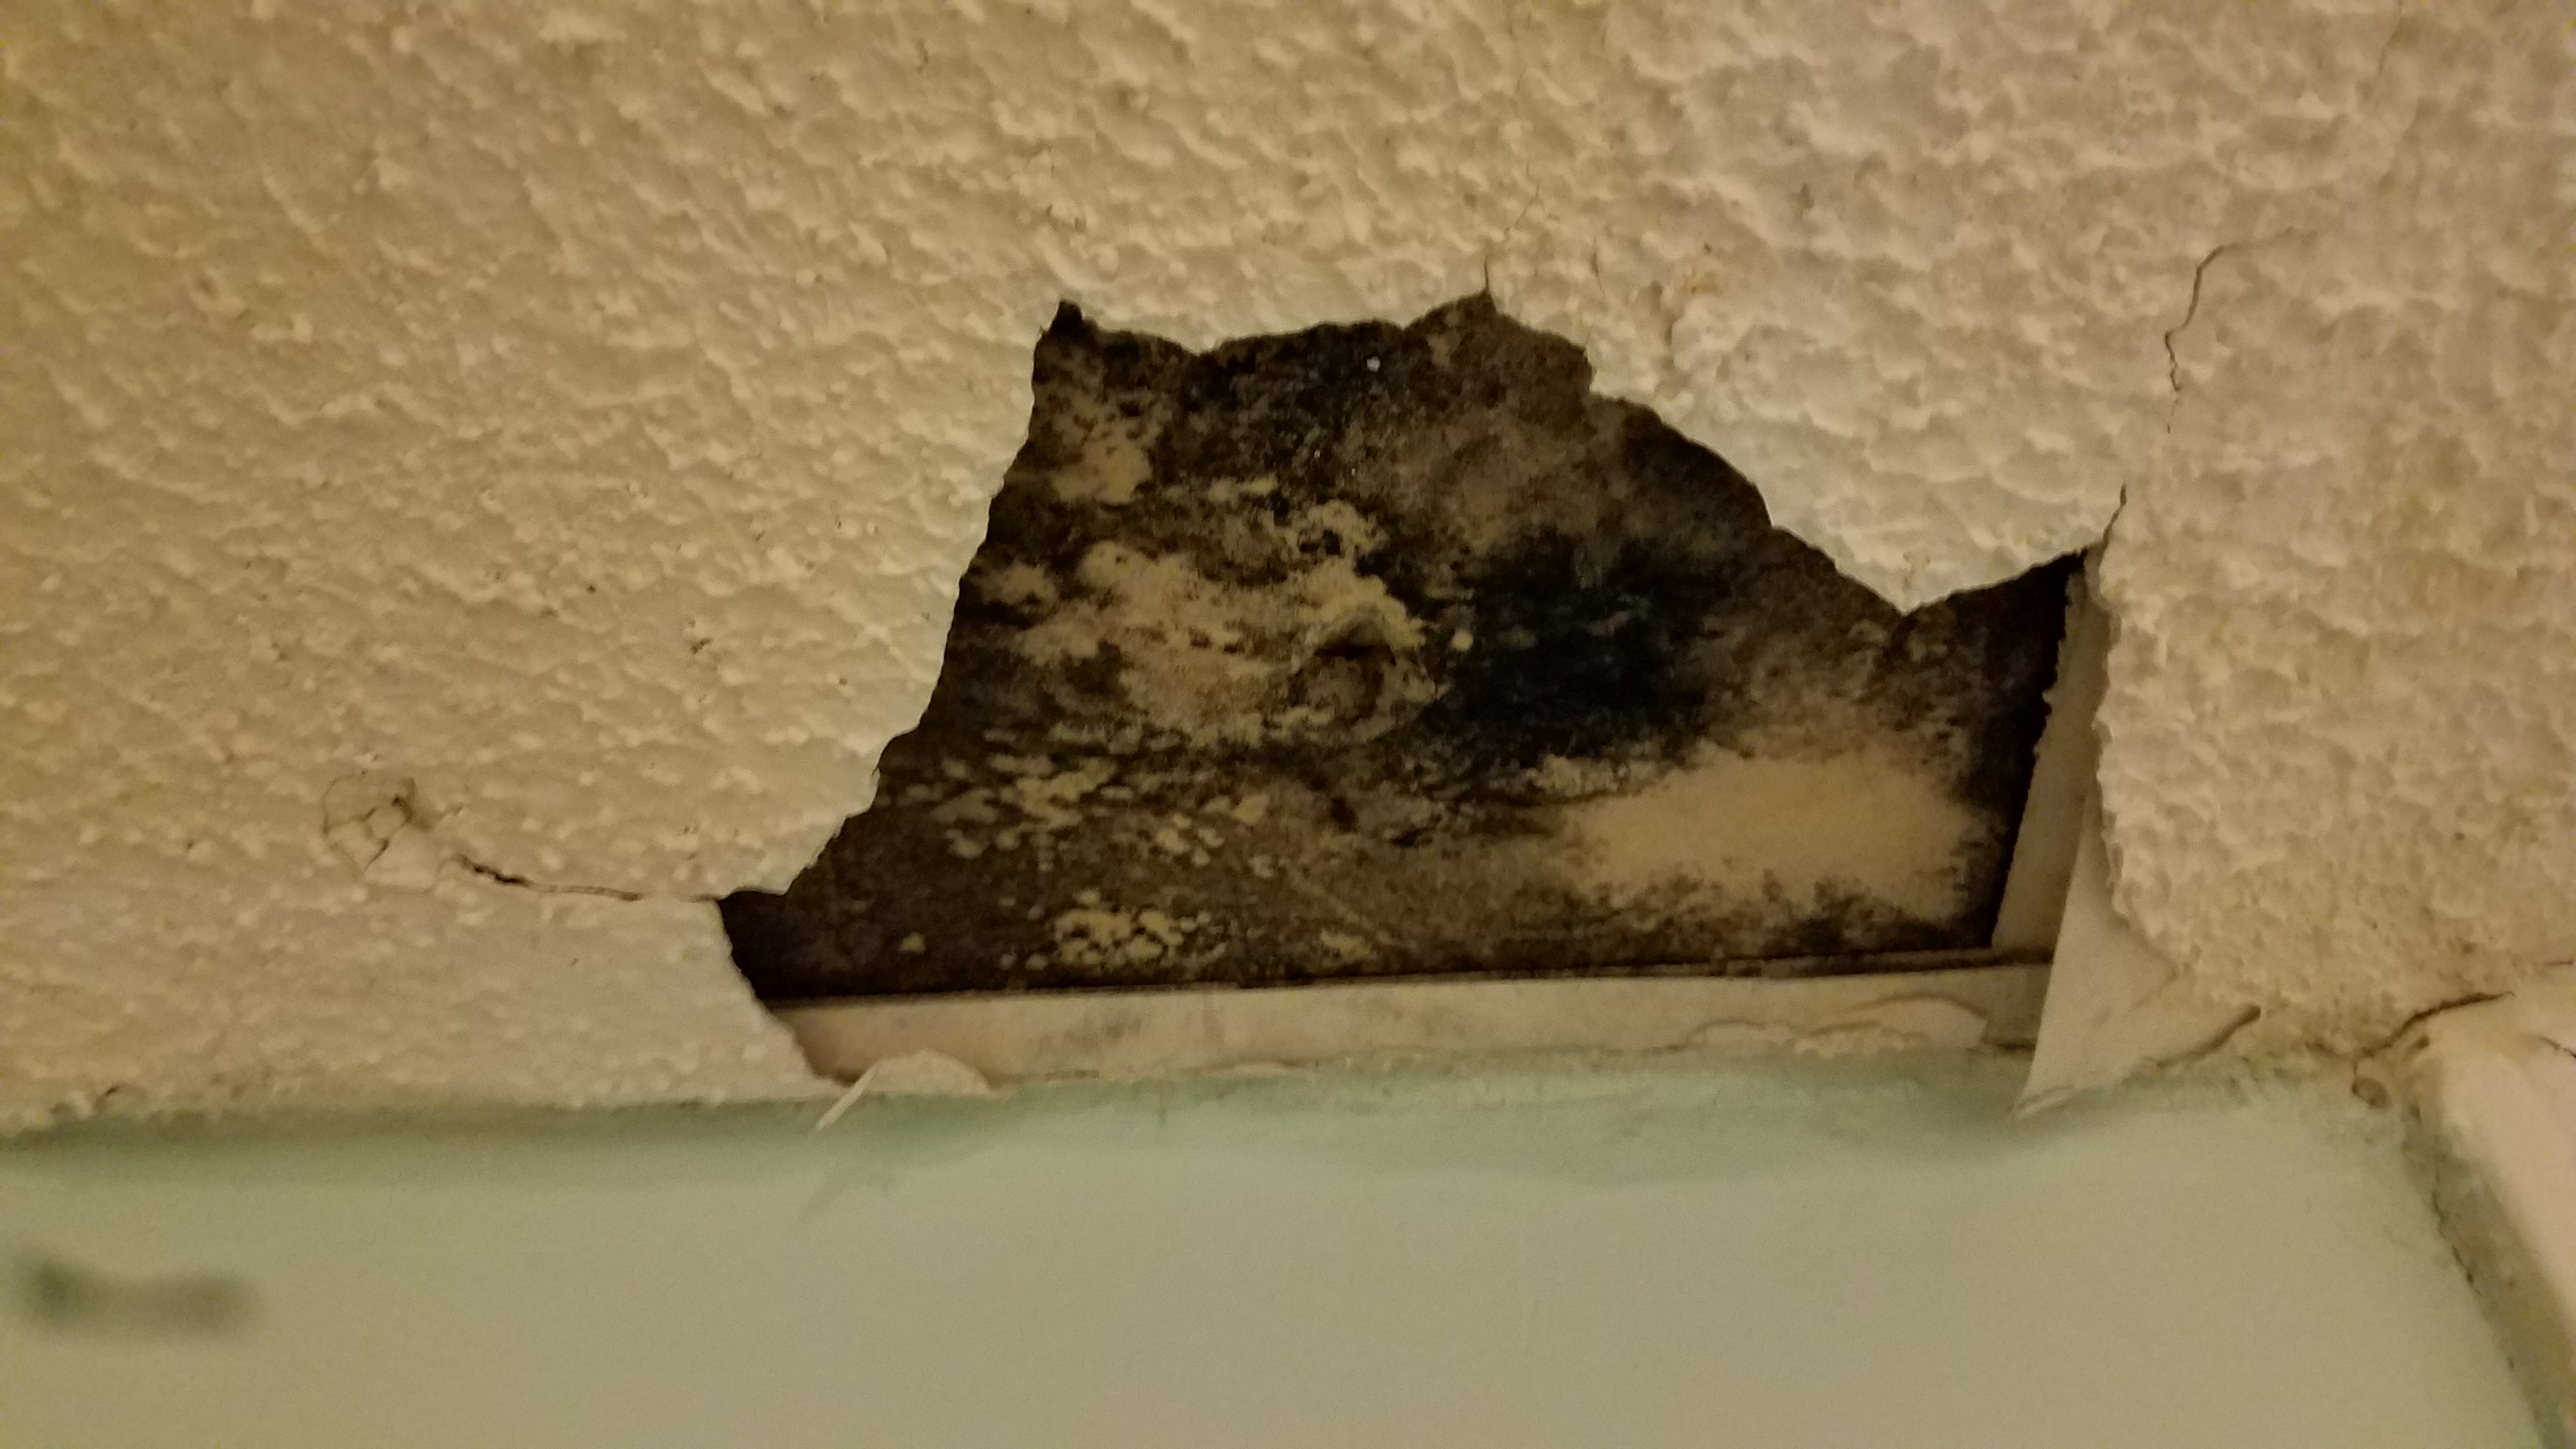
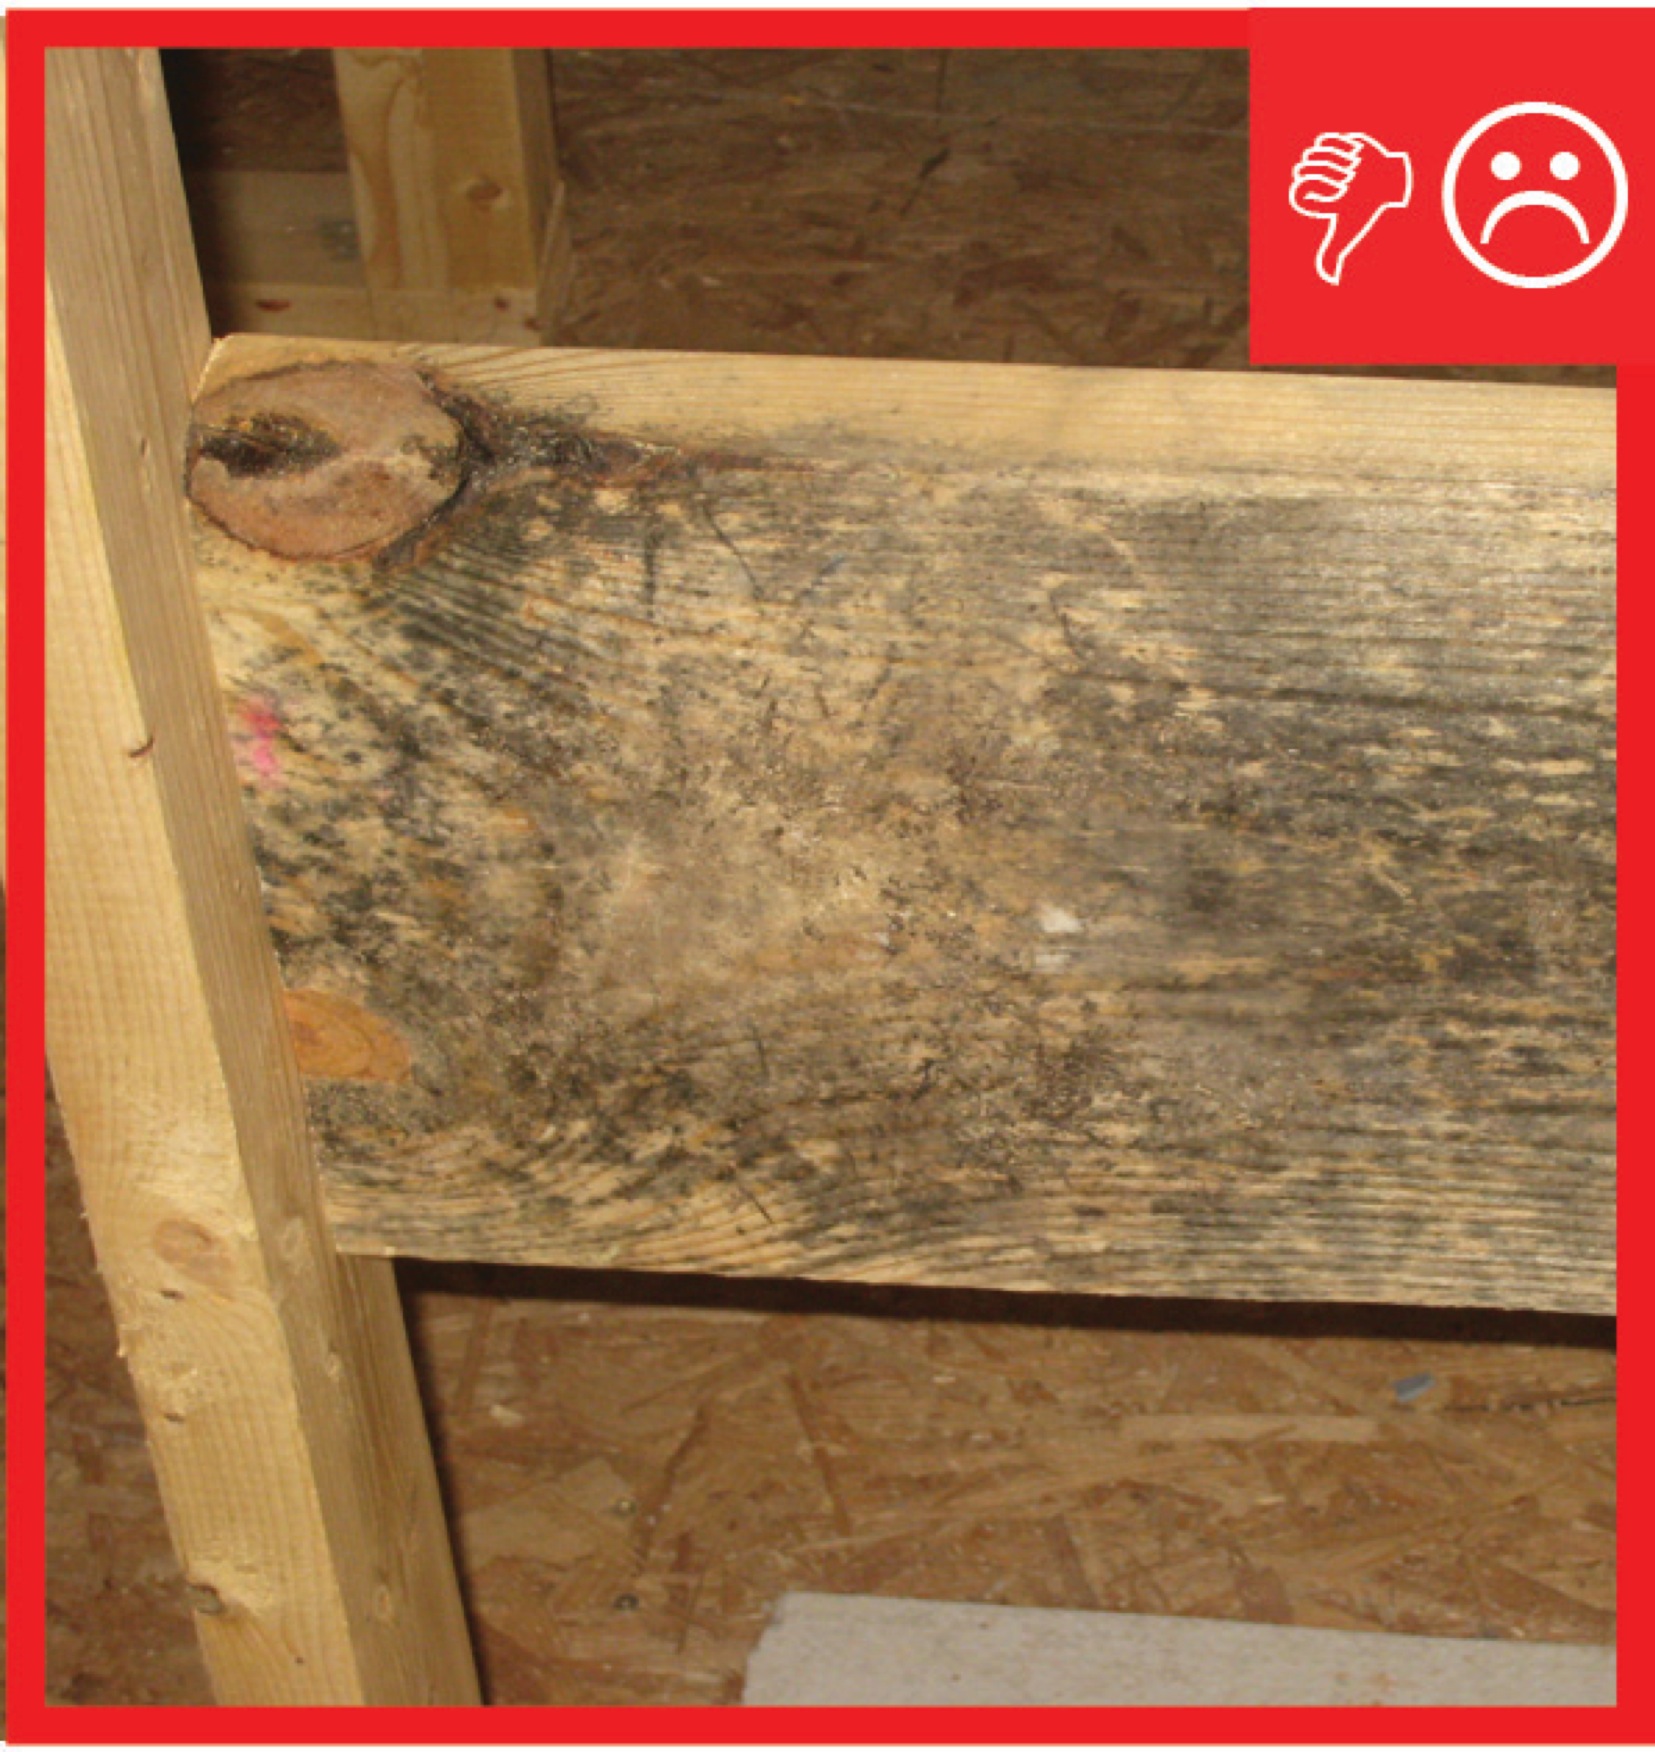
When moisture is trapped inside walls, mold can grow unchecked, causing damage to the walls and health impacts for the occupants.
Image
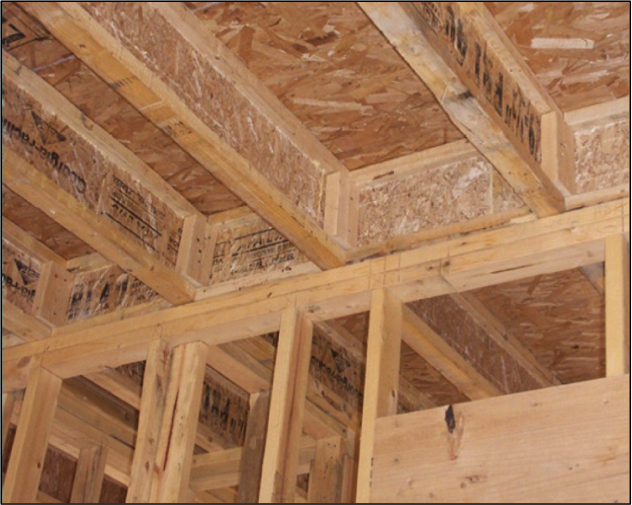
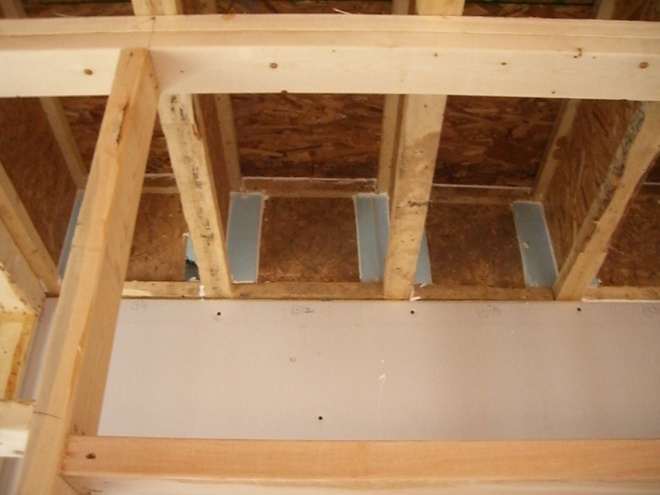
When using I-joists, make sure to fill in the gaps on each side of the blocking material to air-seal the joist bay where a wall separates conditioned and unconditioned spaces.
Image

White walls and roofs; overhangs and awnings; and operable shutters and garden walls all help to keep out unwanted solar heat gain providing cool interiors for this Florida home.
Image
Image
Image
Image
Window and door rough openings in the ICF wall are surrounded with pressure-treated wood
Image
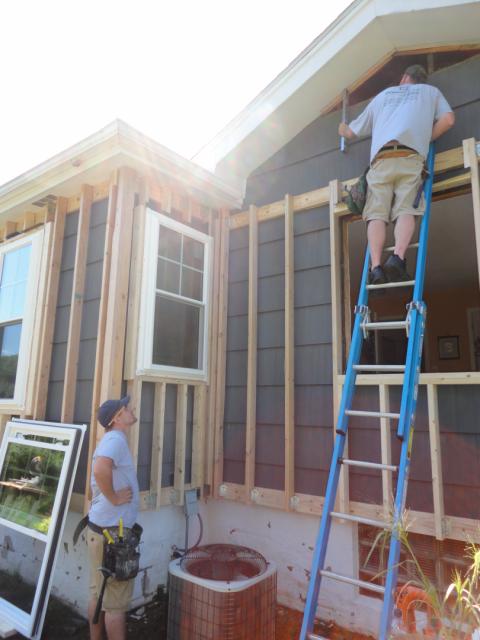
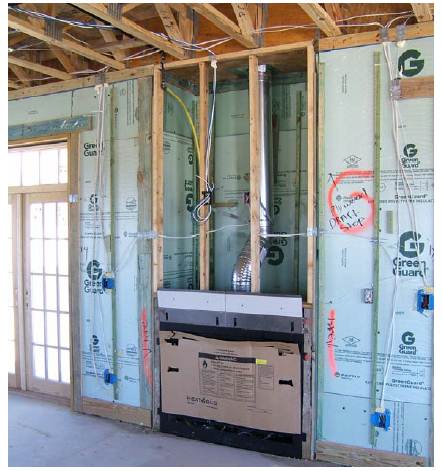
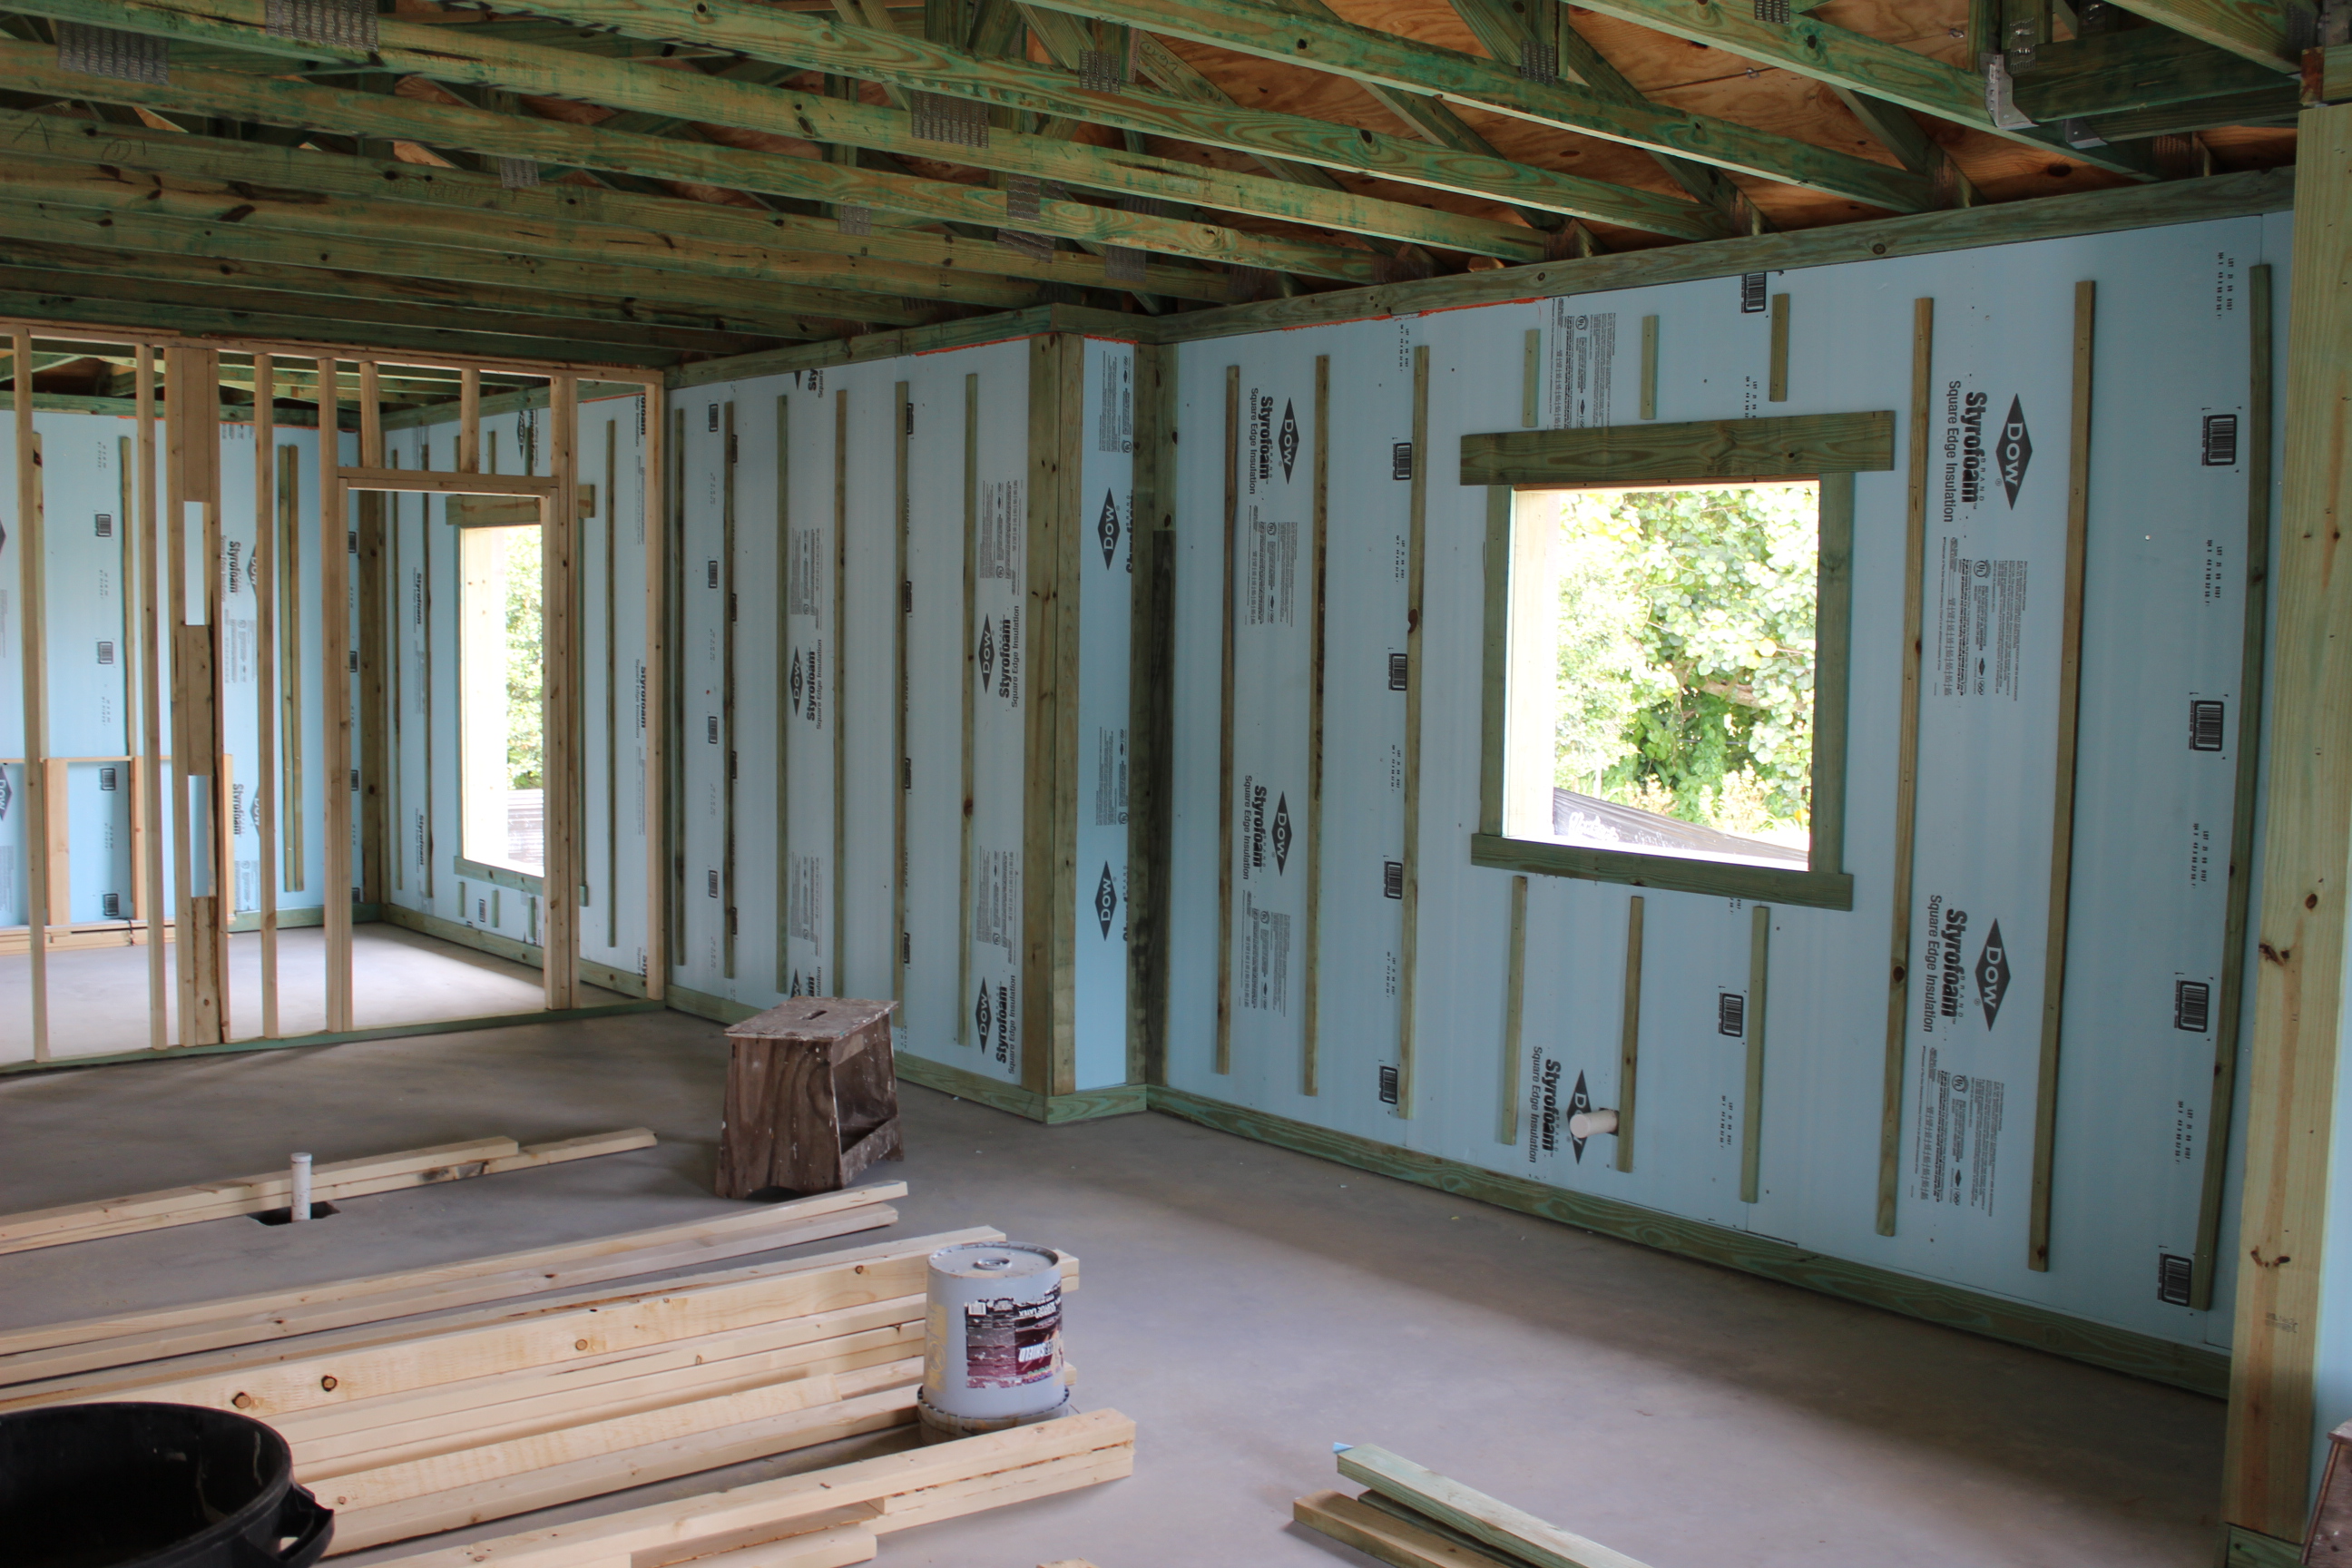
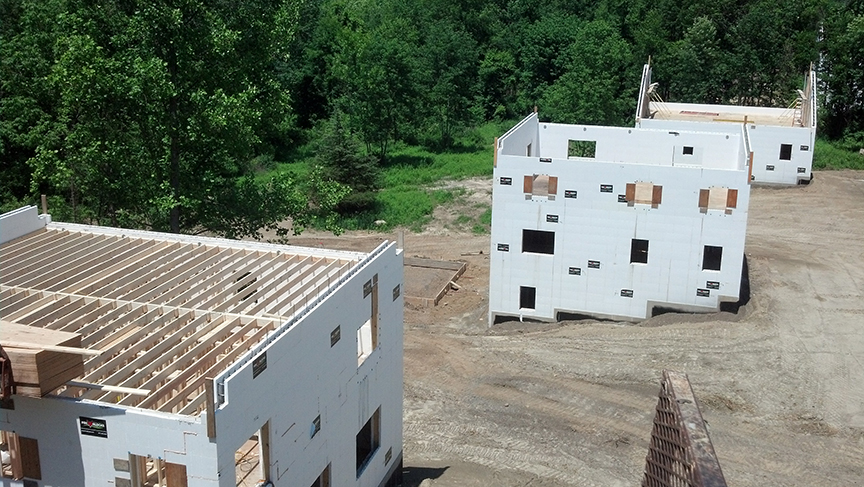
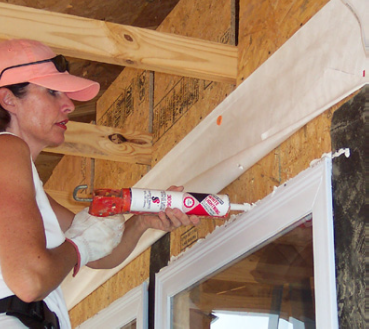
Windows are installed in new framing in preparation for adding exterior spray foam insulation
Image

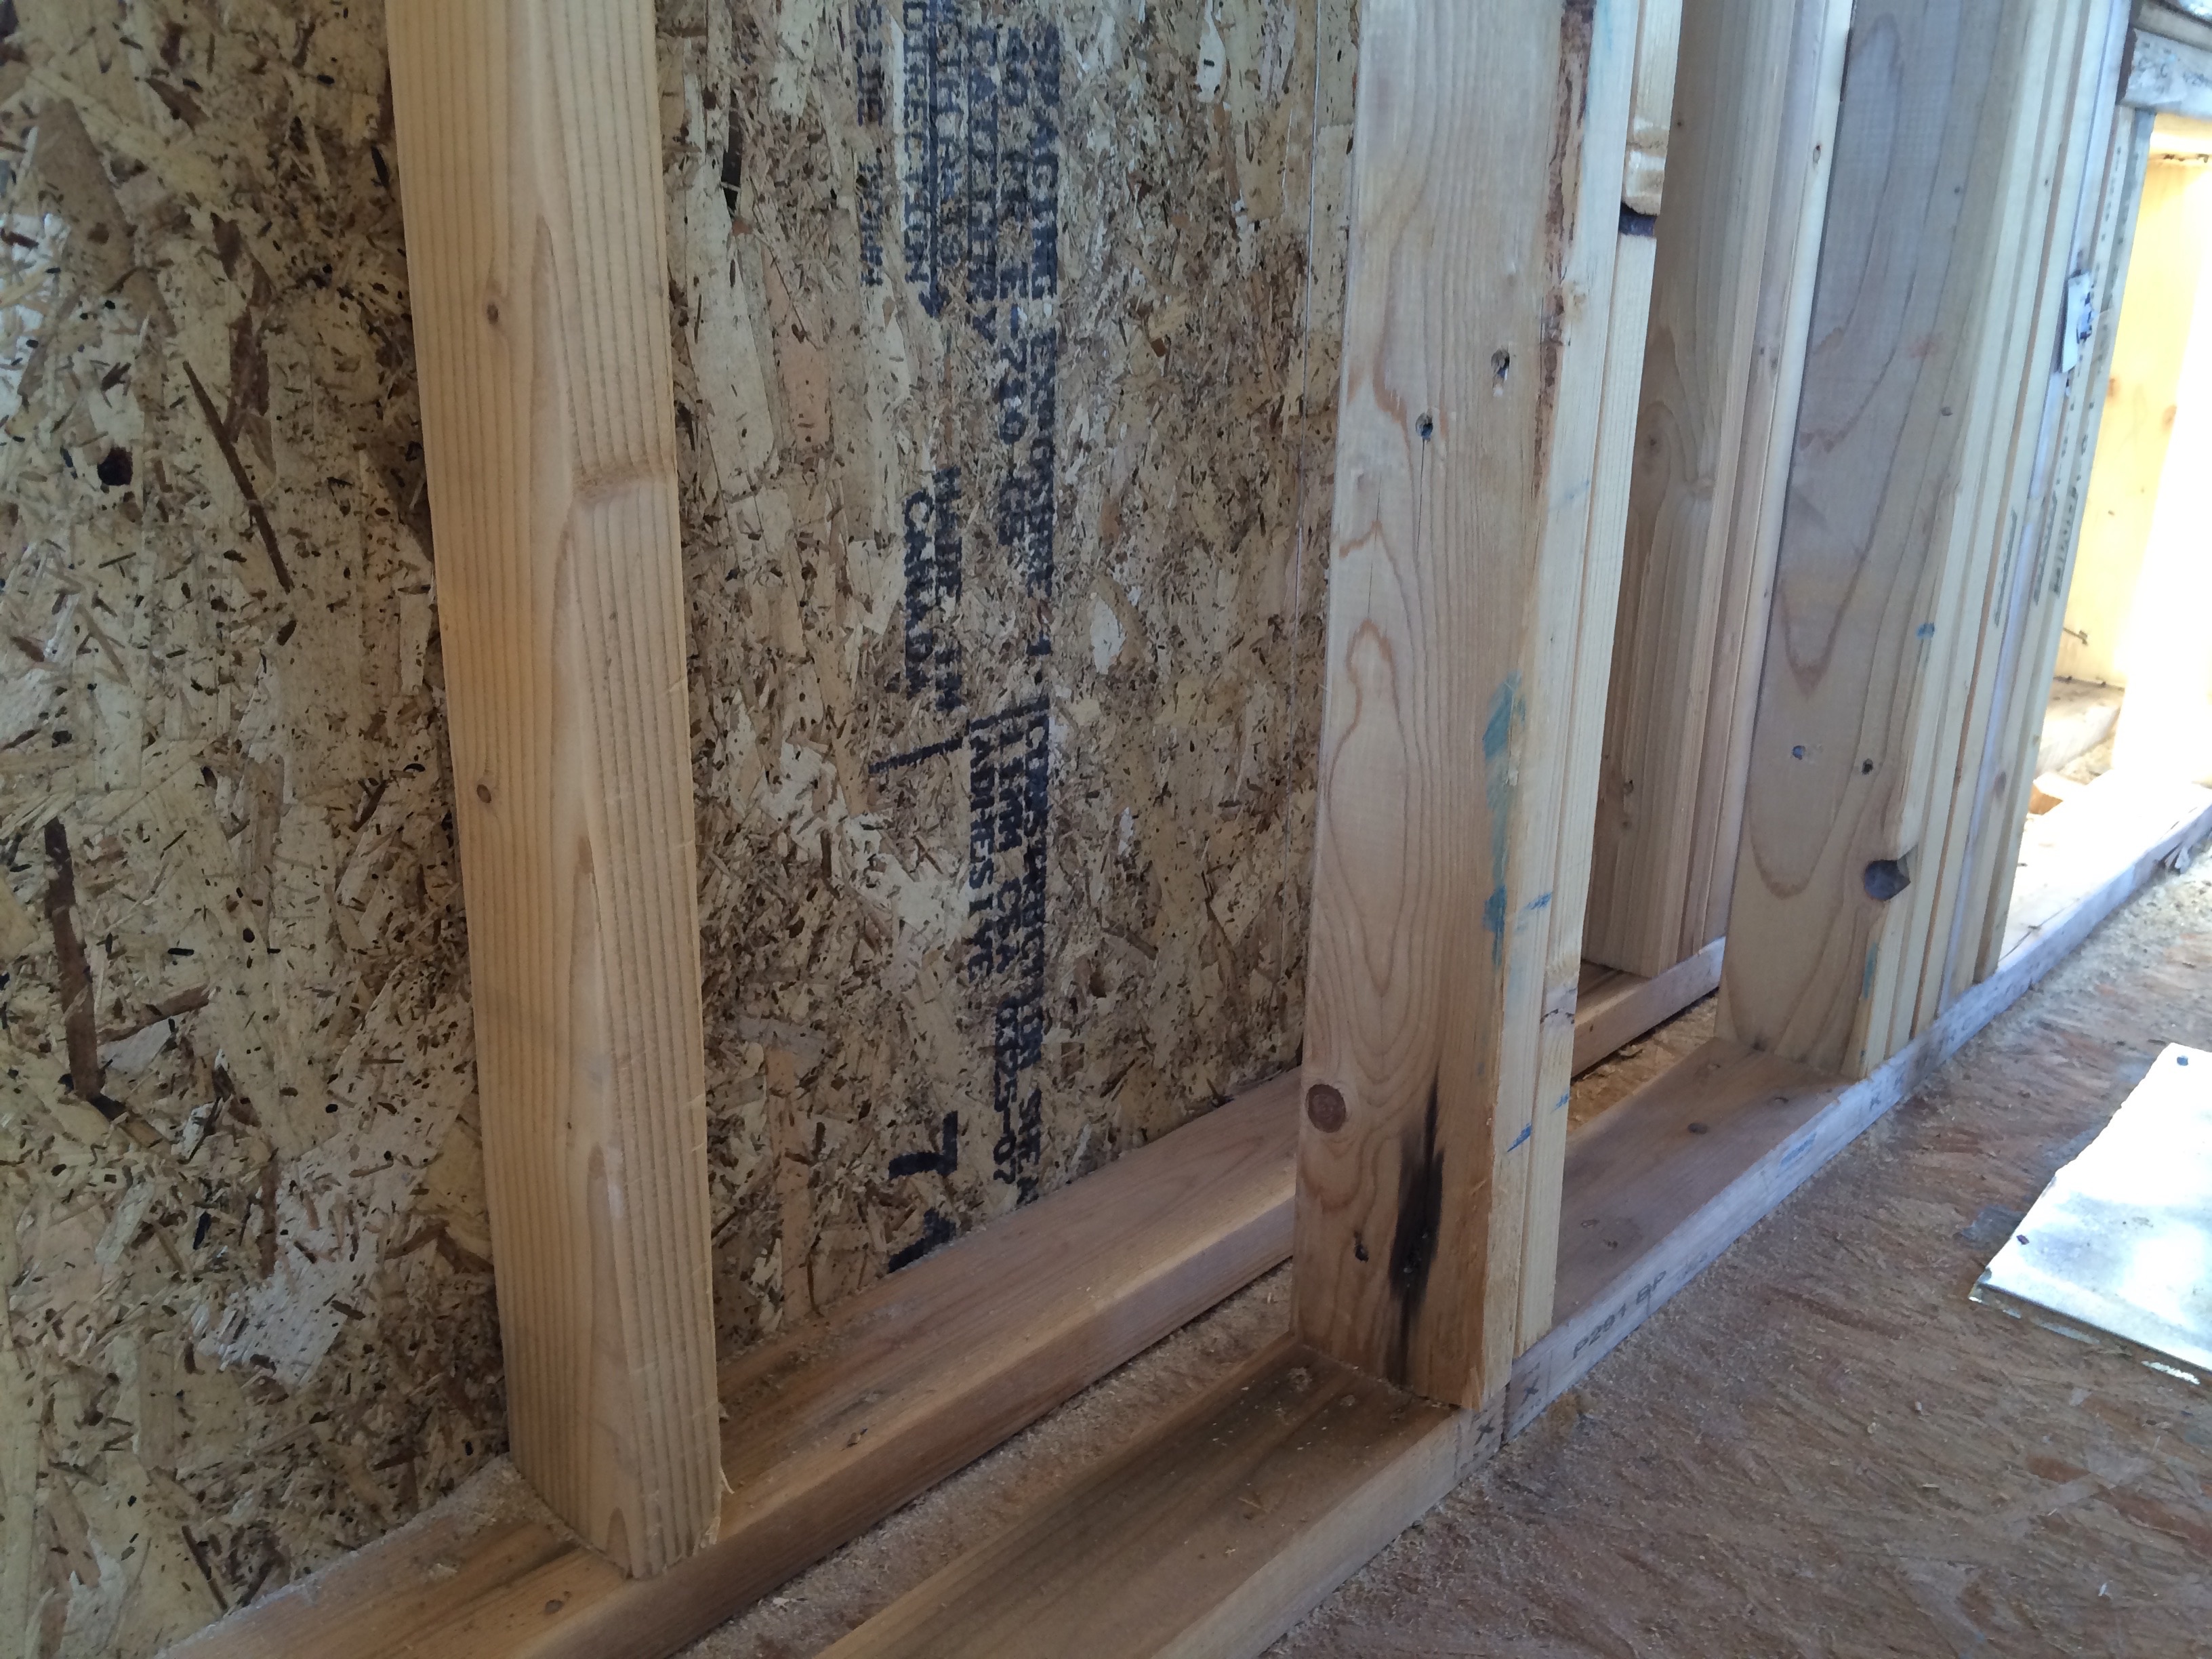
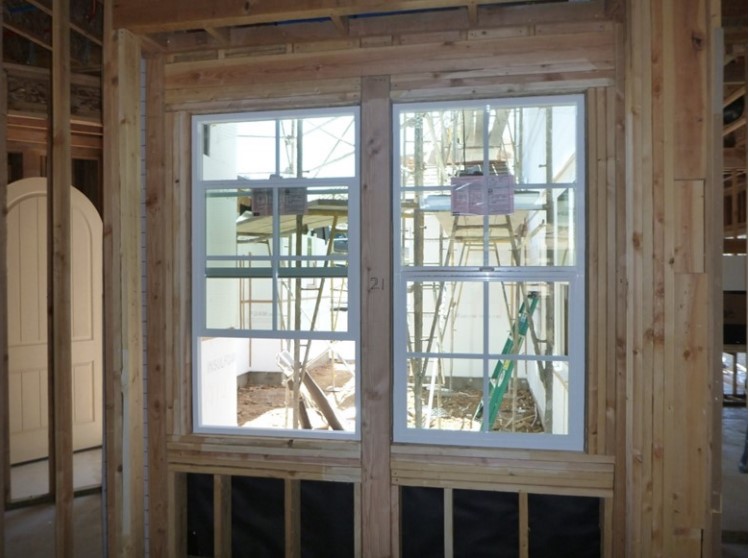
Windows are sized and positioned so only one king stud is needed on each side of the window.
Image
Wiring runs are covered with canned spray foam to maintain the continuous foam layer that covers the inside and outside of these ICF block walls.
Image
Image
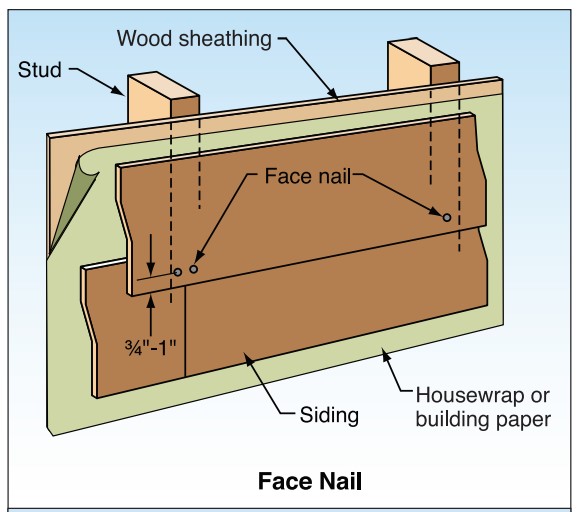
With fiber cement siding, face nail rather than blind nail where the design wind speed is ≥100 mph.
Image
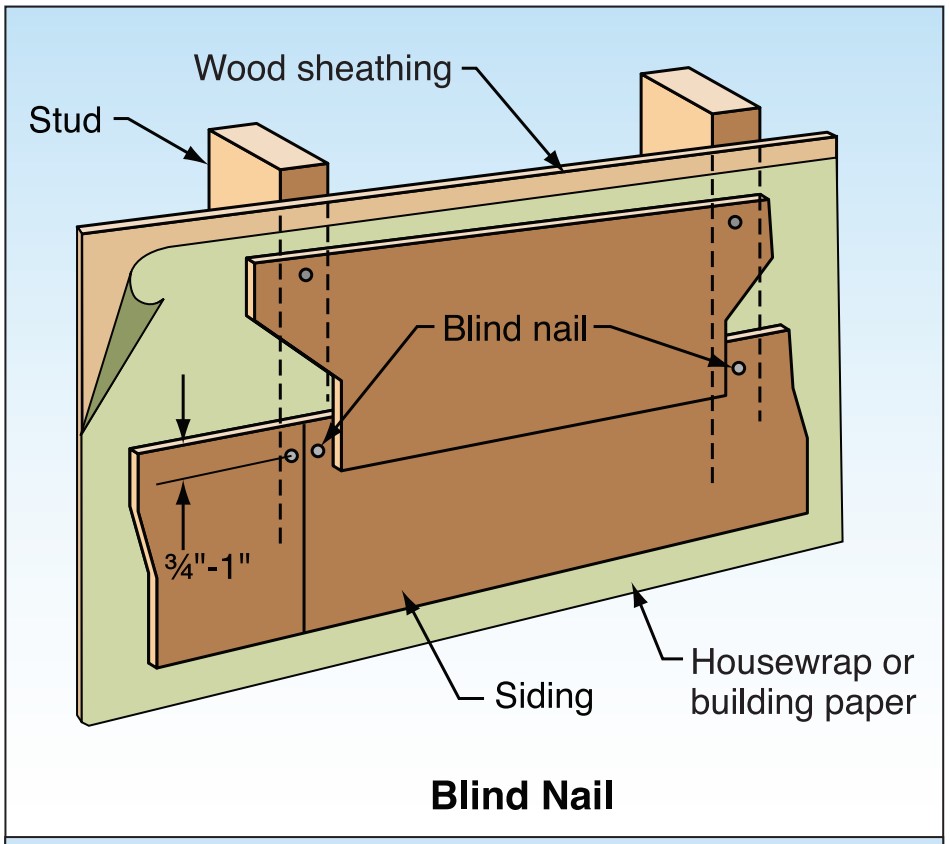
With fiber cement siding, place blind nails 3/4 to 1 inch from top edge and > 3/8 inch in from butt ends.
Image
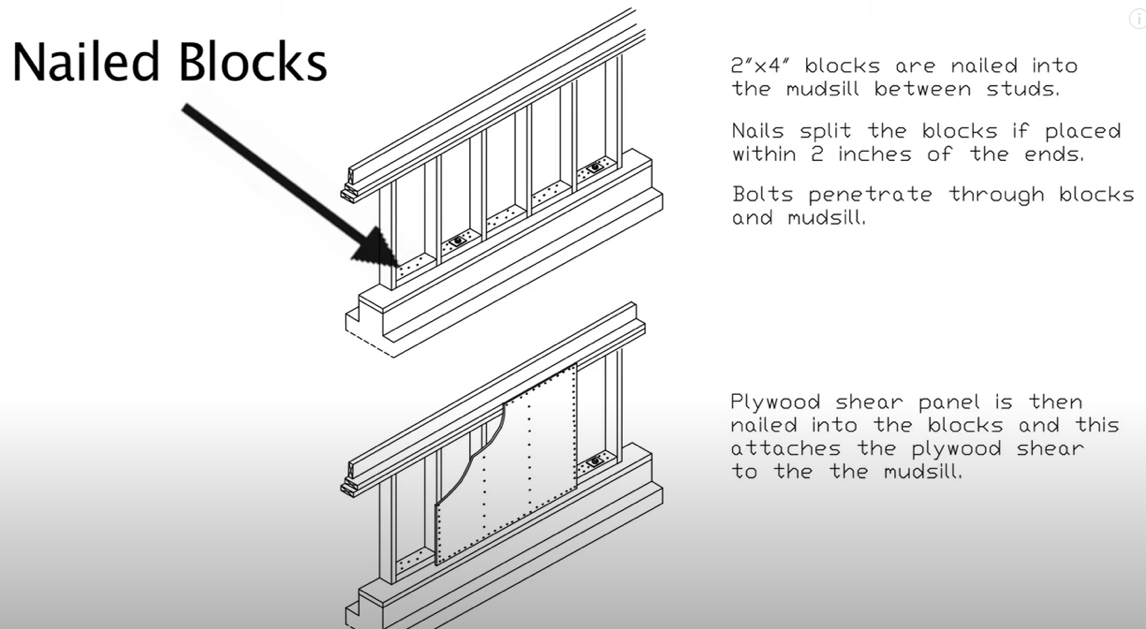
With the nailed block method, wood blocks are attached to the sill plate and the cripple wall plywood is attached to the block to provide shear strength for correctly bracing a cripple wall in a seismic retrofit
Image

Image
Image

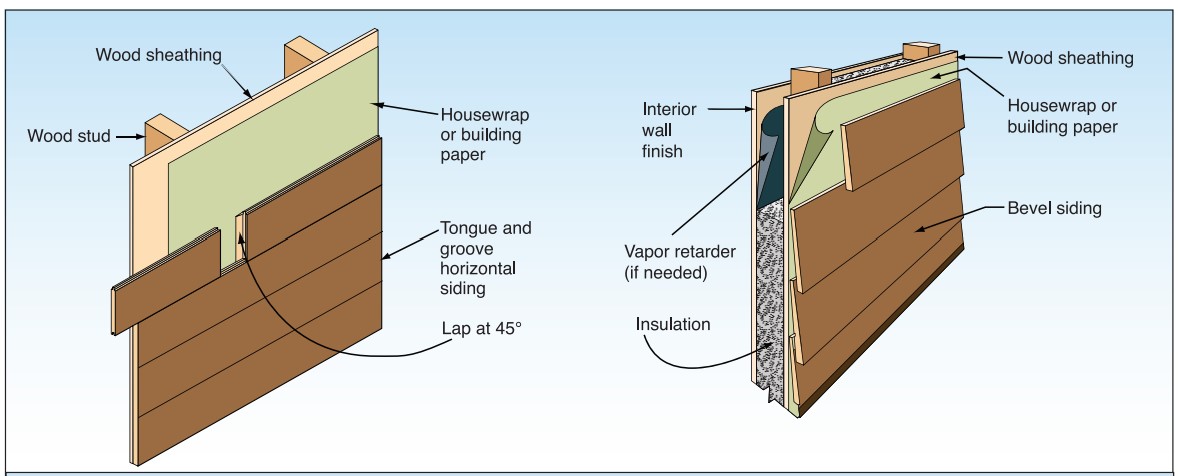
Wood siding installation details to improve resistance to wind-driven rain at corners.
Image
Image
Image
Image
Image
Image

Image
Image
Image
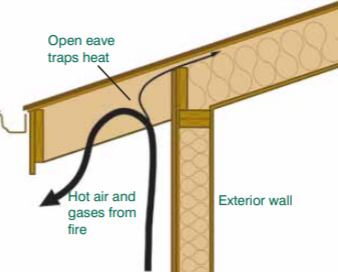
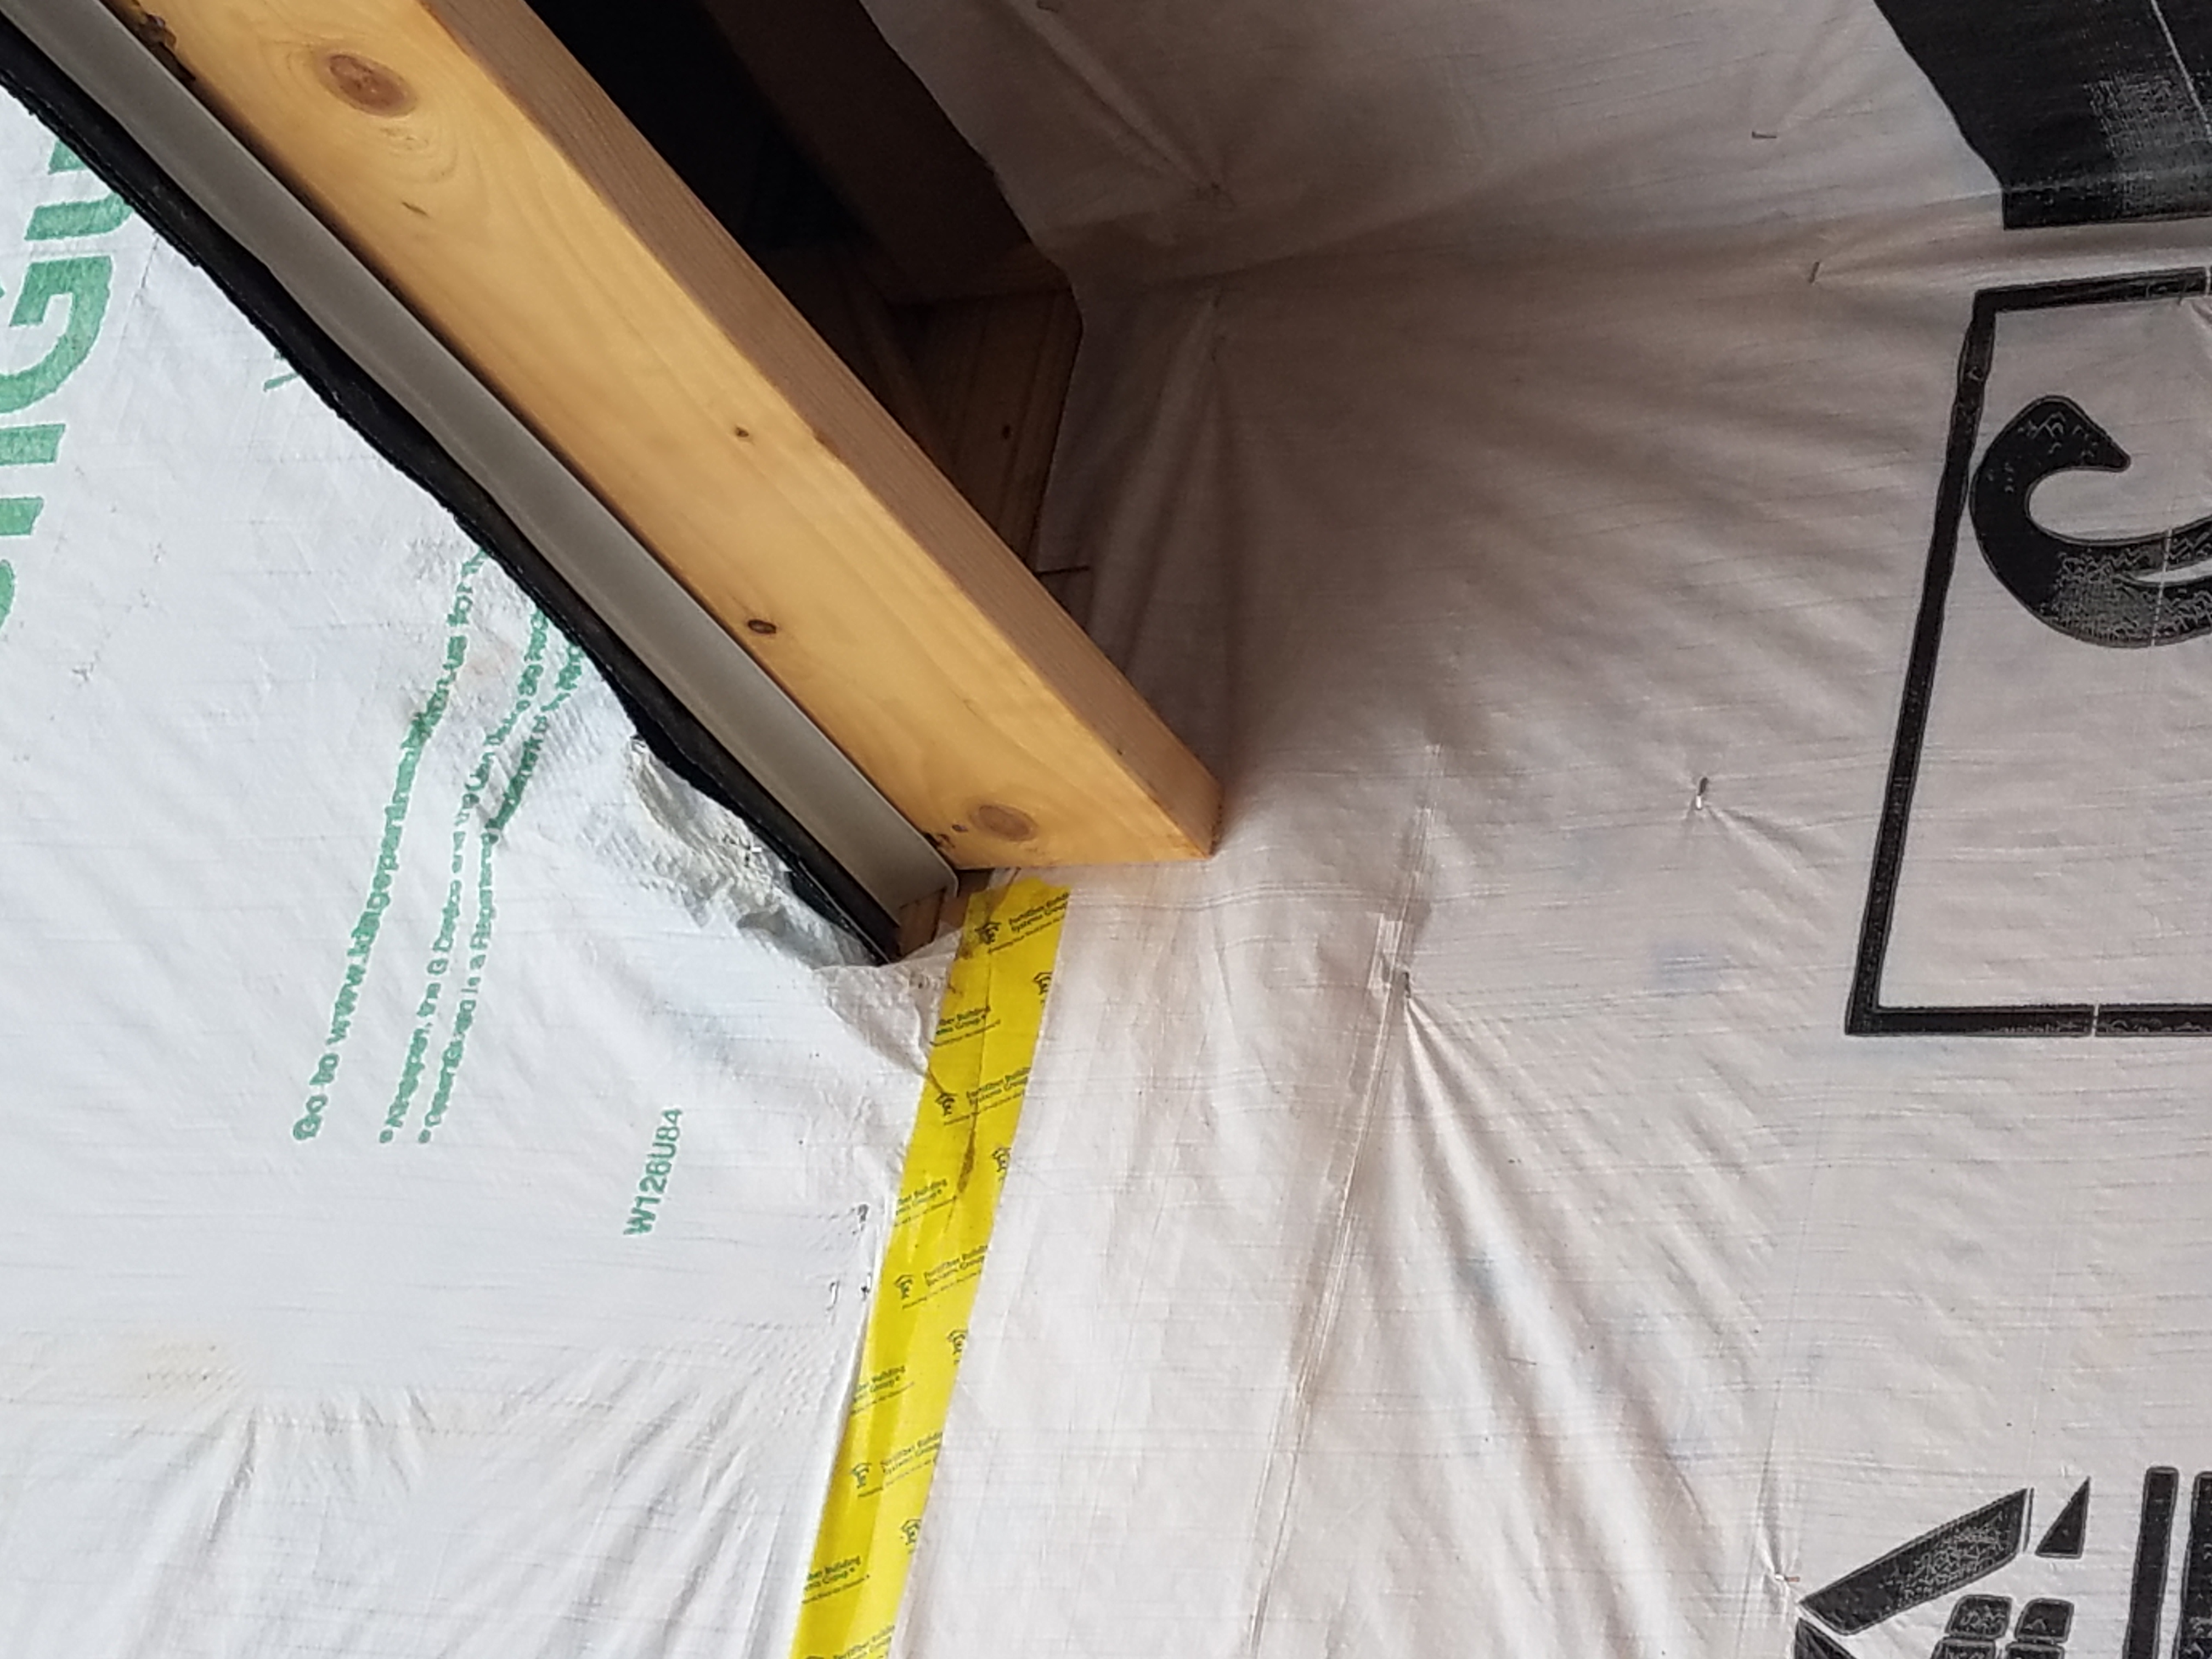
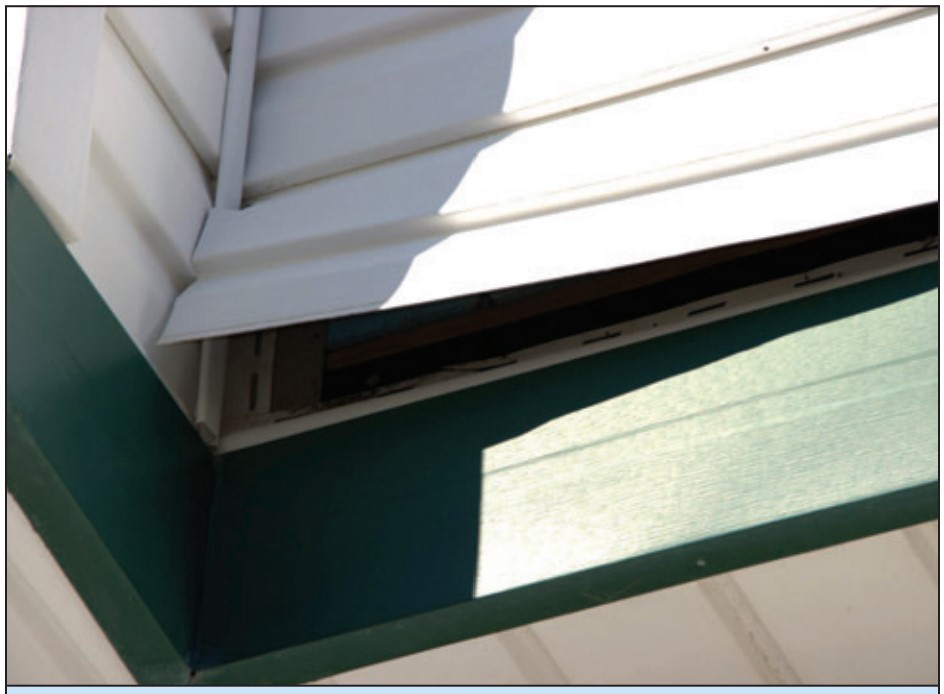
Wrong - An open eave with no soffit covering can trap rising hot air and embers from a wildfire.
Image
Image
Image

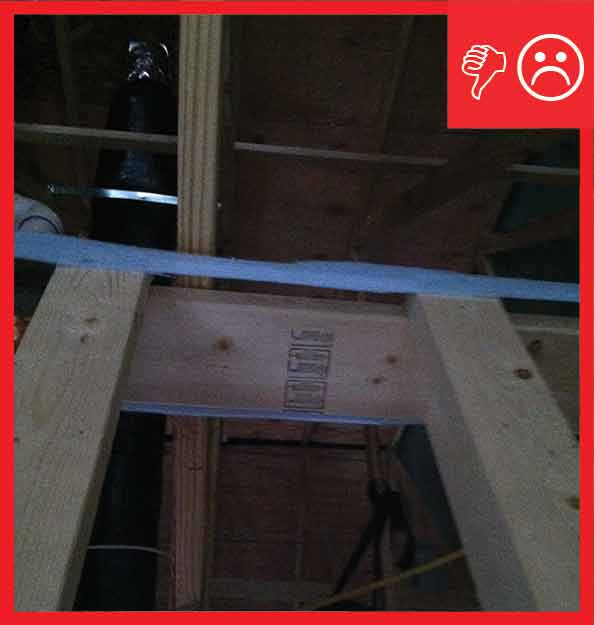
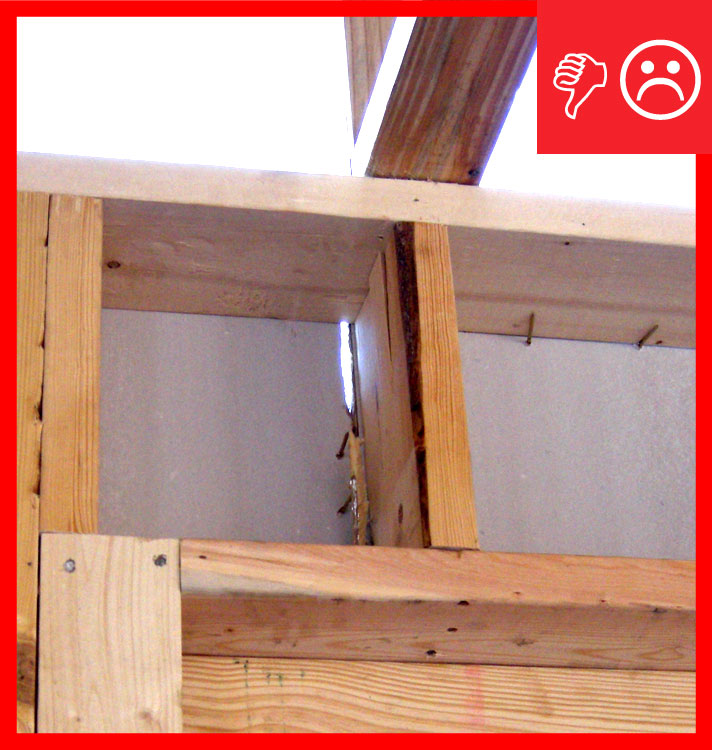
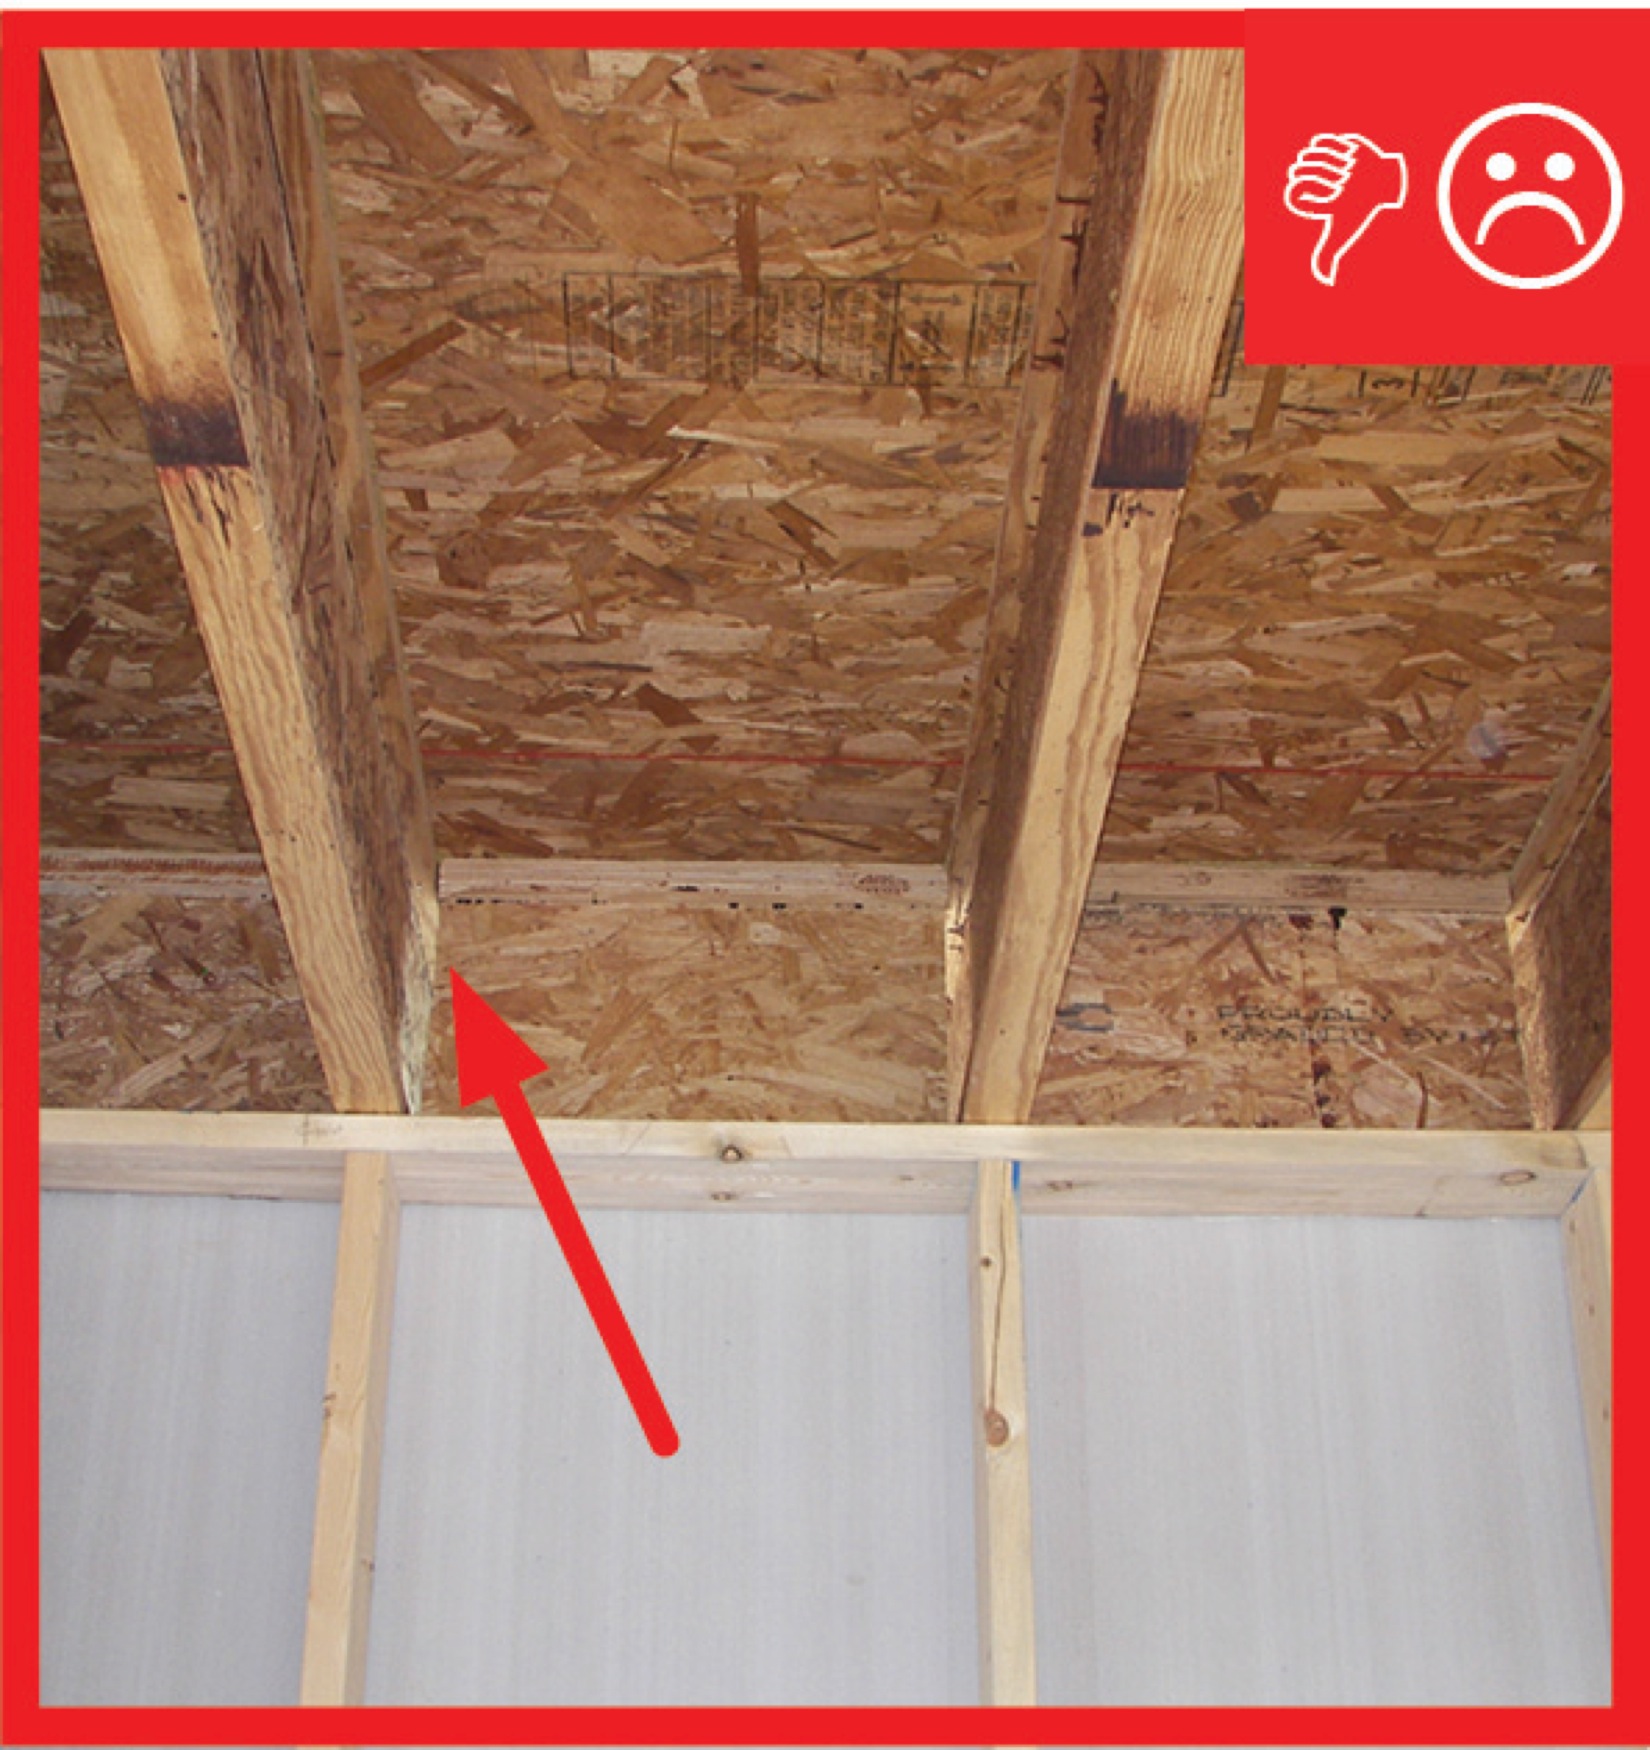
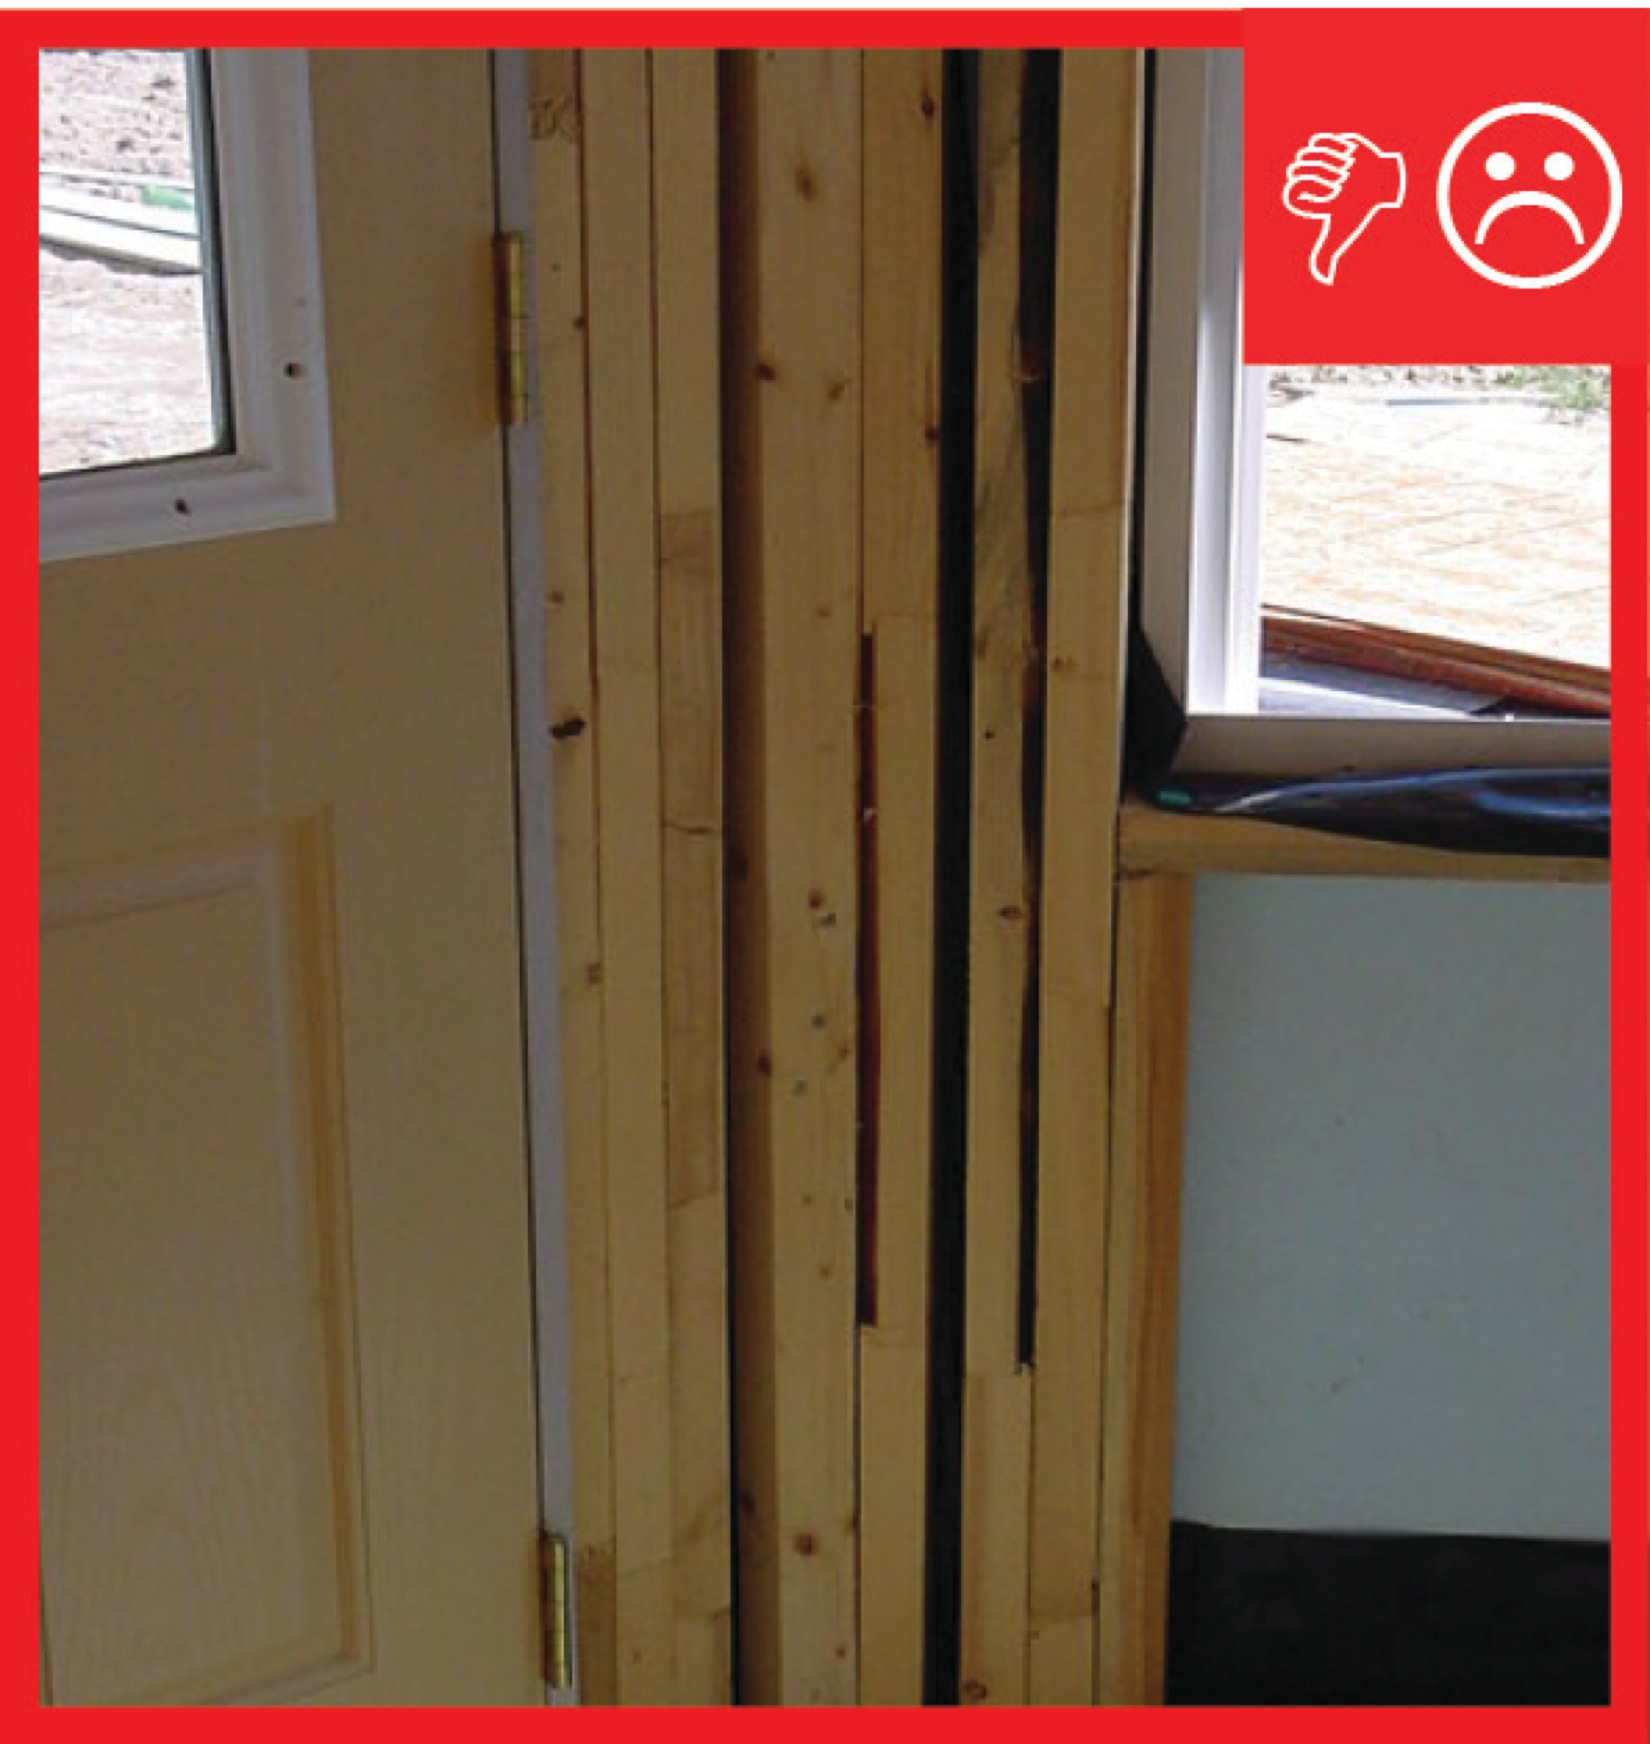
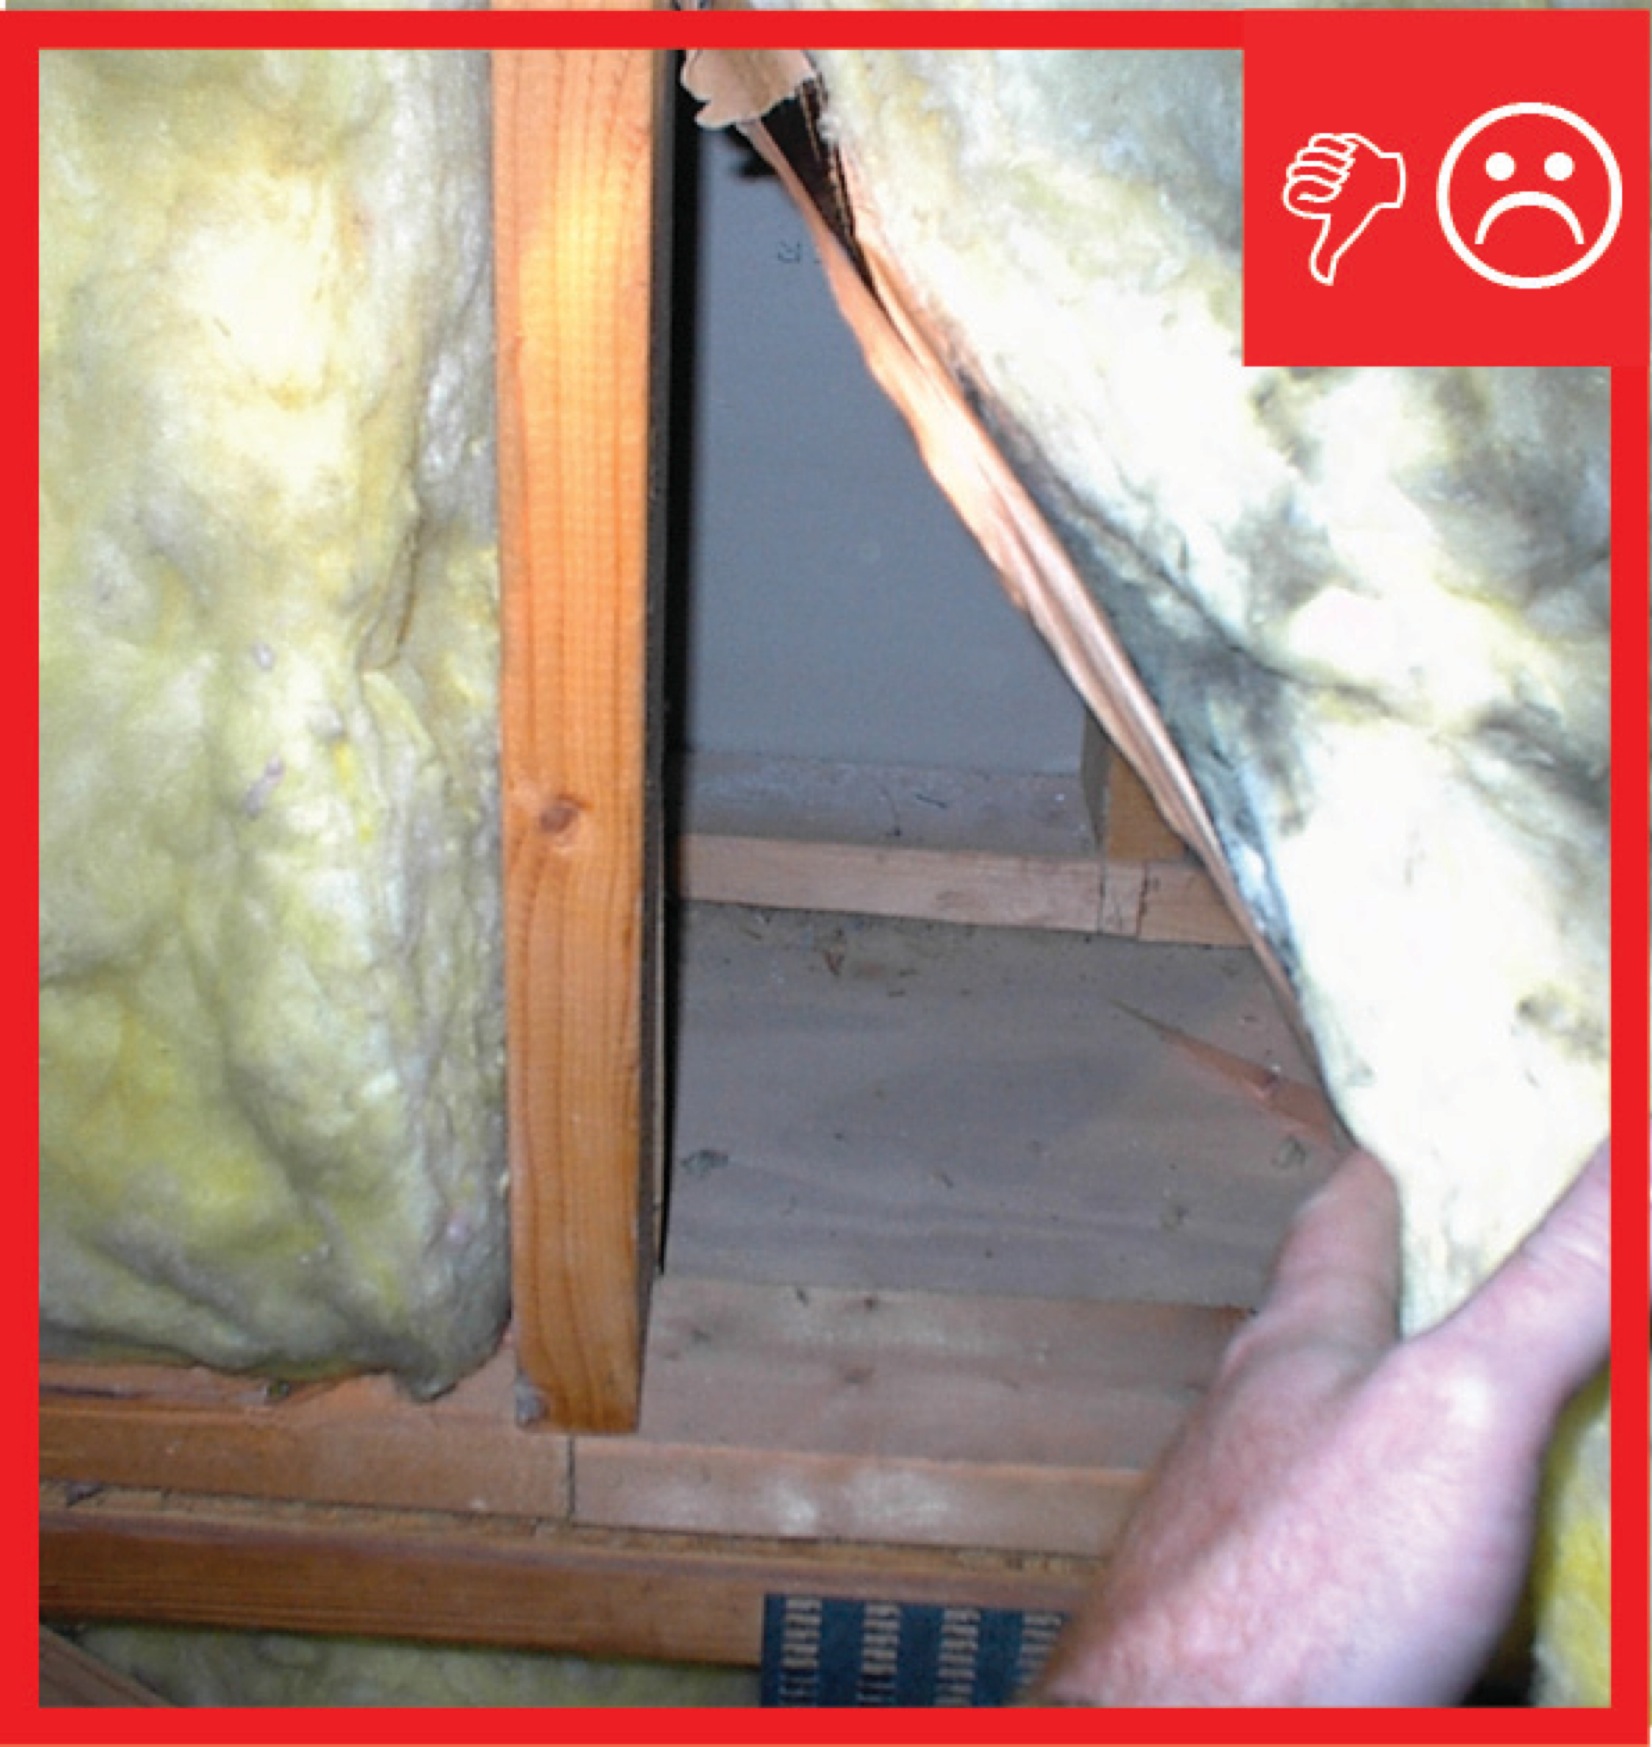
Wrong - Board is not properly cut and is split where it is toenailed into top plate.
Image
Image
Image
Image

Image
Wrong - Continuous rigid insulation was not installed to continuously cover the sheathing.
Image
Image
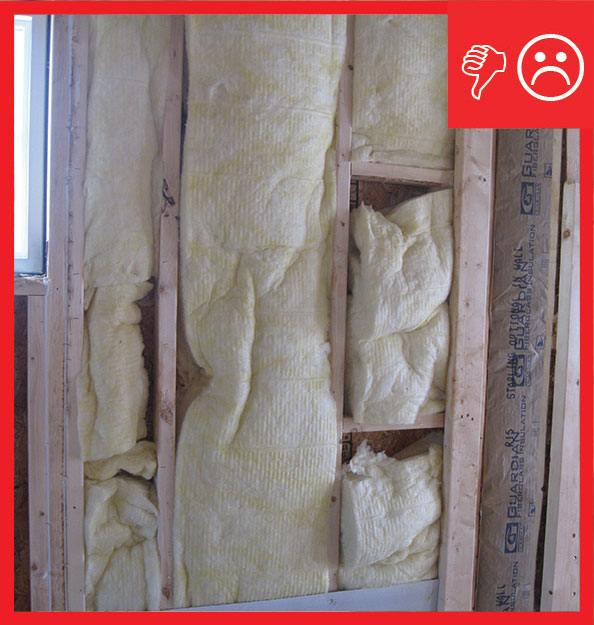
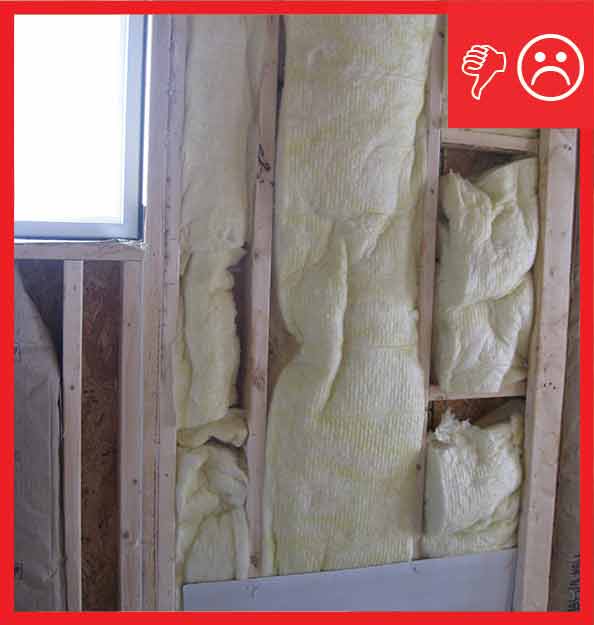
Wrong - Craft faced batt insulation is not cut to fit around wiring and eletrical boxes and is squished into corners forming voids which could encourage cold spots in wall.
Image
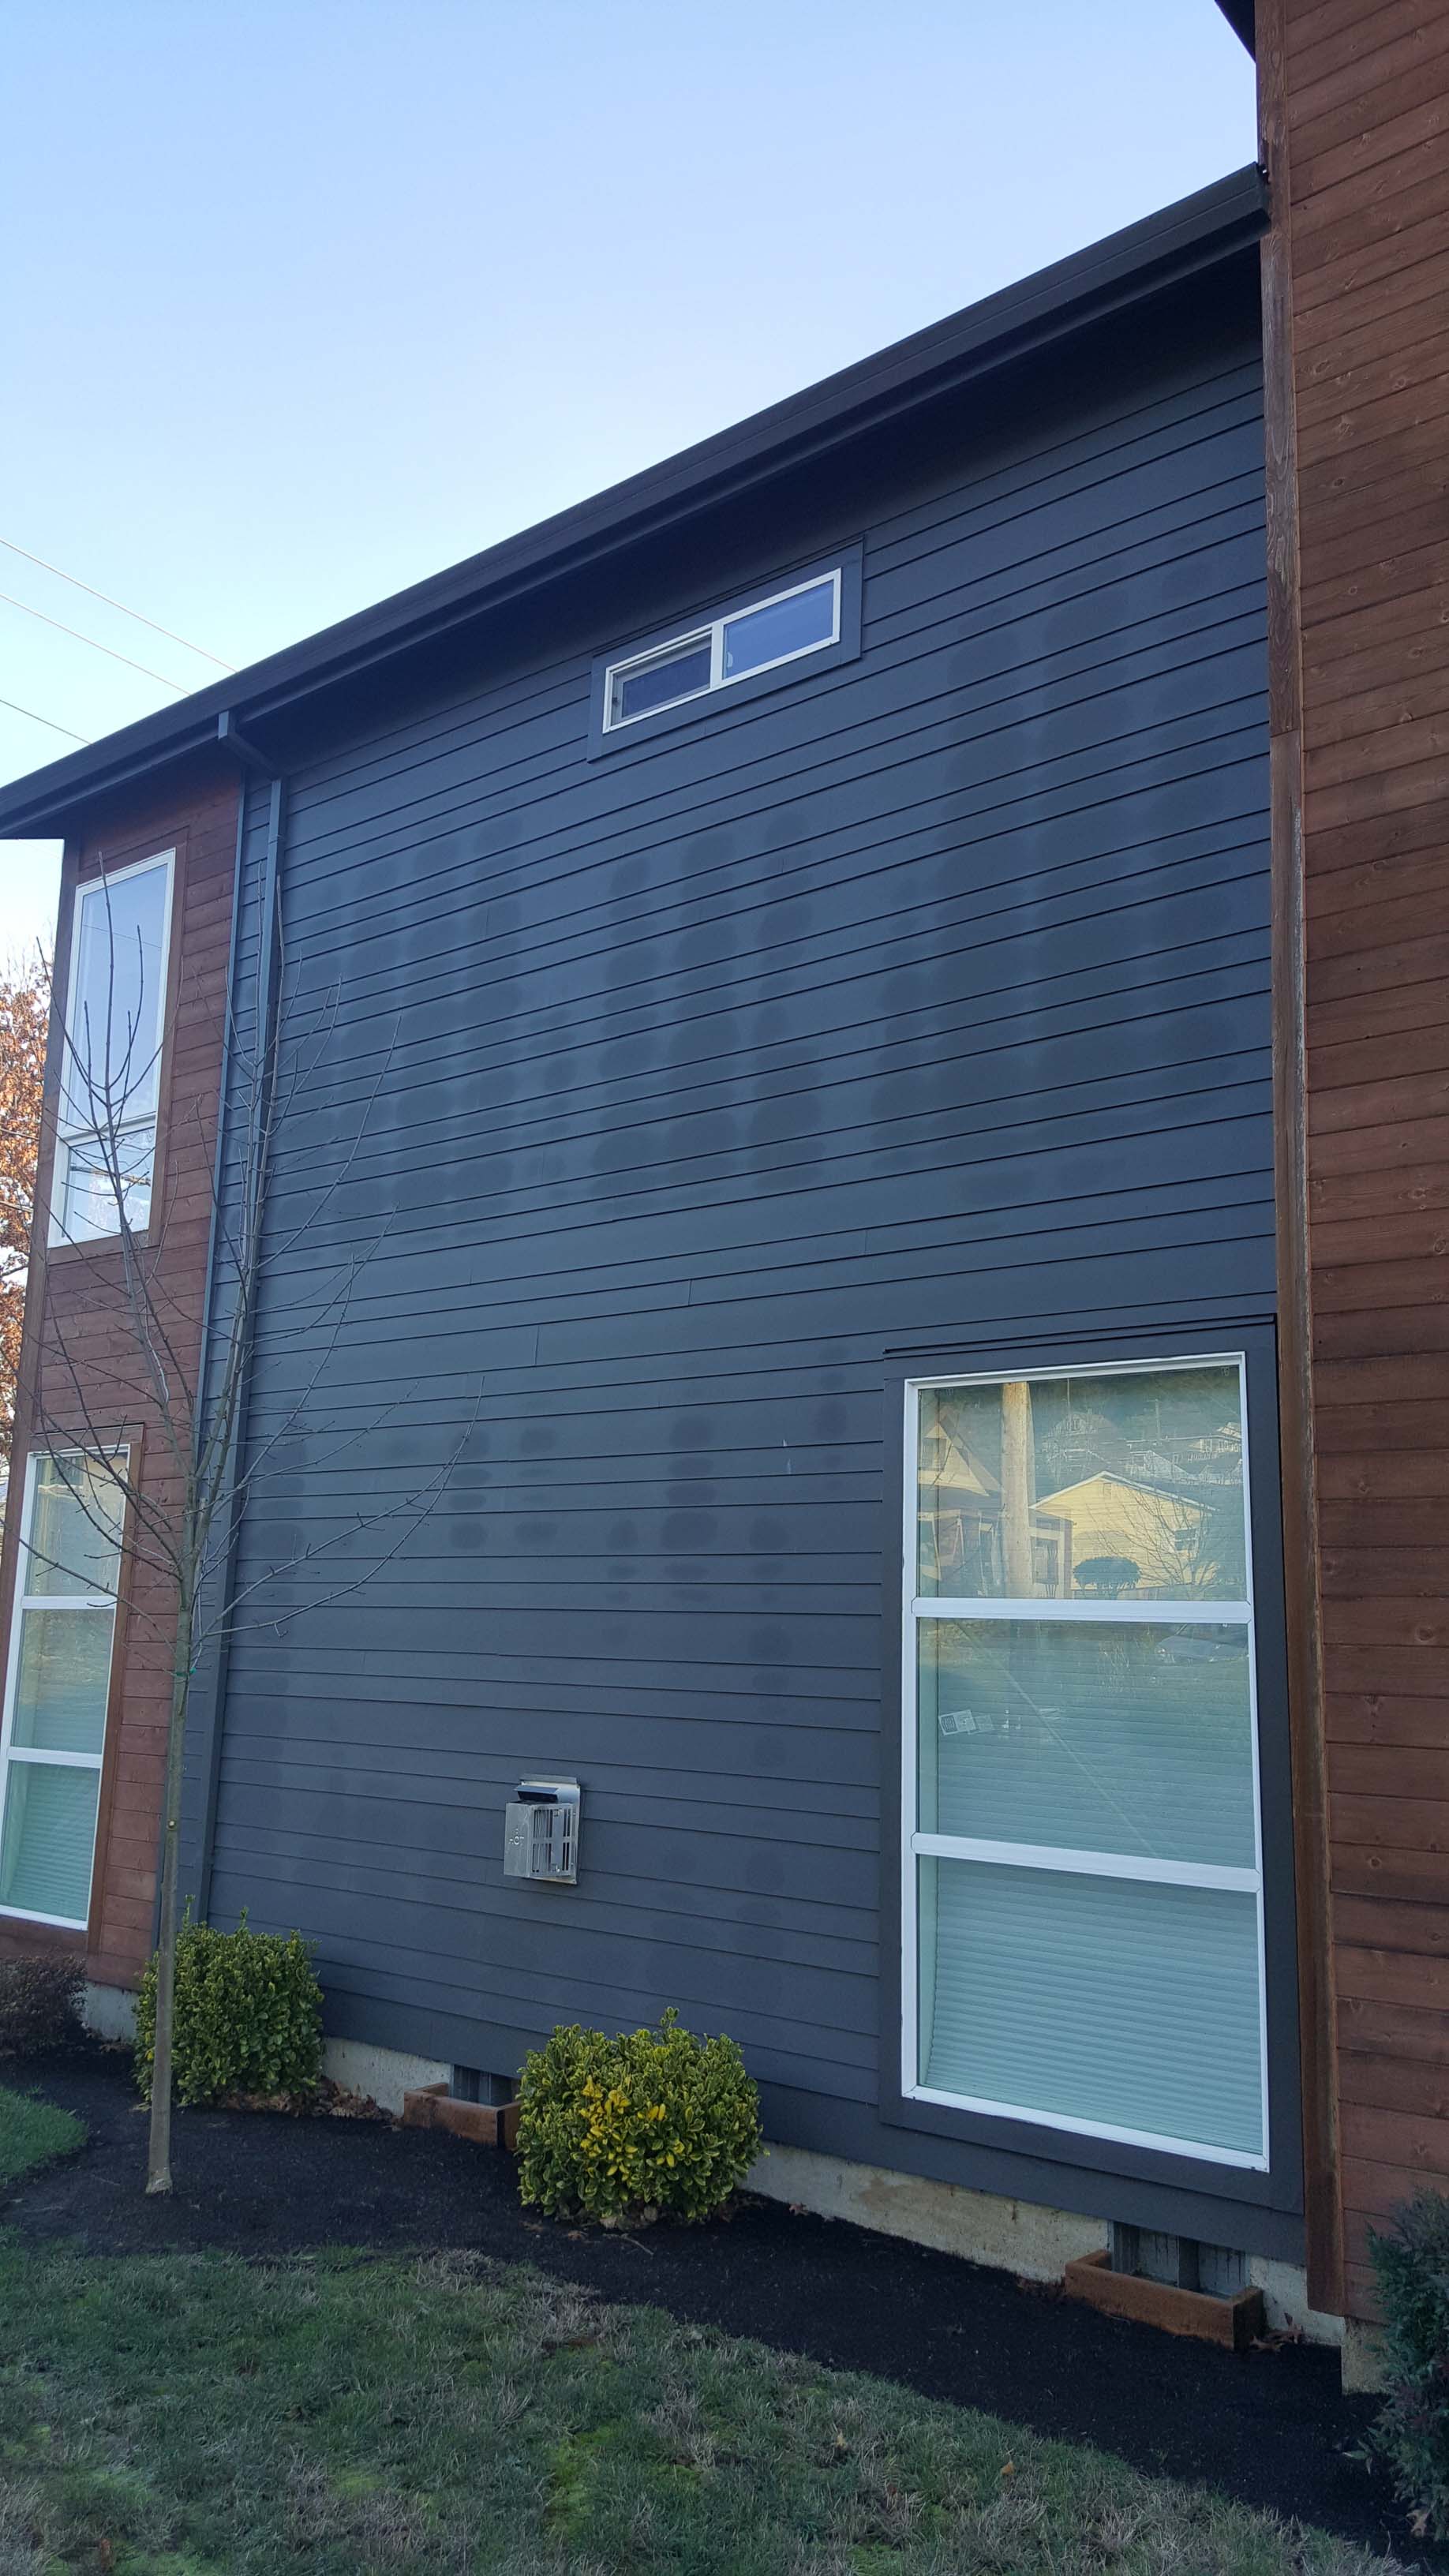
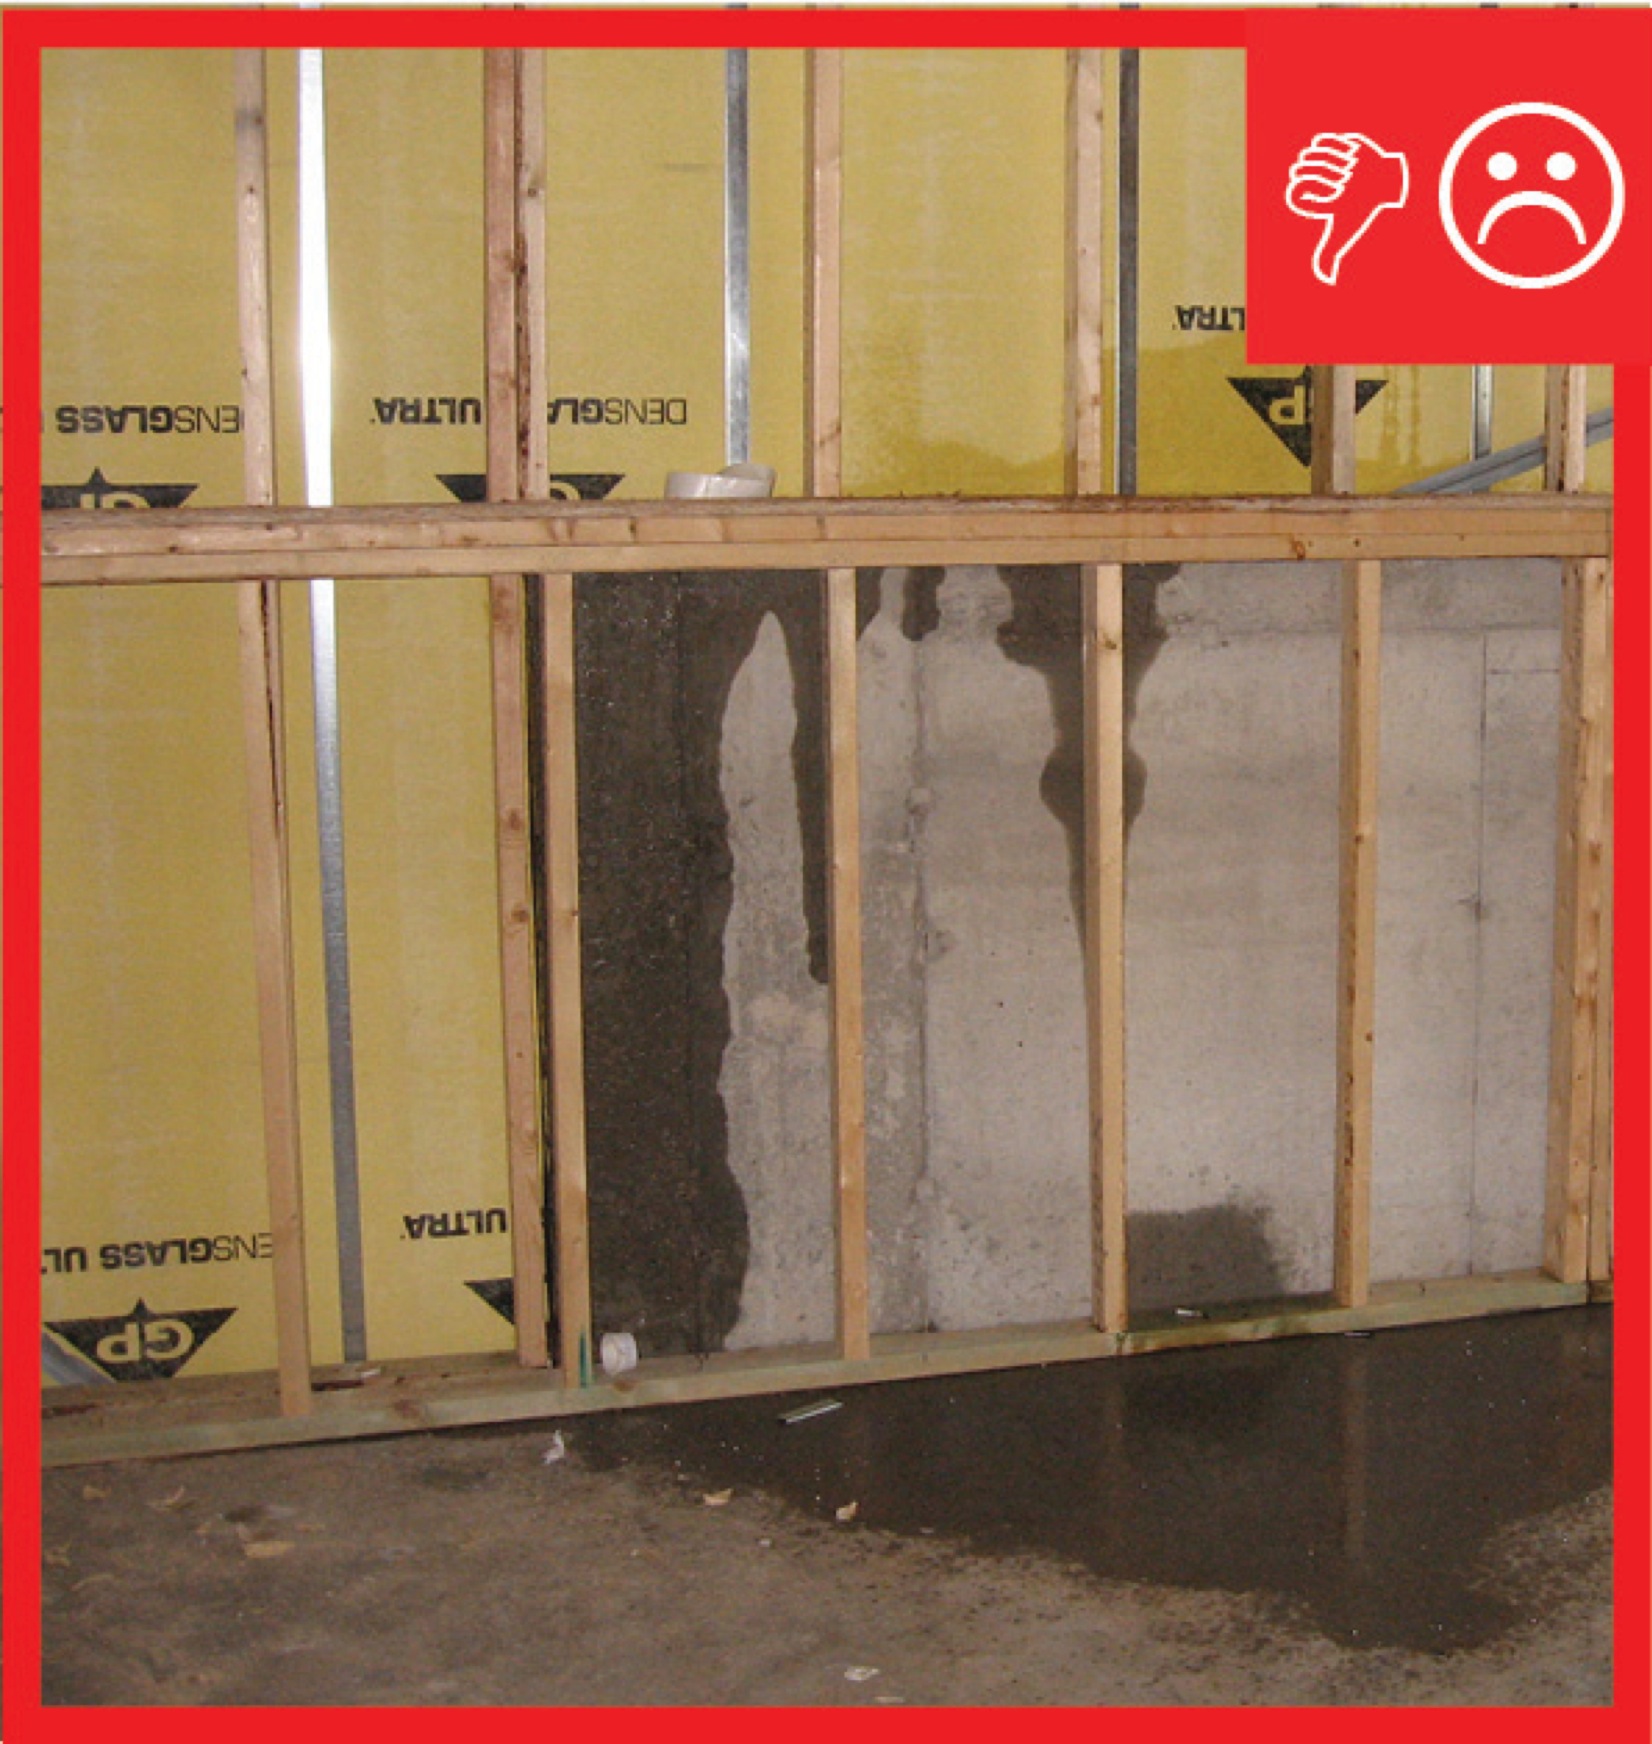
Wrong - Dark pattern on wall is showing where warm air is leaking into the wall cavity from interior of home.
Image
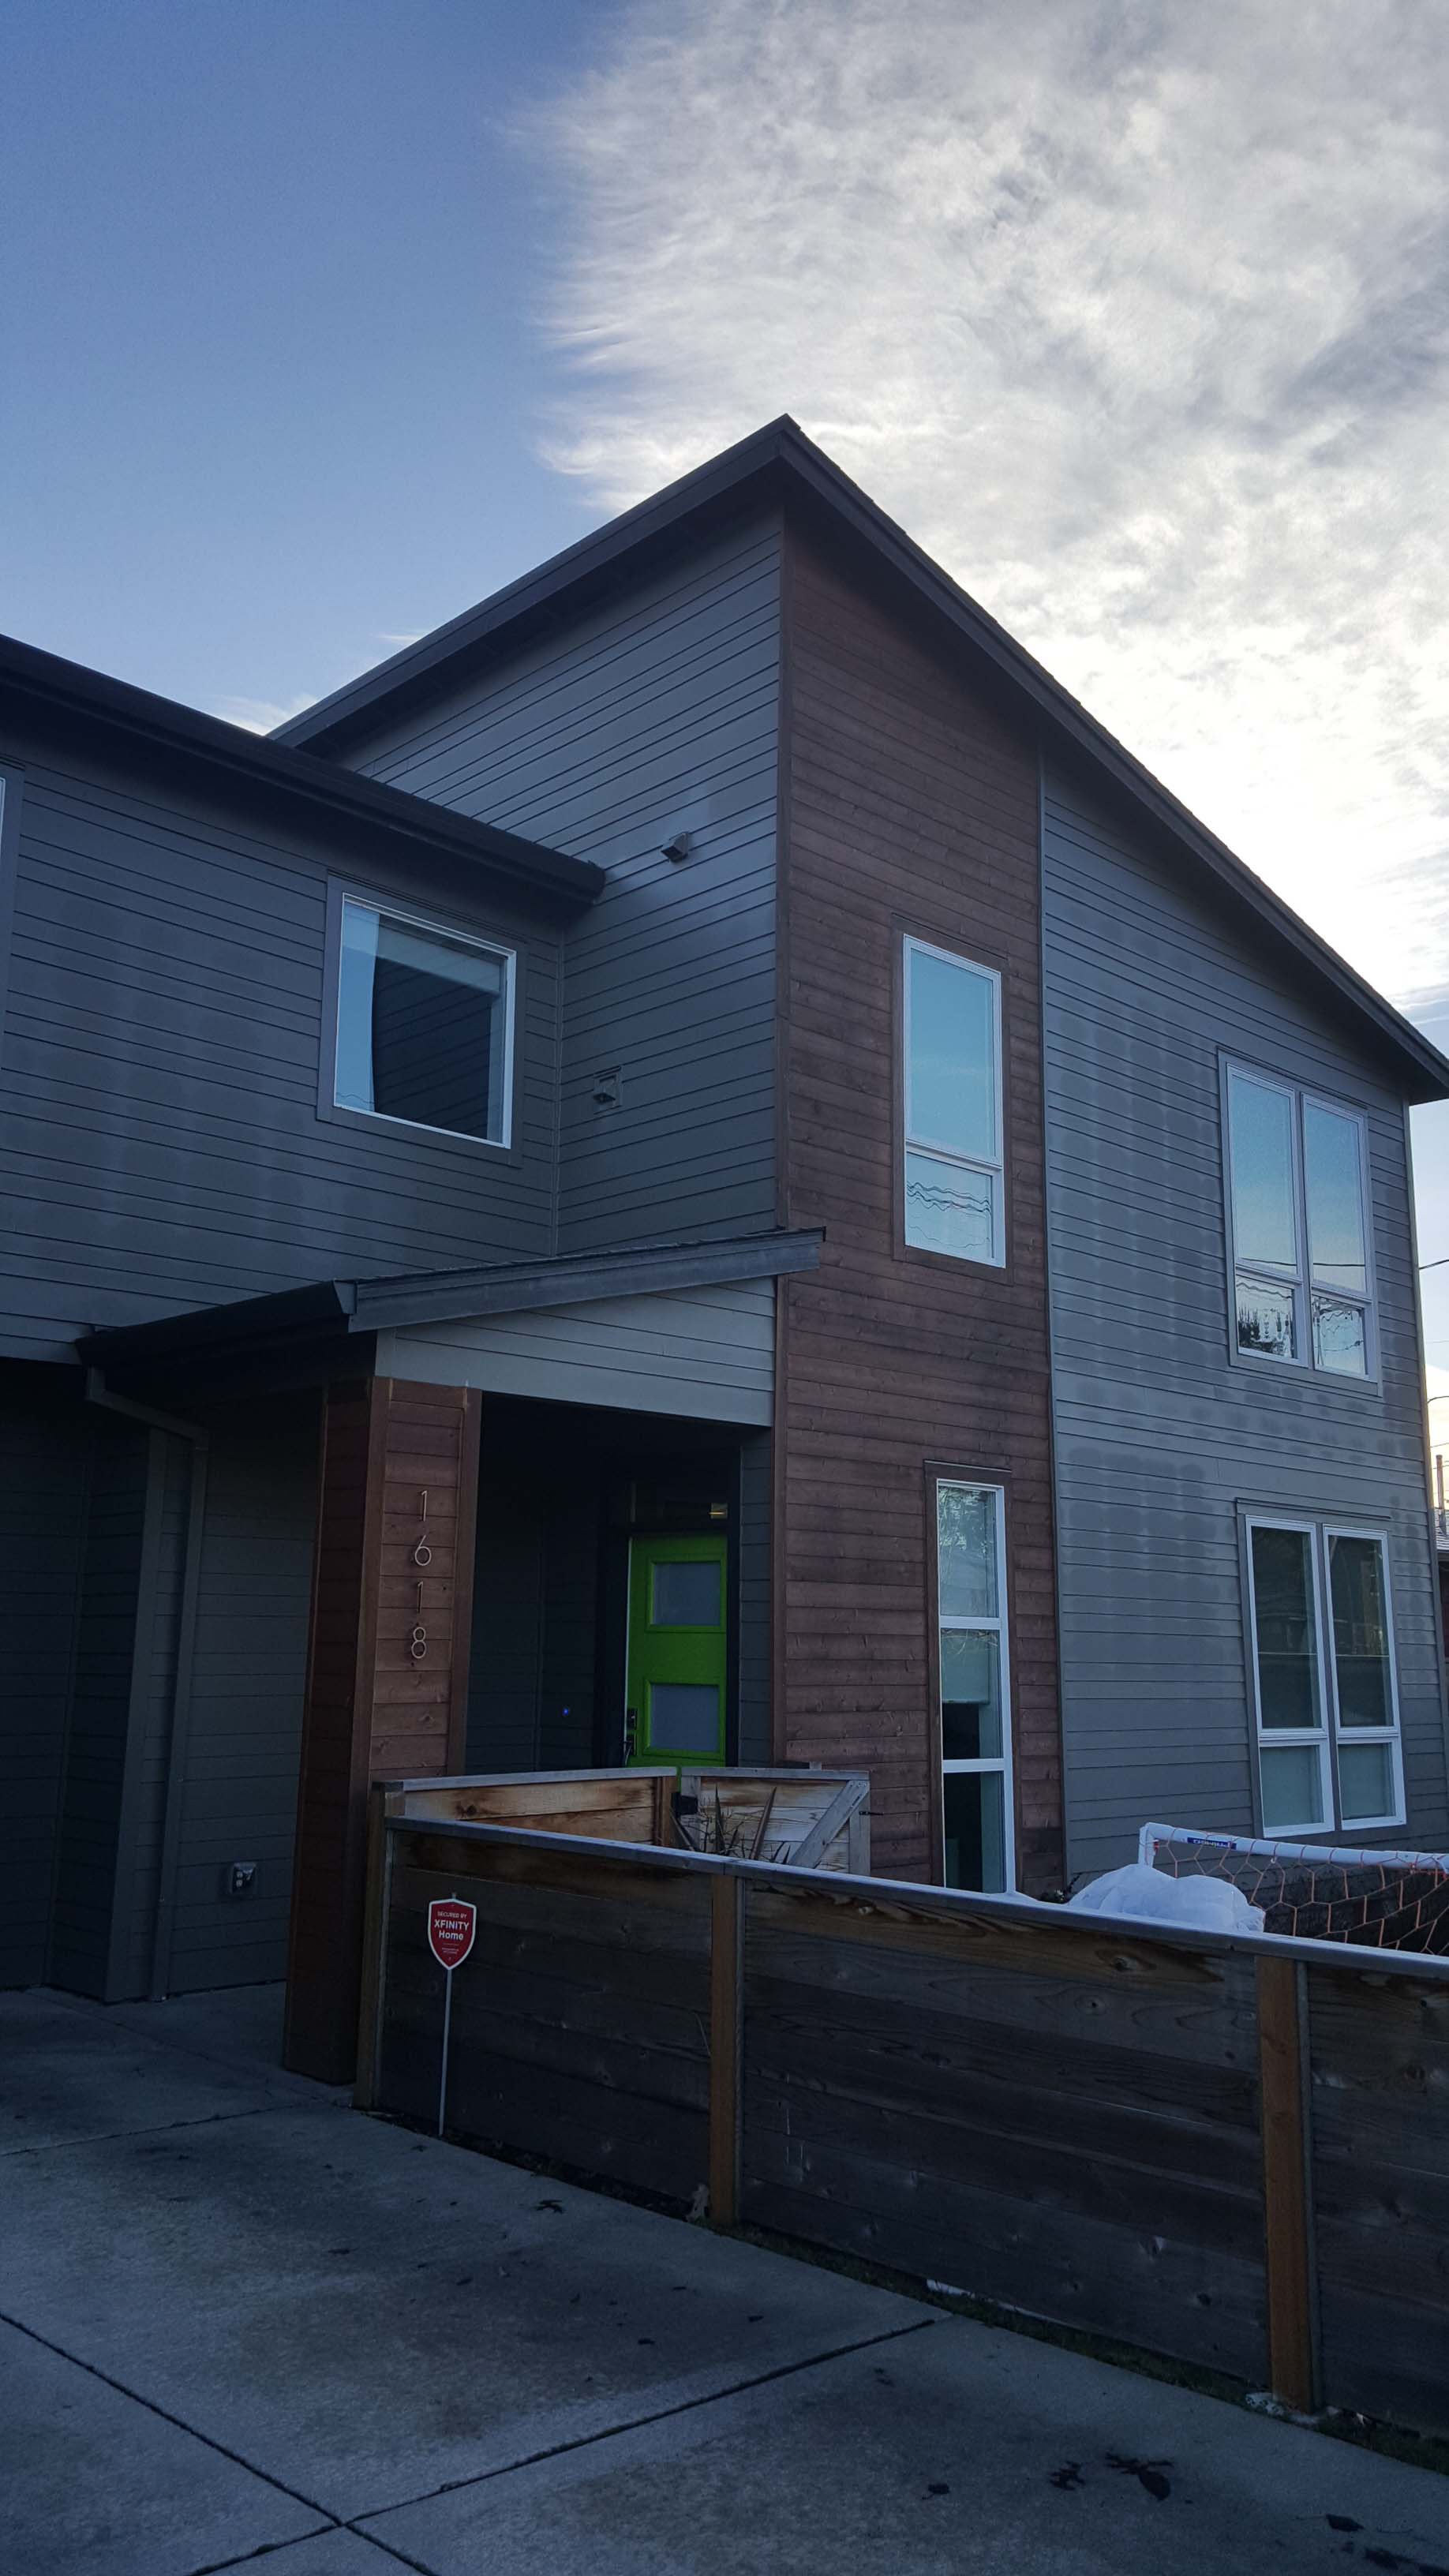
Wrong - Dark patterns on the Home's exterior siding show where warm air is leaking into the wall cavities.
Image
Image
Image
Wrong - During high winds air entered the home elsewhere and pushed out the door which was inadequately anchored to the wall.
Image
Image
Image
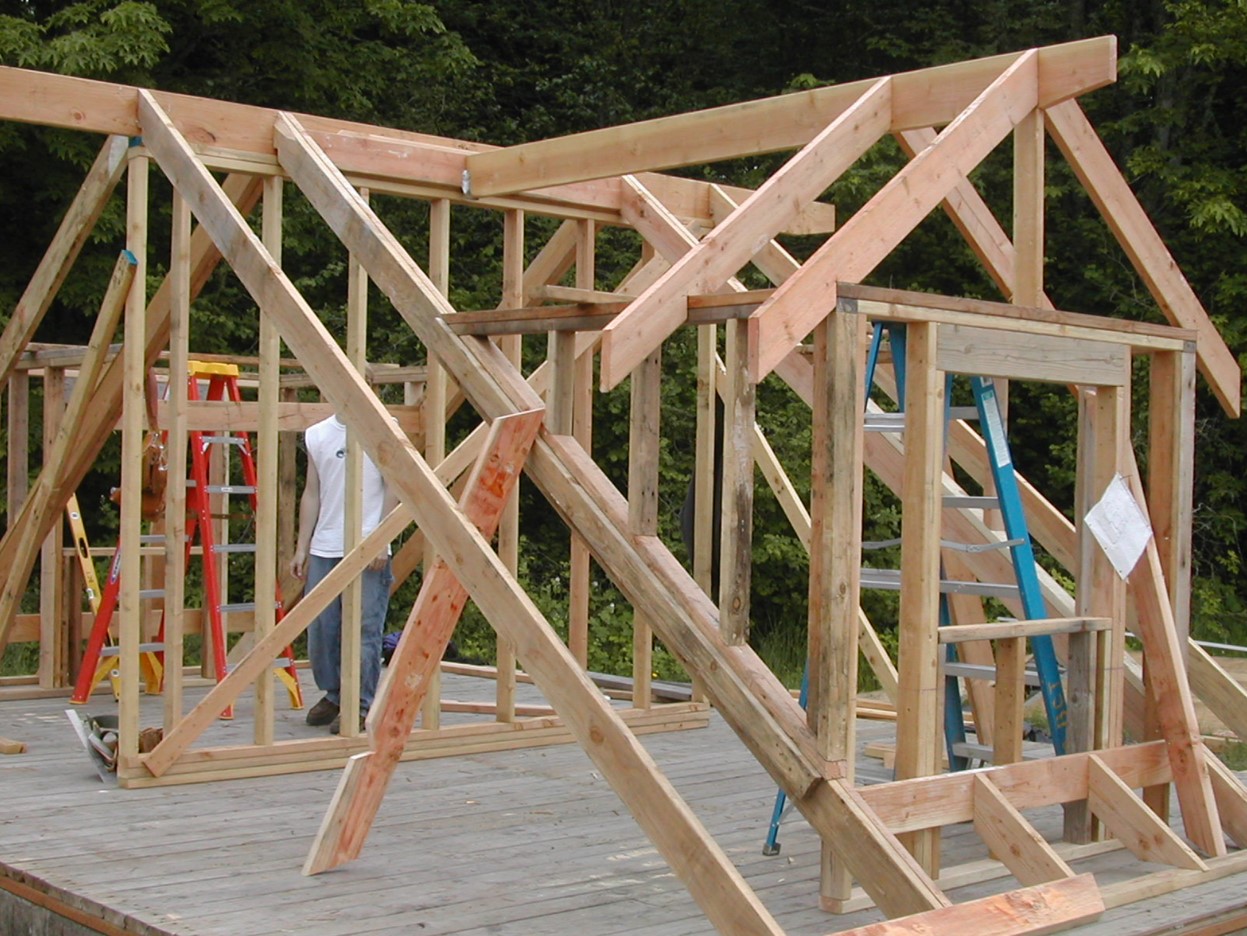
Wrong - Framing a dormer using only toe nailing and end nailing is not acceptable in areas subjected to high winds, hurricanes, or earthquakes.
Image
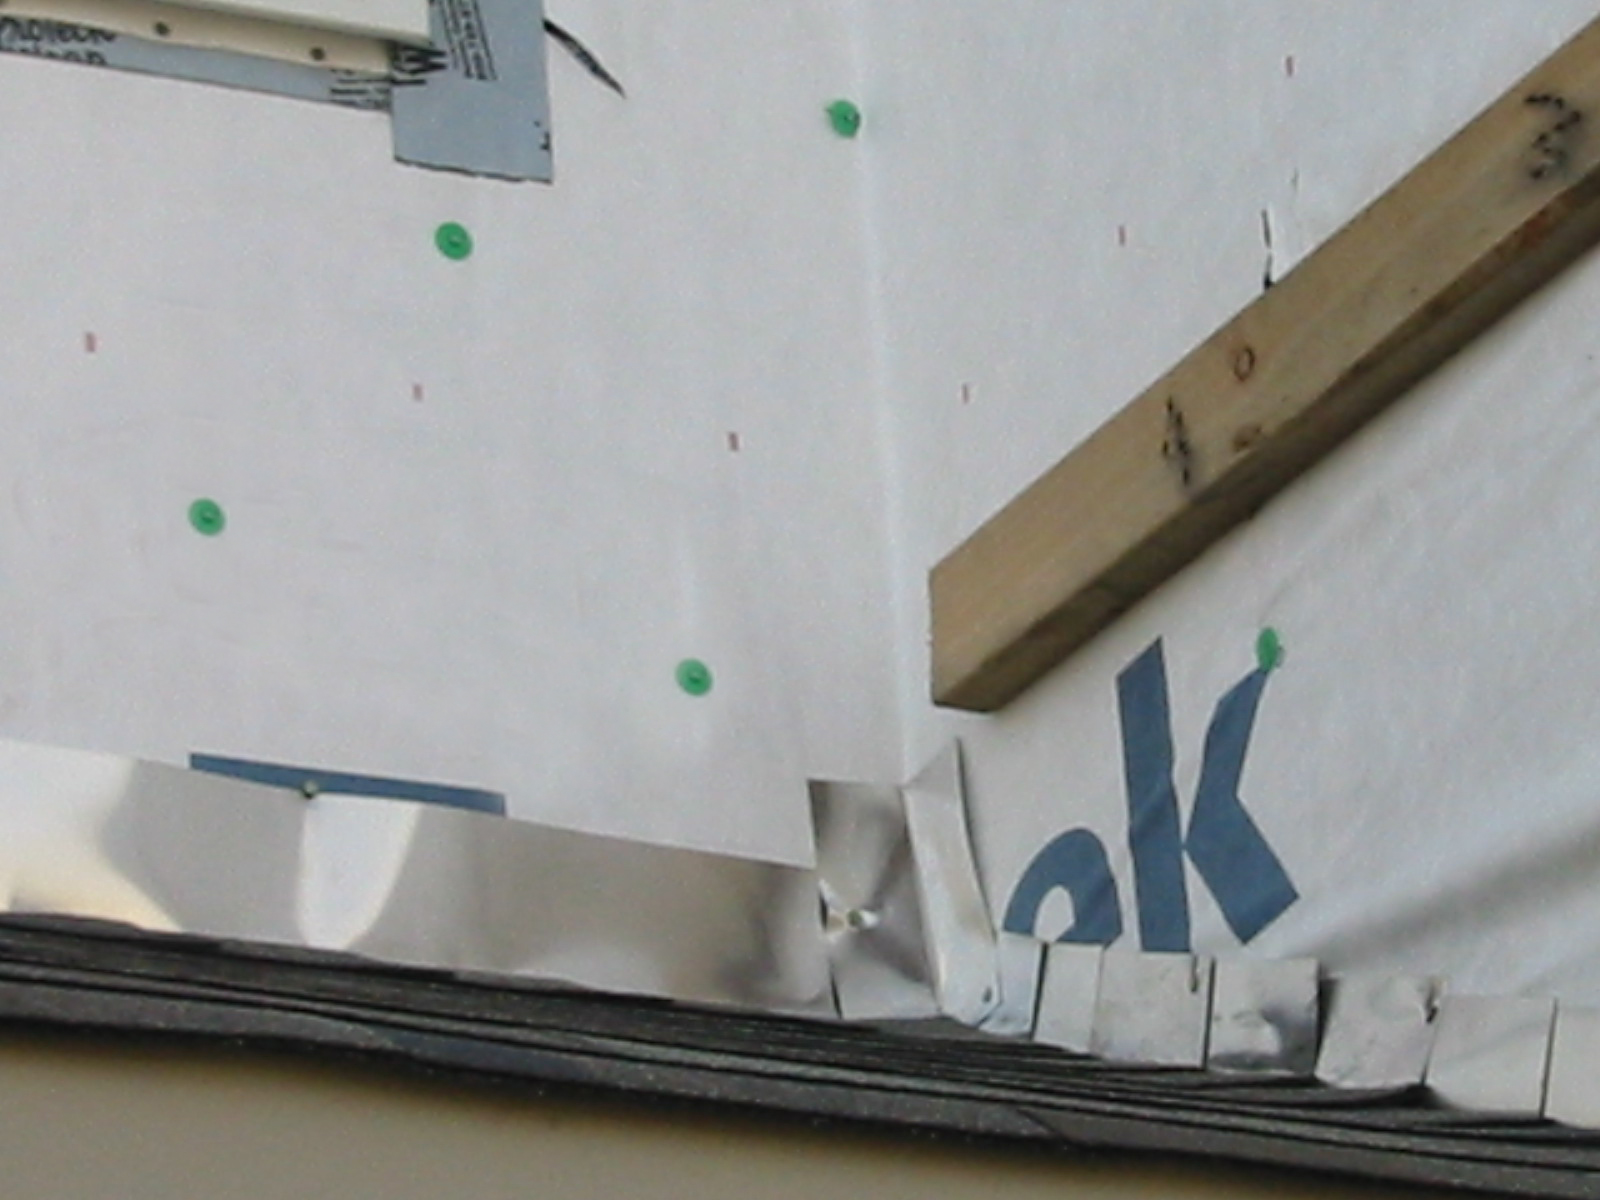
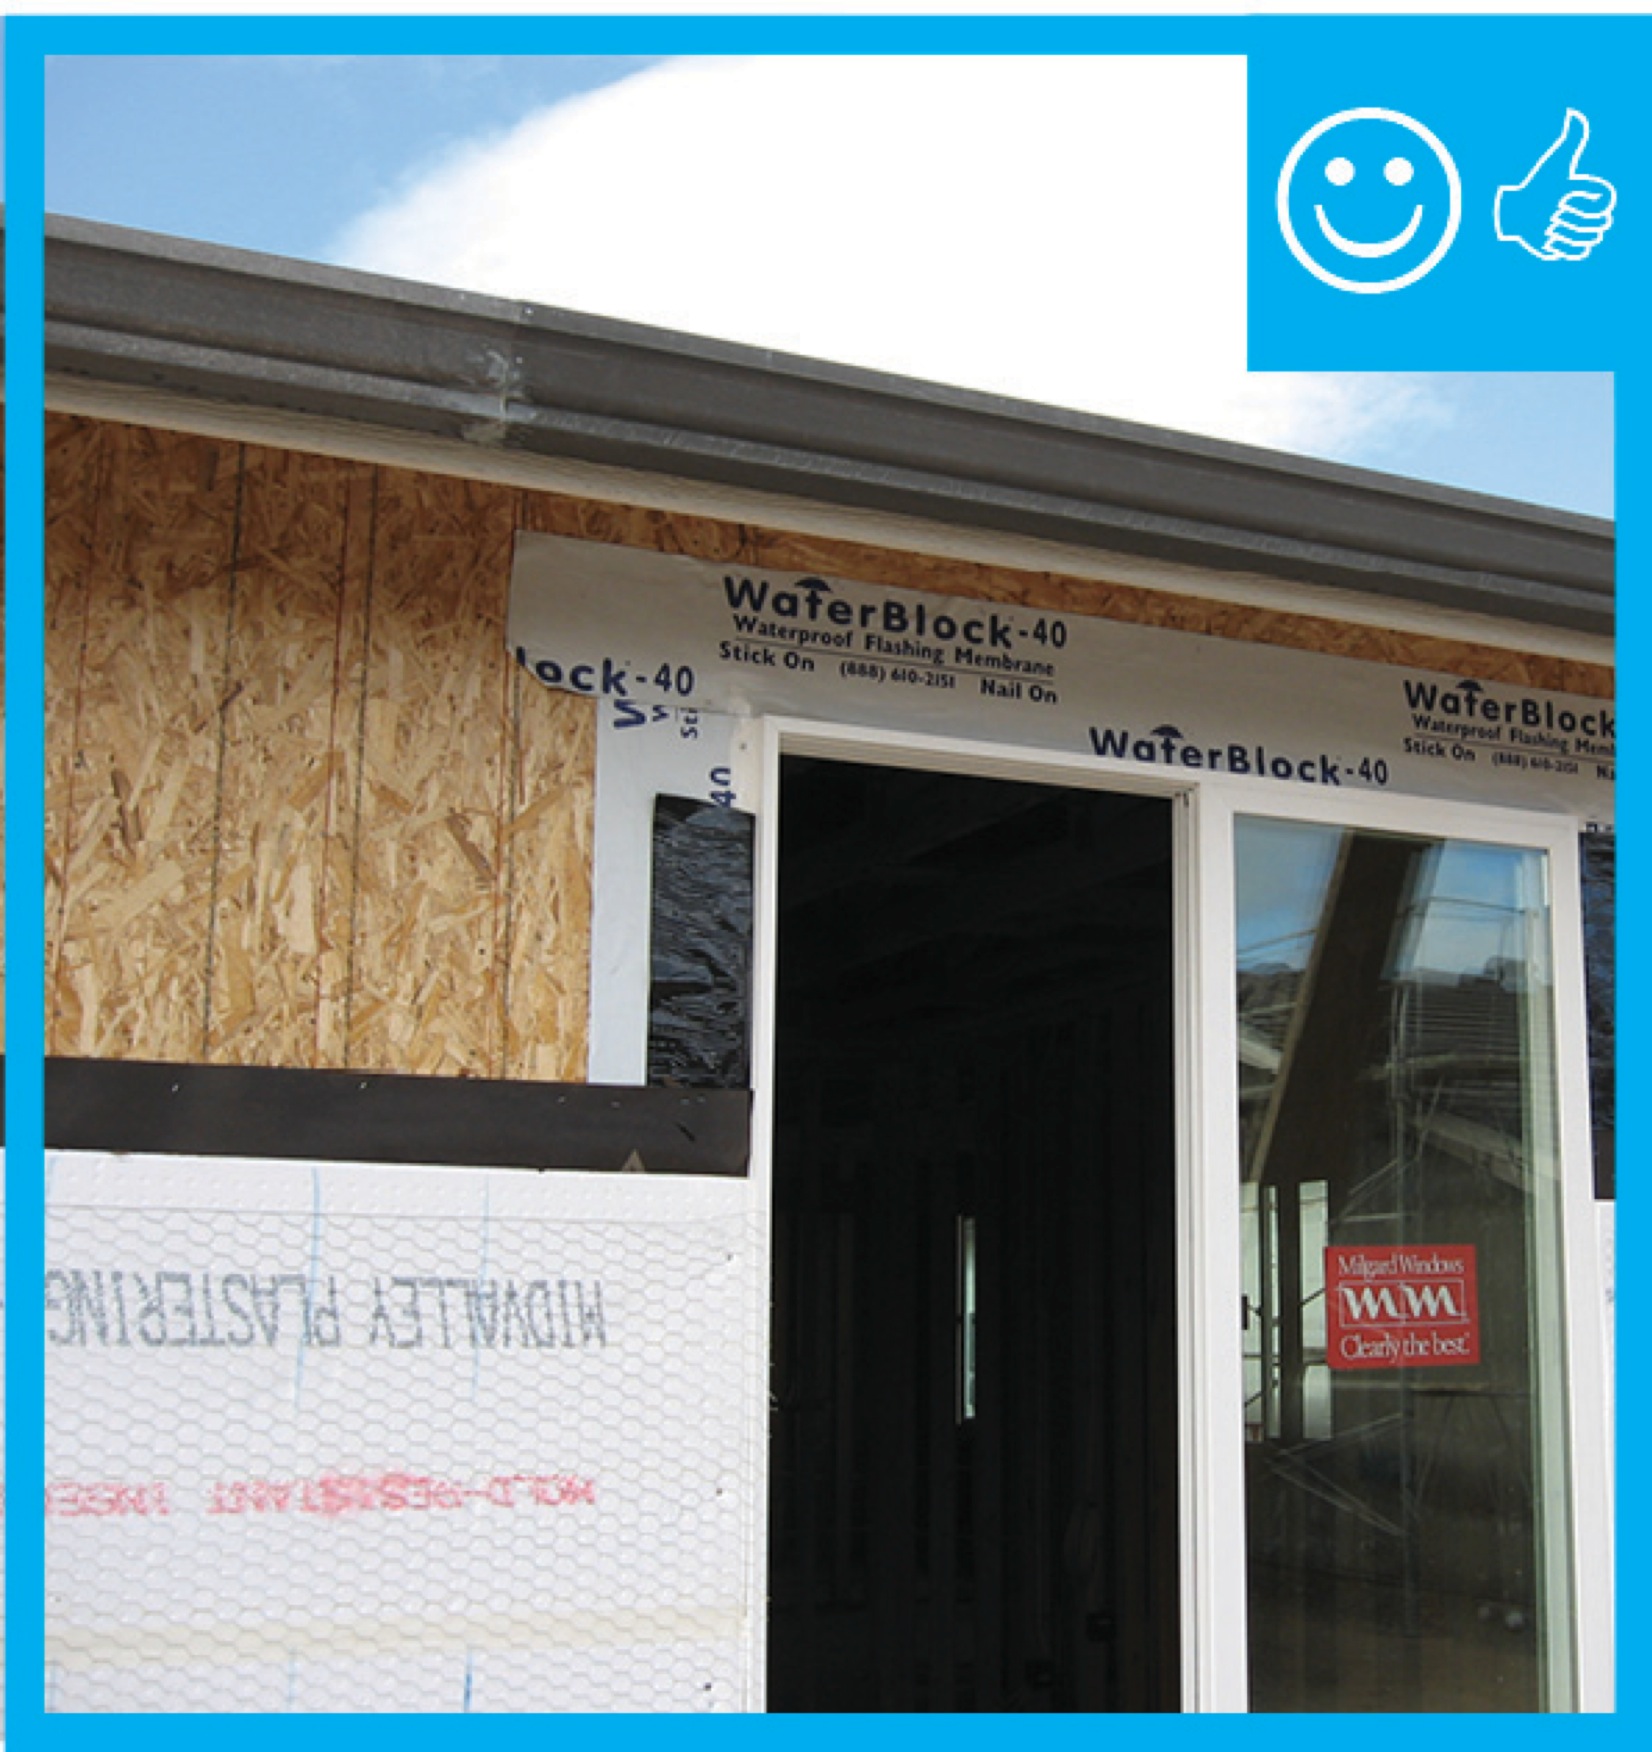
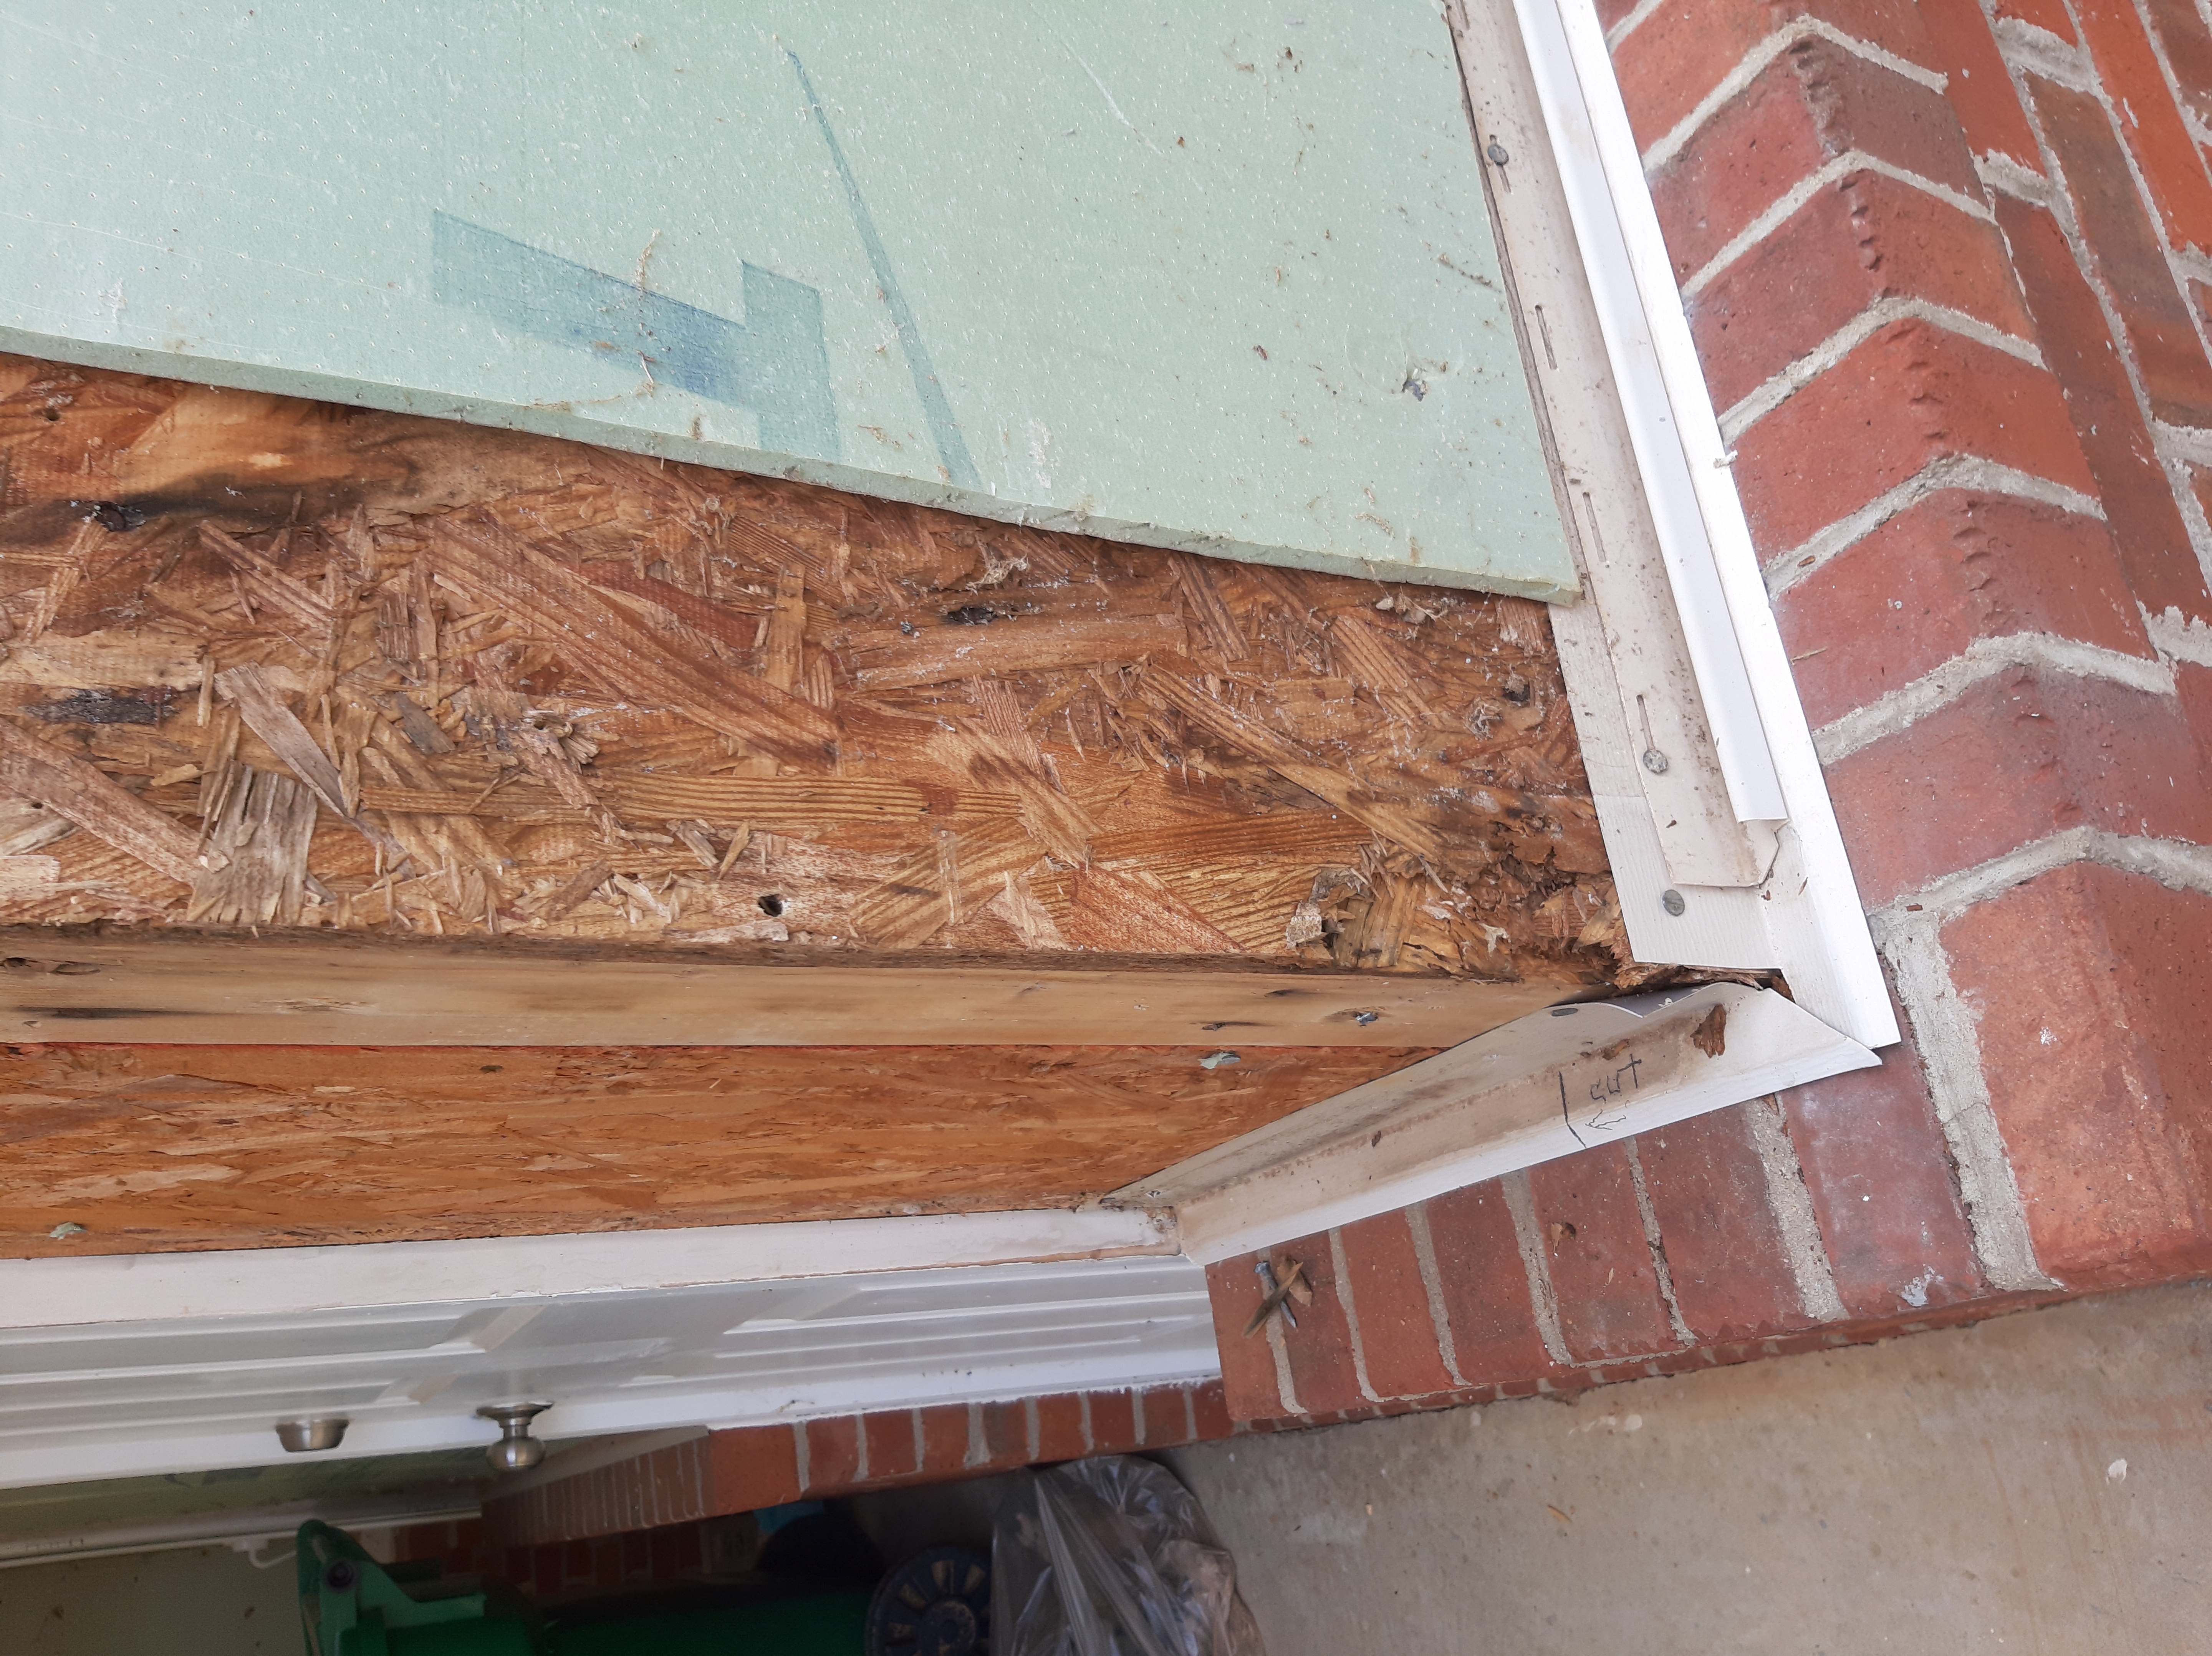
Wrong - House wrap was not properly cut and adhered where the roof meets the wall so water is likely to get behind the house wrap.
Image
Wrong - House wrap was poorly cut at wall interface and not taped leaving wood exposed and vulnerable to water entry.
Image
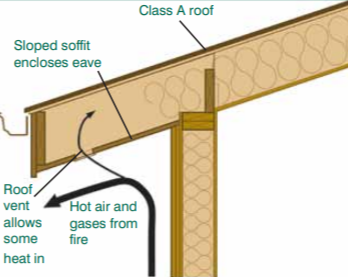
Wrong - If the soffit is applied directly to the rafter eave, it forms a sloping soffit, which creates a pocket that can trap hot air and embers from a wildfire.
Image
Image
Image
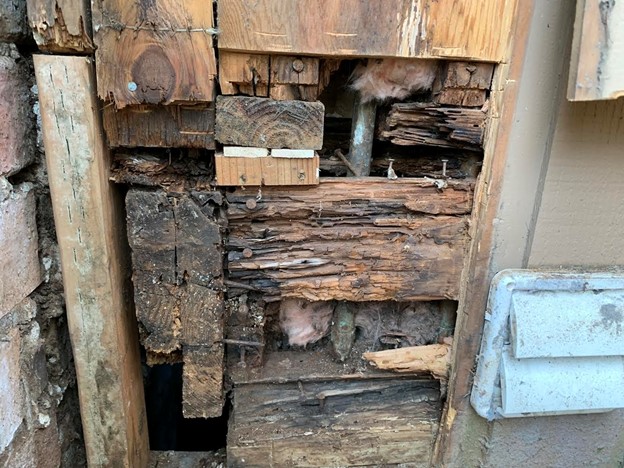
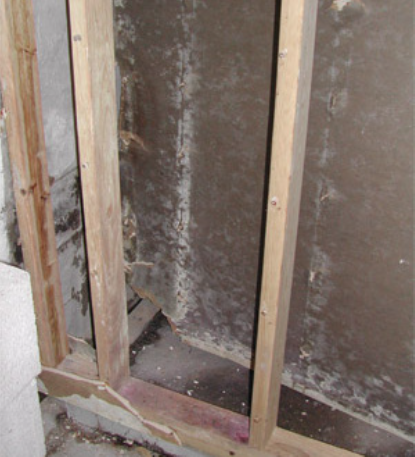
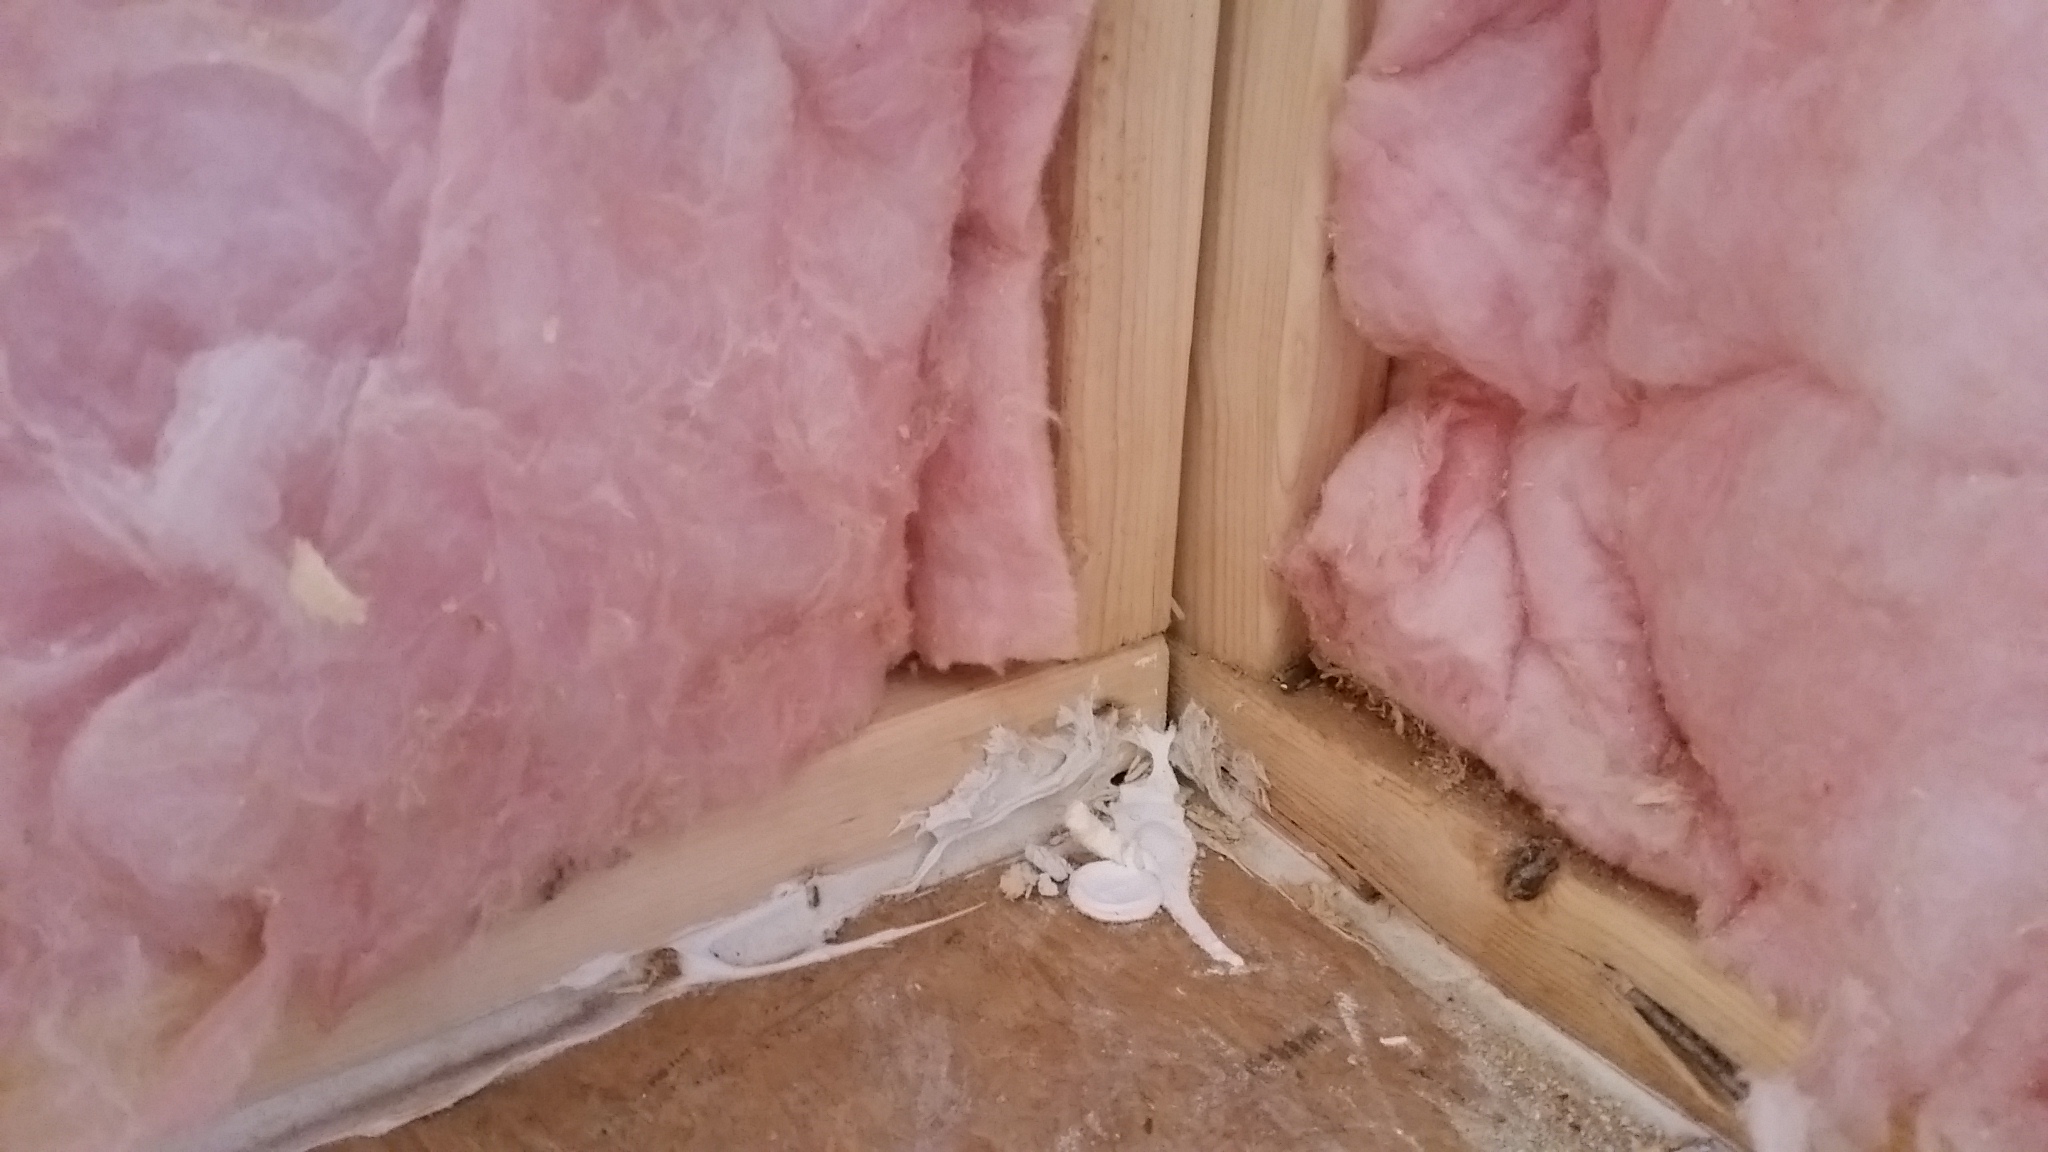
Wrong - Lack of a weather-resistant barrier allowed water to get behind the siding and rot the framing in this corner rim joist area.
Image
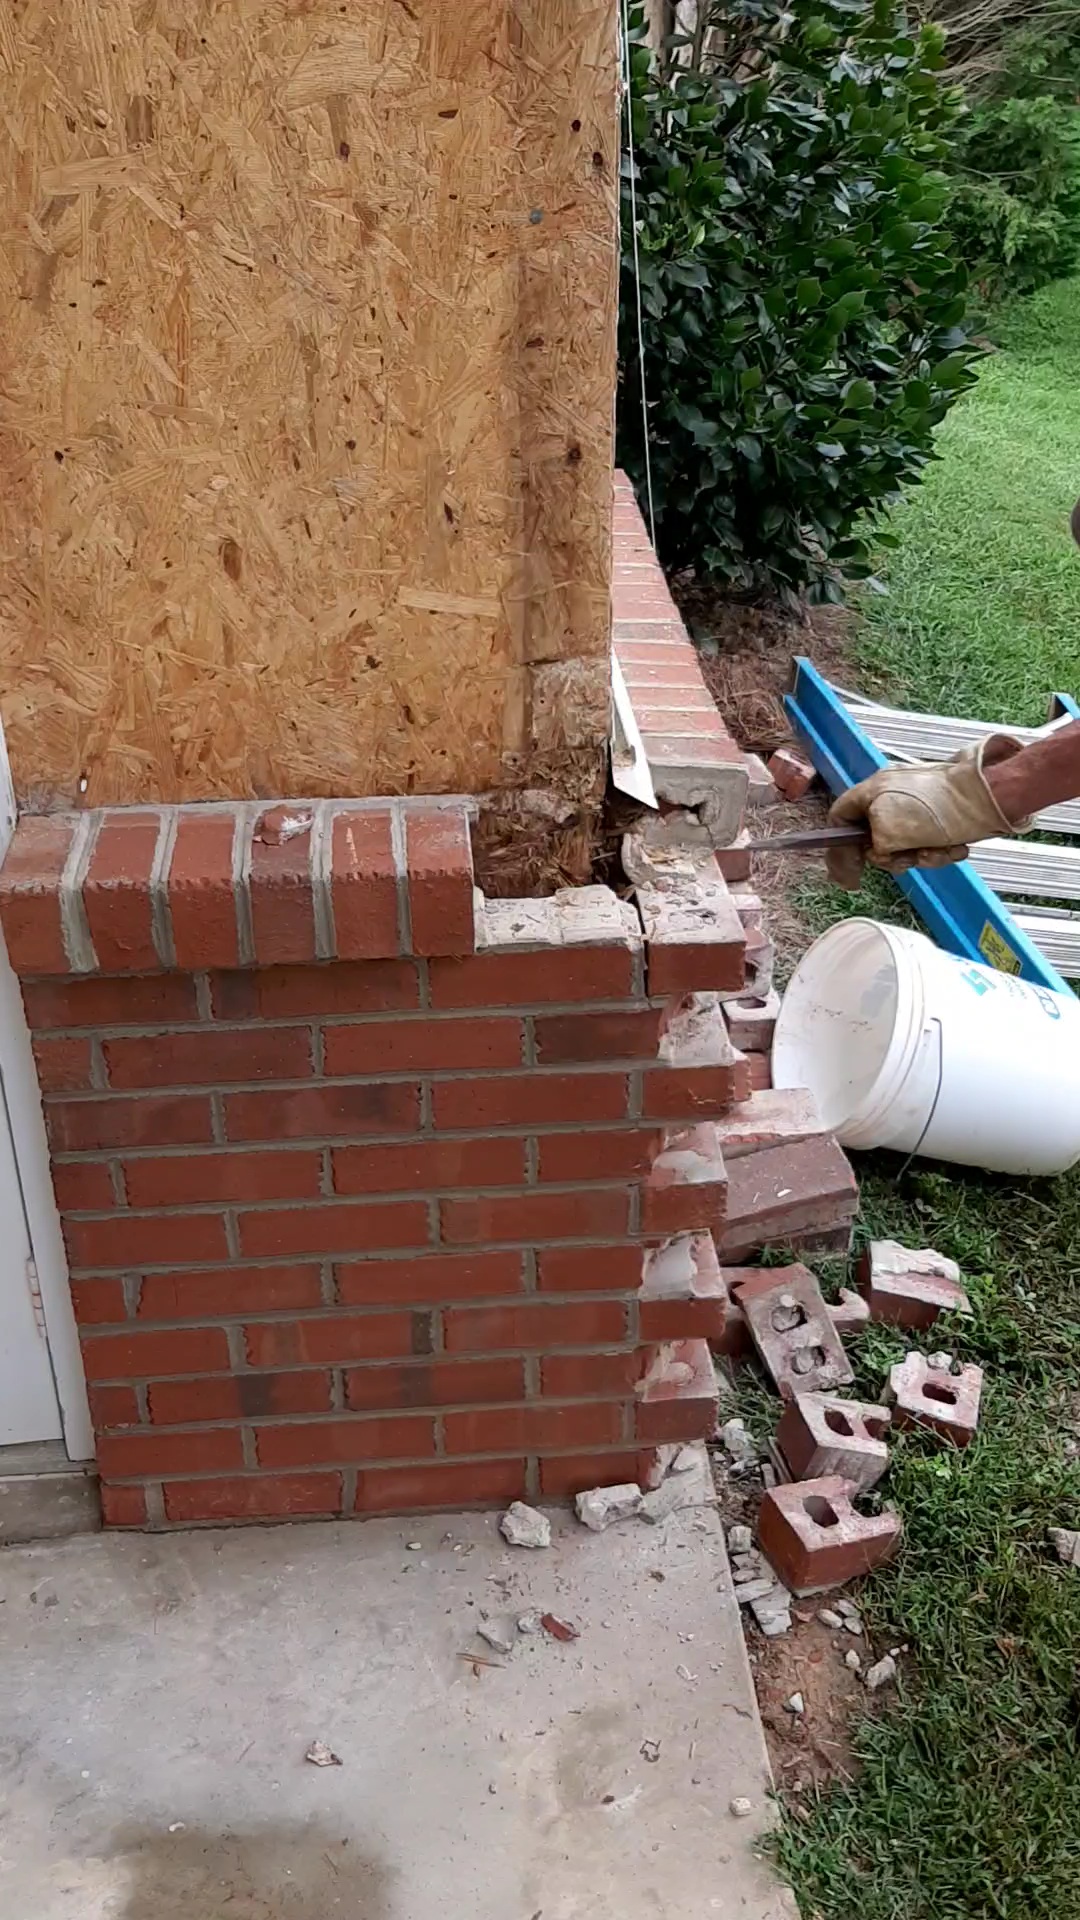
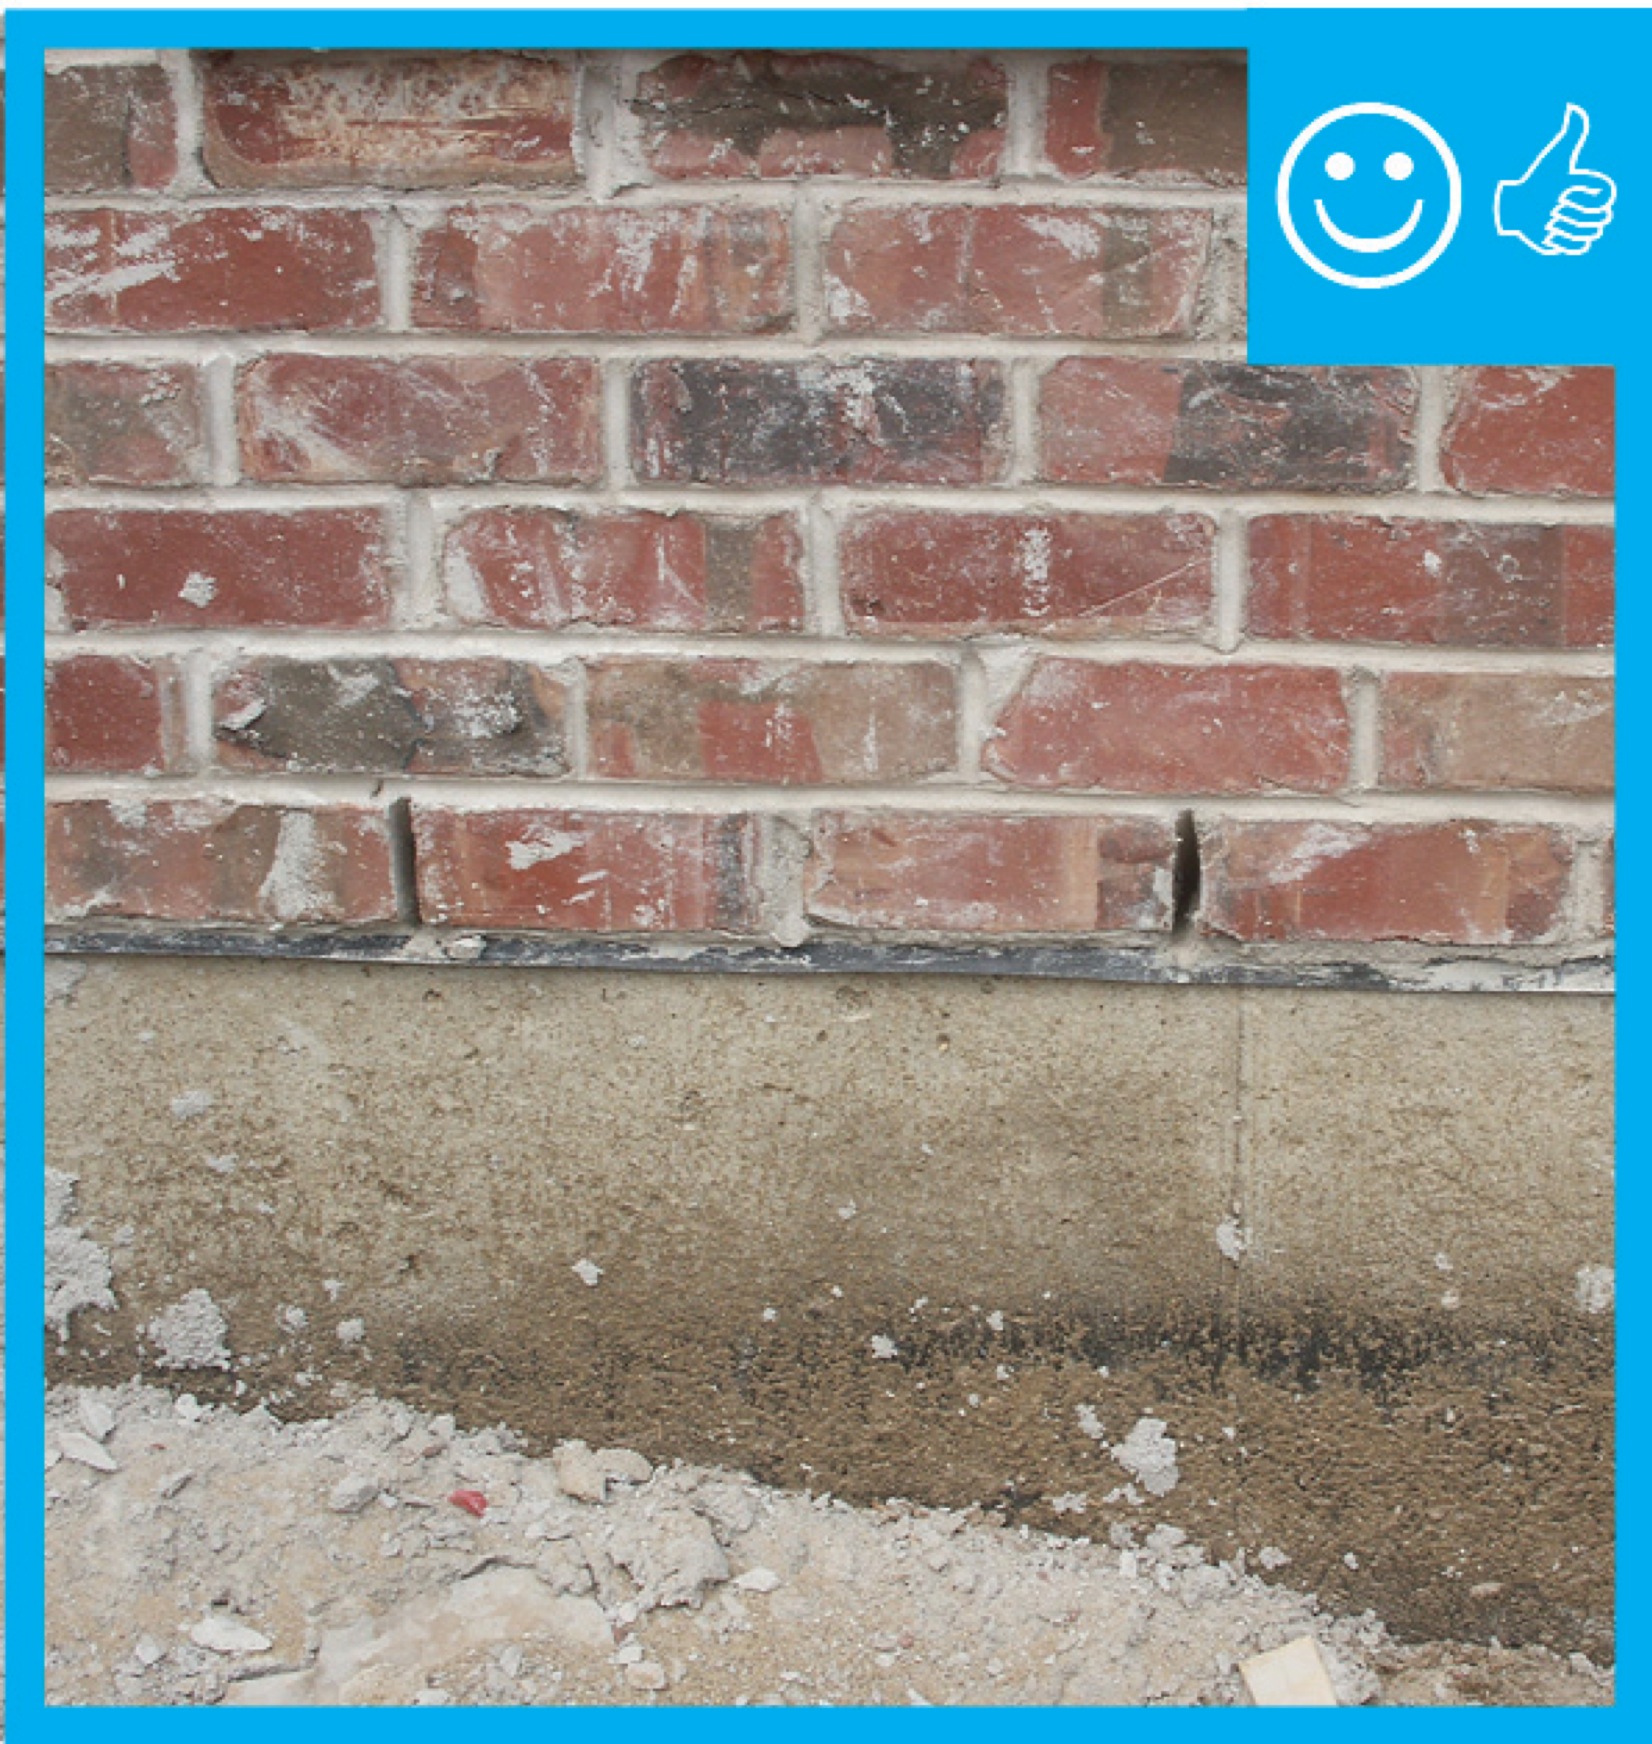
Wrong - Lack of house wrap or weather resistant barrier lead to significant water damage behind the brick veneer.
Image
Wrong - Metal flashing is bent and poorly installed and tape flashing is missing.
Image
Image

Image

Image
Wrong - Rigid insulation blocking is installed but not air-sealed with spray foam around edges.
Image
Image

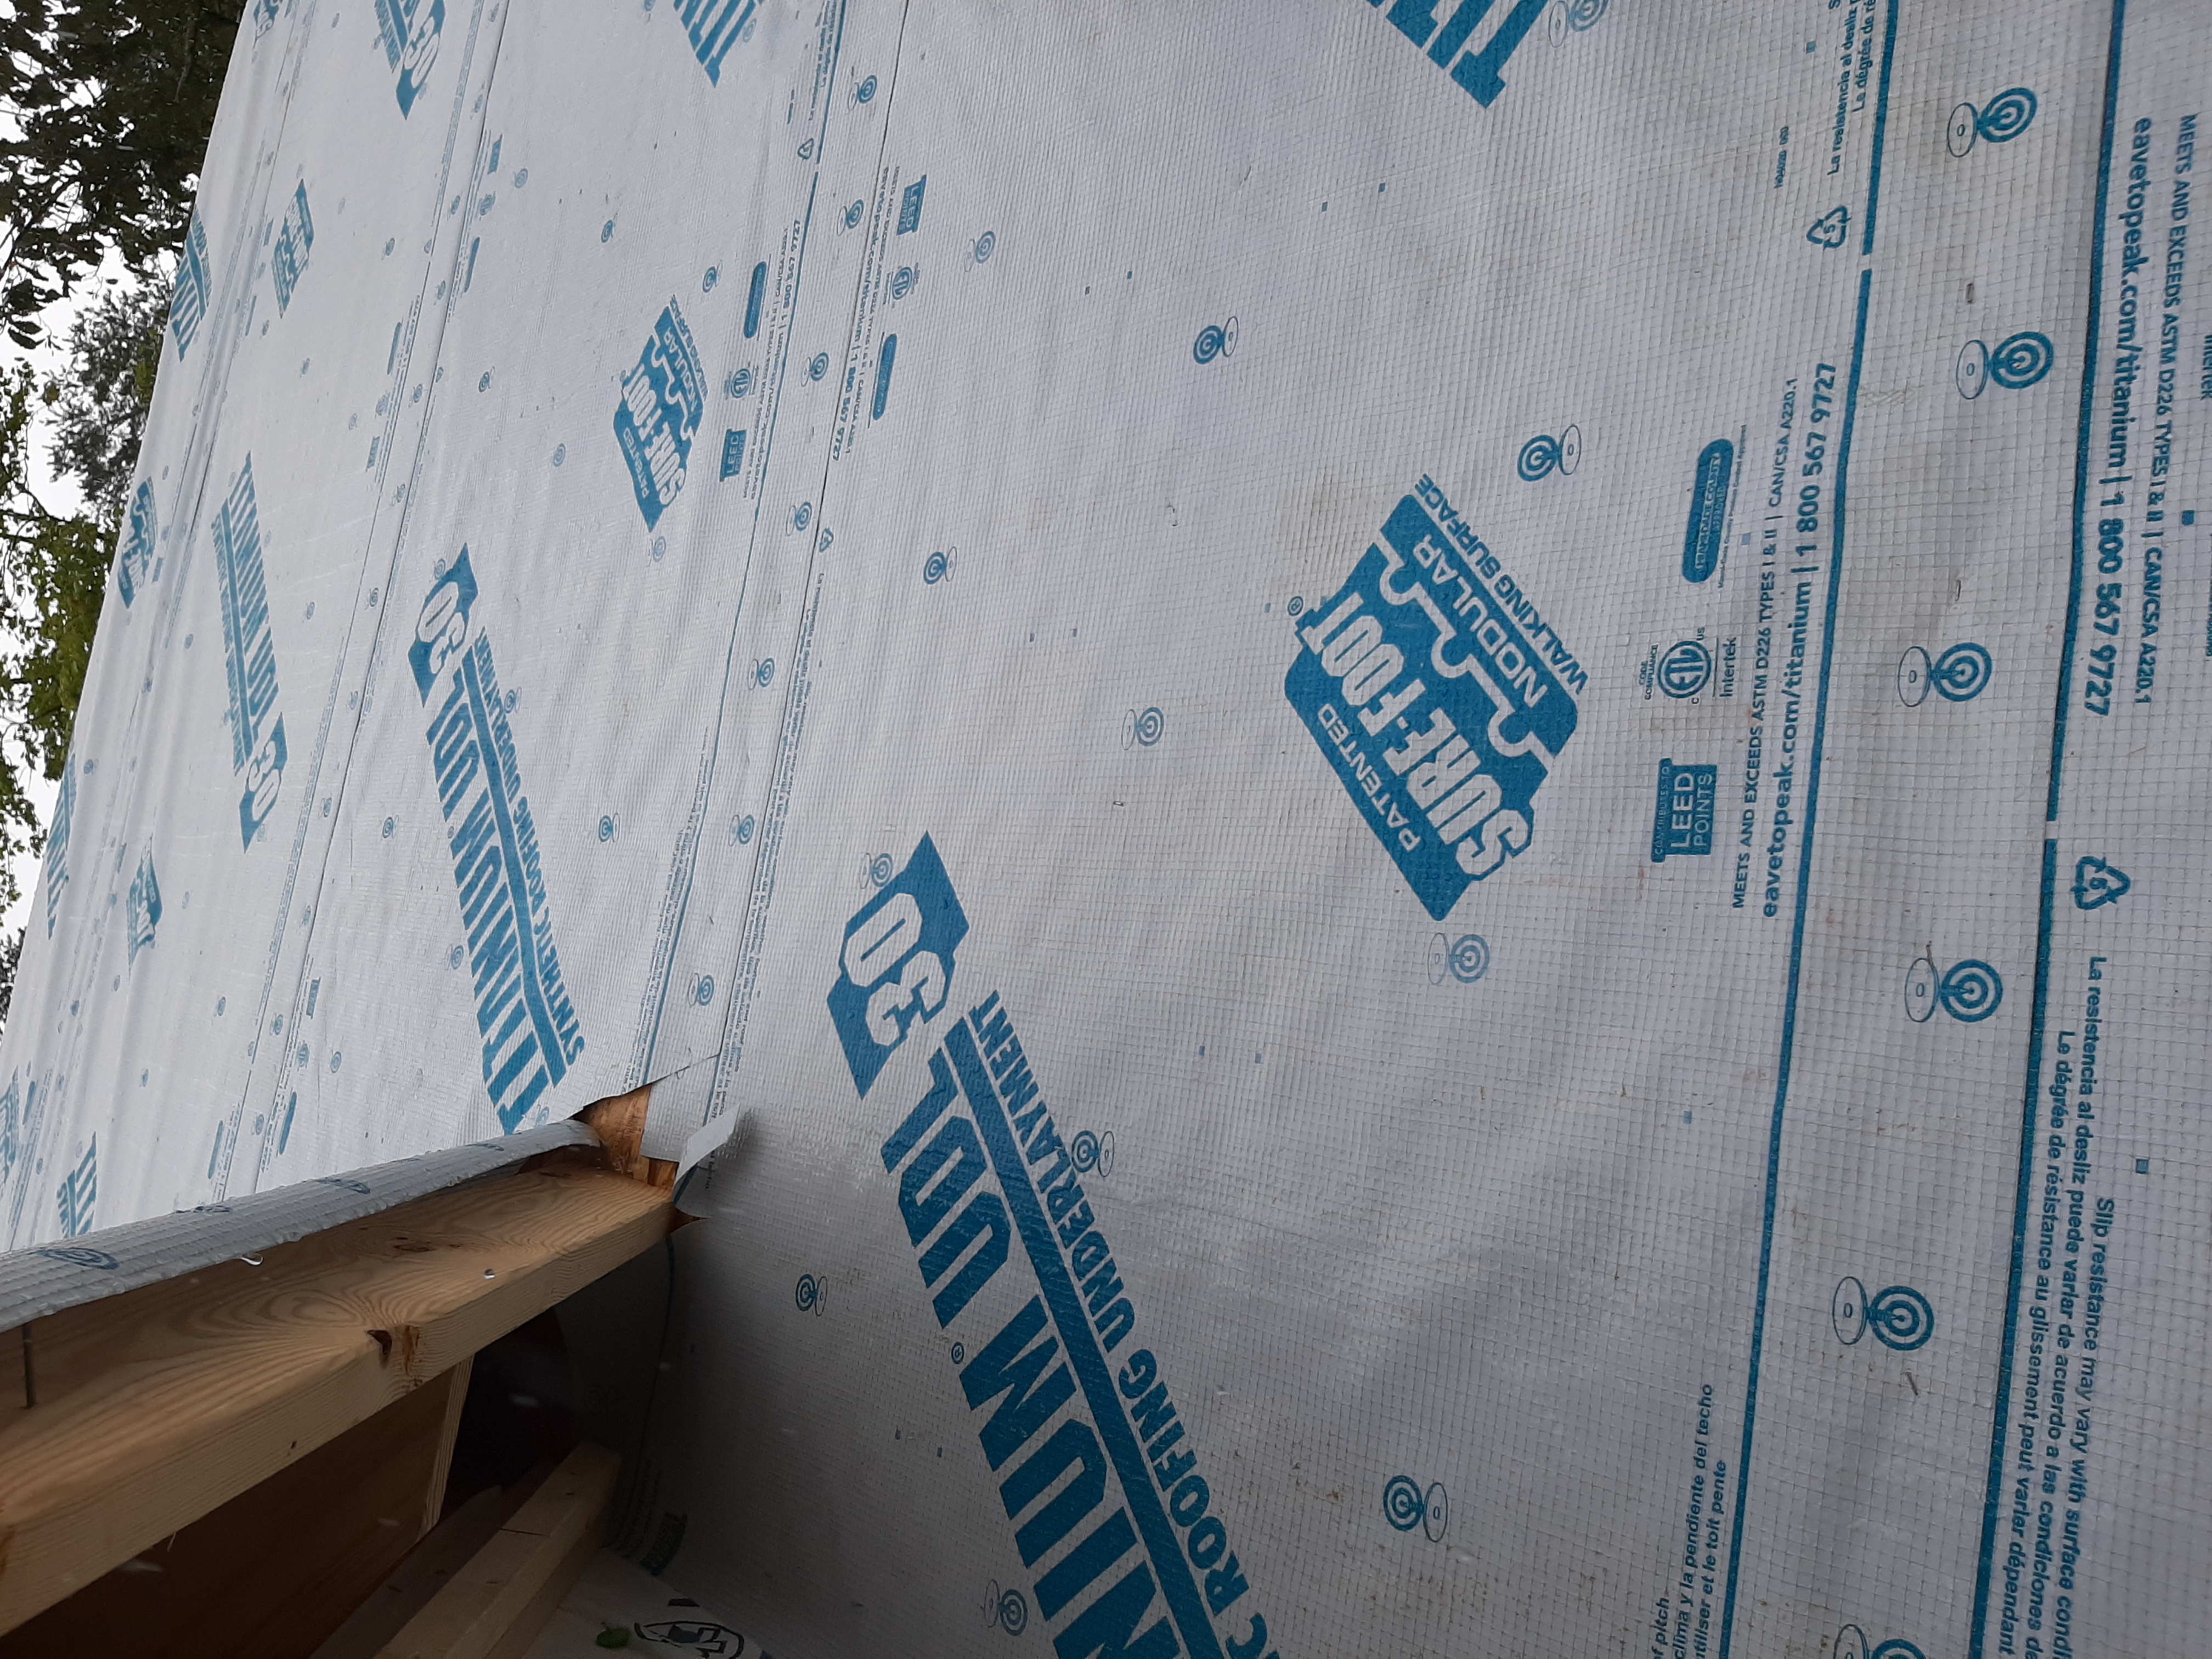
Wrong - Roof is missing metal drip edge to cover the edge of OSB roof decking, roof underlayment should be trimmed back, and asphalt shingles are poorly installed.
Image
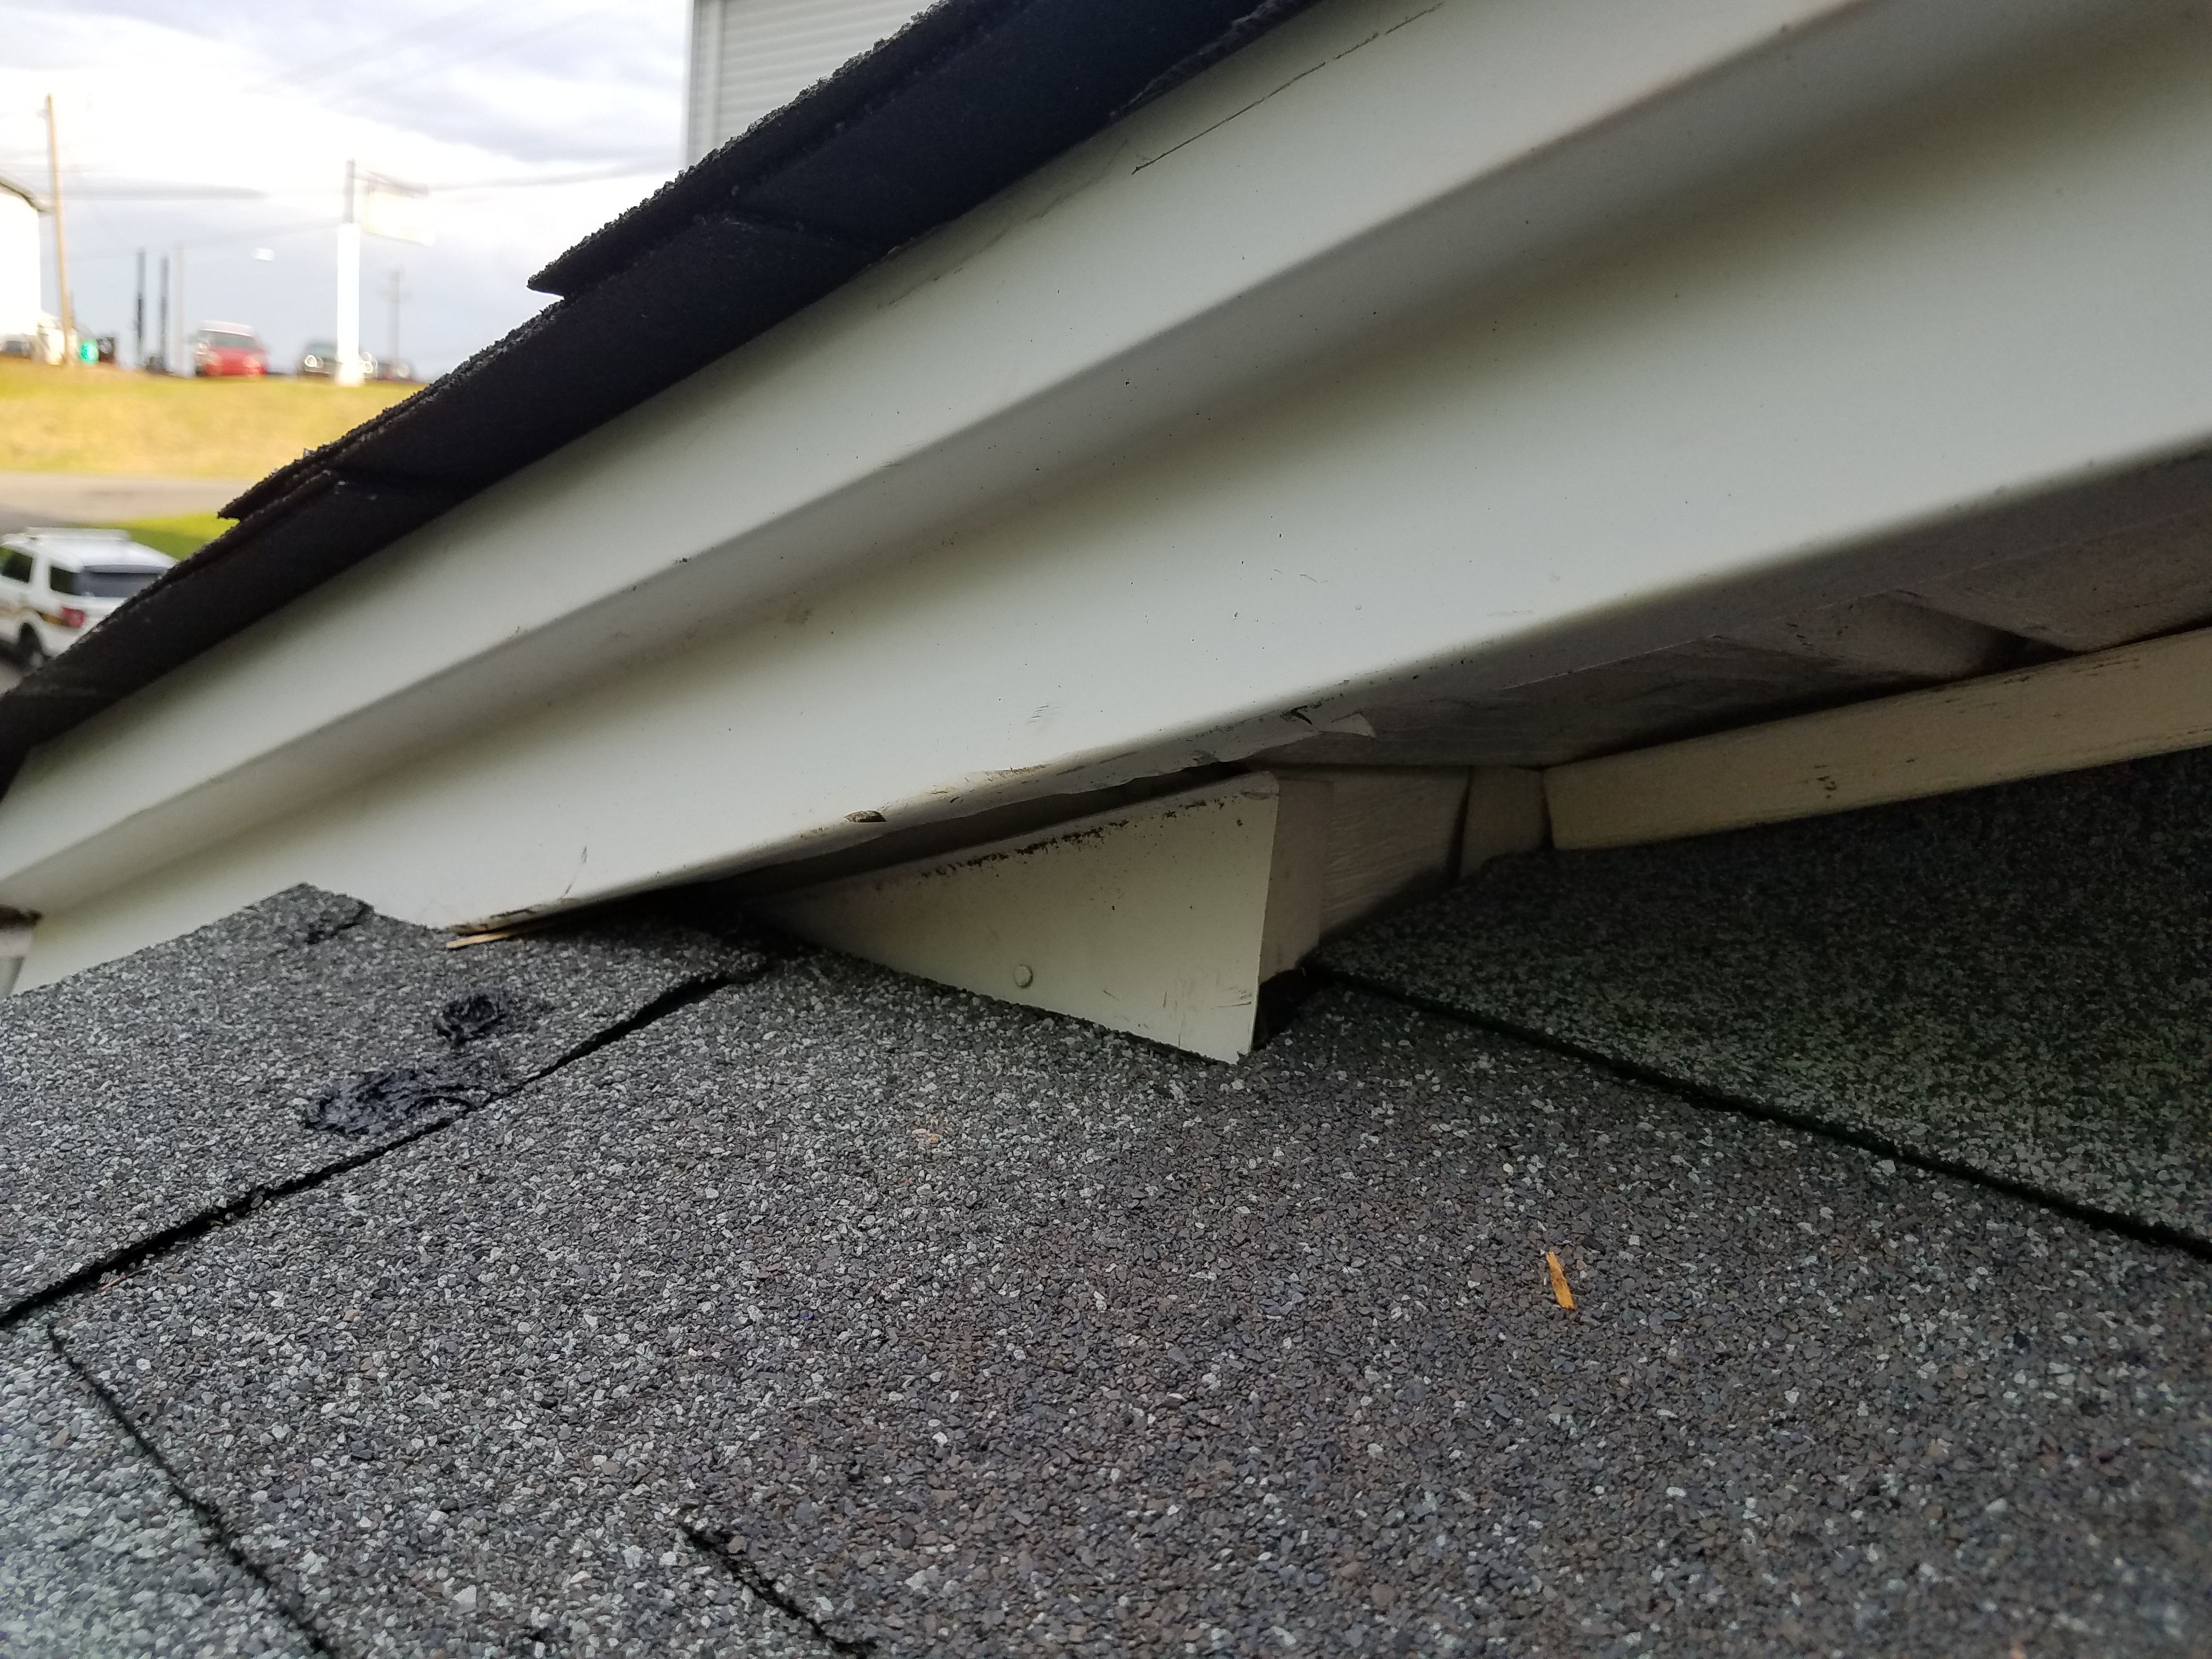
Wrong - Roof-wall juncture lacks metal flashing and is poorly designed, thus encouraging water entry.
Image
Wrong - Stucco has rotted and cracked above a window because of water damage due to lack of proper flashing and drainage.
Image

Wrong - The air barrier is not sealed (picture taken from garage looking into house).
Image
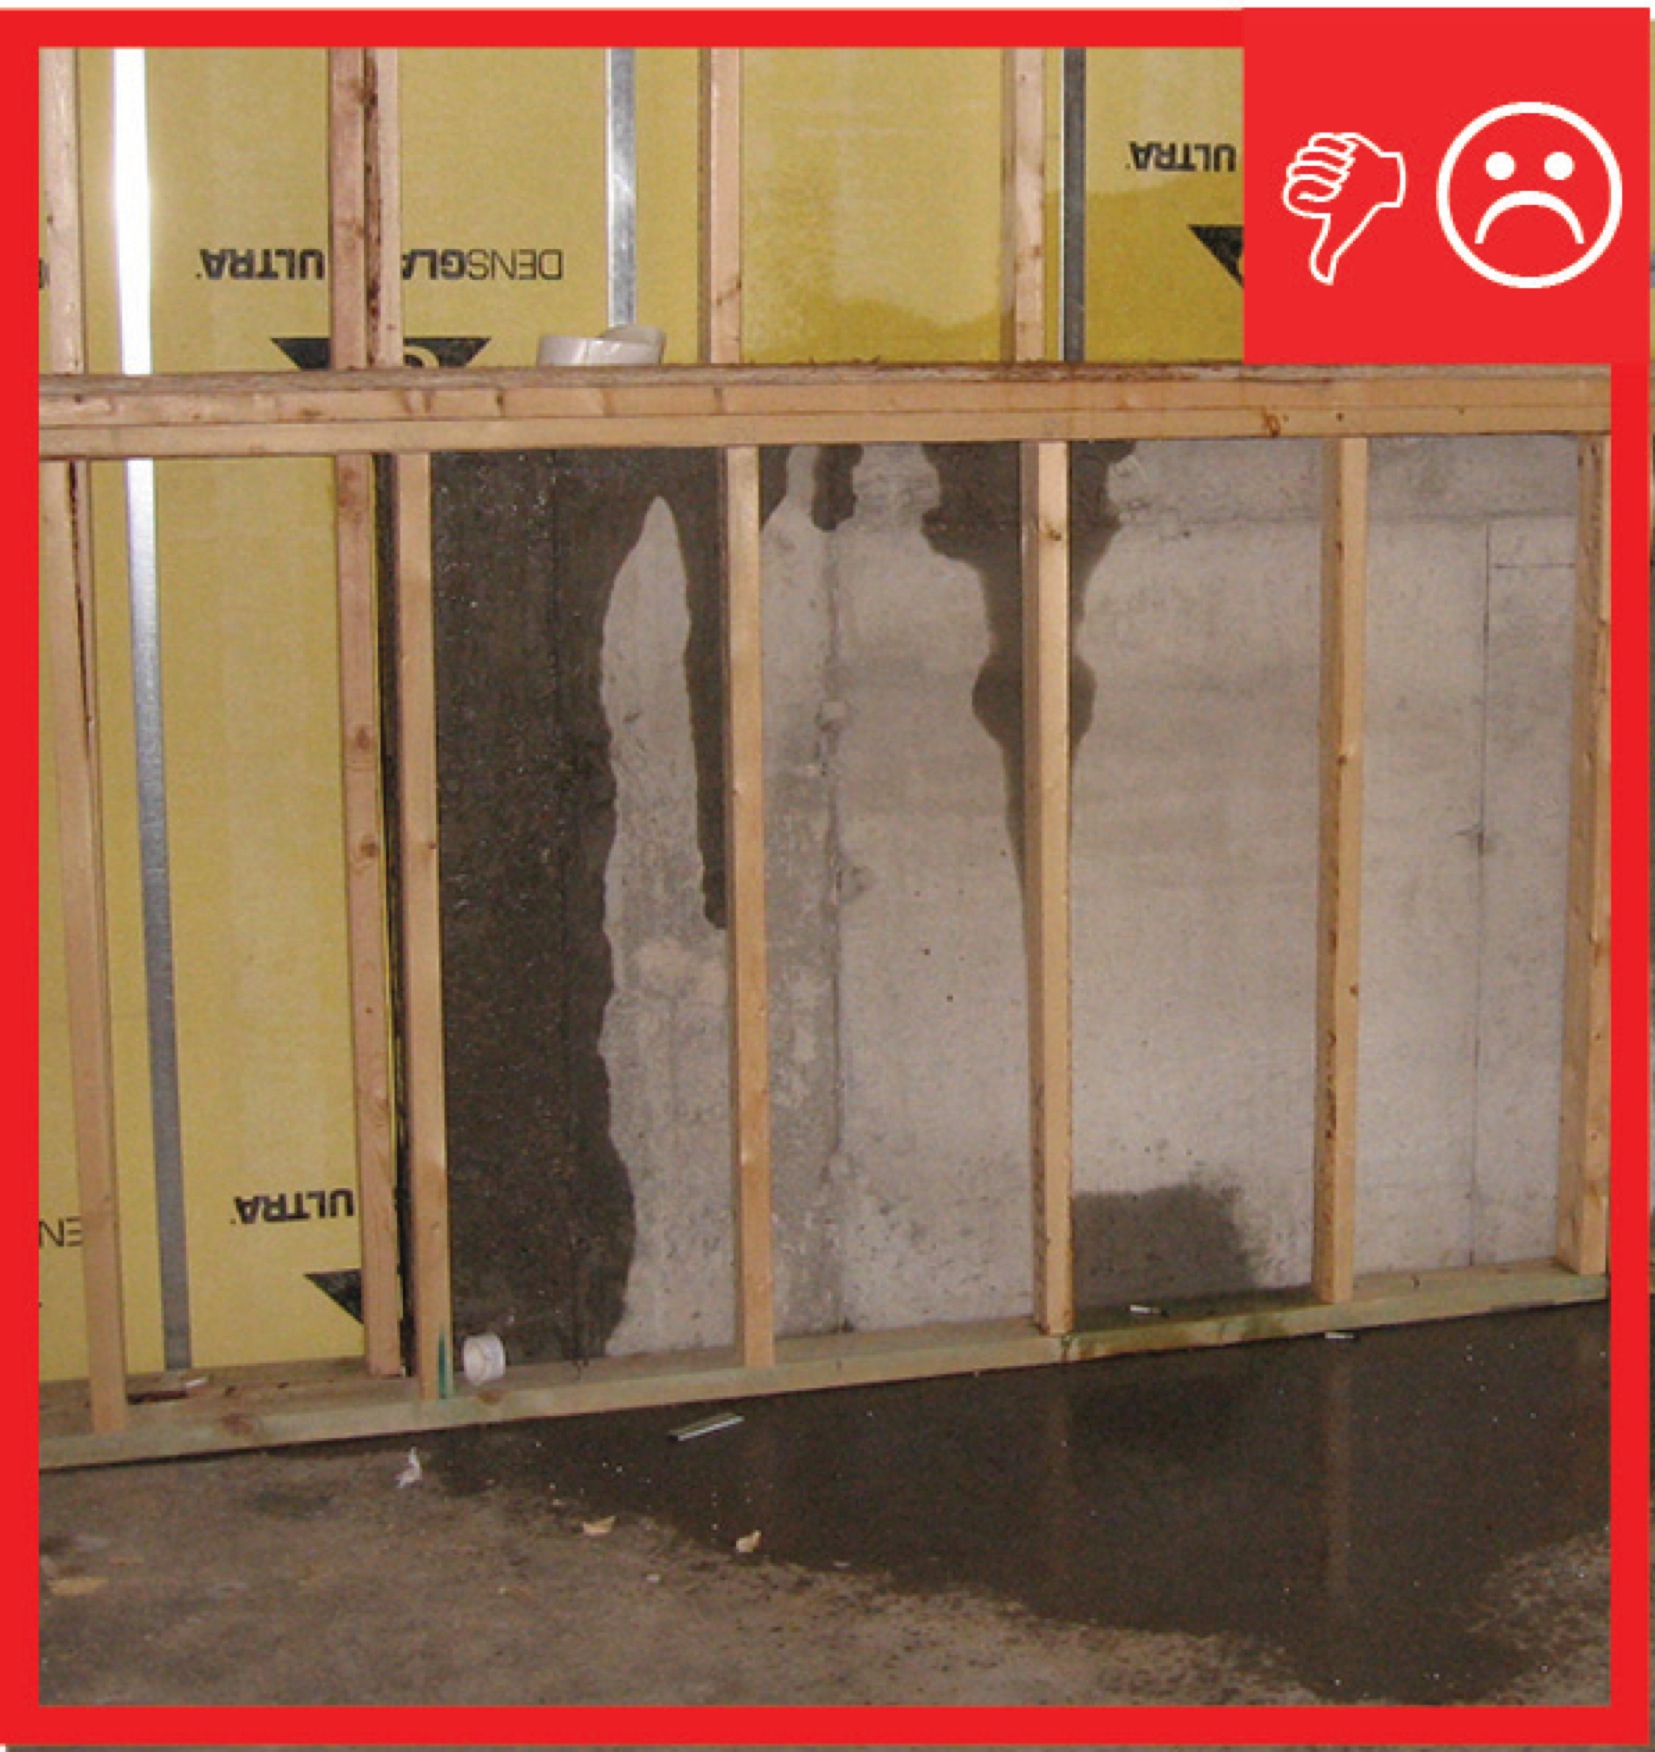
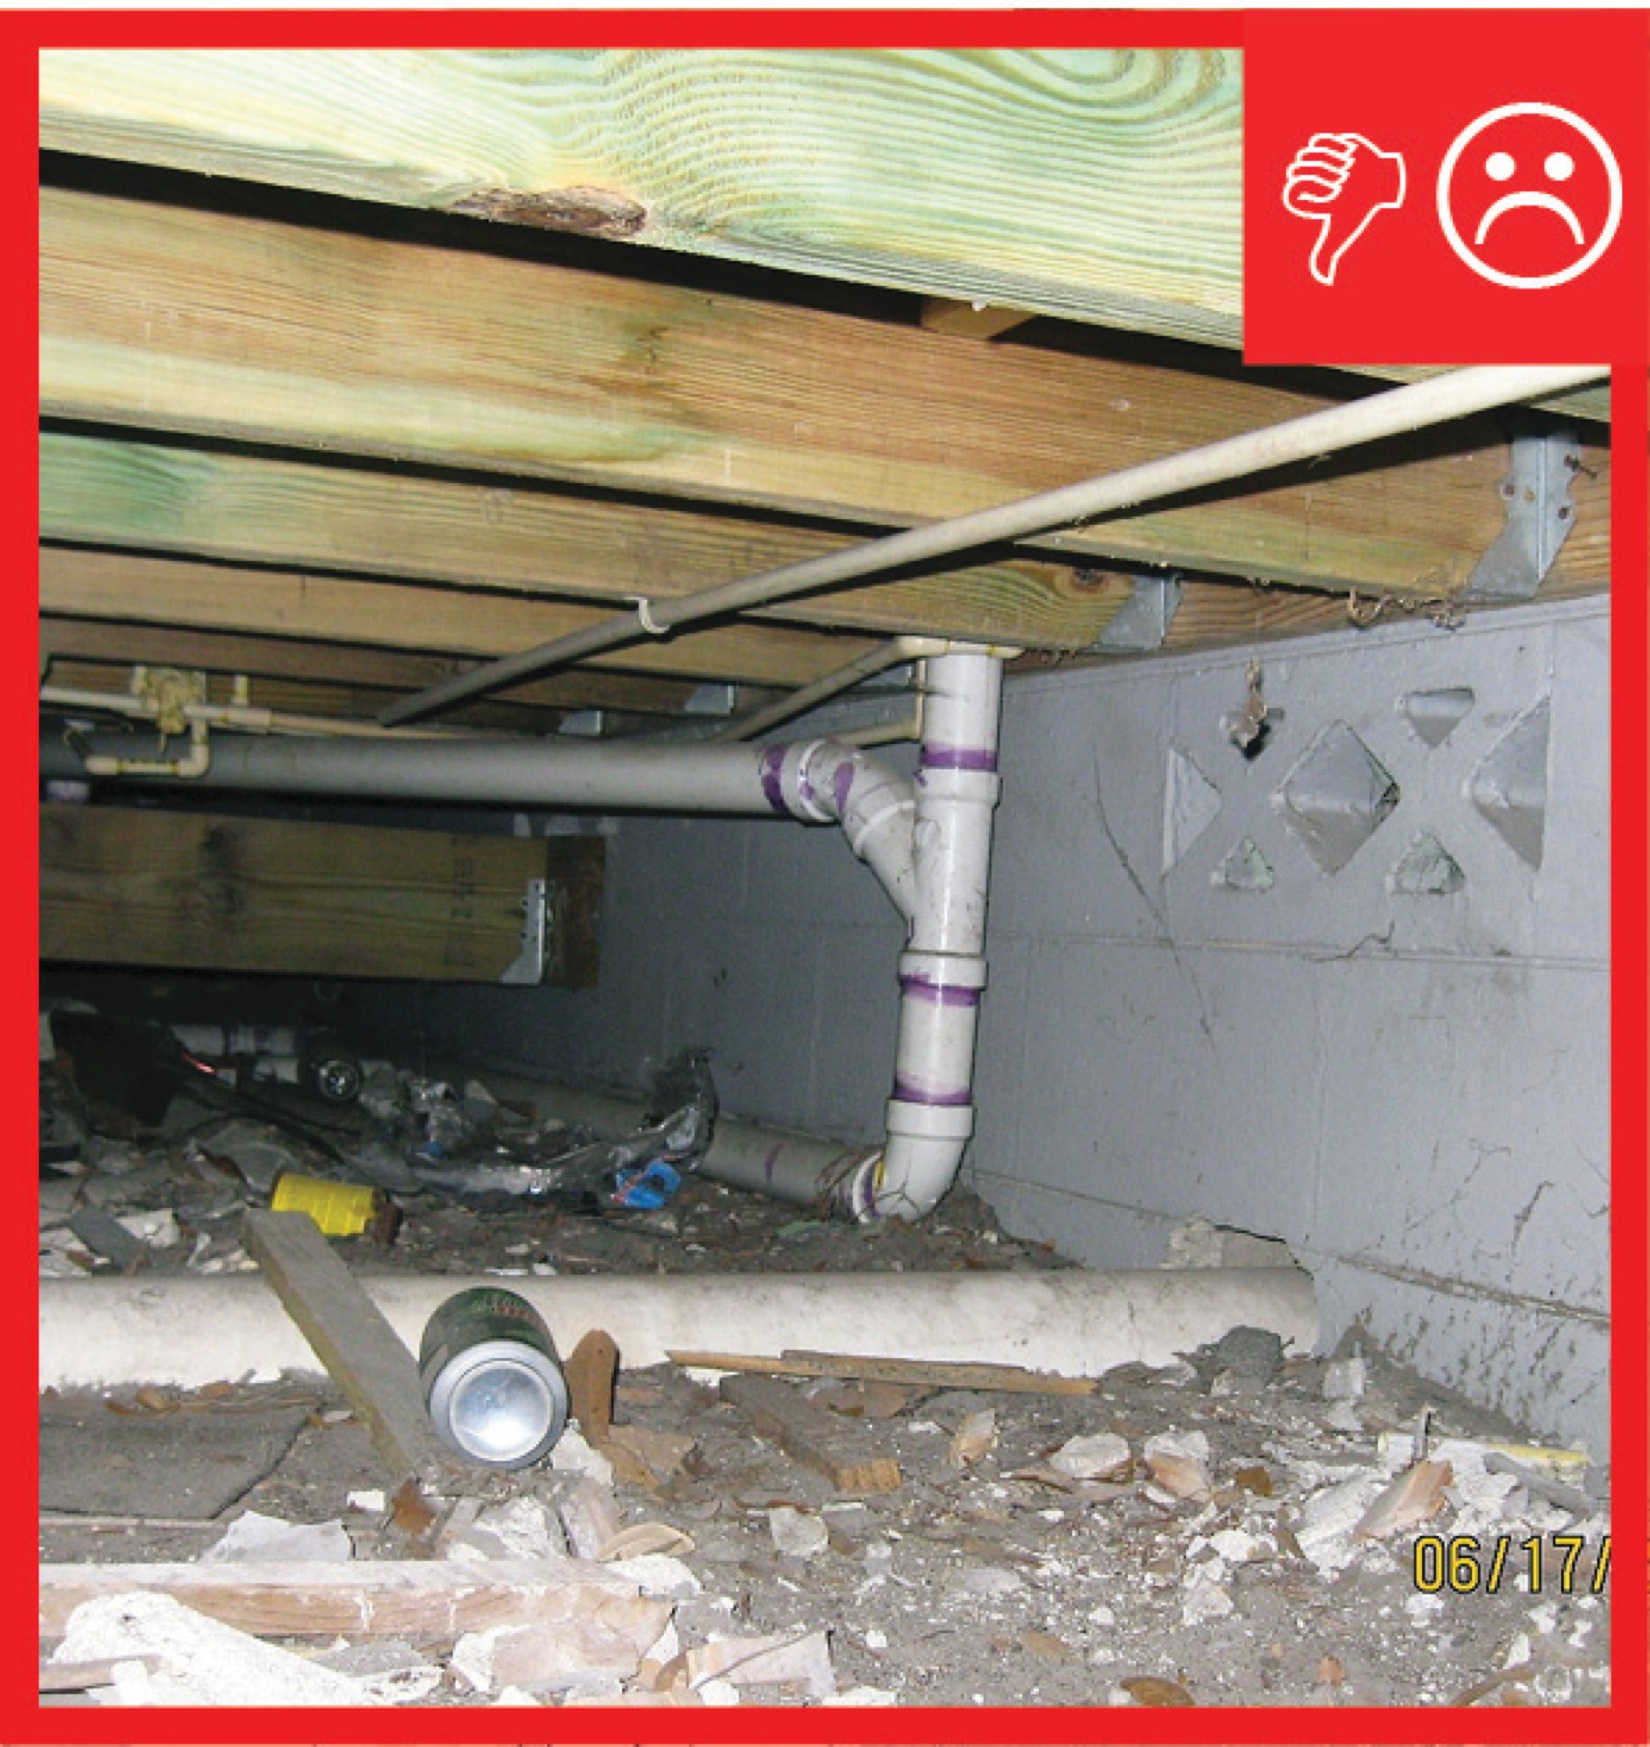
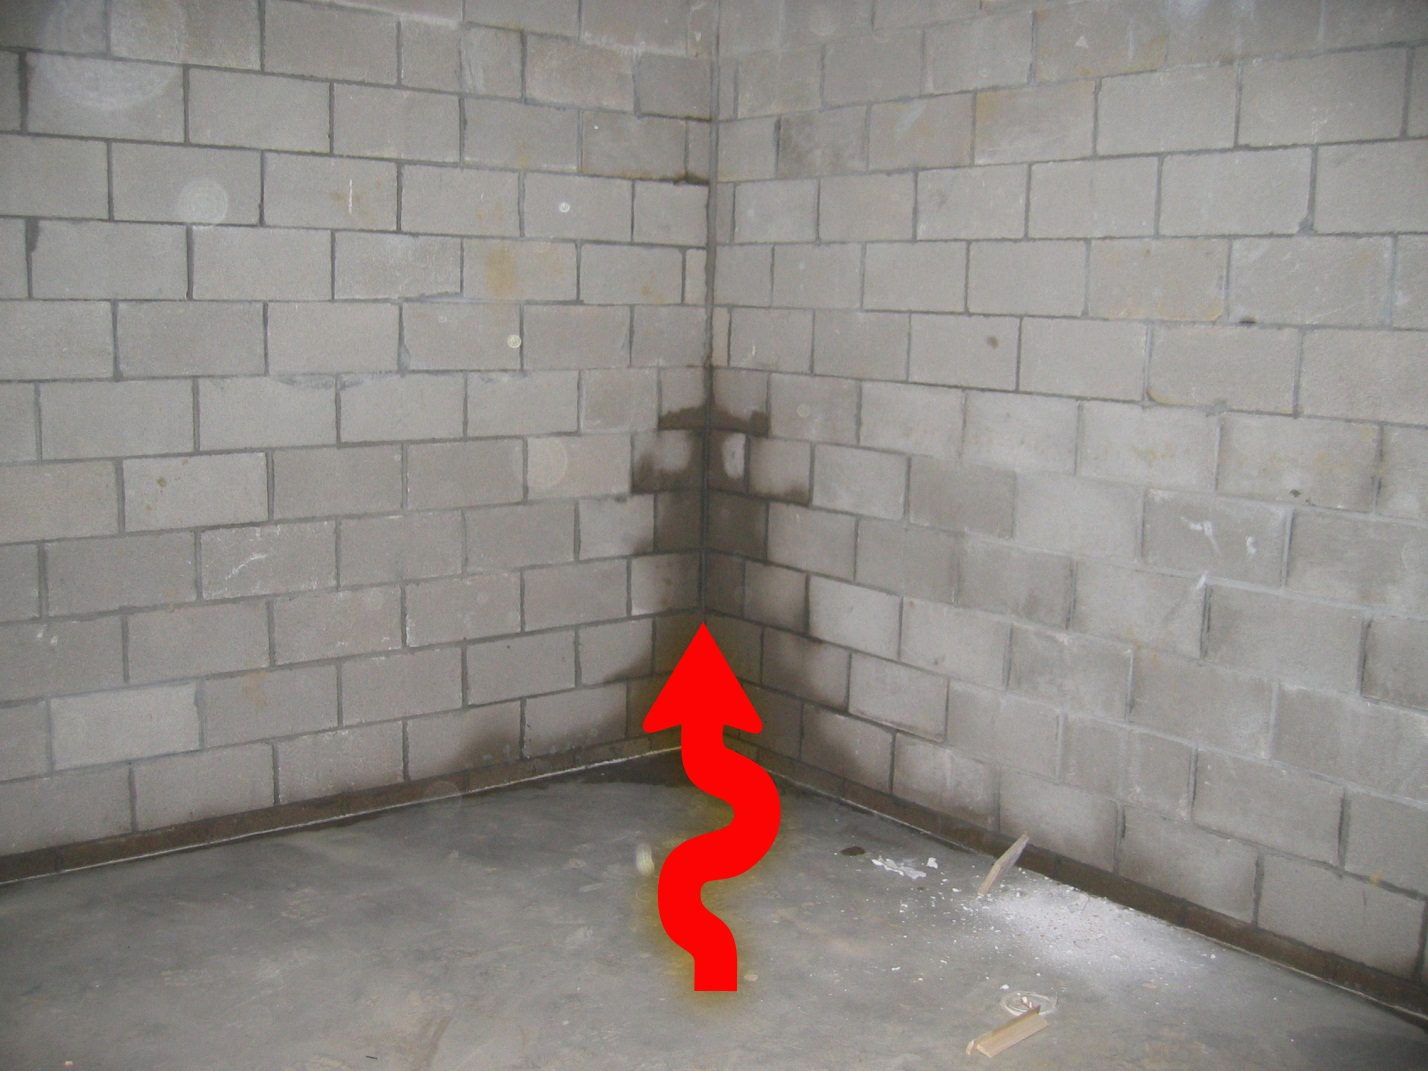
Wrong - The below-grade concrete does not have the correct construction to be impermeable to moisture because the lumber is untreated and against the concrete that lacks waterproofing.
Image
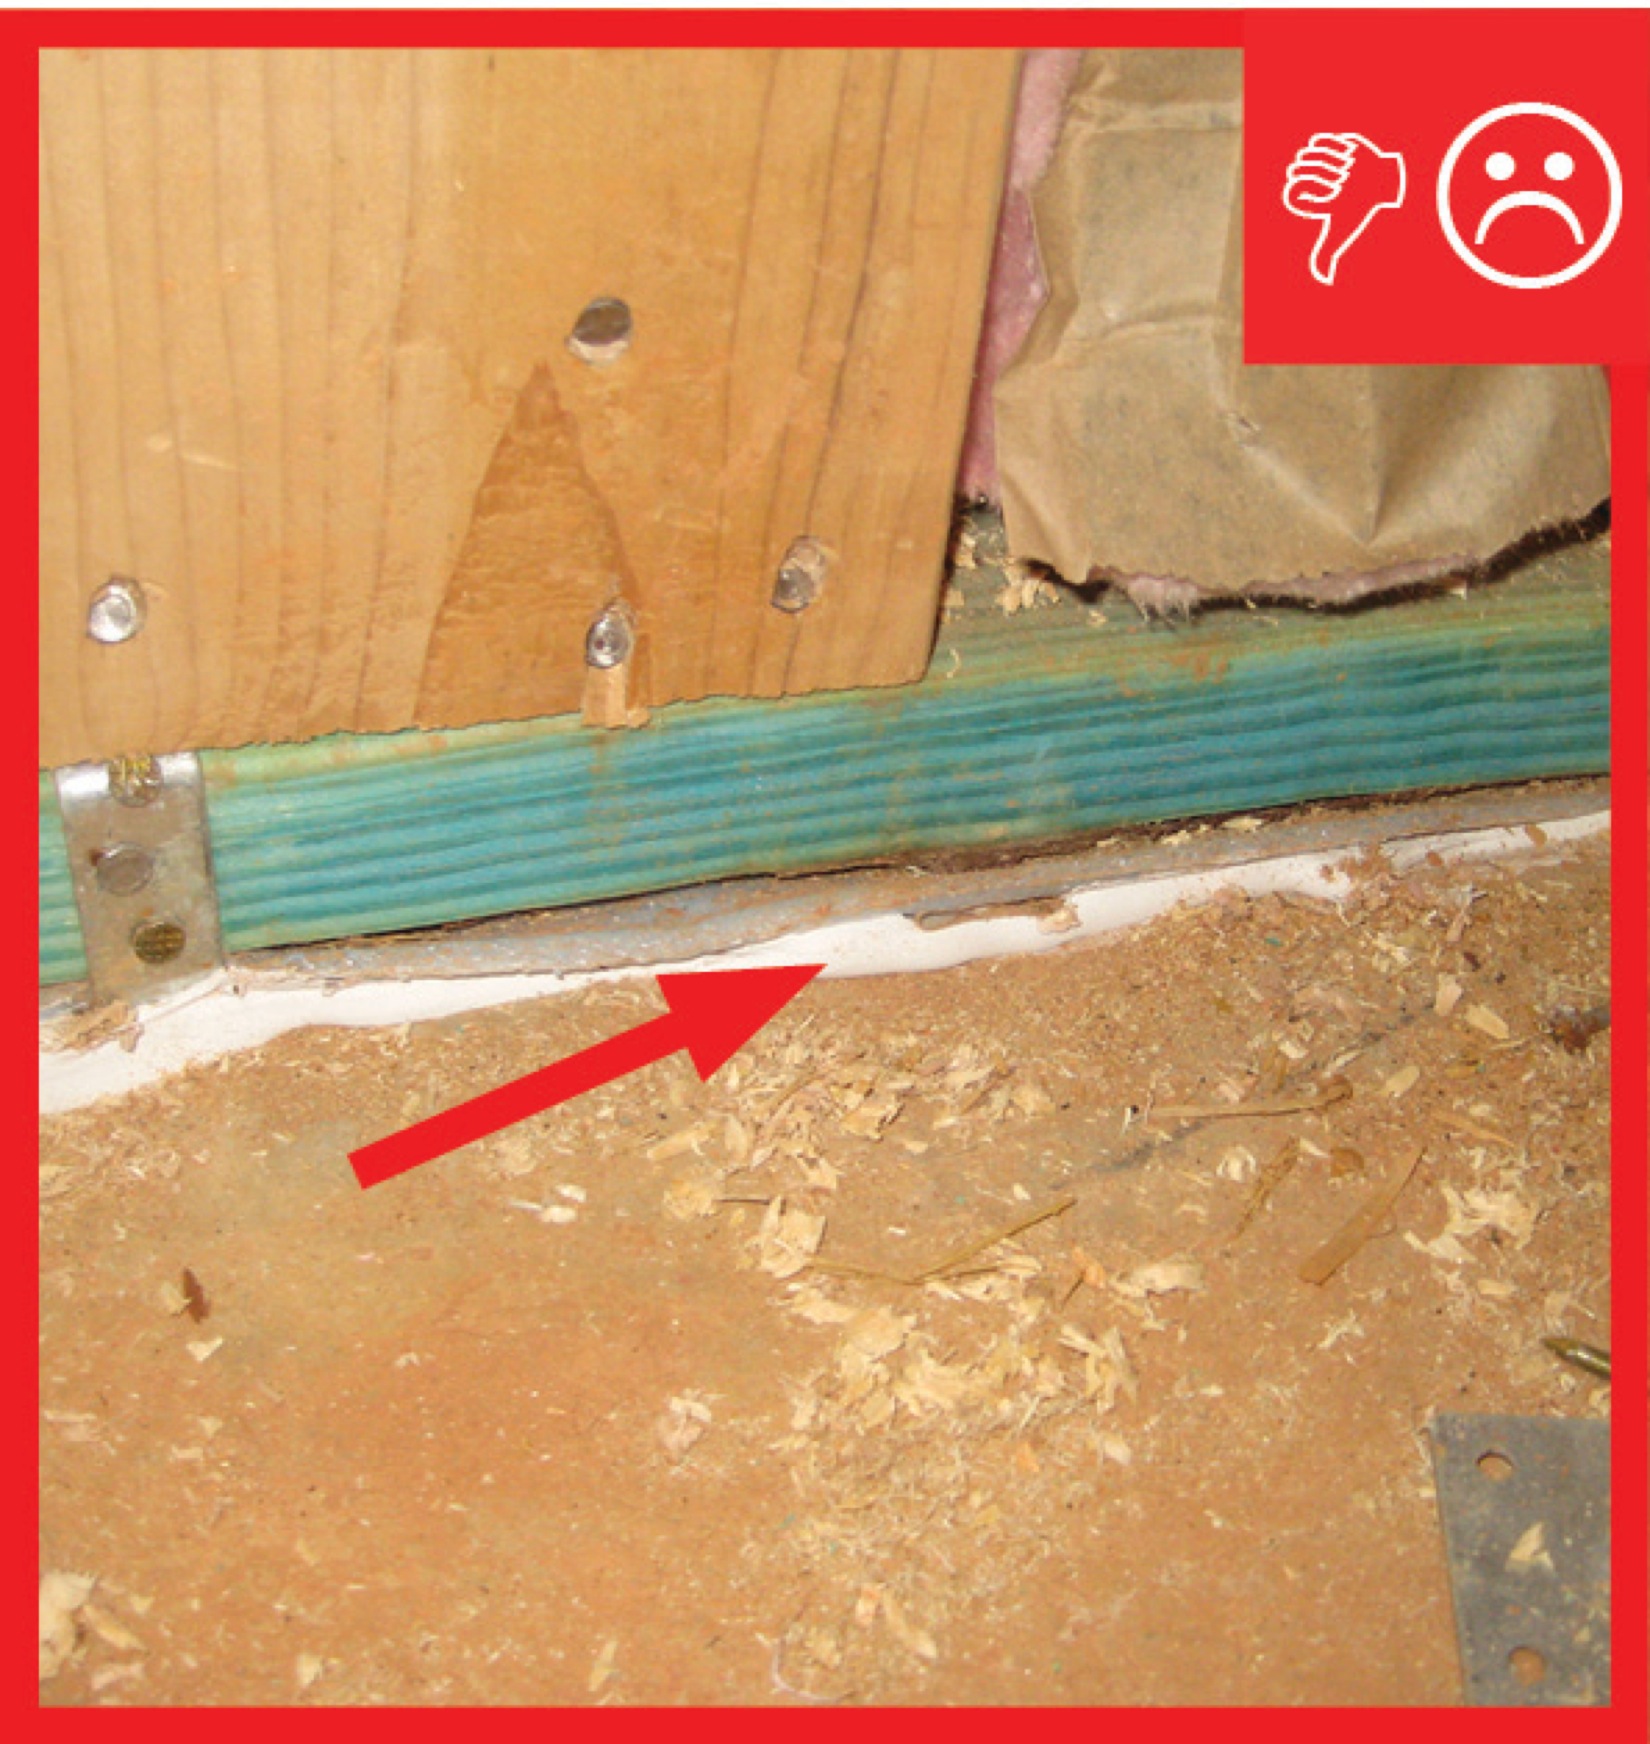
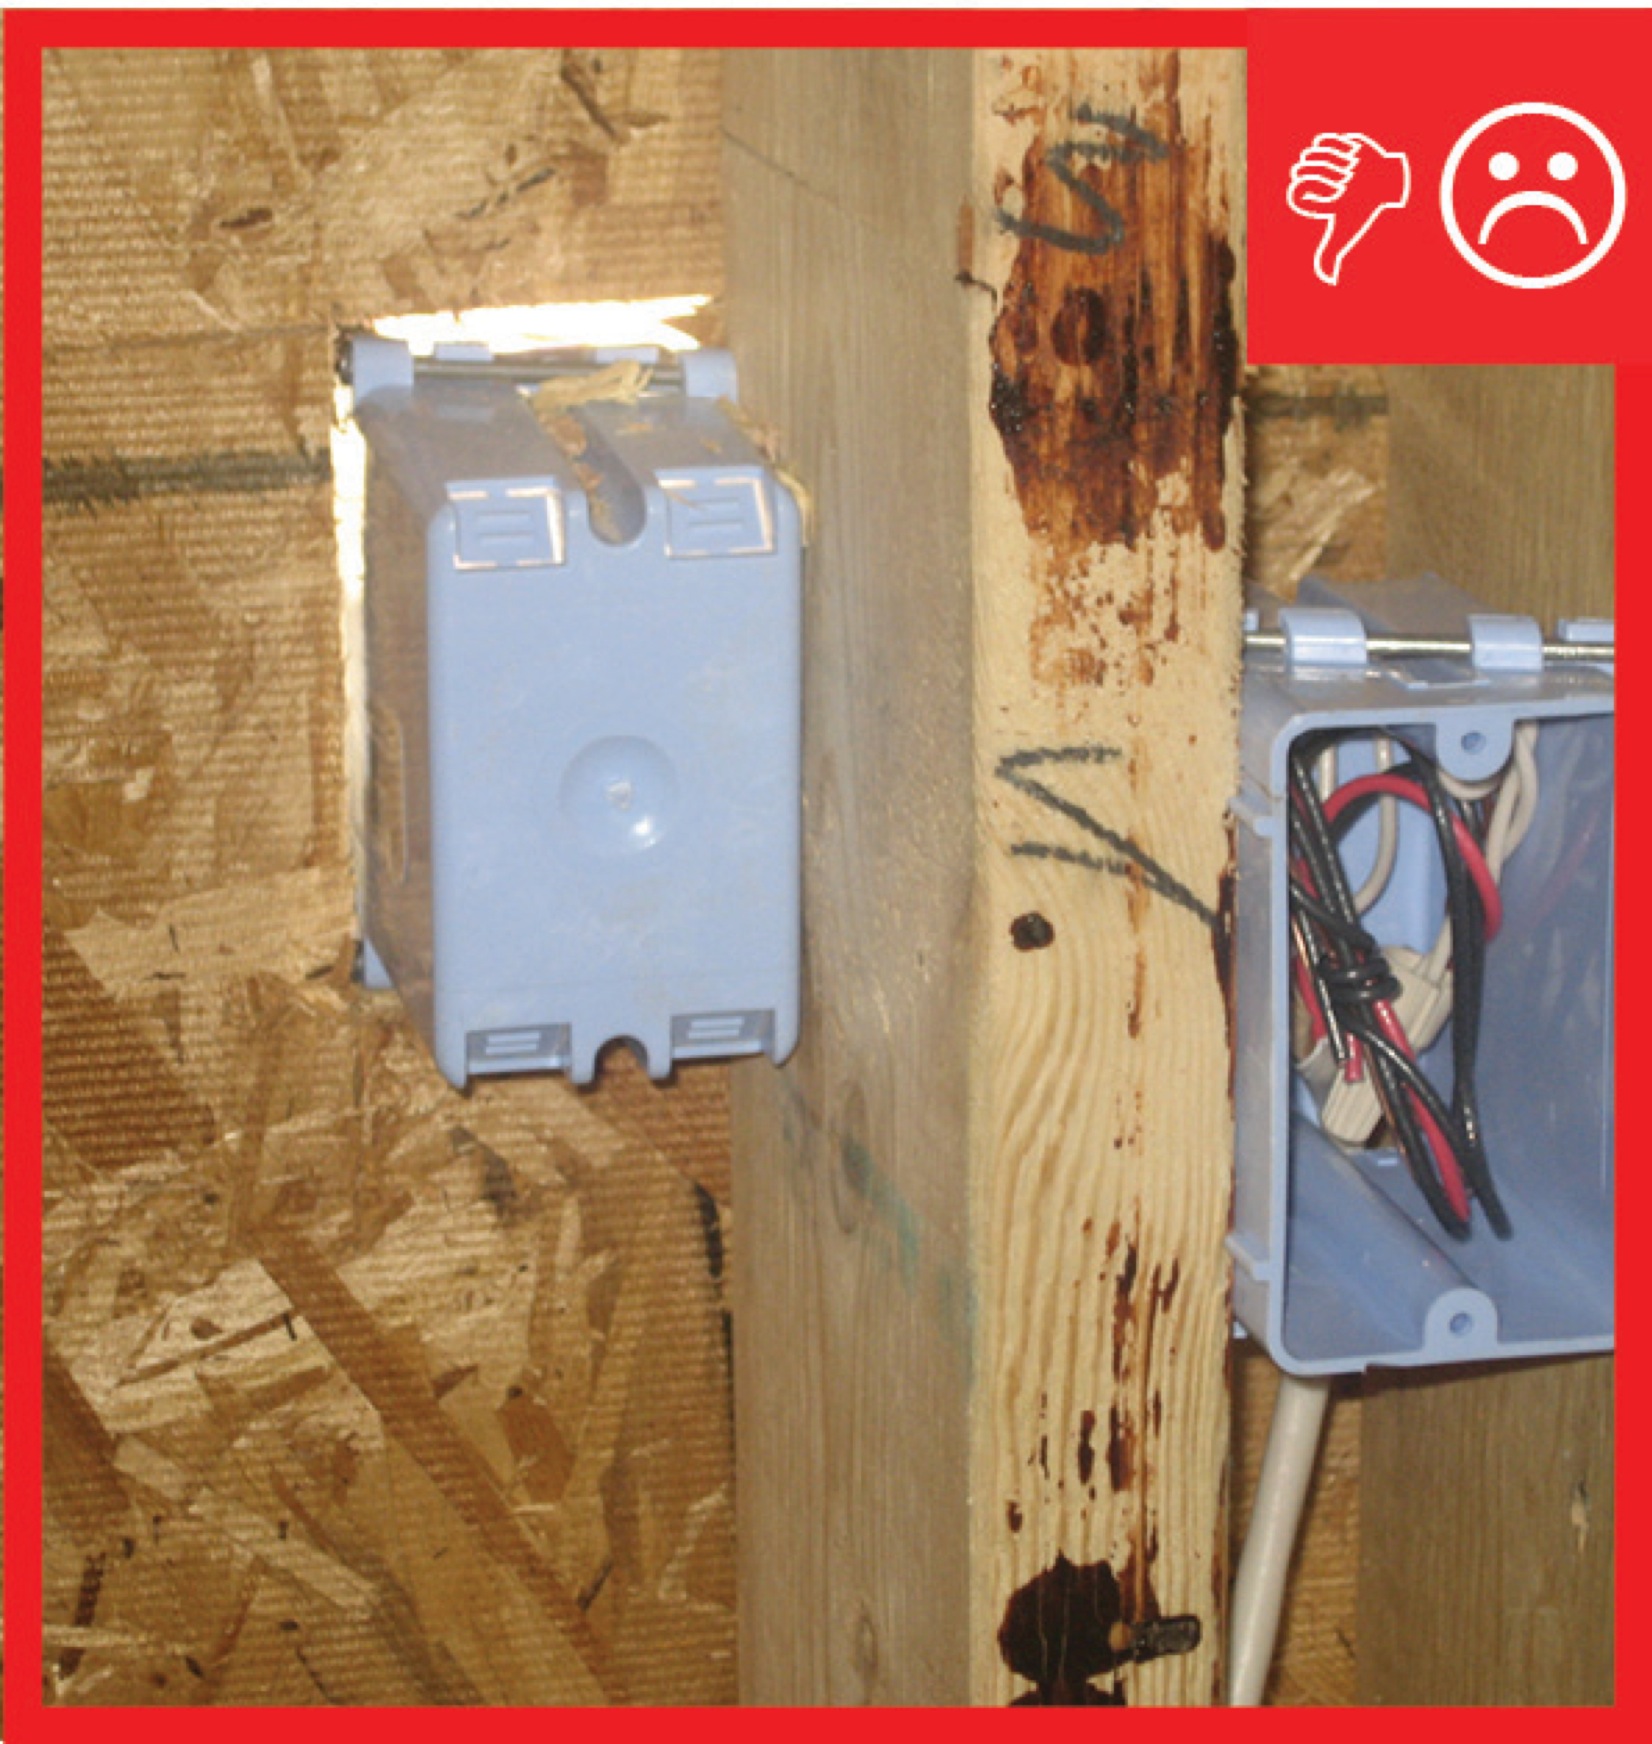
Wrong - The caulk is too far from the sill plate to effectively air-seal the gap.
Image
Wrong - The faced batt insulation does not provide an air barrier in the joist bay between the garage and the conditioned space of the home.
Image

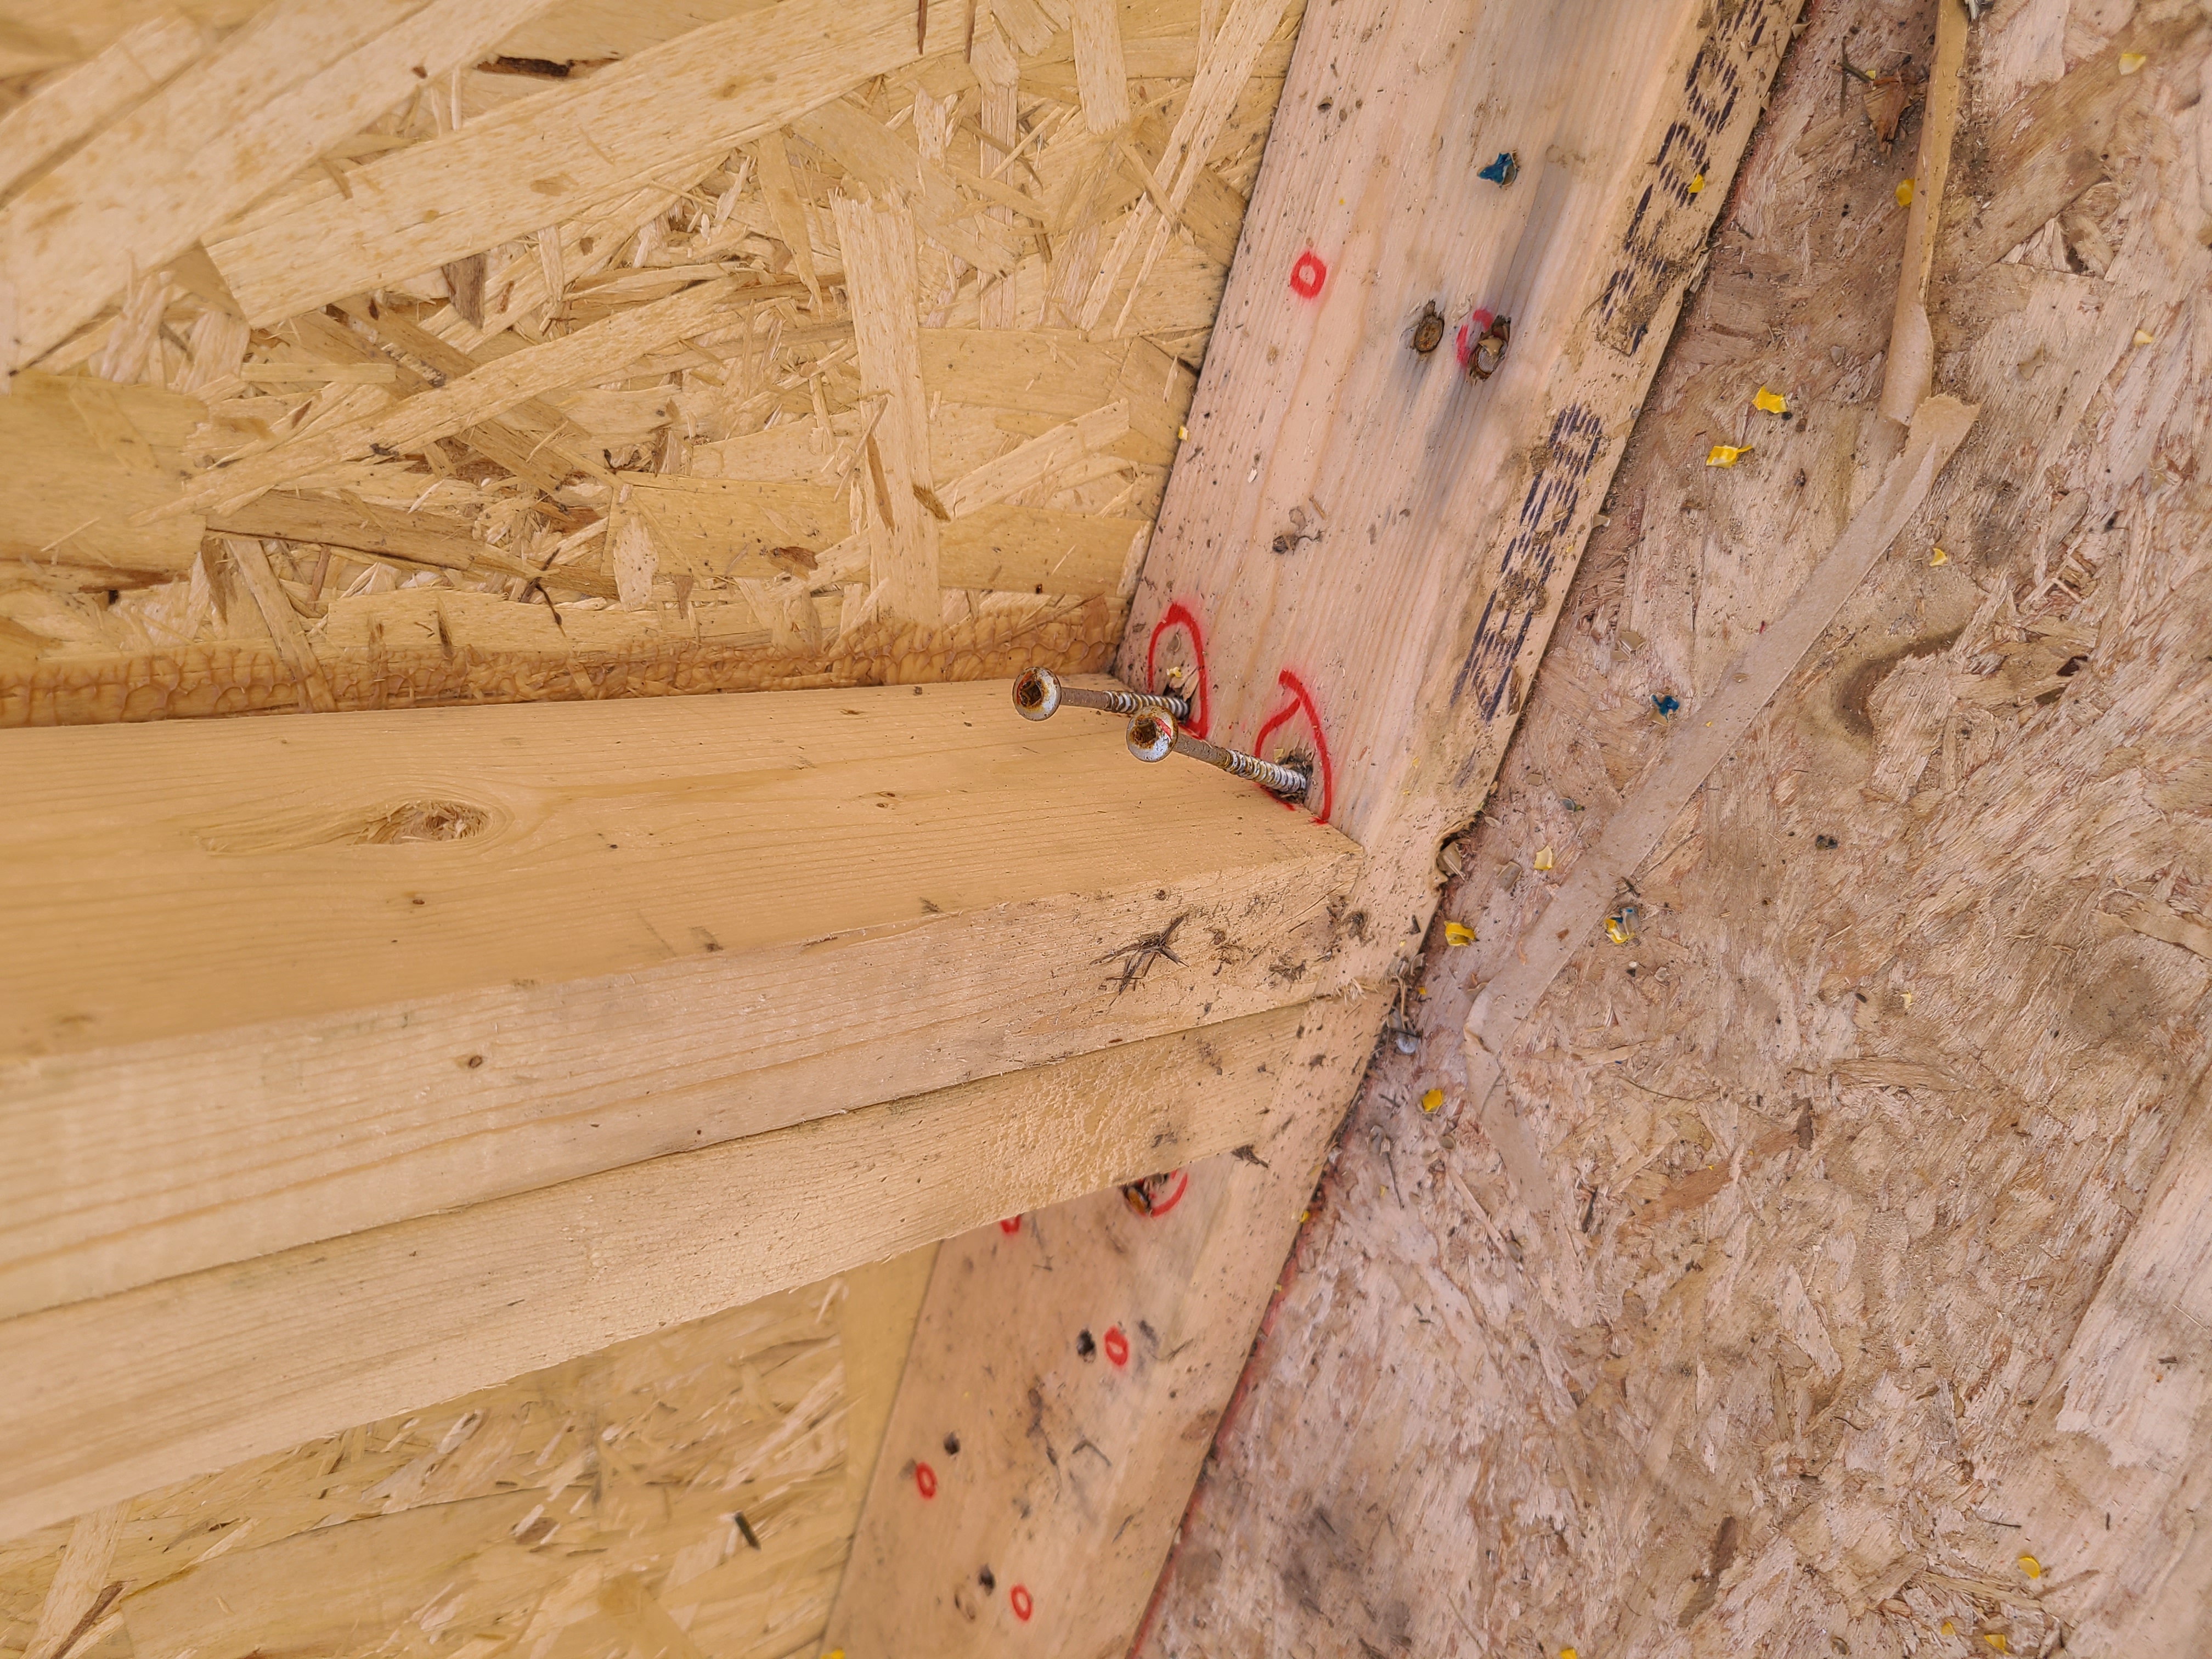
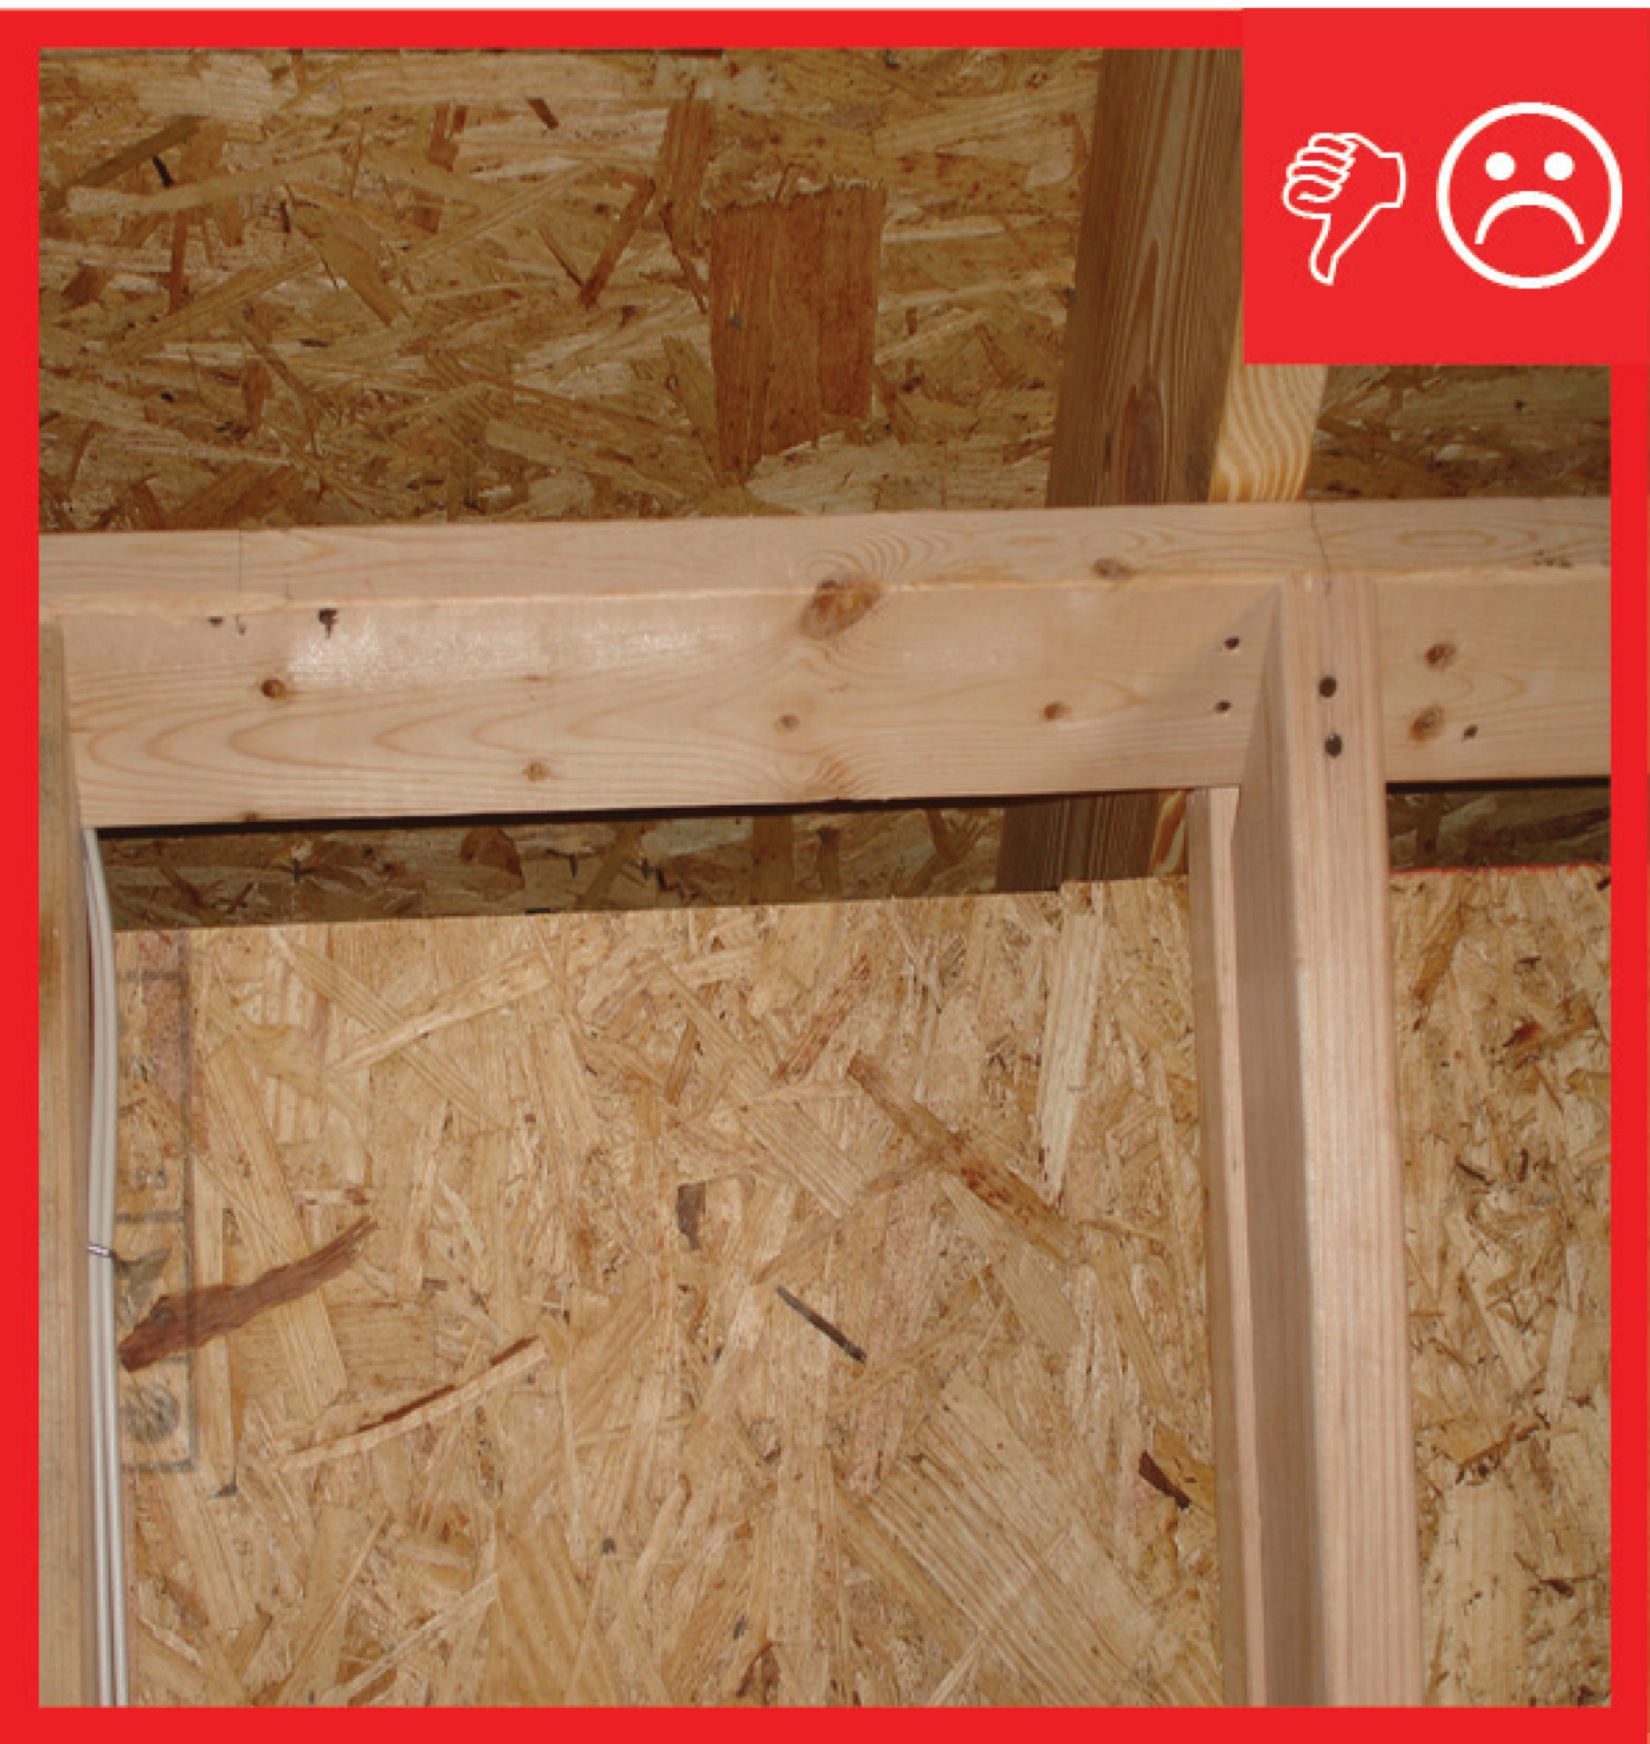
Wrong - The studs added for support were cut at an angle providing weak support where the stud meets the compression block.
Image
Image
Image
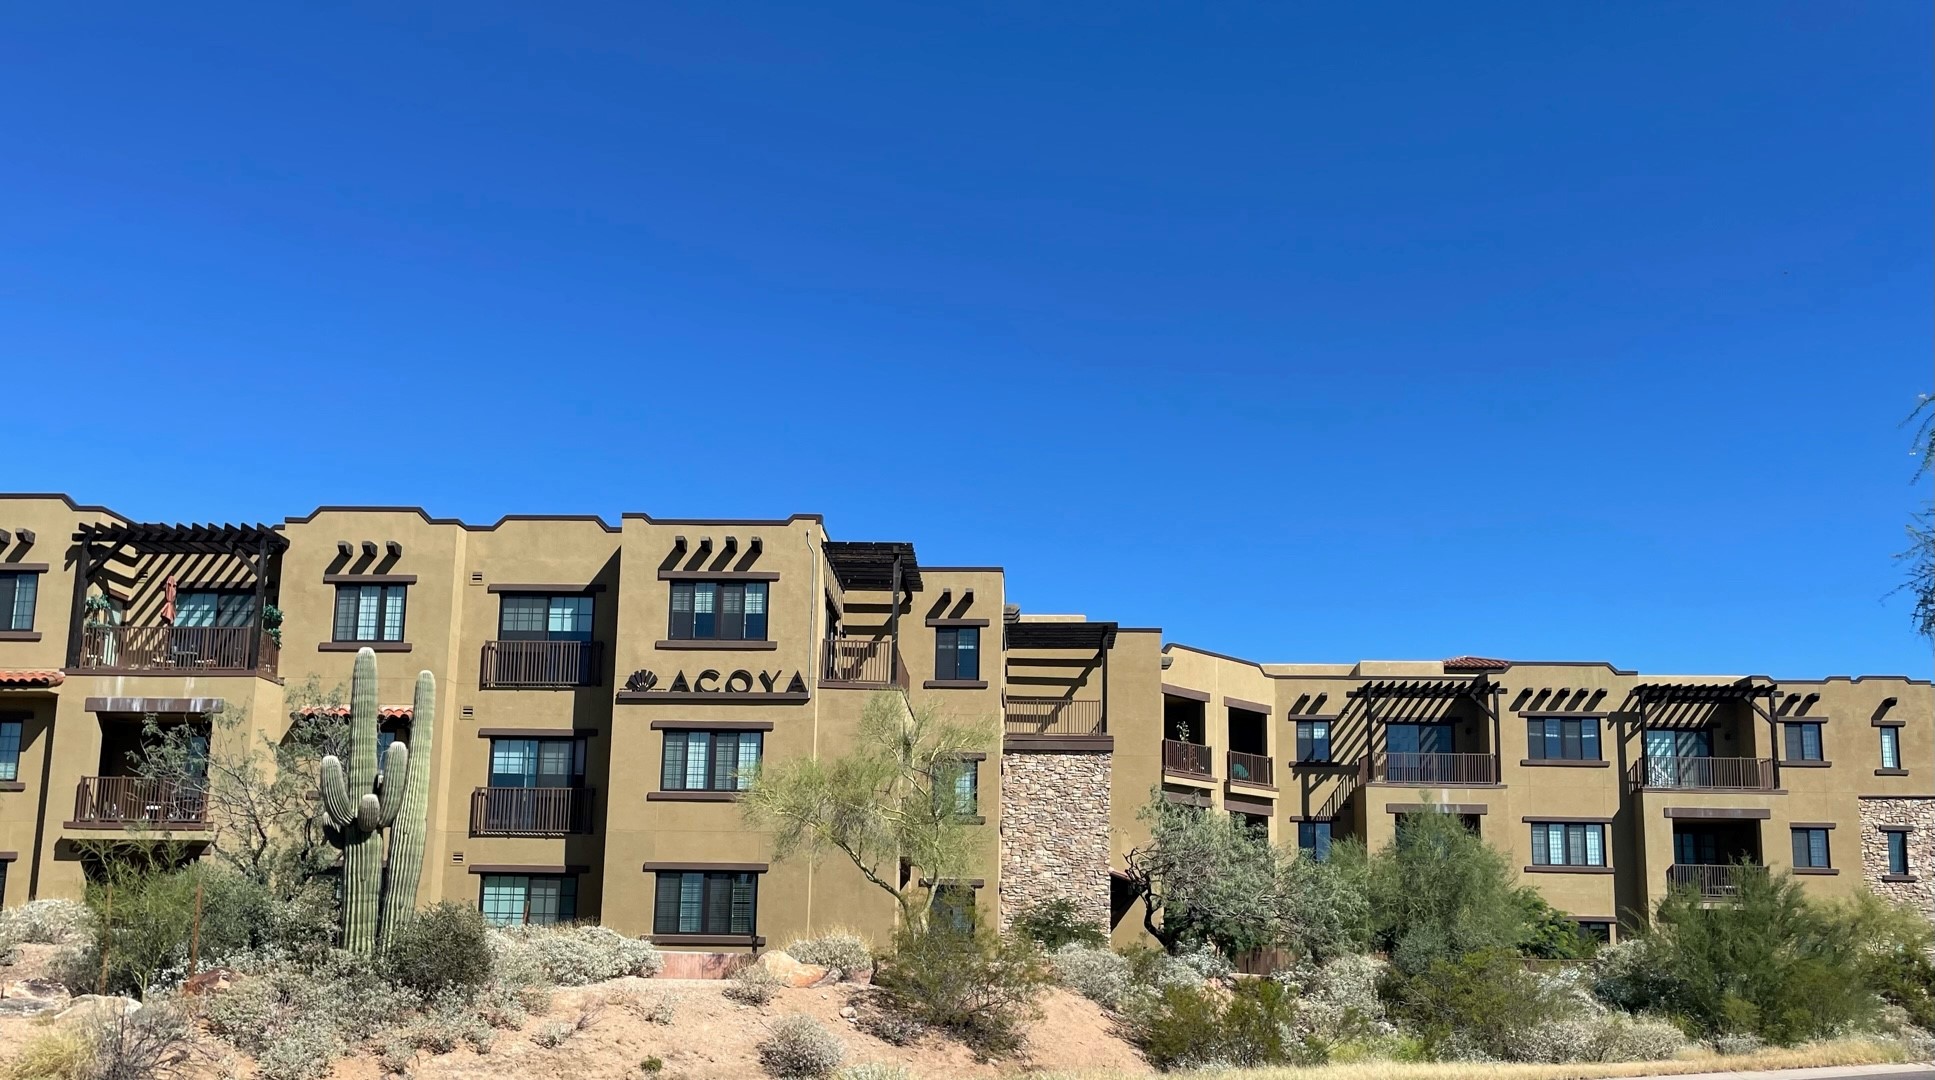
Wrong - this building provides no overhangs, minimal window shading, and clear window glass resulting in high solar heat gain.
Image
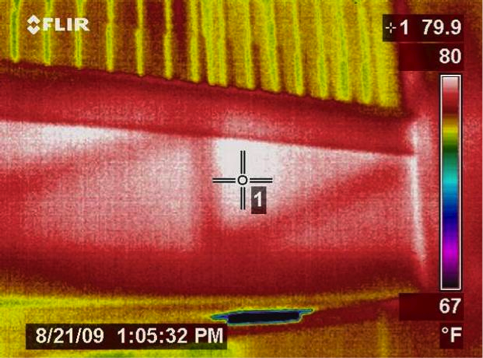
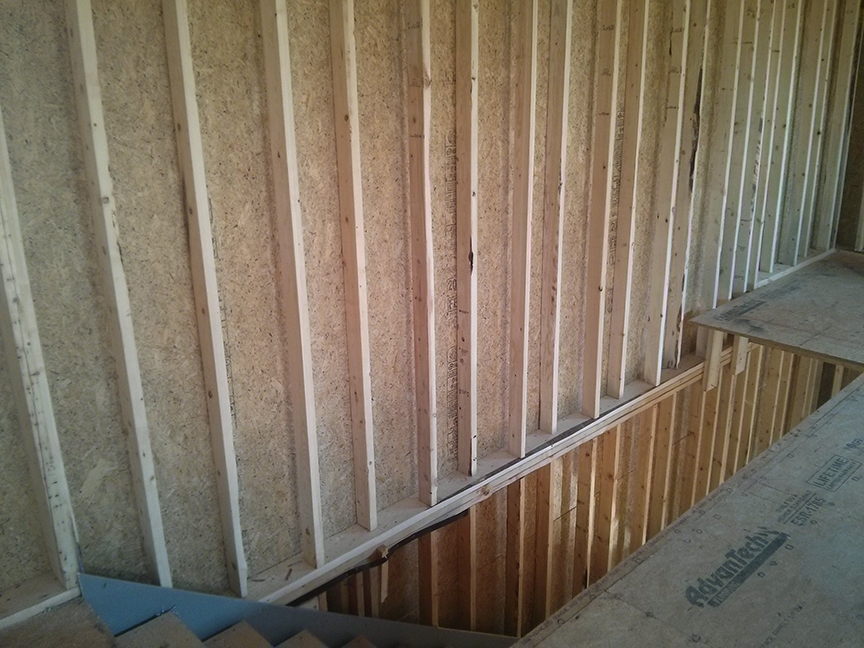
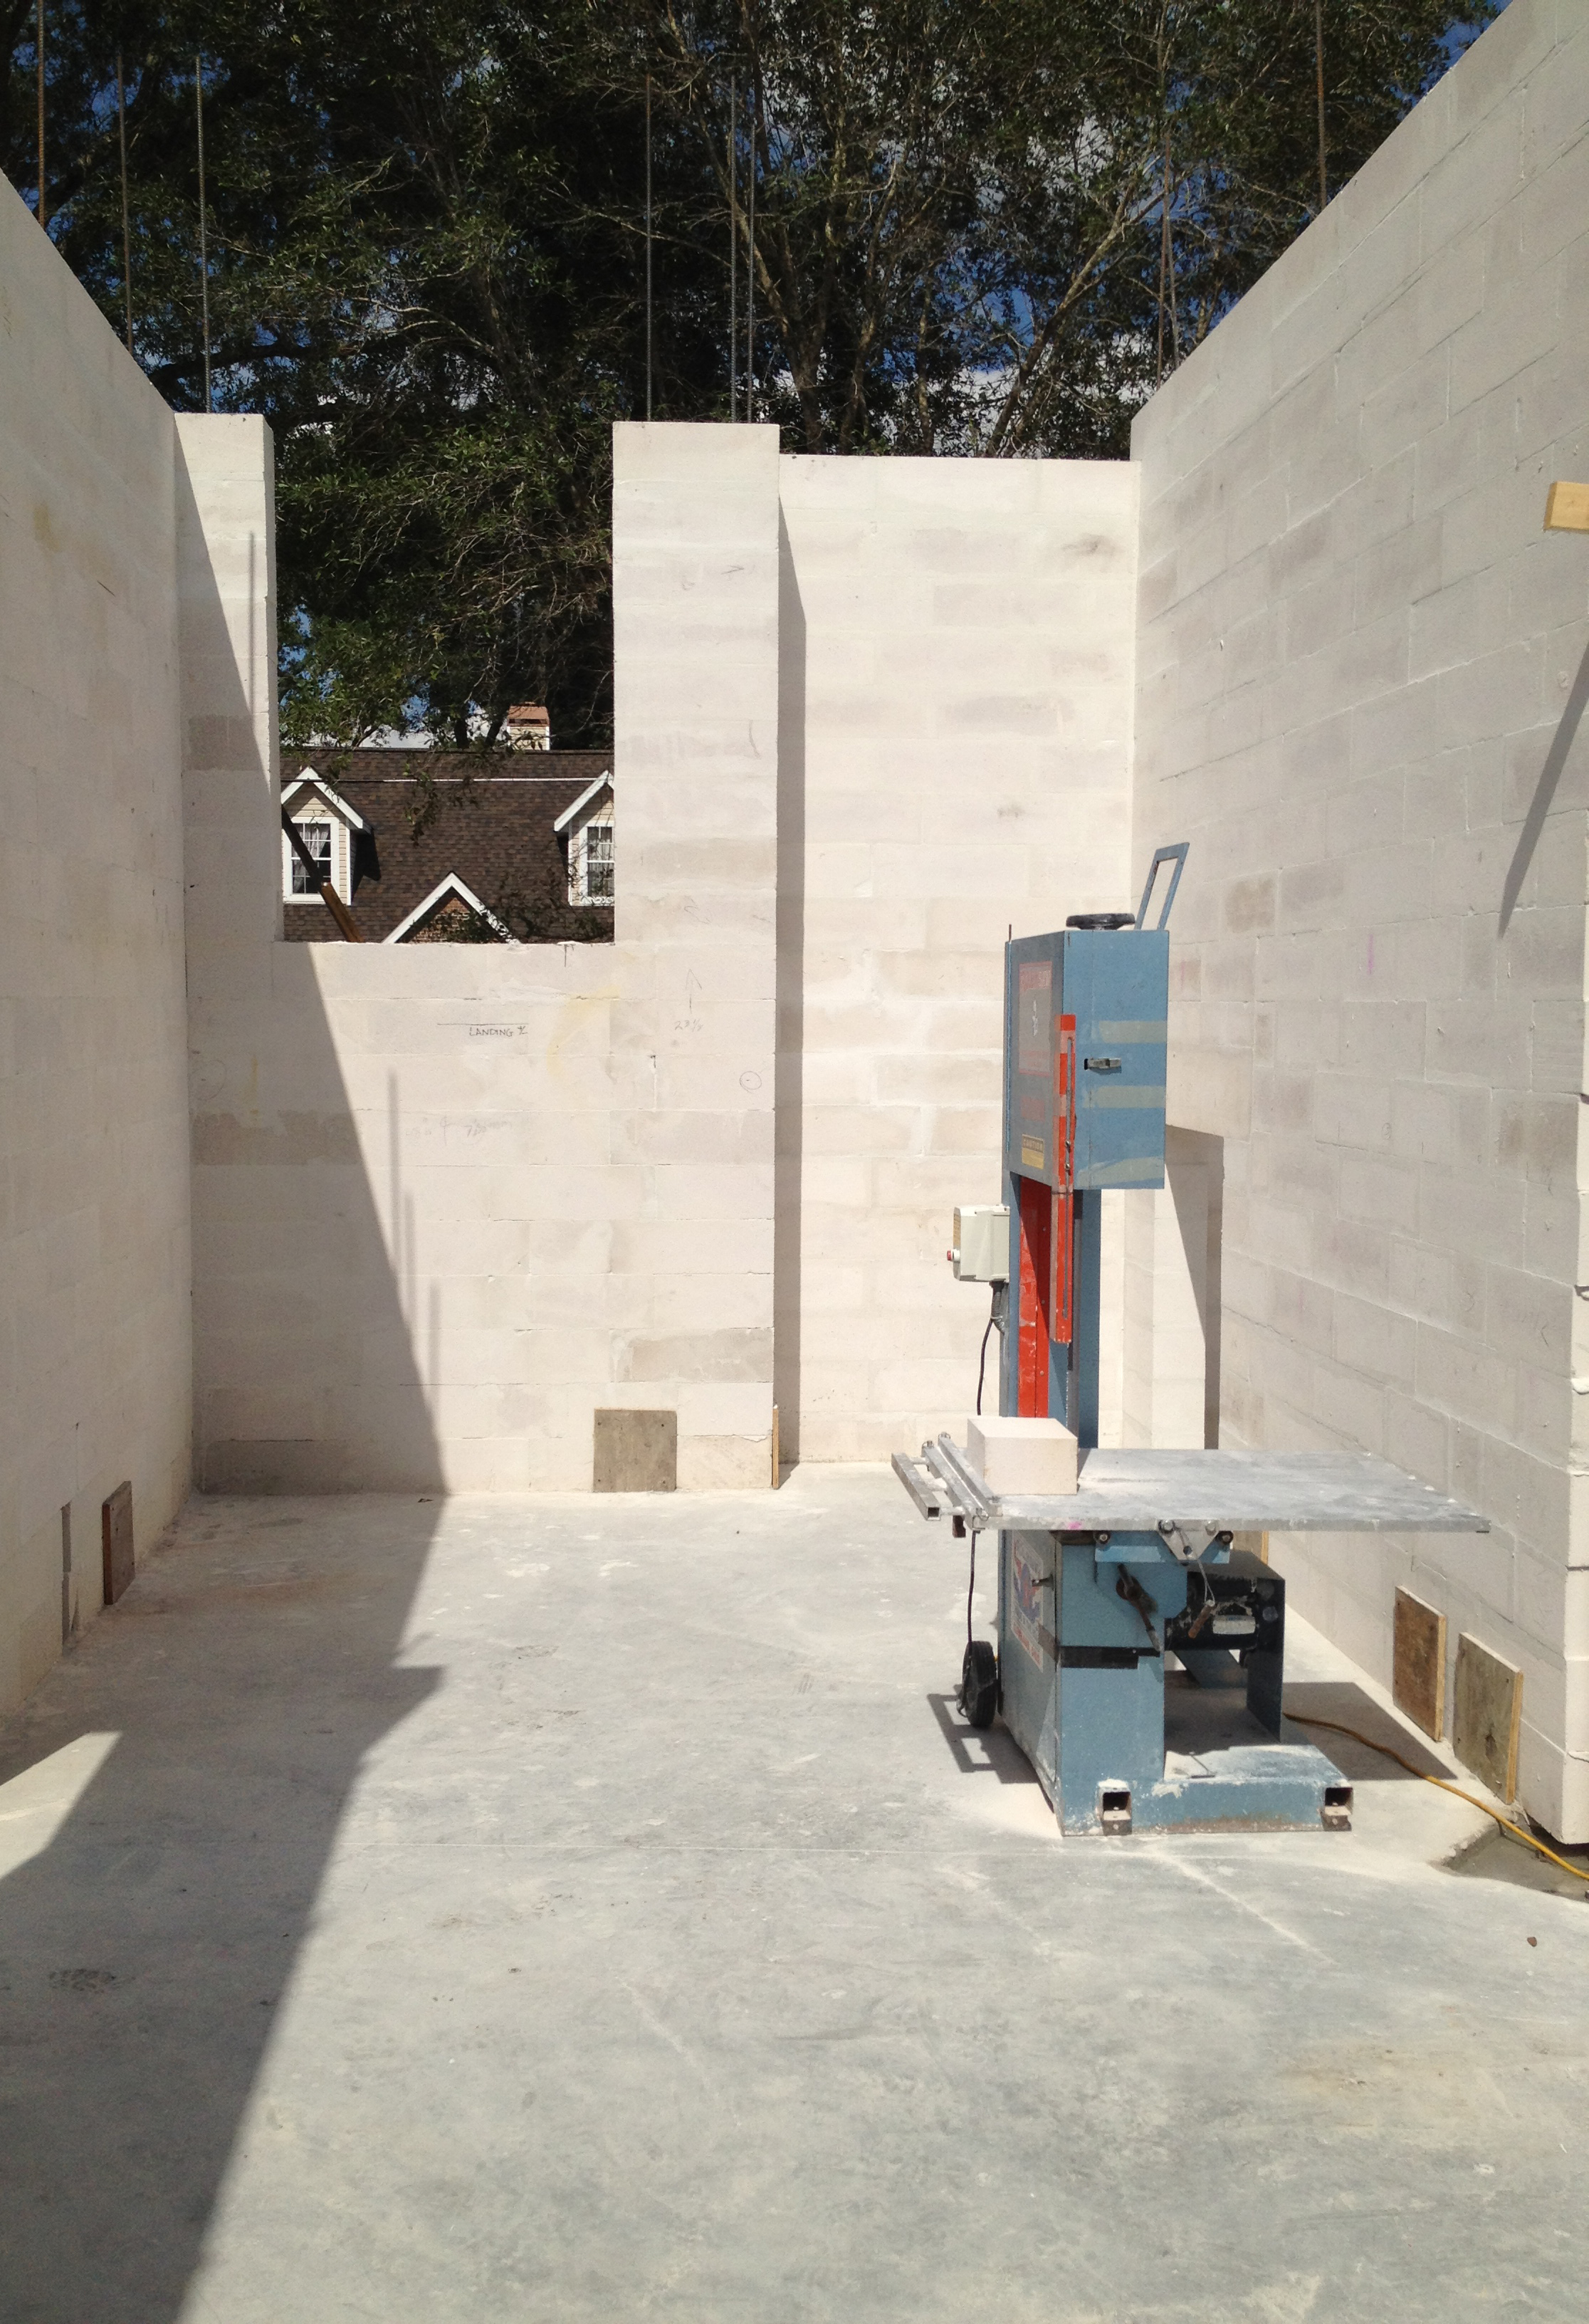
Wrong - This IR image of a second-floor landing shows that attic air is flowing far into the interstitial floor cavity of the second-floor landing
Image

Wrong - This IR image shows where hot attic air has penetrated into the floor cavity that lies behind the stairwell wall
Image

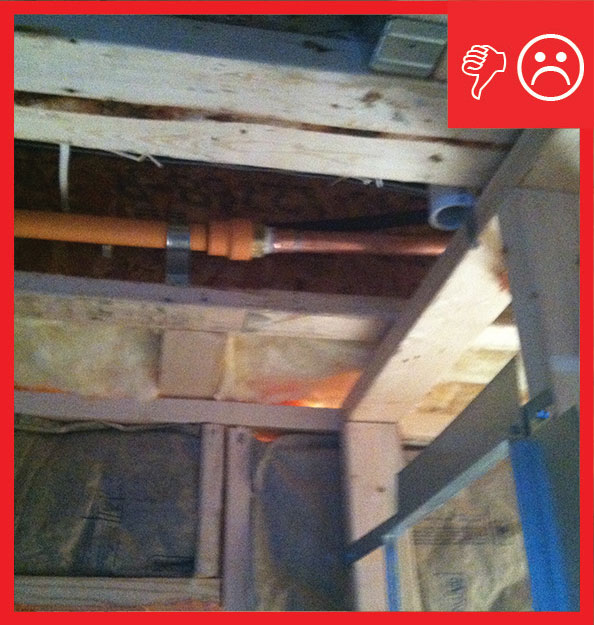
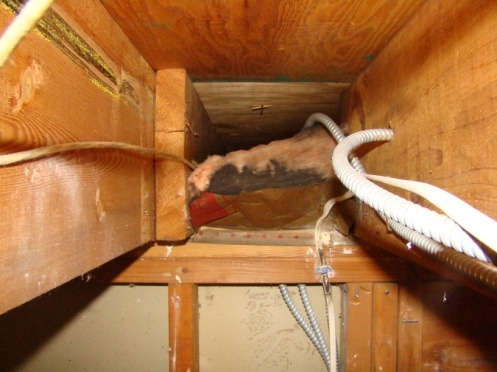
Wrong - This is a poorly sealed chase with no solid air barriers along the sides of the chase and no caulk around the electrical wires installed through the ceiling of the chase.
Image
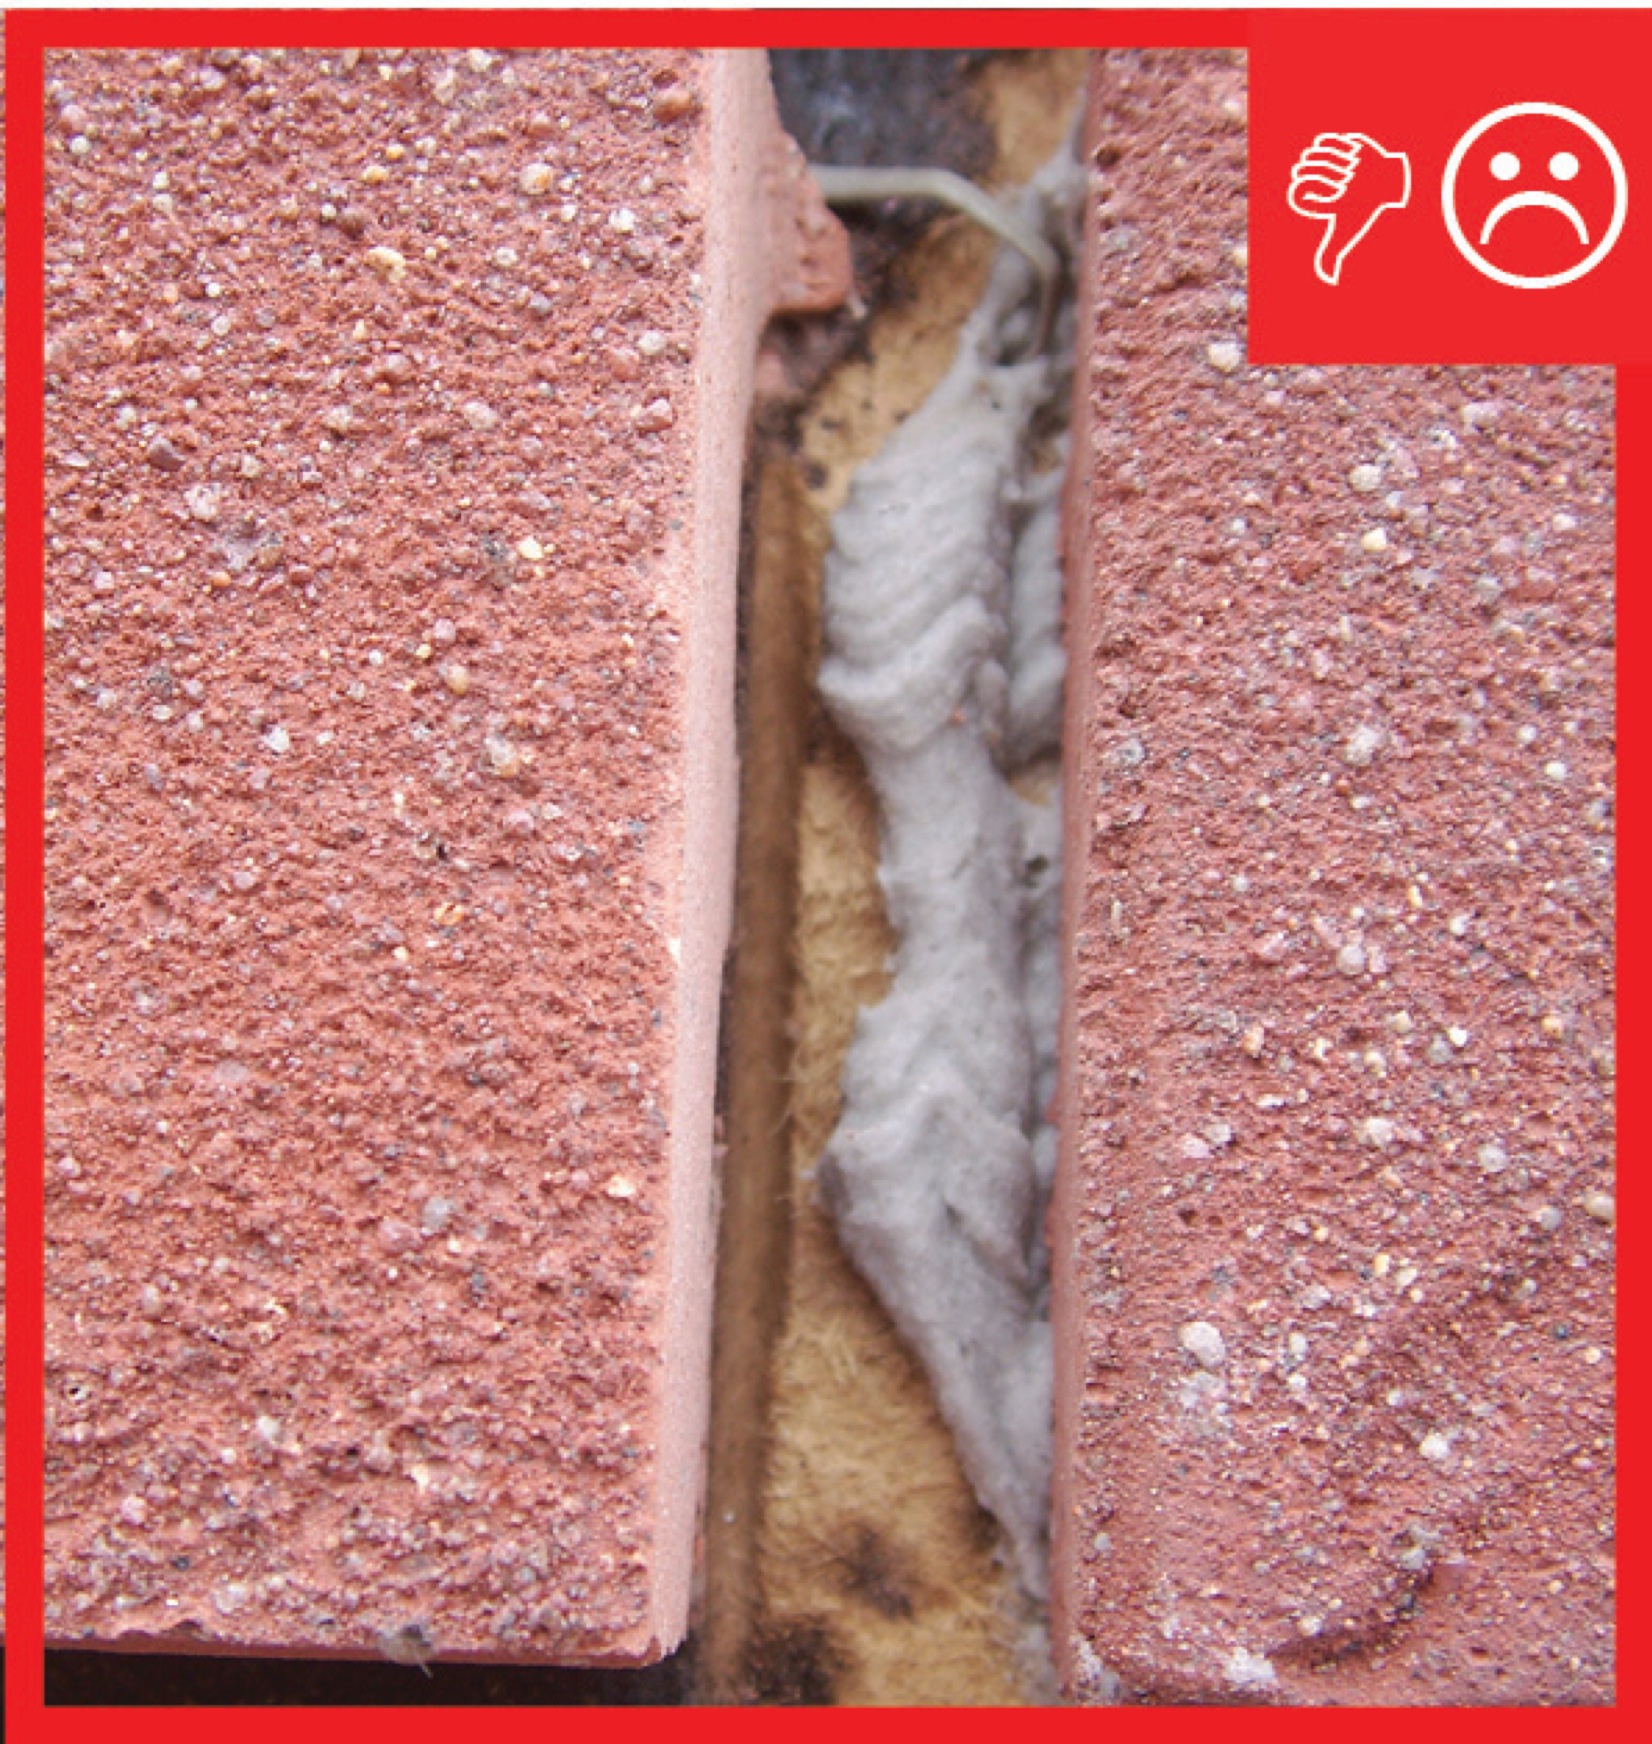
Wrong - Through-wall flashing has not been installed at brick wall intervals and house wrap is missing.
Image
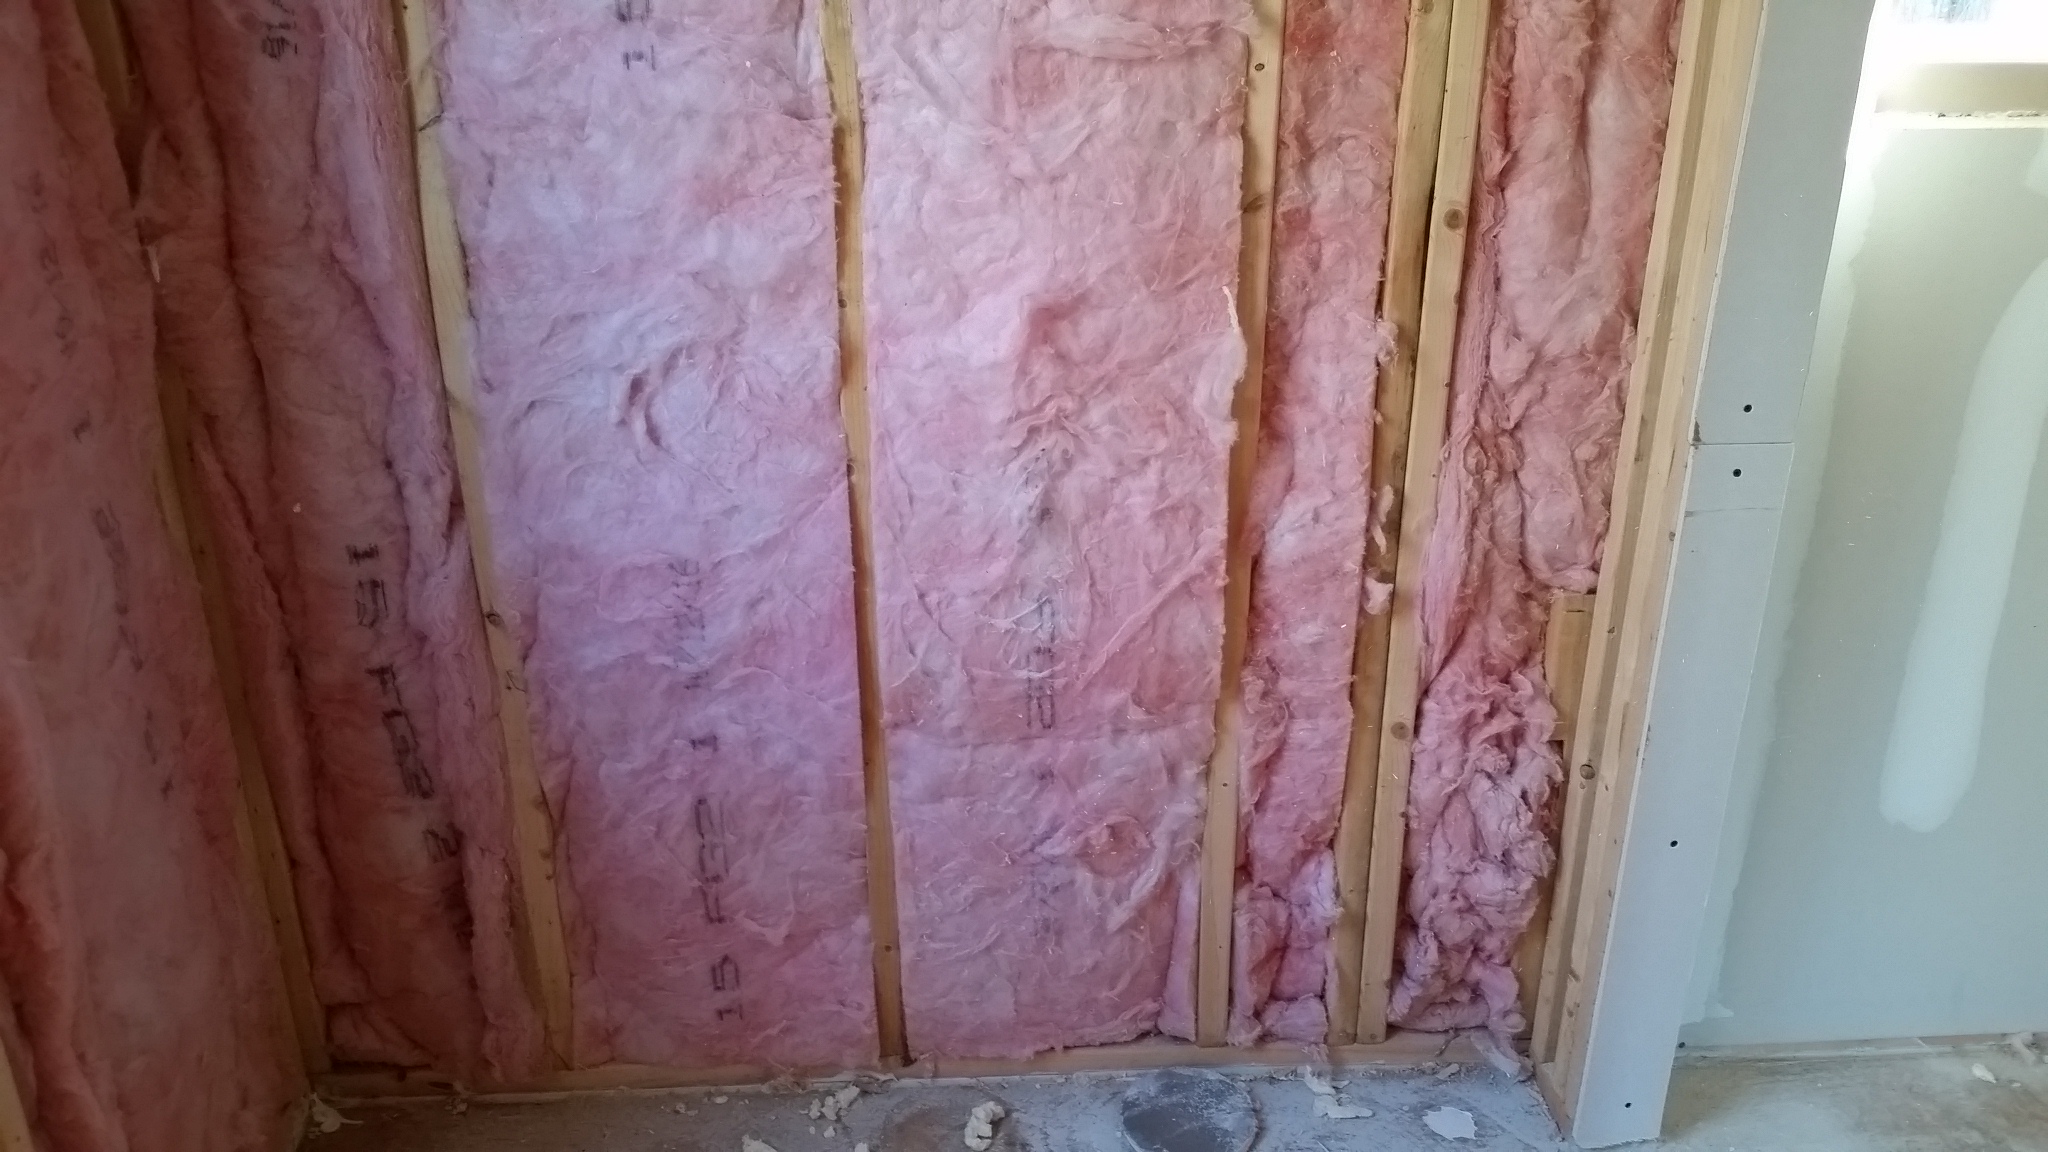
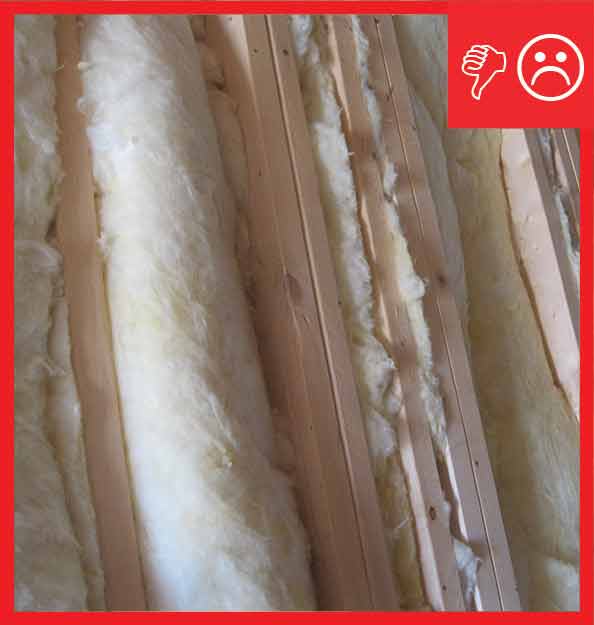
Wrong - Unfaced fiberglass batt is not properly cut to fit in all the stud bays.
Image
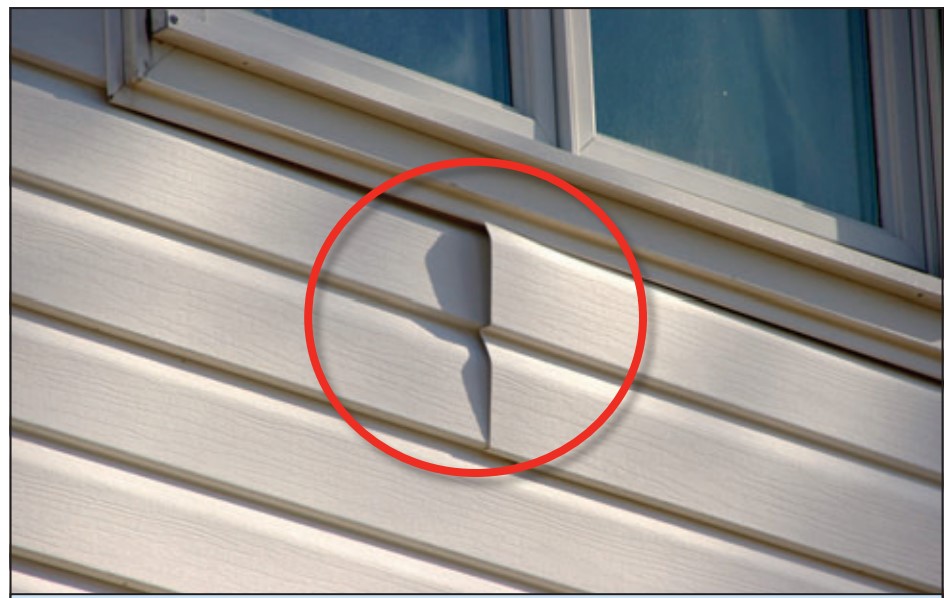
Wrong - Utility trim was substituted for the starter strip and the bottom lock was cut off this vinyl siding so the siding pulled loose under wind pressure.
Image
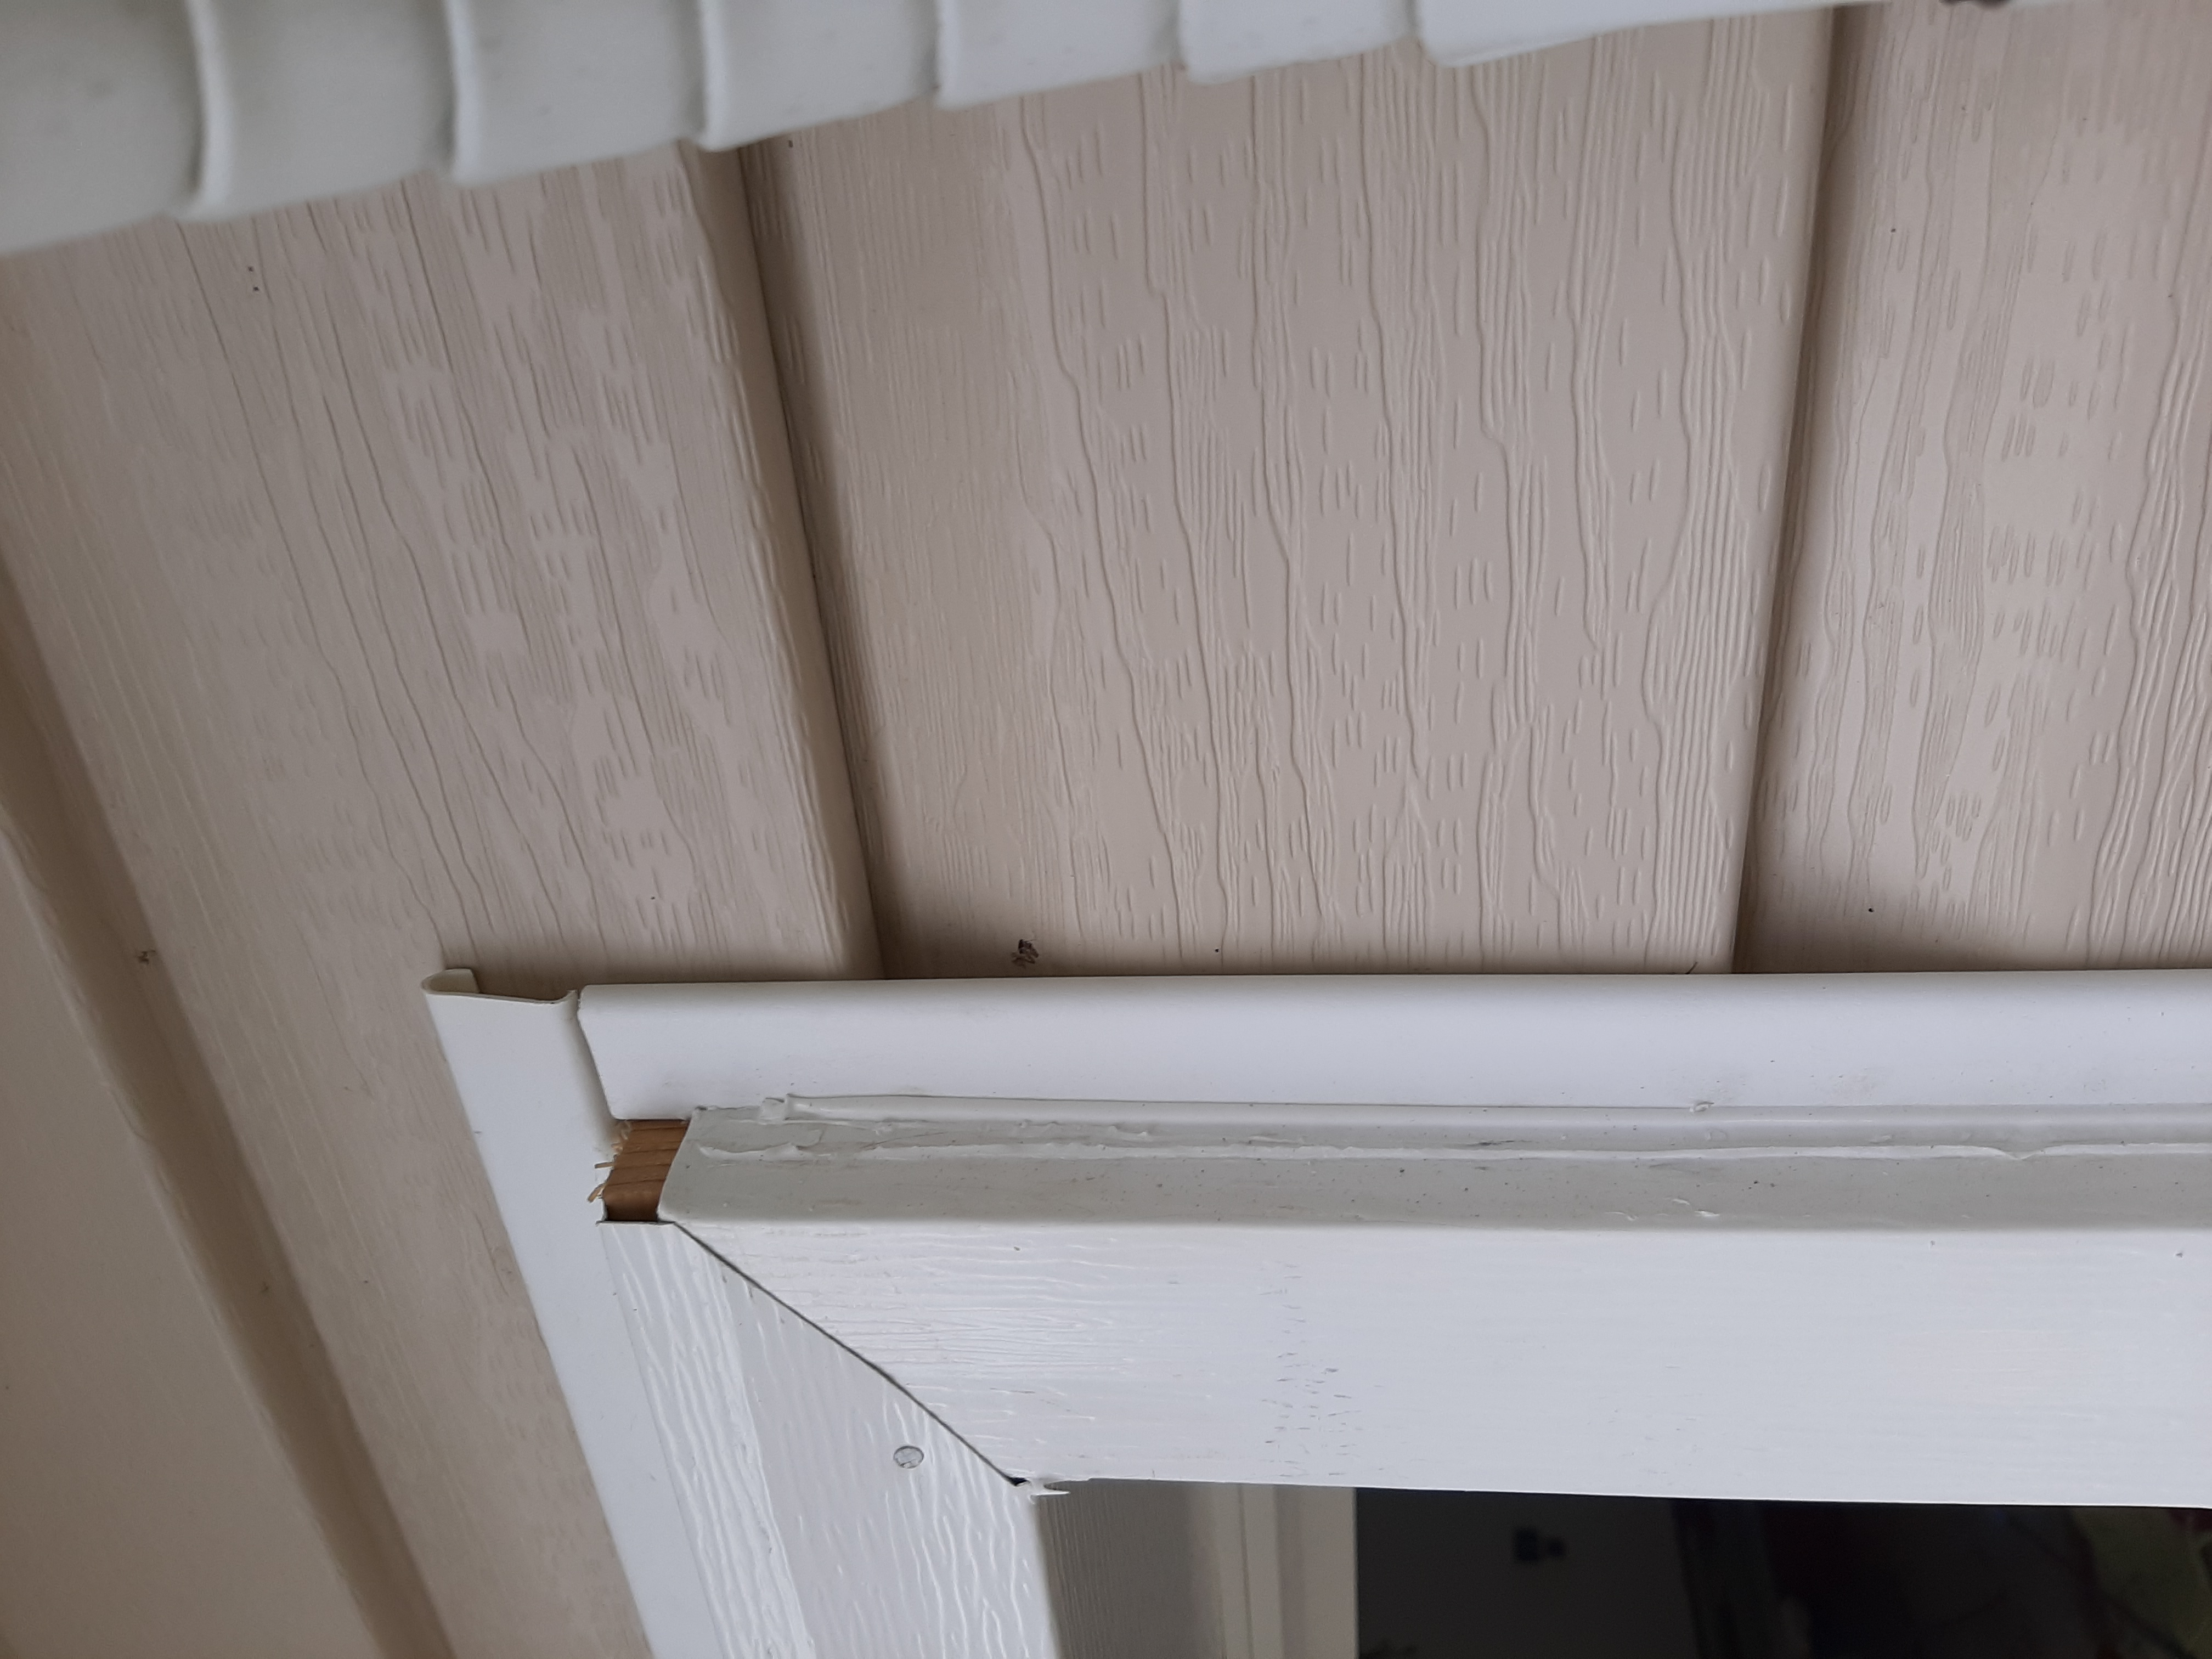
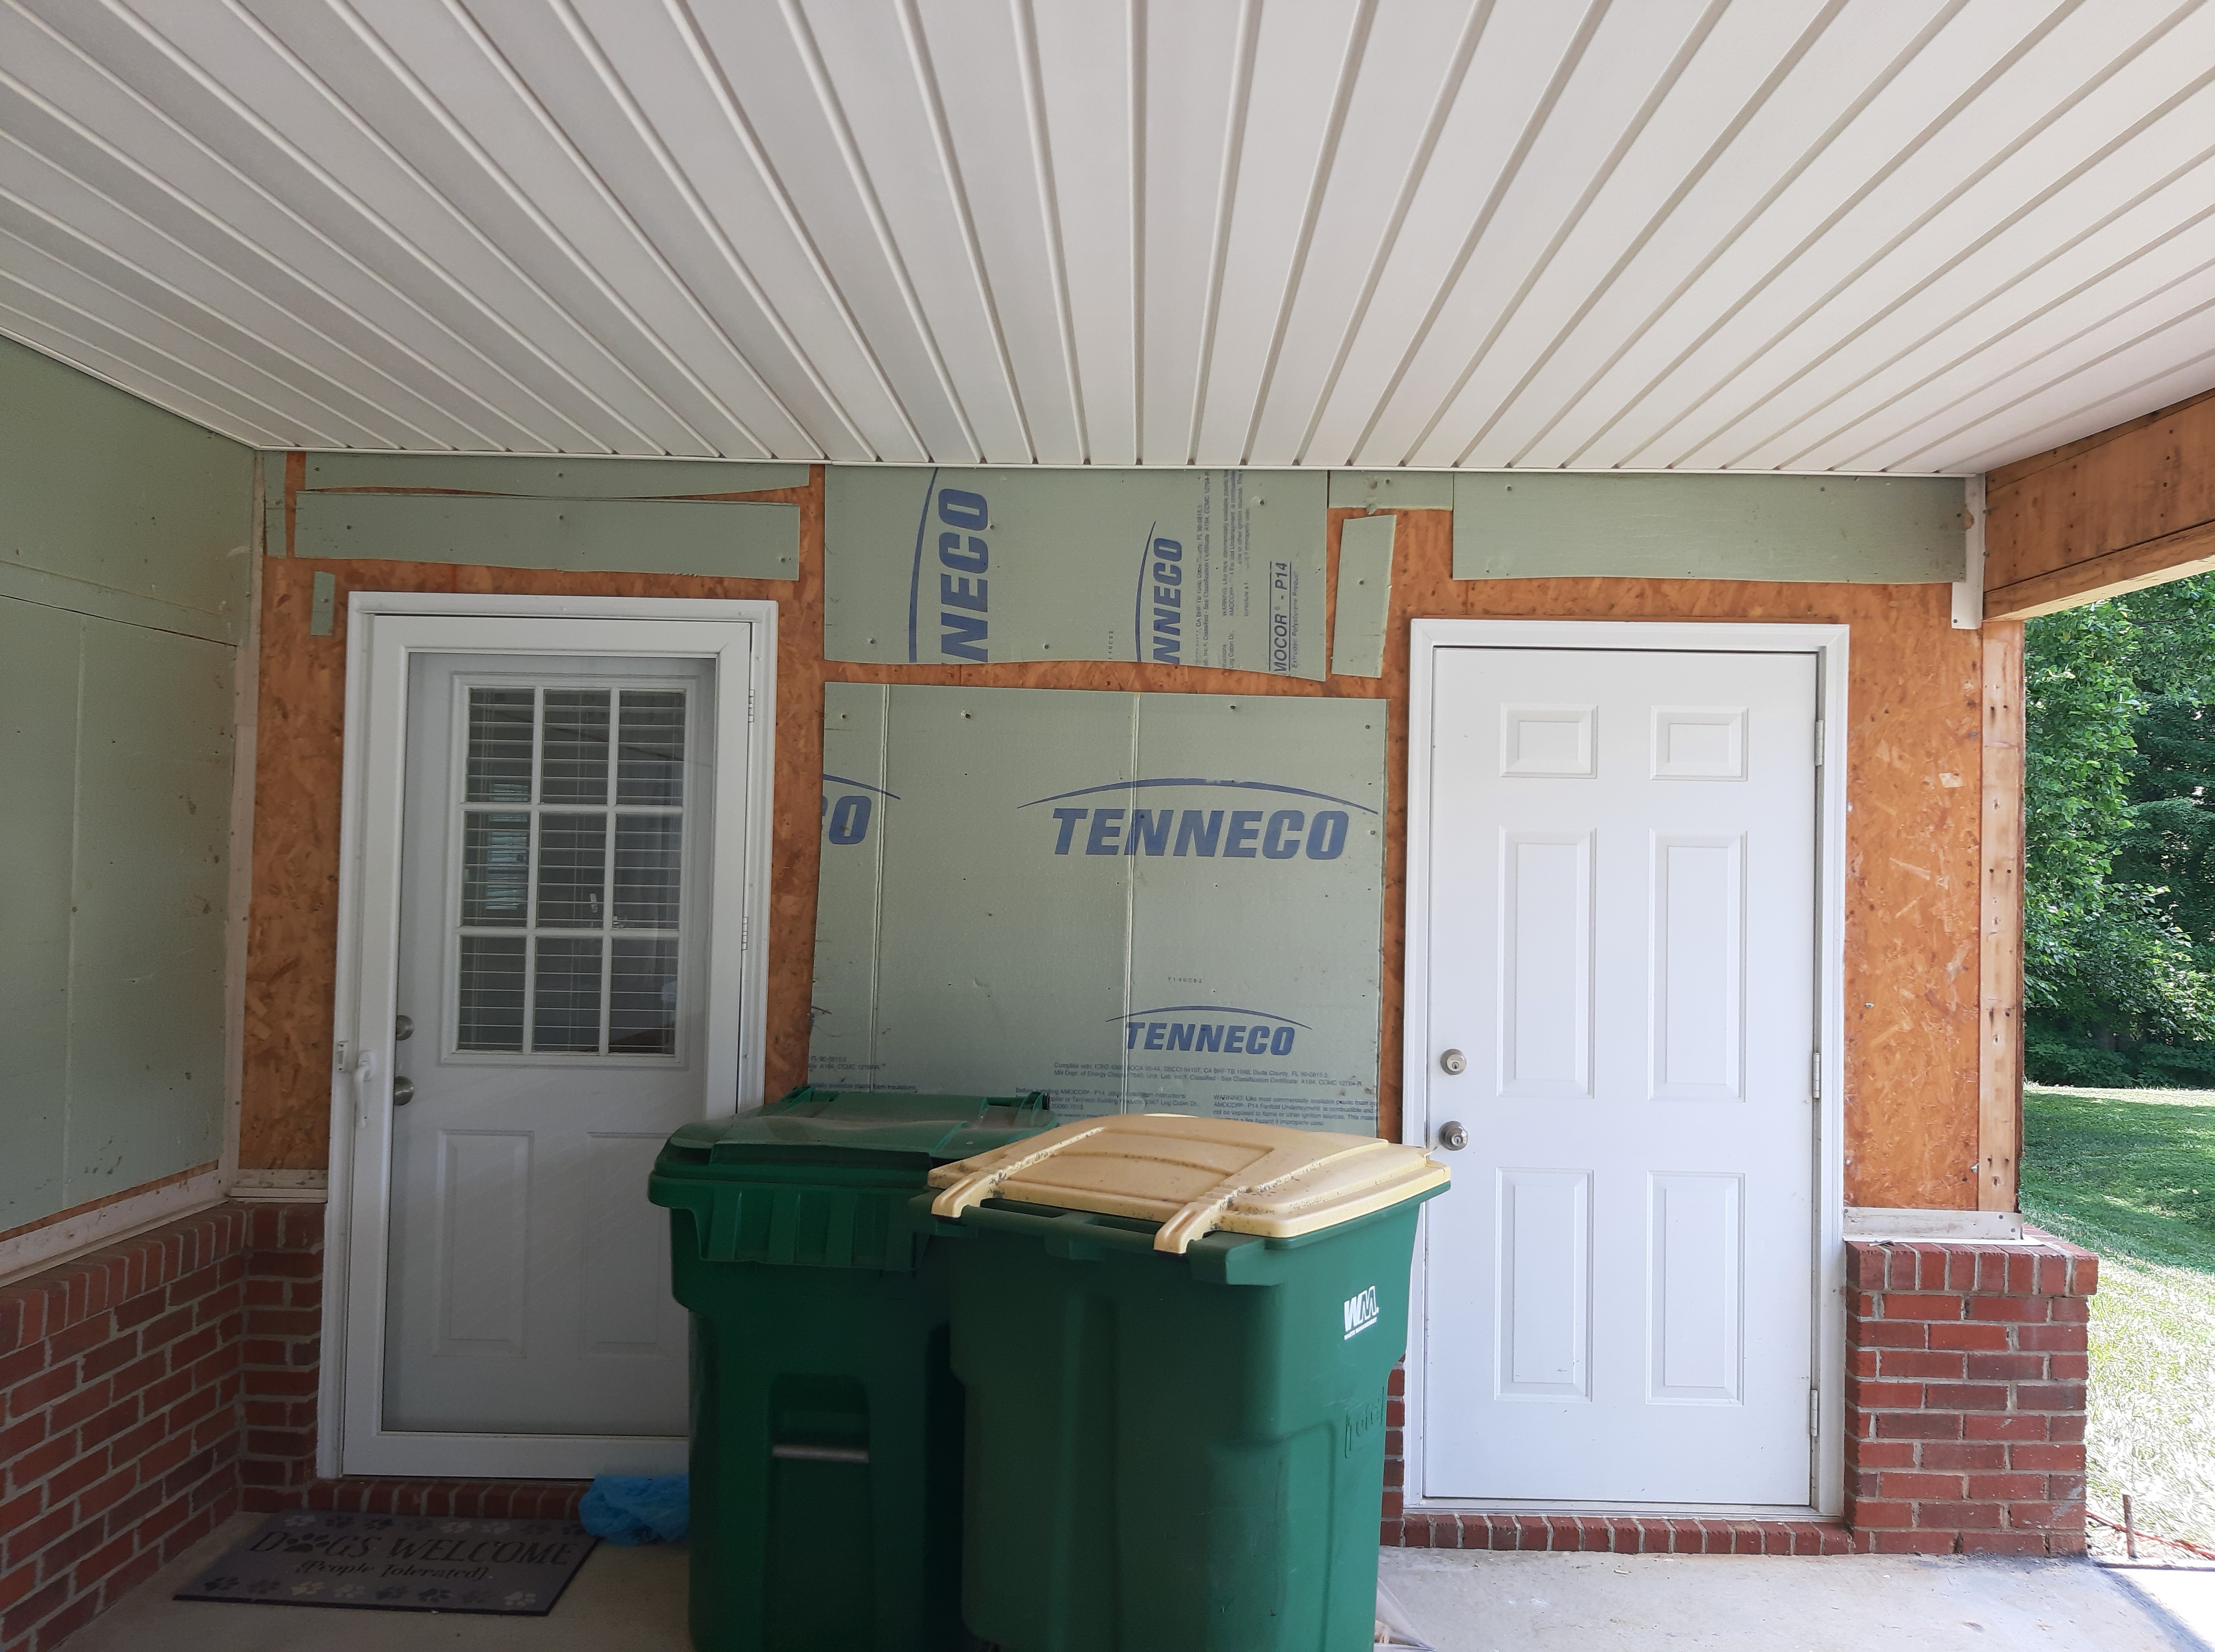
Wrong - Vinyl siding in incorrectly installed under not over door trim and door trim channel pieces are missing.
Image
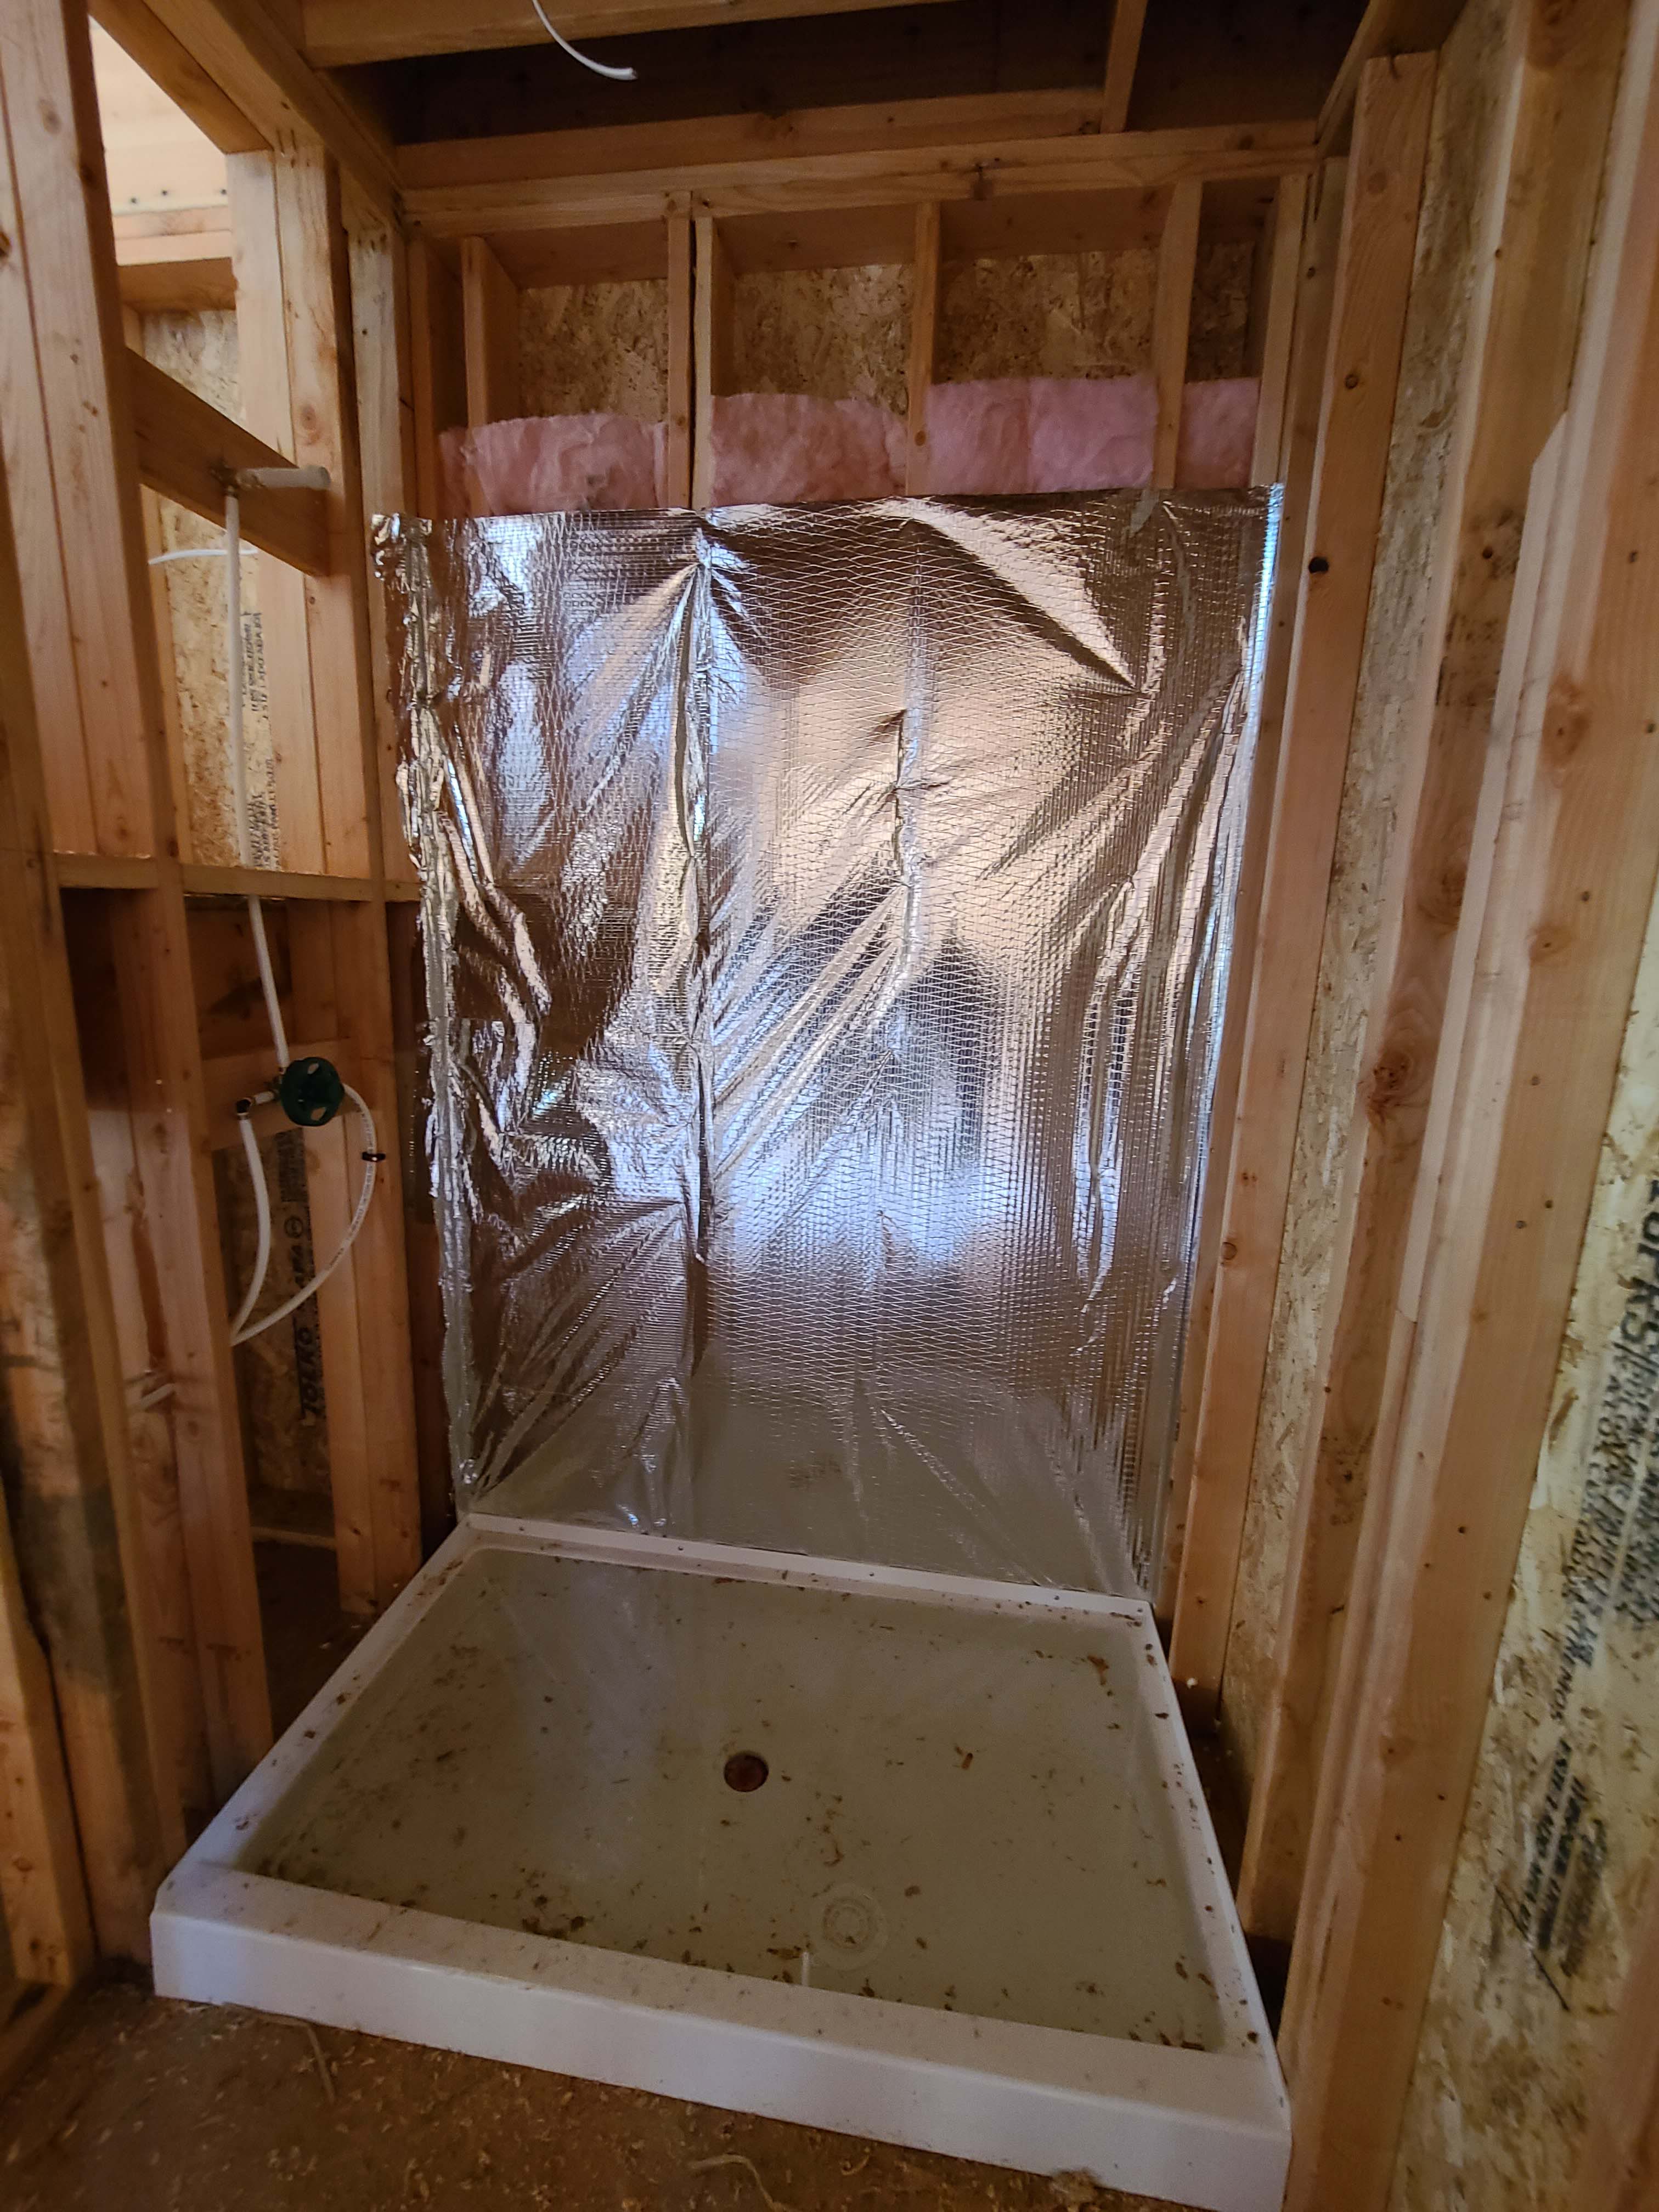
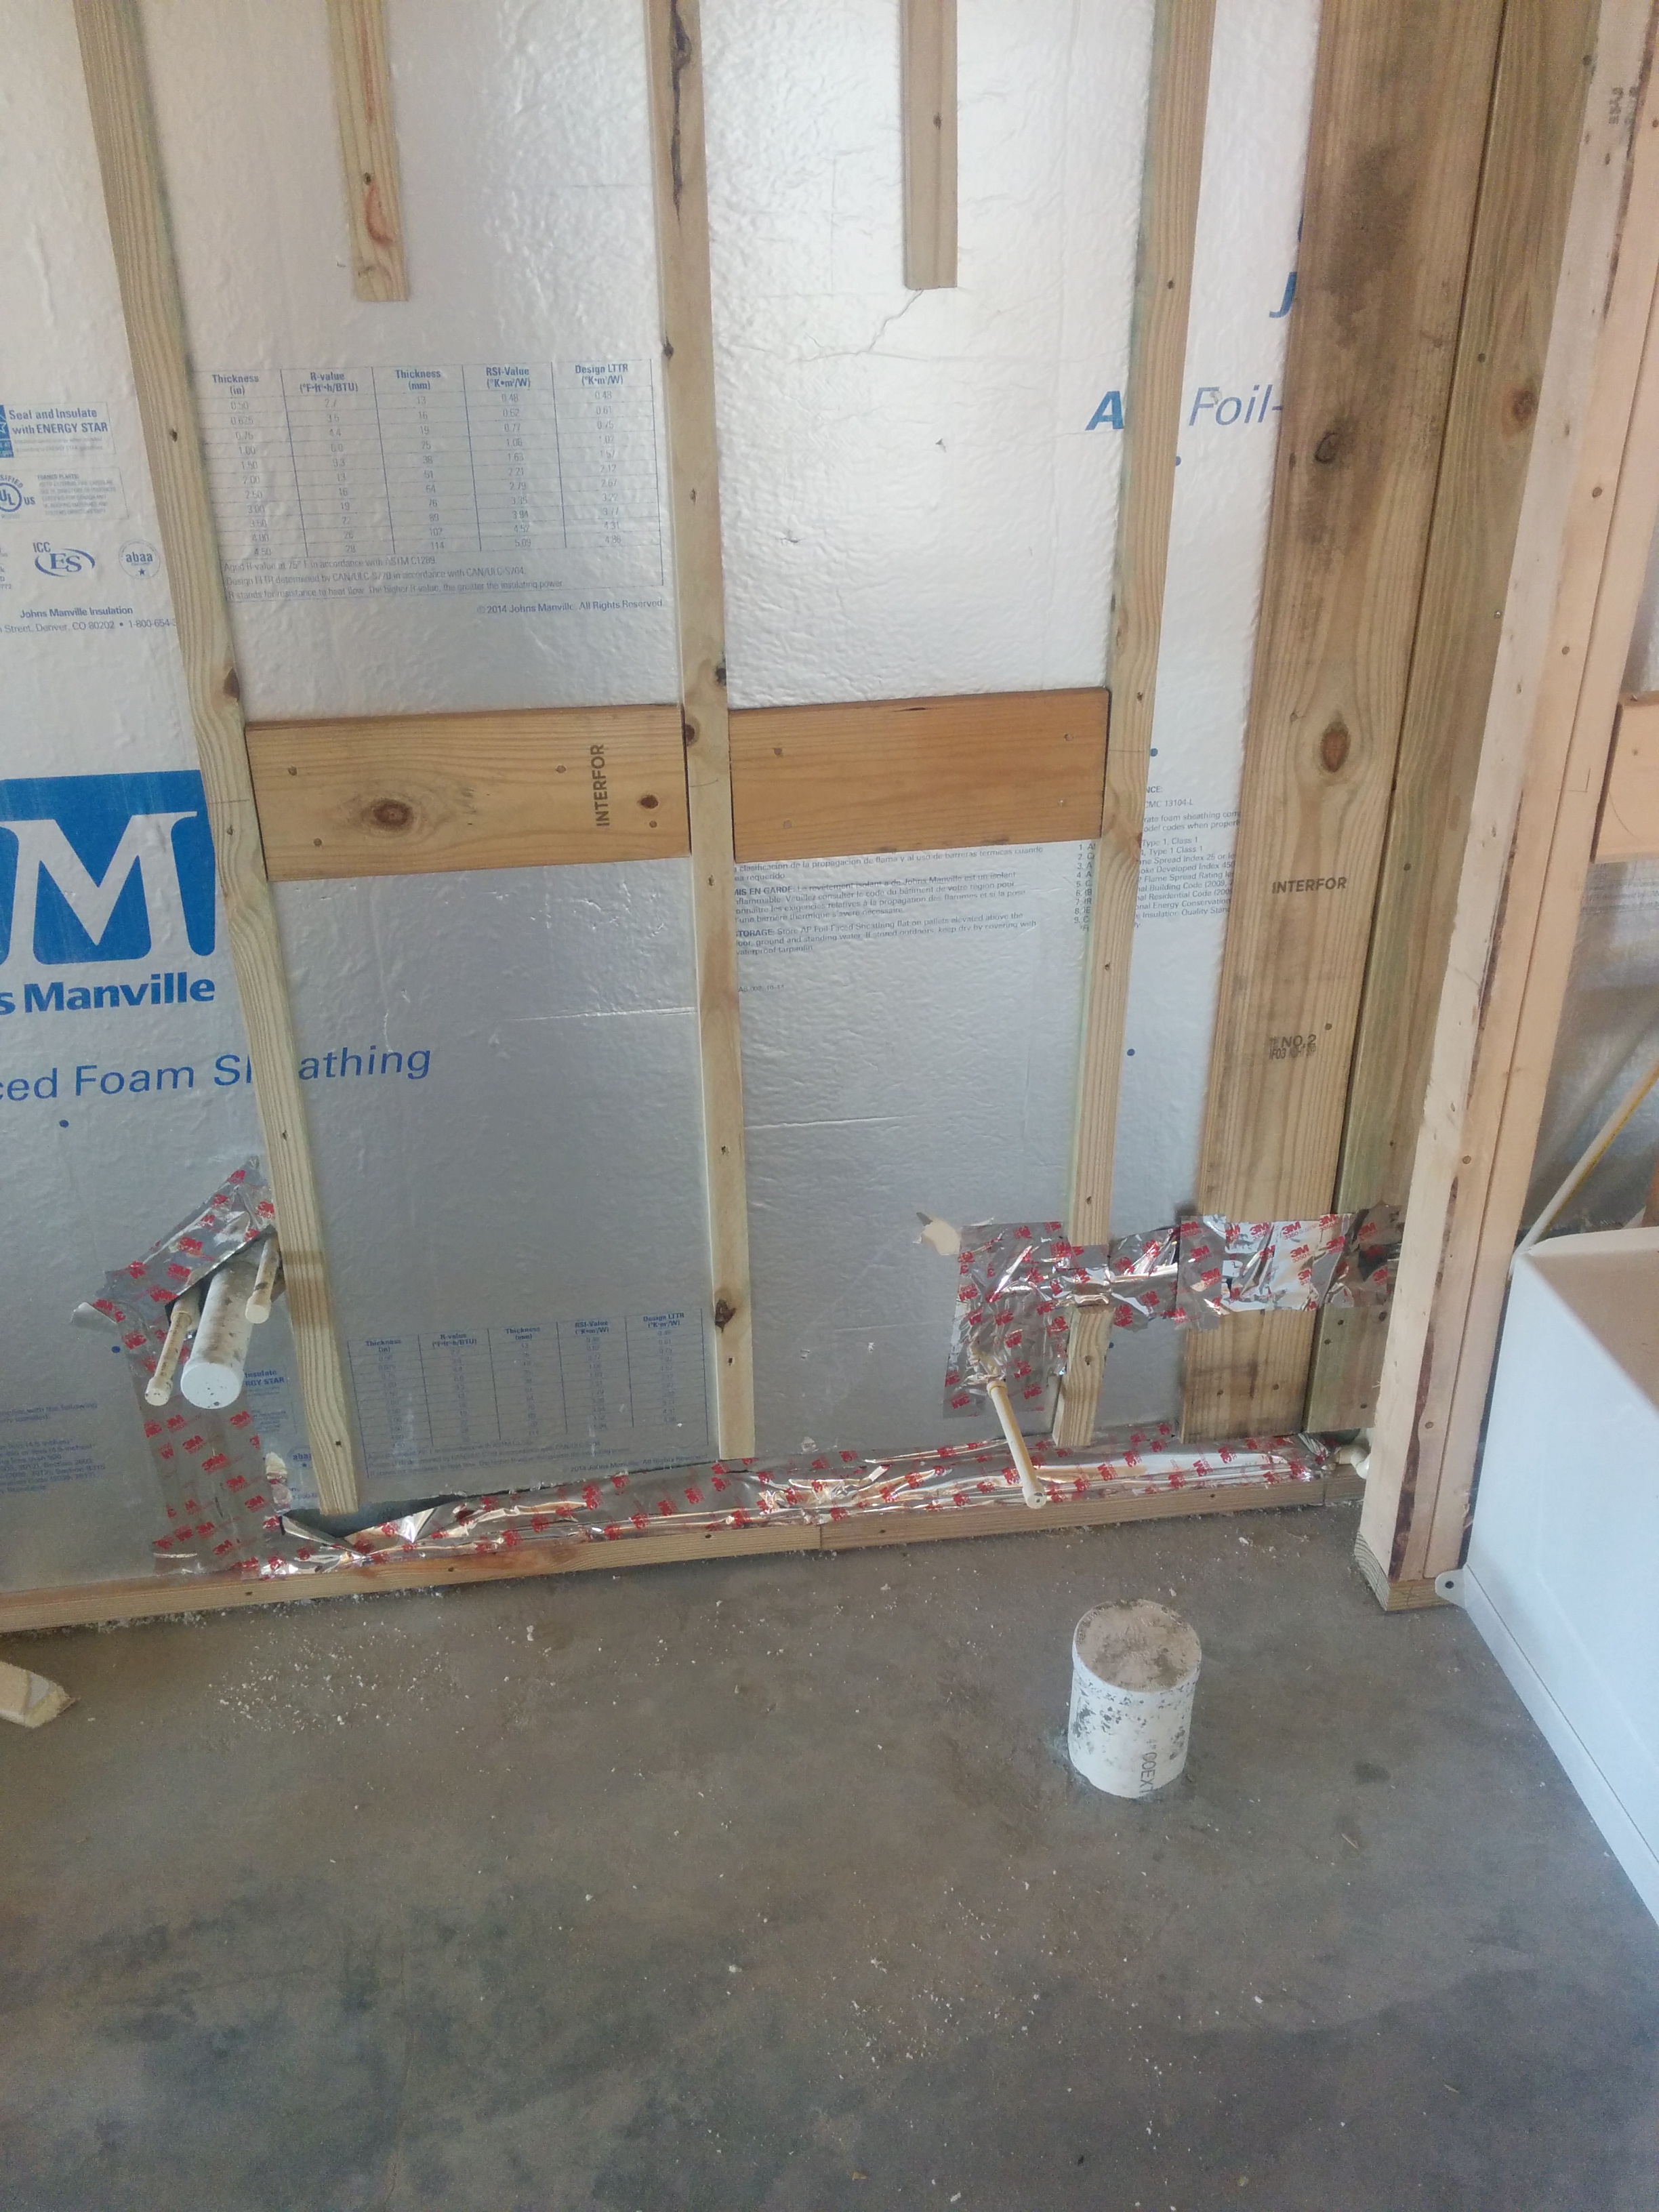
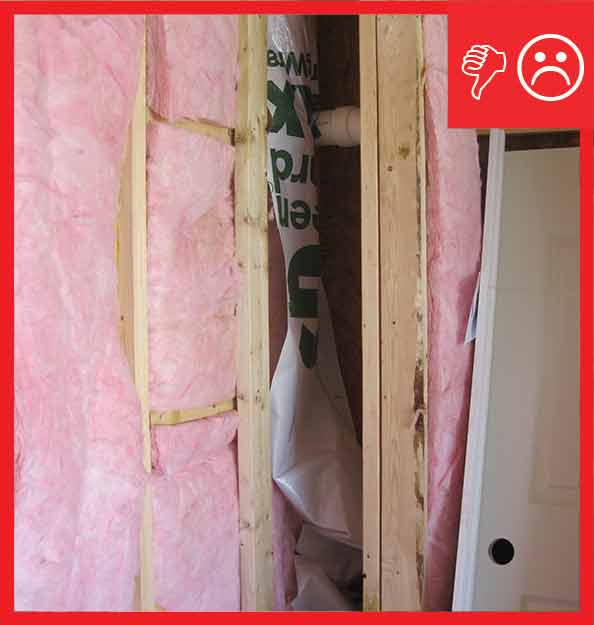
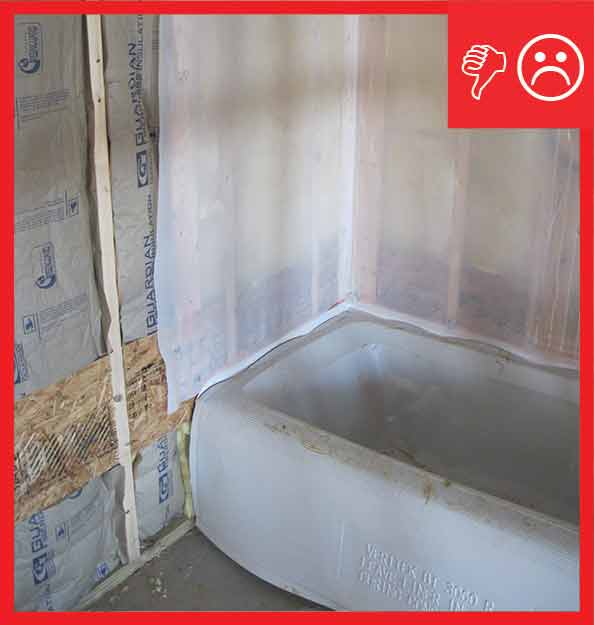
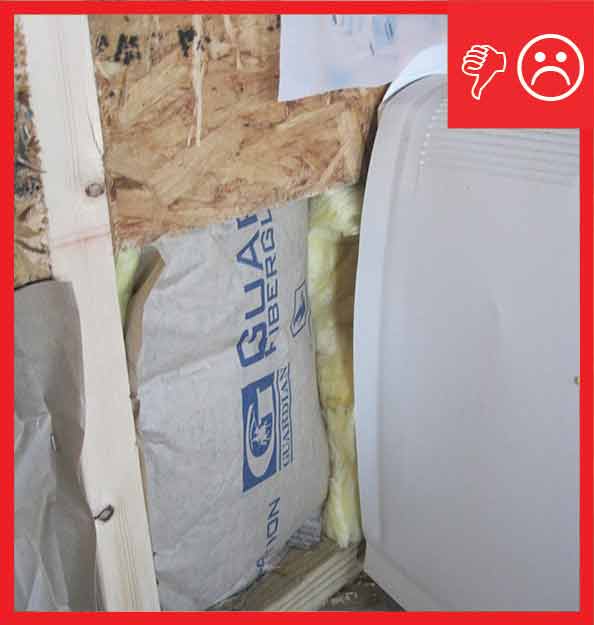
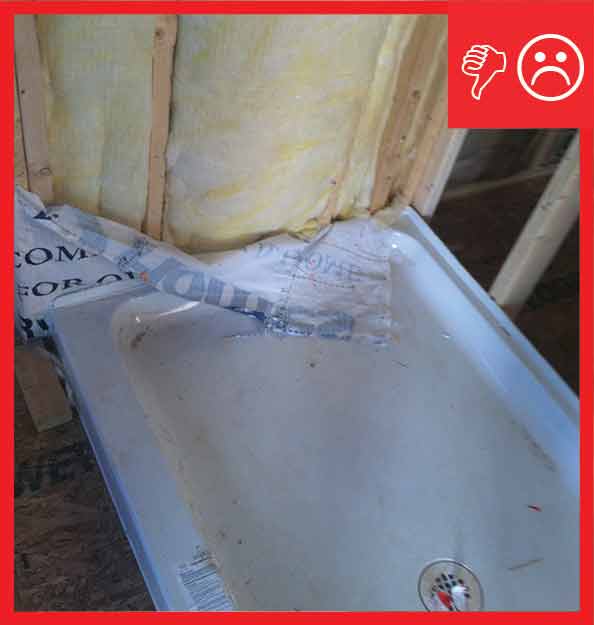
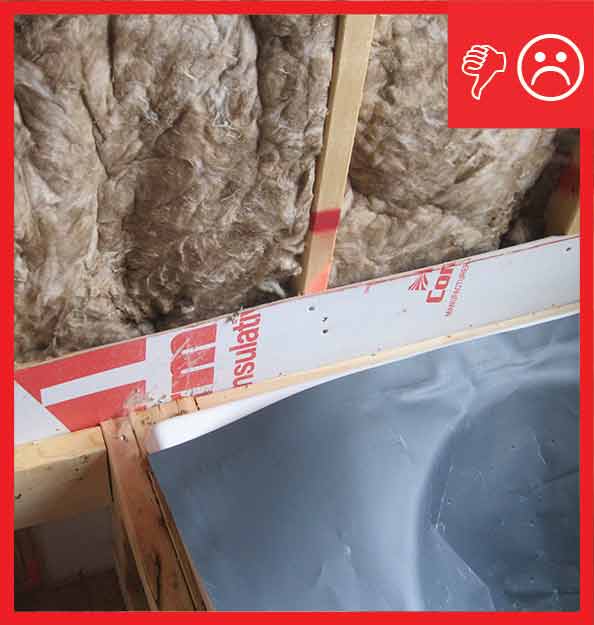
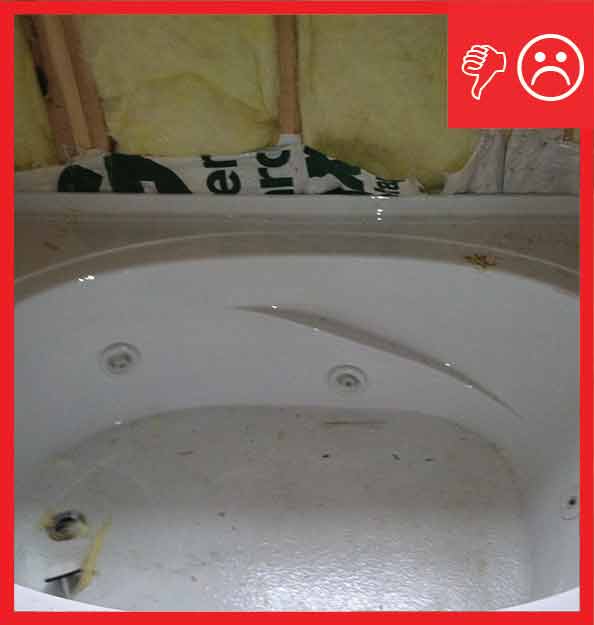
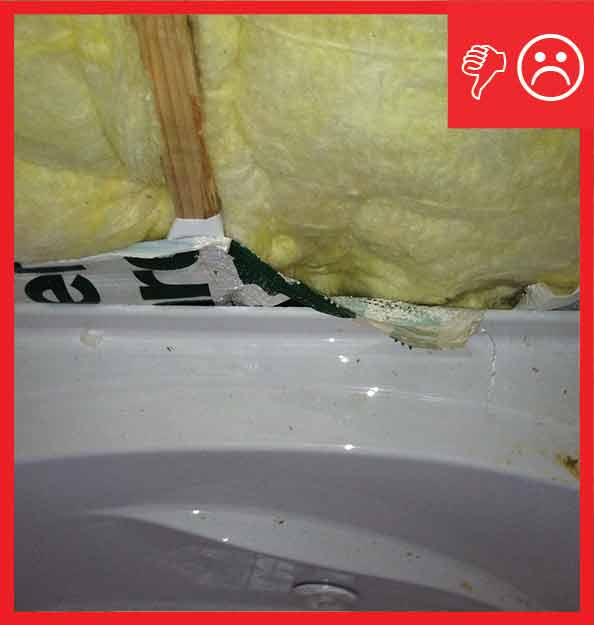
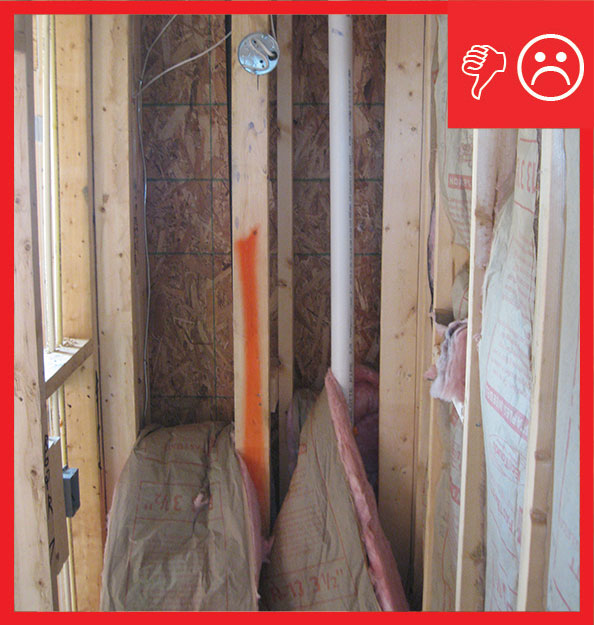
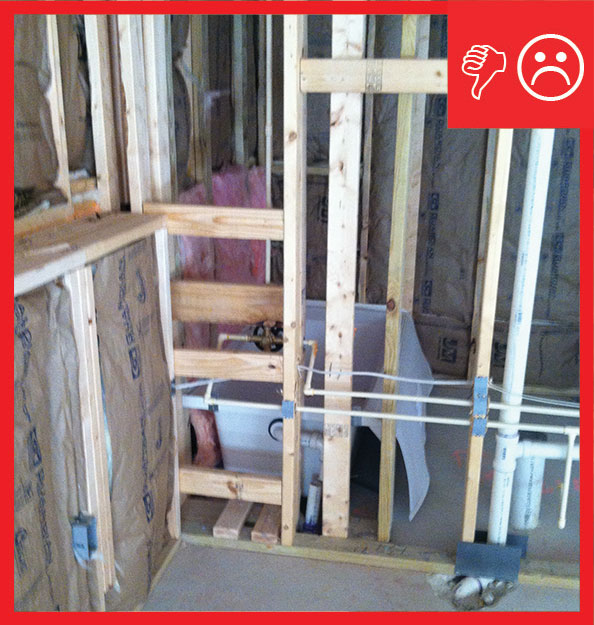
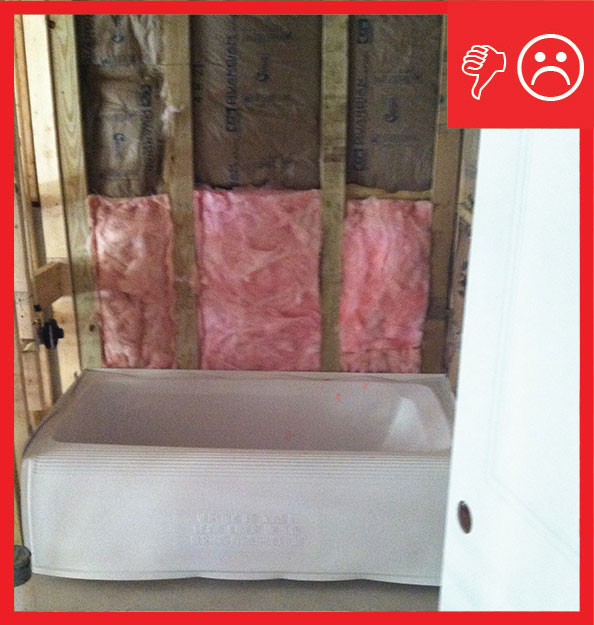
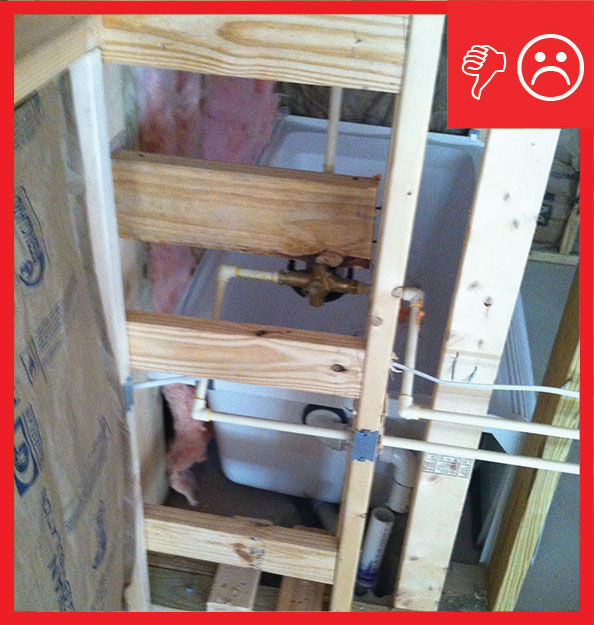
Wrong - Wall cavities behind shower are not completely filled with insulation and are lacking the solid interior air barrier.
Image
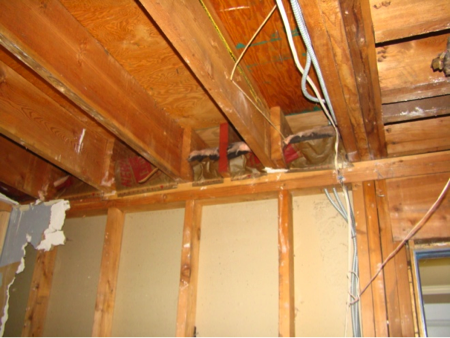
Wrong - When ceiling joists over a garage run perpendicular to the adjoining wall, the joist bays must be blocked and sealed to prevent garage fumes from entering the living space
Image
Image
Image
Image
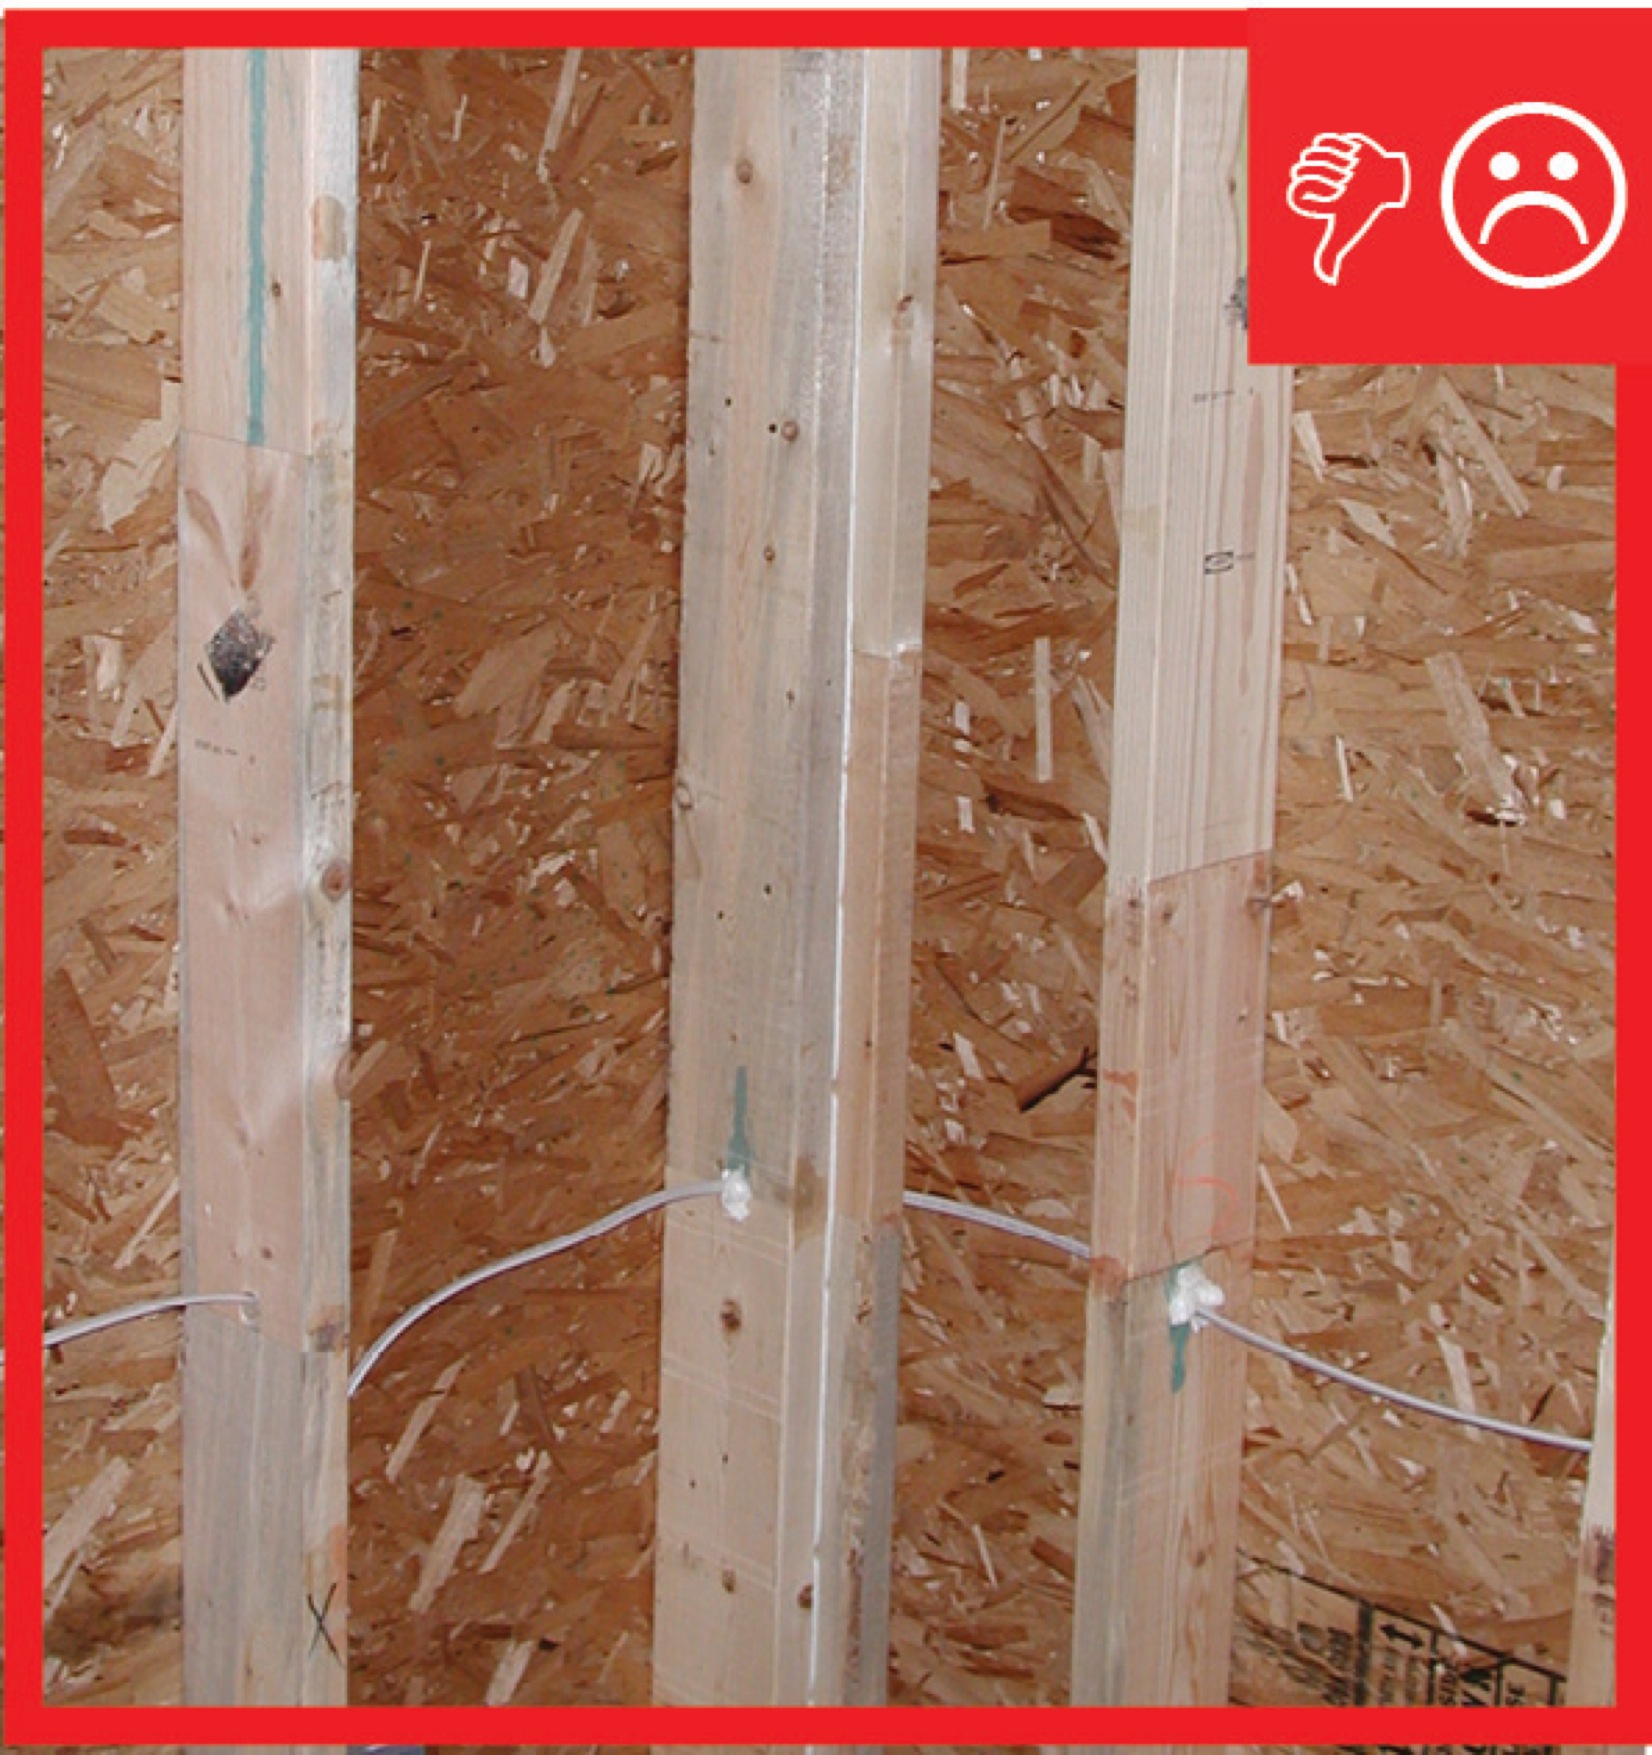
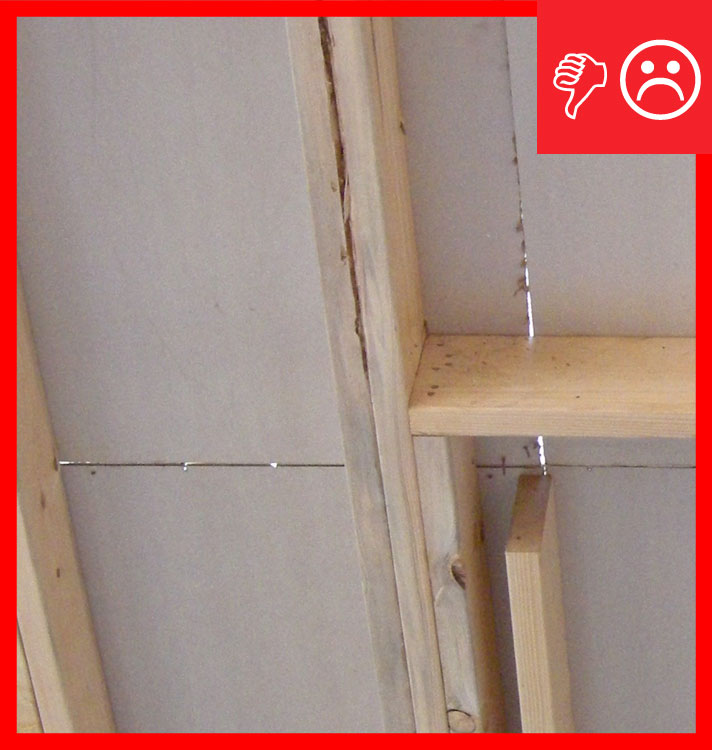
Wrong – A visible gap in the insulated sheathing introduces unwanted outside air, creating a thermal bypass and encouraging convective air flow
Image

Image
Image
Image
Image
Image
Image
Image
Image
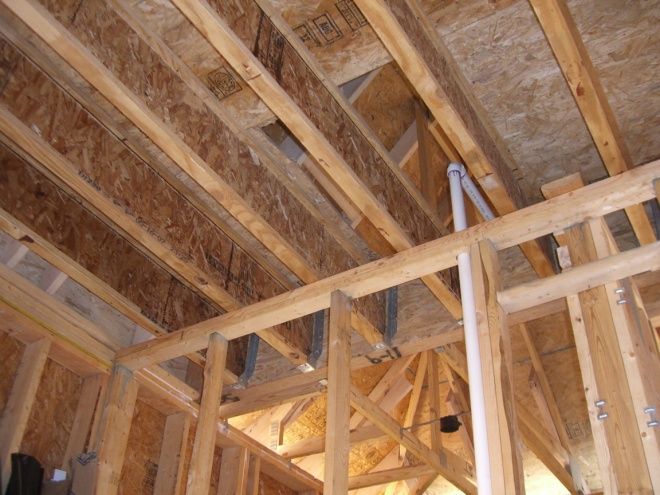
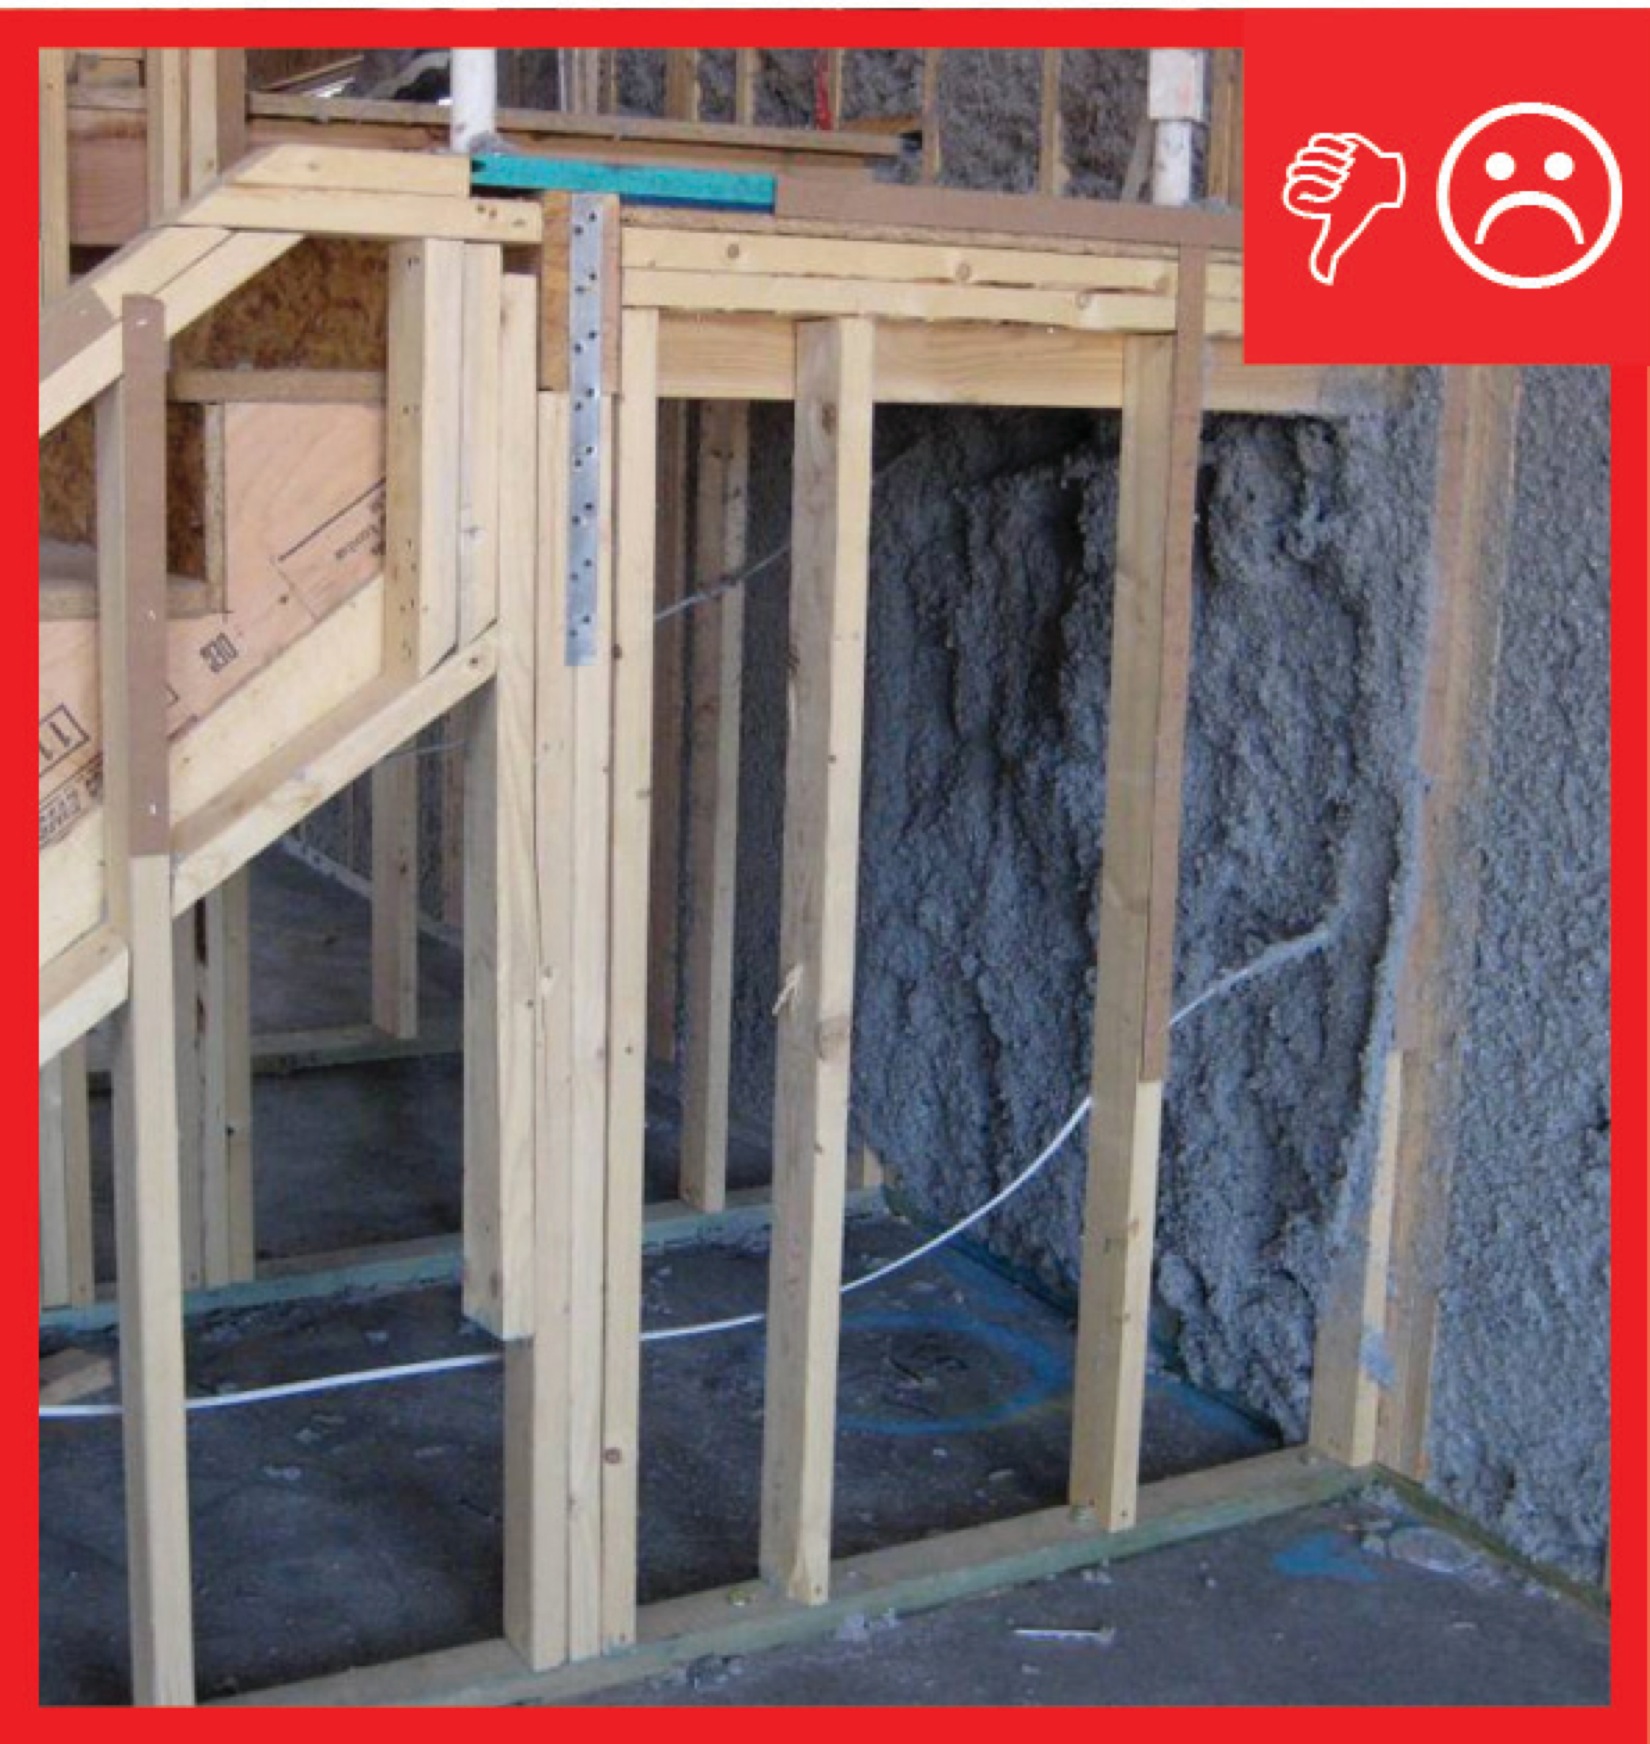
Wrong – An opportunity to use structural members as a natural air barrier was missed in this home and blocking was not initially planned for between the garage and living space.
Image
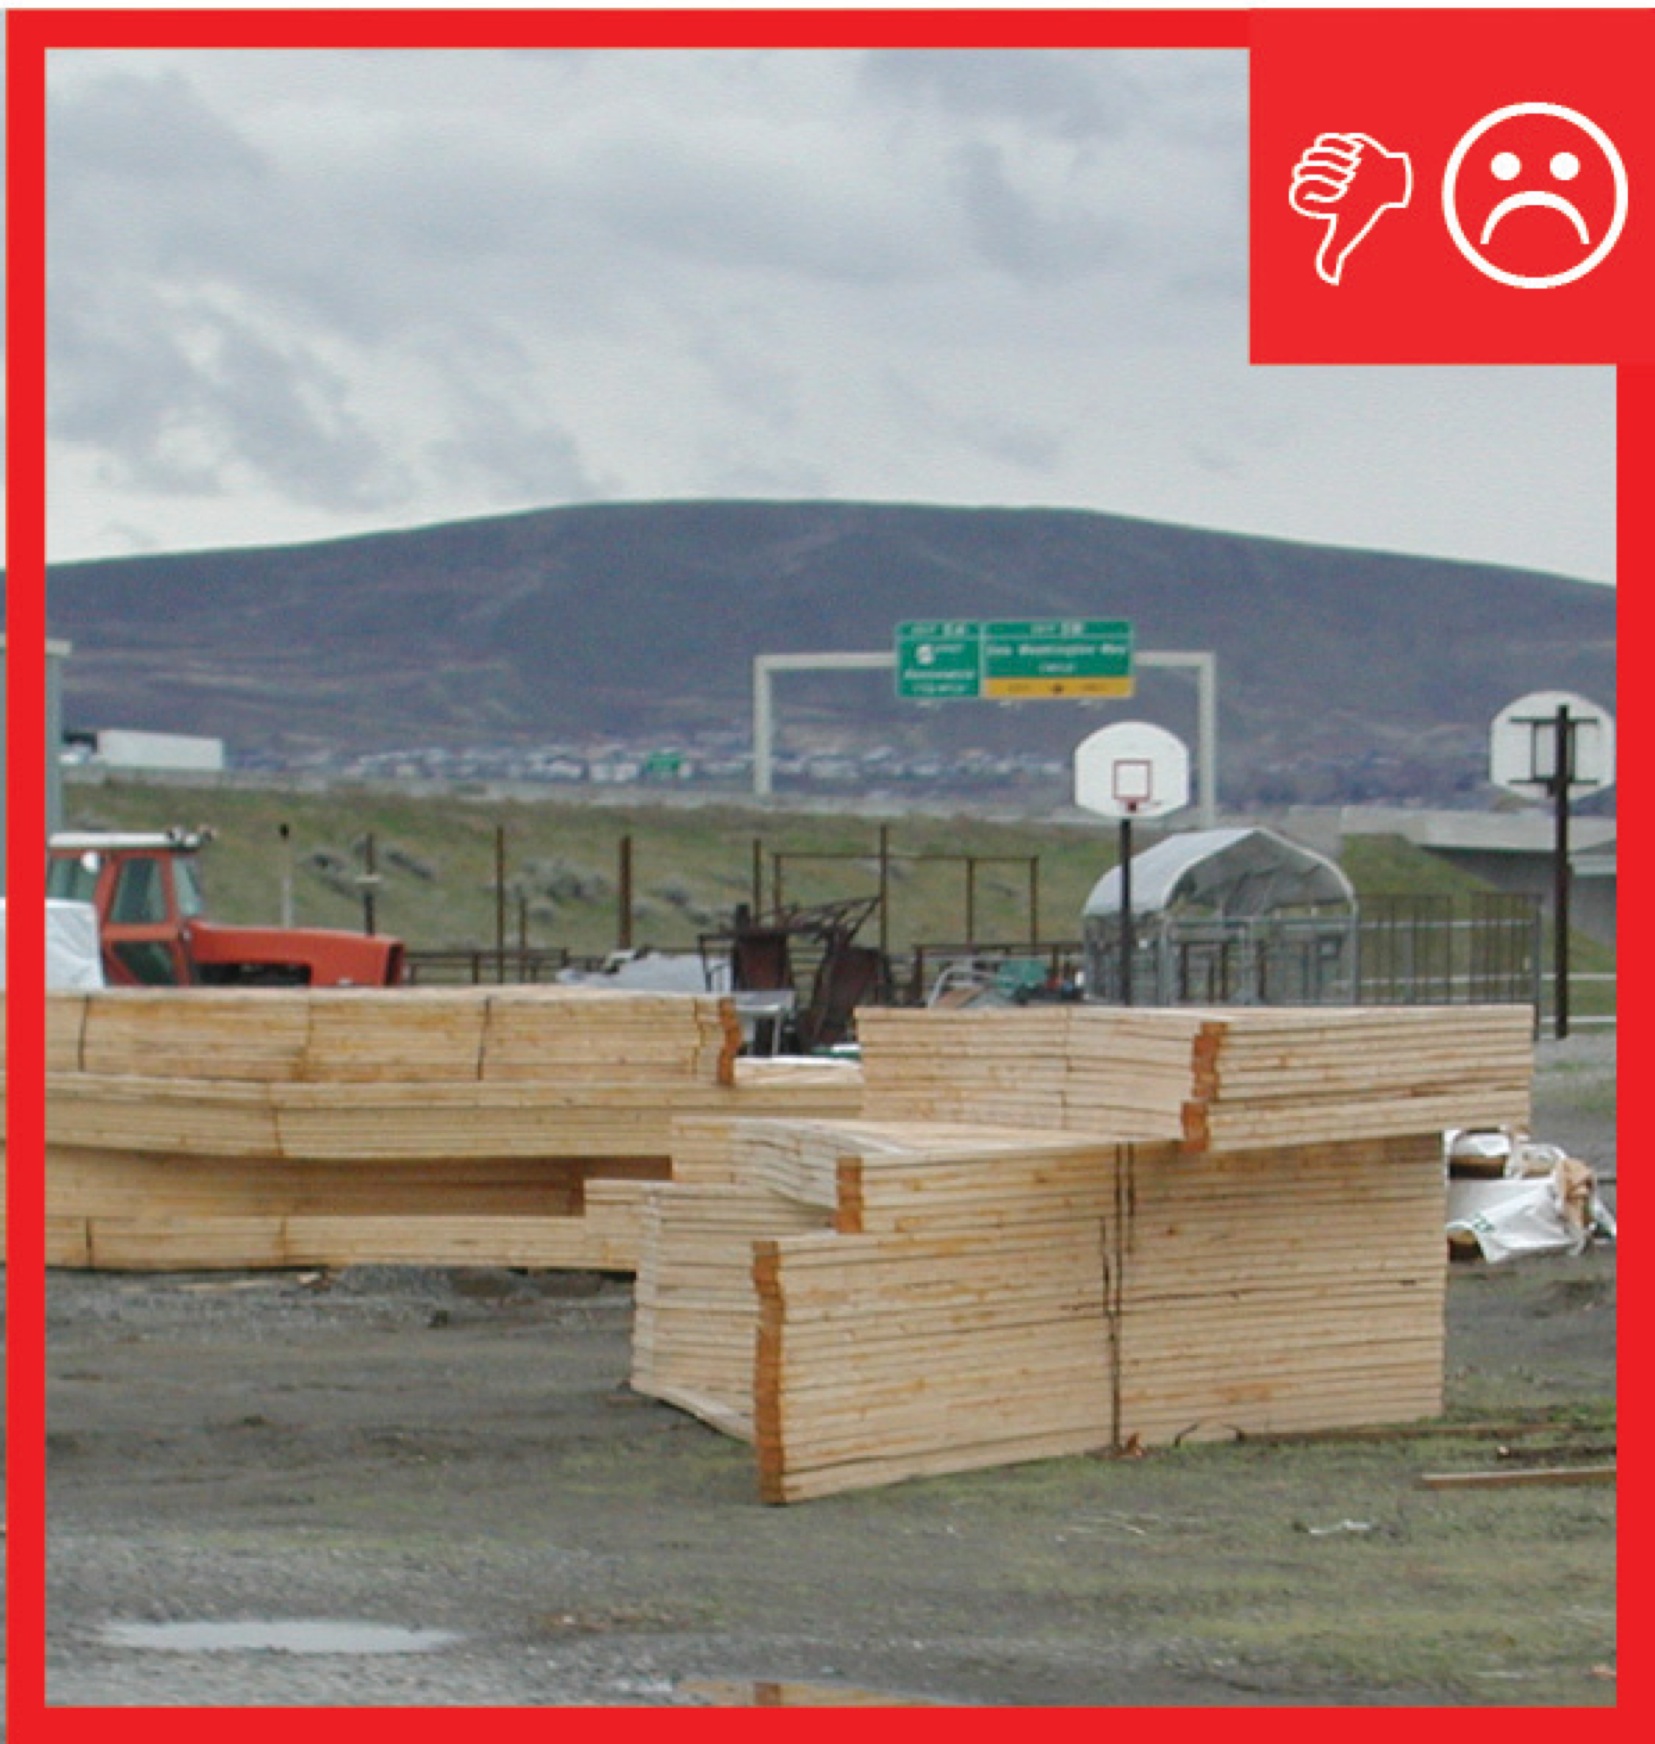
Wrong – Building materials are being stored outdoors with no protection from weather
Image
Image

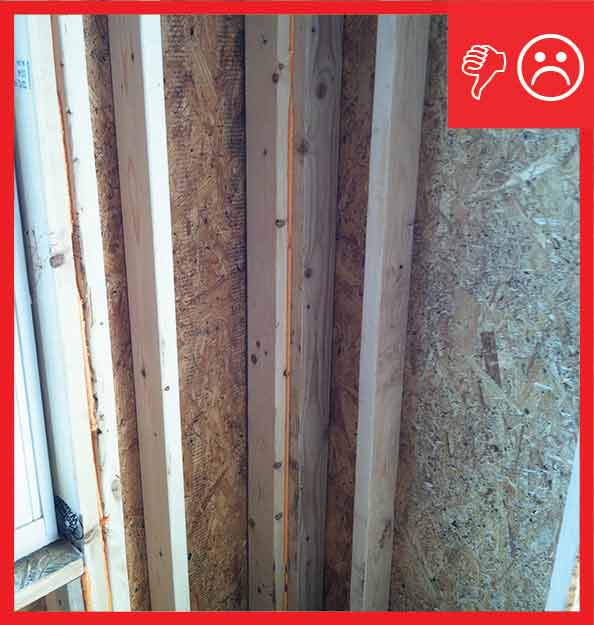
Wrong – Conventional T-post detail is extremely difficult to insulate and usually doesn't happen
Image
Wrong – Design walls so that windows are positioned to fit regularly spaced studs so less additional studs are needed.
Image
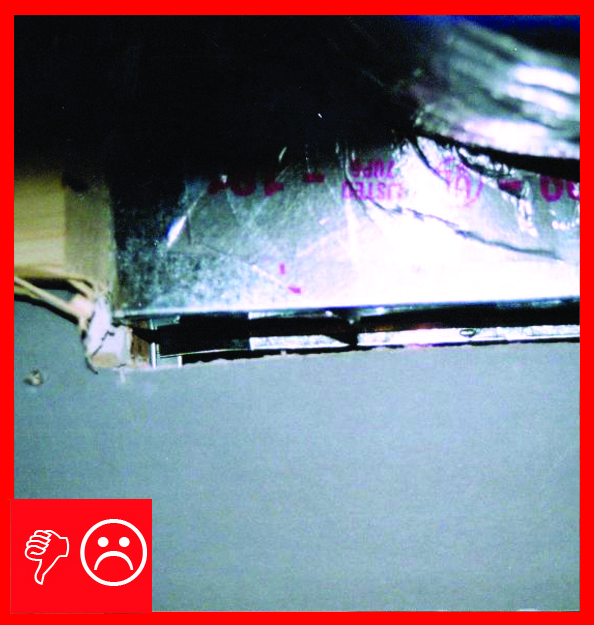
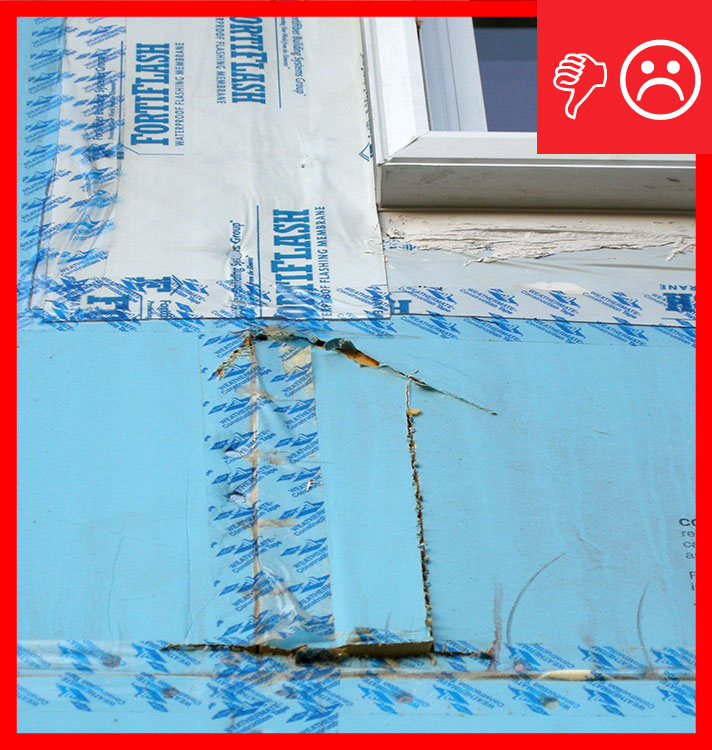
Wrong – Either this tape was not pressed down firmly or the surface was wet or dirty so the tape is not sticking properly even during construction.
Image
Image
Image

Image
Image
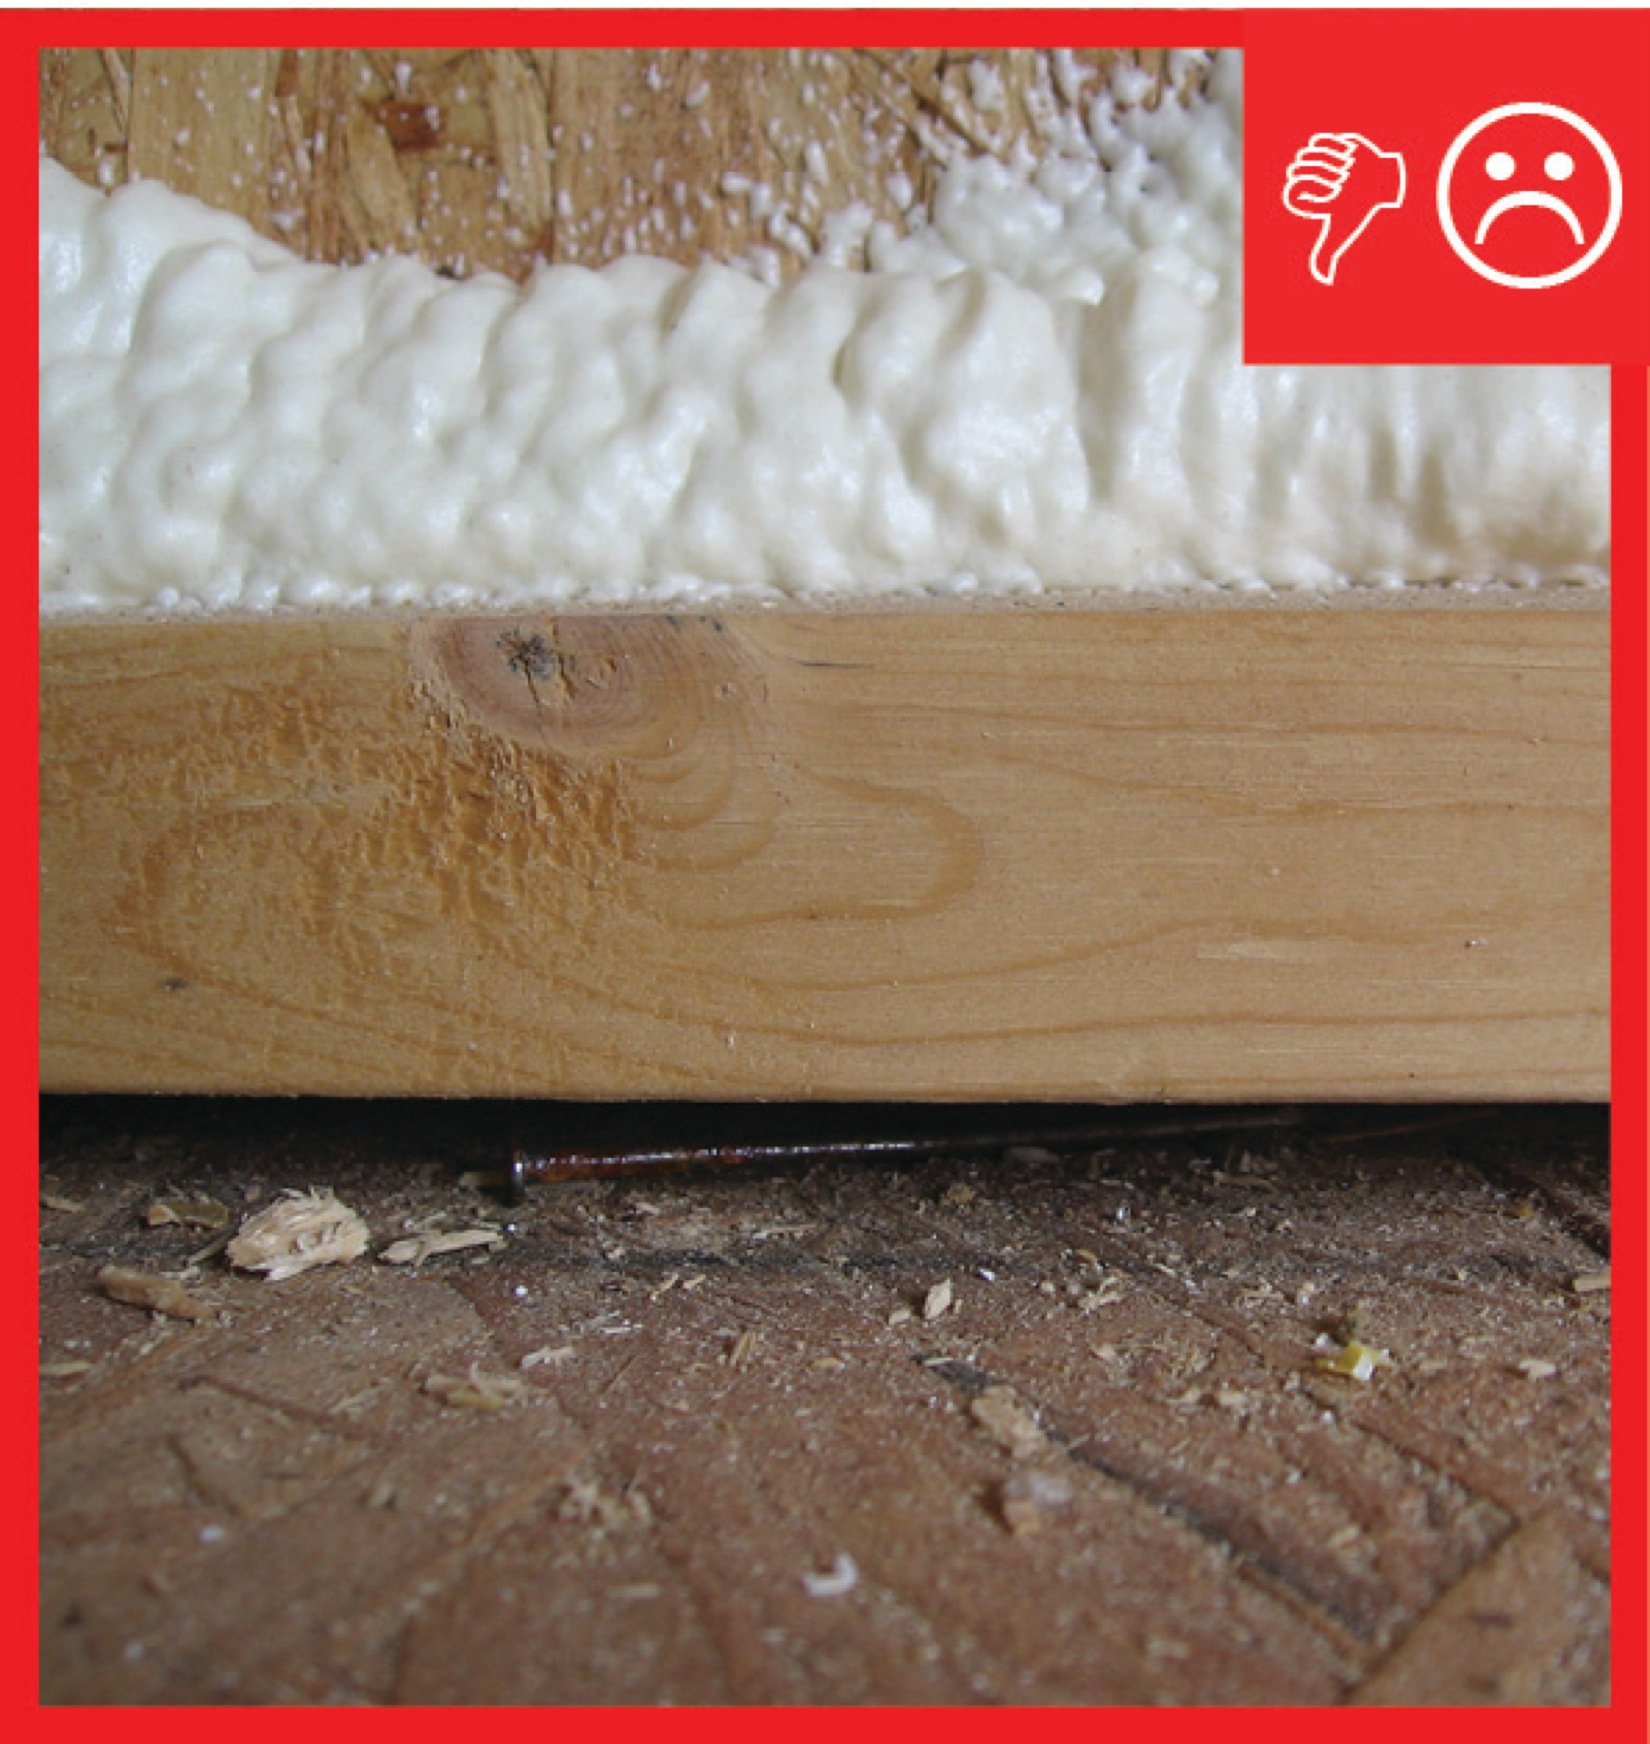
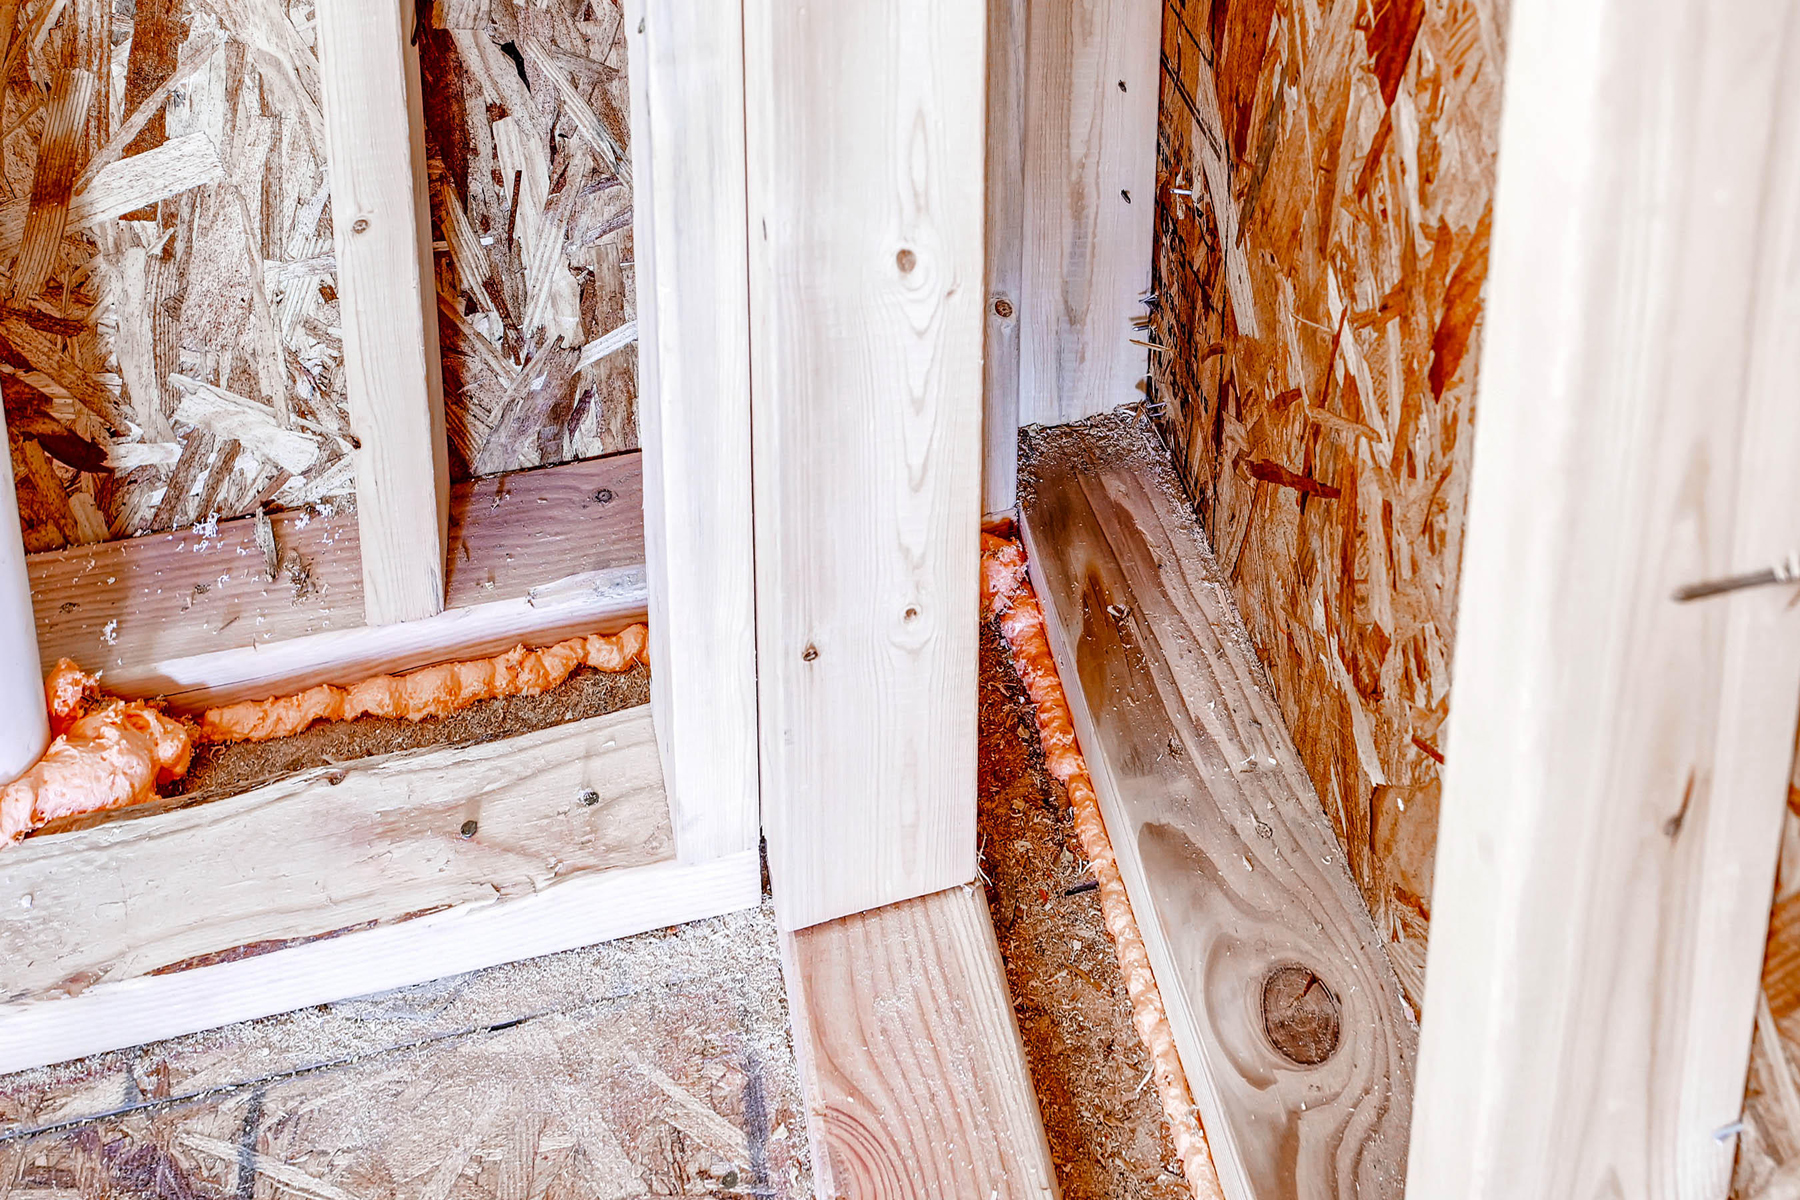
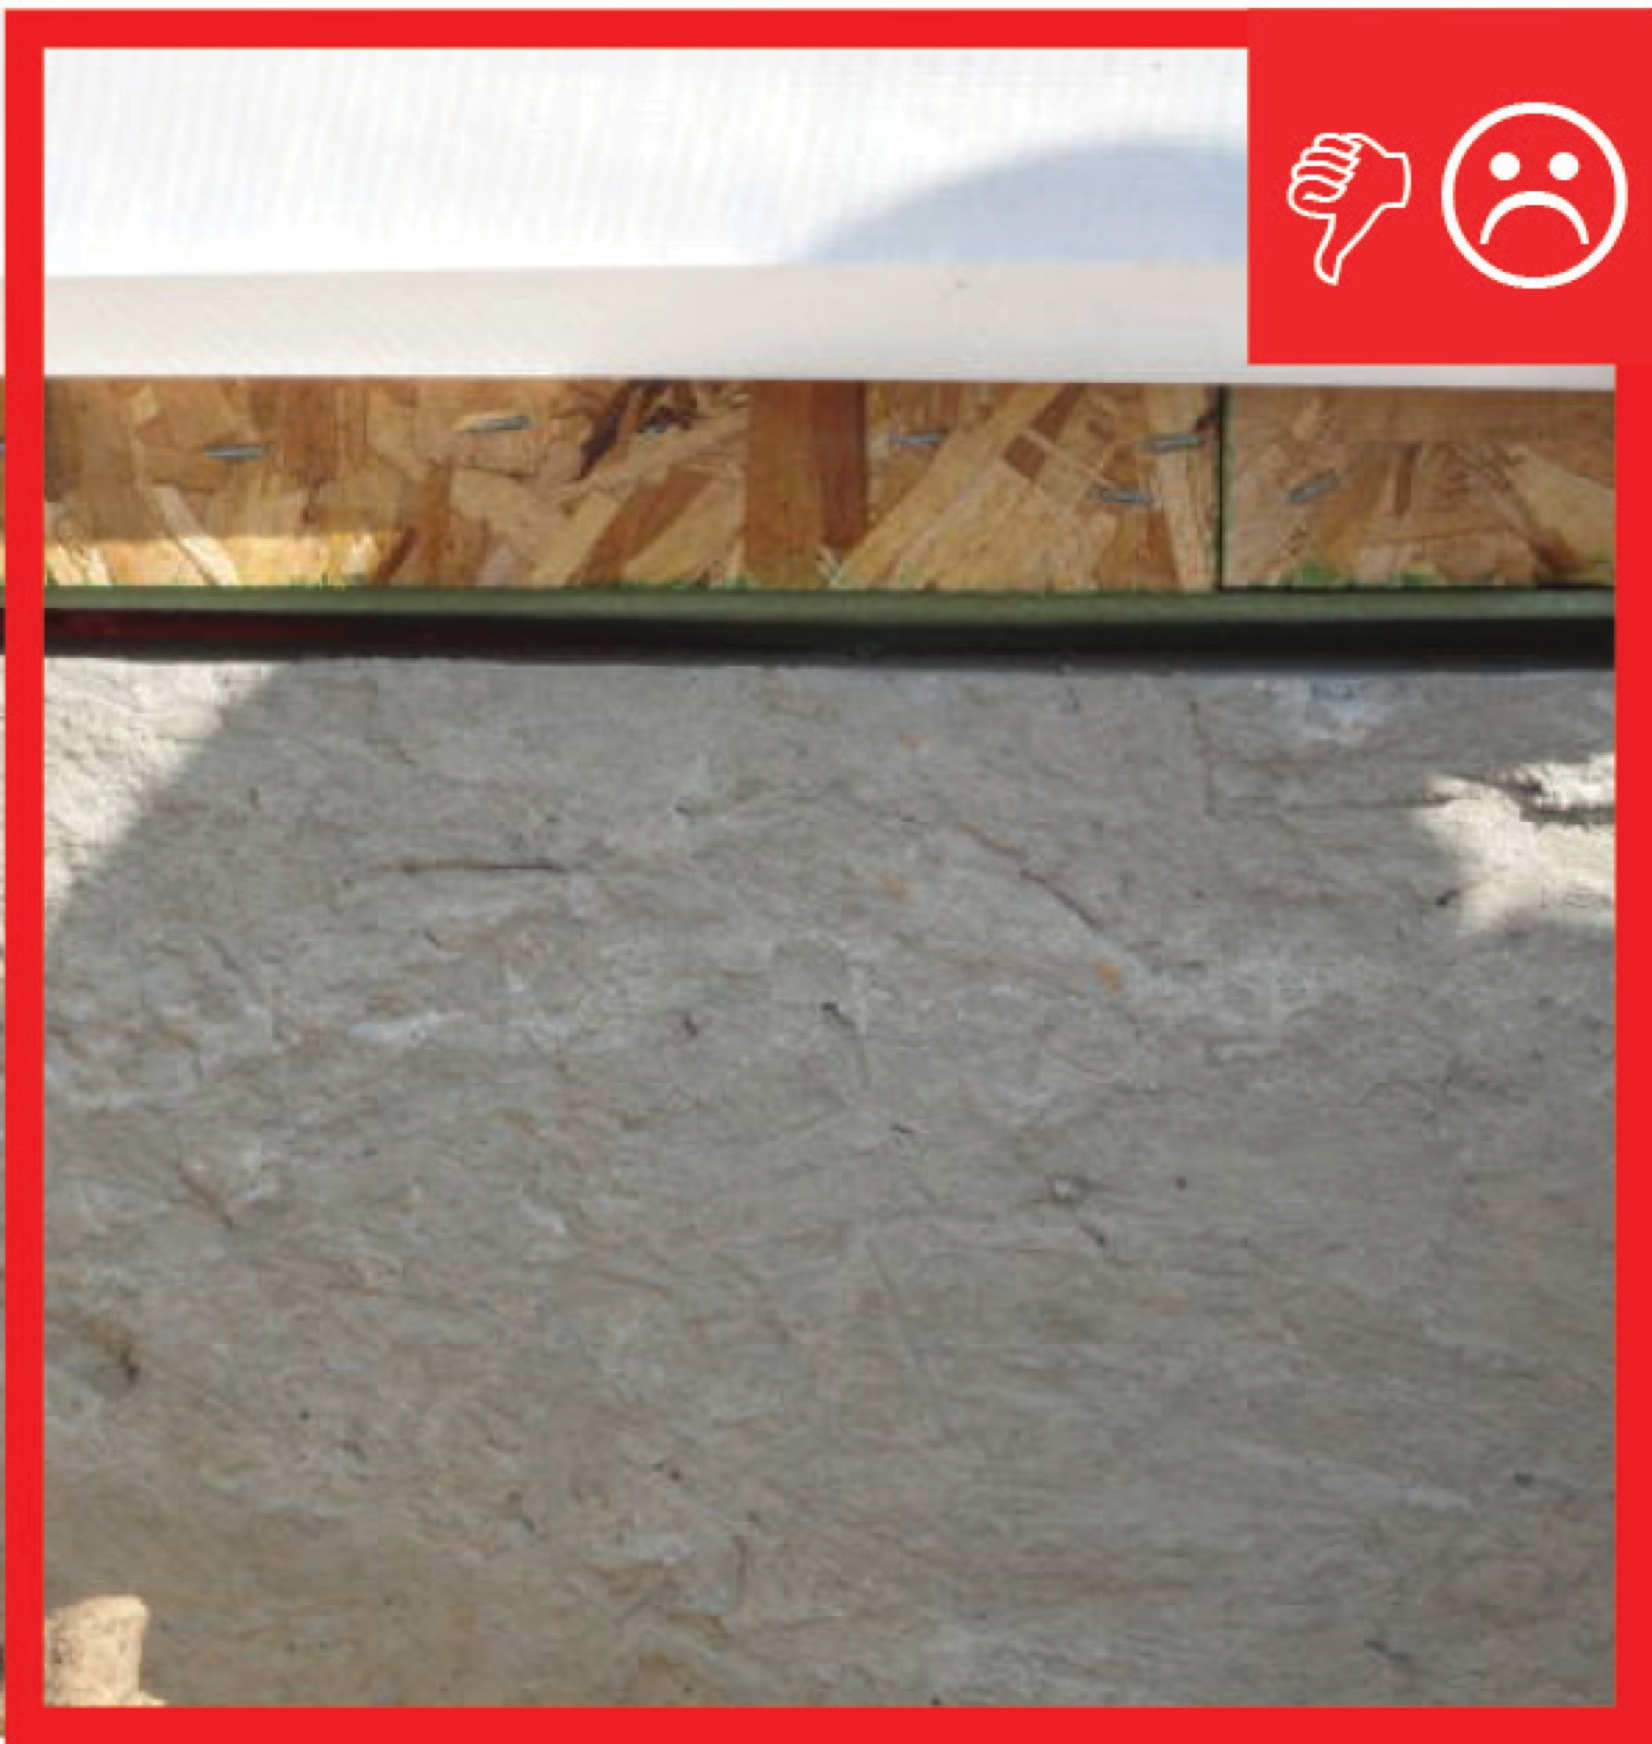
Wrong – Foam was sprayed at exterior sheathing and sill plate connection, leaving gaps beneath sill plate.
Image
Wrong – For proper detailing of vinyl around windows and other obstacles, use utility trim, punch snaplocks into siding, and do not overlap directly beneath a window.
Image
Image
Image

Image
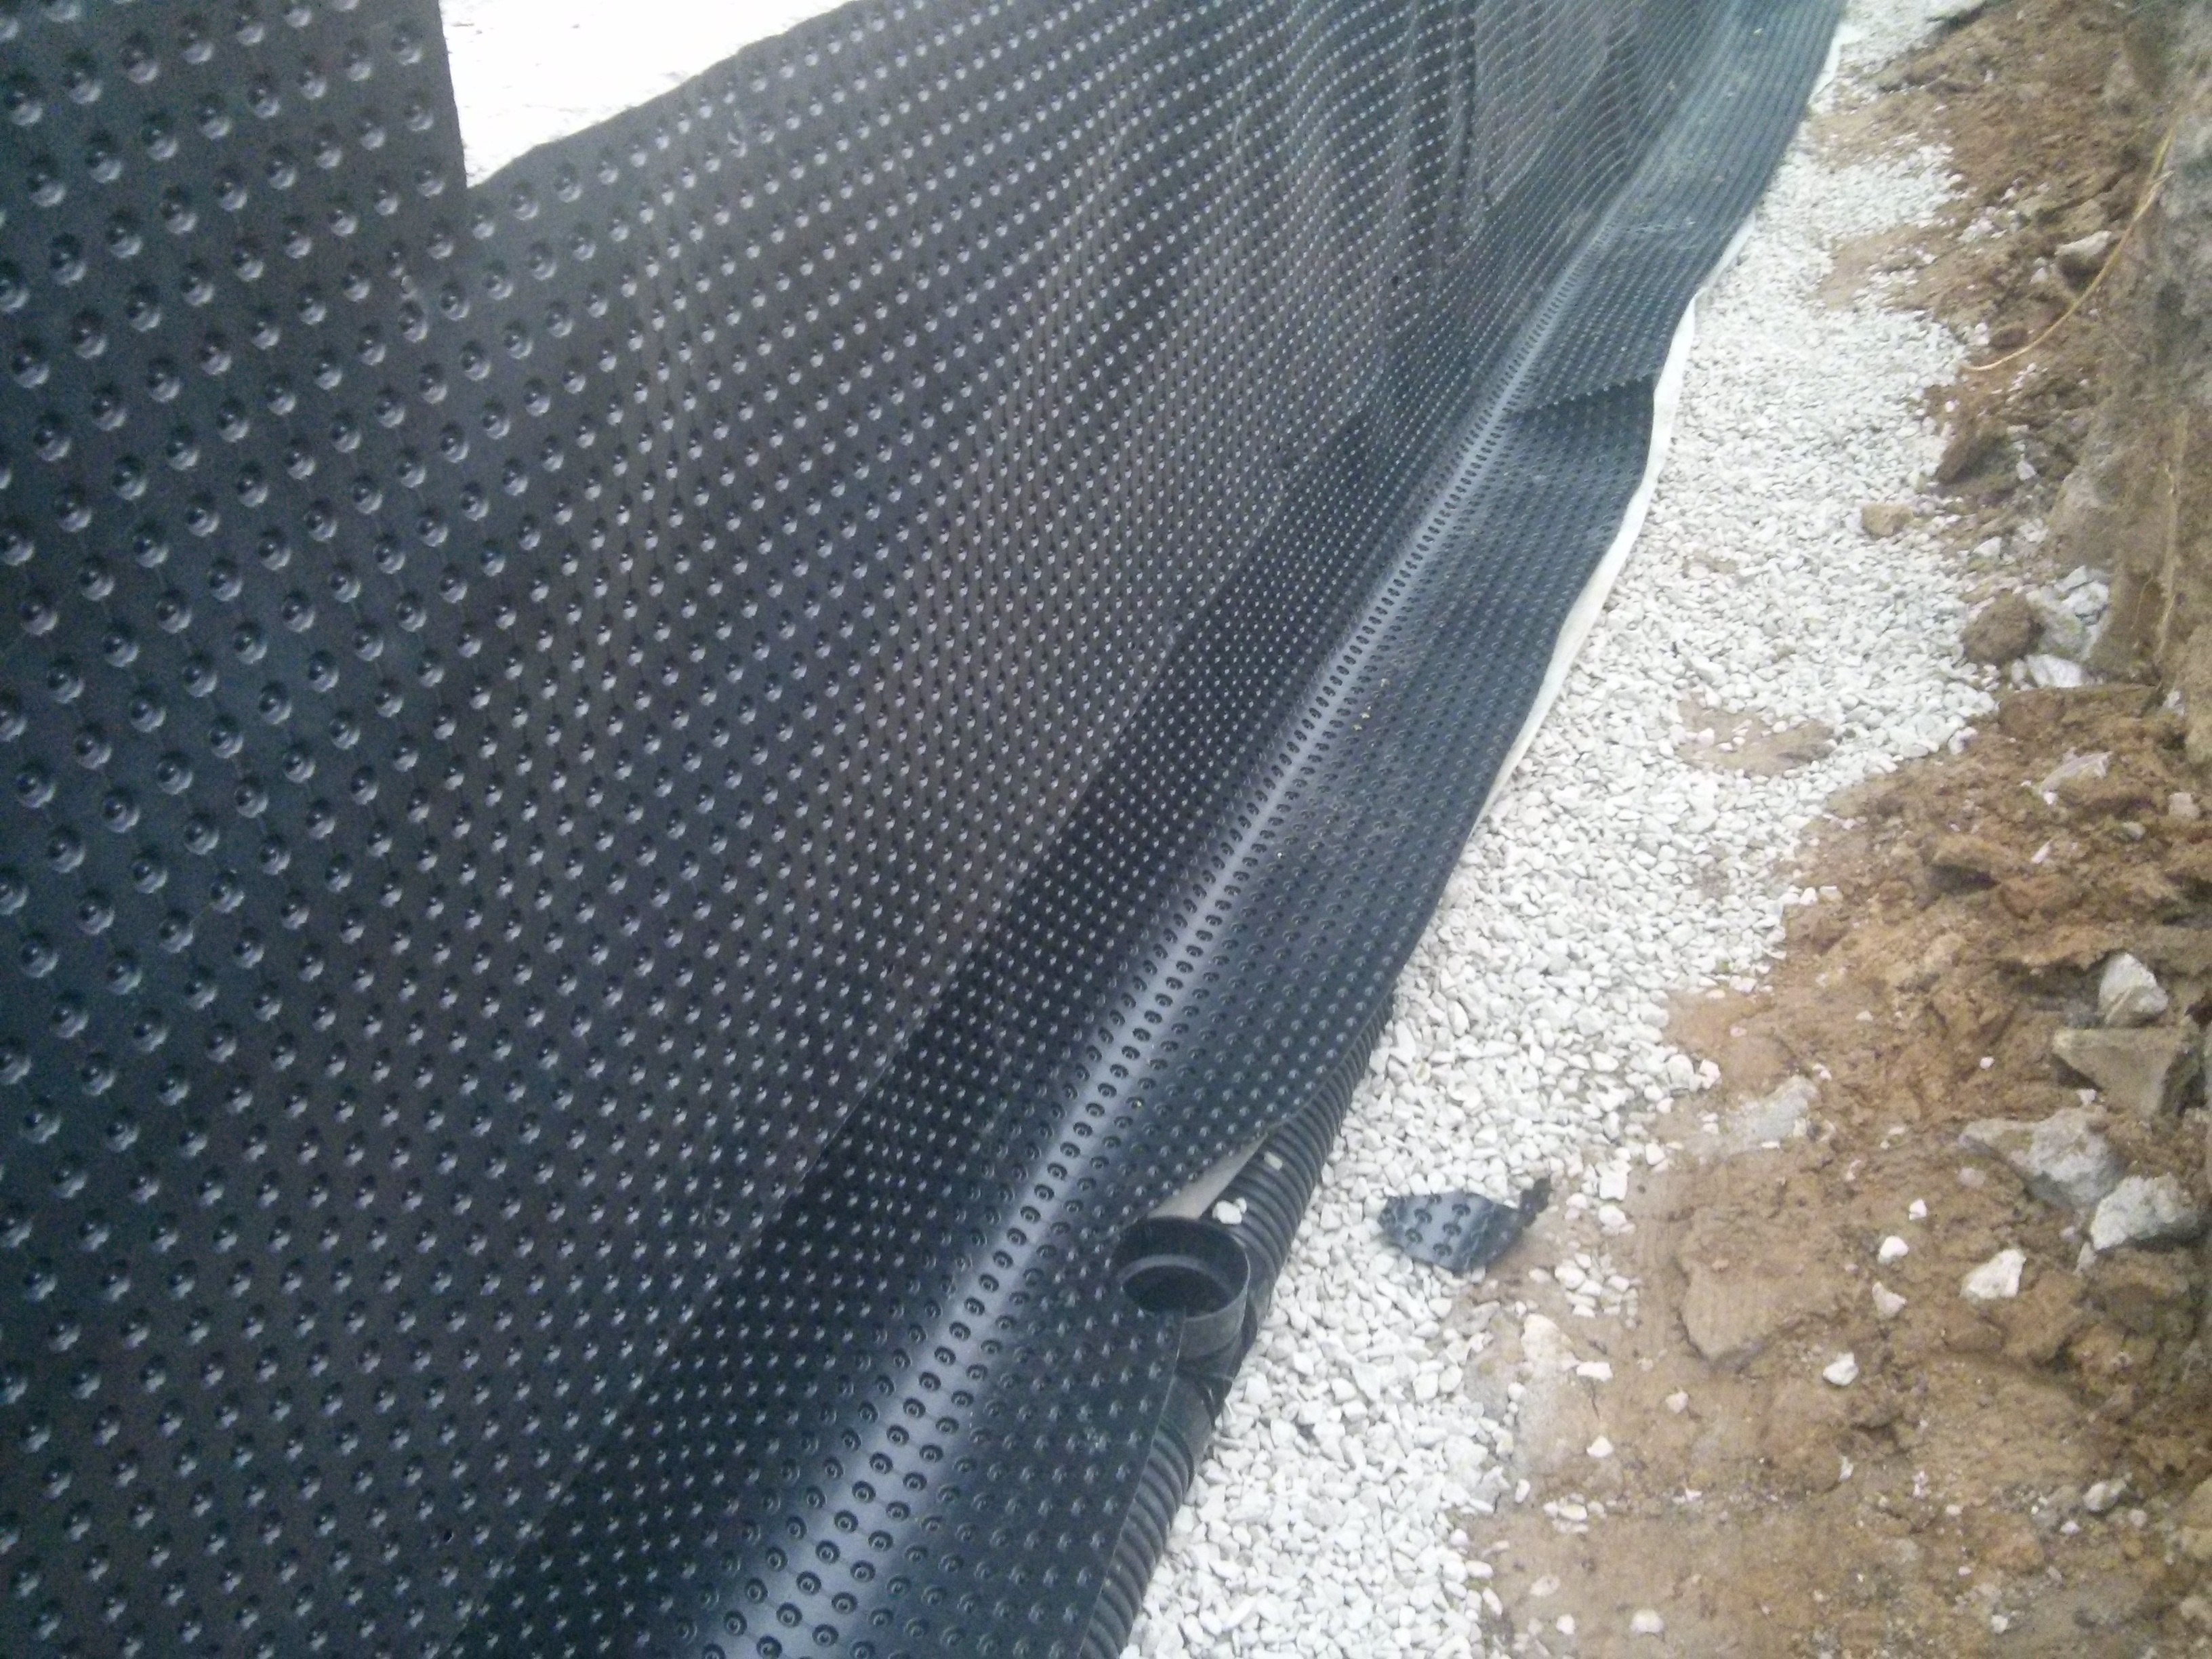
Wrong – If dimpled plastic is used it should be trimmed to drain down at the bottom rather than up where water can collect in it.
Image
Wrong – If the insulated sheathing will serve as an air barrier and drainage plane, any cuts and seams must be taped or sealed.
Image
Image
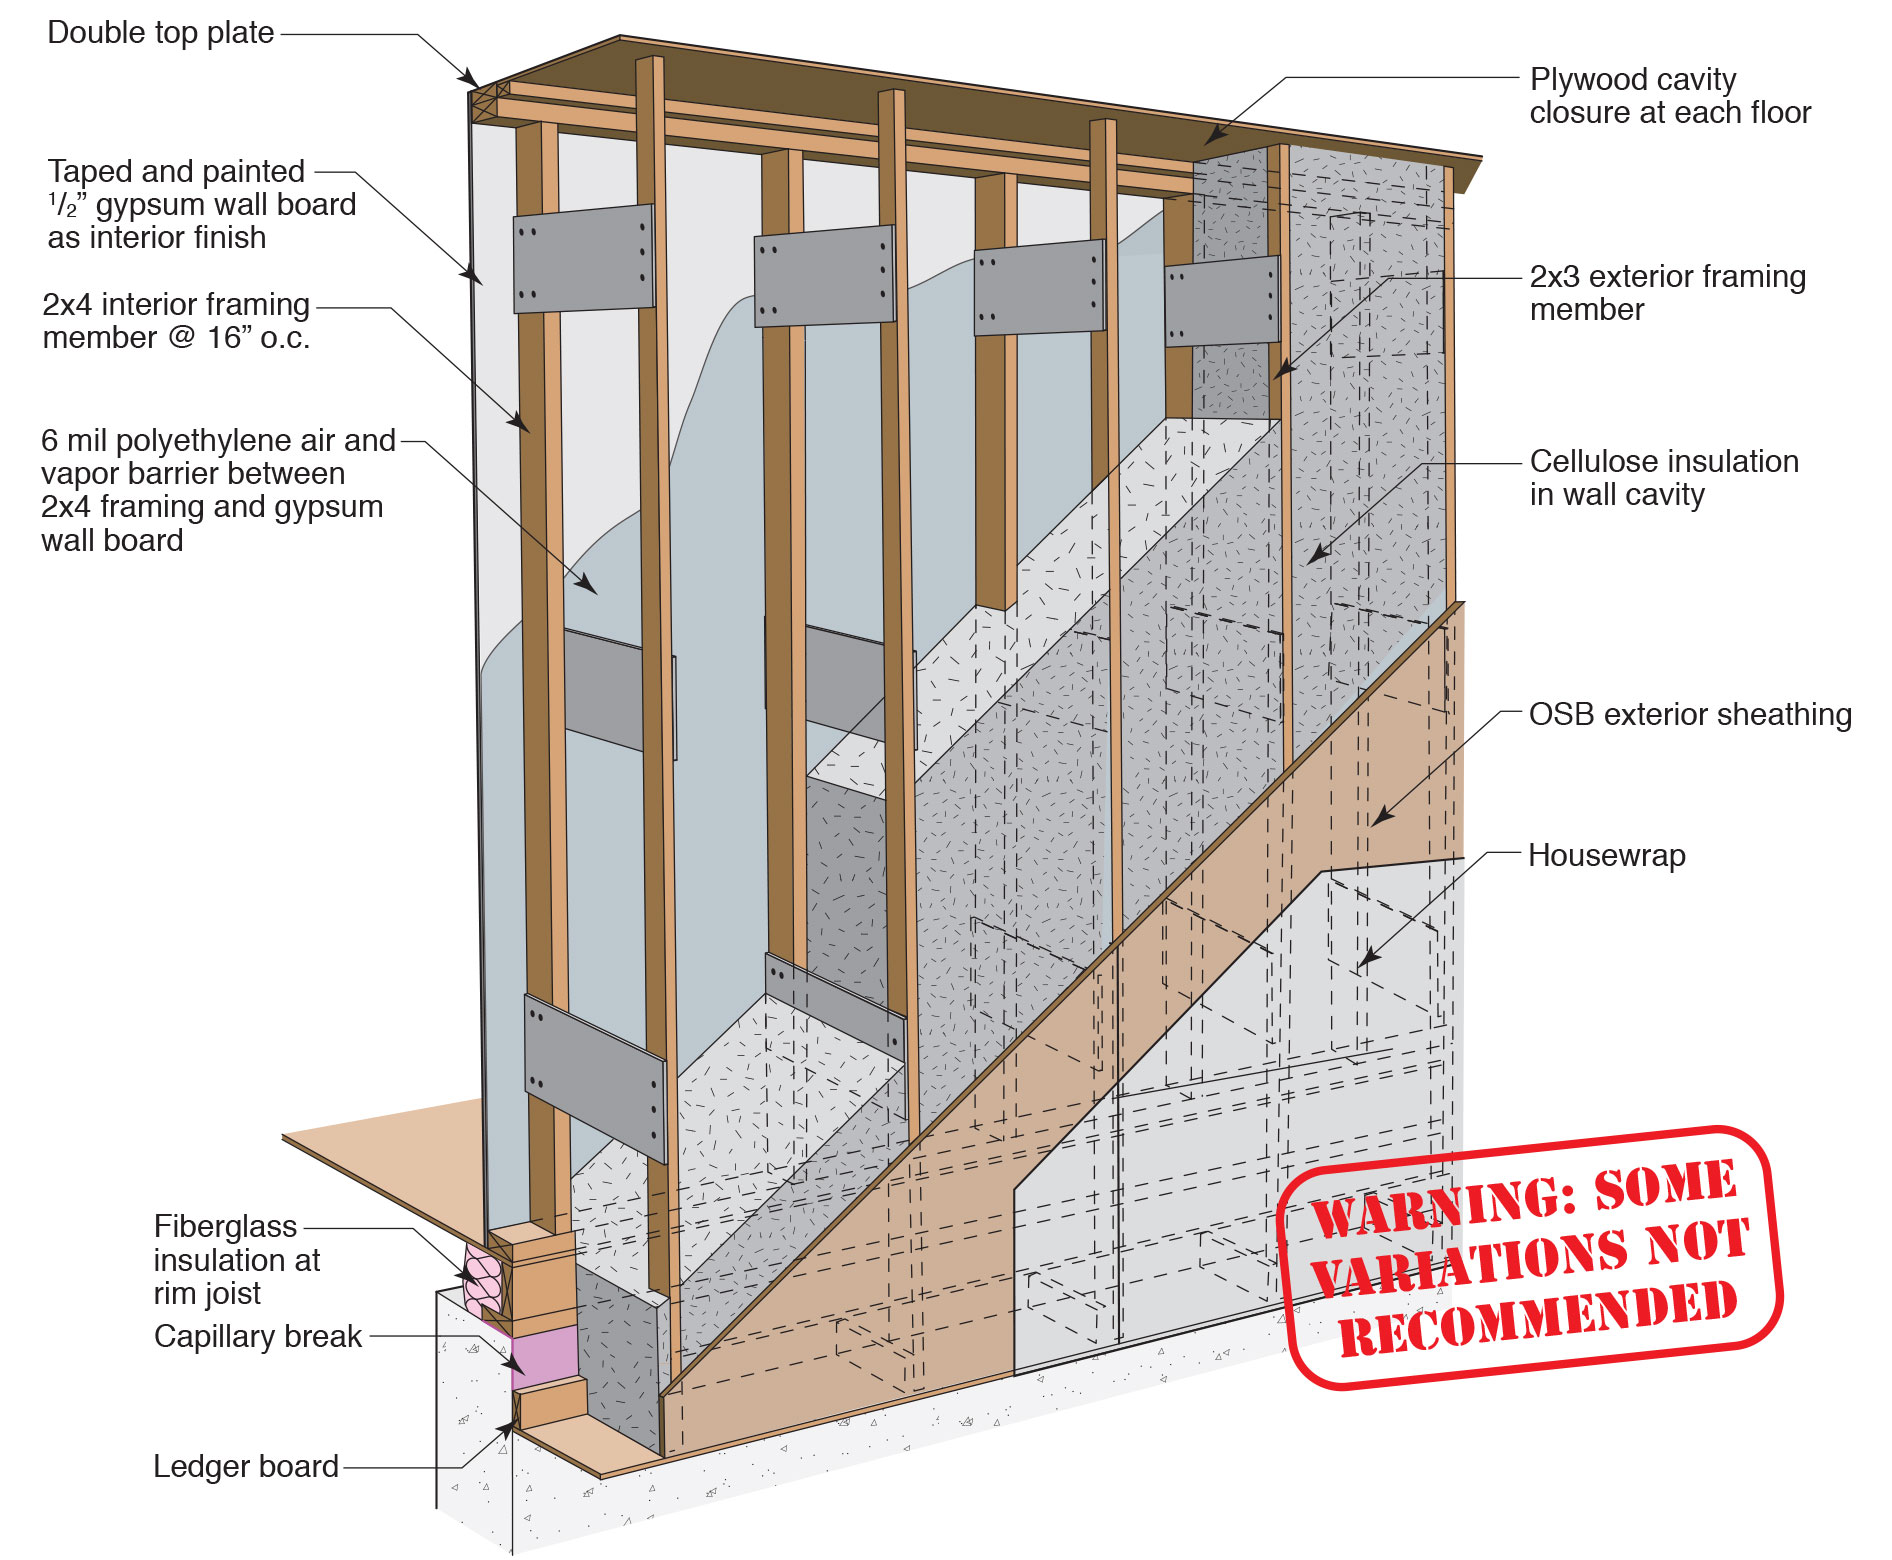
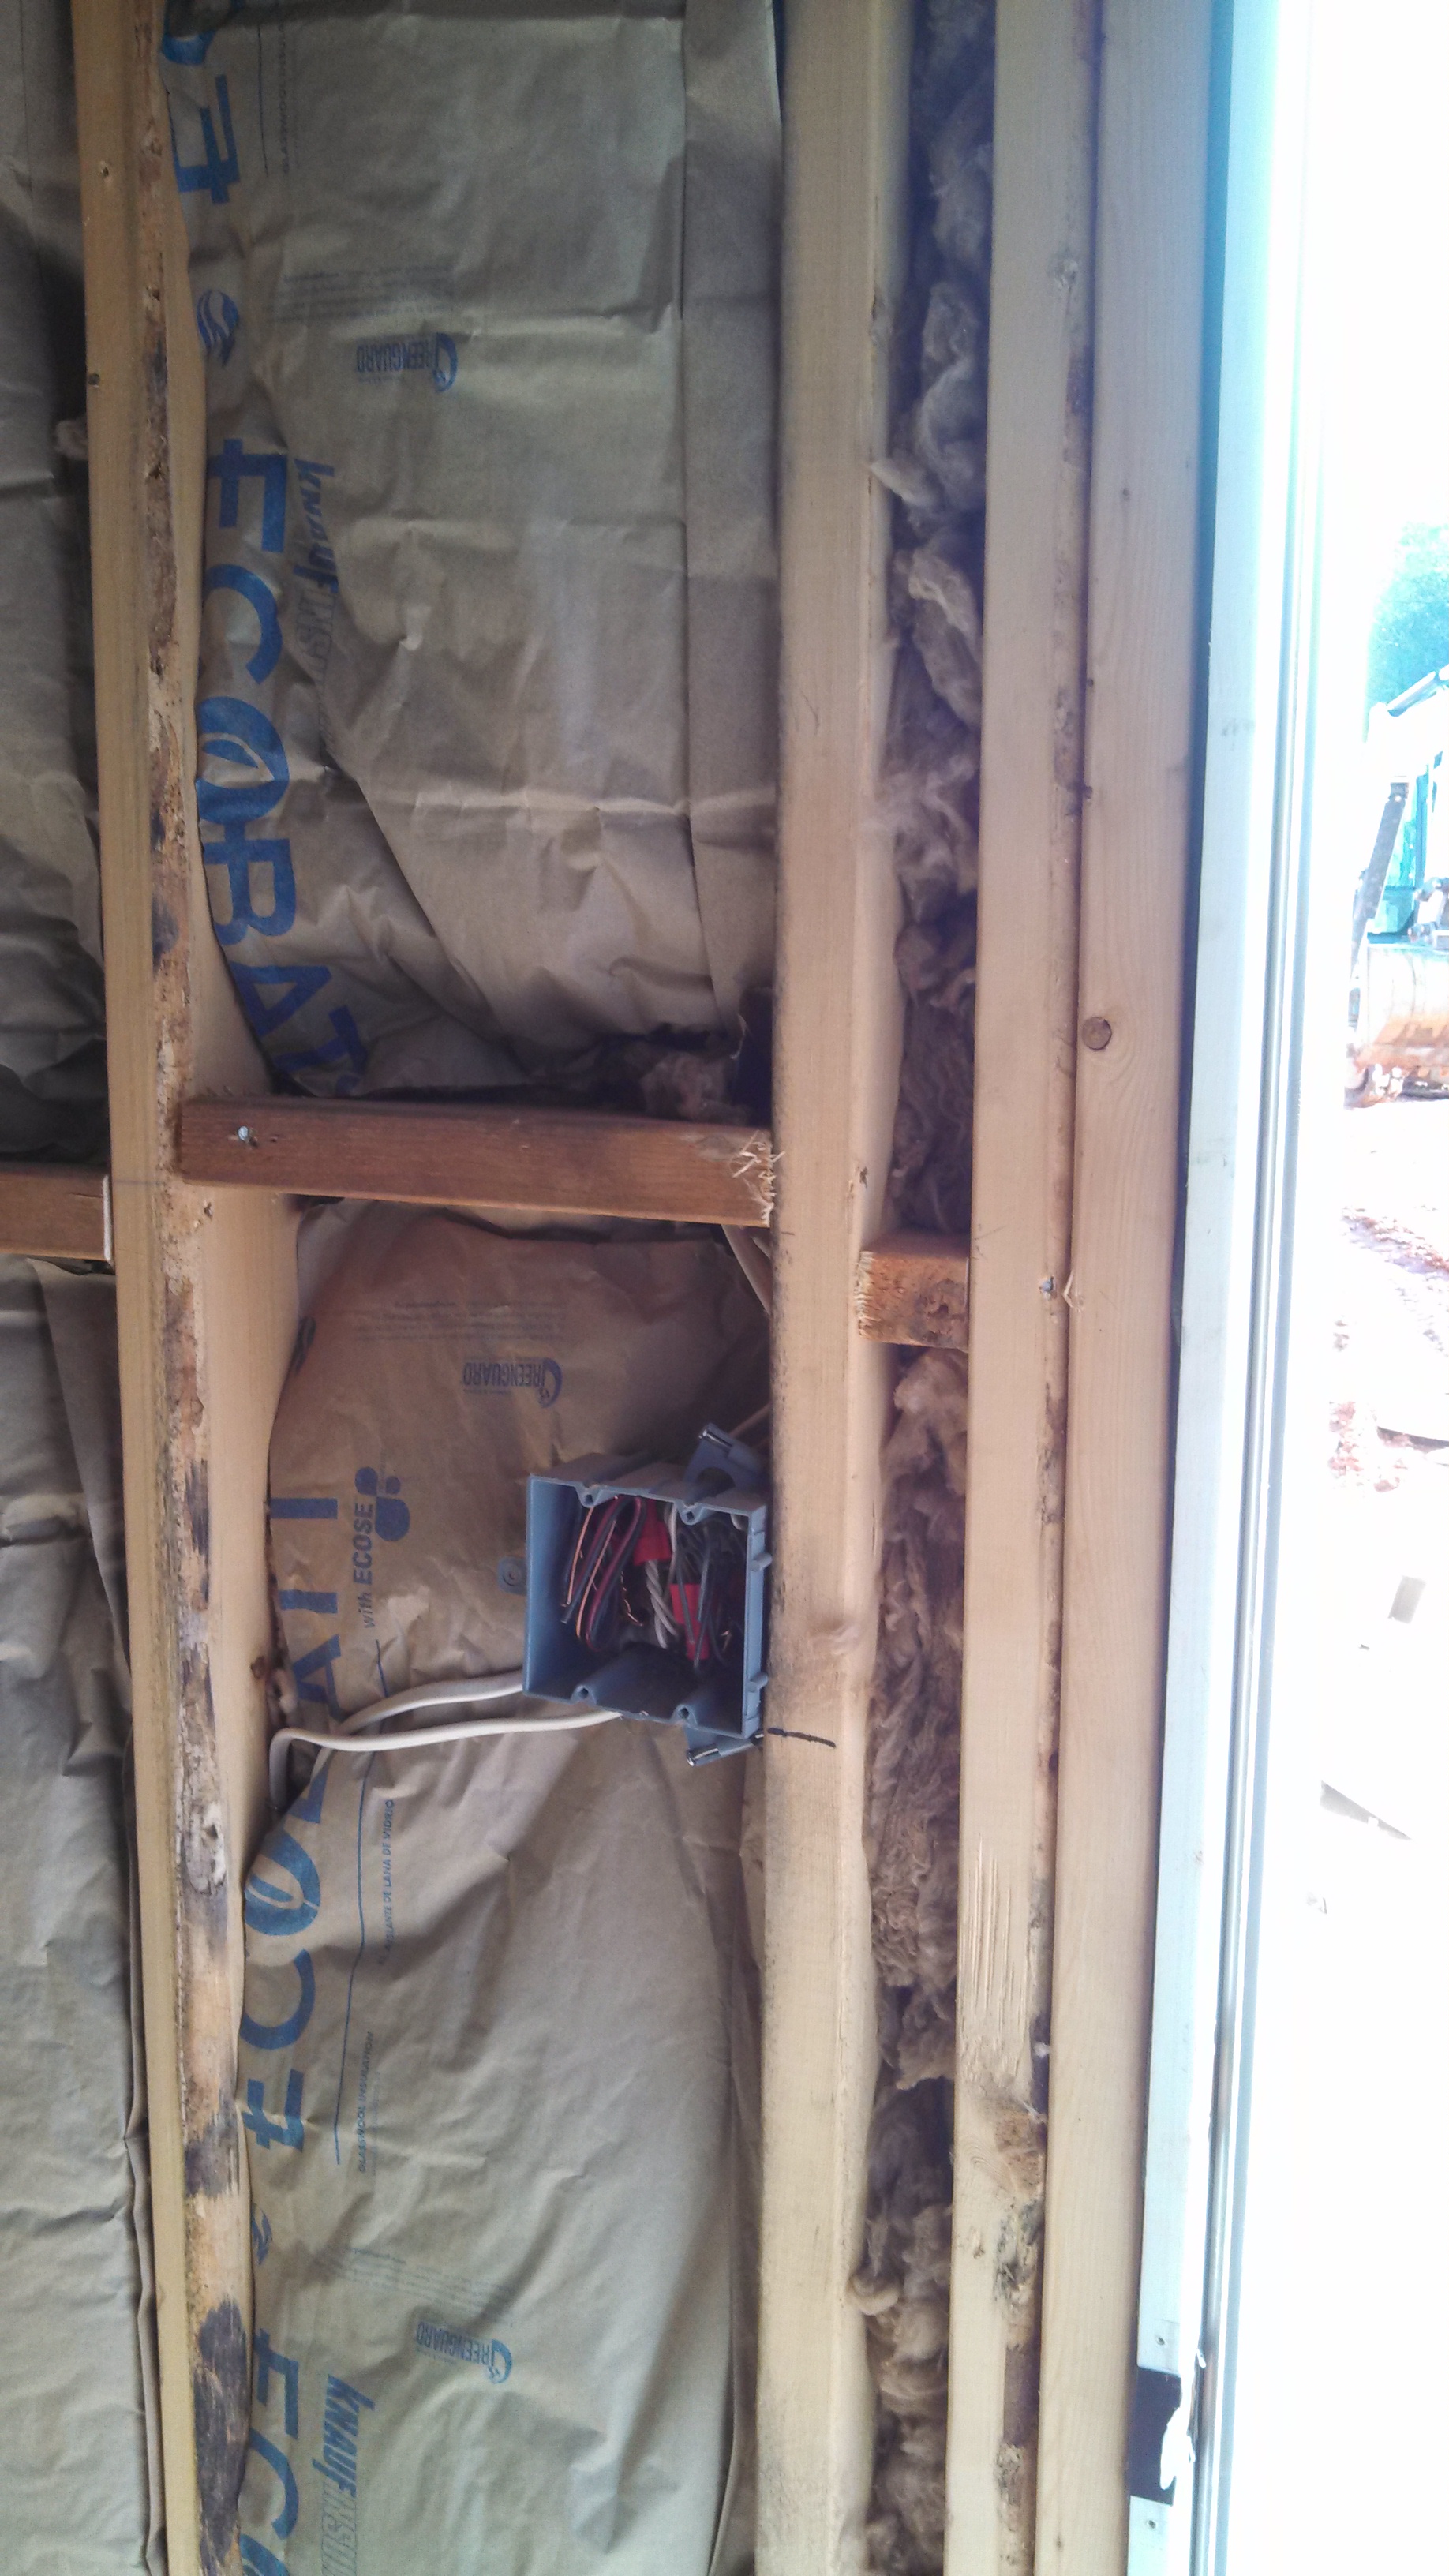
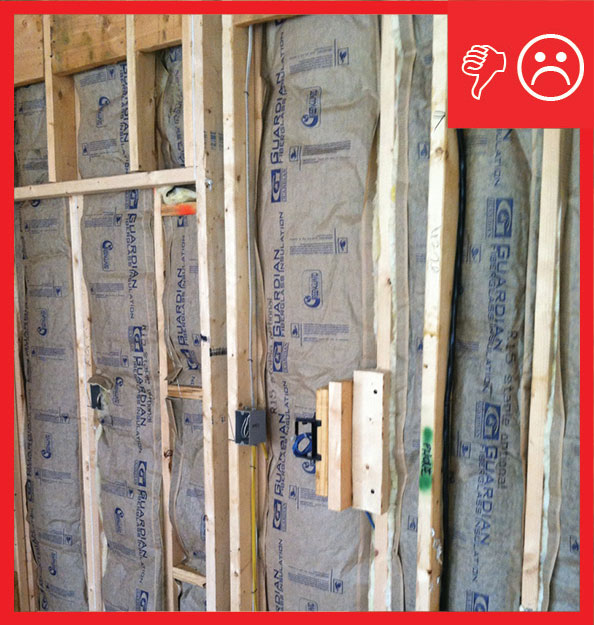
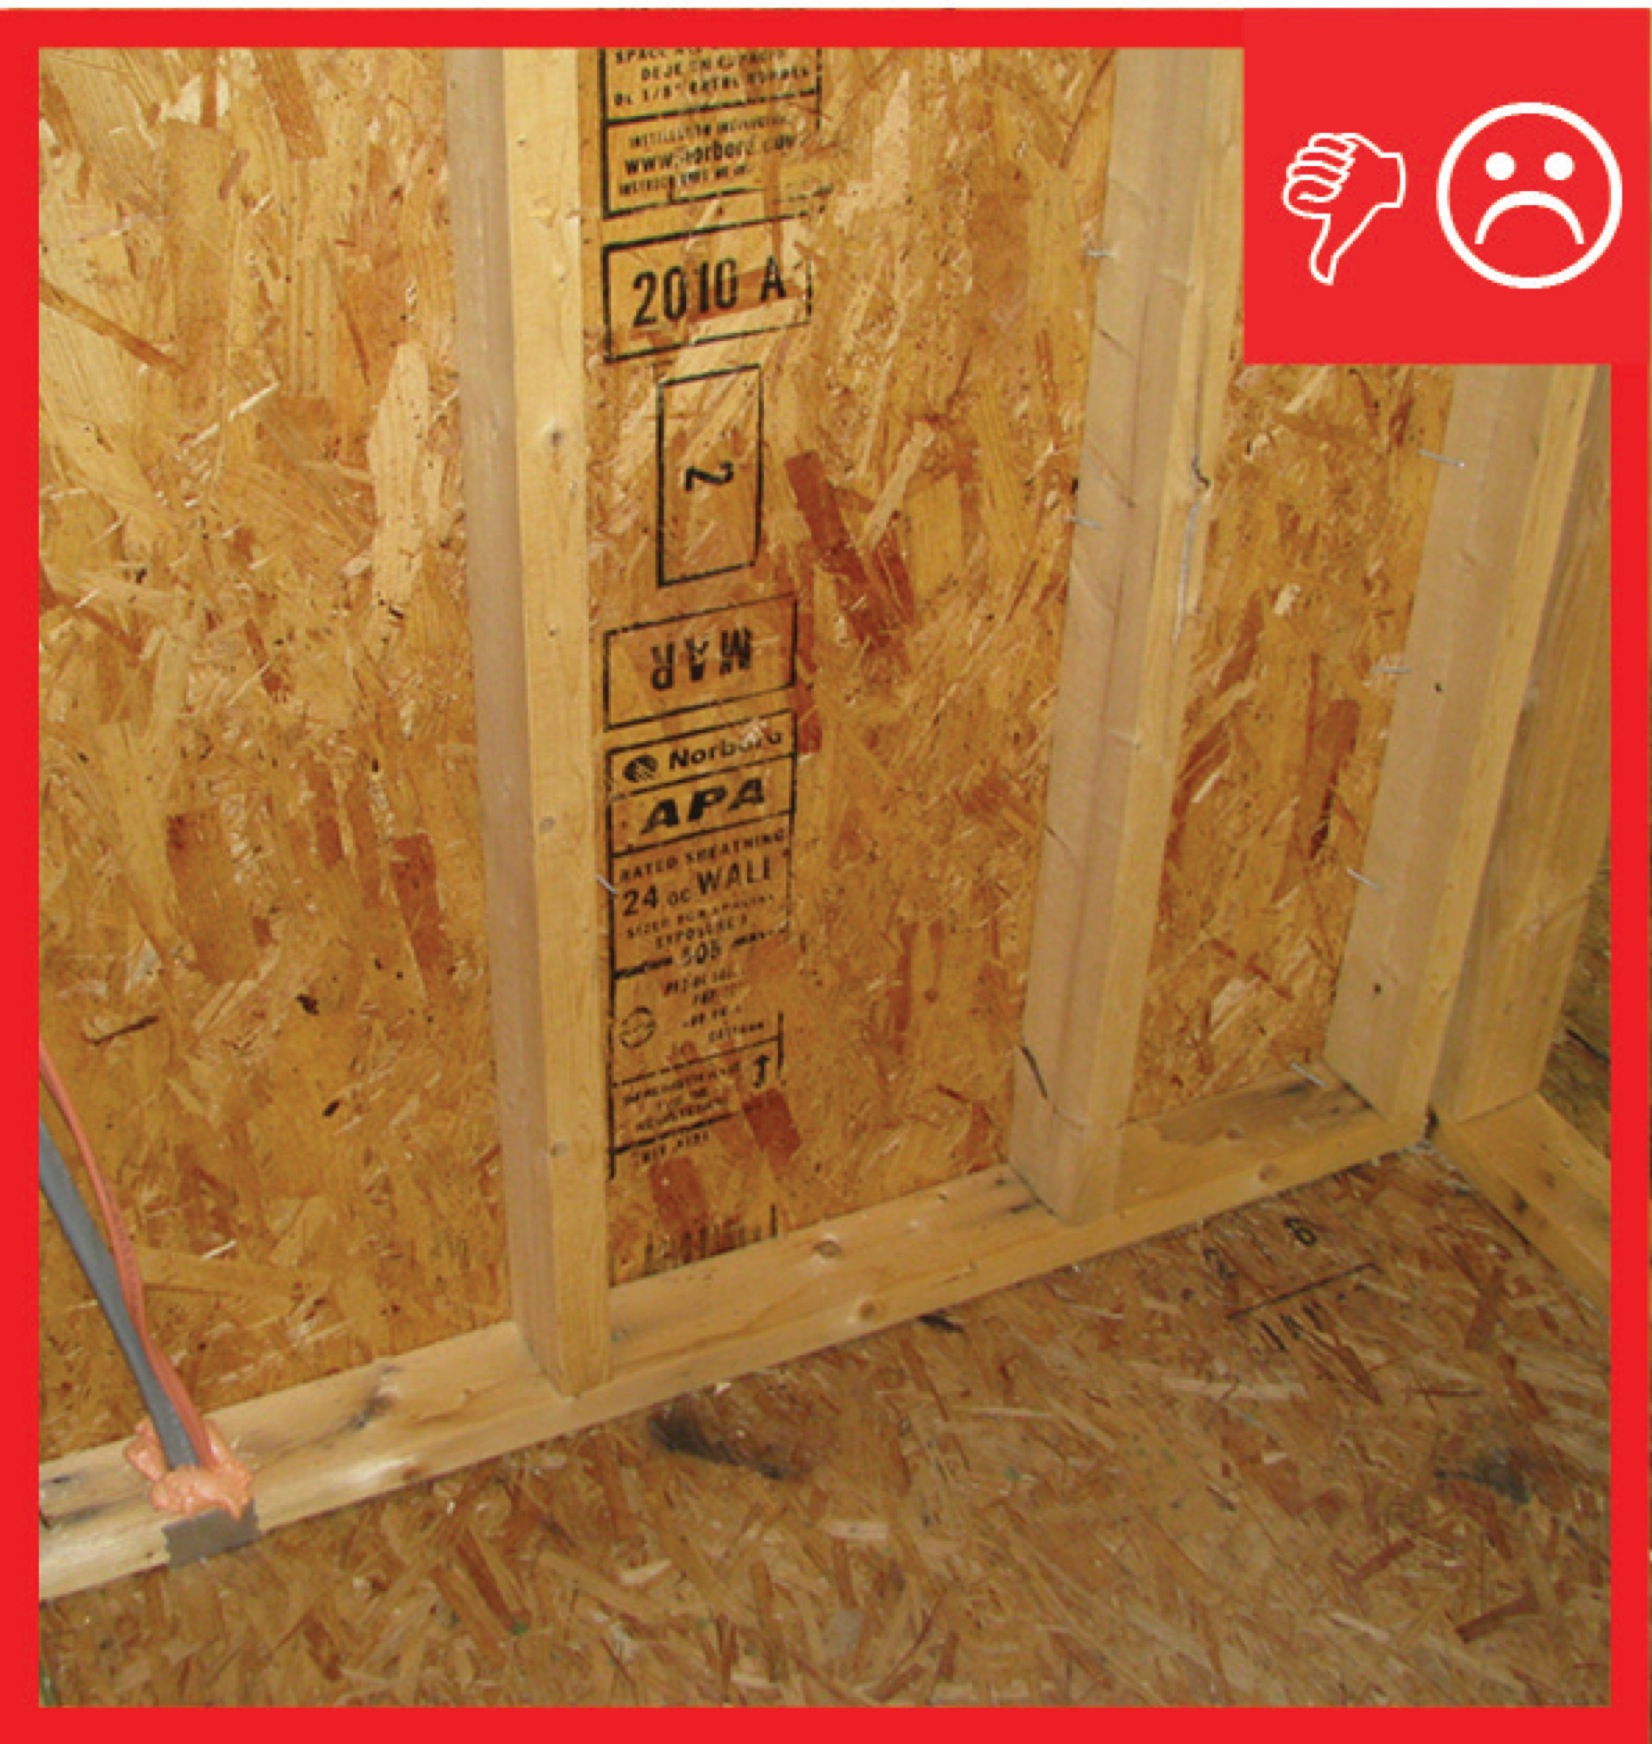
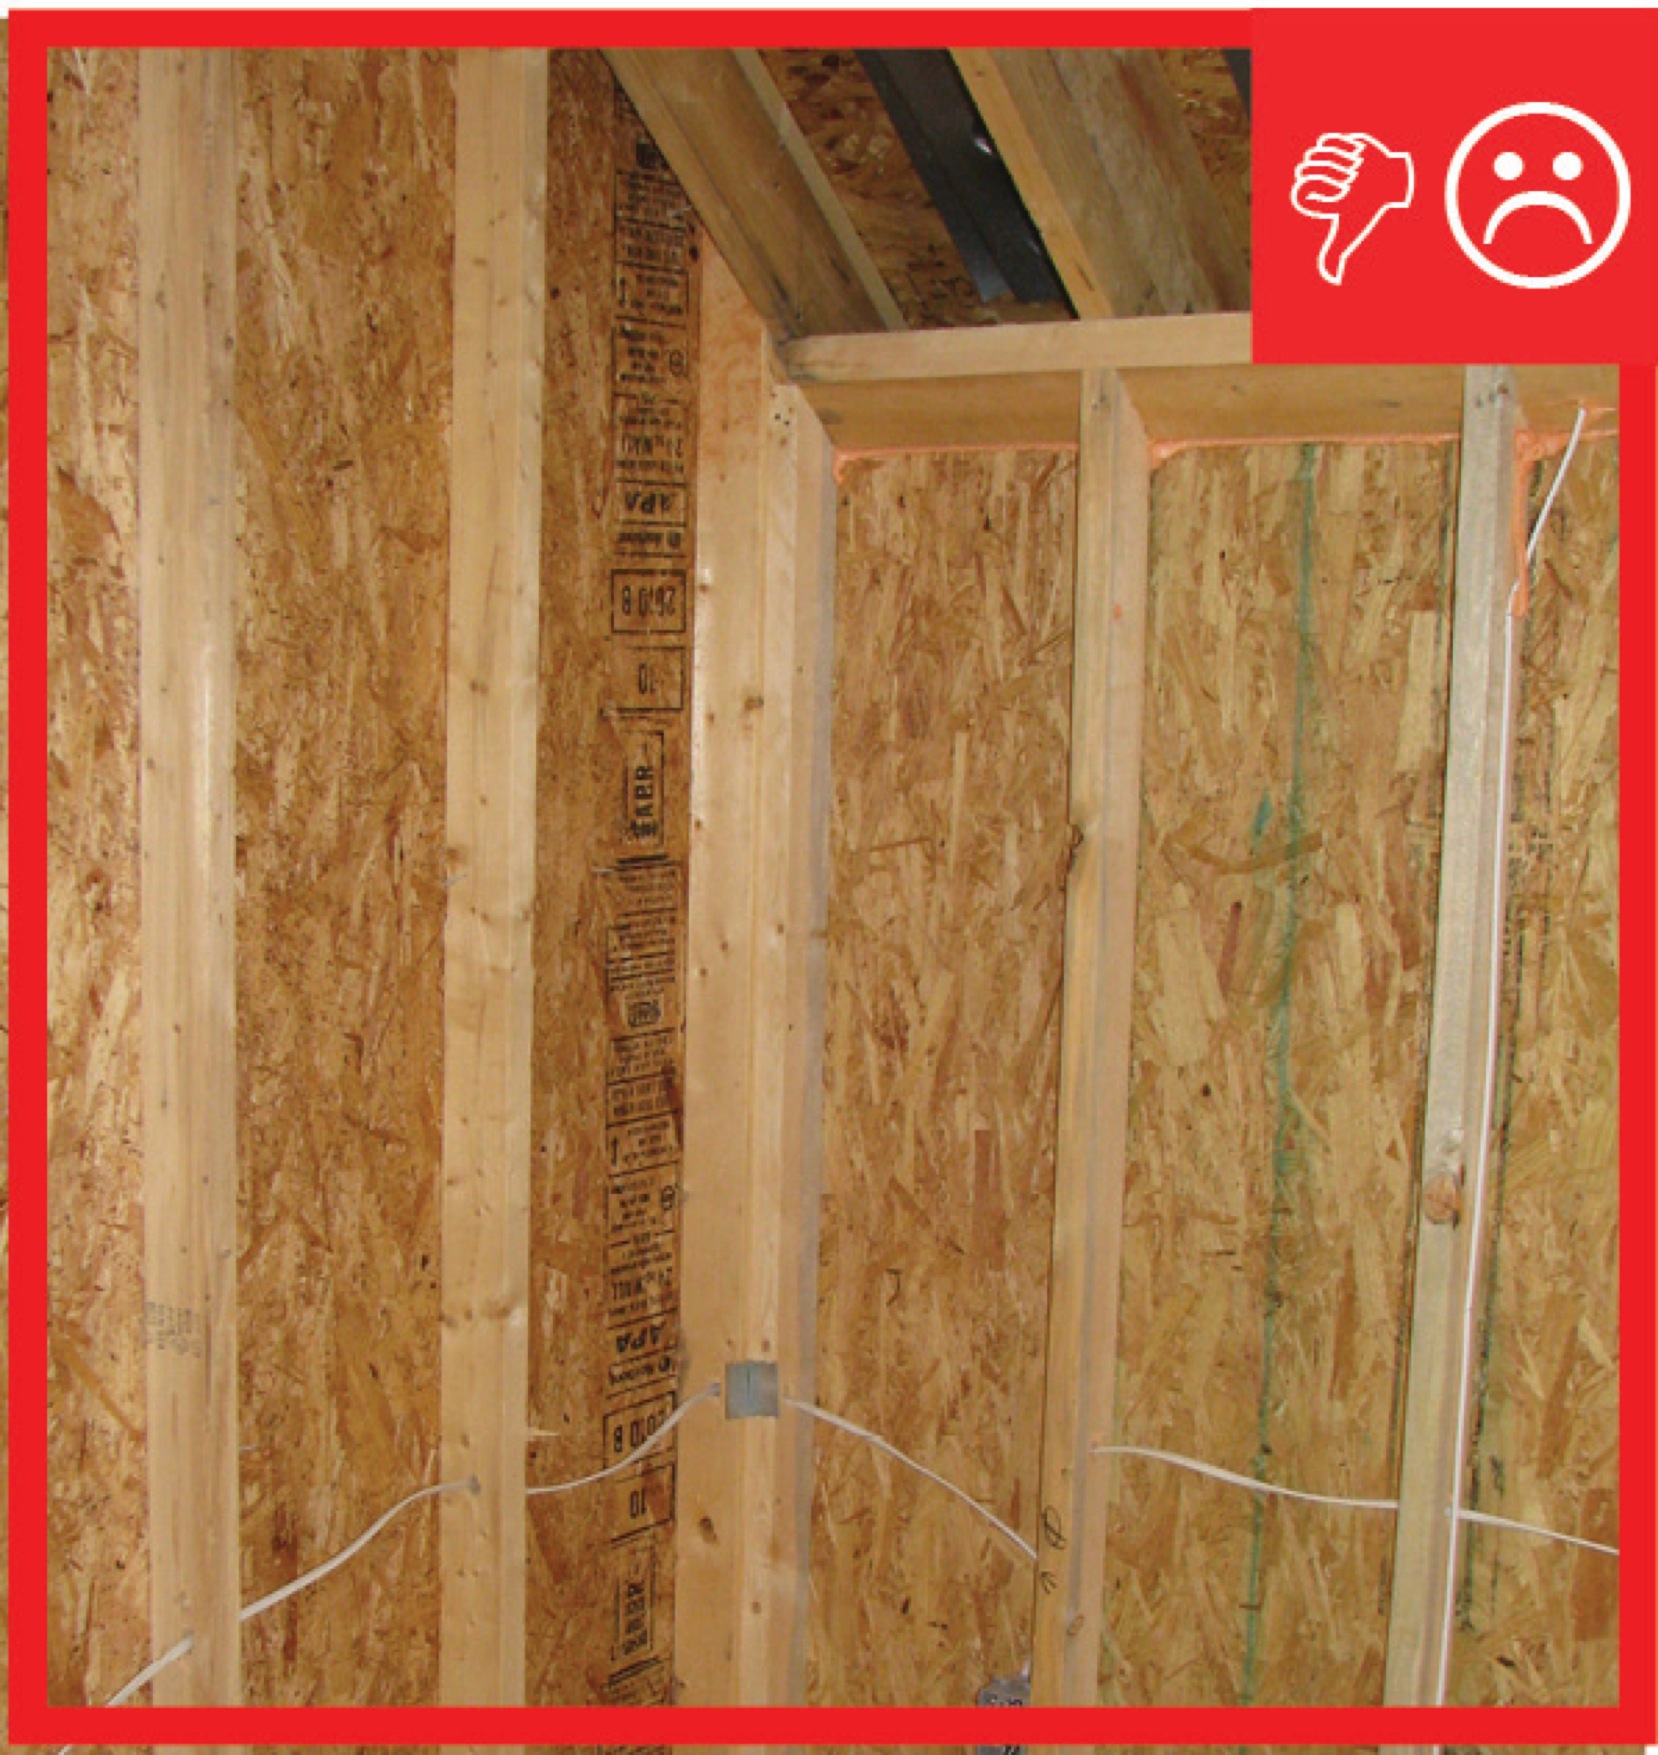
Wrong – Insulation does not fill entire cavity nor is there an air barrier present between the double wall