Showing results 501 - 750 of 1073
Image

Image
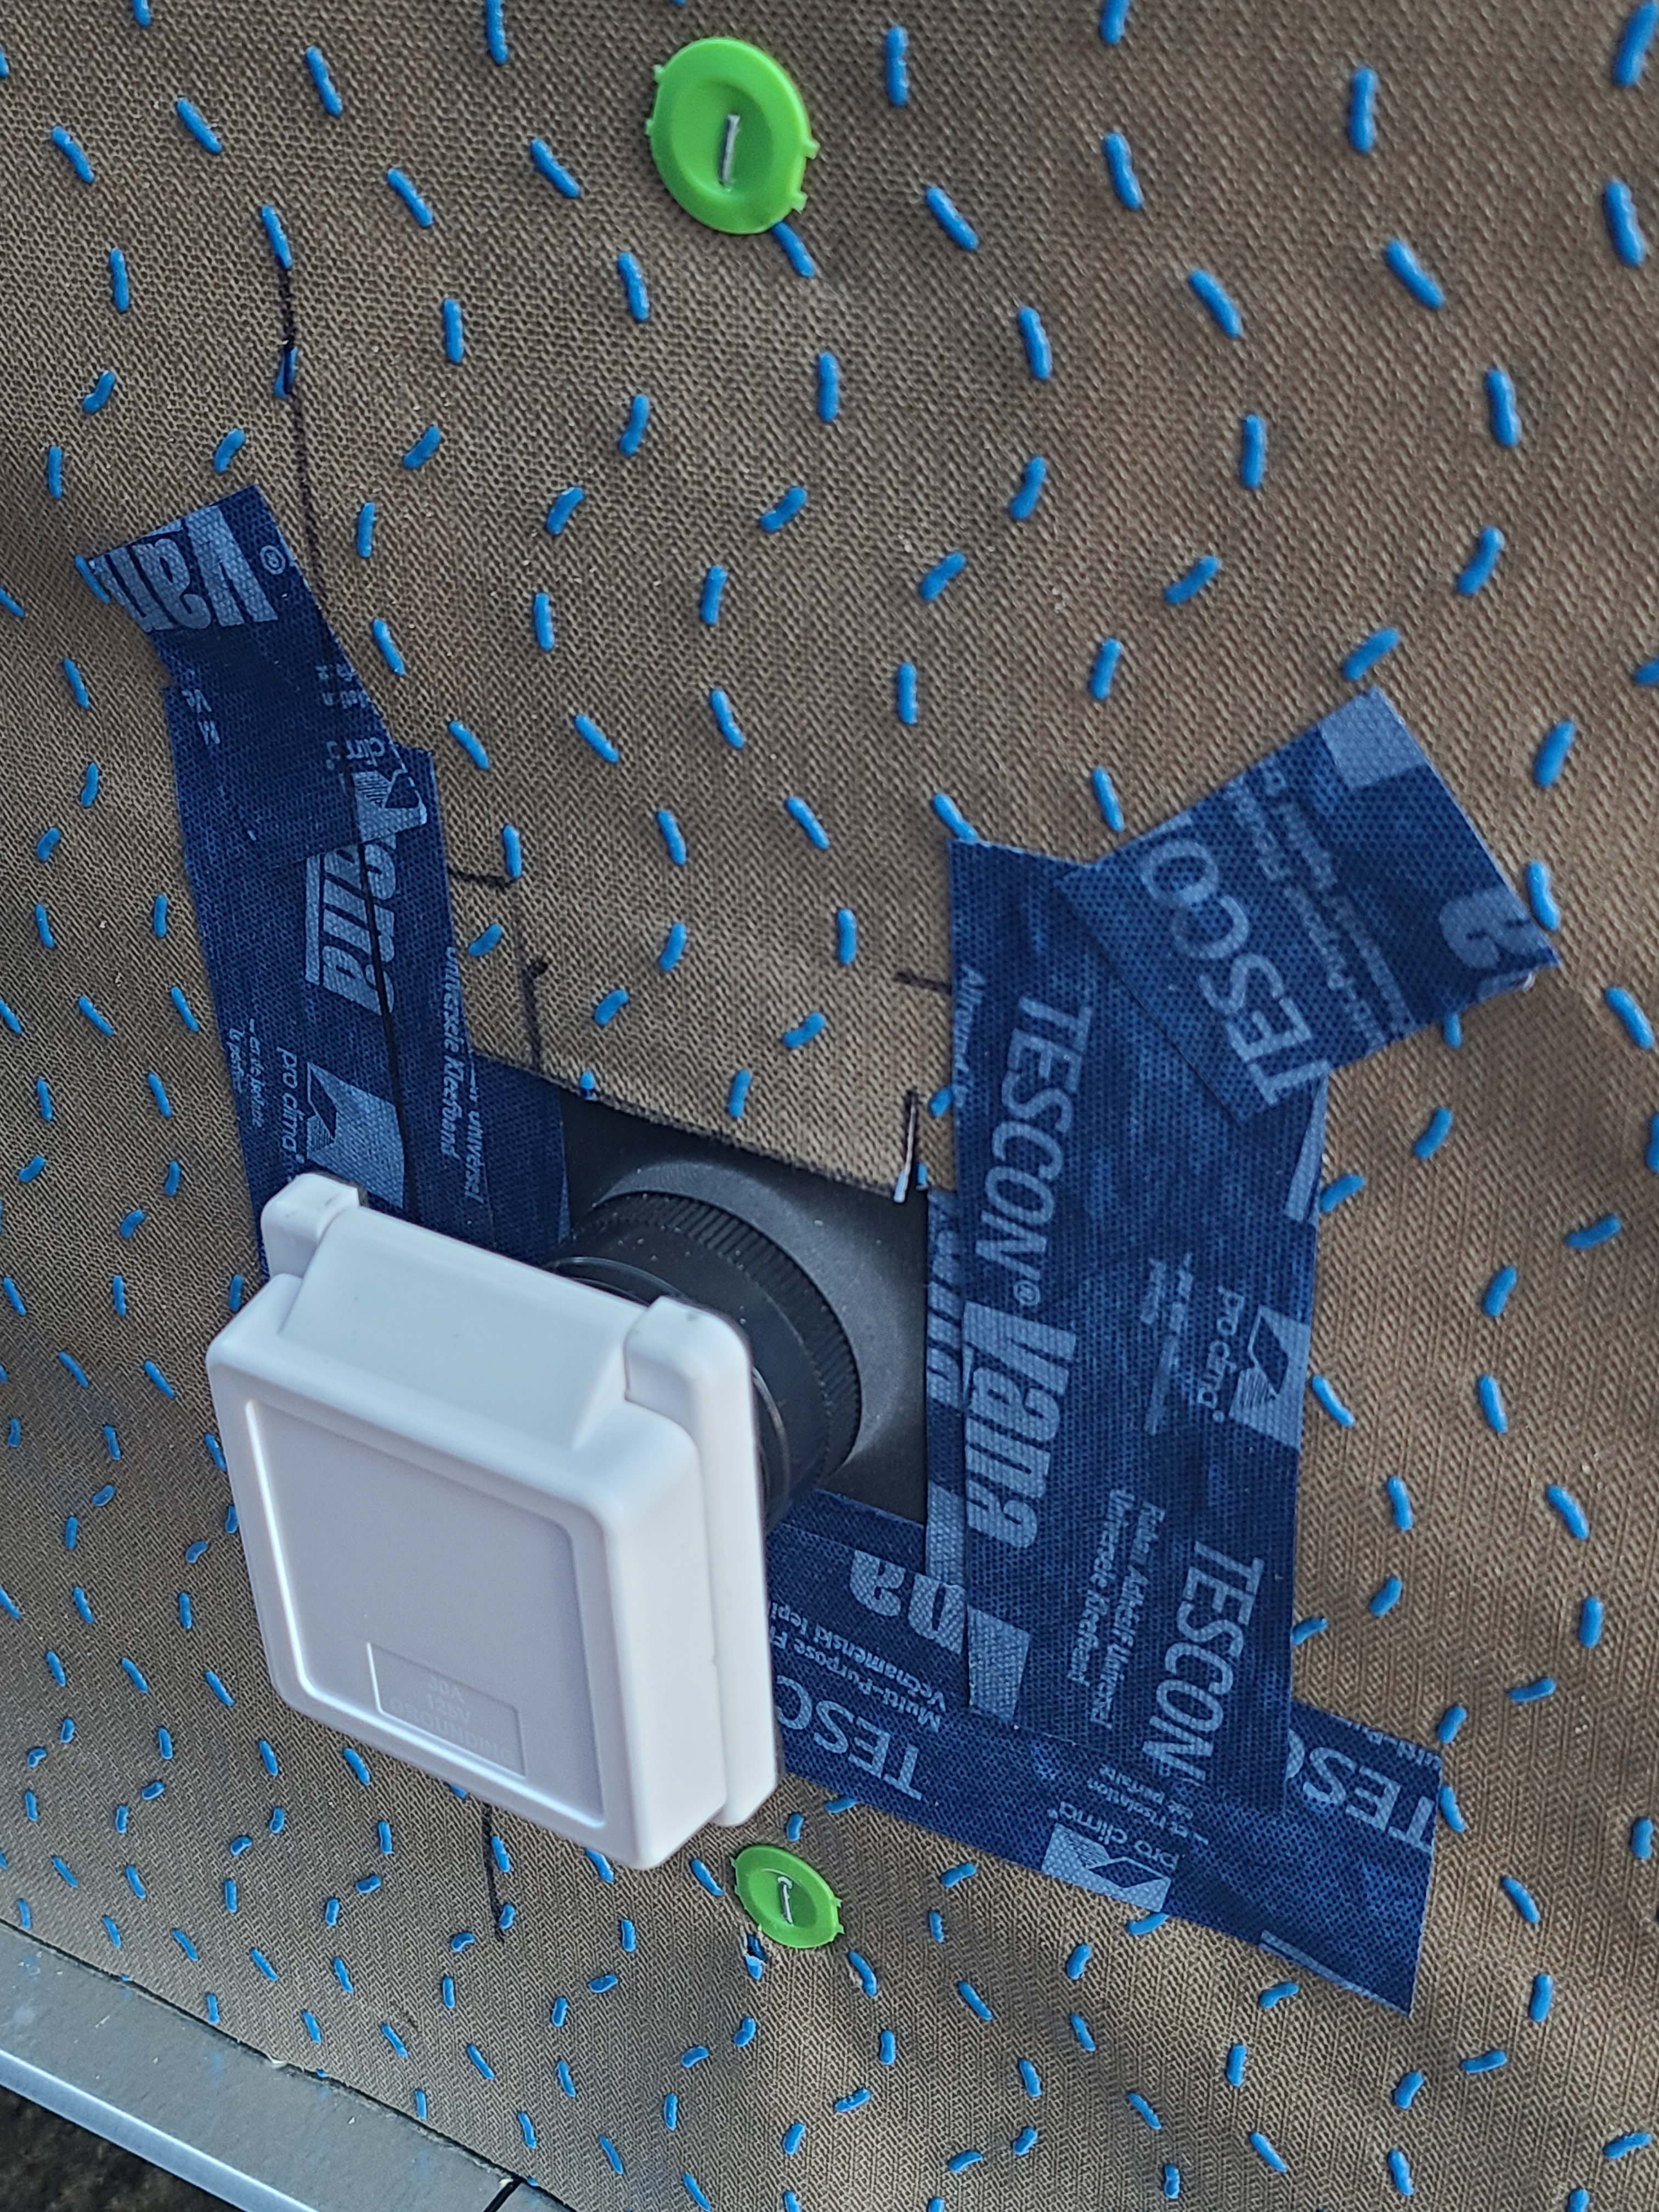
Right - External outlet wall penetration is flashed with tape that is properly layered with house wrap.
Image
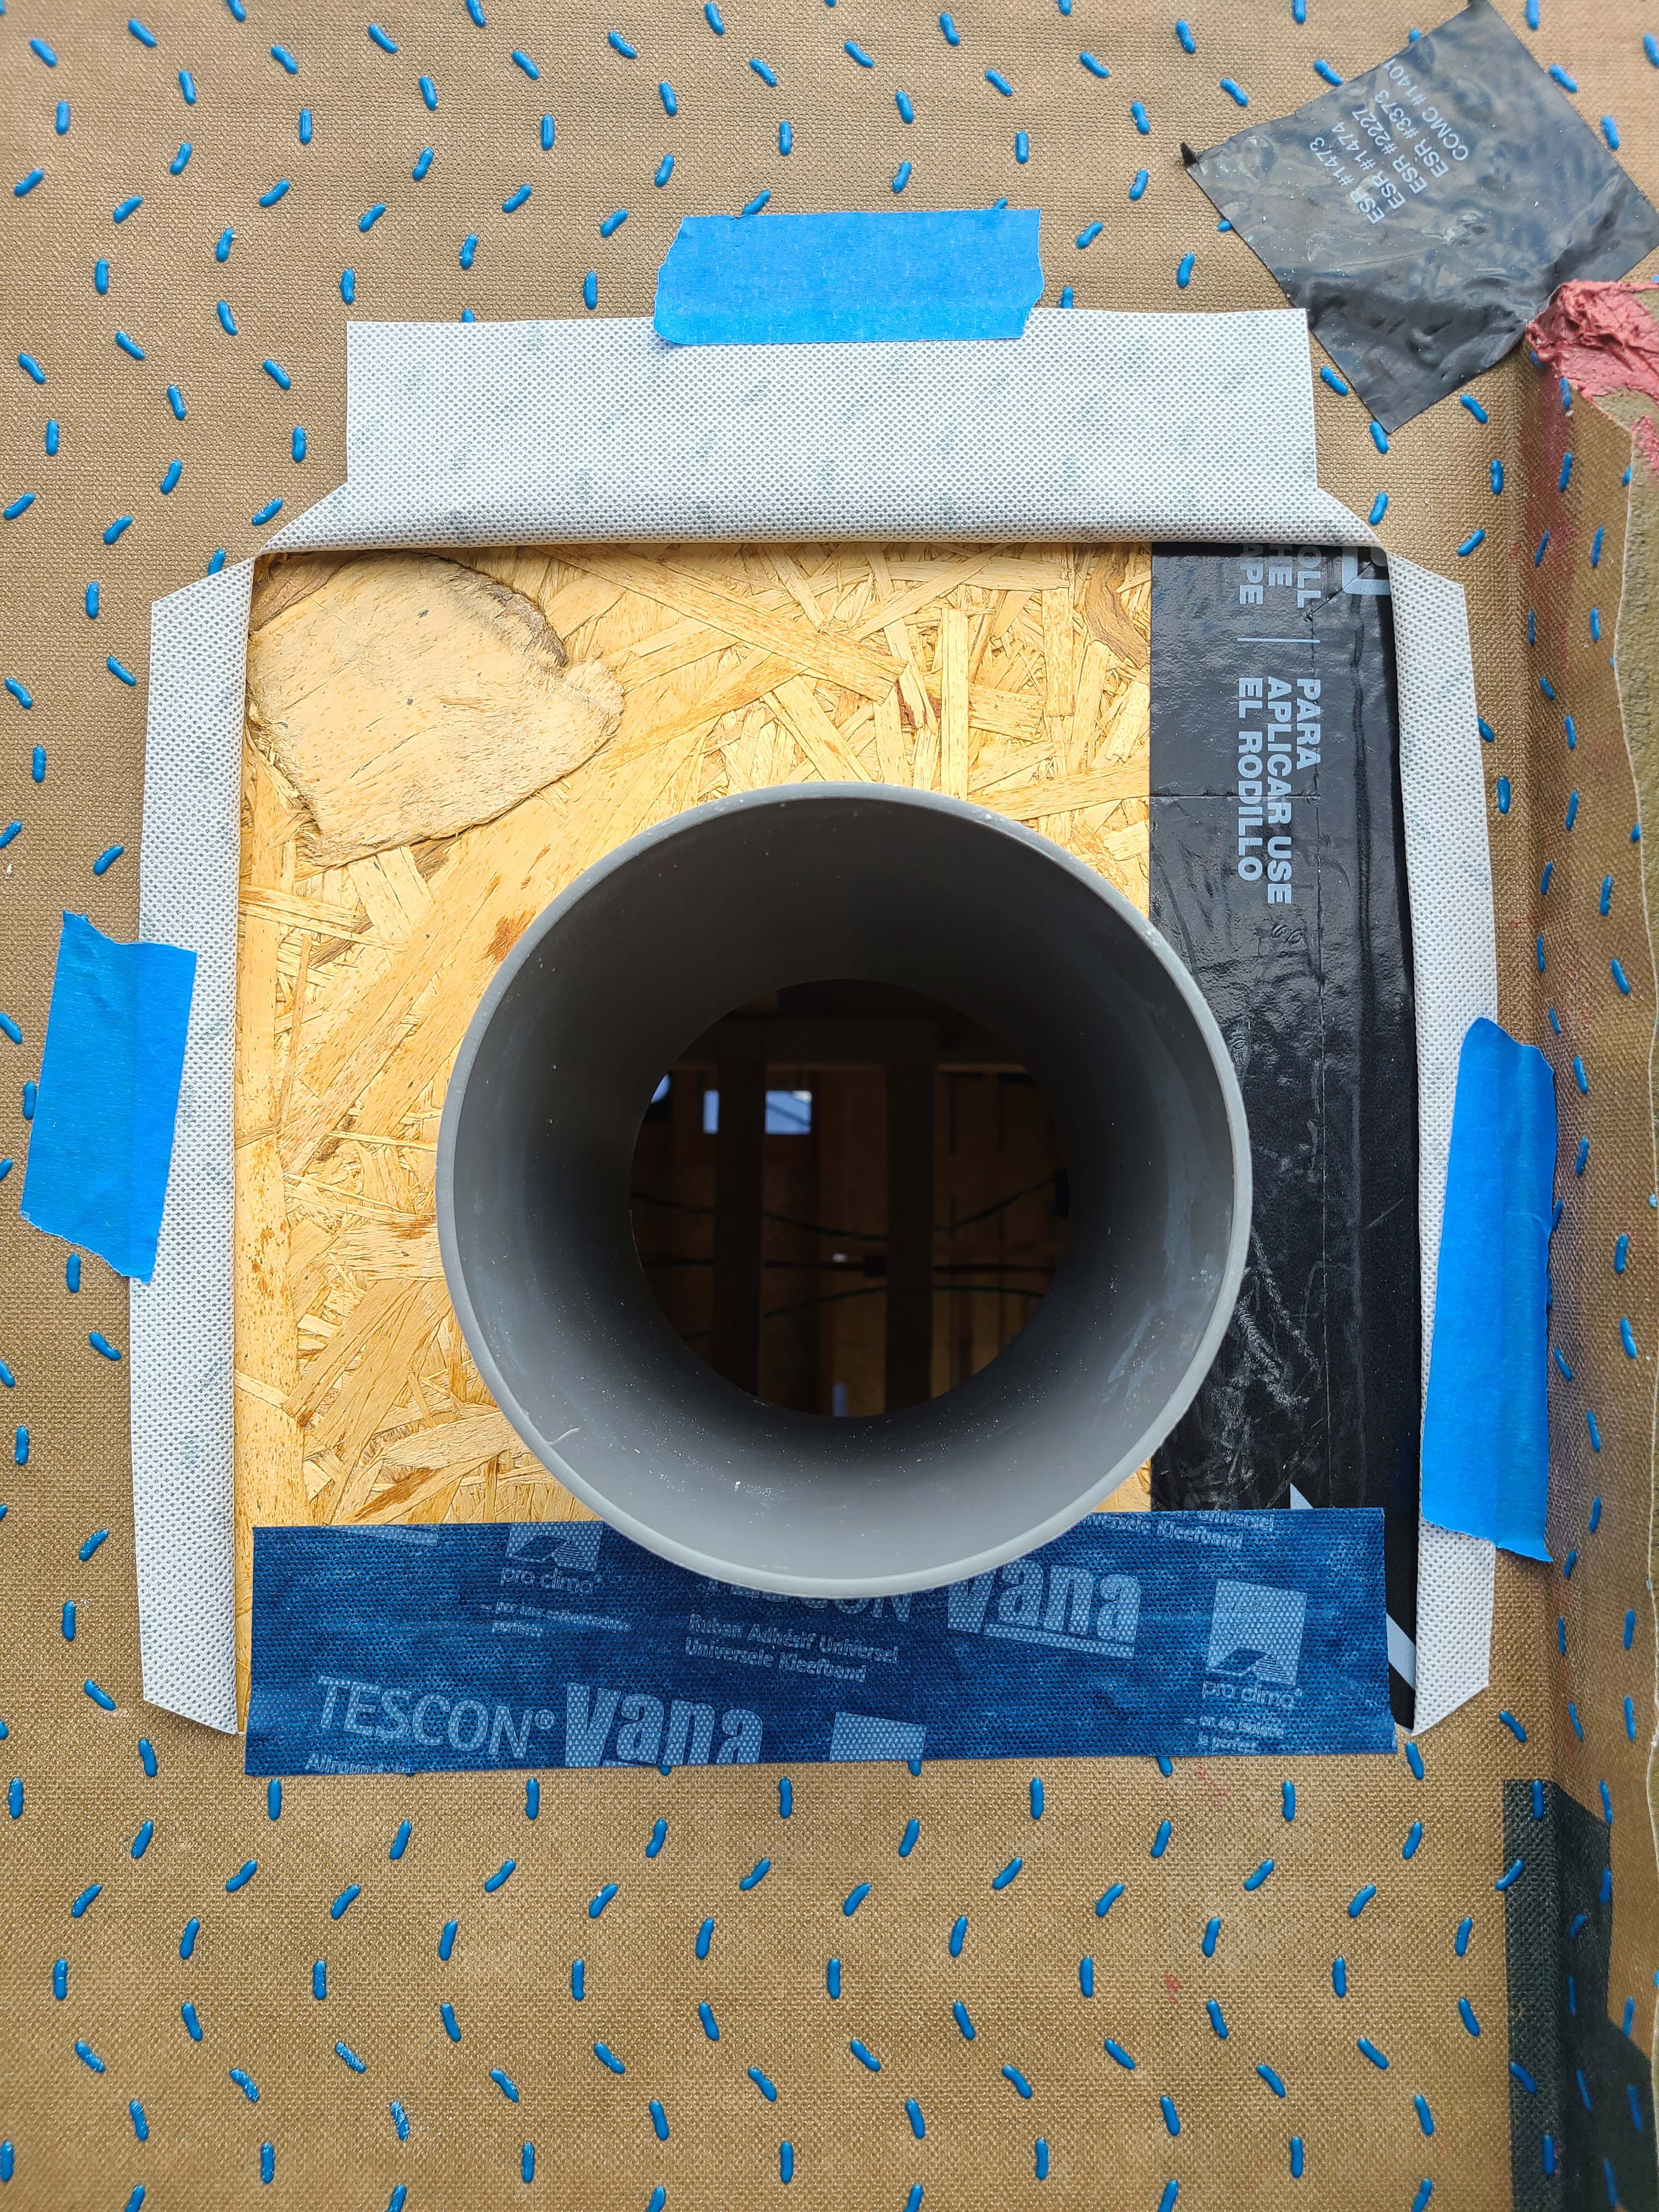
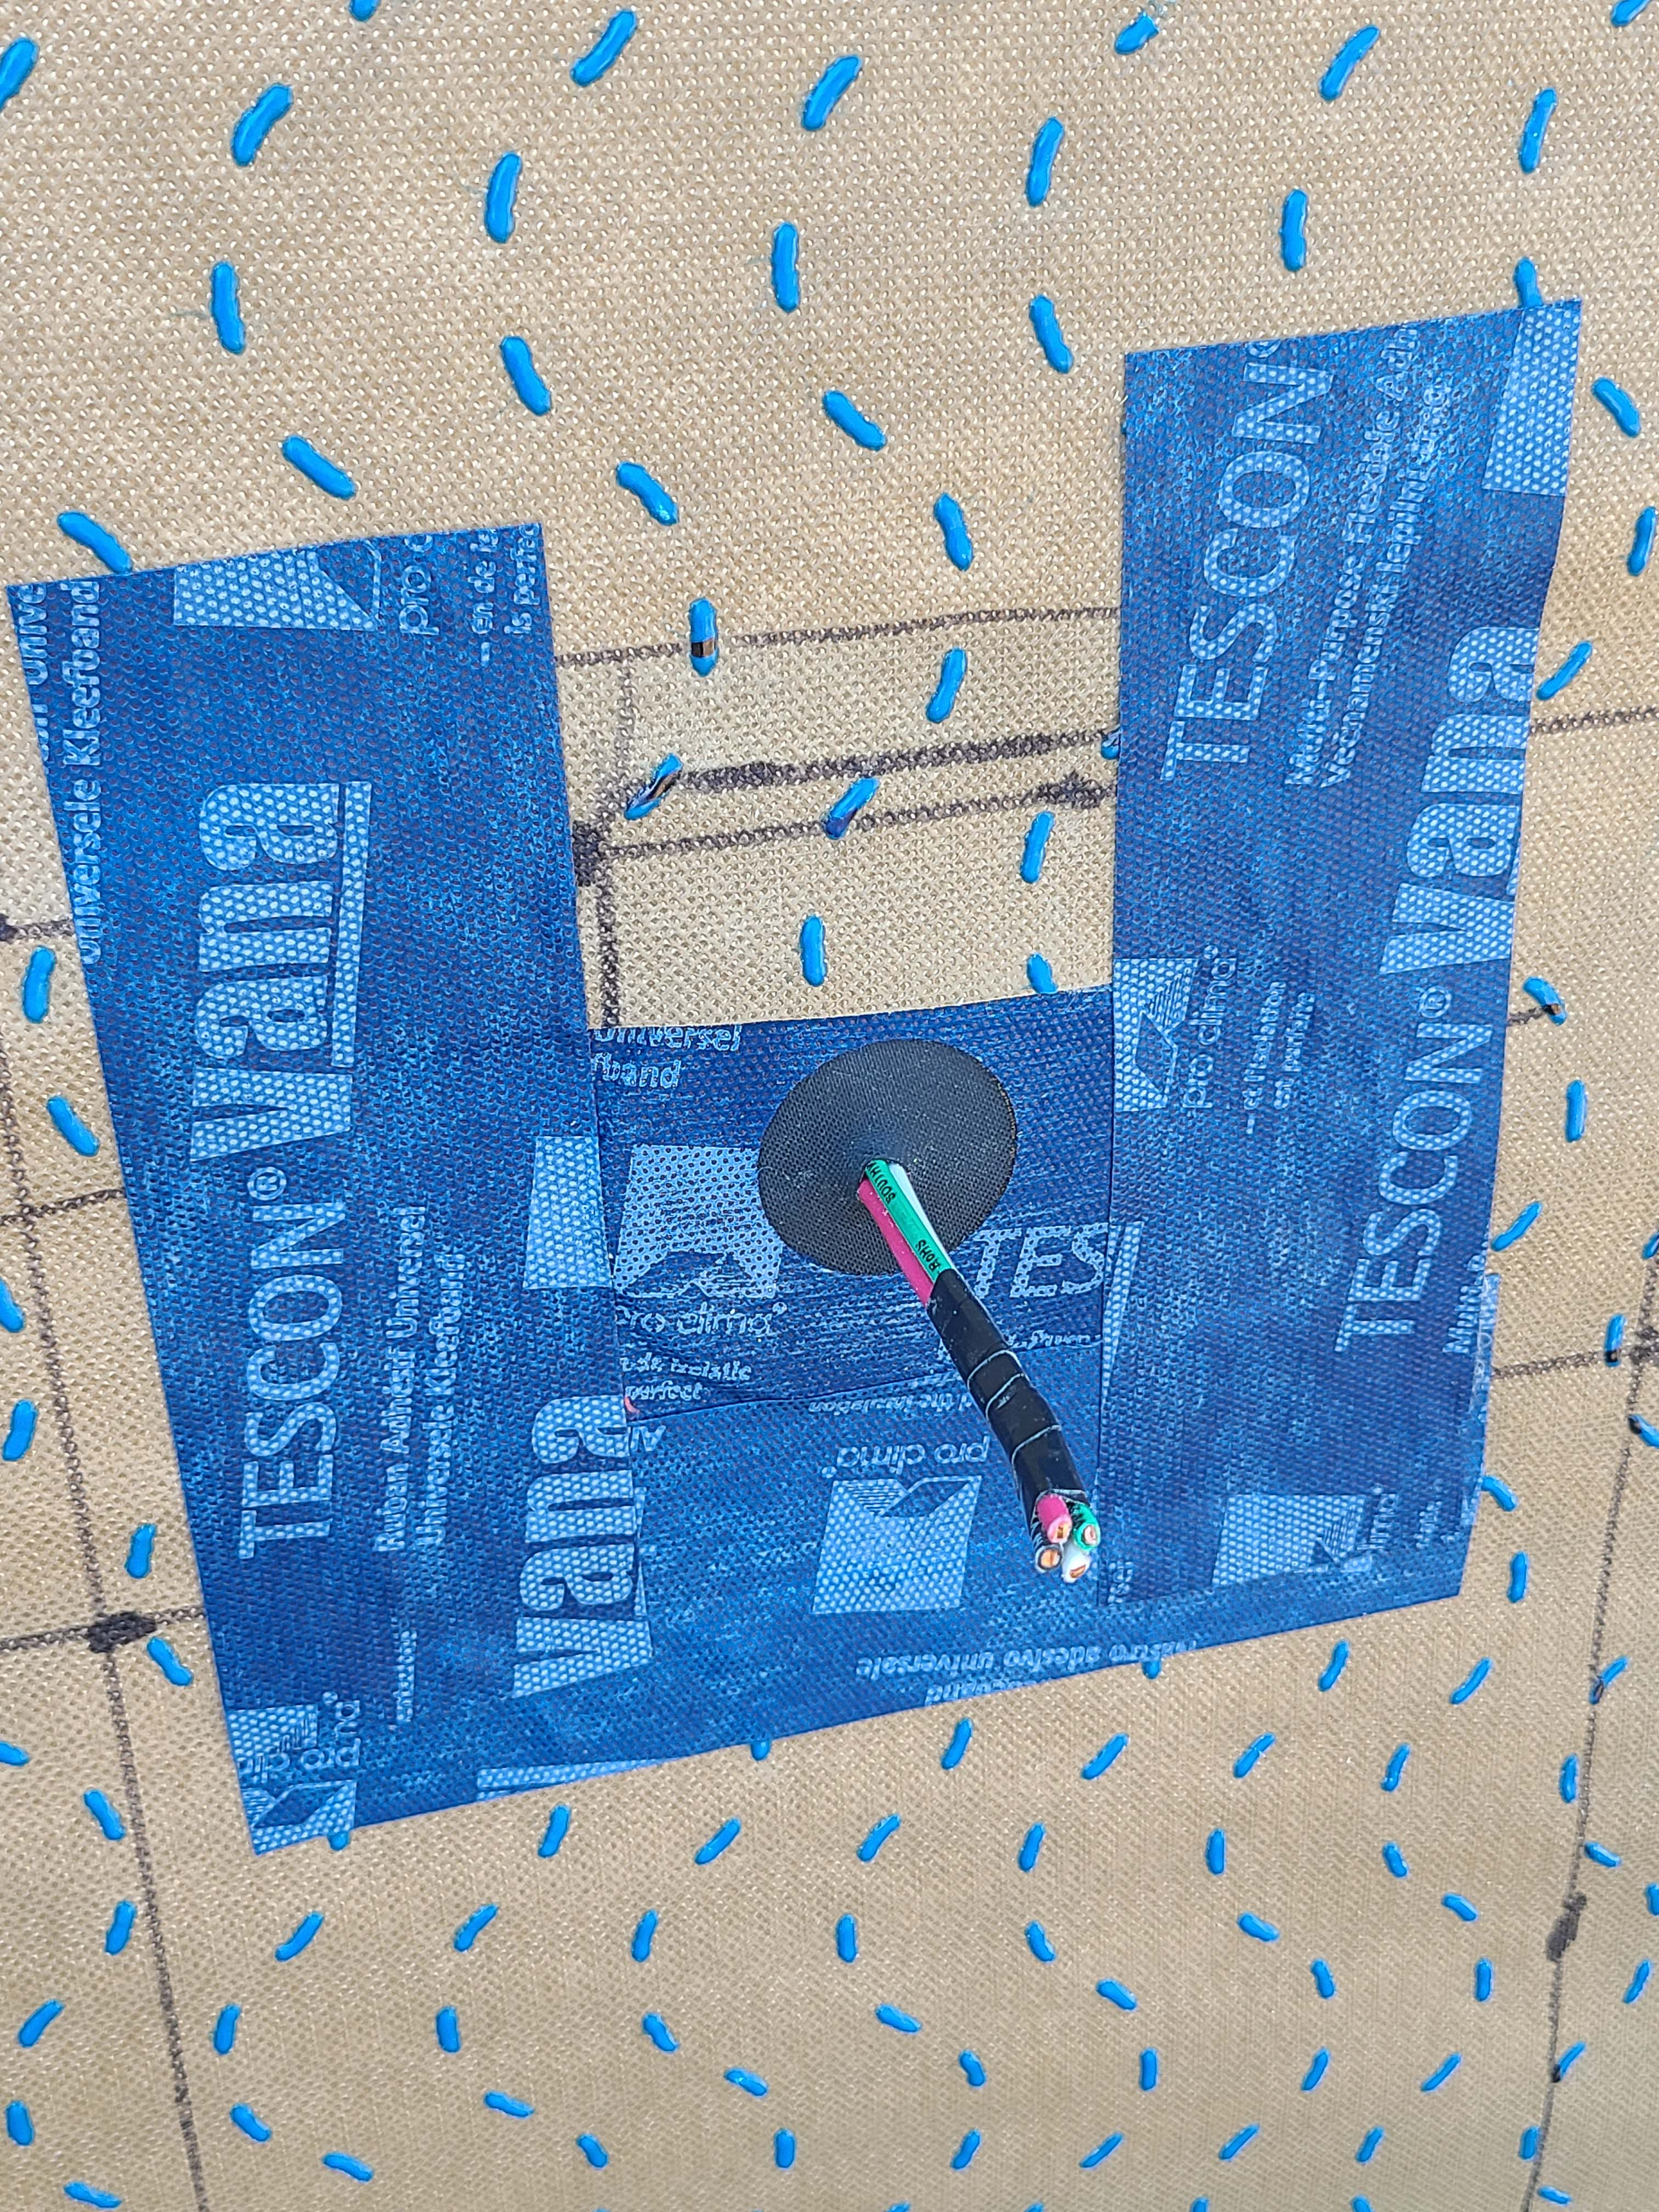
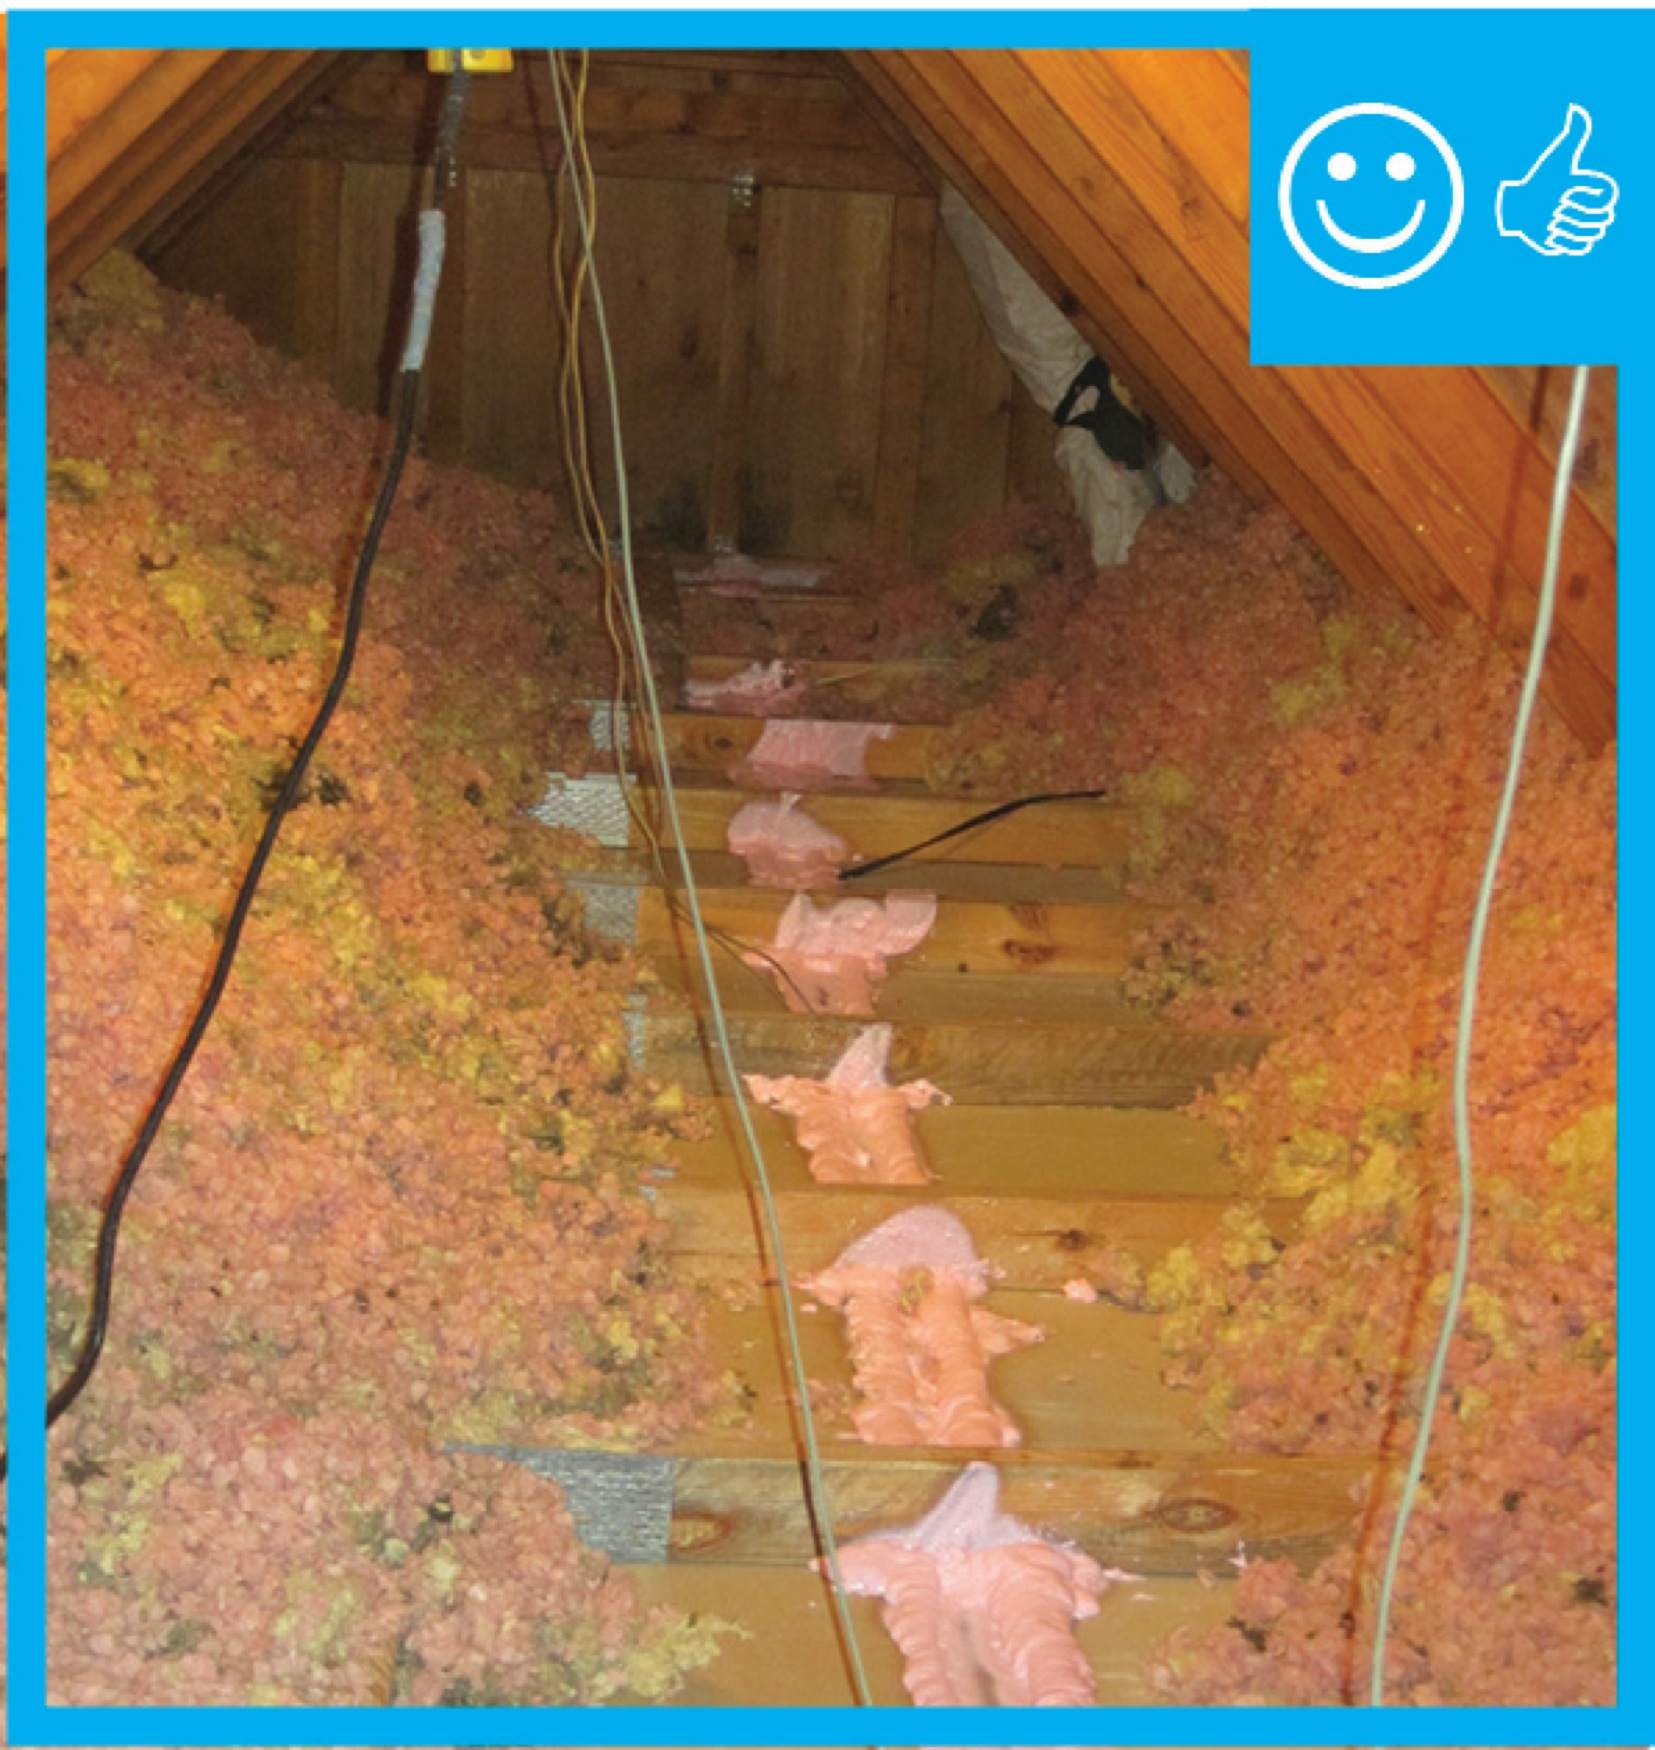
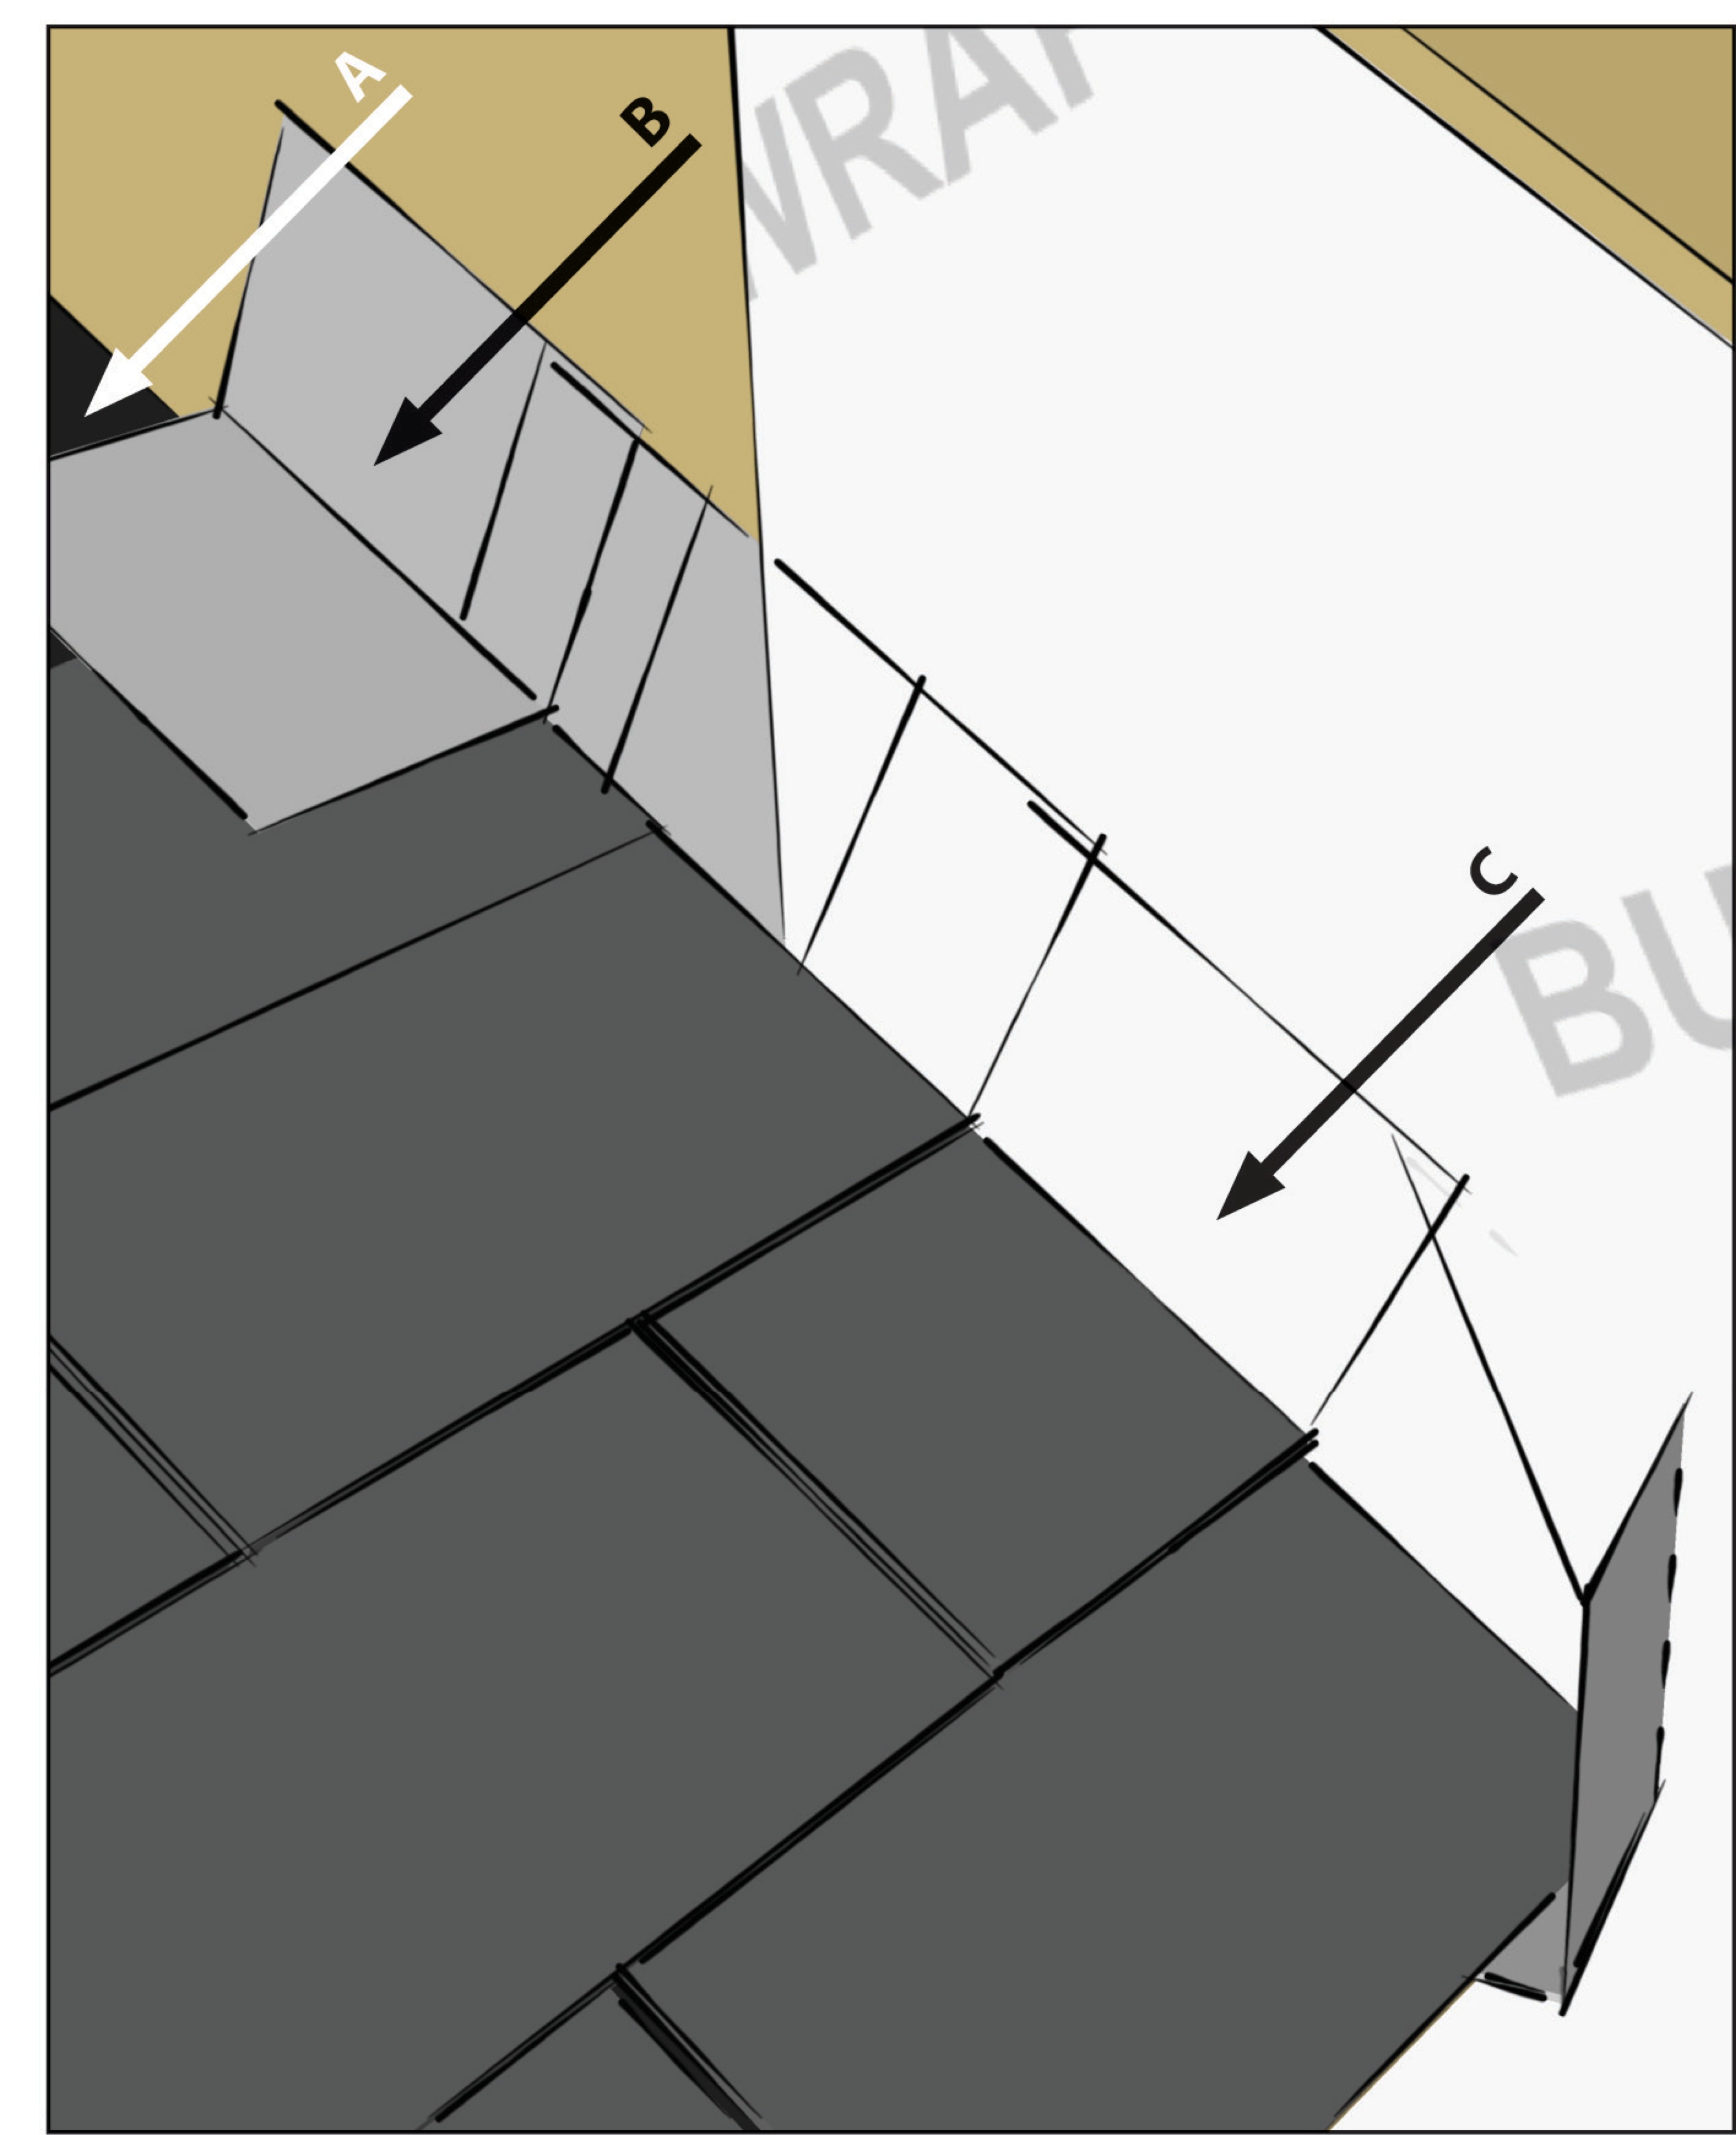
Right - Flaps are cut into house wrap installed over an HRV duct then taped out of the way to install flashing; 8 of 14.
Image

Image
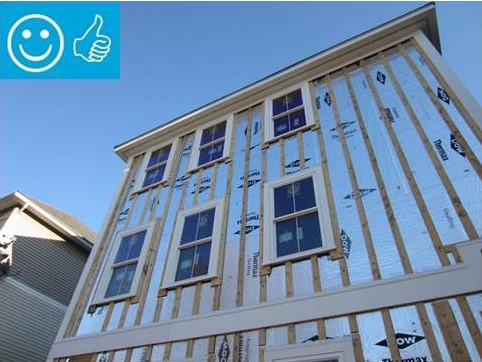
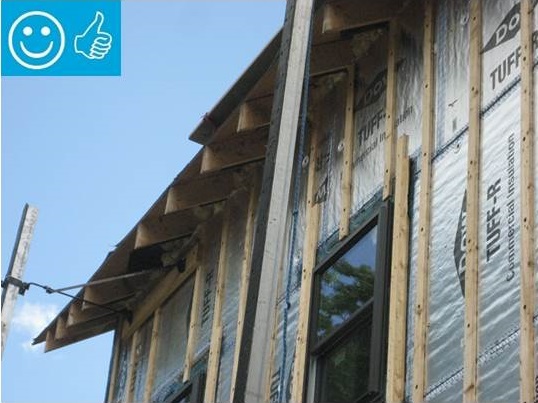
Right - Foil-faced polyisocyanurate rigid foam is attached to the existing exterior wall with vertical wood furring strips
Image
Right - Furring strips create an air gap to allow penetrating moisture to drain instead of wicking into walls; they also provide a nailing surface for siding.
Image
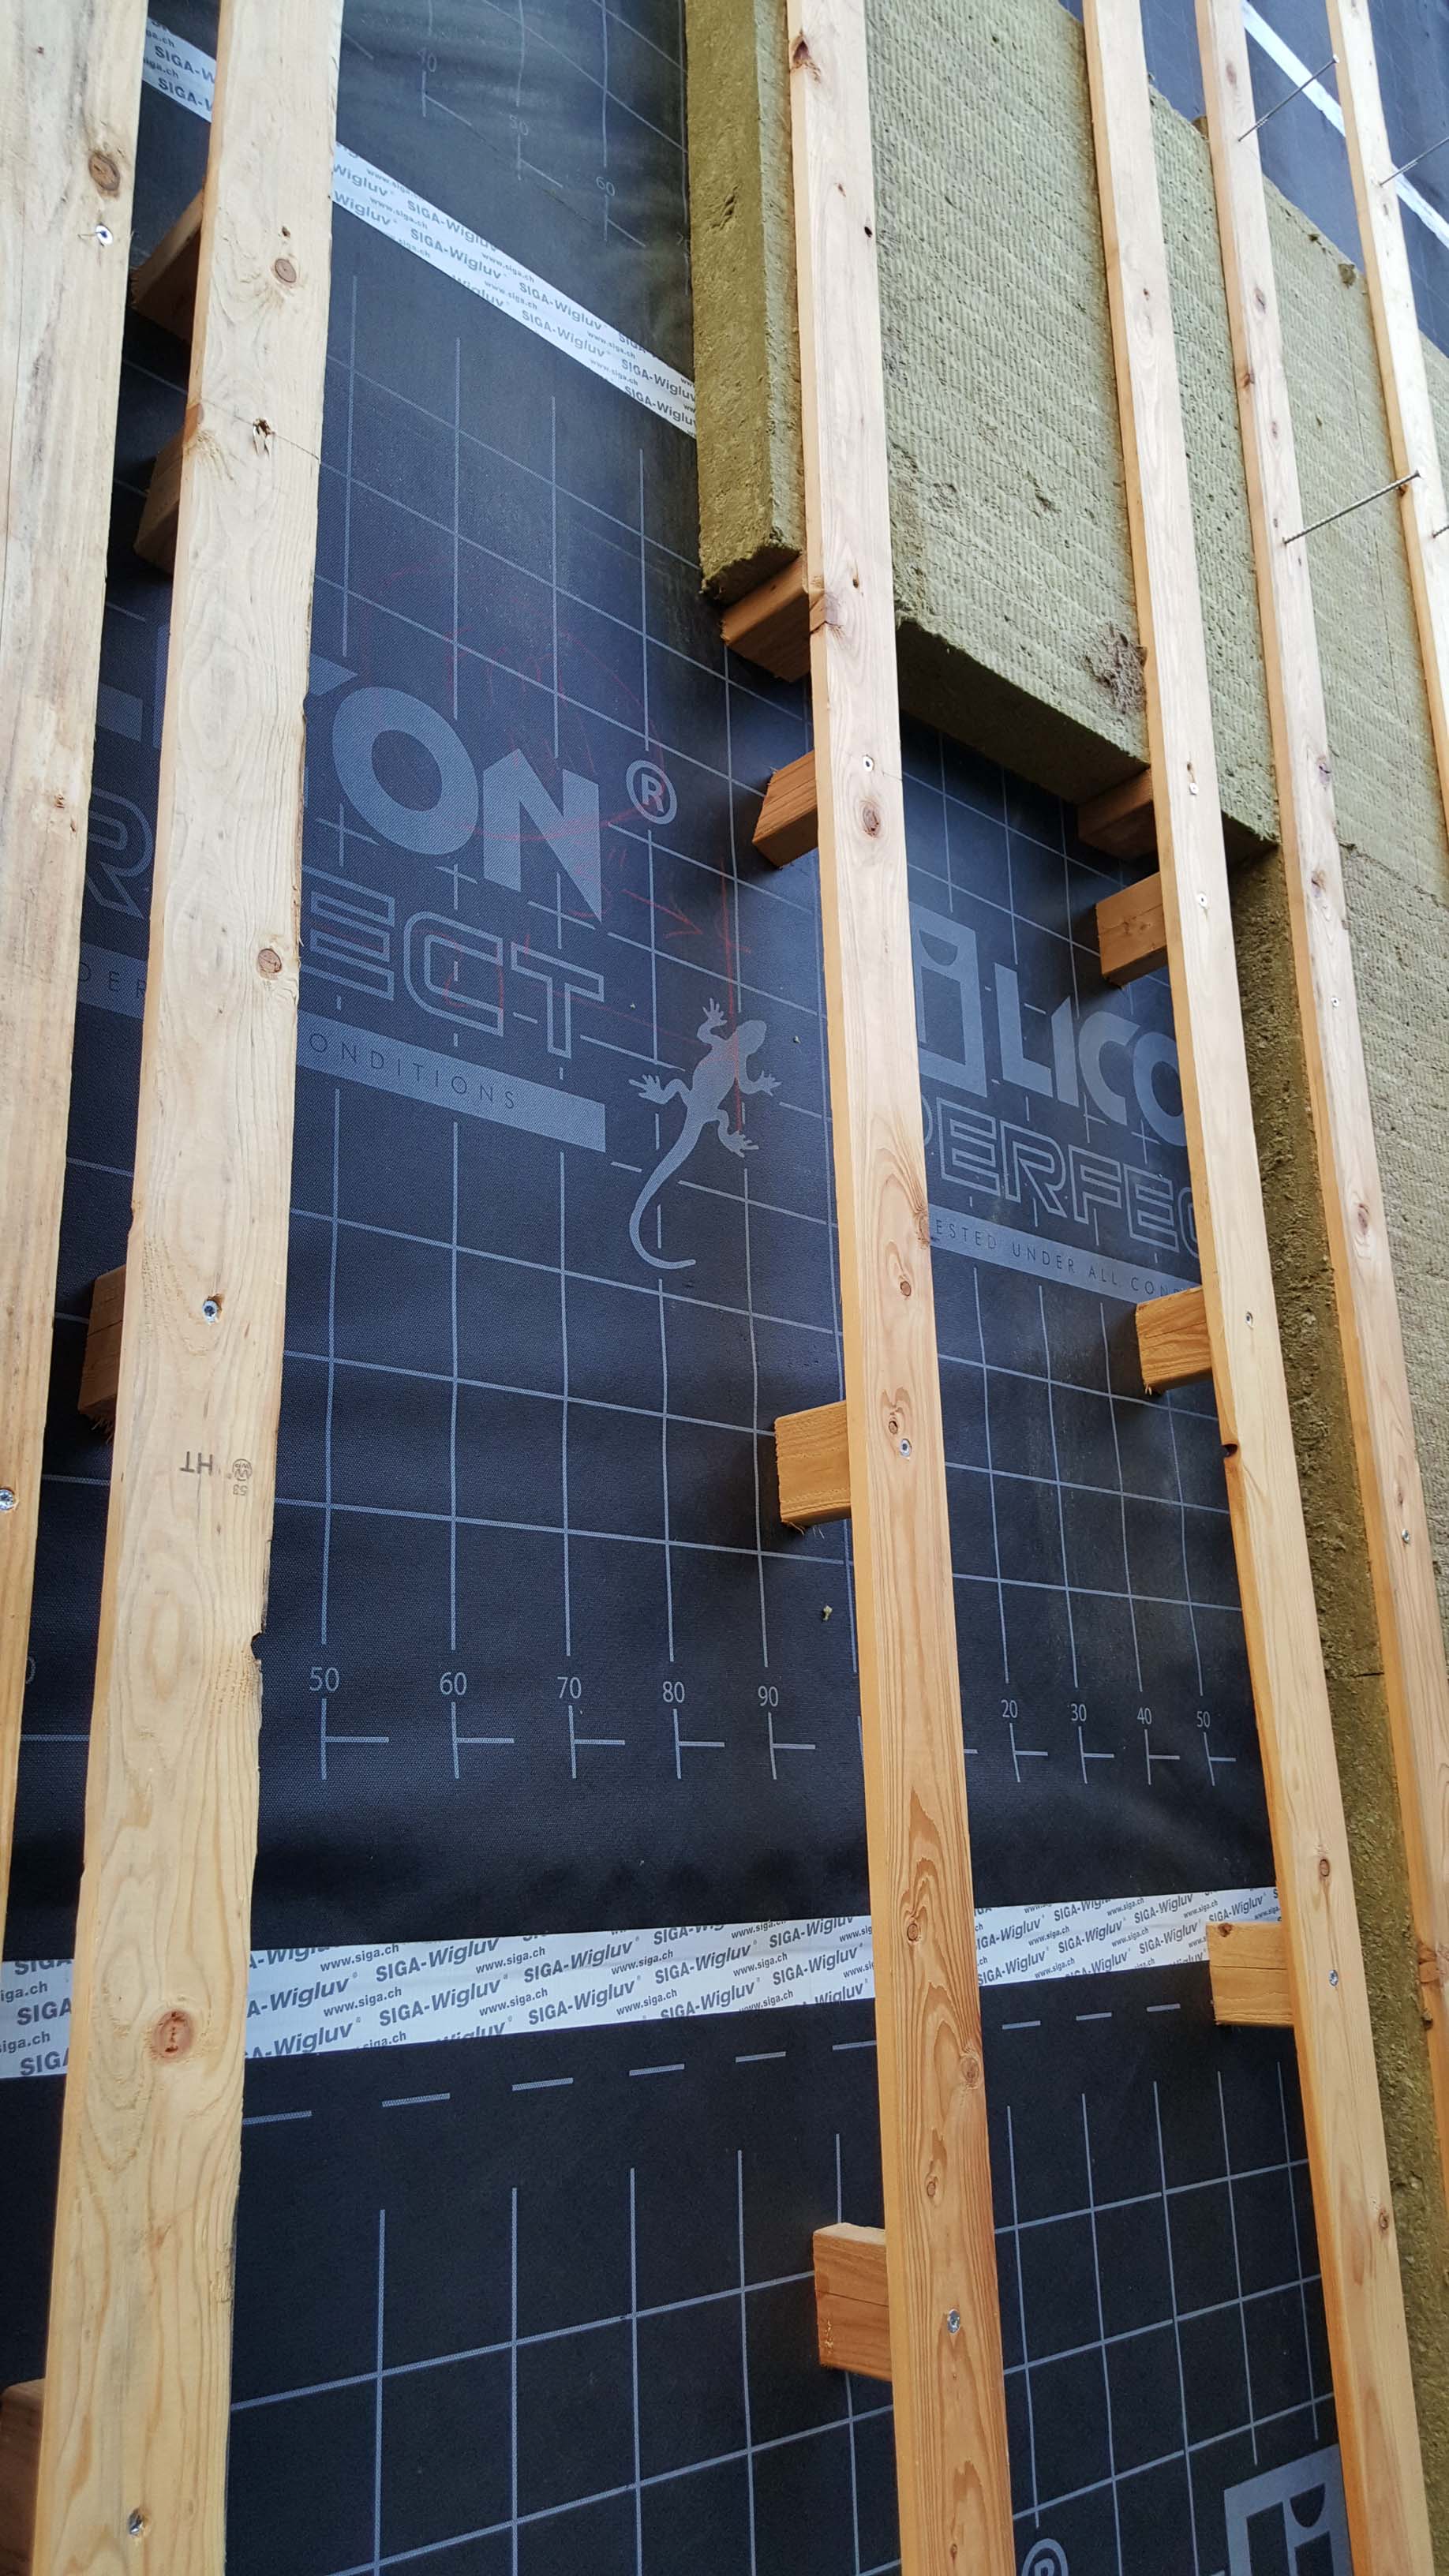
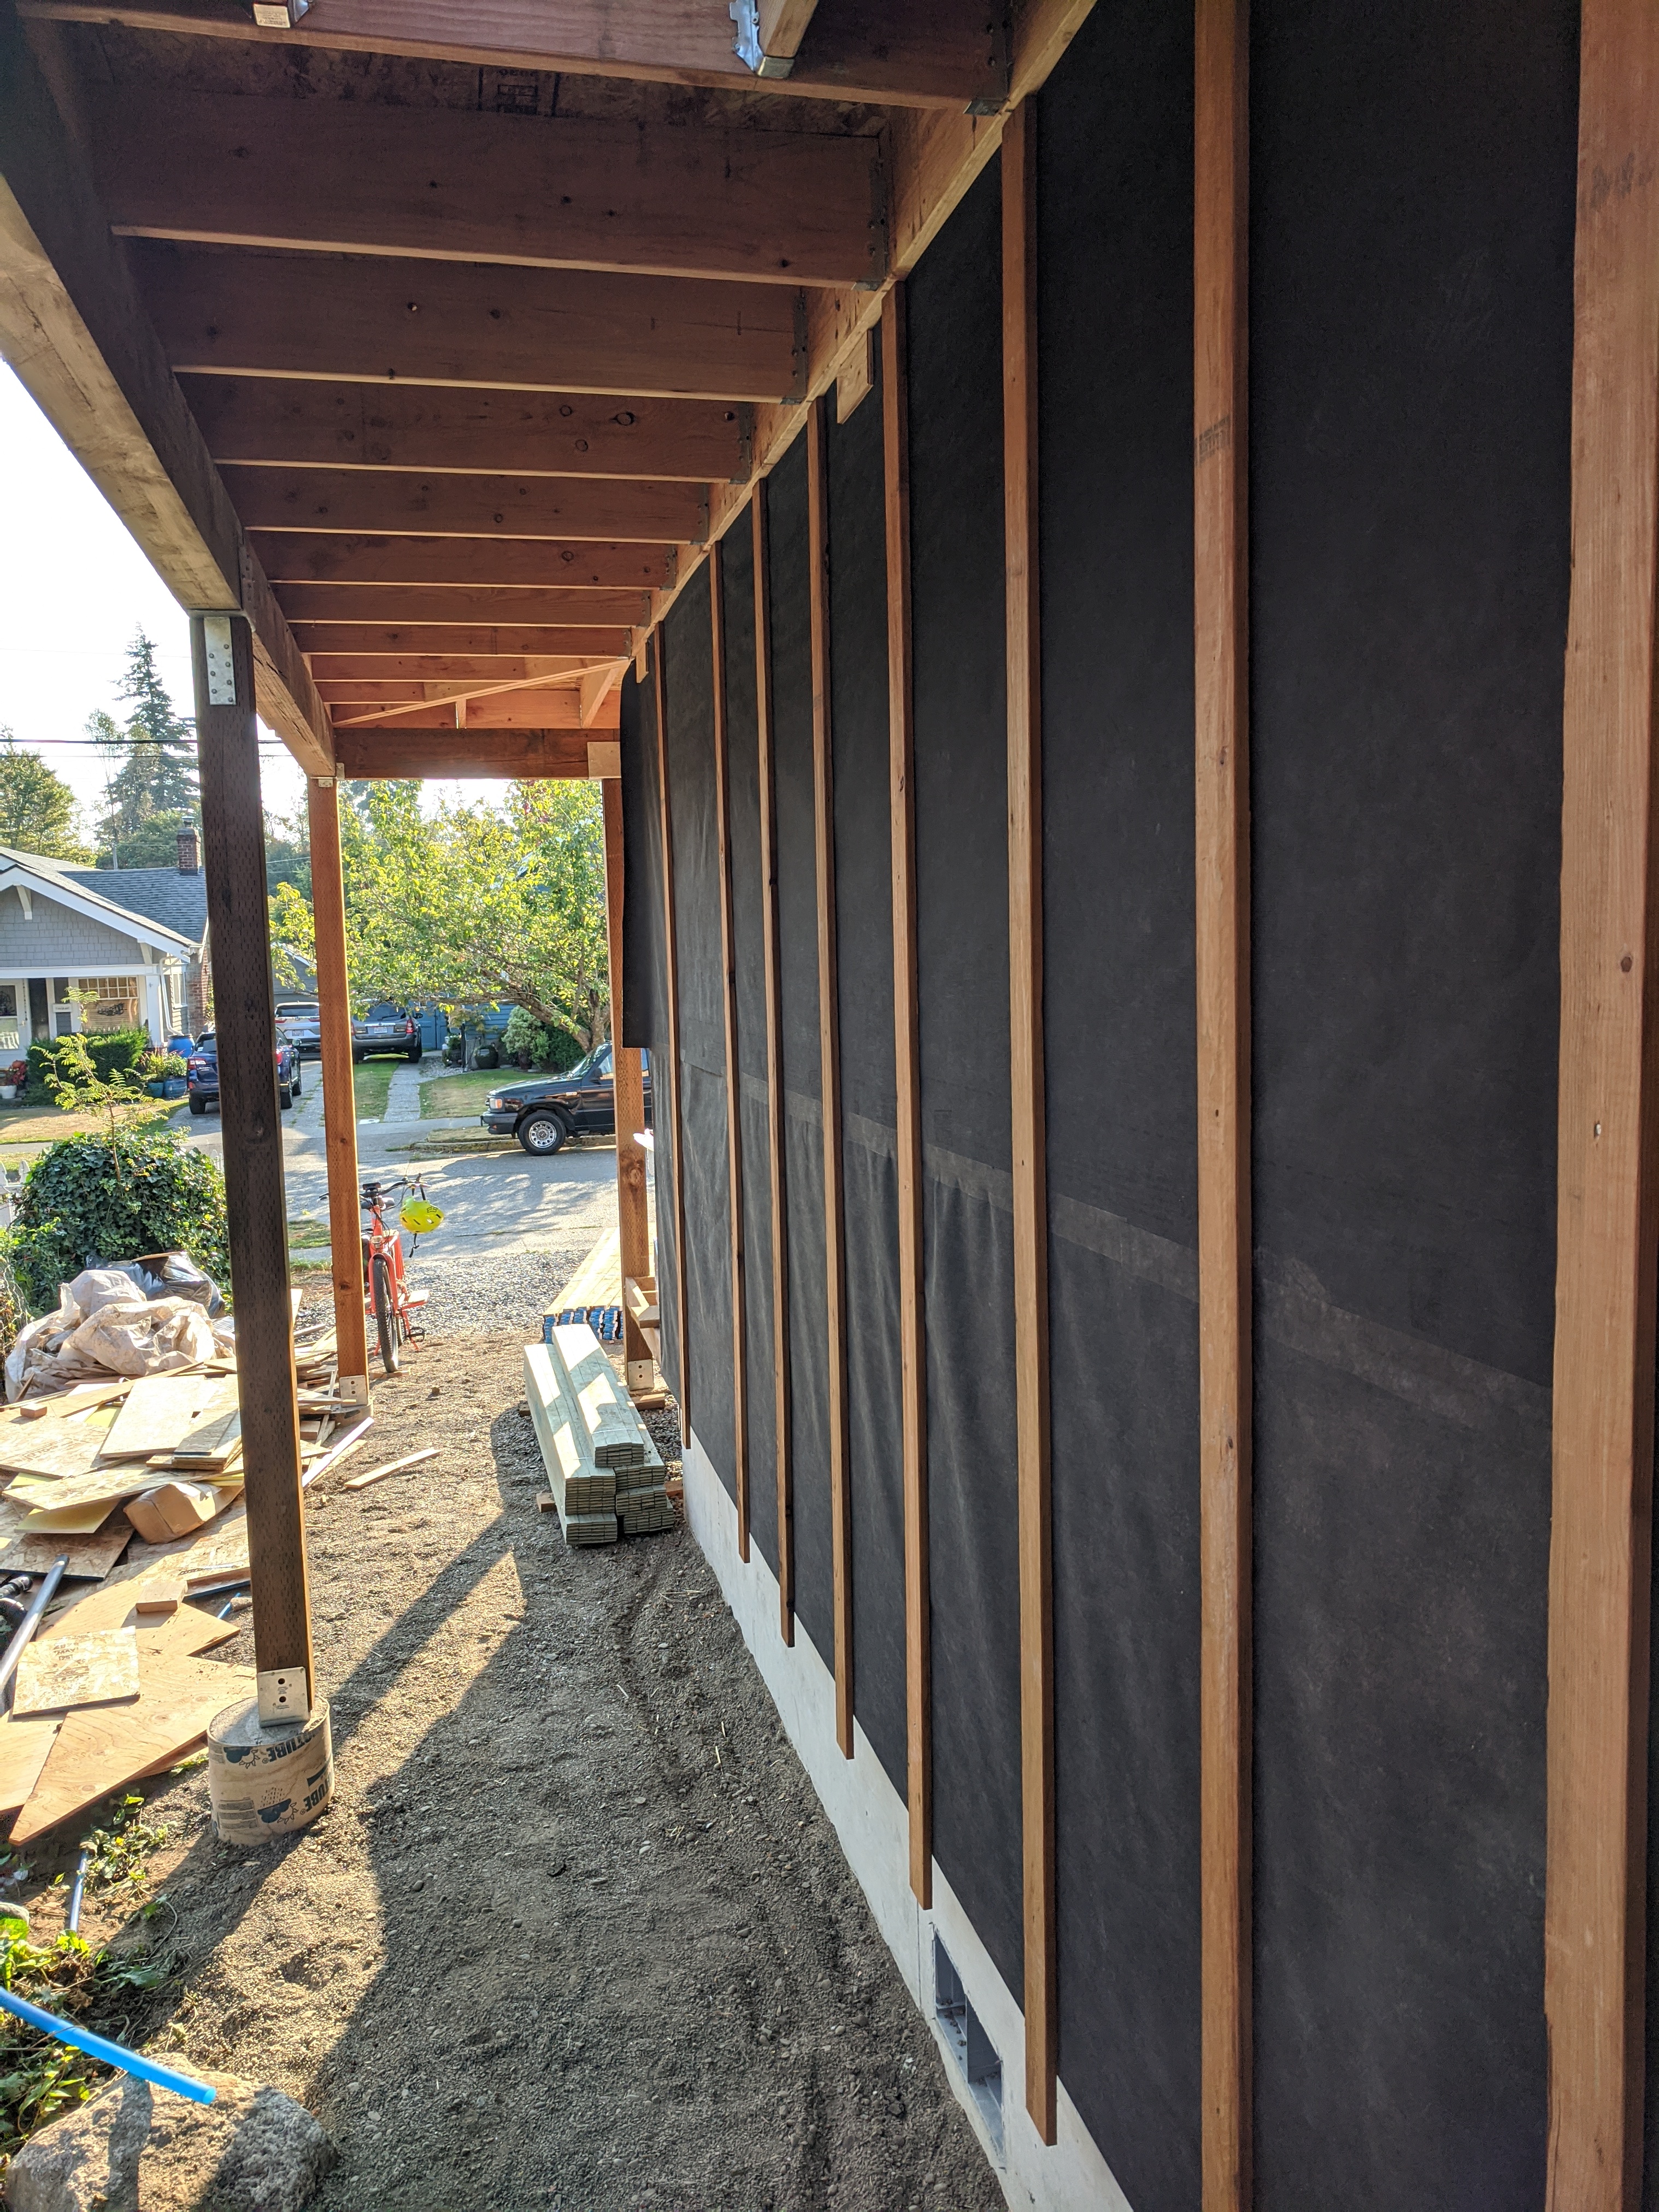
Right - Furring strips were installed with blocking to allow adequate room for 4 inches of mineral wool.
Image
RIght - Furring strips, house wrap, and siding are installed in the field after assembling panelized walls.
Image

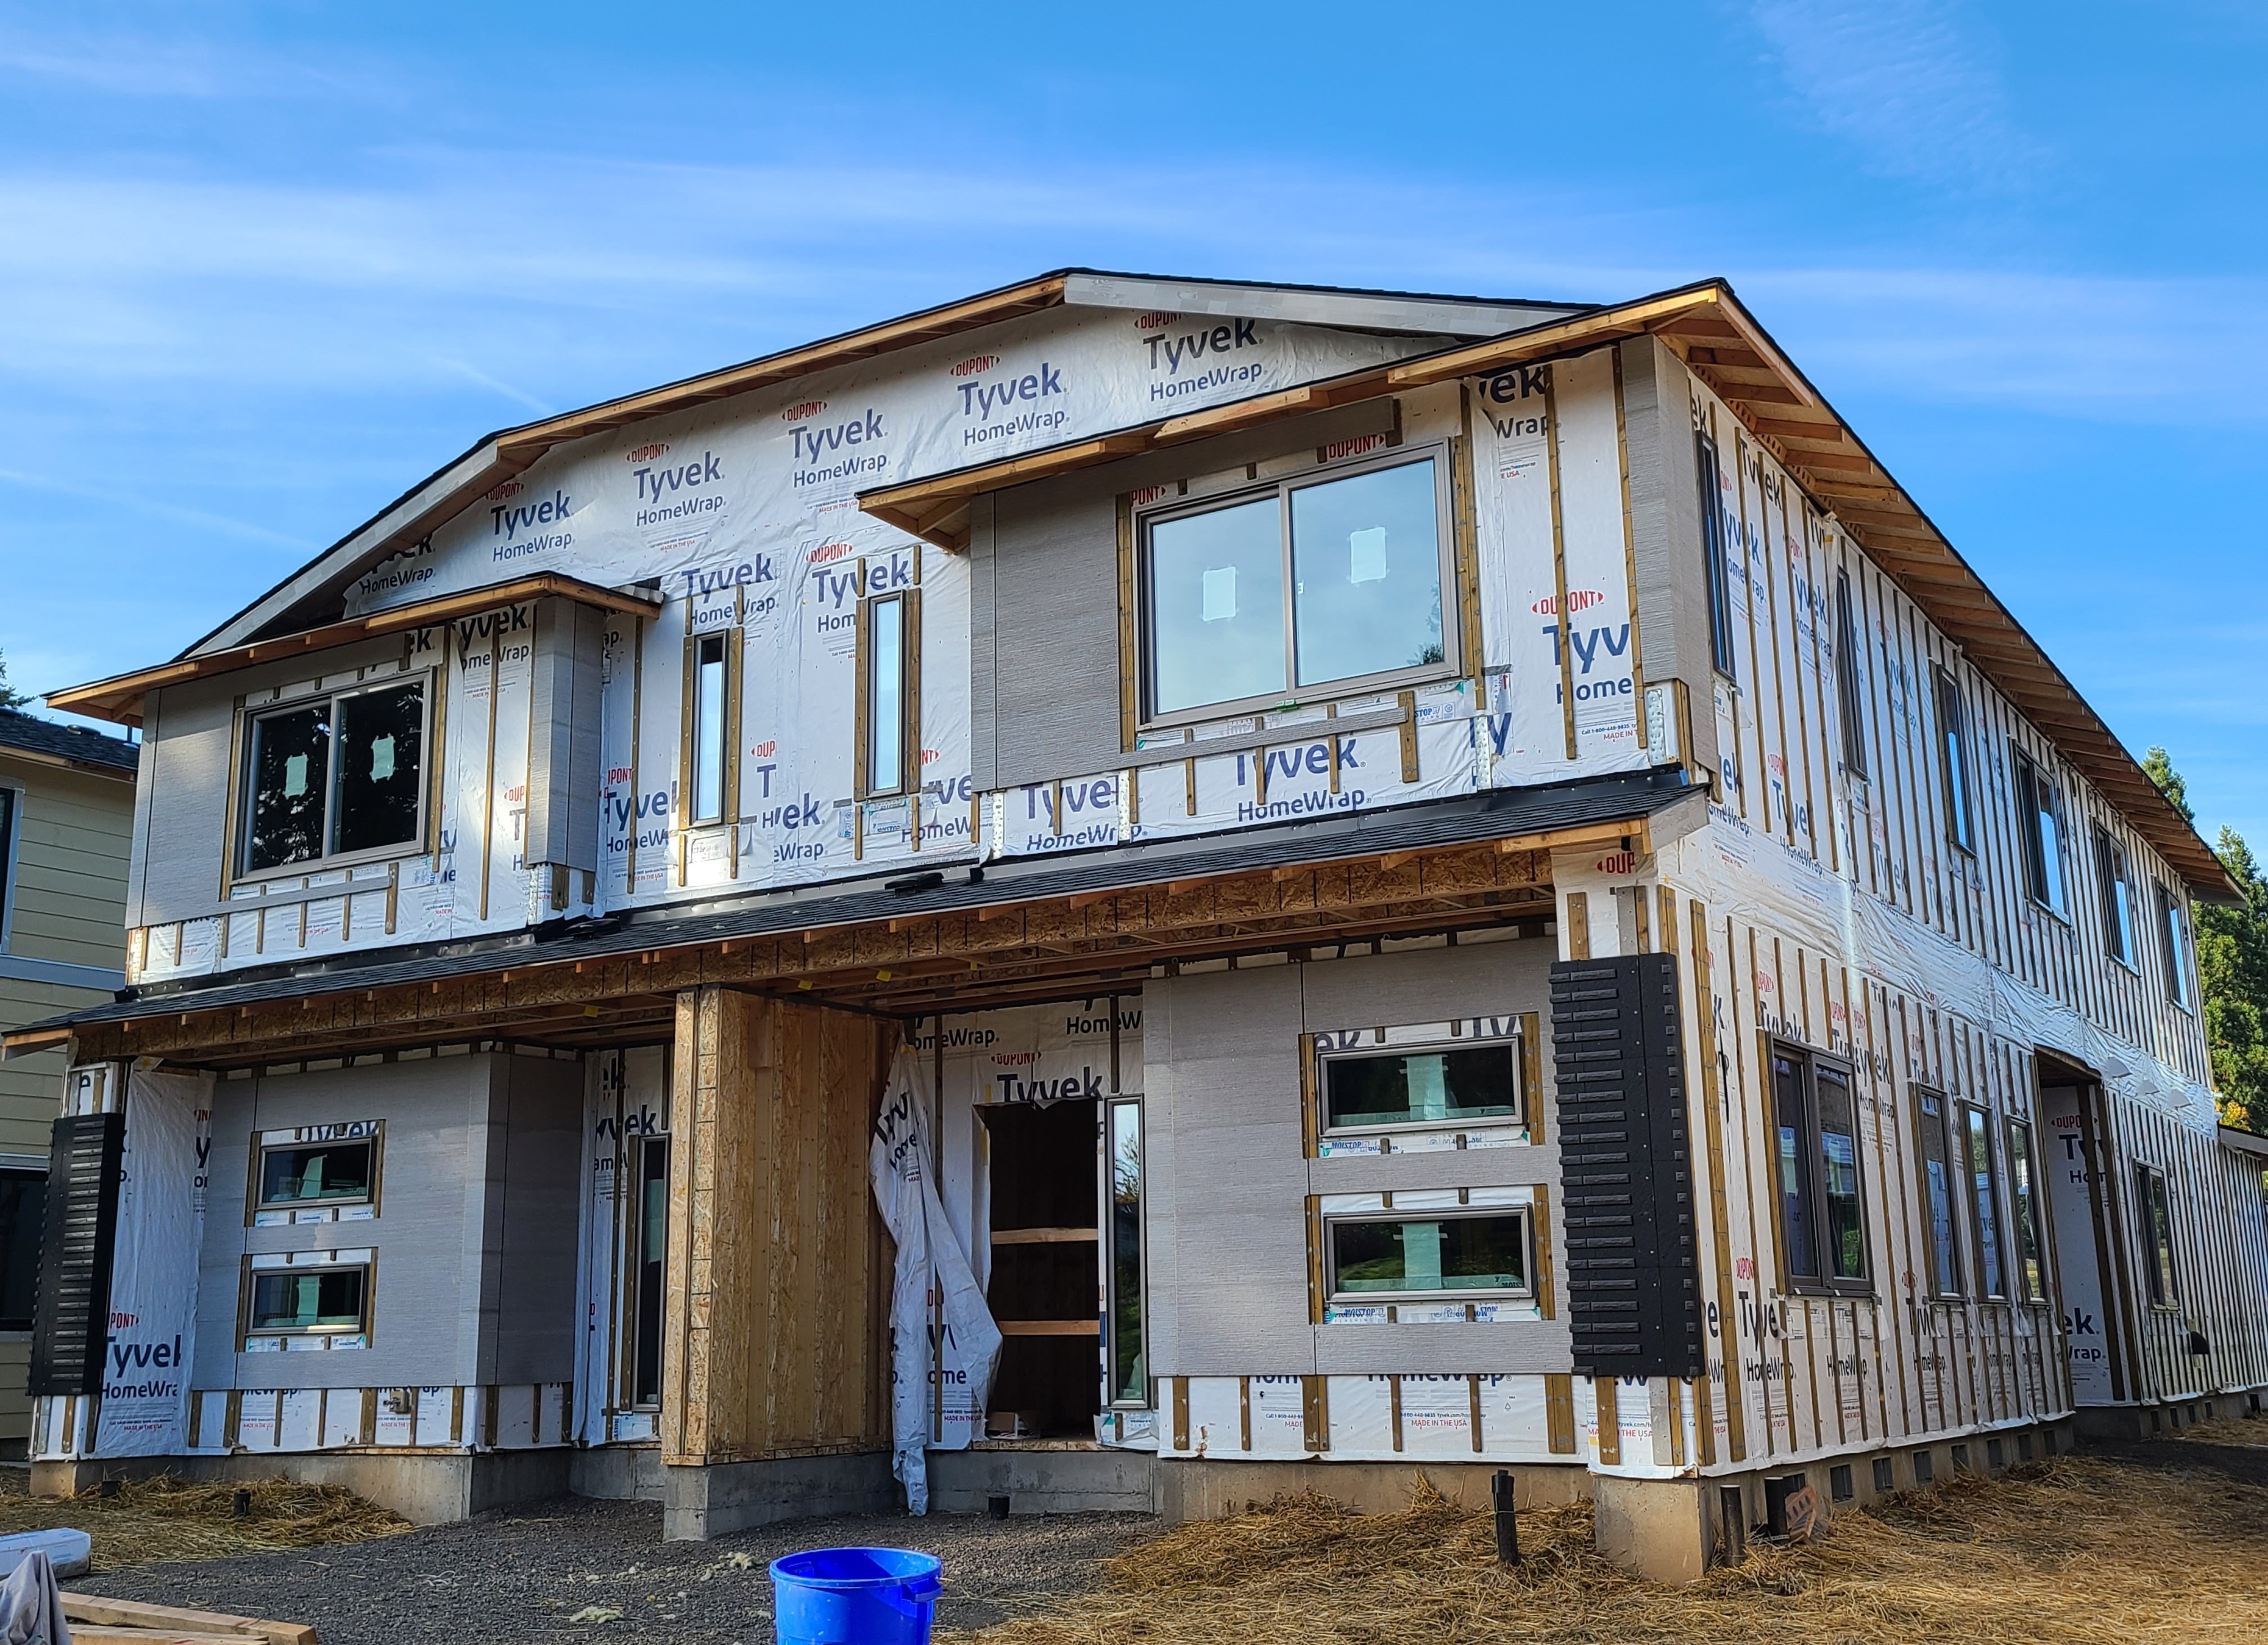
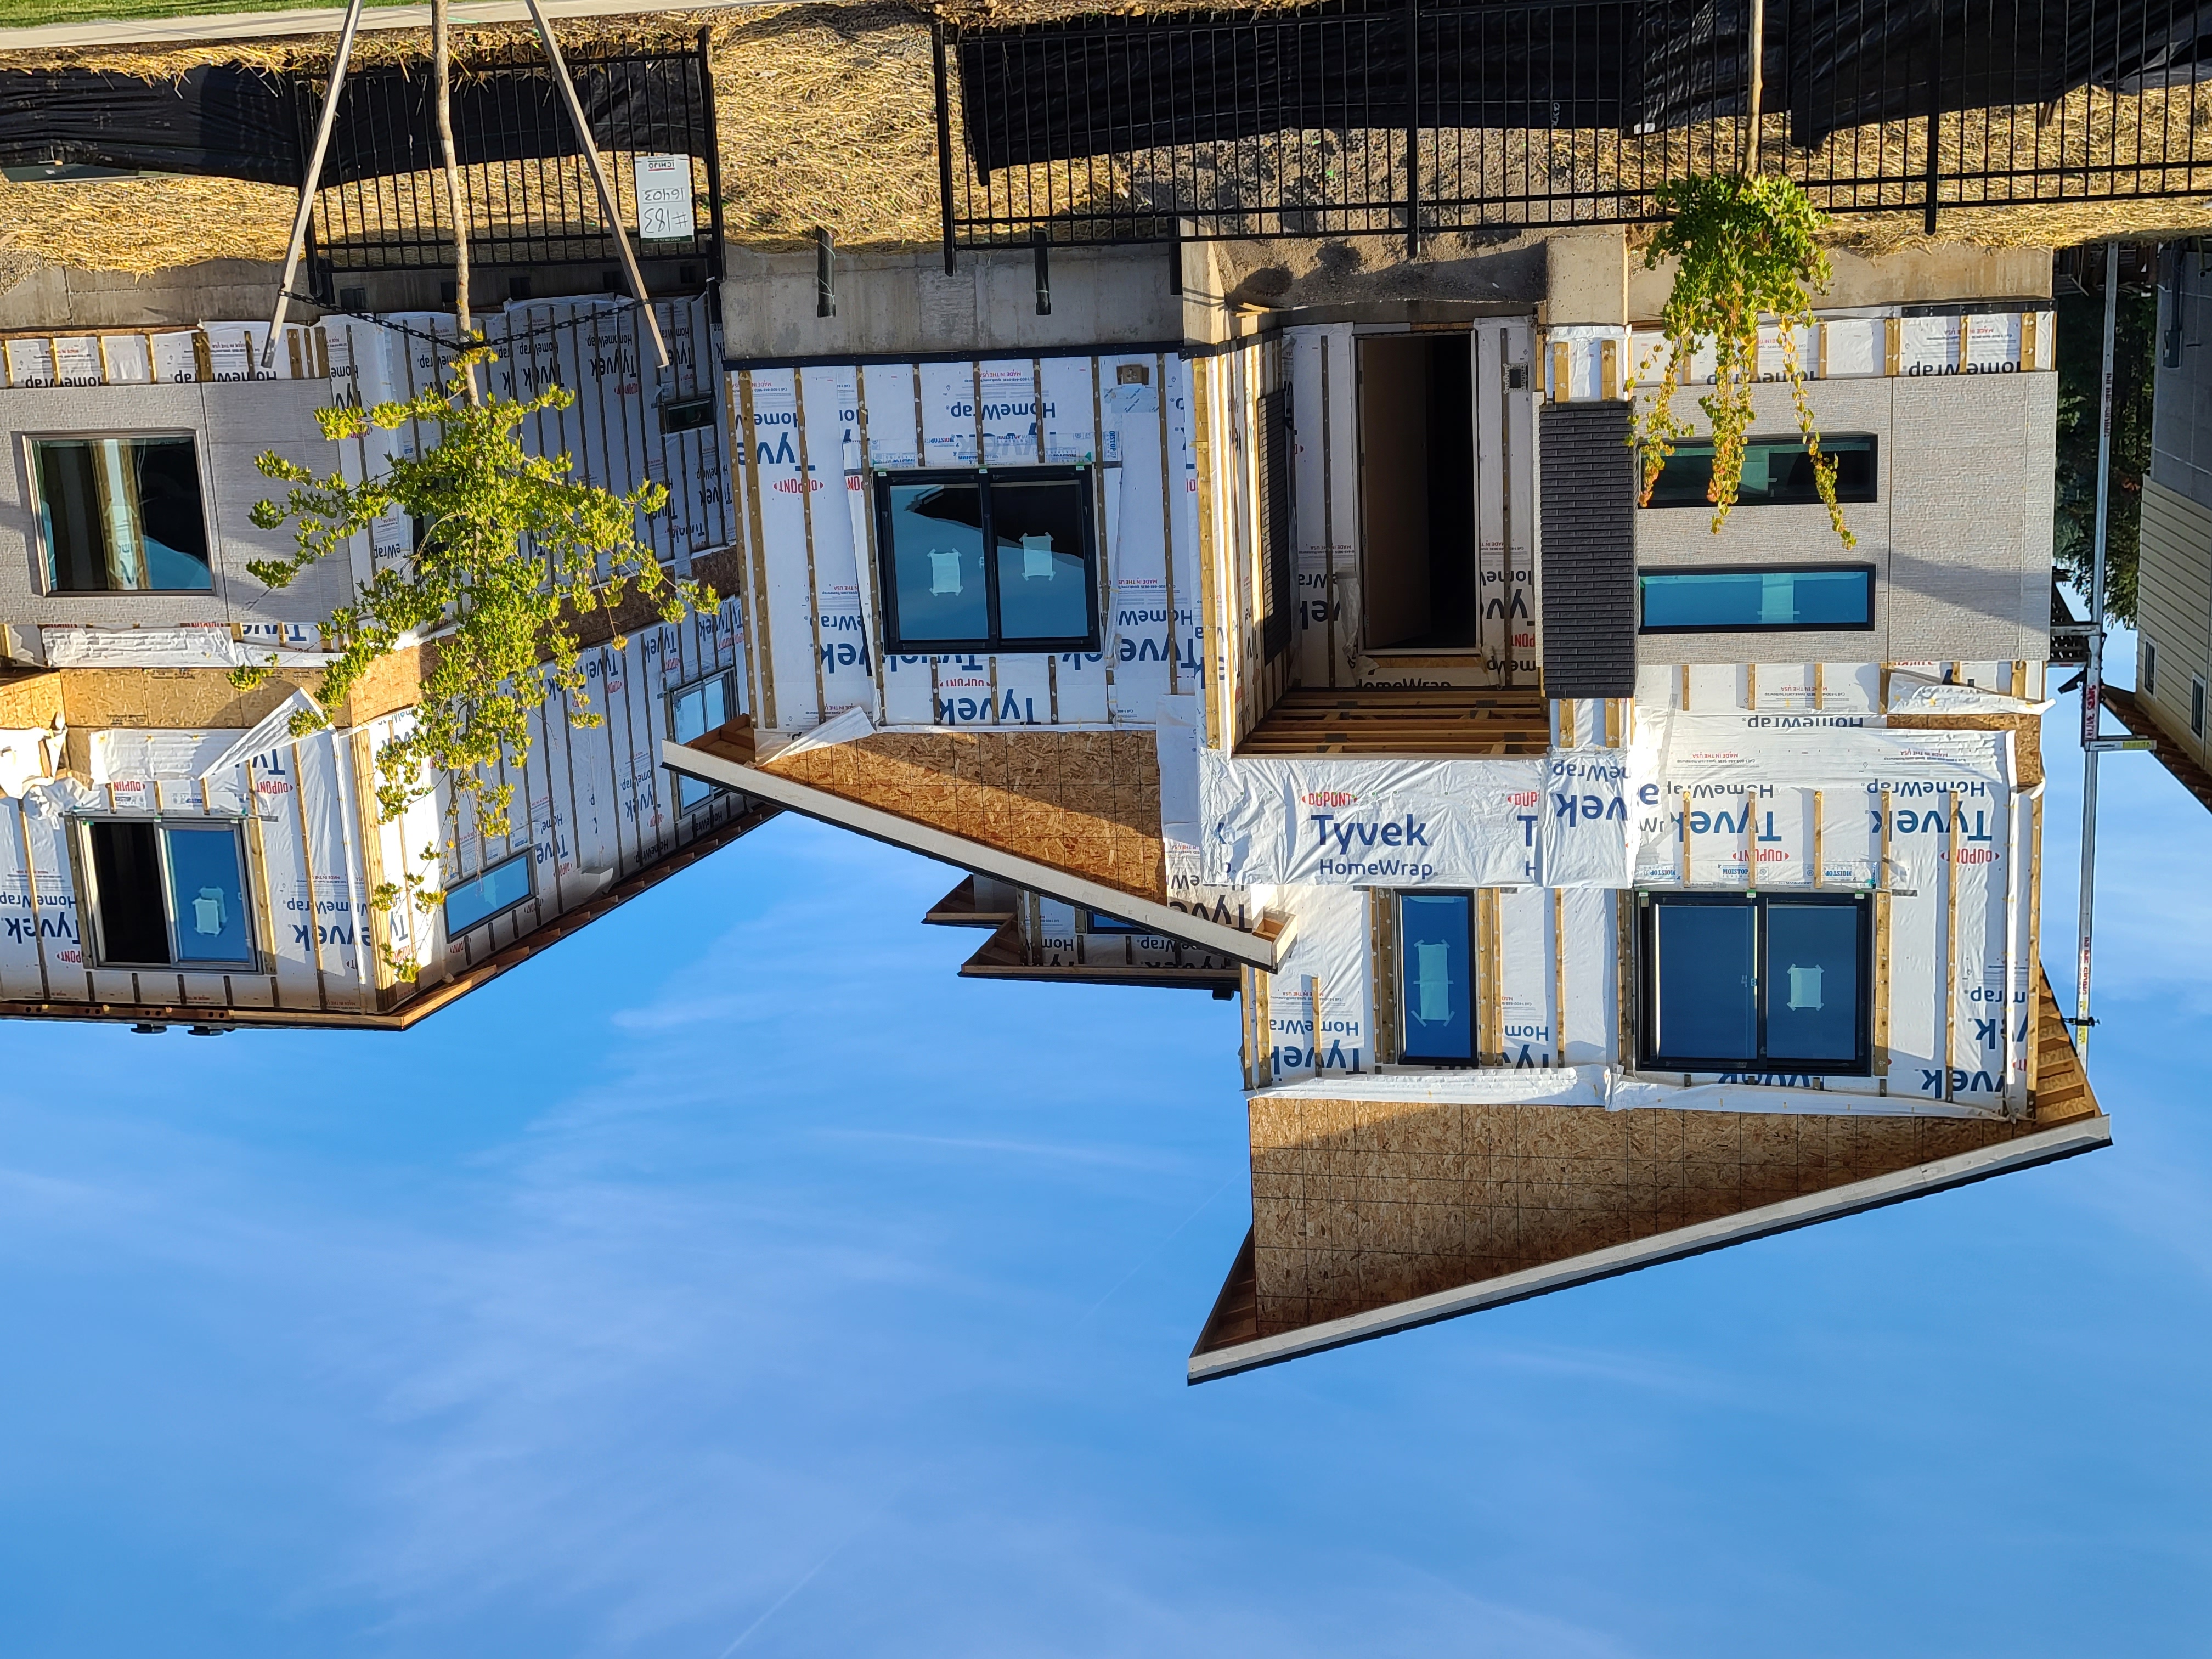
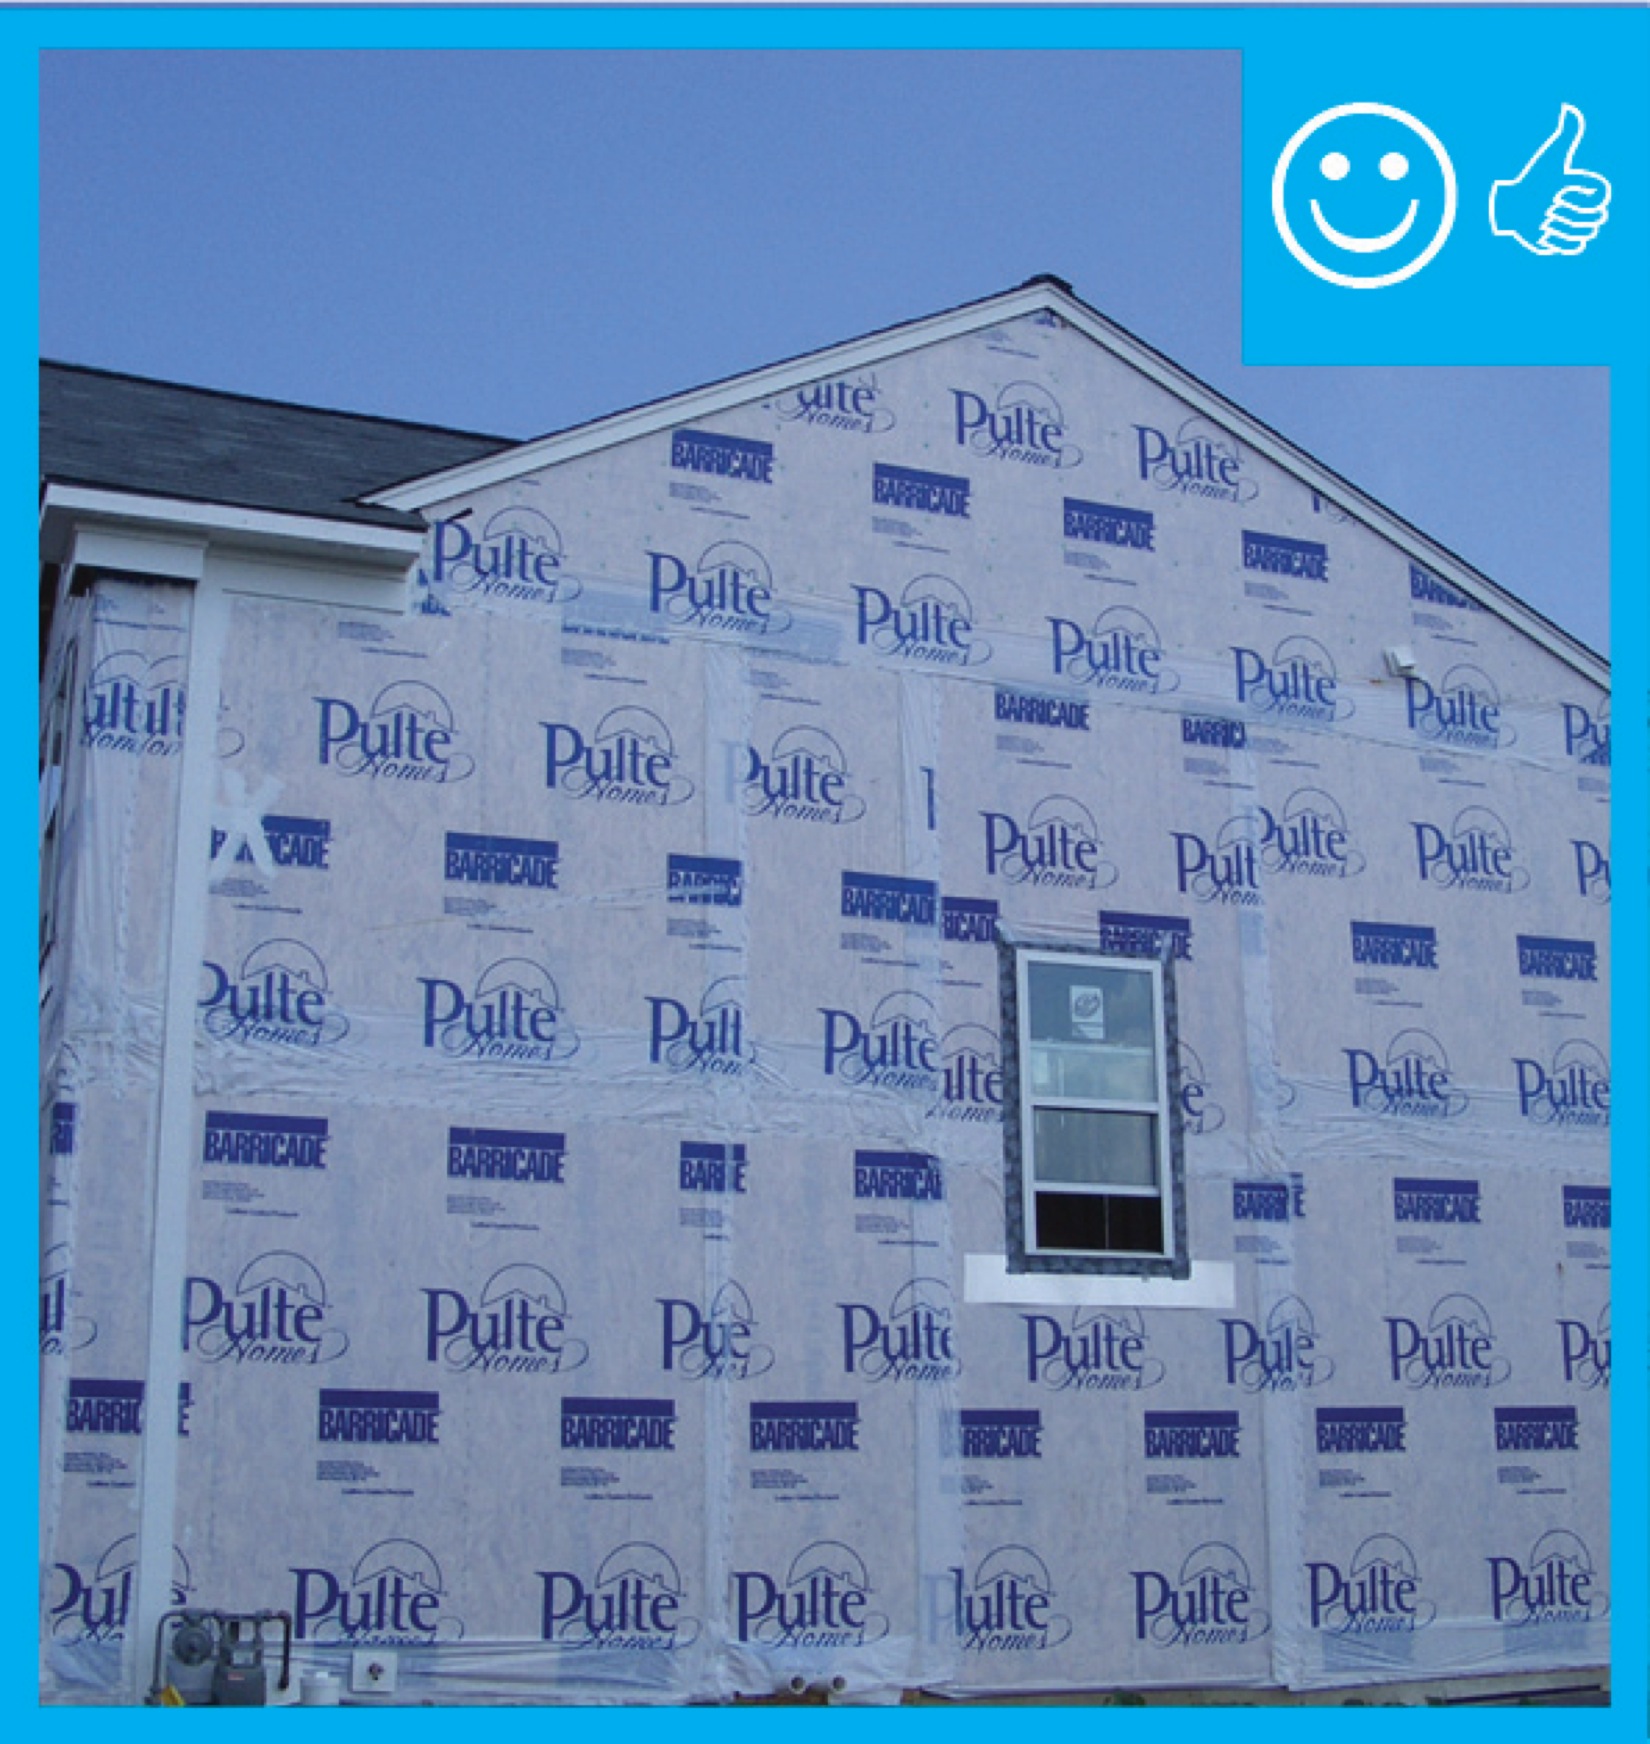
Right - House wrap is overlapped “shingle” style to direct moisture down and away from the house; seams will be taped so house wrap serves as both an air and weather barrier.
Image
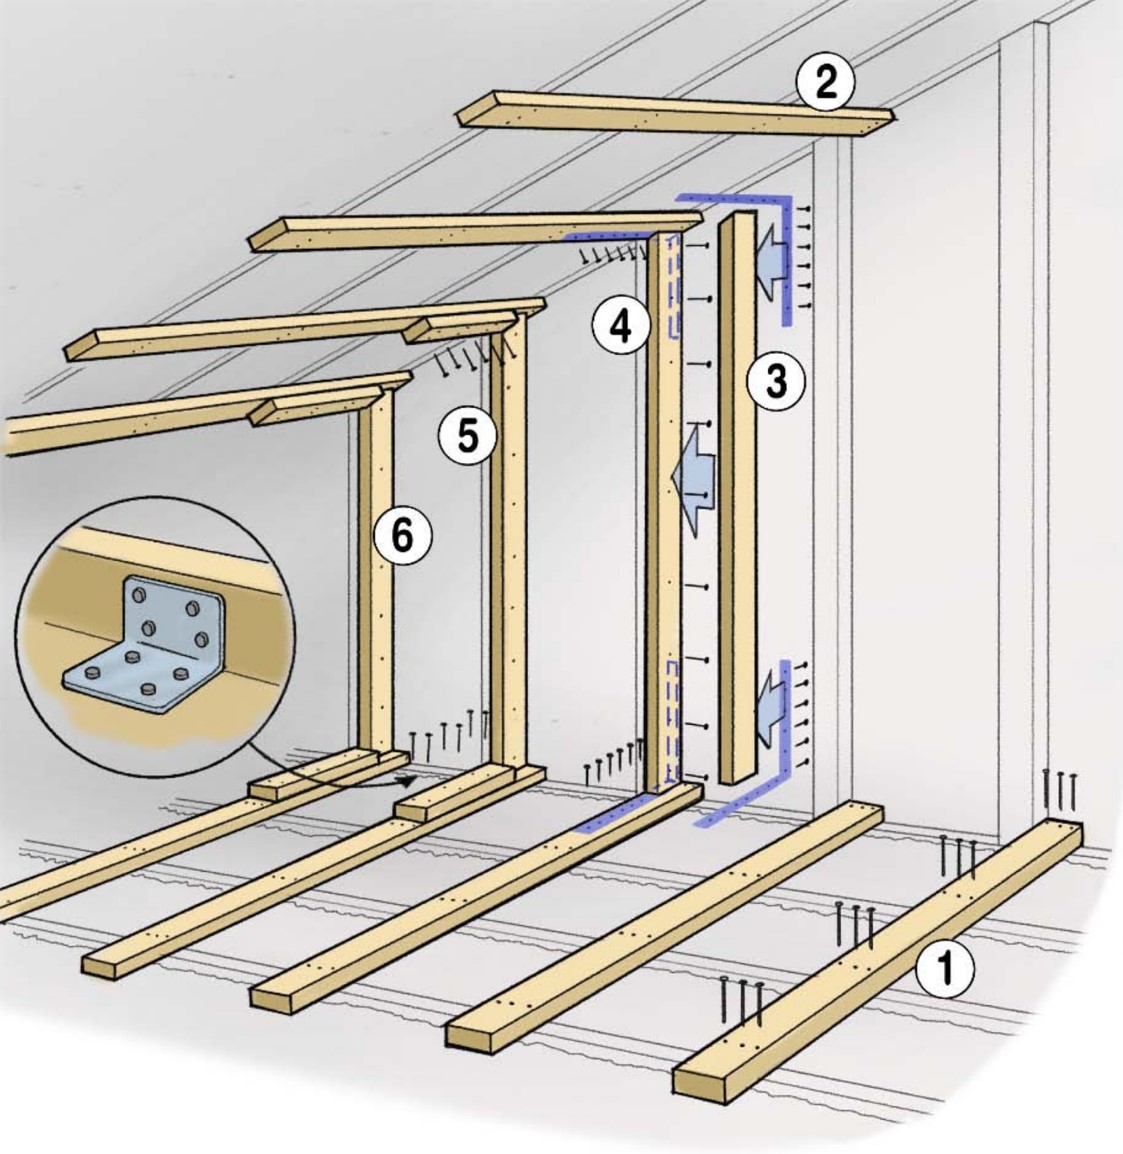
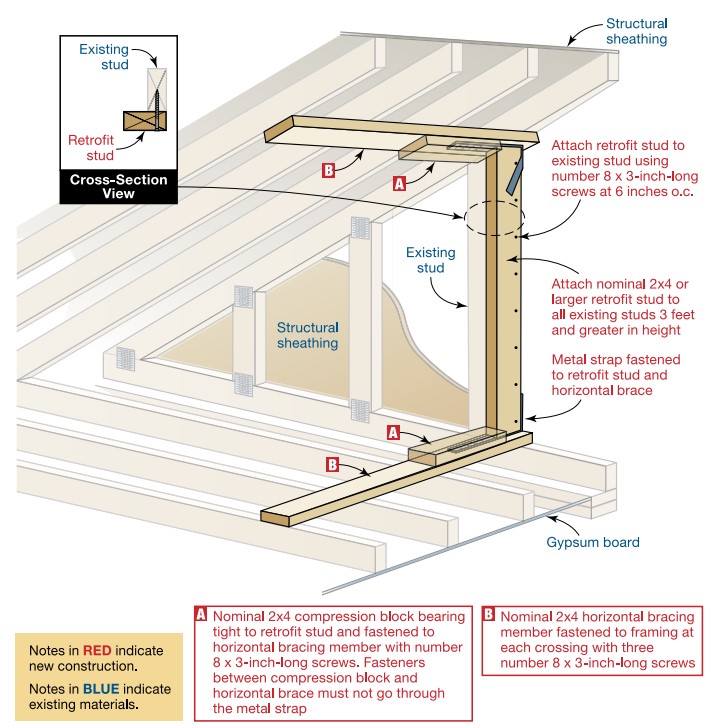
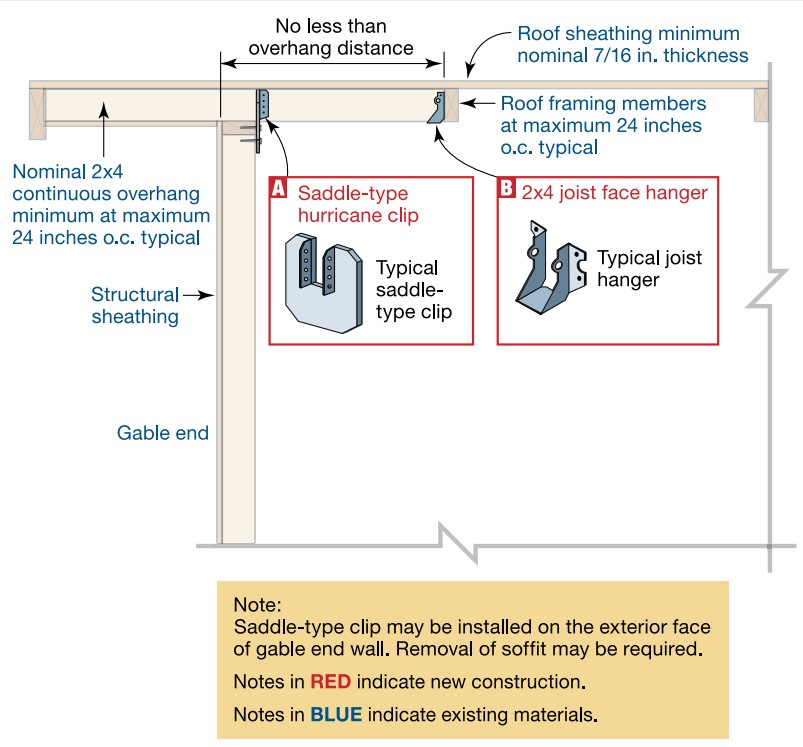
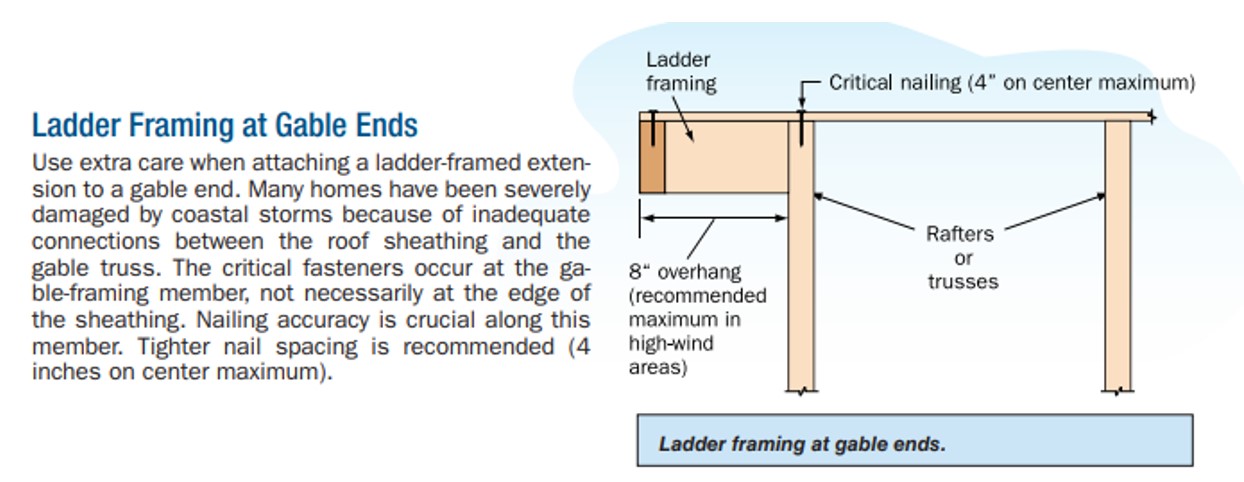
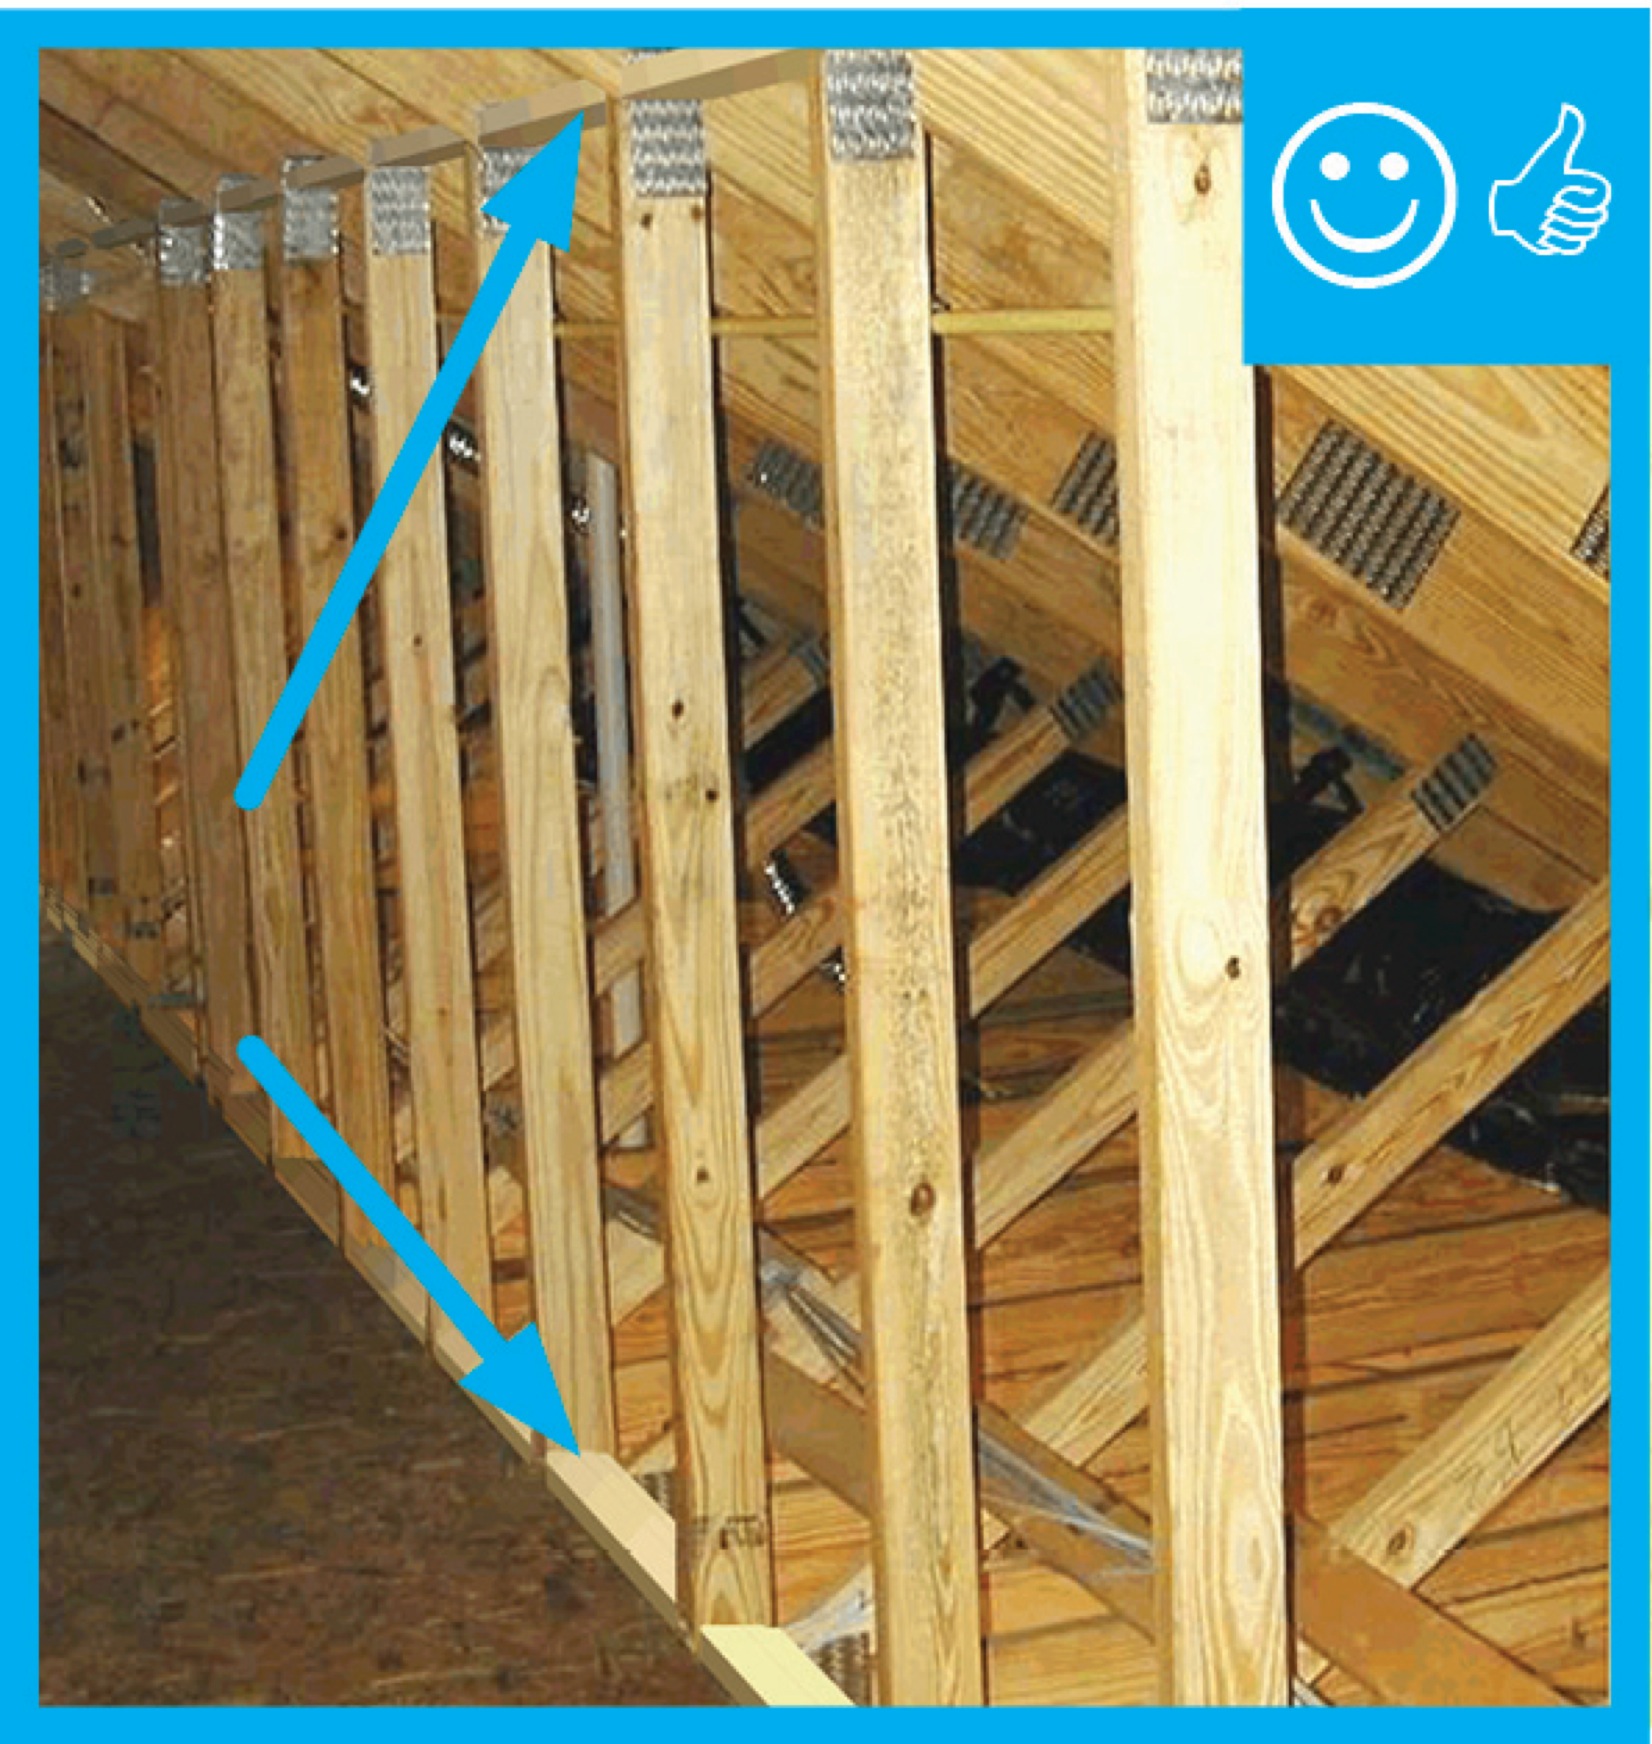
Right - Installation steps for the L-bent strap method of bracing a gable end wall
Image
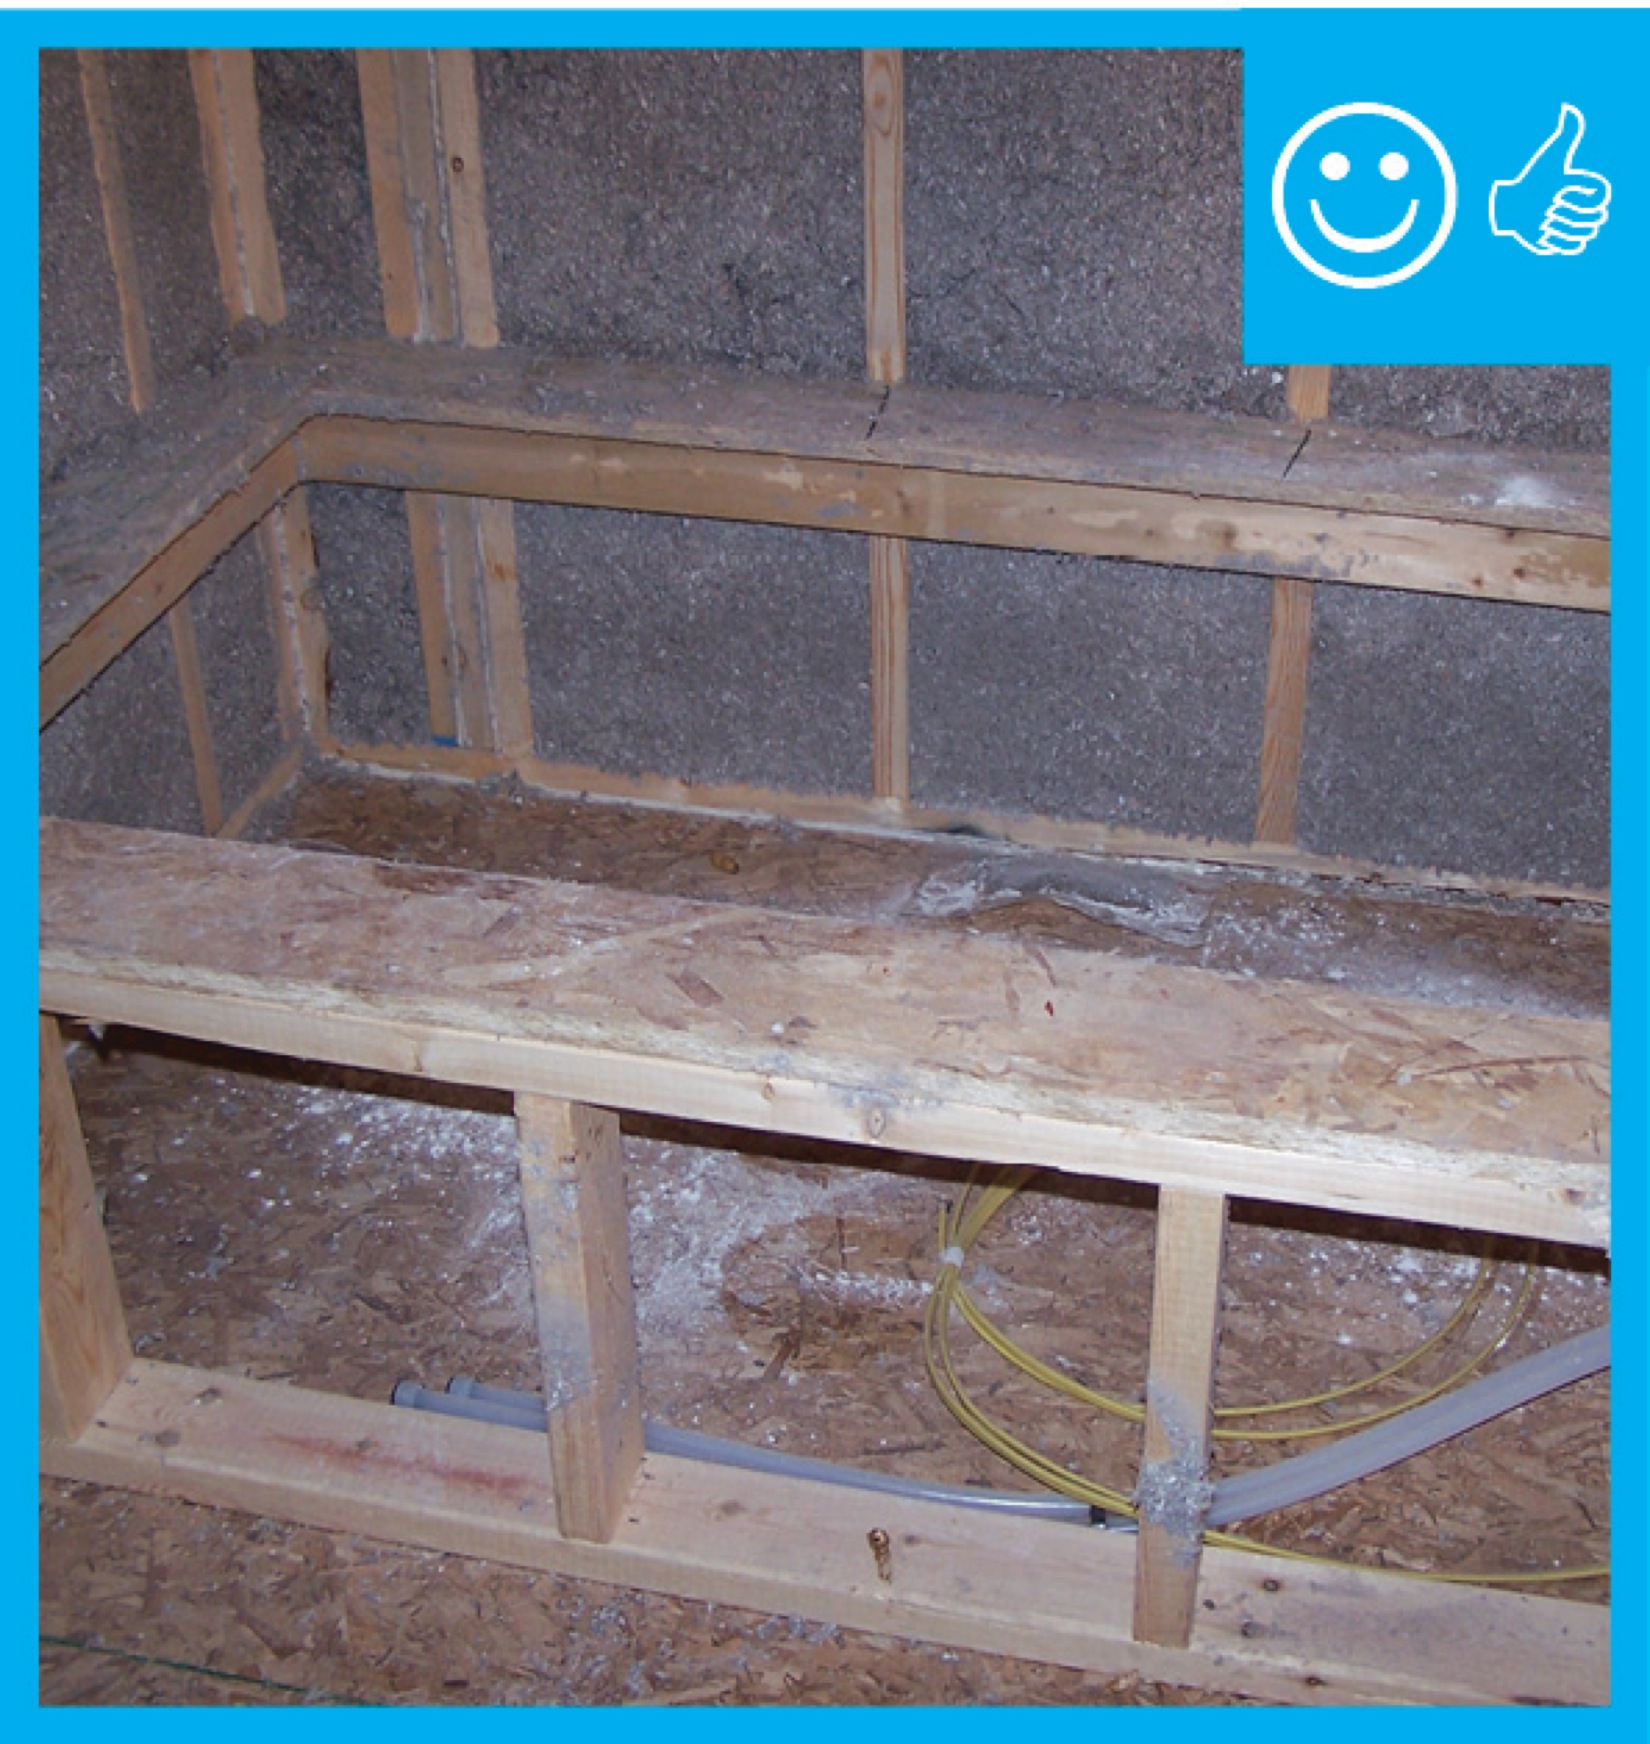
Right - Ladder blocking allows insulation to be installed in exterior walls at interior-exterior wall intersections.
Image
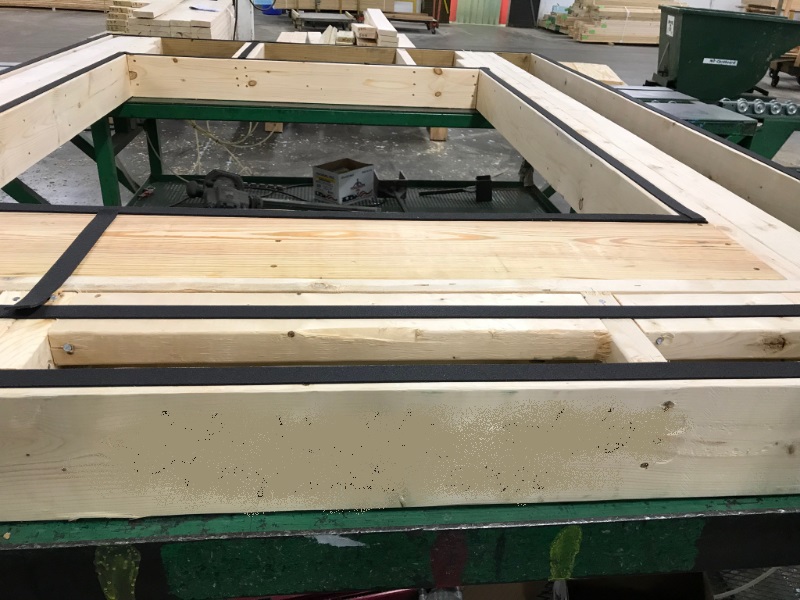
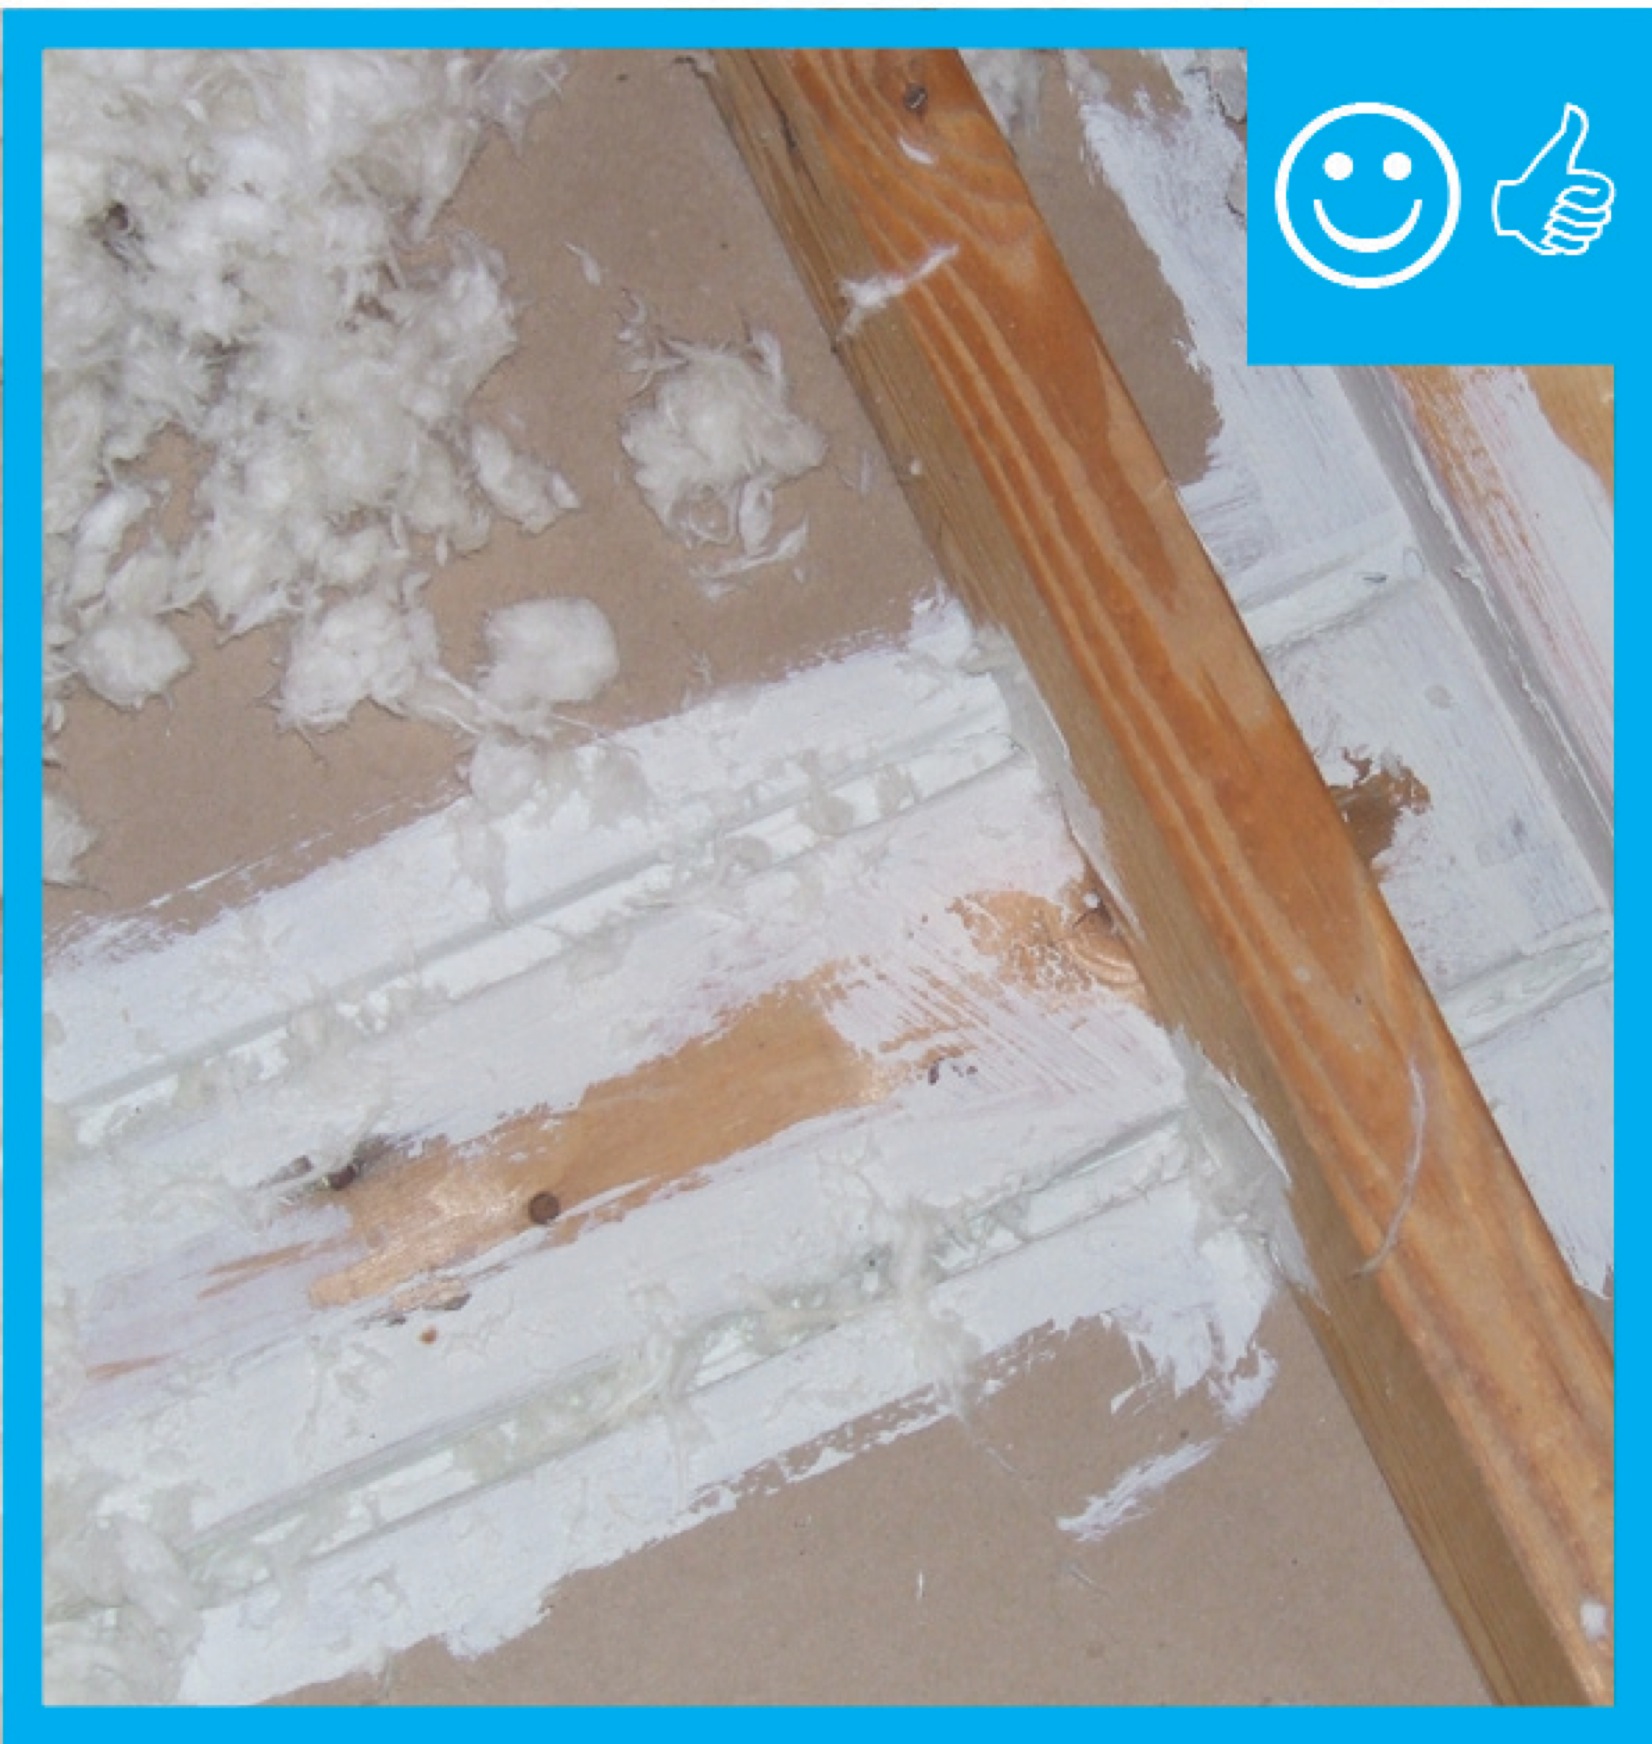
Right - Mastic is being installed to air seal the wood-to-wood joints in this wall.
Image
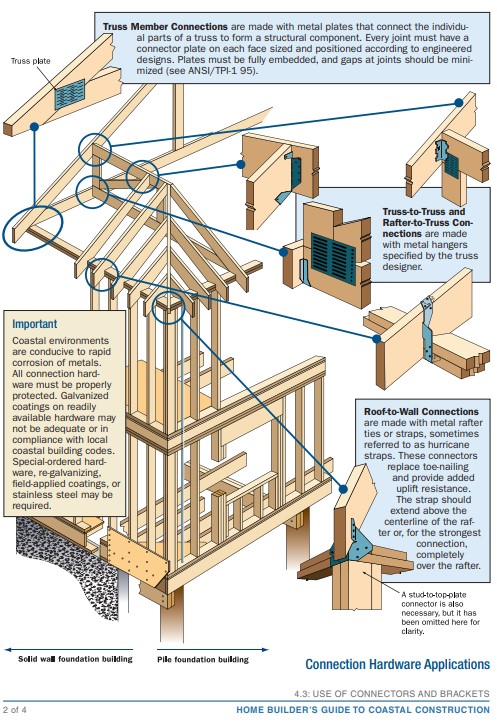
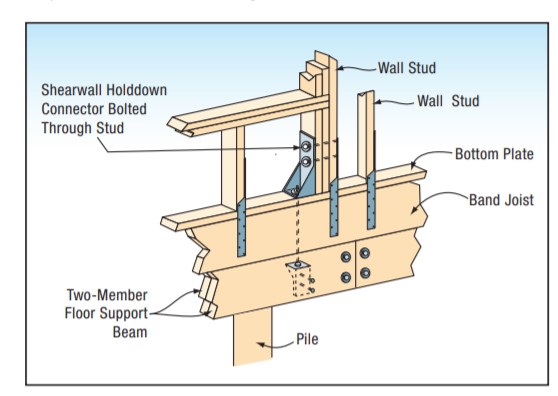
Right - Metal connectors provide uplift resistance at the rim joist between floors in new construction for a continuous load path.
Image
Right - Metal connectors provide uplift resistance at the stud-to-bottom plate connection in new construction for a continuous load path.
Image
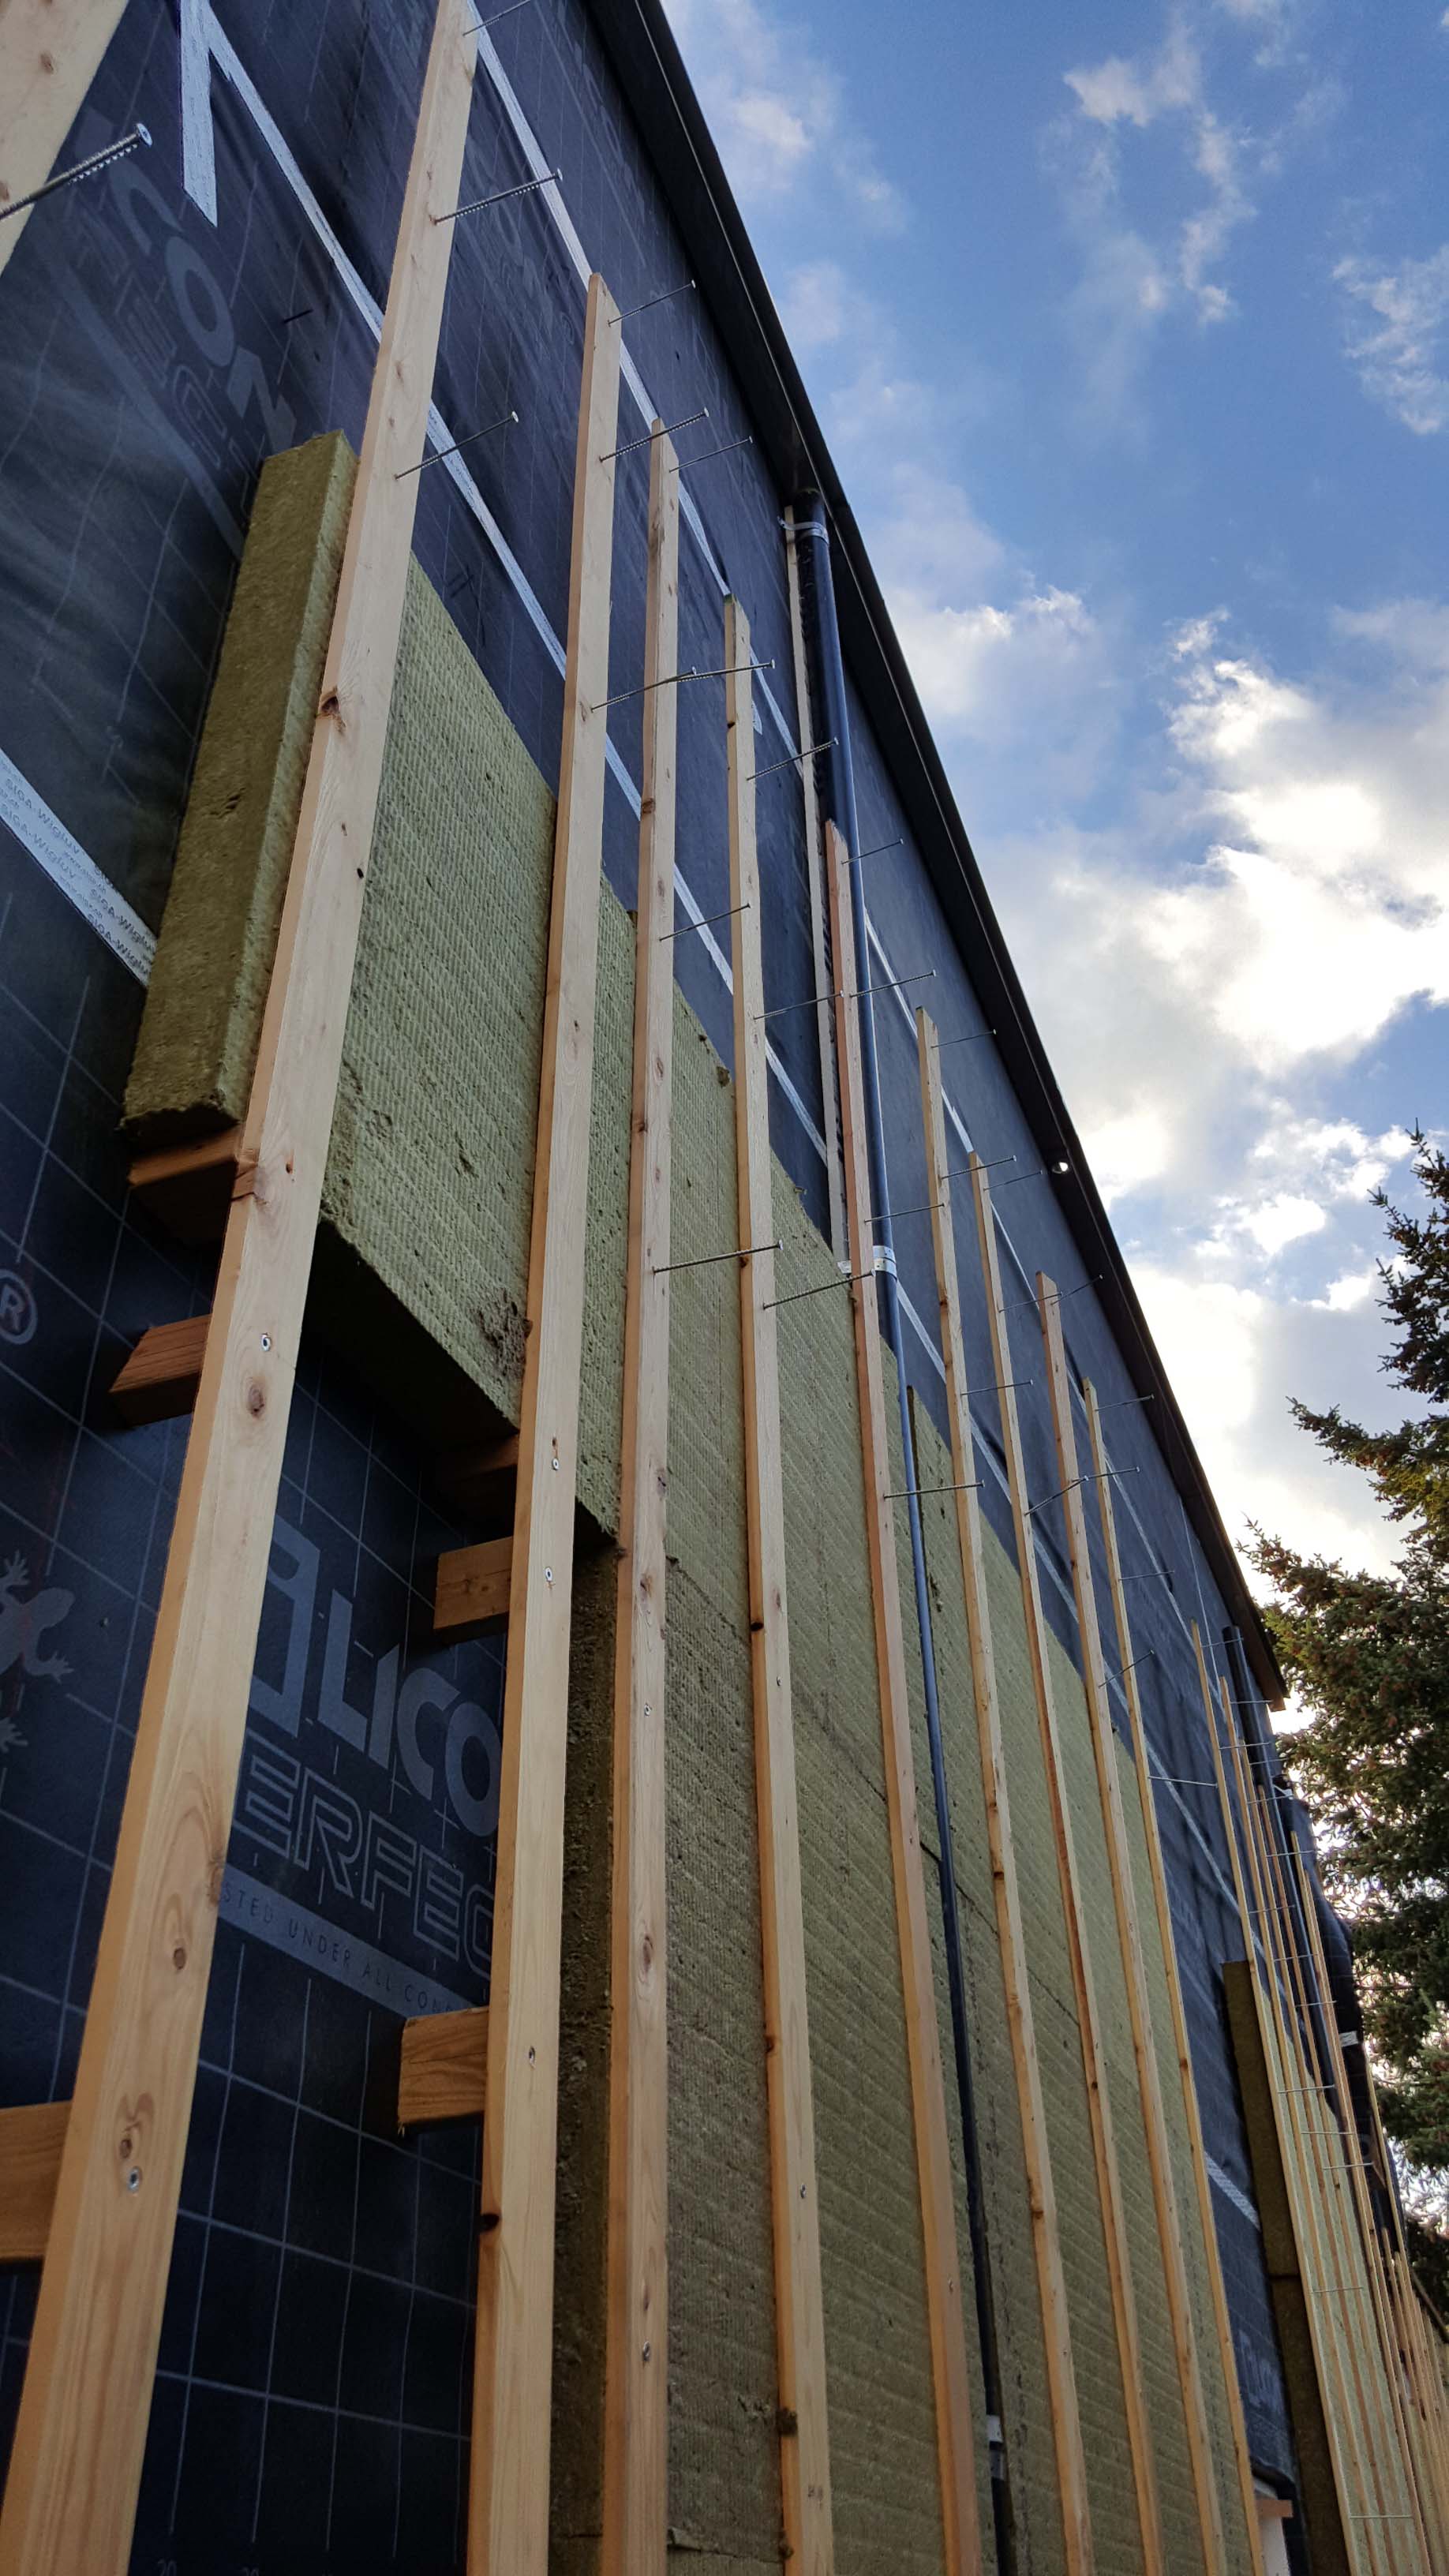
Right - Mineral Wool insulation is installed on the exterior of wall with furring strips.
Image
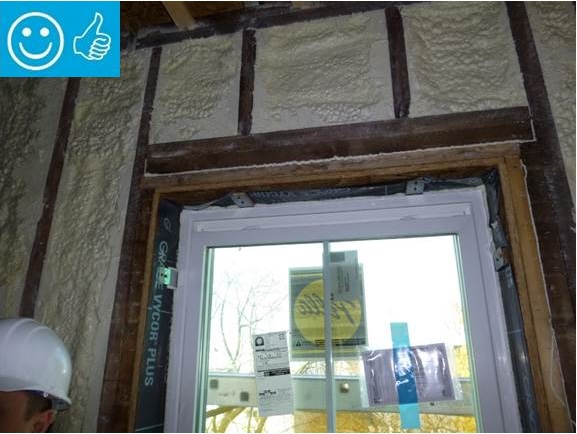
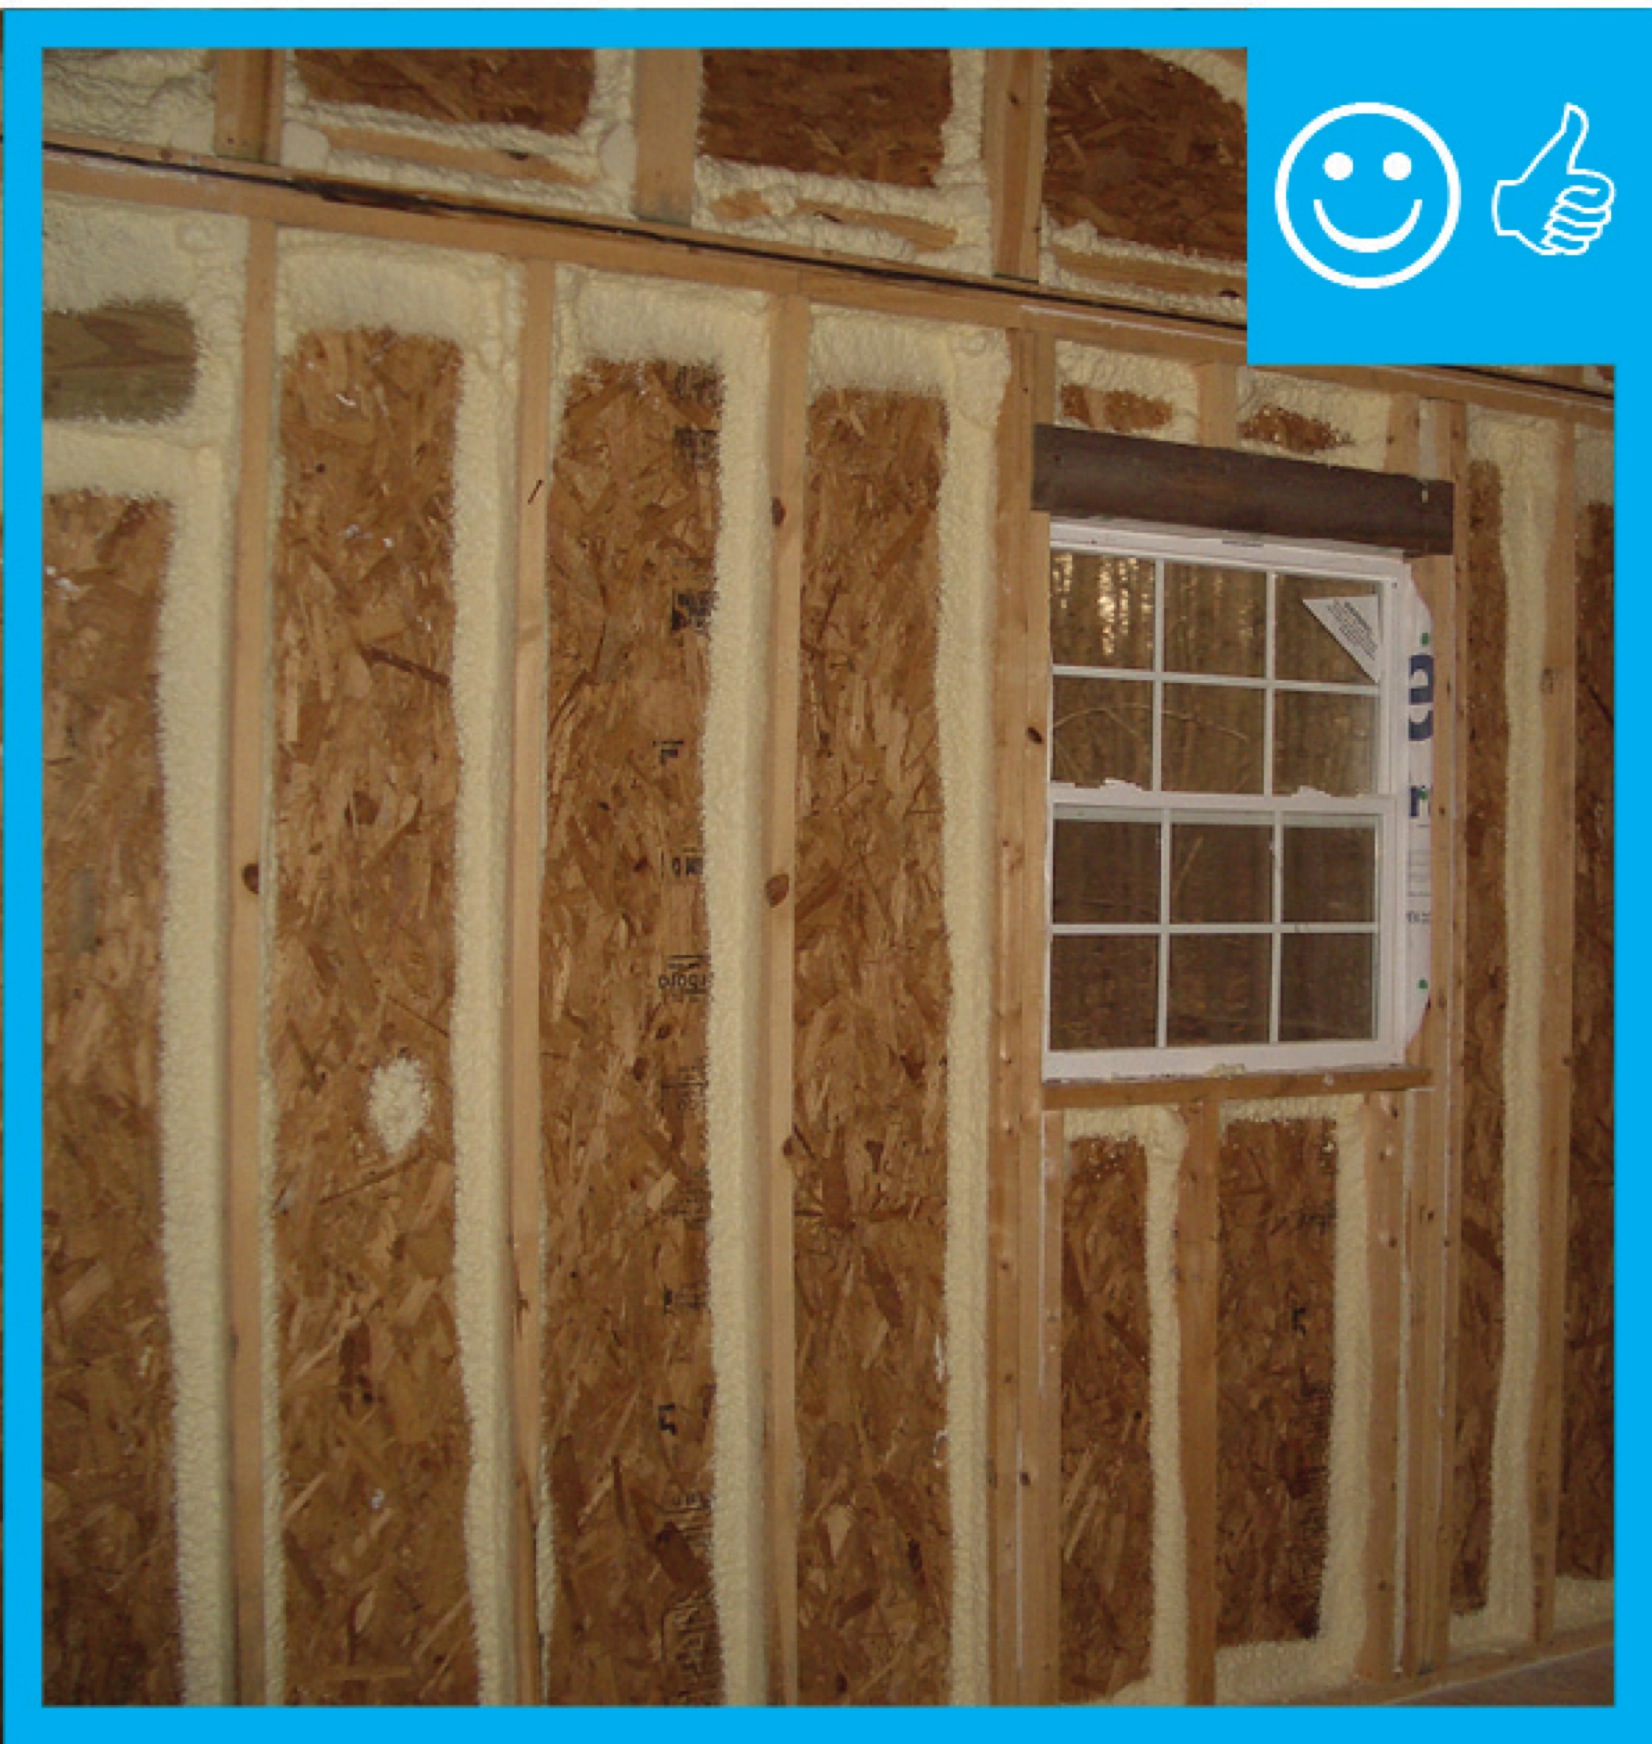
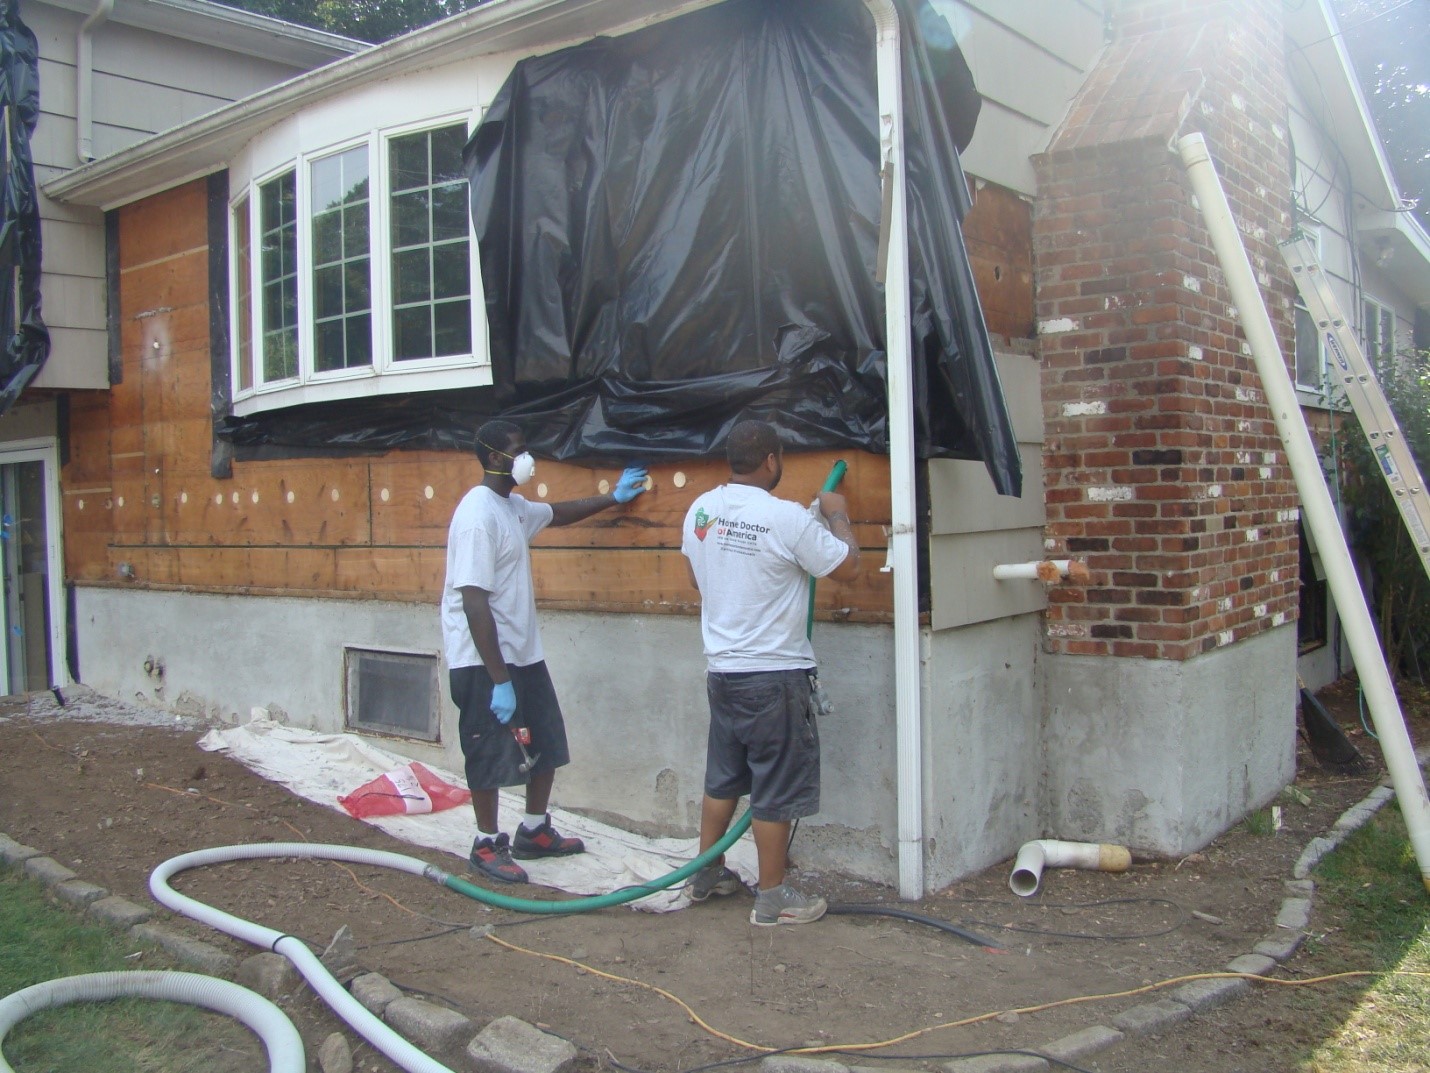
Right - New flashing has been installed to complete the air and water control layers at the window openings of this wall retrofit that includes insulating the wall cavities with spray foam
Image
Right - Panelized walls came to site with house wrap and furring strips pre-installed; seams will be overlapped and taped on site.
Image
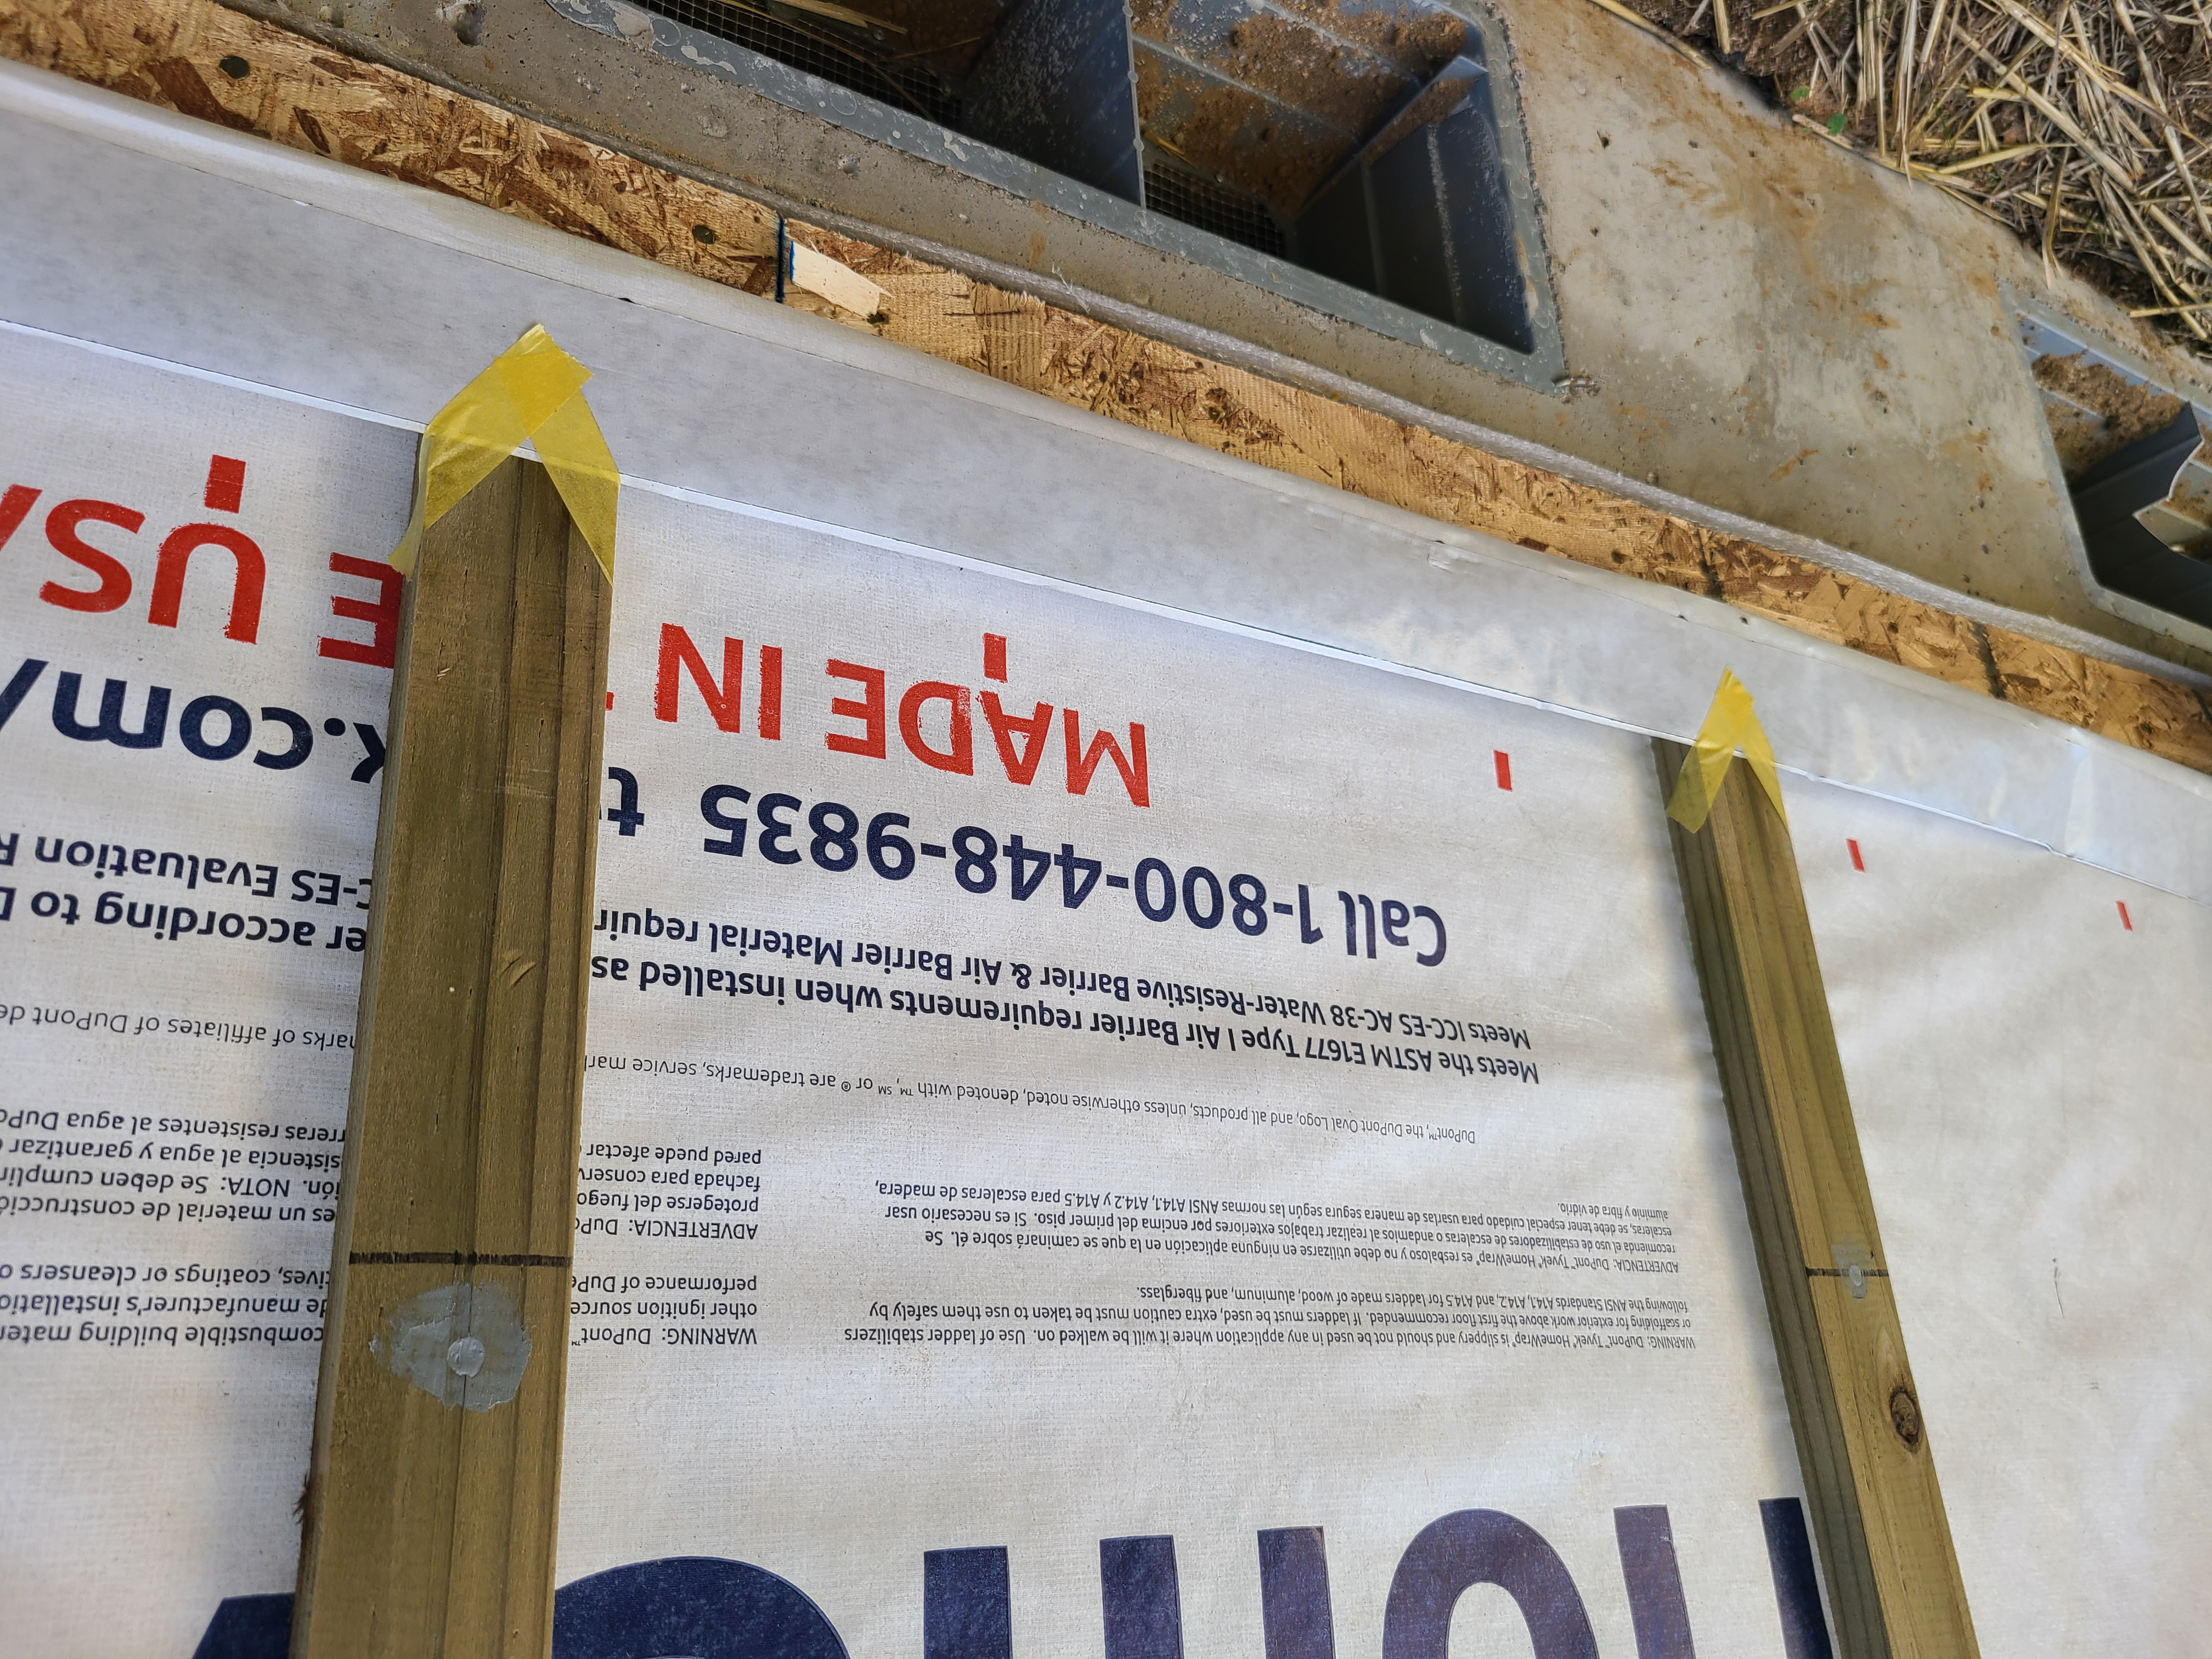
Right - Panelized walls came to site with house wrap pre-installed and ready to unfurl to cover foundation-to-sheathing seam.
Image

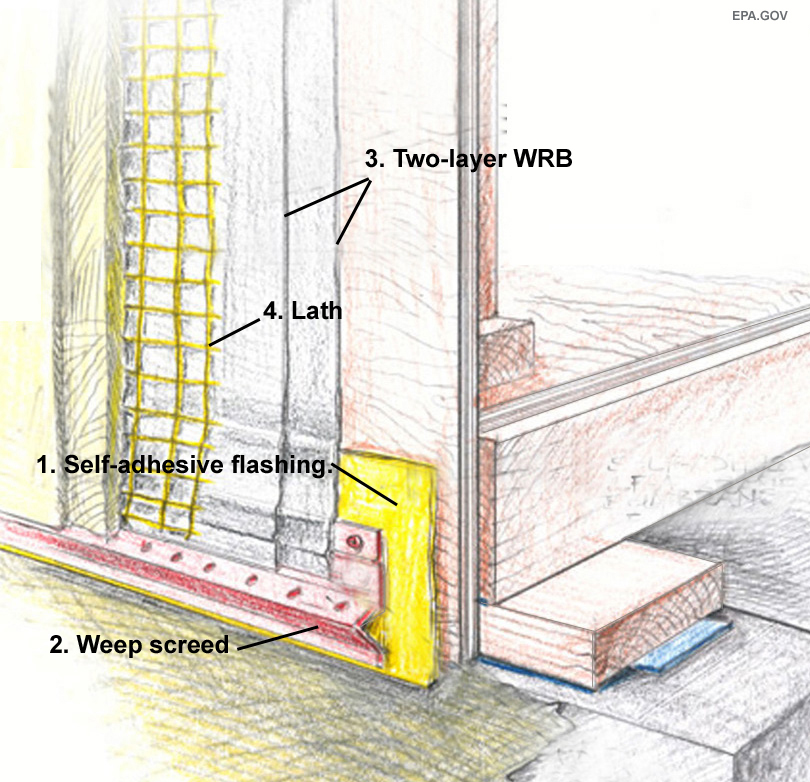
Right - Permeable rigid mineral wool insulation and appropriate water-management flashing details are integrated with new rigid foam siding to keep water away from the sill beam above the foundation wall
Image
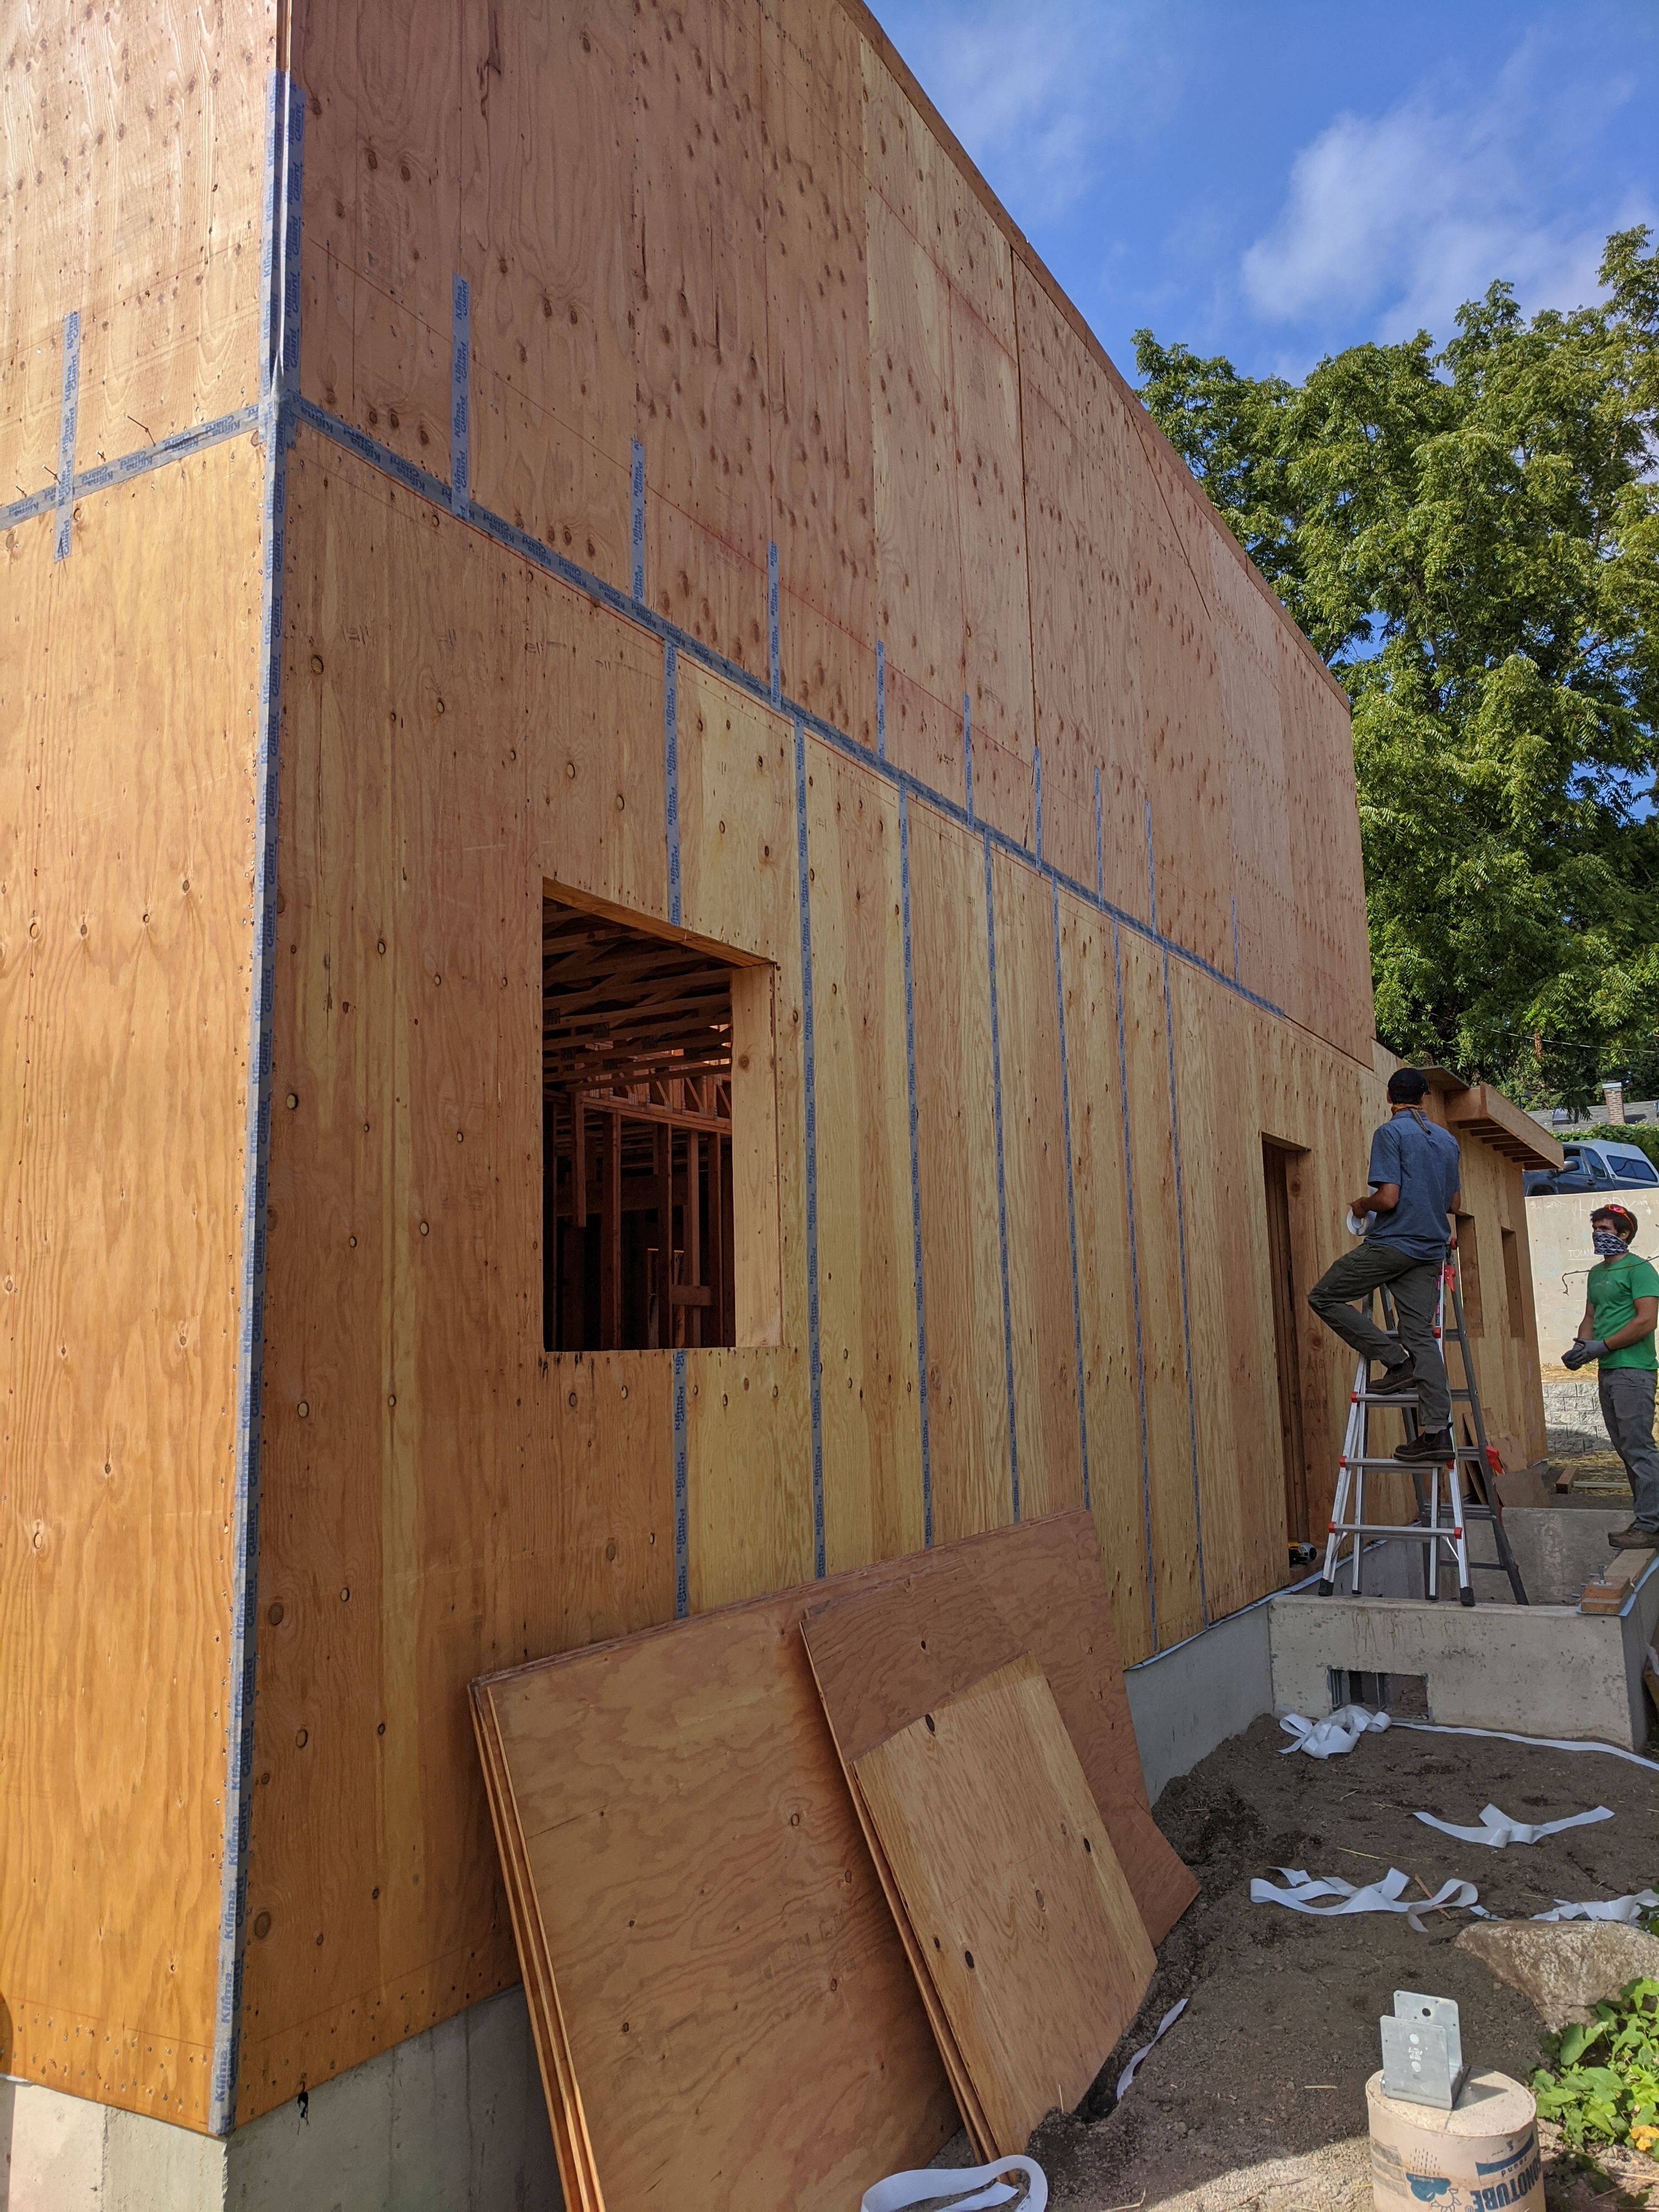
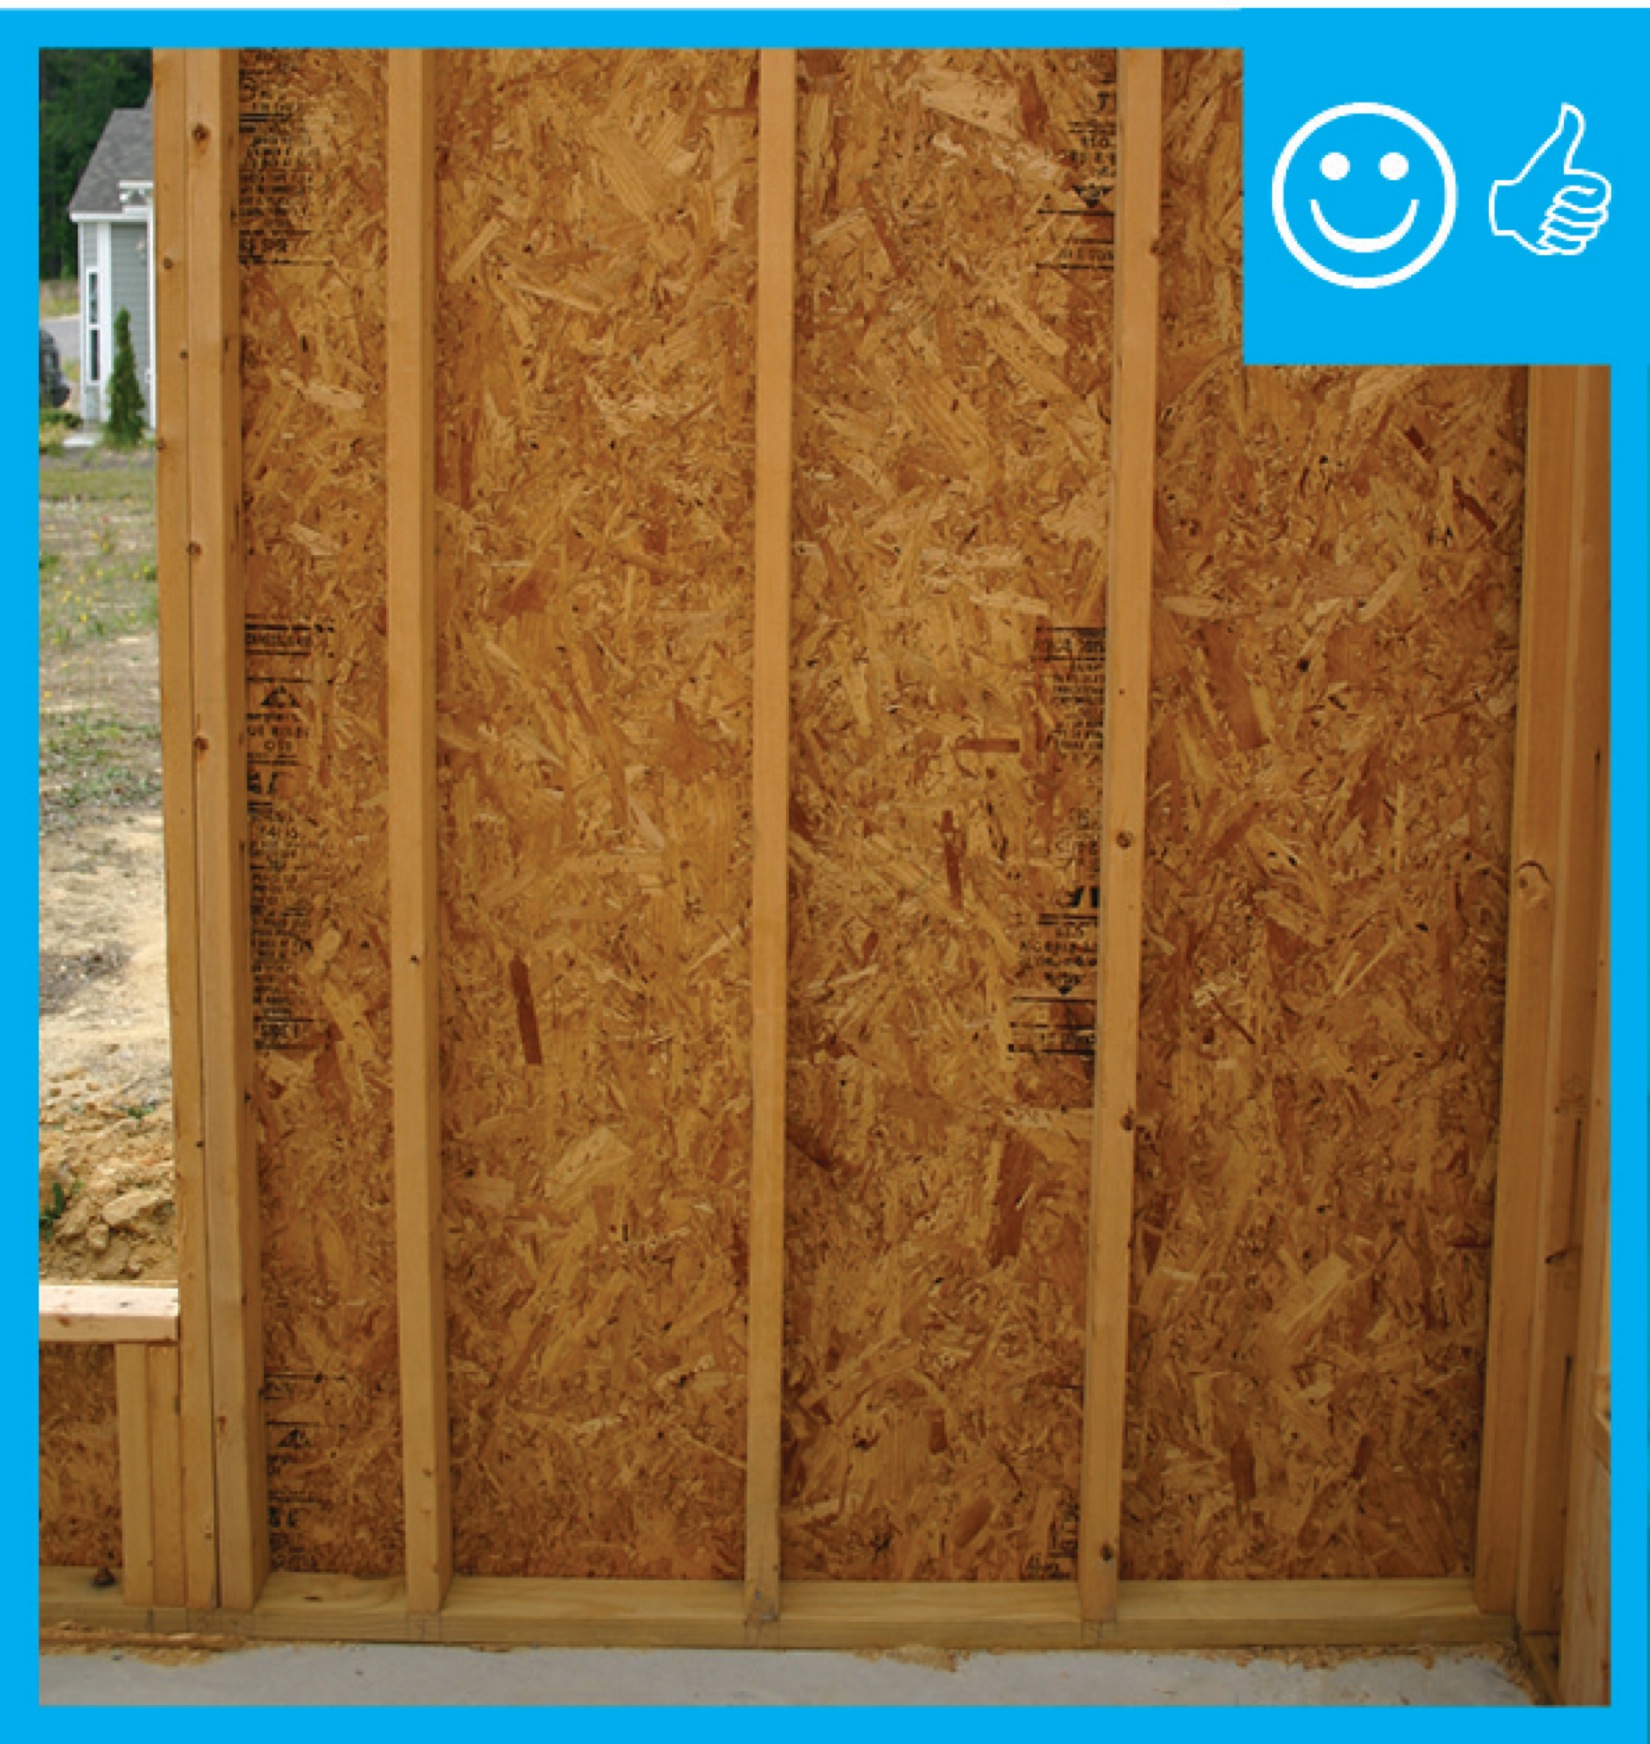
Right - Plywoood sheathing is taped at the seams to create a continuous air barrier that prevents air infiltration through critical junctures in the wall, such as at corners and between floors.
Image
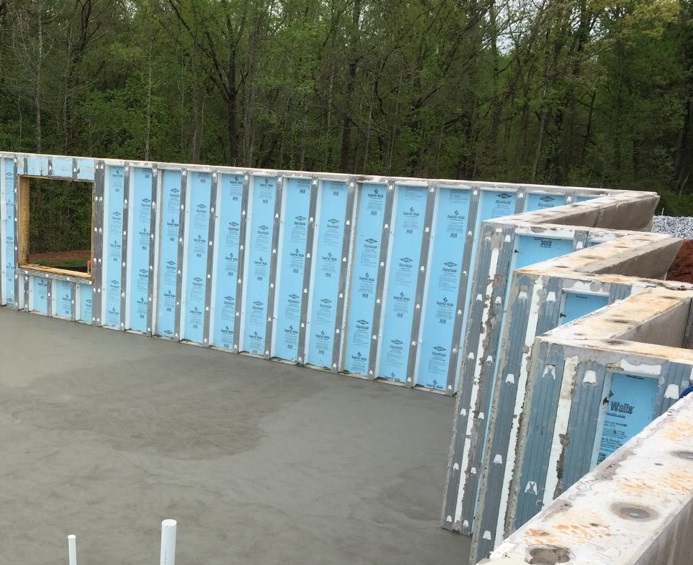
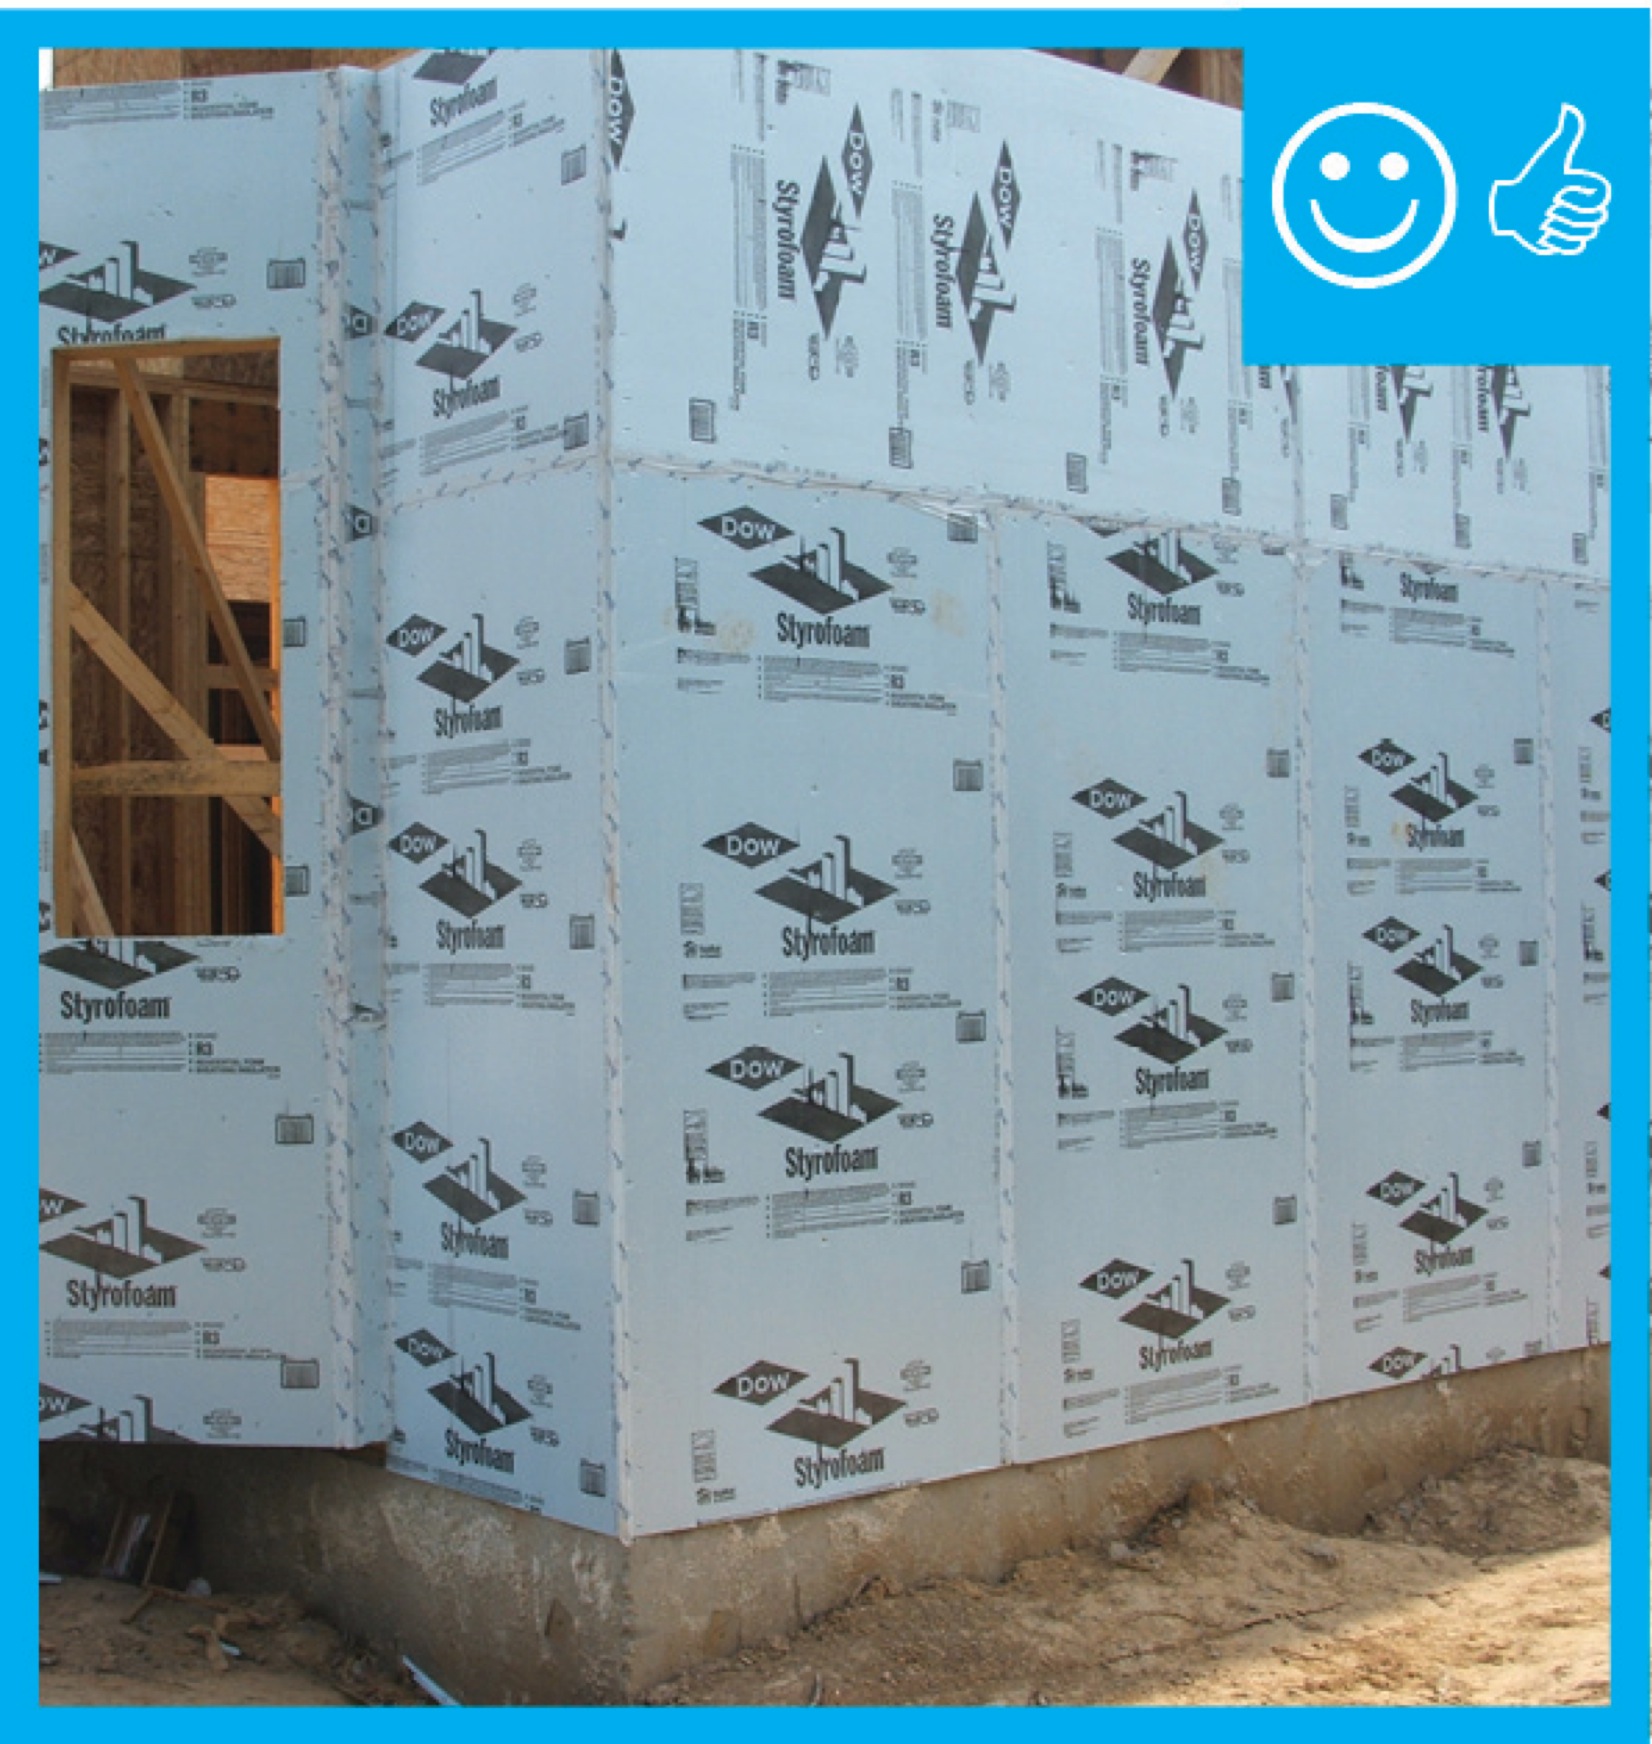
Right - Precast concrete basement walls come to the site with integrated rigid foam insulation and steel-faced concrete studs.
Image
Image
Right - Seams in coated sheathing and joints around window are properly sealed and flashed with tape and all nail holes are covered with paint-on sealant.
Image
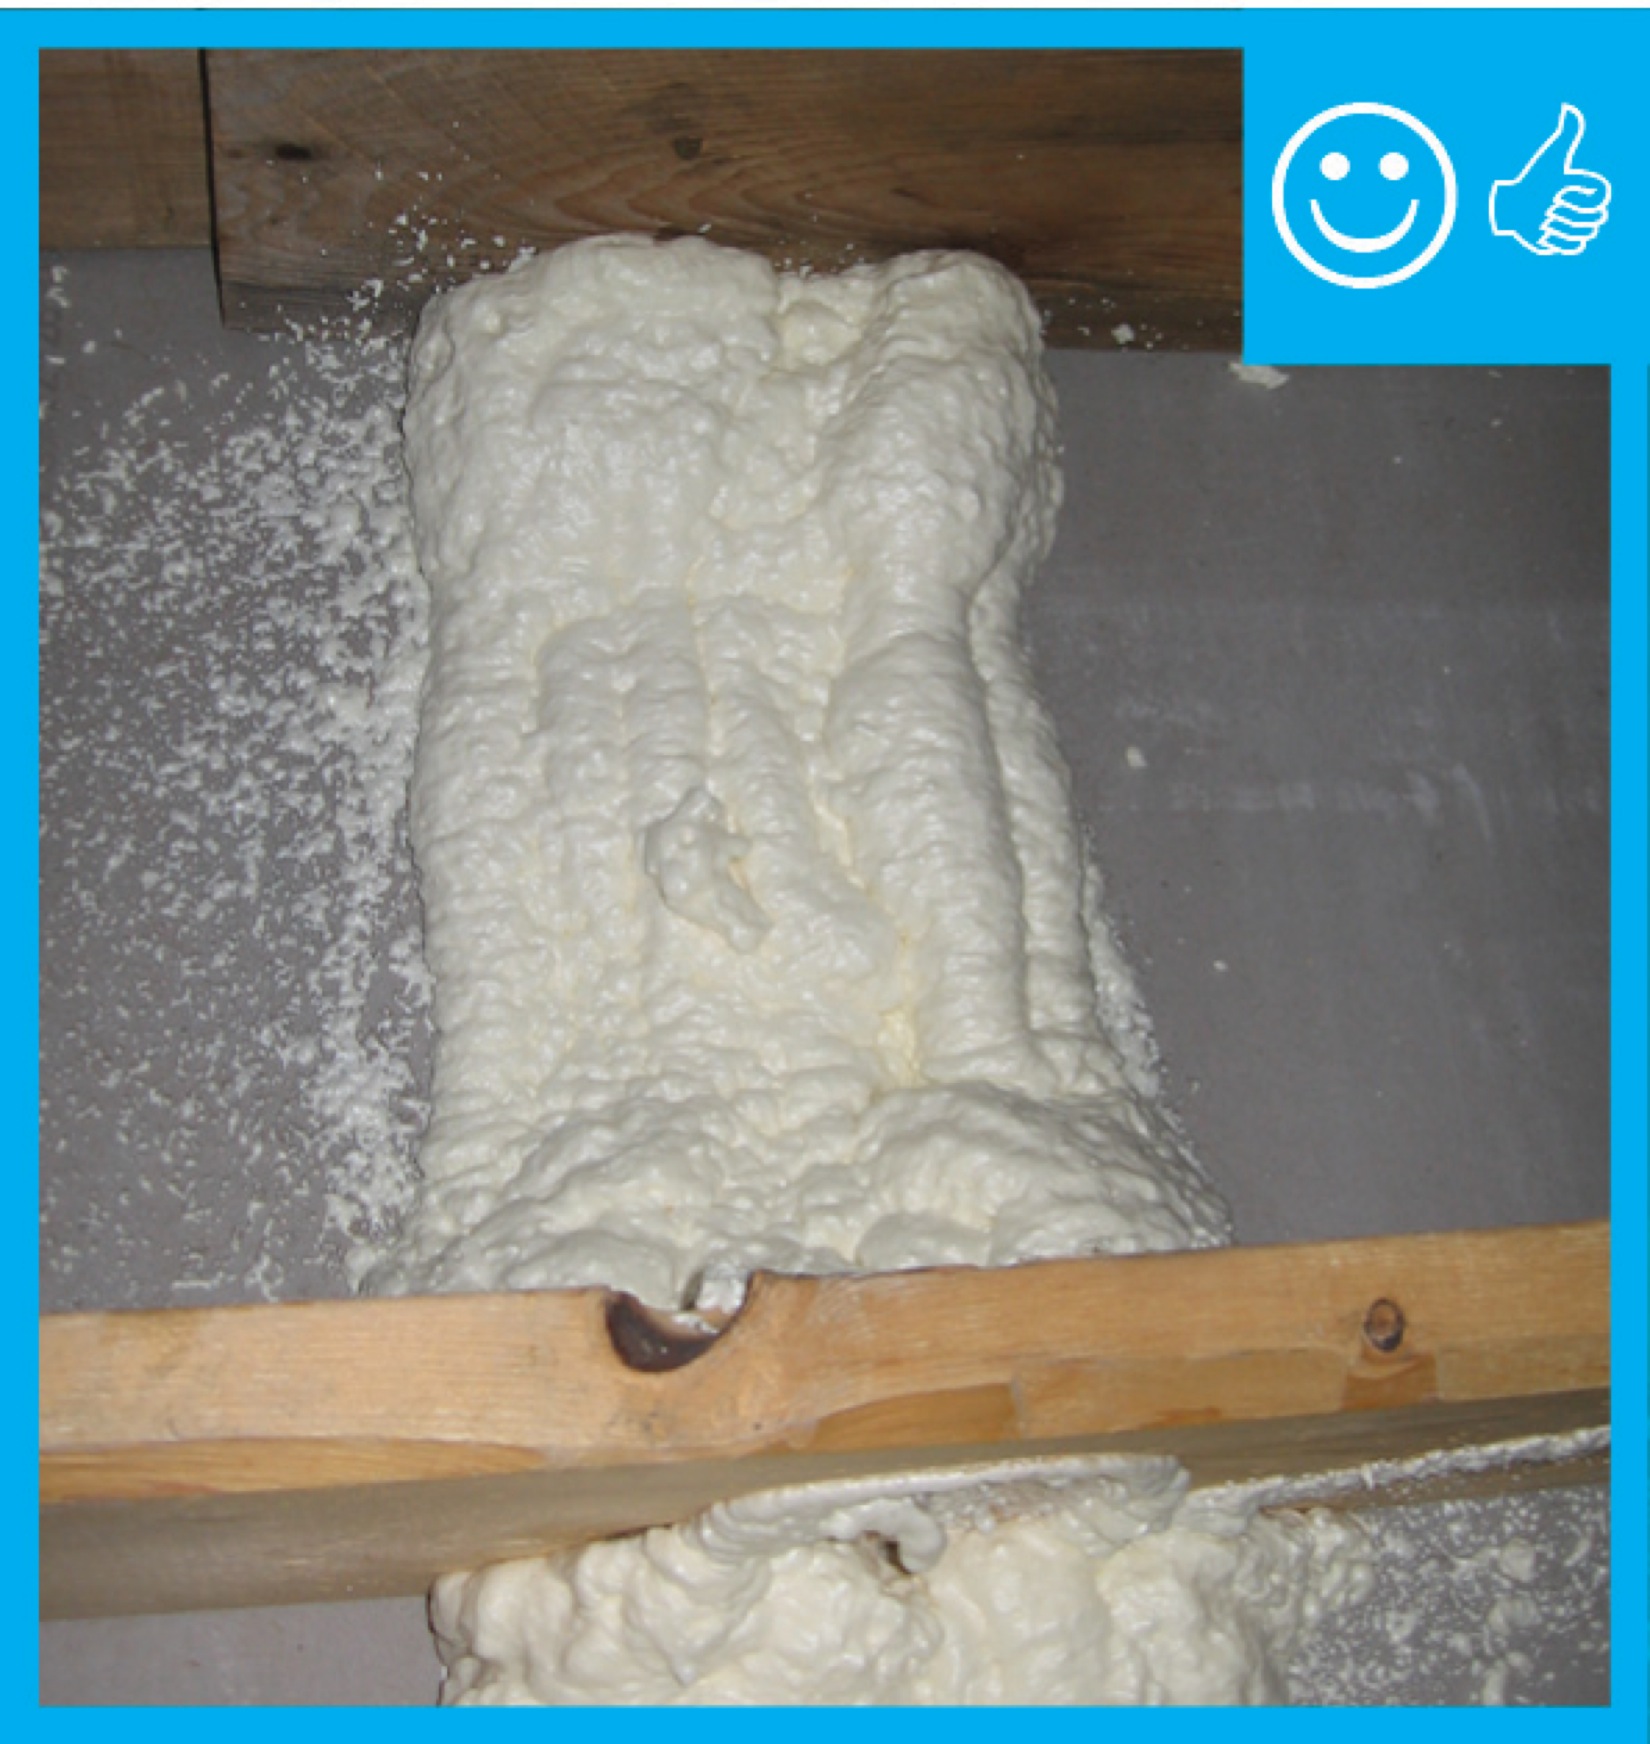
Right - Spray foam fills the walls and rim joists to air seal and insulate while caulk seals the framing joints.
Image
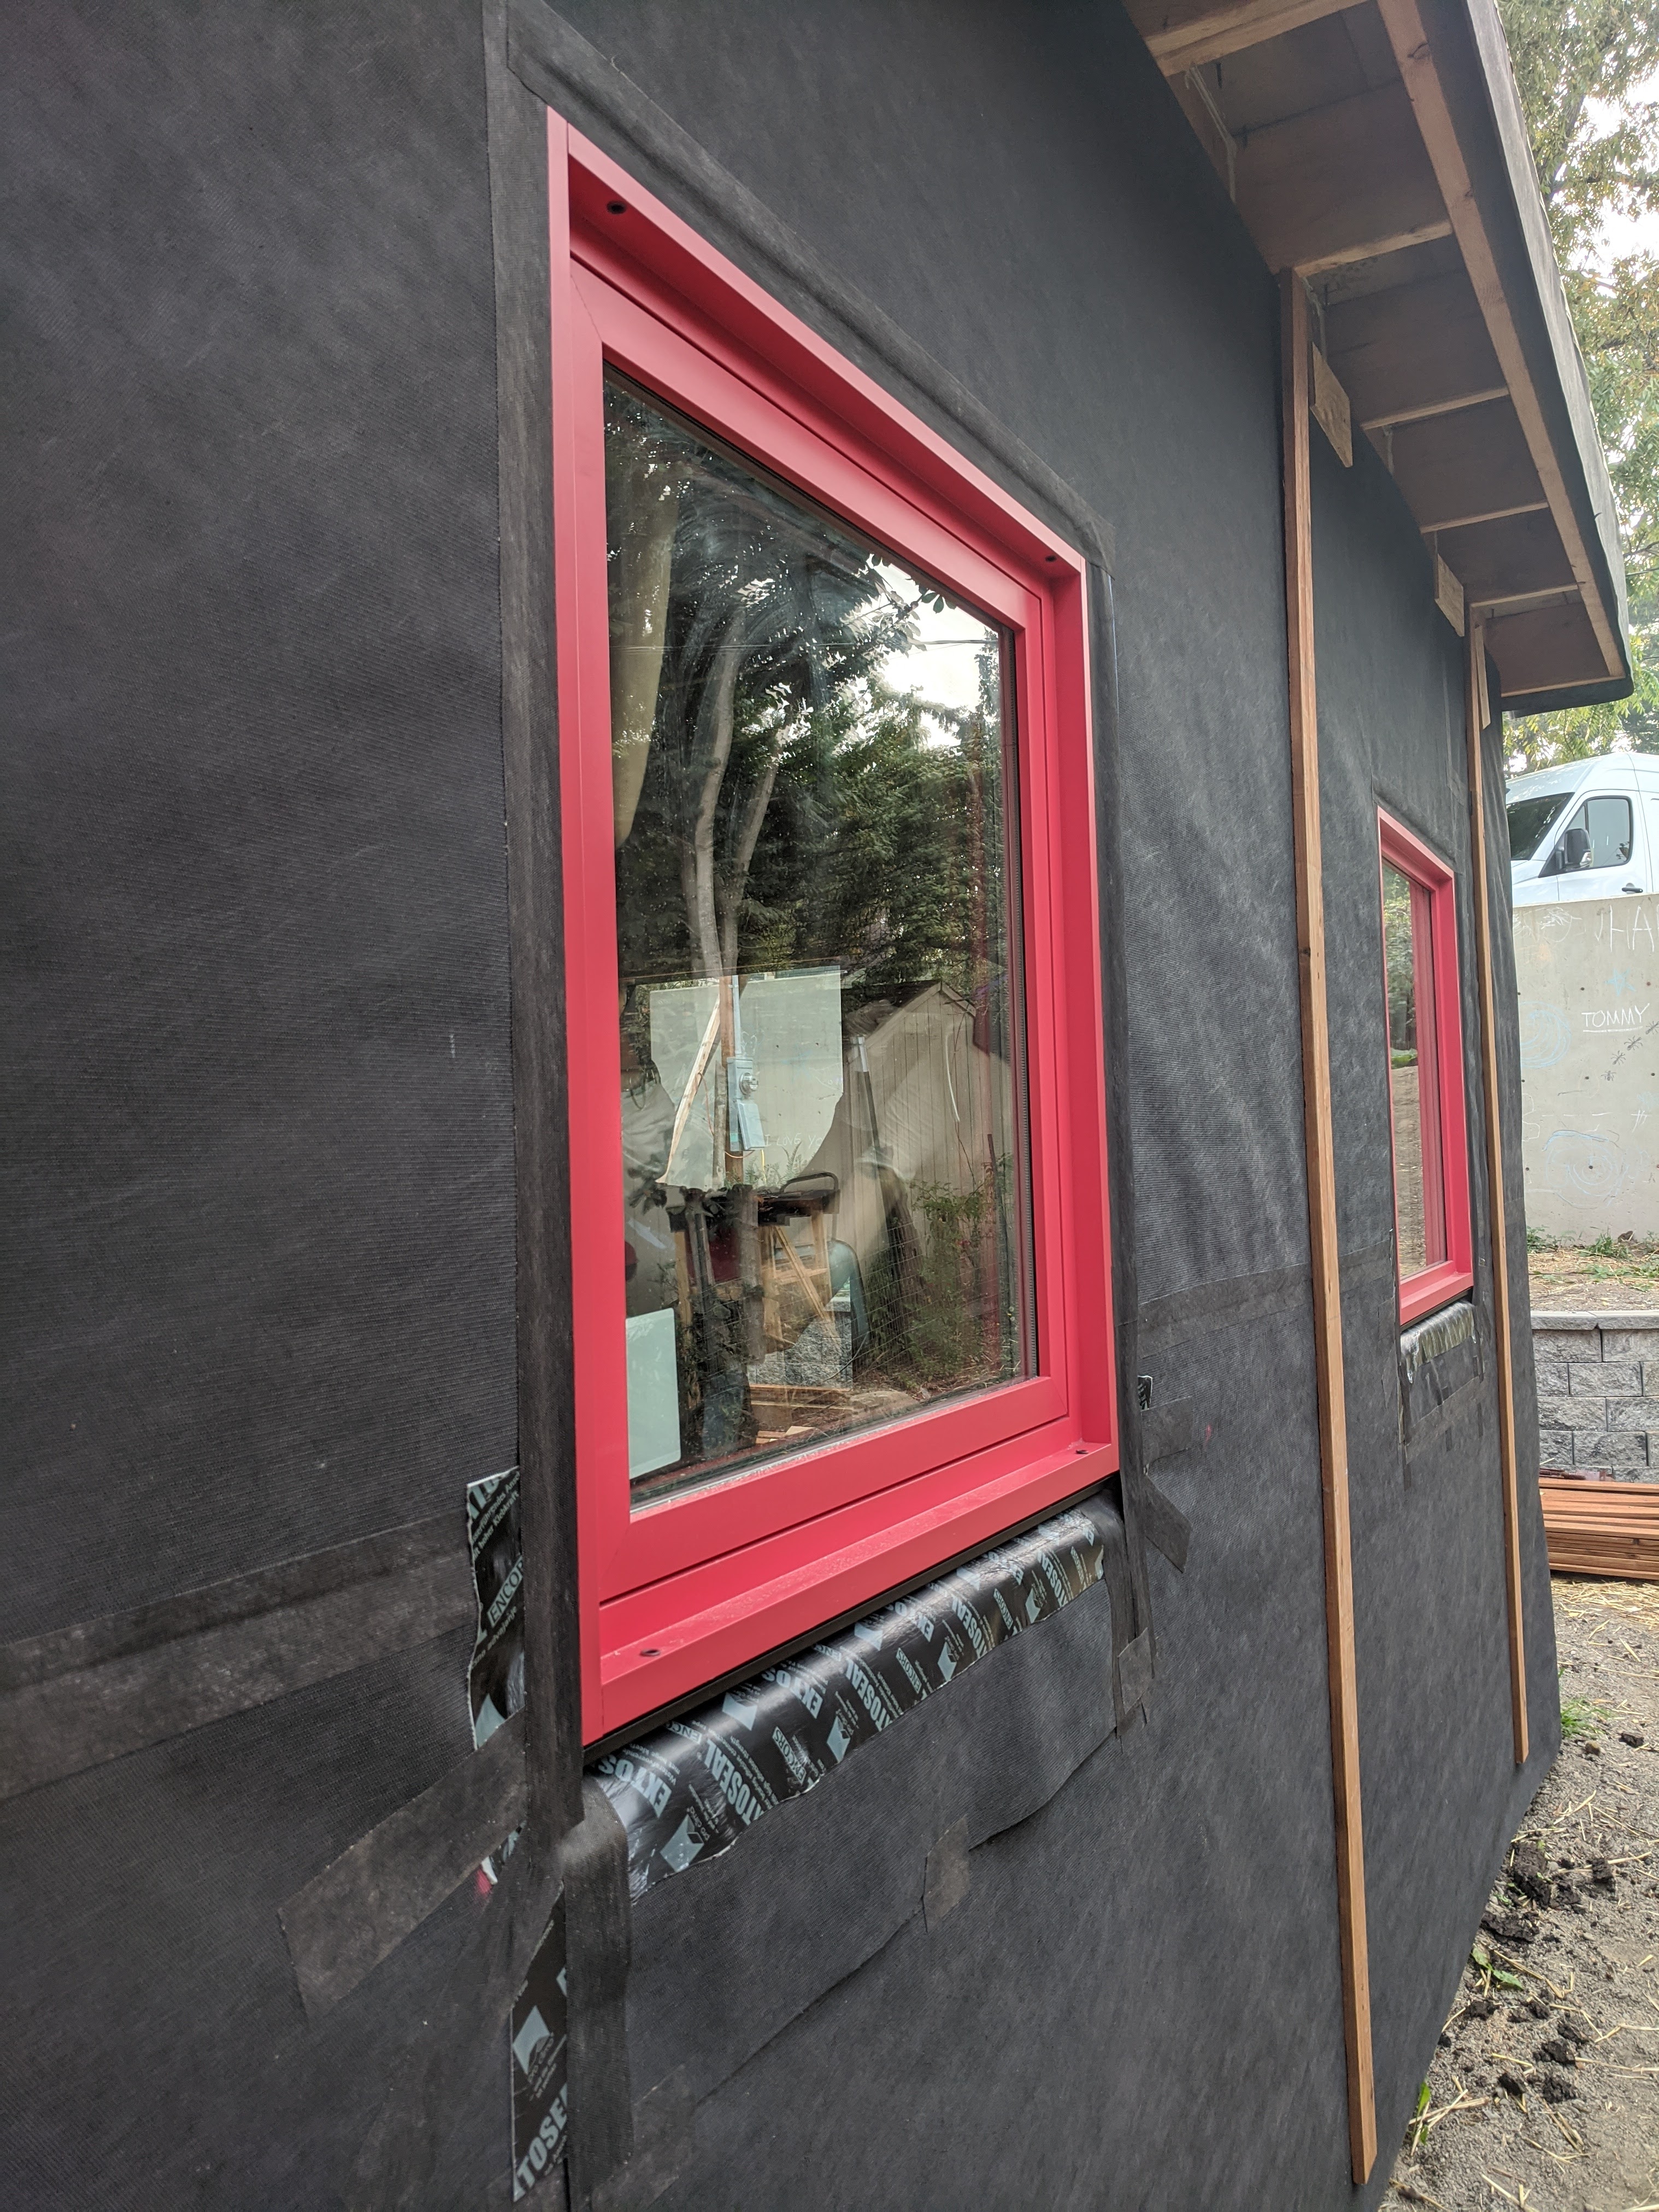
Right - Tape flashing keeps moisture out around and below the window; extra tape reinforces the corners to prevent tearing of the house wrap and to keep water out of this critical juncture.
Image
Right - The poured concrete basement walls are insulated along the inside with 2.5 inches of extruded polystyrene insulation.
Image
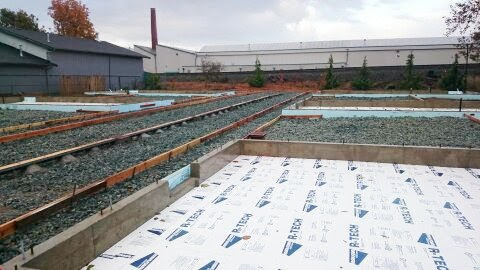
Right - The slab-on-grade foundation is insulated with two layers (R-20) of XPS foam under the-slab and R-10 on the exterior of the stem walls.
Image

Right - The wall framing is connected to roof framing with metal ties for hurricane-resistant construction.
Image
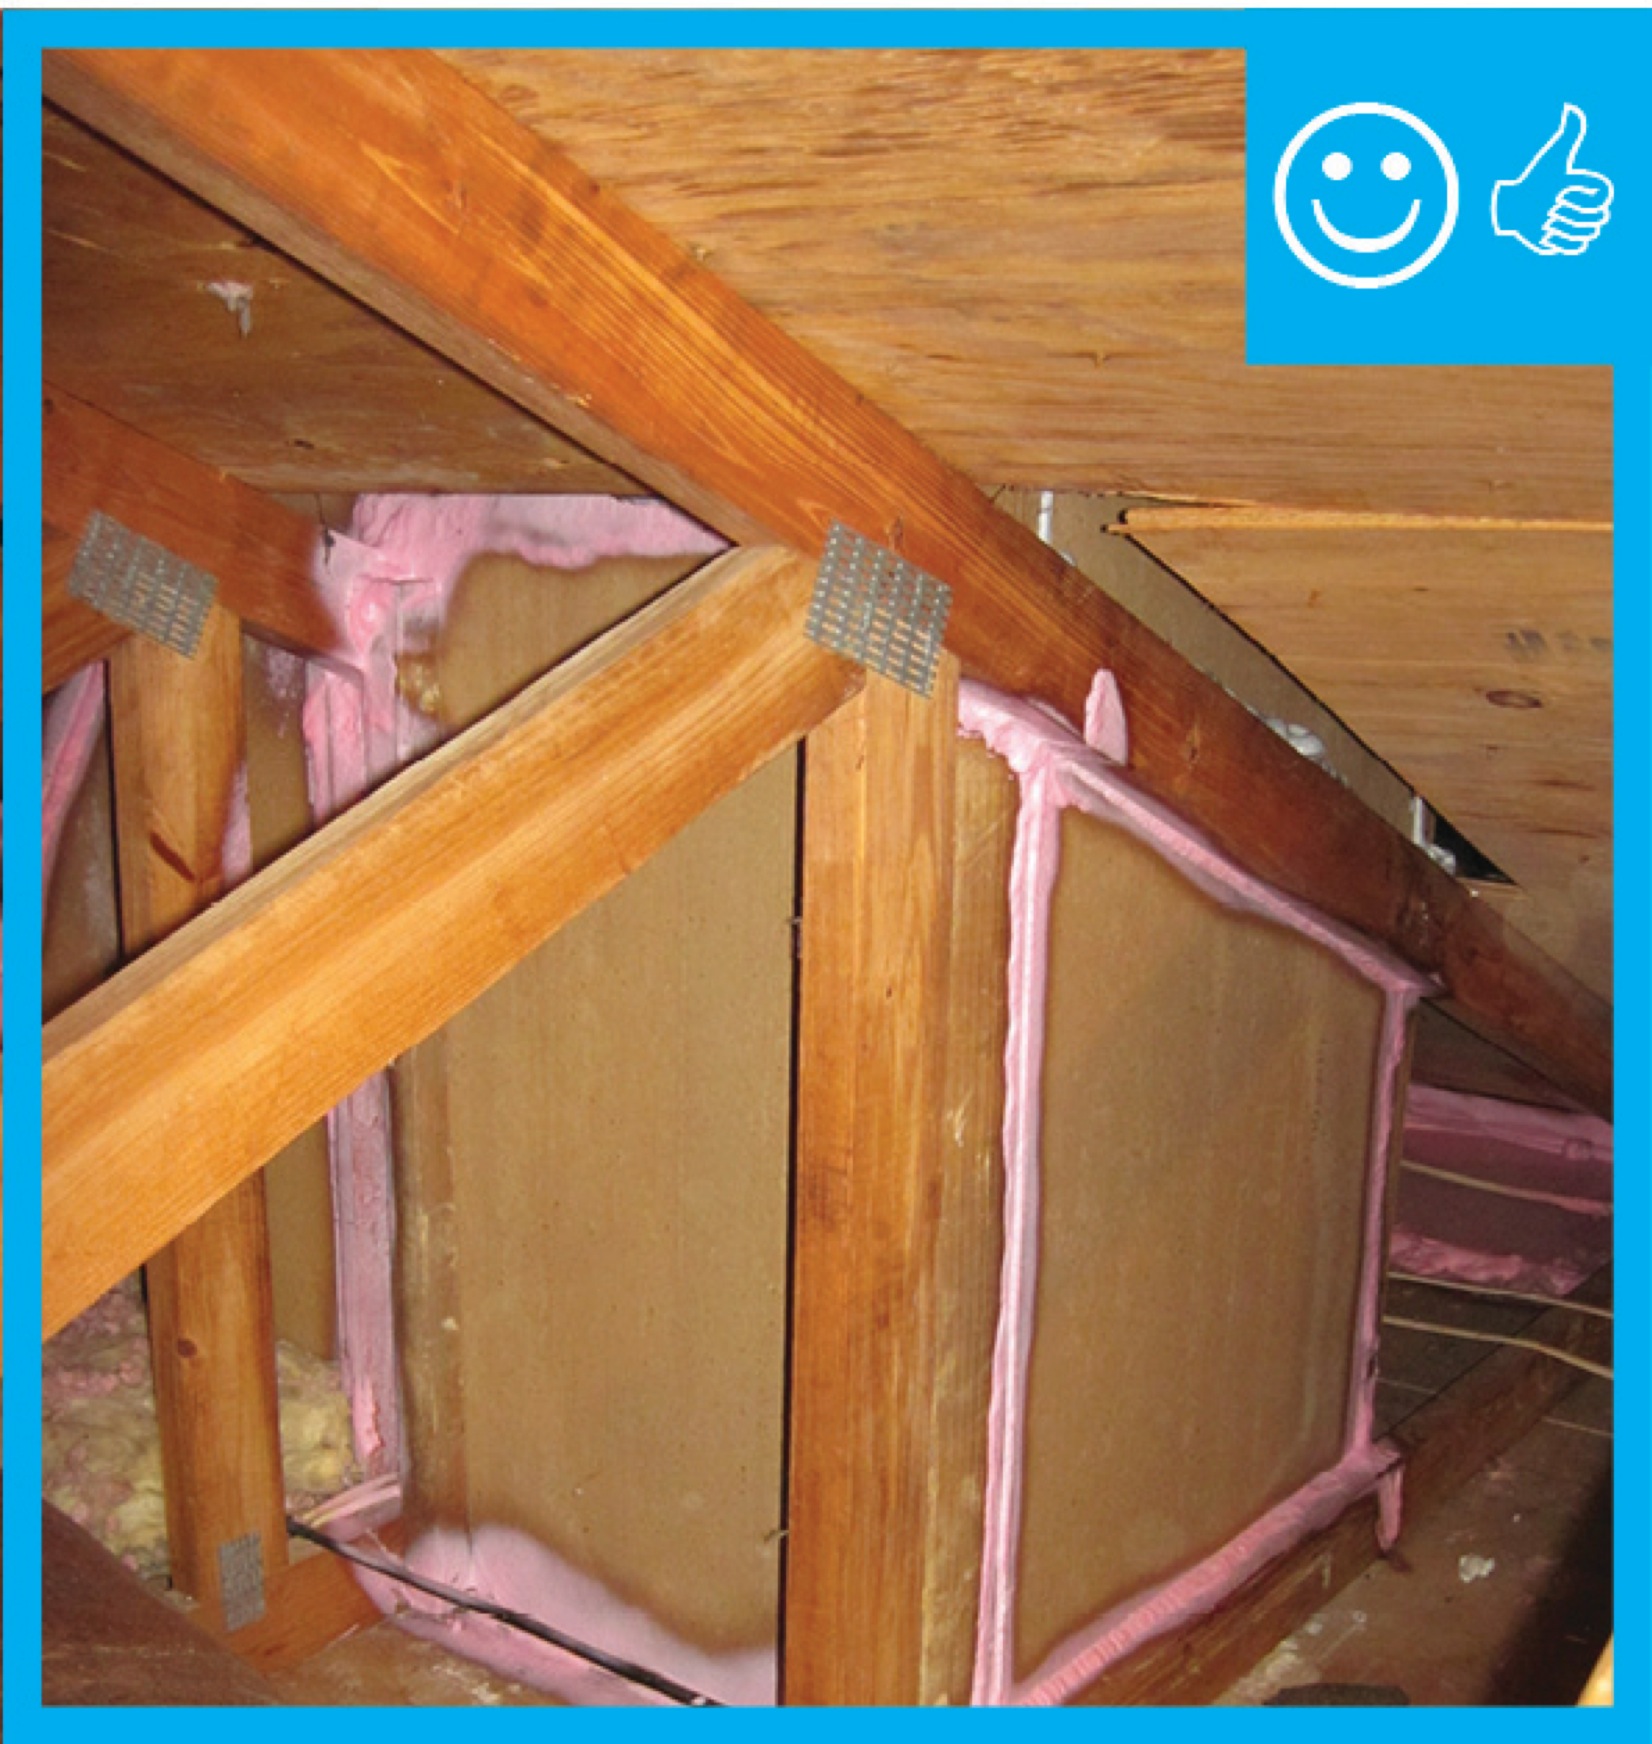
Right - These attic knee walls are insulated with rigid foam and sealed with spray foam to form a continuous air barrier at the gable end of this cathedral ceiling.
Image
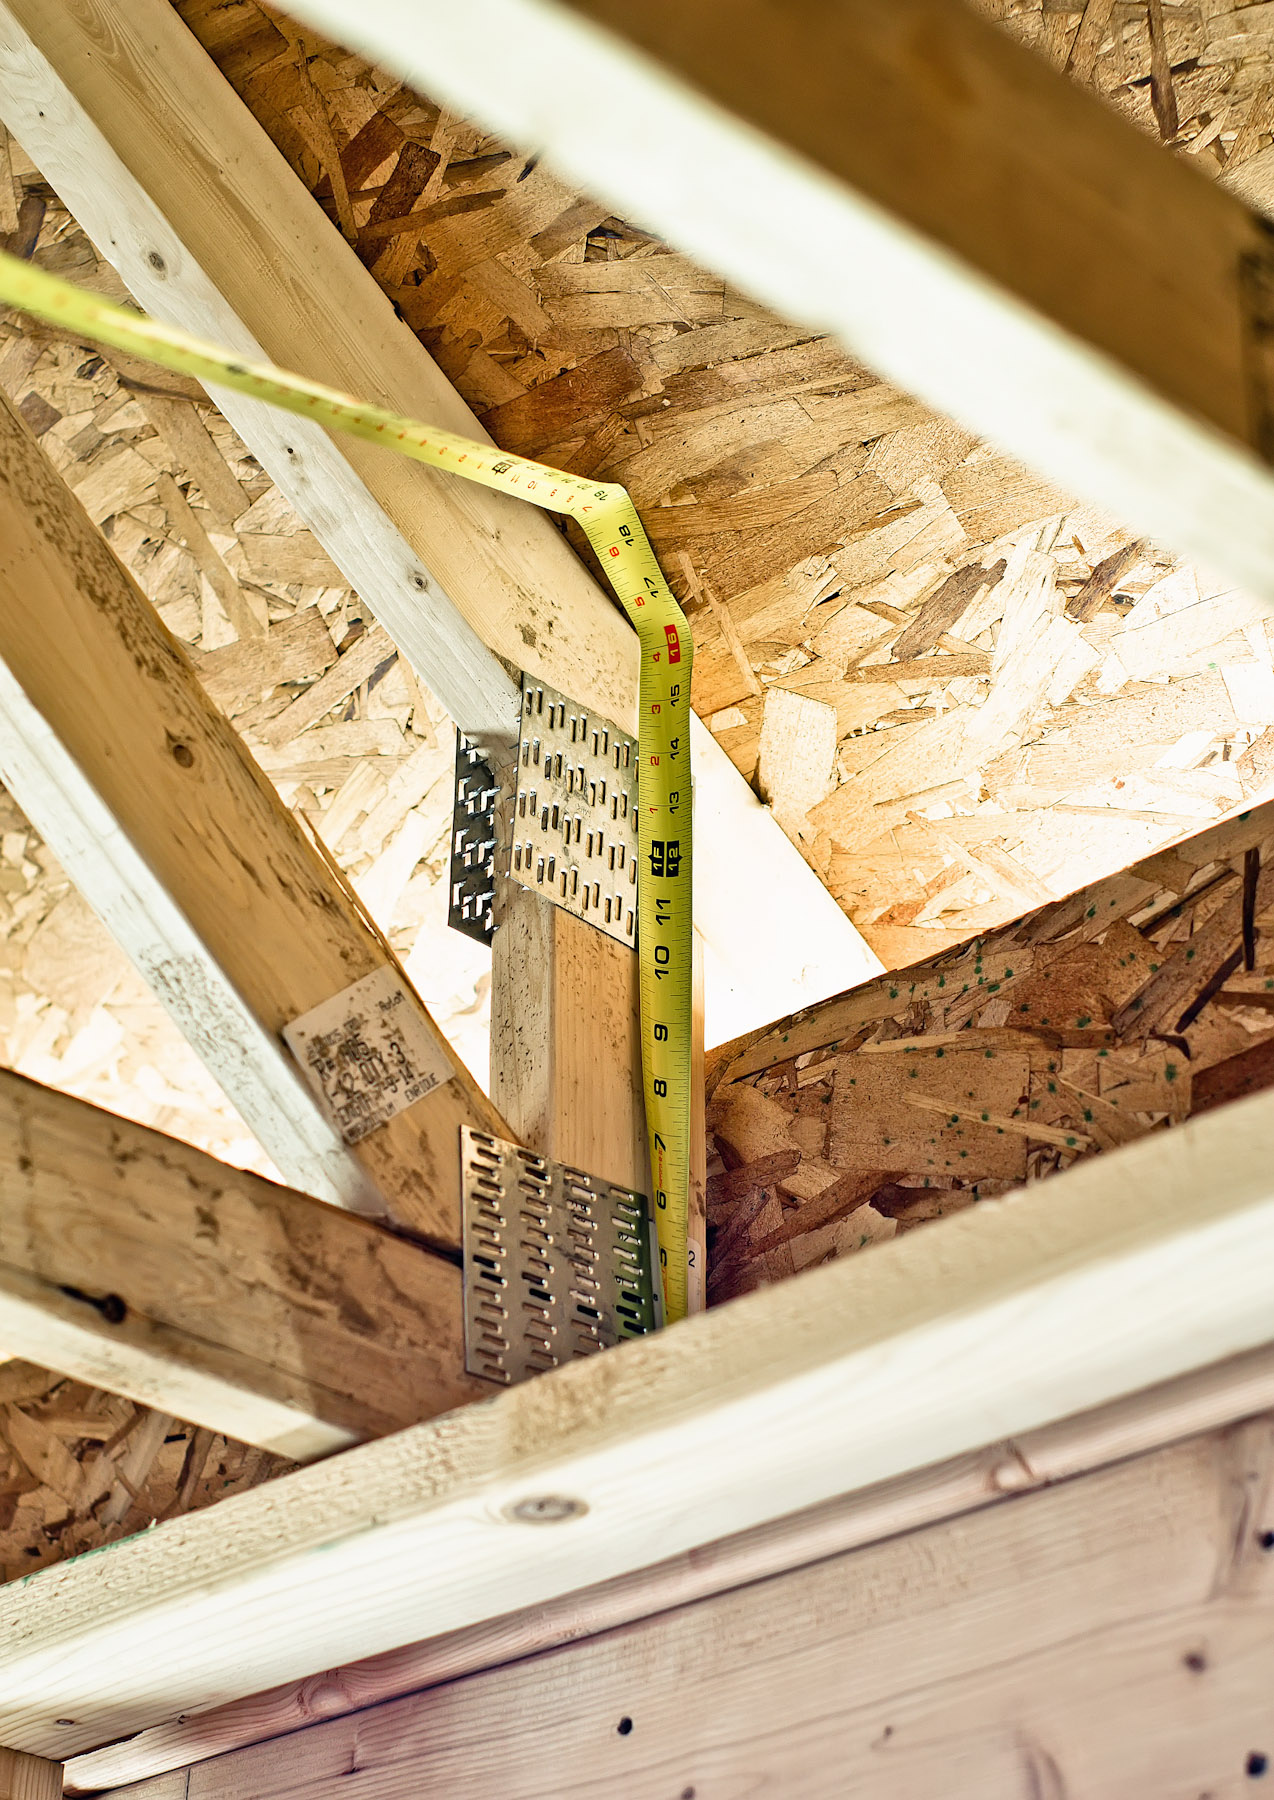
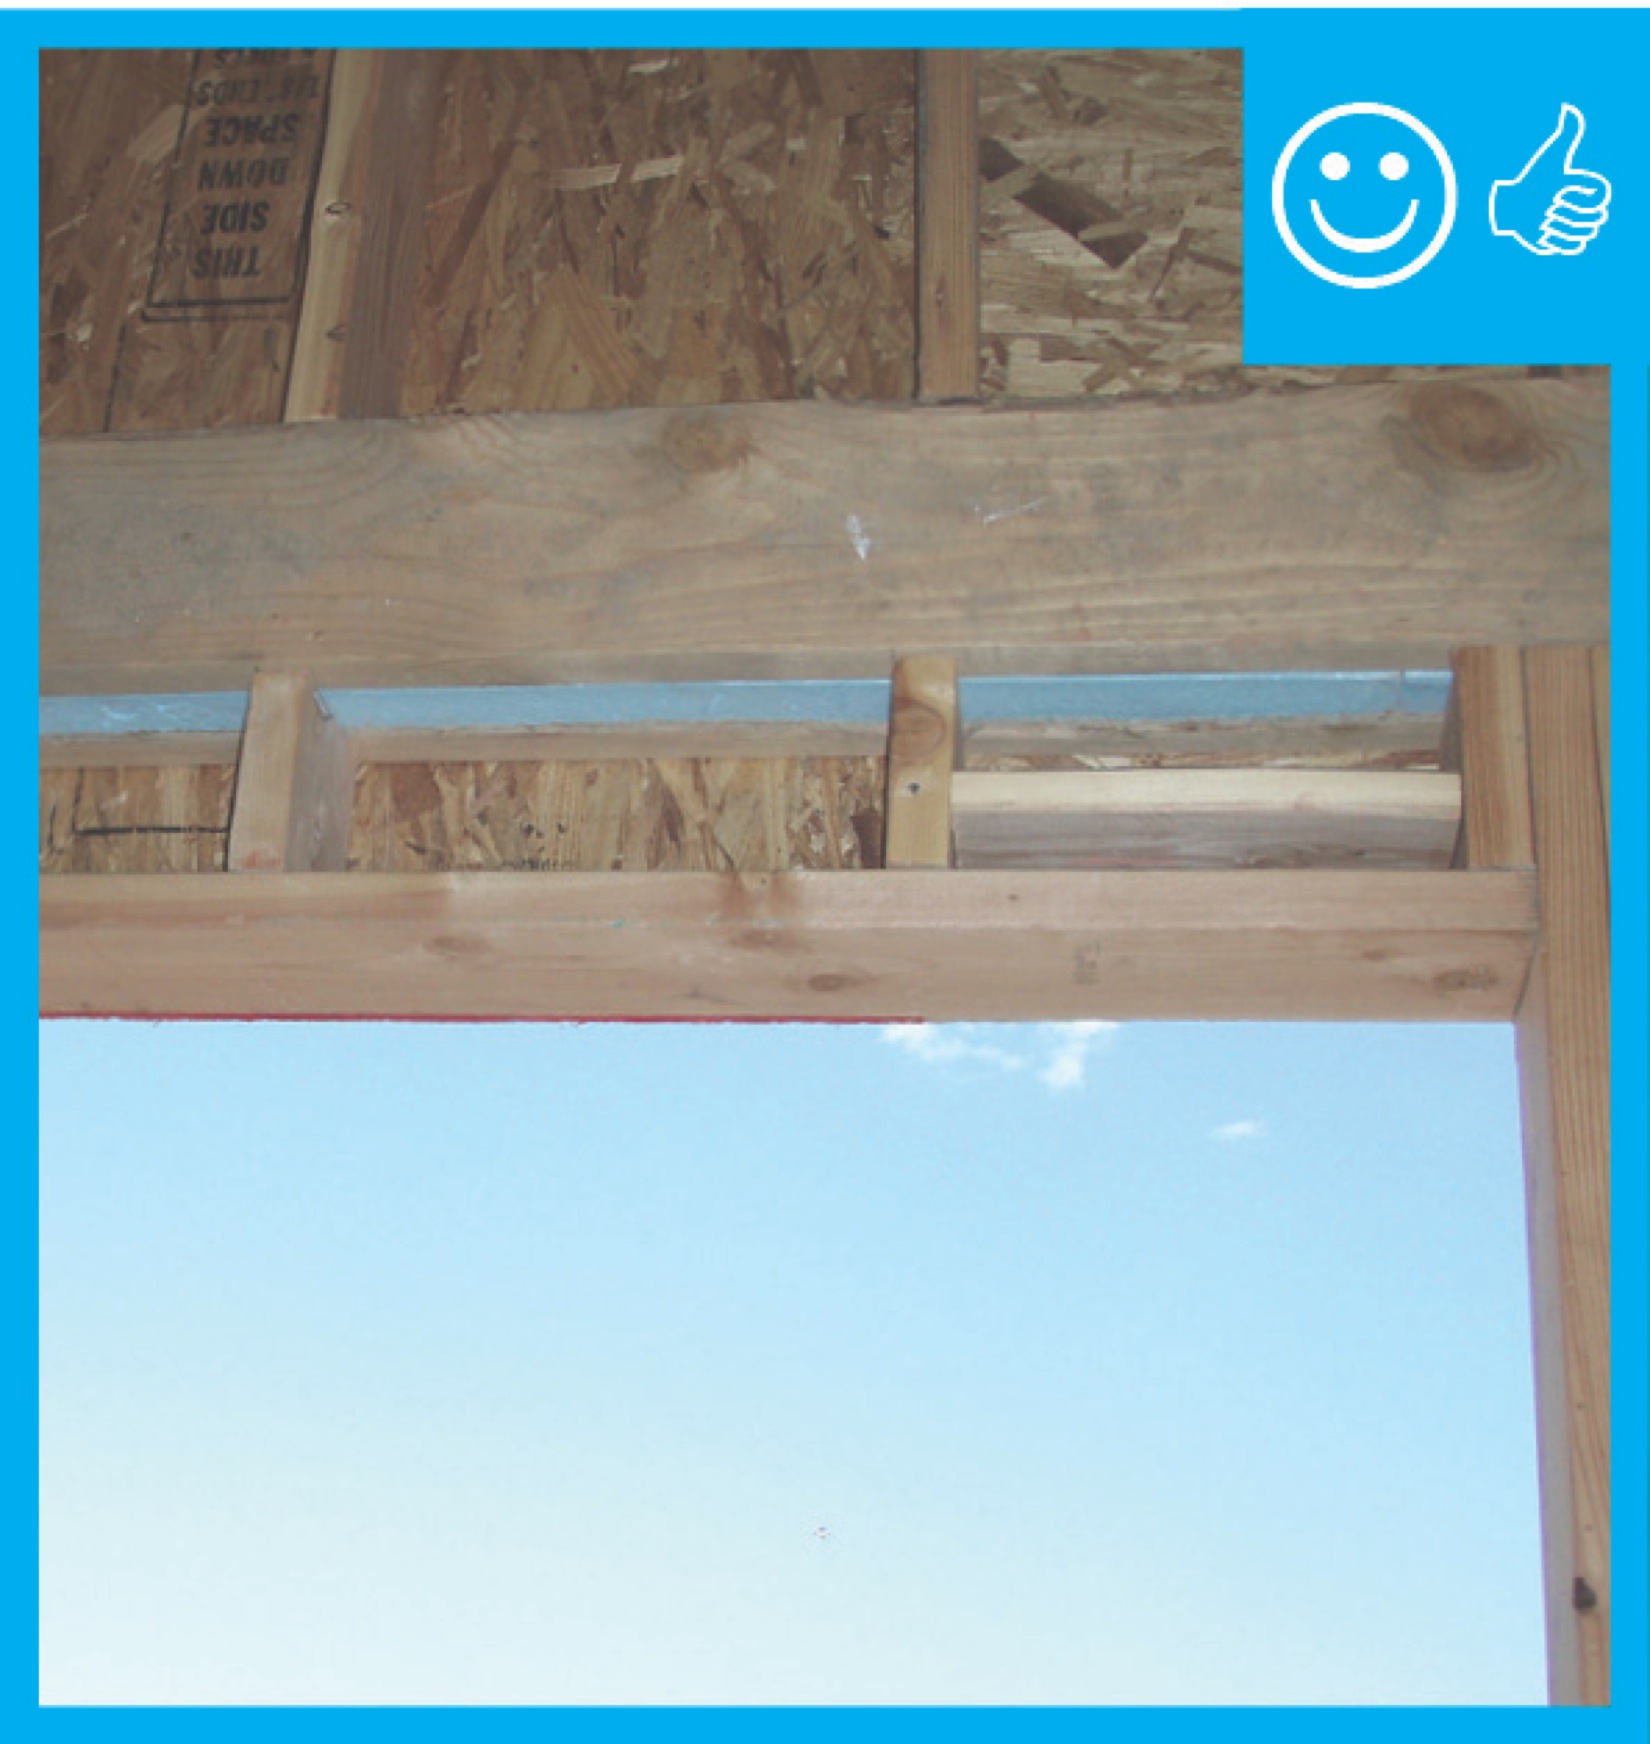
Right - These raised heel roof trusses provide 16 inches of space over the outer walls for full insulation coverage at the attic perimeter.
Image
Right - This concrete basement wall has exterior rigid insulation and comprehensive moisture management details.
Image
Right - This foil-faced polyisocyanurate rigid foam is installed on an existing exterior wall and the seams are taped so the rigid foam can serve as a water control layer
Image

Right - This high-thermal-mass home uses masonry construction to naturally regulate temperatures inside the house
Image
Image
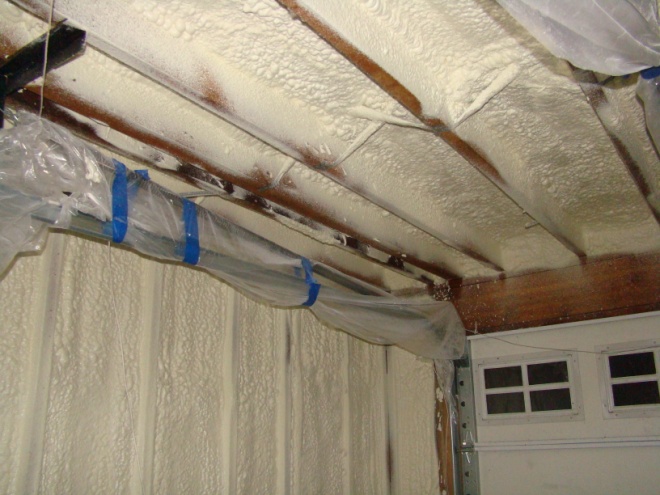
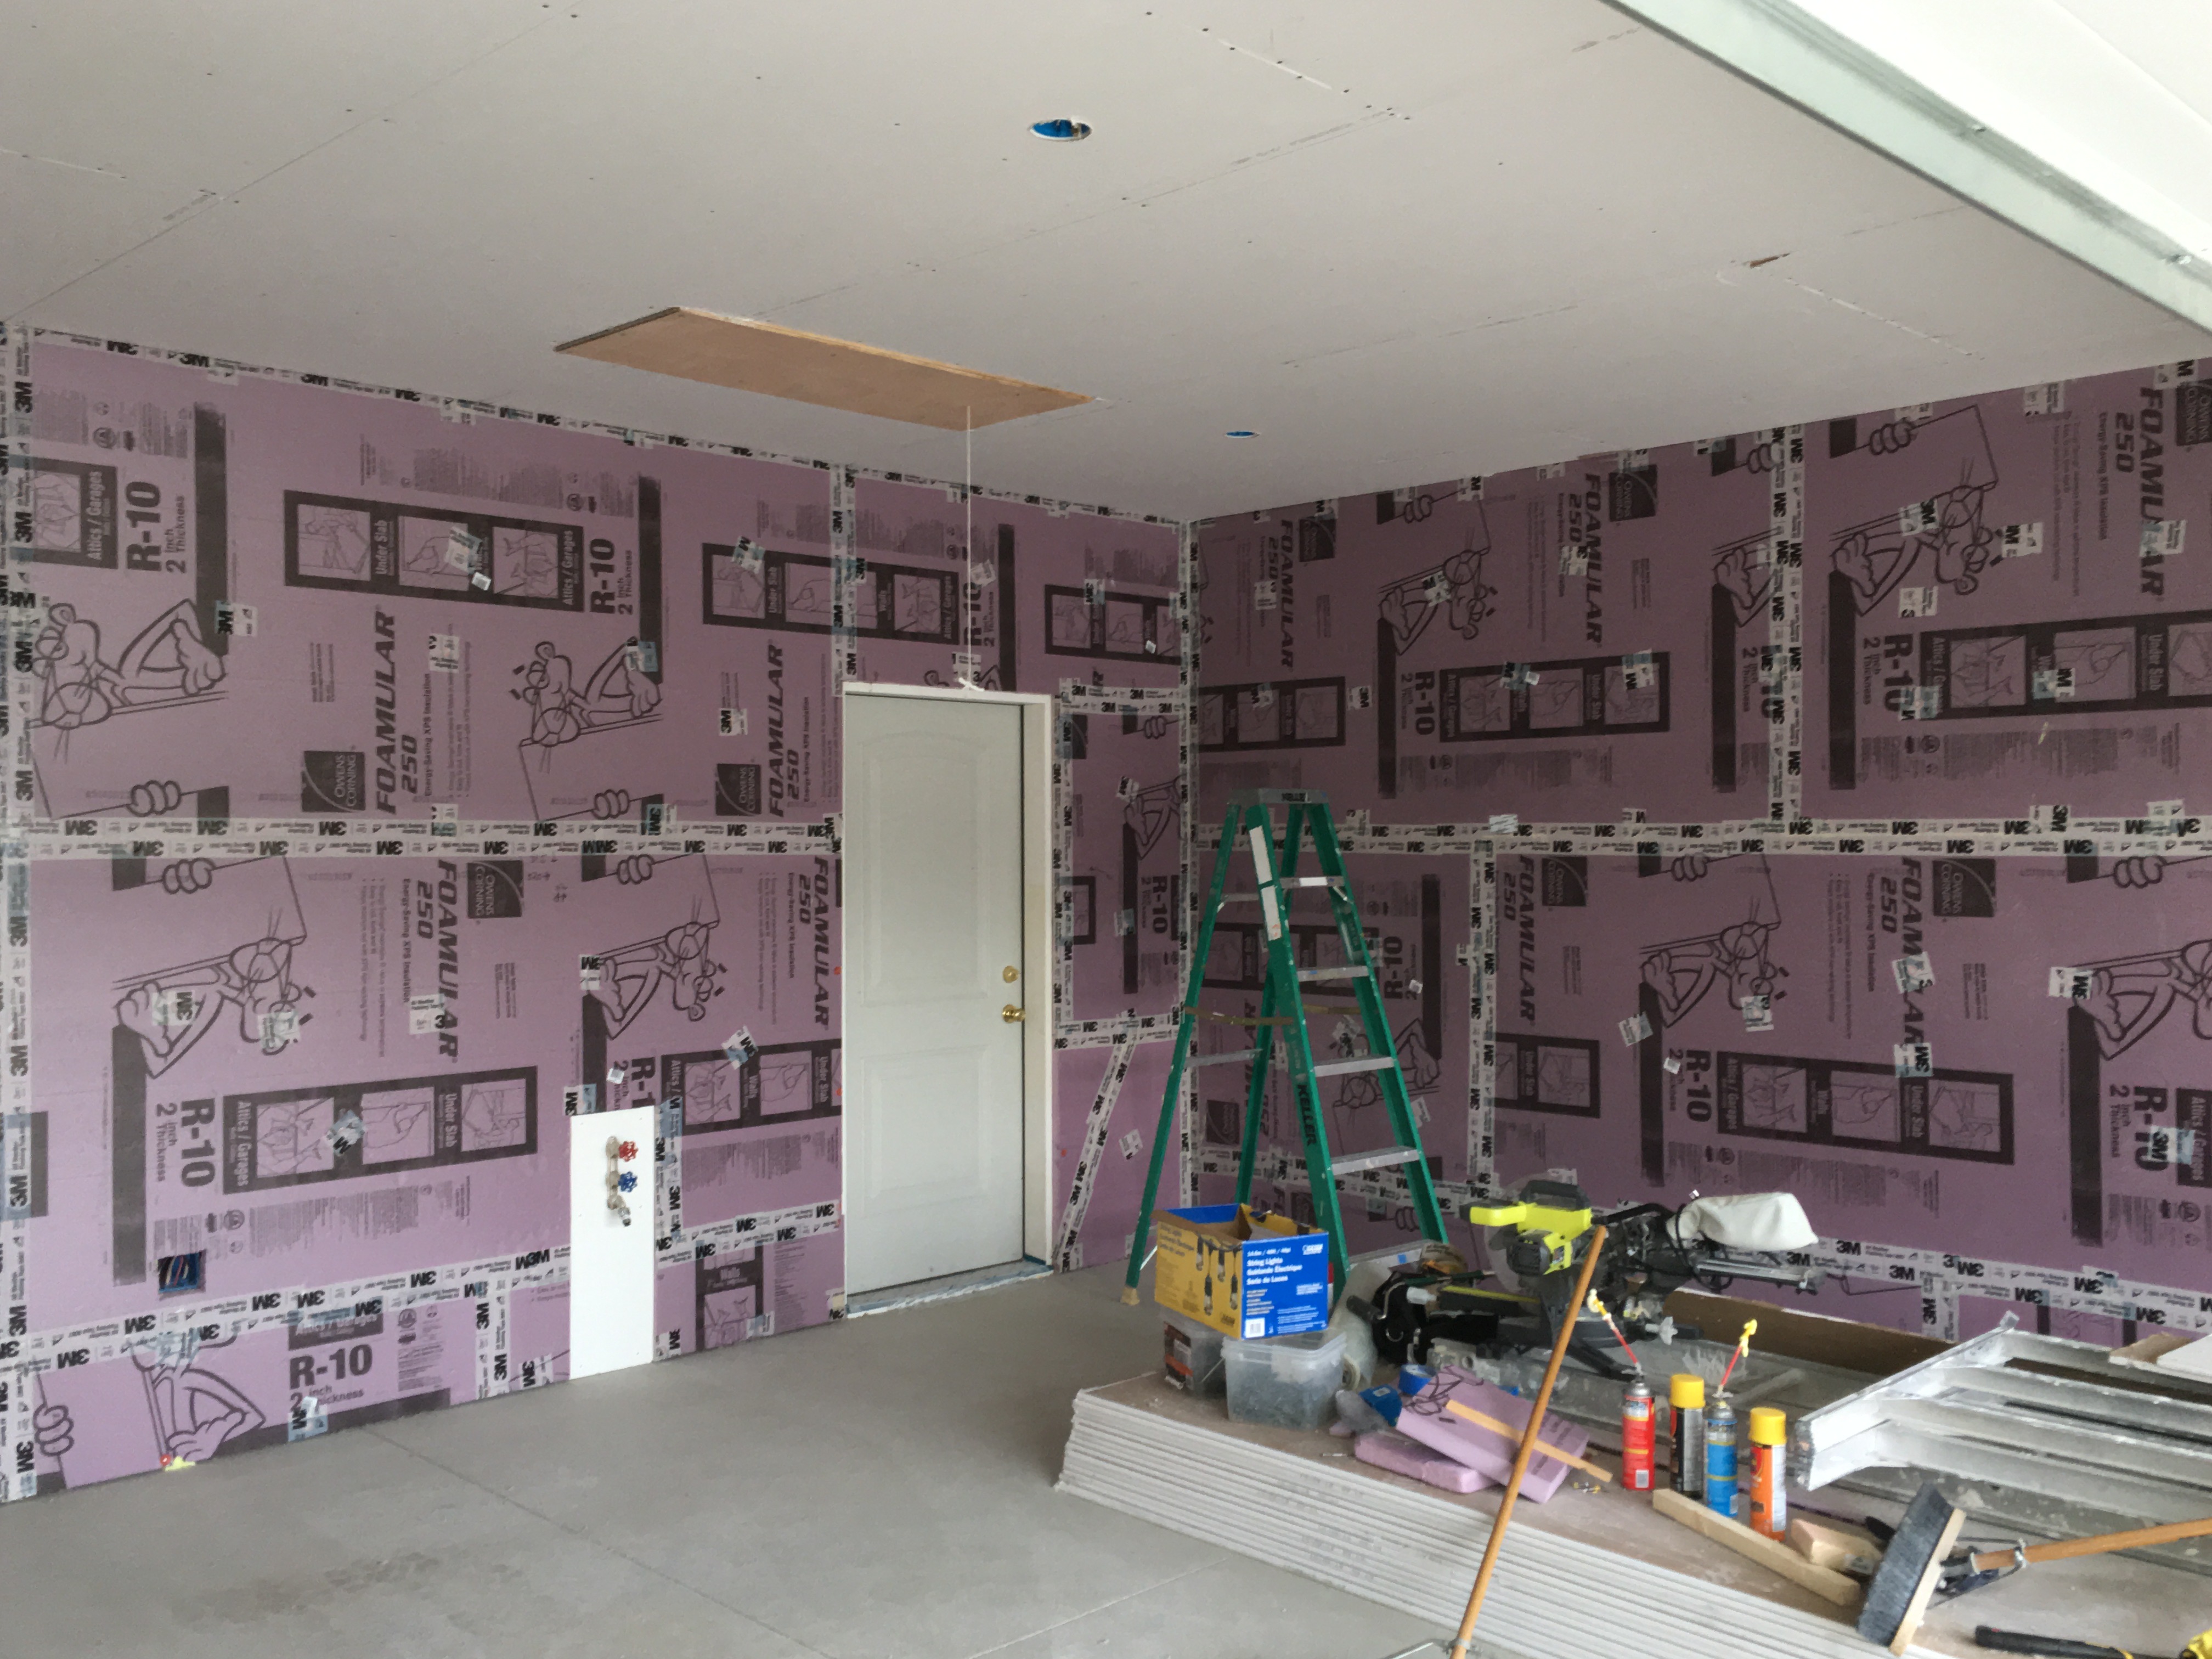
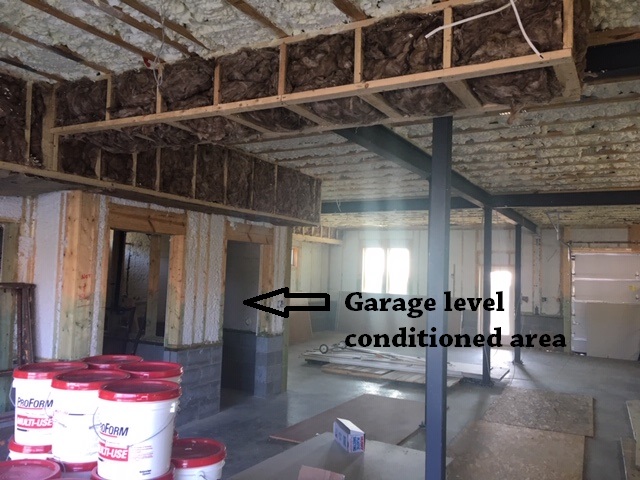
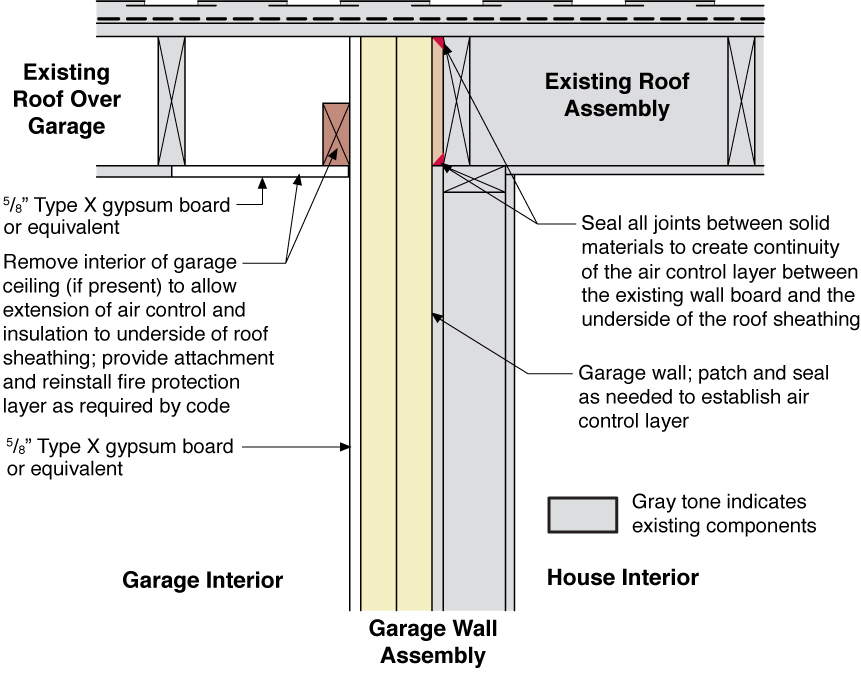
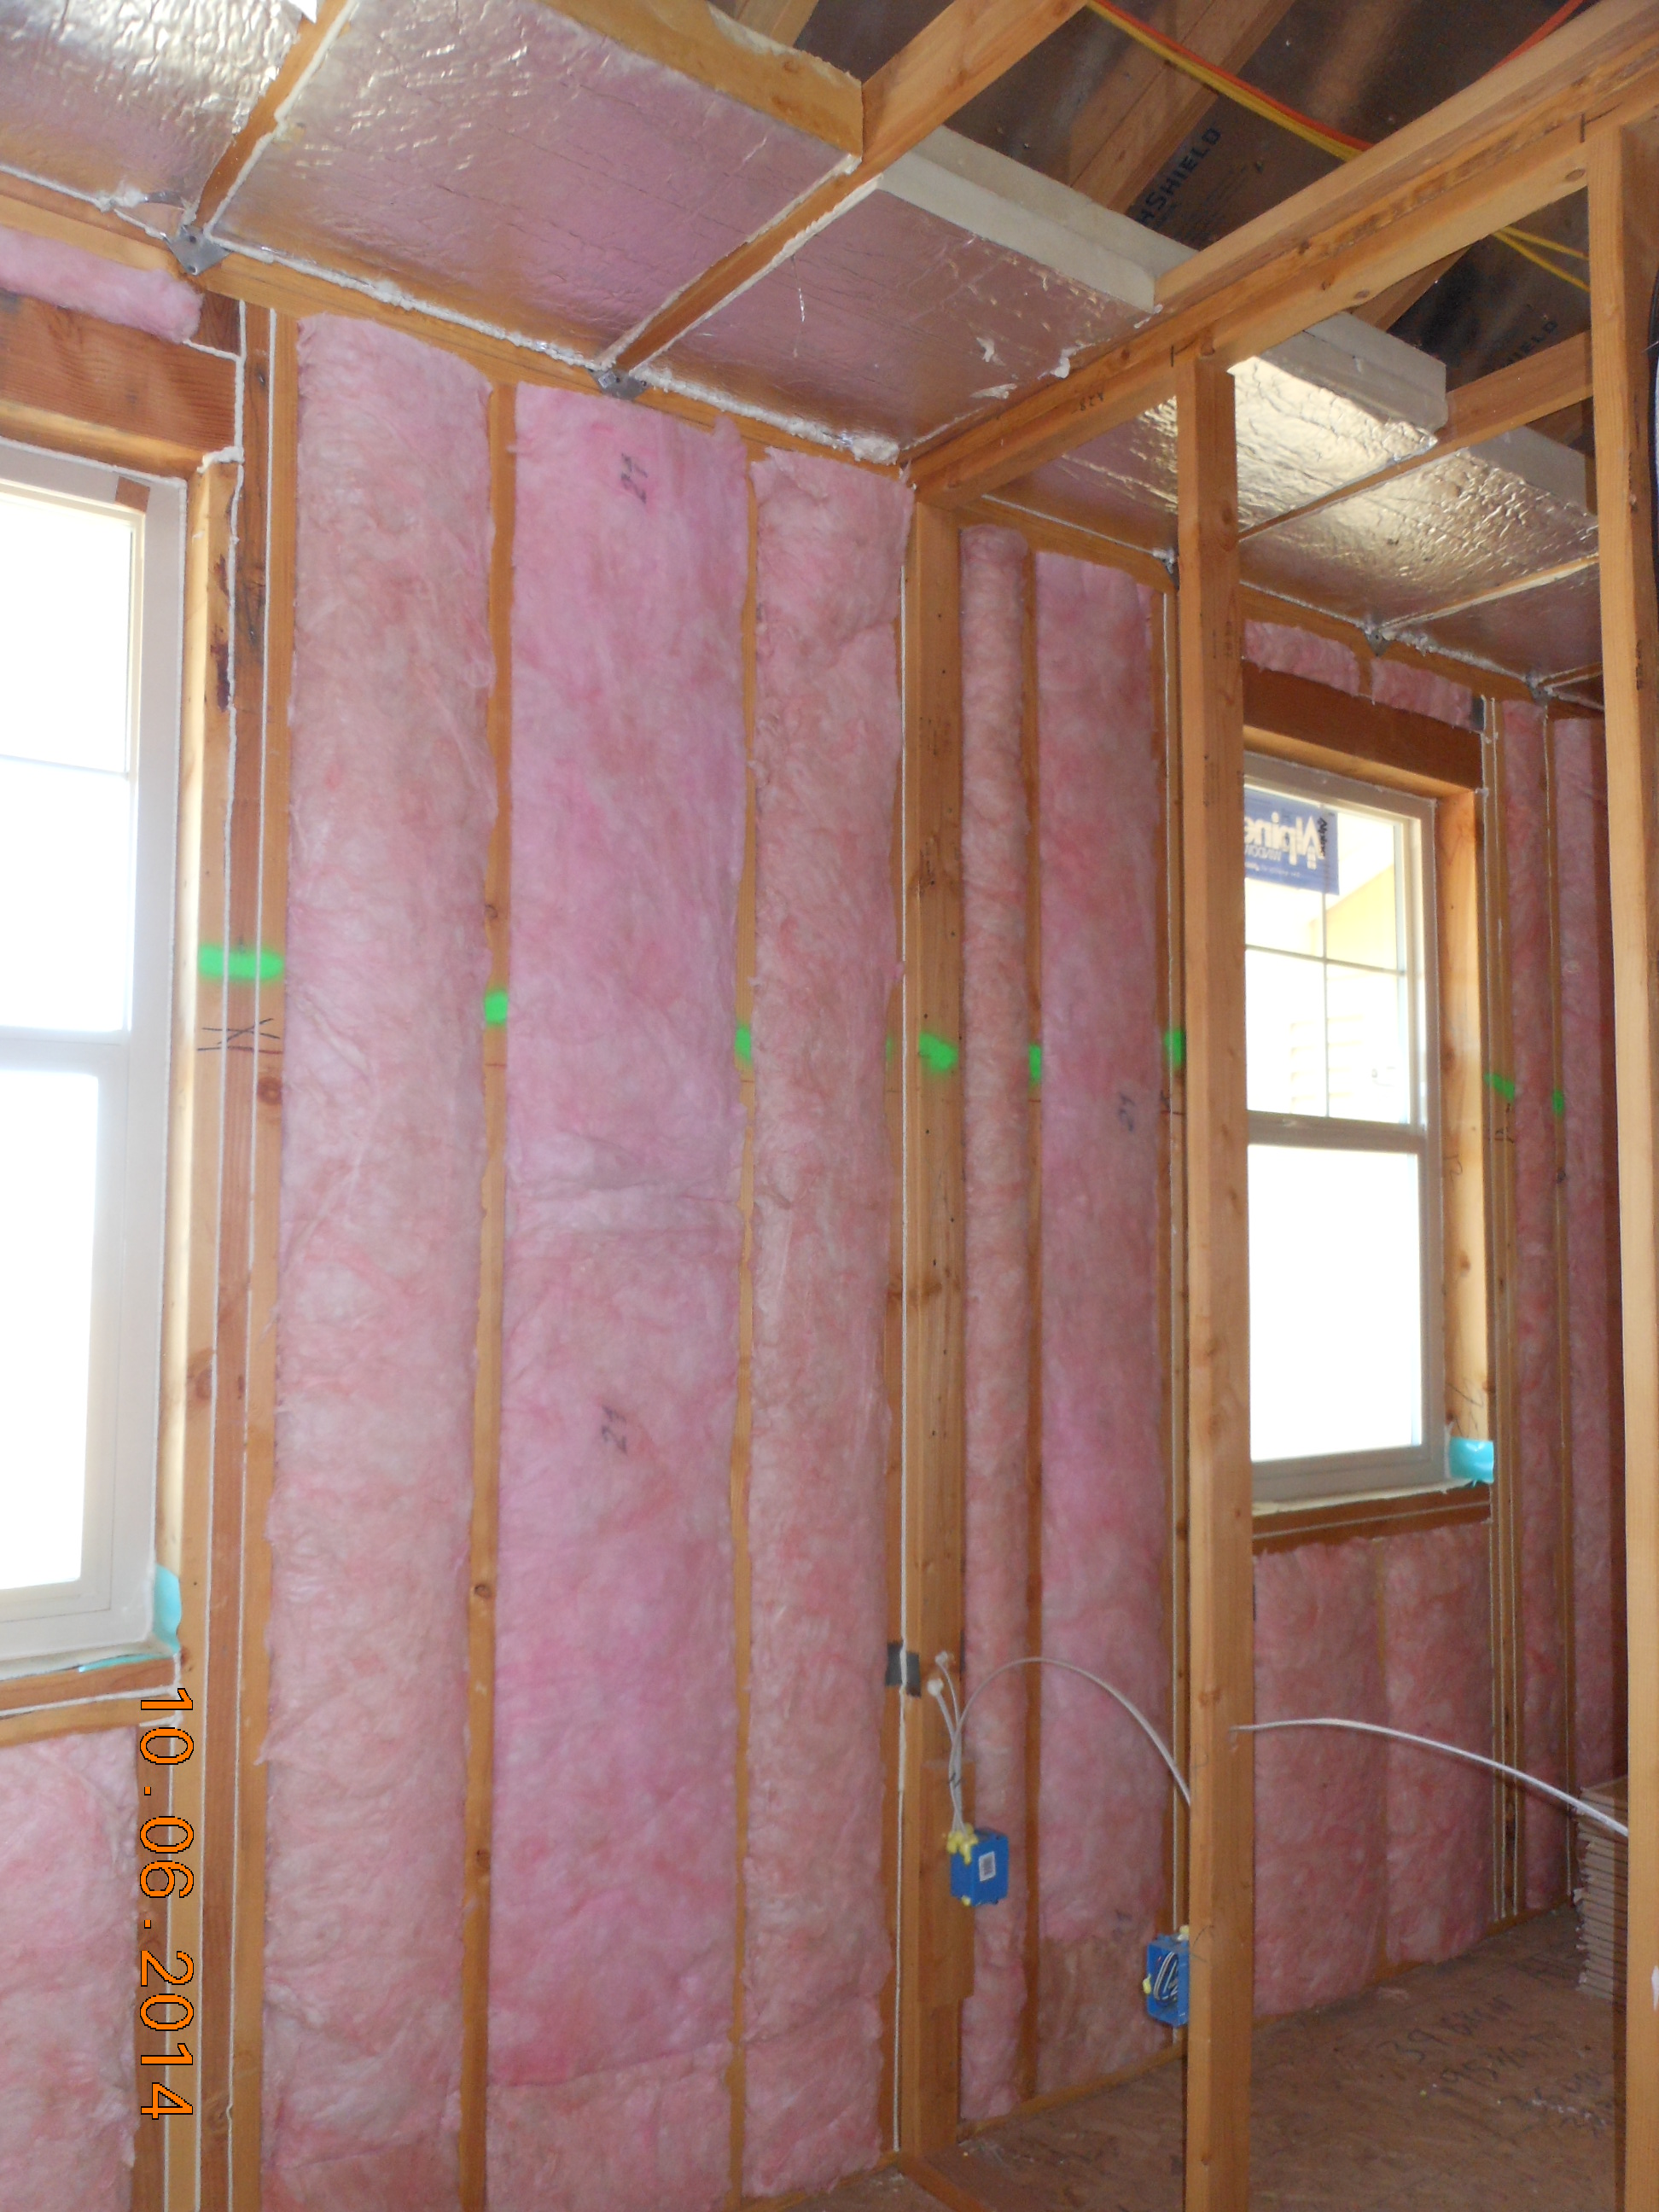
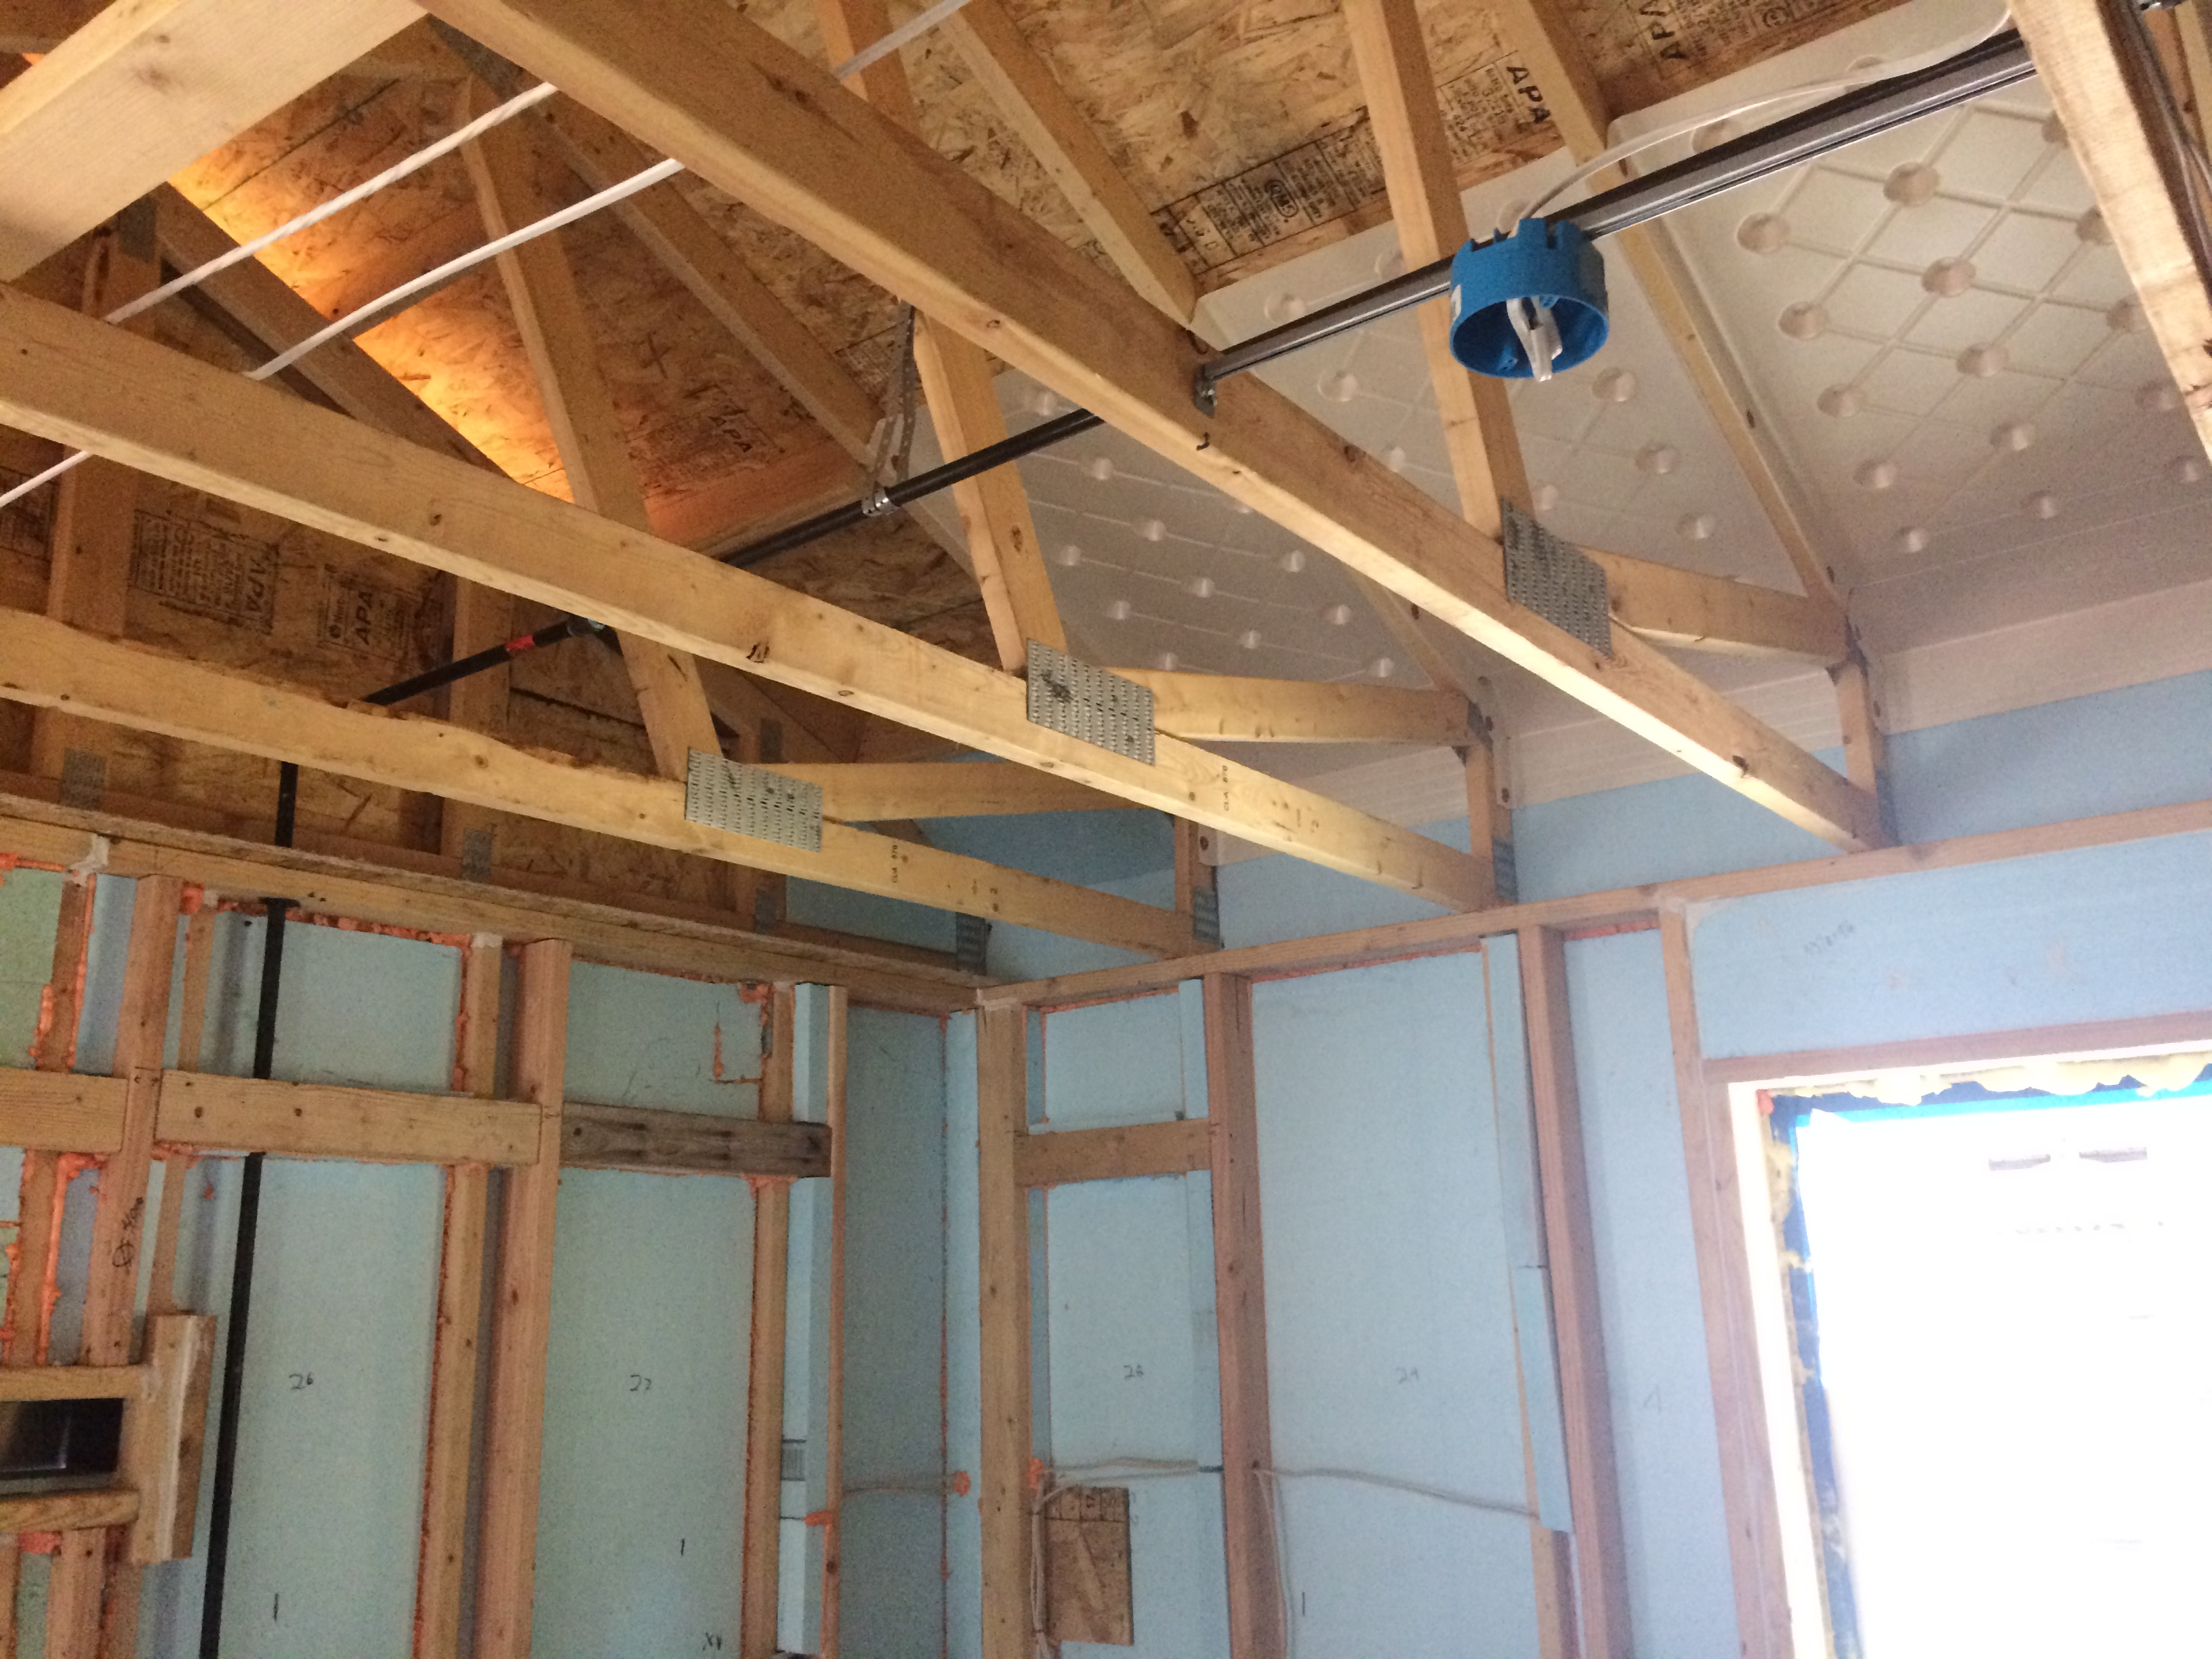
Right - Walls and ceilings shared by the garage and living space must be air sealed and insulated.
Image
Image
Right - XPS foam insulation is attached to the existing exterior wall with wood furring strips that serve as a nail base for the siding and are installed vertically to allow for drainage and drying behind the siding
Image
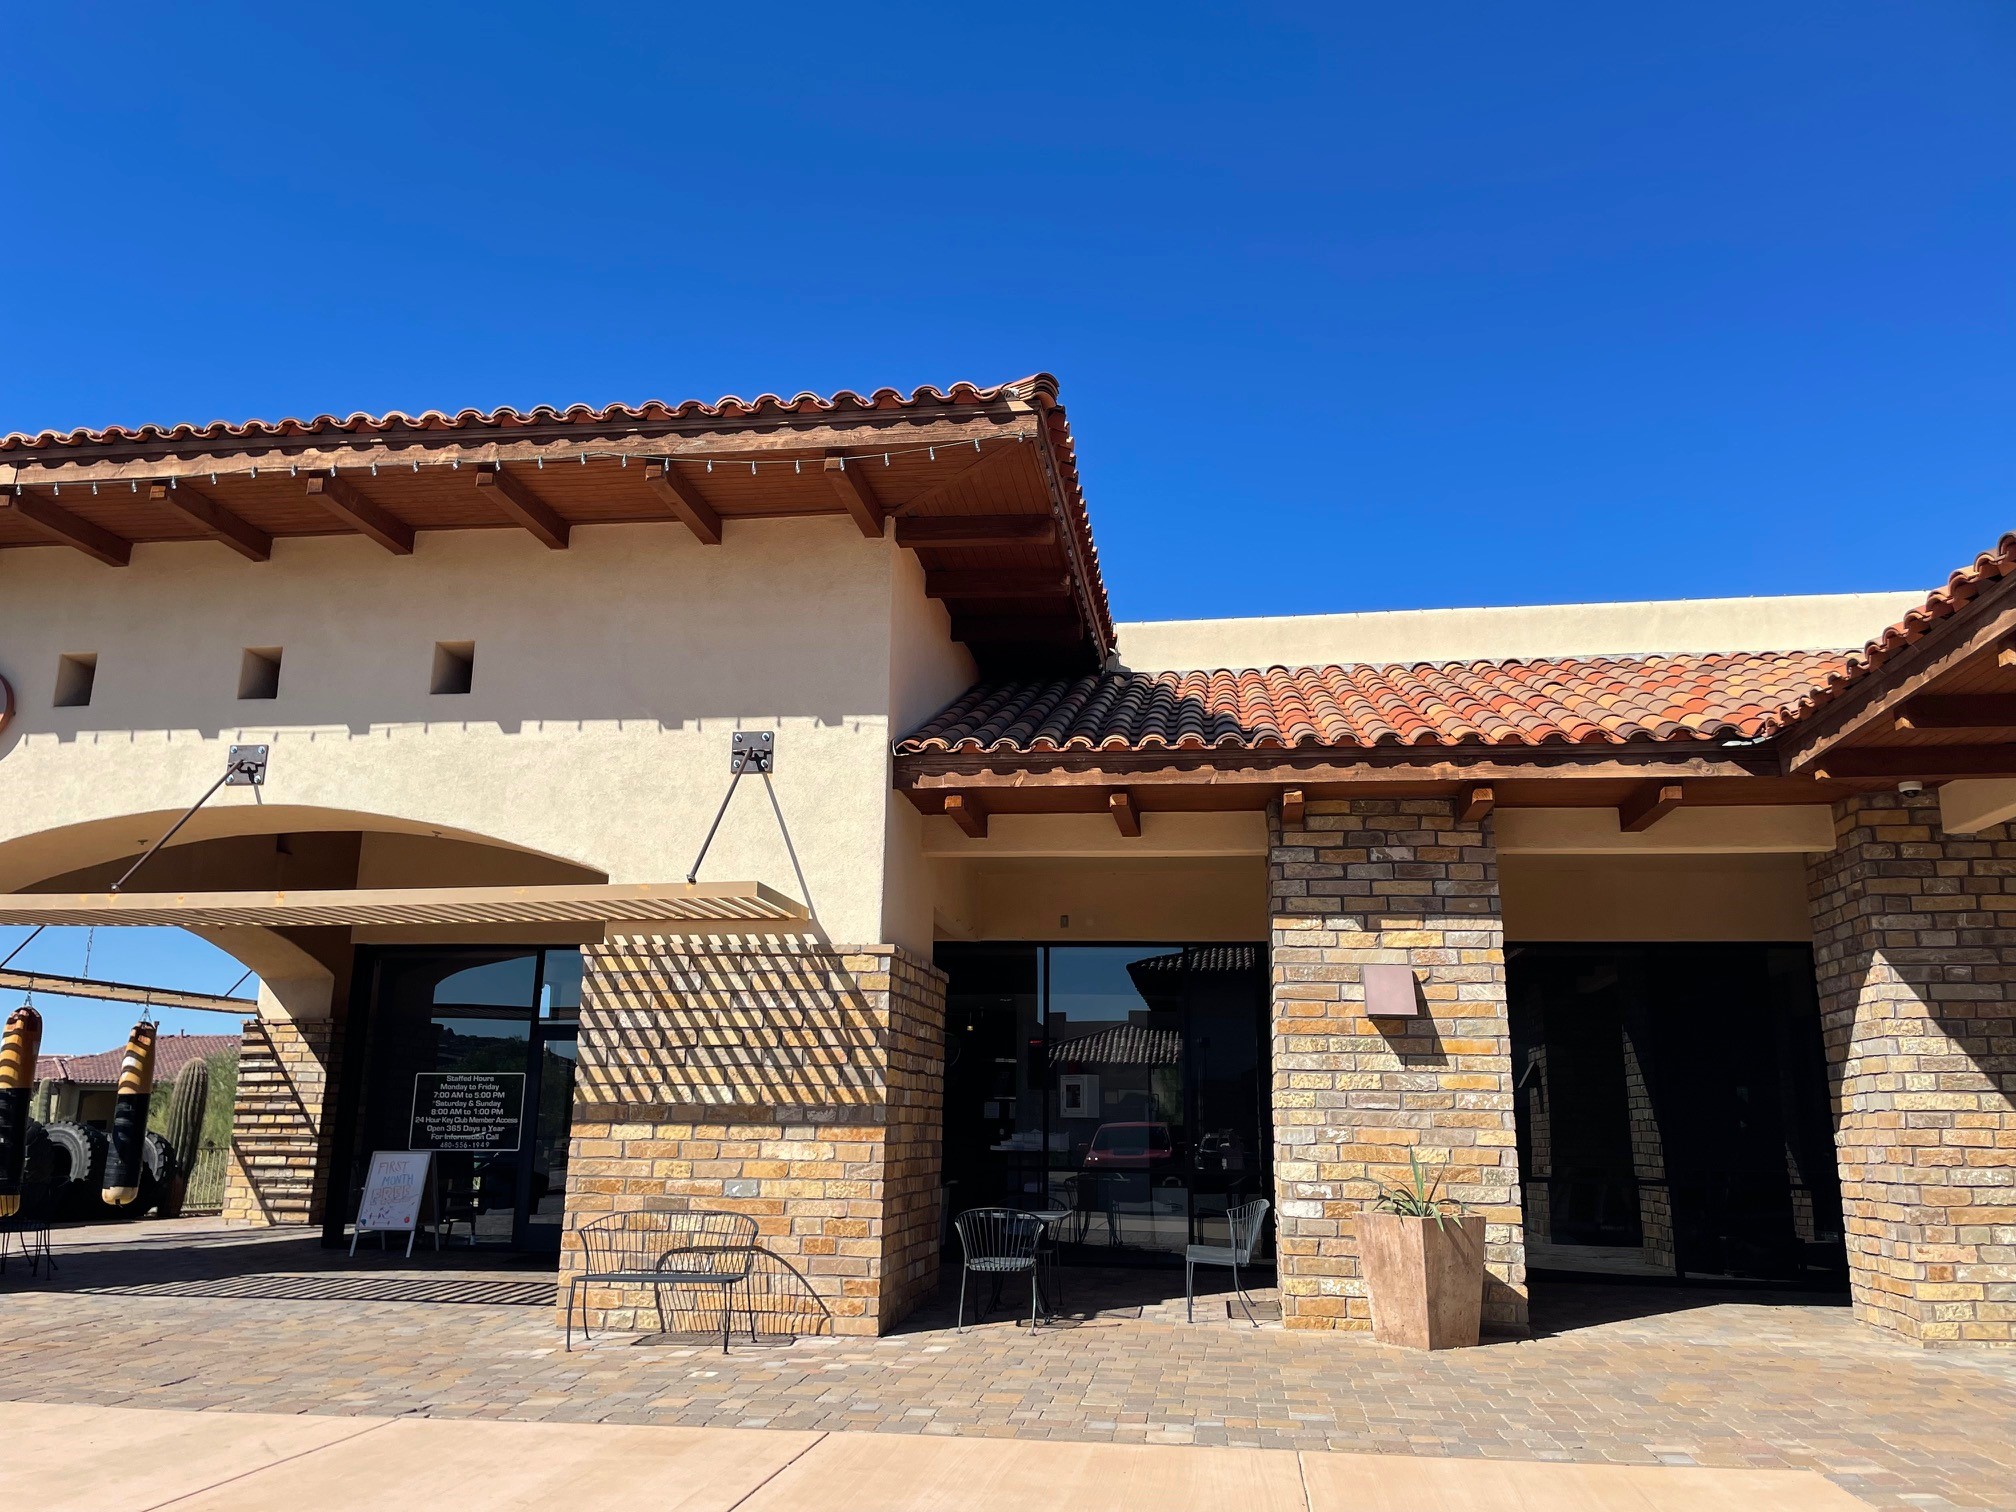
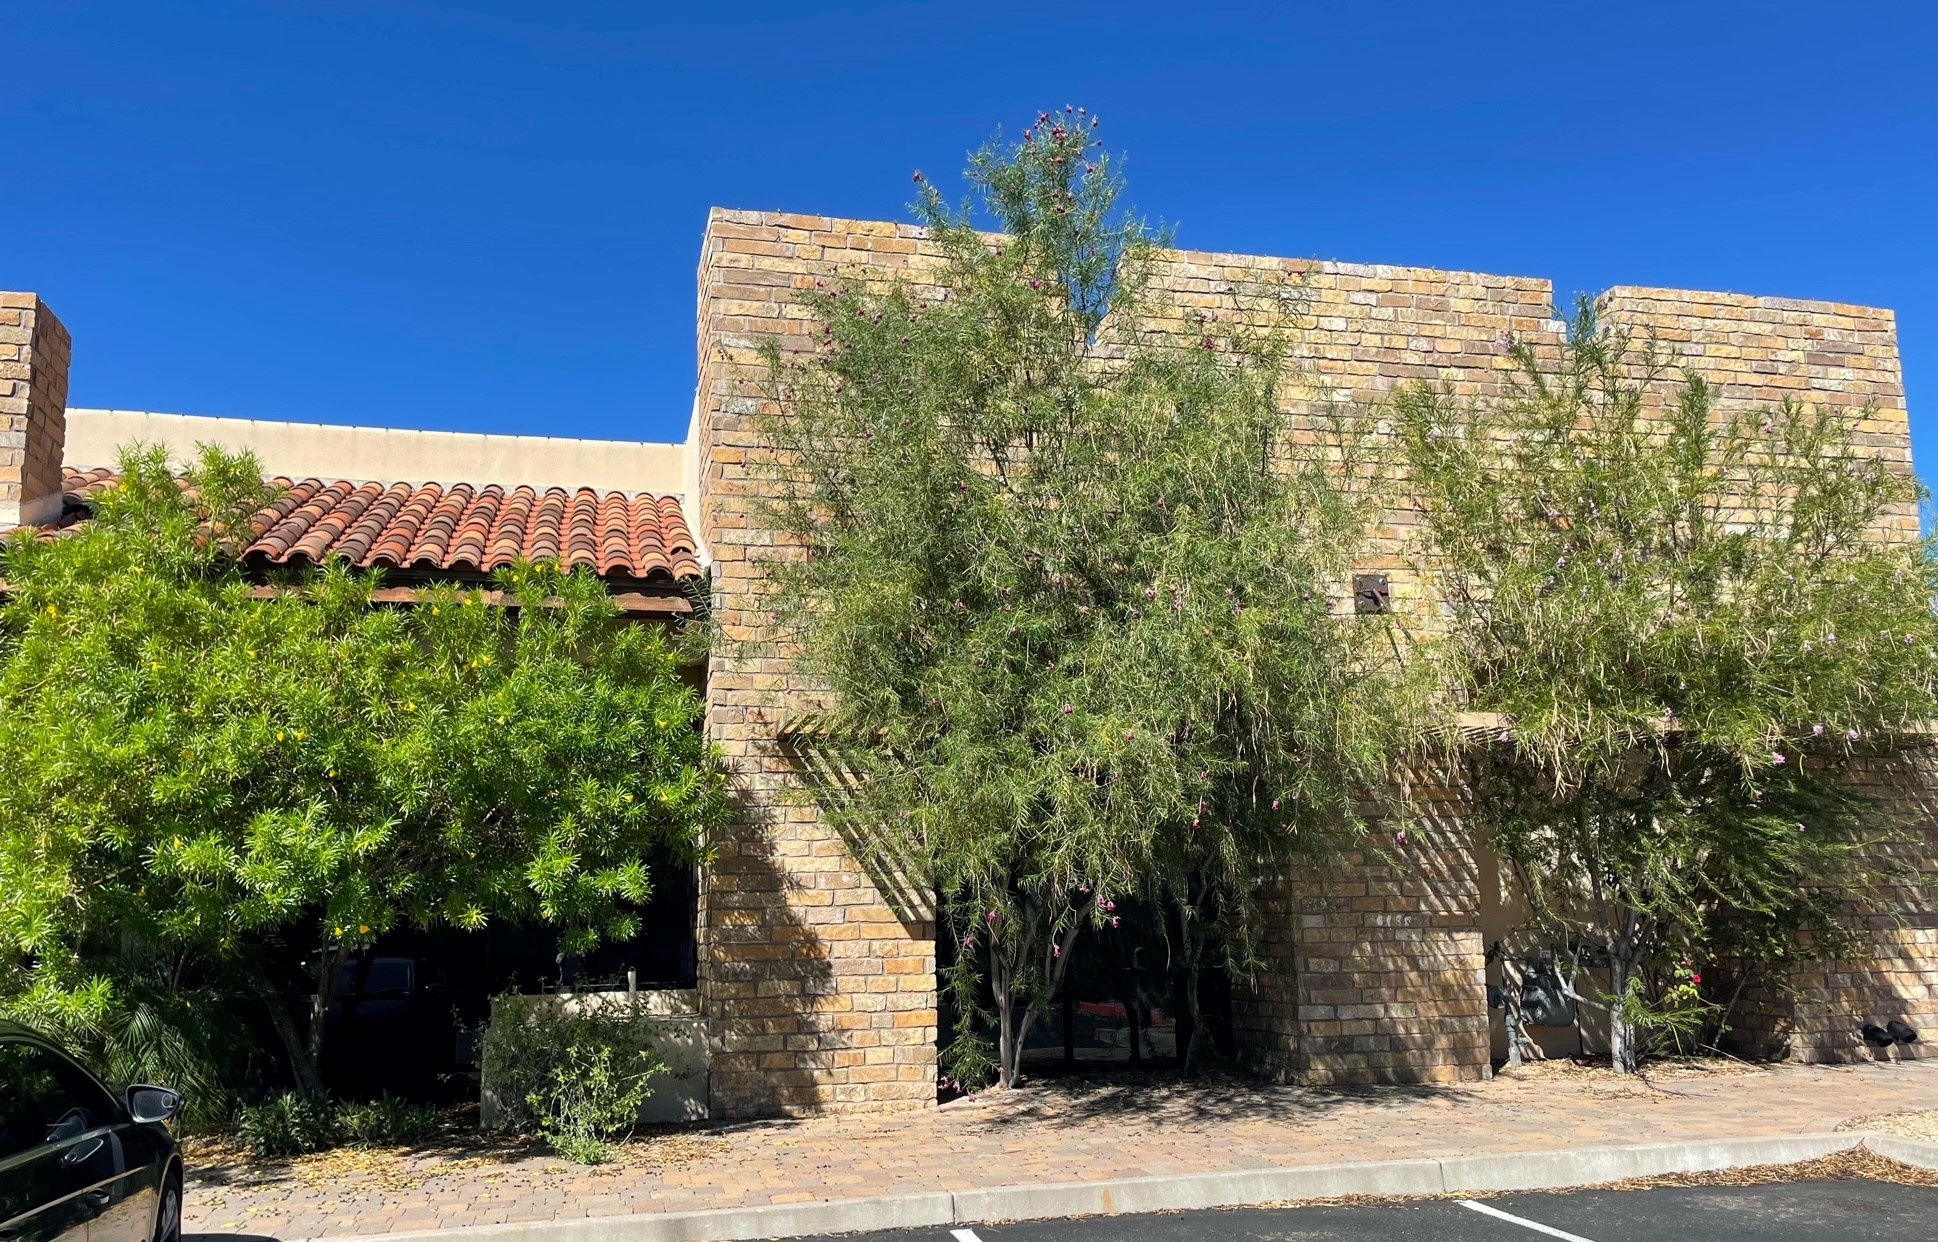
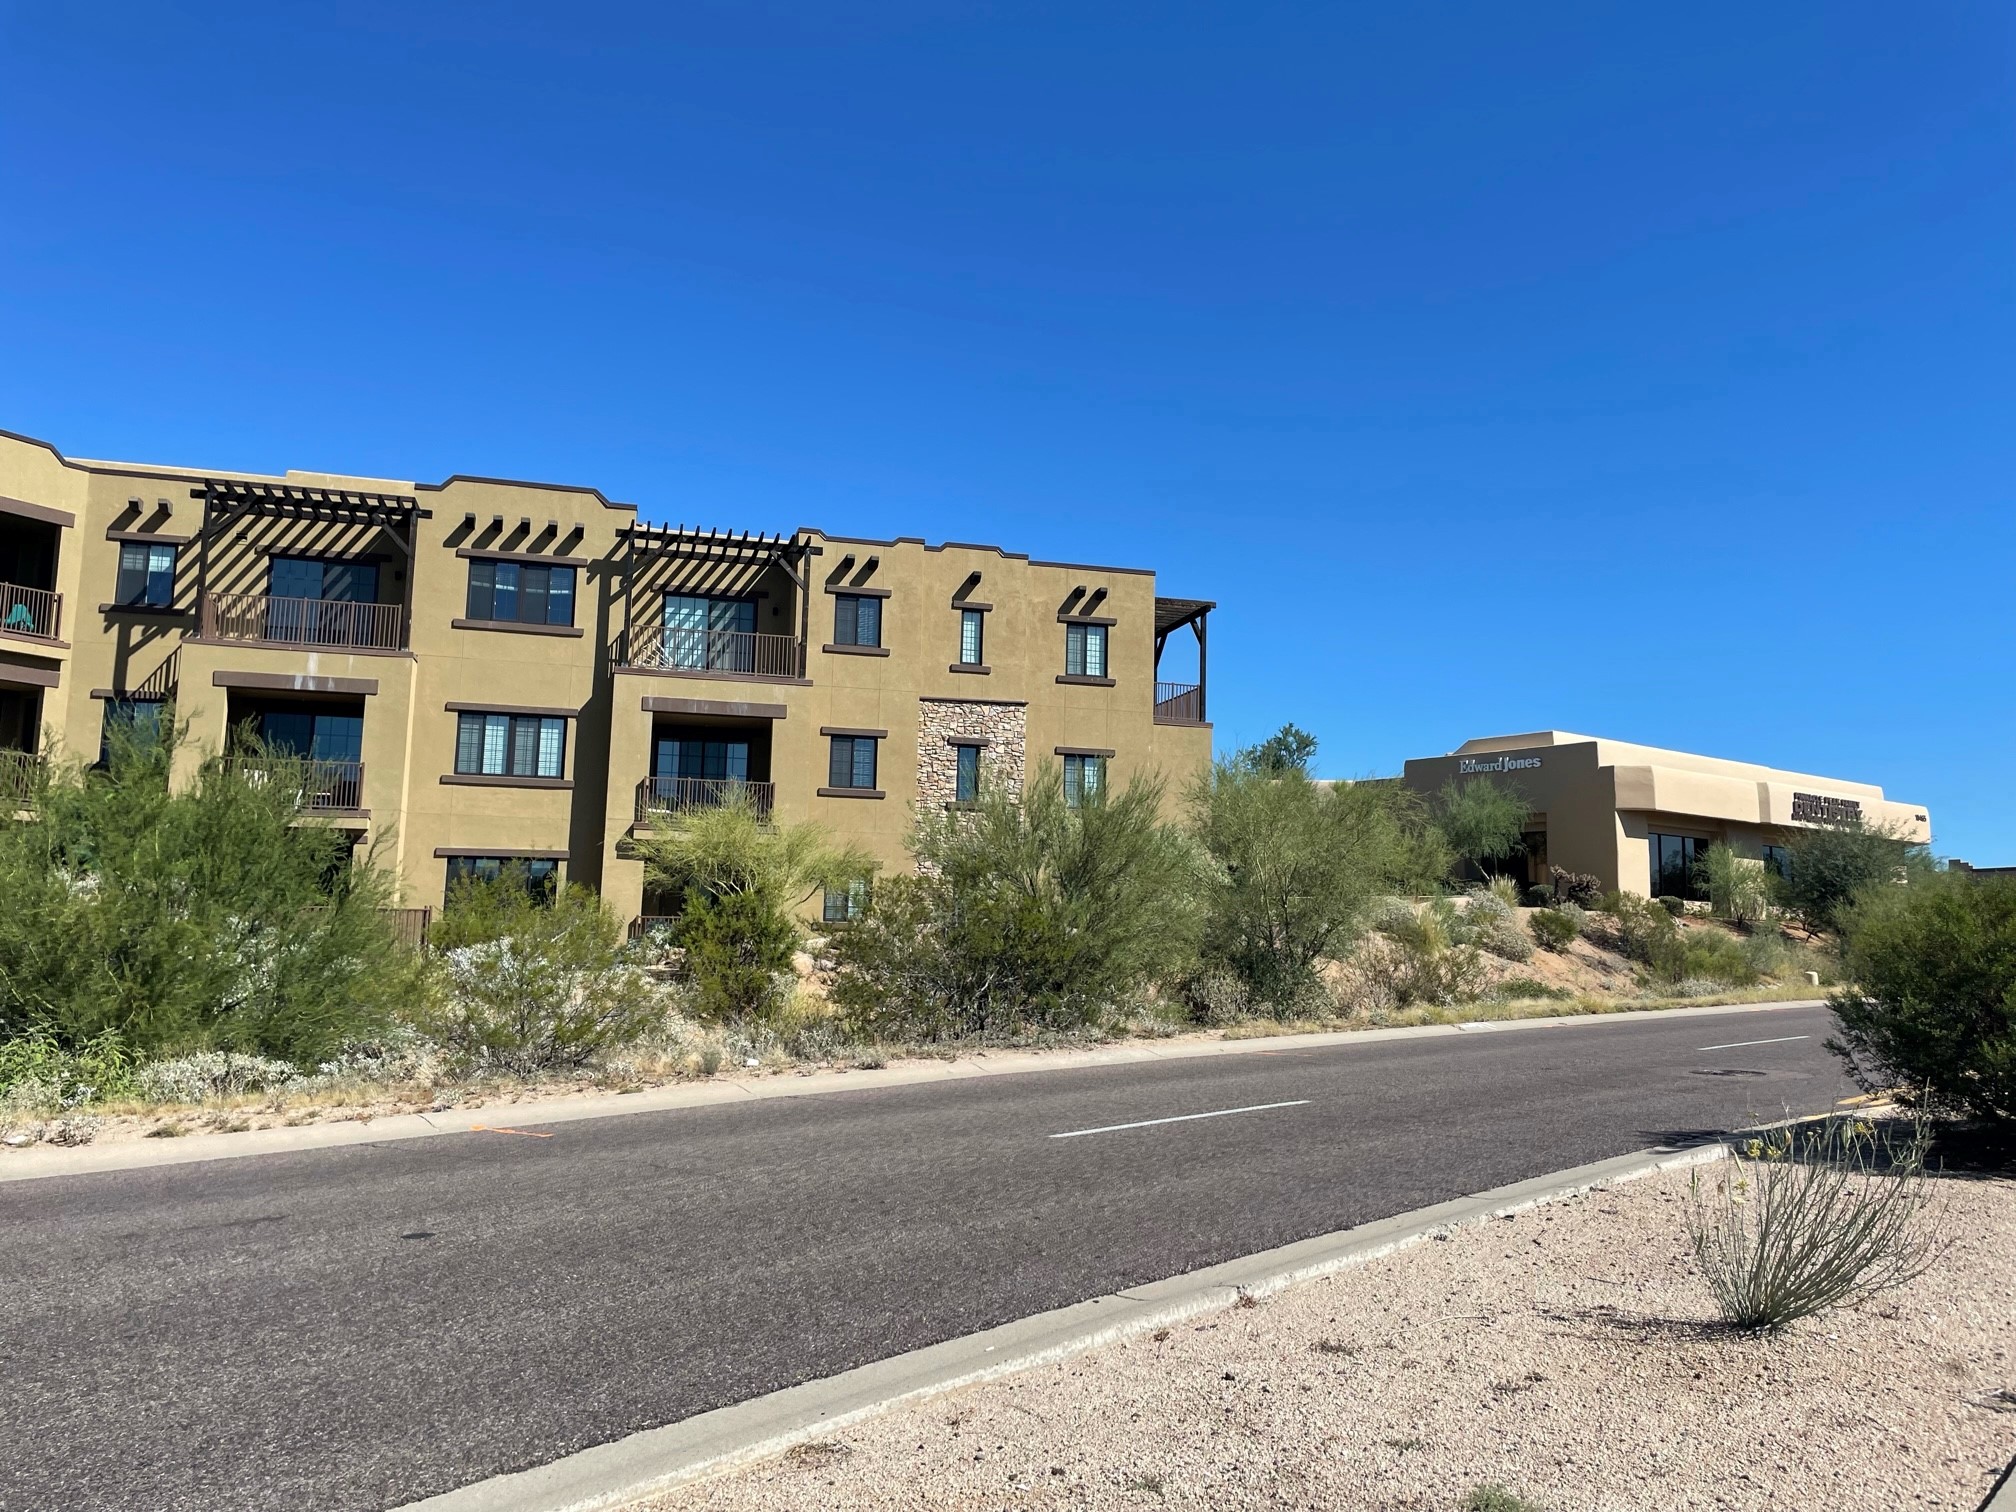
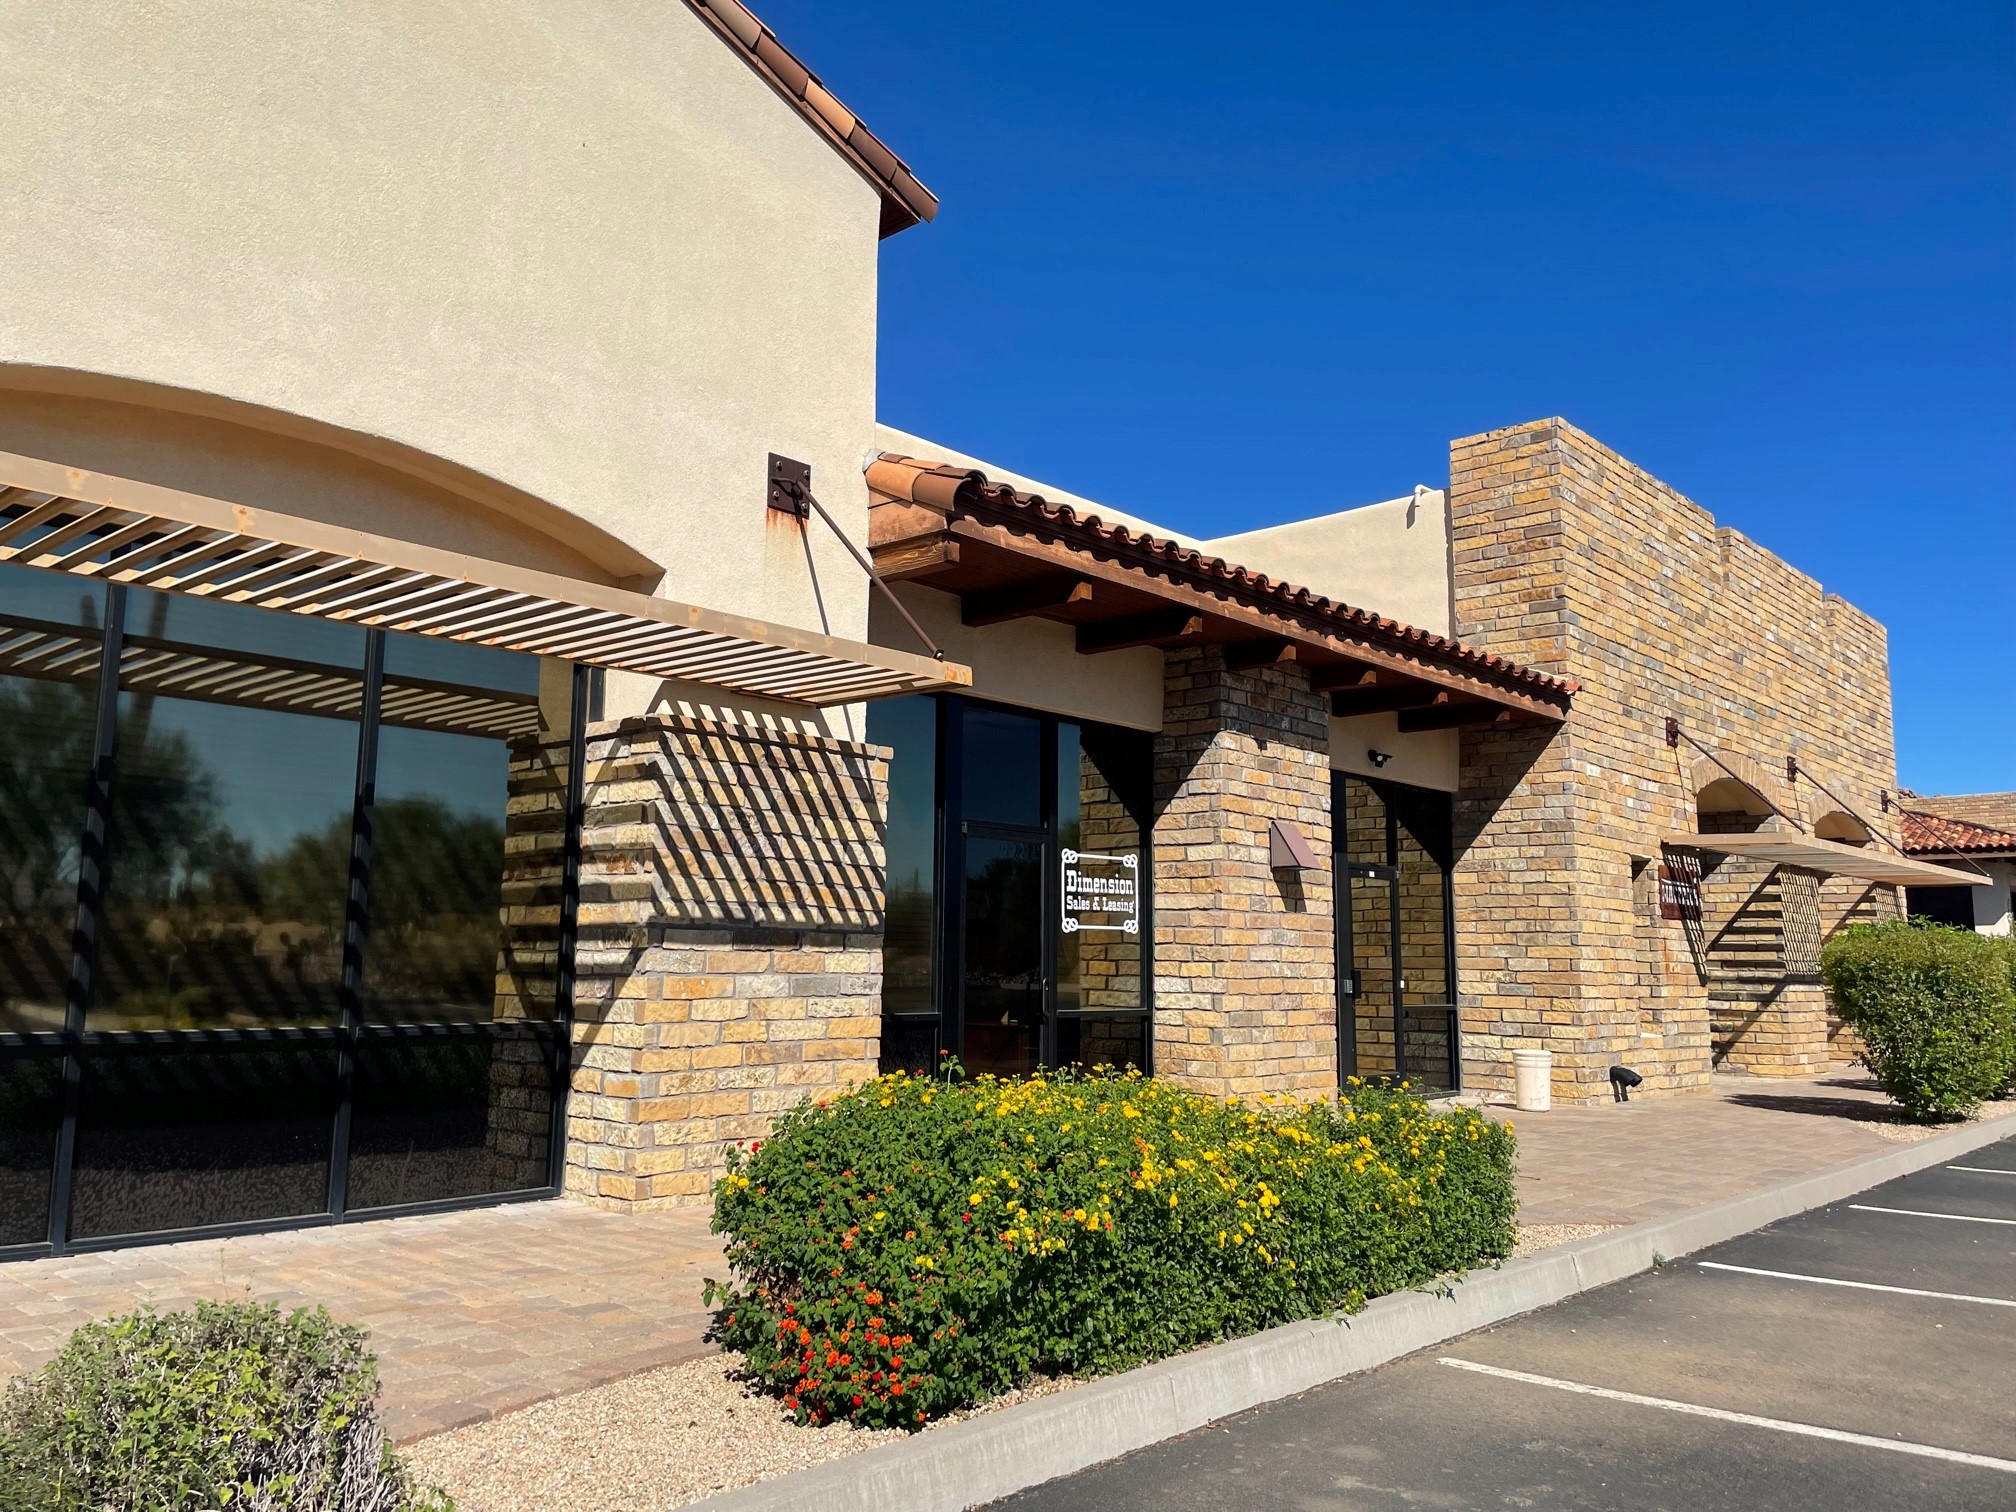
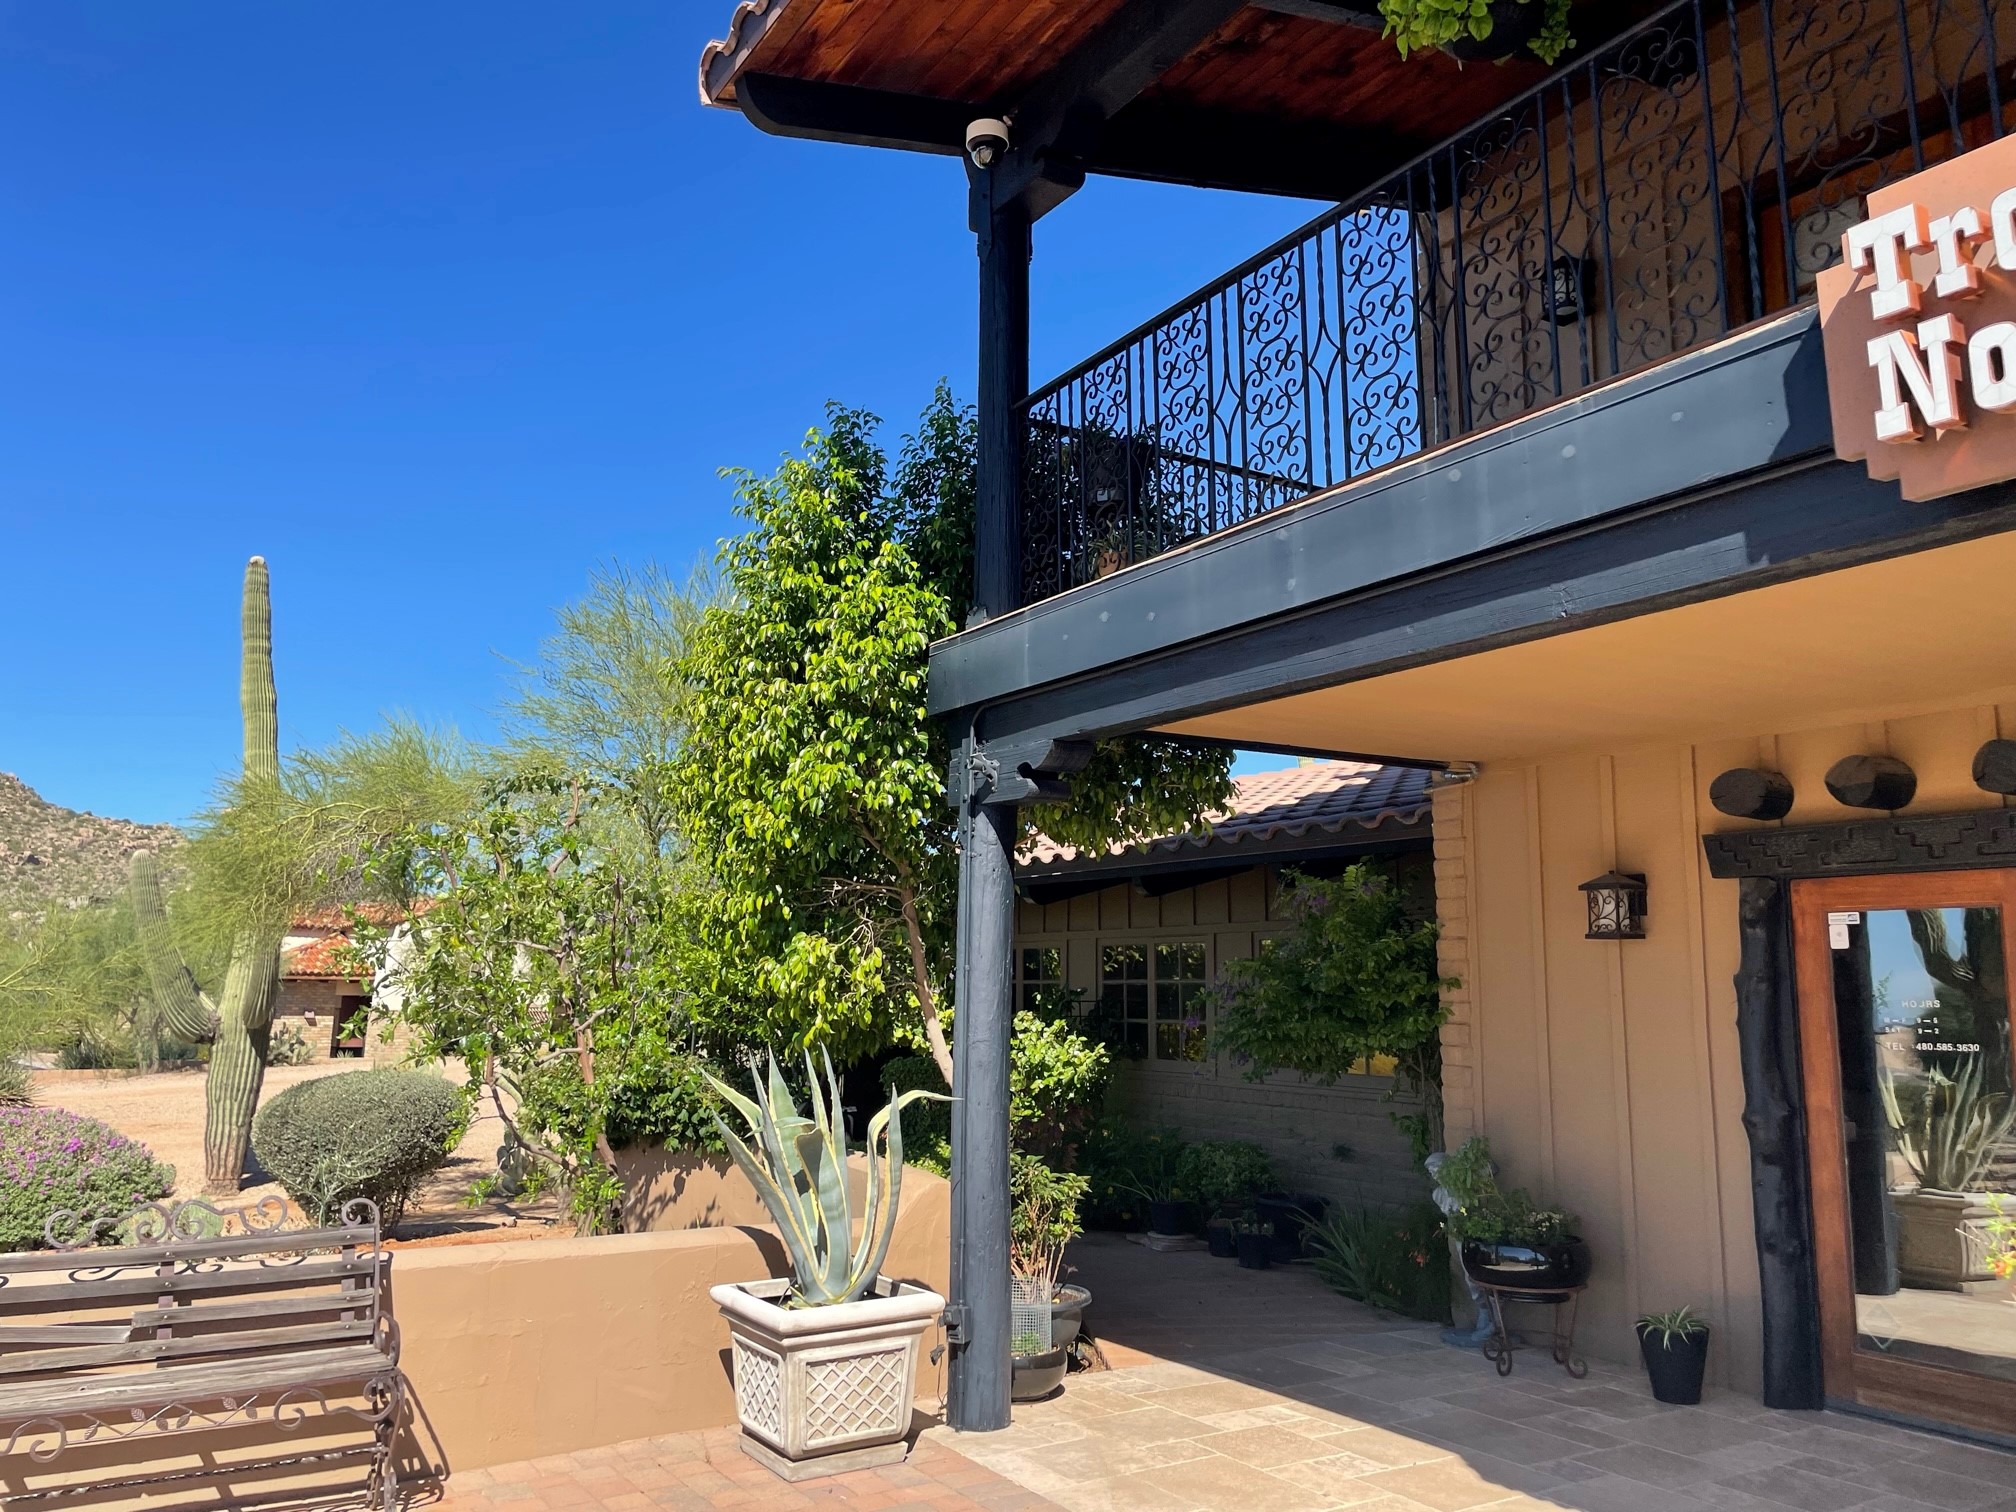
Right – Deep overhangs, pergolas, and covered entryways minimize heat gain in this commercial building in the hot-dry climate.
Image
Image
Image
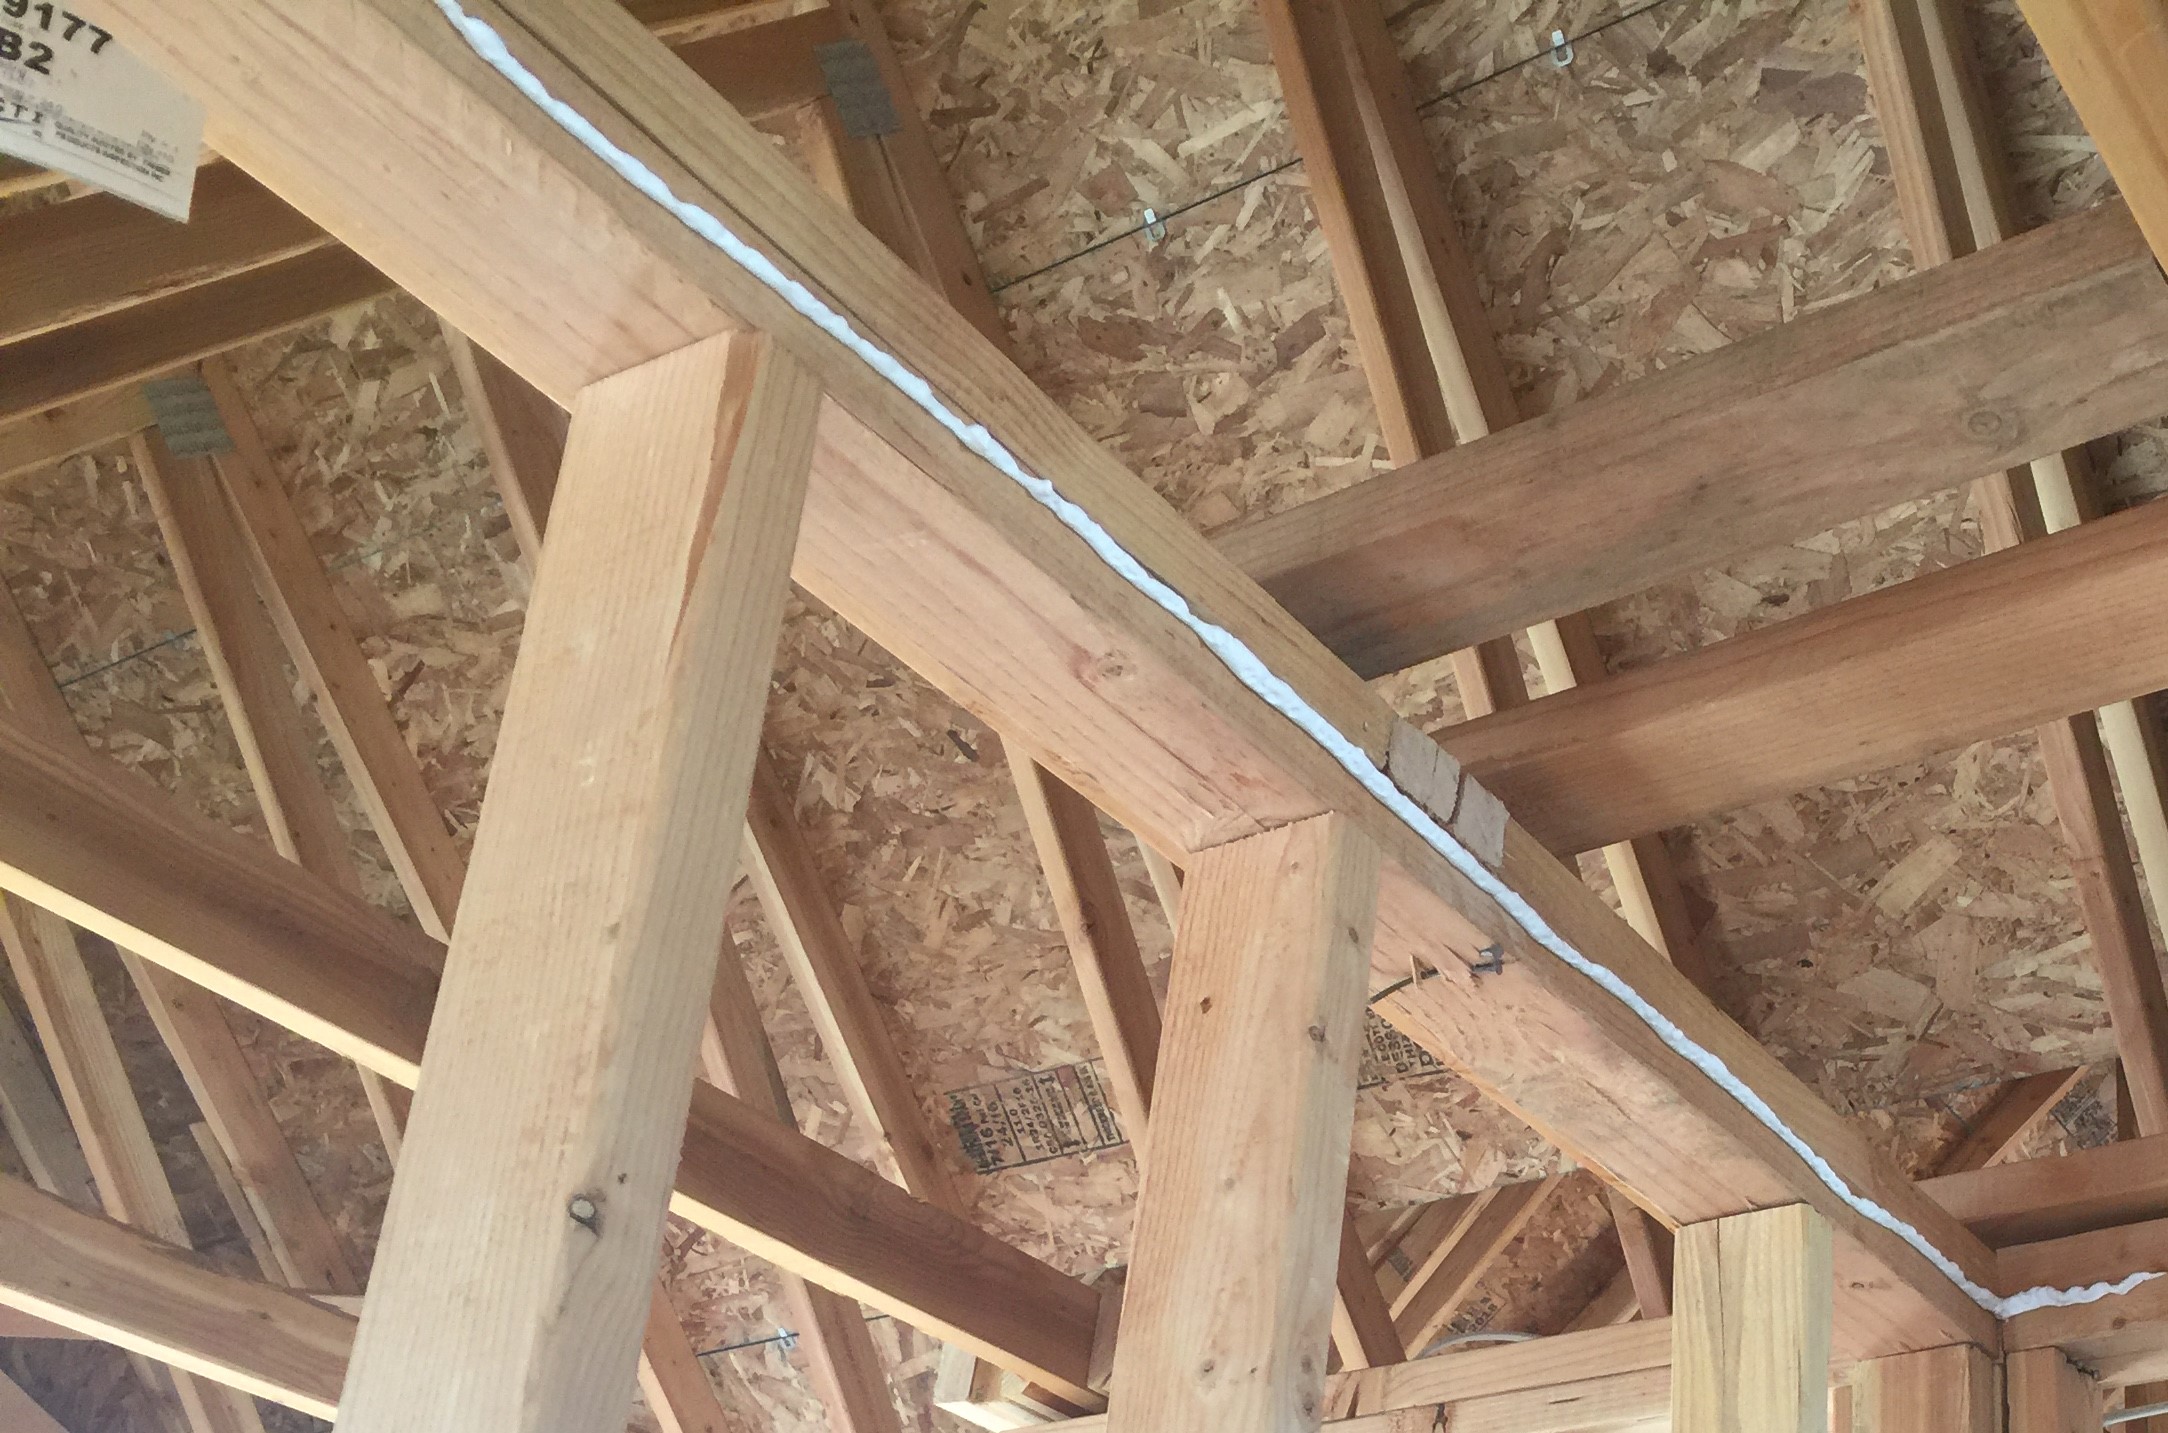
Right – A bead of sealant will form an airtight gasket between the top plate and drywall.
Image
Image

Right – A gap separates the two wall layers in this double-stud wall assembly allowing room for insulation to stop thermal bridging between the inner and outer wall
Image
Right – Air barrier and penetrations sealed between porch attic and conditioned space
Image
Image
Image
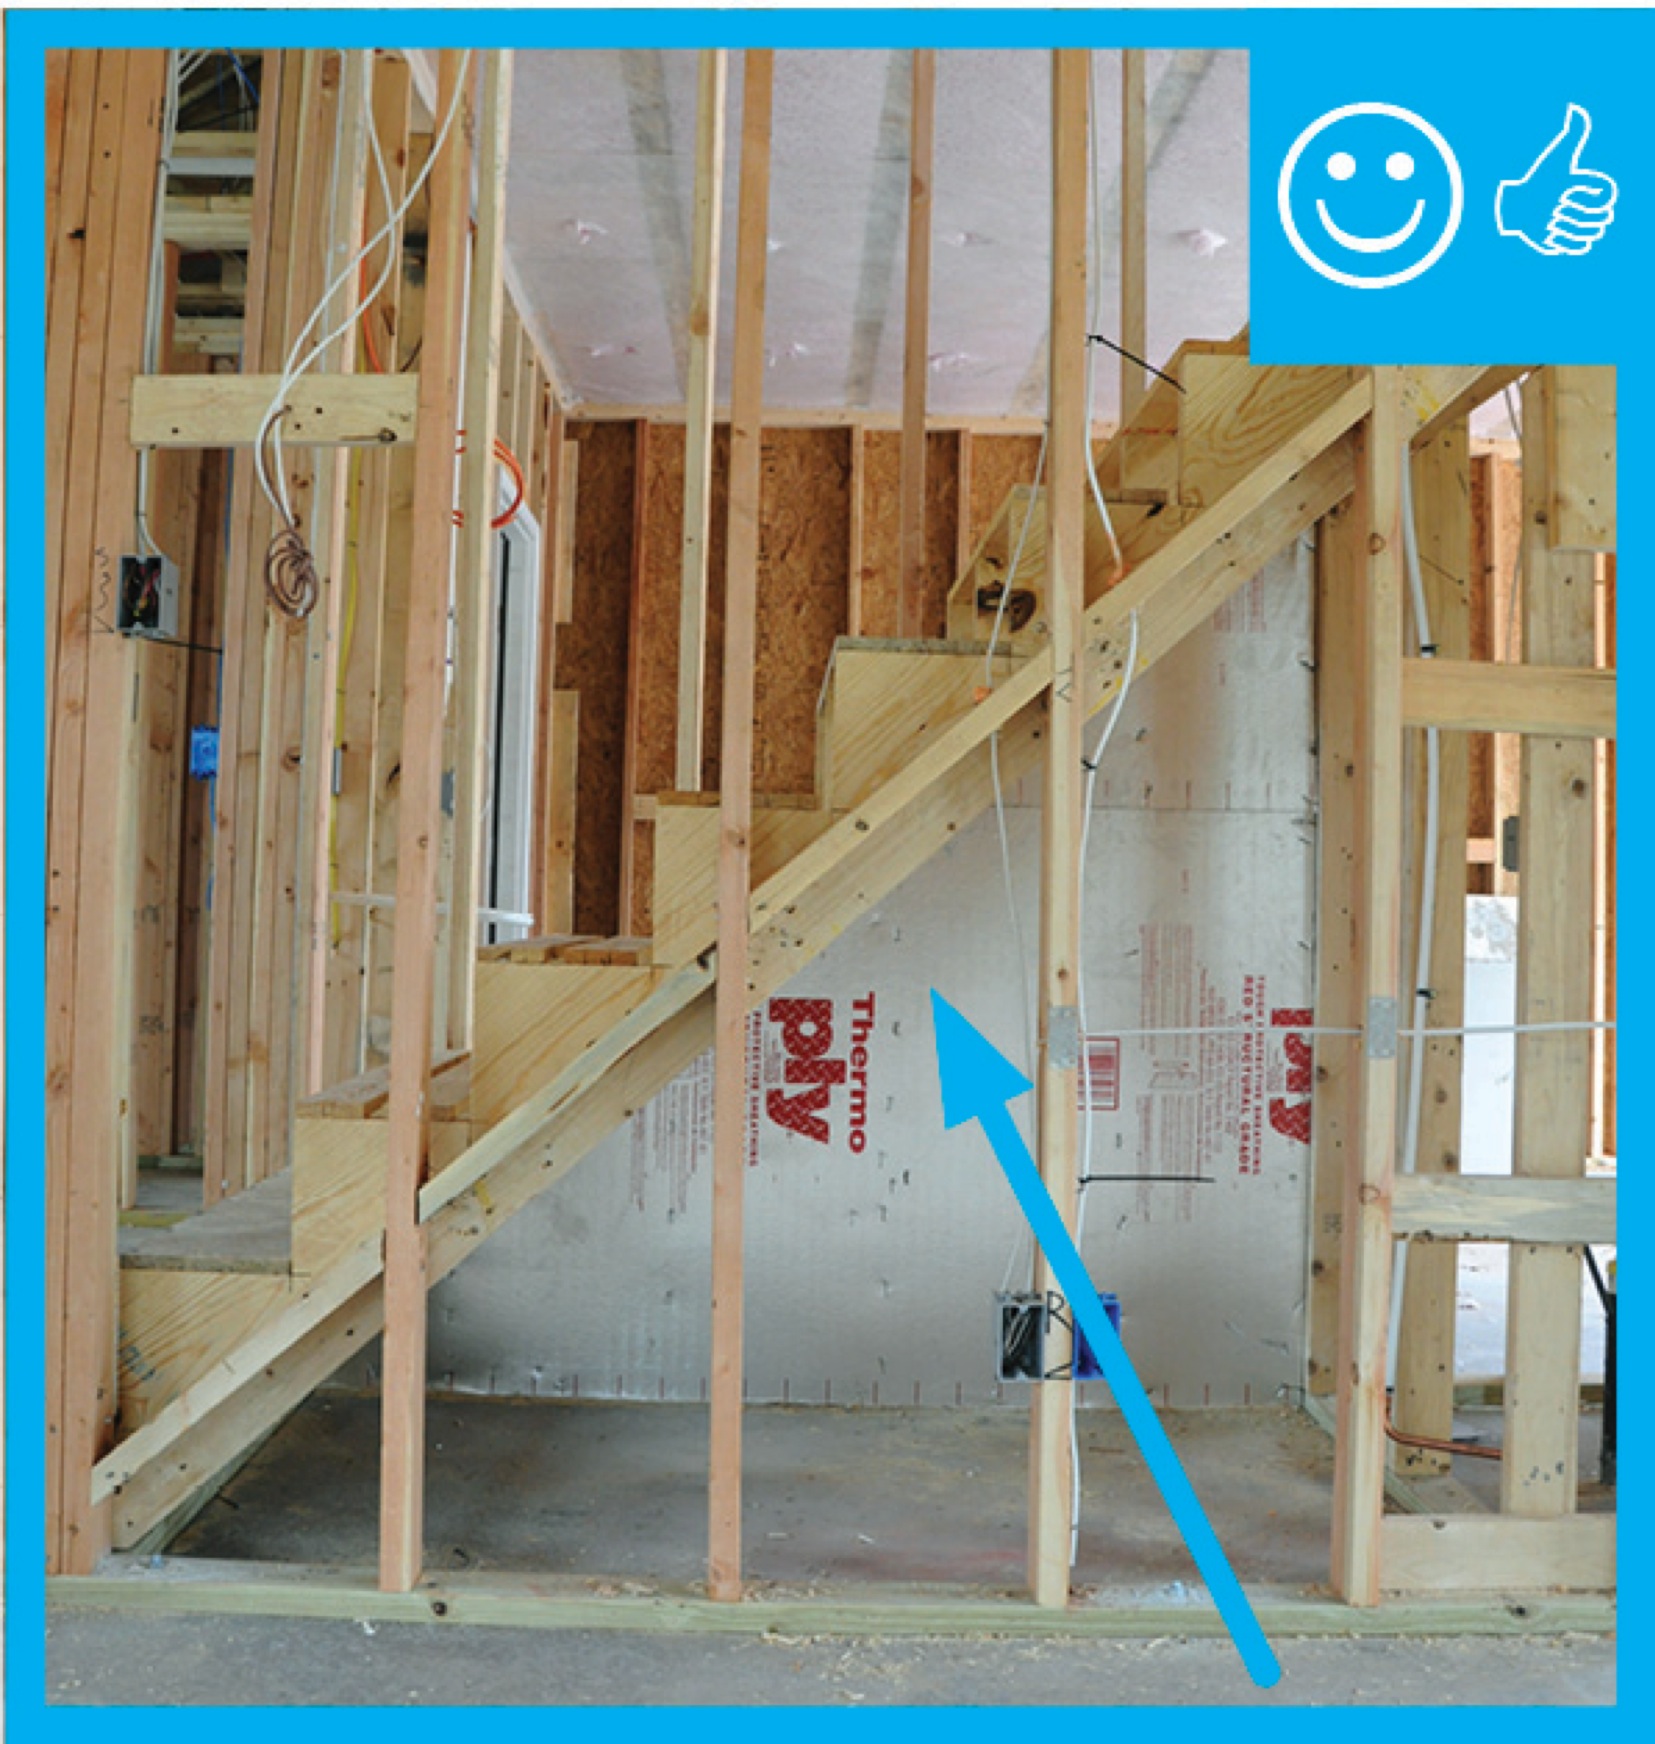
Right – Air barrier installed under staircase (picture taken from house looking into attached garage)
Image
Image
Image
Image
Image
Image
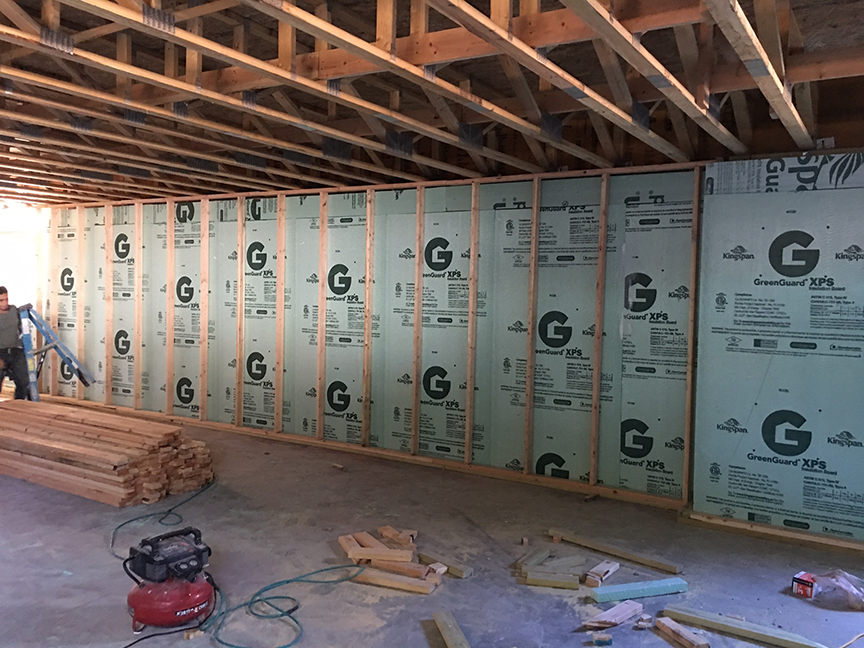
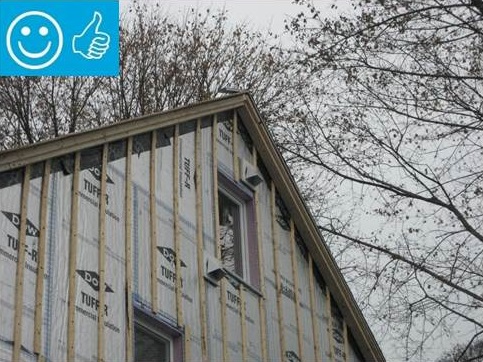
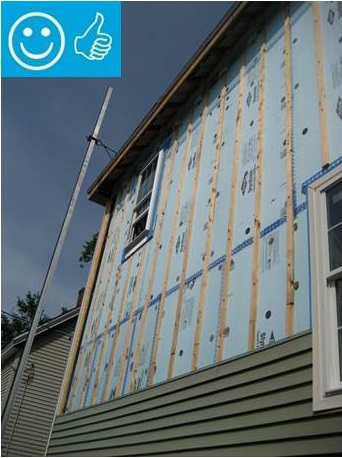
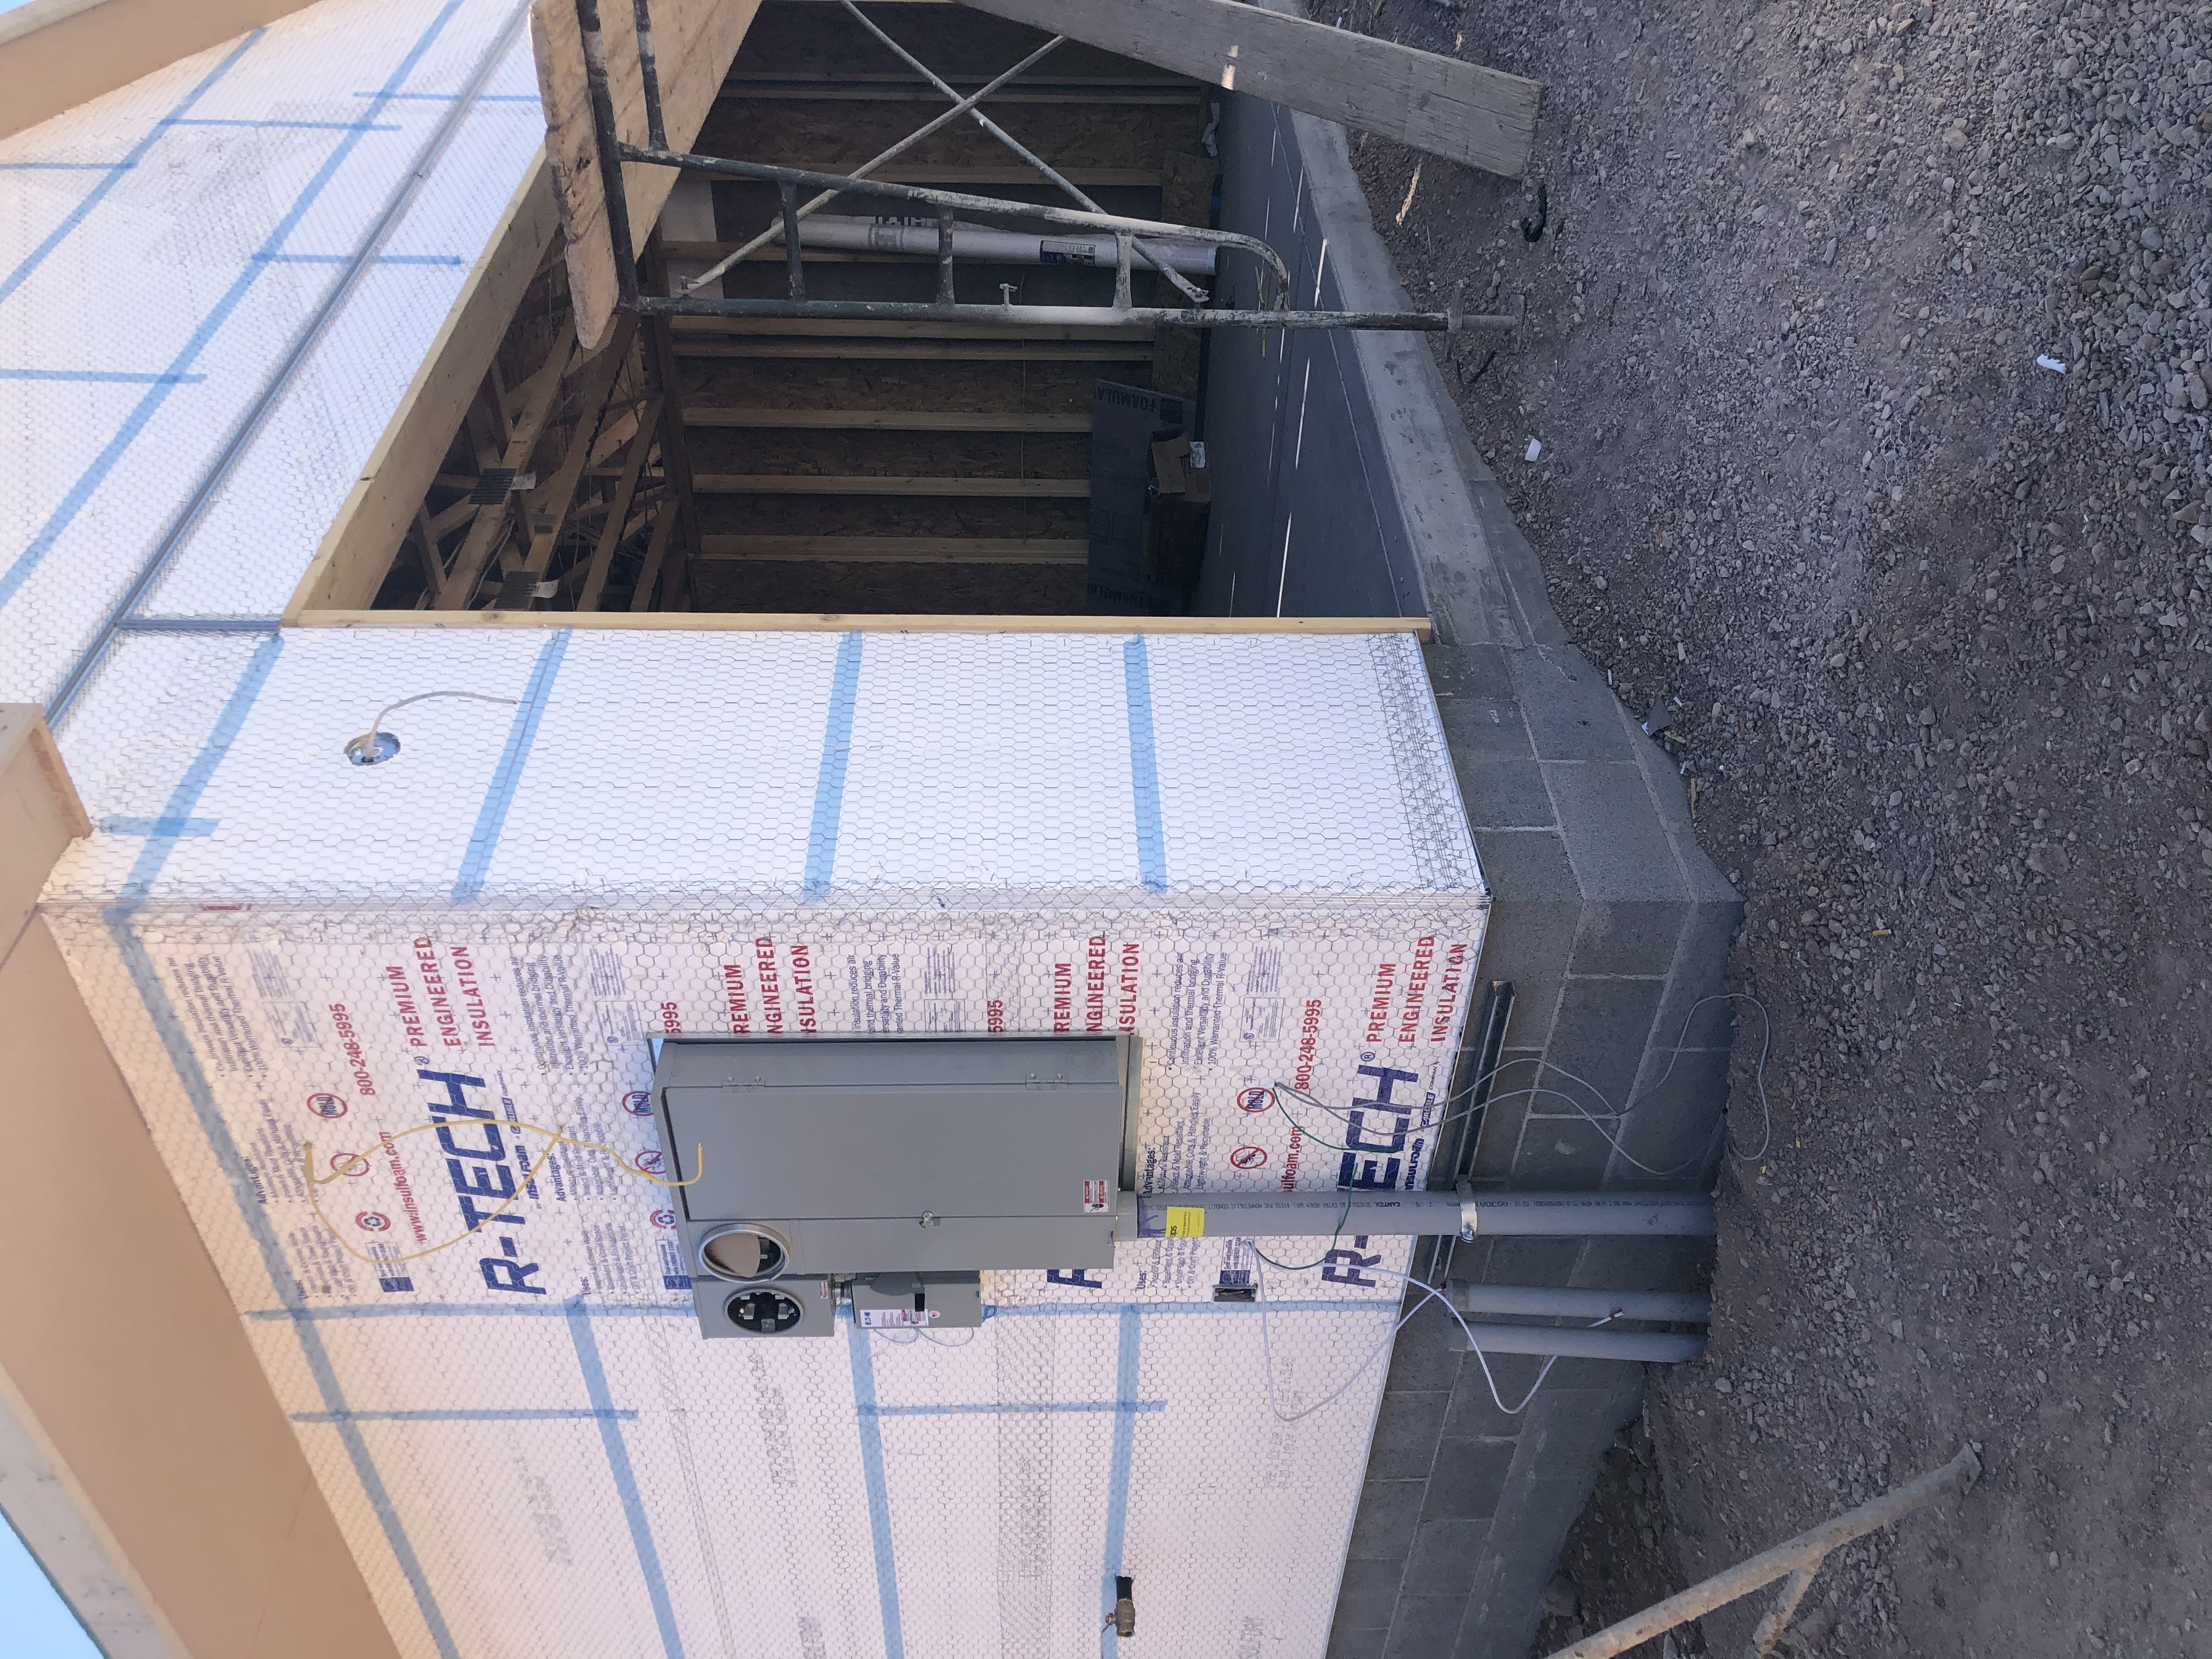
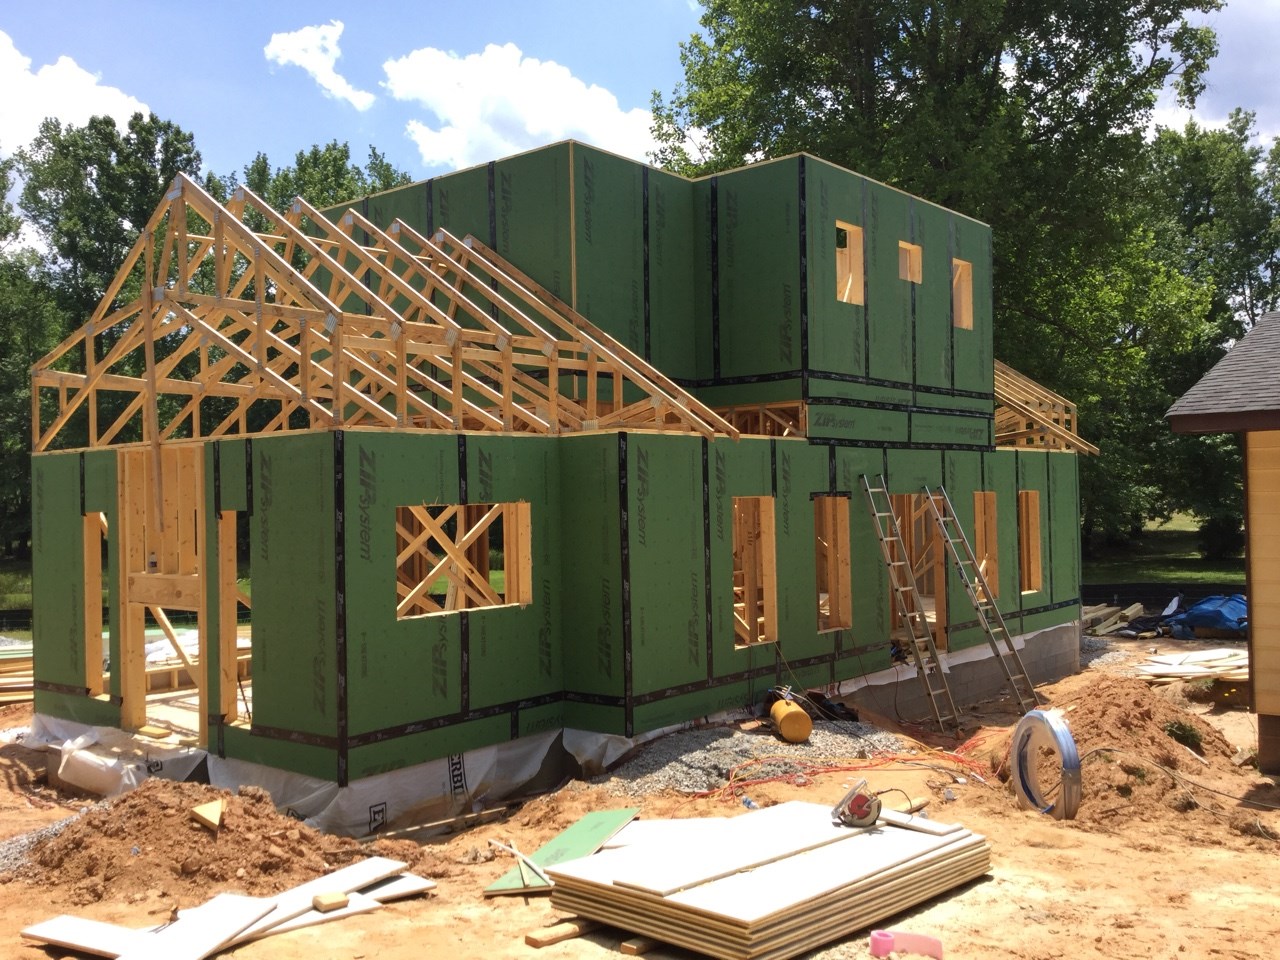
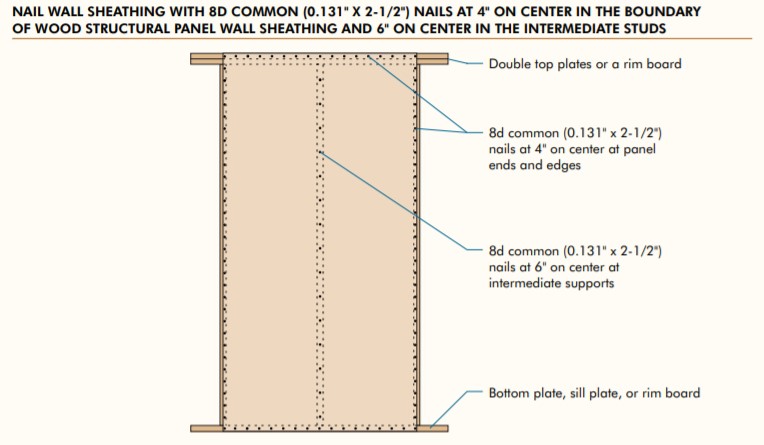
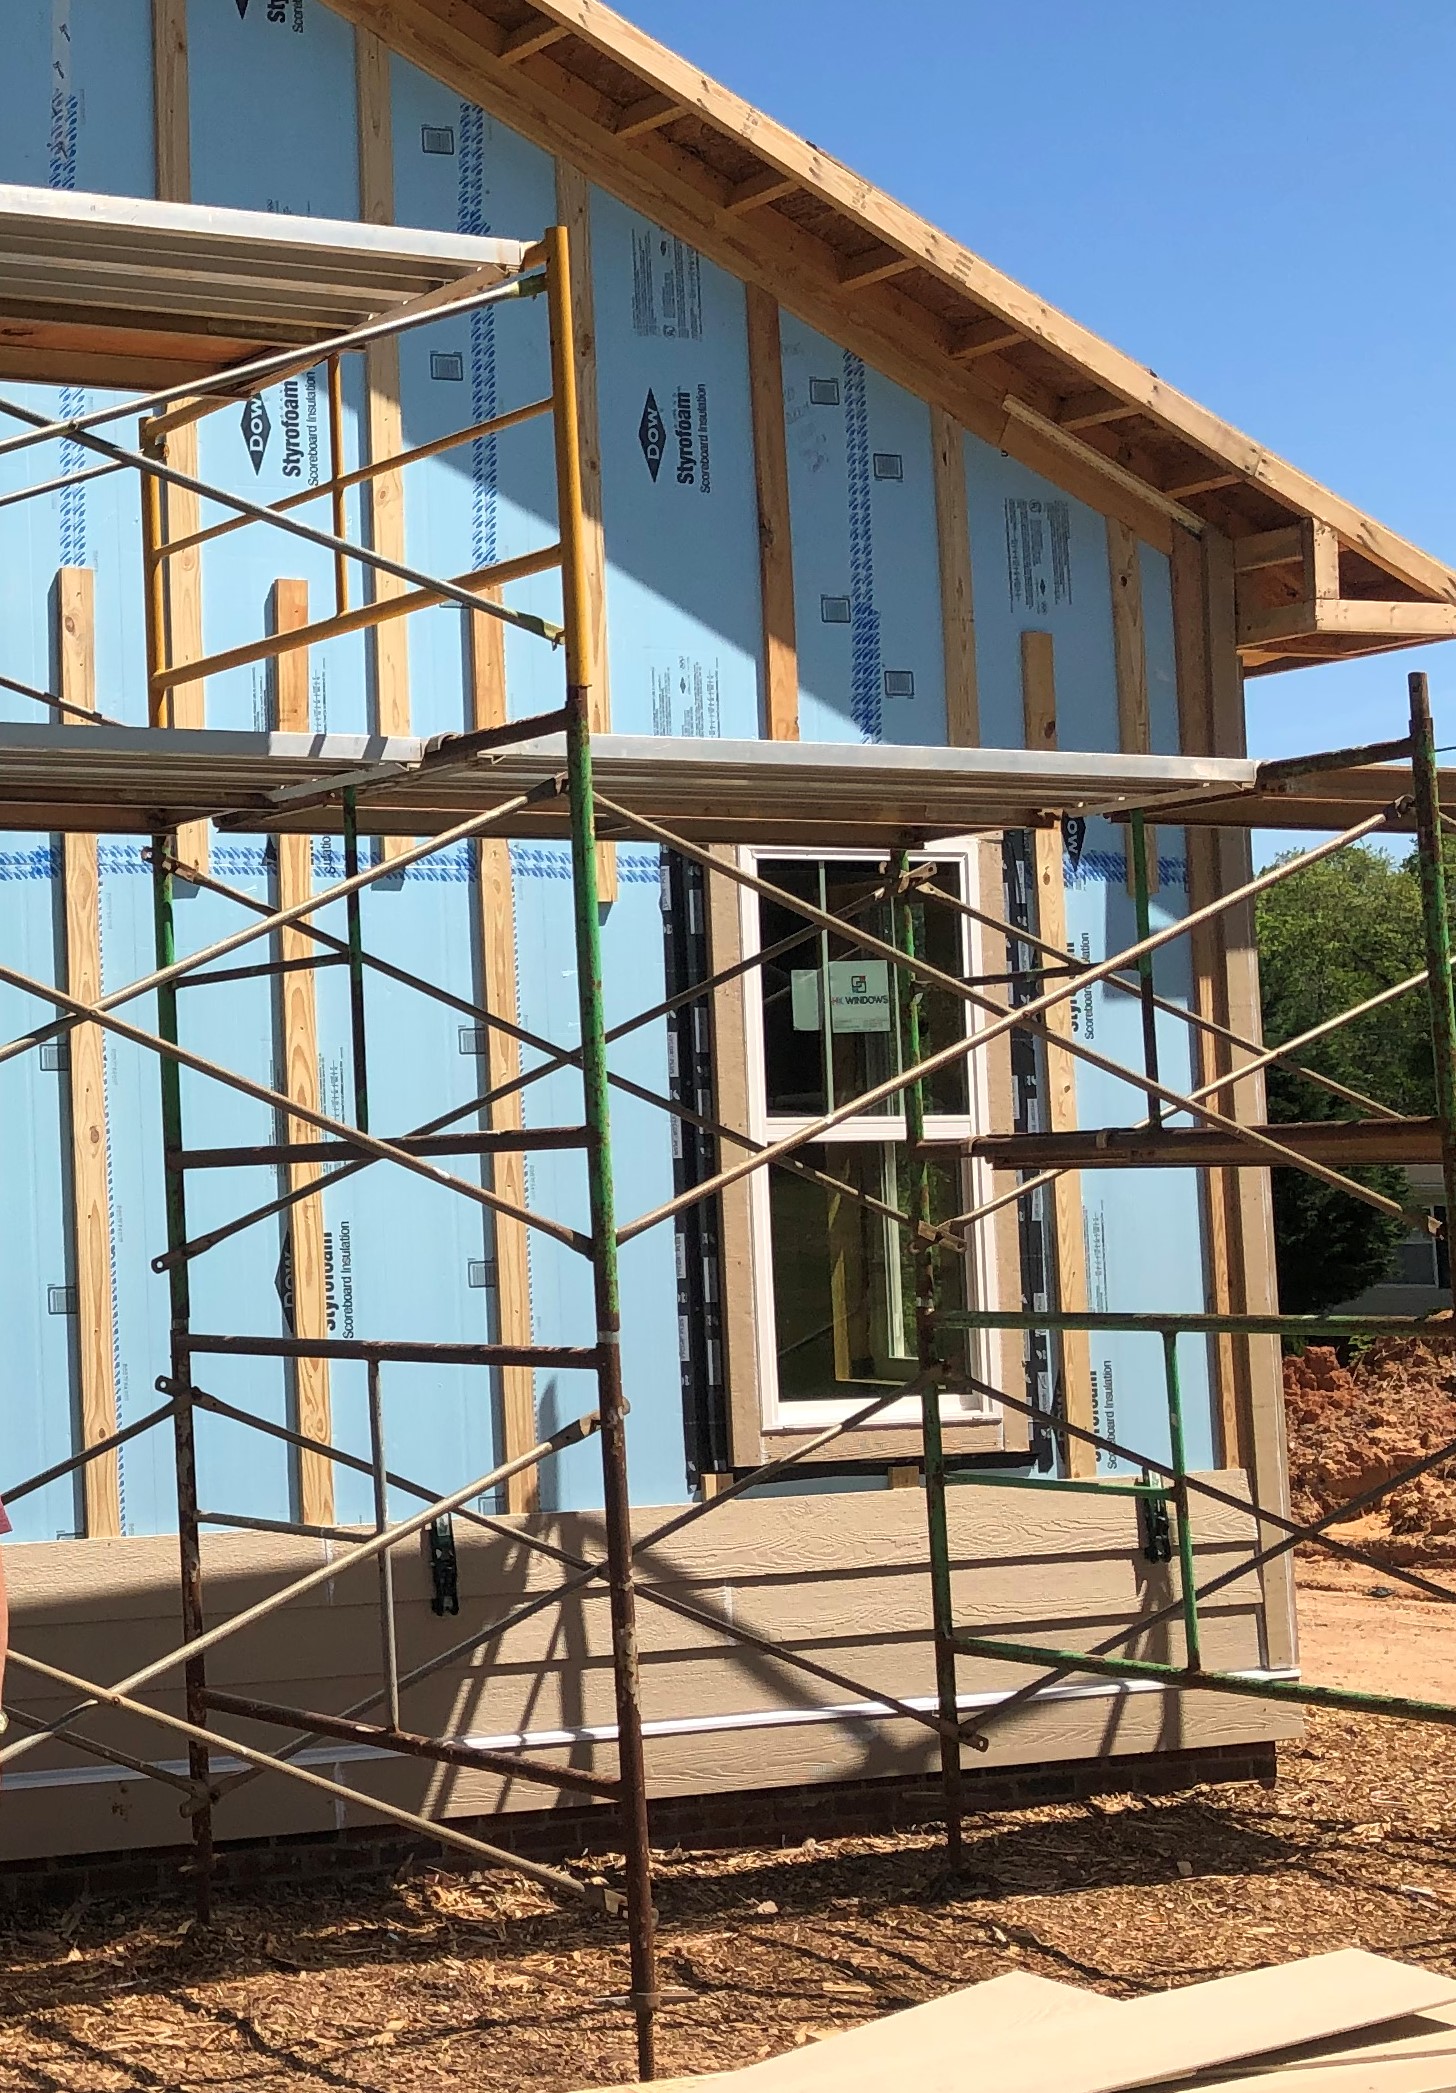
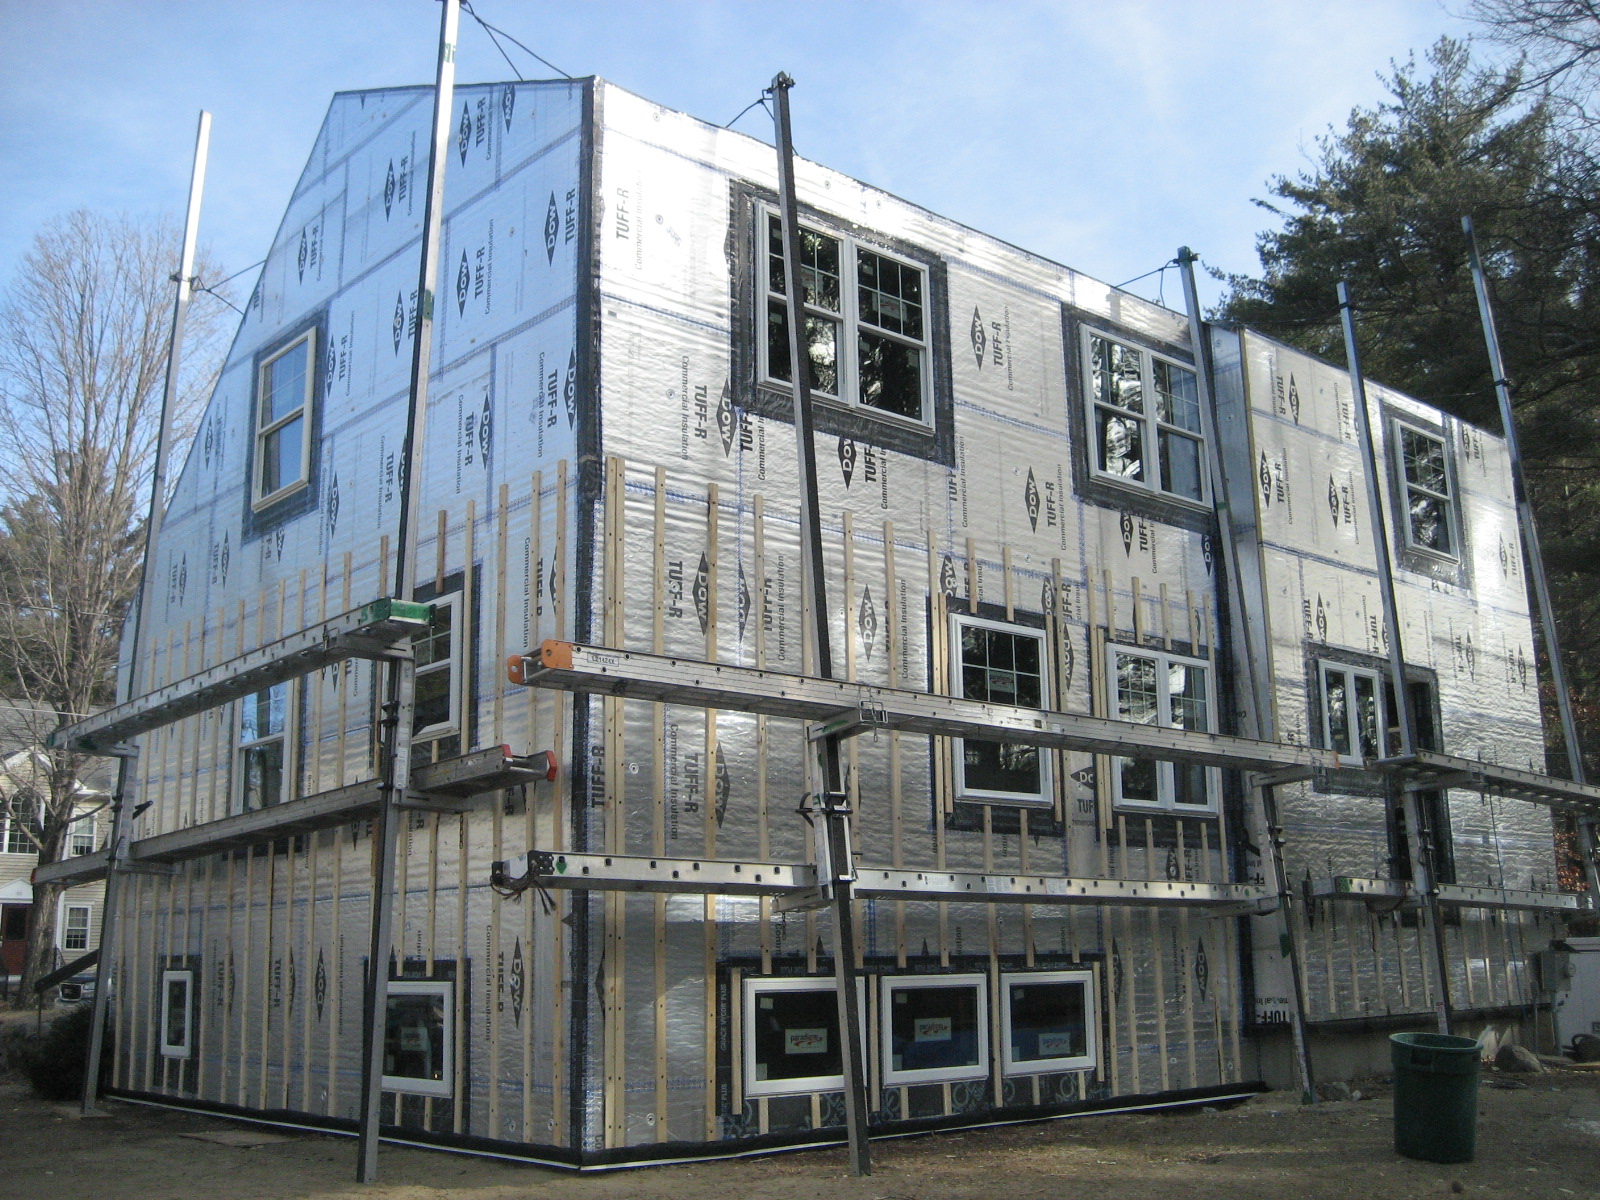
Right – All insulated sheathing boards are installed according to the manufacturer’s recommended fastening schedule and taping specifications
Image
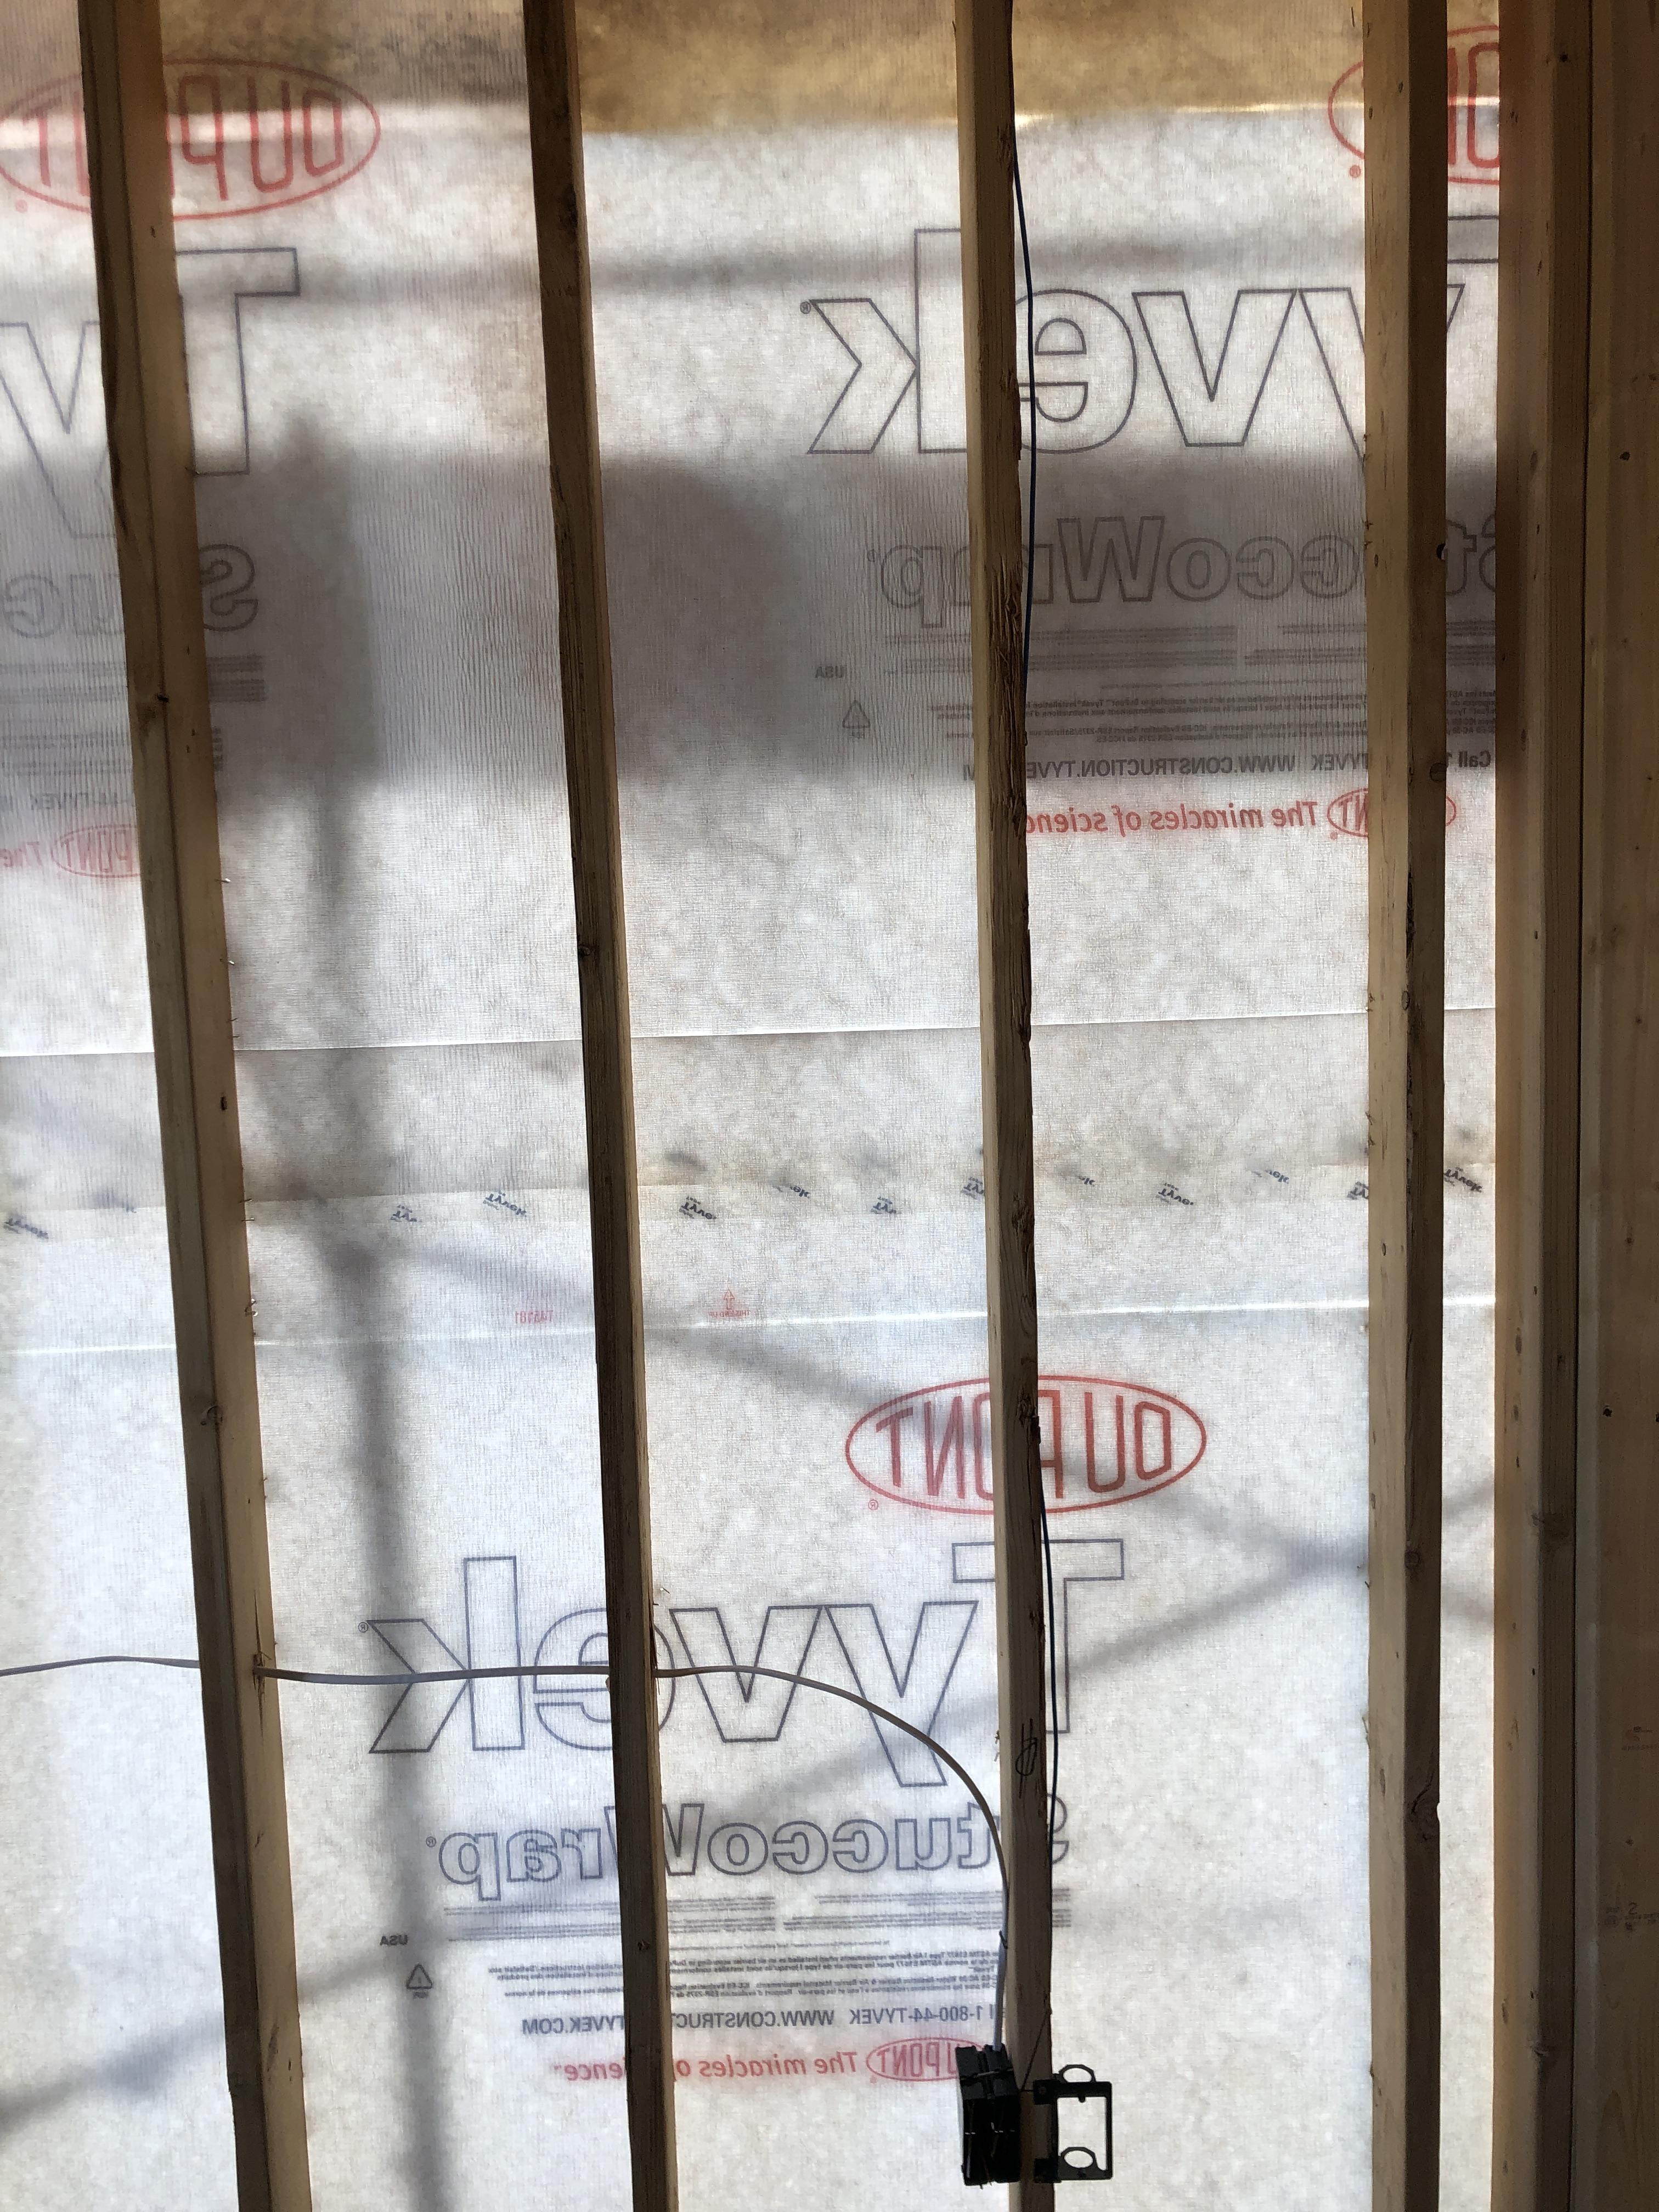
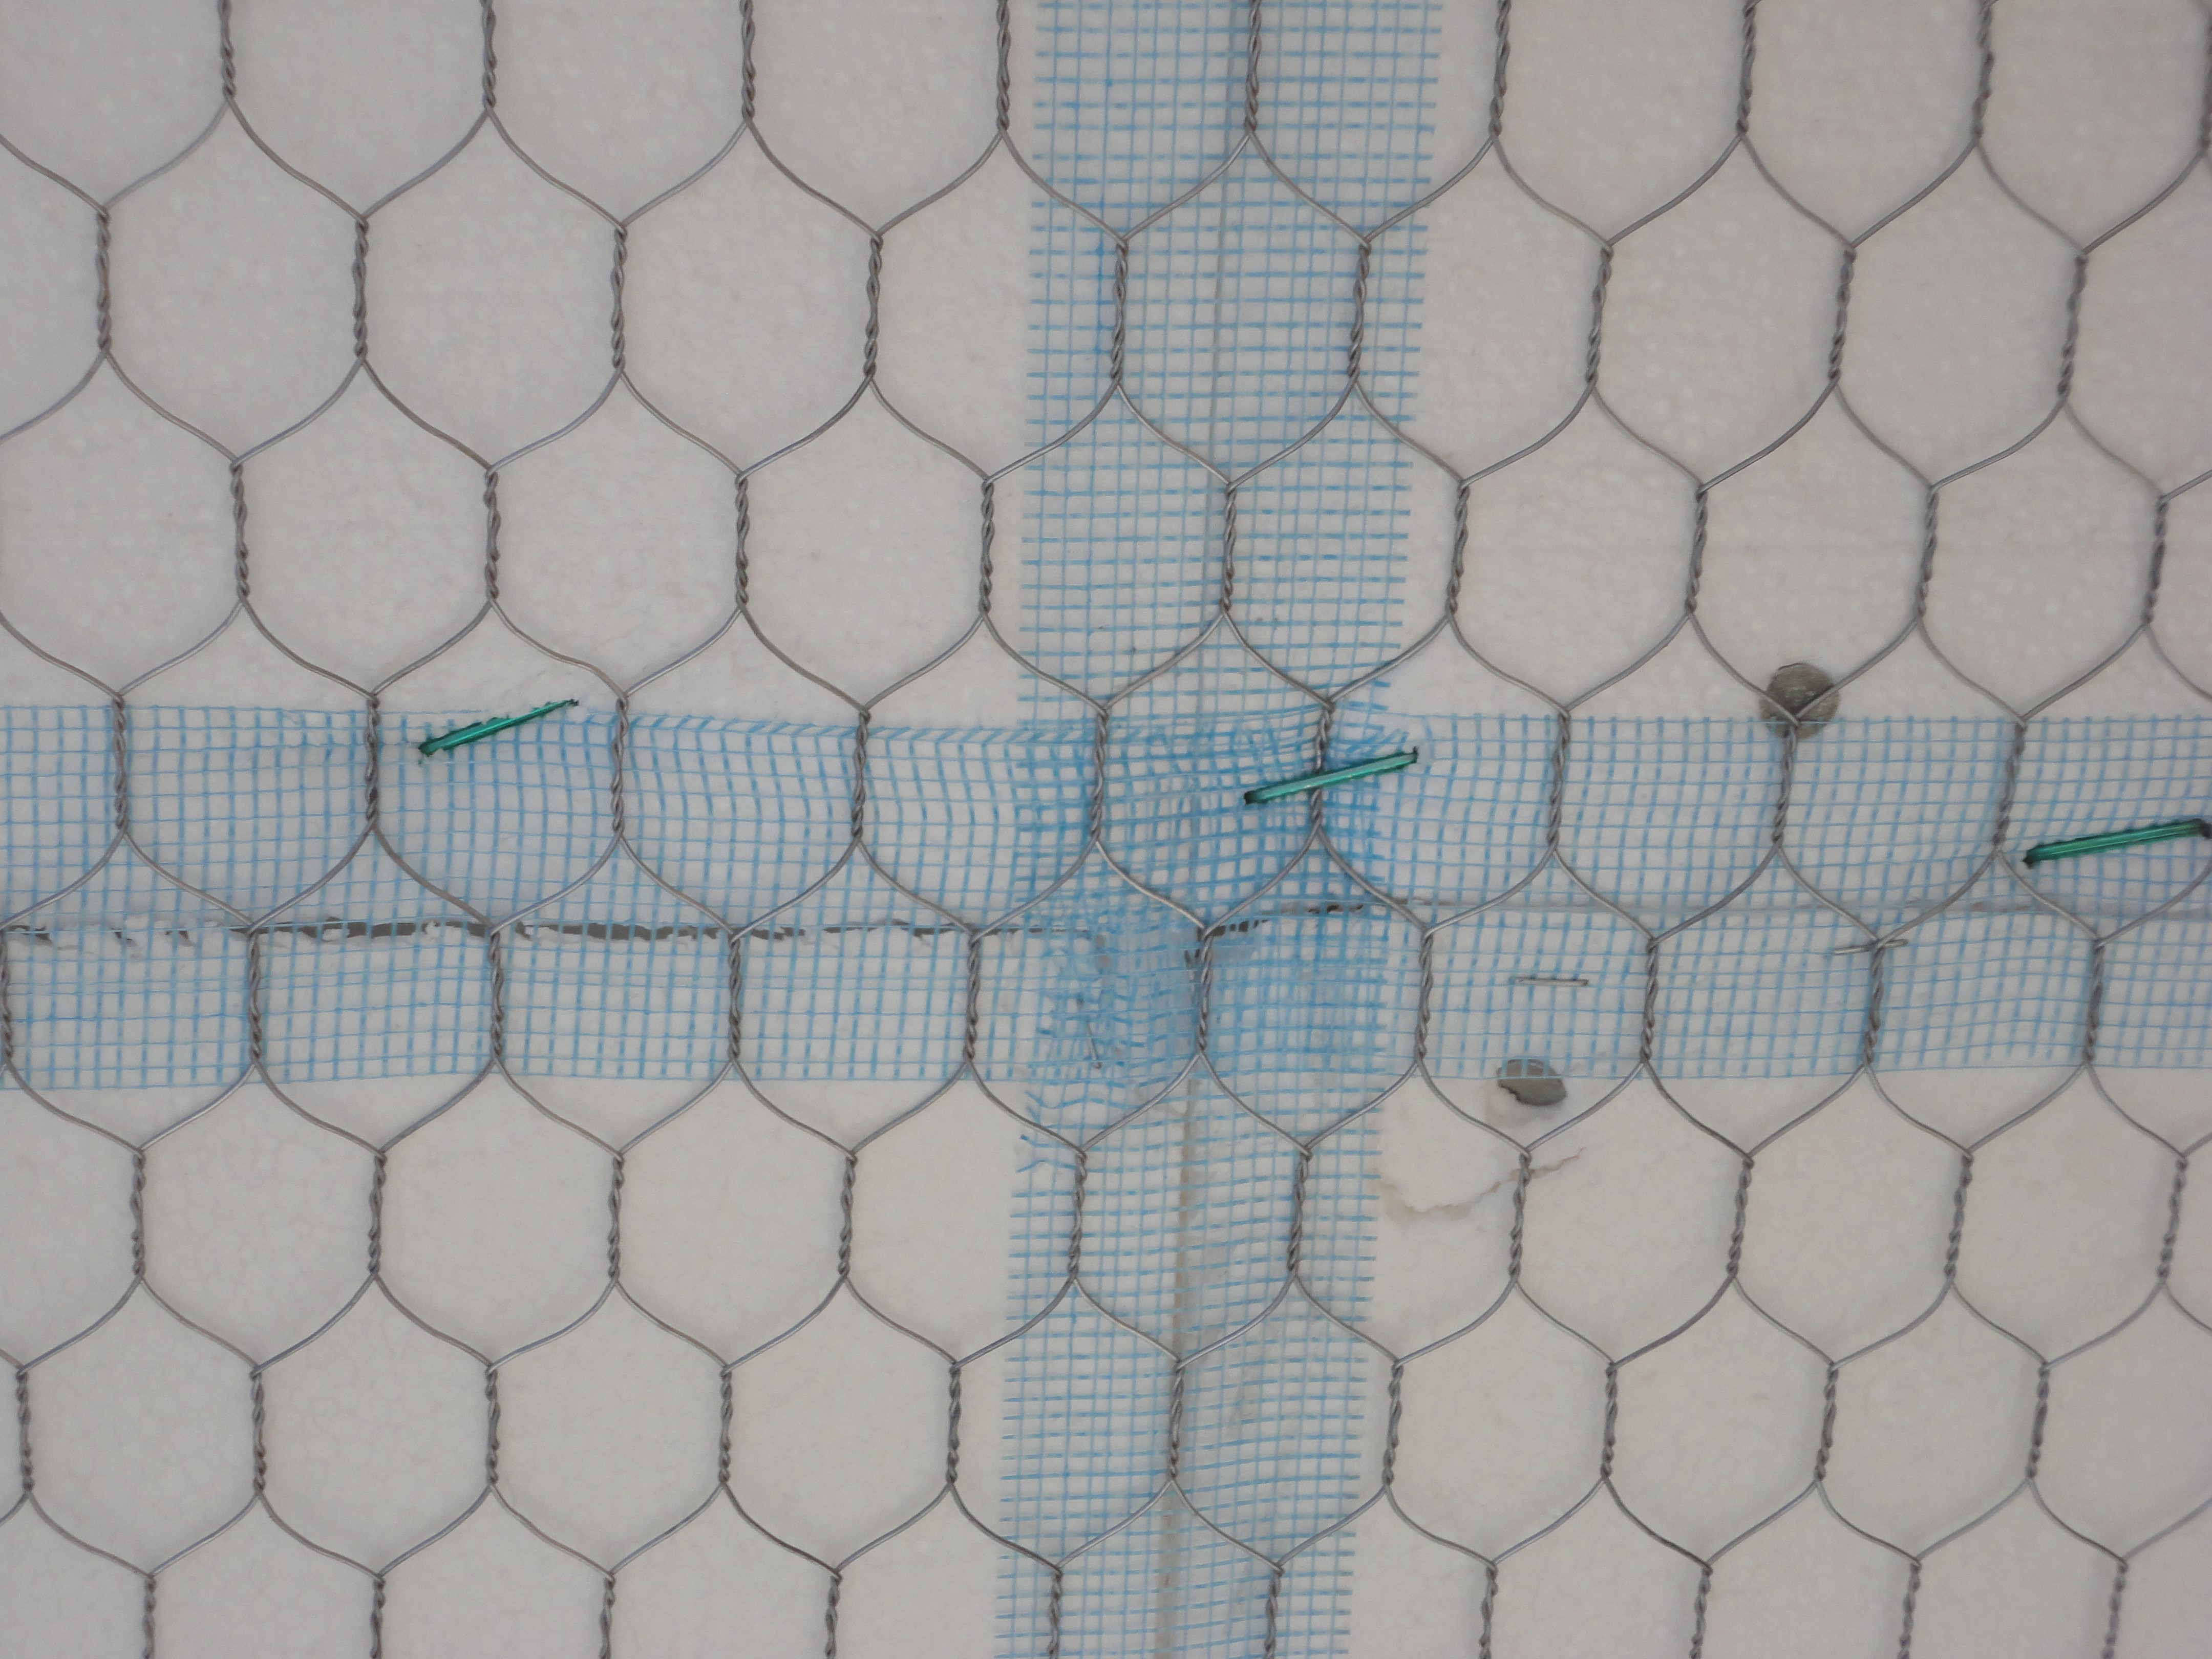
Right – all seams in the rigid foam were sealed with tape before installing the wire lathe for stucco.
Image
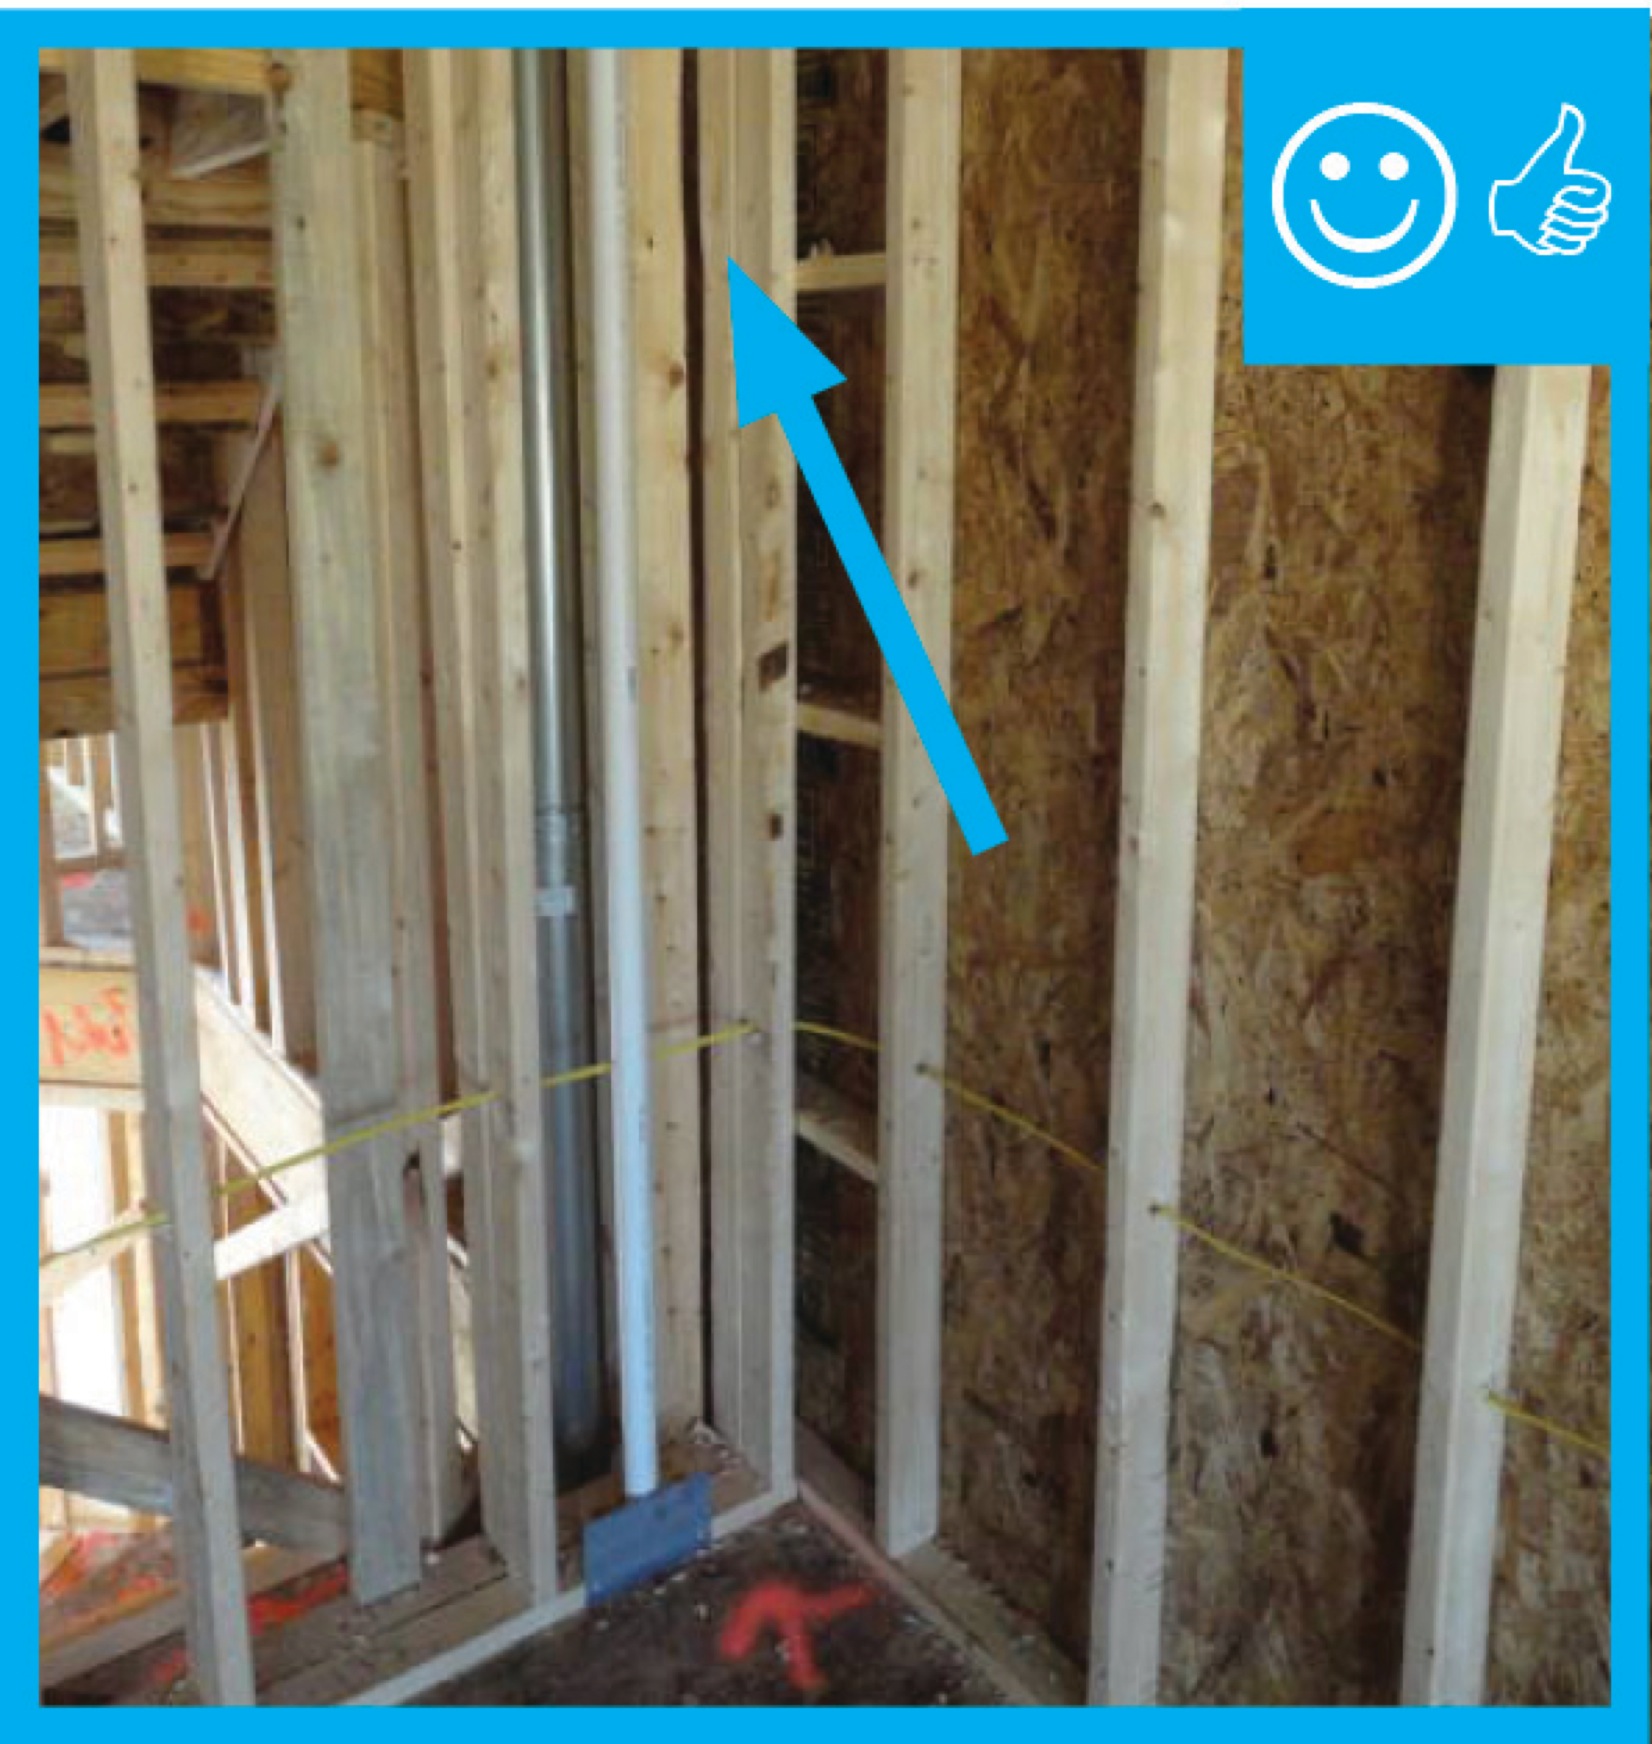
Right – An existing gable wall is reinforced with horizontal braces that butt up to the gable end wall and connect back to multiple trusses; retrofit studs make full contact with the wall and the compression blocks and are connected to the horizontal brac
Image
Right – Apply sealant around penetrations through foundation walls and along foundation wall seams
Image
Image
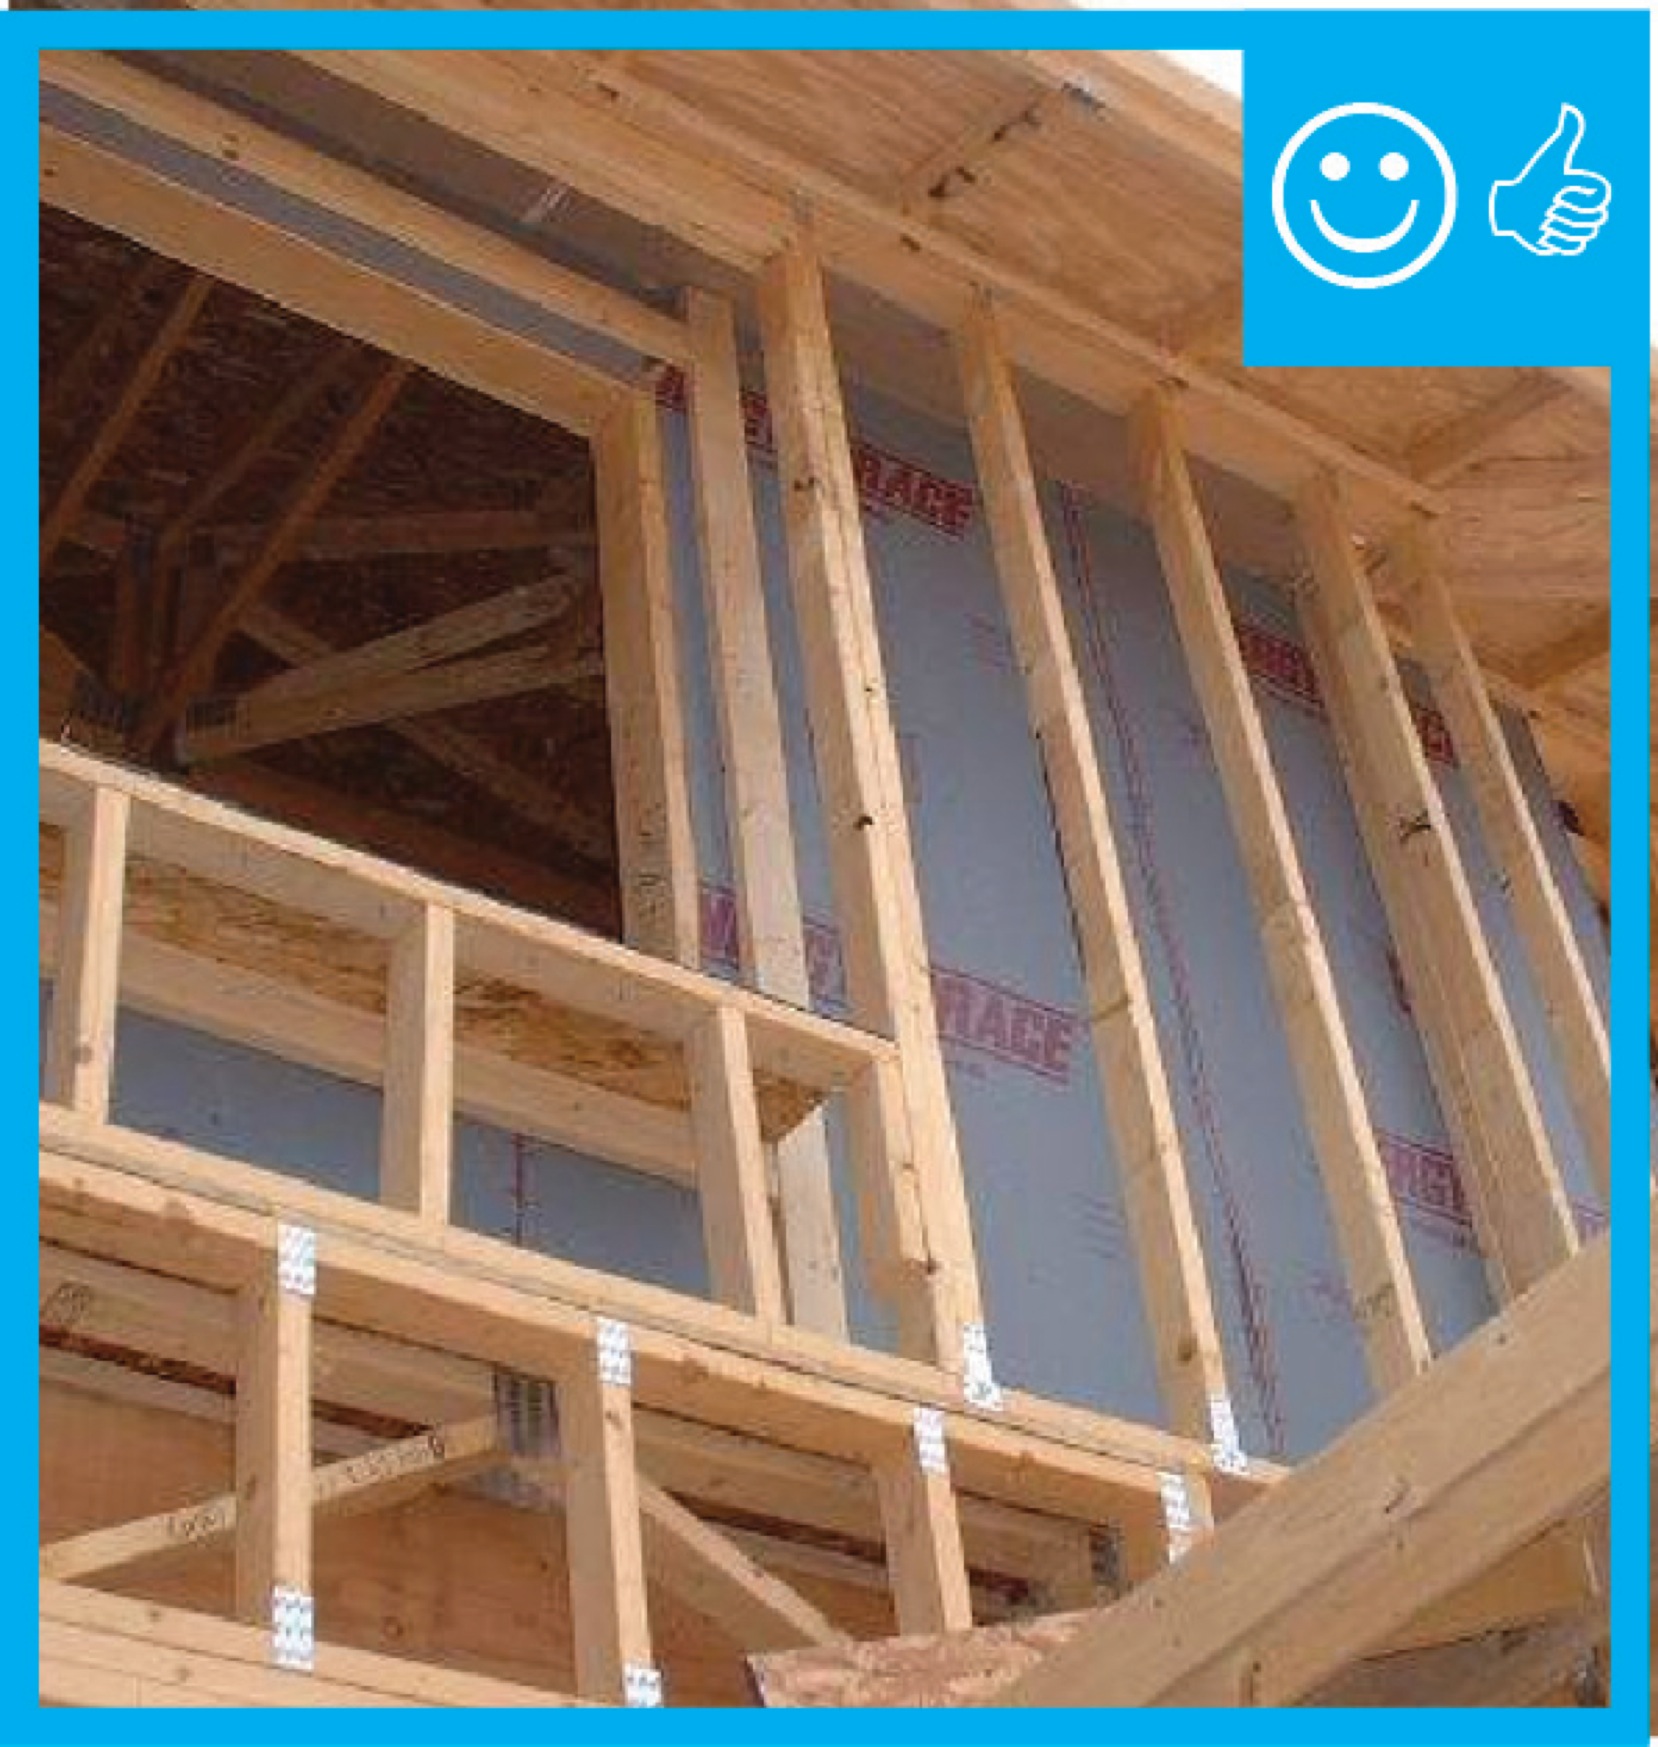
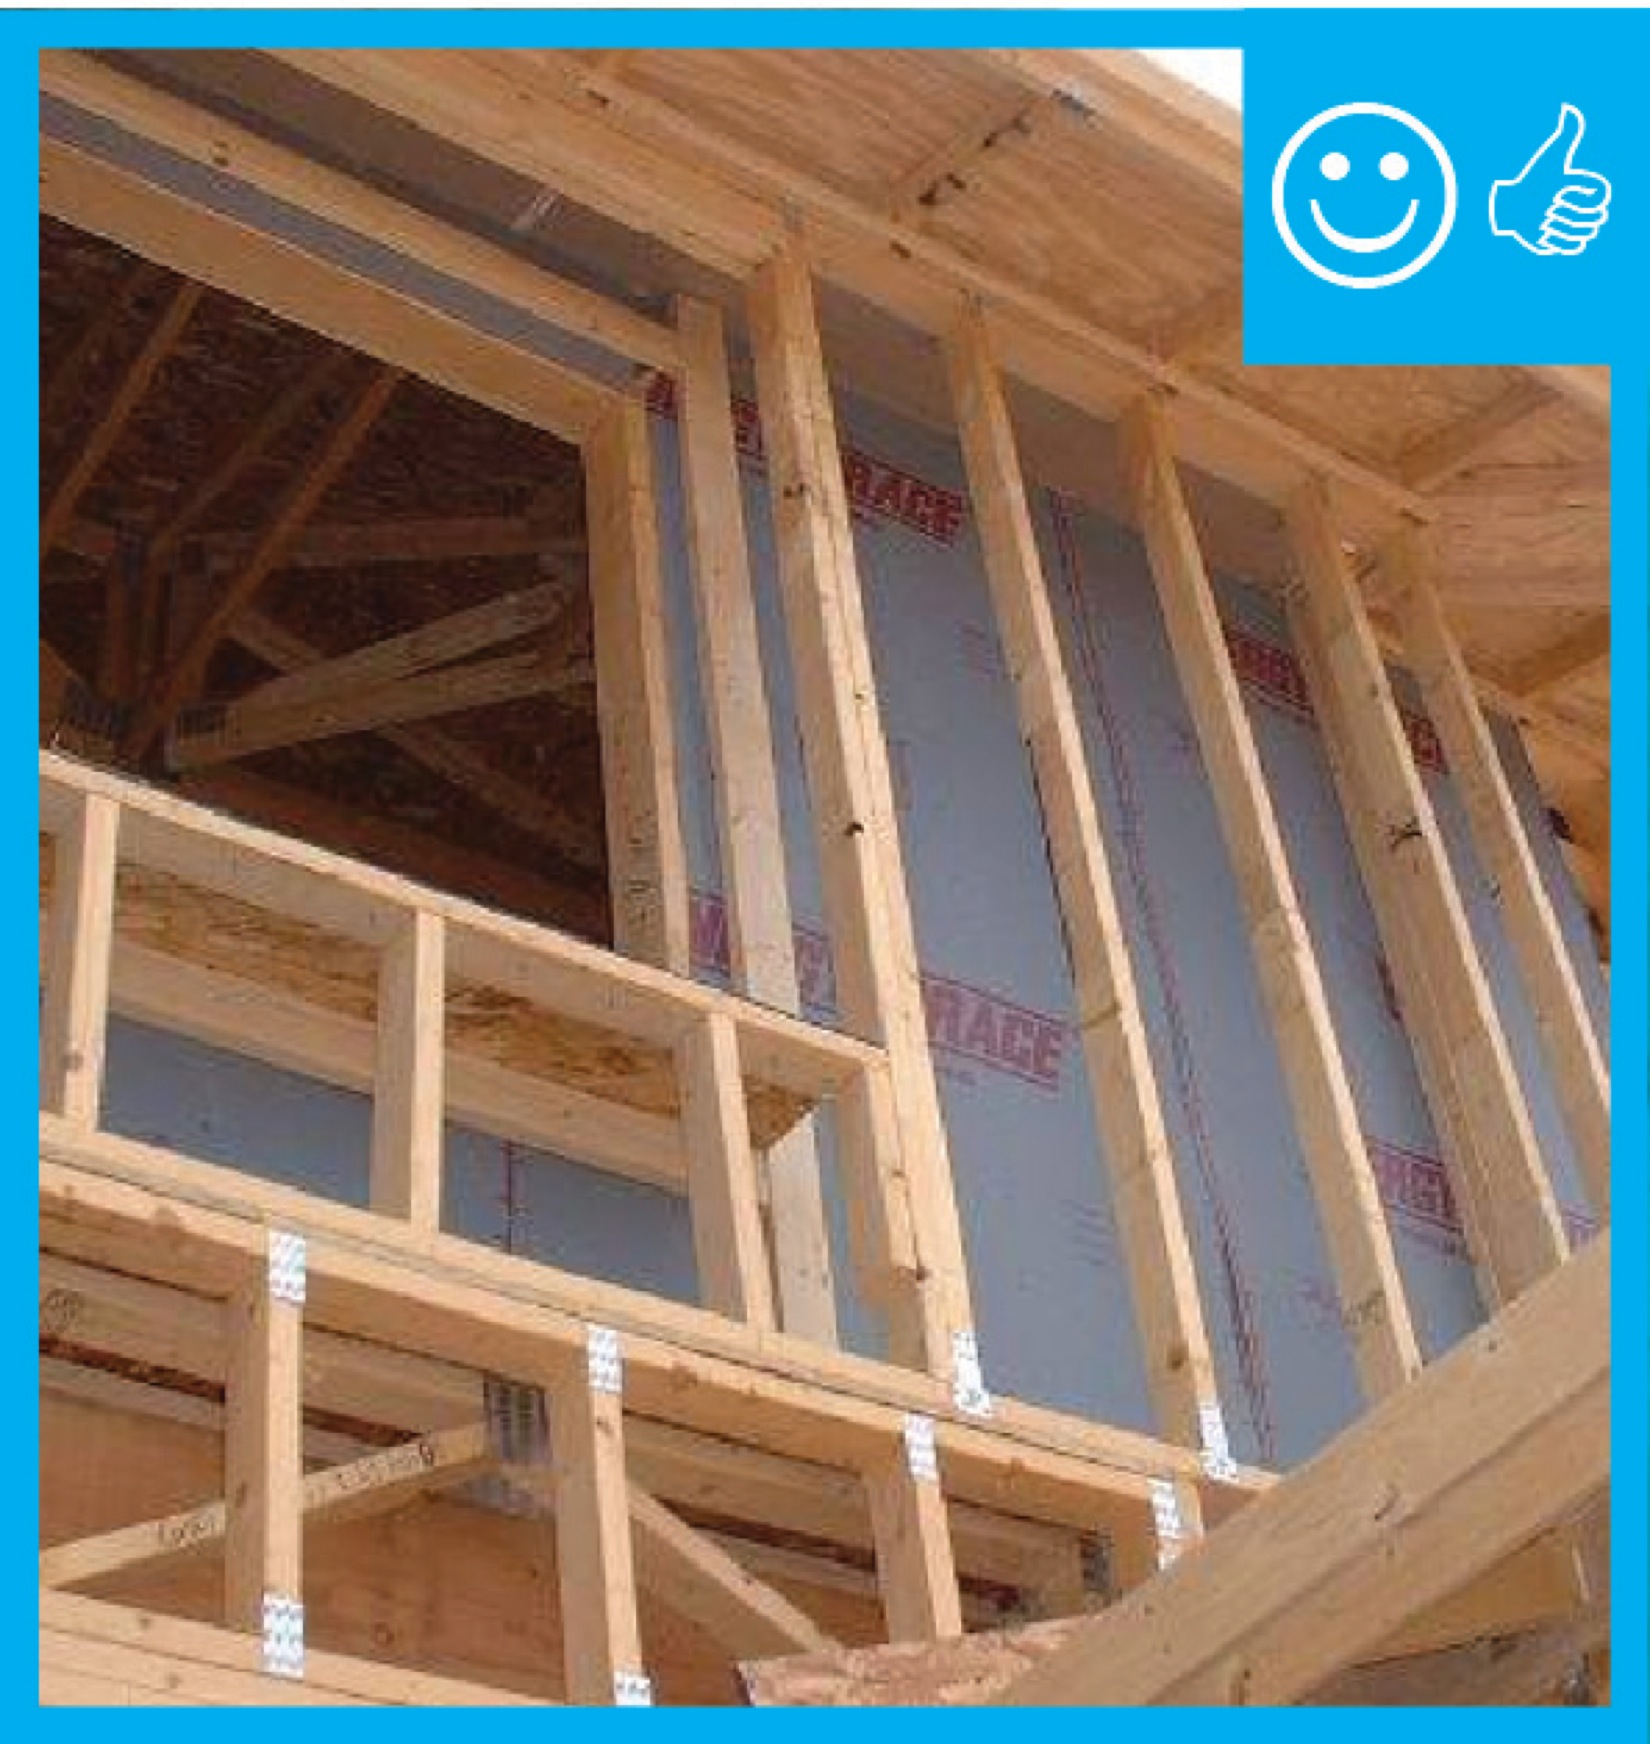
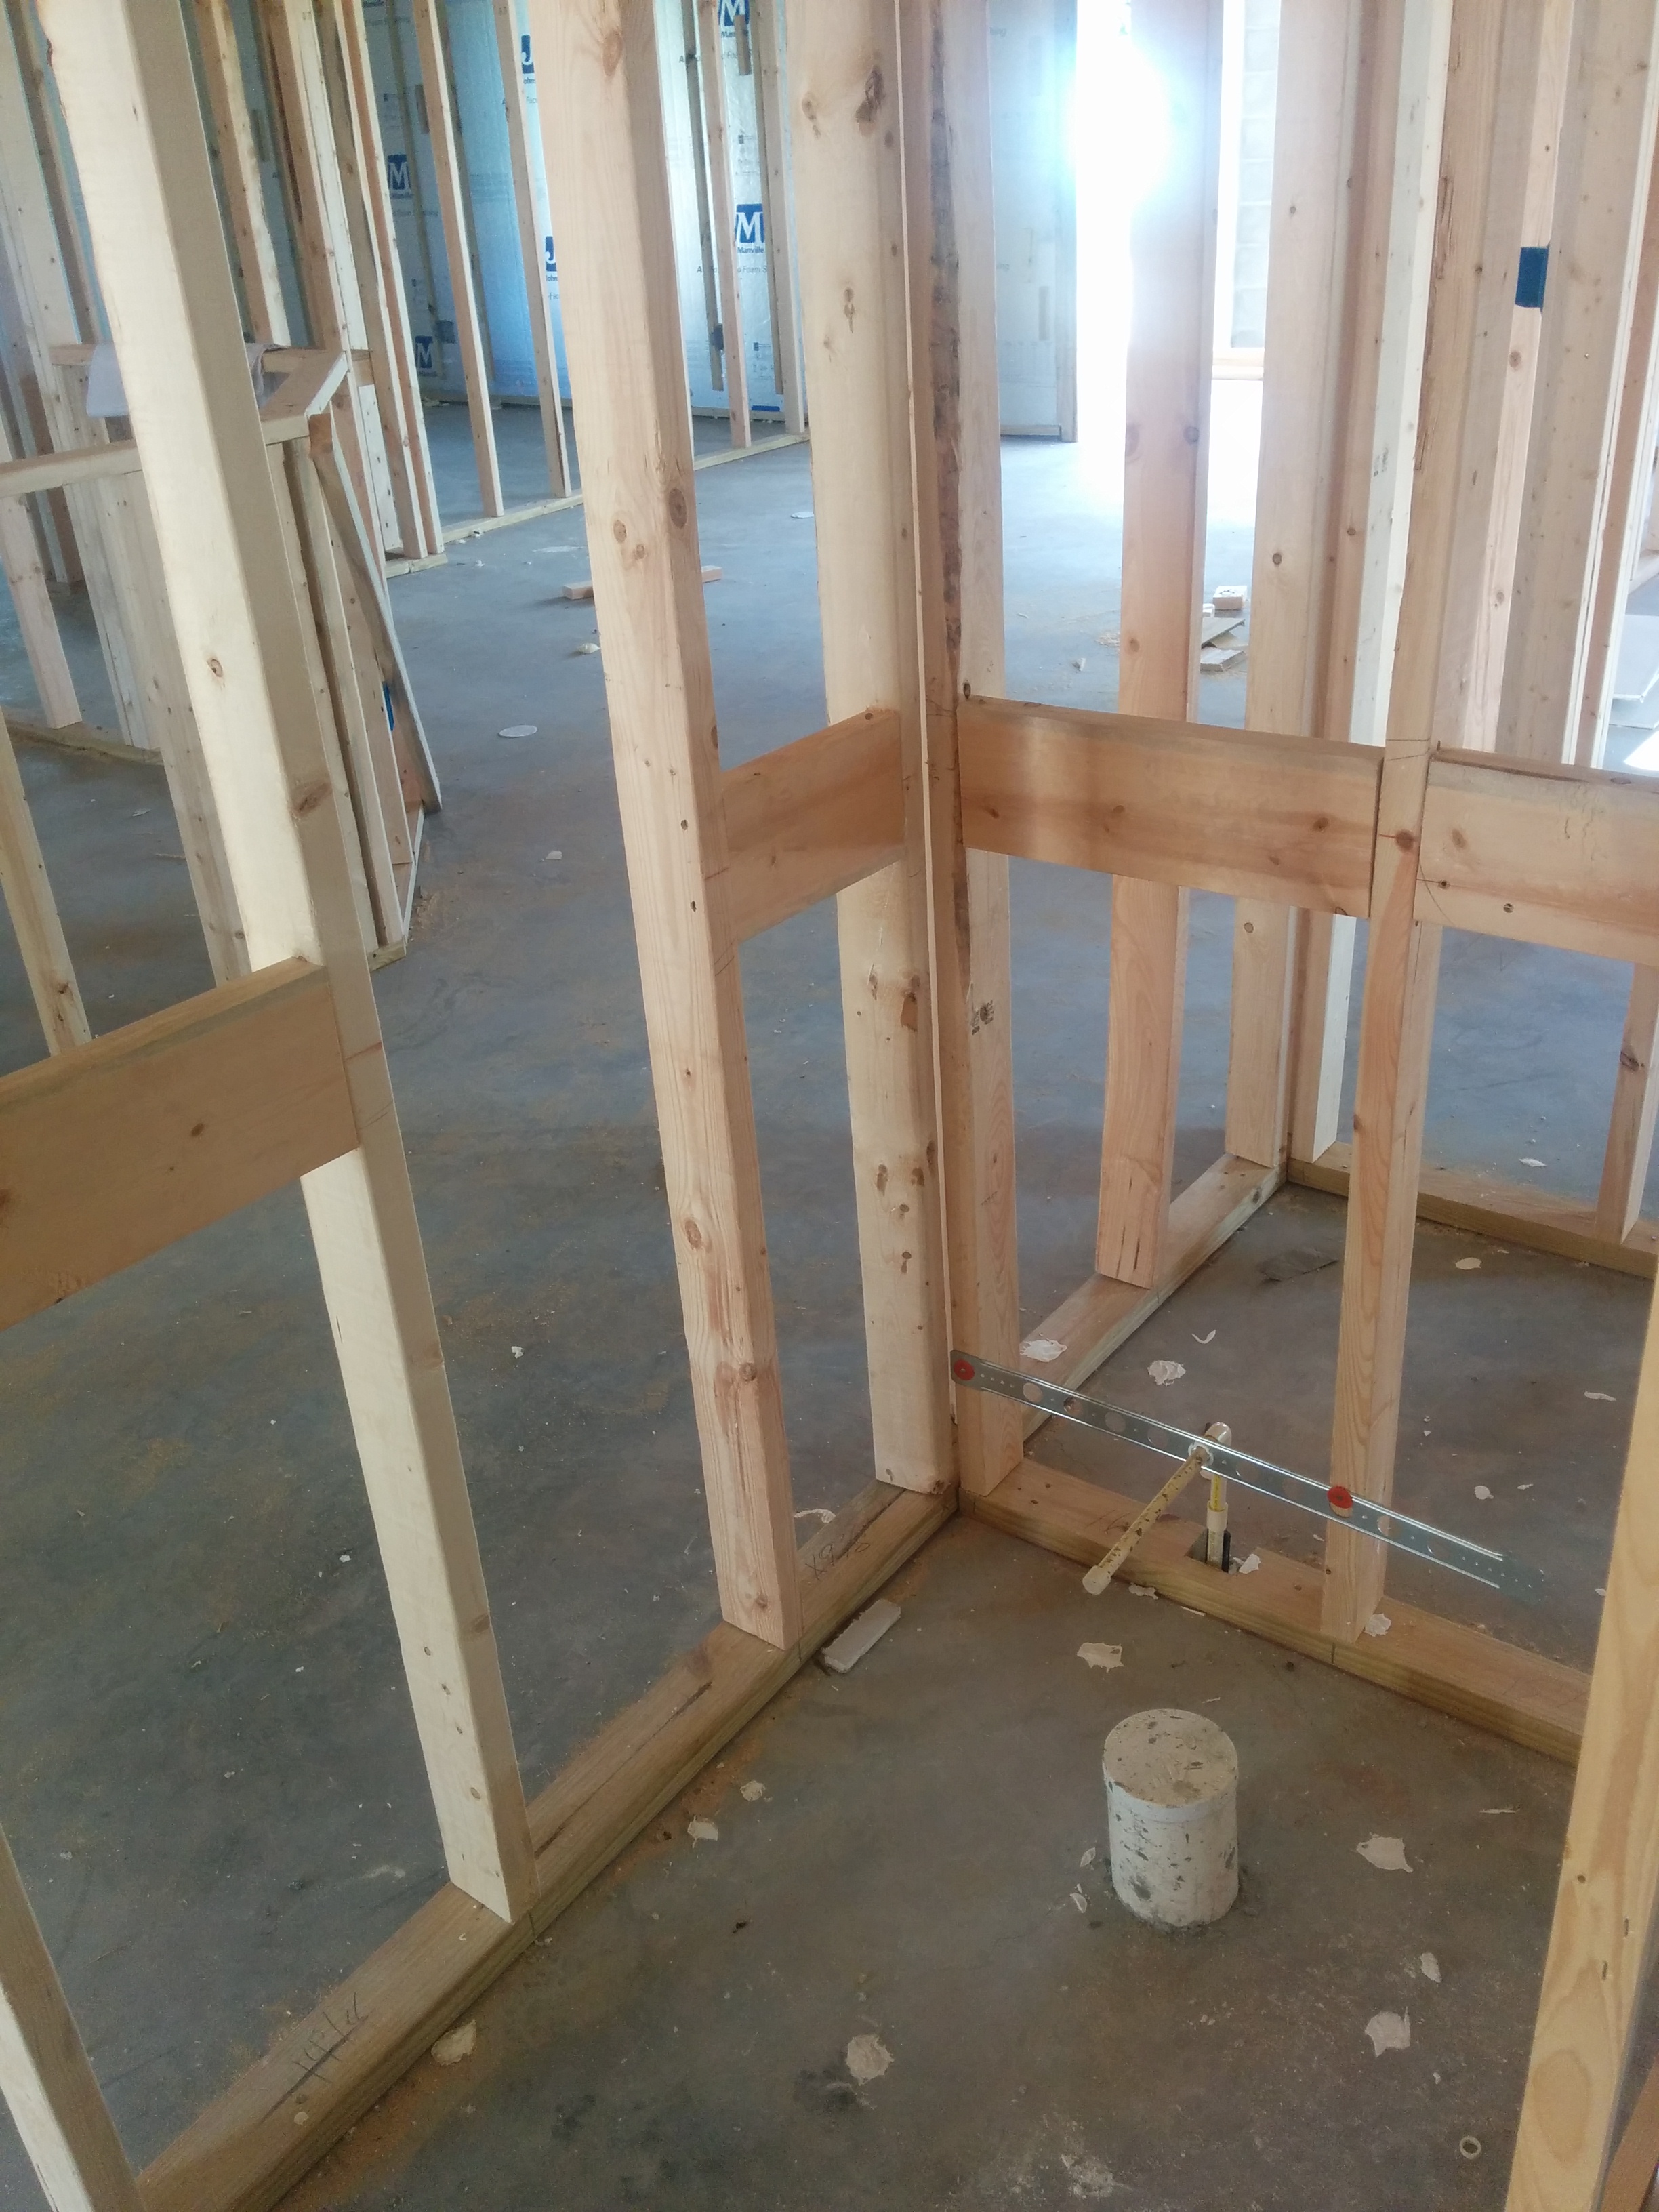
Right – Appropriate use of framing members to support double windows and additional cripples for drywall purposes
Image

Image
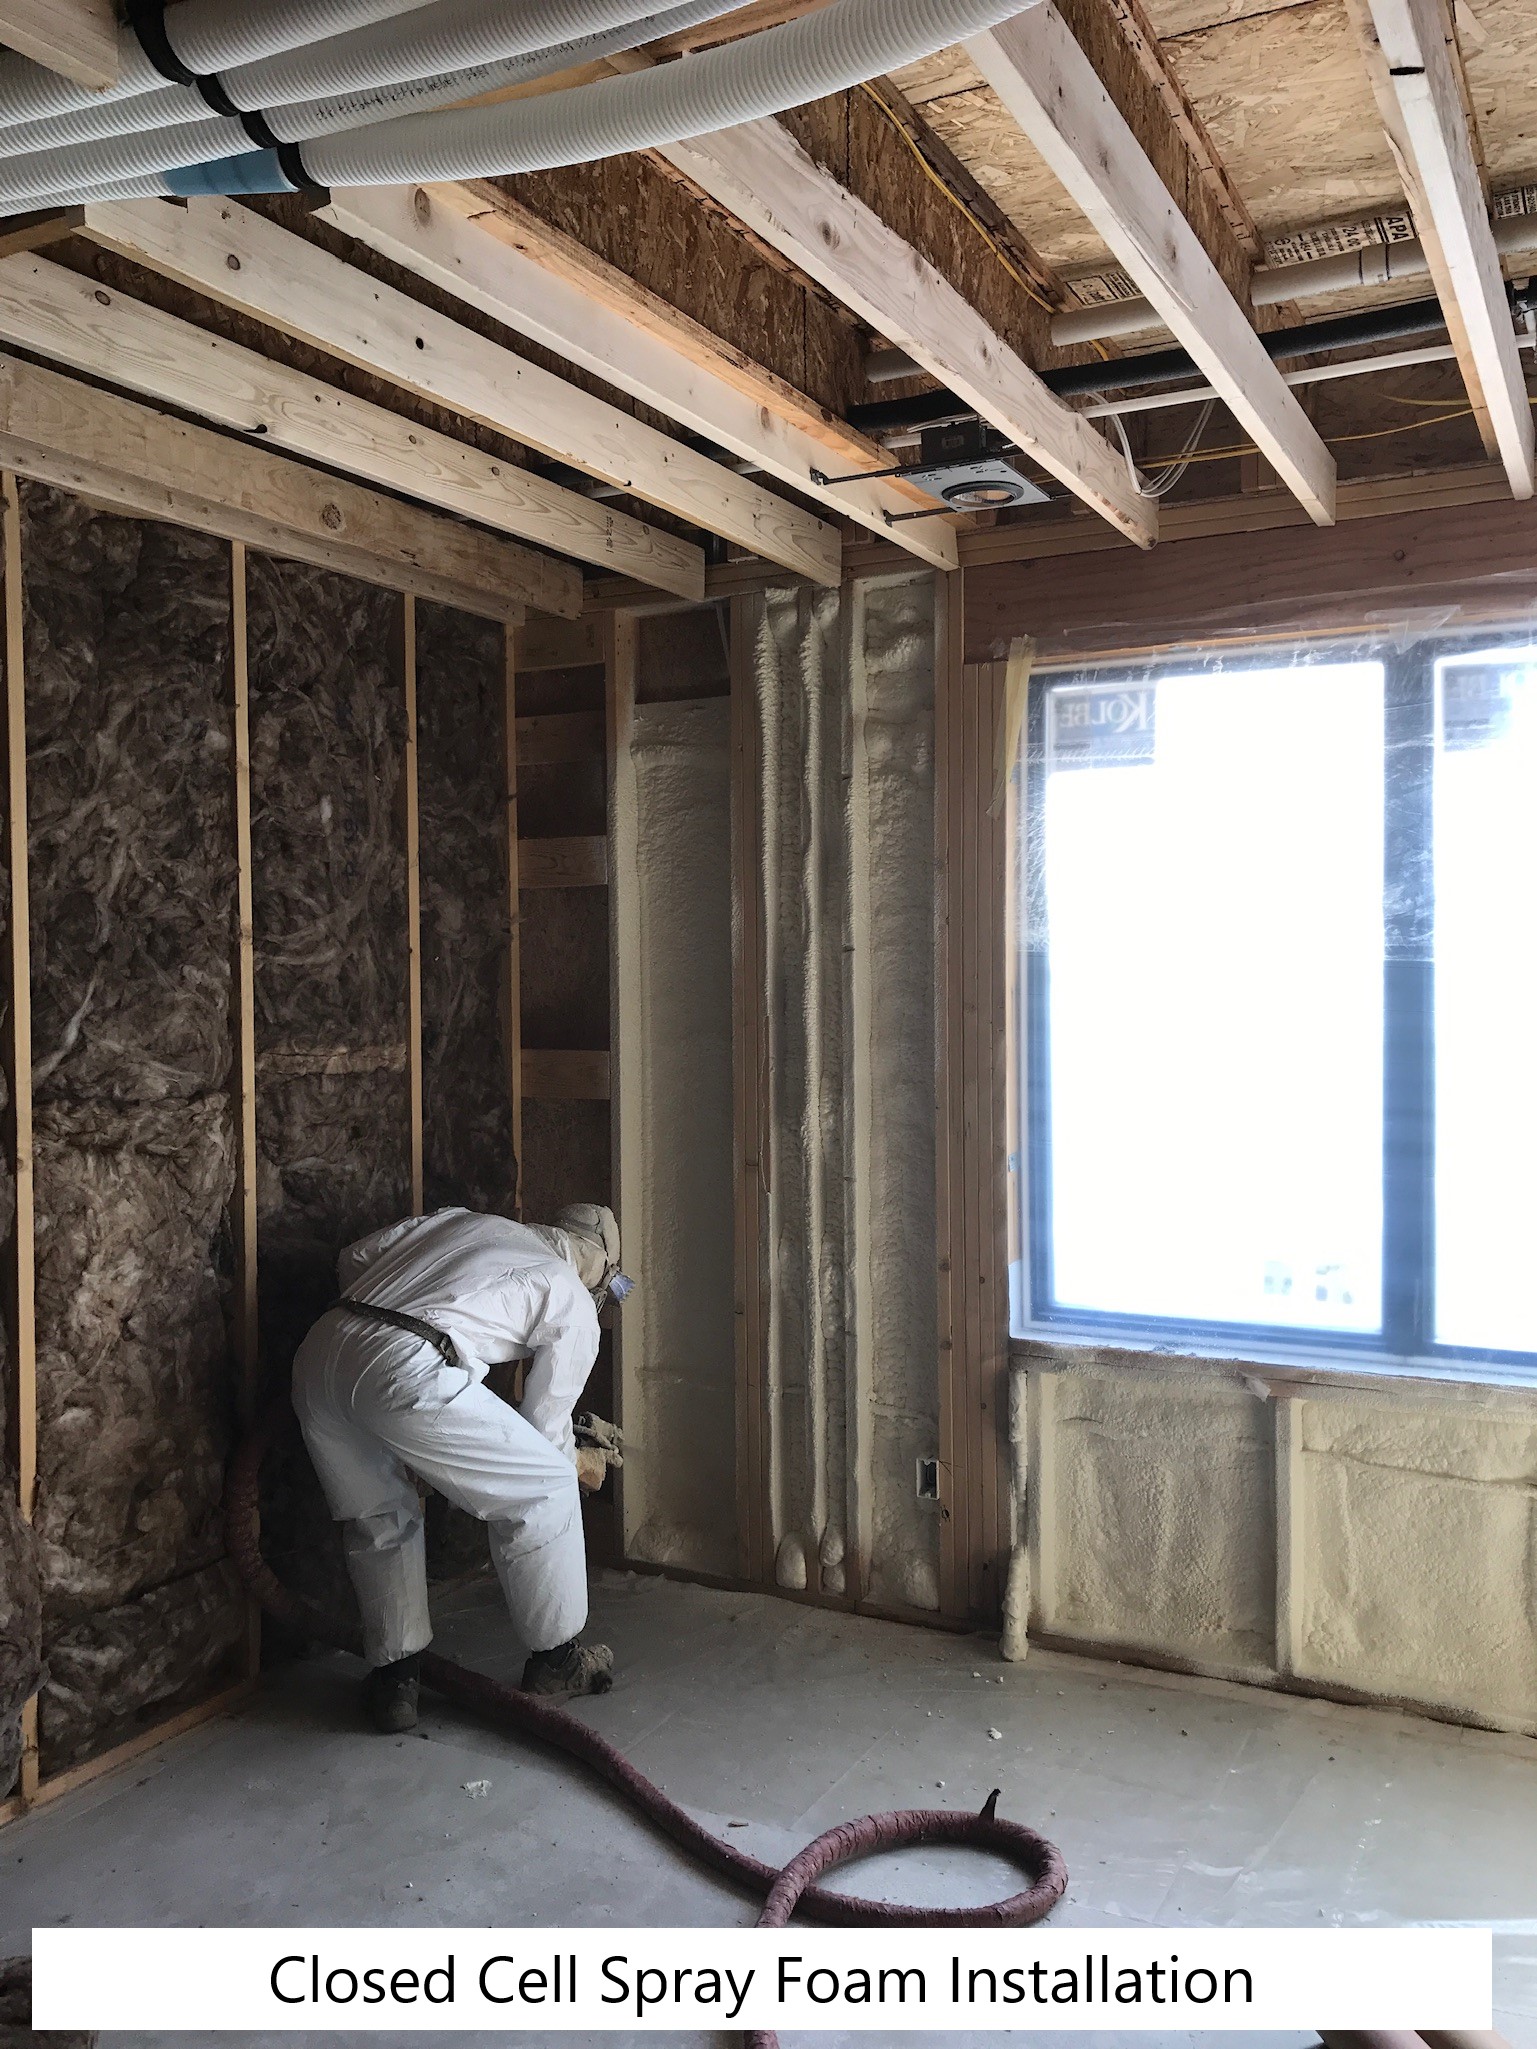
Right – Closed-cell spray foam insulation in the shared wall between the garage and living space helps to air-seal the wall and protect occupants from garage pollutants.
Image
Image
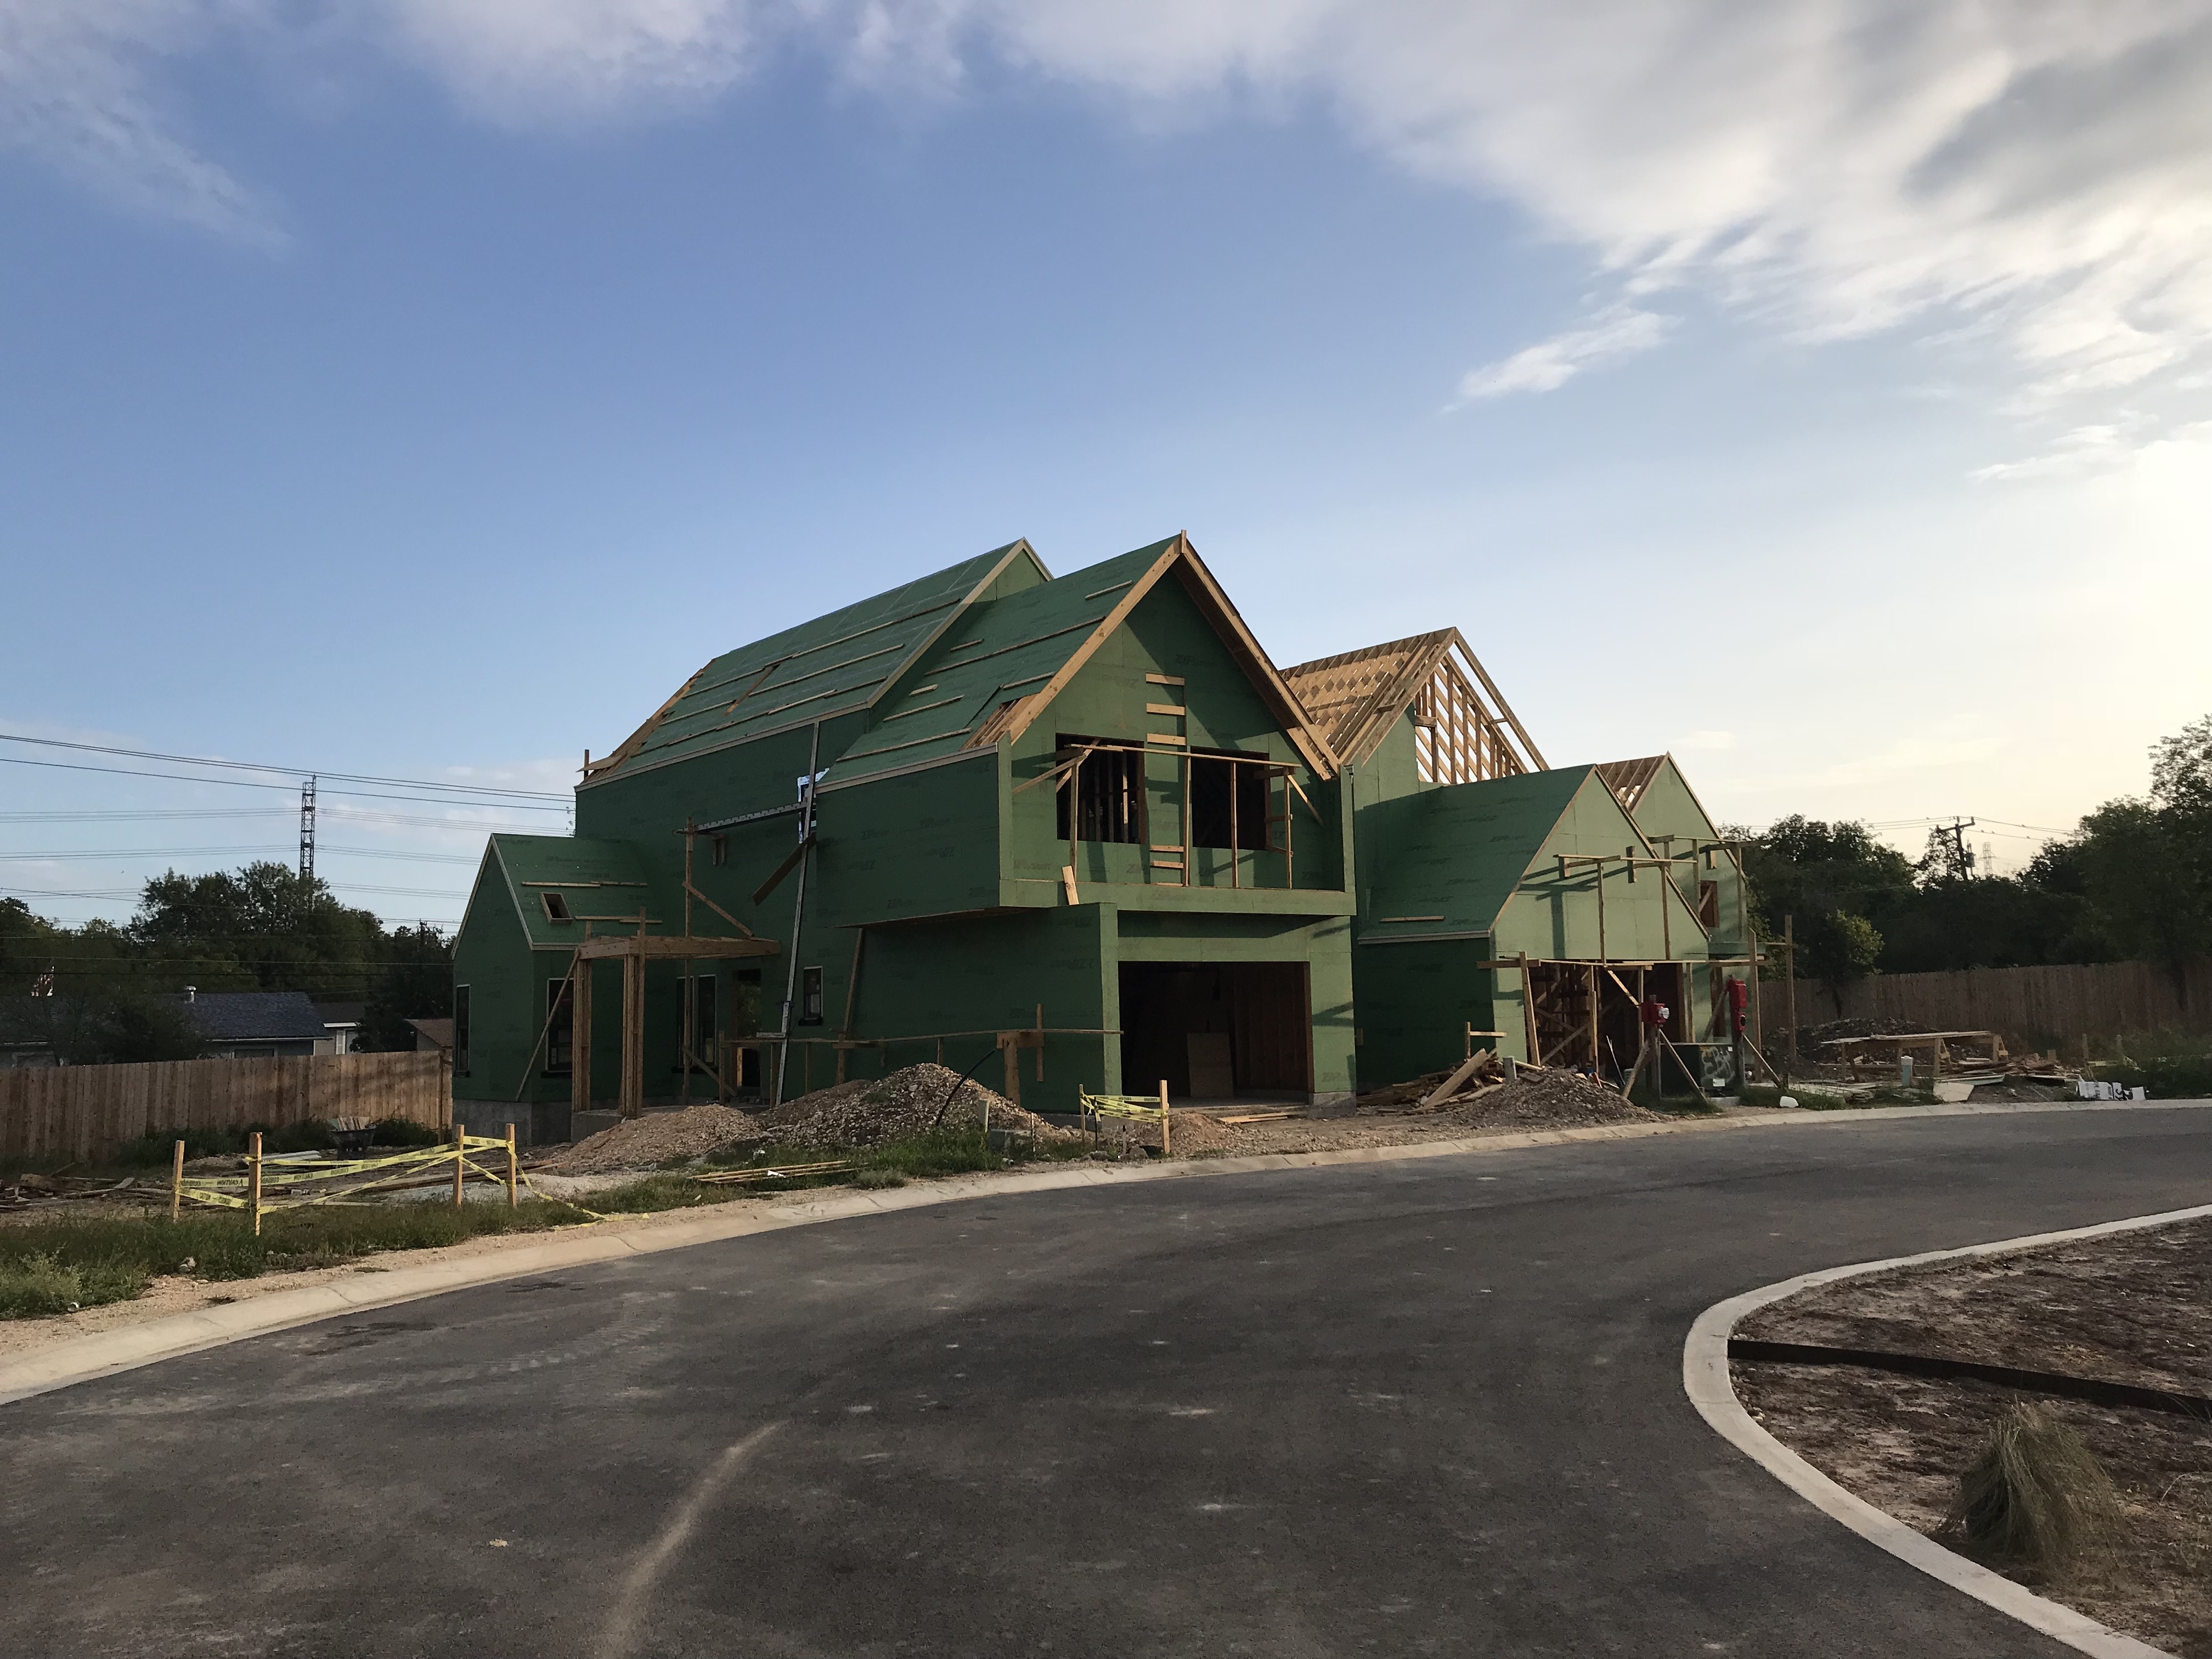
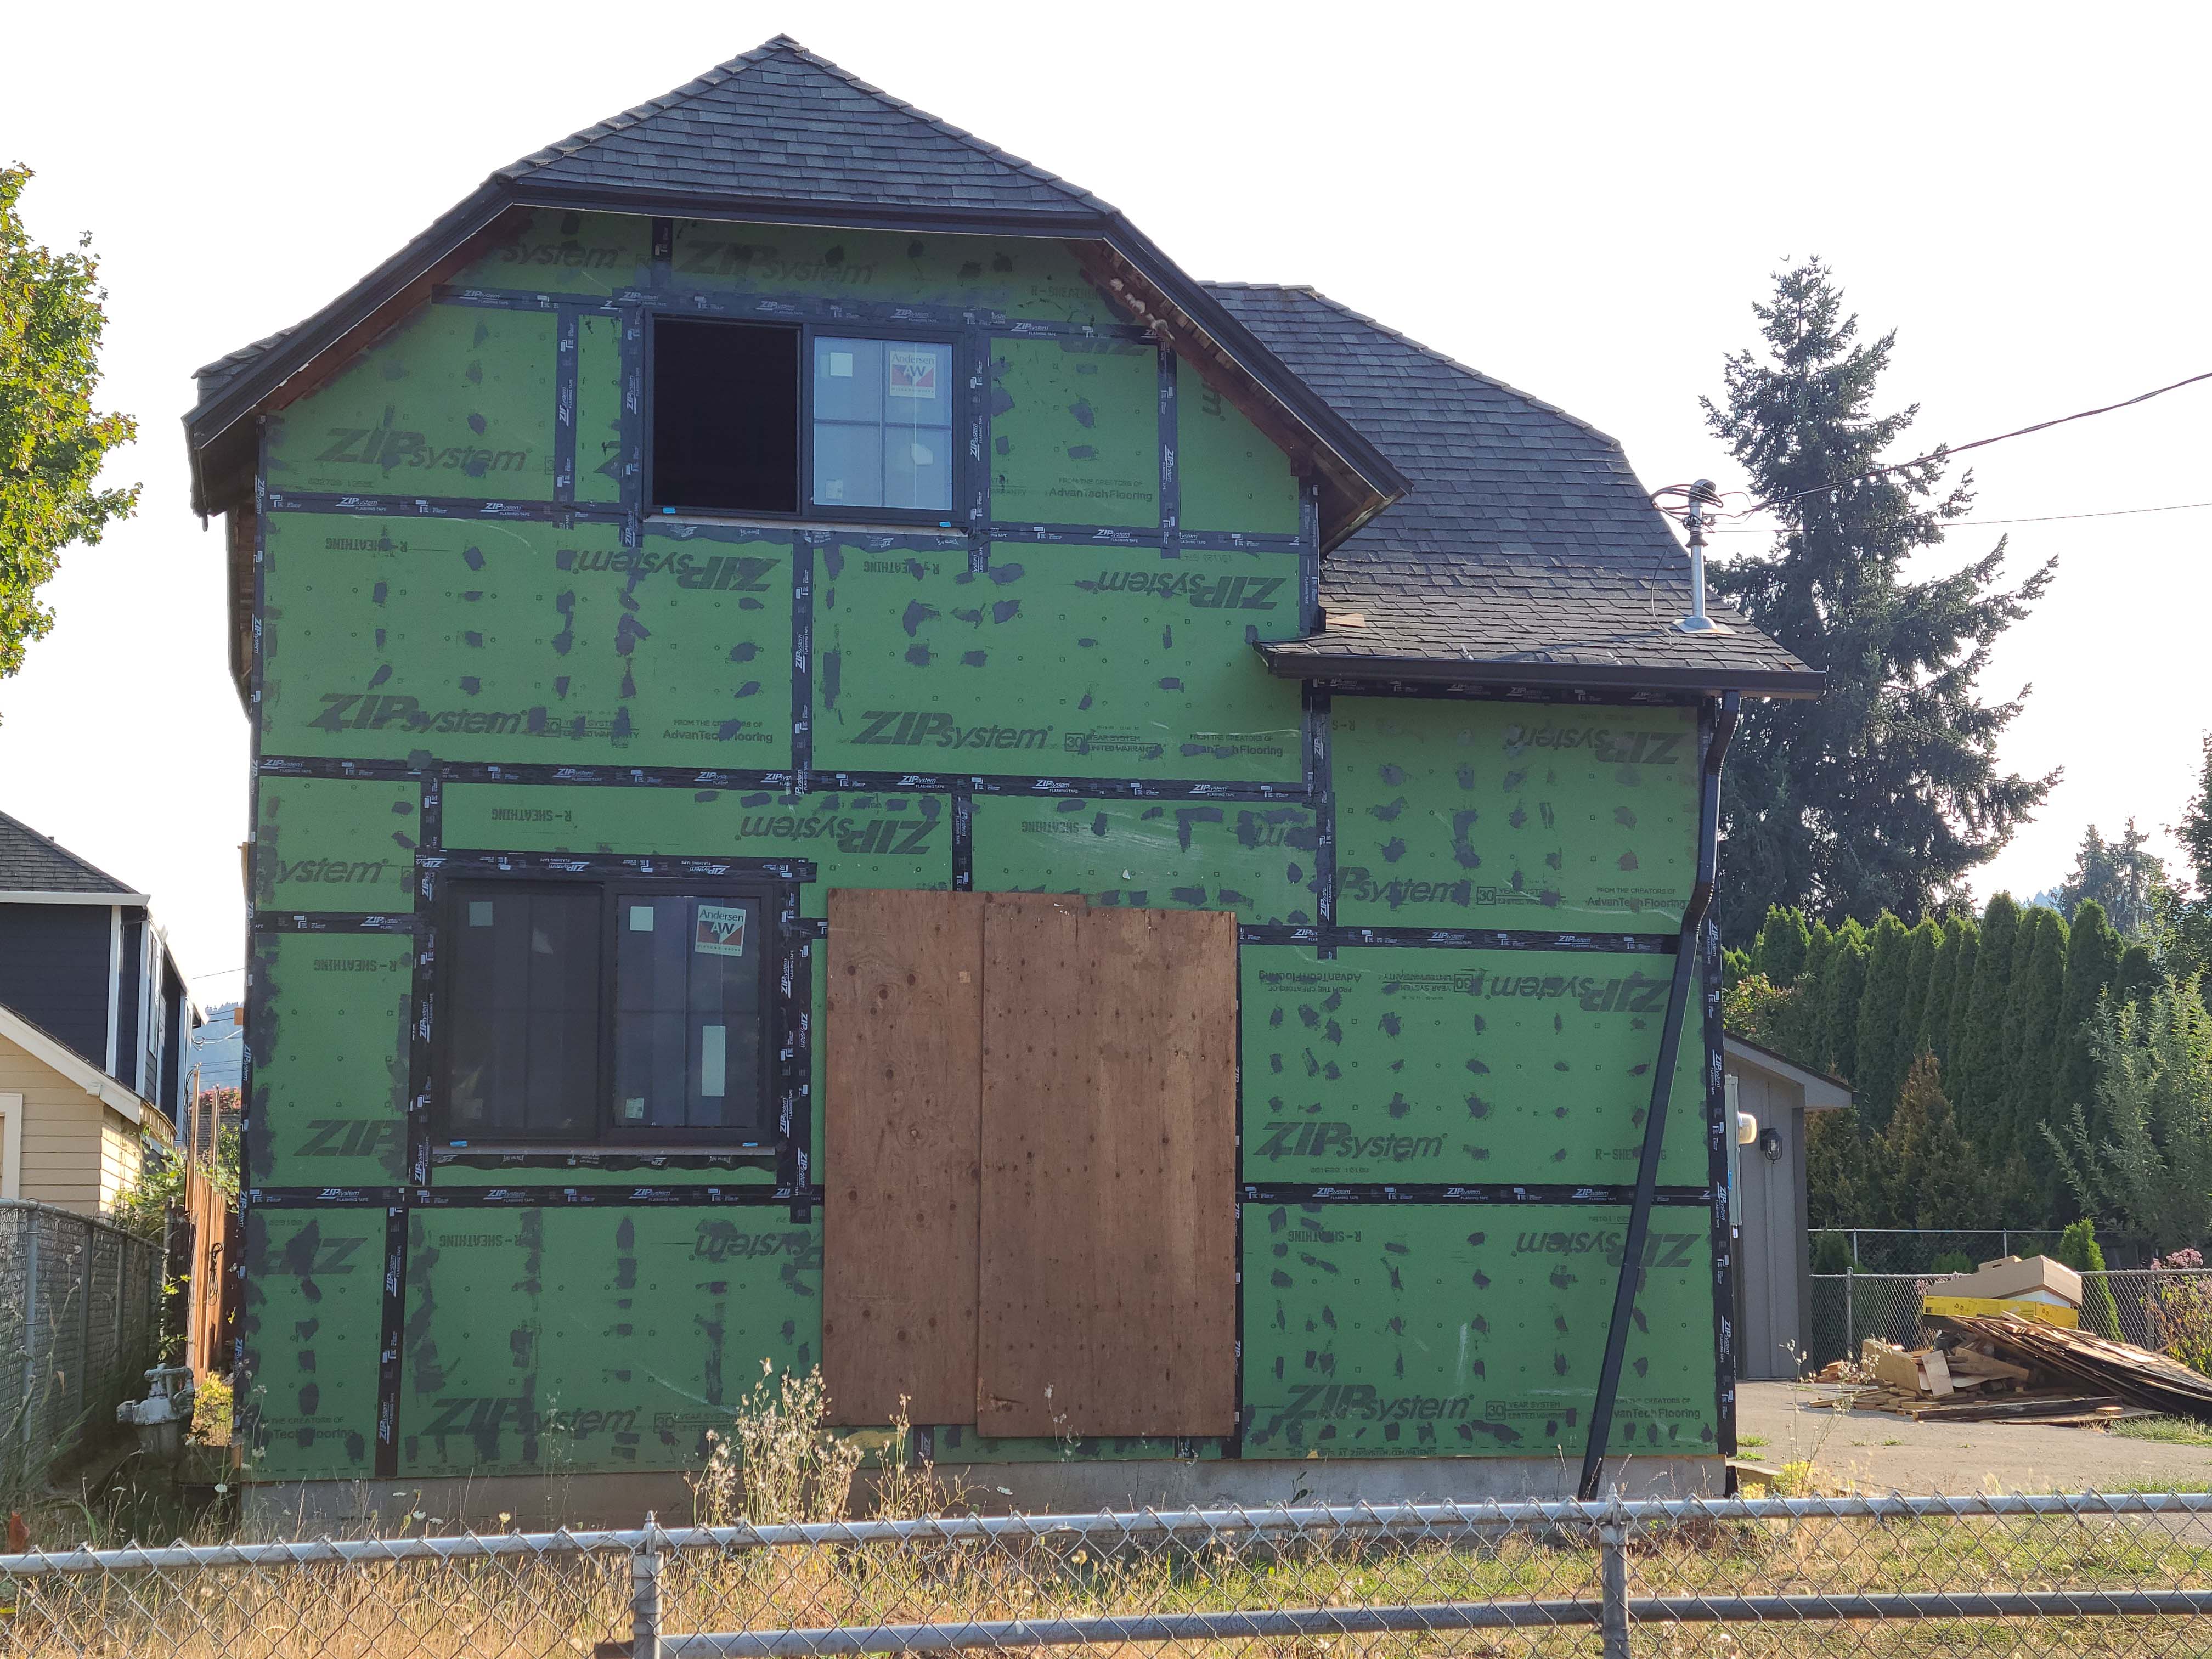
Right – Coated OSB provides a weather-resistant air barrier for this envelope of this home.
Image
Right – Coated sheathing is taped at all seams to serve as an exterior air barrier on the walls.
Image
Image

Image
Image
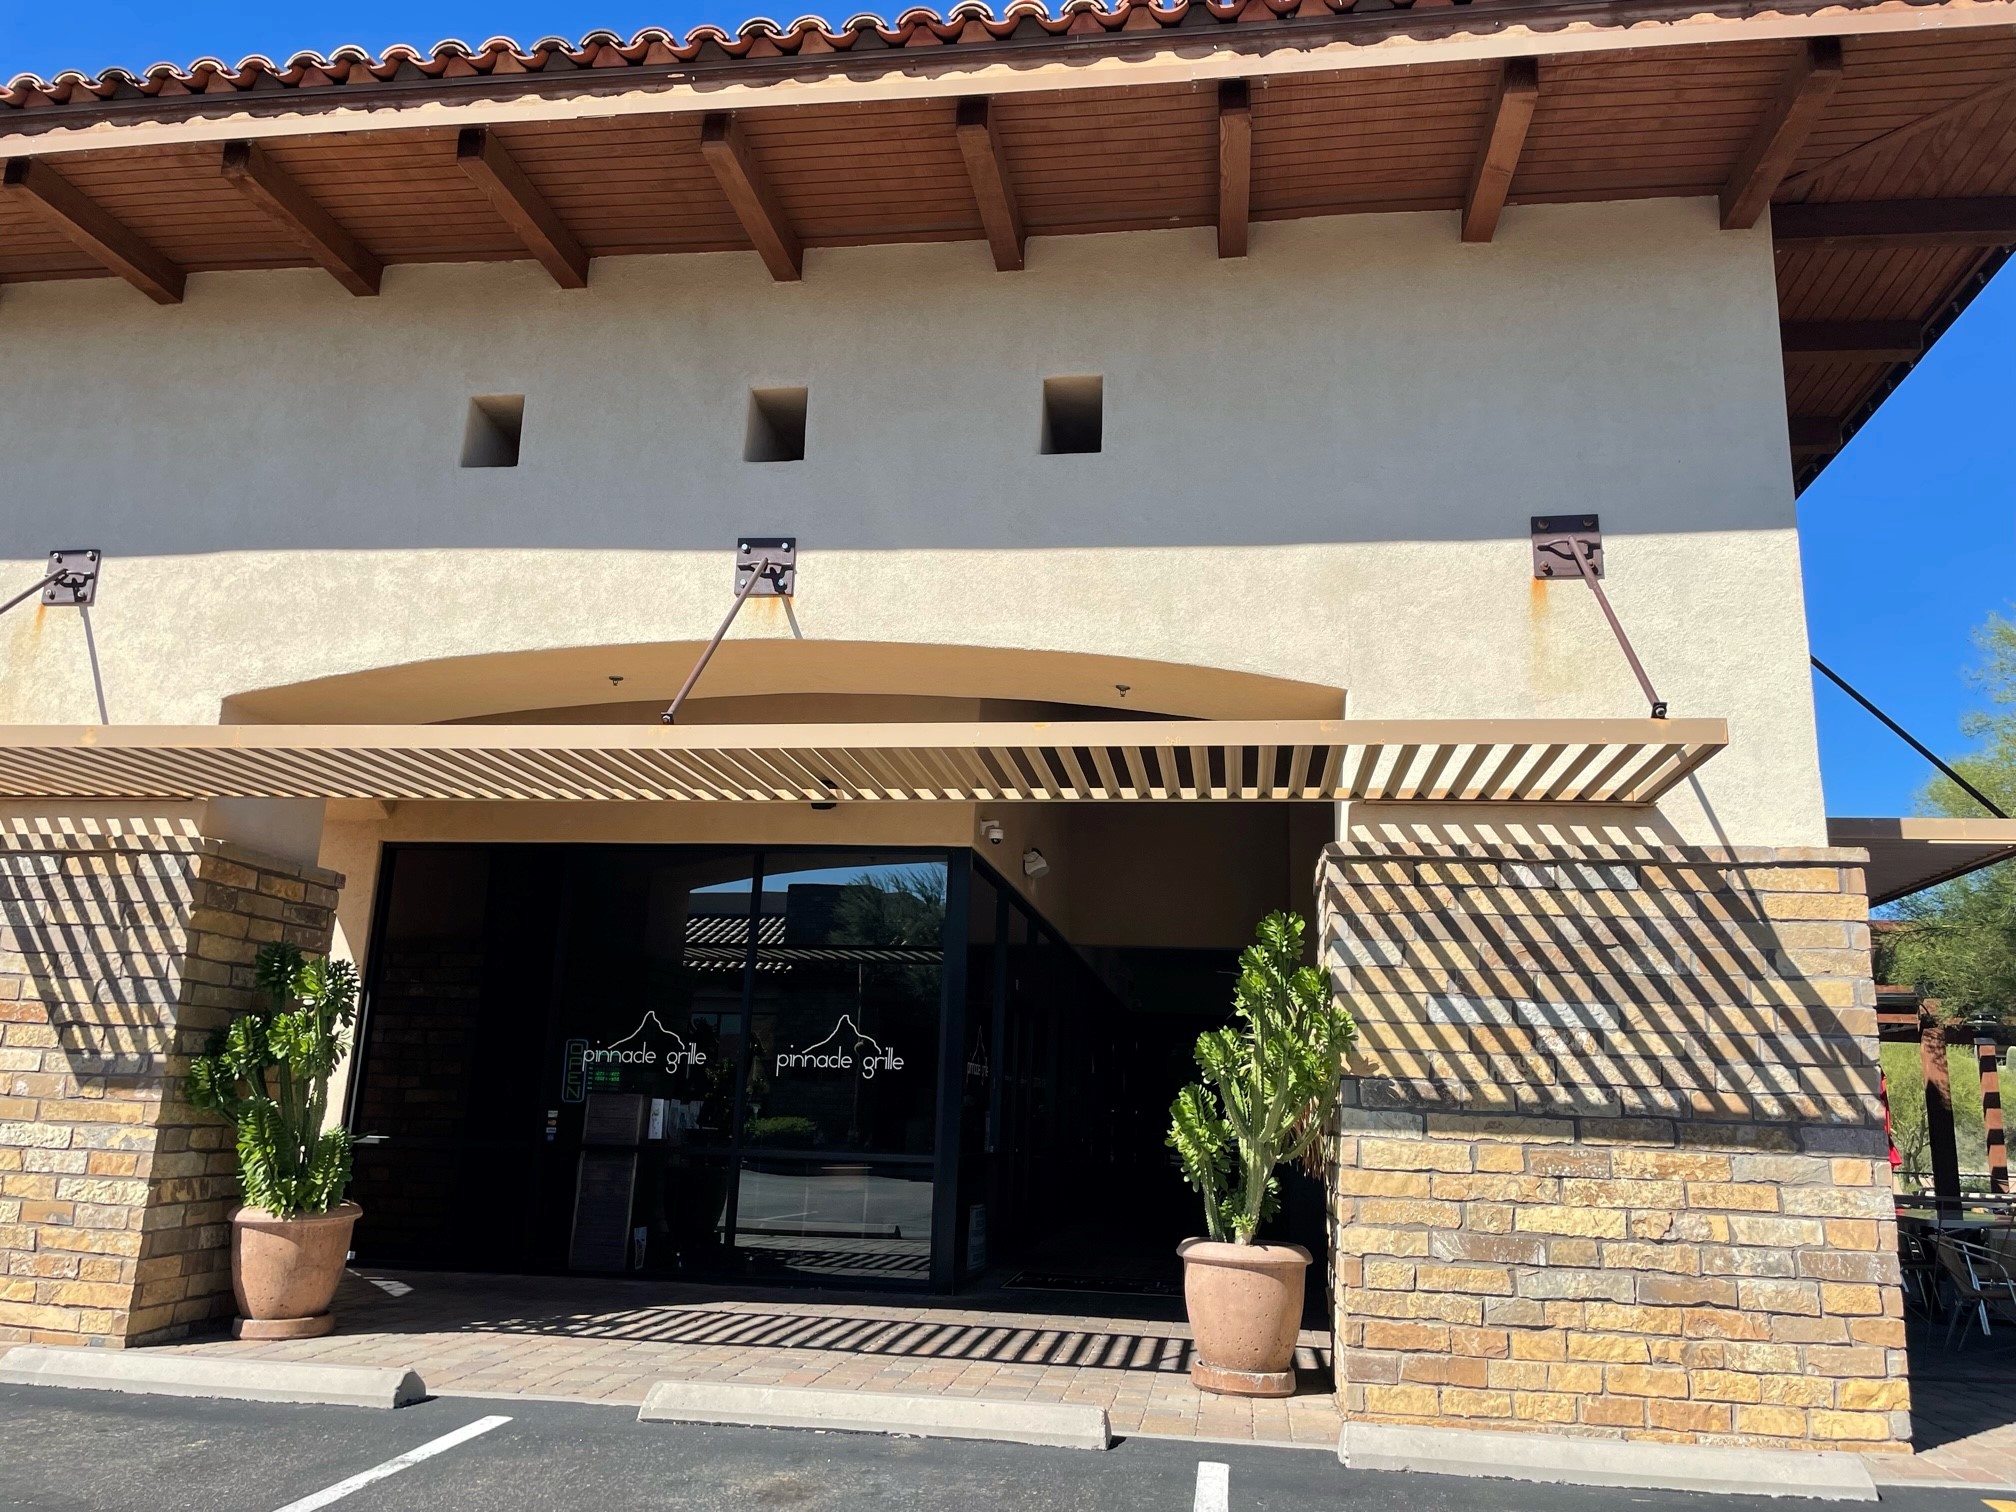
Right – deeply inset entryways and overhangs provide shade to reduce solar heat entry to this building.
Image
Right – Every seam and nail hole in these garage-to-house walls is sealed with tape.
Image
Image
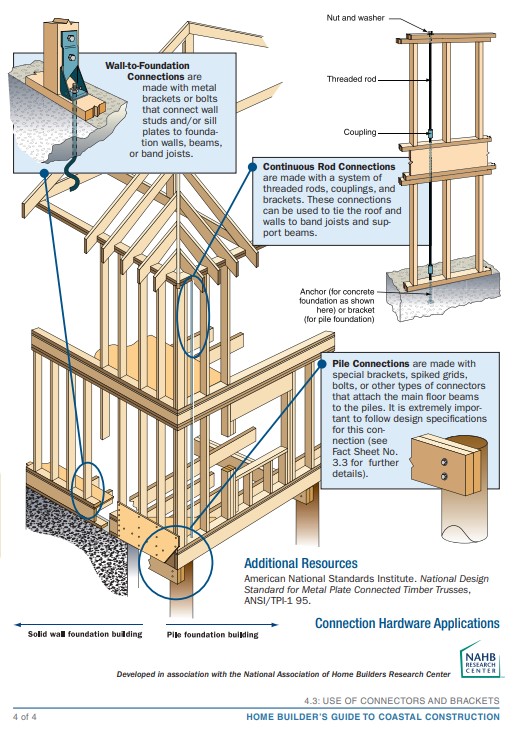
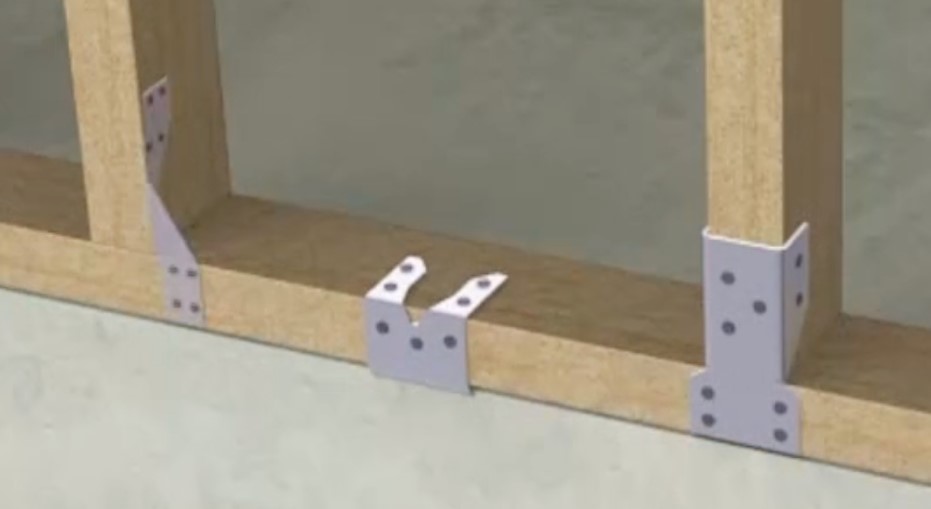
Right – Examples of wall stud to sill plate and foundation and wall rod connectors and brackets.
Image
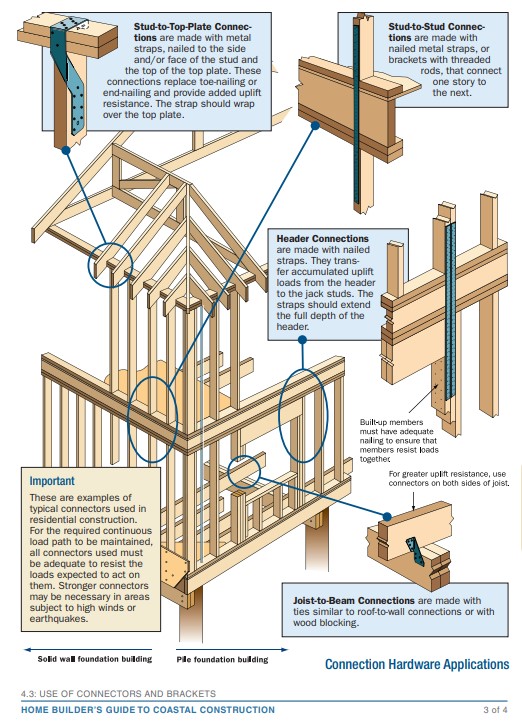
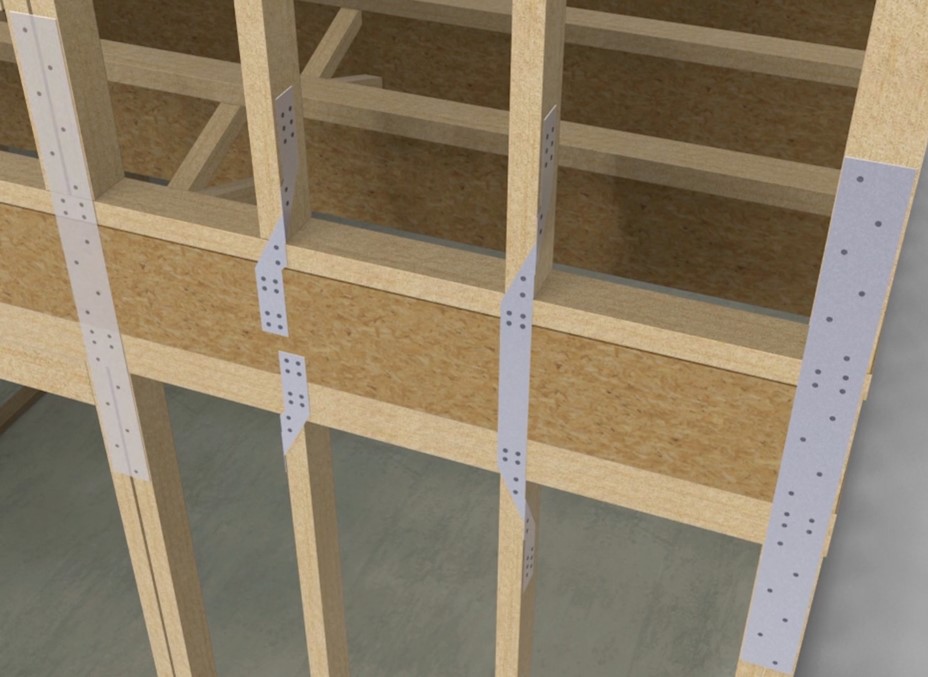
Right – Examples of wall stud to top plate and stud to rim joist framing connectors and brackets.
Image

Right – Fiberglass batt insulation fills the walls while the floor joists above are insulated with spray foam insulation to both insulate and air seal this transition space.
Image
Image
Image
Right – Foam gasket is installed on the surface of the framing before plywood sheathing is installed on these factory-constructed wall panels.
Image
Image

Image
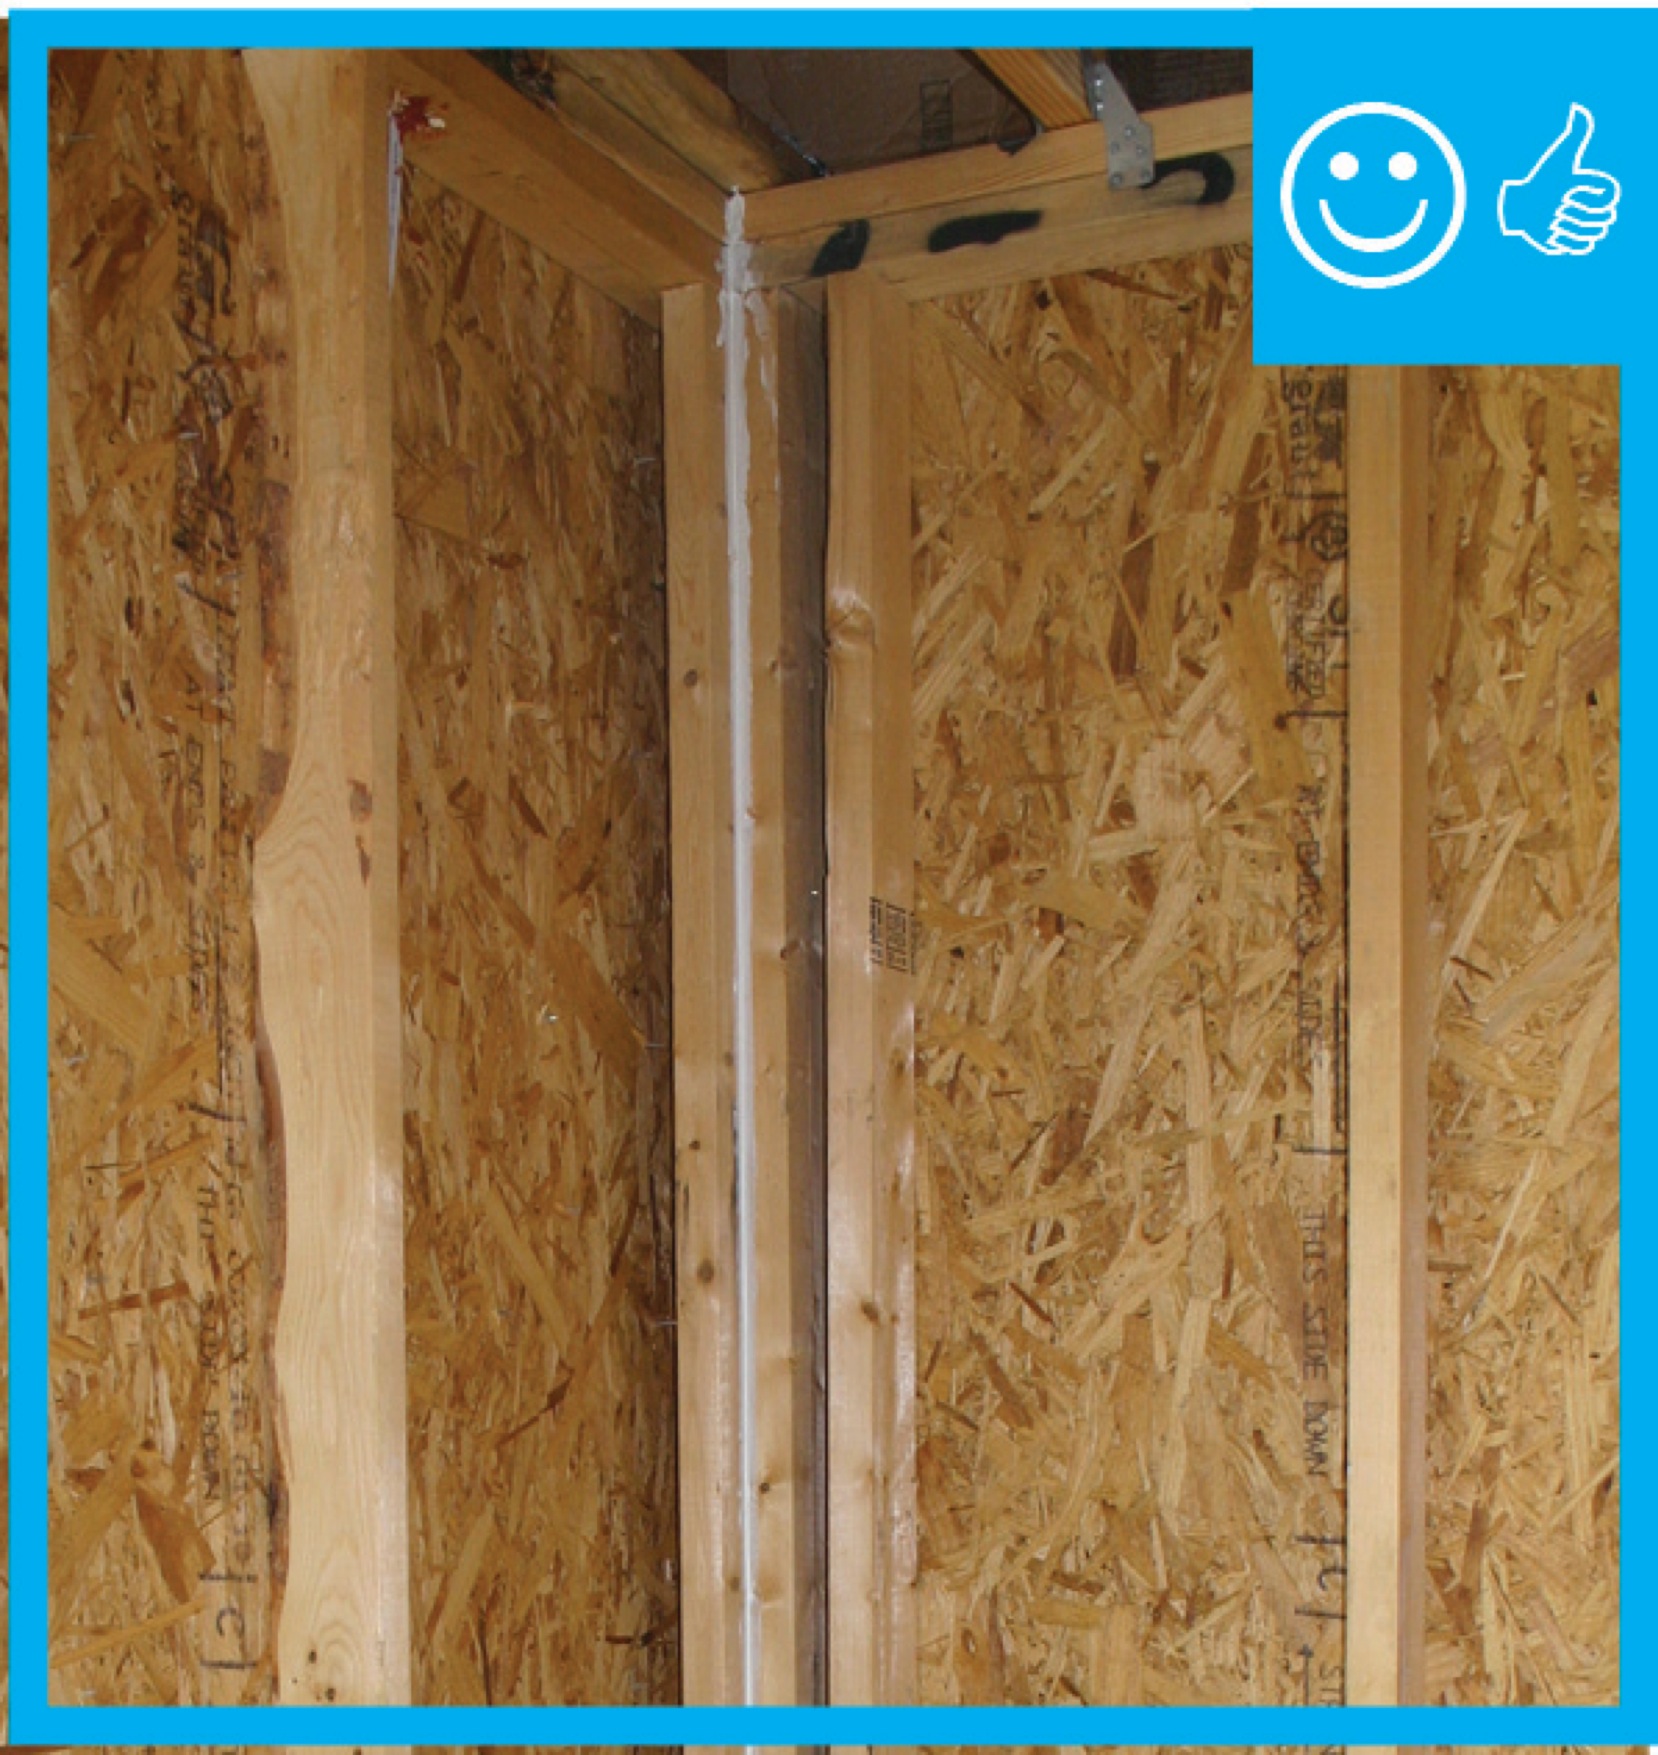
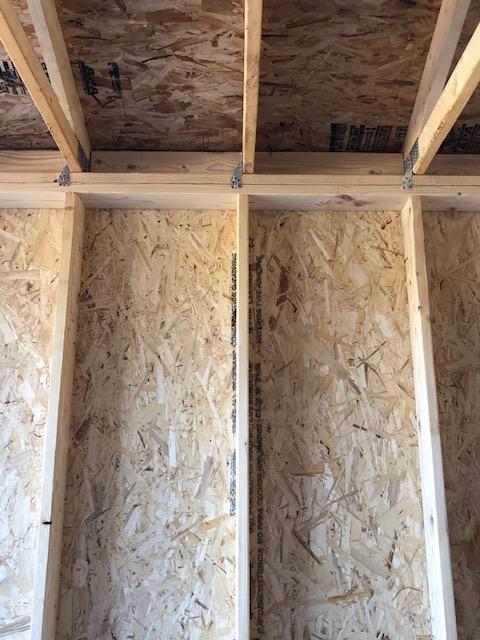
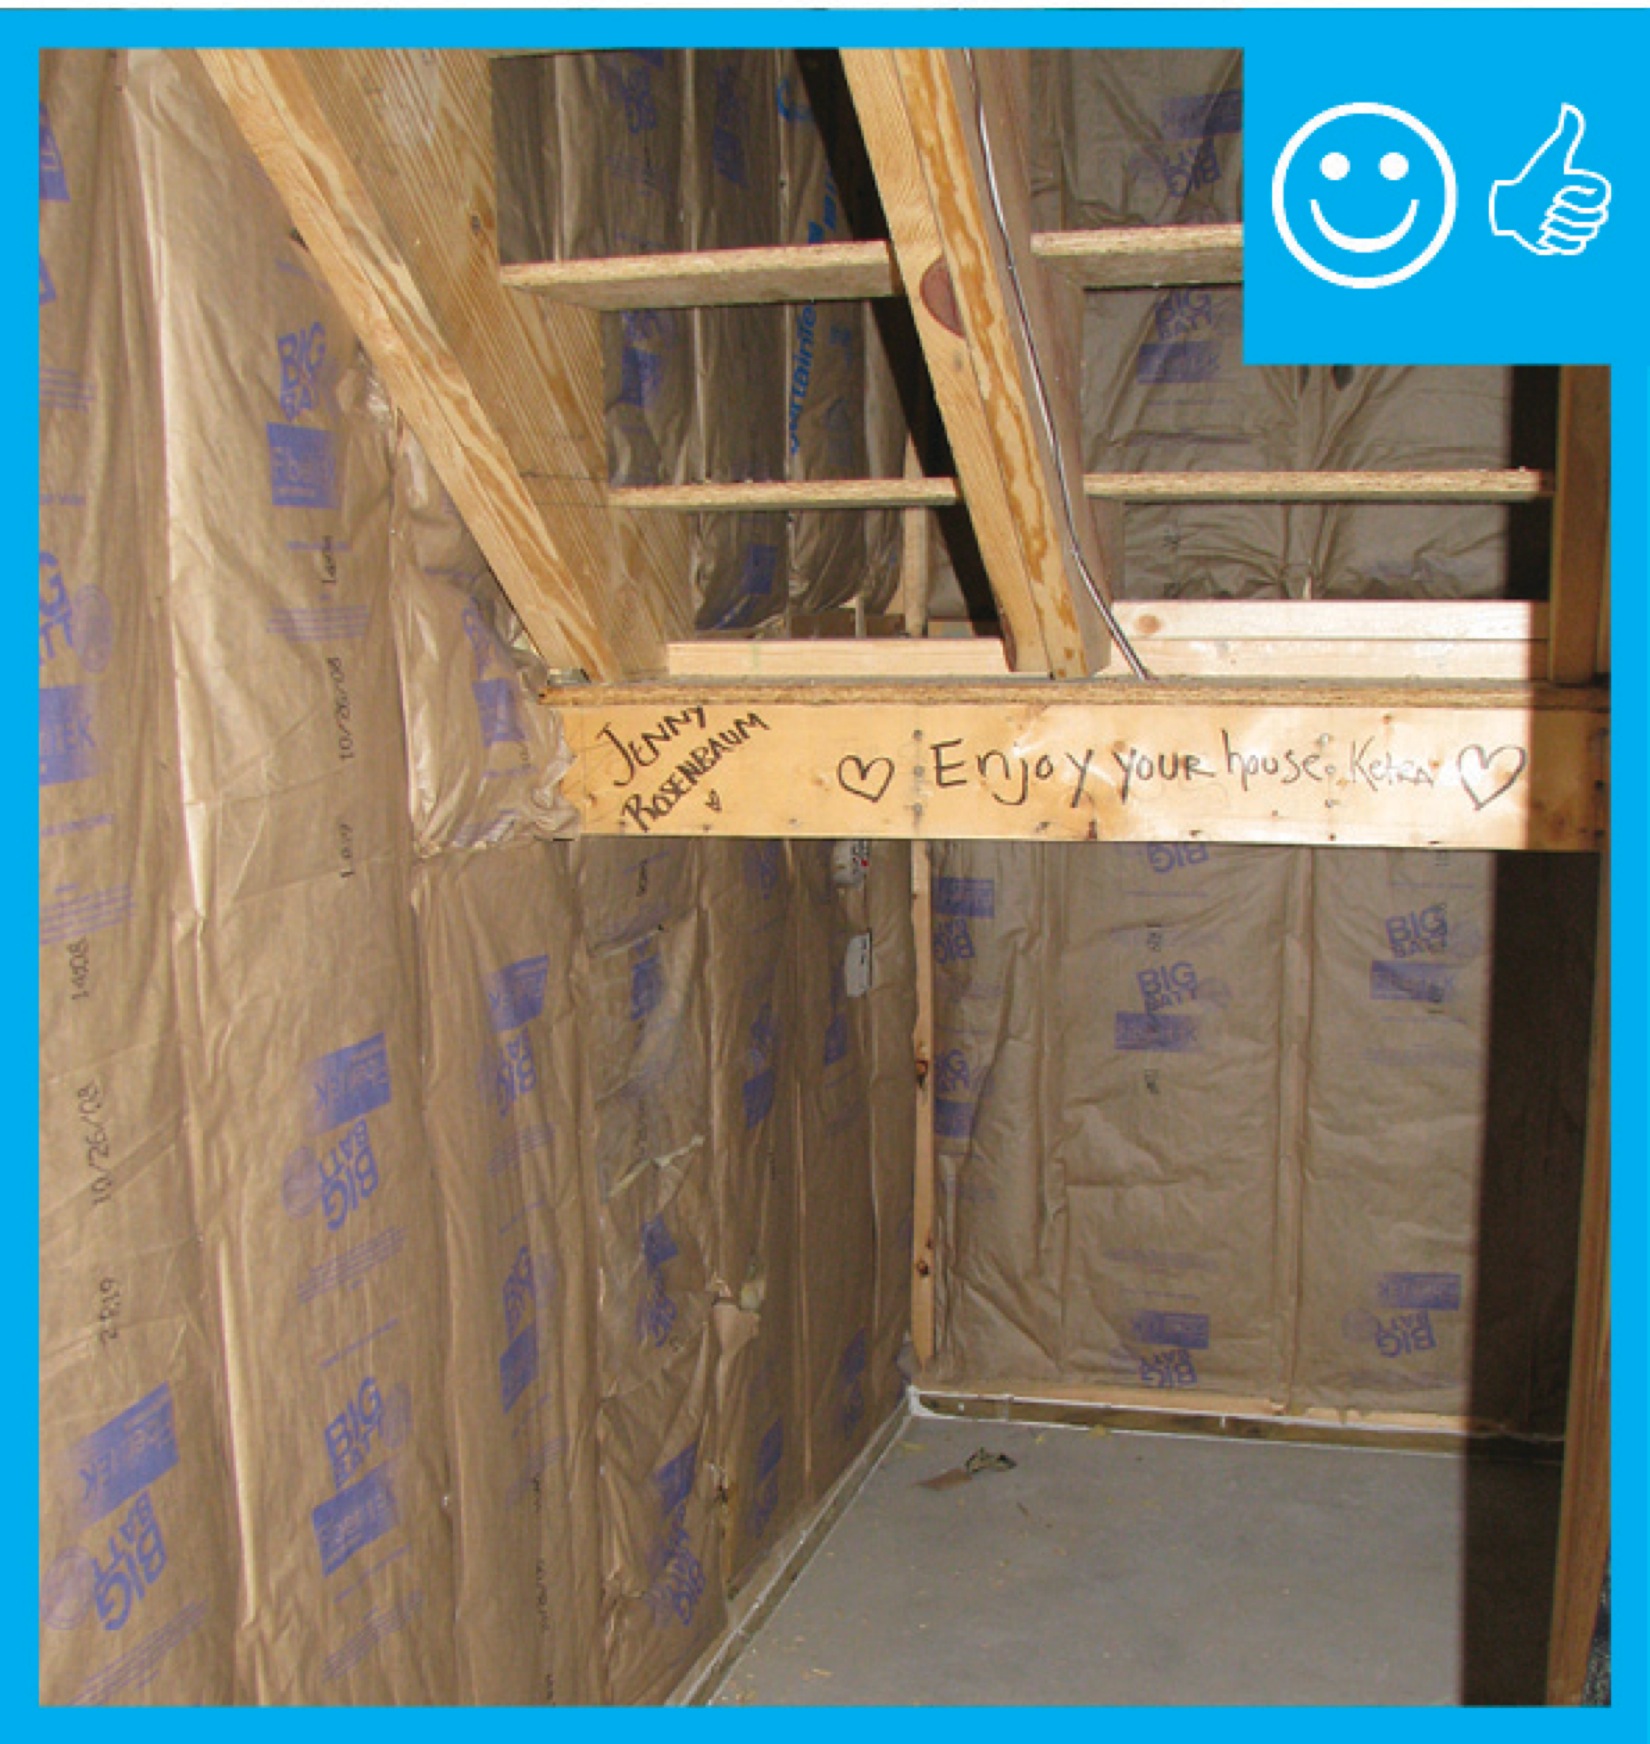
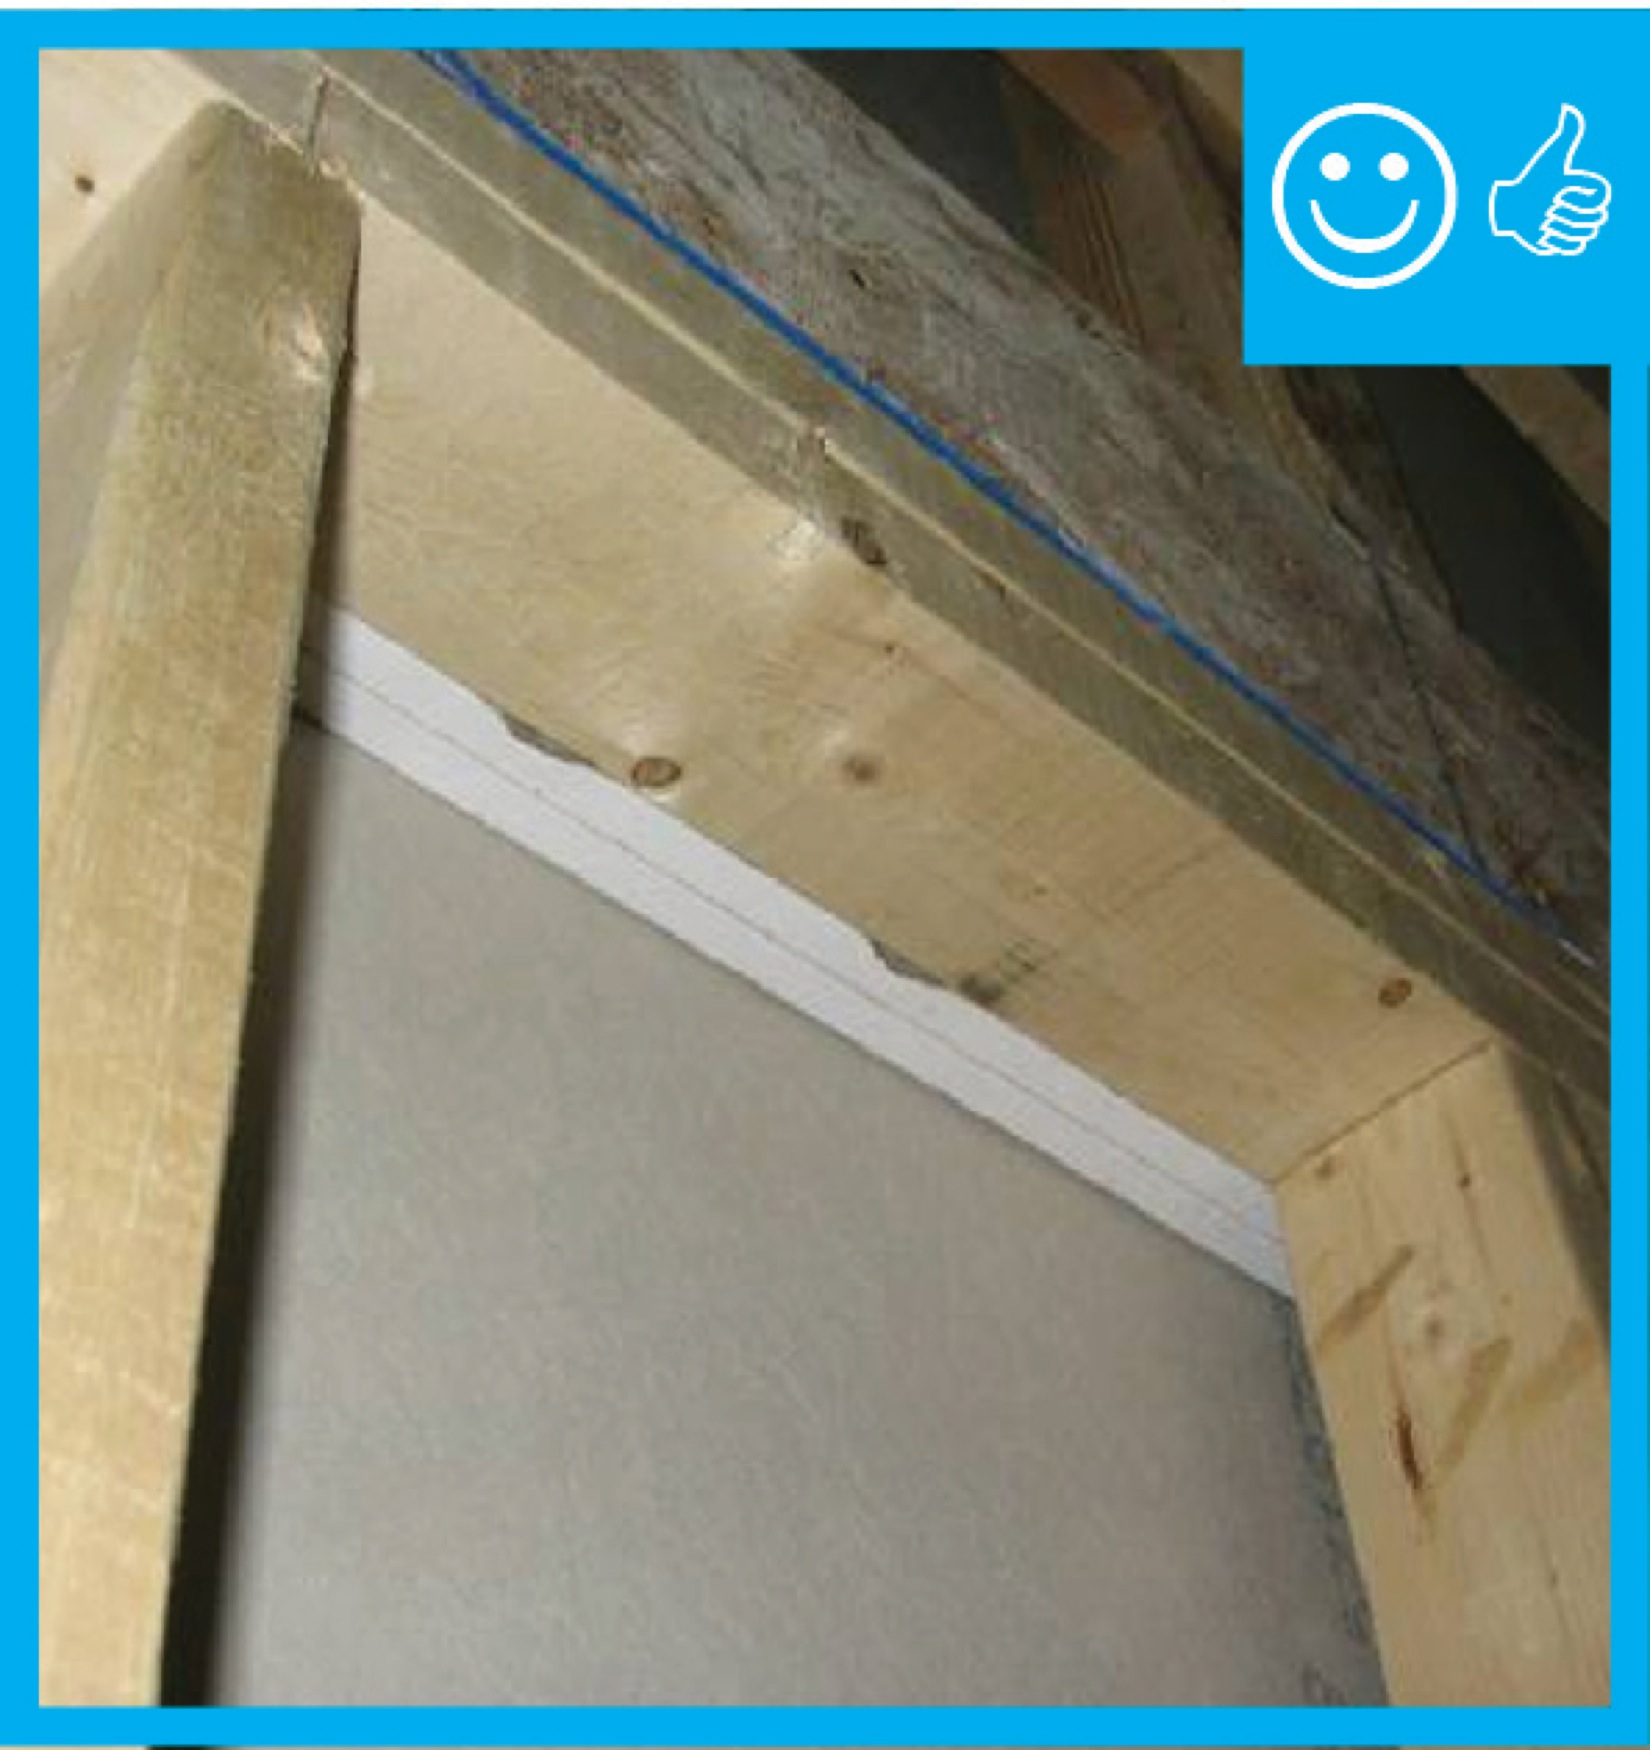
Right – Full length 2x6 nailer has been installed to allow space for insulation at wall intersection
Image
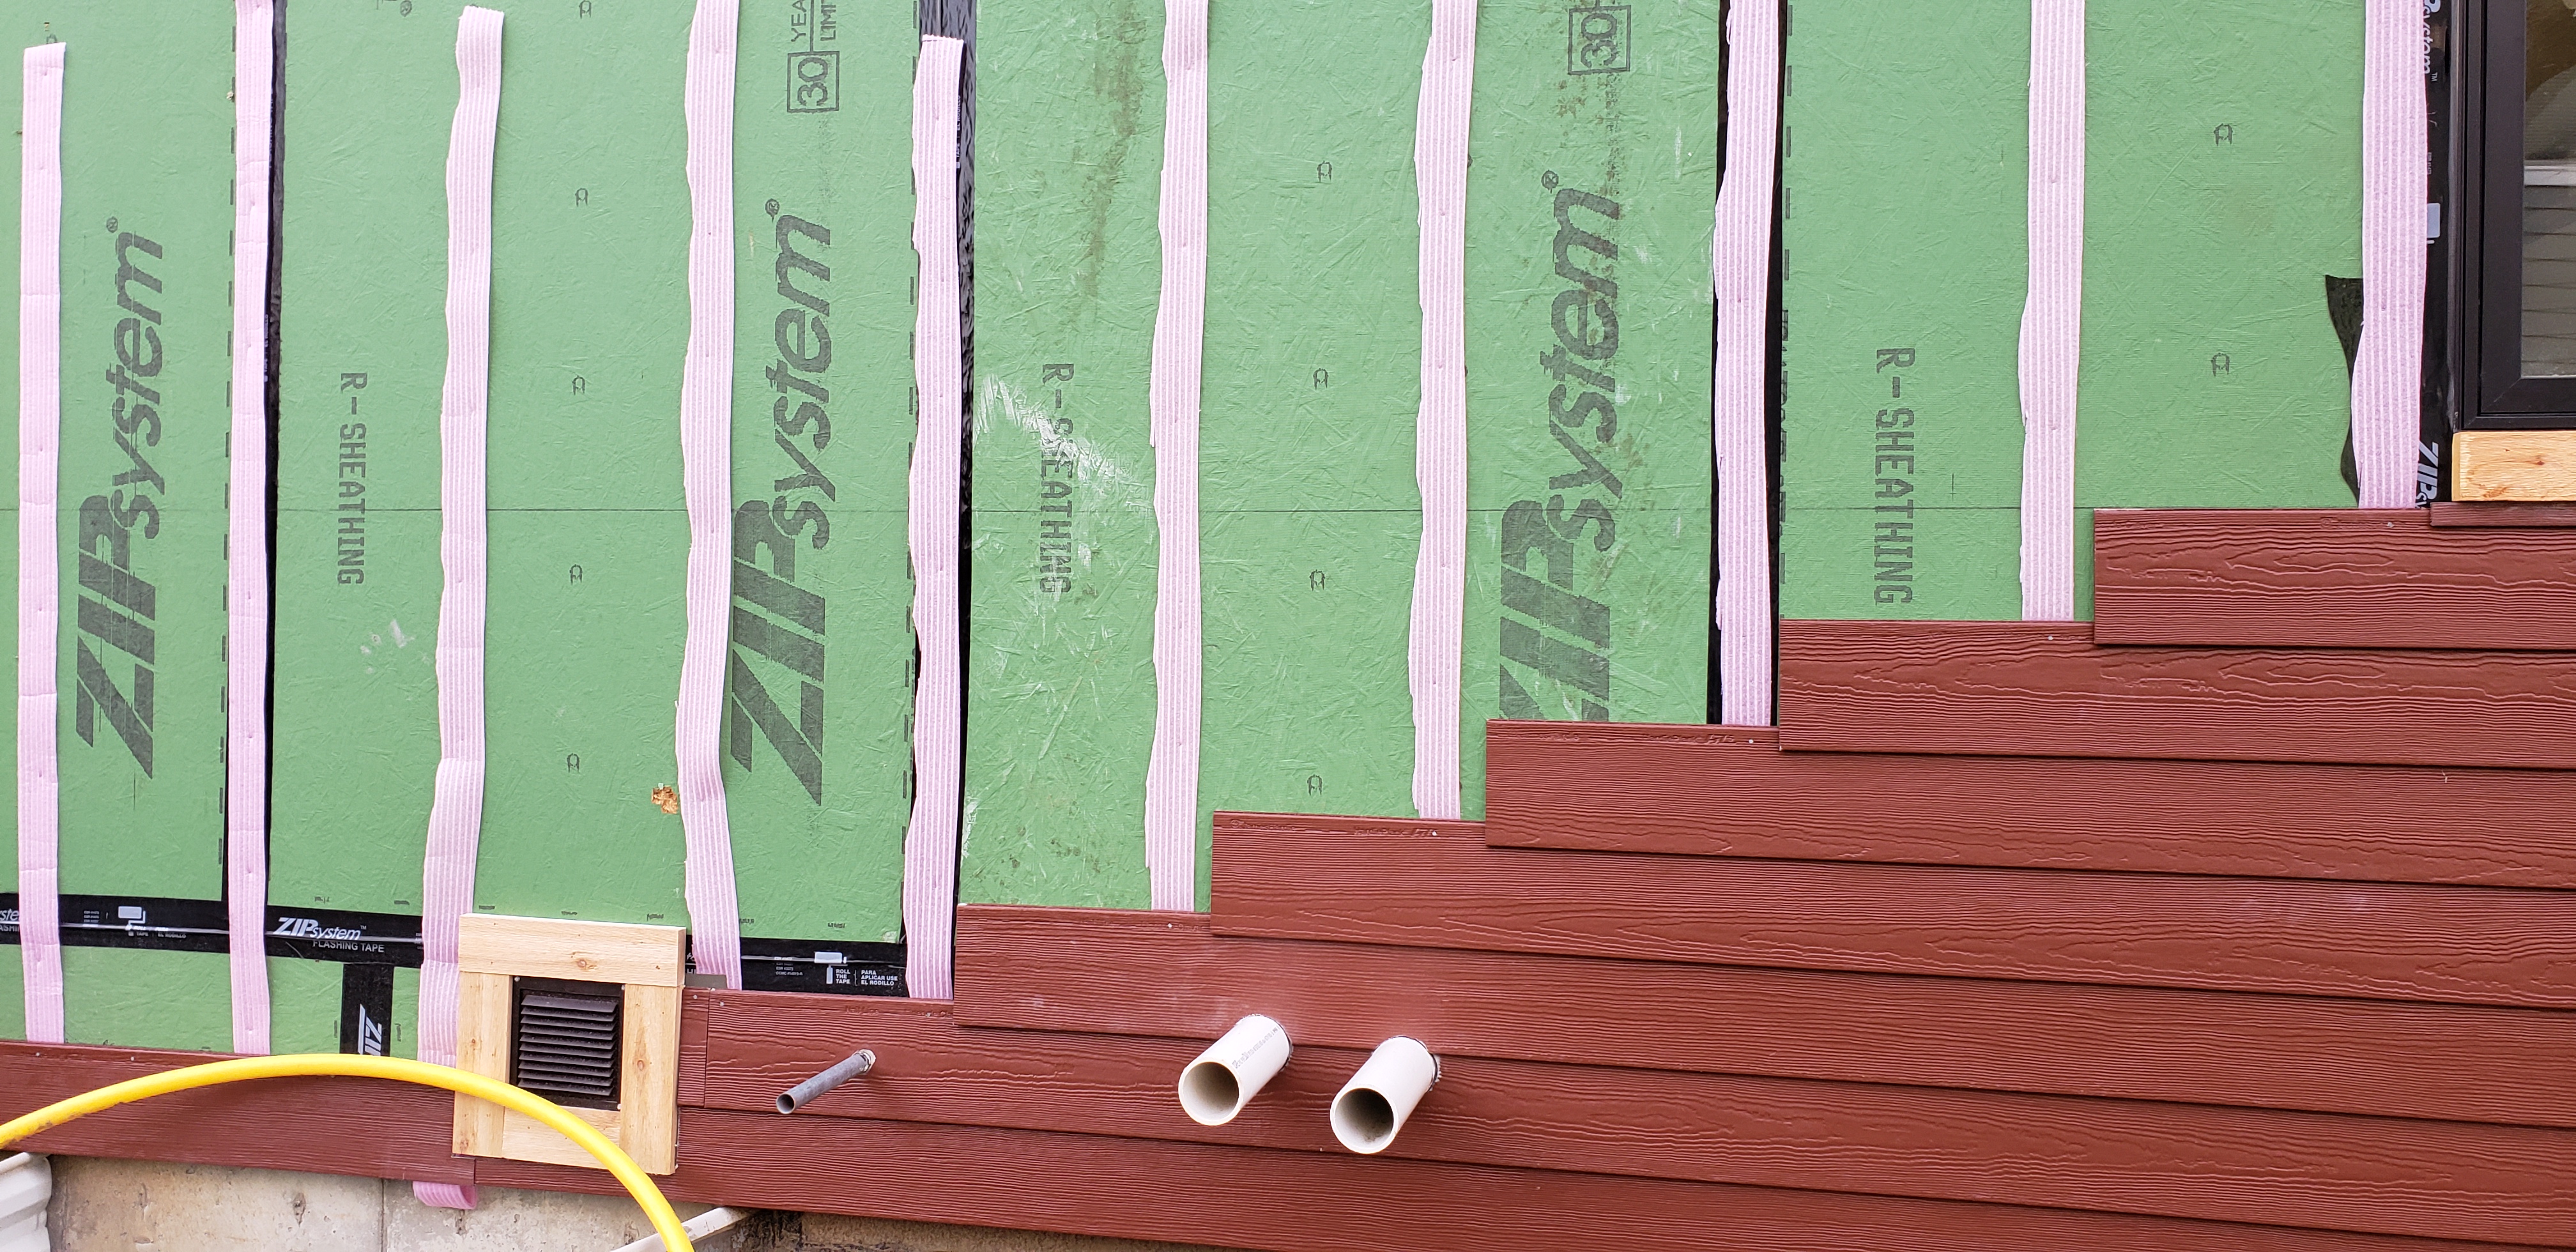
Right – Furring strips provide a drainage gap between the rigid foam and the siding.
Image
Image

Right – Half-inch furring strips provide a rain screen and air gap between the weather-resistant membrane and the fiber cement siding on the exterior walls of this marine-climate home.
Image
Image
Right – Housewrap was properly shingled and taped on this wall assembly which places the housewrap beneath the rigid foam sheathing; wall cavities will be filled with spray foam.
Image
Image
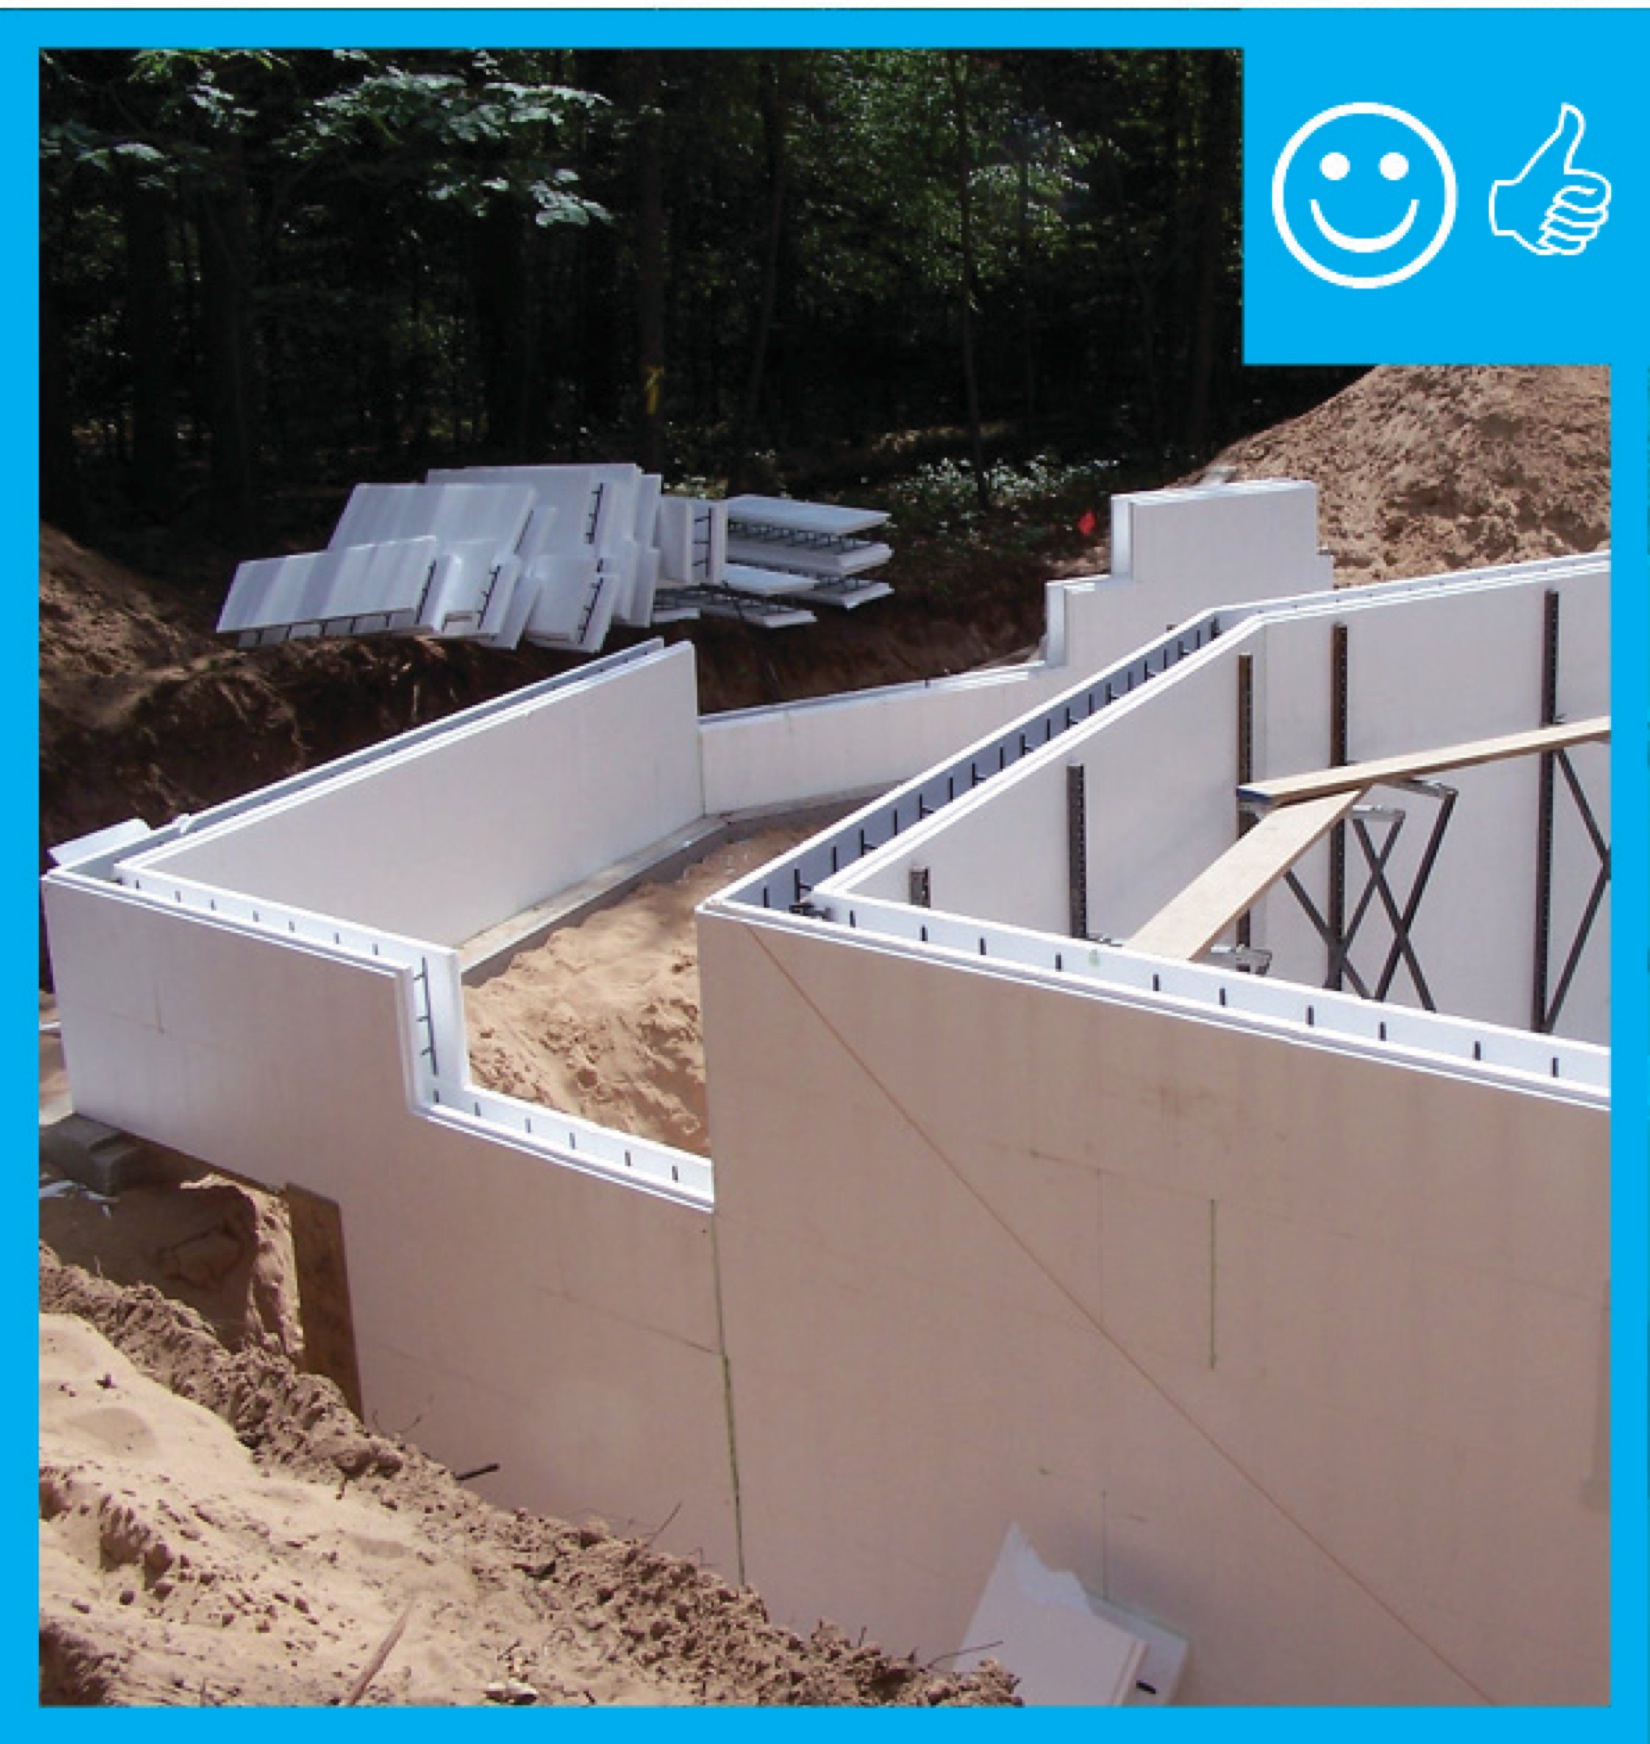
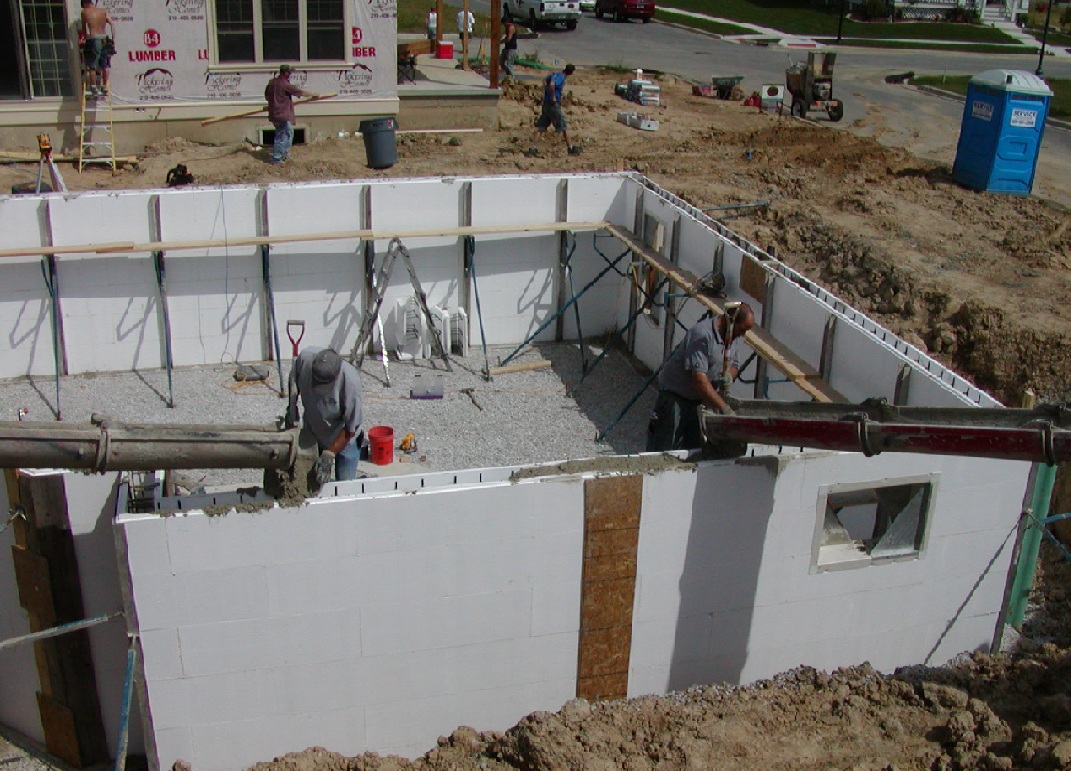
Right – ICFs are being installed to create a continuous air and thermal boundary
Image
Right – ICFs are being installed to create a continuous air and thermal boundary
Image

Right – ICFs are being installed to create a continuous air and thermal boundary
Image
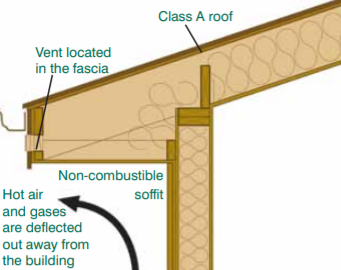
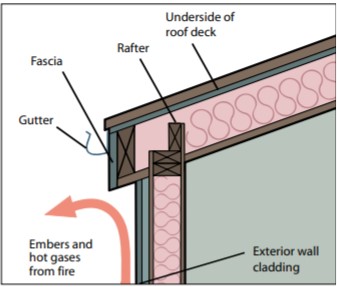
Right – In wildfire prone areas, using a flat soffit with venting on the fascia instead of an angled soffit with down-facing venting reduces the risk of catching rising embers.
Image
Image

Image
Image
Image
Image
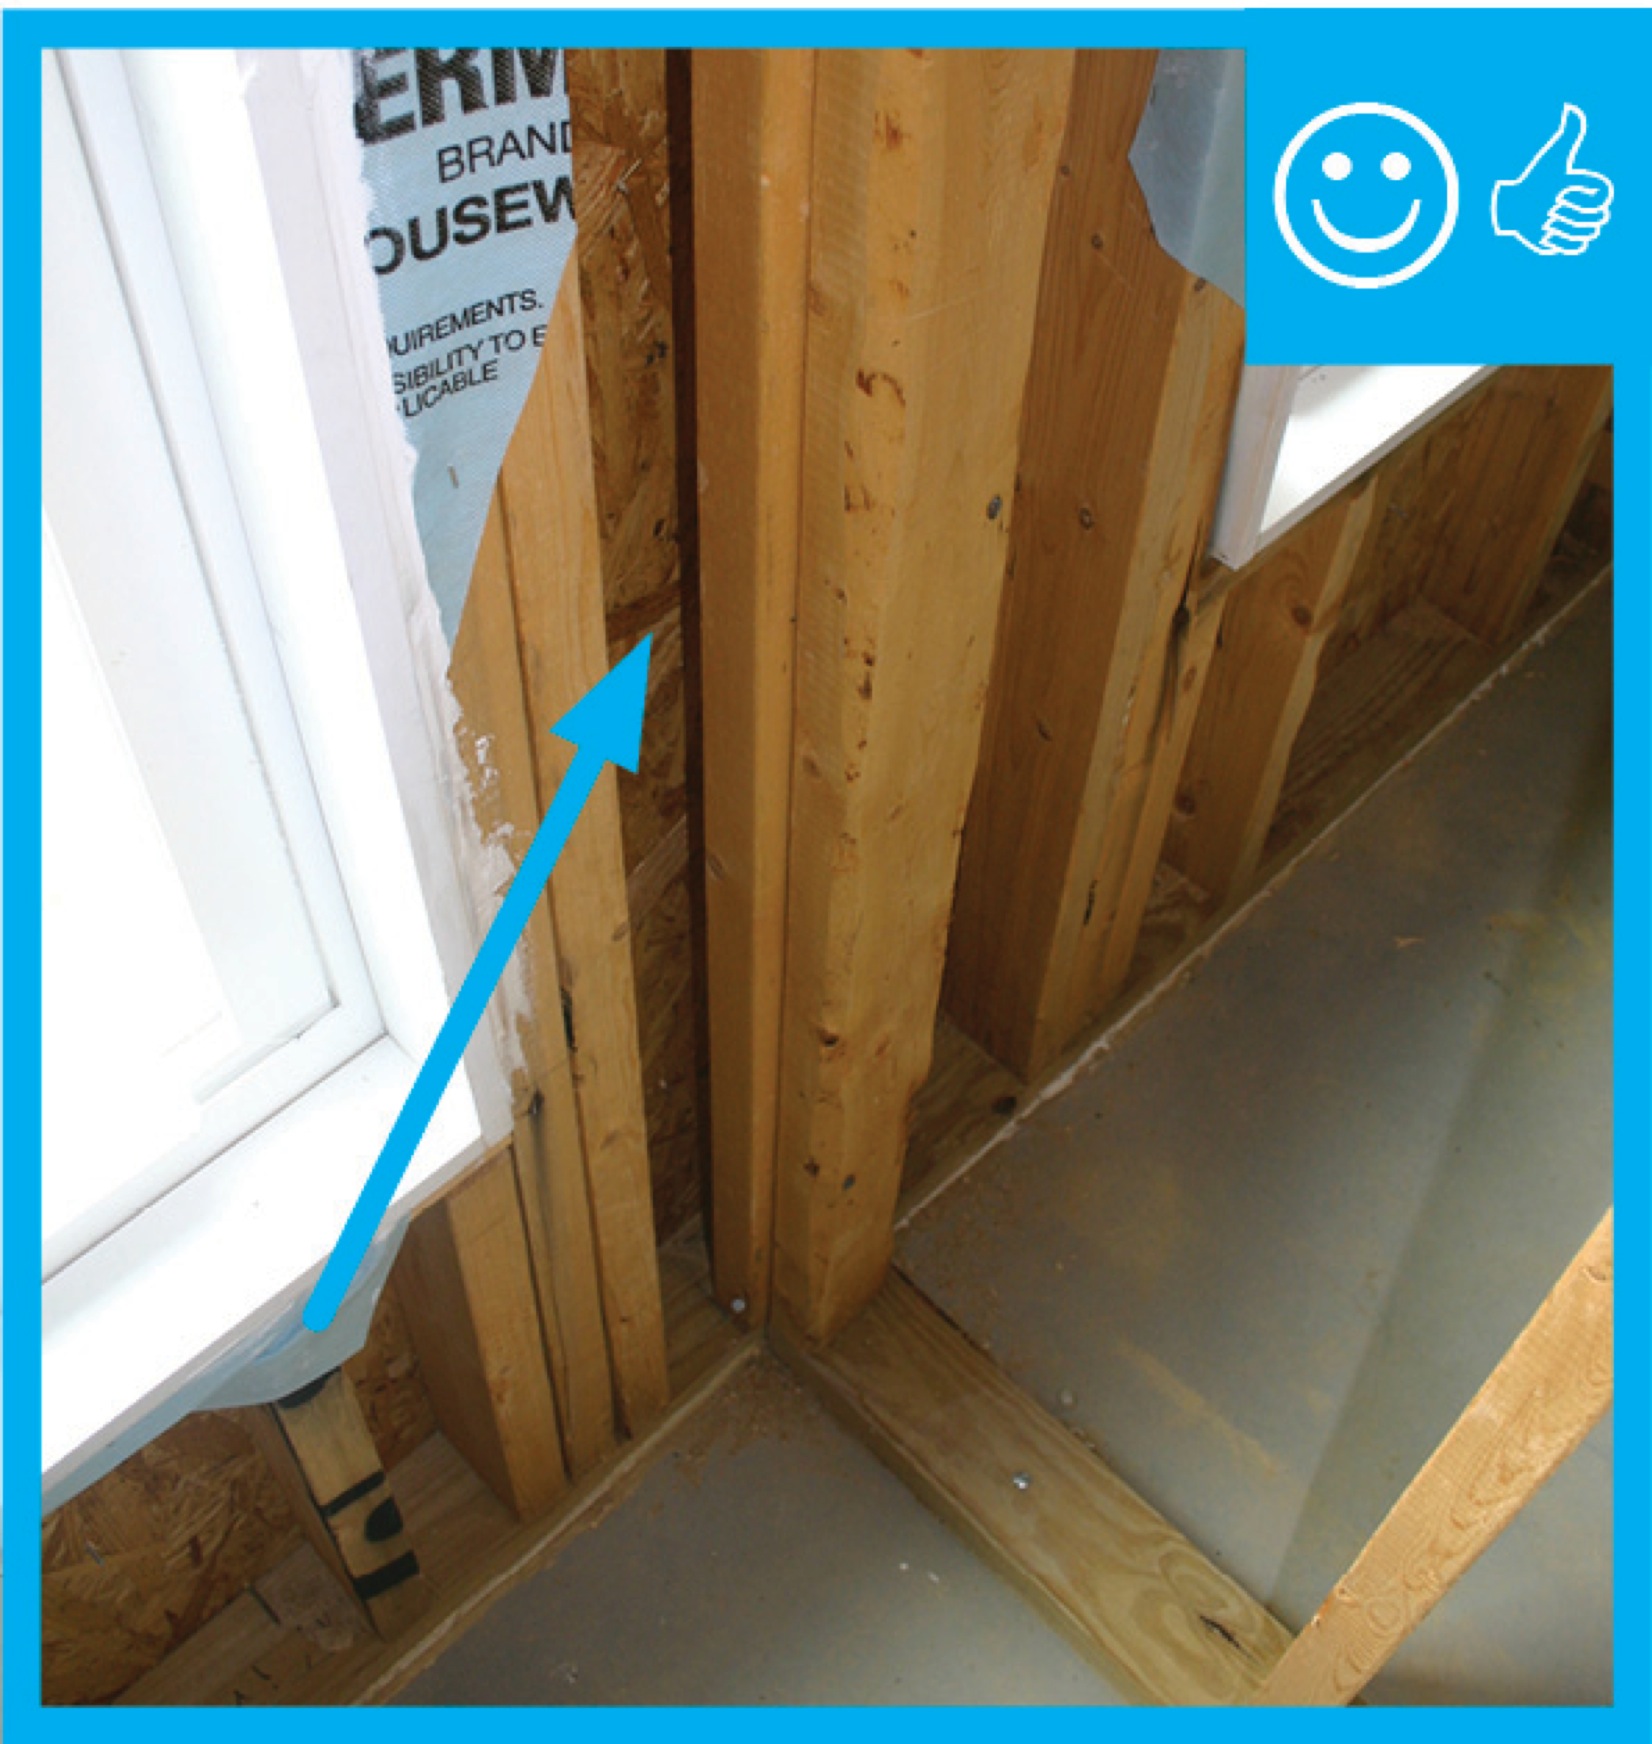
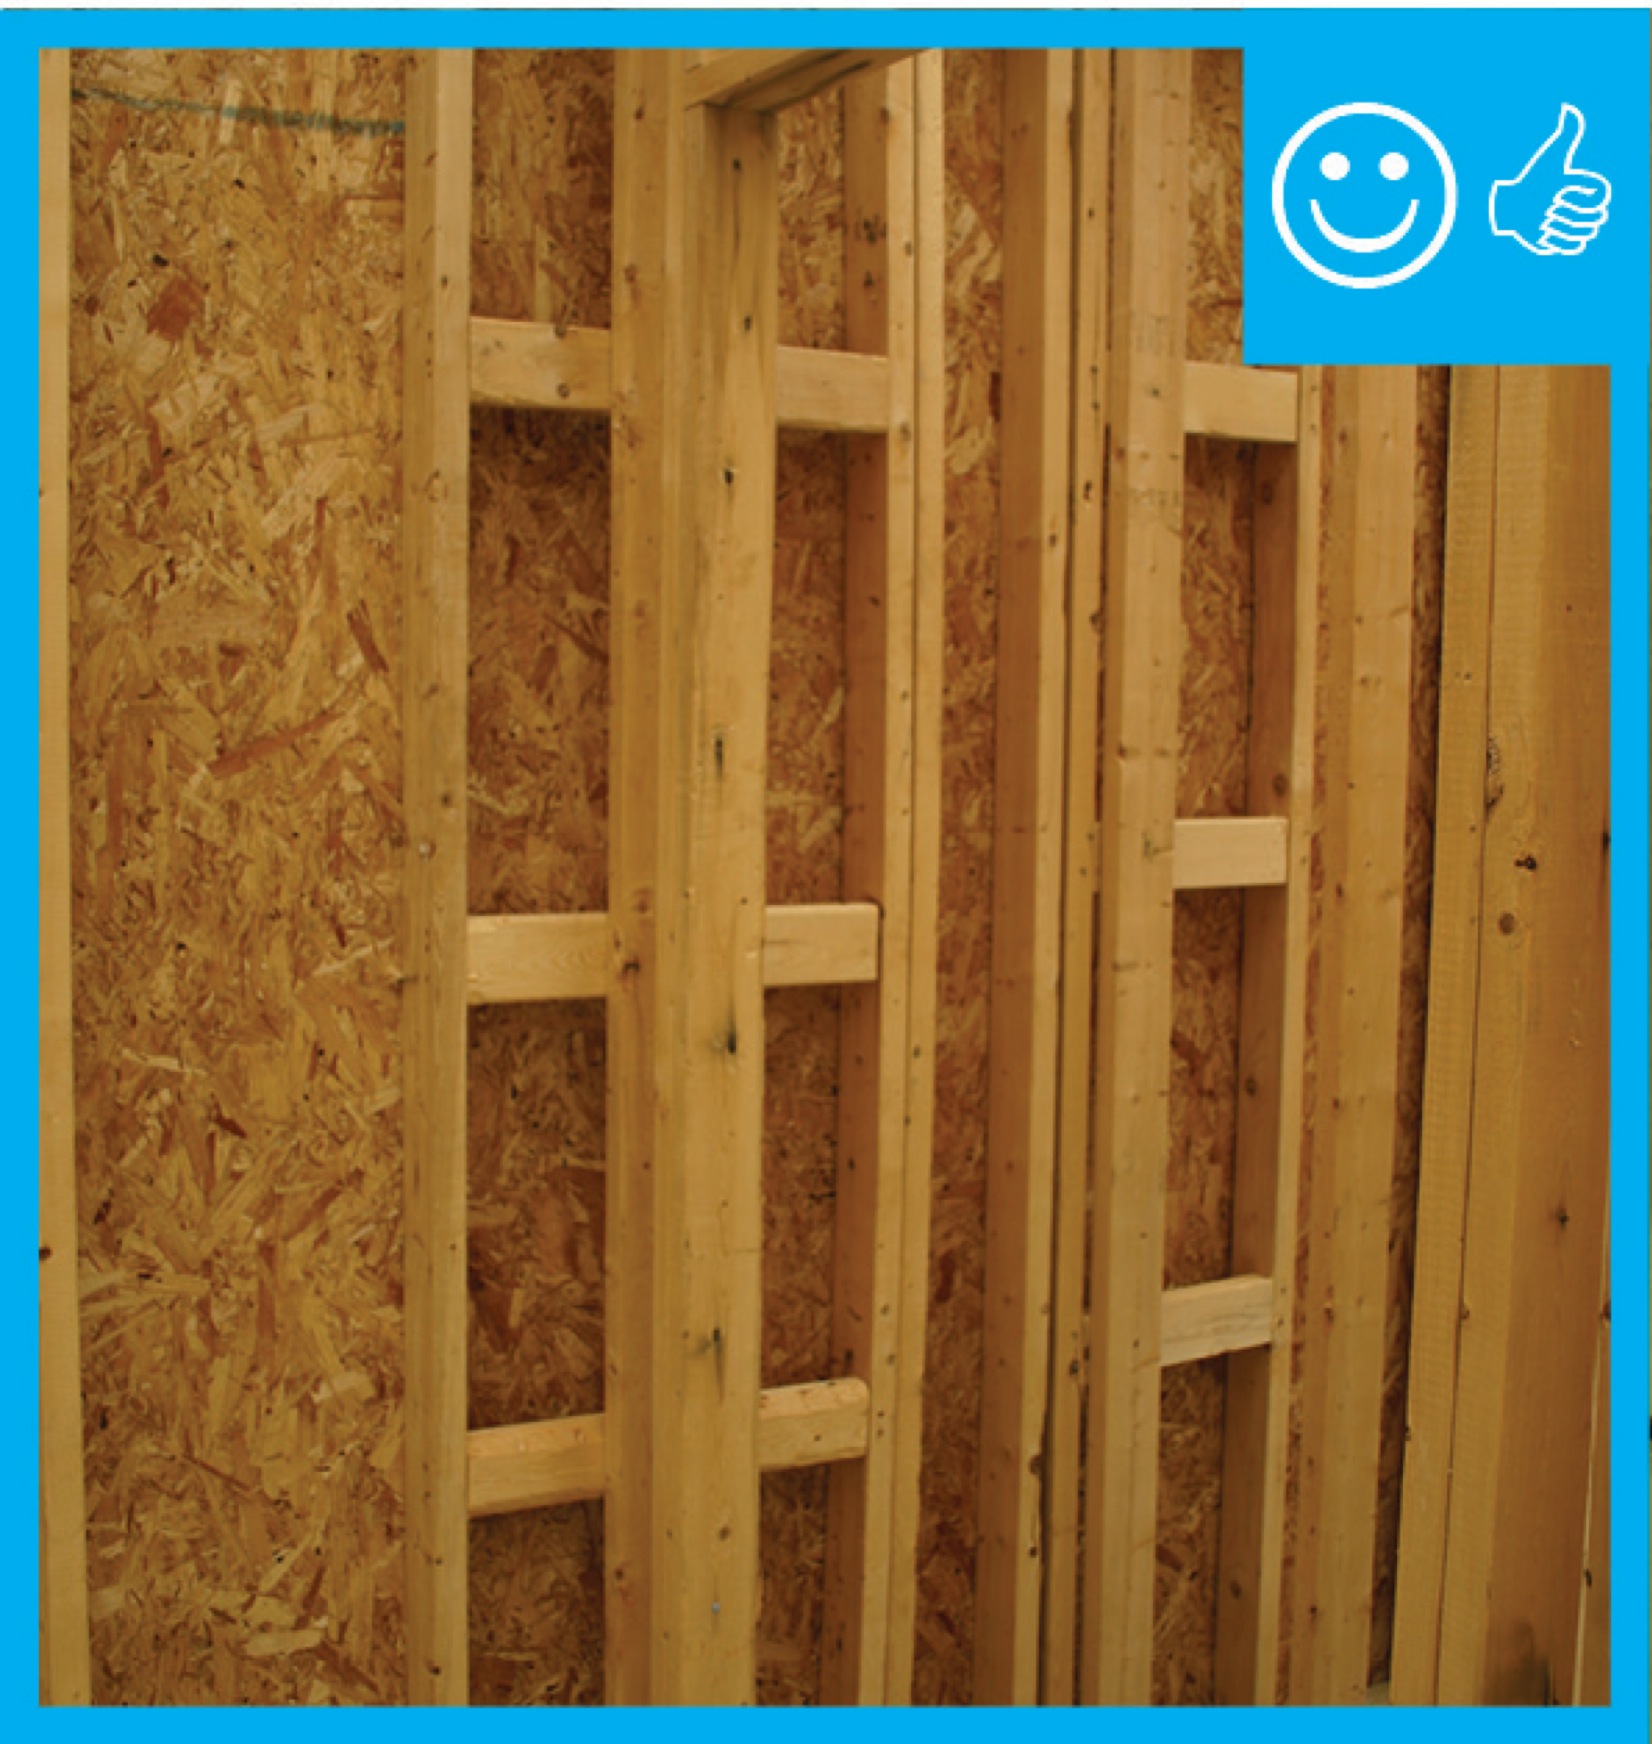
Right – Ladder blocking allows the exterior wall to be insulated where intersected by an interior wall.
Image
Right – Mineral wool batt insulation is cut to fit snuggly and to fully fill wall cavities with minimal voids and gaps.
Image
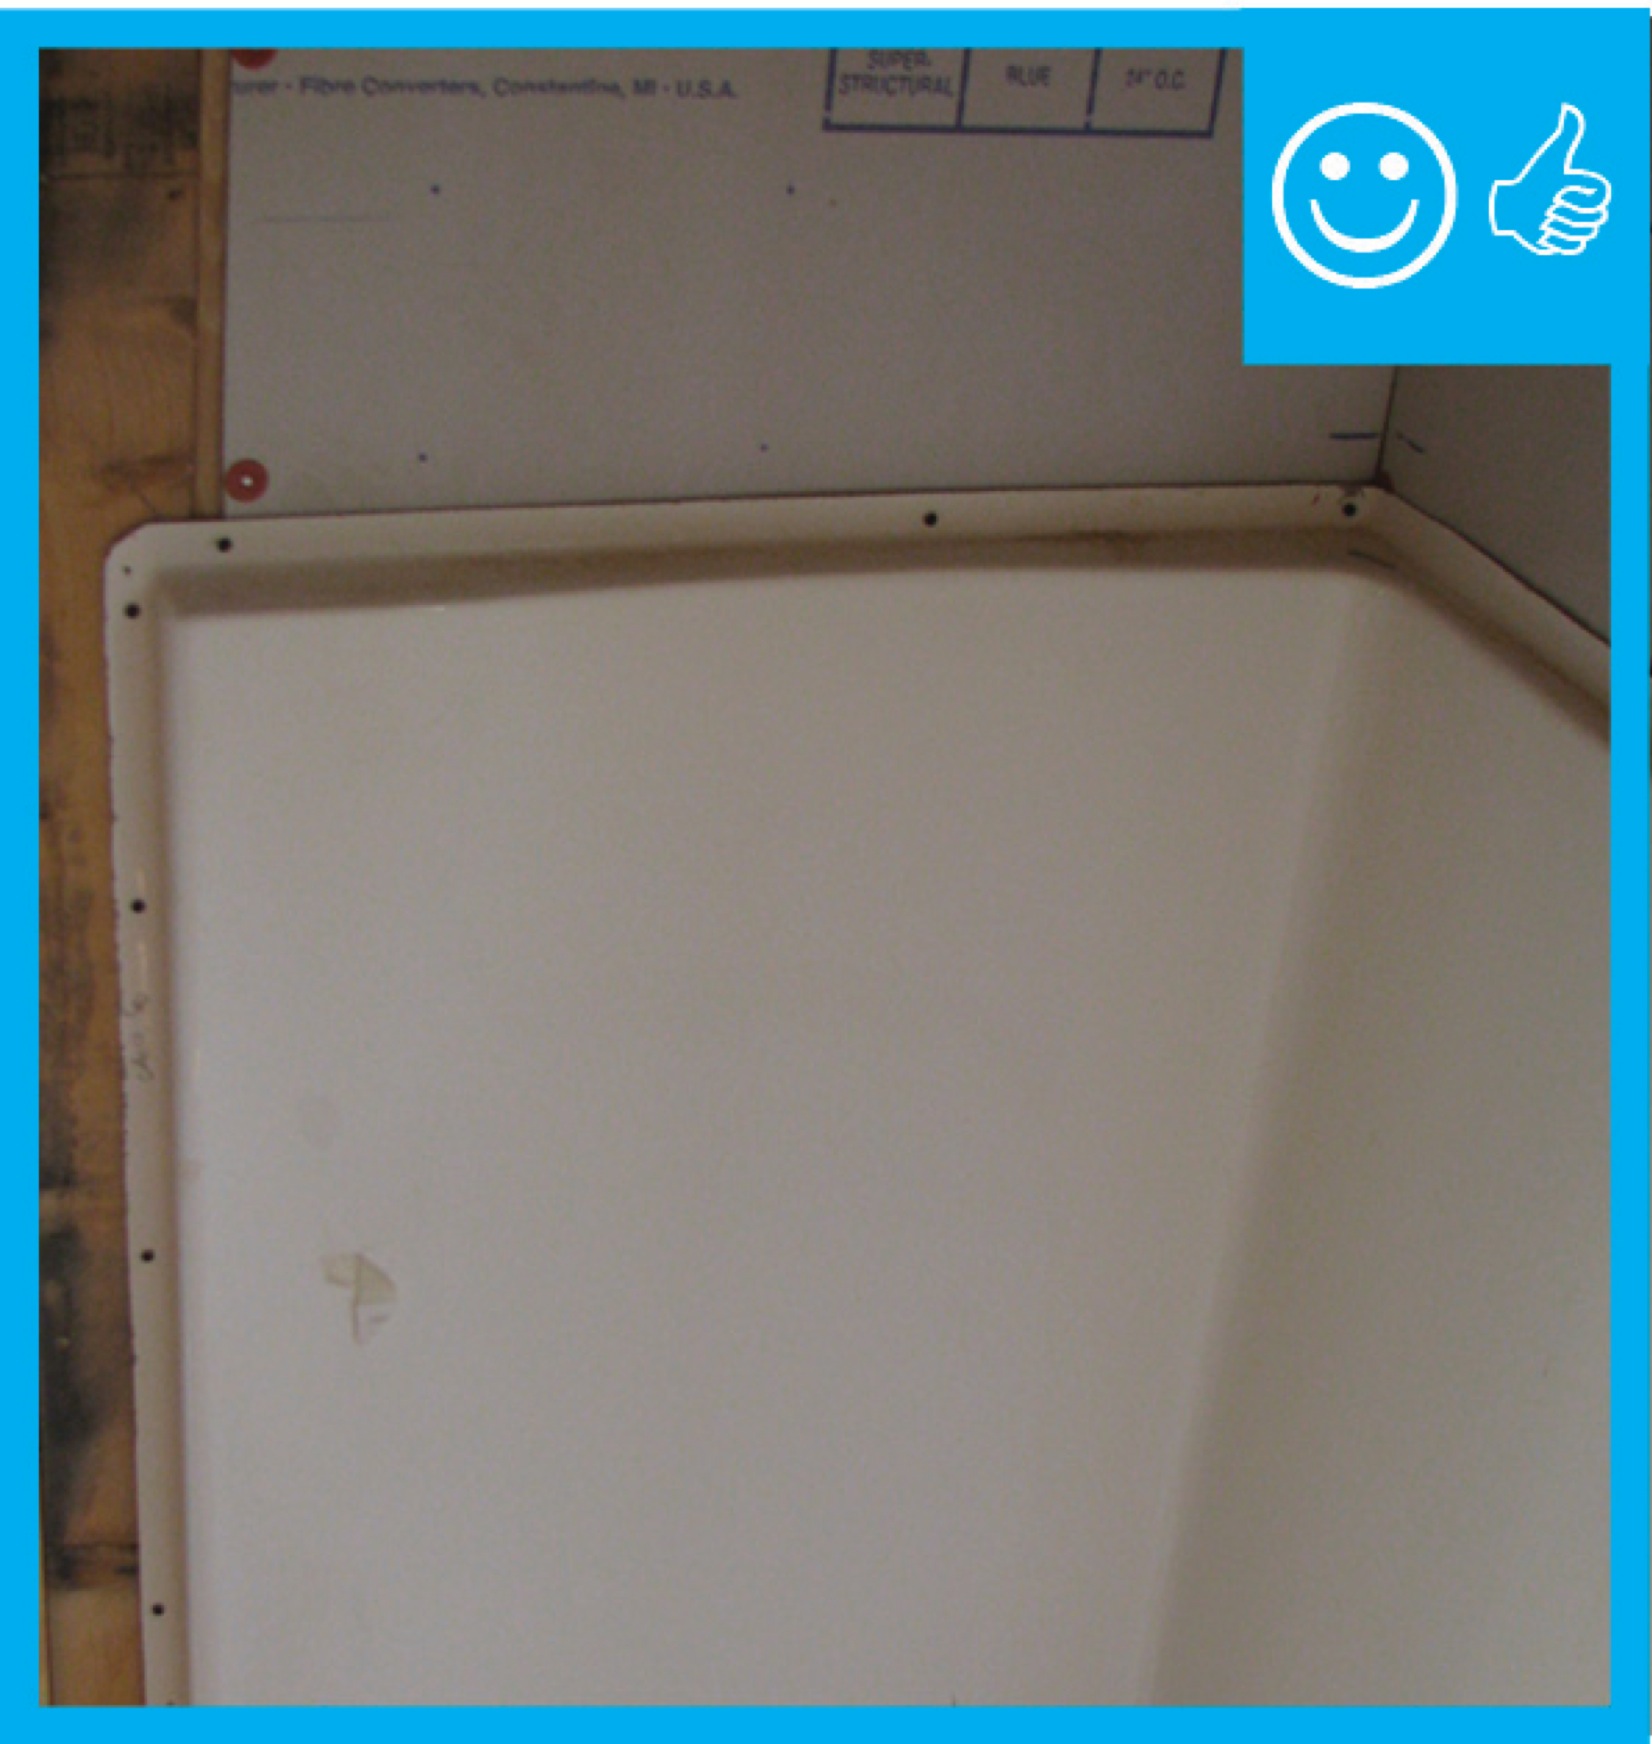
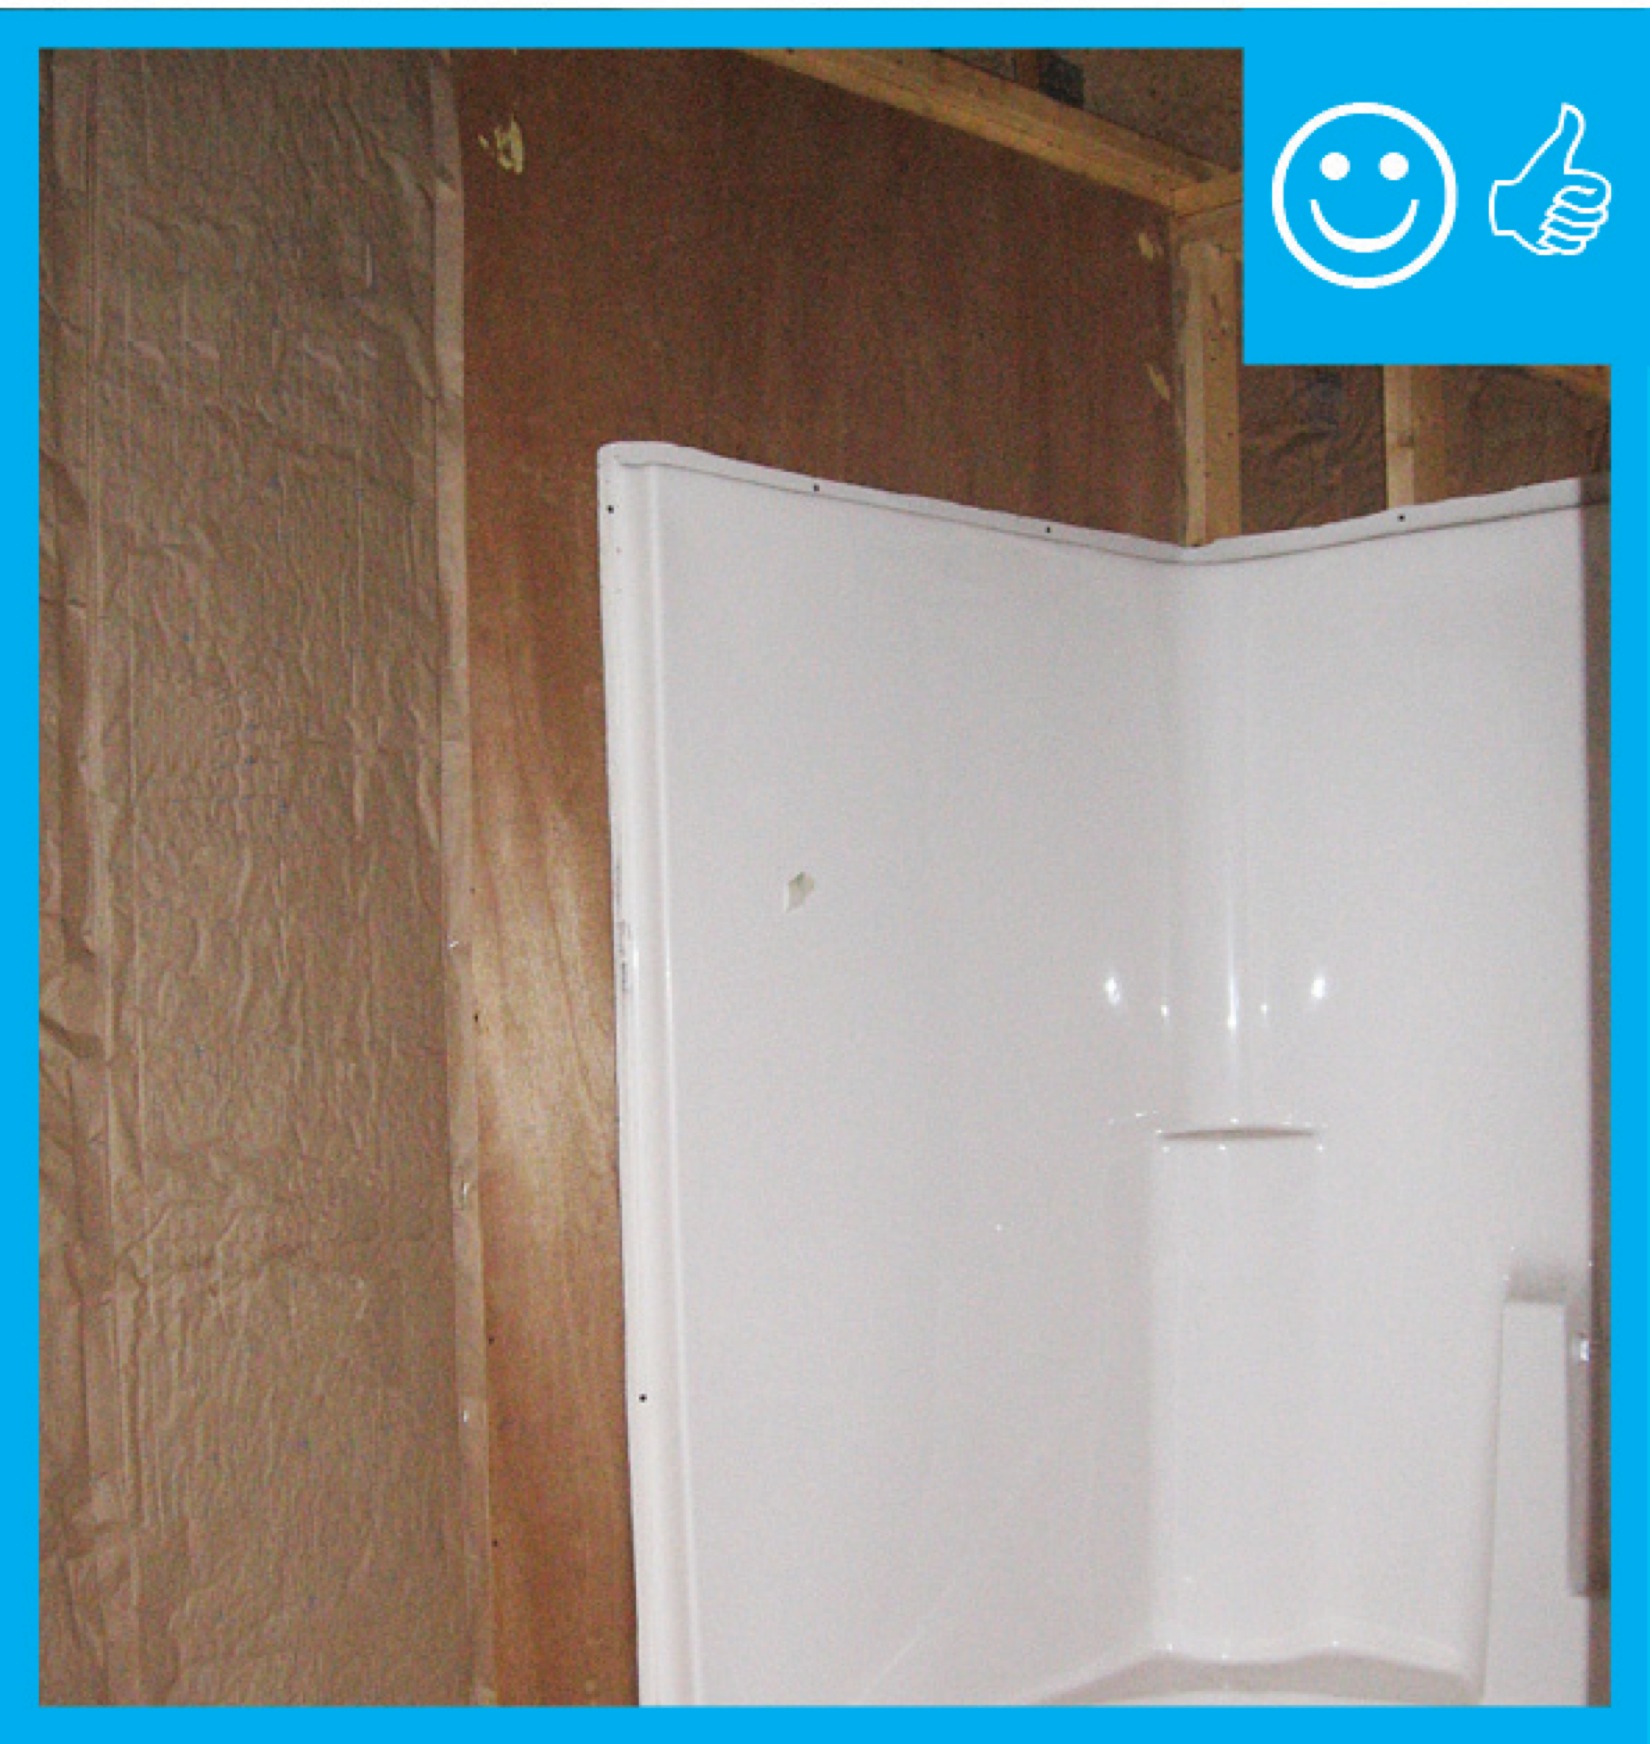
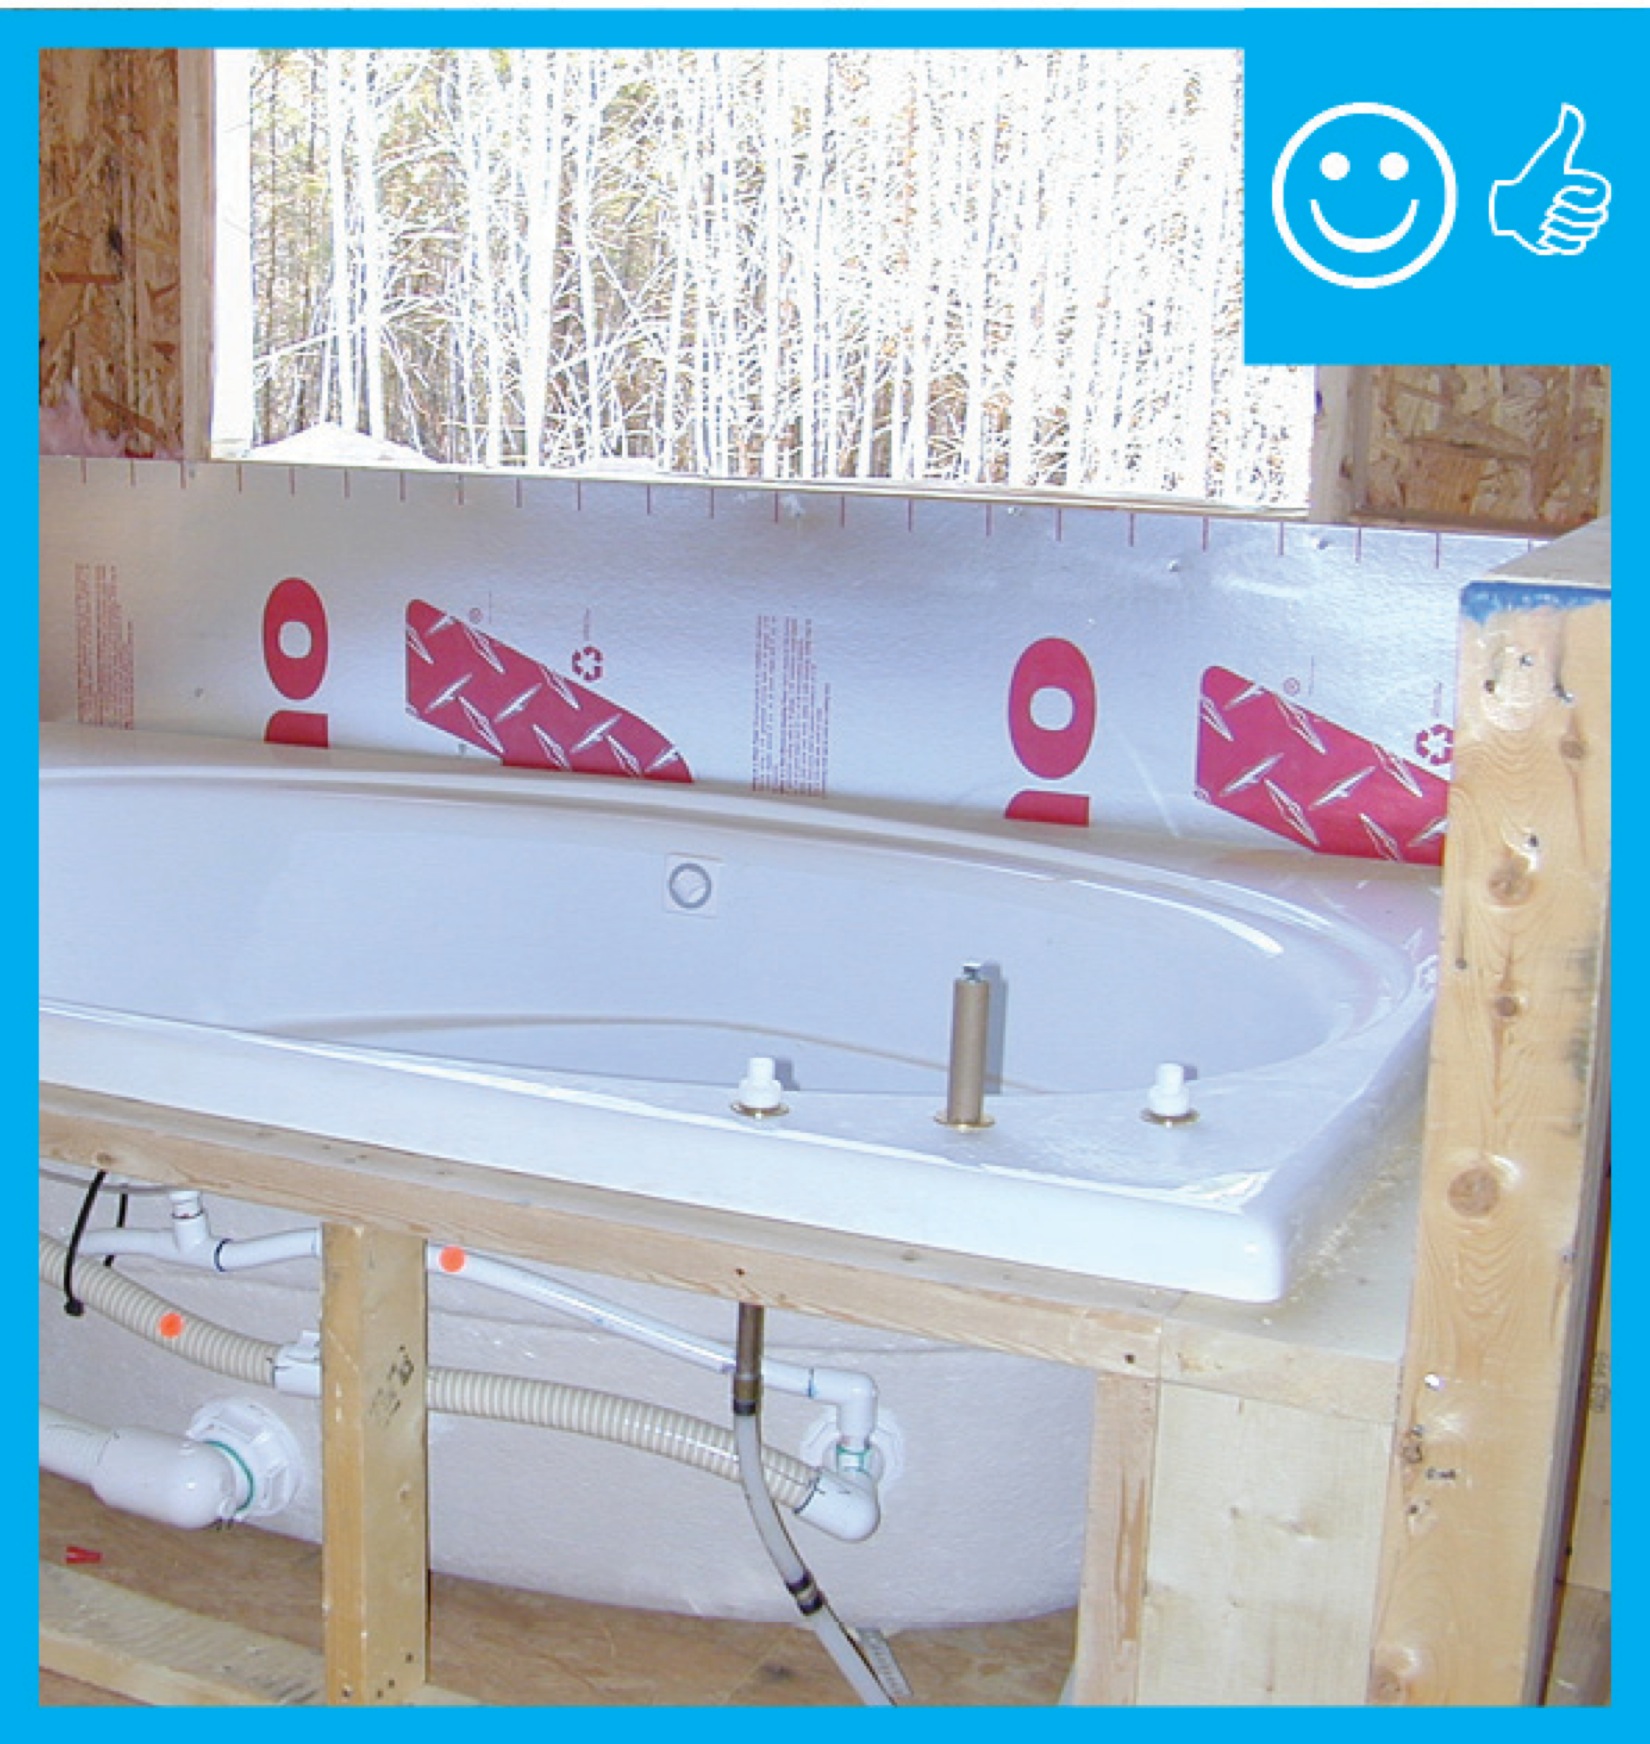
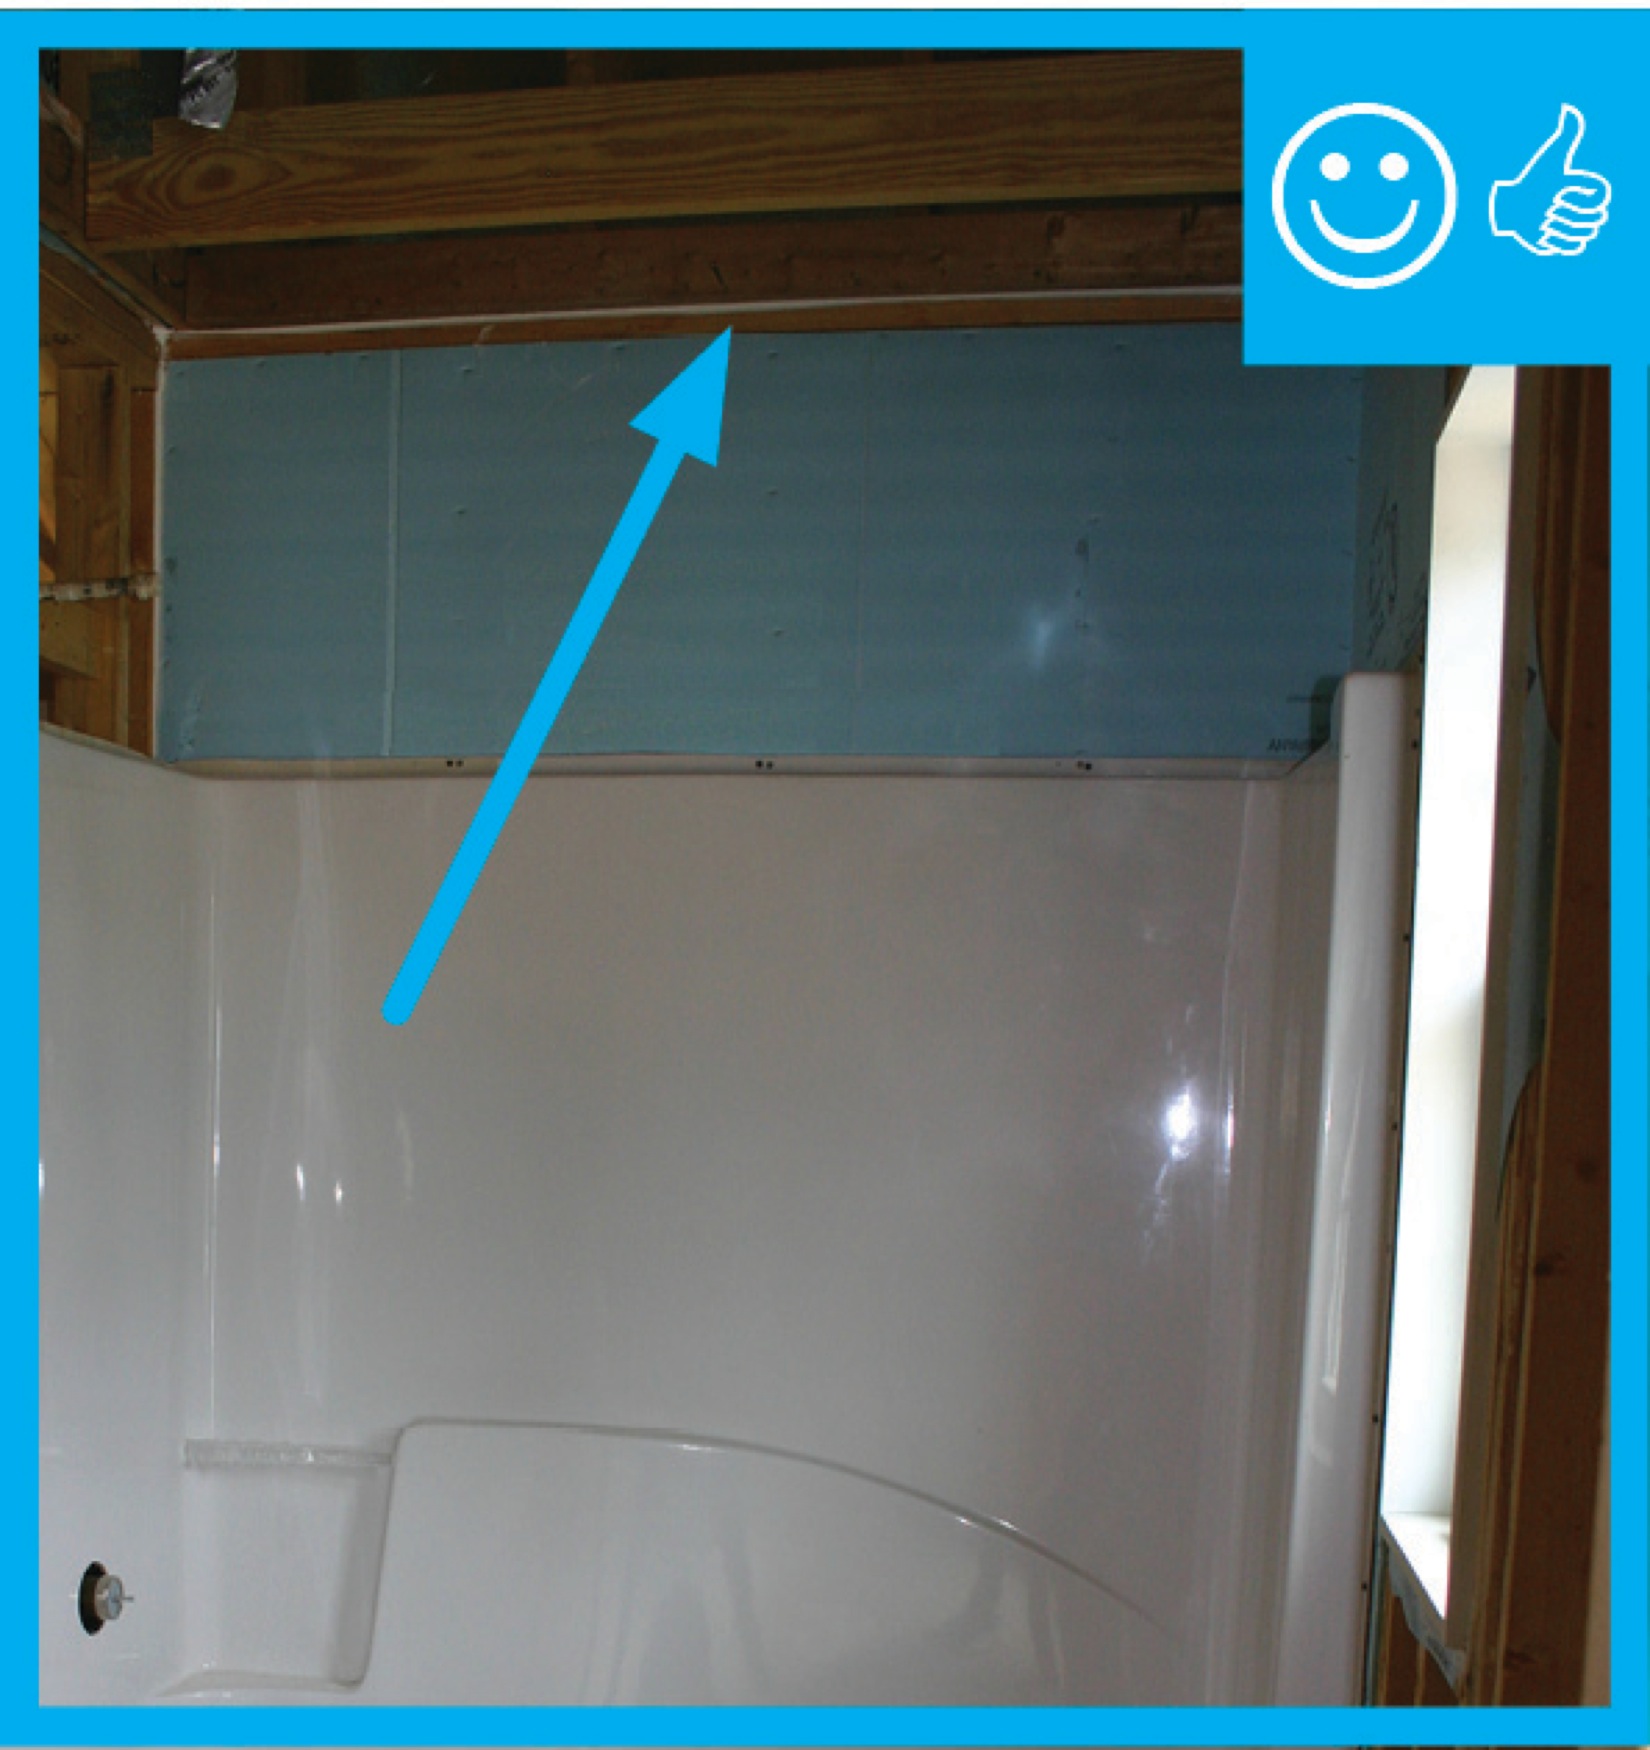
Right – Moisture-resistant backing material has been used above and behind the tub enclosure.
Image
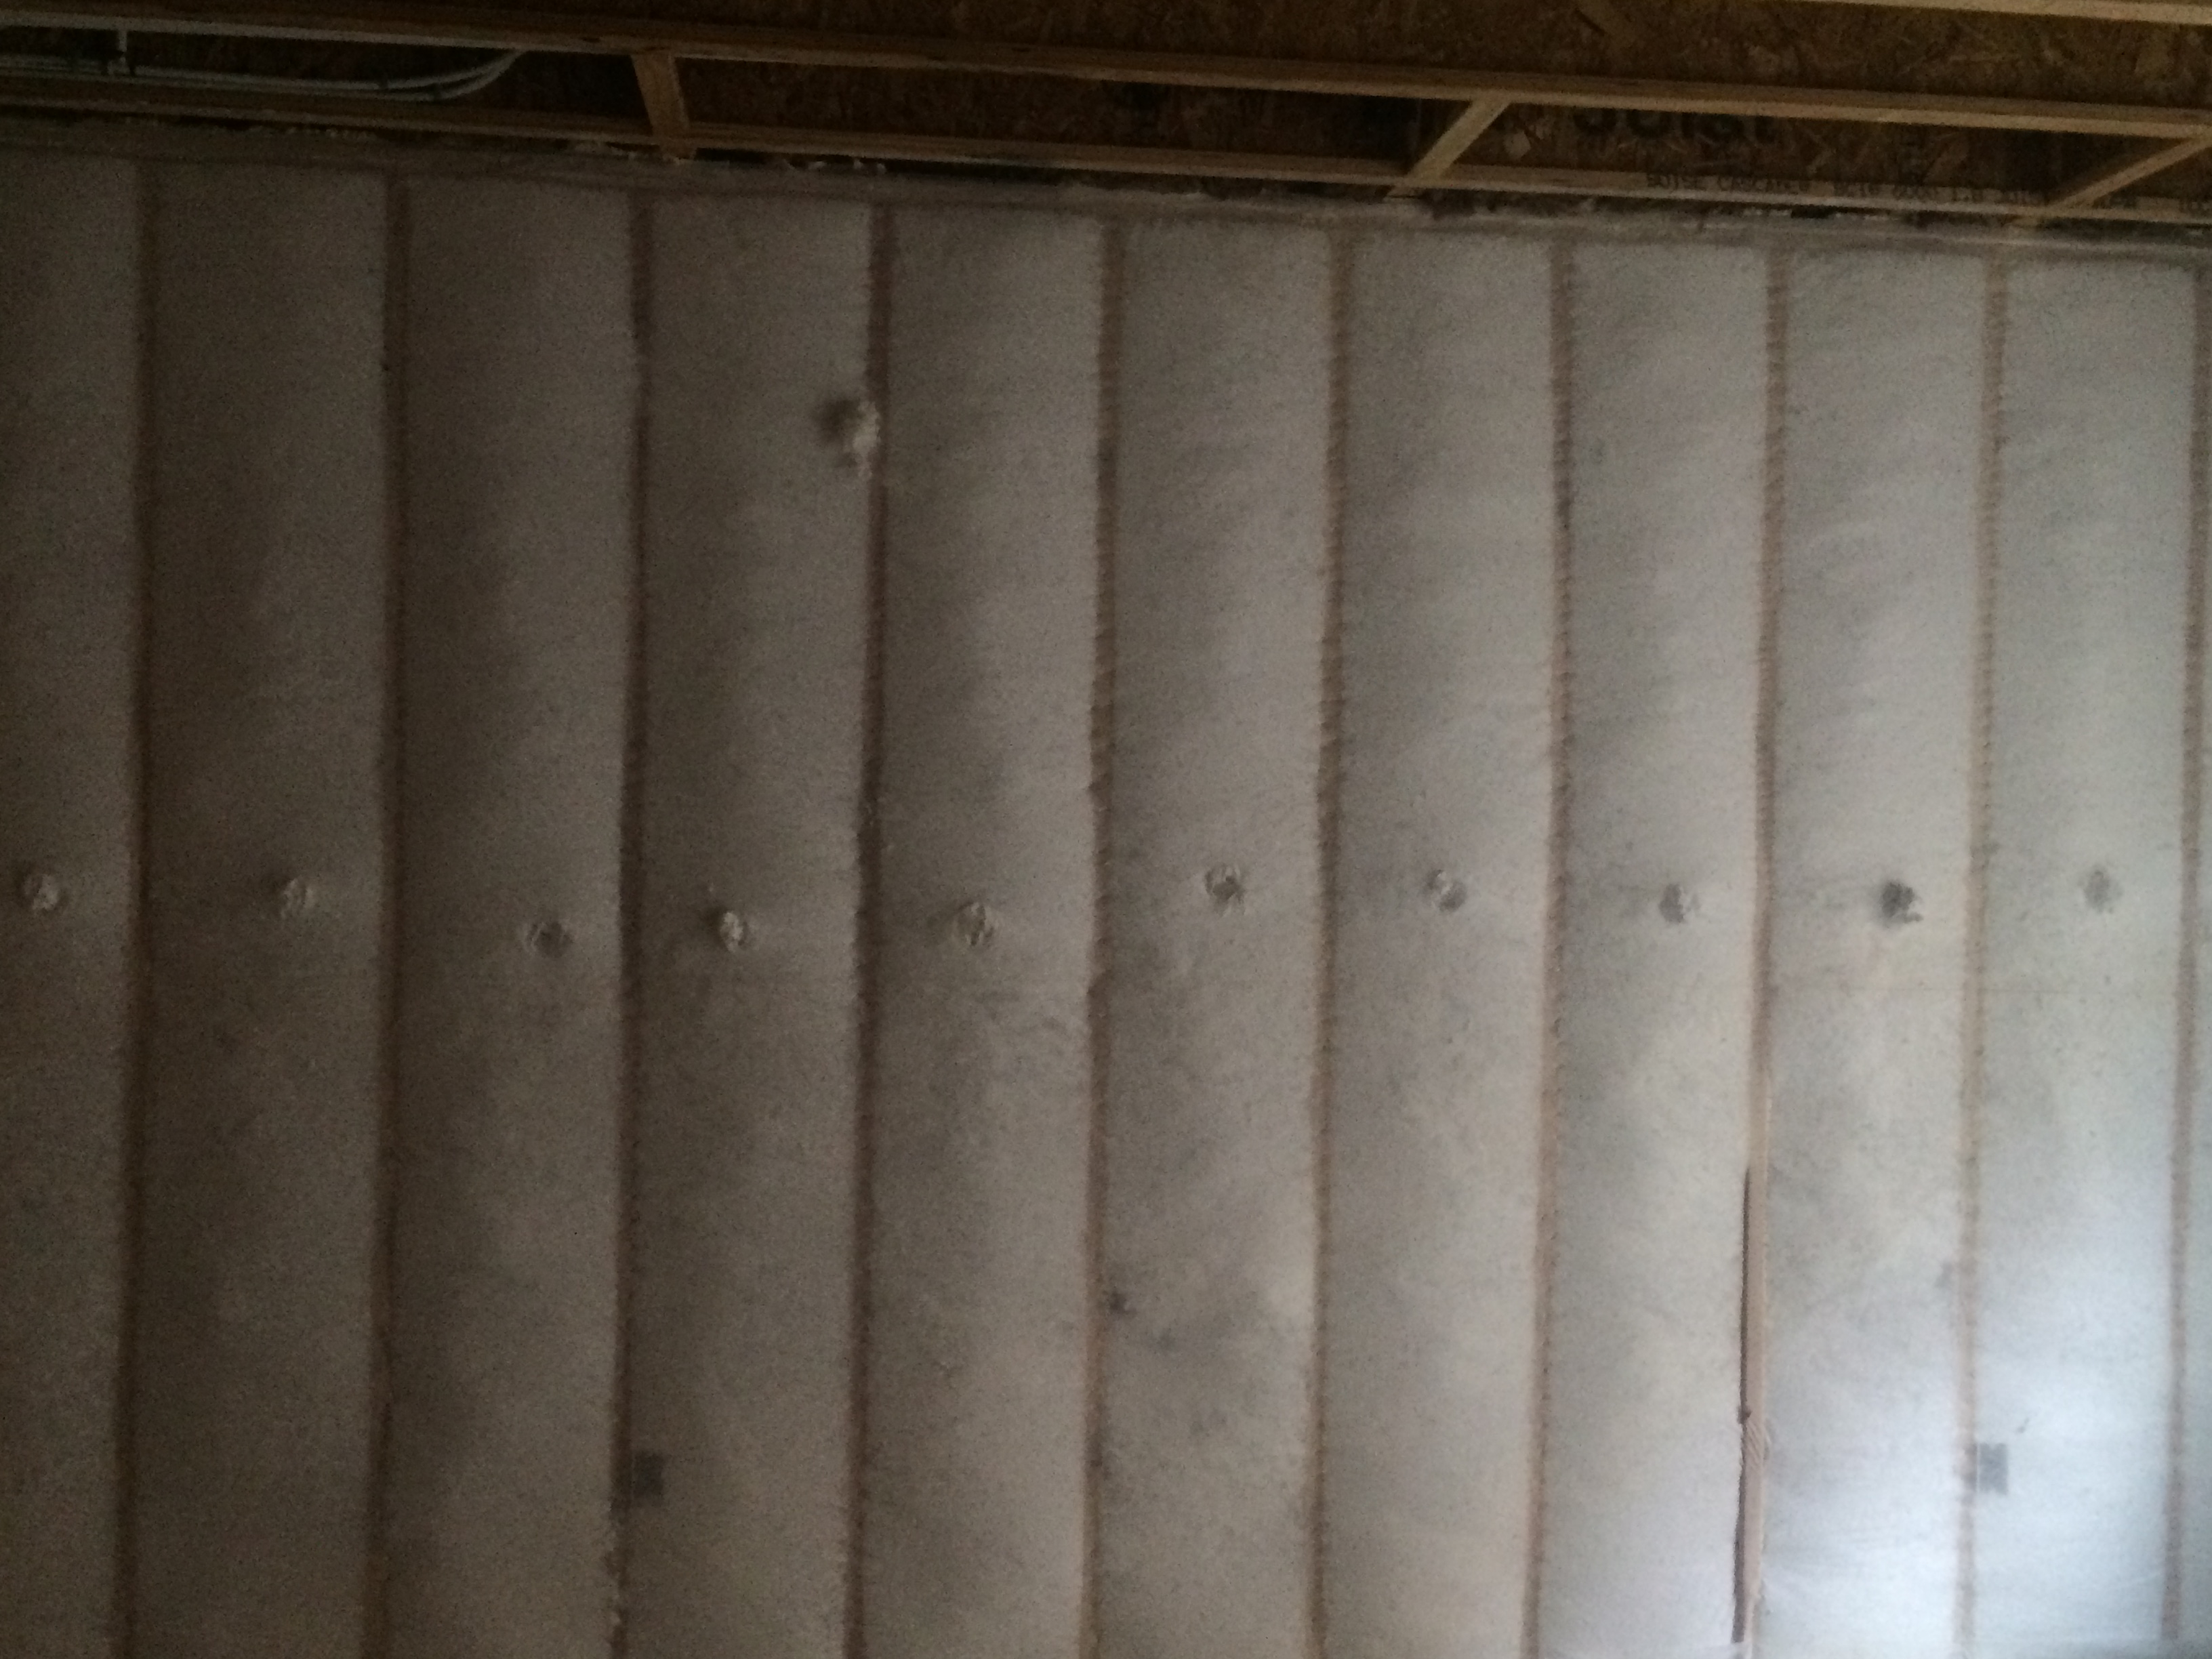
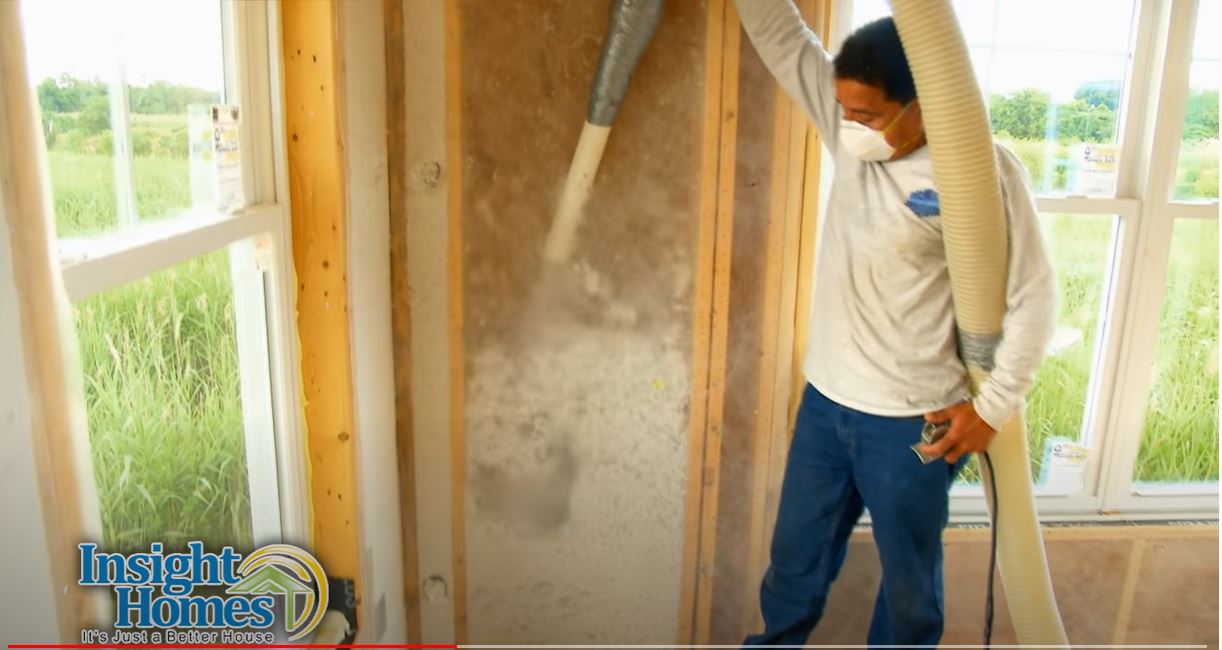
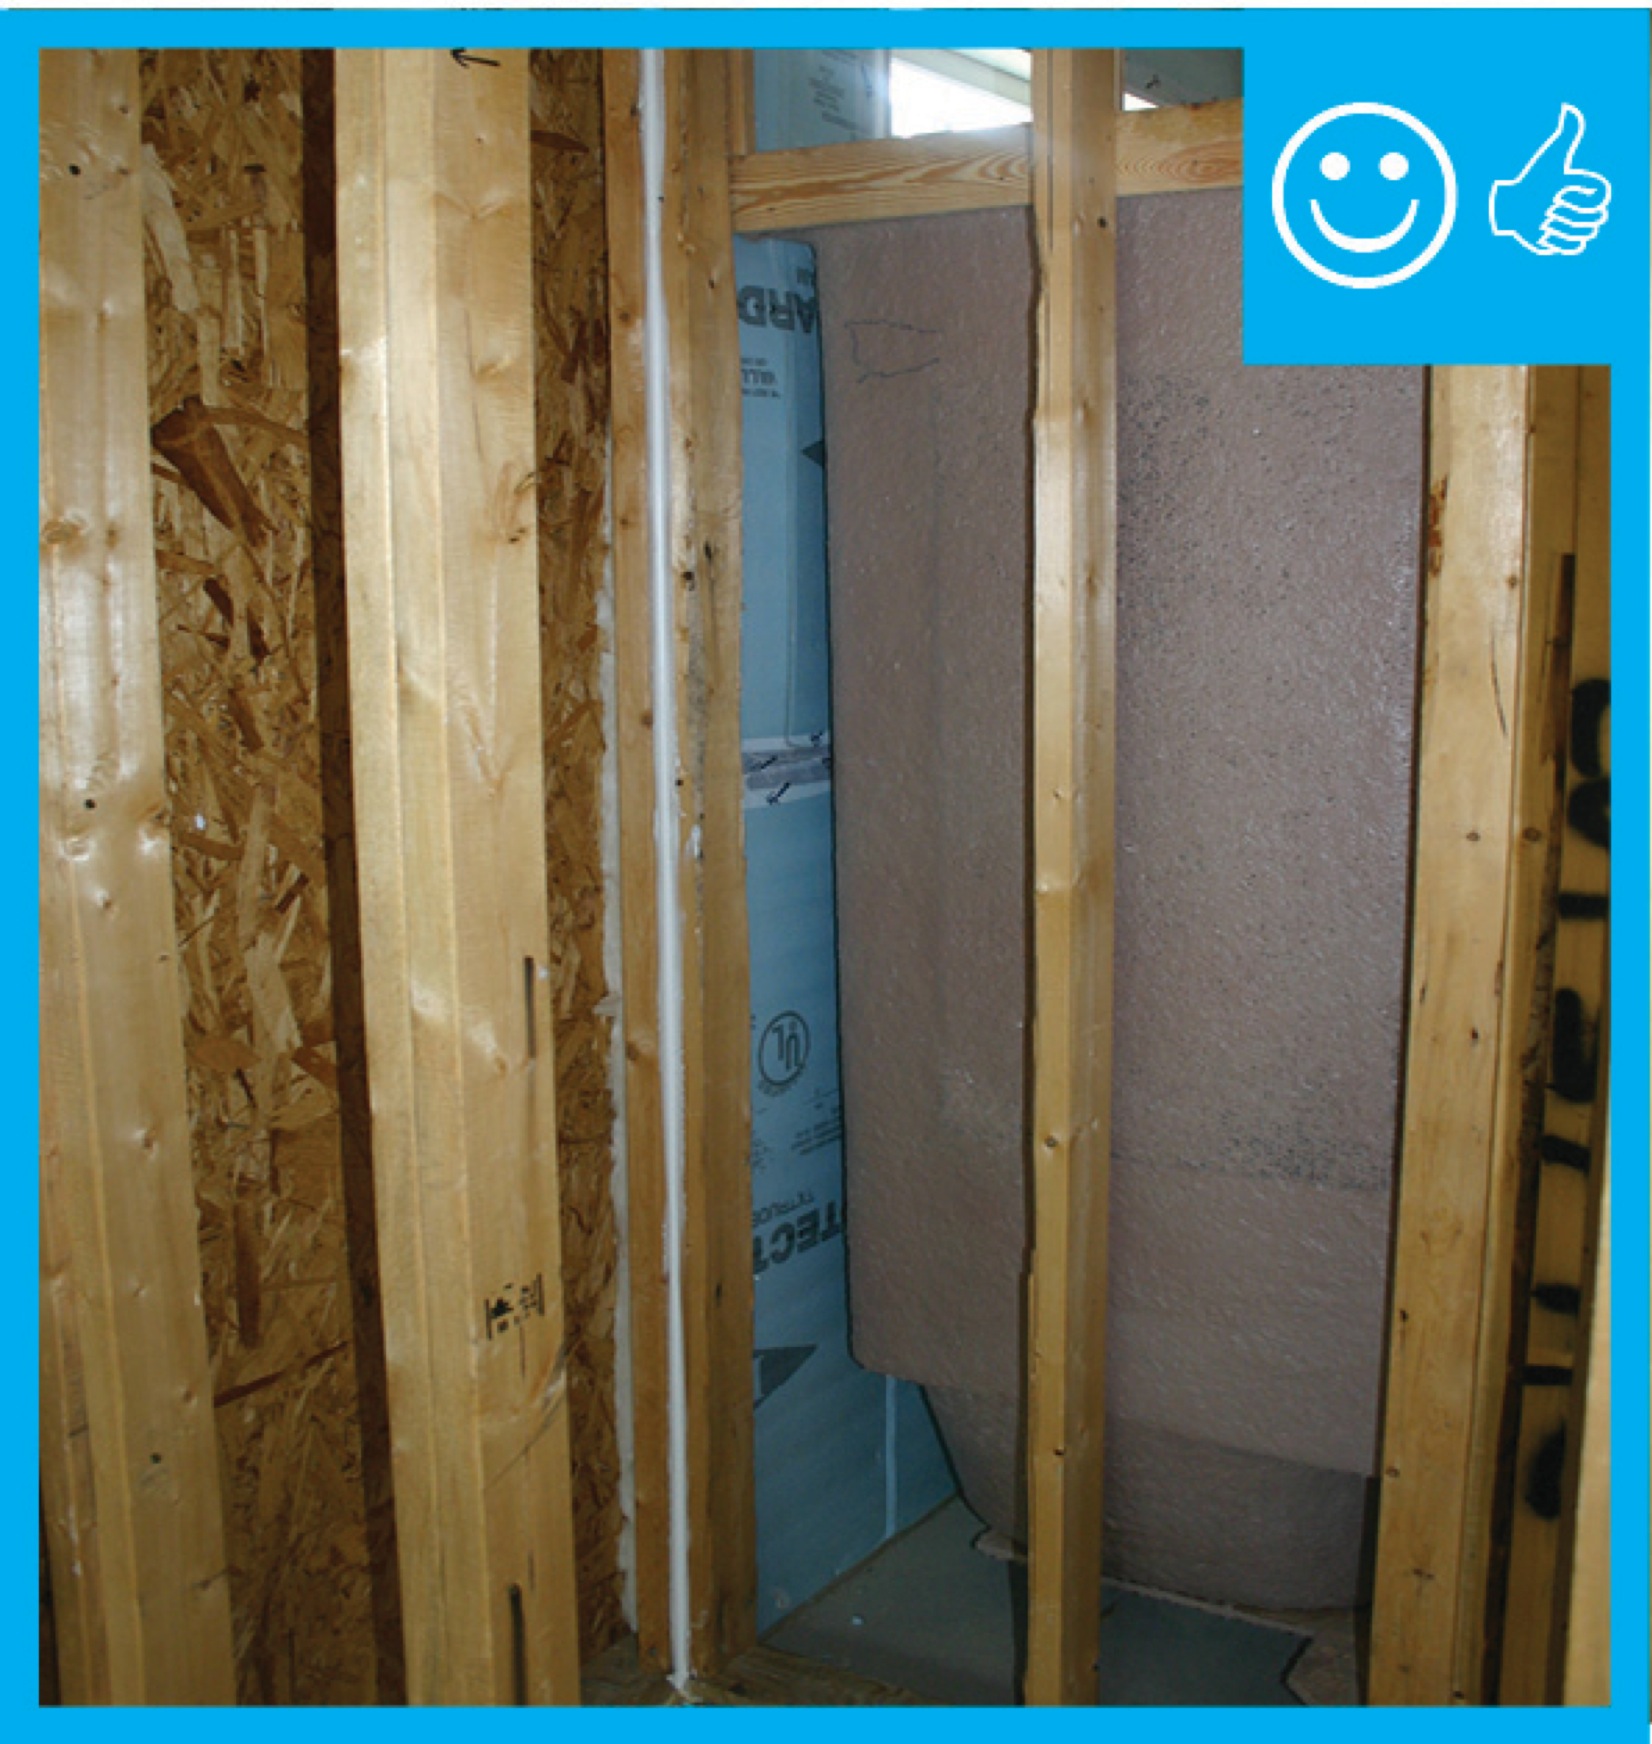
Right – Netted blown fiberglass insulation completely fills the wall cavities with no gaps or voids.
Image
Image
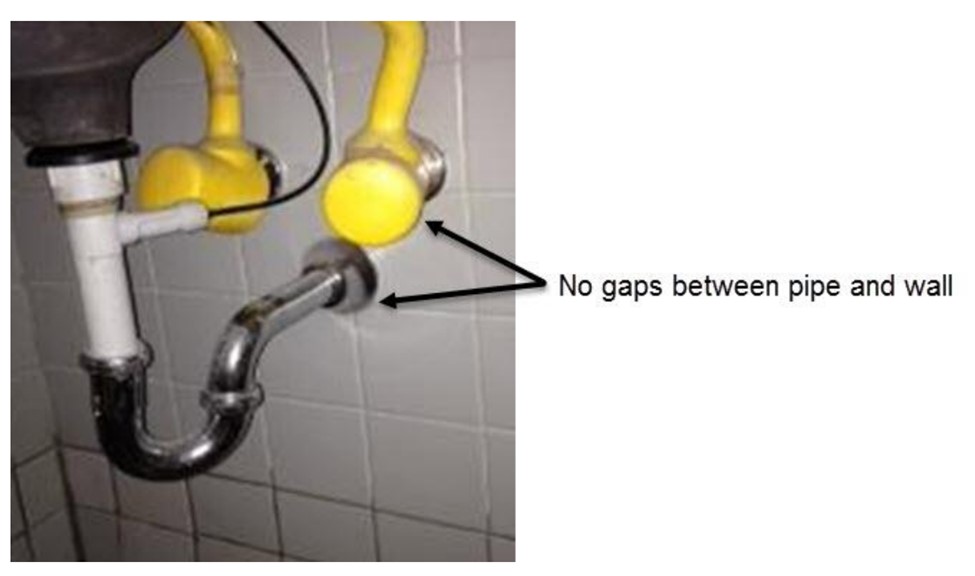
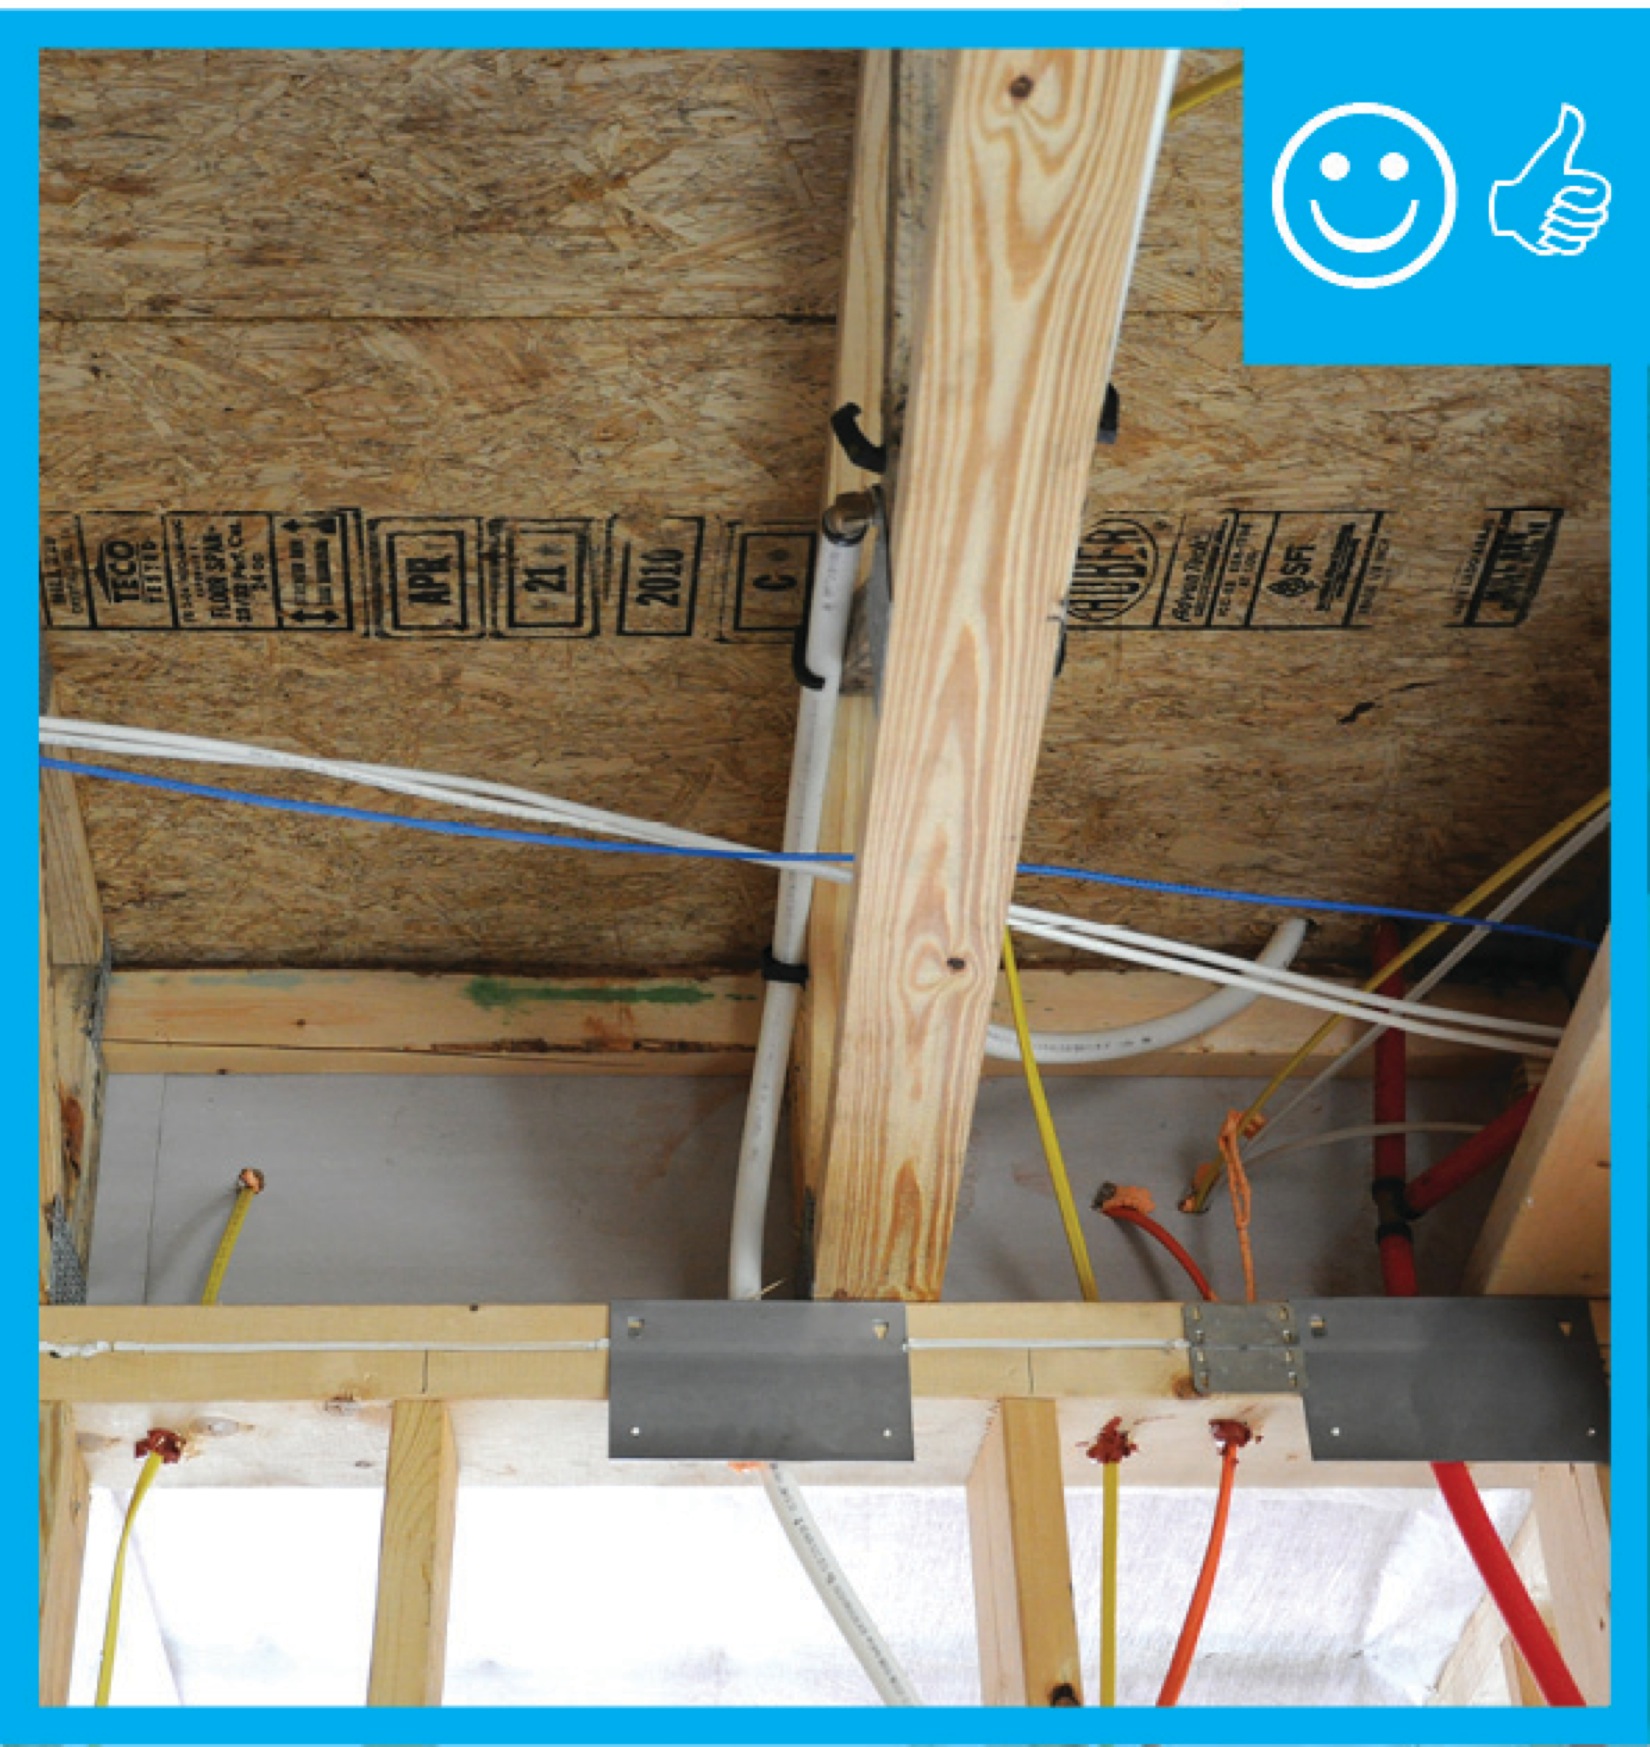
Right – Plumbing pipes have flanges that are sealed to the wall with caulk to prevent pest entry
Image
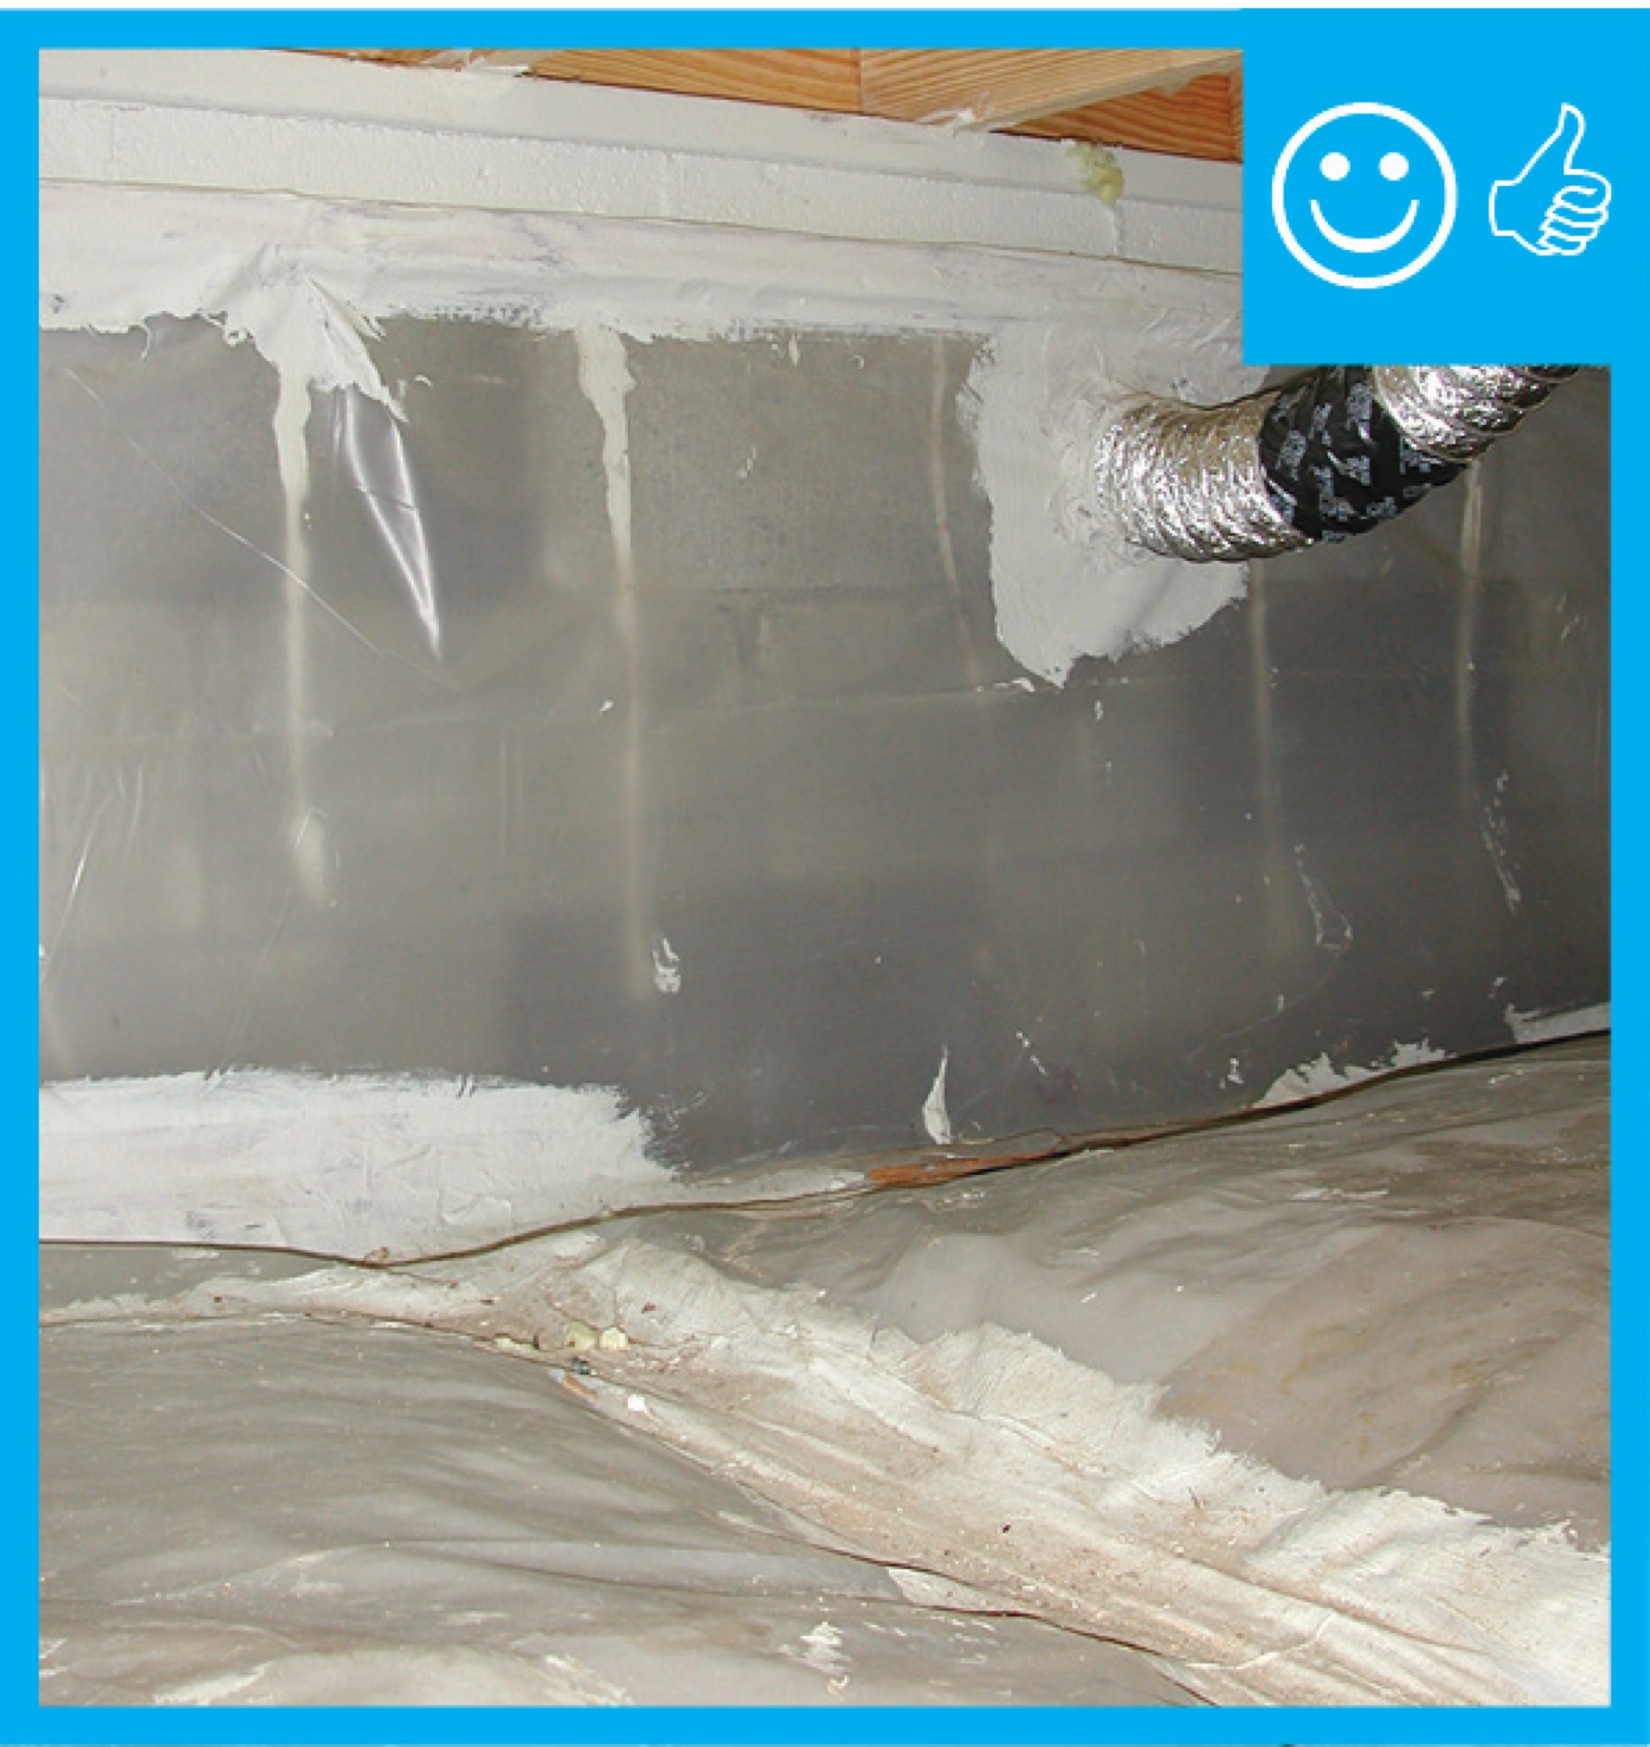
Right – Polyethylene sheeting vapor barrier is installed and sealed to the crawlspace walls with mastic
Image
Image
Image
Image

Image

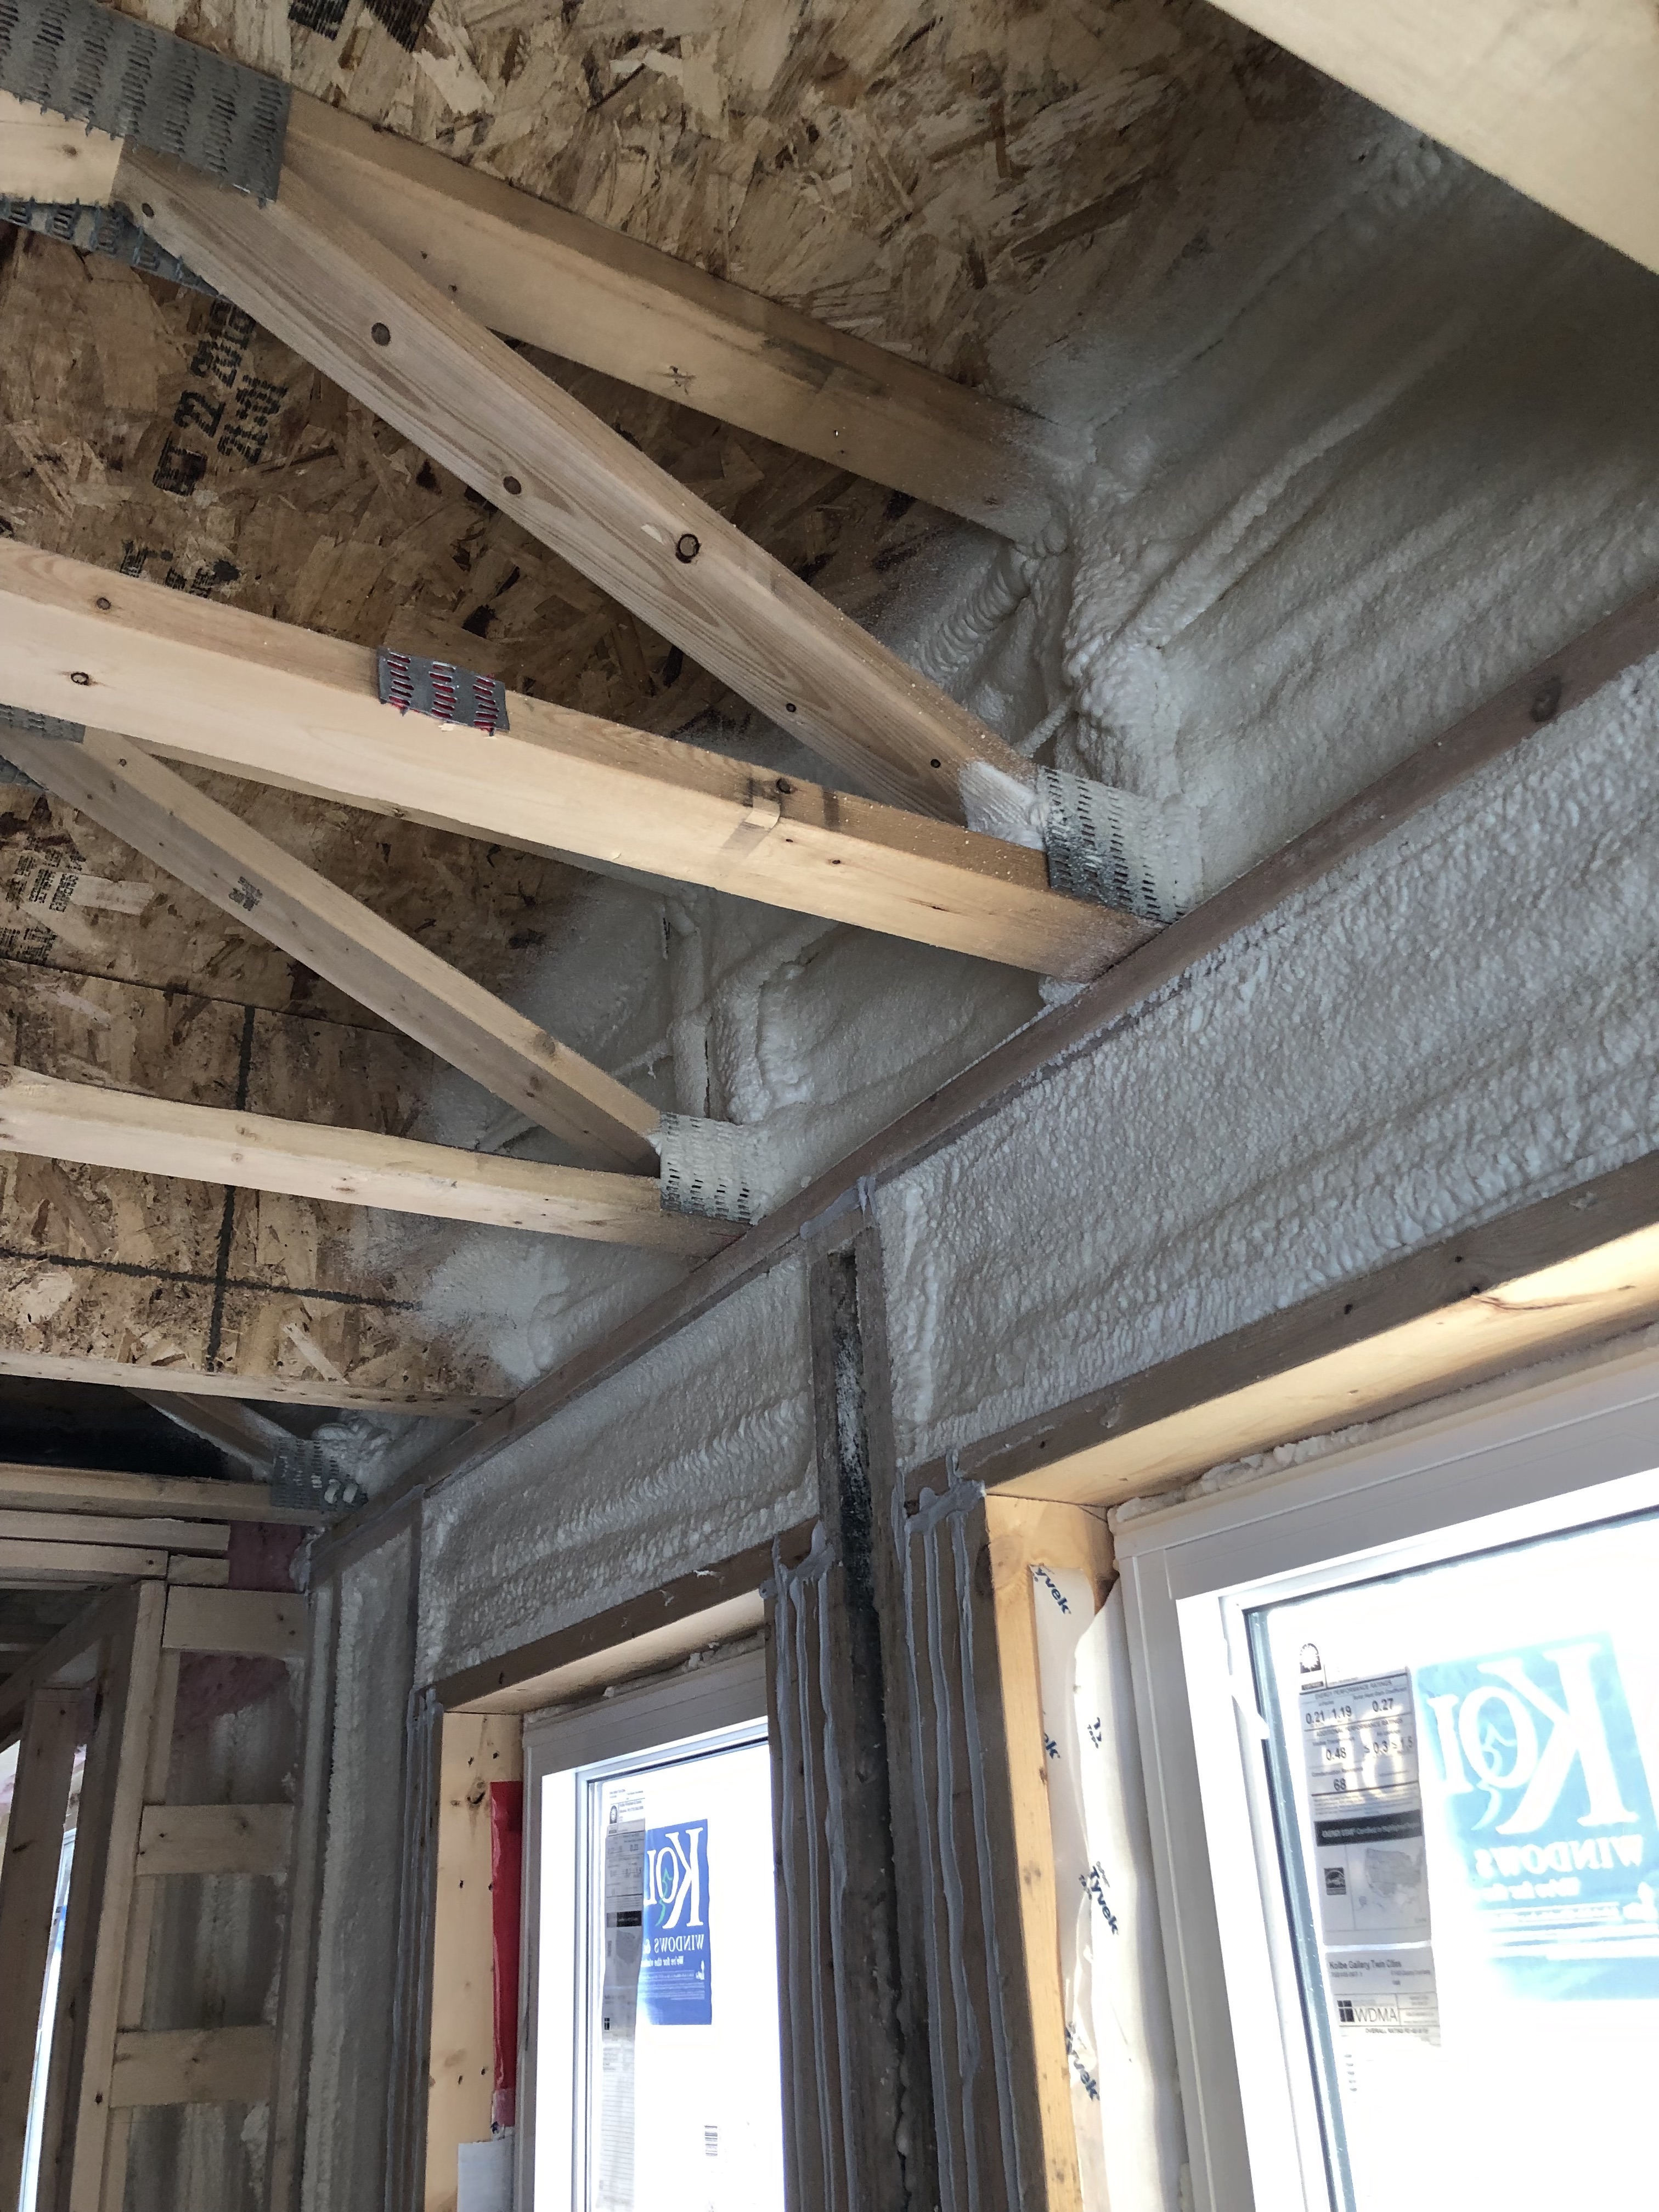
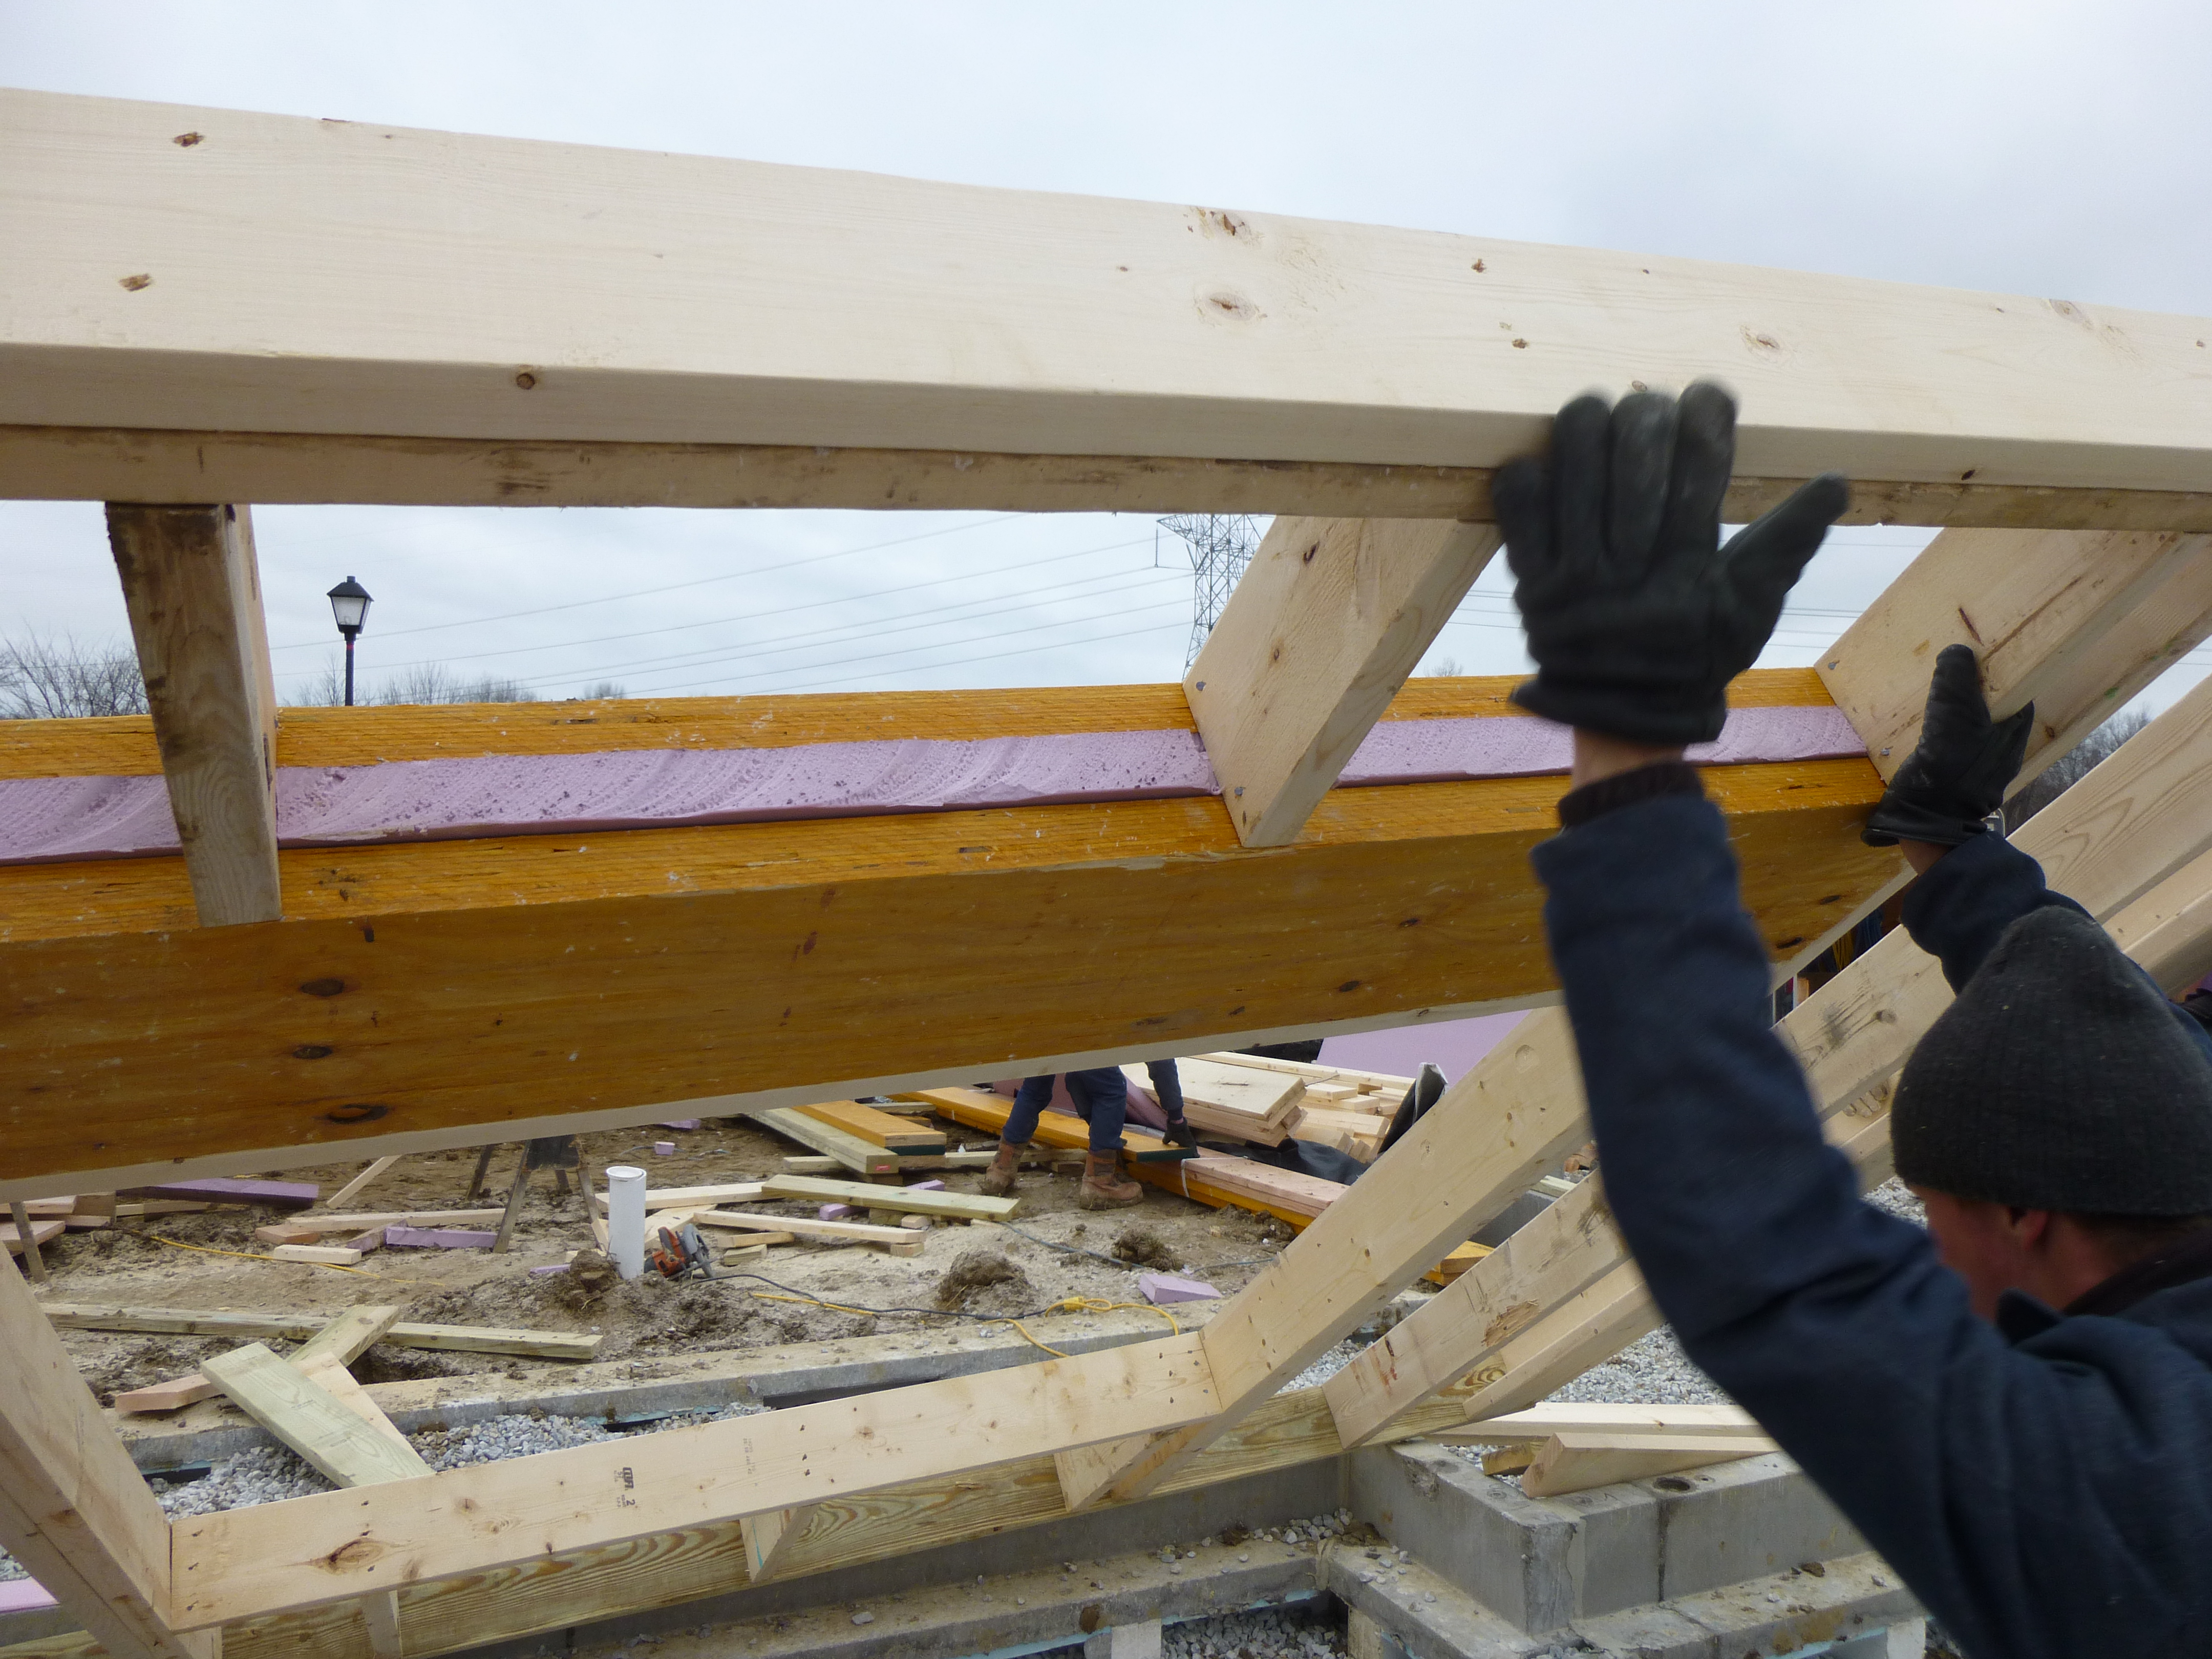
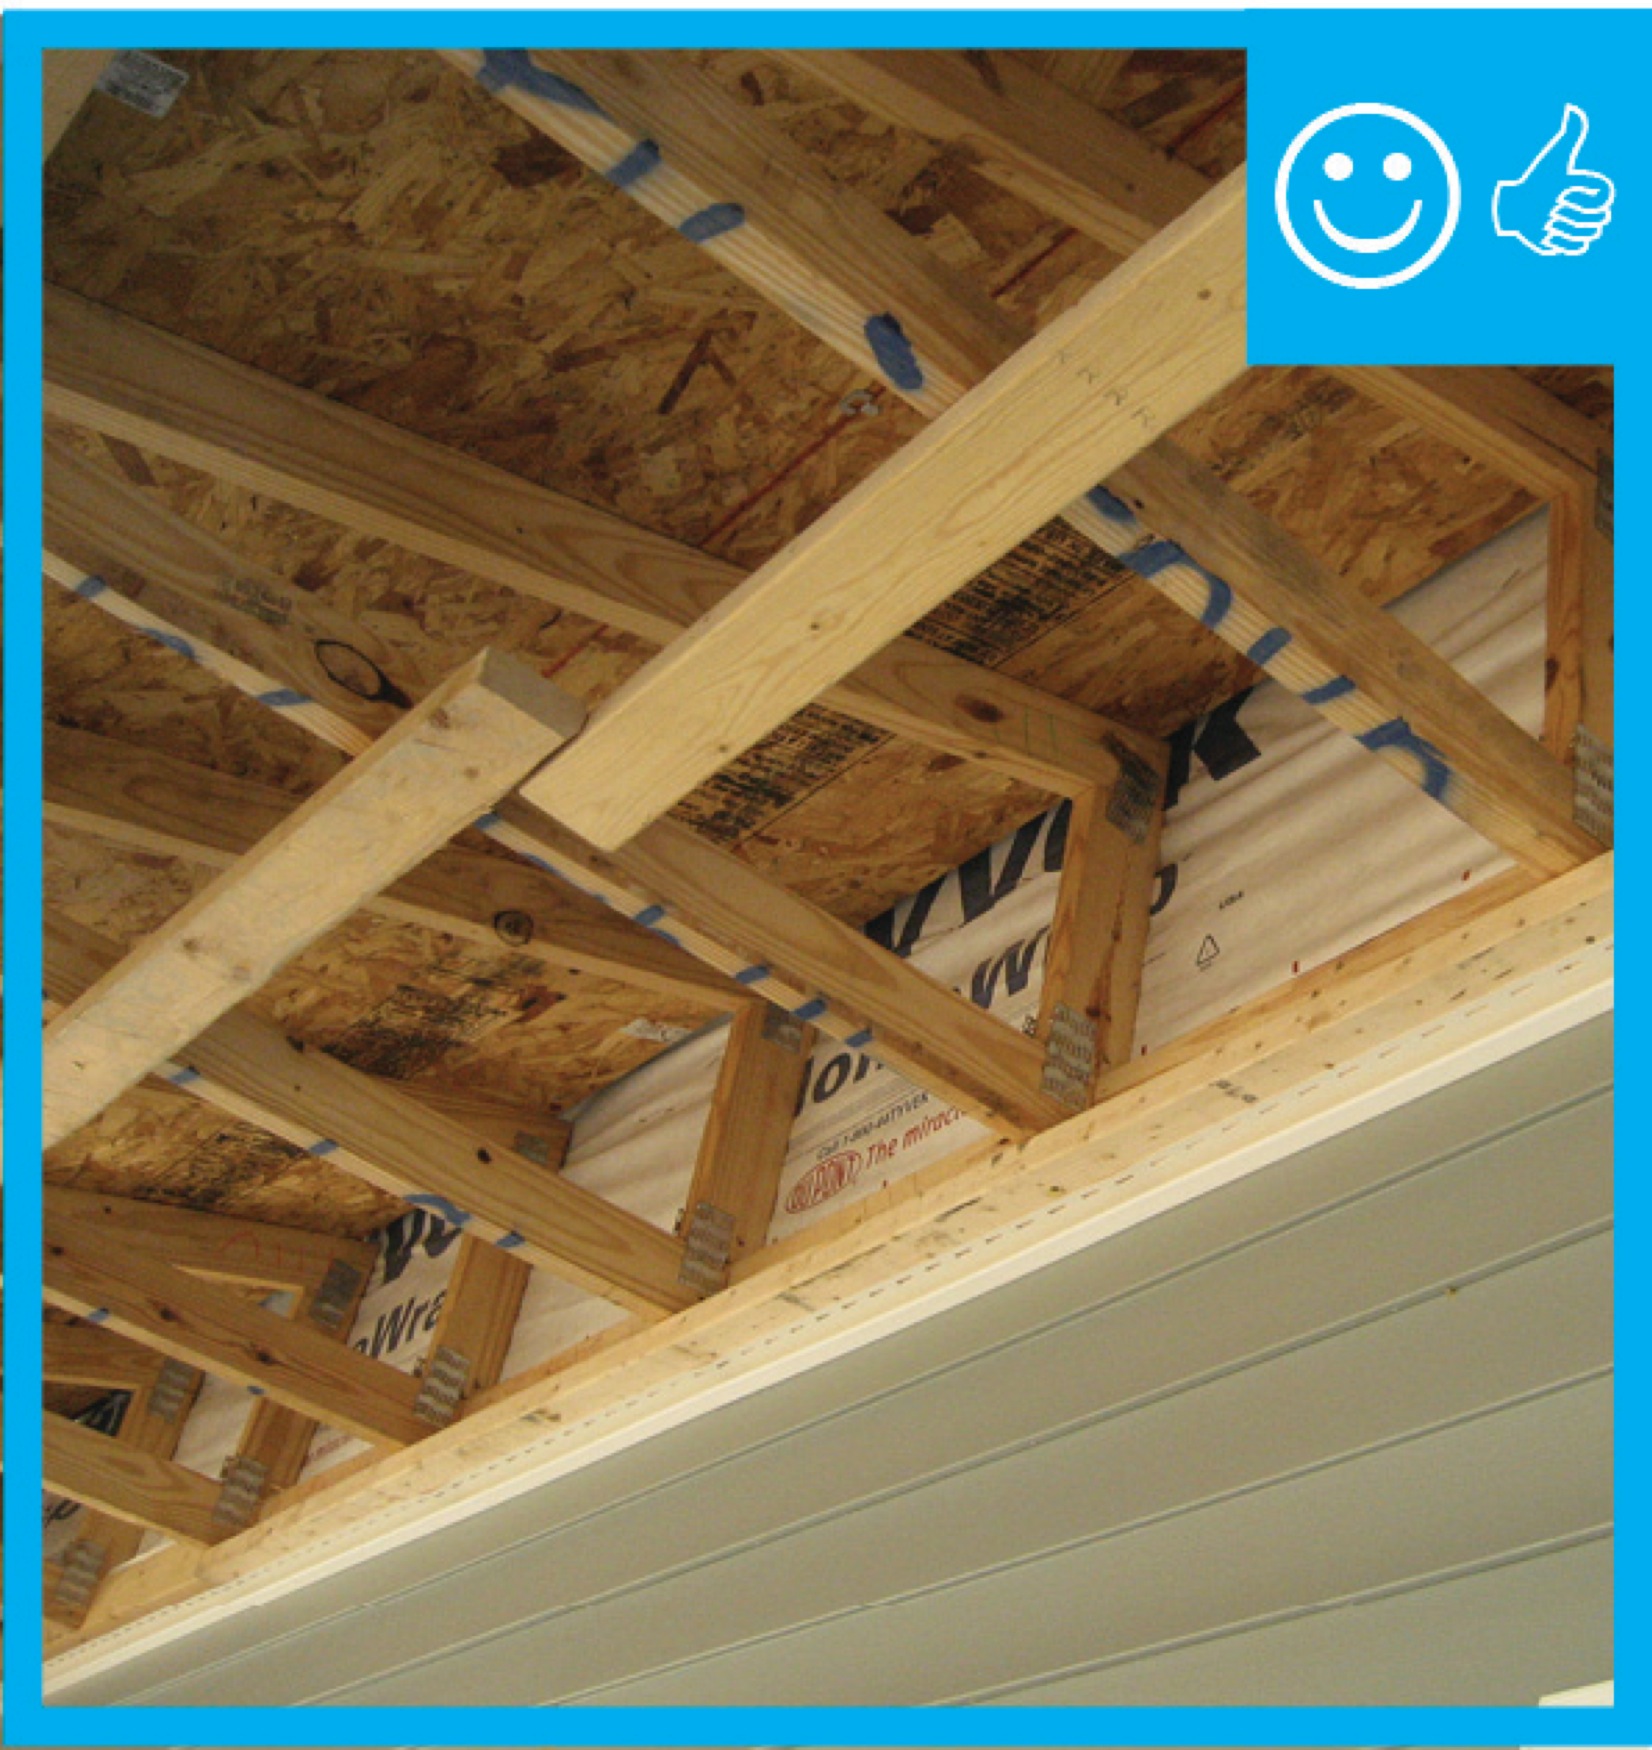
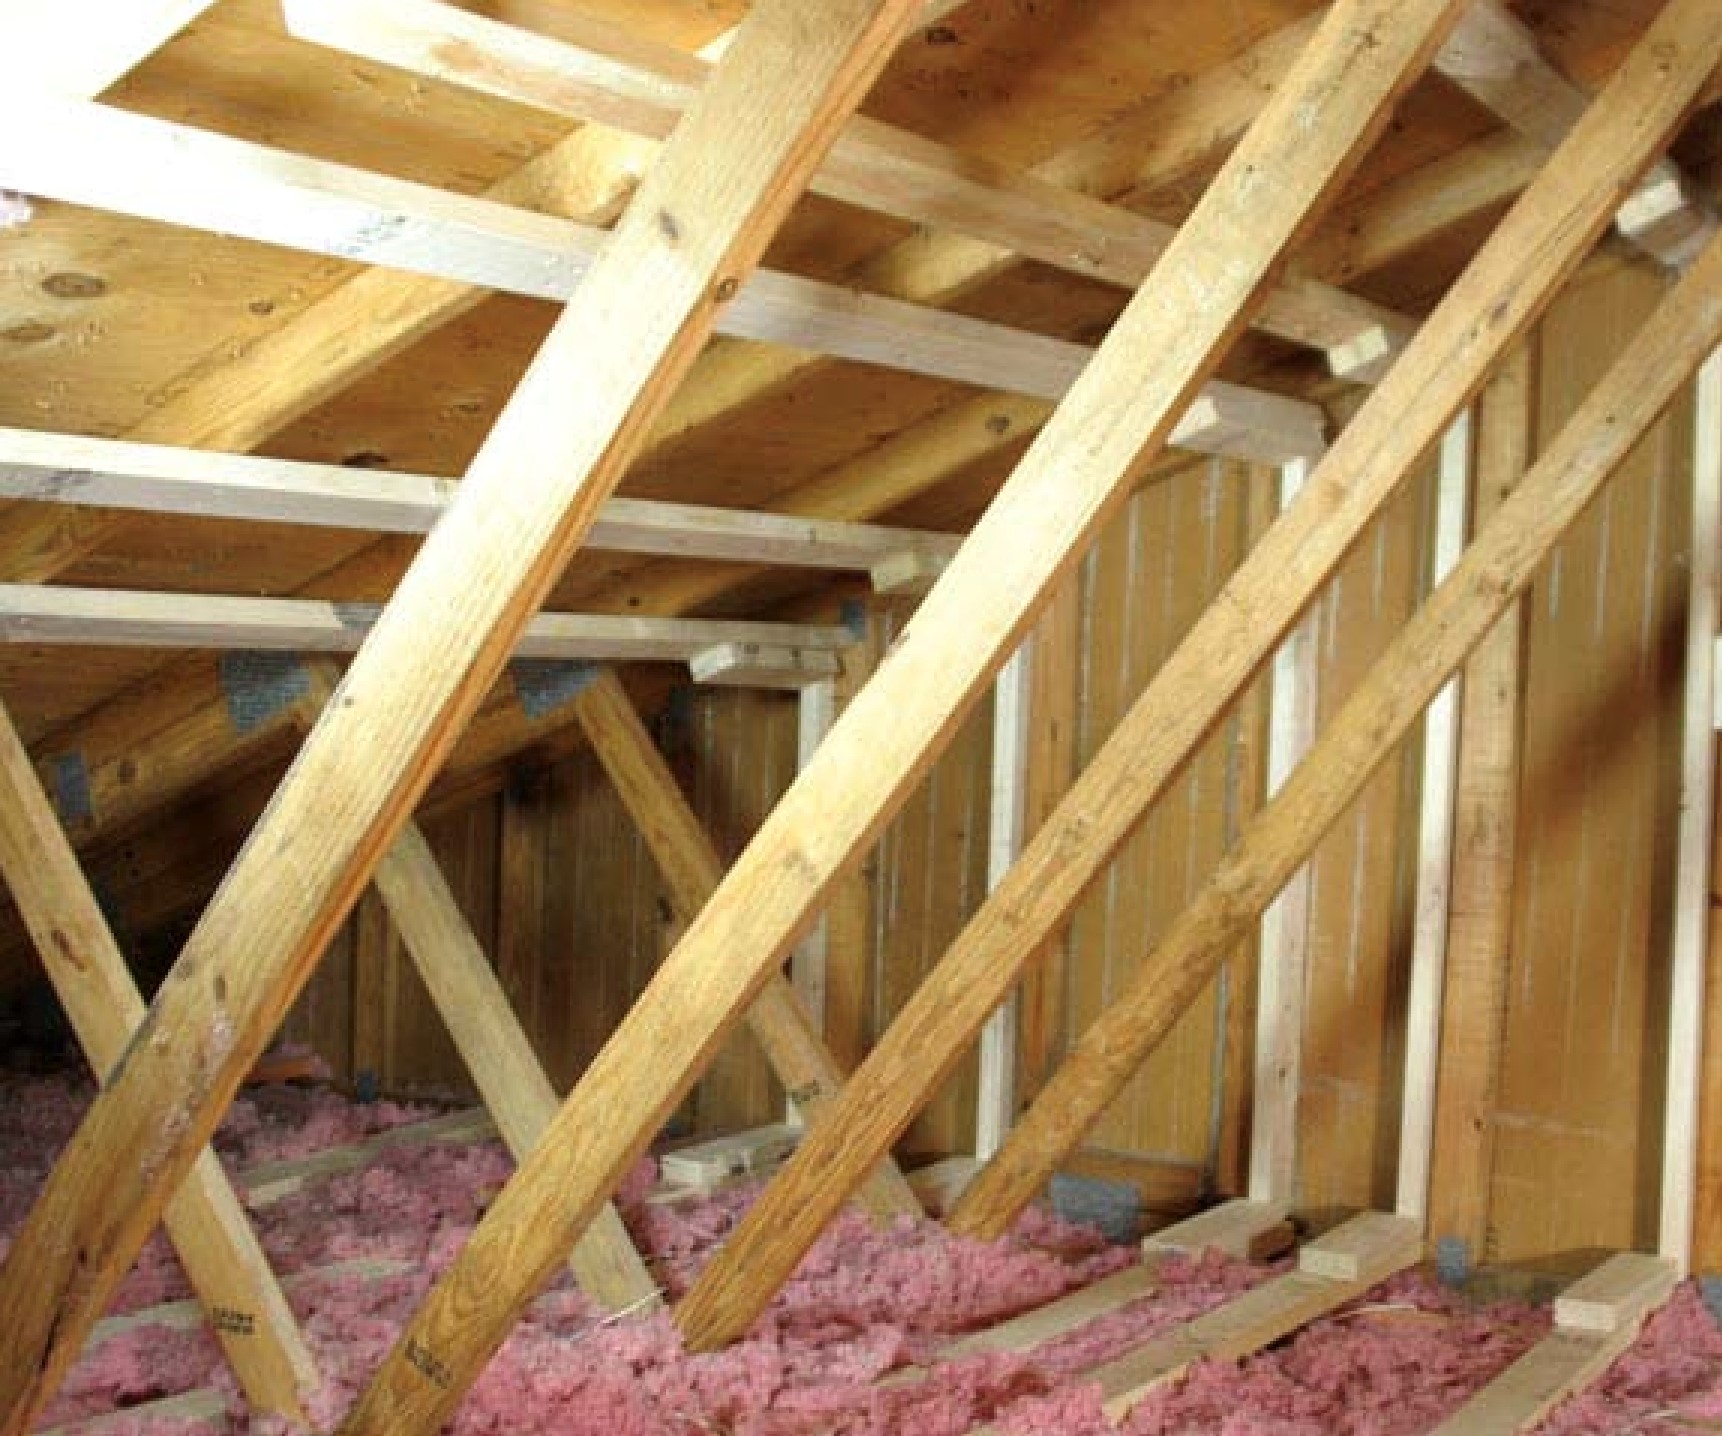
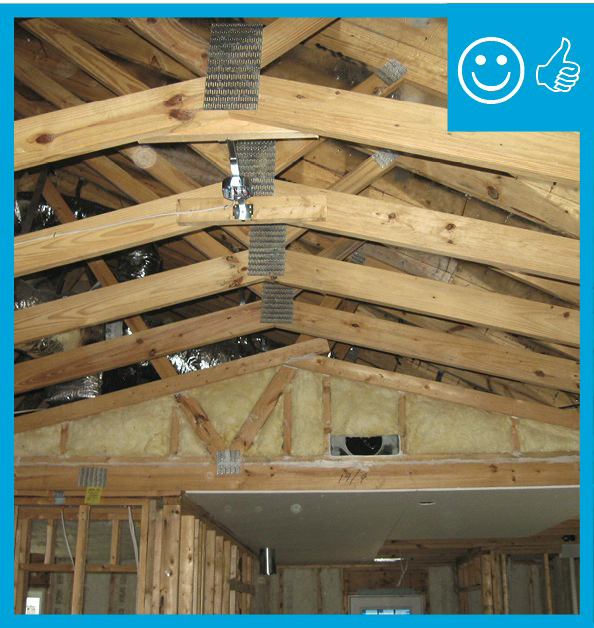
Right – Raised heel trusses allow for full-height insulation over exterior wall top plates.
Image
Right – Rigid air barrier installed between double-wall assembly. Inside cavity will be insulated
Image
Image
Image
Image

Image

Right – Sheathing, rigid foam, and windows are installed in the factory for these factory-constructed wall panels.
Image
Image
Image
Right – SIP panels assemble quickly on site to provide sturdy walls and a roof that needs few interior supports so there is great flexibility in the layout of interior spaces.
Image
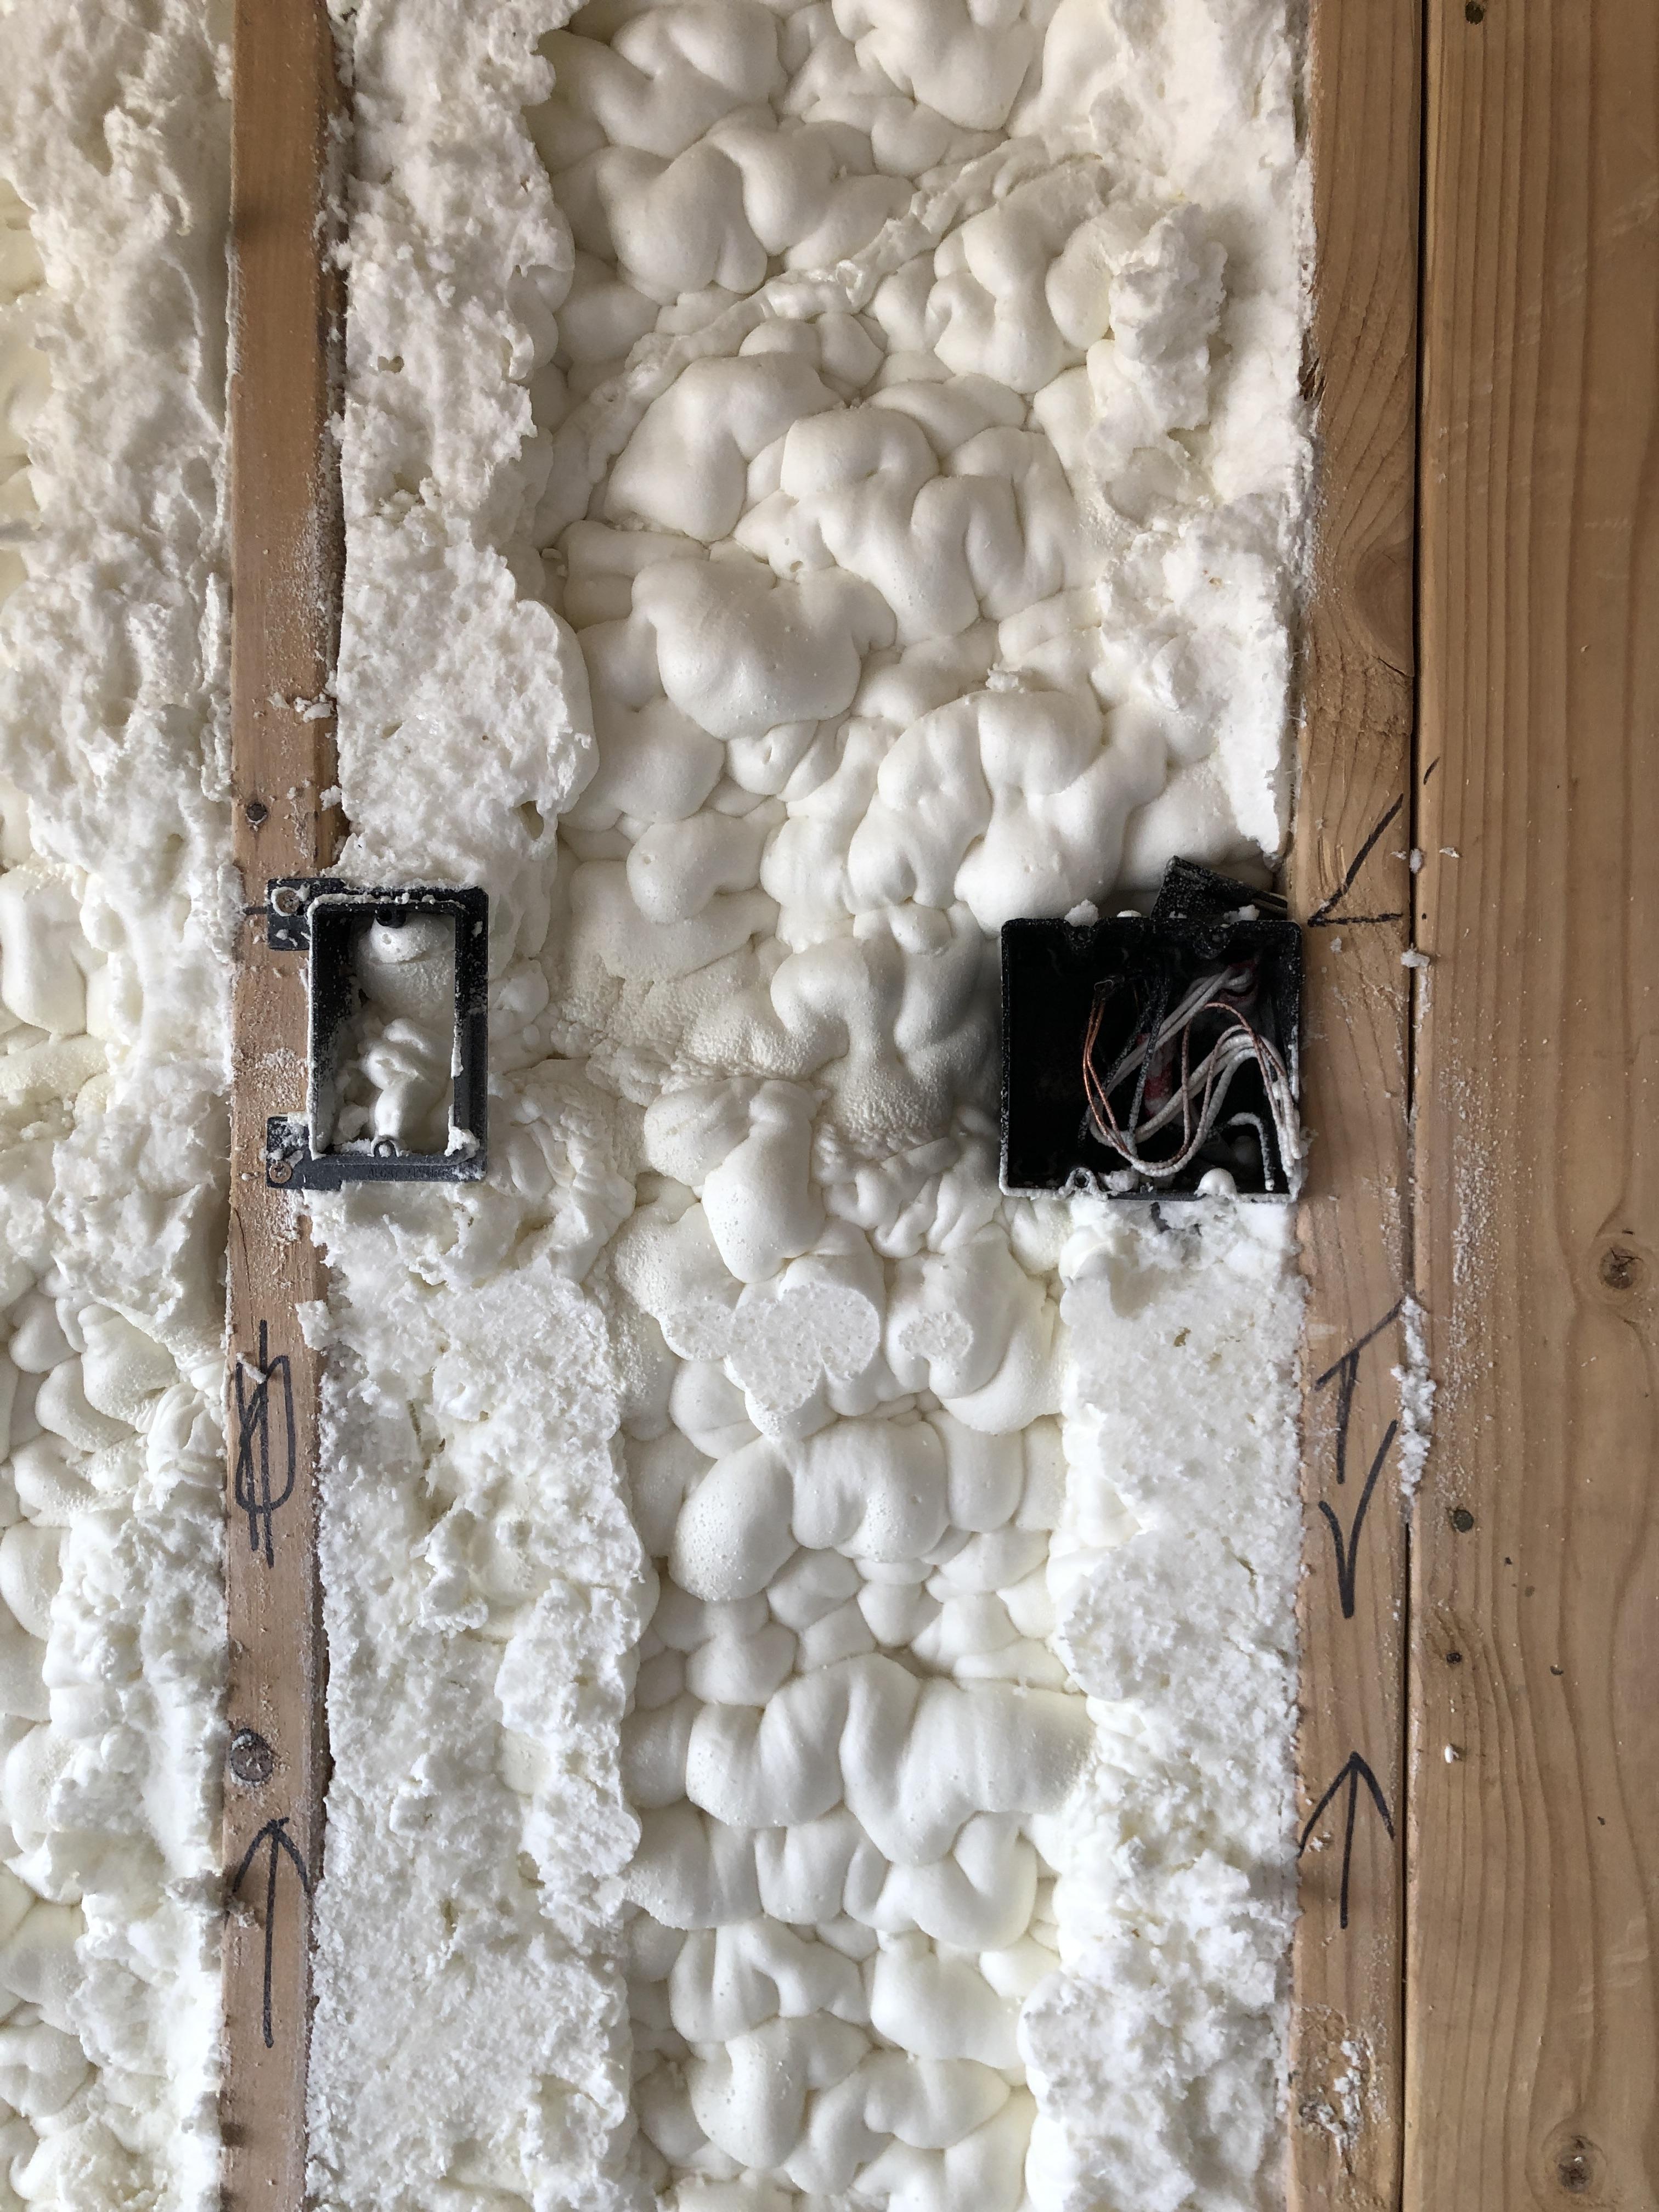
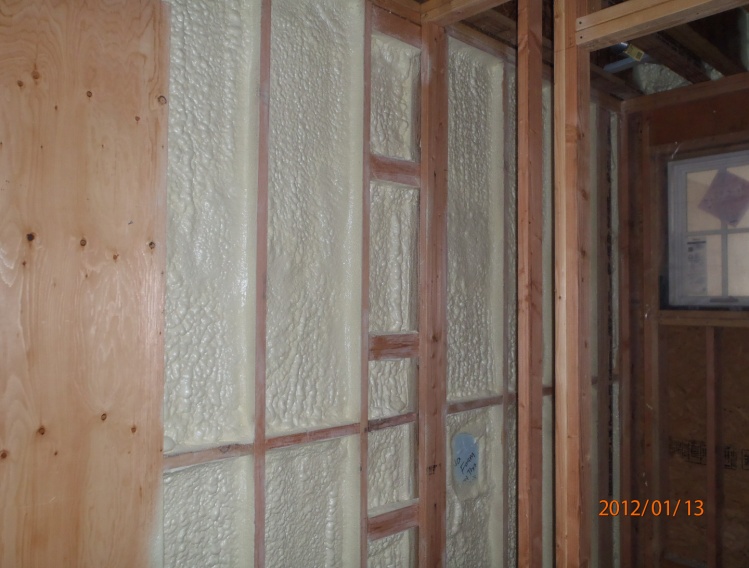
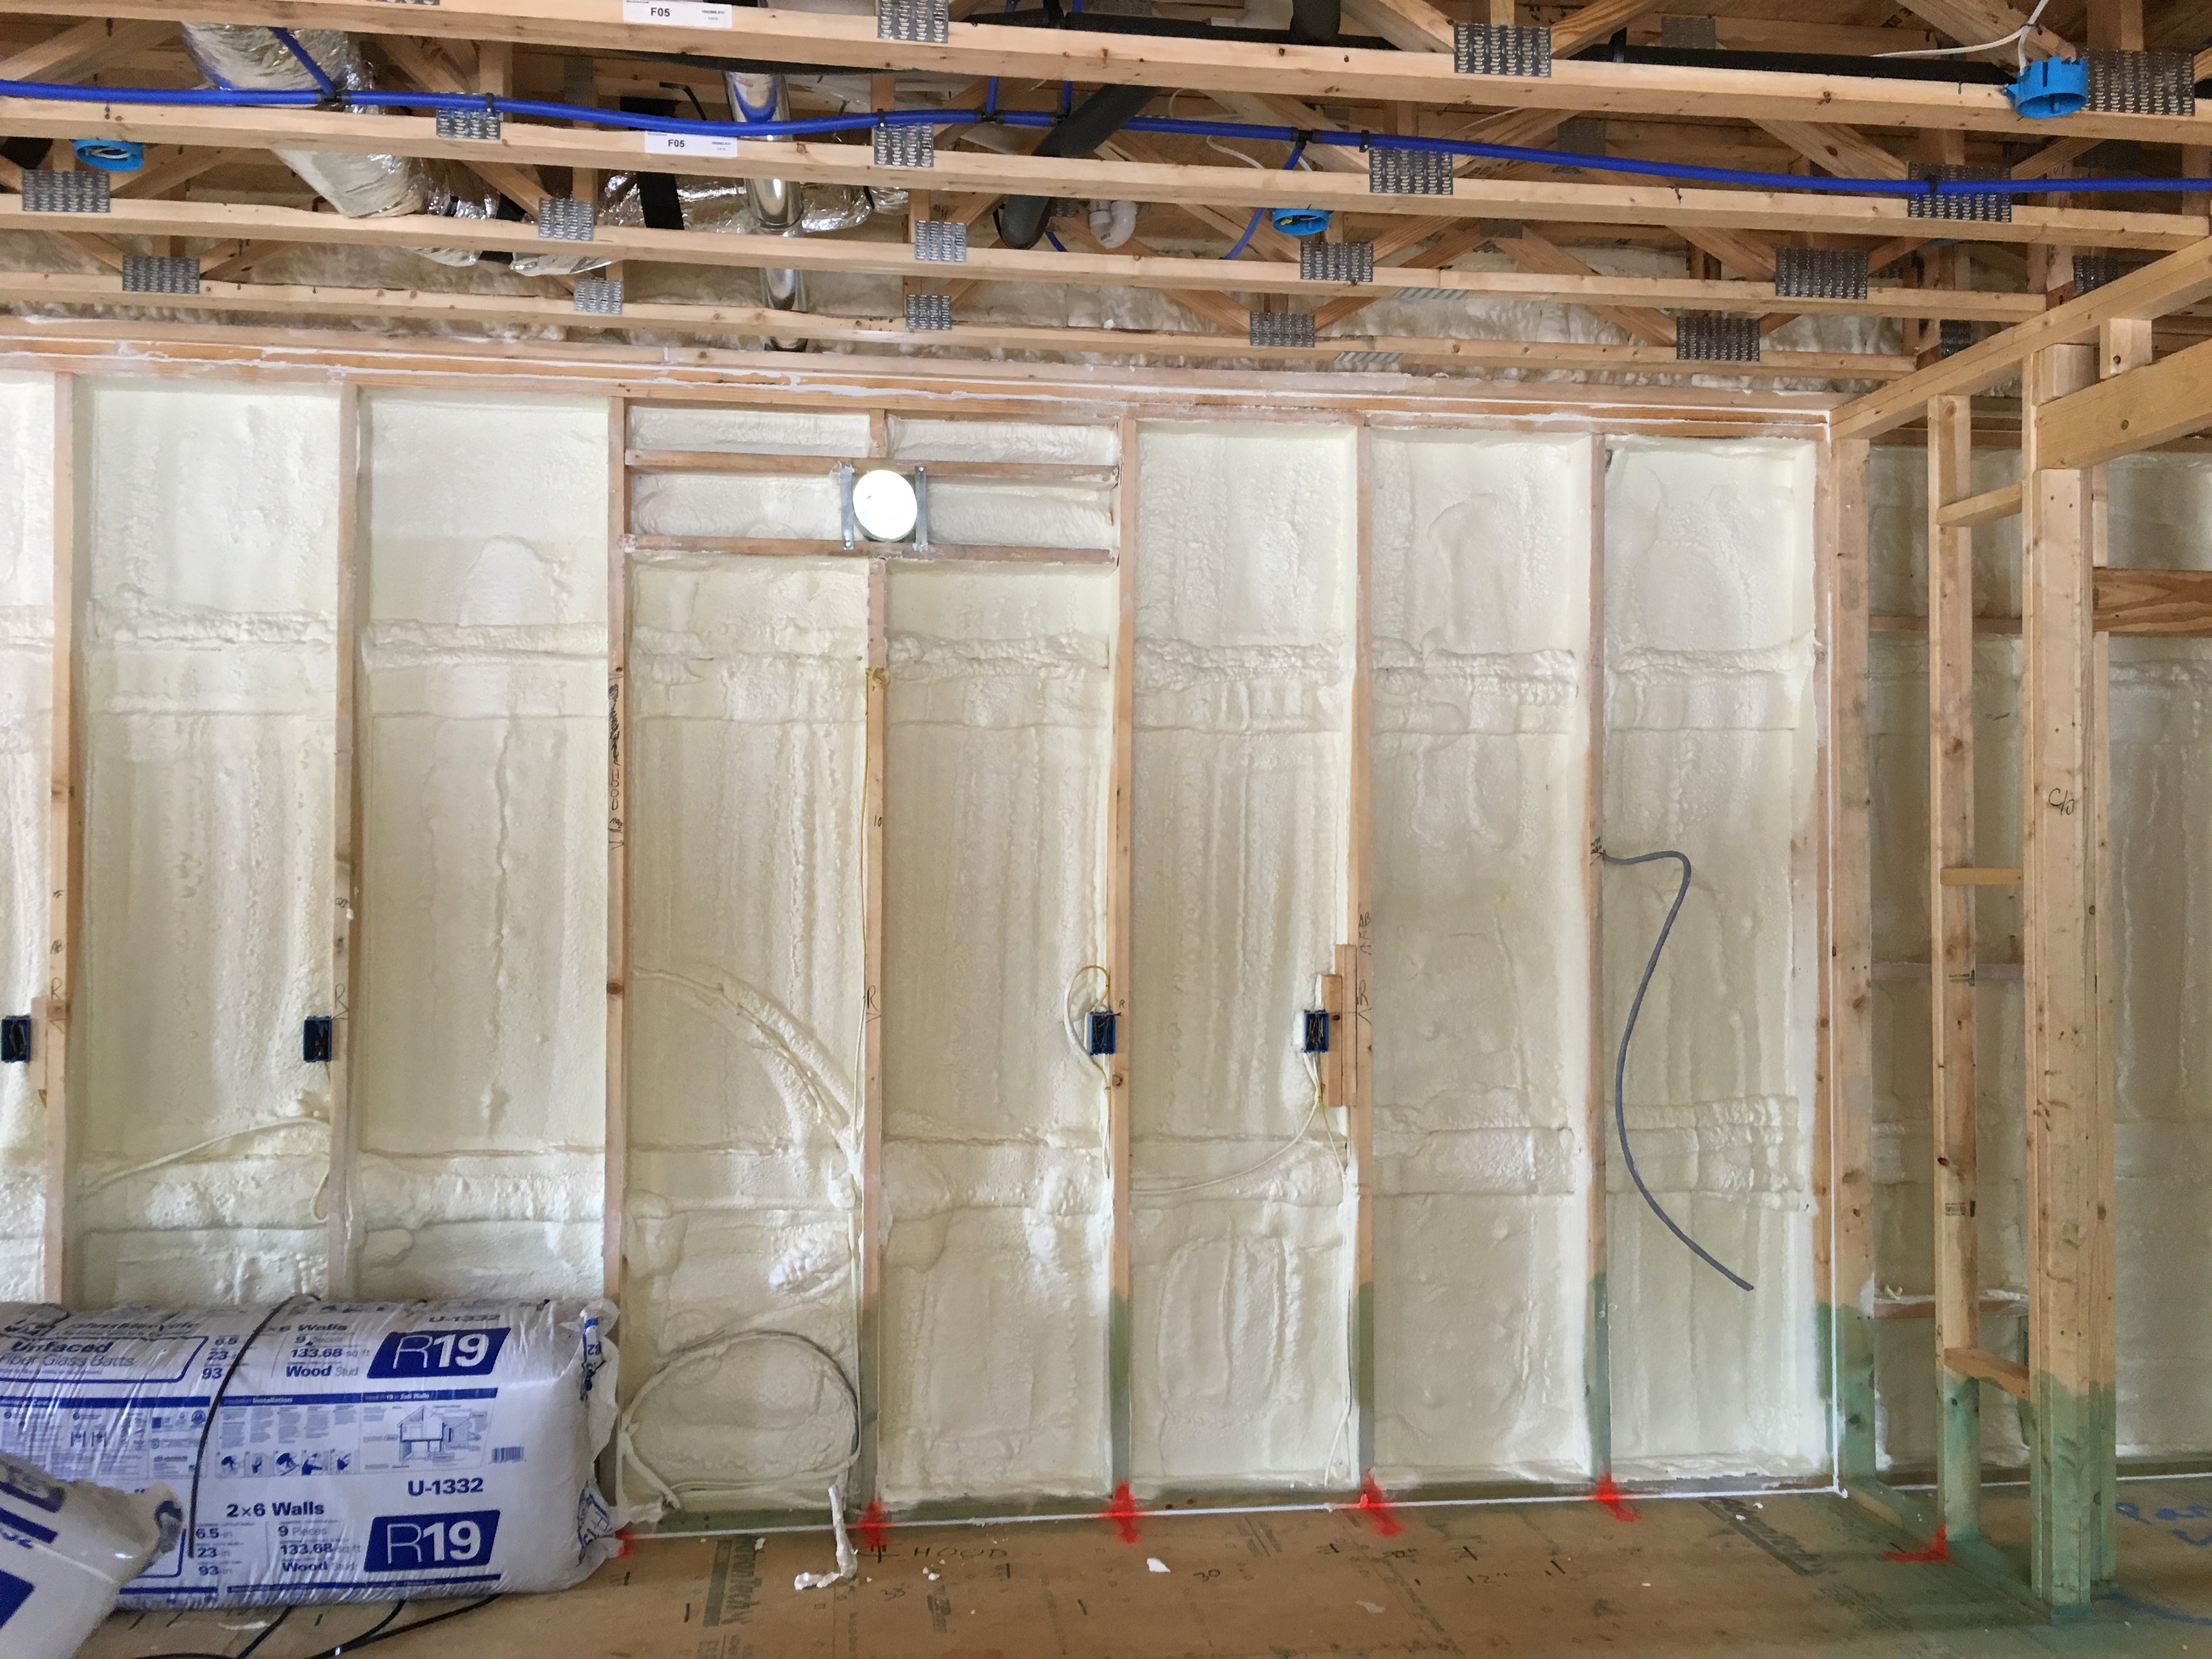
Right – Spray foam completely fills the wall cavities, providing a thorough layer of insulation behind electrical boxes.
Image
Right – Spray foam insulates the walls and ceilings separating the garage from the home.
Image
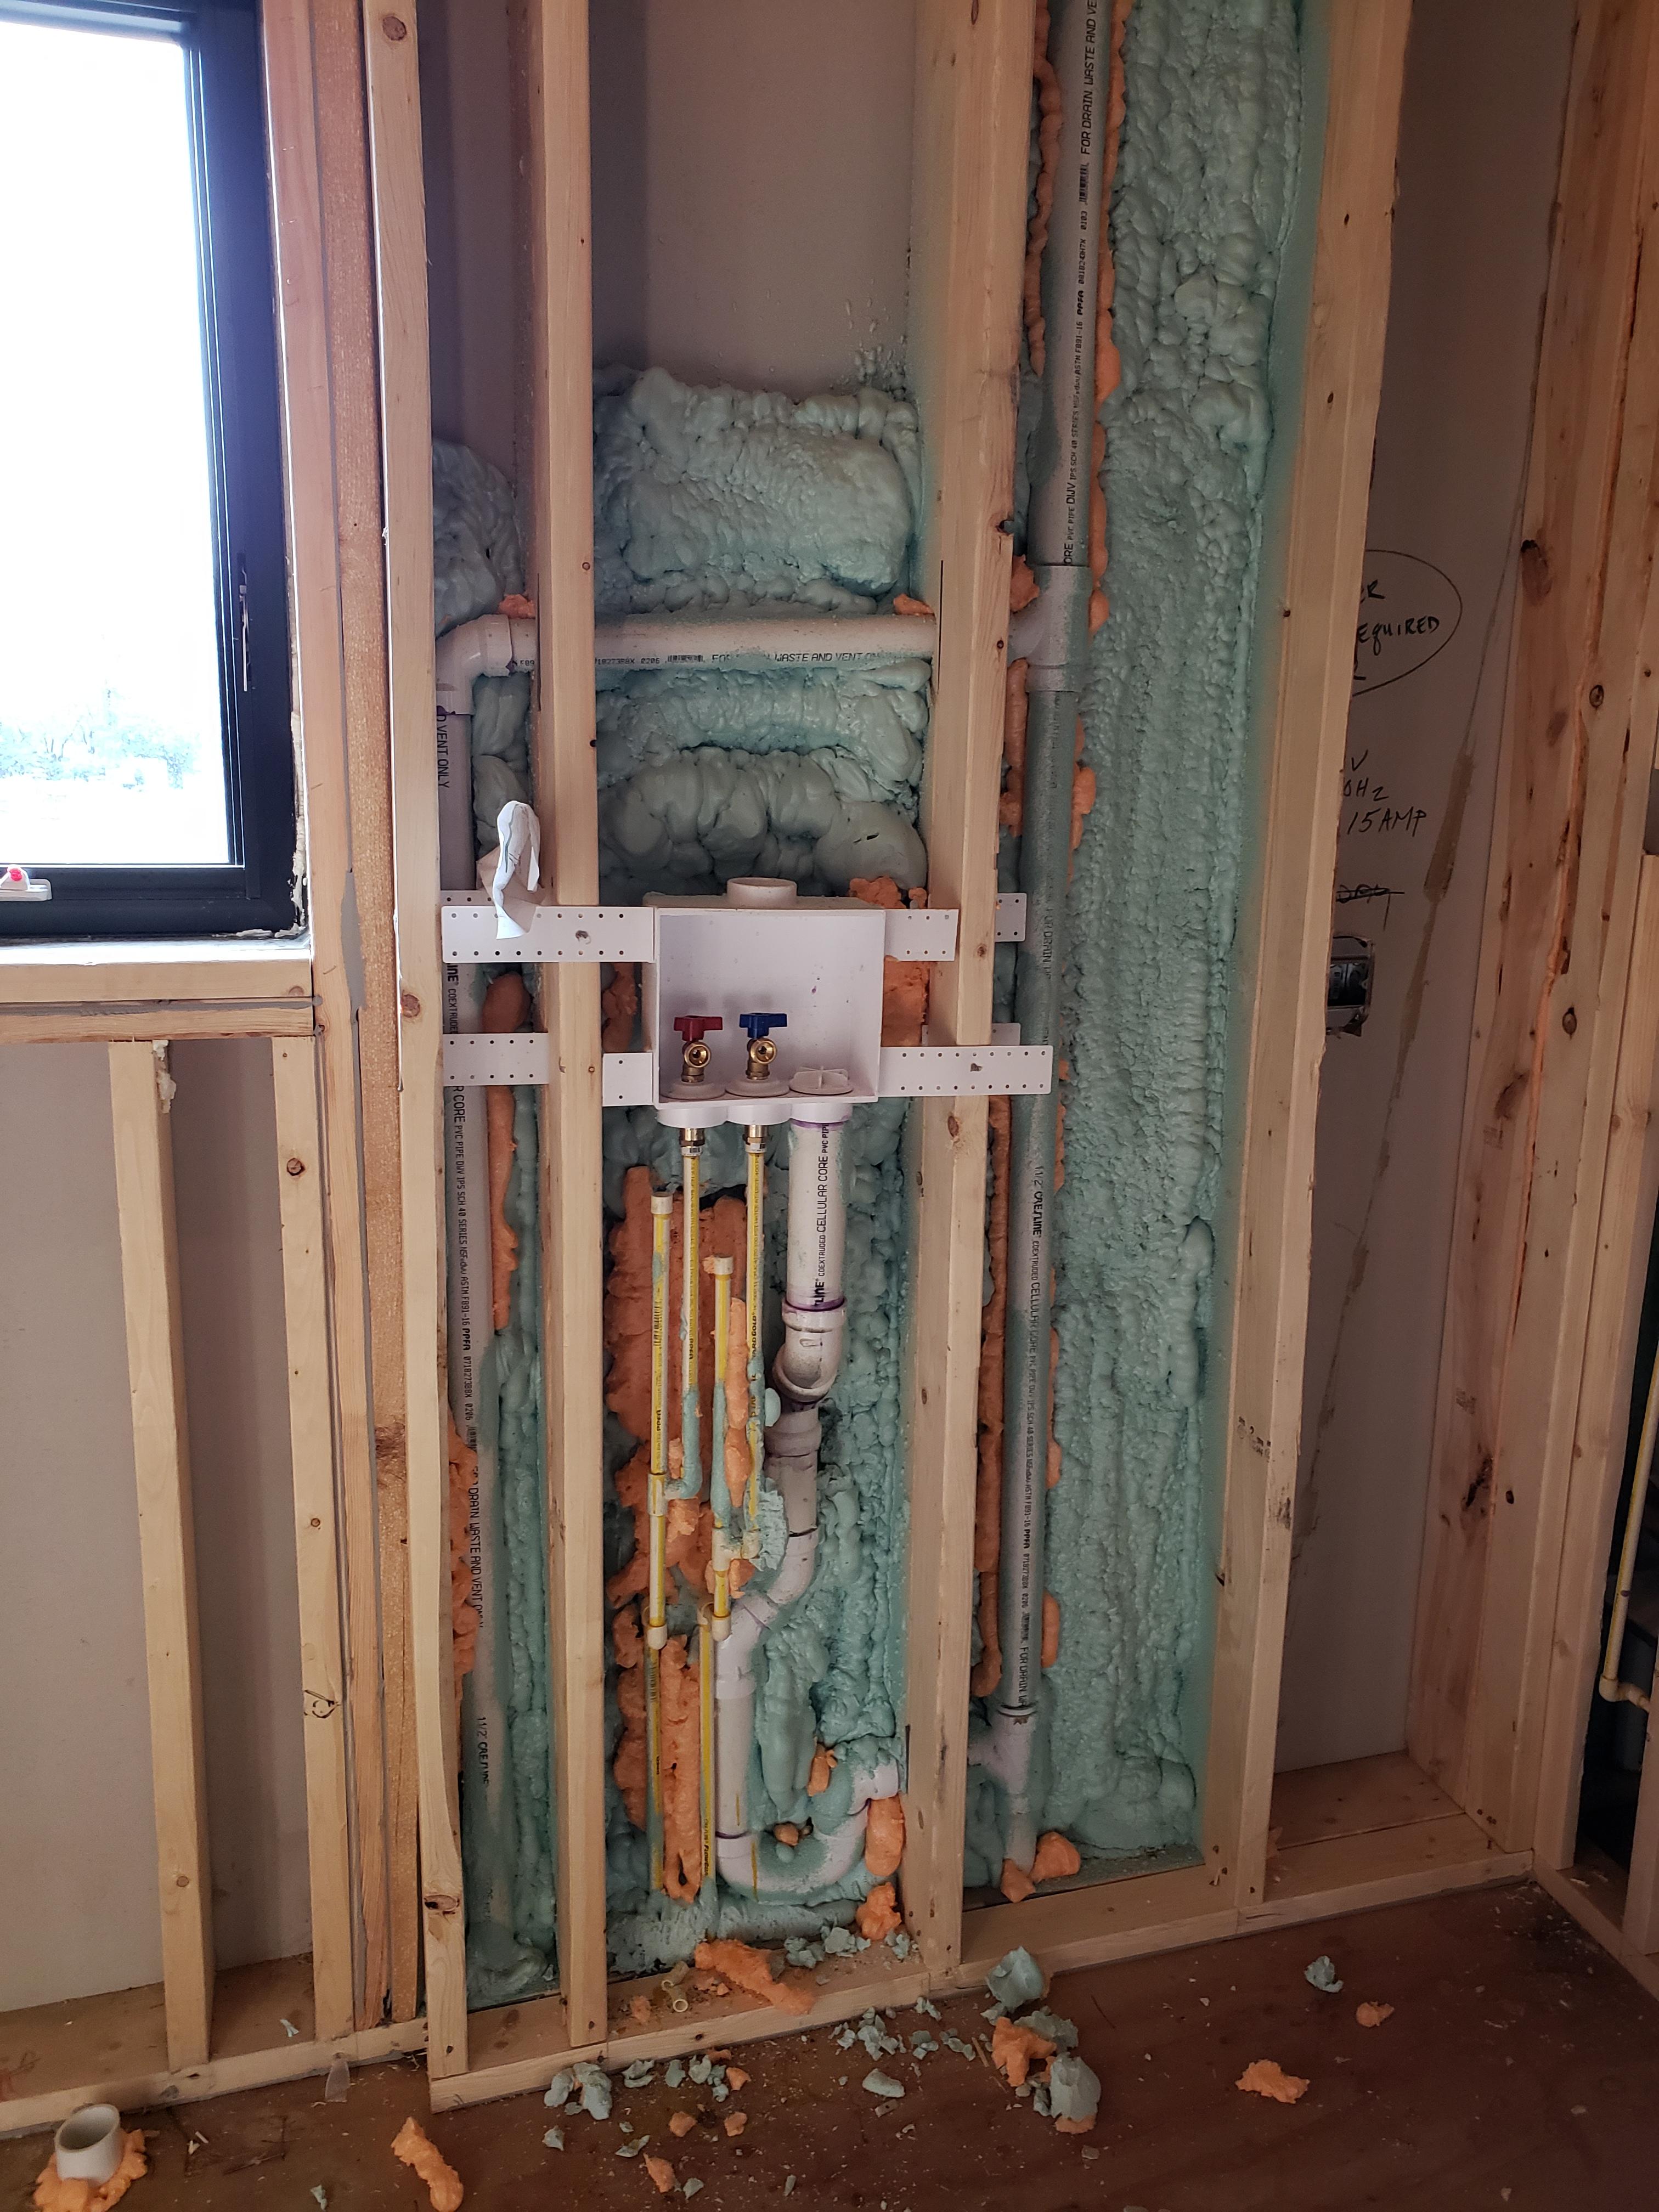
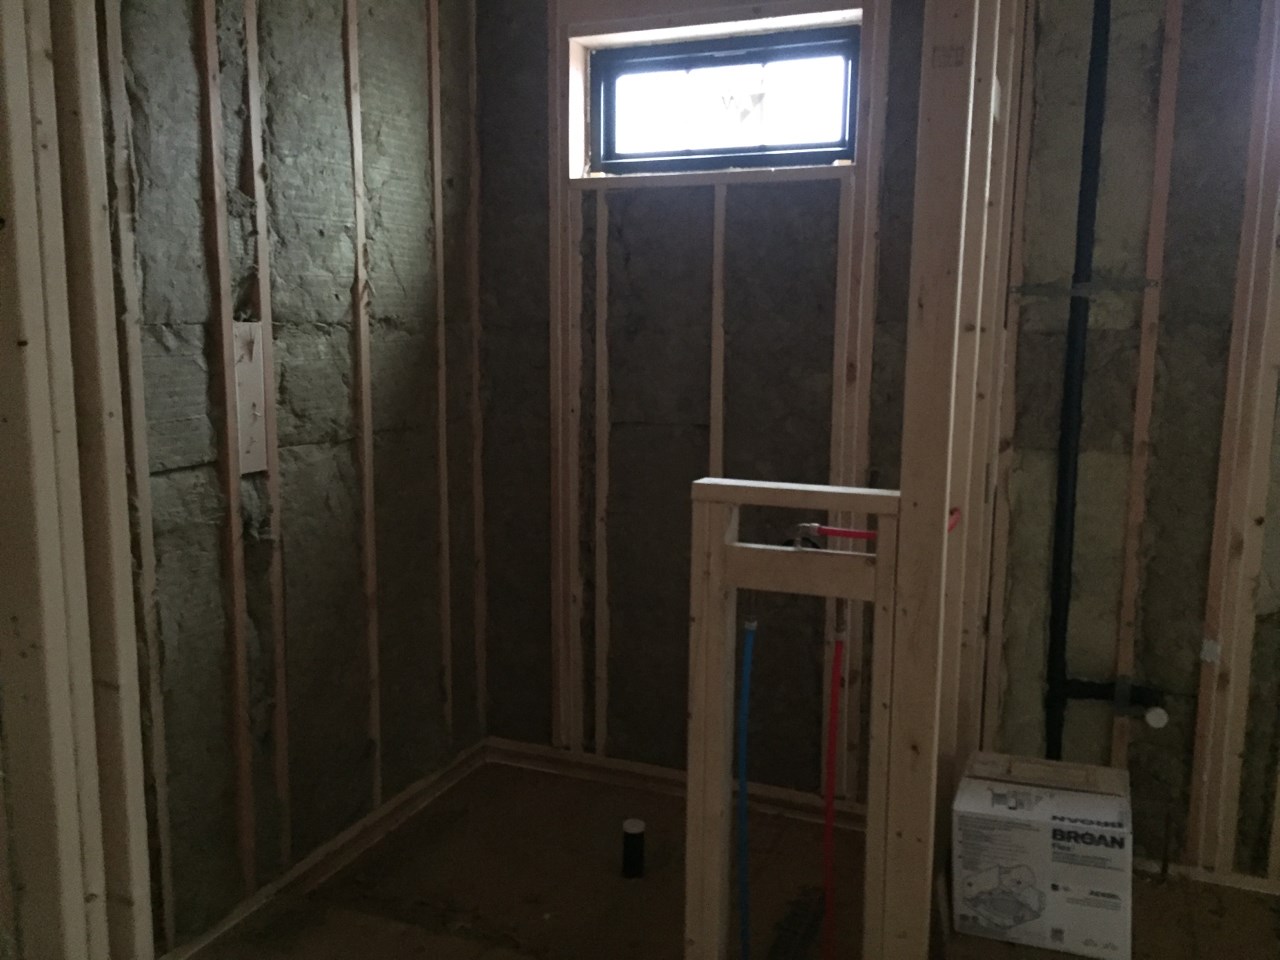
Right – Spray foam is used to carefully seal behind plumbing that was installed in an exterior wall.
Image
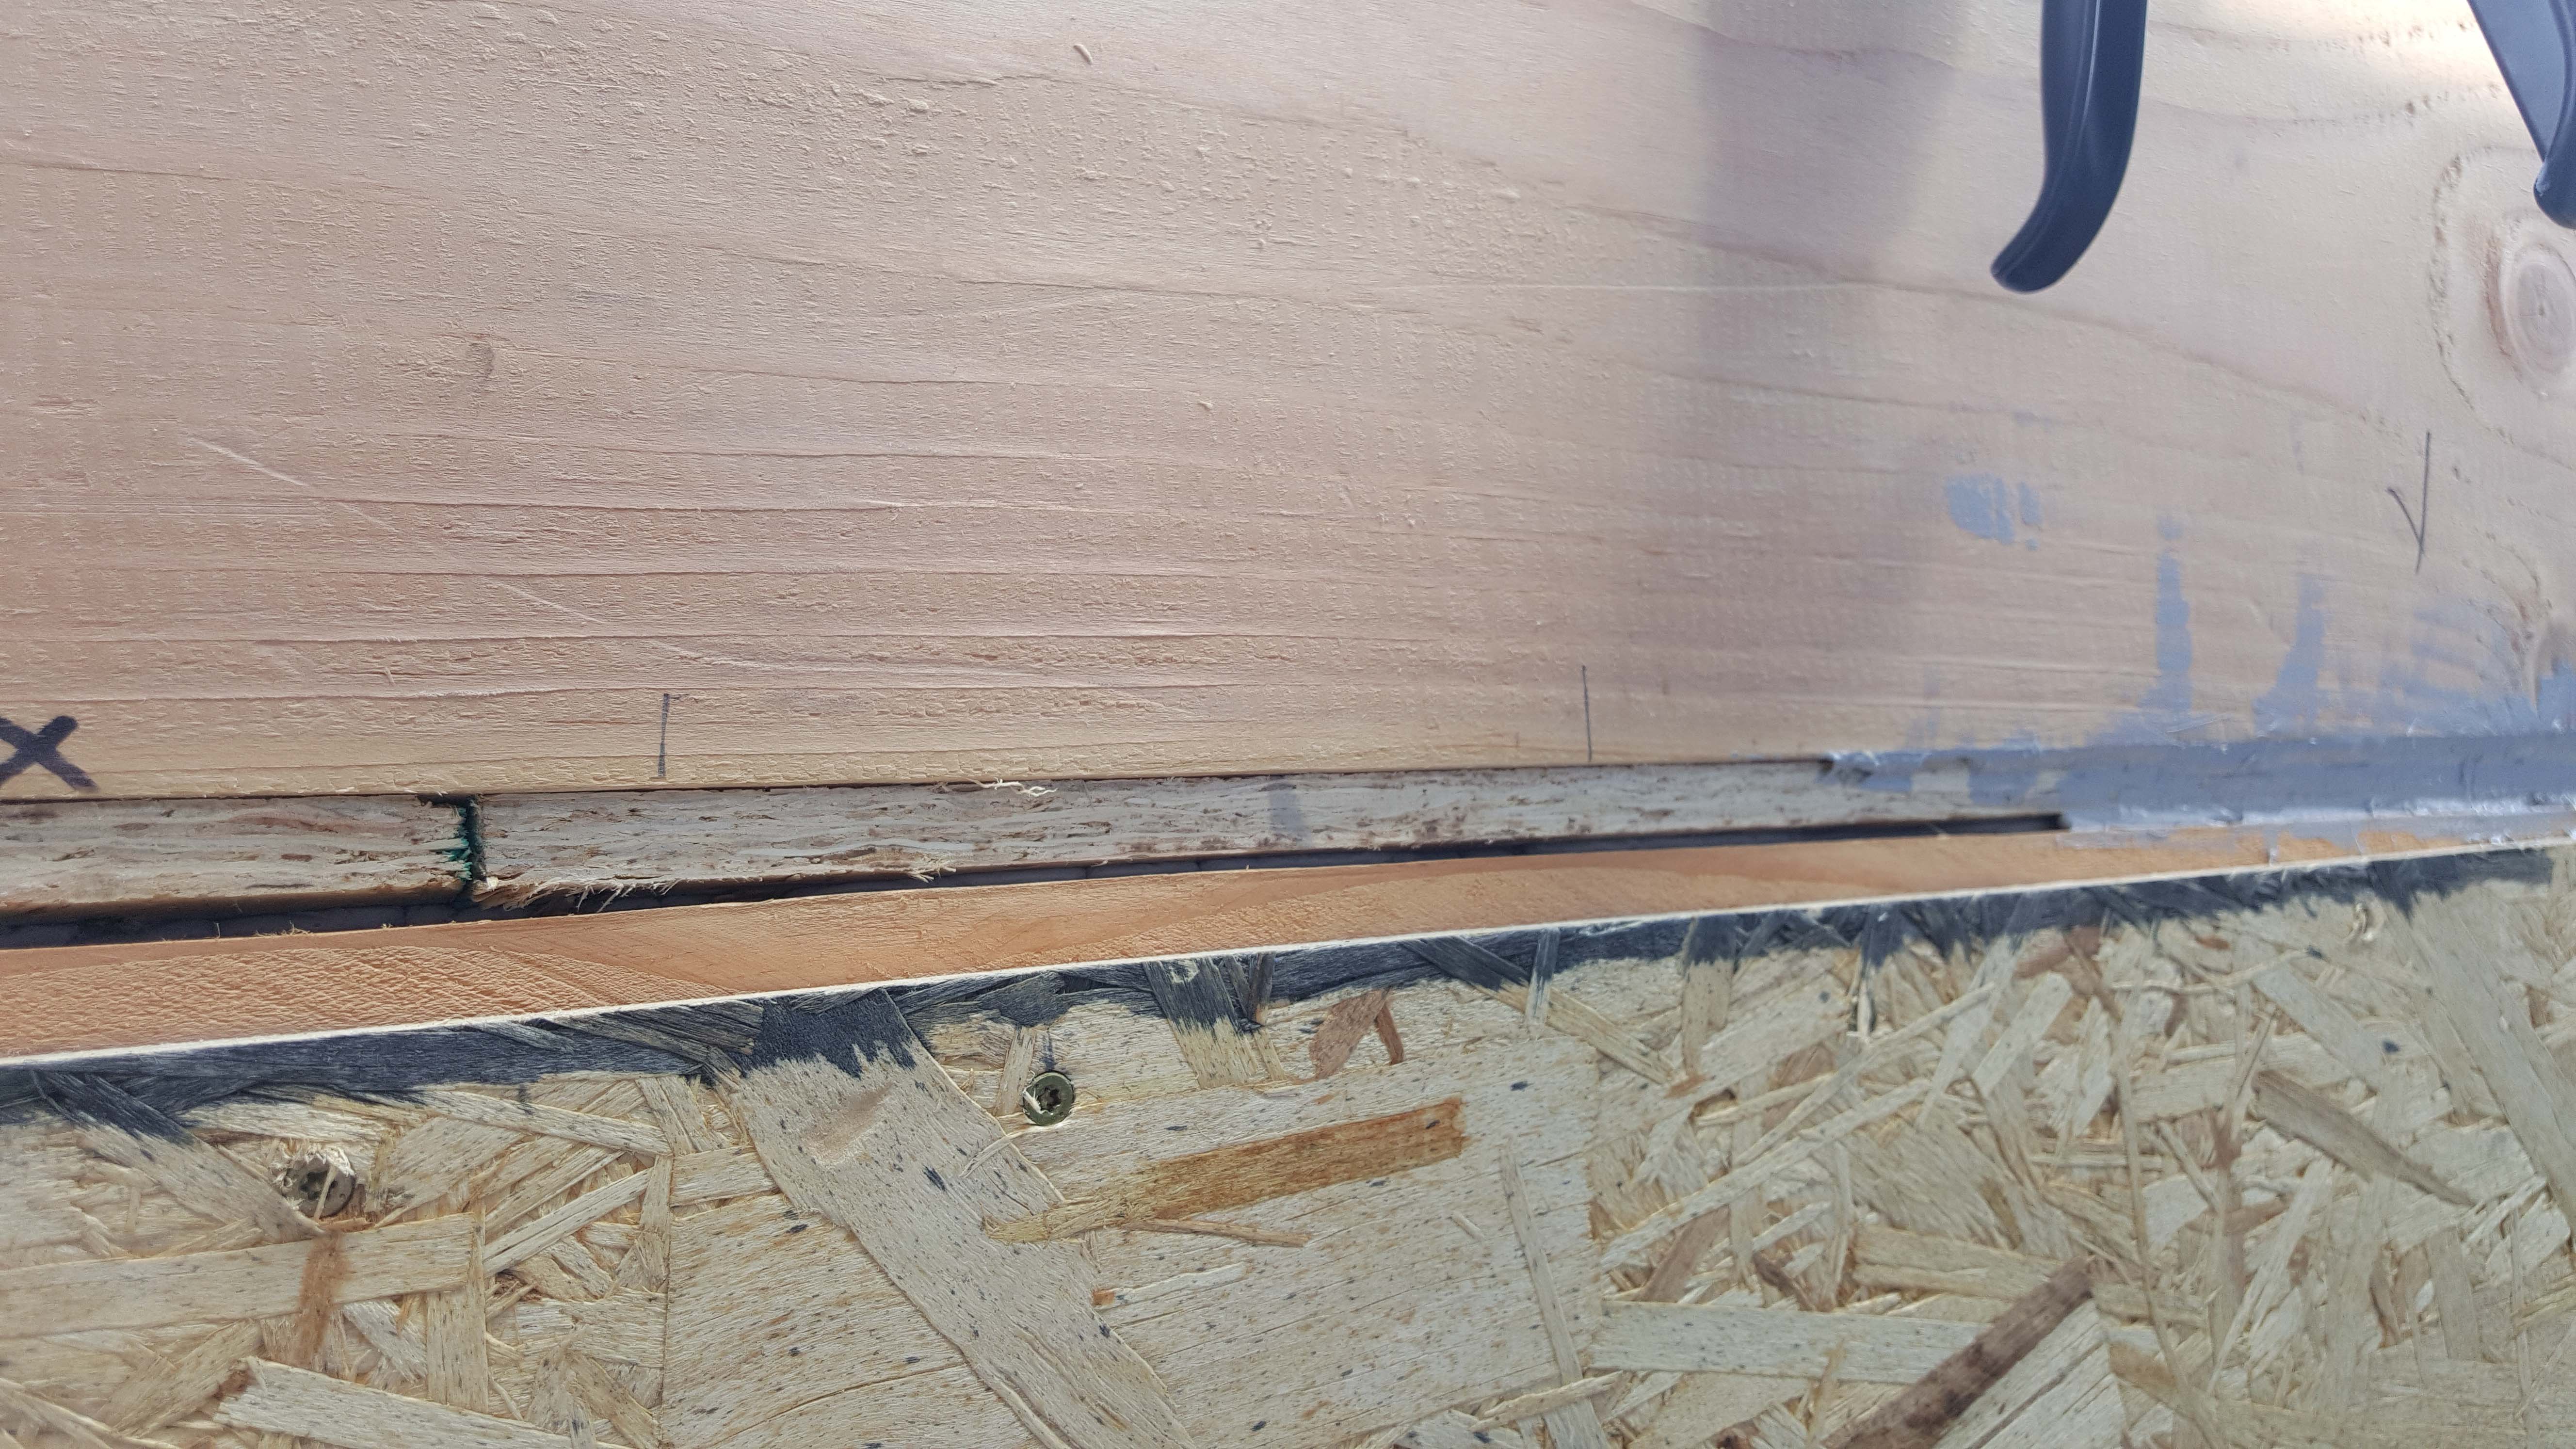
Right – Spray foam was installed at the sheathing intersection as well as the sill plate to sub-floor connection.
Image
Right – Strategically placed trees provide shade to the south-facing windows of this building.
Image
Image
Right – Structural insulated sheathing can provide racking strength (lateral load resistance), and serve as an air barrier and thermal barrier if installed according to manufacturer’s specifications with taped, sealed seams
Image

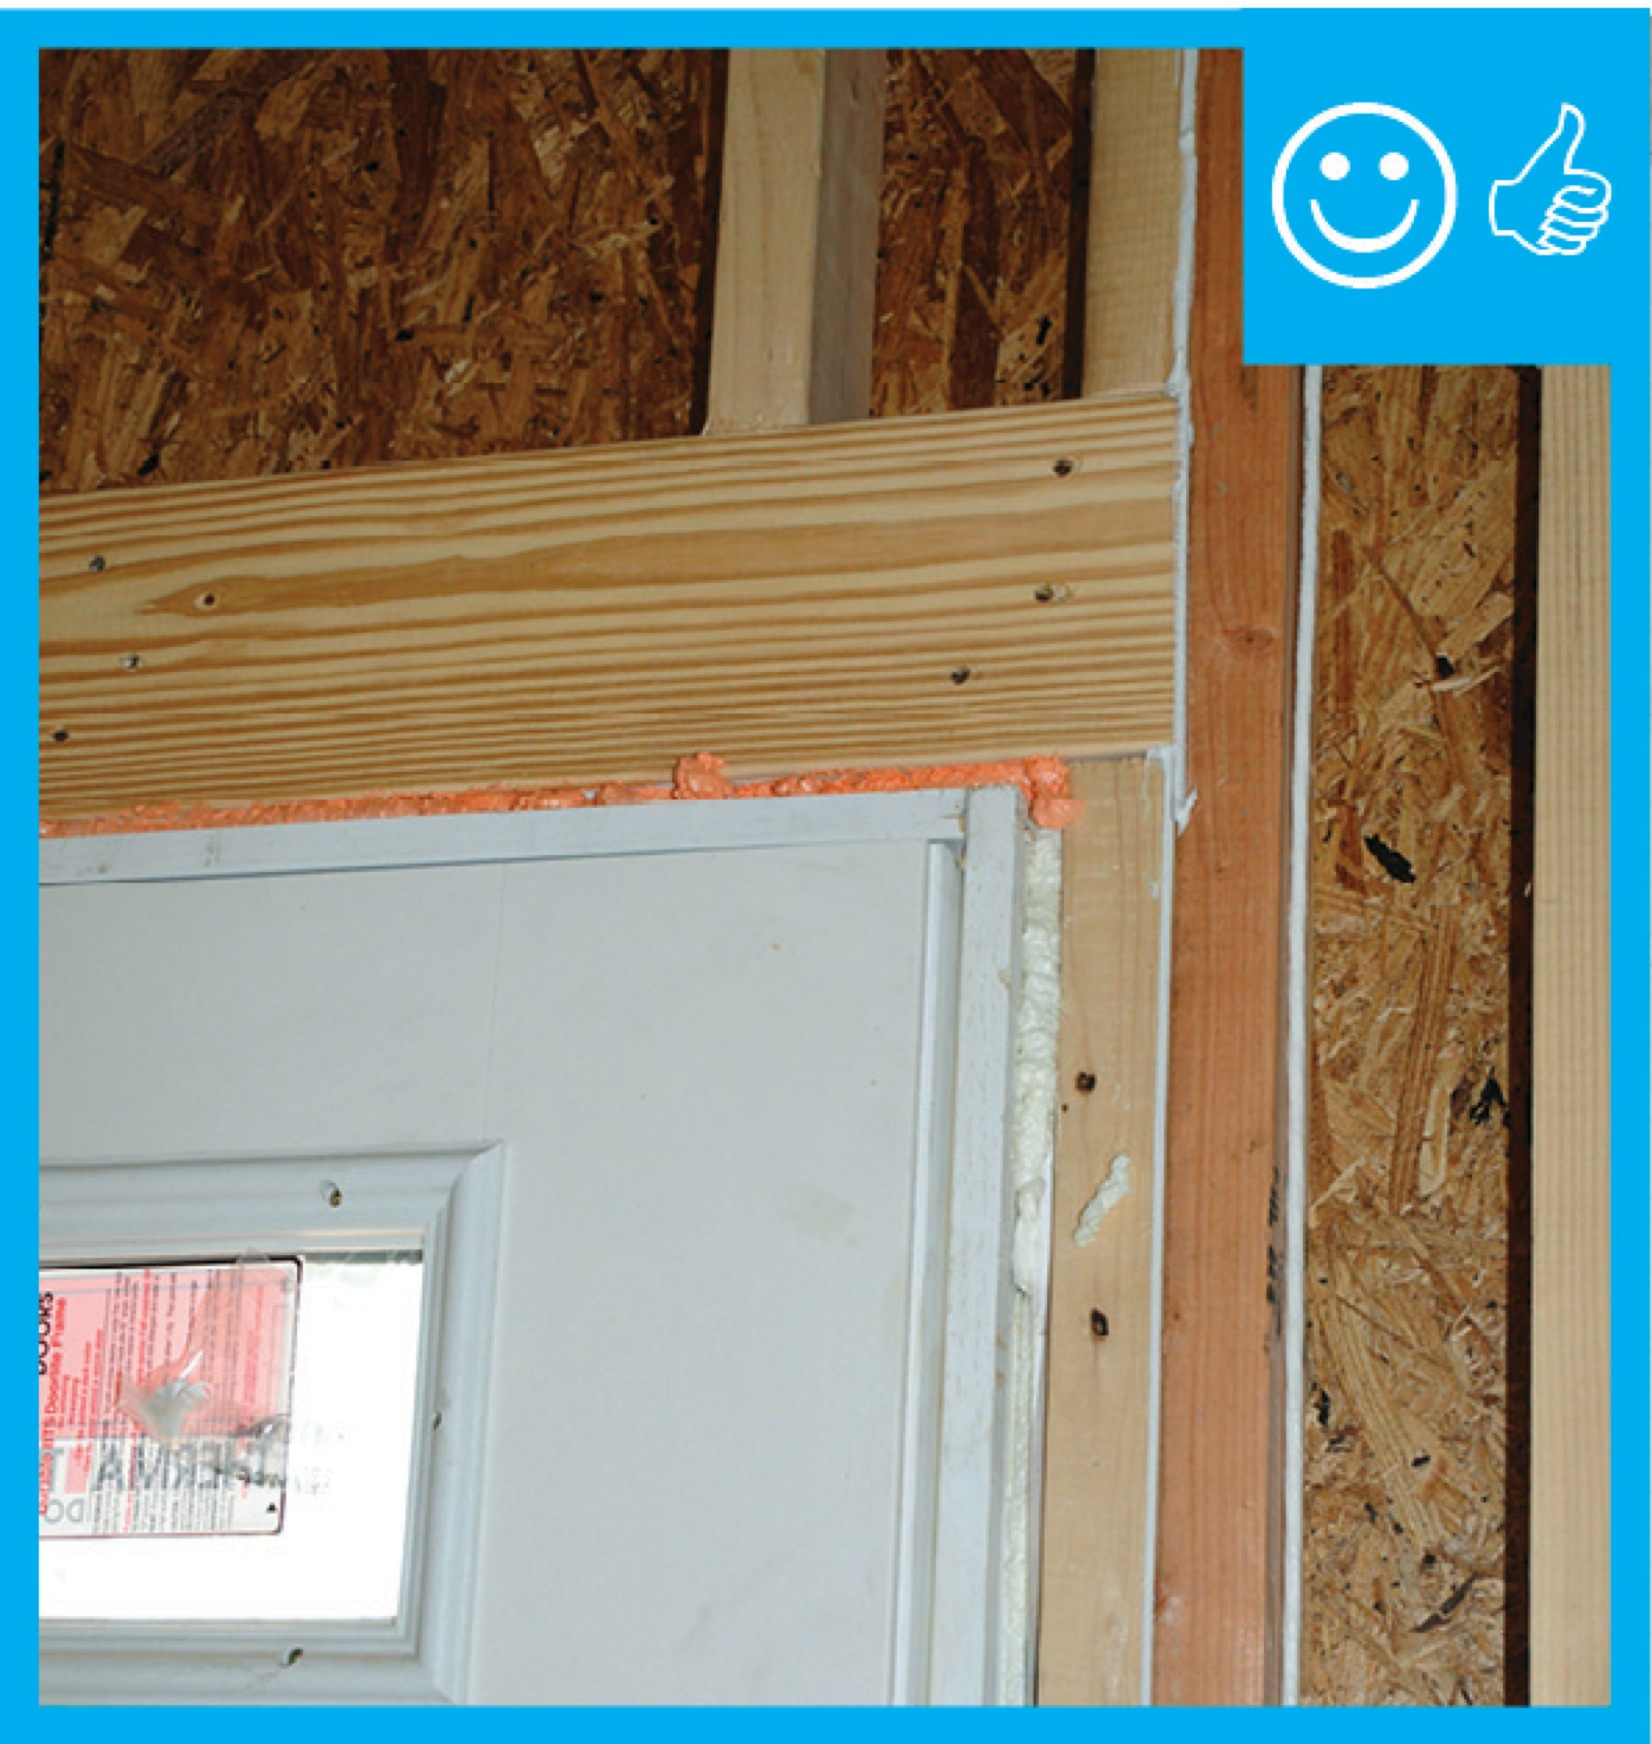
Right – Tape and spray foam are used to air seal around pipes that extend through exterior walls.
Image

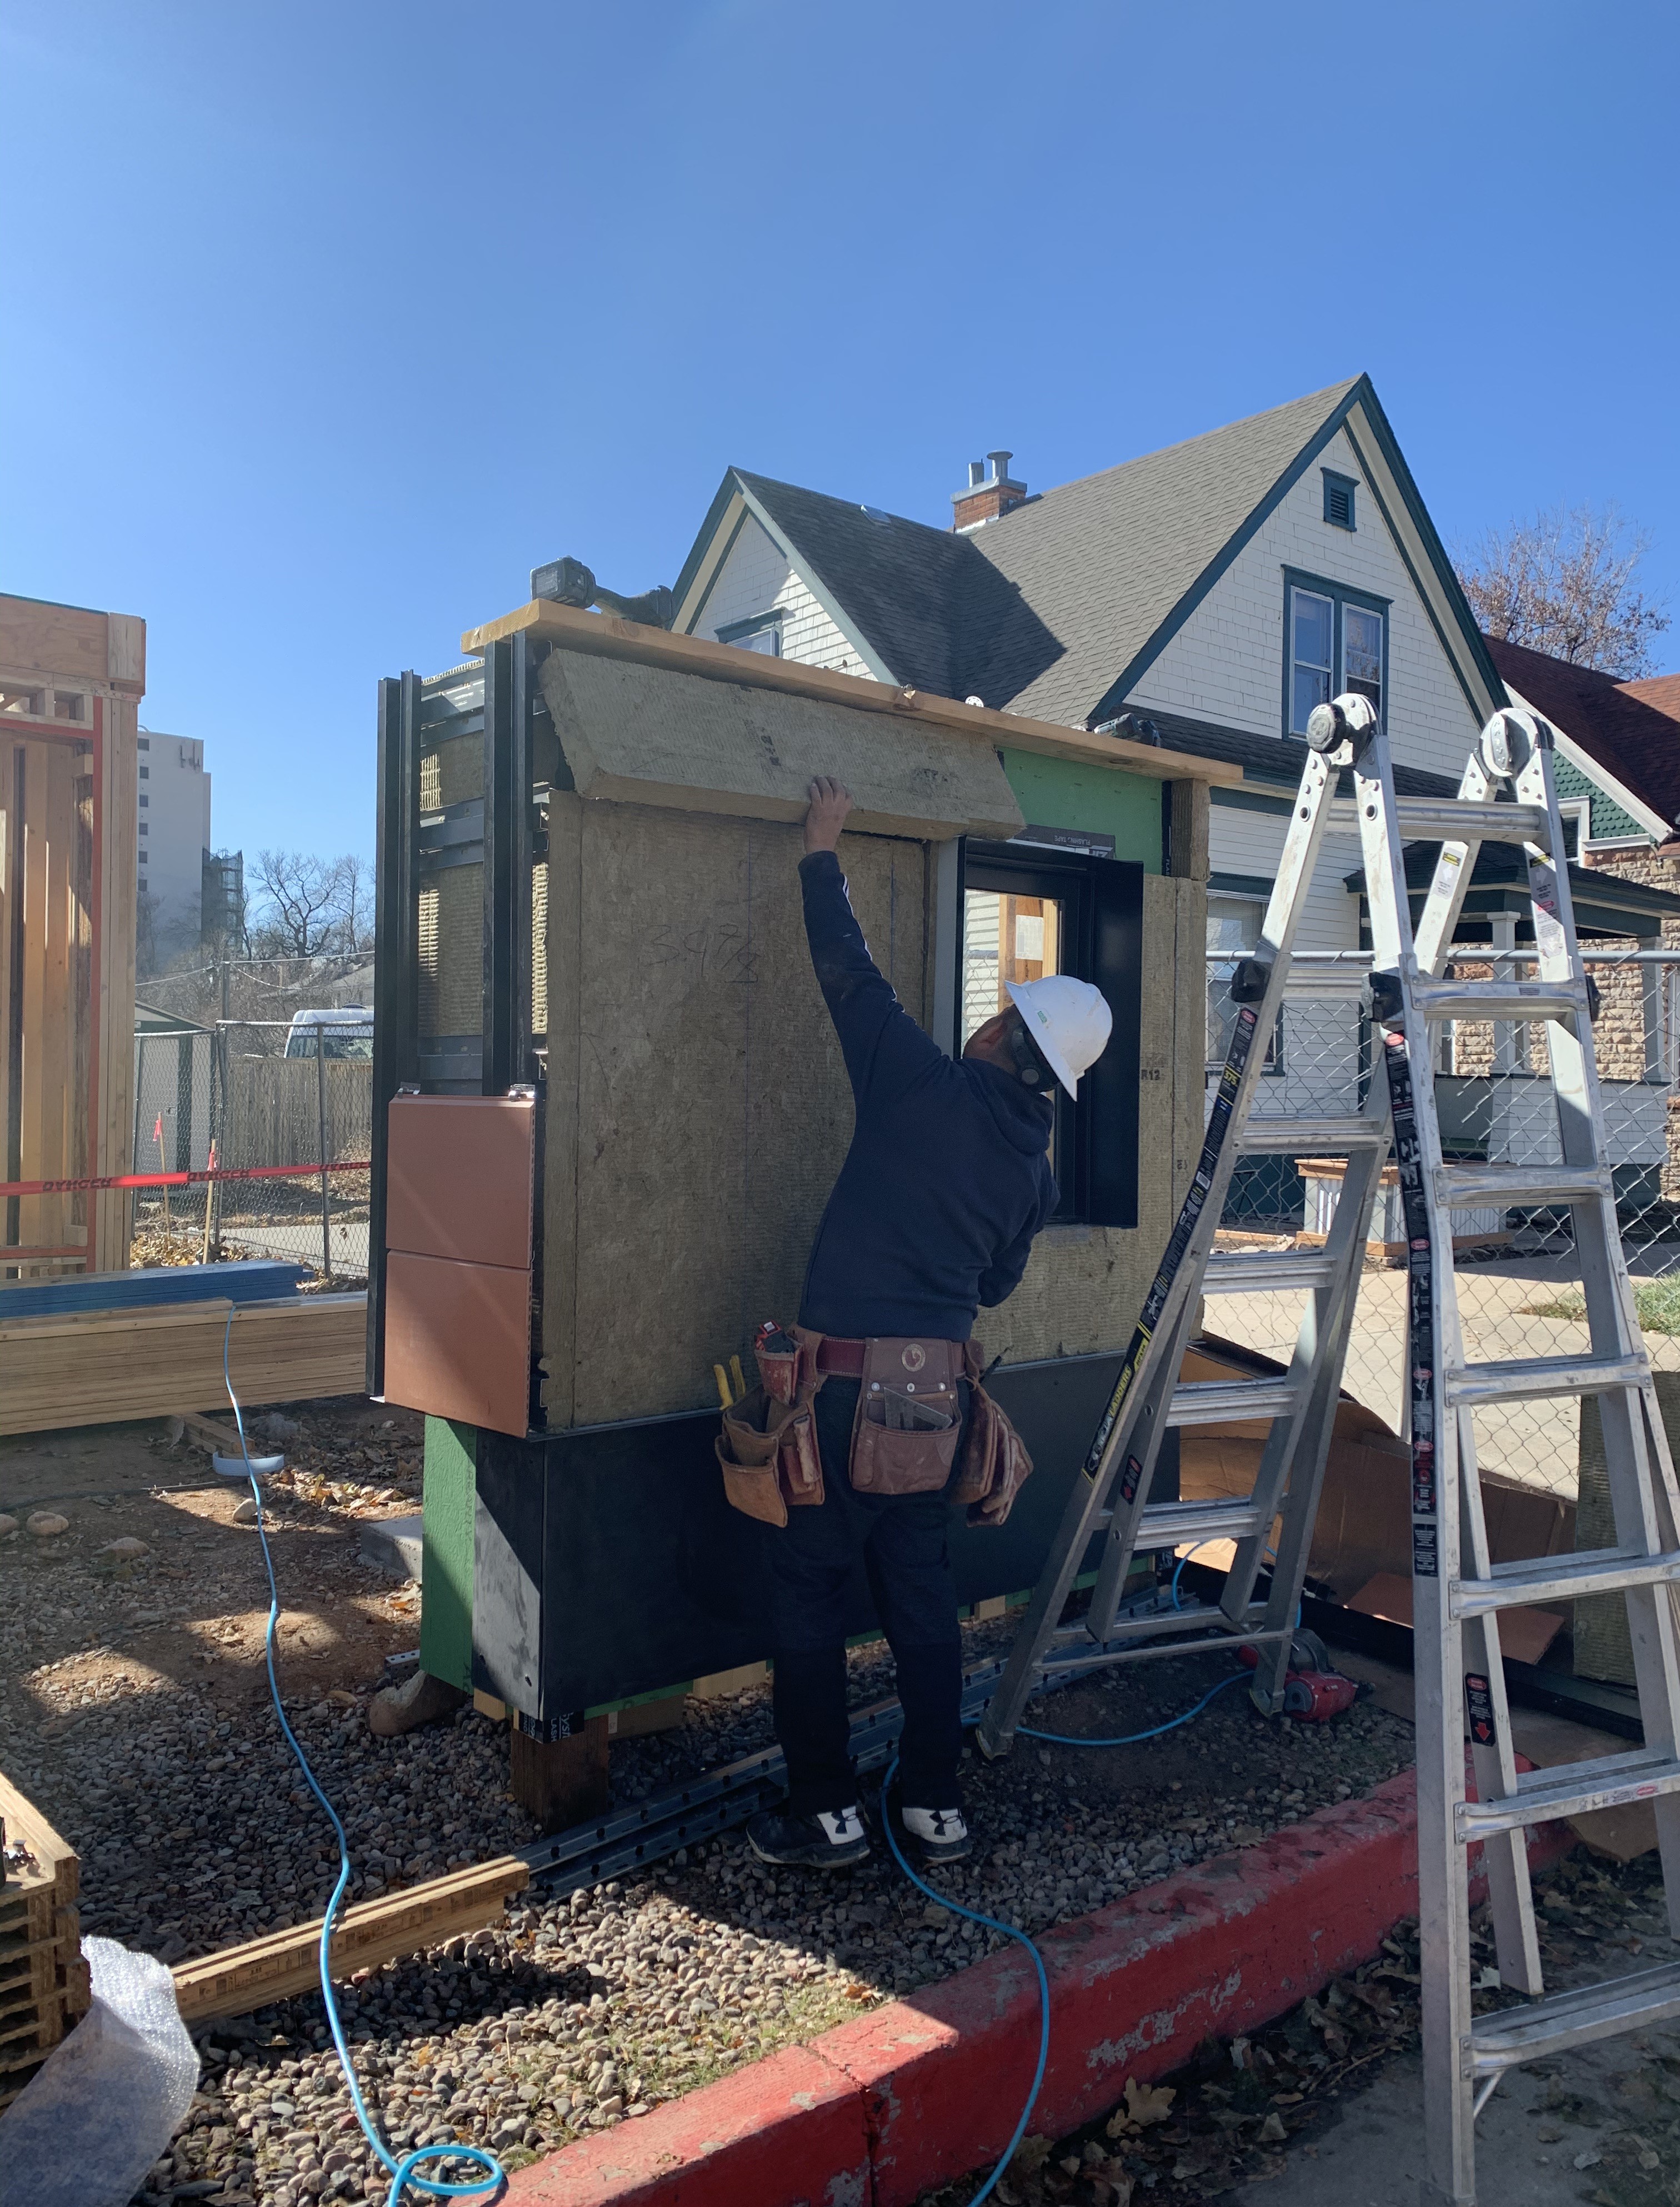
Right – Terra cotta tiles are attached to horizontal metal furring strips as the exterior cladding over mineral wool insulation on this multi-family building in Colorado.
Image
Right – the 2x6 walls are insulated with a flash-and-batt approach that includes spraying the wall cavities with one inch of open-cell foam to seal the sheathing to the framing then filling the wall cavities with R-19 fiberglass batts that are compressed
Image
Image

Right – The base of the wall is water proofed and the seam between the base of the wall and the sidewalk is air sealed.
Image

Image
Right – The builder constructed a mock up of the wall assembly for this multi-family building.
Image
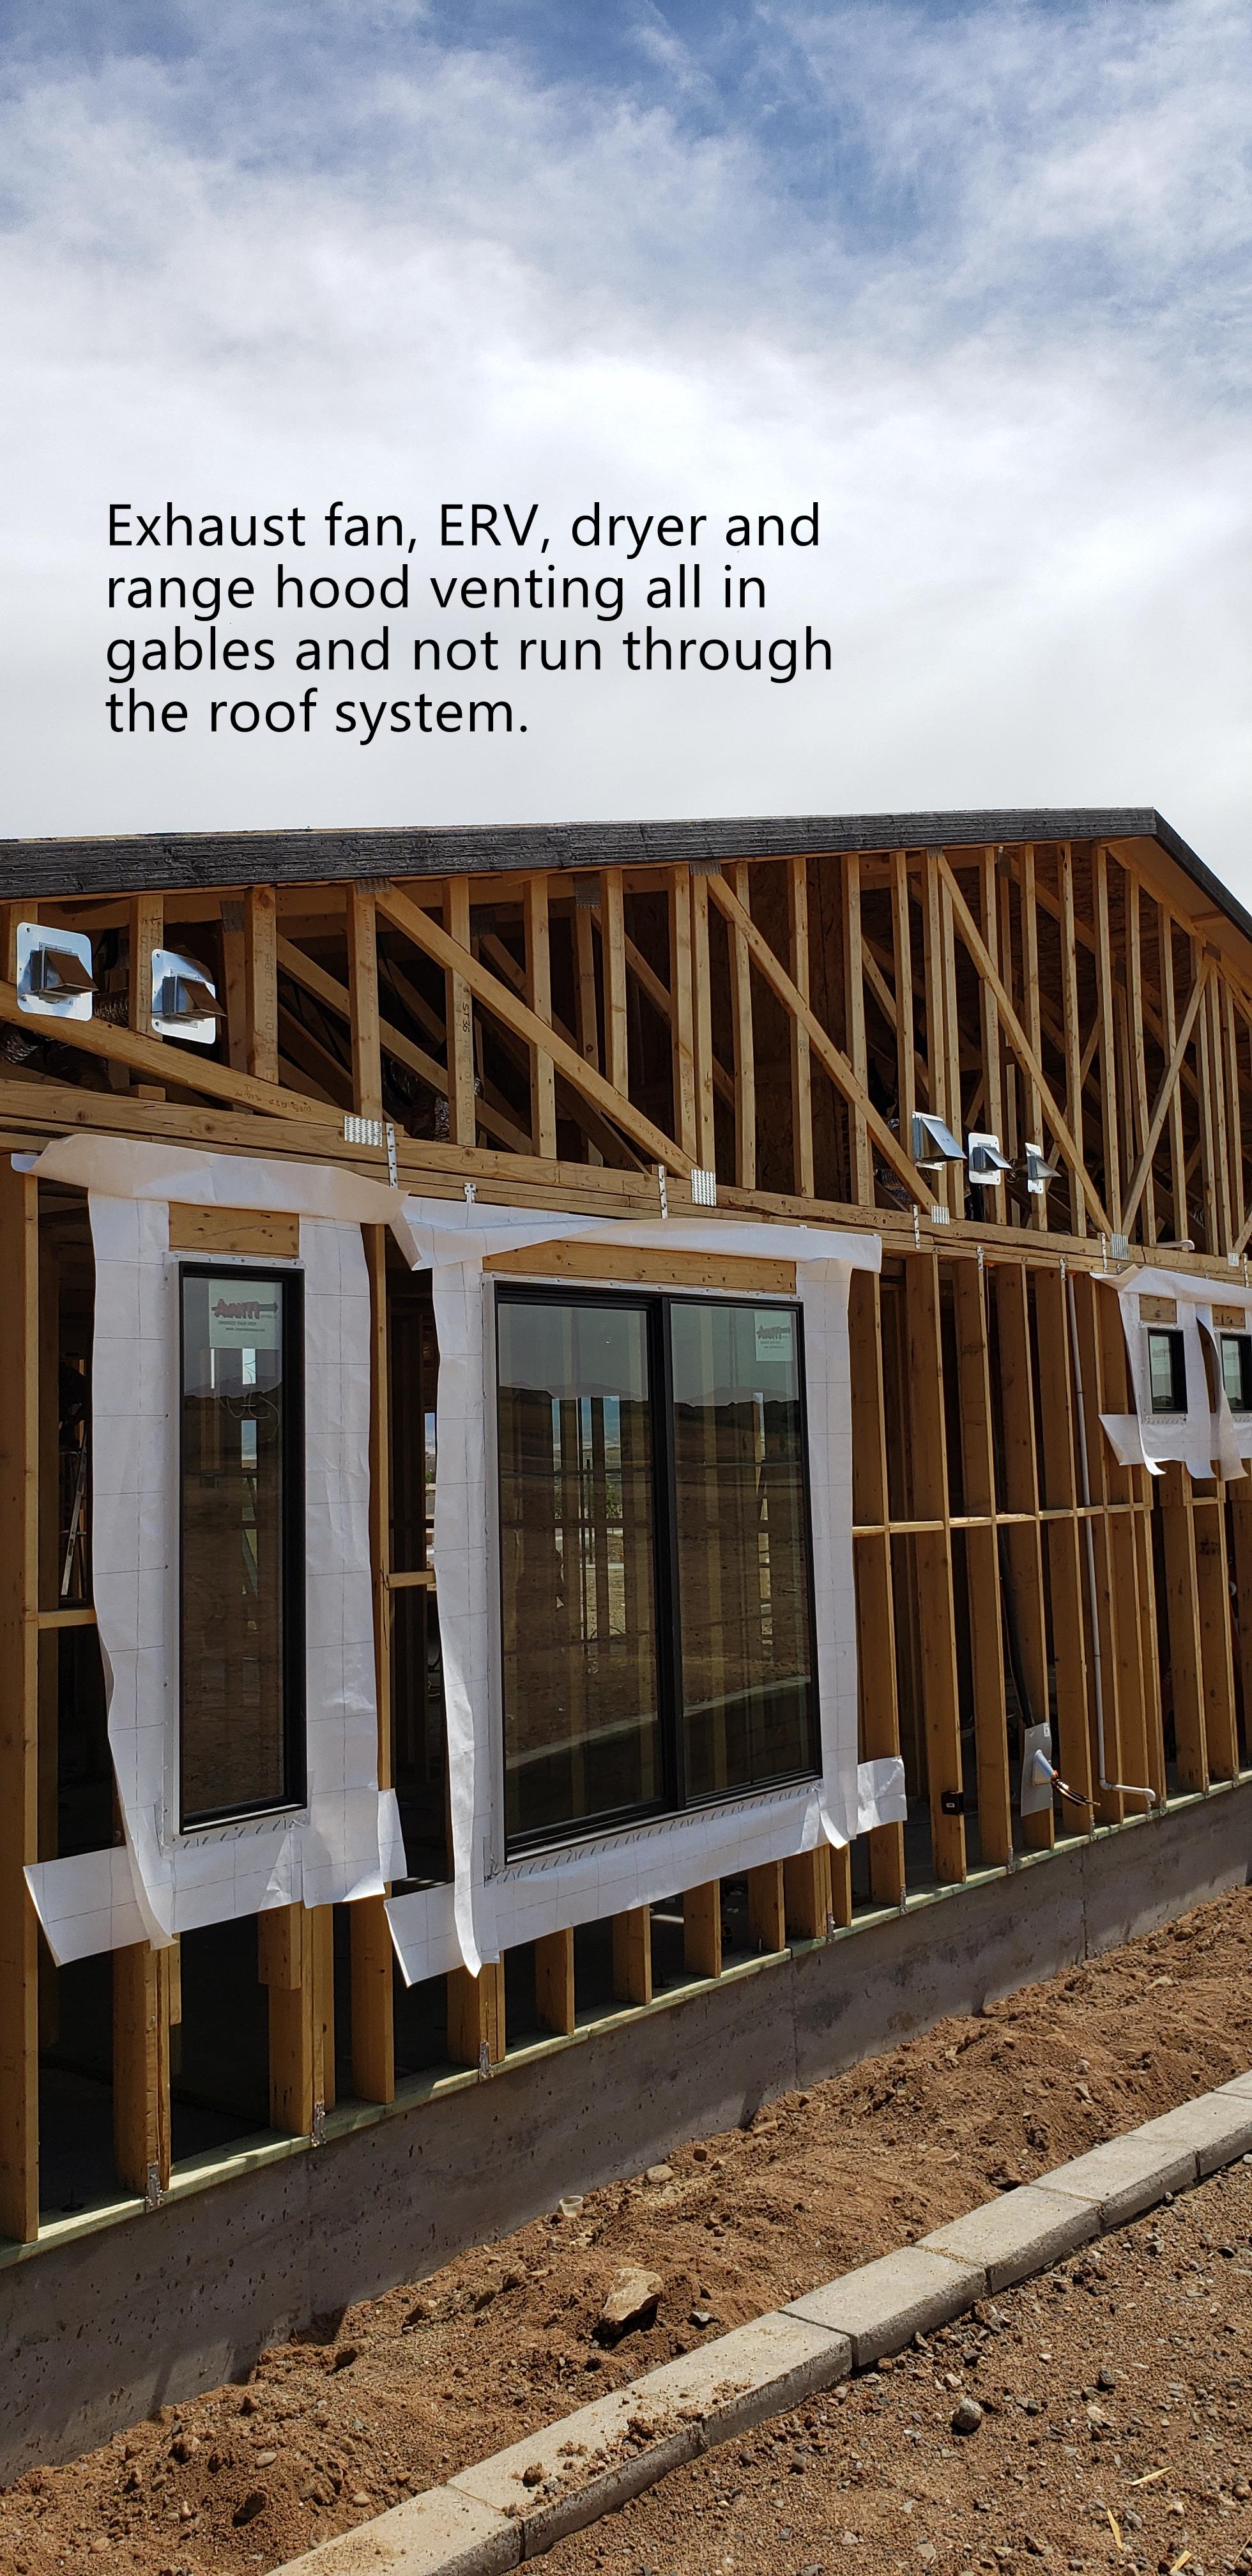
Right – The builder routed all vents through side walls to avoid holes in the roof.
Image
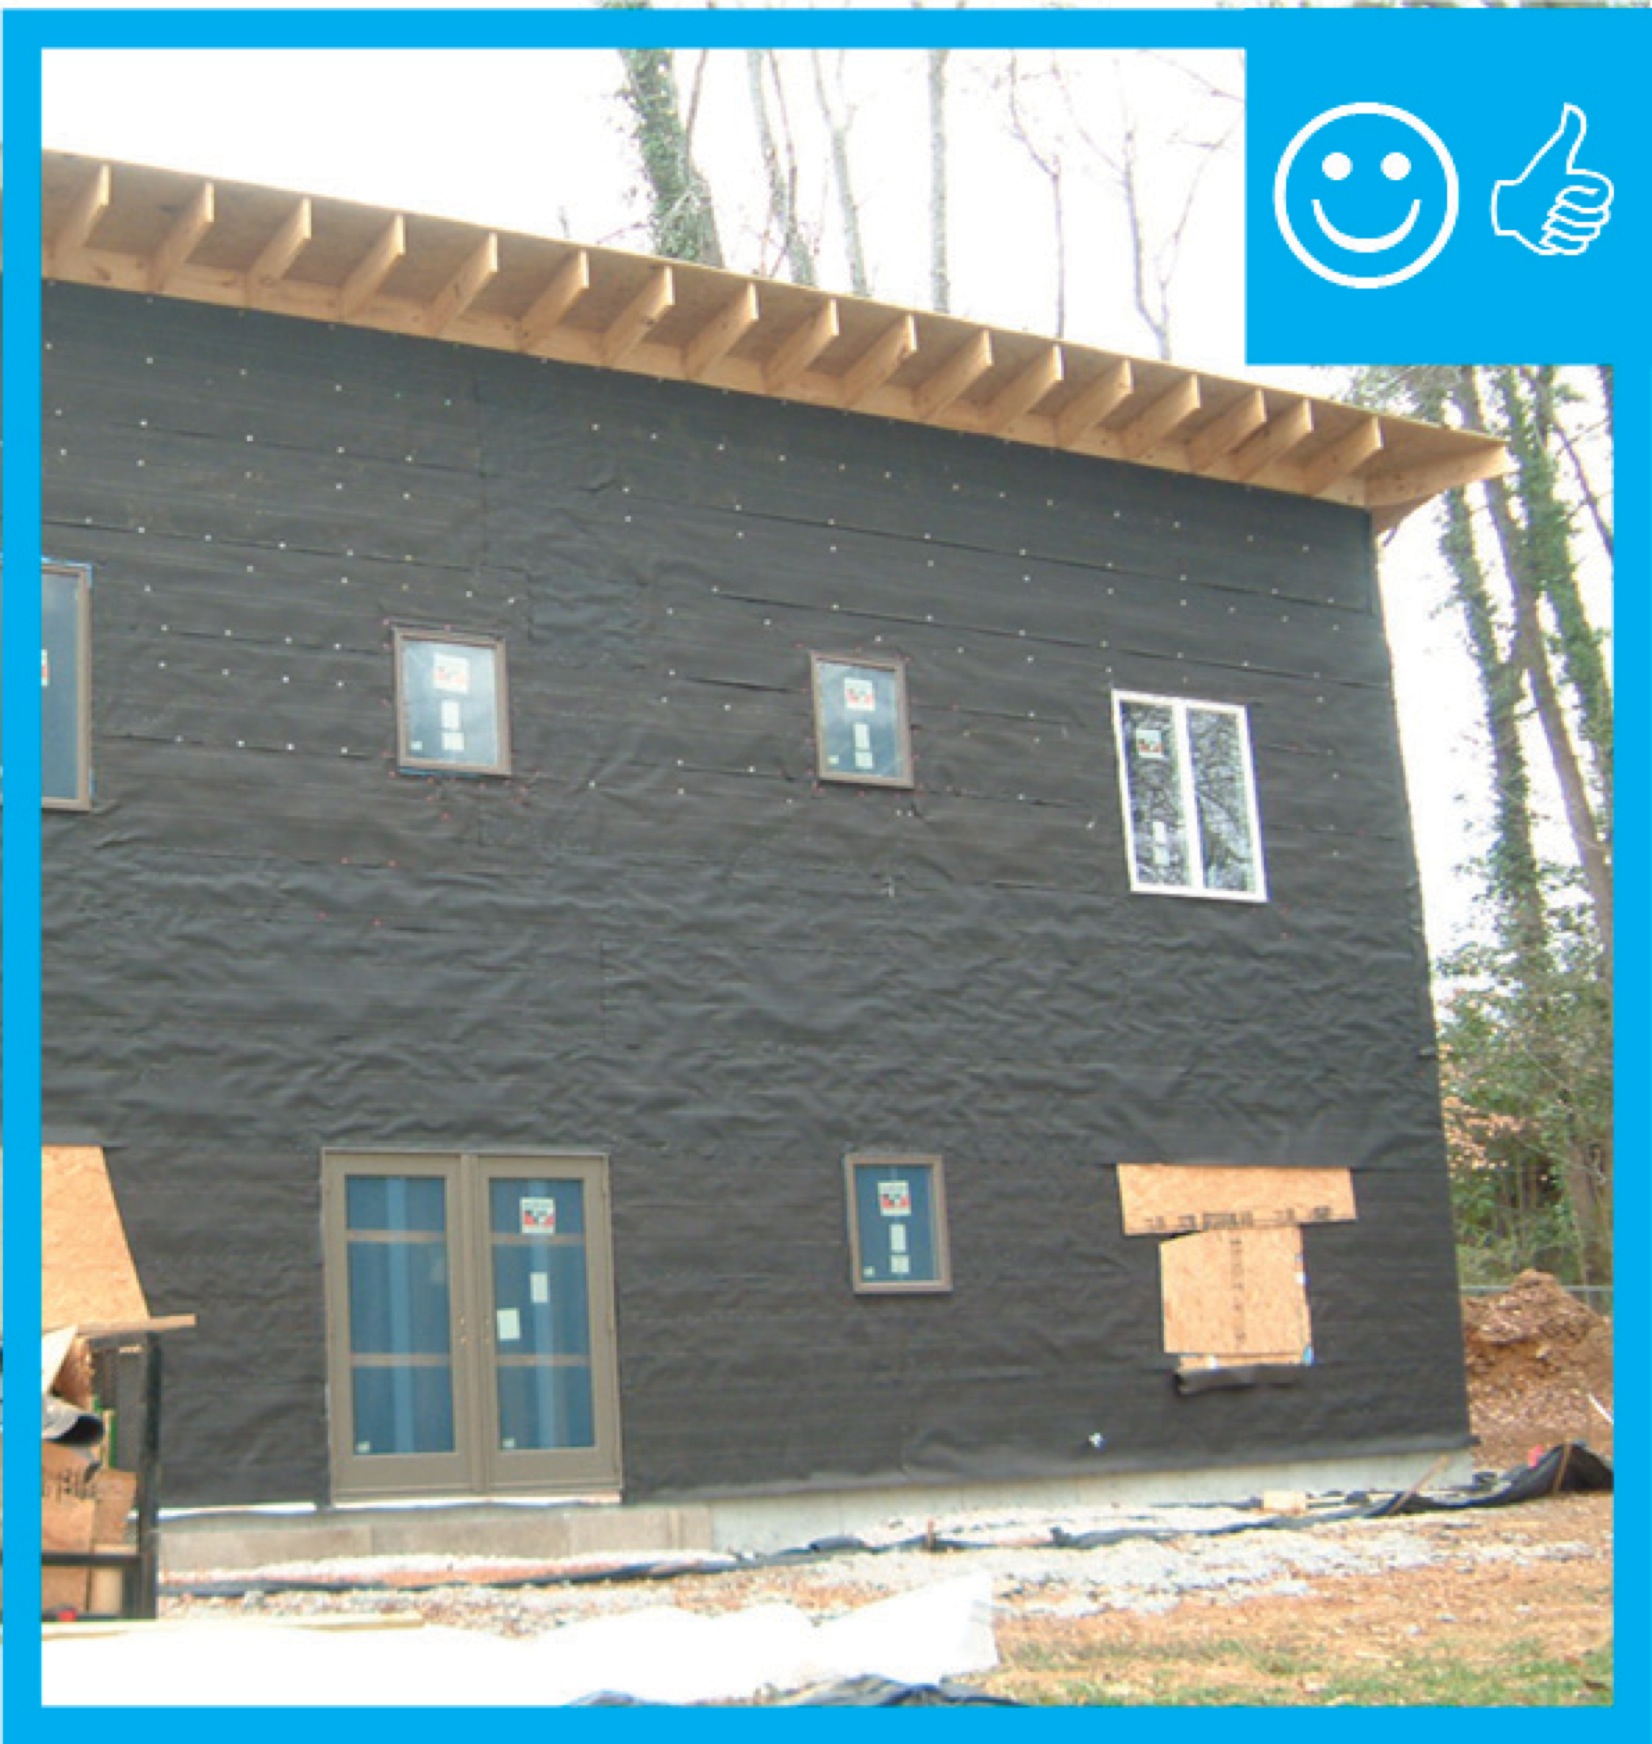
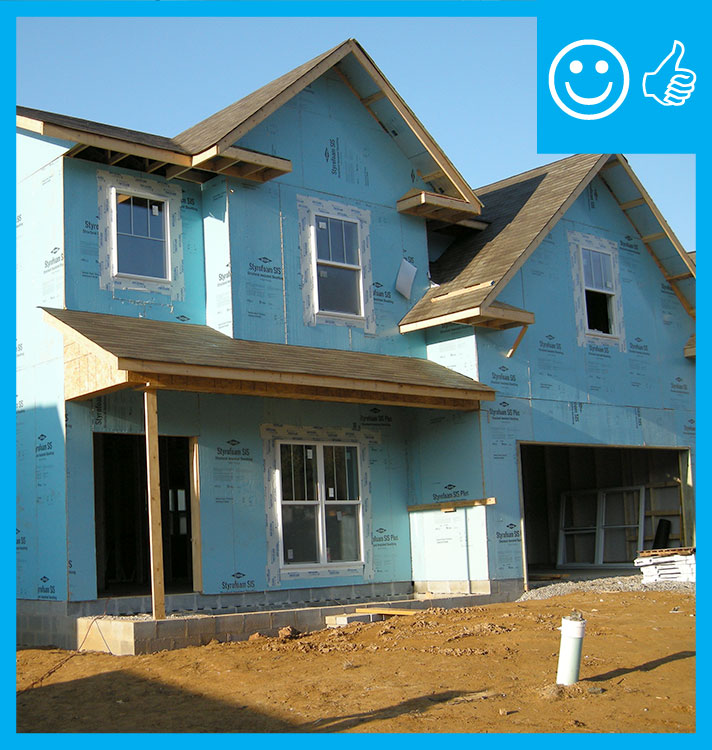
Right – The building felt is installed on all exterior walls and provides a complete drainage system
Image
Right – the building on the right employs light-colored walls, deep tinting, and deeply recessed windows to minimize solar heat gain
Image
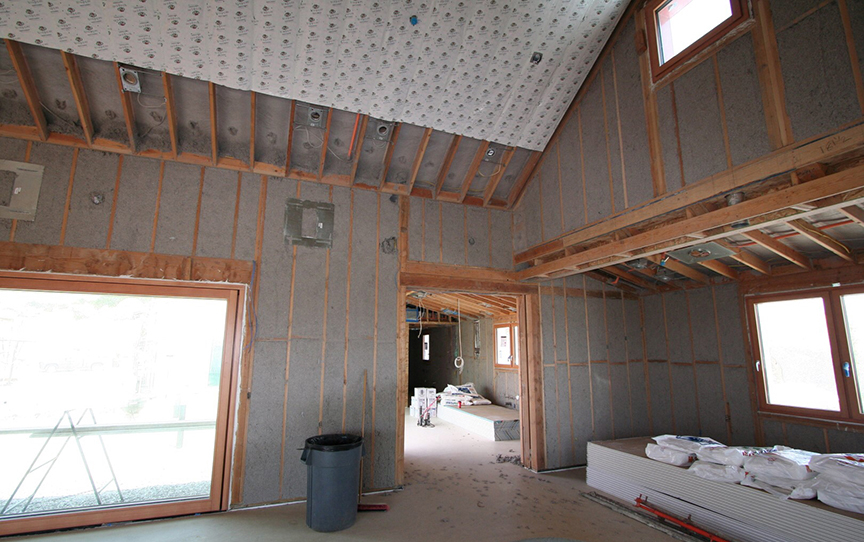
Right – The exterior wall cavities are completely filled with dense-packed cellulose.
Image

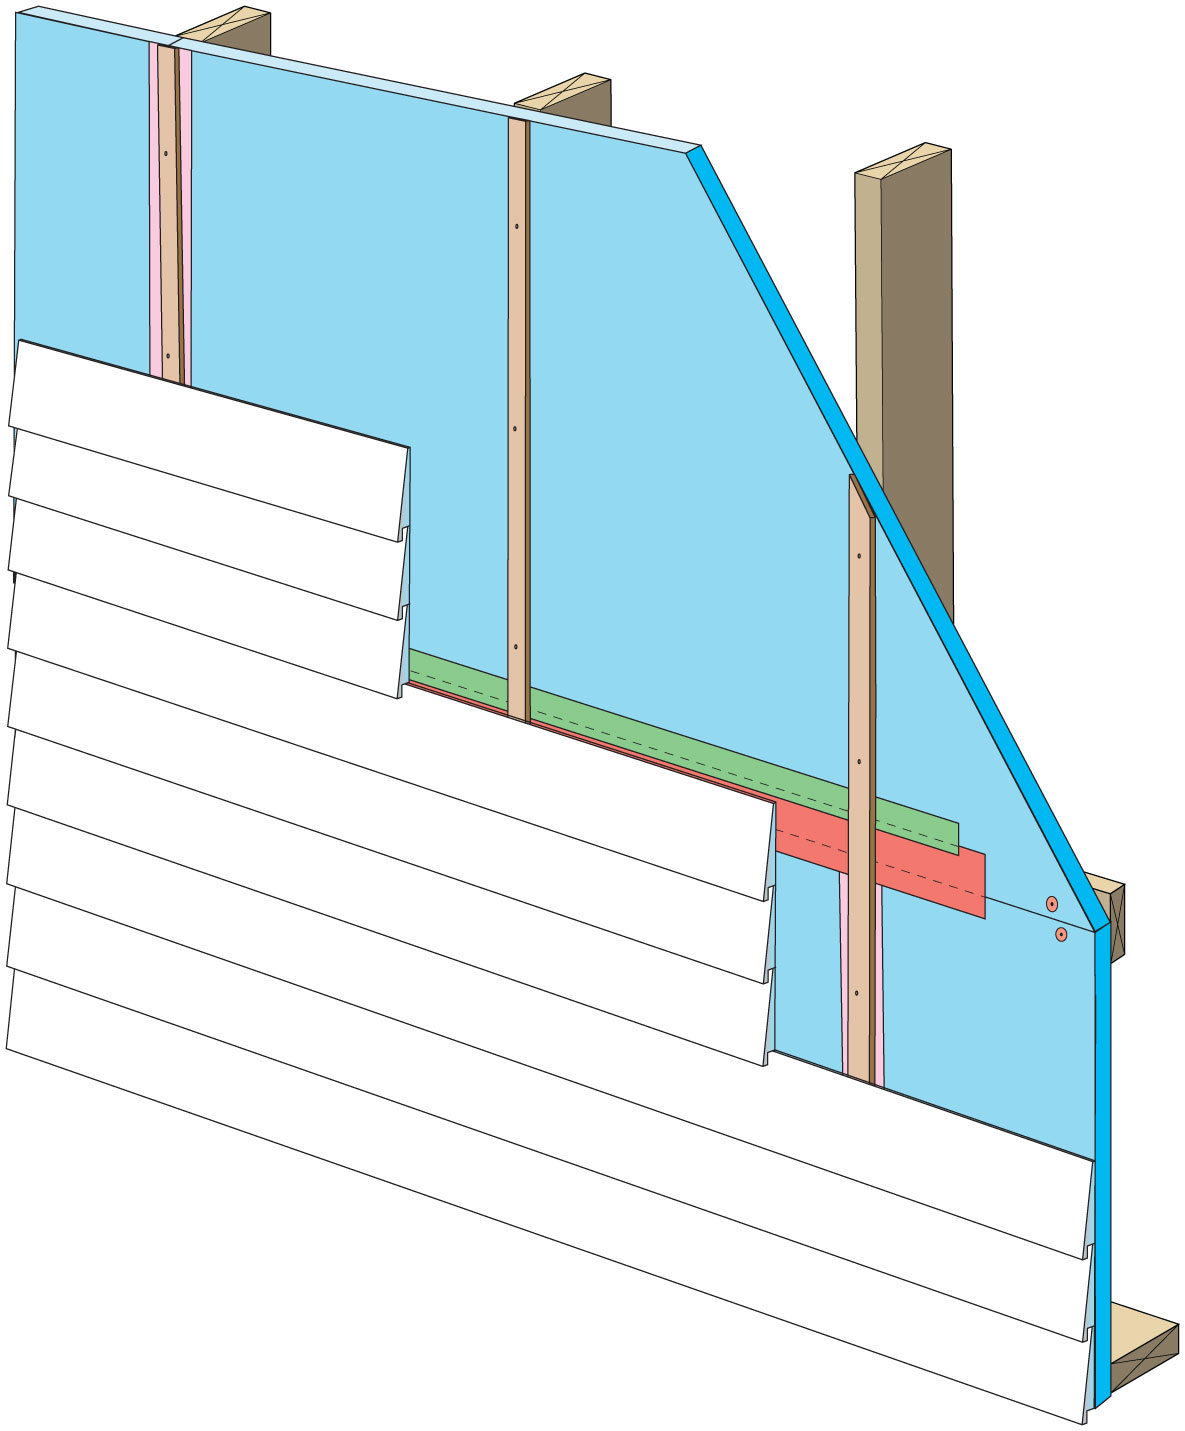
Right – The flashing is properly installed to create a complete drainage system with continuous rigid insulation sheathing/siding
Image

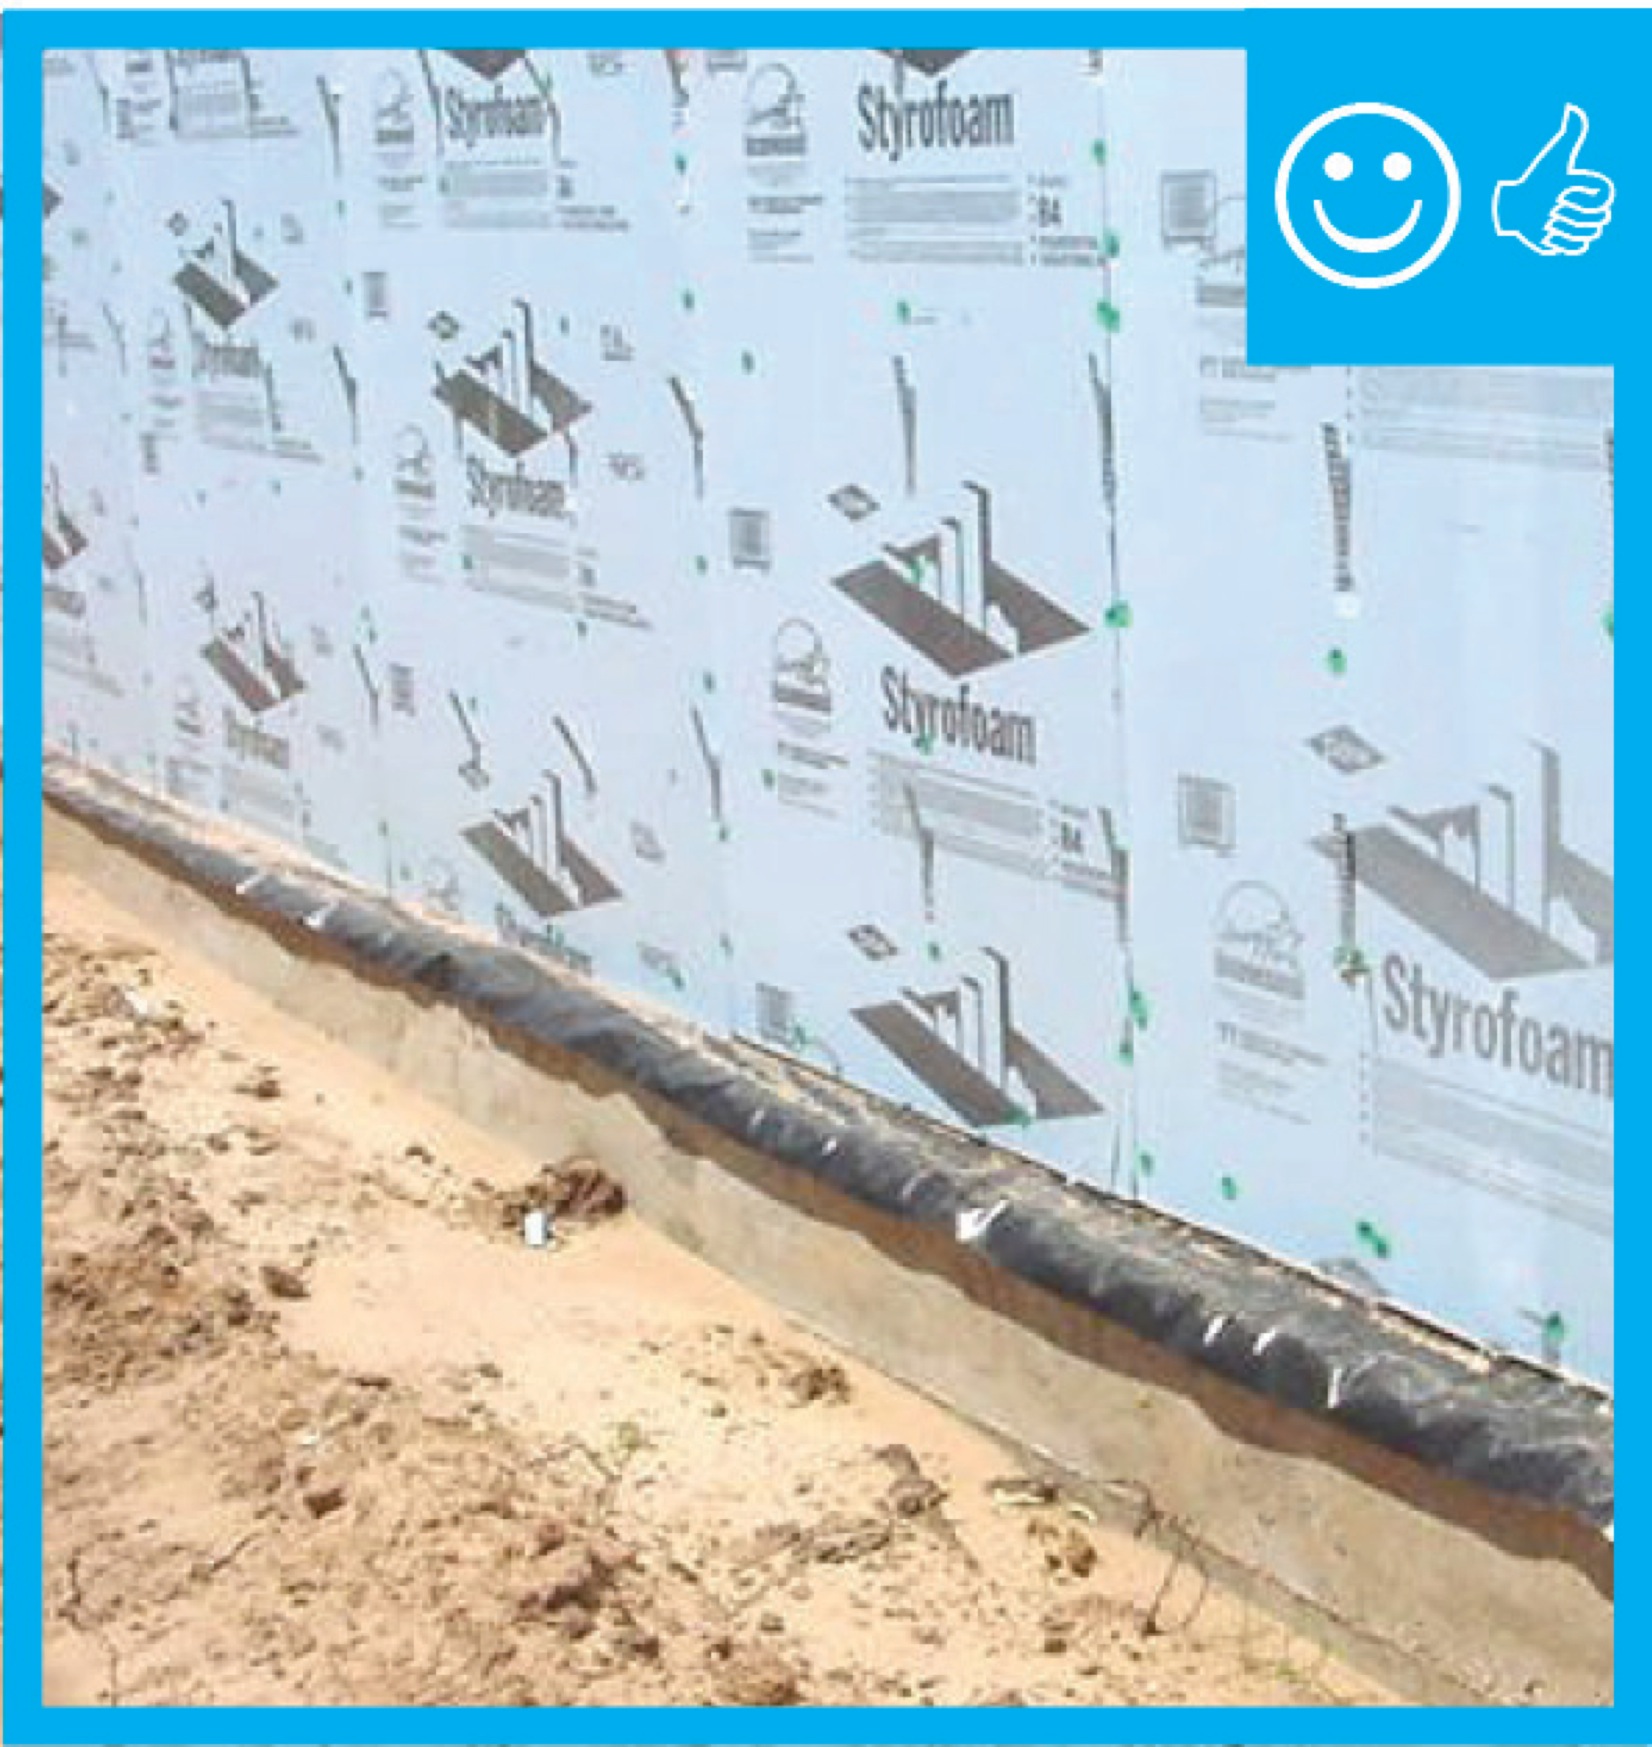
Right – The insulated concrete forms that are below-grade have a damp-proof coating to prevent moisture seeping into the foundation
Image
Image

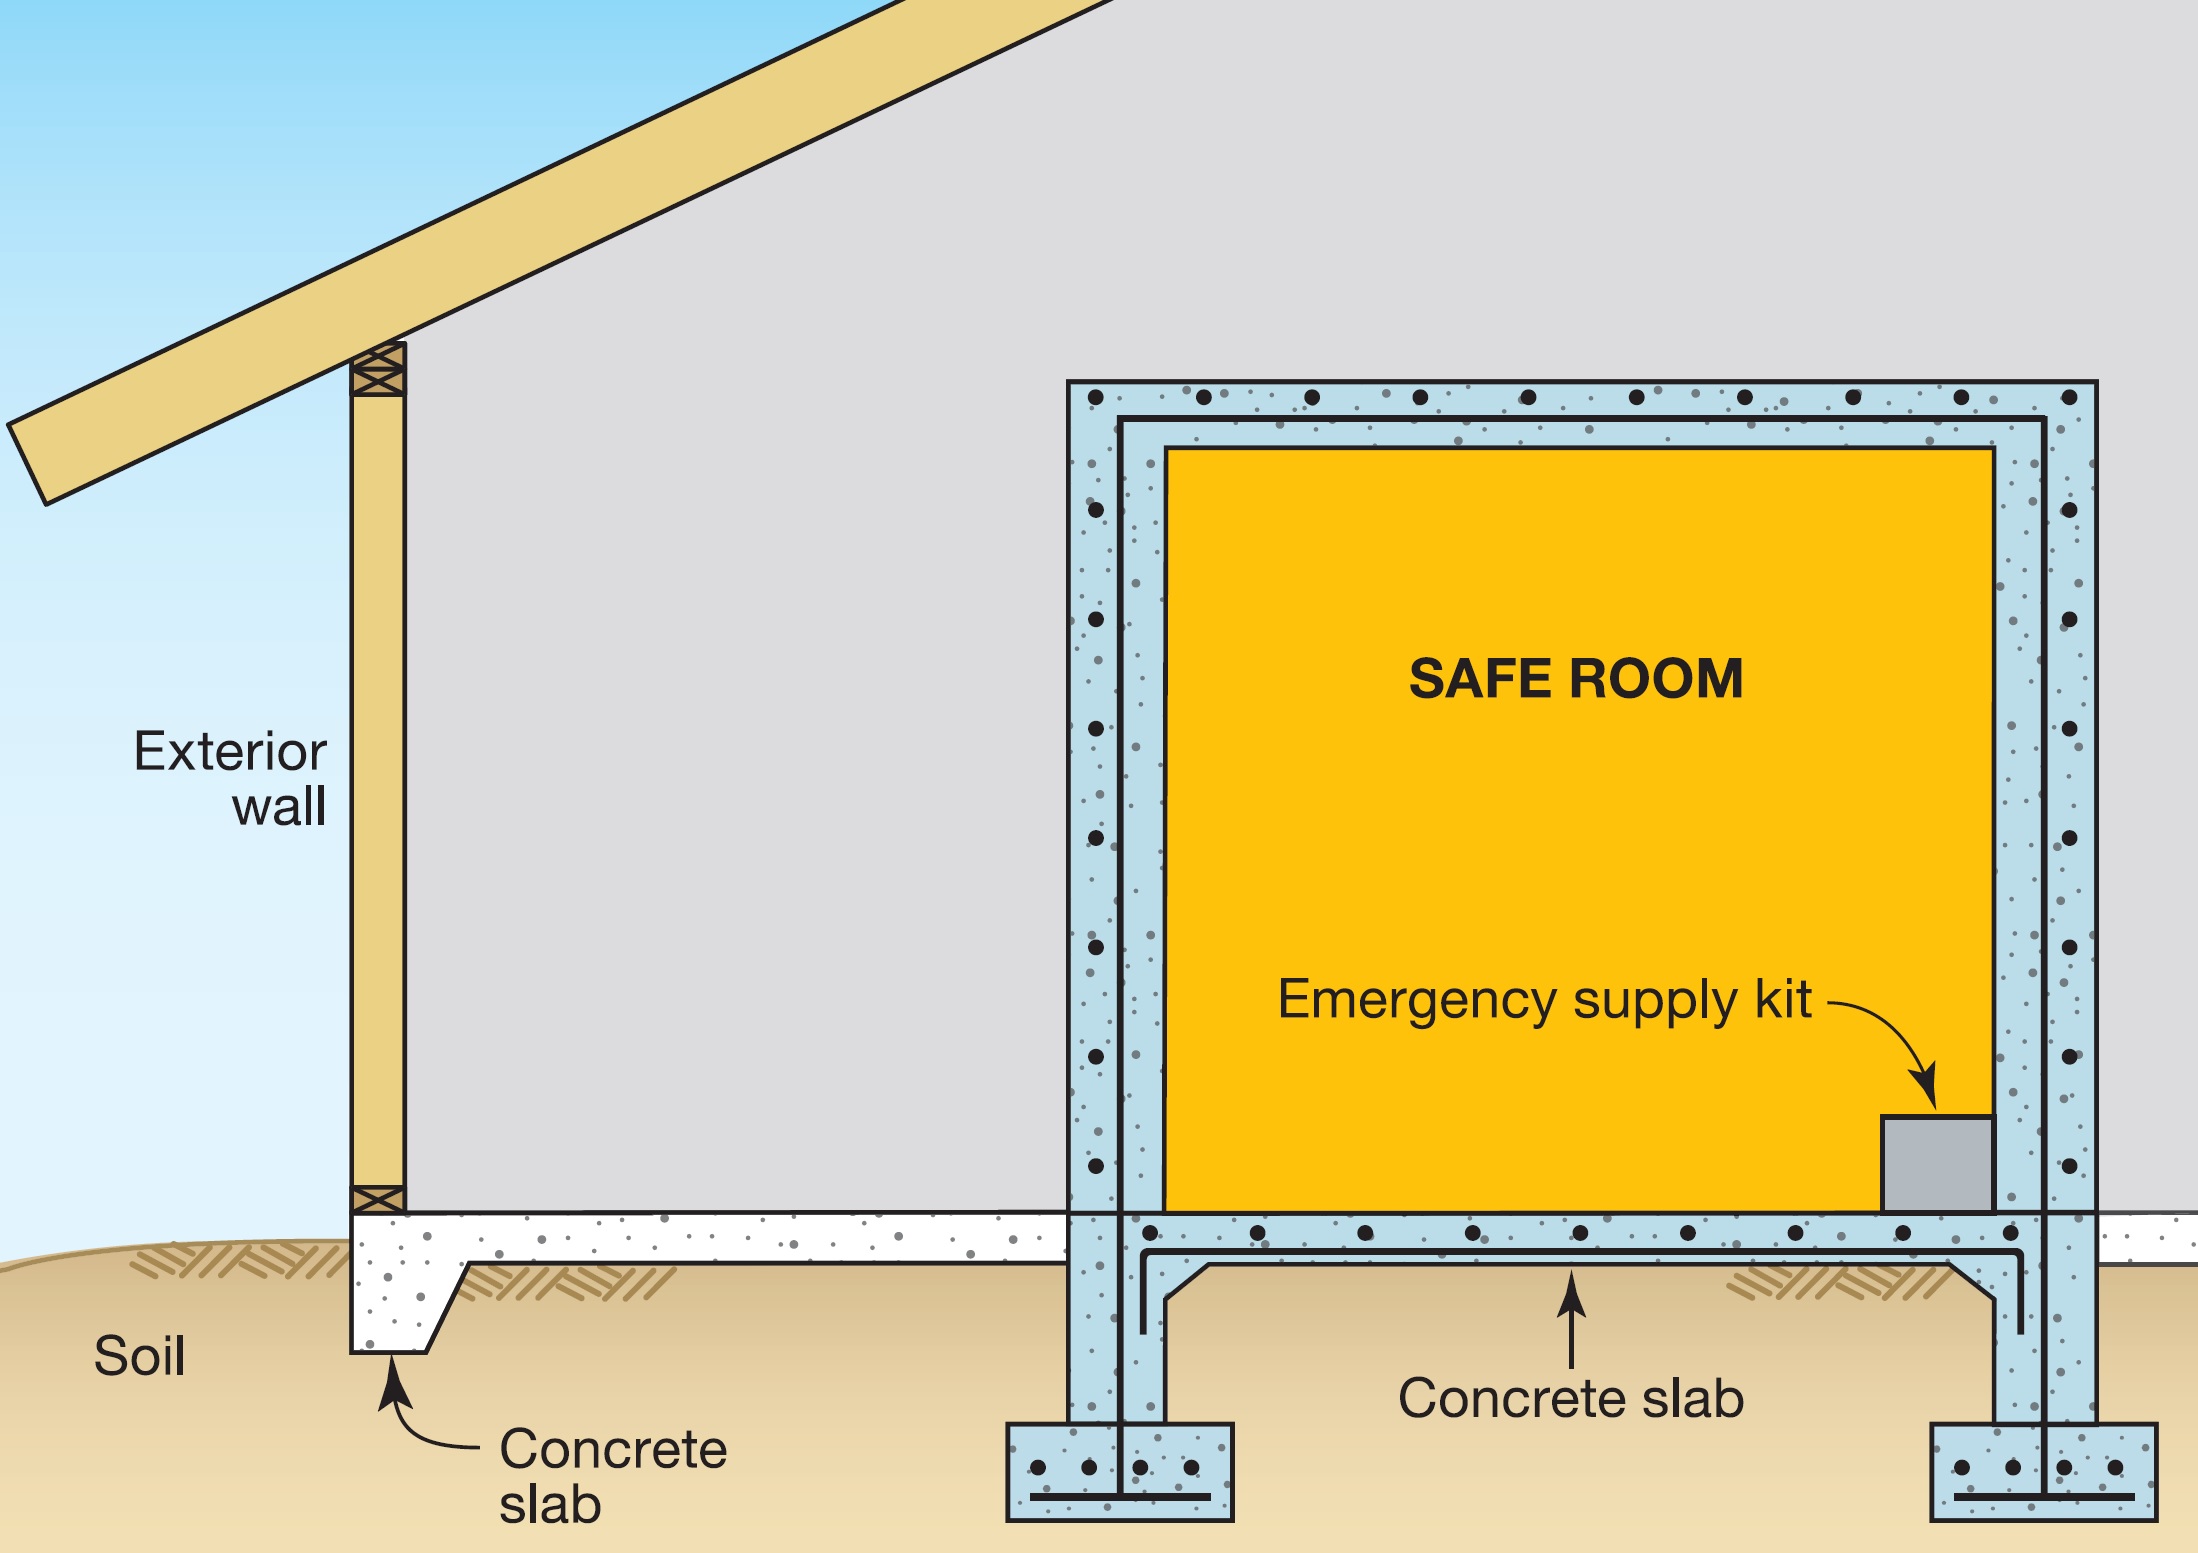
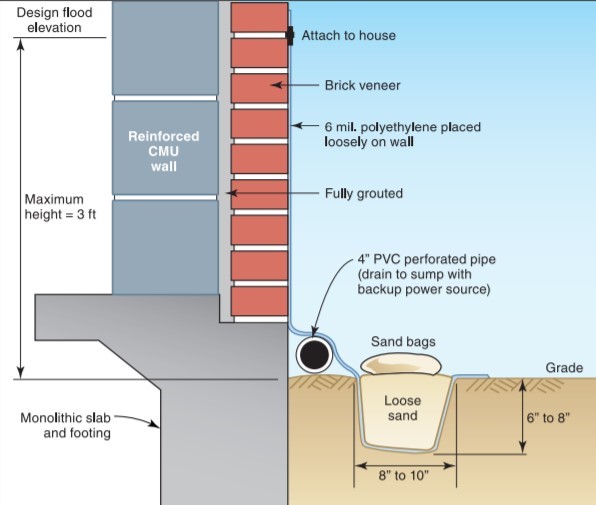
Right – The raised-slab, brick-and-block stem wall, above-grade walls, and roof of this house use flood damage-resistant materials, integrated water, vapor, and air control layers, and construction methods which promote good drainage and rapid drying
Image
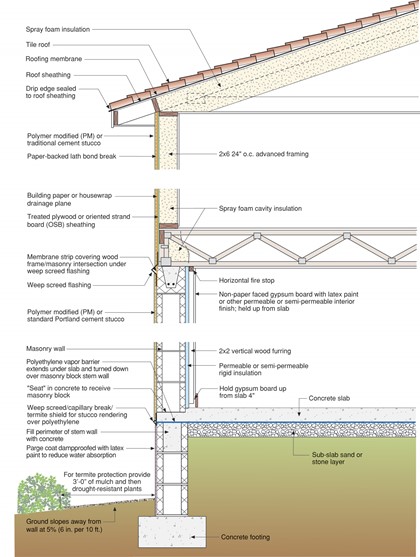
Right – The raised-slab, CMU block stem wall, above-grade walls, and roof of this house use flood damage-resistant materials, integrated water, vapor, and air control layers, and construction methods which promote good drainage and rapid drying
Image
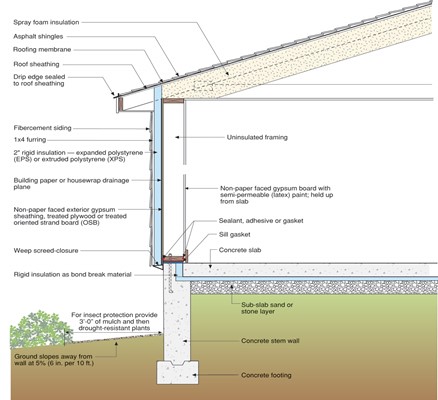
Right – The raised-slab, poured-concrete stem wall, above-grade walls, and roof of this house use flood damage-resistant materials, integrated water, vapor, and air control layers, and construction methods which promote good drainage and rapid drying
Image
Right – The rigid insulation covers all exterior walls and all seams are taped to provide a complete drainage system
Image
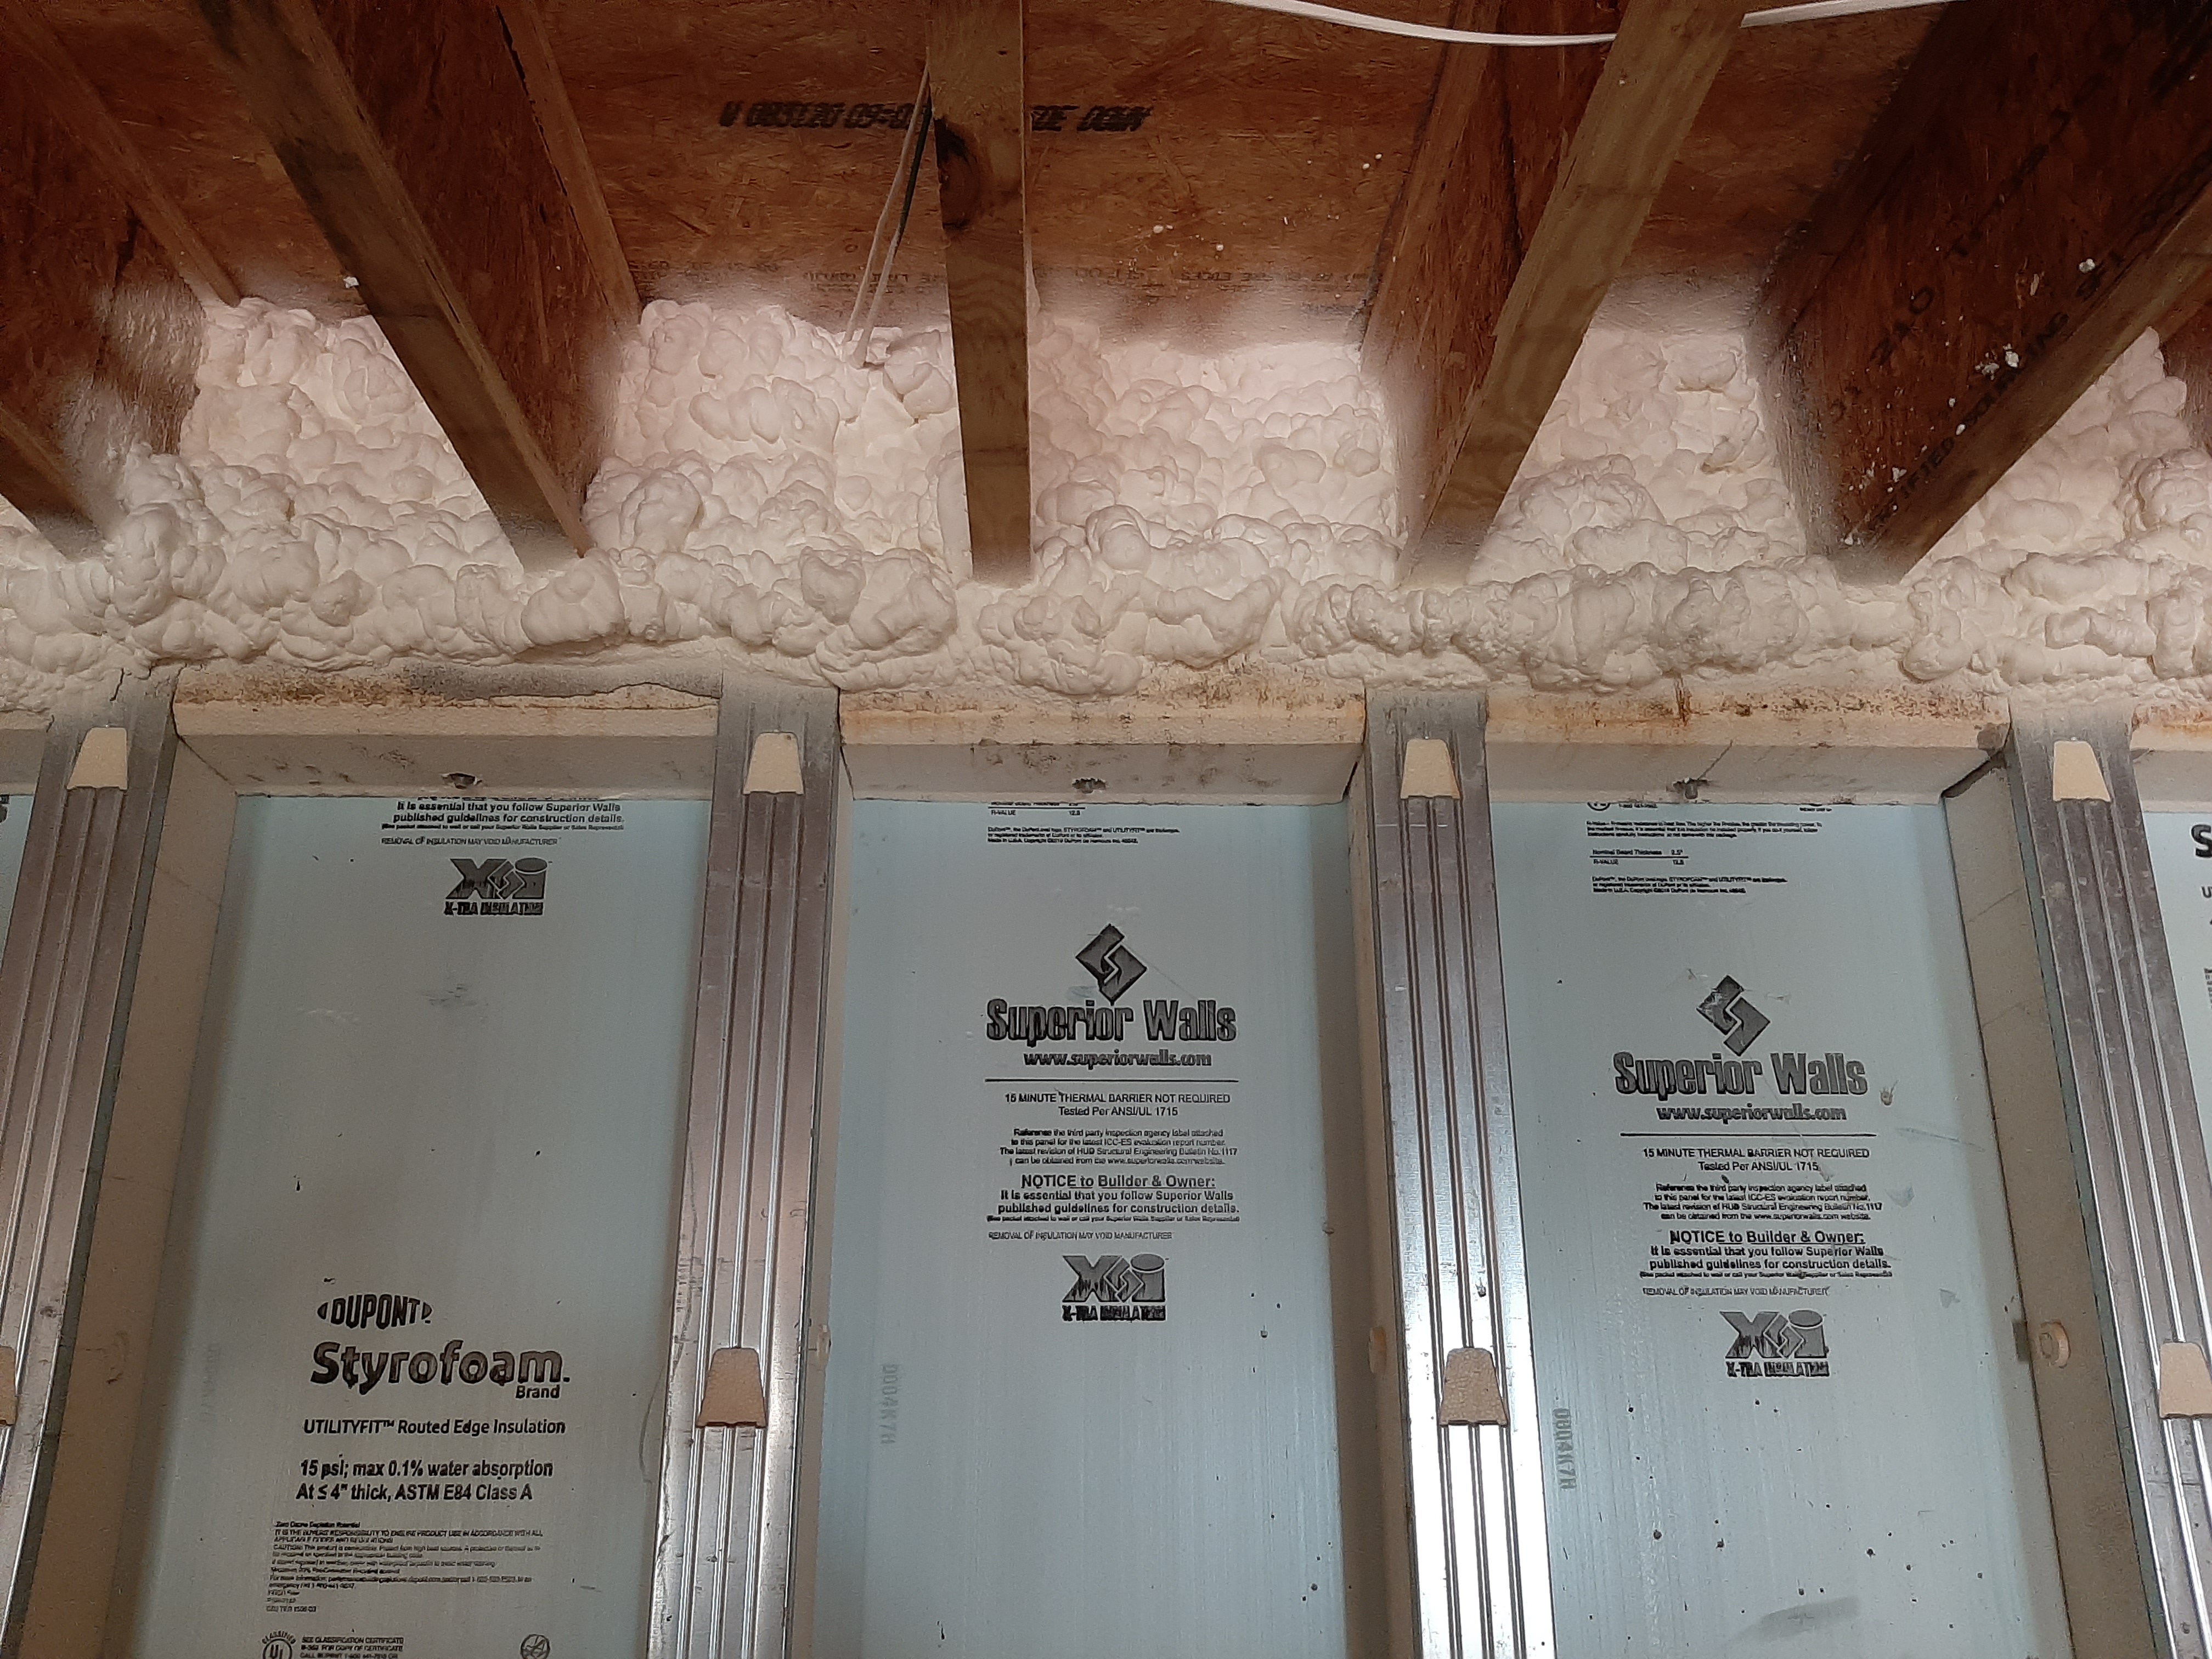
Right – The rim joists above the pre-insulated basement walls are sealed and insulated with spray foam to prevent air leakage at this juncture in the building envelope.
Image
Right – The sill plate was sprayed with foam prior to installation atop foundation.
Image

Image

Right – The termination of this kitchen exhaust duct is sealed to the wall to keep out air and water and is screened to keep out pests.
Image
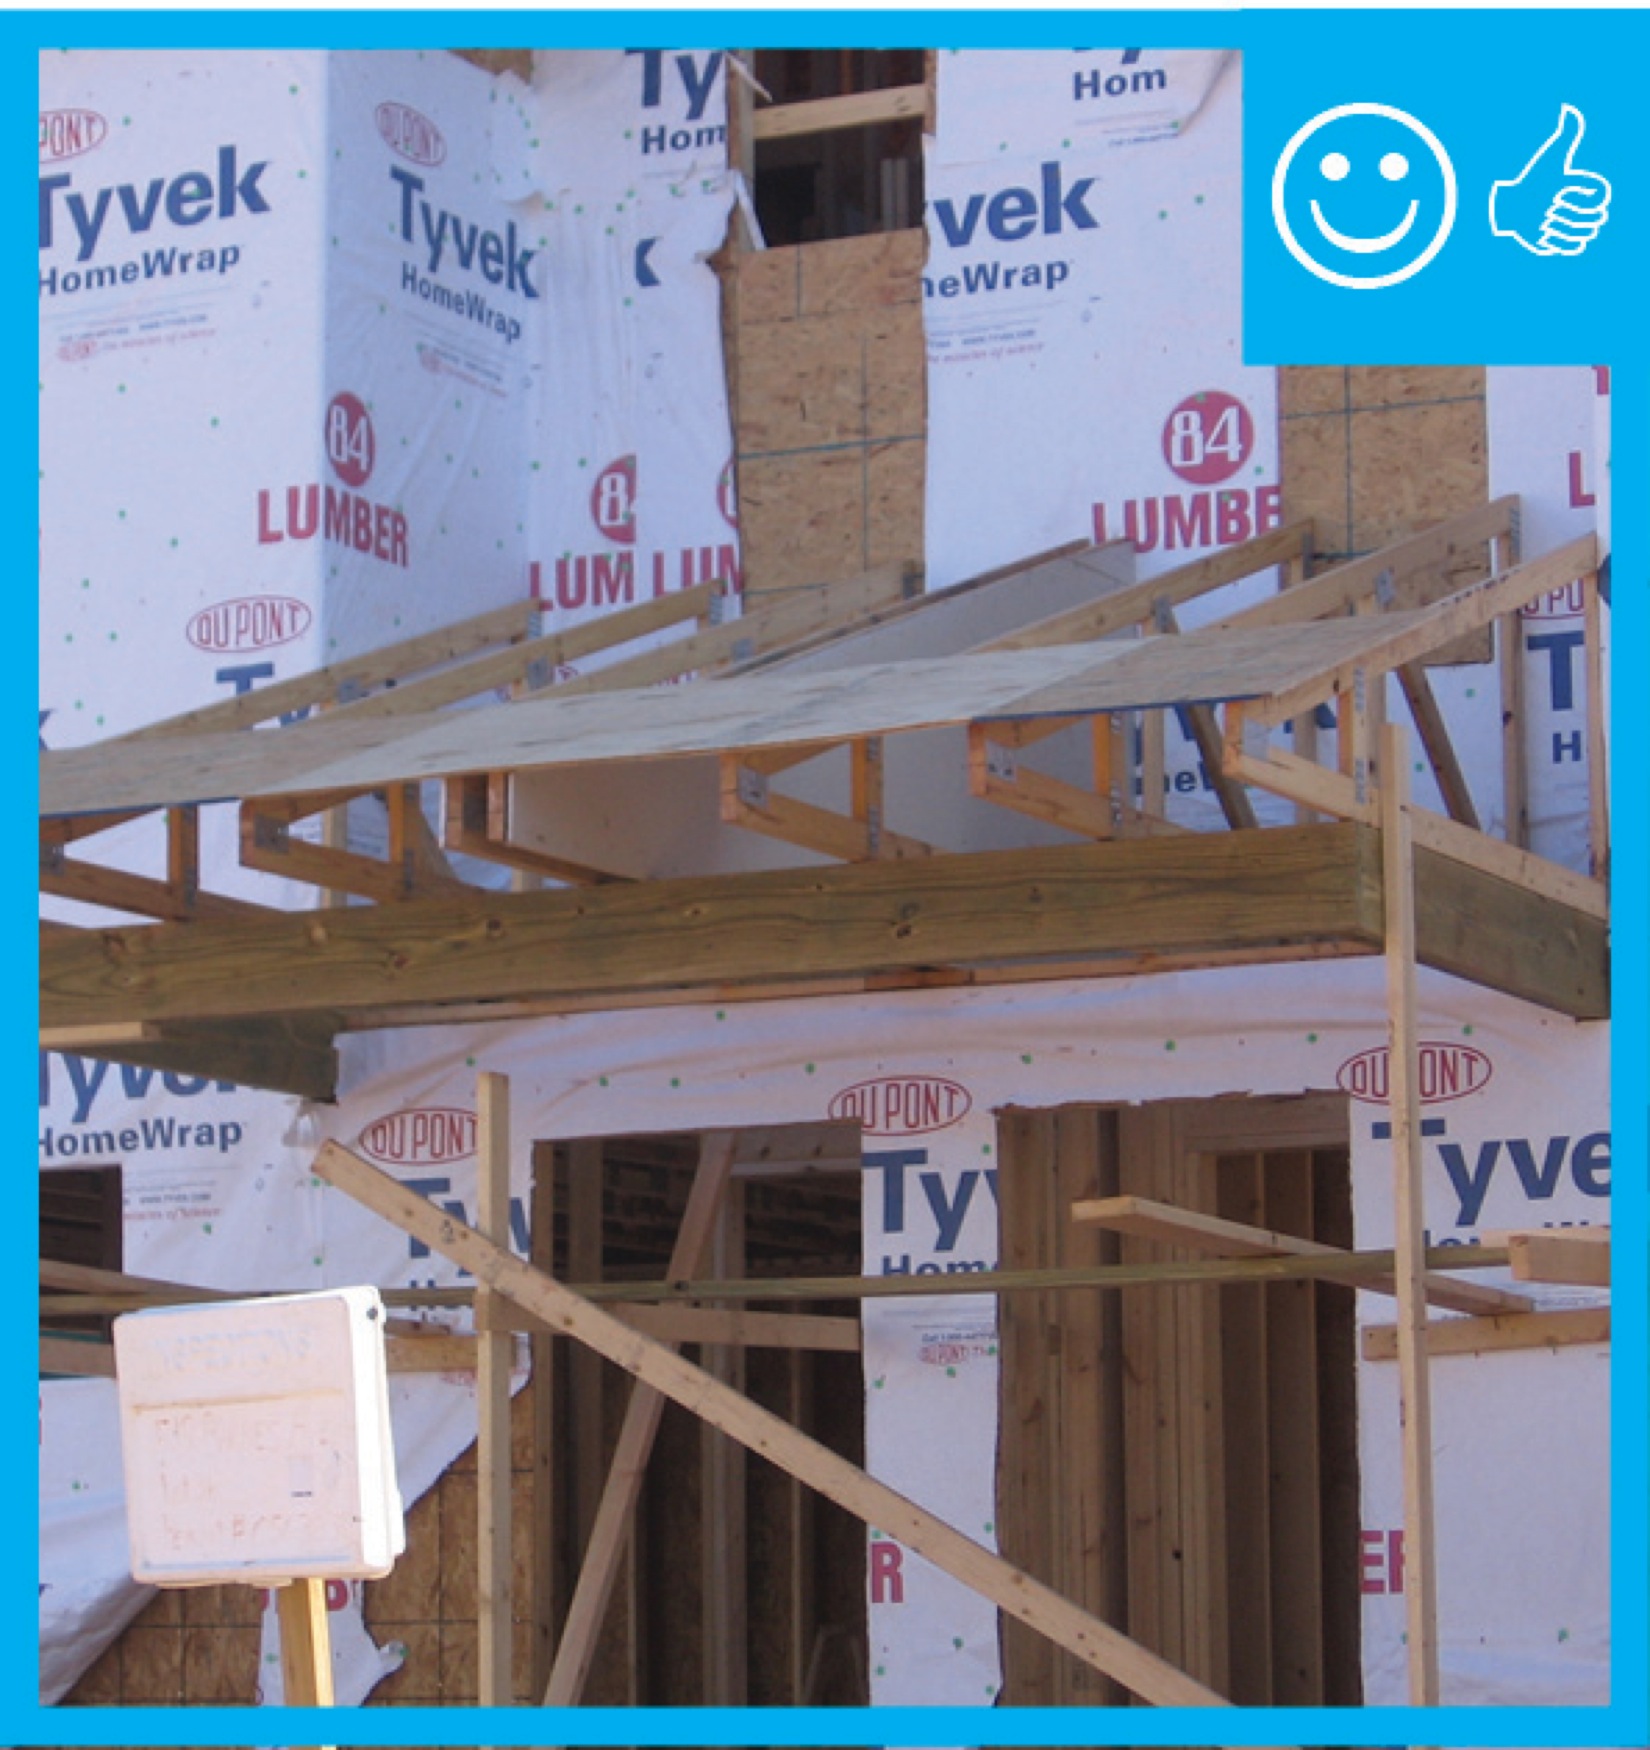
Right – The water-resistant barrier covers the entire house and the seams are taped to provide a complete drainage system
Image
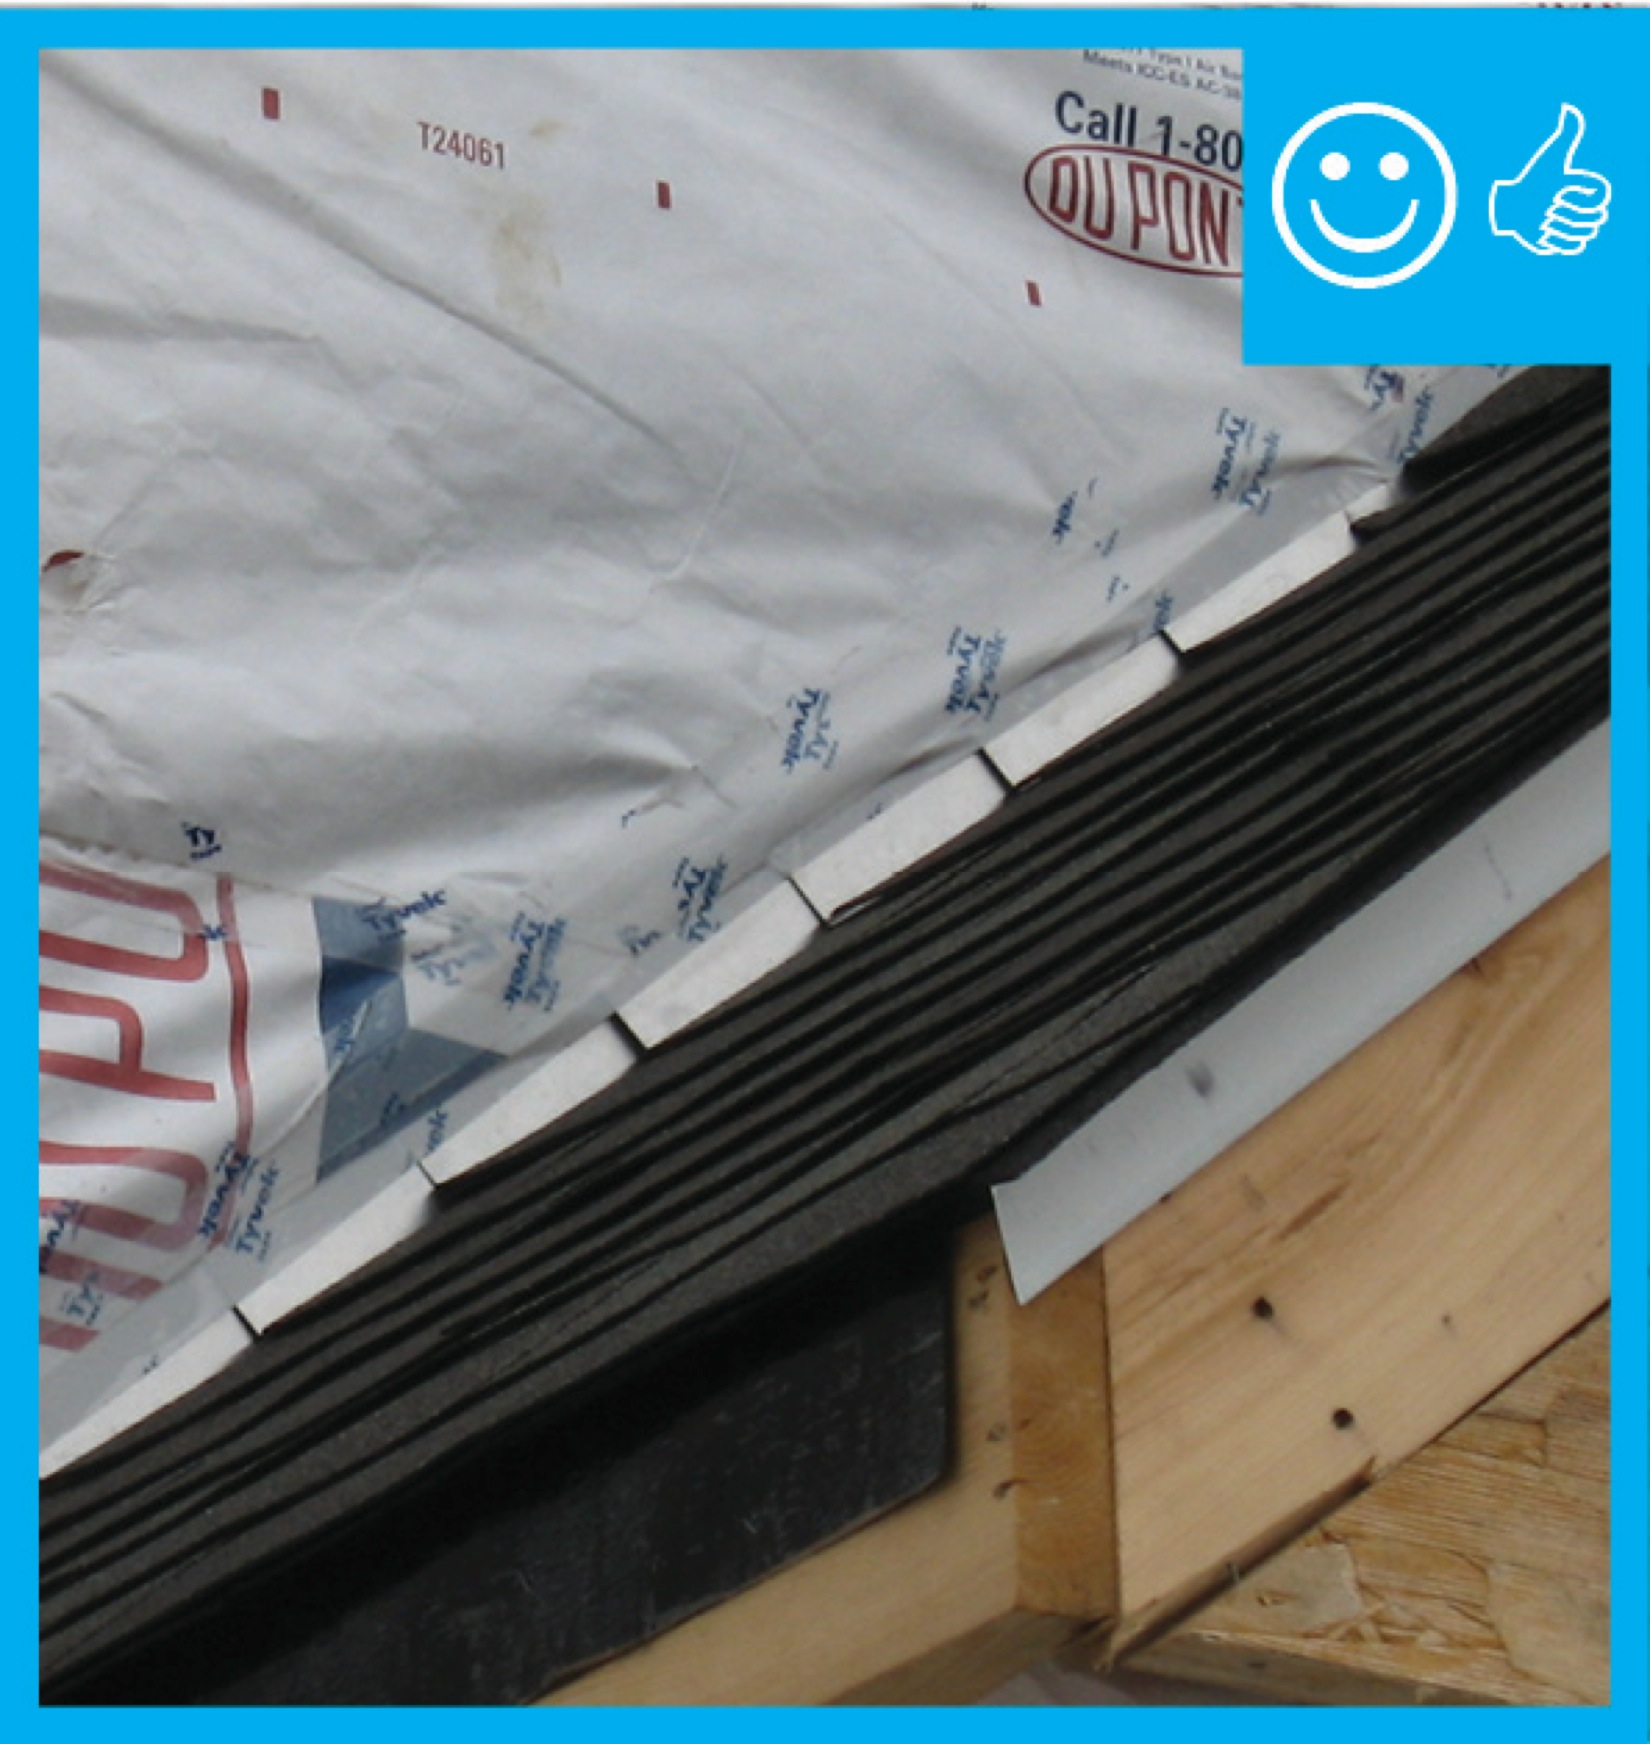
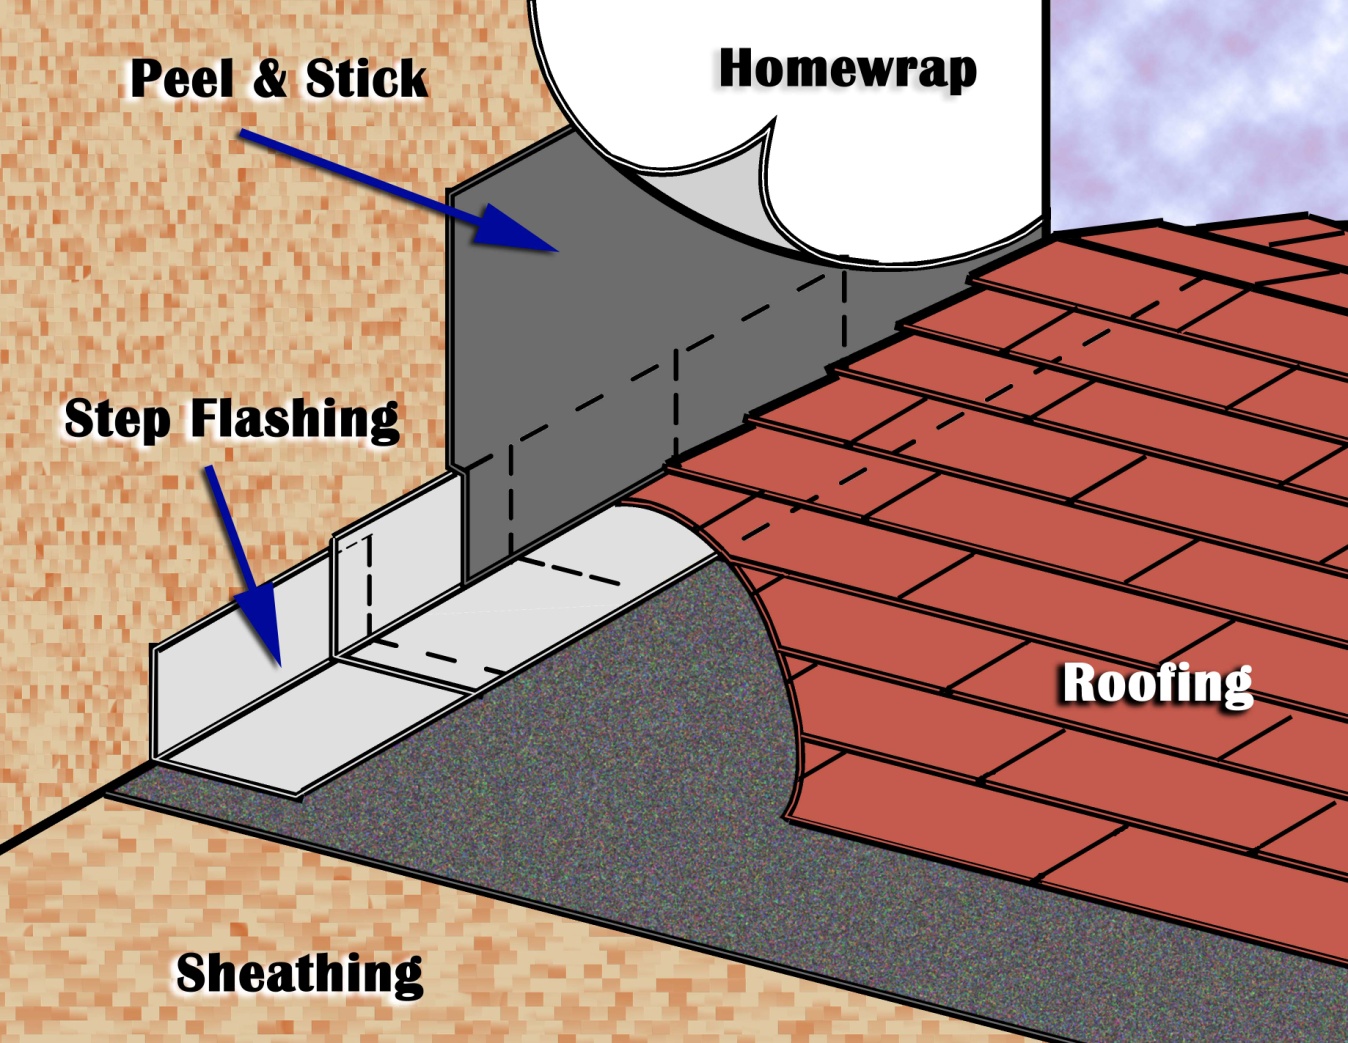
Right – The water-resistant barrier is layered over the step flashing to provide a complete drainage system
Image
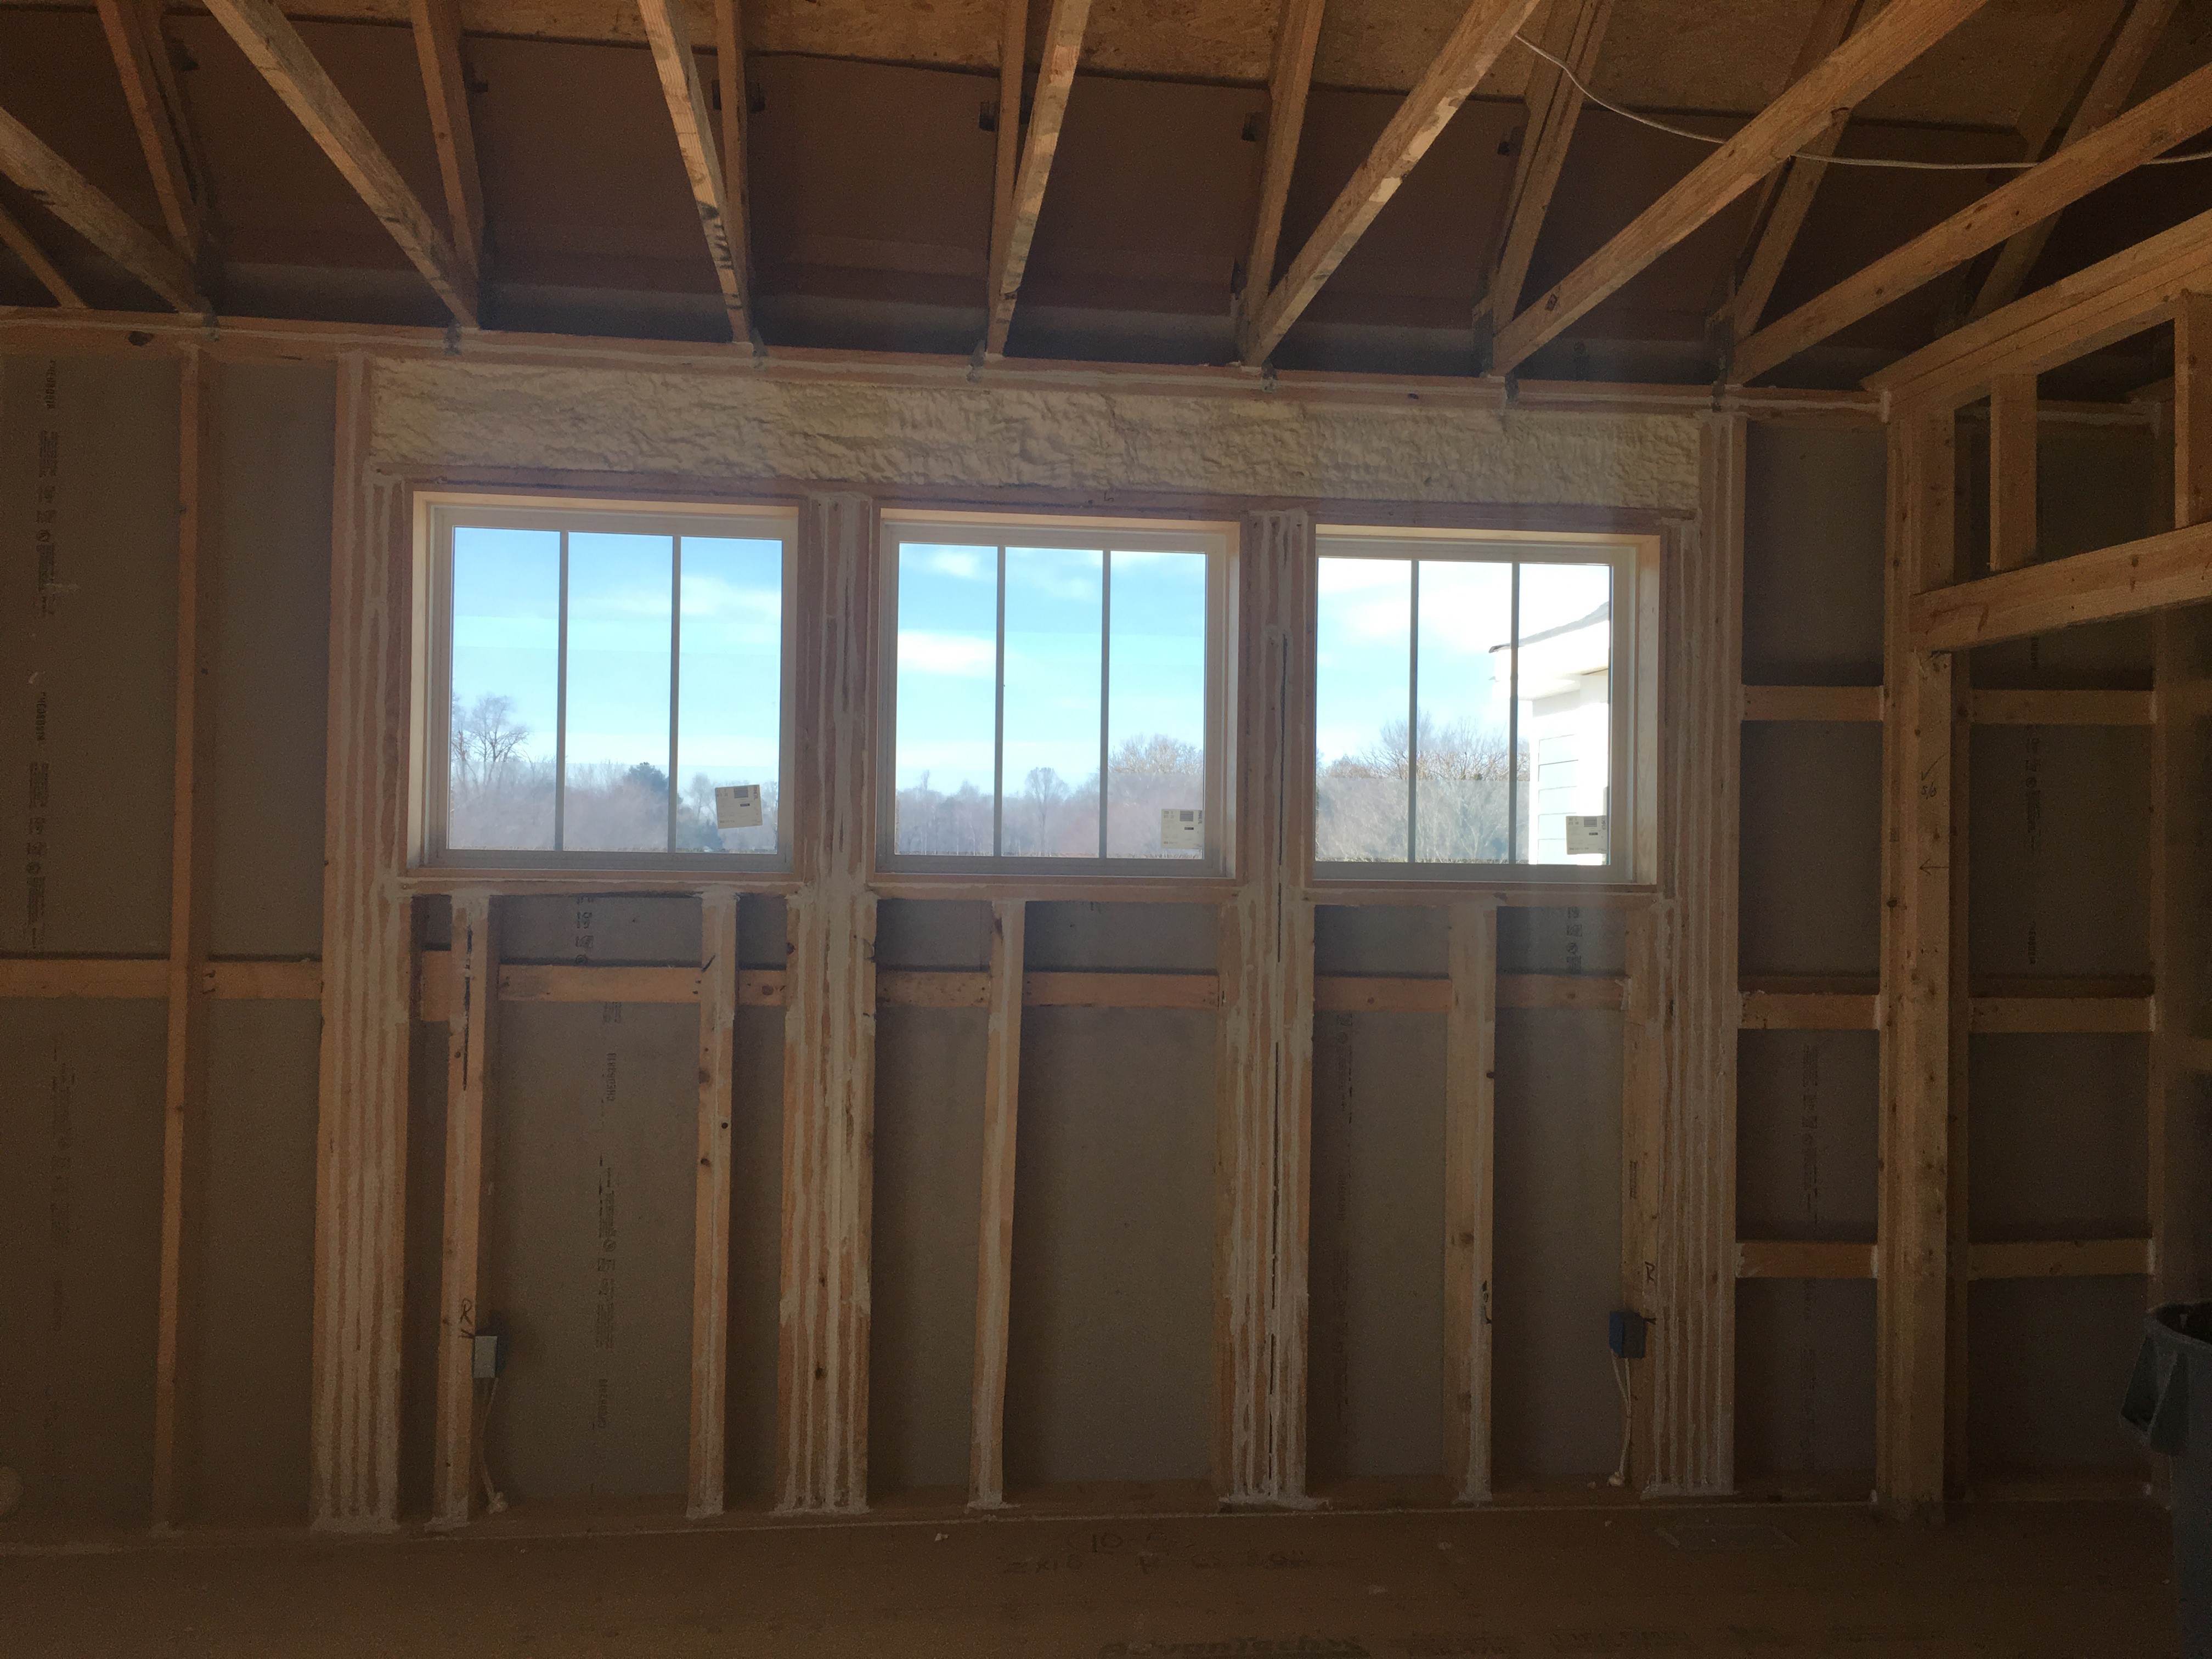
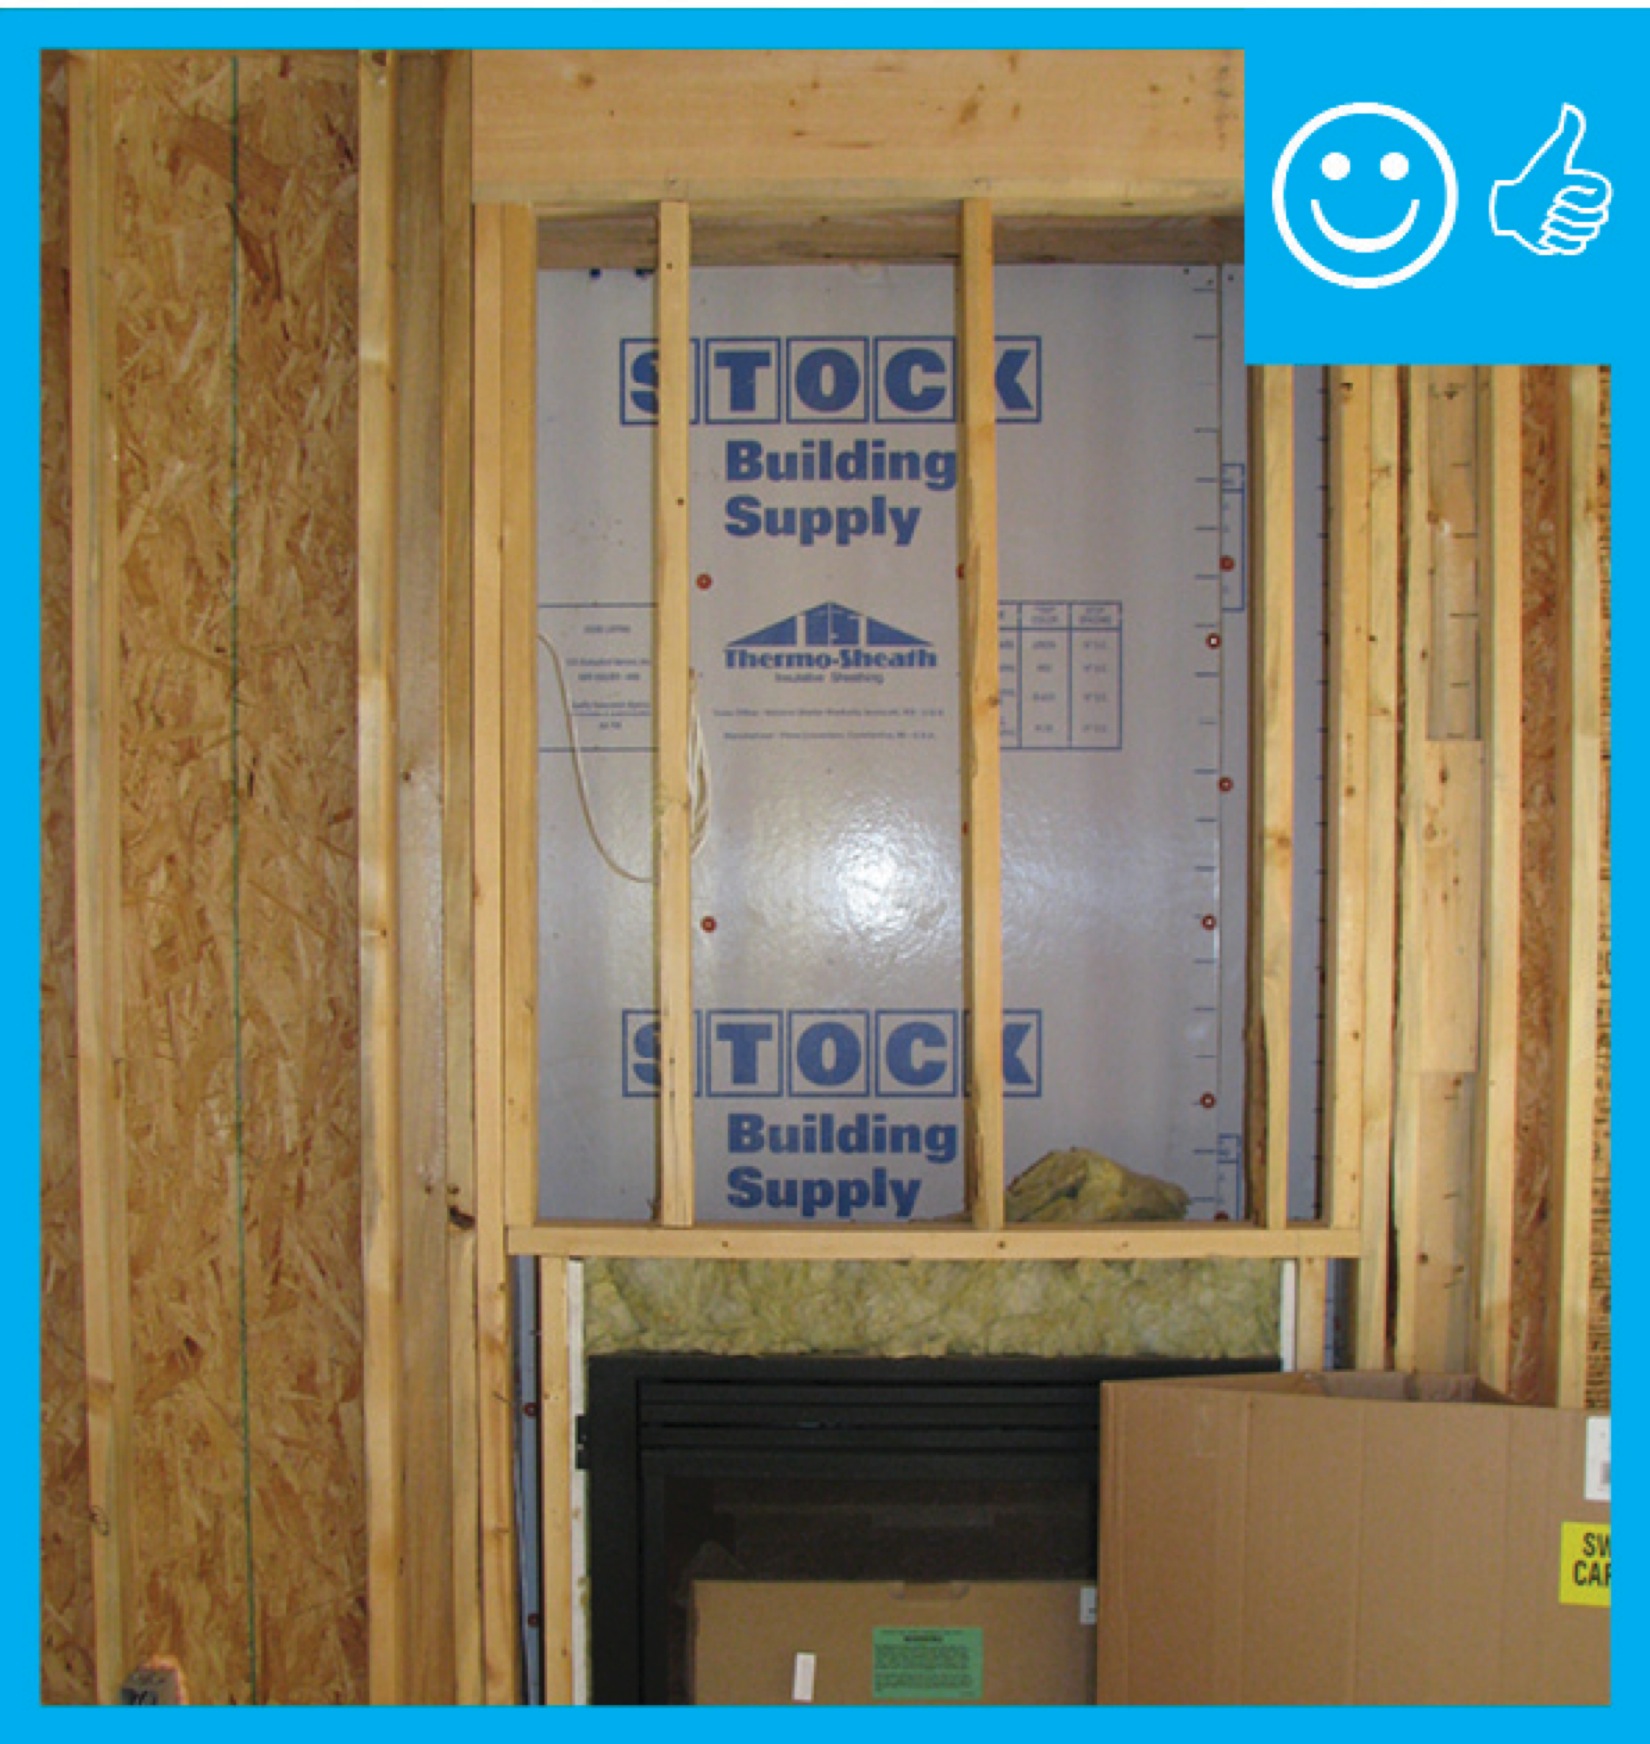
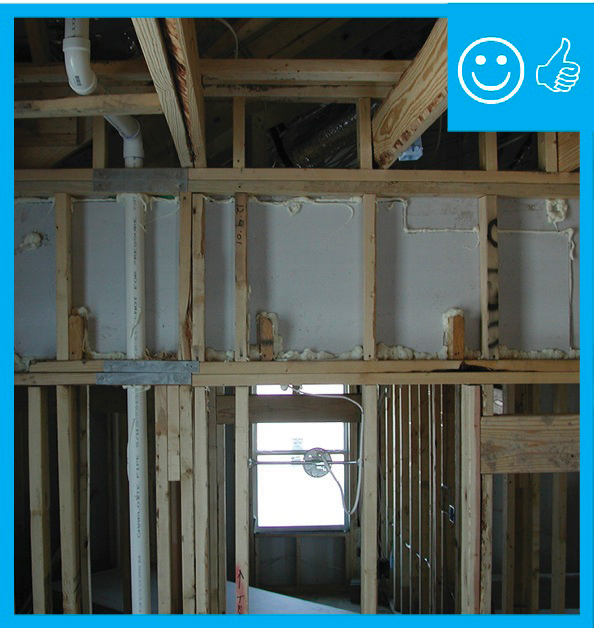
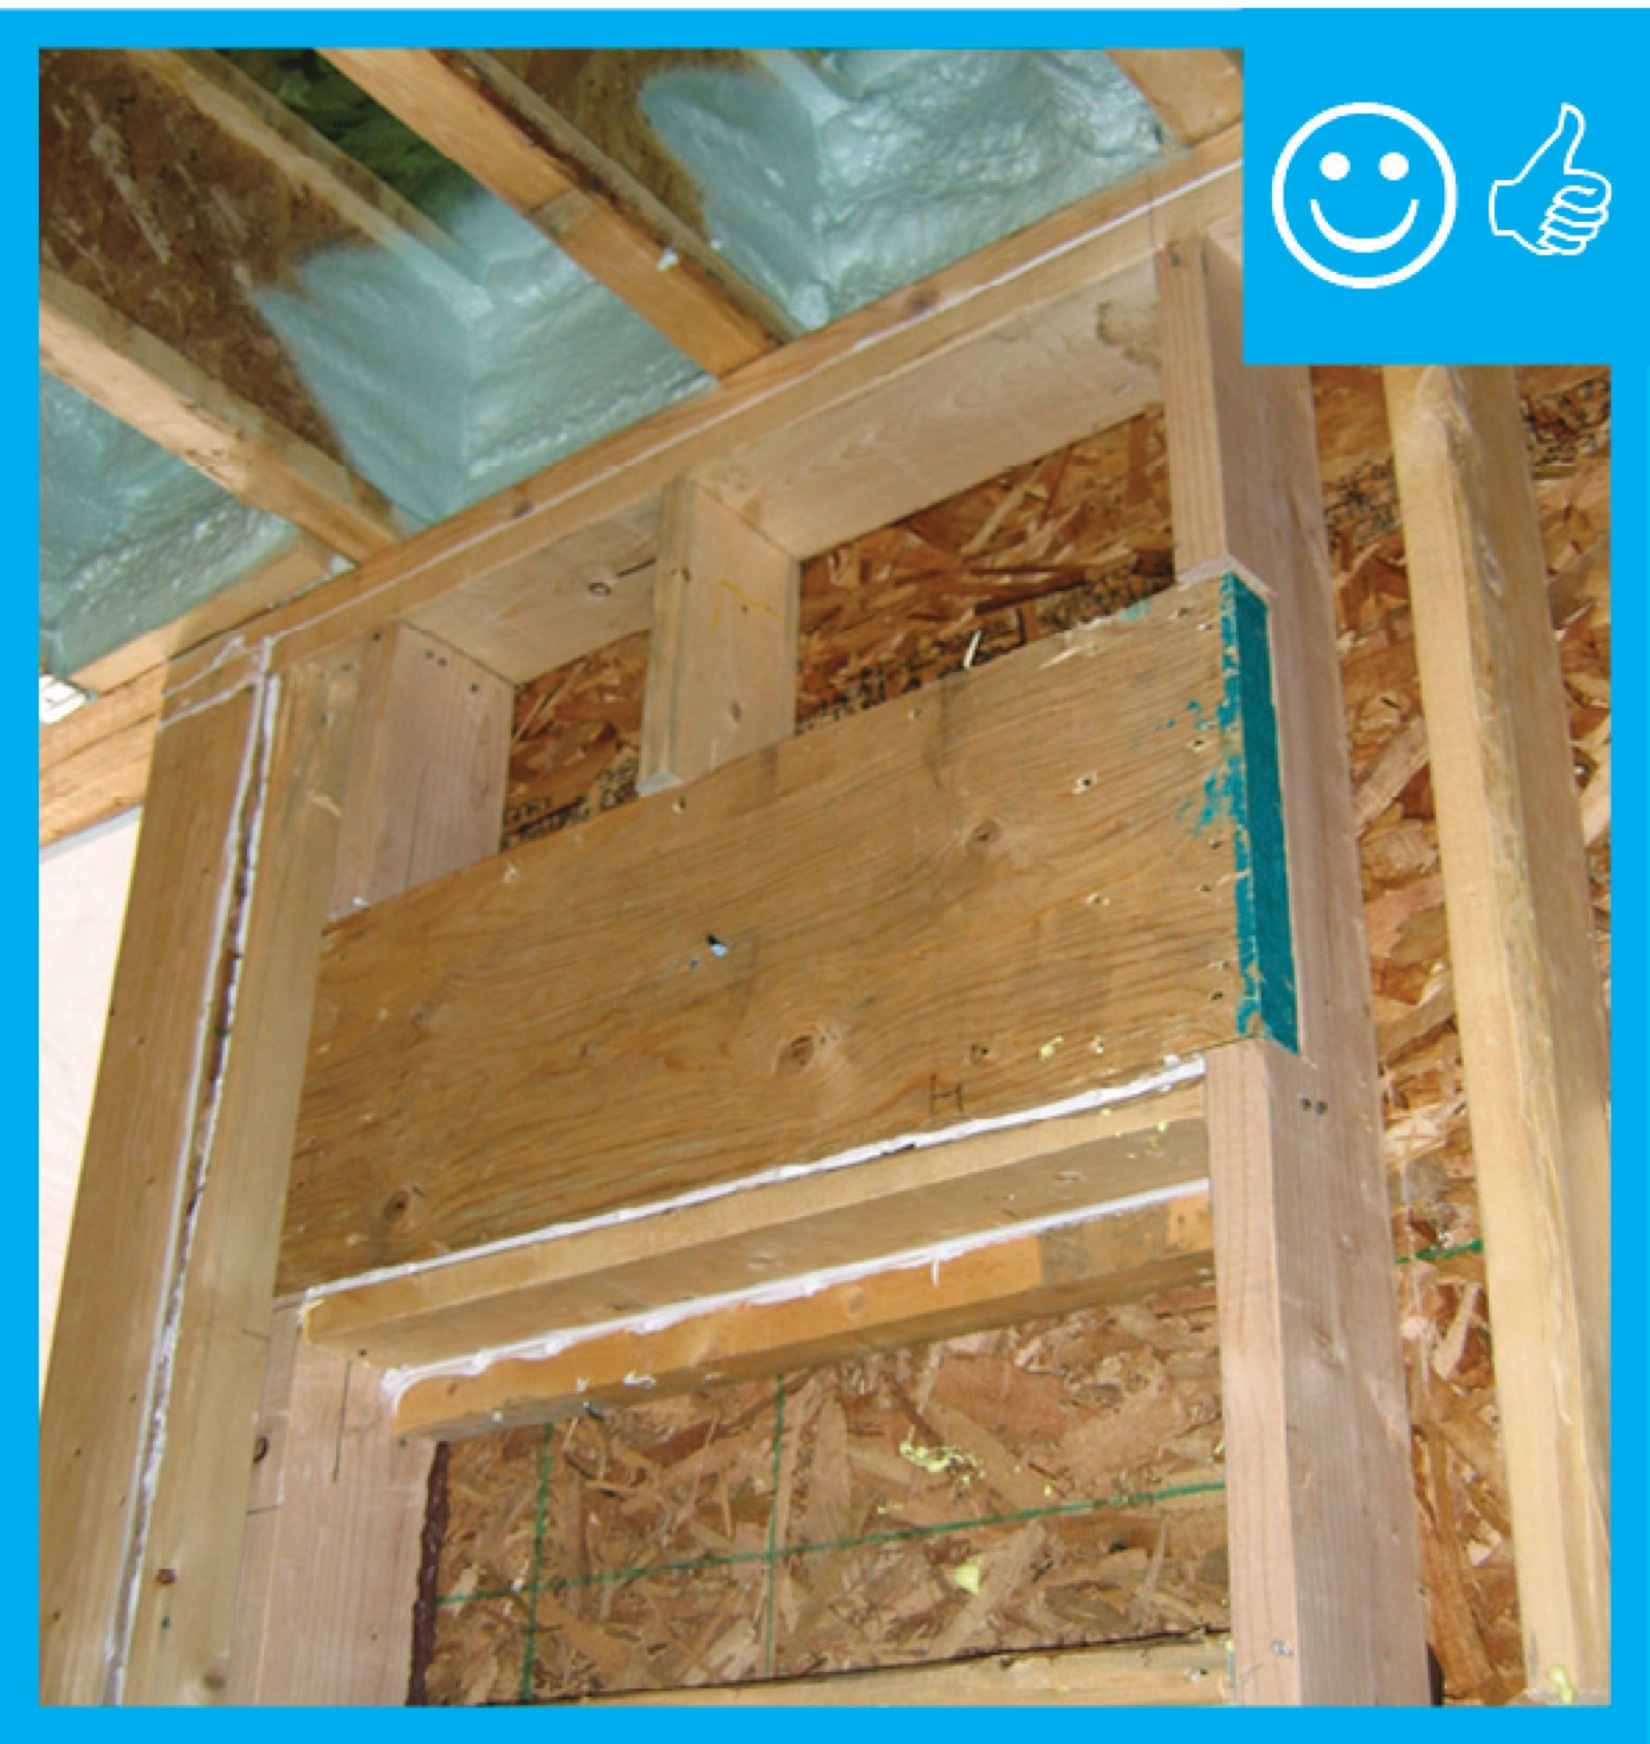
Right – The window header is filled with spray foam and sealant is used to air seal wood-to-wood seams; however, it would be preferable to design the wall to avoid so many stacked studs around the windows because they prevent wall insulation installation.
Image
Image
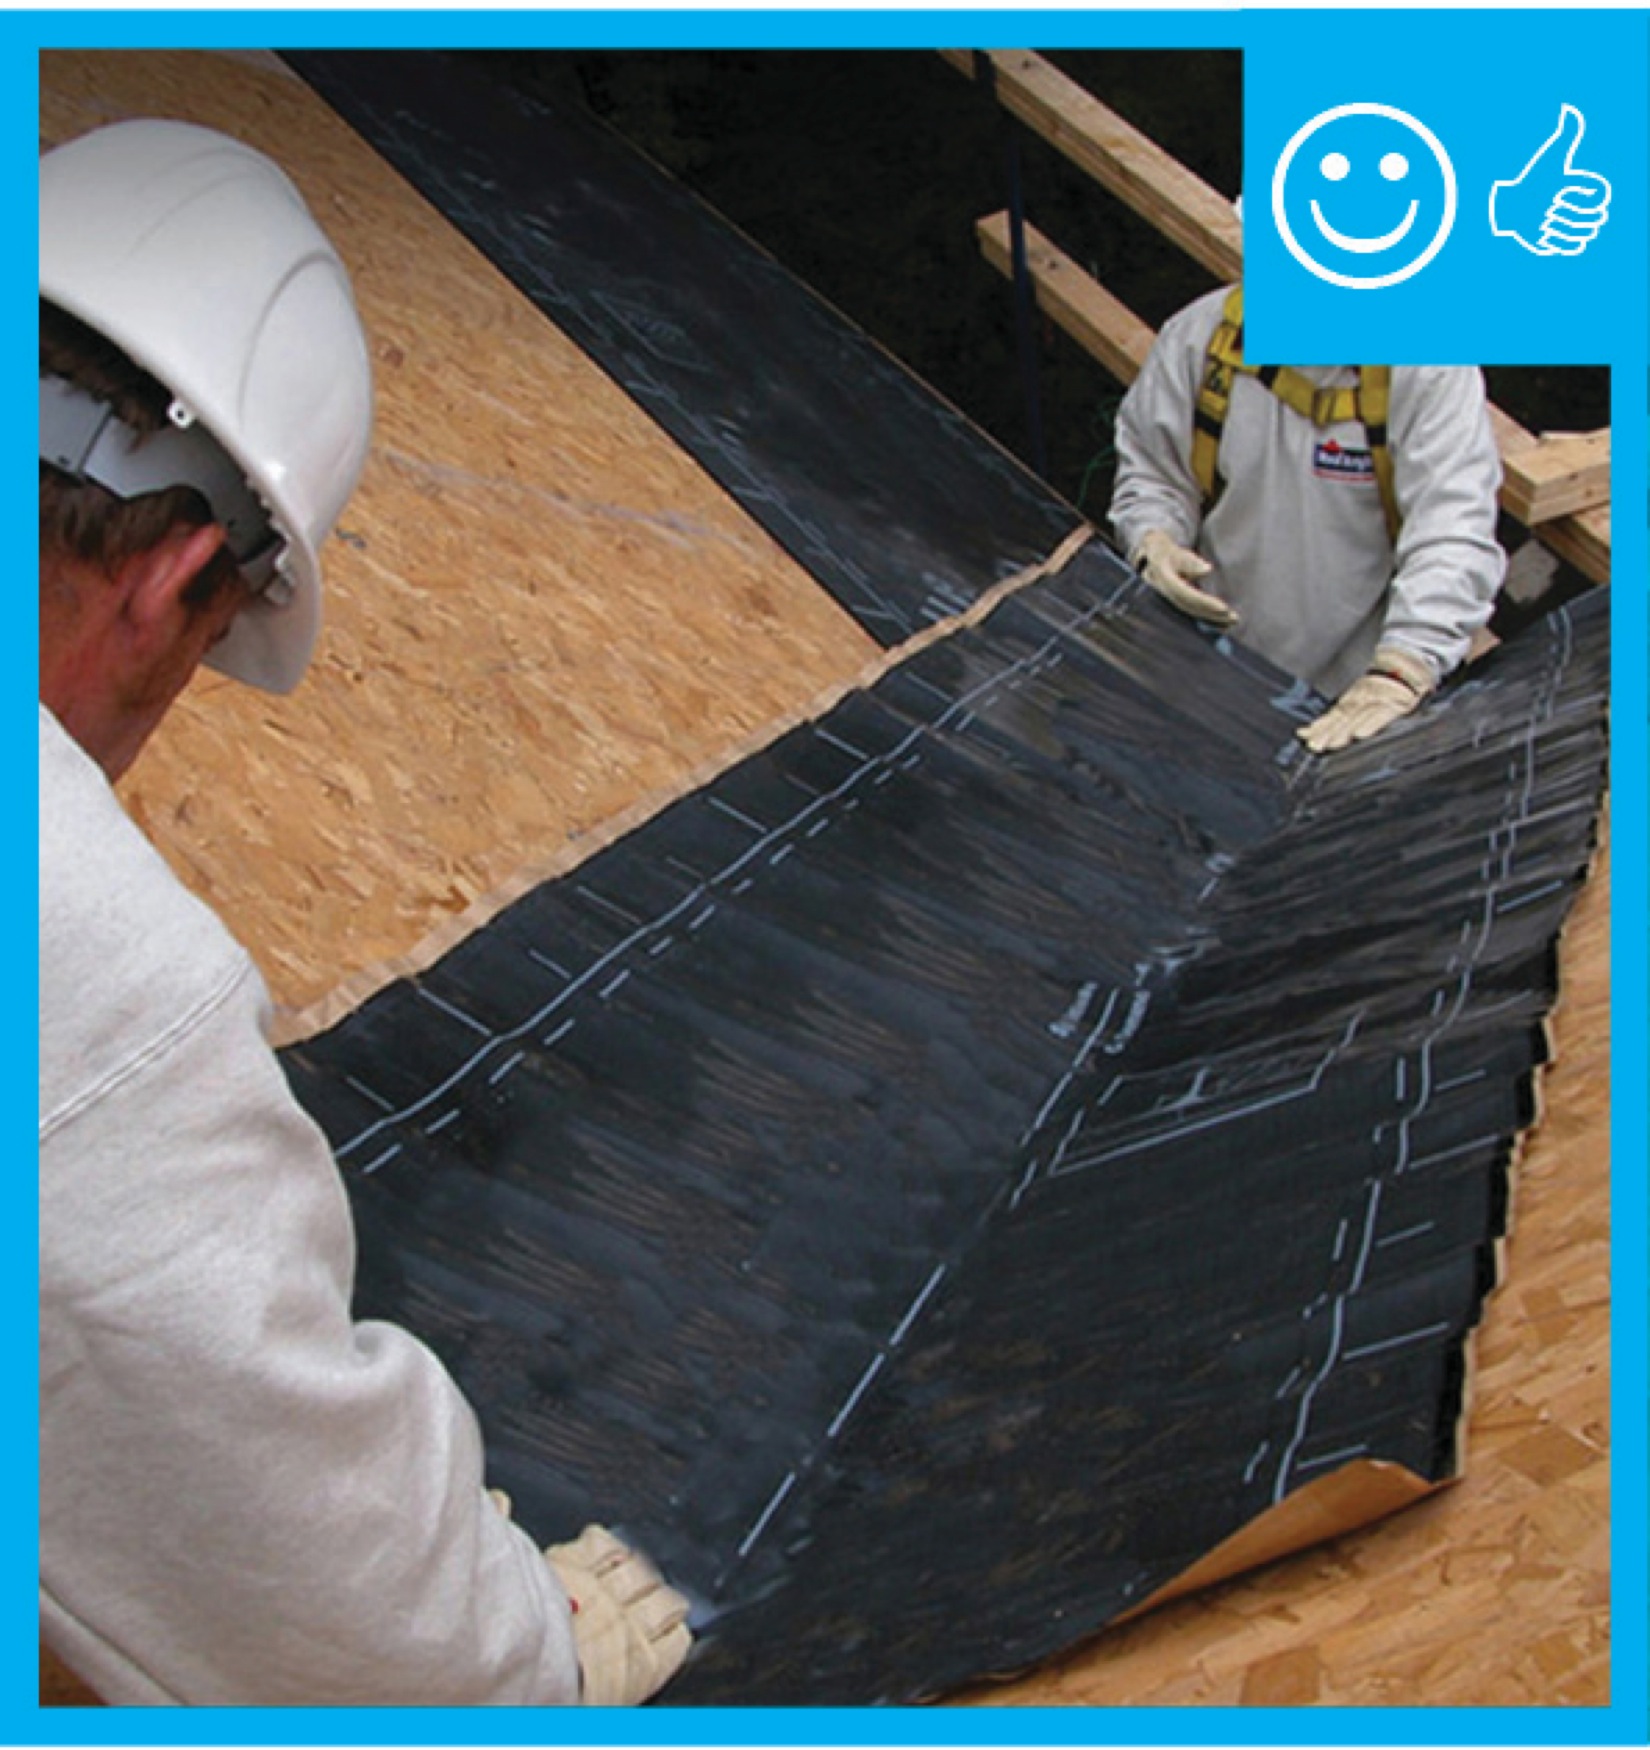
Right – There is a self-sealing bituminous membrane installed at the valley of the roof prior to the roof felt
Image
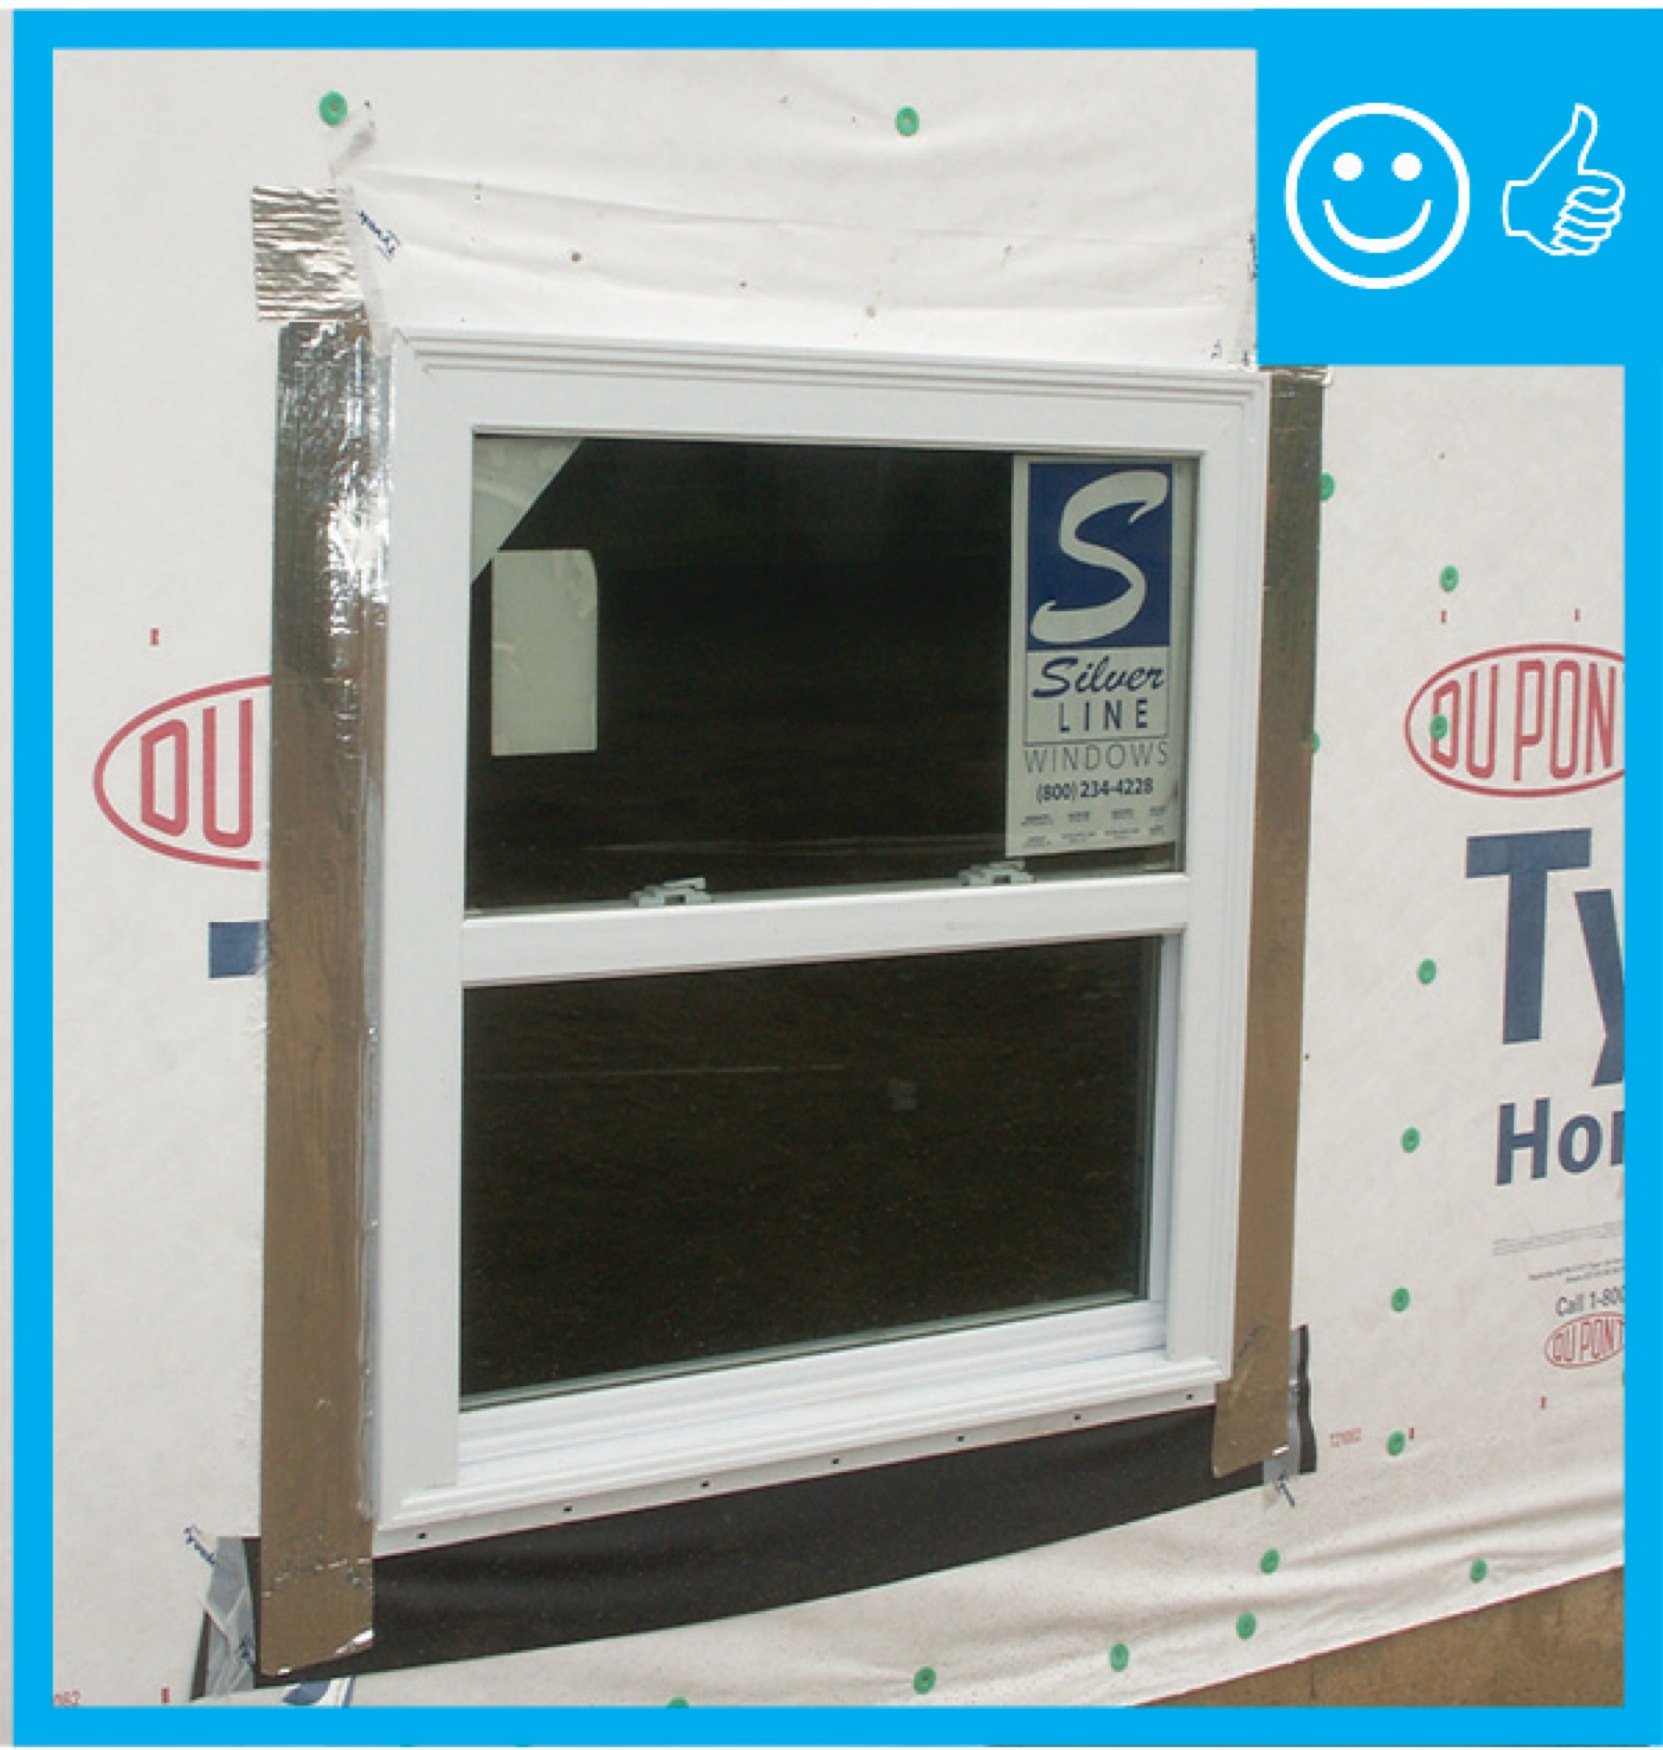
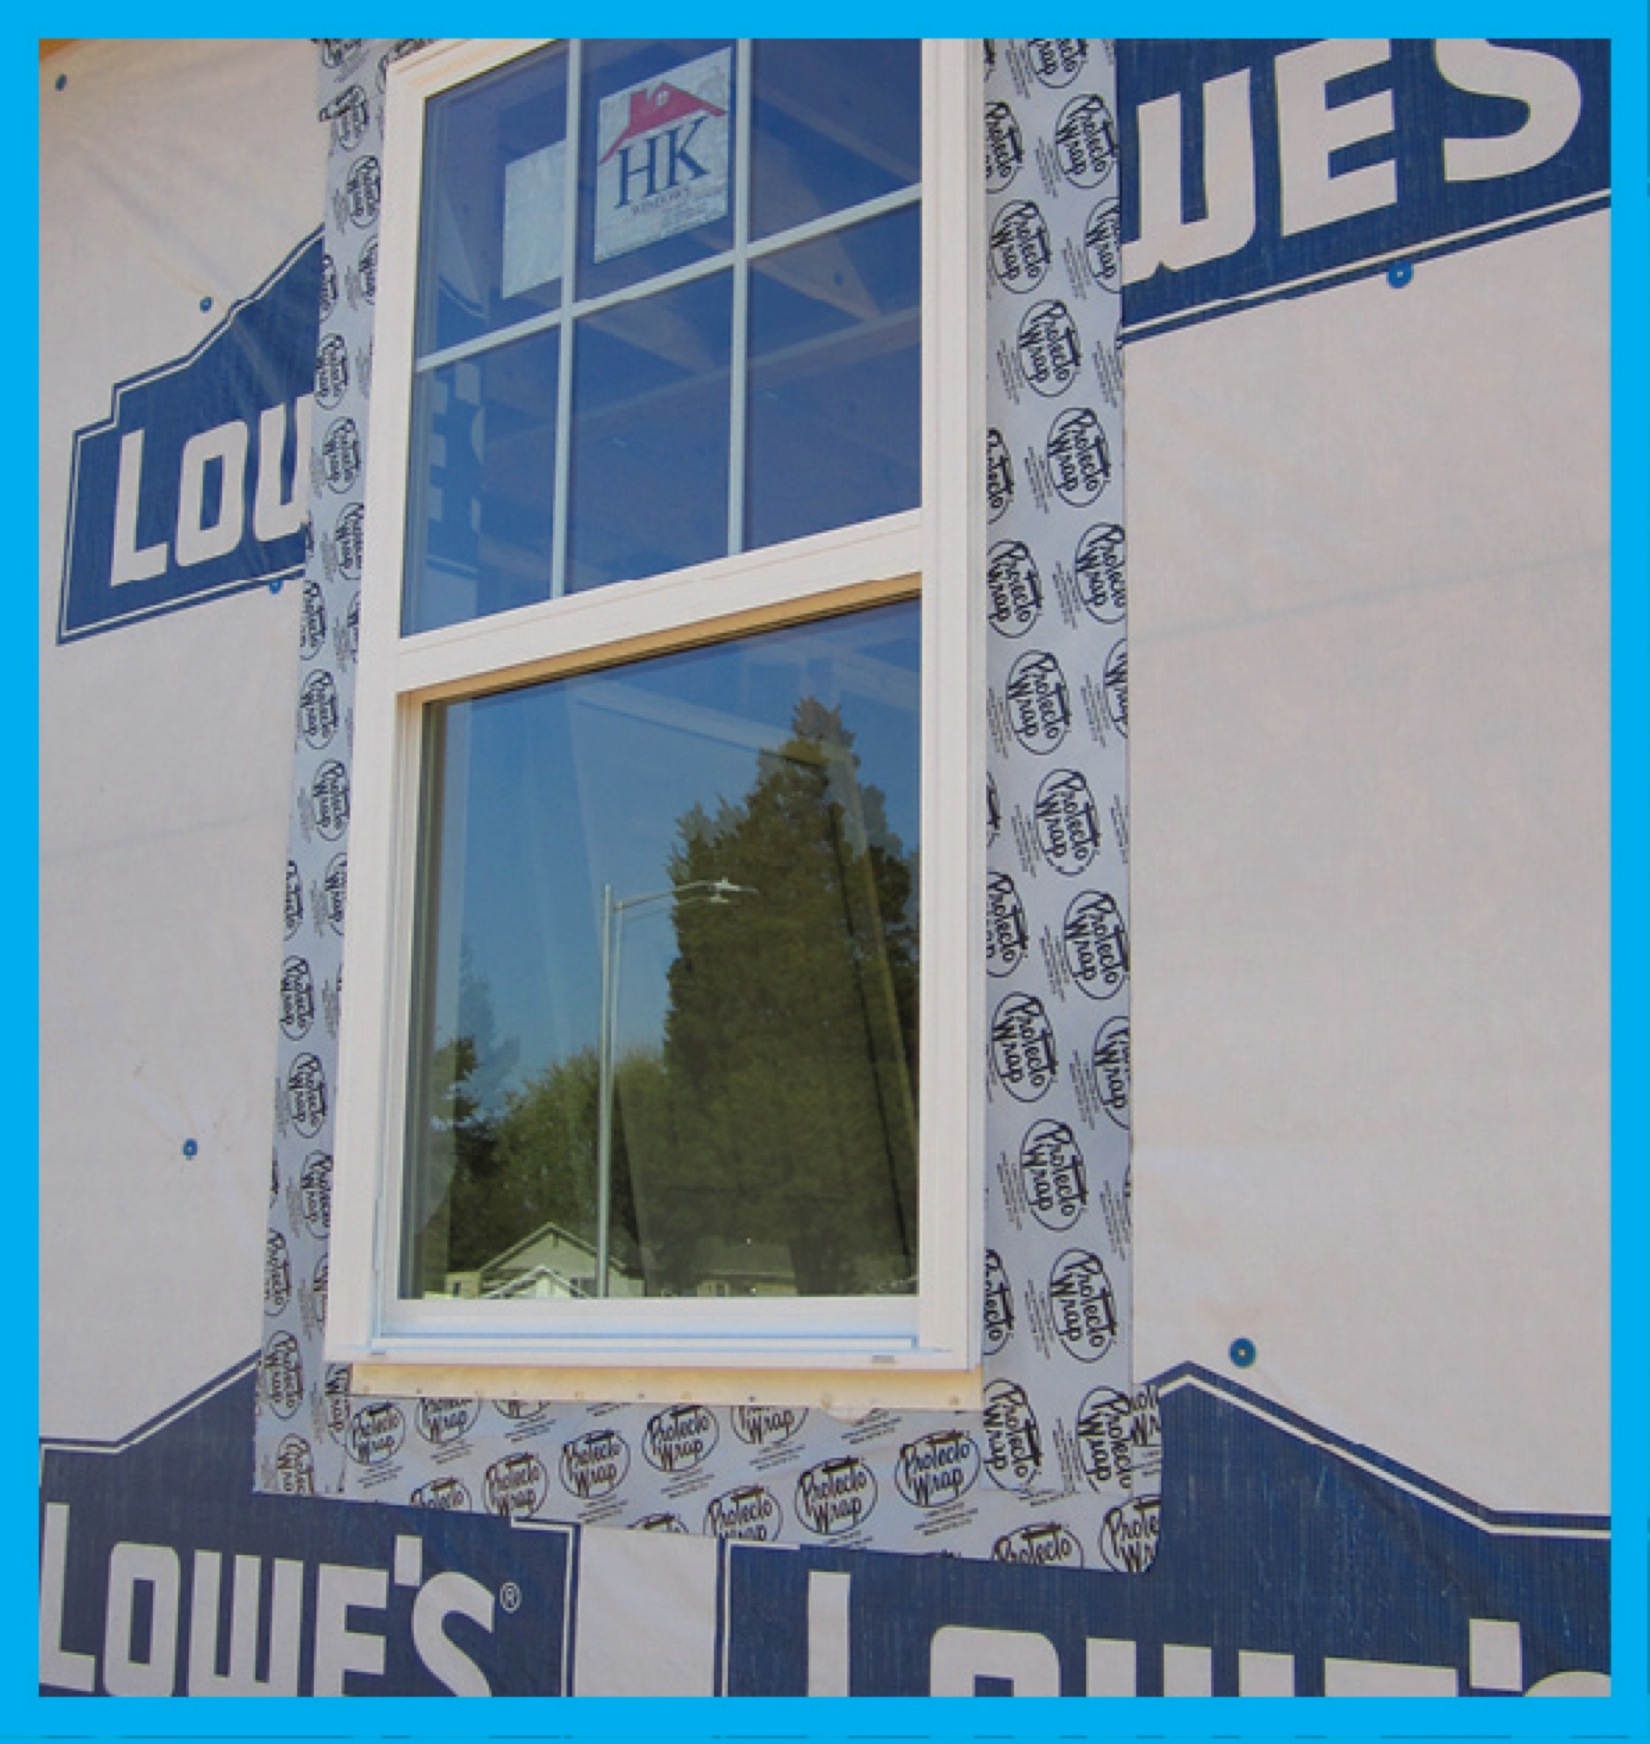
Right – There is flashing installed along the top of the window and the water-resistant barrier is layered over to create a complete drainage system
Image
Right – There is flashing installed at the bottom of the wall to create a satisfactory drainage system
Image
Right – thermal mass walls, small windows, and recessed porch and trees on the south side of this southwest home help to minimize solar heat gain.
Image

Right – This attic knee wall and the floor joist cavity openings beneath it are being sealed and insulated with spray foam.
Image
Right – this commercial building employs good techniques to resist solar heat gain: awnings and pergolas over windows, recessed windows and entryways, deep tinting on glass, and shade plants.
Image
Right – This fire-rated wall assembly uses exterior gypsum board and an exterior siding of fiber-cement or metal to increase fire resistance.
Image
Right – This foil-faced foam sheathing has taped seams and proper flashing details so it can serve as a drainage plane.
Image

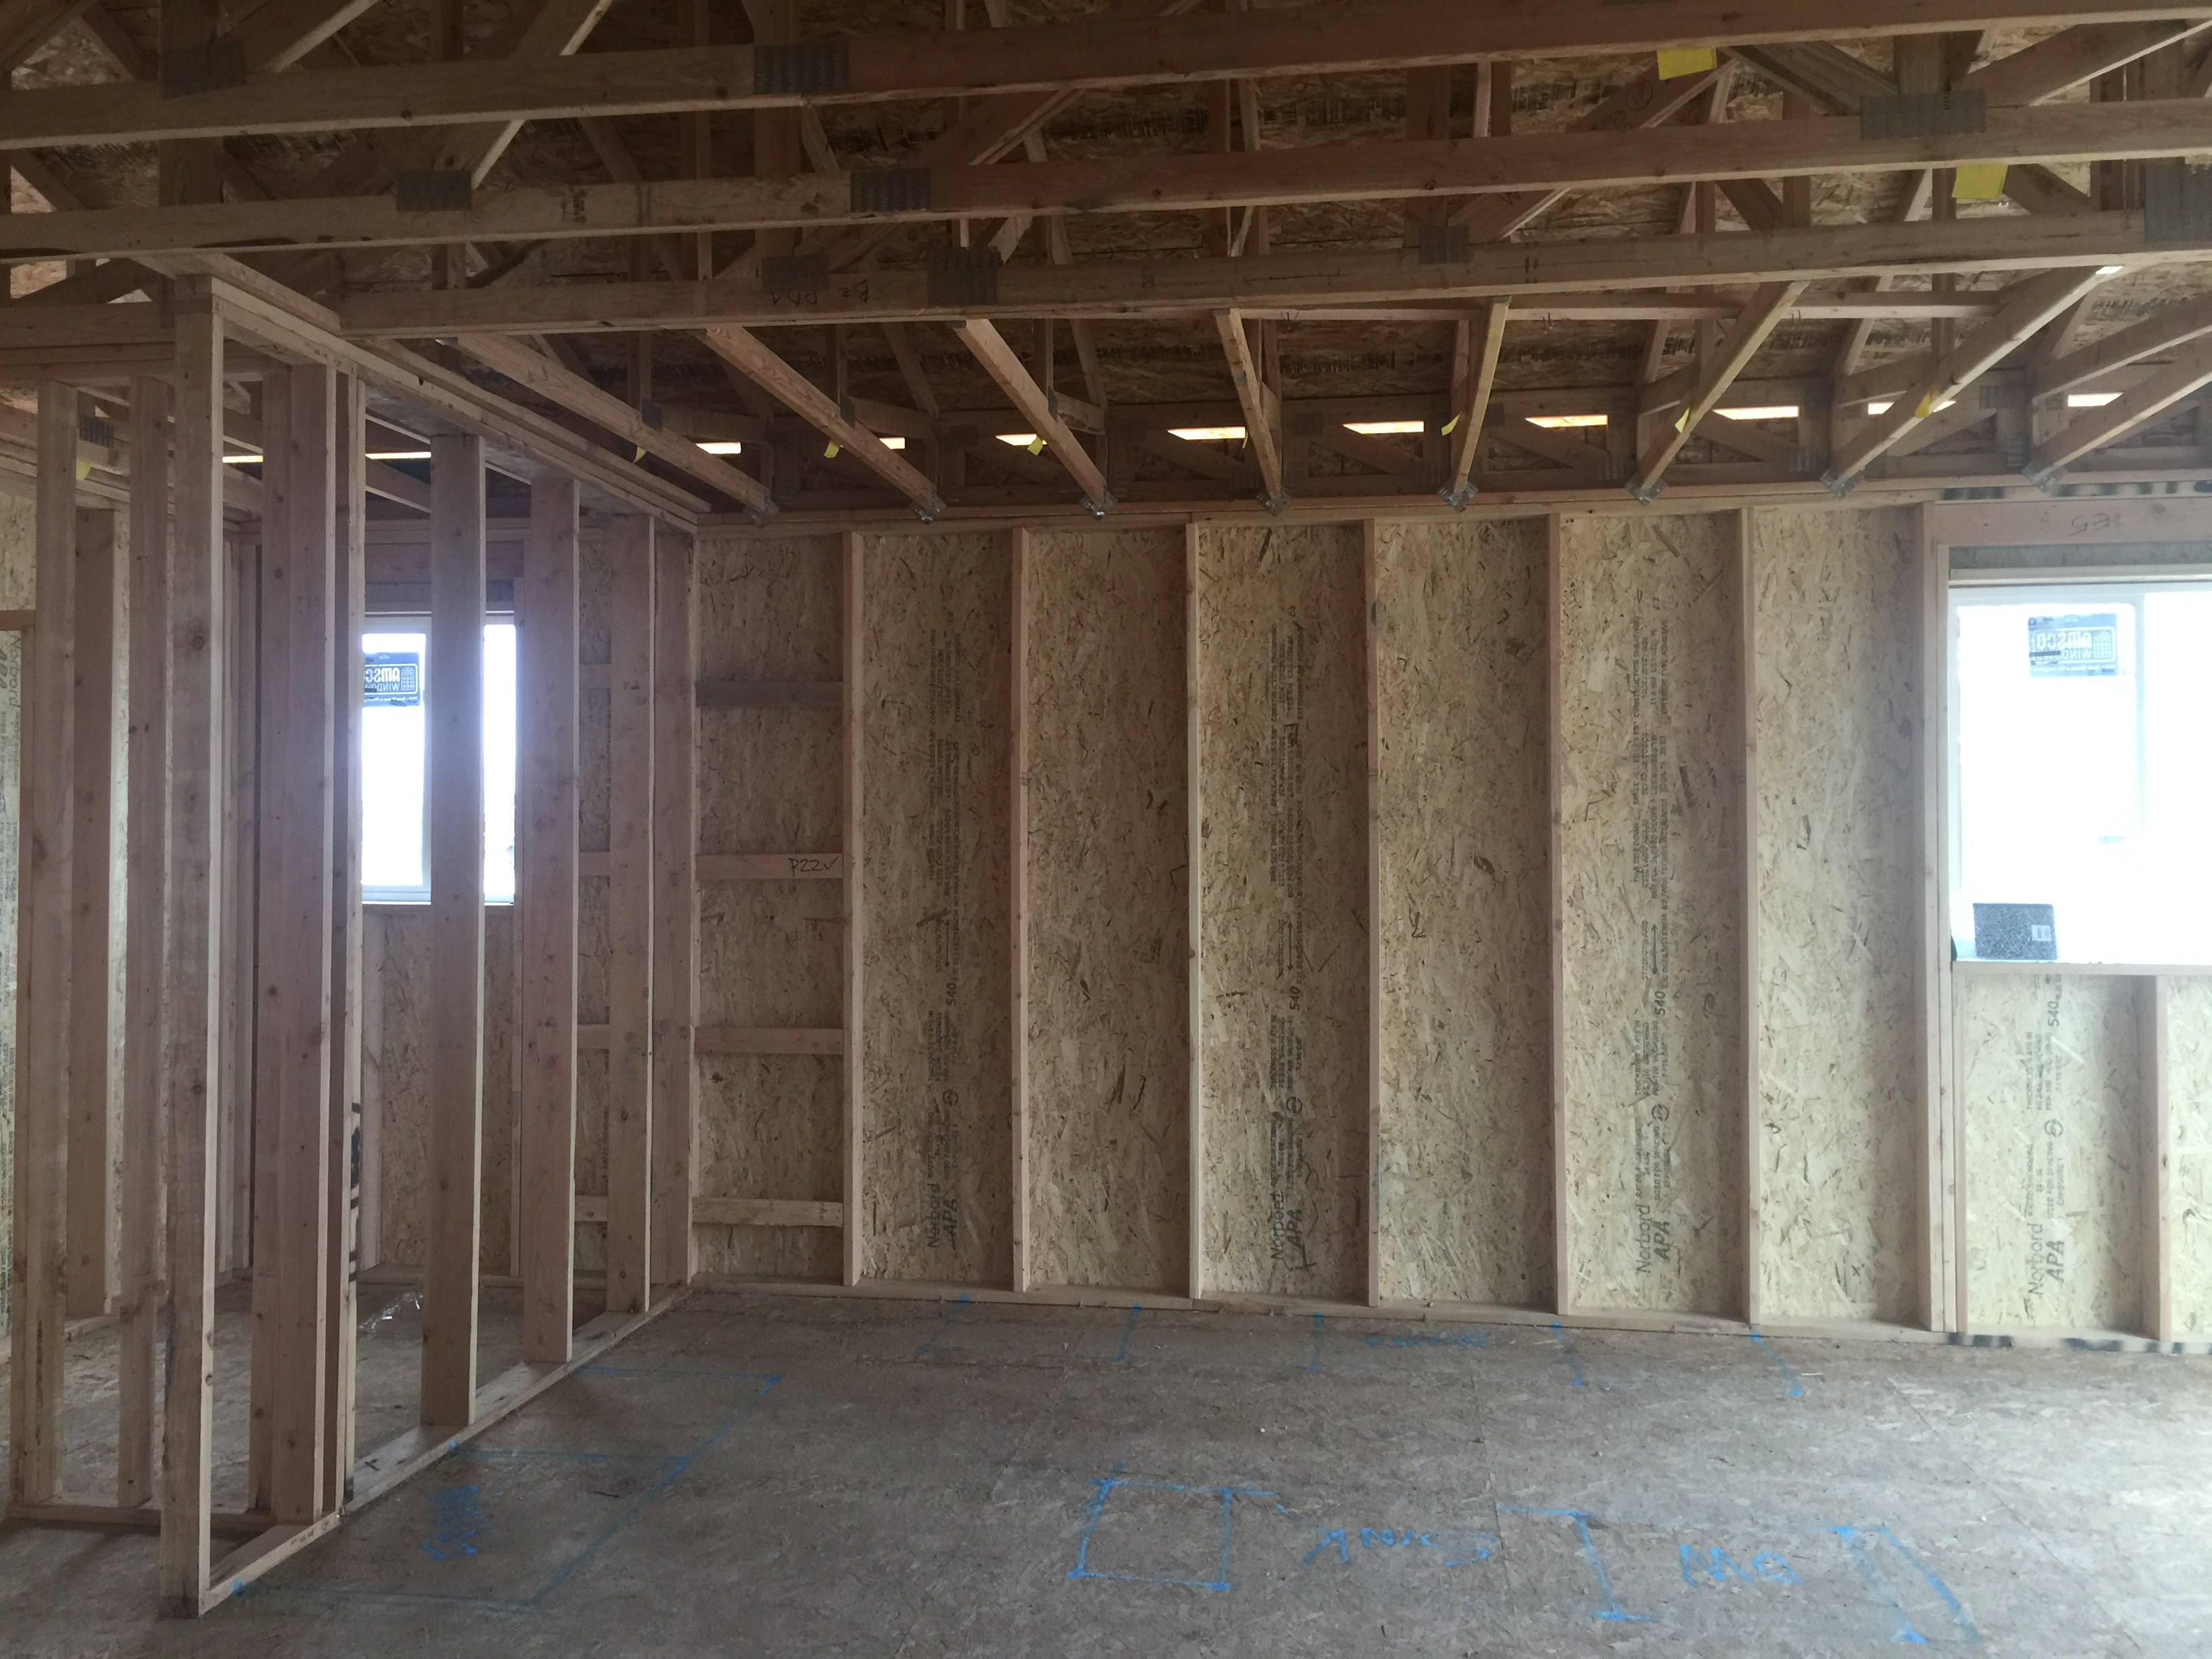
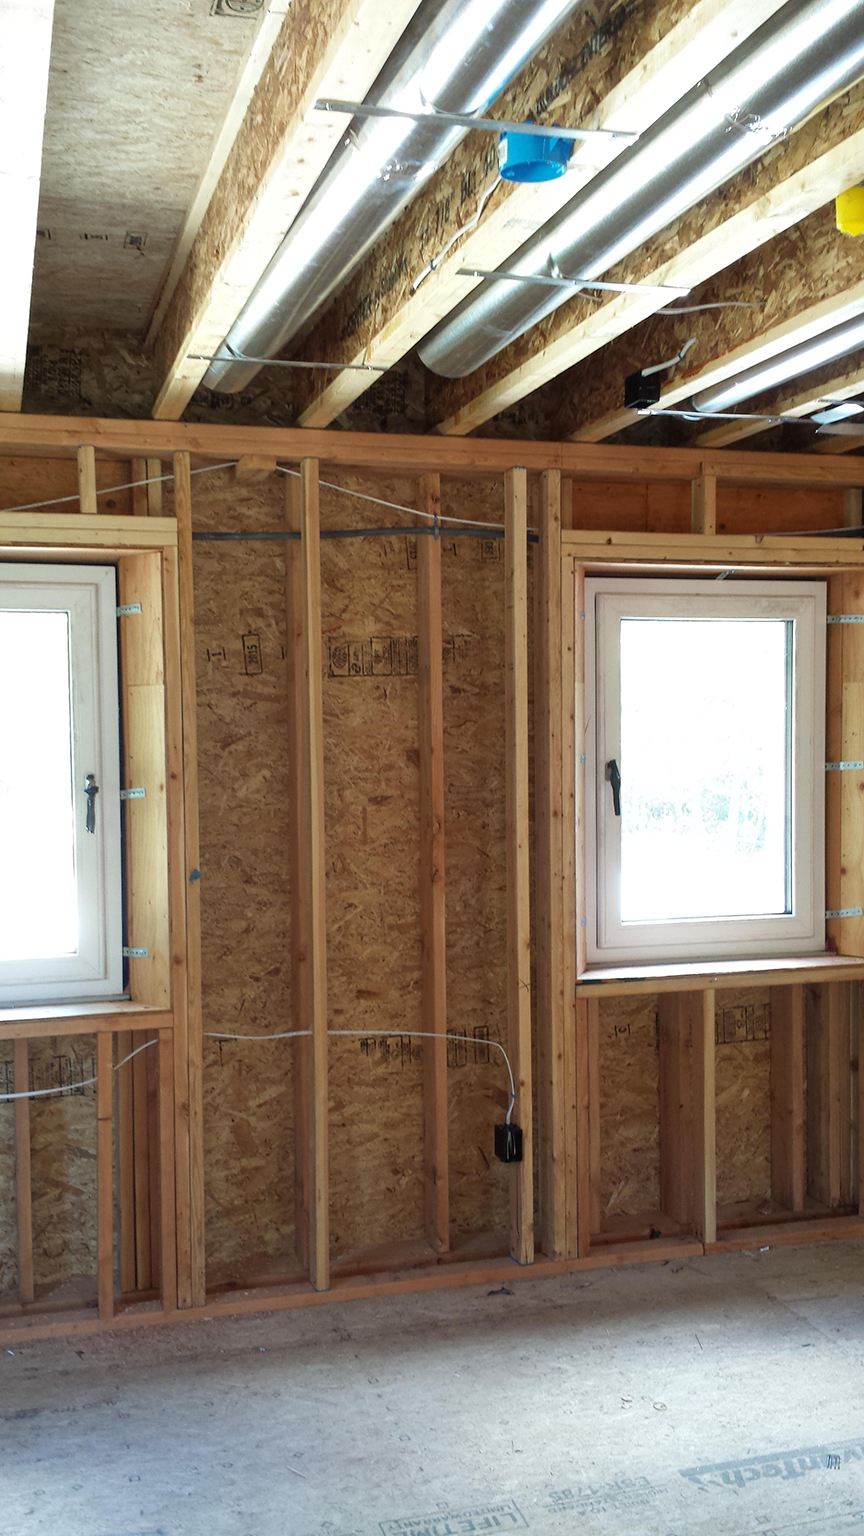
Right – This home is framed with double walls – two 2x4 walls set next to each other then sheathed with OSB on the exterior and netted on the interior face to create an extra-deep wall cavity that can be filled with blown-in insulation.
Image
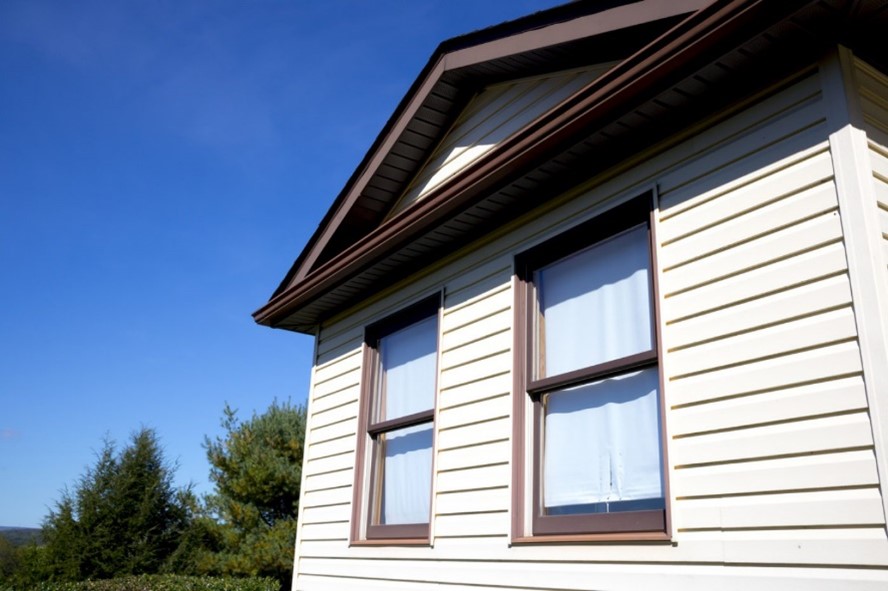
Right – This home uses a light-colored exterior wall to reduce solar heat gain
Image
Image
Right – This home uses light tan stucco and white trim to reduce solar heat gain.
Image
Right – This home’s above-grade walls are constructed in a factory where wall panels of 2x6 studs are assembled and sheathed with a coated OSB product, then windows are installed and flashed before shipping the panels to the site for assembly by crane.
Image
Image

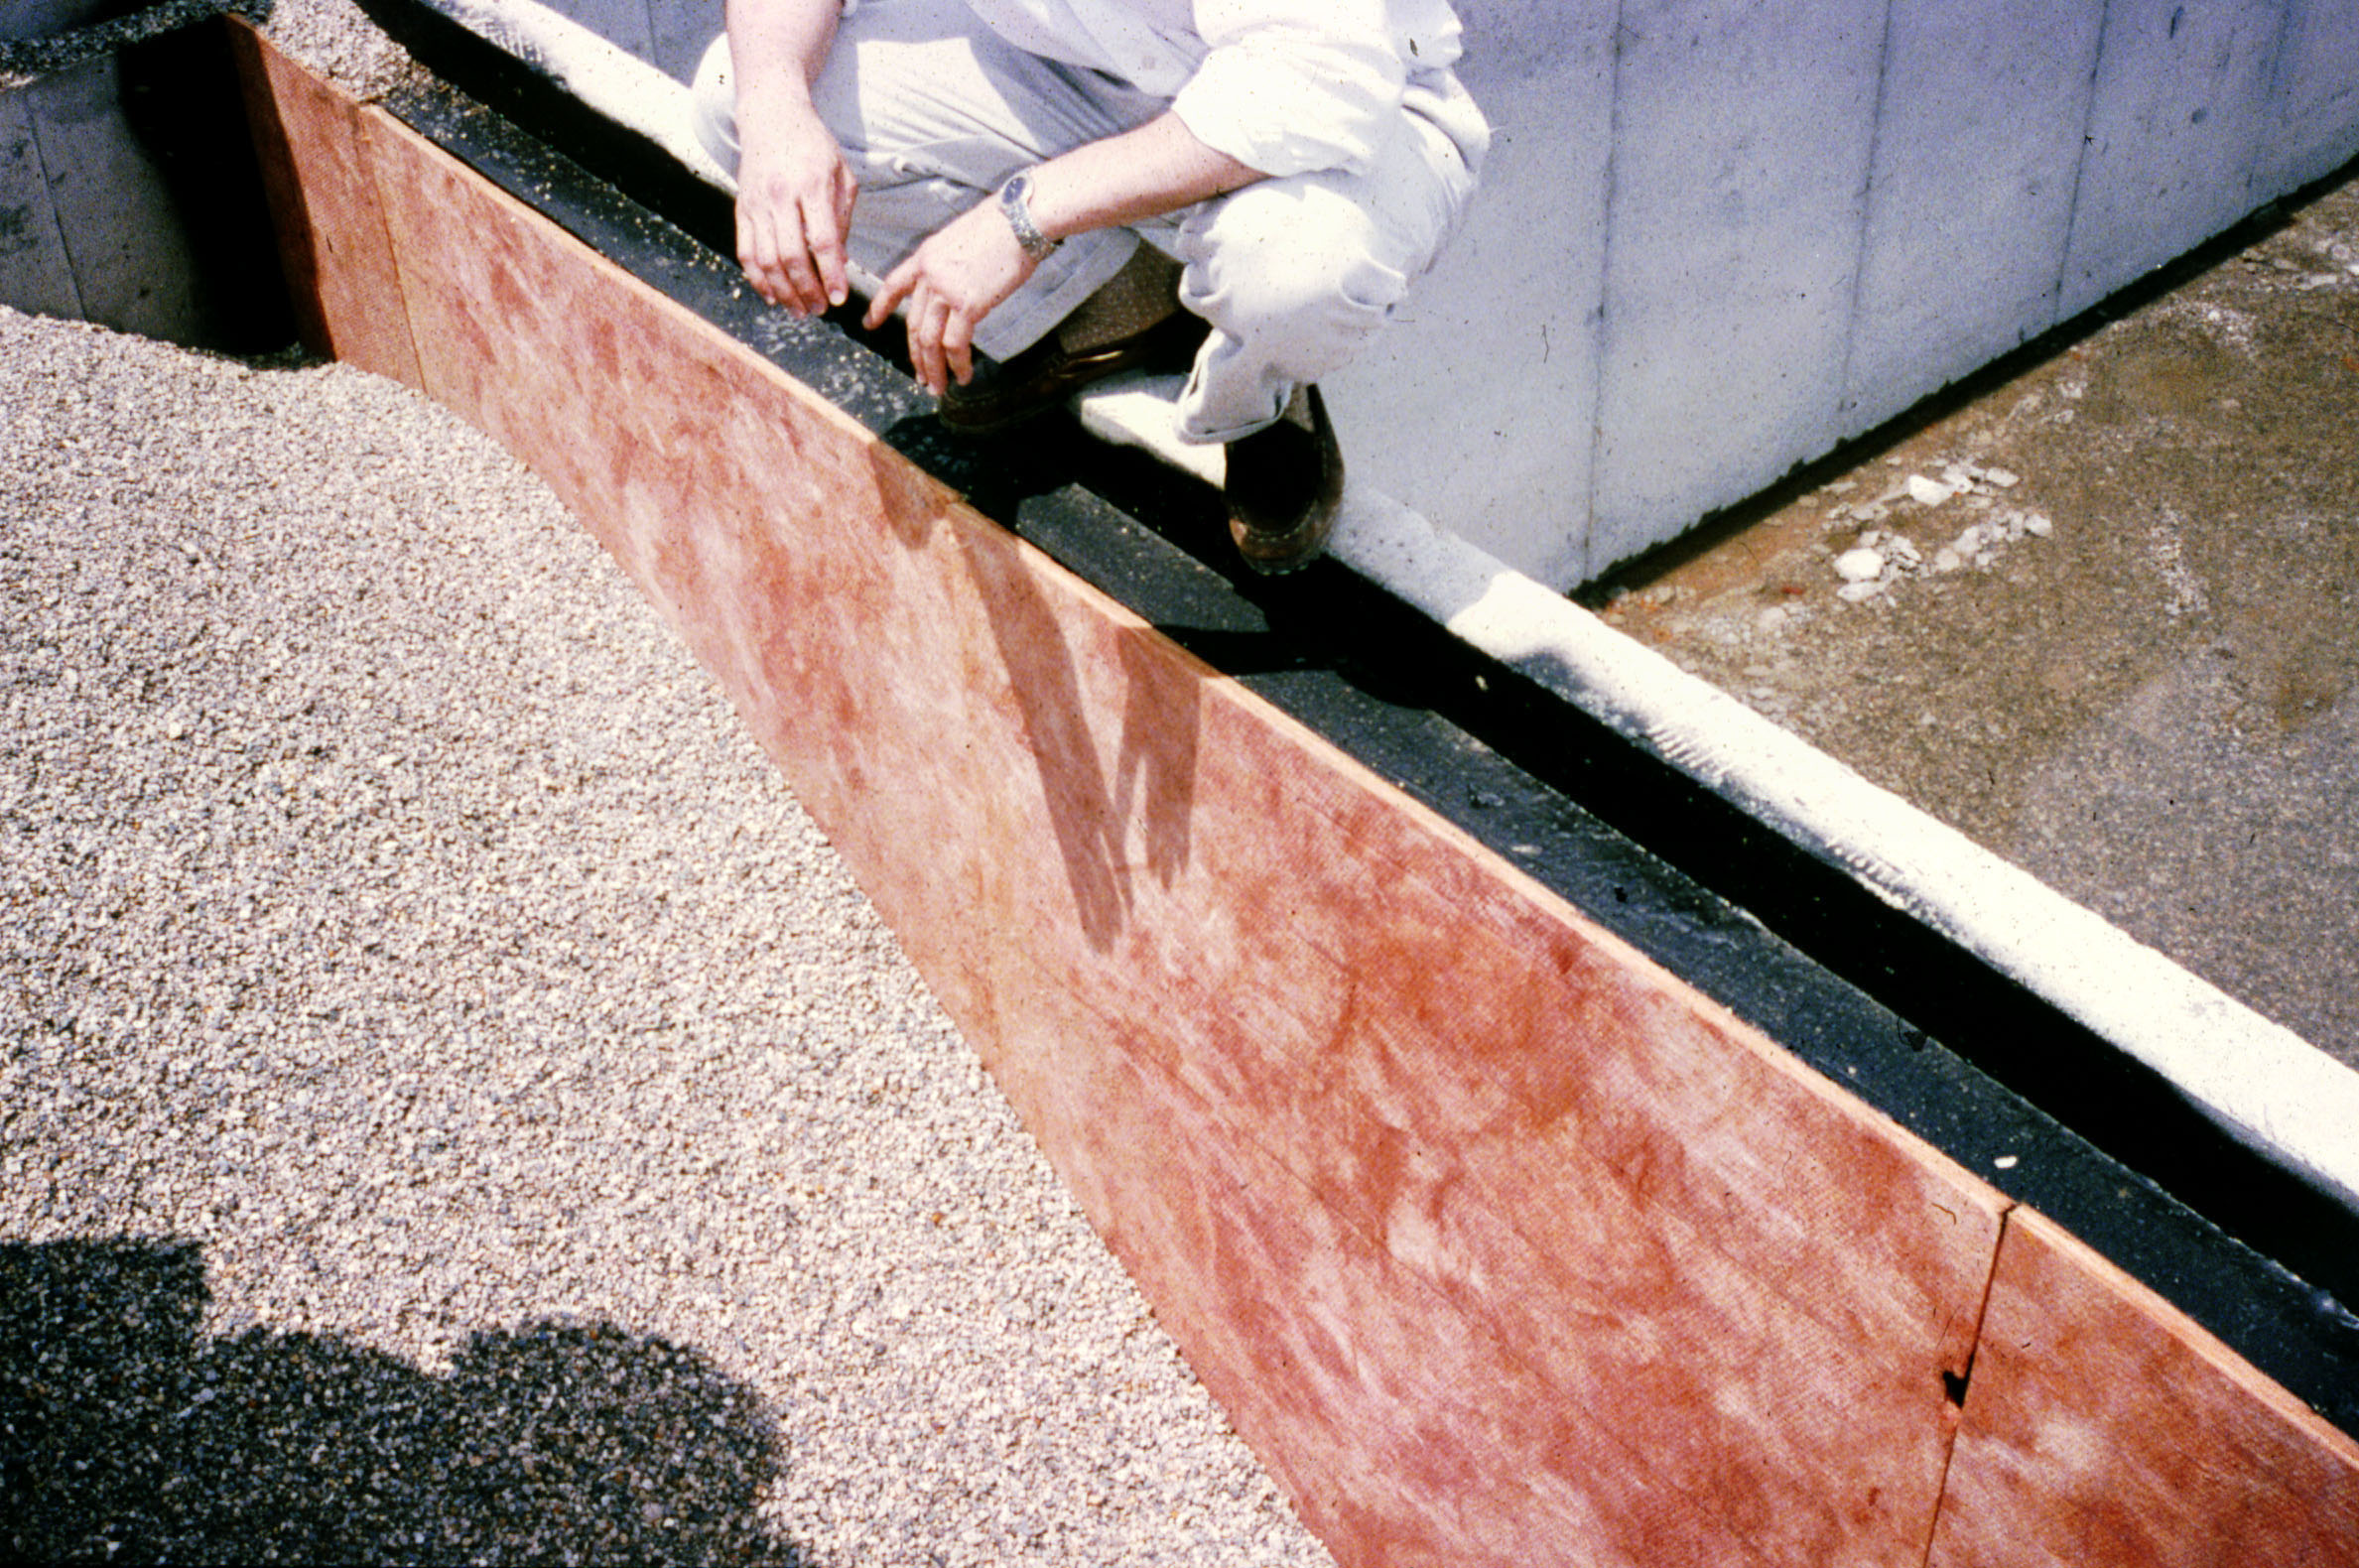
Right – This low-slope roof and parapet assembly has continuity of both the air and water barriers
Image
Right – This metal roof is being coated with a cool (high SRI) coating to reduce solar heat gain
Image
Right – This modular home consists of prebuilt wall panels that are assembled on site.
Image
Image
Image
Image
Image
Image

Image

Image
Image
Image

Image
Image

Right – Walls, windows, and wiring are installed in the factory for these modular homes, which are installed at the site on basement foundations made of insulated concrete wall panels.
Image
Image
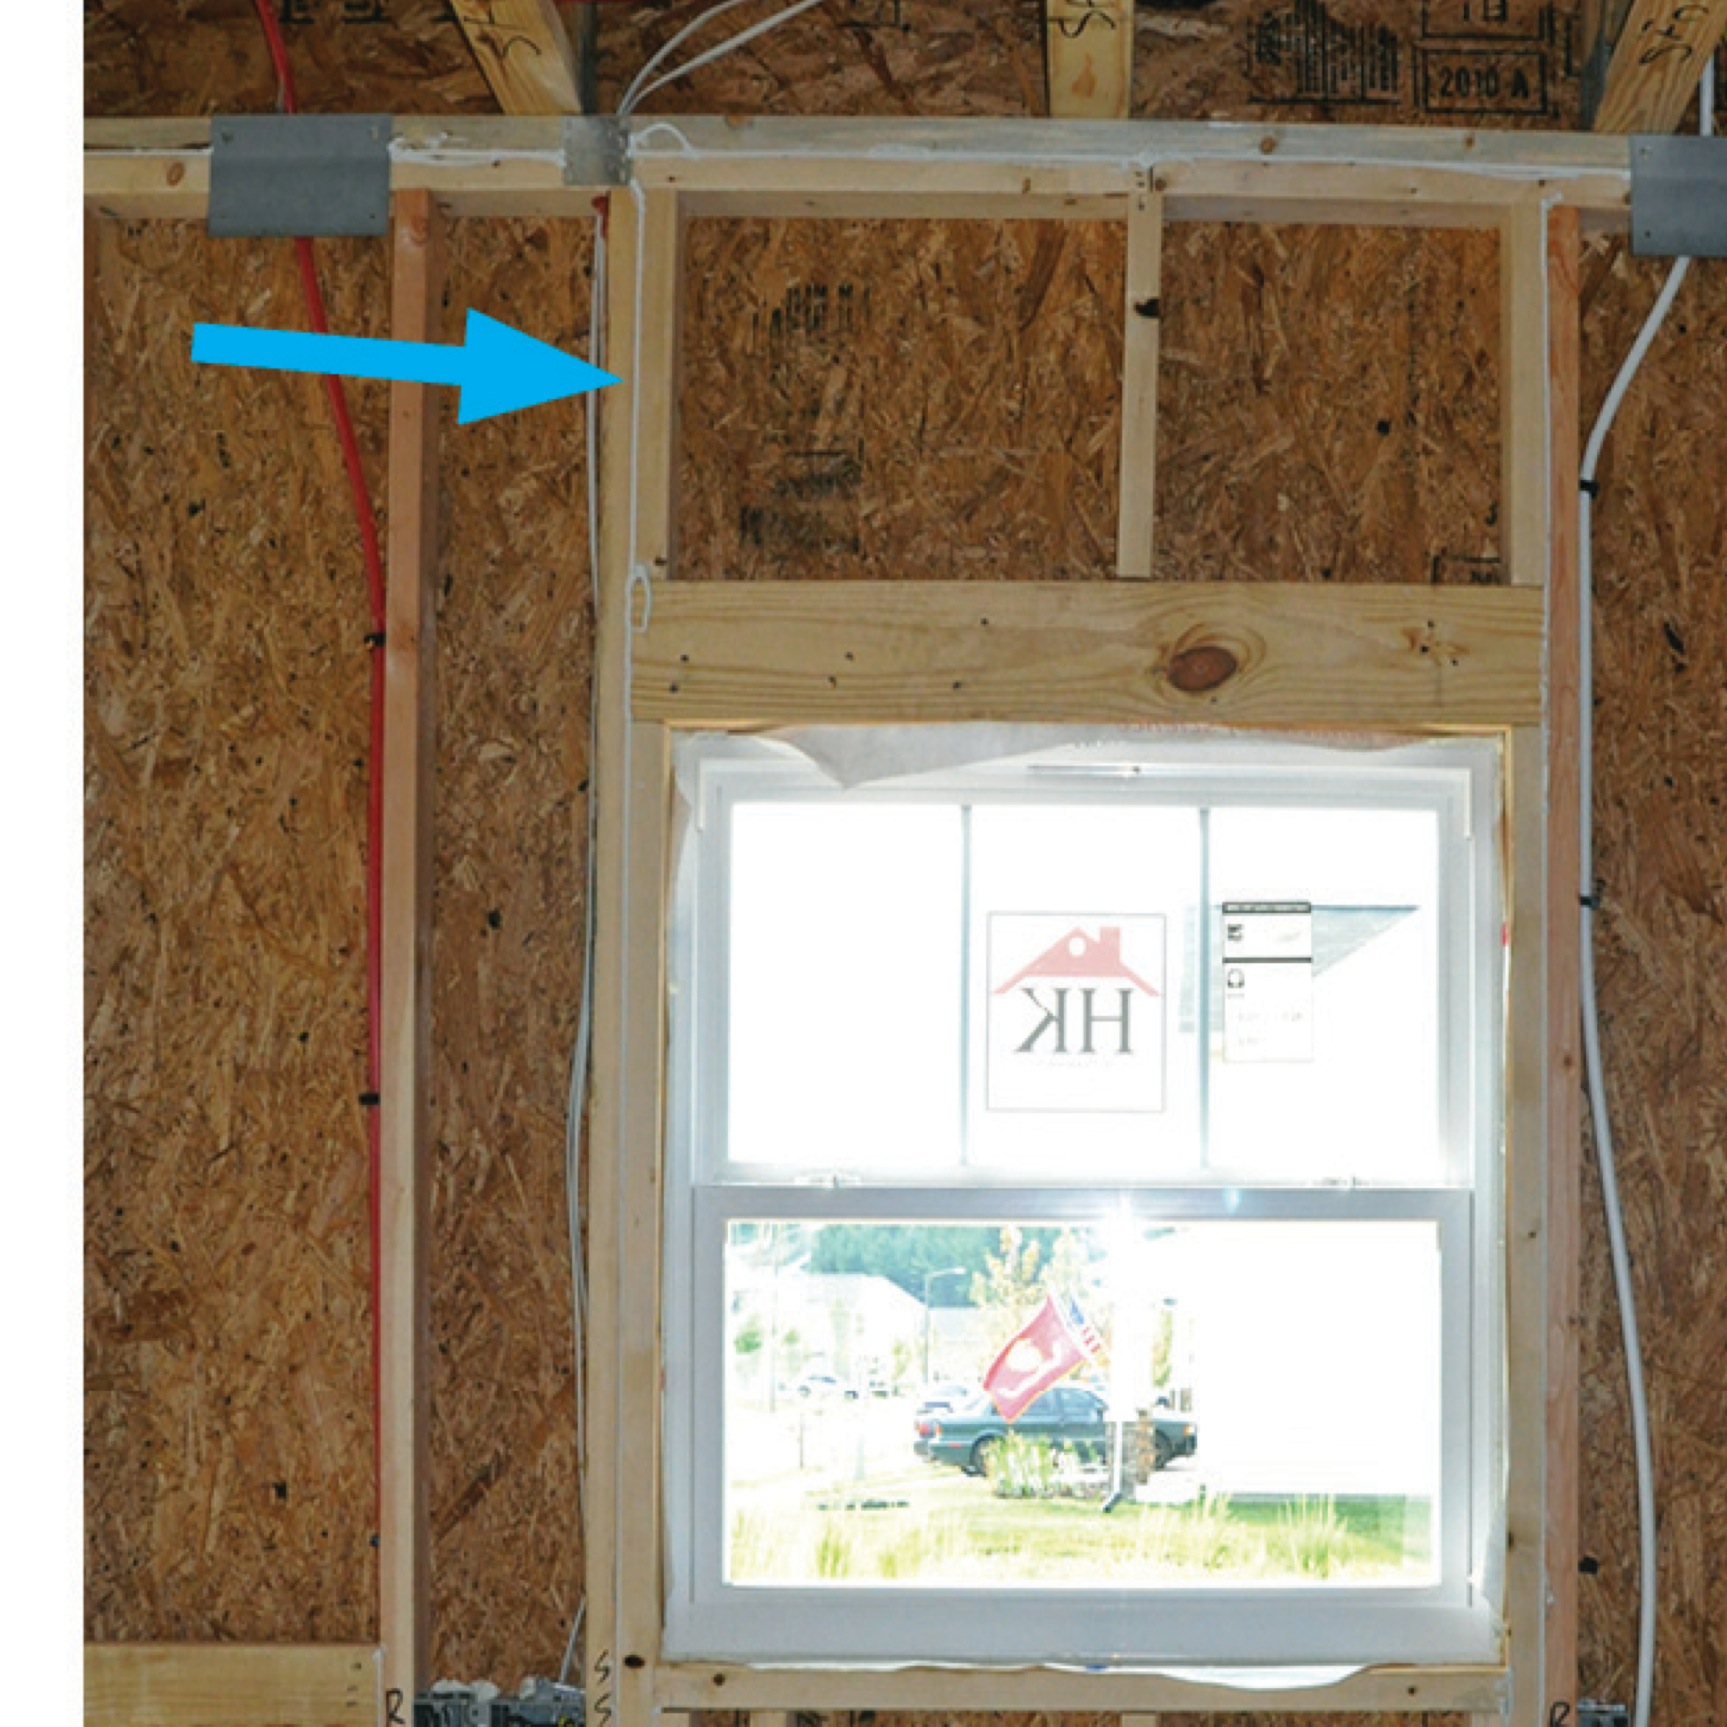
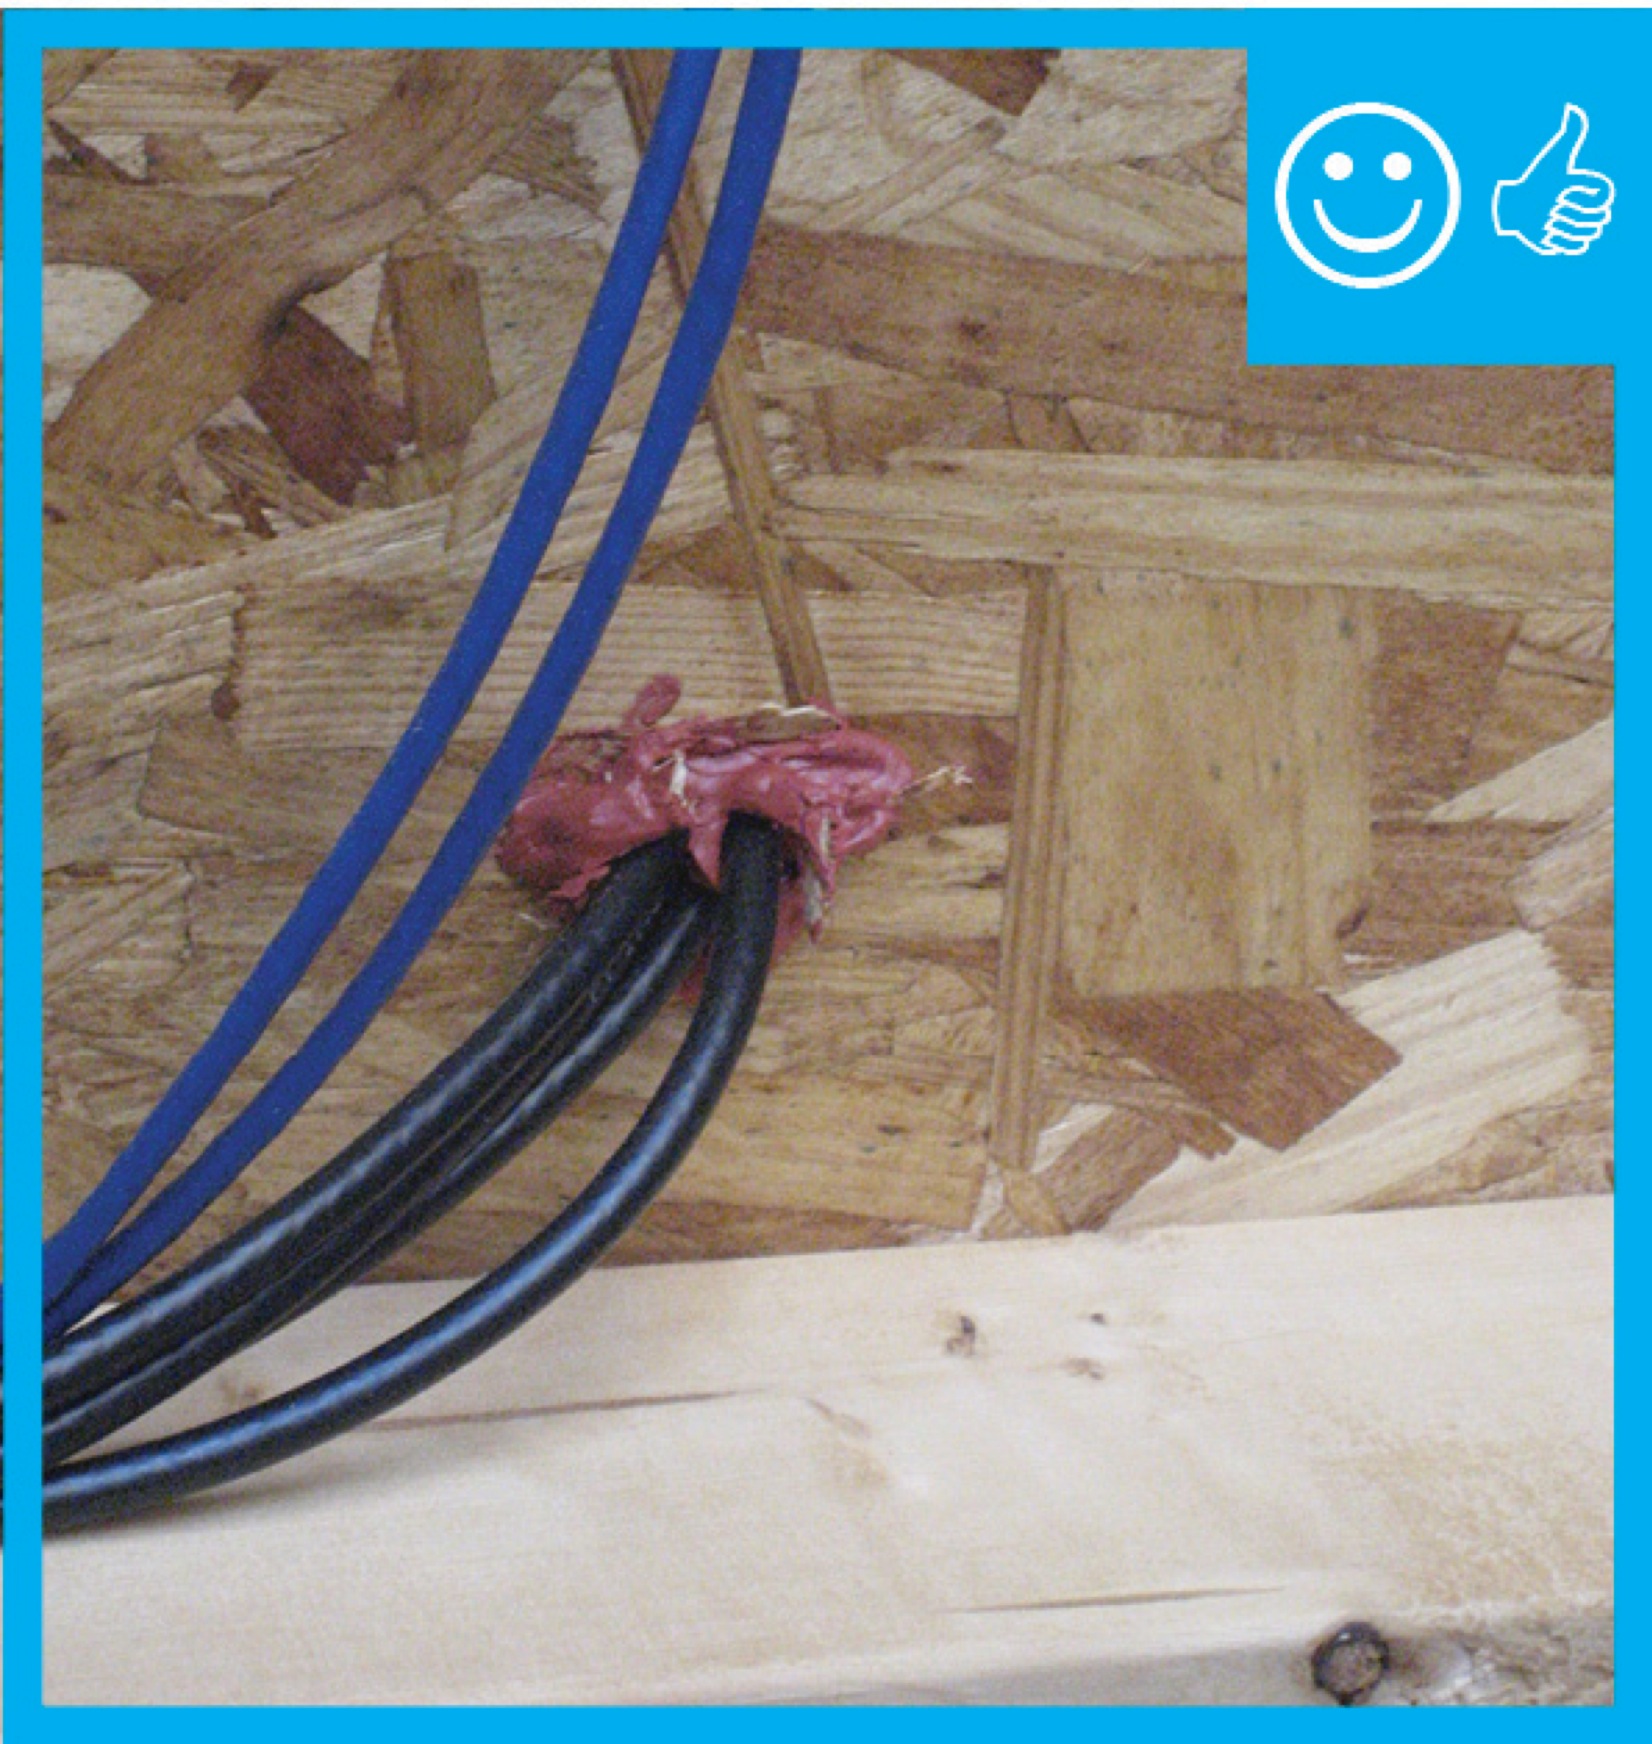
Right – Wiring holes in the exterior walls are sealed with canned spray foam to prevent air leakage into or out of the home.
Image
Image
Right- Landscaping shades the entry on the south west corner of this hot dry climate building.
Image
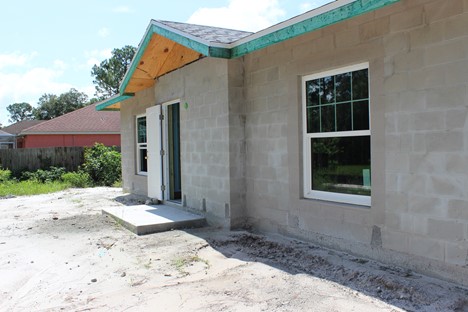
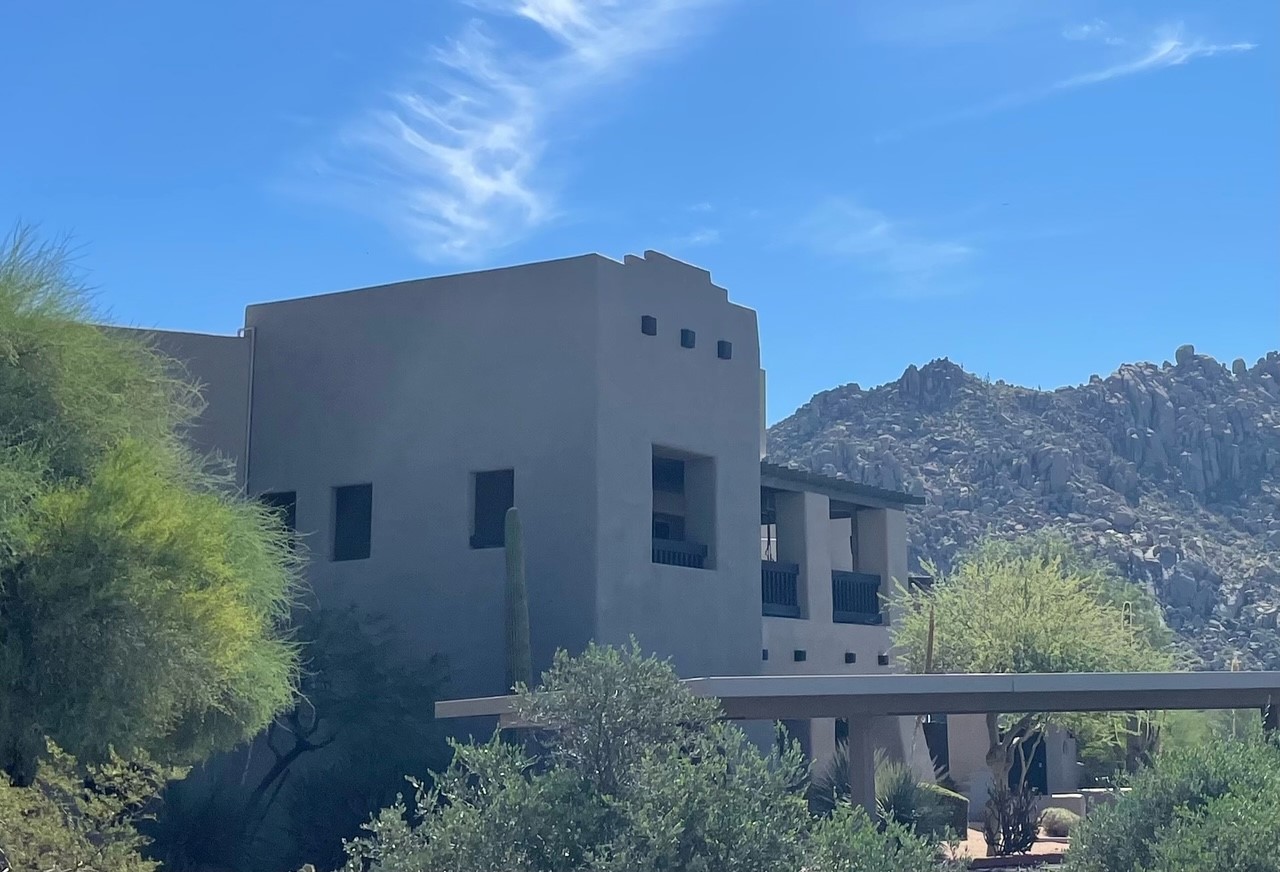
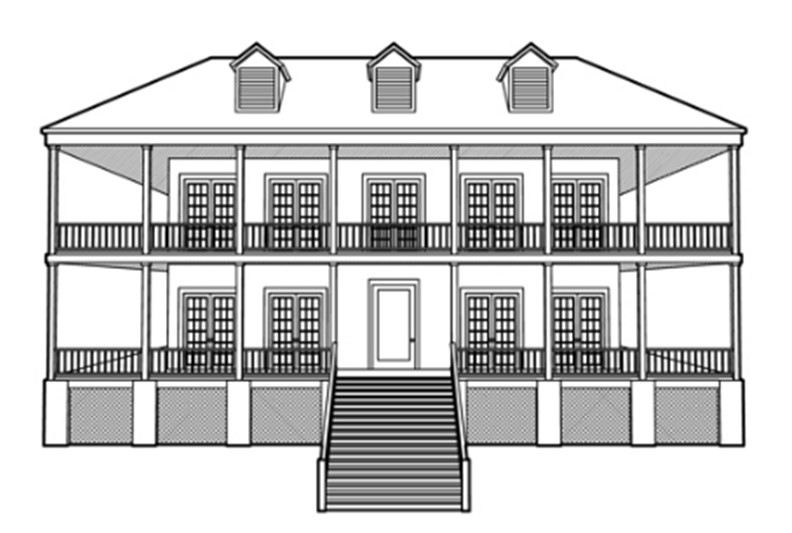
Right- This house uses CMU construction for flood and termite resistance as well as thermal mass
Image
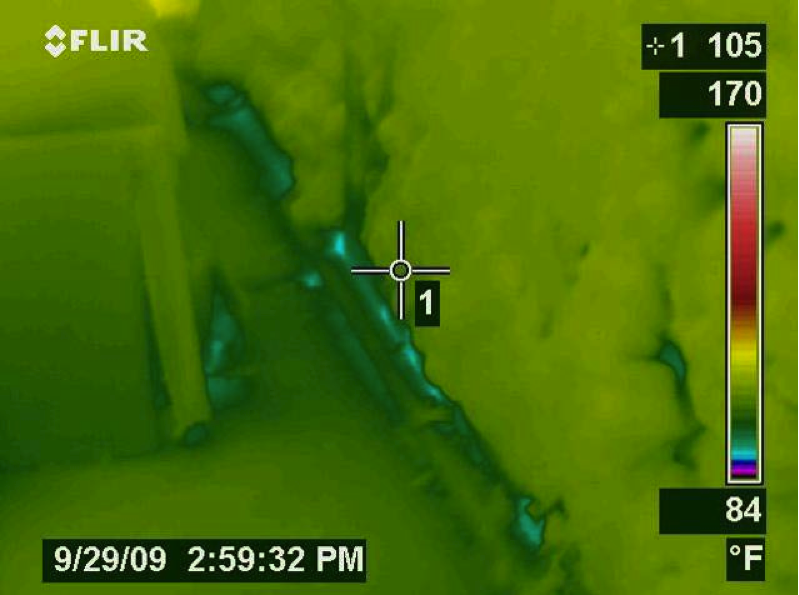
Right-- IR photo shows how effectively spray foam insulated/air sealed attic kneewall and the floor cavities under kneewall
Image
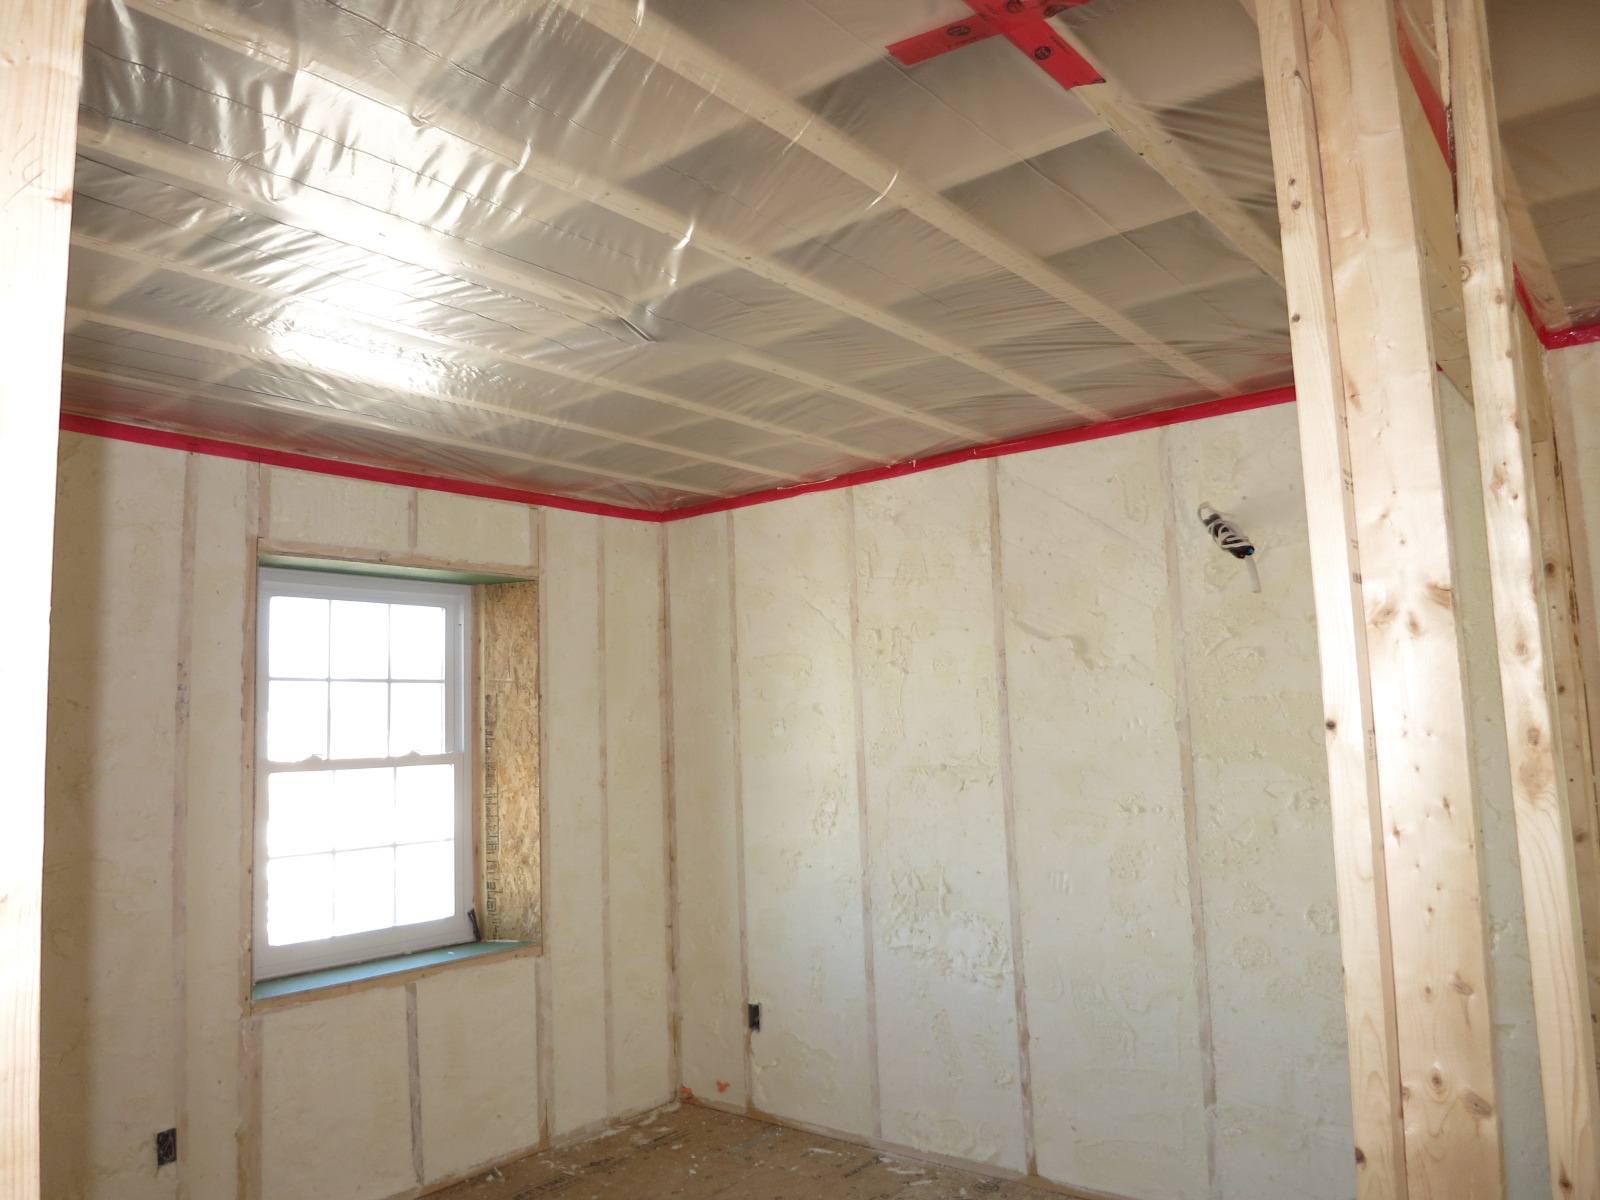
Right-Wall-insulating sheathing is extended up to roof rafters and sealed around the framing with spray foam
Image
Right: All joints in the rigid foam are taped to keep stucco out of joints for even drying. Mesh tape (shown here) is used with expanded polystyrene (EPS); acrylic sheathing tape or self-adhered membrane is used with XPS
Image
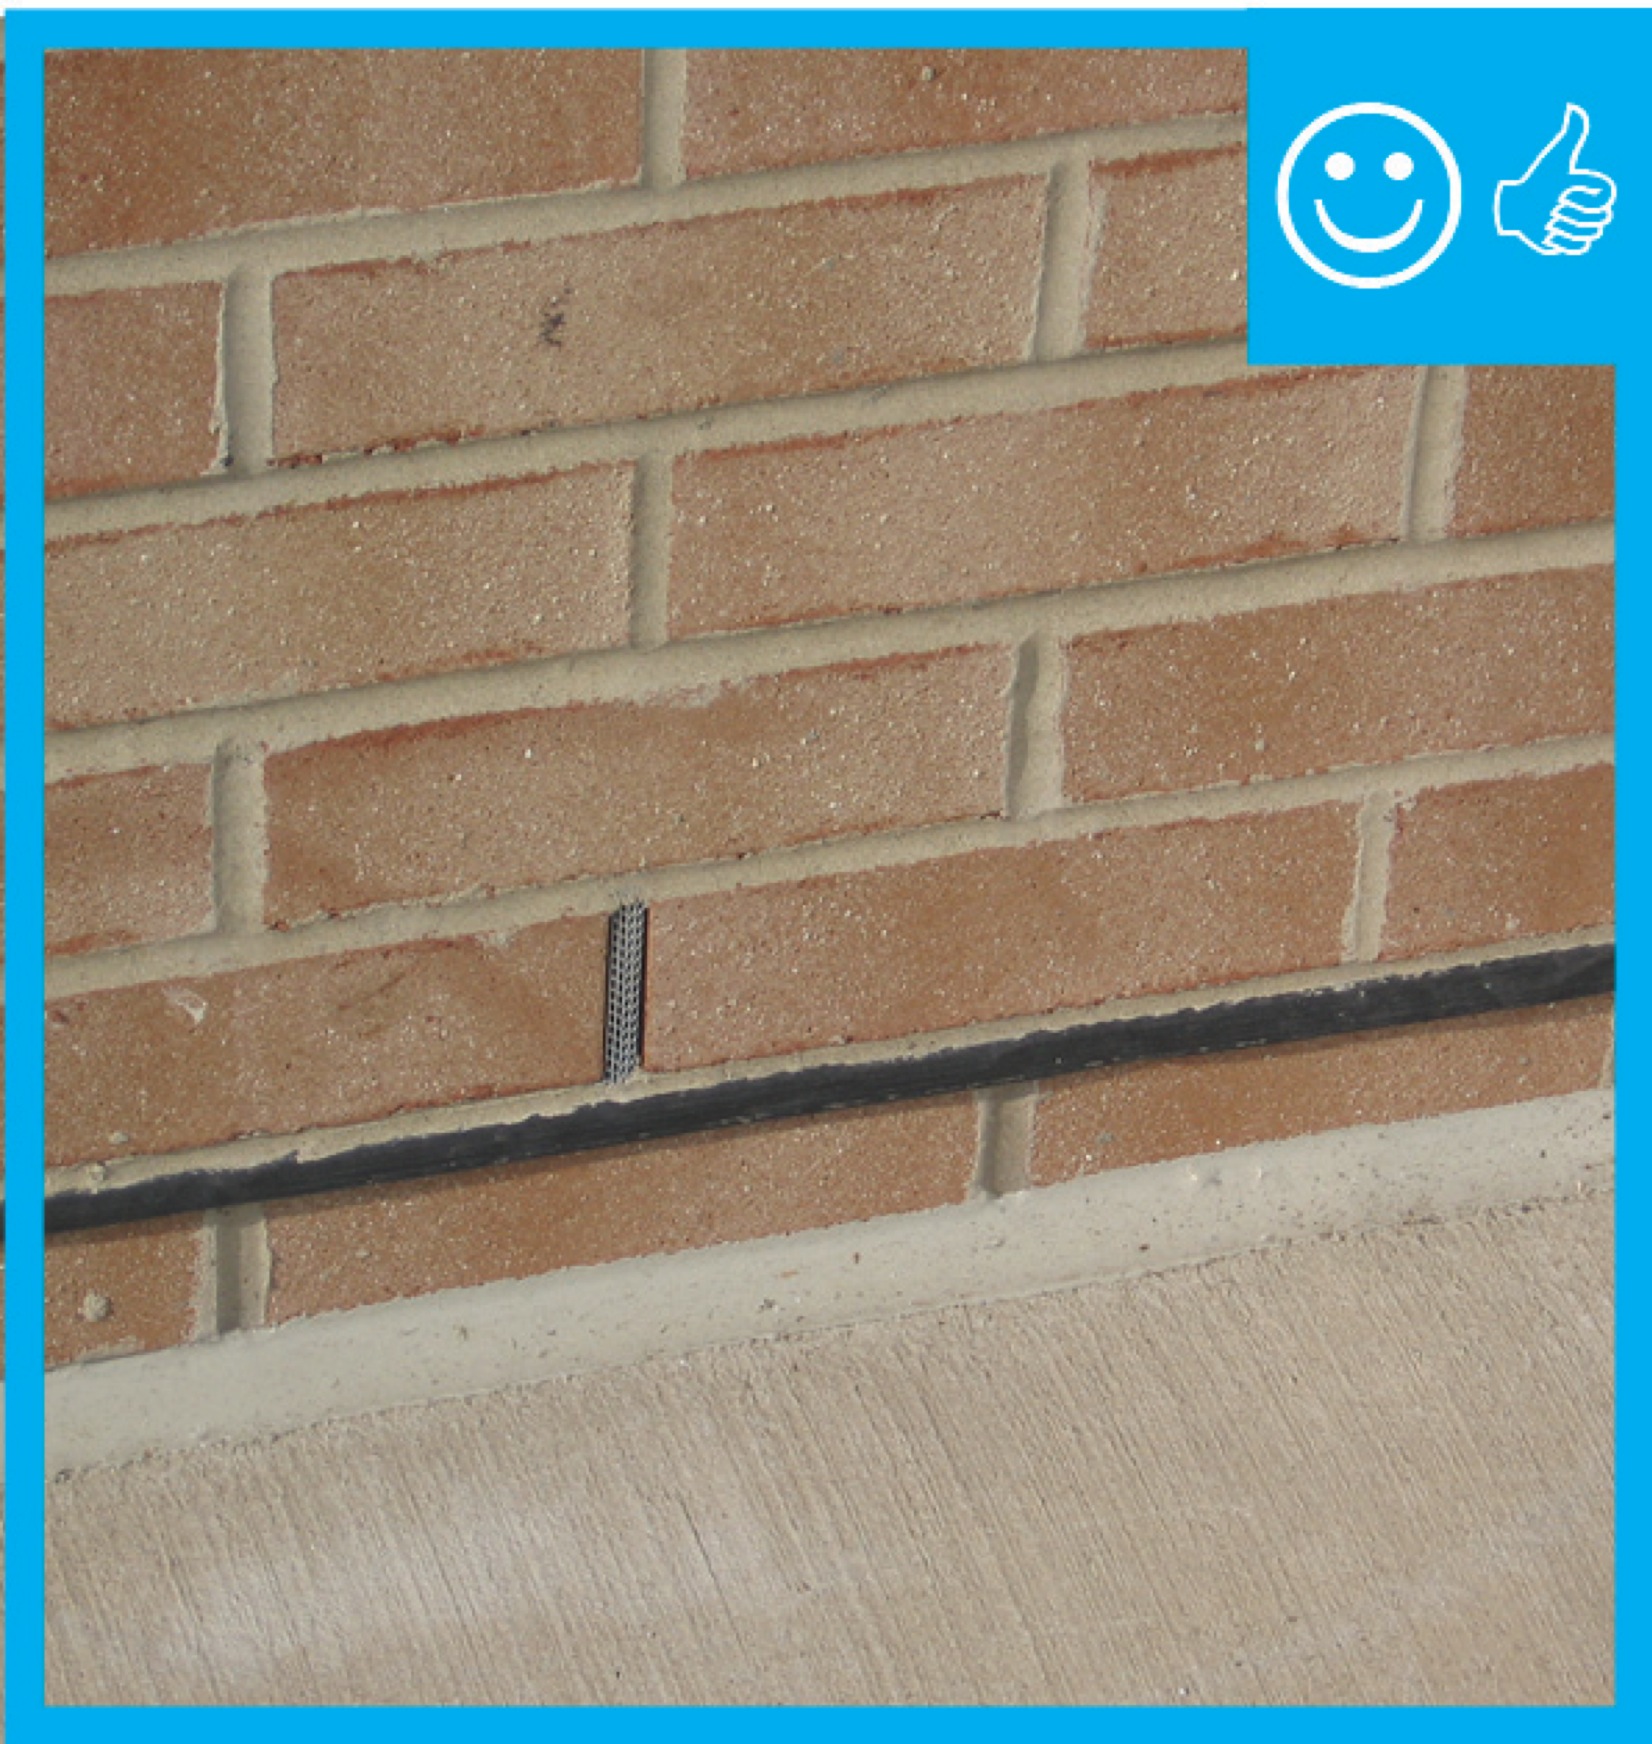
Right: Brick veneer is flashed correctly with weep holes and a fine mesh screen is installed to prevent pest entry.
Image

Right: This vent was correctly flashed providing proper waterproofing detailing for this siding penetration.
Image

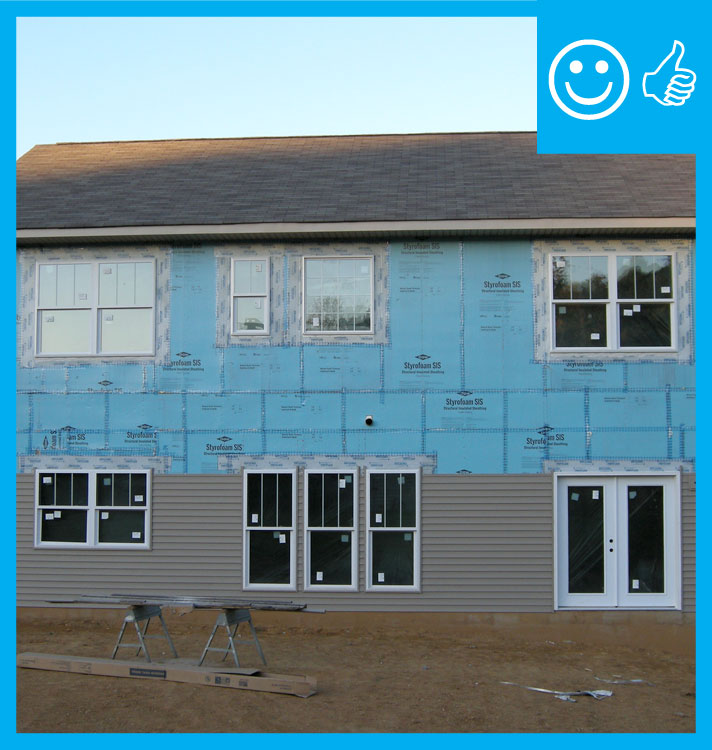
Rigid foam insulated sheathing placed exterior to house wrap, interior to house wrap, or take the place of the house wrap
Image

Rigid foam insulation applied to the crawlspace walls, allowing a 3-in. pest control inspection strip at the top
Image
Rigid foam insulation can serve as the drainage plane when all seams are taped. Furring strips provide an air gap behind the cladding.
Image
Rigid foam insulation is installed on the garage side of the shared garage wall and roof of an existing home
Image
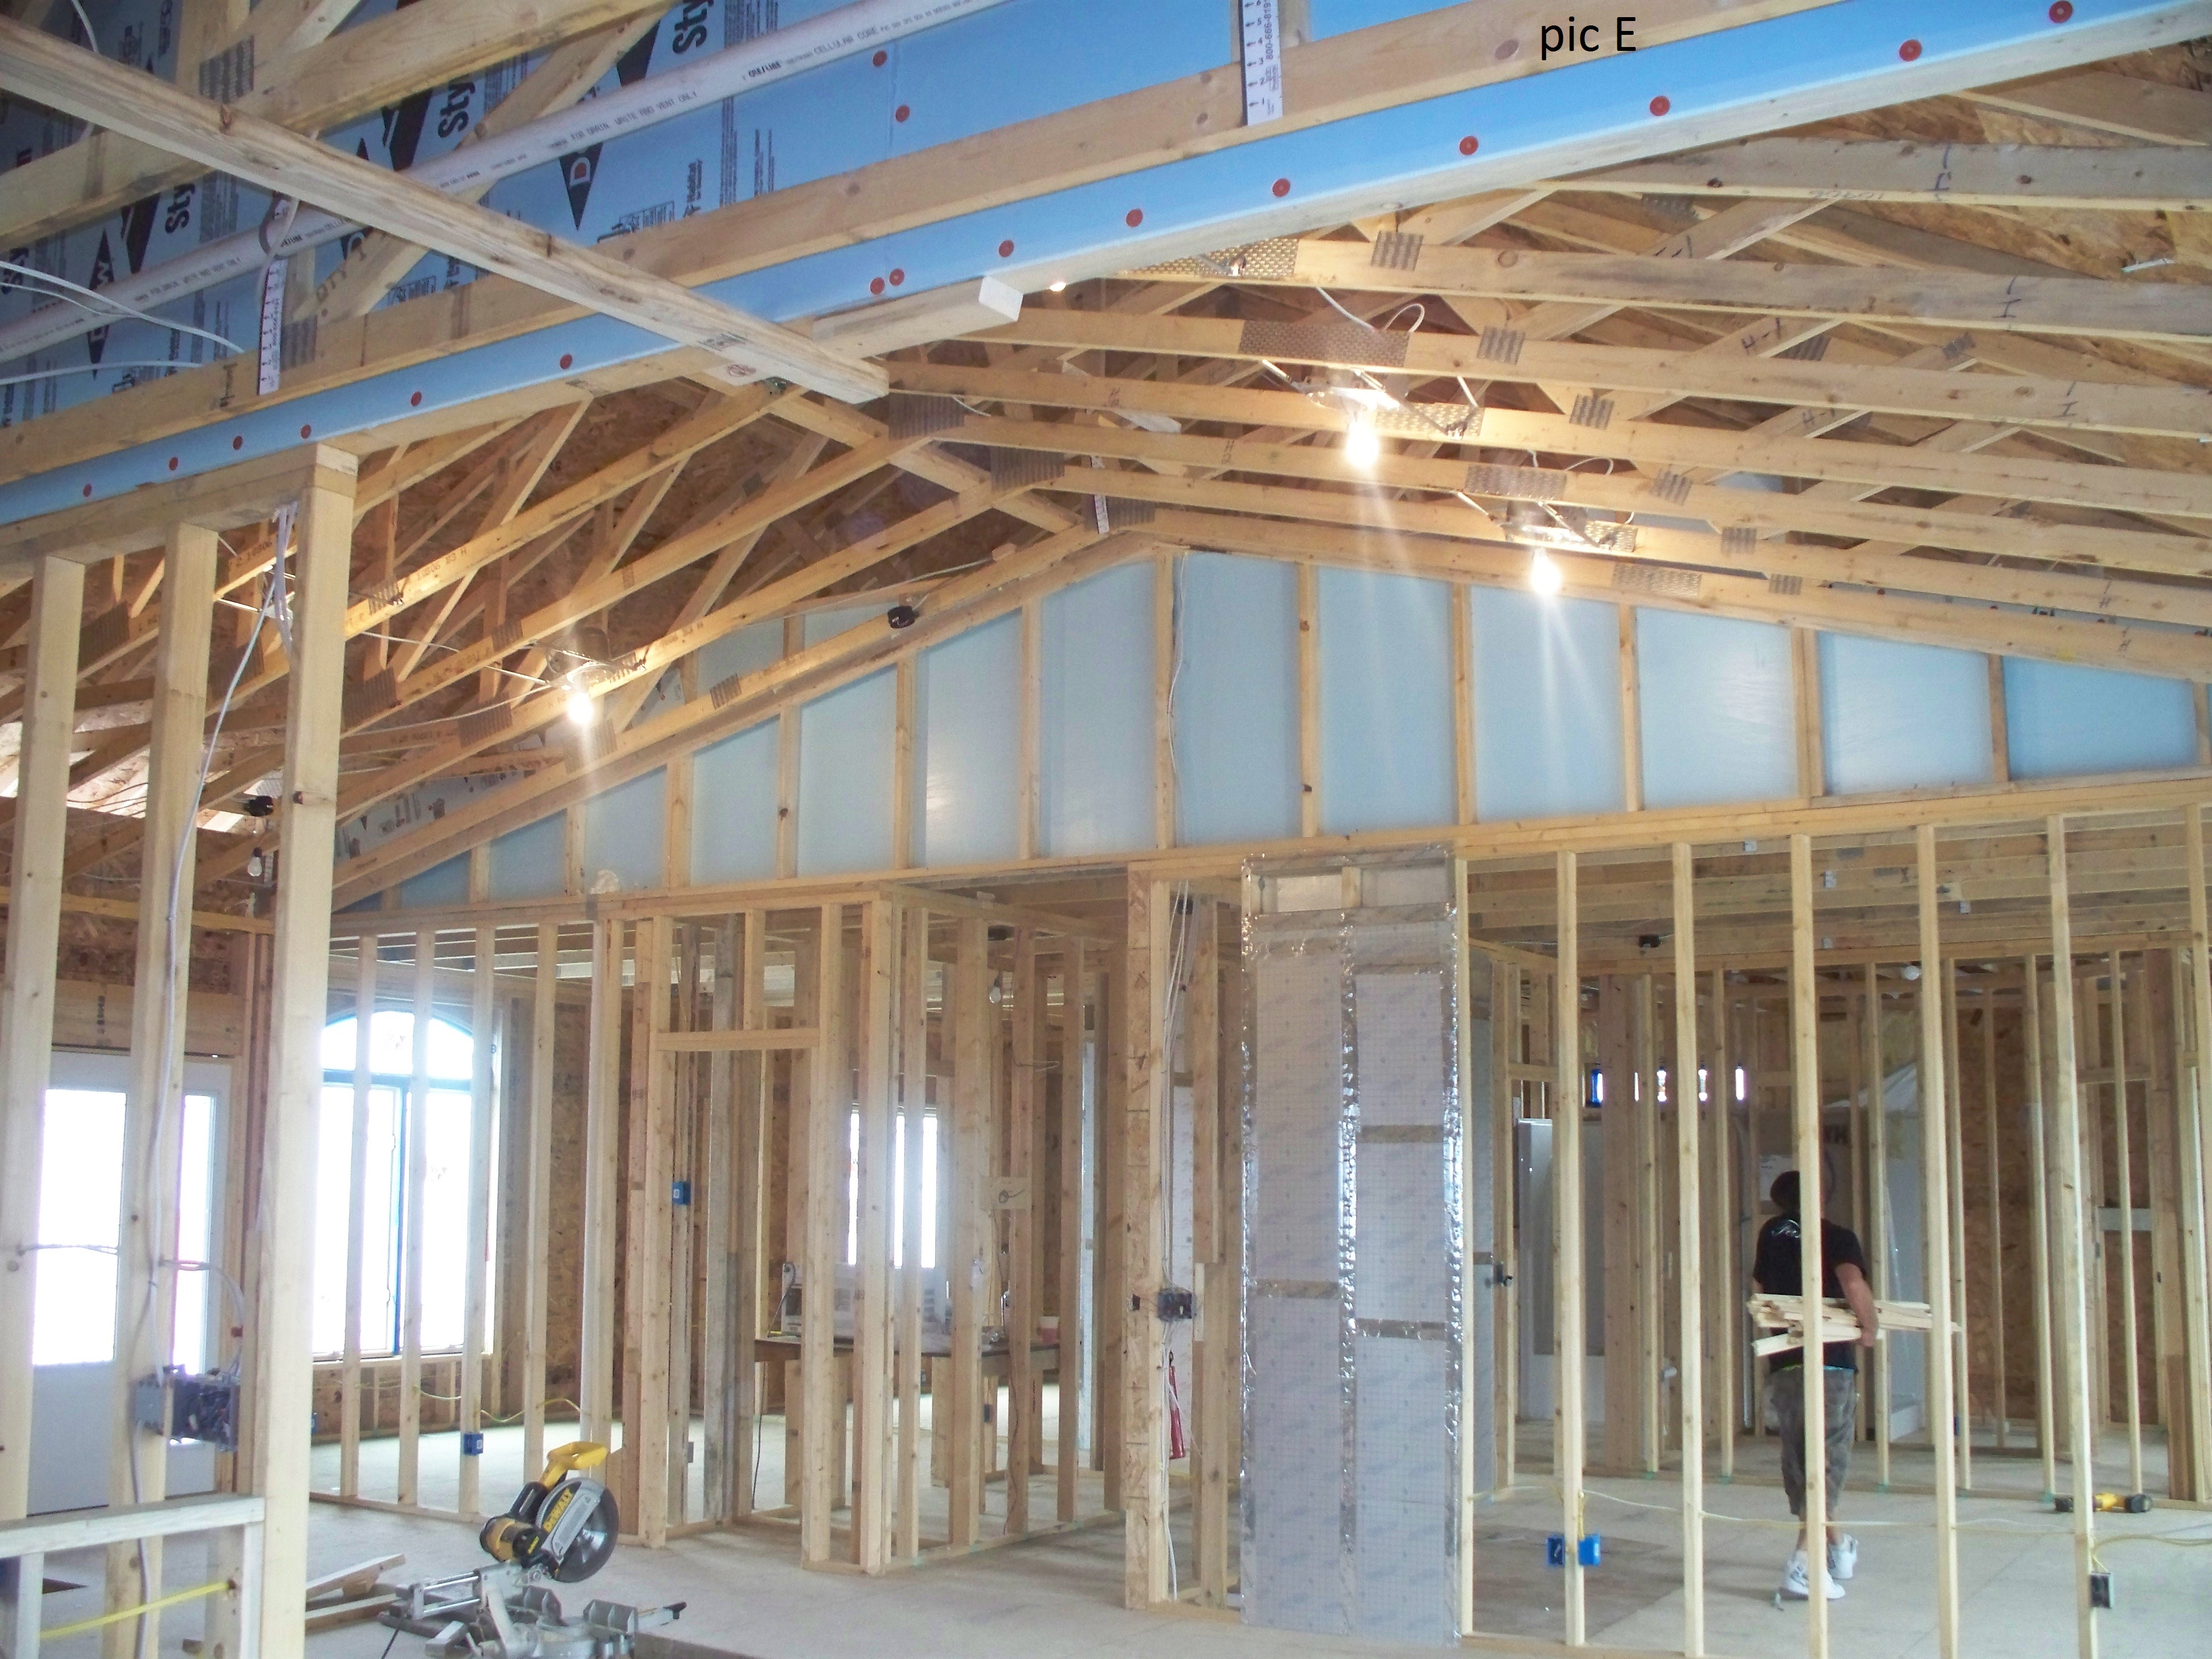
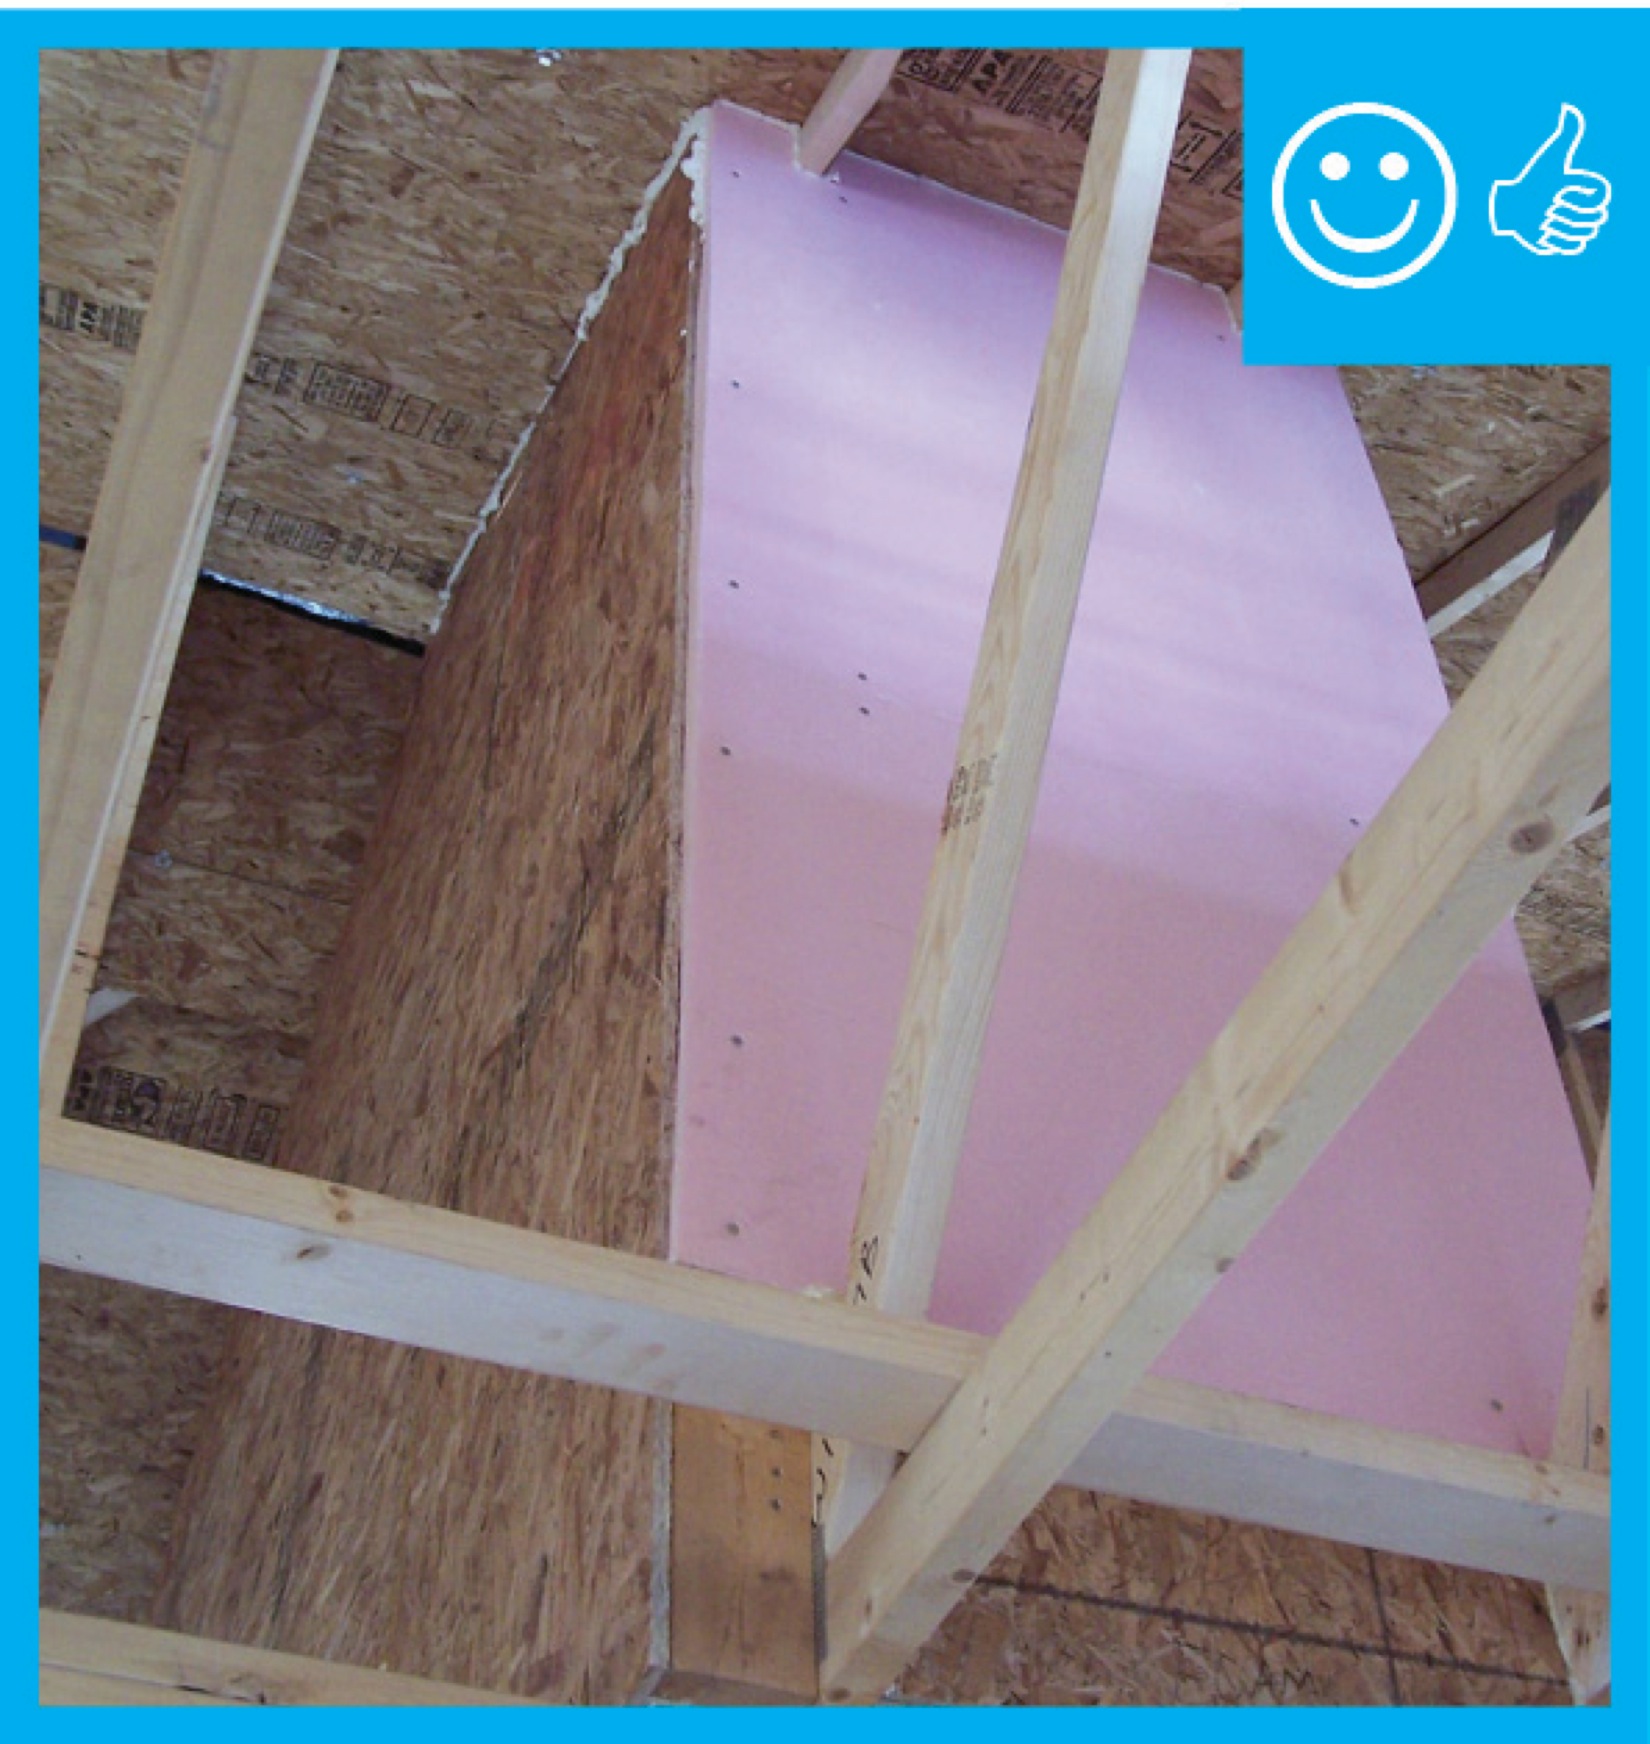
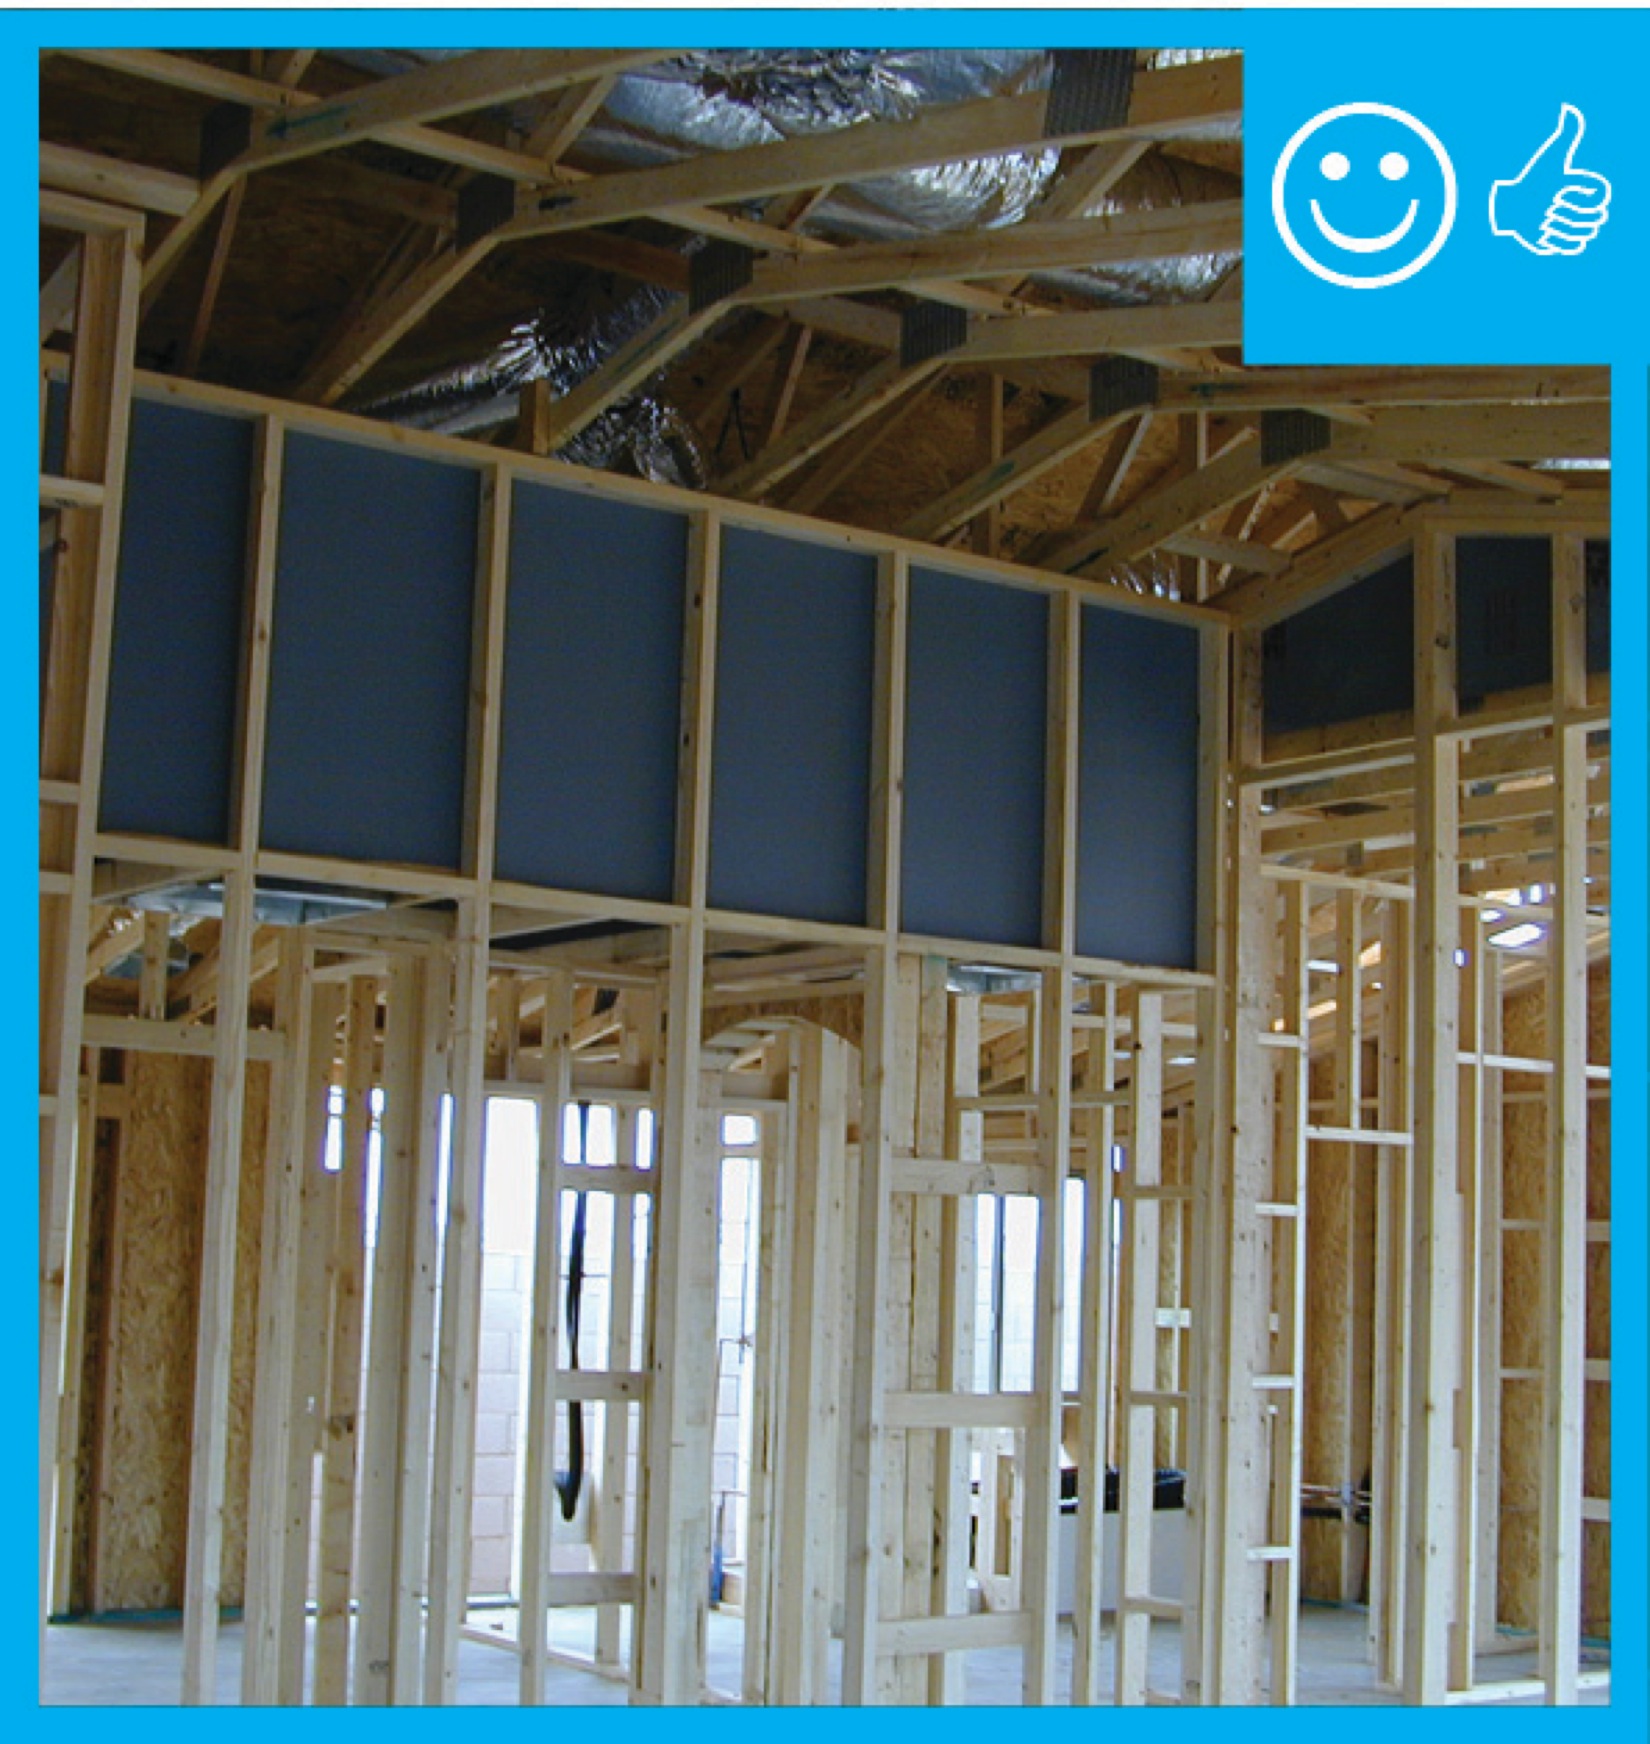
Rigid foam insulation was installed at the perimeter of the one-level apartments before installing ceiling drywall to ensure a minimum R-21 attic perimeter insulation.
Image
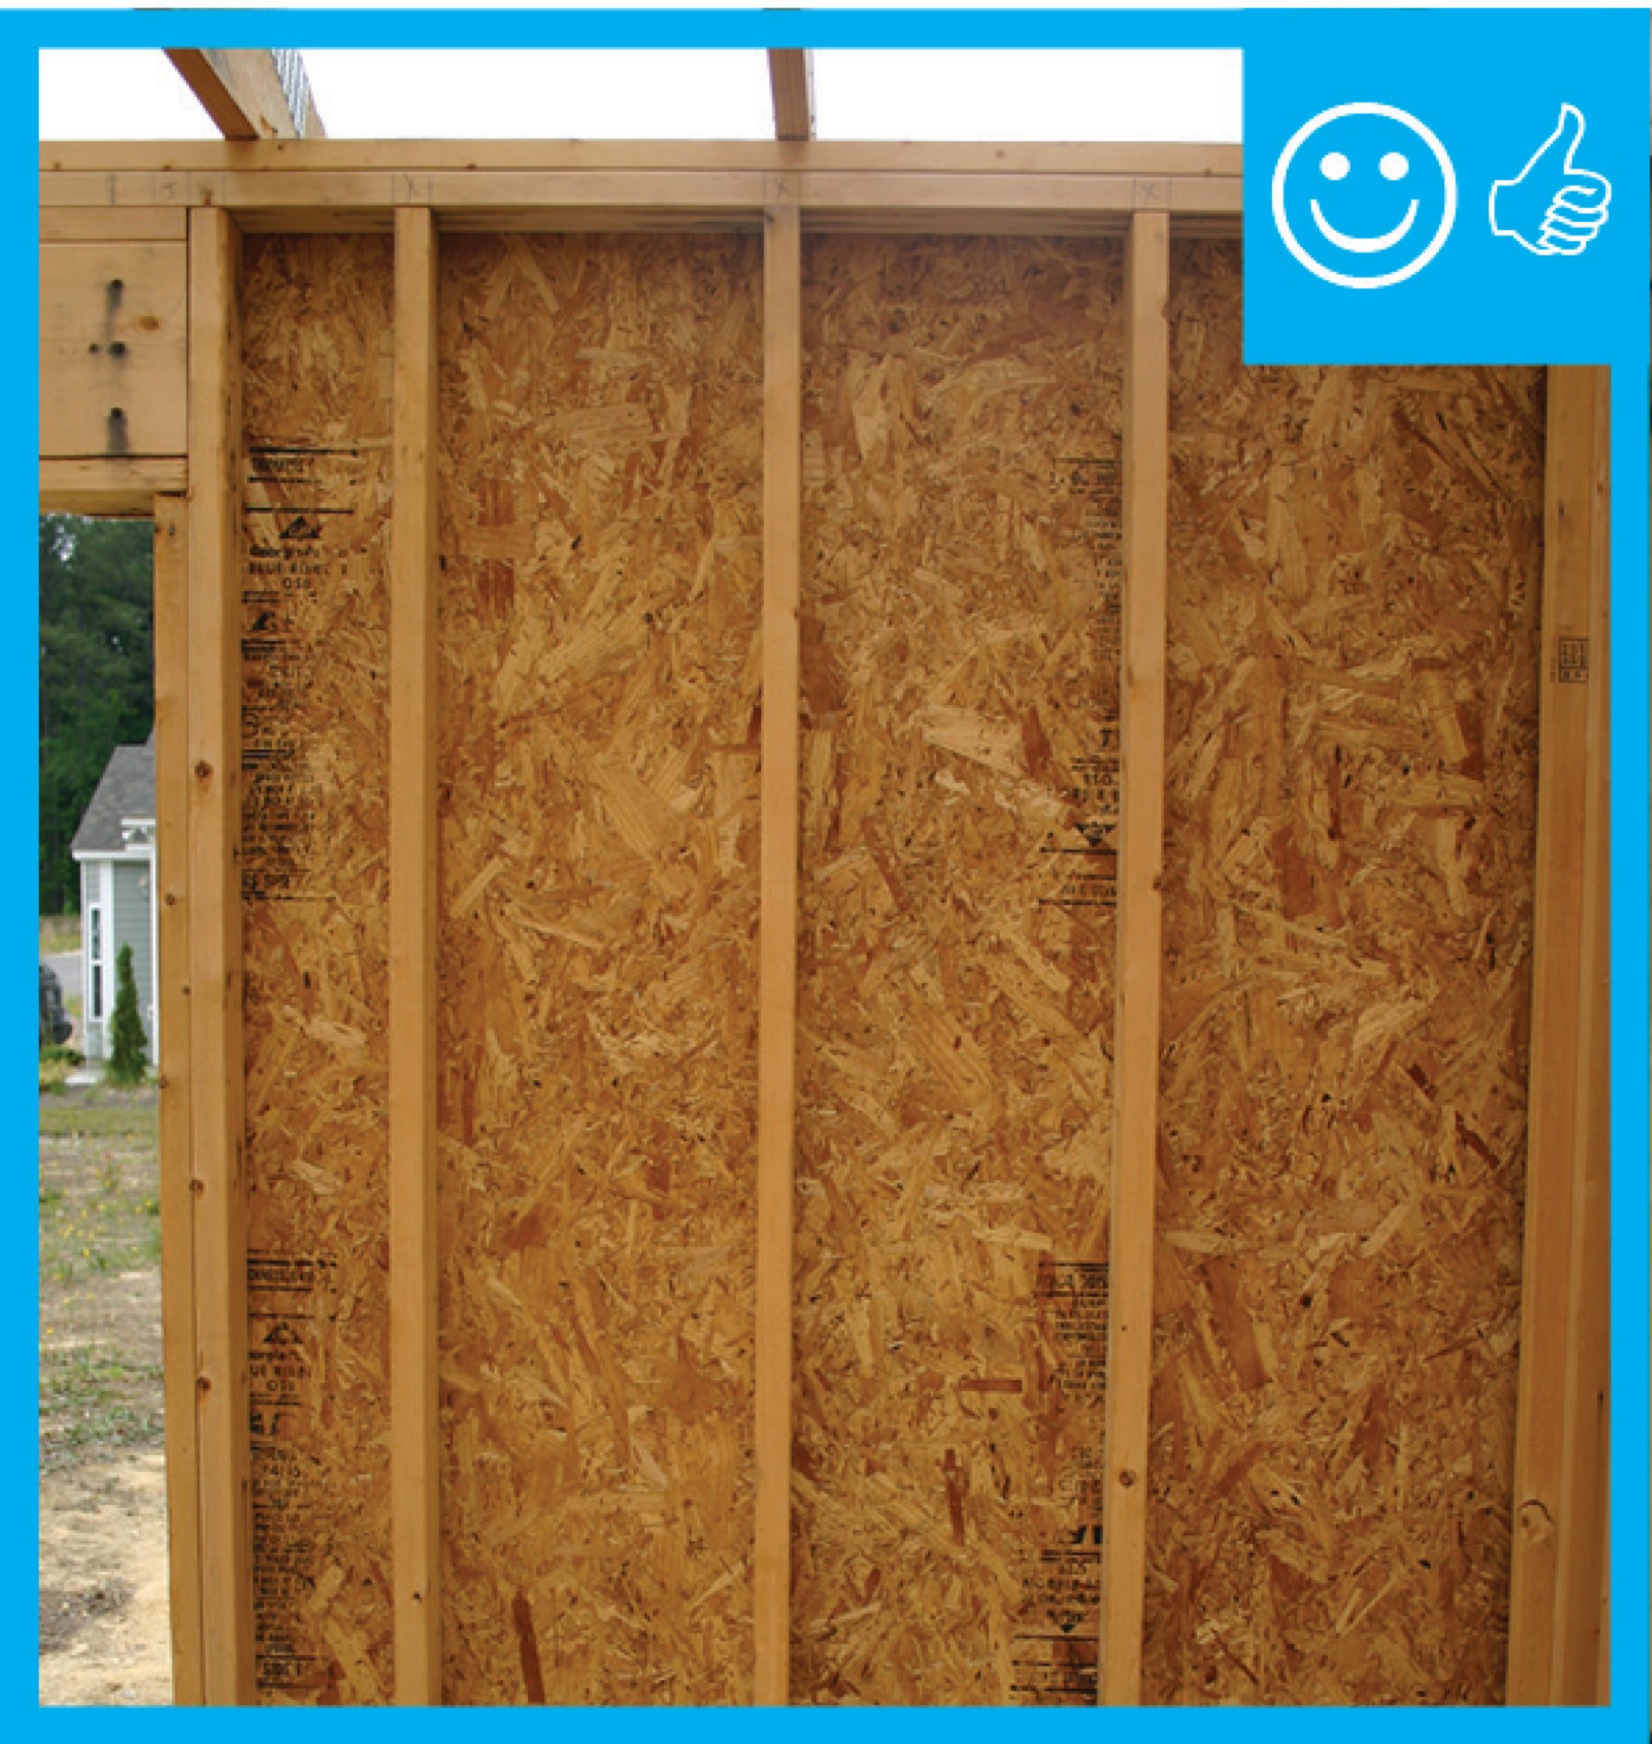
Rigid foam serves as the sheathing on these 2x6 24-inch on center walls; plywood is used only at the corners for wind bracing.
Image
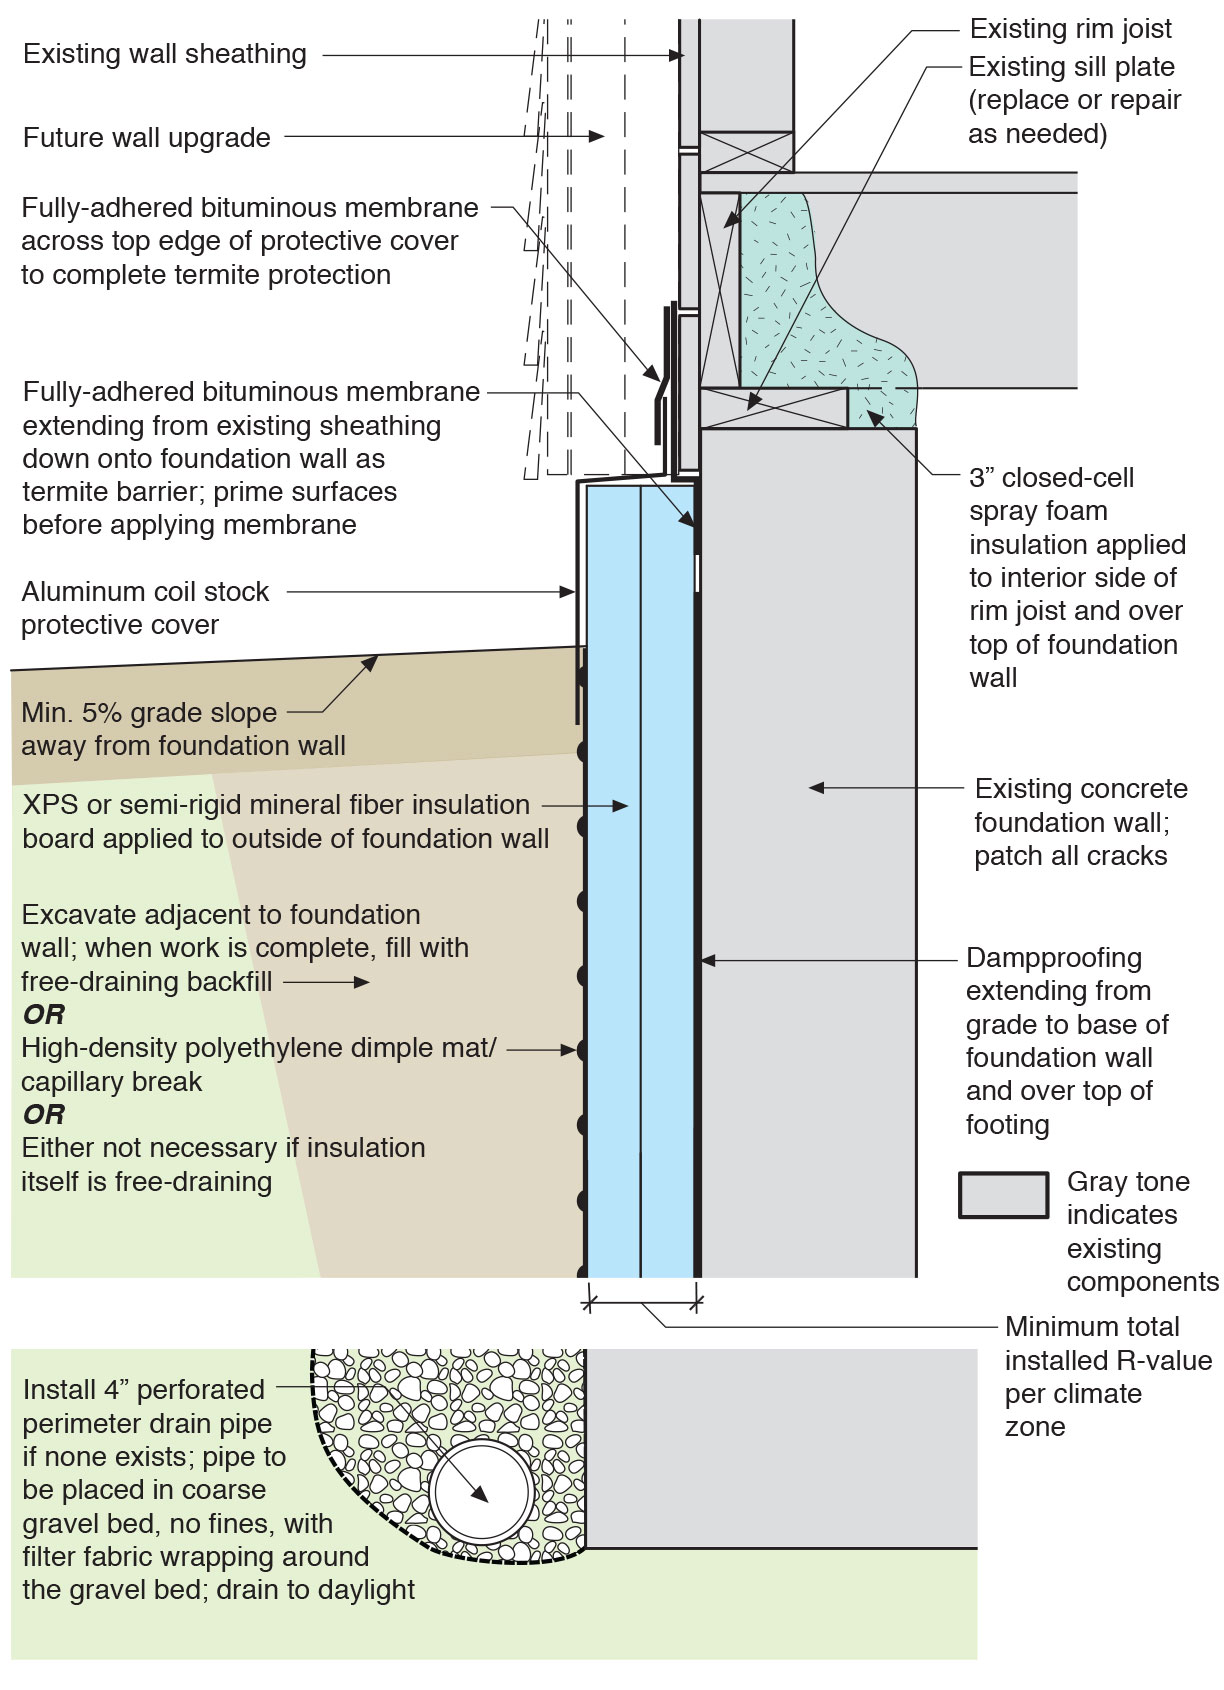
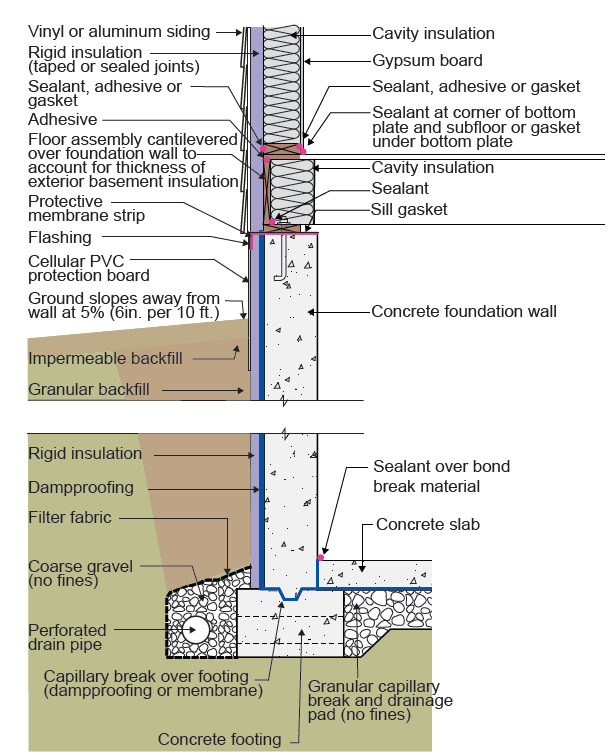
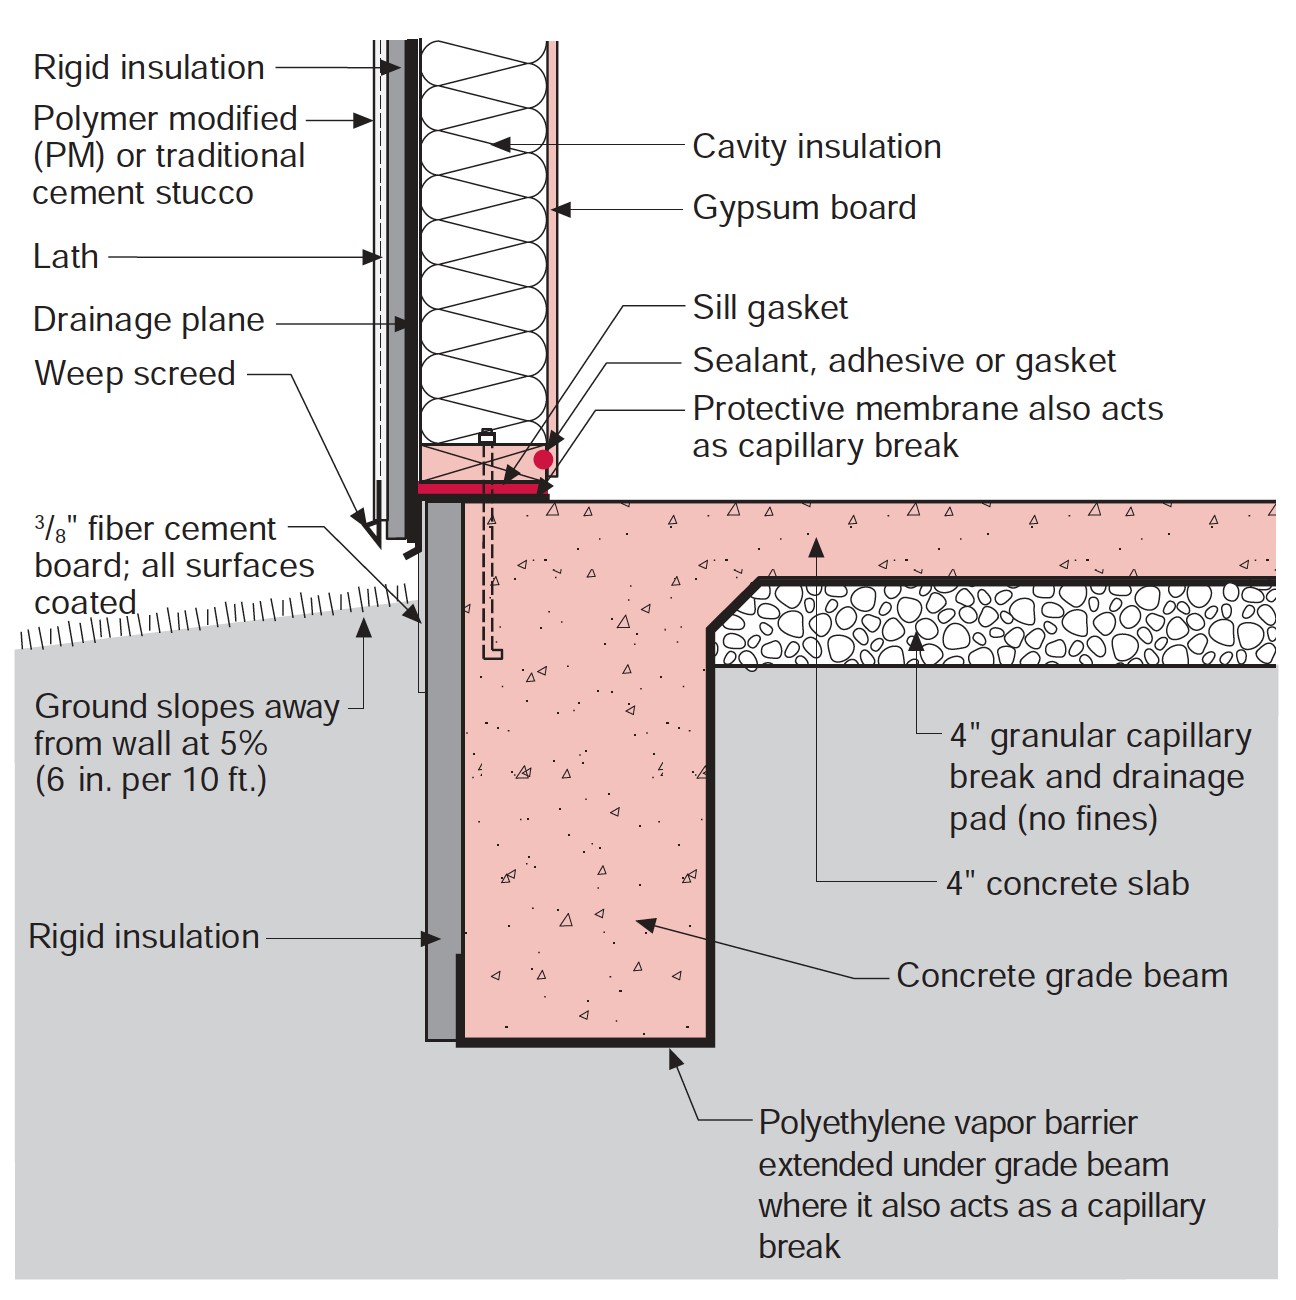
Rigid insulation and water control layers are installed on the exterior of a flat foundation wall; spray foam insulates the rim joist
Image
Image
Image
Image
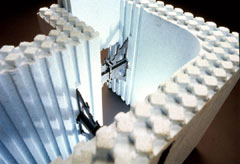
Scaffolding is continually raised as courses of foam brick are added so that the pour man can see both sides of the wall during the pour.
Image
Image
Image

Seams in the ICF block are sealed so the EPS foam surface can serve as the drainage plane; no house wrap is needed.
Image
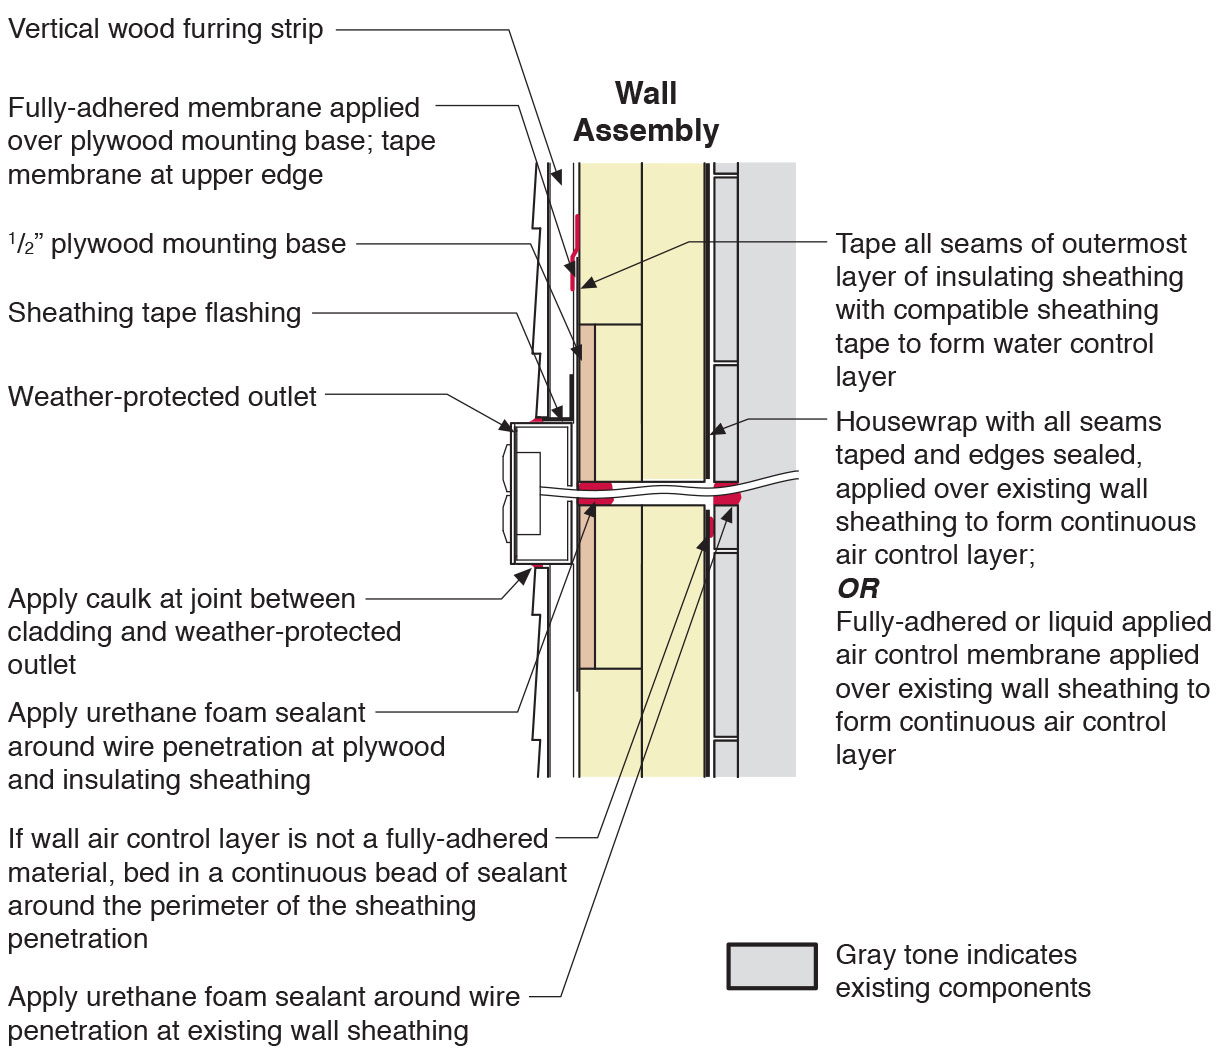
Section view of electric box installation in exterior wall showing flashing and air sealing details
Image
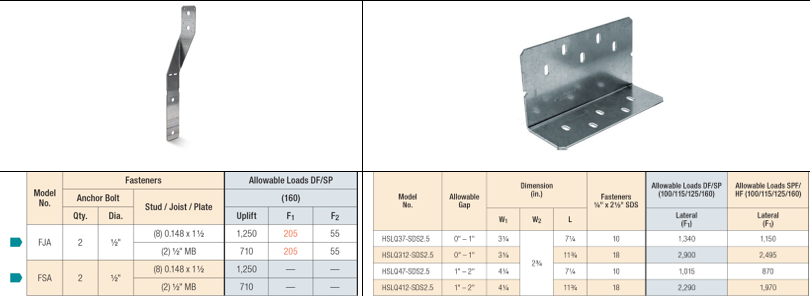
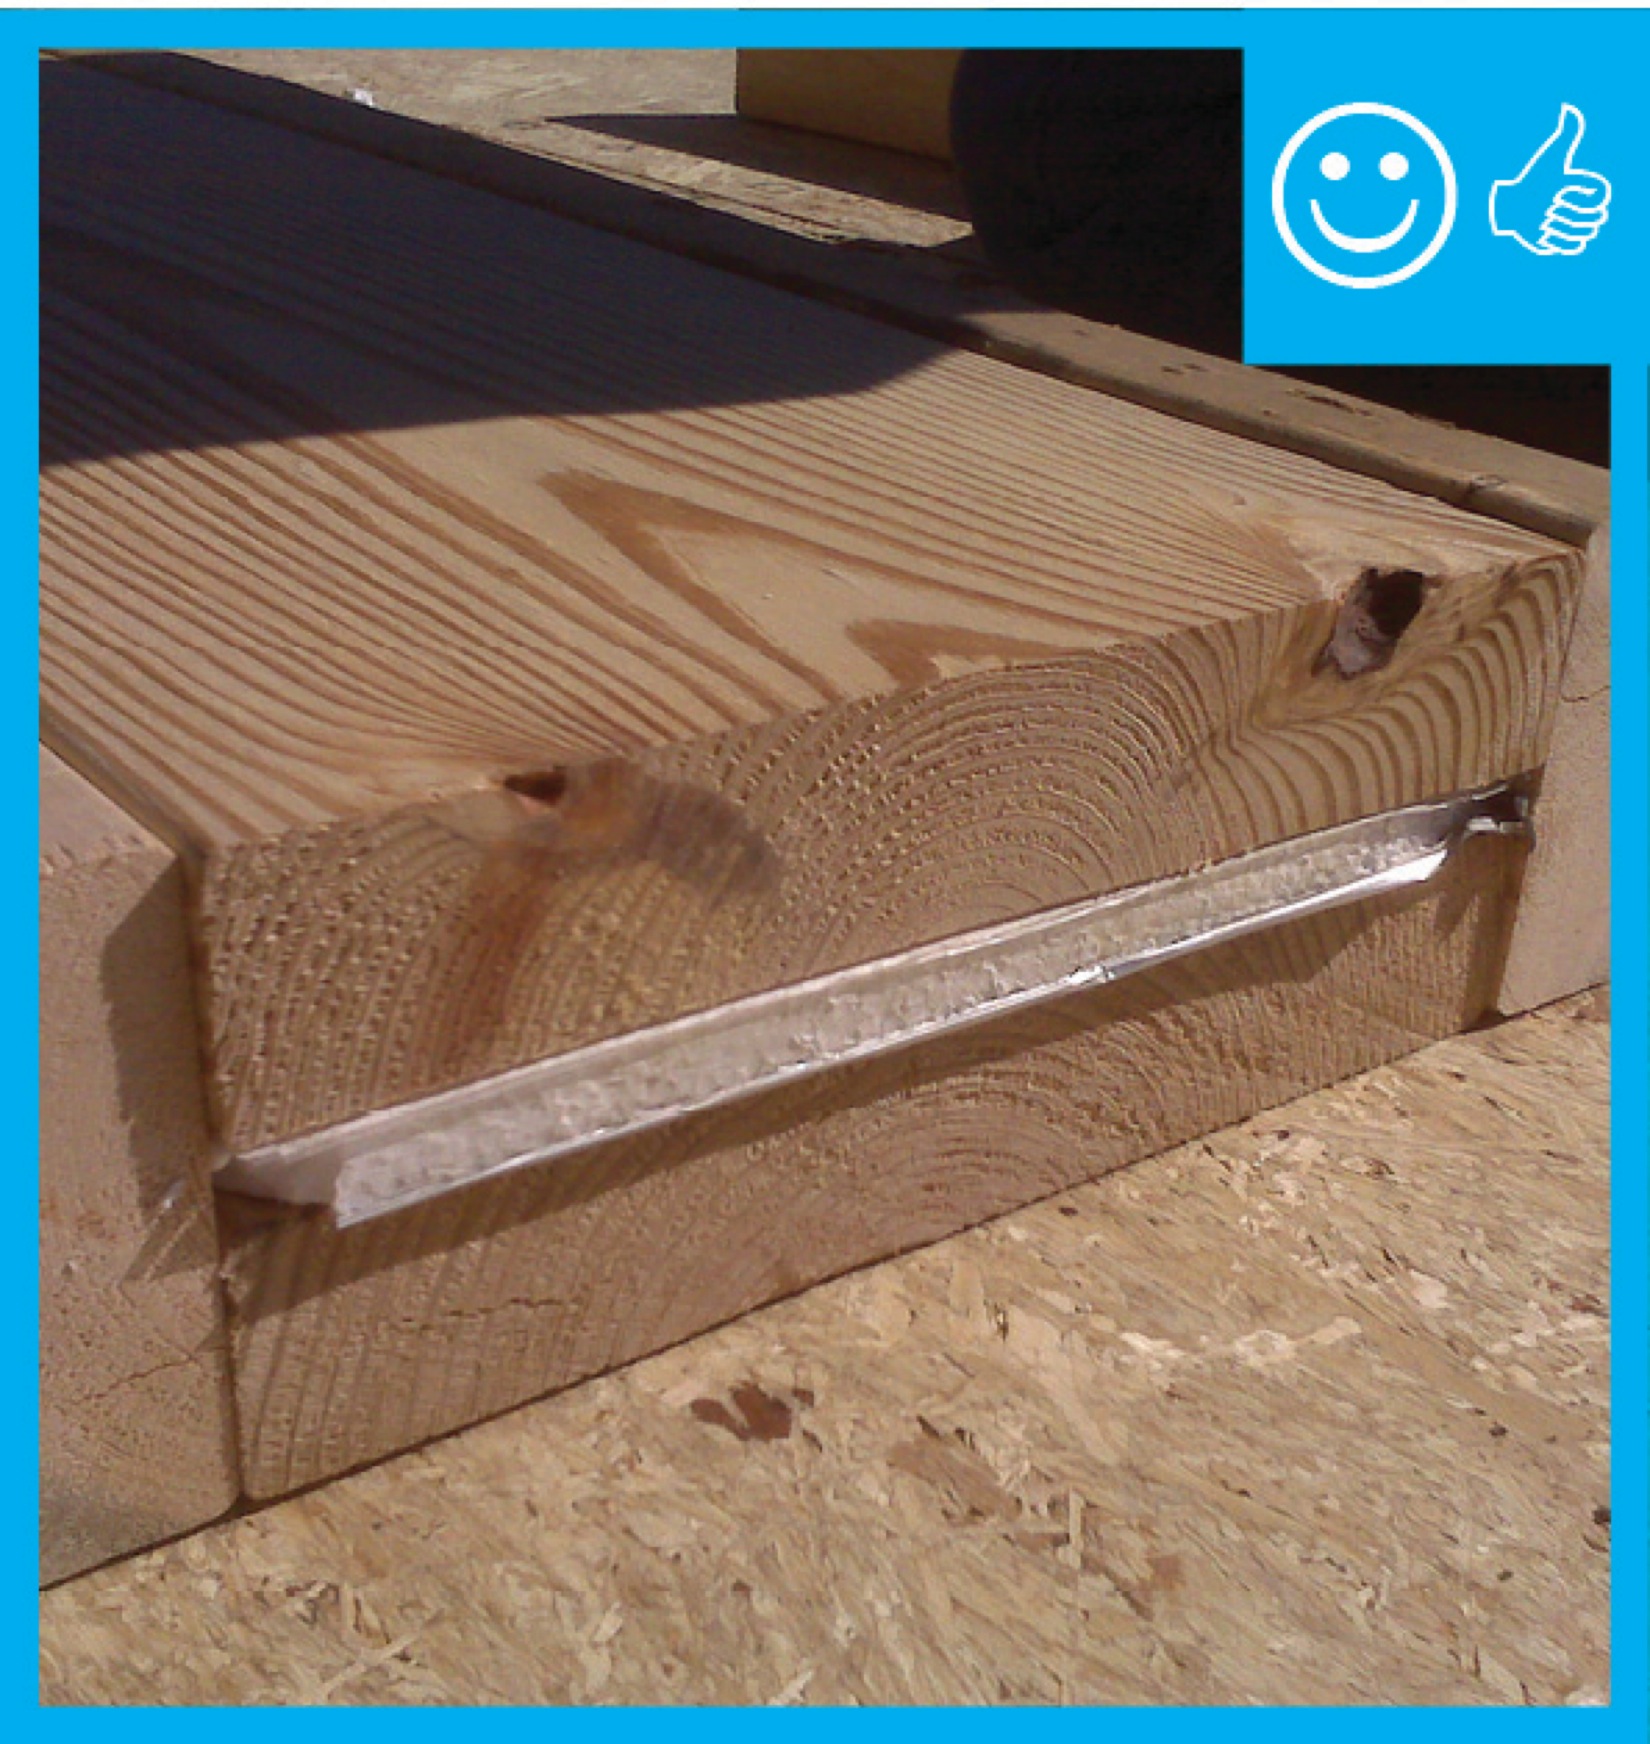
Shear Strength Comparison Between a Foundation Stud Anchor (on left) and a Shear Transfer Angle (on right)
Image
Image
Sheets of phase-change material are installed over the cellulose insulation to help even out interior temperatures.
Image
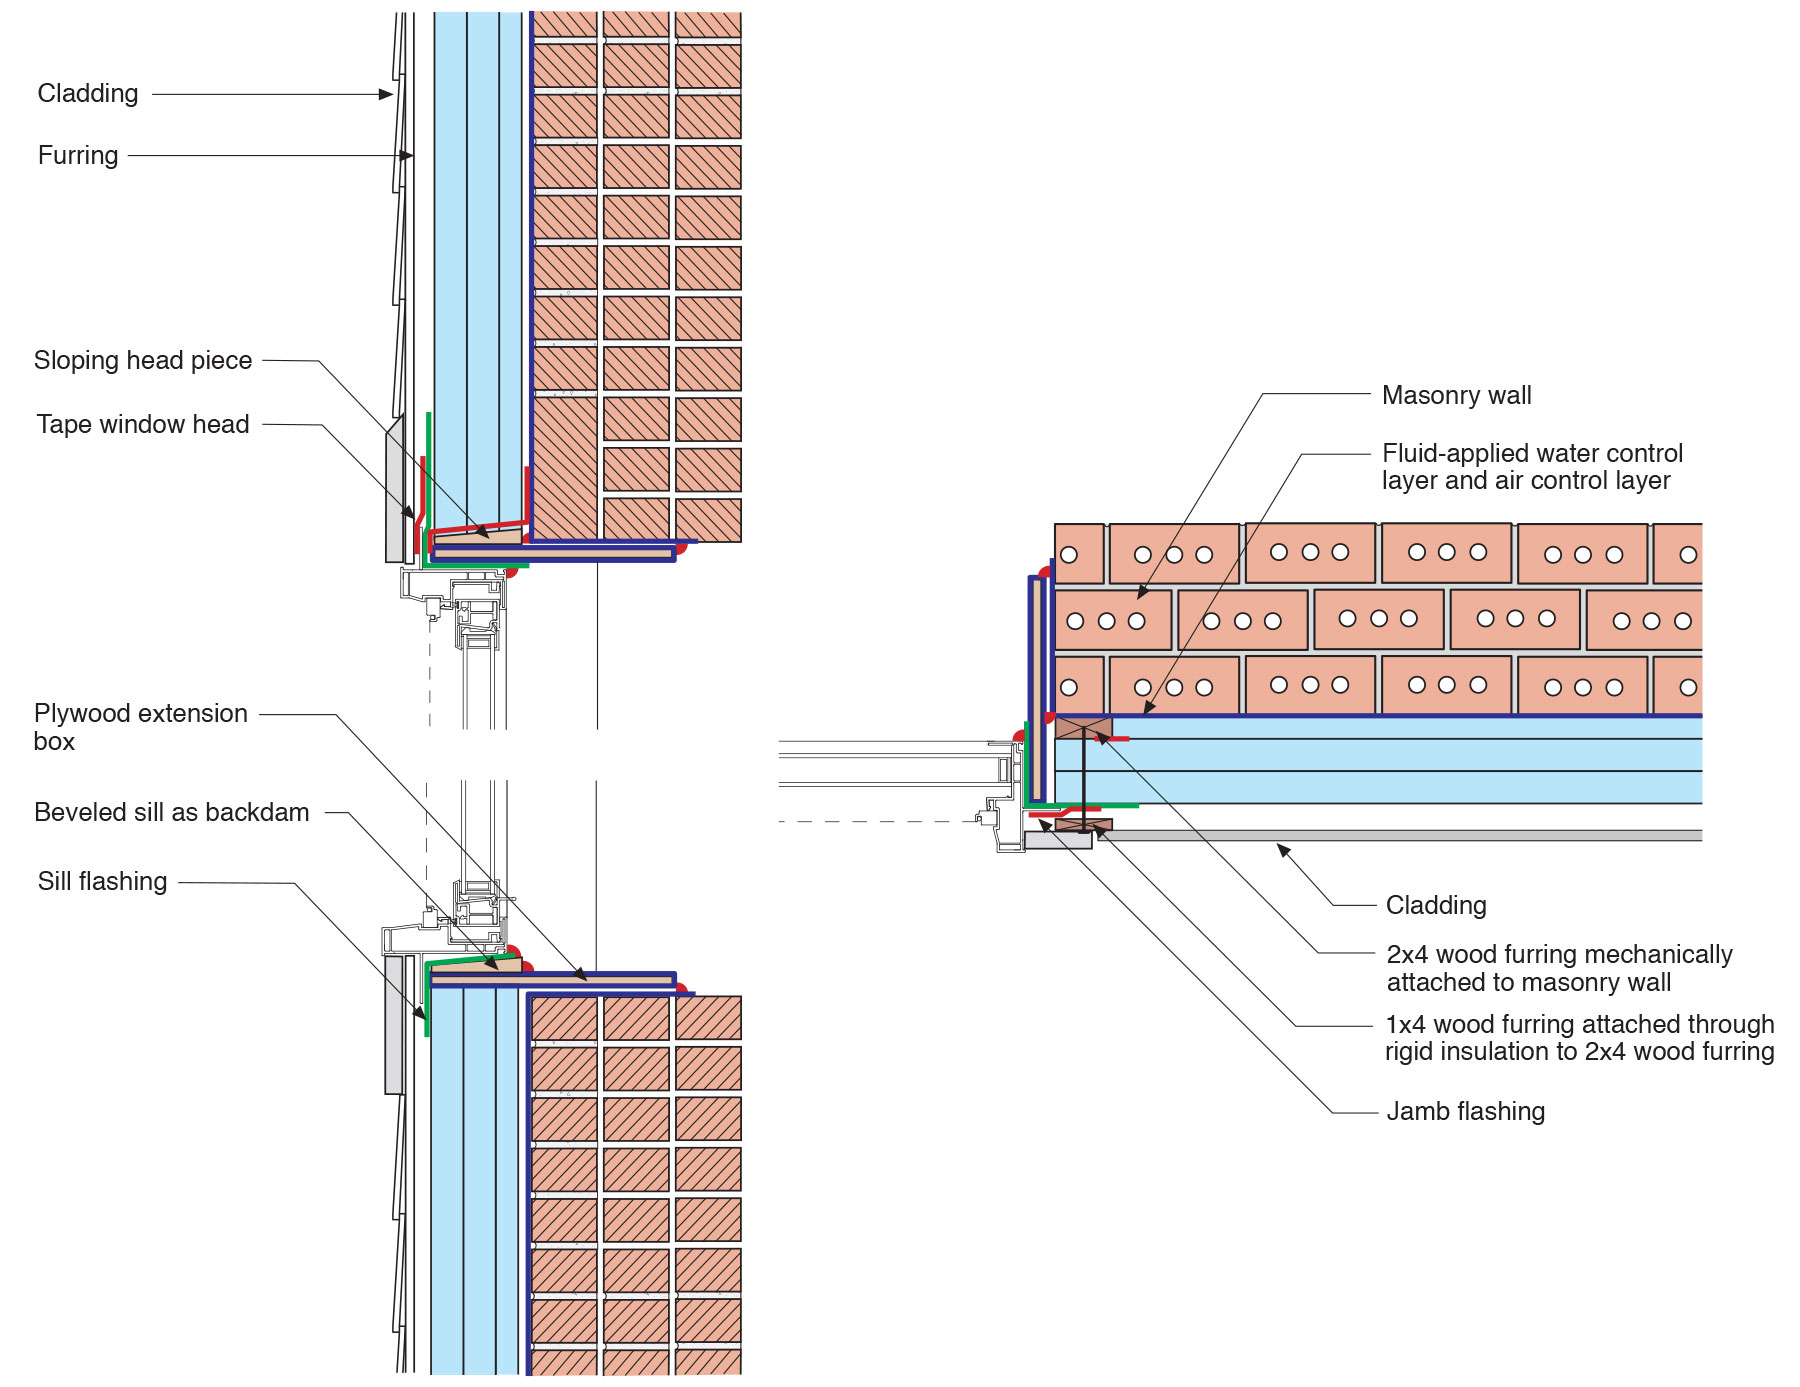
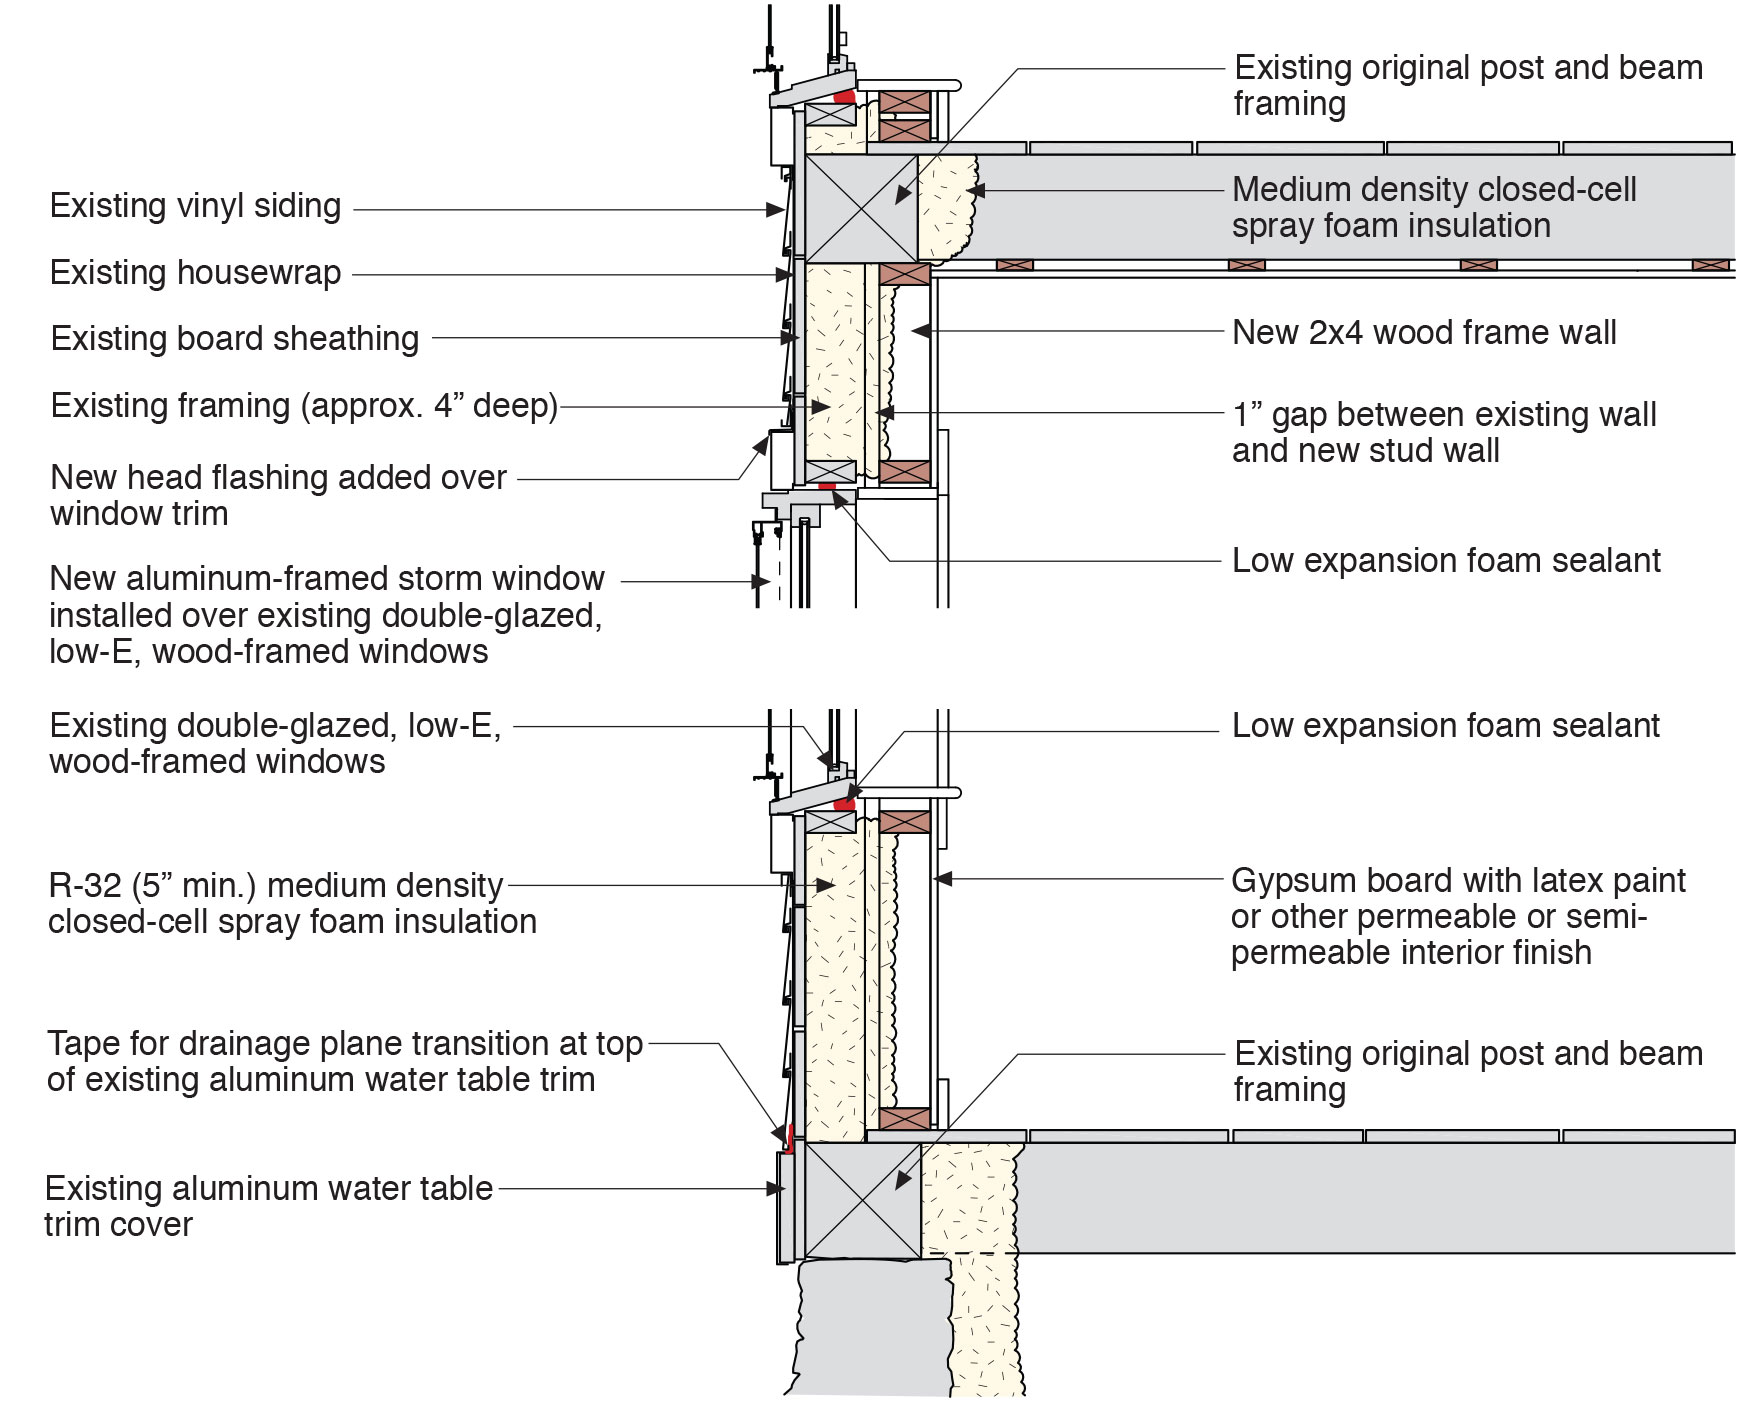
Side and plan views of window-to-wall interface in masonry wall retrofit including three layers of rigid foam exterior insulation, box extensions, and flashing around new windows.
Image

Side view showing air-sealing and rigid foam insulation is installed over existing wall and ceiling under a room above, then covered with new gypsum board.
Image
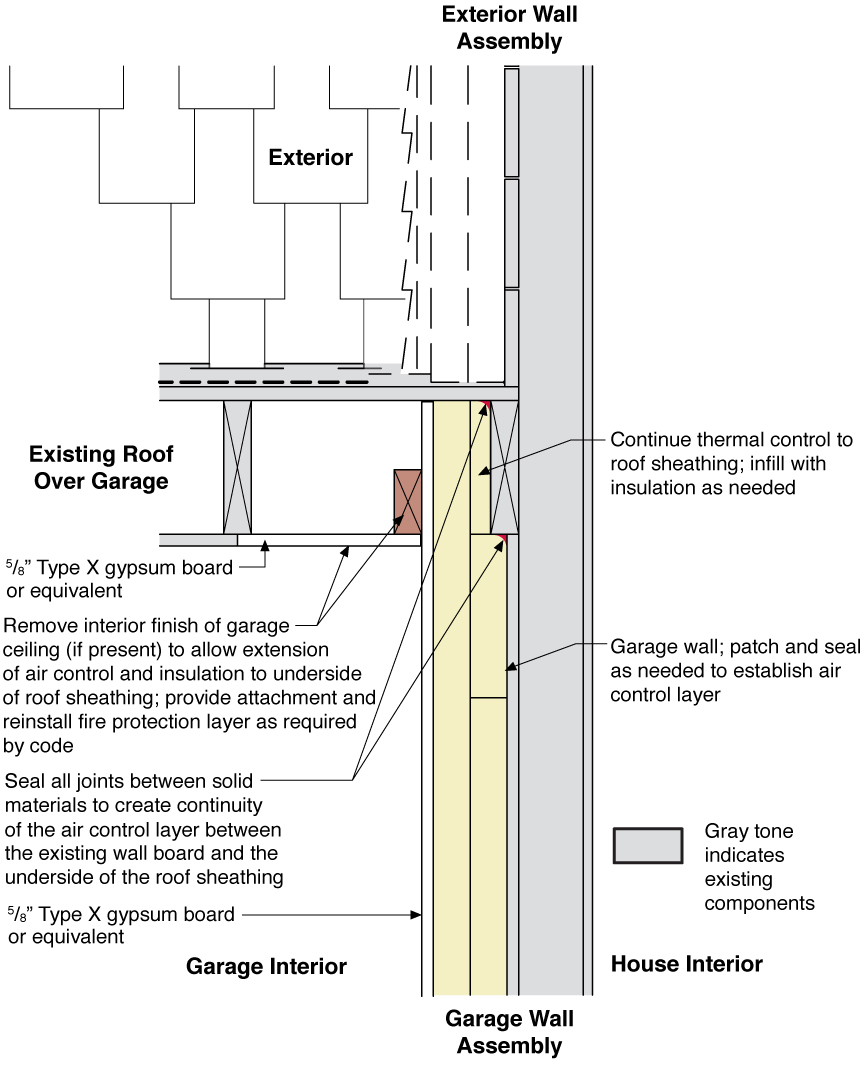
Side view showing how the existing garage wall and ceiling are air-sealed prior to installing rigid foam insulation on the garage side of the shared wall of an existing home.
Image
Siding has been removed so cellulose insulation can be dense-packed into the exterior walls of this home
Image
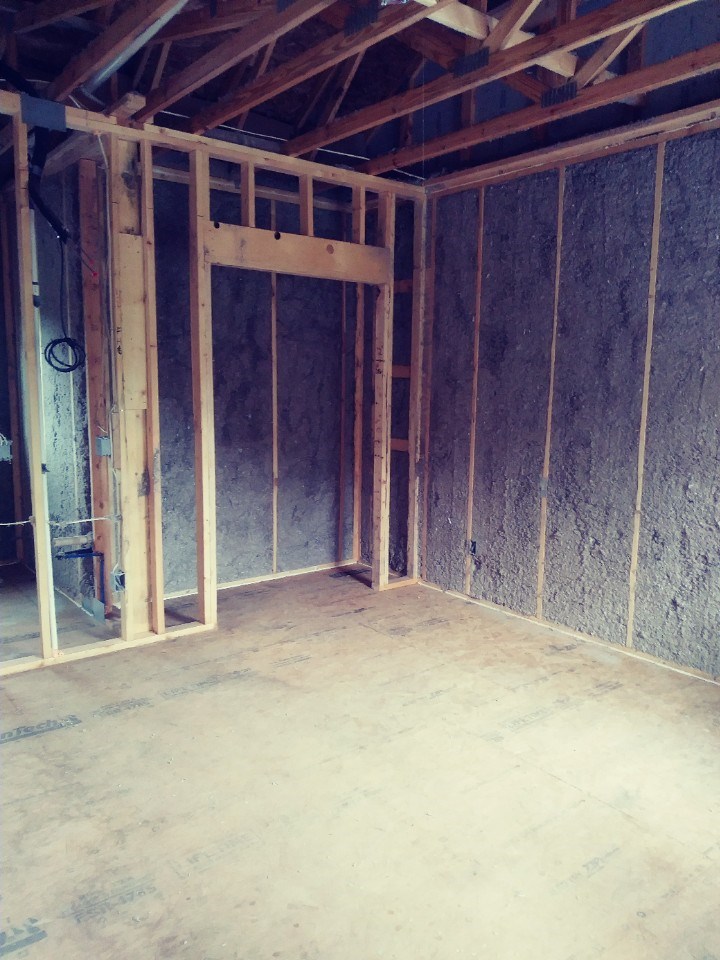
Single framed wall converted to double wall and insulated with closed-cell spray foam
Image
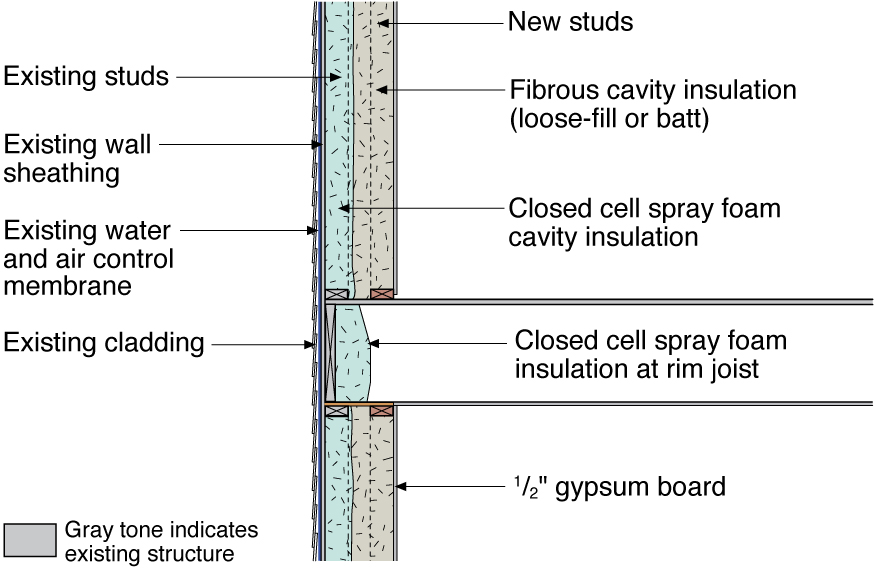
Single framed wall converted to double wall and insulated with closed-cell spray foam and loose-fill fibrous insulation
Image
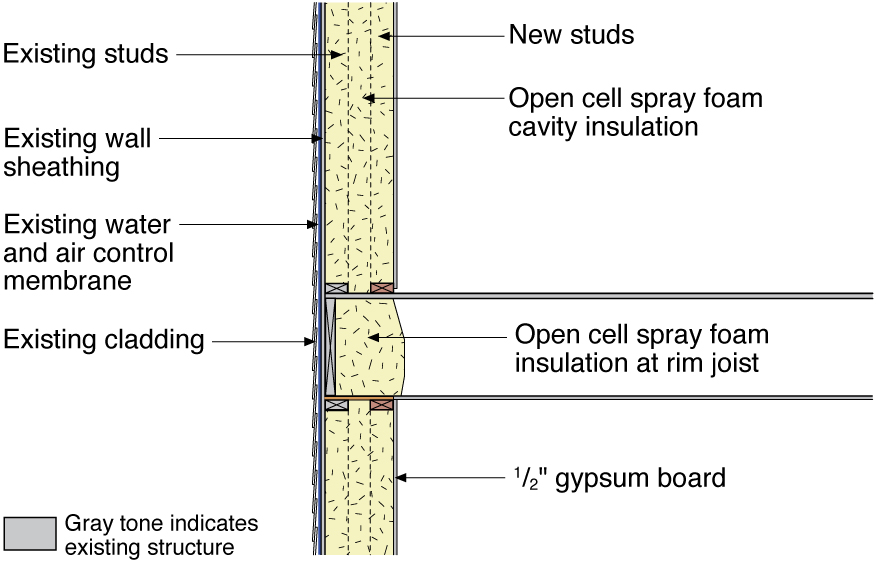
Single framed wall converted to double wall and insulated with open-cell spray foam
Image

SIP panel walls are less susceptible to air leakage and convection issues than stick-built walls
Image
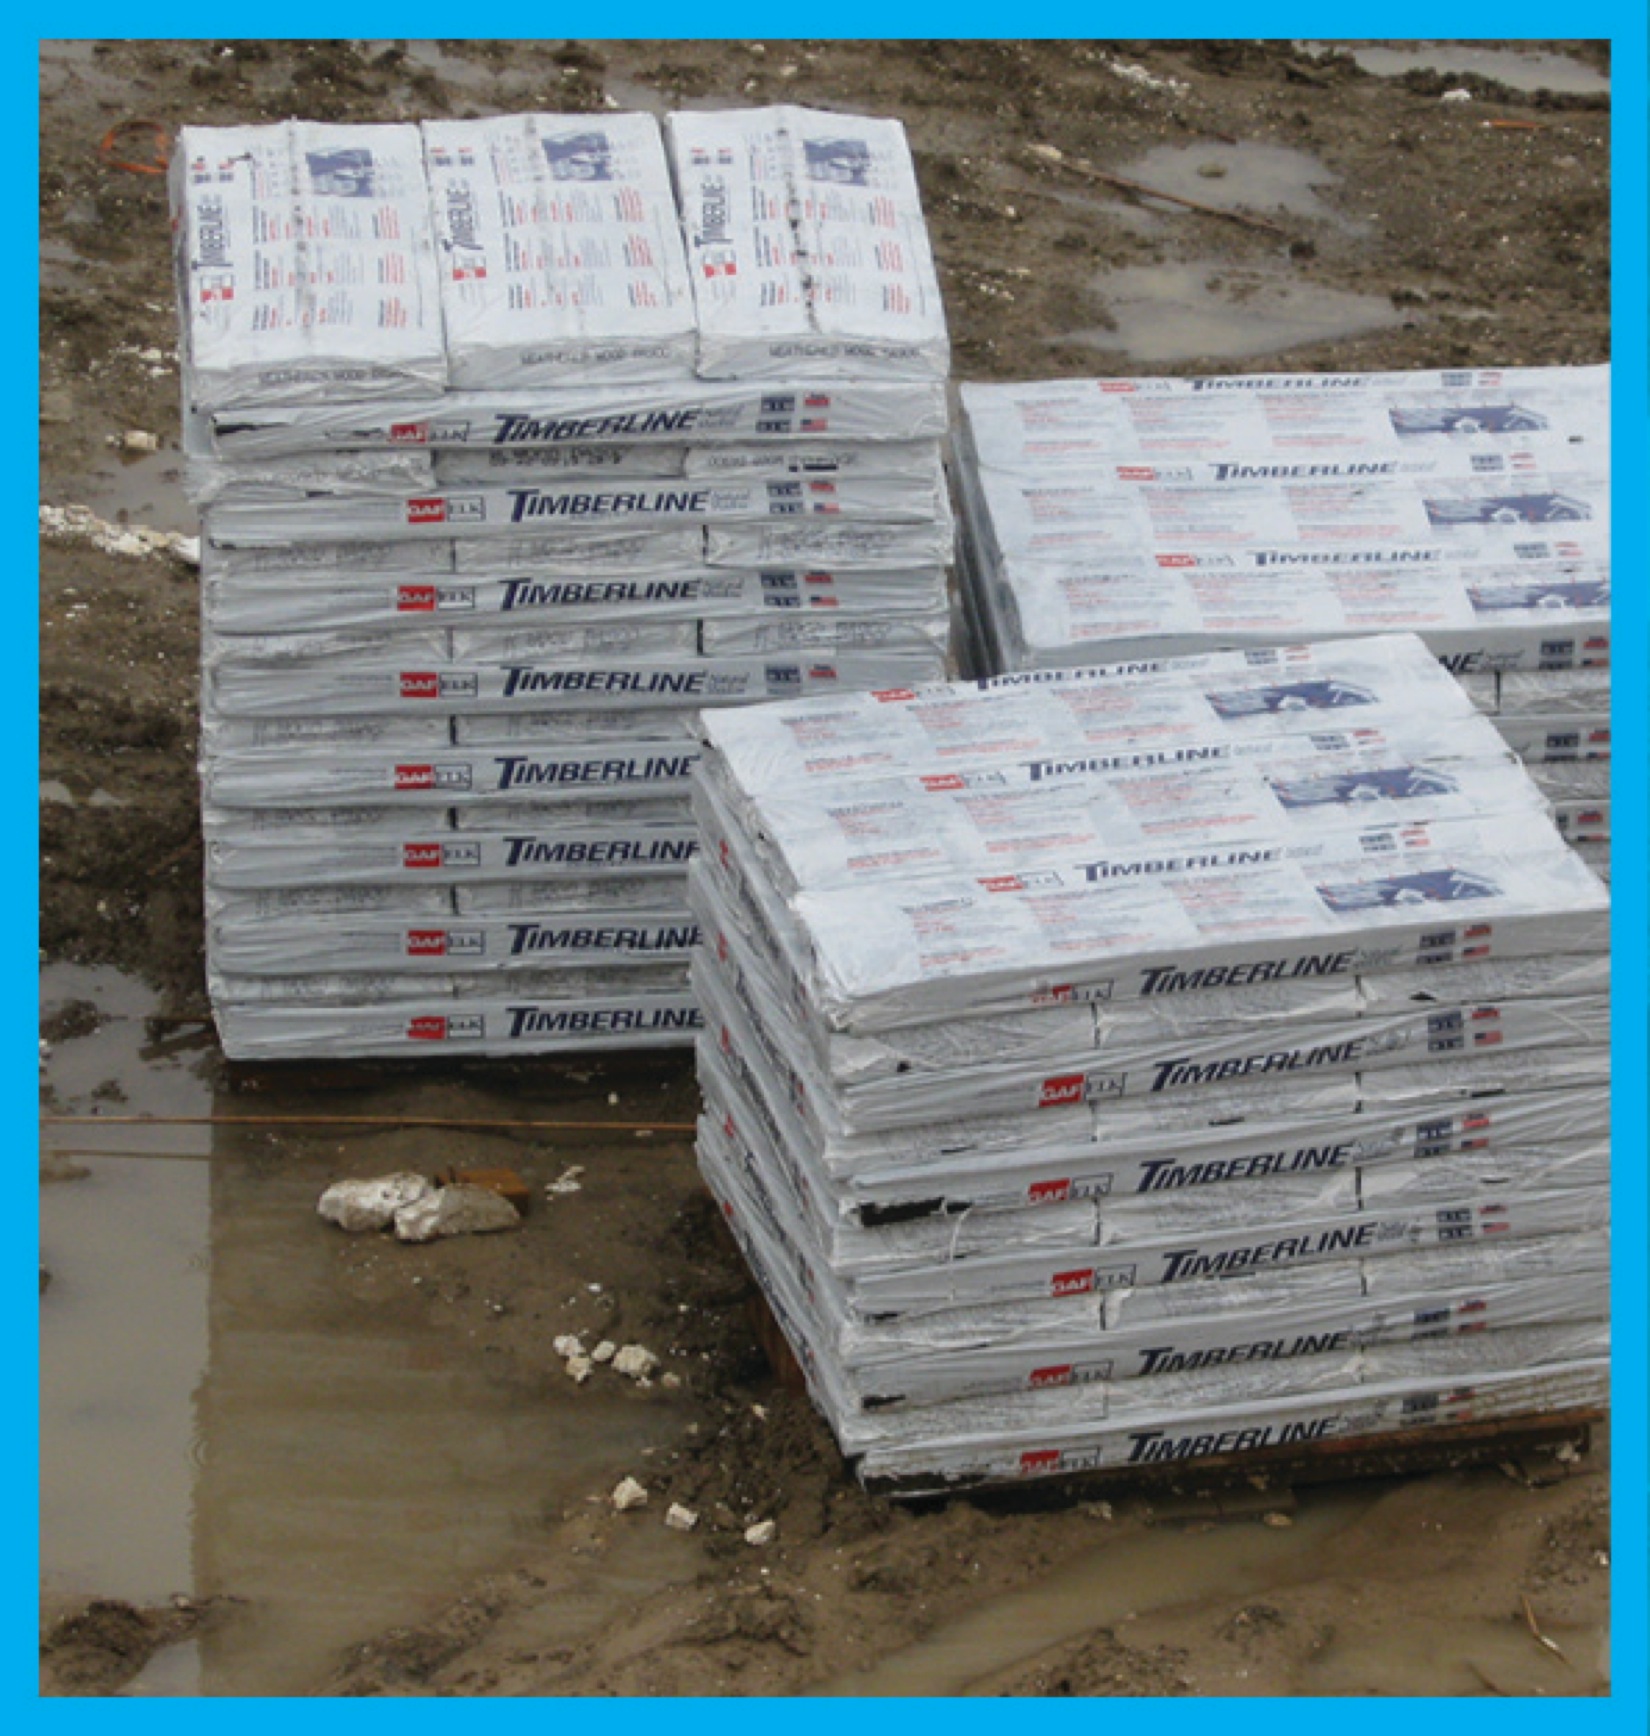
SIP panels should be stacked high, dry, and flat
Image
Image
Solid wood blocking was installed in the walls to accommodate future grab bars in both bathrooms.
Image
Sources of heat gain in a house include solar gains, infiltration, conduction through walls and roof, occupants, and internal equipment
Image
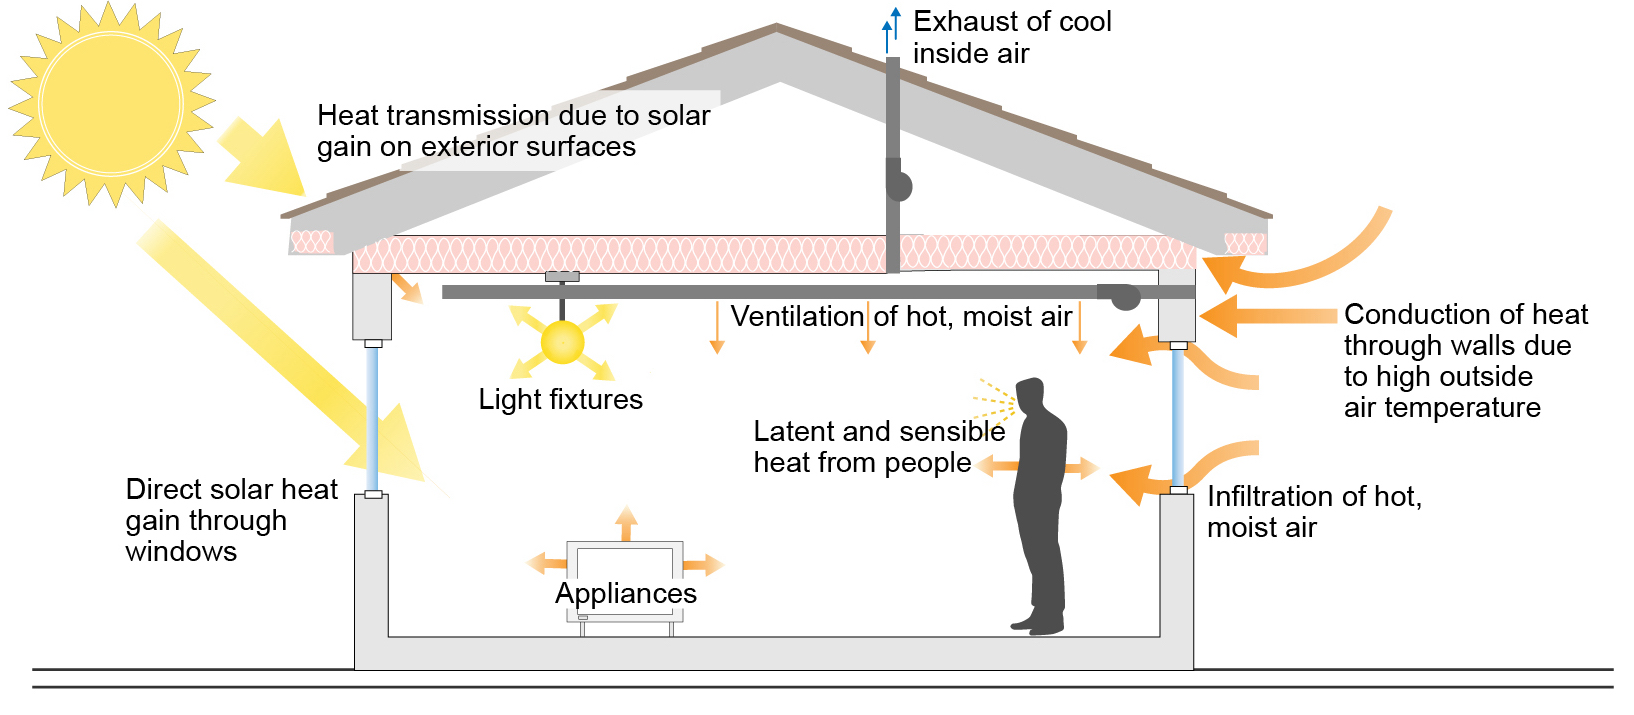
Sources of heat gain in a house include solar gains, infiltration, conduction through walls and roof, occupants, and internal equipment
Image
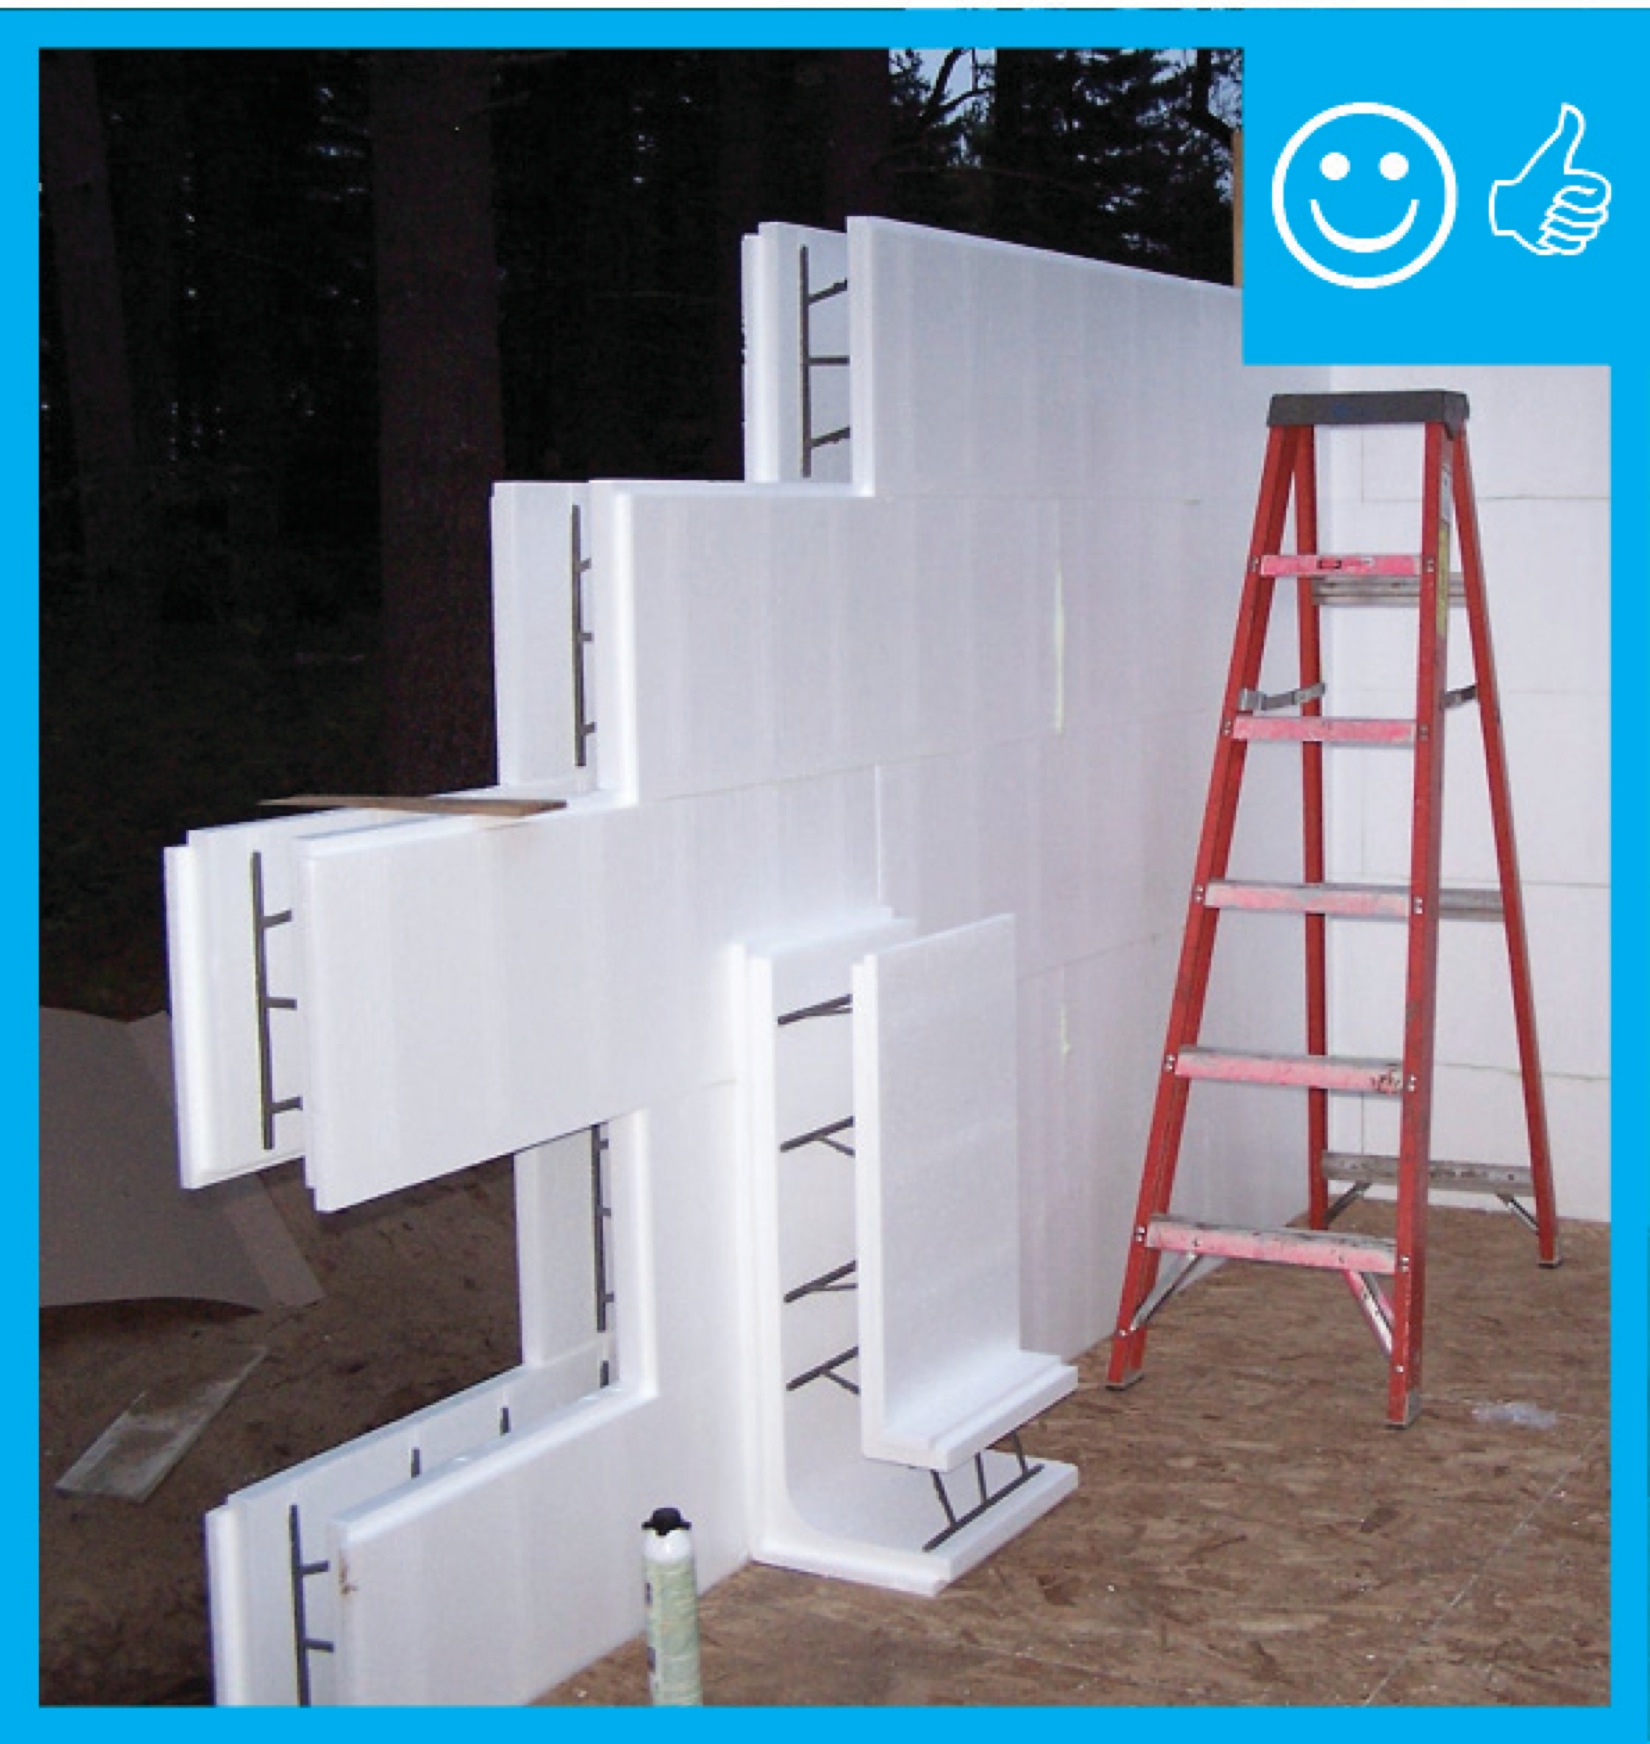
Special molded corners provide continuous insulation layer at the corners to improve structural strength and minimize thermal bridging
Image
Image
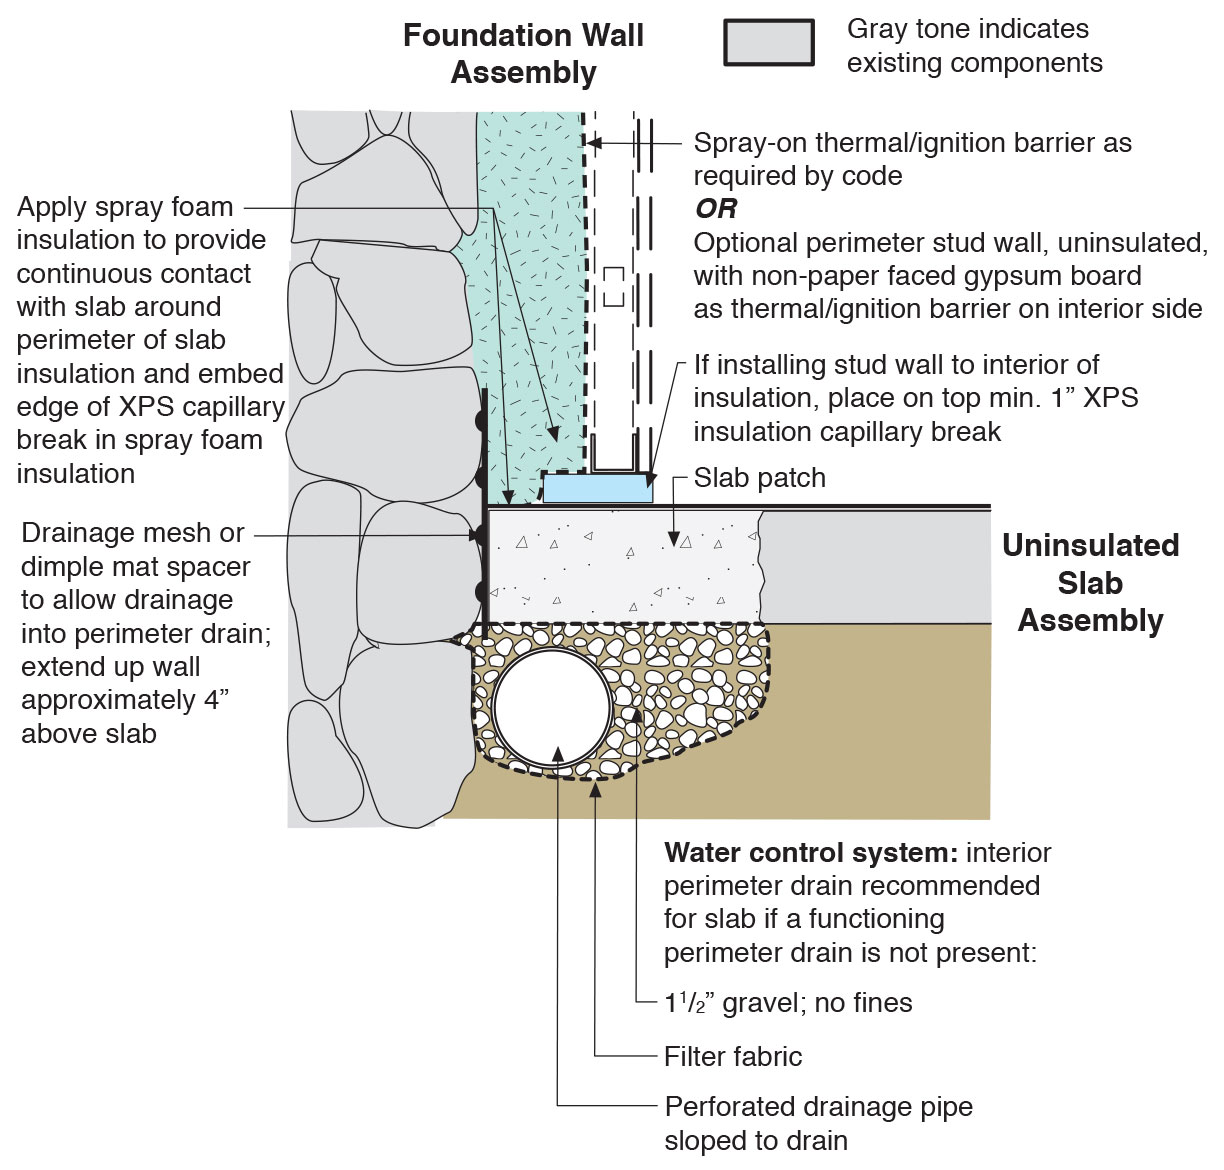
Spray foam extends down the inside of the foundation wall to the uninsulated slab; because the wall lacked exterior perimeter drainage, the slab was cut and an interior footing drain was installed.
Image
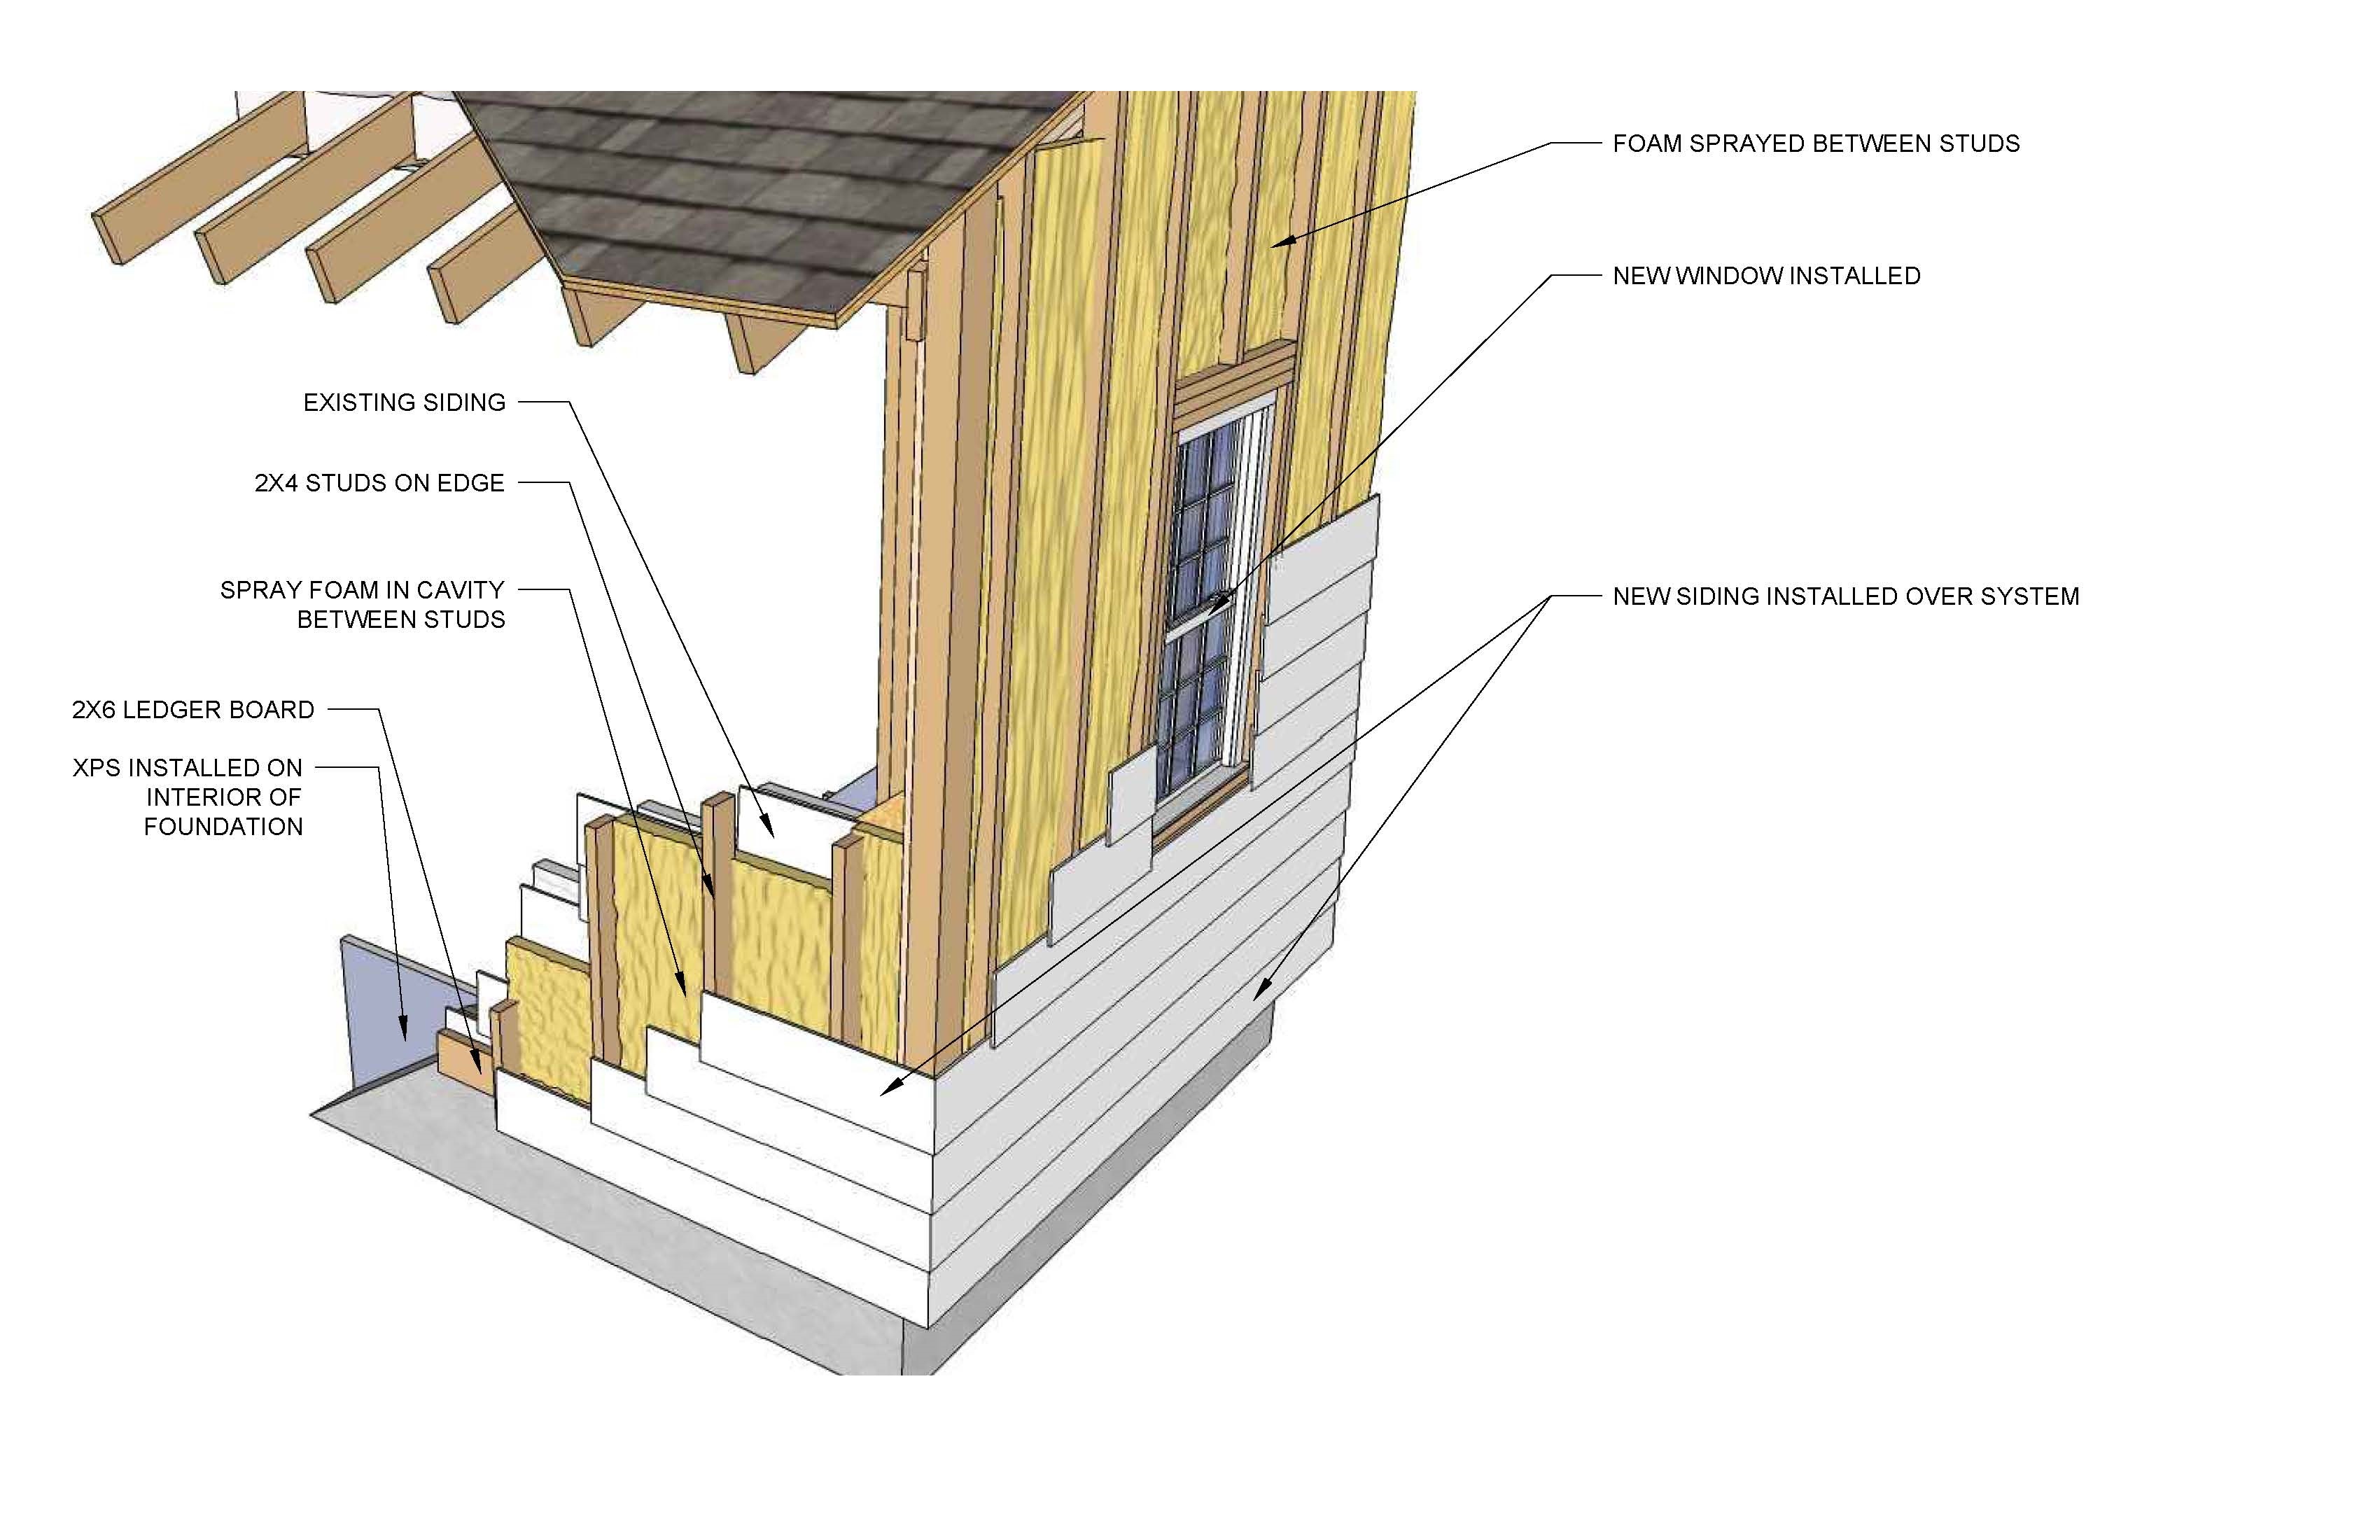
Spray foam is installed between new studs over the existing siding in this deep energy retrofit
Image
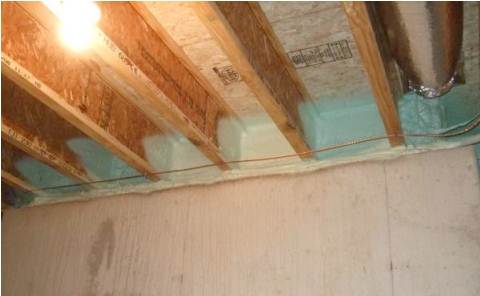
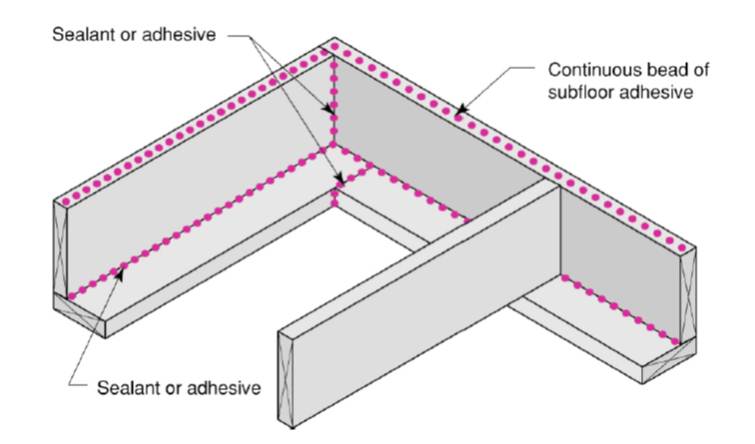
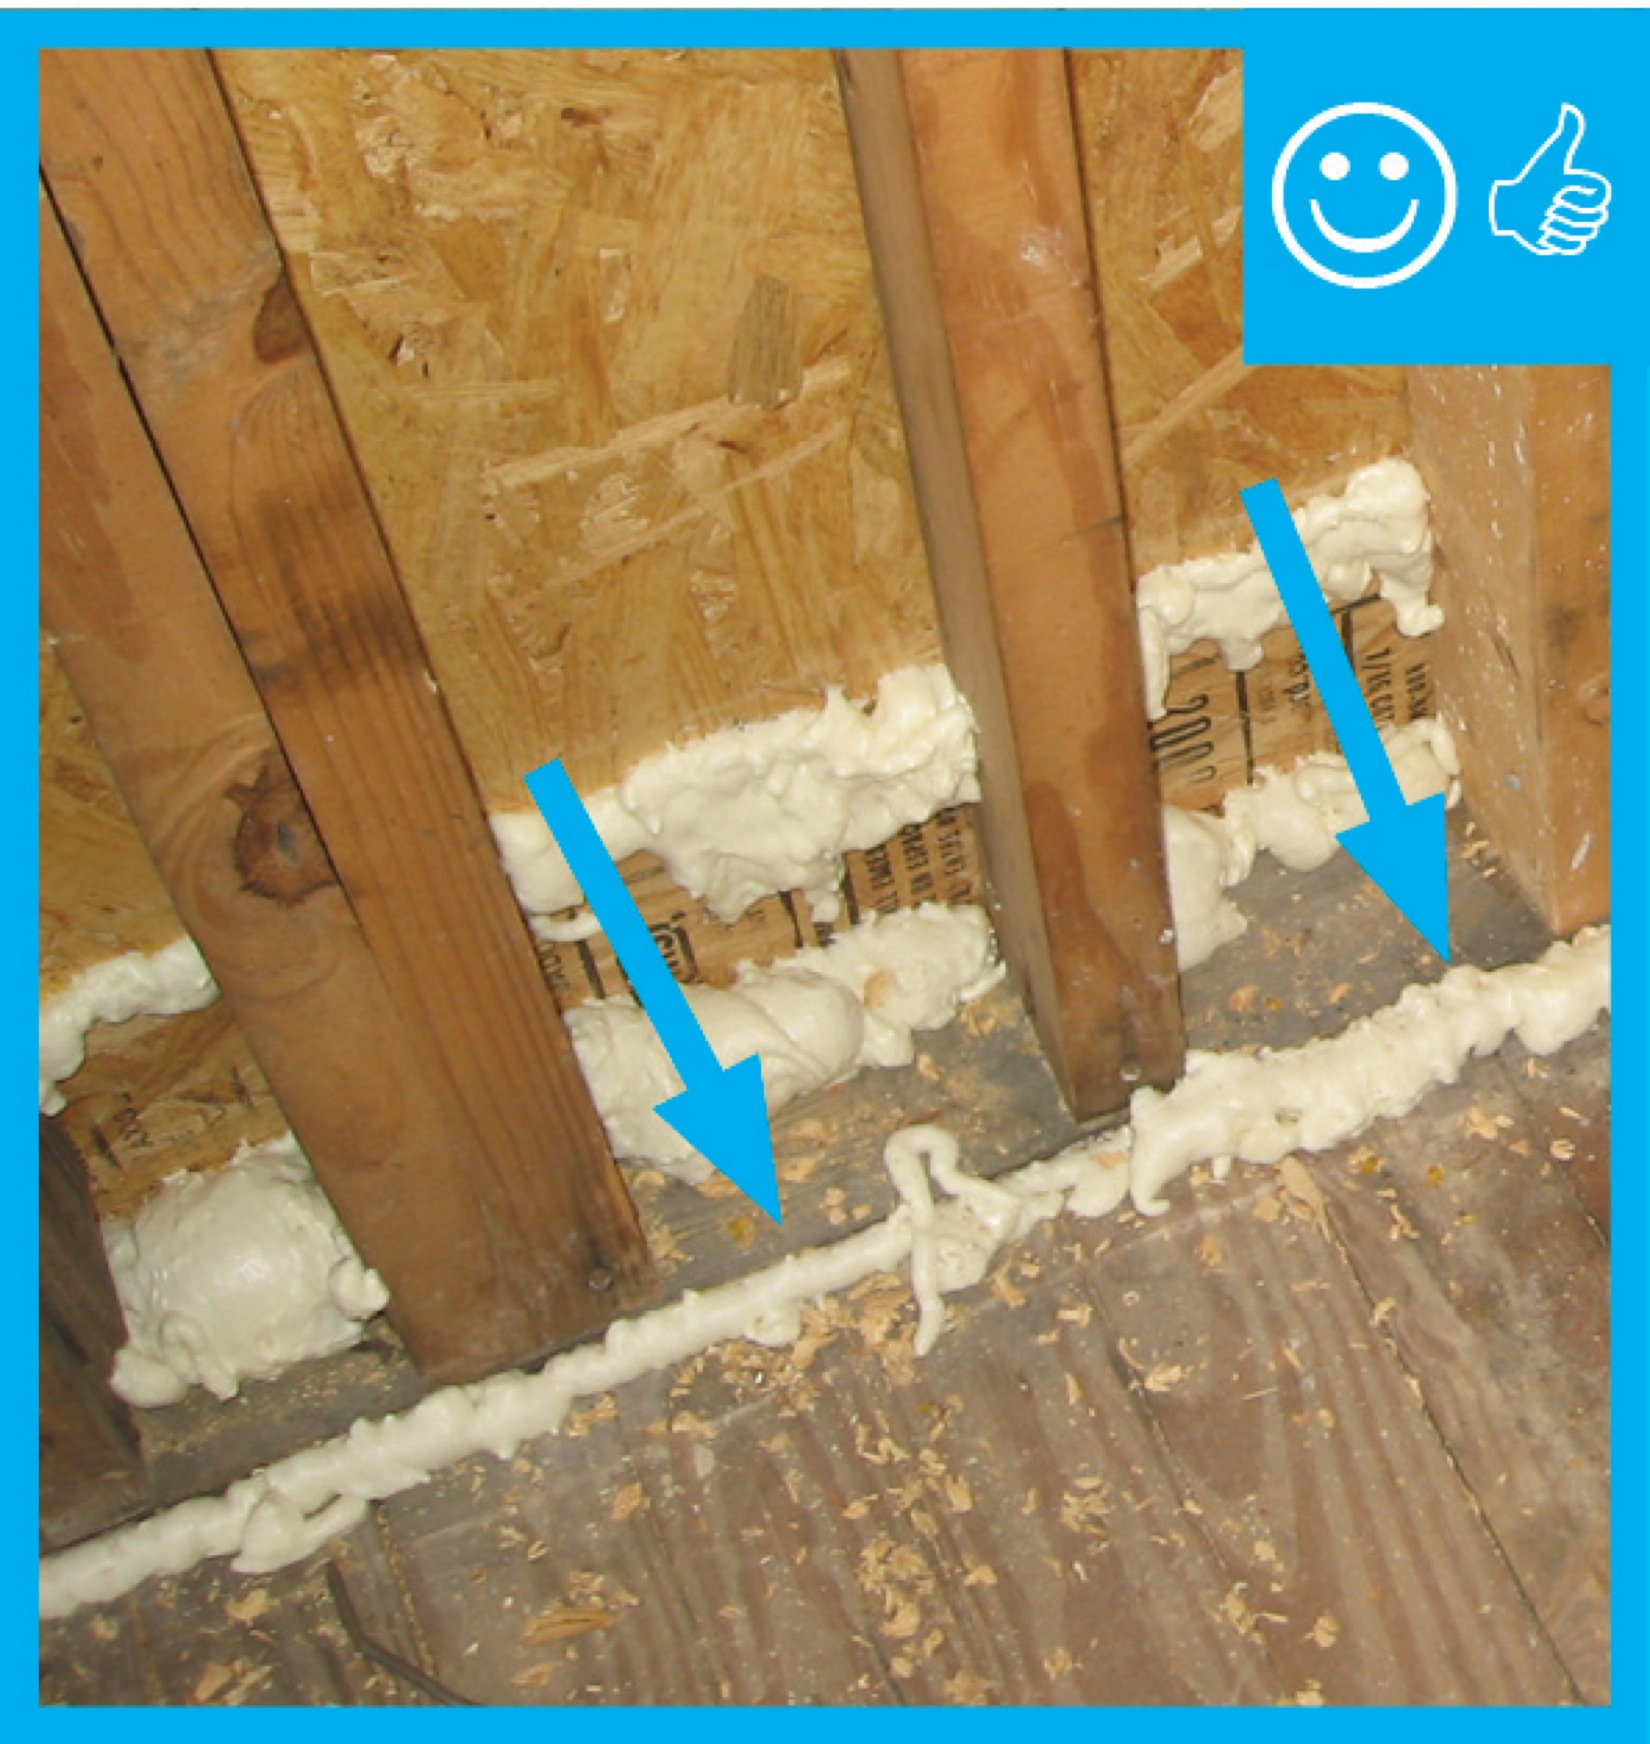
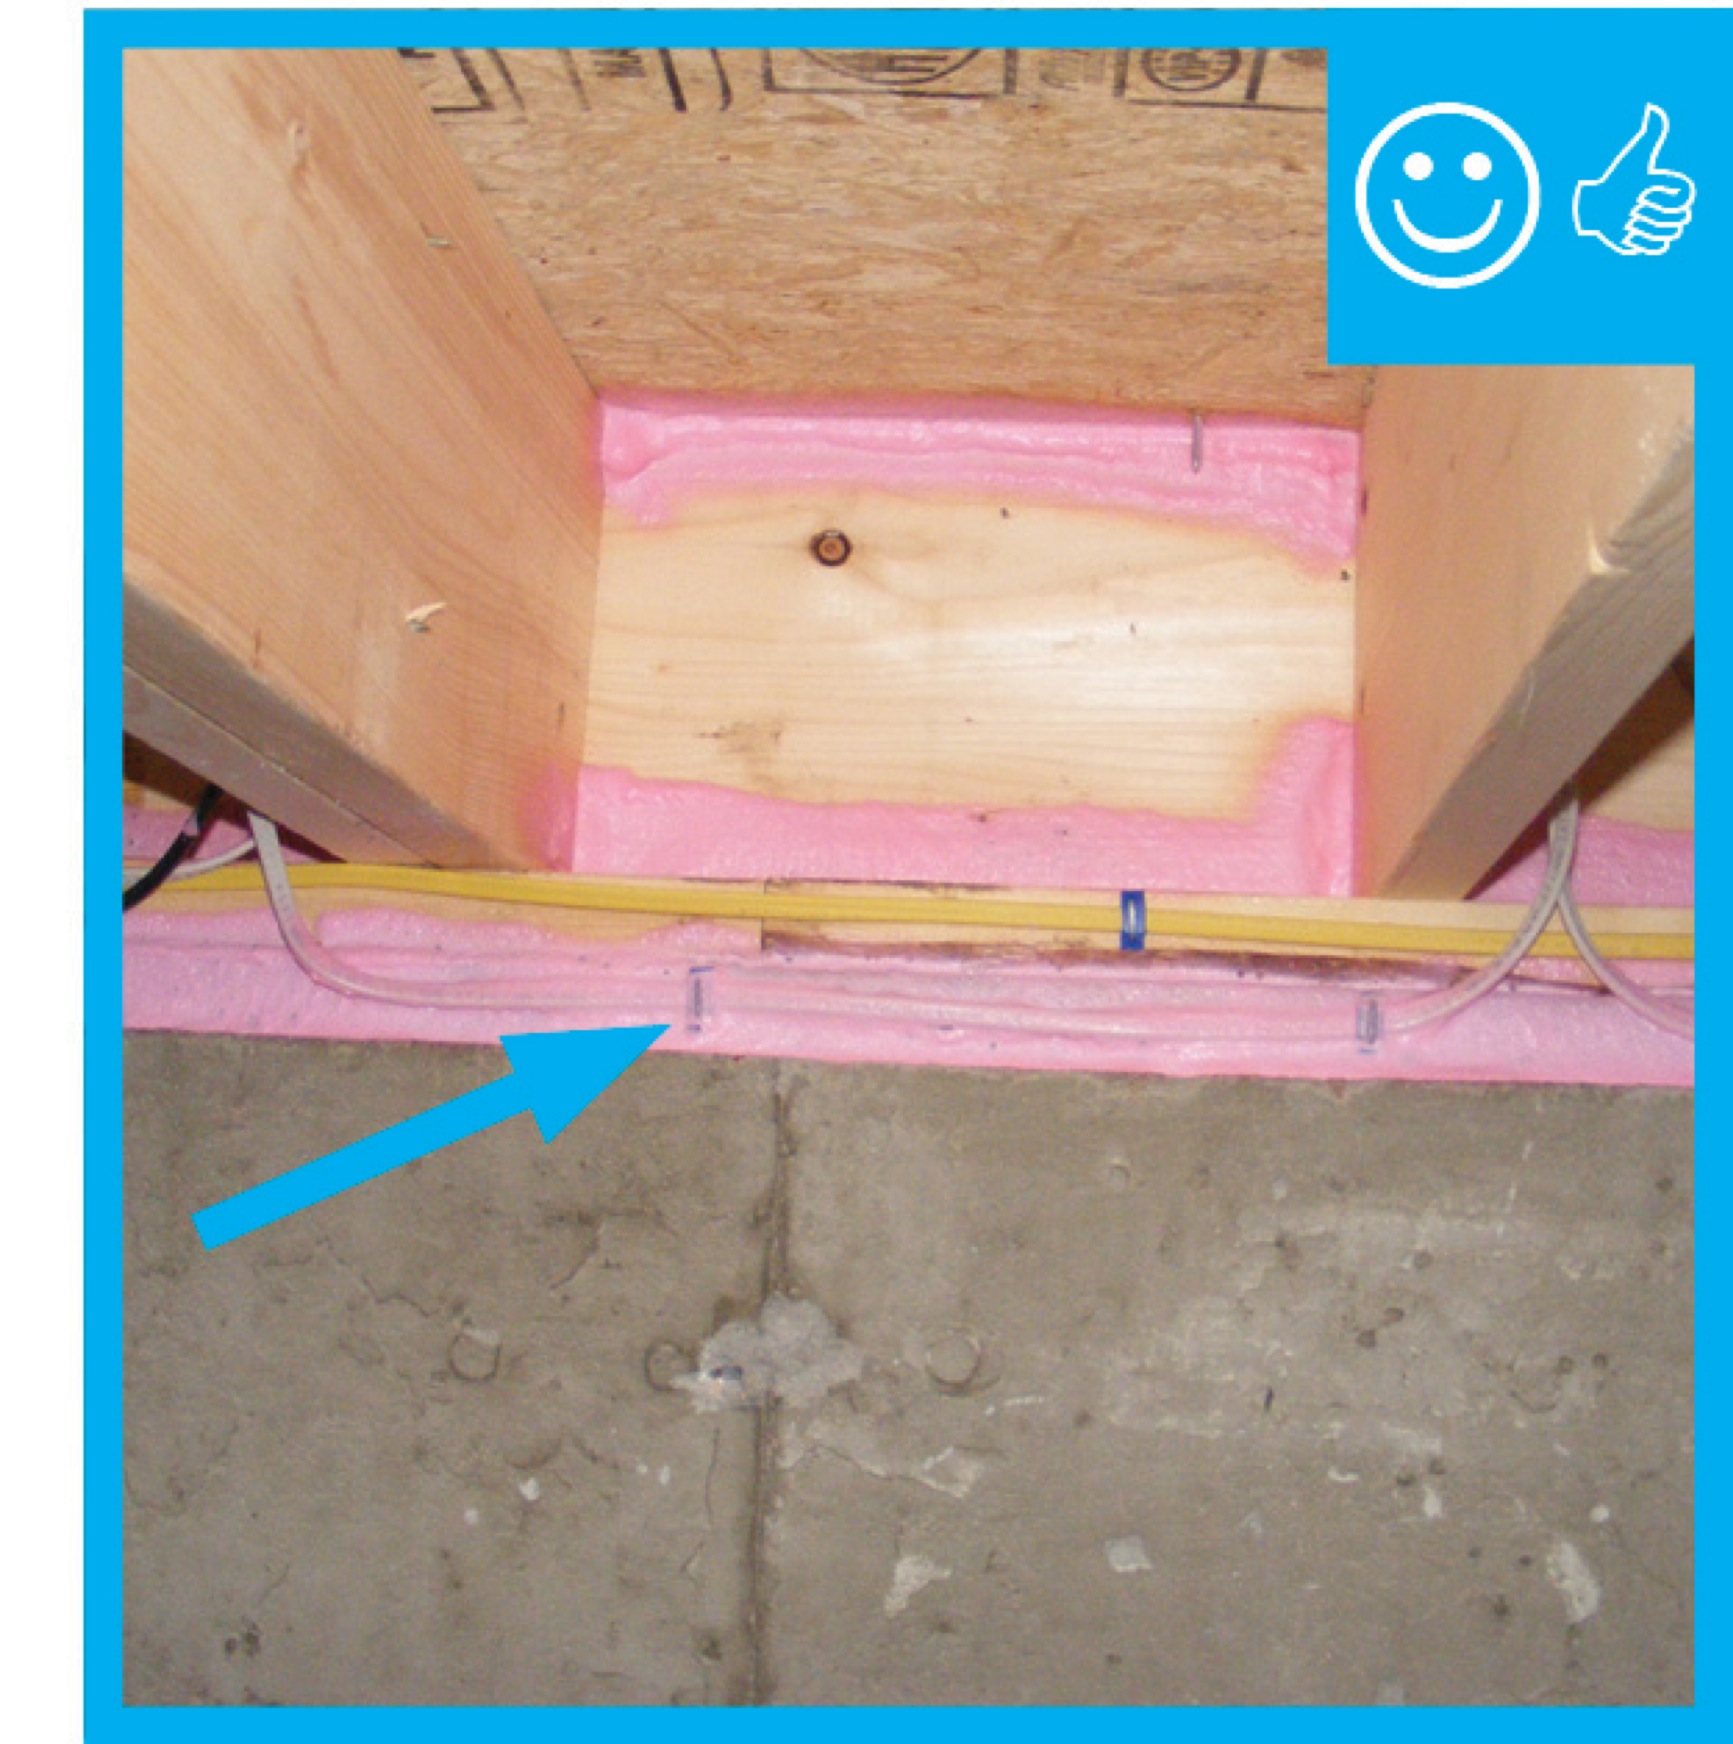
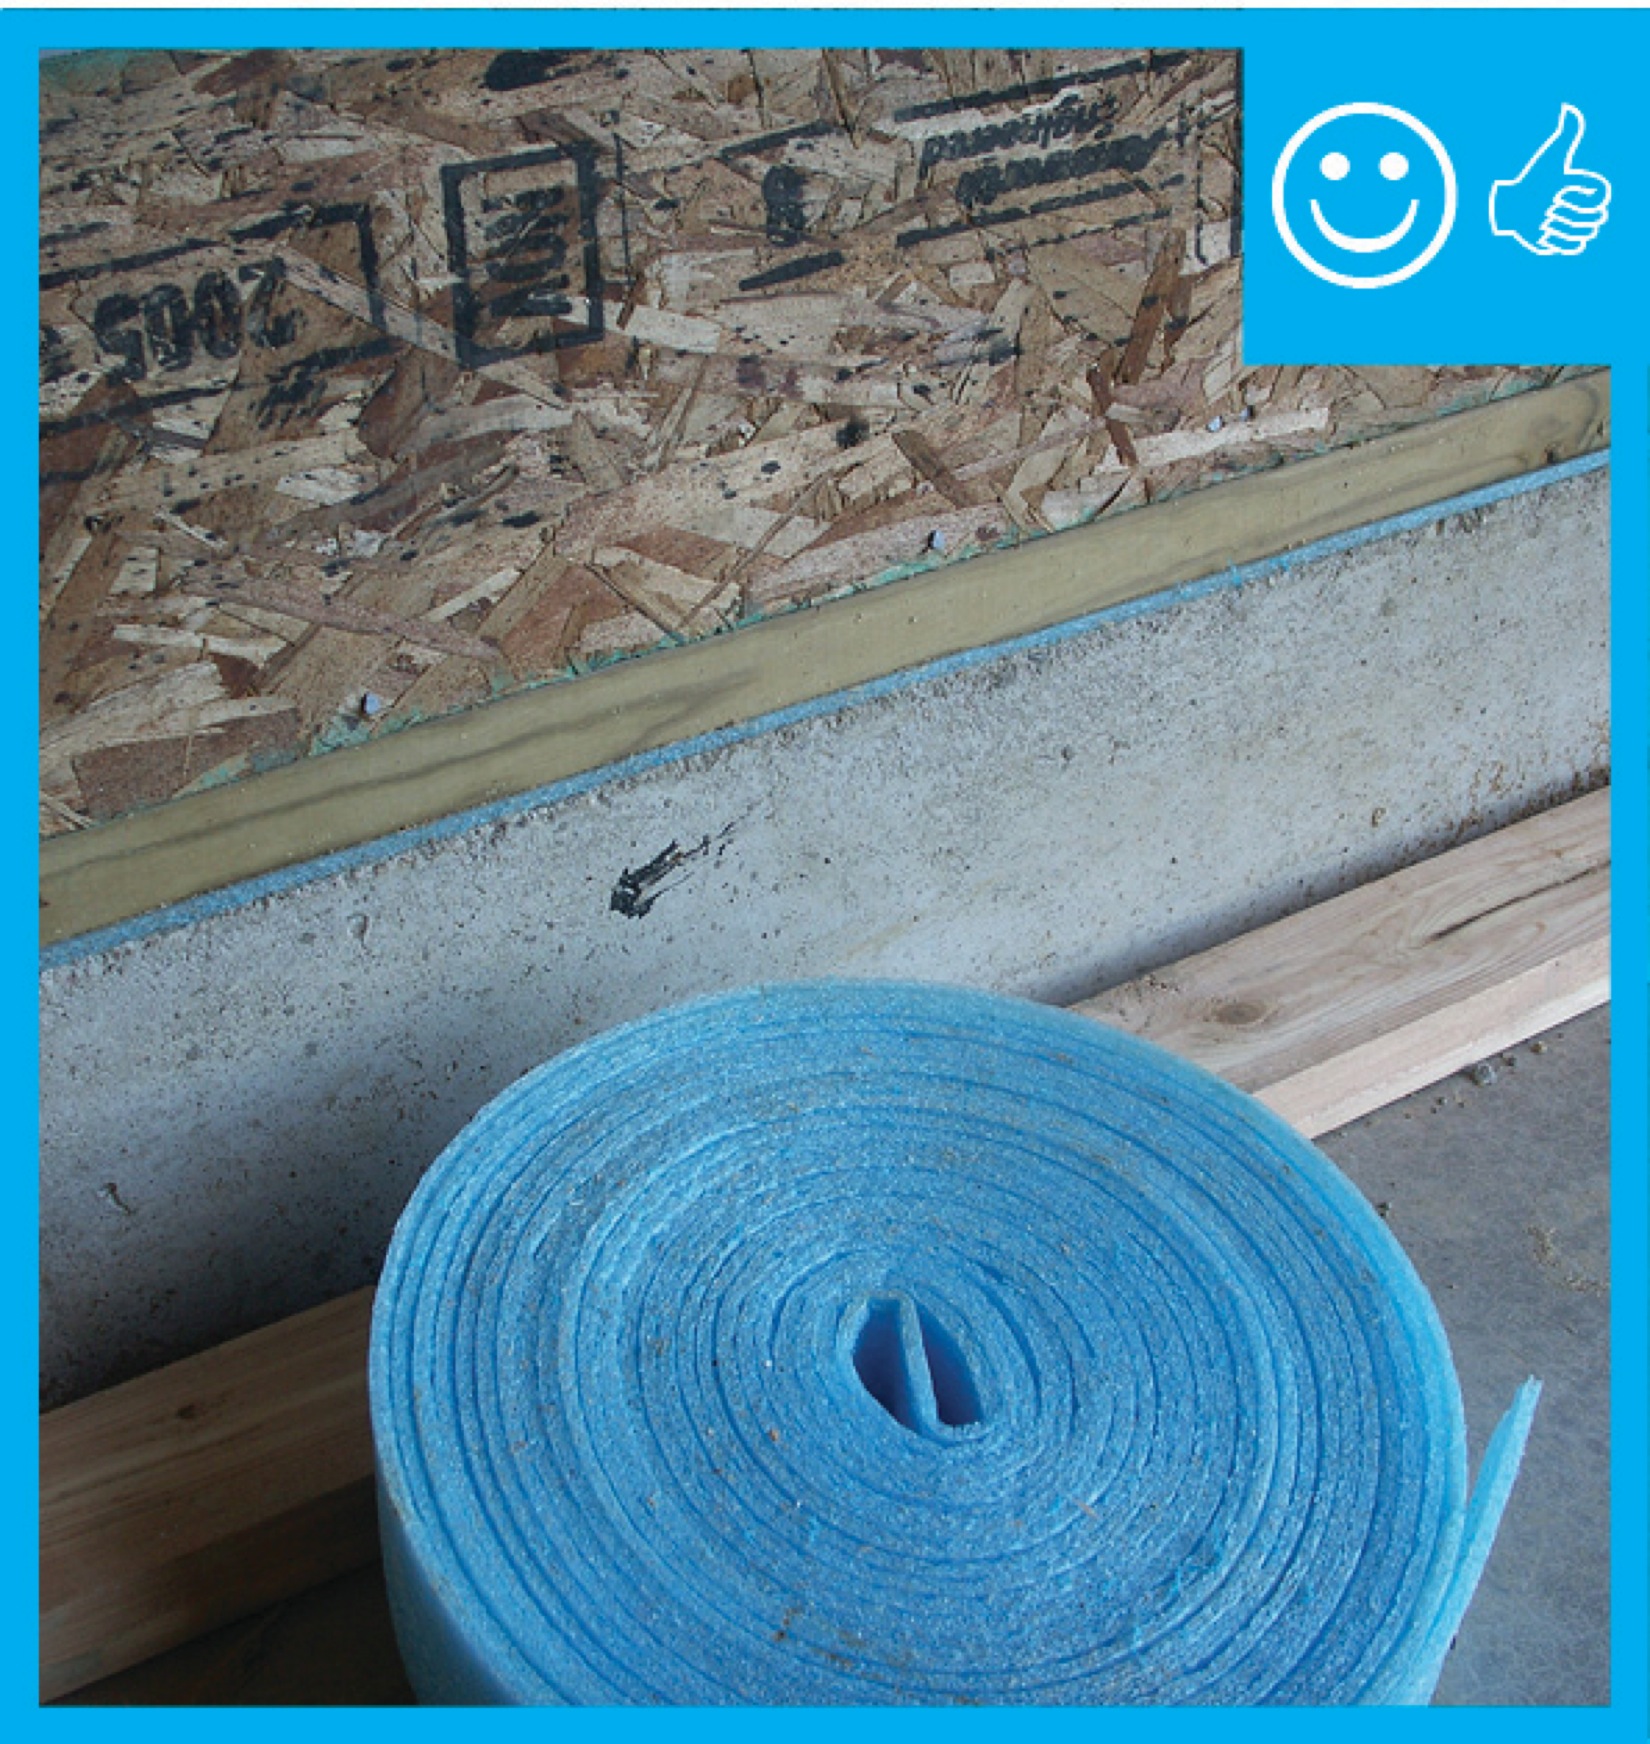
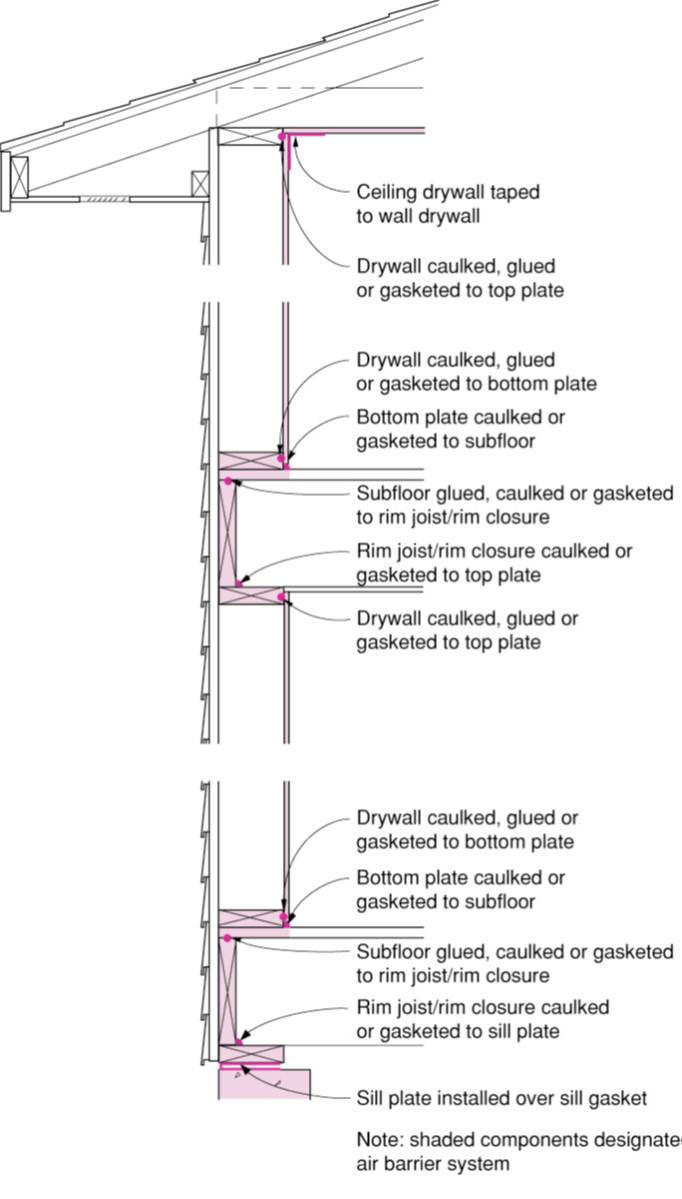
Spray foam provides a critical seal between the subfloor, rim joist, and sill plate
Image

Image
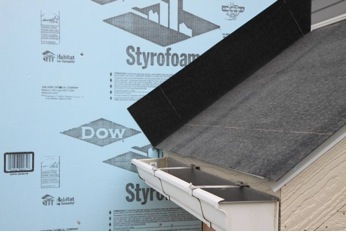
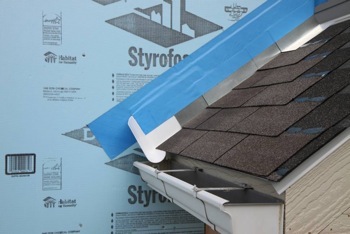
Step 1. Apply roof underlayment over roof deck and up the sidewall over the rigid foam insulation
Image
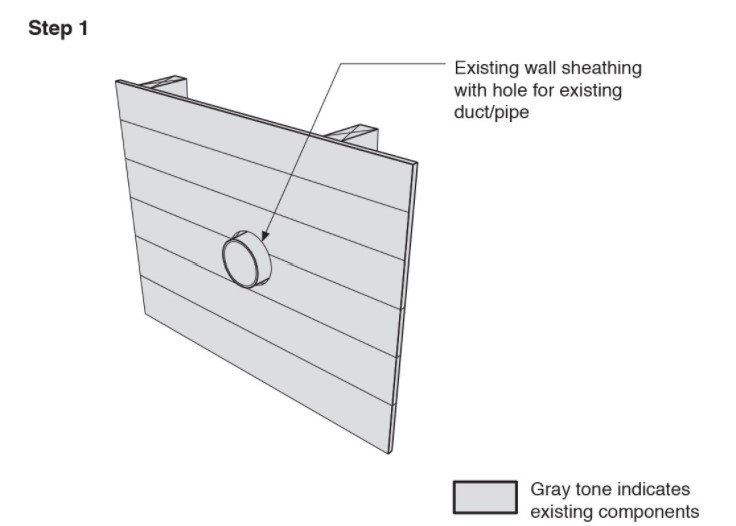
Step 1. Remove the existing wall cladding to prepare to retrofit an exterior wall.
Image
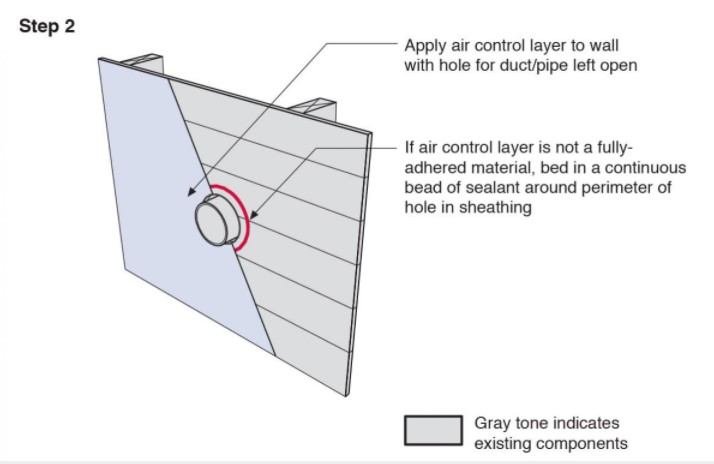
Step 2. Install a continuous air and water control layer over the existing wall sheathing.
Image
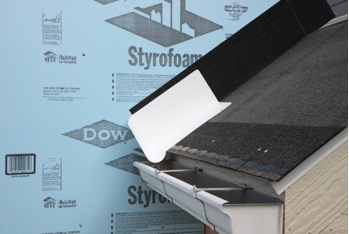
Step 2. Install shingle starter strip then kick-out diverter as first piece of step flashing.
Image
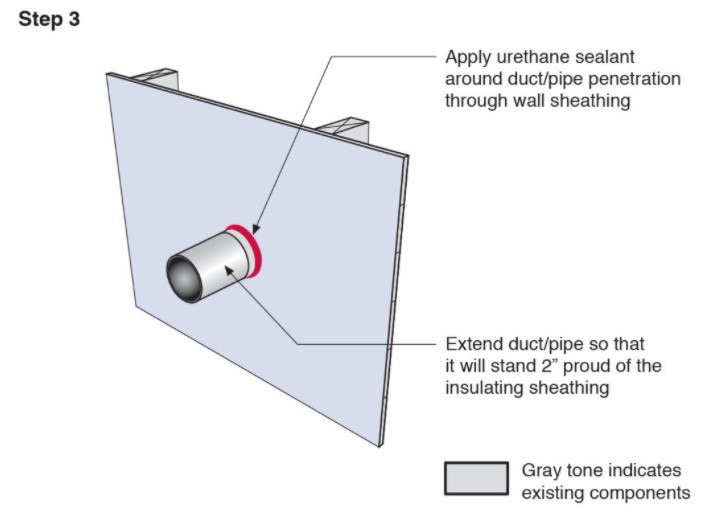
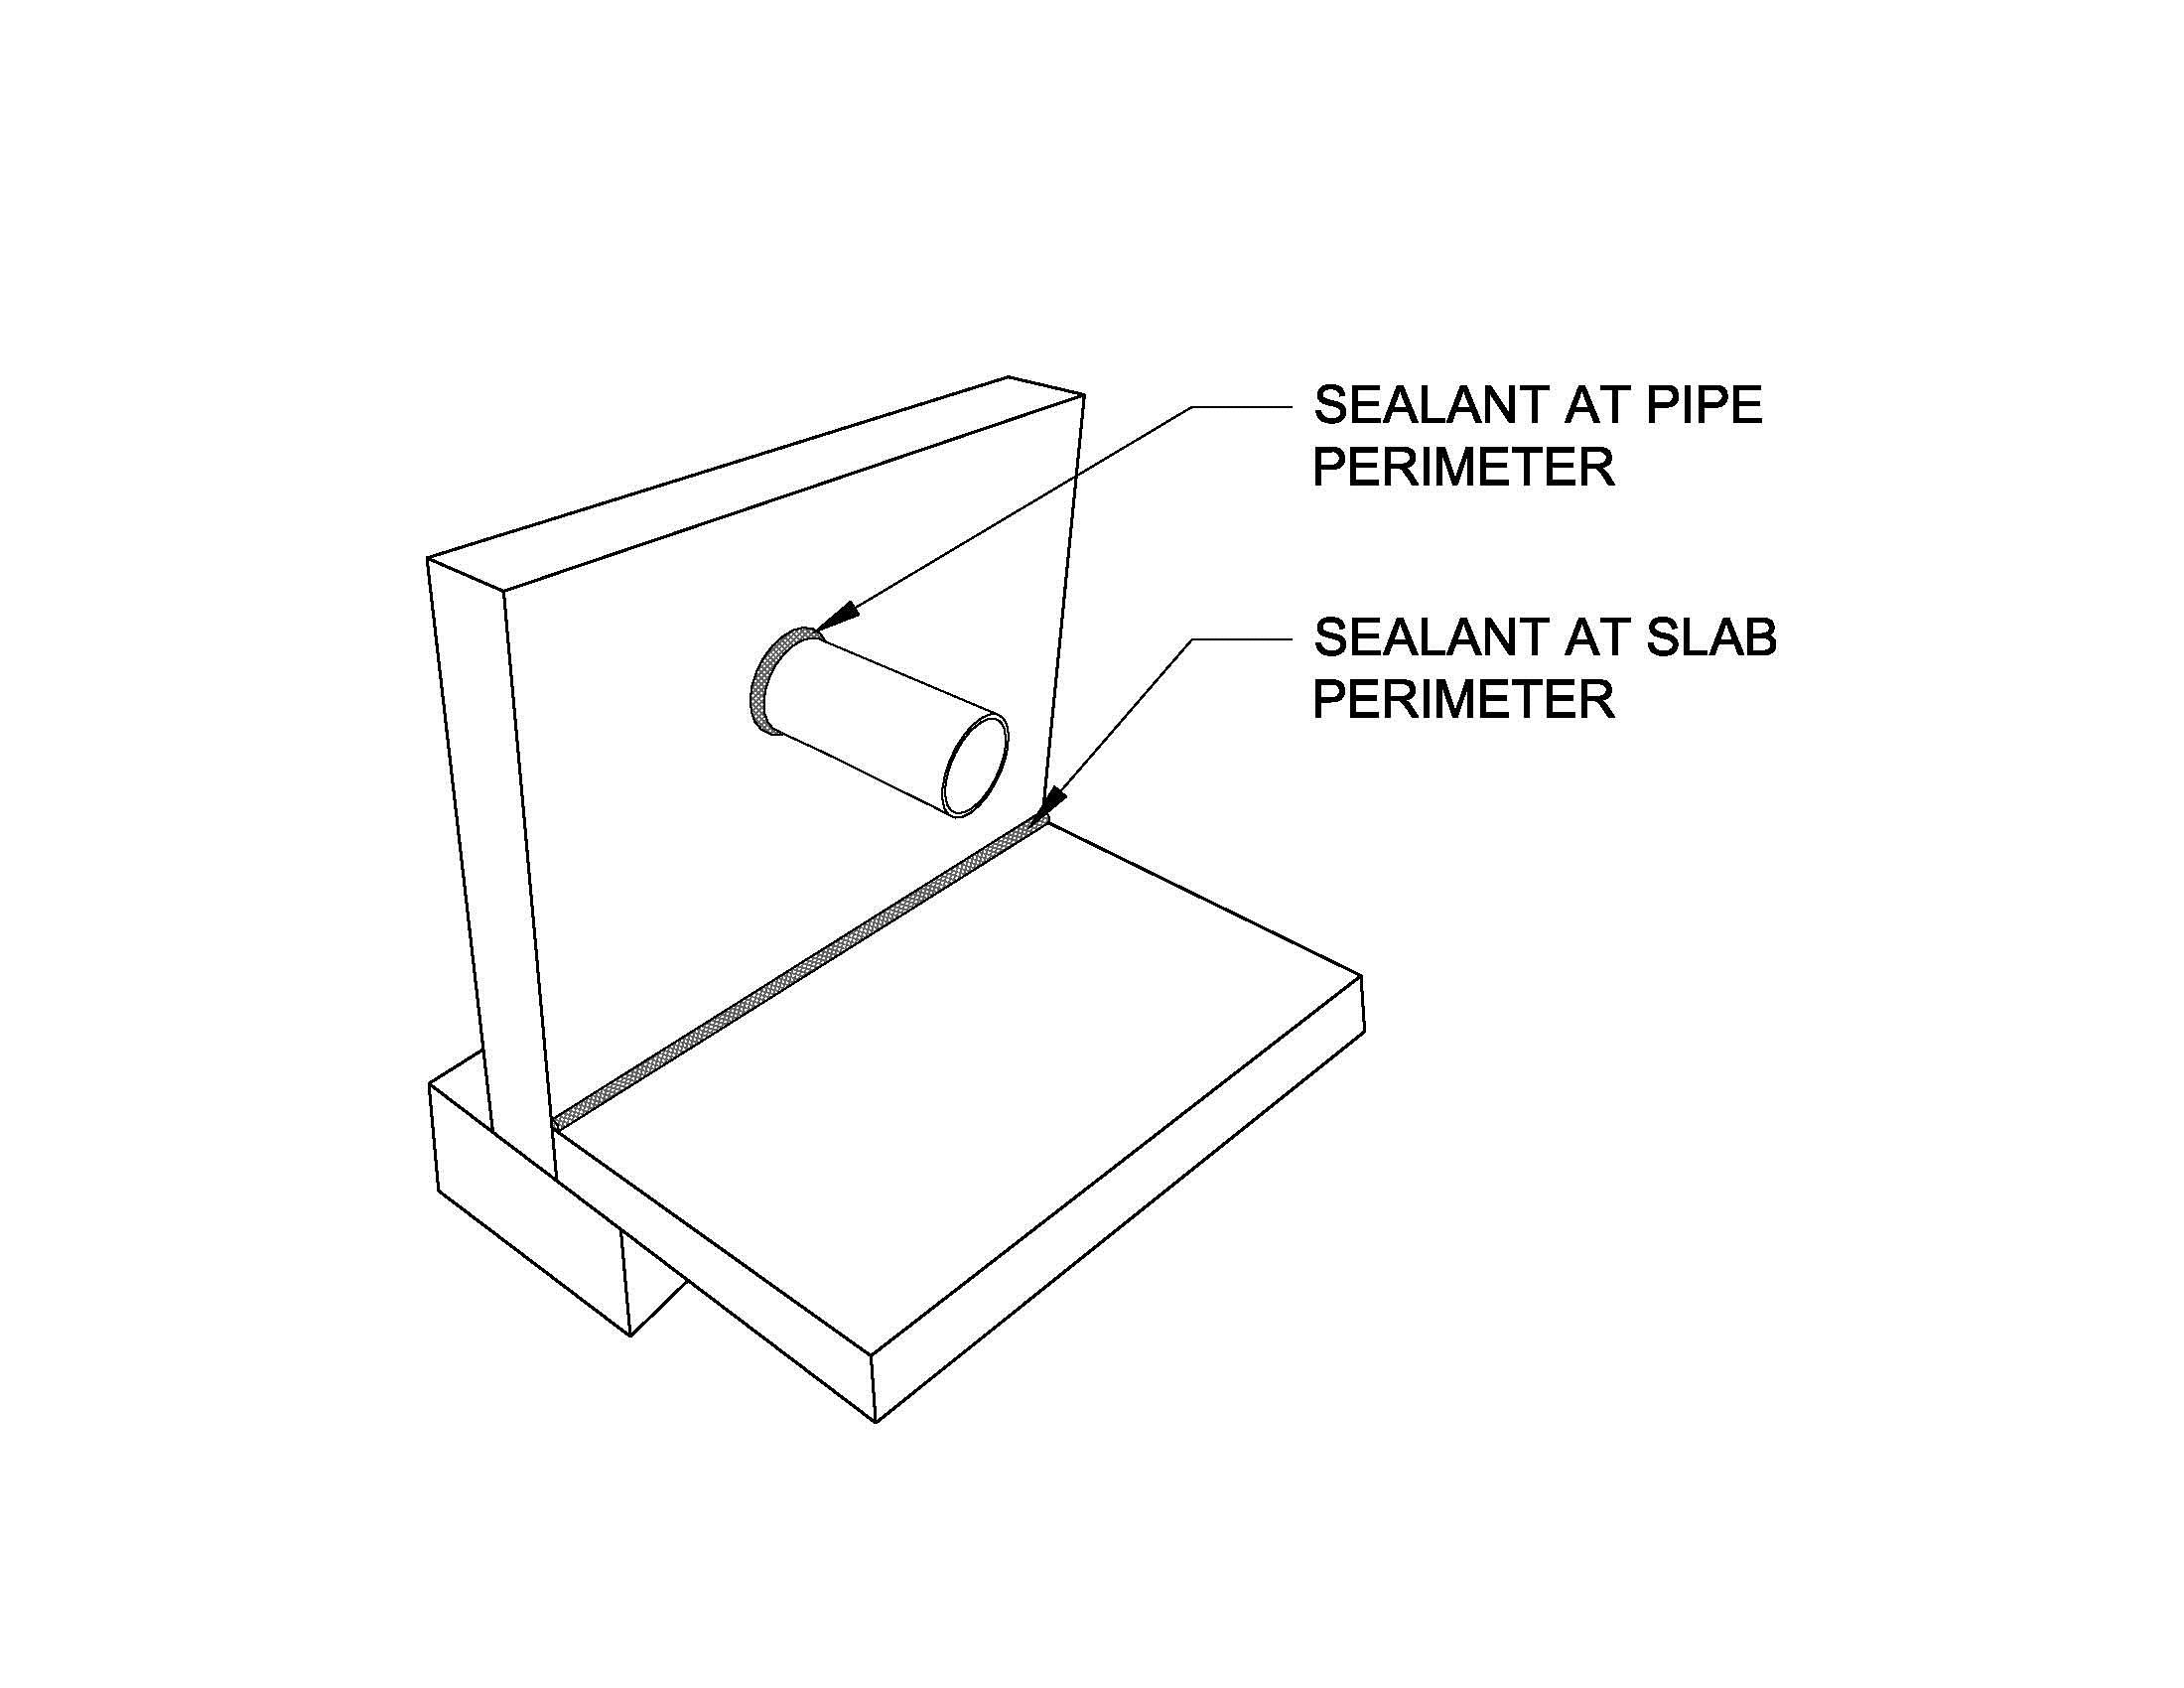
Step 3. Apply urethane sealant around the duct or pipe in the retrofitted exterior wall.
Image
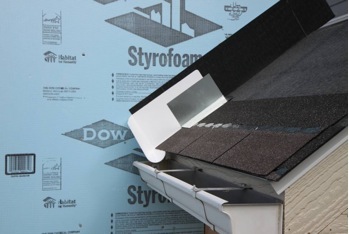
Step 3. Place the first shingle and the next section of sidewall flashing over upper edge of diverter
Image
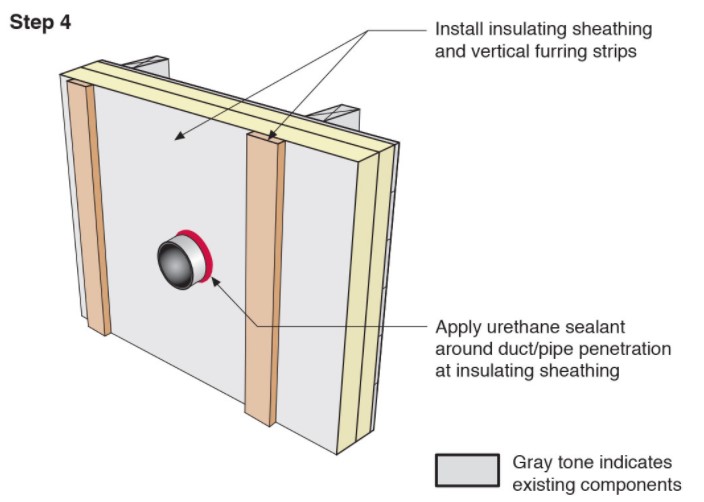
Step 4. Install insulating sheathing and vertical furring strips on the retrofitted exterior wall; seal around pipe or duct with urethane sealant.
Image

Step 4. Install remaining sidewall flashing, appropriate counter flashing, and shingles
Image
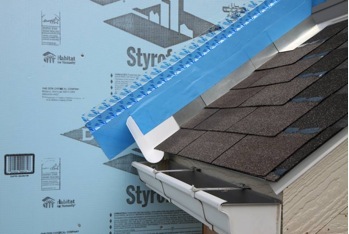
Step 5. Apply self-adhesive flashing over top edge of the wall flashing, diverter, and rigid foam insulation
Image
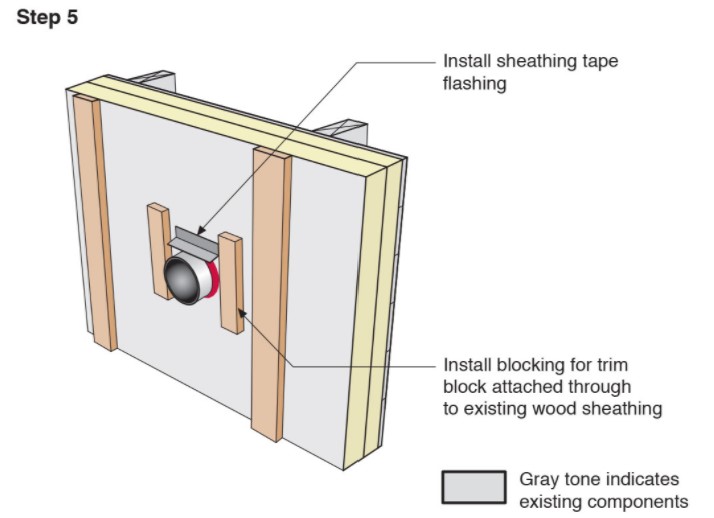
Step 5. Install sheathing tape flashing over the duct or pipe and wood blocking on either side for later attachment of trim.
Image
Image
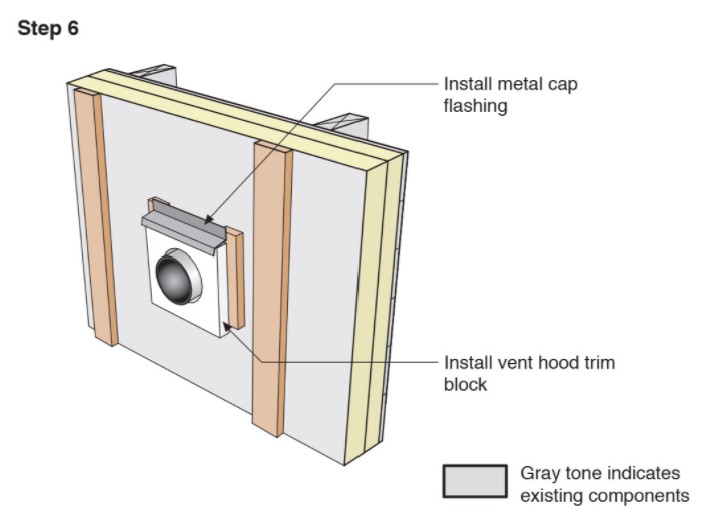
Step 6. Install vent hood trim block, metal cap flashing; seal top edge of flashing with sheathing tape.
Image
Image
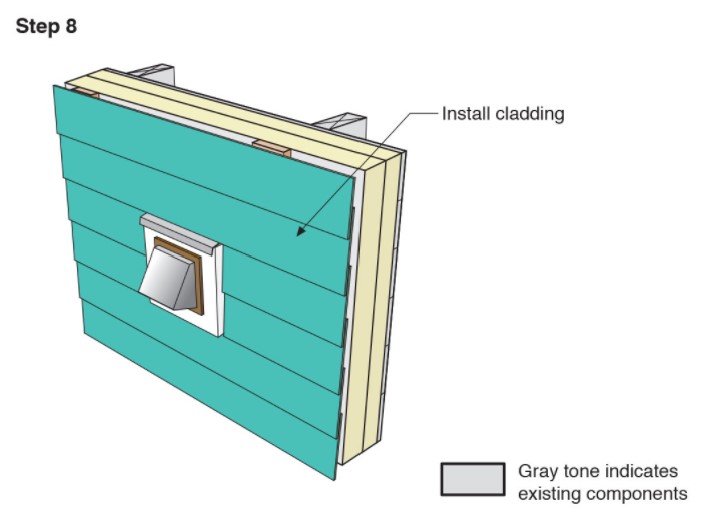
Step 8. Attach the new cladding to the furring strips over the rigid foam for the exterior wall retrofit.
Image
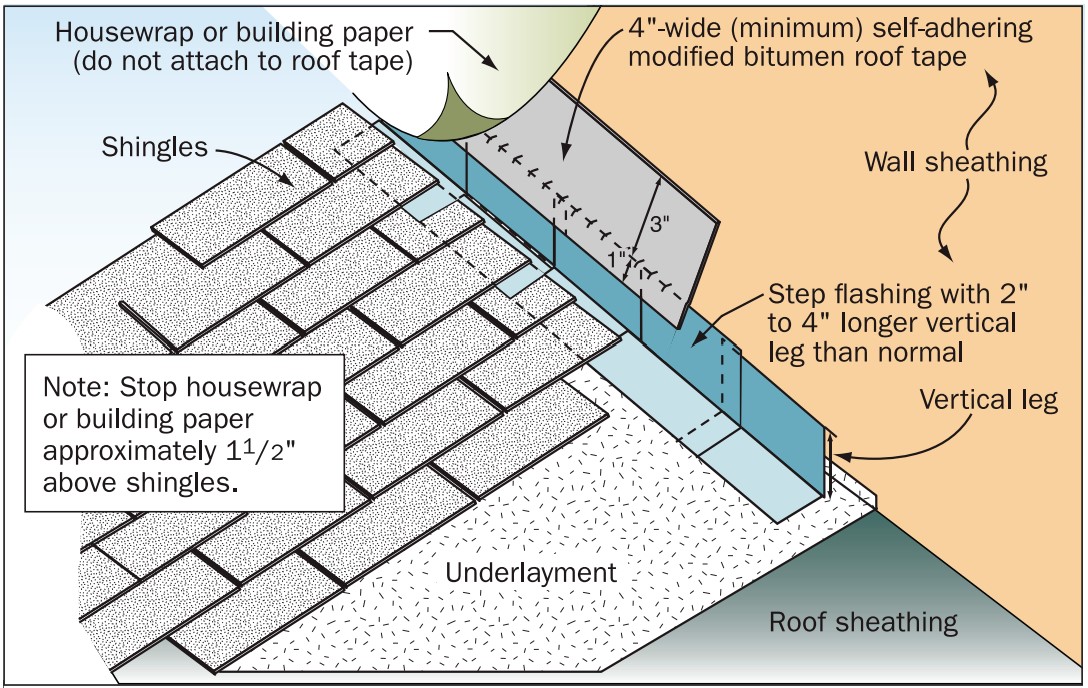
Step and kick-out flashing at all roof-wall intersections extending ≥ 4 in. on wall surface above roof deck and integrated with drainage plane above
Image
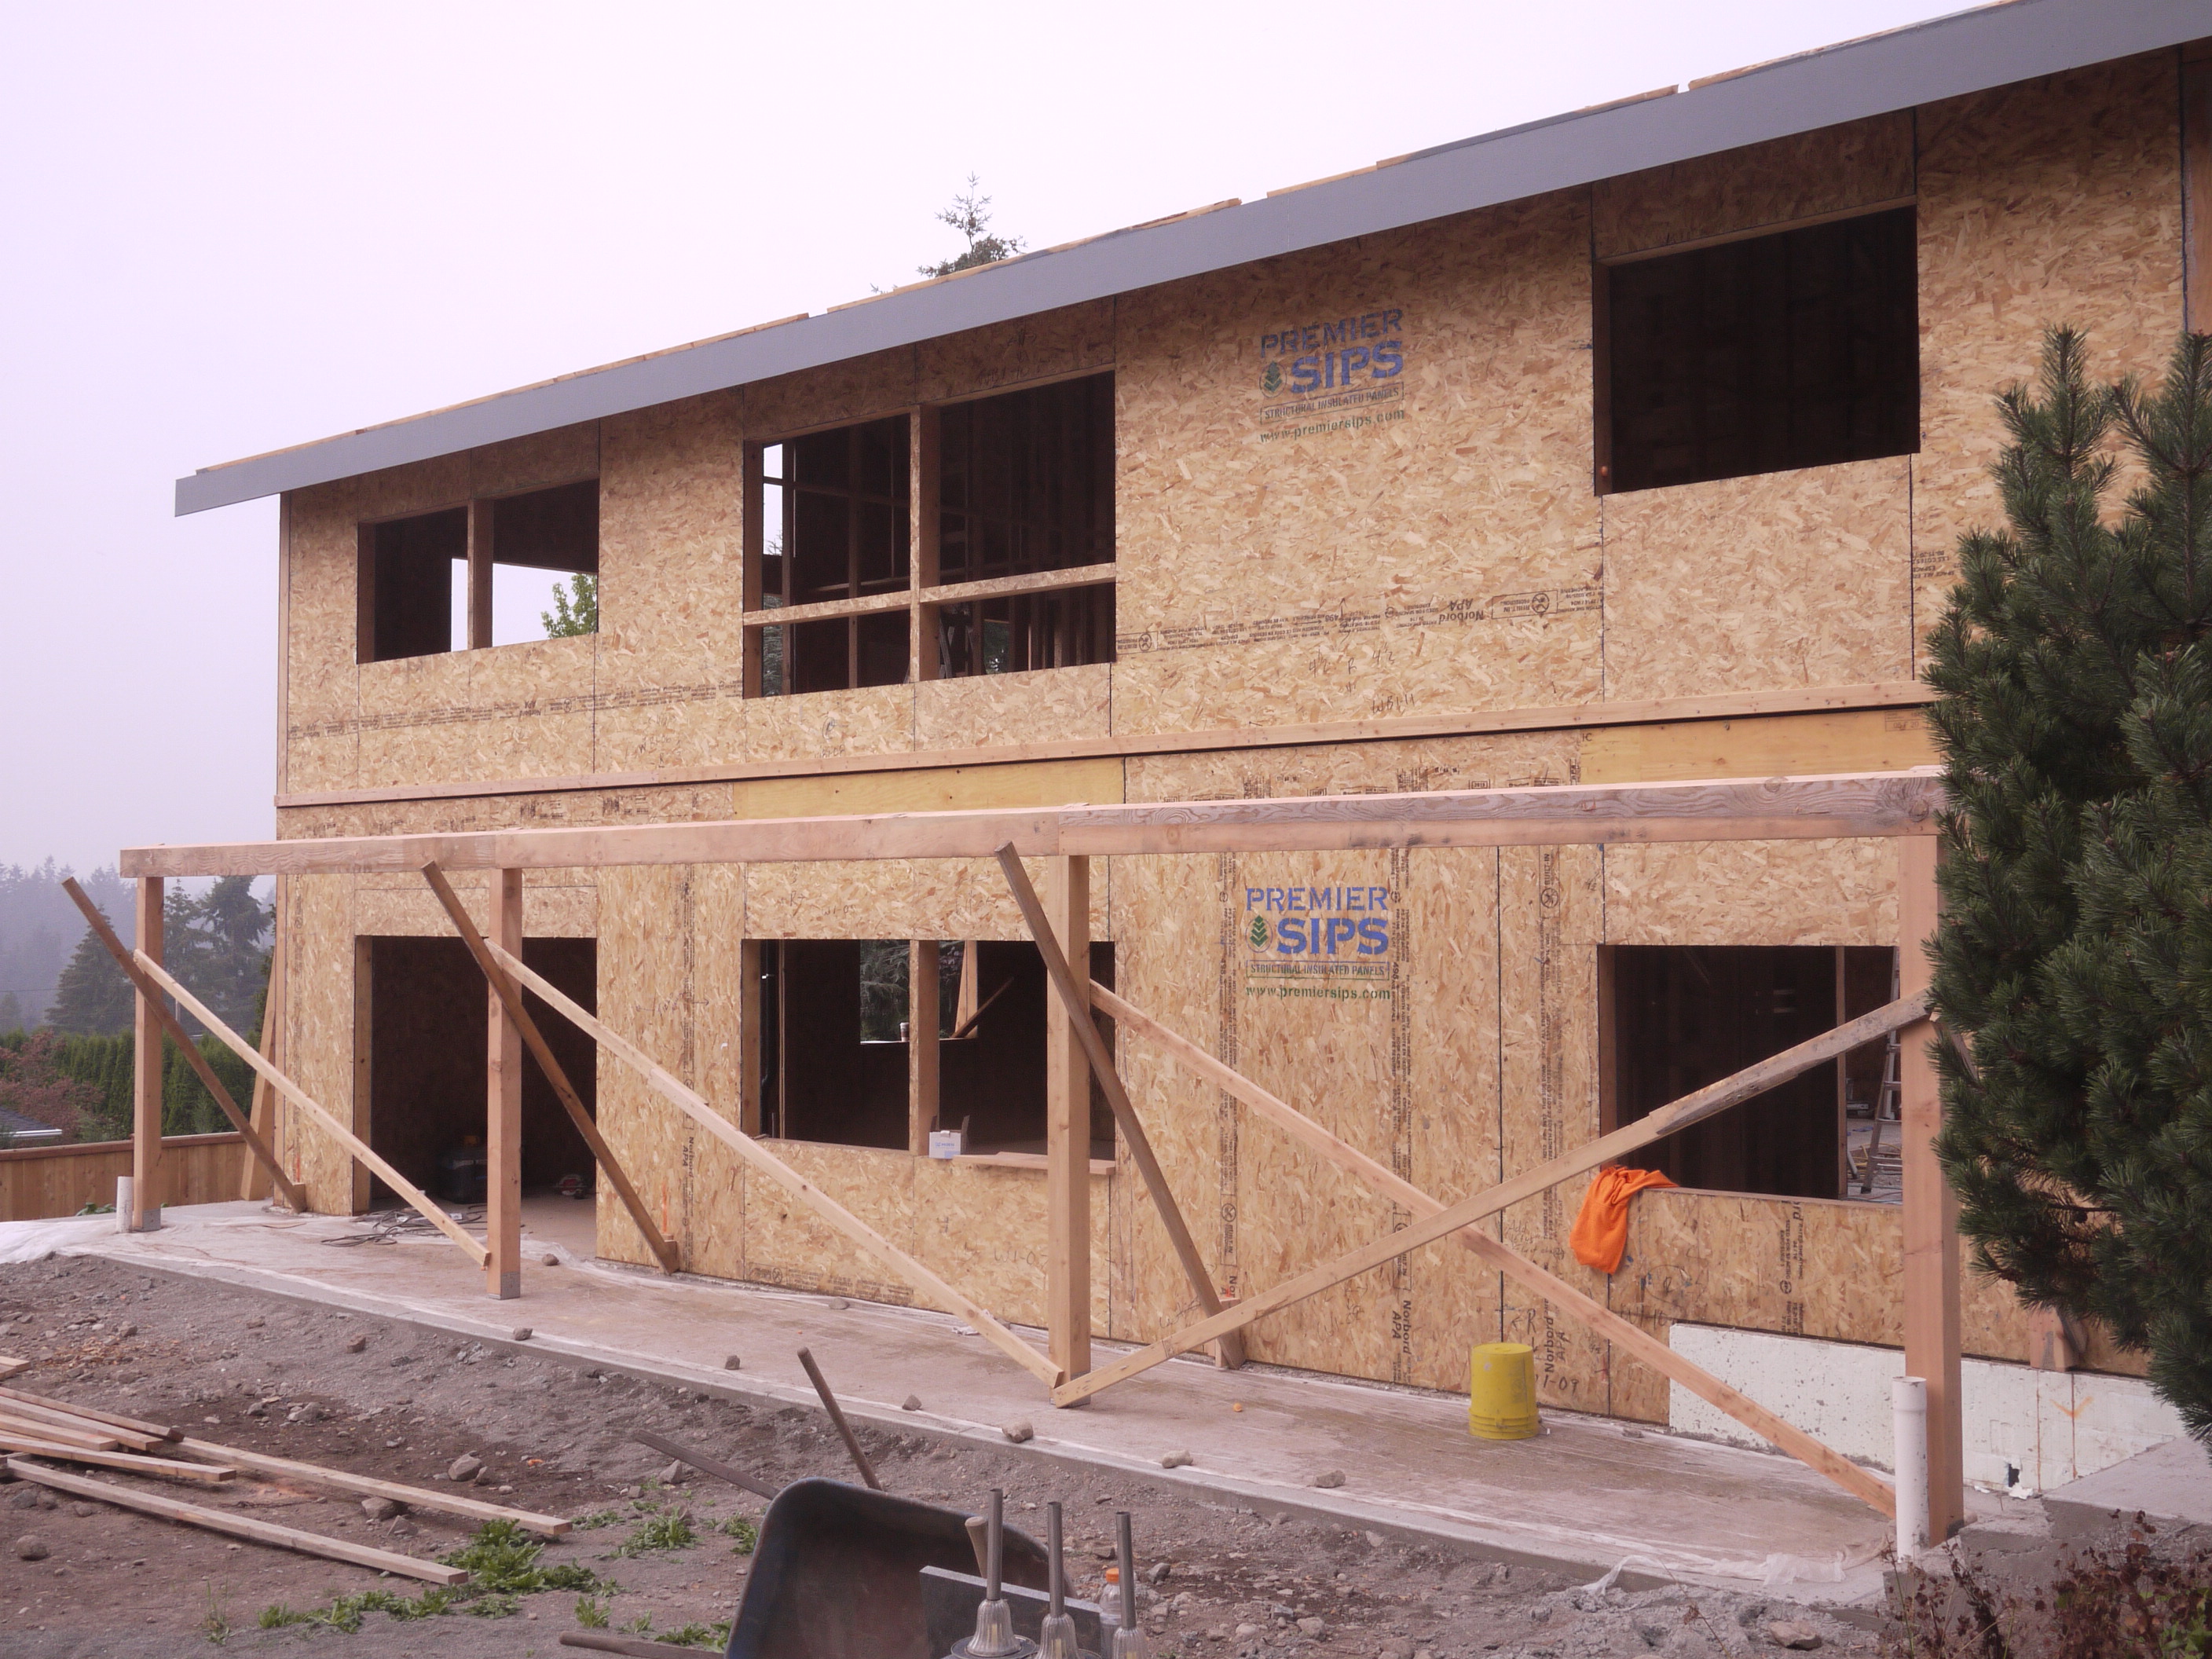
Structural insulated panels offer a continuous layer of thermal protection and draft resistance around the home and come from the factory precut for fast assembly.
Image
Structural insulated panels provide a continuous layer of insulation sandwiched between two continuous layers of OSB for thermal protection and sturdy construction.
Image
Image
Stucco is installed over rigid insulation, which is installed over a drainage plane consisting of a drainage gap and building wrap layer over the sheathing
Image
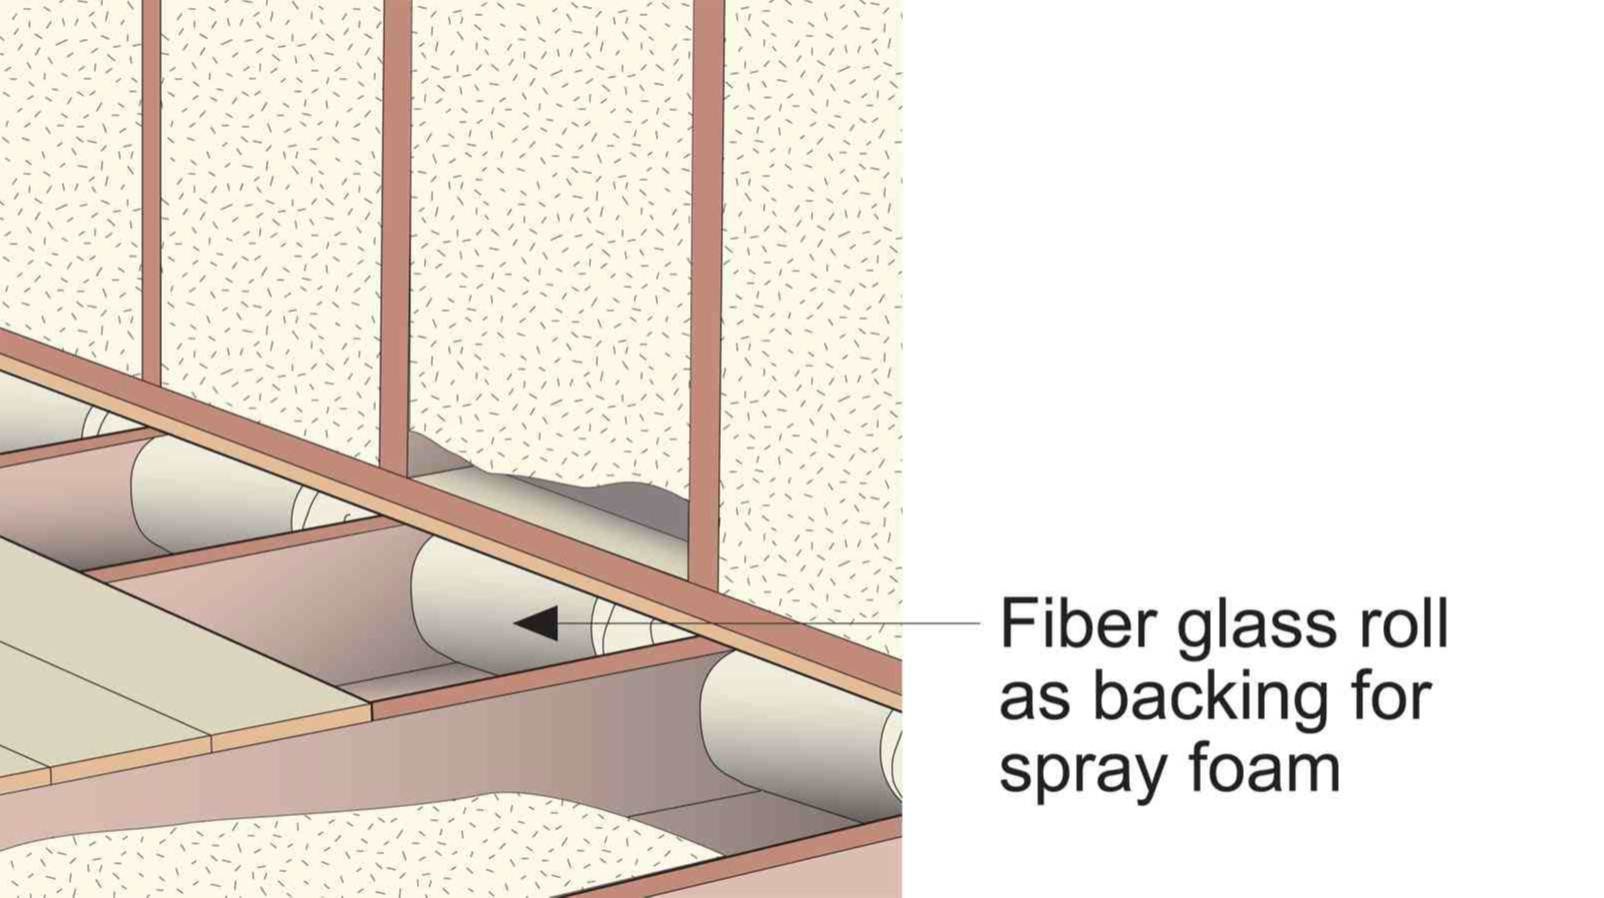
Stuff cavities under kneewalls with rolls of fiberglass batt and spray foam in place
Image

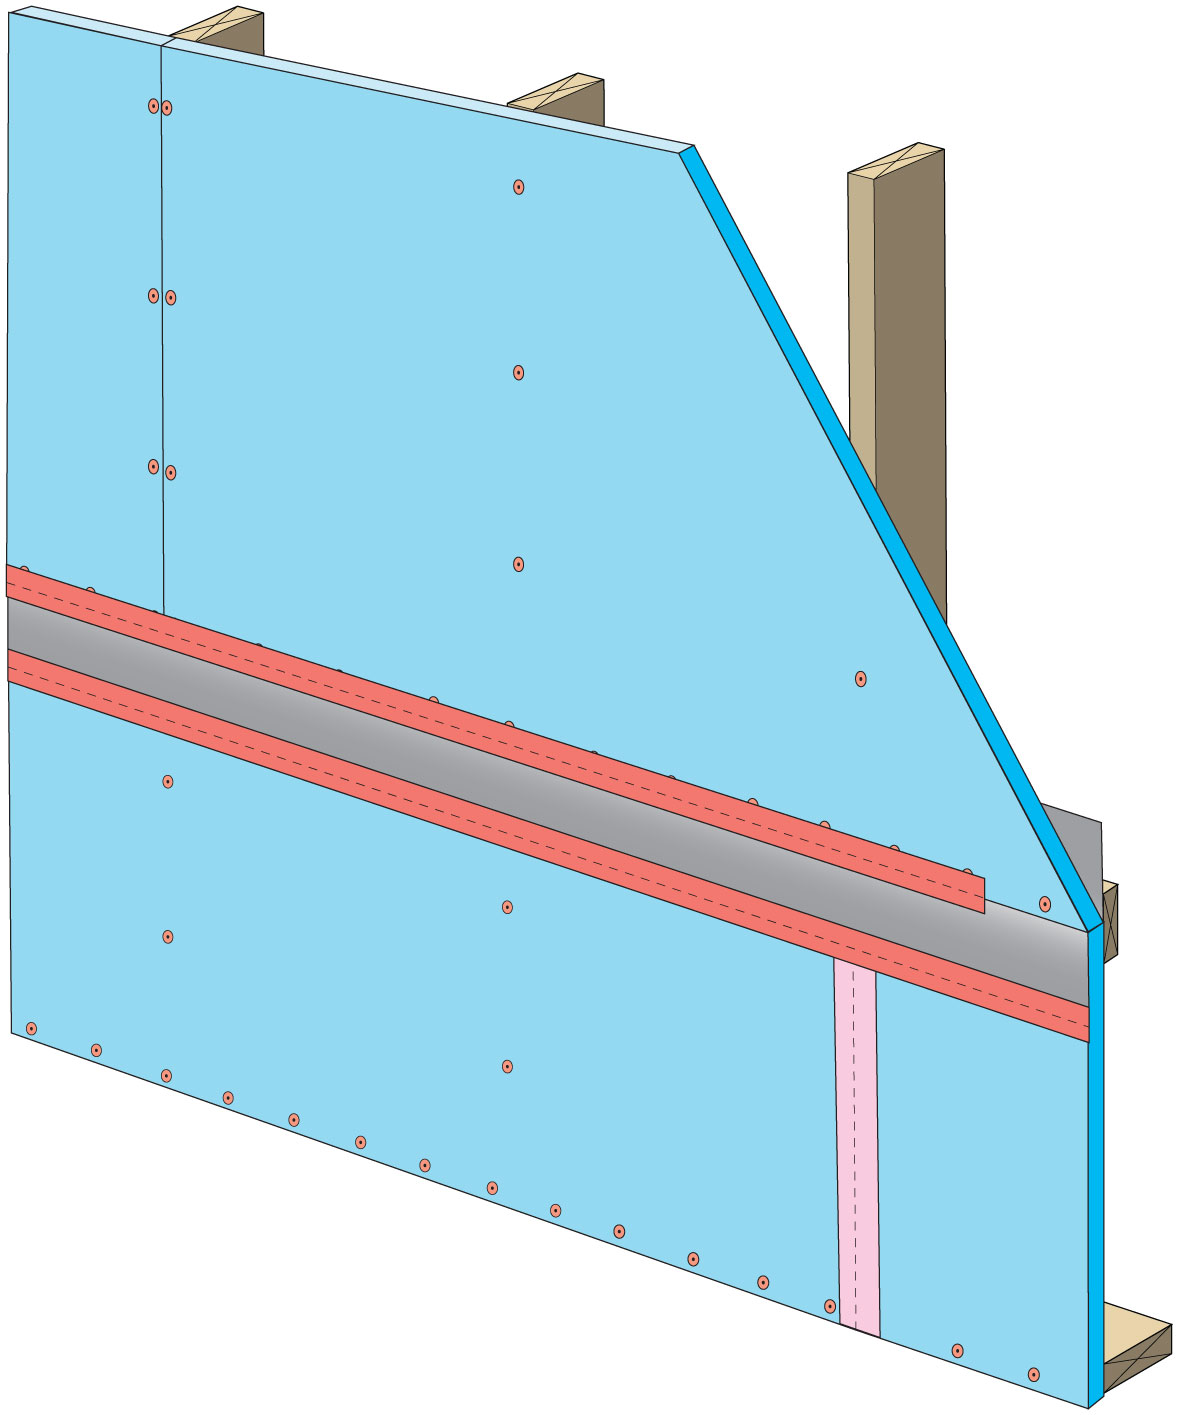
Tape horizontal joint with minimum 3" wide tape placing tape offset high on the joint, adhearing to the upper sheet without wrinkles
Image
Tape the joint between the top insulation sheet and the Z-flashing with 2" wide tape to improve air tightness
Image
Image
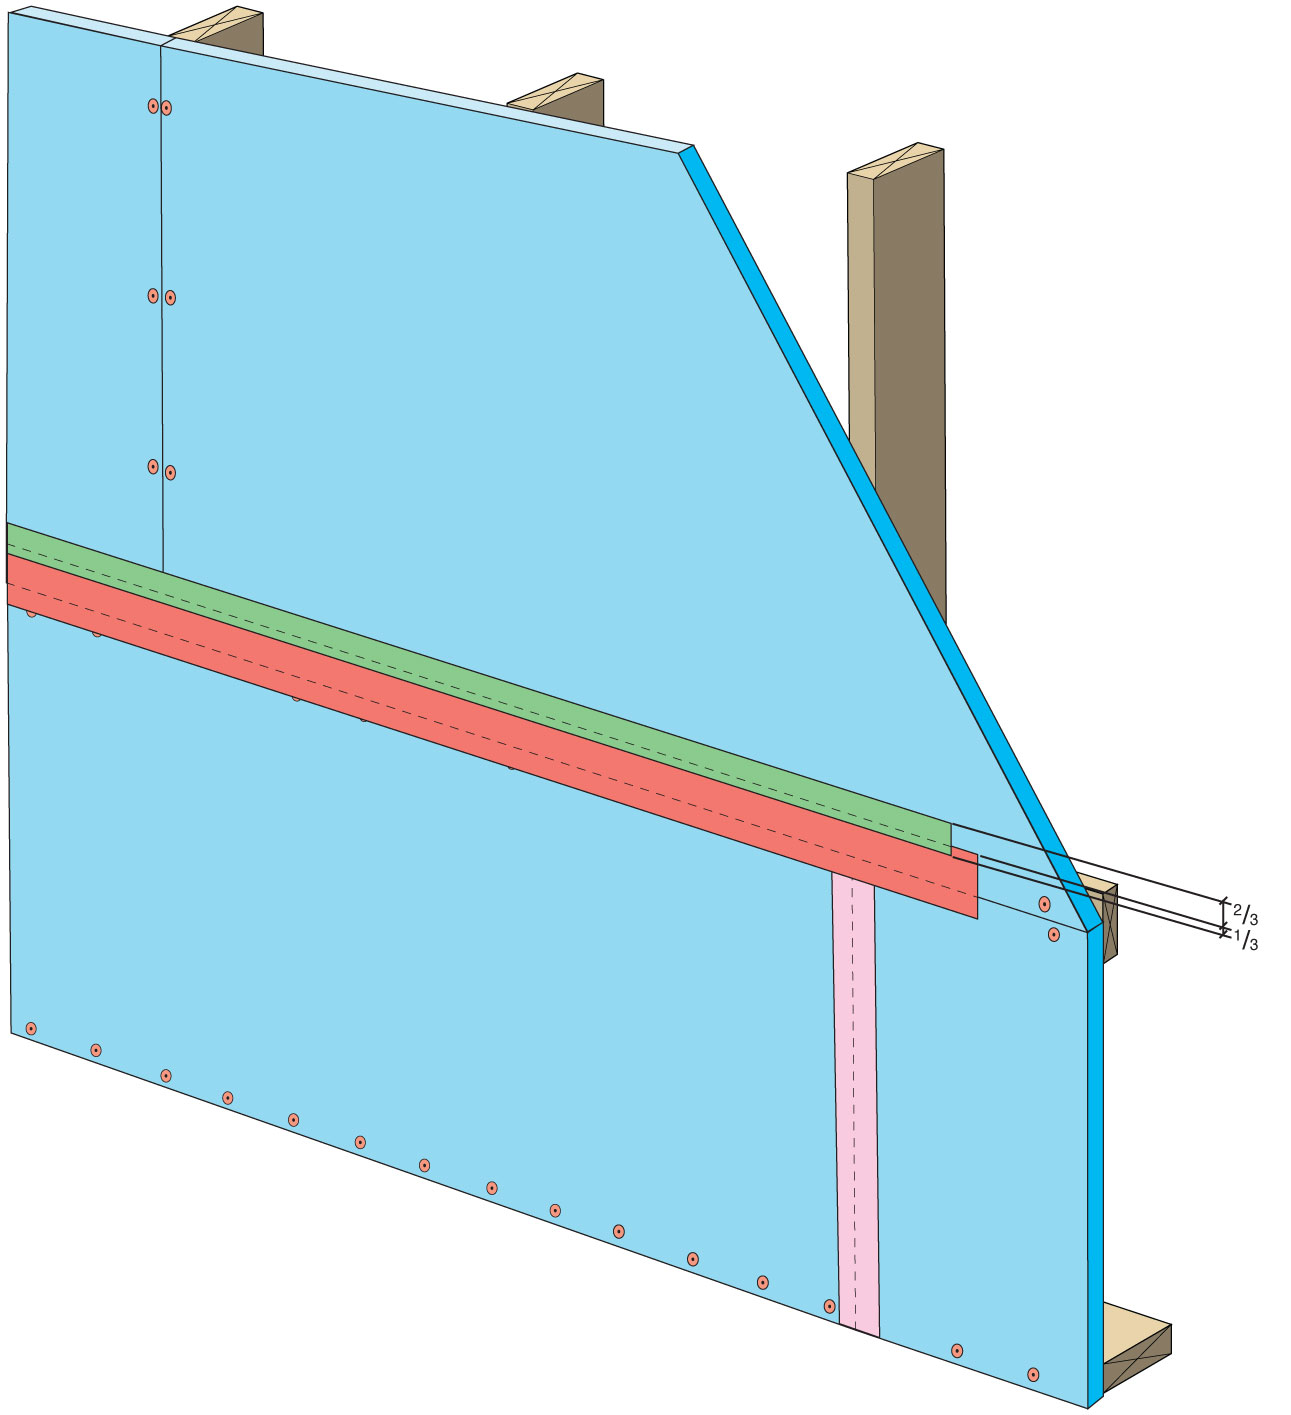
Terminate 4" tape with 2" wide tape placing tape offset high on the joint, 2/3 of the tape should be adhered to the sheet of insulation
Image
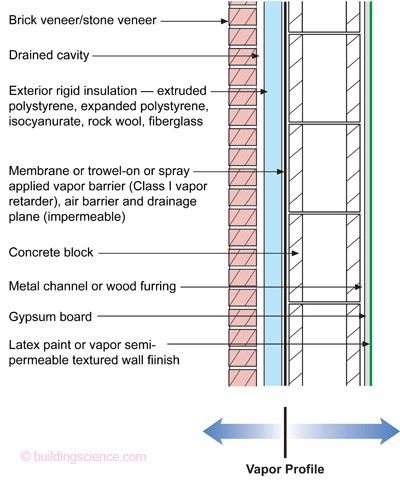
The “institutional” perfect wall works in all climate zones; water, air, vapor, and thermal control layers are exterior of the sheathing, assembly allows drying to interior and exterior
Image
Image

The 2x4 wall studs are staggered along the 2x6 sill plate providing space to weave insulation around each stud to stop thermal bridging through the wall.