Showing results 1 - 192 of 192
Image
Image
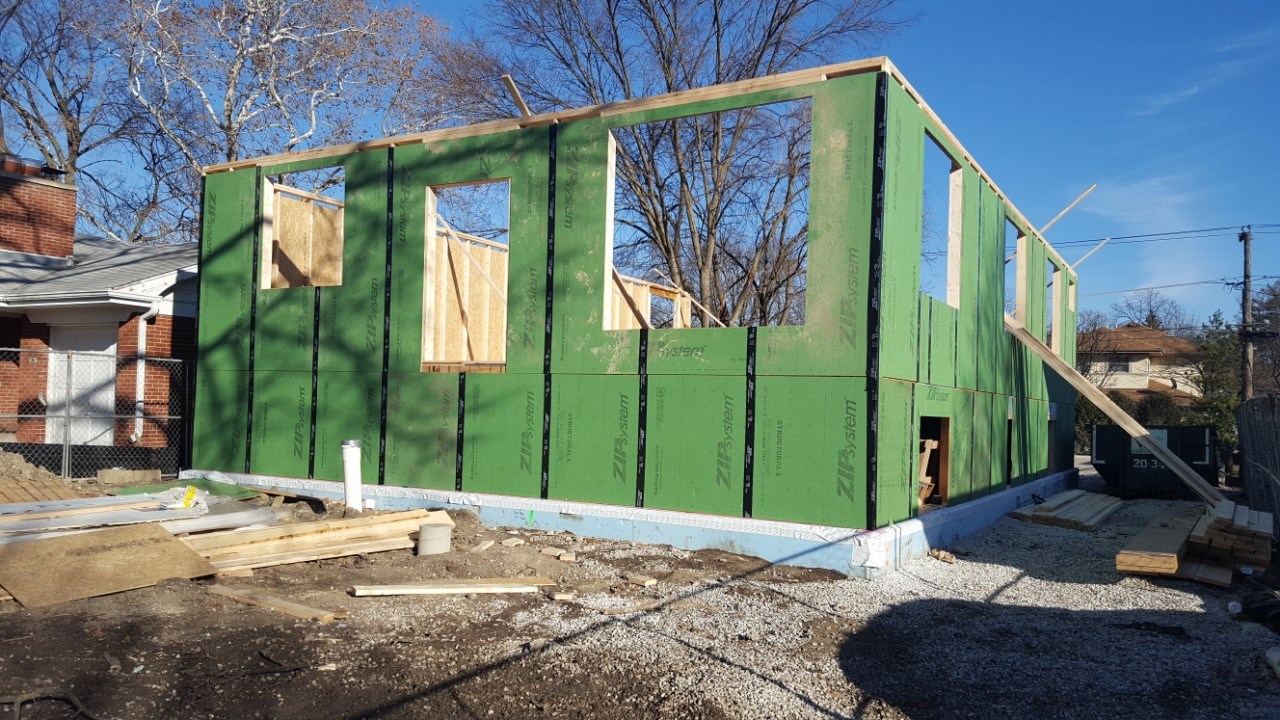
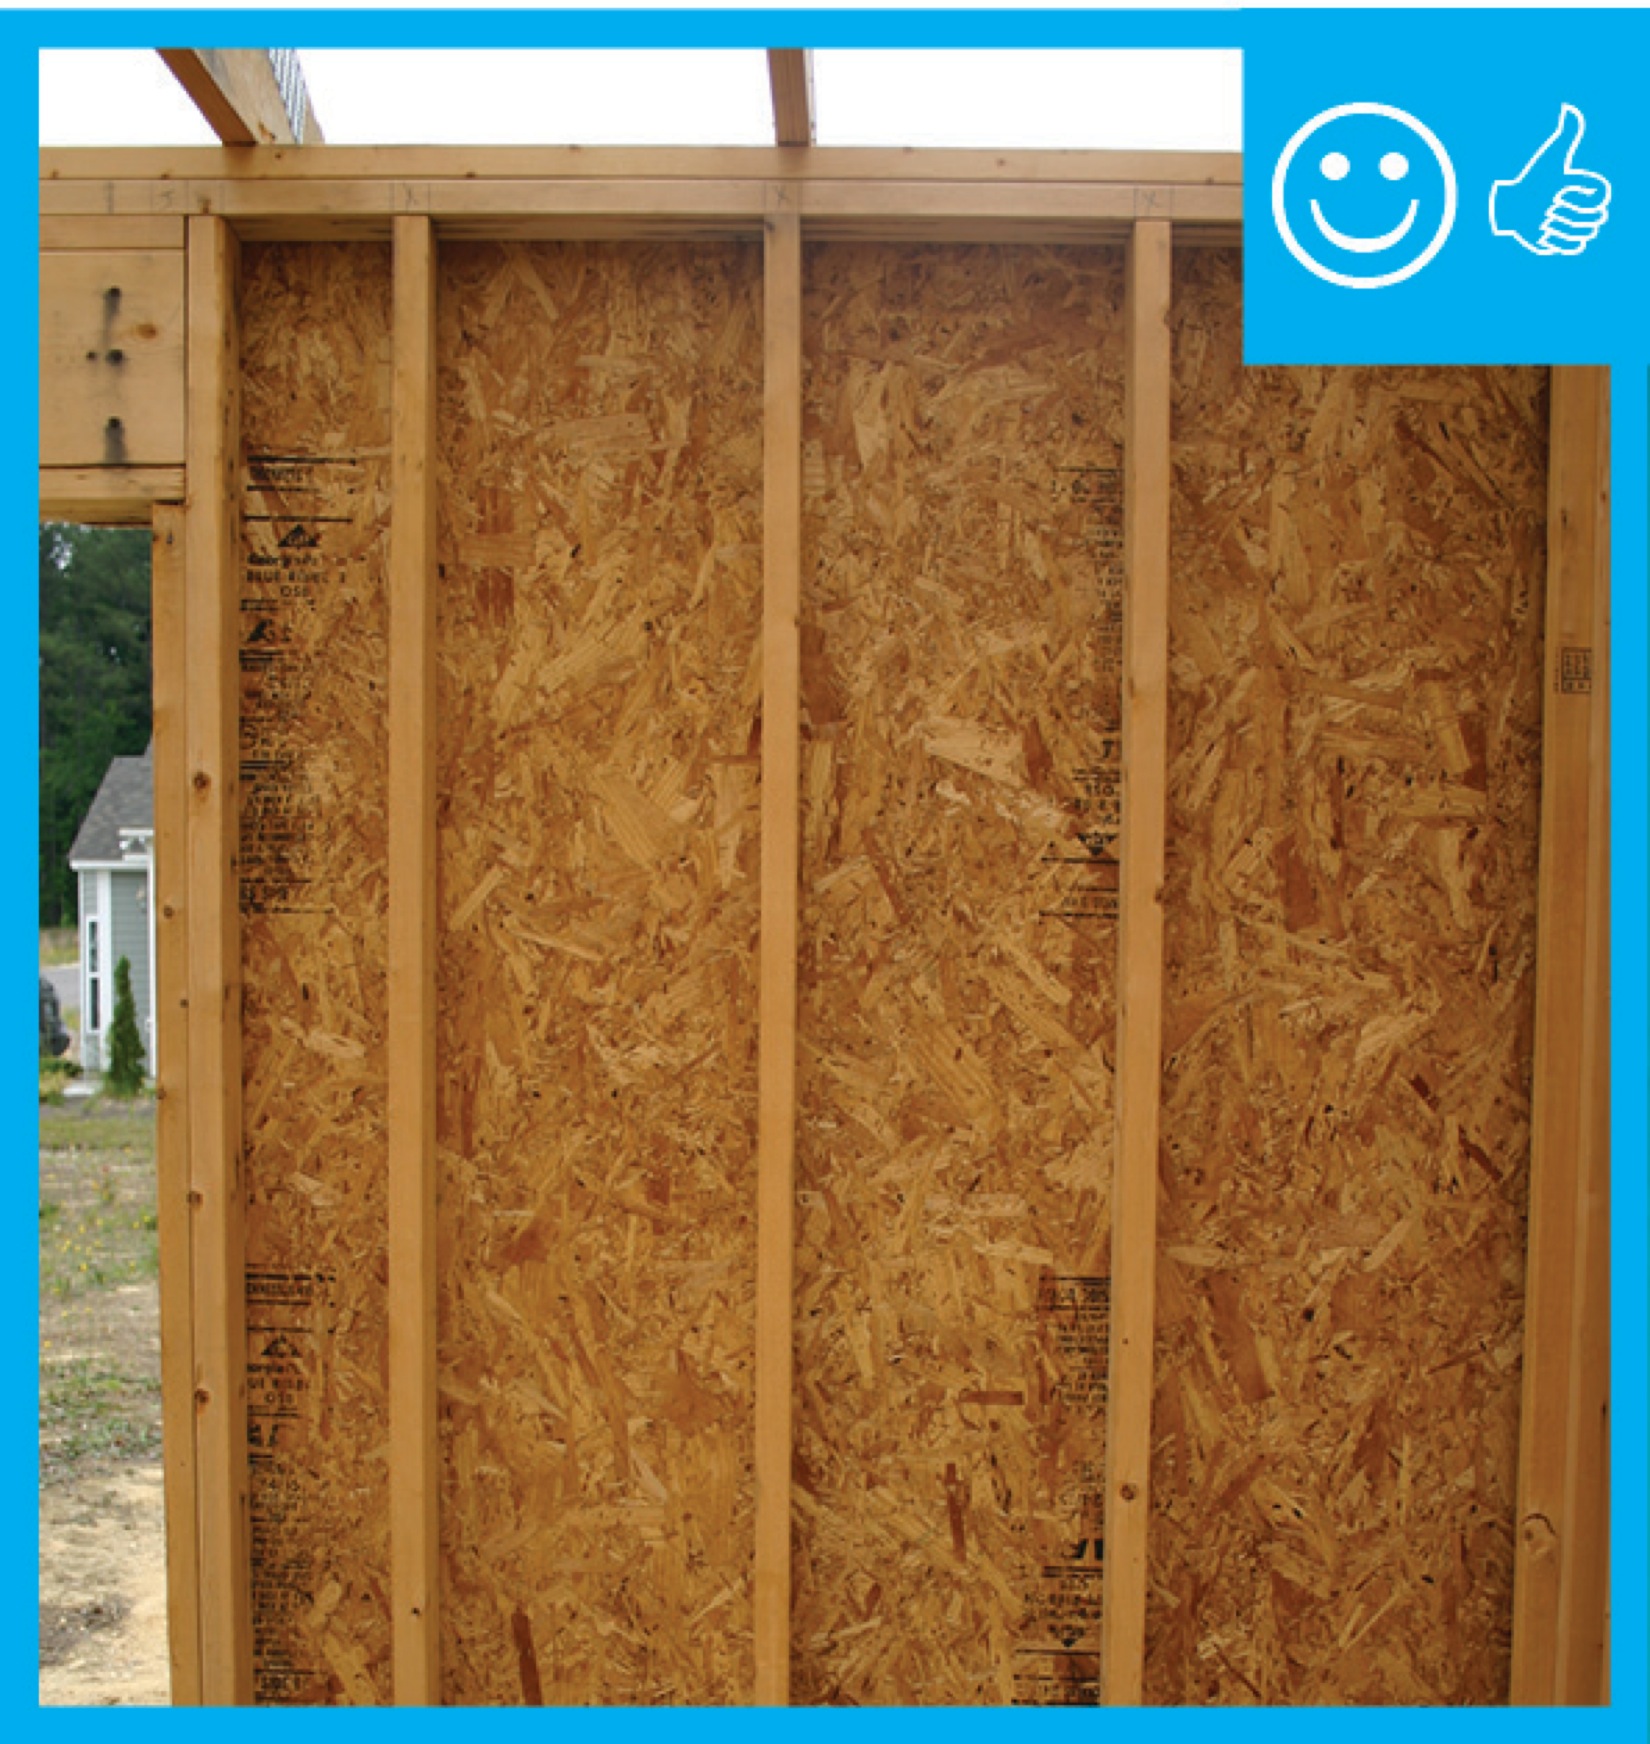
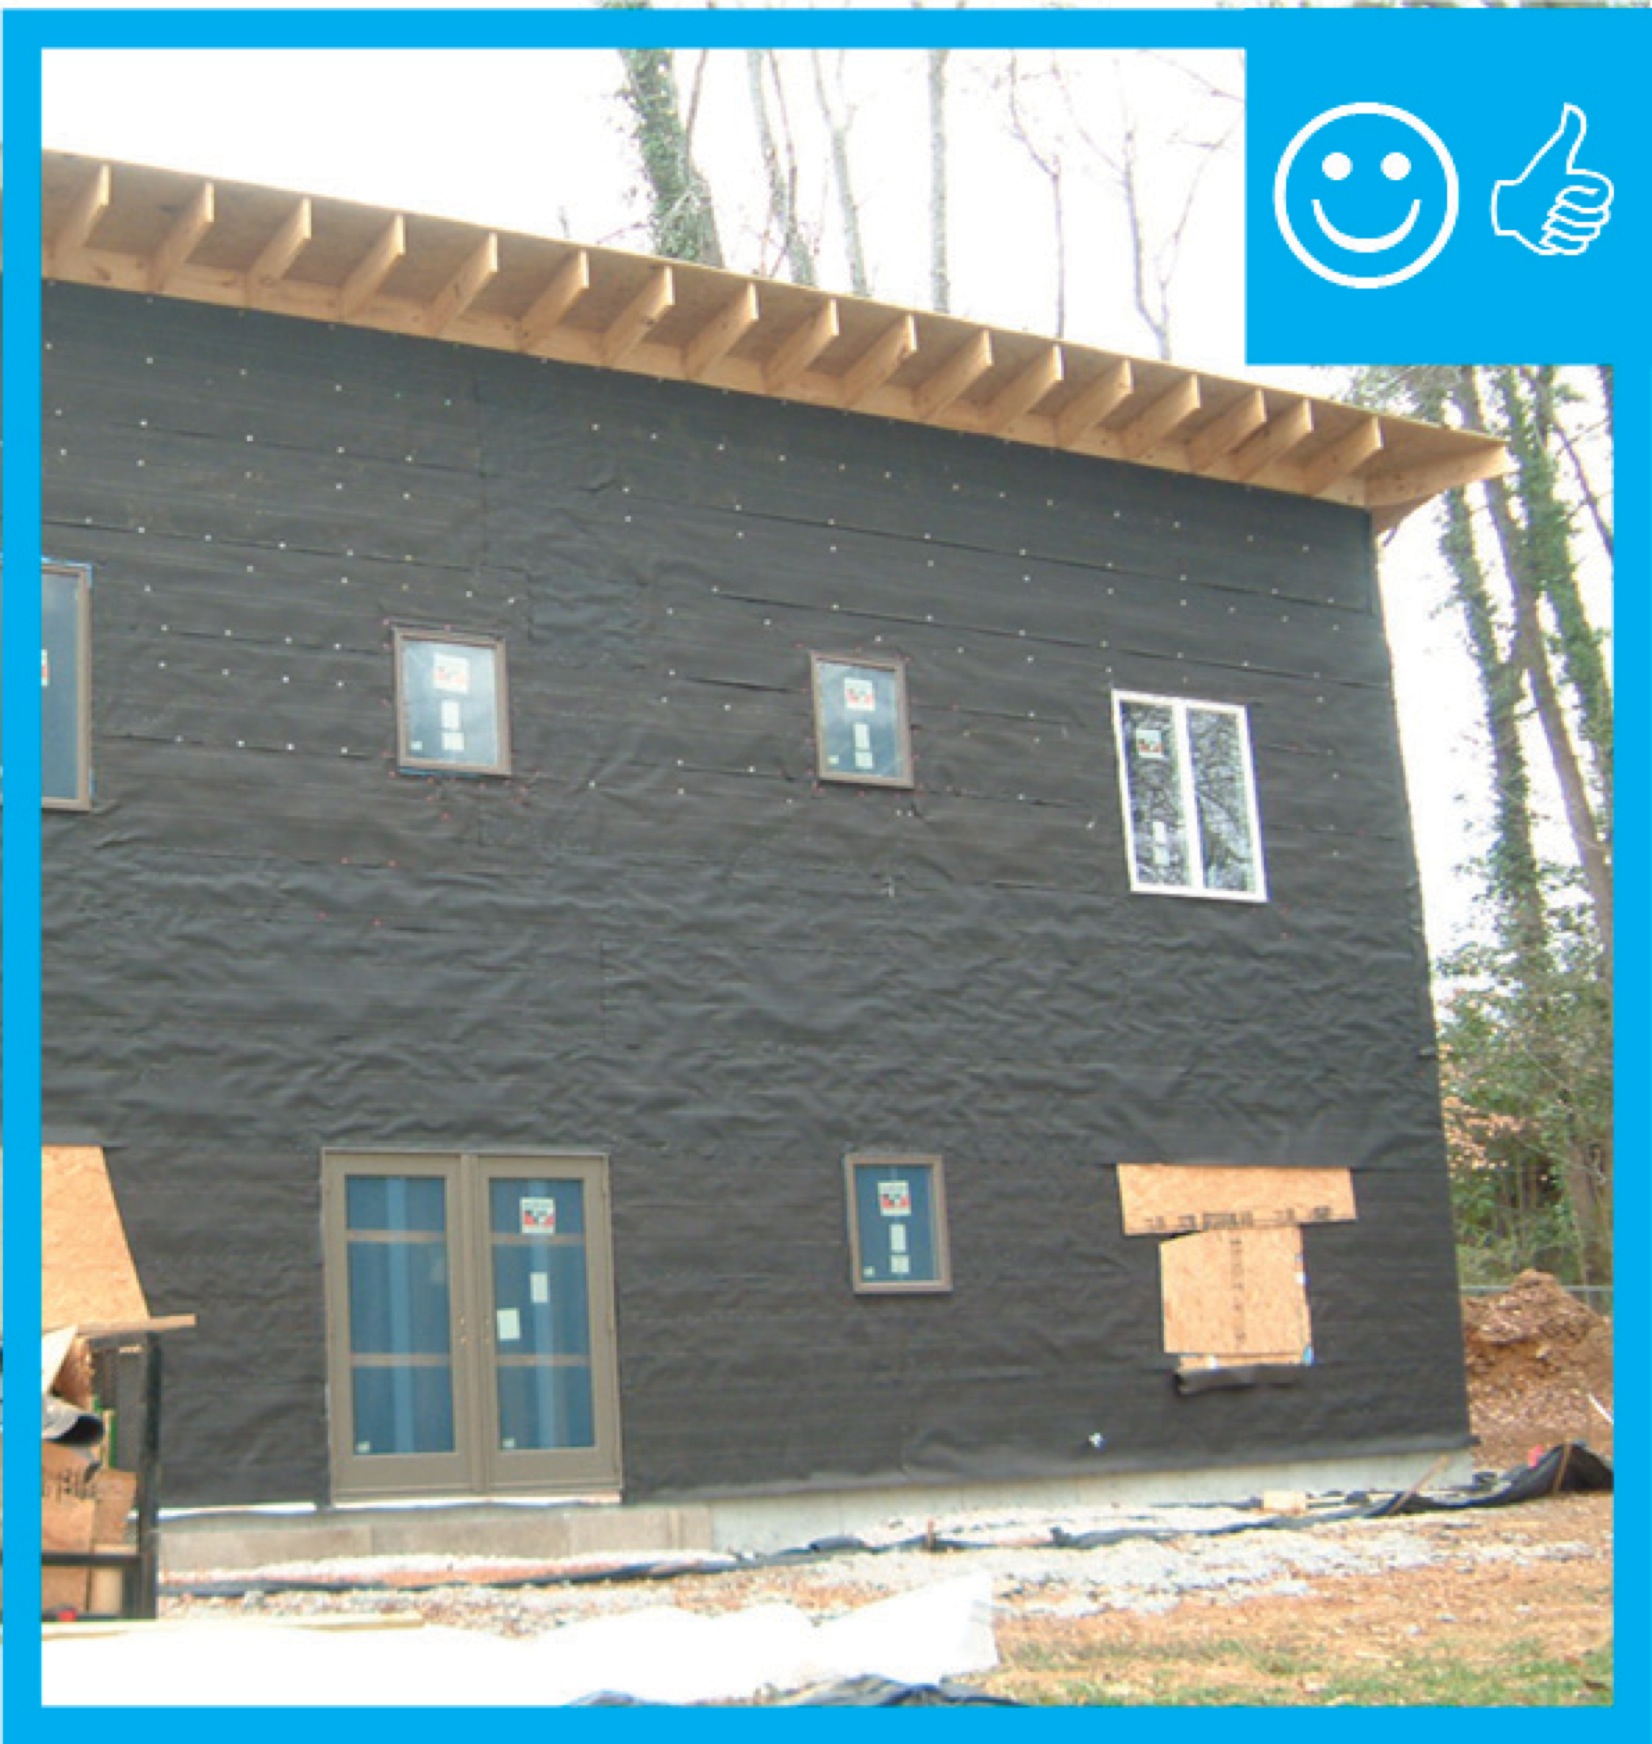
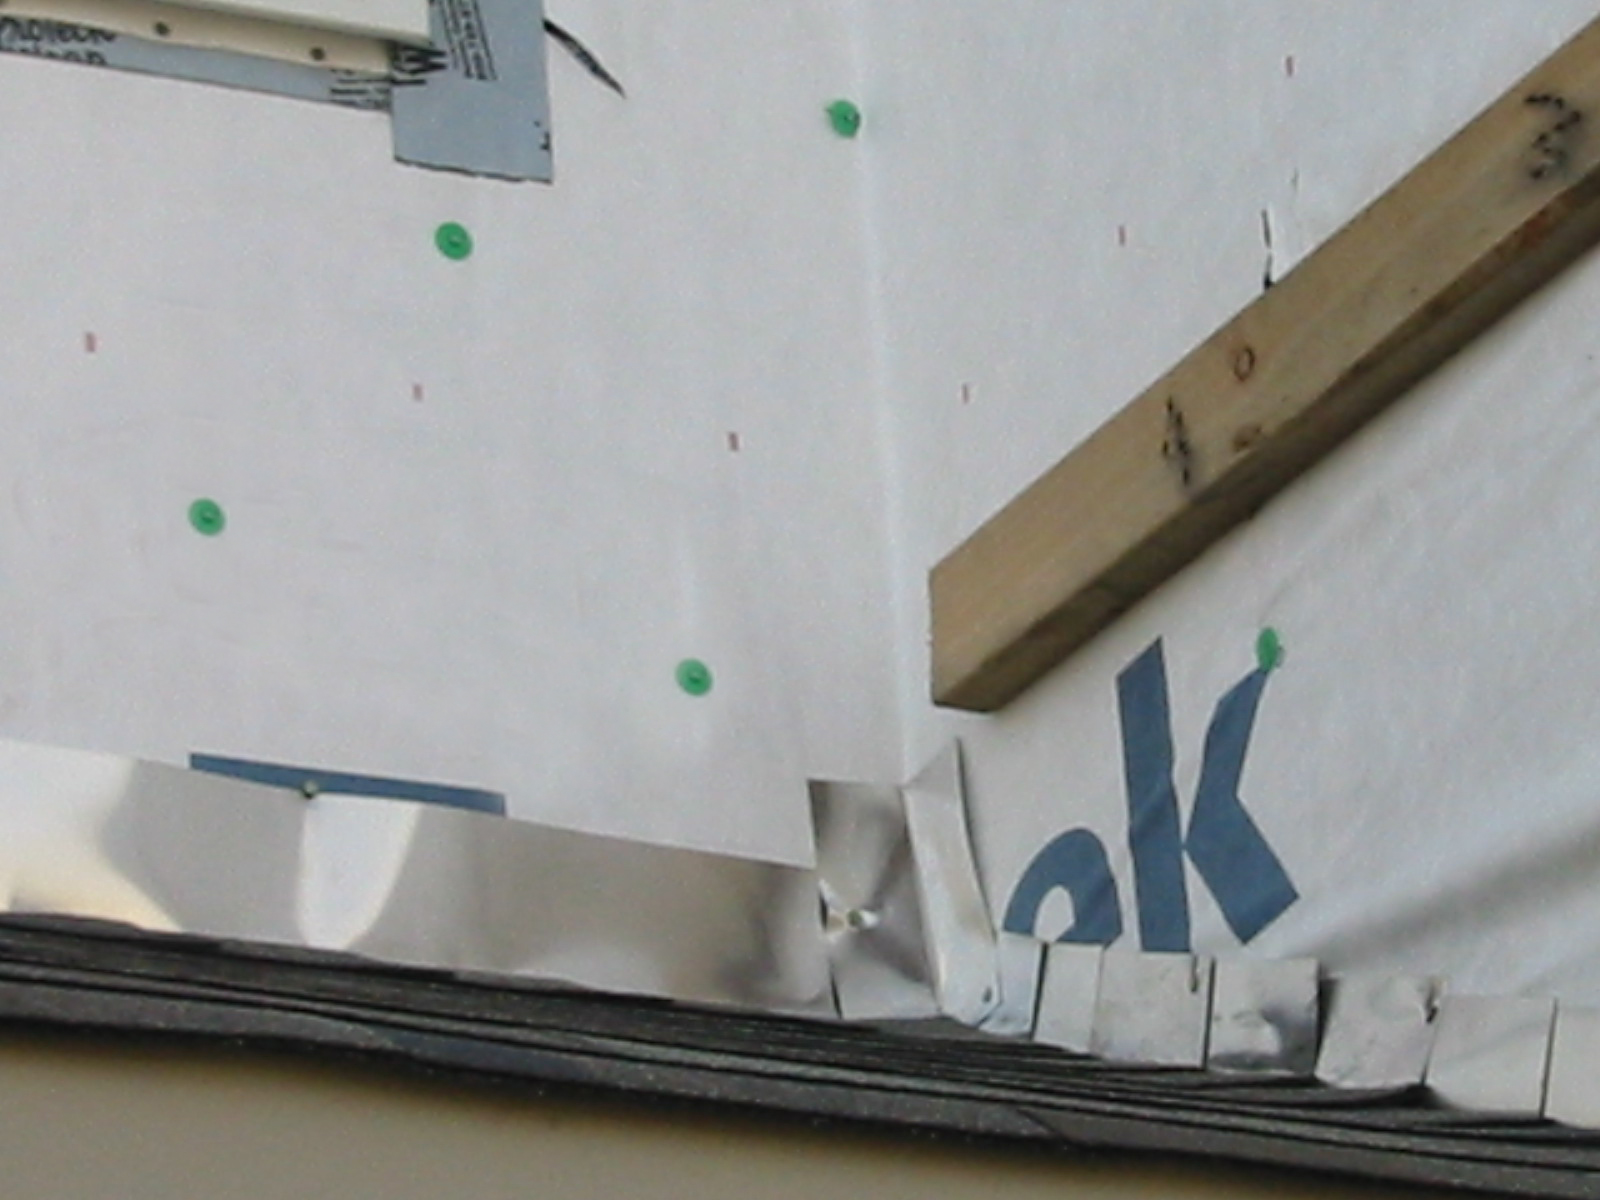
A coated OSB product with taped seams covers the walls to serve as both sheathing and weather-resistant barrier.
Image

A continuous layer of polyethylene covers the crawlspace floor and is attached to the wall with wood nailing strips
Image

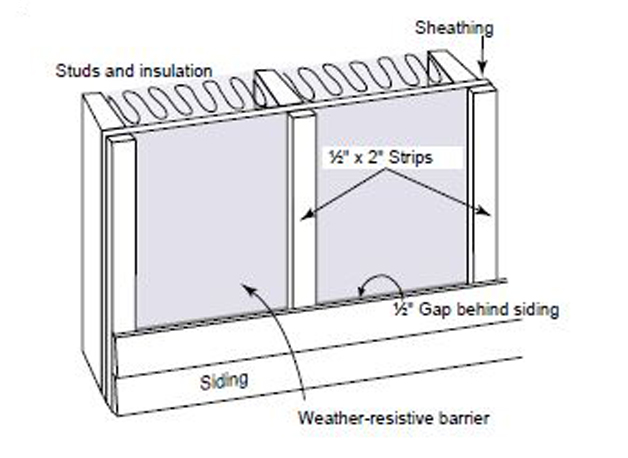
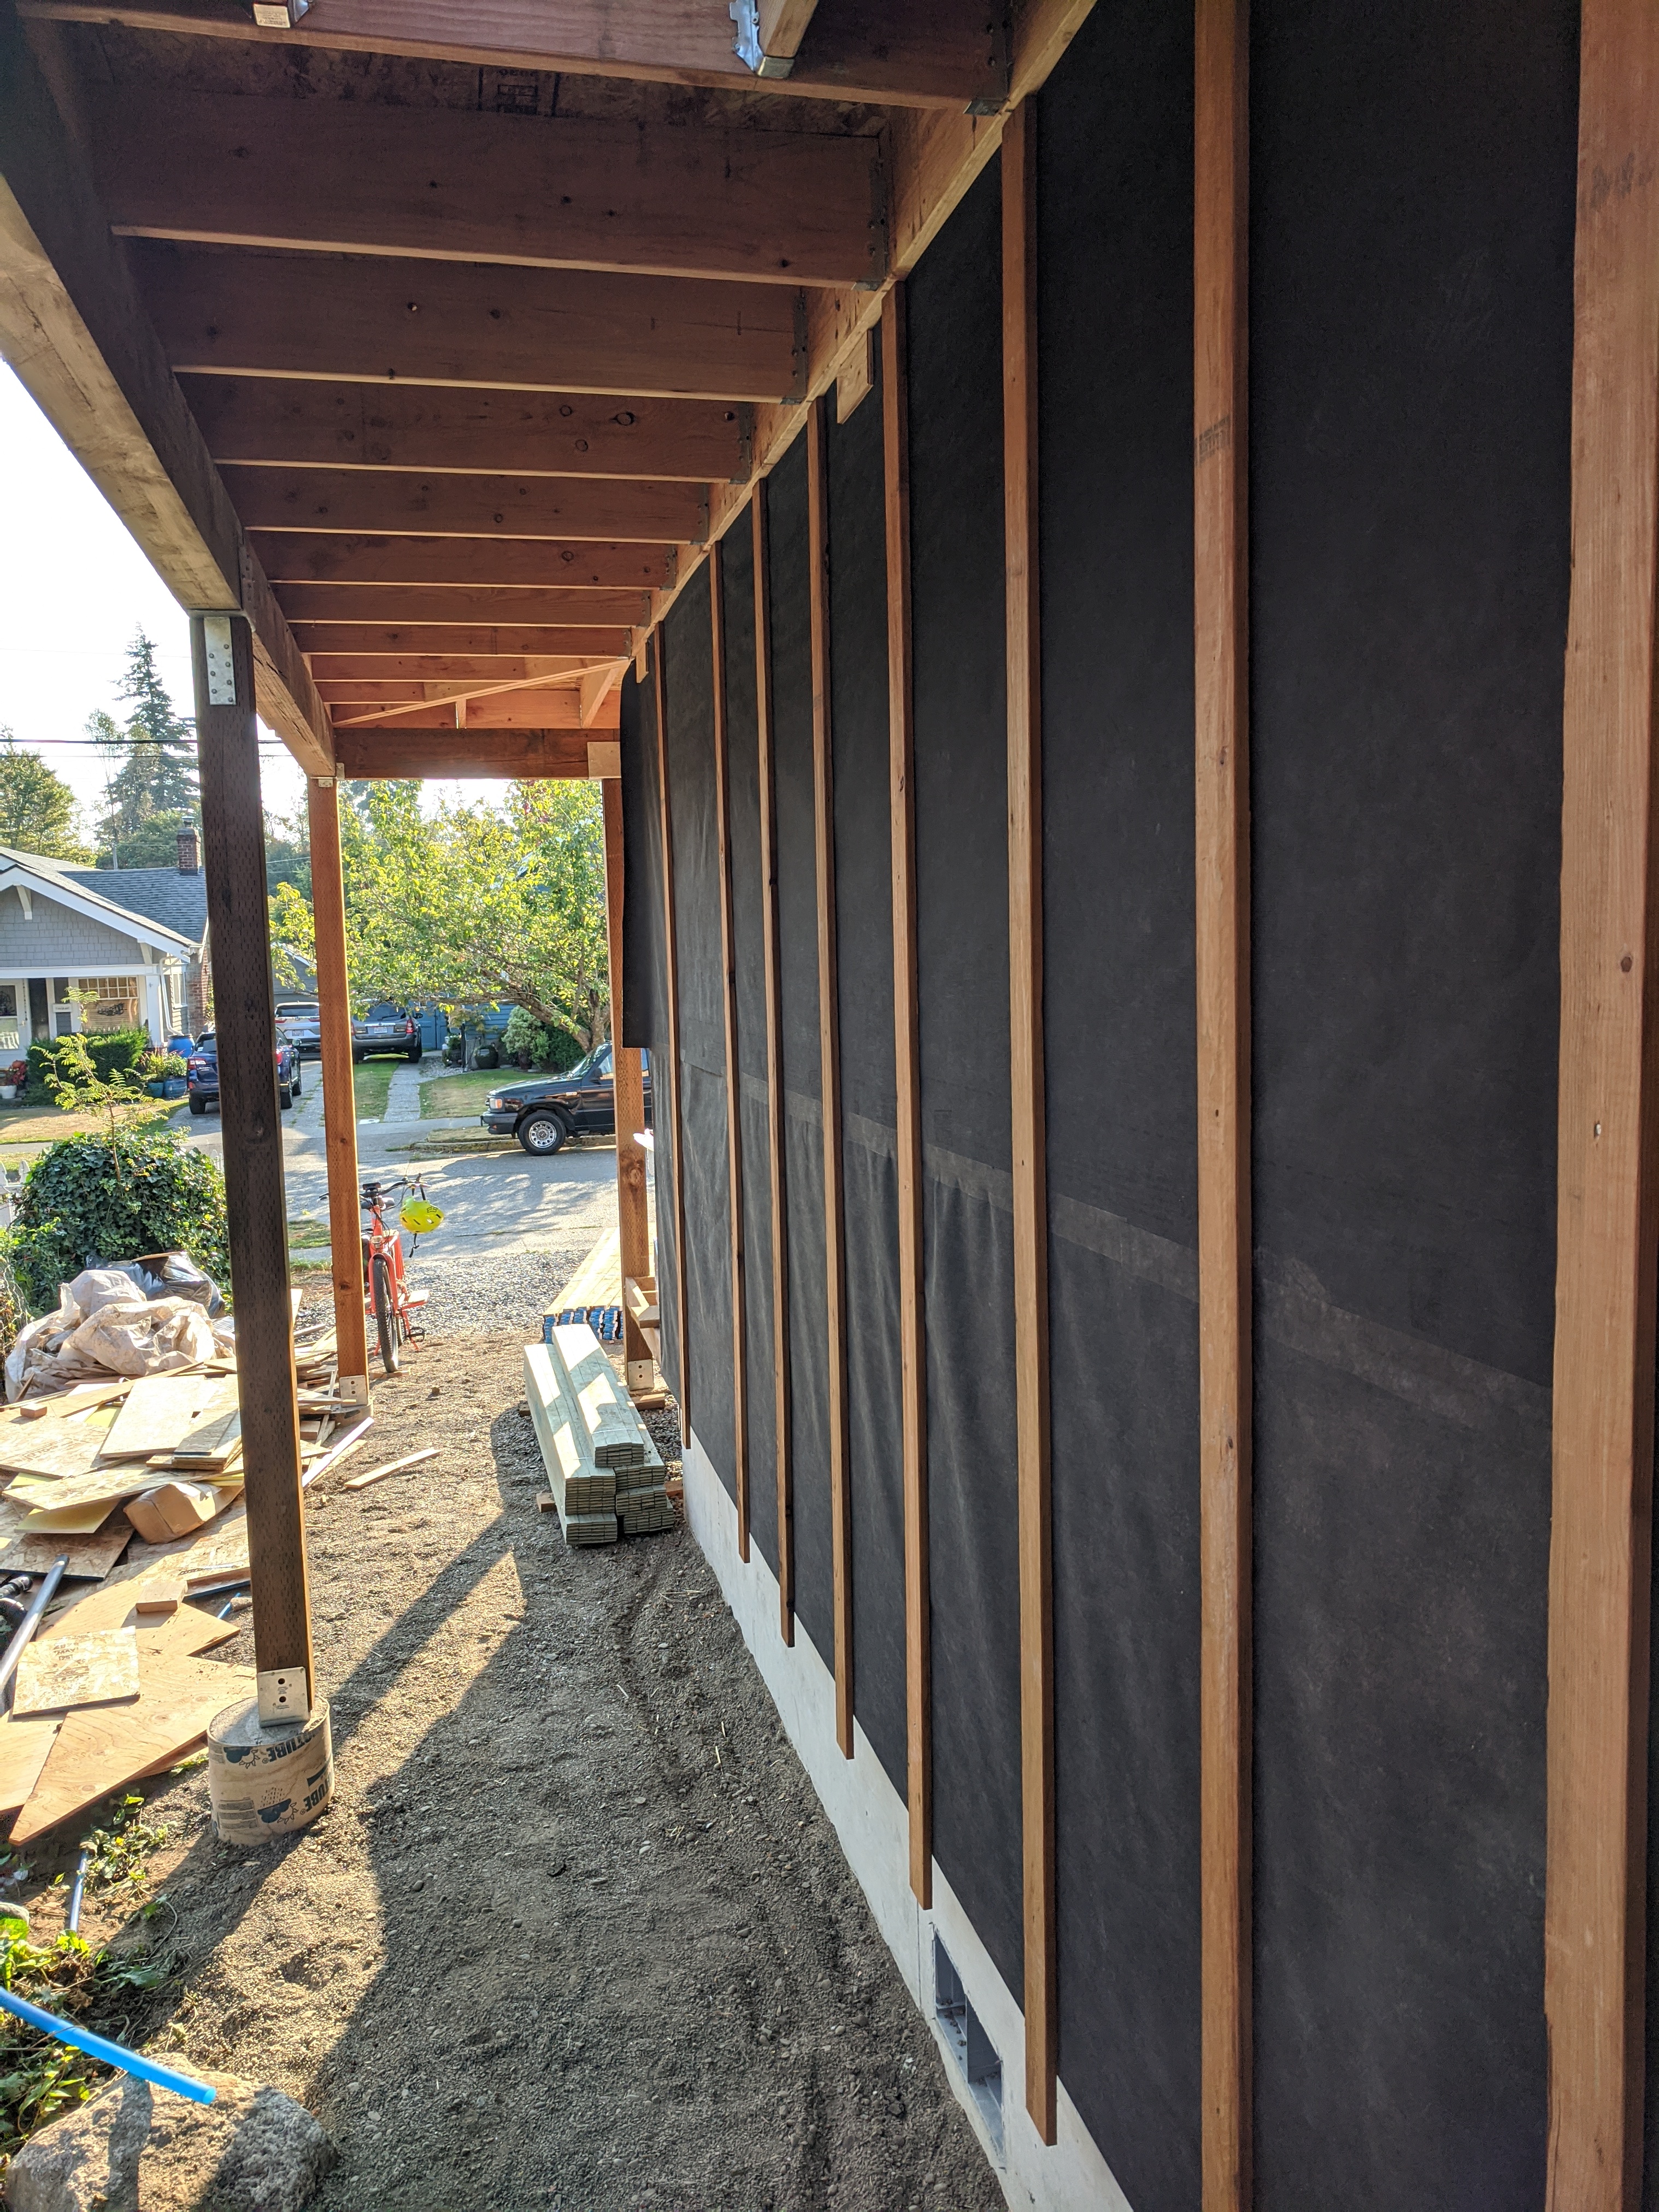
A drainage plane is created behind lap siding by installing furring strips on the exterior walls over house wrap which is overlapped and taped at all seams to serve as an air and water barrier.
Image

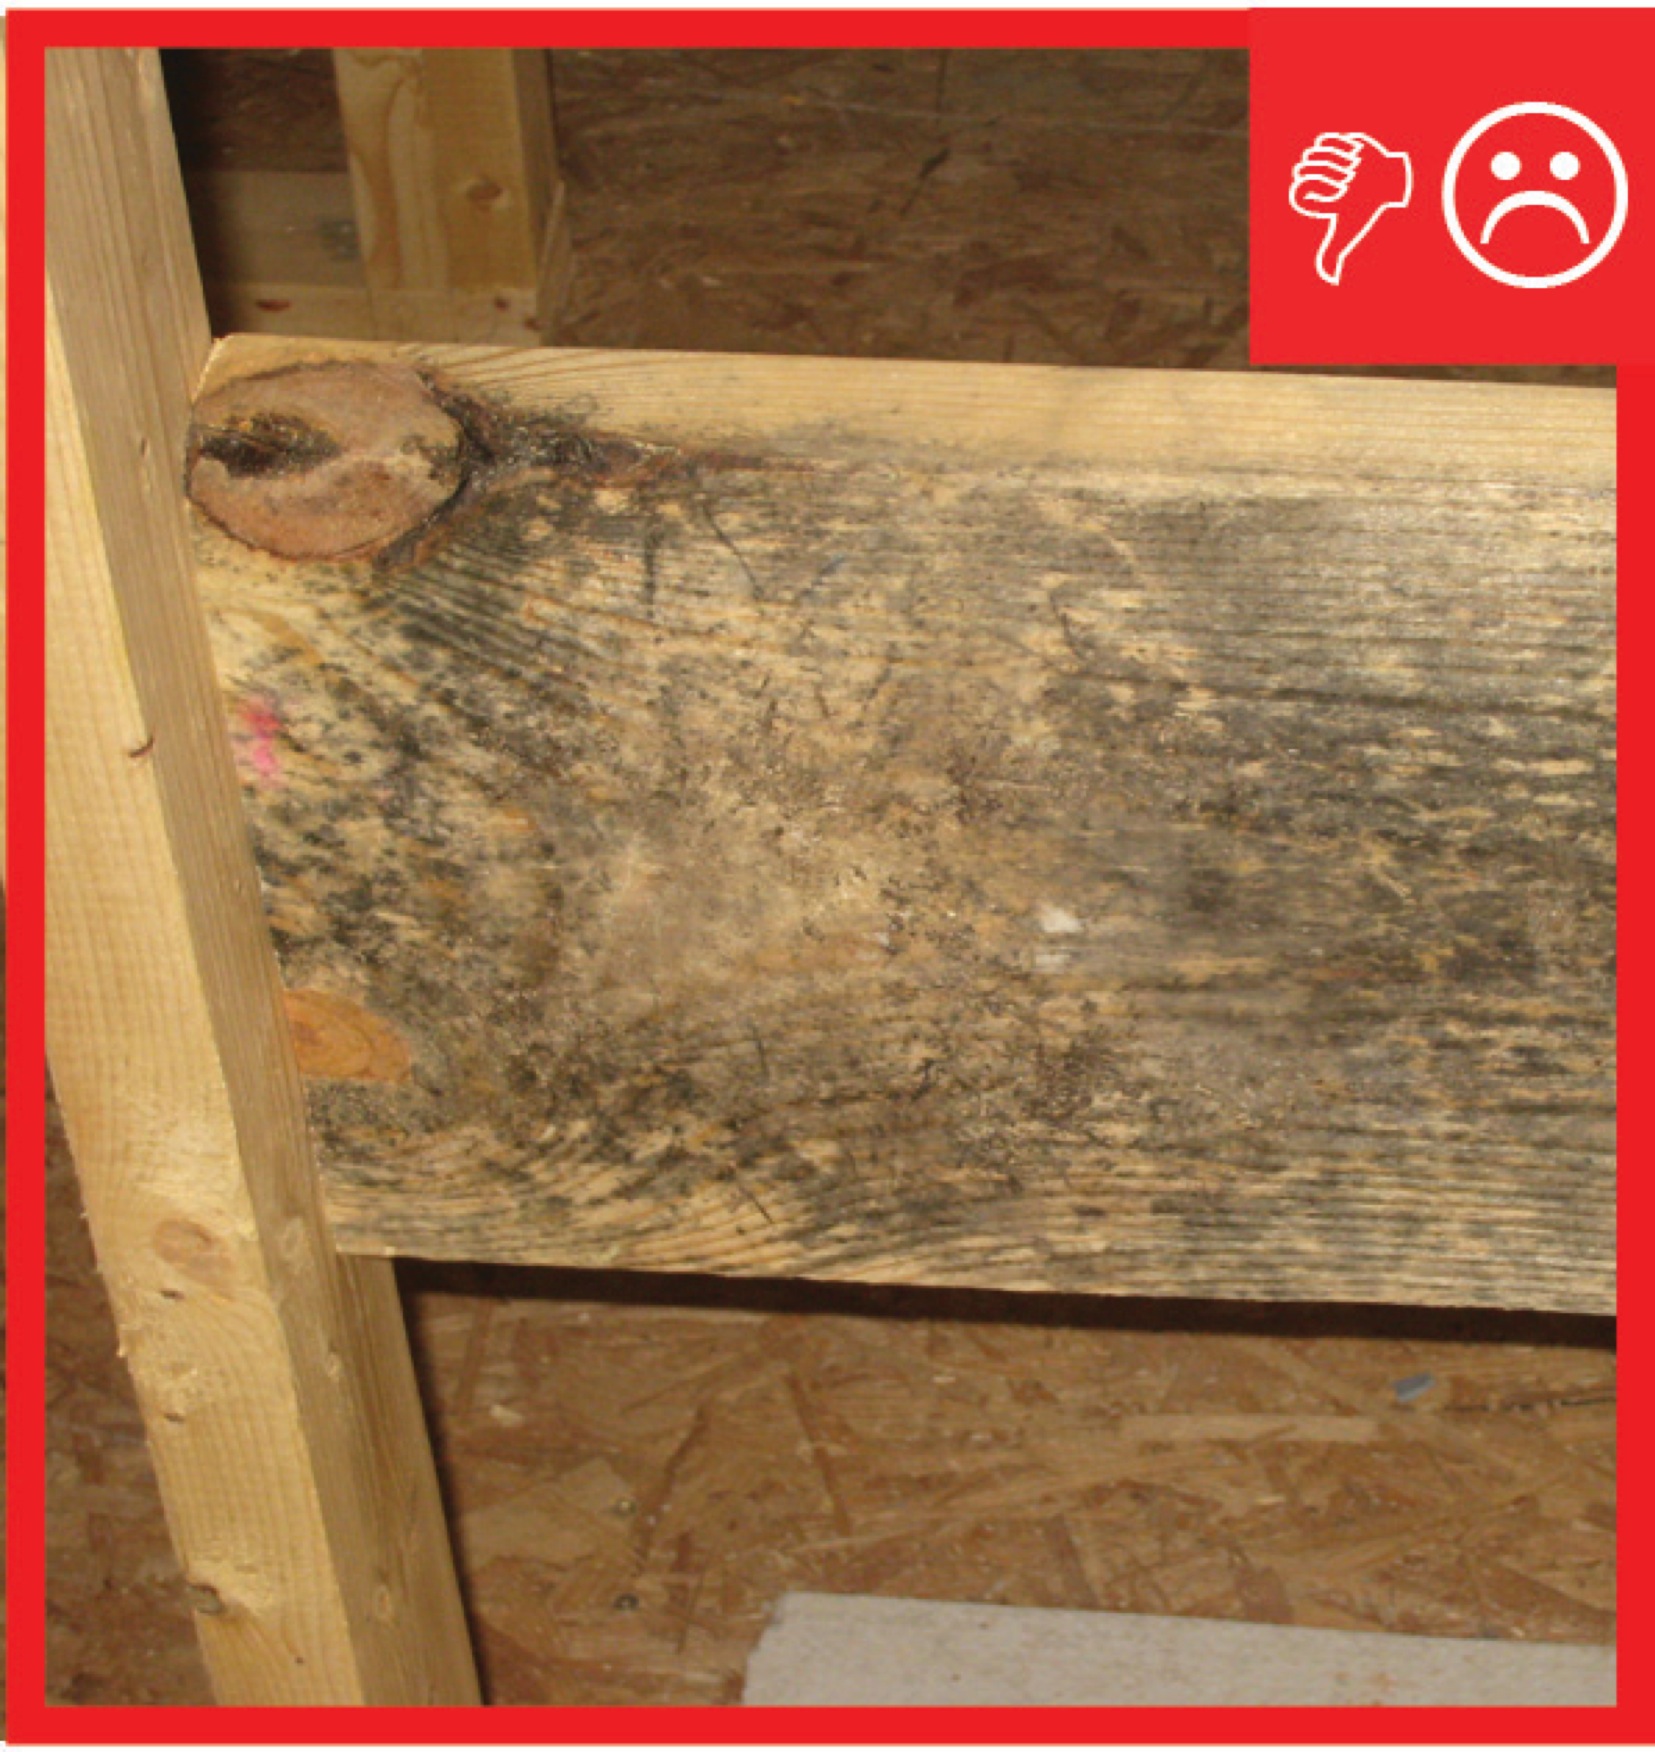
A moisture meter verifies that the moisture of the framing is below the recommended 18%.
Image
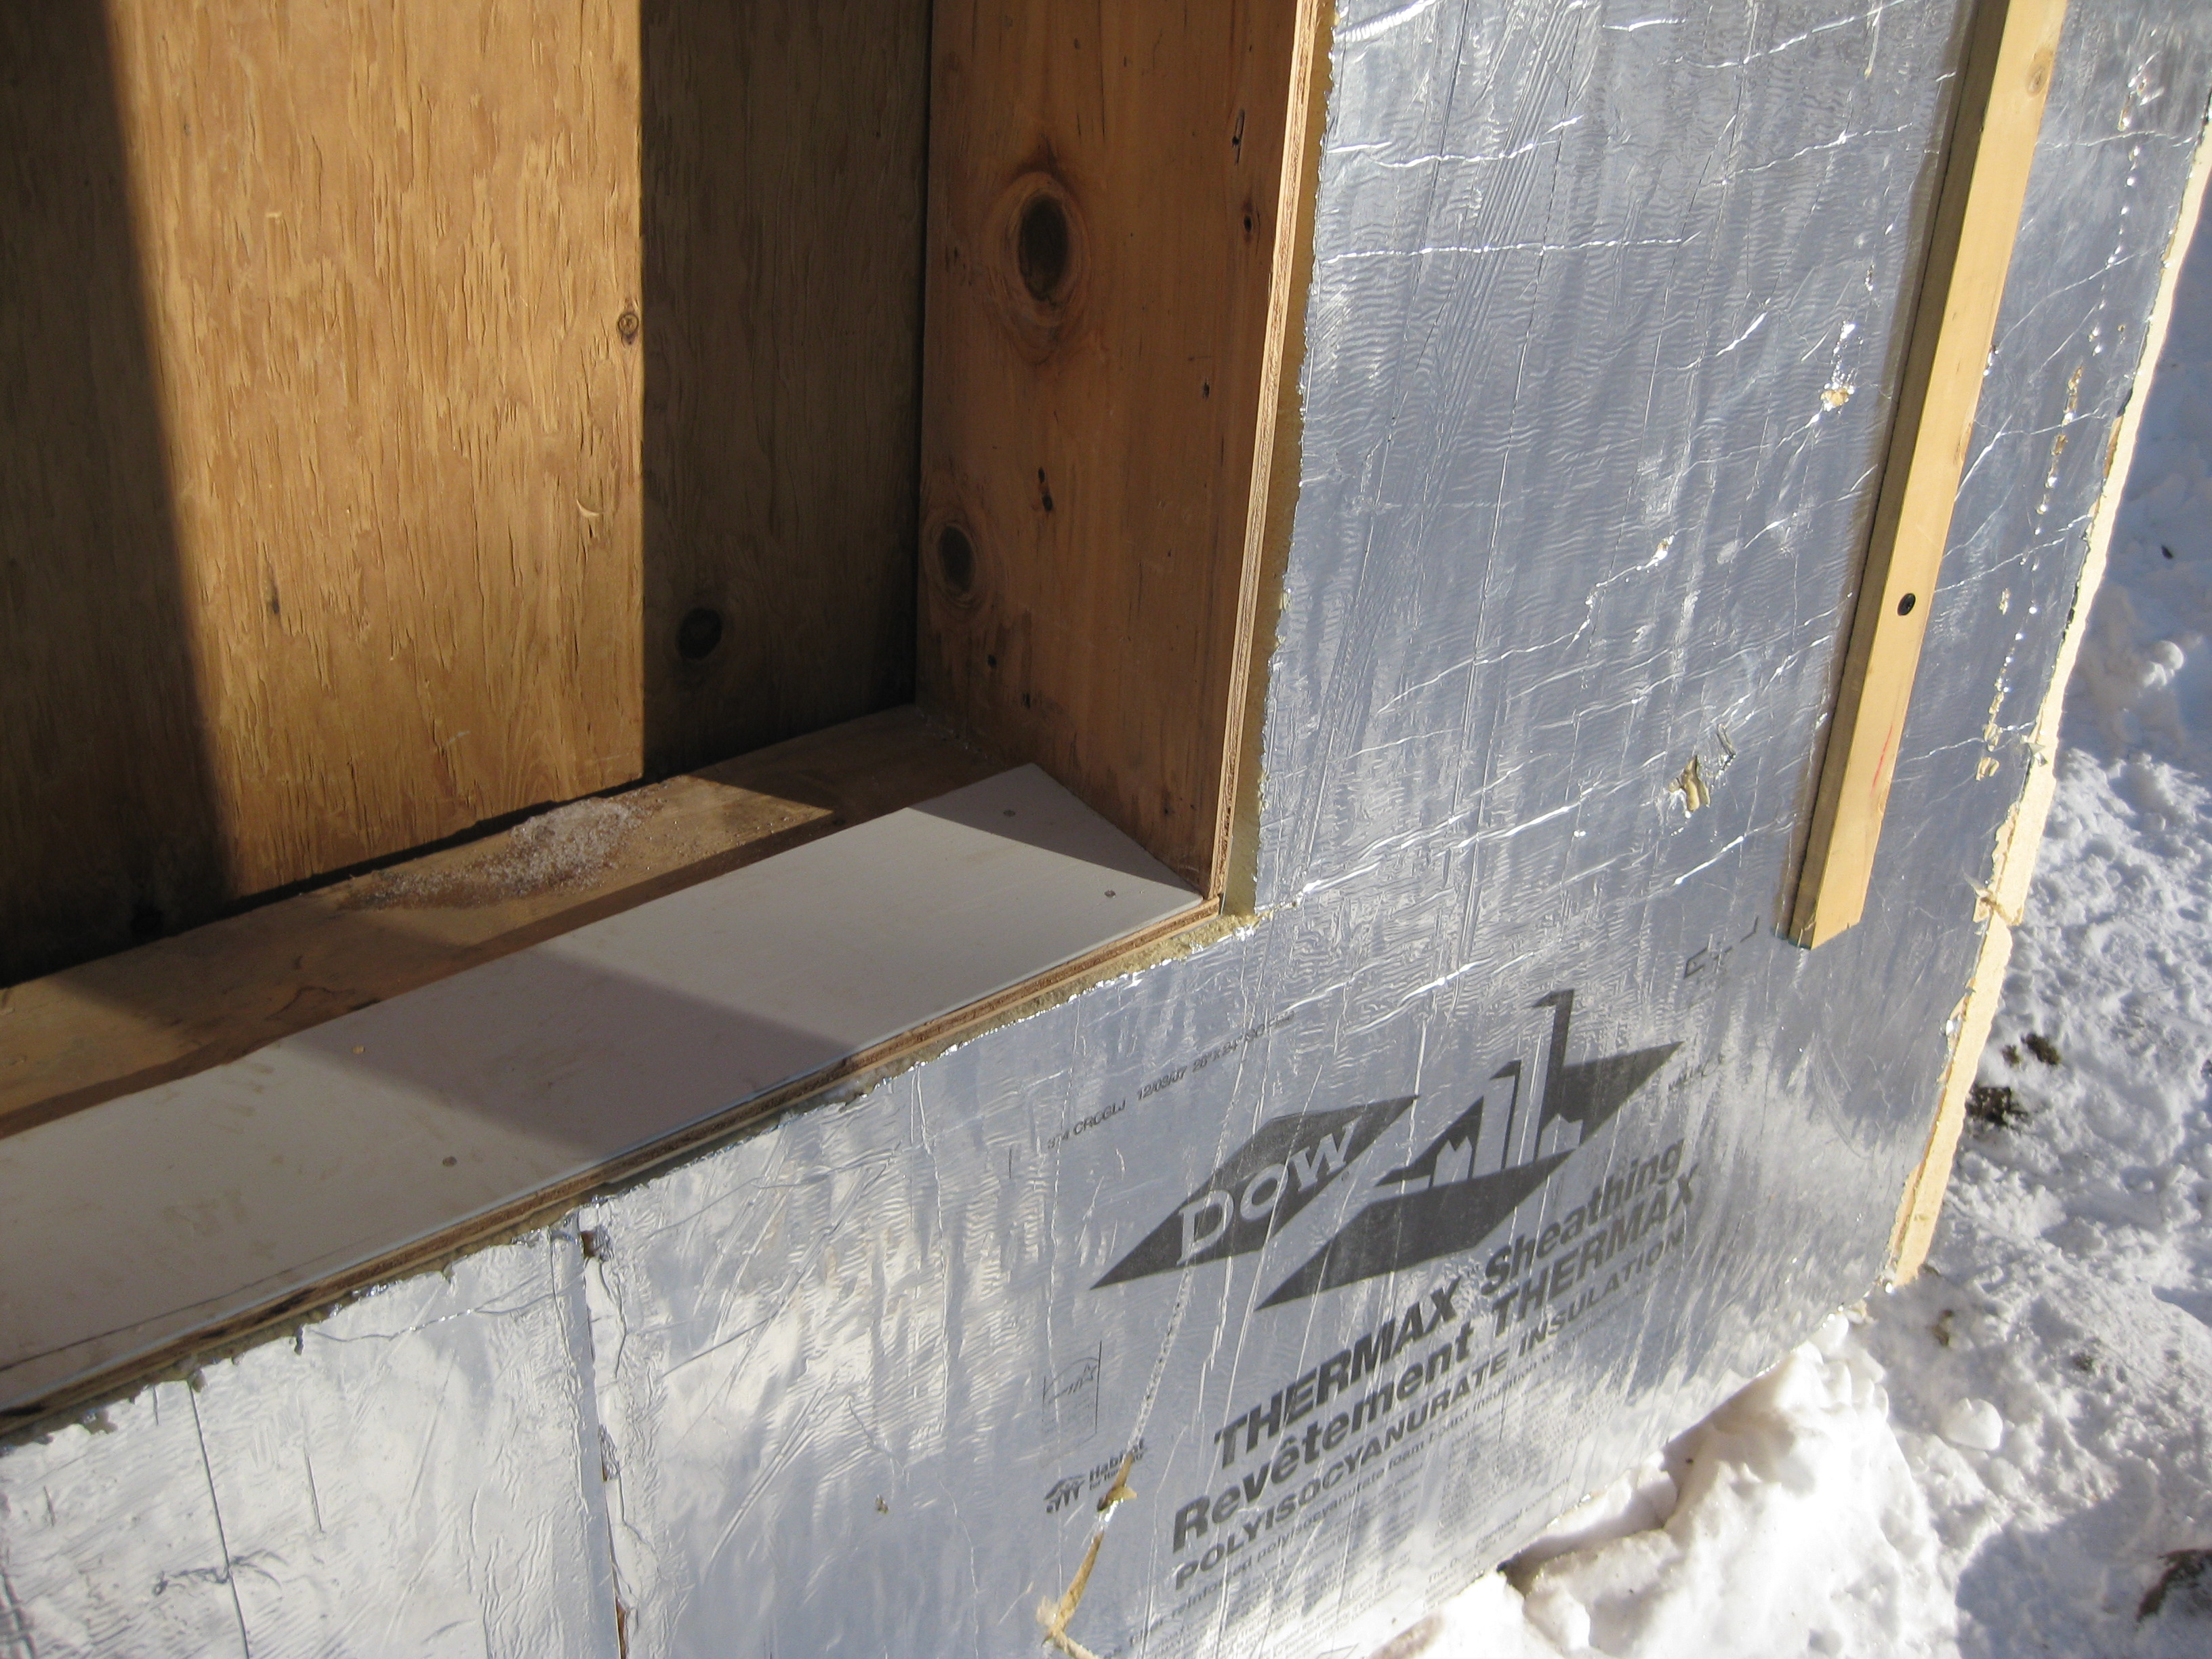
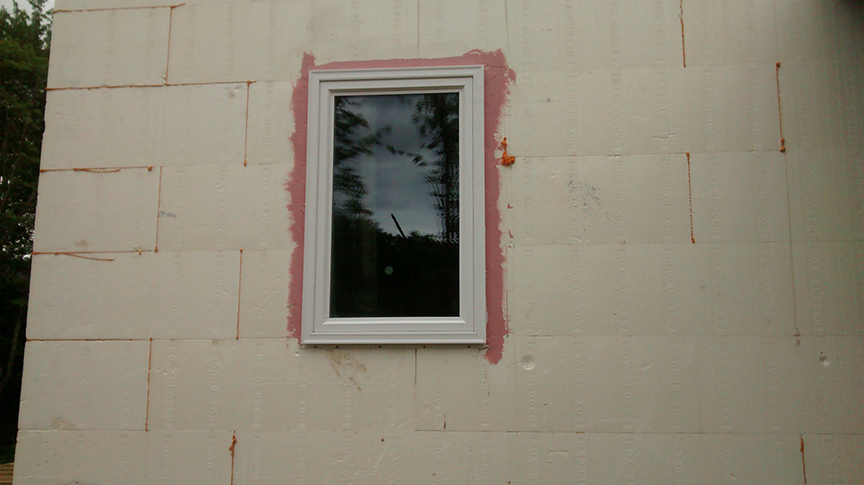
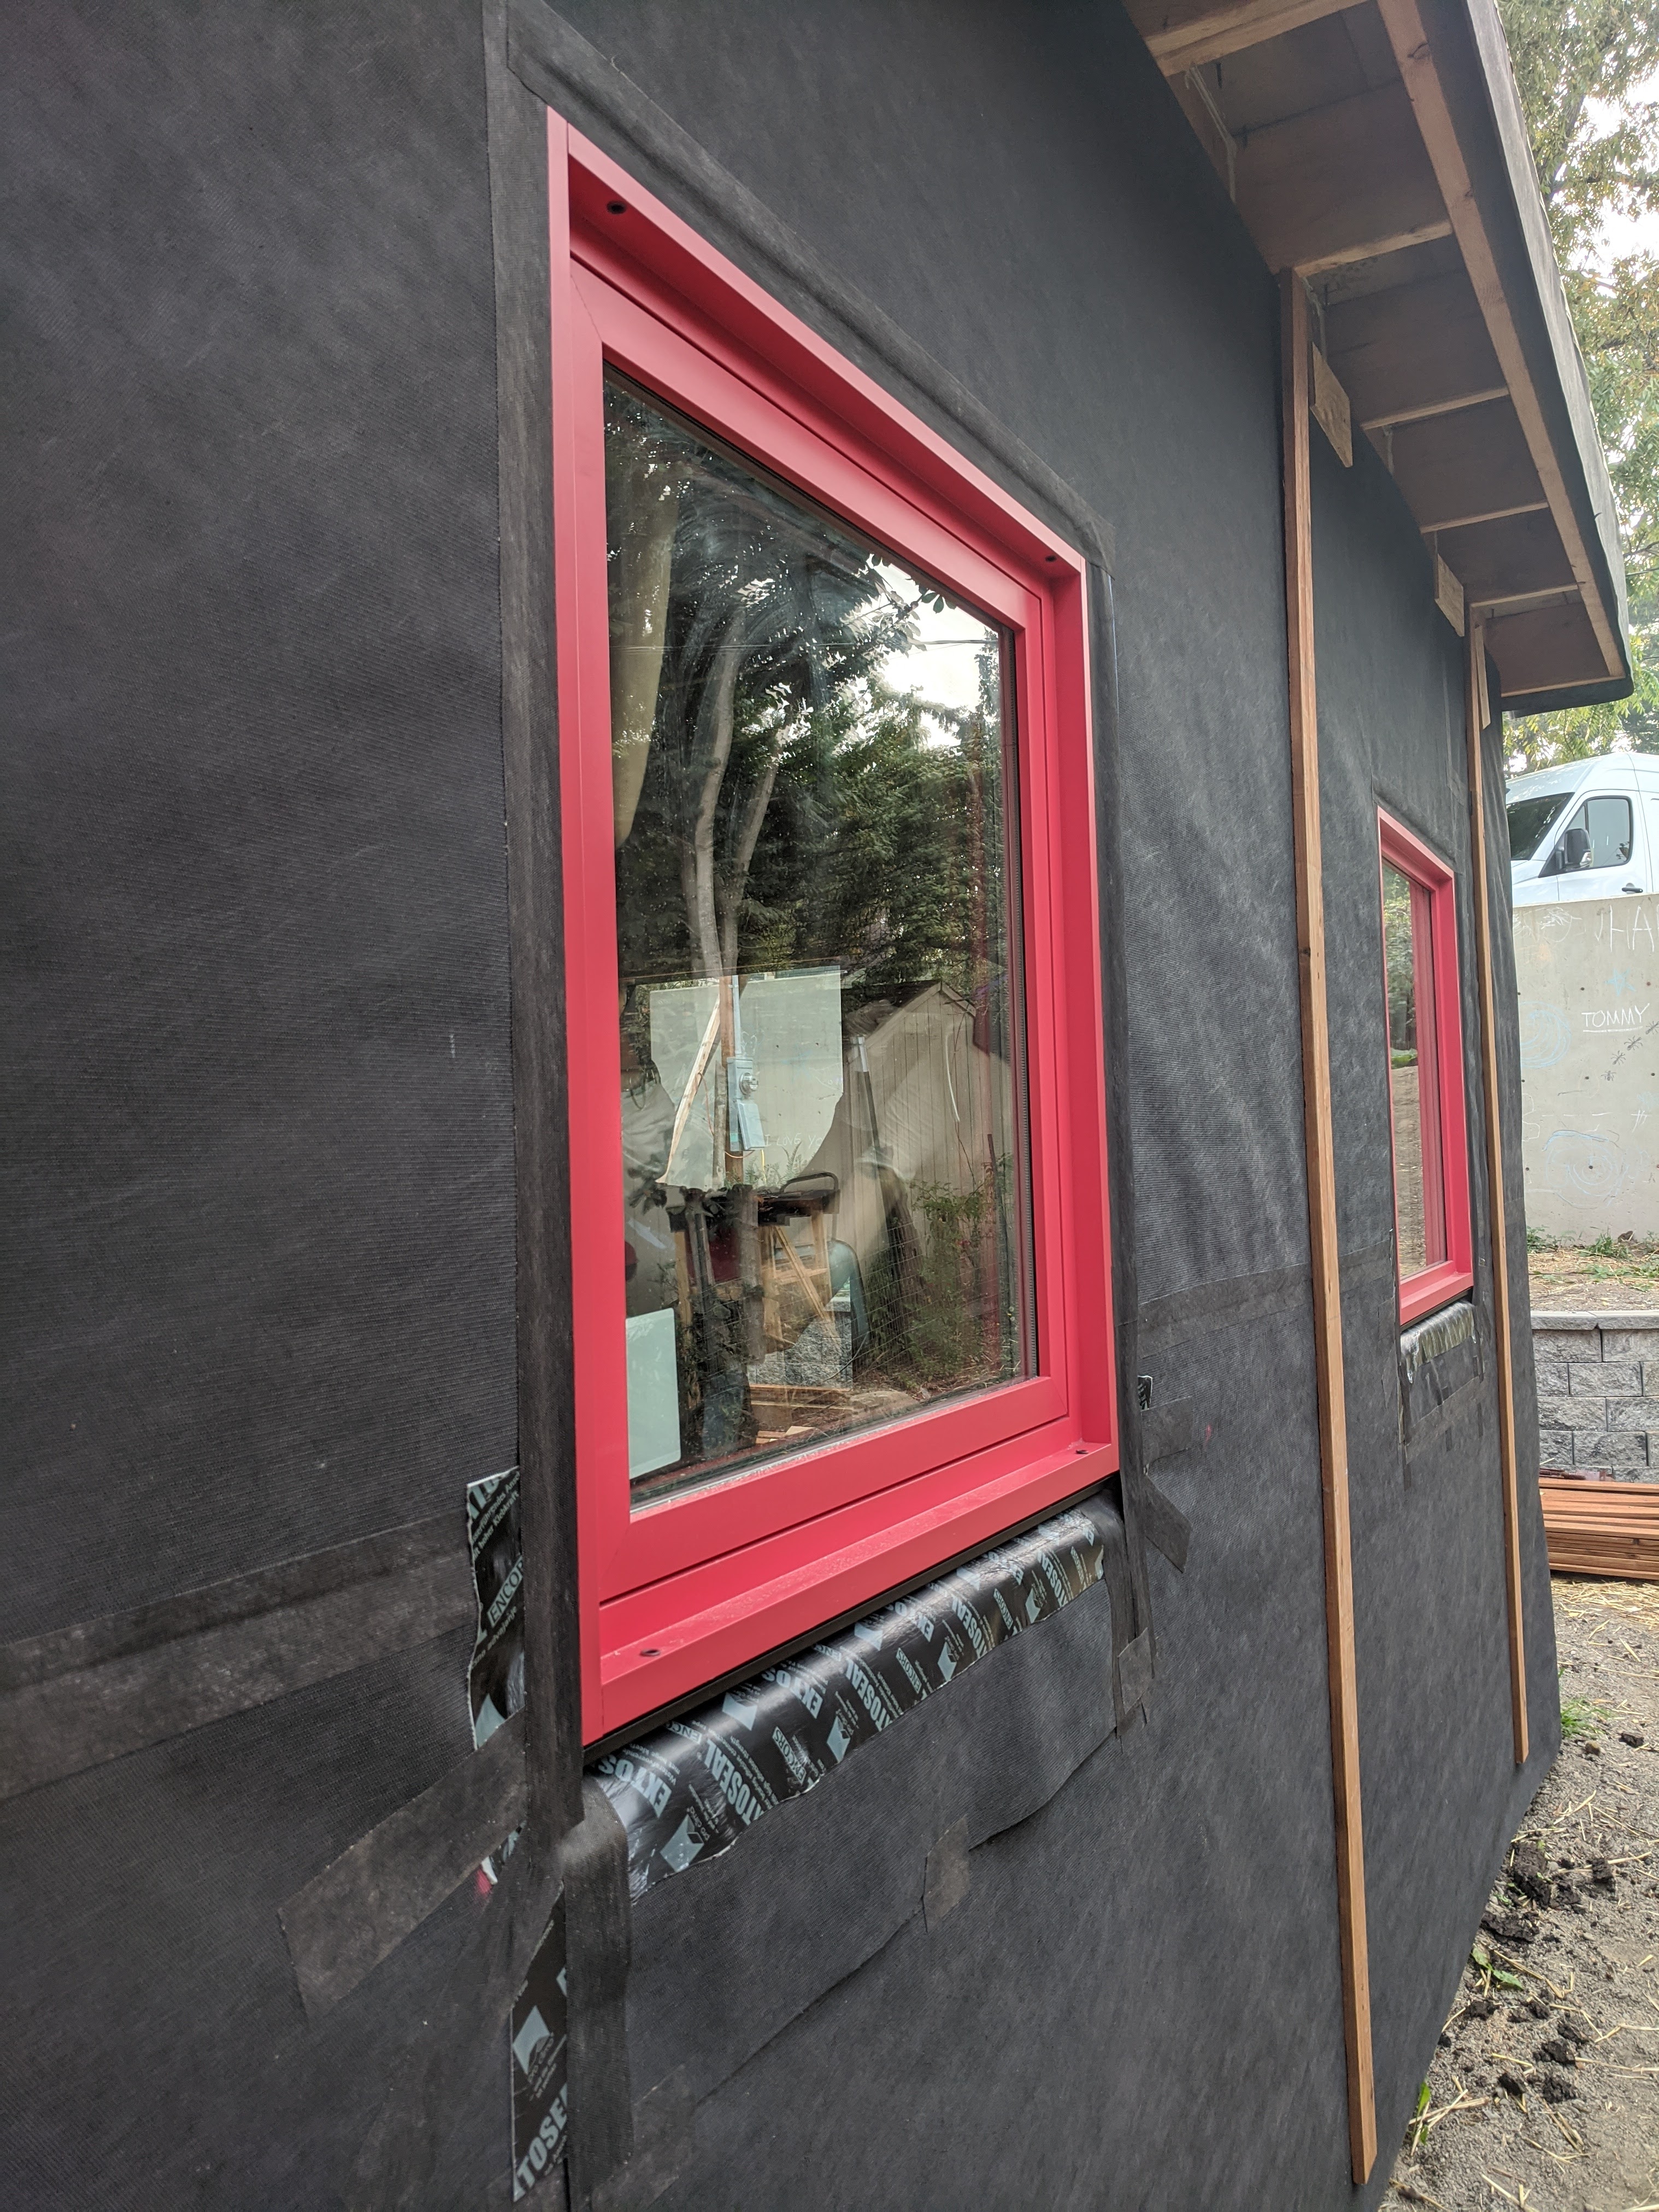
A piece of siding is used as sill extension and to provide slope in the opening for the window, which is deeper because exterior rigid foam has been added
Image
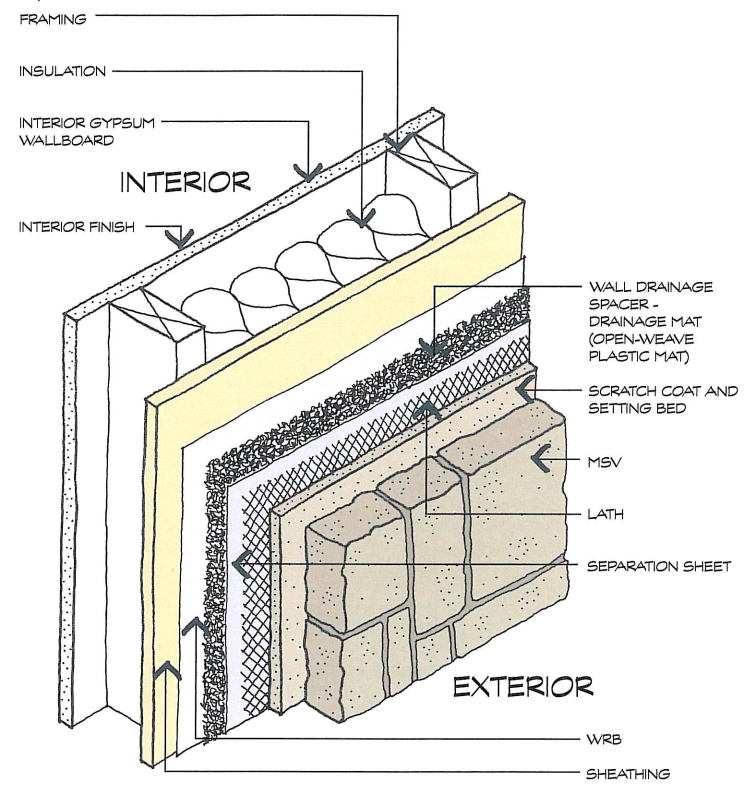
A plastic fiber drainage mat rainscreen provides uniform support for the siding and allows moisture to flow horizontally and diagonally in addition to vertically.
Image
Image
Image
Apply self-adhesive flashing over top edge of the wall flashing, diverter, and housewrap
Image
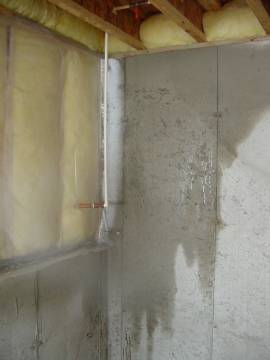
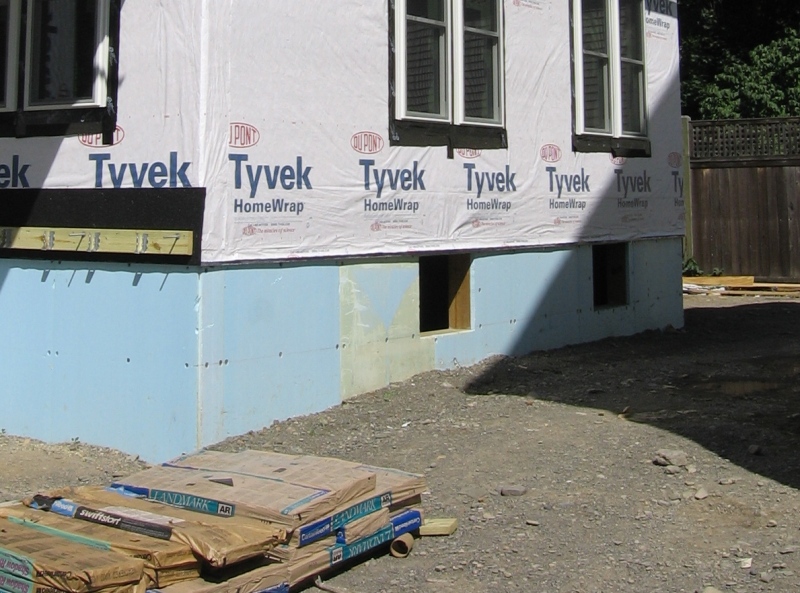
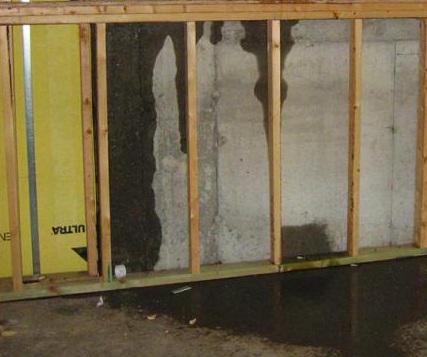
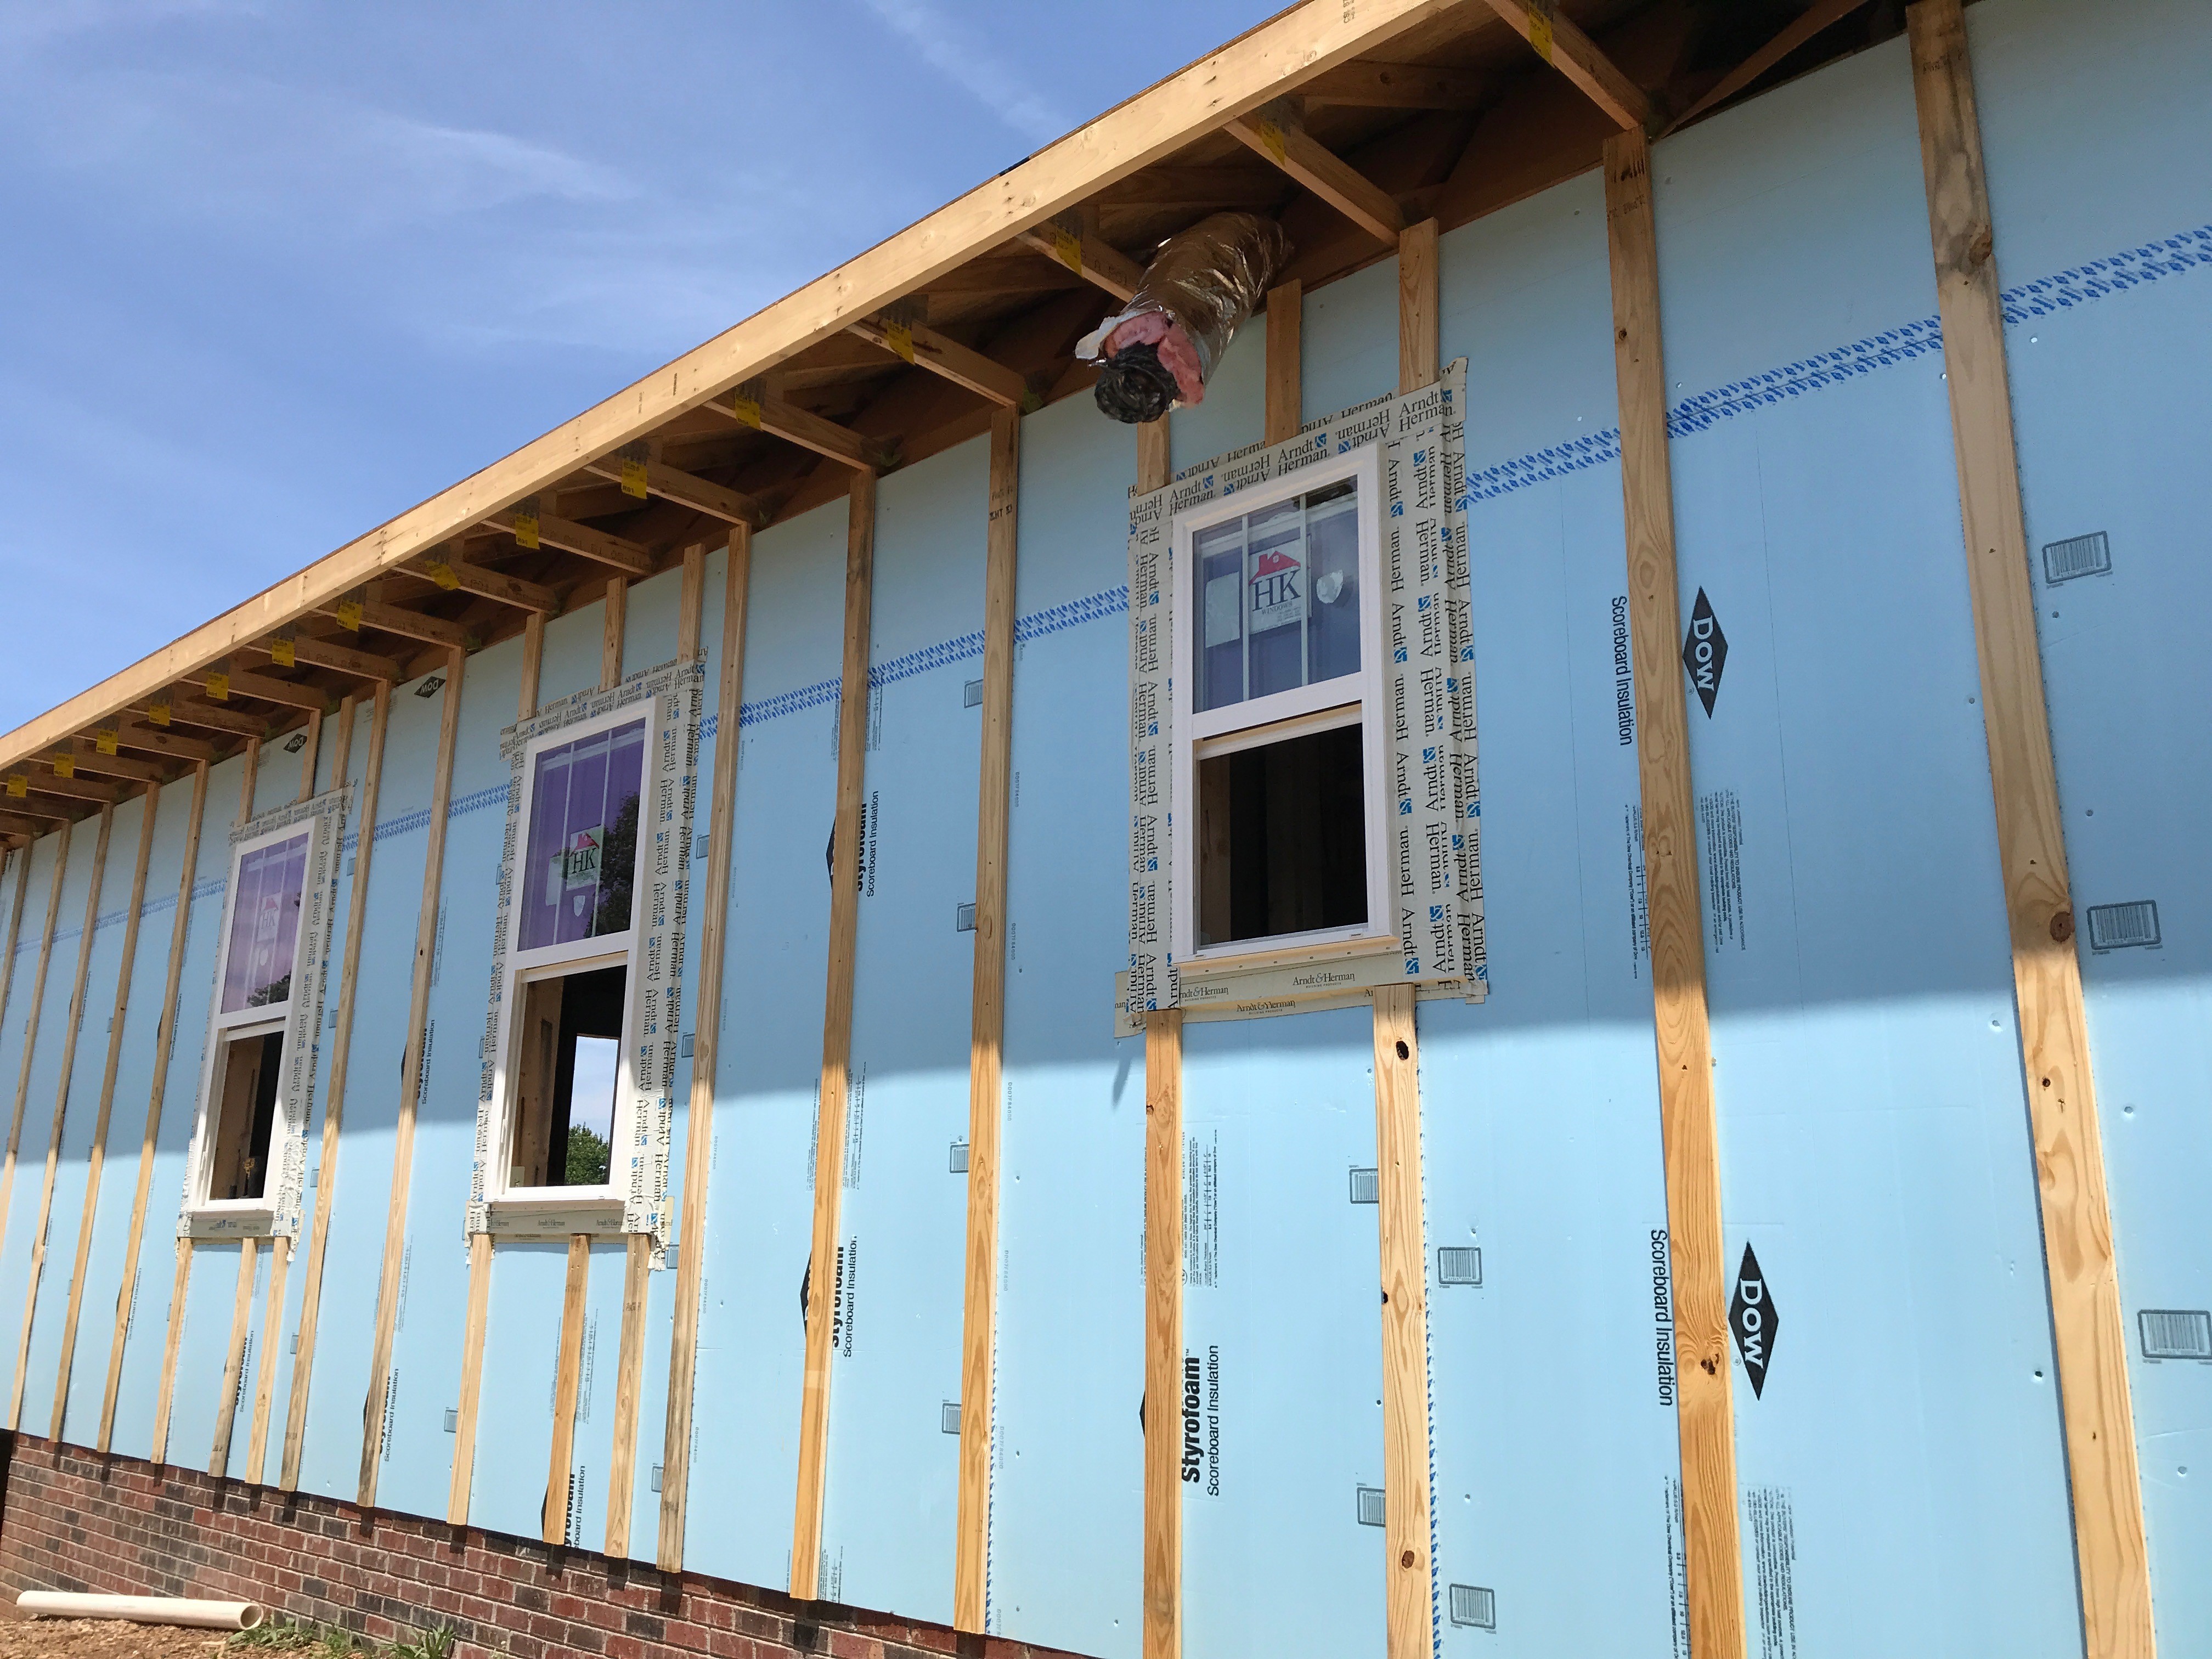
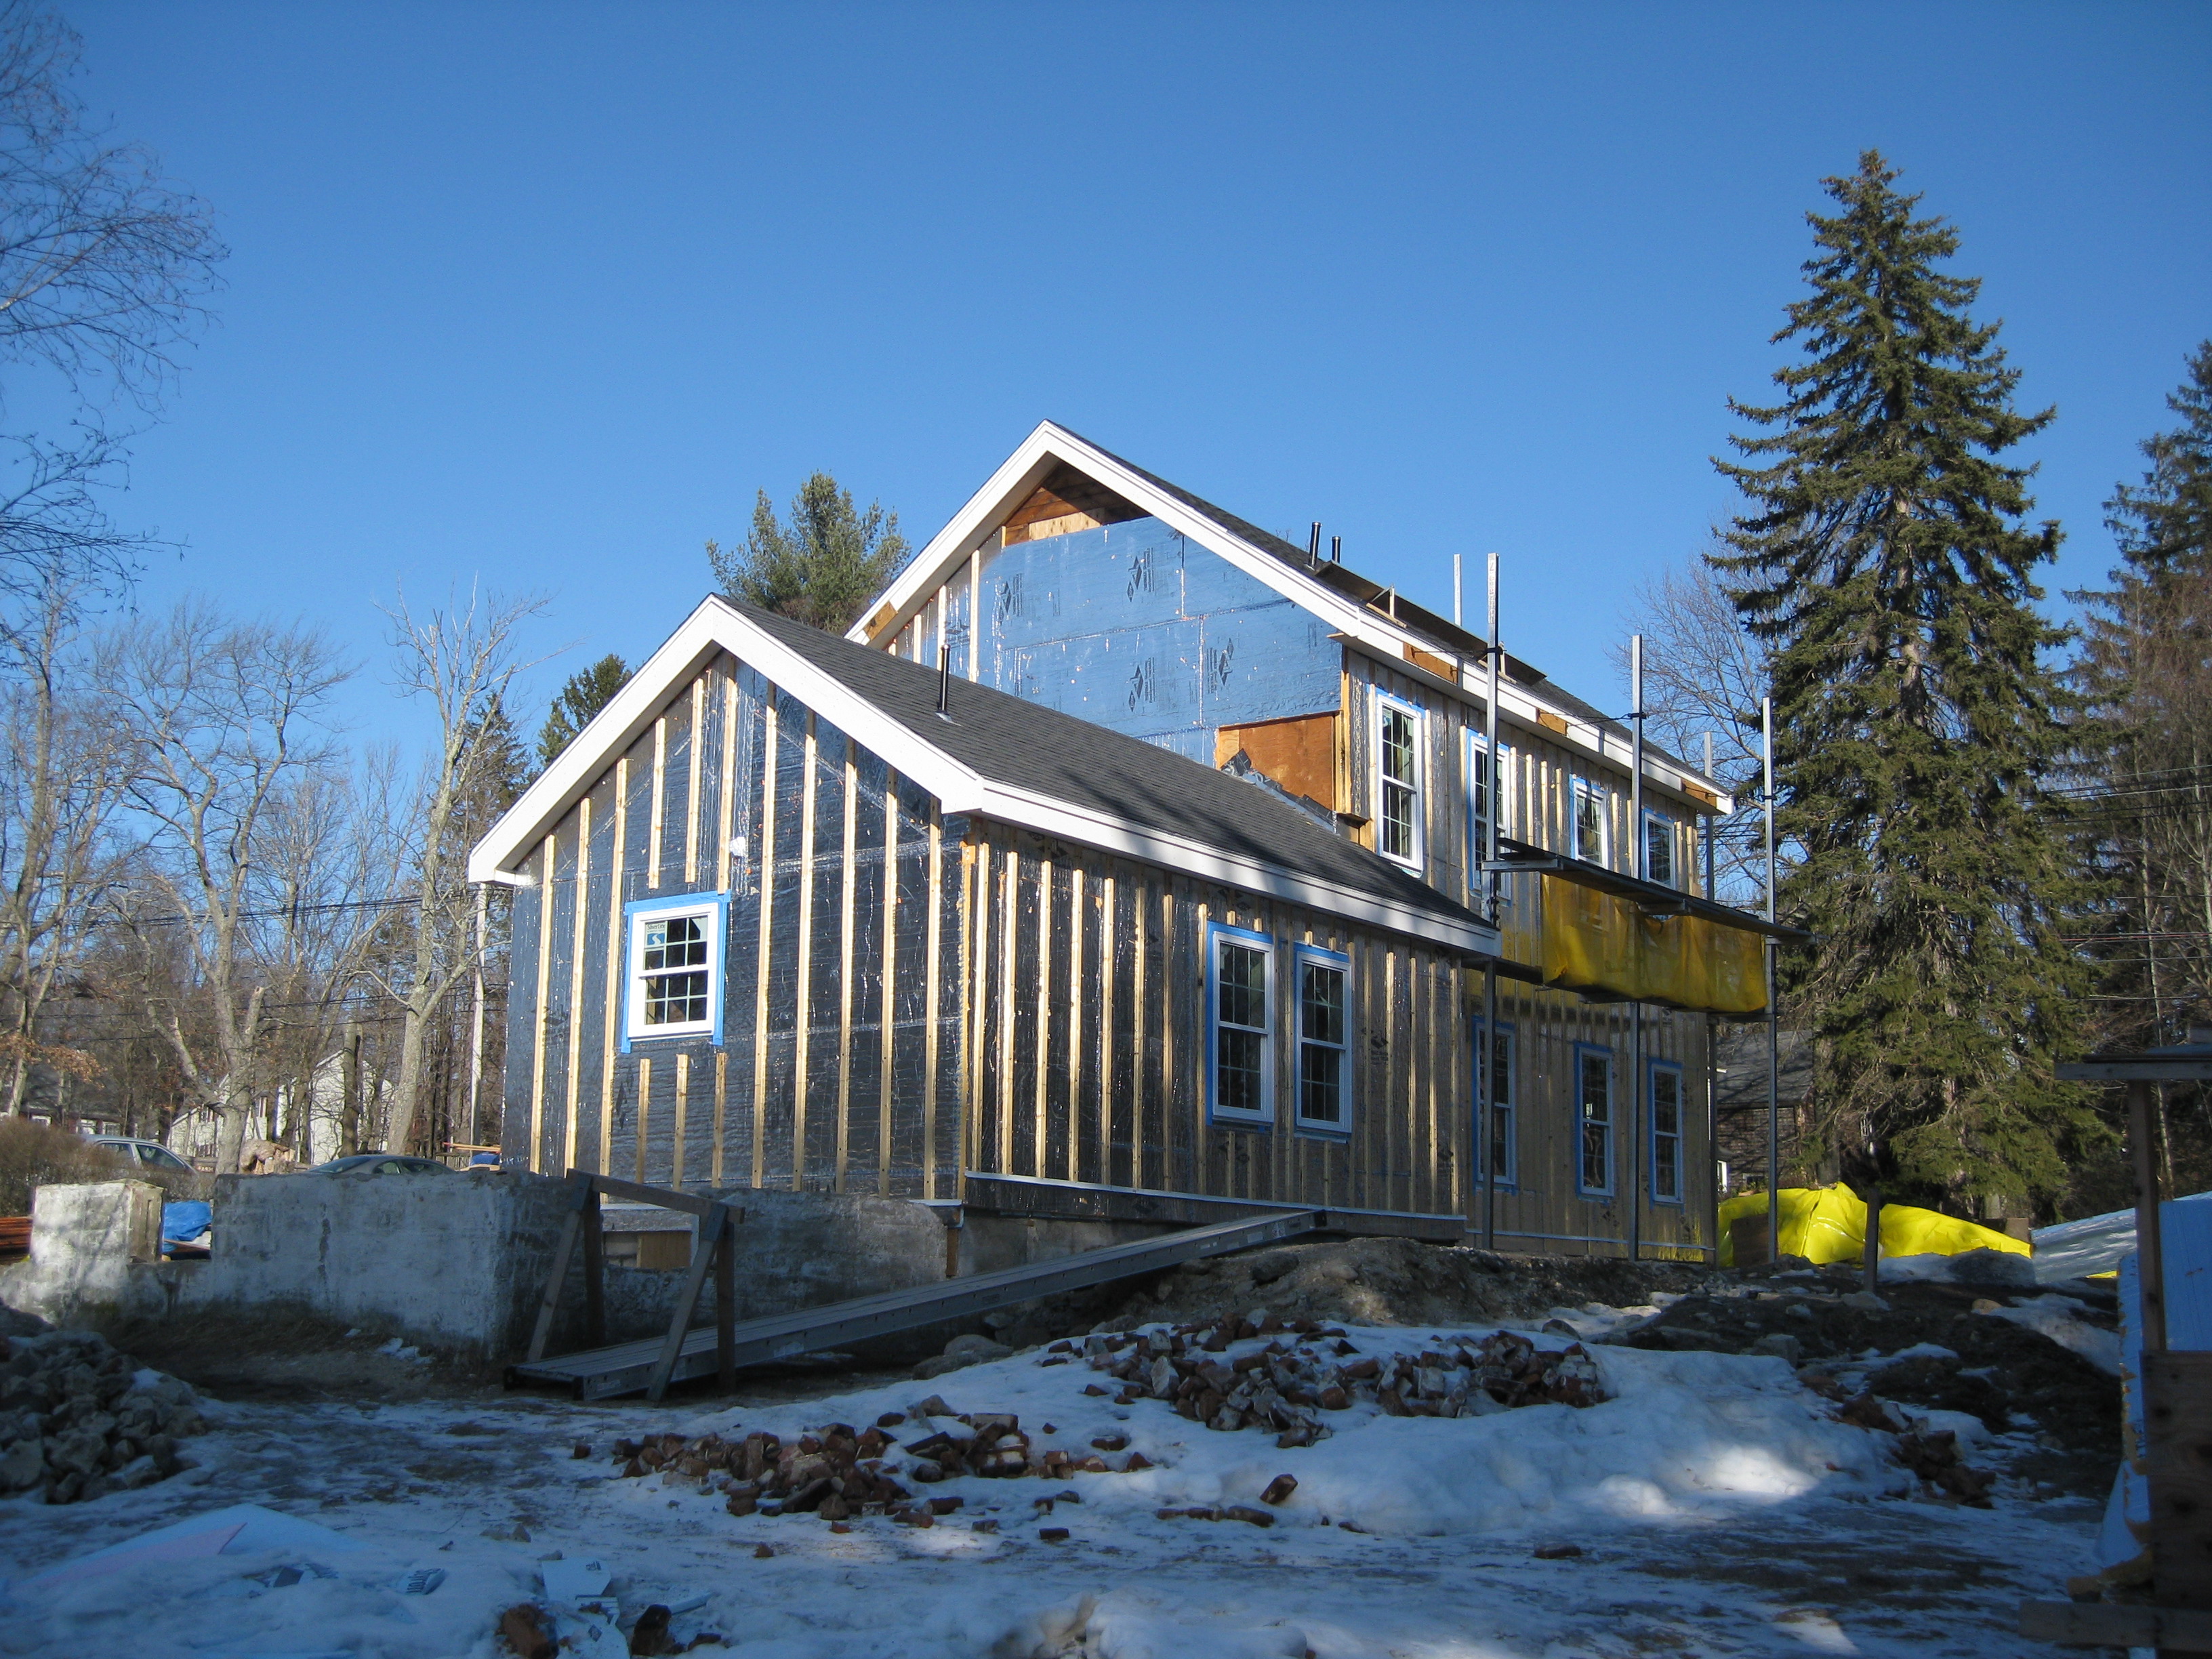
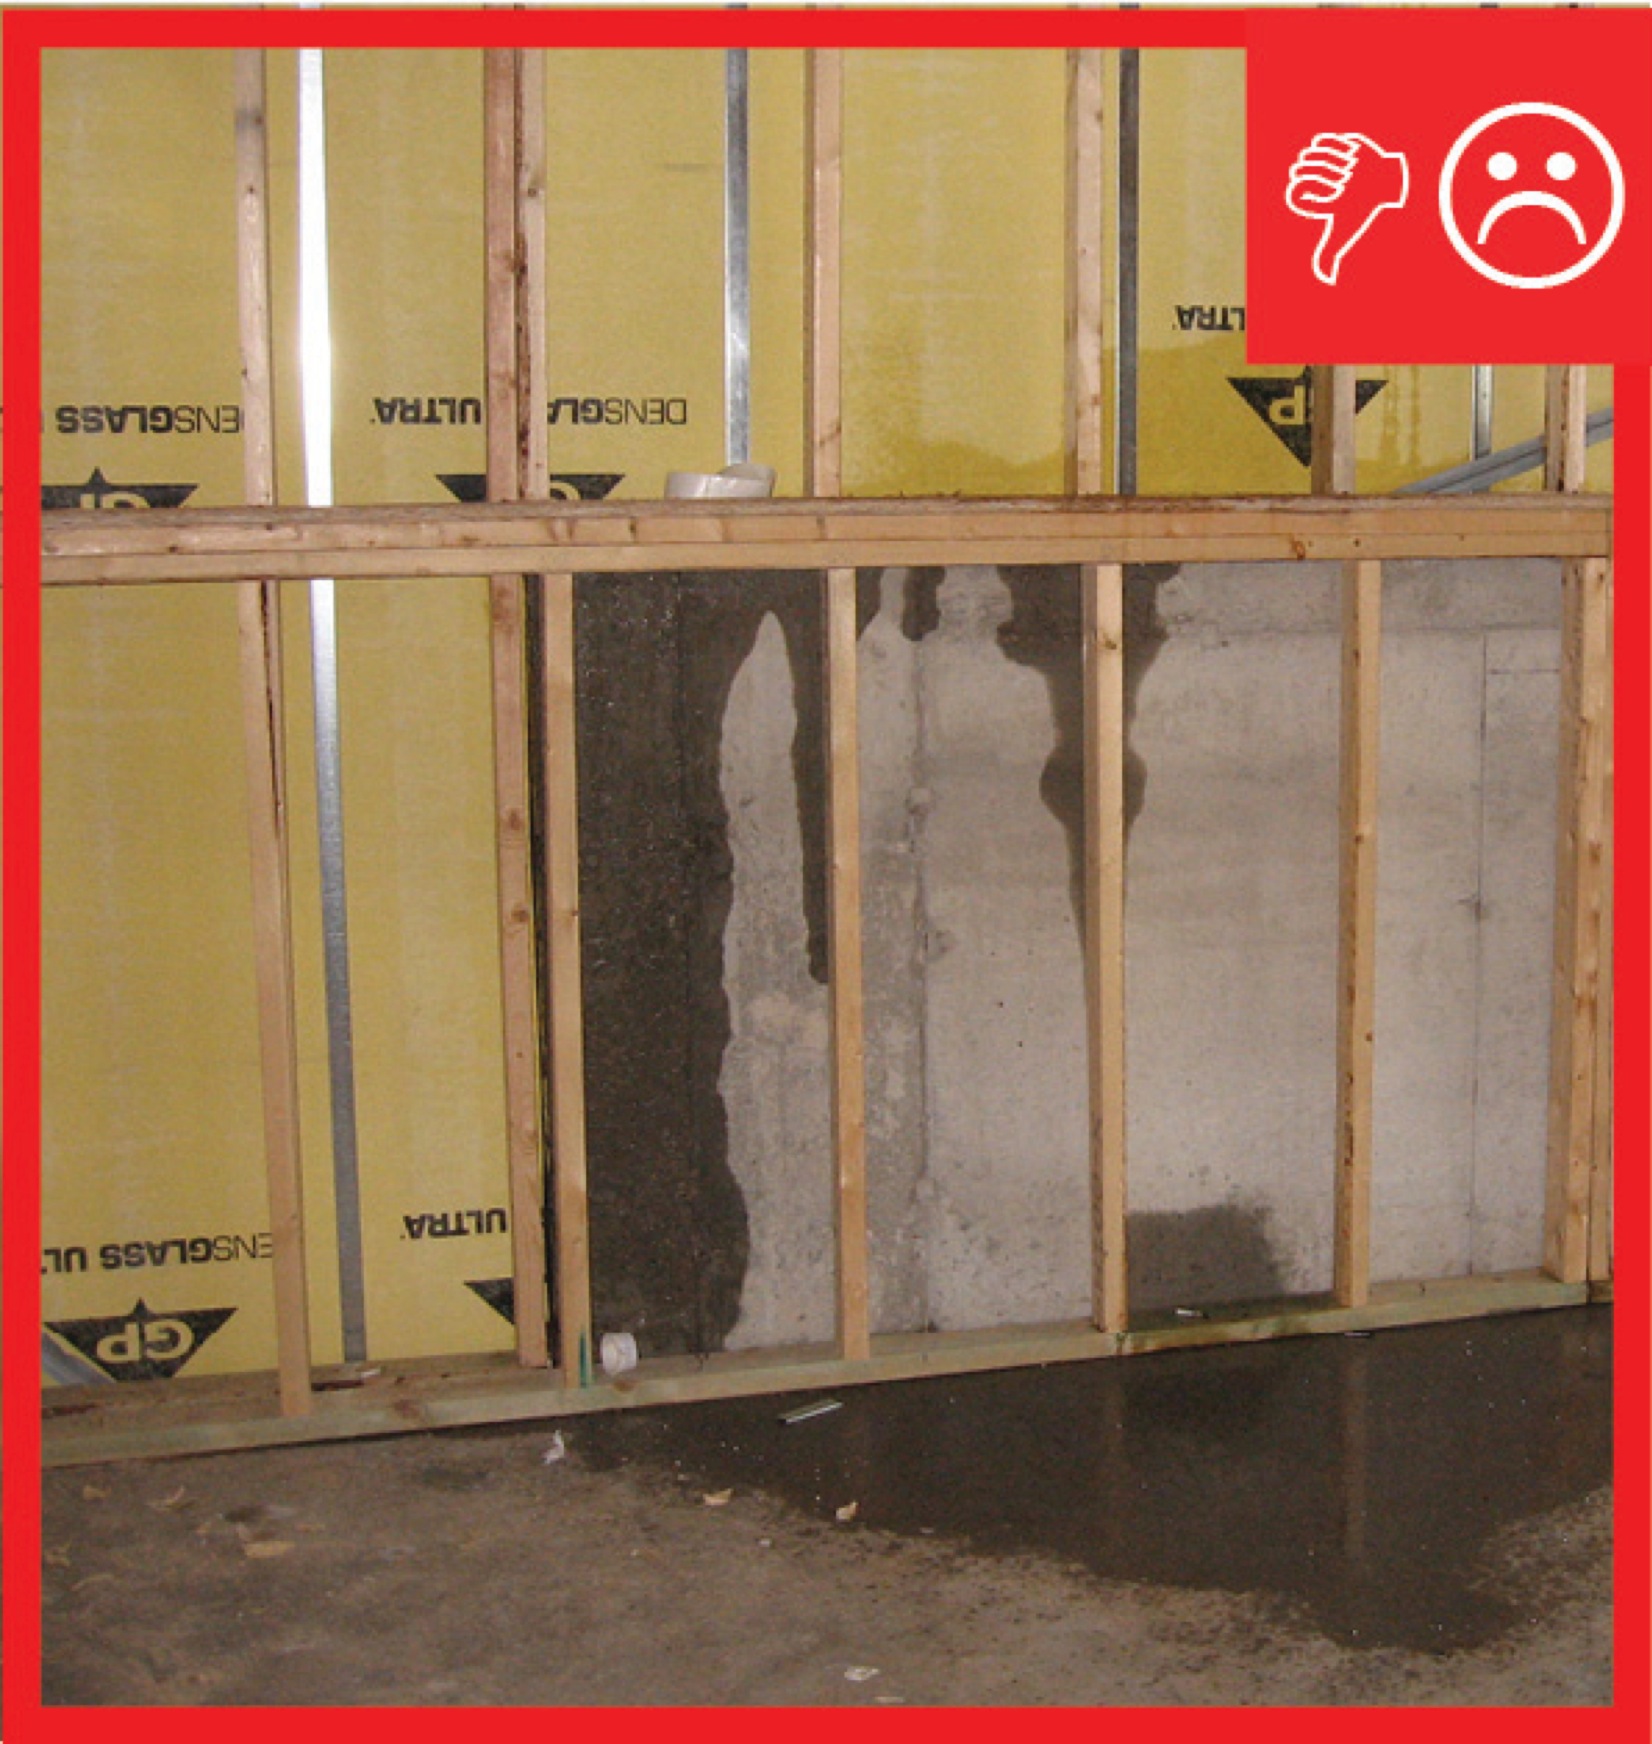
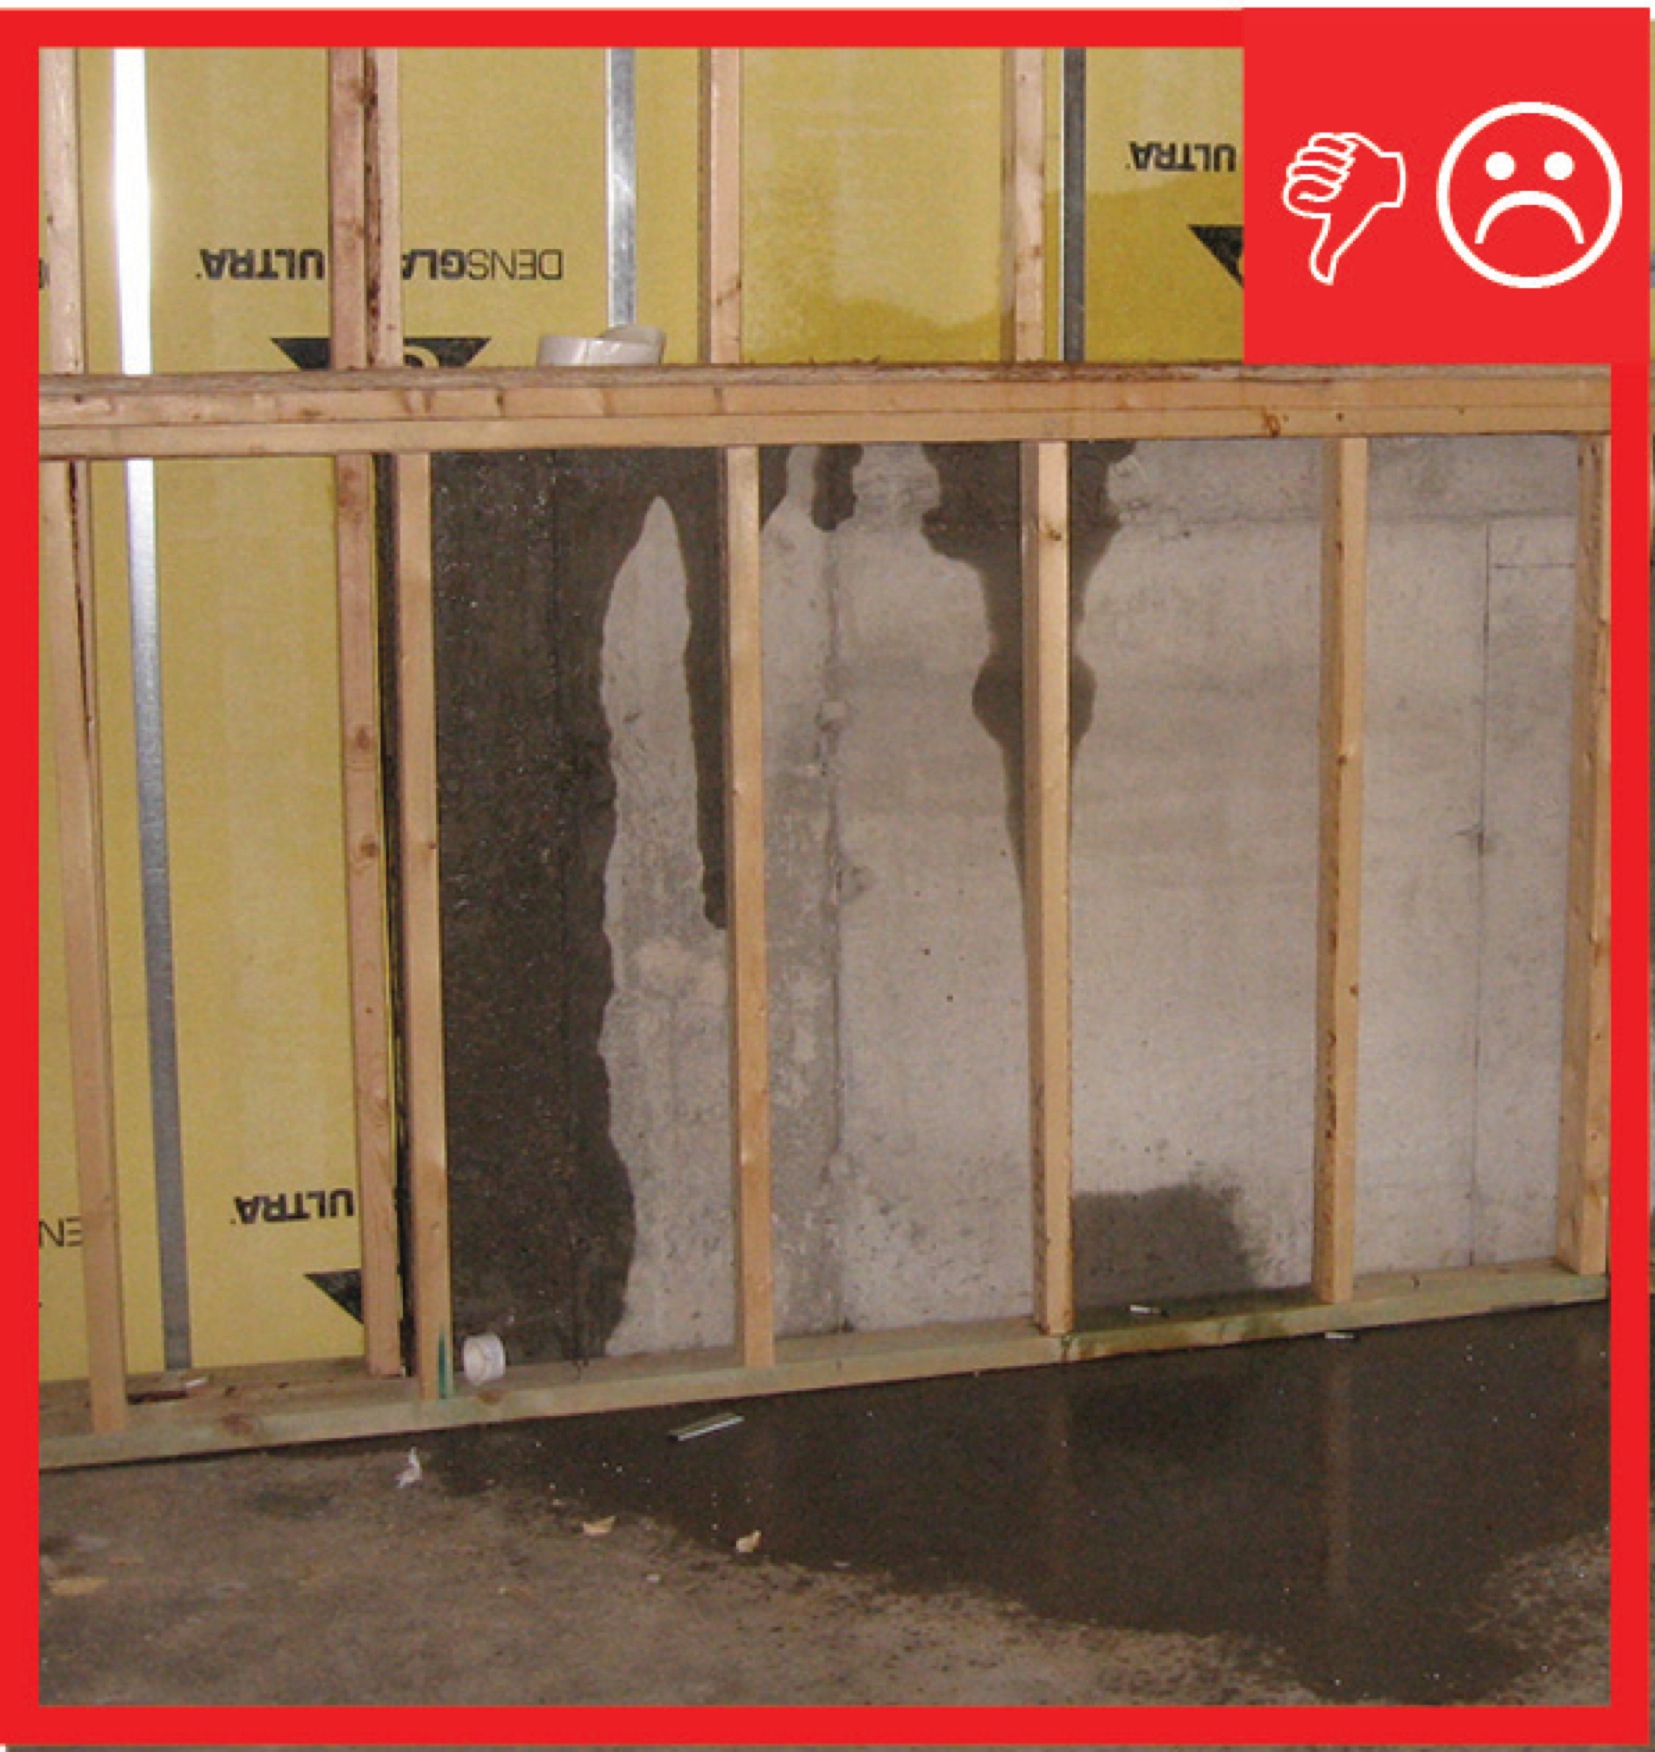
Because the above-grade potions of the wall lack exterior insulation, condensation and even ice form during cold winter conditions
Image
Before installing the windows, the window rough openings are sealed with a liquid-applied flashing that provides a seamless moisture and air barrier to protect the wall from water intrusion.
Image
Image

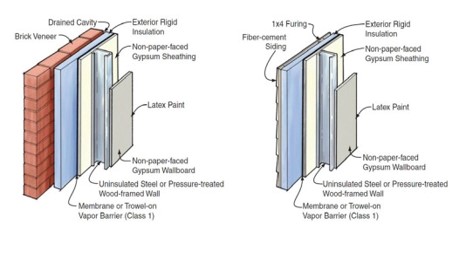
Brick wall assembly for a hot-humid climate with no Class I vapor retarder and with an air gap (drained cavity) to dissipate vapor driven into the wall by the sun.
Image
Image
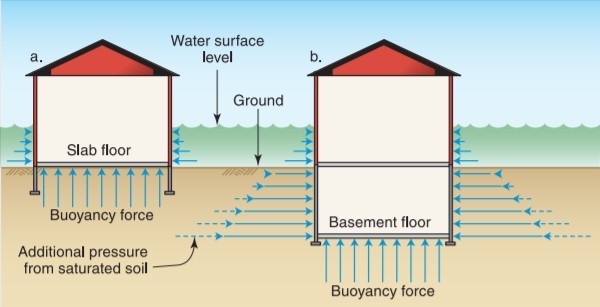
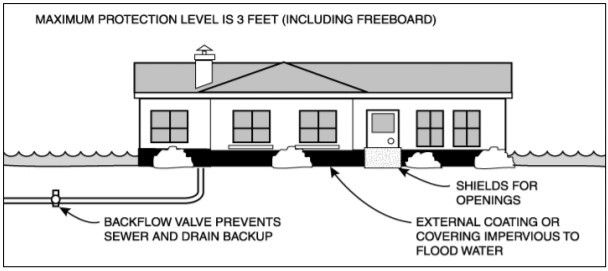
Buoyancy force on dry floodproofed homes with deep basements leads to possible foundation damage
Image
Image

Capillary break at all crawlspace floors using ≥ 6 mil polyethylene sheeting, lapped 6-12 in., and lapped up each wall or pier and fastened with furring strips or equivalent
Image
Image
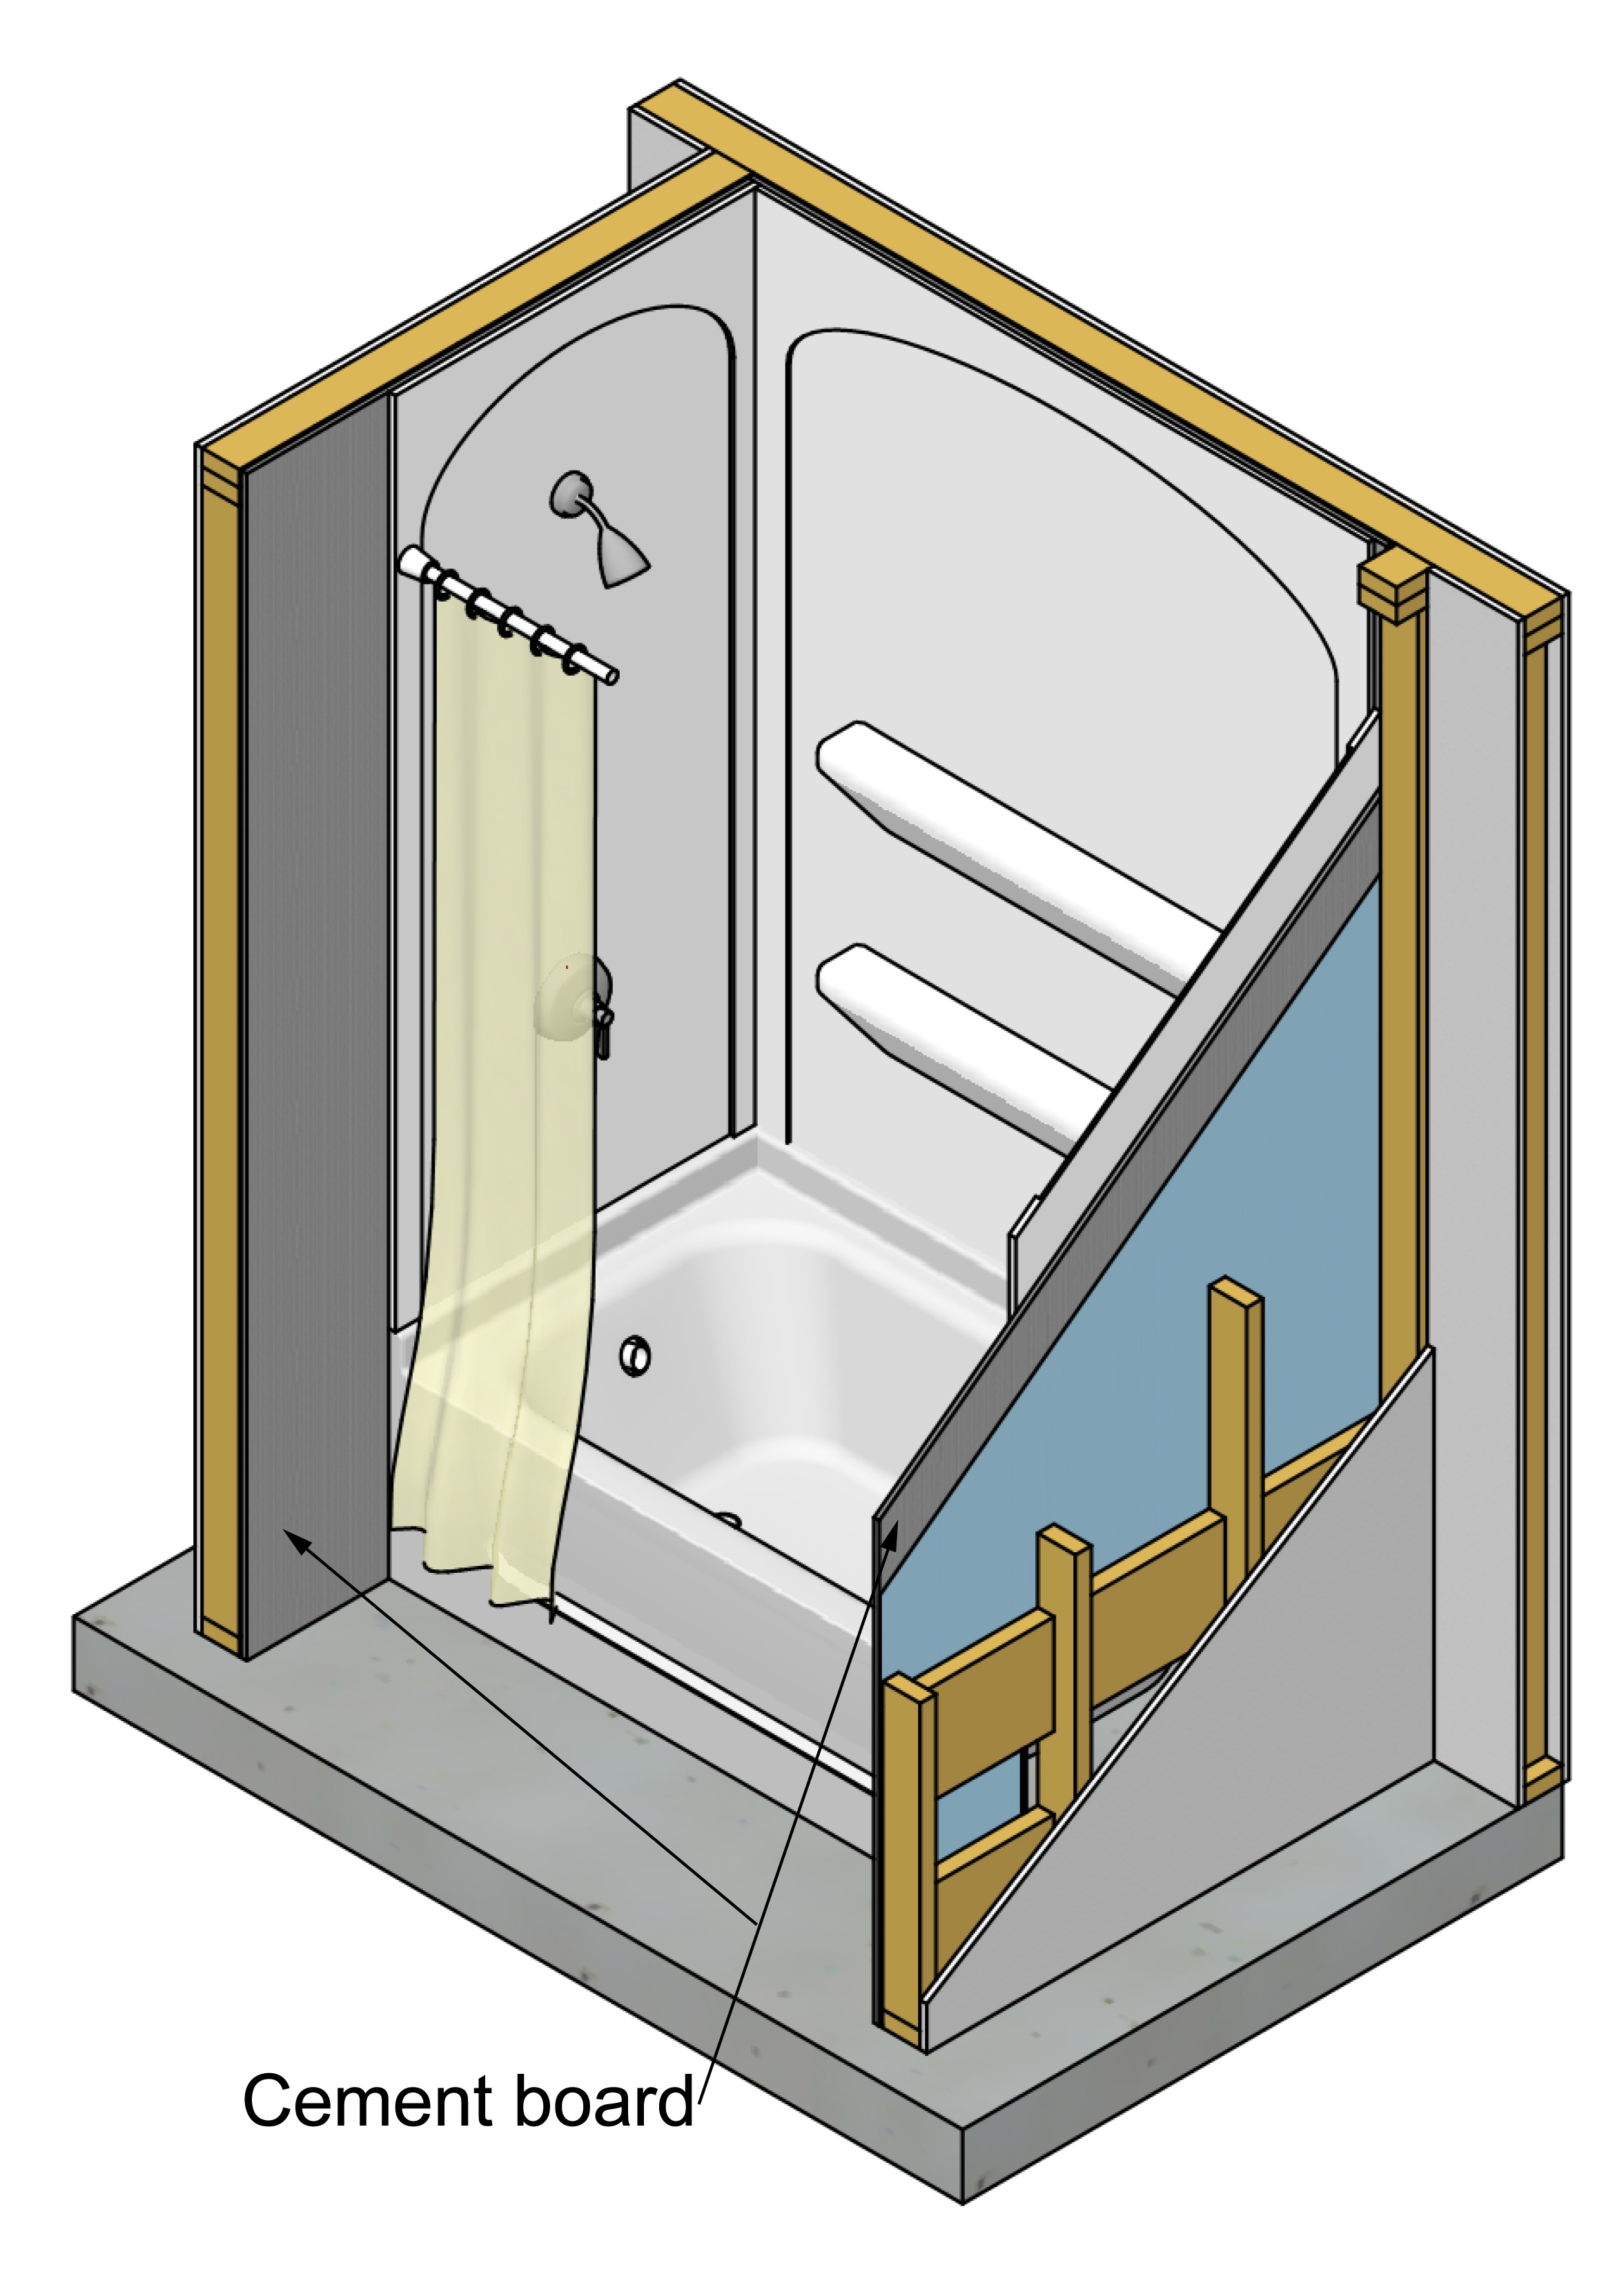
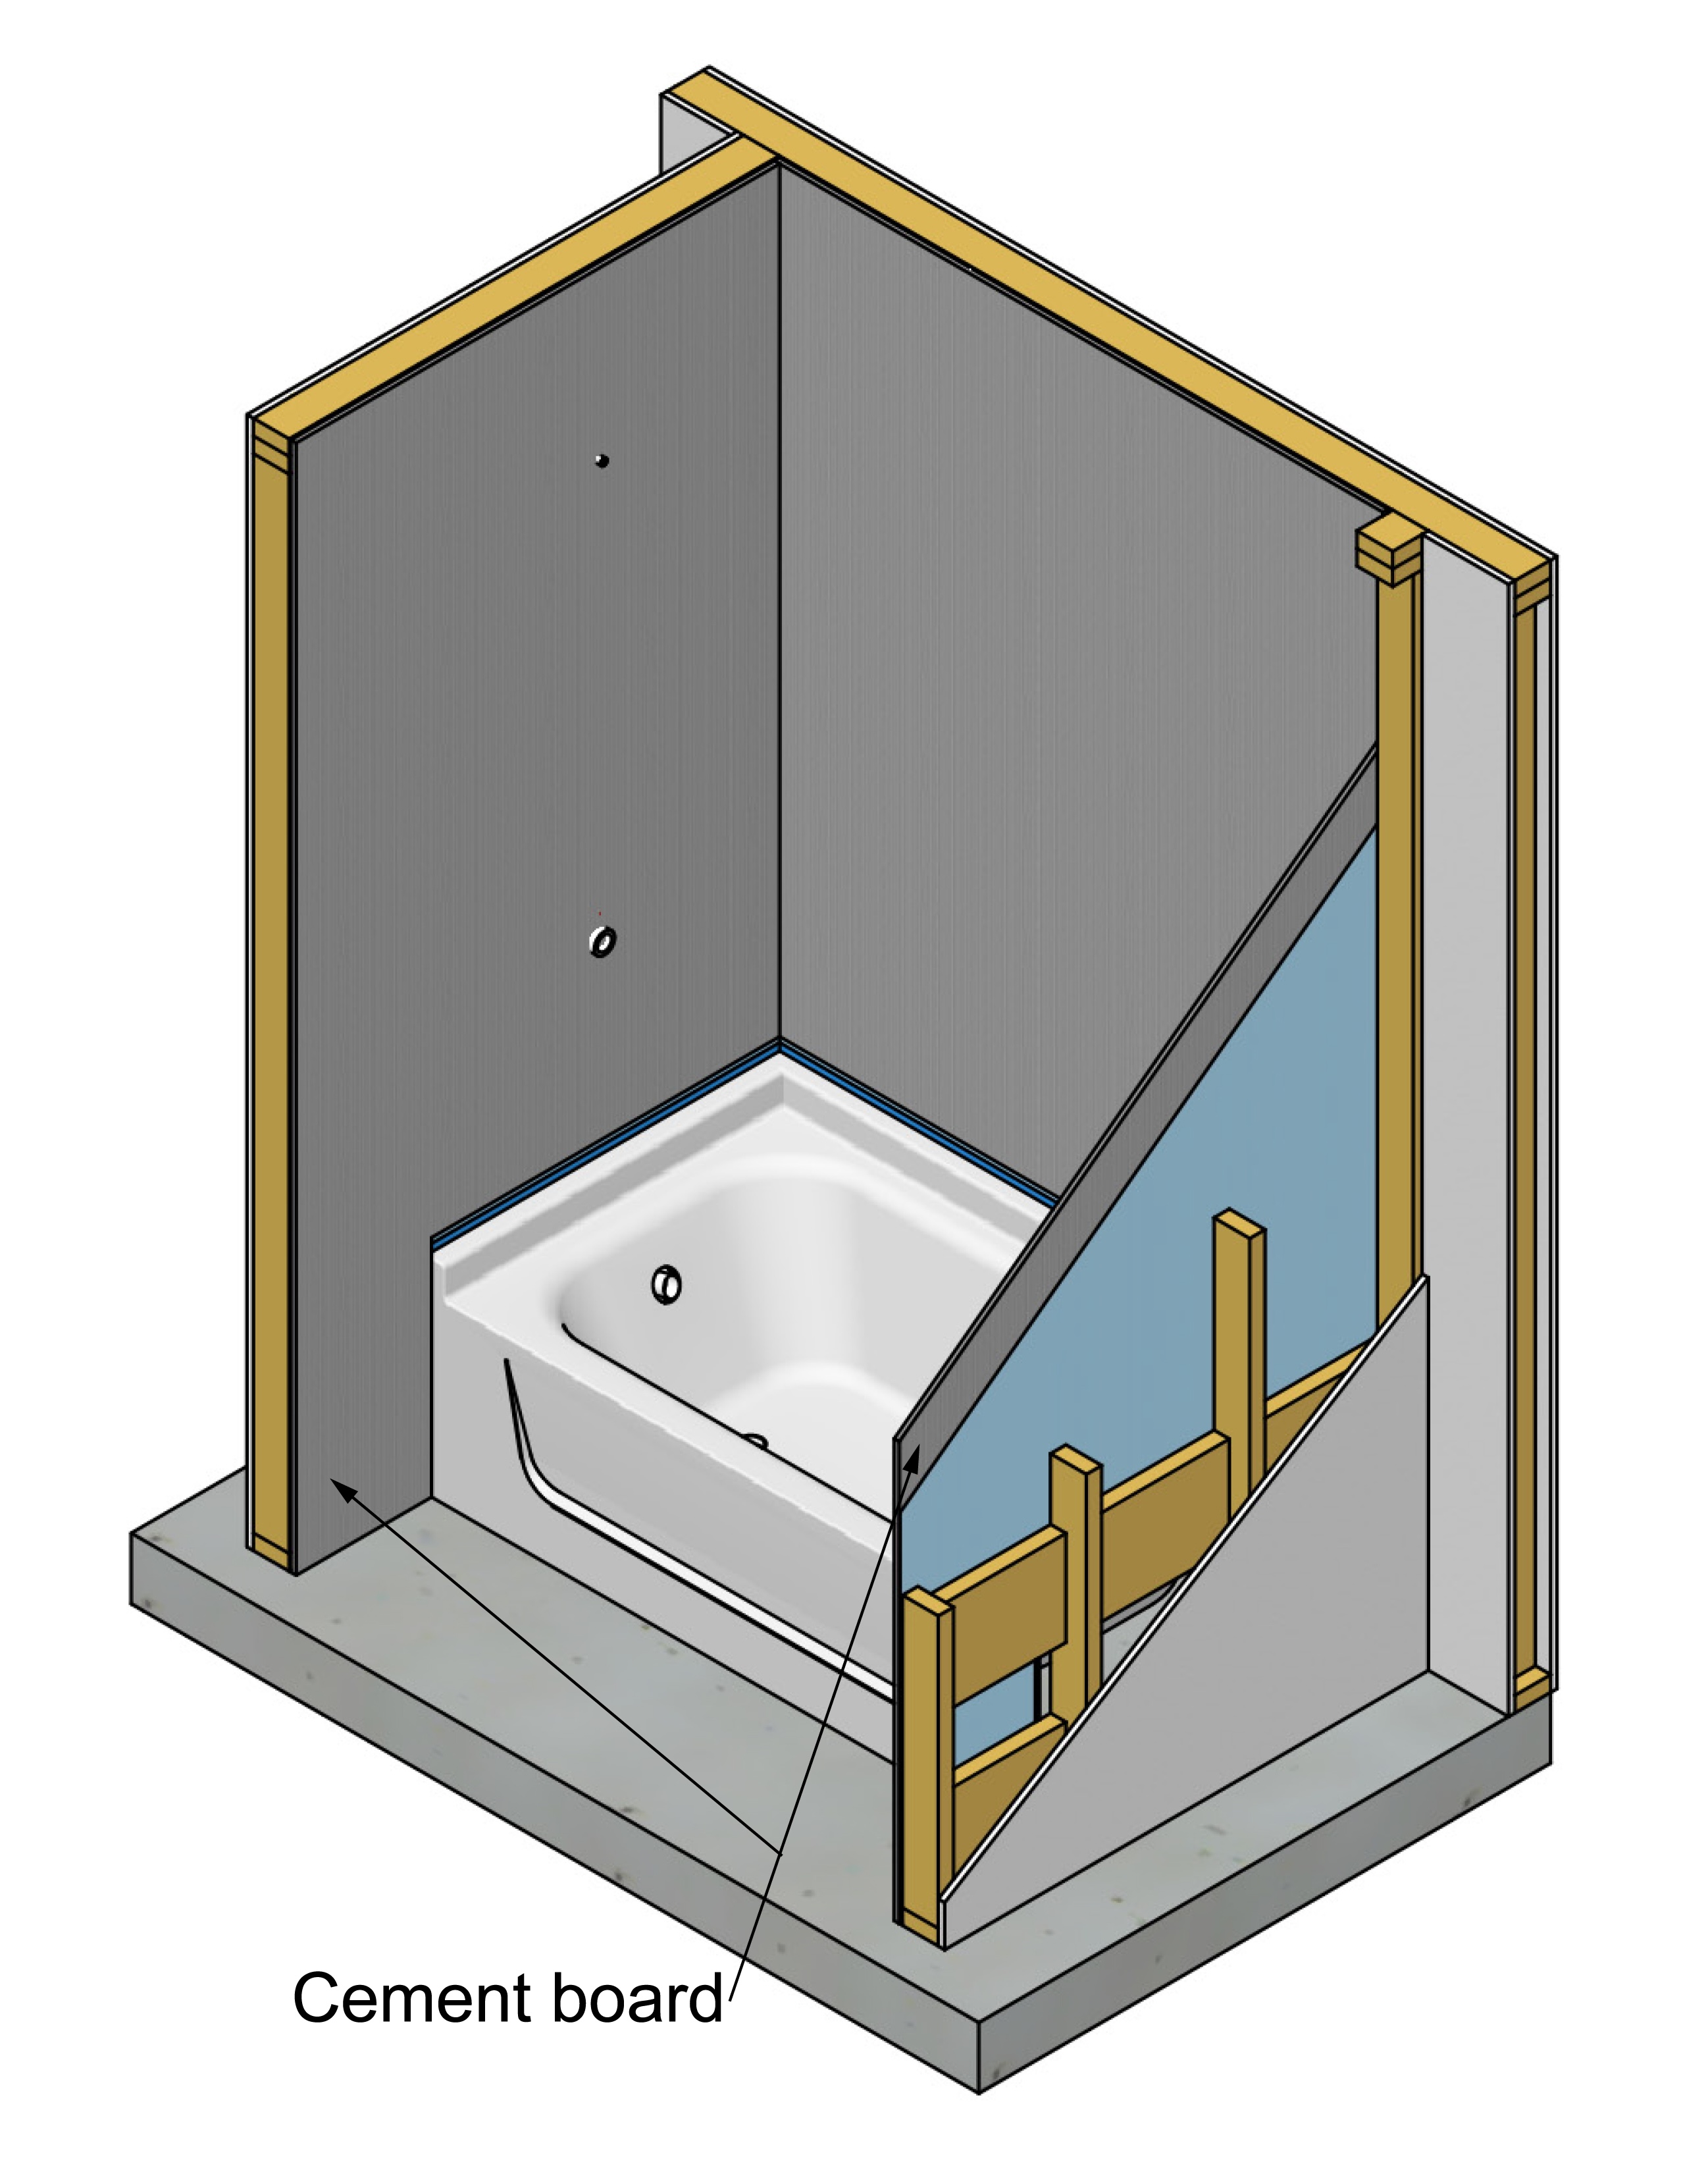
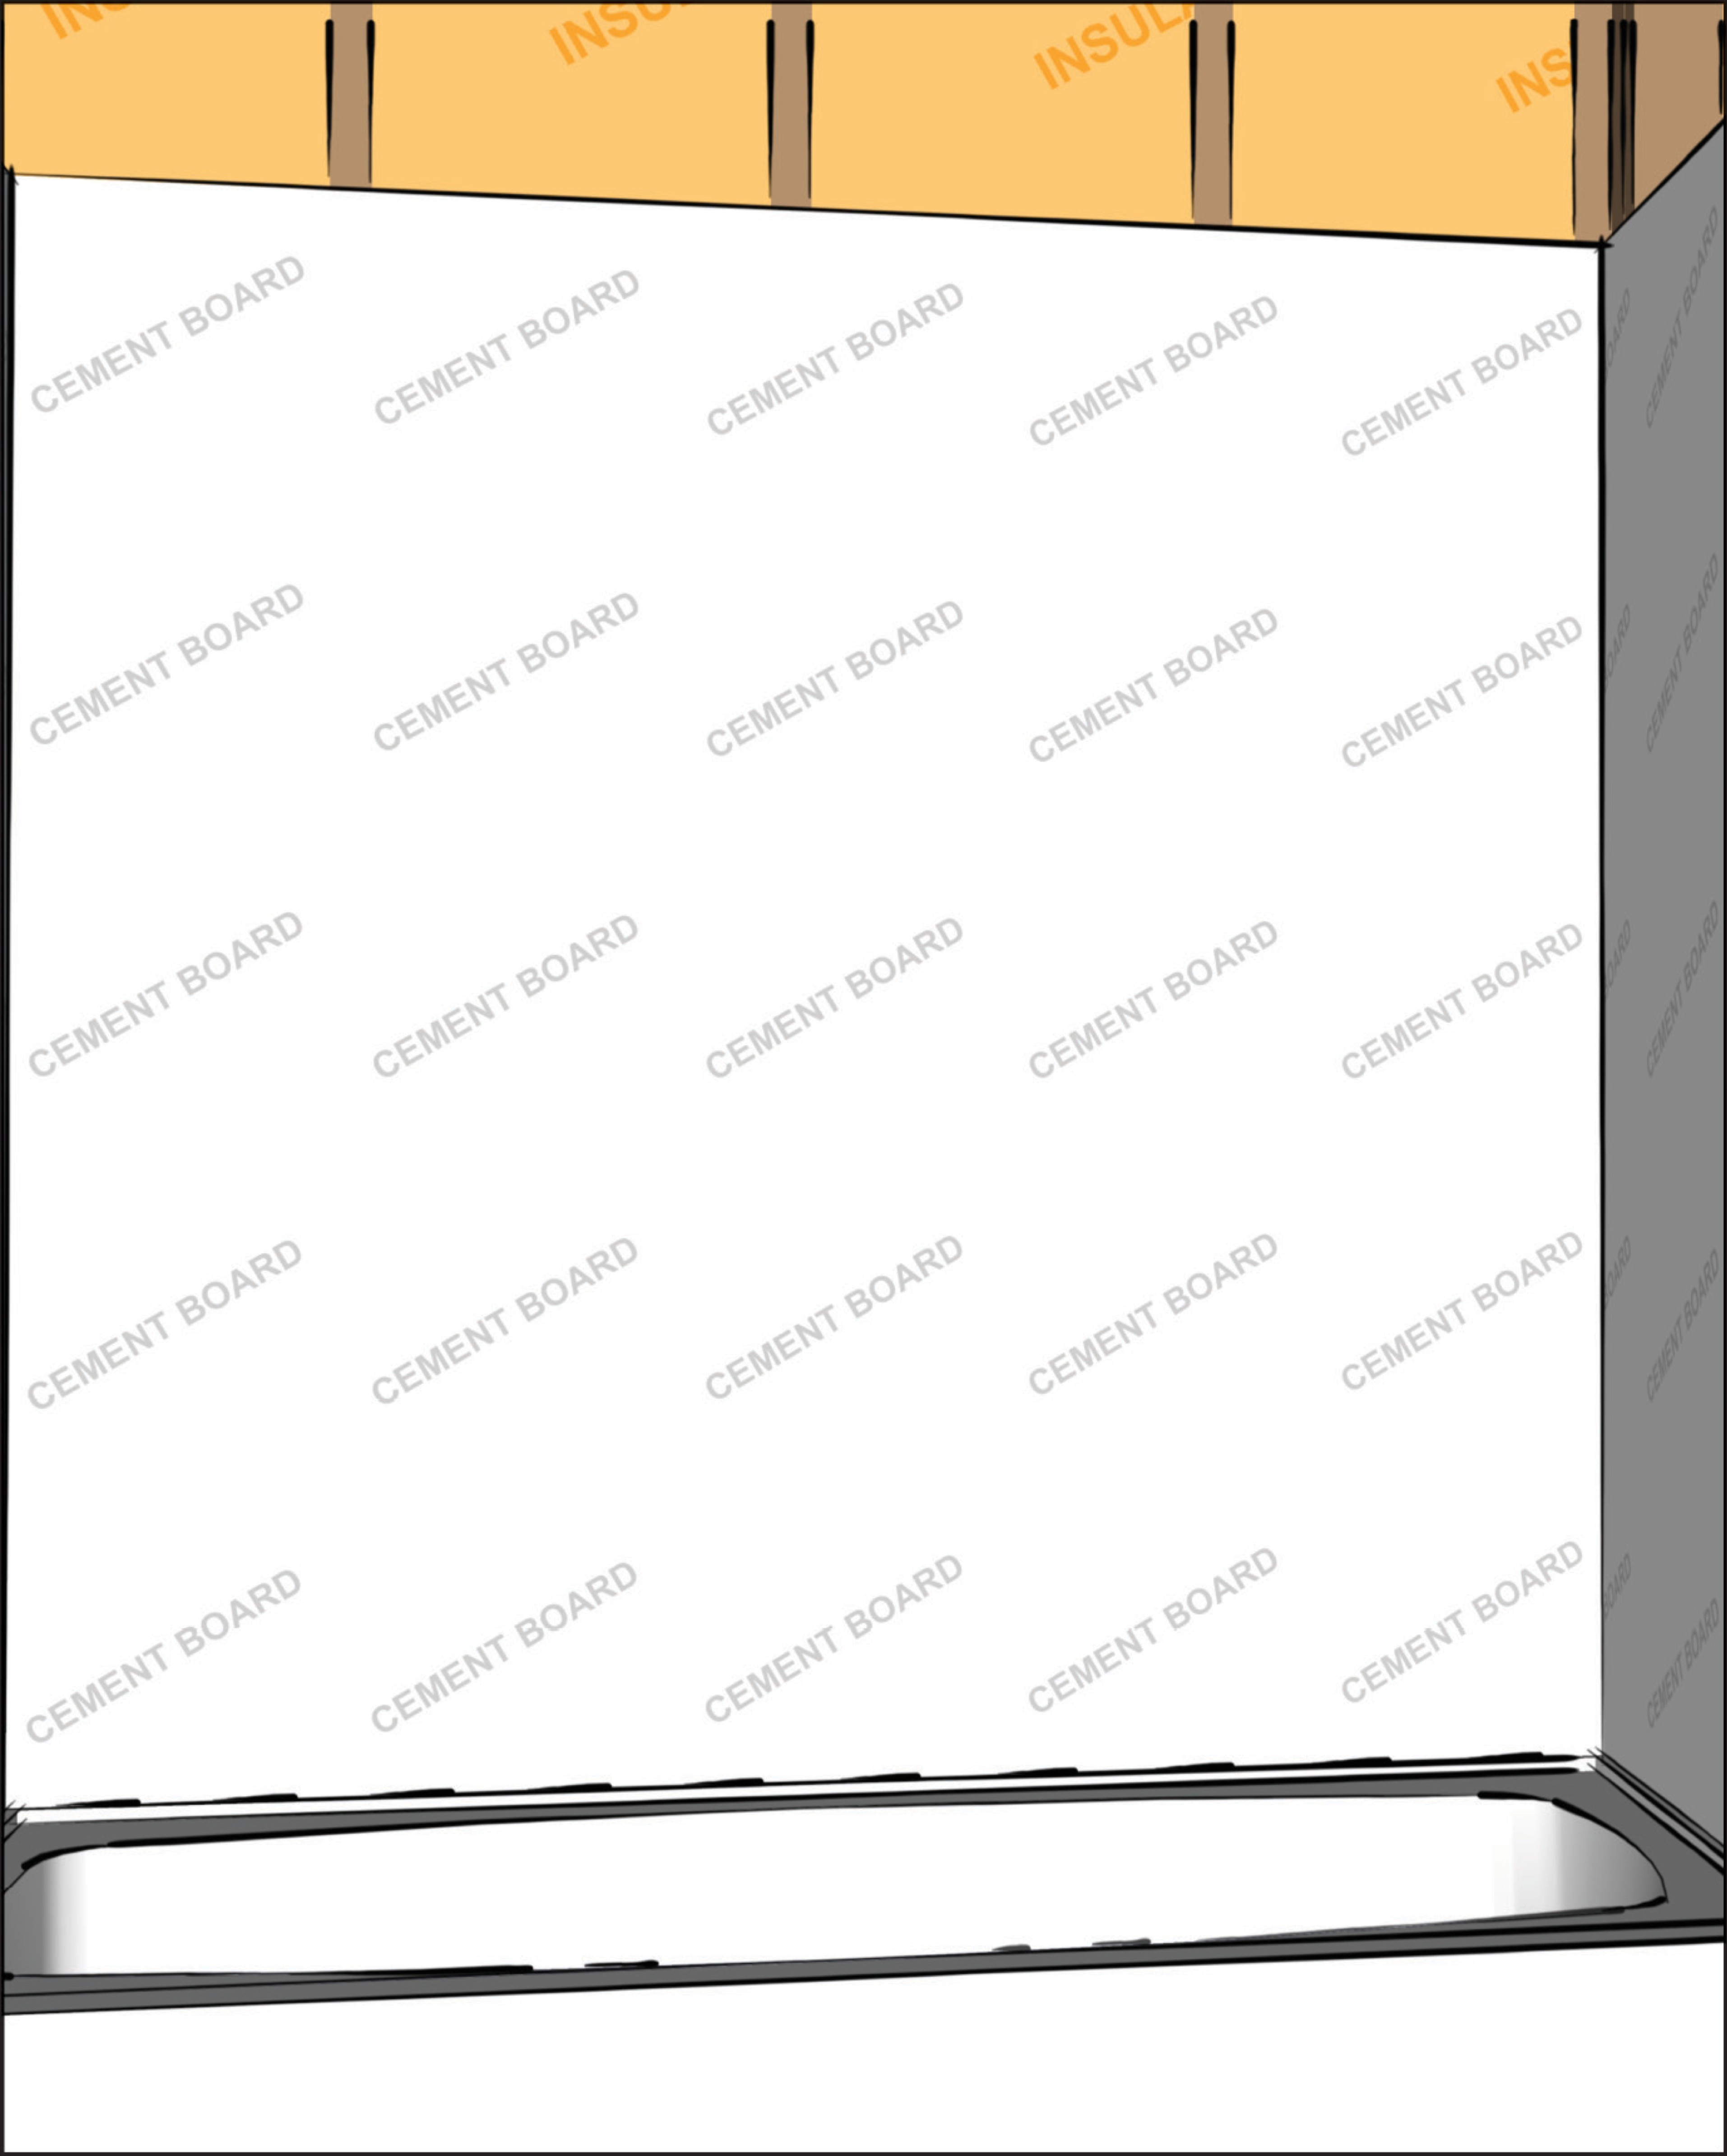
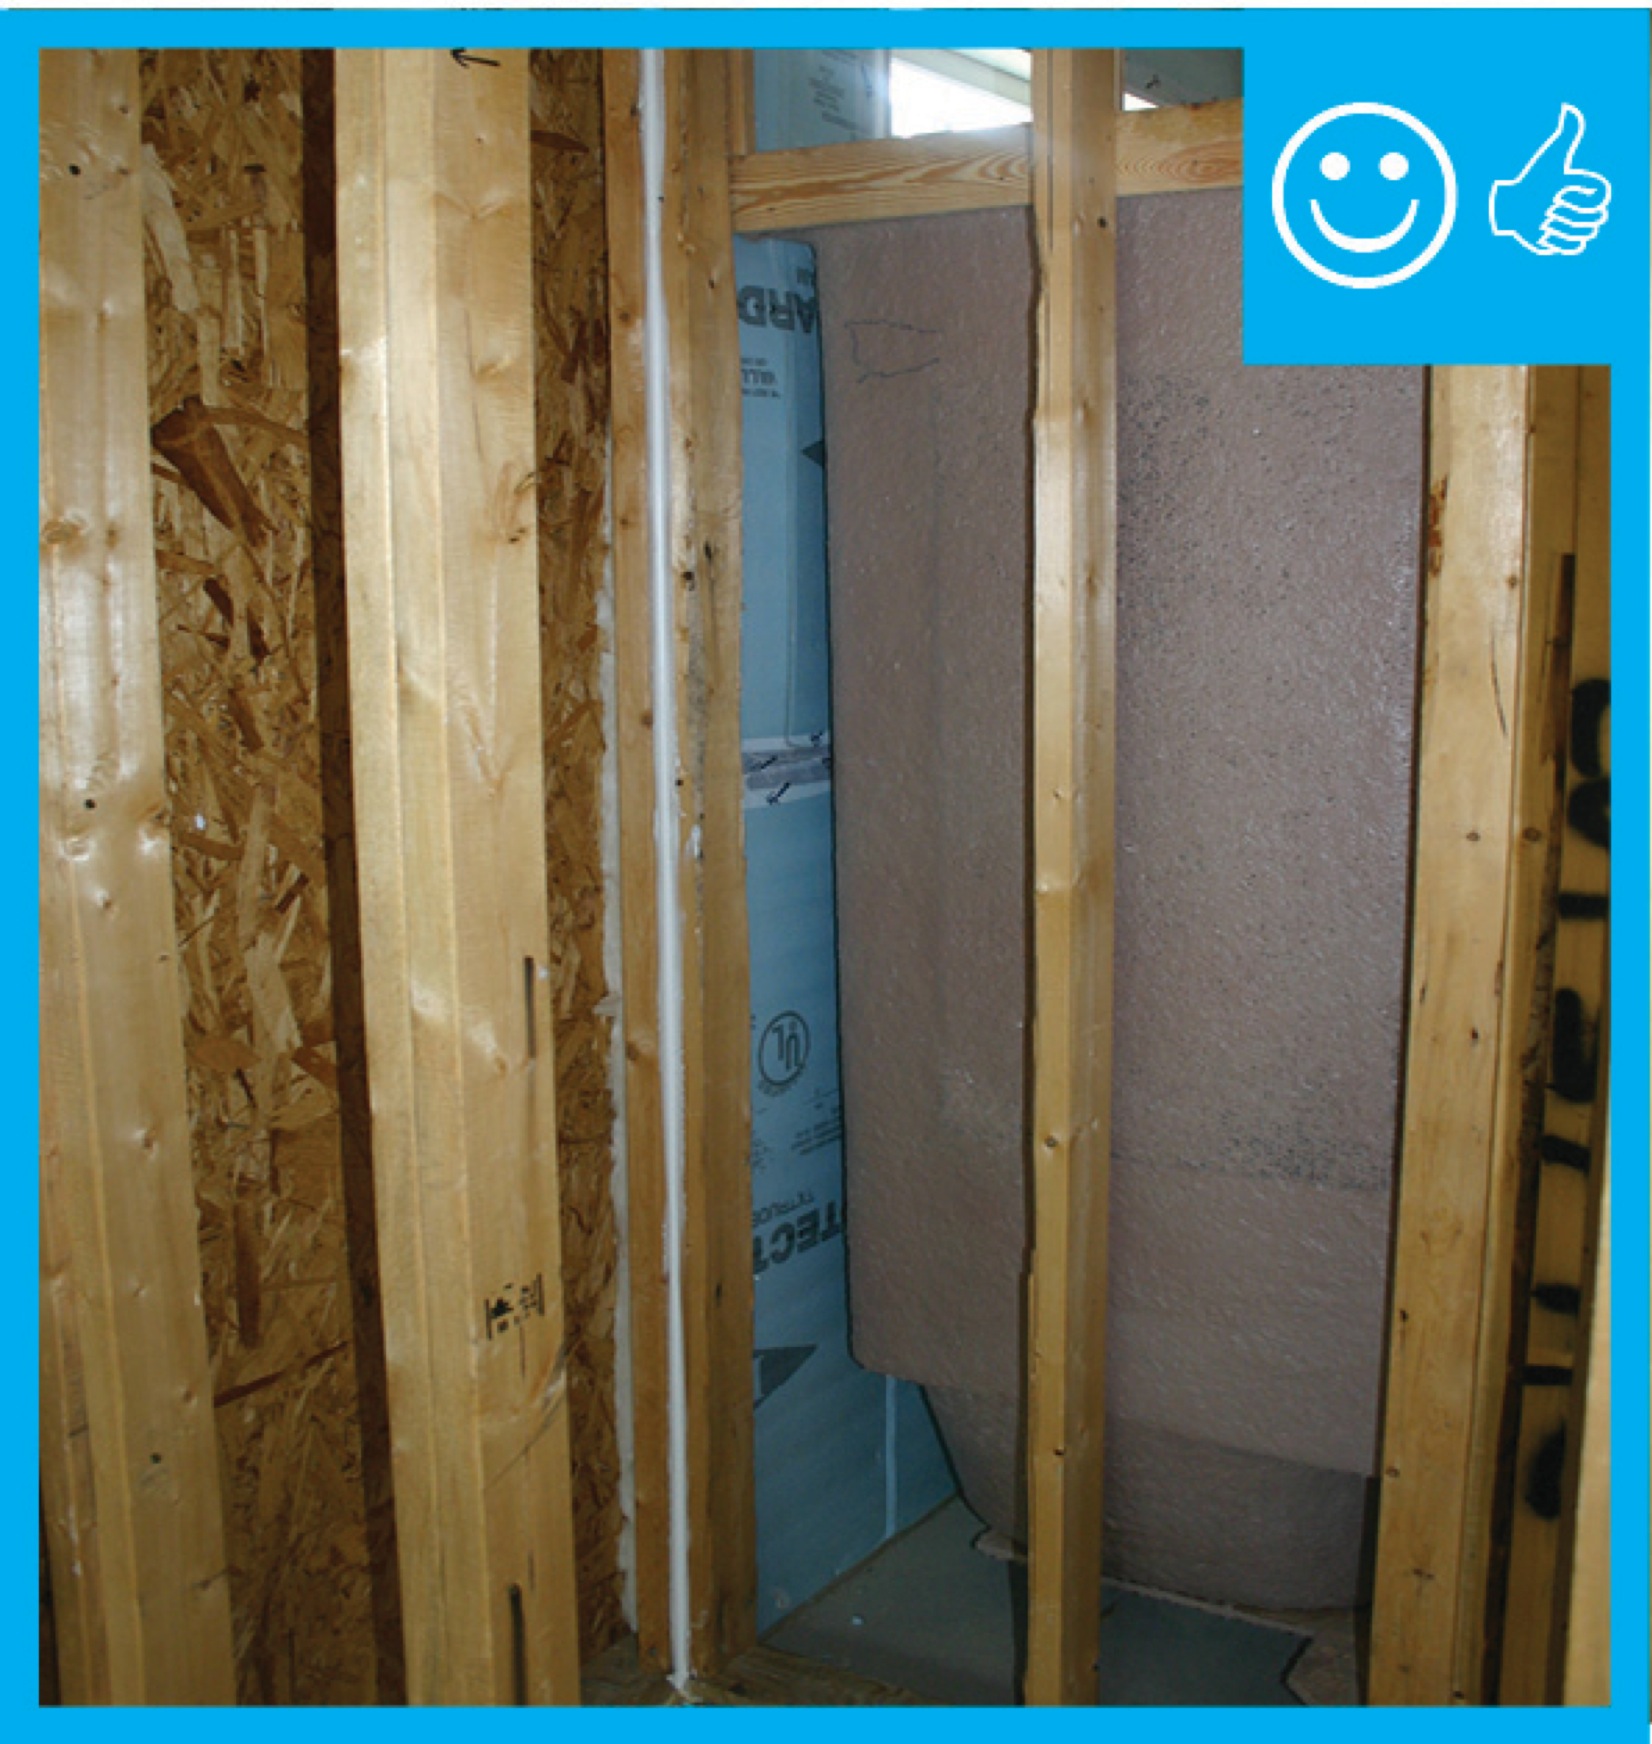
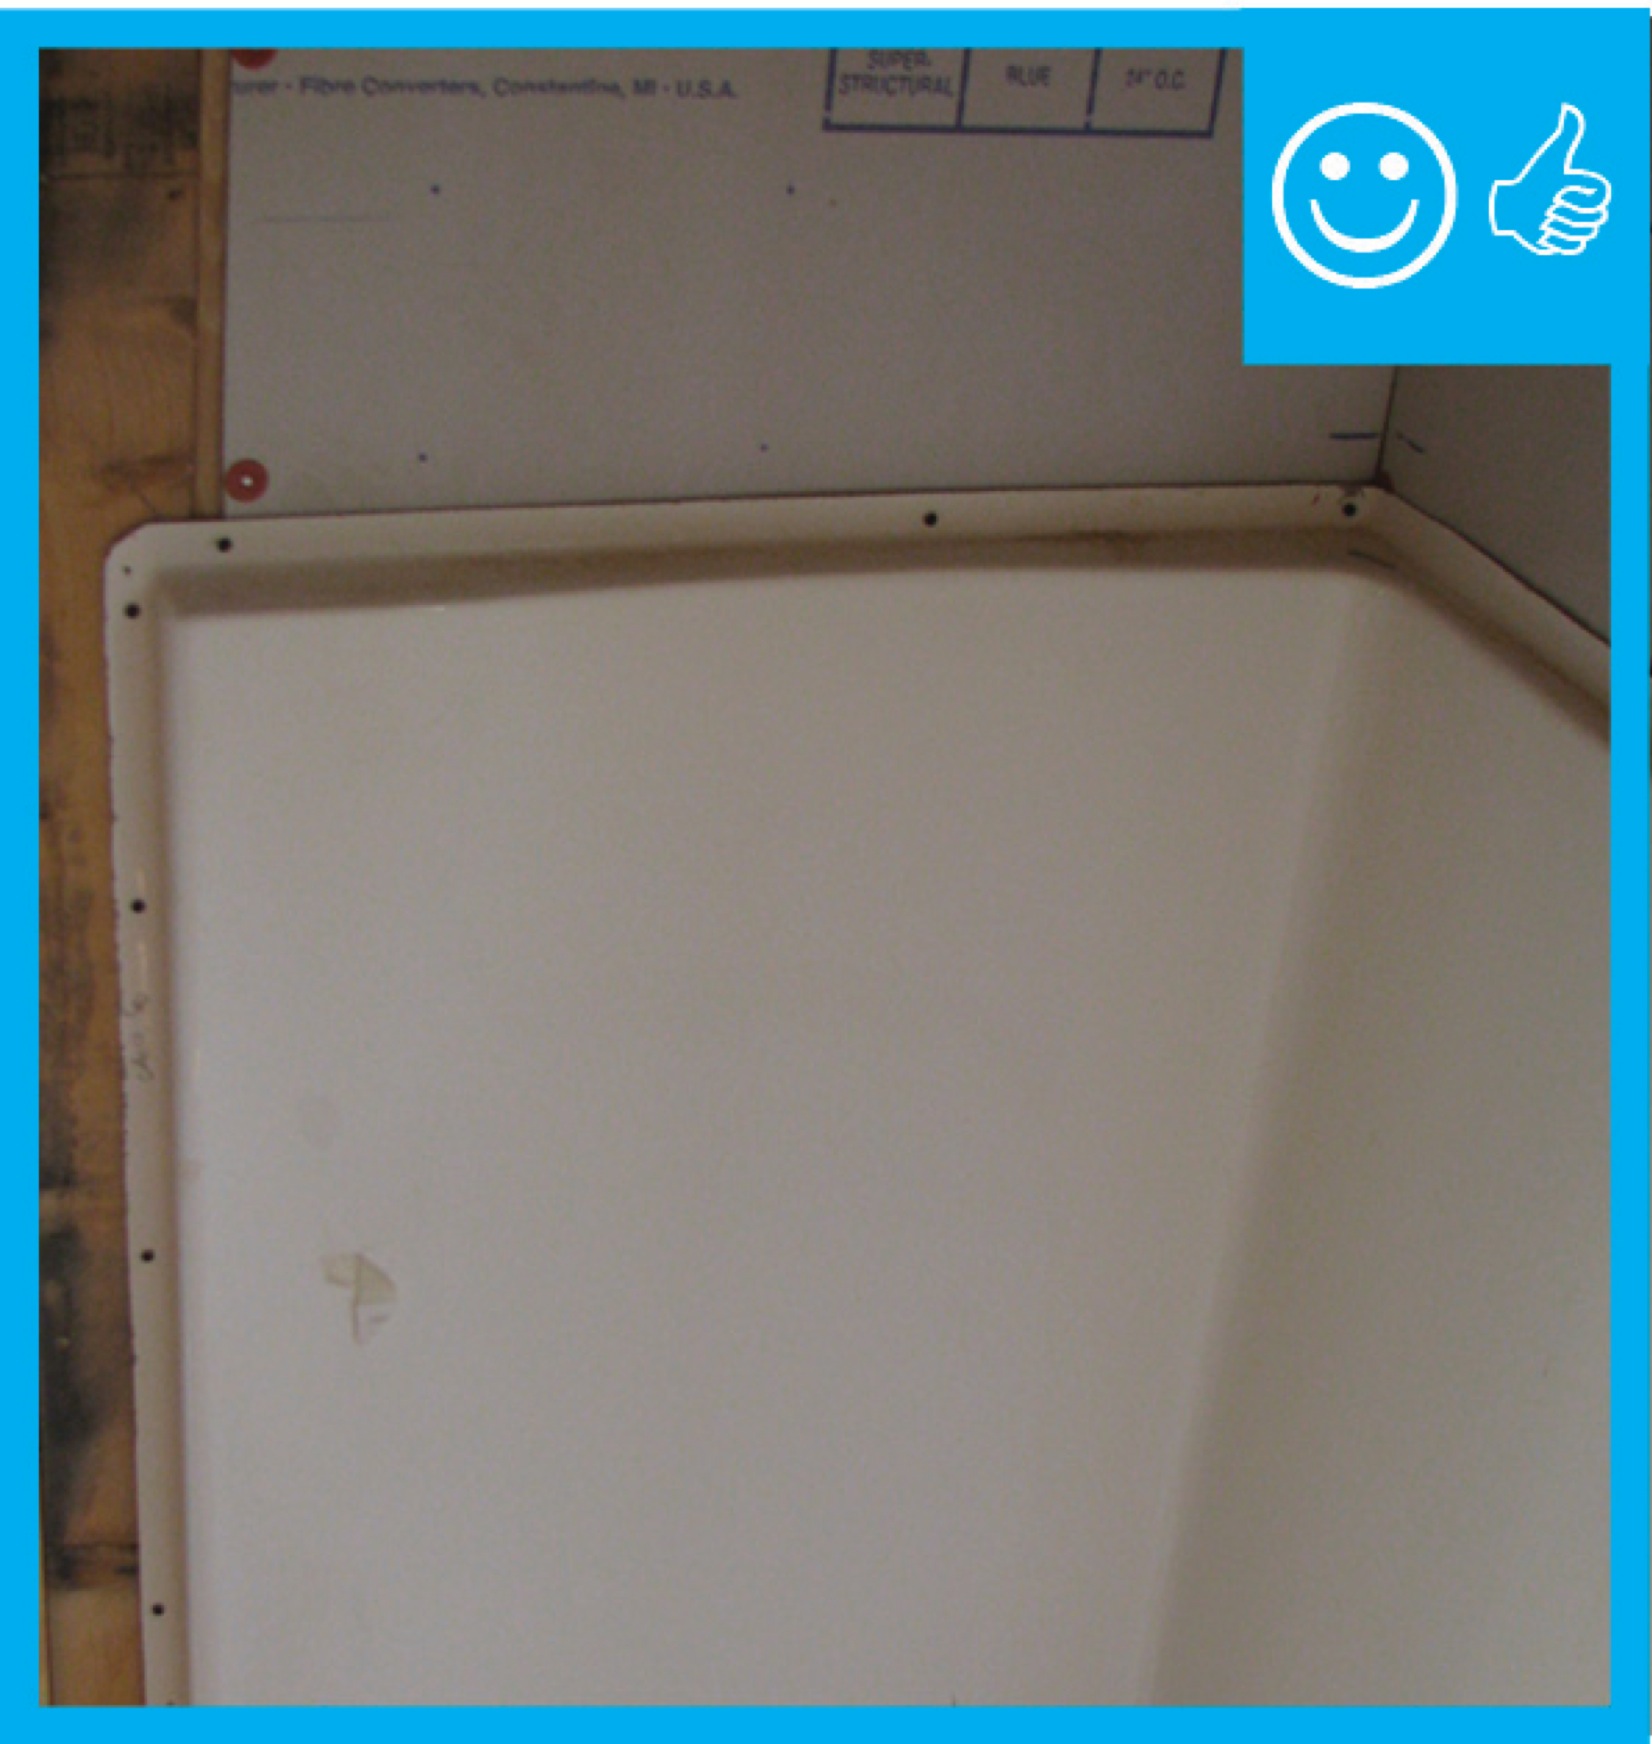
Cement board (shown in dark grey) is installed behind an installed tub and shower surround.
Image
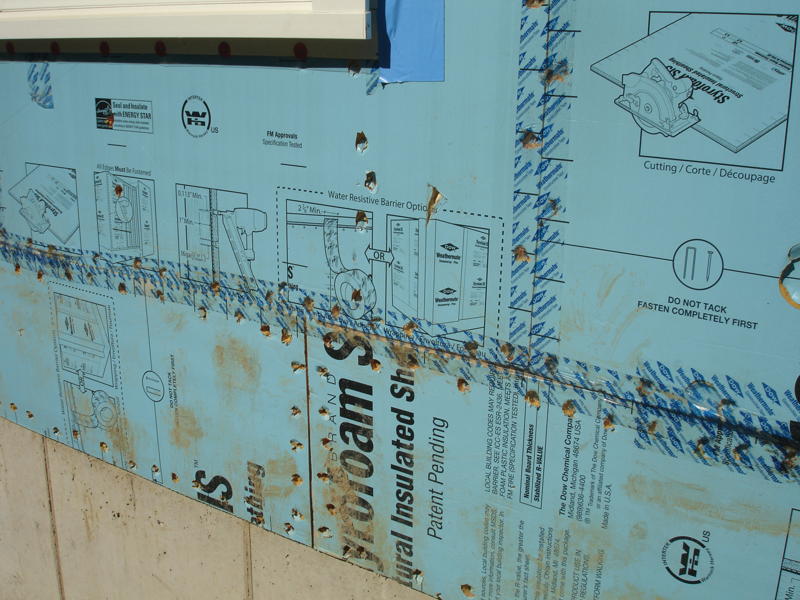
Clean taping areas and install 3" tape on vertical joint of upper insulation overlapping the horizontal joint
Image
Image
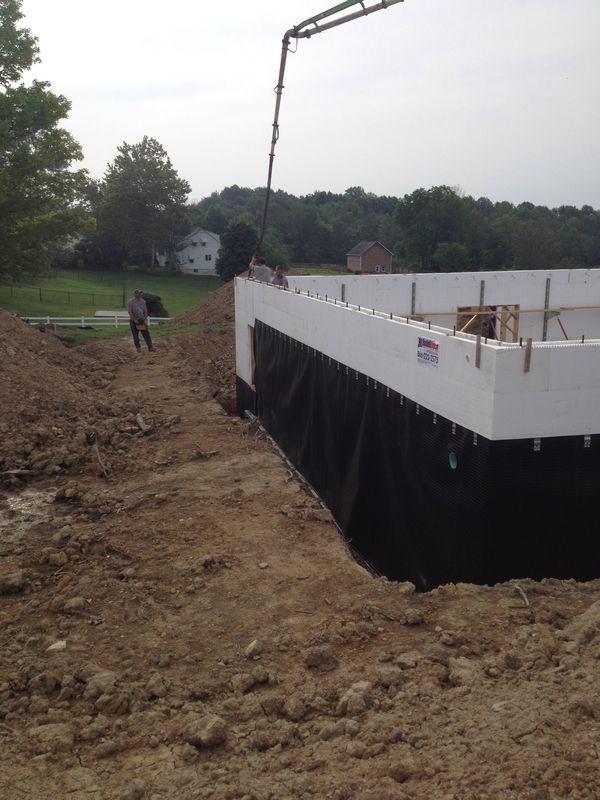
Concrete is poured into the rigid foam shell of the insulated concrete form (ICF) walls; a plastic water barrier has already been installed to protect the below-grade wall surfaces.
Image
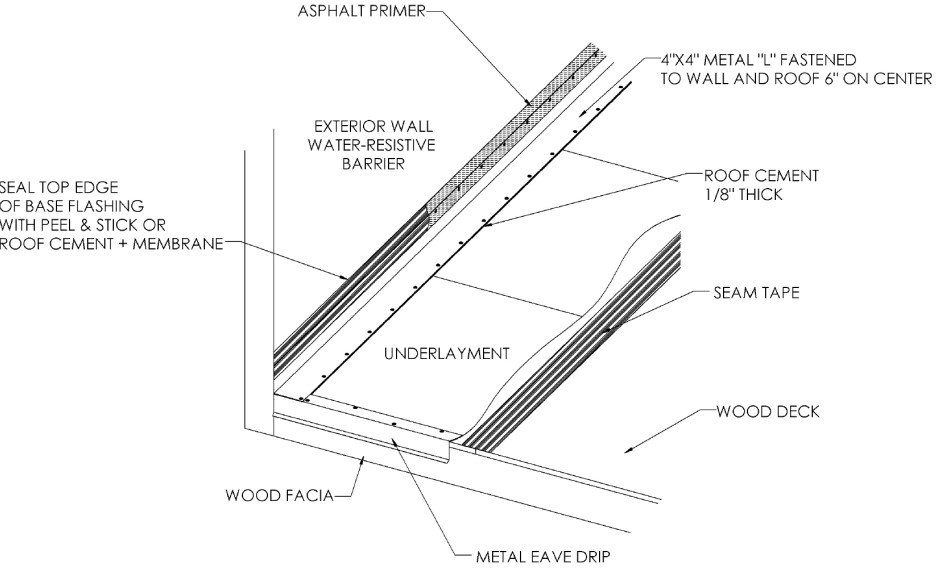
Continuous L-metal flashing integrated with underlayment at roof-wall intersections
Image
Image

Image

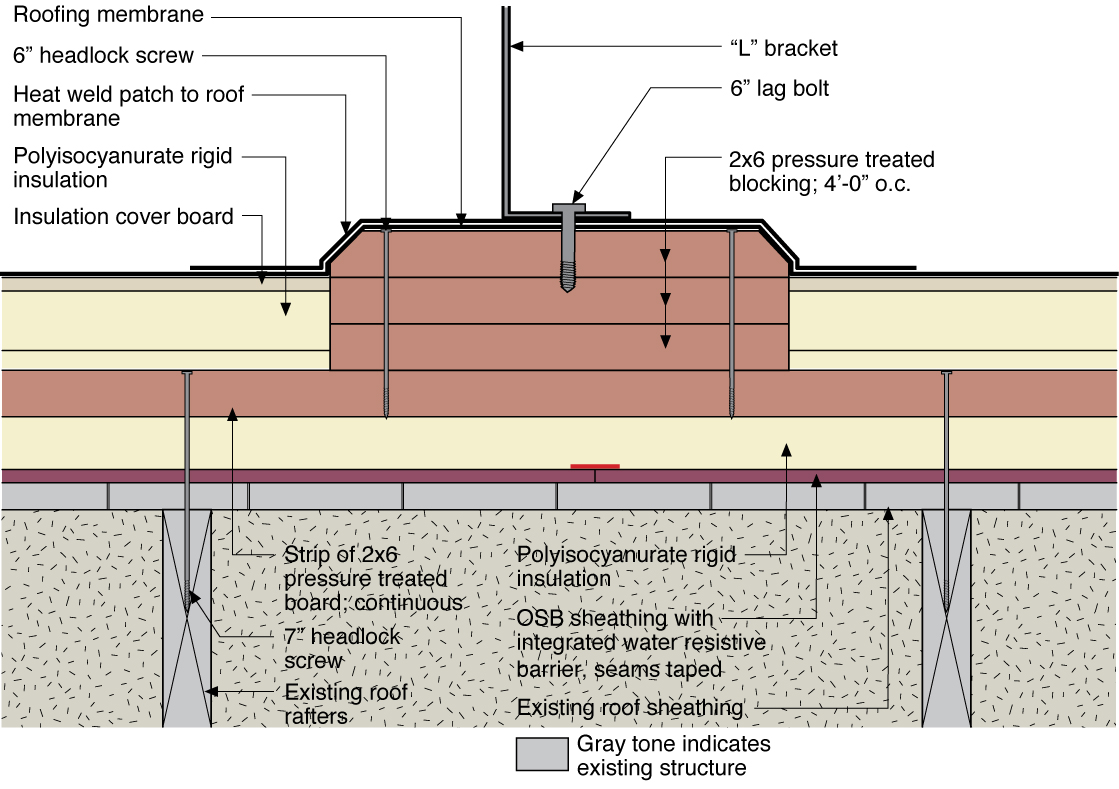
Existing flat roof and wood-framed walls are retrofitted with a new fully adhered air barrier membrane plus polyisocyanurate rigid foam insulation and a roofing membrane water control layer
Image
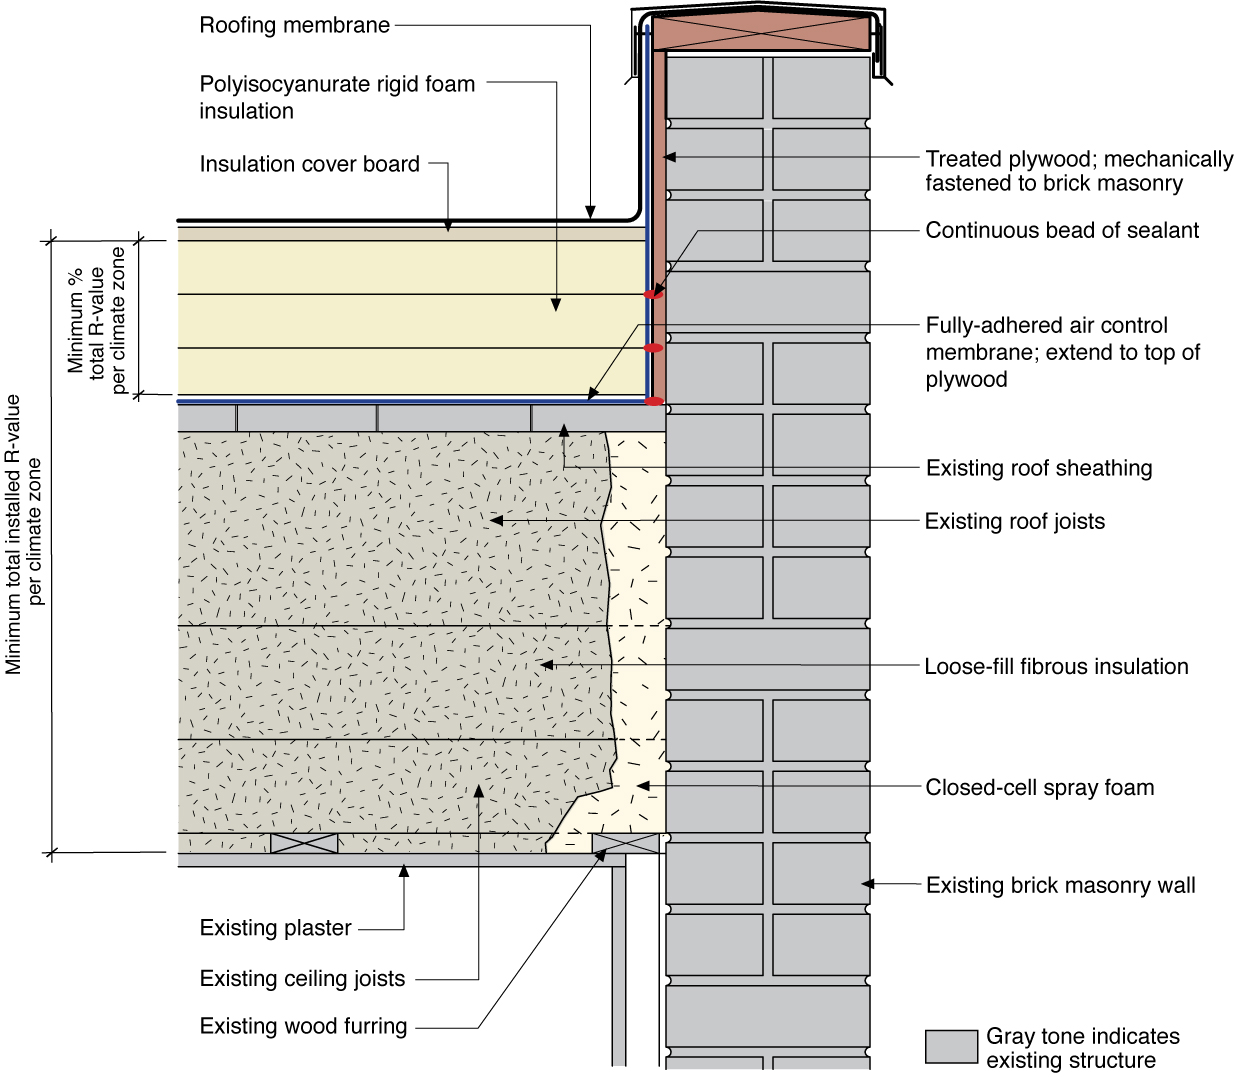
Existing low-slope (“flat”) roof and brick masonry walls with a new fully adhered air barrier membrane plus polyisocyanurate rigid foam insulation and a roofing membrane water control layer
Image
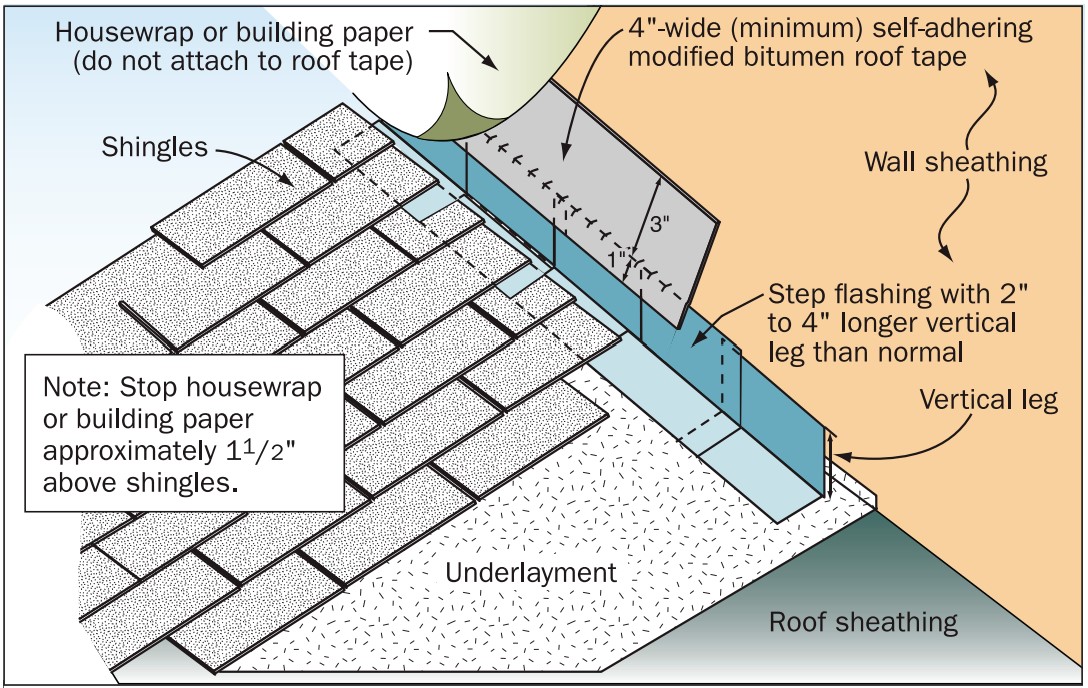
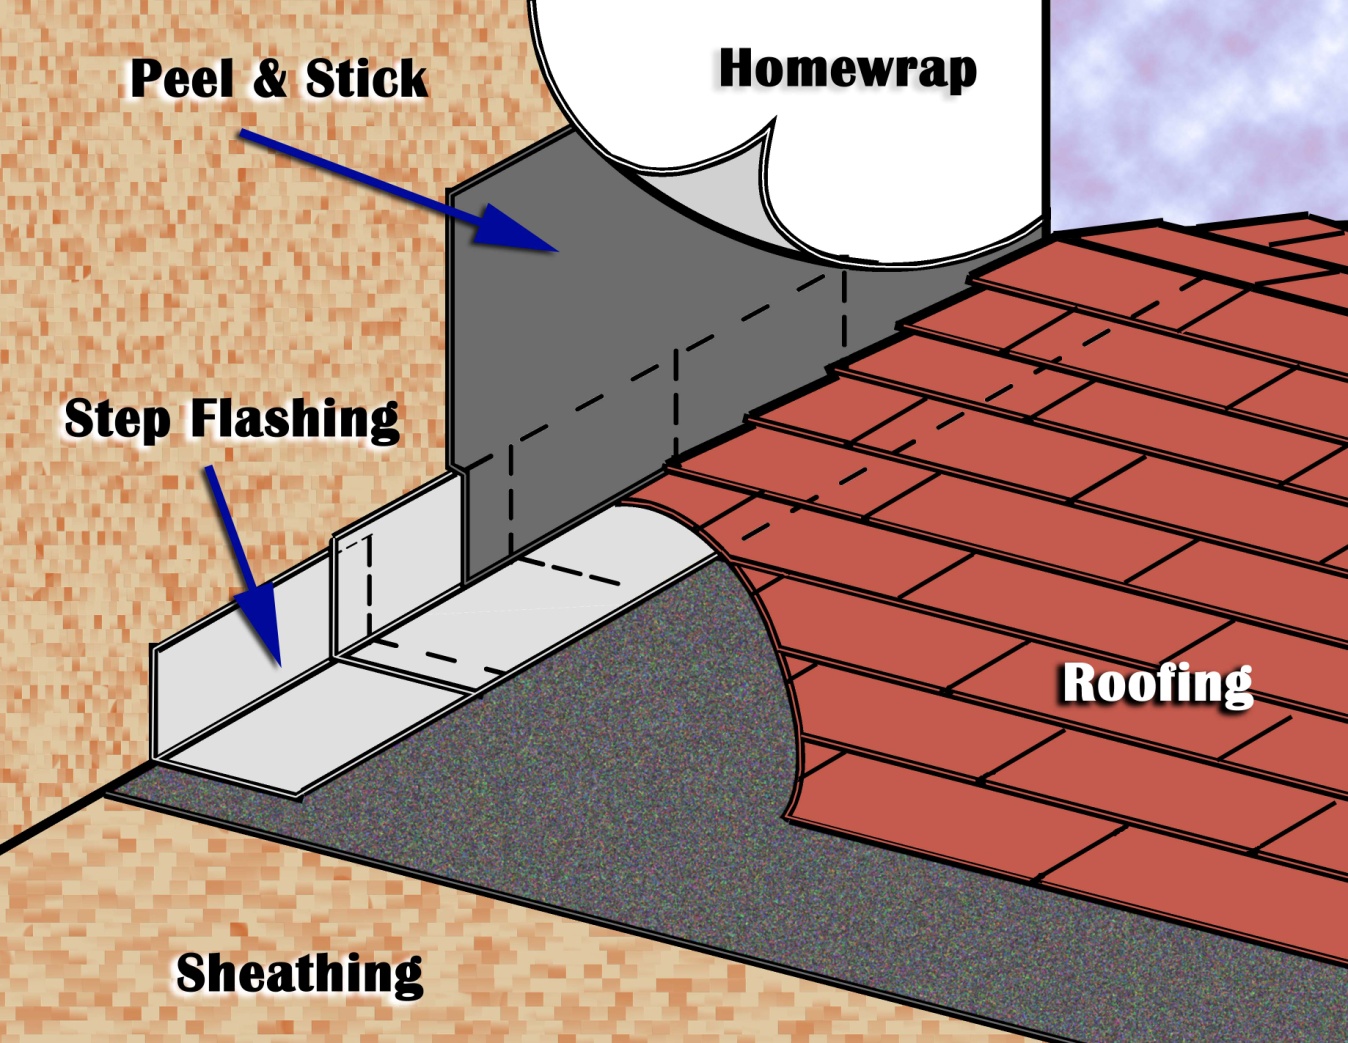
Existing wall-to-lower roof transition retrofitted with a new strip of fully adhered air control transition membrane, new step flashing, new roof underlayment, and new cladding
Image
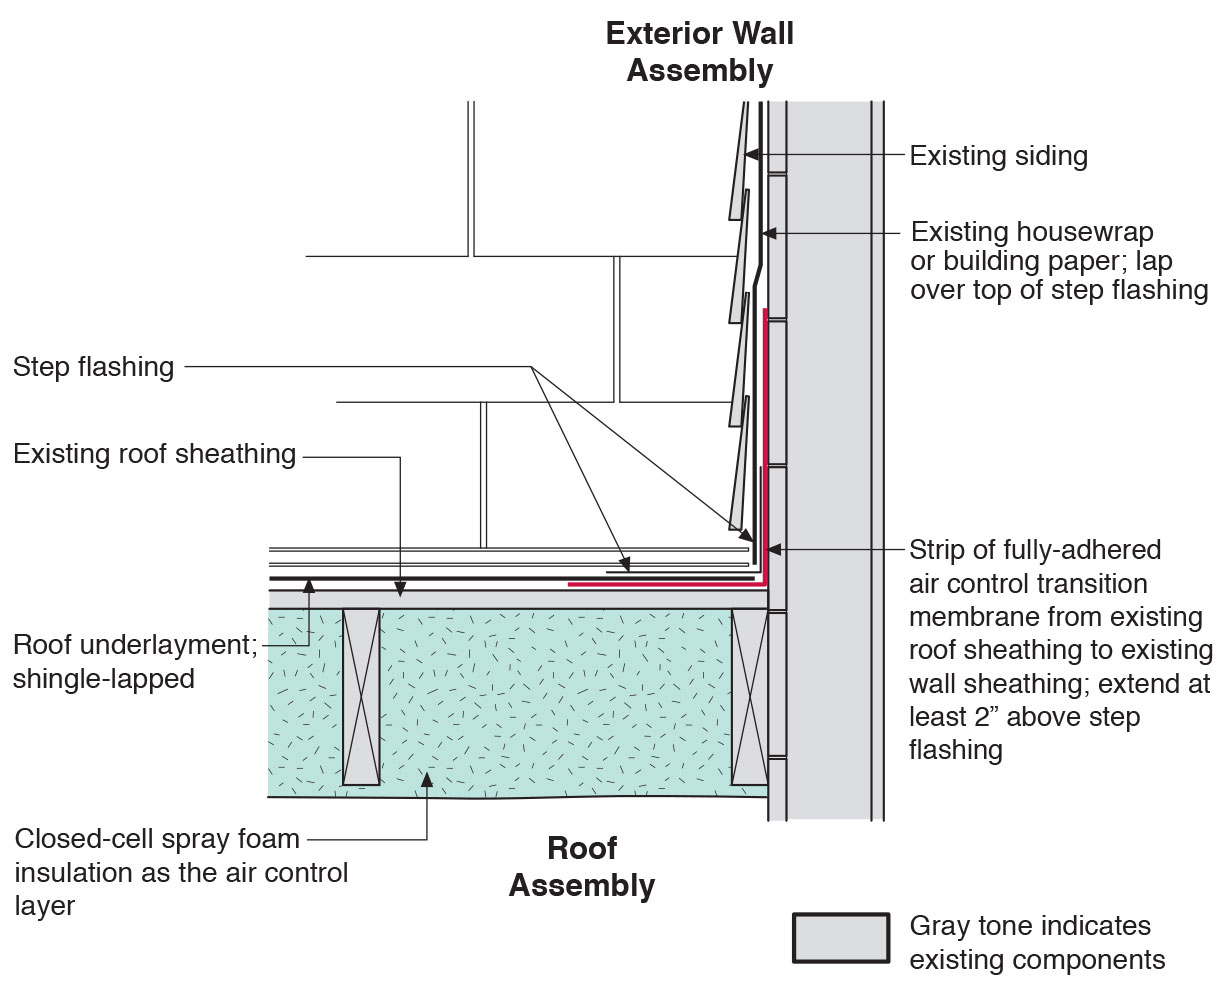
Existing wall-to-lower roof transition with a new strip of fully adhered air control transition membrane, new step flashing, new roof underlayment, and new cladding – view from eave
Image
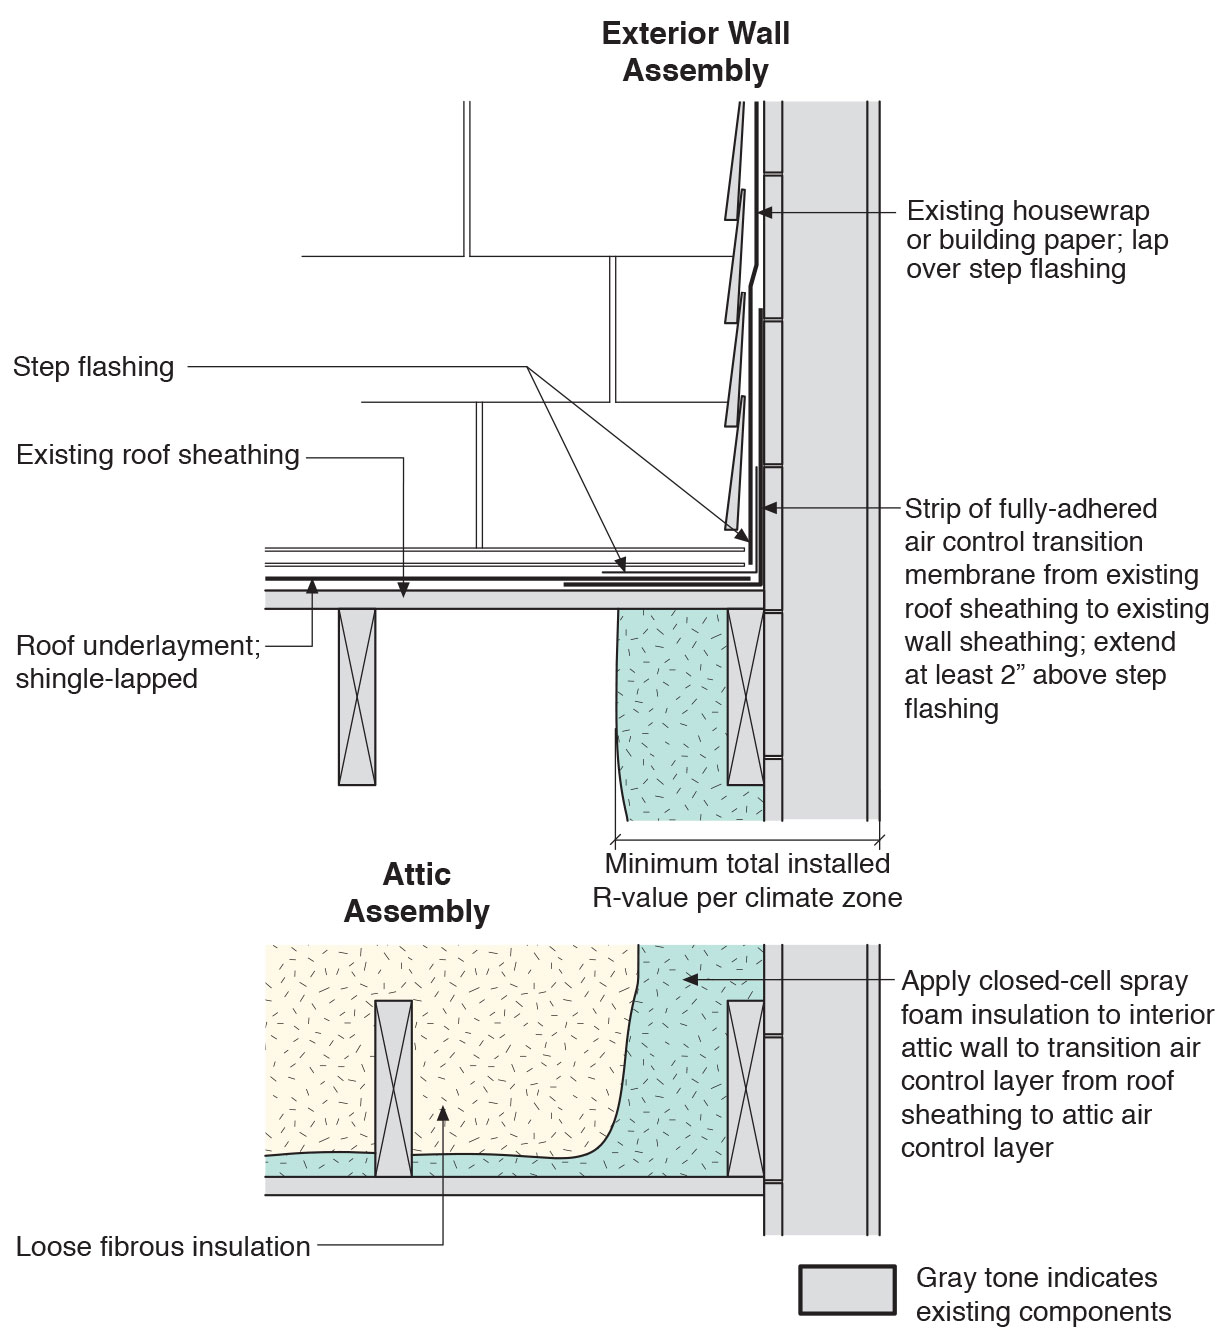
Existing wall-to-lower roof with attic transition with a new strip of fully adhered air control transition membrane, new step flashing, new roof underlayment, and new cladding – view from eave
Image

Exterior fiberglass insulation on this new home was (incorrectly) cut to terminate below-grade after backfill, which will expose the above-grade portions of the foundation wall to cold temperatures
Image
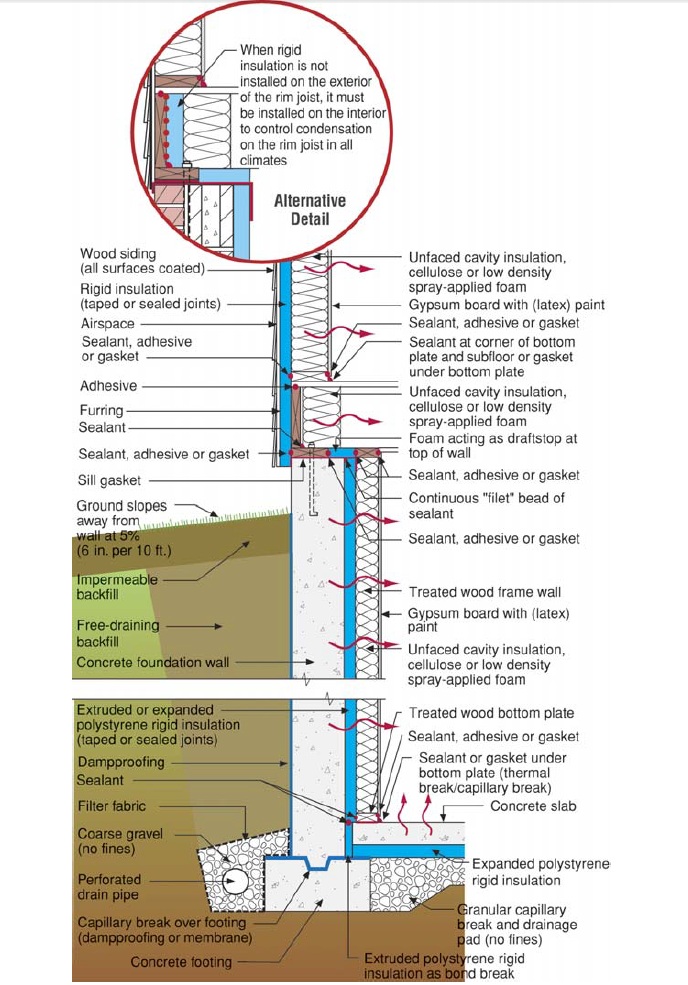
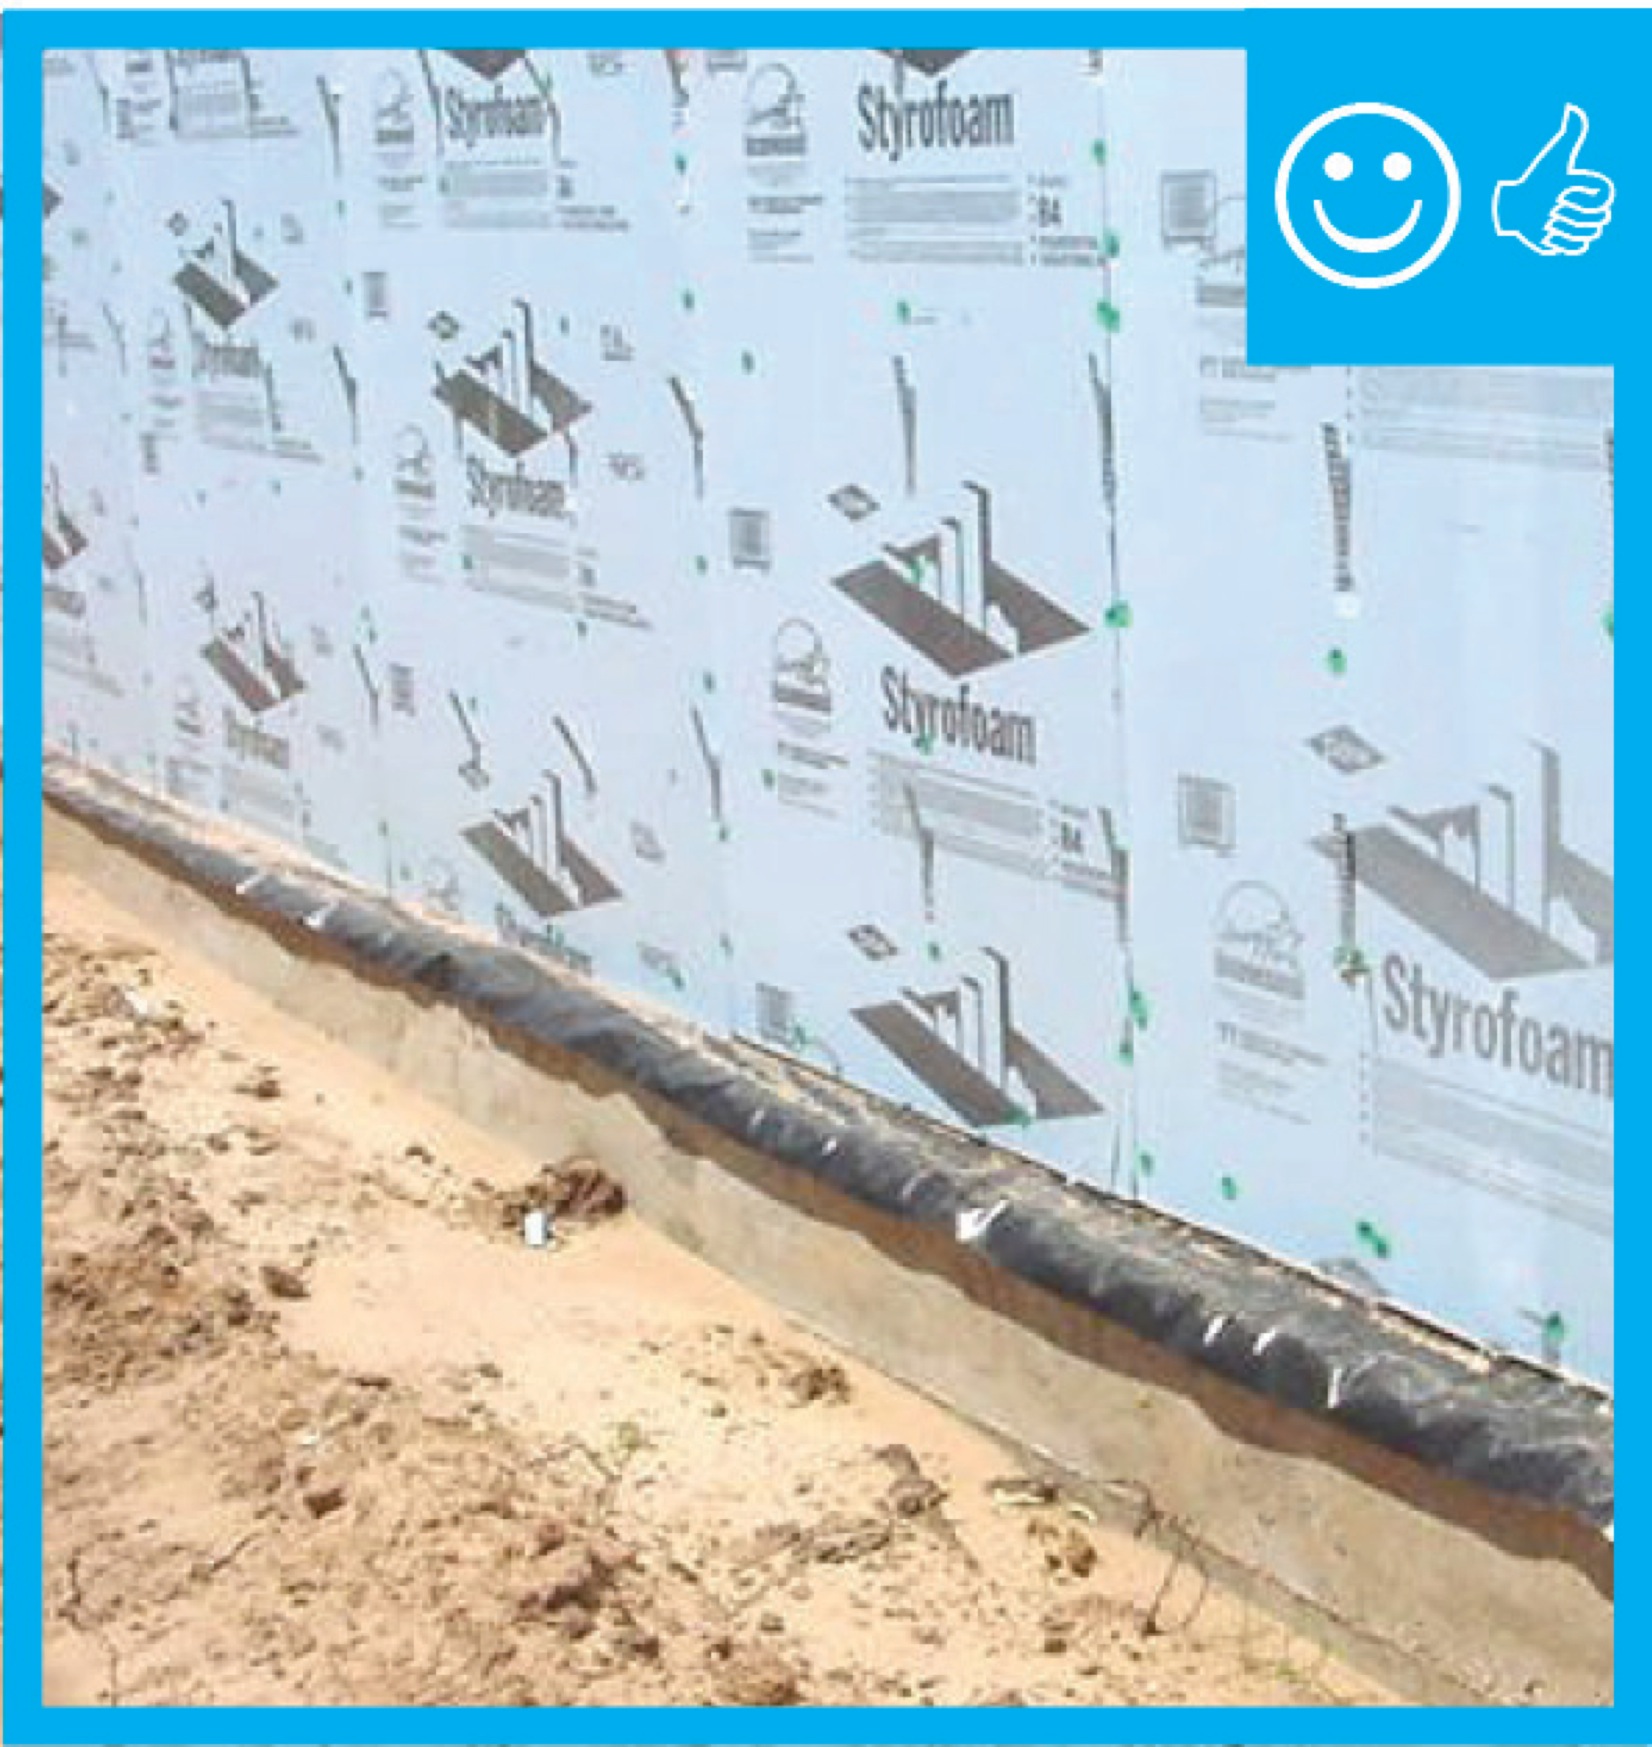
Exterior surface of below-grade walls finished as follows: For poured concrete, concrete masonry, and insulated concrete forms, finish with damp-proof coating
Image
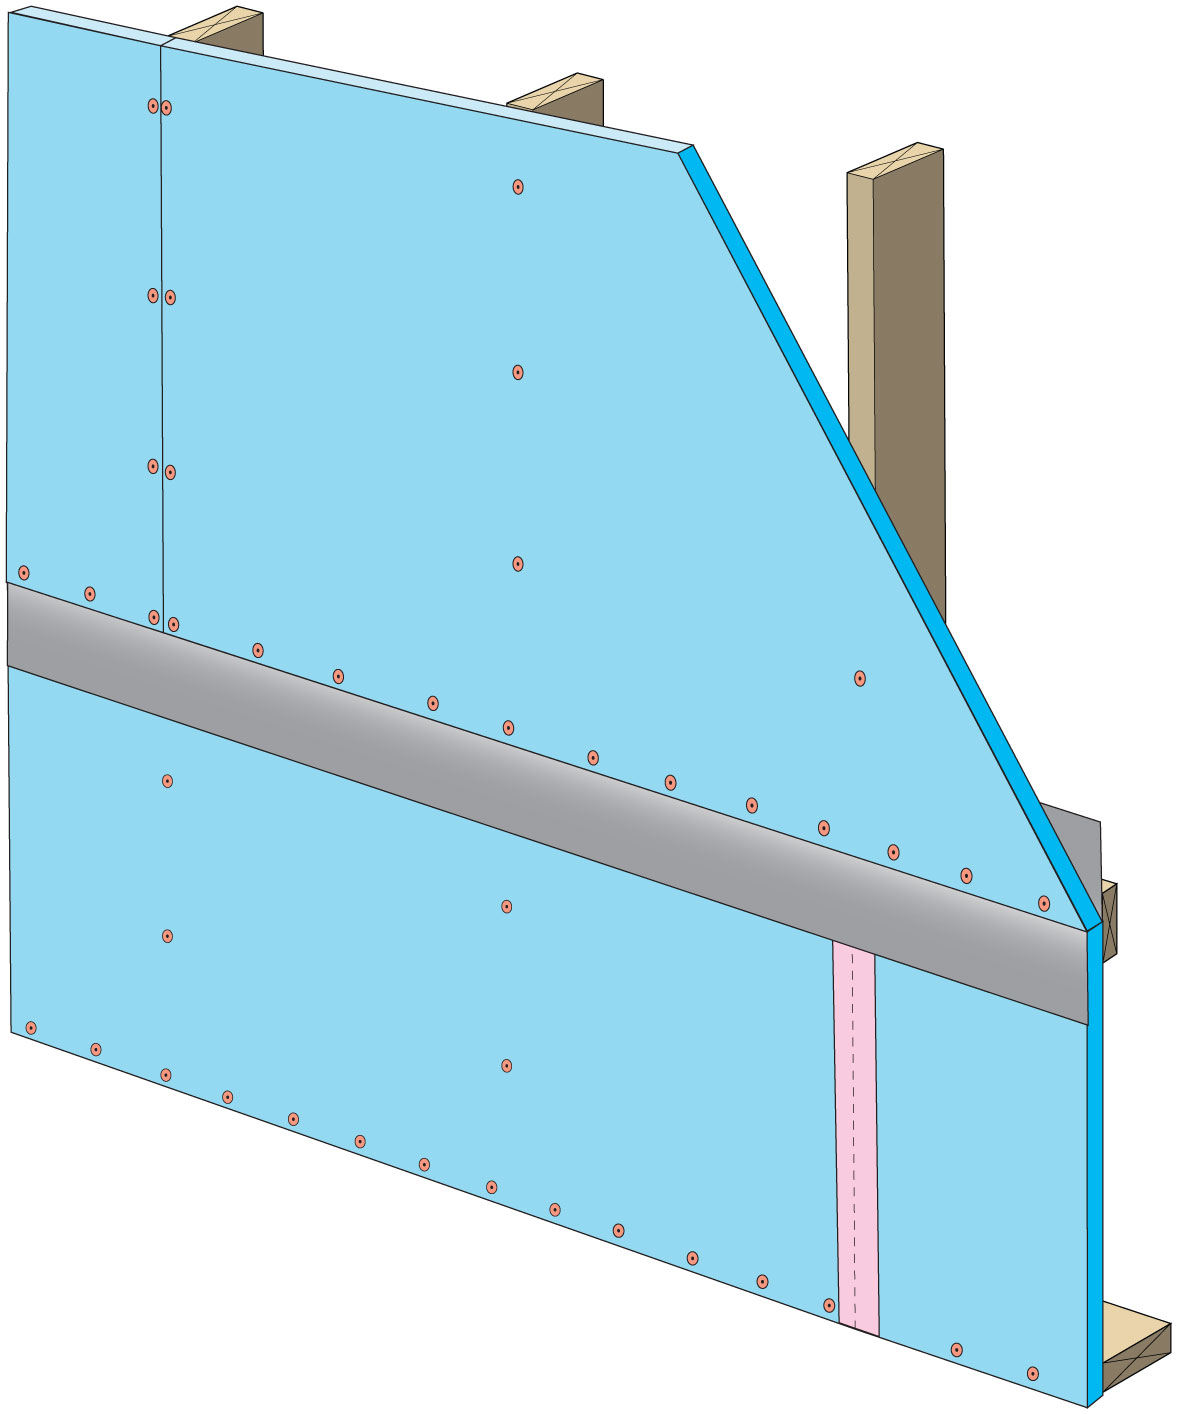
Exterior surface of below-grade walls finished as follows: For wood-framed walls, finish with polyethylene and adhesive or other equivalent waterproofing
Image
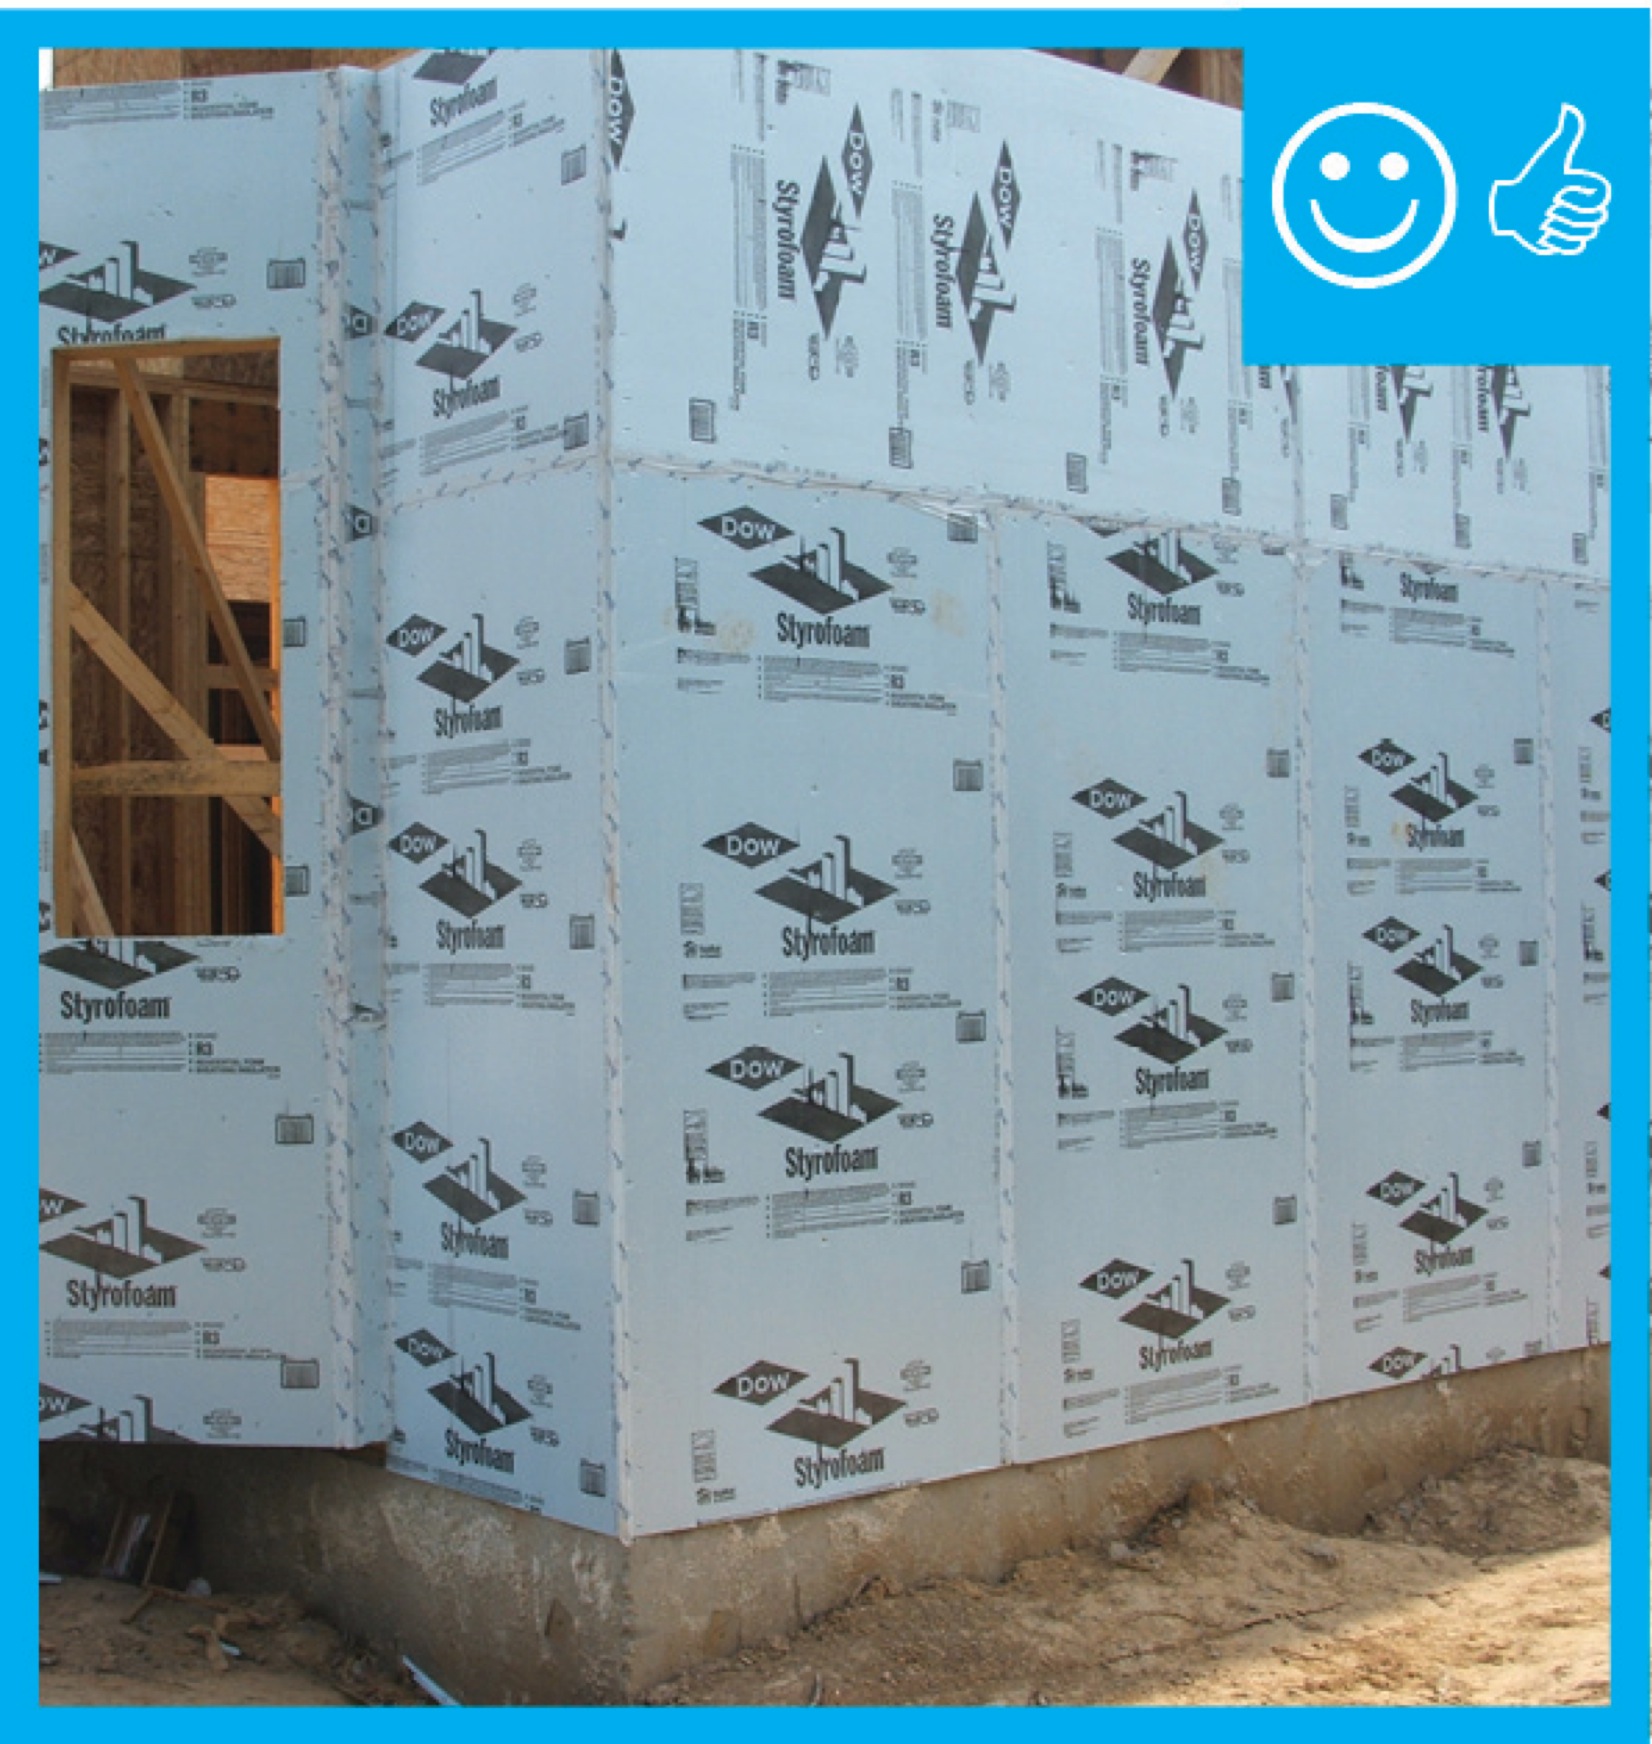
Exterior XPS basement insulation is correctly installed to completely cover the foundation wall
Image
Image
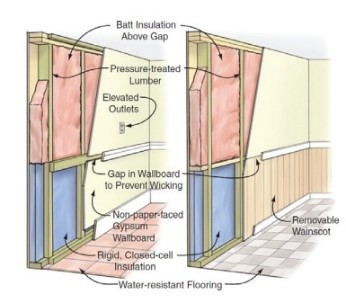
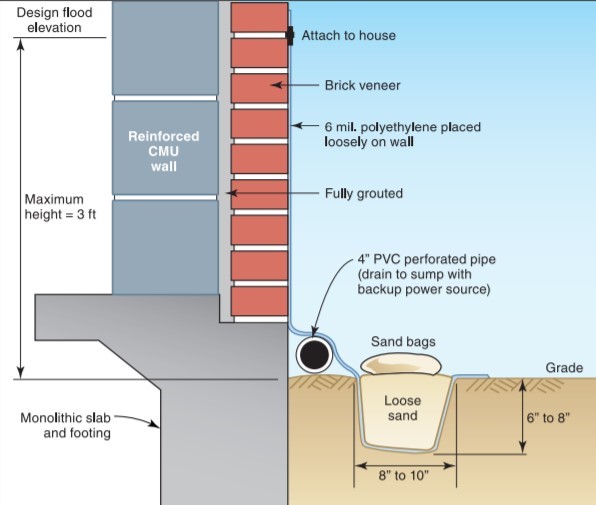
FEMA recommends techniques like open lower wall cavities with exterior rigid foam insulation and paperless drywall for flood-resistant, dryable wall interiors.
Image

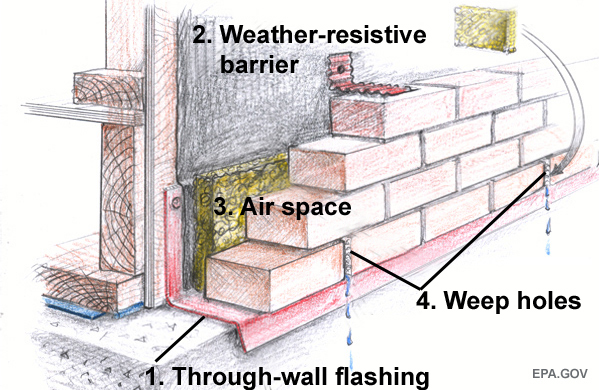
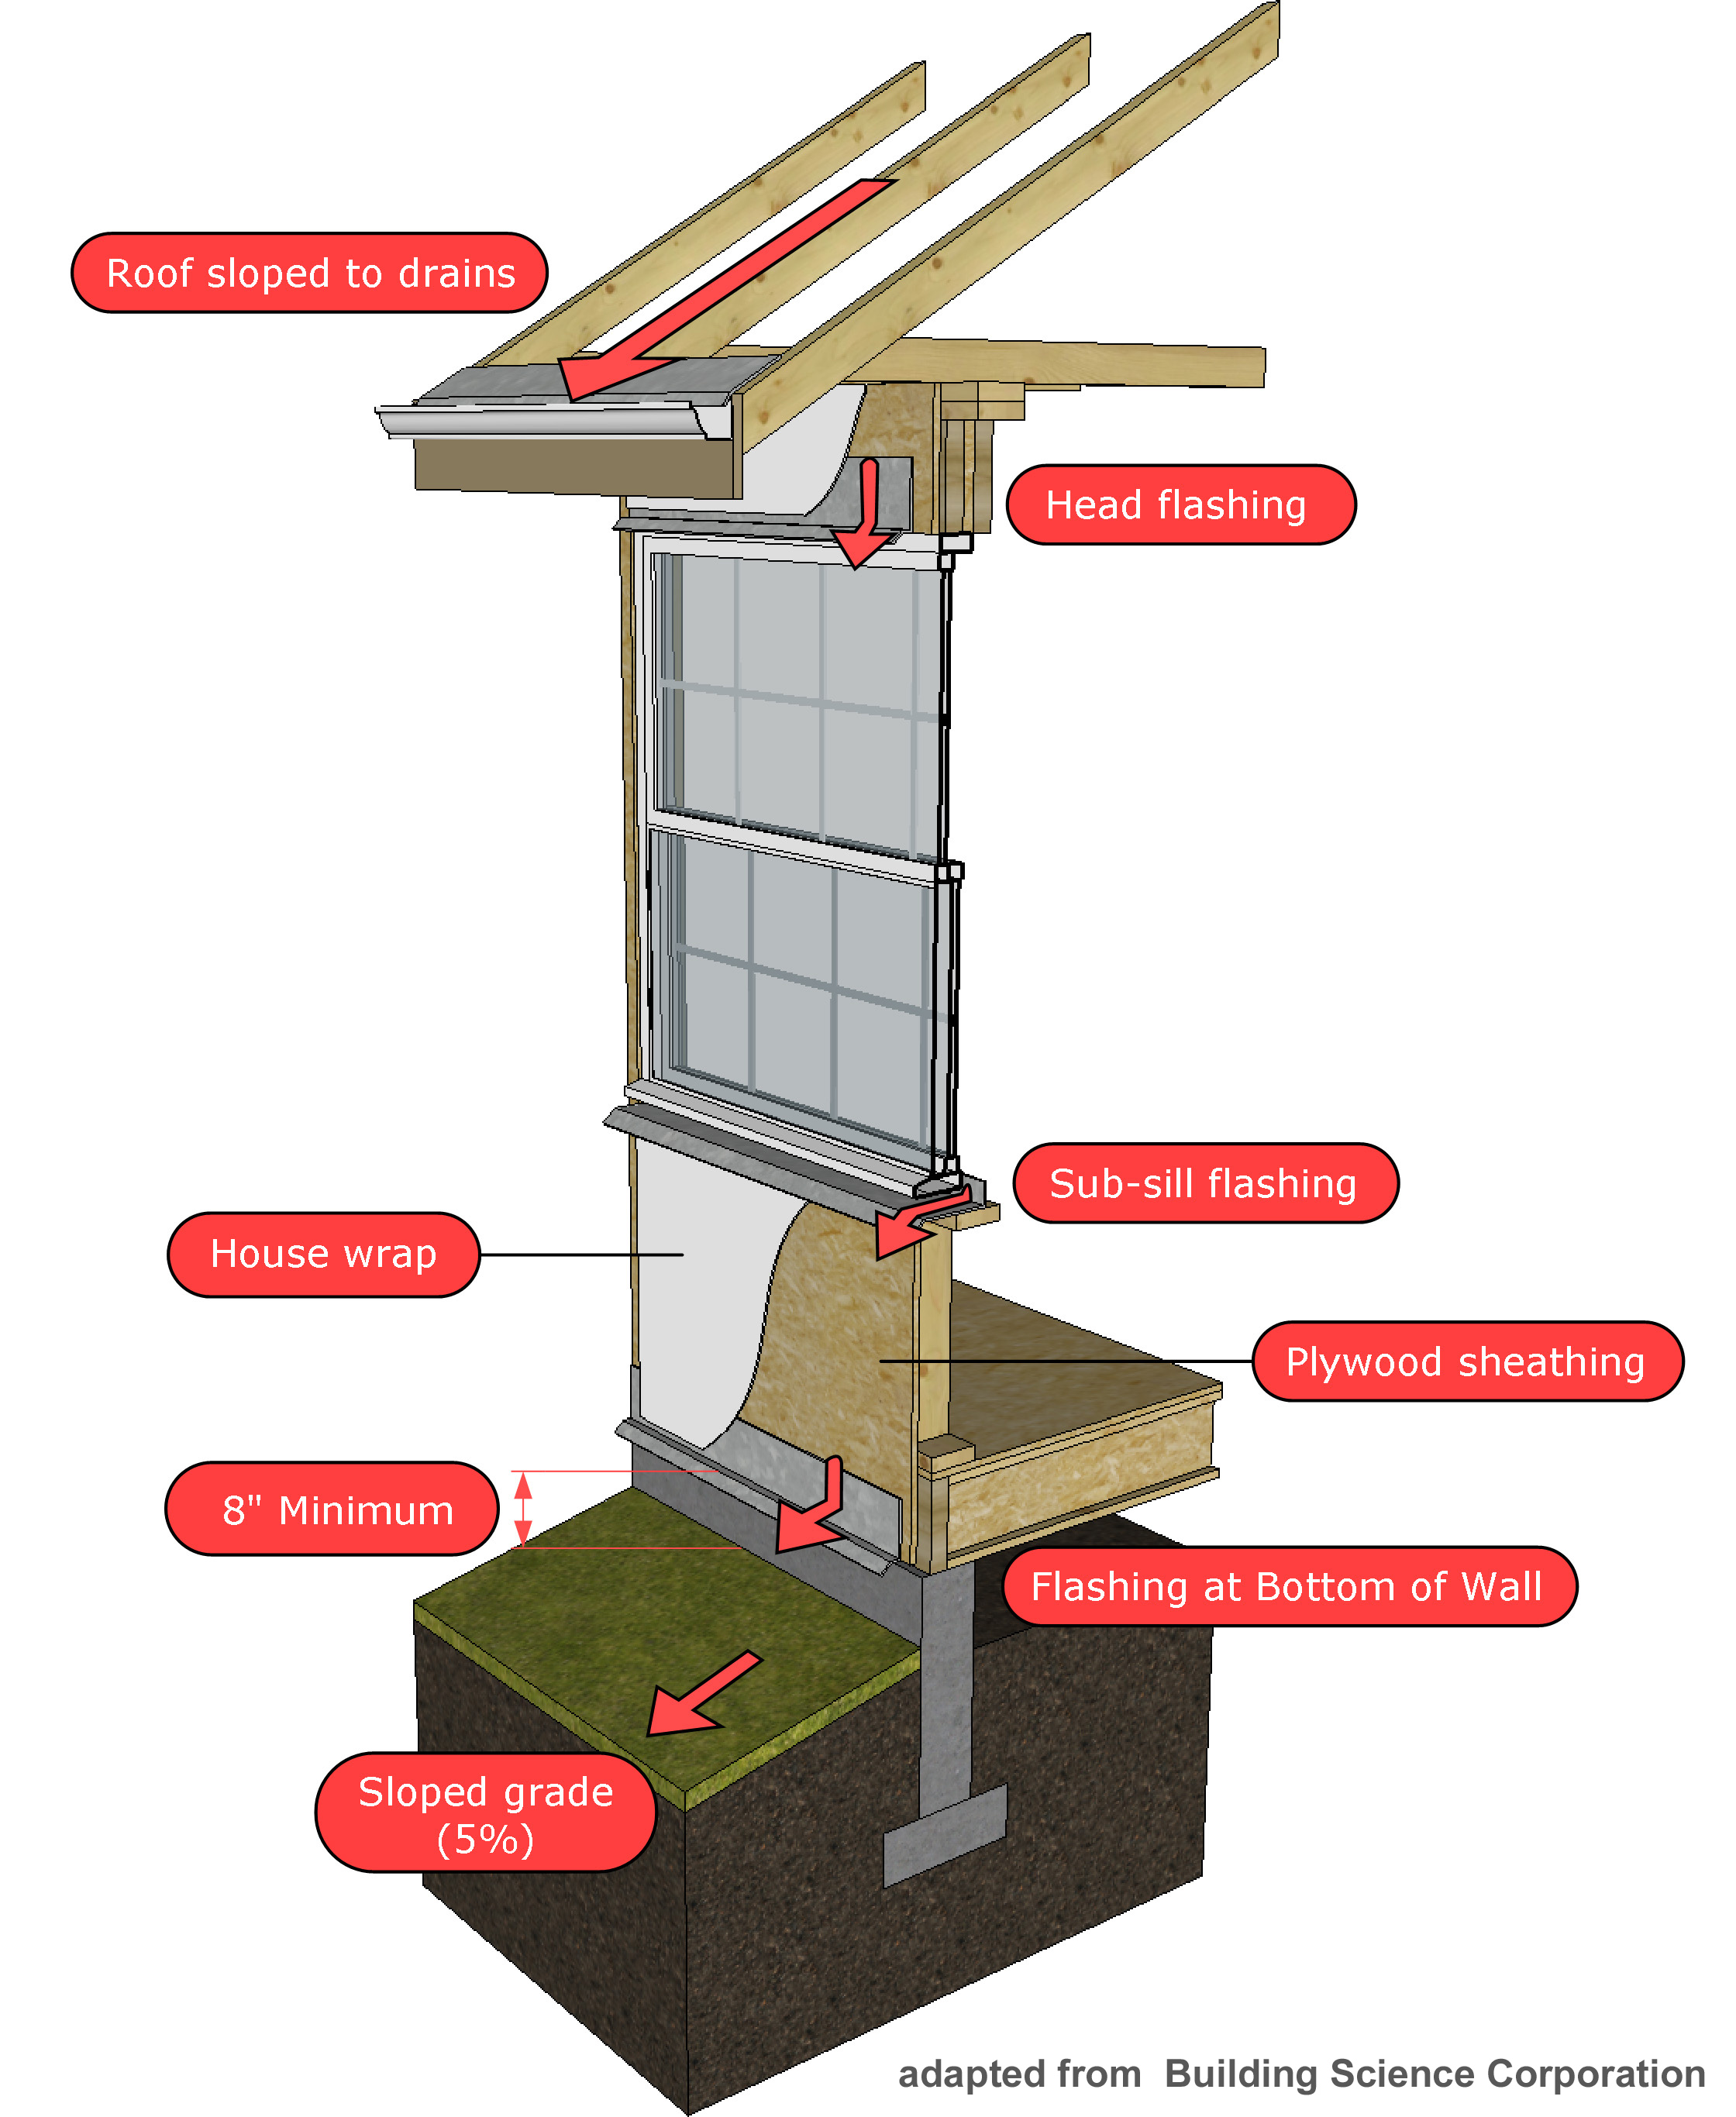
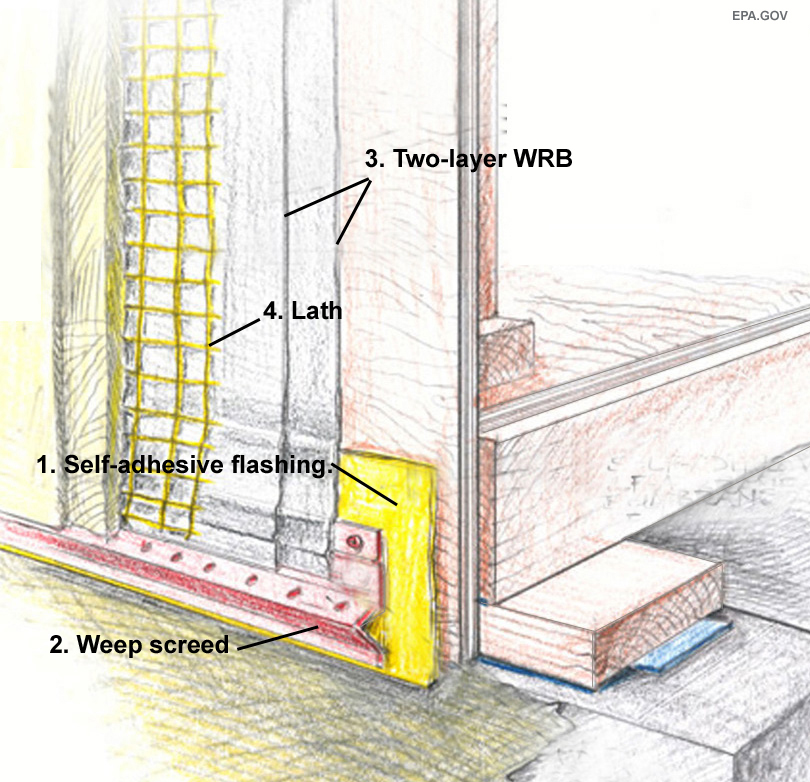
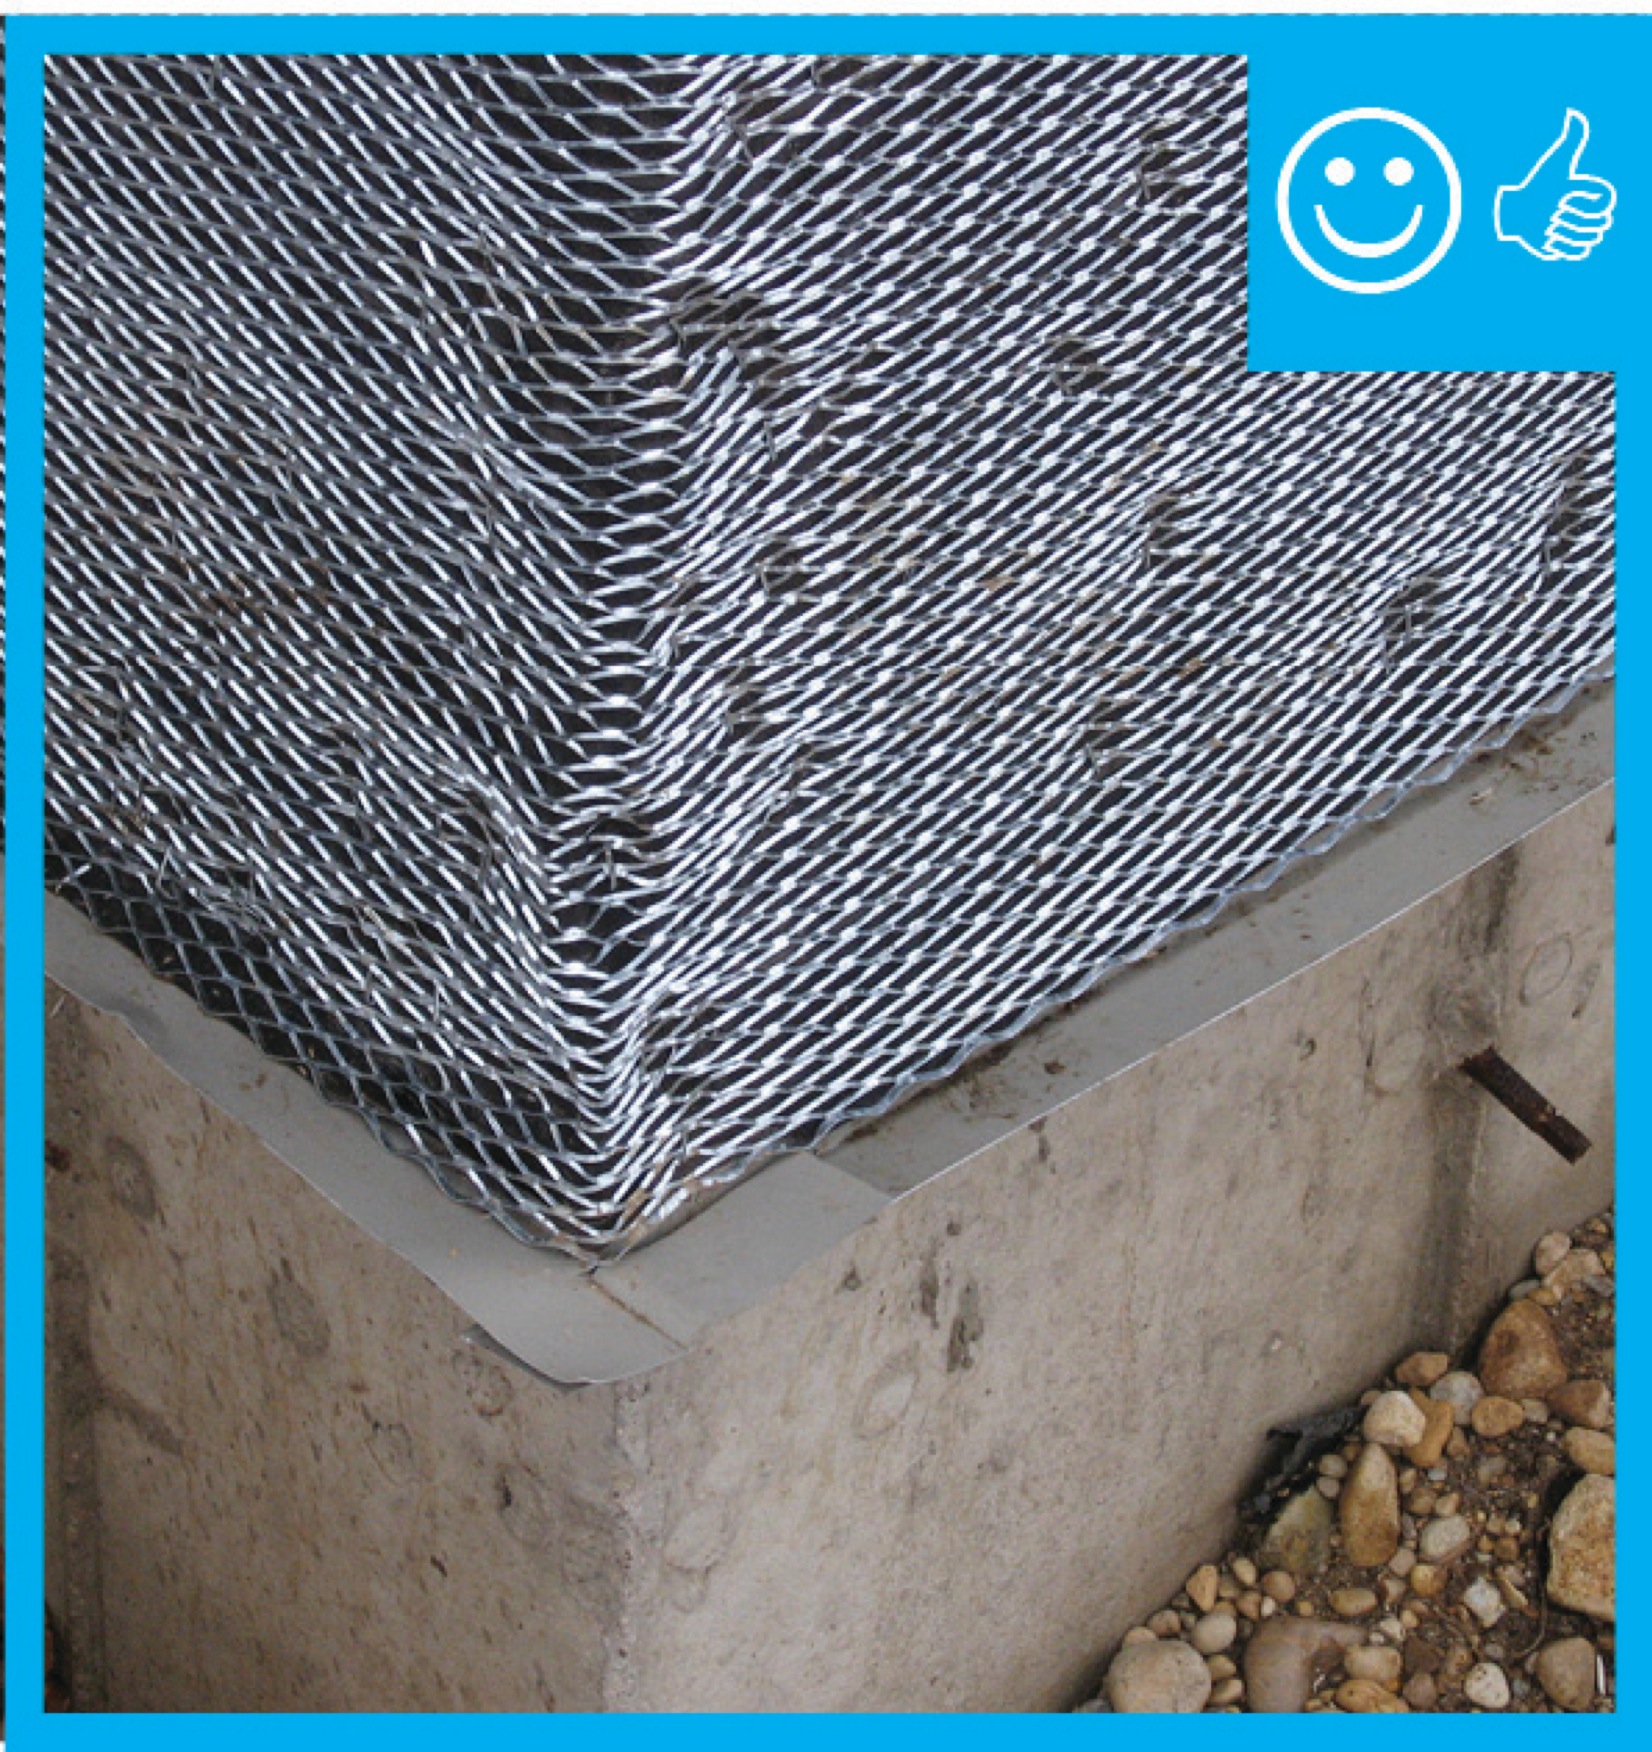
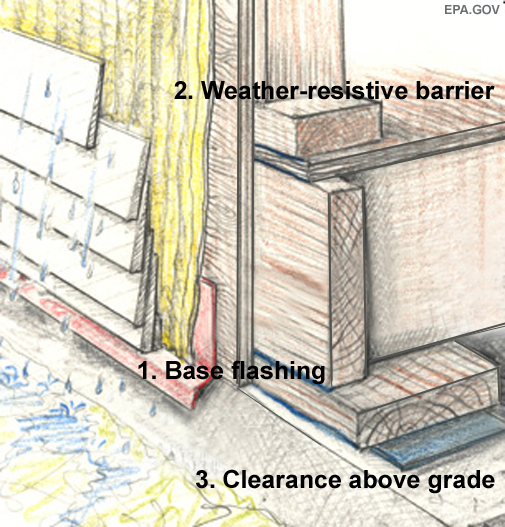
Flashing at bottom of exterior walls with weep holes included for masonry veneer and weep screed for stucco cladding systems, or equivalent drainage system
Image
Flashing at bottom of exterior walls with weep holes included for masonry veneer and weep screed for stucco cladding systems, or equivalent drainage system
Image
Flashing at bottom of exterior walls with weep holes included for masonry veneer and weep screed for stucco cladding systems, or equivalent drainage system
Image
Image
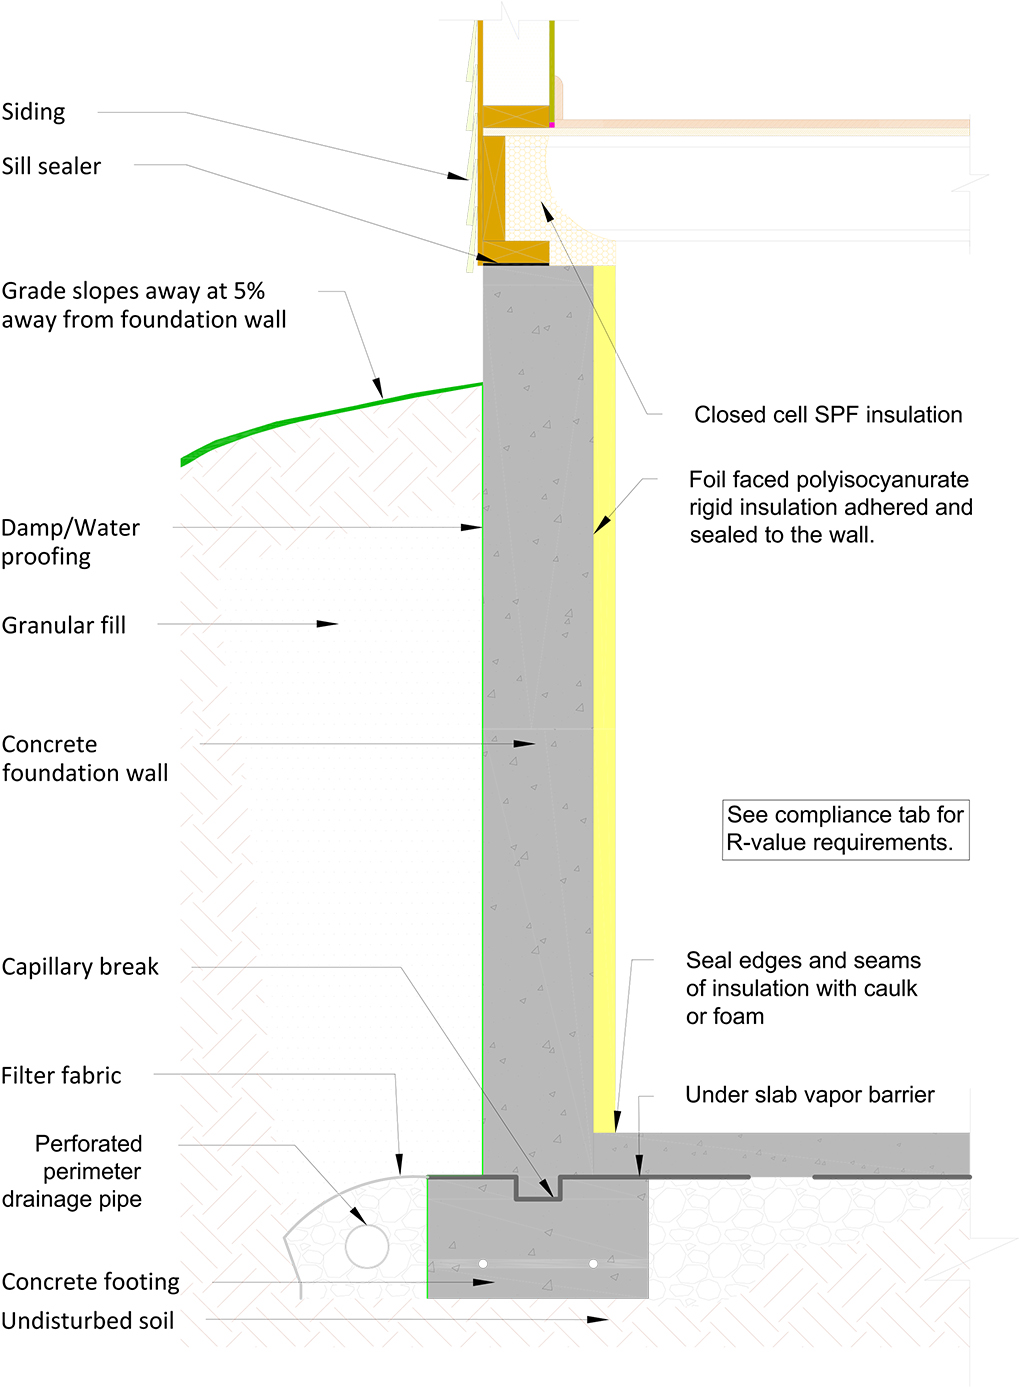
Foil-faced rigid foam and spray foam can be used to insulate a basement on the interior; use good moisture management techniques to keep the basement dry
Image
Image
Image
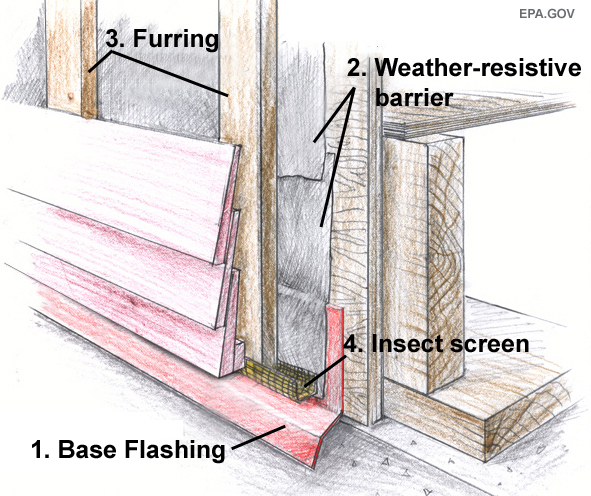
Furring strips provide drainage gap behind lap siding; screen is added at bottom and top to prevent entry of insects and wildfire embers.
Image
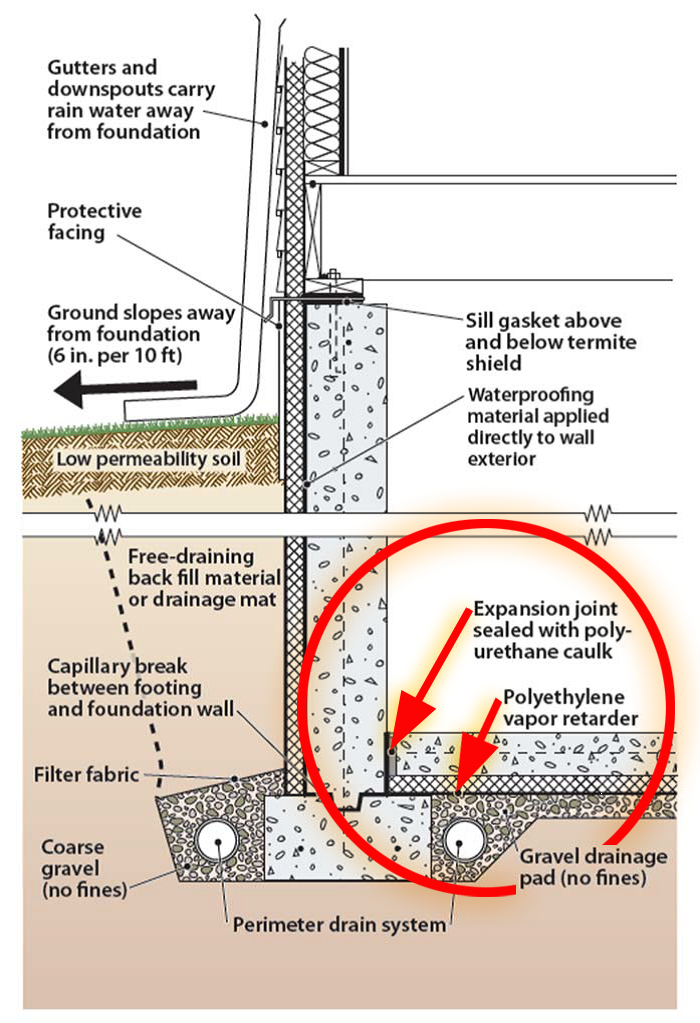
Good water management practices like sloping grade away from house, and installing gutters, perimeter drain pipe, a capillary break, and free-draining soils or drainage mat protect the foundation from water saturation.
Image

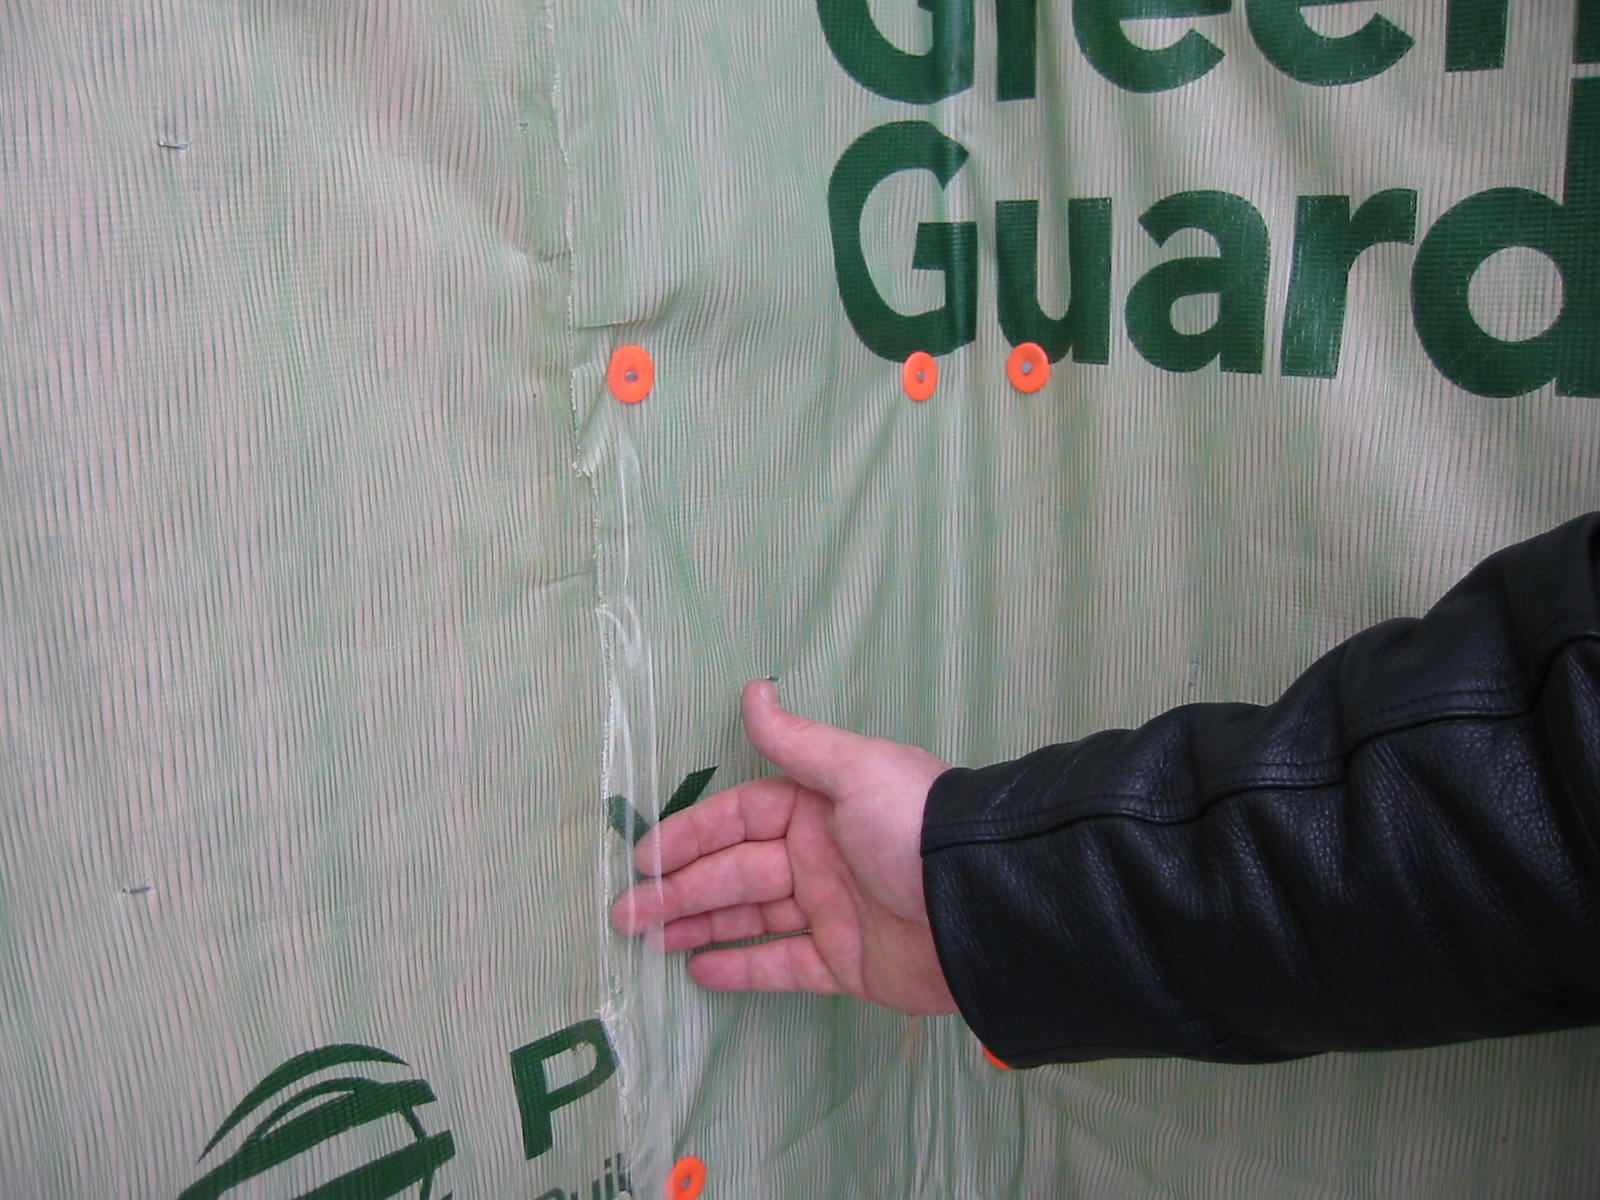
House wrap is sealed at all seams and overlaps flashing to serve as a continuous drainage plane over the exterior walls.
Image
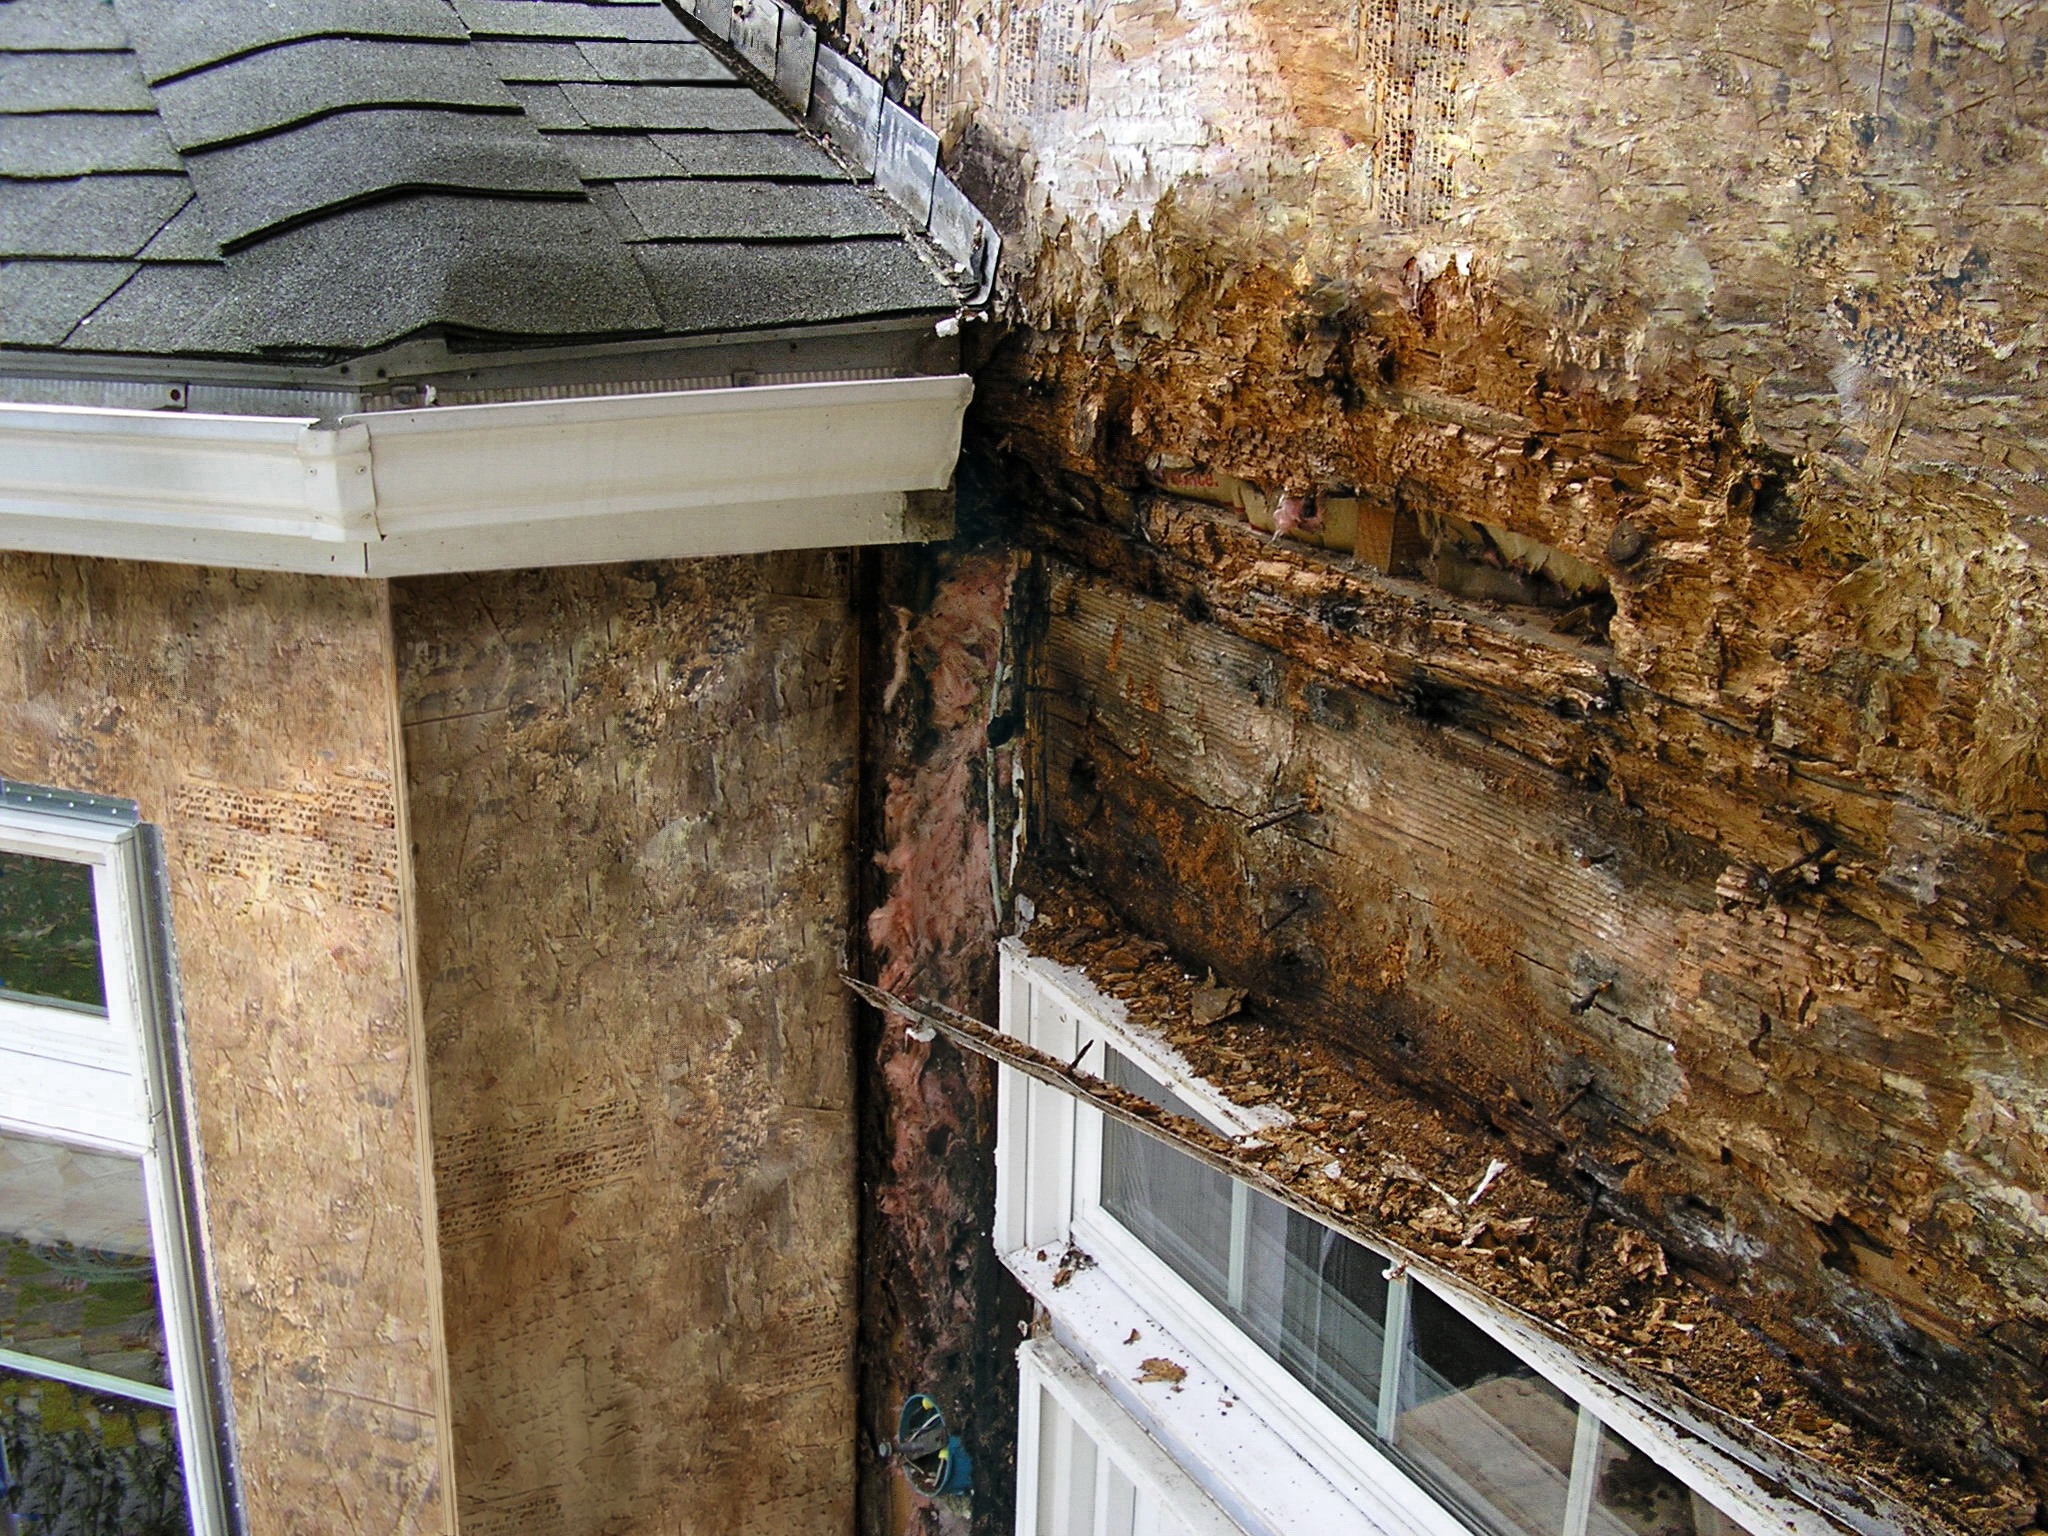
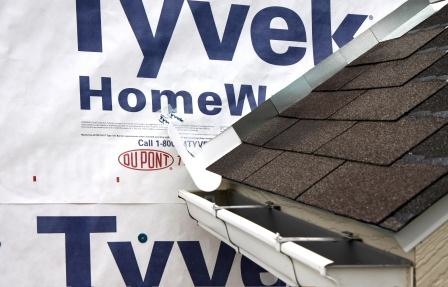
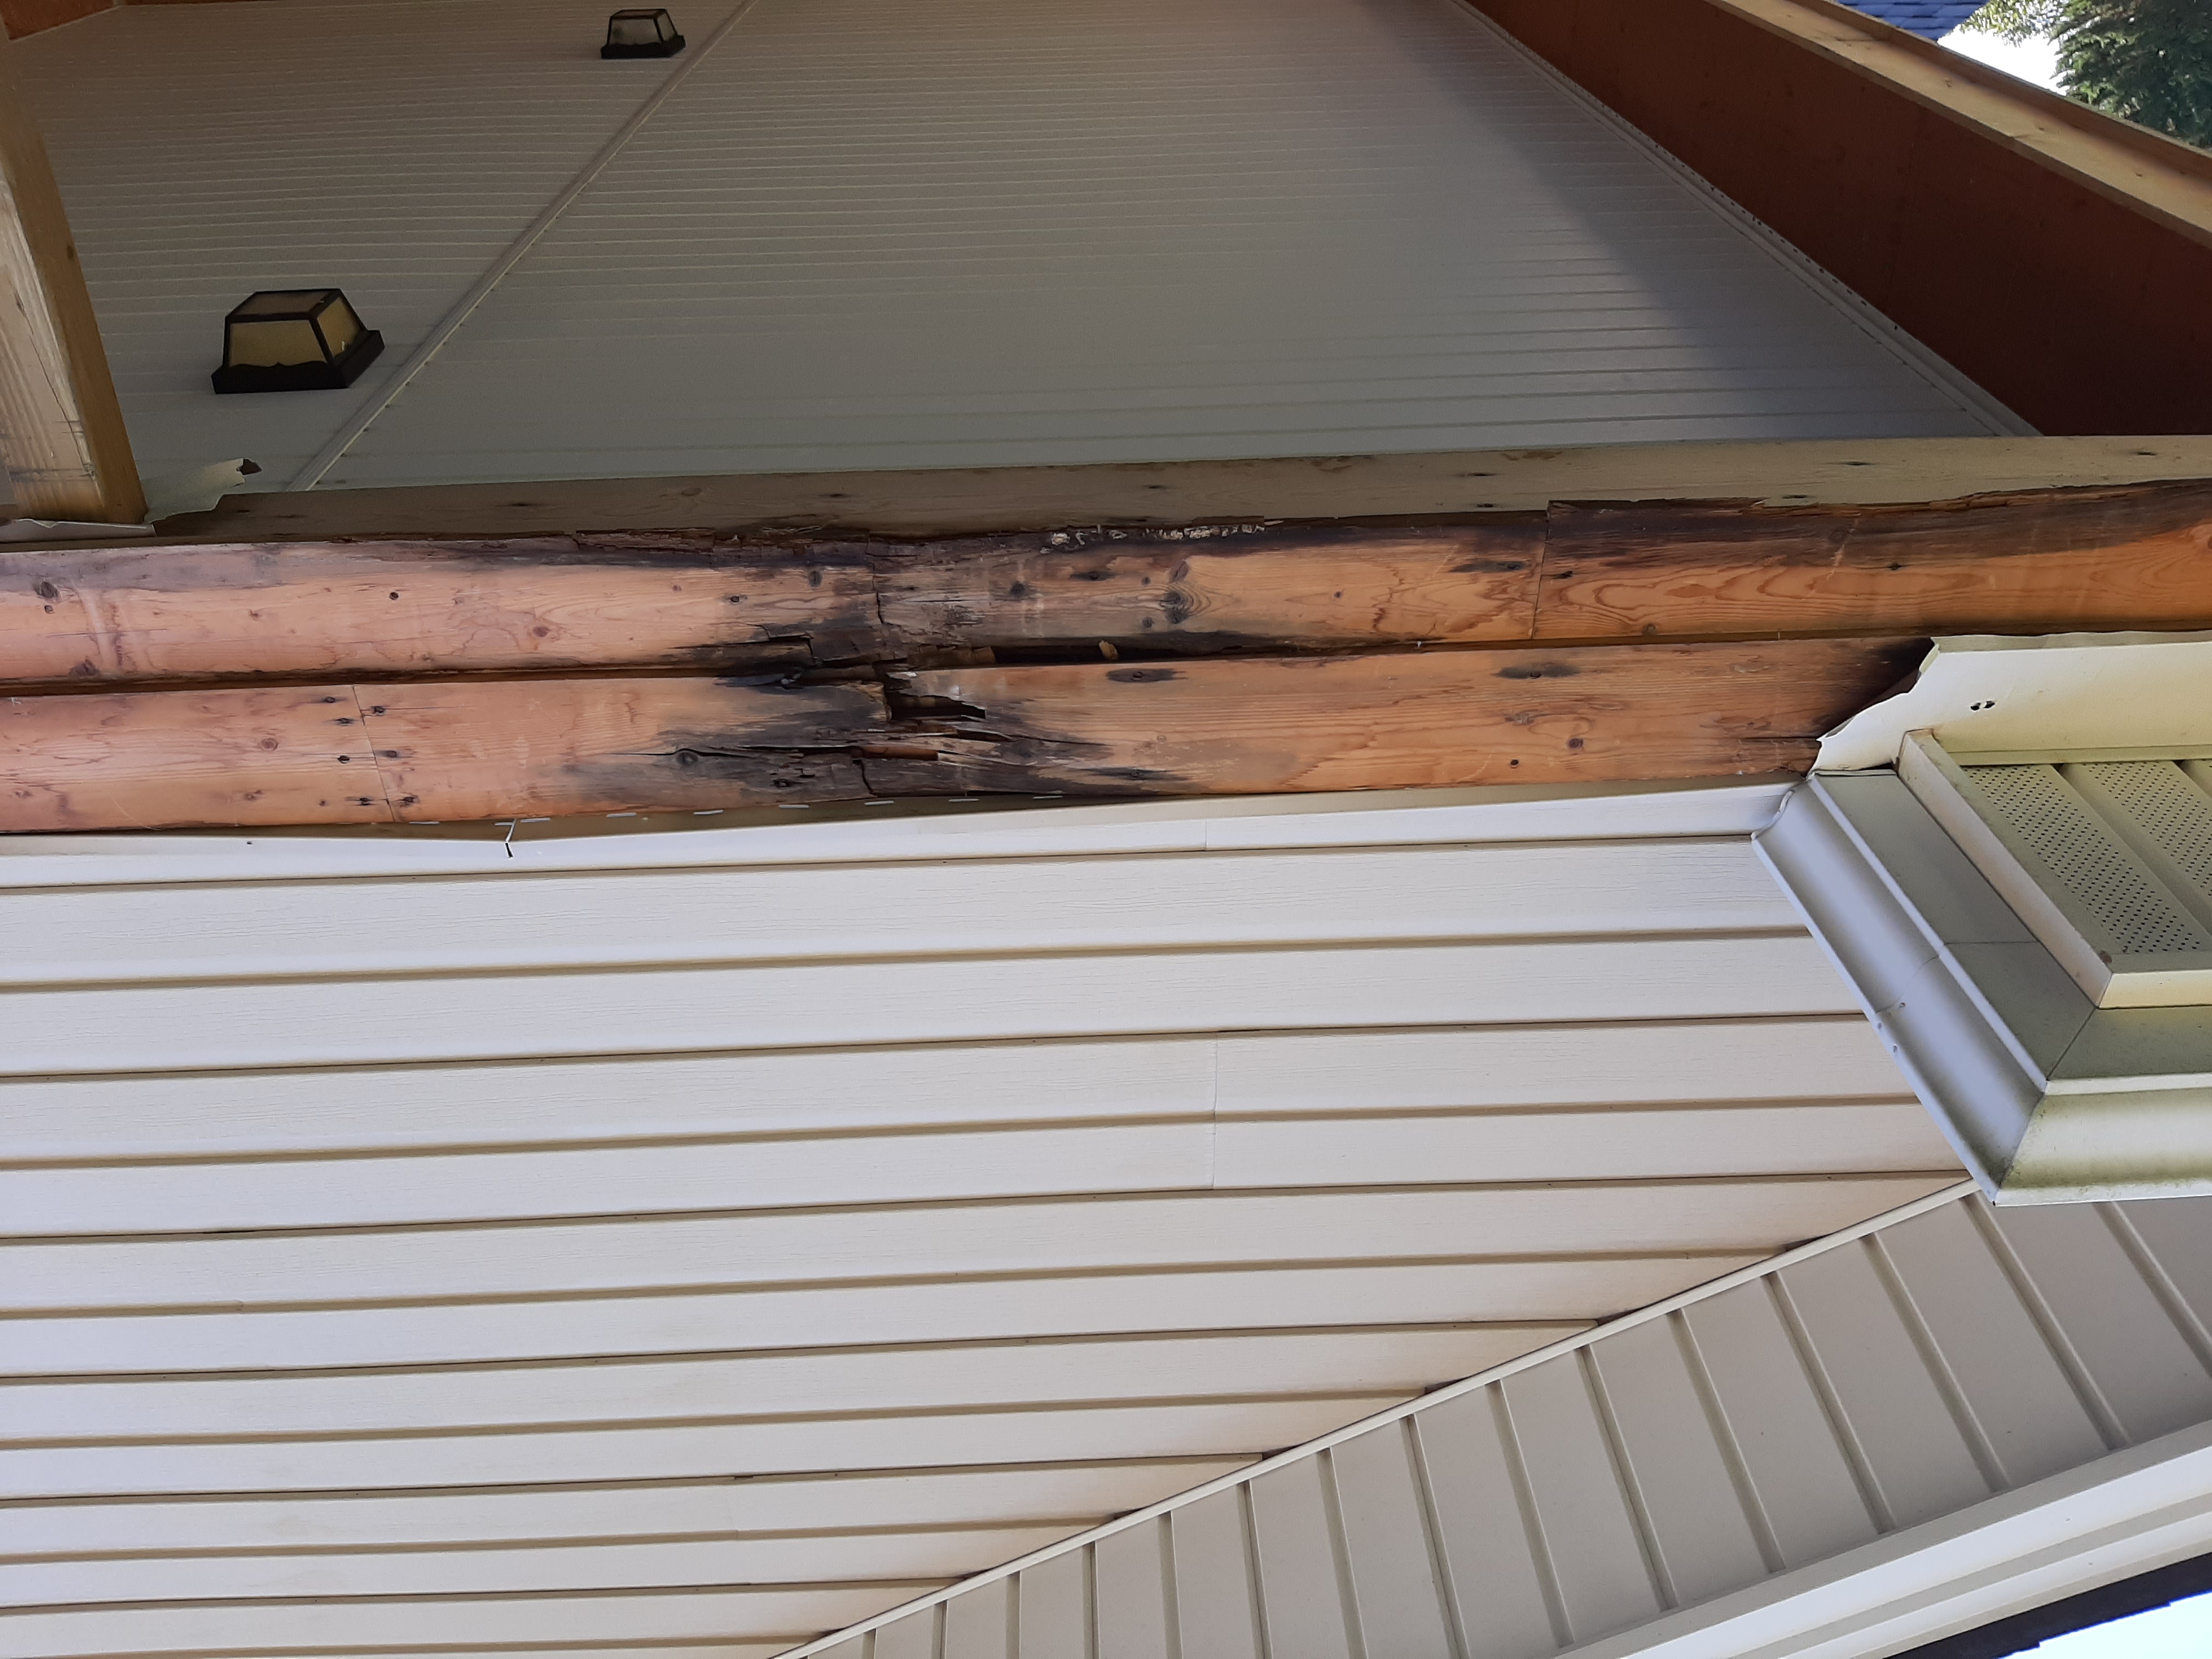
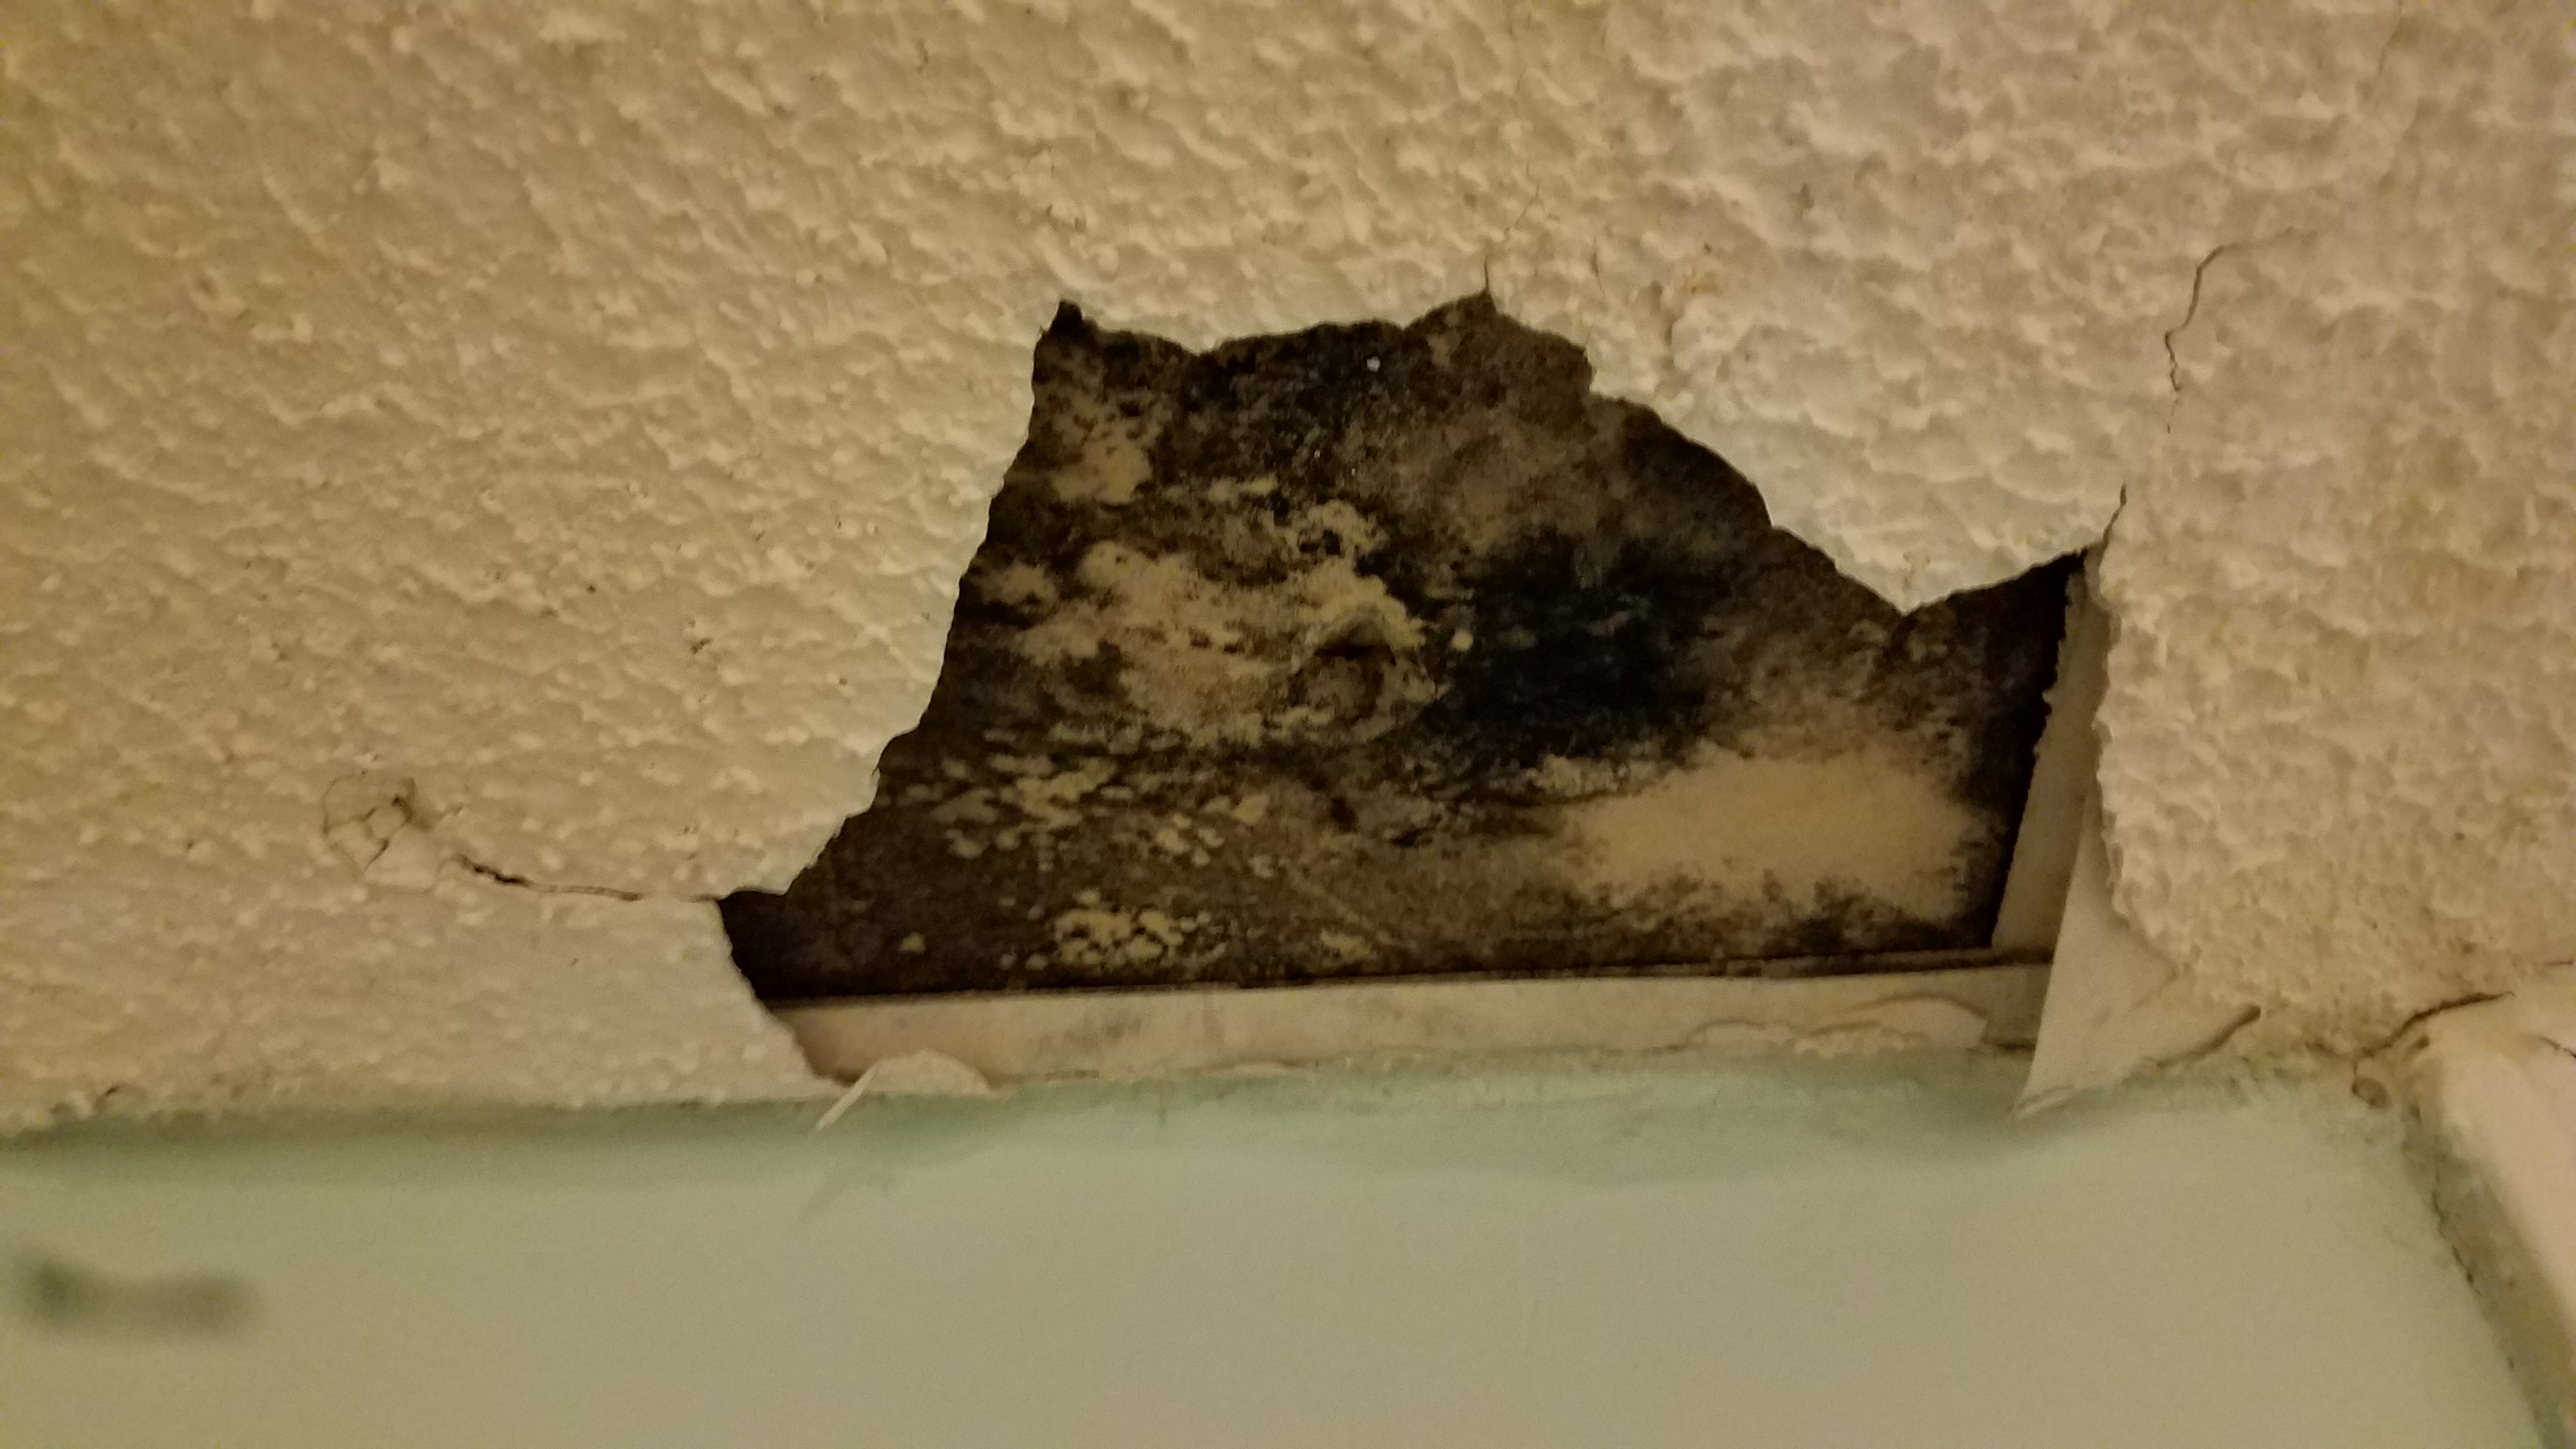
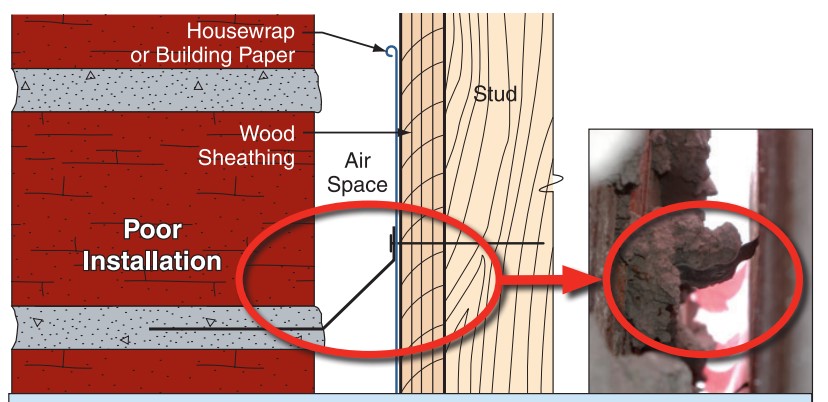
Improper flashing can allow rain water into walls, causing significant damage
Image
Image
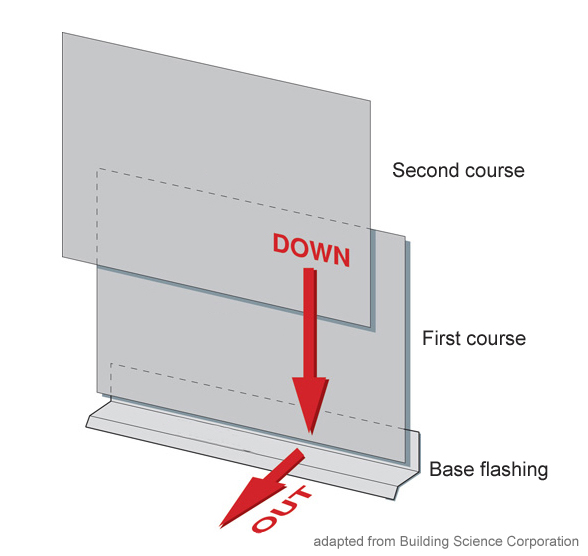
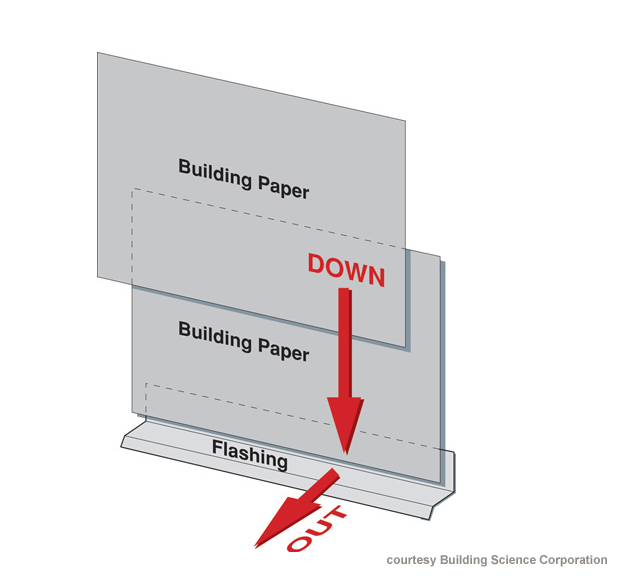
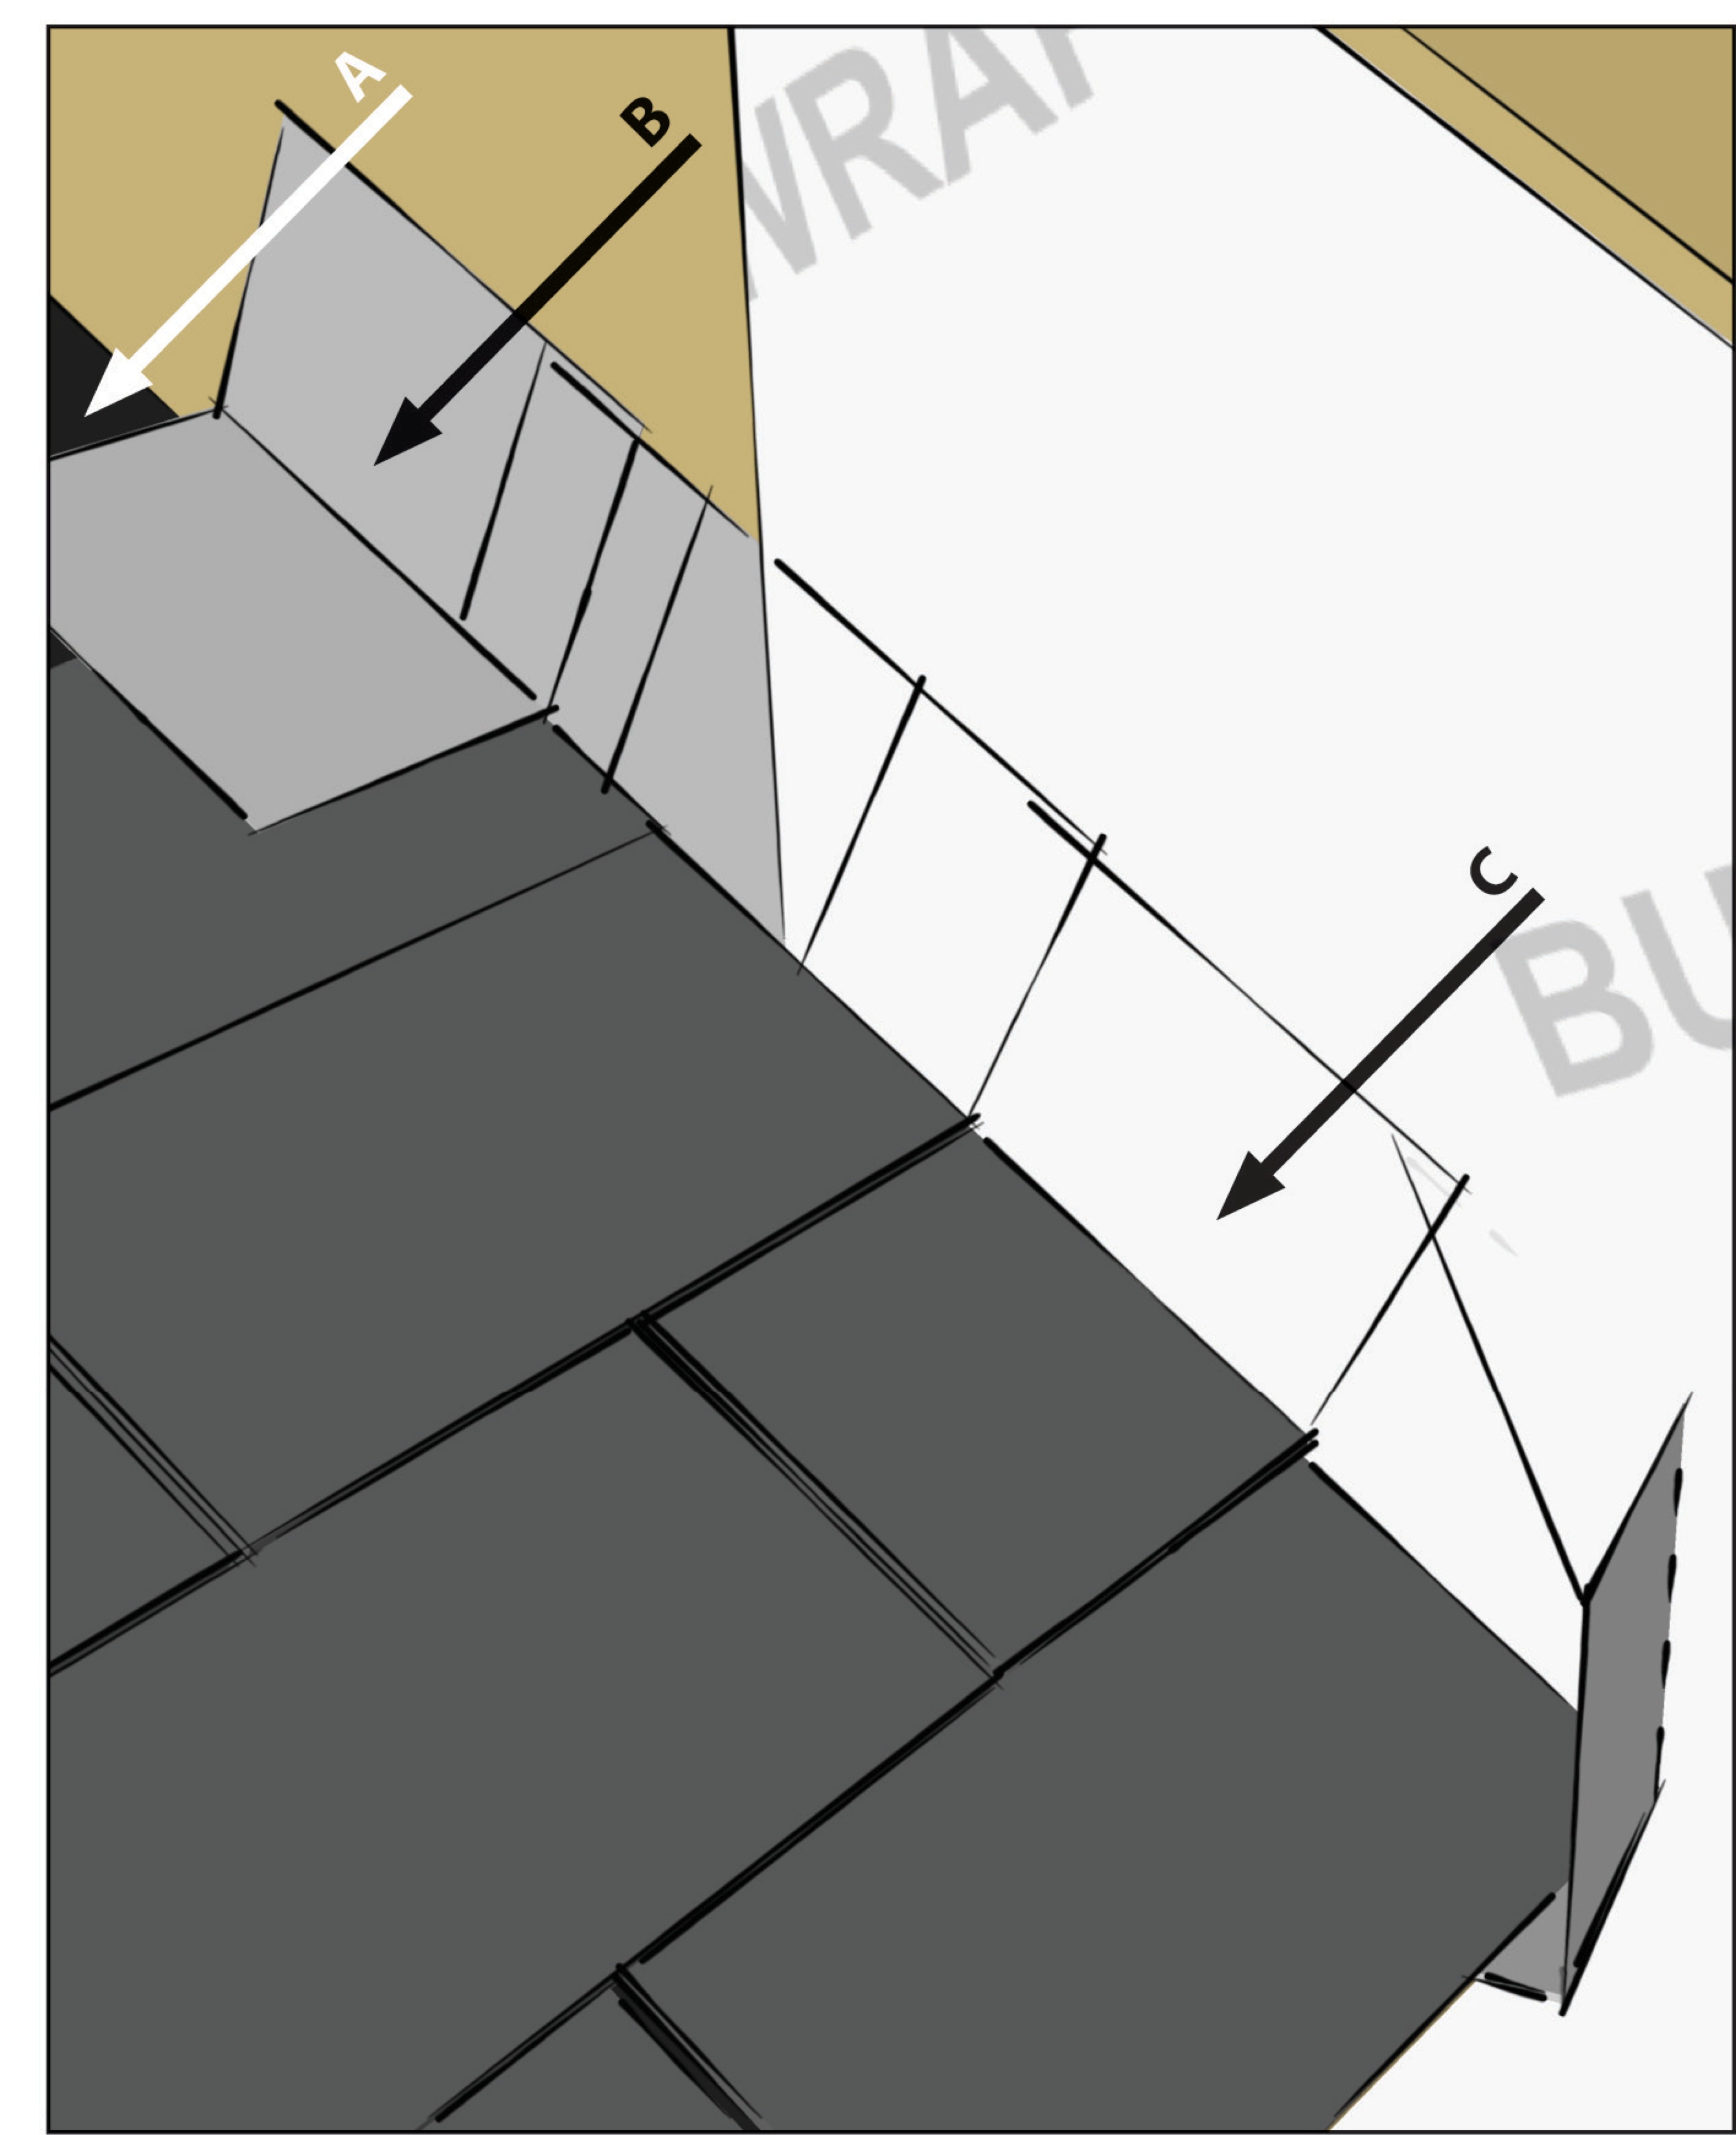
Install all layers of the drainage plane to overlap, not underlap, to direct bulk water down and out of the wall.
Image
Image

Install furring strips over house wrap to provide a rainscreen behind wood siding.
Image
Image
Image
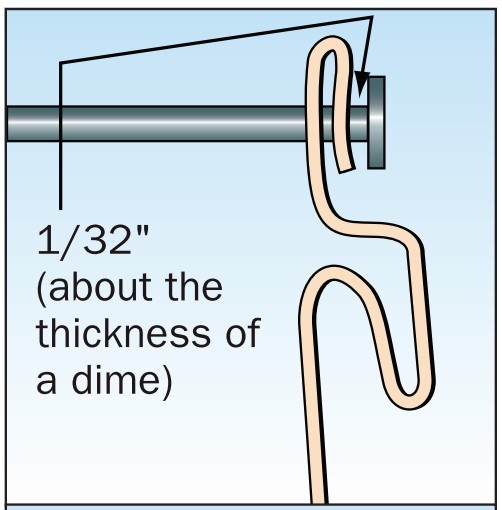
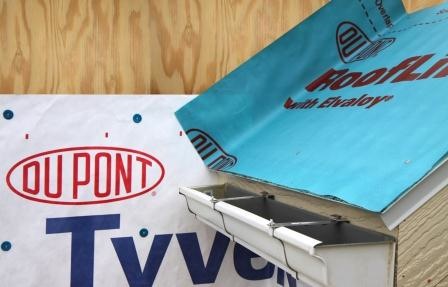
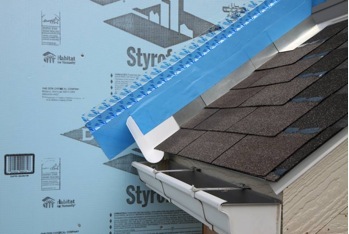
Install shingle starter strip then kick-out diverter; attach to roof deck but not sidewall
Image
Image
Image

Image

Image
Image
Image
Image
Image
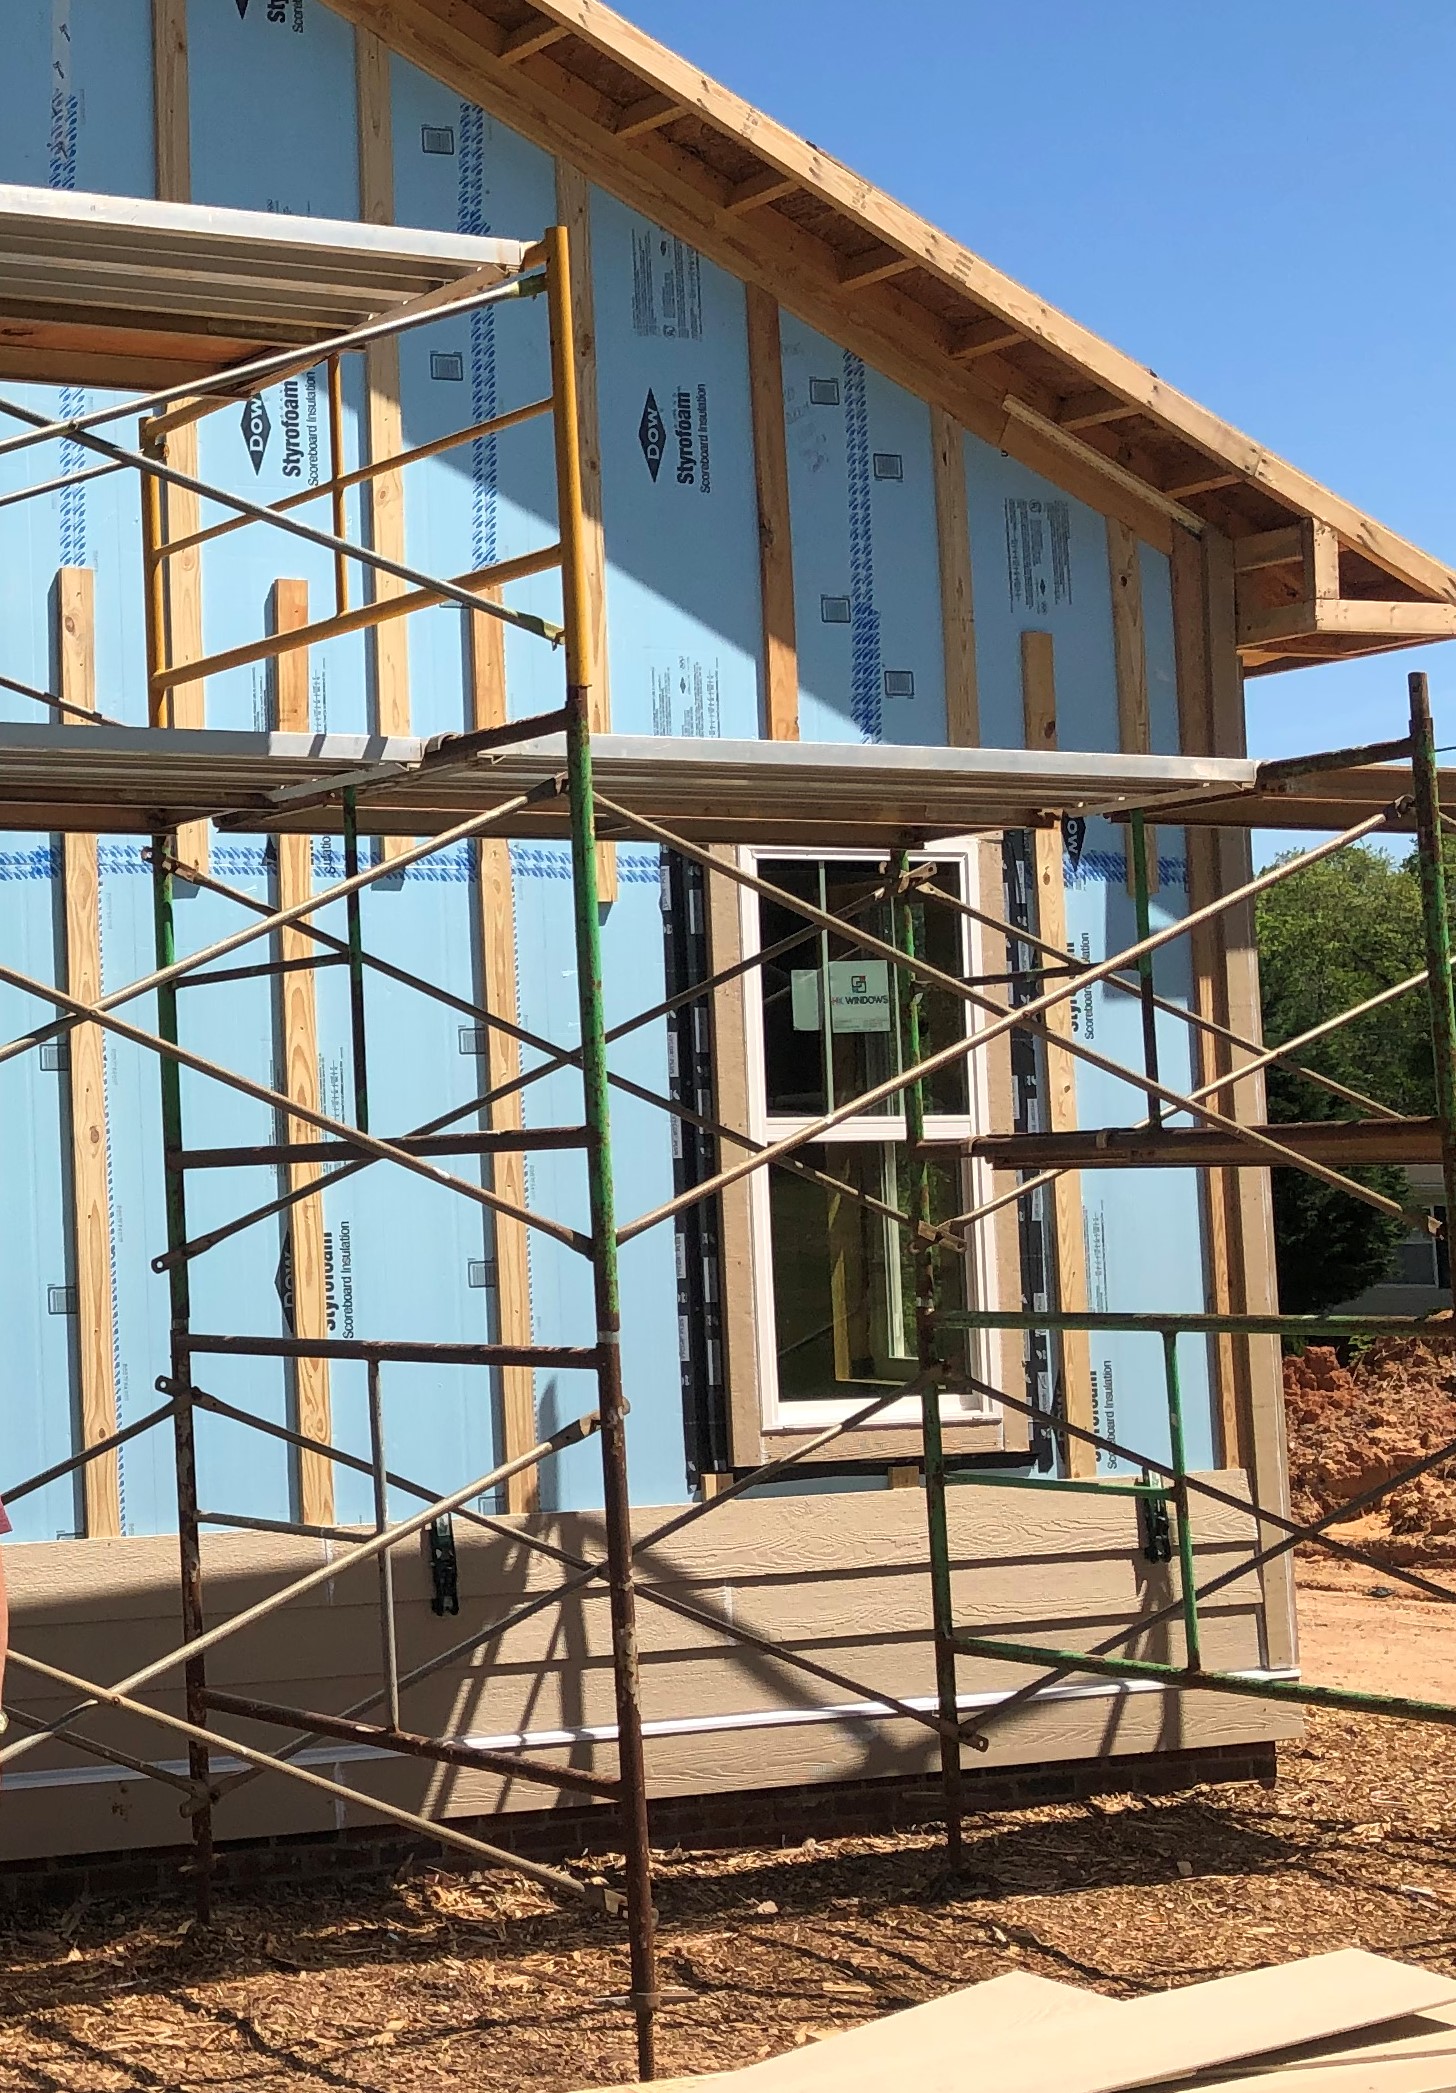
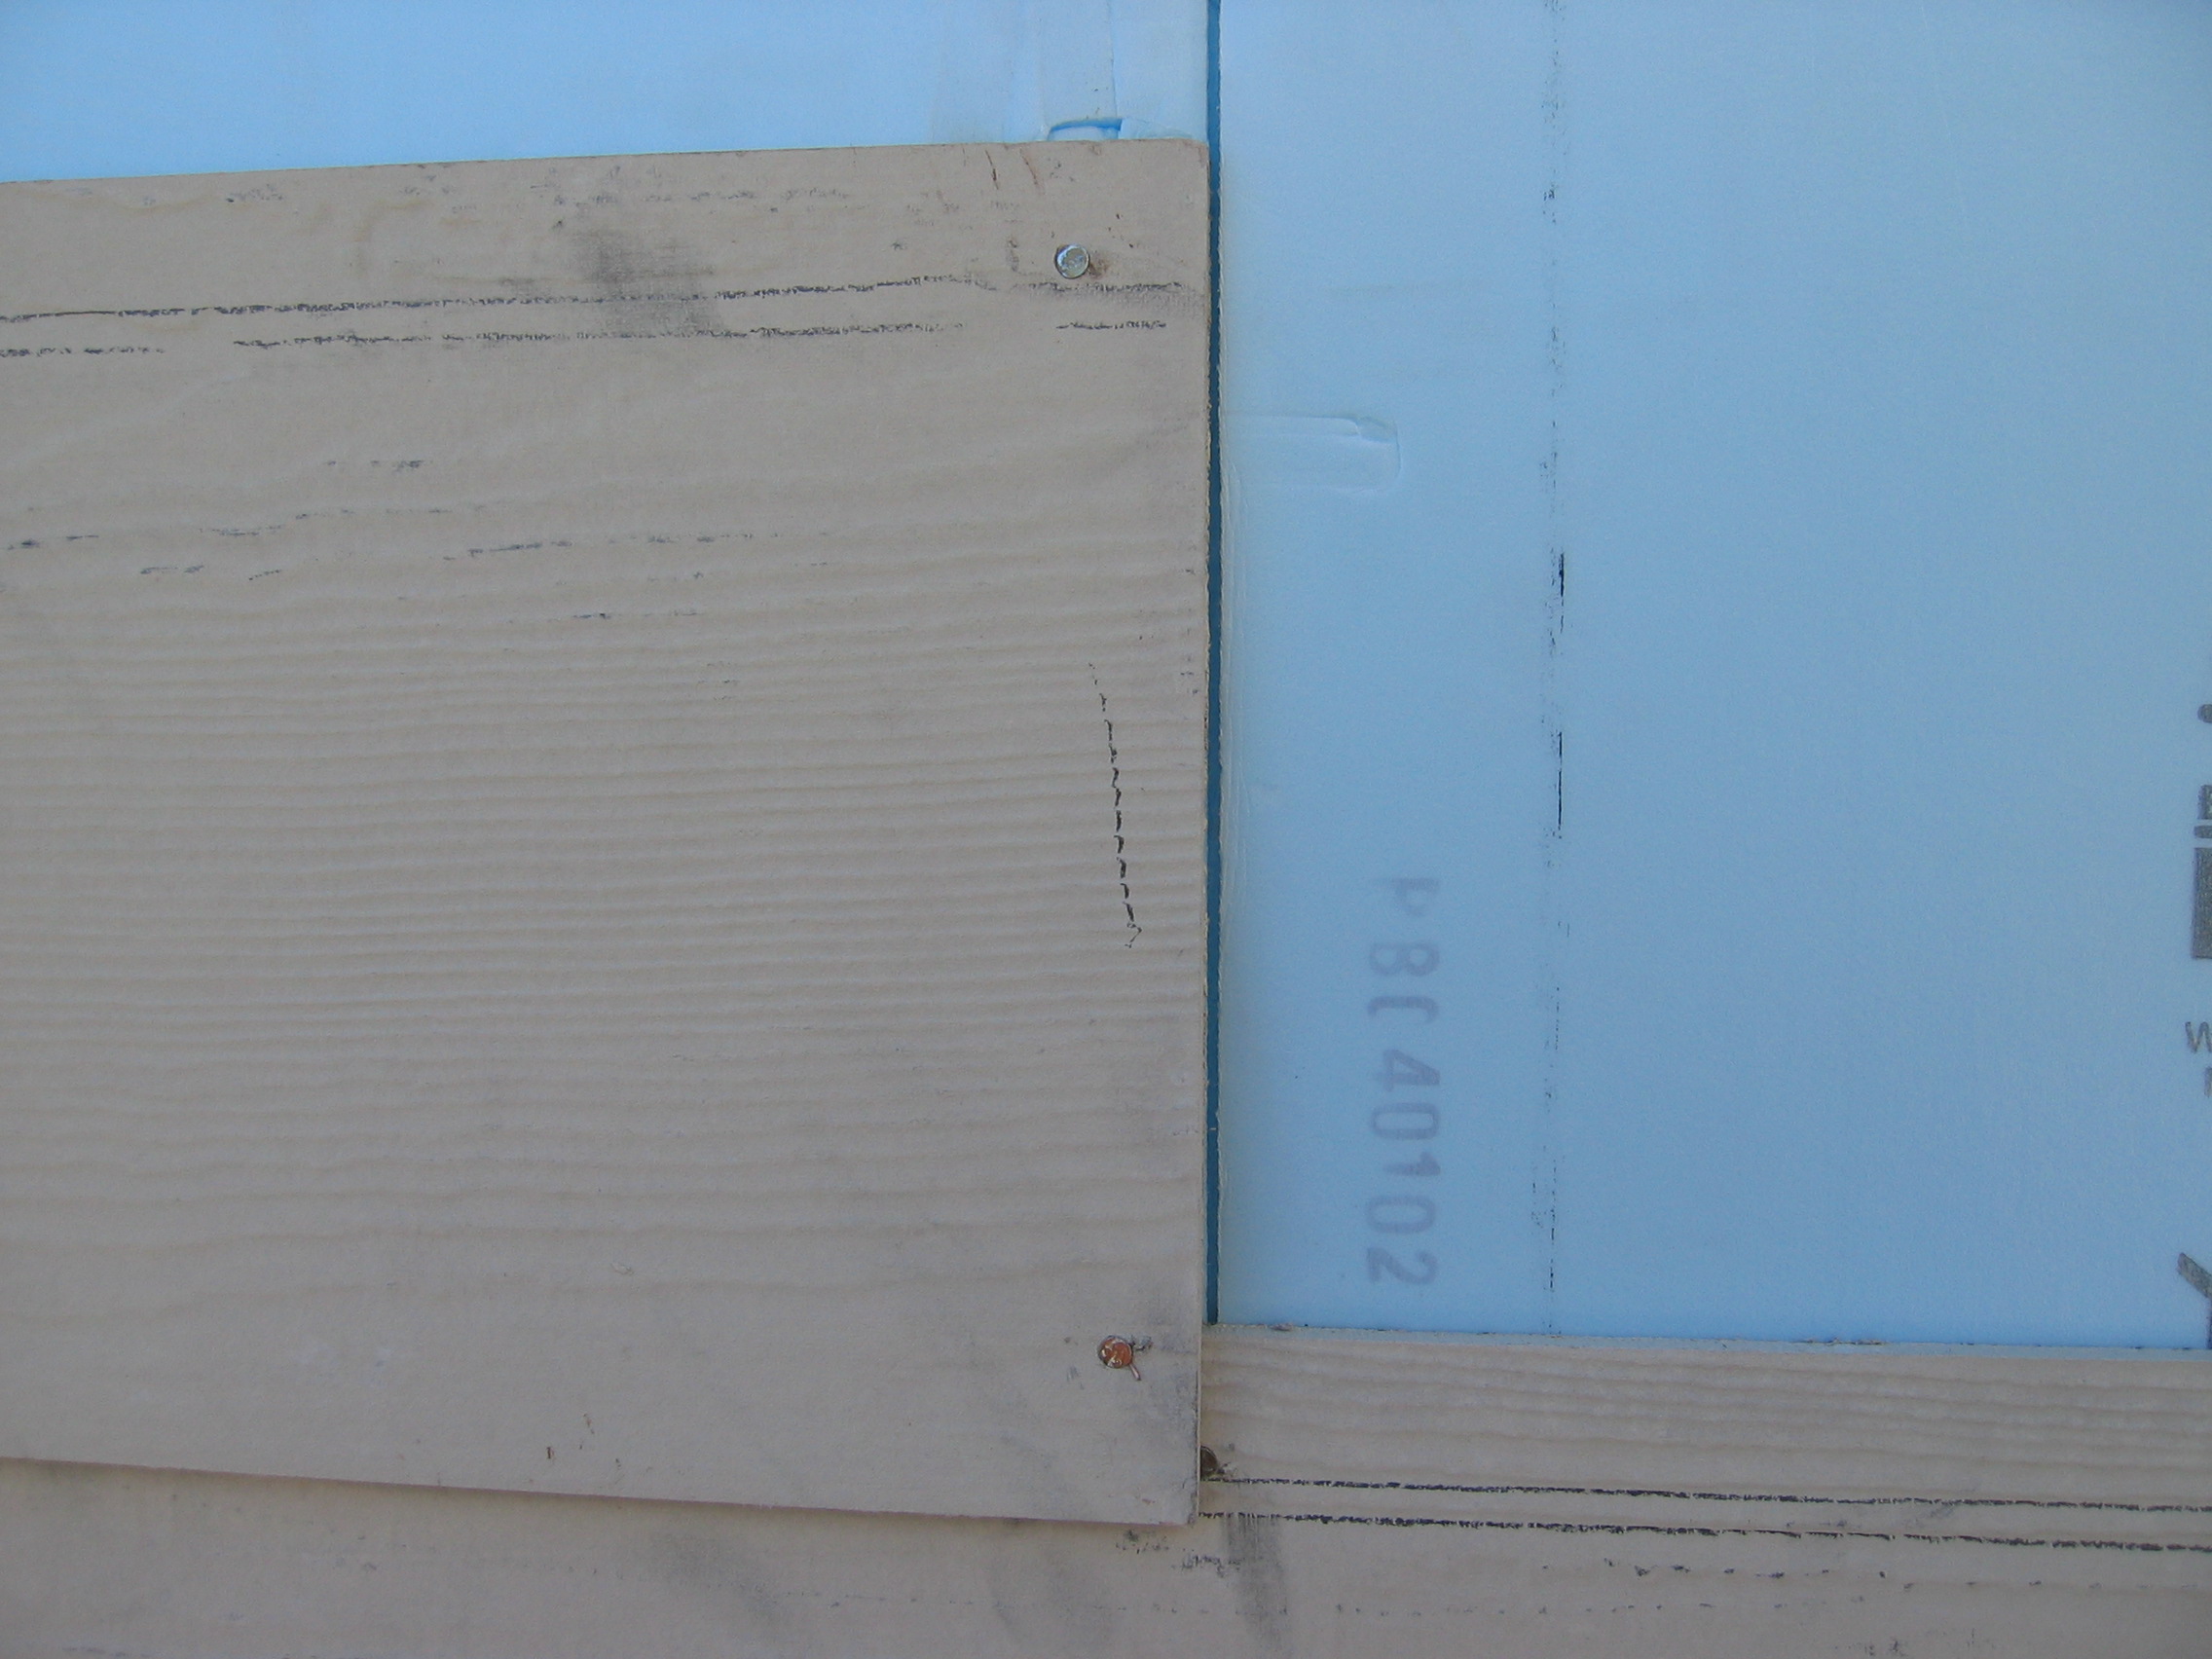
Over the taped rigid foam board, 2x4 furring strips provide a ventilating air gap and drainage plane under the engineered wood lap siding. The furring strips were attached with structural screws to provide an attachment surface for the siding.
Image
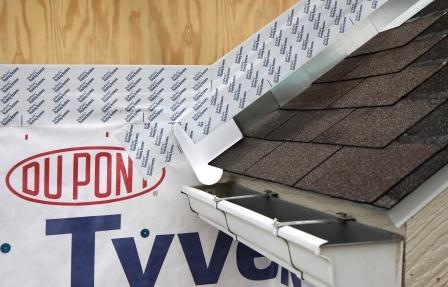
Place first shingle and next section of sidewall flashing over upper edge of diverter
Image
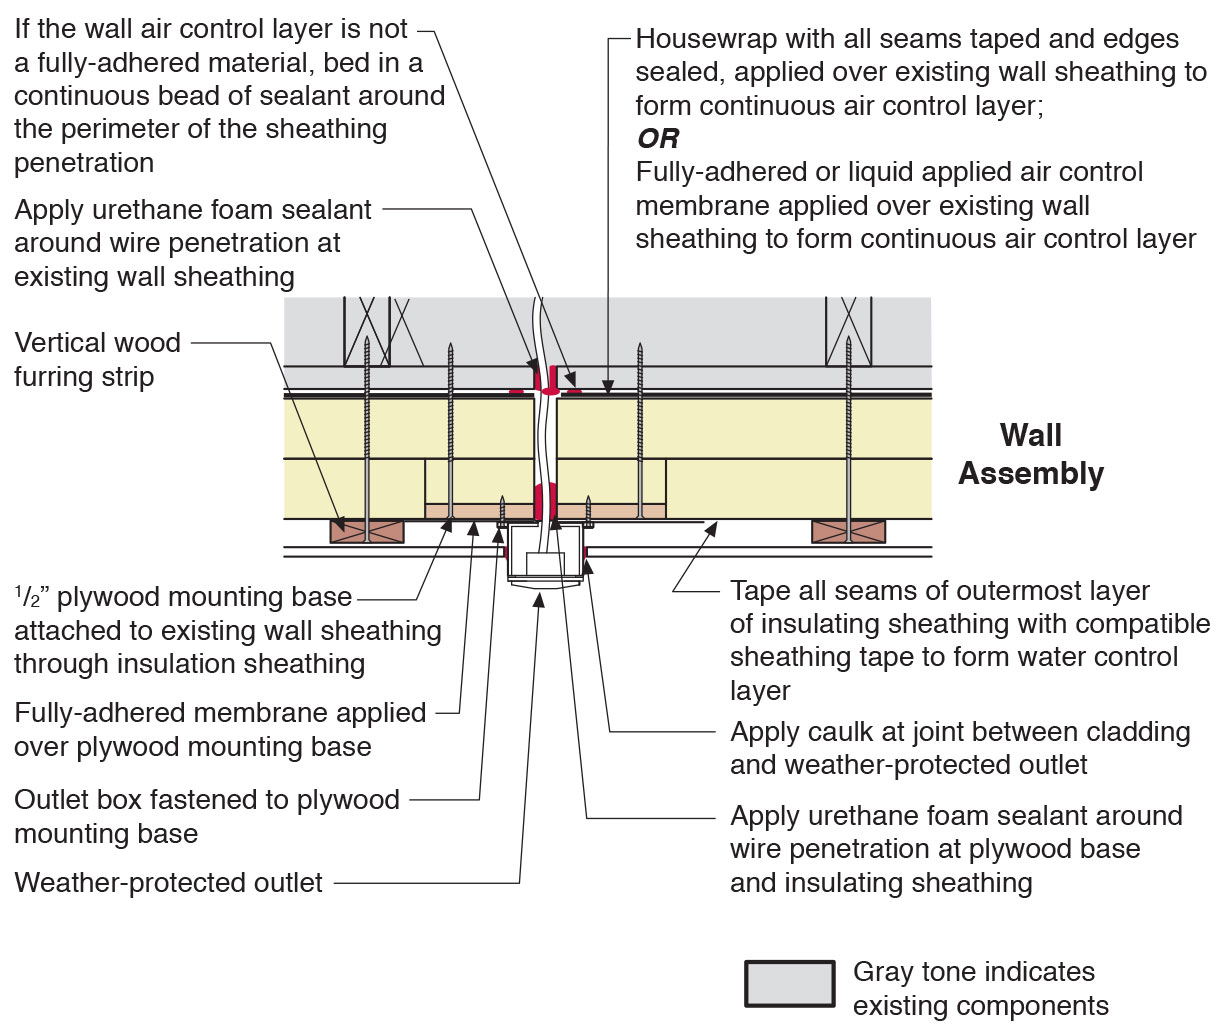
Plan view of electric box installation in exterior wall showing flashing and air sealing details
Image
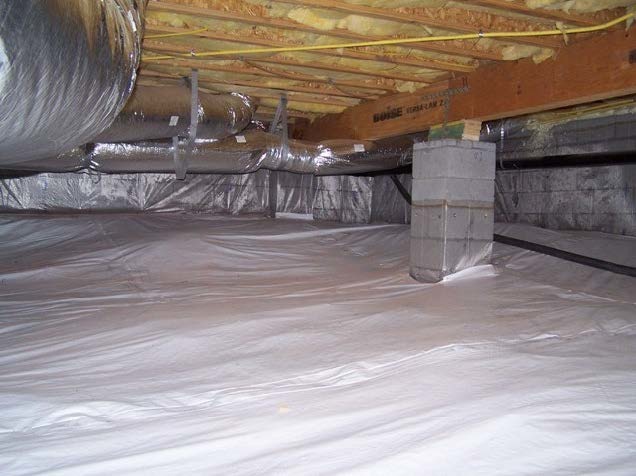
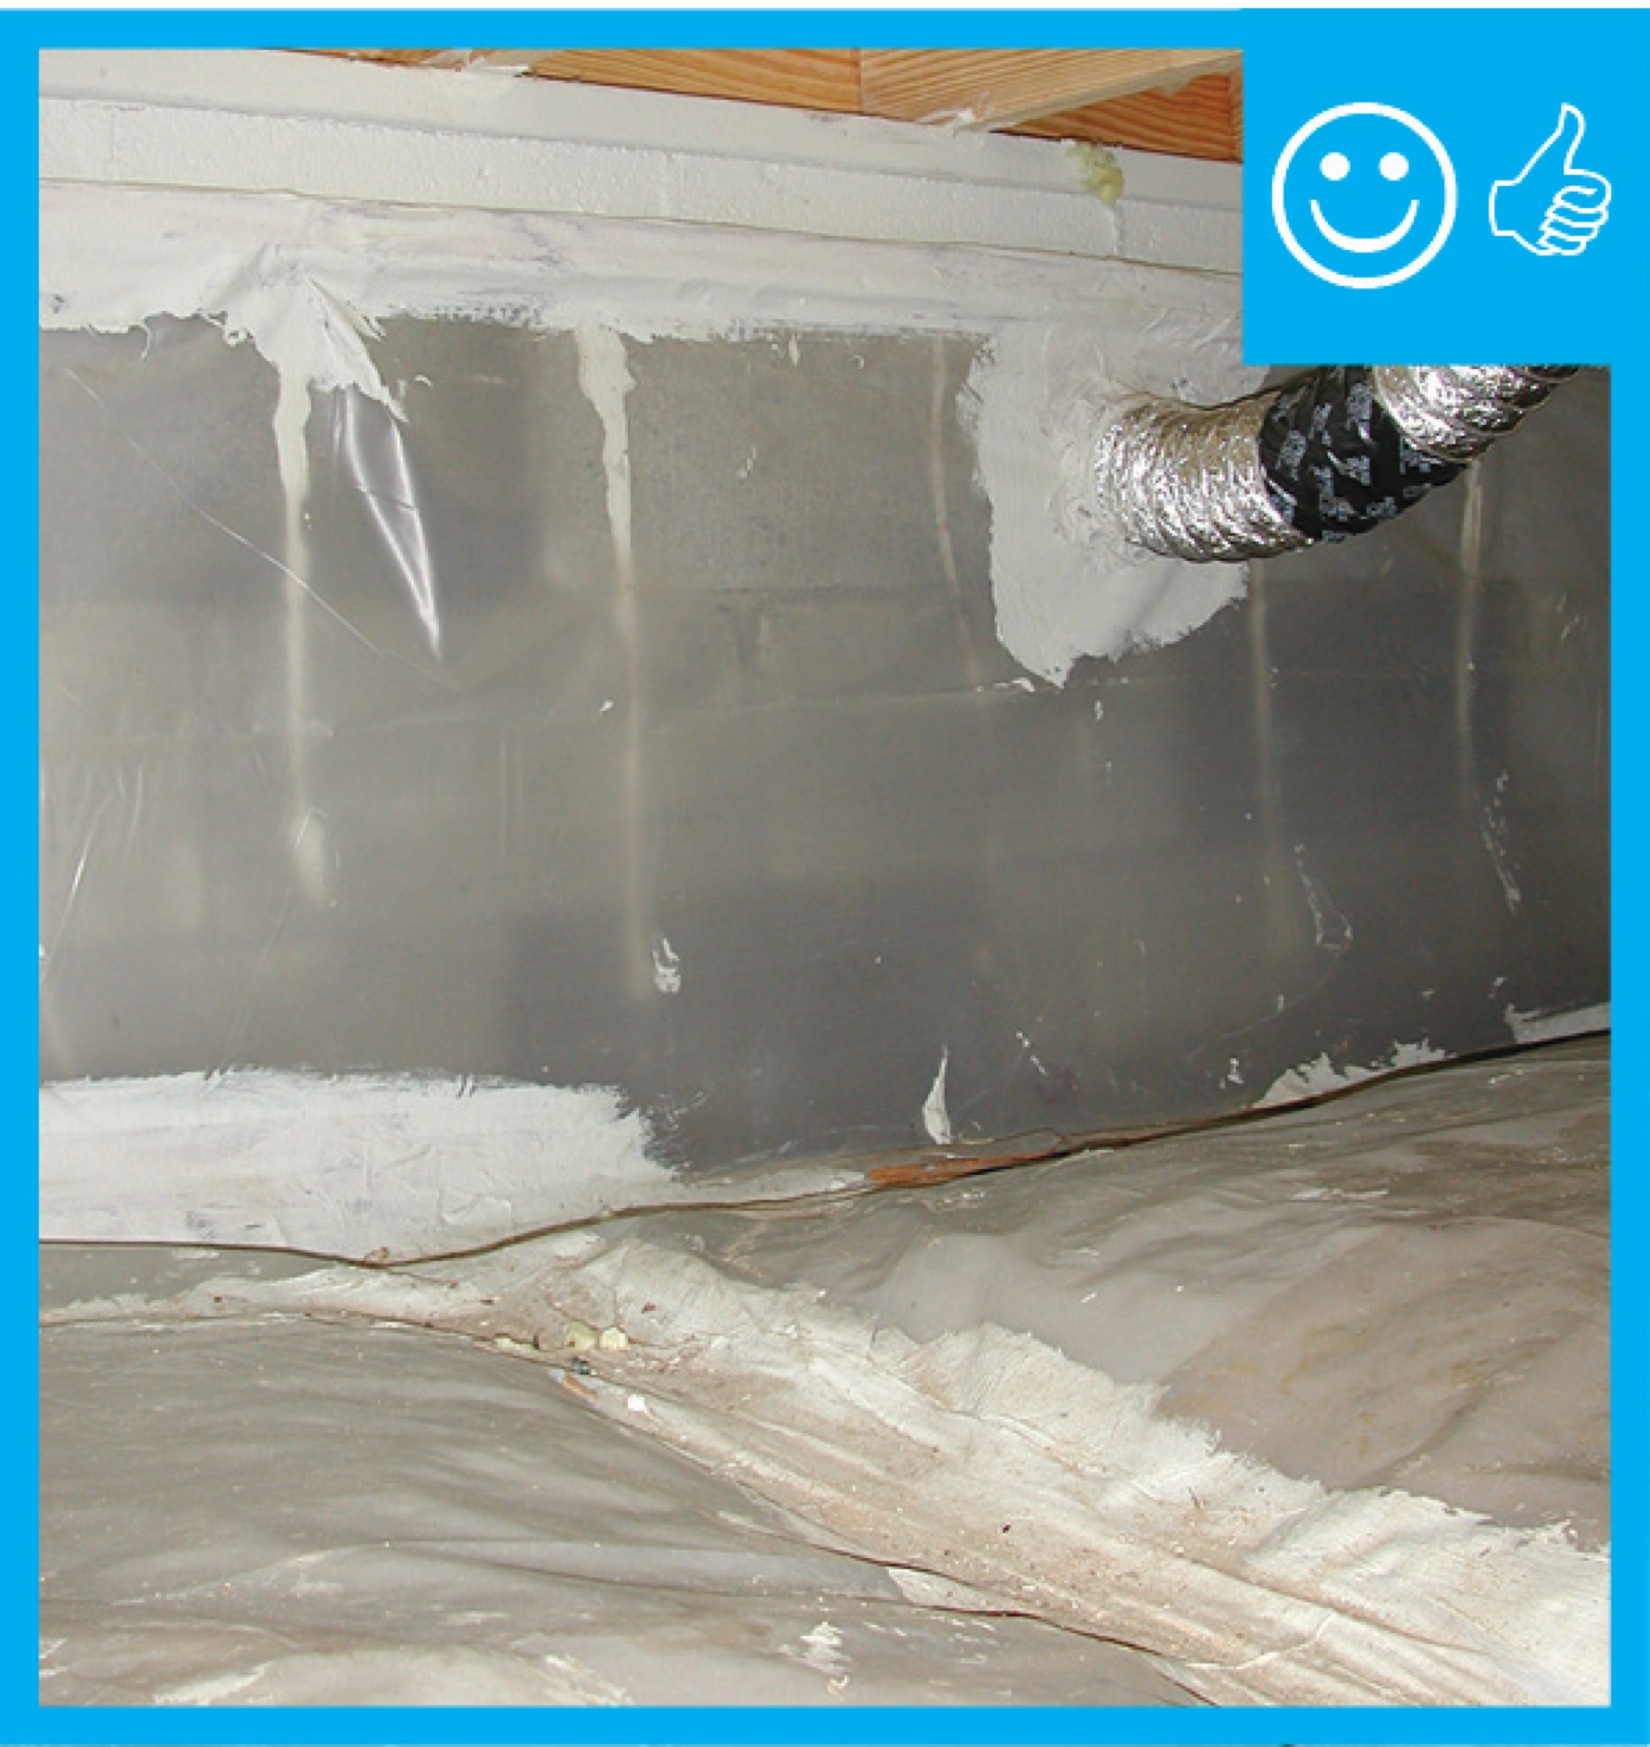
Polyethylene completely covers the floor of this crawlspace and is attached to the walls and piers as well
Image
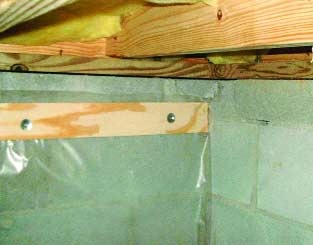
Polyethylene is being attached to the crawlspace floor and walls with plywood furring strips
Image

Image
Image
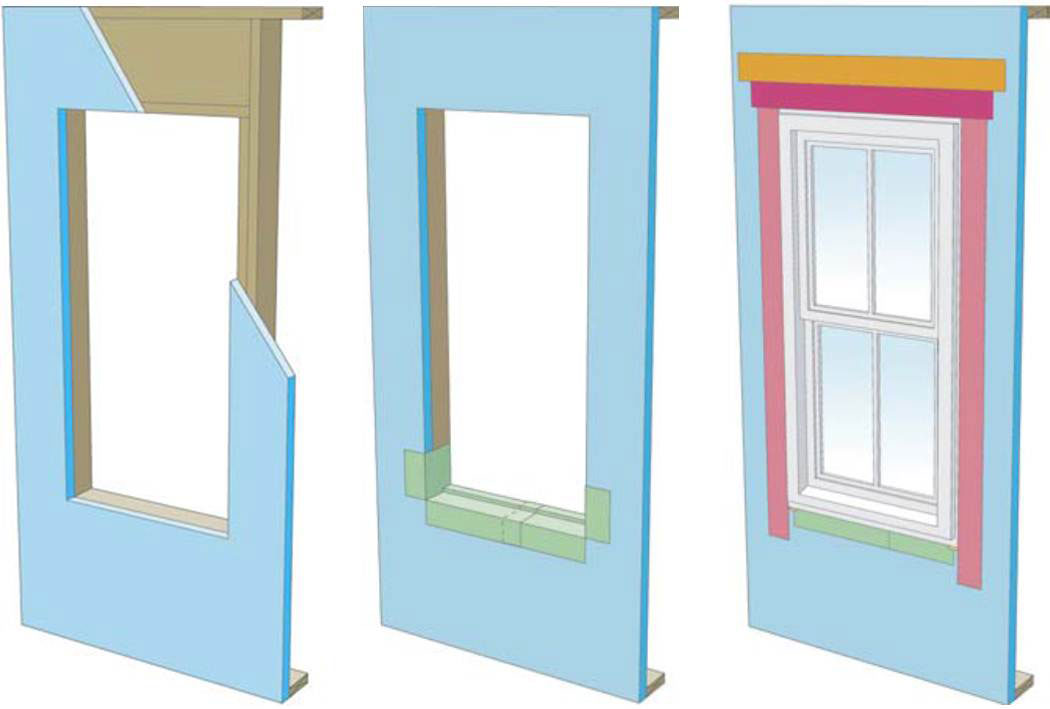
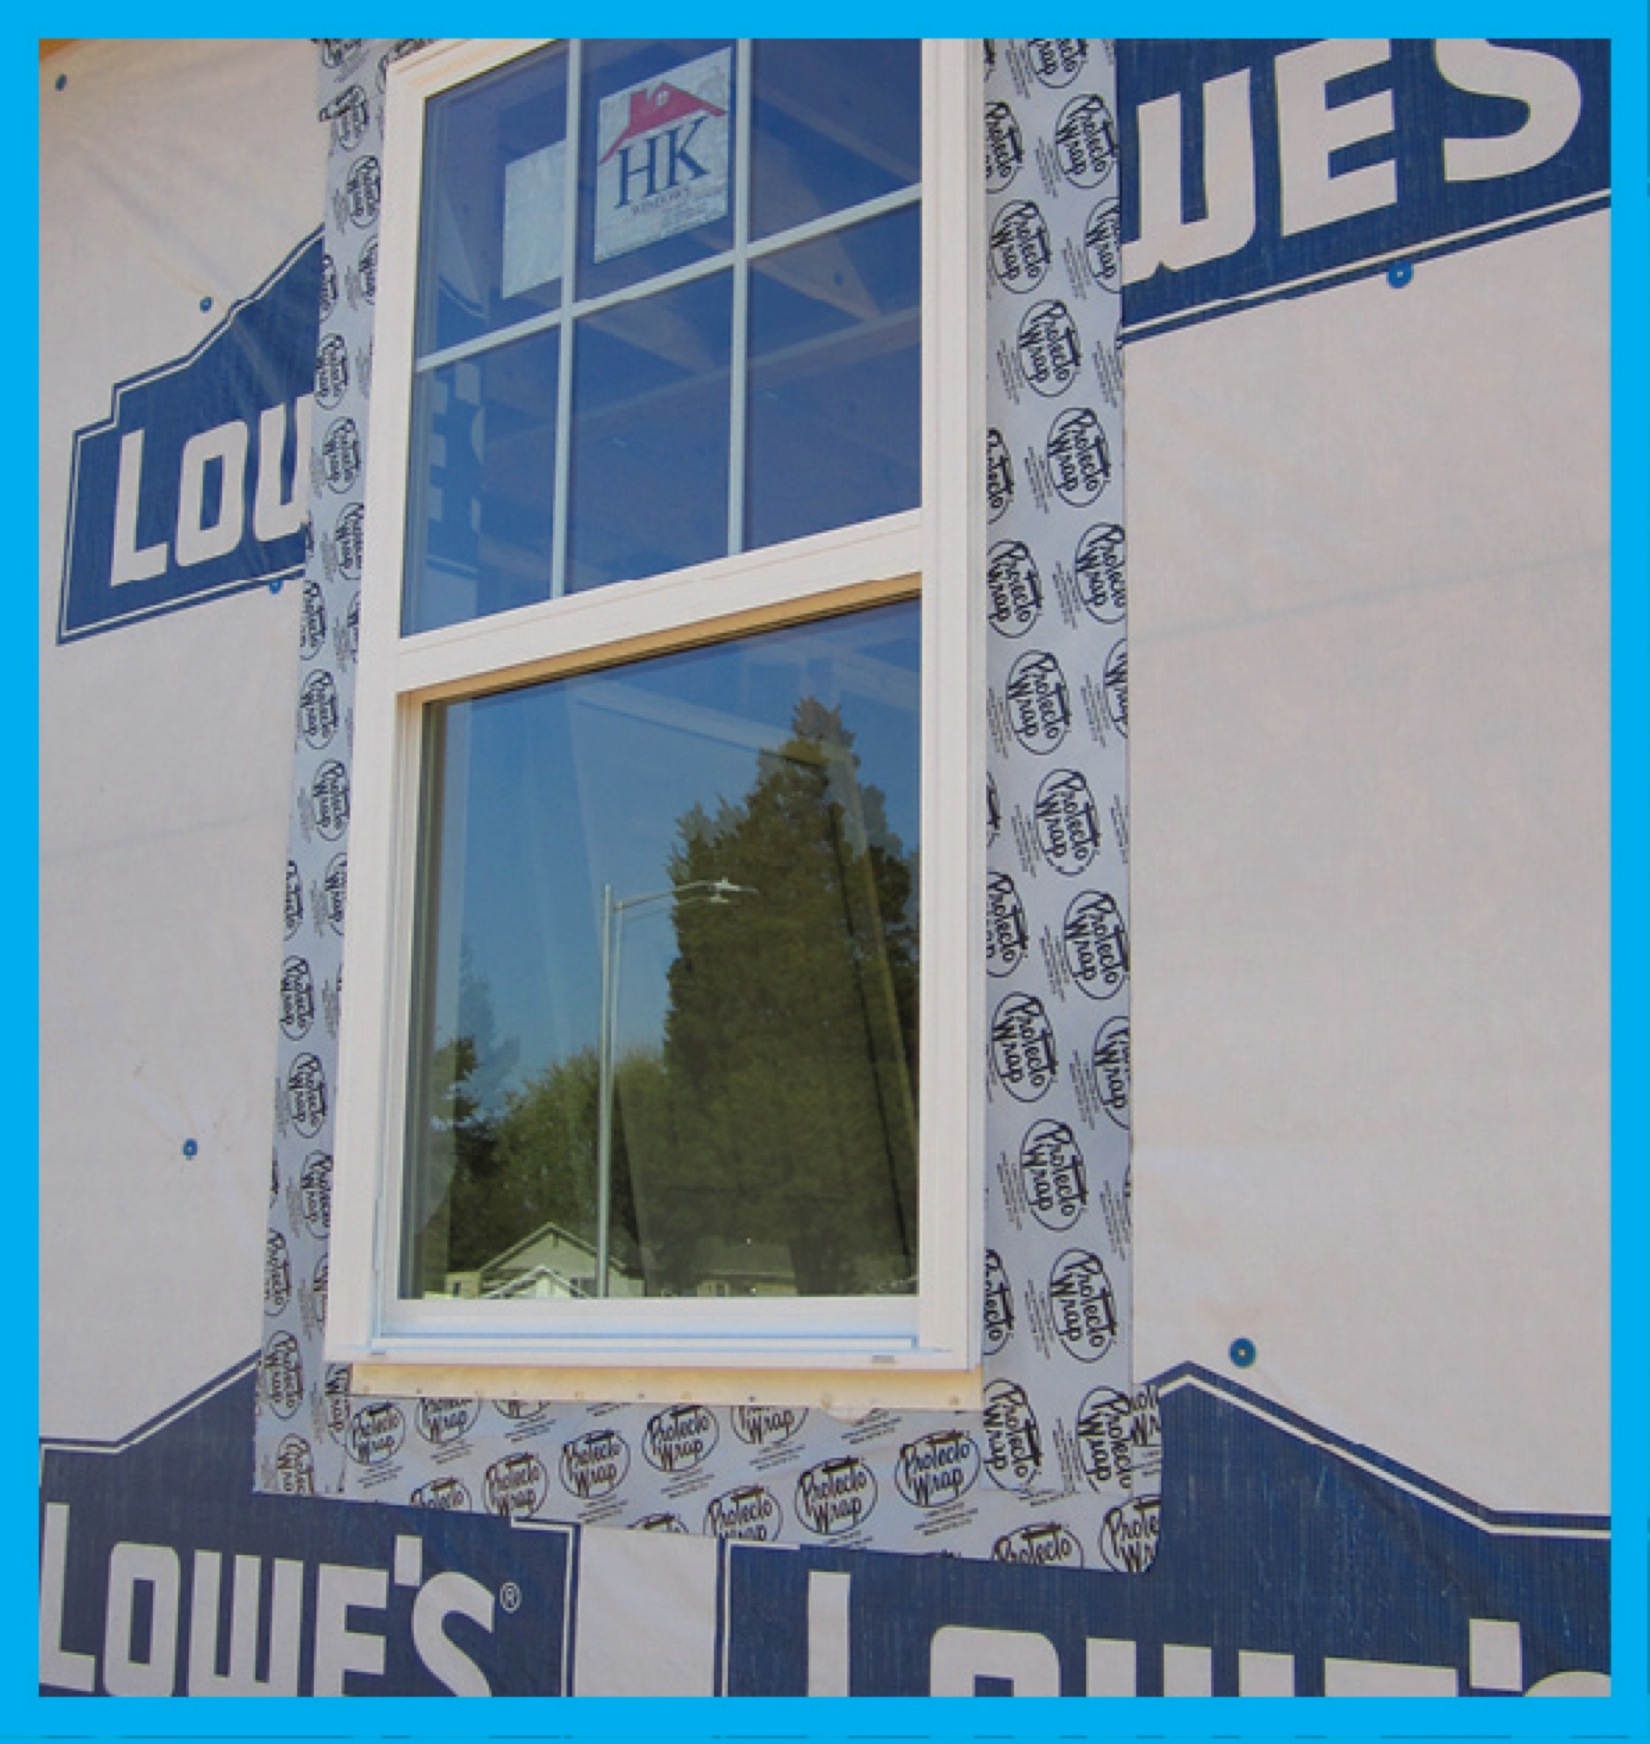
Proper flashing around windows is especially important when the rigid foam serves as the drainage plane in the wall
Image
Image
Image
Image
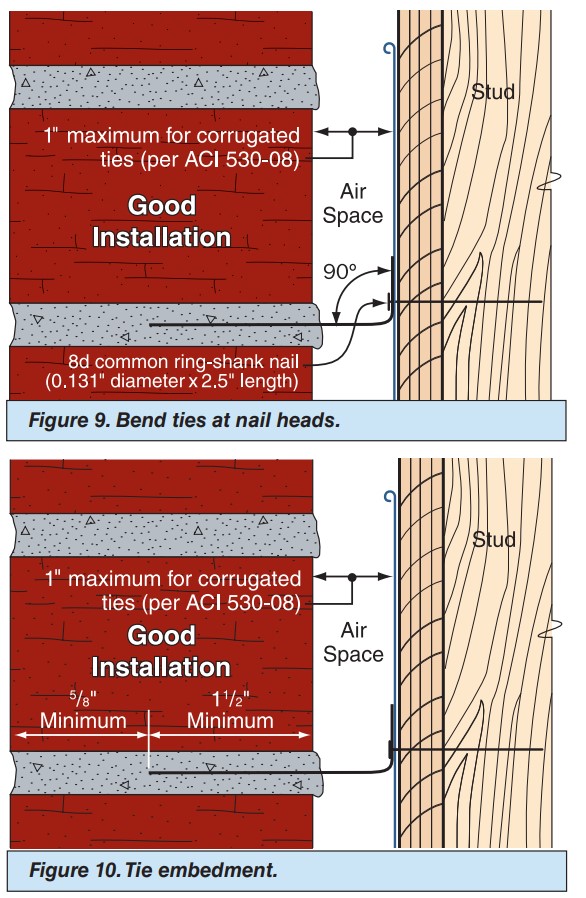
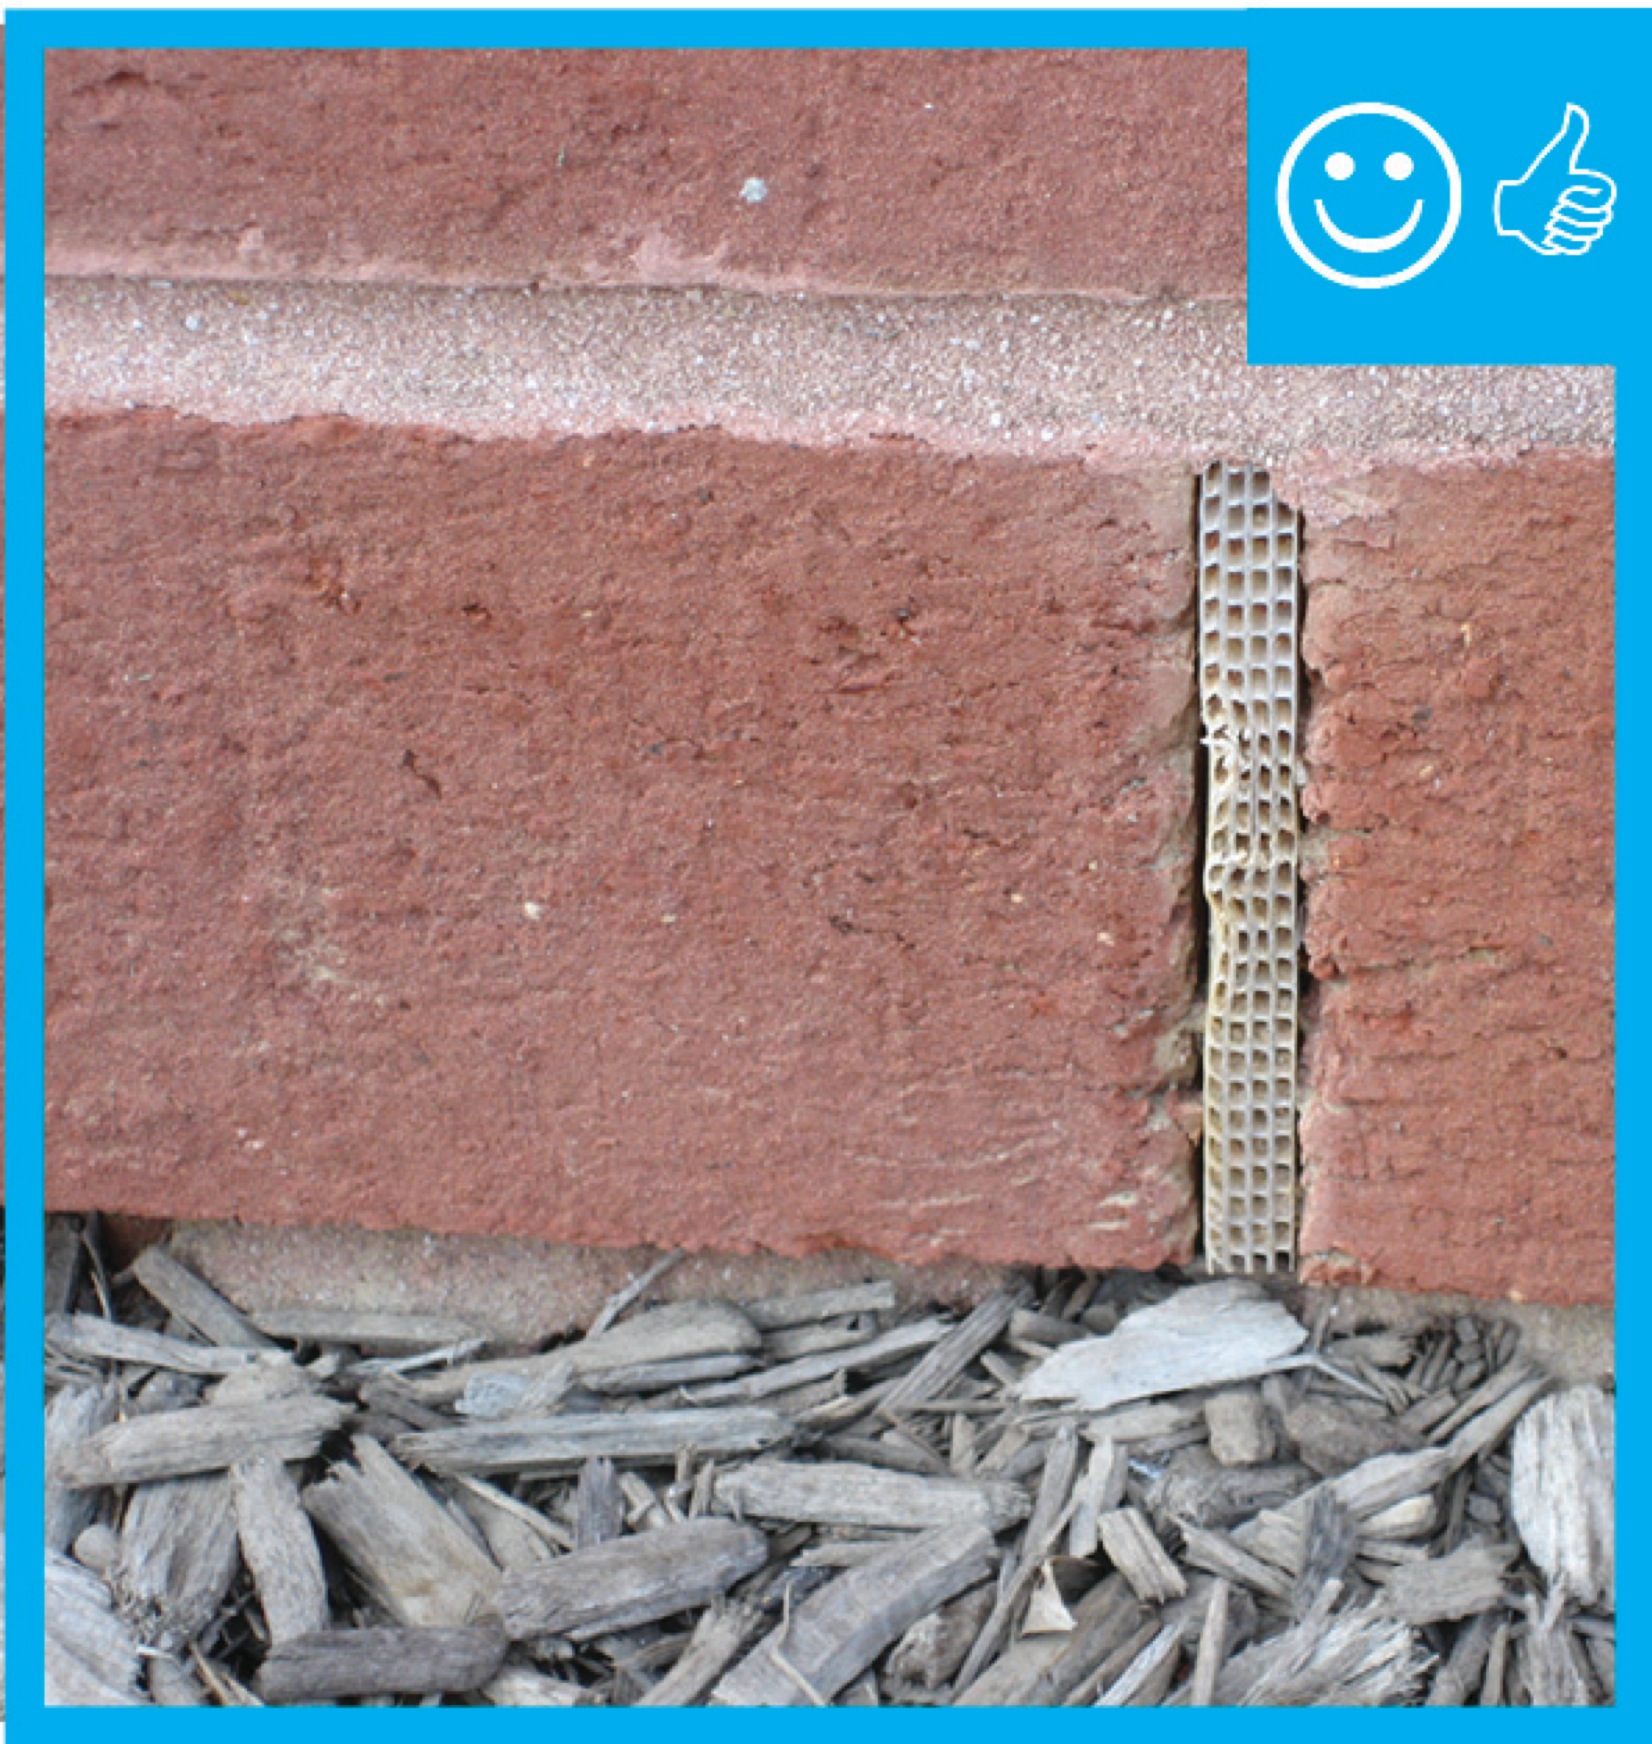
Right – The ties are bent at a 90 degree angle at the nail head and embedded into the mortar joint at least 1.5 inches.
Image
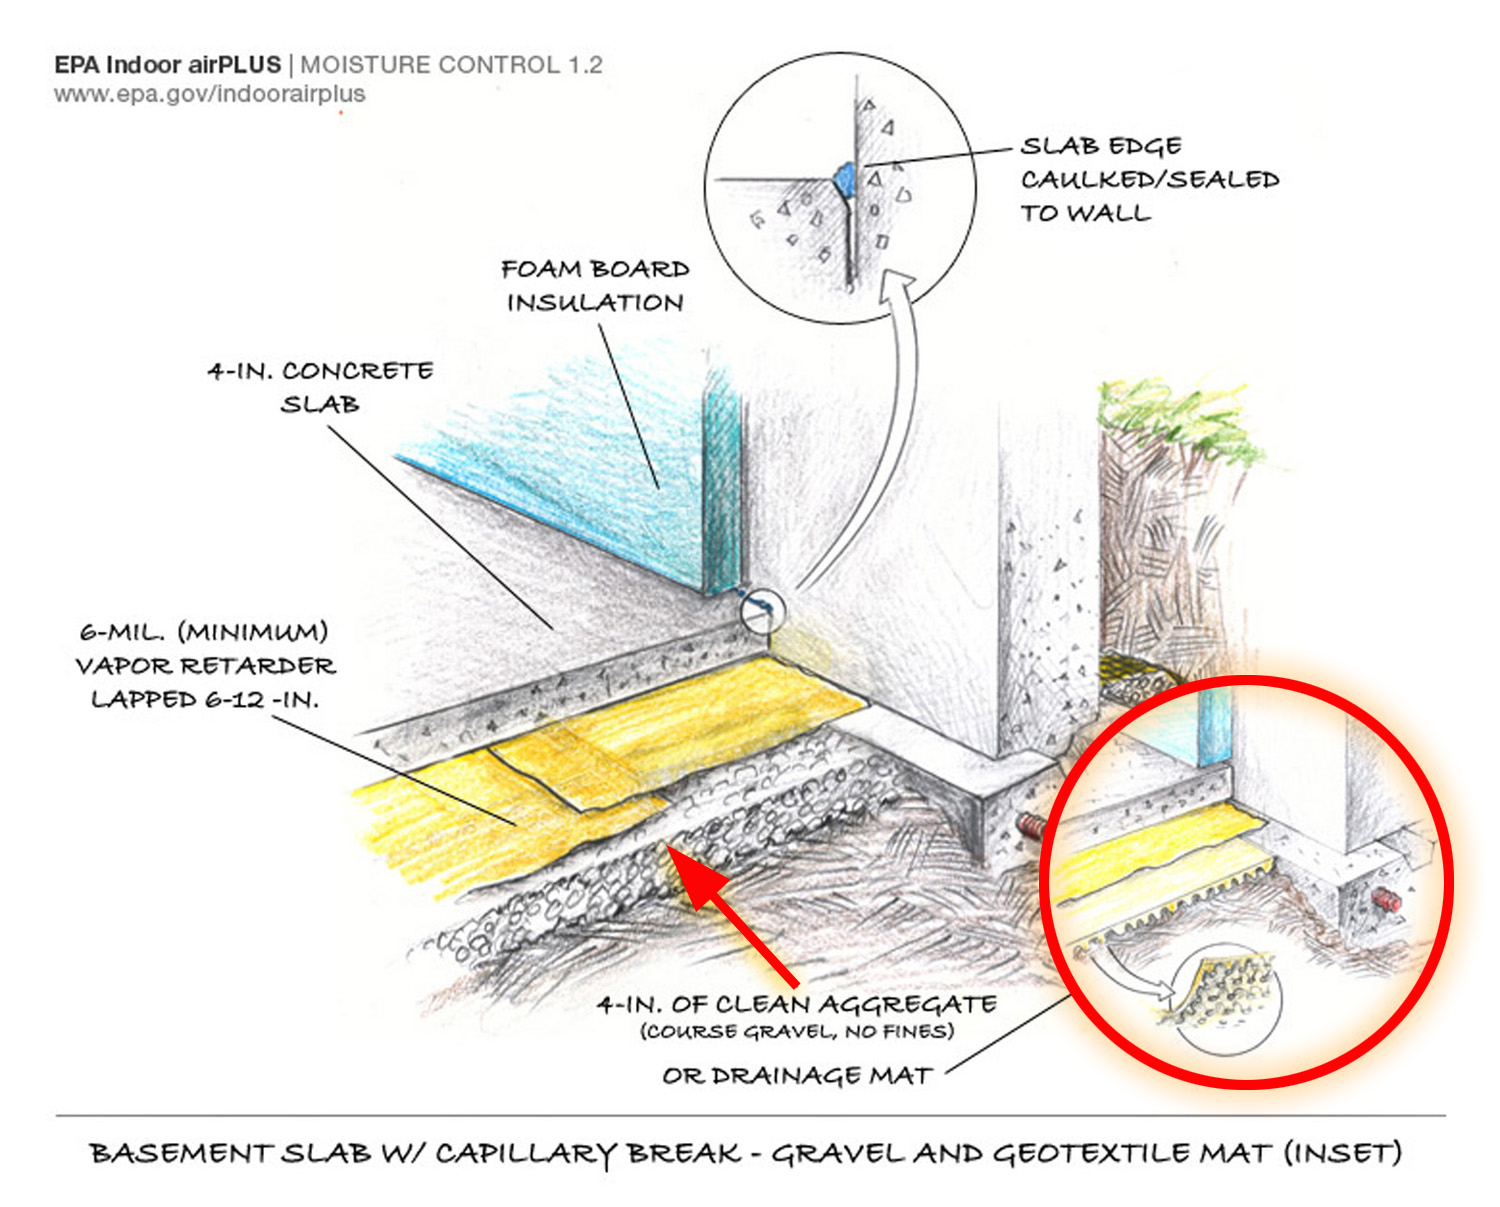
Right - Basement slab with a capillary break of either gravel or a drainage mat.
Image
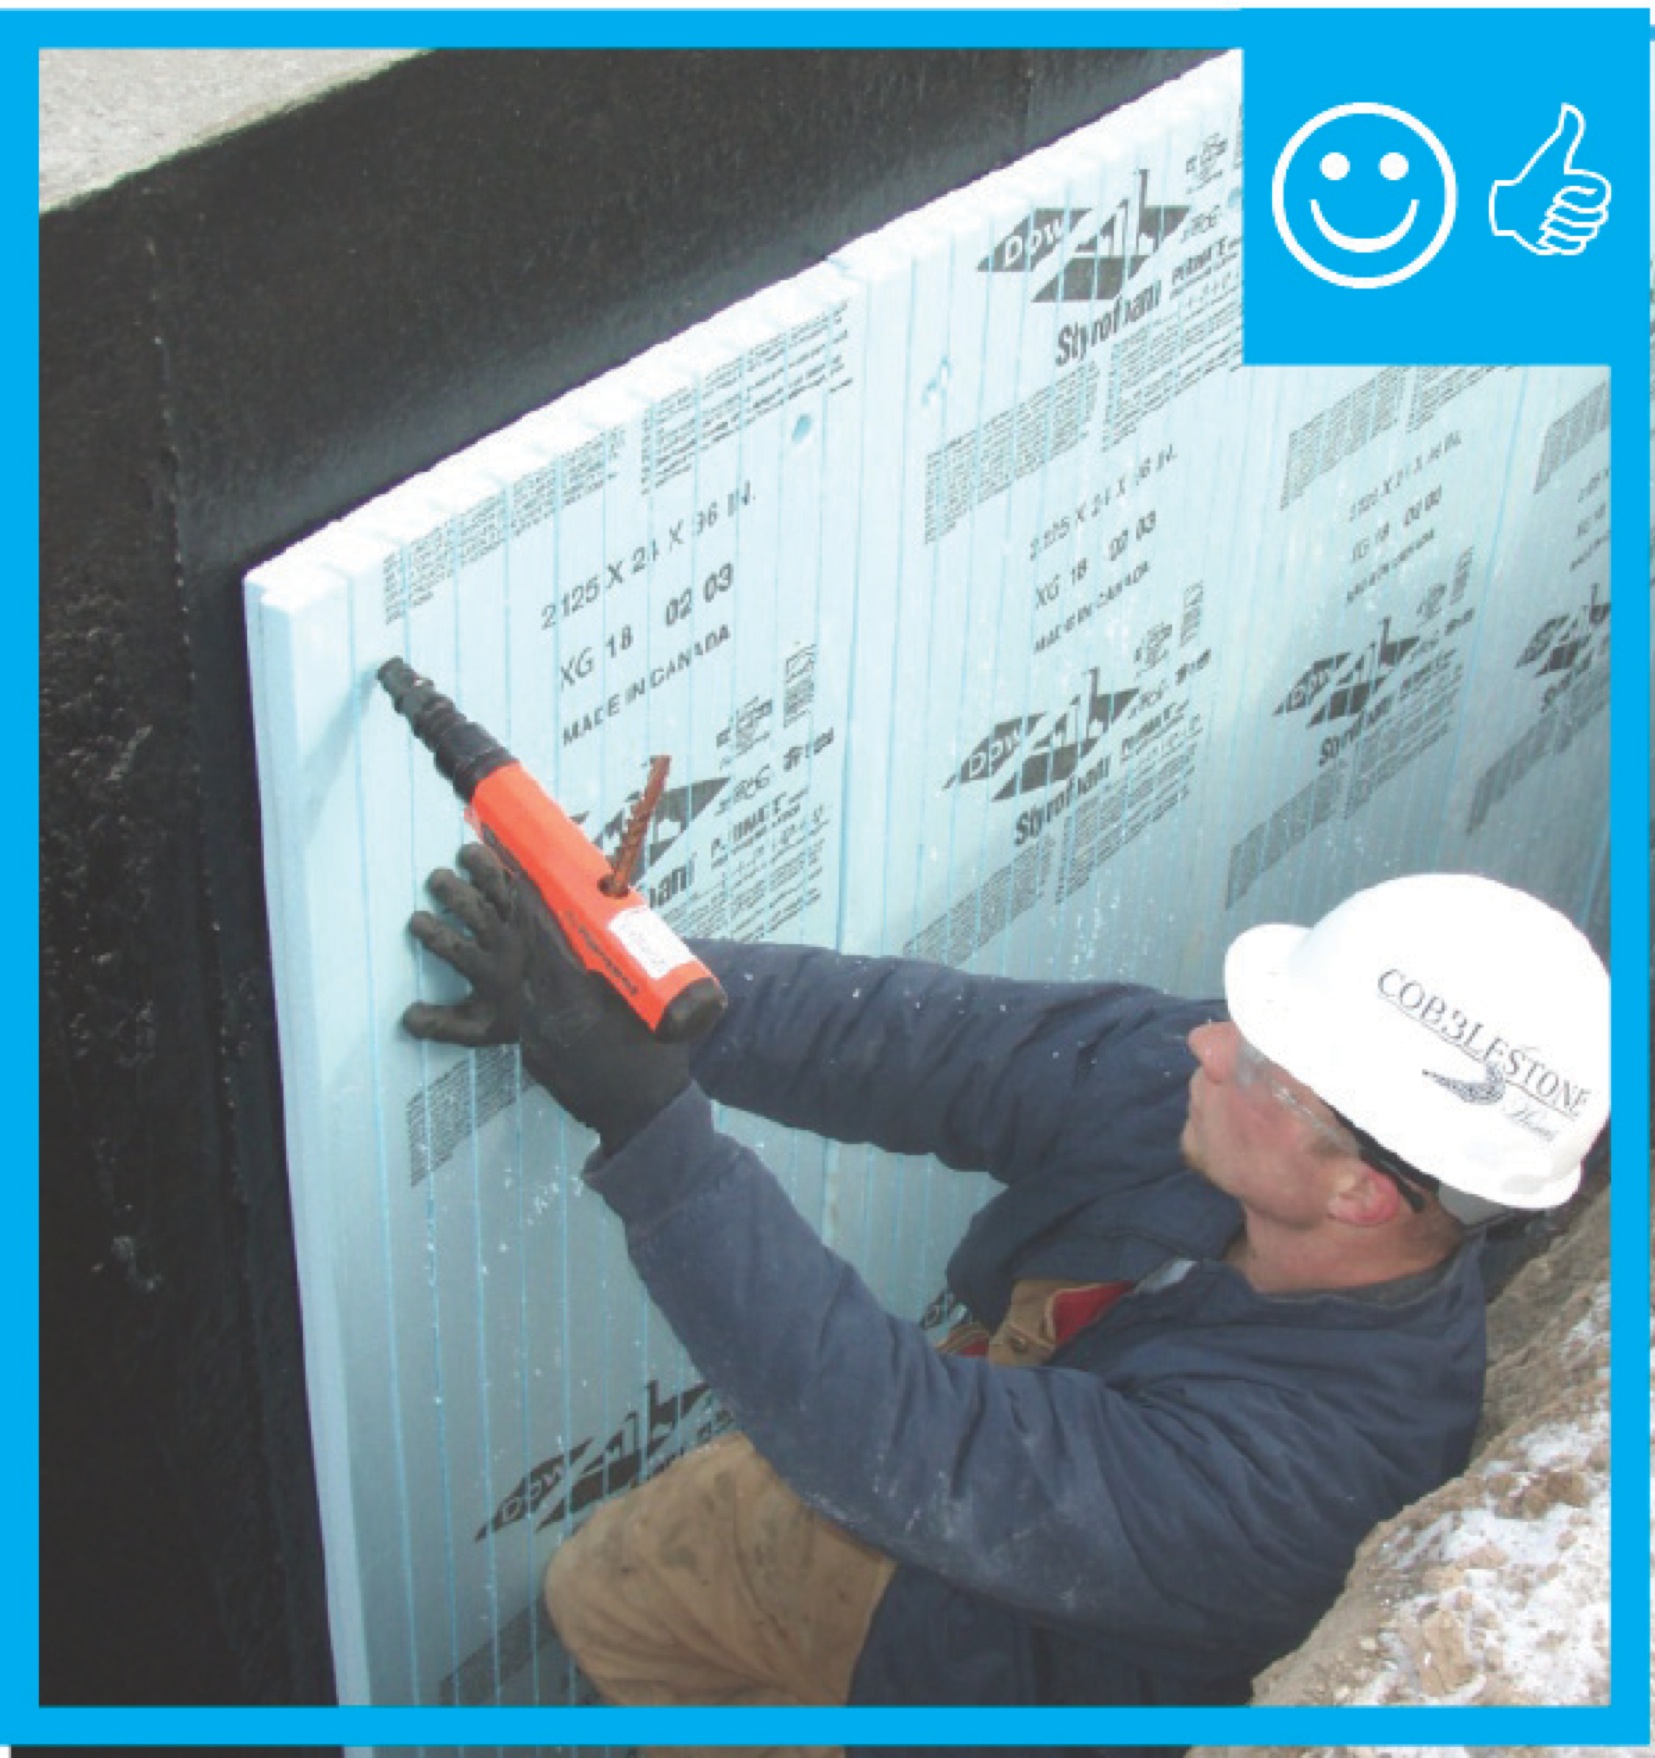
Right - Below-grade concrete has been properly sealed against moisture and is now having insulation installed.
Image
Right - Furring strips create an air gap to allow penetrating moisture to drain instead of wicking into walls; they also provide a nailing surface for siding.
Image

Right - House wrap is overlapped “shingle” style to direct moisture down and away from the house; seams will be taped so house wrap serves as both an air and weather barrier.
Image

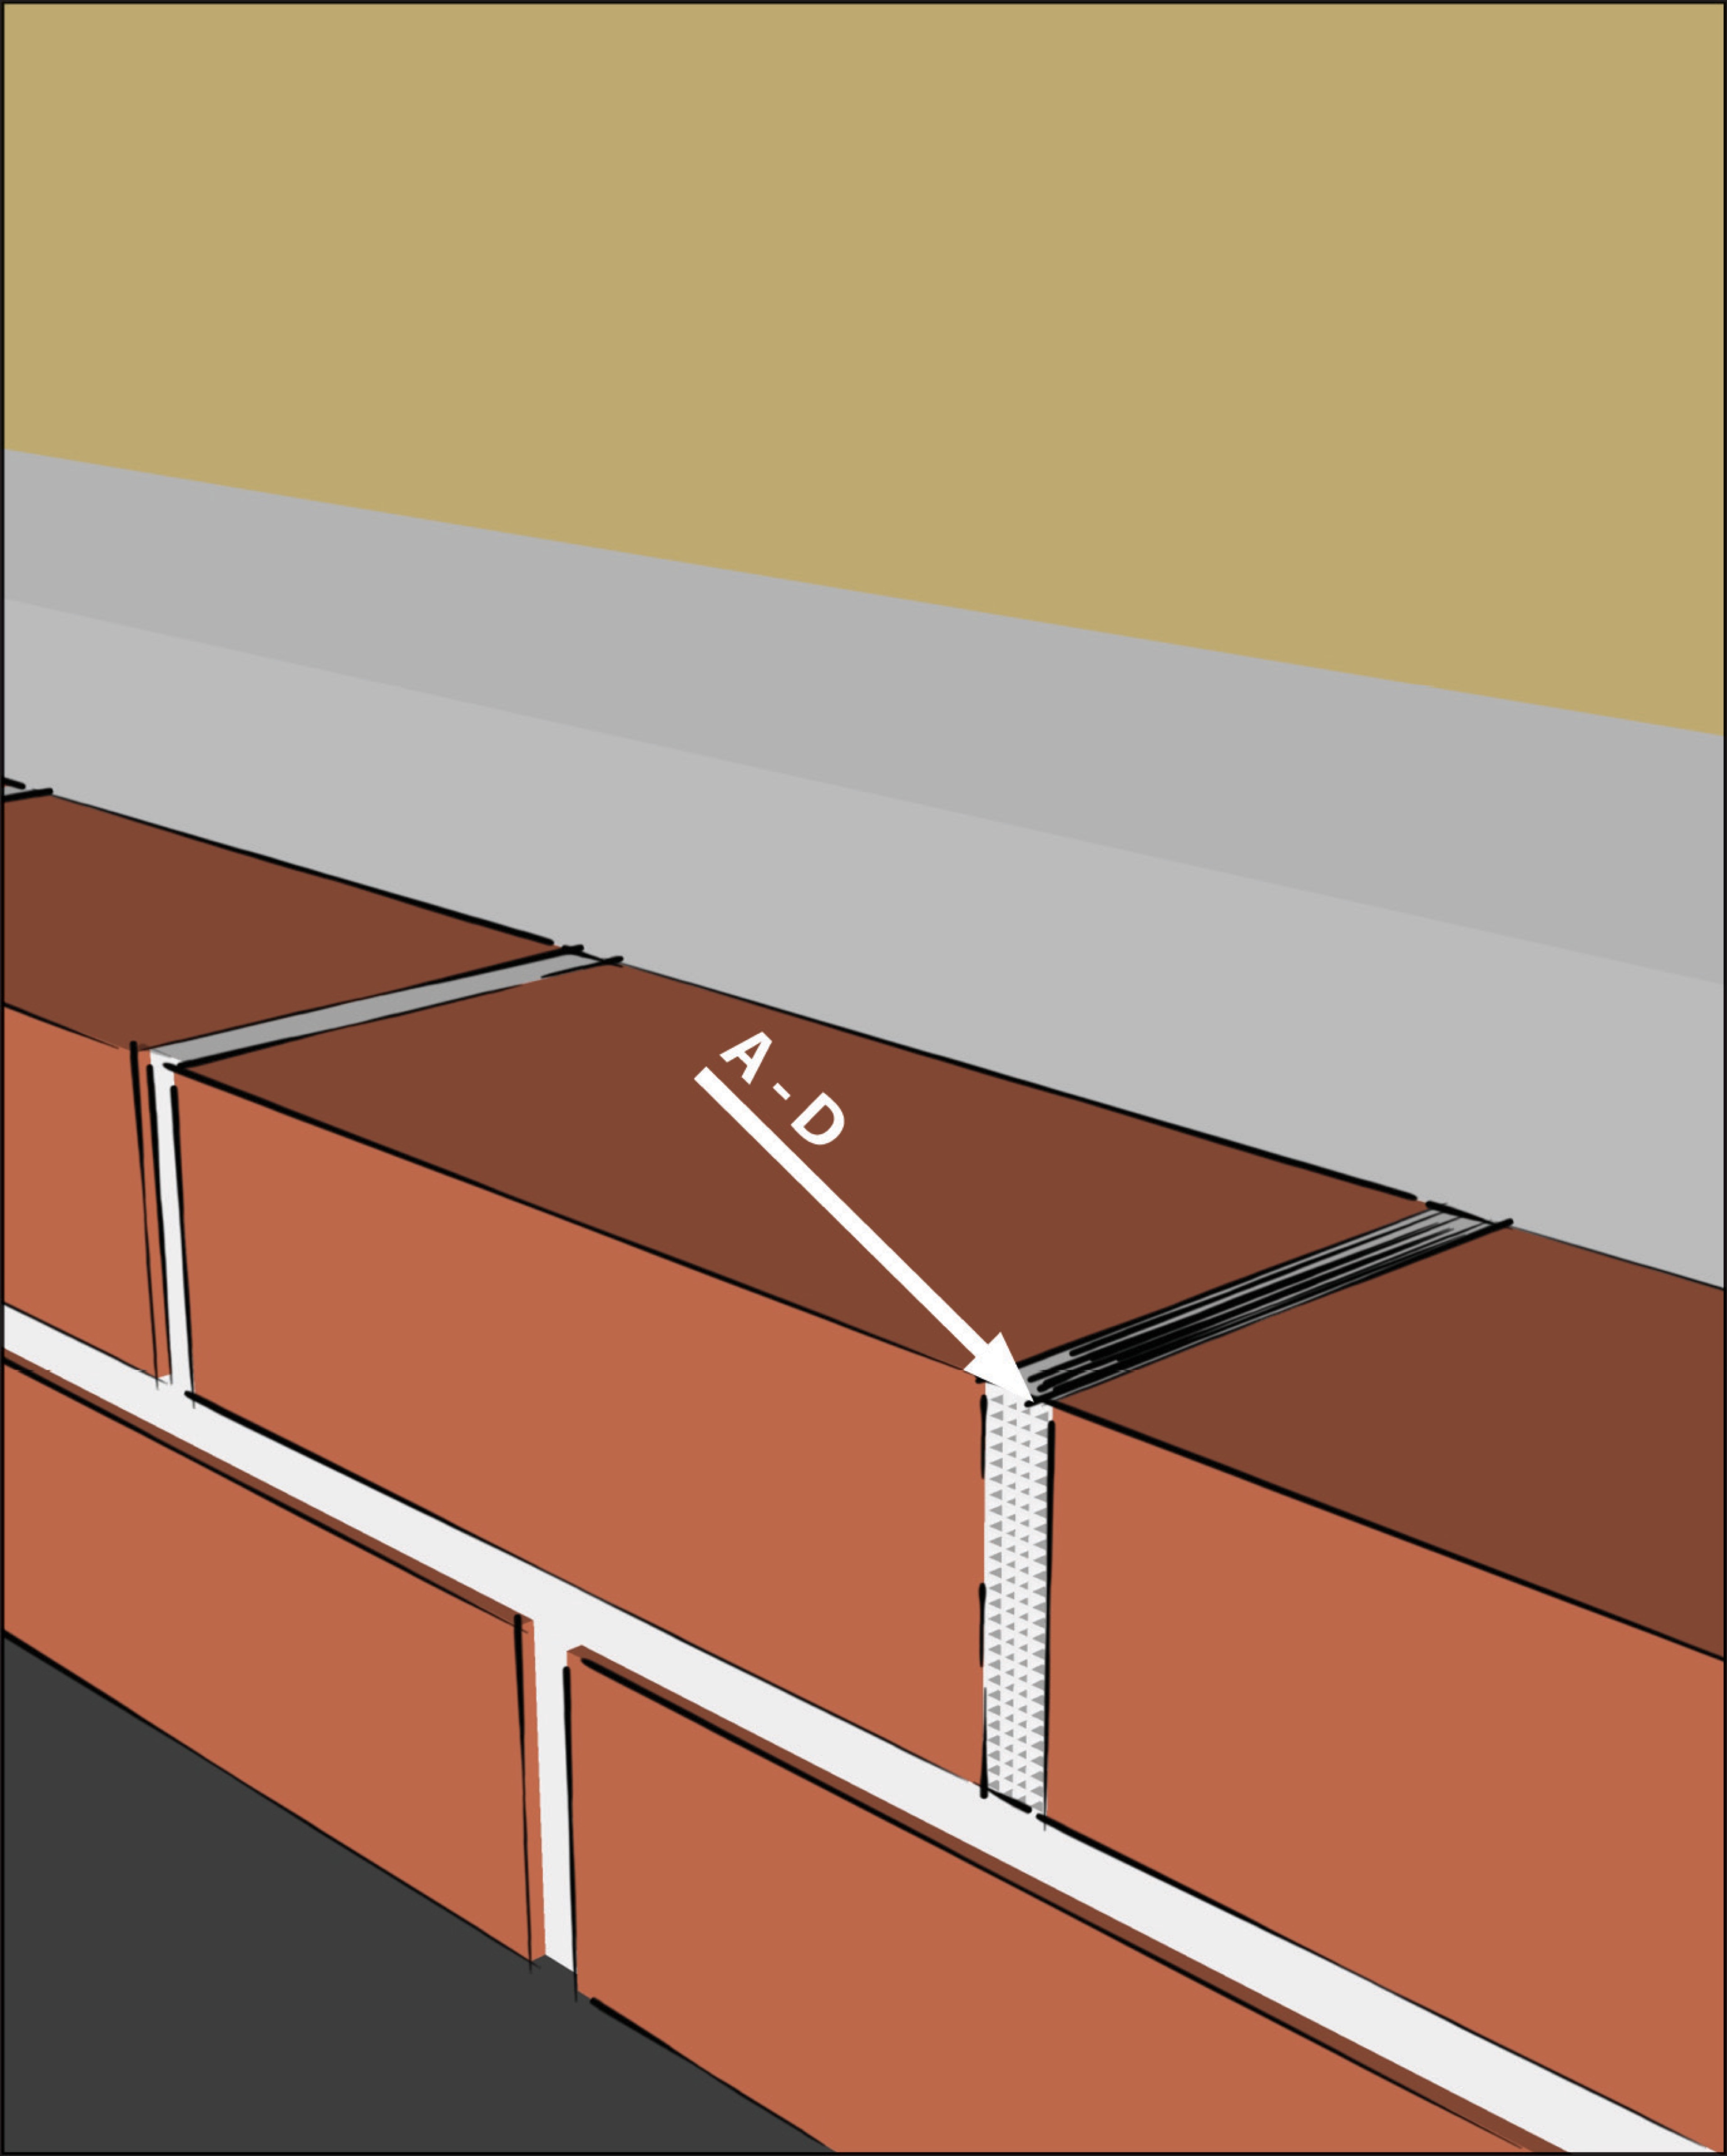
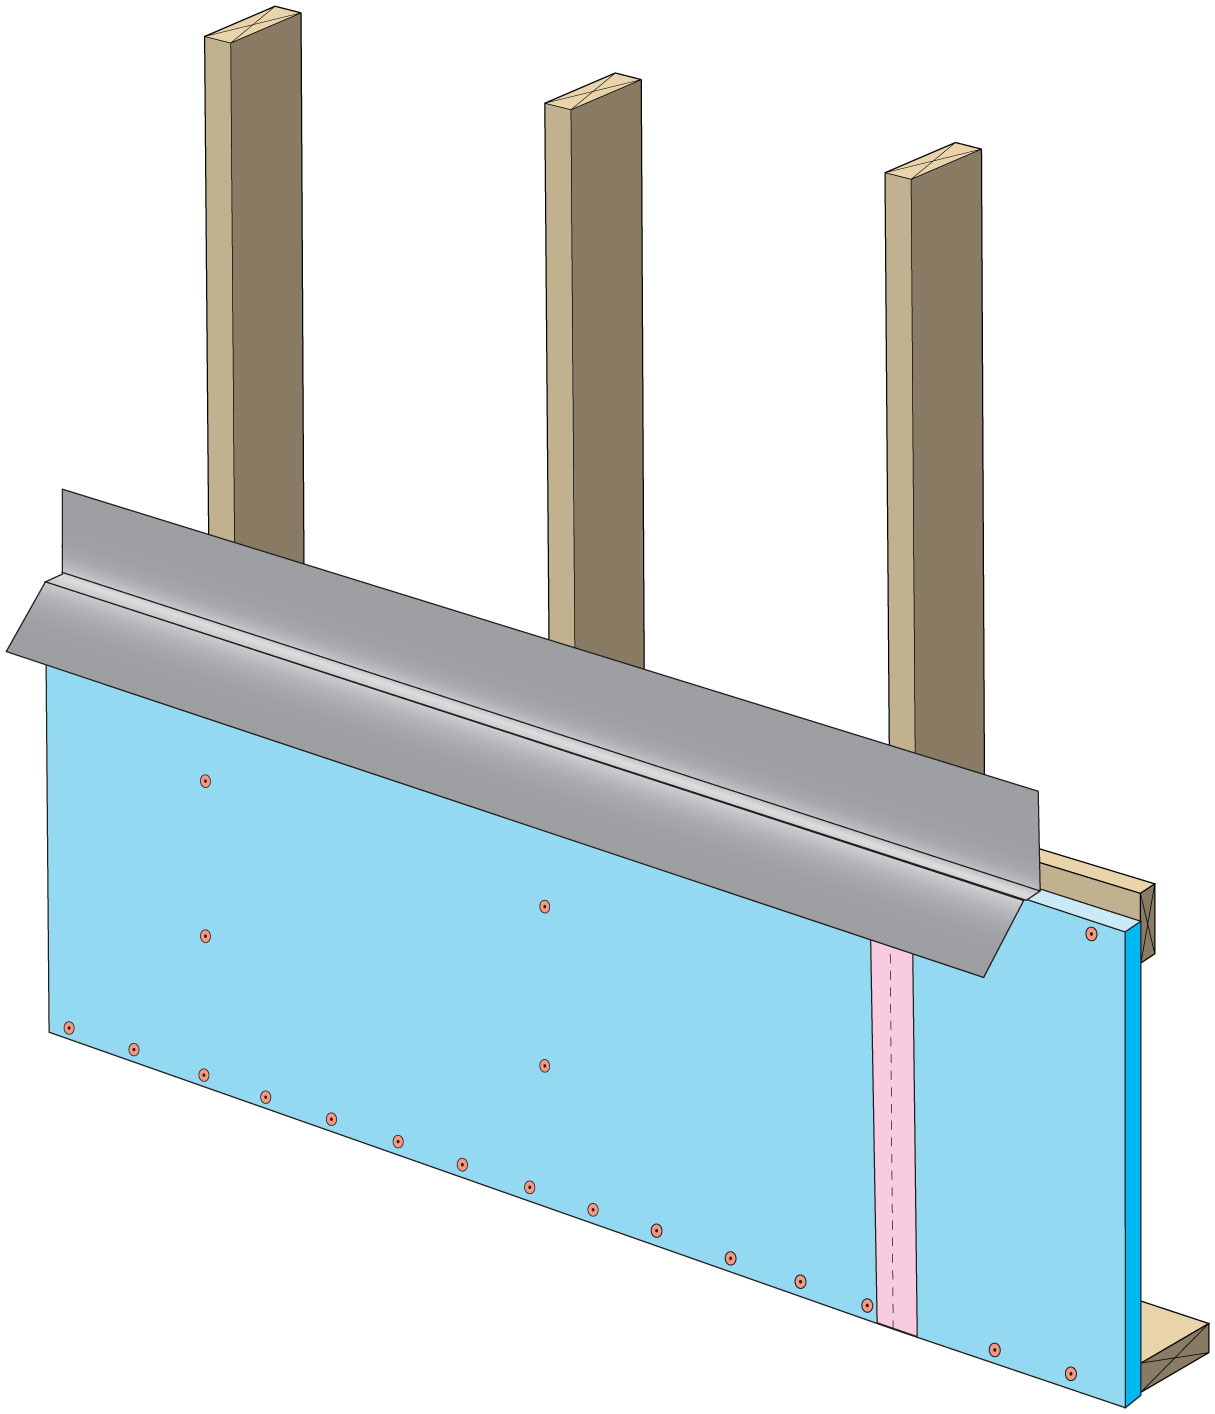
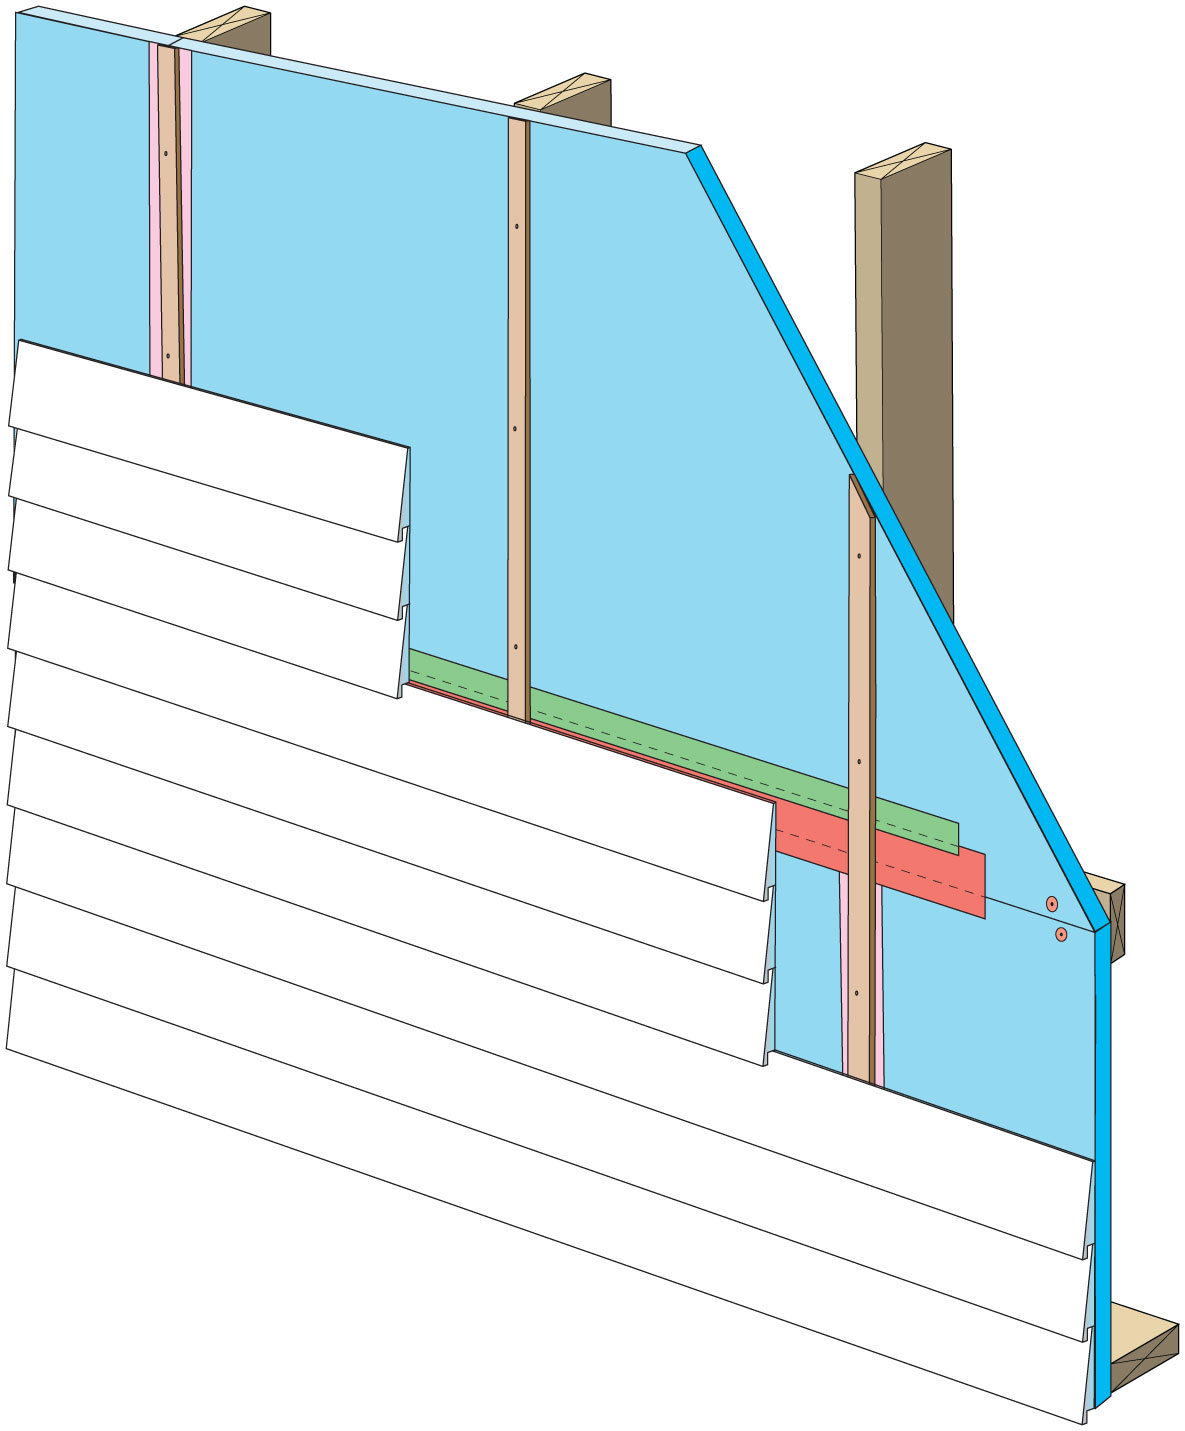
Right - Permeable rigid mineral wool insulation and appropriate water-management flashing details are integrated with new rigid foam siding to keep water away from the sill beam above the foundation wall
Image
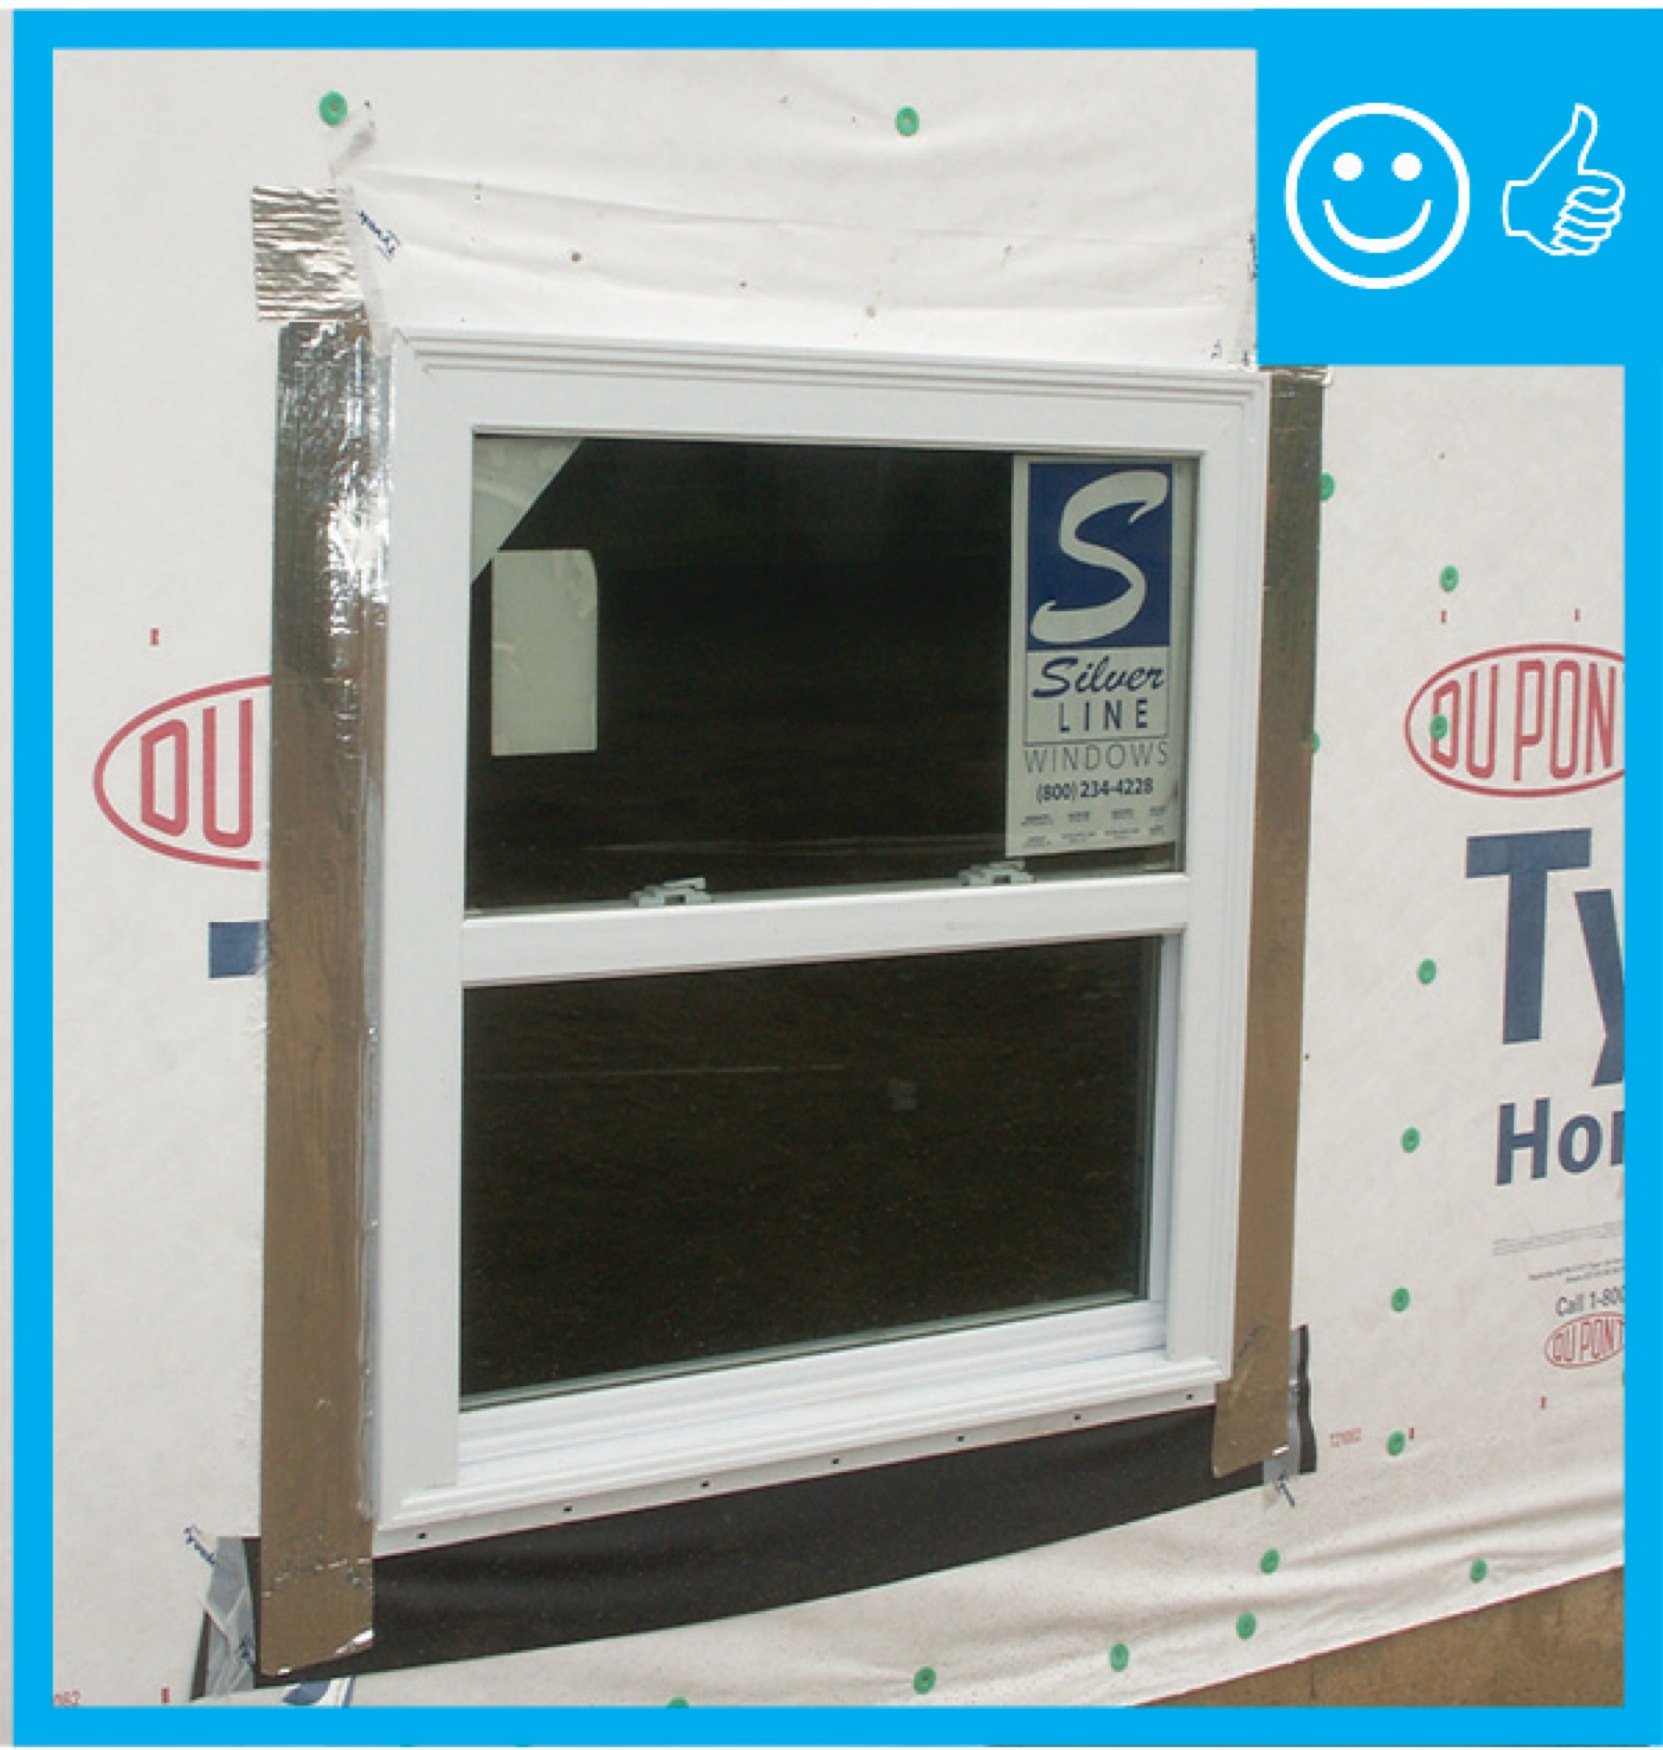
Right - Tape flashing keeps moisture out around and below the window; extra tape reinforces the corners to prevent tearing of the house wrap and to keep water out of this critical juncture.
Image
Image
Image
Right – Furring strips provide a drainage gap between the rigid foam and the siding.
Image

Right – Half-inch furring strips provide a rain screen and air gap between the weather-resistant membrane and the fiber cement siding on the exterior walls of this marine-climate home.
Image
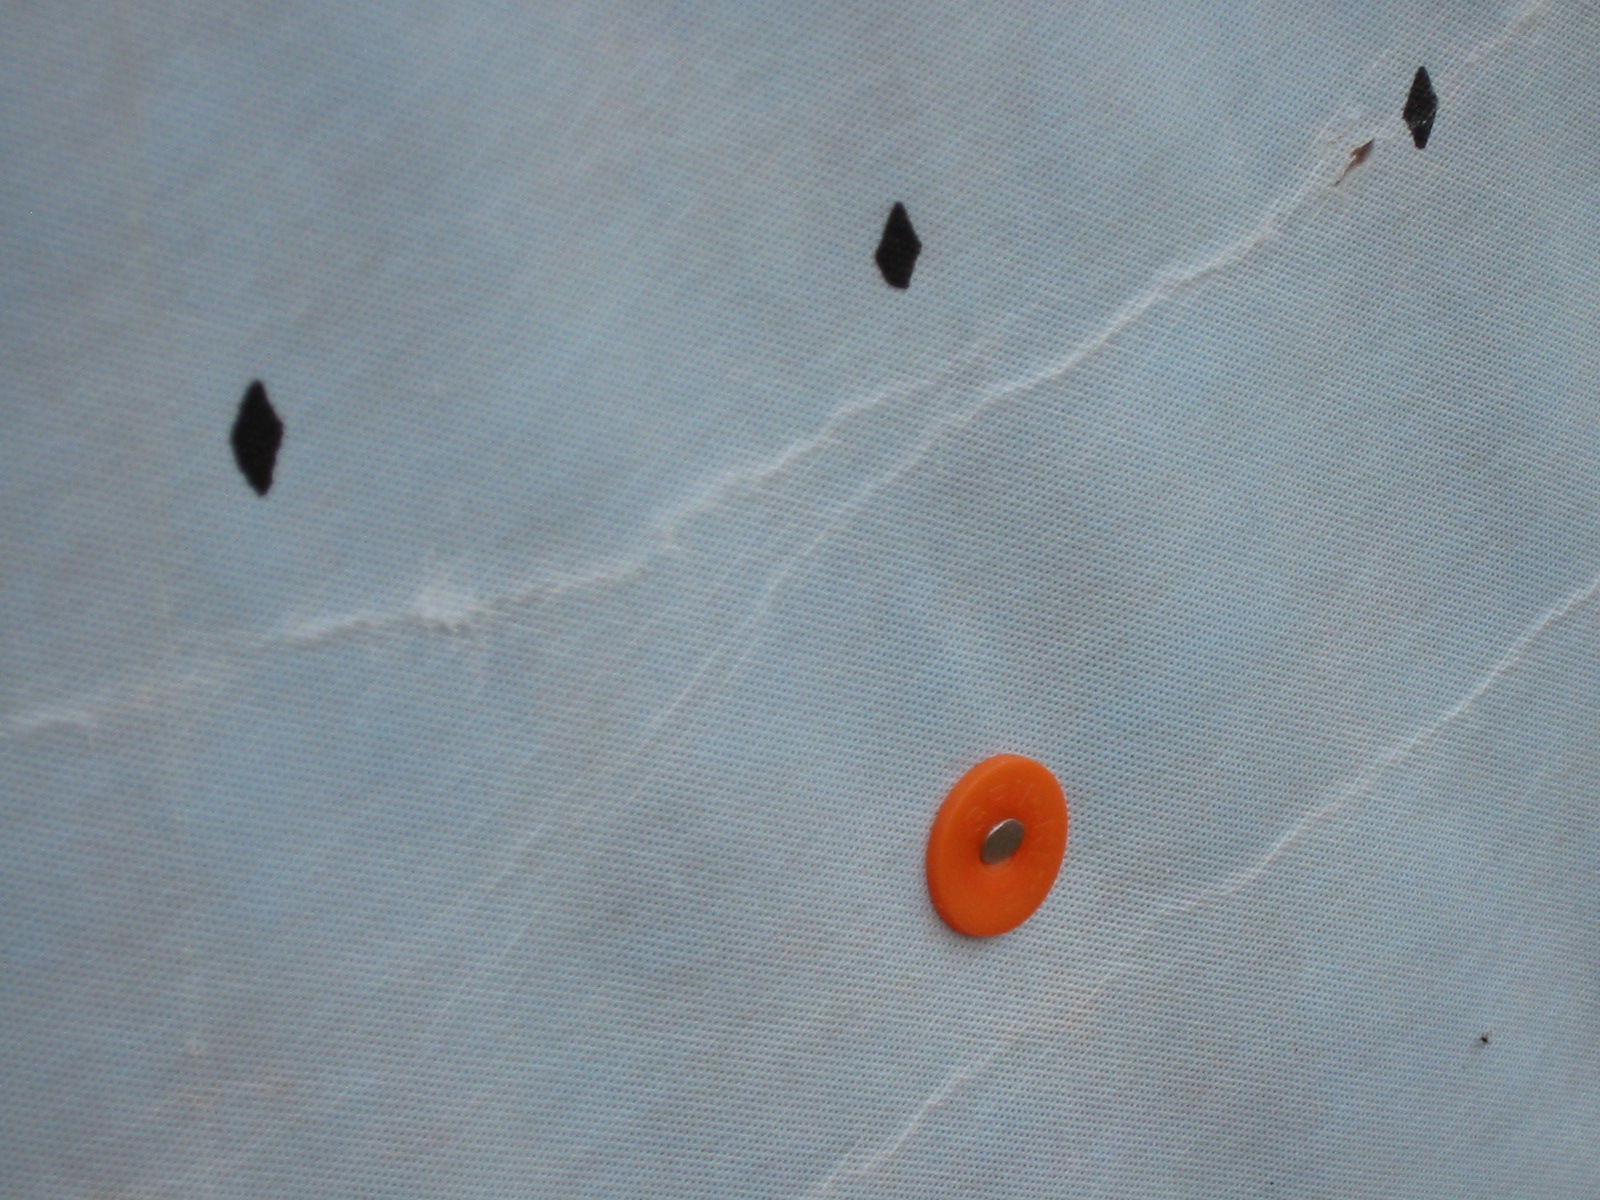
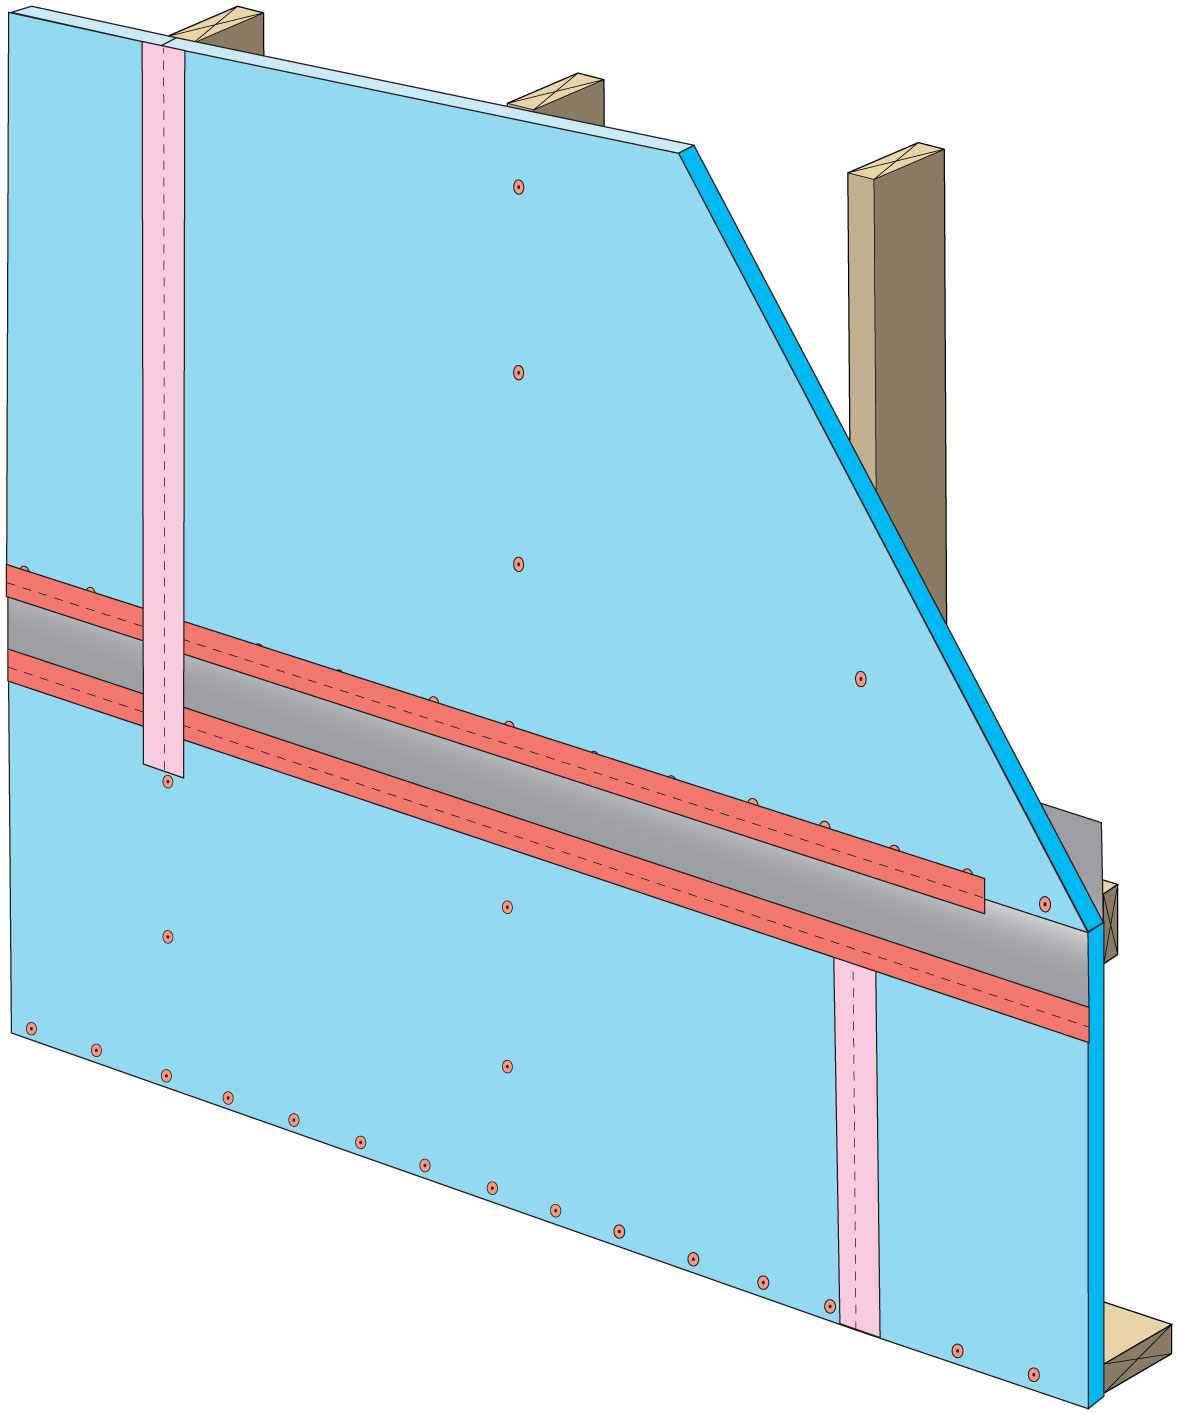
Right – Moisture-resistant backing material has been used above and behind the tub enclosure.
Image
Right – Polyethylene sheeting vapor barrier is installed and sealed to the crawlspace walls with mastic
Image
Image
Image
Image

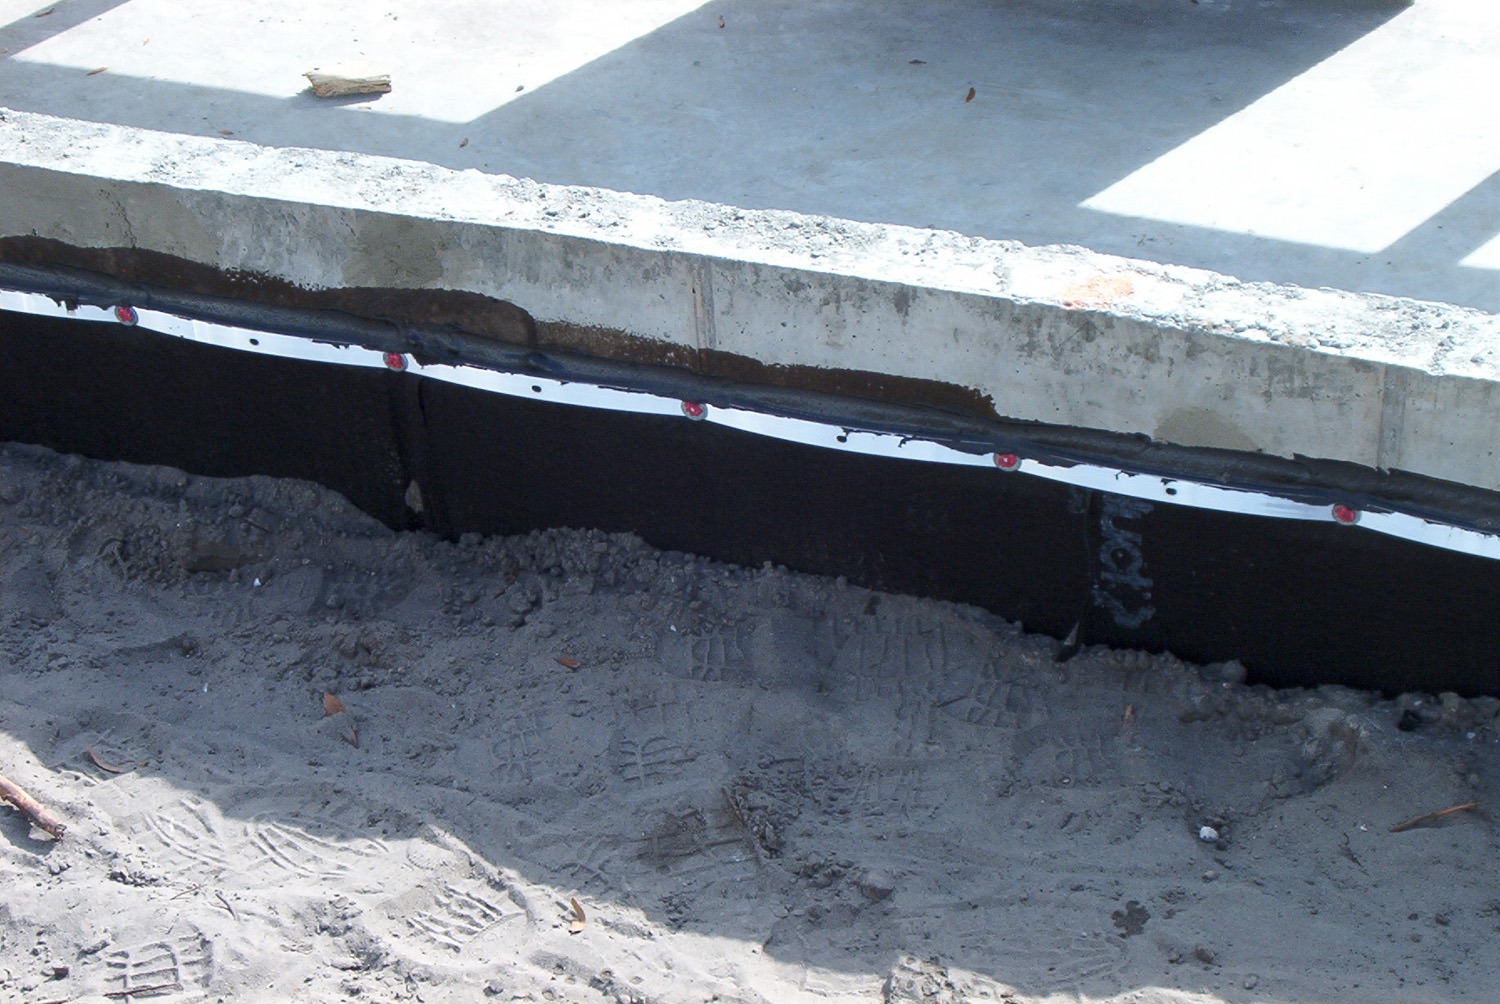
Right – The base of the wall is water proofed and the seam between the base of the wall and the sidewalk is air sealed.
Image

Image
Right – The building felt is installed on all exterior walls and provides a complete drainage system
Image

Right – The flashing is properly installed to create a complete drainage system with continuous rigid insulation sheathing/siding
Image

Right – The insulated concrete forms that are below-grade have a damp-proof coating to prevent moisture seeping into the foundation
Image
Right – The rigid insulation covers all exterior walls and all seams are taped to provide a complete drainage system
Image

Image
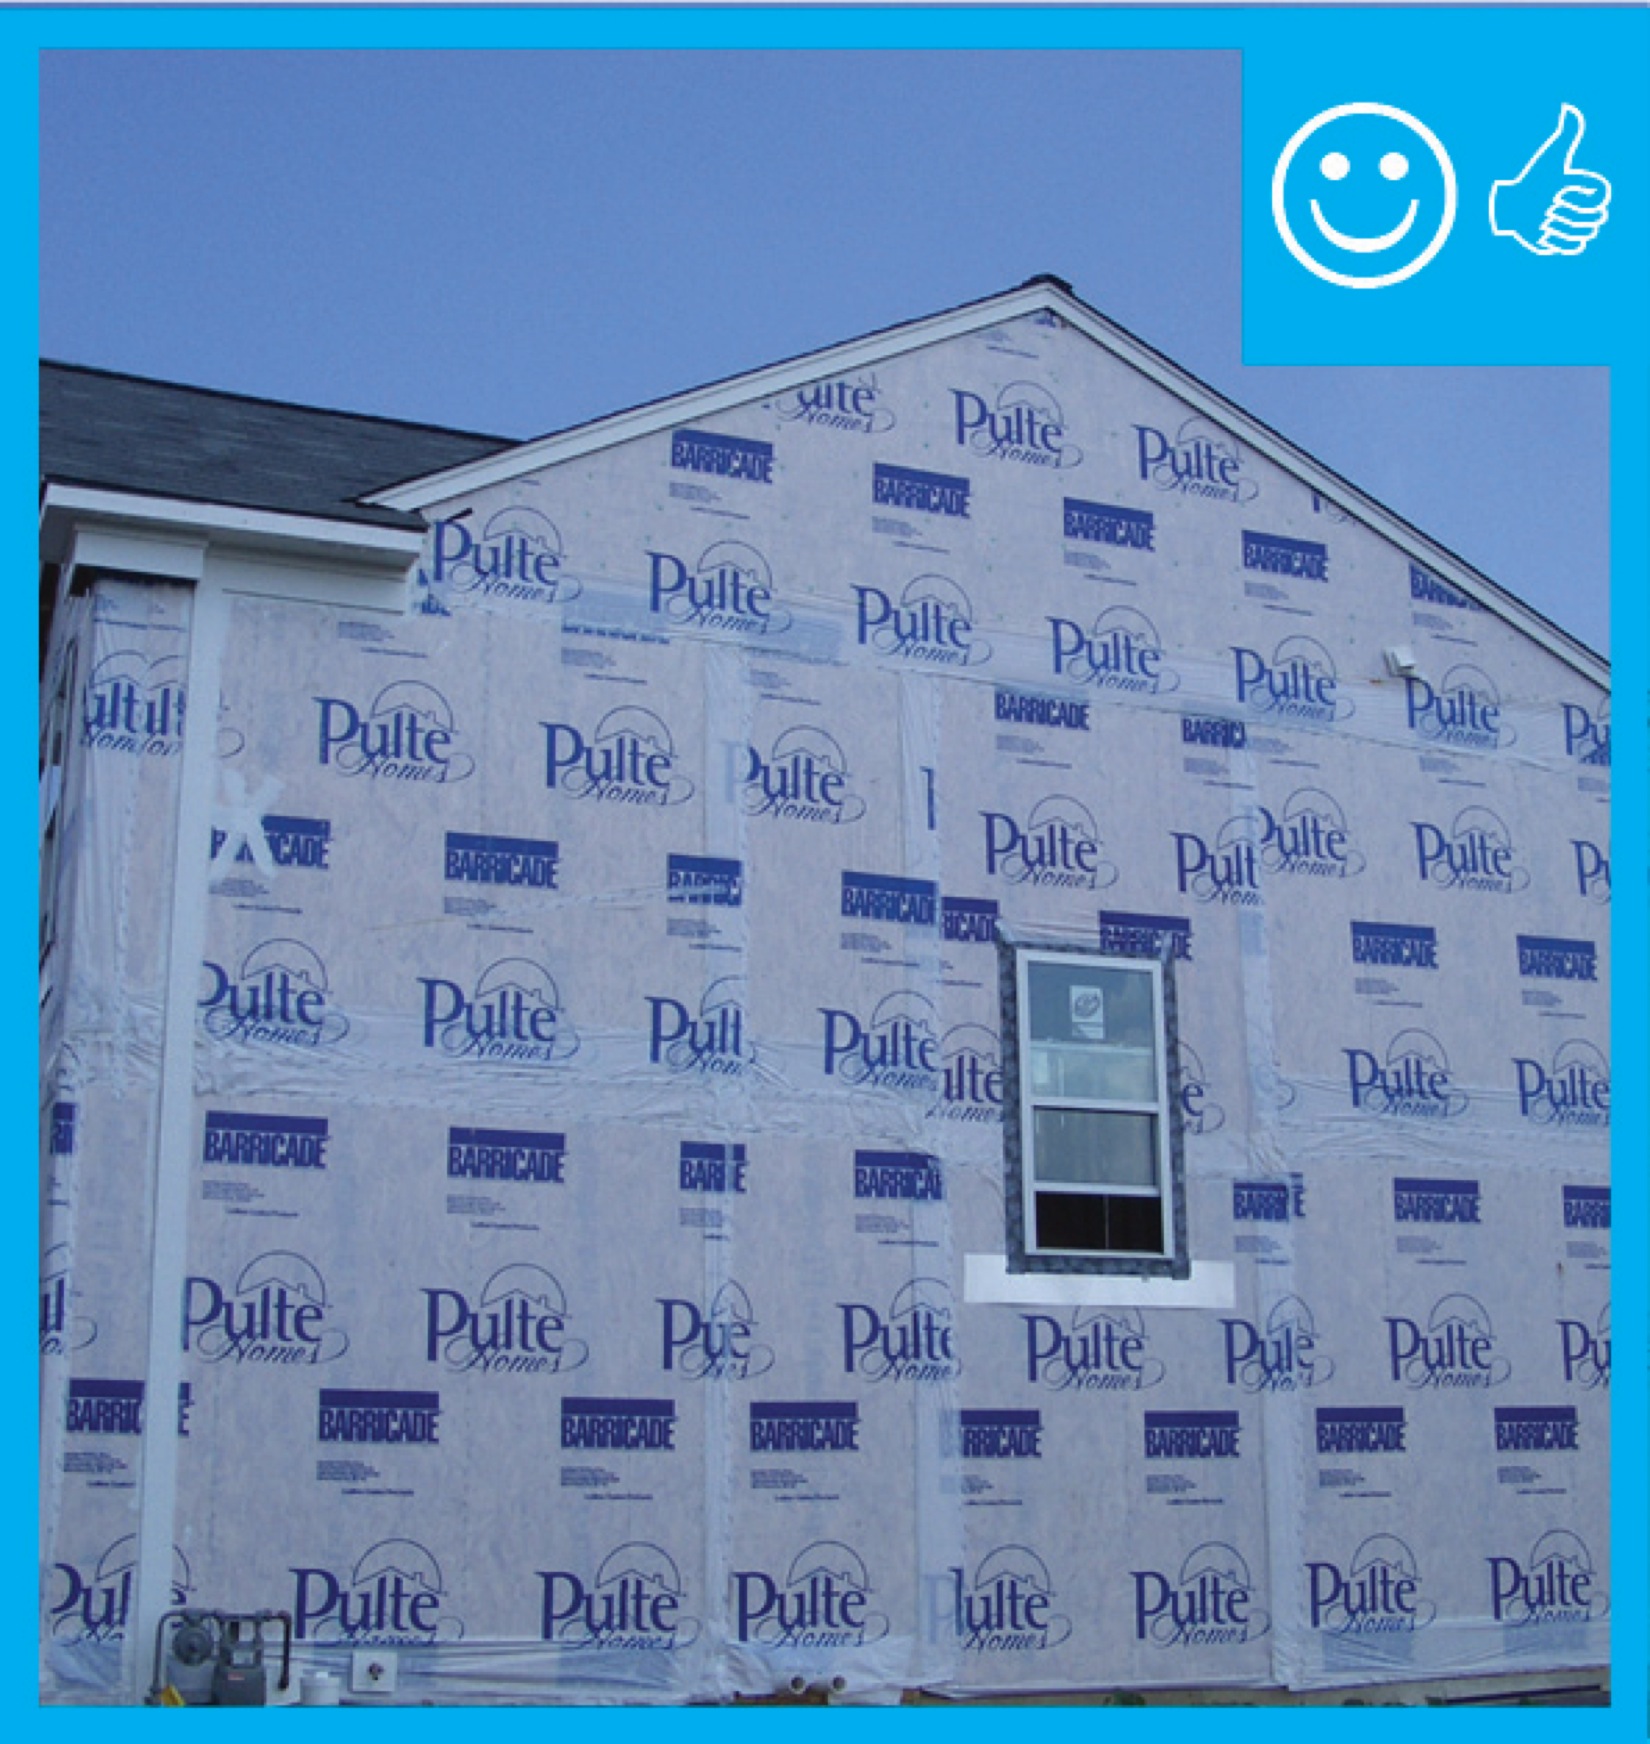
Right – The water-resistant barrier covers the entire house and the seams are taped to provide a complete drainage system
Image
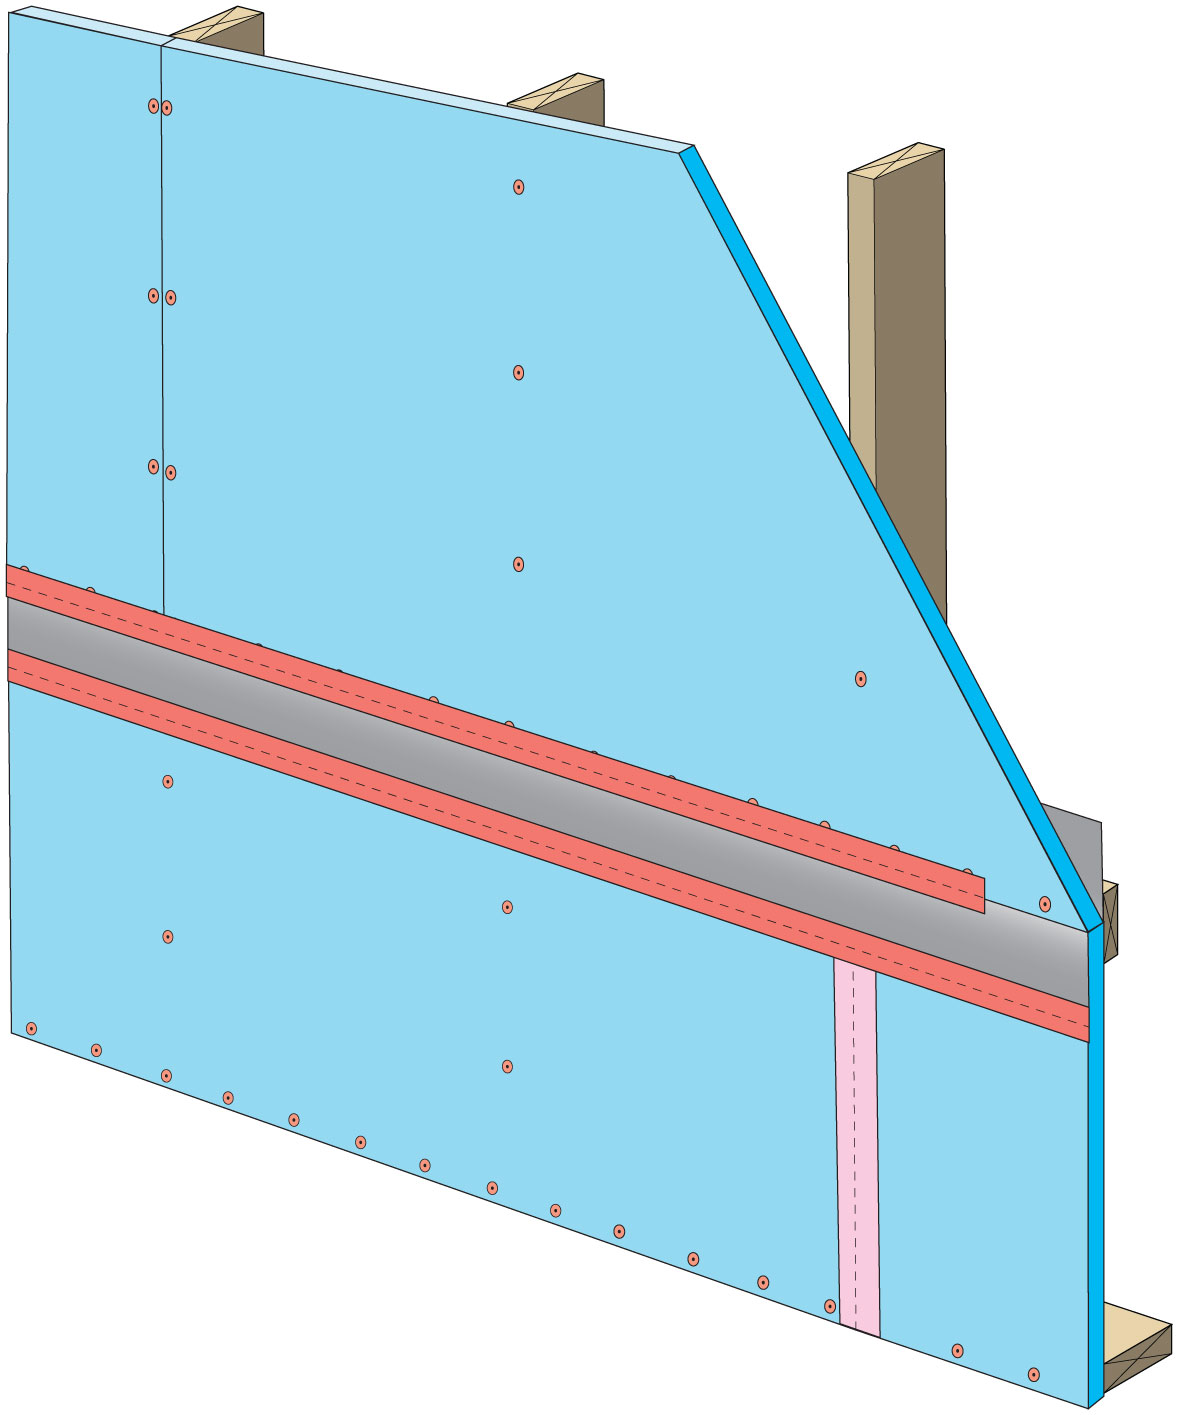
Right – The water-resistant barrier is layered over the step flashing to provide a complete drainage system
Image
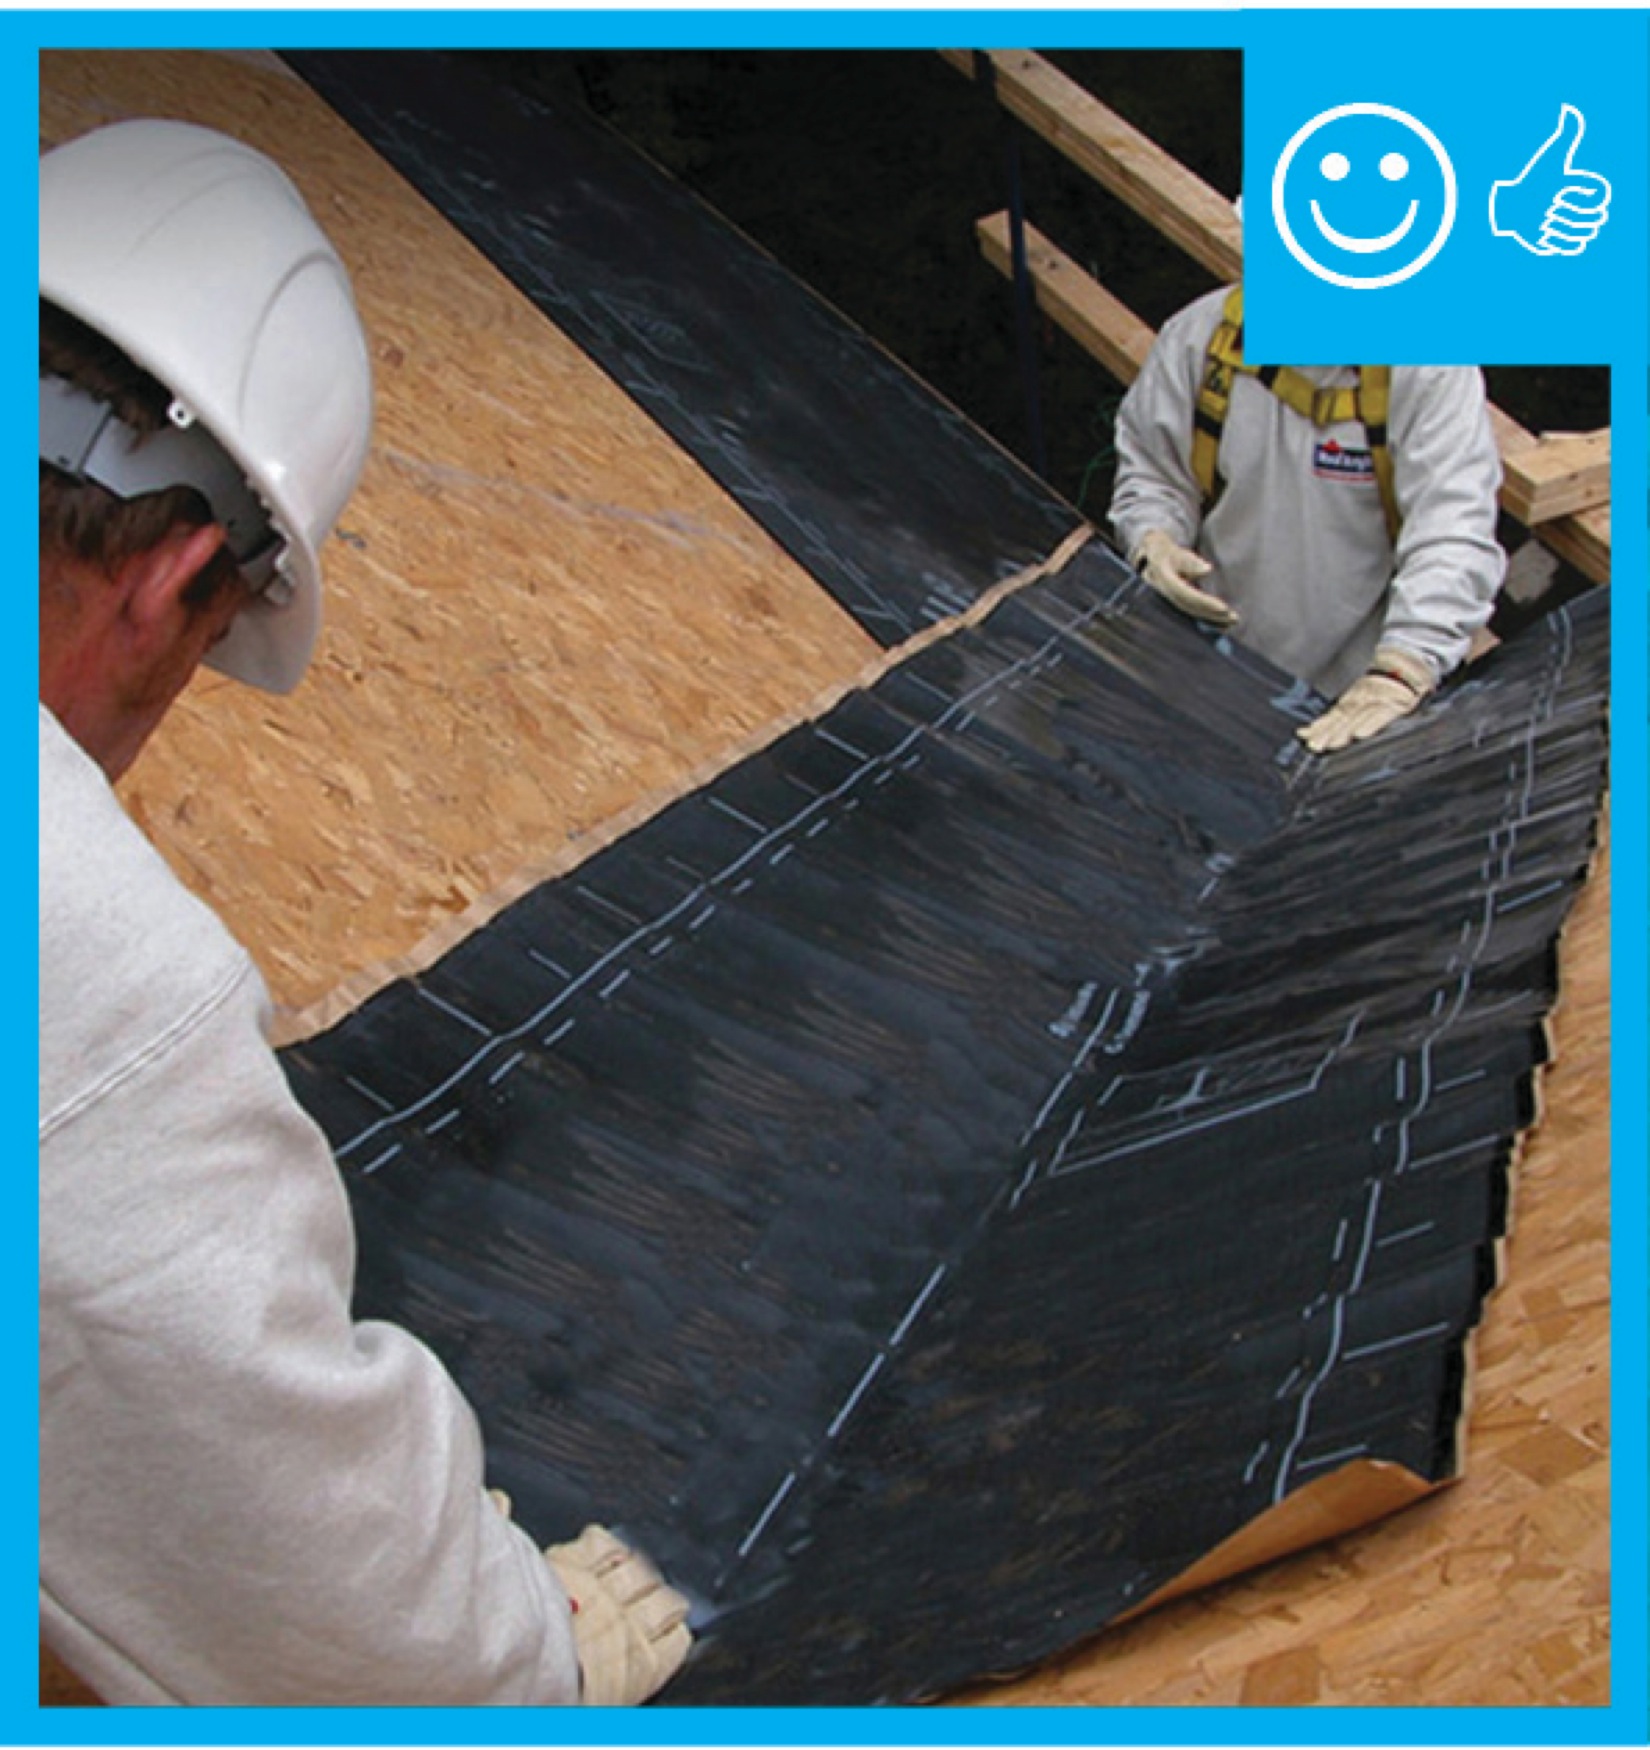
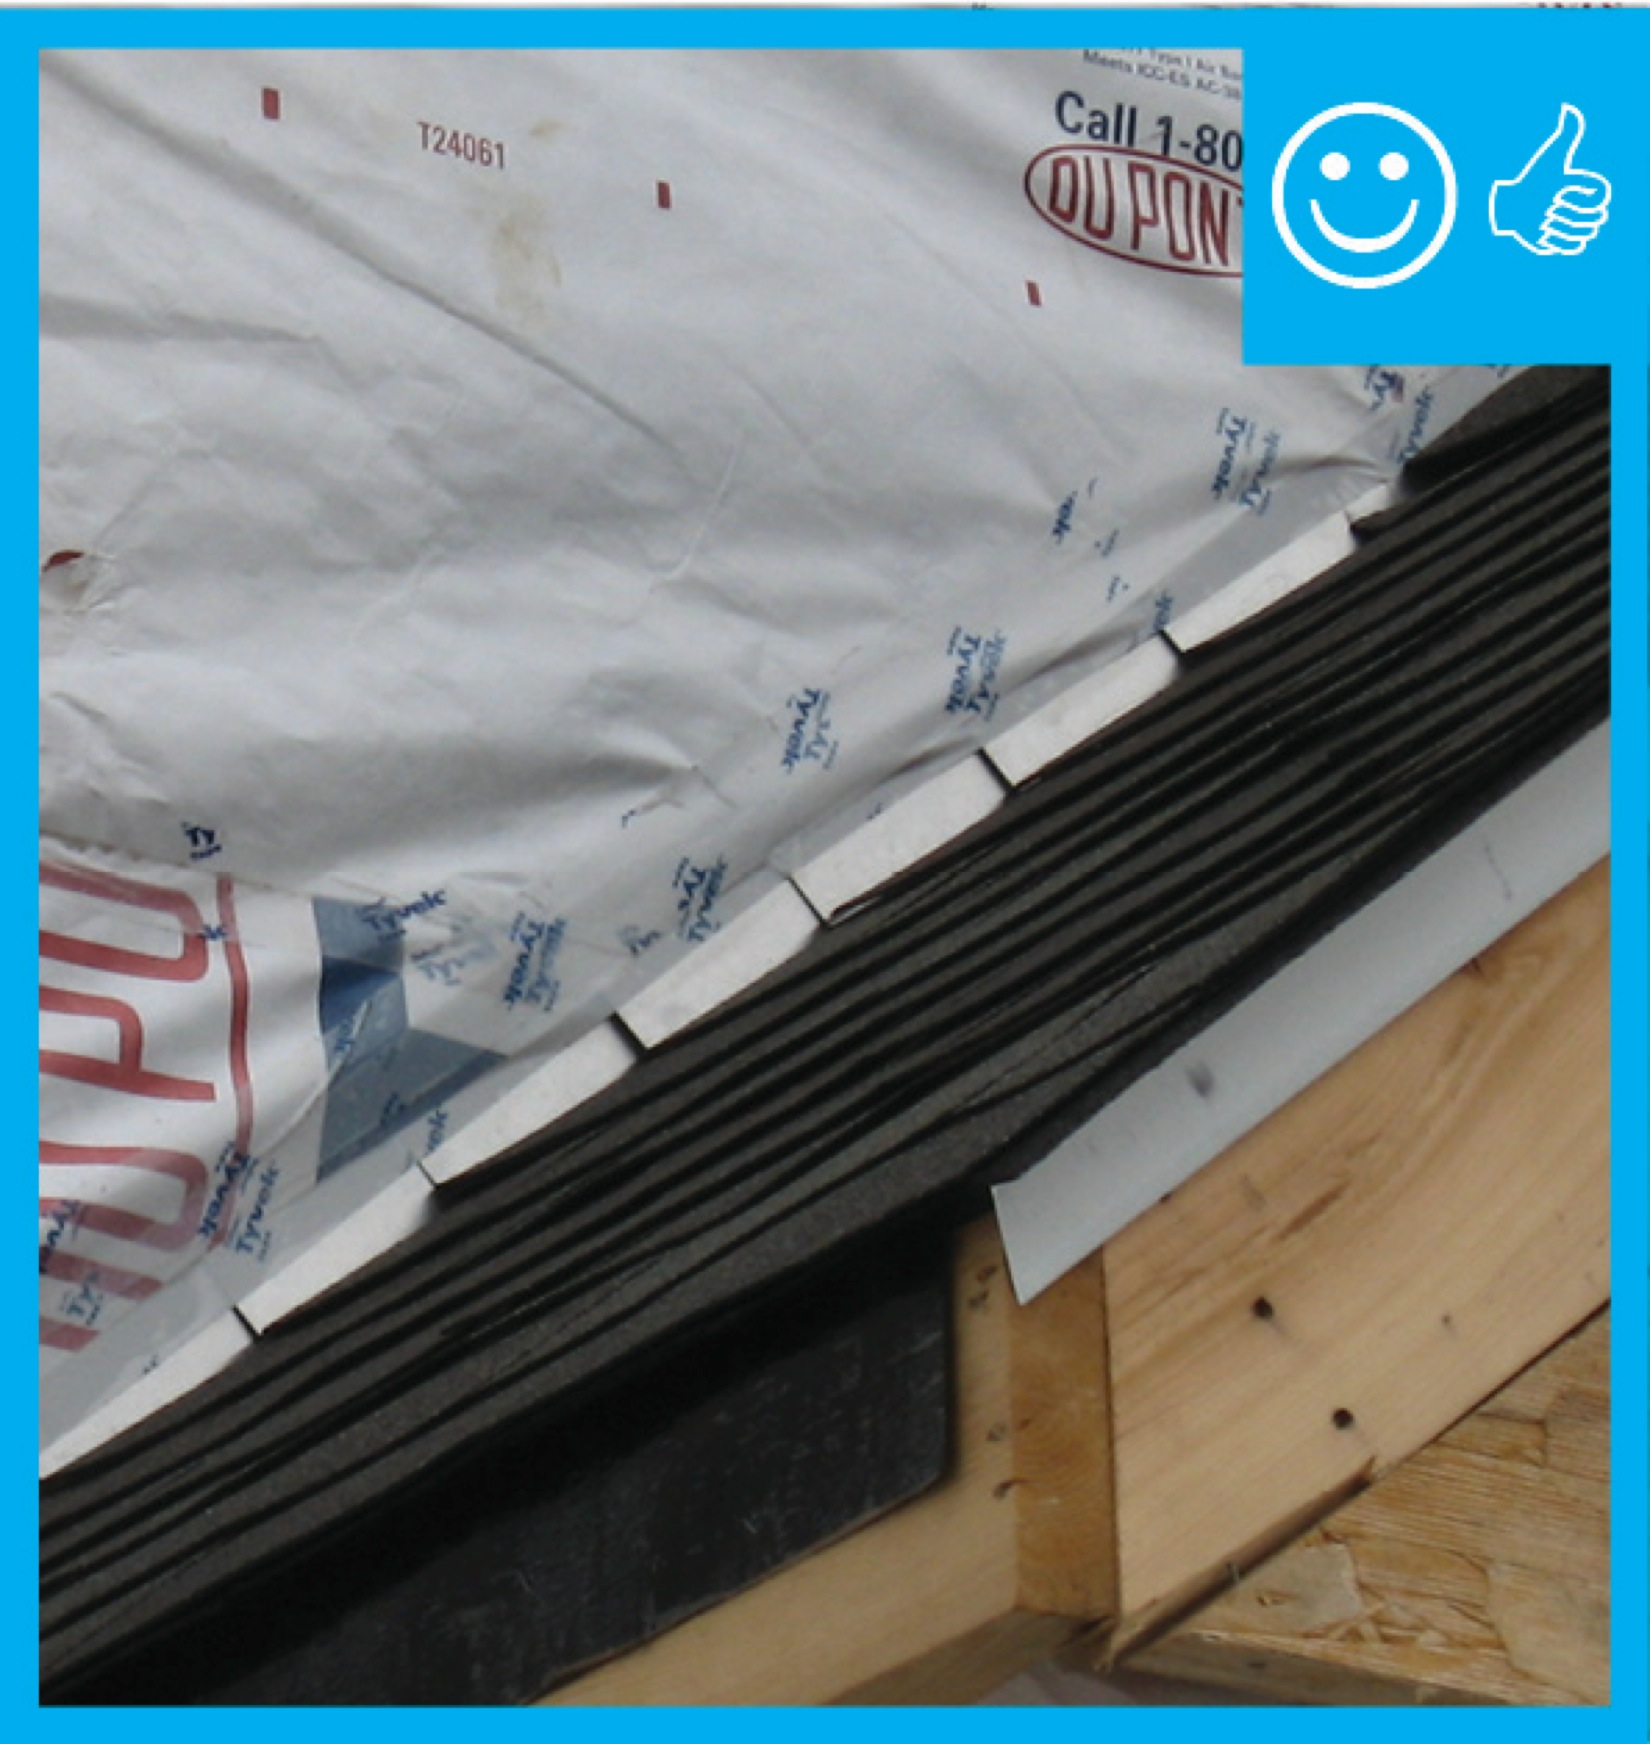
Right – There is a self-sealing bituminous membrane installed at the valley of the roof prior to the roof felt
Image
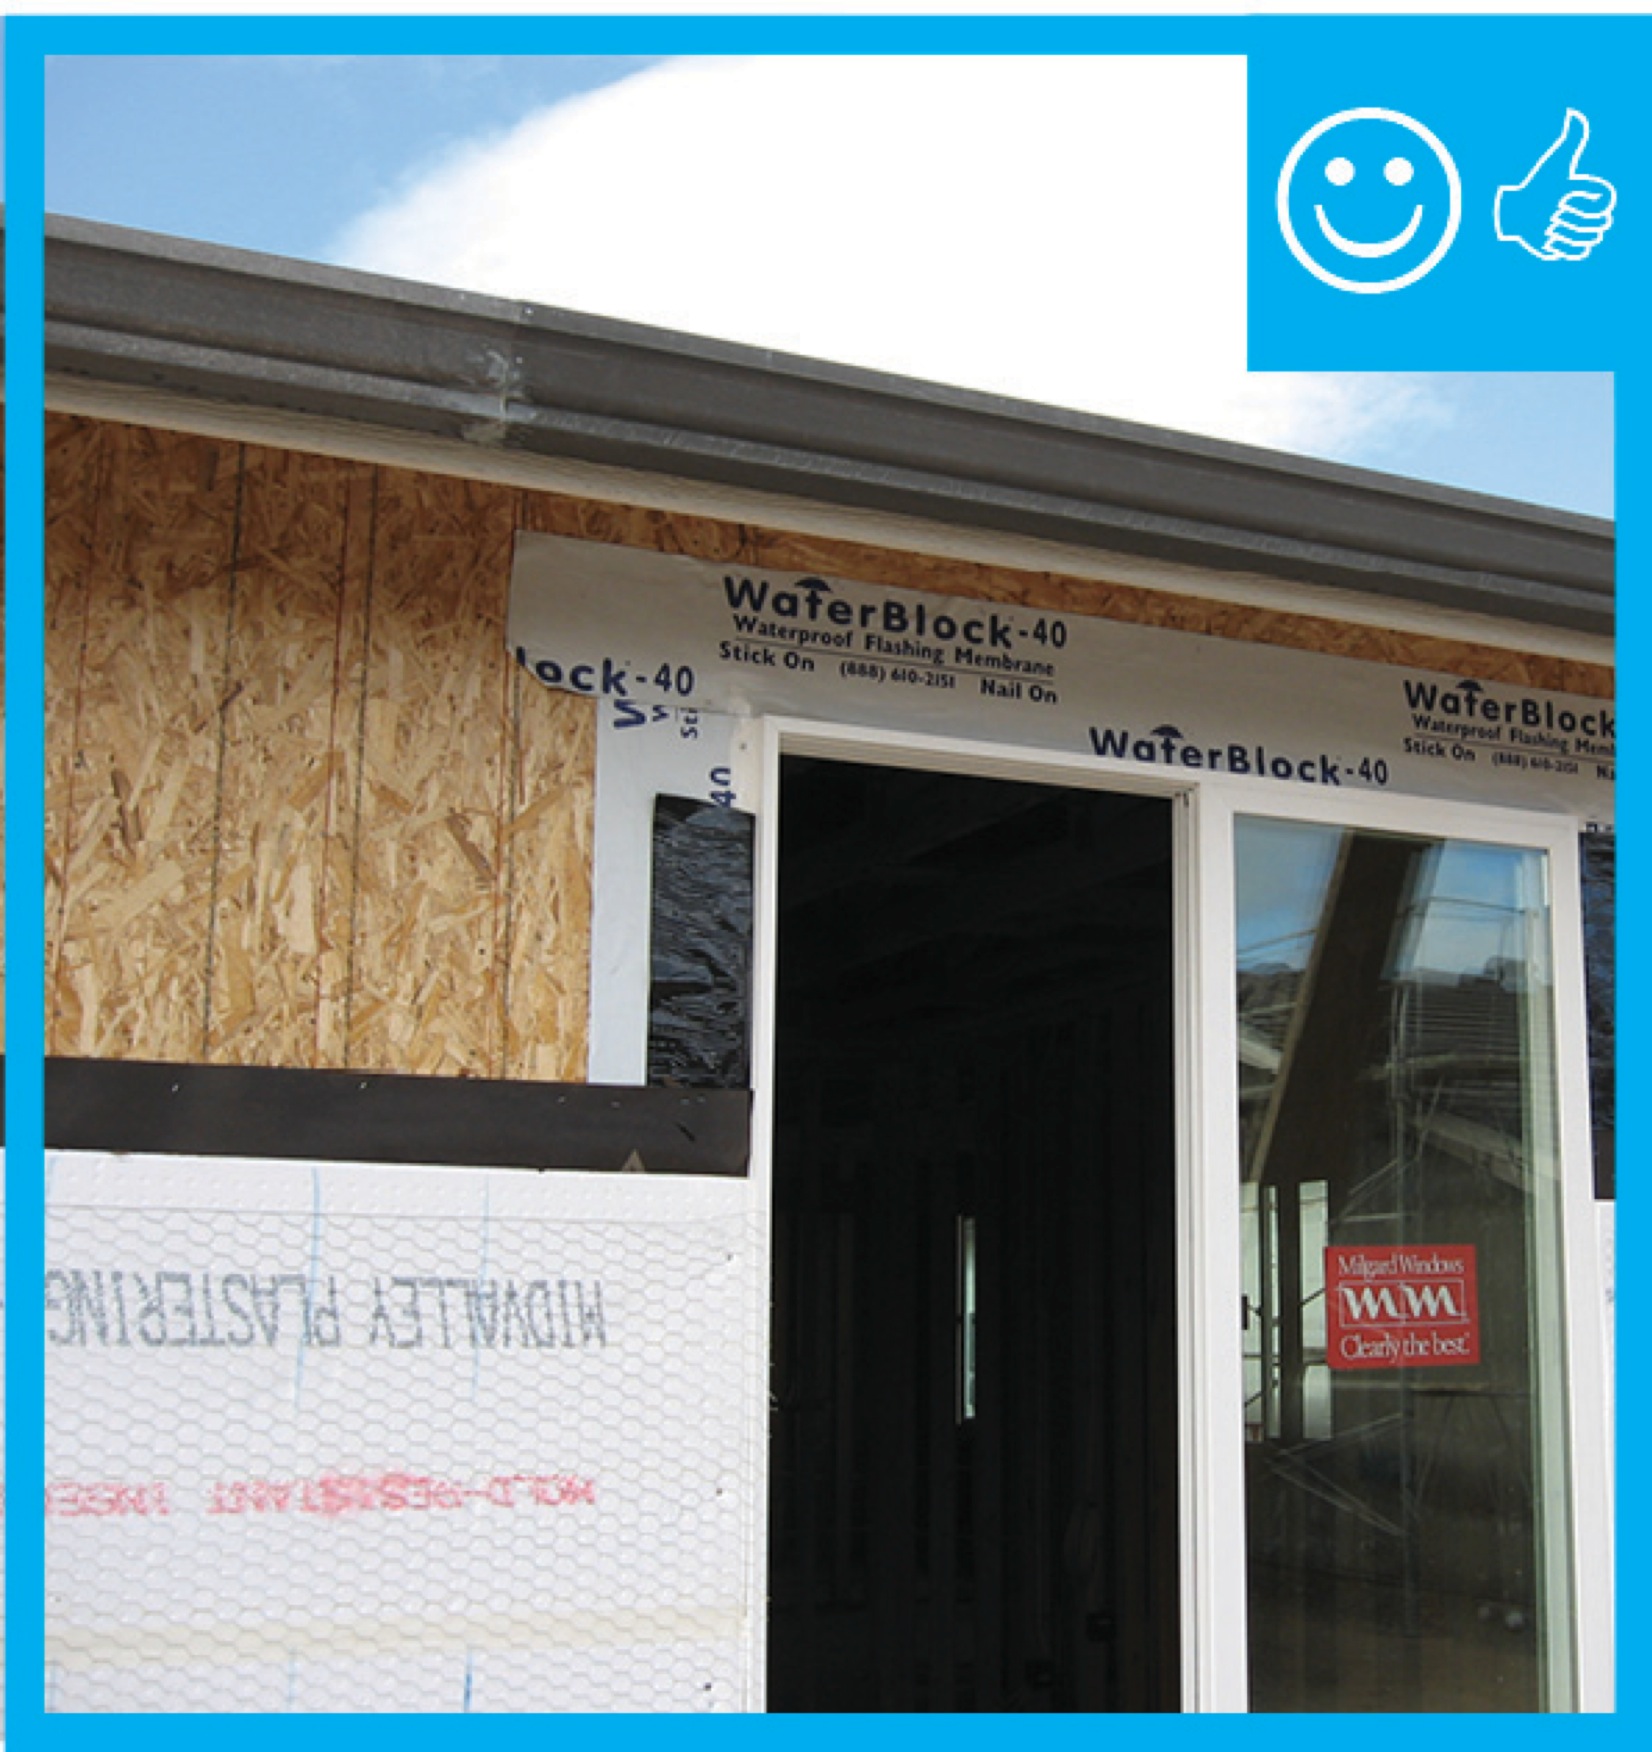
Right – There is flashing installed along the top of the window and the water-resistant barrier is layered over to create a complete drainage system
Image
Right – There is flashing installed at the bottom of the wall to create a satisfactory drainage system
Image

Right – This low-slope roof and parapet assembly has continuity of both the air and water barriers
Image
Right: All joints in the rigid foam are taped to keep stucco out of joints for even drying. Mesh tape (shown here) is used with expanded polystyrene (EPS); acrylic sheathing tape or self-adhered membrane is used with XPS
Image
Right: Brick veneer is flashed correctly with weep holes and a fine mesh screen is installed to prevent pest entry.
Image
Rigid foam insulation can serve as the drainage plane when all seams are taped. Furring strips provide an air gap behind the cladding.
Image
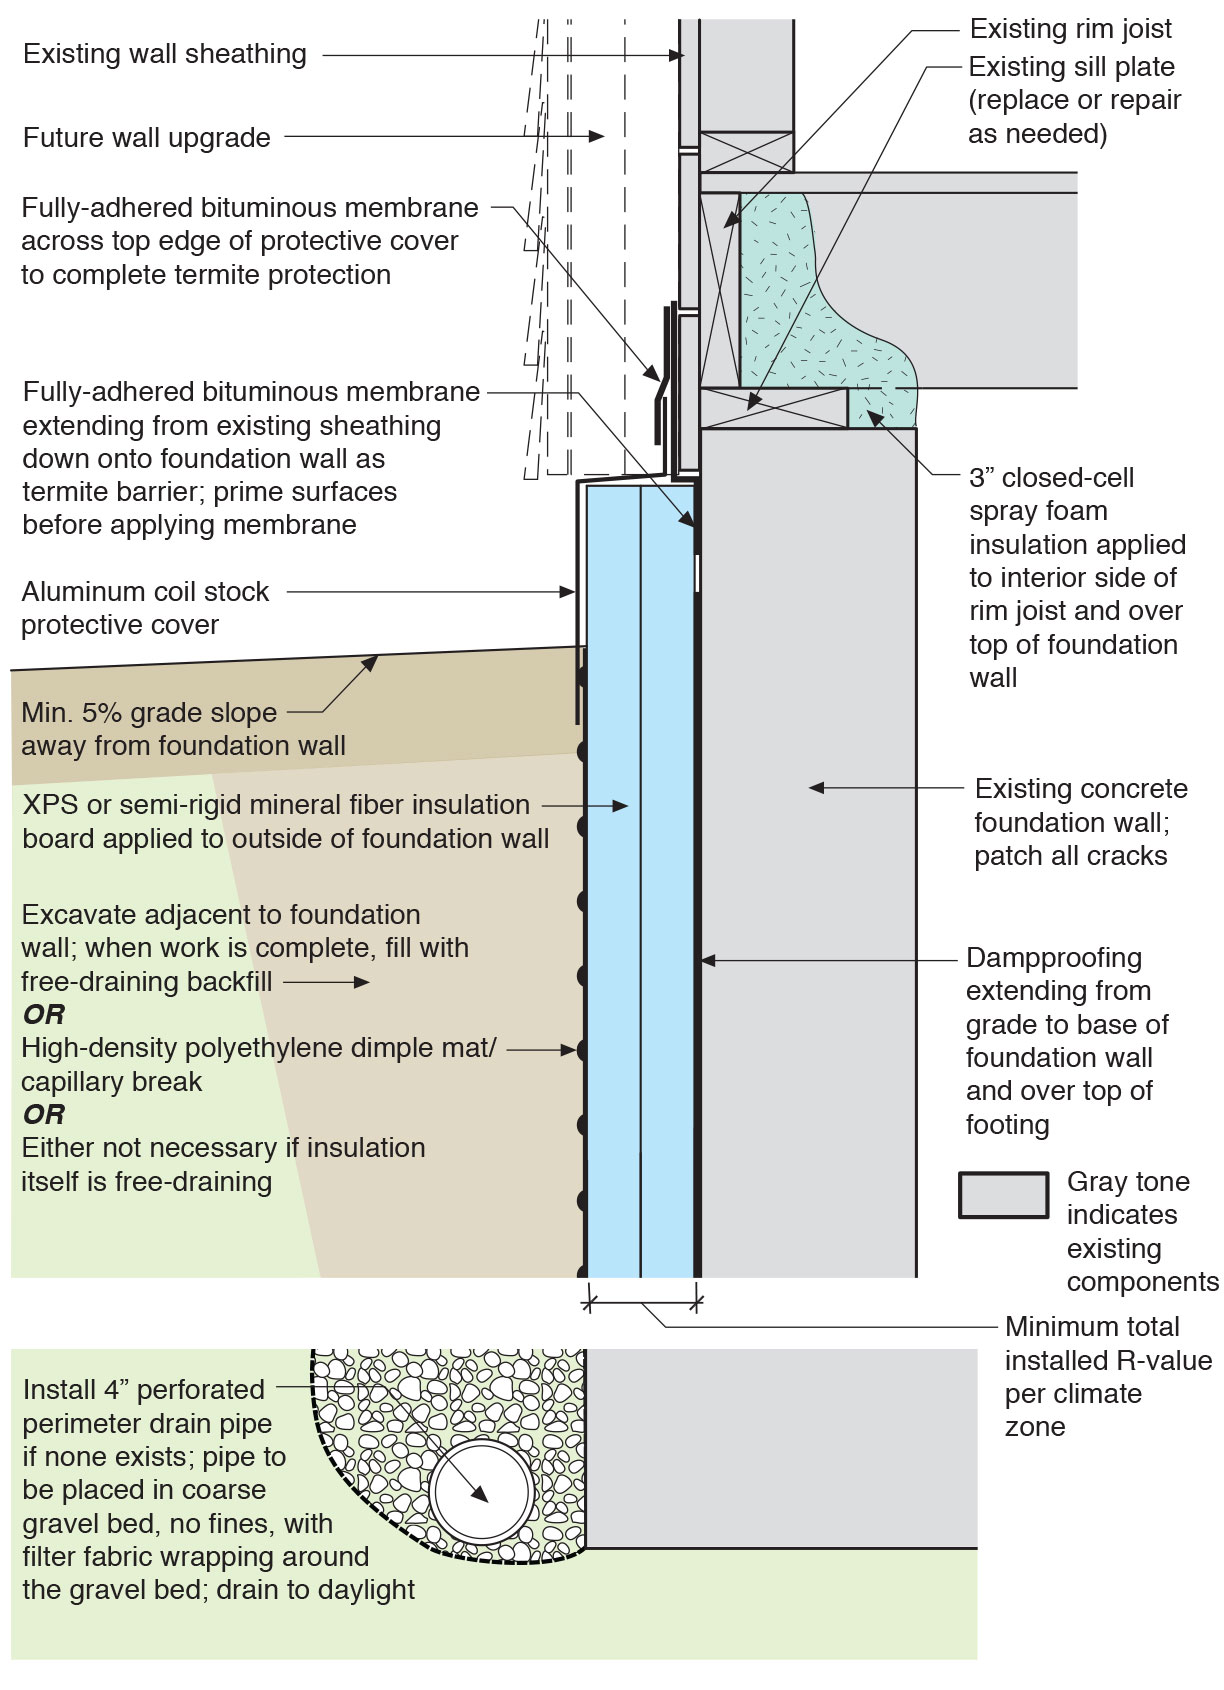
Rigid insulation and water control layers are installed on the exterior of a flat foundation wall; spray foam insulates the rim joist
Image
Image
Image

Seams in the ICF block are sealed so the EPS foam surface can serve as the drainage plane; no house wrap is needed.
Image
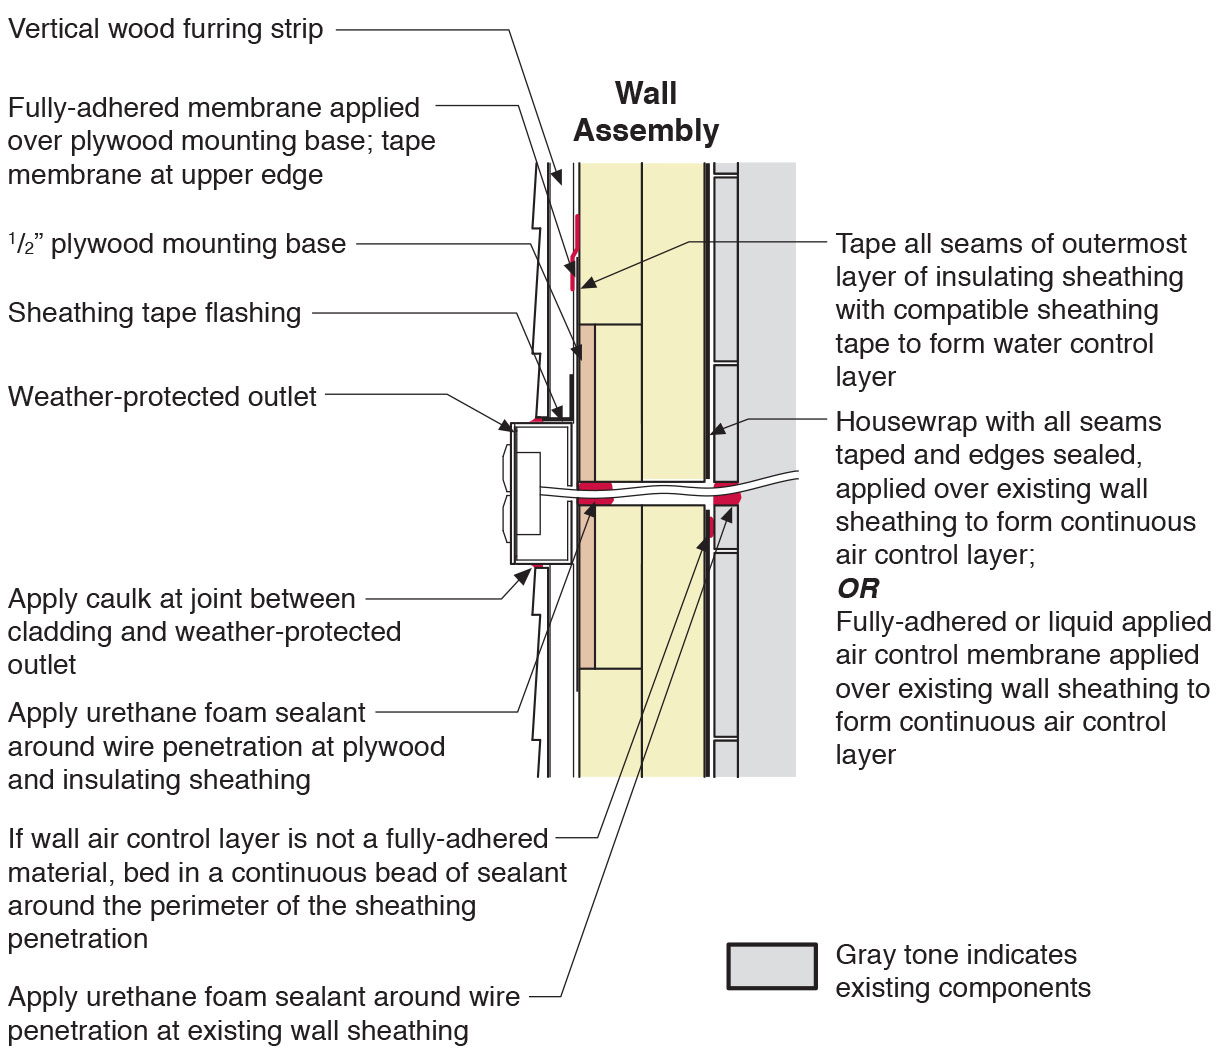
Section view of electric box installation in exterior wall showing flashing and air sealing details
Image
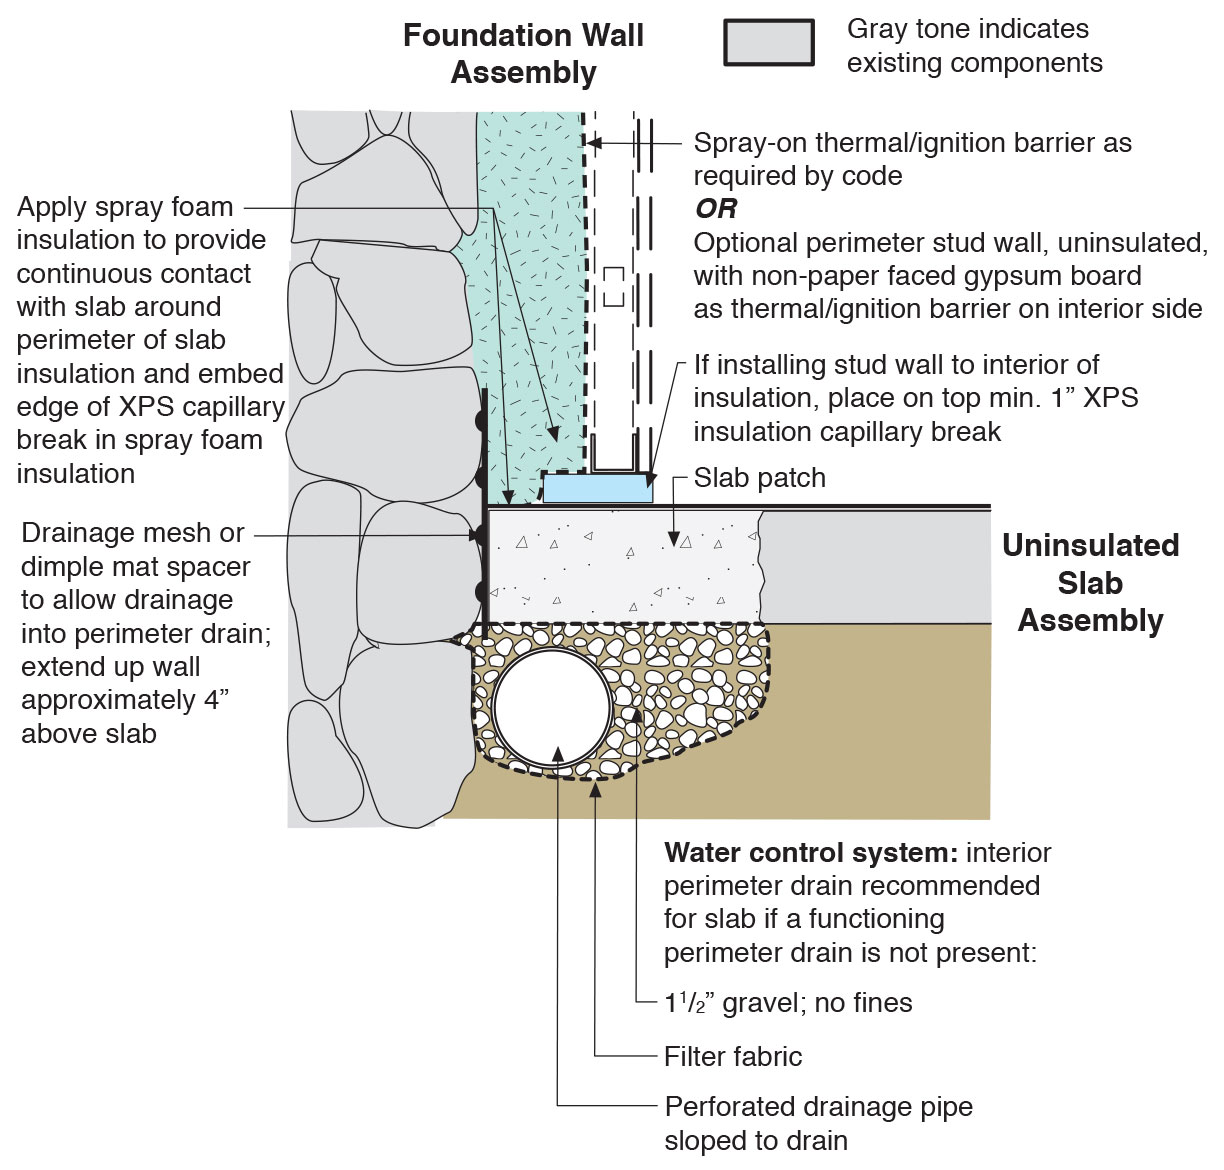
Spray foam extends down the inside of the foundation wall to the uninsulated slab; because the wall lacked exterior perimeter drainage, the slab was cut and an interior footing drain was installed.
Image

Image
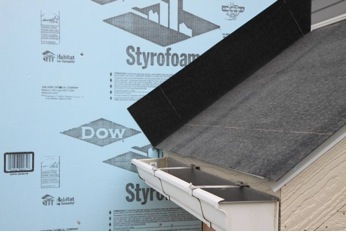
Step 1. Apply roof underlayment over roof deck and up the sidewall over the rigid foam insulation
Image
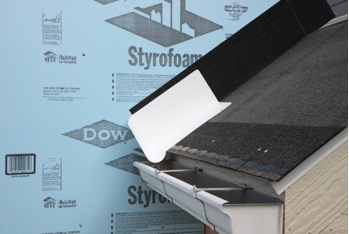
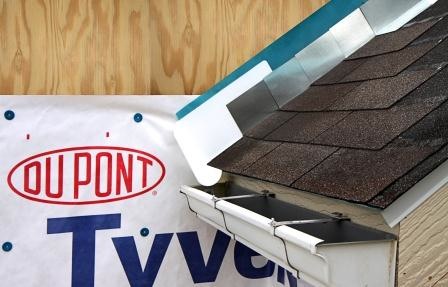
Step 2. Install shingle starter strip then kick-out diverter as first piece of step flashing.
Image
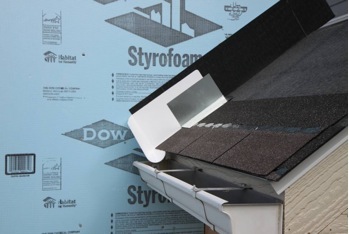
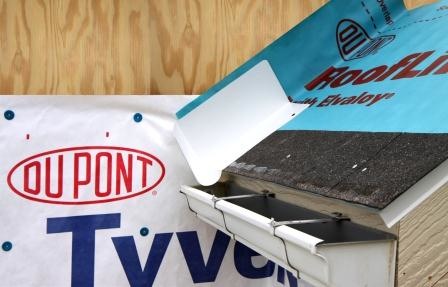
Step 3. Place the first shingle and the next section of sidewall flashing over upper edge of diverter
Image

Step 4. Install remaining sidewall flashing, appropriate counter flashing, and shingles
Image
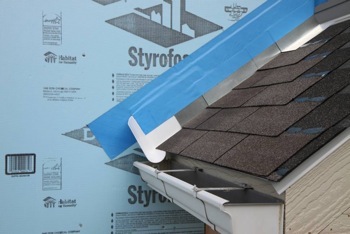
Step 5. Apply self-adhesive flashing over top edge of the wall flashing, diverter, and rigid foam insulation
Image
Image
Step and kick-out flashing at all roof-wall intersections extending ≥ 4 in. on wall surface above roof deck and integrated with drainage plane above
Image
Image

Tape horizontal joint with minimum 3" wide tape placing tape offset high on the joint, adhearing to the upper sheet without wrinkles
Image
Tape the joint between the top insulation sheet and the Z-flashing with 2" wide tape to improve air tightness
Image
Image
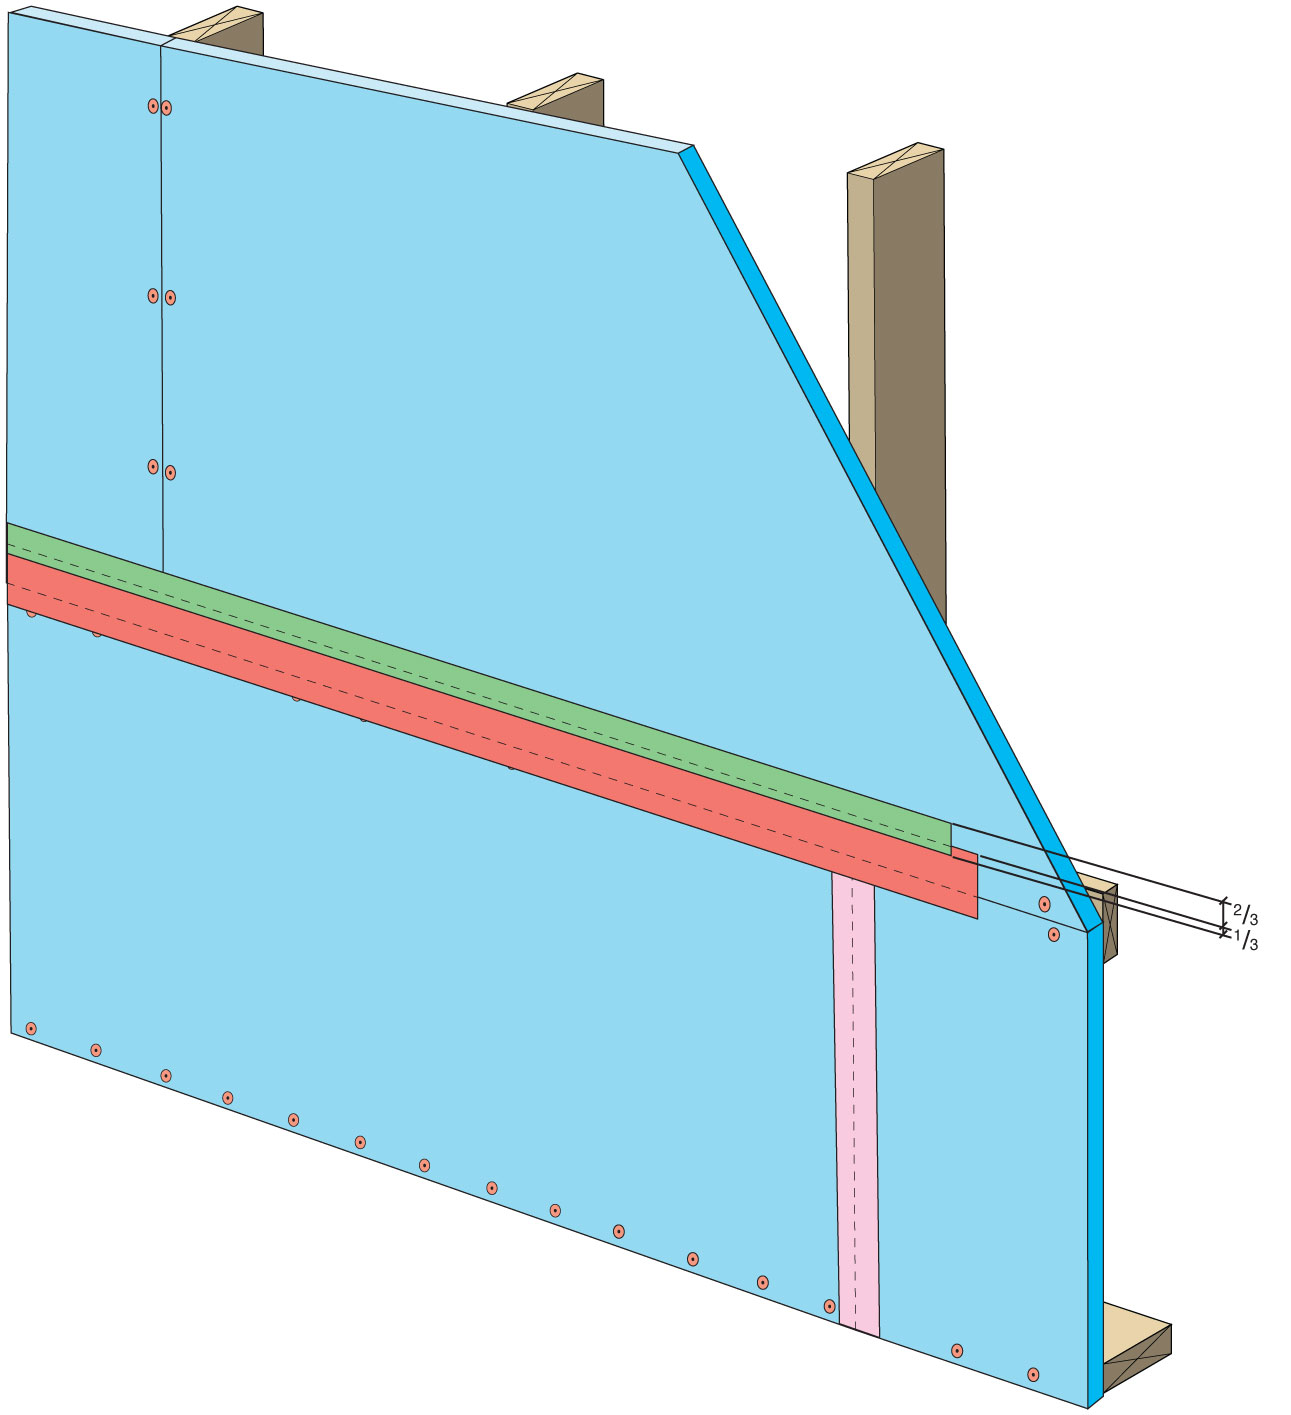
Terminate 4" tape with 2" wide tape placing tape offset high on the joint, 2/3 of the tape should be adhered to the sheet of insulation
Image
Image
Image
Image
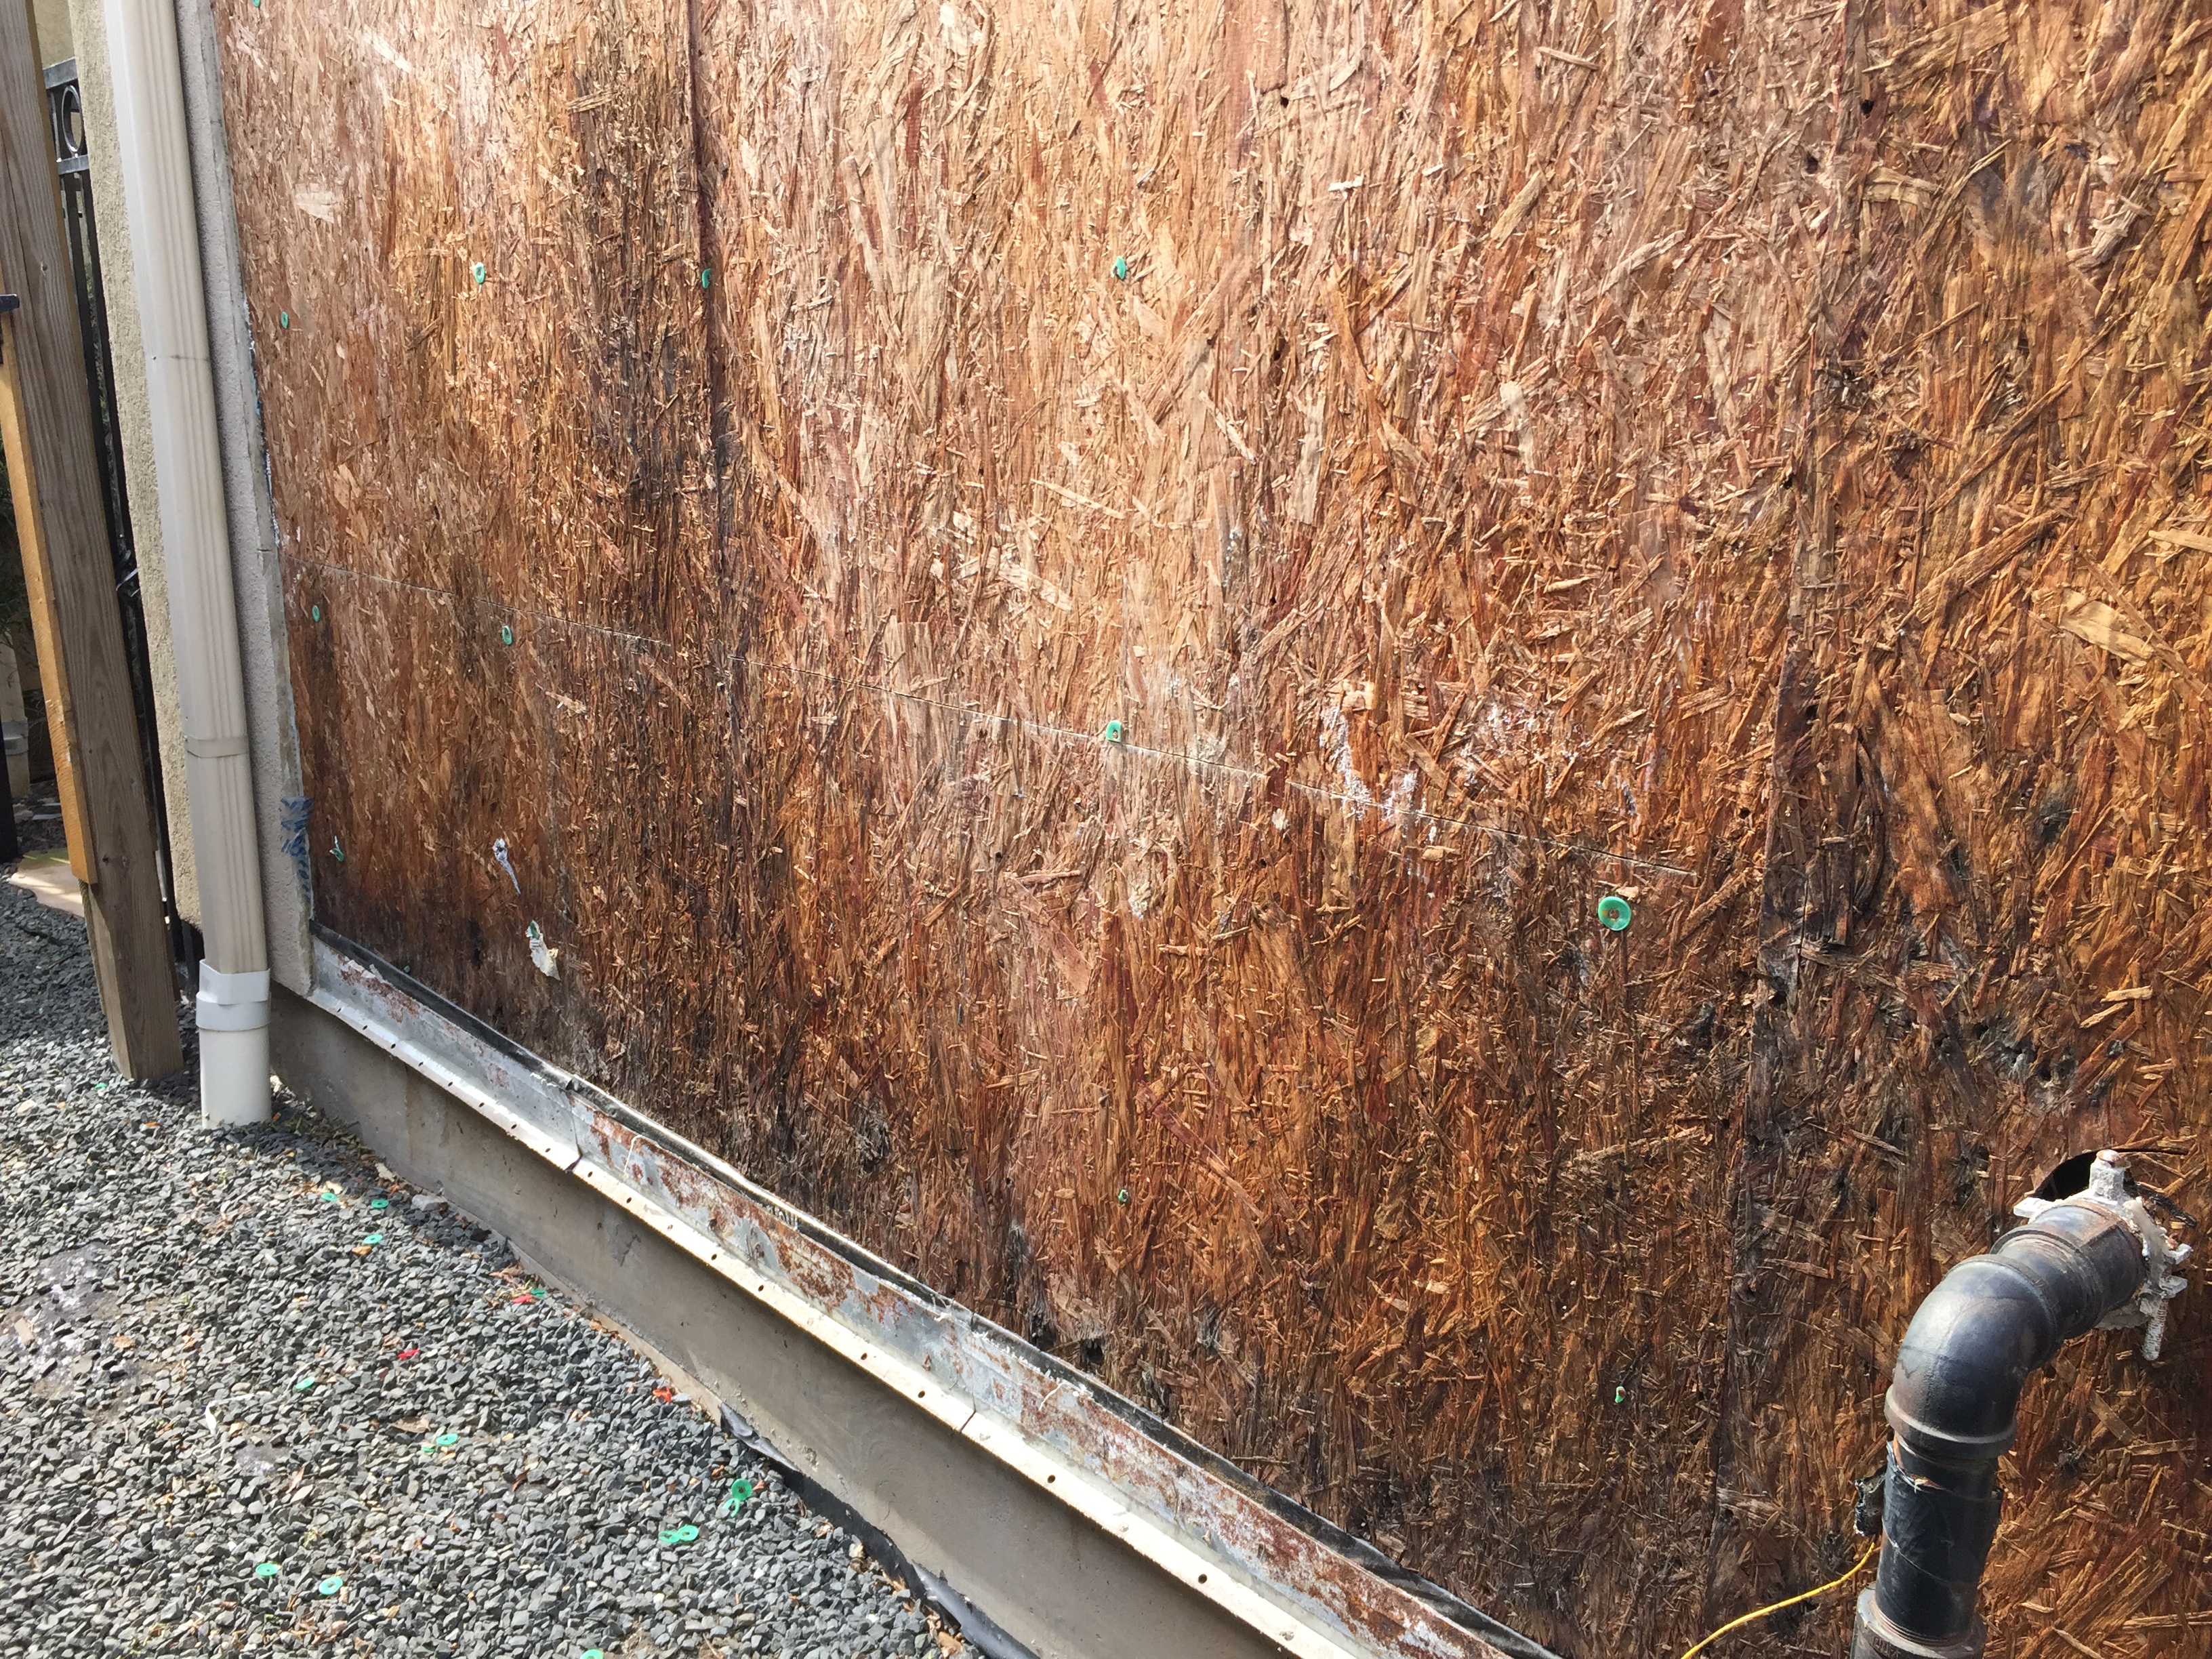
The sheathing has rotted because there was not a sufficient drainage gap behind the stucco cladding
Image
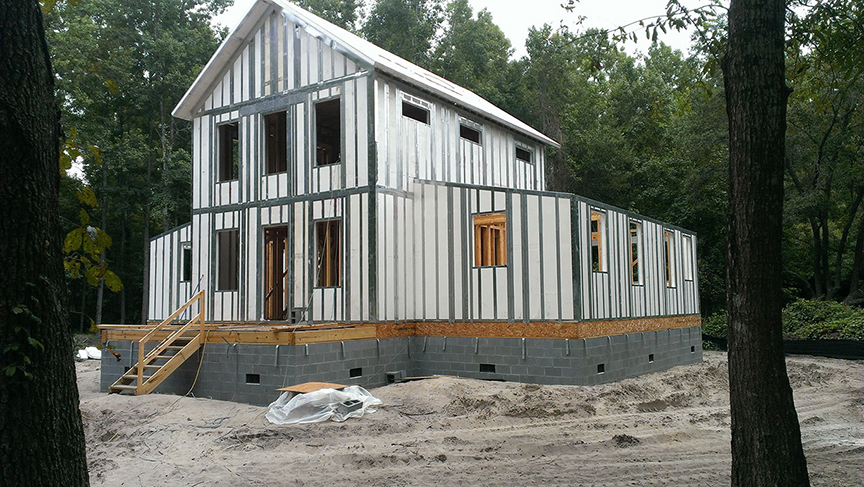
The walls of this mixed-humid location home are constructed with moisture-resistant steel-framed expanded polystyrene R-34 wall panels that are designed to withstand winds up to 200 mph and level D seismic forces.
Image

The water-resistant barrier, weep screed, and stucco lathe are not properly layered
Image
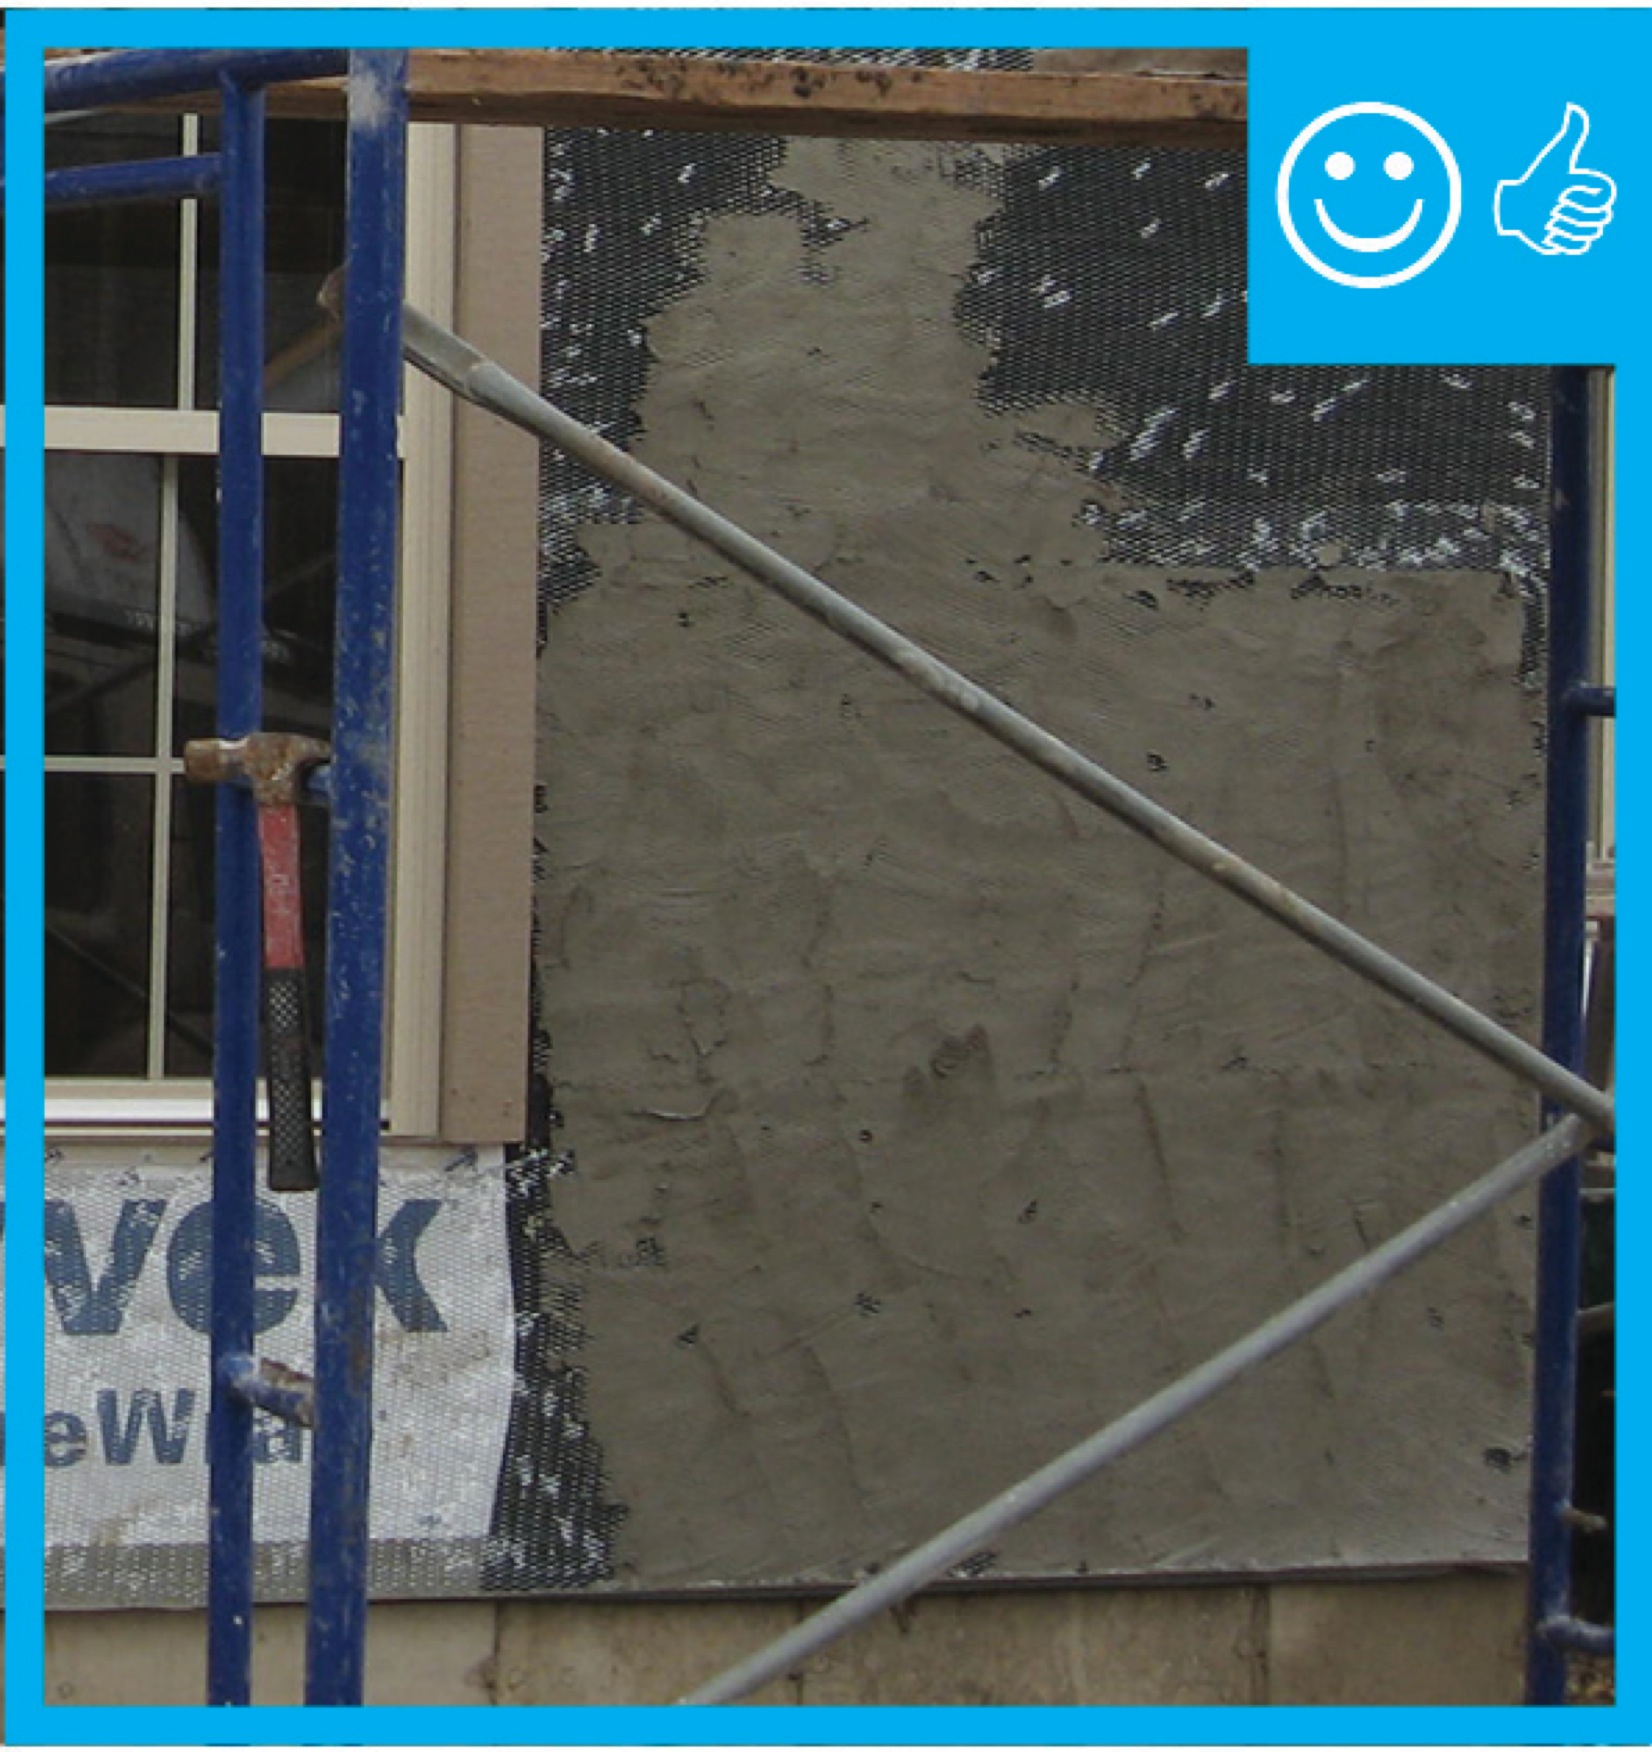
The water-resistant barrier, weep screed, and stucco lathe are properly layered and will create a complete drainage system
Image
Image
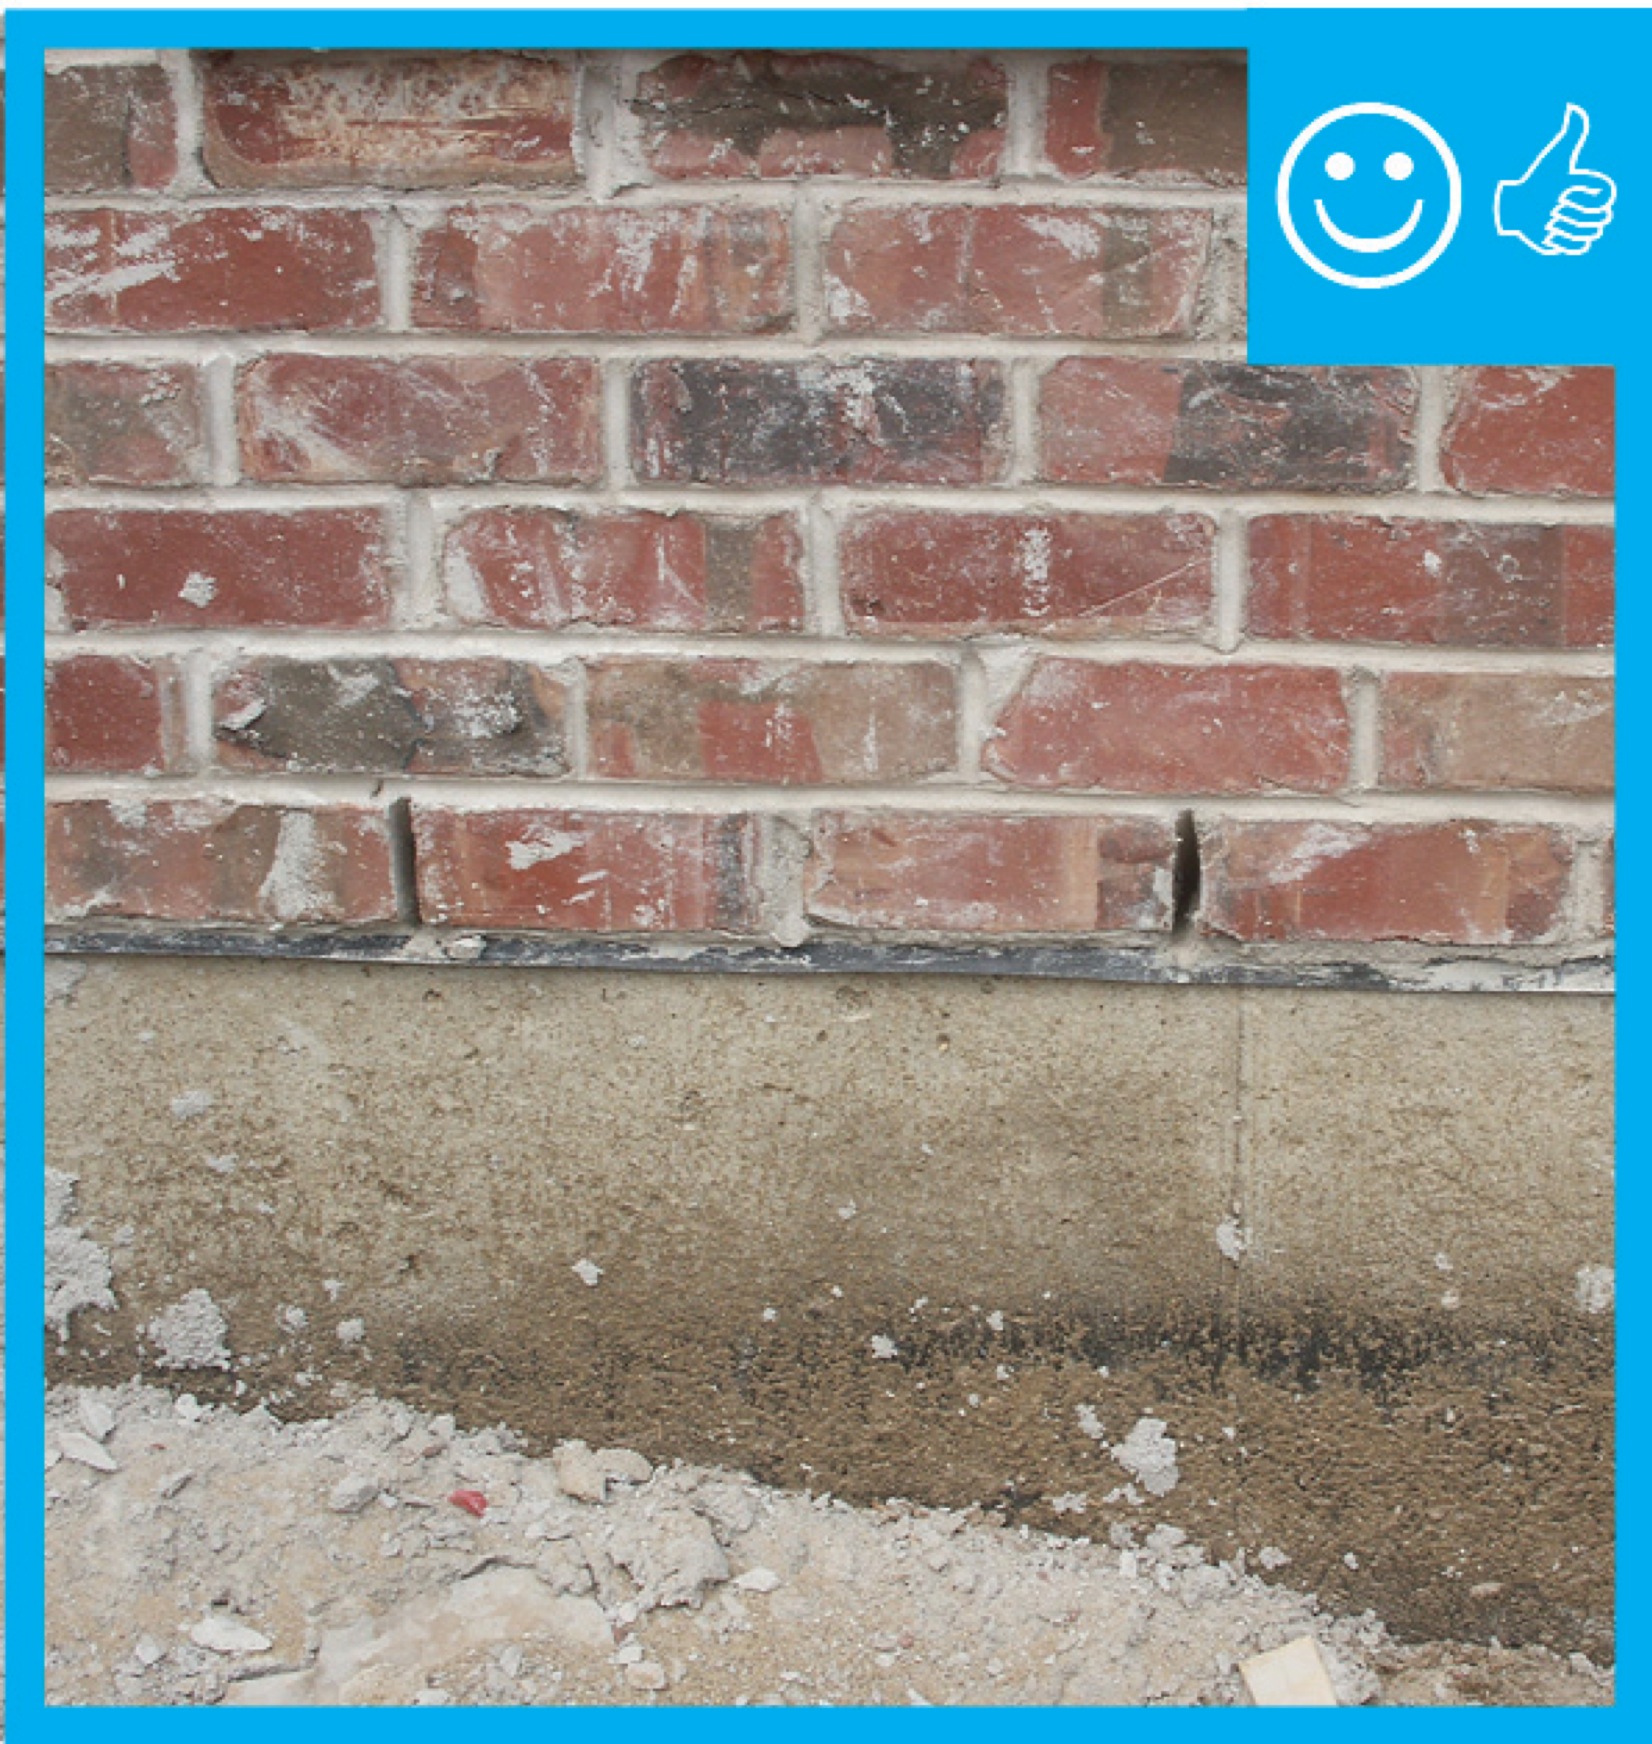
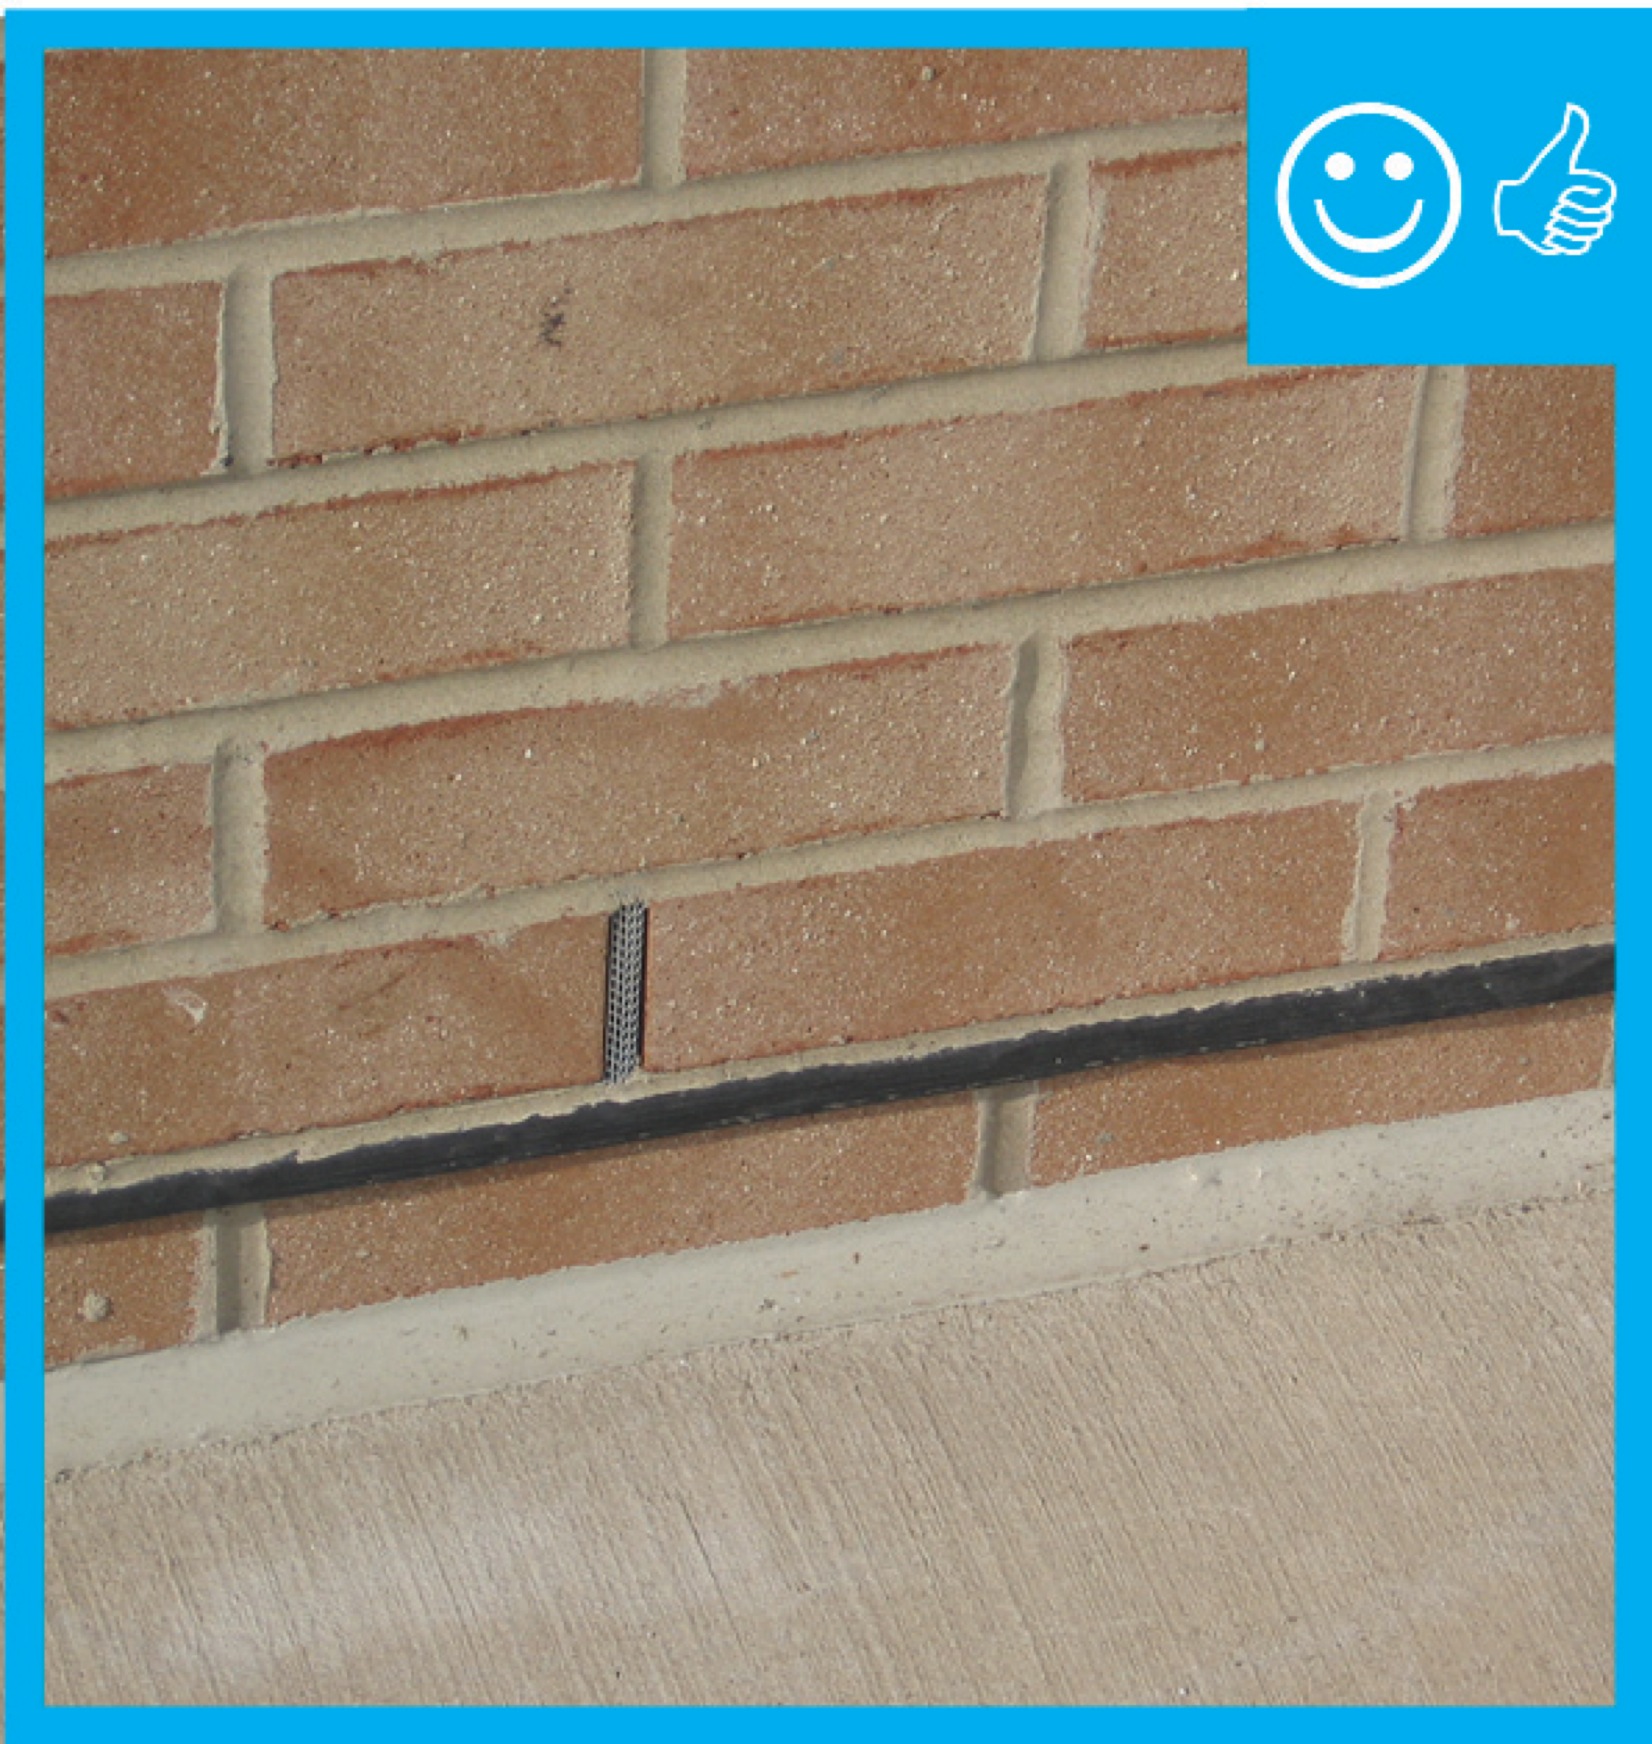
The weep holes are spaced at the correct distance to provide a complete drainage system
Image

Image
Image

Image
Image
Image
Image
Image
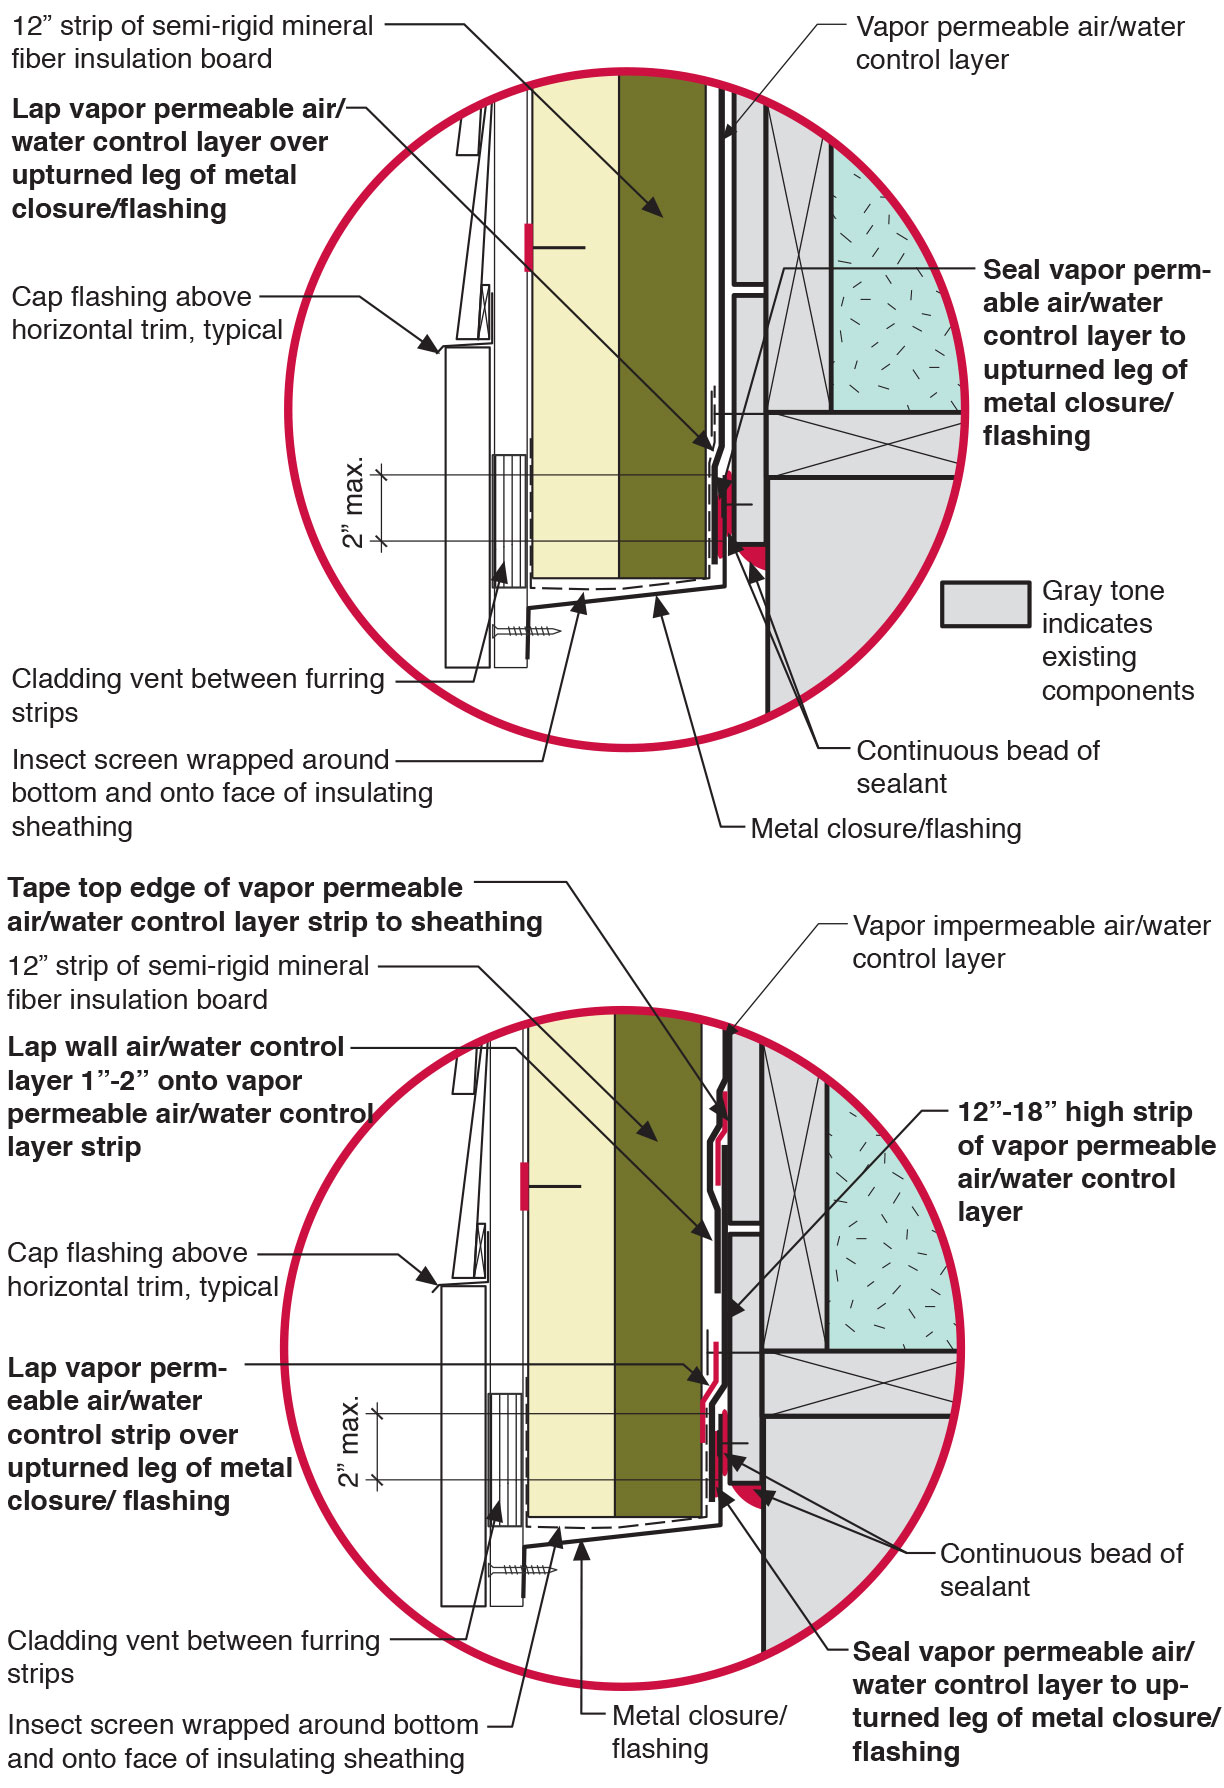
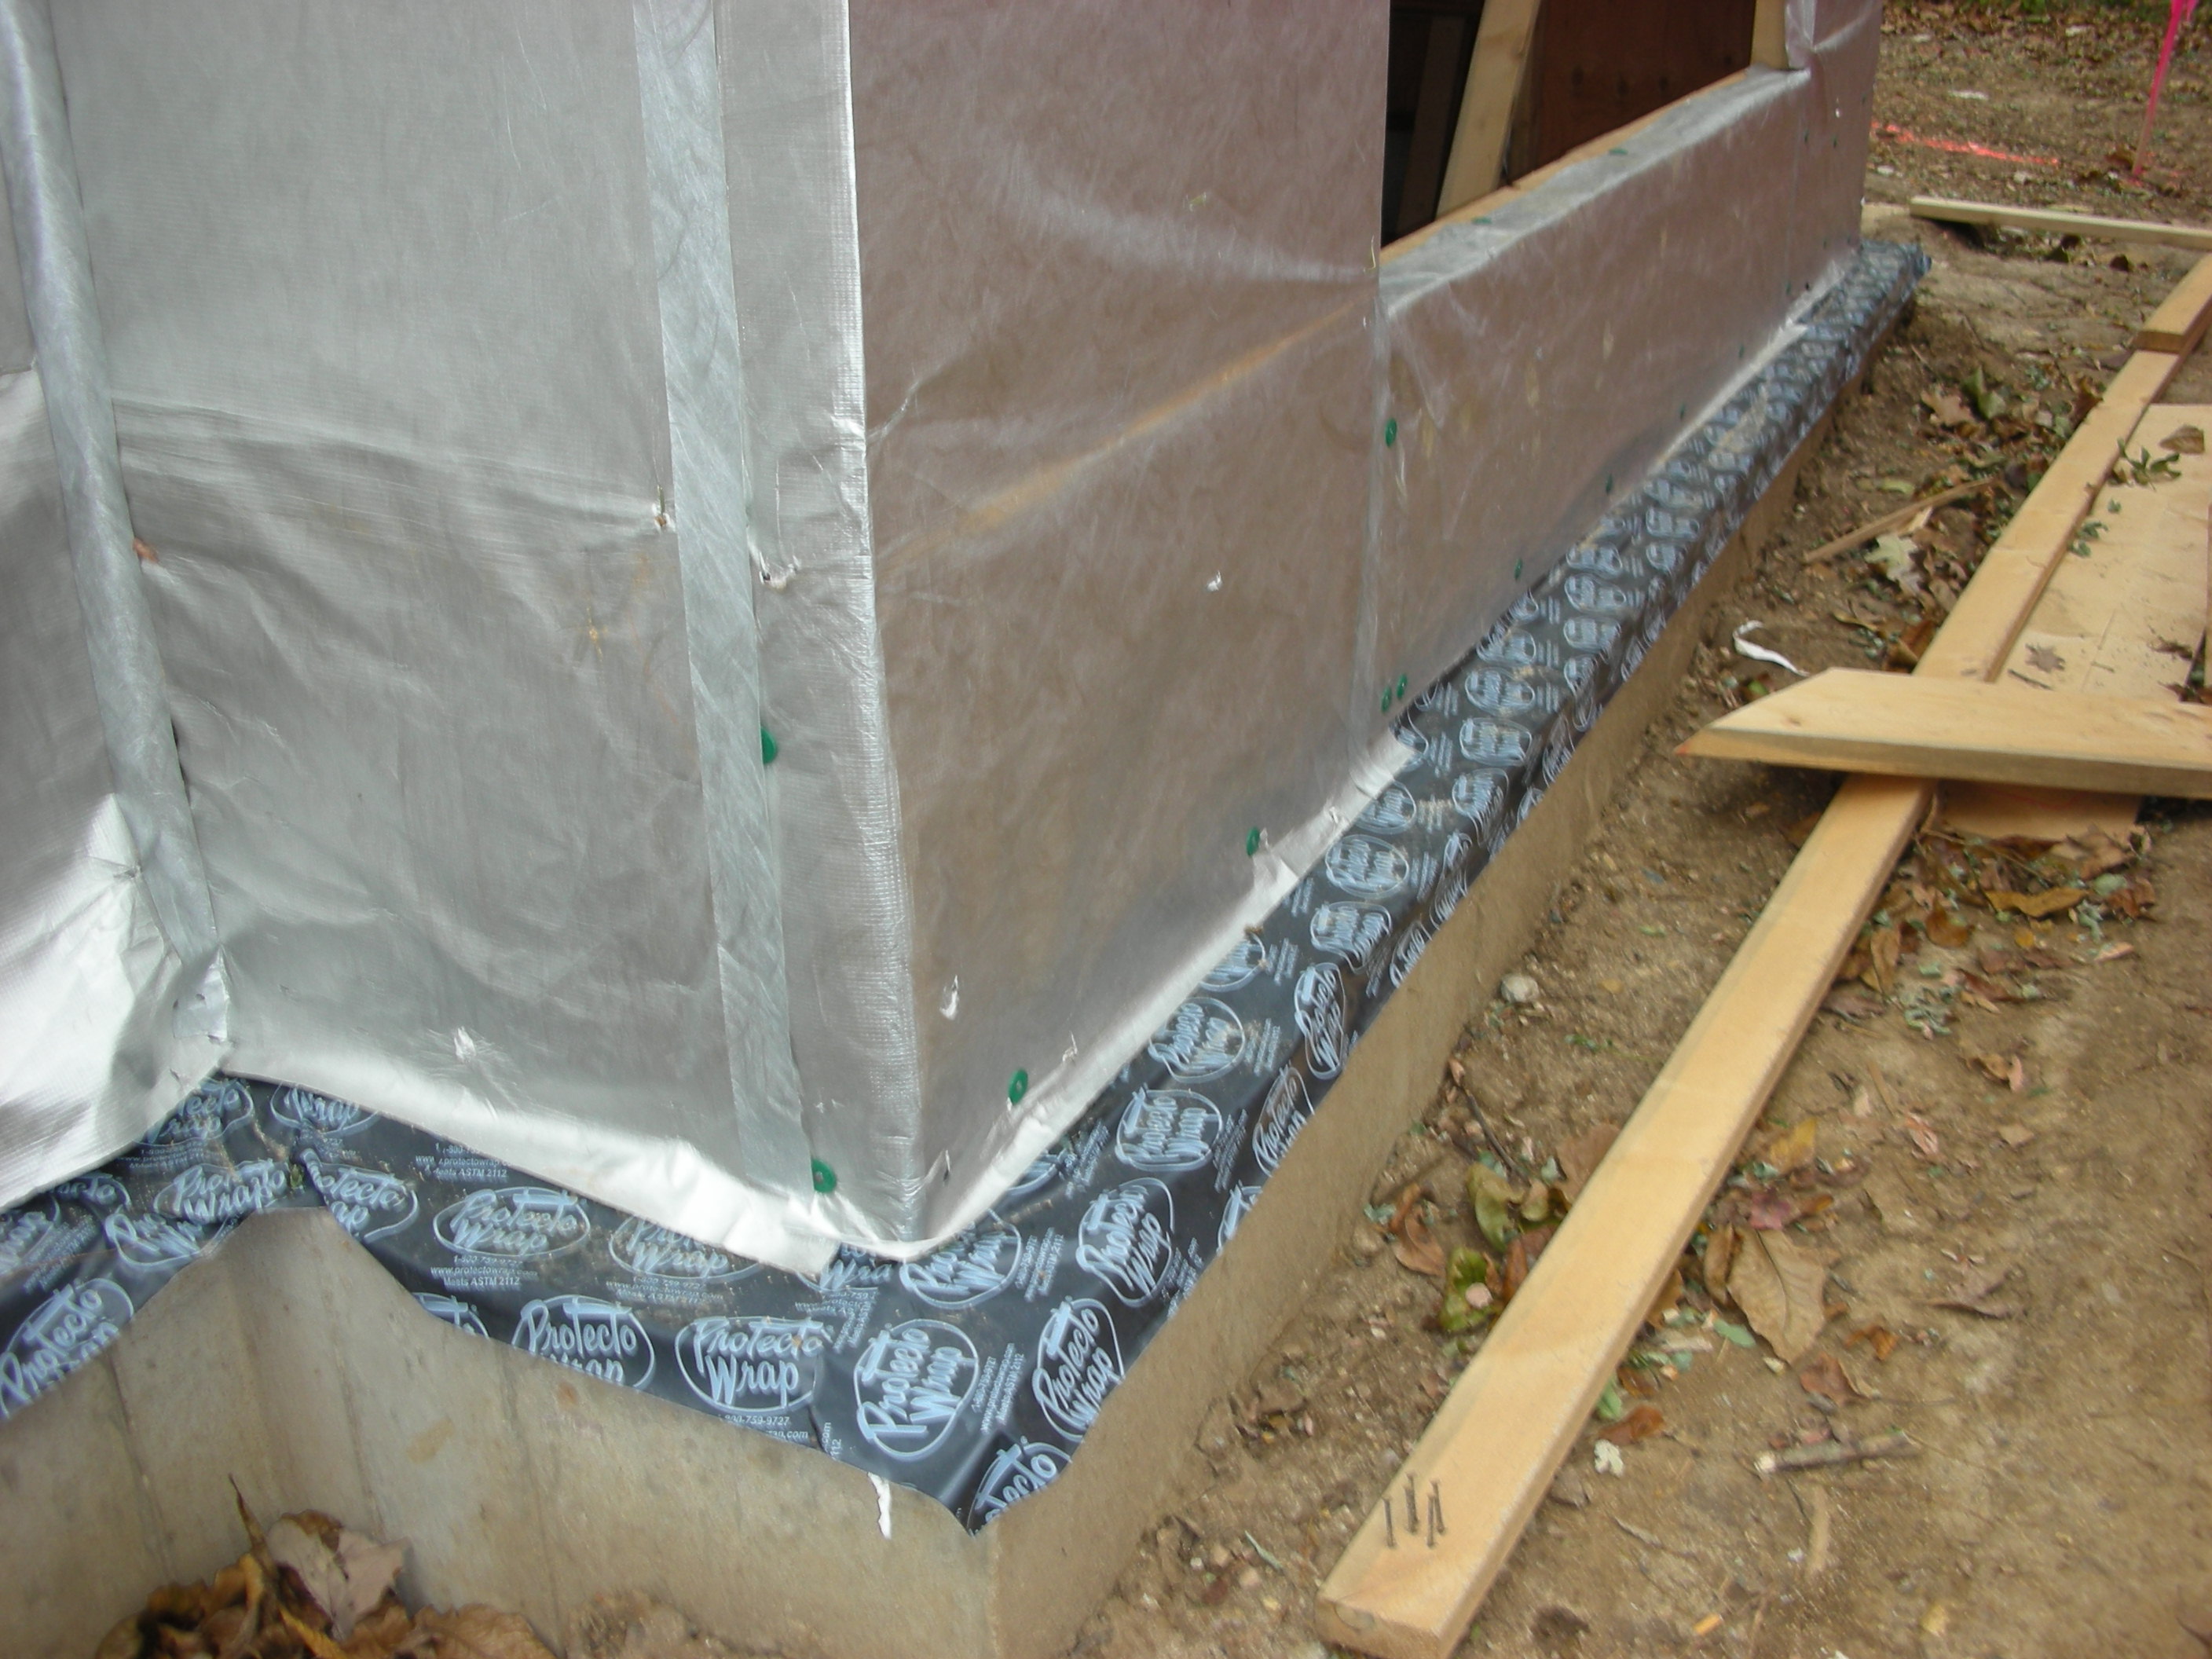
This exterior wall retrofit permits drying to the exterior of a sill plate installed on an untreated flat foundation wall
Image
This farmhouse was retrofit by removing the existing siding and adding taped insulated sheathing and battens before installing new siding
Image
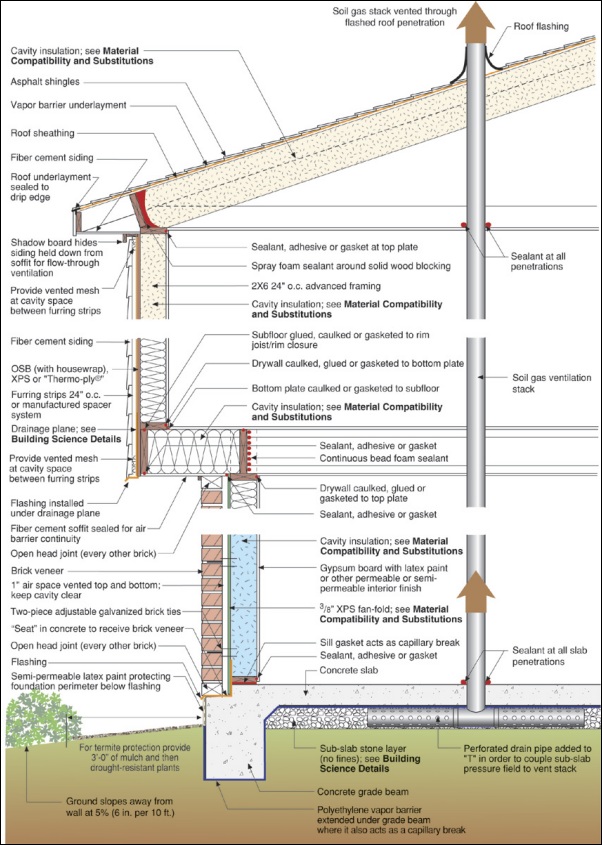
This flood-resistant exterior wall with brick or fiber-cement siding will limit moisture damage in exterior walls.
Image
This flood-resistant masonry wall design with metal framing and rigid foam insulation will limit moisture damage in exterior walls.
Image
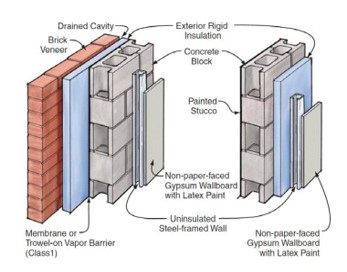
This house design in the Hot-Humid climate uses a slab foundation, masonry walls, and an Exterior Insulation Finish System (EIFS) cladding.
Image
Image
Image

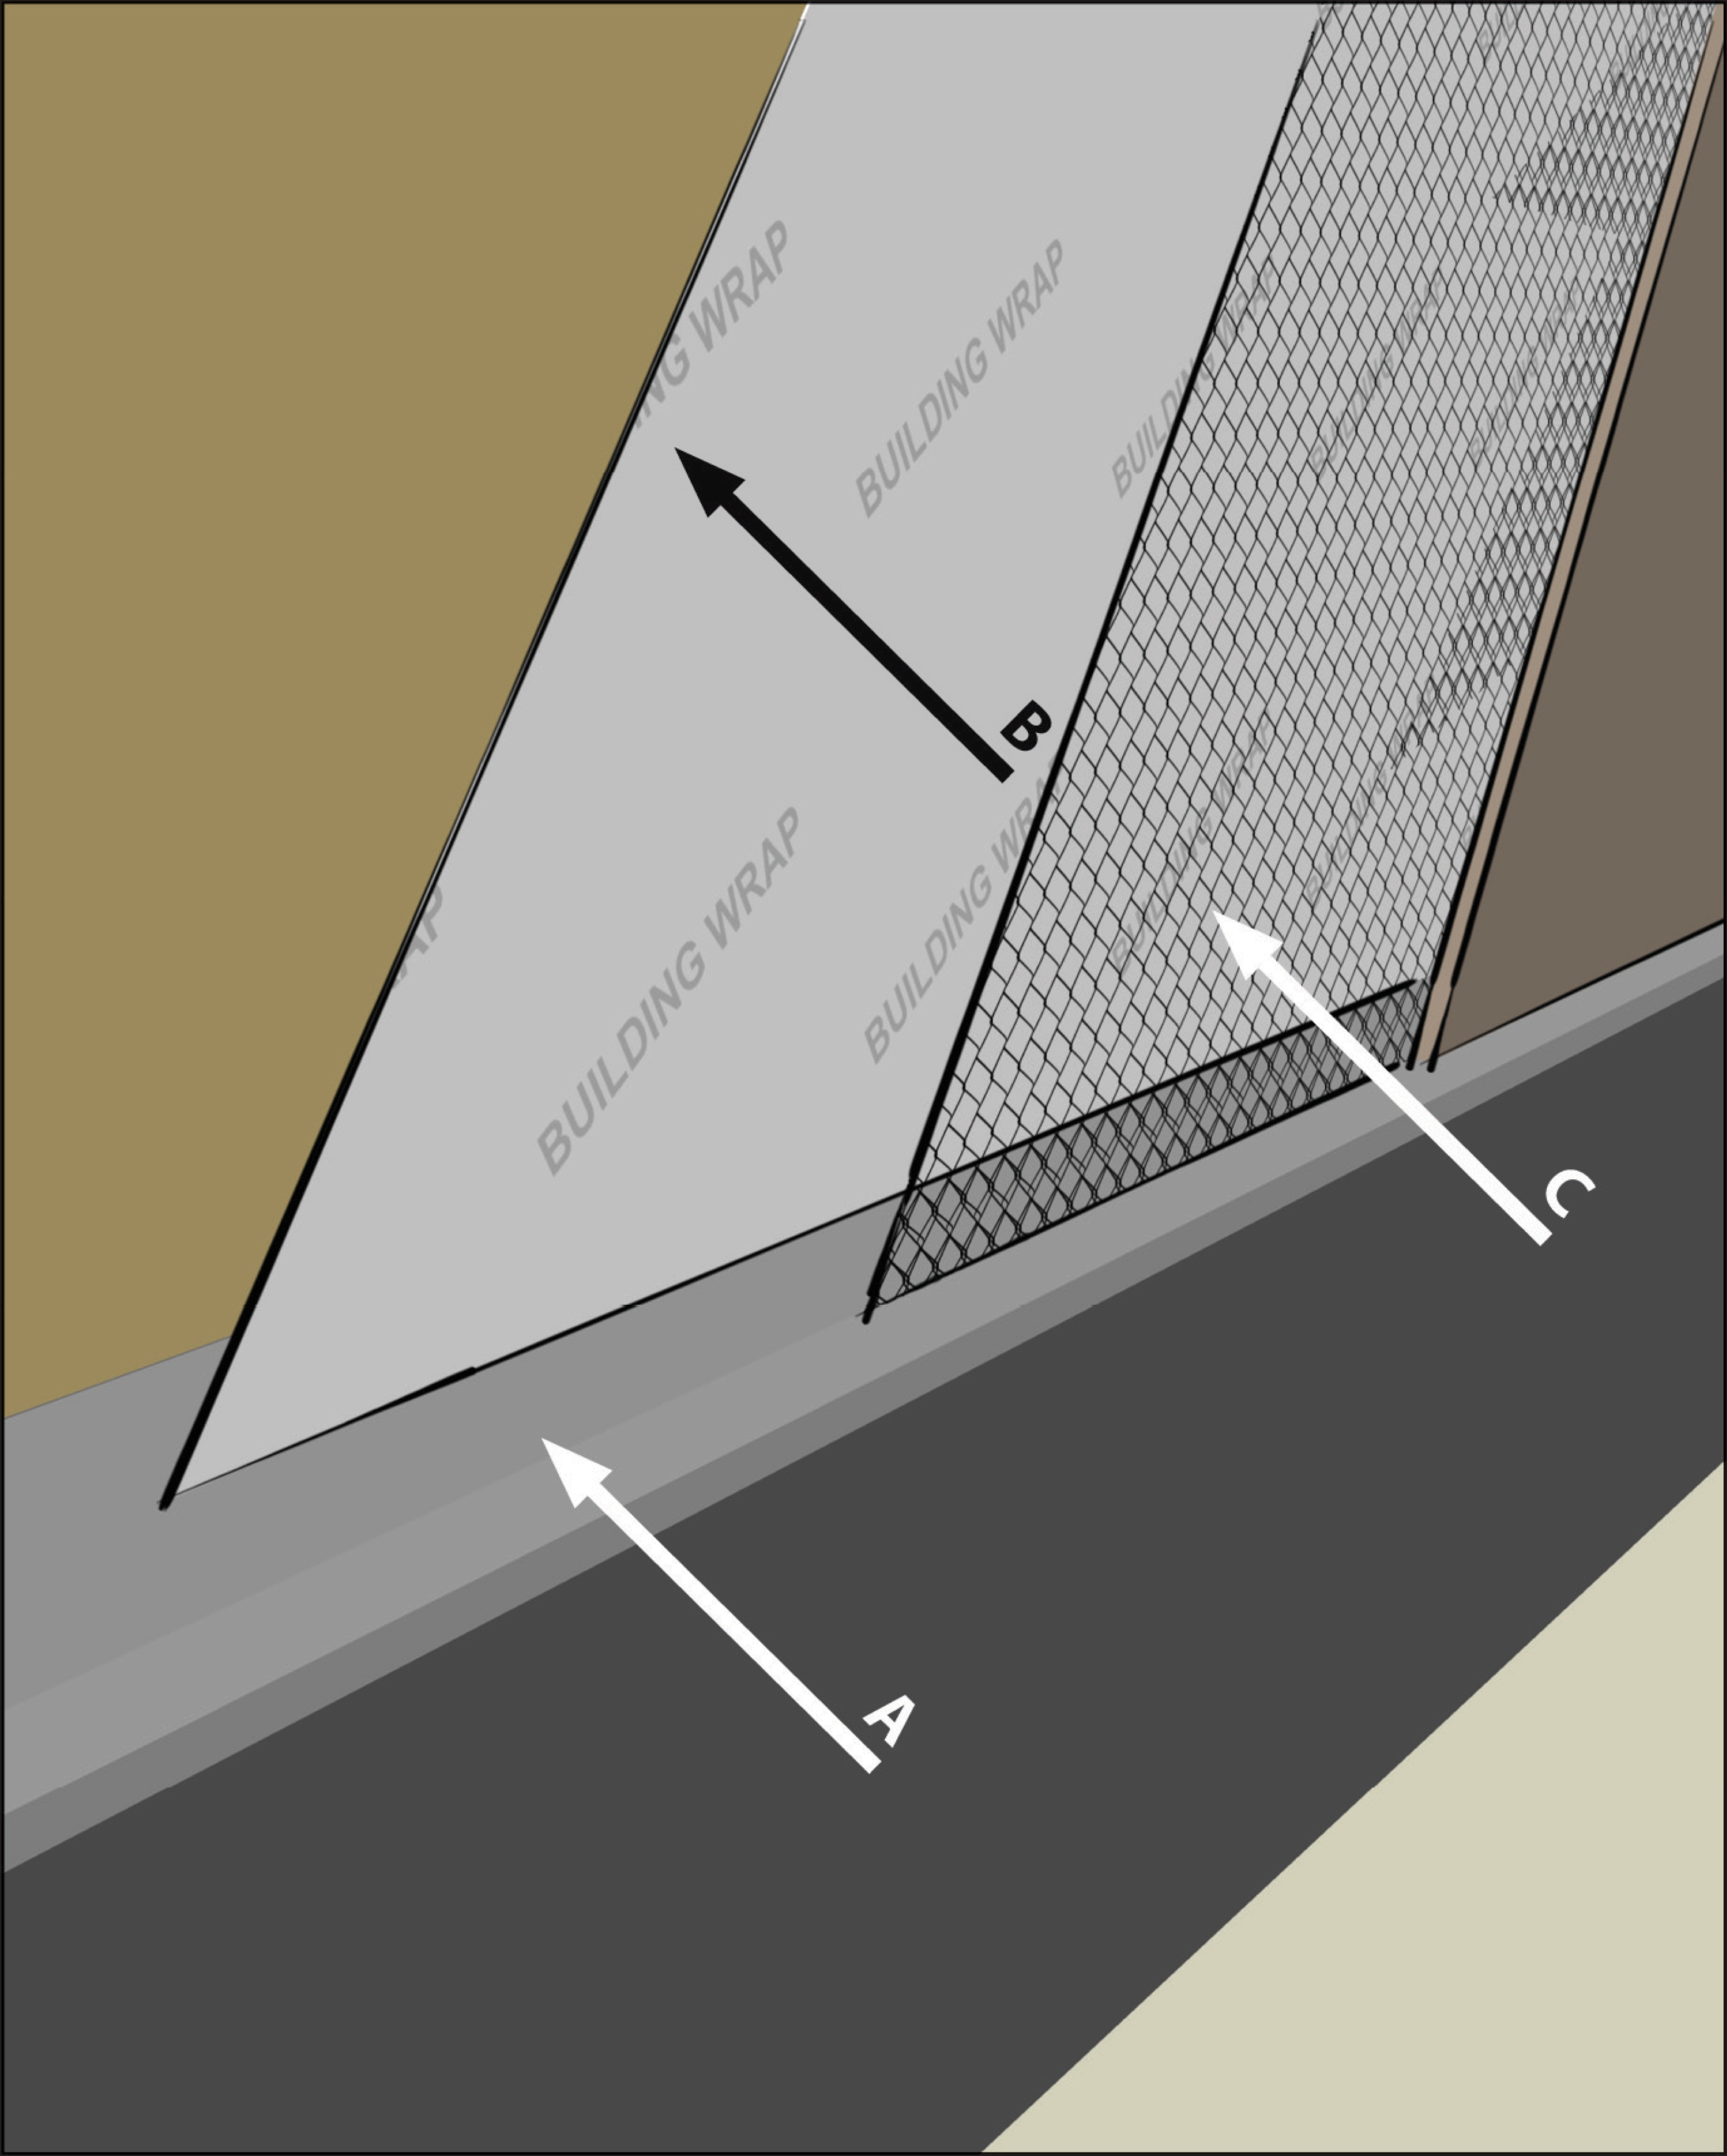
Vapor-permeable mineral wool insulation is installed on the exterior side of the sill beam during an exterior wall retrofit to allow the sill beam to dry to the outside
Image
Image
Image
Water management detail for a solar panel rack mounting block installed in rigid foam that was installed over an existing roof
Image

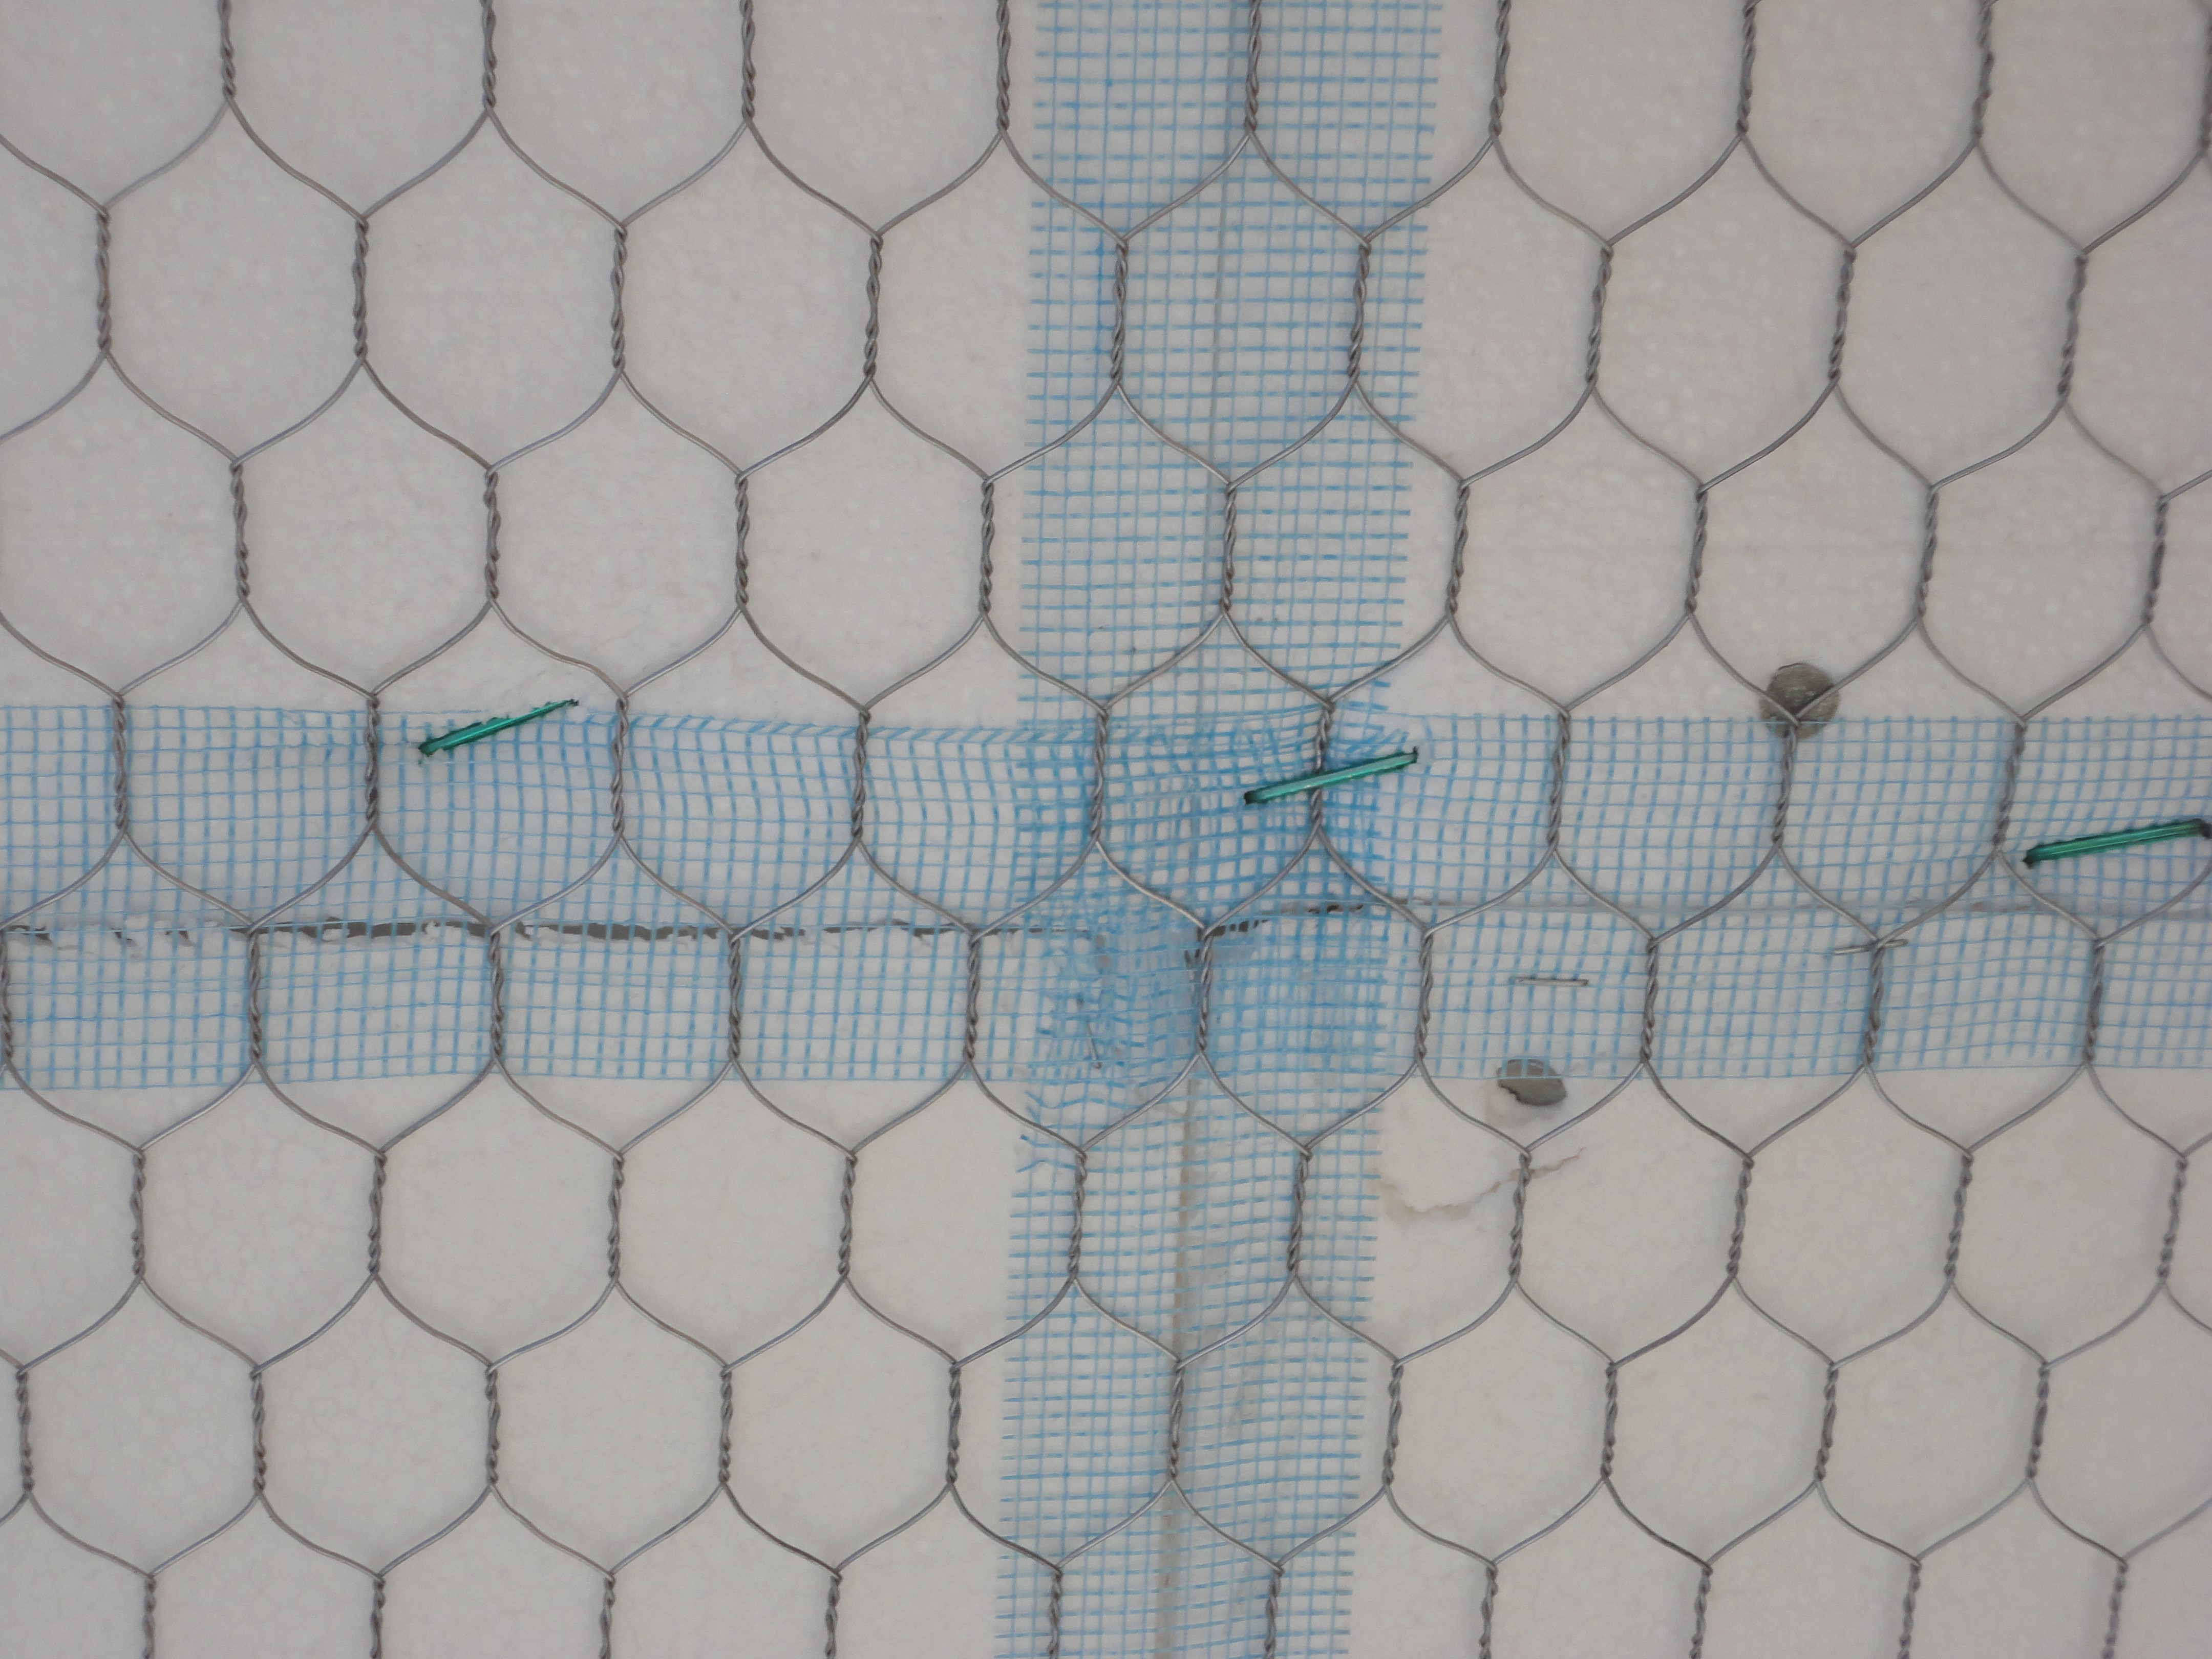
Weep holes: Rope inserted in the head joist between bricks will allow water to weep out of the base of the wall assembly
Image
Image
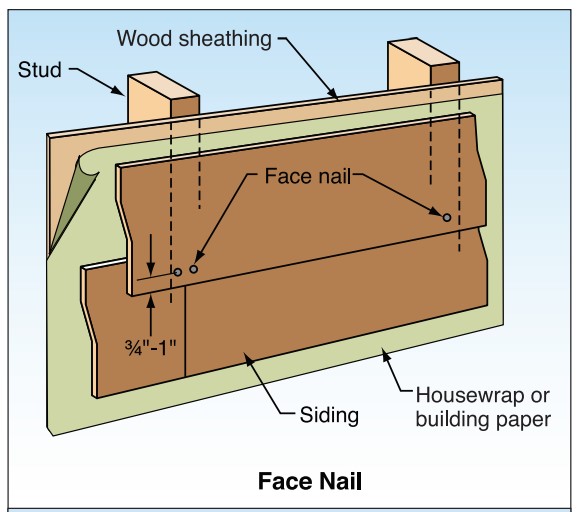
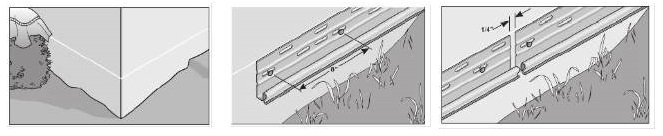
With fiber cement siding, face nail rather than blind nail where the design wind speed is ≥100 mph.
Image
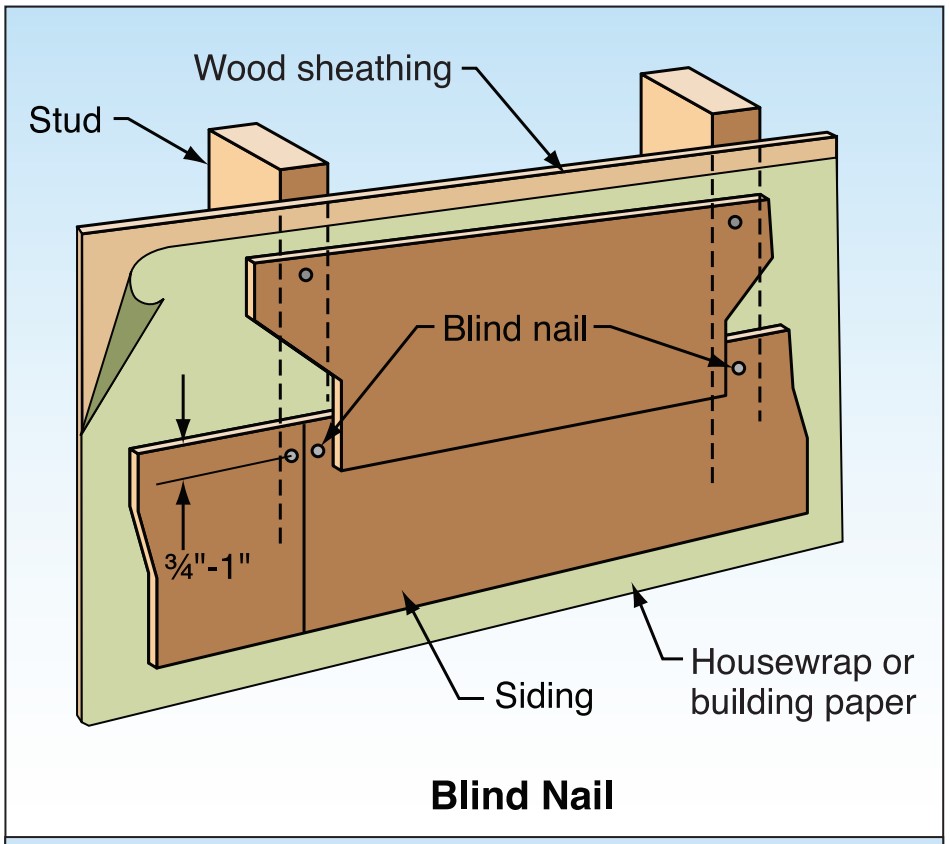
With fiber cement siding, place blind nails 3/4 to 1 inch from top edge and > 3/8 inch in from butt ends.
Image
Image

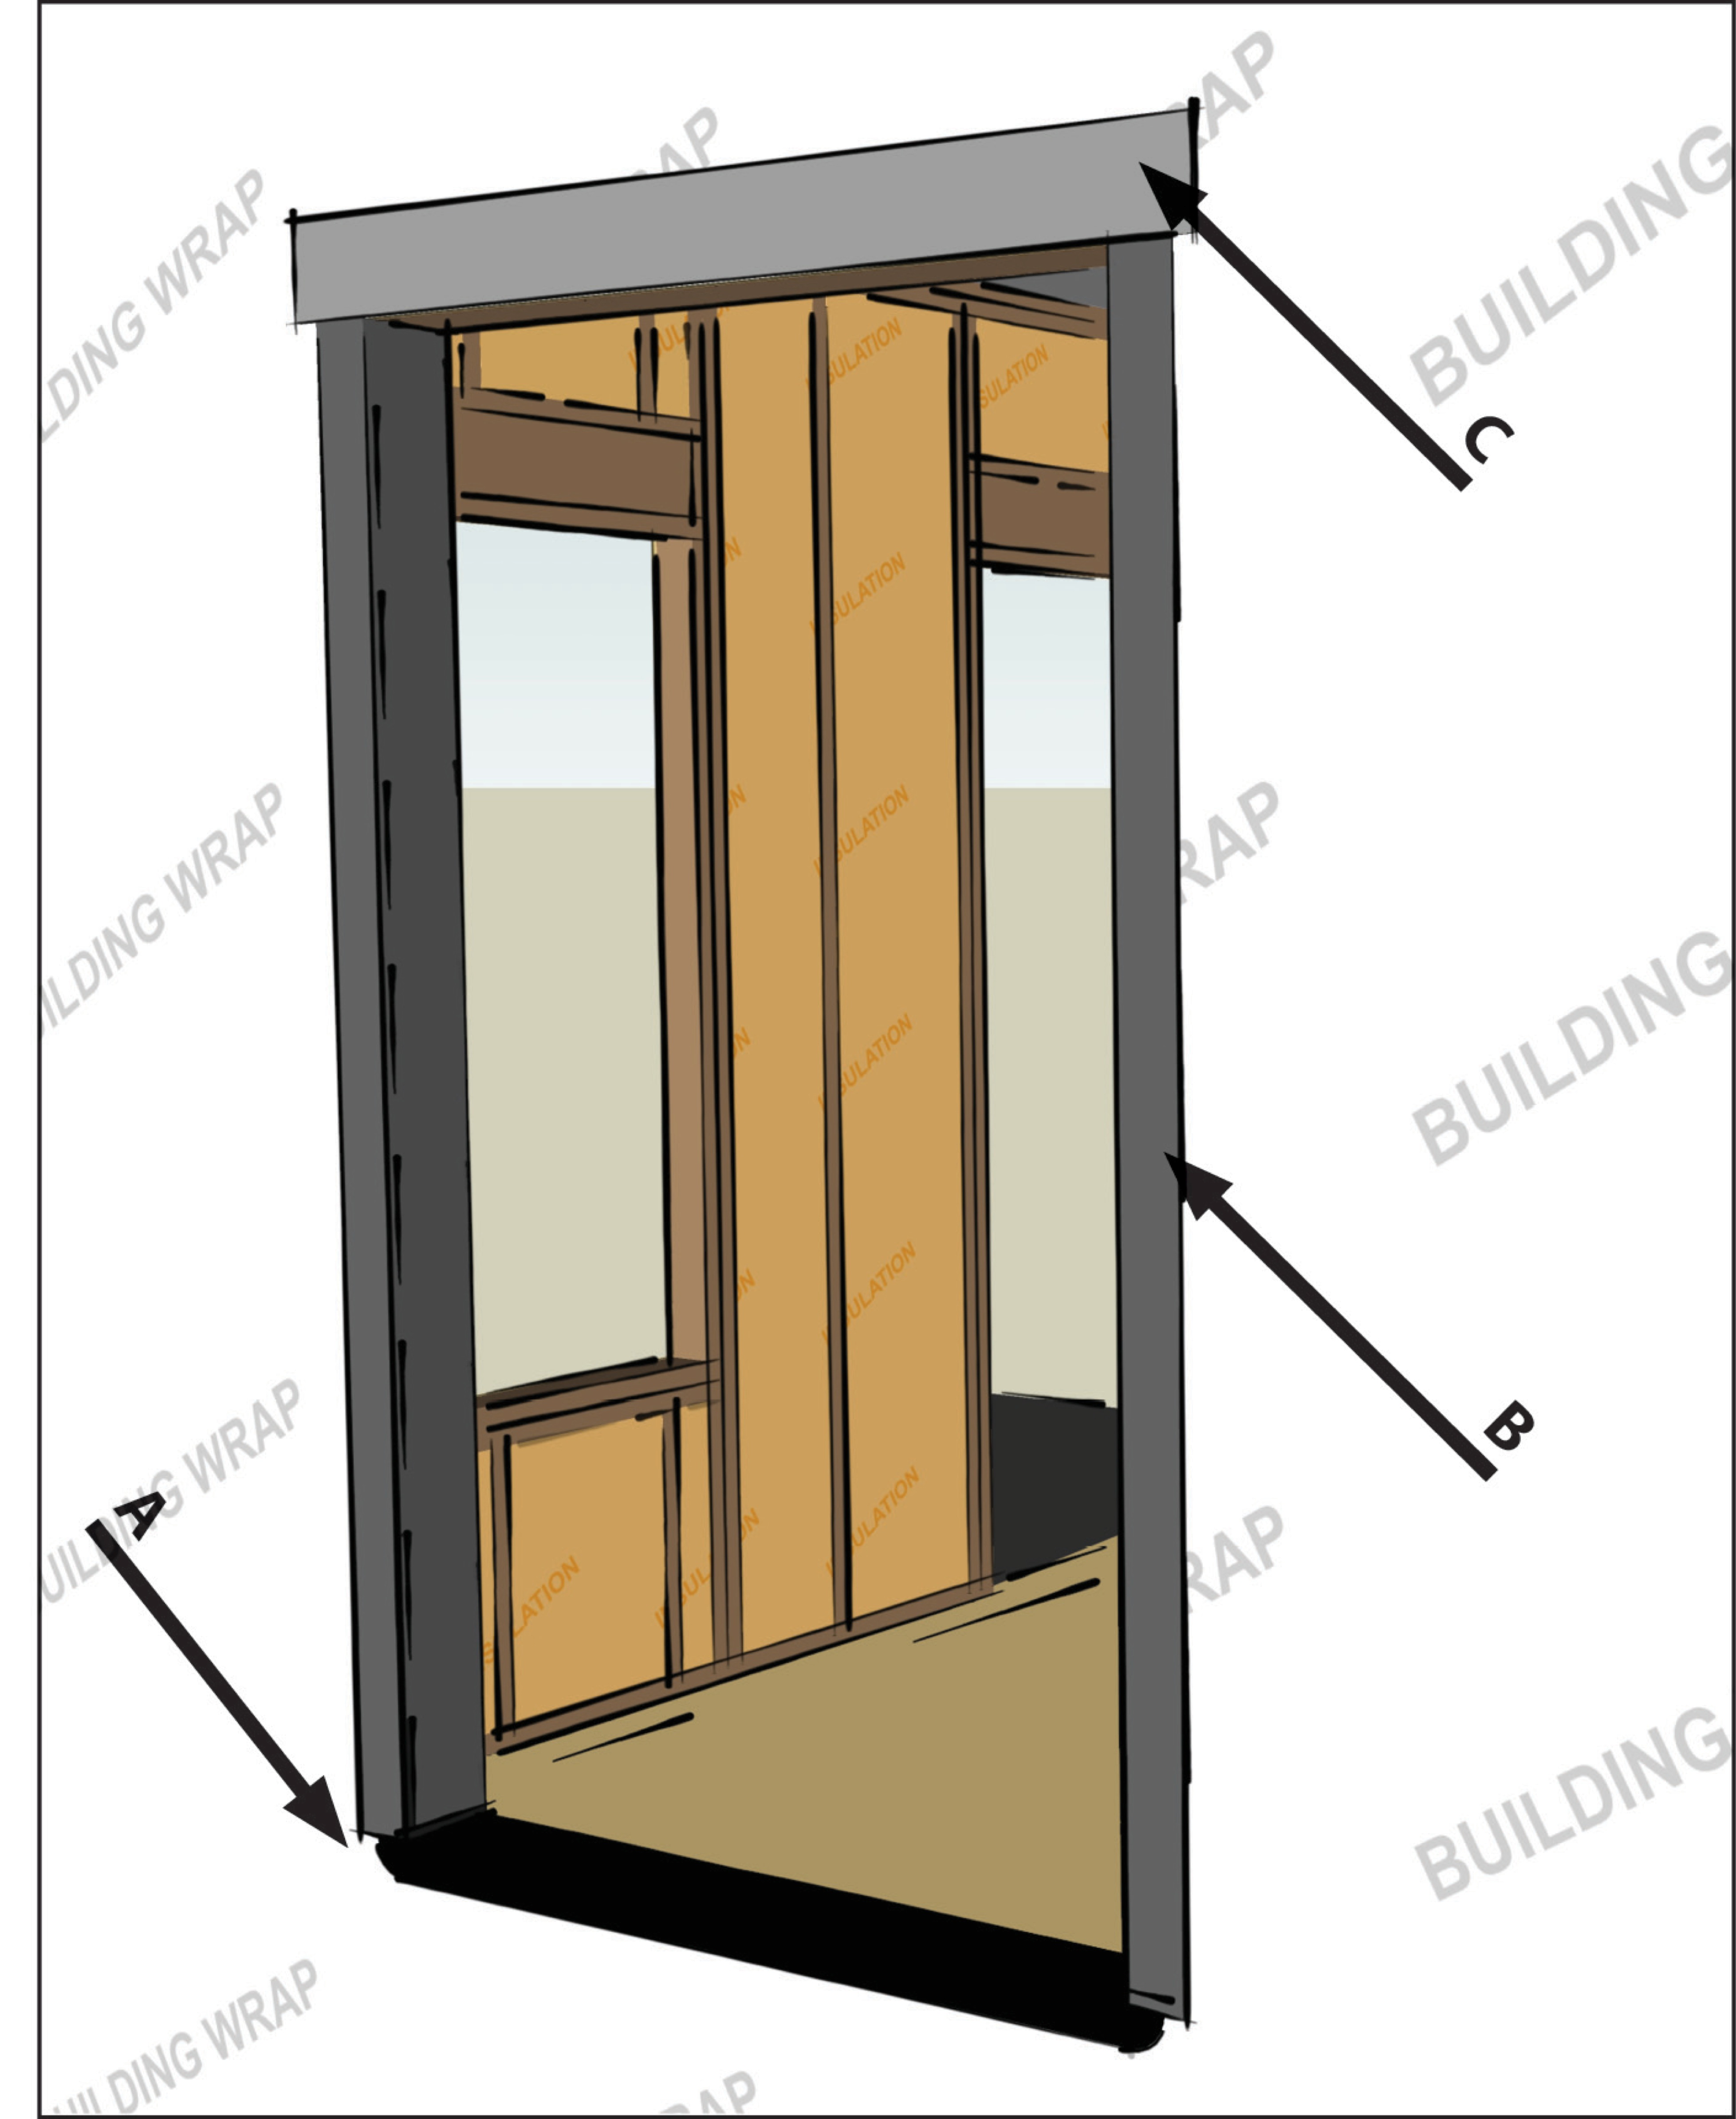
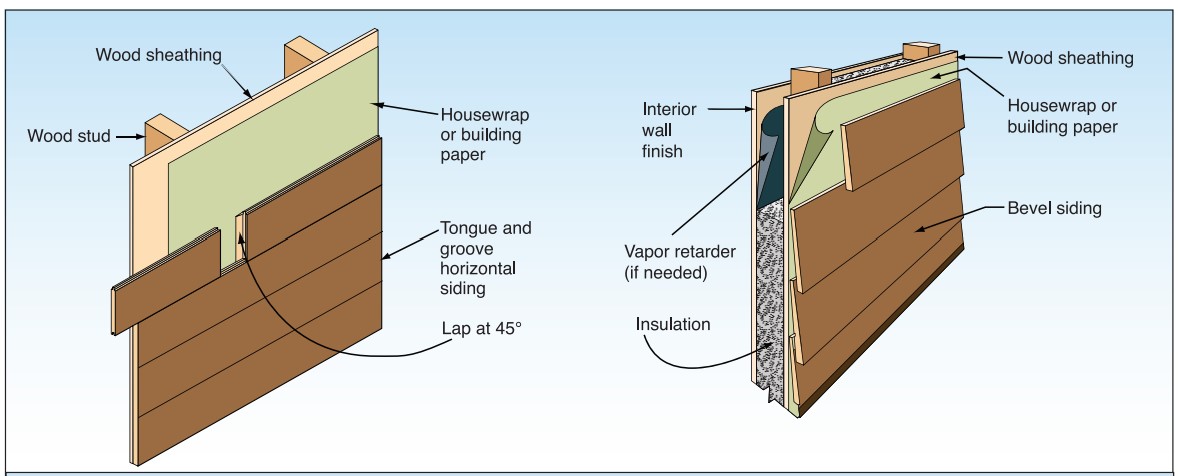
Wood siding installation details to improve resistance to wind-driven rain at corners.
Image
Image
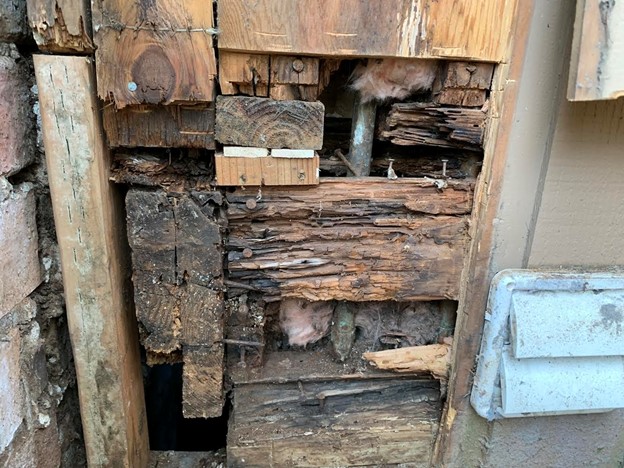
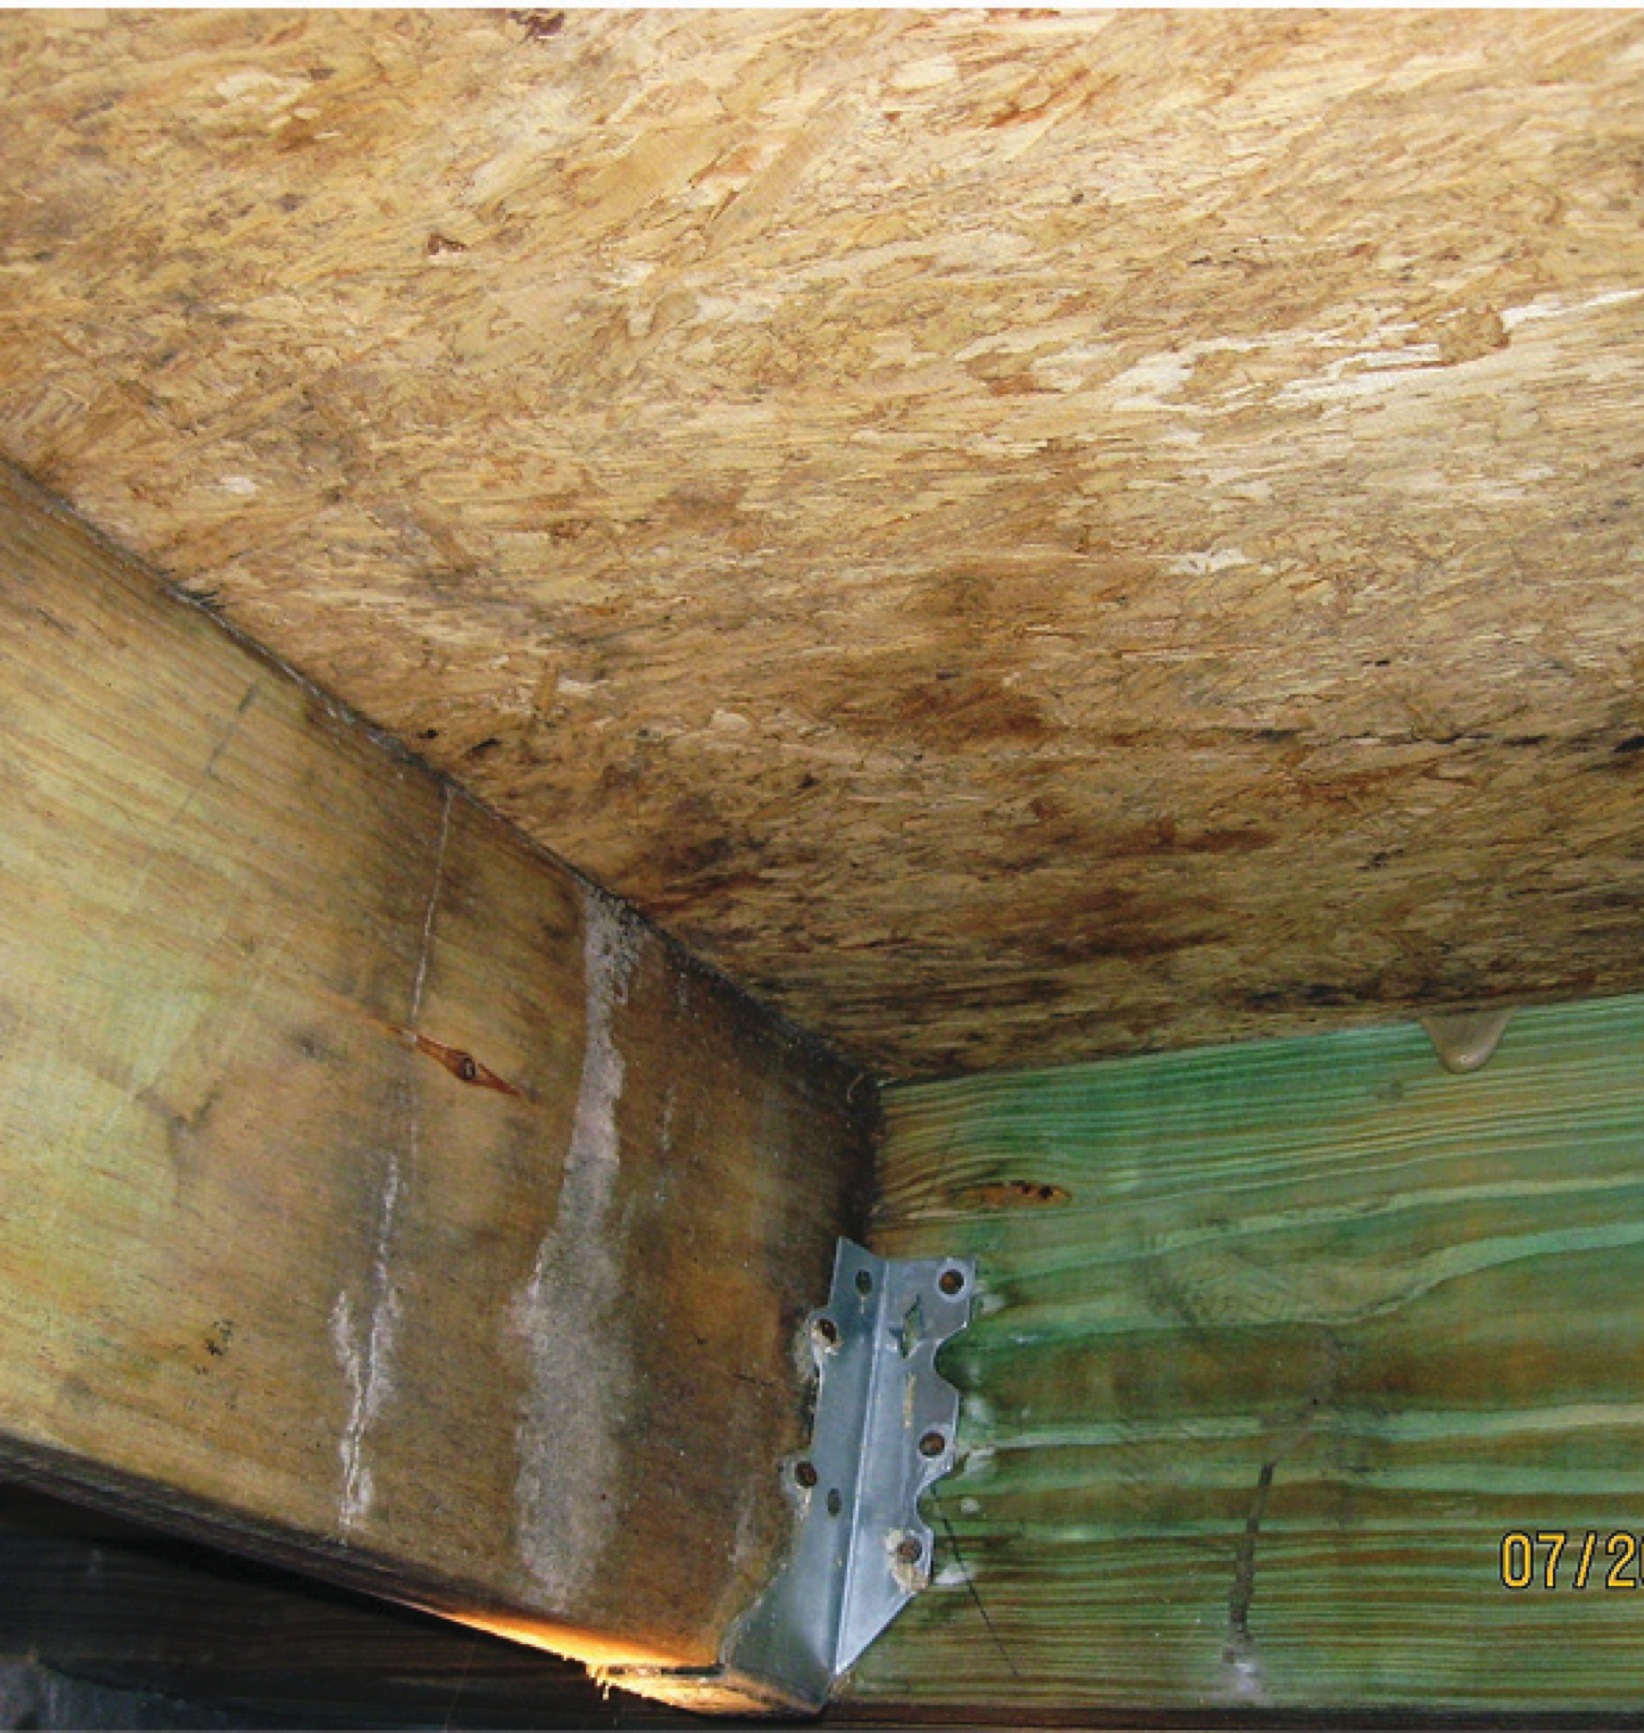
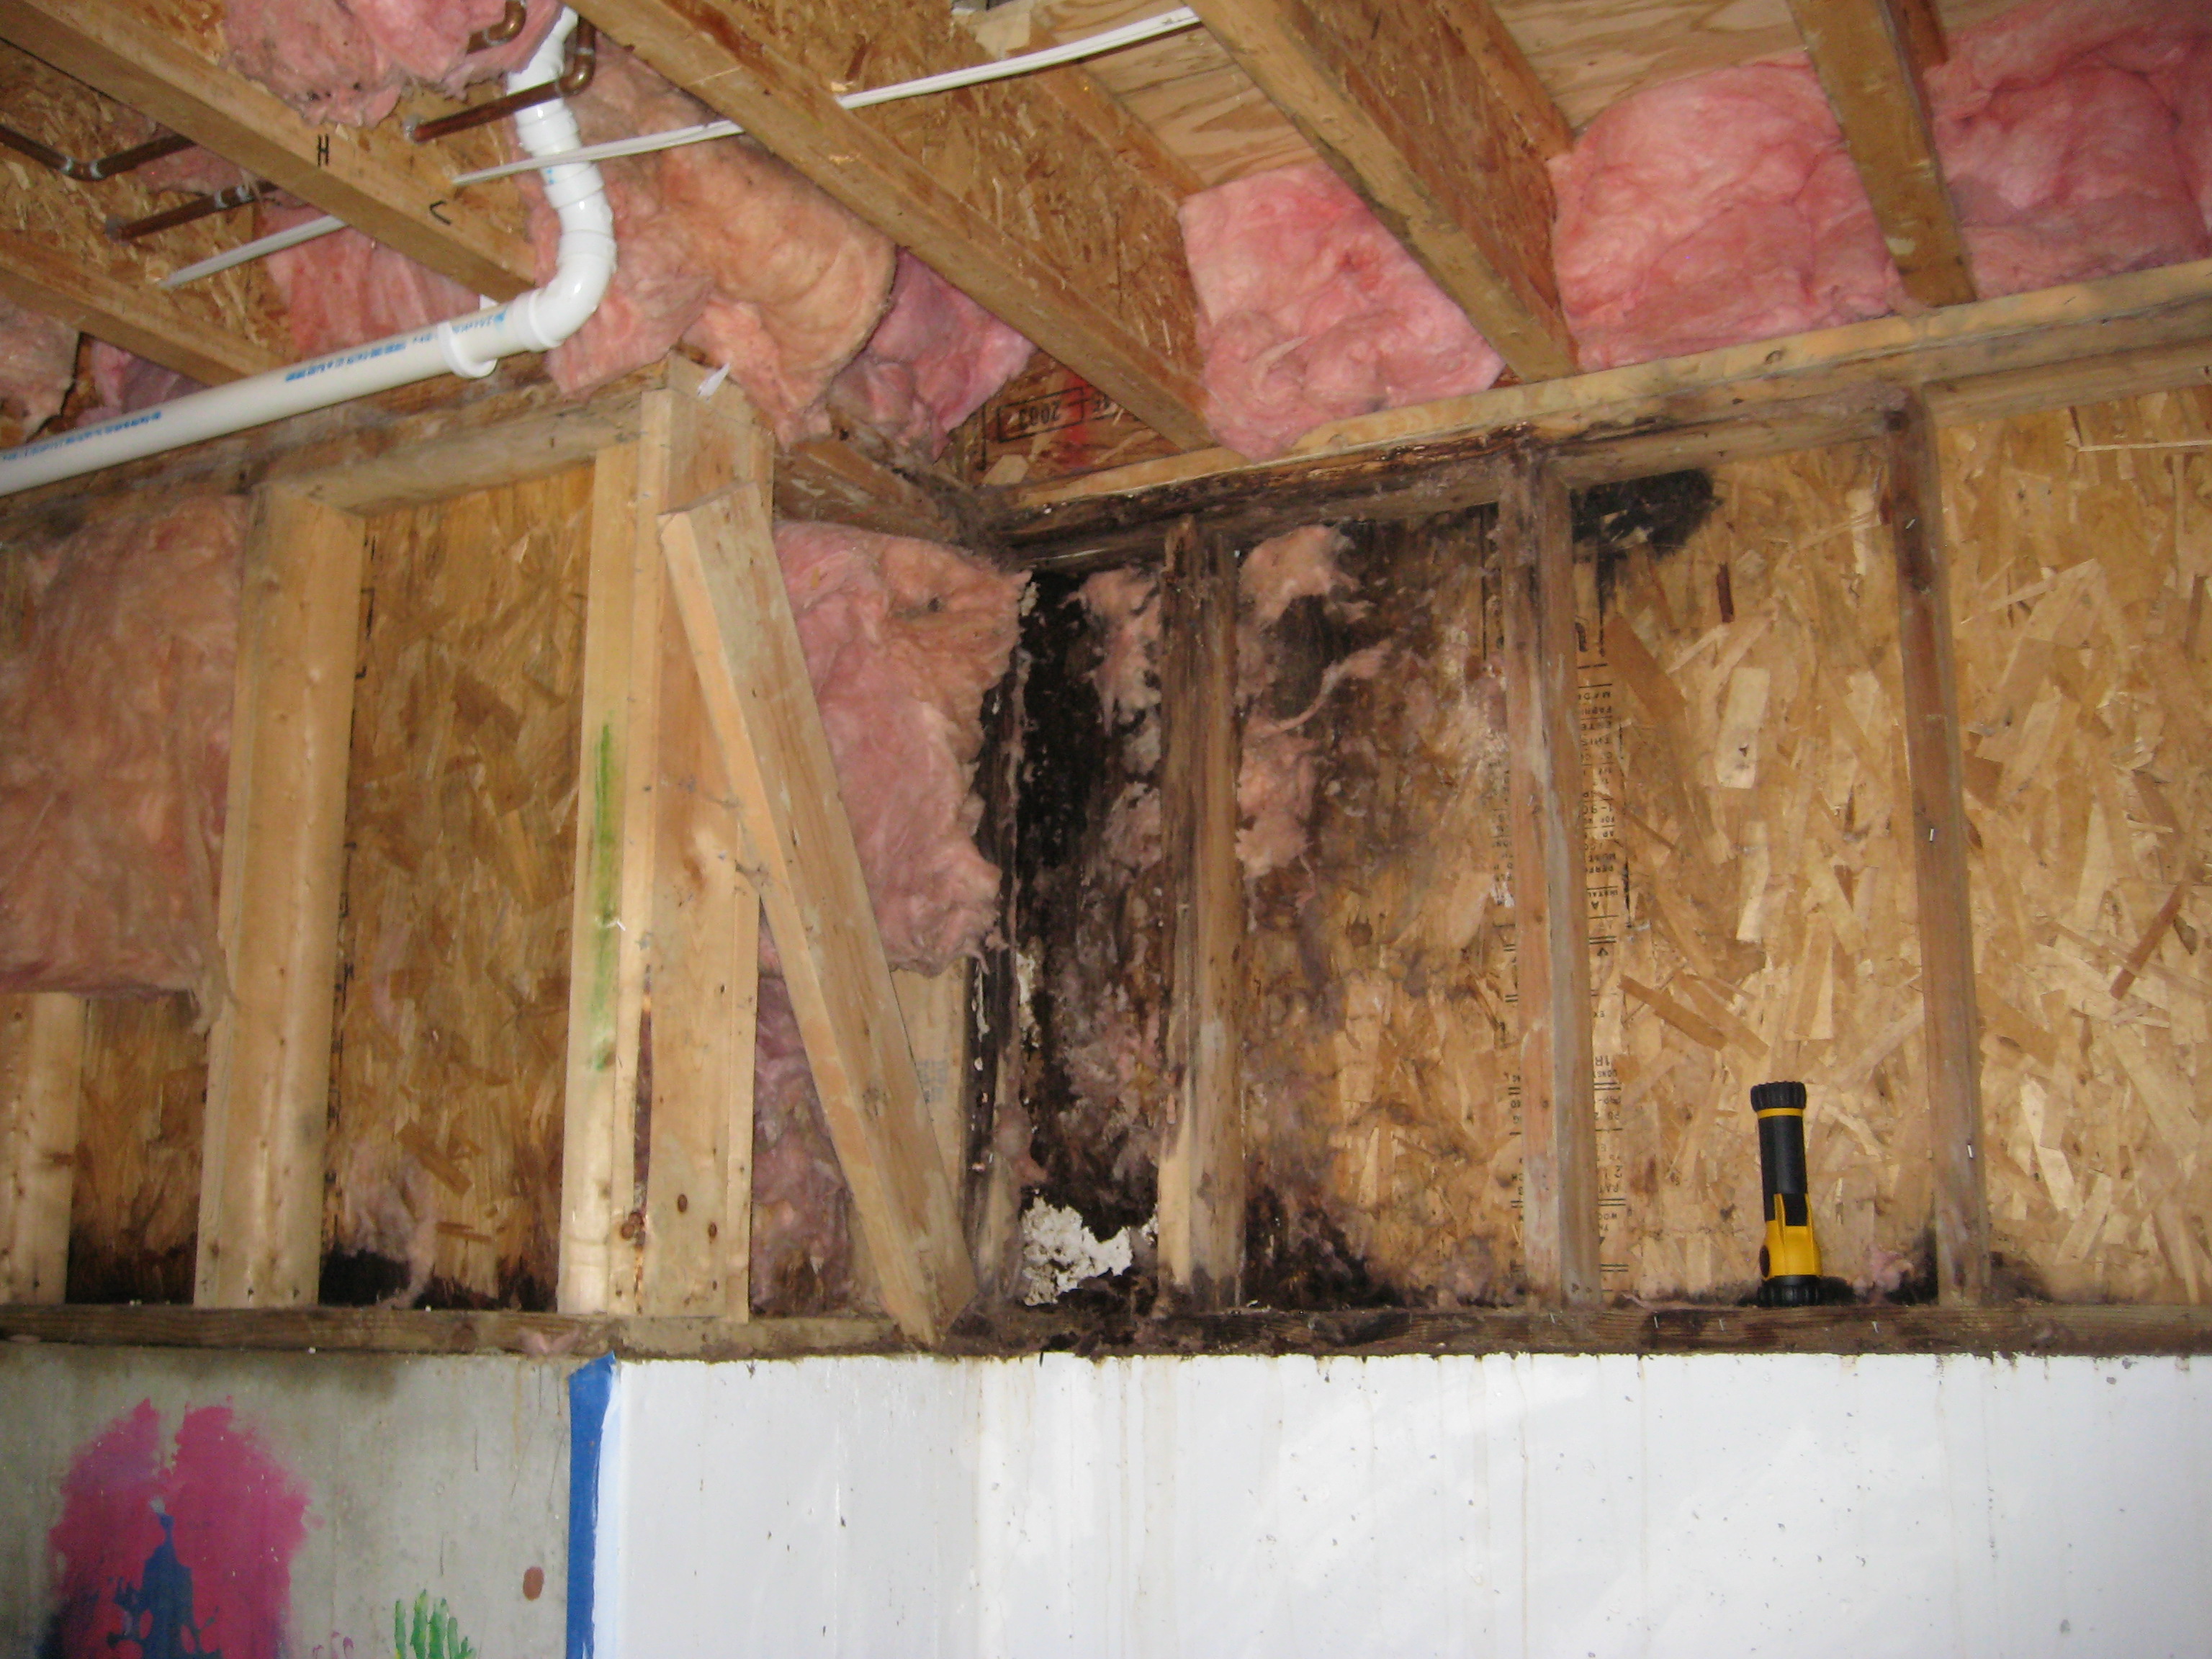
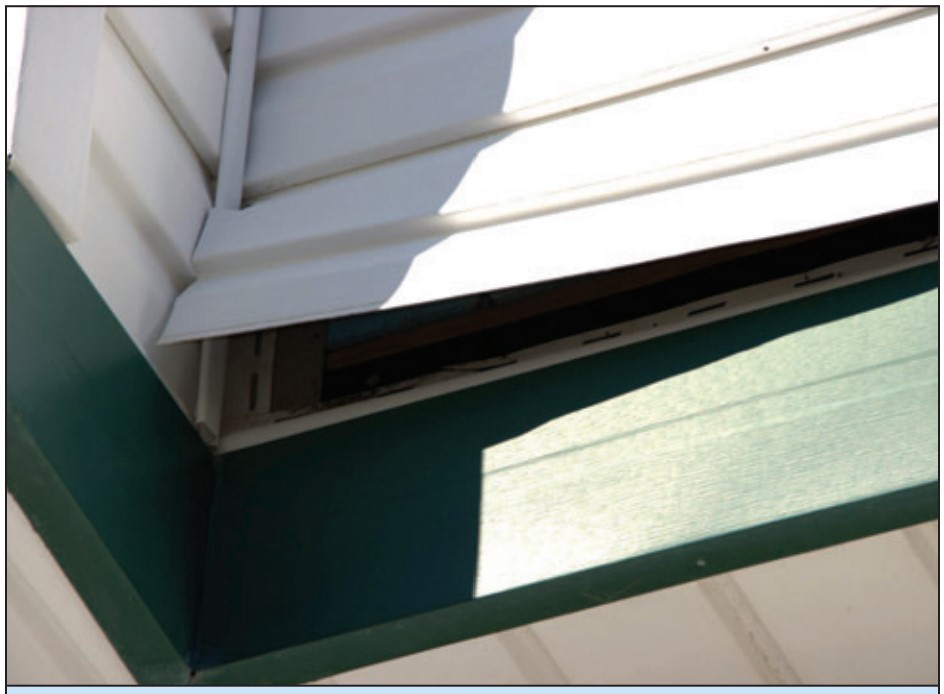
Wrong - Lack of a weather-resistant barrier allowed water to get behind the siding and rot the framing in this corner rim joist area.
Image
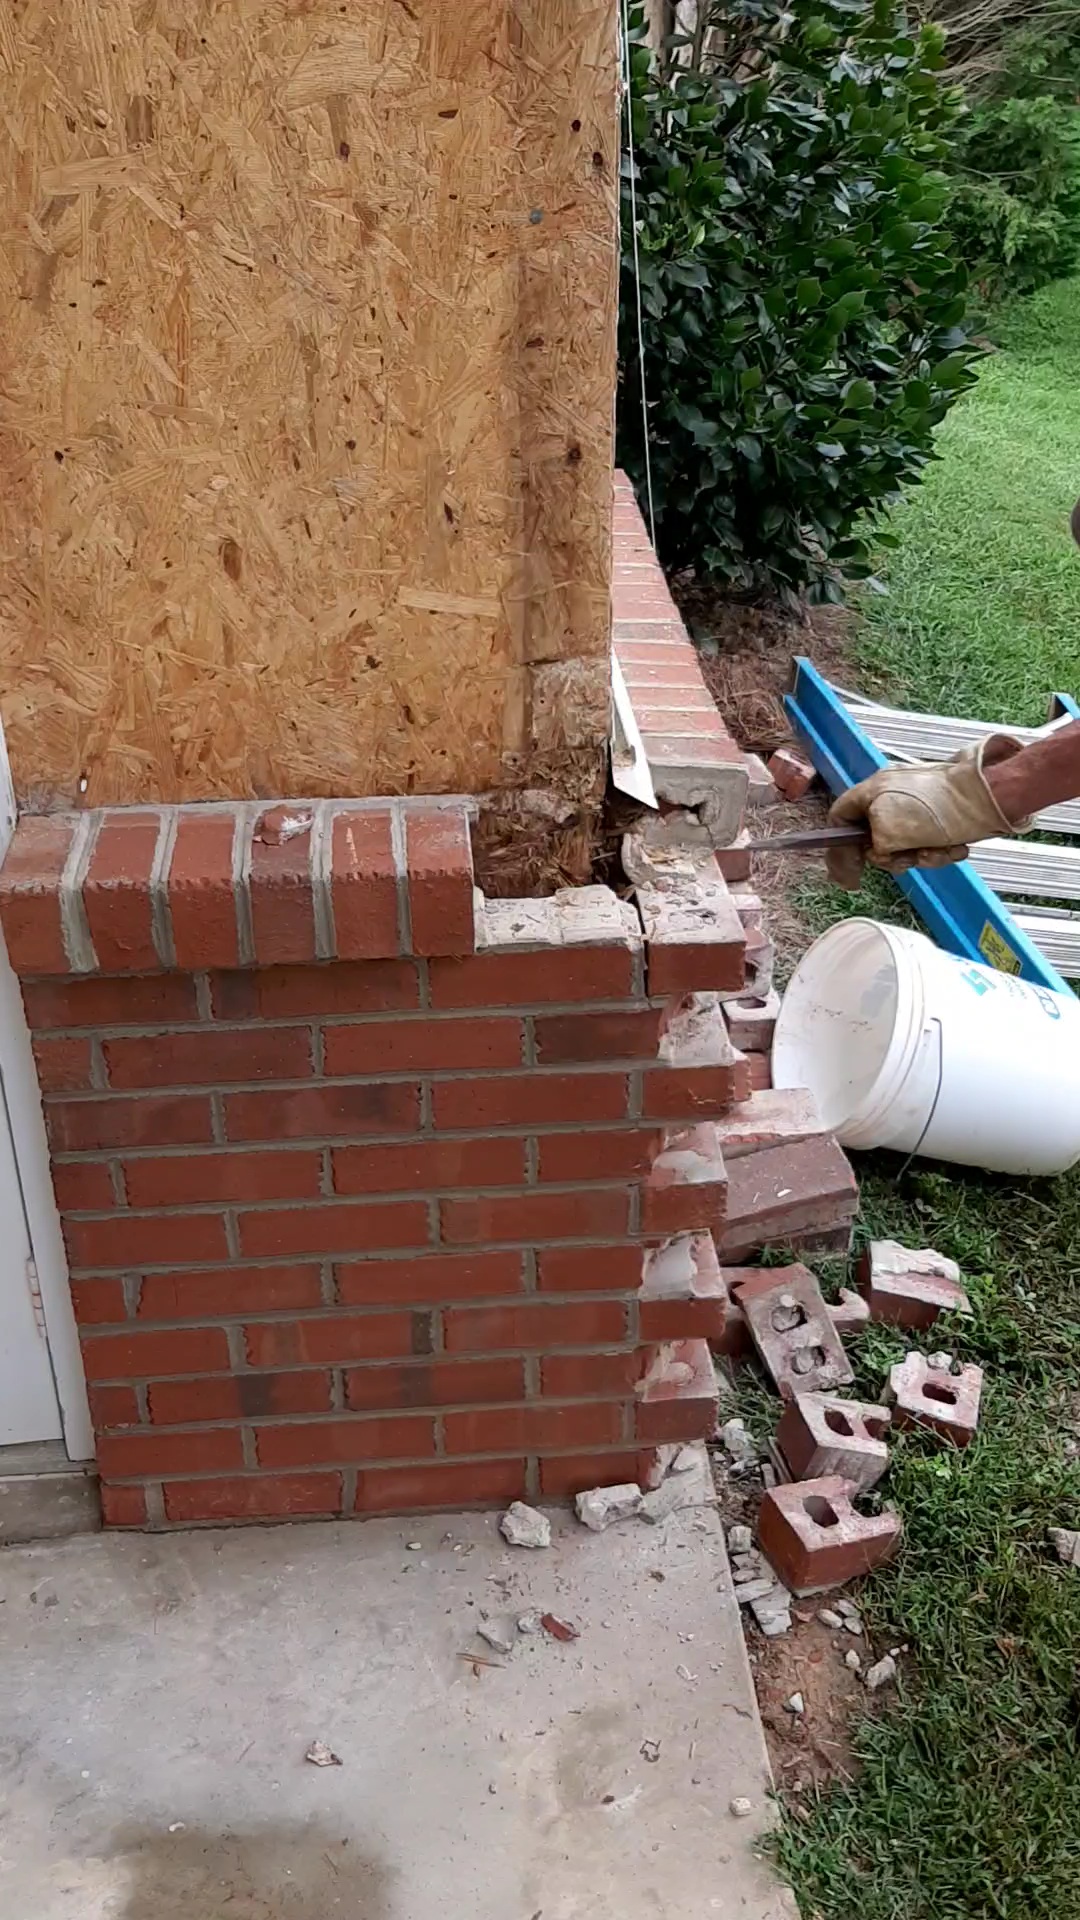
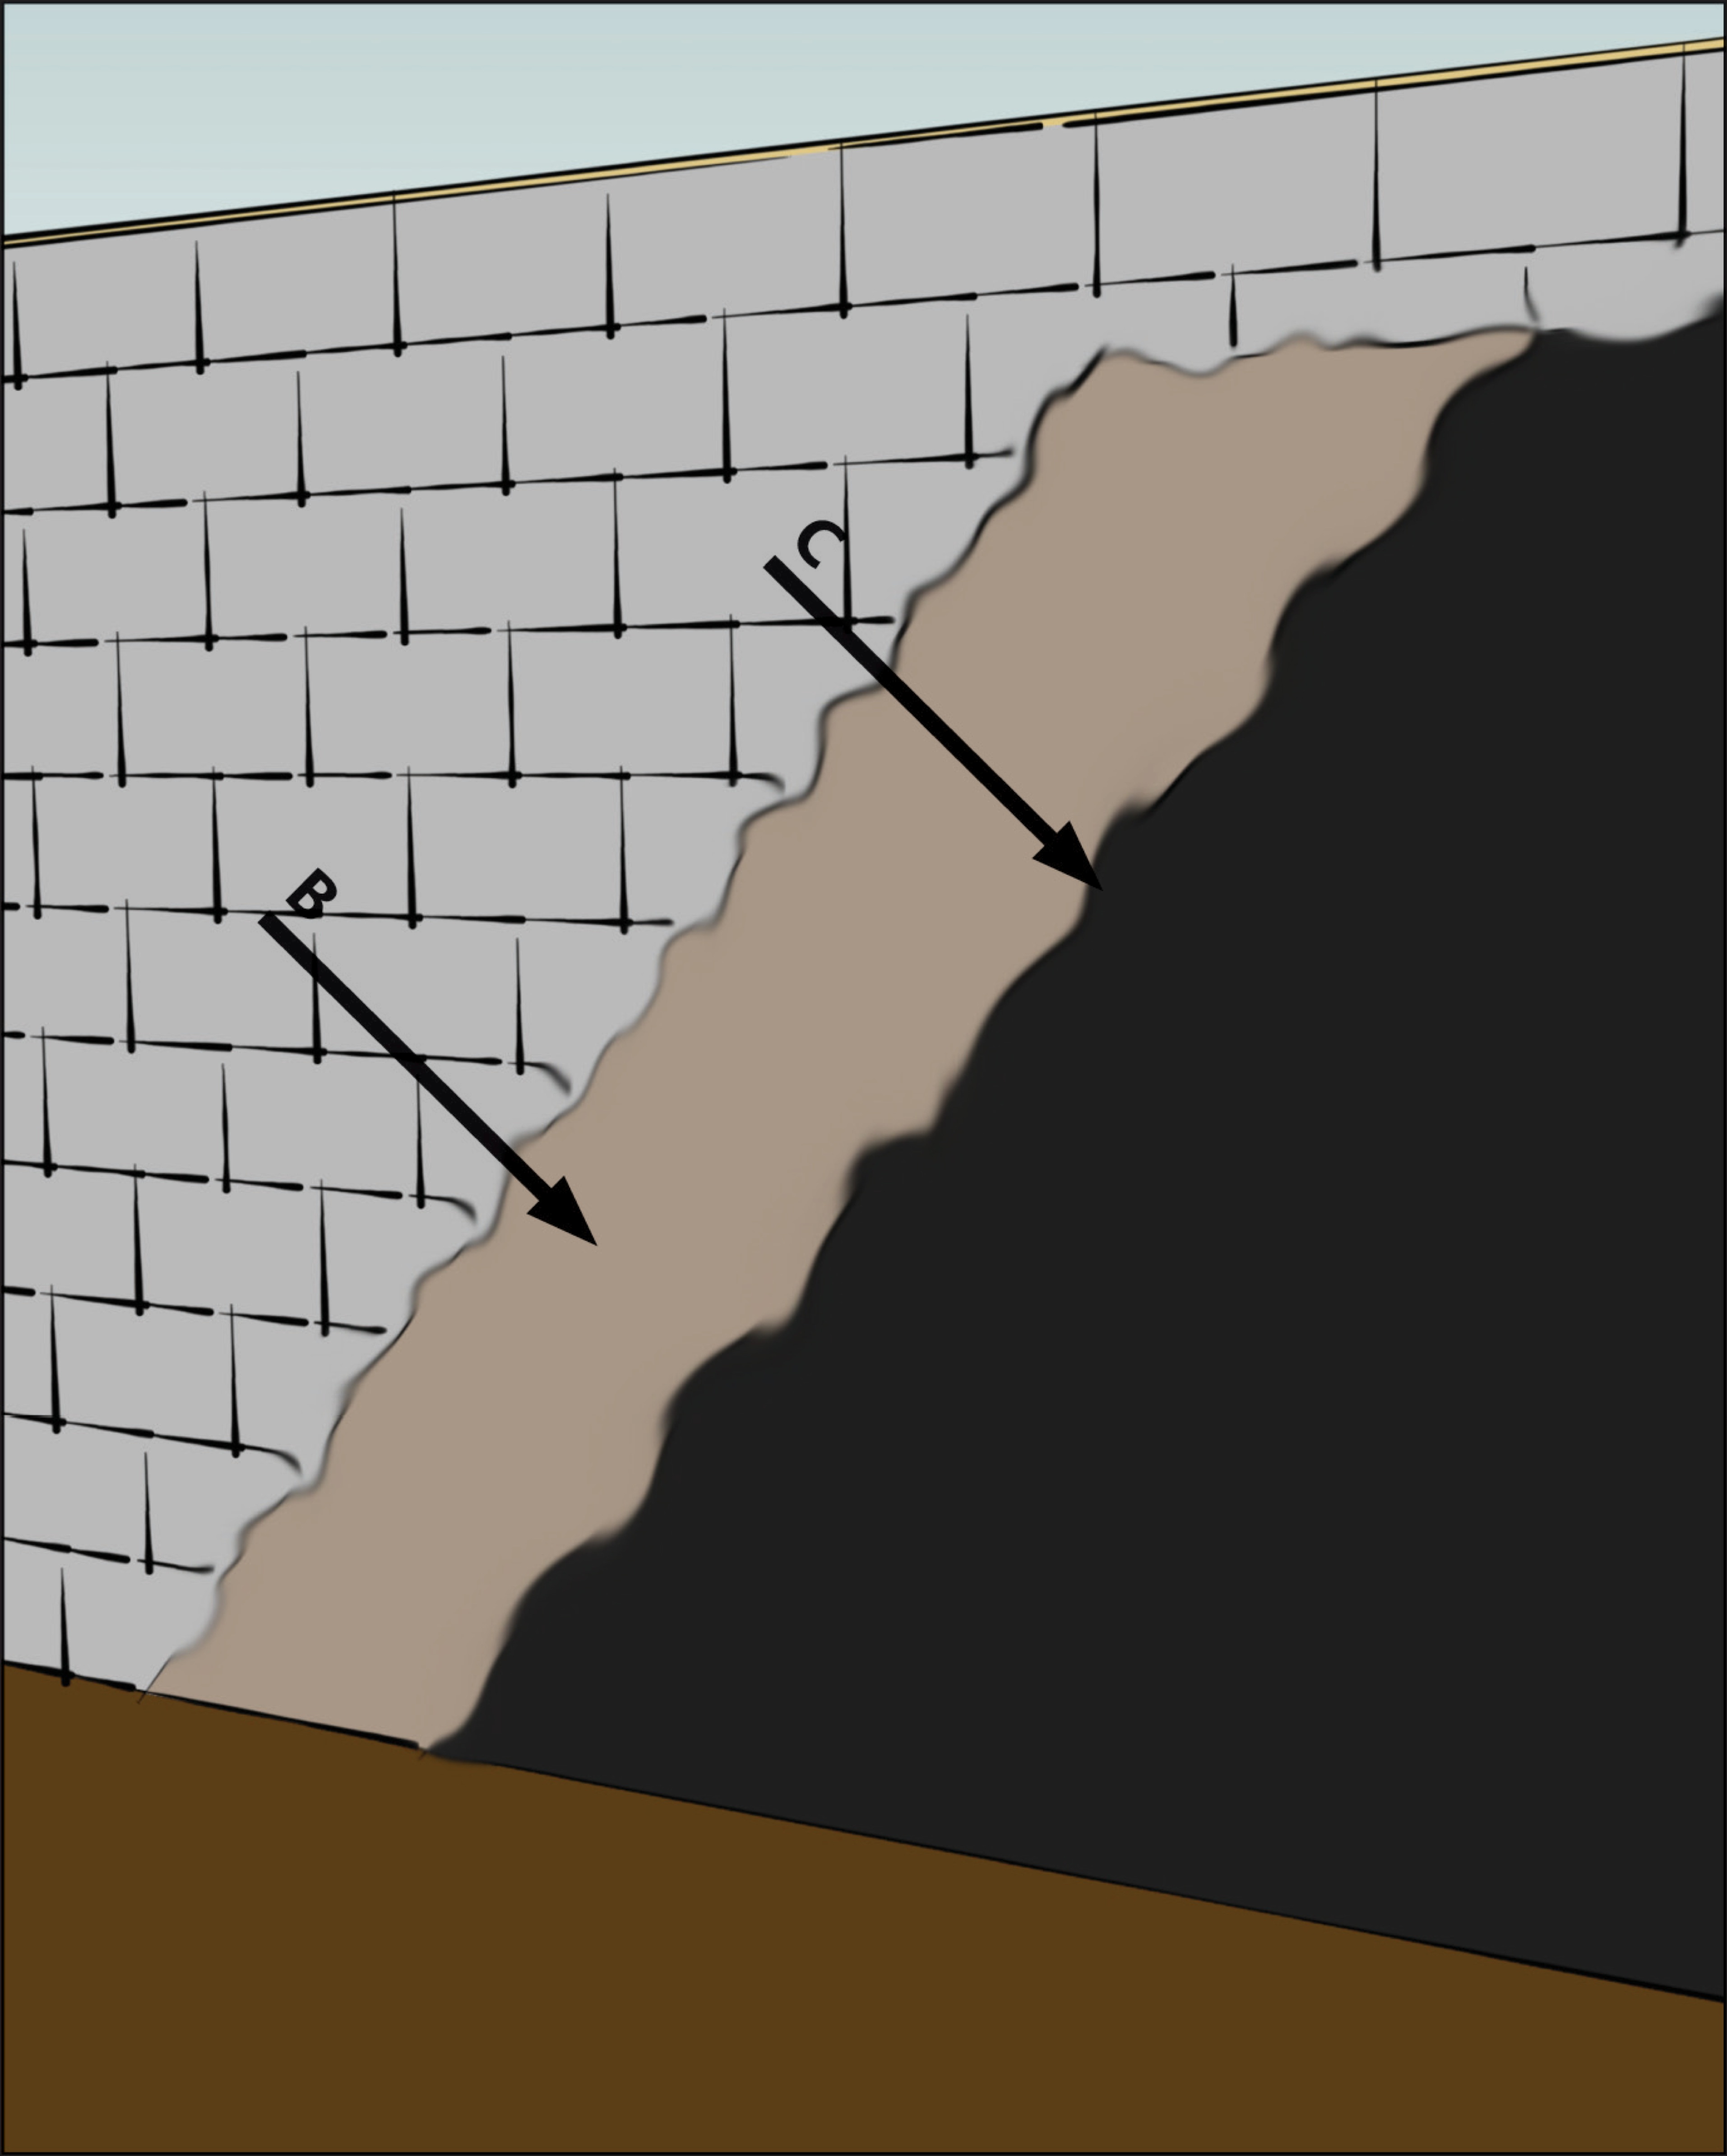
Wrong - Lack of house wrap or weather resistant barrier lead to significant water damage behind the brick veneer.
Image
Image
Wrong - Stucco has rotted and cracked above a window because of water damage due to lack of proper flashing and drainage.
Image
Wrong - The below-grade concrete does not have the correct construction to be impermeable to moisture because the lumber is untreated and against the concrete that lacks waterproofing.
Image
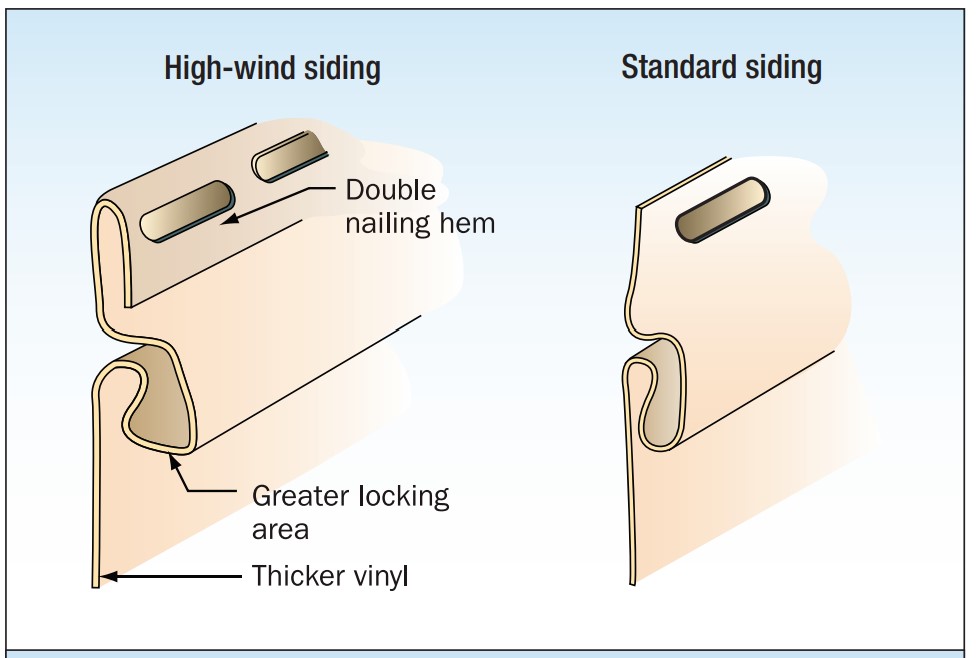
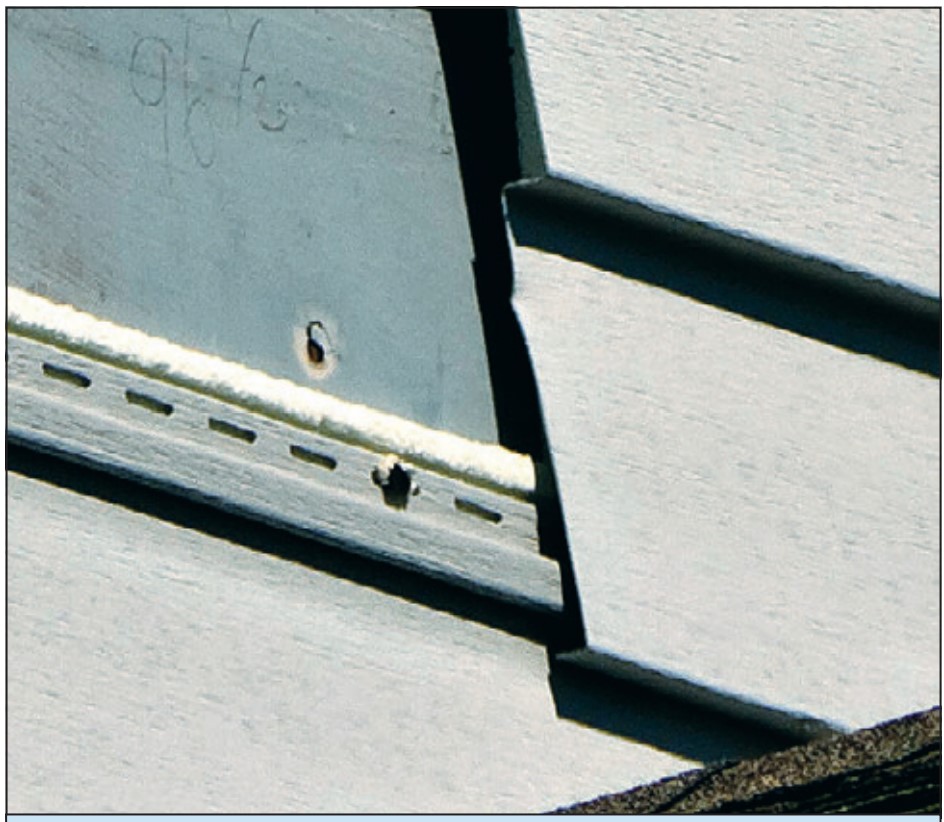
Wrong - Utility trim was substituted for the starter strip and the bottom lock was cut off this vinyl siding so the siding pulled loose under wind pressure.
Image
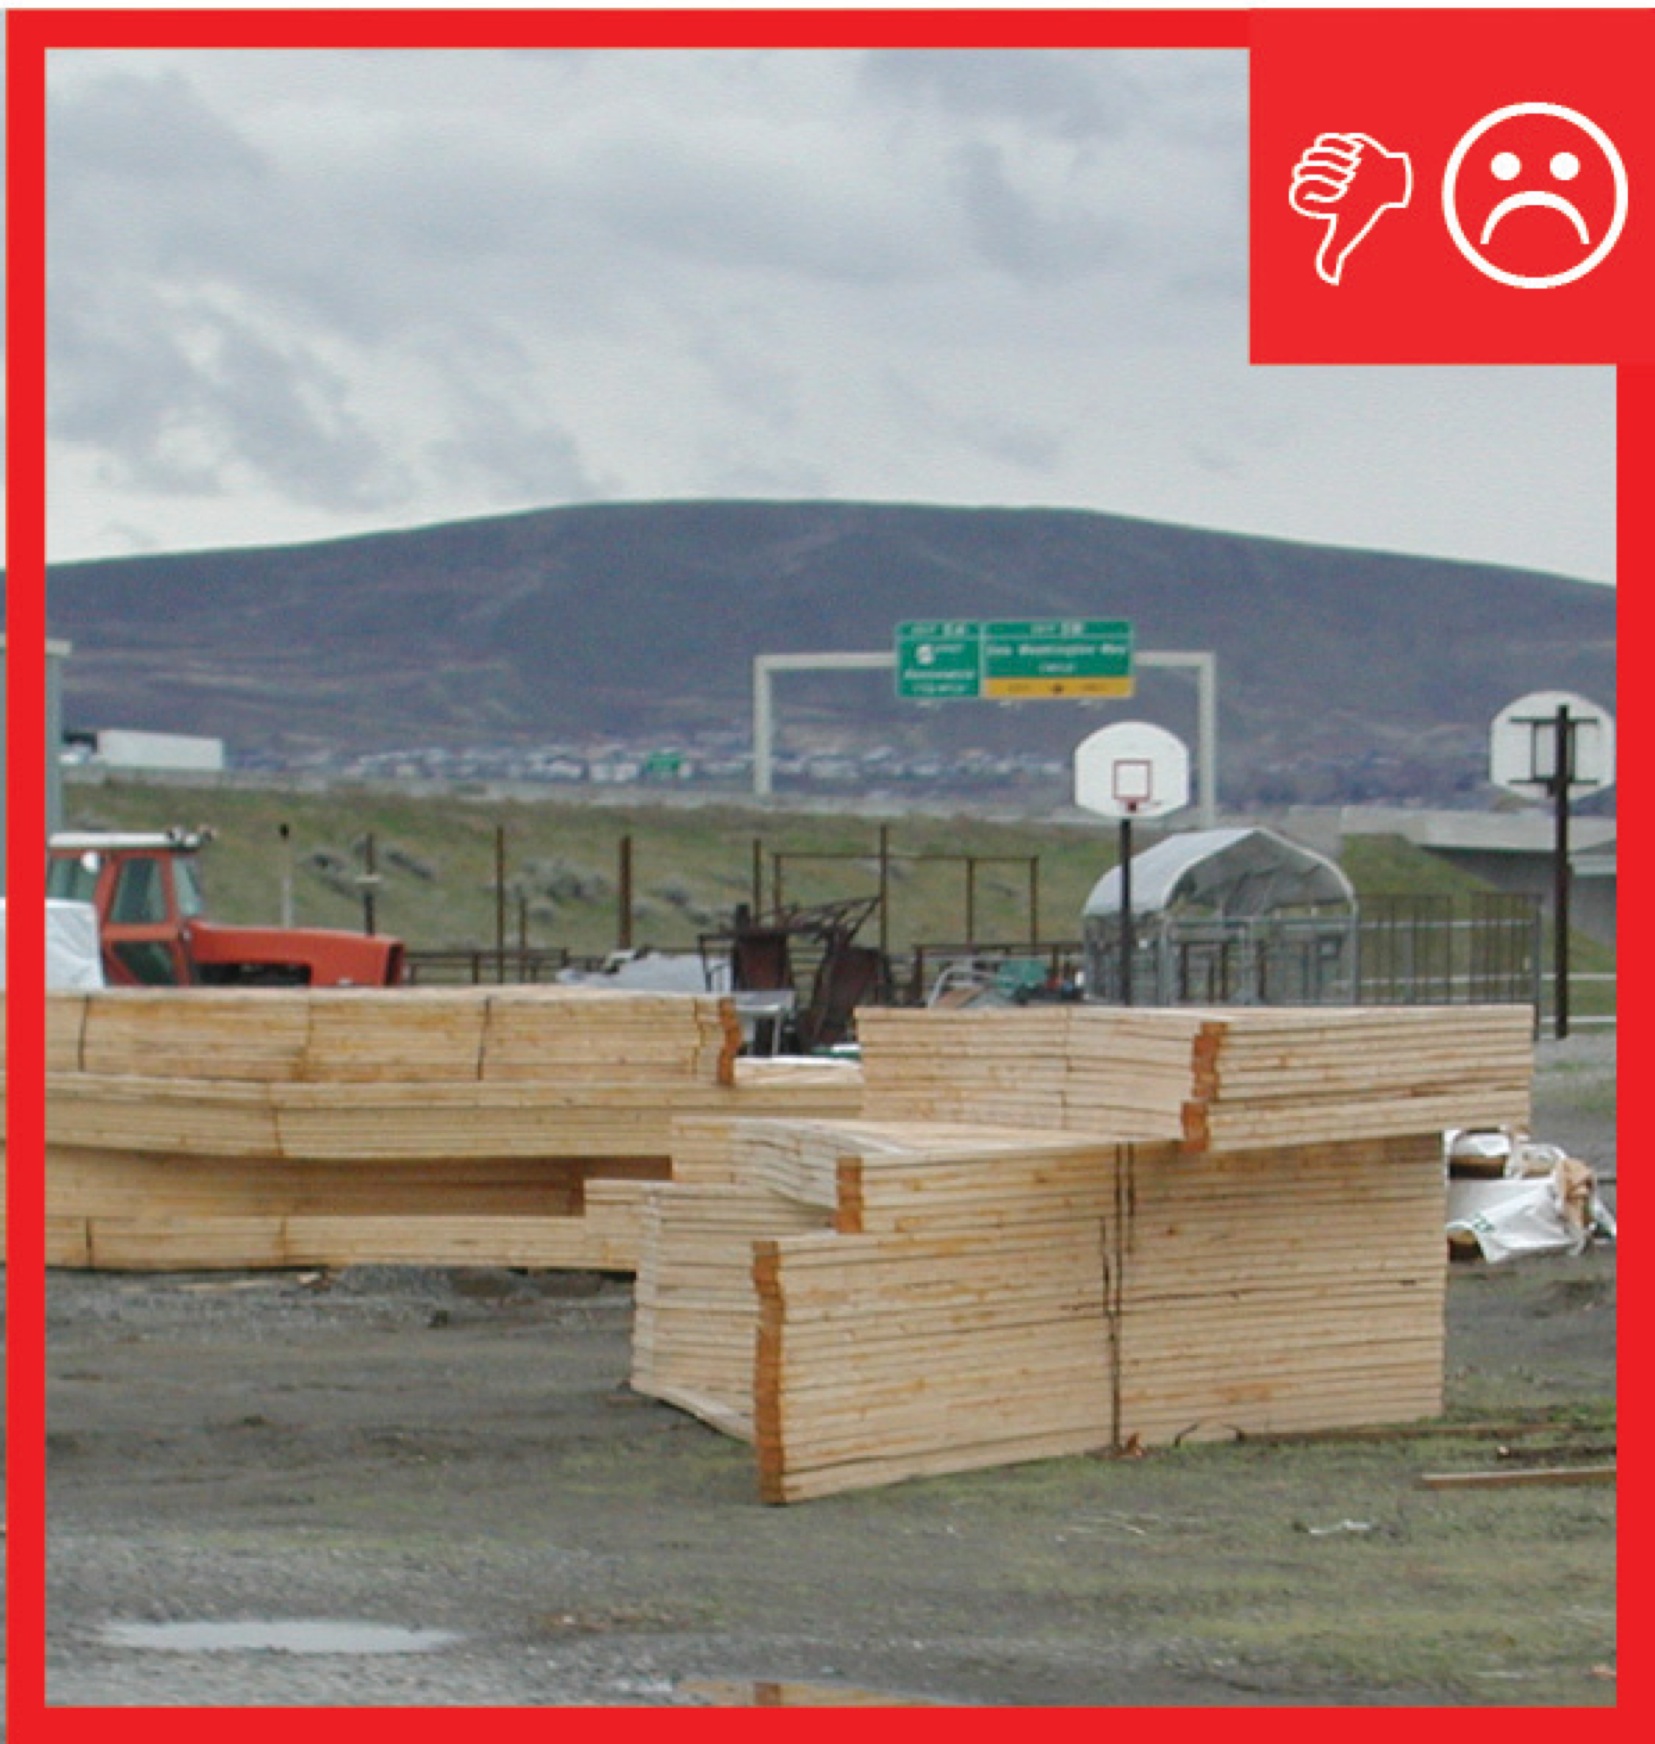
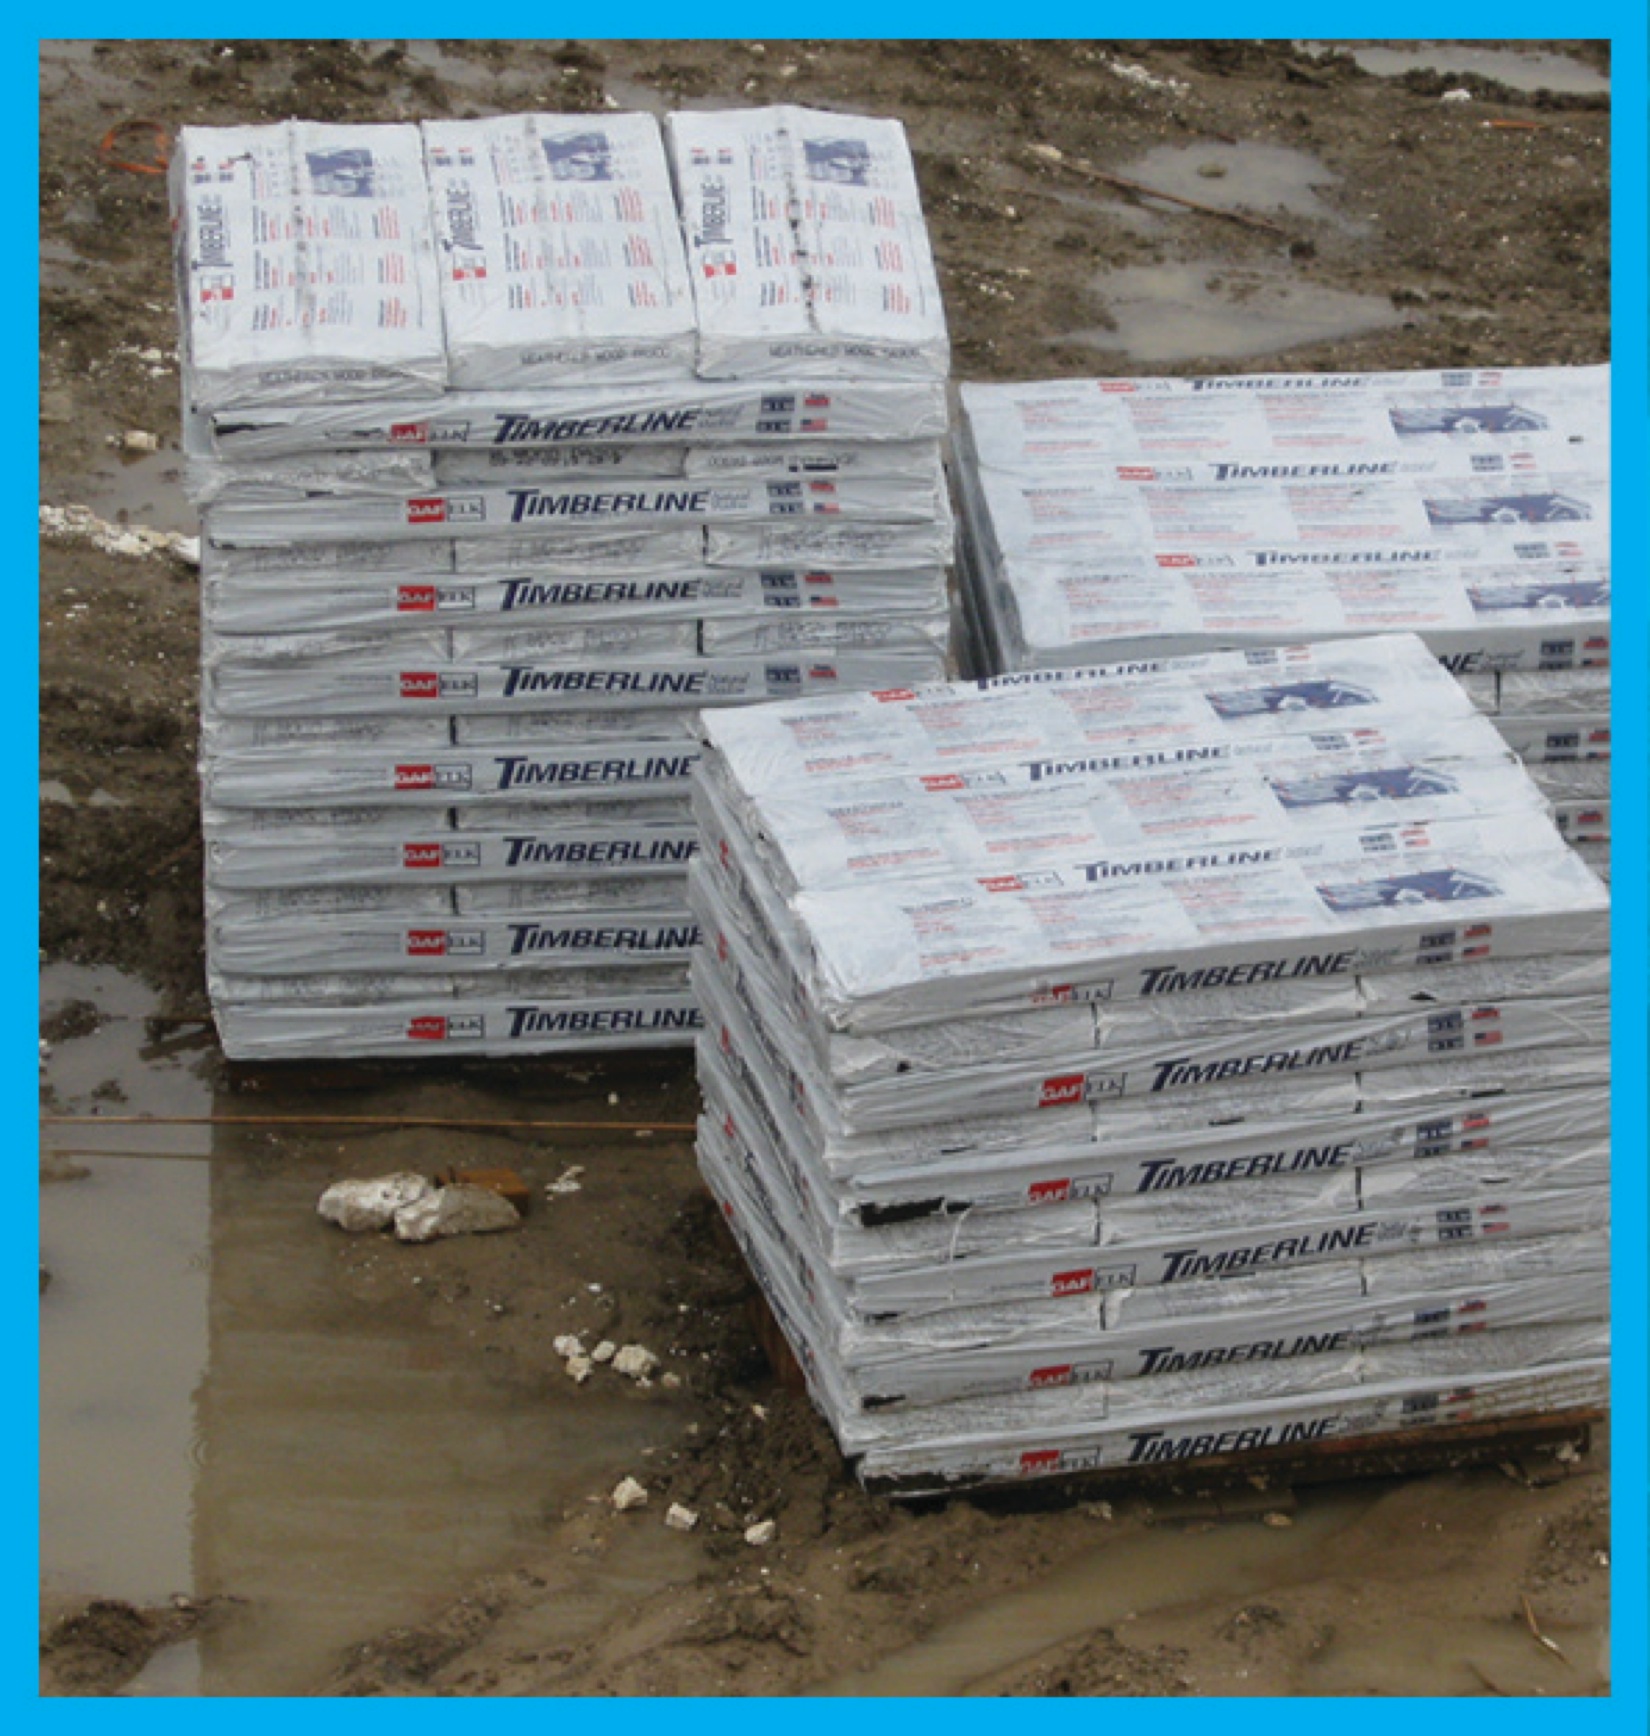
Wrong – Building materials are being stored outdoors with no protection from weather
Image
Image
Wrong – For proper detailing of vinyl around windows and other obstacles, use utility trim, punch snaplocks into siding, and do not overlap directly beneath a window.
Image
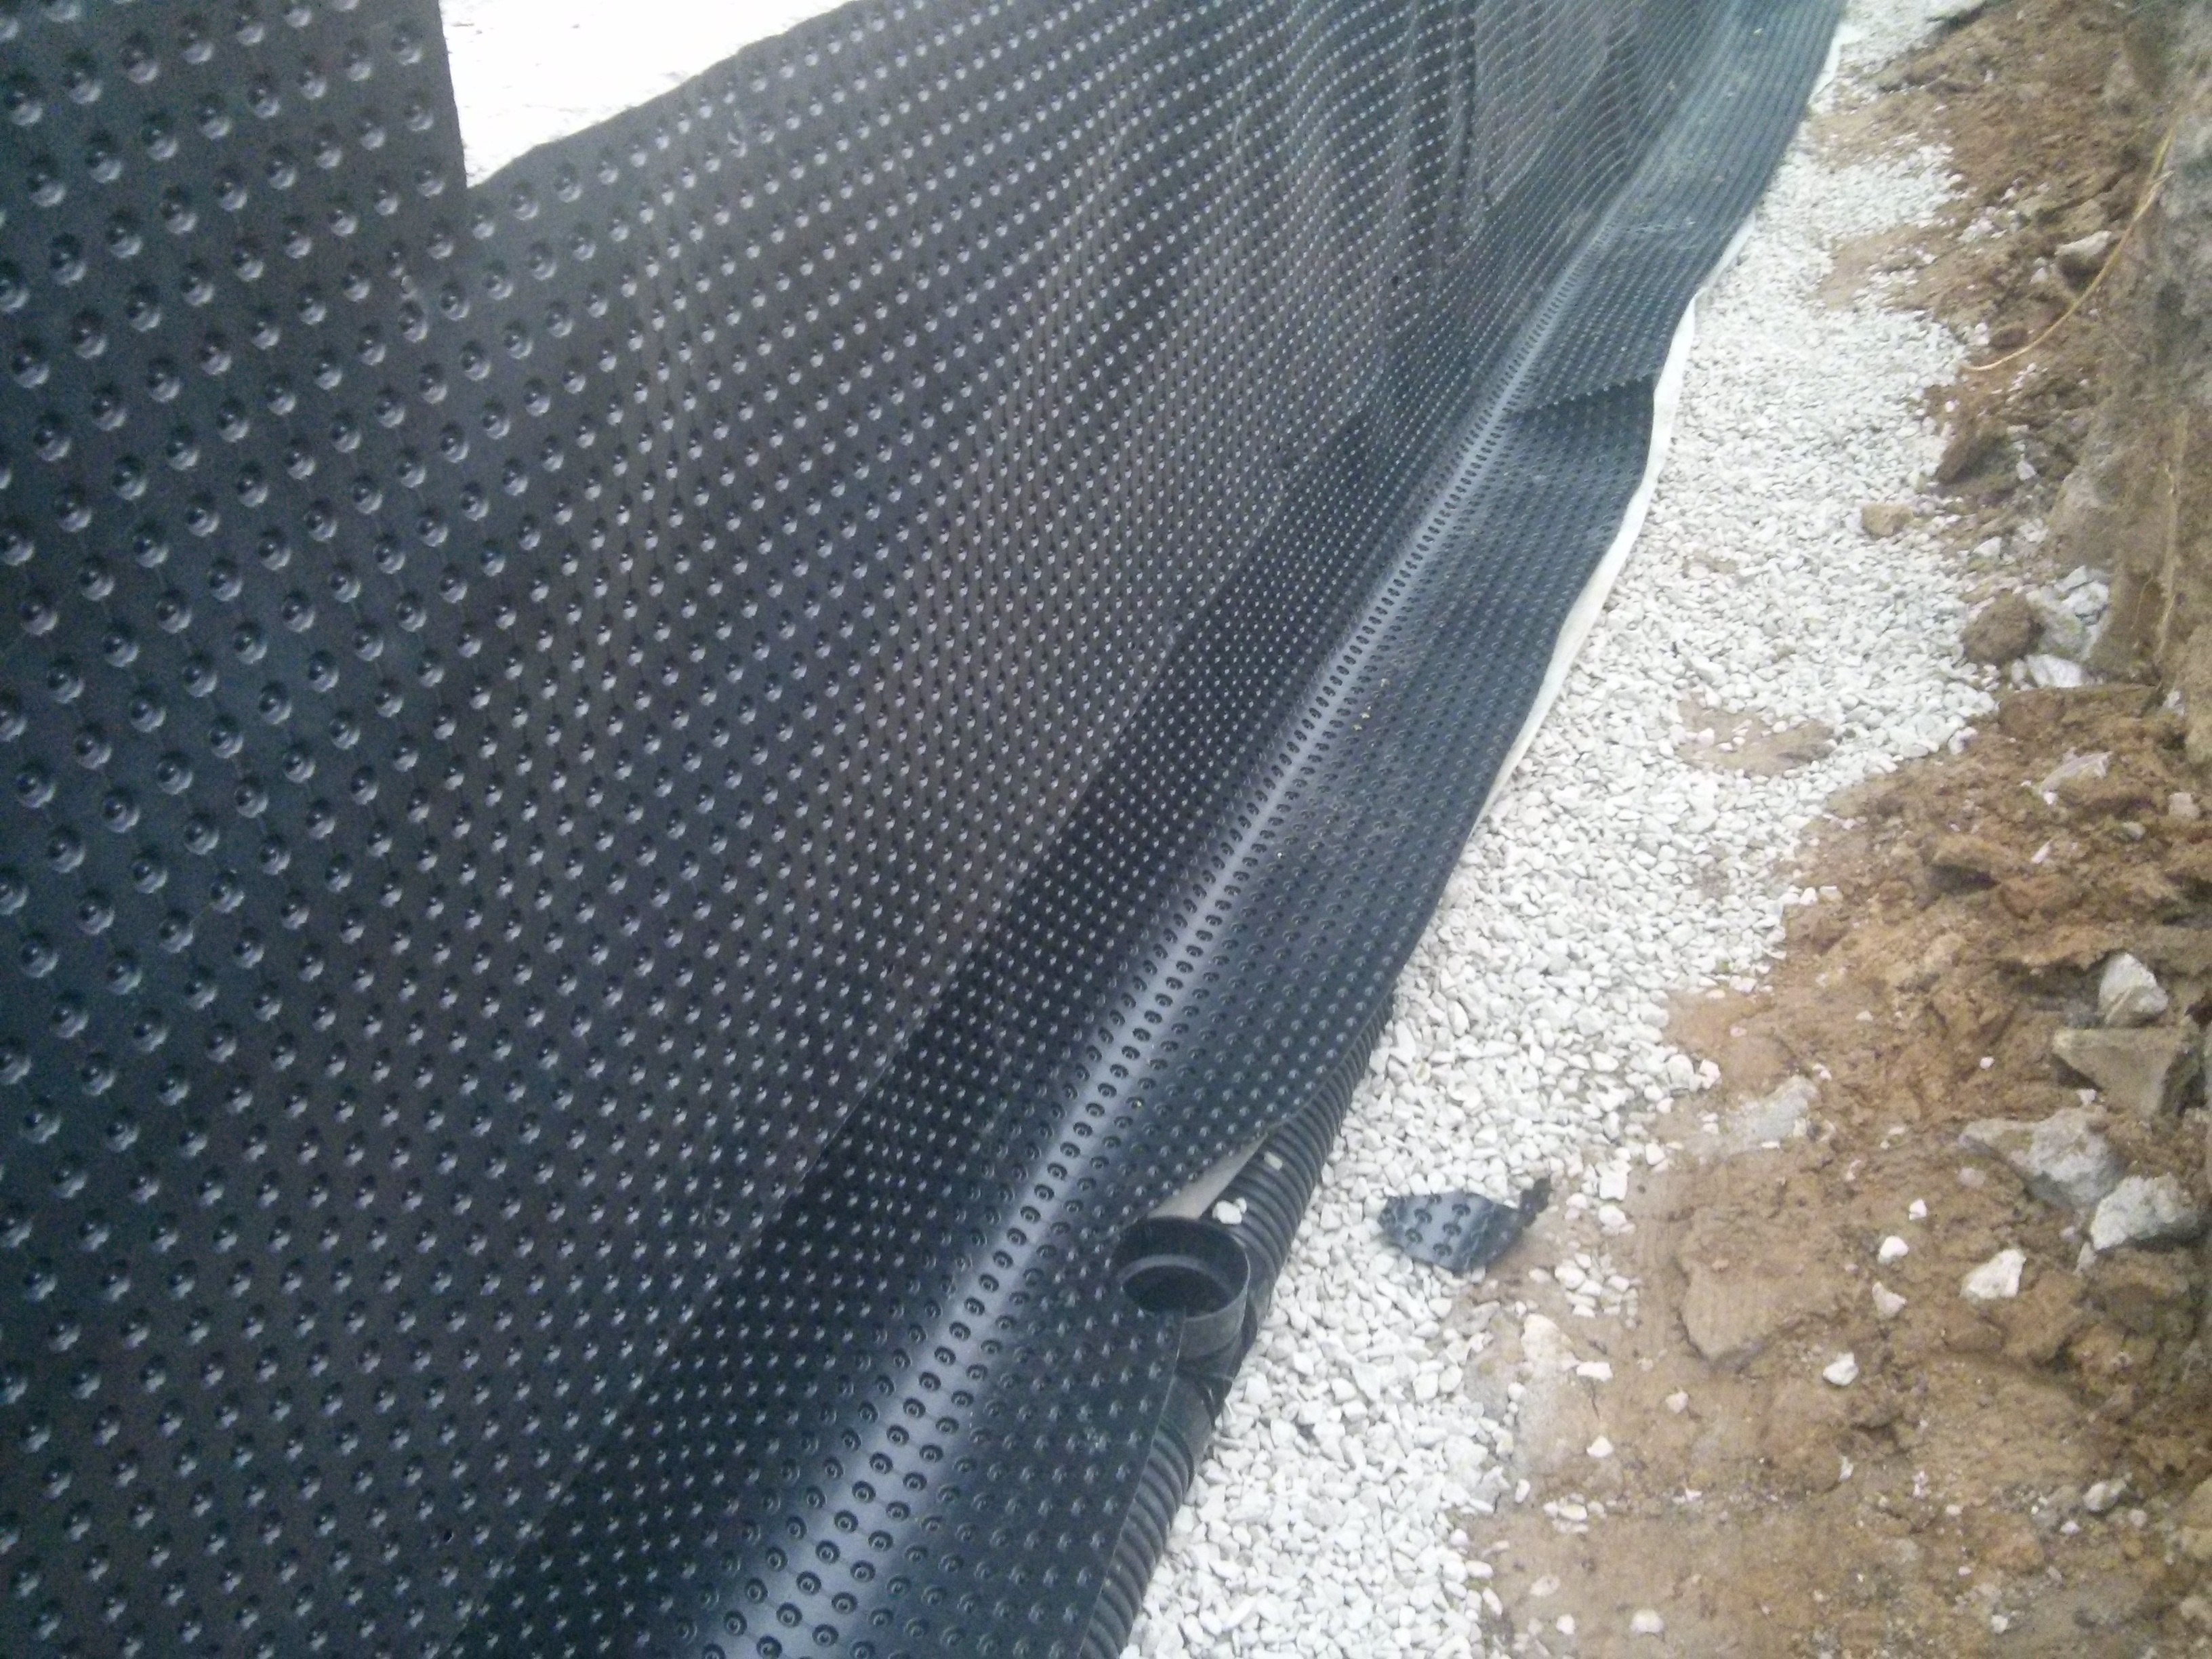
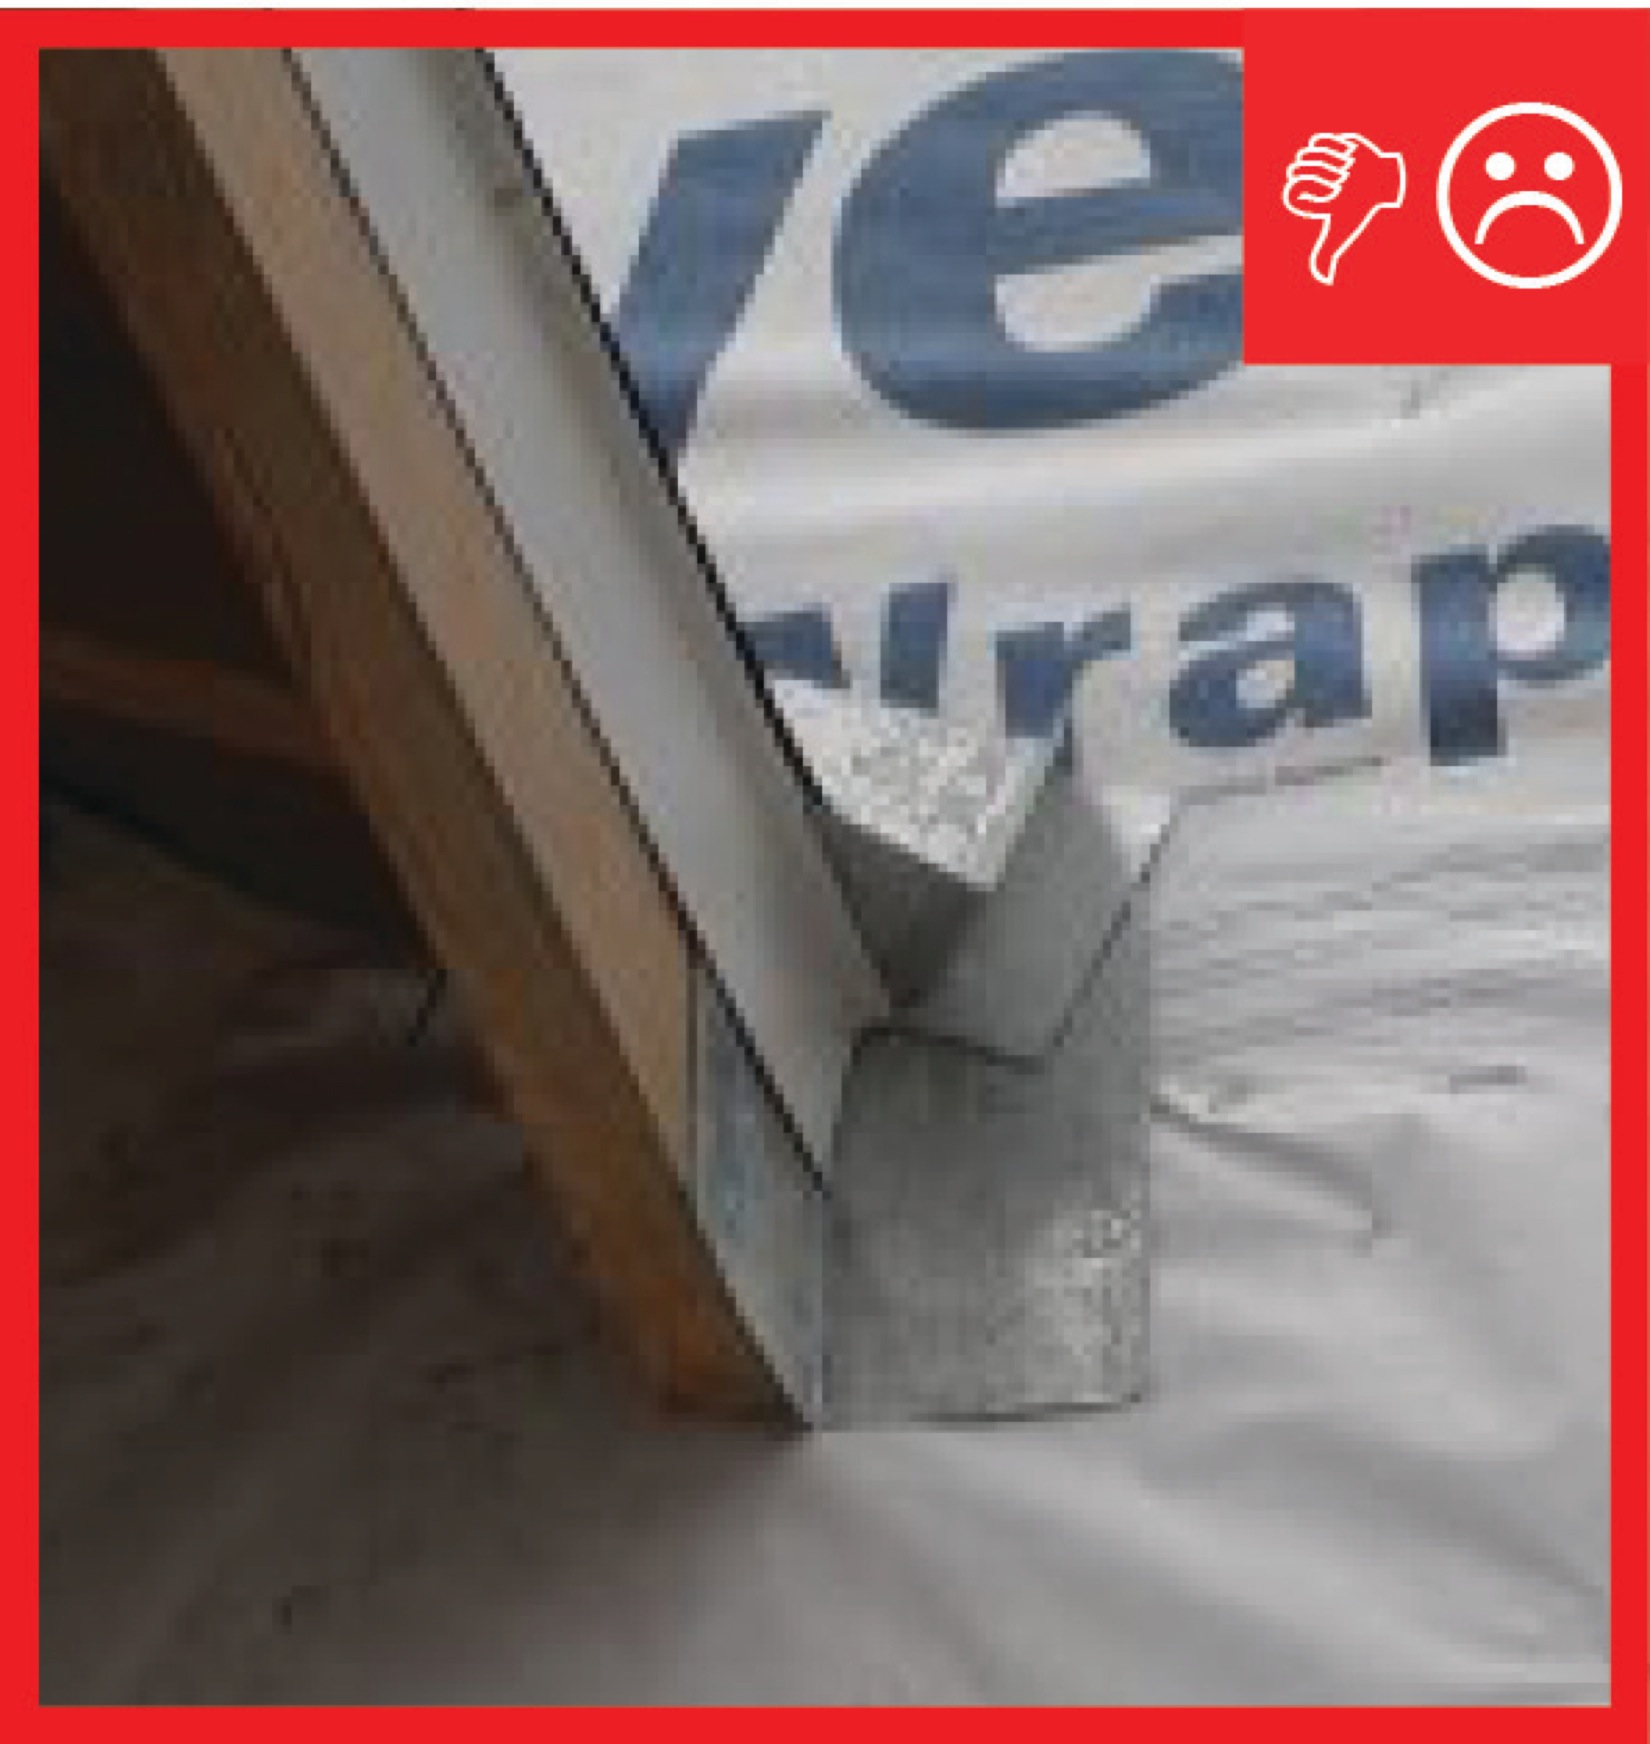
Wrong – If dimpled plastic is used it should be trimmed to drain down at the bottom rather than up where water can collect in it.
Image
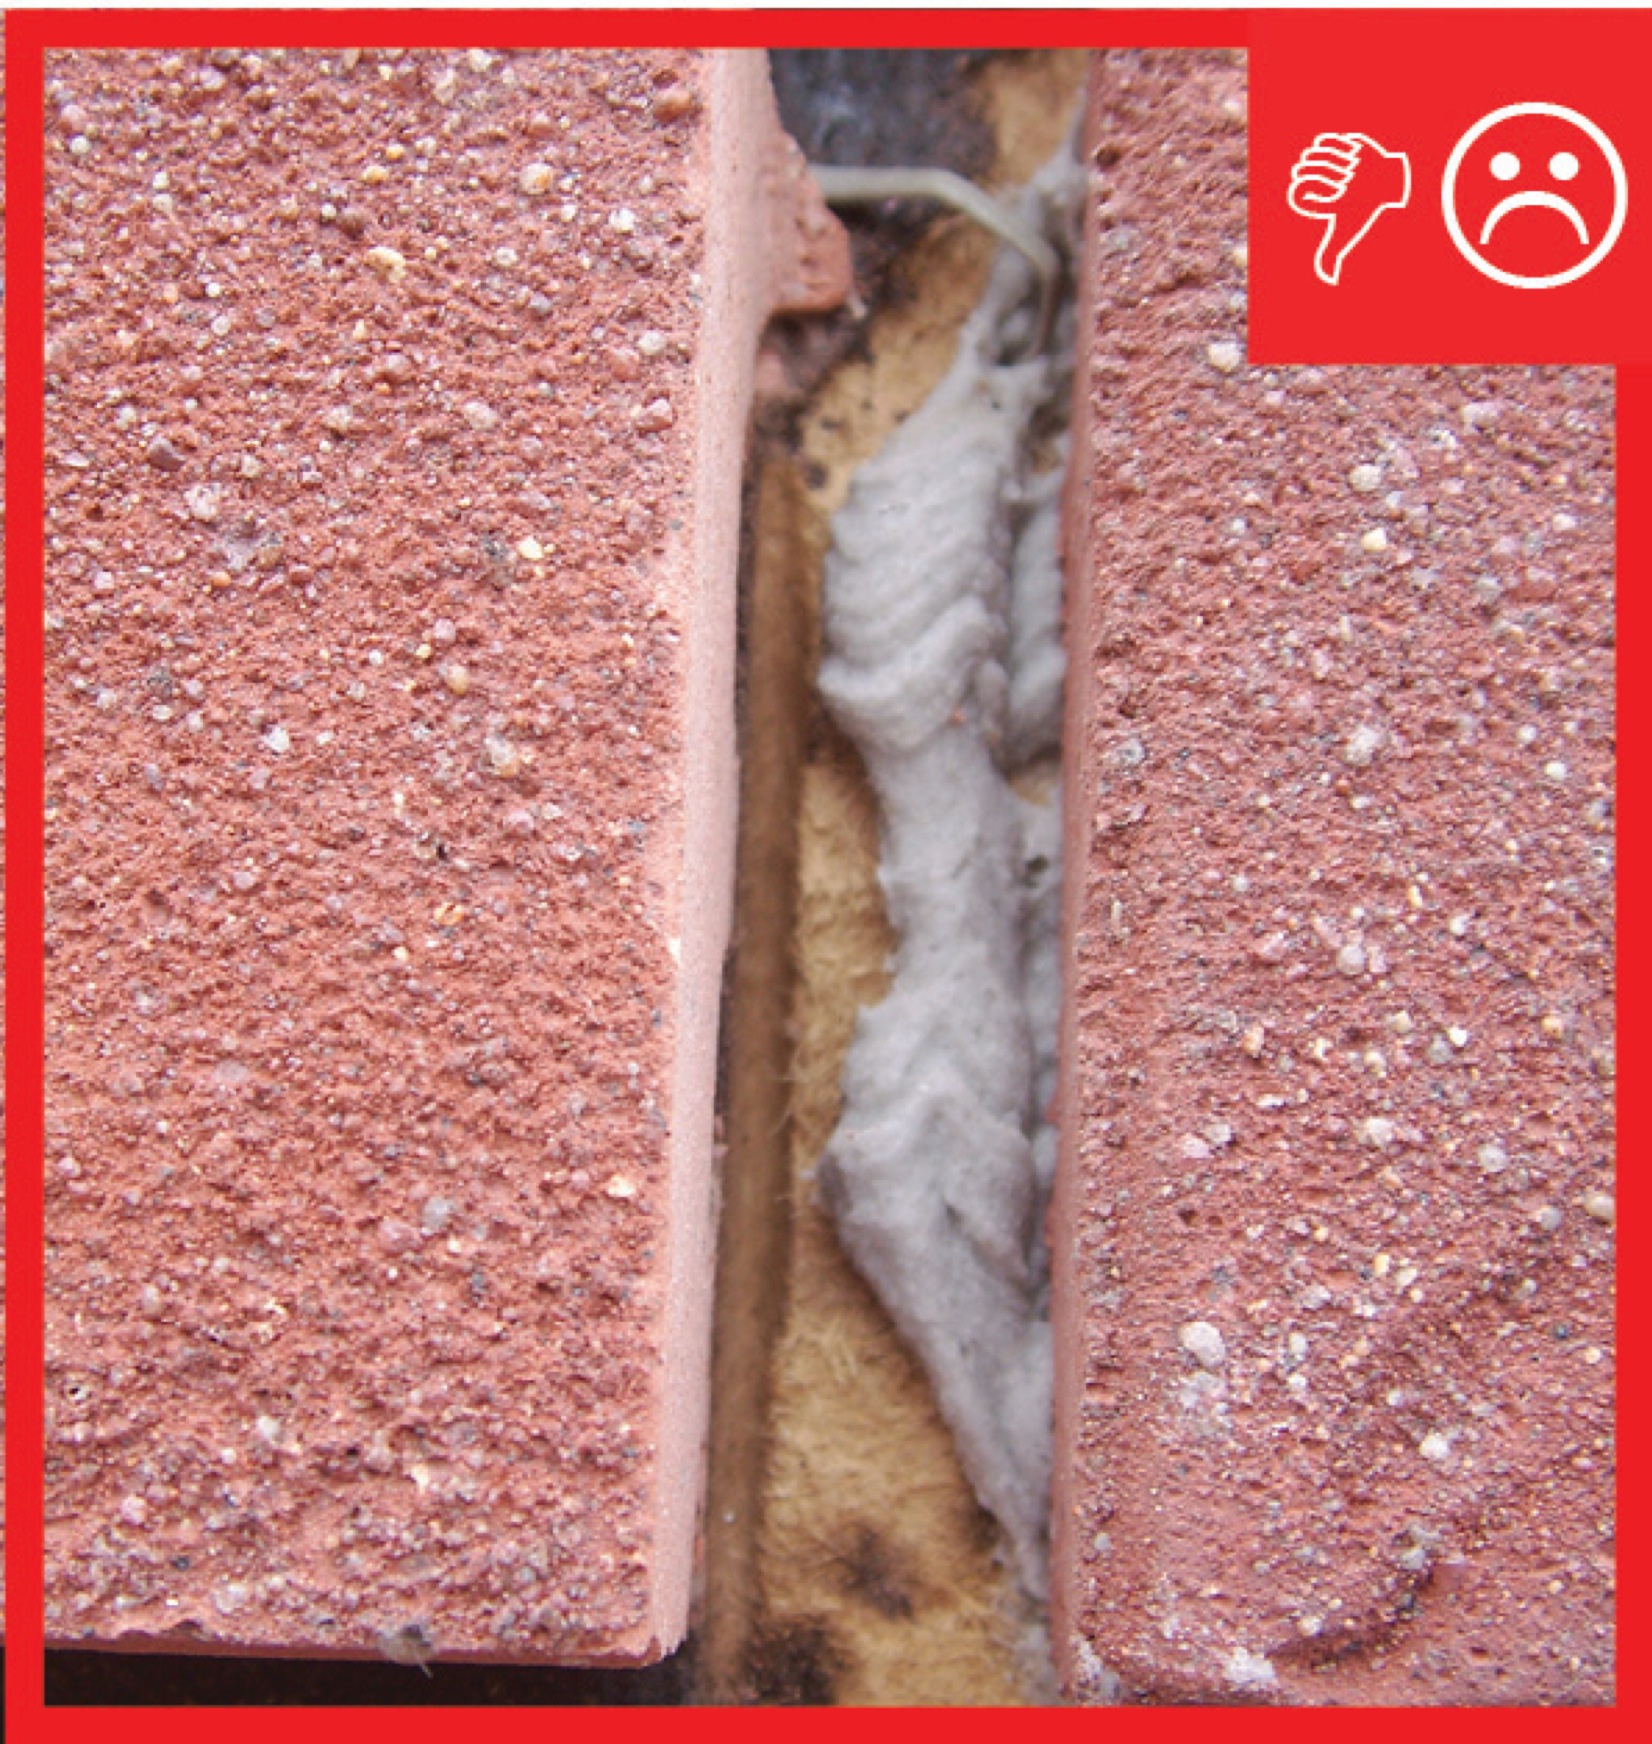
Wrong – Misalignment of the tie reduces the embedment and enables the brick veneer to be pulled away.
Image

Image

Image
Wrong – The corners are not properly flashed, leaving a vulnerable area in the drainage system
Image
Wrong – The insulated concrete forms at the foundation do not have a damp-proof coating
Image
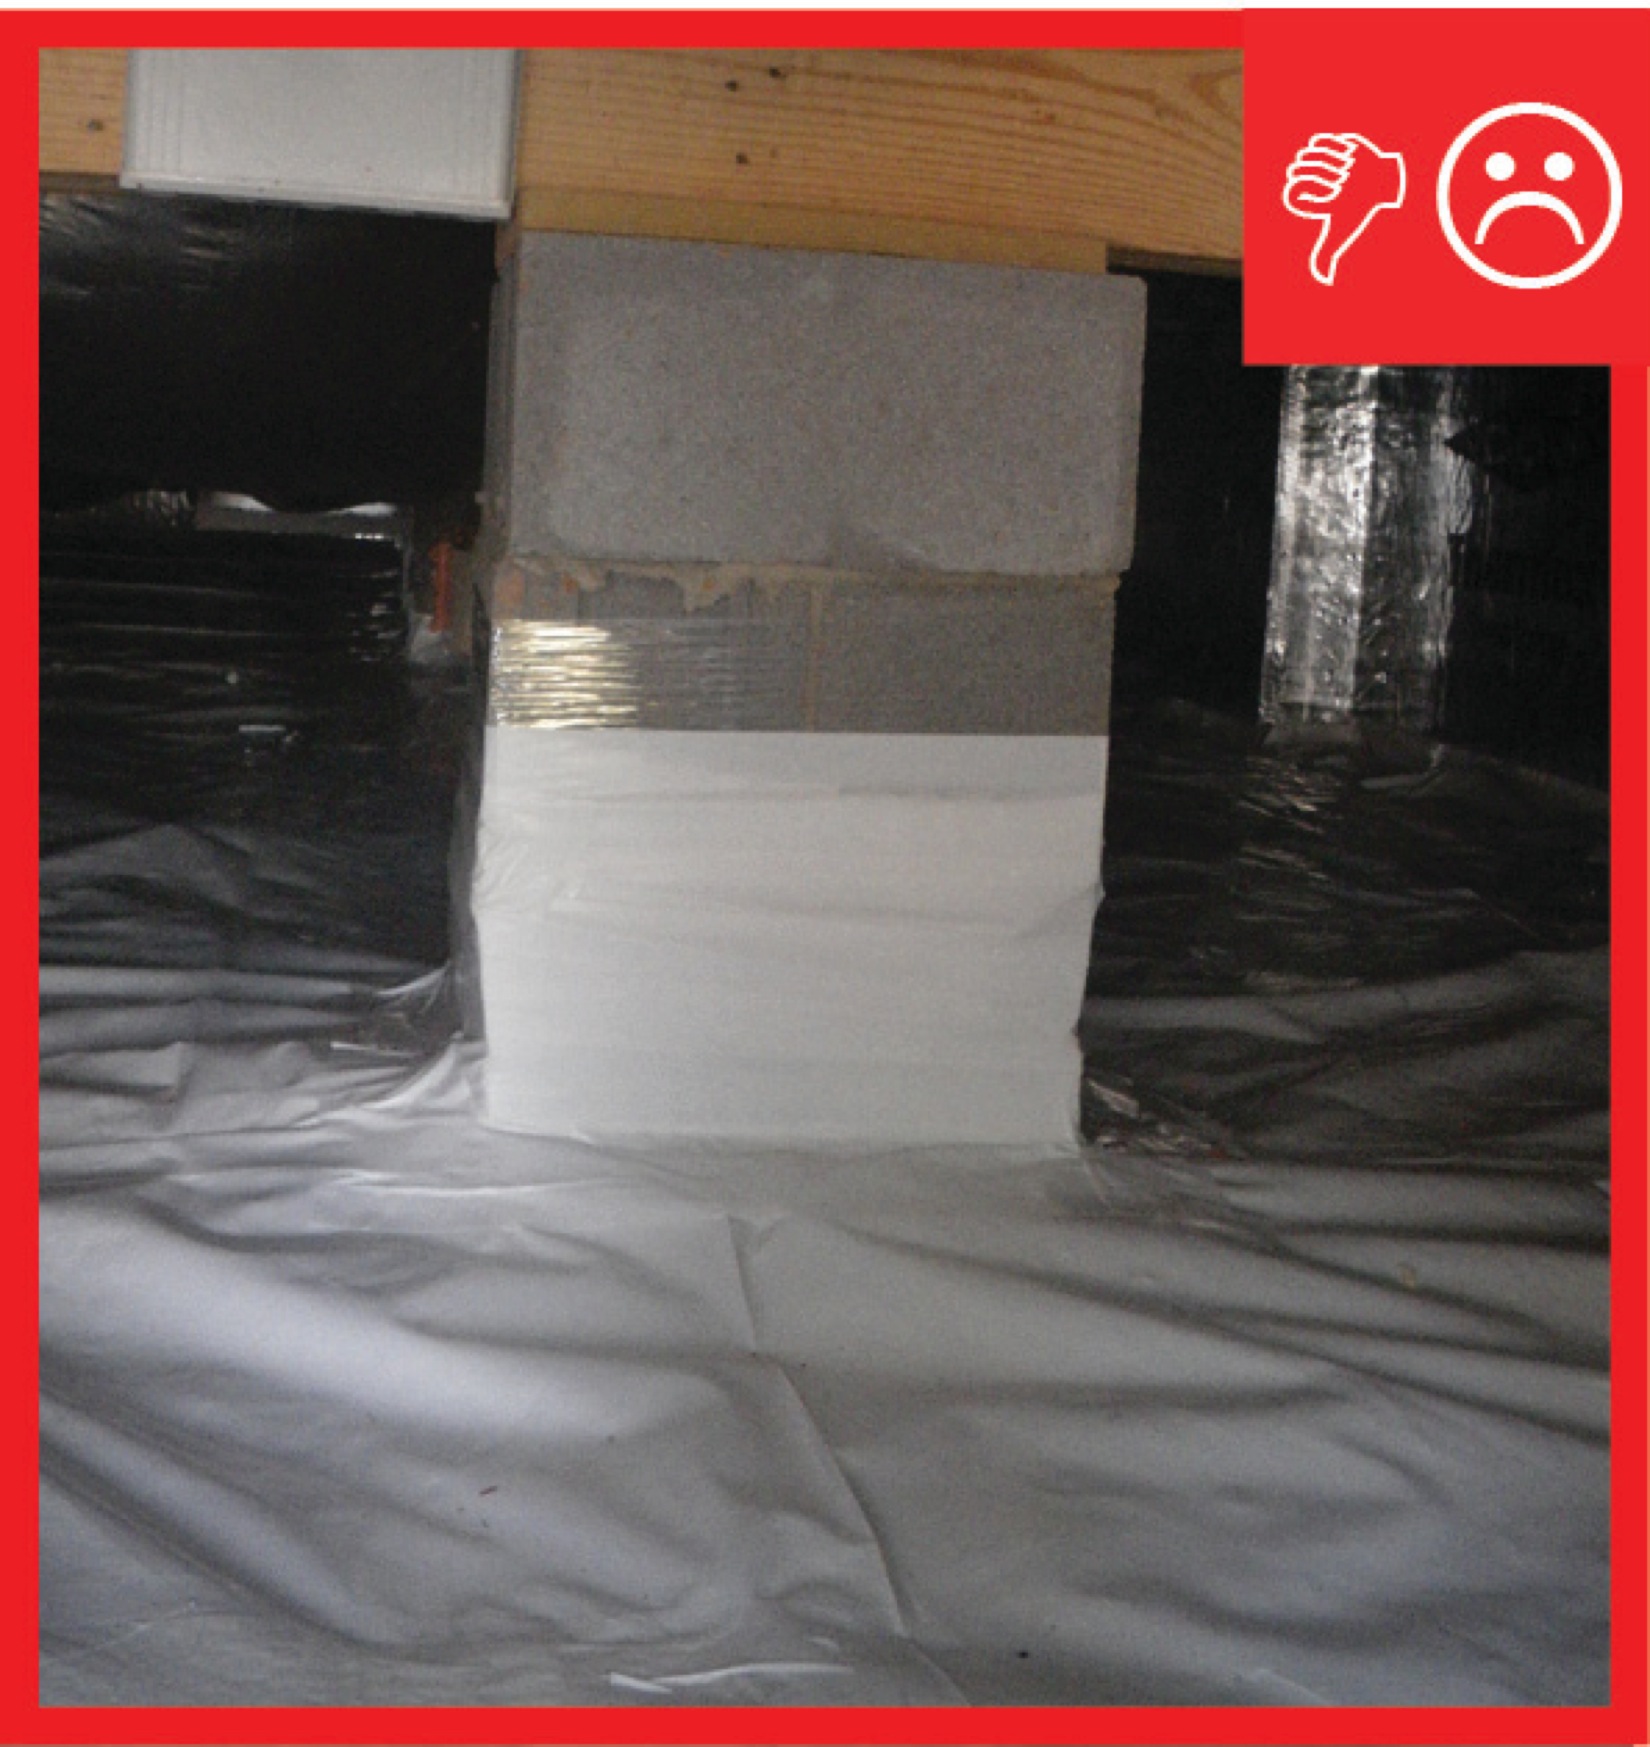
Wrong – The polyethylene sheeting vapor barrier is not attached to the piers with mechanical fasteners
Image
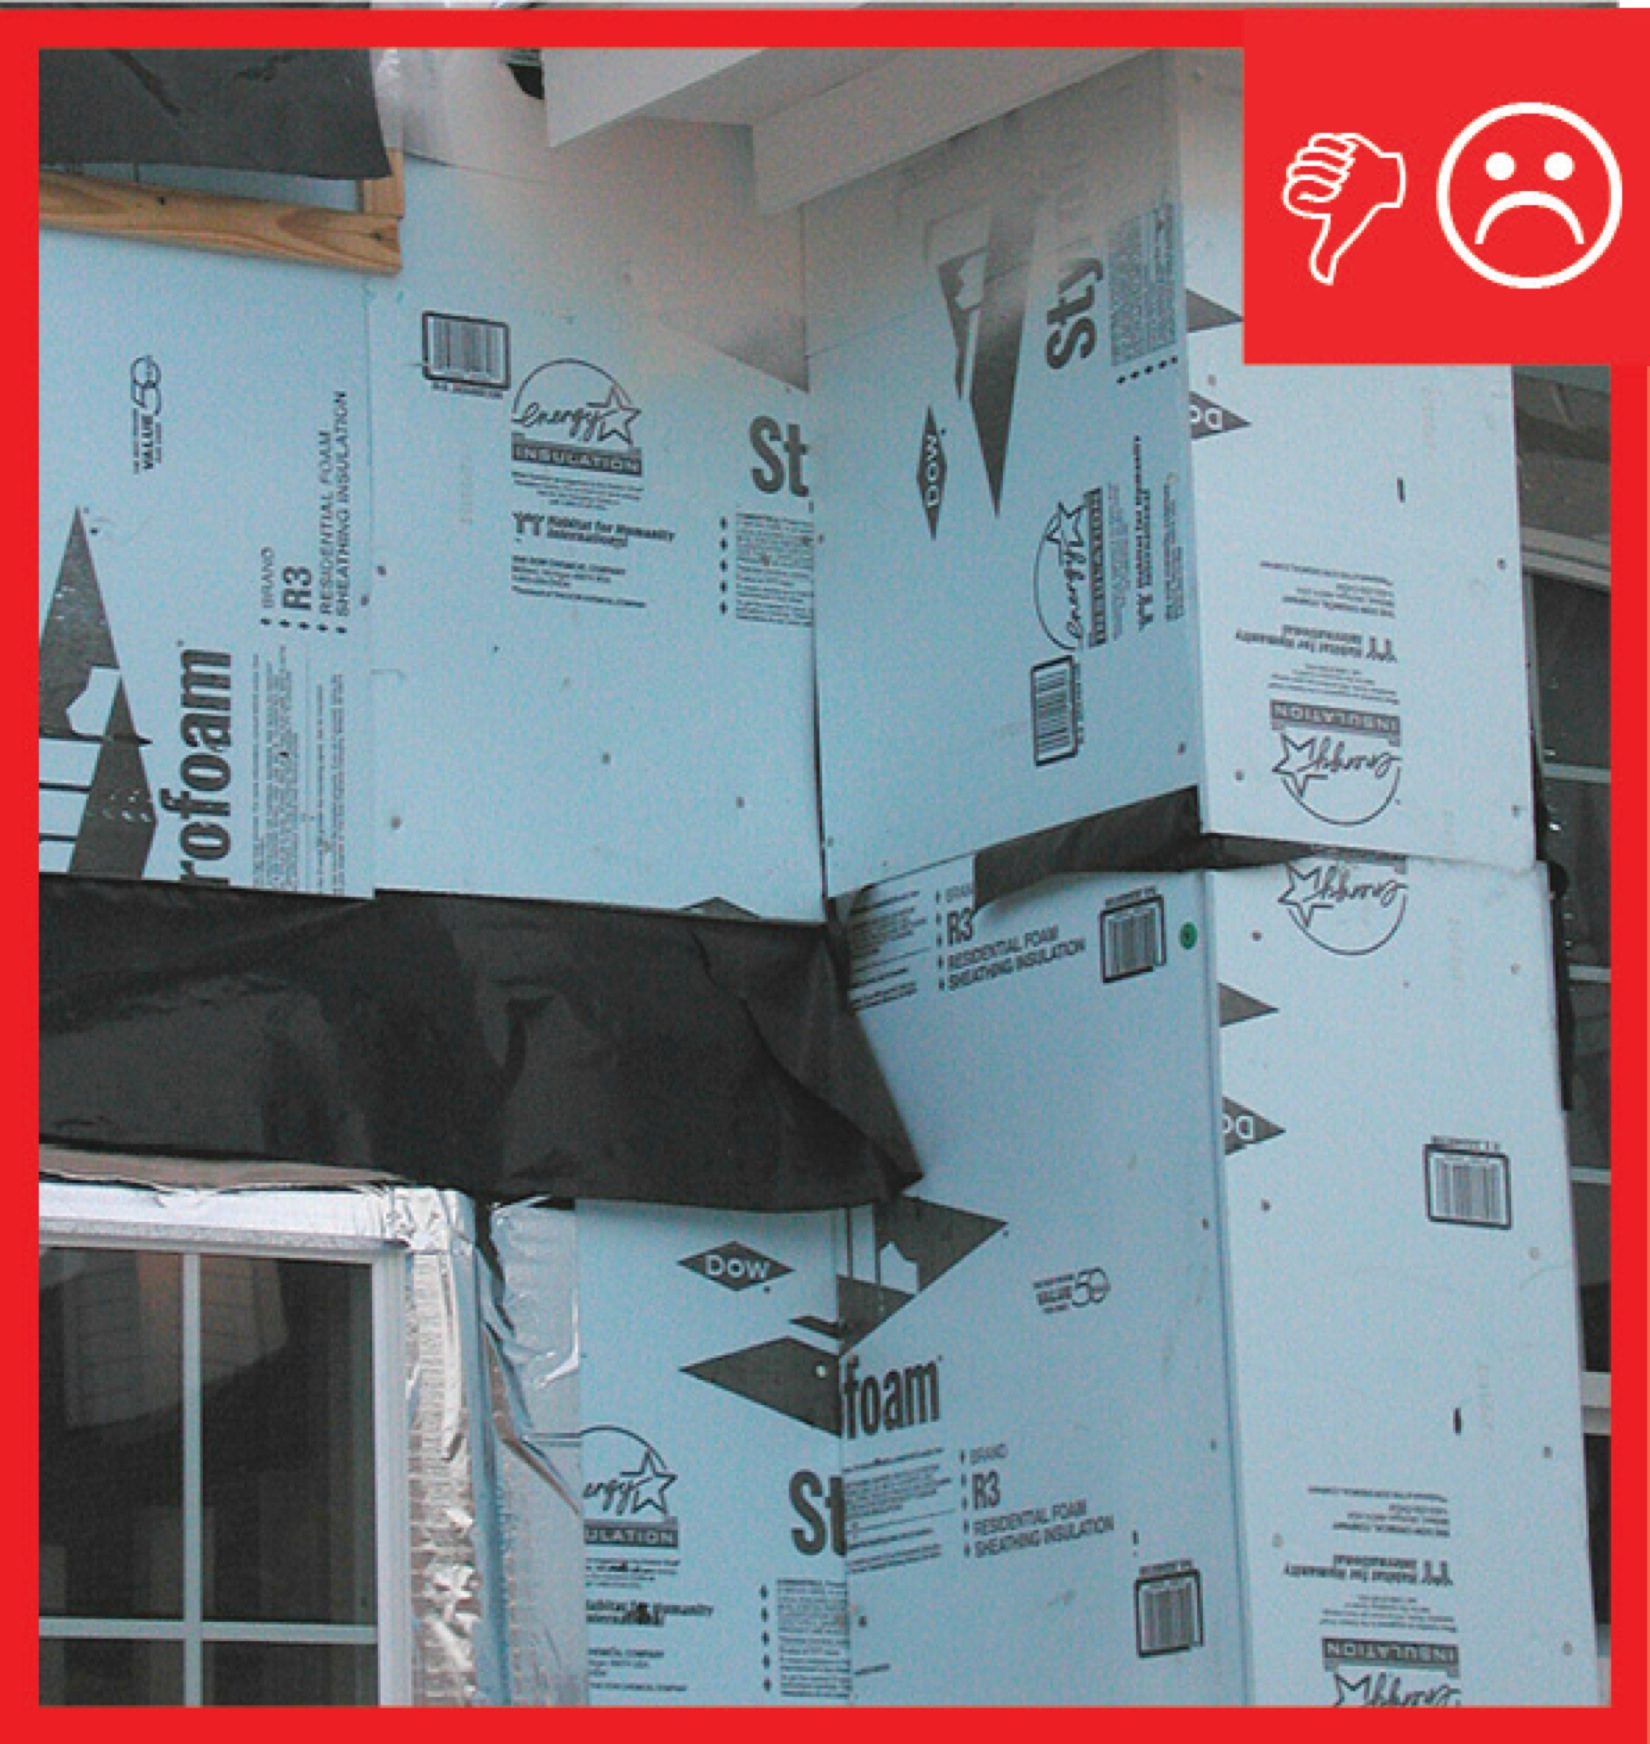
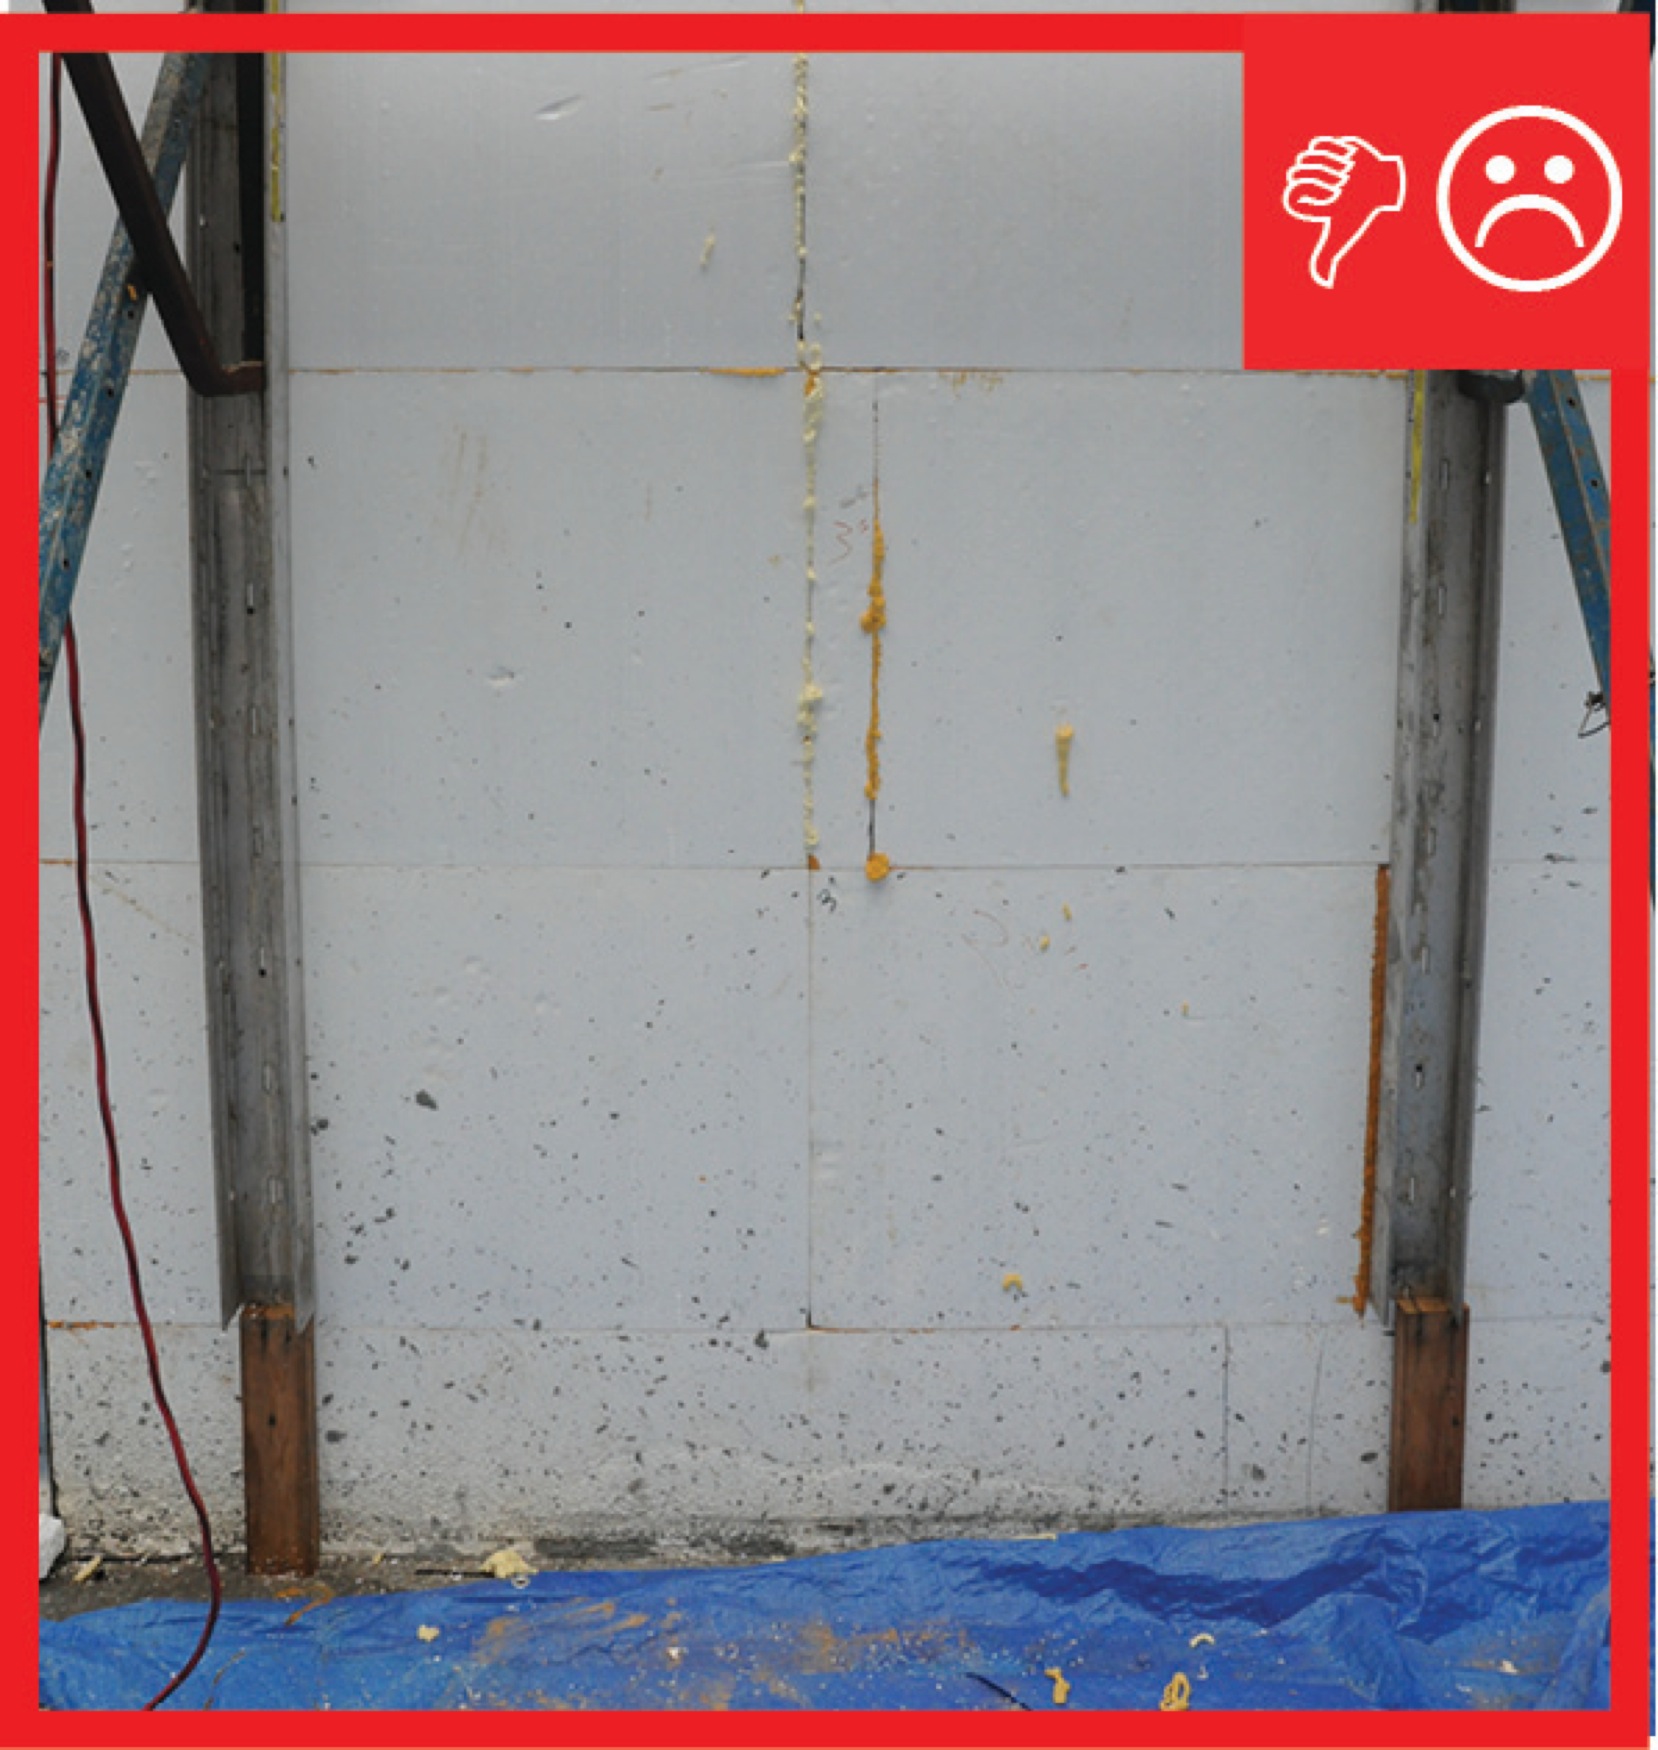
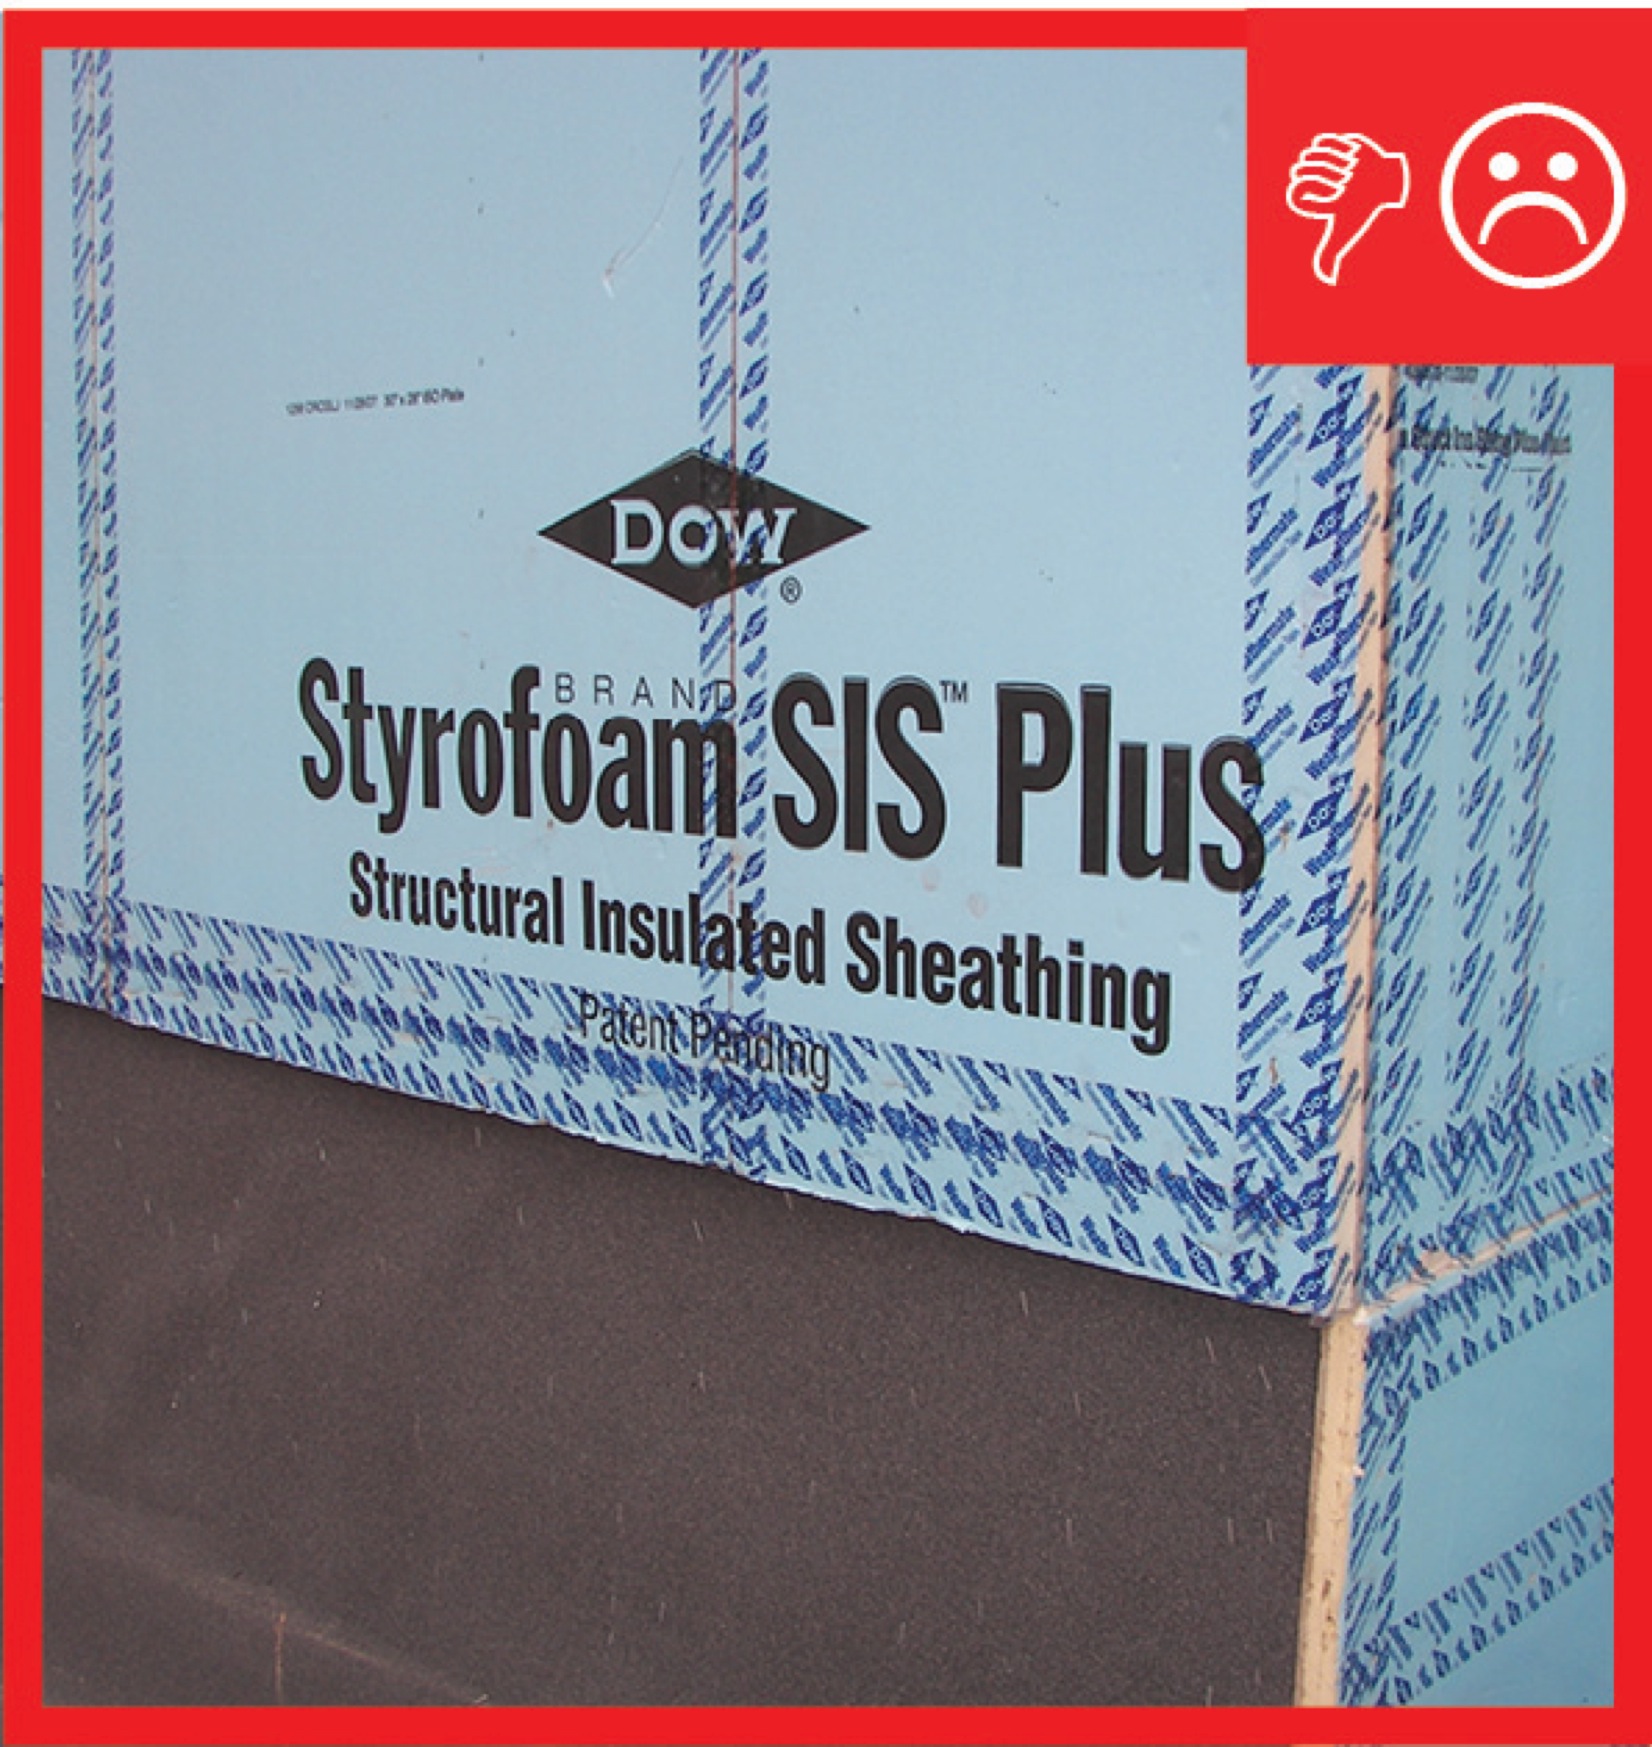
Wrong – The rigid sheathing seams are not taped and the gaps could cause moisture problems
Image
Image
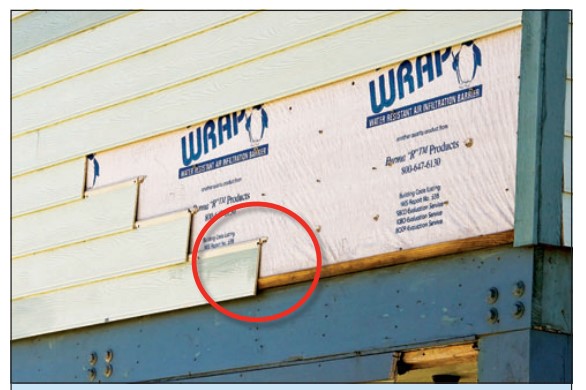
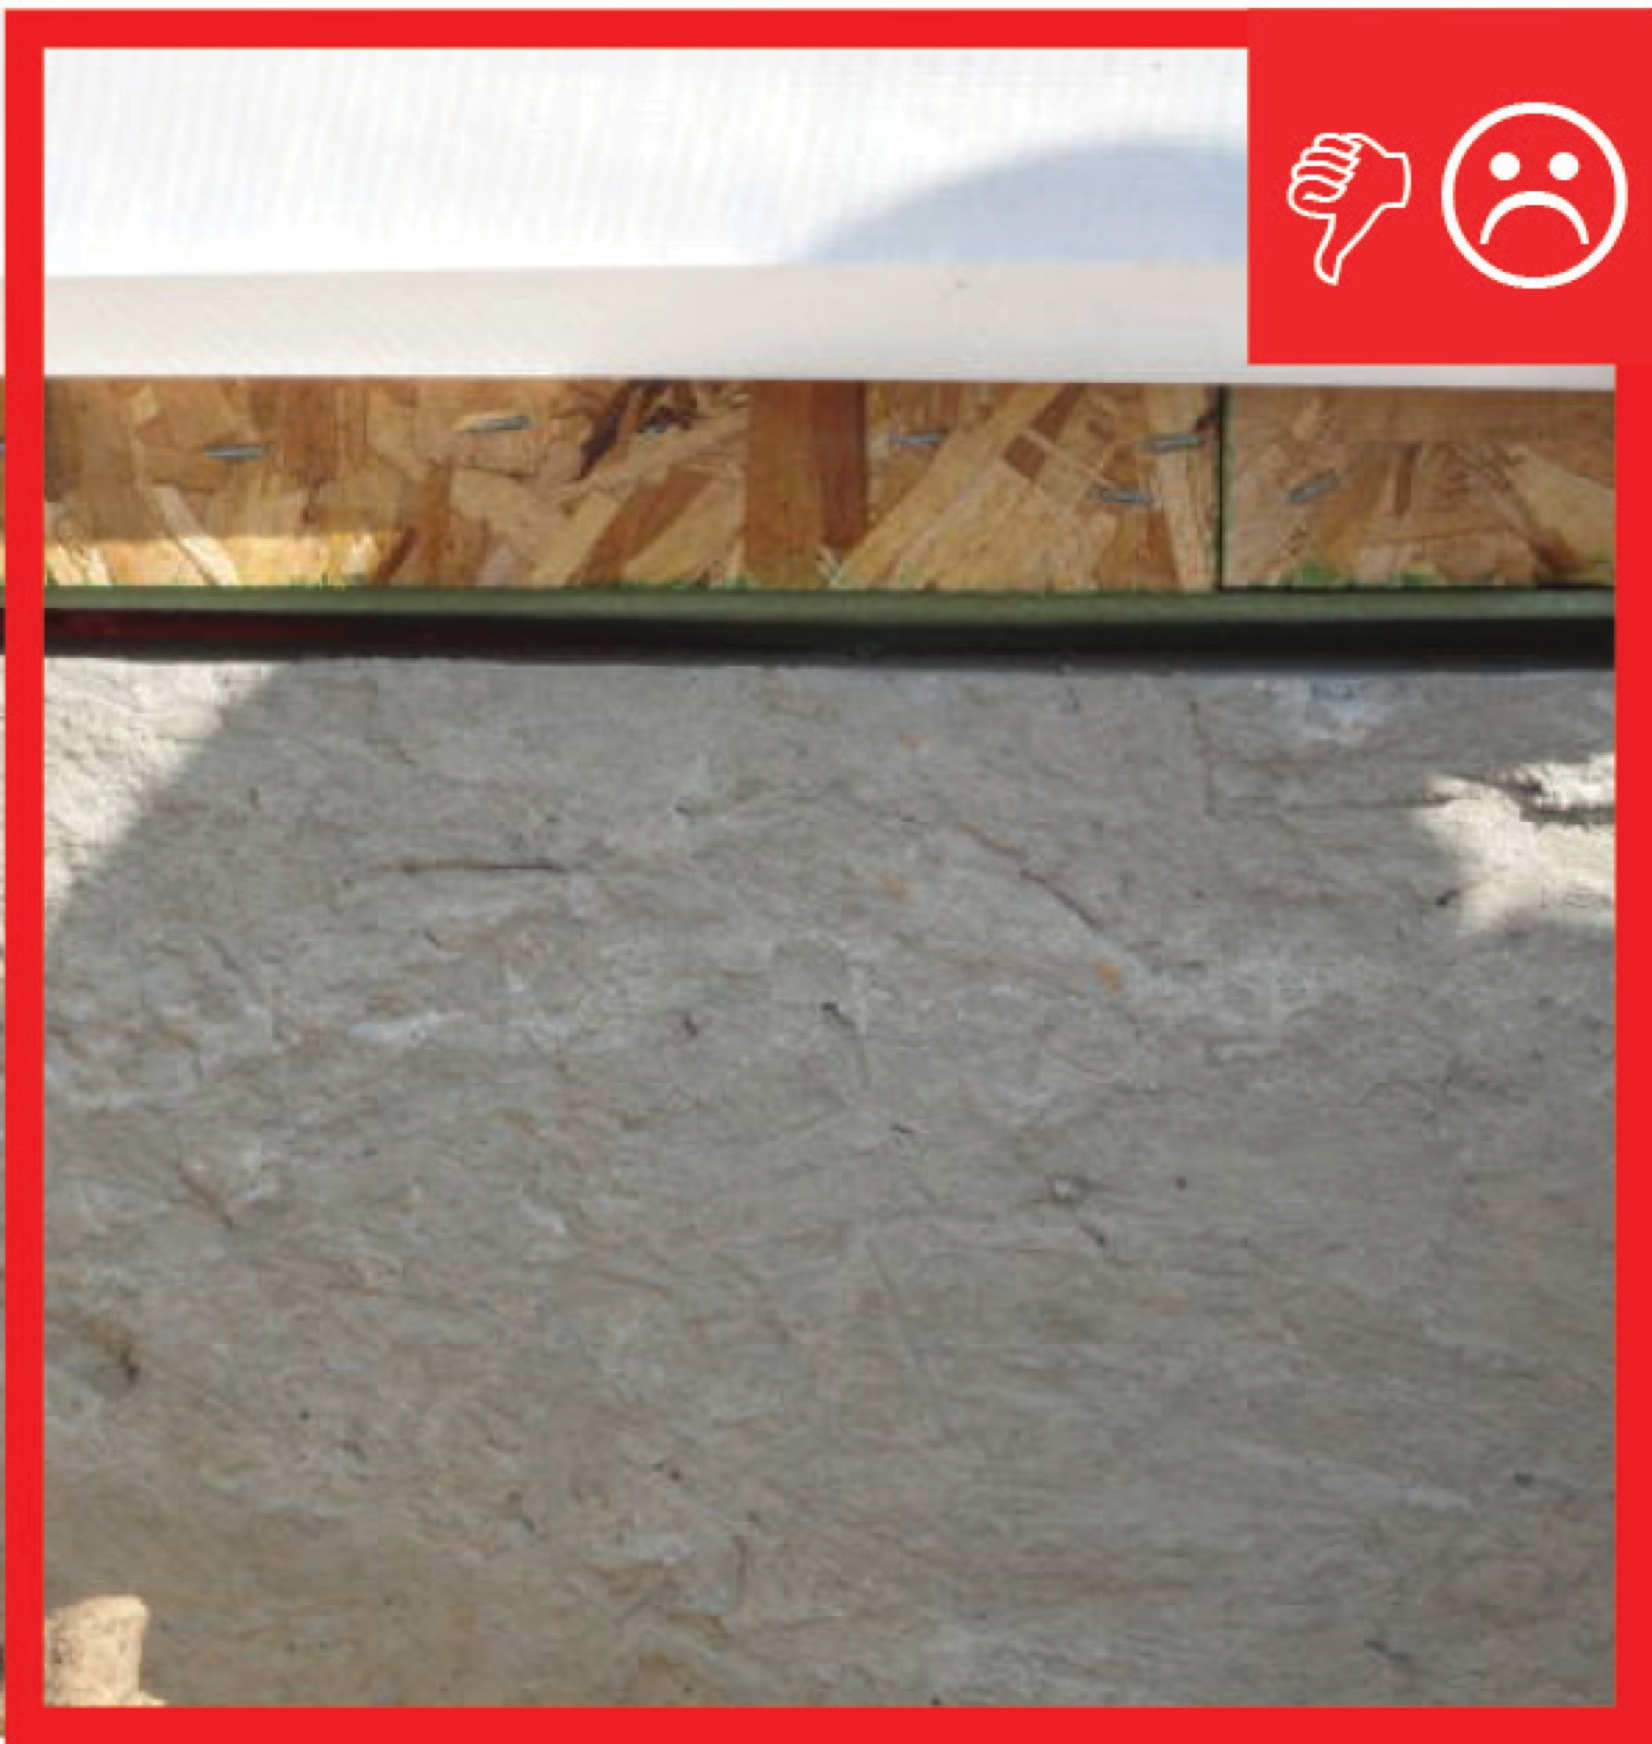
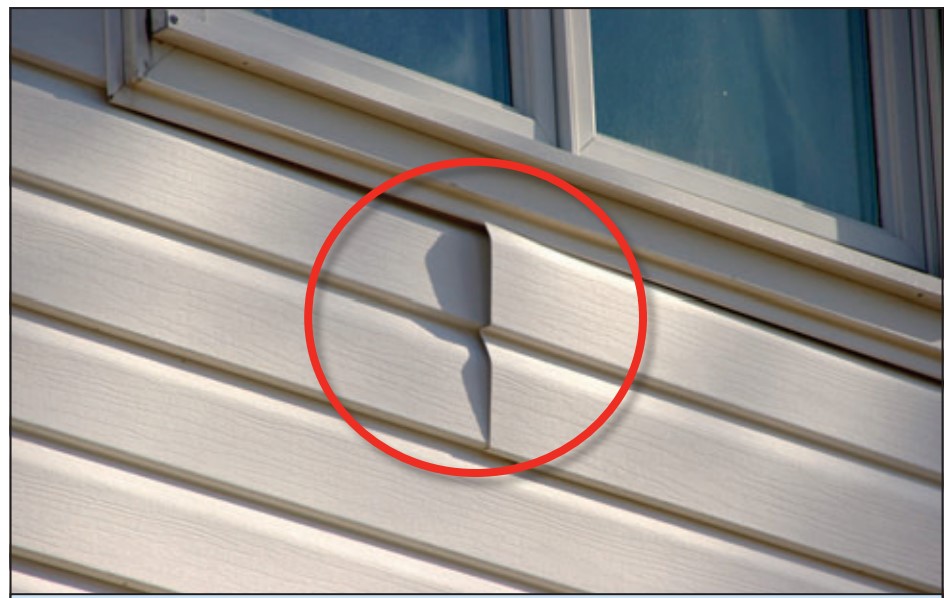
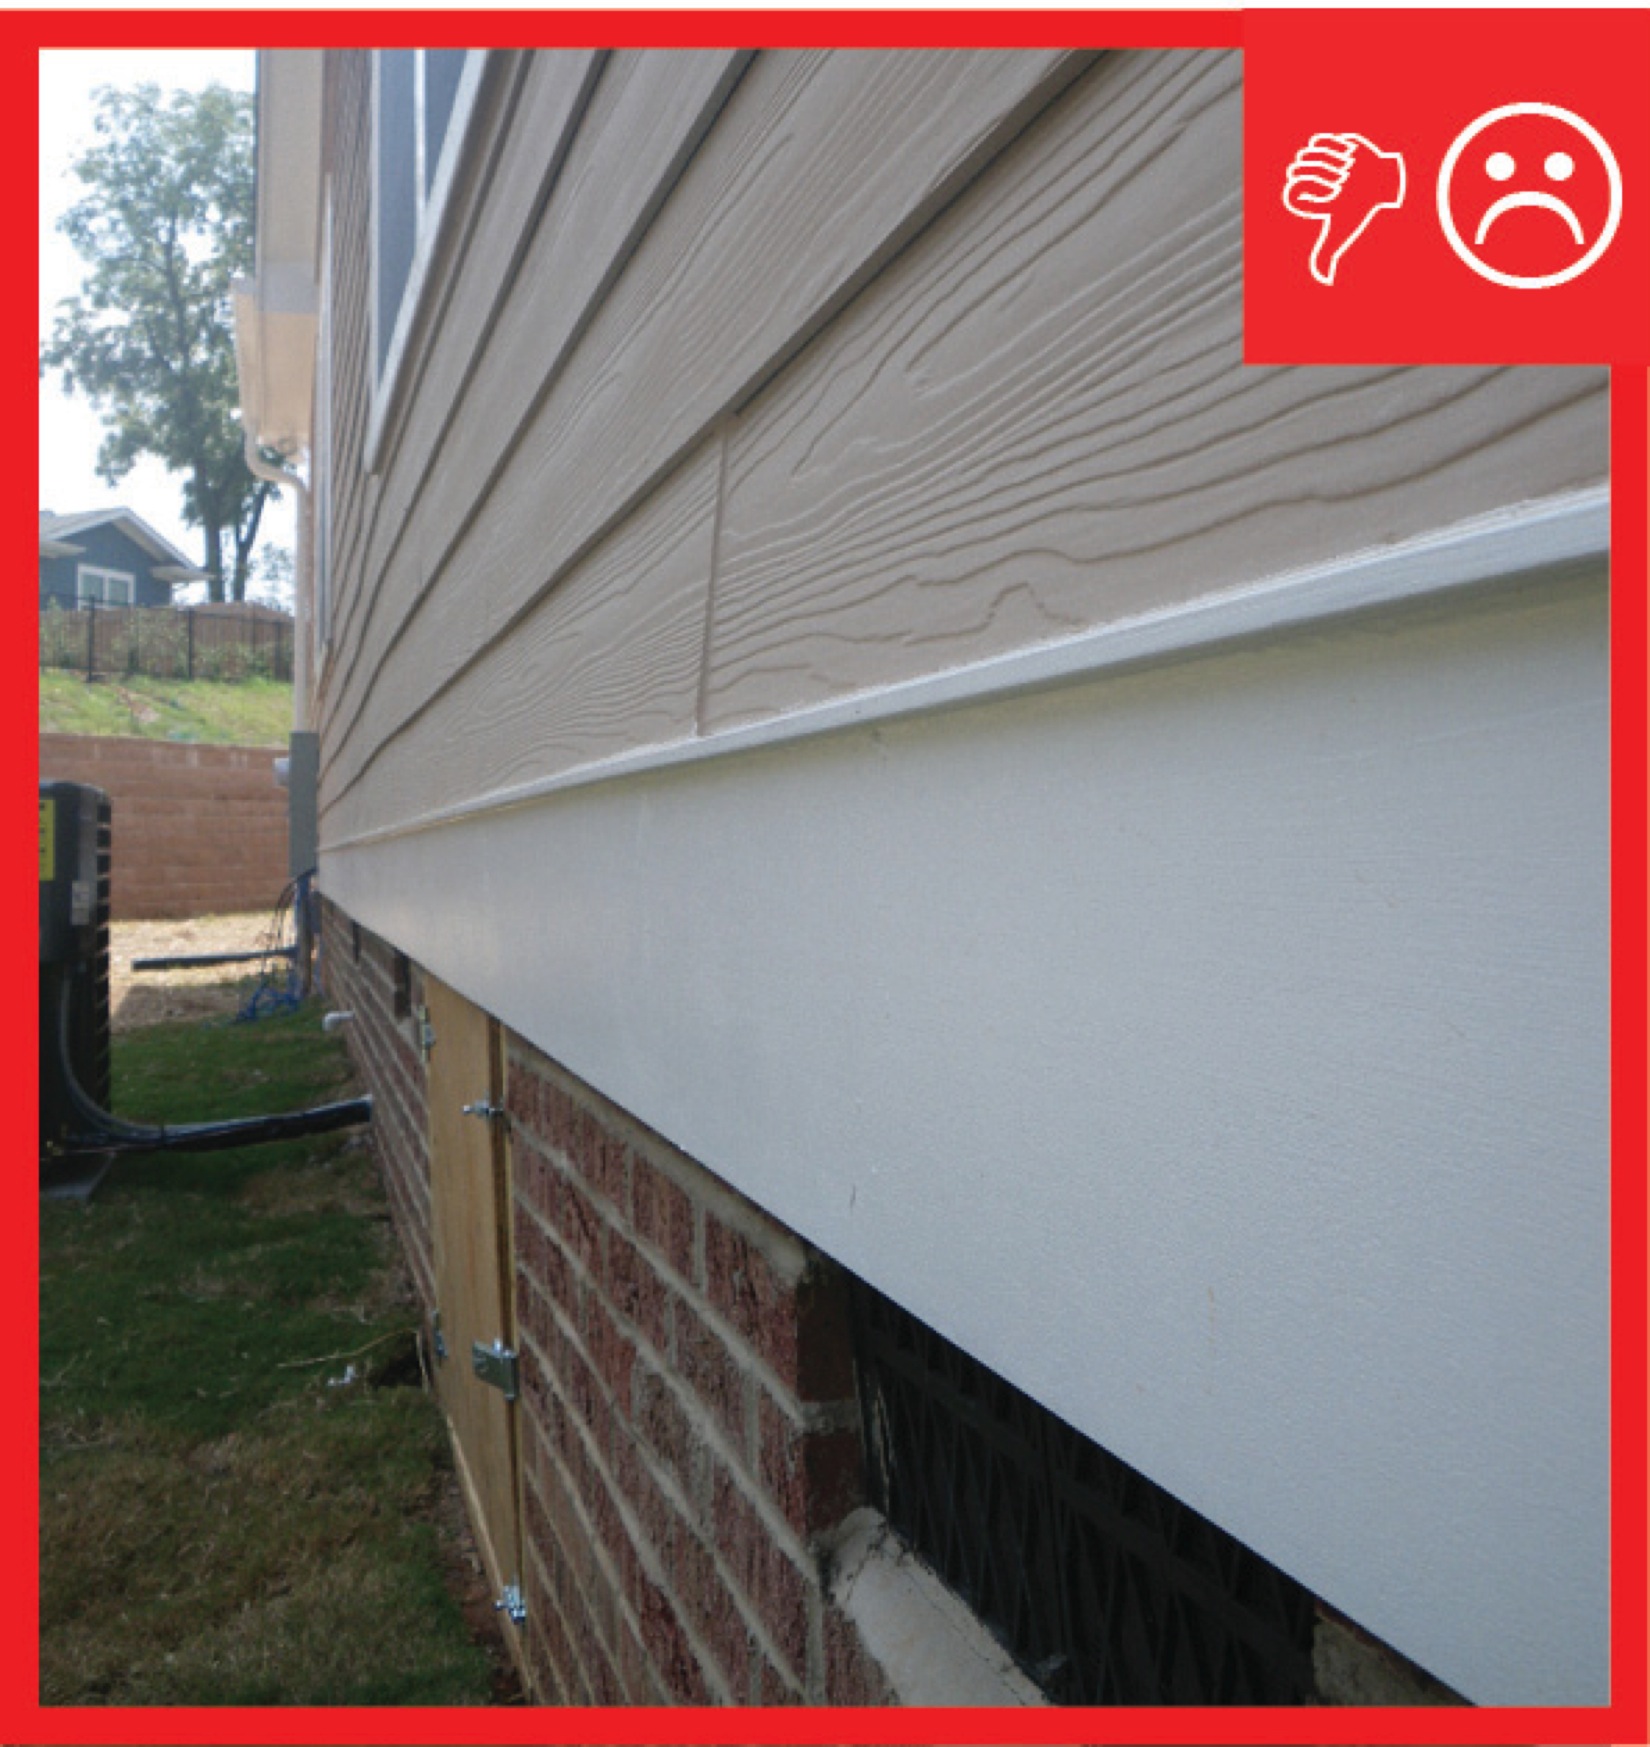
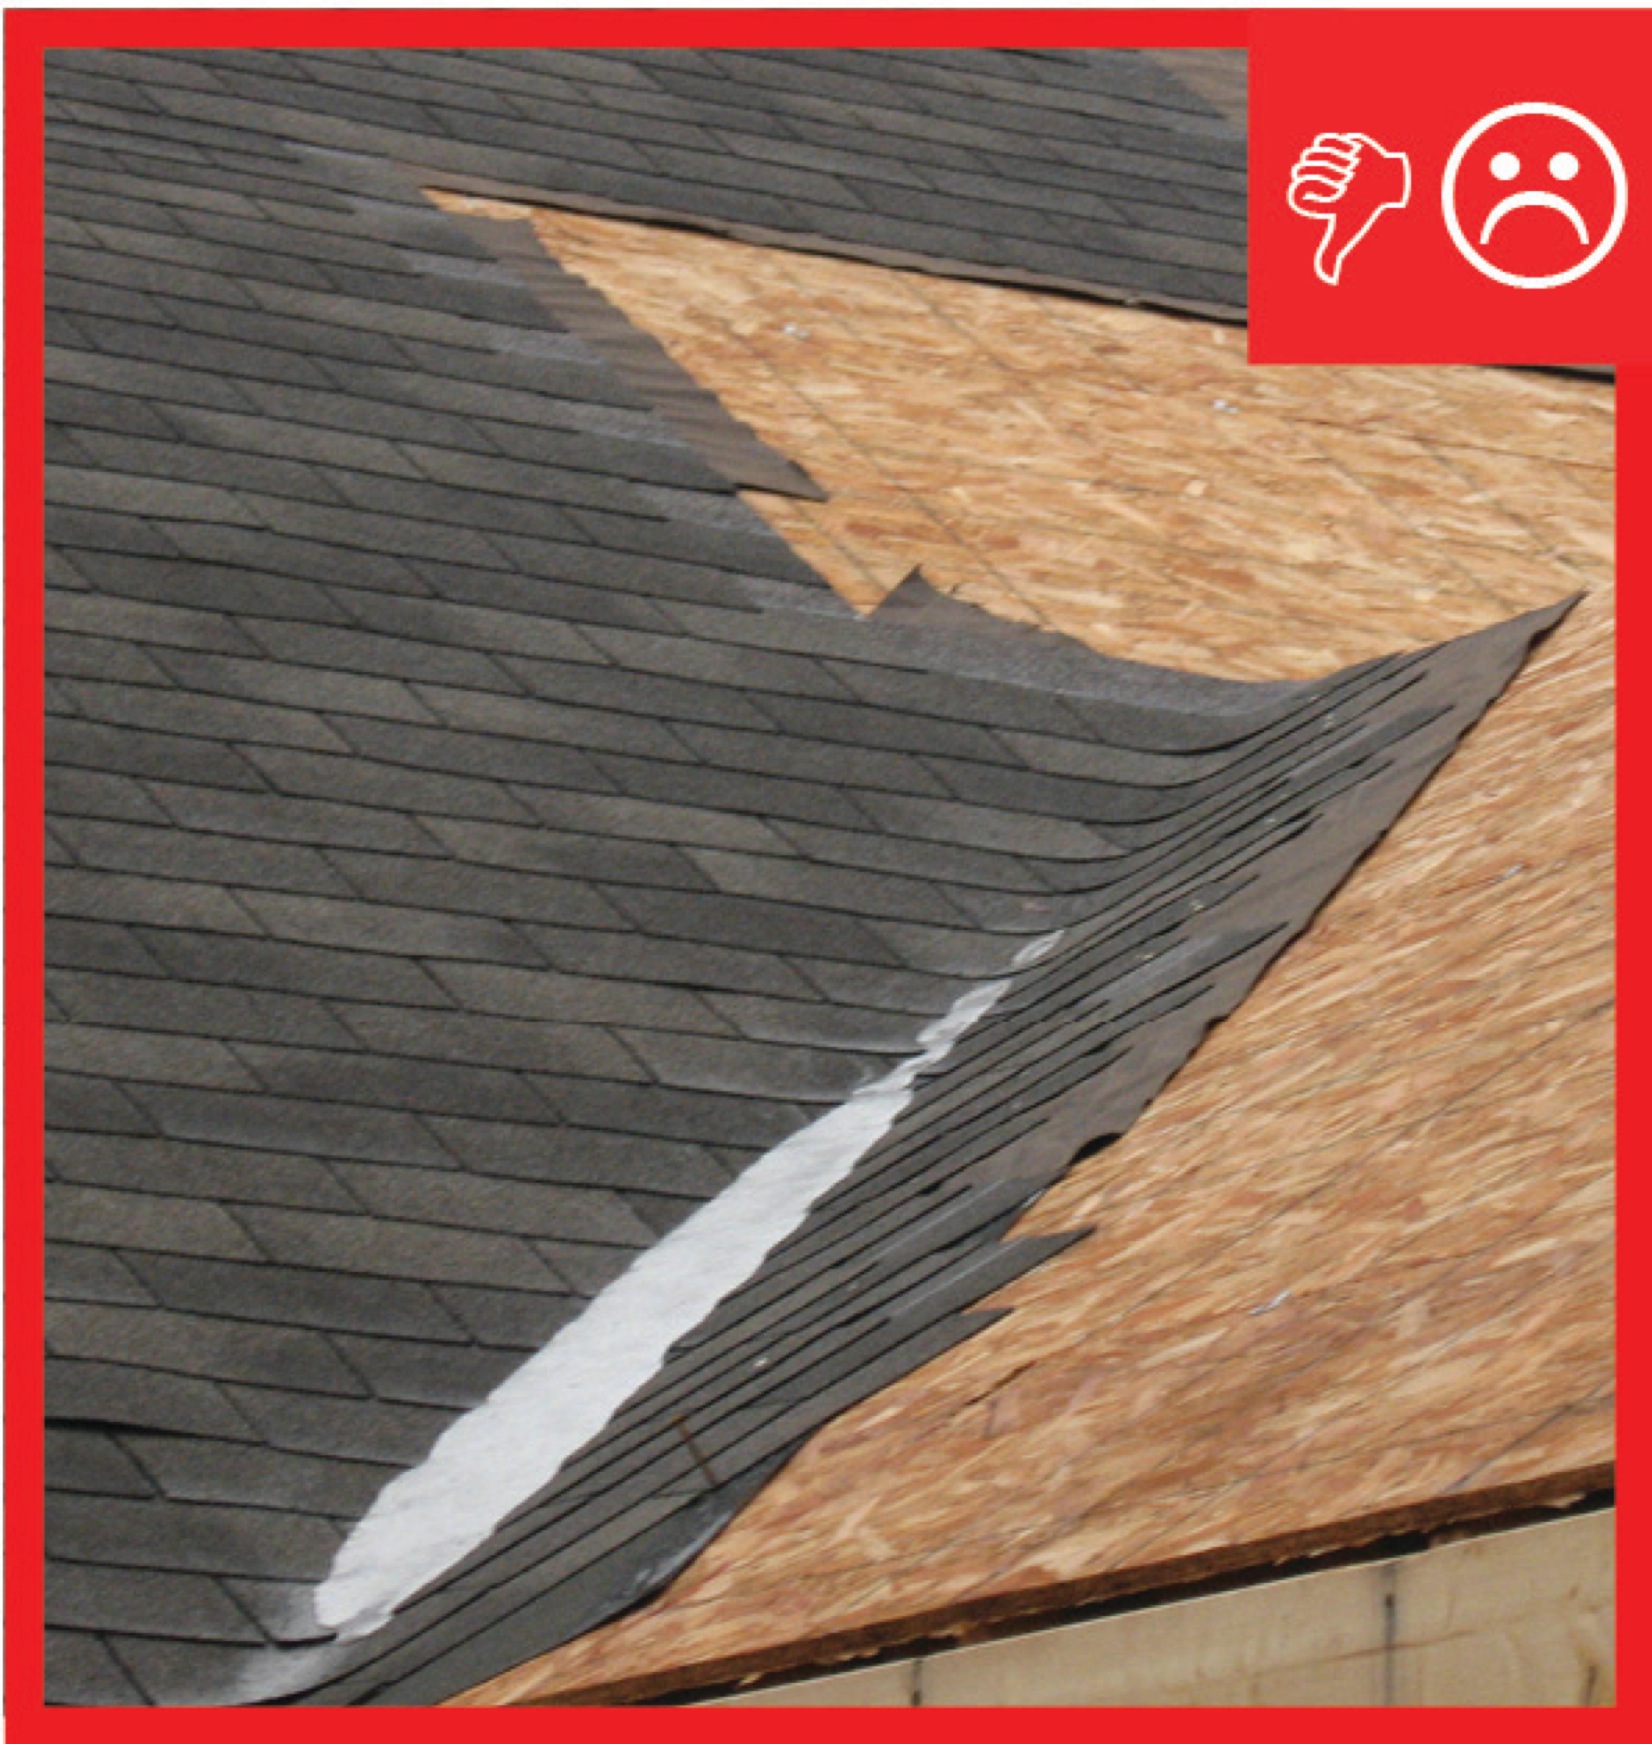
Wrong – The underside of the first course of siding extends beyond the underlying sheathing leaving it vulnerable being pulled off by pressure from high winds.
Image
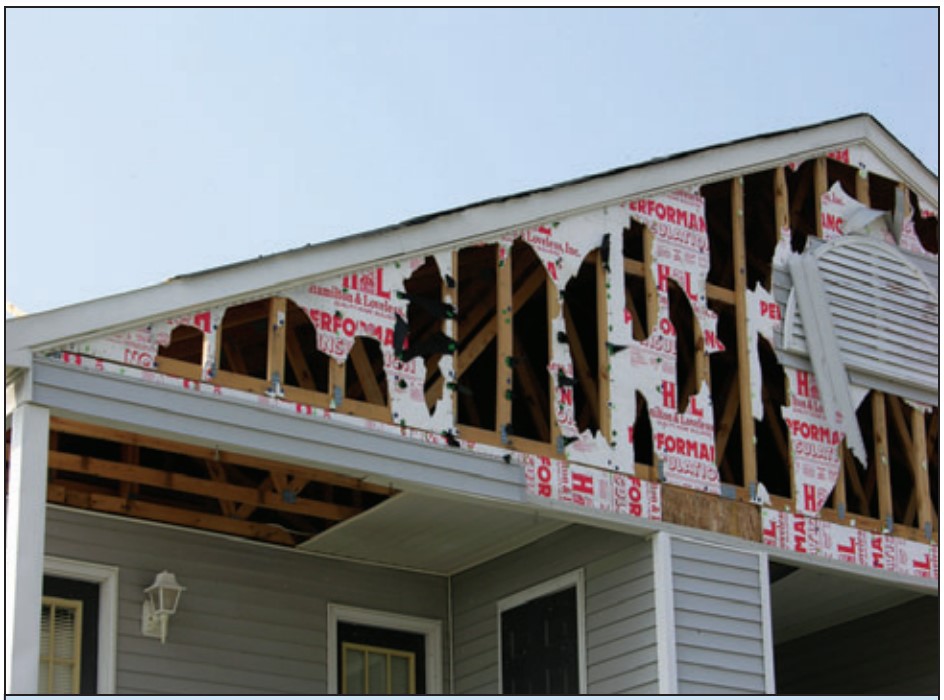
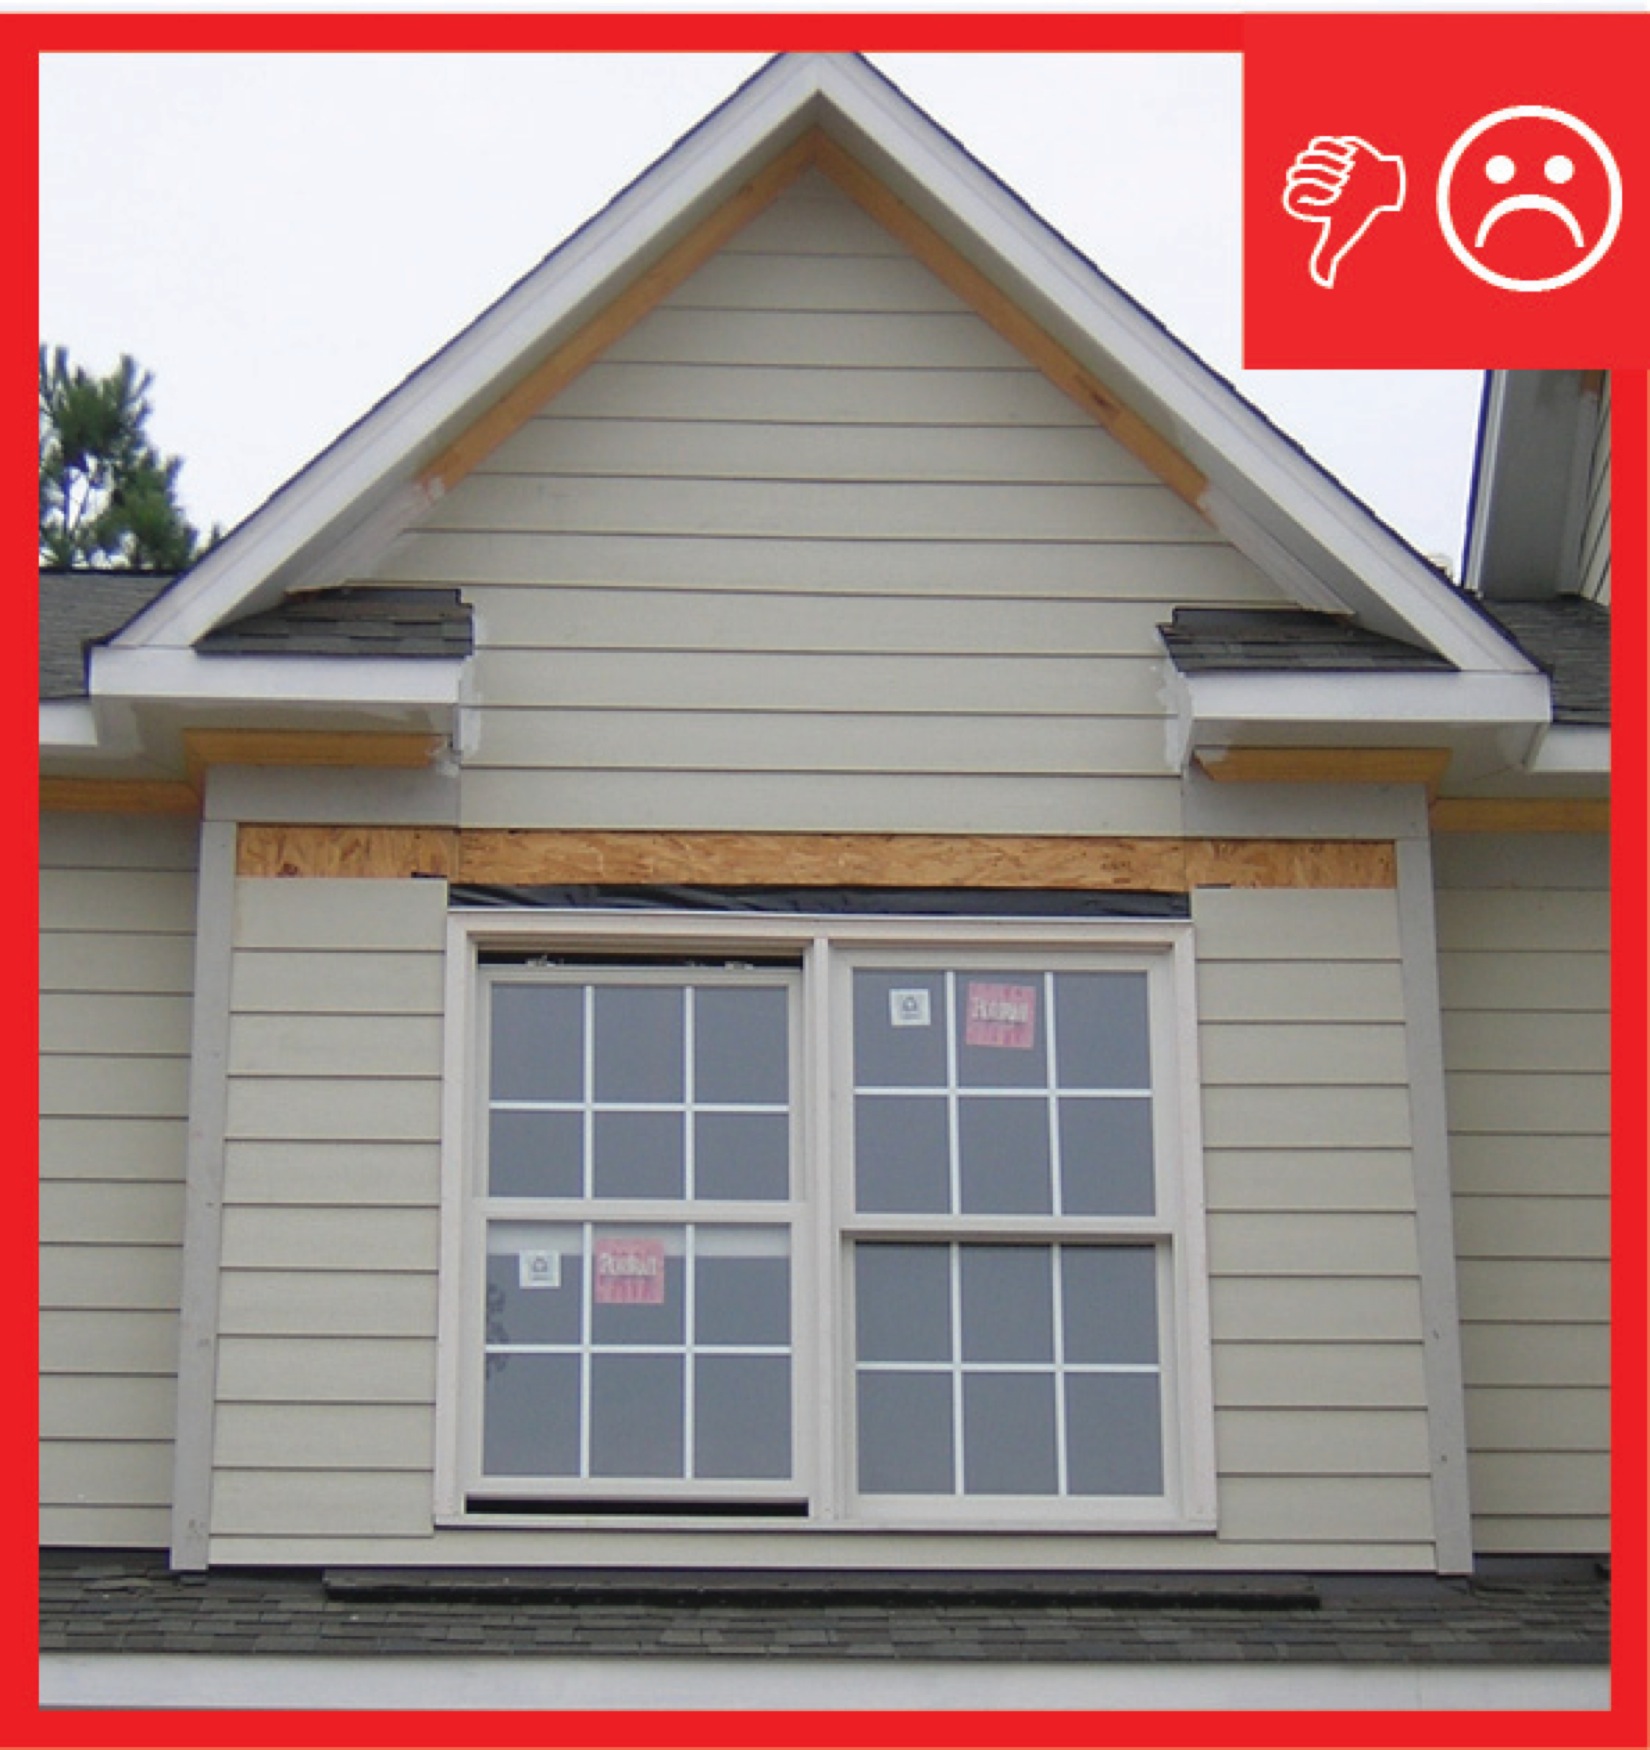
Wrong – The vinyl siding at this gable was installed over rigid foam instead of wood sheathing and neither had the structural strength to resist hurricane wind pressures.
Image
Image
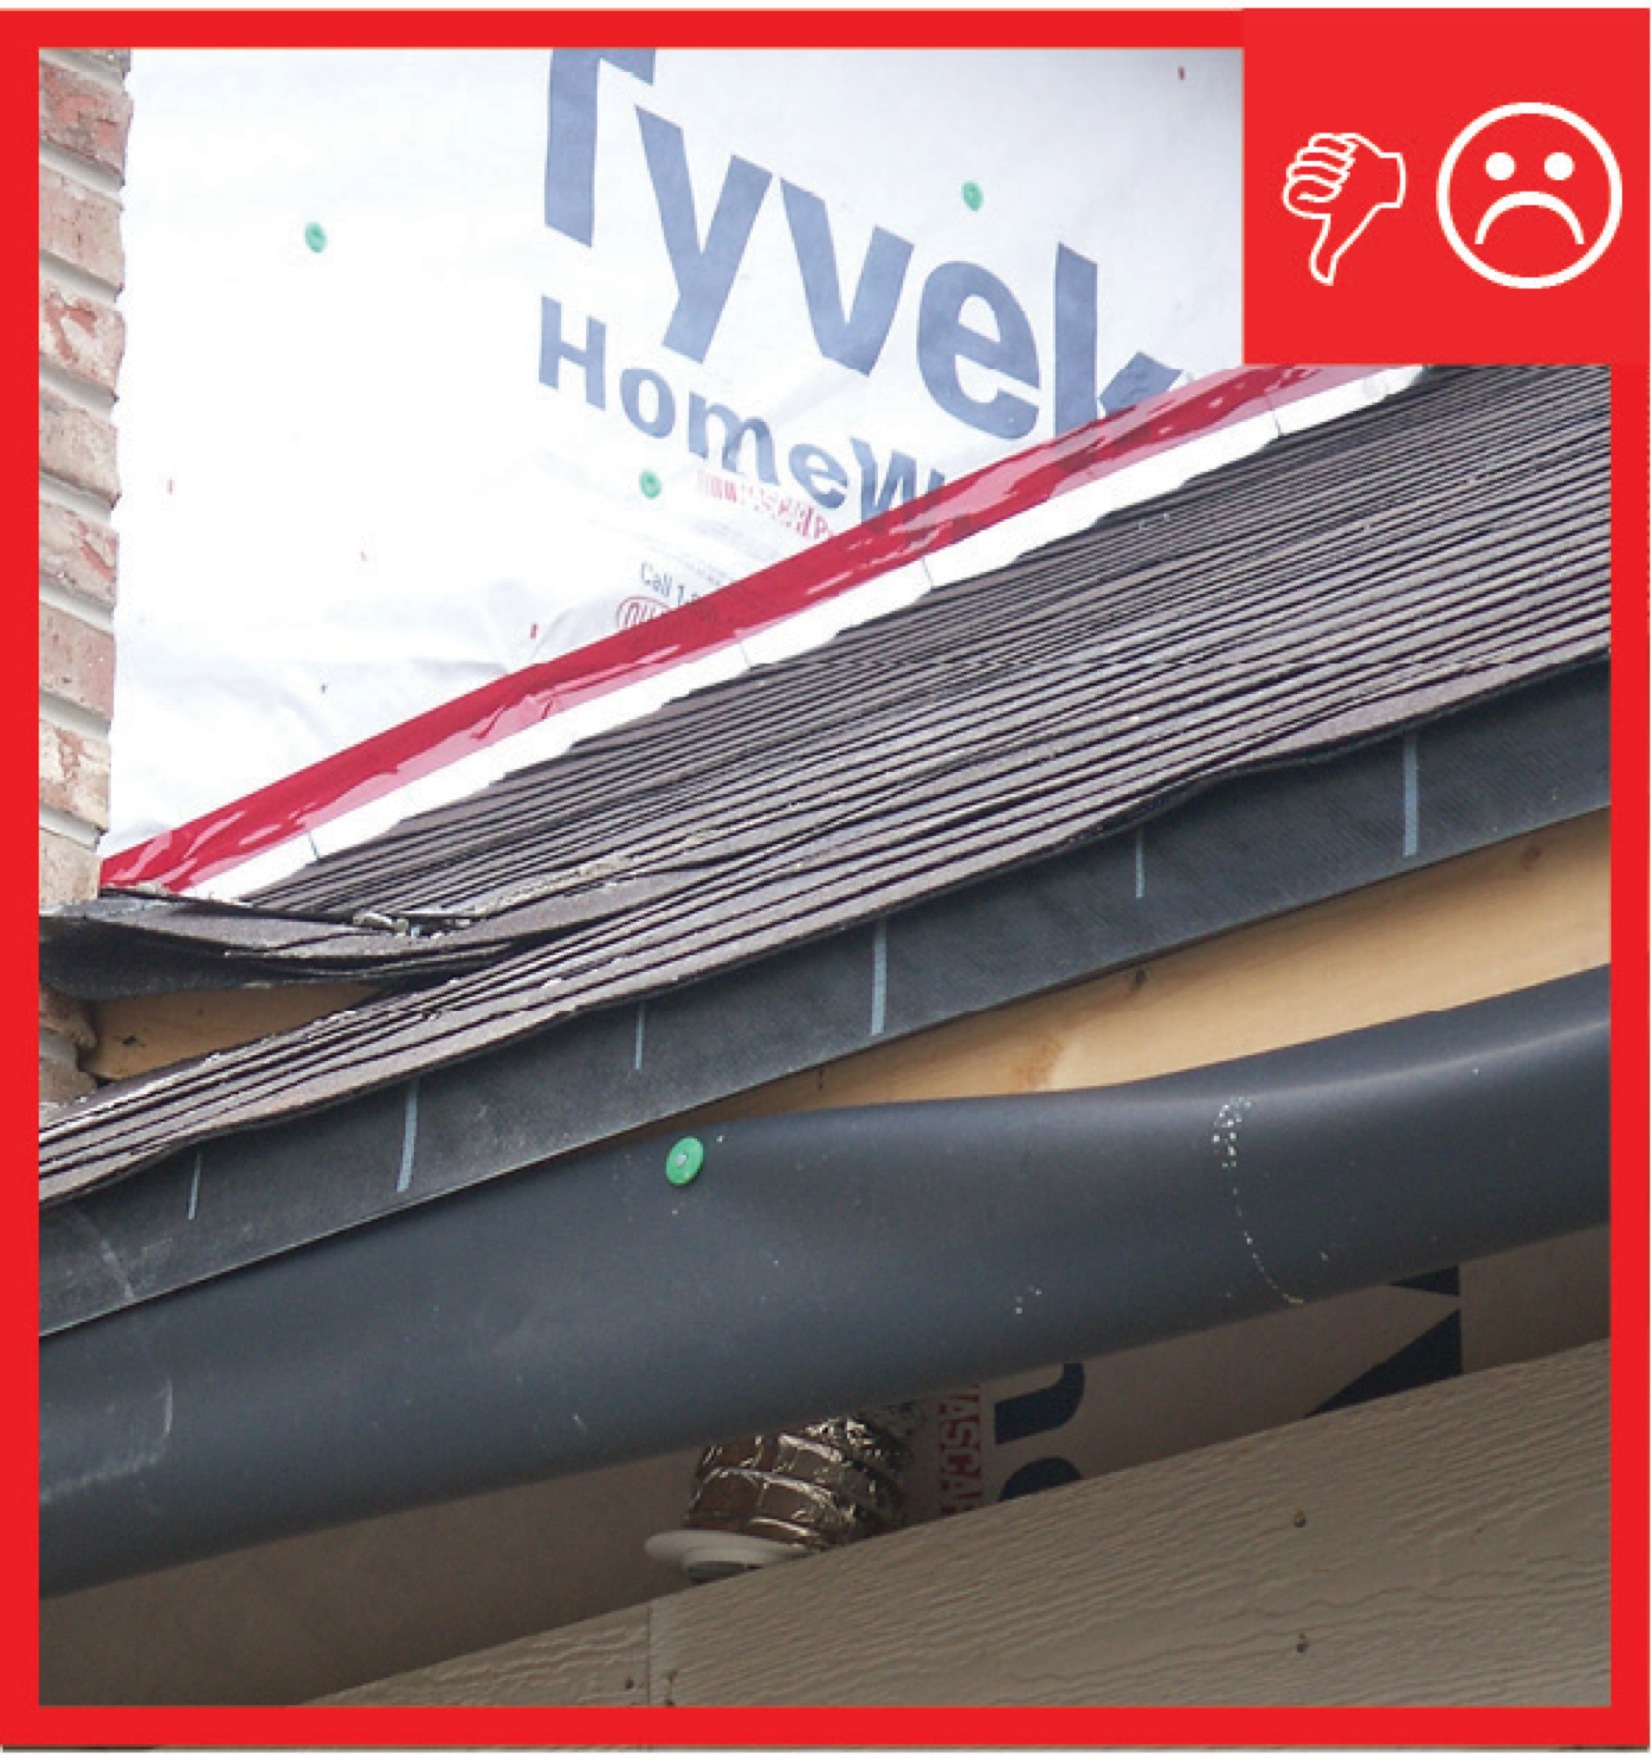
Wrong – the water-resistant barrier is layered underneath the step flashing, which could allow water to get behind the step flashing and into the wall.
Image
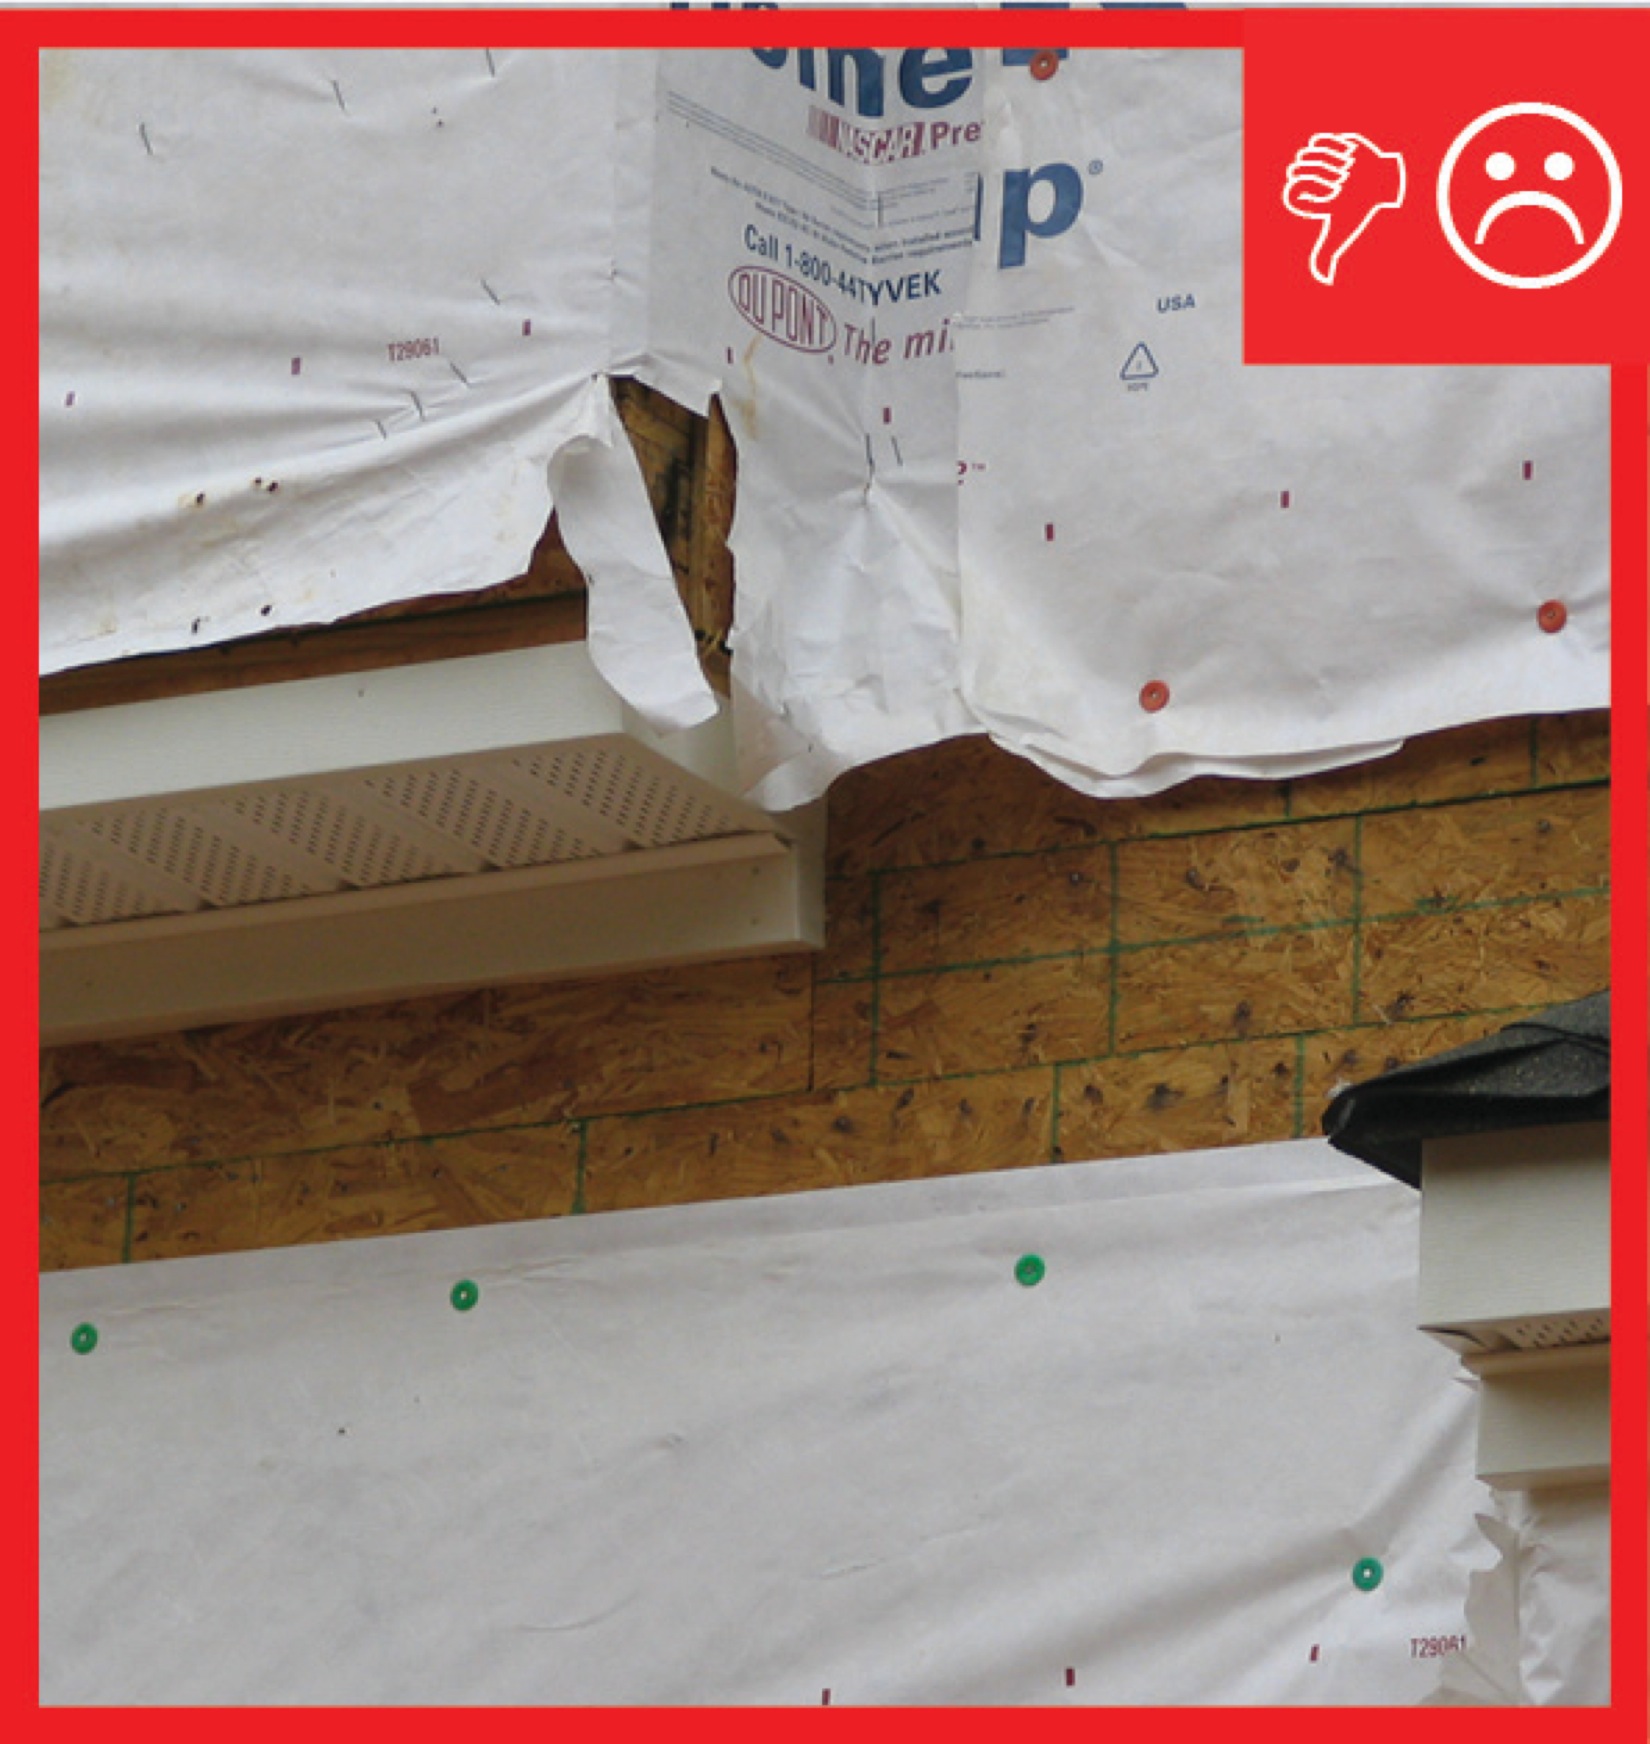
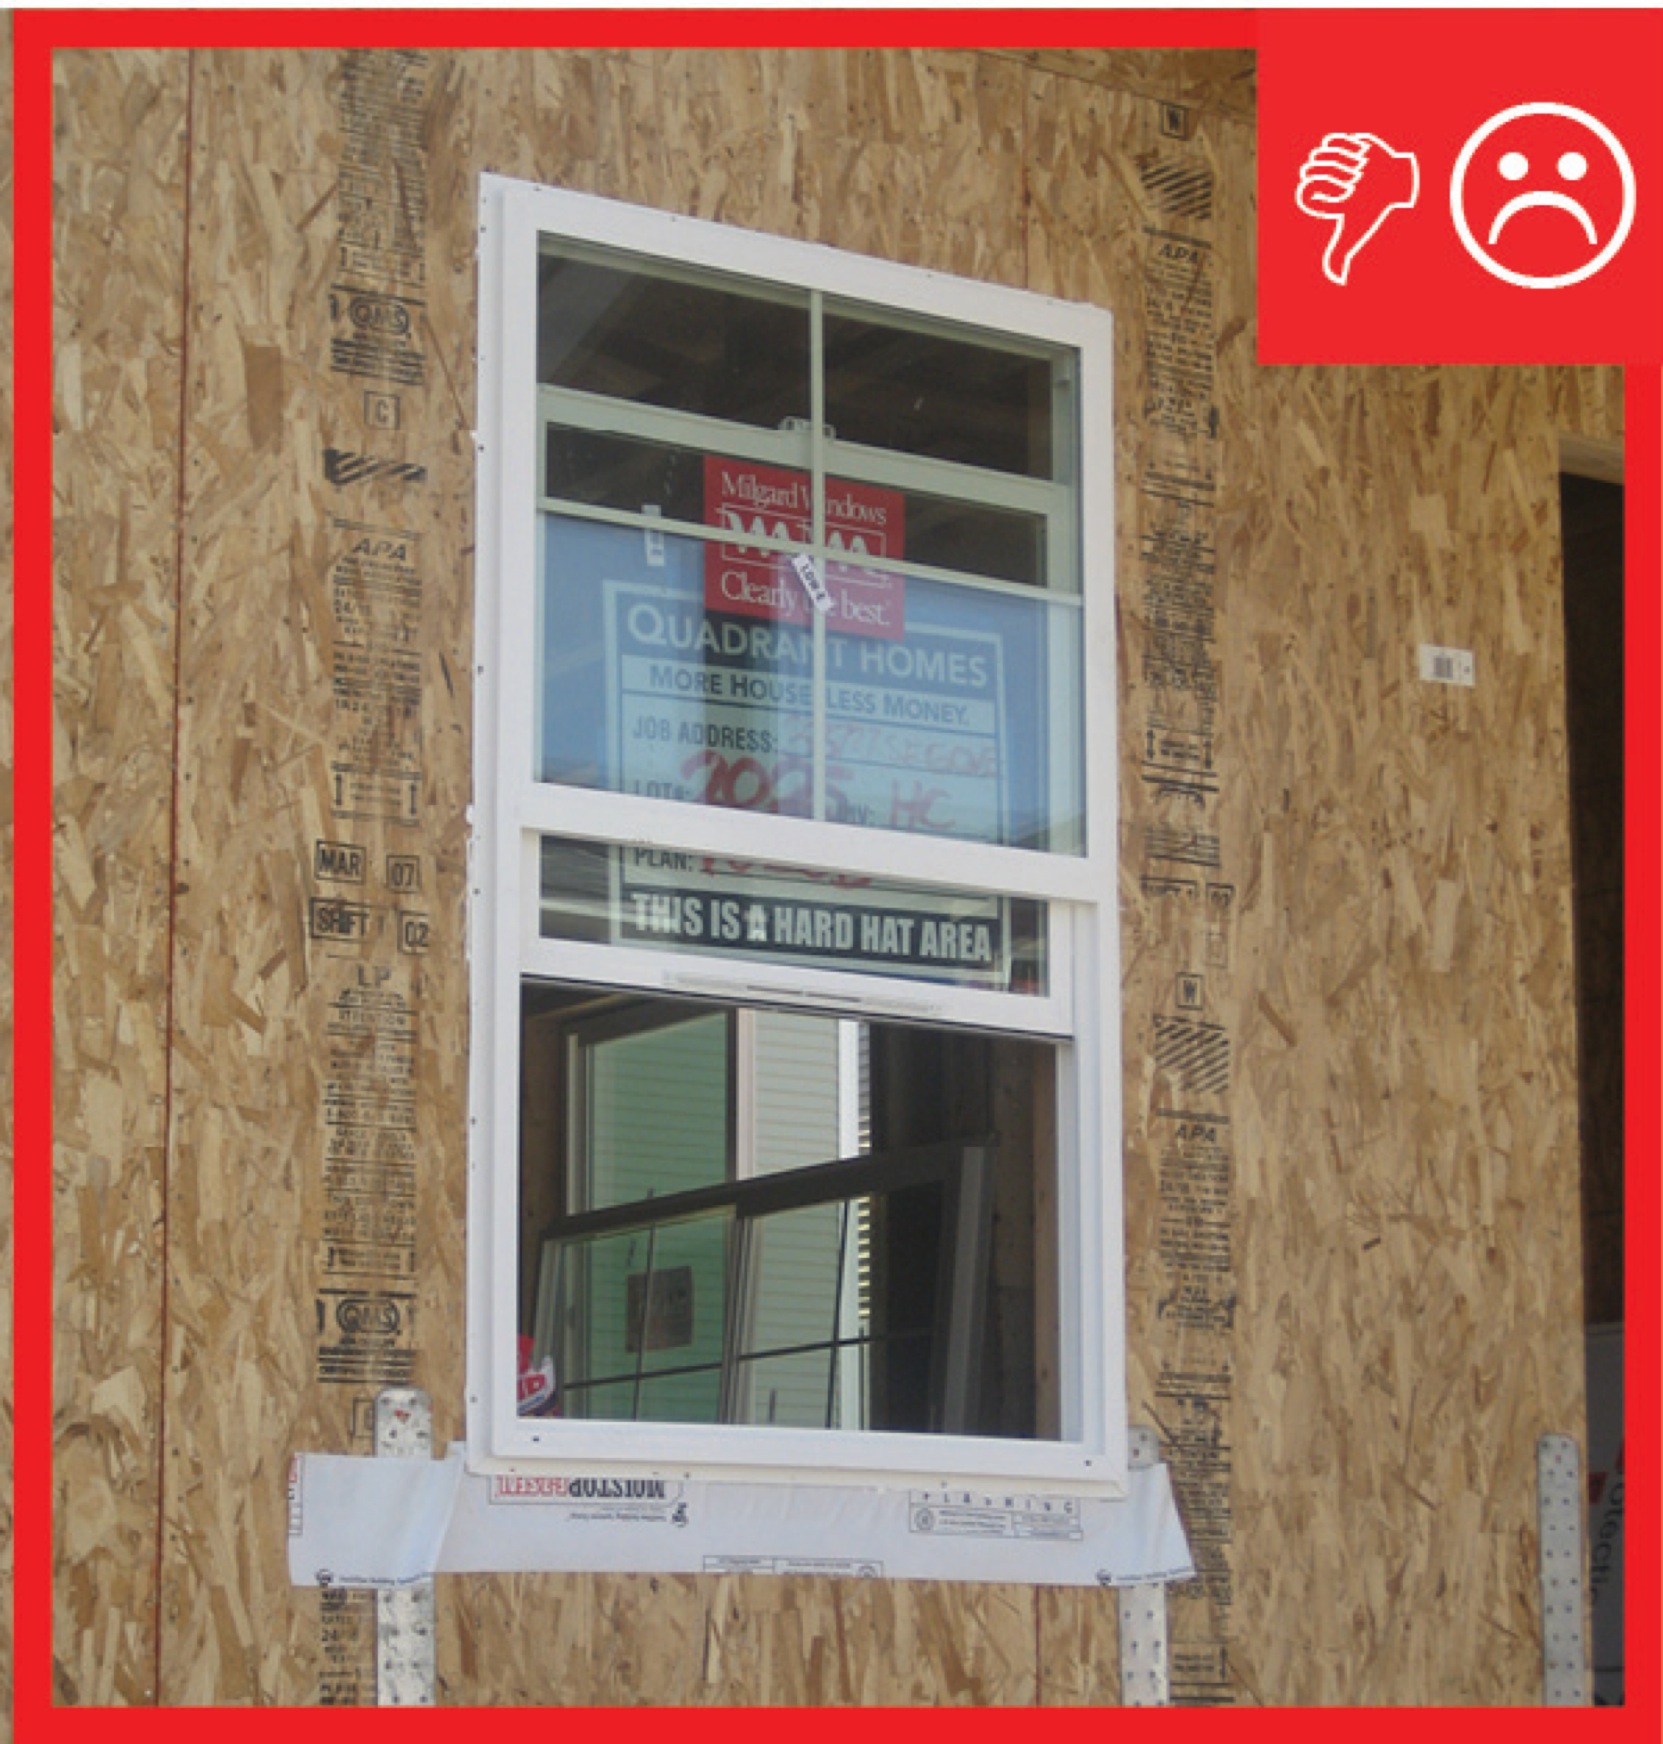
Wrong – The water-resistant barrier is not complete and the holes and gaps could cause moisture problems
Image

Image

Image
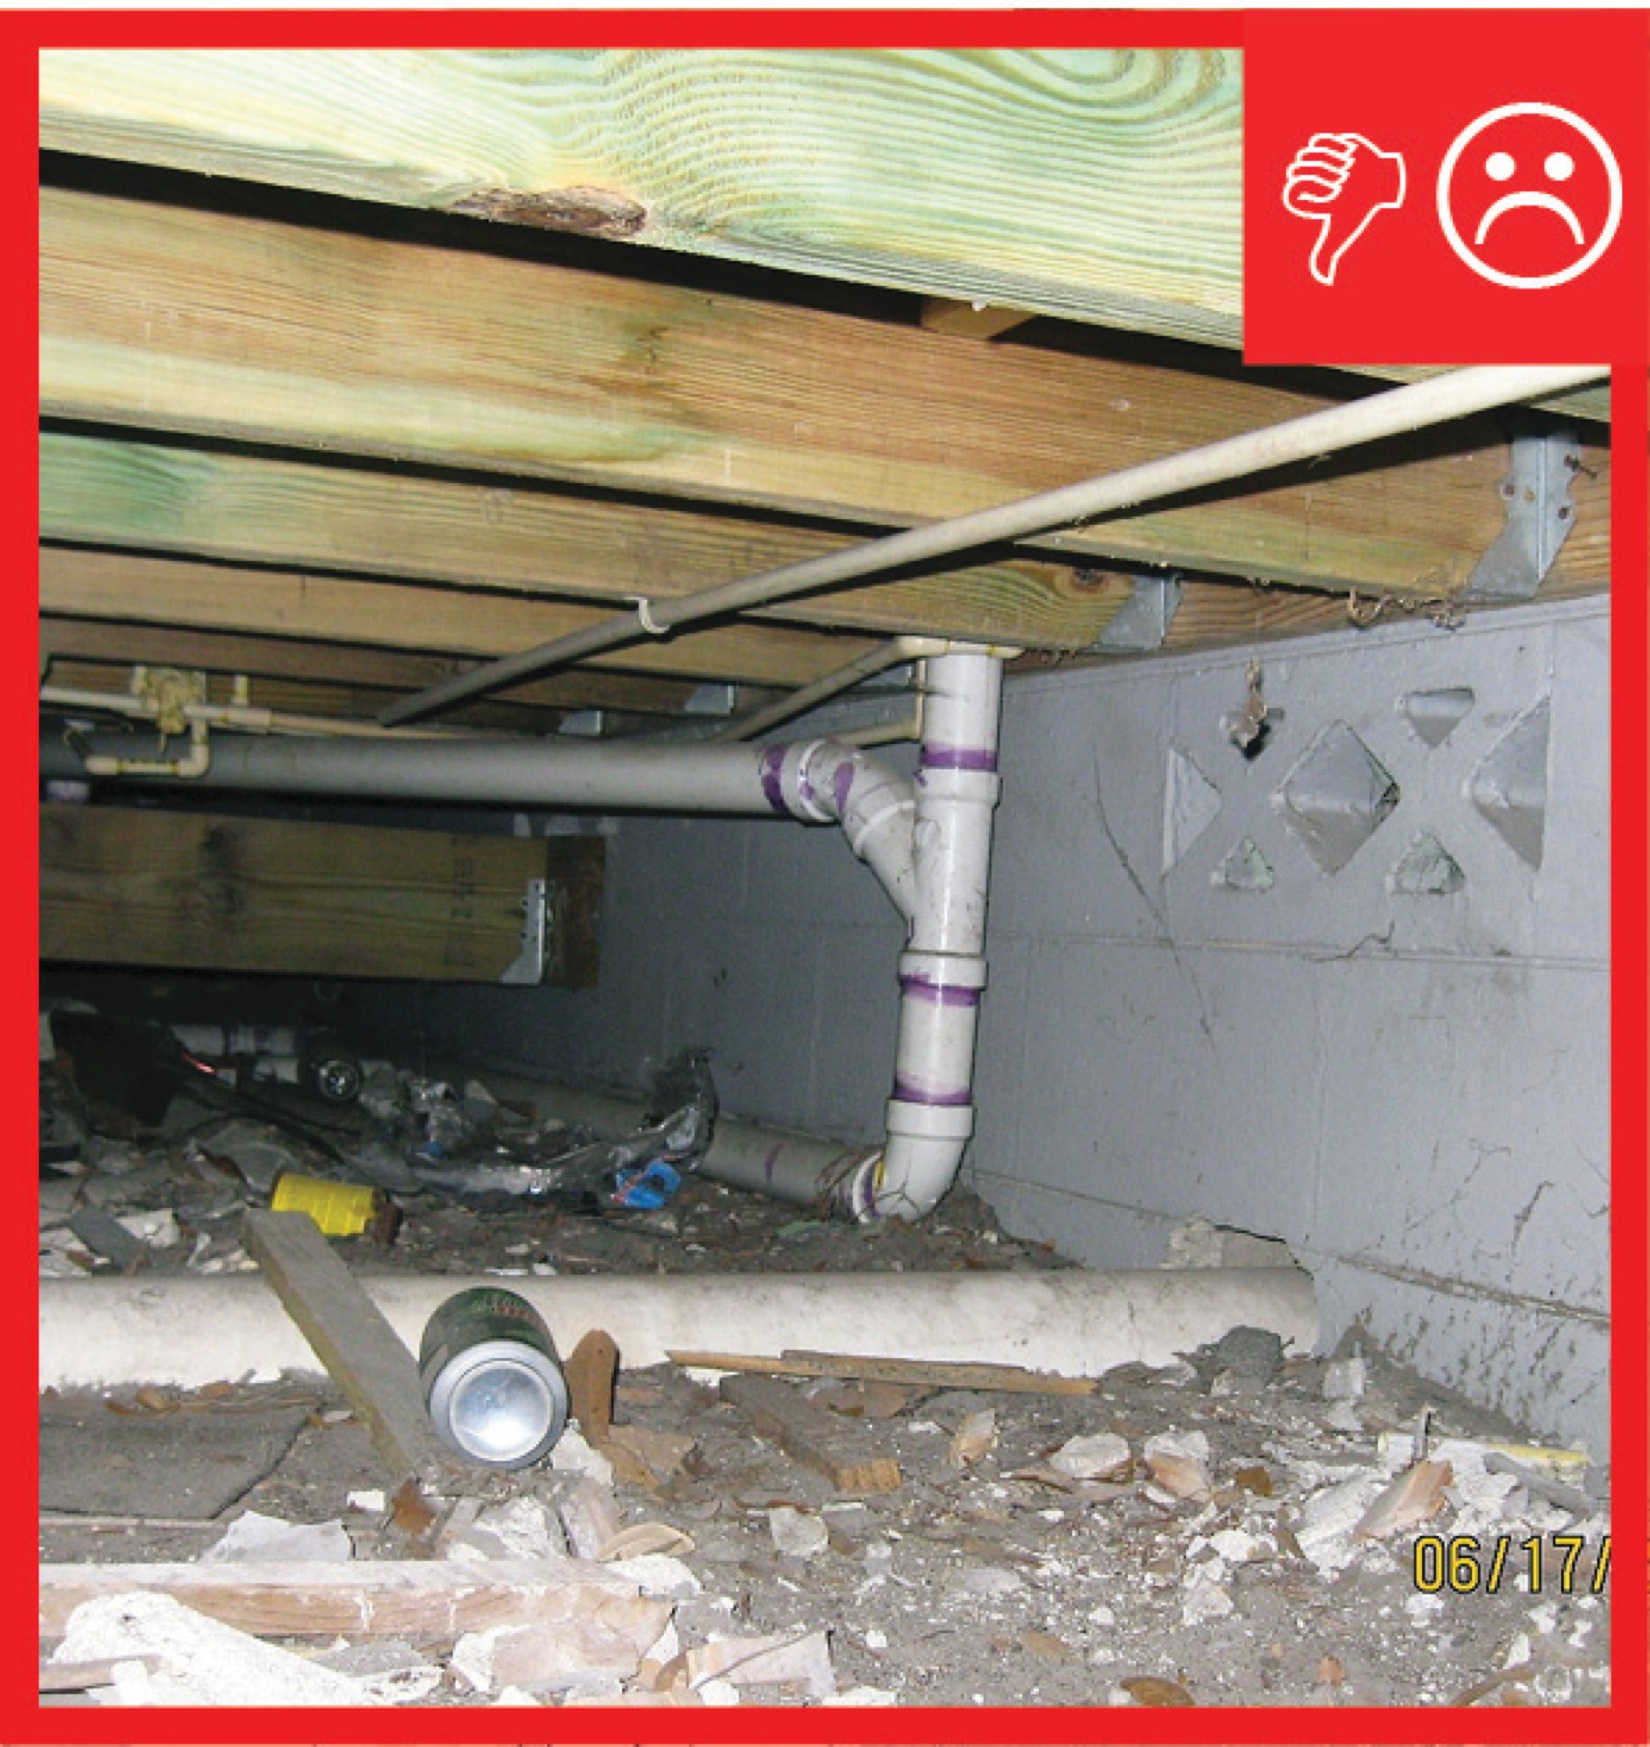
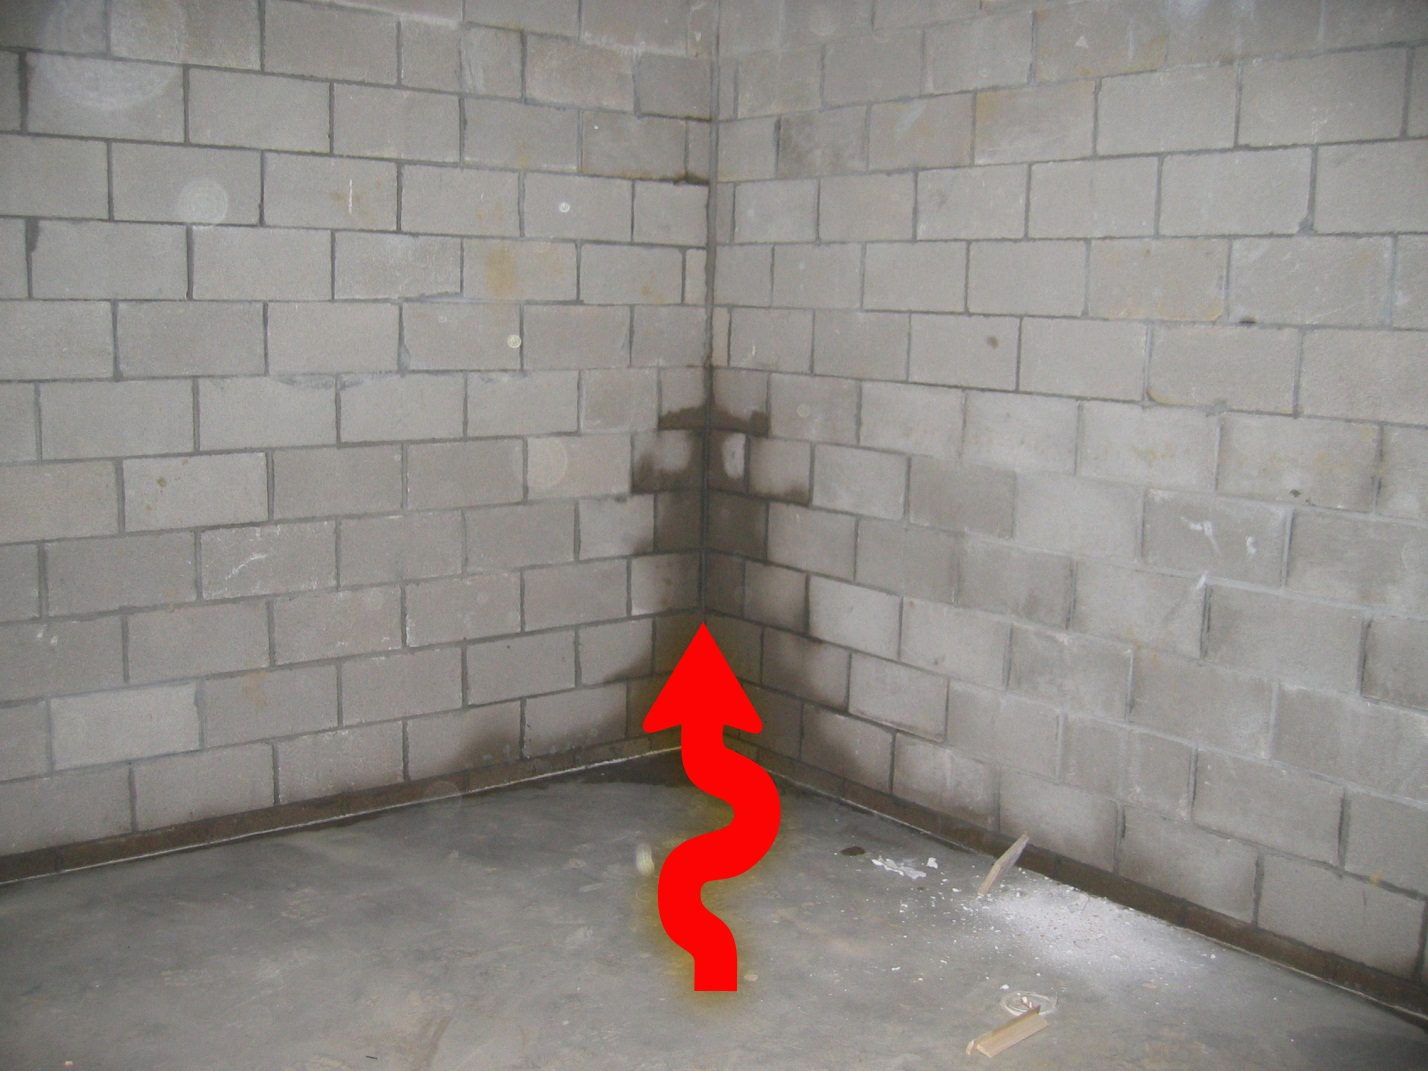
Wrong – There is no flashing installed at the bottom of the exterior walls to create a drainage system
Image
Wrong – There is no flashing installed at the bottom of the exterior walls to create a drainage system
Image
Image
Wrong – There is not a self-sealing bituminous membrane installed at the valley of the roof
Image
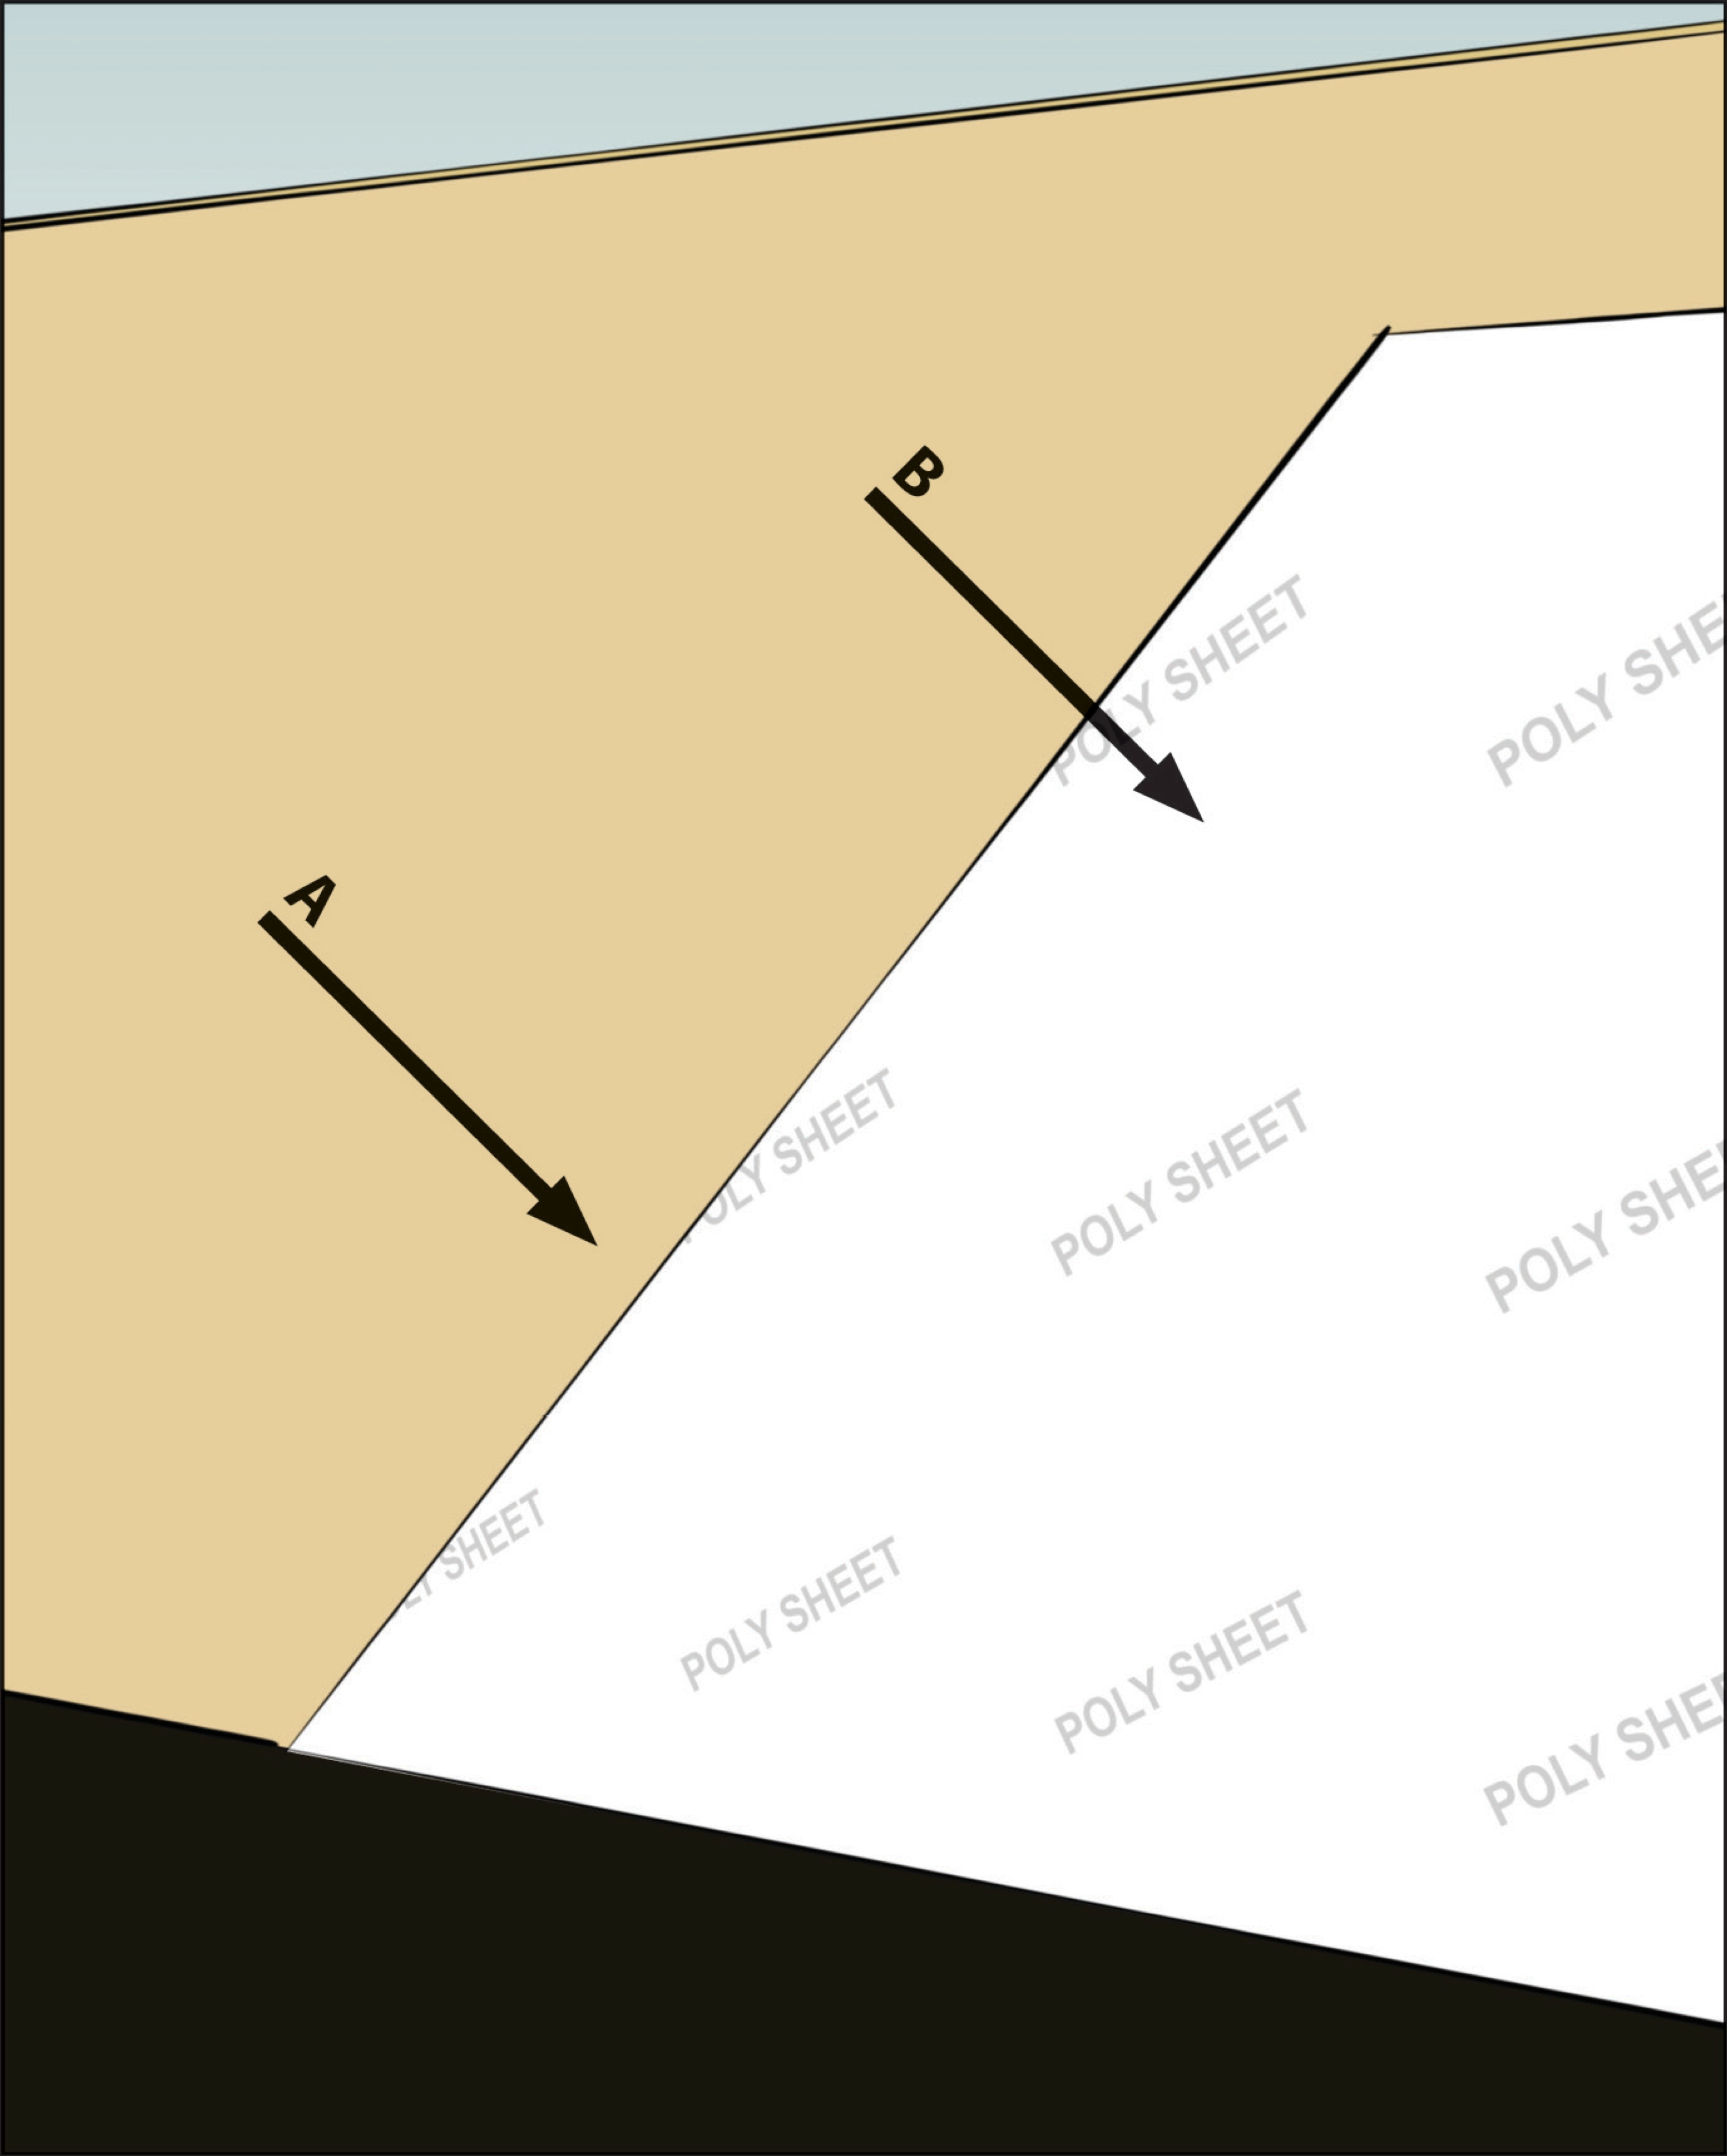
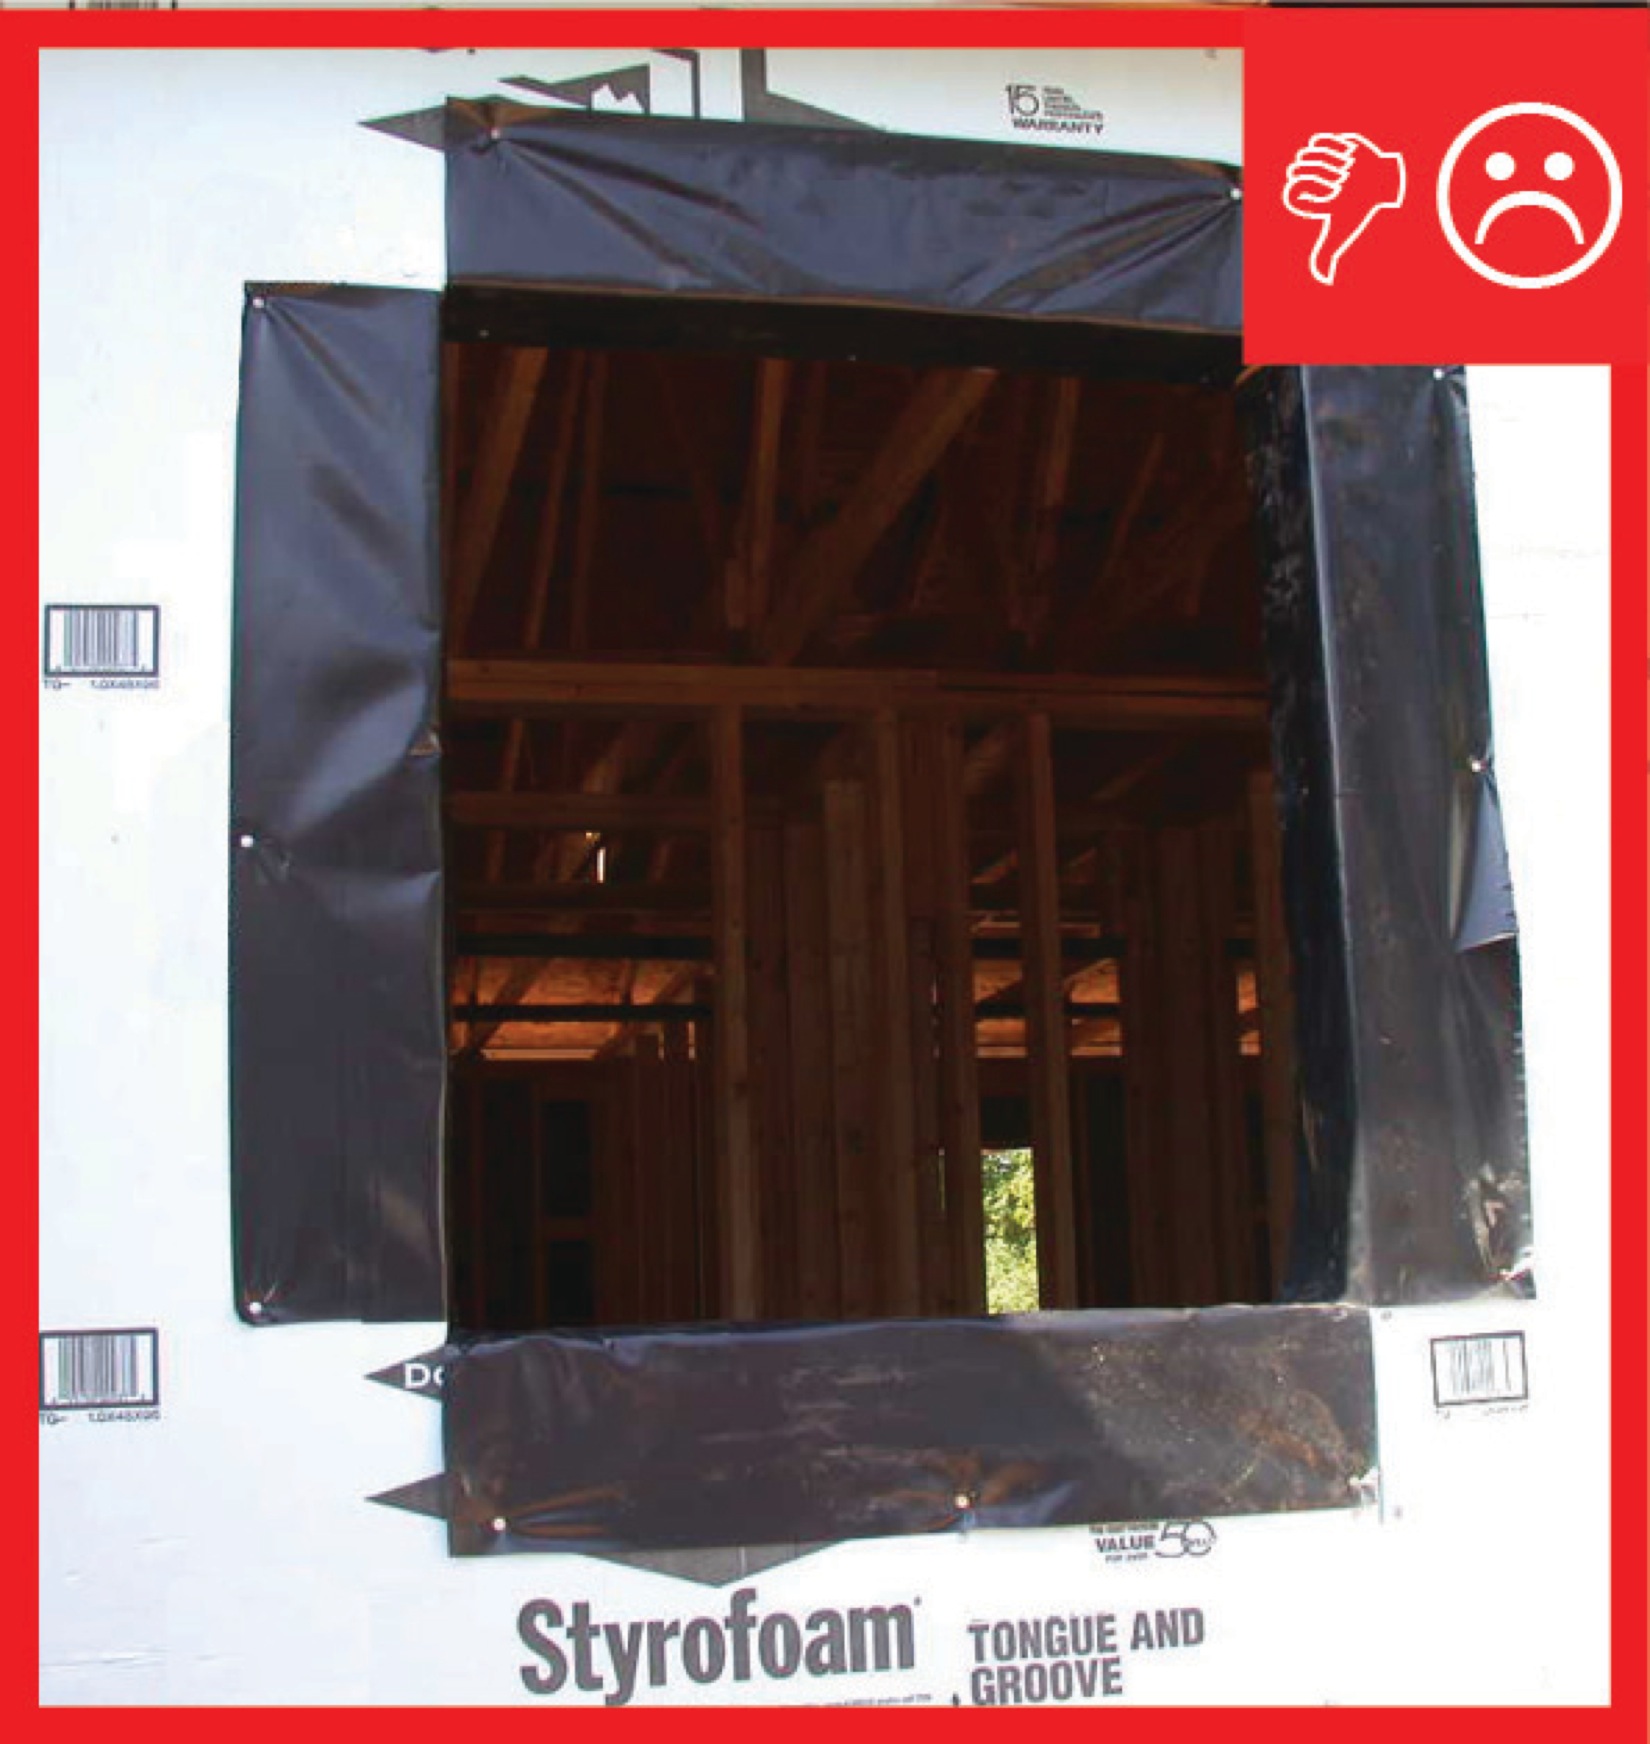
Wrong – There is not a water-resistant barrier installed underneath the exterior finish of the walls
Image
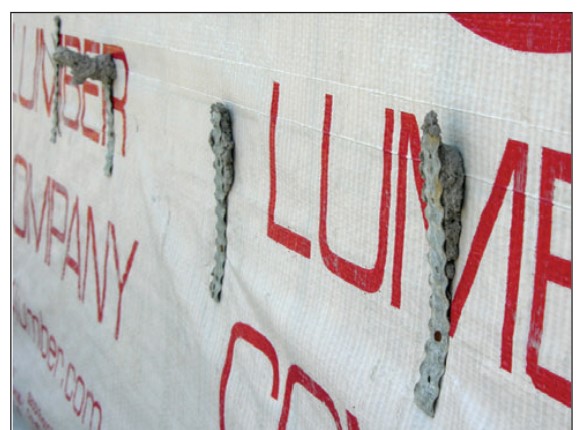
Wrong – These four ties were never embedded into the mortar joint, allowing the brick wall to be pulled away from the sheathing.
Image
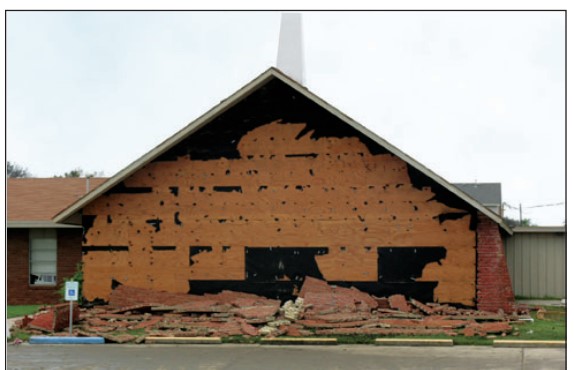
Wrong – This brick veneer failed in high winds (107 mph) because the ties pulled out of the substrate.
Image
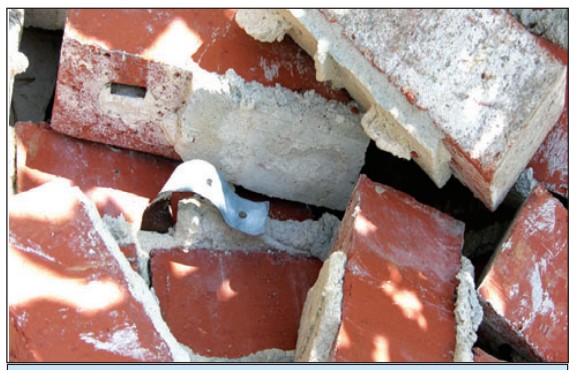
Wrong – This metal tie remained embedded in the mortar joint but the smooth-shank nail pulled out from the stud.