Showing results 1 - 50 of 77
Image
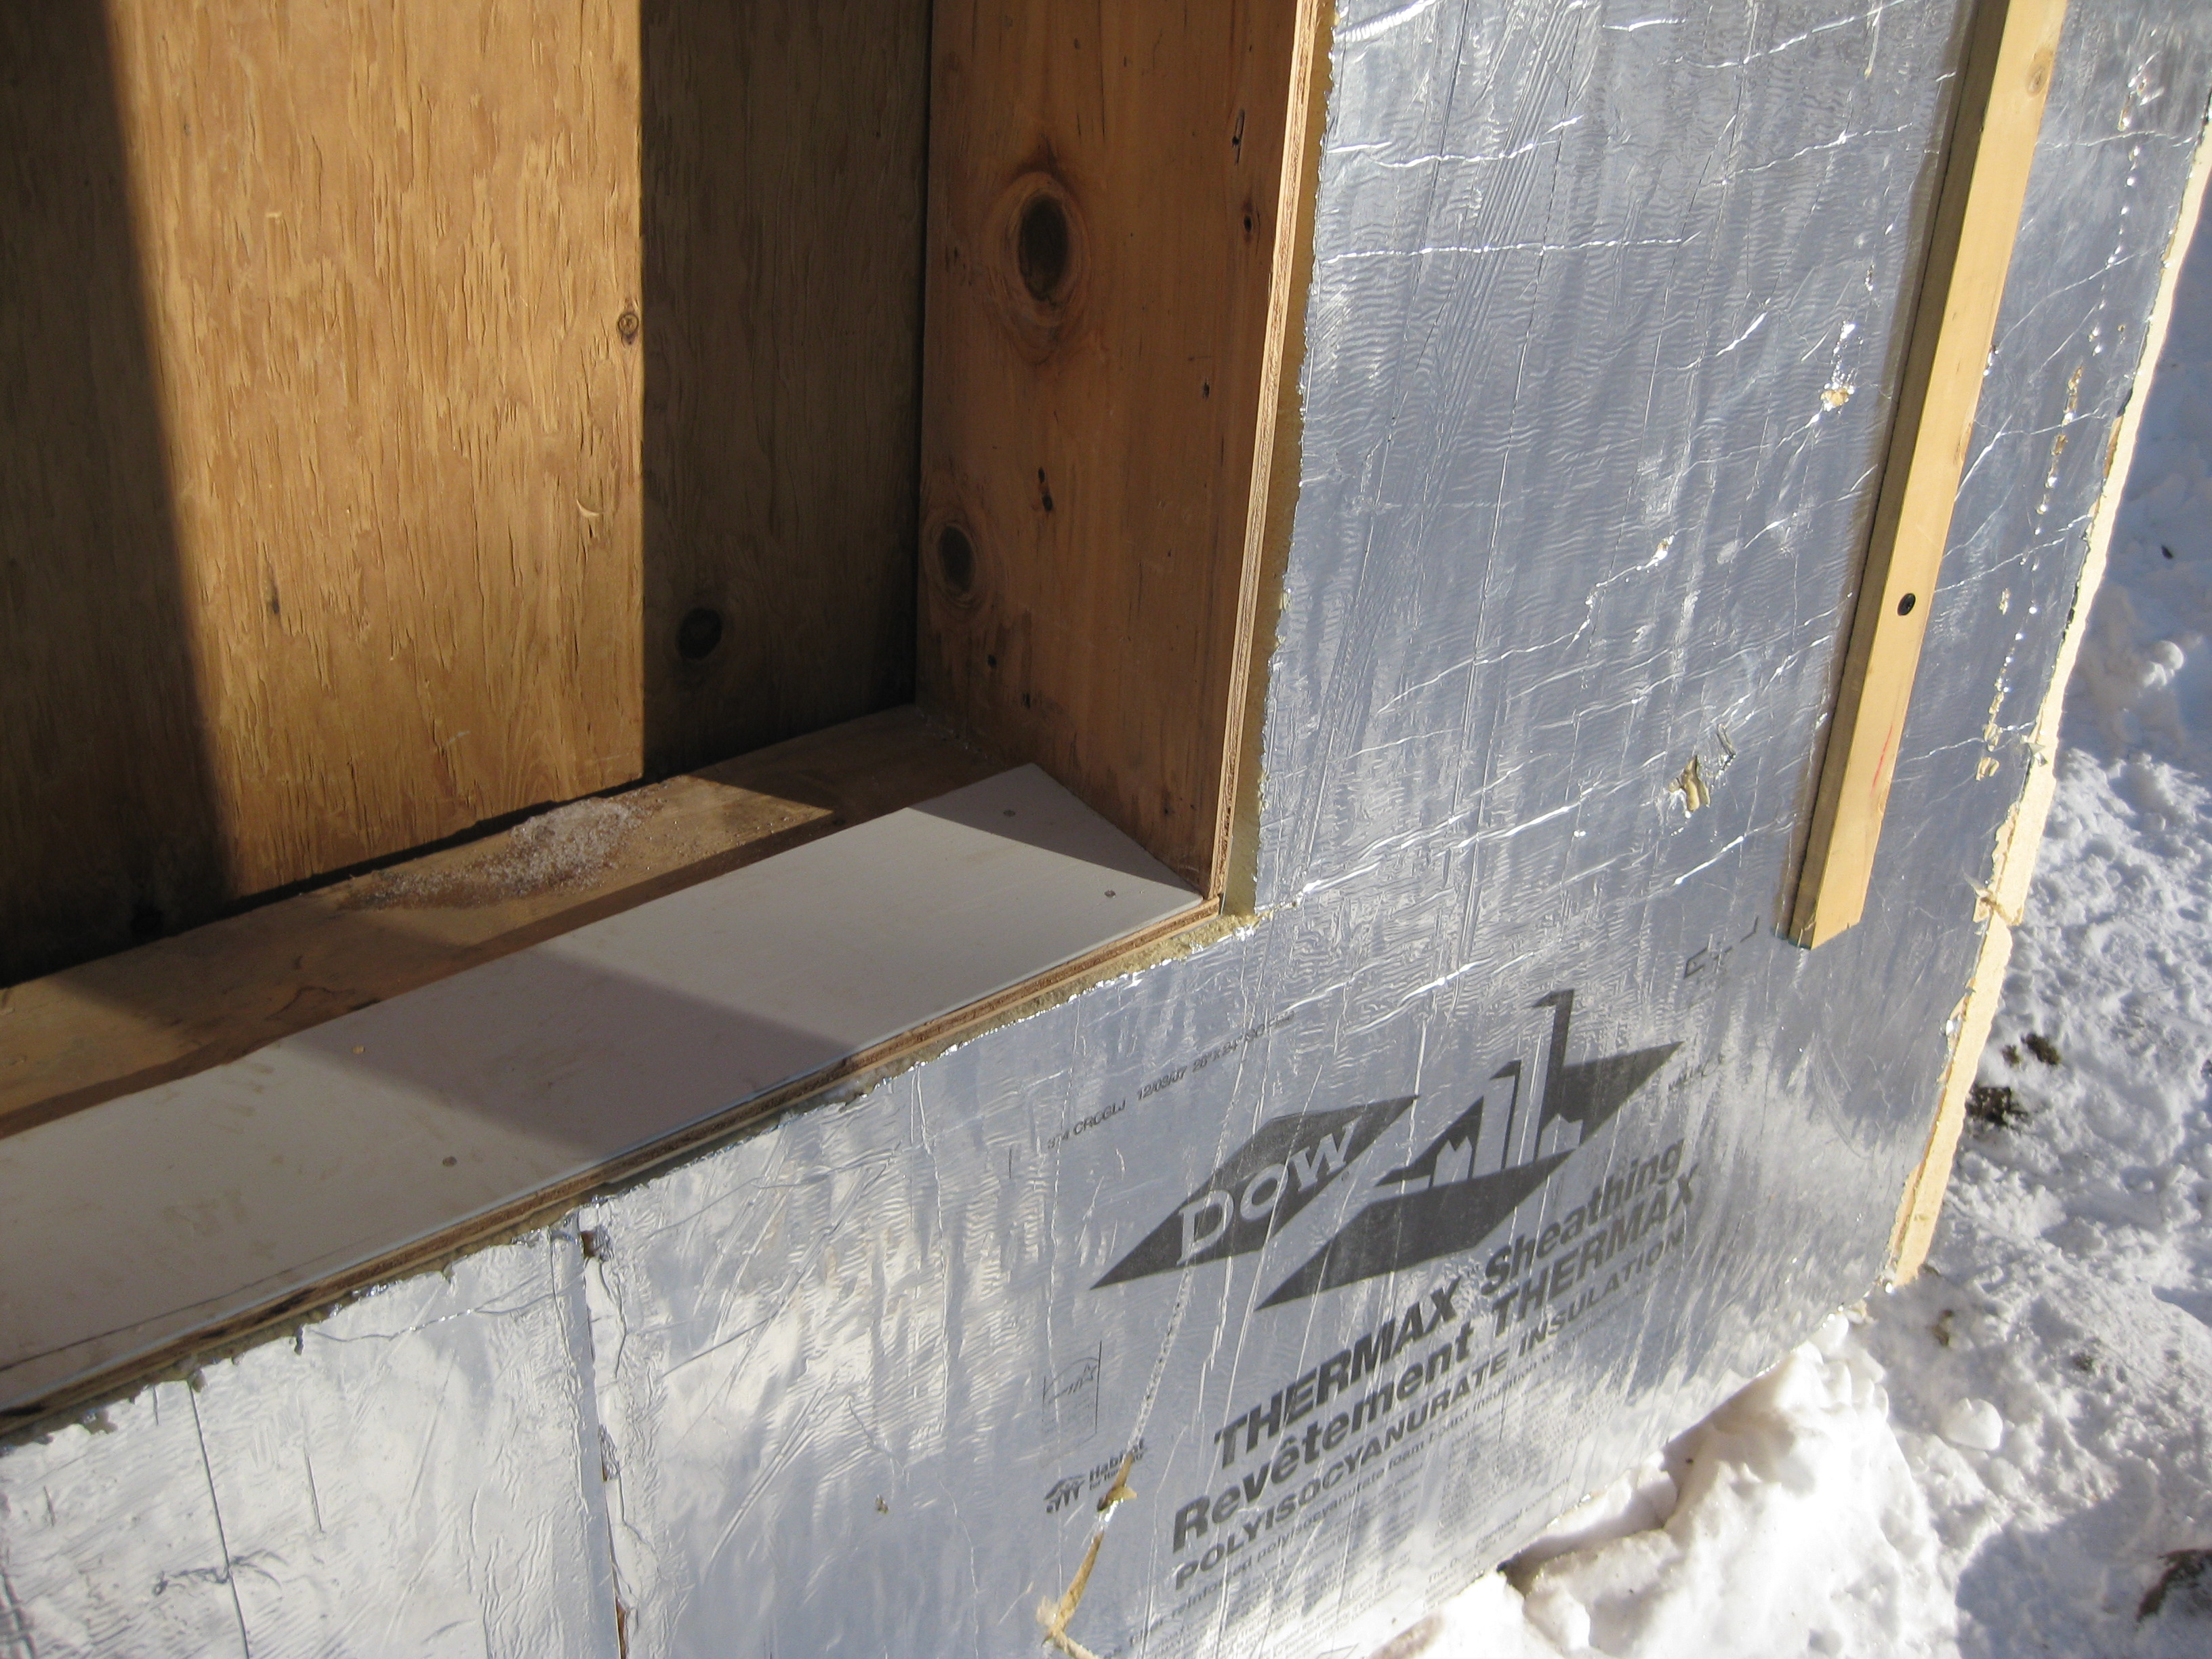
A piece of siding is used as sill extension and to provide slope in the opening for the window, which is deeper because exterior rigid foam has been added
Image
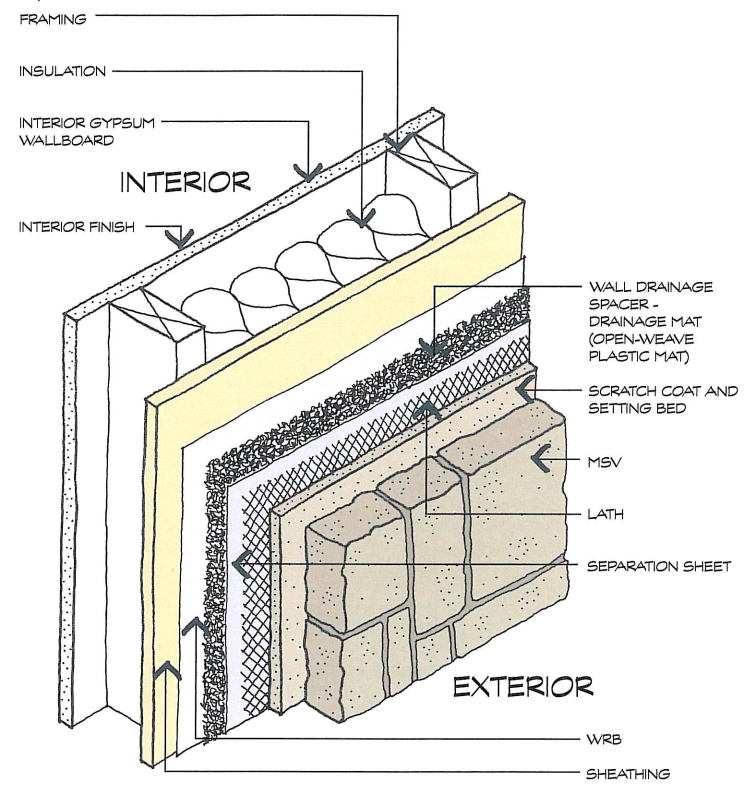
A plastic fiber drainage mat rainscreen provides uniform support for the siding and allows moisture to flow horizontally and diagonally in addition to vertically.
Image
Image
Image
Apply self-adhesive flashing over top edge of the wall flashing, diverter, and housewrap
Image
Image
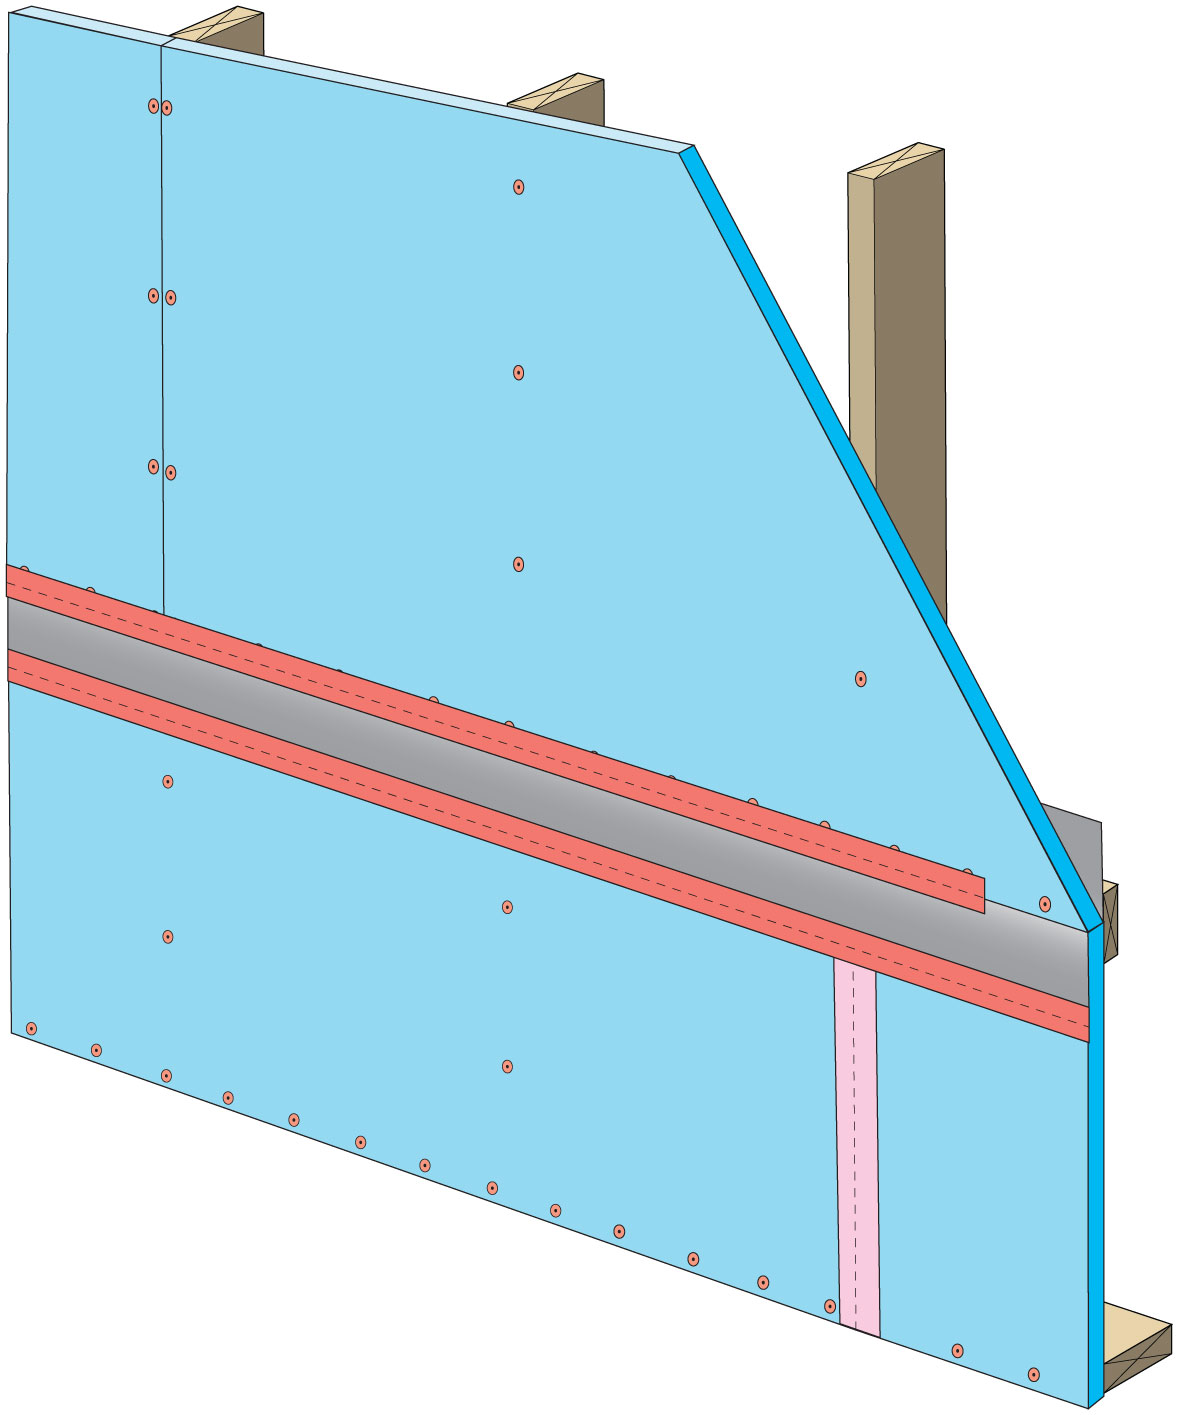
Clean taping areas and install 3" tape on vertical joint of upper insulation overlapping the horizontal joint
Image
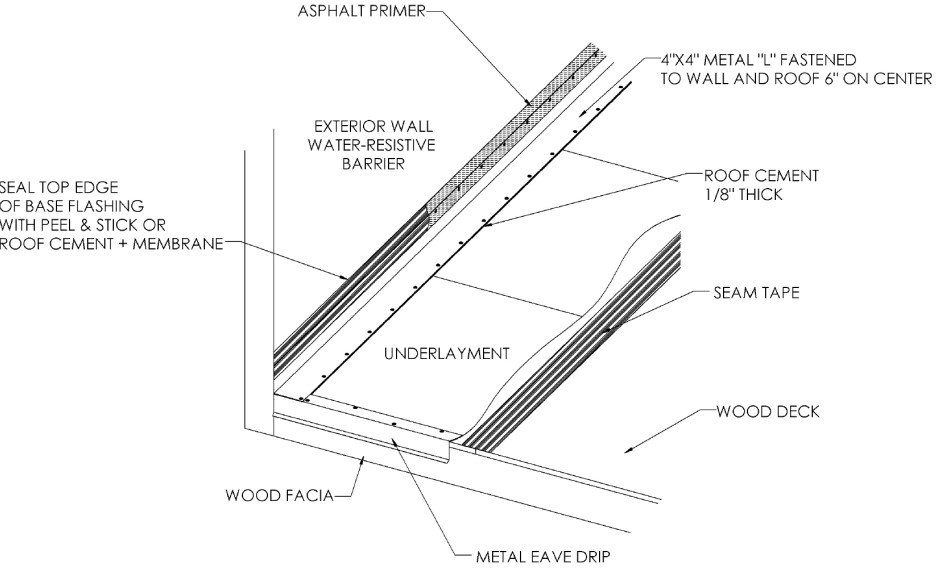
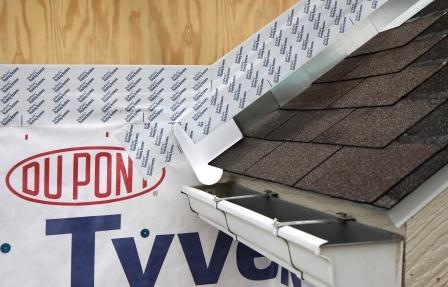
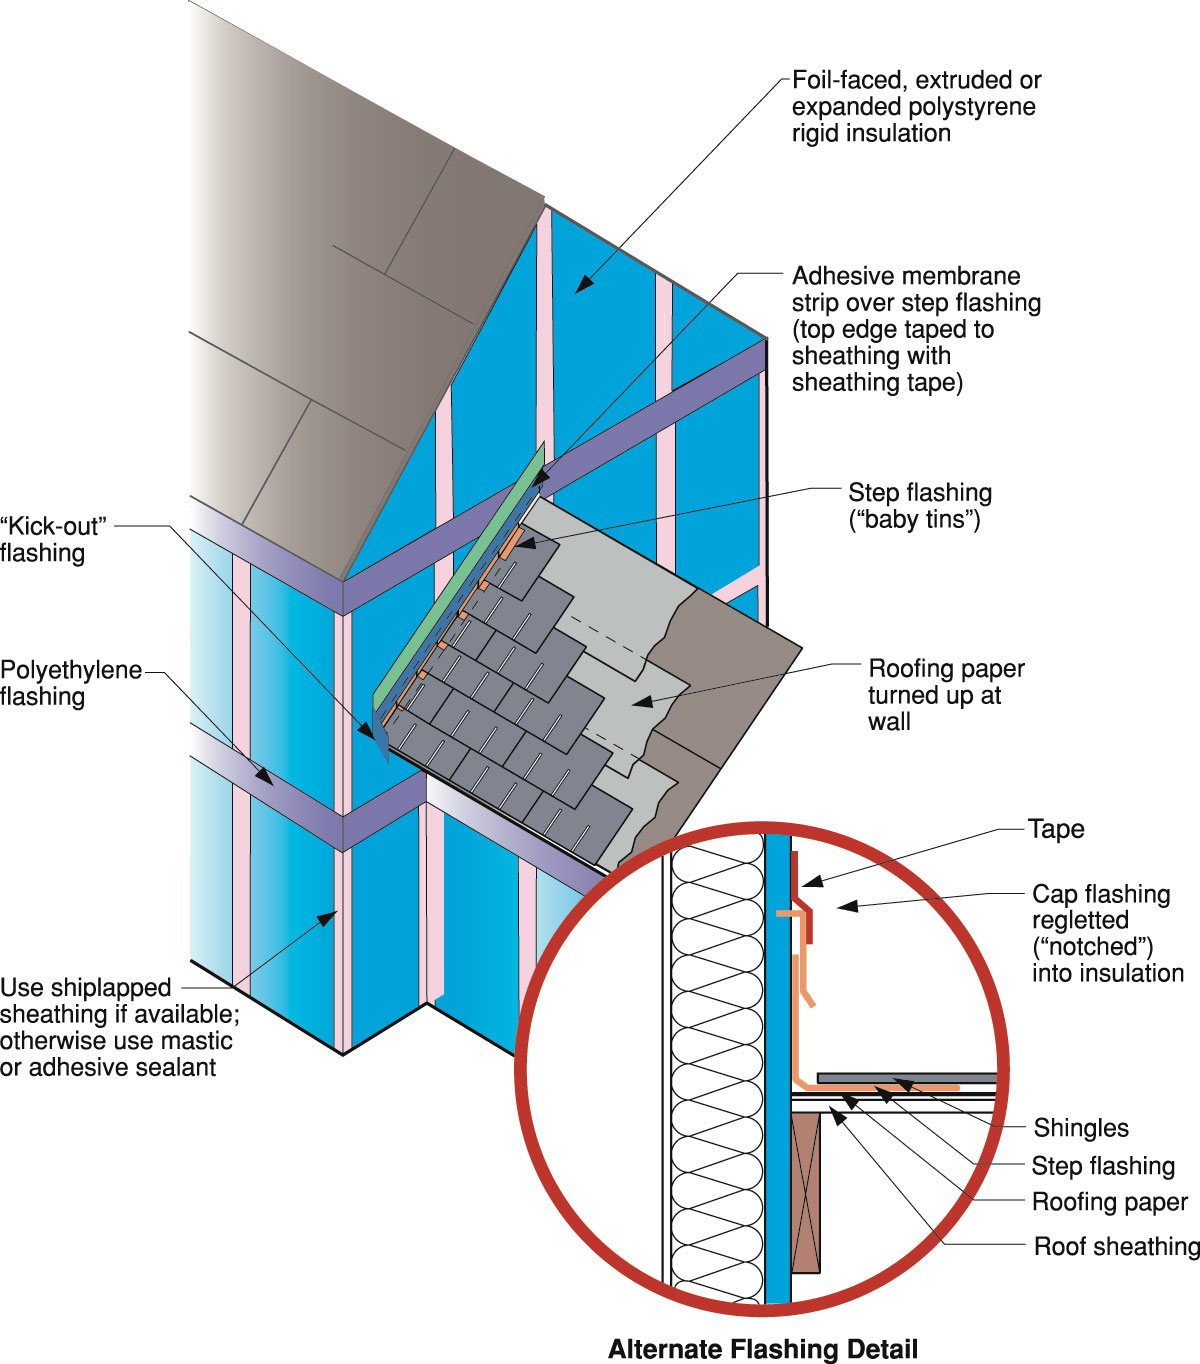
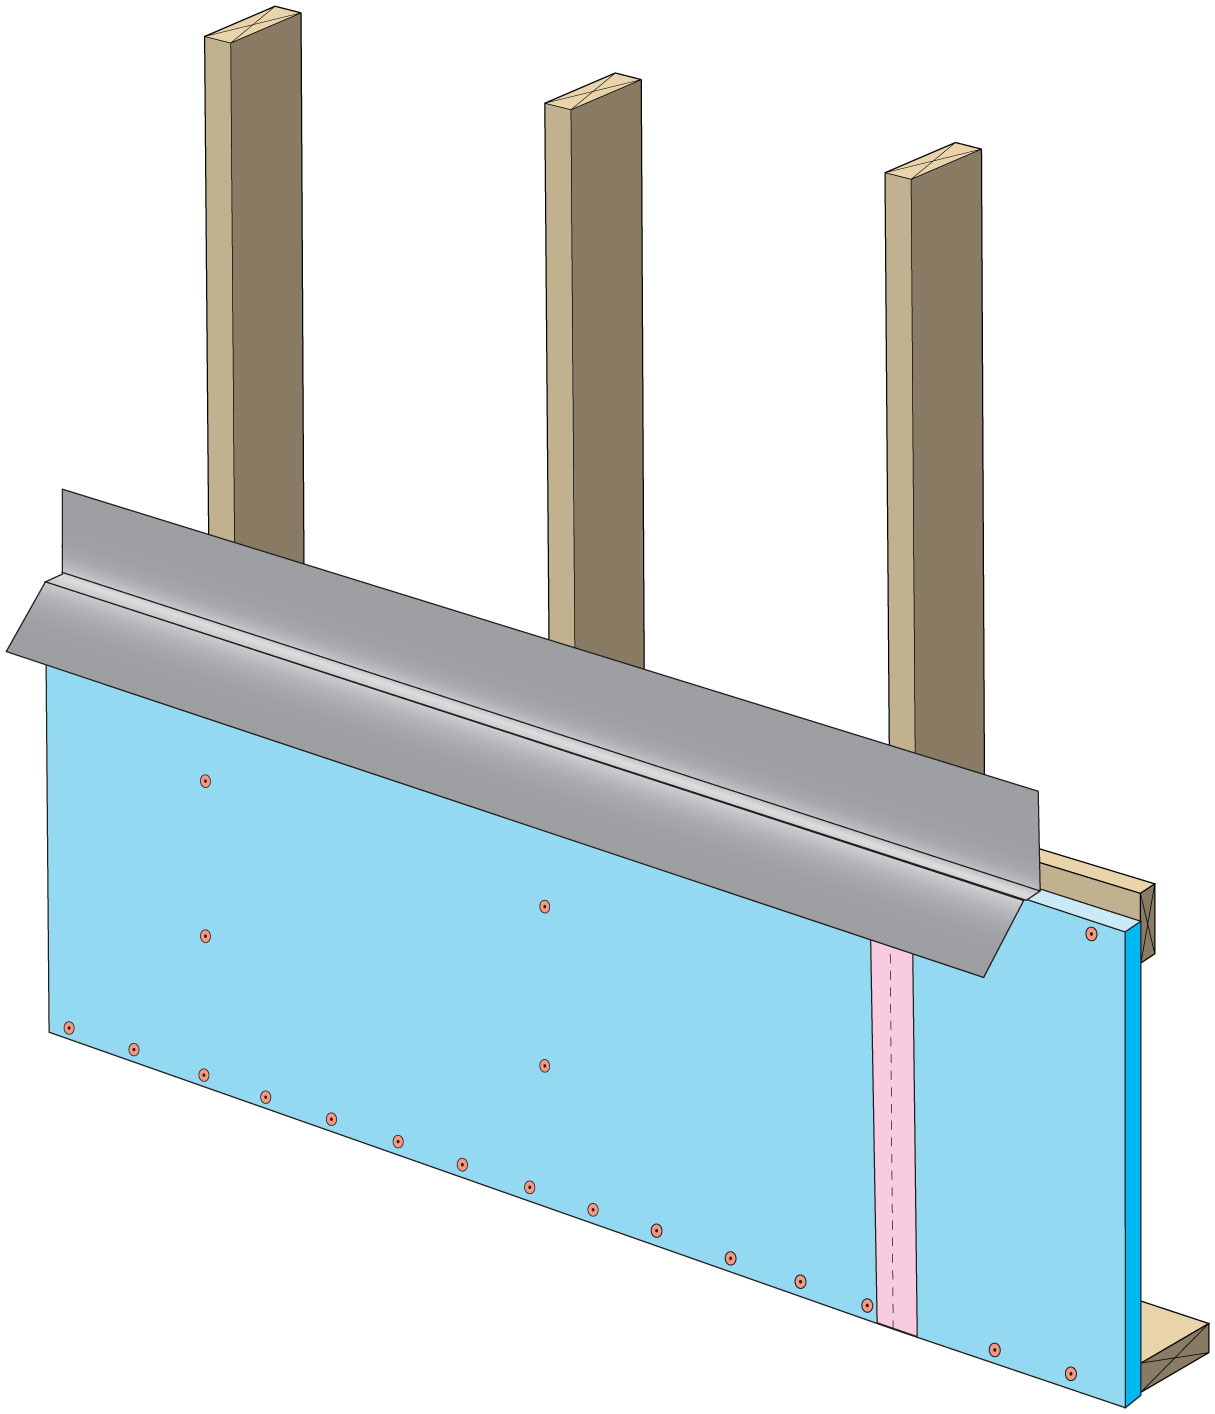
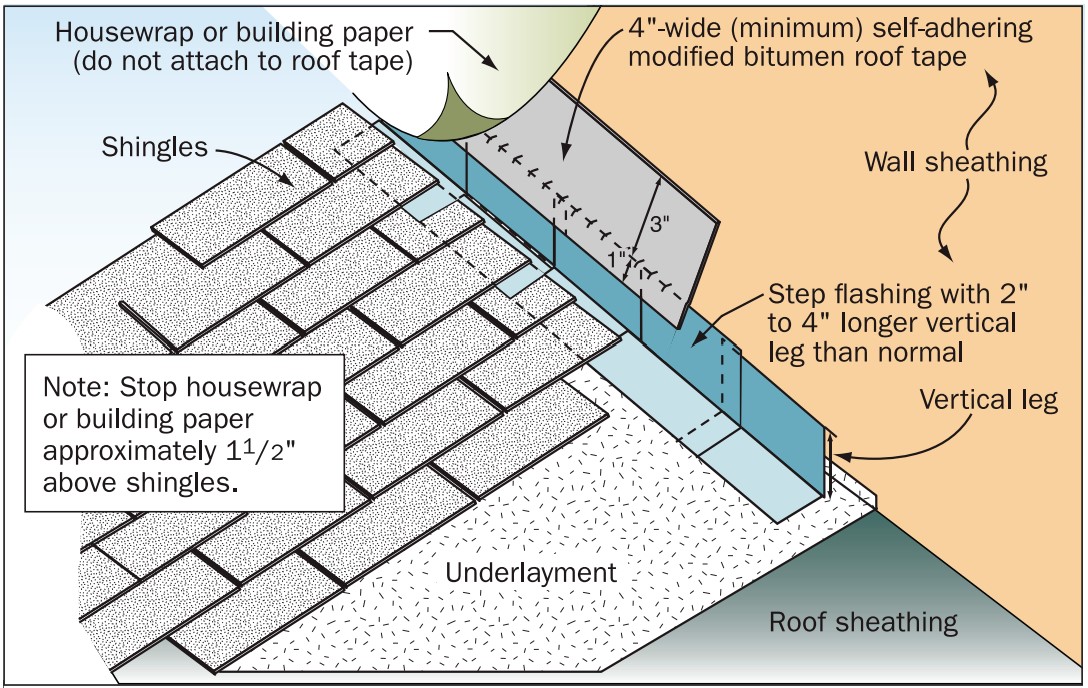
Continuous L-metal flashing integrated with underlayment at roof-wall intersections
Image
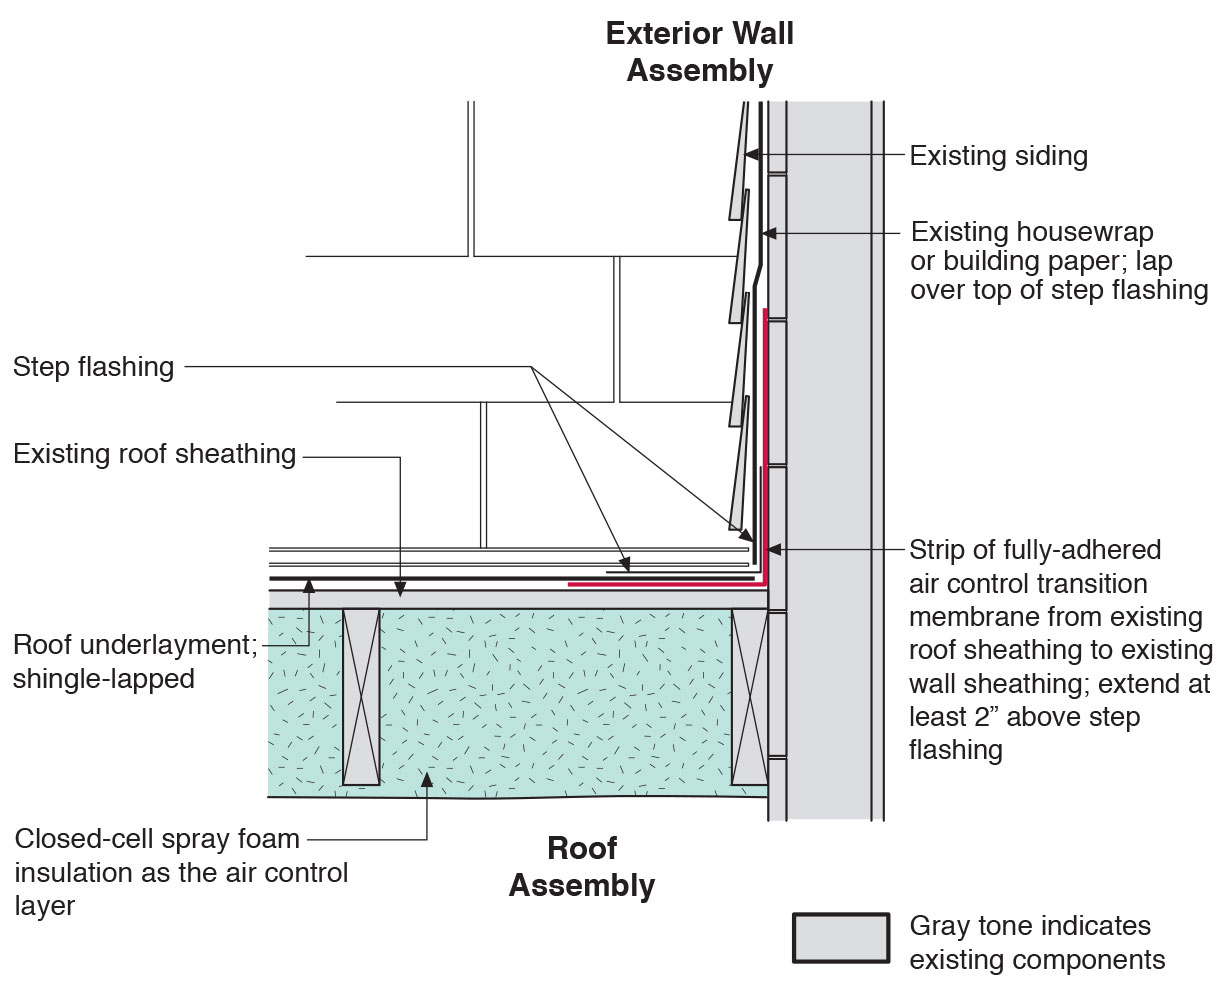
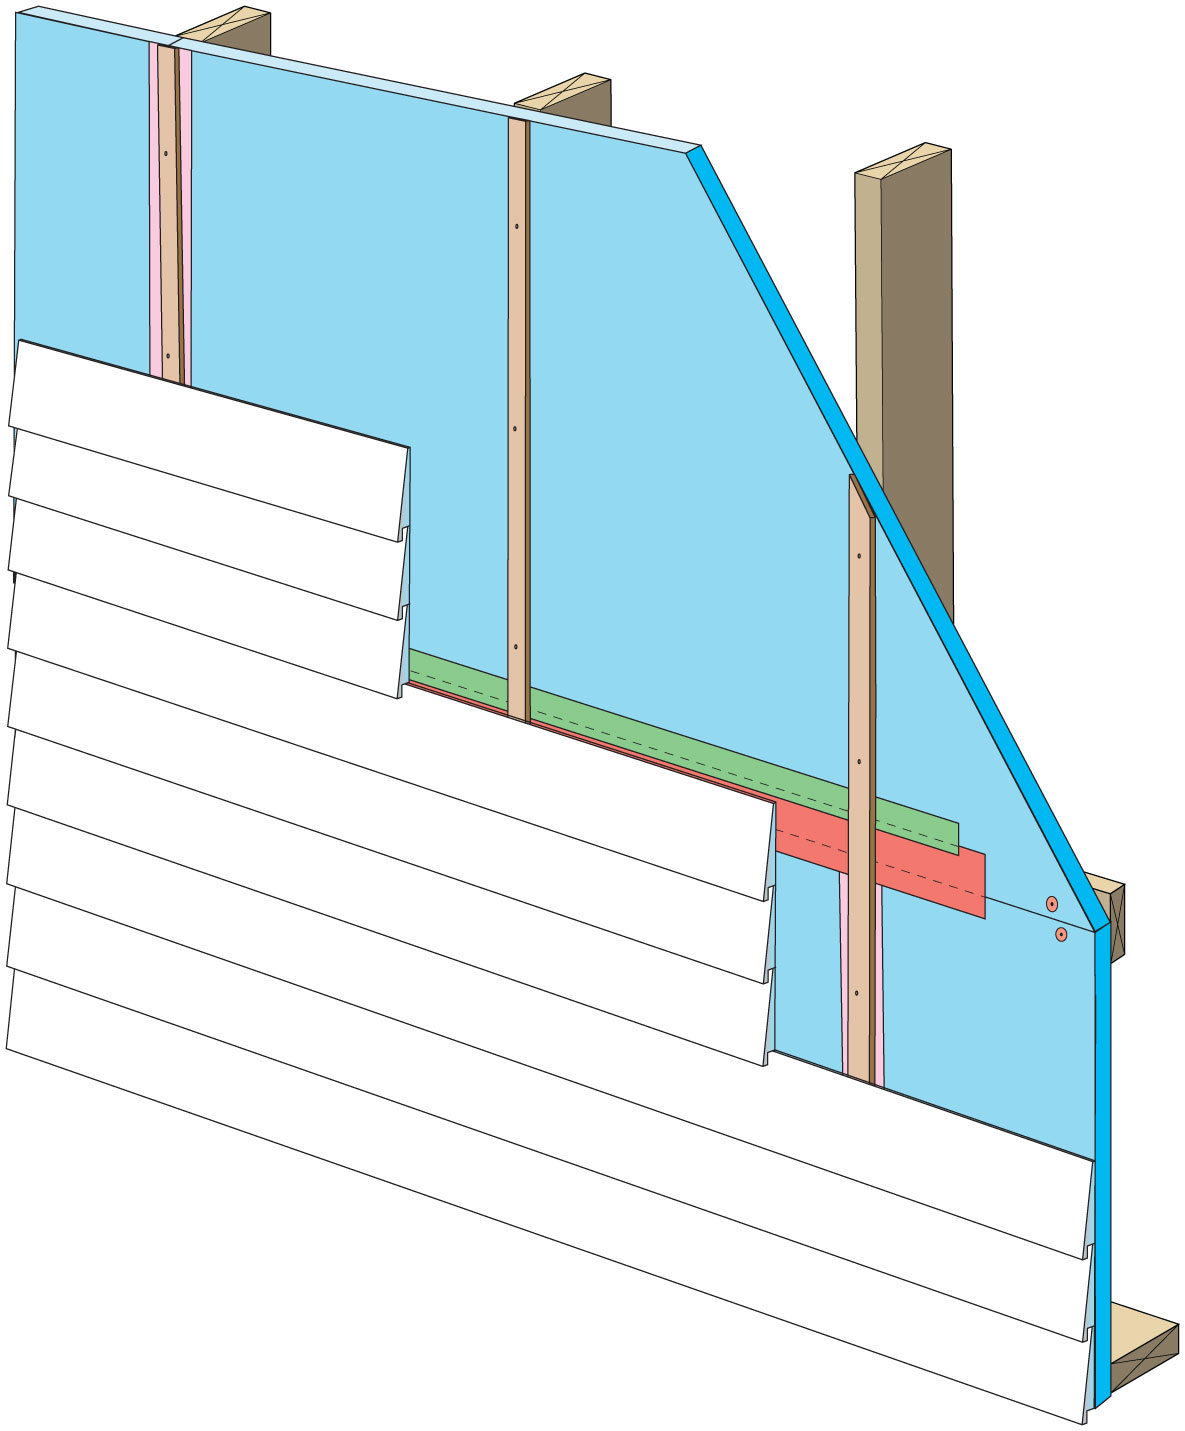
Existing wall-to-lower roof transition retrofitted with a new strip of fully adhered air control transition membrane, new step flashing, new roof underlayment, and new cladding
Image
Existing wall-to-lower roof transition with a new strip of fully adhered air control transition membrane, new step flashing, new roof underlayment, and new cladding – view from eave
Image
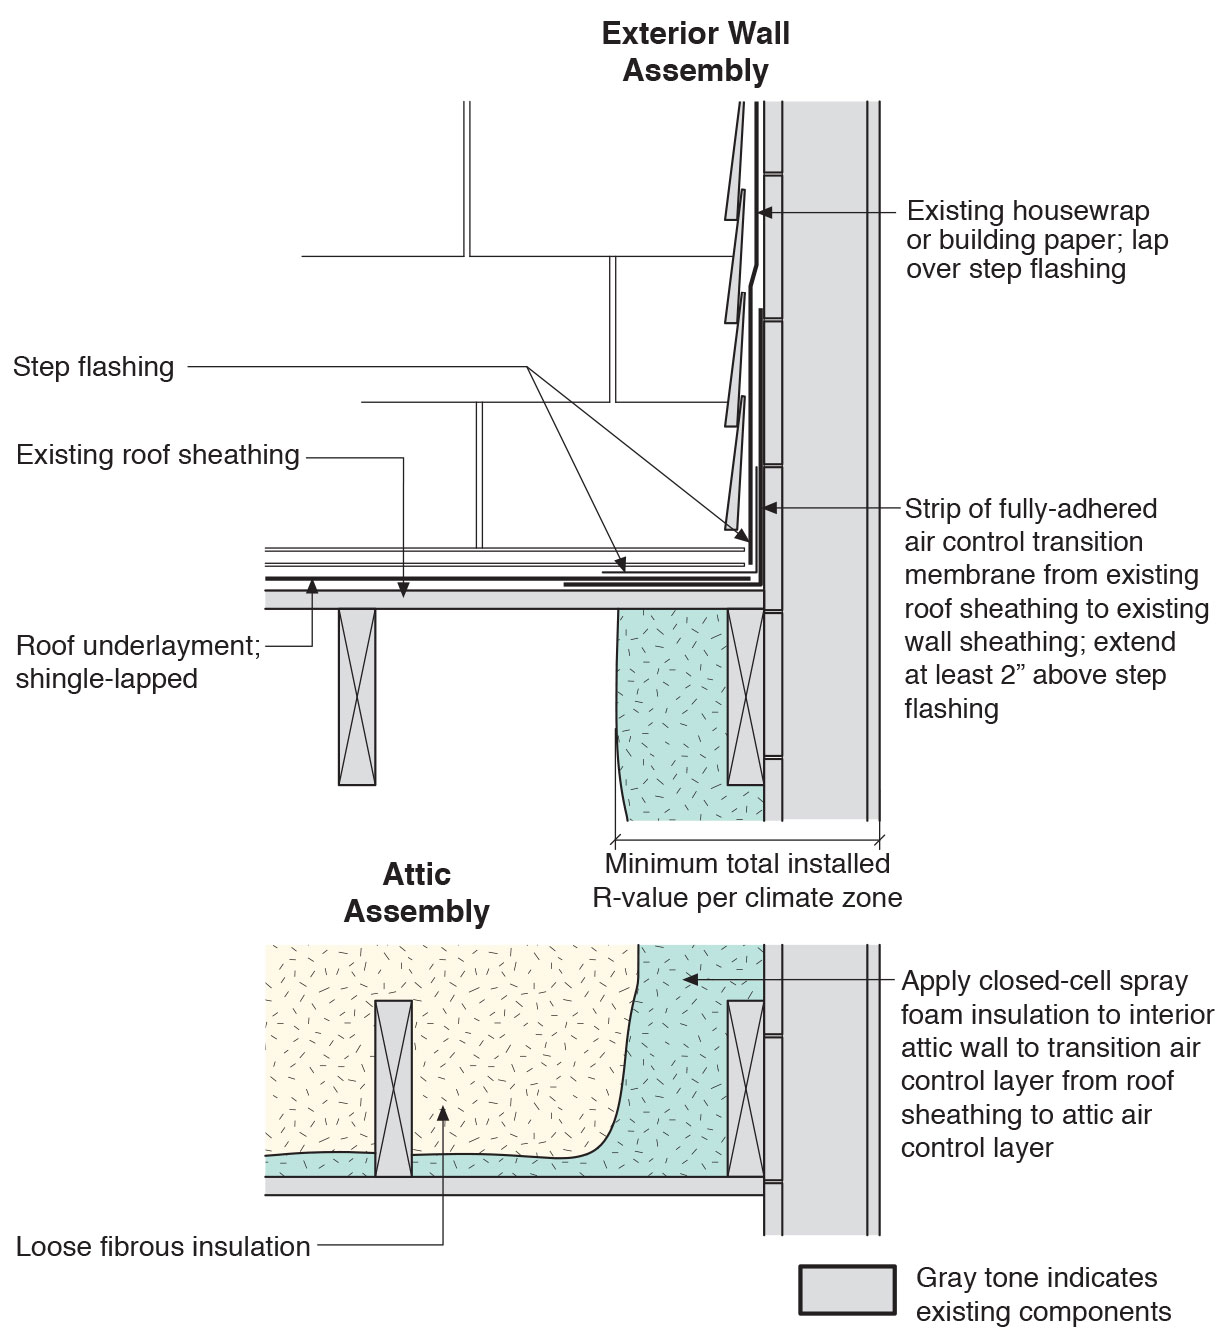
Existing wall-to-lower roof with attic transition with a new strip of fully adhered air control transition membrane, new step flashing, new roof underlayment, and new cladding – view from eave
Image
Image
Image
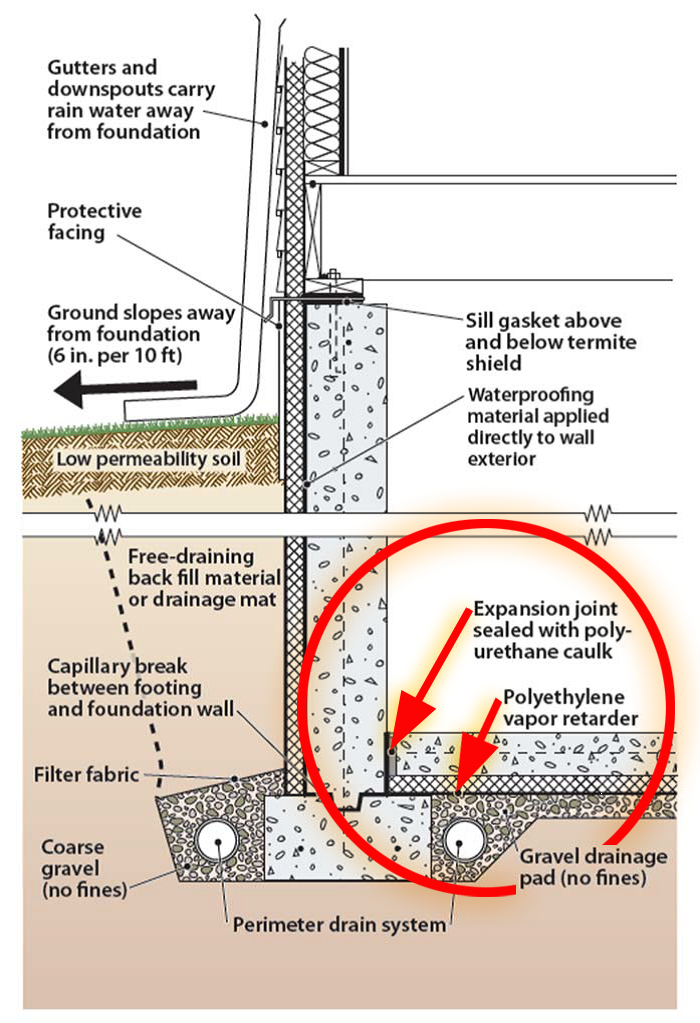
Good water management practices like sloping grade away from house, and installing gutters, perimeter drain pipe, a capillary break, and free-draining soils or drainage mat protect the foundation from water saturation.
Image

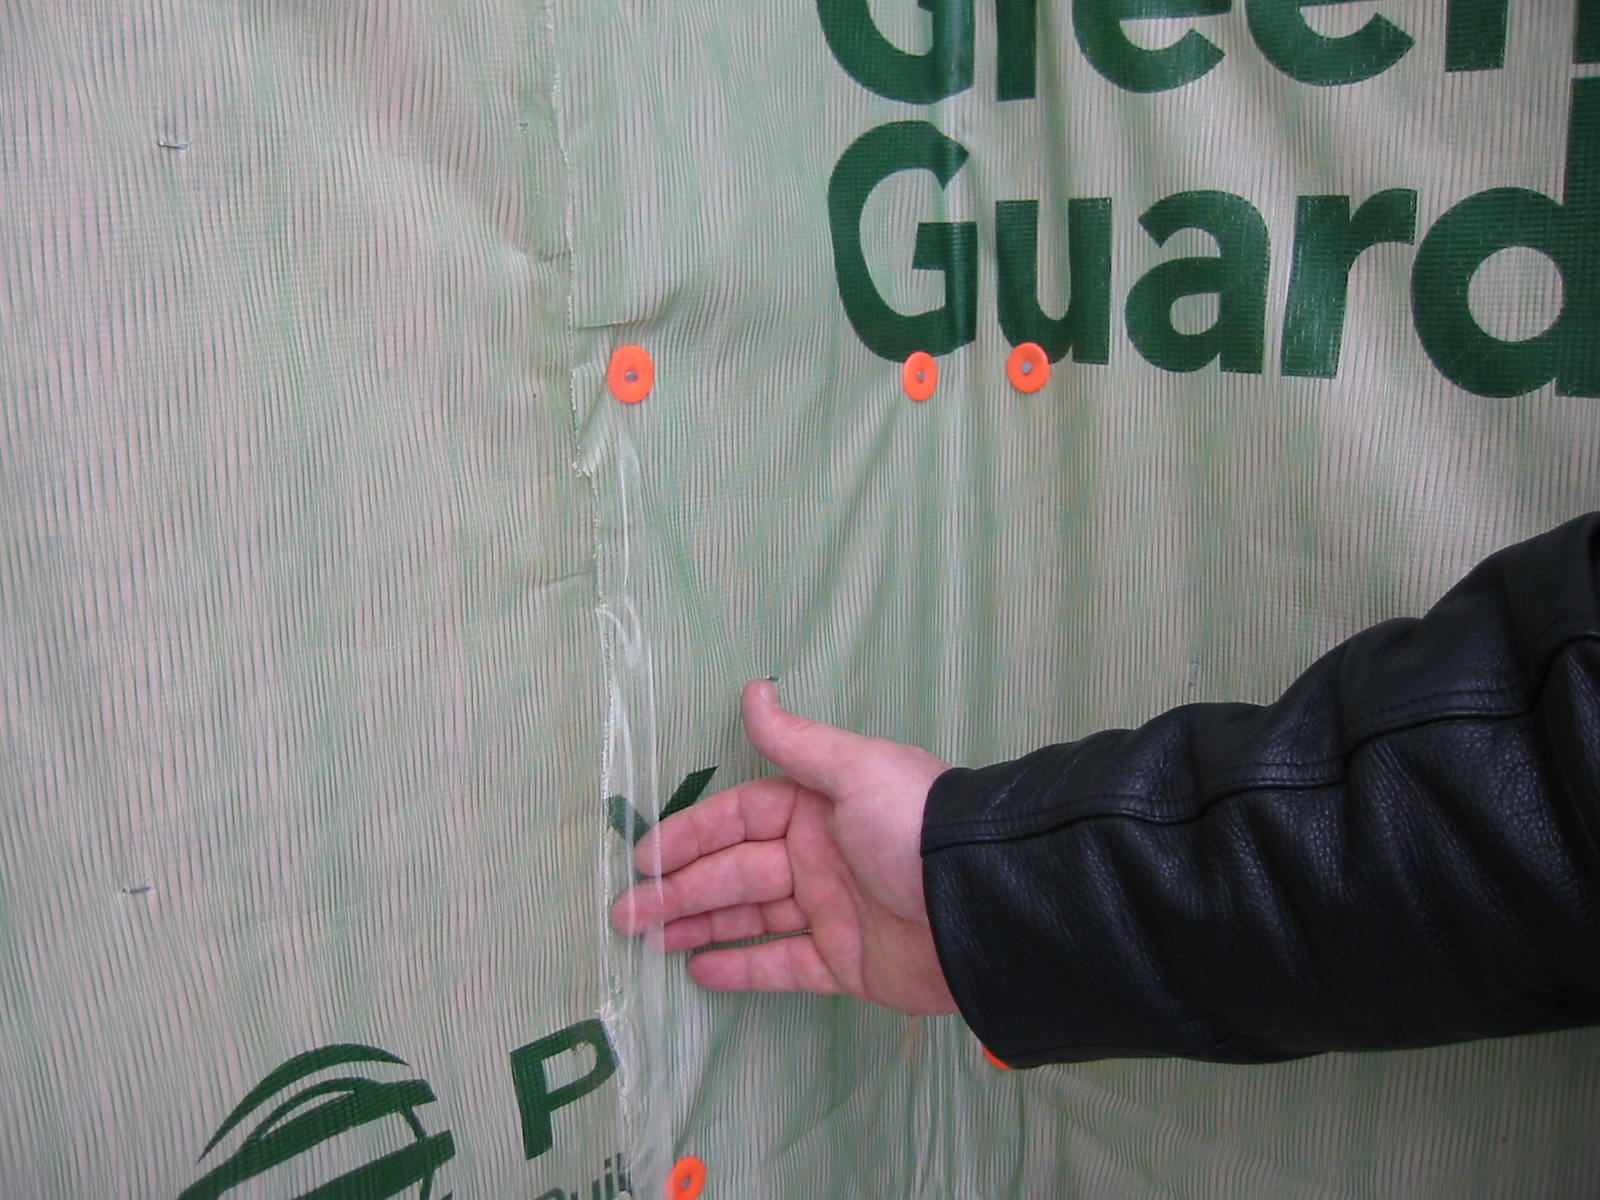
House wrap is sealed at all seams and overlaps flashing to serve as a continuous drainage plane over the exterior walls.
Image
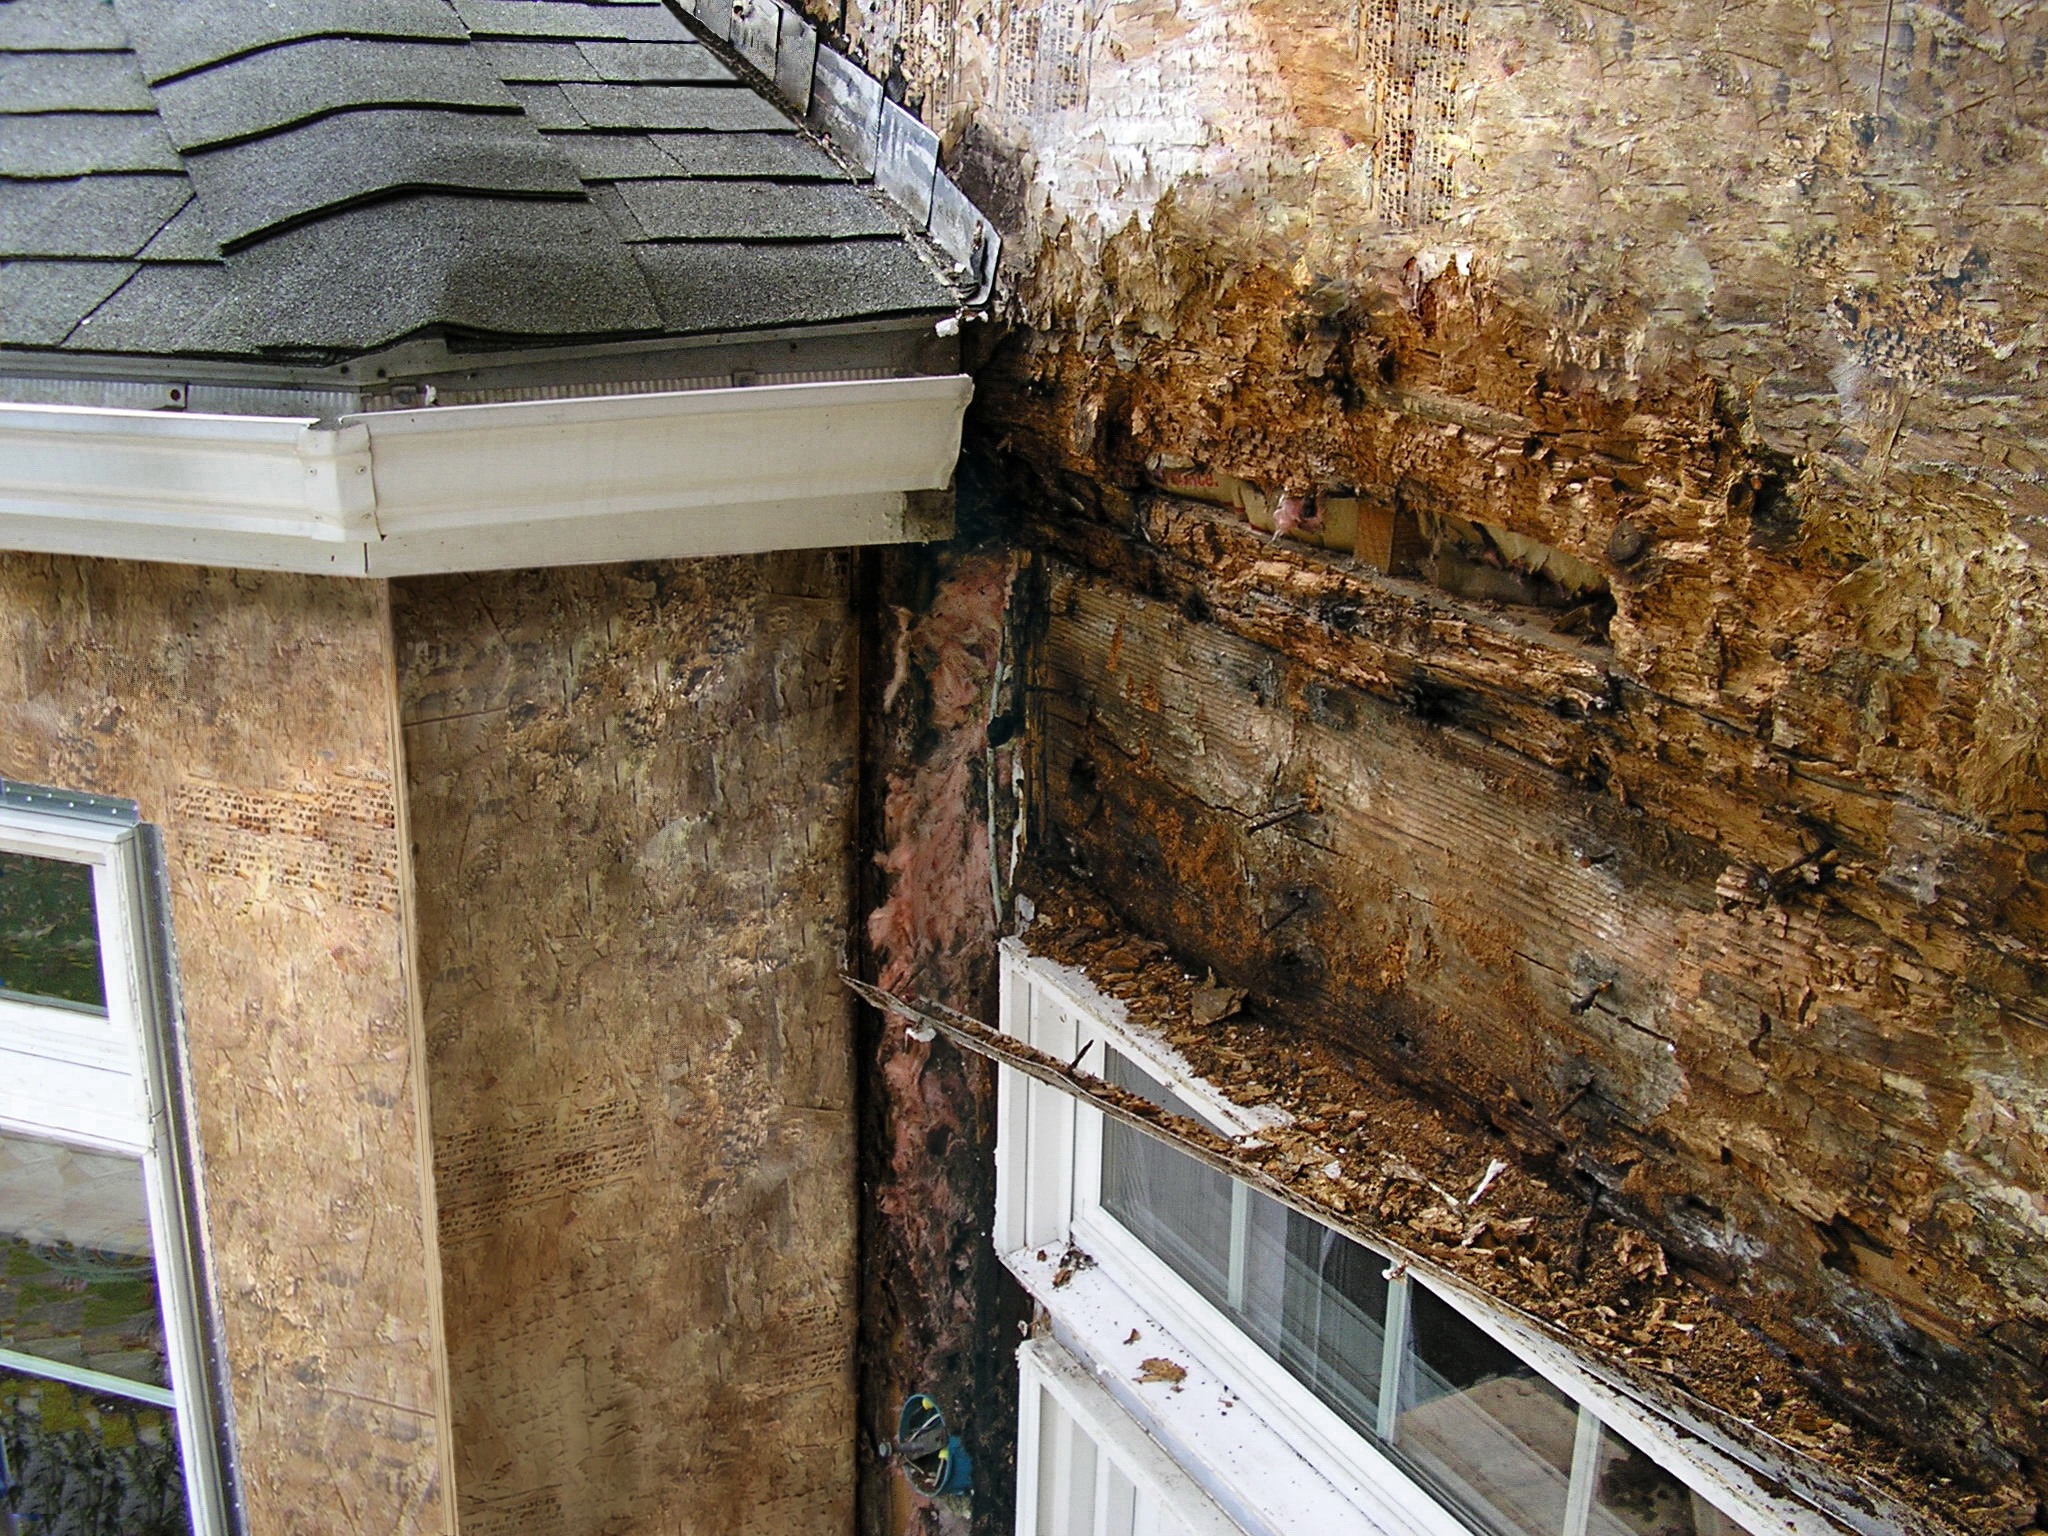
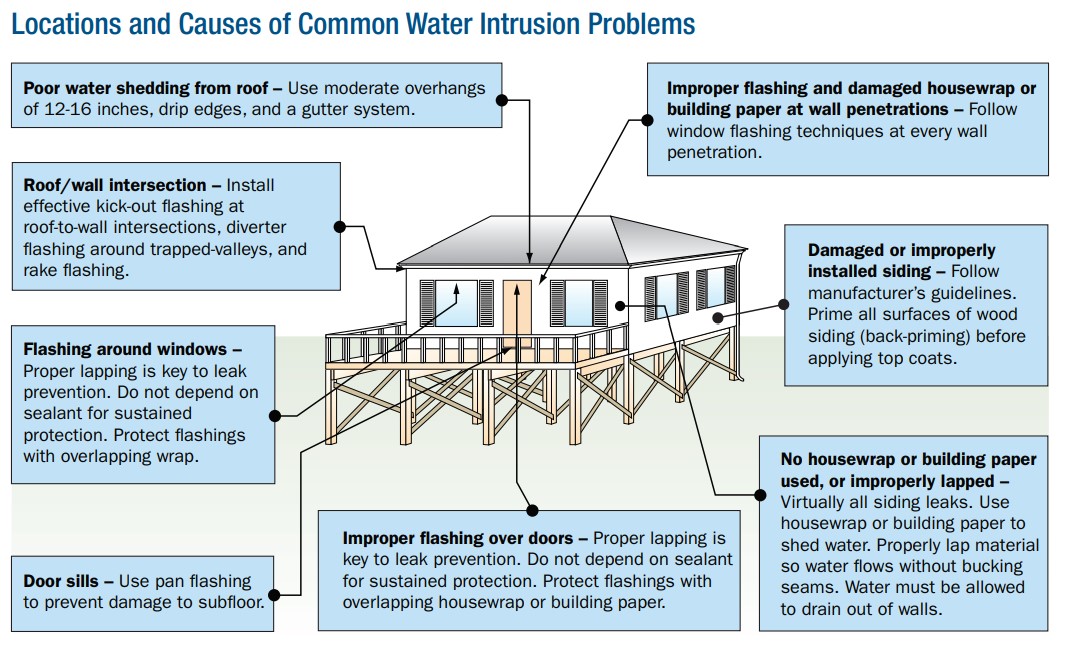
Improper flashing can allow rain water into walls, causing significant damage
Image
Image
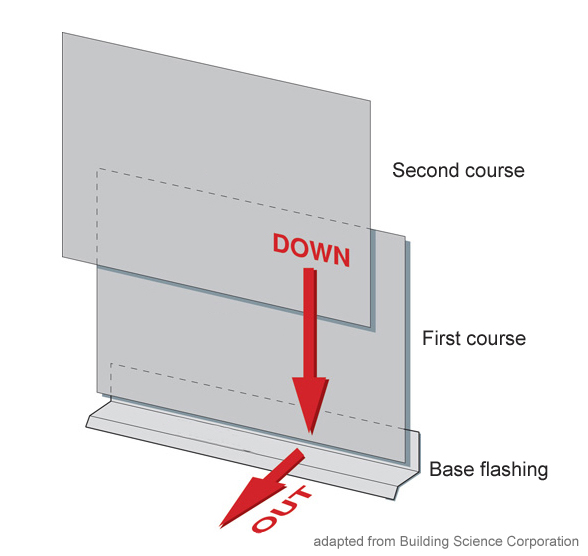
Install all layers of the drainage plane to overlap, not underlap, to direct bulk water down and out of the wall.
Image

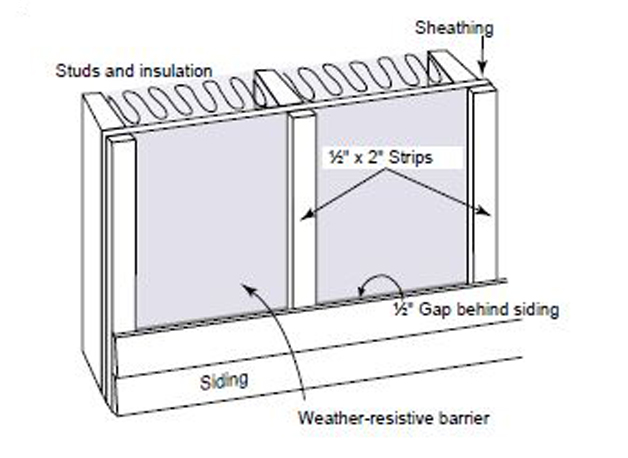
Install furring strips over house wrap to provide a rainscreen behind wood siding.
Image
Image
Image
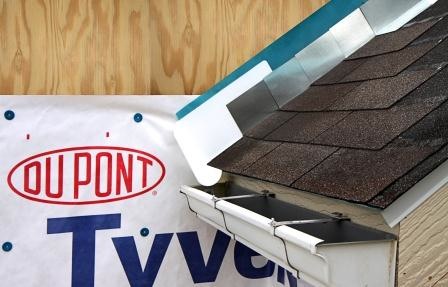
Install shingle starter strip then kick-out diverter; attach to roof deck but not sidewall
Image

Image

Image

Image
Image
Image
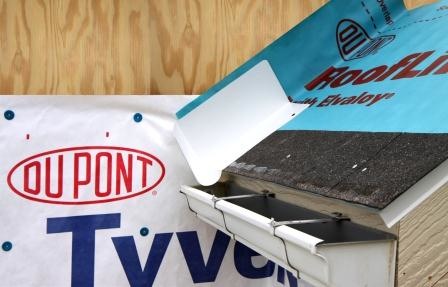
Place first shingle and next section of sidewall flashing over upper edge of diverter
Image
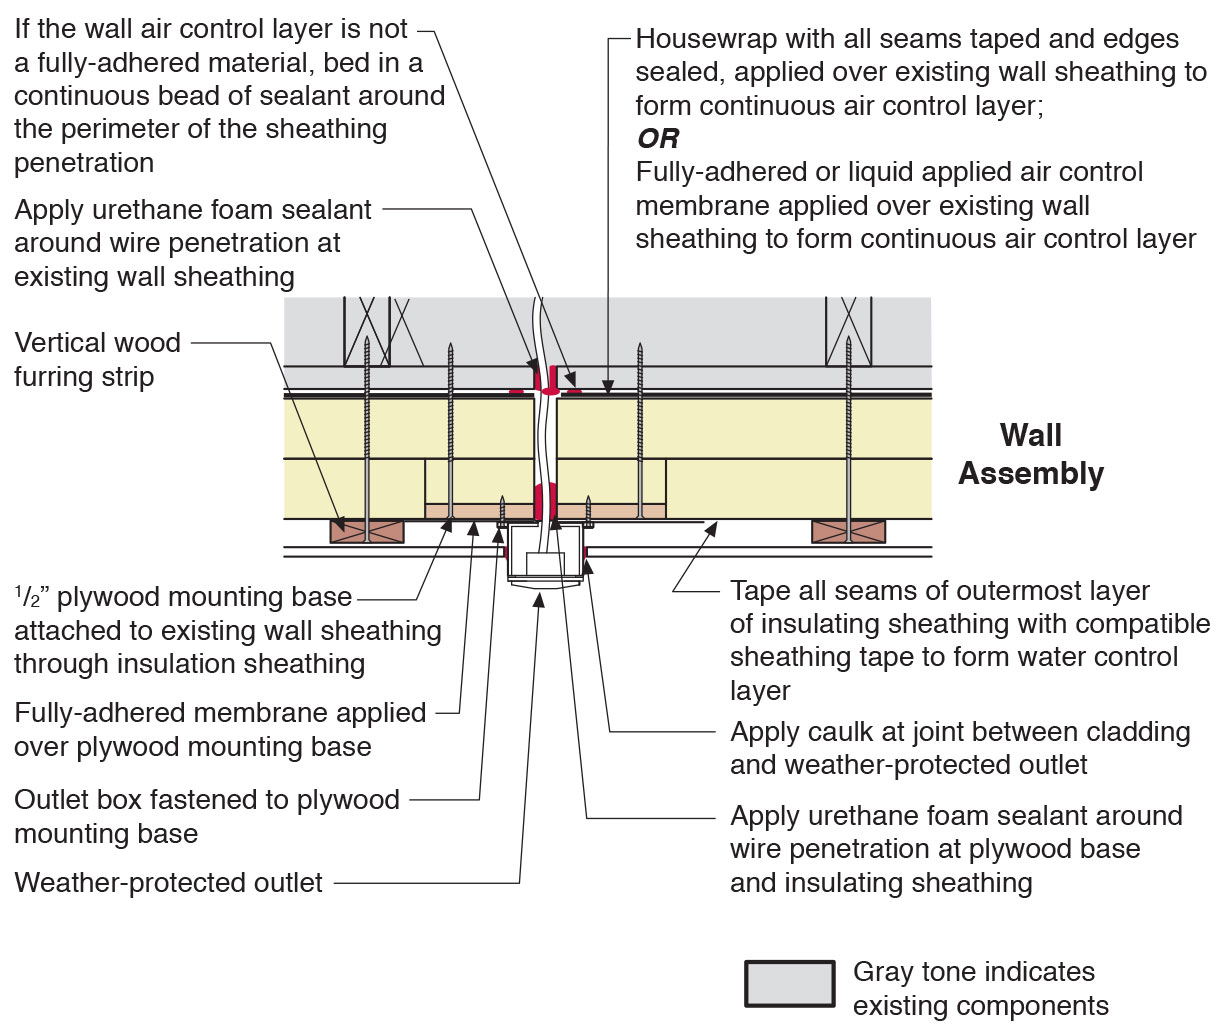
Plan view of electric box installation in exterior wall showing flashing and air sealing details
Image
Image
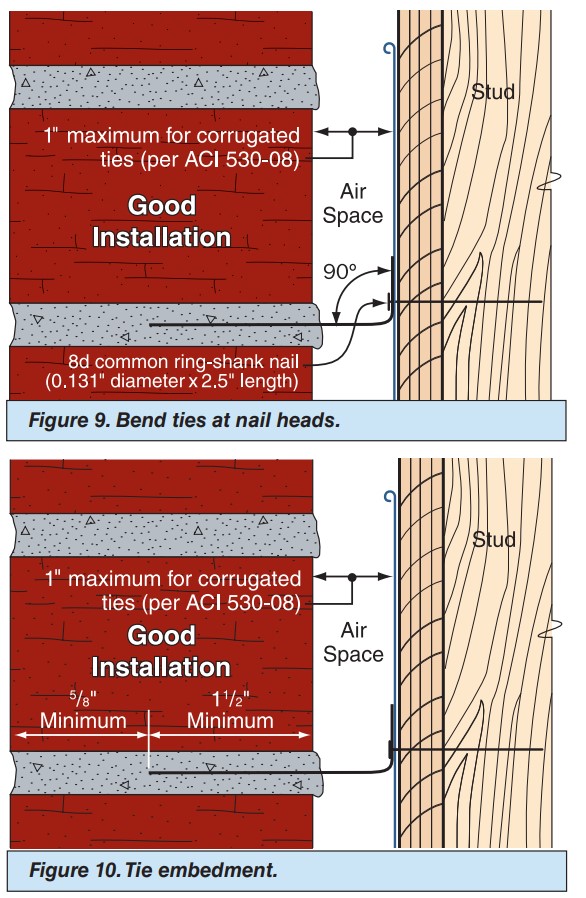
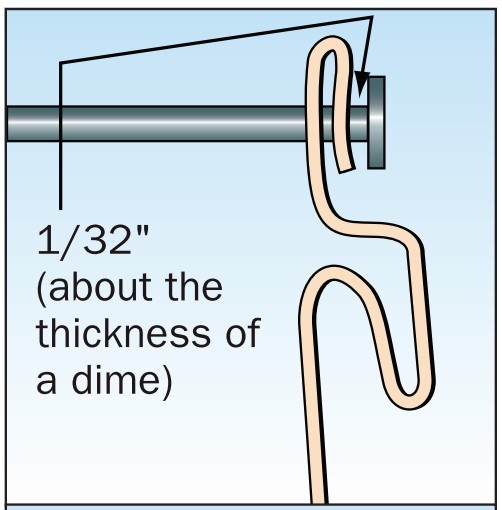
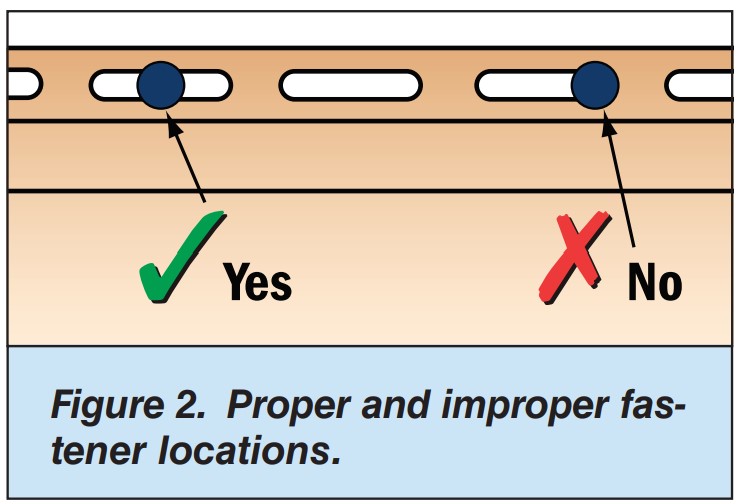
Right – The ties are bent at a 90 degree angle at the nail head and embedded into the mortar joint at least 1.5 inches.
Image
Right – Furring strips provide a drainage gap between the rigid foam and the siding.
Image
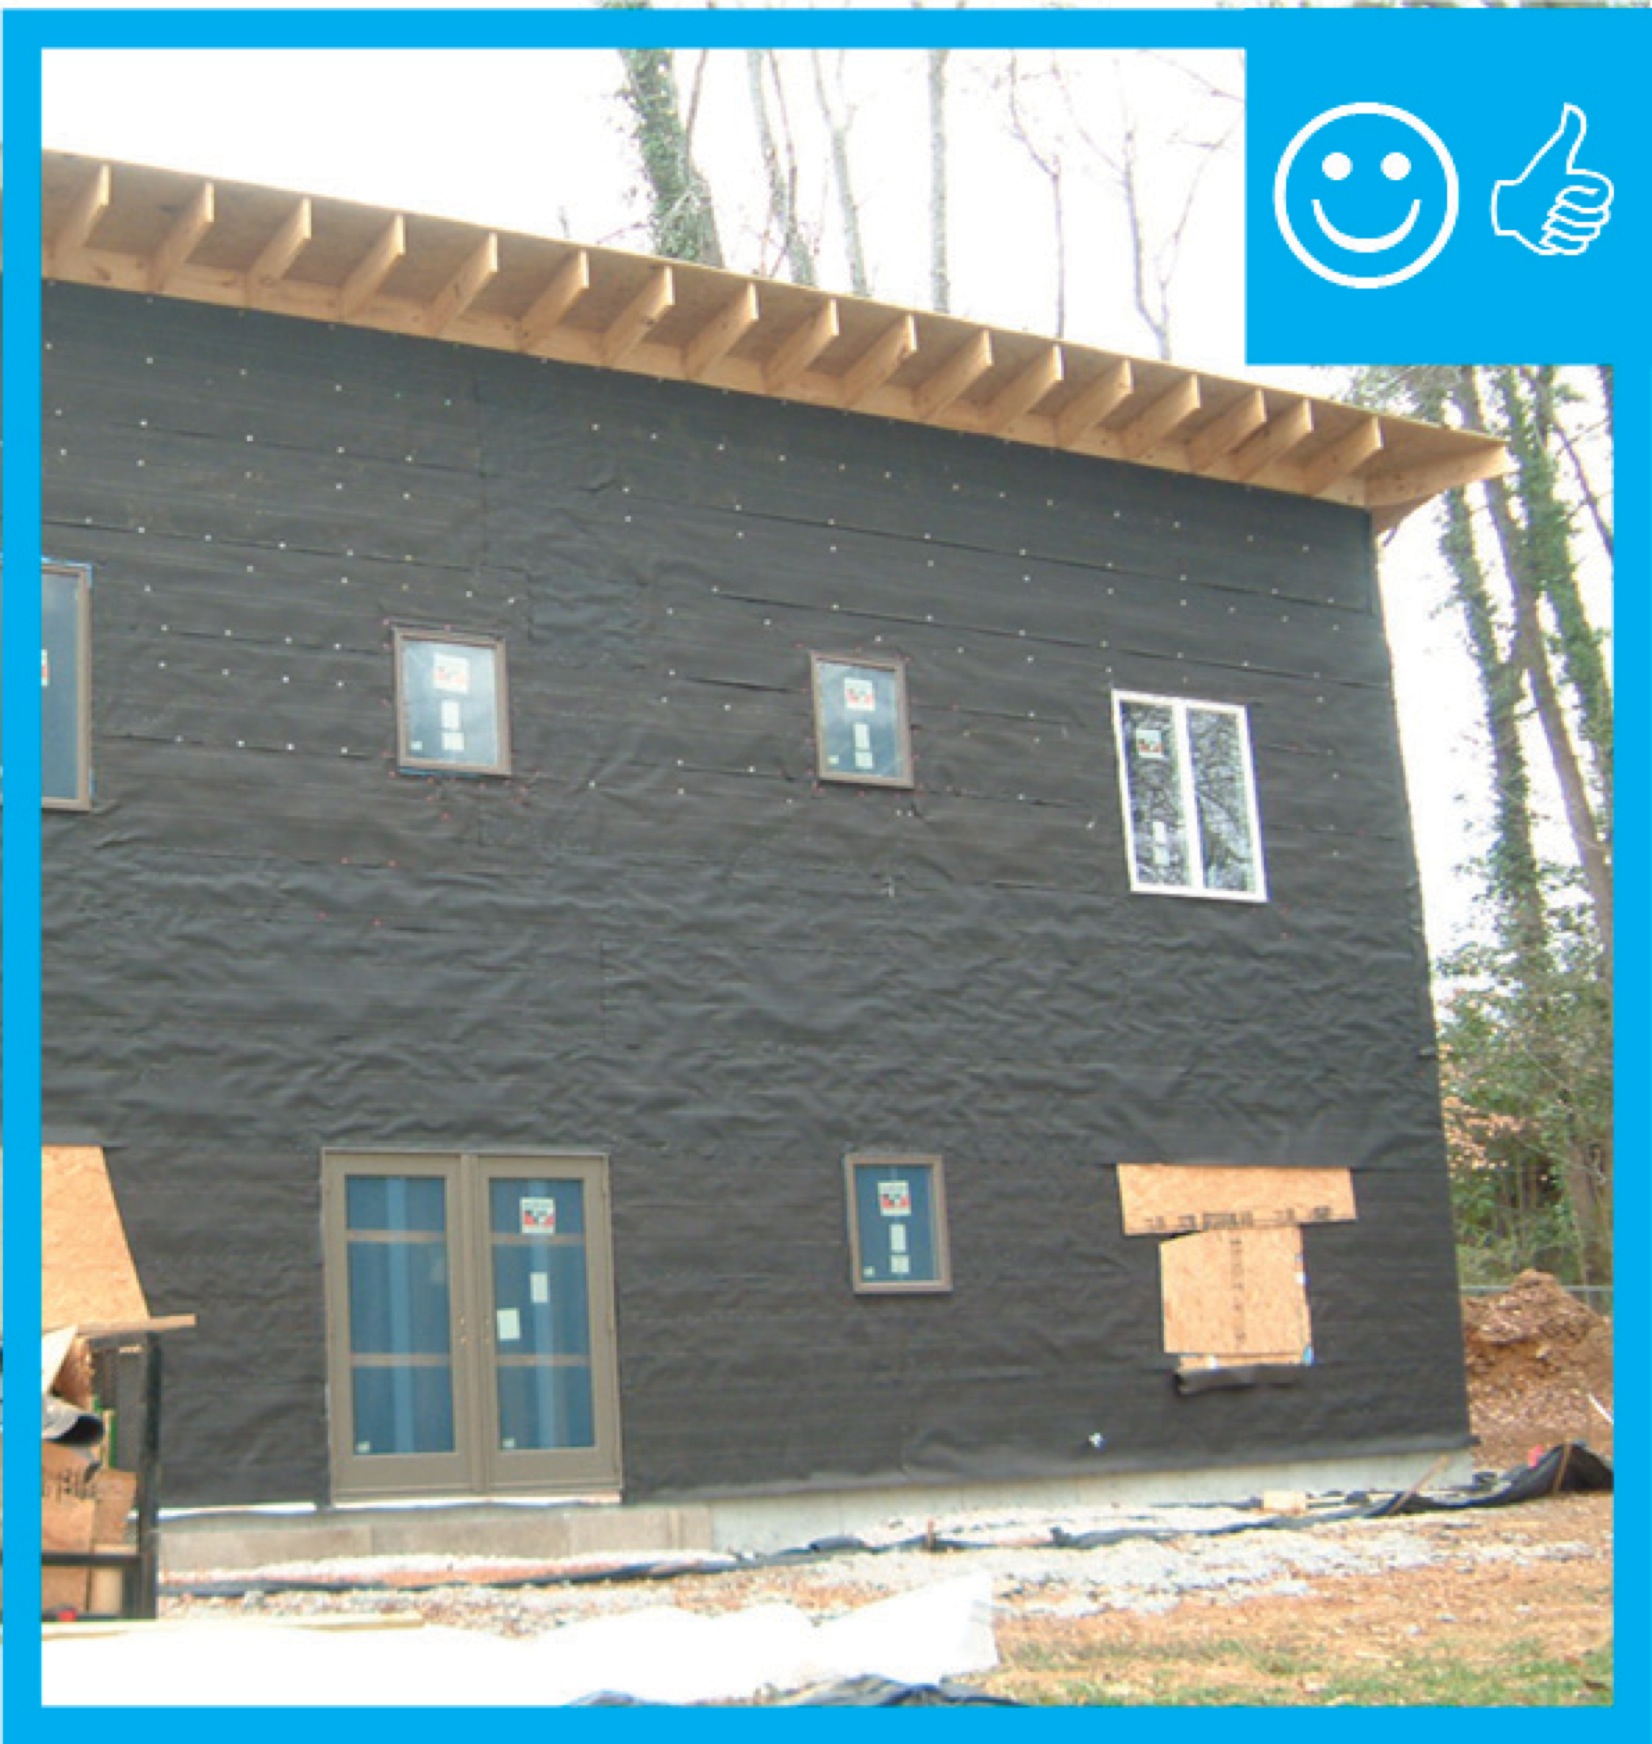
Right – The building felt is installed on all exterior walls and provides a complete drainage system
Image
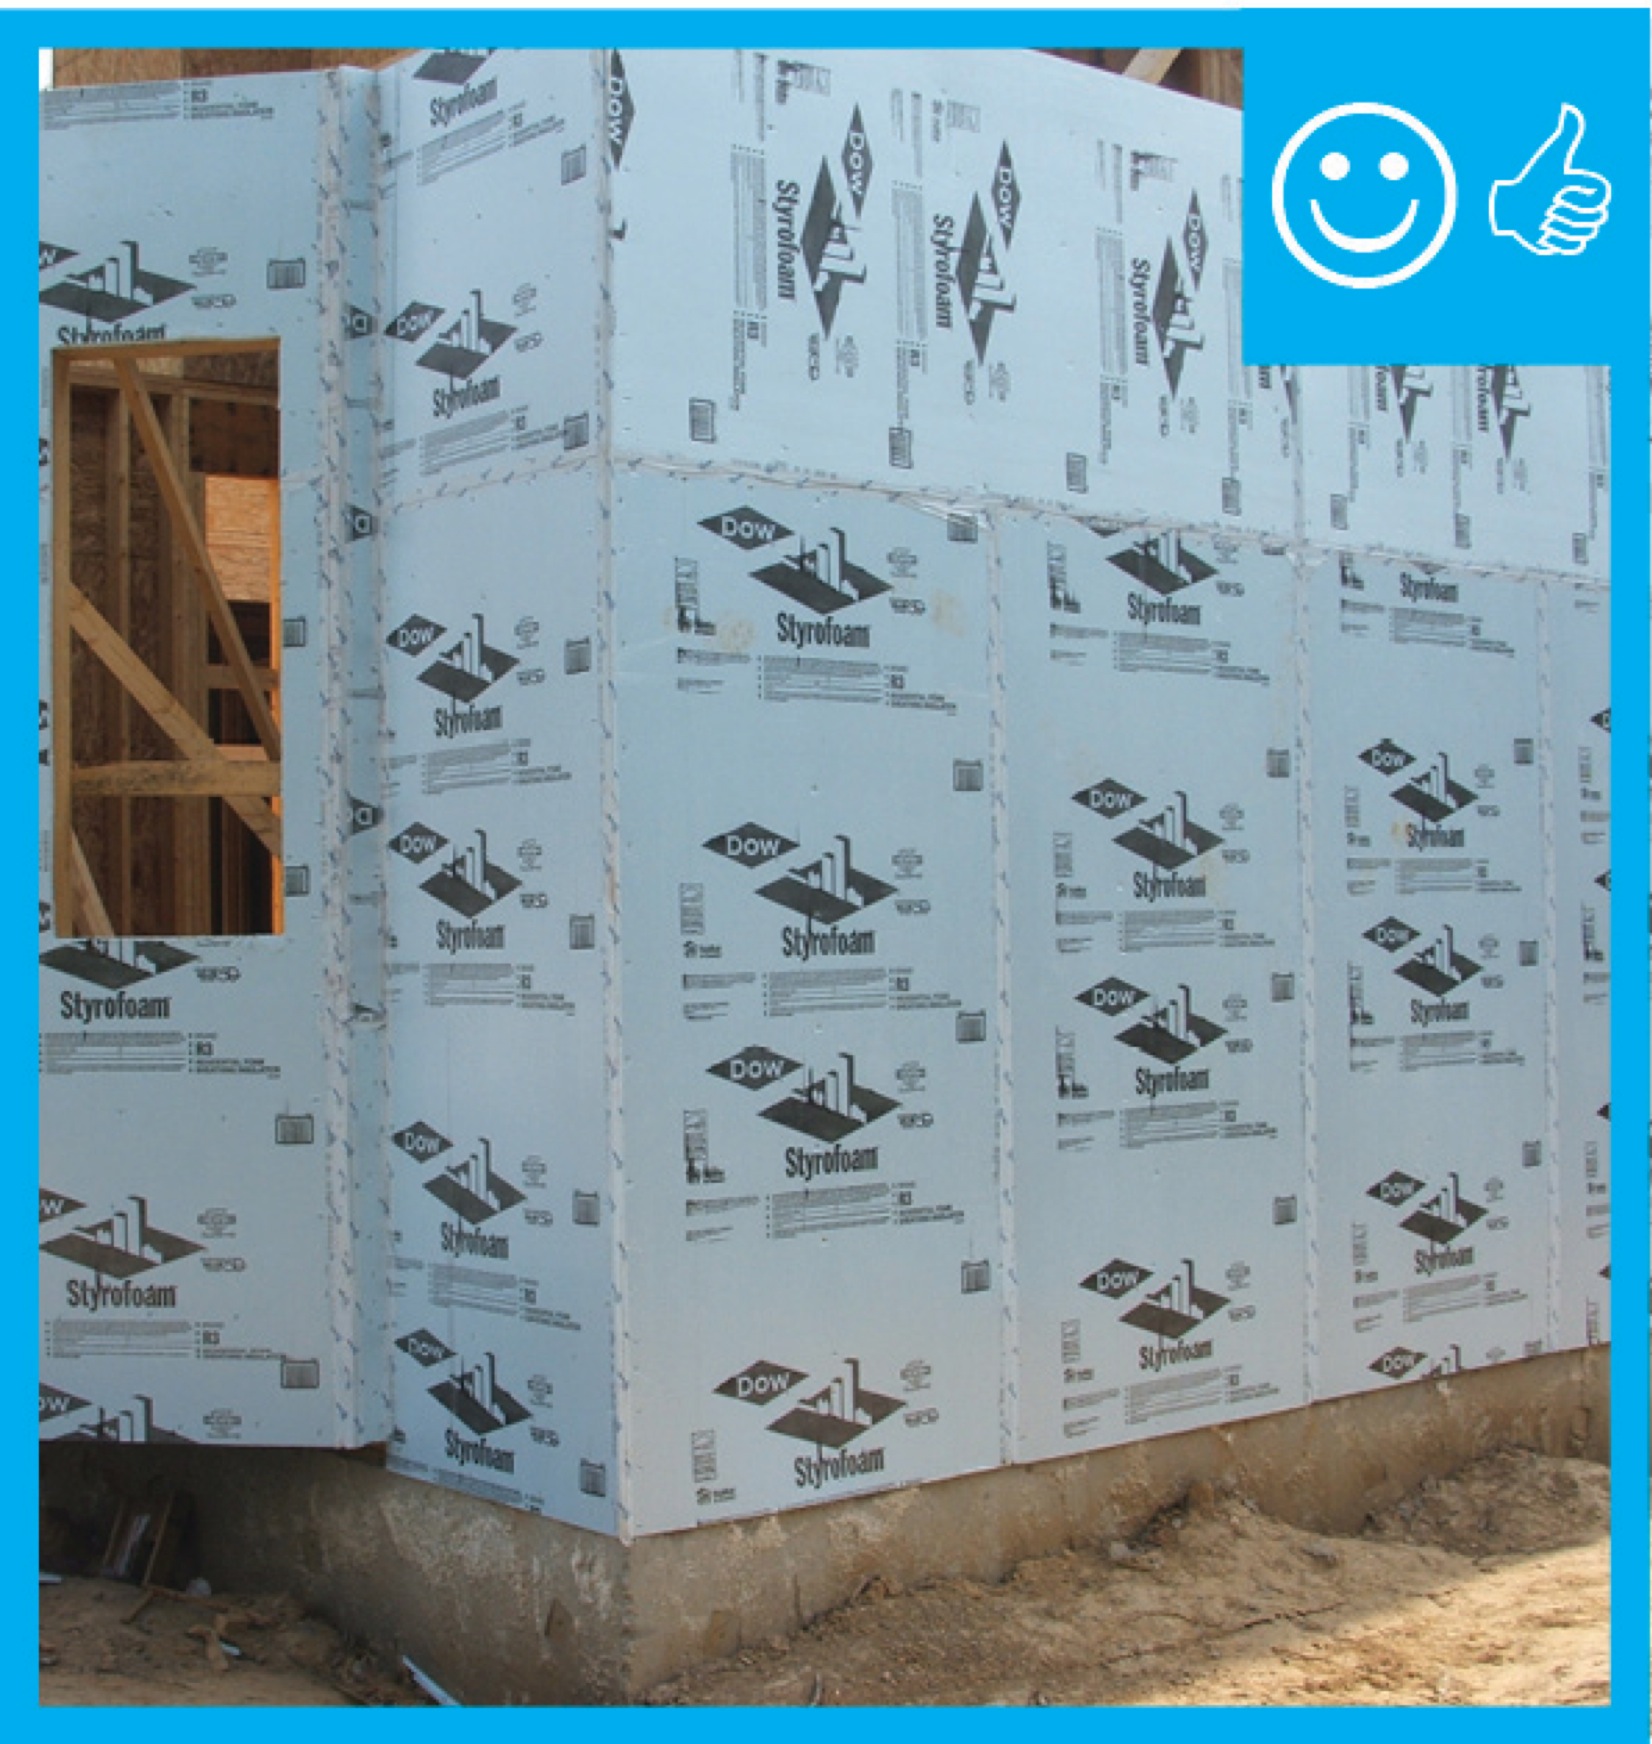
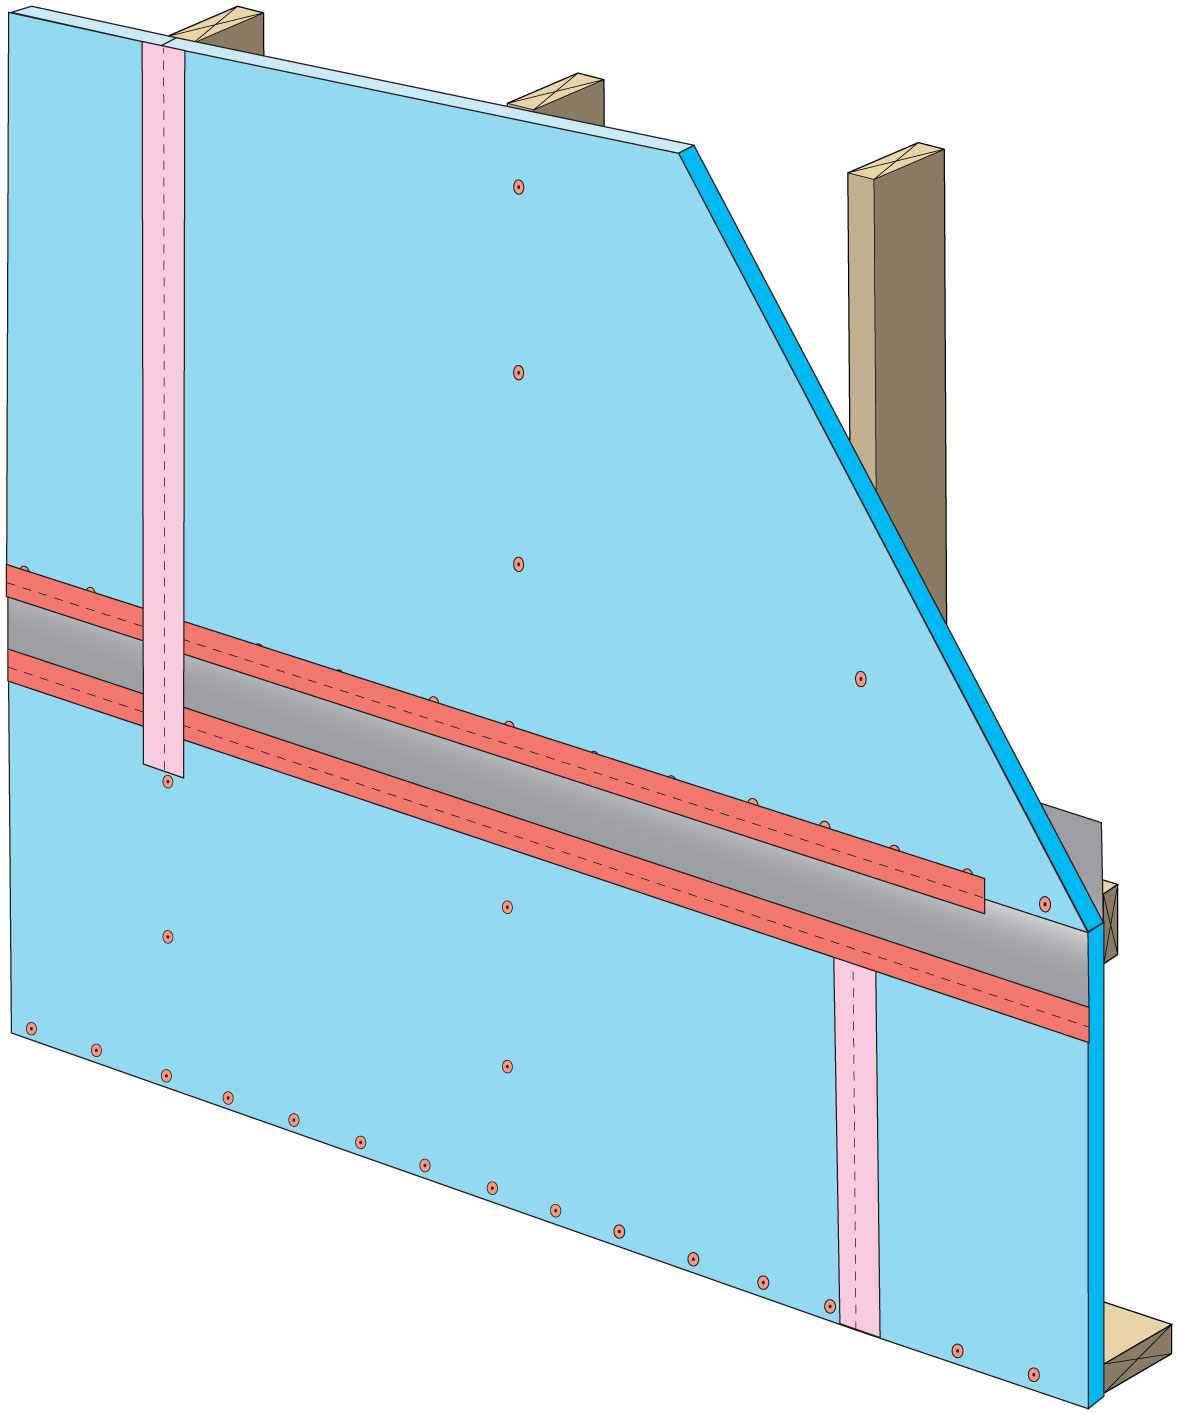
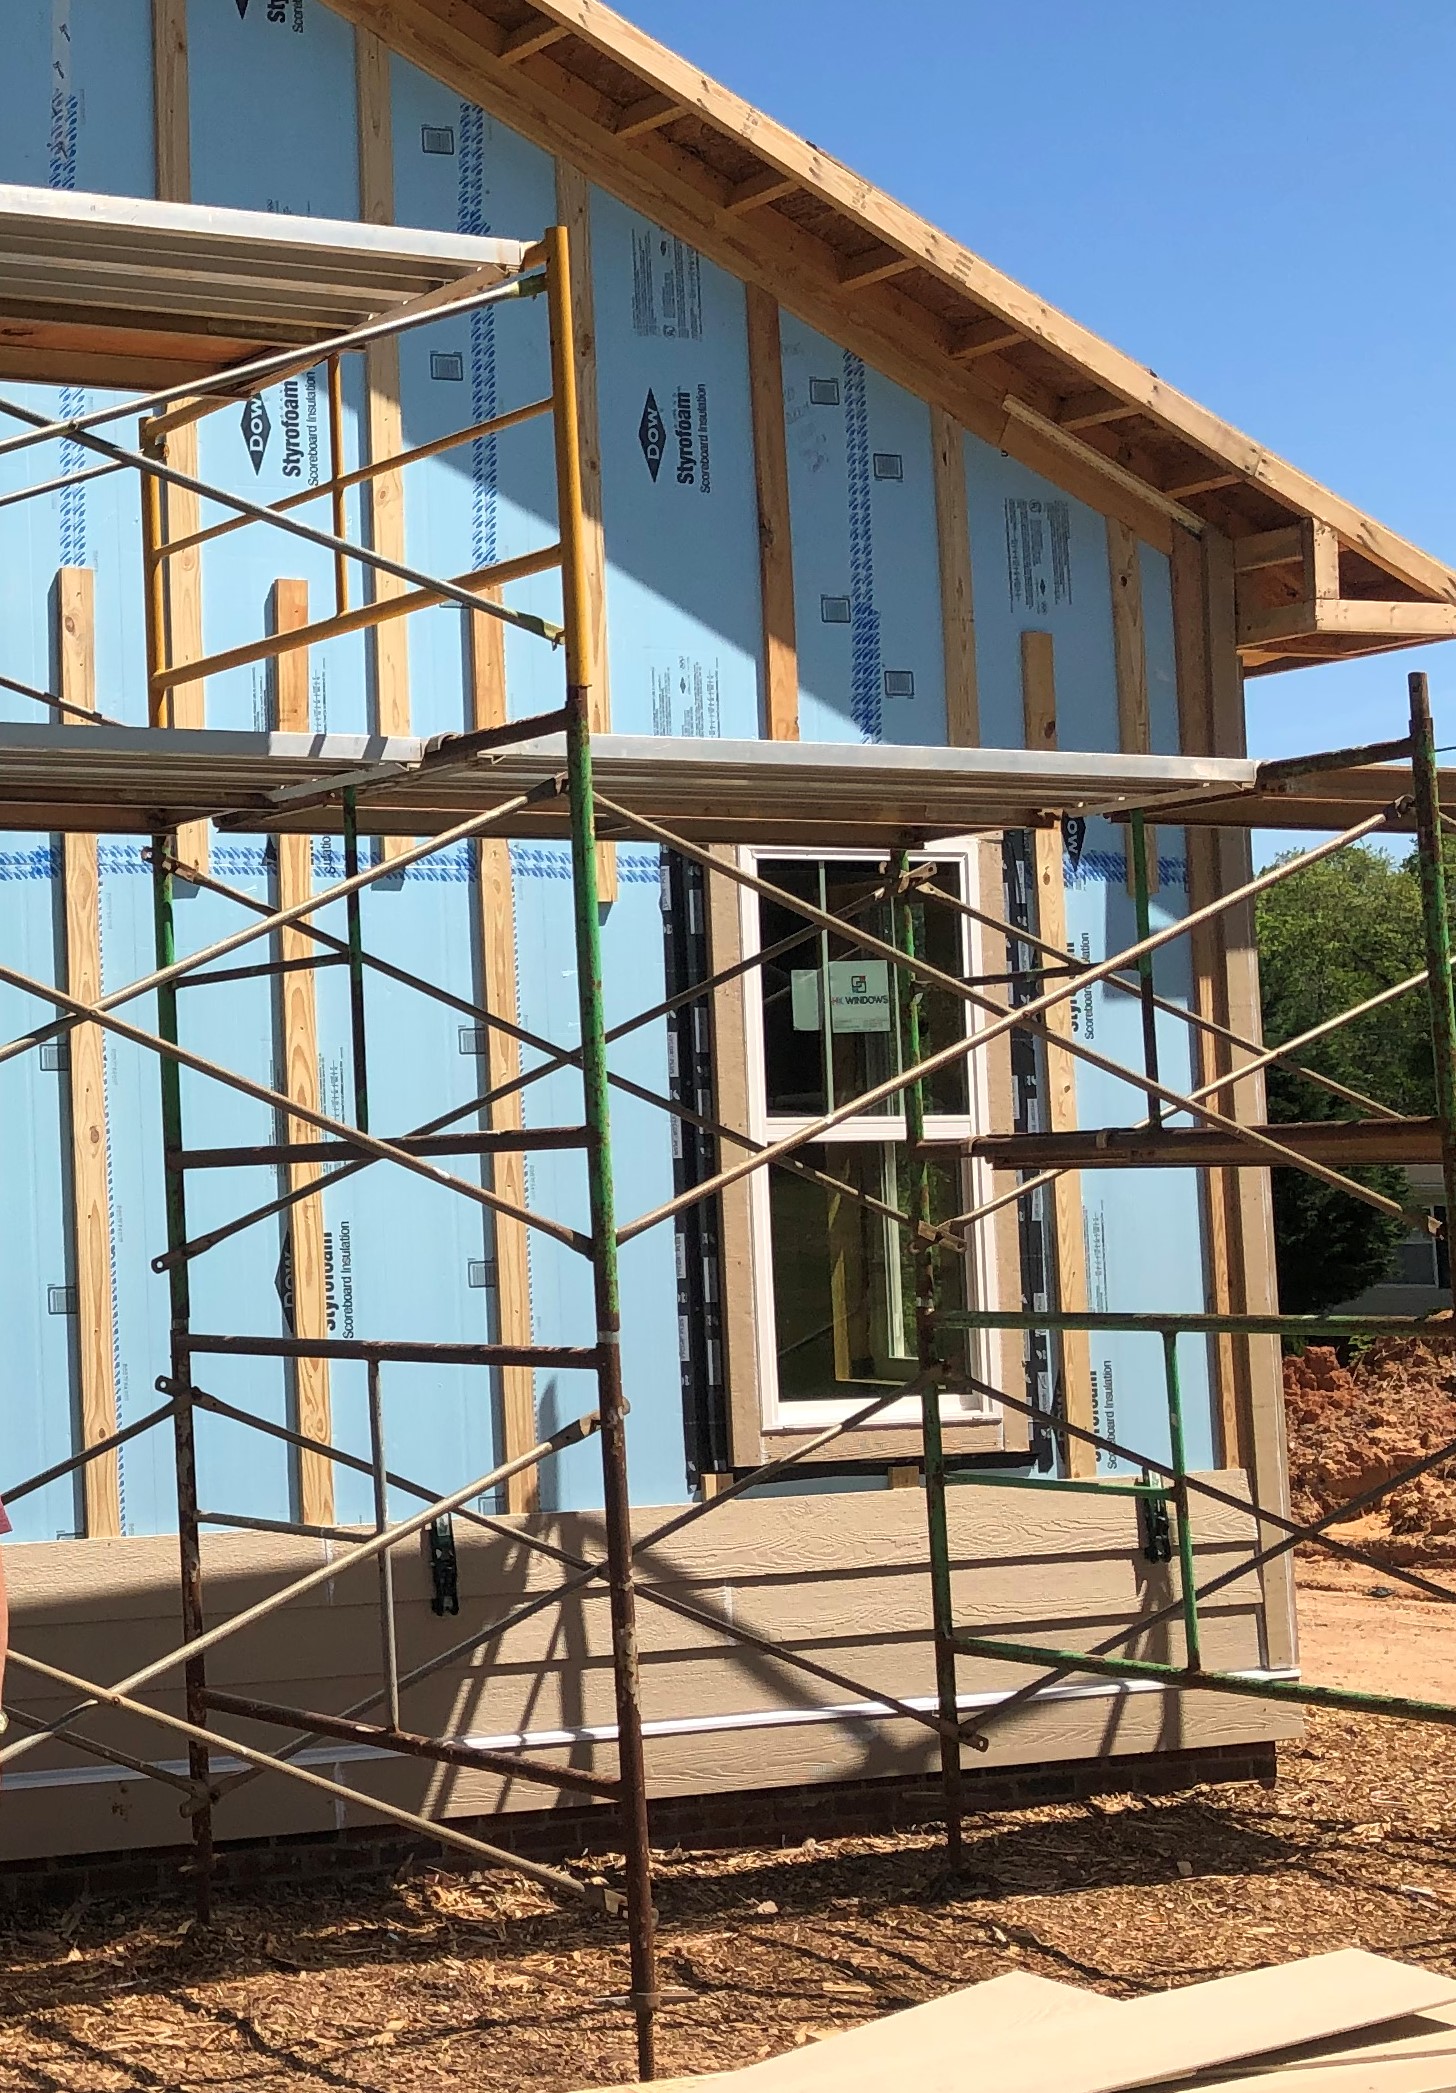
Right – The rigid insulation covers all exterior walls and all seams are taped to provide a complete drainage system
Image

Image
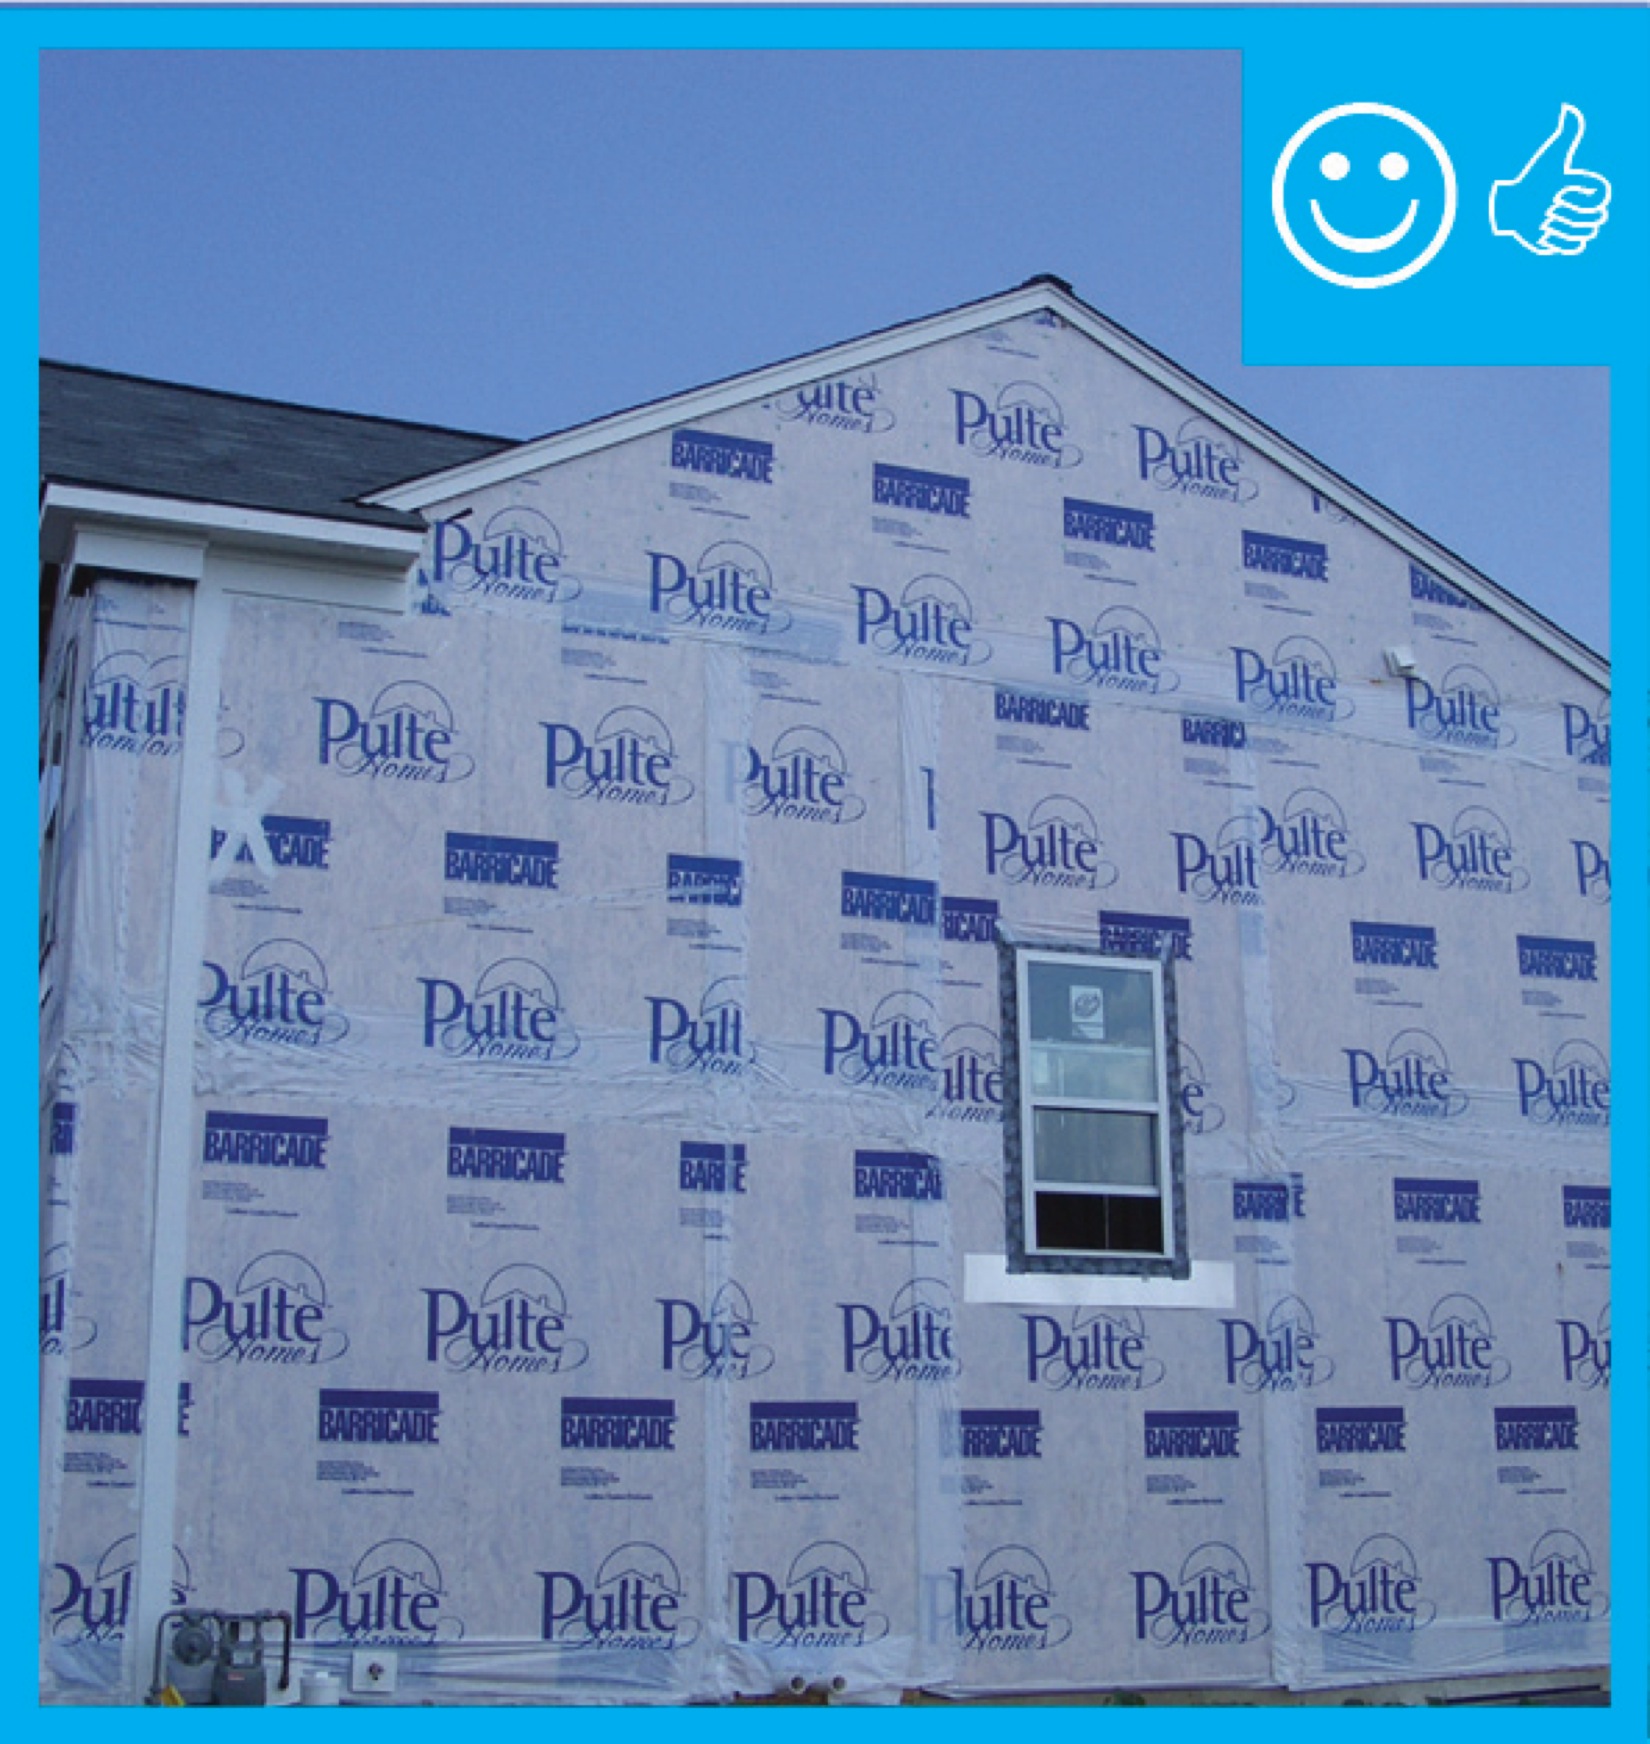
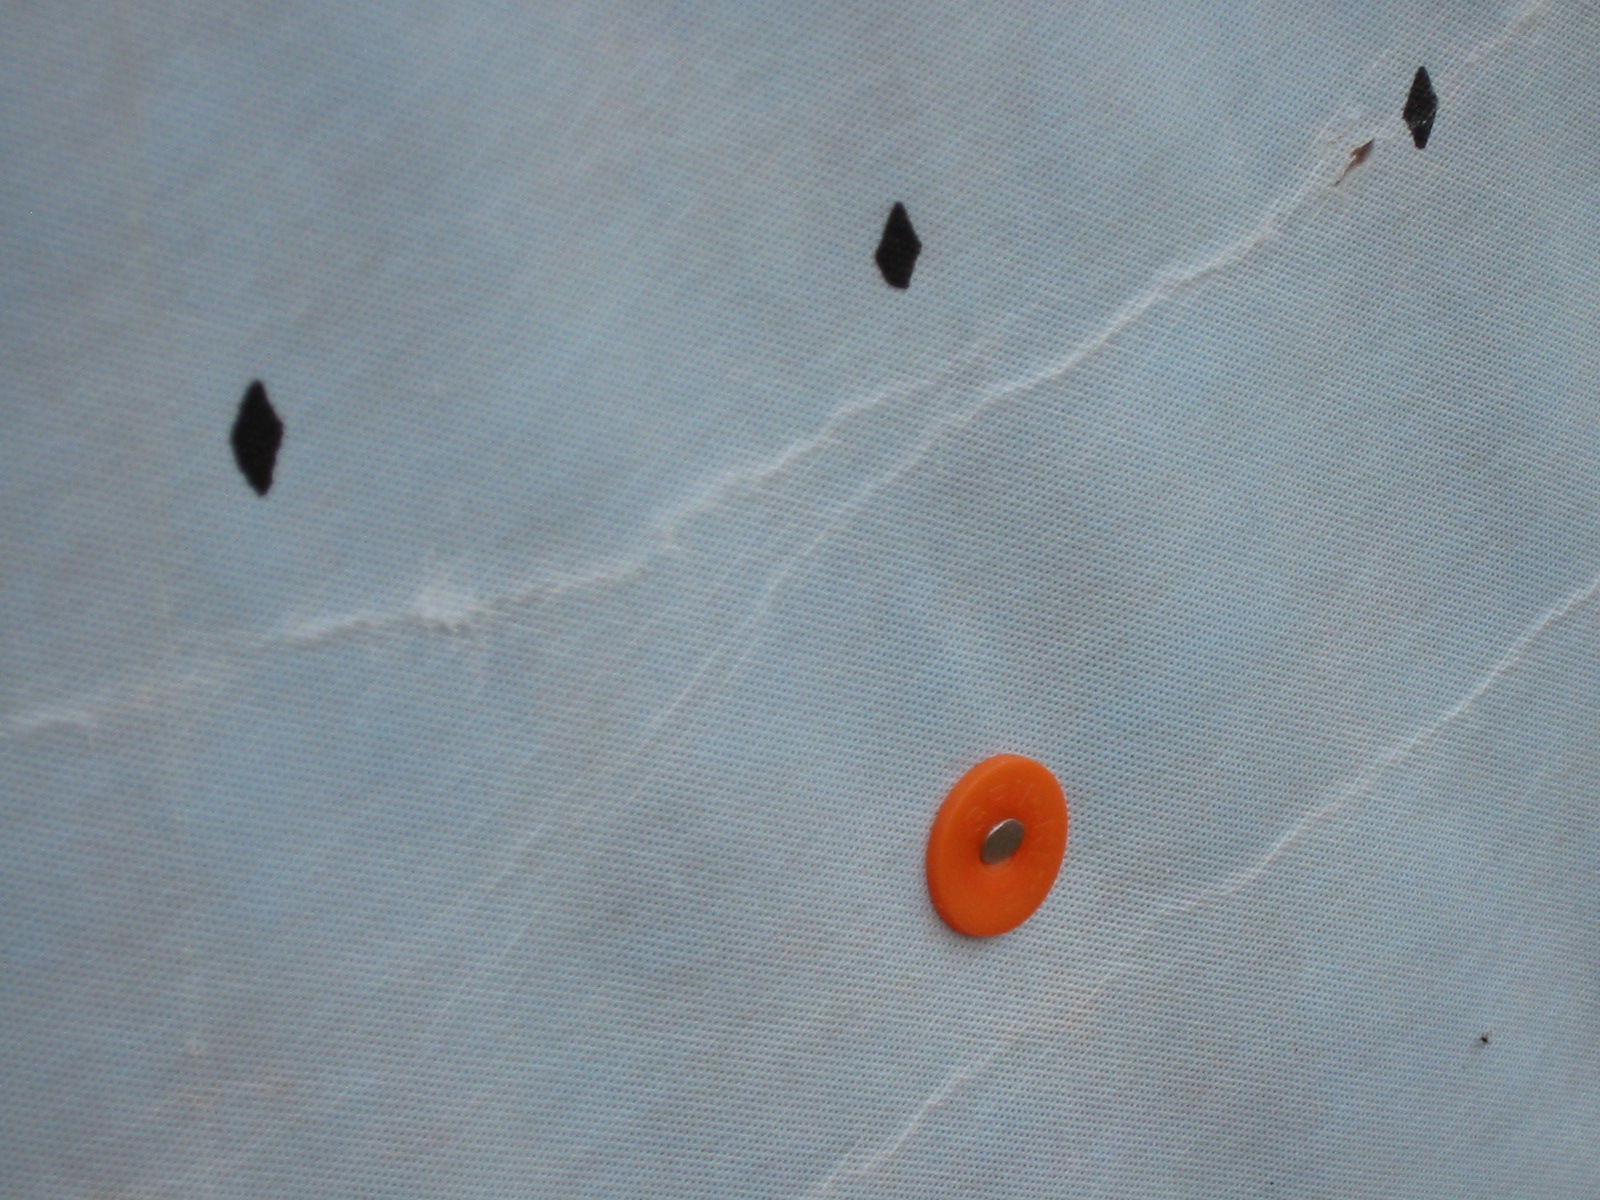
Right – The water-resistant barrier covers the entire house and the seams are taped to provide a complete drainage system
Image
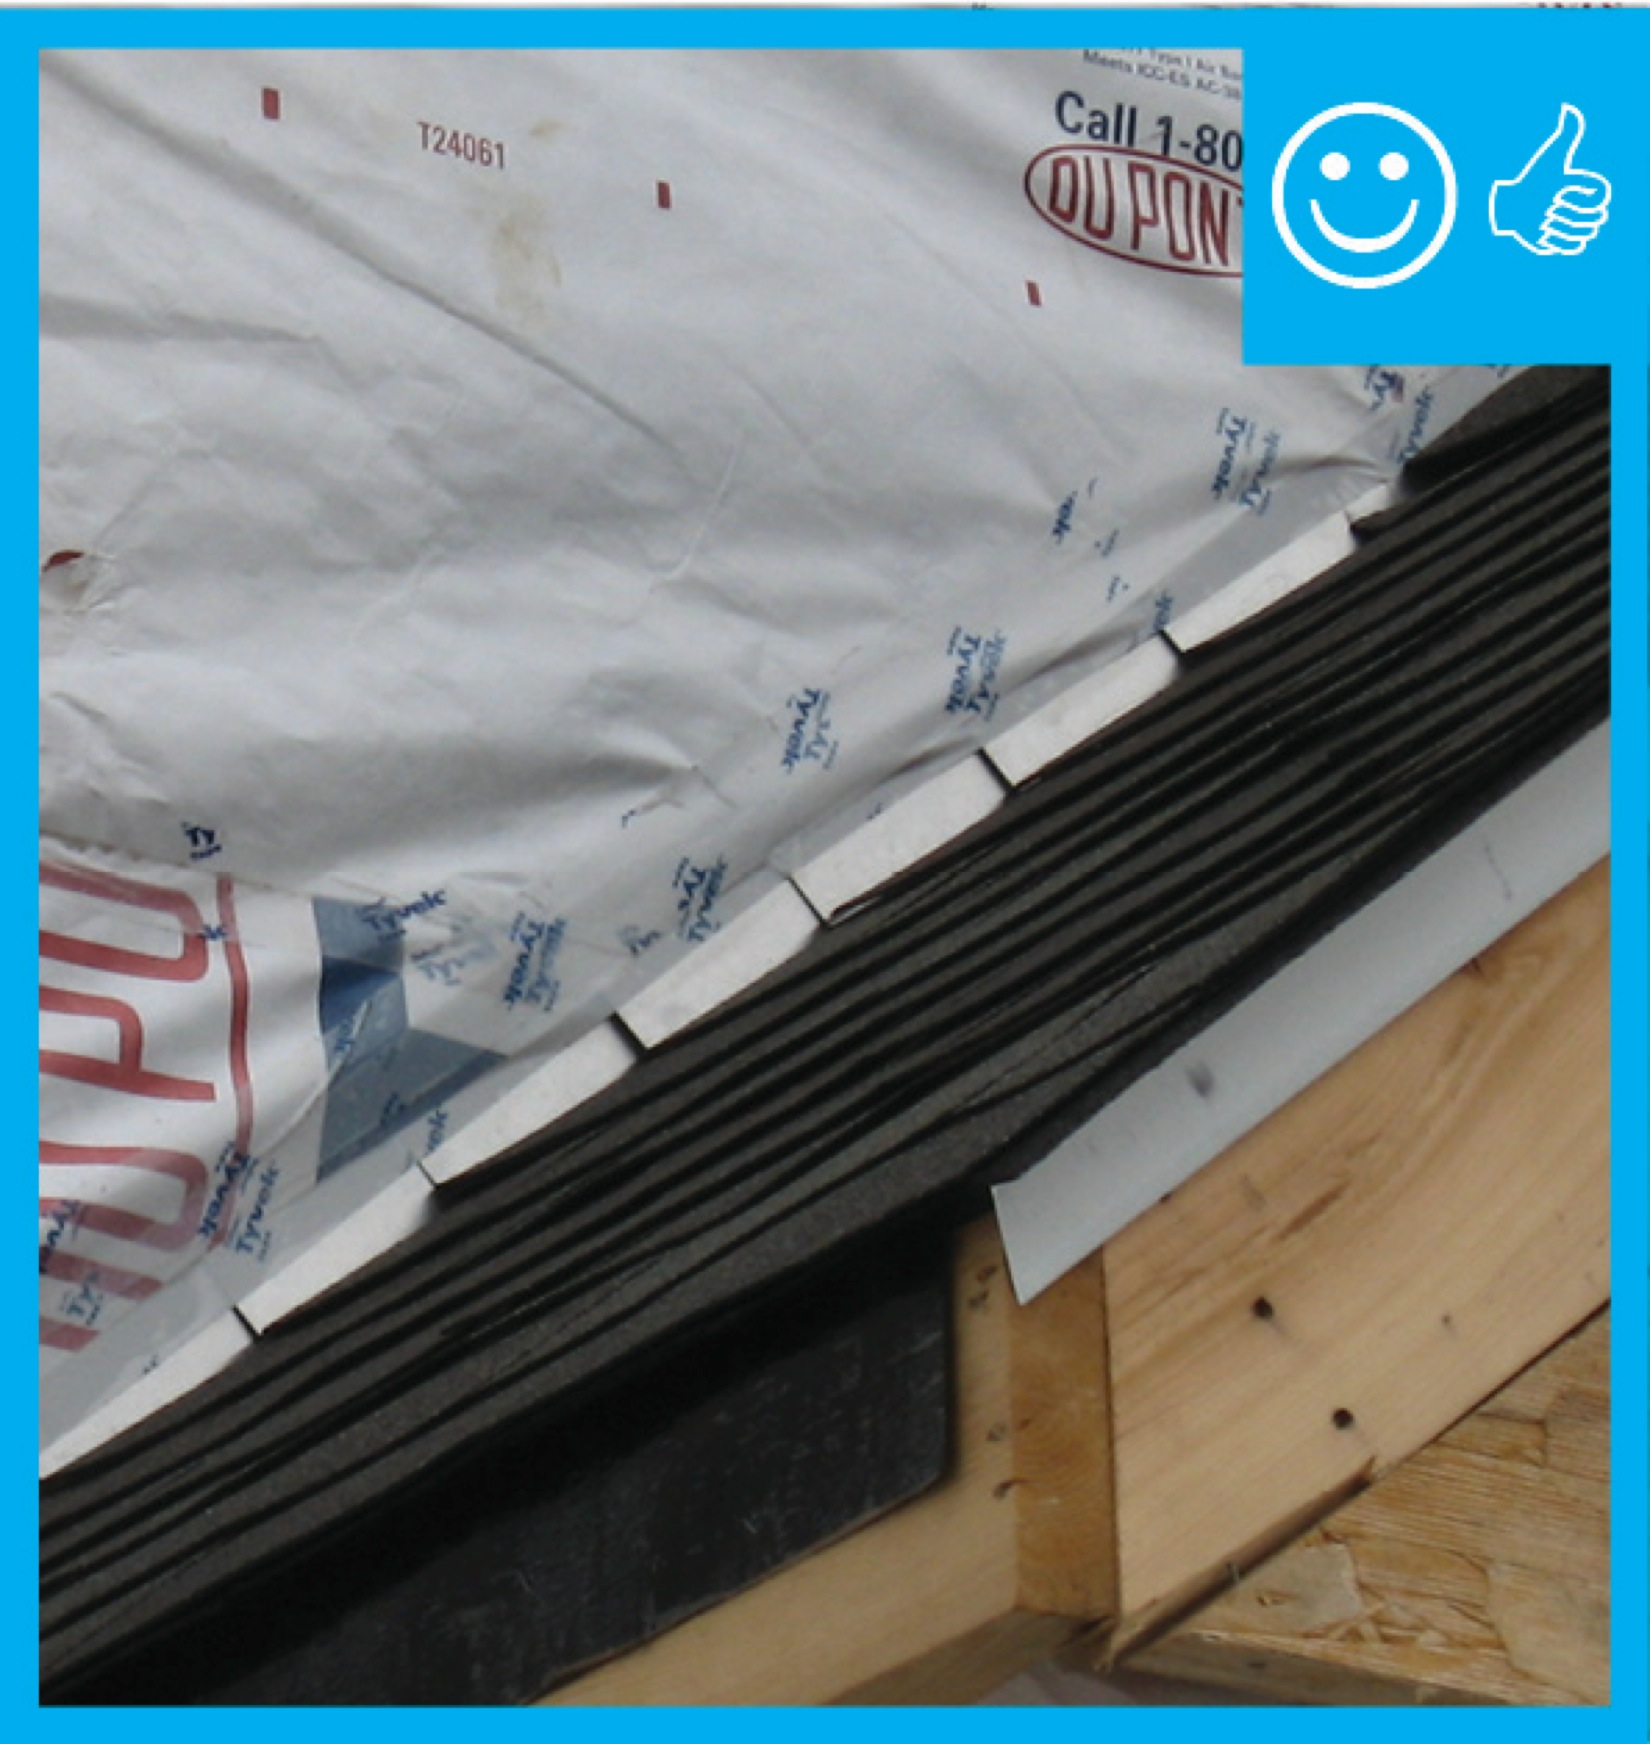
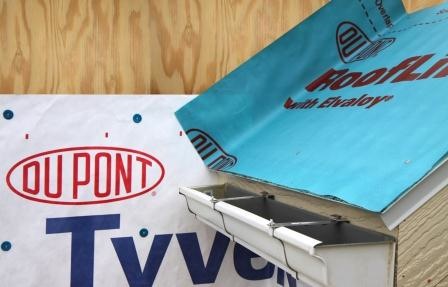
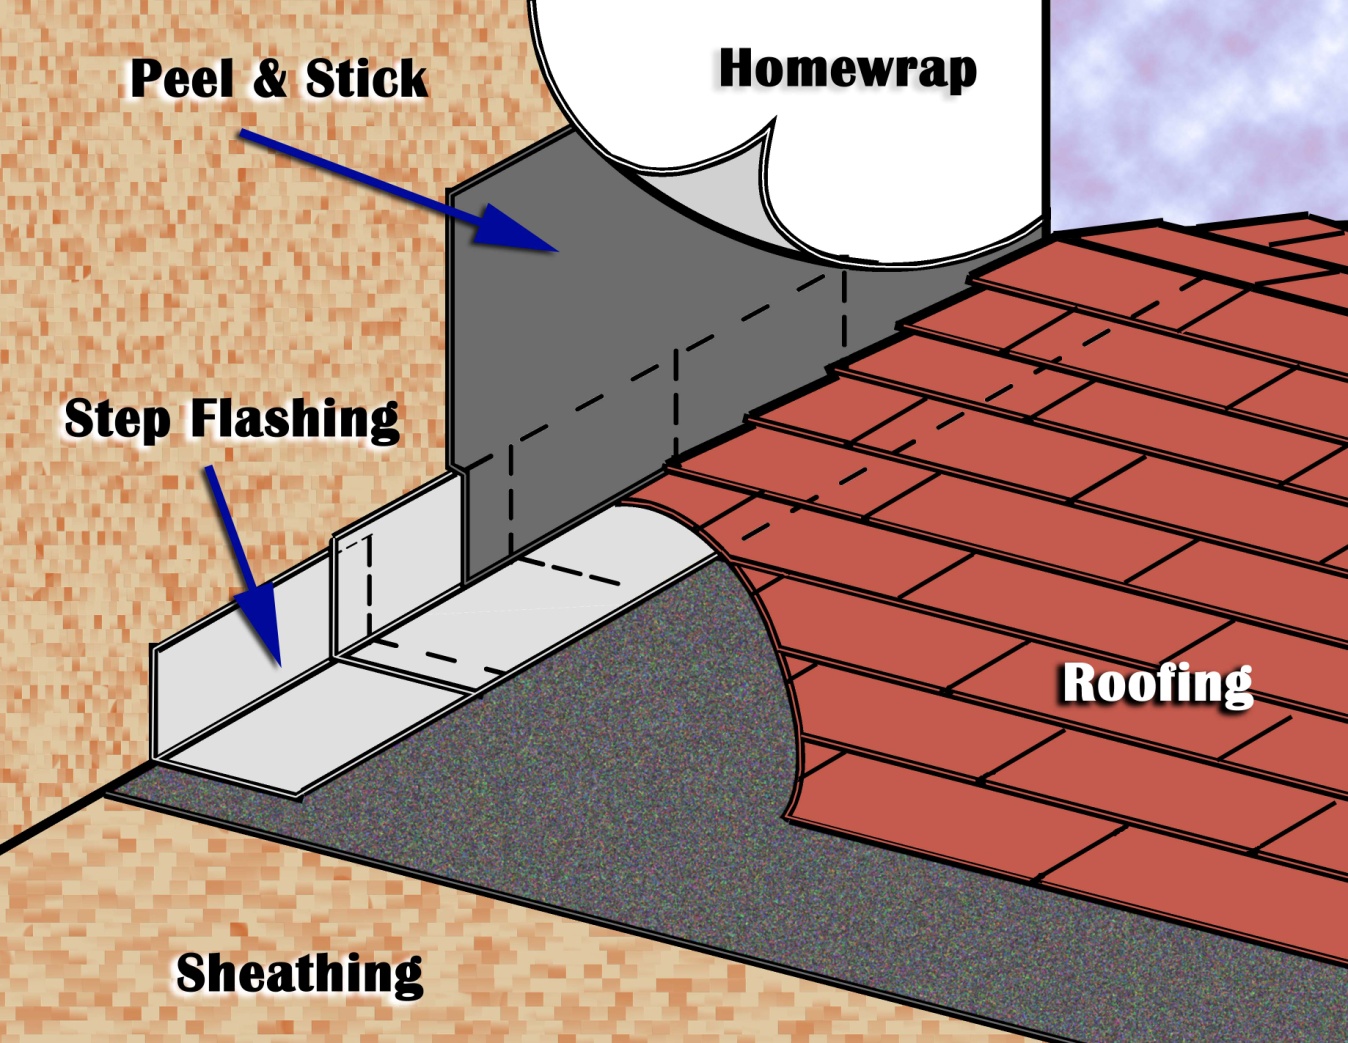
Right – The water-resistant barrier is layered over the step flashing to provide a complete drainage system
Image
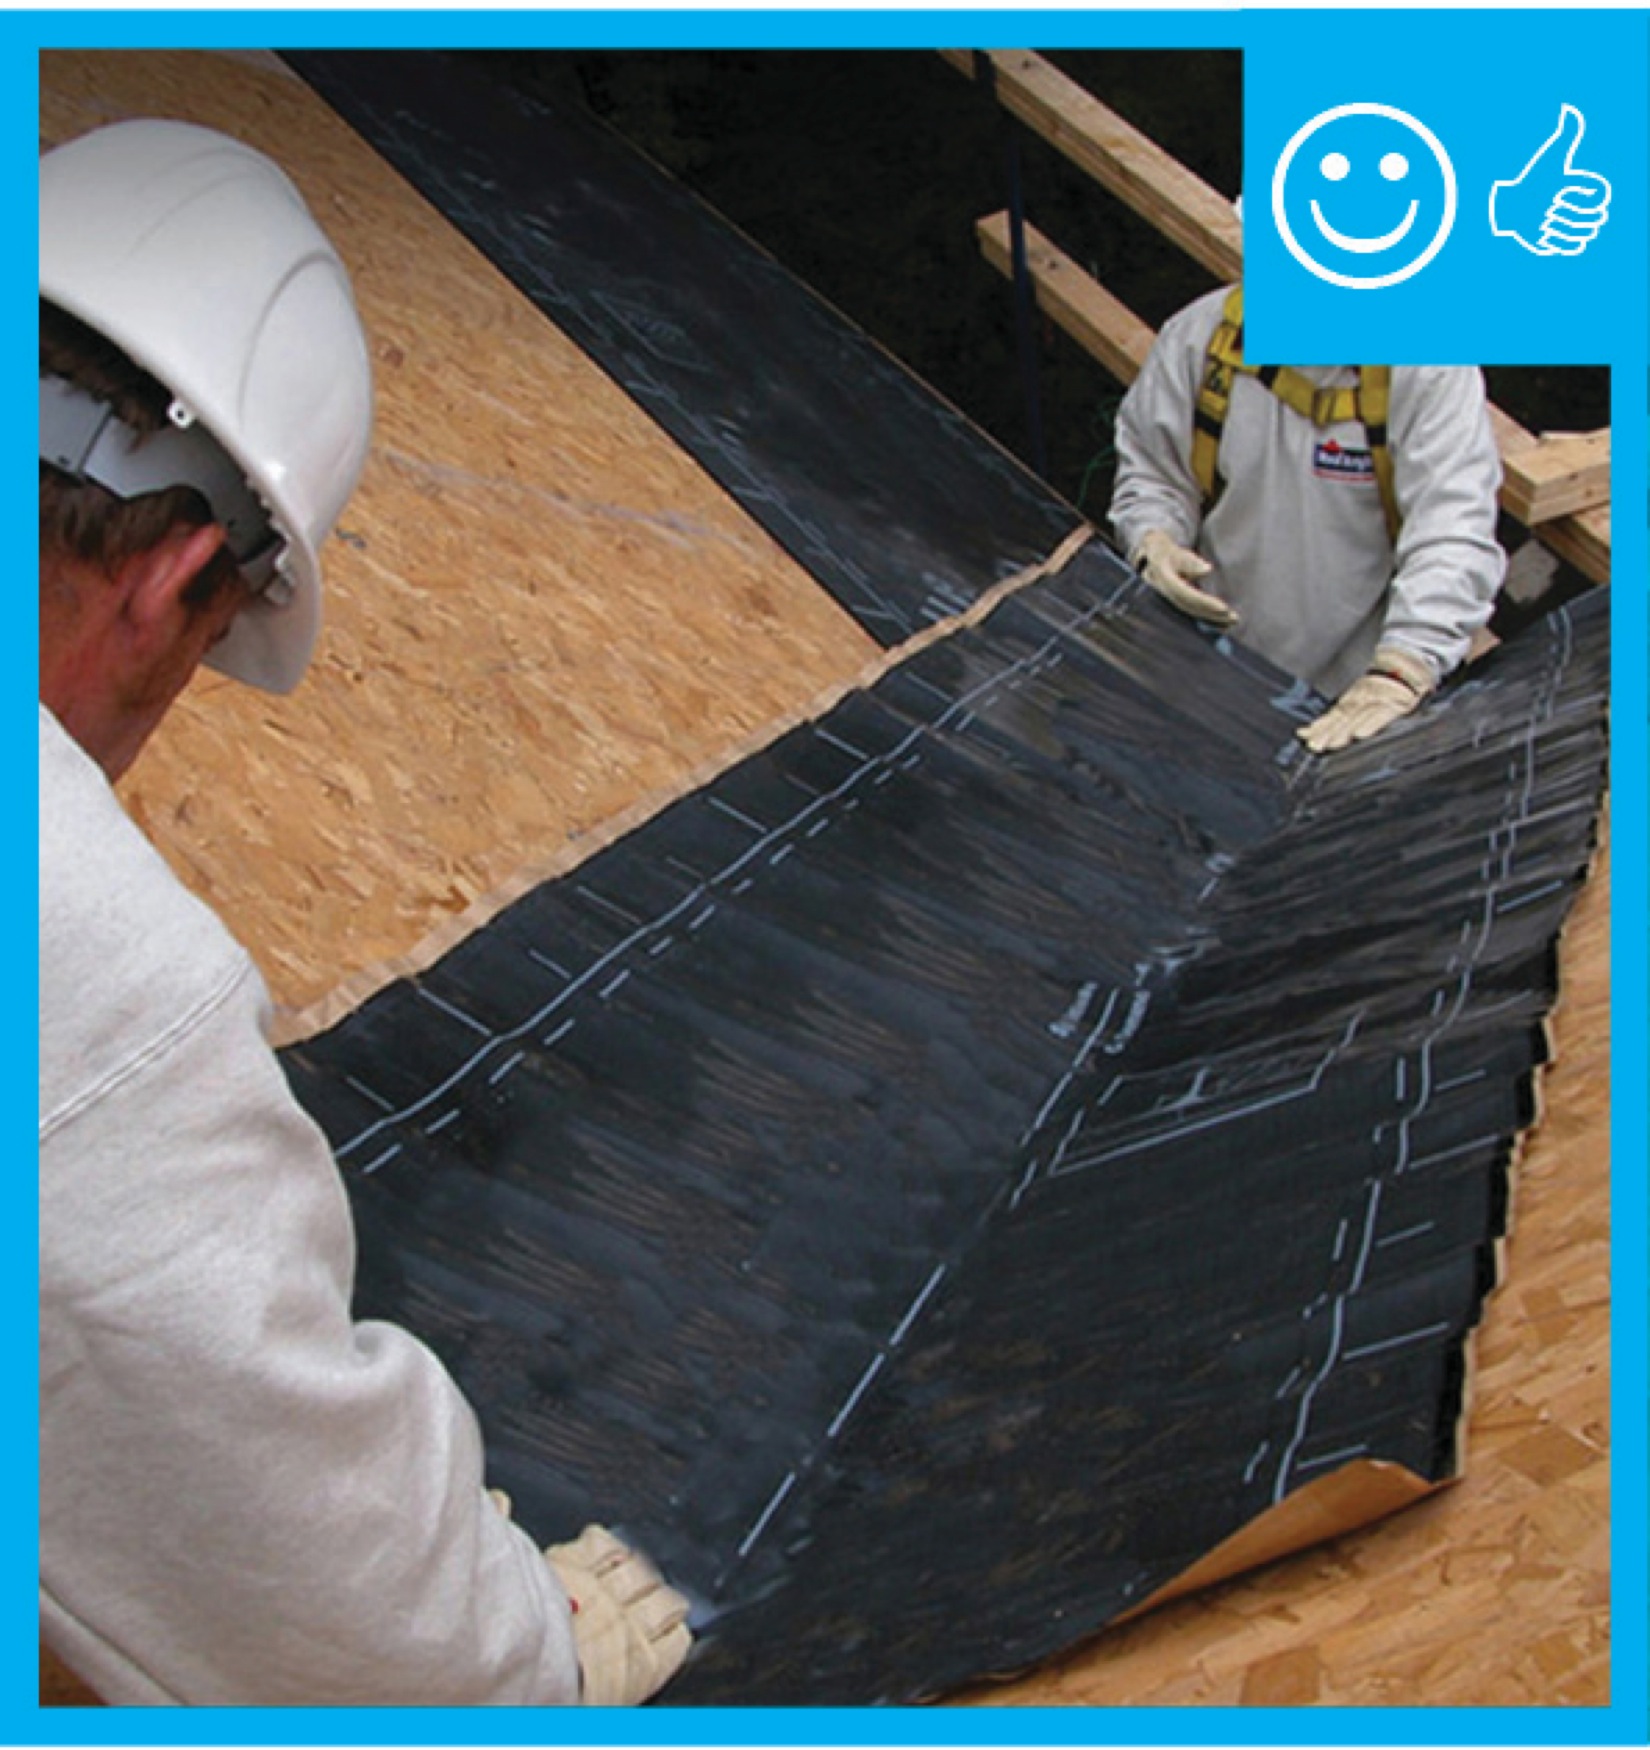
Right – There is a self-sealing bituminous membrane installed at the valley of the roof prior to the roof felt
Image

Right – This low-slope roof and parapet assembly has continuity of both the air and water barriers
Image
Rigid foam insulation can serve as the drainage plane when all seams are taped. Furring strips provide an air gap behind the cladding.
Image
Image
Image
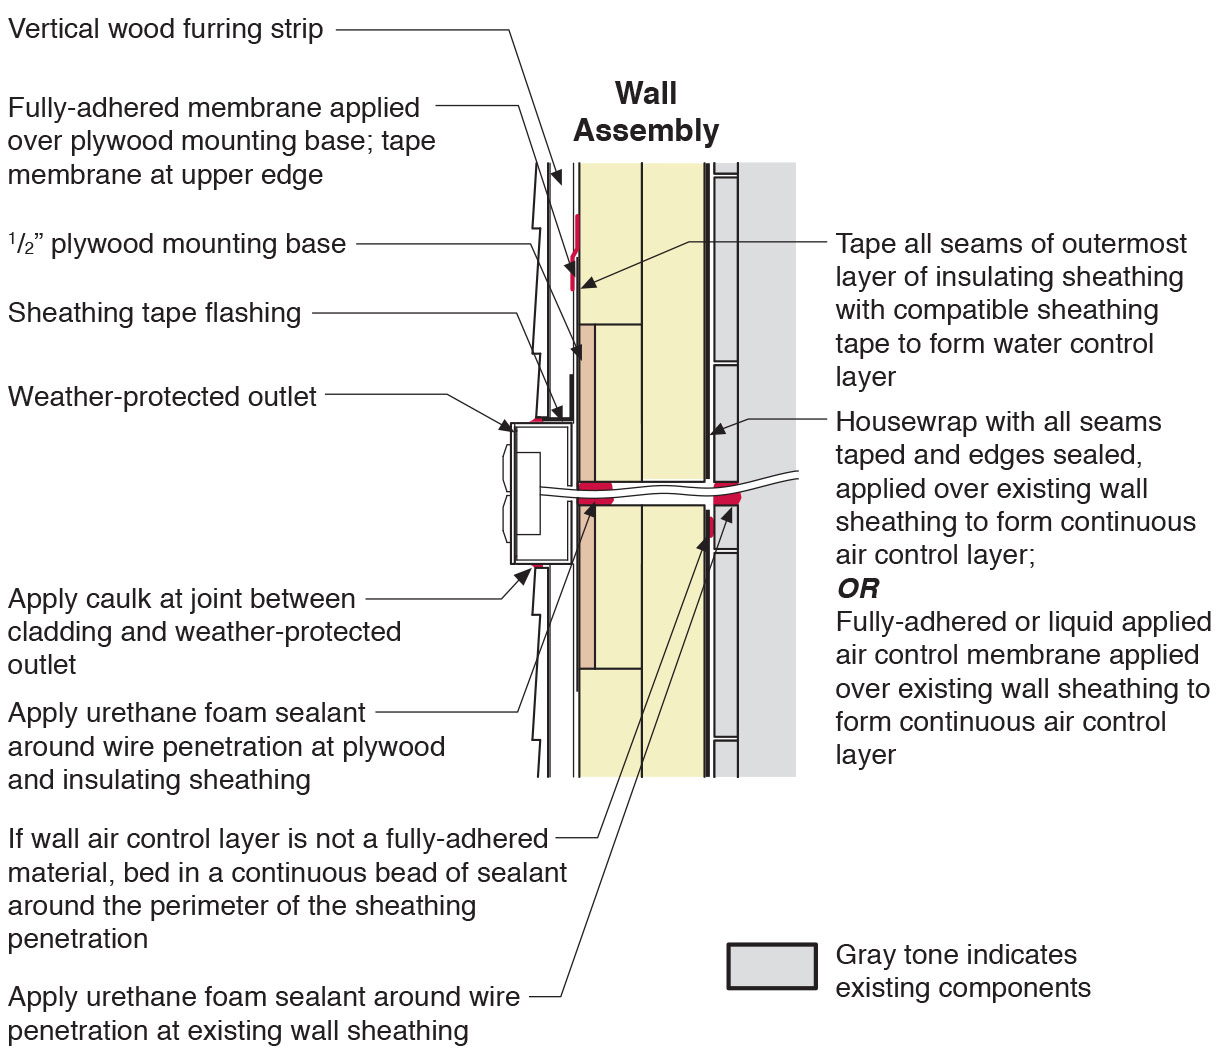
Section view of electric box installation in exterior wall showing flashing and air sealing details
Image
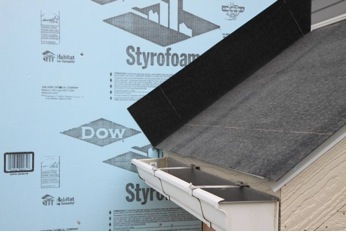
Step 1. Apply roof underlayment over roof deck and up the sidewall over the rigid foam insulation
Image
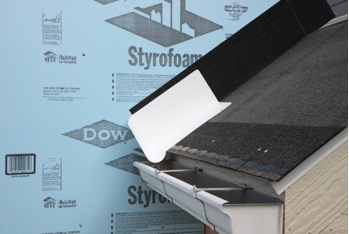
Step 2. Install shingle starter strip then kick-out diverter as first piece of step flashing.
Image

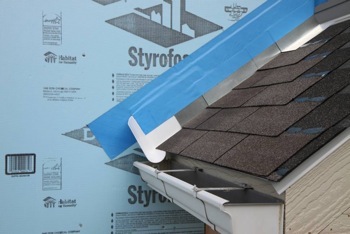
Step 4. Install remaining sidewall flashing, appropriate counter flashing, and shingles
Image
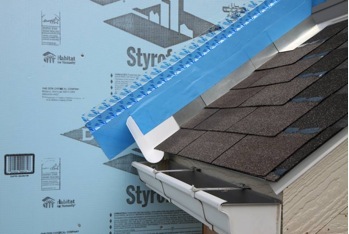
Step 5. Apply self-adhesive flashing over top edge of the wall flashing, diverter, and rigid foam insulation
Image
Image
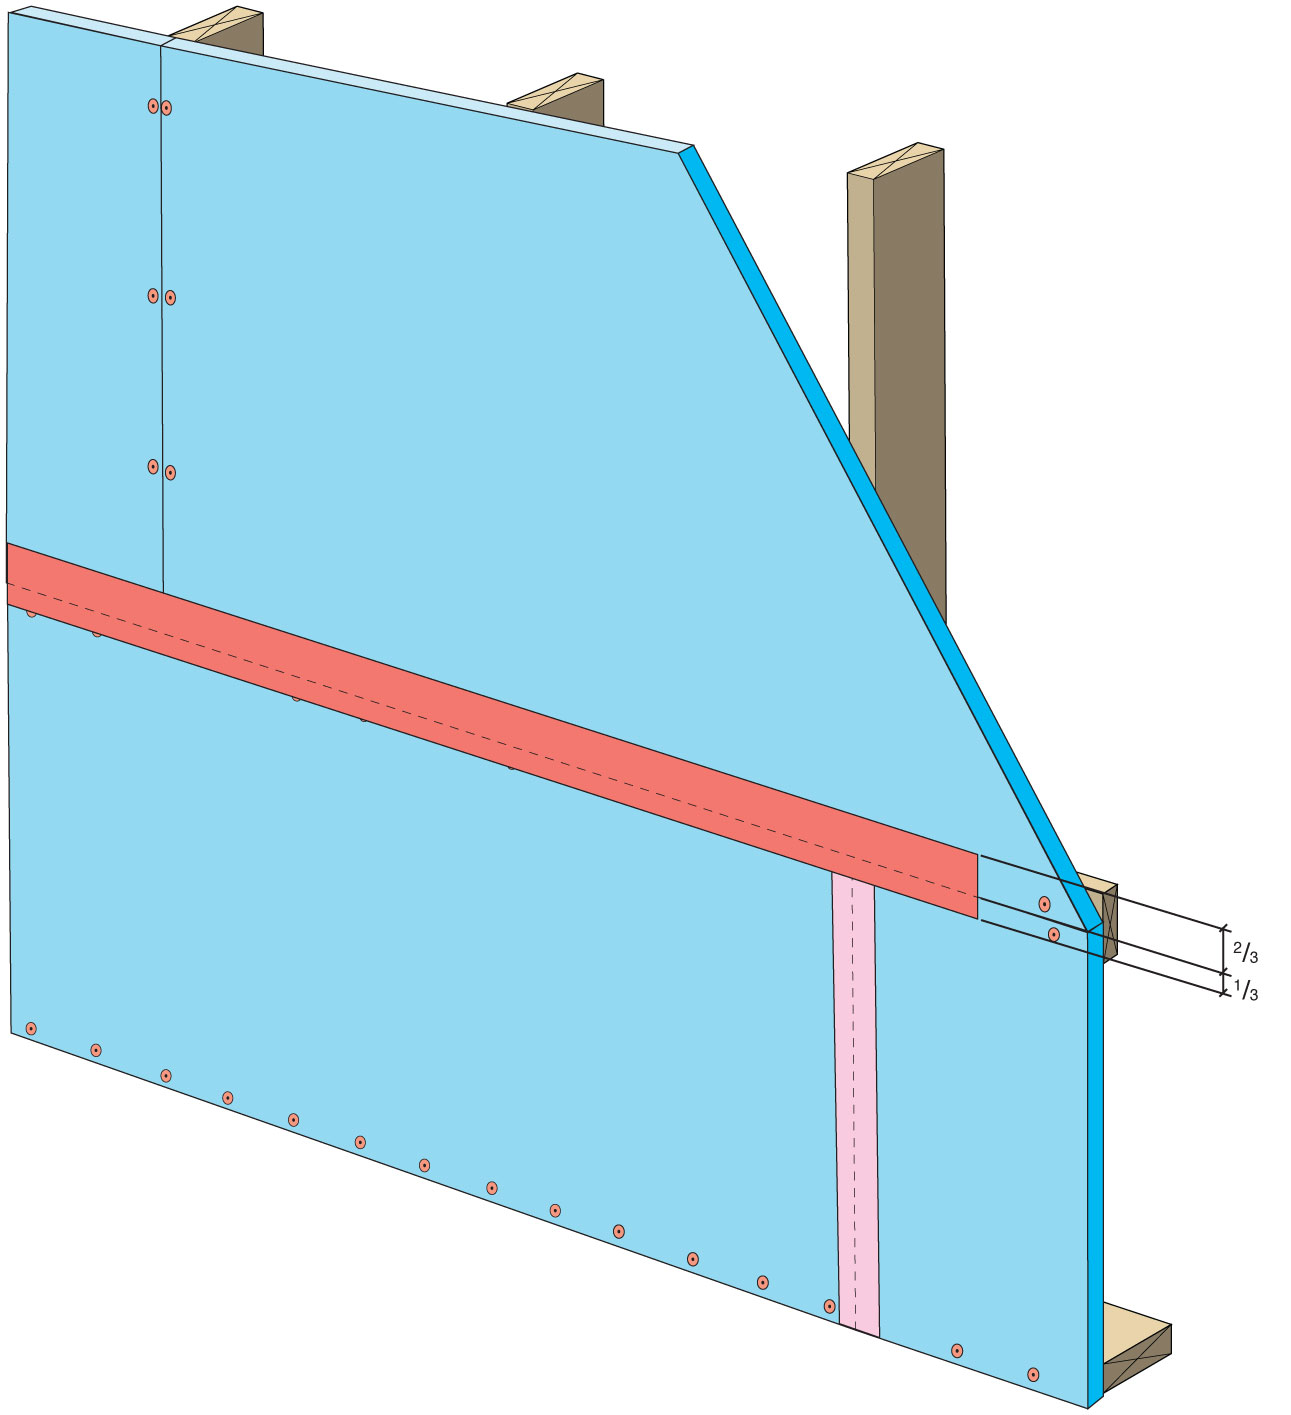
Tape horizontal joint with minimum 3" wide tape placing tape offset high on the joint, adhearing to the upper sheet without wrinkles
Image
Tape the joint between the top insulation sheet and the Z-flashing with 2" wide tape to improve air tightness