Showing results 101 - 150 of 192
Image
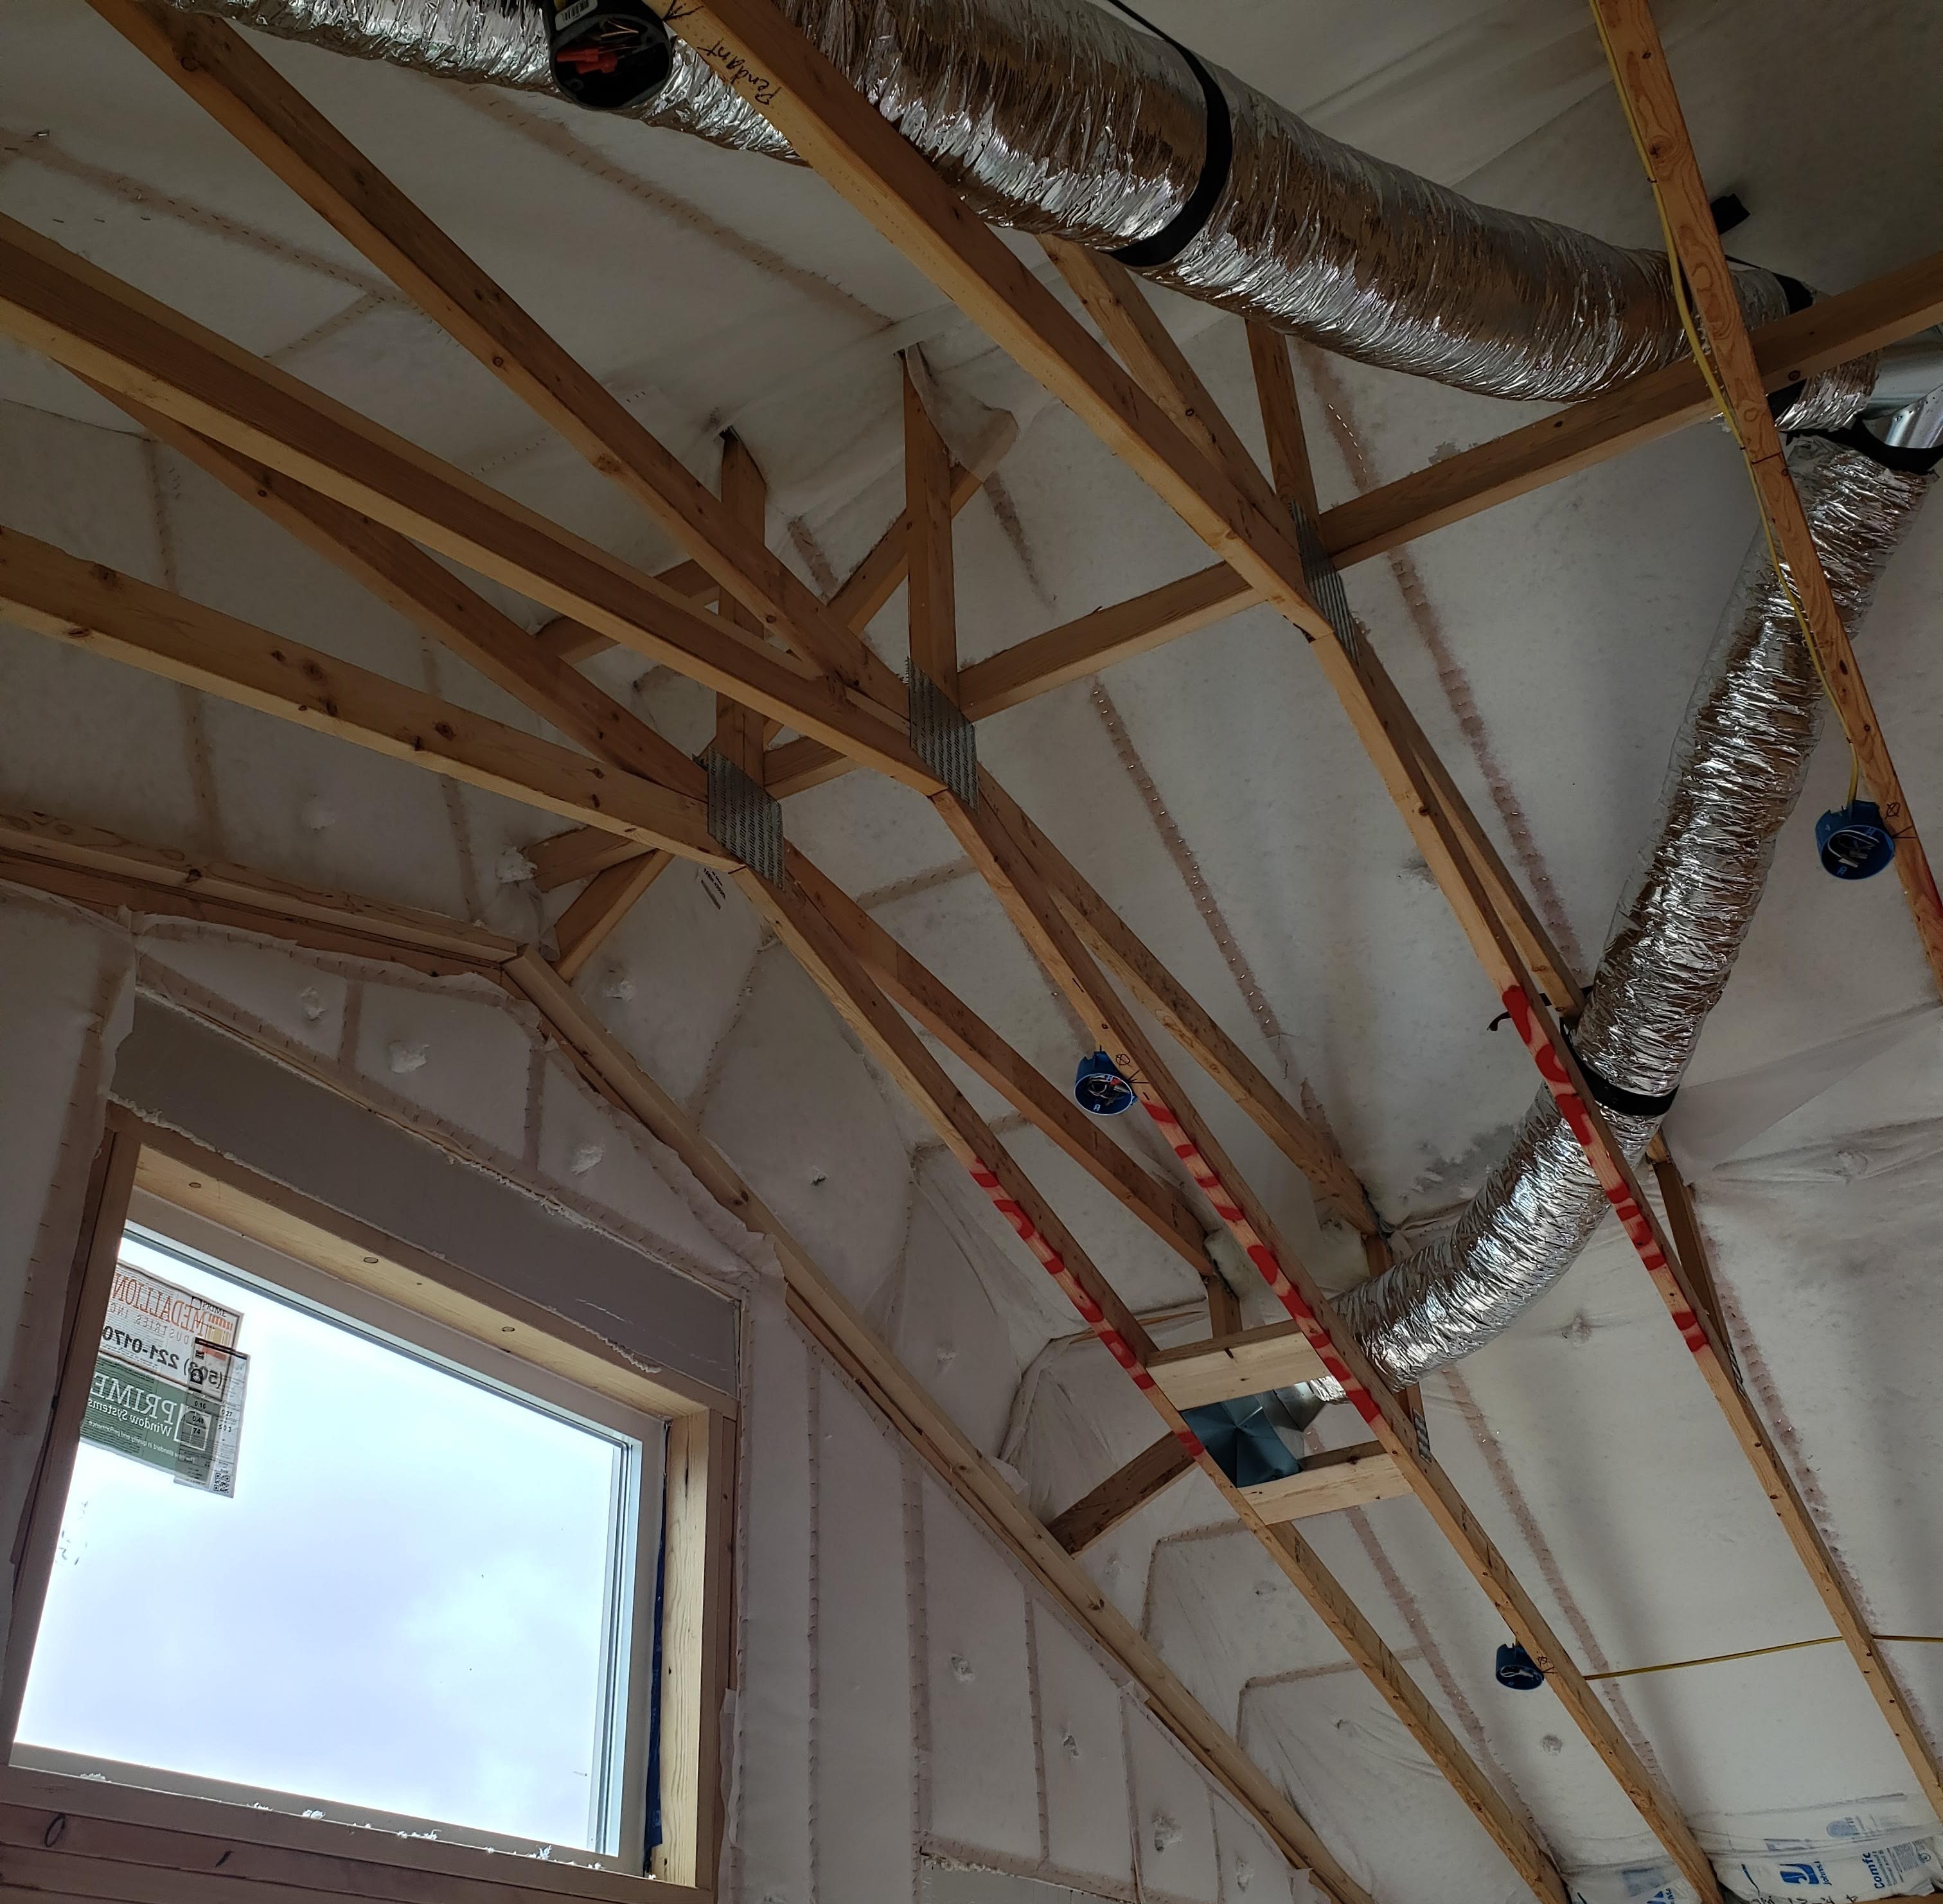
Right – R-23 of blown fiberglass fills the walls and unvented vaulted attic cavities of this marine-climate home while an additional R-20 (4-inches) of graphite-enhanced expanded polystyrene is installed above the roof sheathing.
Image
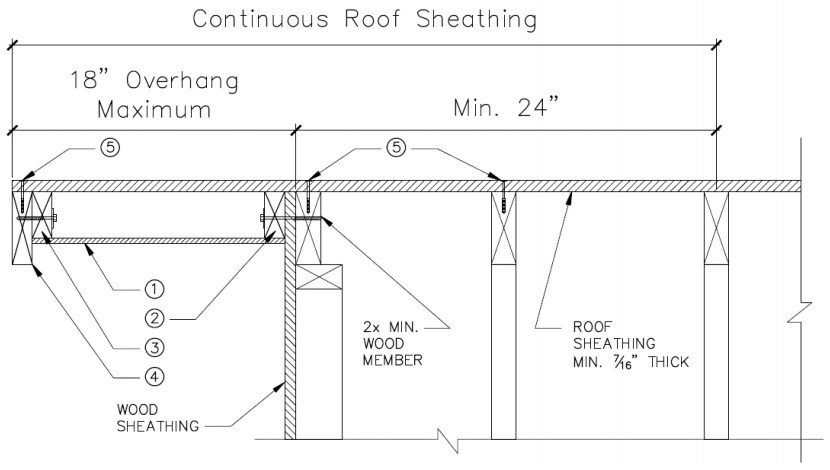
Right – Retrofit Specification for installing roof sheathing an 18-inch gable end overhang
Image

Image
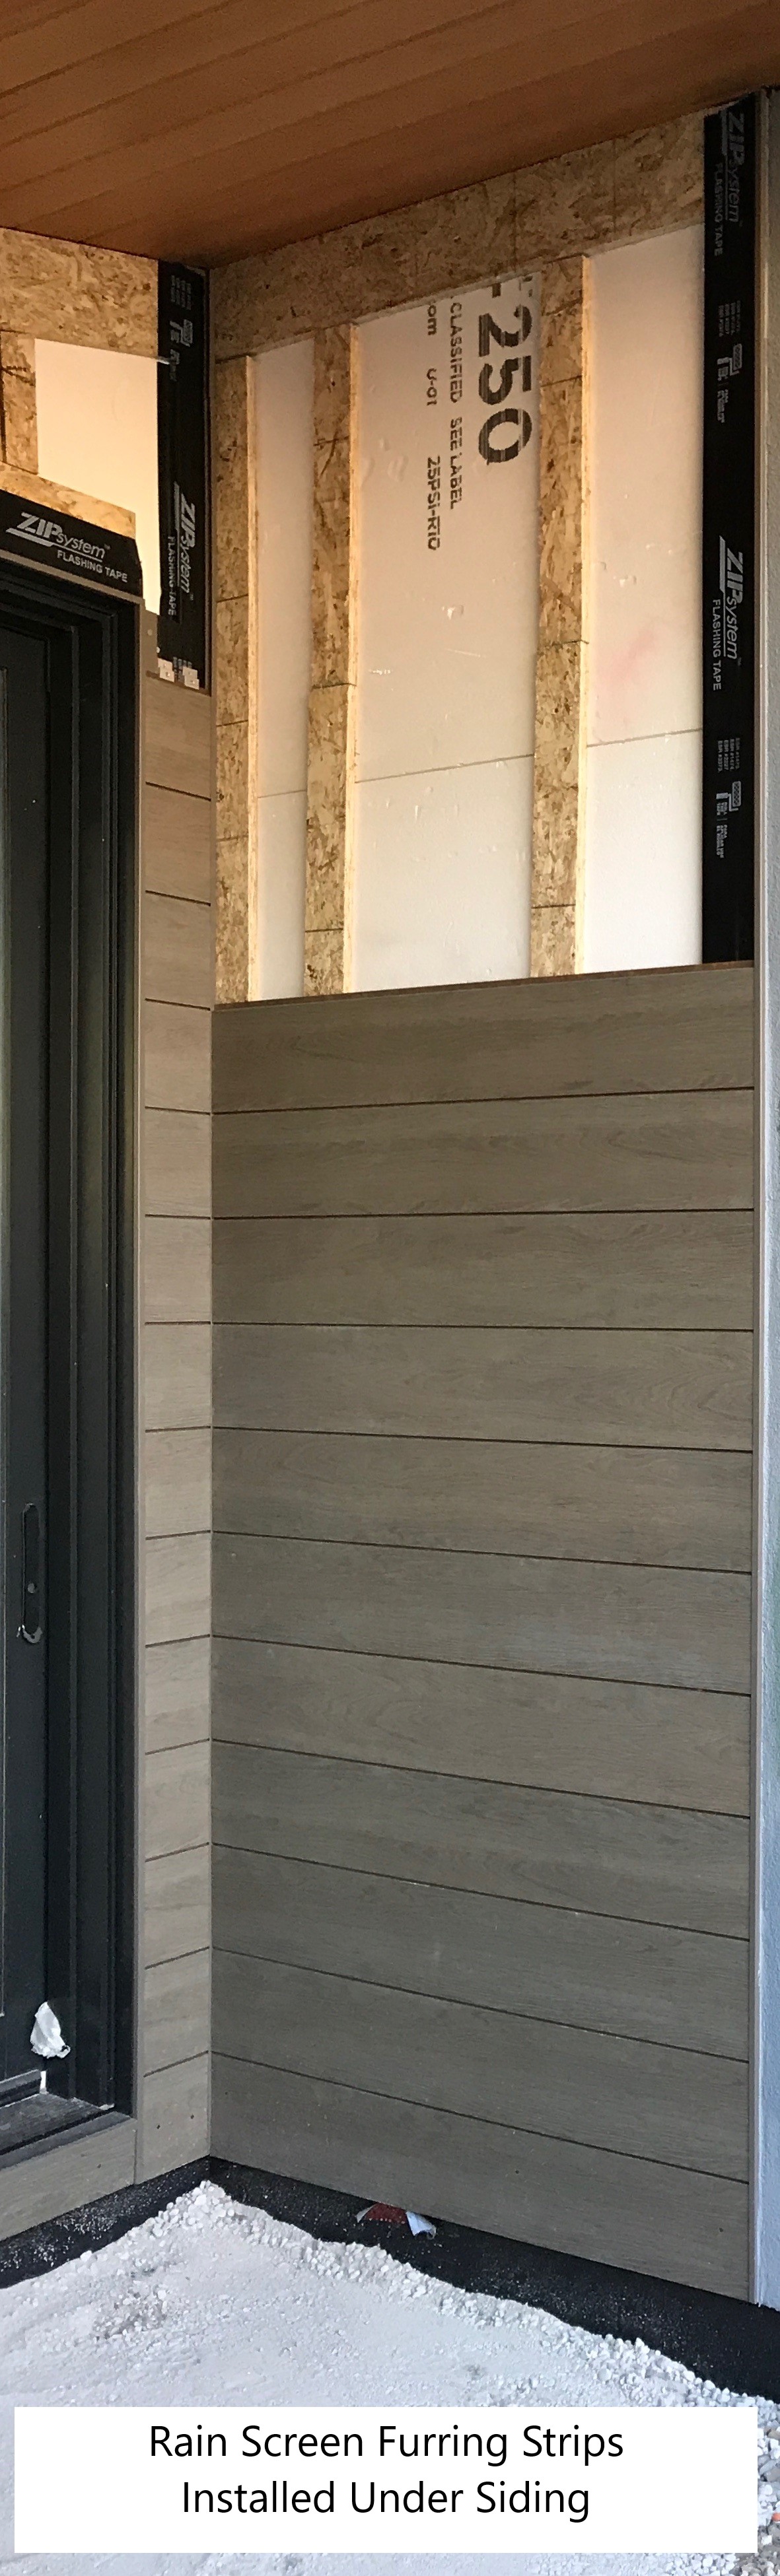
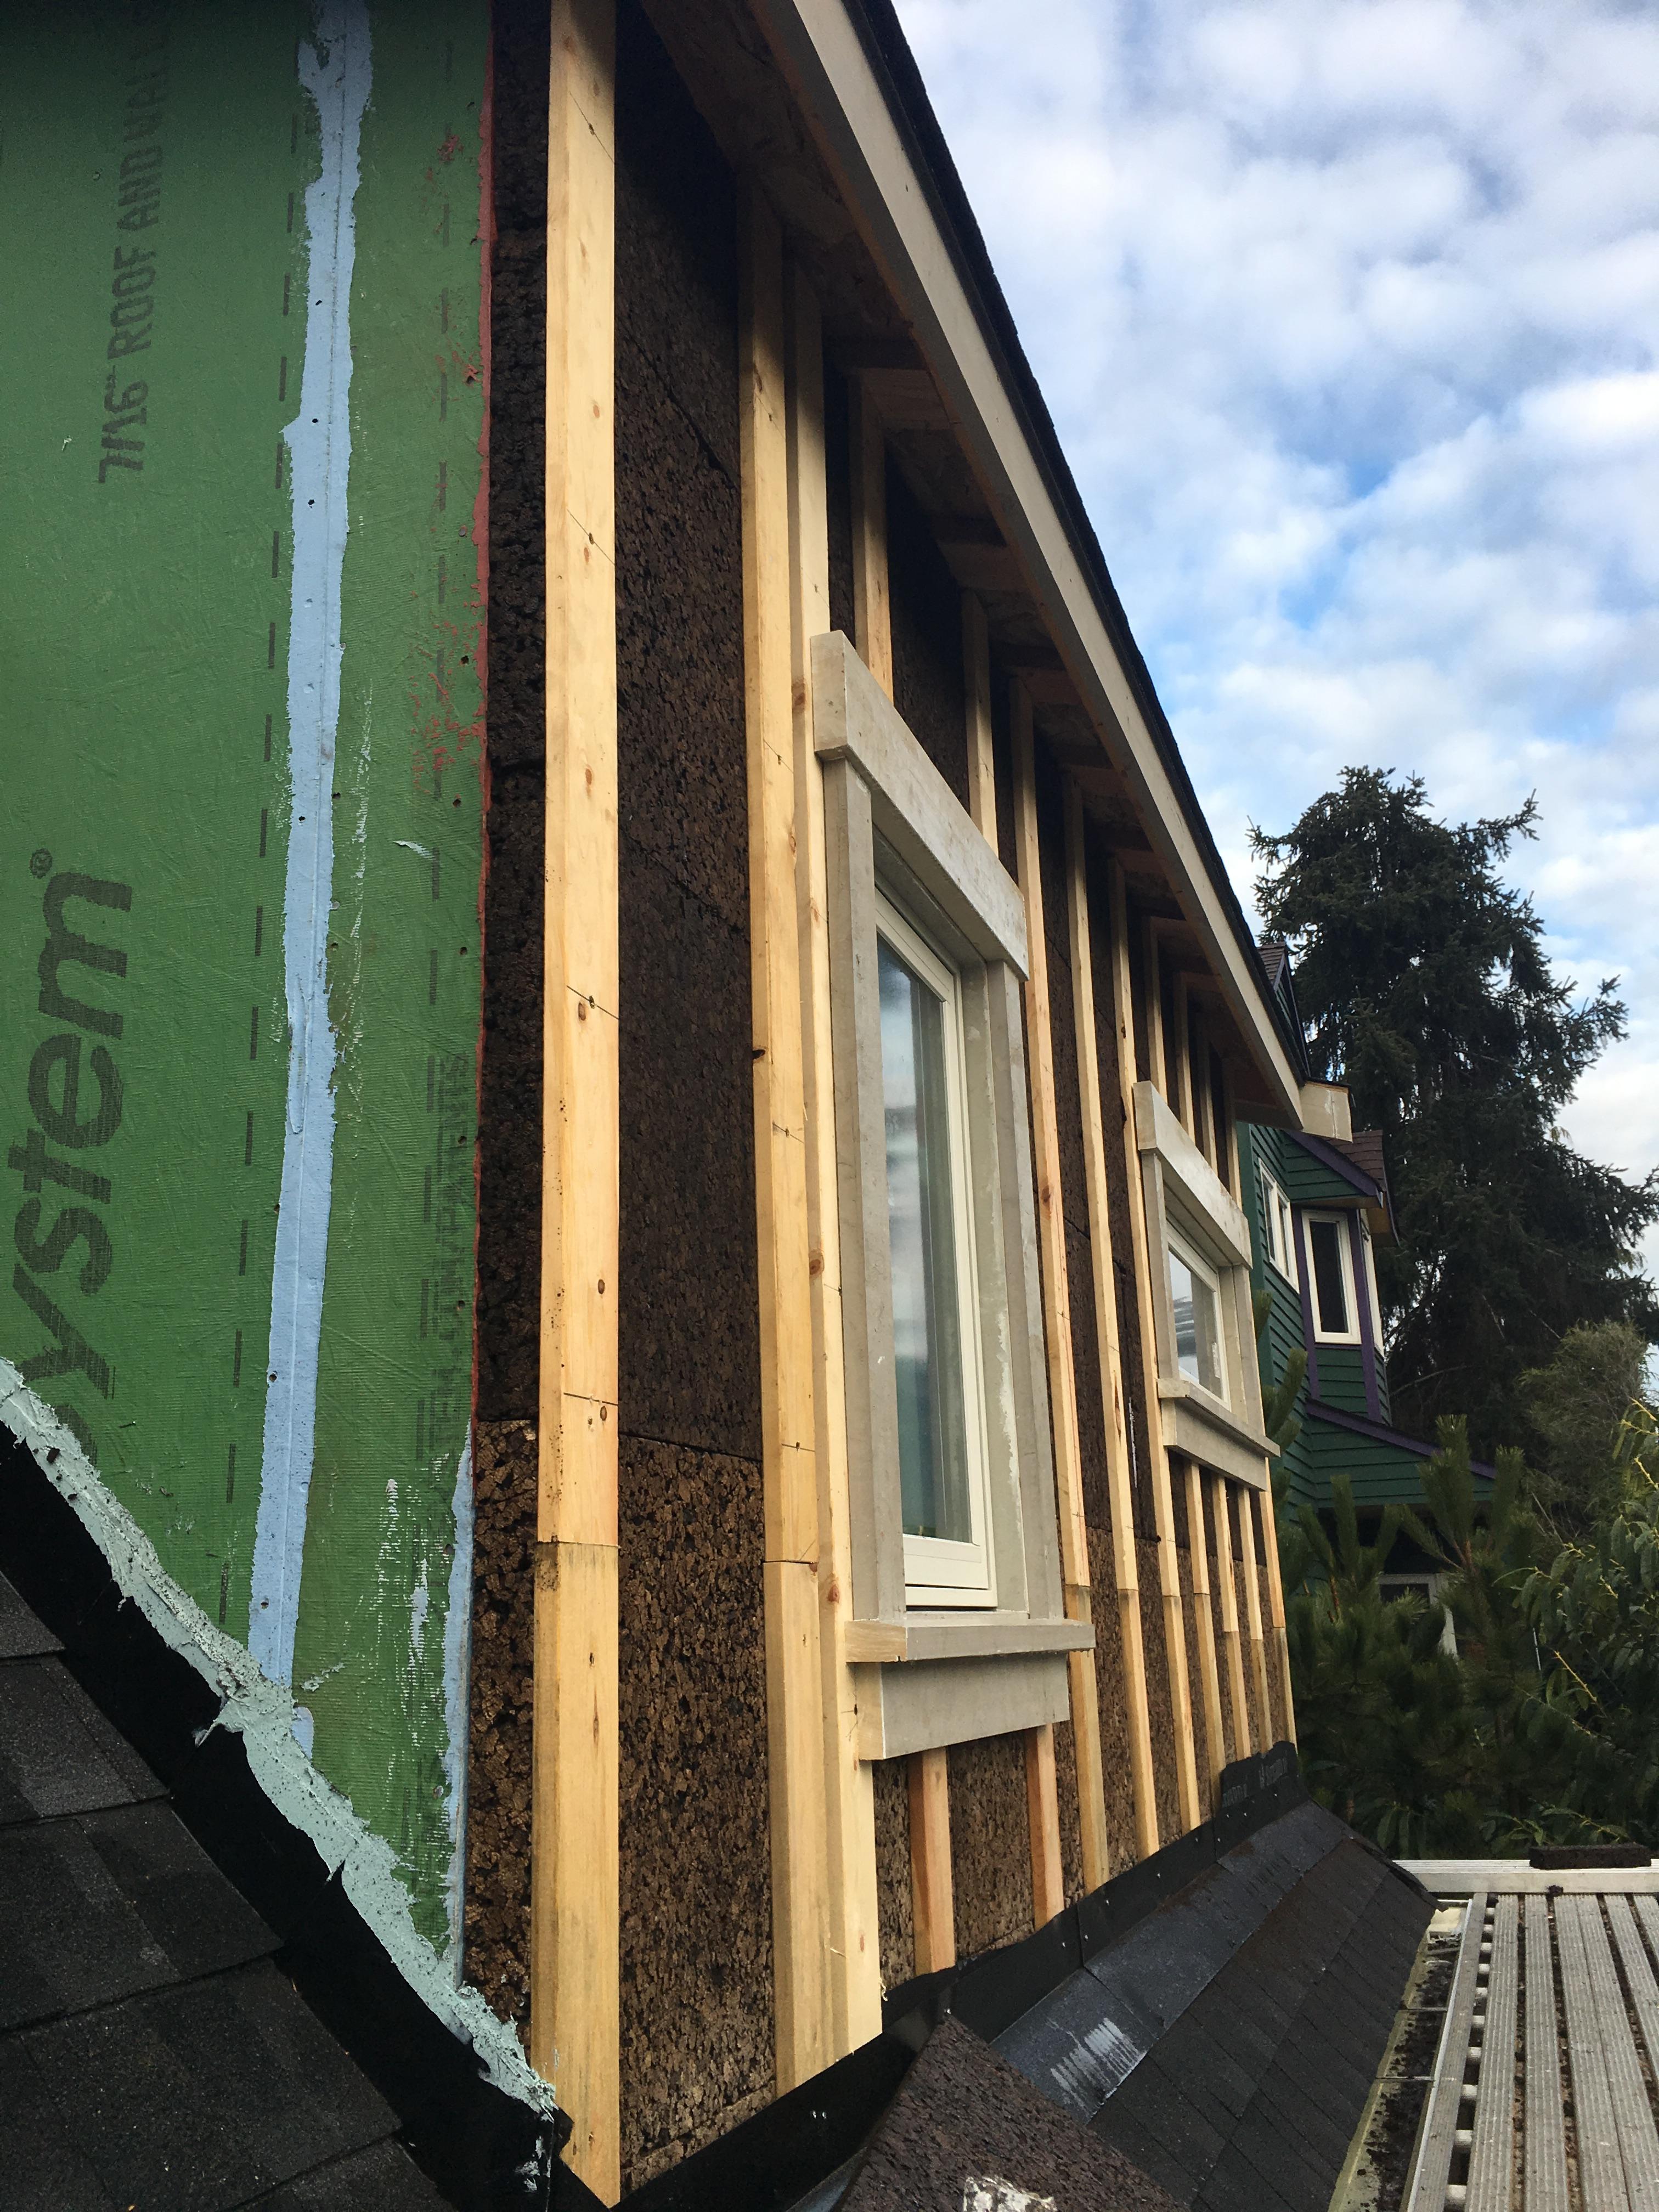
Right – Ripped OSB provides furring strips for a ventilation gap behind the wood siding.
Image
Image
Right – Some tape is pressure sensitive; a roller is used to apply even pressure to ensure full adhesion.
Image

Right – Start asphalt shingle installation with a starter strip set in an 8-inch strip of flashing cement
Image
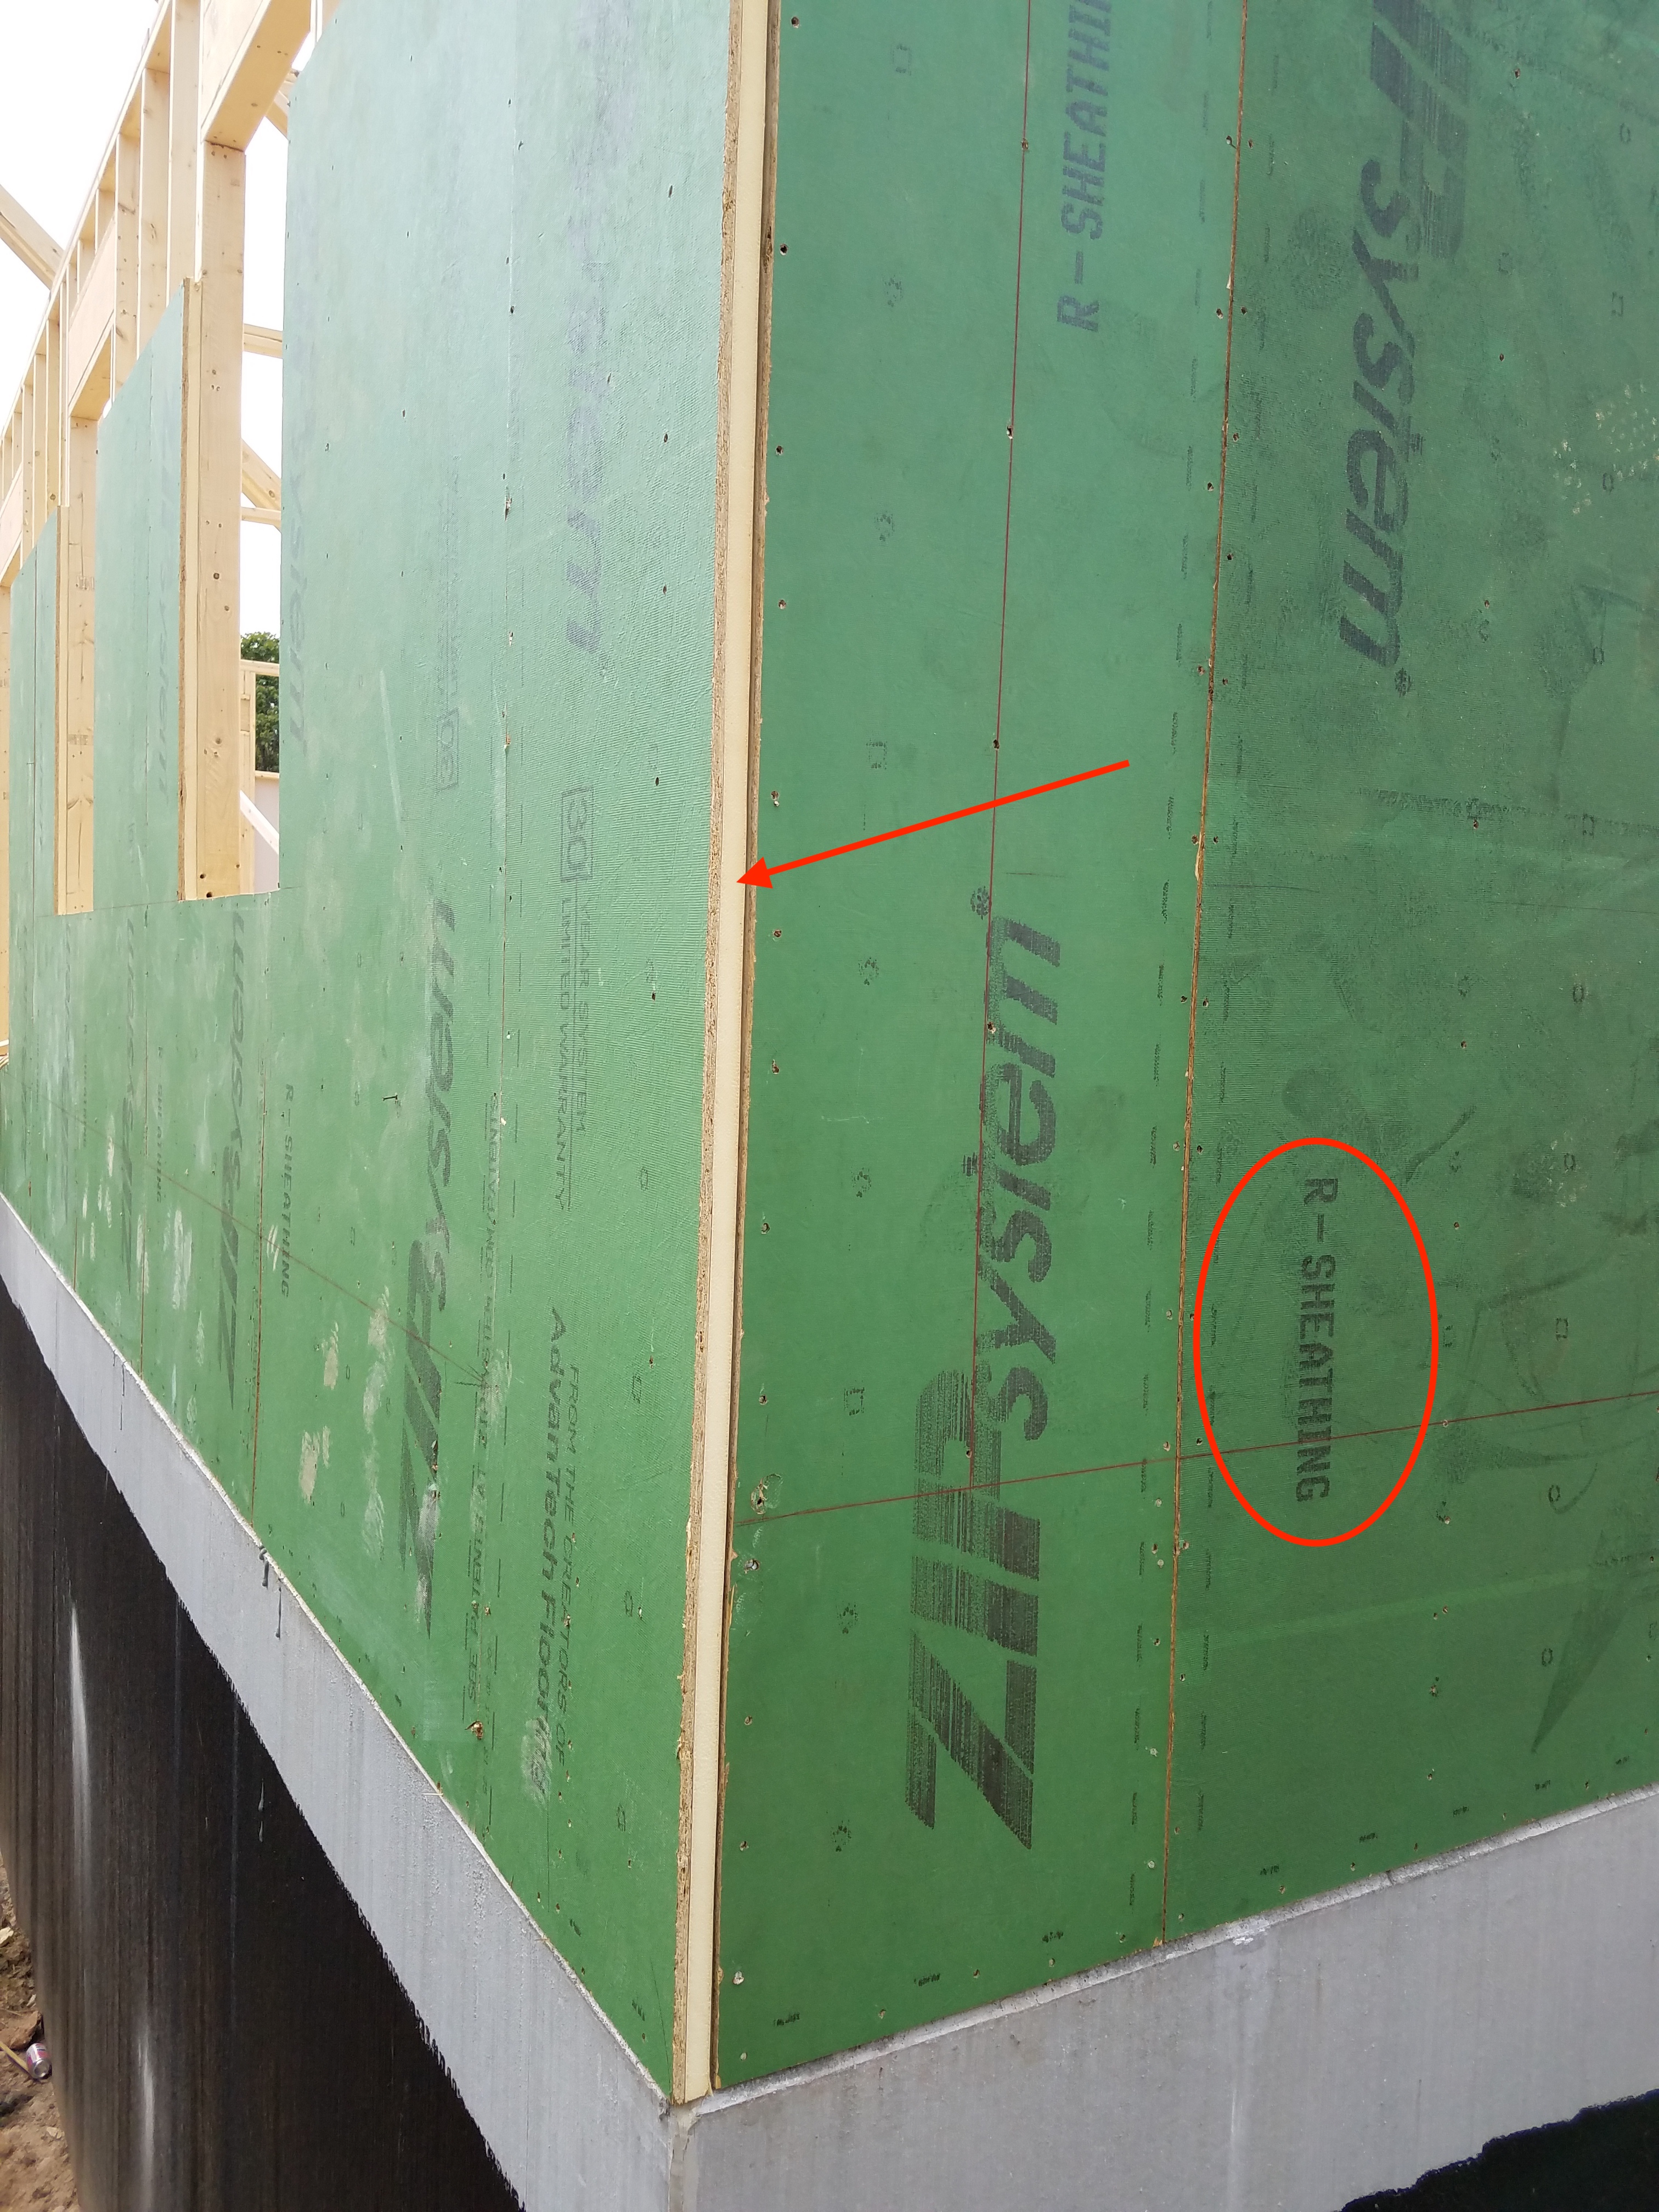
Right – Structural insulated sheathing can provide racking strength (lateral load resistance), and serve as an air barrier and thermal barrier if installed according to manufacturer’s specifications with taped, sealed seams
Image
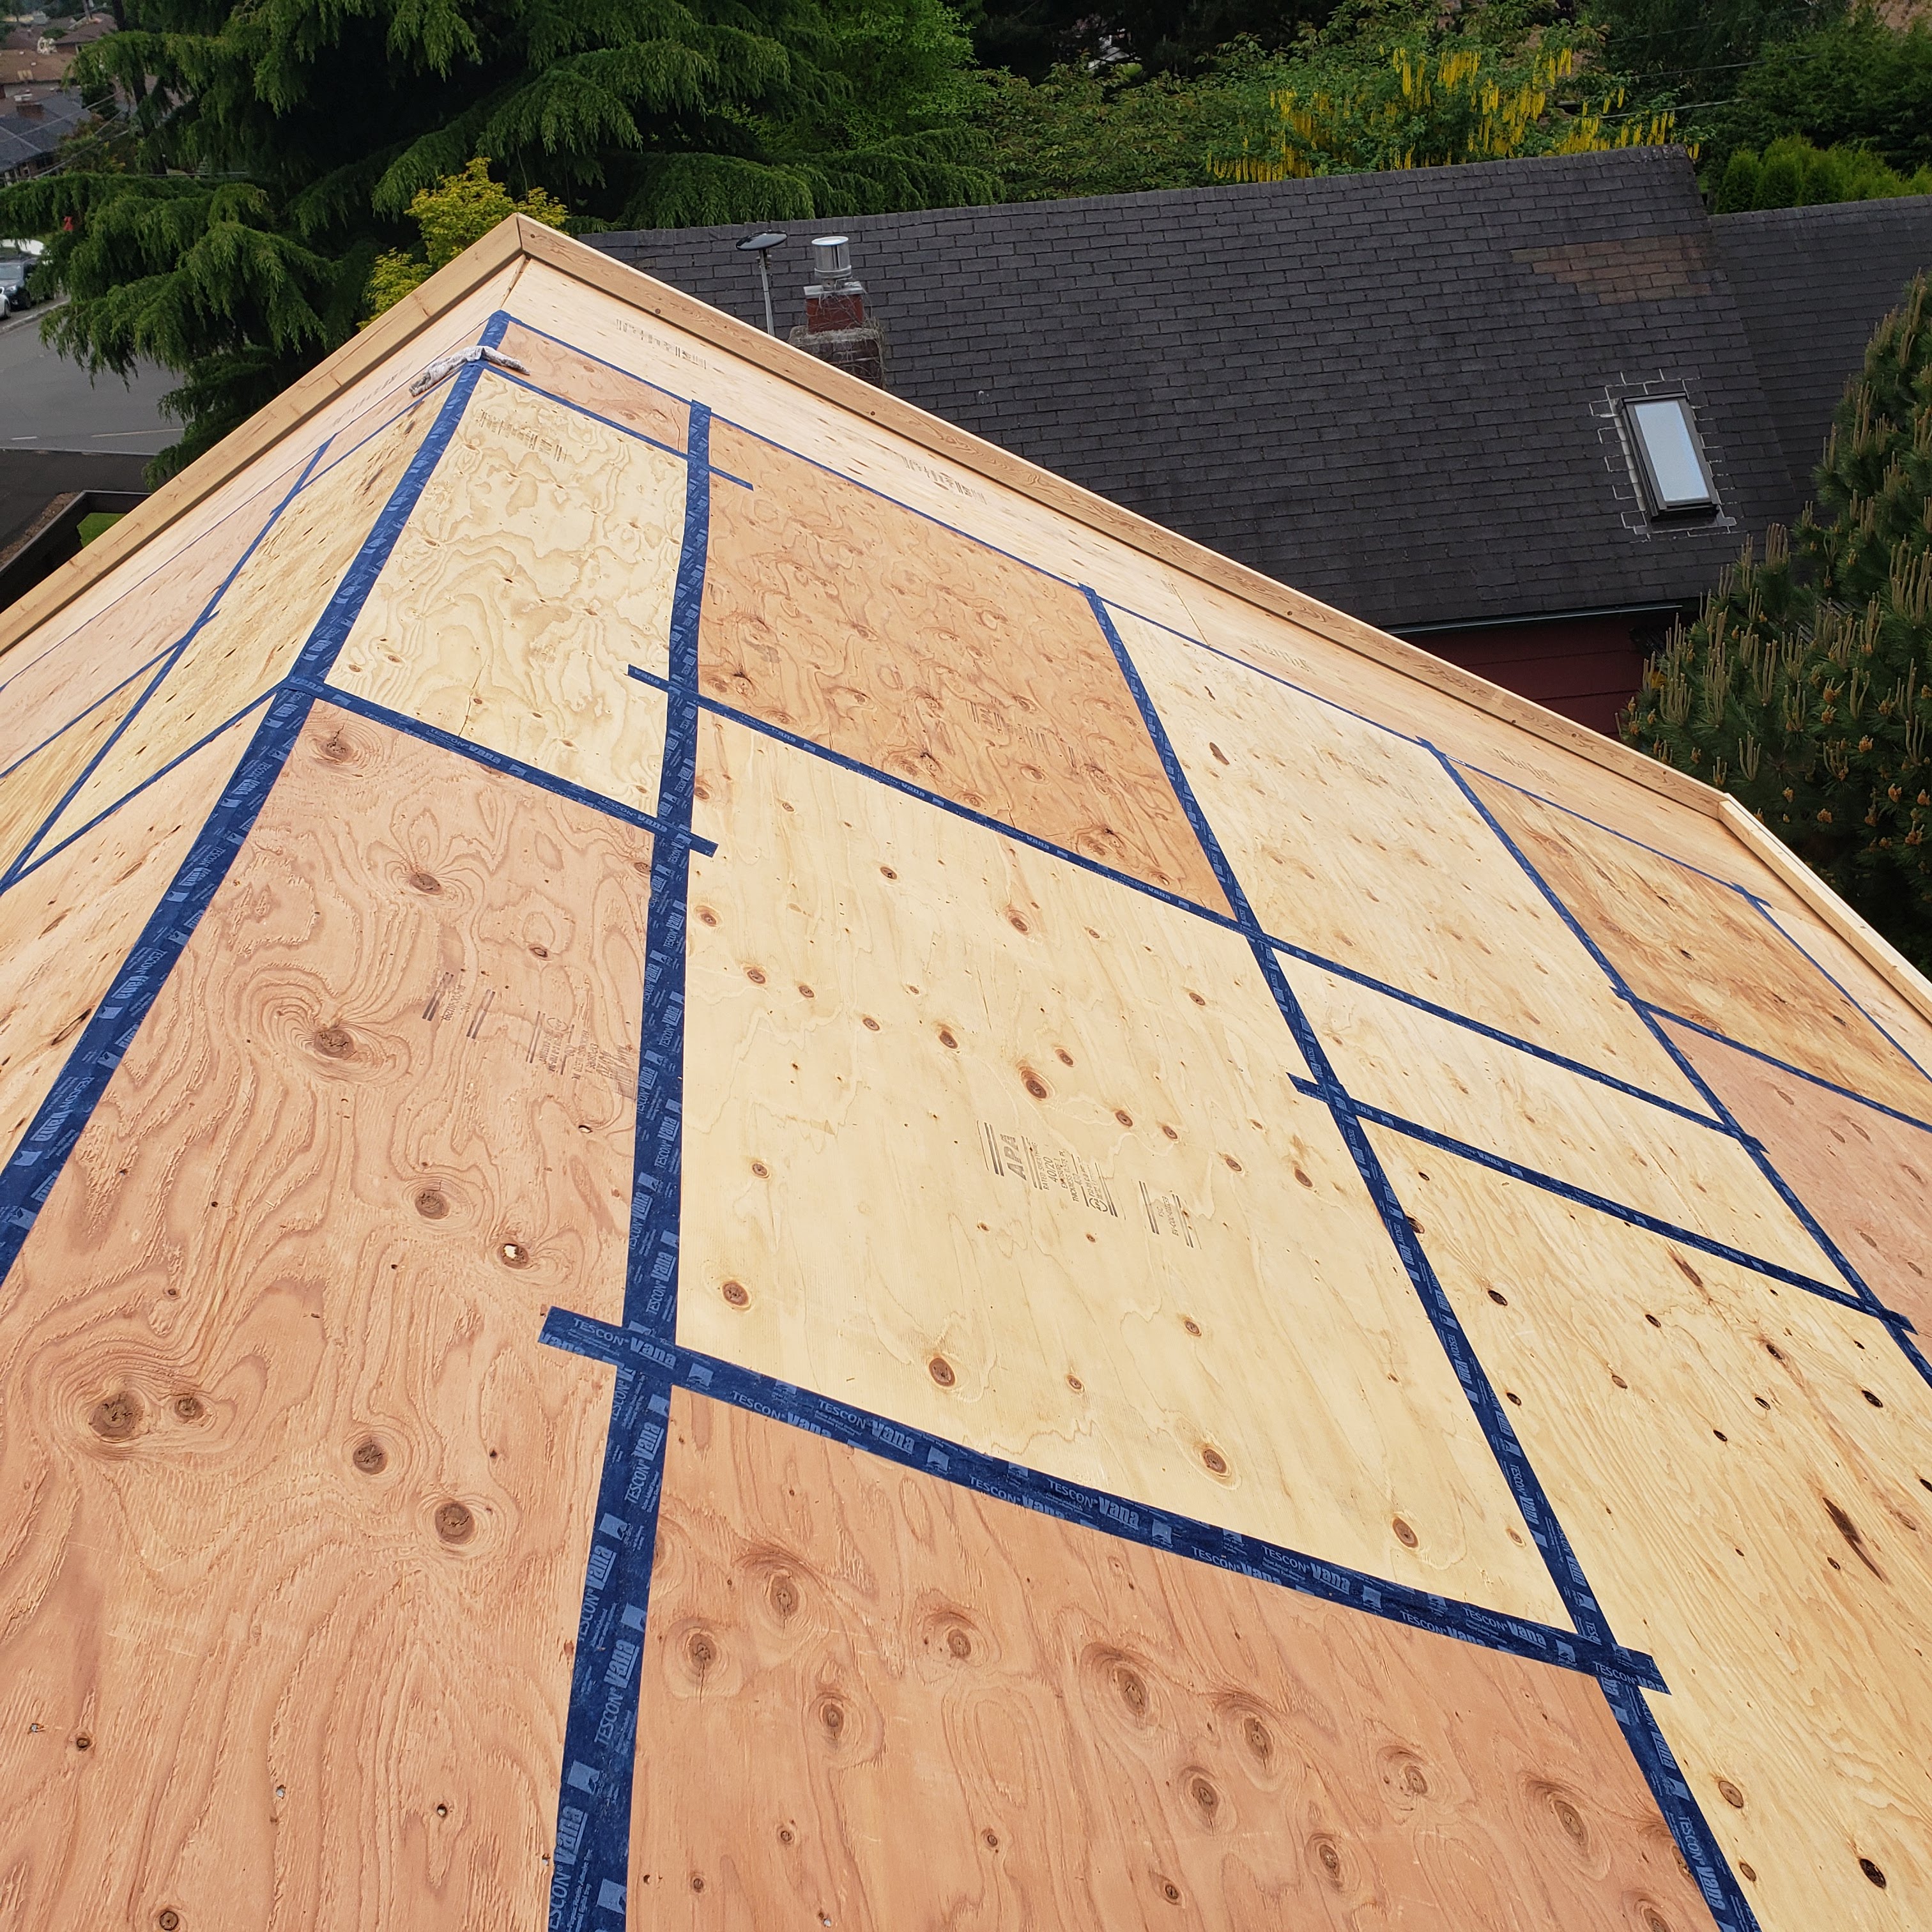
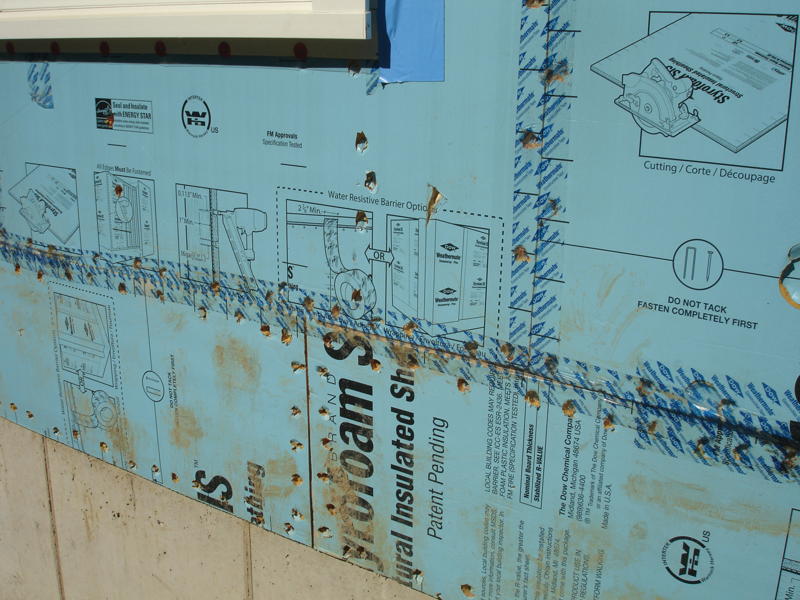
Right – Taping the roof sheathing seams can greatly decrease the likelihood of water infiltration into a home in the event of a hurricane.
Image
Right – The coated OSB sheathing can take the place of house wrap to serve as the weather-resistant barrier because it is sealed at the seams with a paint-on flashing.
Image
Right – The seams are taped on the coated OSB sheathing of this home to provide a complete air barrier.
Image

Image
Right – This coated OSB sheathing product is available with an integrated insulation layer.
Image
Right – This foil-faced foam sheathing has taped seams and proper flashing details so it can serve as a drainage plane.
Image
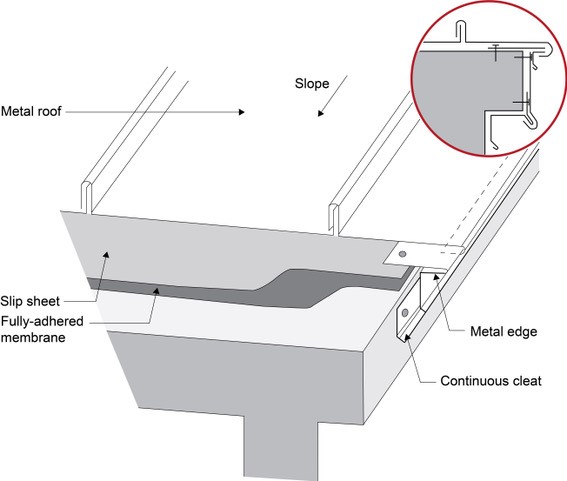
Right – Under metal roofing, sheathing is protected by metal edging over a fully adhered membrane and a slip sheet of loose laid building paper
Image
Right – Wood-to-sheathing joints are caulked so the sheathing can provide an air barrier for the home.
Image
Right- The rigid foam sheathing is taped at all seams before installing the metal lathe for stucco cladding.
Image
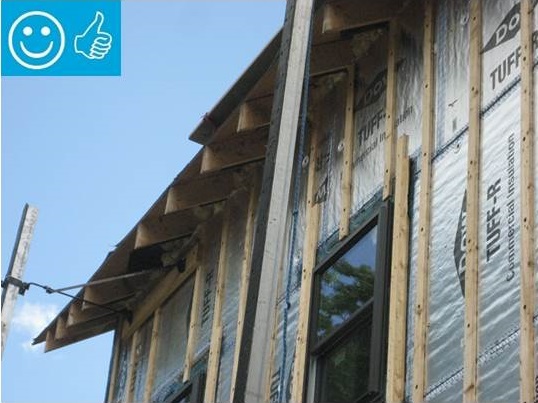
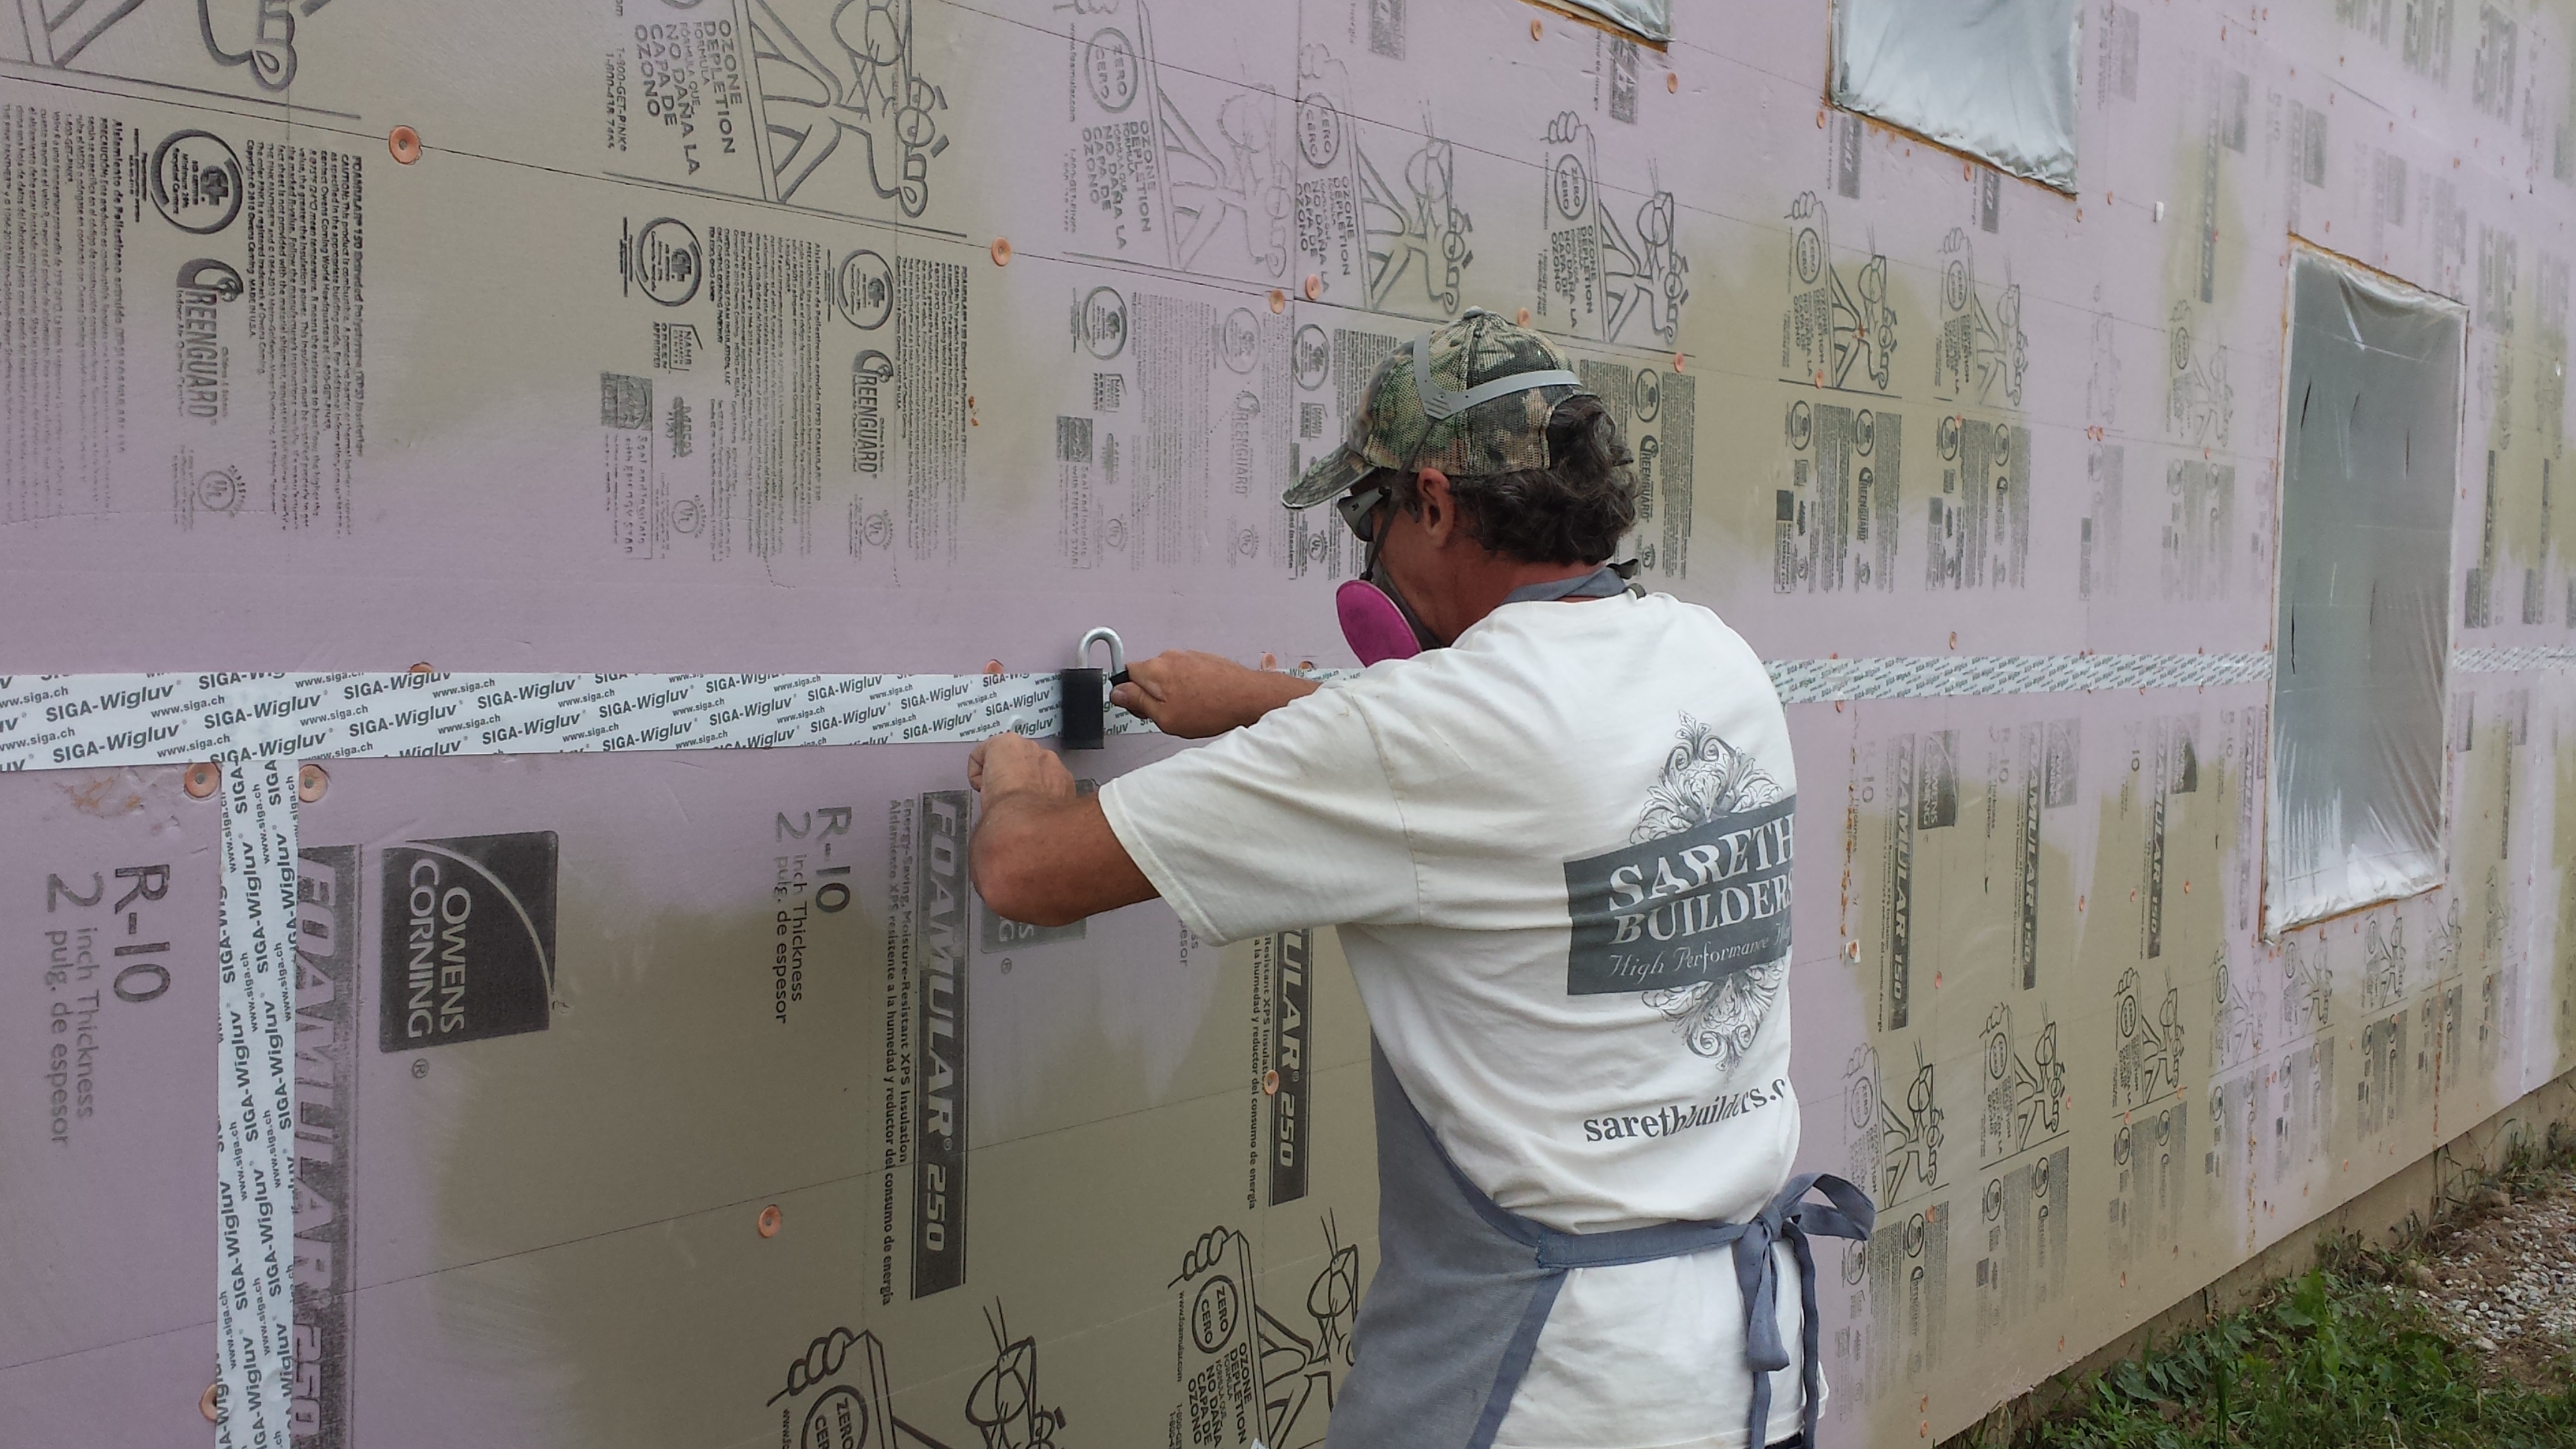
Right-Wall-insulating sheathing is extended up to roof rafters and sealed around the framing with spray foam
Image
Right: All joints in the rigid foam are taped to keep stucco out of joints for even drying. Mesh tape (shown here) is used with expanded polystyrene (EPS); acrylic sheathing tape or self-adhered membrane is used with XPS
Image

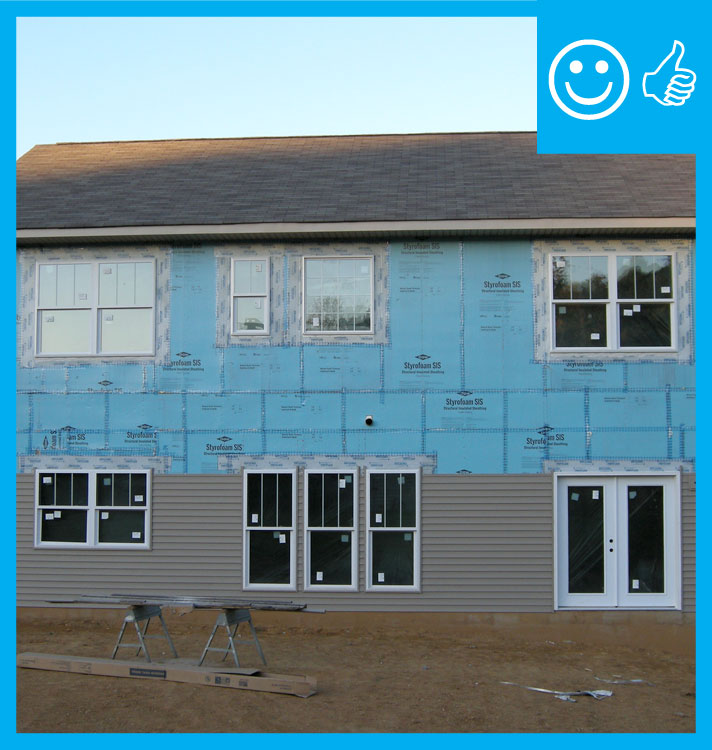
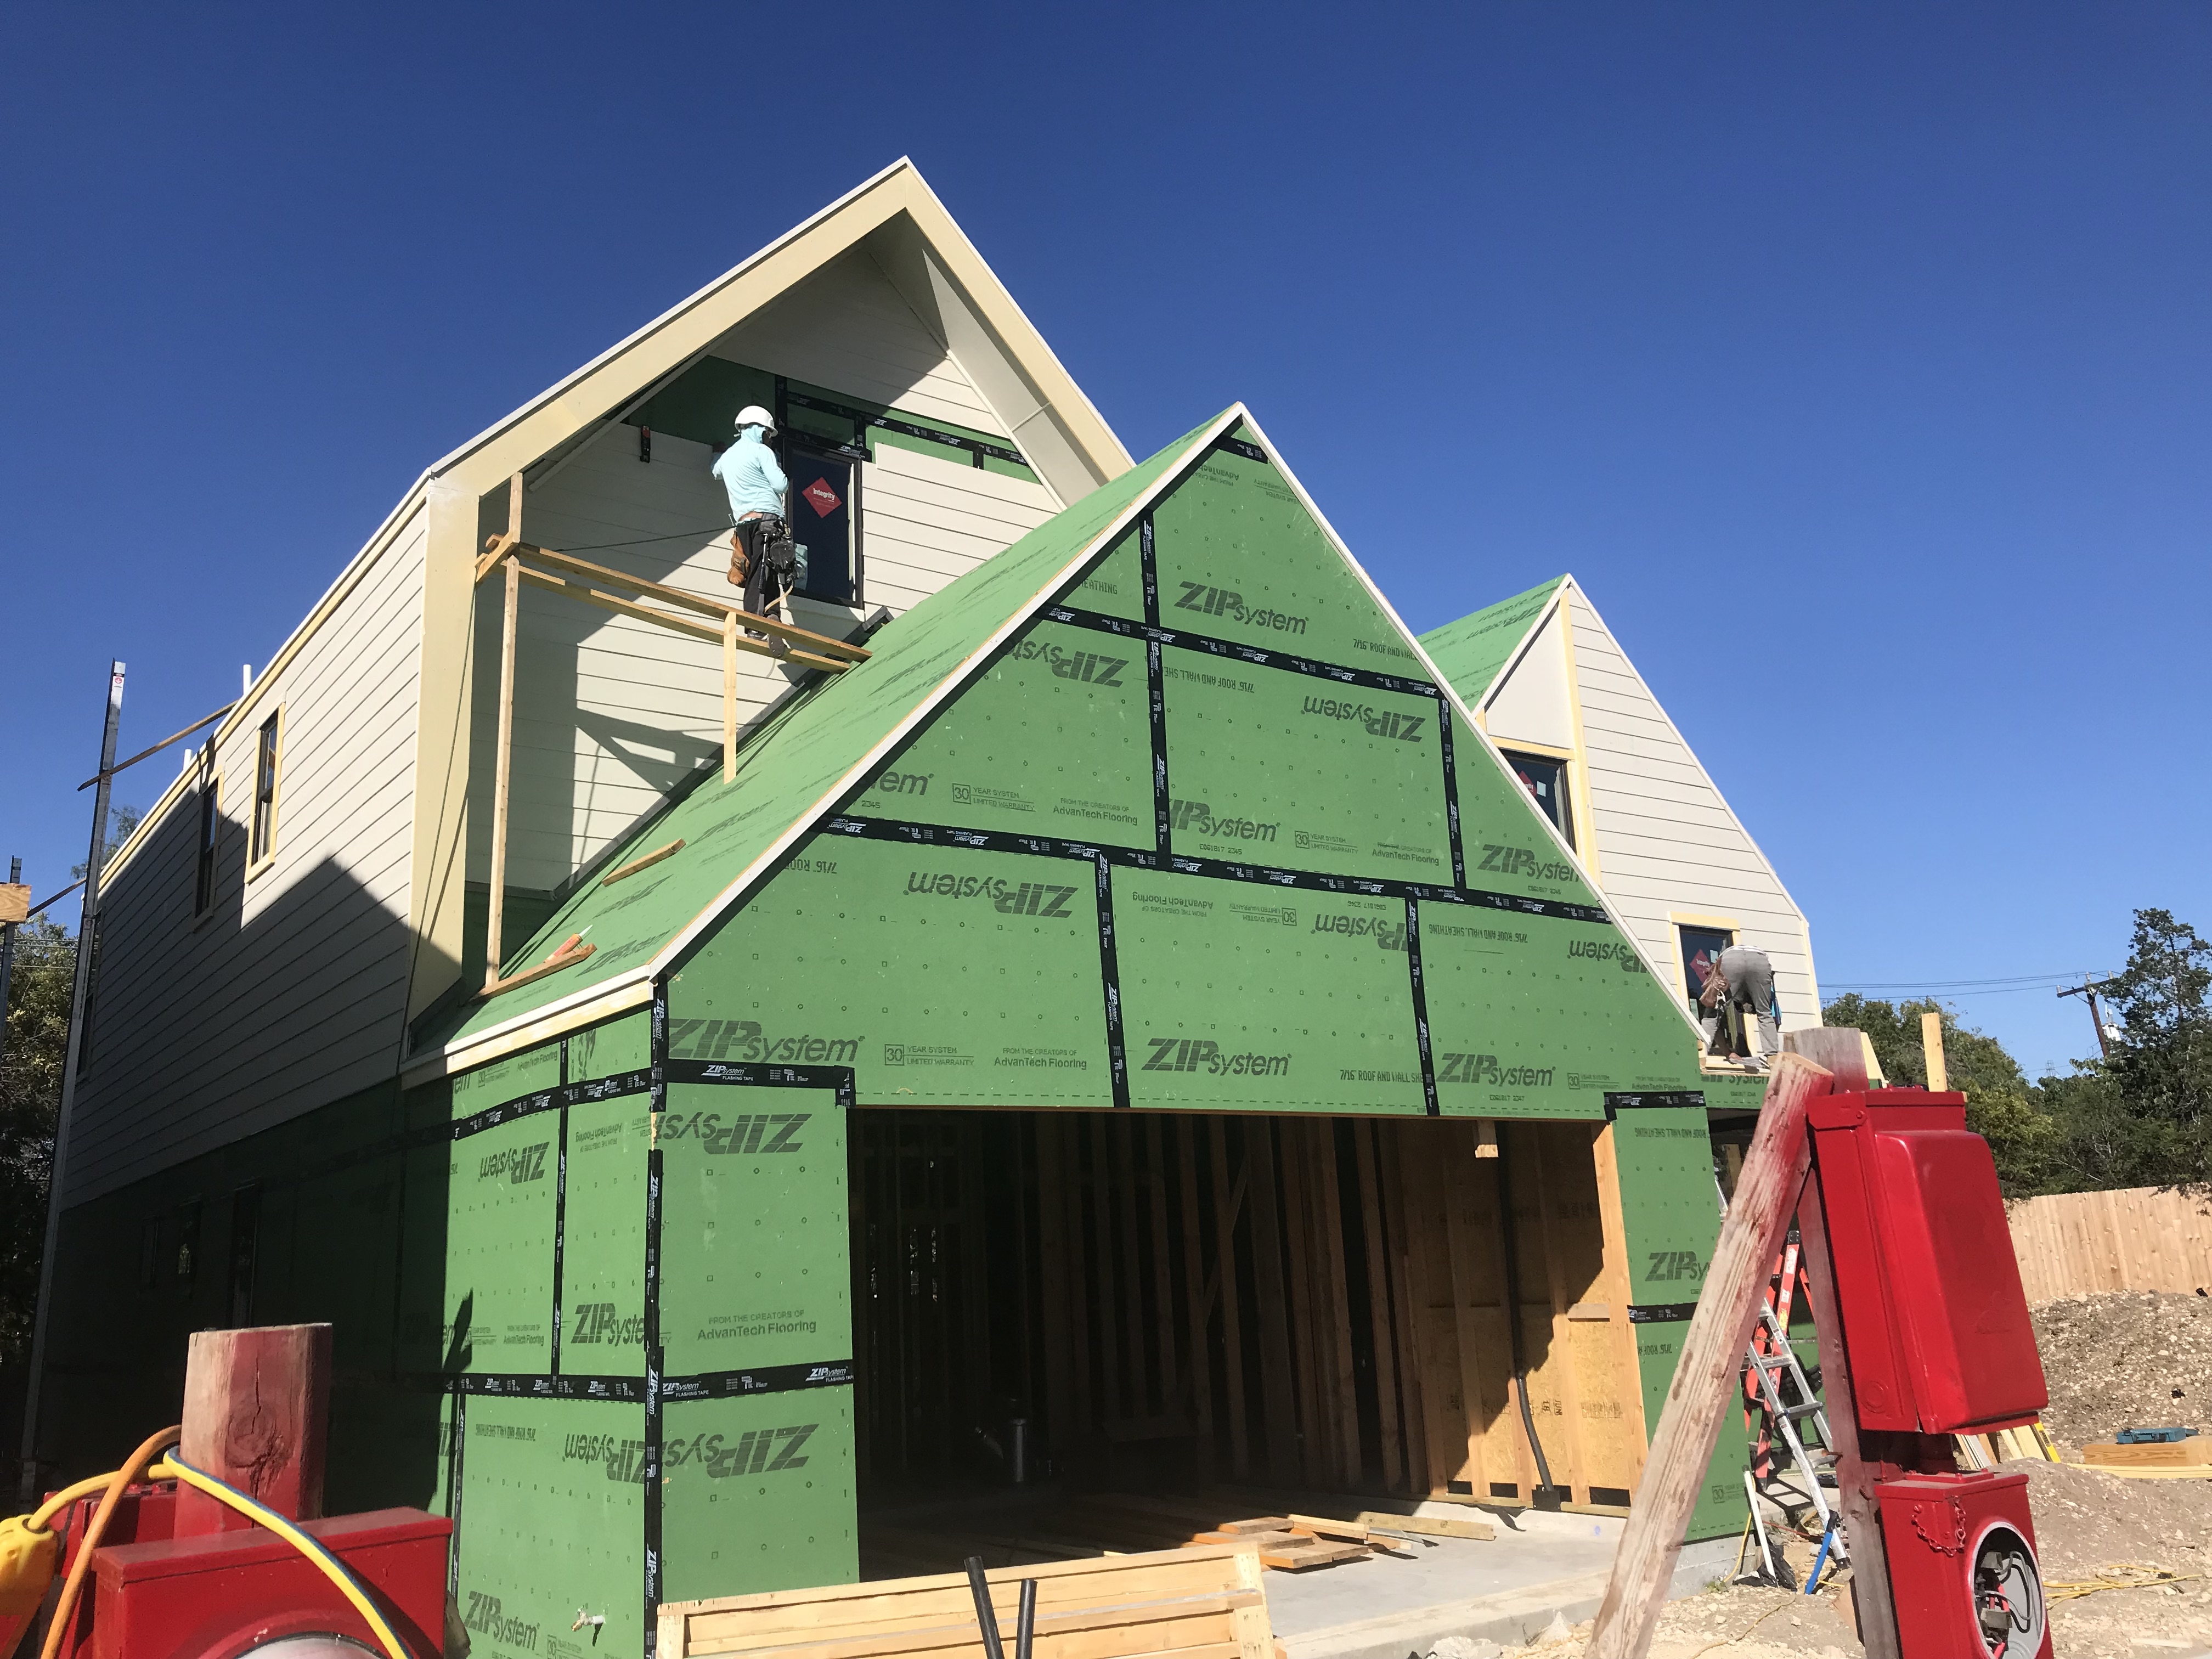
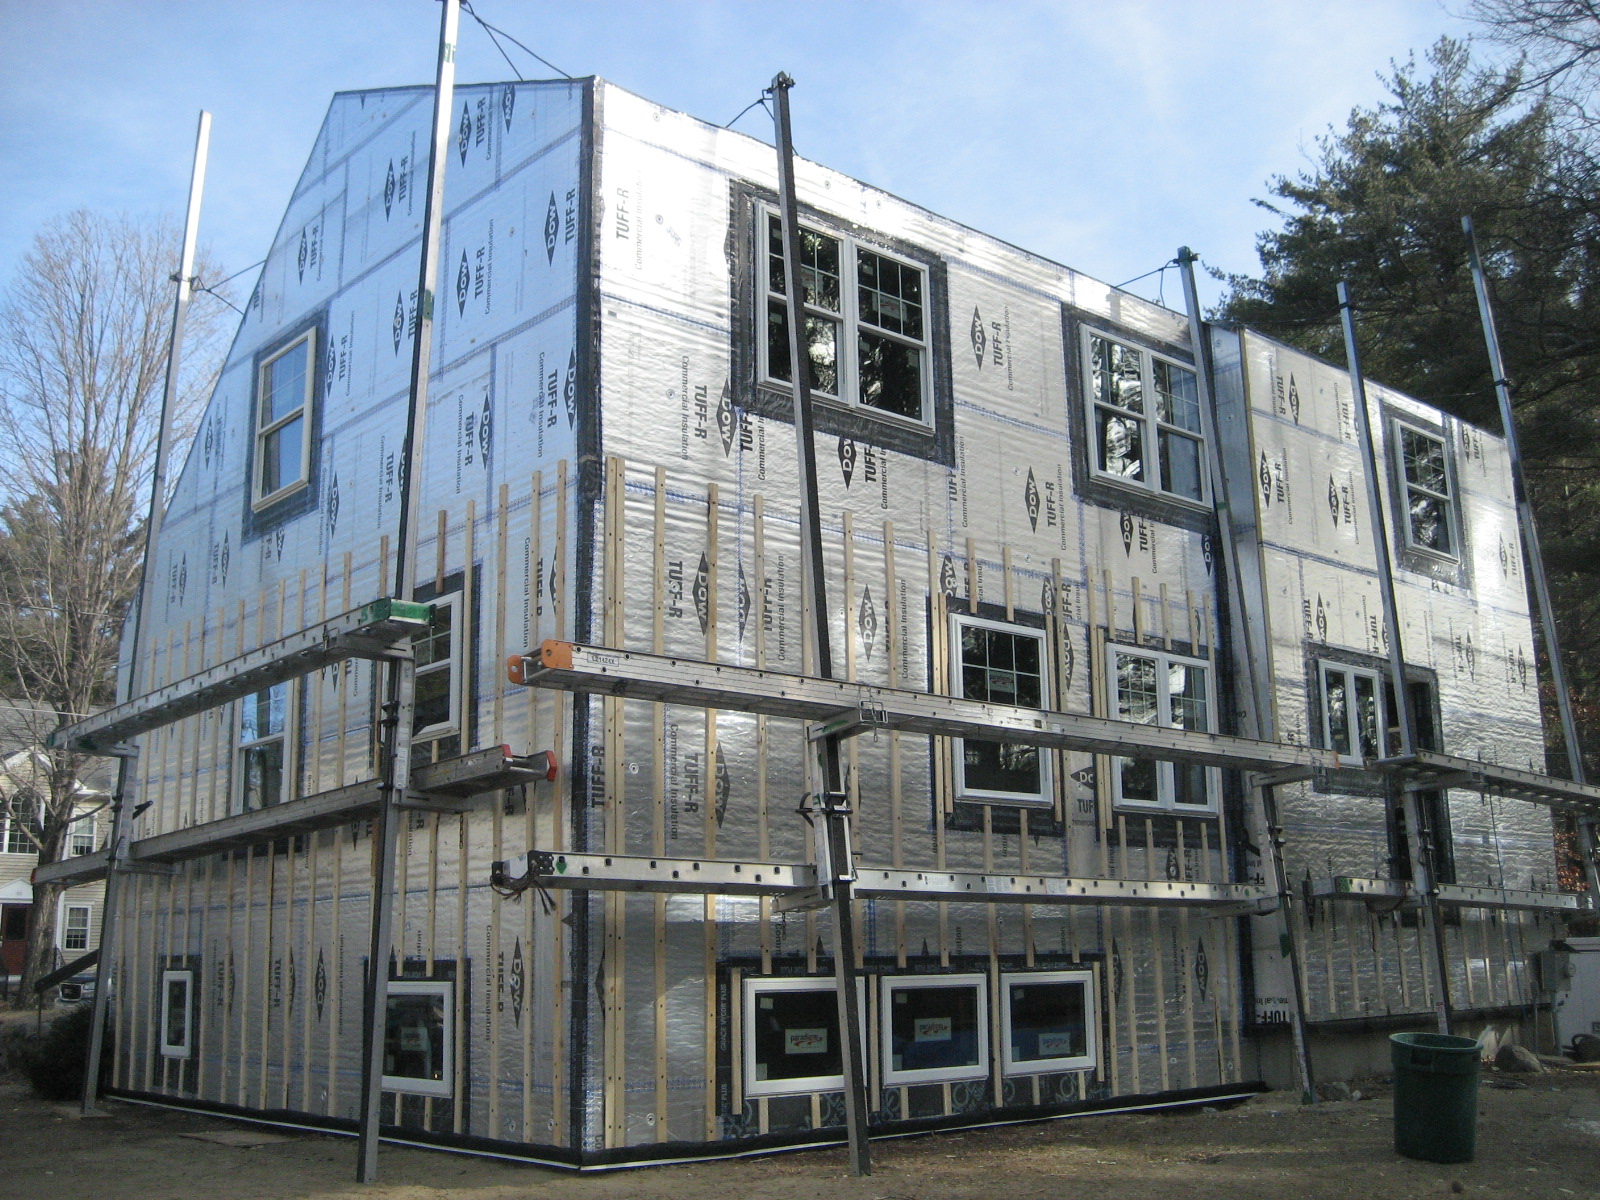
Rigid foam insulated sheathing placed exterior to house wrap, interior to house wrap, or take the place of the house wrap
Image
Rigid foam serves as the sheathing on these 2x6 24-inch on center walls; plywood is used only at the corners for wind bracing.
Image
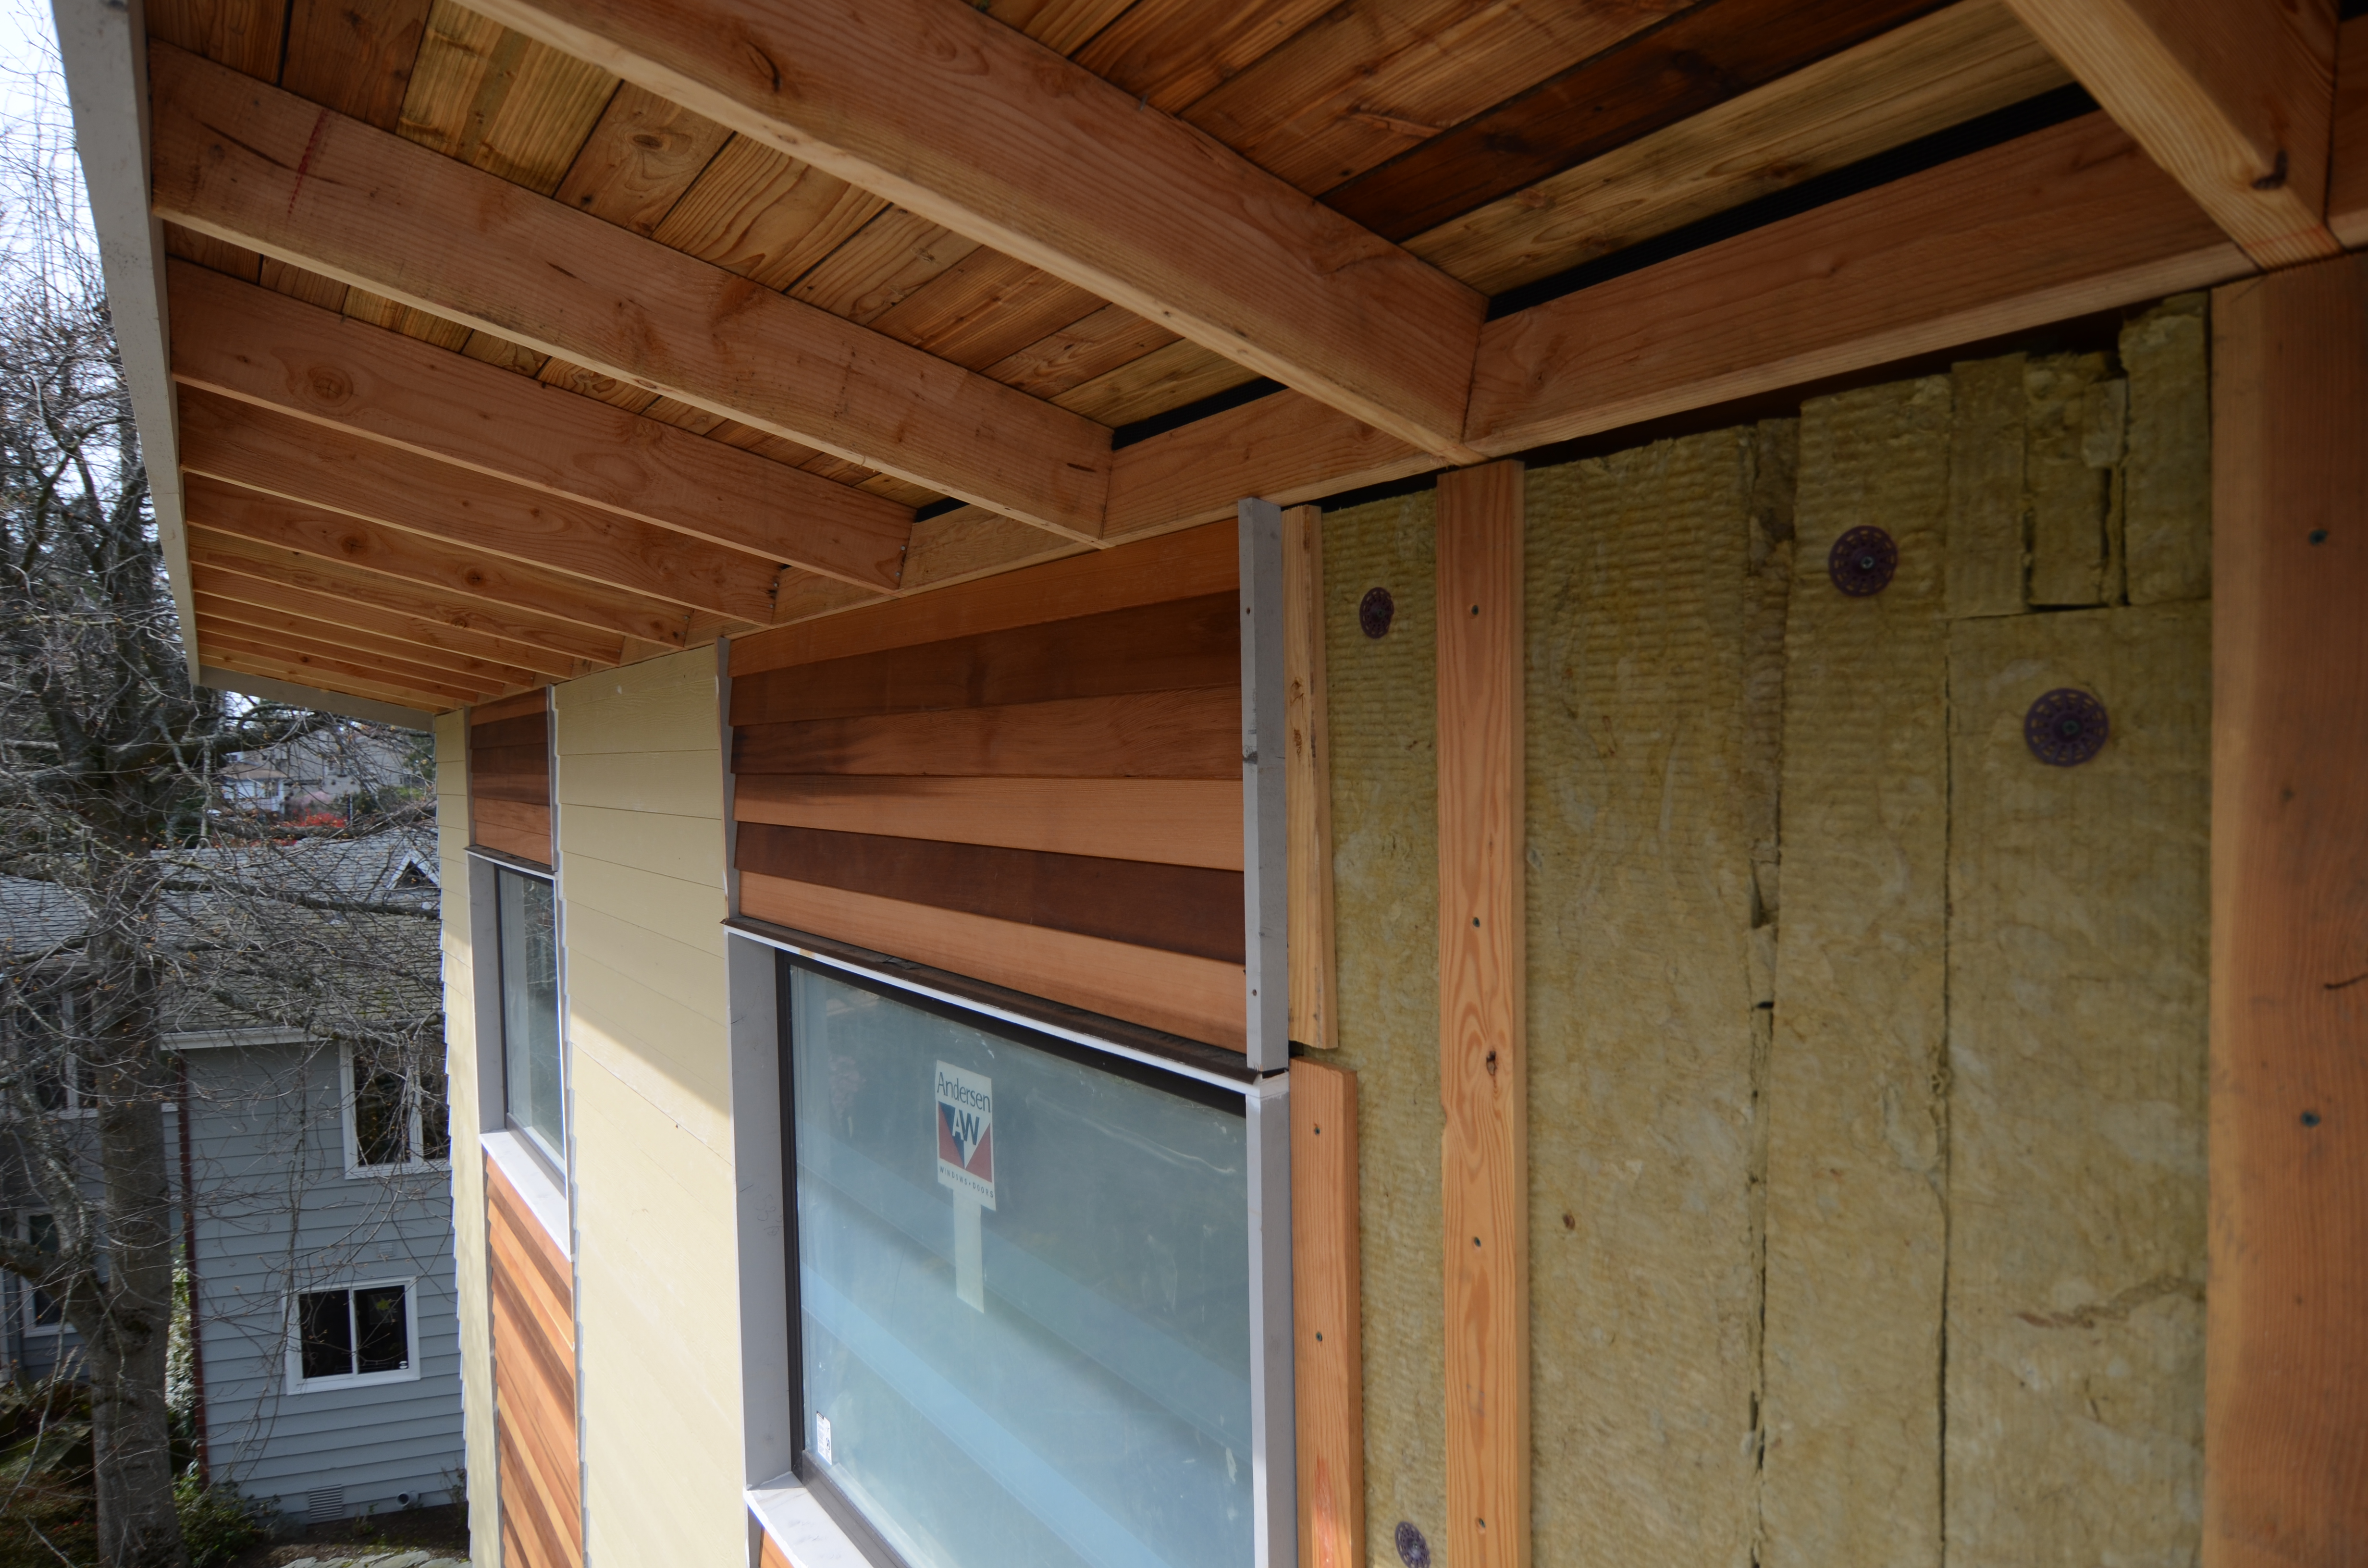
Rigid mineral wool insulation is covered with ¼-inch wood battens which provides a air and drainage gap under the cedar and fiber cement siding.
Image

Image
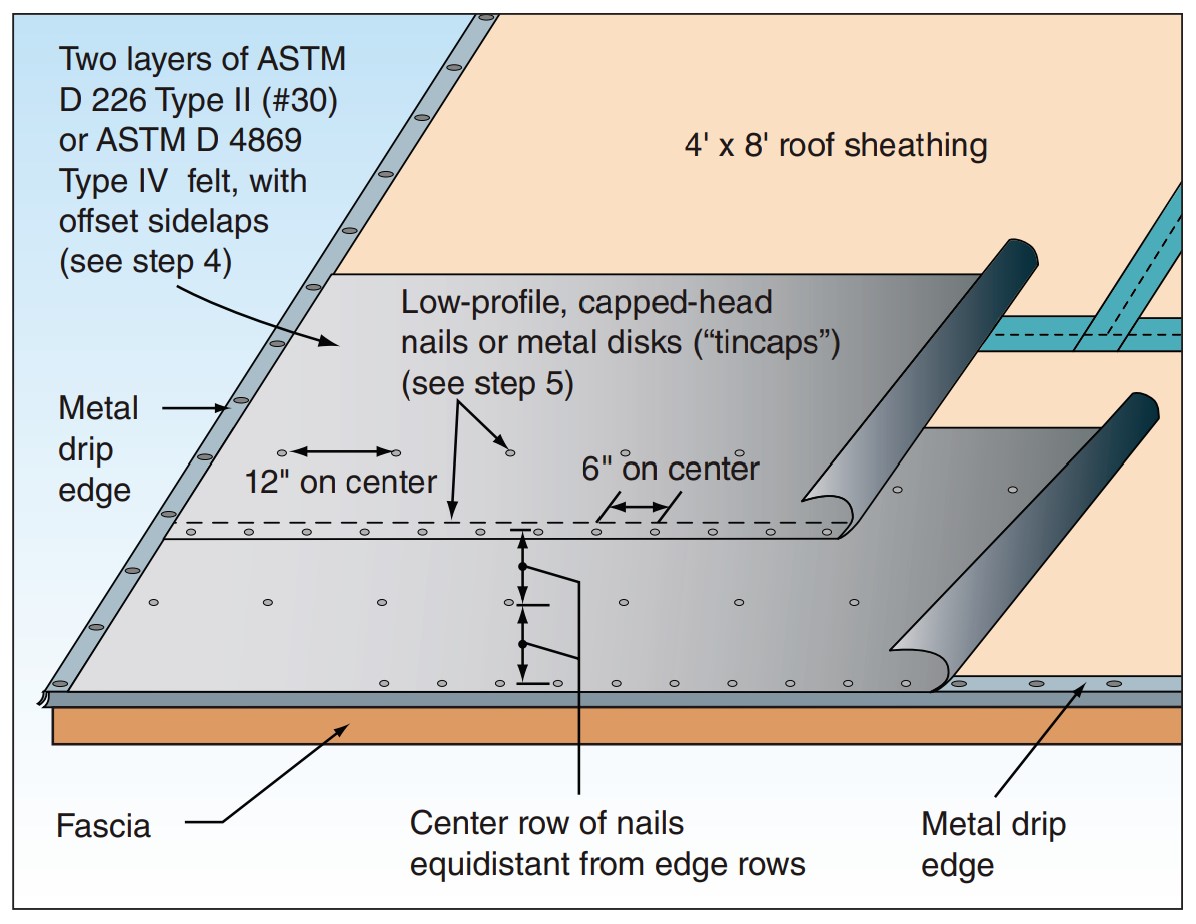
Seal the roof deck as follows: Sweep roof decking, tape seams, and cover underlayment or roofing felt as shown.
Image
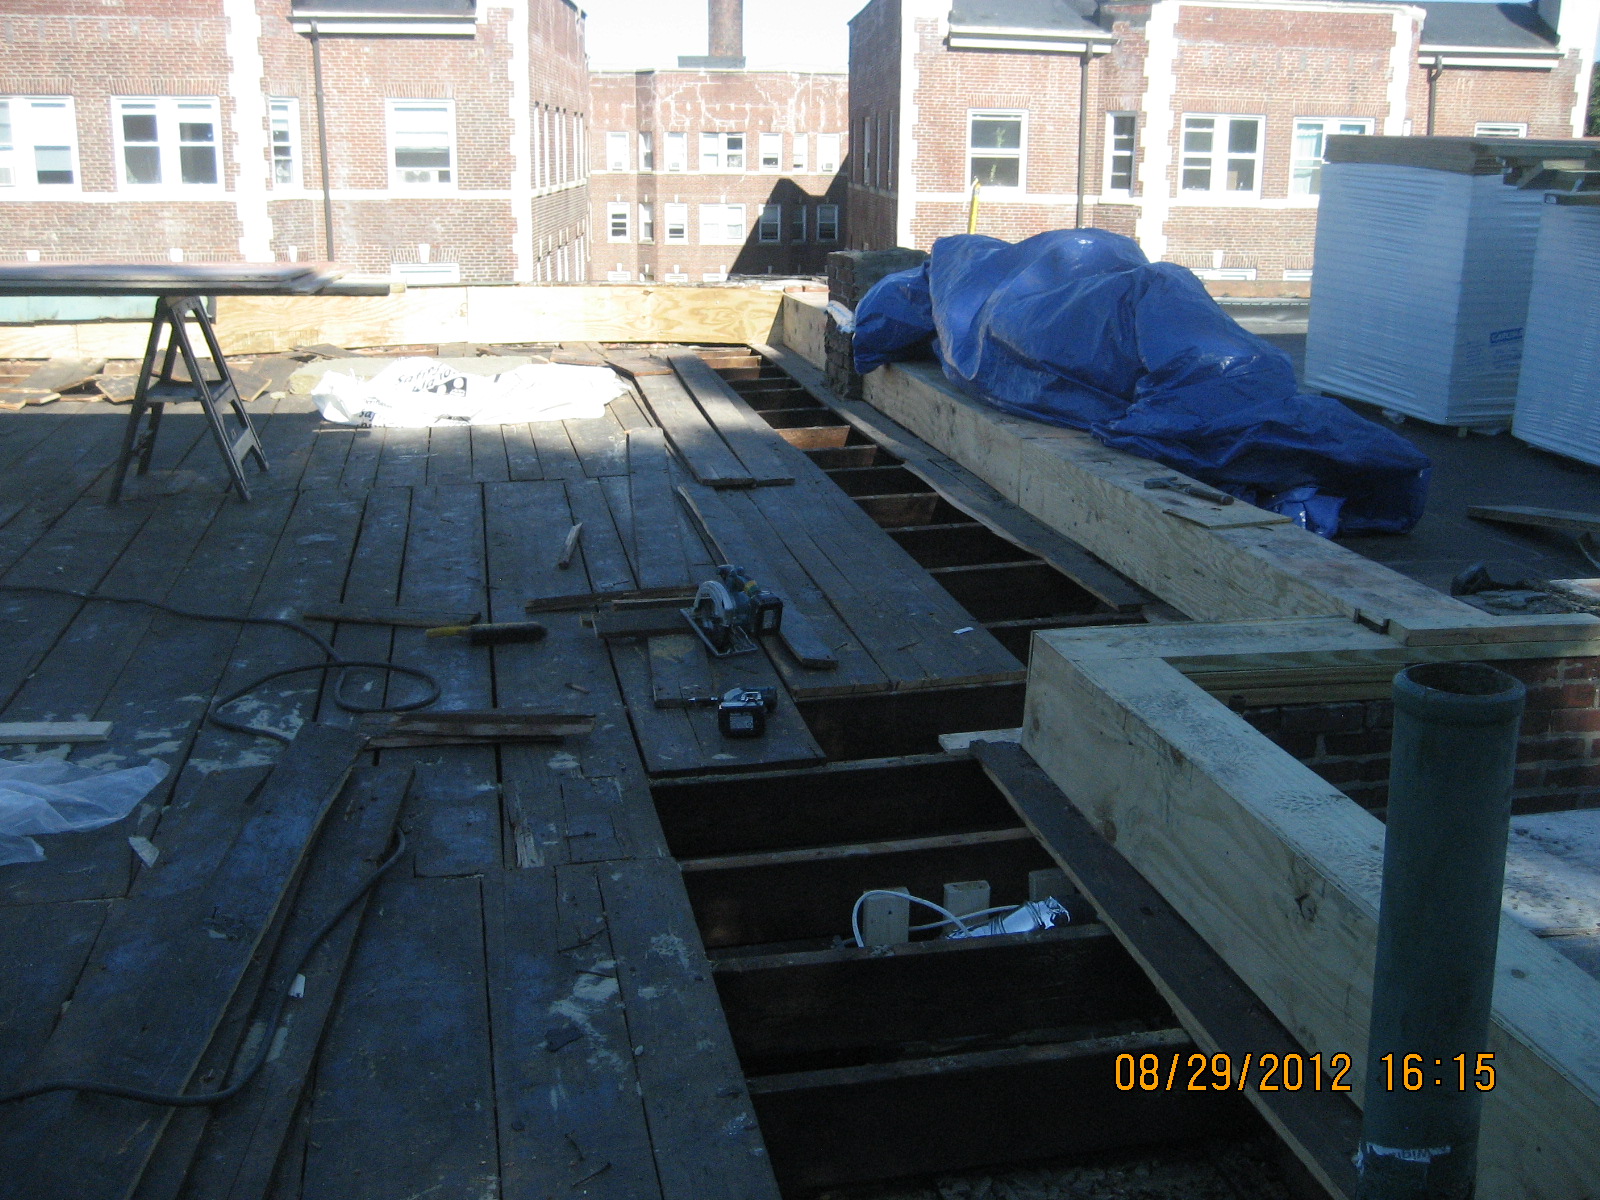
Sheathing is removed from a flat roof to retrofit with air sealing, insulation, and water control layers
Image

Sleepers (tapered wood furring strips) are installed over the existing board sheathing to slope the new sheathing toward the drain in this flat roof retrofit
Image

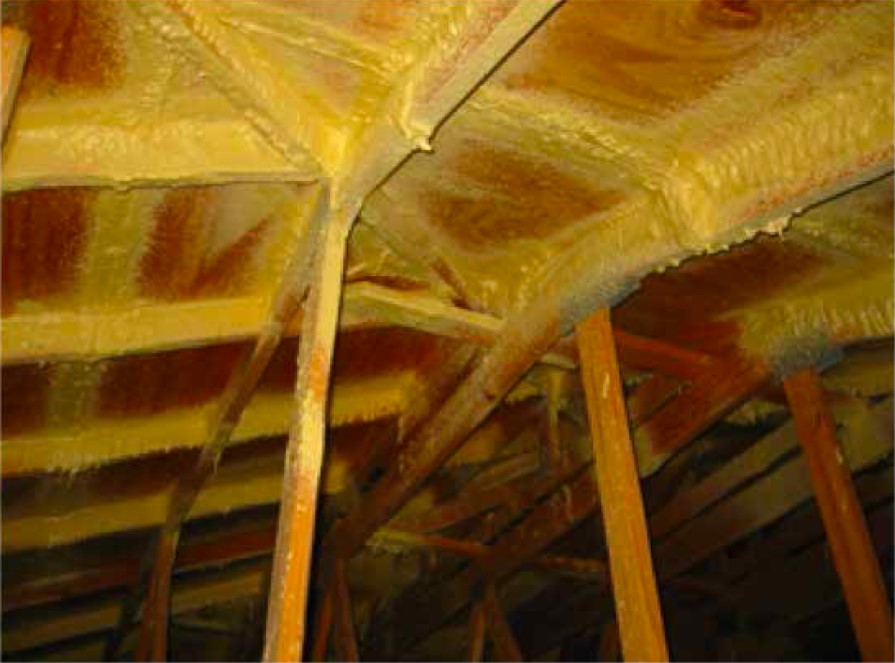
Sloped roof with cavity spray foam insulation sprayed on underside of roof deck and covered with sprayed-on thermal or ignition barrier coating.
Image
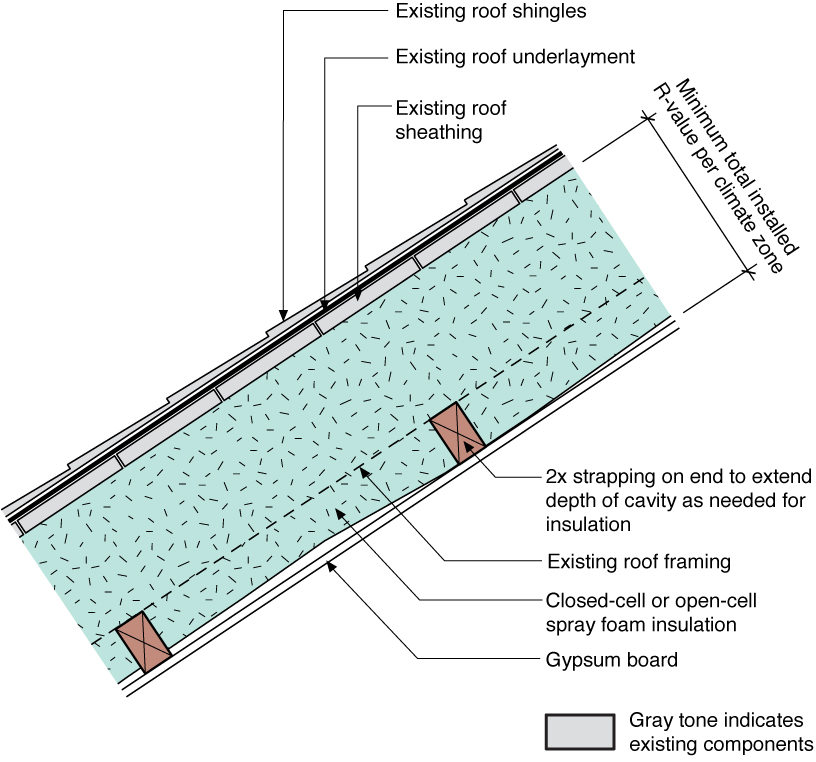
Sloped roof with cavity spray foam insulation, strapping, and gypsum board thermal barrier
Image

Spray foam adhesive provides an extra water resistant layer to the joints and seams on the inside of attics.
Image
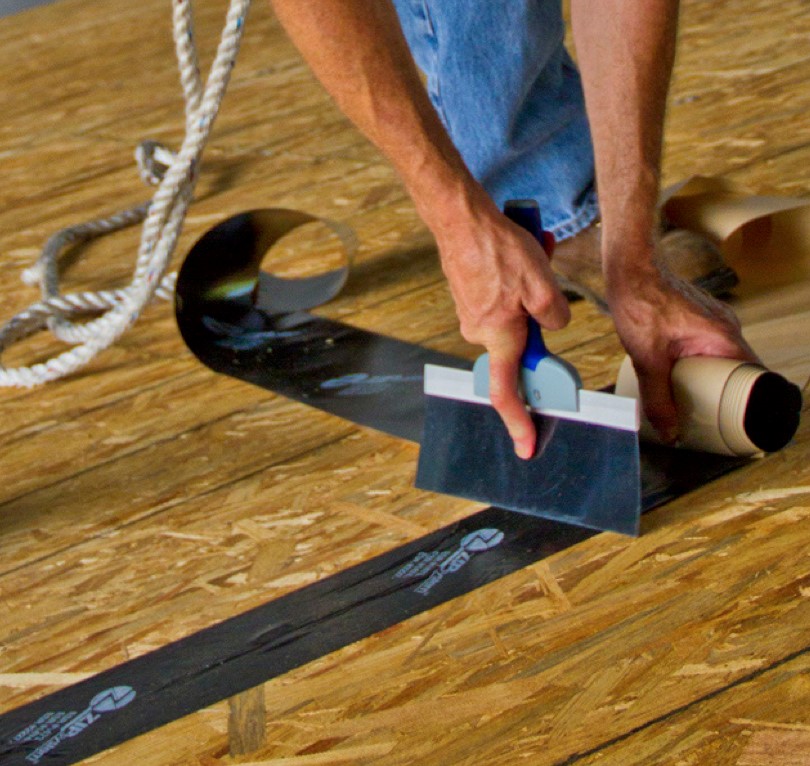
Staggering sheathing seams makes it harder for moisture to infiltrate the wall to the air gap, where furring strips will allow permeating moisture to drain if needed.
Image
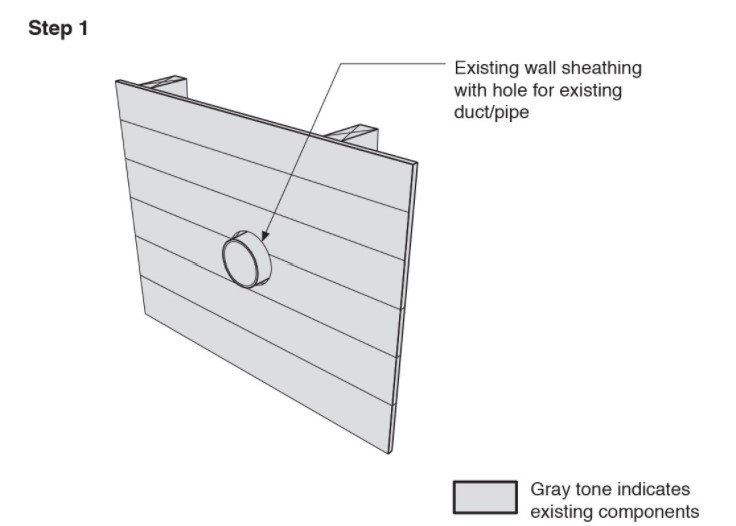
Step 1. Remove the existing wall cladding to prepare to retrofit an exterior wall.
Image
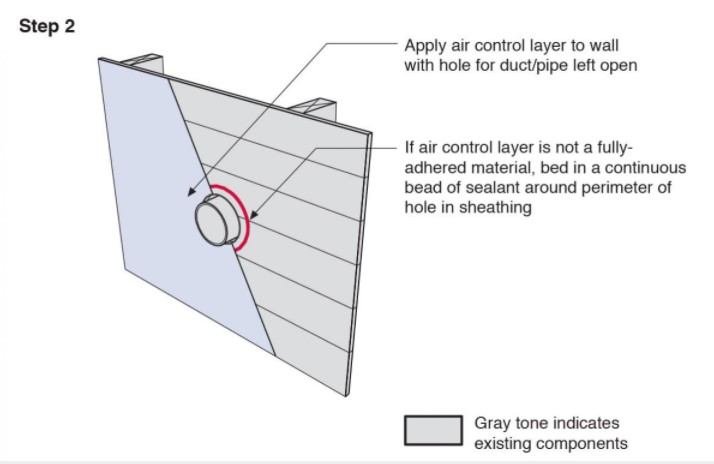
Step 2. Install a continuous air and water control layer over the existing wall sheathing.
Image
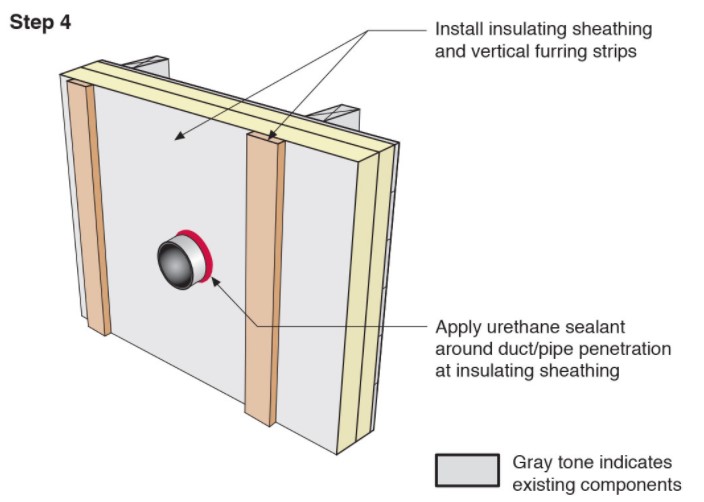
Step 4. Install insulating sheathing and vertical furring strips on the retrofitted exterior wall; seal around pipe or duct with urethane sealant.
Image
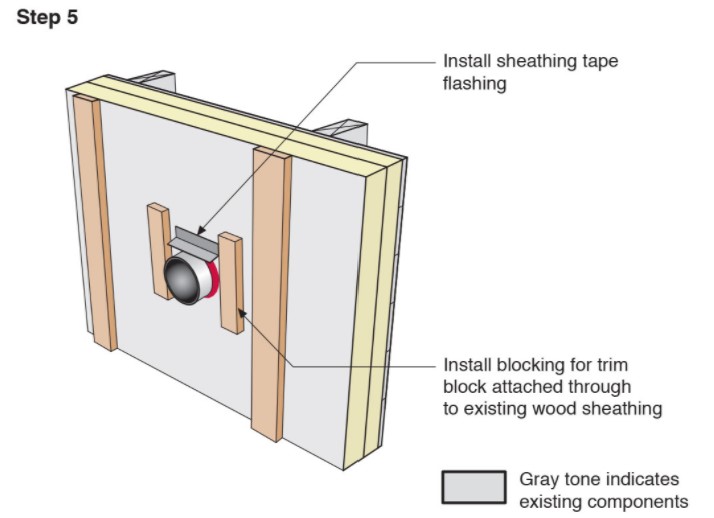
Step 5. Install sheathing tape flashing over the duct or pipe and wood blocking on either side for later attachment of trim.
Image
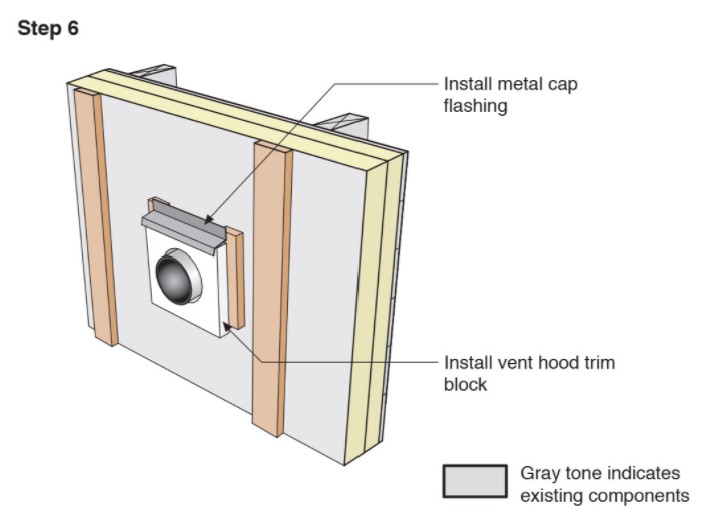
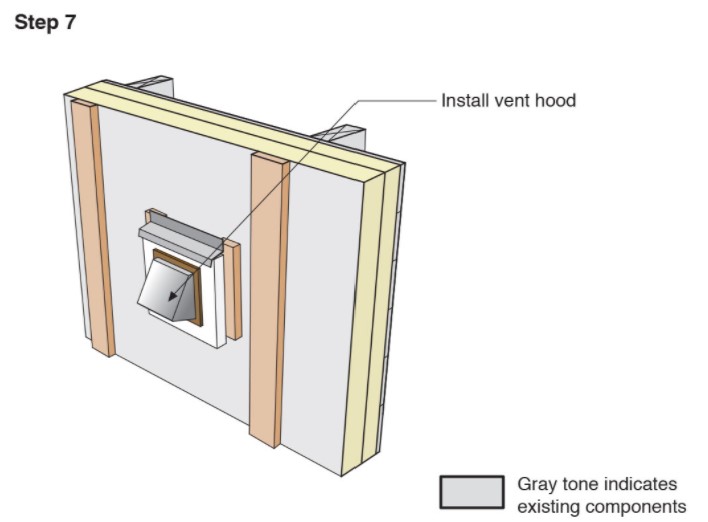
Step 6. Install vent hood trim block, metal cap flashing; seal top edge of flashing with sheathing tape.
Image
Image
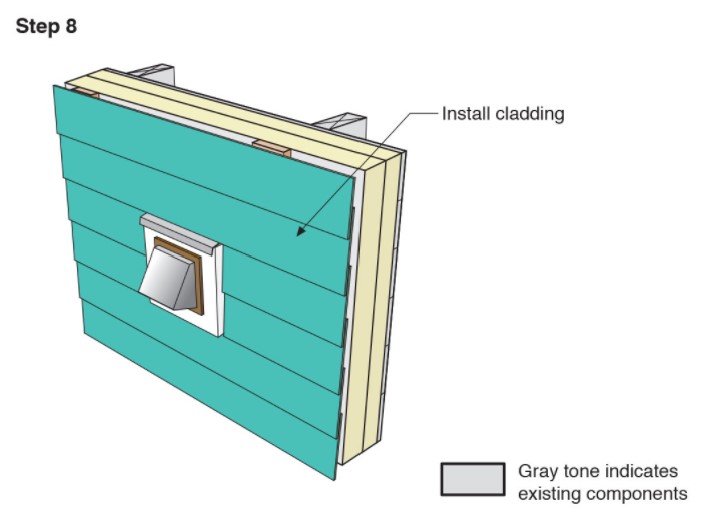
Step 8. Attach the new cladding to the furring strips over the rigid foam for the exterior wall retrofit.
Image
Strengthen an existing roof by applying two-part spray-applied polyurethane foam adhesive to all sheathing and framing joints from the underside of the roof
Image
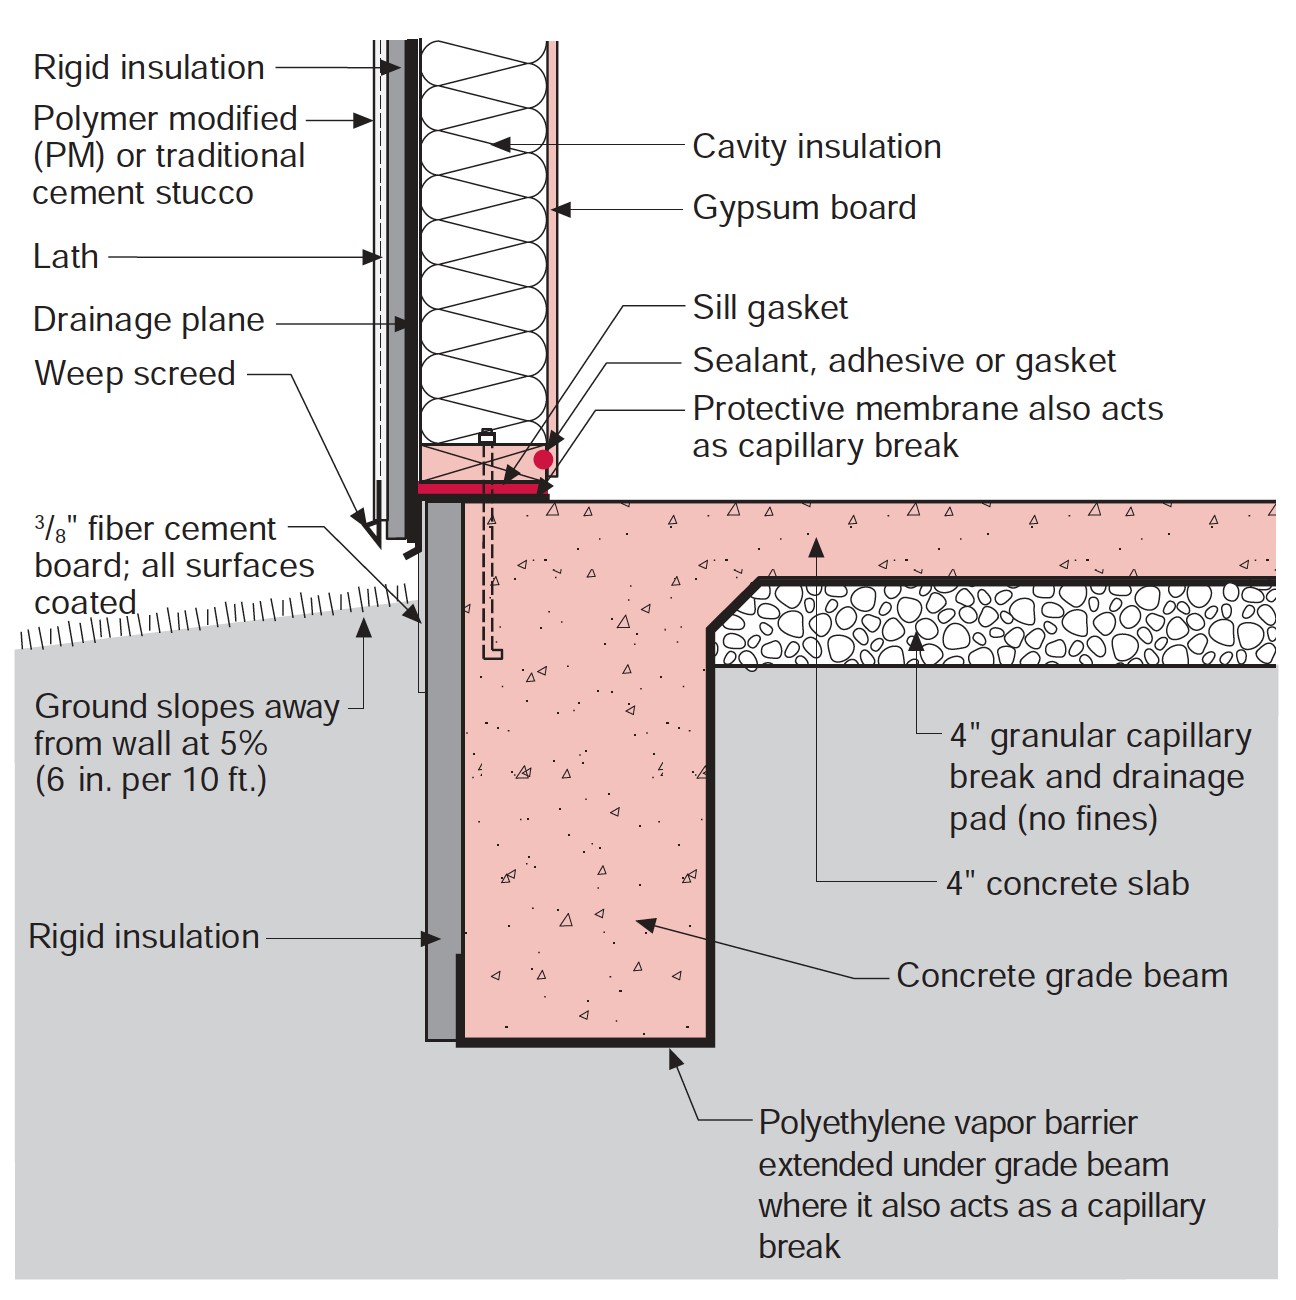
Stucco is installed over rigid insulation, which is installed over a drainage plane consisting of a drainage gap and building wrap layer over the sheathing
Image
Taped seams on the coated roof sheathing improve this home’s resistance to damage from high winds.
Image
The builder installed 1.5 inches of soy-based spray foam on the outside of the walls over the OSB sheathing, then kept a ¾ inch gap between the foam and the brick veneer siding to allow moisture vapor from the bricks to dissipate.
Image

The builder installed a rain screen product that provides an air gap and drainage plane between the coated OSB sheathing and the cladding; the fabric layer folded over the bottom edge forms an insect screen.
Image
The existing 2x8 roof rafters were topped with OSB; two layers of 2-inch rigid foam; plywood; ice and water shield at rakes, eaves, and valleys; underlayment; and fiberglass shingles, plus 6 inches of open-cell foam under the decking.
Image
The existing sheathing boards are removed near the perimeter of the flat roof and pressure-treated plywood is installed at the vertical face of the parapet
Image
The exterior of the home is wrapped in a continuous layer of rigid foam with all seams taped to provide a thermal, air, and moisture barrier and serve as a drainage plane, eliminating the need for house wrap.
Image
The exterior walls of this home consist of two wall cavities: a 2x6 wall with plywood sheathing plus 8-inch I-joists sheathed with engineered wood; both cavities are dense-packed with cellulose for R-60 total.
Image
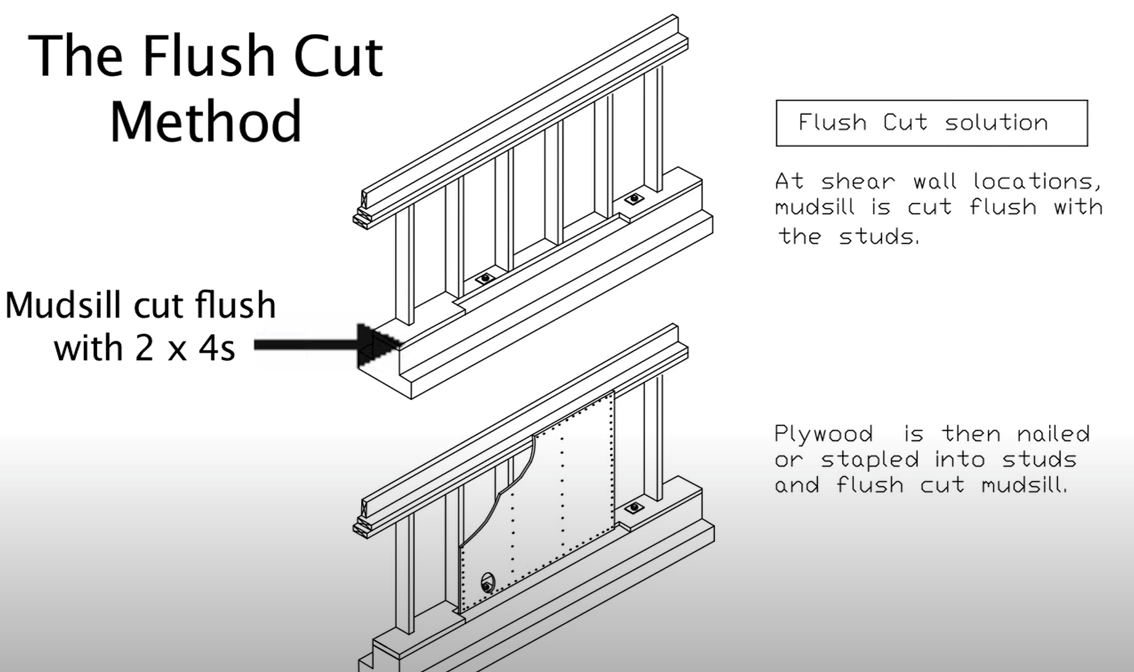
The flush cut method for seismic retrofit bracing of a cripple wall allows the plywood sheathing to be attached directly to both the cripple studs and the notched section of the mudsill
Image
The home is sheathed with rigid foam insulation and all seams and holes are taped to provide a continuous air barrier.
Image

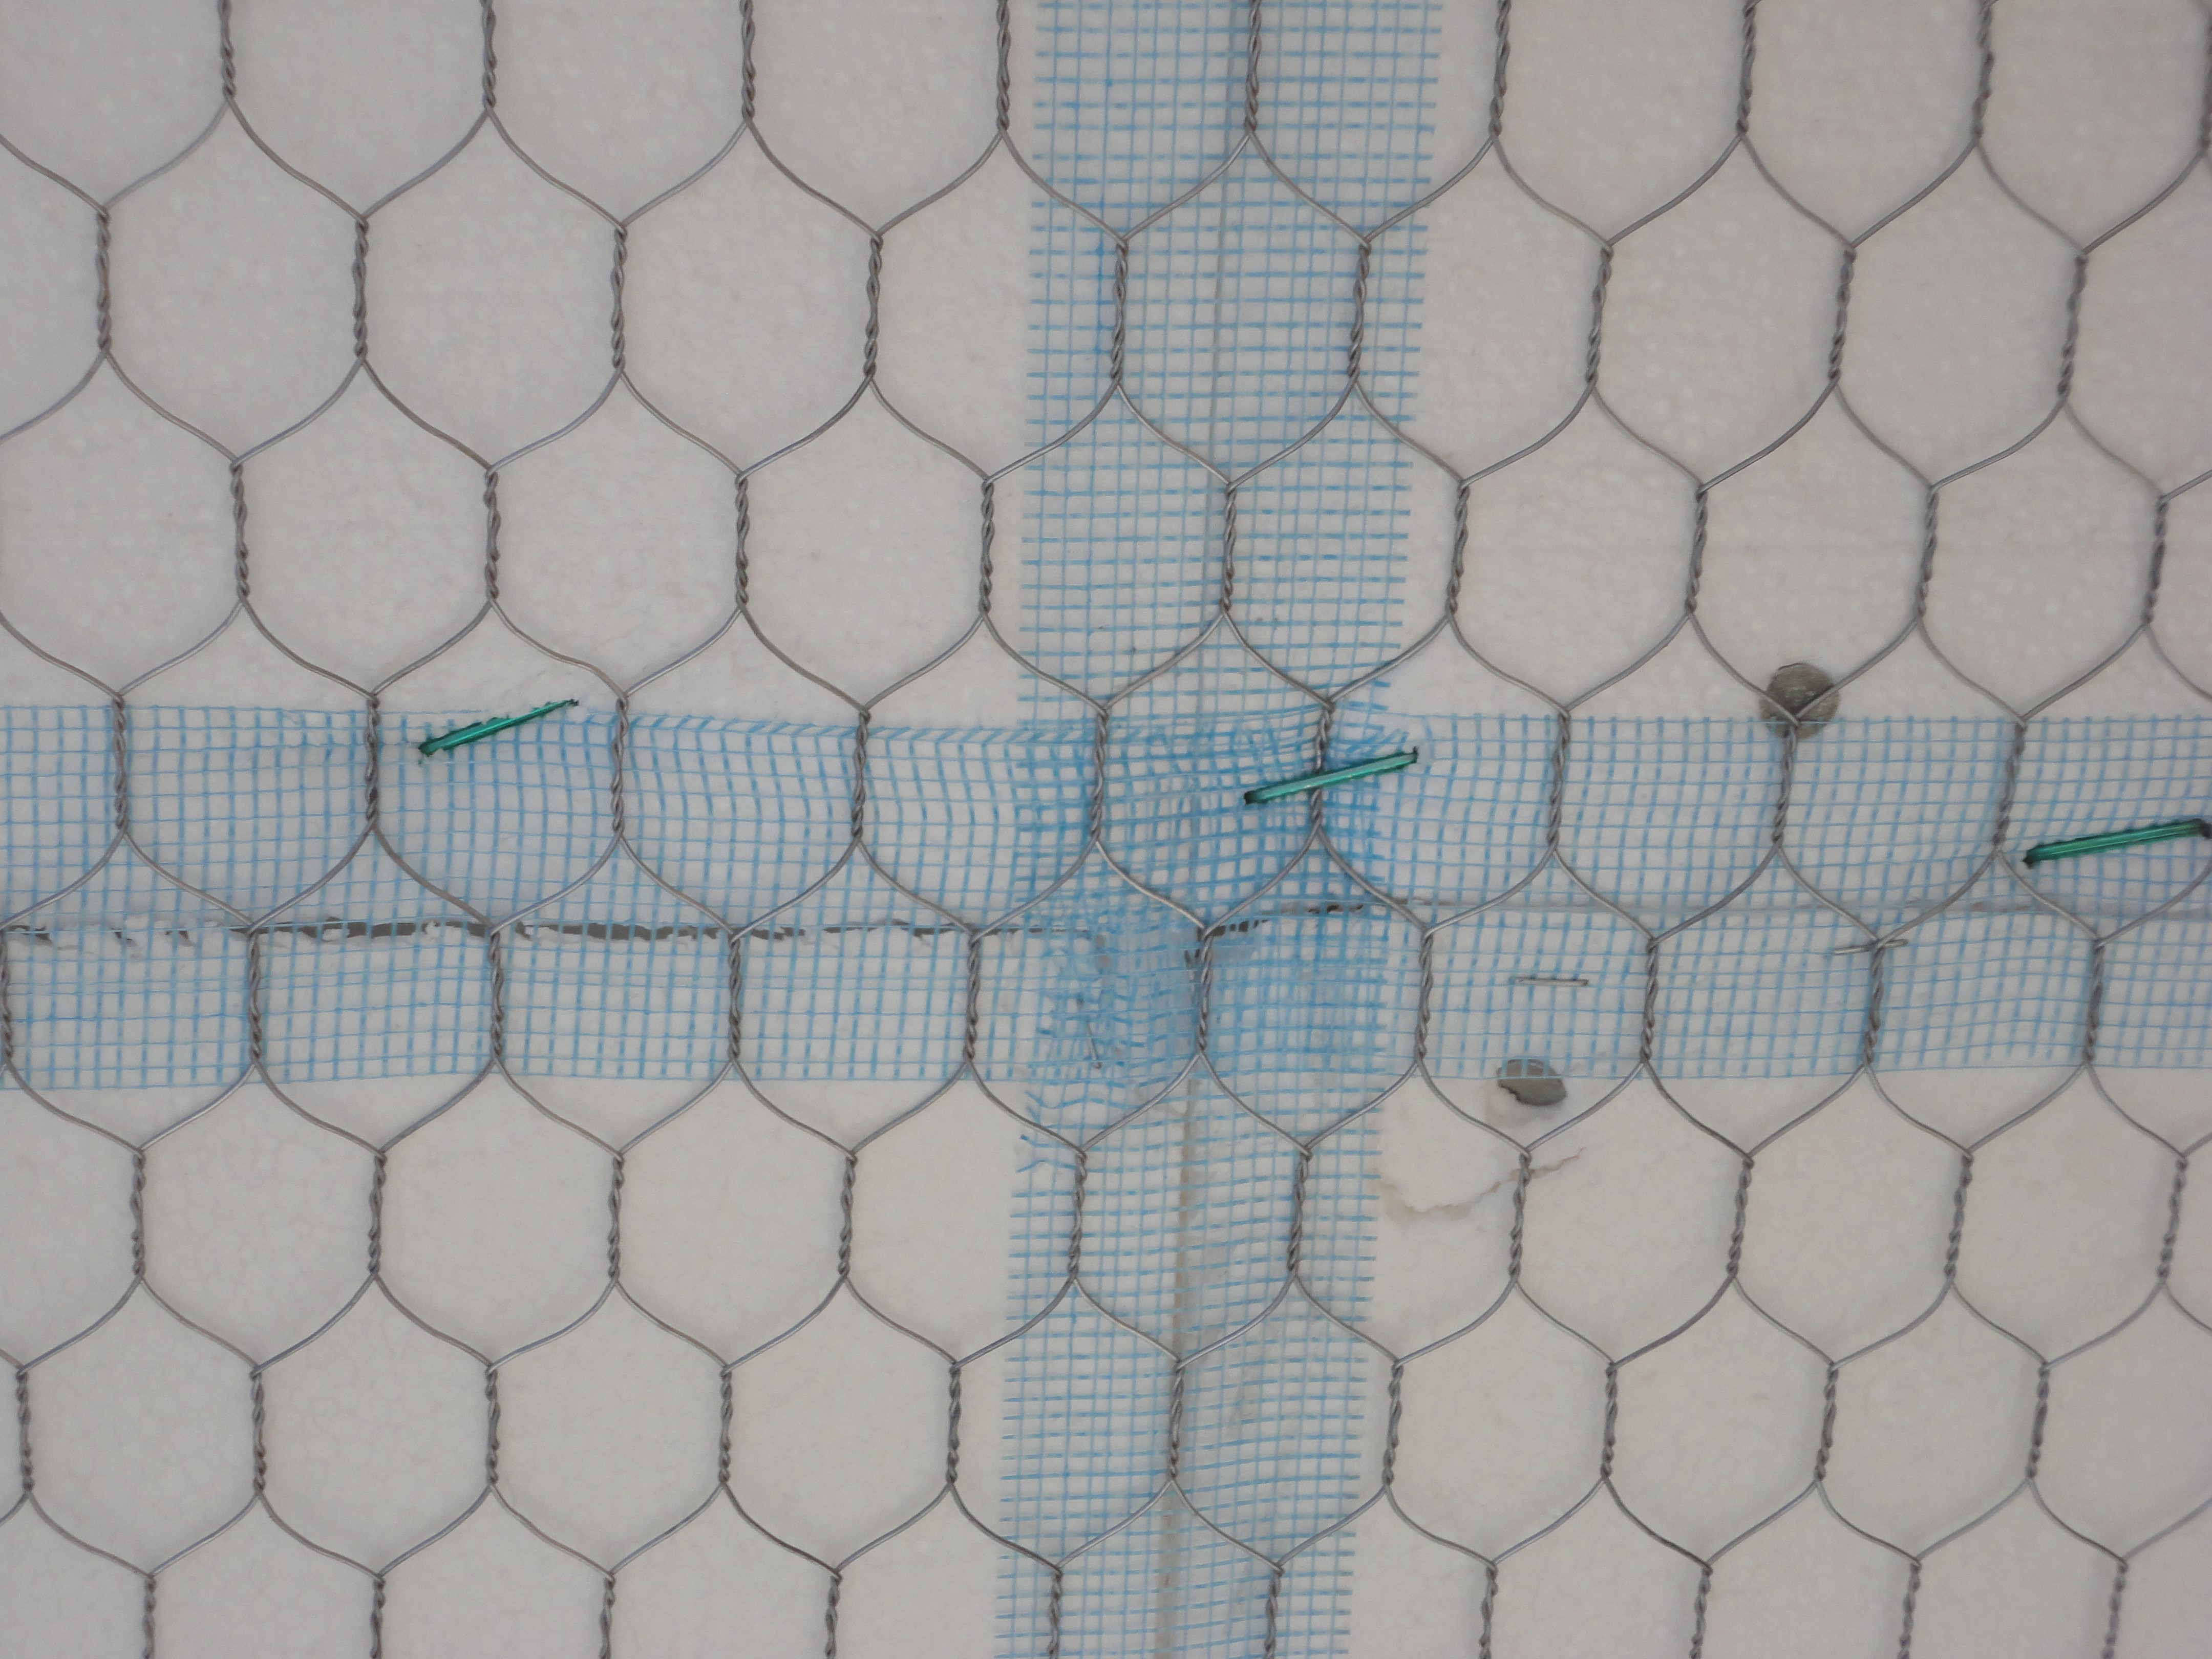
The metal screening keeps insects out of the black mesh plastic fabric which provides a ventilation gap behind the home’s siding, which includes the ship-lapped cypress shown here.
Image