Showing results 1 - 100 of 192
Image
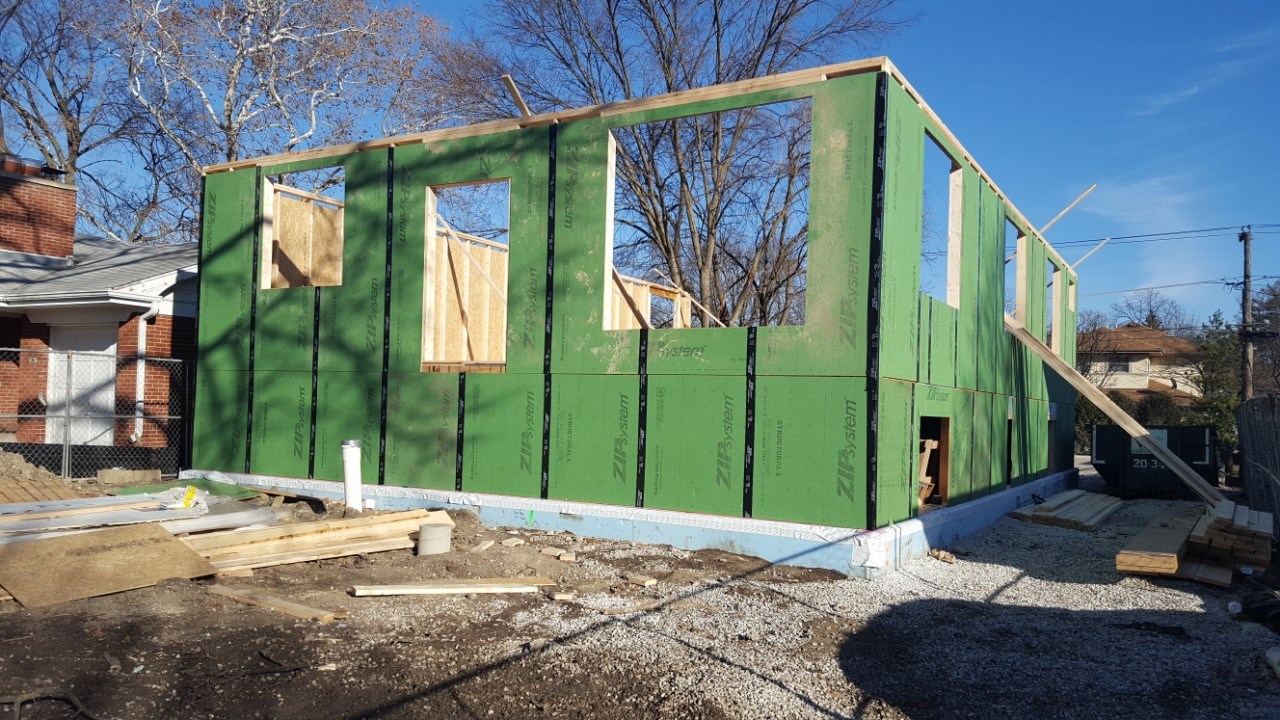
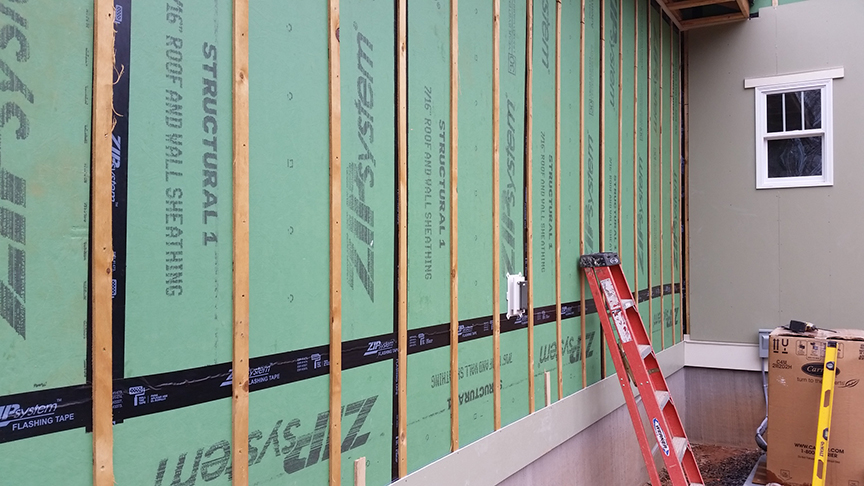
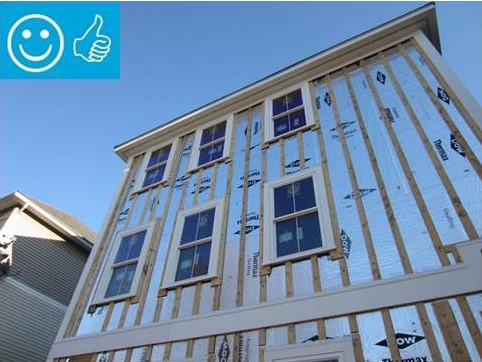
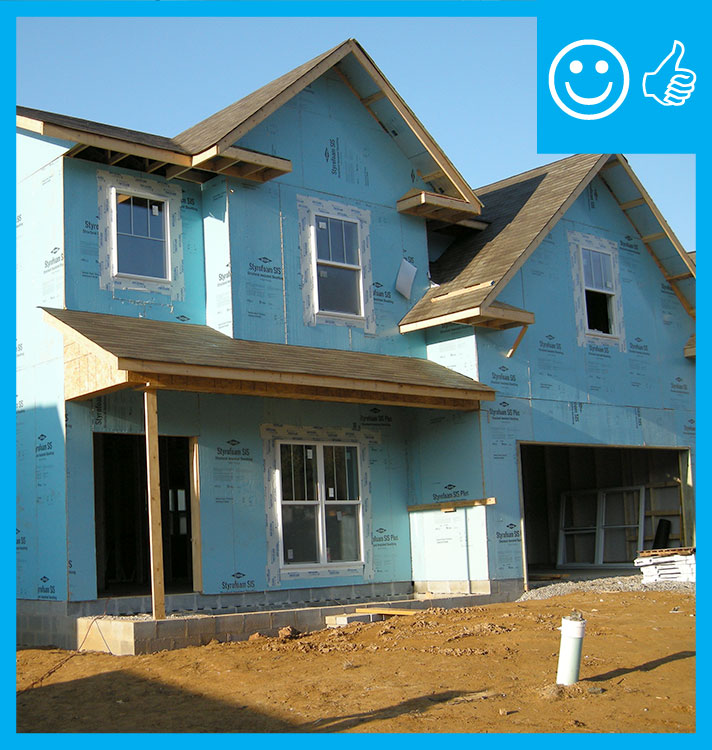
A coated OSB product with taped seams covers the walls to serve as both sheathing and weather-resistant barrier.
Image

A drainage plane is created behind lap siding by installing furring strips on the exterior walls over house wrap which is overlapped and taped at all seams to serve as an air and water barrier.
Image
A mesh plastic rainscreen product separates the coated OSB from the siding, providing a drainage space and ventilation gap.
Image
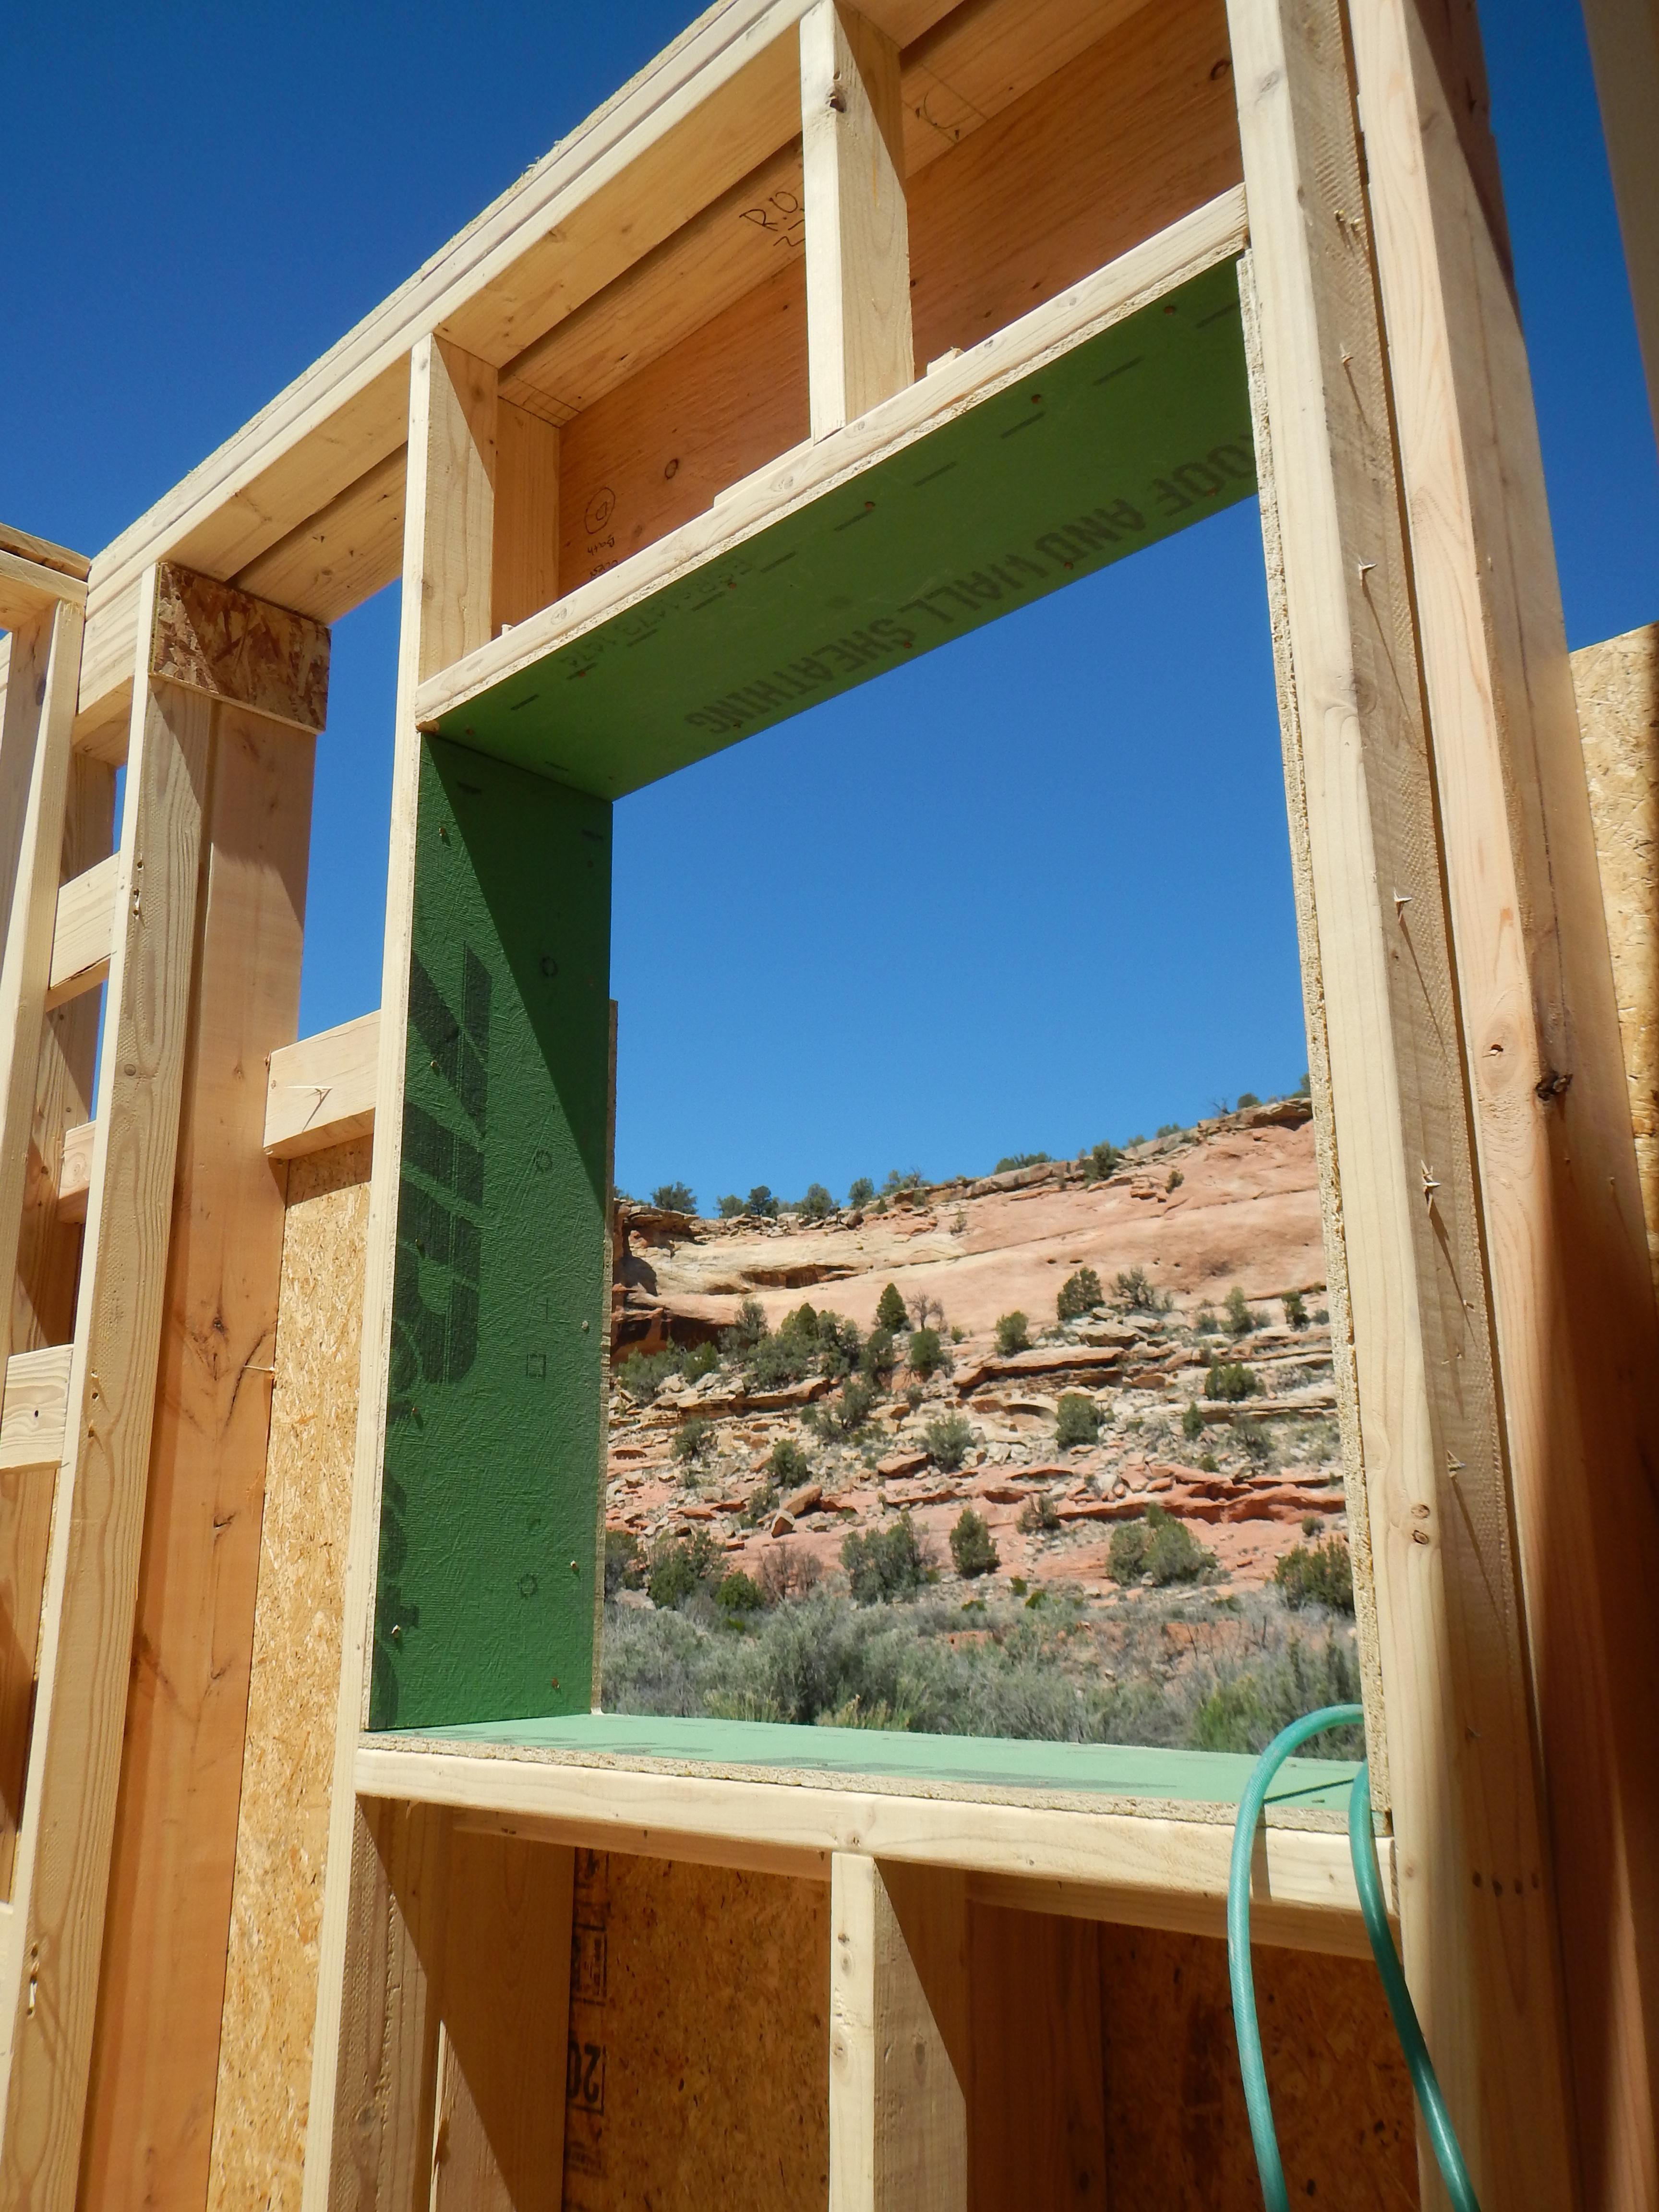
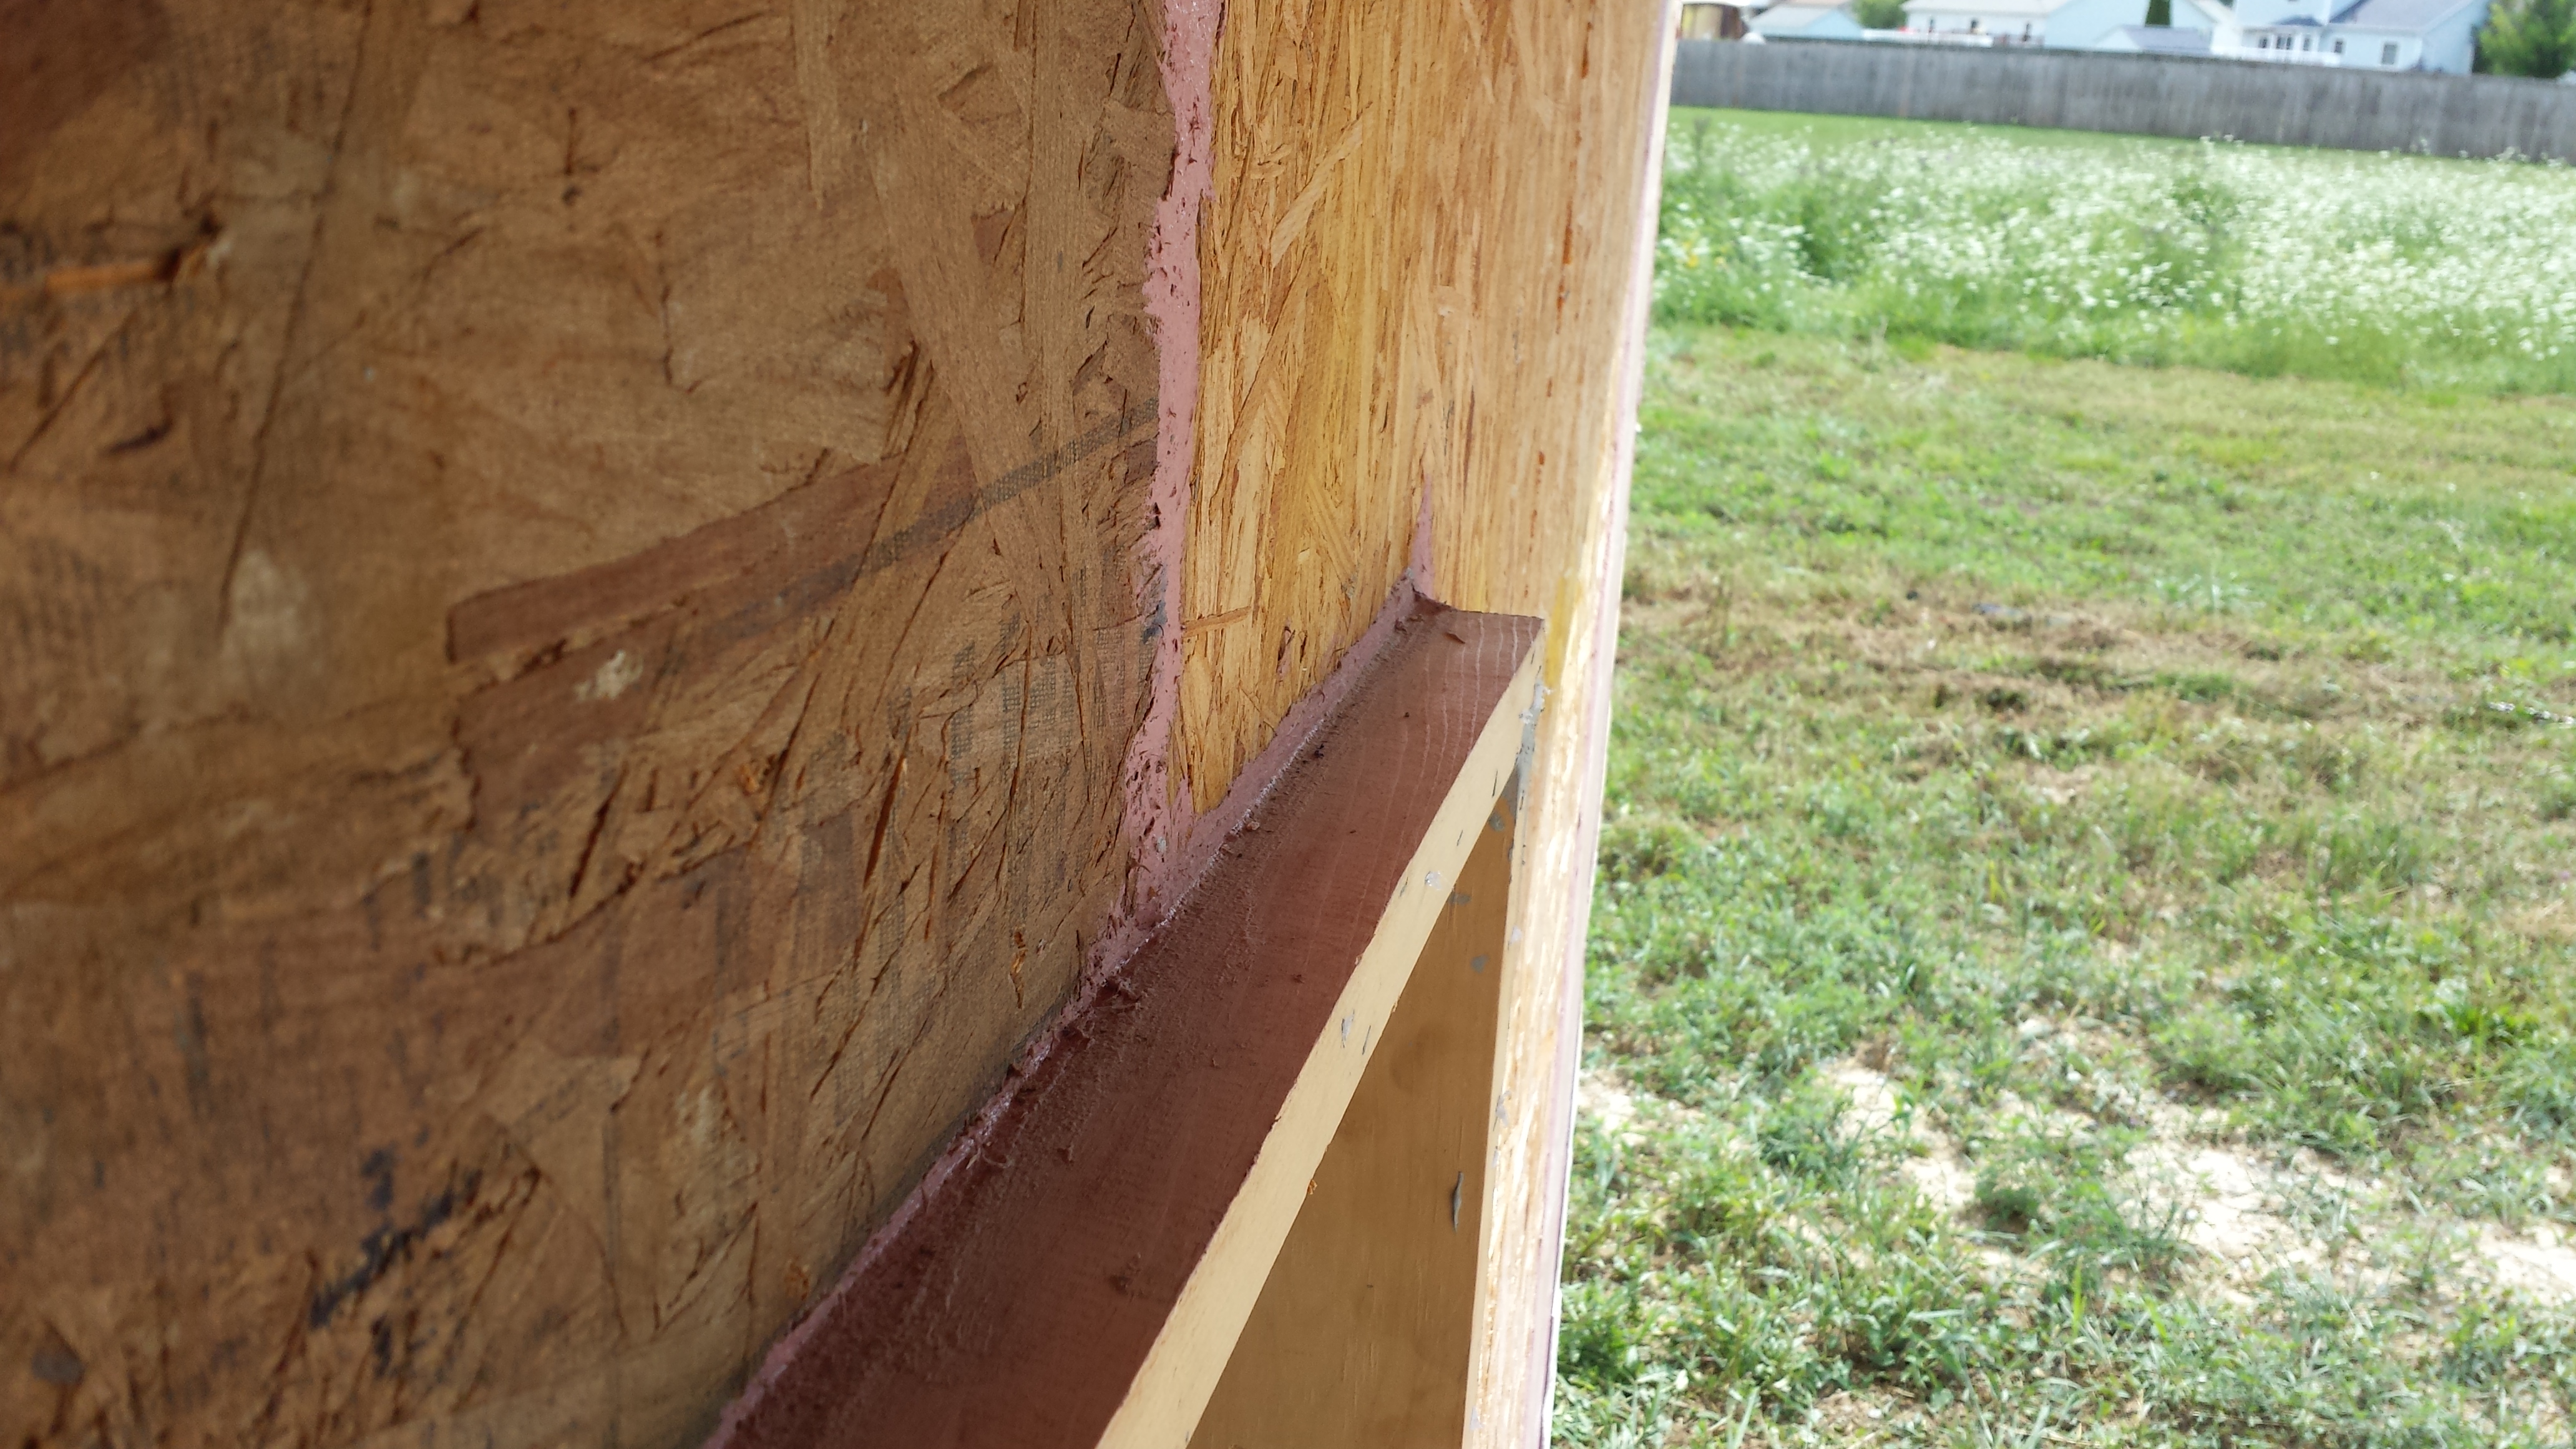
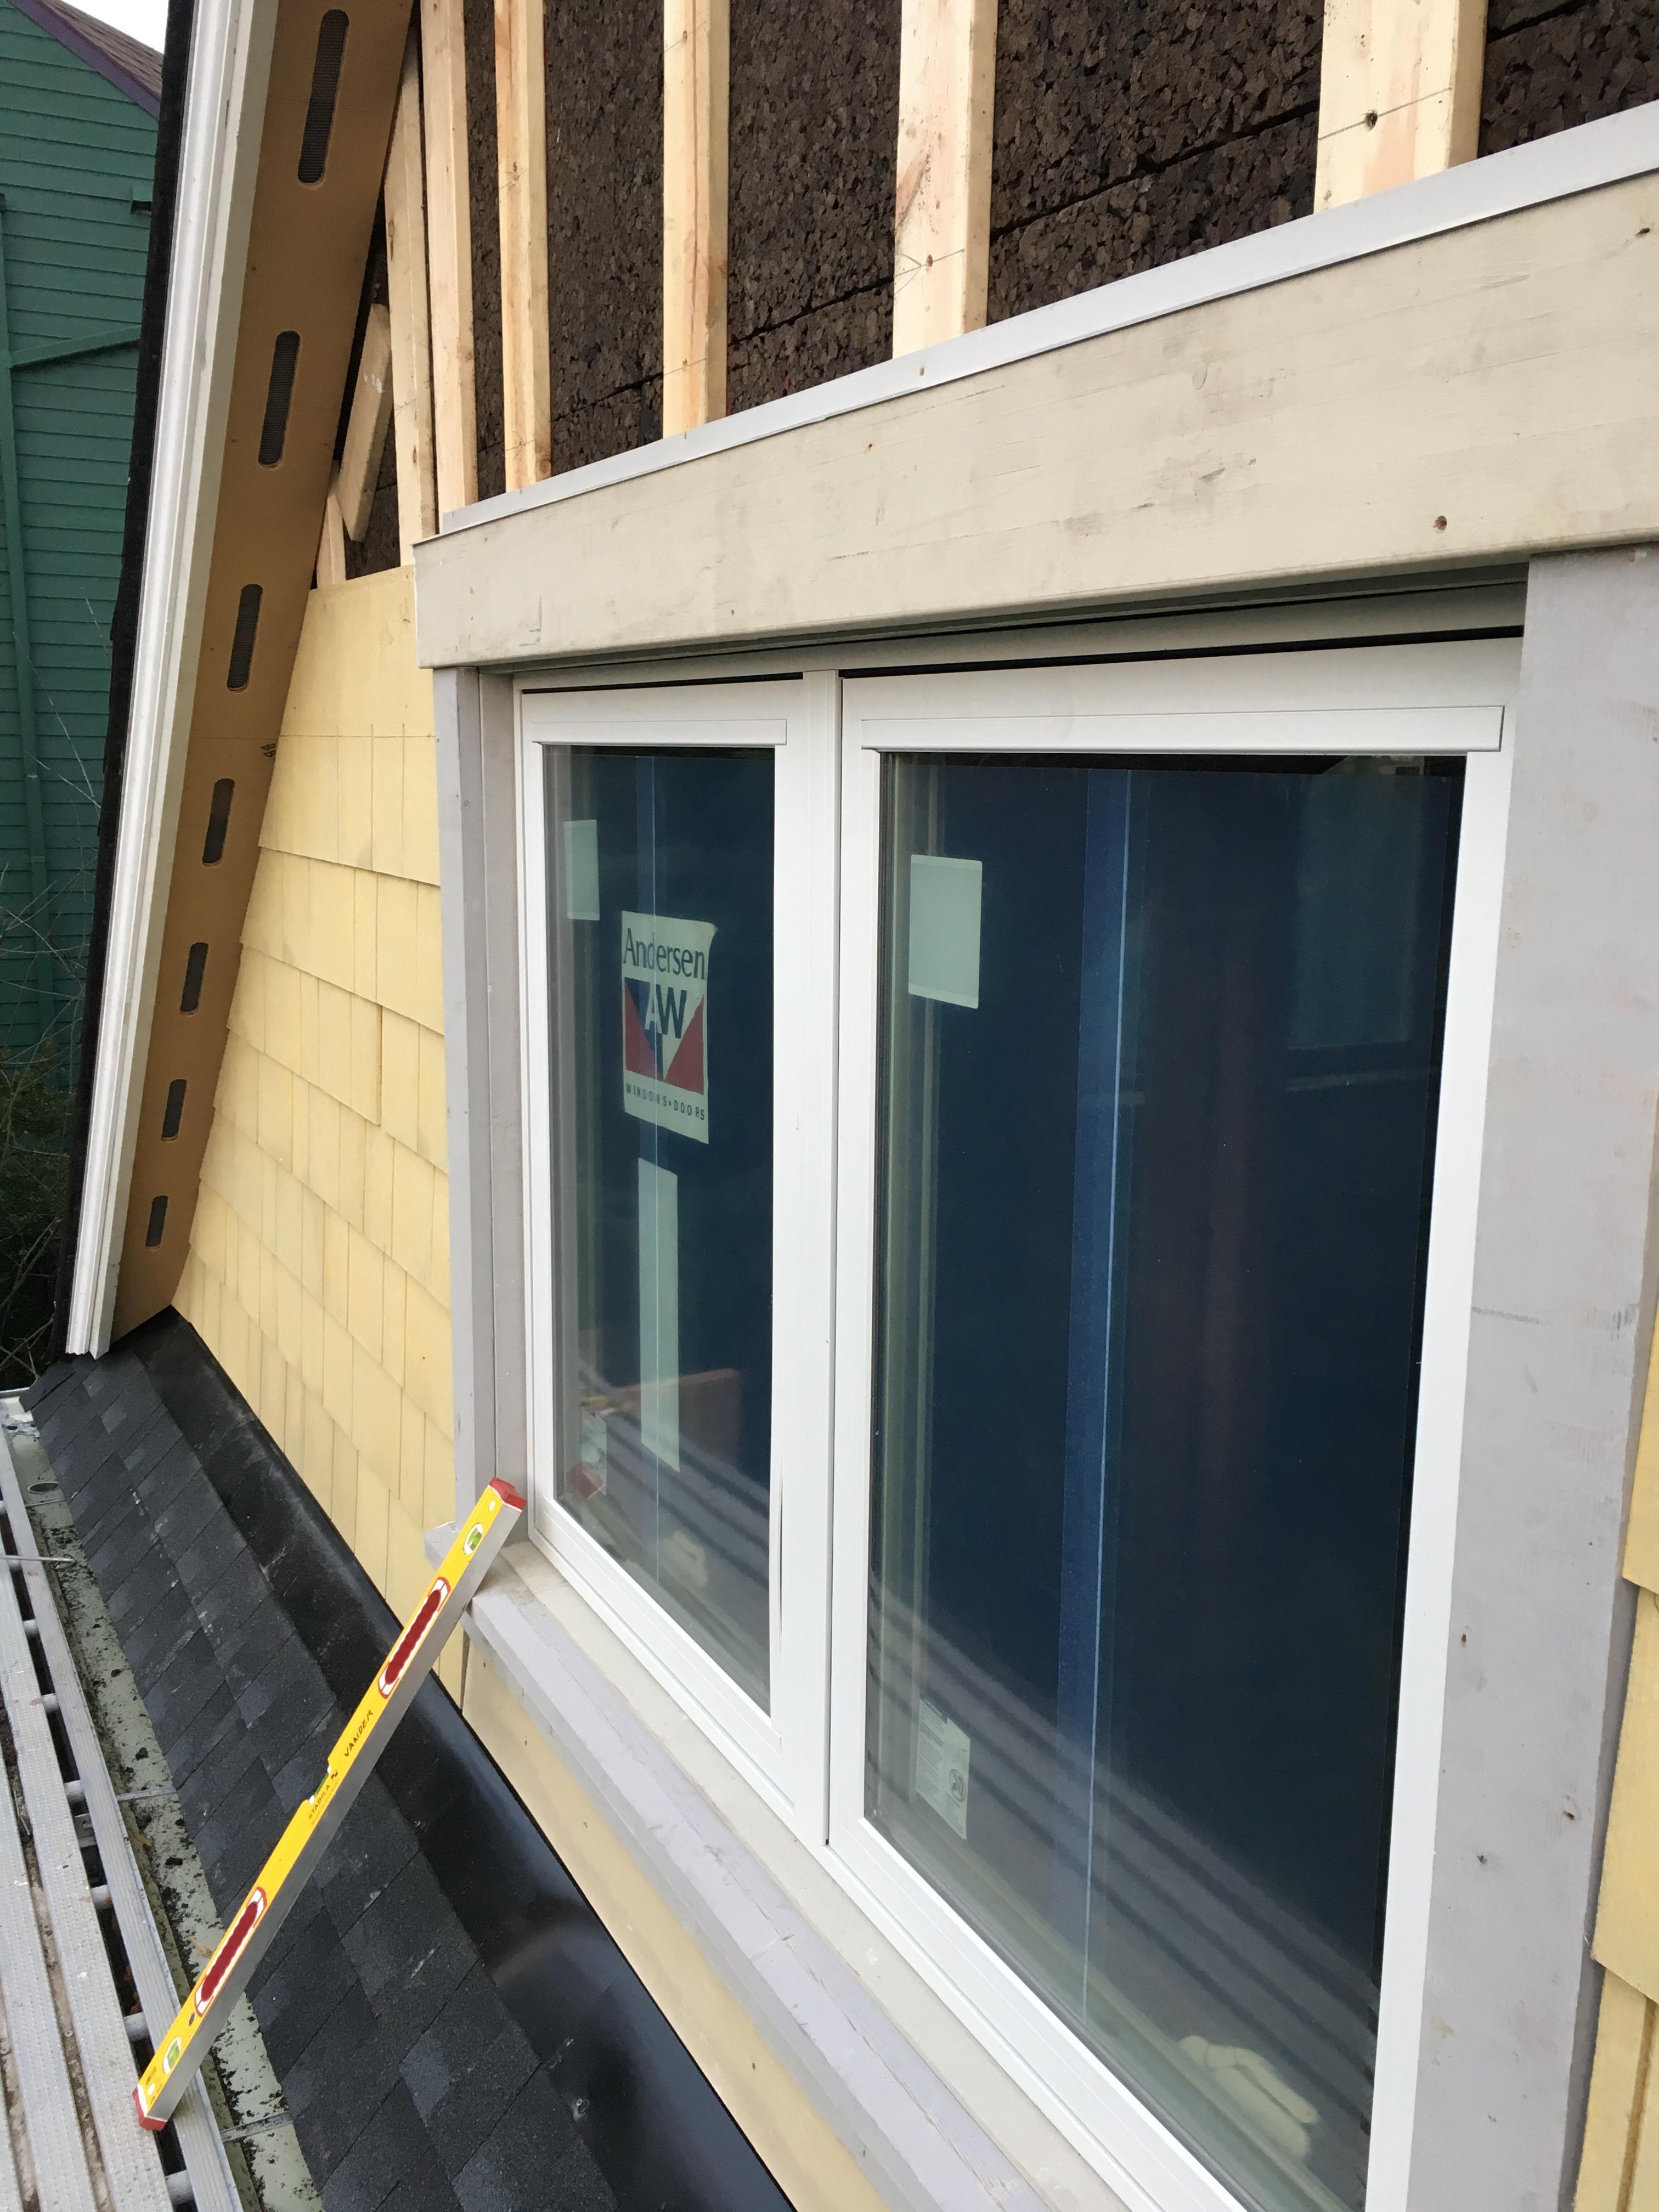
A piece of siding is used as sill extension and to provide slope in the opening for the window, which is deeper because exterior rigid foam has been added
Image
A plastic mesh rain screen is installed over the rigid foam to provide an air gap behind the exterior cladding allowing for drainage and drying.
Image
Image

A strip of OSB sheathing is installed along the perimeter when retrofitting a flat roof with a parapet
Image

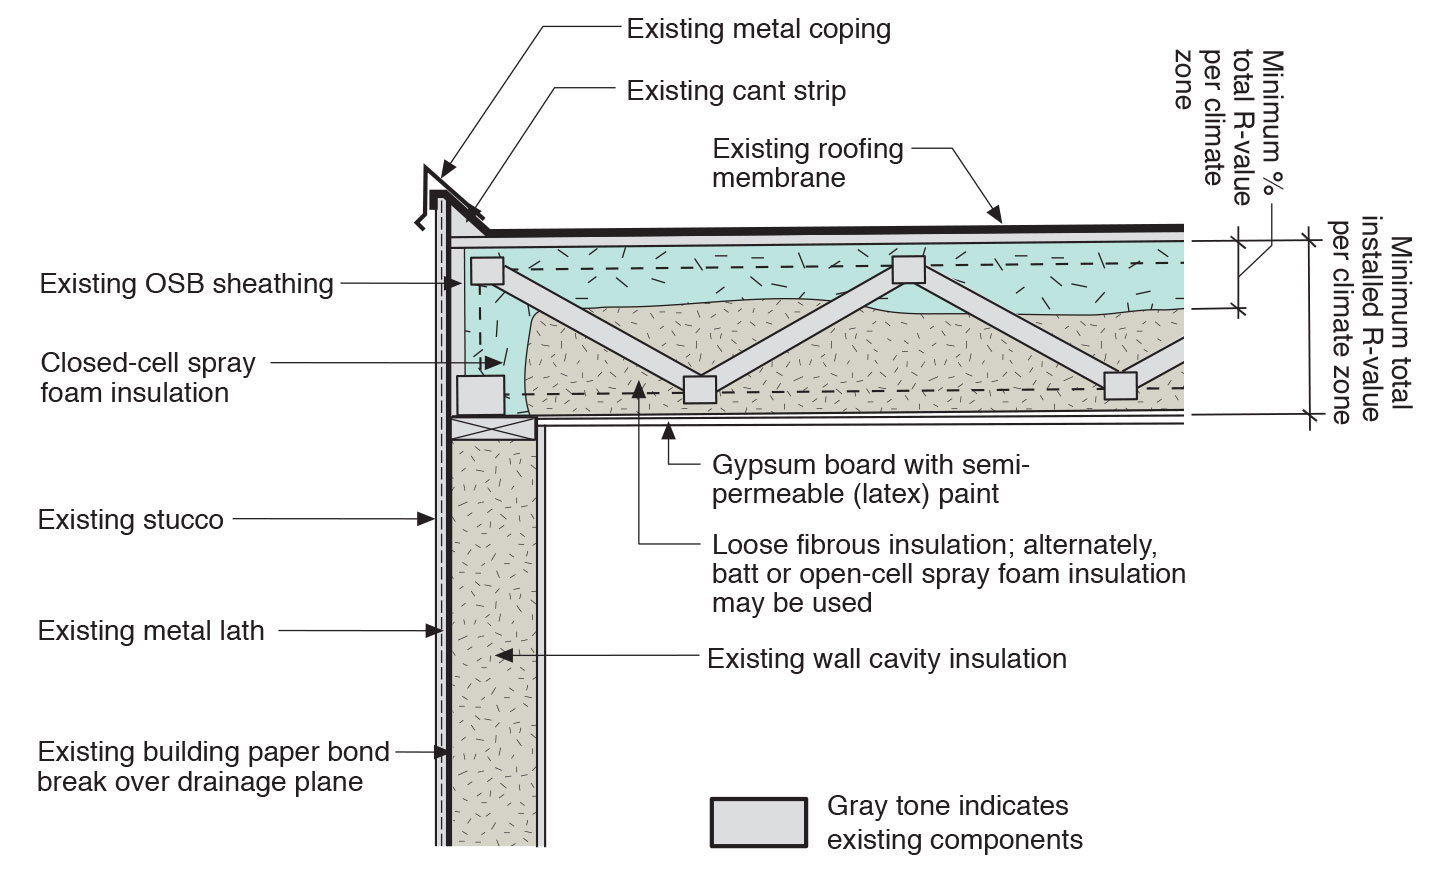
A wall assembly approved for use in the wildland-urban interface has 5/8-inch type X gypsum installed exterior of the wood sheathing and an exterior covering or siding that has a 1-hour fire-resistance rating
Image

A water-resistant membrane that takes the place of house wrap is sprayed is painted over seams and window framing then sprayed over the entire wall to provide a weather-resistant air barrier.
Image
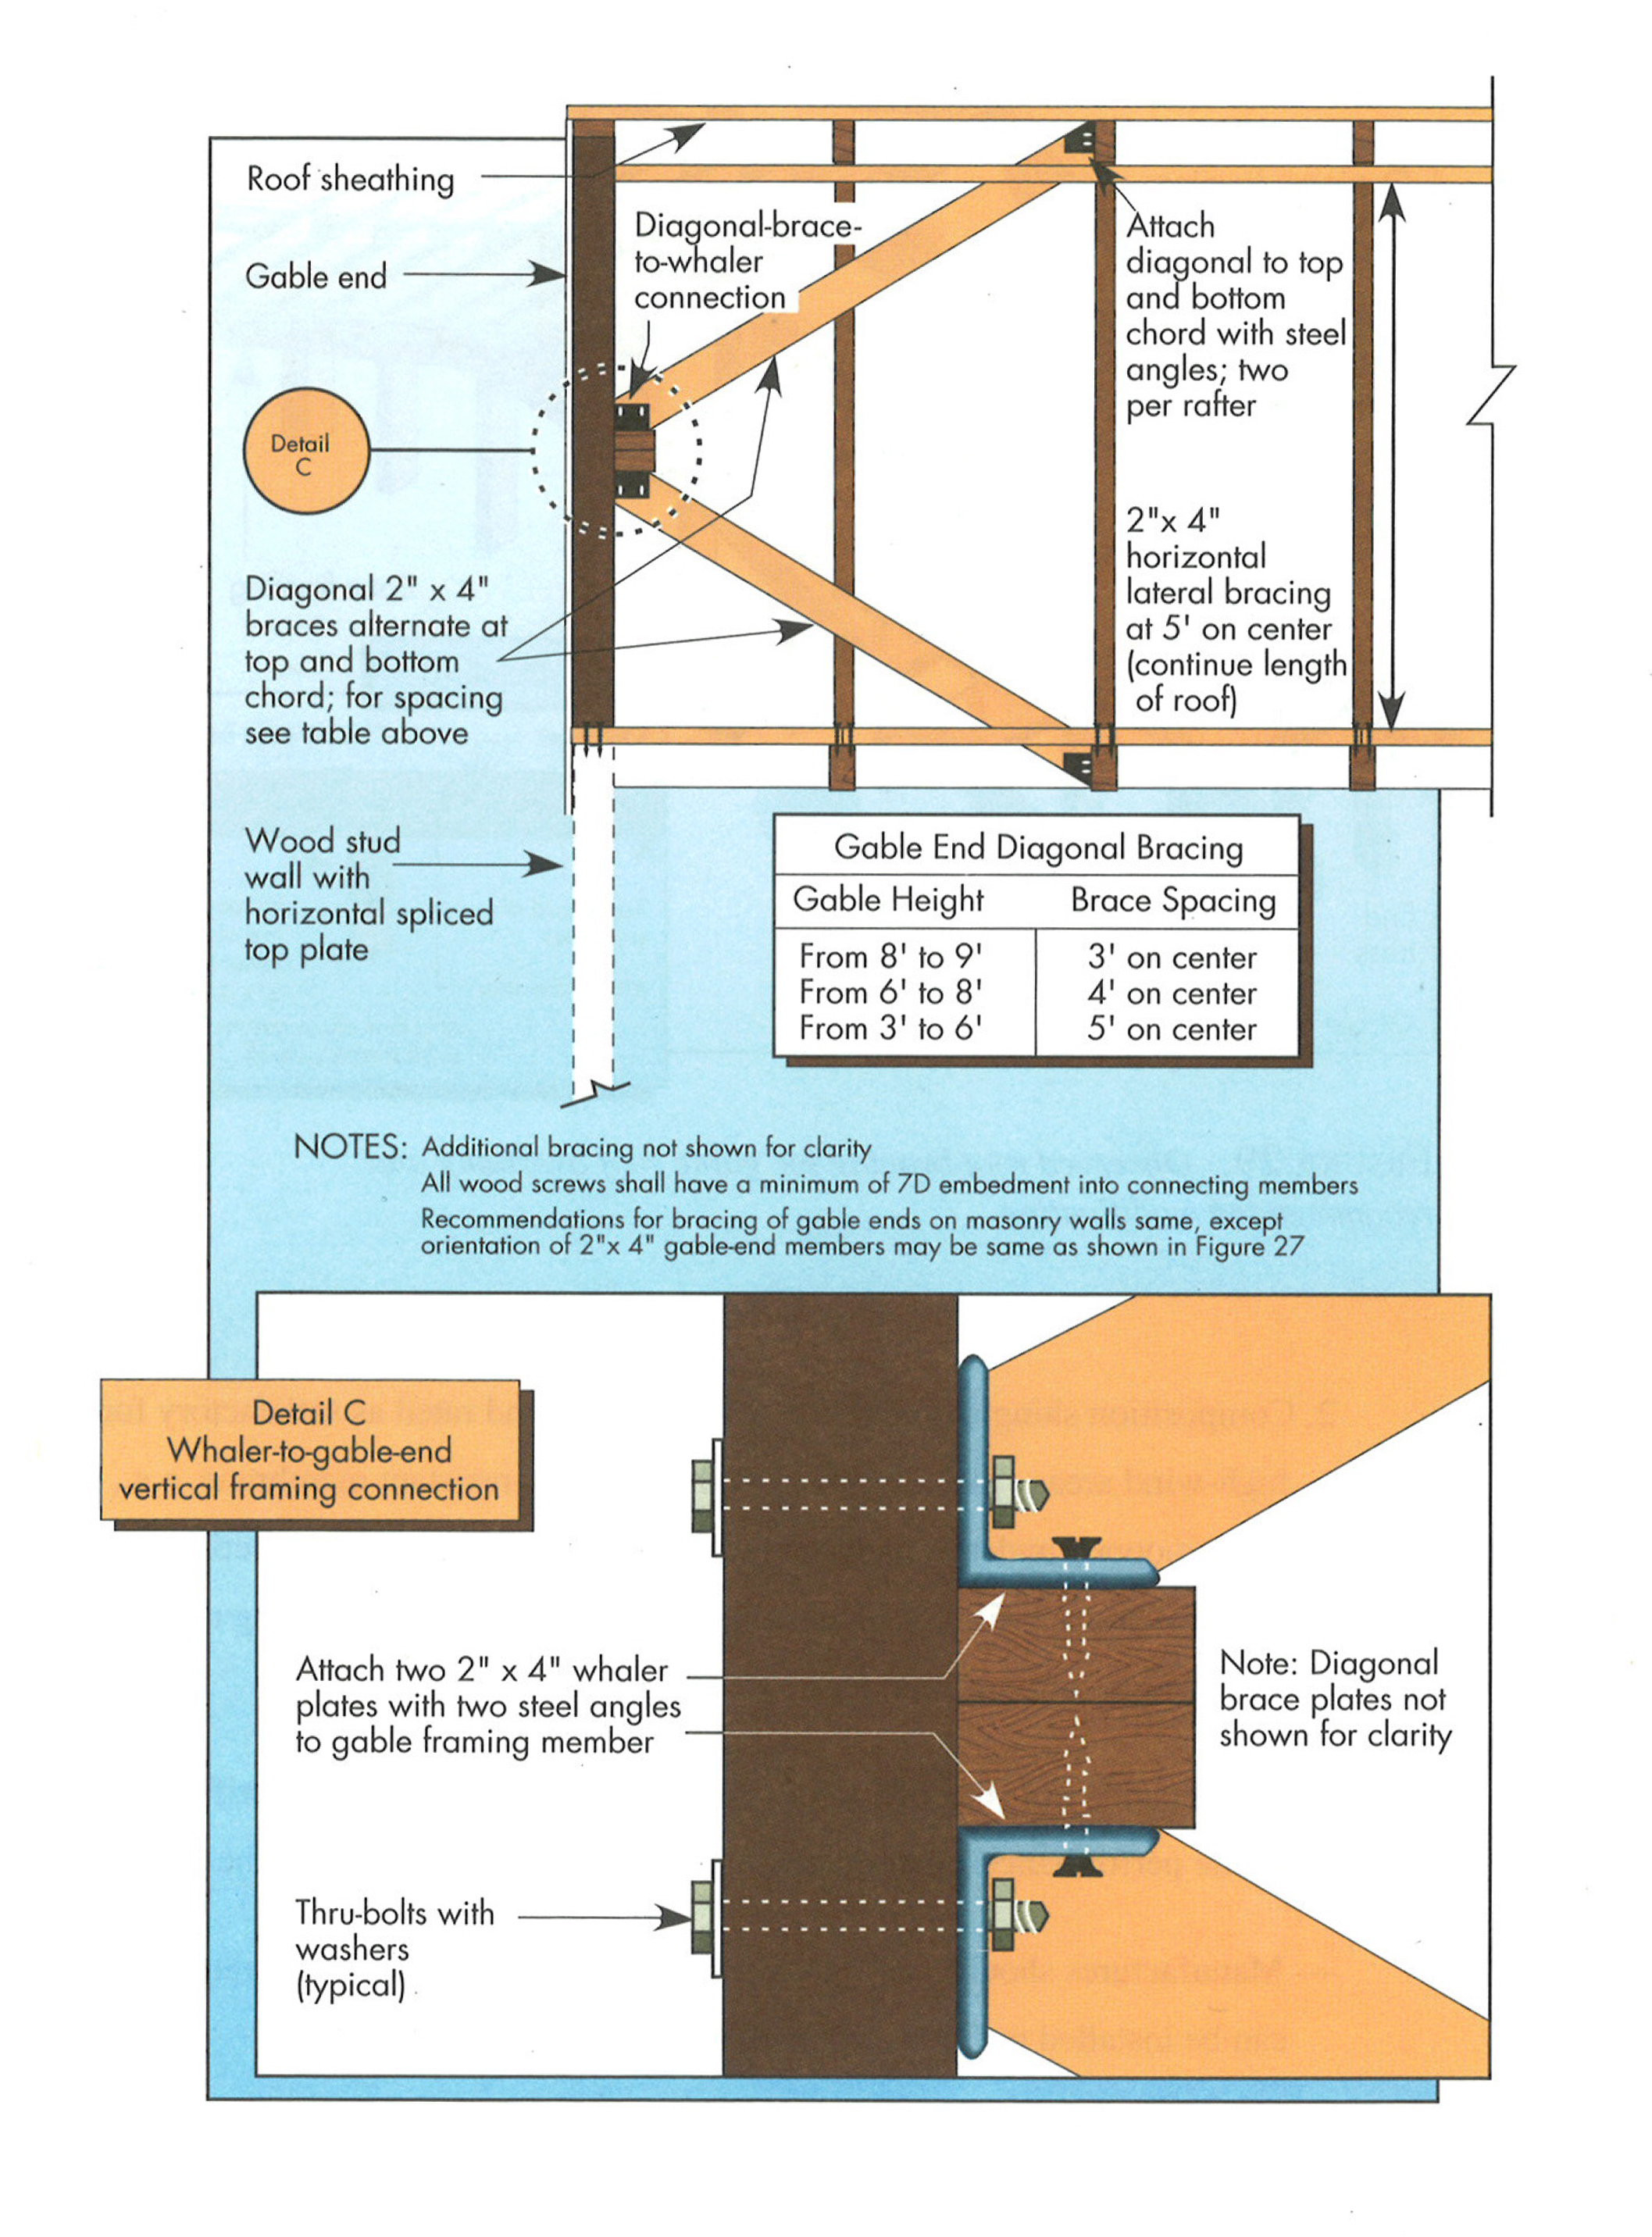
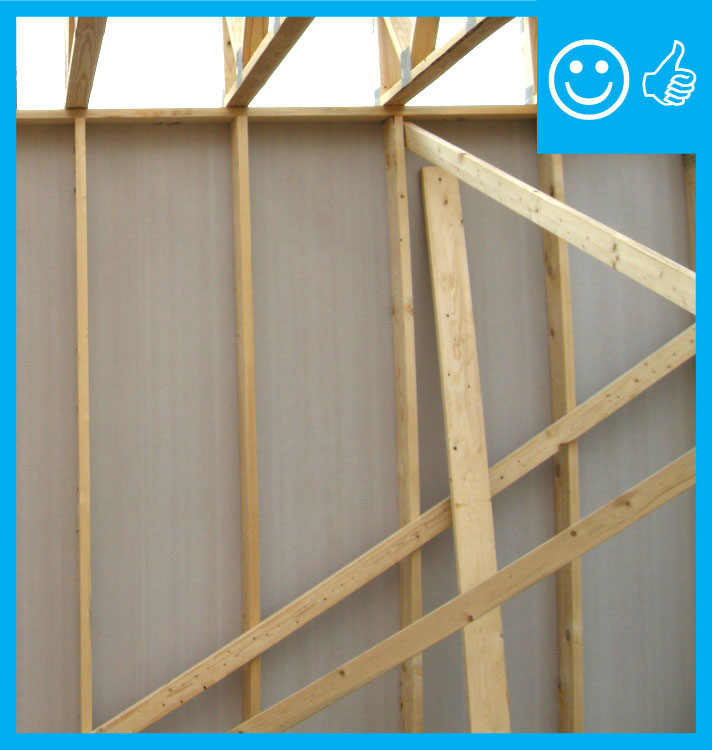
An exterior wall braced using the let-in-bracing (LIB) method with no exterior sheathing
Image
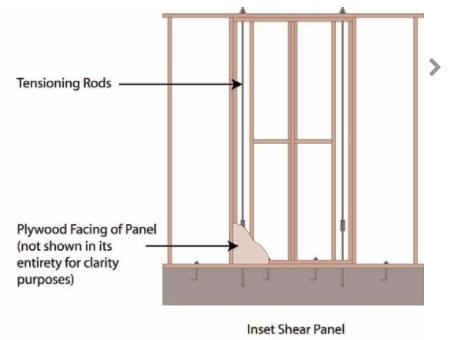
An Inset Shear Panel constructed with 2x4 dimensional lumber installed into a 2x6 stud bay
Image
Image
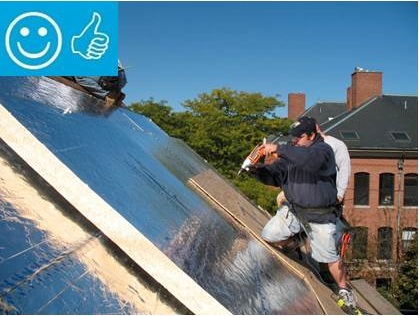
Builders in hot climates may uses a radiant barrier product that comes adhered to the underside of the roof sheathing to reduce solar heat gain into the home.
Image
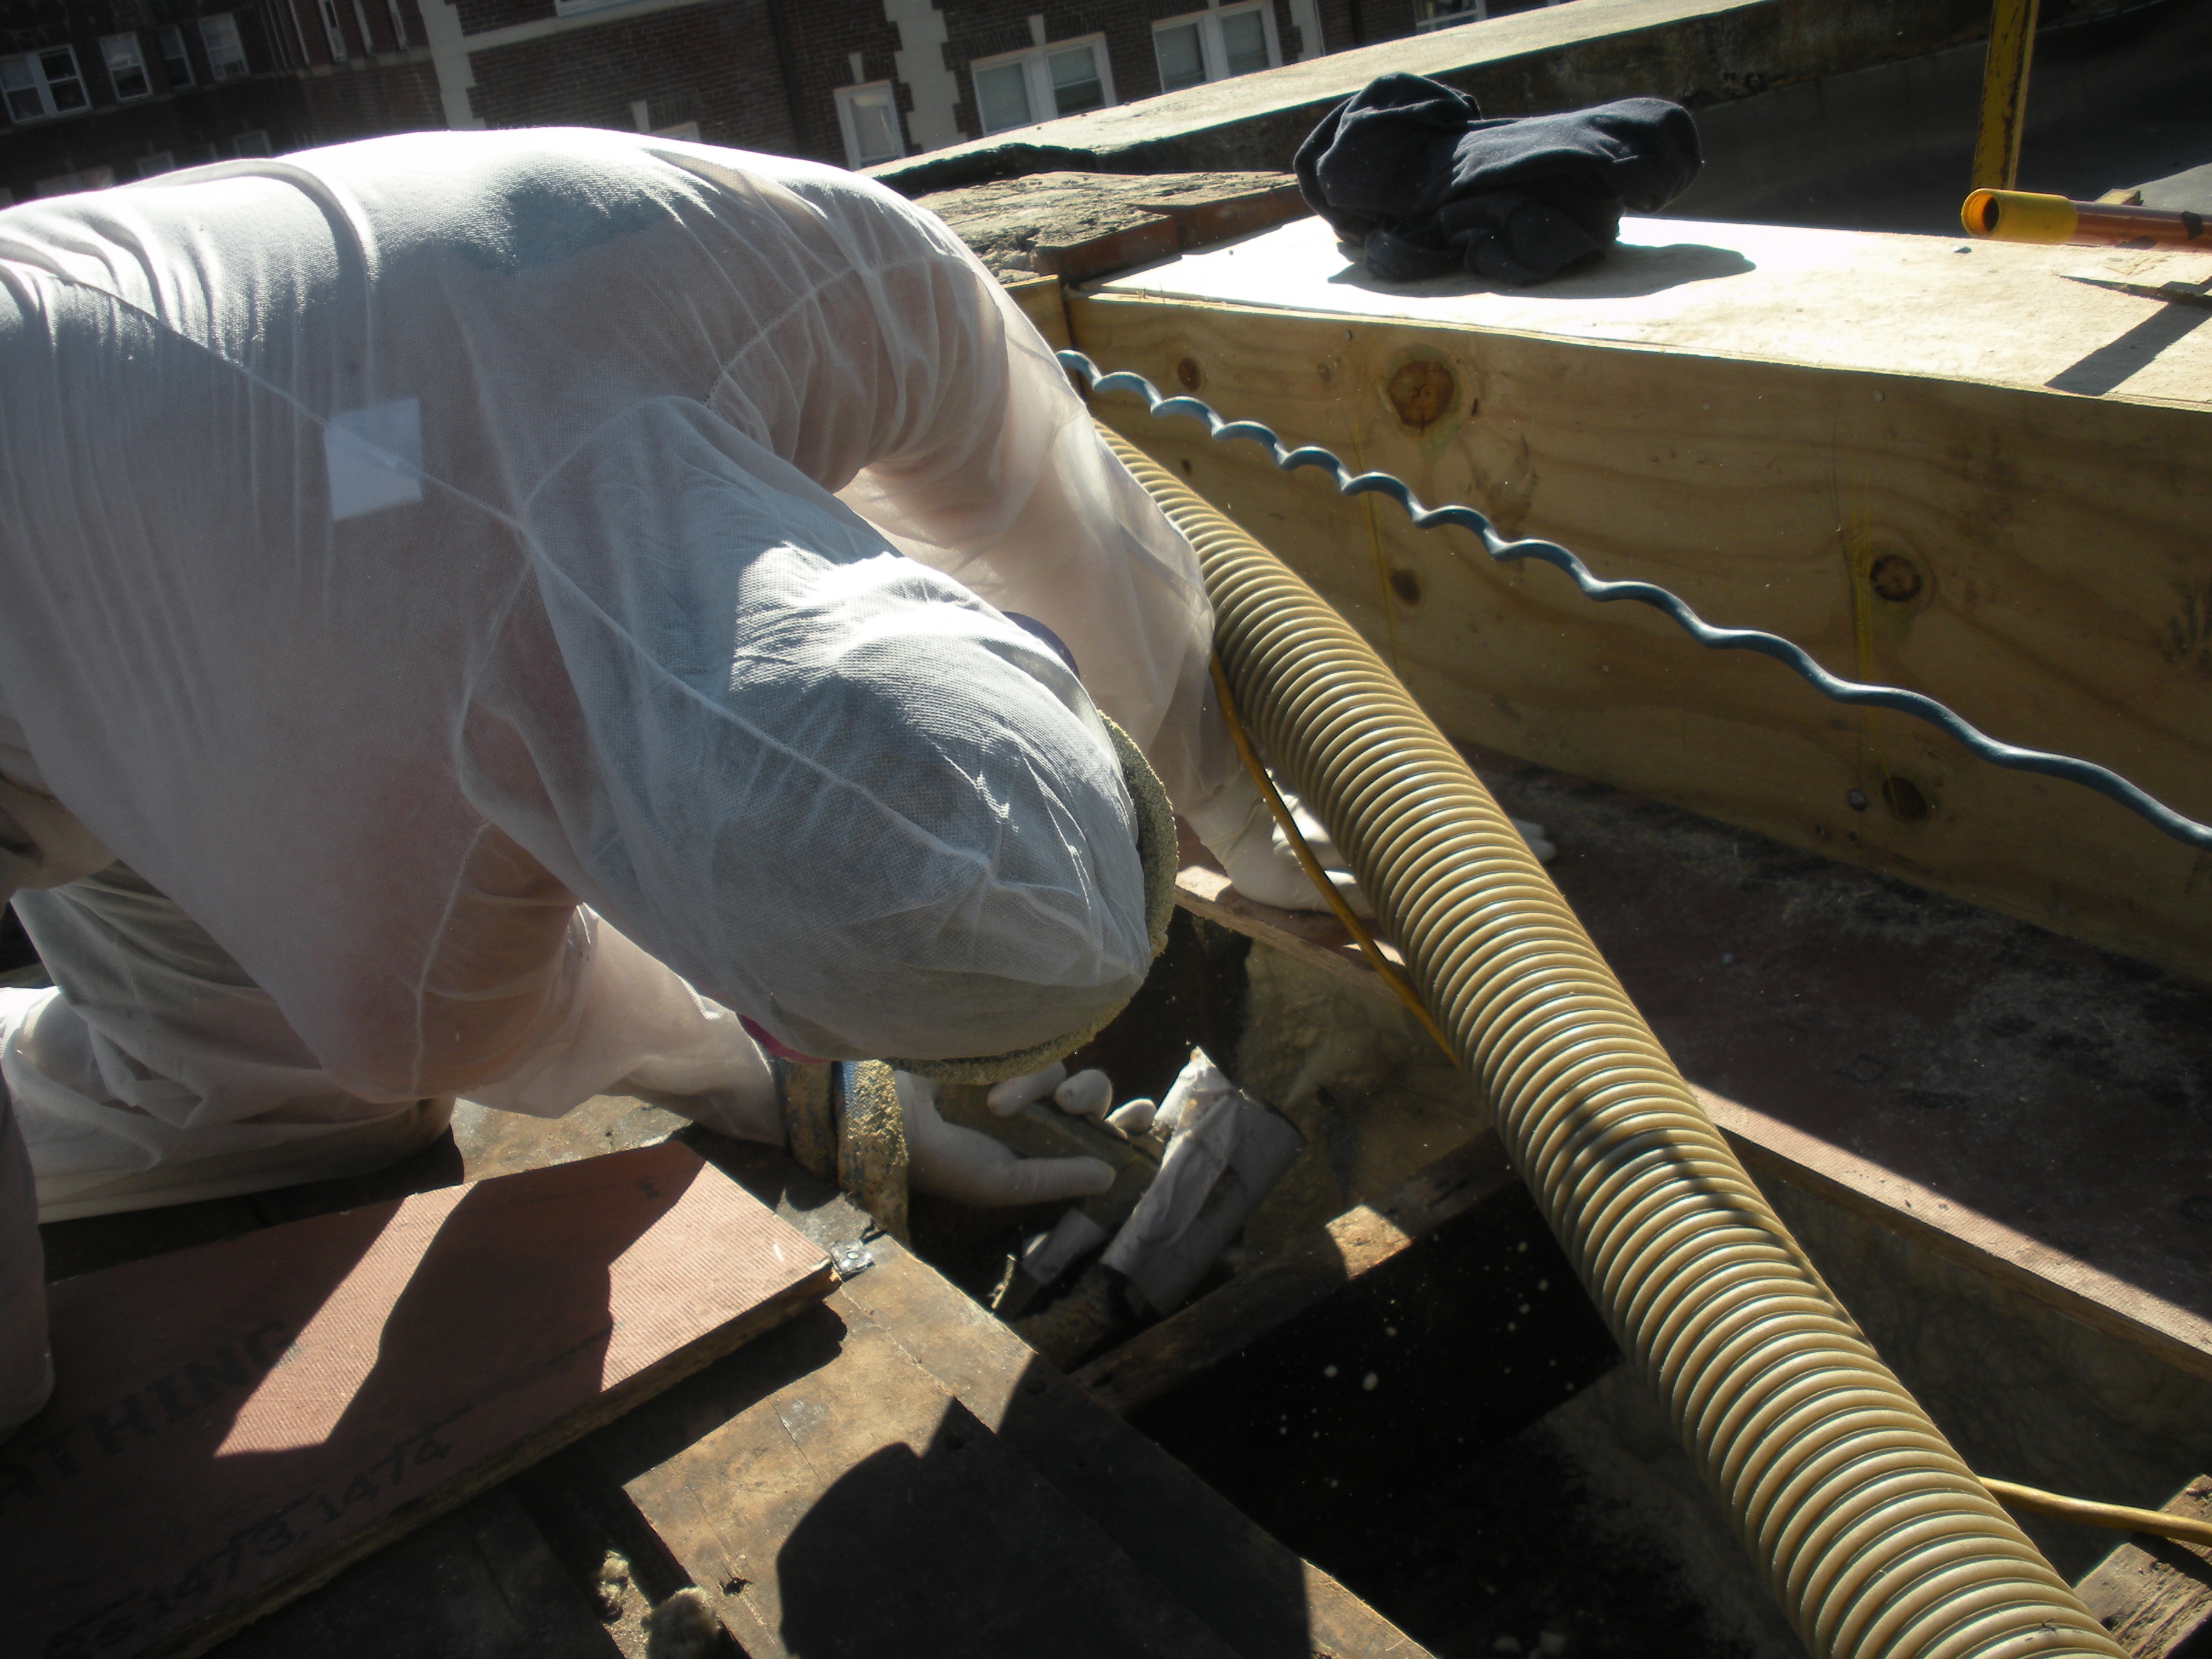
Closed-cell foam is sprayed into roof cavities along the masonry parapet wall to form a continuous air barrier between the wall and the sheathing of the flat roof
Image
Closed-cell spray foam fills the roof joist cavities forming an air barrier between the masonry parapet wall and the roof sheathing
Image
Image
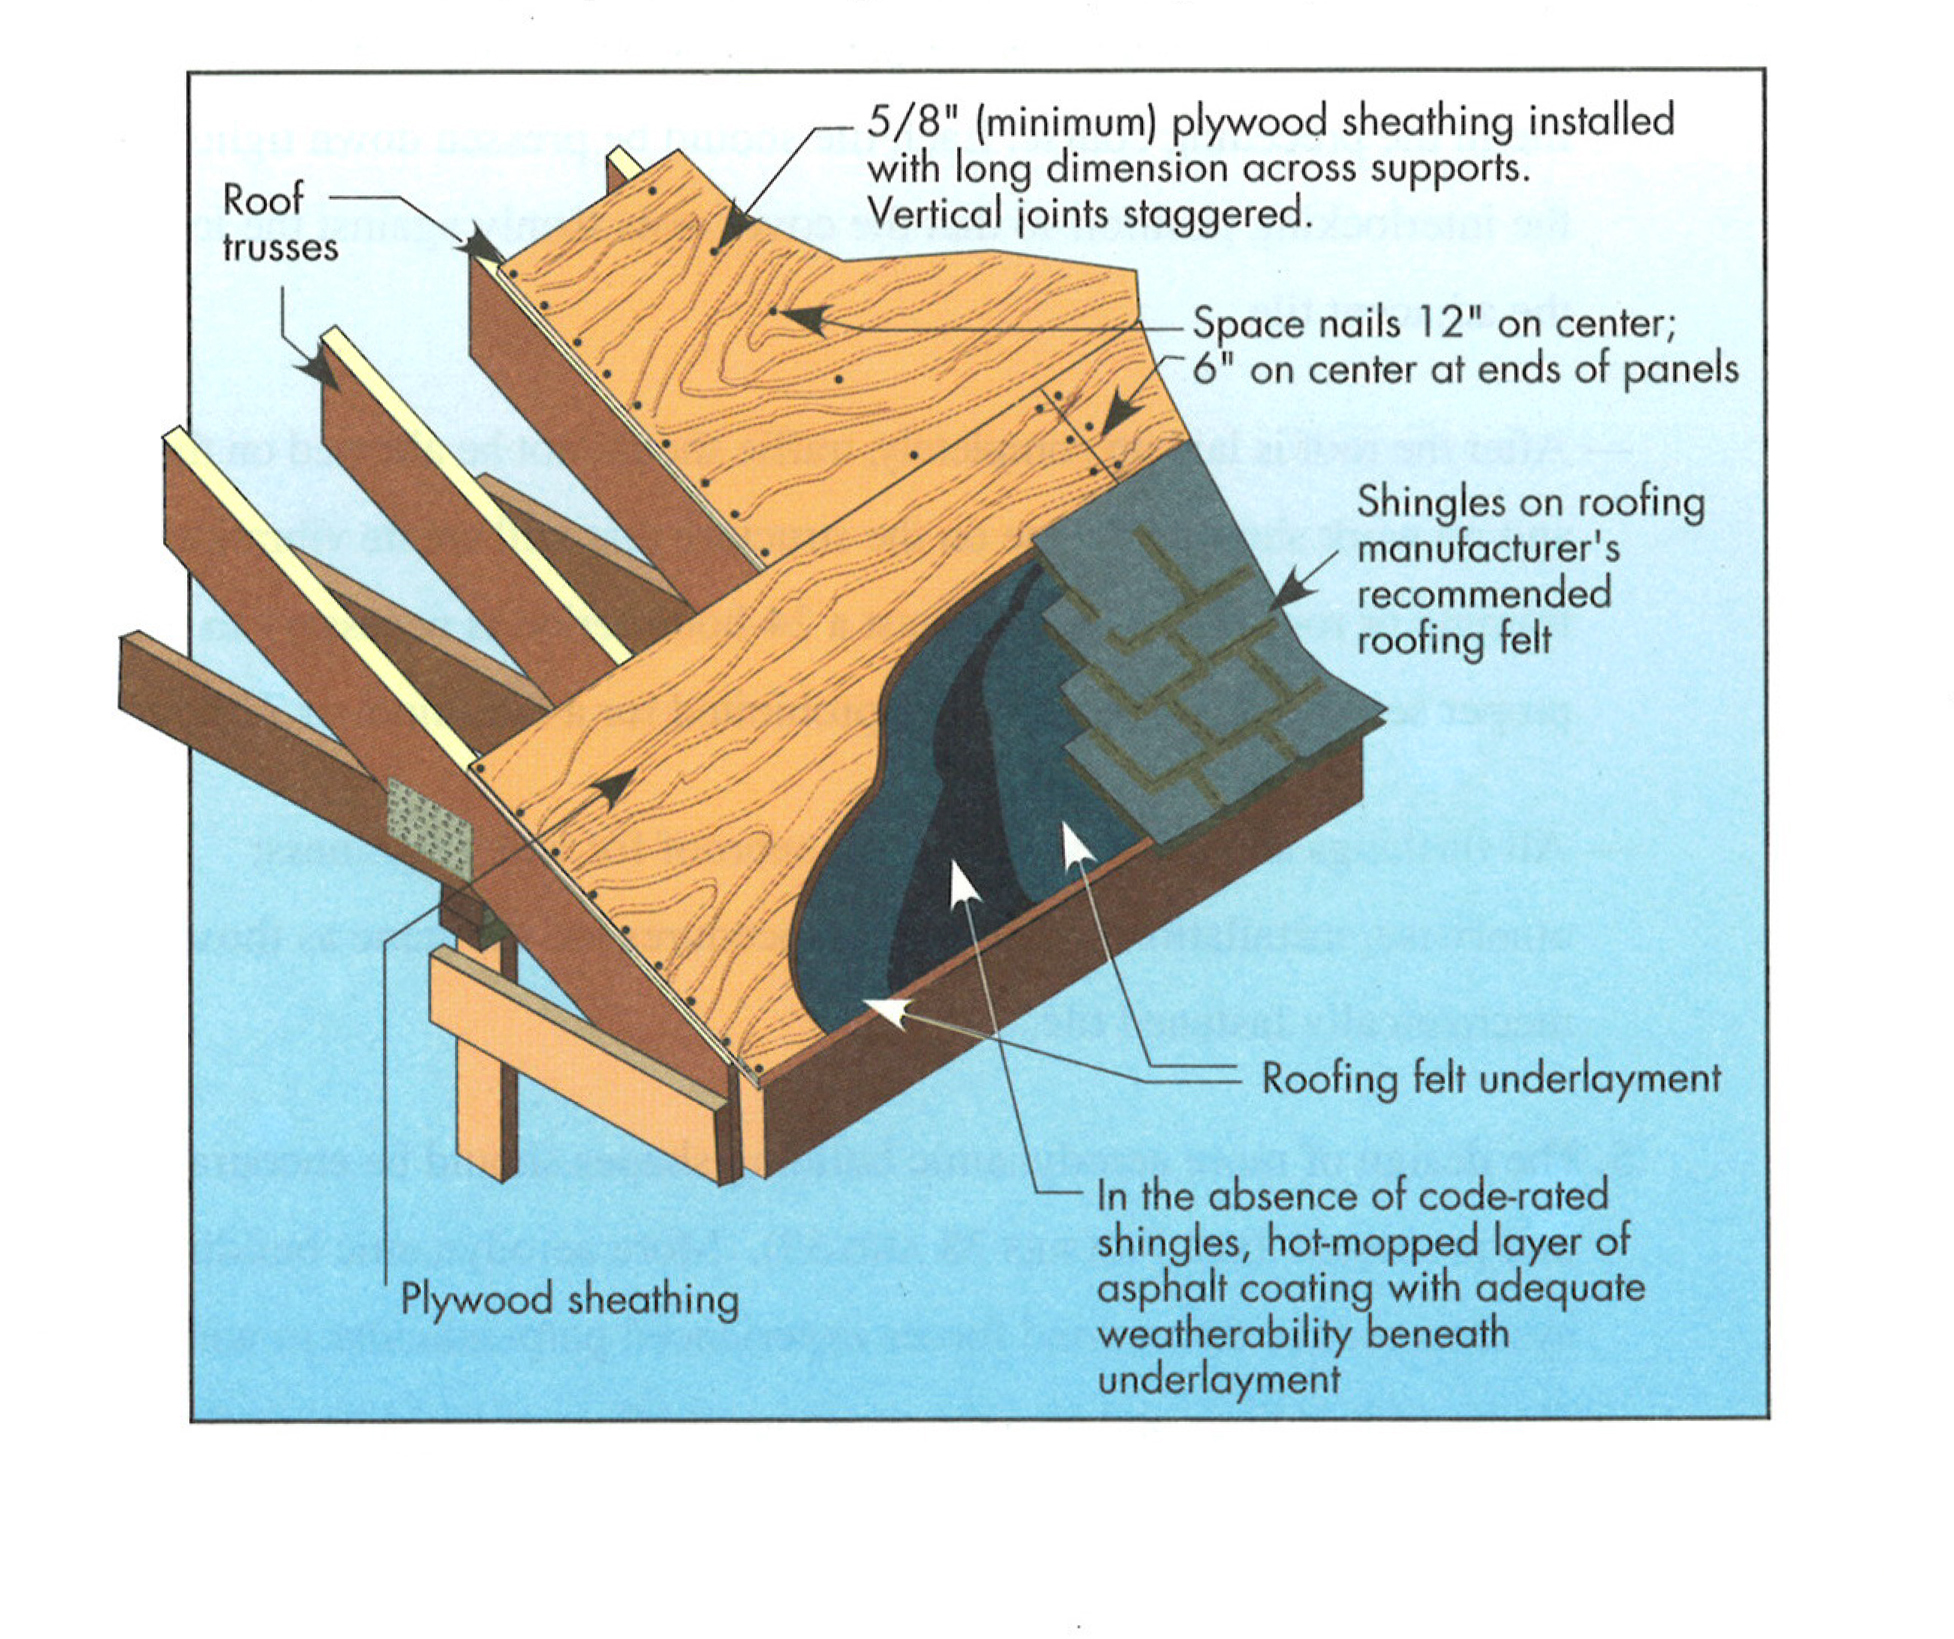
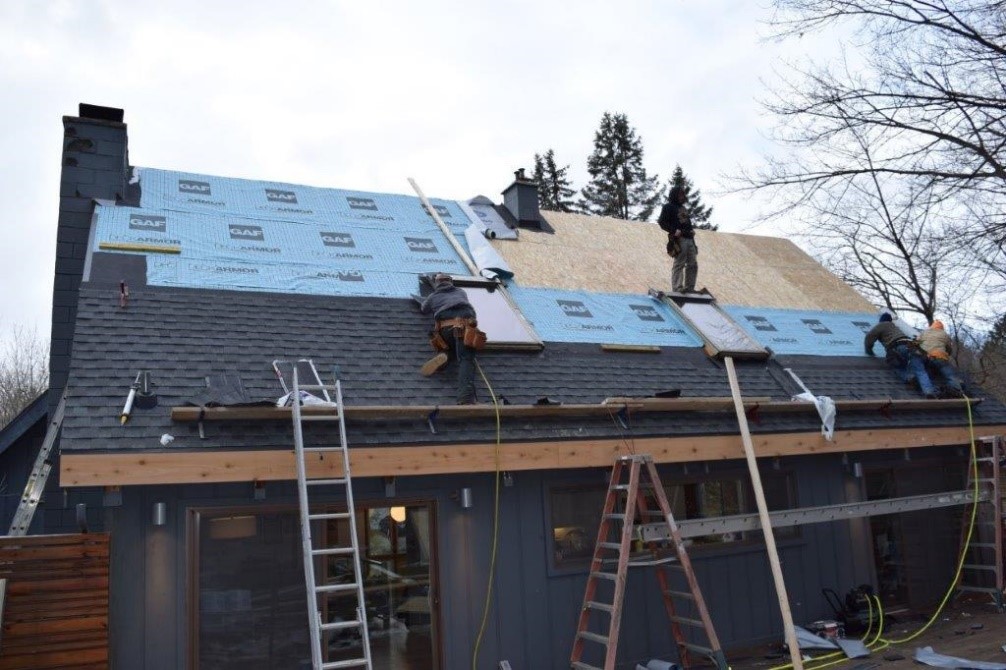
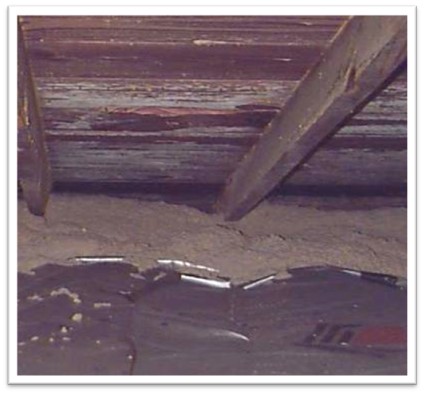
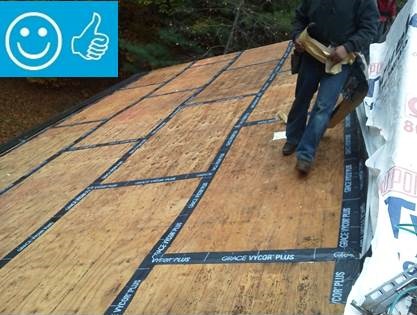
Composition shingle roofing system showing sheathing and hot-mopped underlayment
Image
Image

Image
Image
Image

Durability concerns on a house continuously sheathed with a proprietary fiber structural panel used as bracing. Photo 1 of 2.
Image
Durability concerns on a house continuously sheathed with a proprietary fiber structural panel used as bracing. Photo 2 of 2.
Image
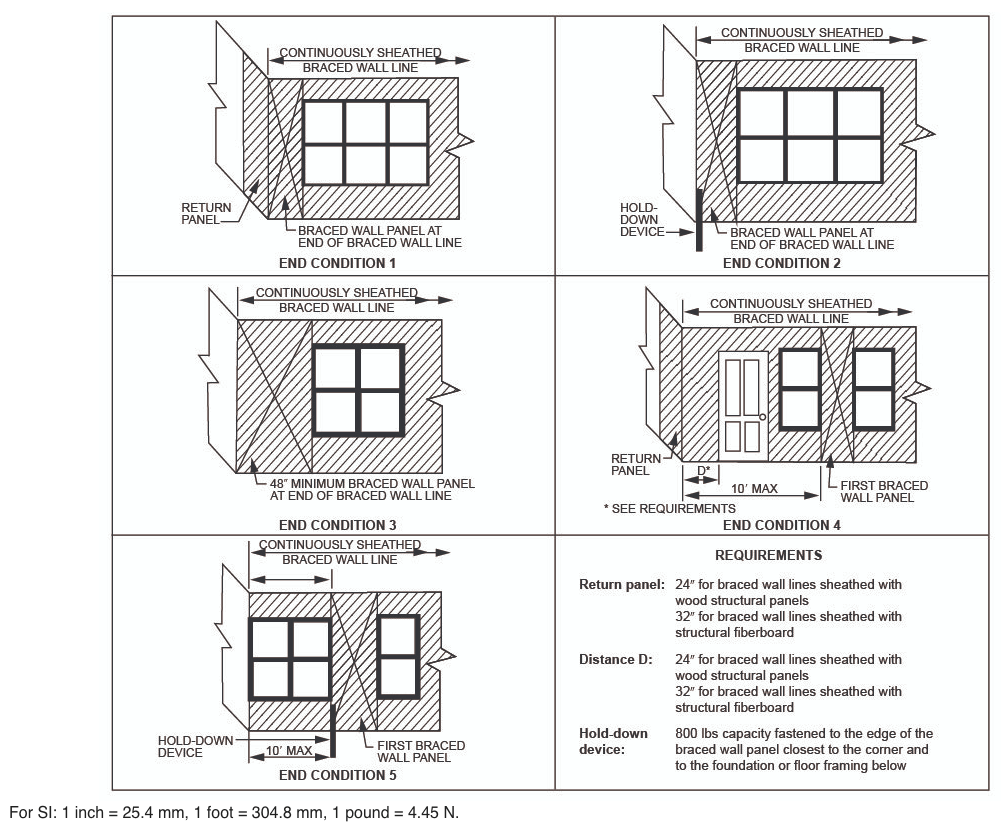
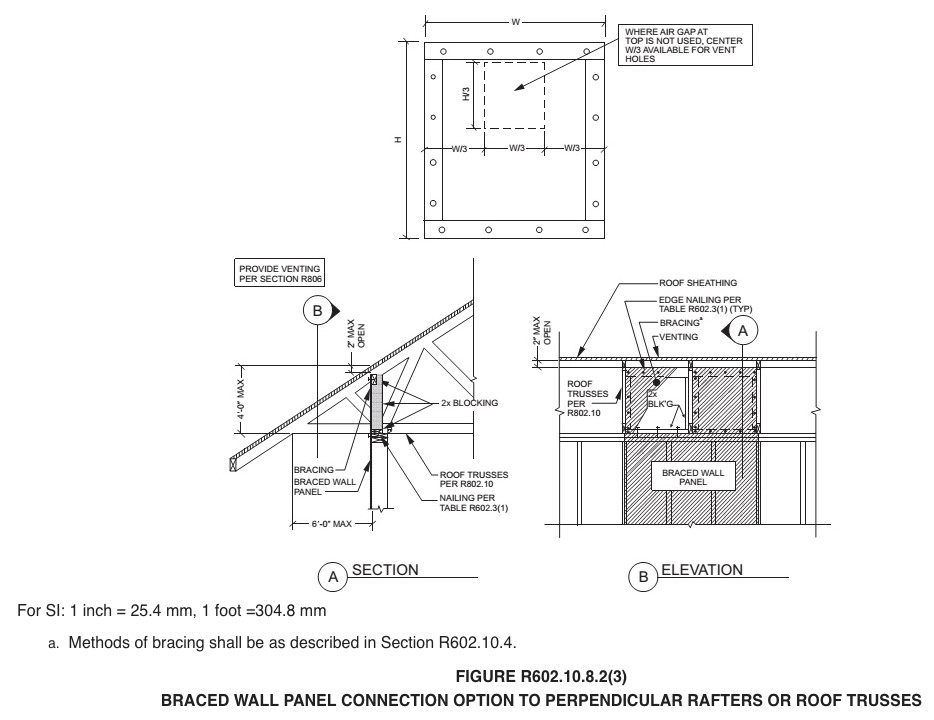
End conditions for braced wall lines with continuous sheathing, Figure R602.10.7 in the IRC
Image
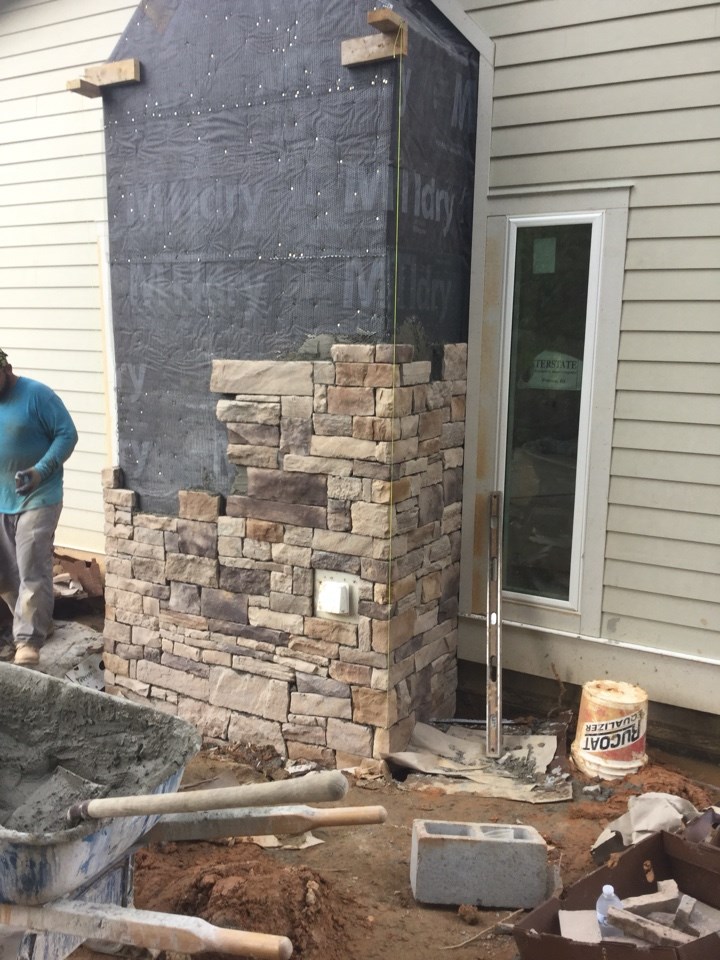
Expanded polystyrene insulation is installed with joints taped and lath attached in preparation for the application of stucco
Image
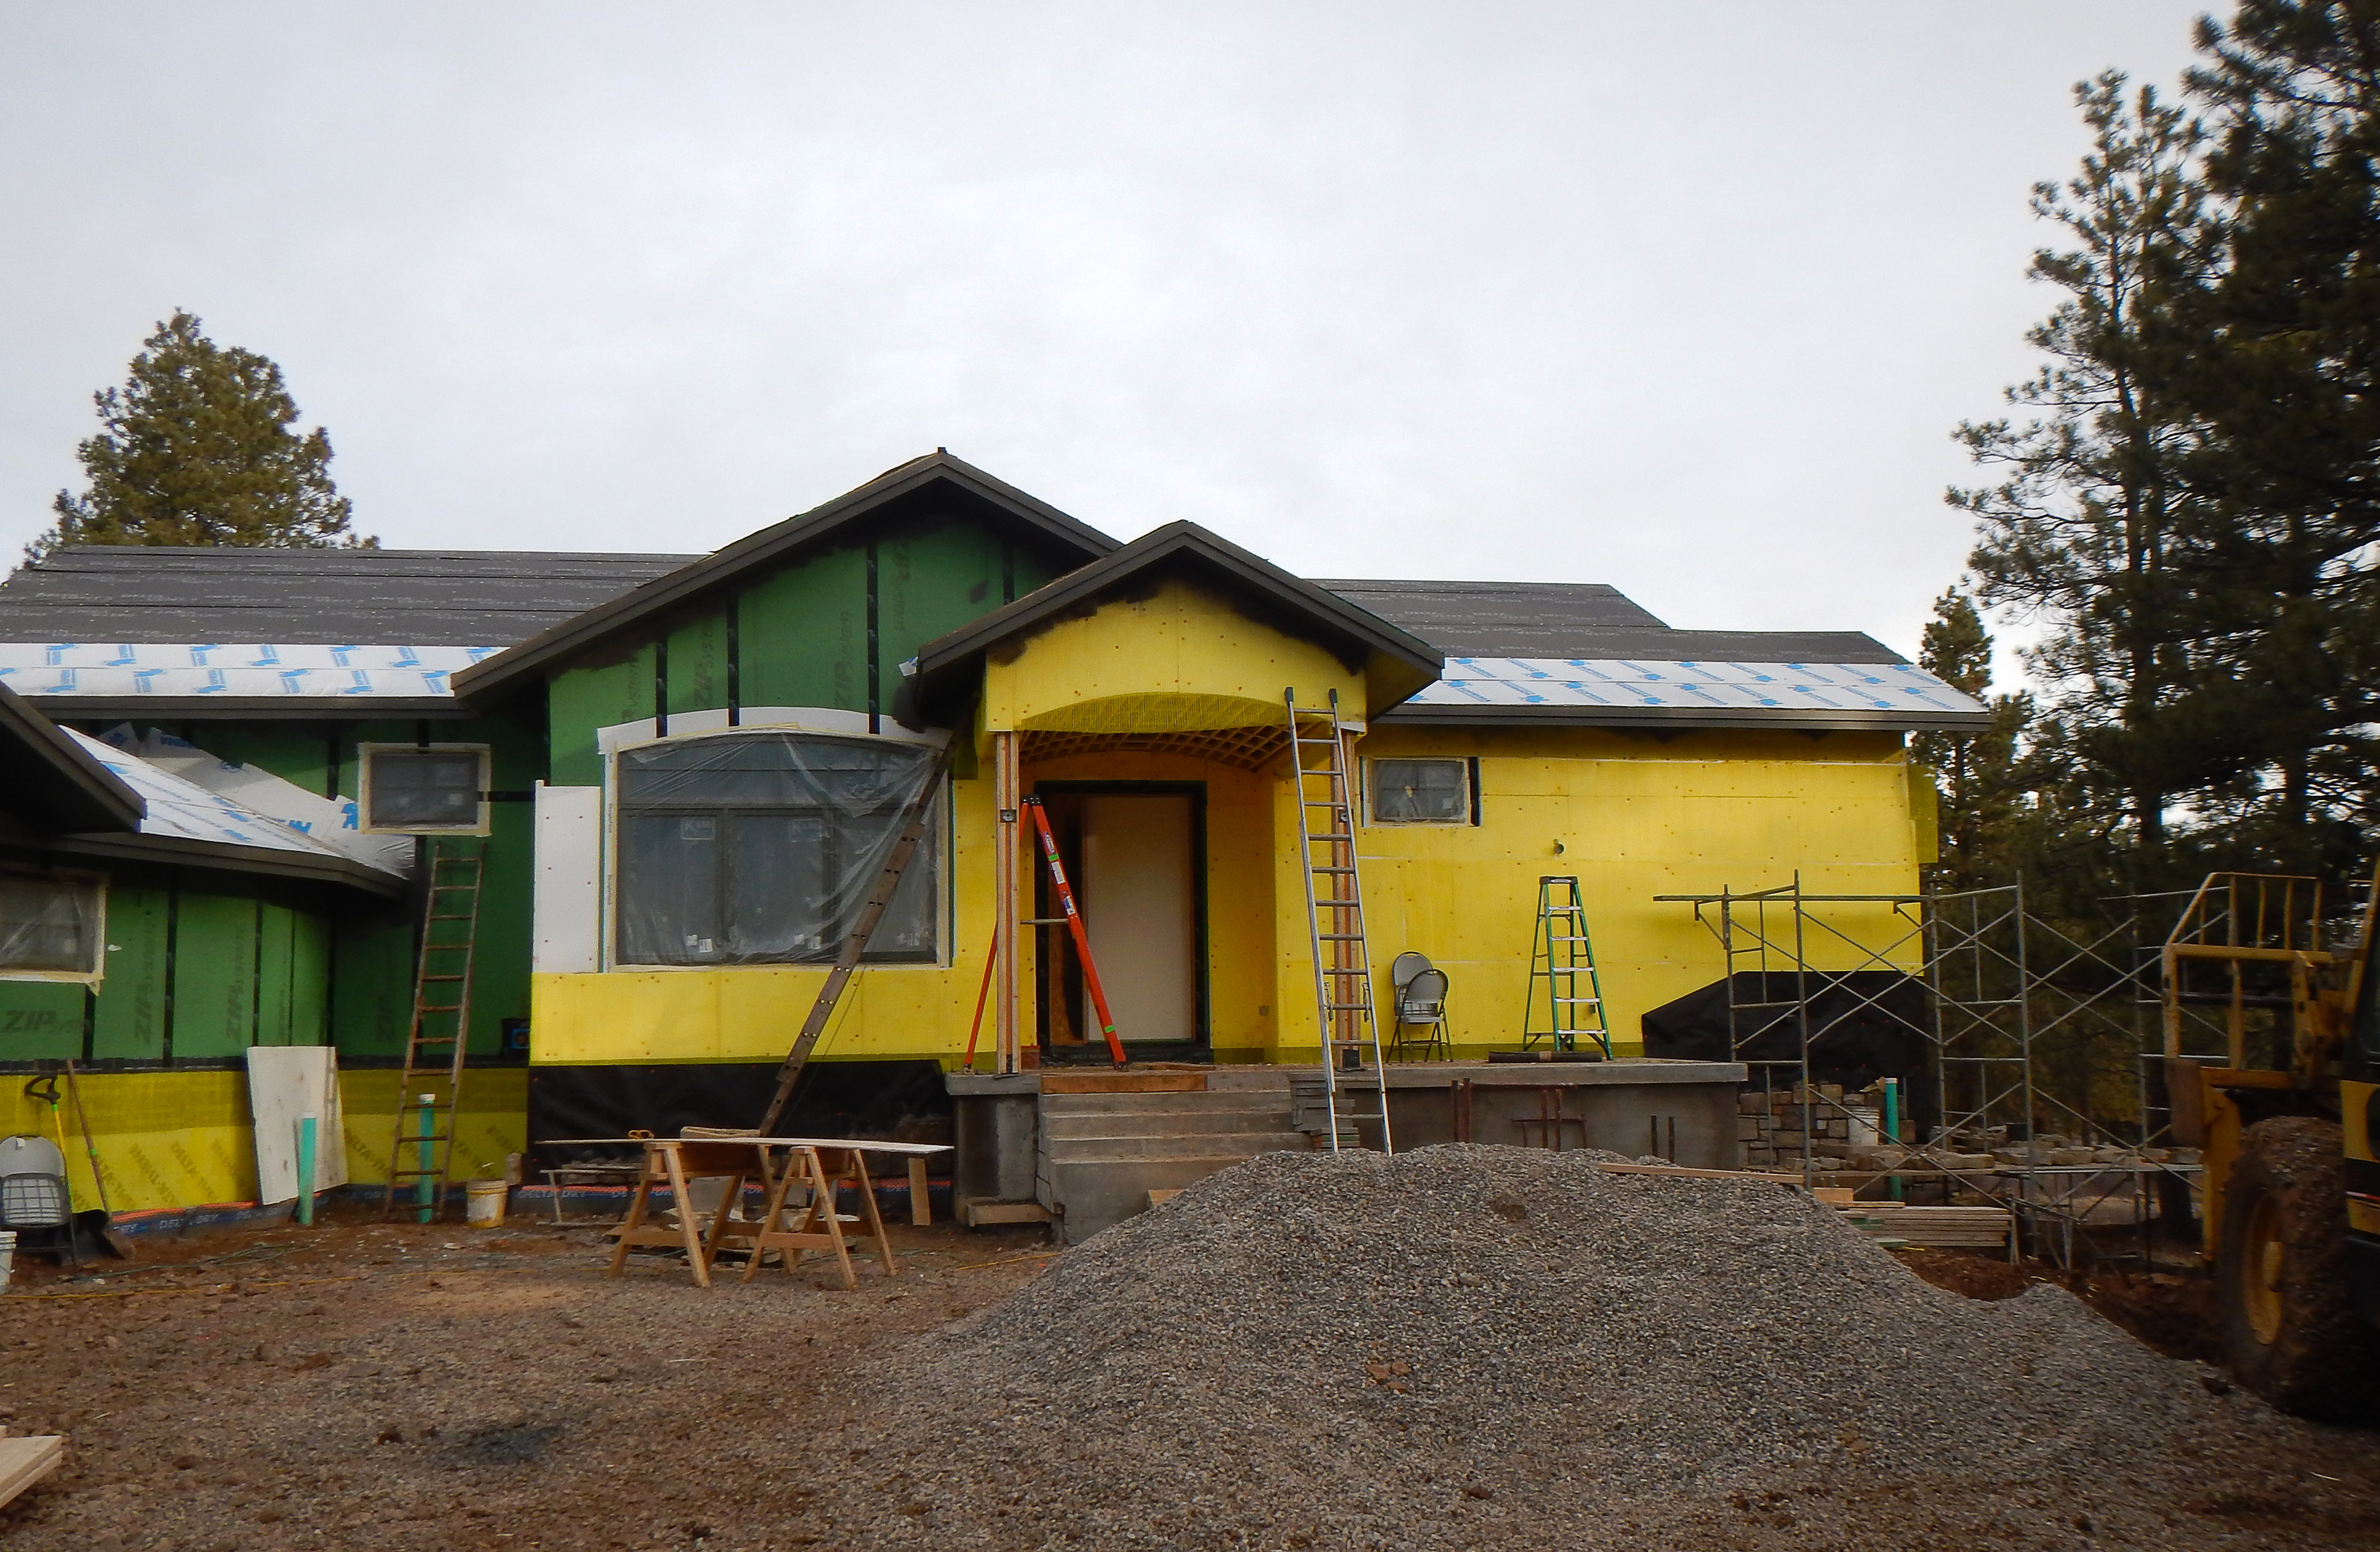
Extruded polystyrene (XPS) rigid foam is taped at the seams to provides a continuous air and weather-resistant barrier so no house wrap is needed; it also provides a continuous layer of insulation.
Image
Image
Image
Image
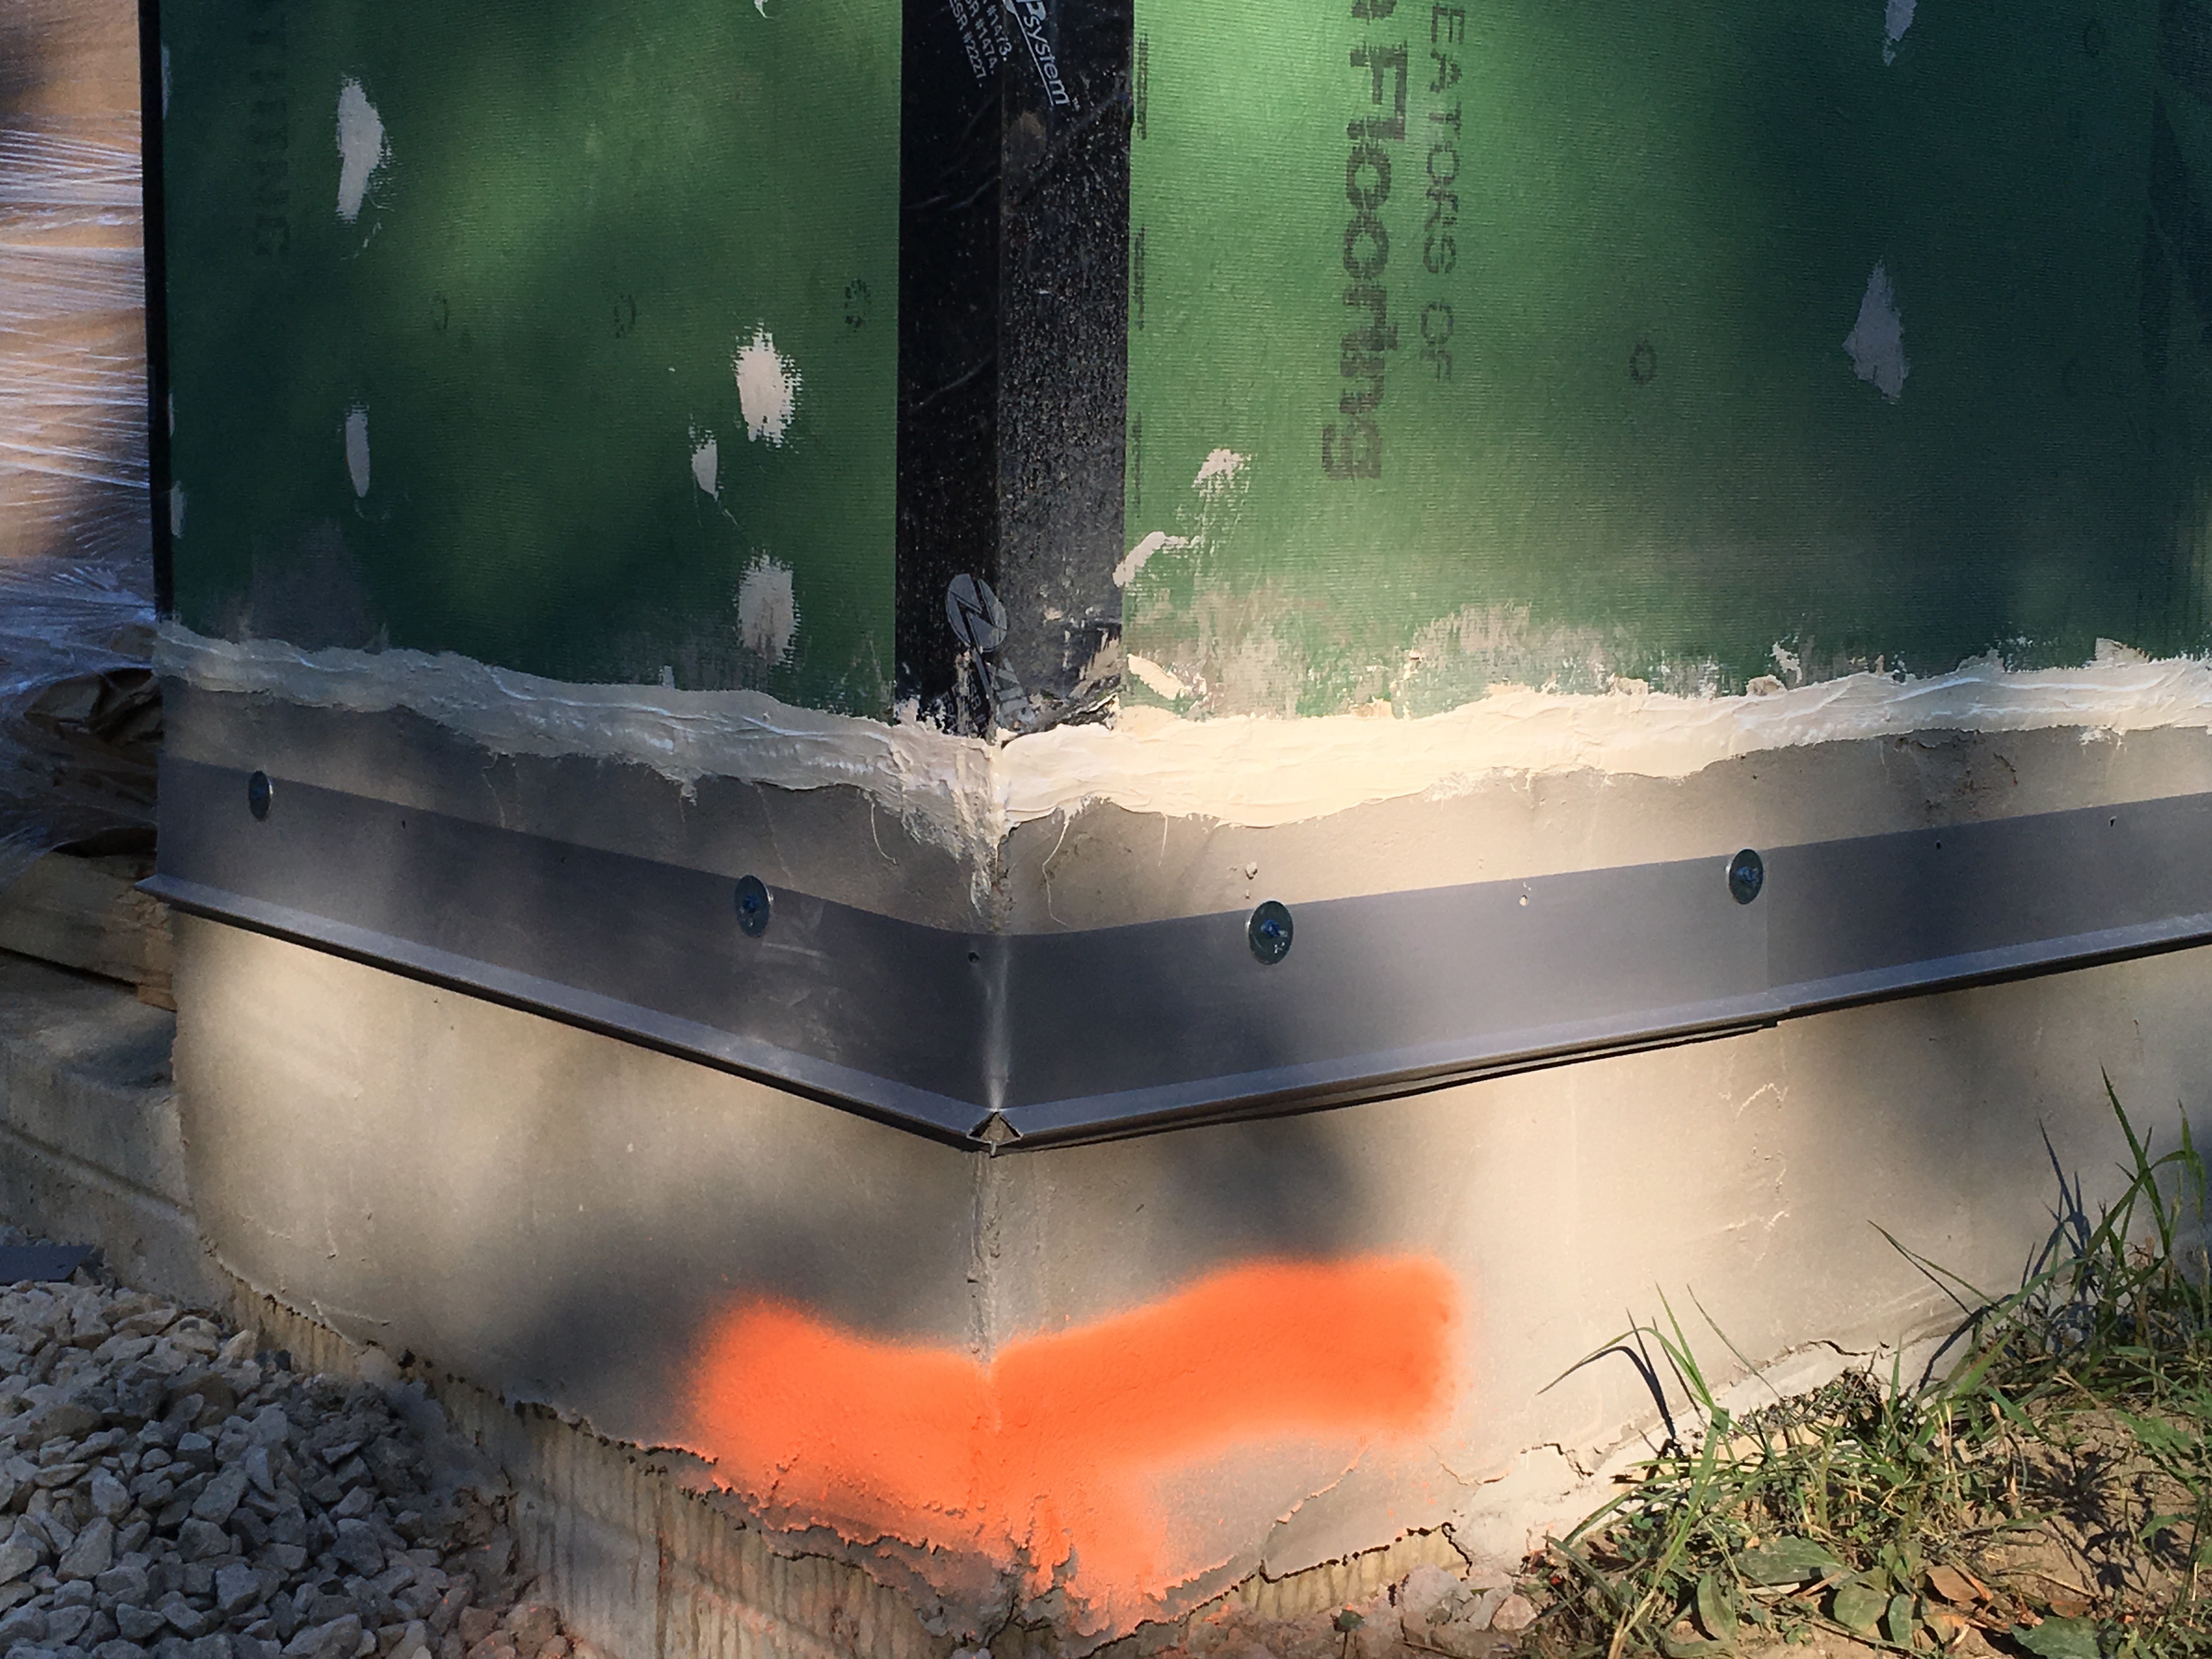
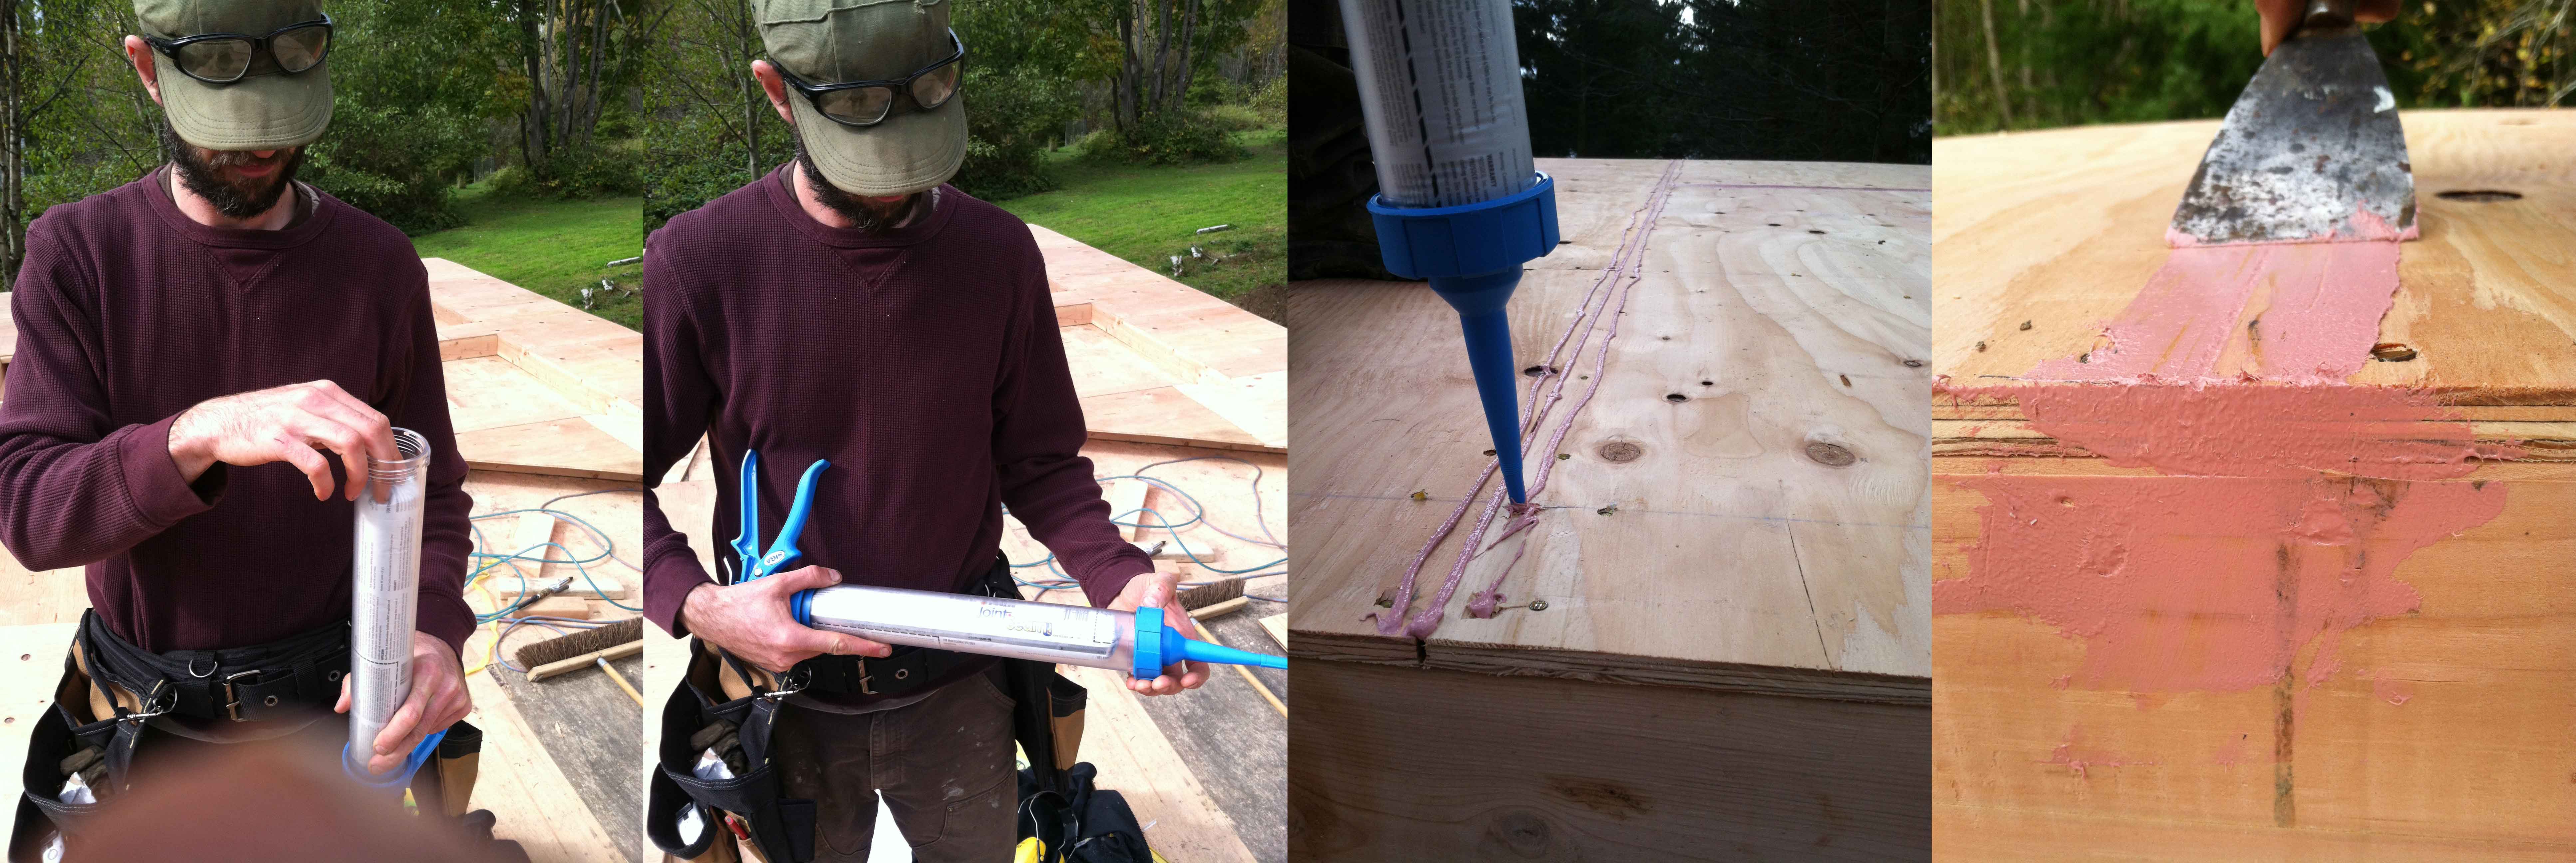
Flashing is installed above the foundation wall before installing the siding. Seams in sheathing are sealed with tape and caulk, while nail holes are sealed with caulk.
Image
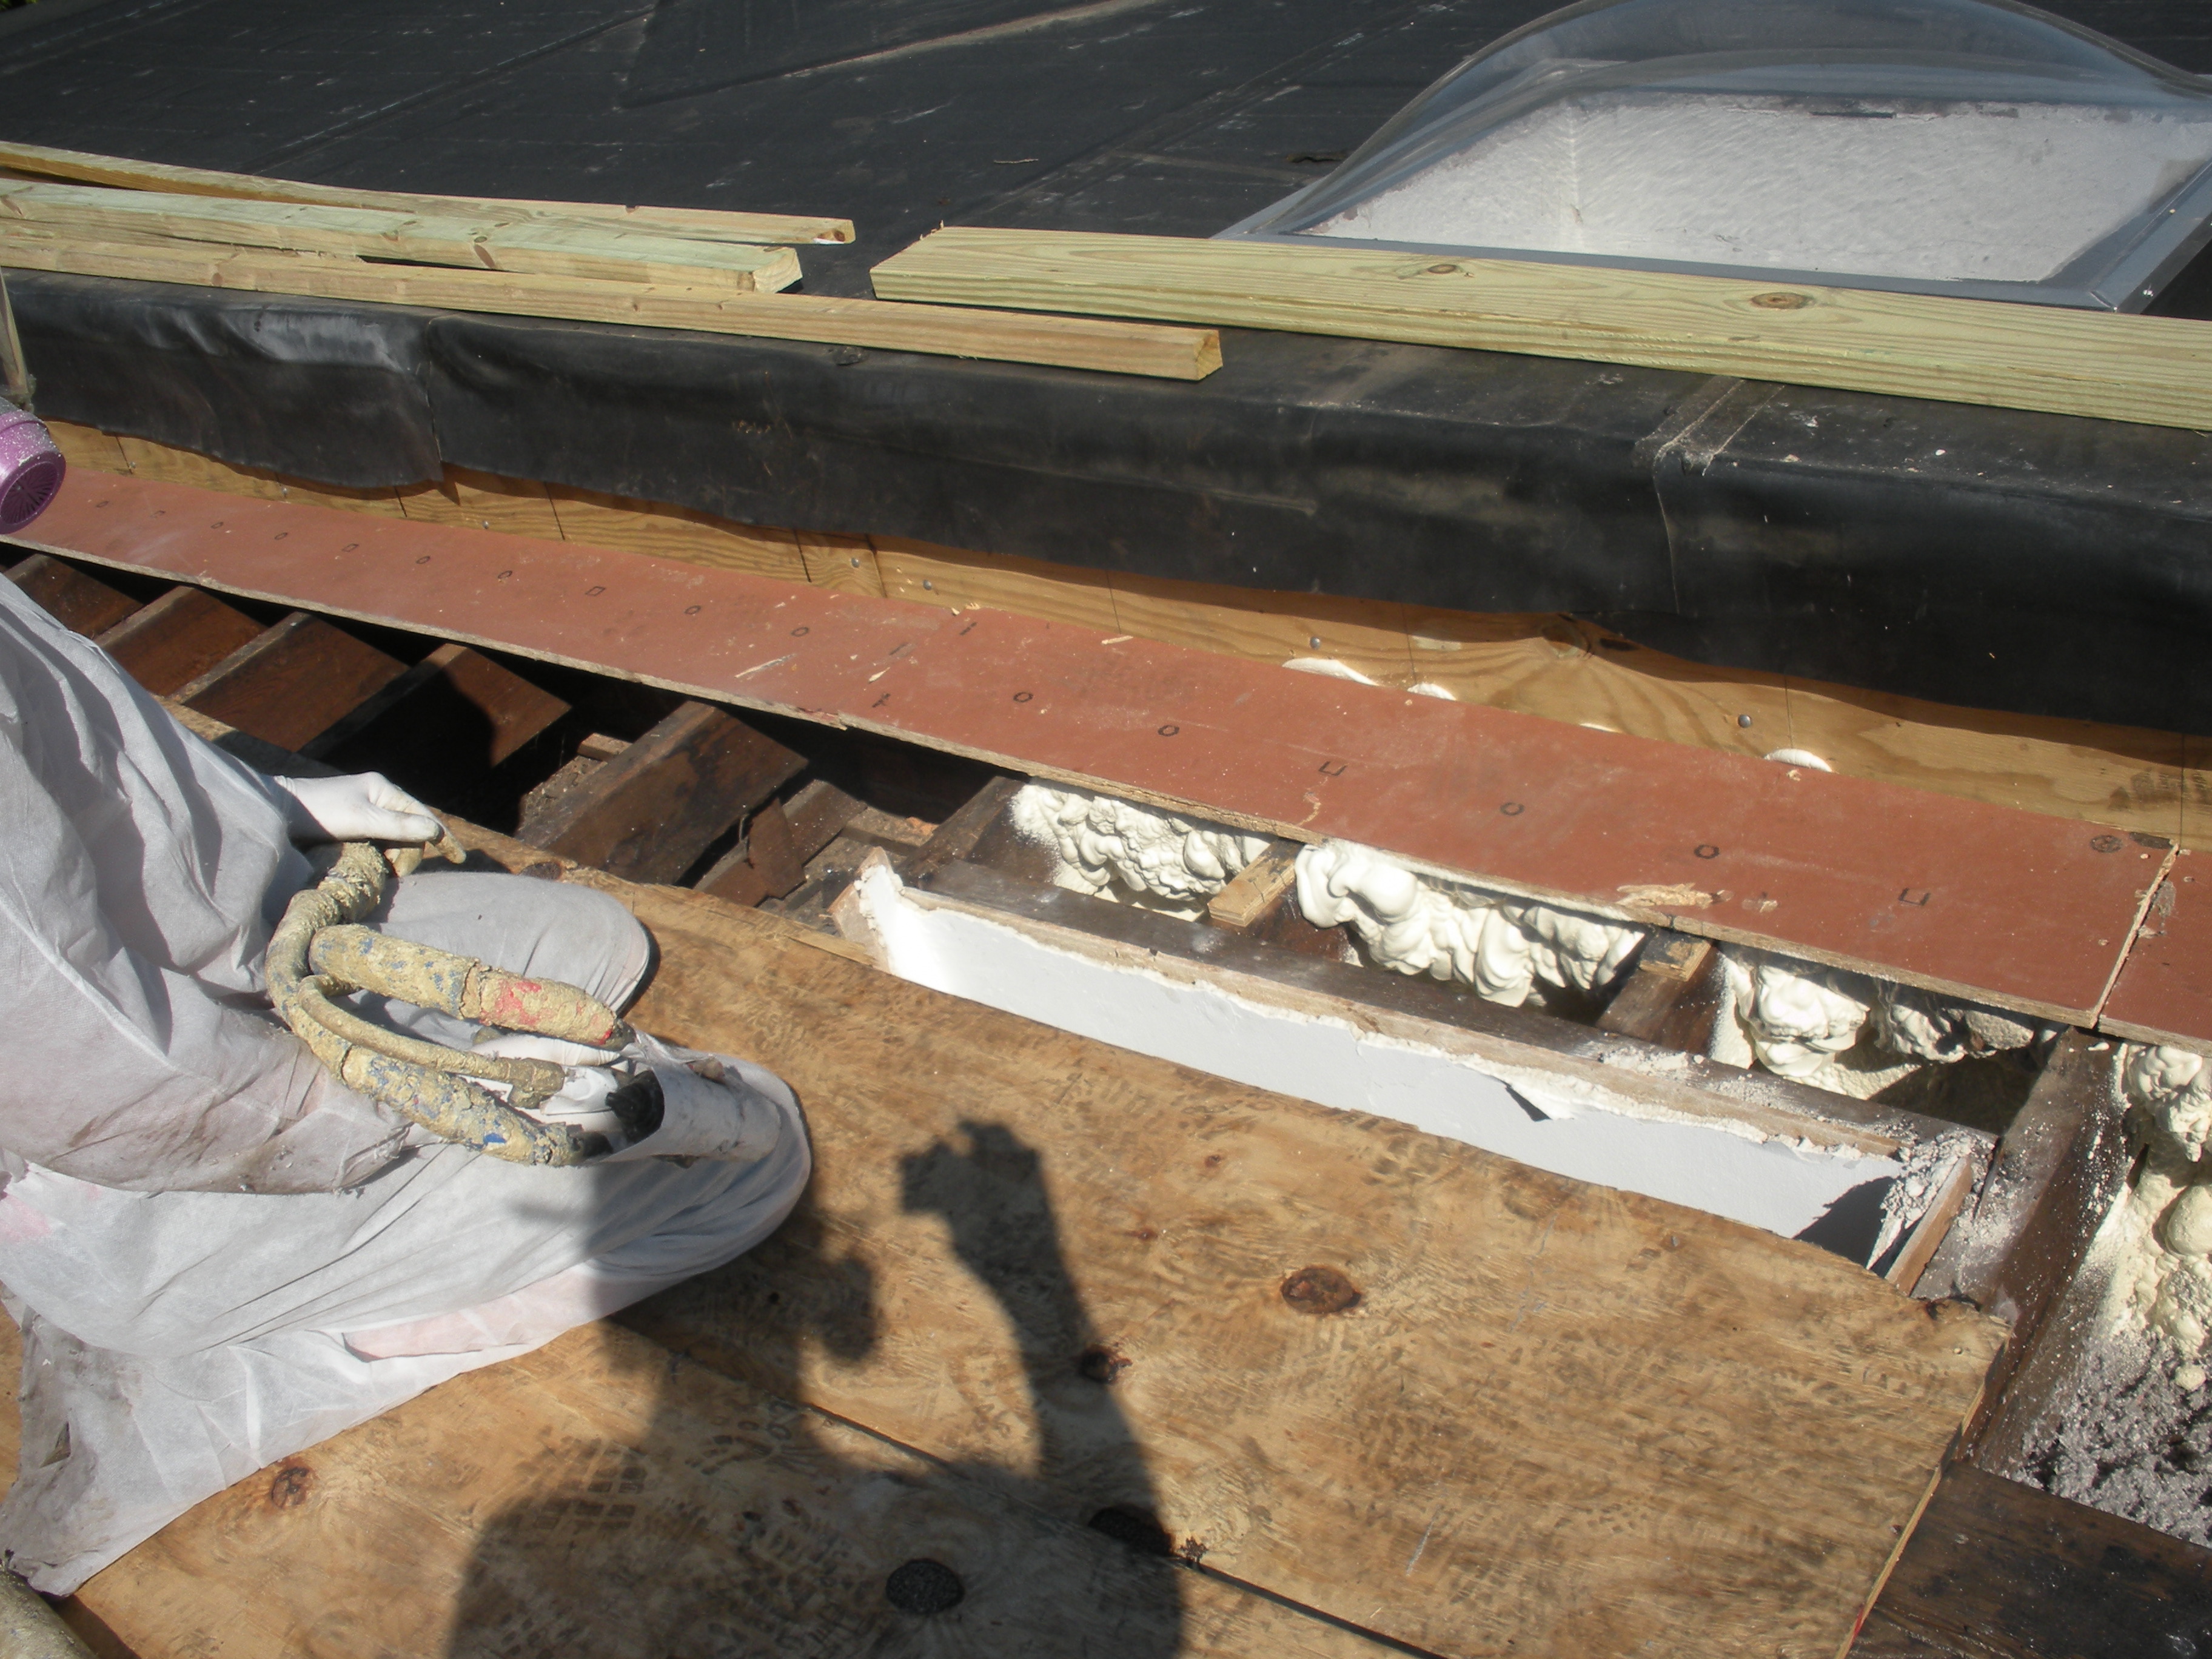
Flat roof with cavity spray foam plus loose-fill insulation and gypsum board thermal barrier.
Image
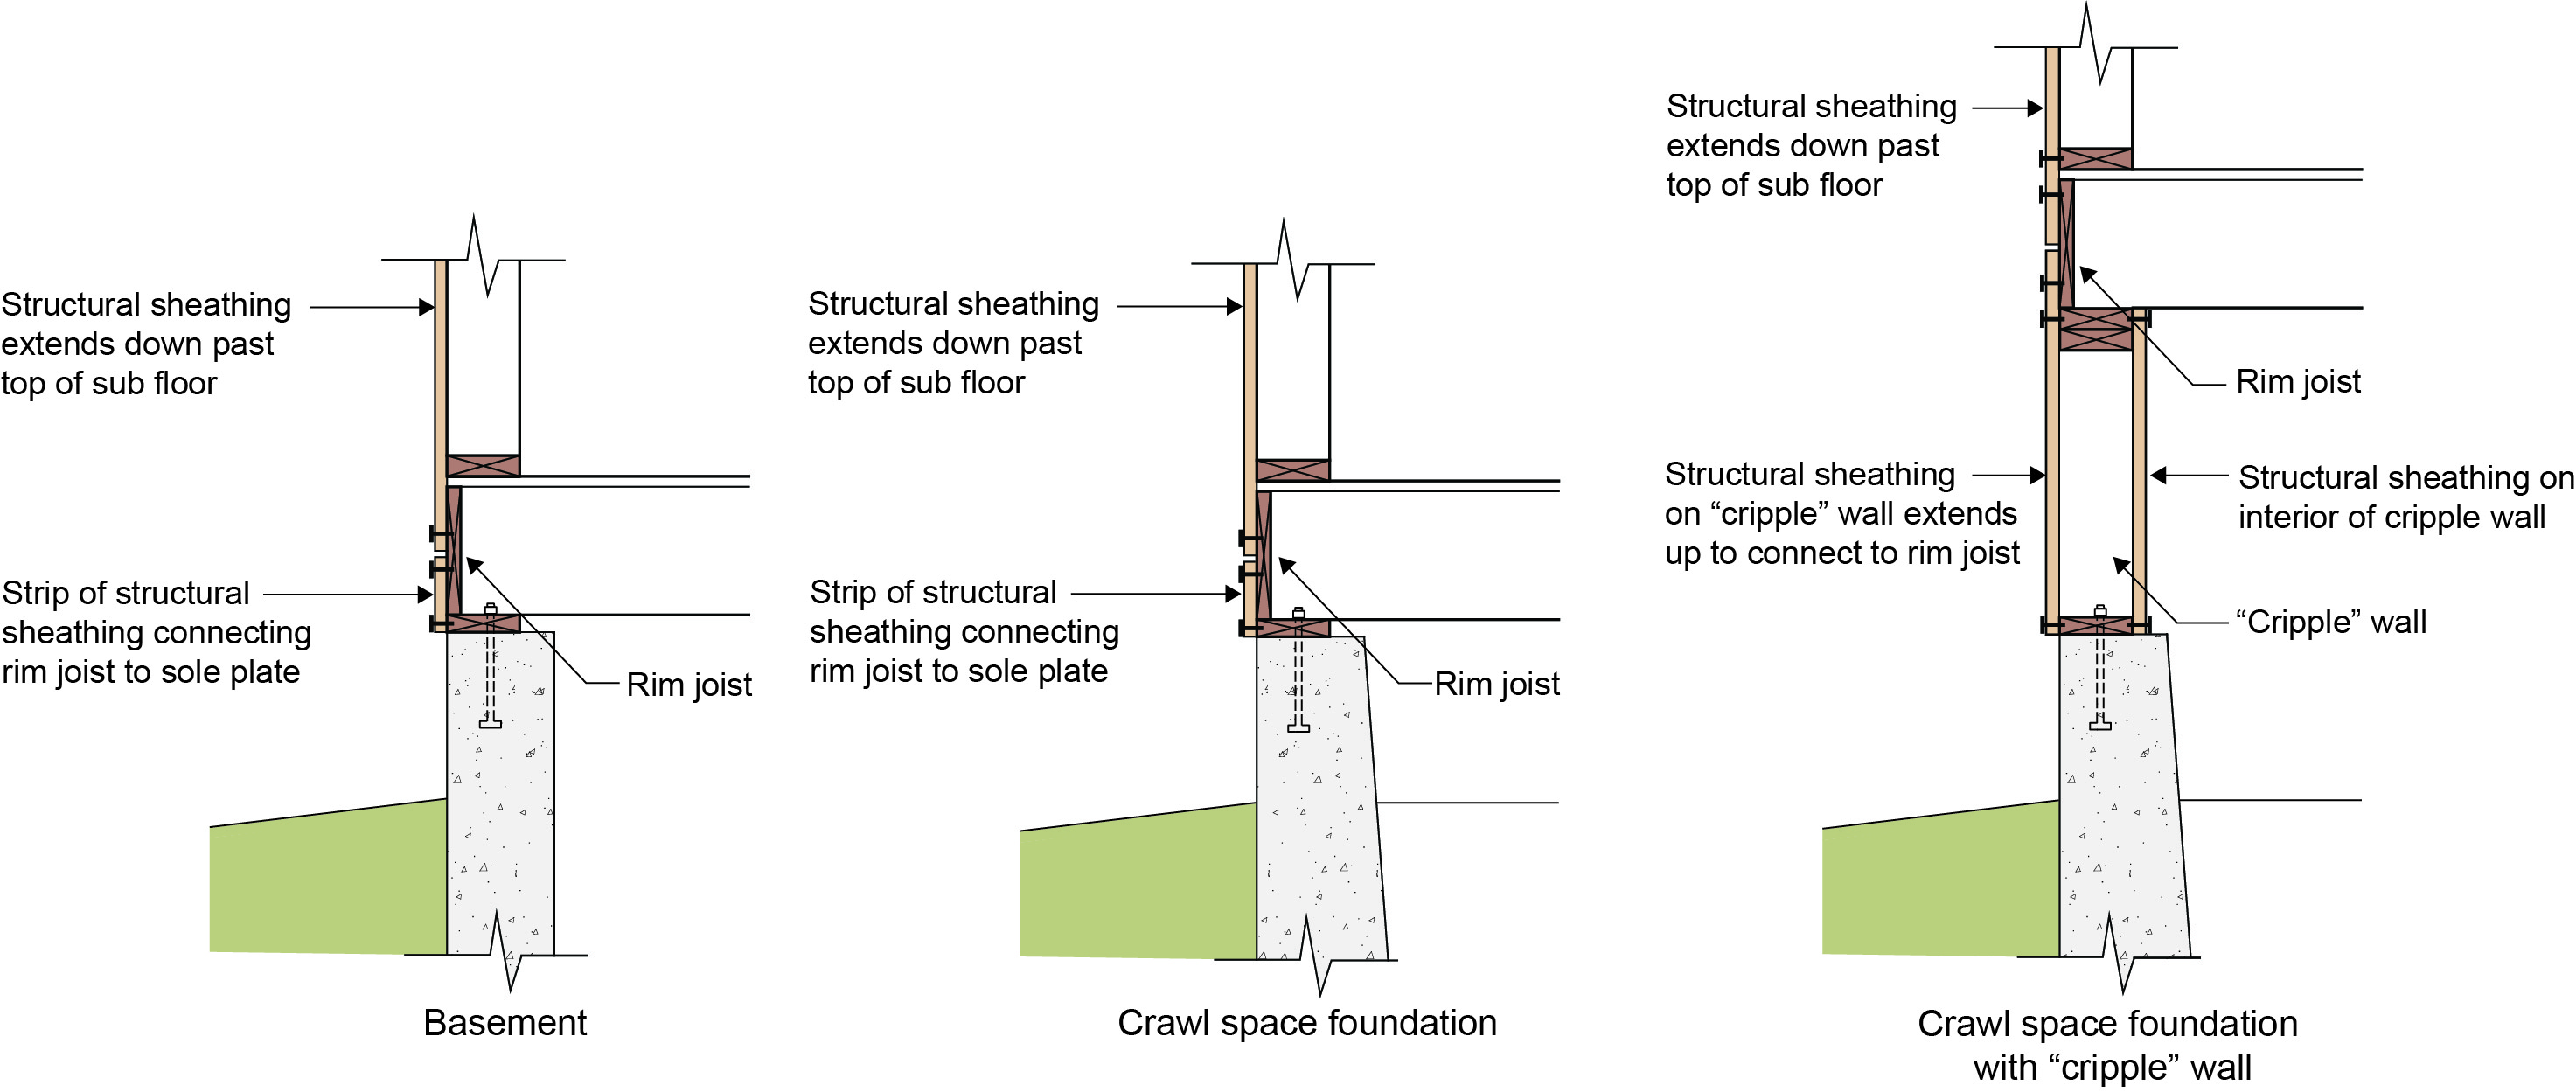
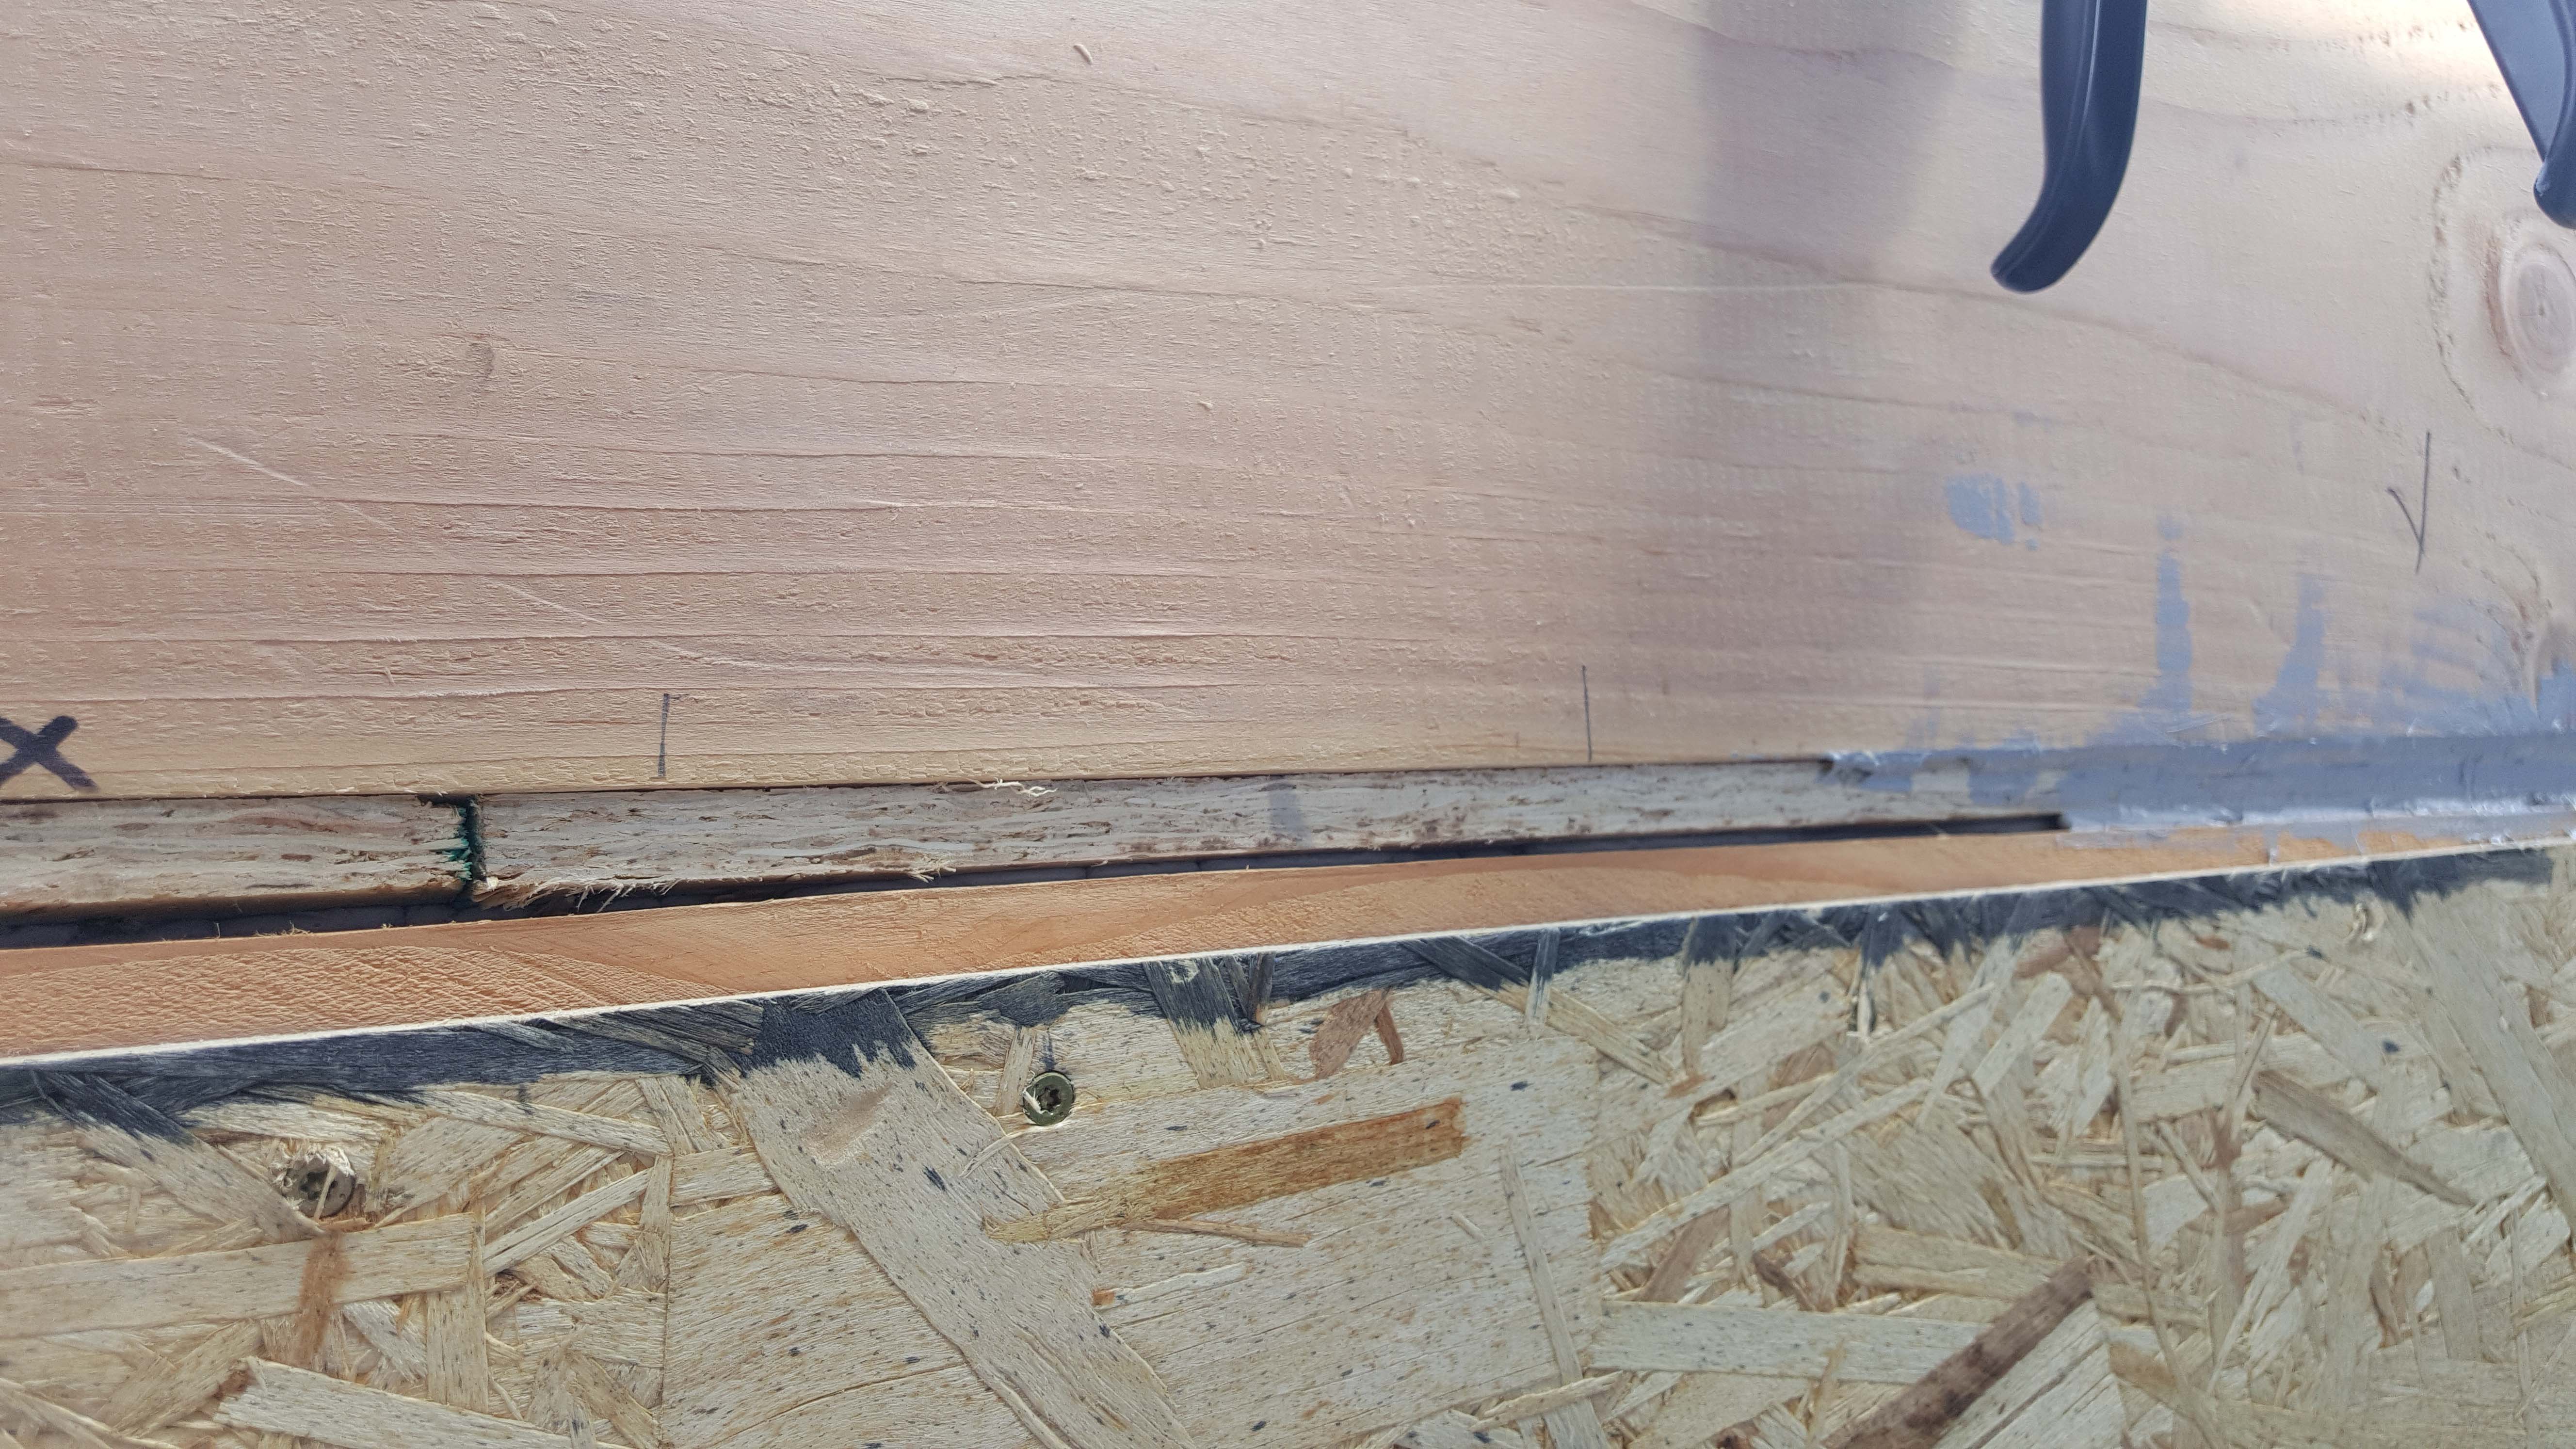
For seismic resistance in basement, crawlspace, and crawlspace “cripple” wall foundations, connect the plywood or OSB sheathing to the wall framing, rim joist, and sill plate and anchor bolt the sill plate to the foundation
Image
Image
Furring strips are installed over a foil-faced rigid foam sheathing to provide a drainage plane and ventilation gap behind siding.
Image
Furring strips provide a ventilation gap between the coated OSB sheathing and the fiber cement siding.
Image
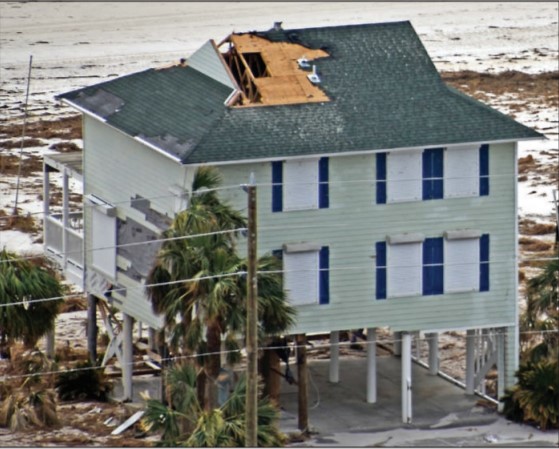
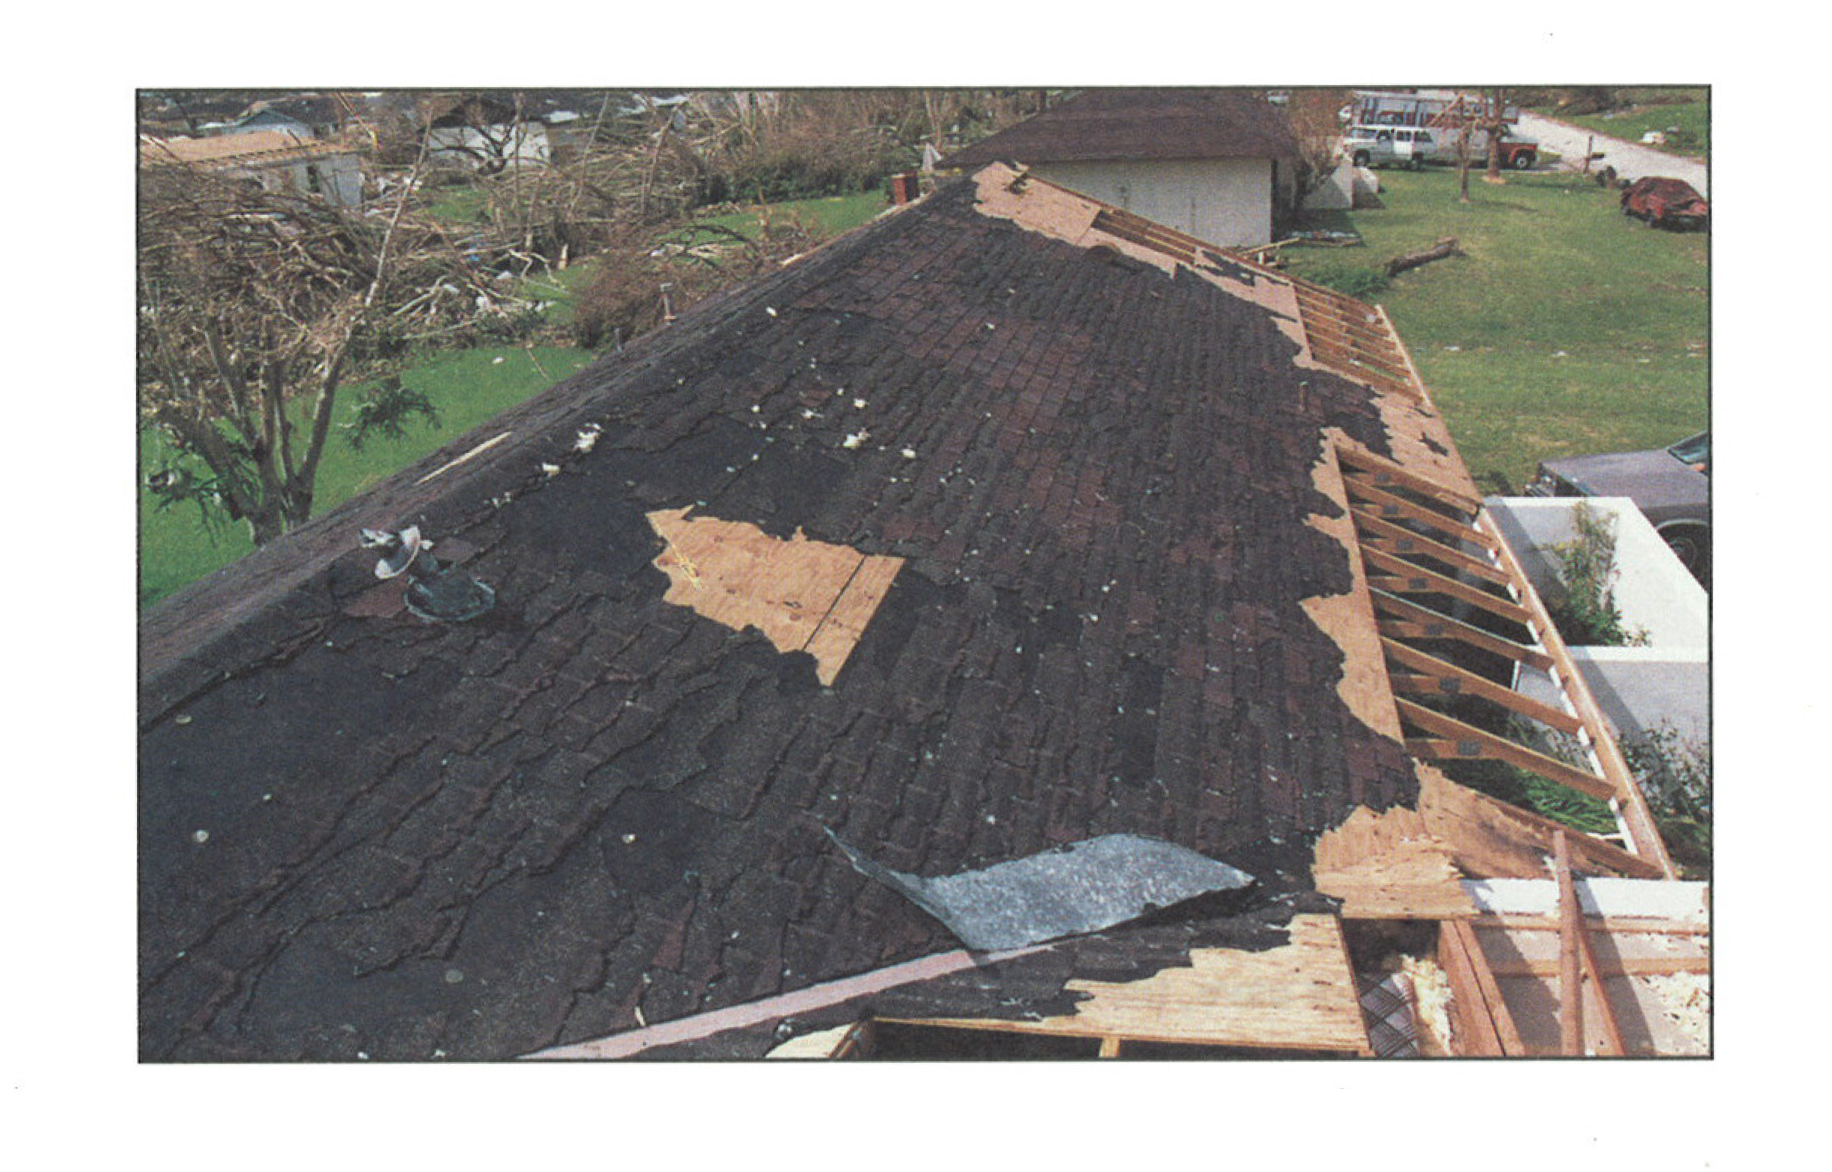
High winds pulled the asphalt shingles and sheathing panels off this coastal home, although storm shutters protected the windows
Image
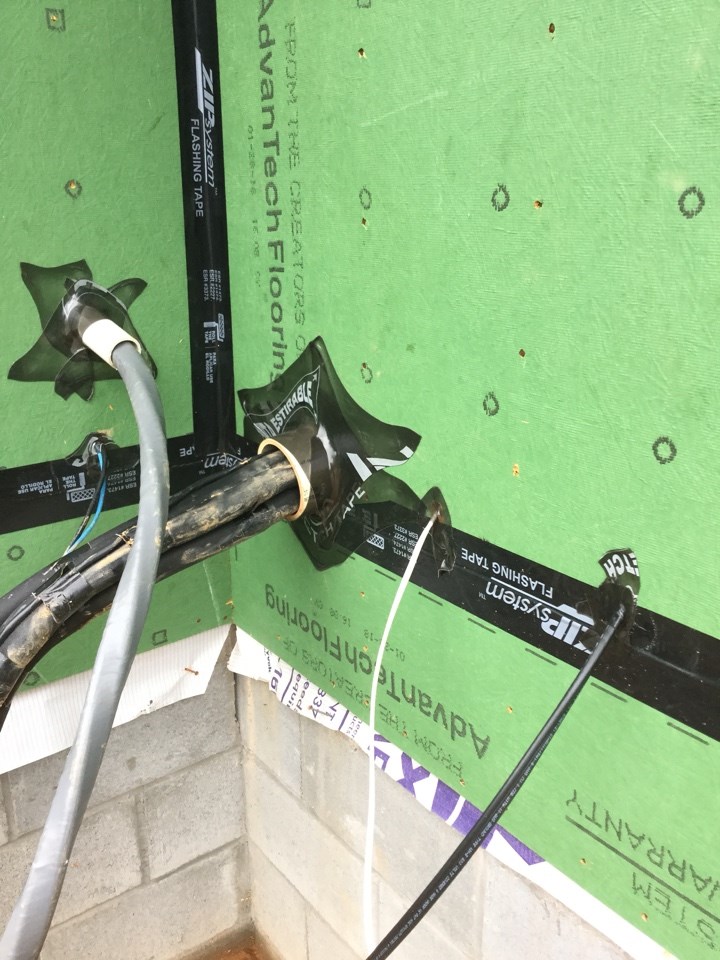
Holes in the exterior walls are flashed and flashing is integrated with housewrap before installing rigid mineral wool insulation.
Image
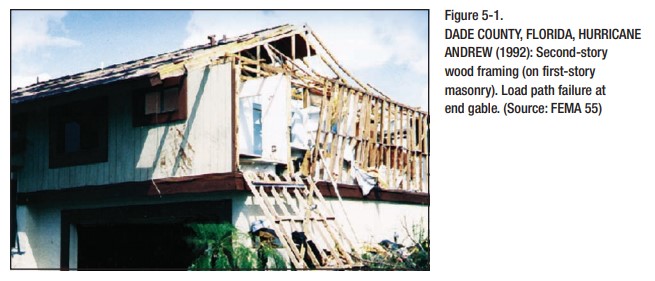
Improper continuous load path design lacking bracing results in the failure of gable end walls under high wind conditions.
Image
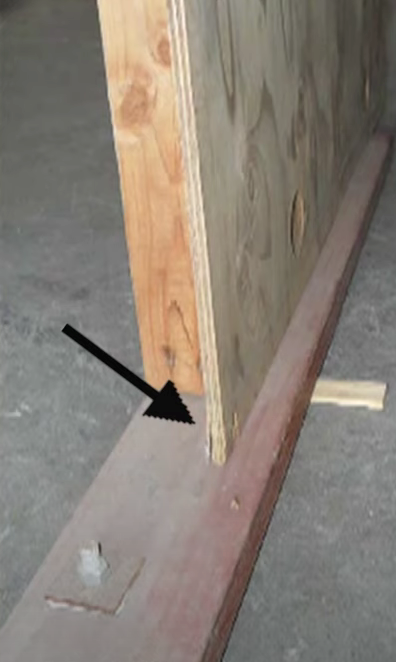
Incorrectly done seismic retrofit, the plywood sheathing is not nailed to the mud sill and therefore it is not providing any shear strength
Image
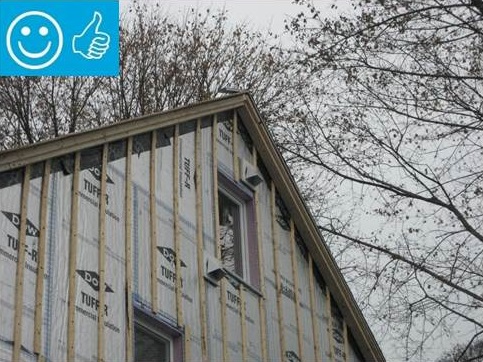
Install continuous rigid foam insulation or insulated siding to help reduce thermal bridging through wood- or metal-framed exterior walls.
Image
Image
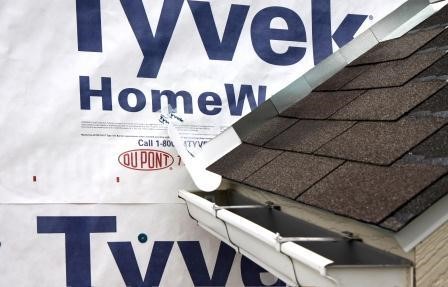
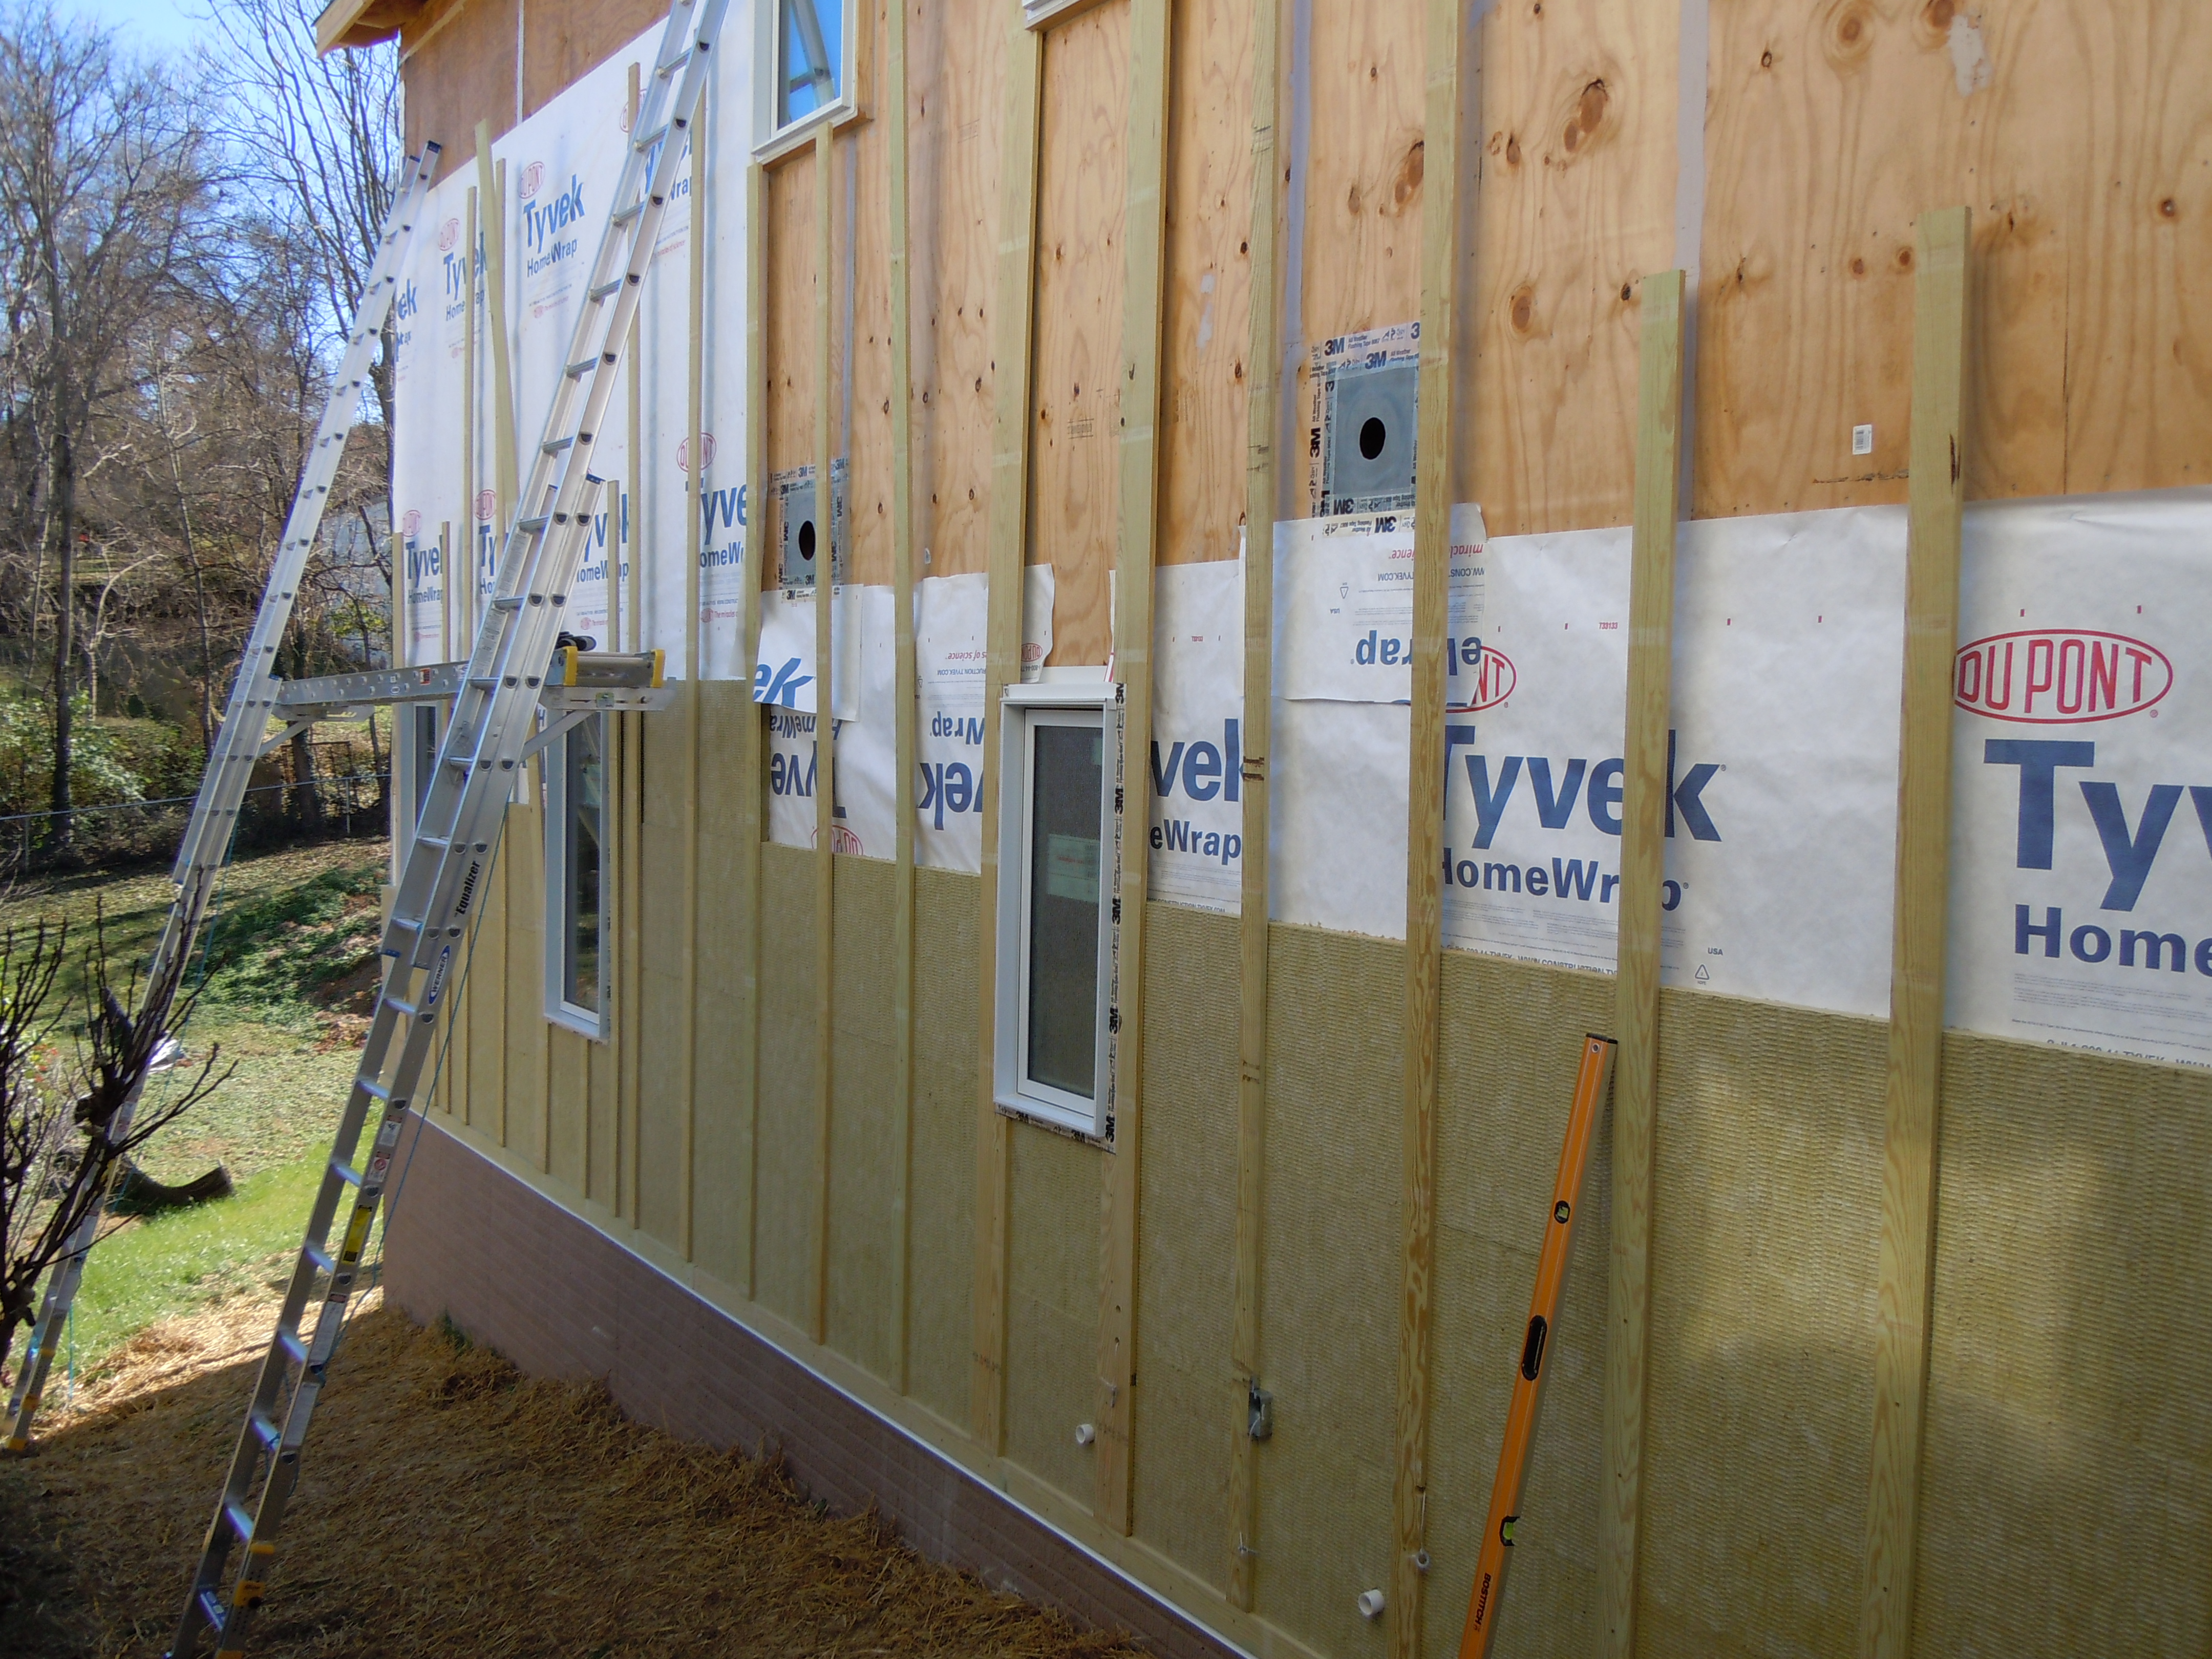
Install the house wrap. Cut house wrap to fit over diverter and tape top of cut wrap
Image

Image
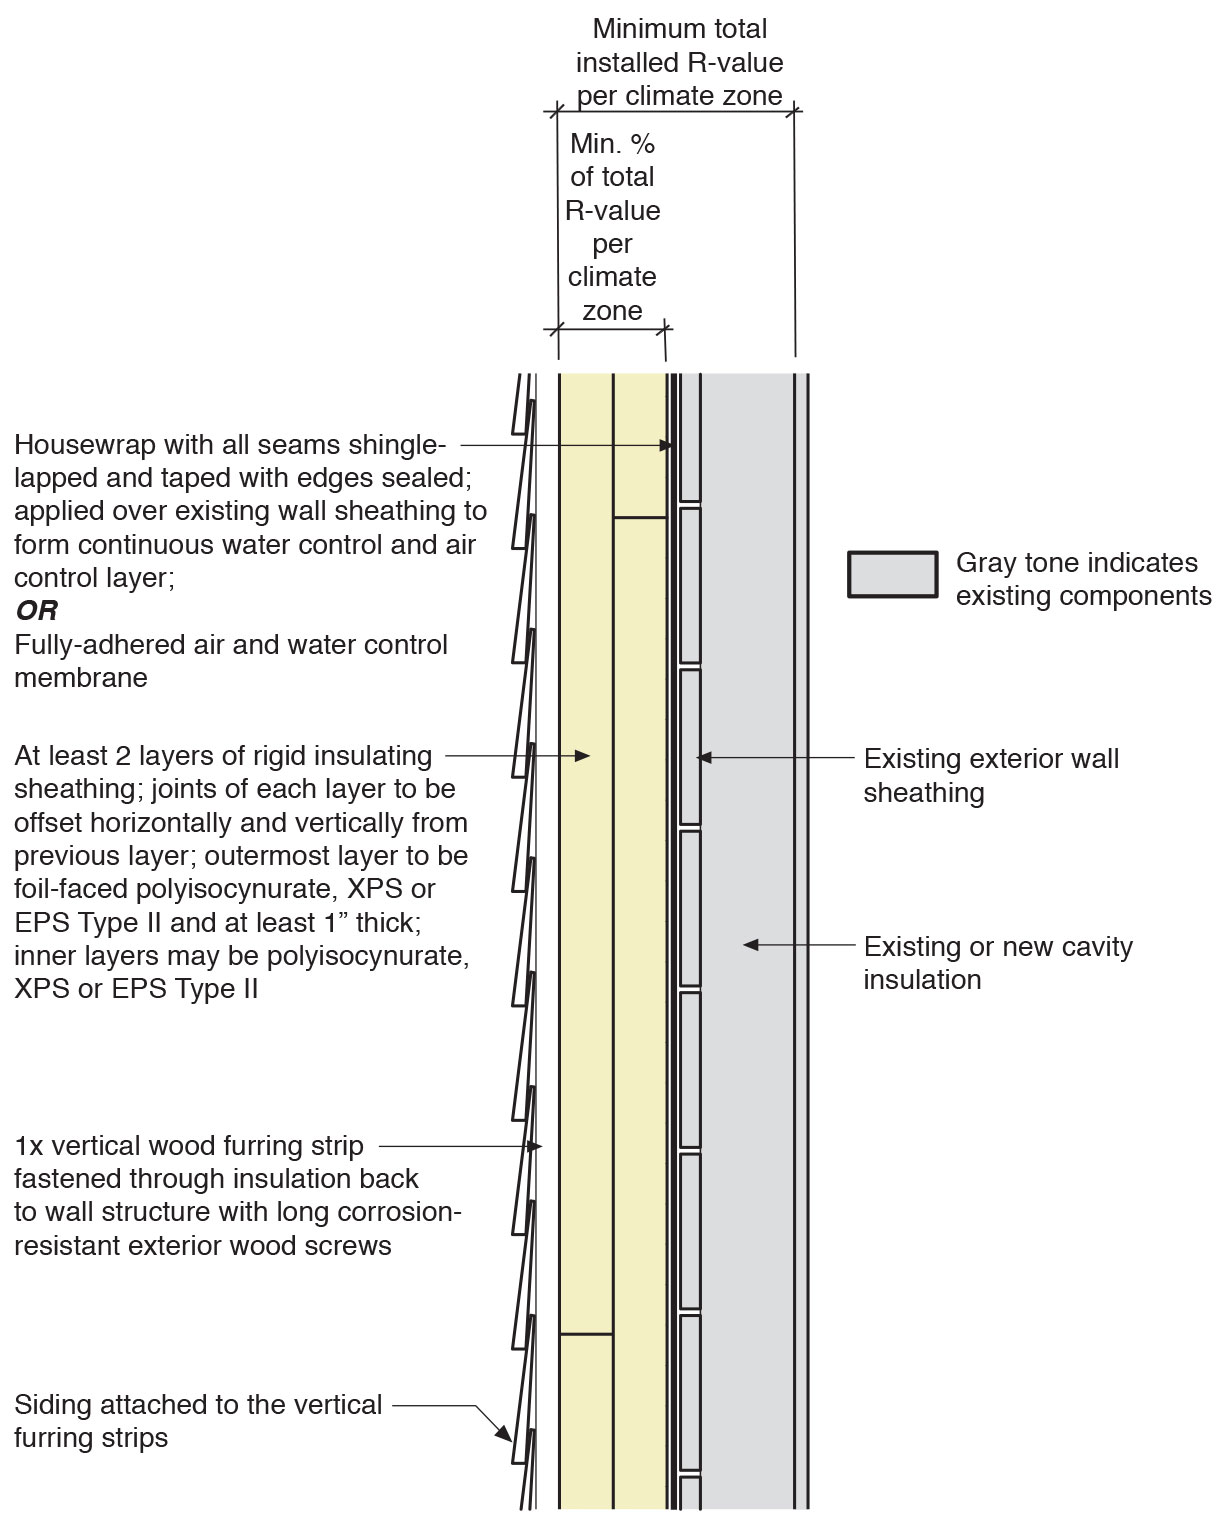
Insulating sheathing is installed on exterior of an existing framed wall with water control between existing sheathing and insulating sheathing
Image

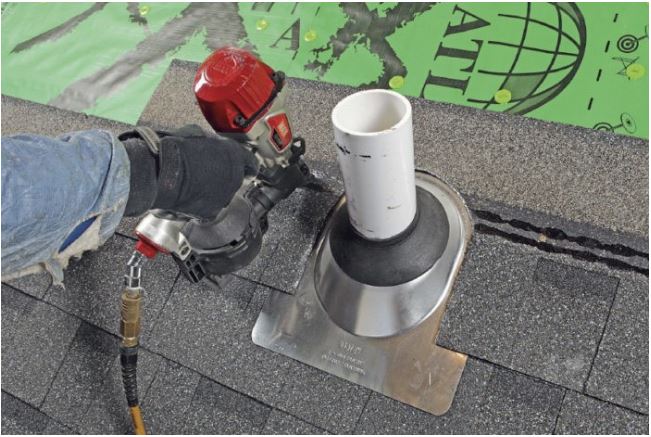
Integrate pre-formed vent pipe flashing, shingle-fashion, with roofing underlayment and shingles
Image
Lay out the rigid foam sheathing joints so they do not align with the window and door edges
Image
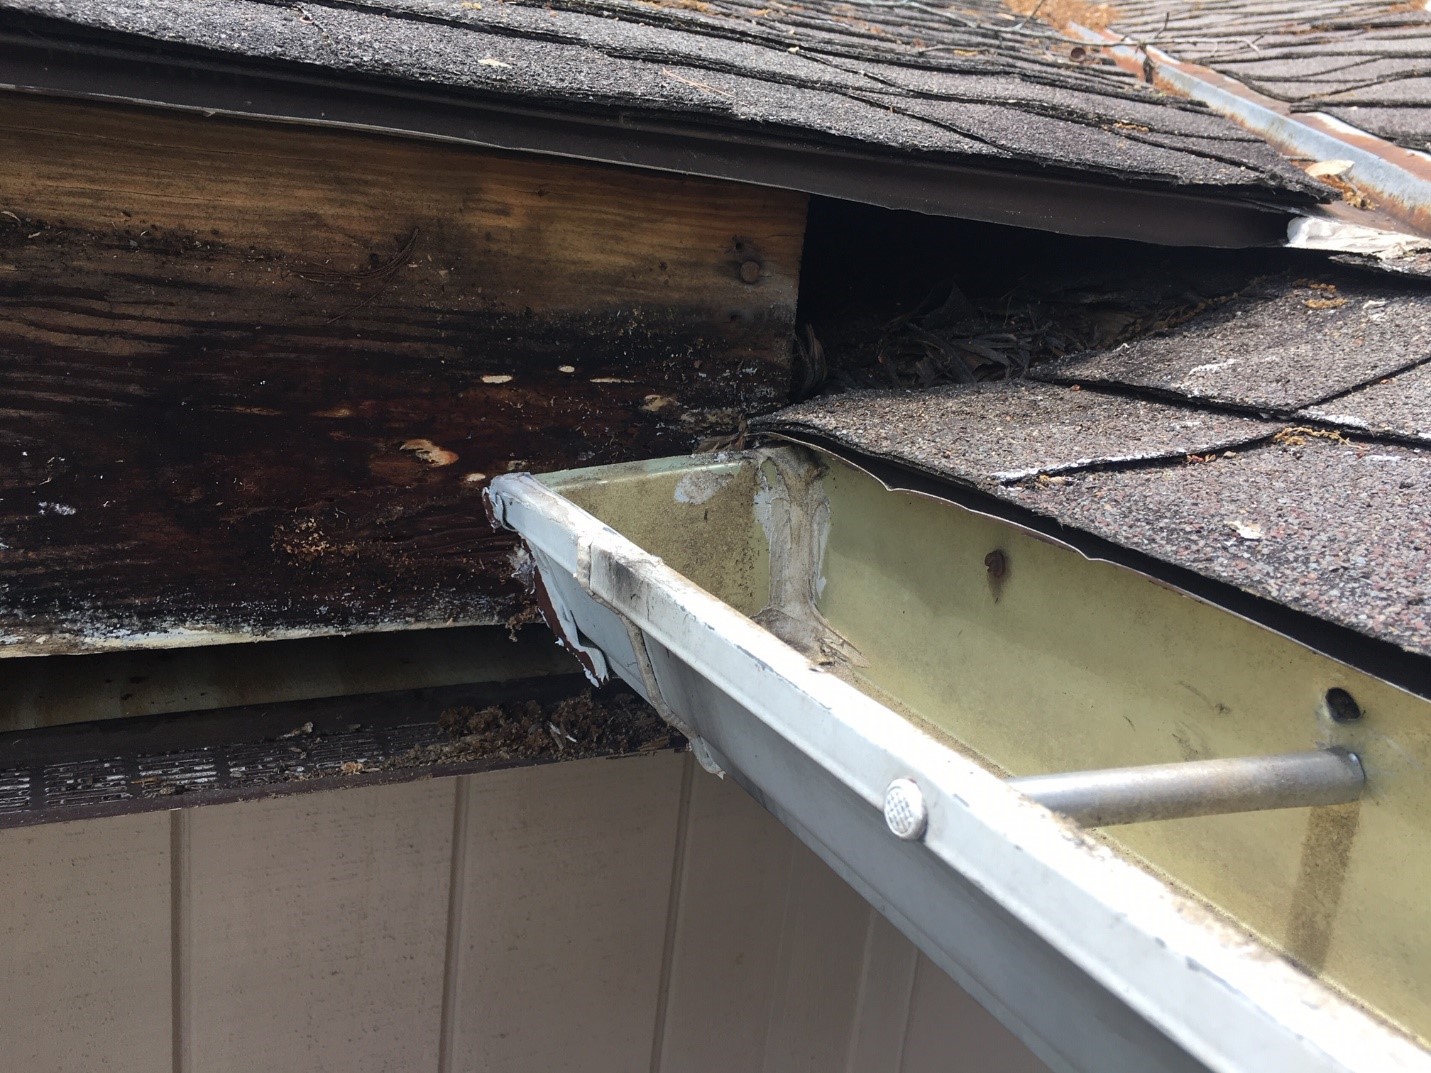
Missing step flashing and kickout flashing caused rotting of wall and roof sheathing, fascia, framing, and plywood cover below the eave at this complicated roof juncture.
Image
Mold on the sheathing in this attic occurred after attic ventilation was increased
Image
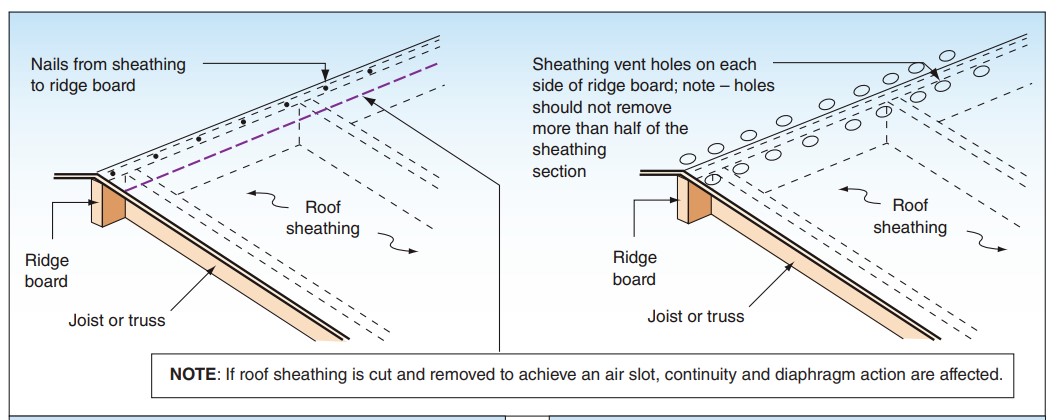
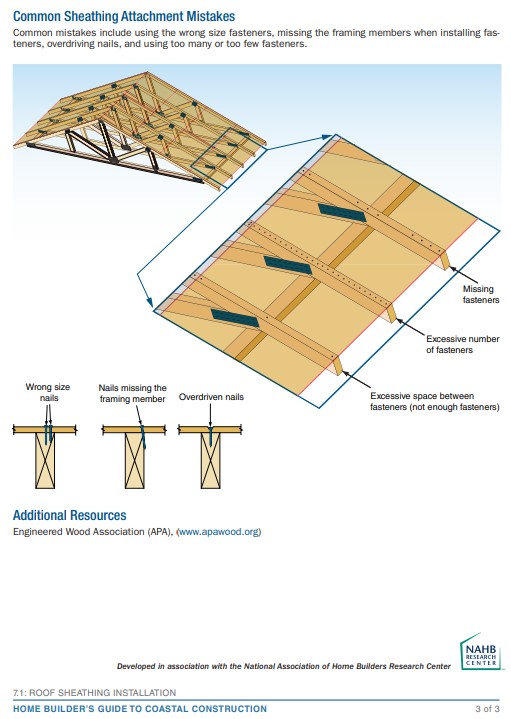
Nailing and ridge ventilation for roof sheathing used as a structural diaphragm in high-wind and seismic hazard areas.
Image
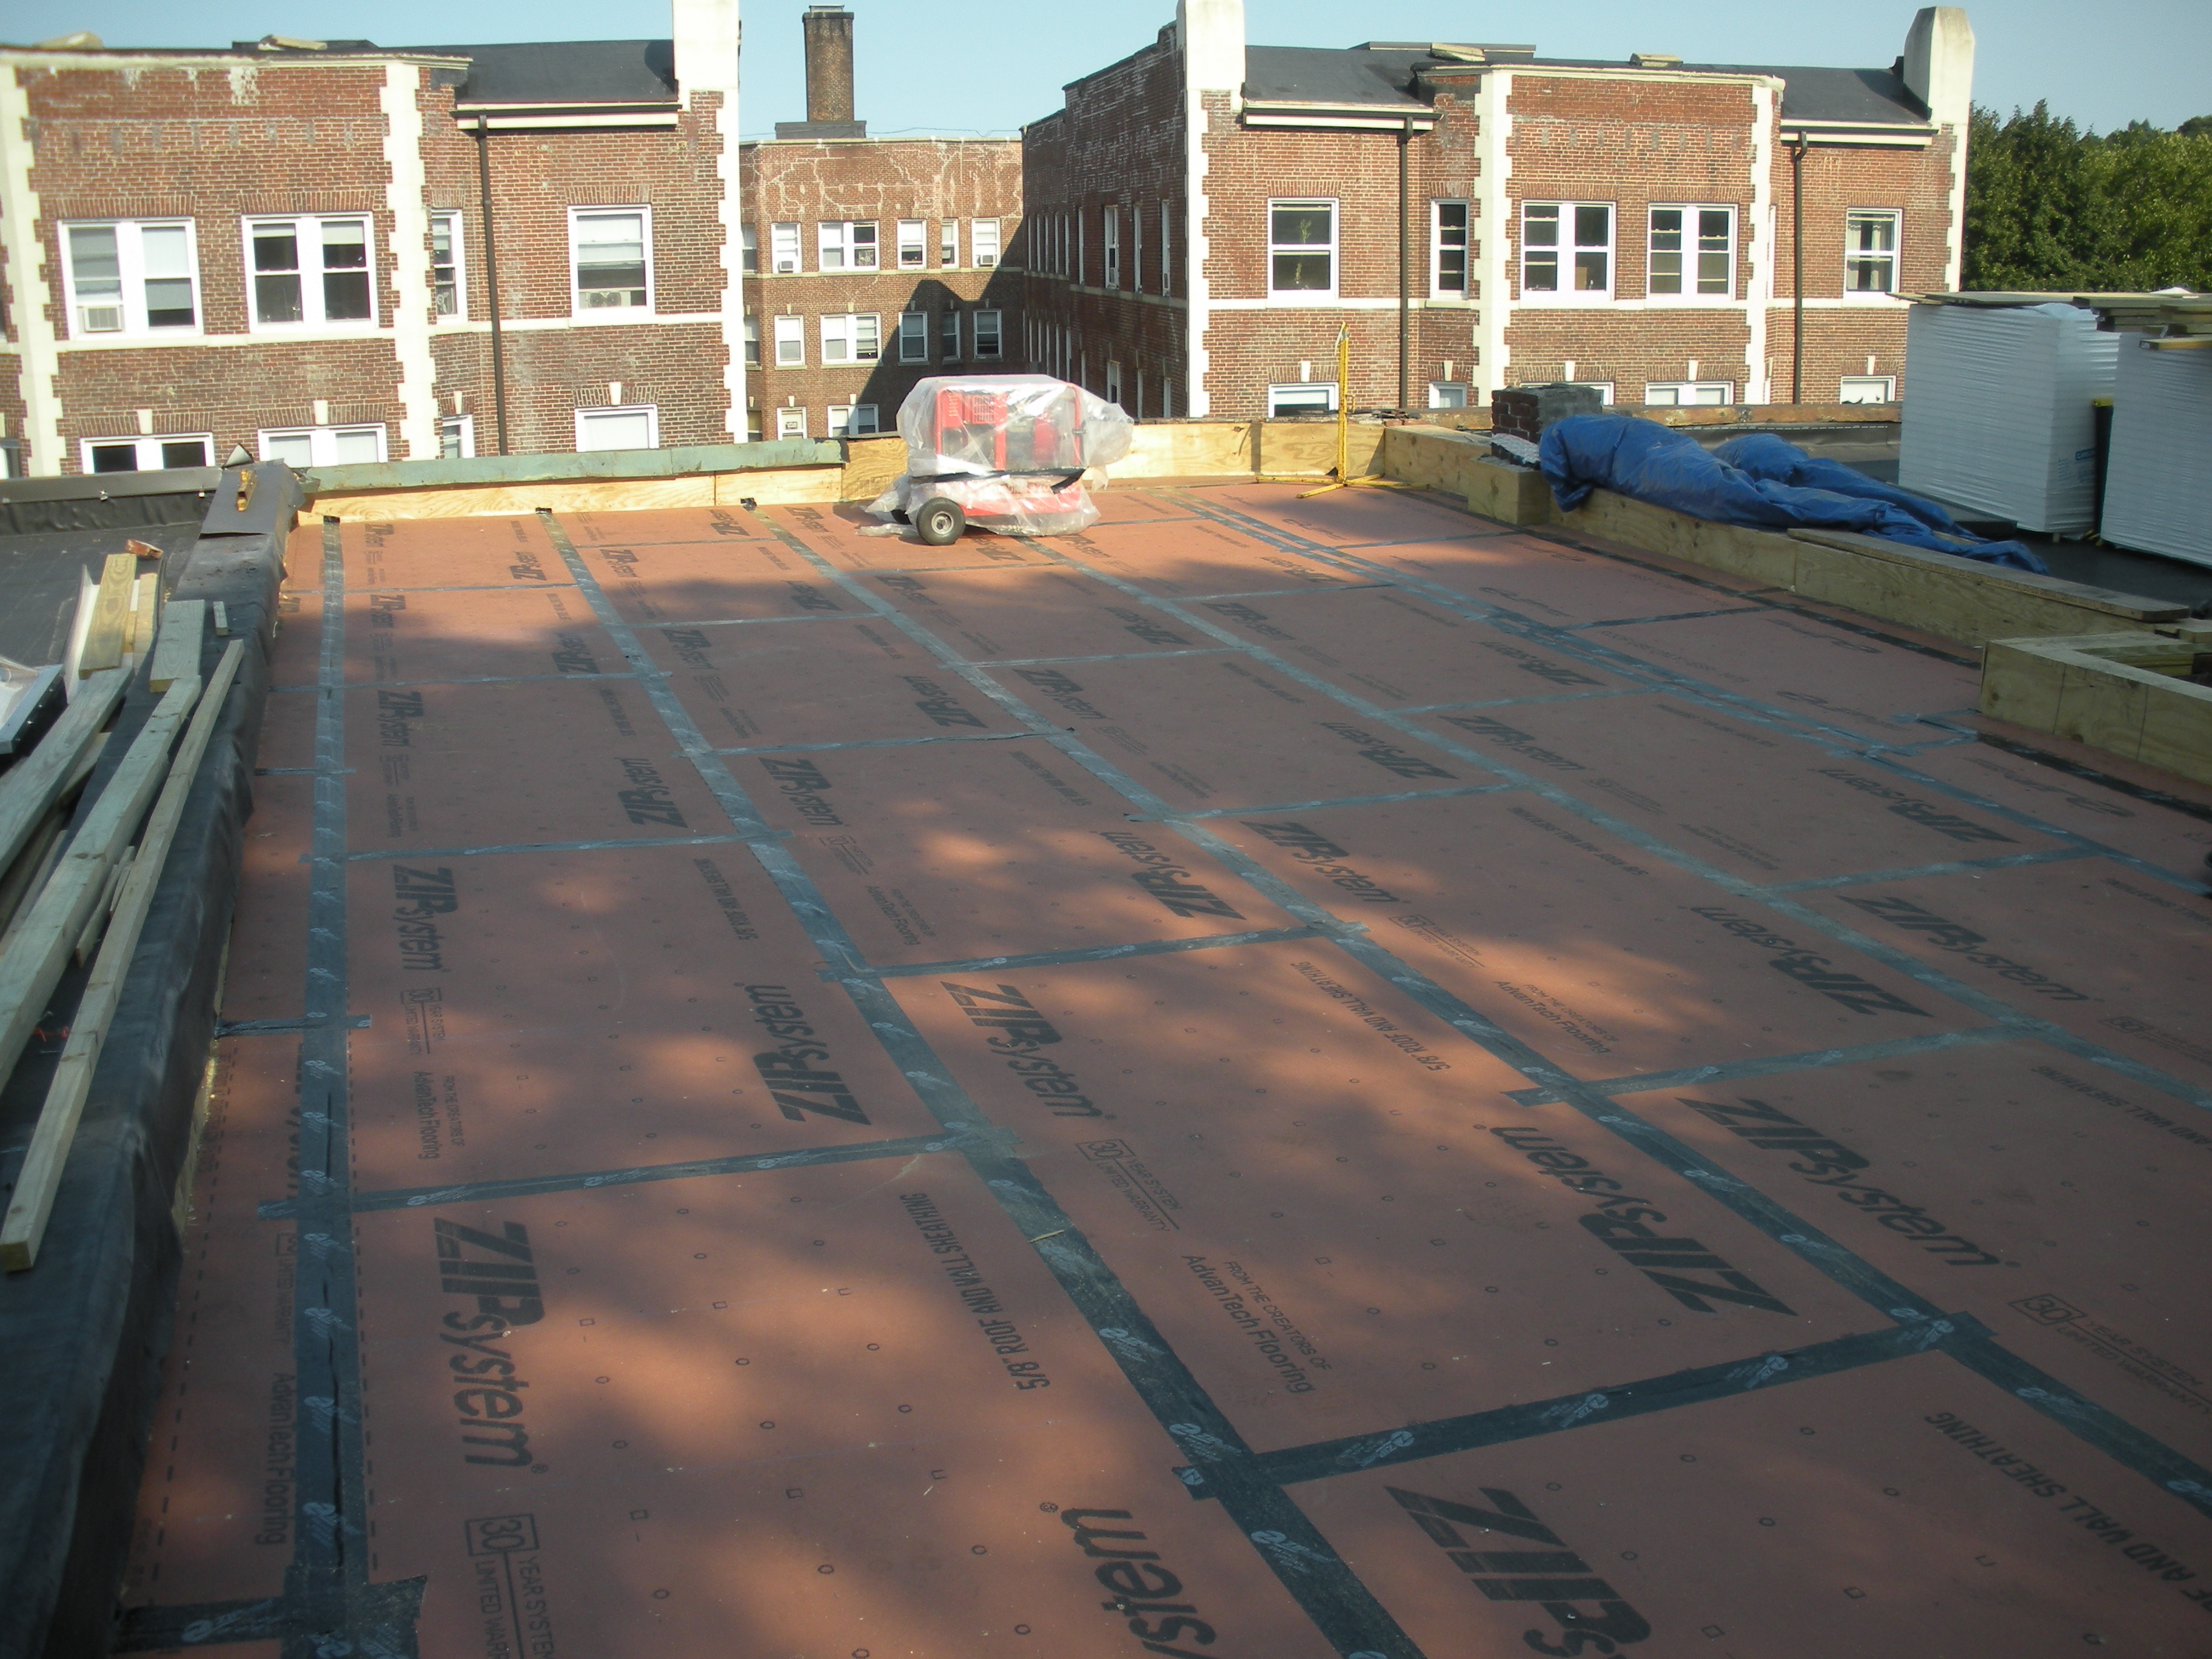
New coated OSB roof sheathing is installed over the existing sheathing of the flat roof and taped at the seams to provide a continuous air barrier
Image
Image
Image
Image
Image
Over the coated sheathing air barrier, the builder installed a continuous layer of 2-inch rigid foam and then covered this with a yellow mesh rain screen layer.
Image
Over the taped rigid foam board, 2x4 furring strips provide a ventilating air gap and drainage plane under the engineered wood lap siding. The furring strips were attached with structural screws to provide an attachment surface for the siding.
Image
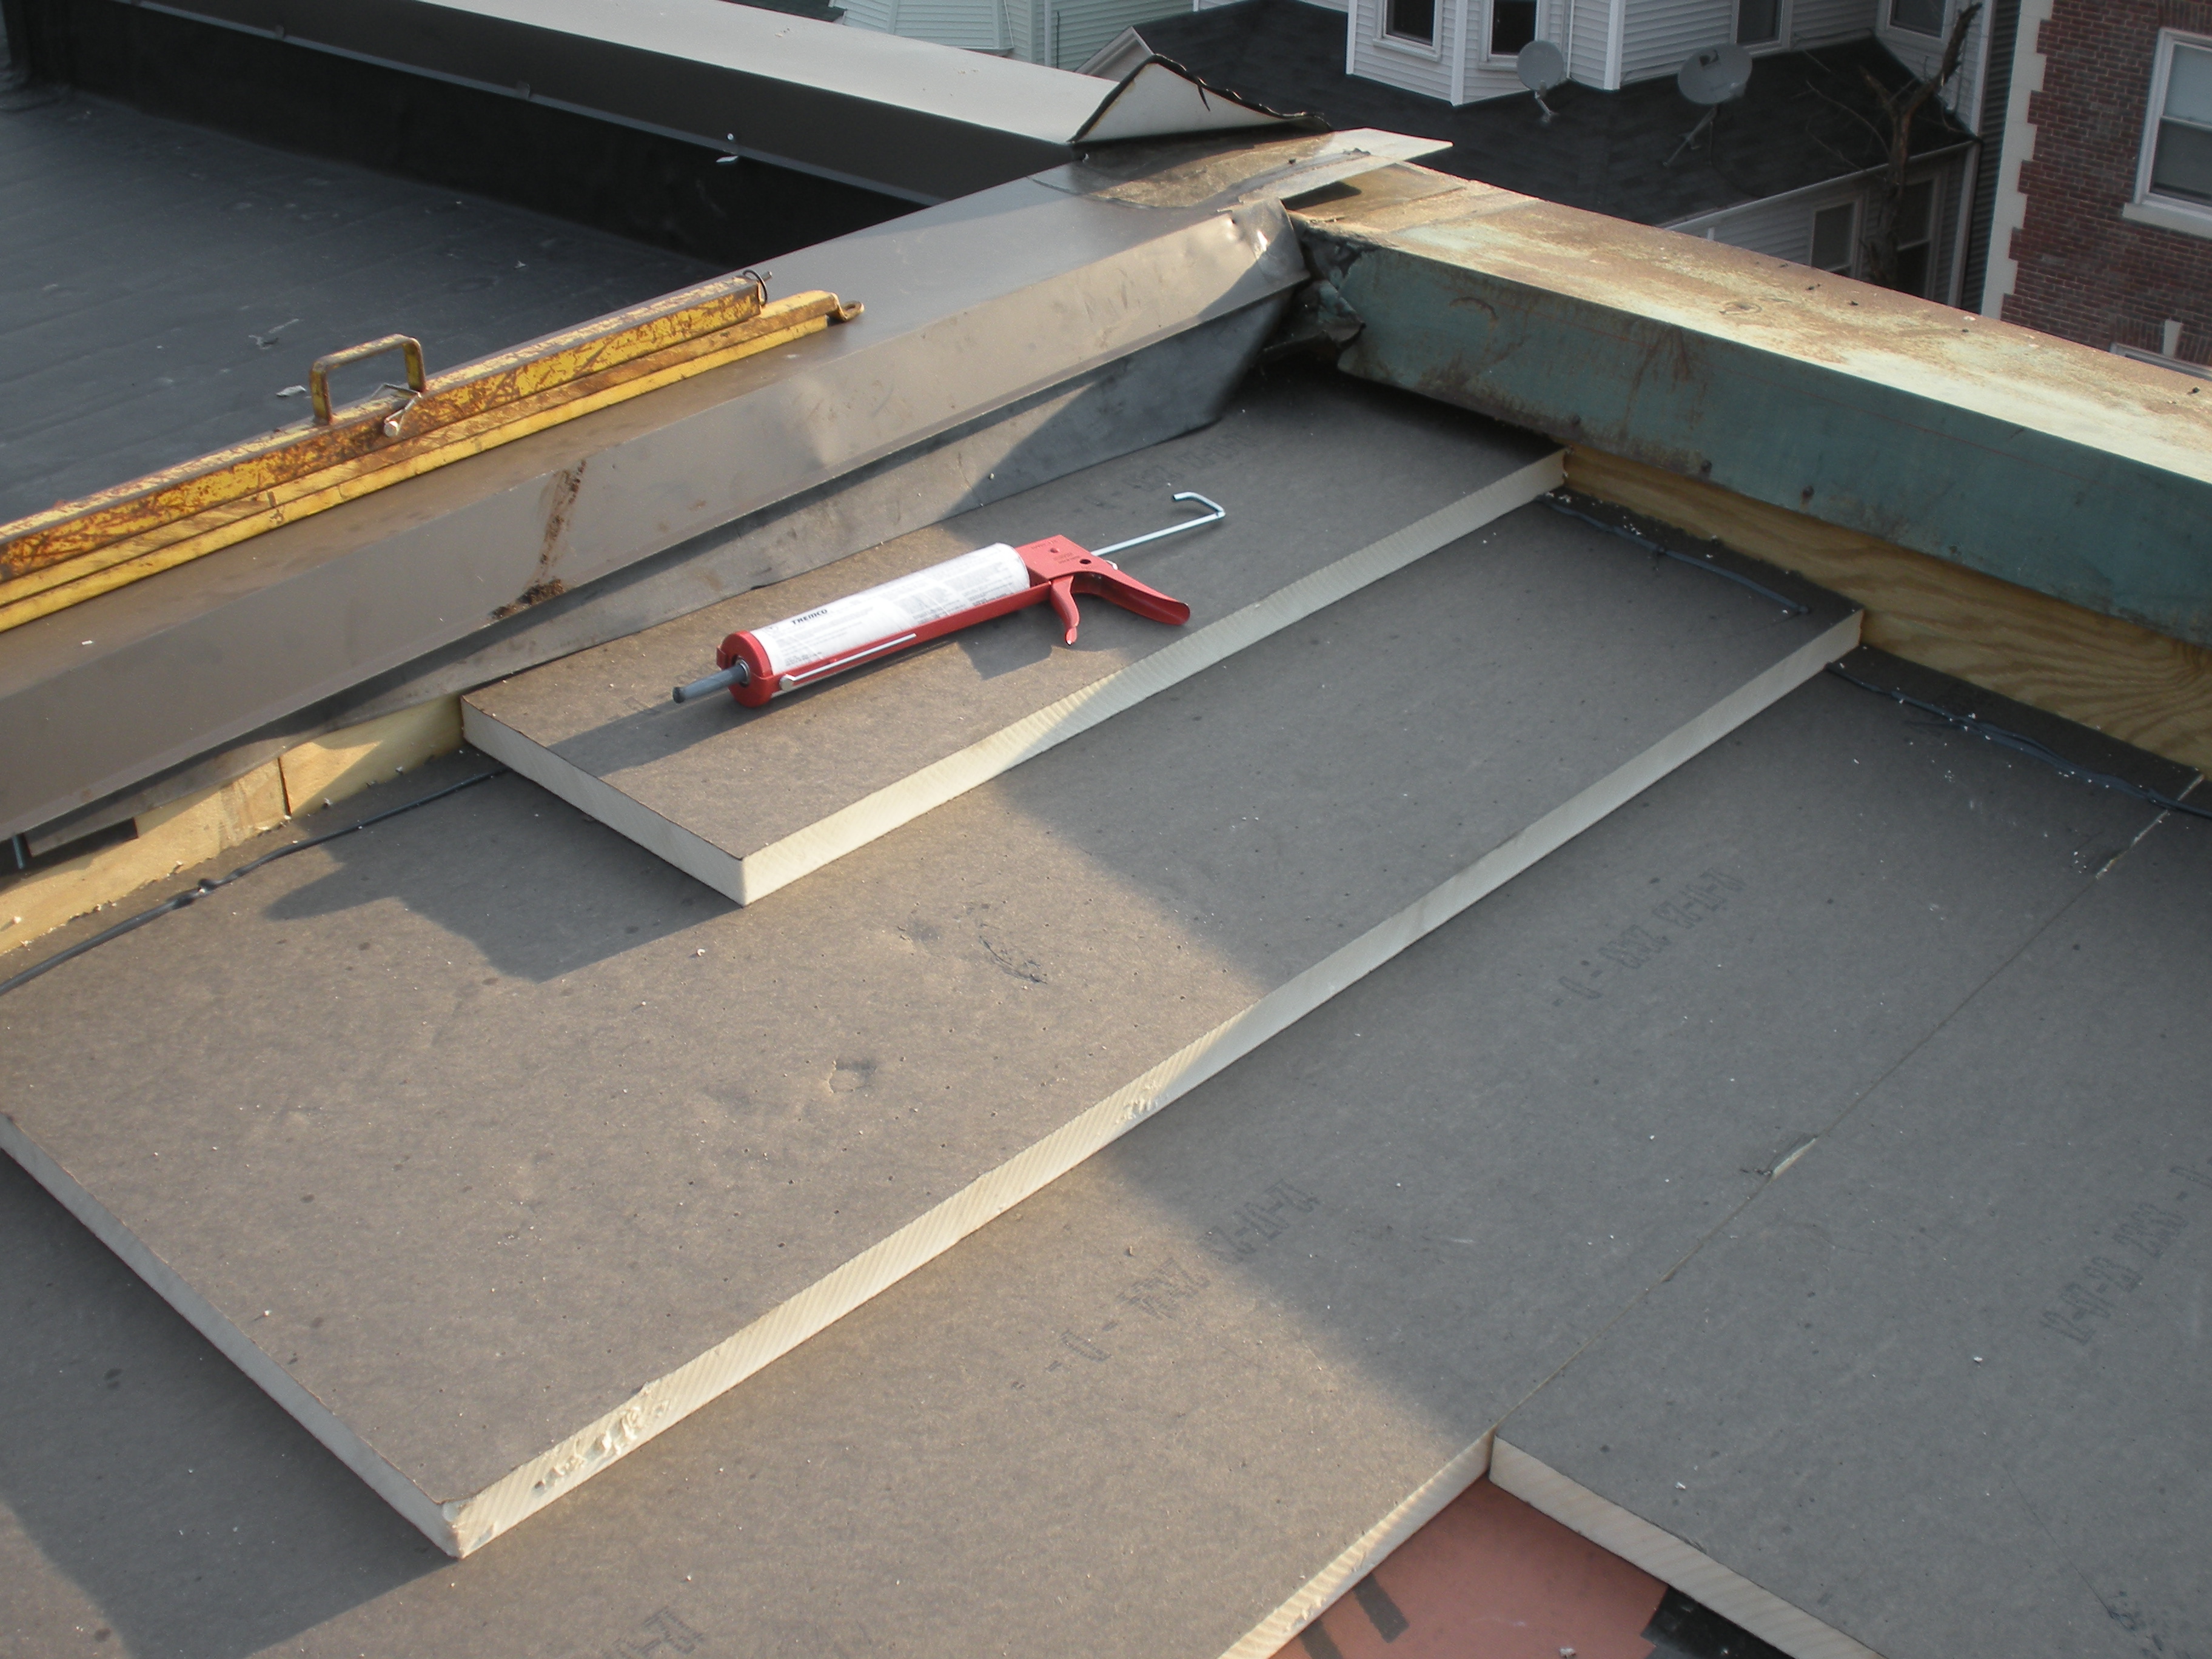
Polyisocyanurate rigid foam insulation is installed in multiple layers with staggered, taped seams over the flat roof
Image
Image
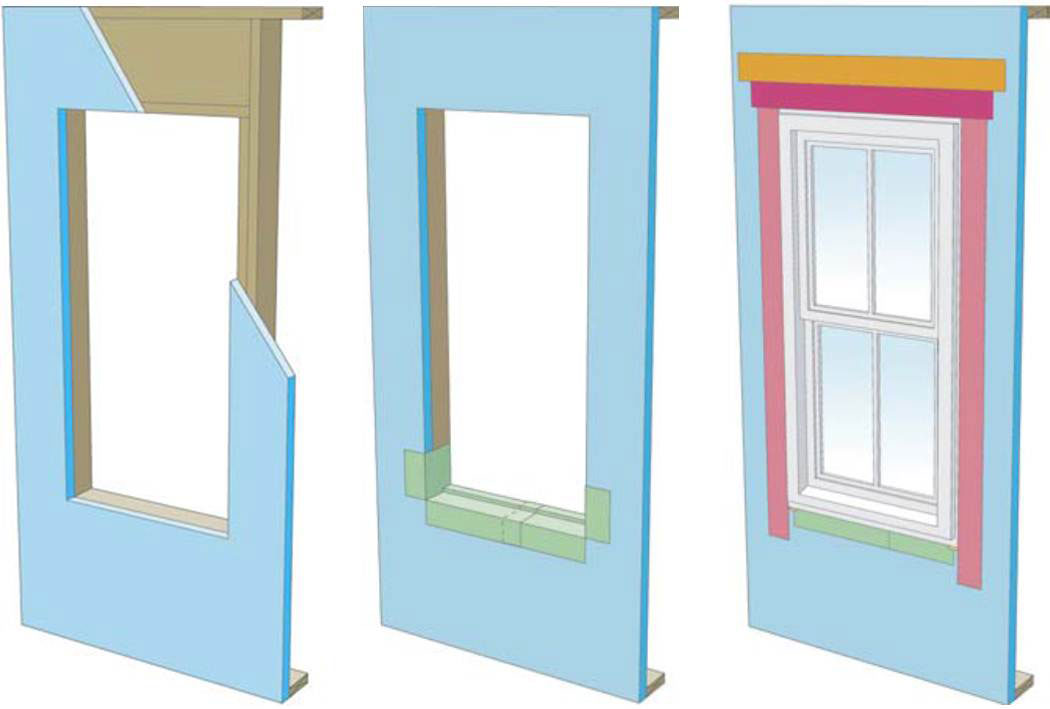
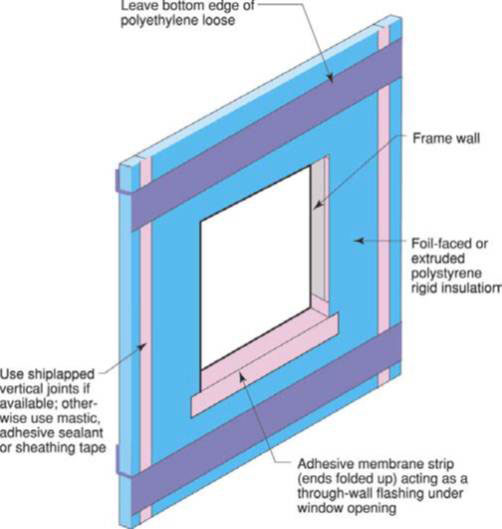
Proper flashing around windows is especially important when the rigid foam serves as the drainage plane in the wall
Image
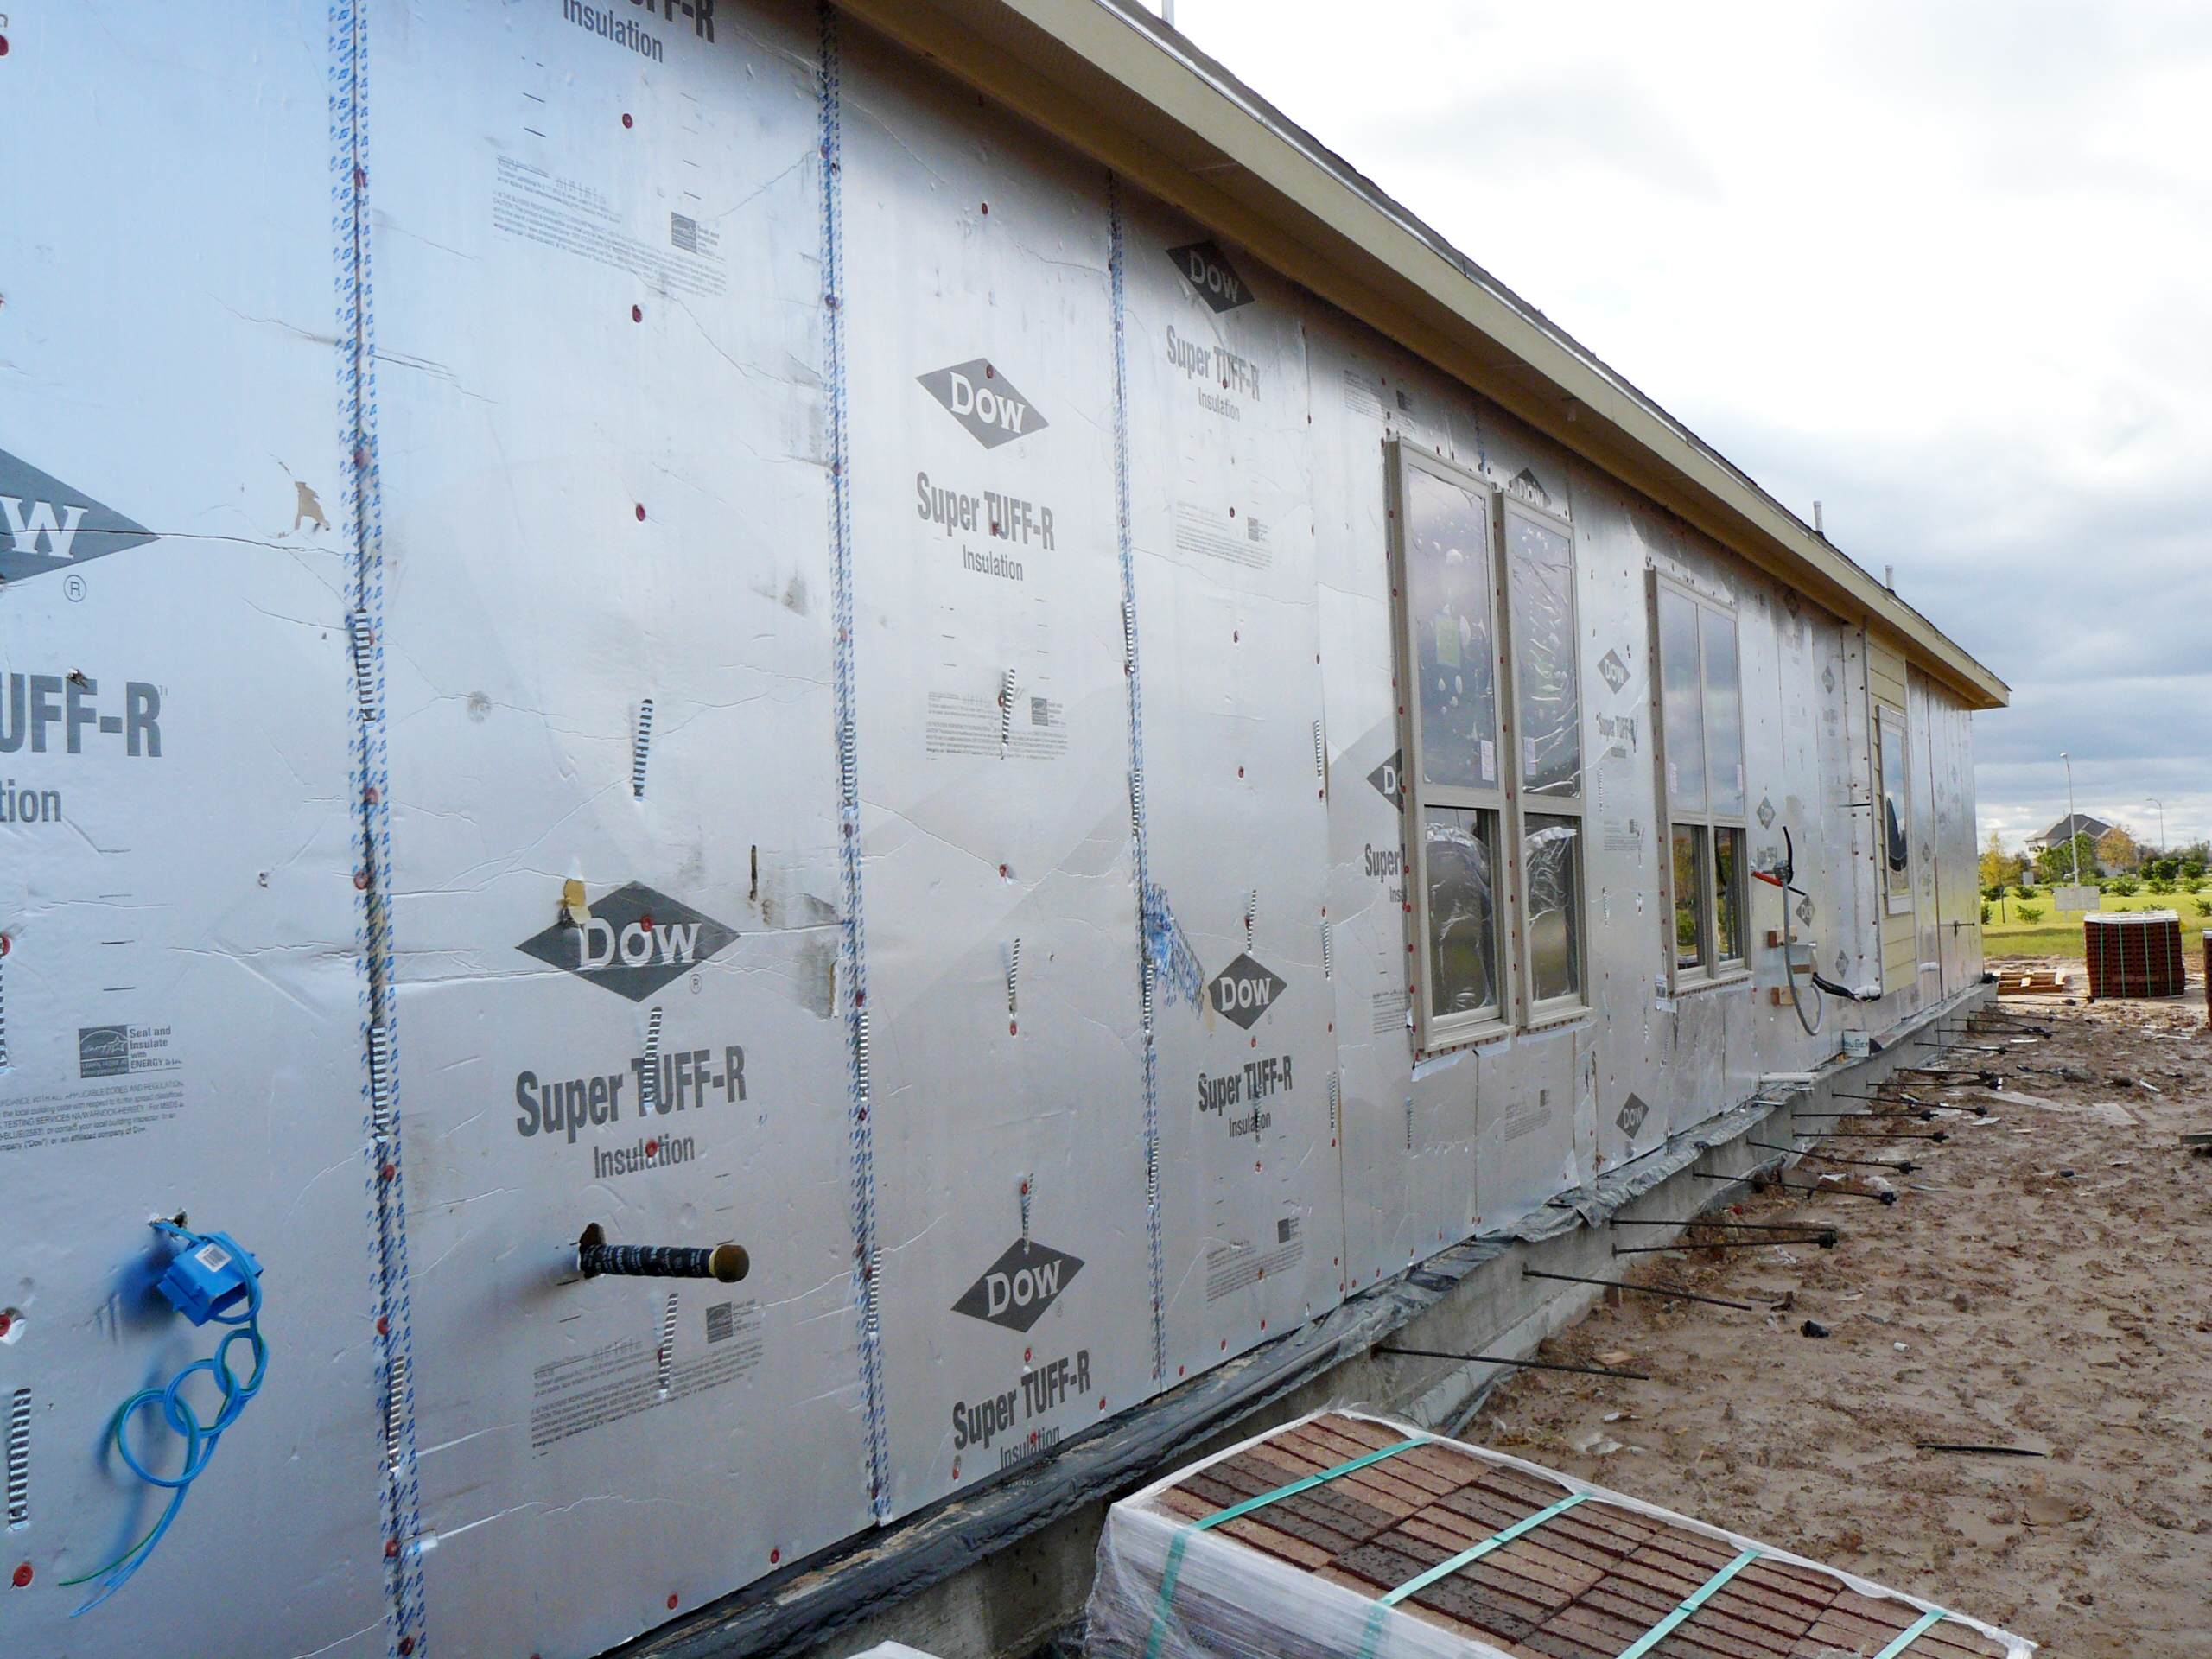
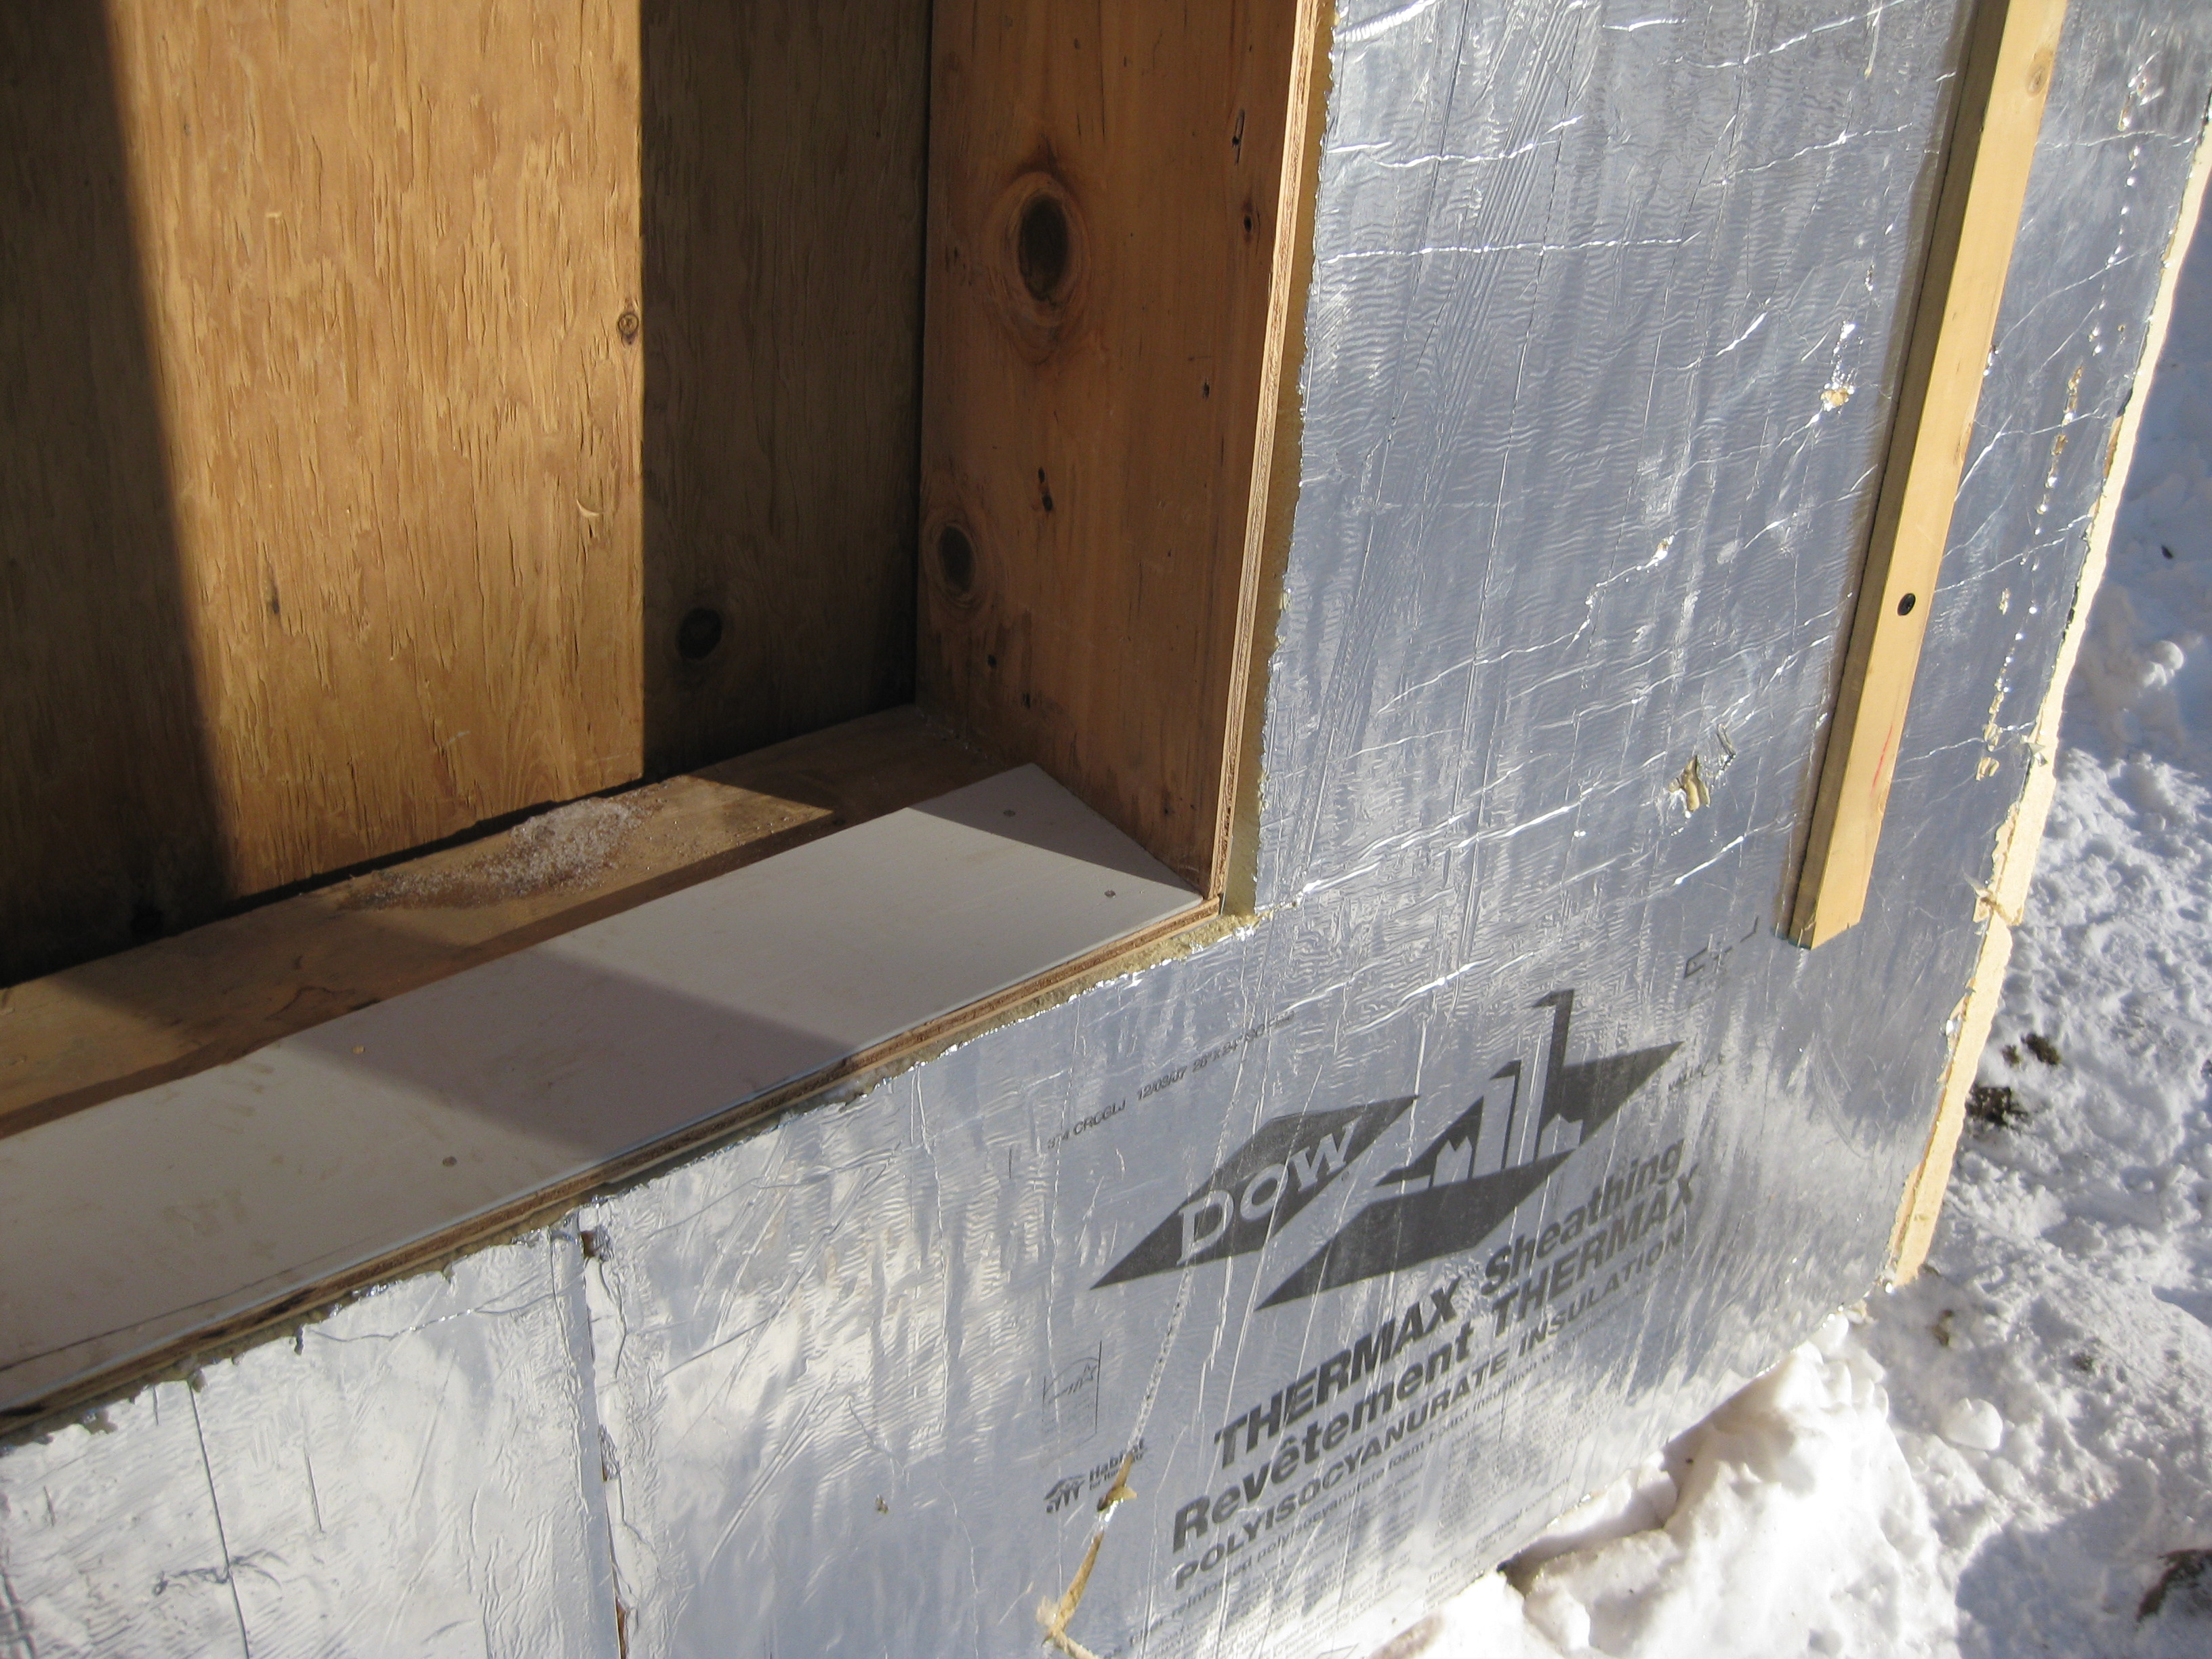
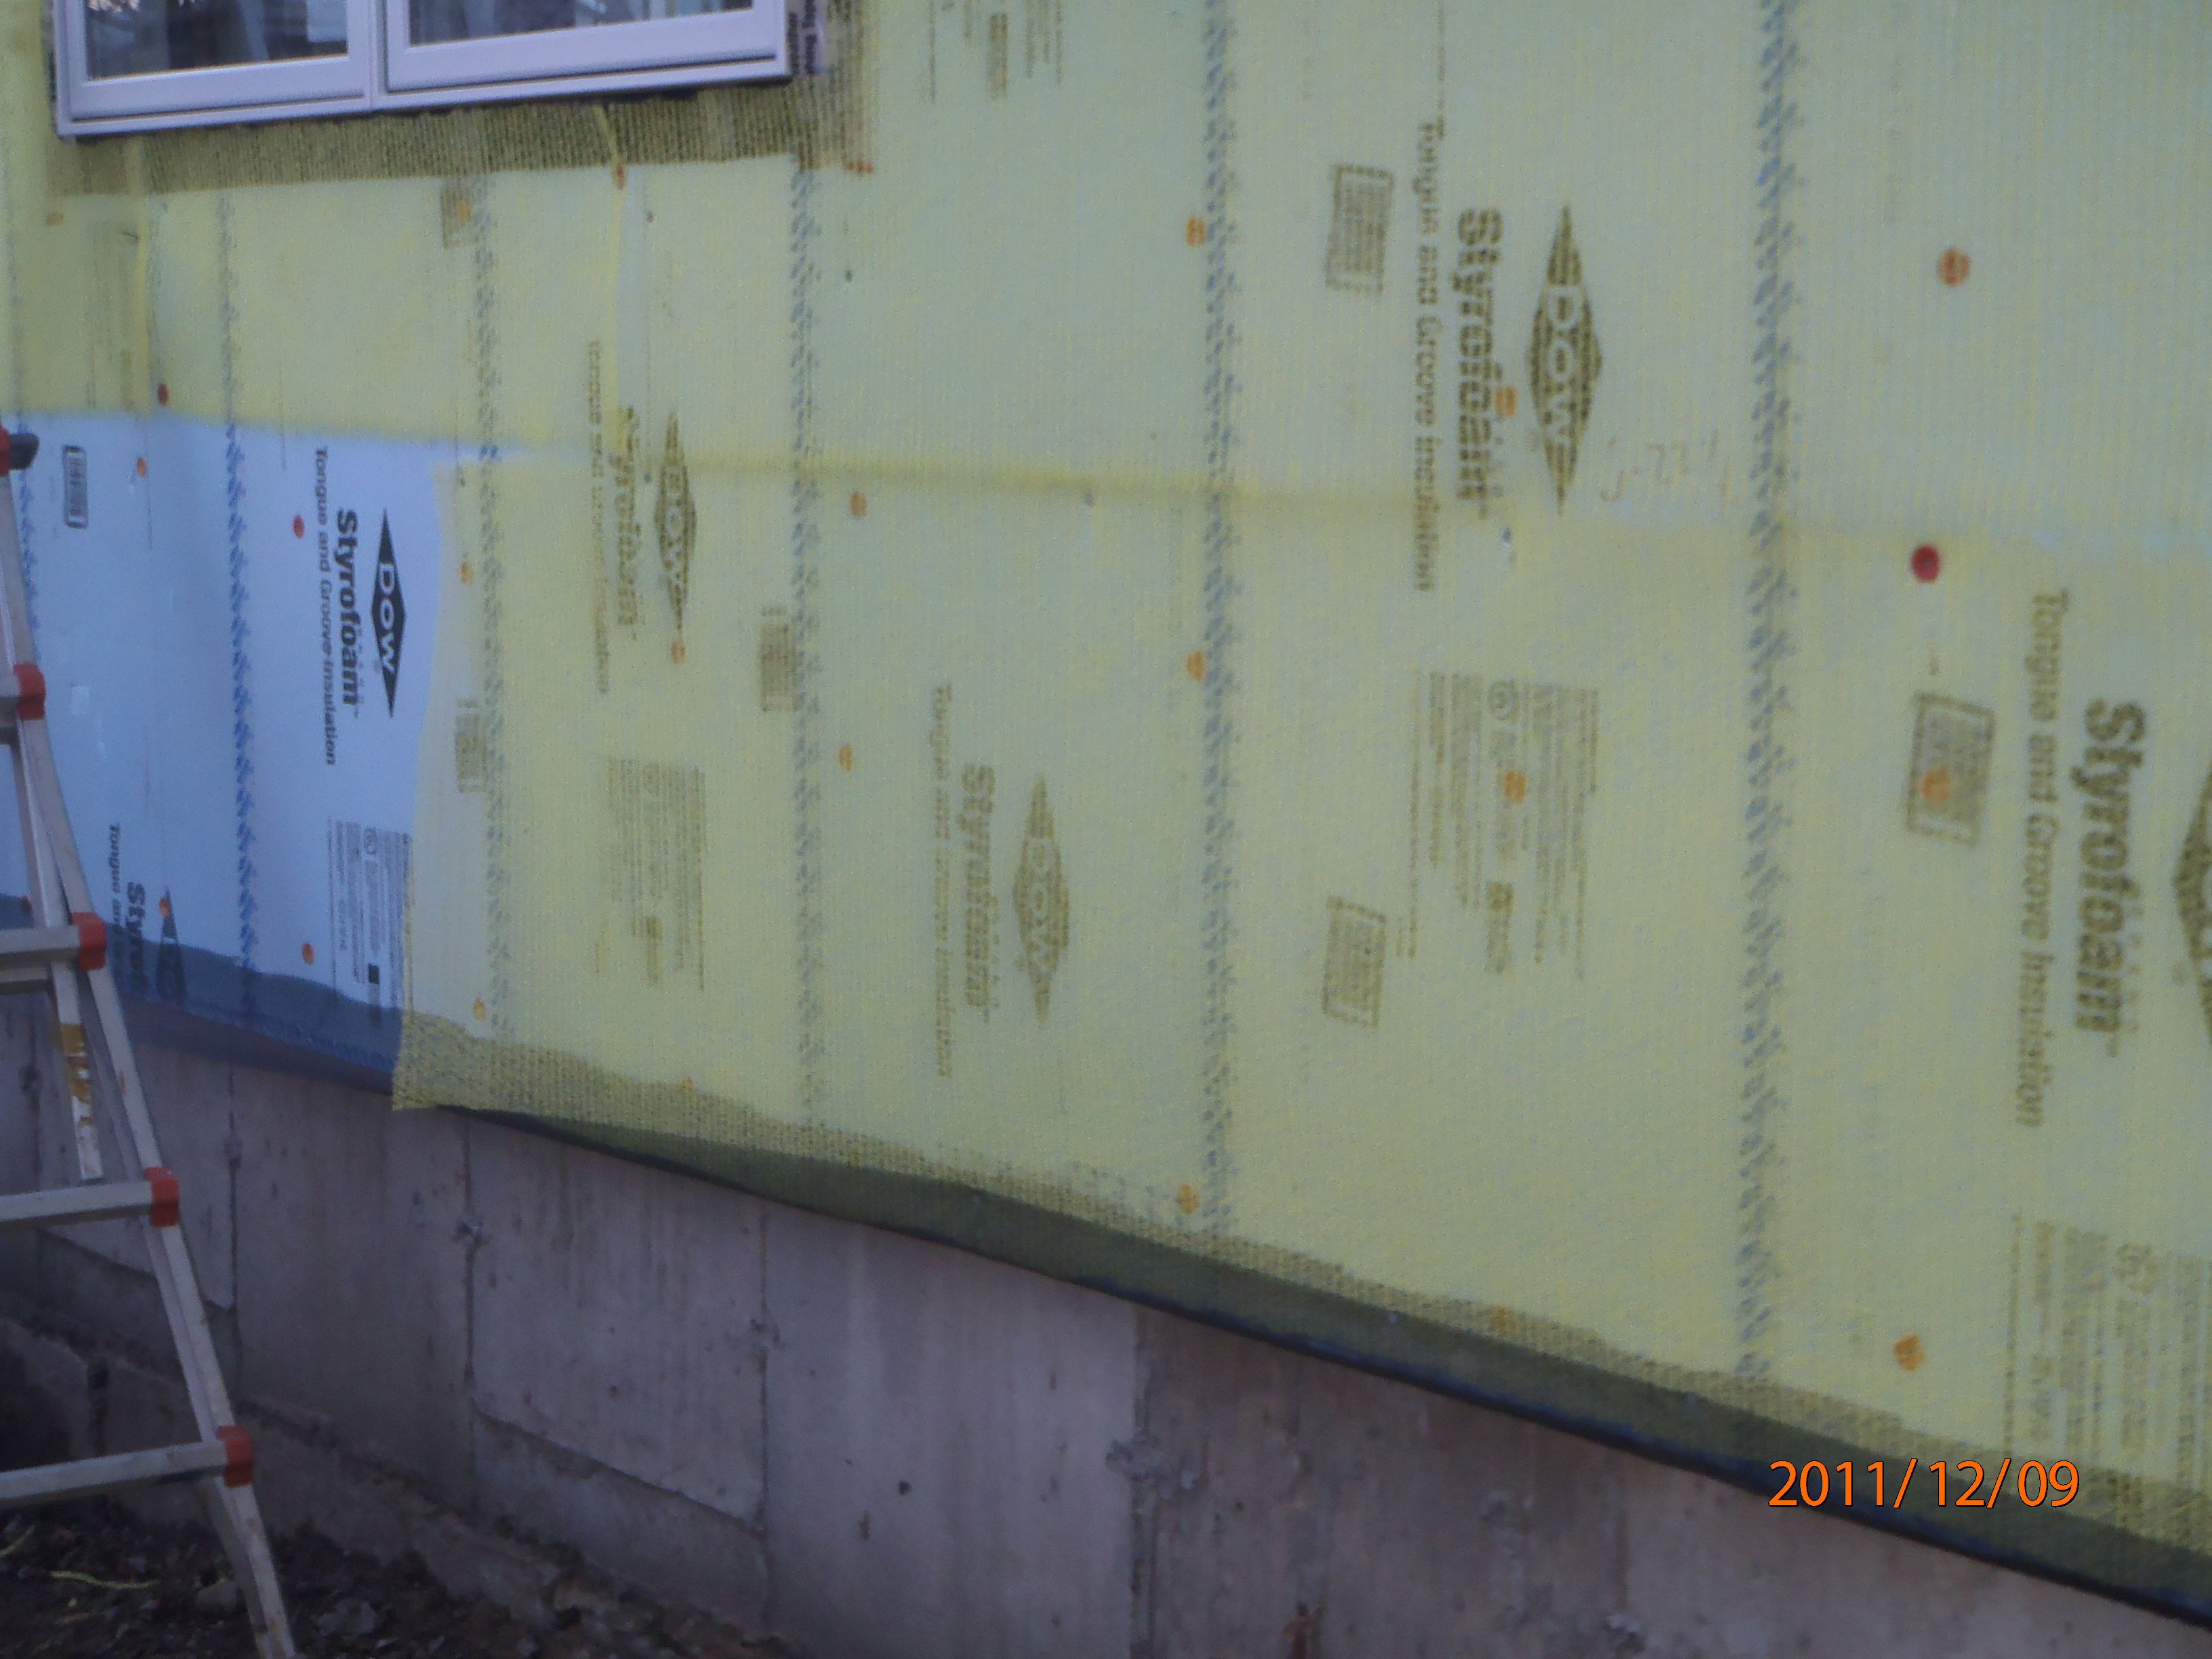
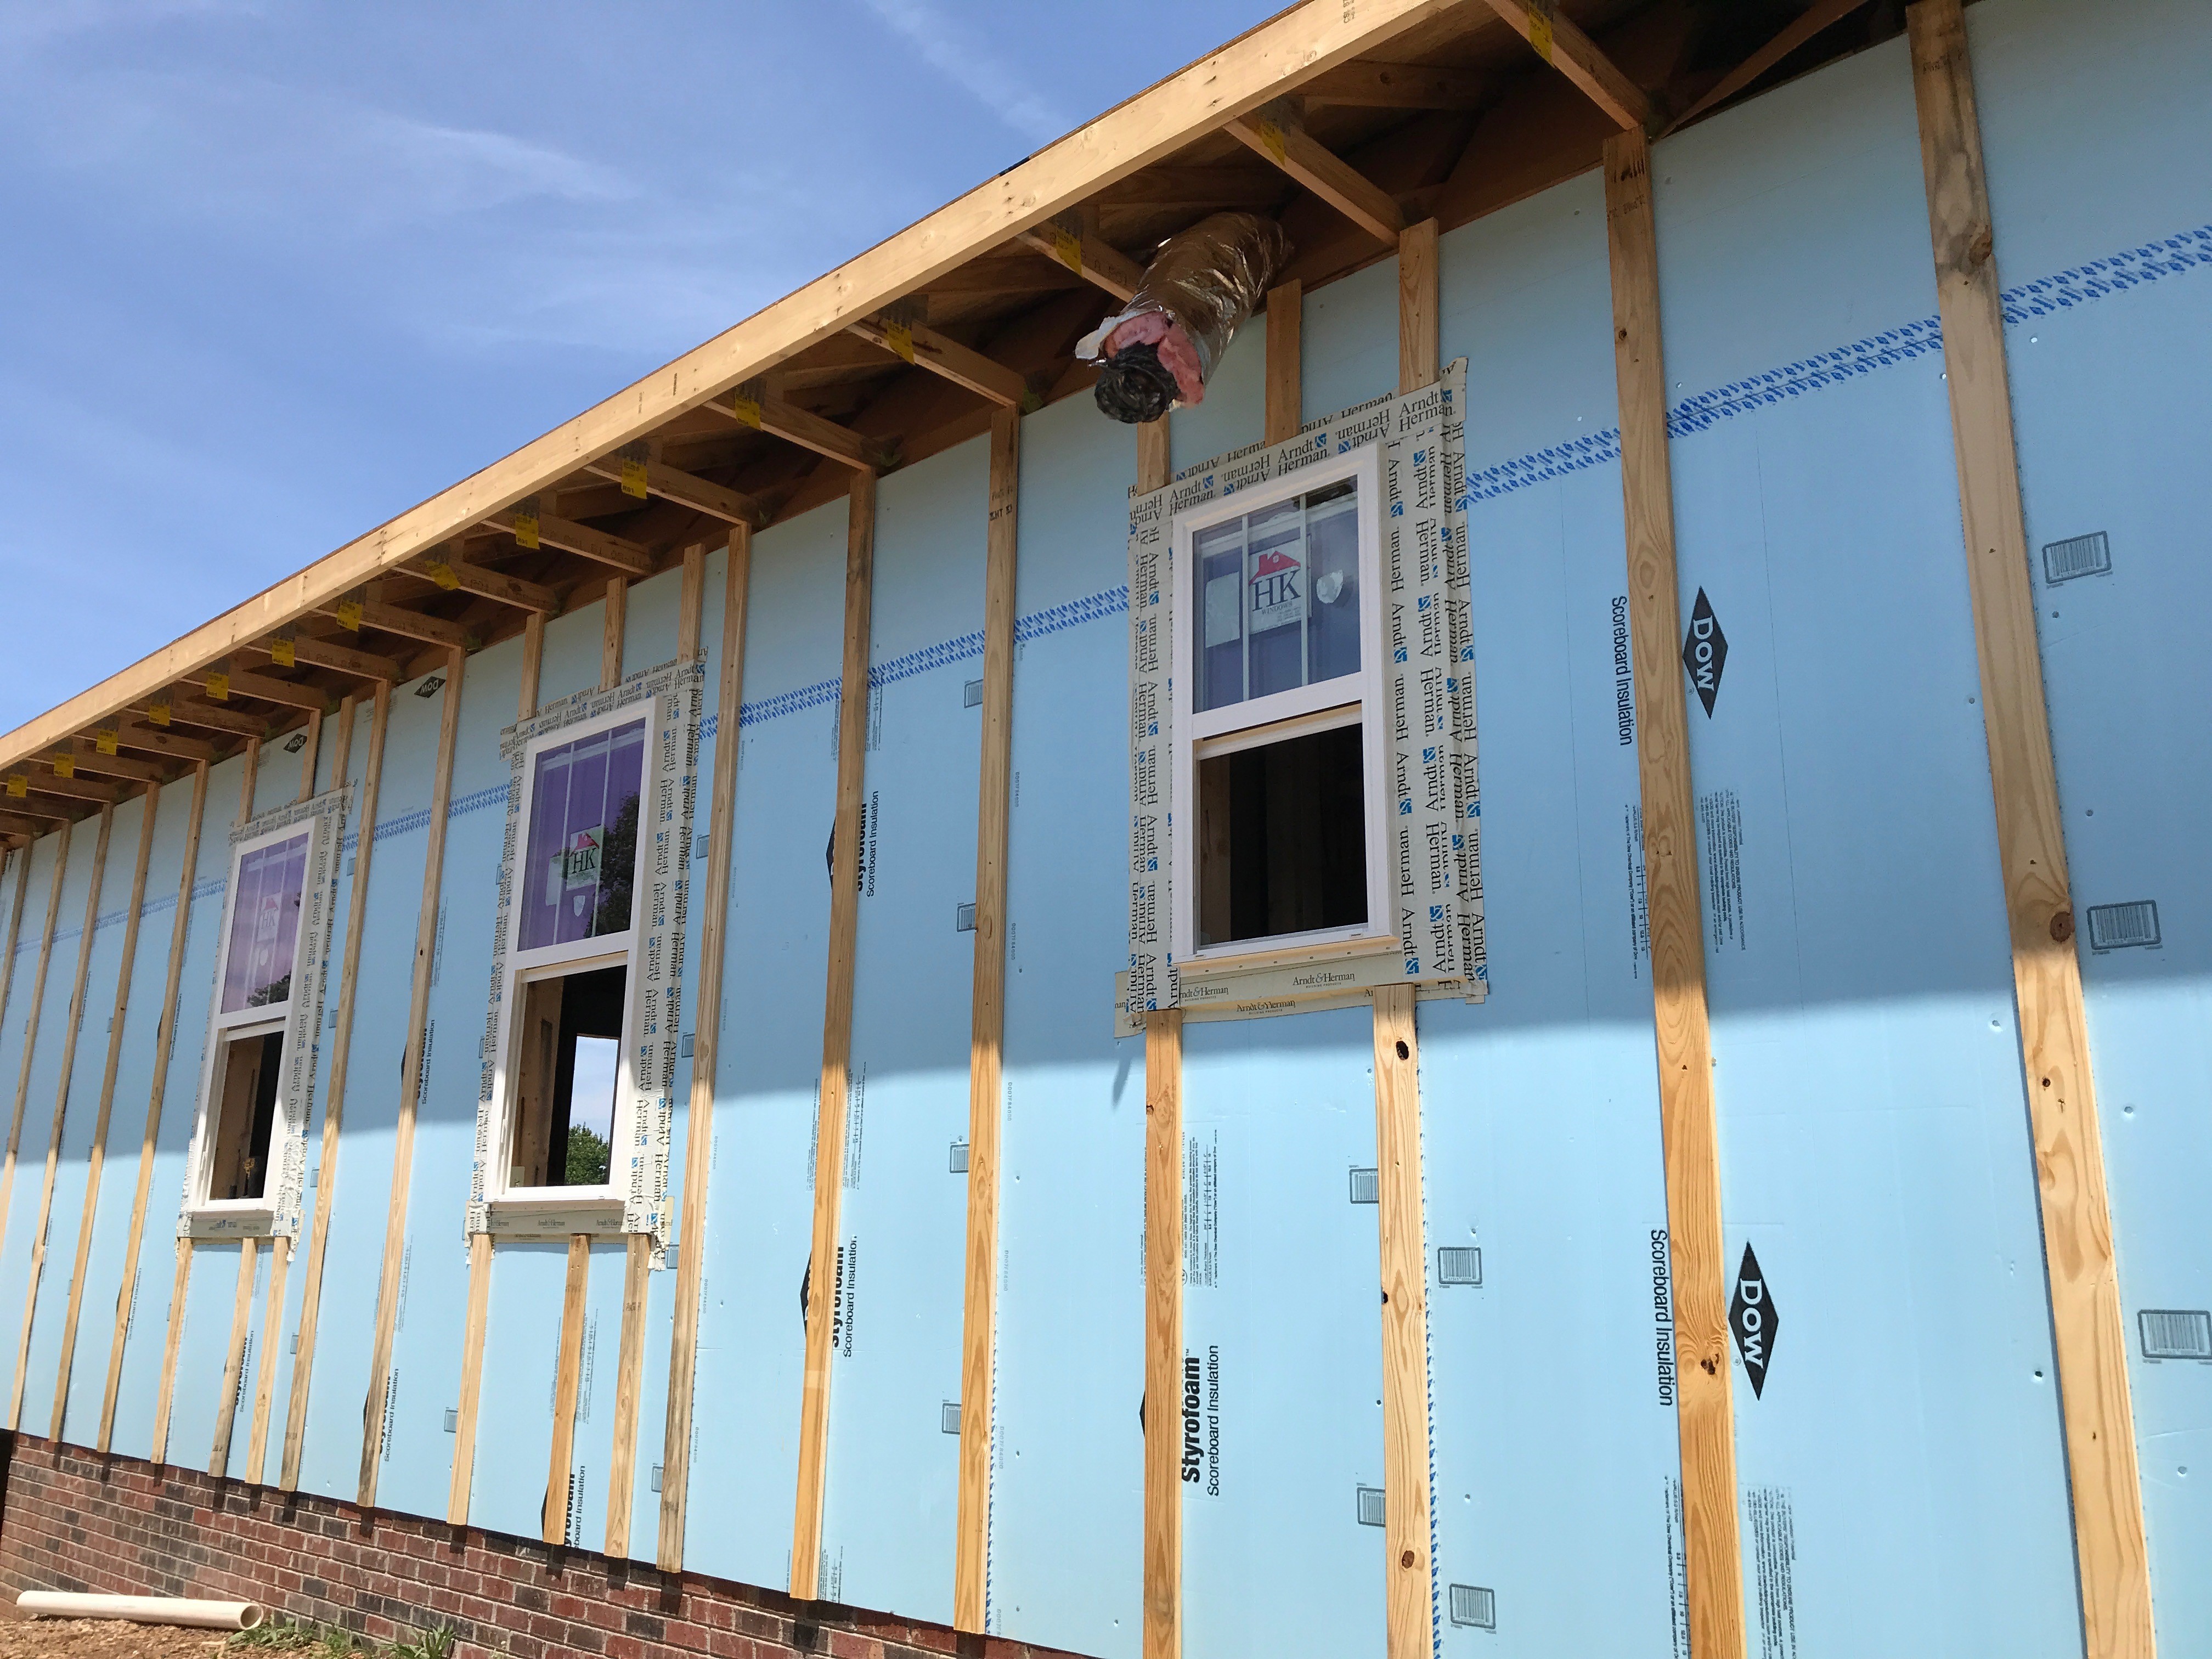
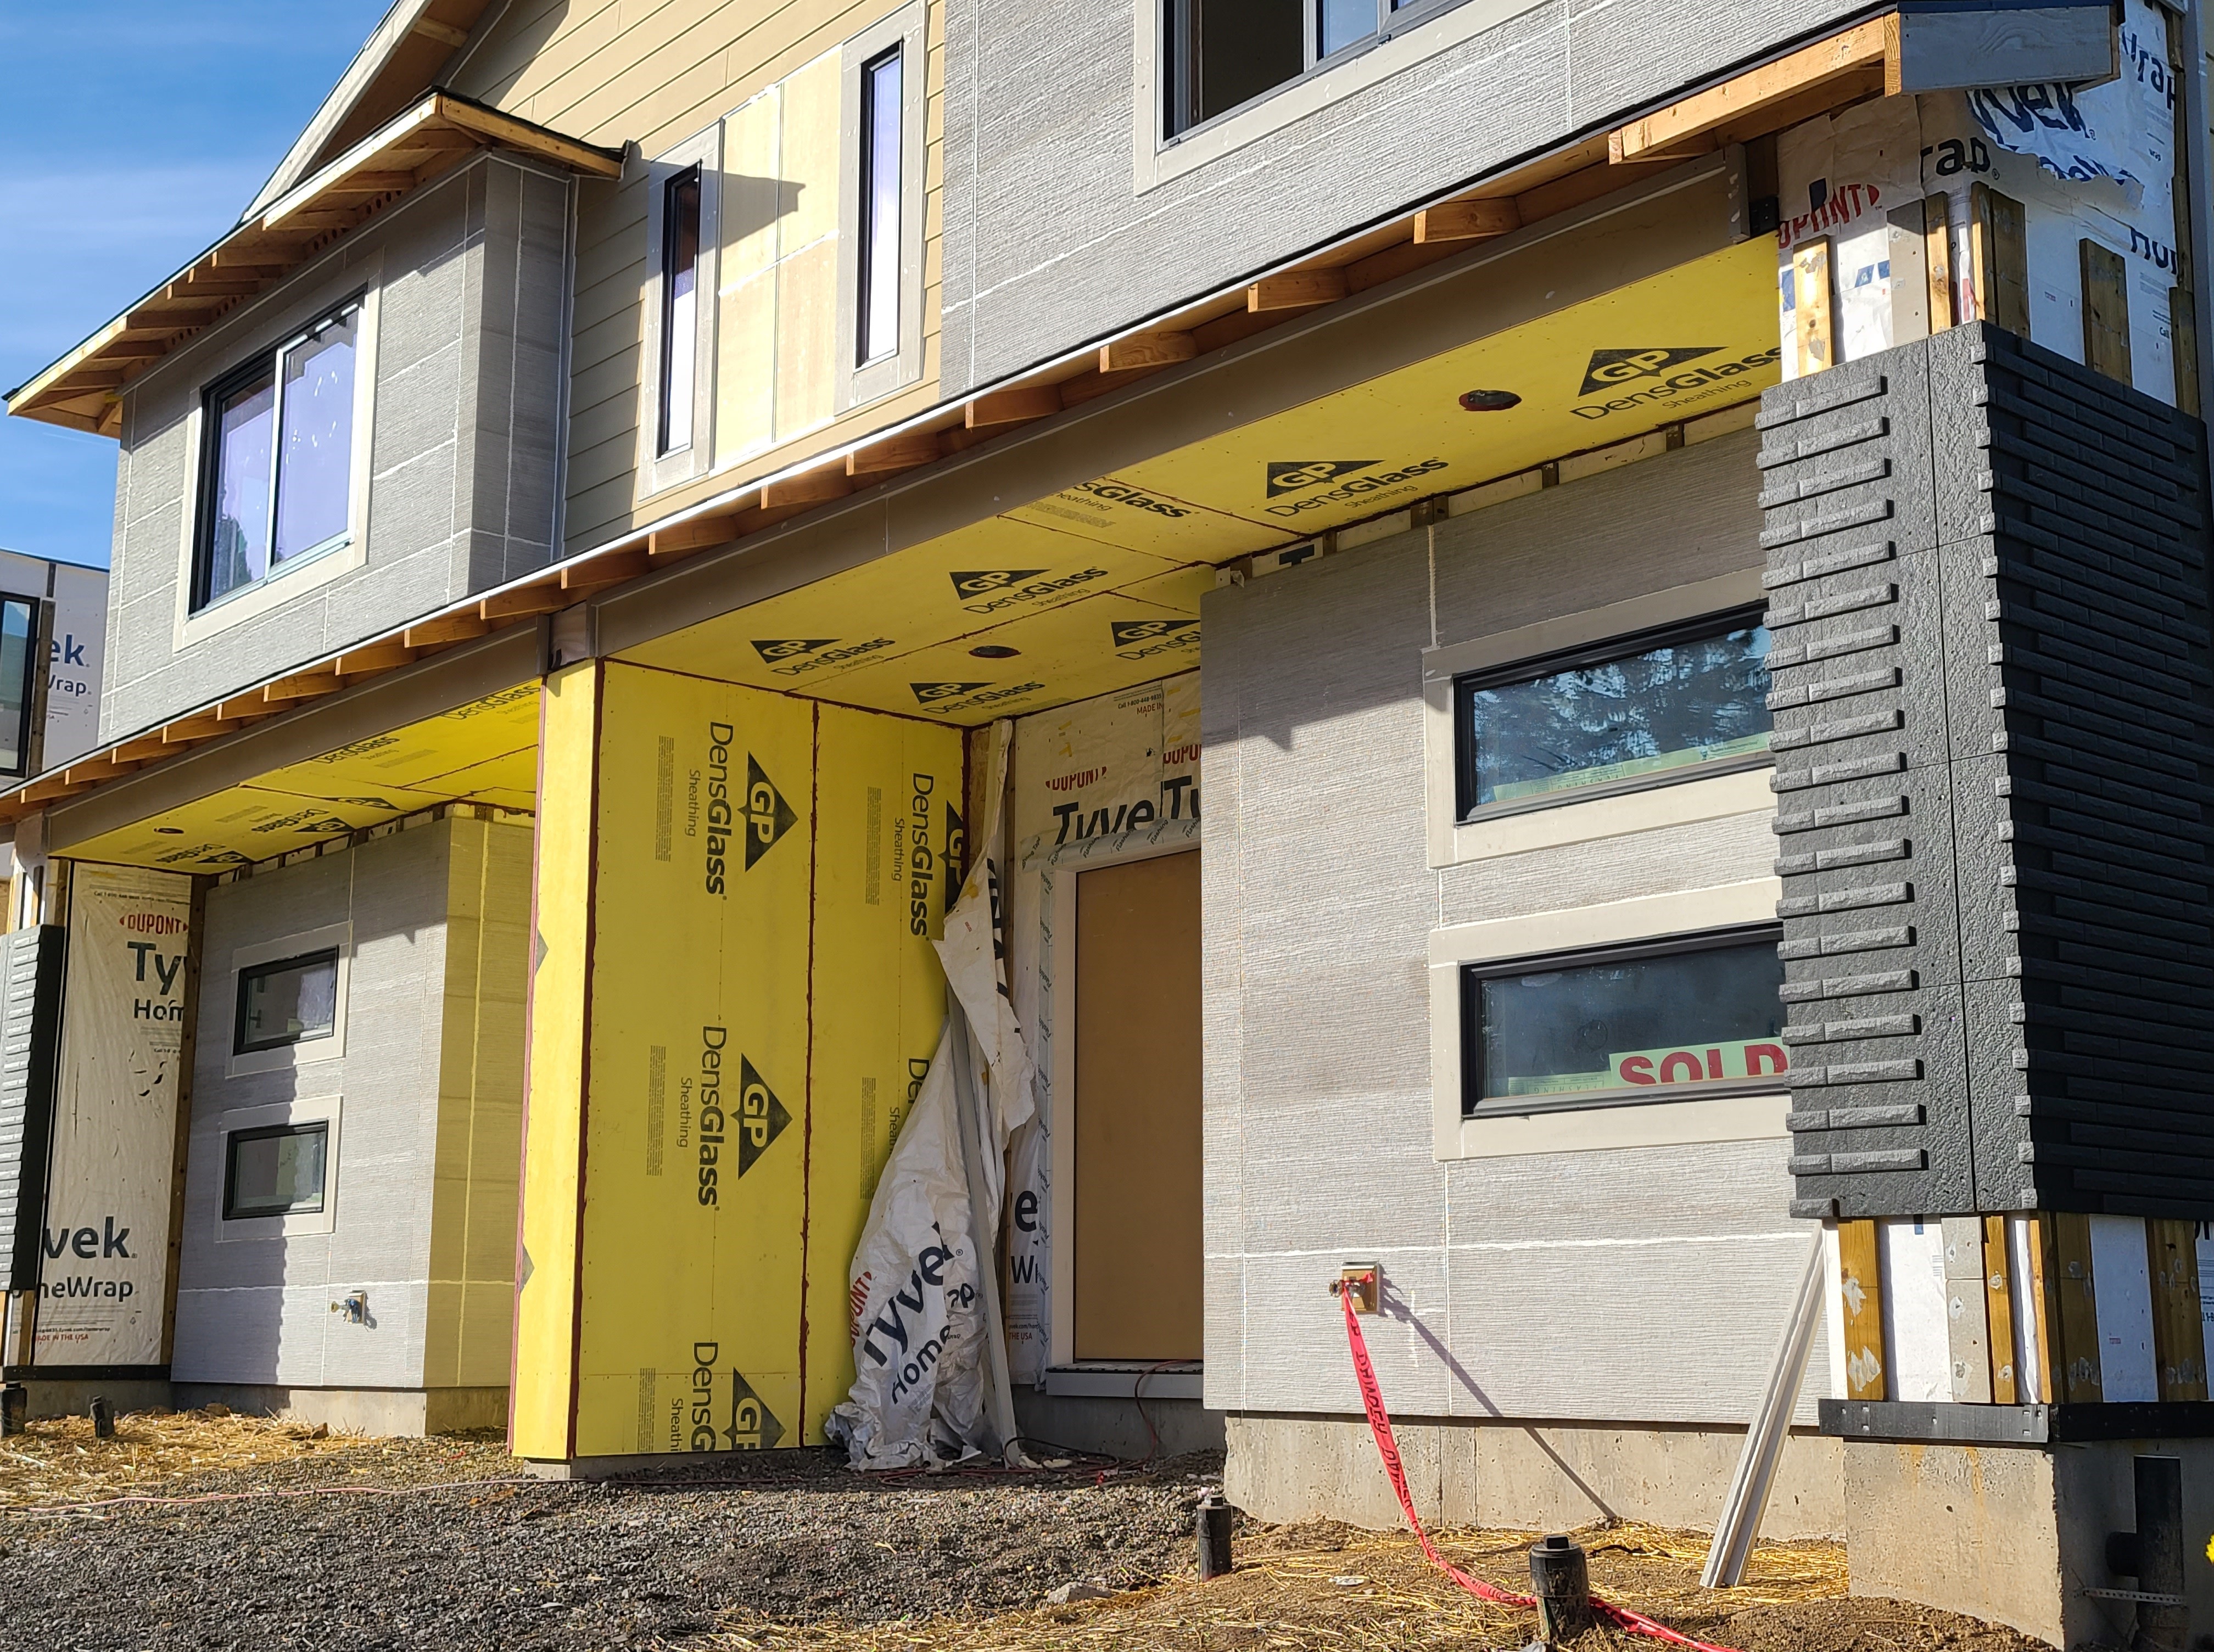
R-5 XPS rigid foam exterior sheathing provides an air seal, moisture barrier, and additional insulation value.
Image
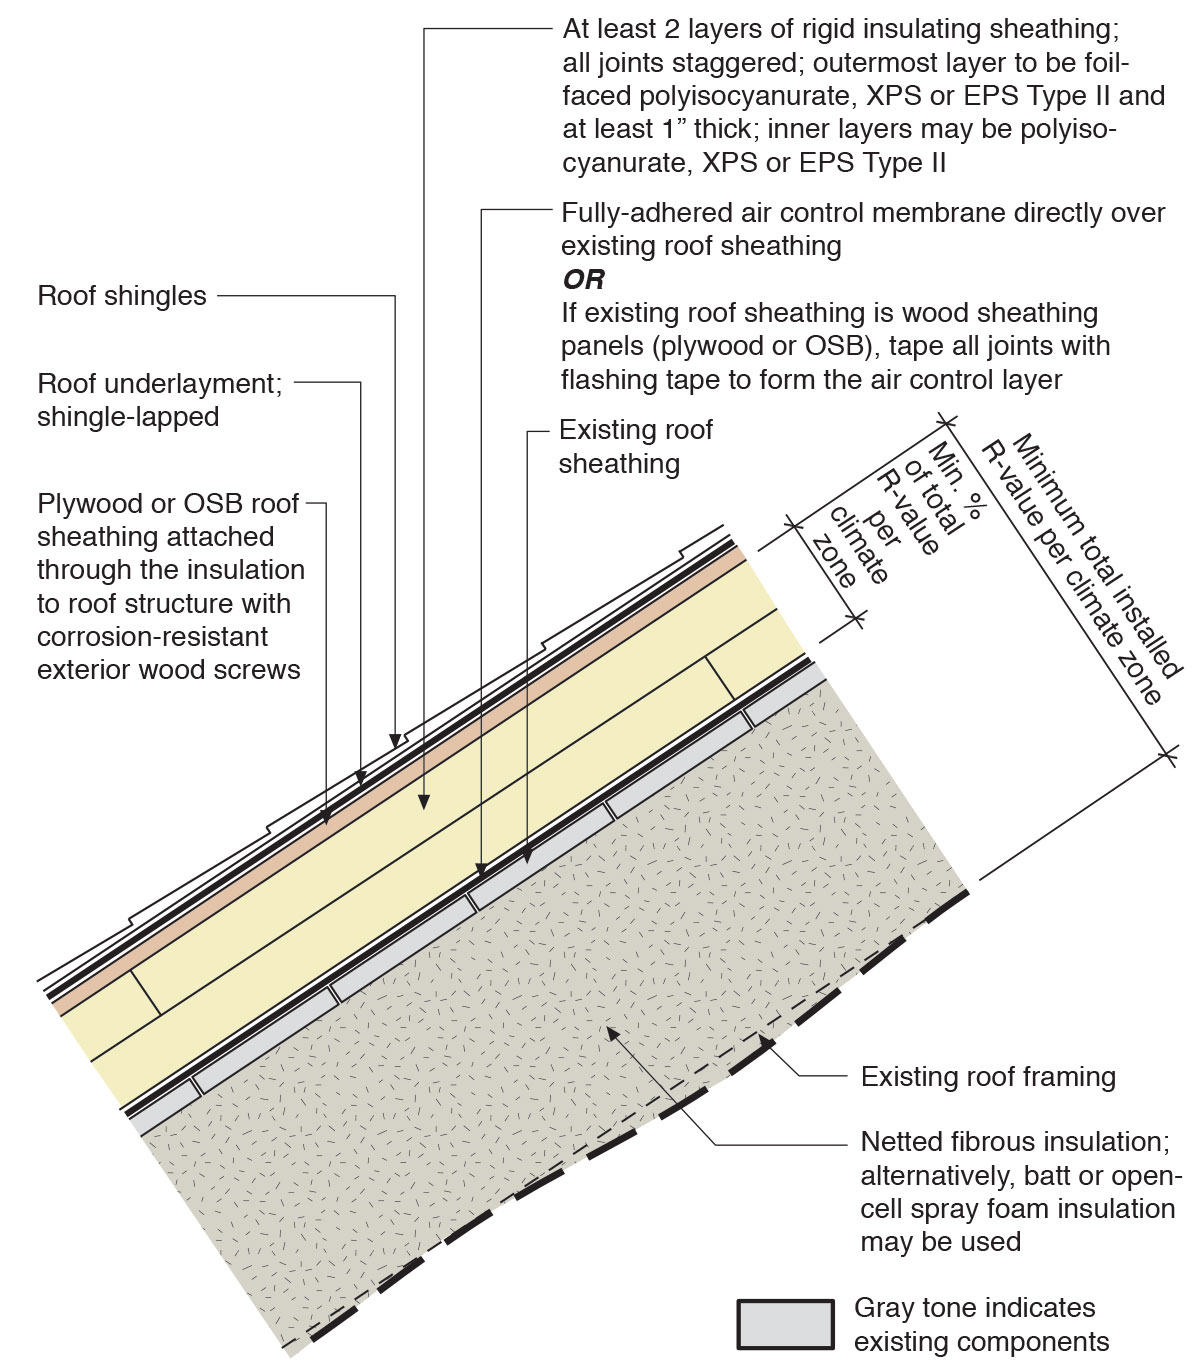
Retrofit an existing roof by installing rigid foam, new moisture and air control layers, new sheathing, and new cladding plus cavity insulation in the roof rafters to create an unvented attic
Image

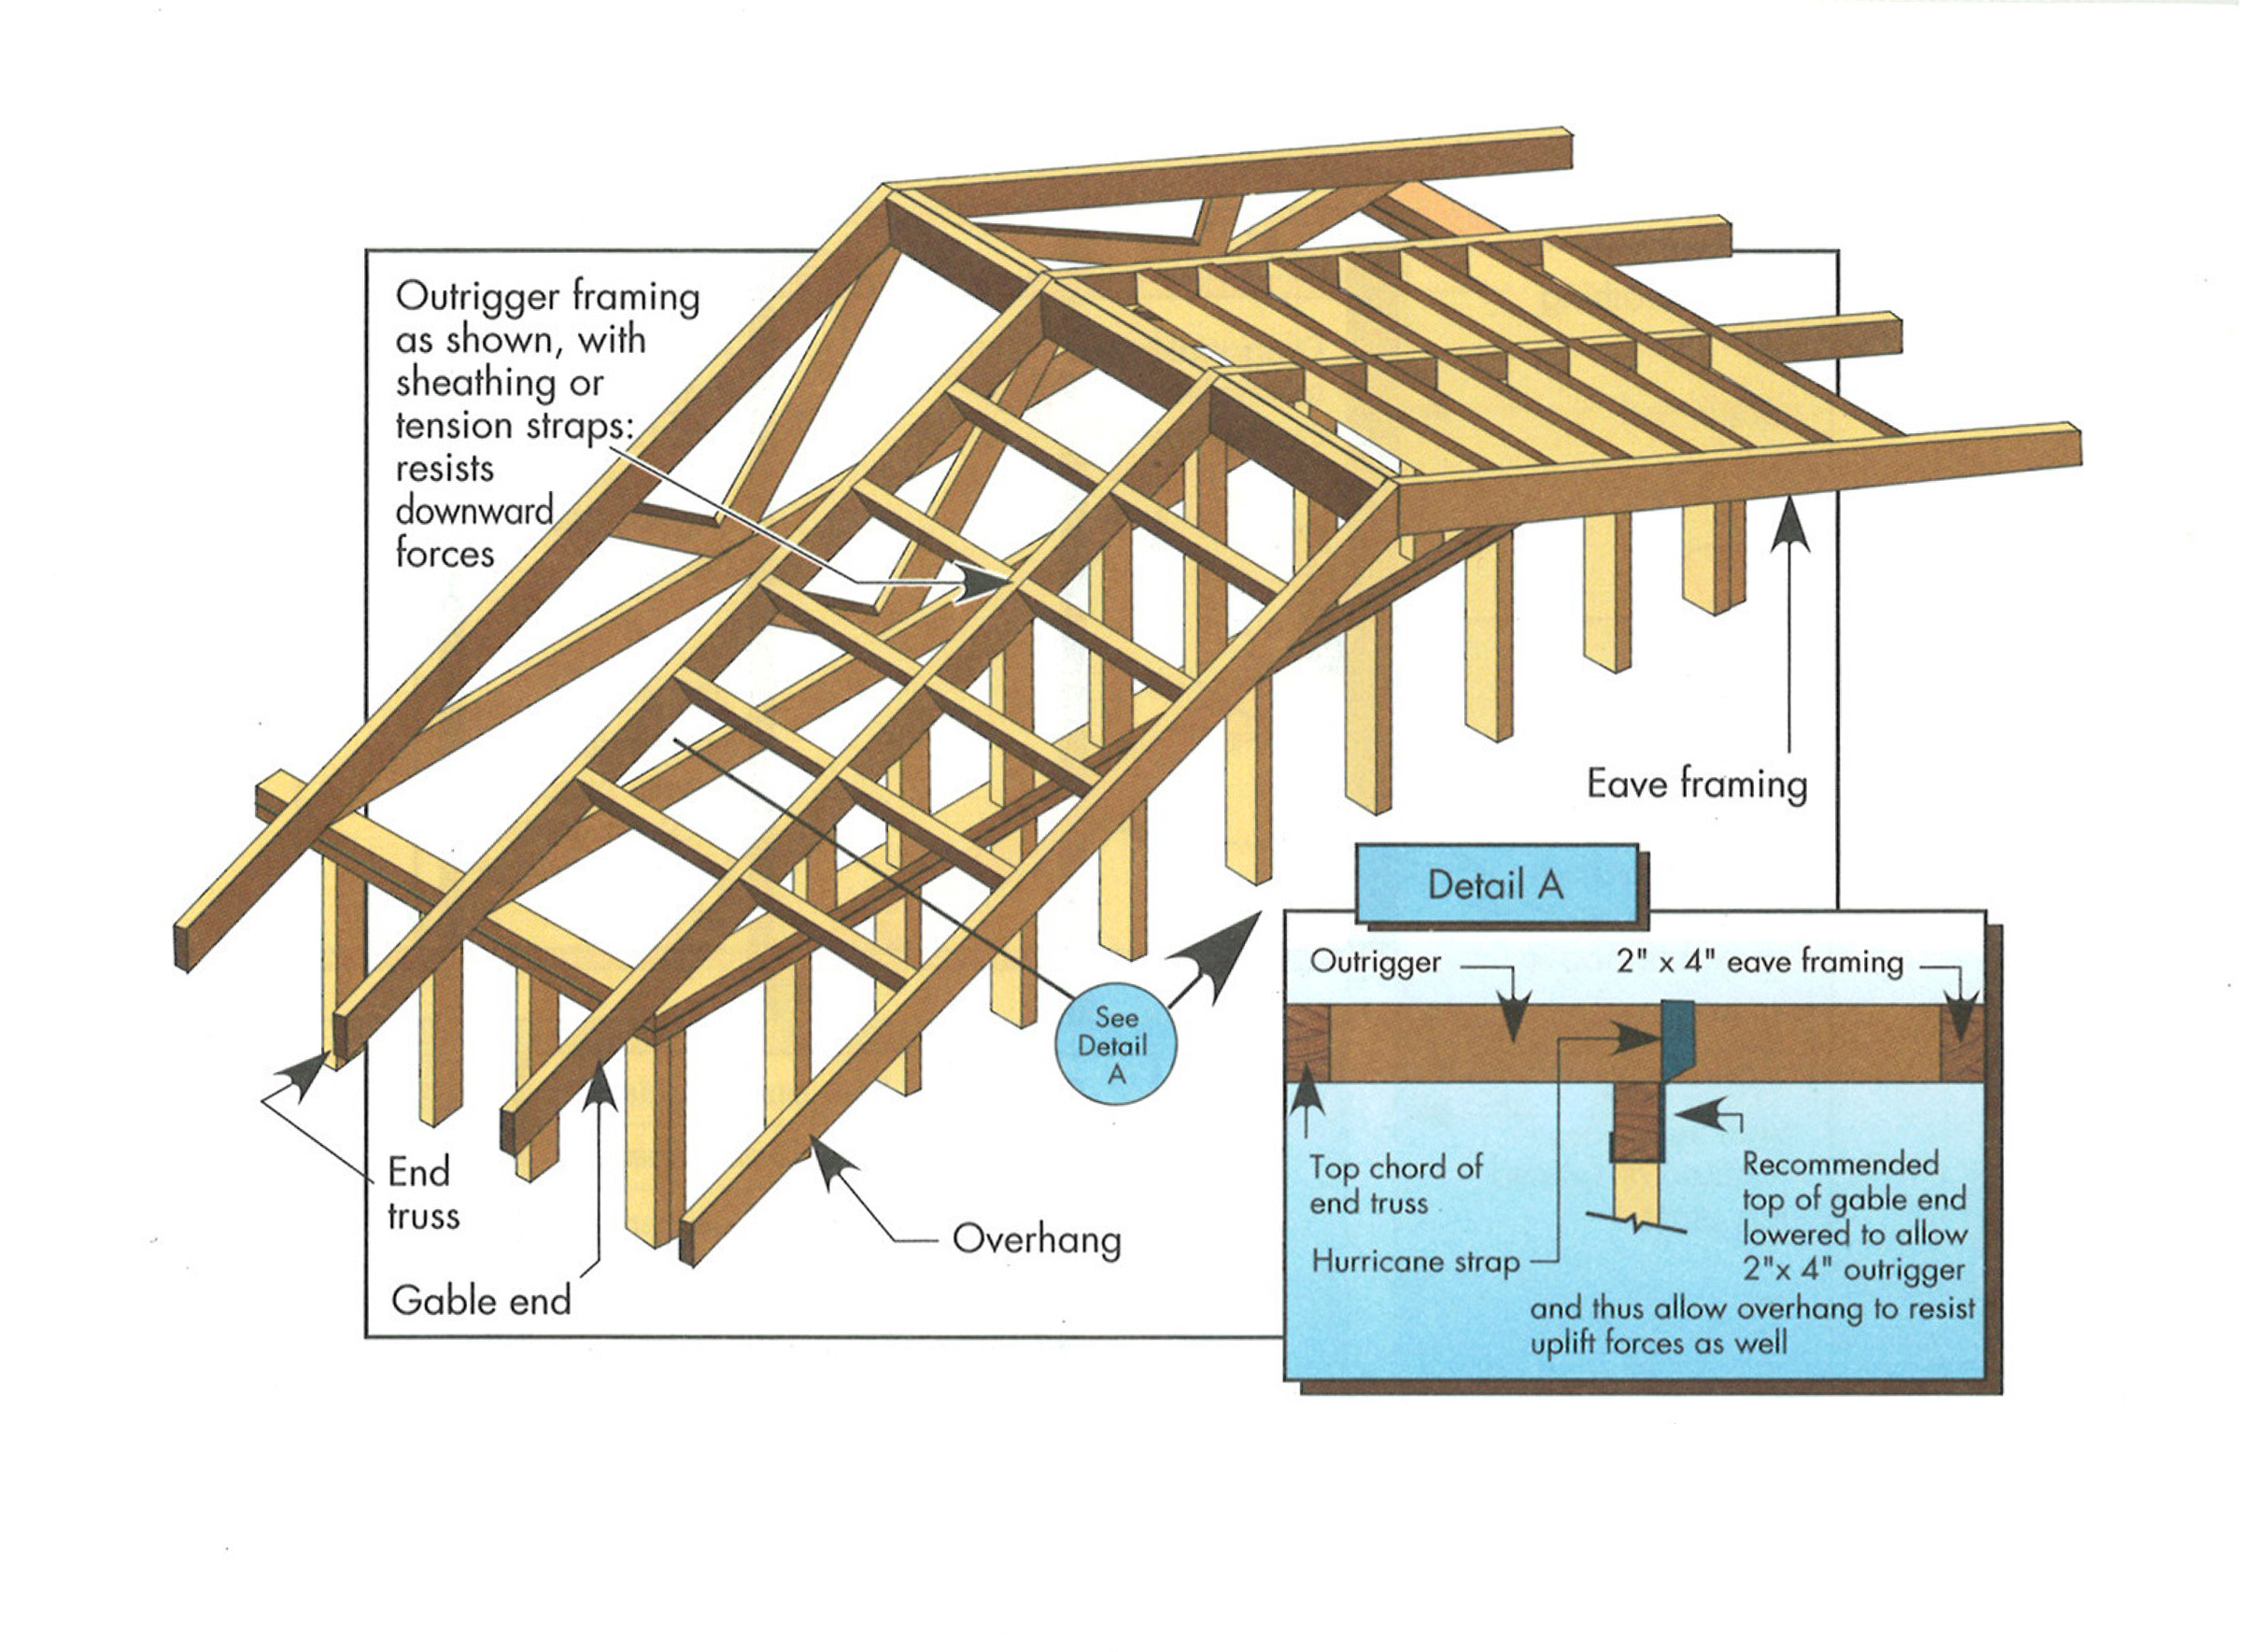
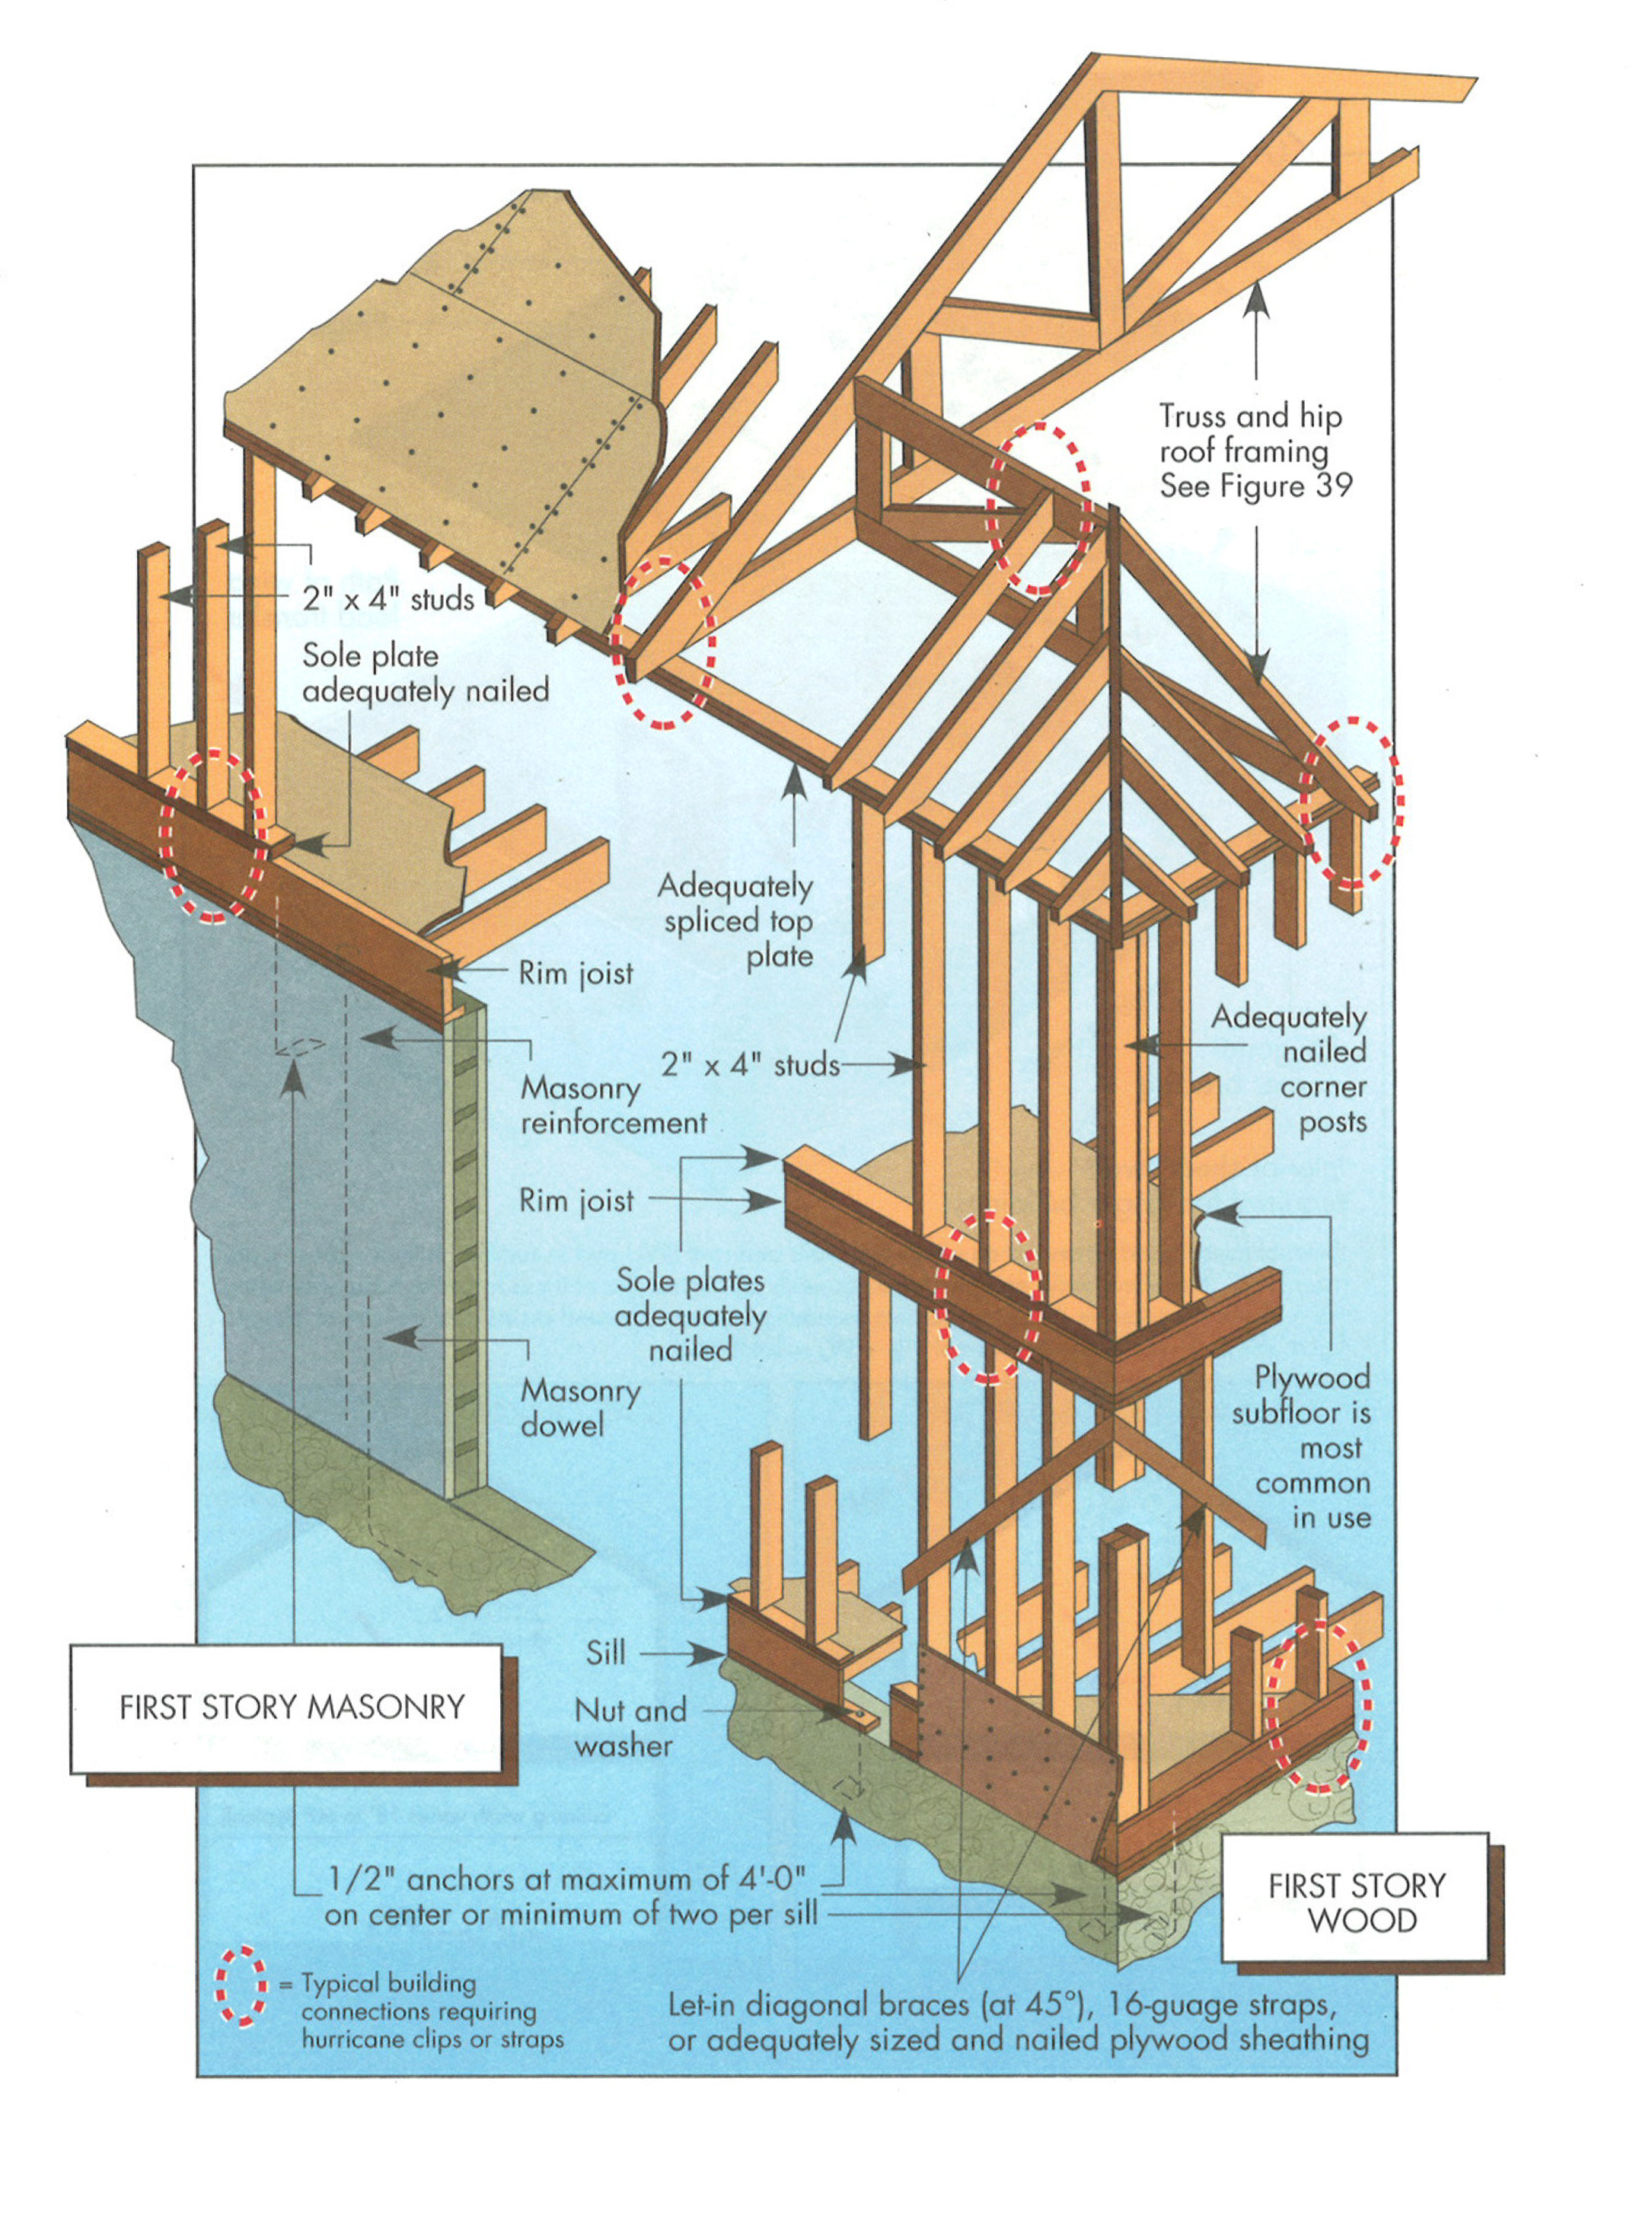
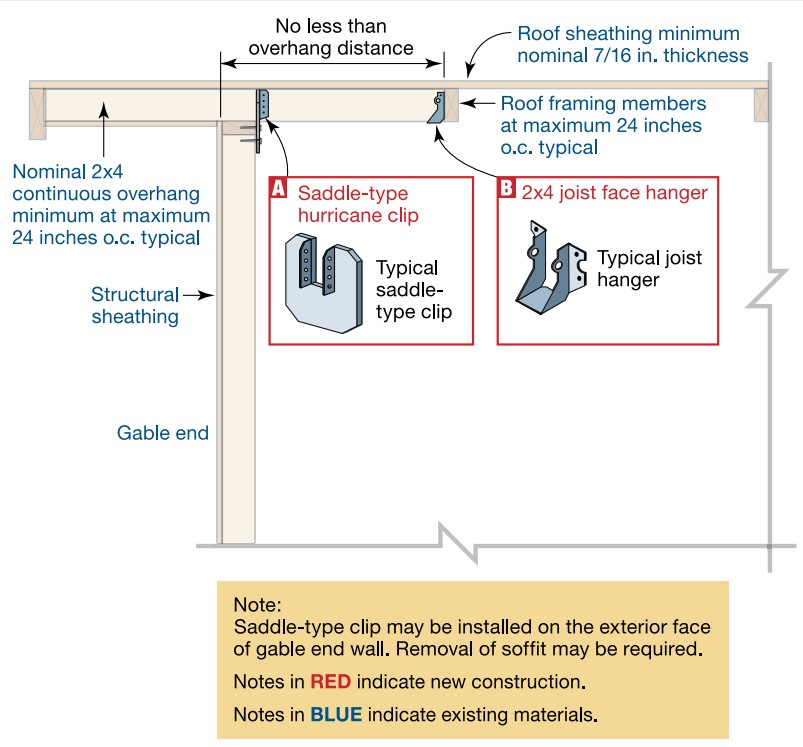
Right - A continuous load path connects the roof and wall framing to the foundation.
Image
Image

Right - Braced wall line spacing is correctly calculated for determining wall bracing in accordance with the IRC.
Image
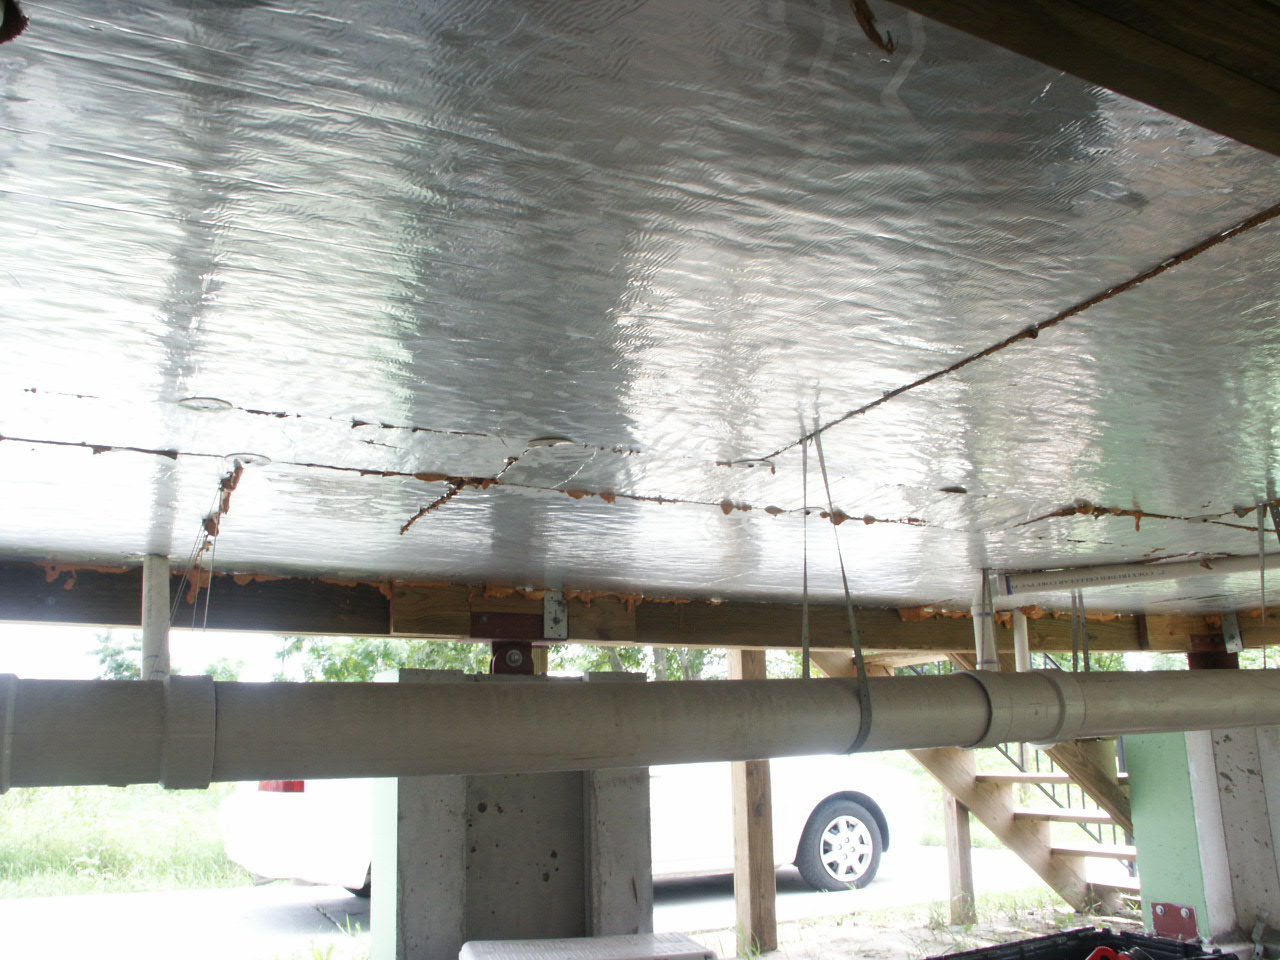
Right - Foil-faced polyisocyanurate insulating rigid foam sheathing is installed below the floor framing of this house built on piers; however, the seams should be sealed with metal taped and the plumbing elevated and protected.
Image
Right - Foil-faced polyisocyanurate rigid foam is attached to the existing exterior wall with vertical wood furring strips
Image
Right - Here, air control is established by taping the seams of the plywood panel sheathing. The roof sheathing is also trimmed flush with the wall sheathing to allow a simple and airtight connection between the roof and wall assemblies
Image
Right - Mastic is being installed to air seal the wood-to-wood joints in this wall.
Image
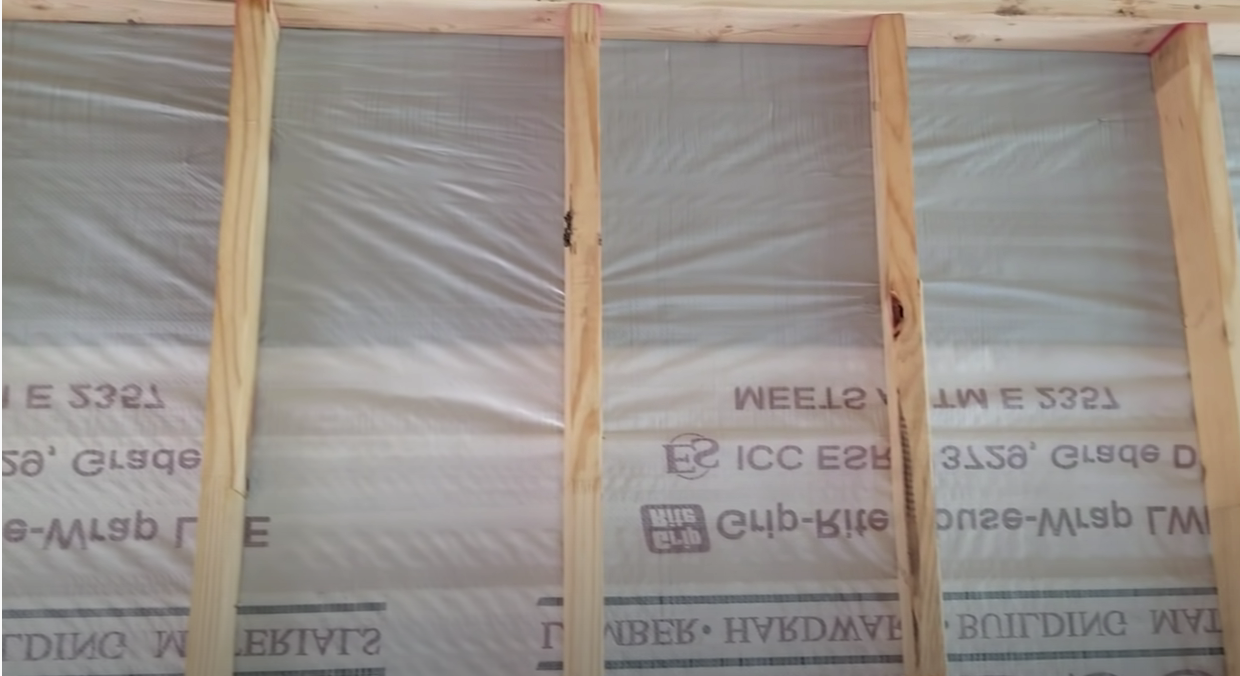
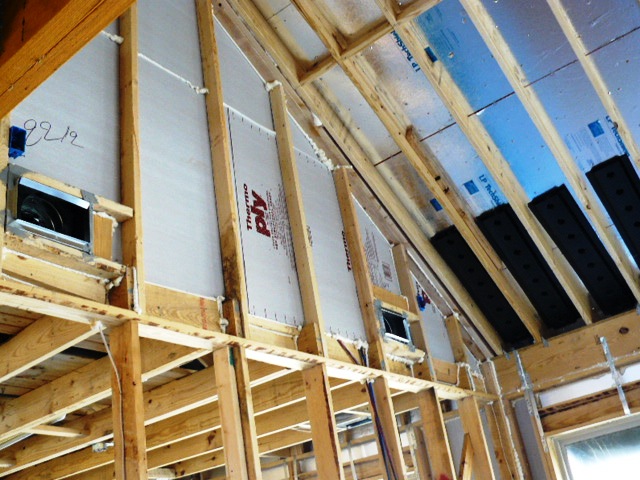
Right - Mold- and water-resistant fiber glass insulating sheathing is installed after panelized walls are assembled on site.
Image
Right - Open-web floor and ceiling trusses provide space for ducts in conditioned space.
Image

Right - Raised-heel trusses increase the roof height above the eaves allowing more space for insulation above exterior wall top plates; exterior wall sheathing extends up to keep wind from soffit vents from disrupting insulation.
Image
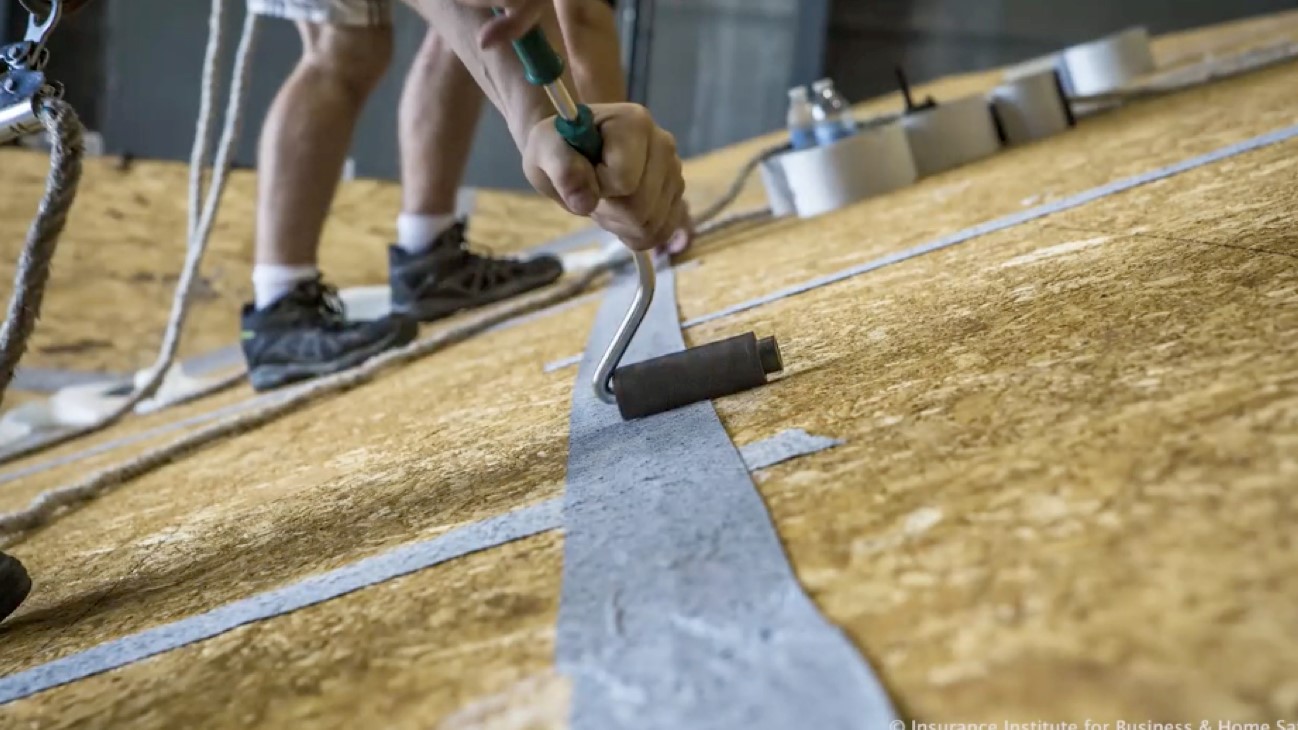
Right - Seam-sealing flashing tape is installed with roller to fully adhere to the OSB.
Image
Right - Seams in coated sheathing and joints around window are properly sealed and flashed with tape and all nail holes are covered with paint-on sealant.
Image
Right - The air control membrane installed over the roof sheathing is continuous. It connects to the air control of the wall around the entire perimeter without interruption. The roof overhangs have been cut off to make this connection continuous
Image
Right - The seams in the OSB sheathing are sealed with a sprayer-applied sealant.
Image
Right - These roof insulation panels are installed in multiple layers with joints offset both vertically and horizontally. The plywood nail base fastened to the roof framing holds the insulation layers together snuggly thus minimizing gaps
Image
Right - This foil-faced polyisocyanurate rigid foam is installed on an existing exterior wall and the seams are taped so the rigid foam can serve as a water control layer
Image
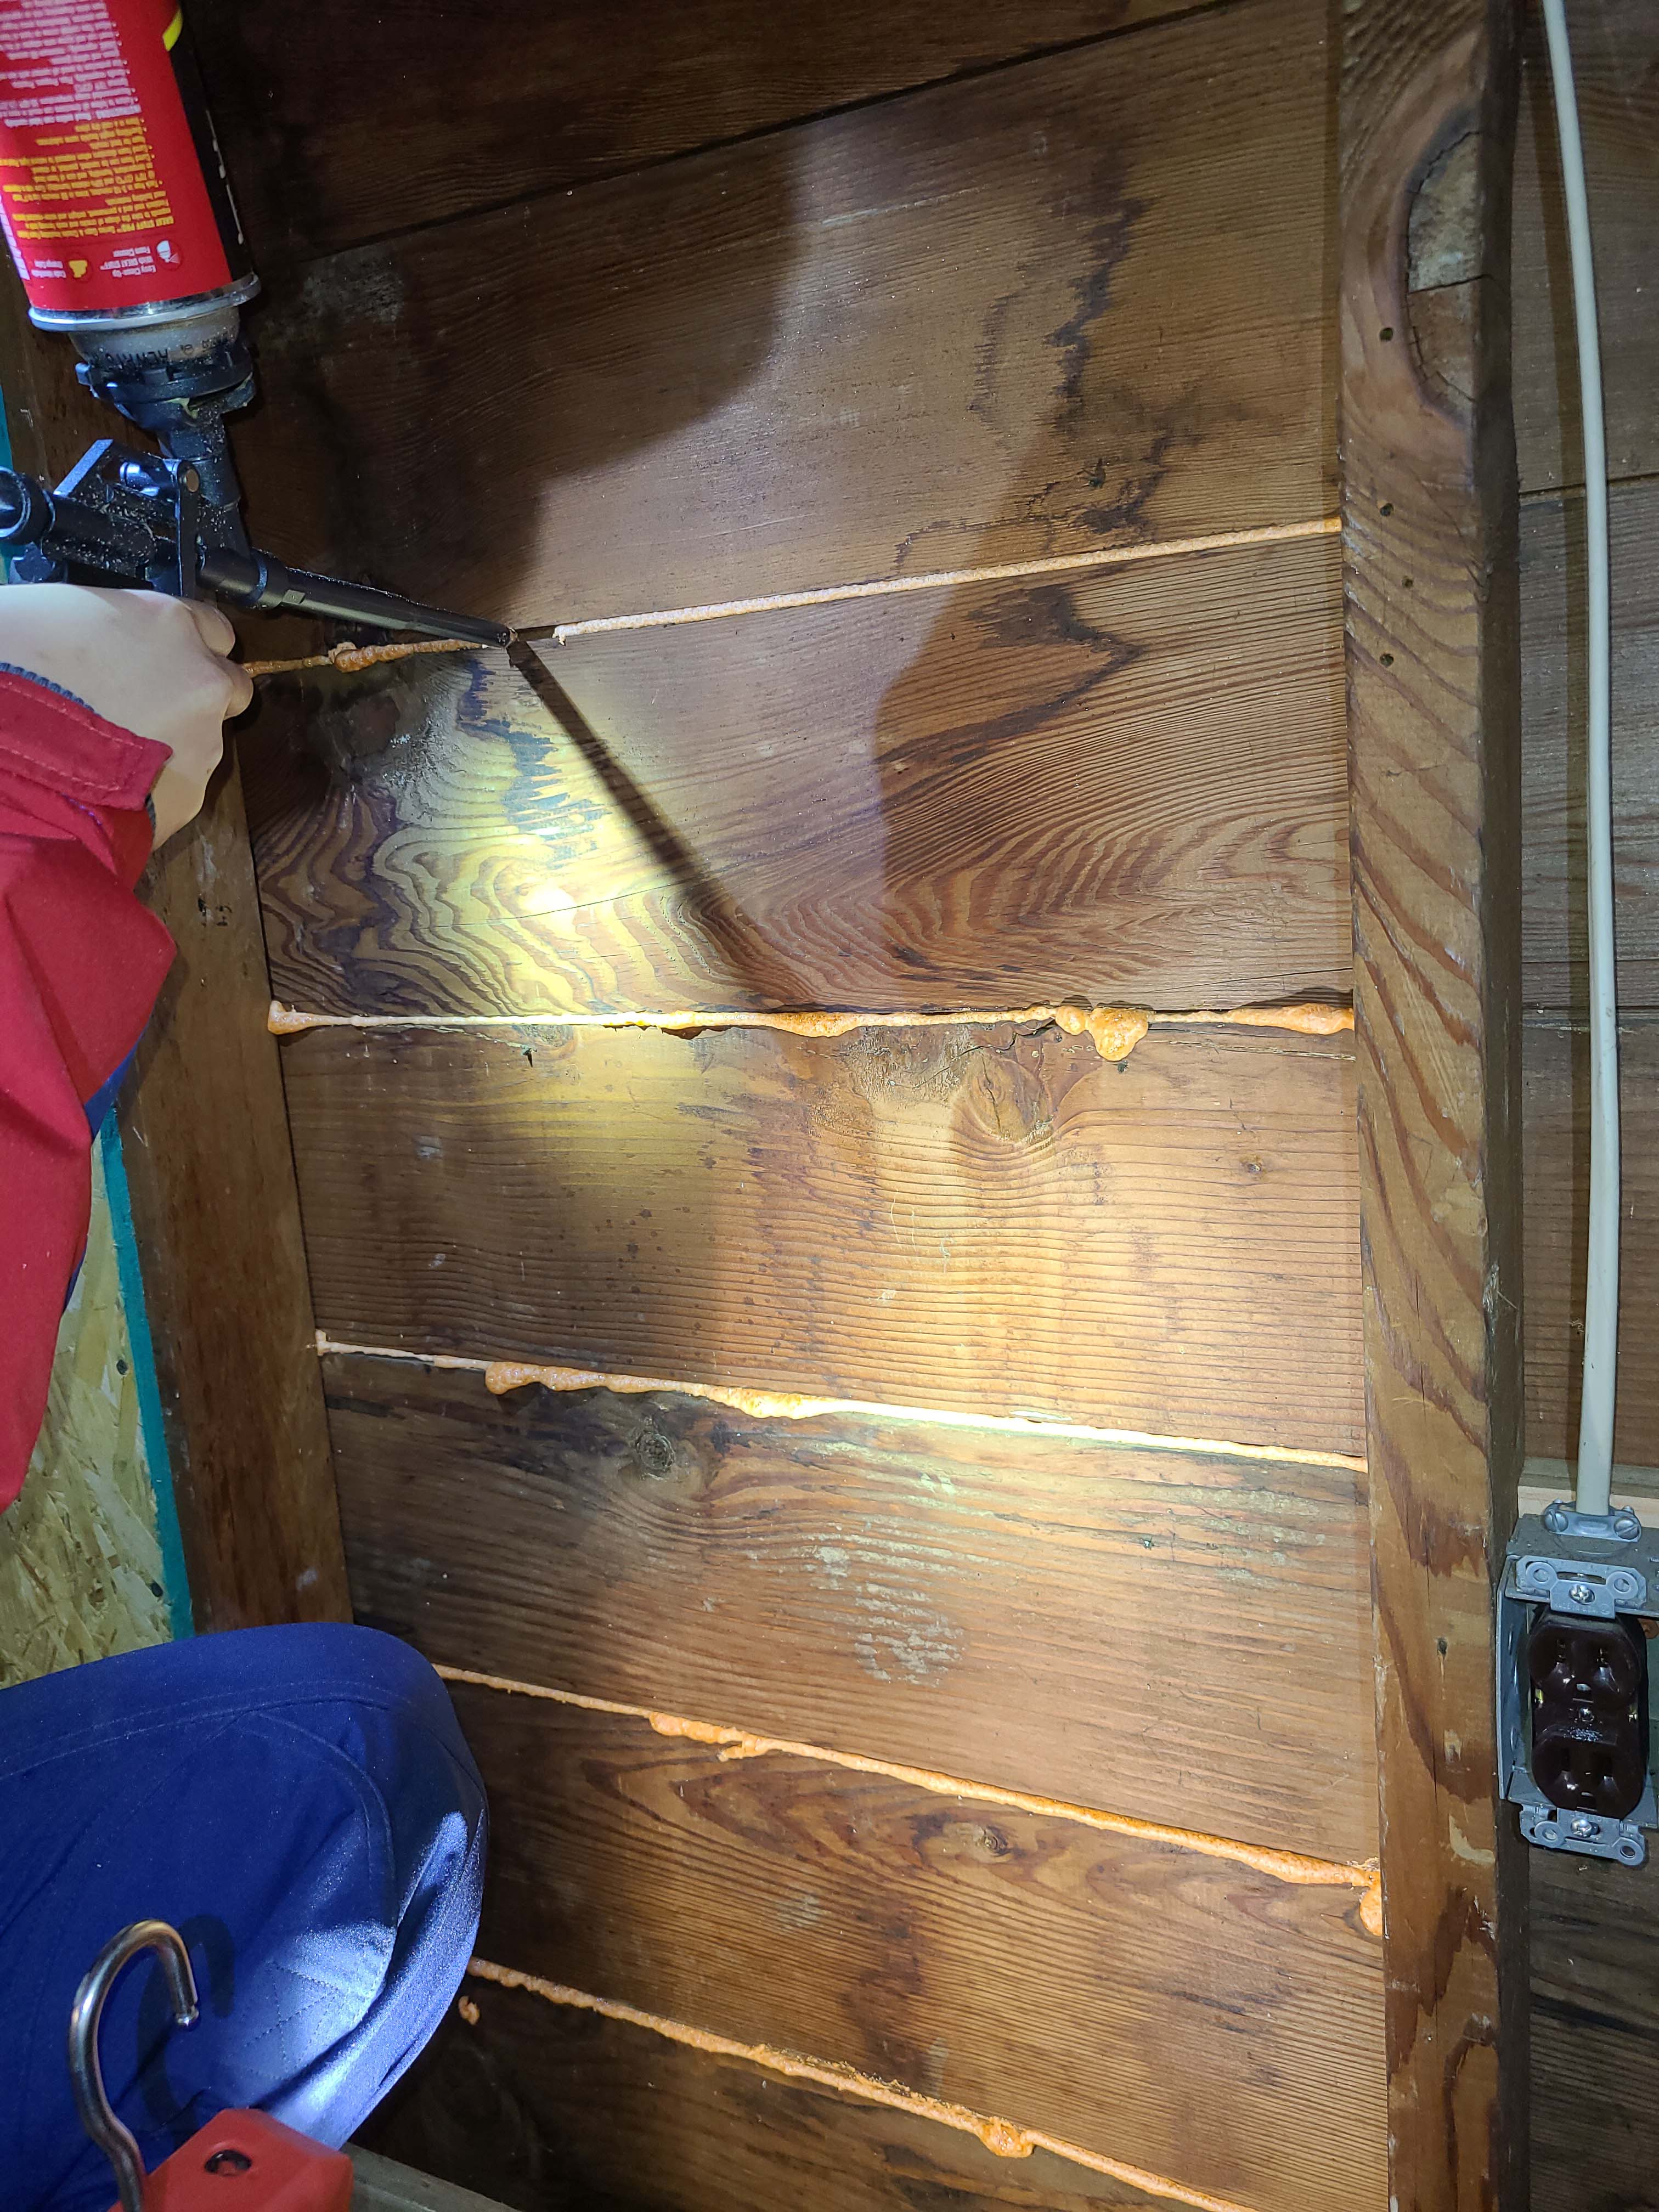
Right - Wood board sheathing seams are being sealed with low-expanding spray foam.
Image
Right – A flexible tape is used to air-seal around wiring holes in the coated sheathing.
Image
Right – A rigid corrugated rain screen product is installed shingle-fashion with overlapping edges behind rock veneer.
Image
Right – A rigid rain screen product completely covers the wall behind the cladding and window framing.
Image
Image
Right – All insulated sheathing boards are installed according to the manufacturer’s recommended fastening schedule and taping specifications
Image
Image
Right – Battens are installed above the cork insulation to provide a ventilating layer between the insulation and the roof sheathing and cladding.
Image

Right – Battens were installed above the cork insulation to provide a ventilating layer between the insulation and the roof sheathing on this “hot roof” design.
Image
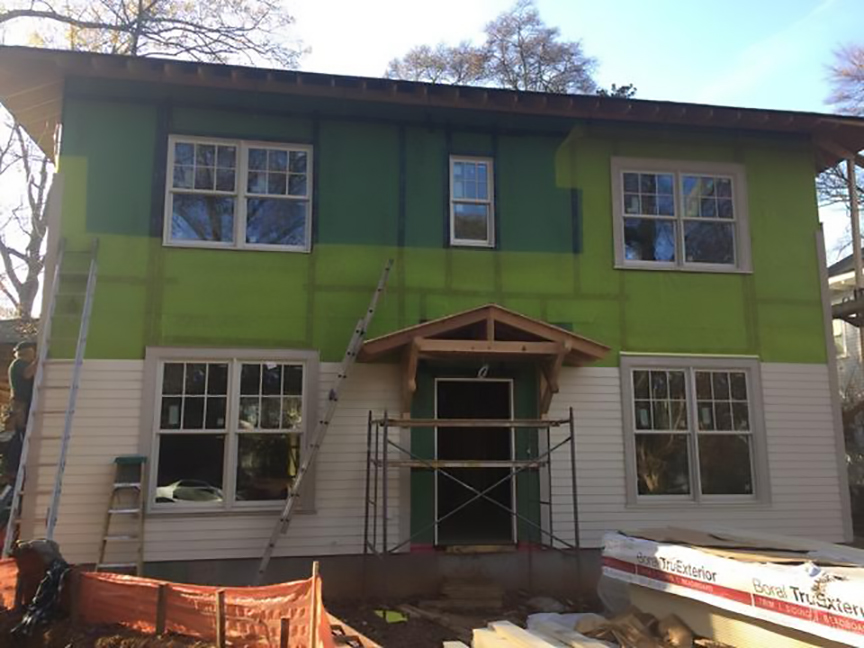
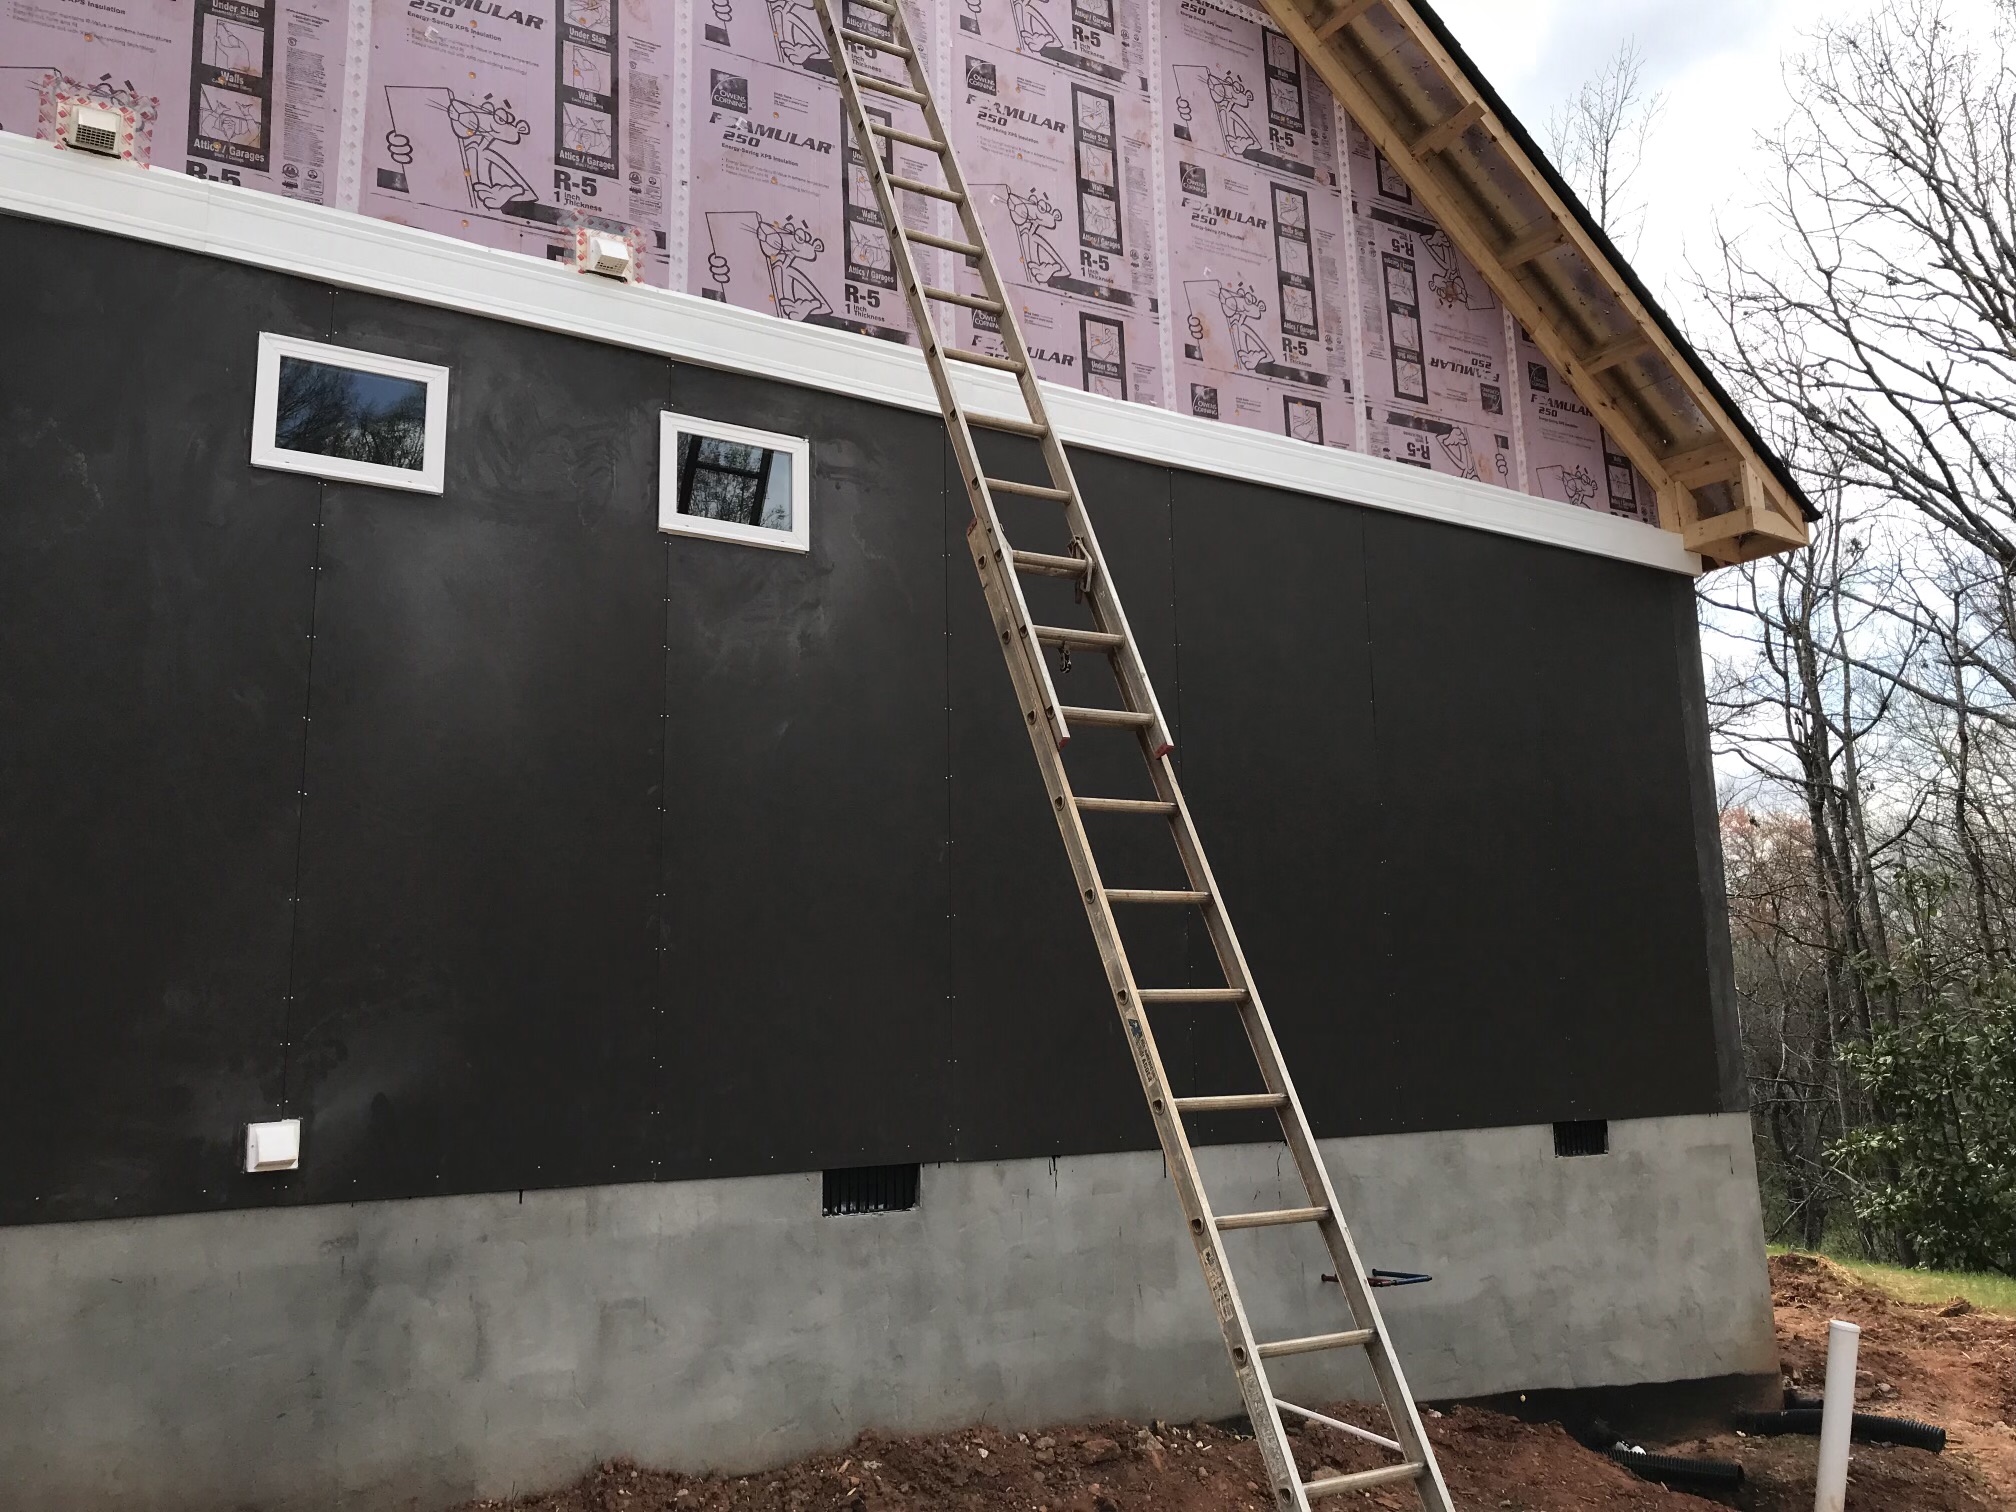
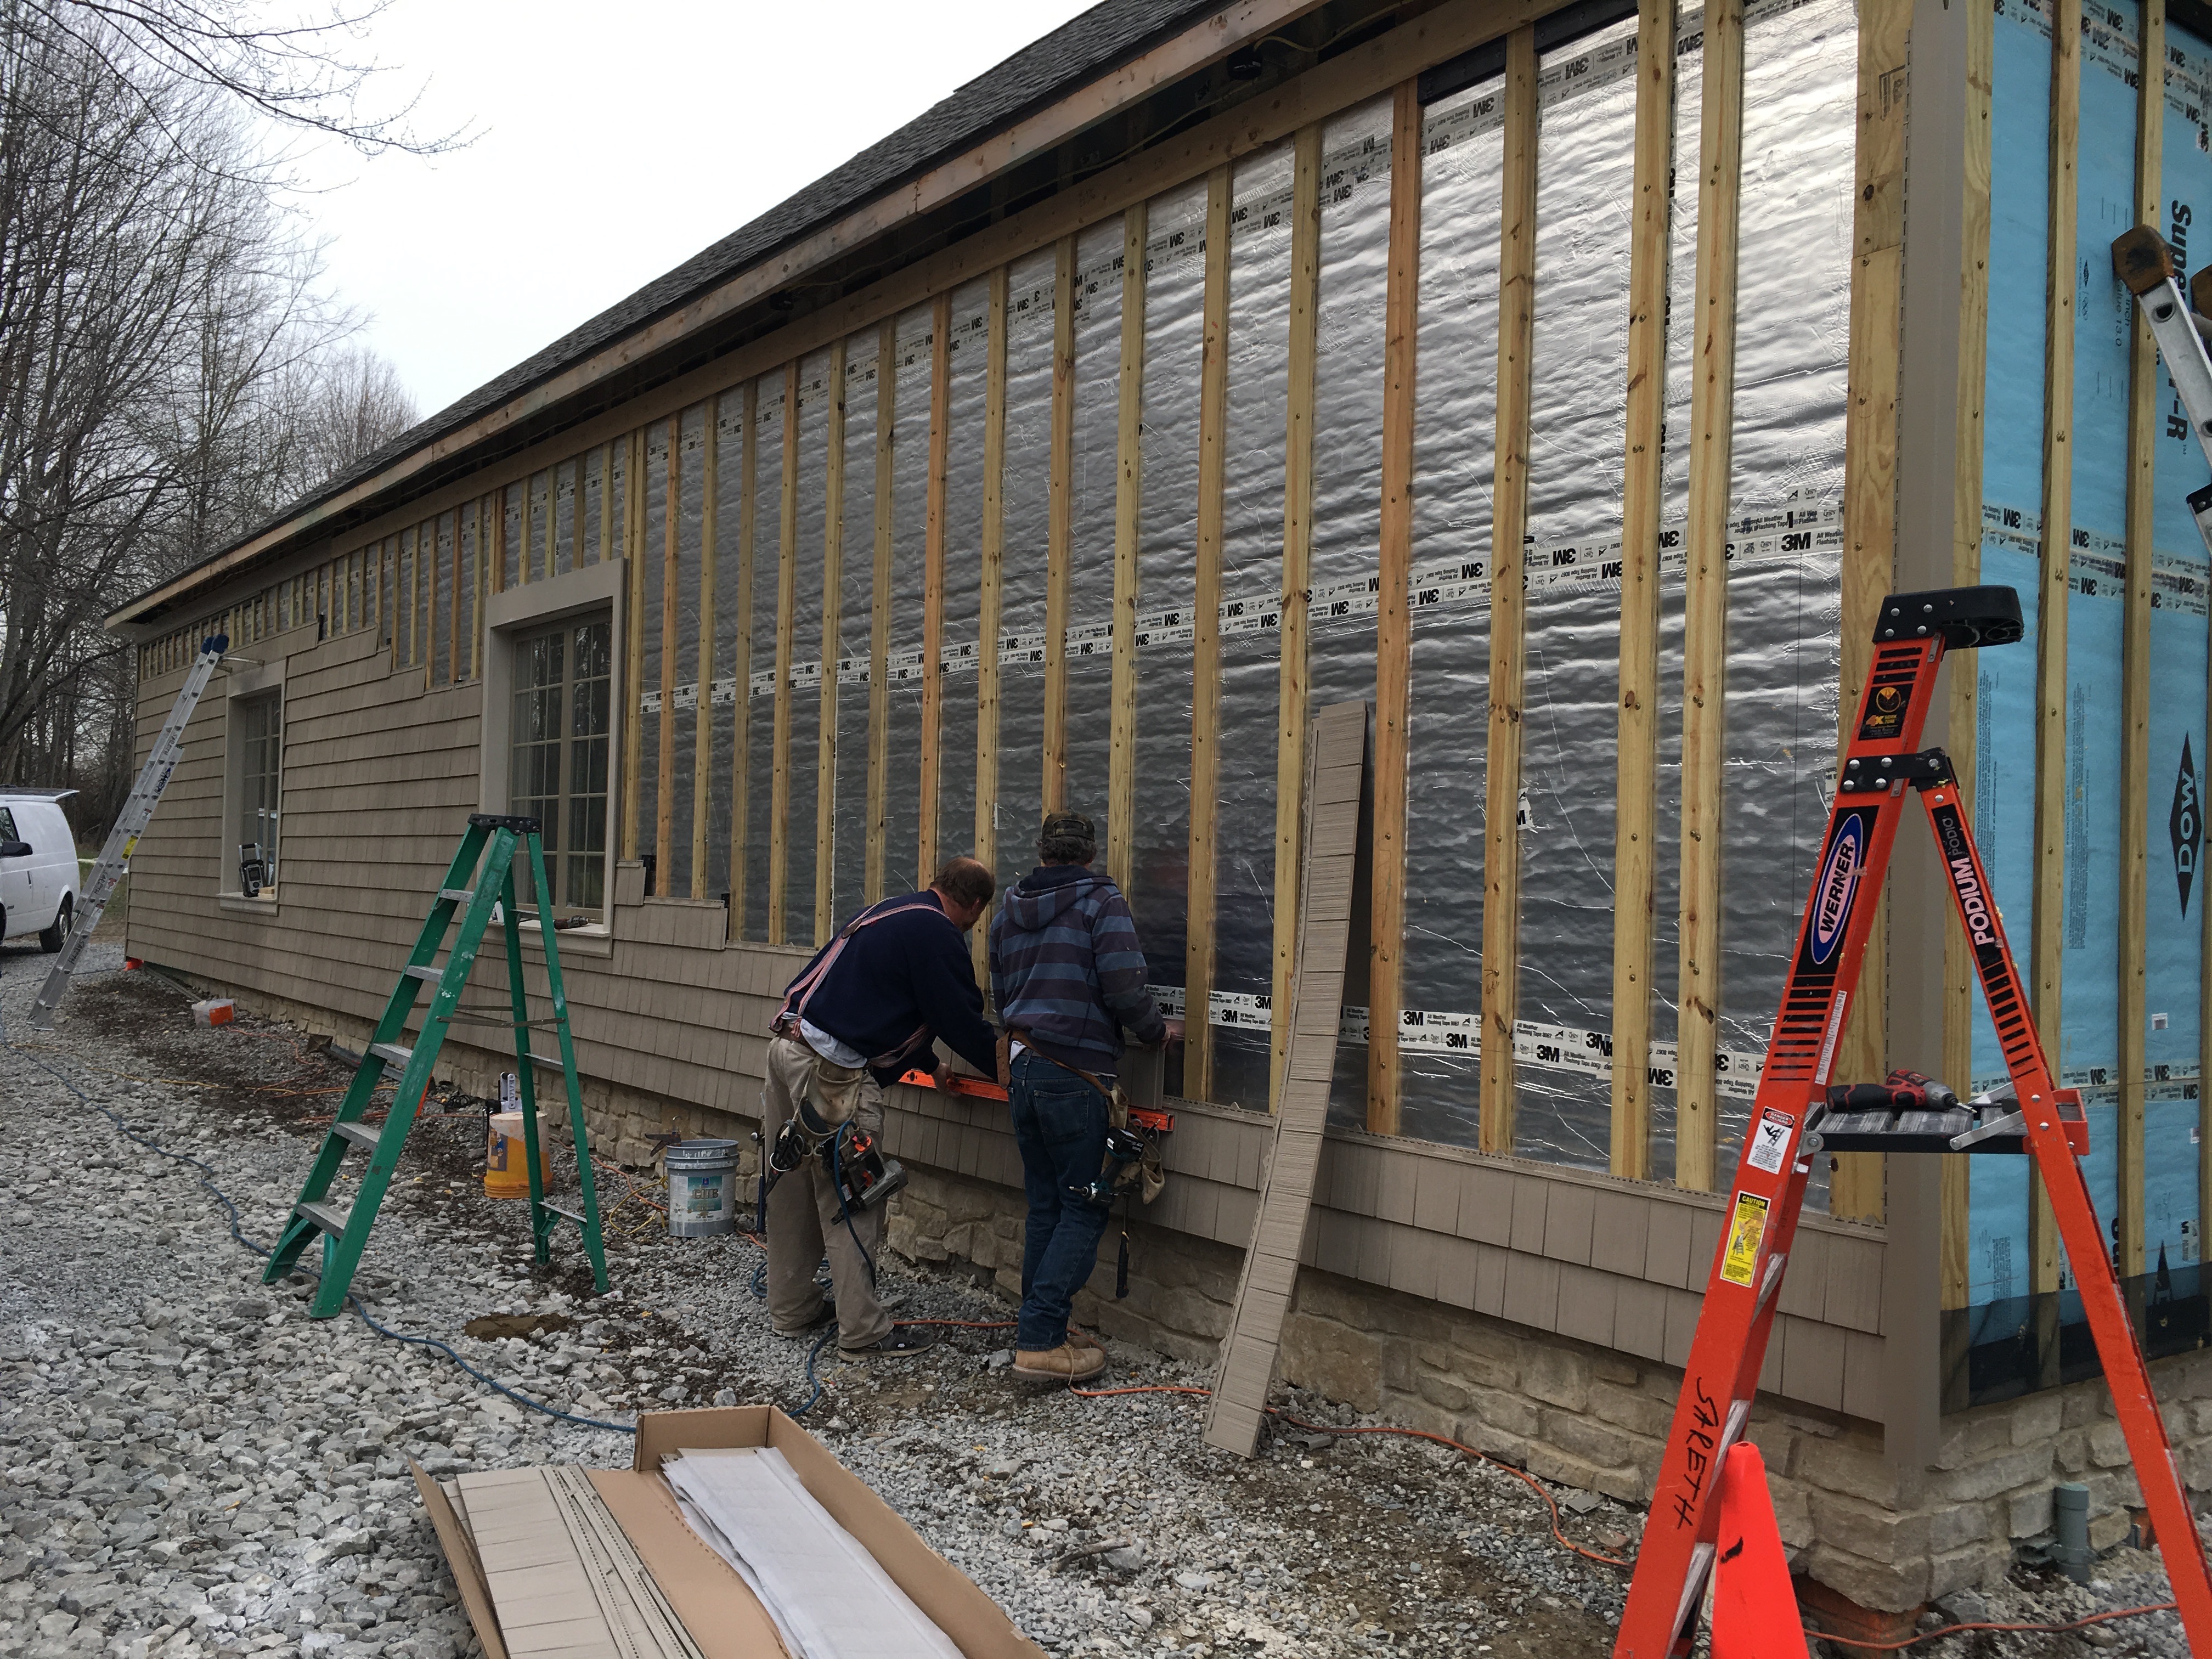
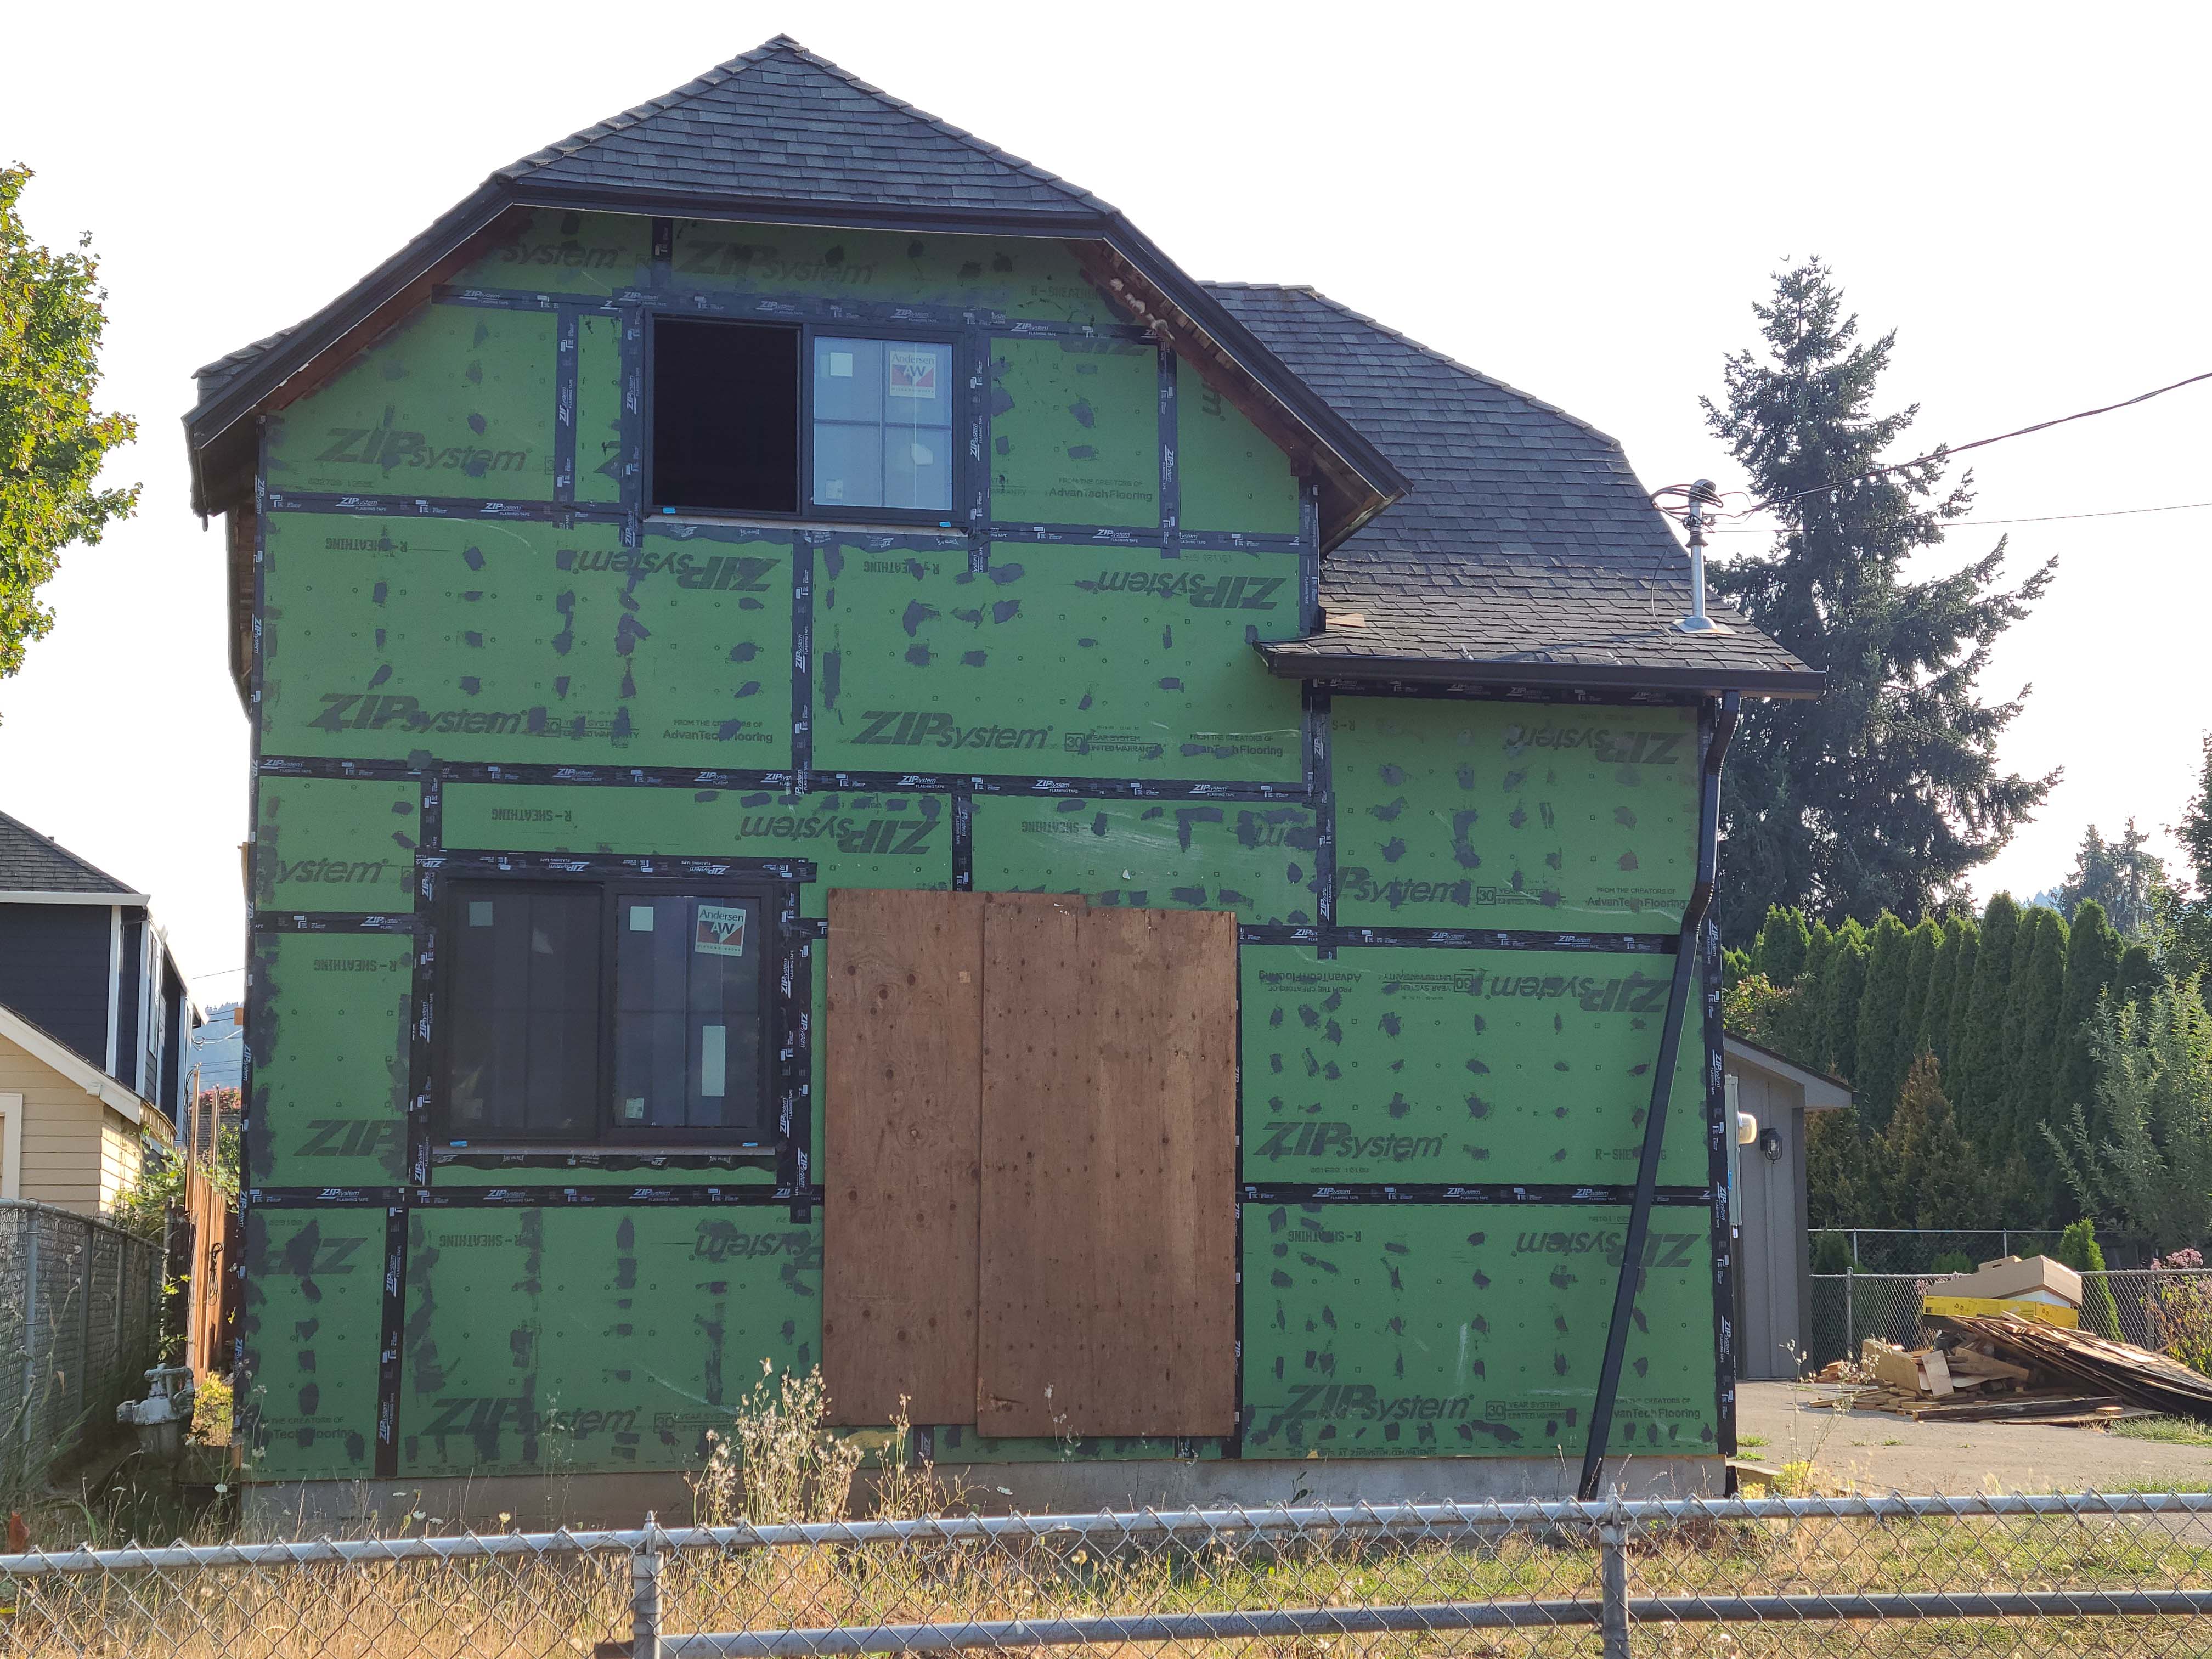
Right – Coated OSB provides a weather-resistant air barrier for this envelope of this home.
Image

Right – Coated OSB sheathing provides a continuous air and moisture barrier around the home.
Image
Right – Coated sheathing is taped at all seams to serve as an exterior air barrier on the walls.
Image

Image
Image
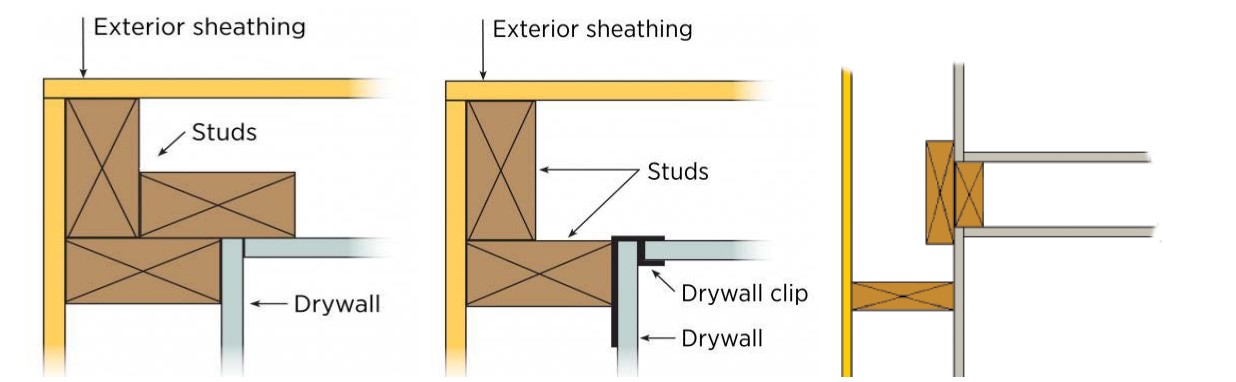
Right – Foam gasket is installed on the surface of the framing before plywood sheathing is installed on these factory-constructed wall panels.
Image
Right – Furring strips provide a drainage and ventilation gap between the siding and the cork insulation.
Image
Right – Furring strips were installed to provide a 3/8-inch drainage plane over the rigid foam and under the fiber cement lap siding.
Image
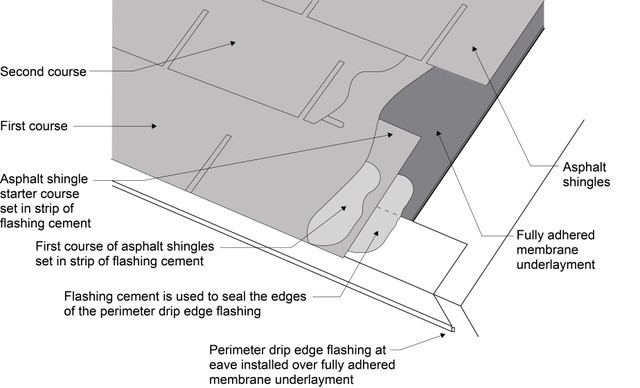
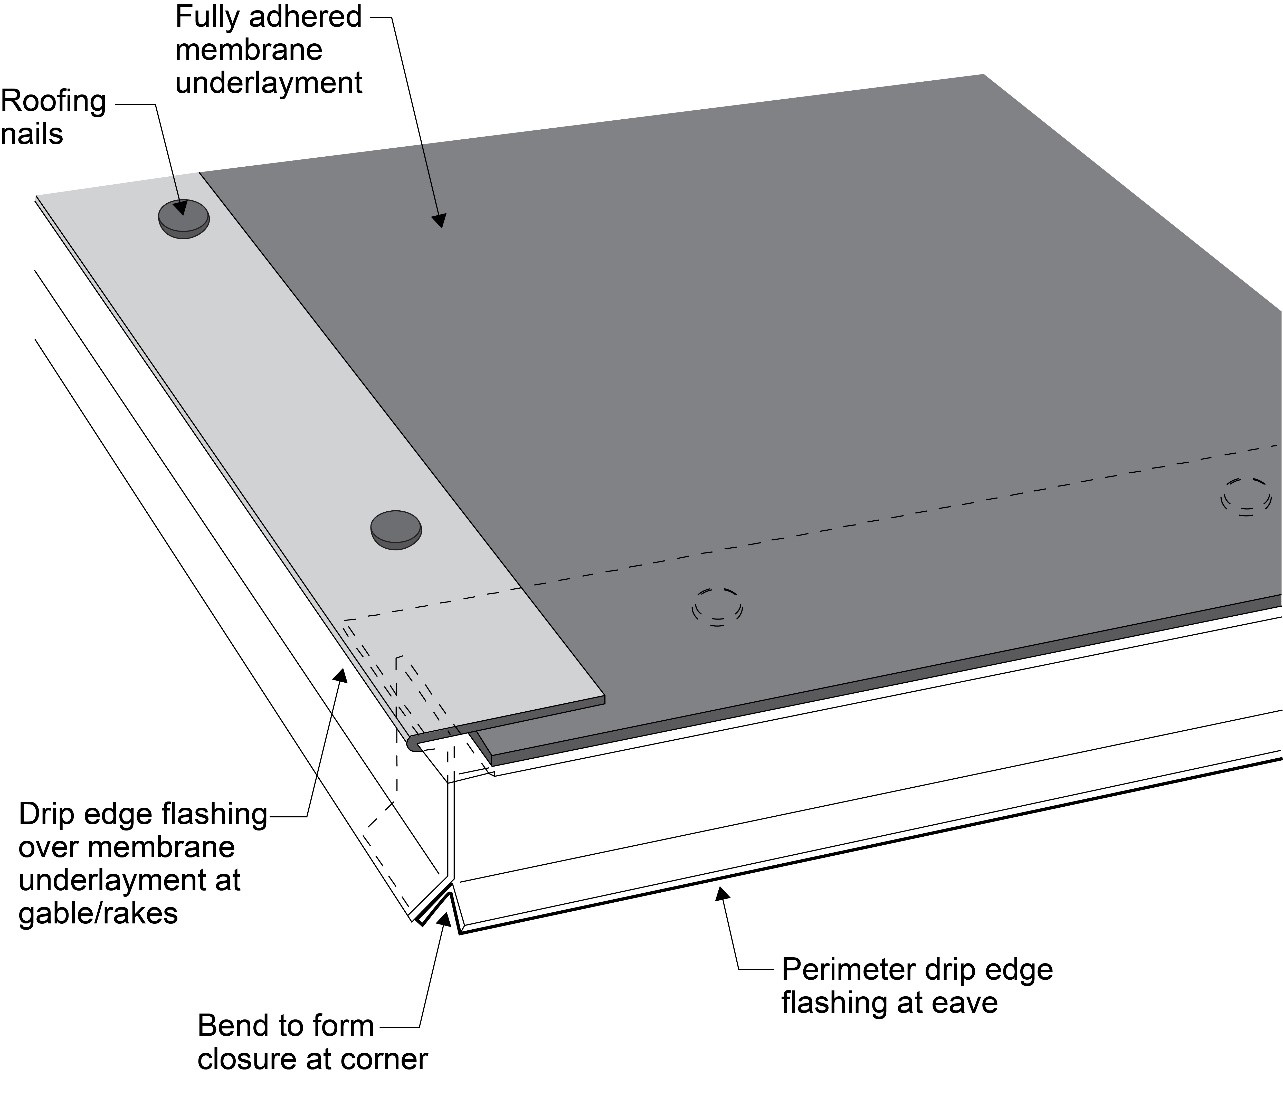
Right – If drip edge flashing is installed over fully adhered roof membrane at eaves, use flashing cement to seal the upper edge of the flashing
Image
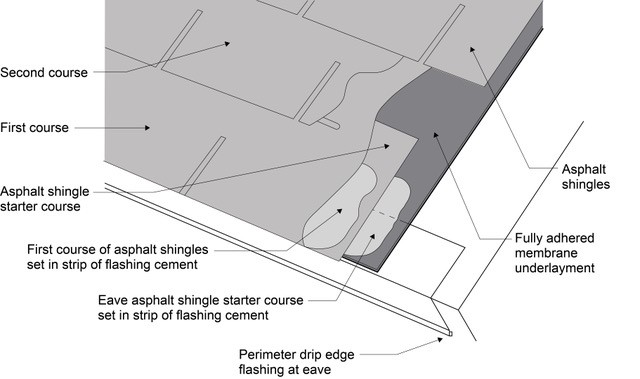
Right – Install asphalt shingles over a starter strip set in an 8-inch strip of flashing cement
Image
Image
Image
Image