Showing results 51 - 77 of 77
Image
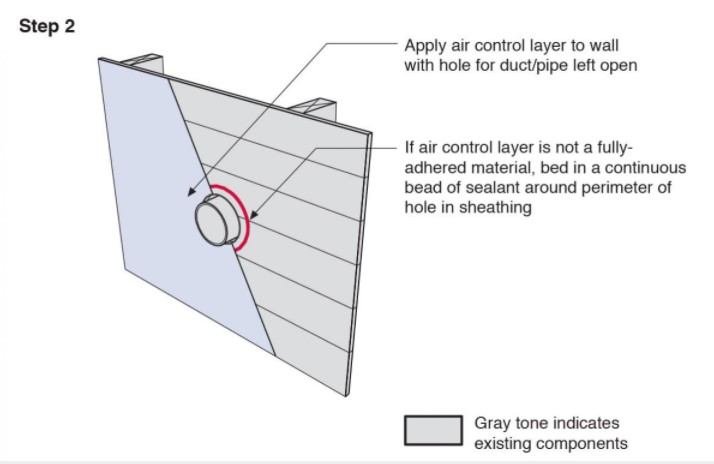
Step 2. Install a continuous air and water control layer over the existing wall sheathing.
Image
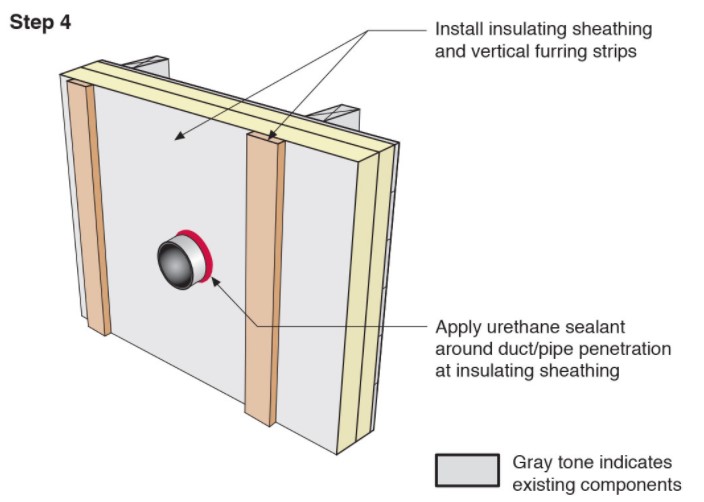
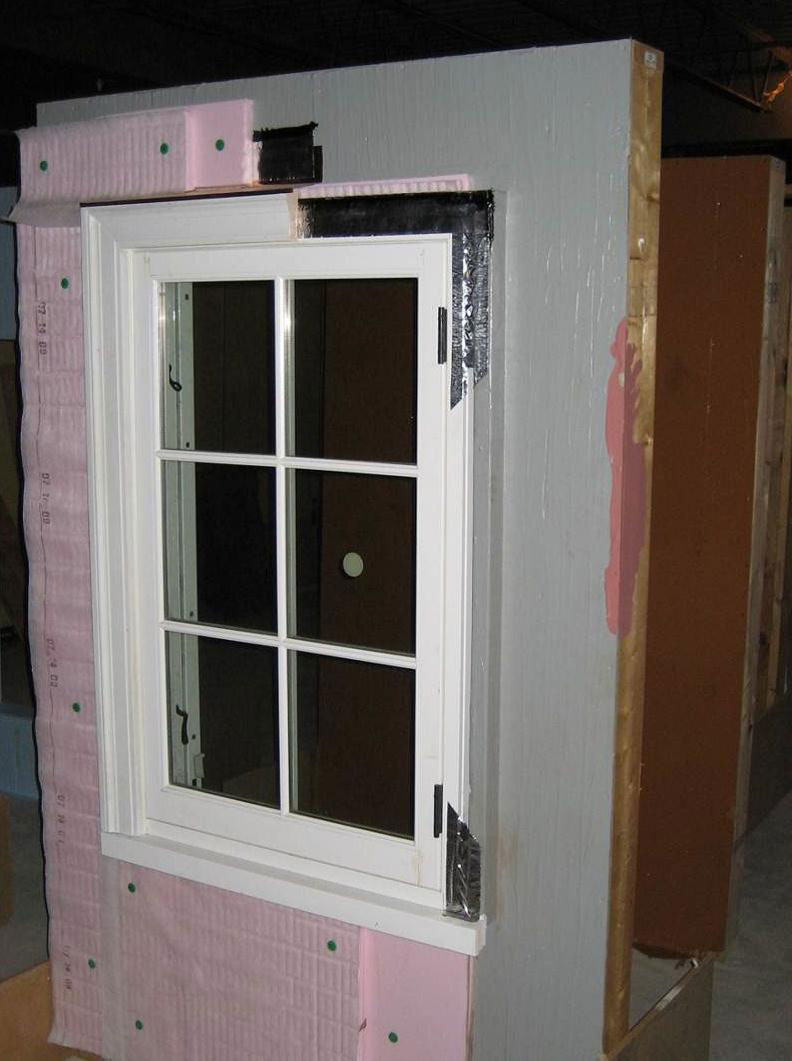
Step 4. Install insulating sheathing and vertical furring strips on the retrofitted exterior wall; seal around pipe or duct with urethane sealant.
Image
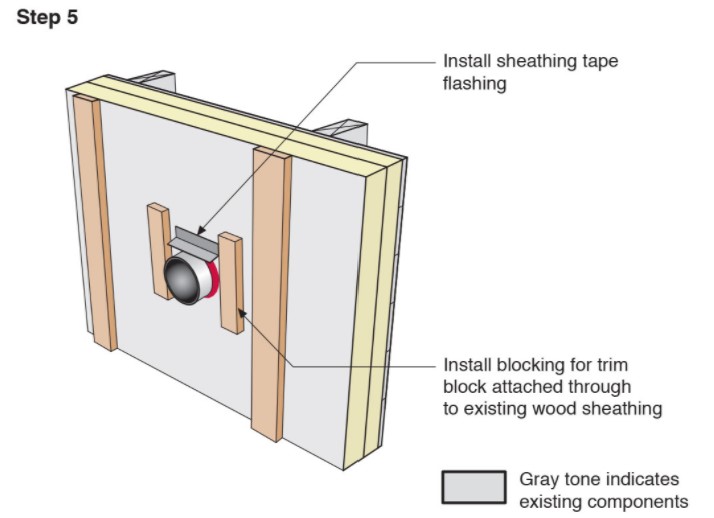
Step 5. Install sheathing tape flashing over the duct or pipe and wood blocking on either side for later attachment of trim.
Image
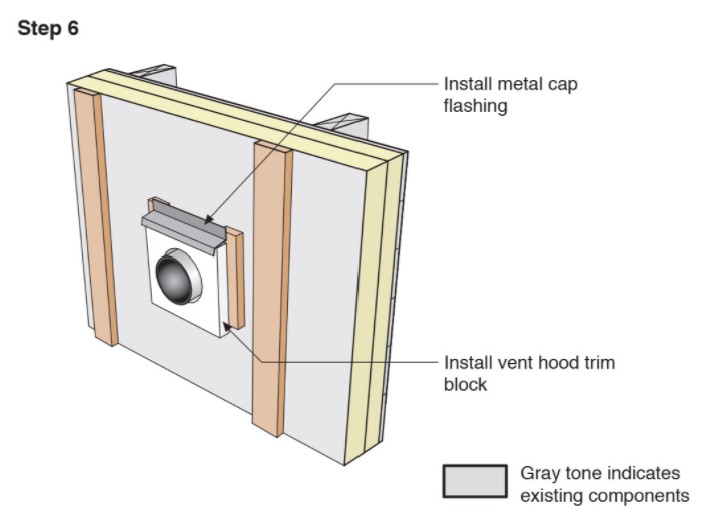
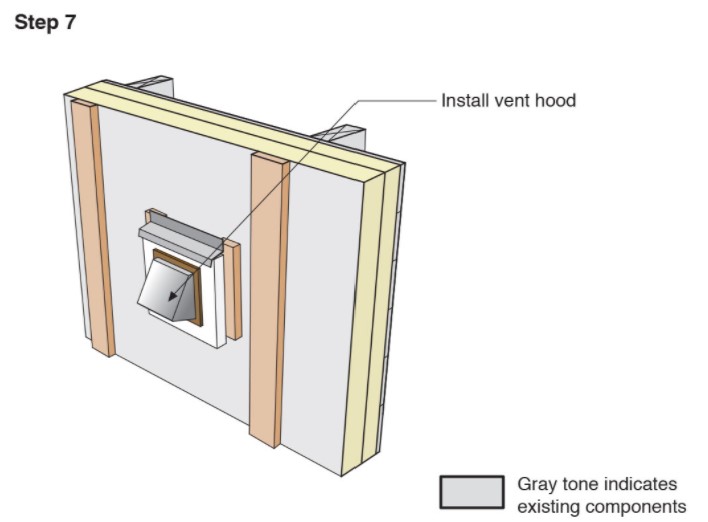
Step 6. Install vent hood trim block, metal cap flashing; seal top edge of flashing with sheathing tape.
Image
Image
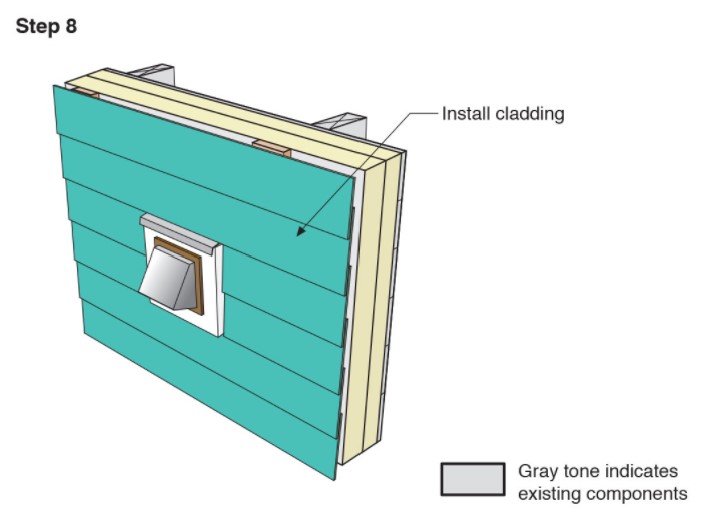
Step 8. Attach the new cladding to the furring strips over the rigid foam for the exterior wall retrofit.
Image
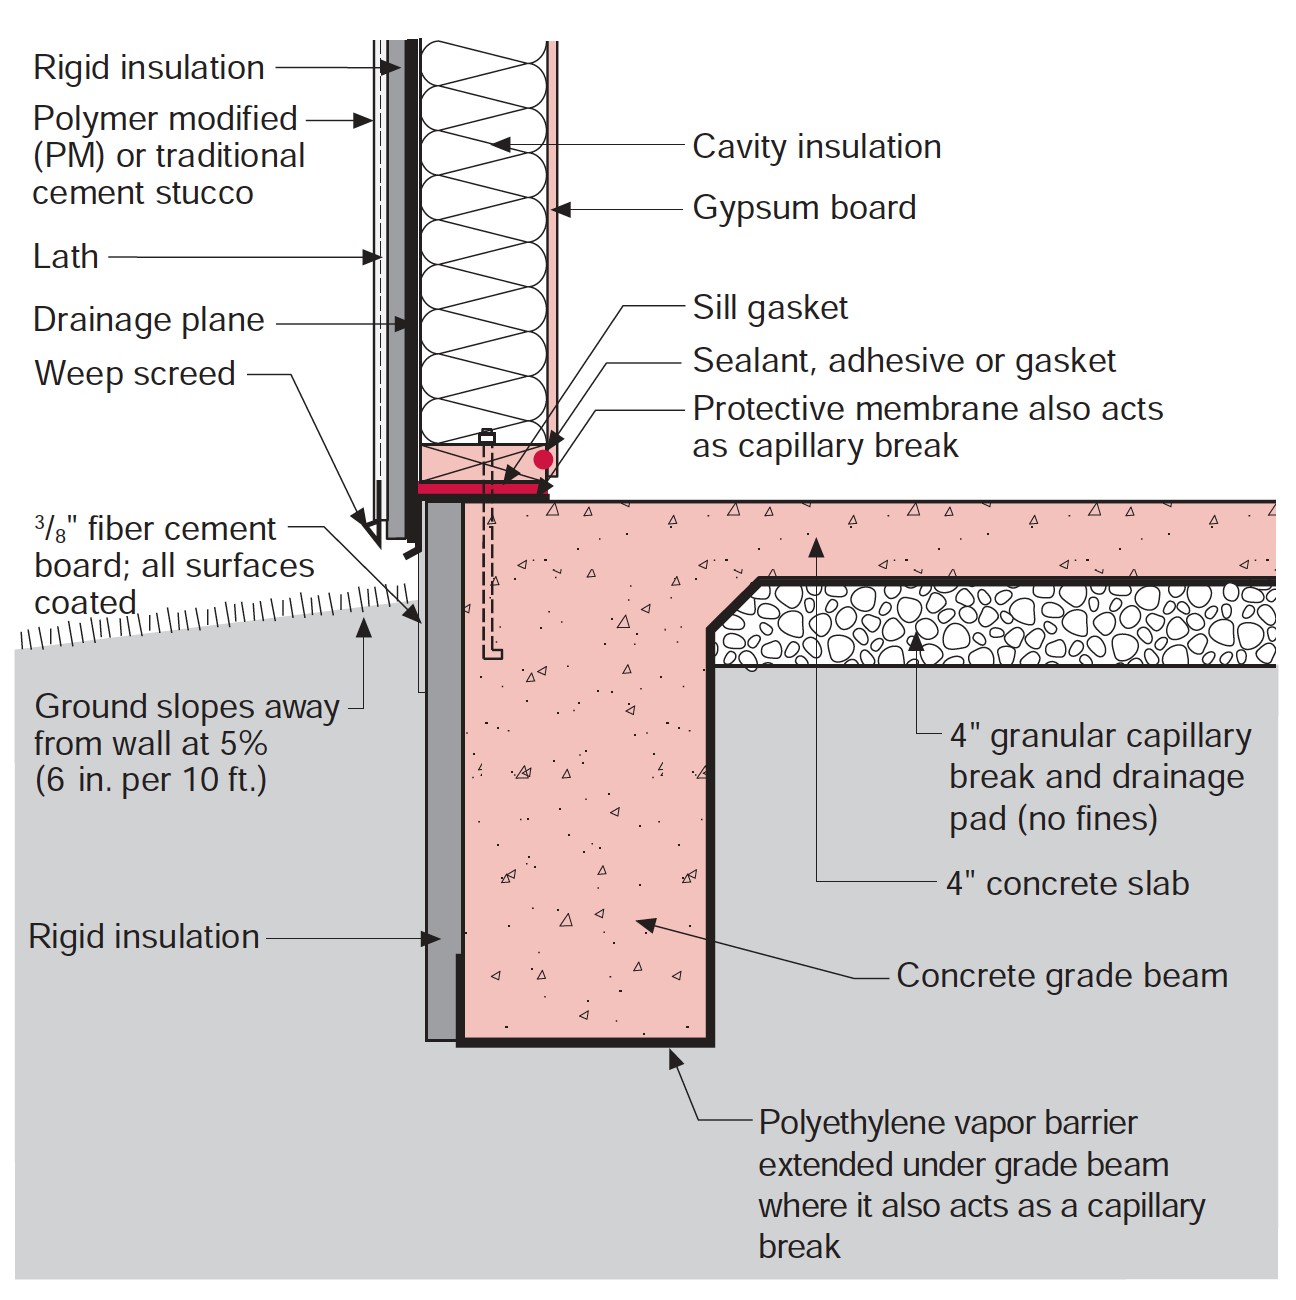
Stucco is installed over rigid insulation, which is installed over a drainage plane consisting of a drainage gap and building wrap layer over the sheathing
Image
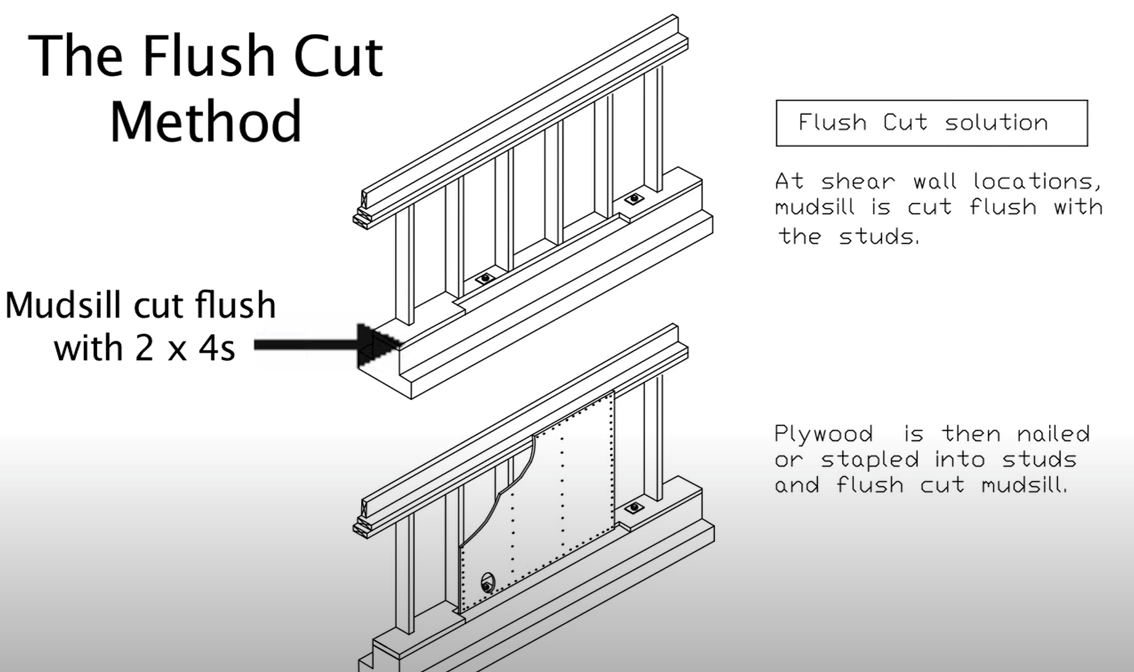
The flush cut method for seismic retrofit bracing of a cripple wall allows the plywood sheathing to be attached directly to both the cripple studs and the notched section of the mudsill
Image
Image
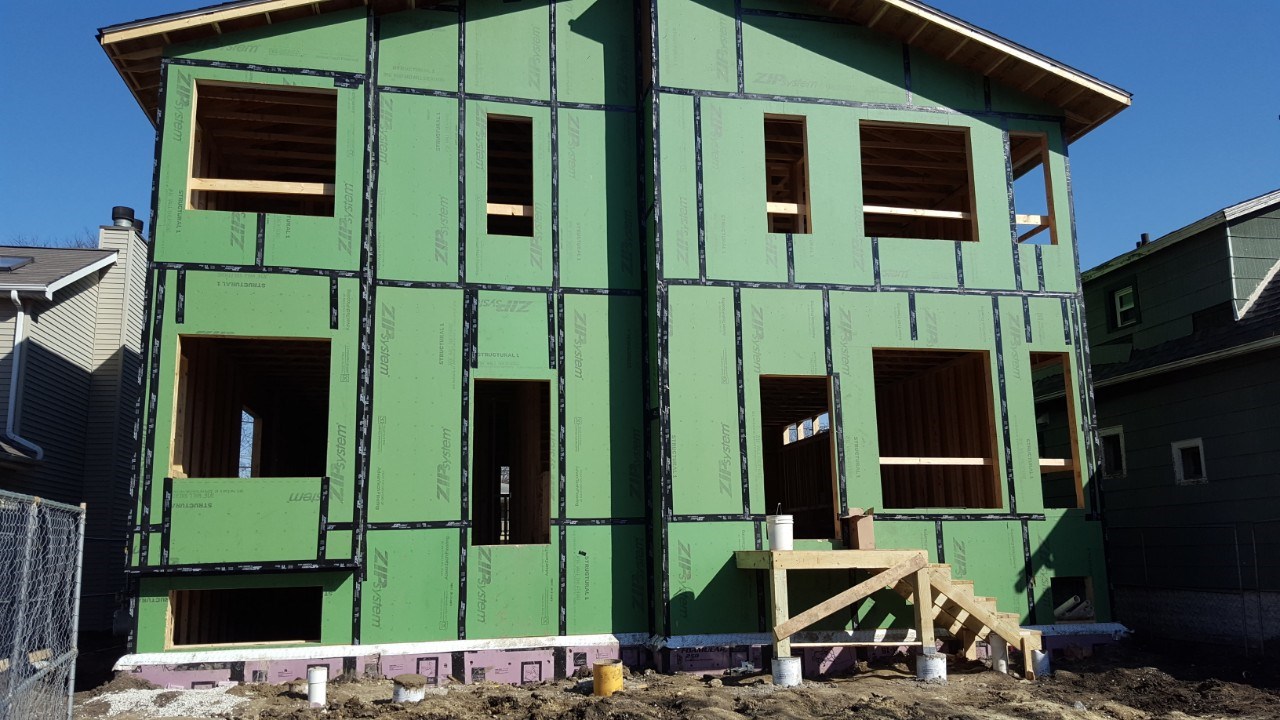
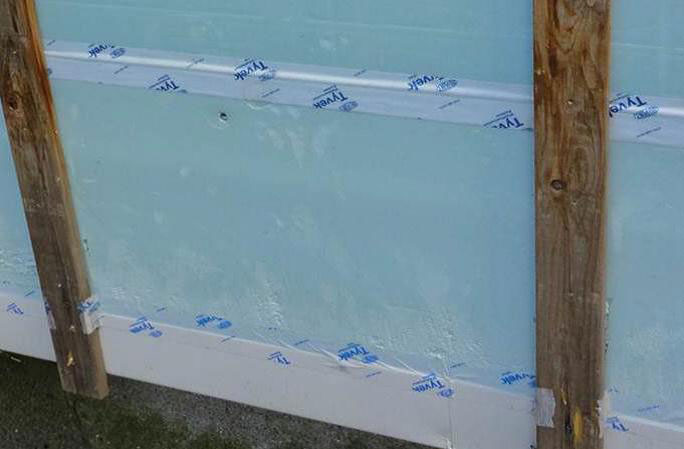
The OSB sheathing is coated and taped at the seams to provide a weather-resistant barrier that can take the place of house wrap.
Image
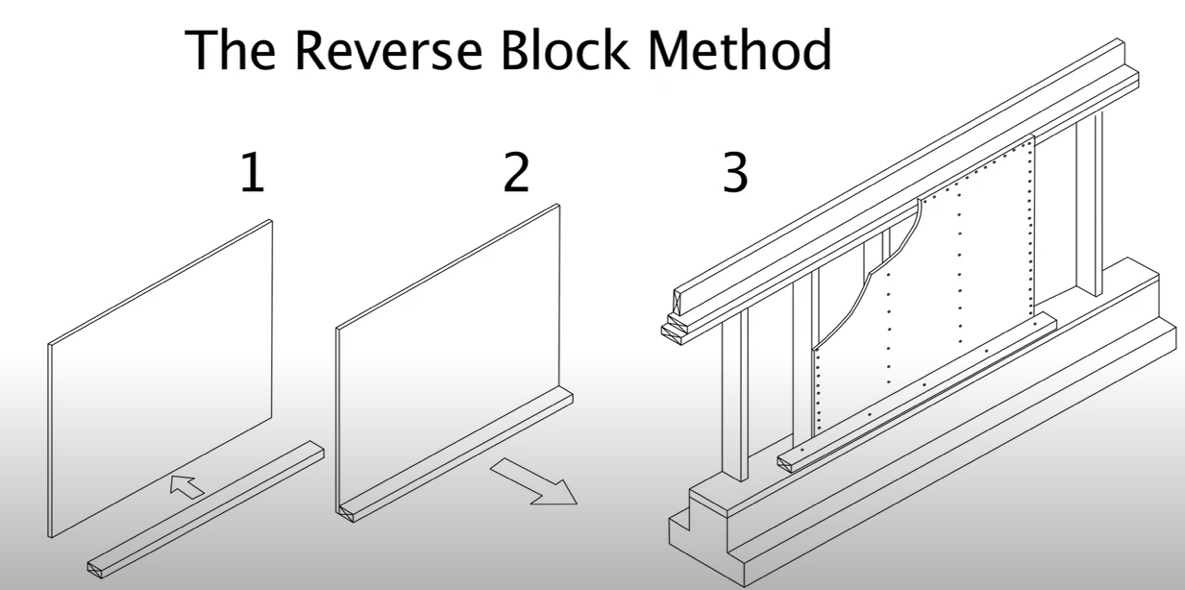
The reverse block method for seismic retrofit bracing of a cripple wall uses a 2x4 attached to the sill plate to provide a means to attach the plywood cripple wall sheathing to the sill plate
Image
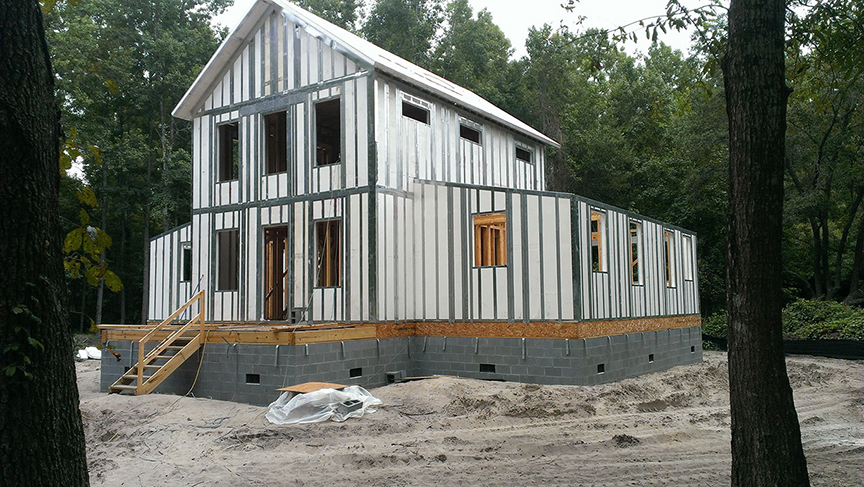
The walls of this mixed-humid location home are constructed with moisture-resistant steel-framed expanded polystyrene R-34 wall panels that are designed to withstand winds up to 200 mph and level D seismic forces.
Image
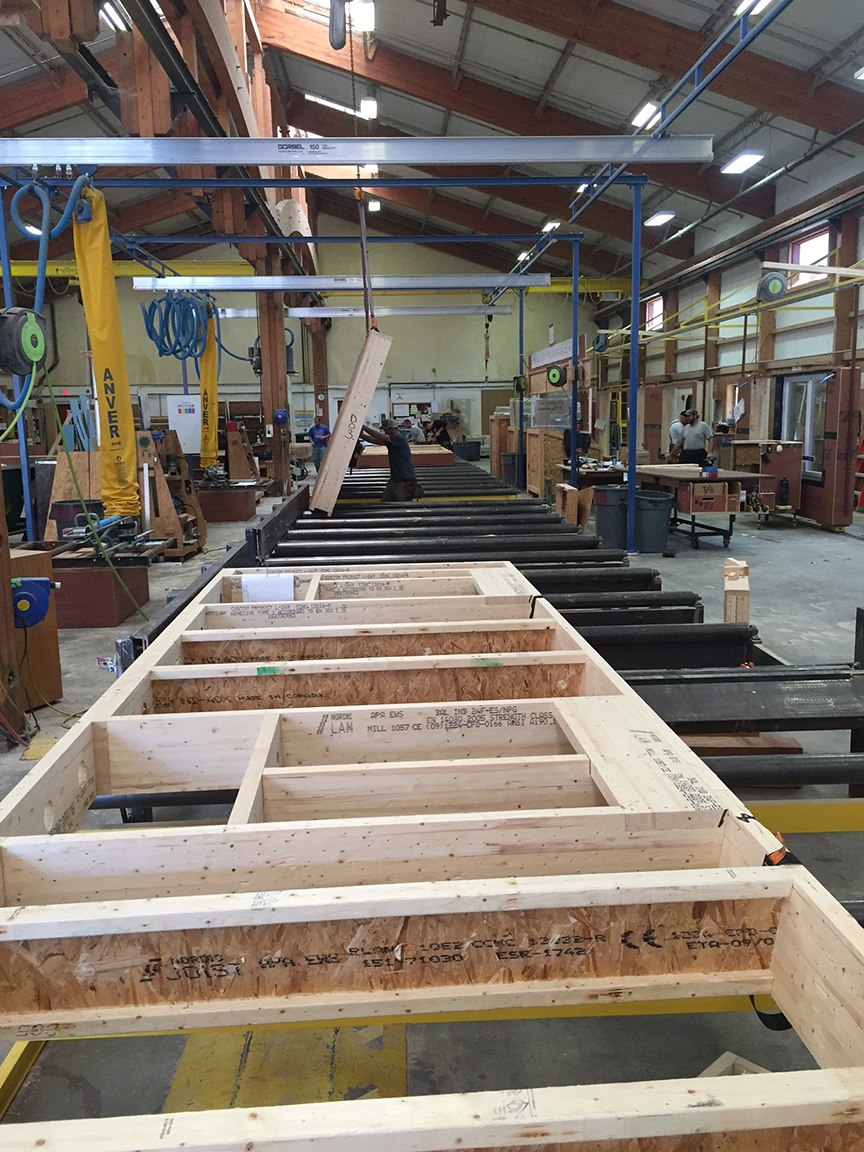
These factory-built walls consist of 9.5-inch I-studs sheathed with coated OSB, faced with OSB, and dense-packed with cellulose; a second interior surface of drywall is added to provide a 1.5-inch cavity for electrical wiring.
Image
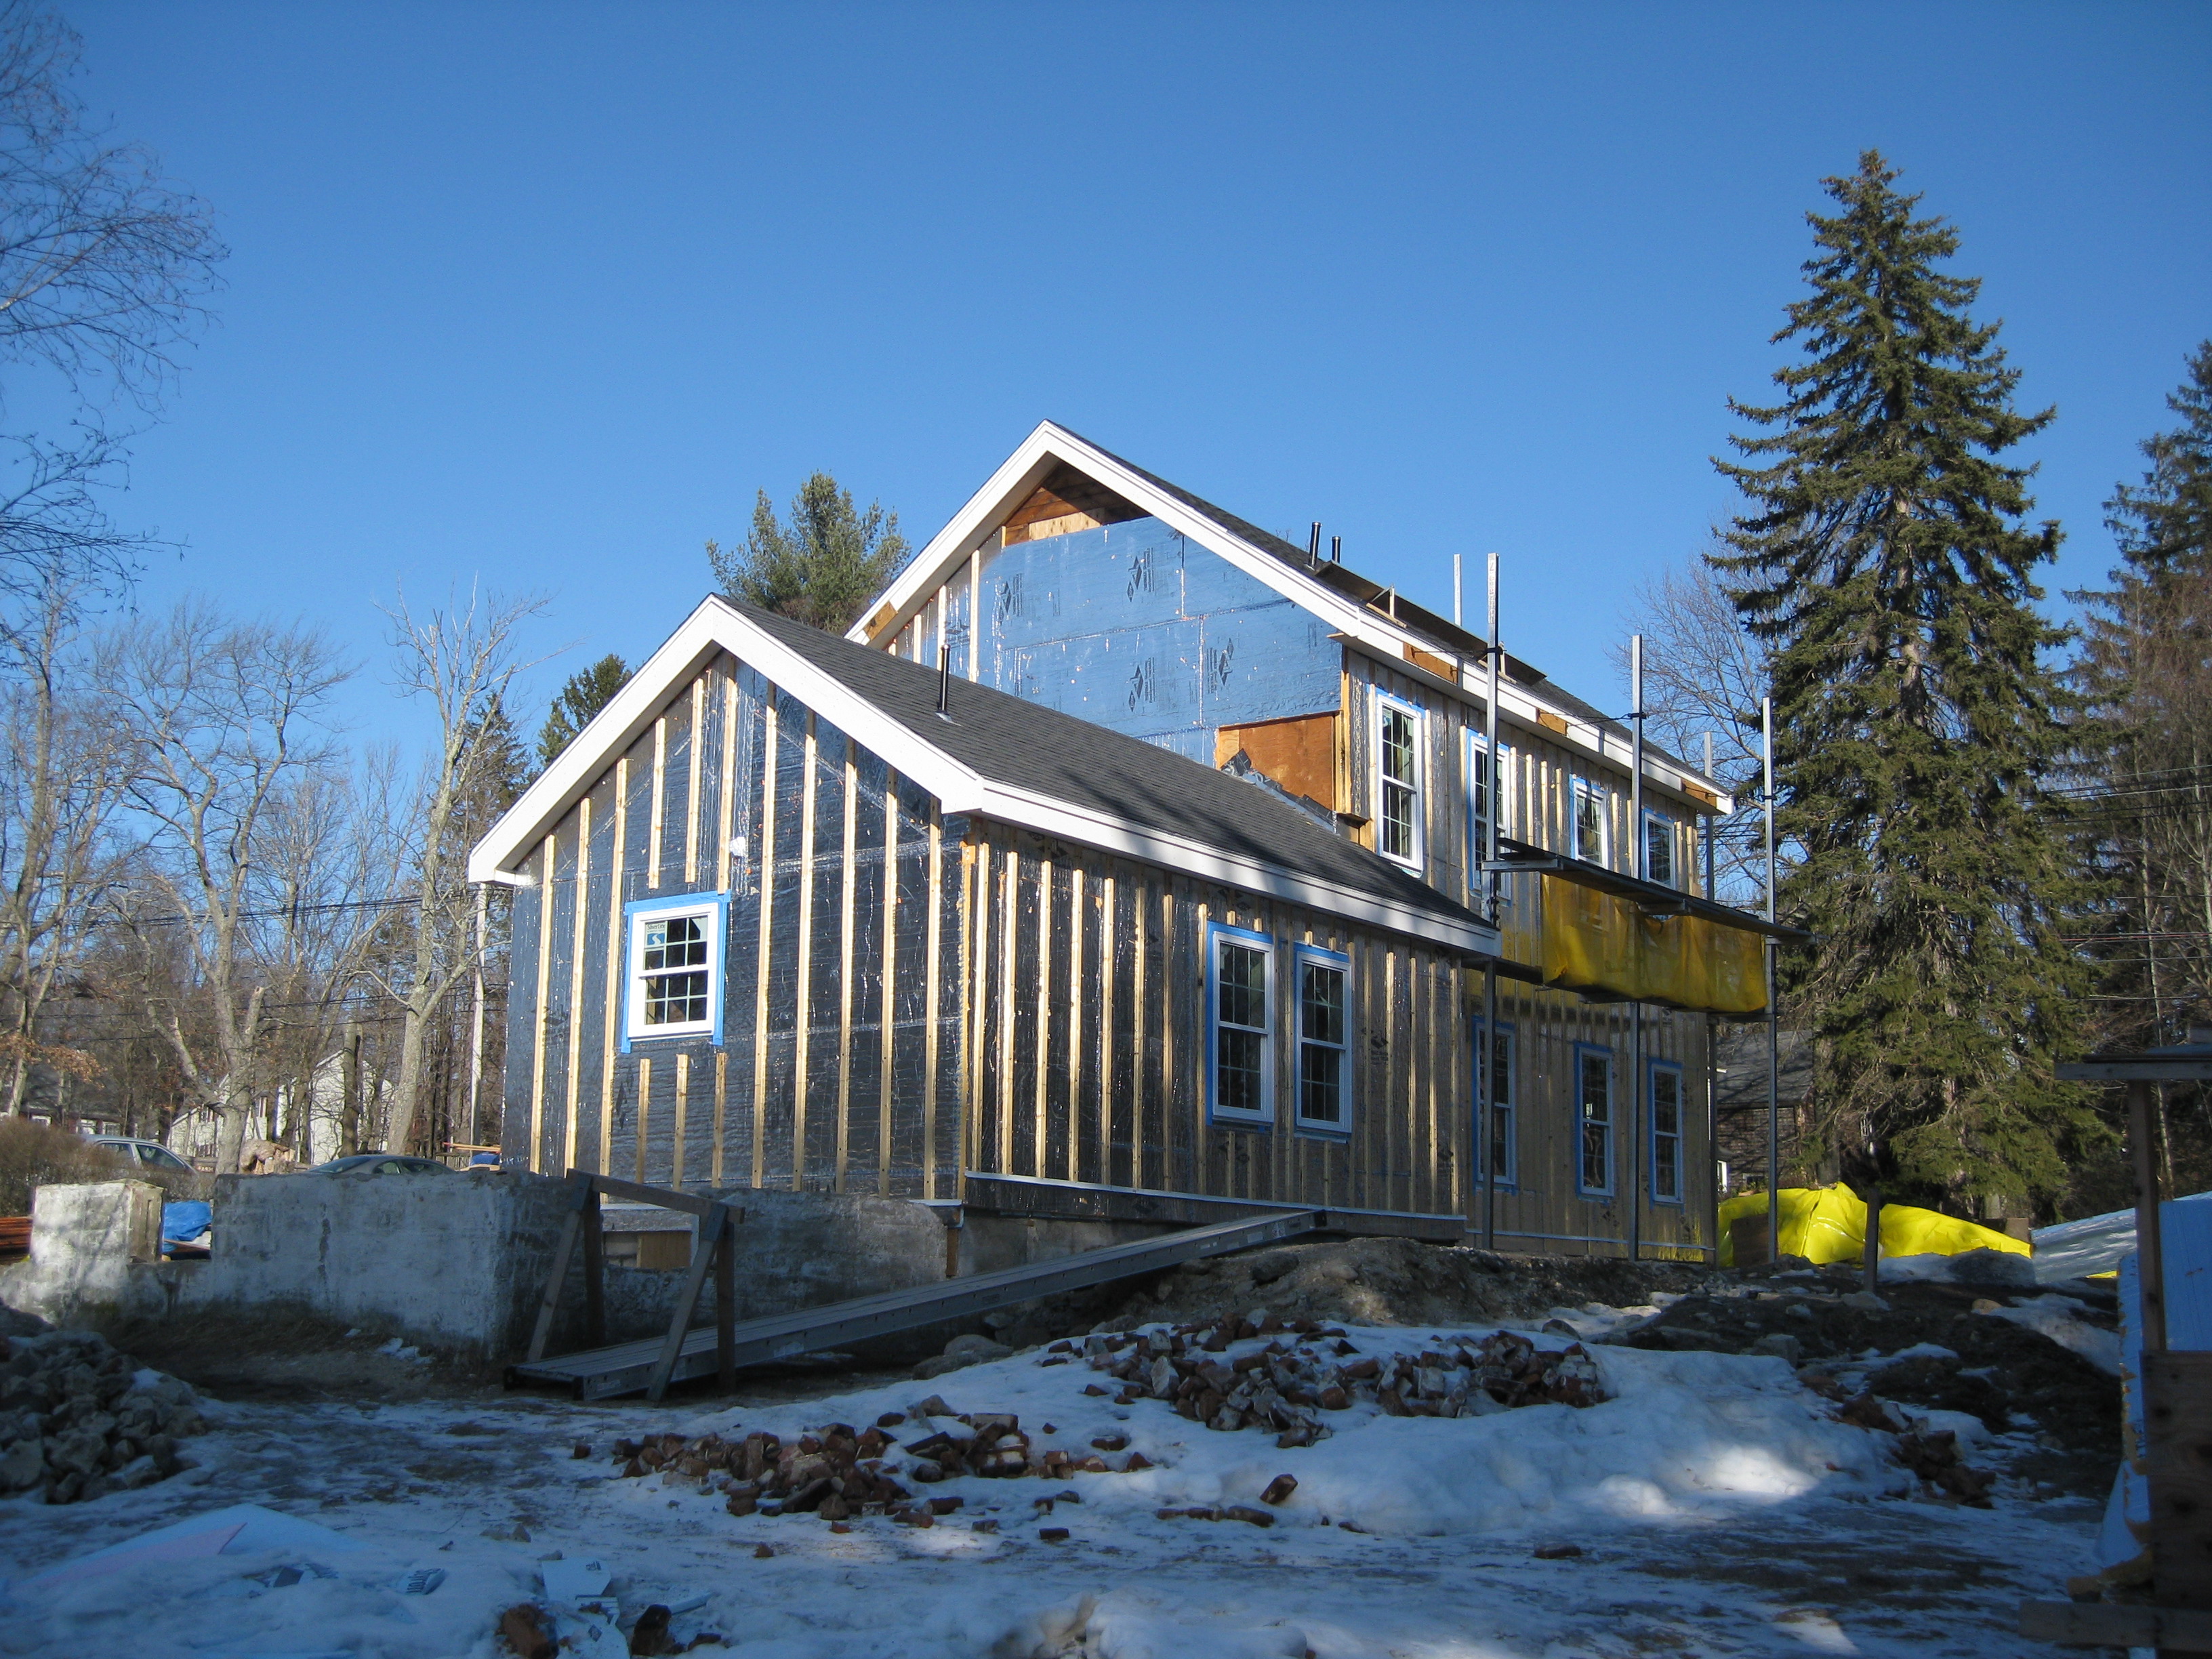
This farmhouse was retrofit by removing the existing siding and adding taped insulated sheathing and battens before installing new siding
Image
Two layers of XPS are installed with staggered seams over a liquid-applied membrane on the structural sheathing
Image
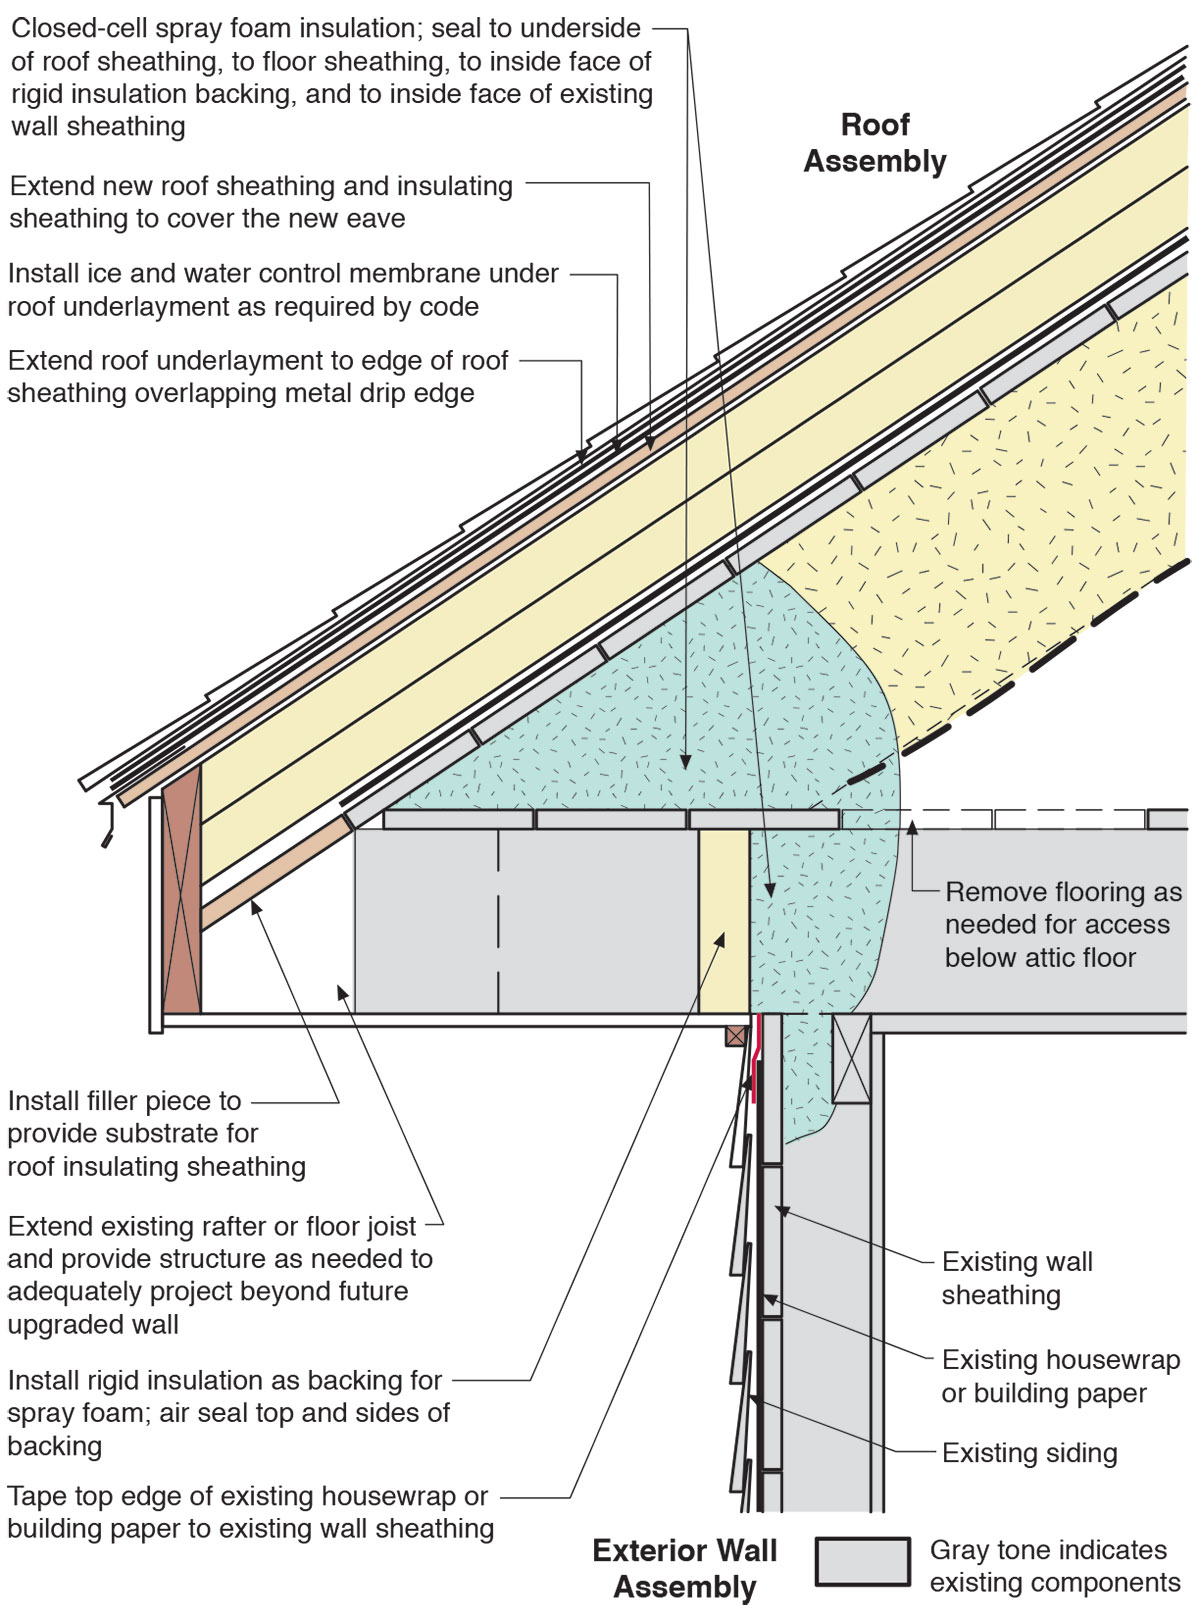
Unvented roof assembly at eave retrofitted with rigid foam, spray foam, and taped top edge of existing house wrap or building paper
Image
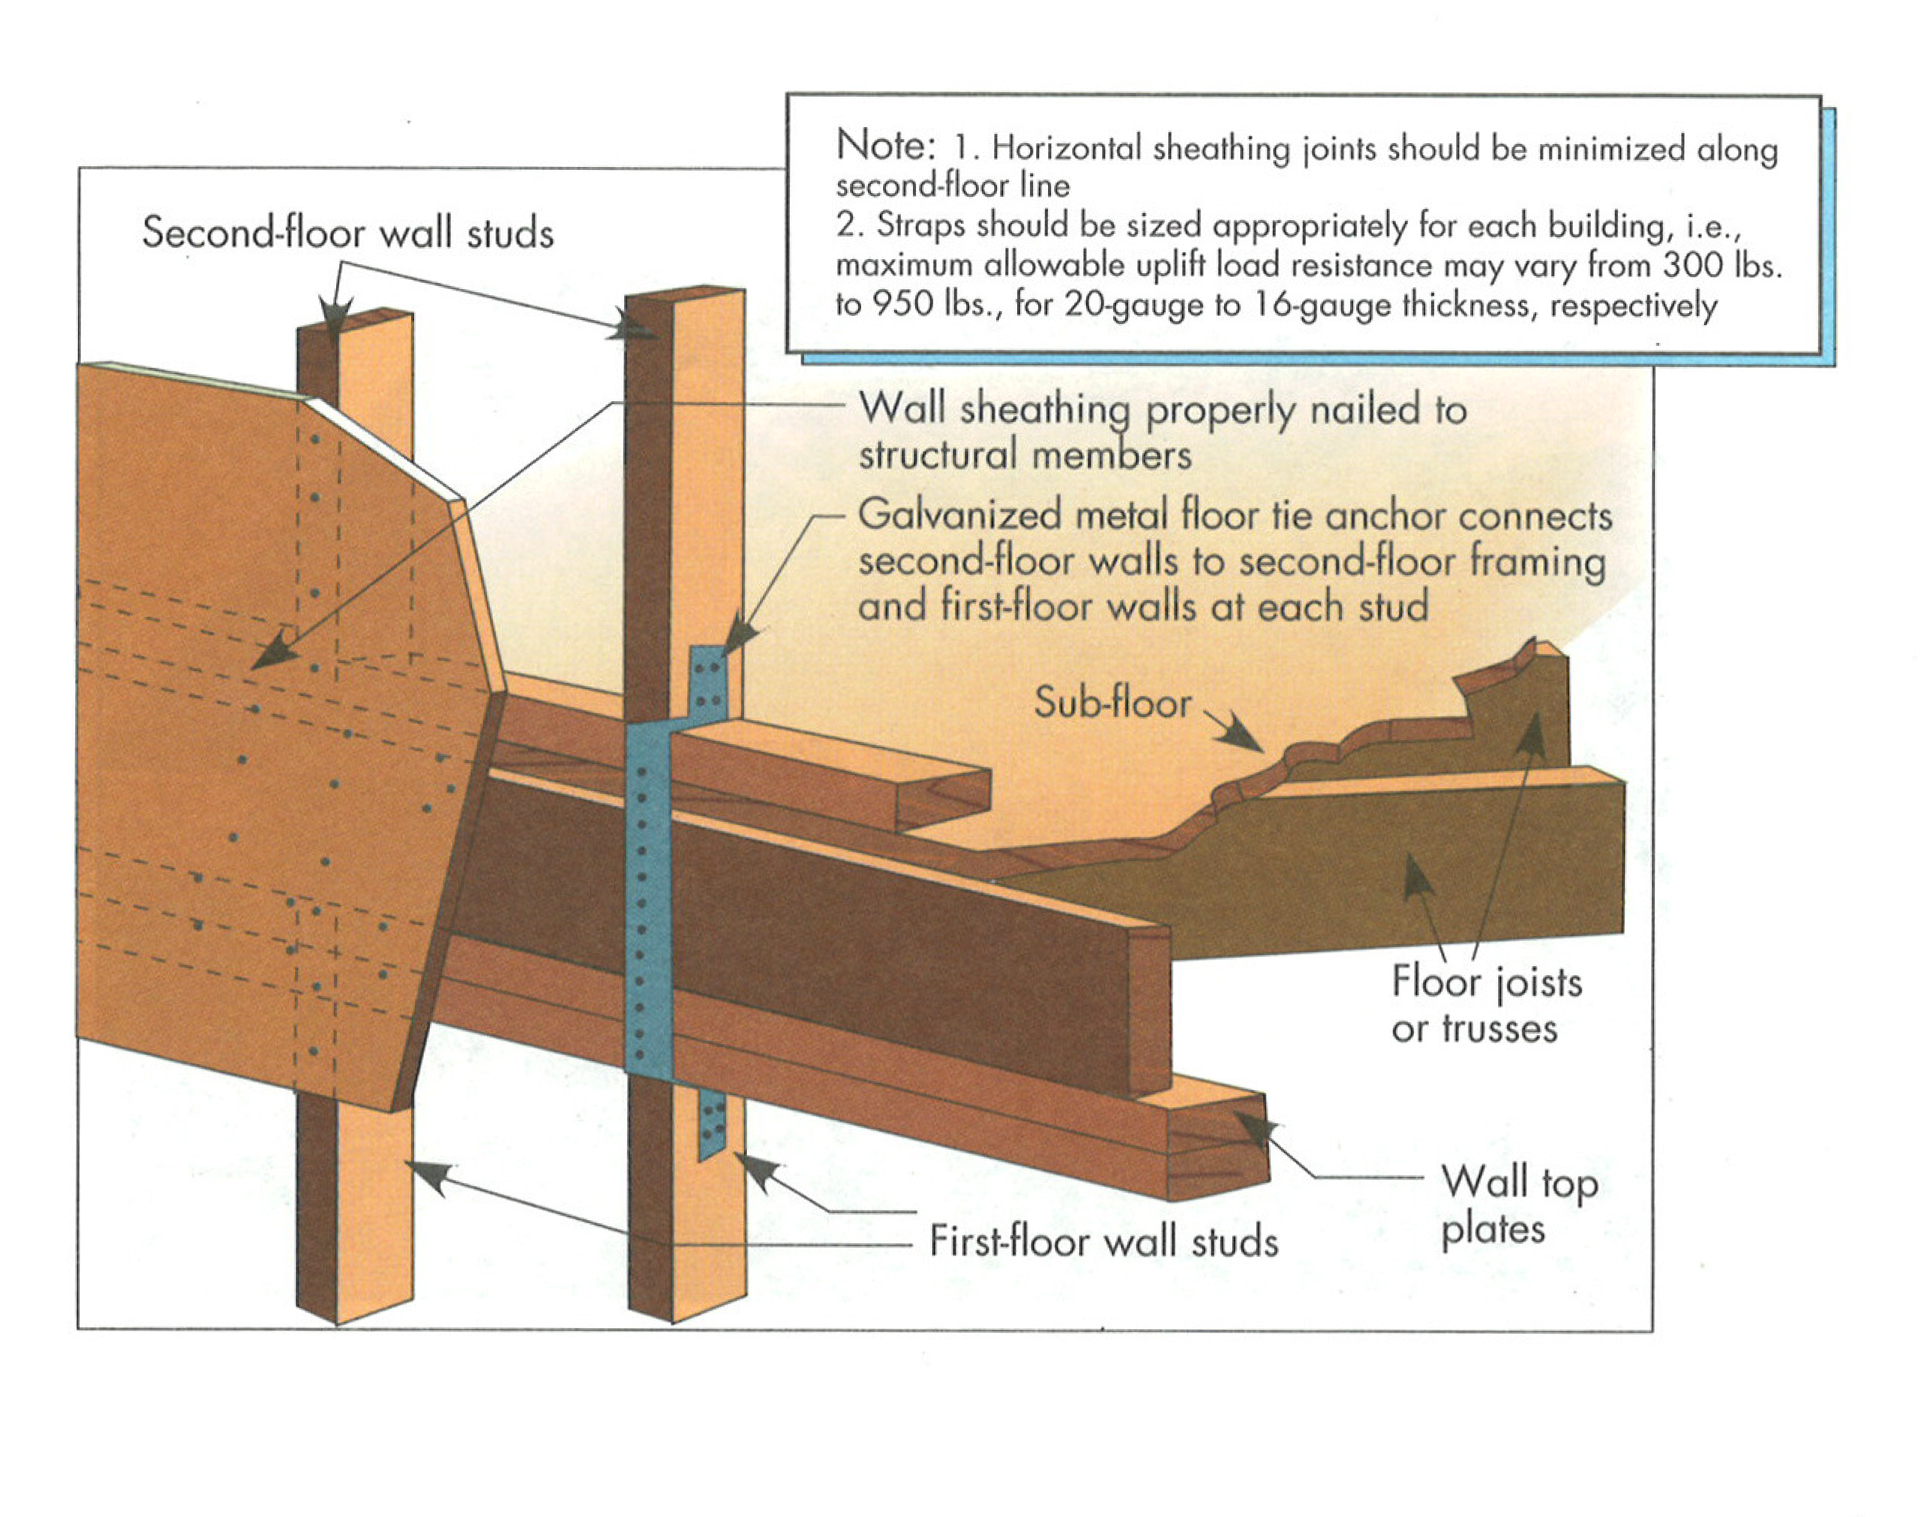
Upper-floor tie to lower floor for two-story building. Floor tie anchor and nailed wall sheathing.
Image
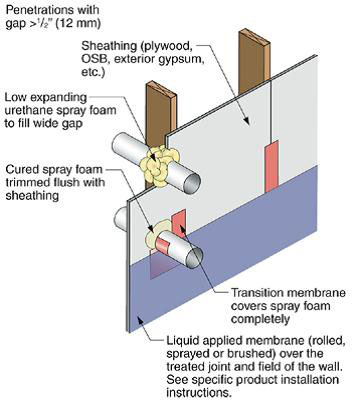
Use flashing tape to seal around any pipes or vents that penetrate through the foam
Image
Image
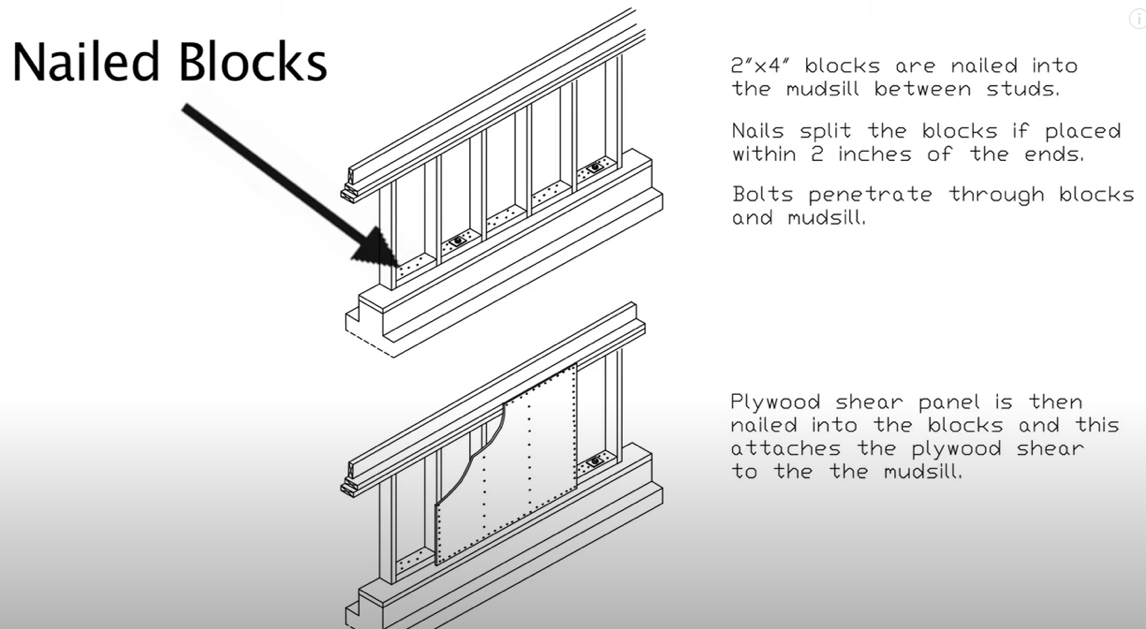
With the nailed block method, wood blocks are attached to the sill plate and the cripple wall plywood is attached to the block to provide shear strength for correctly bracing a cripple wall in a seismic retrofit
Image
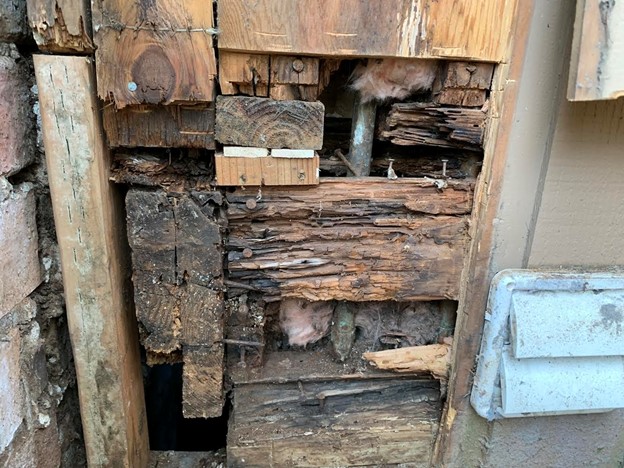
Wrong - Lack of a weather-resistant barrier allowed water to get behind the siding and rot the framing in this corner rim joist area.
Image
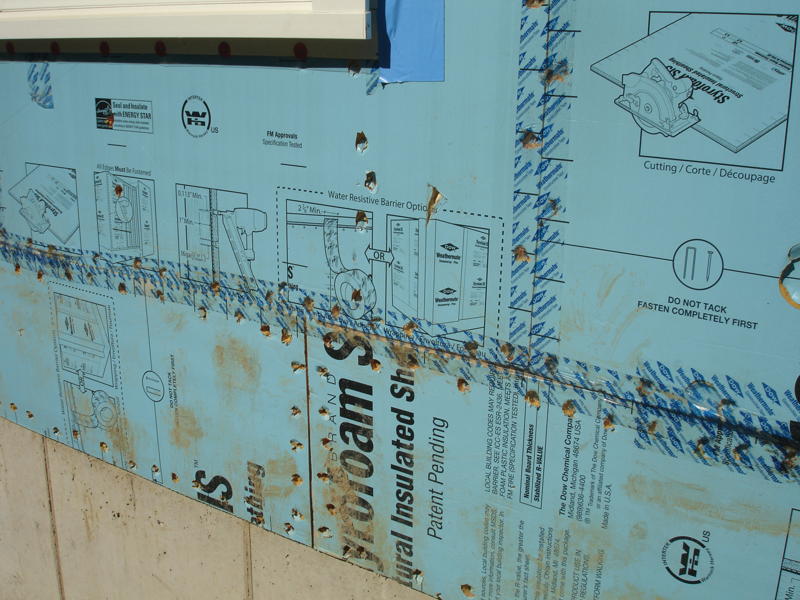
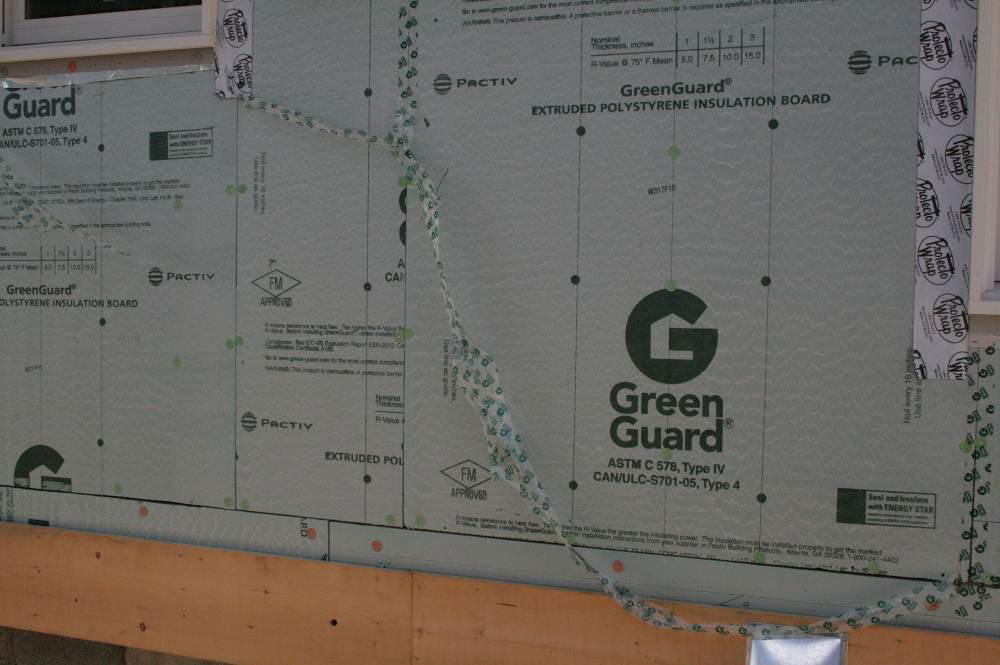
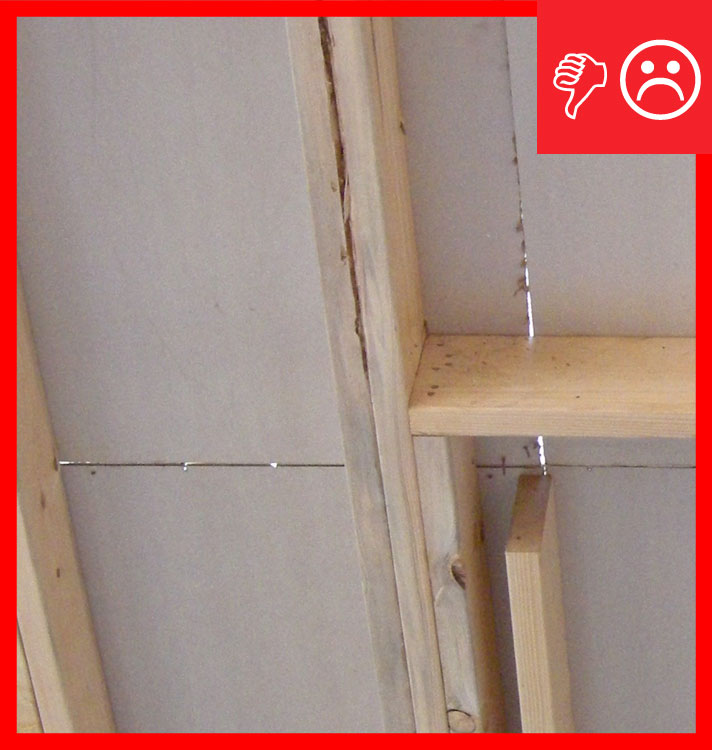
Wrong – A visible gap in the insulated sheathing introduces unwanted outside air, creating a thermal bypass and encouraging convective air flow
Image
Wrong – Either this tape was not pressed down firmly or the surface was wet or dirty so the tape is not sticking properly even during construction.
Image
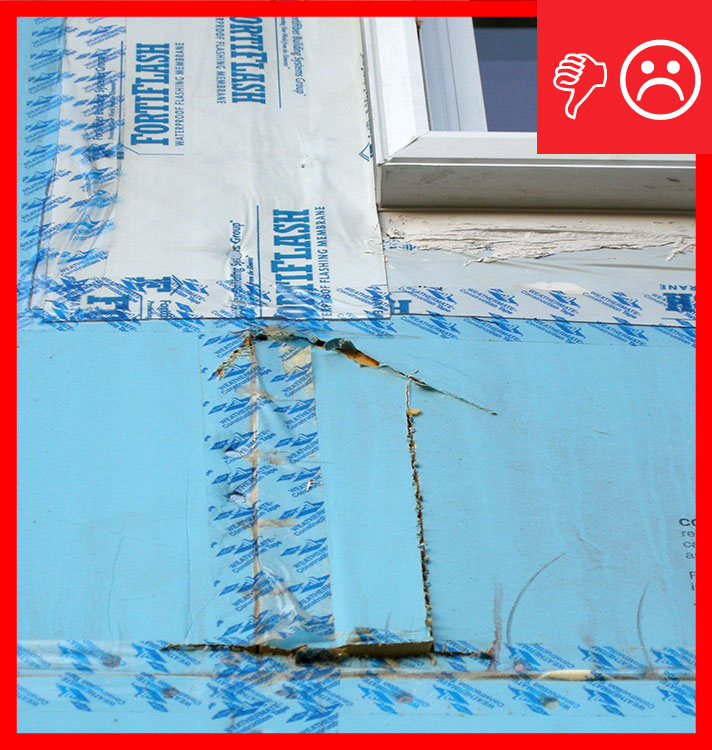
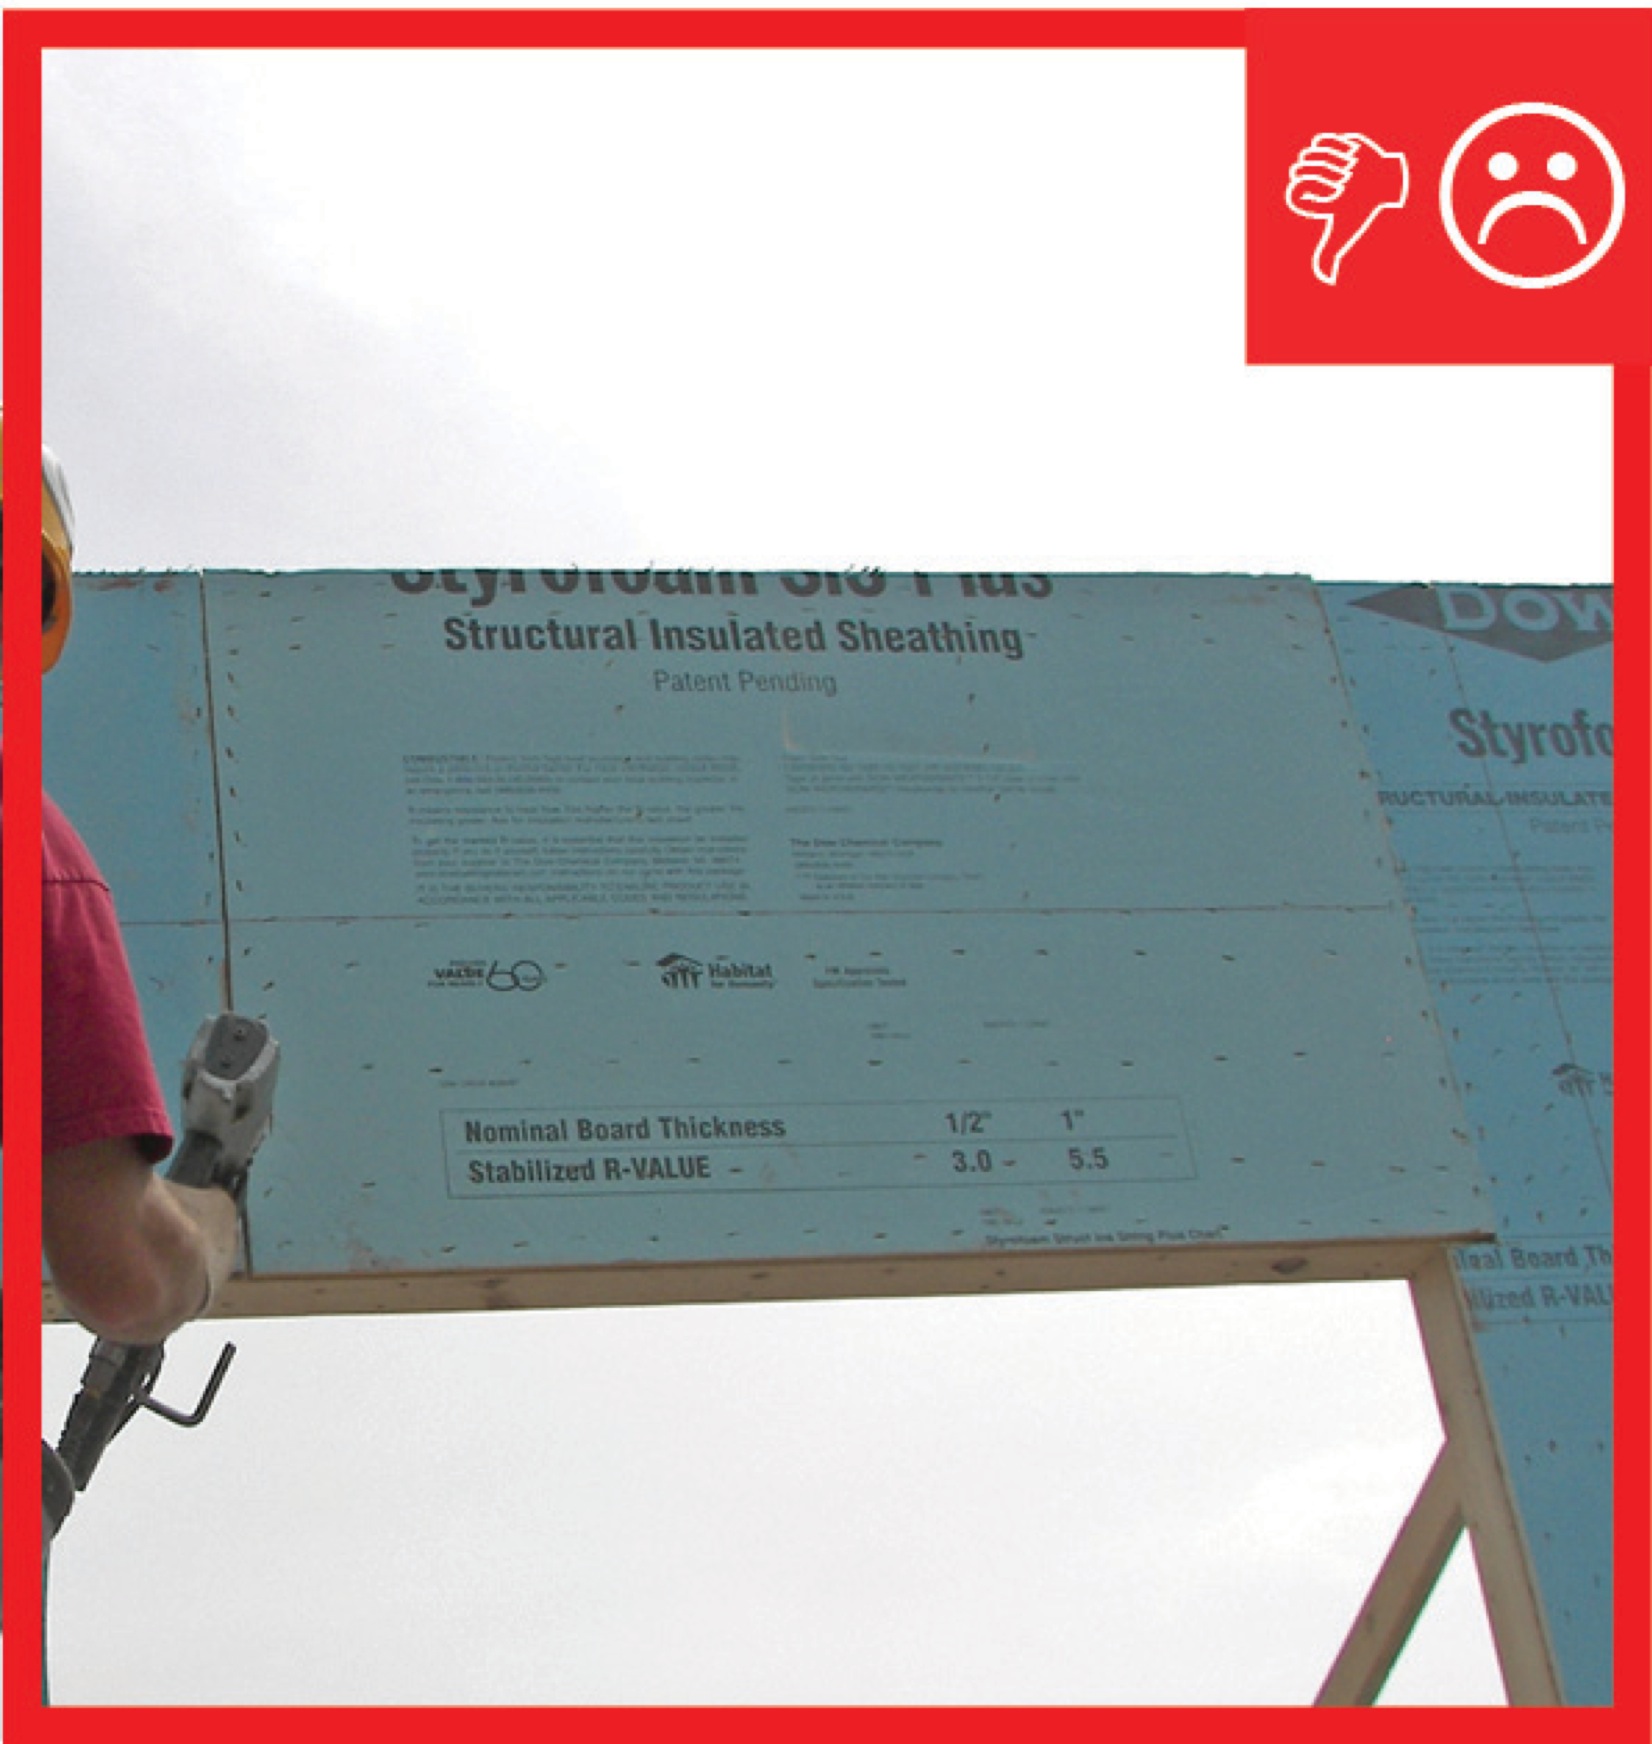
Wrong – If the insulated sheathing will serve as an air barrier and drainage plane, any cuts and seams must be taped or sealed.
Image
Image
Image
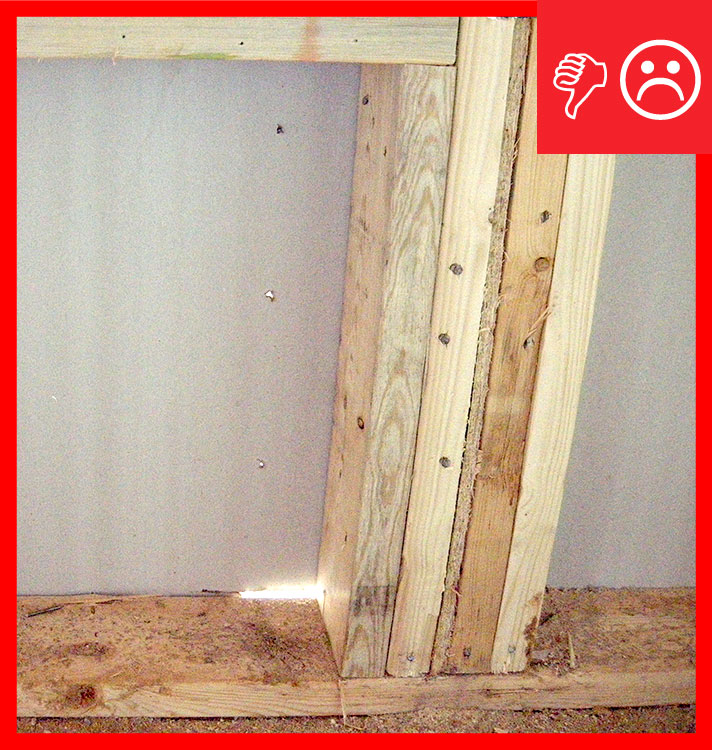
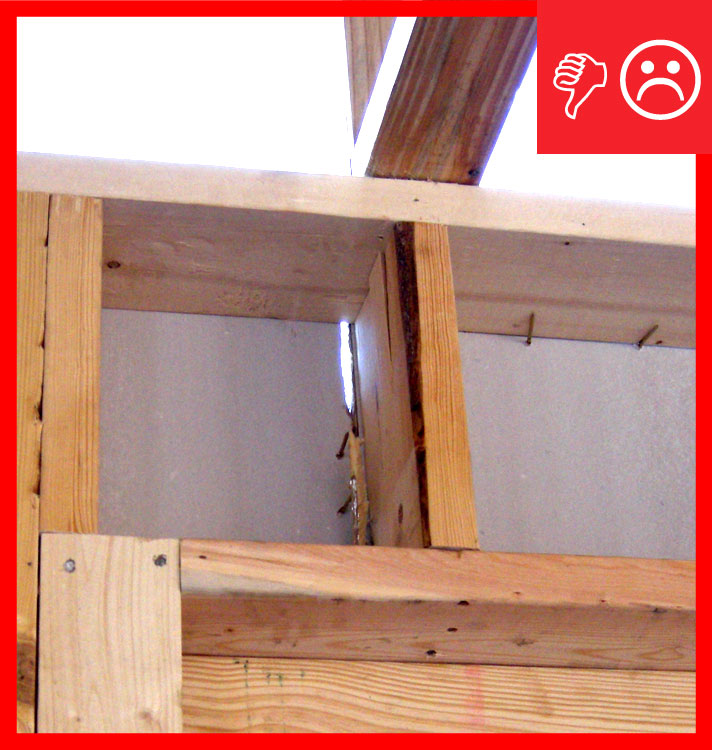
Wrong – When insulated sheathing is installed correctly, you should not see daylight. Nail holes were also left unplugged.