Showing results 101 - 150 of 253
Image
Image
Image
Image
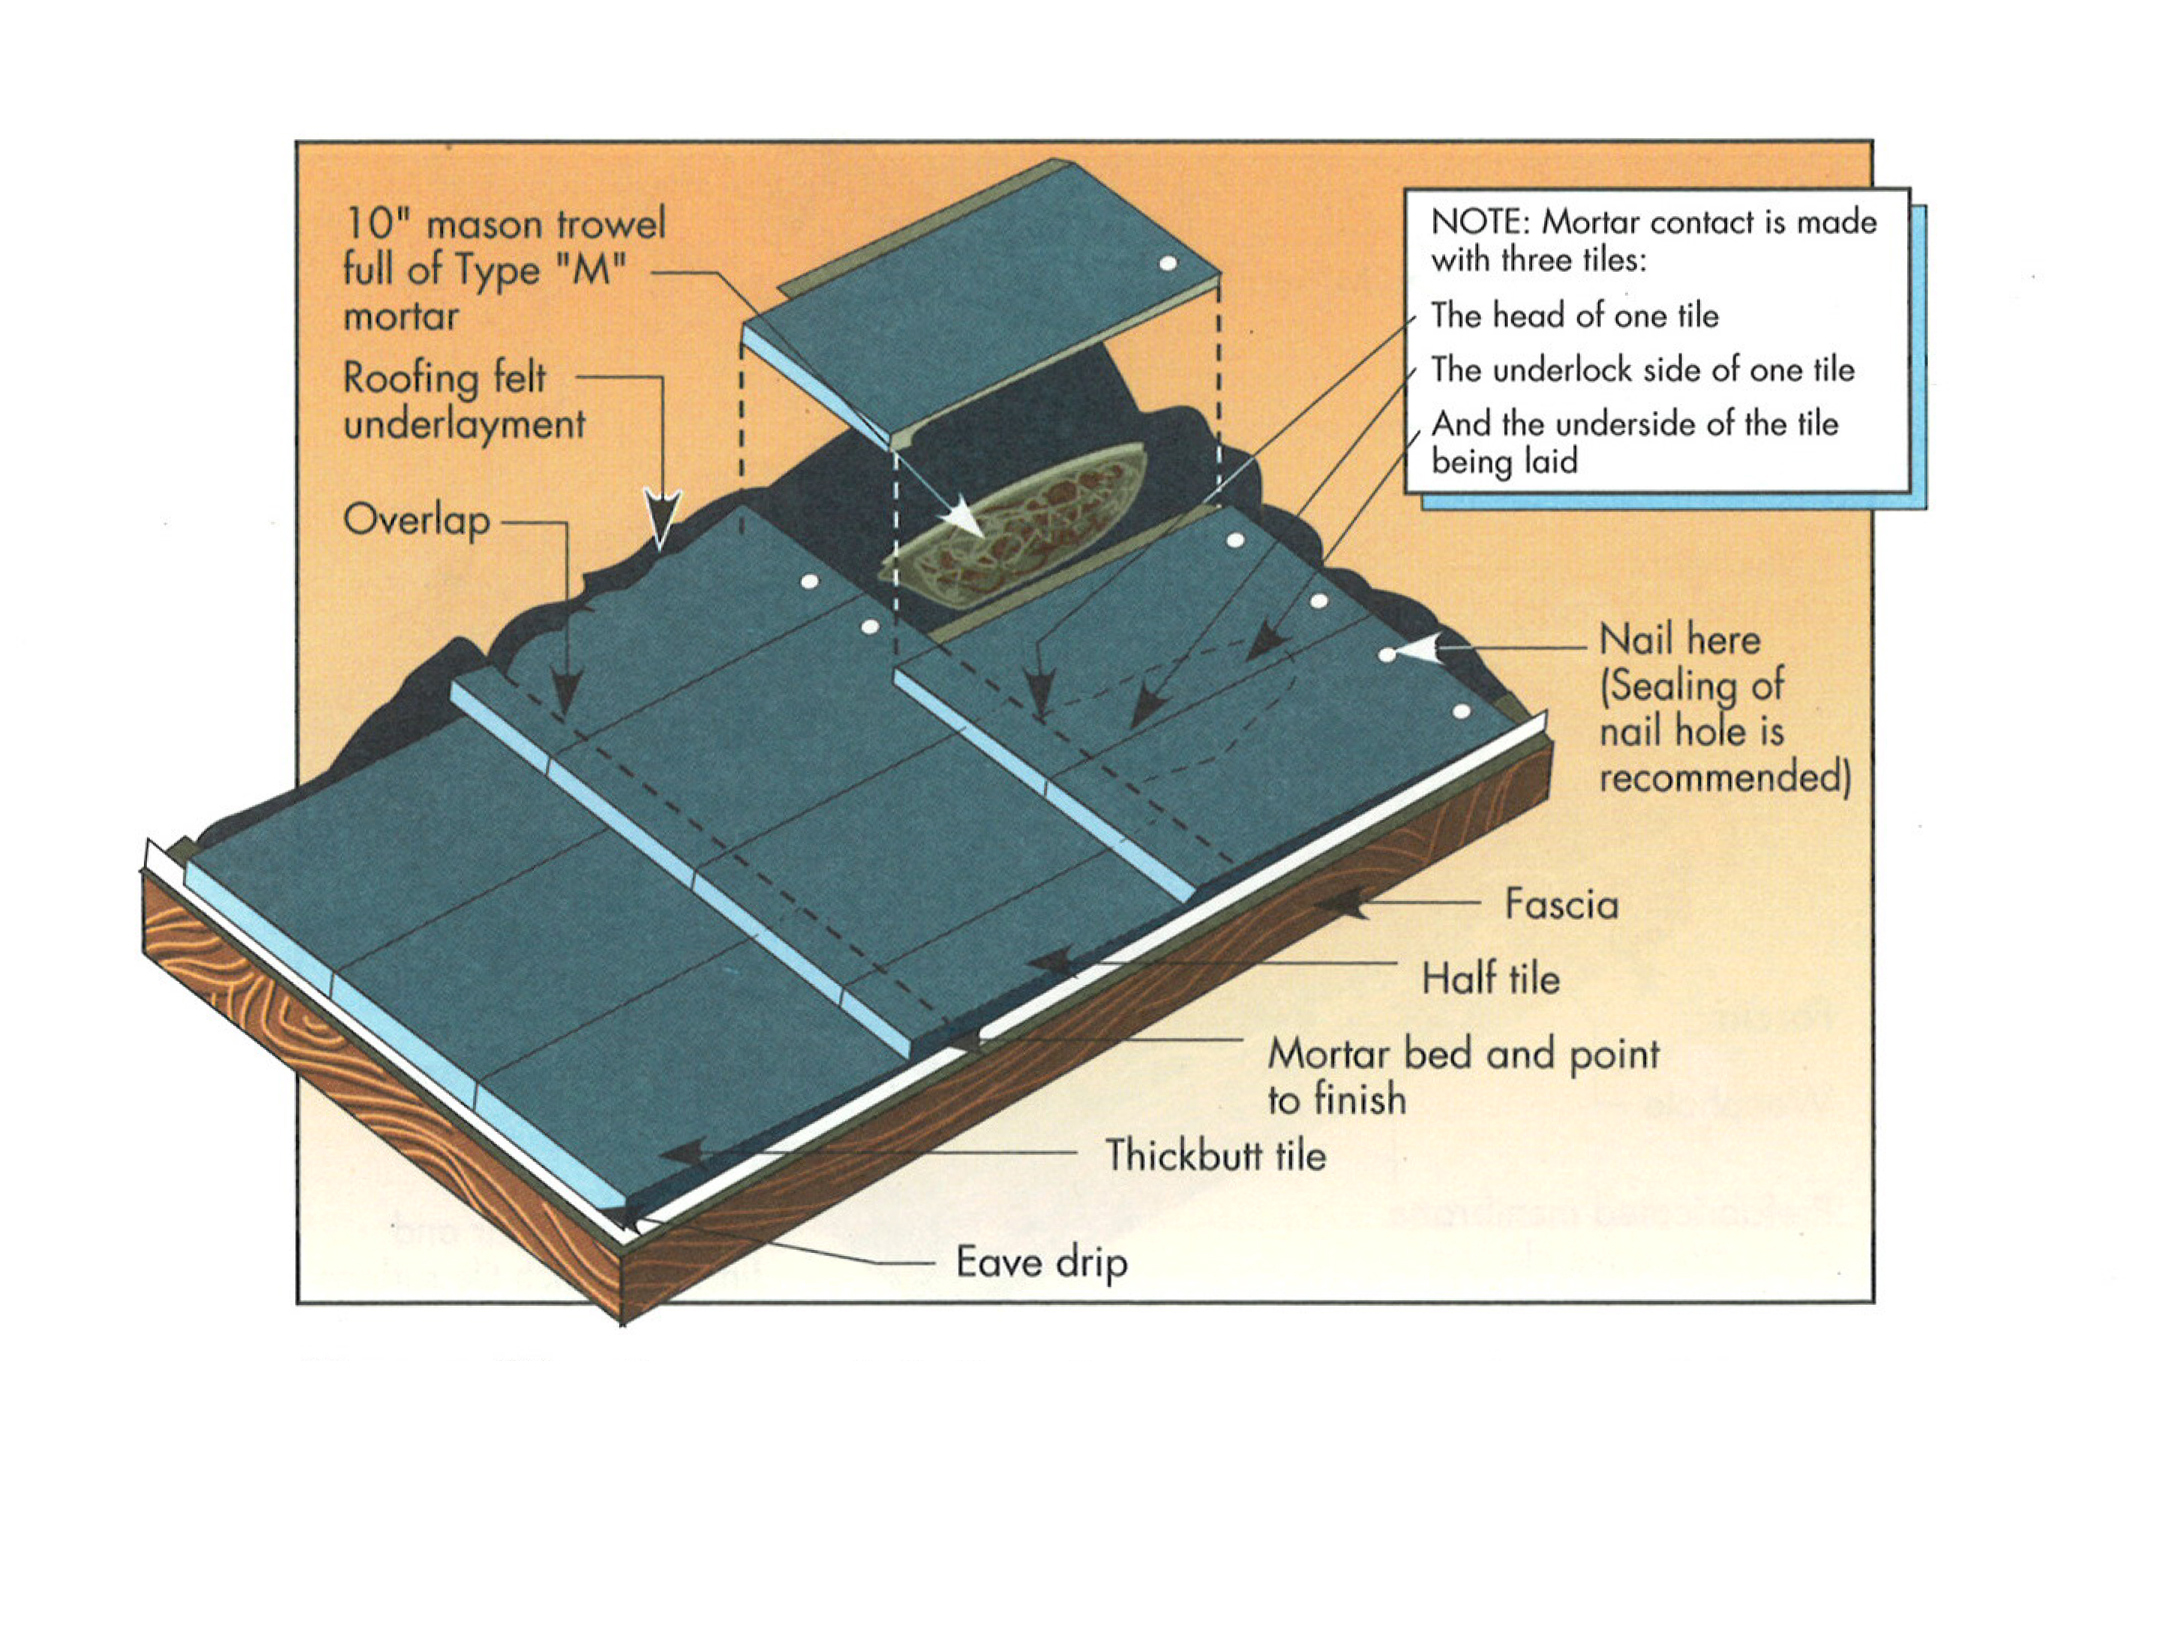
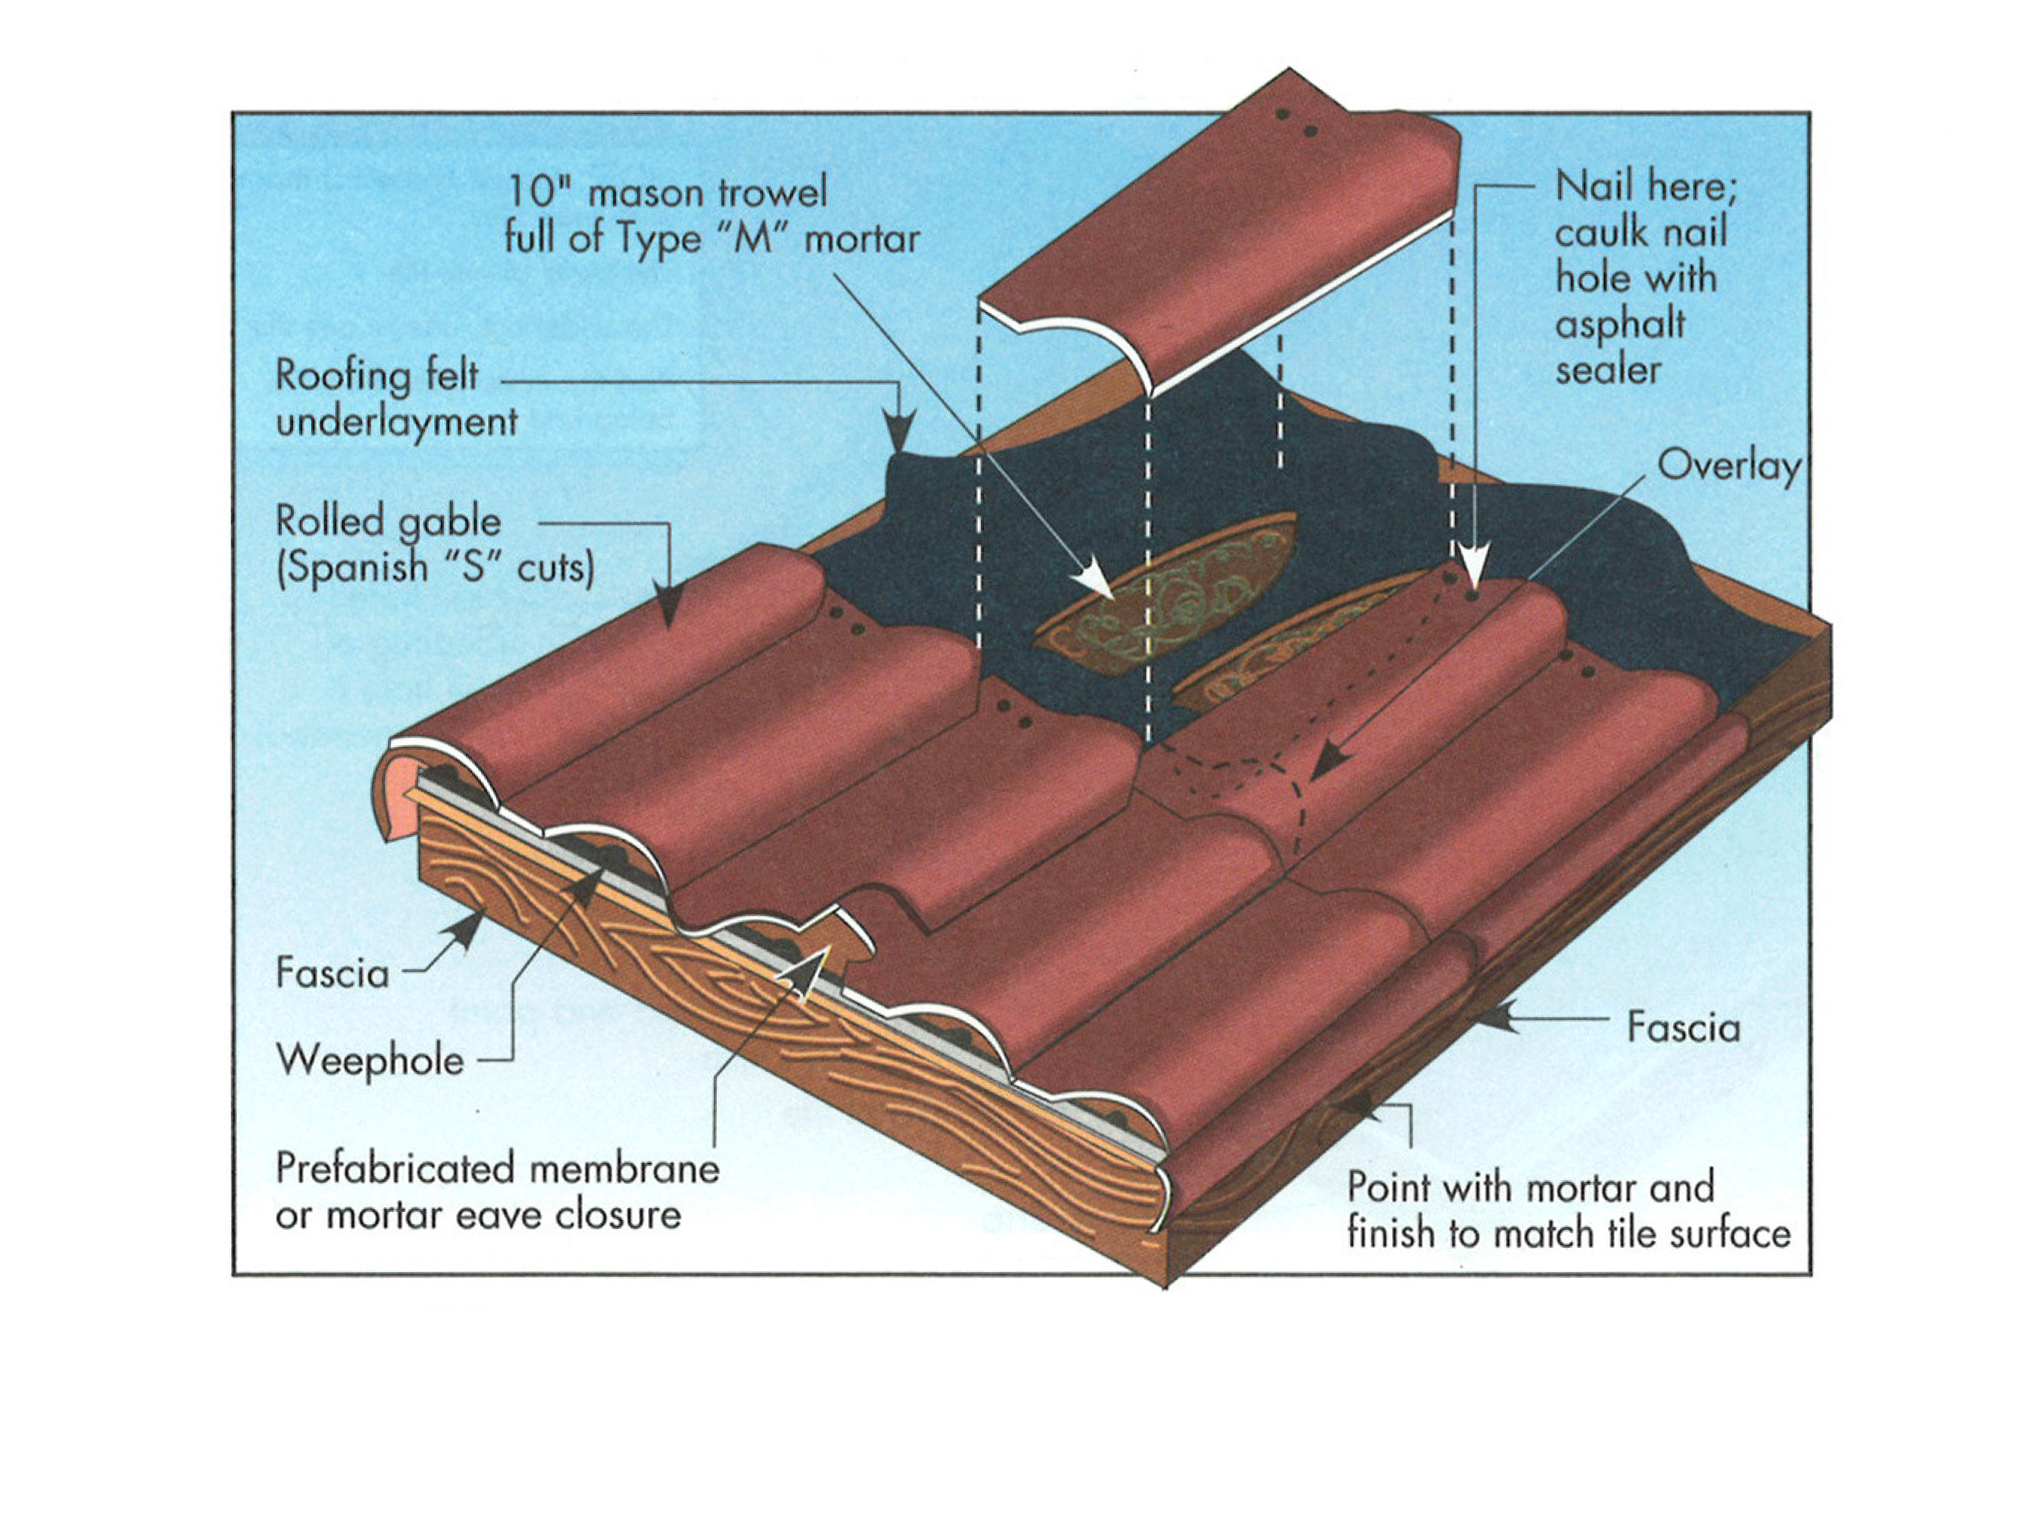
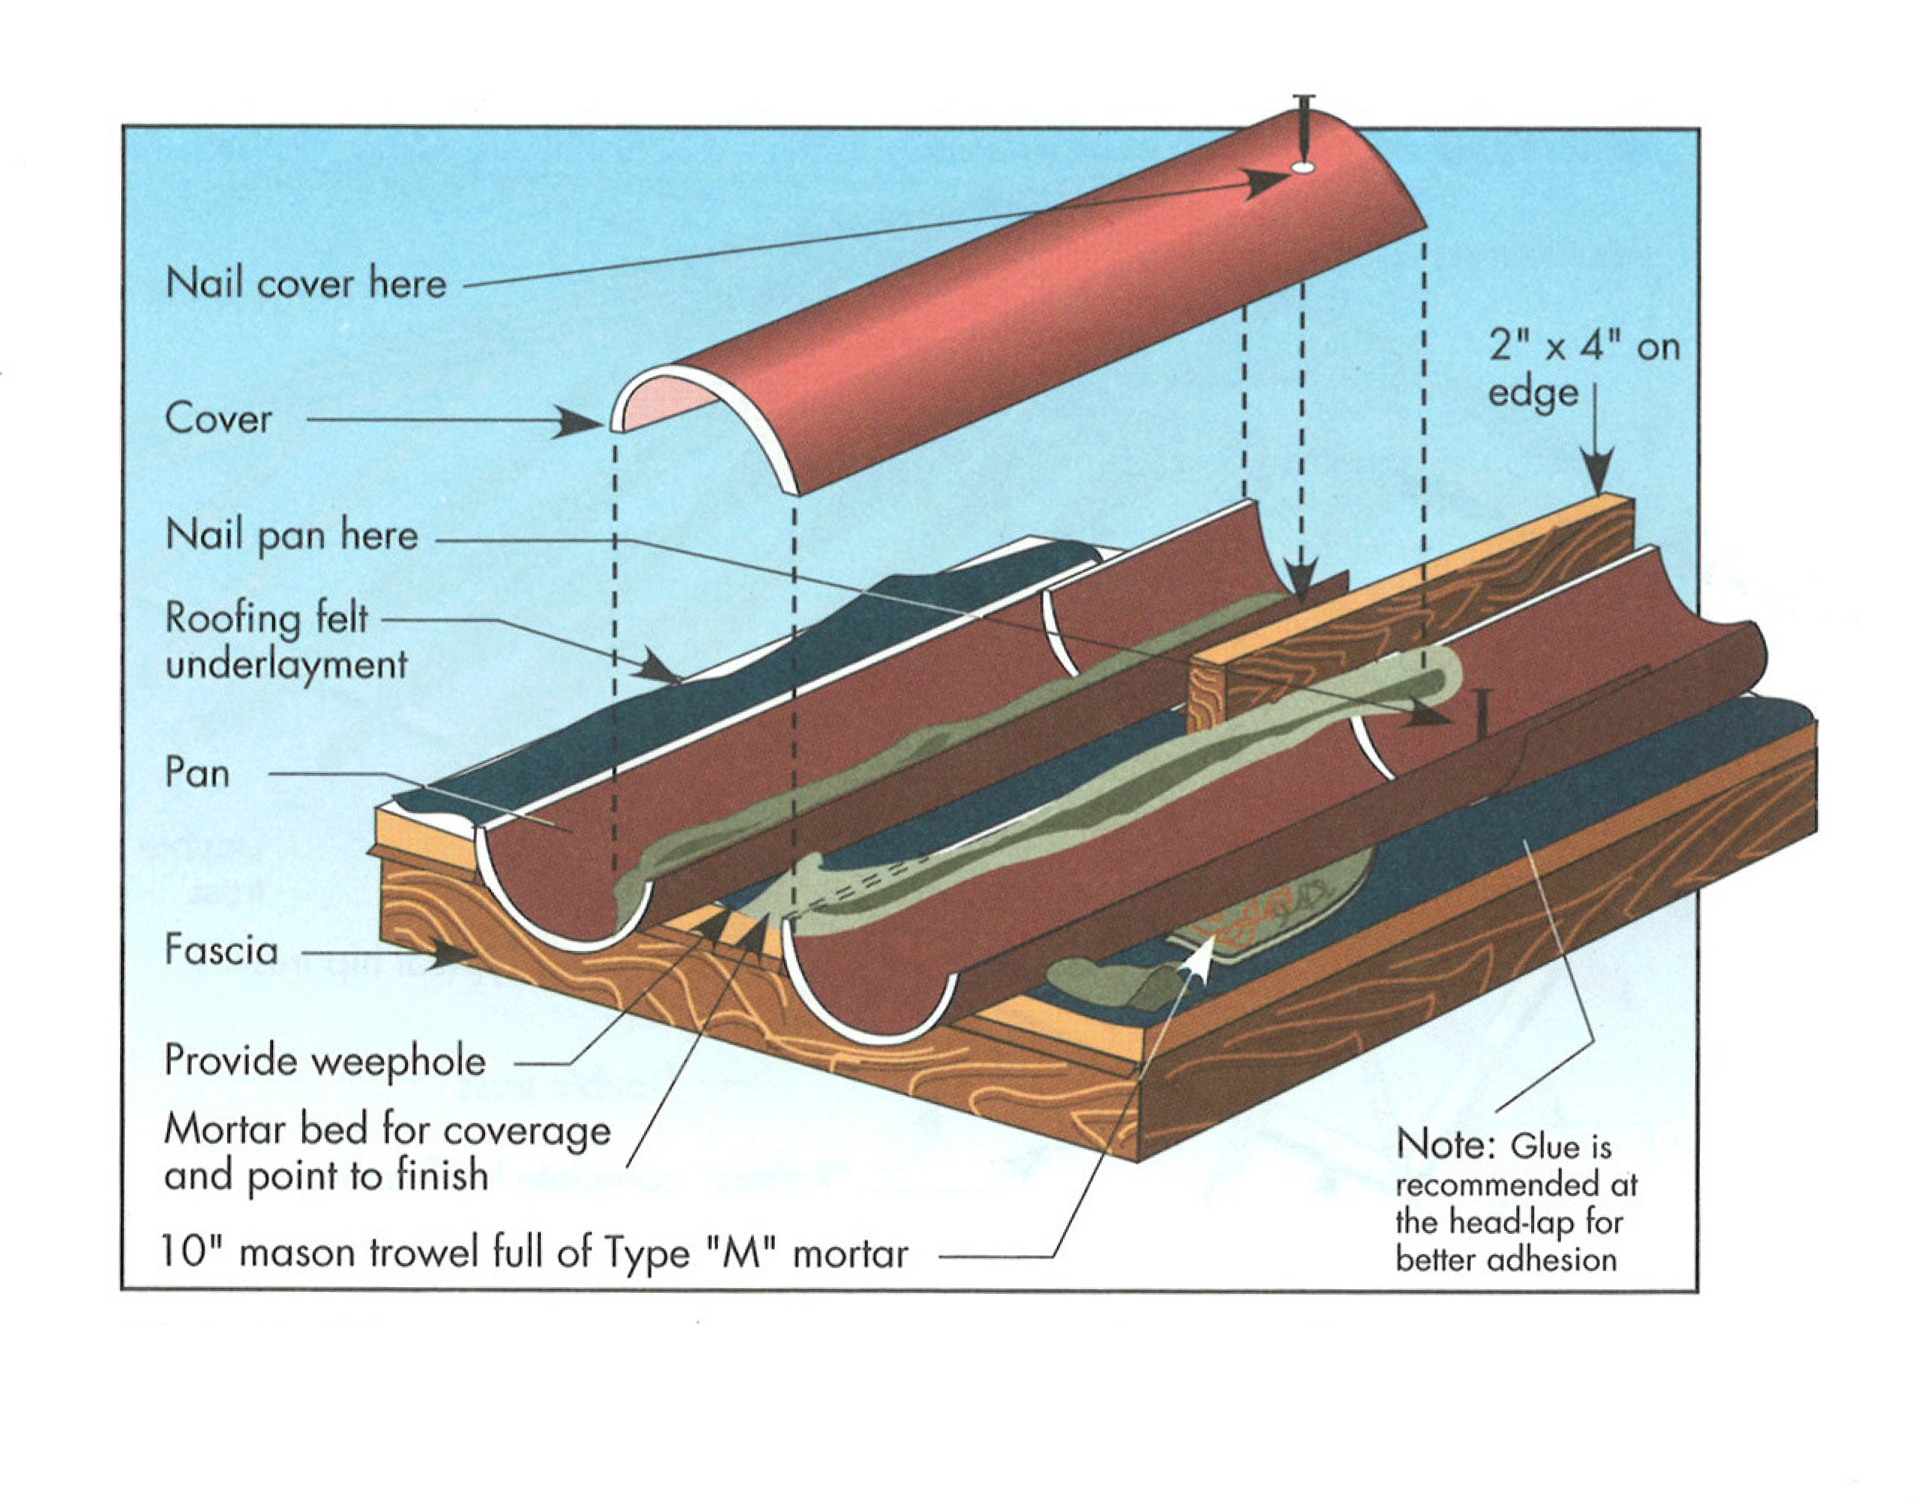
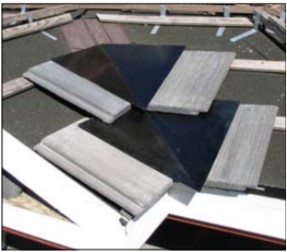
Recommended tile and mortar placement for extruded concrete flat tile roofing system
Image

Right - A continuous load path connects the roof and wall framing to the foundation.
Image
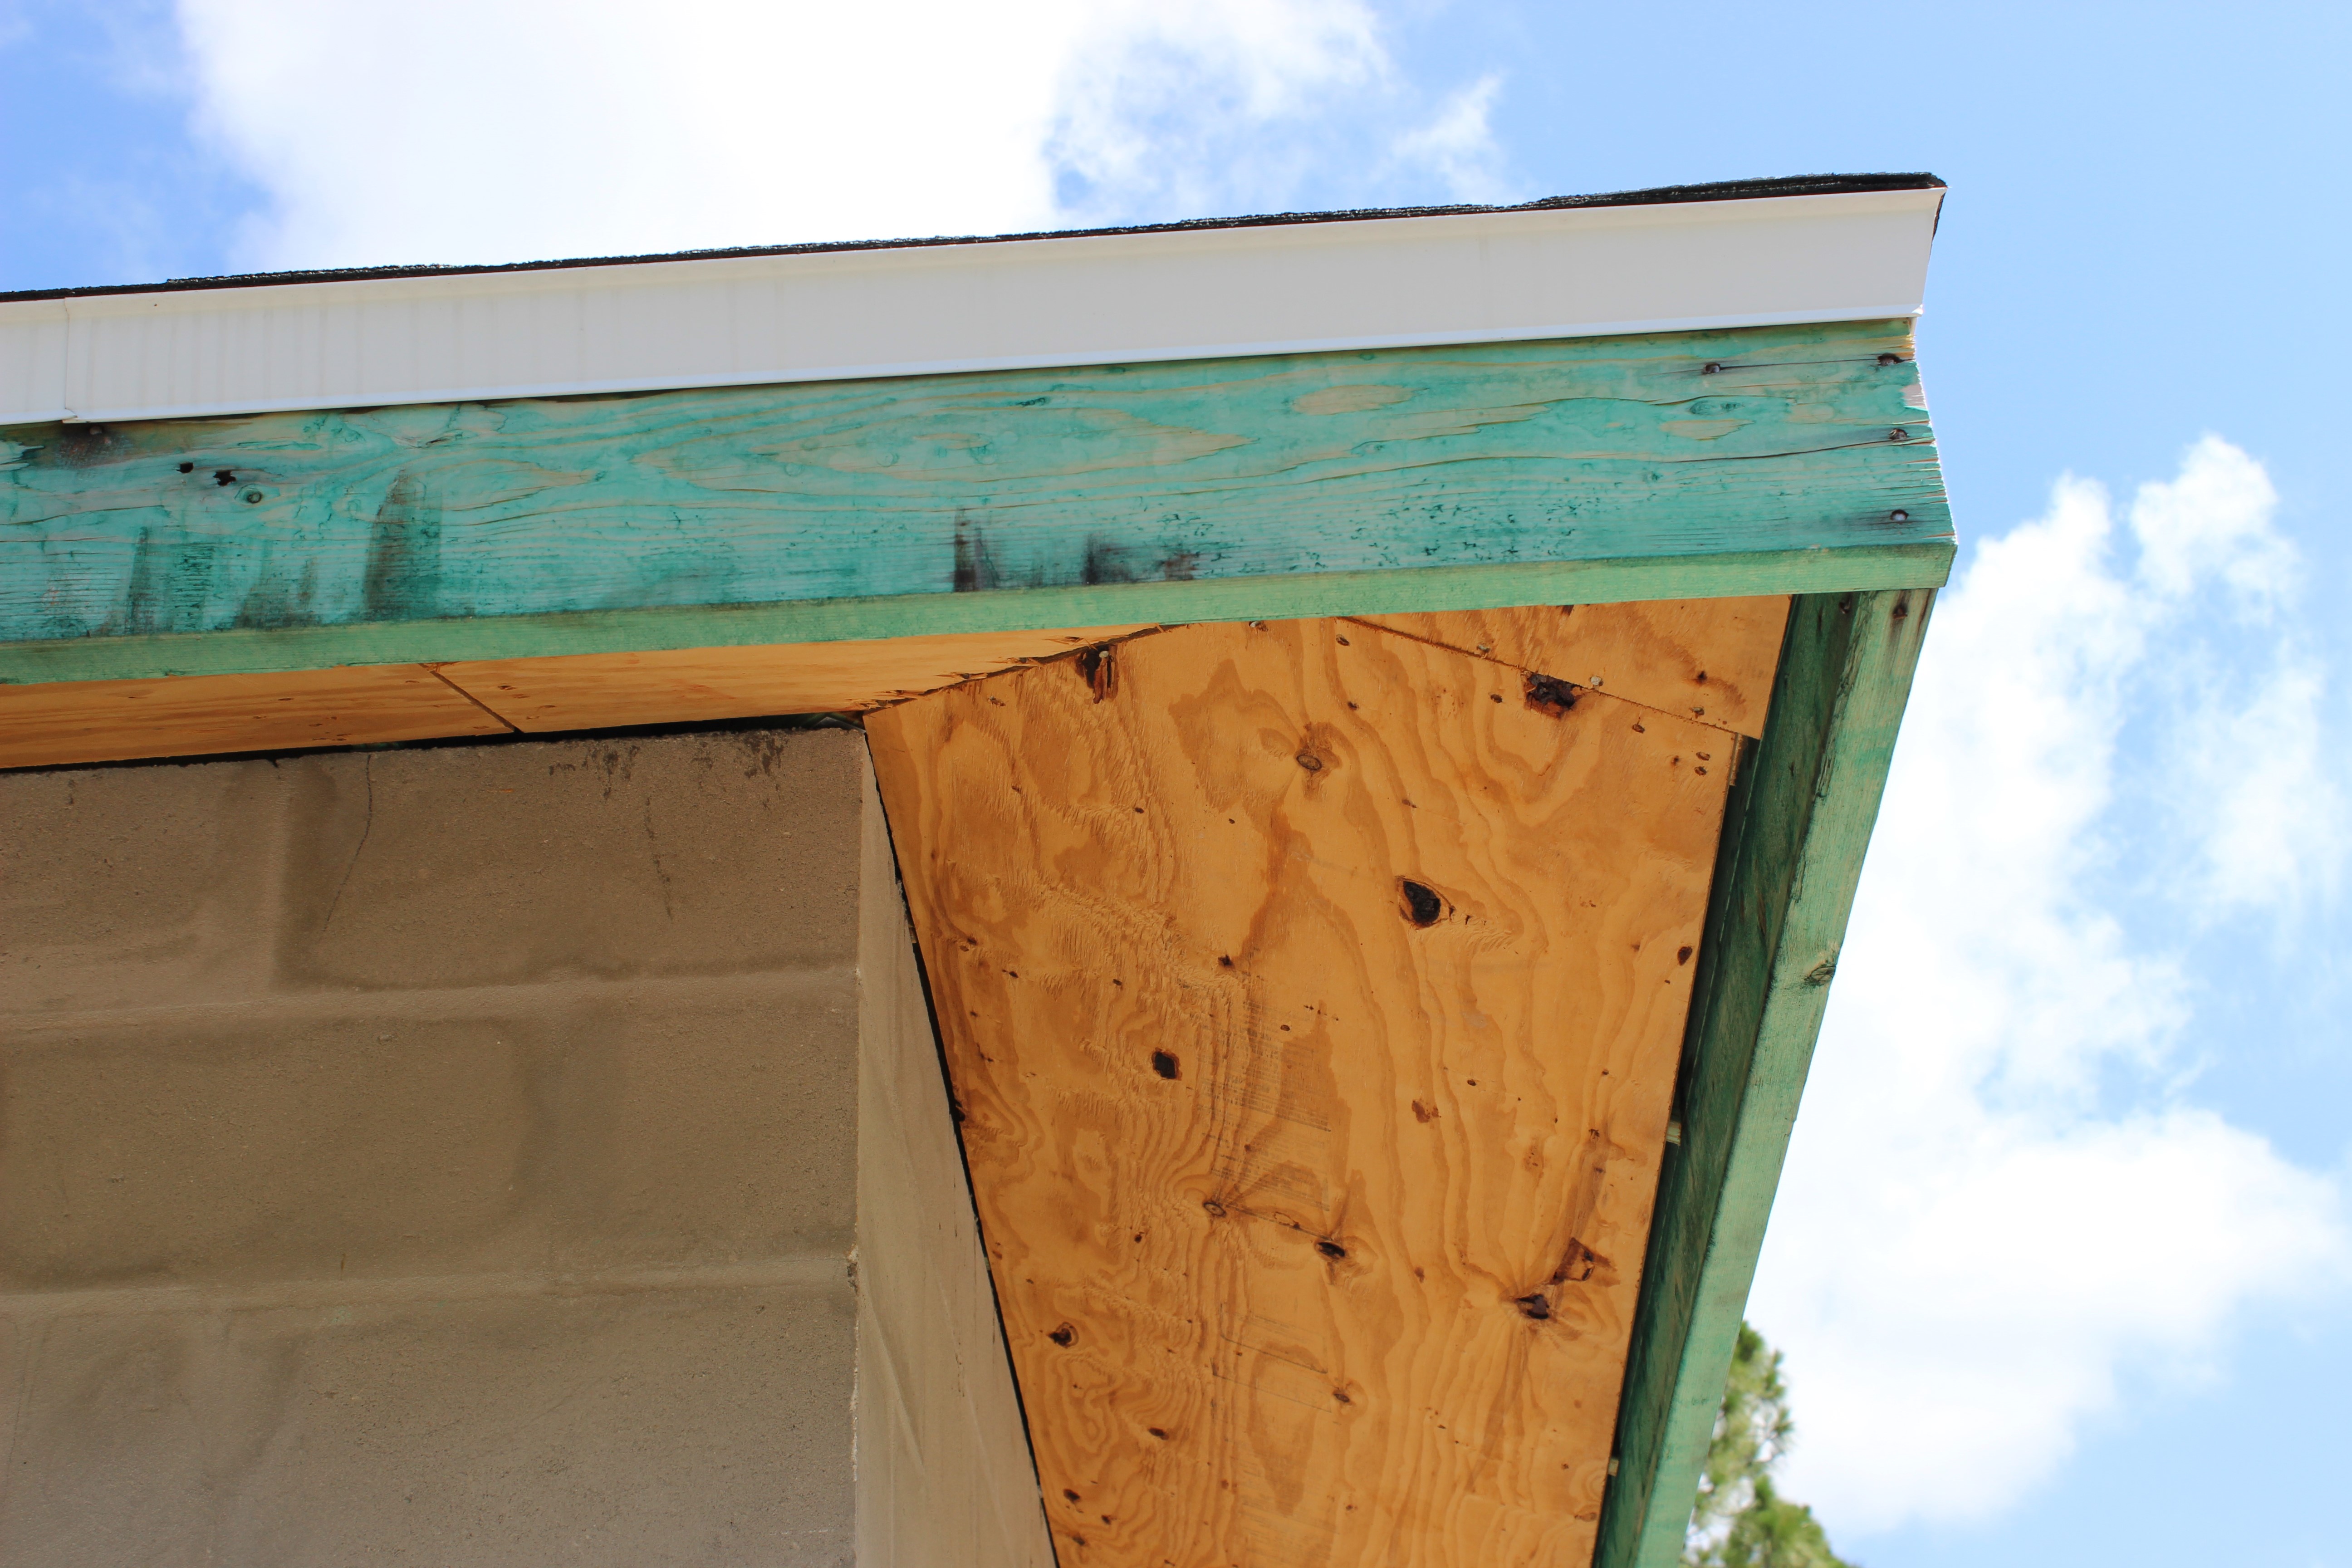
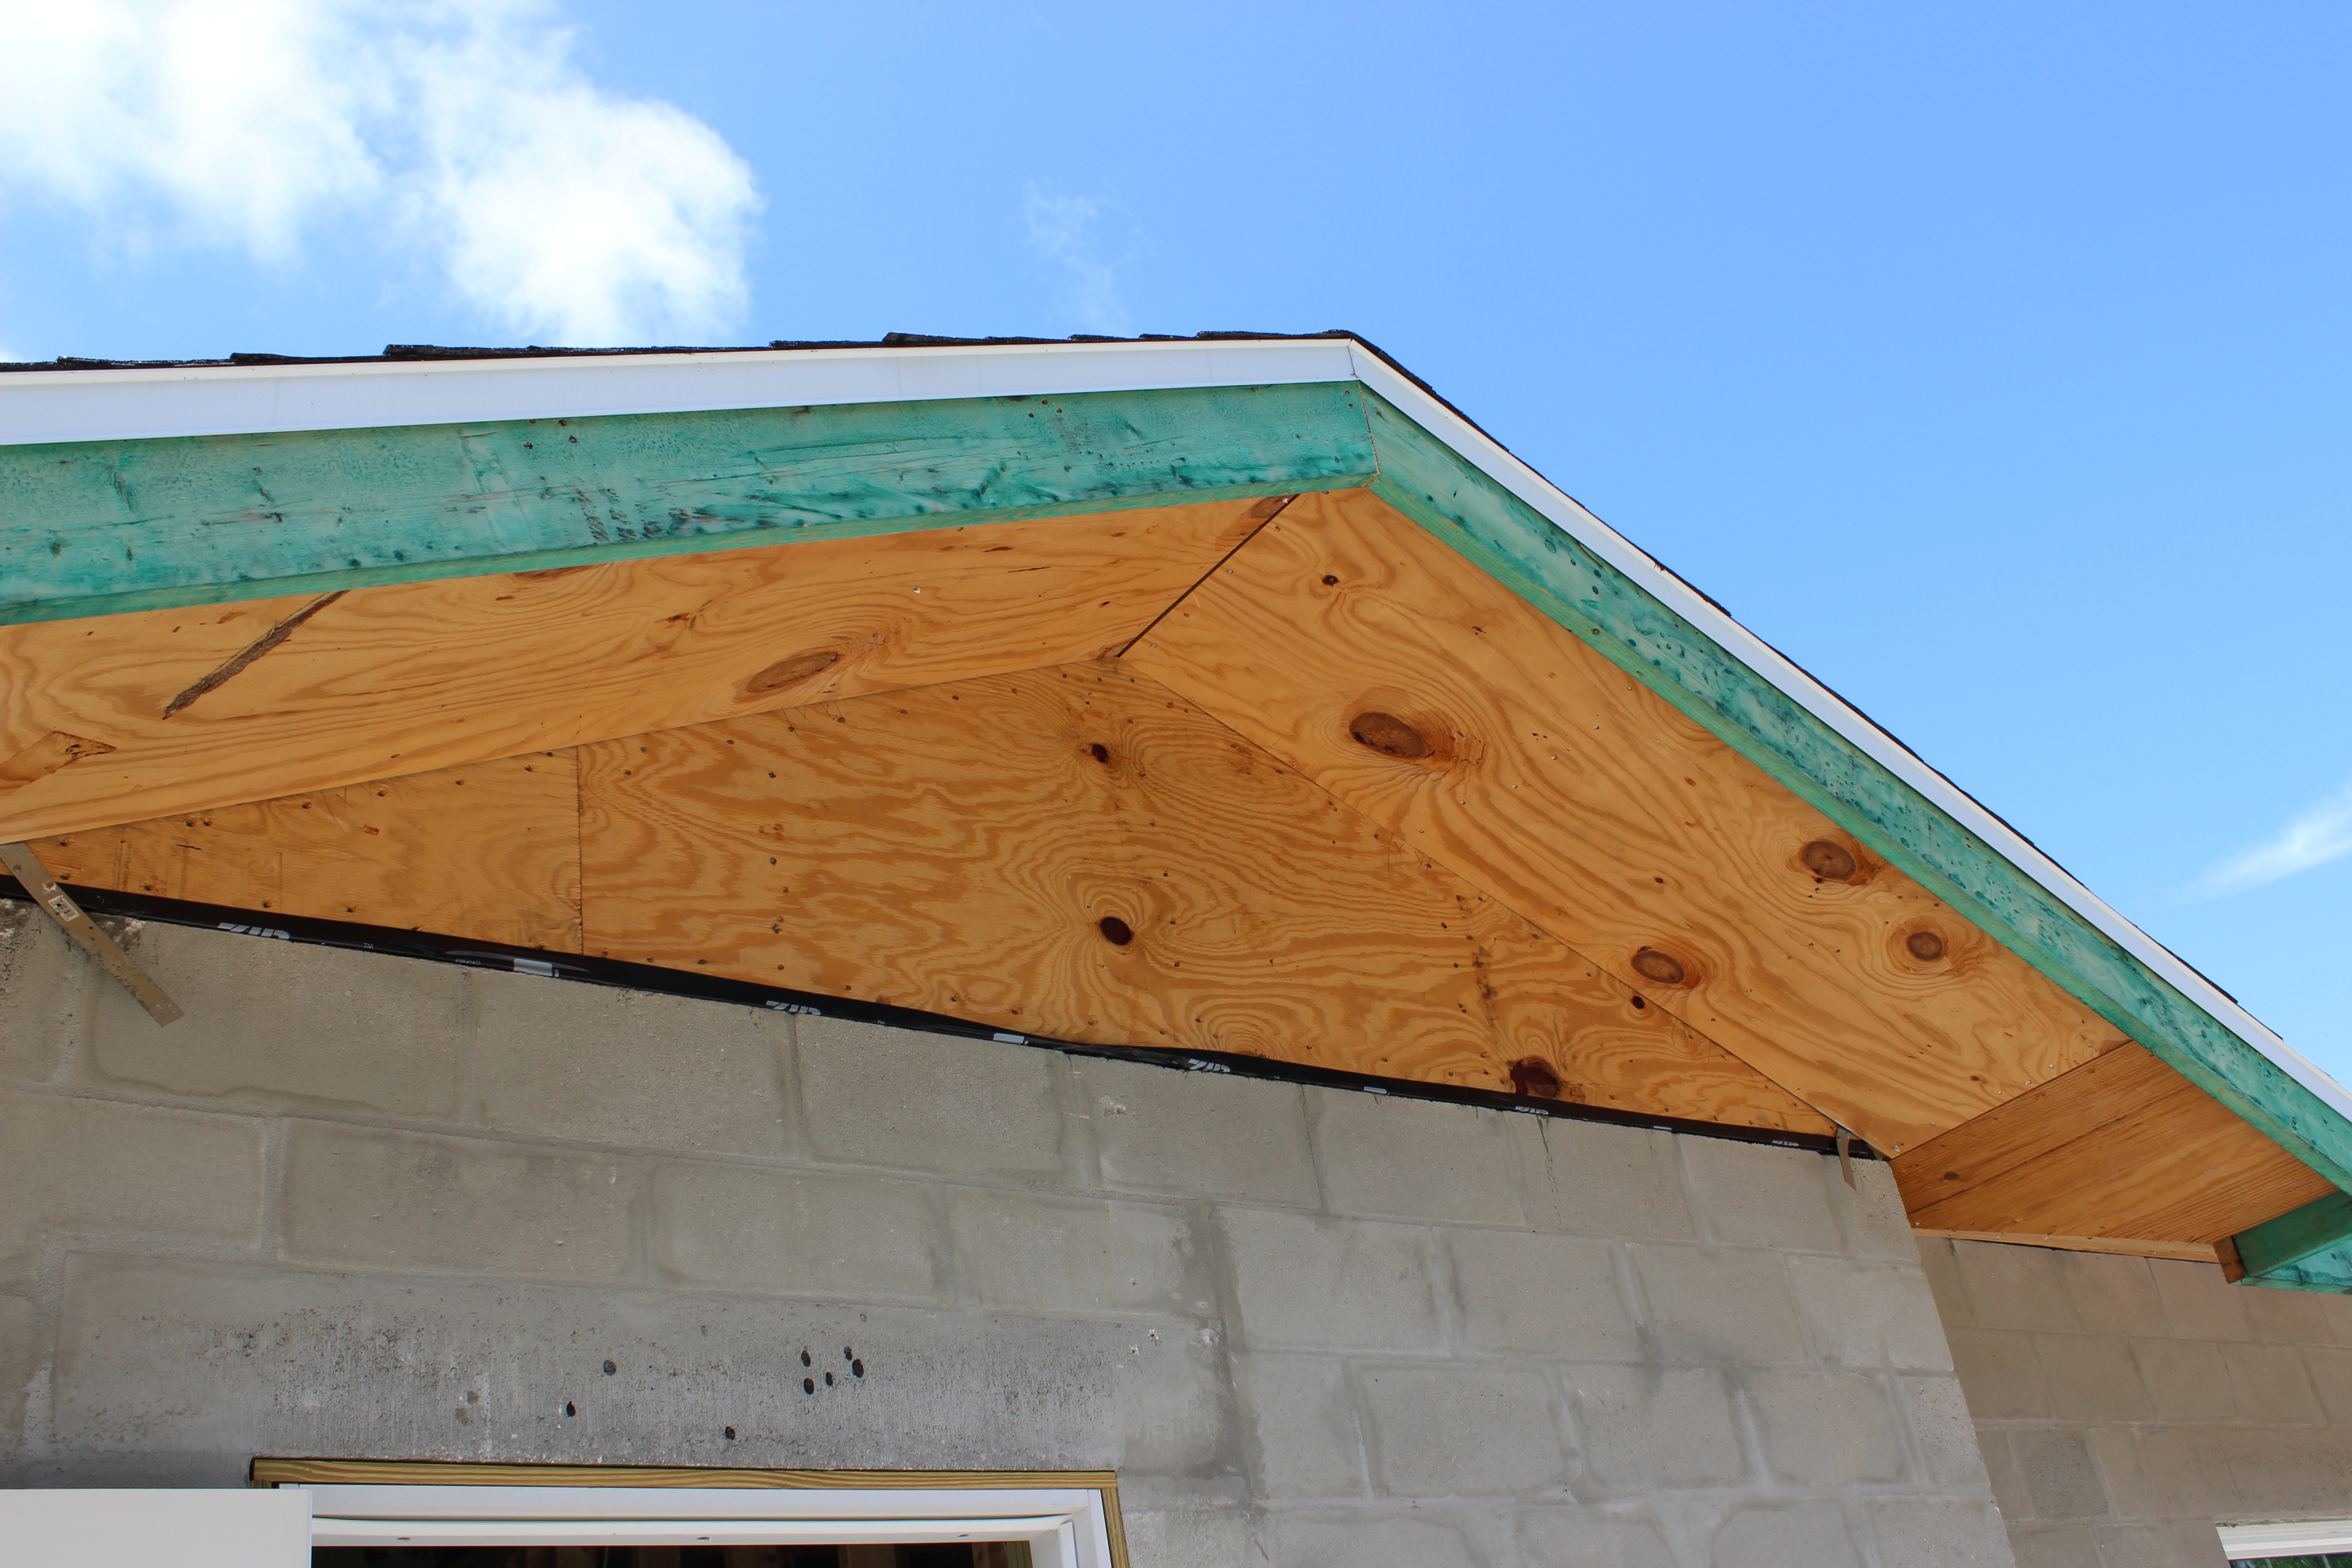
Right - An unvented attic with no soffit vents, borate-treated fascia board, metal drip edge, and concrete block construction on this south Florida home help make it resistant to hurricanes, pests, and wind-born wildfire embers.
Image
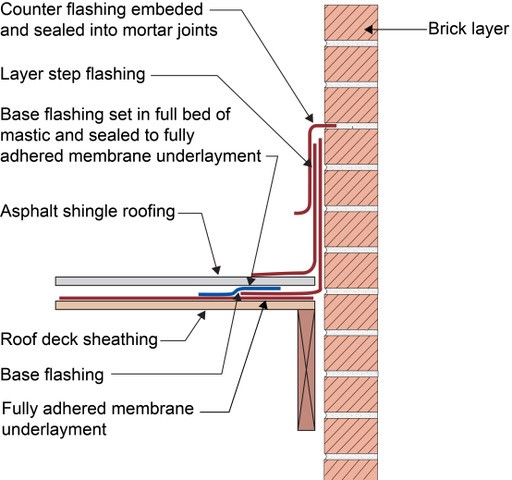
Right - Counterflashing tops a layer of step flashing which comes down above the asphalt shingle and a layer of L-shaped base flashing which comes down and extends below the shingle; the base flashing is adhered to the roof underlayment with mastic, shown
Image
Image
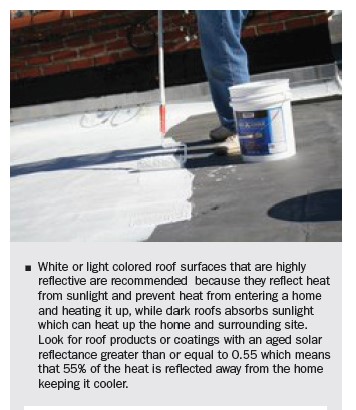
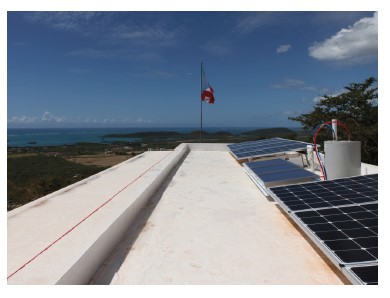
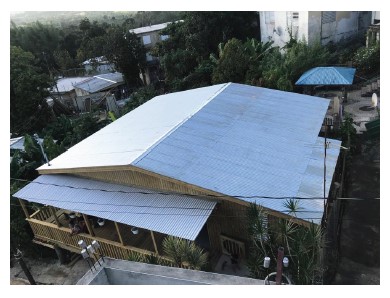
Right - In hot climates, paint flat roofs light colors to reflect solar heat gain.
Image
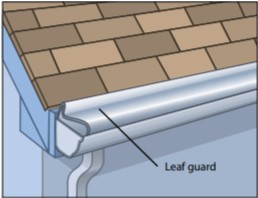
Right - Leaf guards allow rainwater into the gutter but keep combustible debris out, increasing the home's resistance to wildfires.
Image
Right - Metal drip edge on this south Florida CMU home protects the top of the fascia and edge of the roof deck from water, wind-blown rain and embers, and insects.
Image
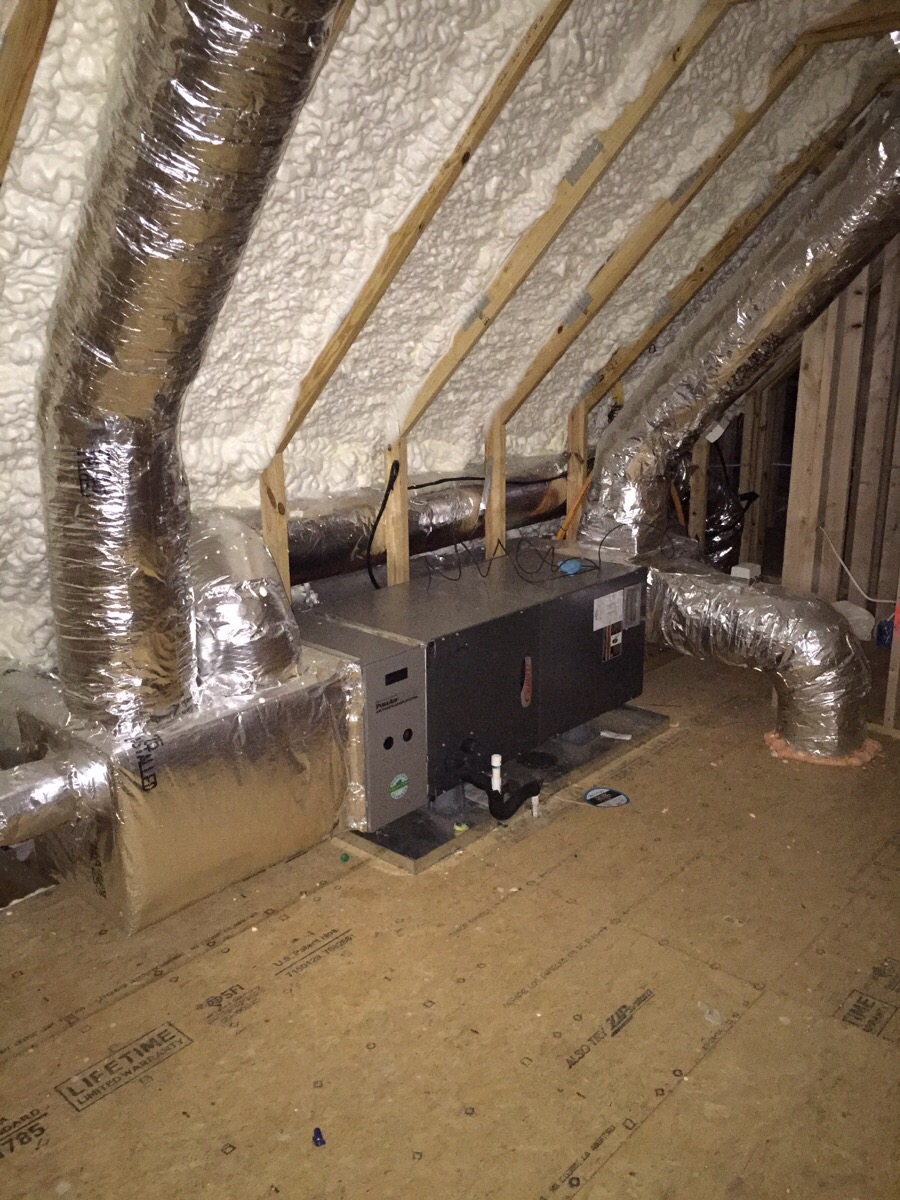
Right - Open-cell polyurethane spray foam to R-28 on underside of roof turns new attic into conditioned space for HVAC.
Image
Right - Pieces of metal flashing are installed under each tile course along the valley centerline to prevent debris accumulation between and below concrete roof tiles.
Image
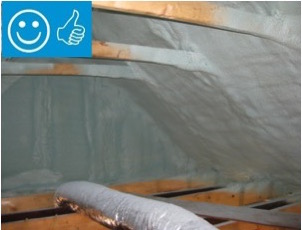
Right - Spray foam insulation has been sprayed onto the underside of the sloped roof and the gable end wall to provide a sealed, insulated attic for housing the HVAC ducts
Image
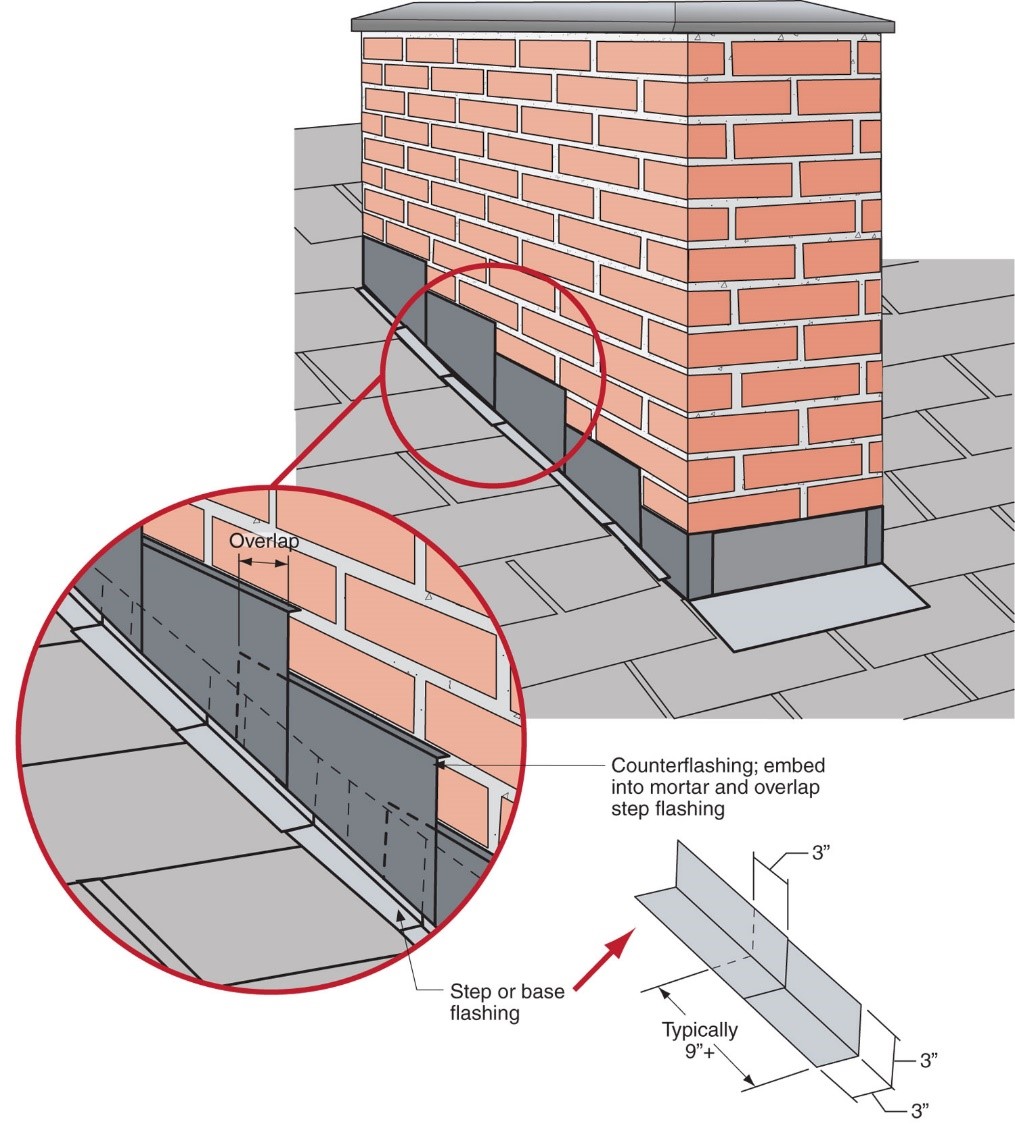
Right - Step flashing along a chimney is integrated in a layered manner with asphalt shingle roofing and topped with counterflashing that is embedded into brick mortar joint above
Image

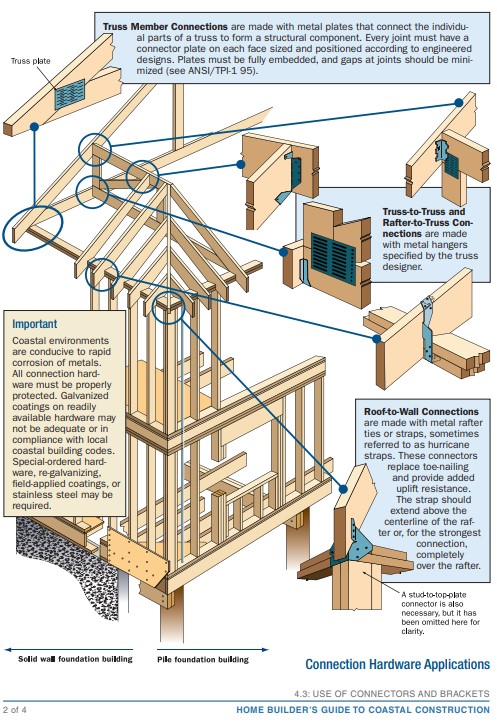
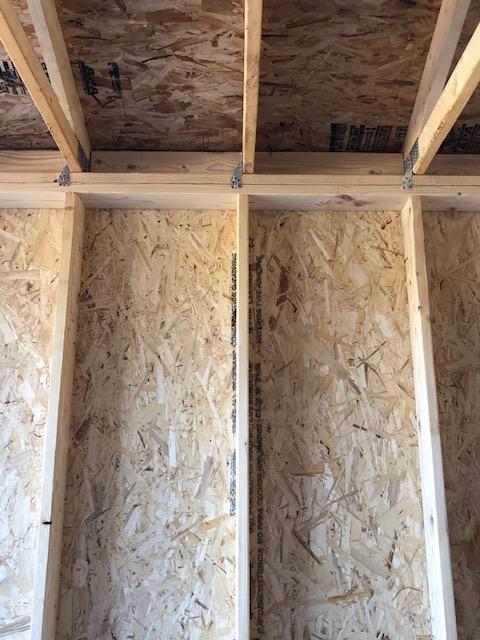
Right - The wall framing is connected to roof framing with metal ties for hurricane-resistant construction.
Image
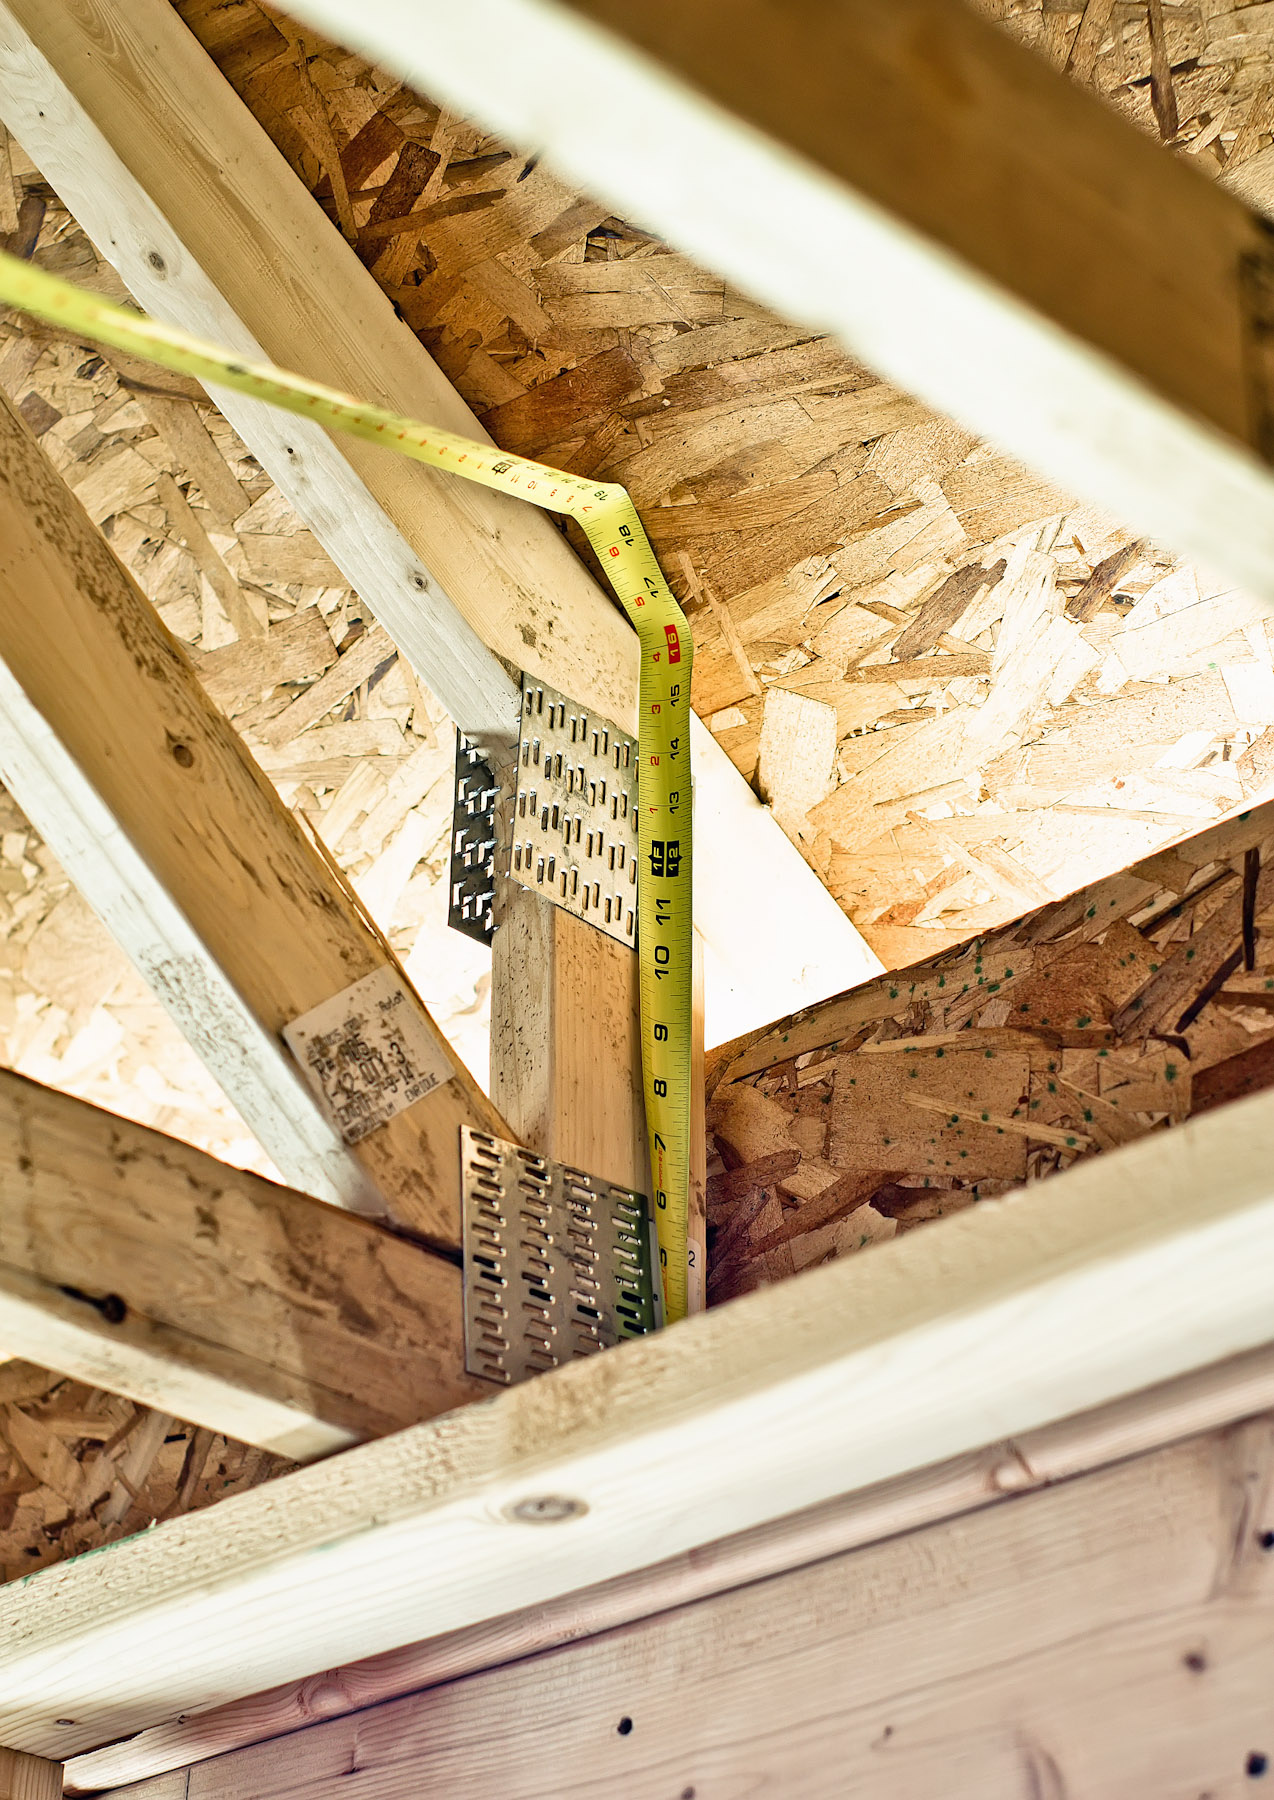
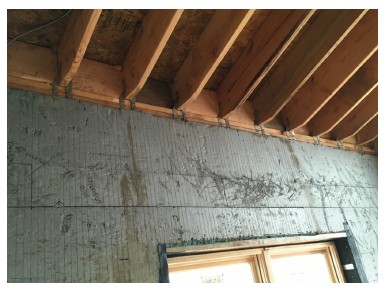
Right - These raised heel roof trusses provide 16 inches of space over the outer walls for full insulation coverage at the attic perimeter.
Image
Right - This concrete roof is properly attached and reinforced to withstand hurricane winds.
Image
Right - This roof has a low gable and is secured to the wall framing to resist wind uplift.
Image
Image
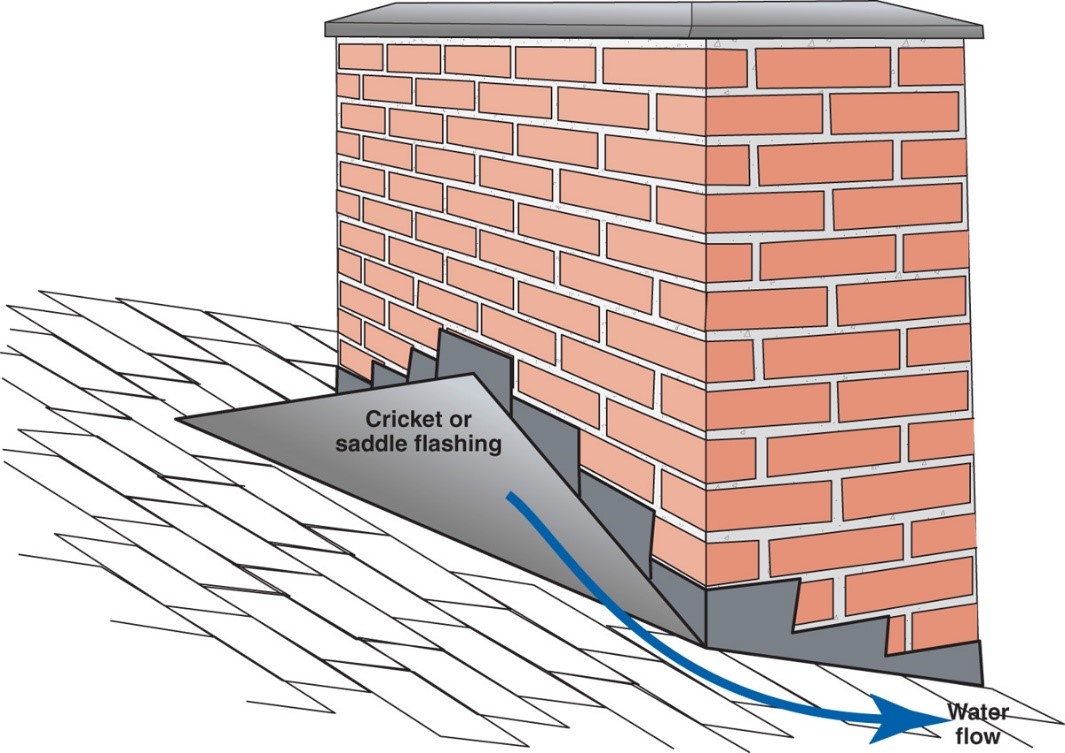
Right – A chimney cricket is installed and flashed to direct rainwater around the chimney
Image
Image
Image

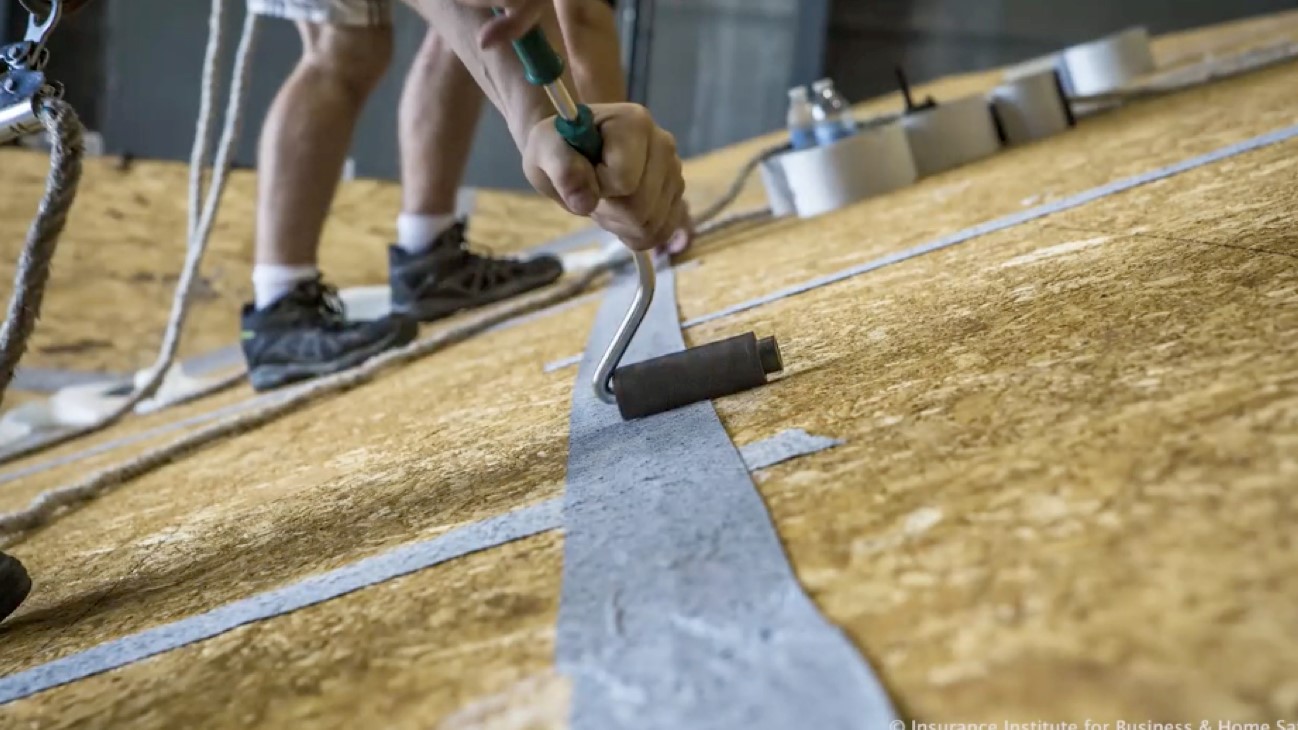
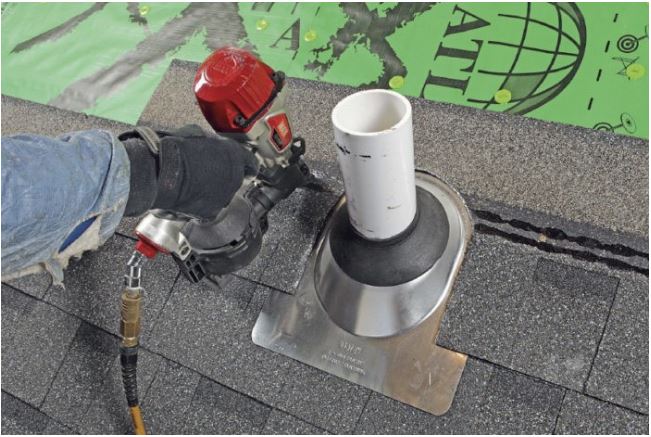
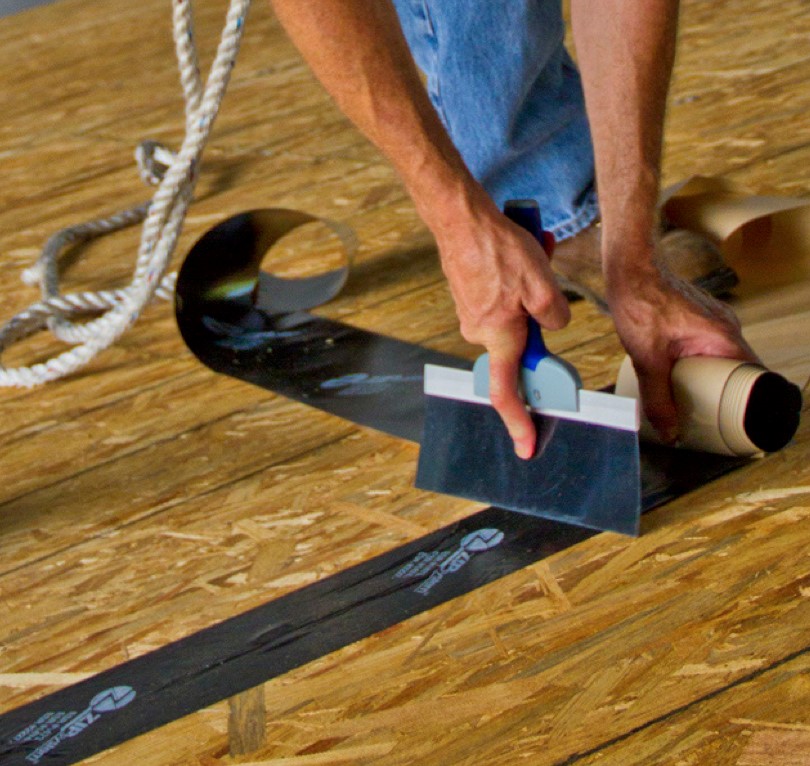
Right – All penetrations through the roof decking are sealed with paint-on flashing.
Image
Image
Image
Image

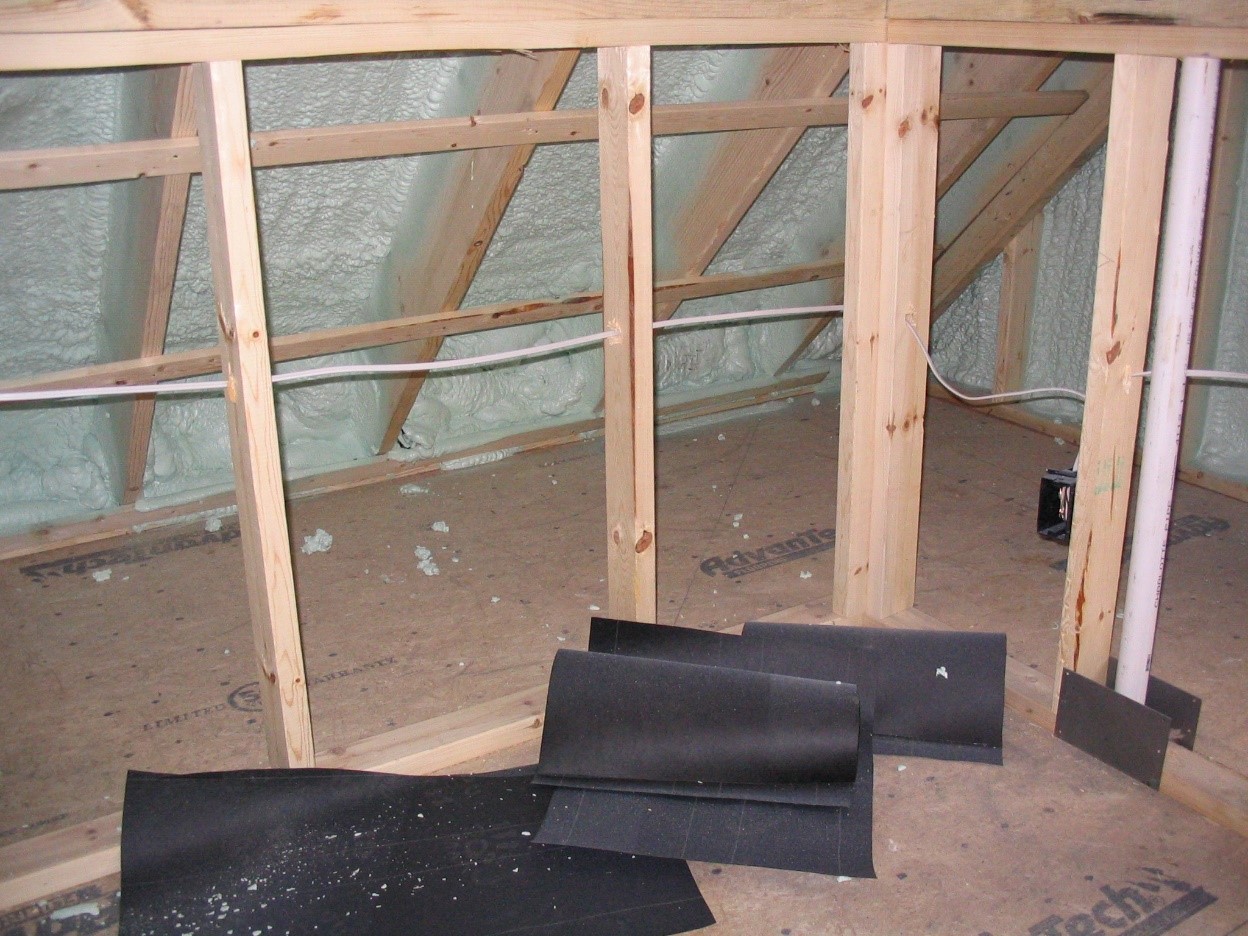
Right – Closed-cell polyurethane foam is sprayed on the underside of the roof deck to provide structural connections and seal seams in the sheathing to increase wind resistance
Image
Image
Image
Image
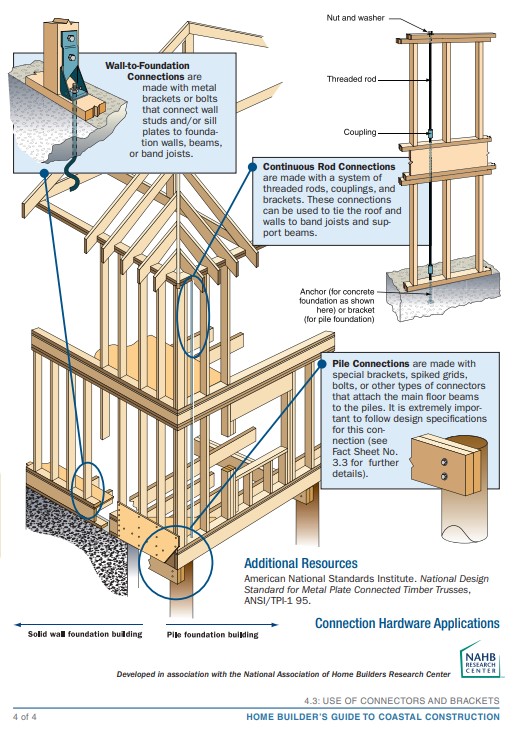
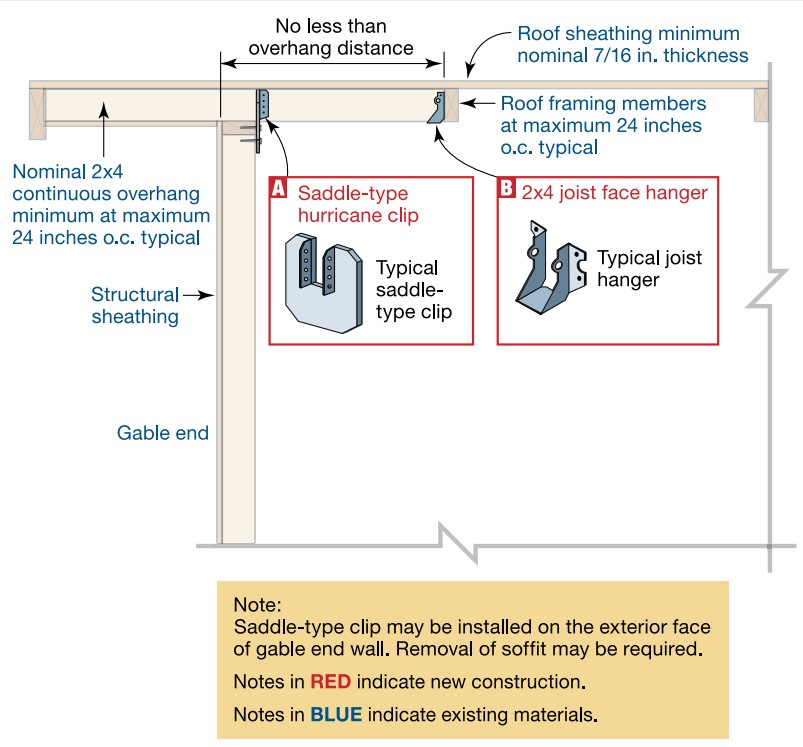
Right – Examples of wall stud to sill plate and foundation and wall rod connectors and brackets.
Image
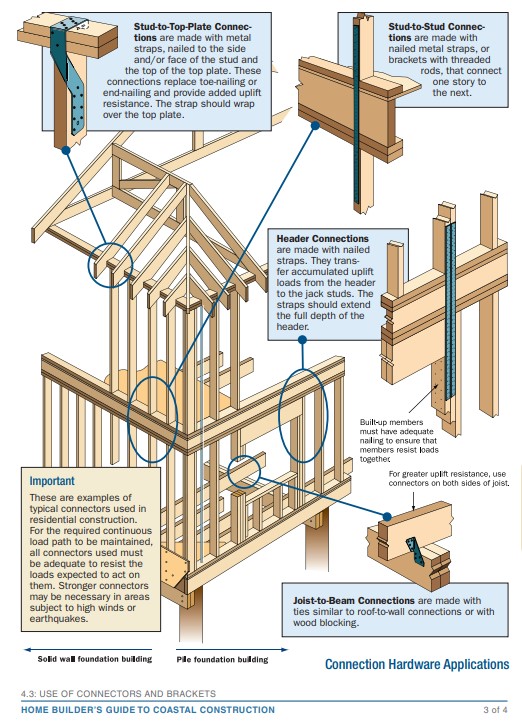
Right – Examples of wall stud to top plate and stud to rim joist framing connectors and brackets.
Image
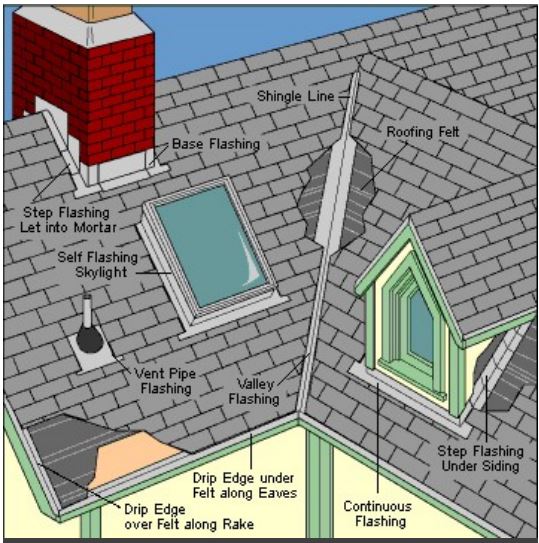
Right – Flashing is installed around chimney, skylight, vents, dormers, in valleys and at eaves
Image
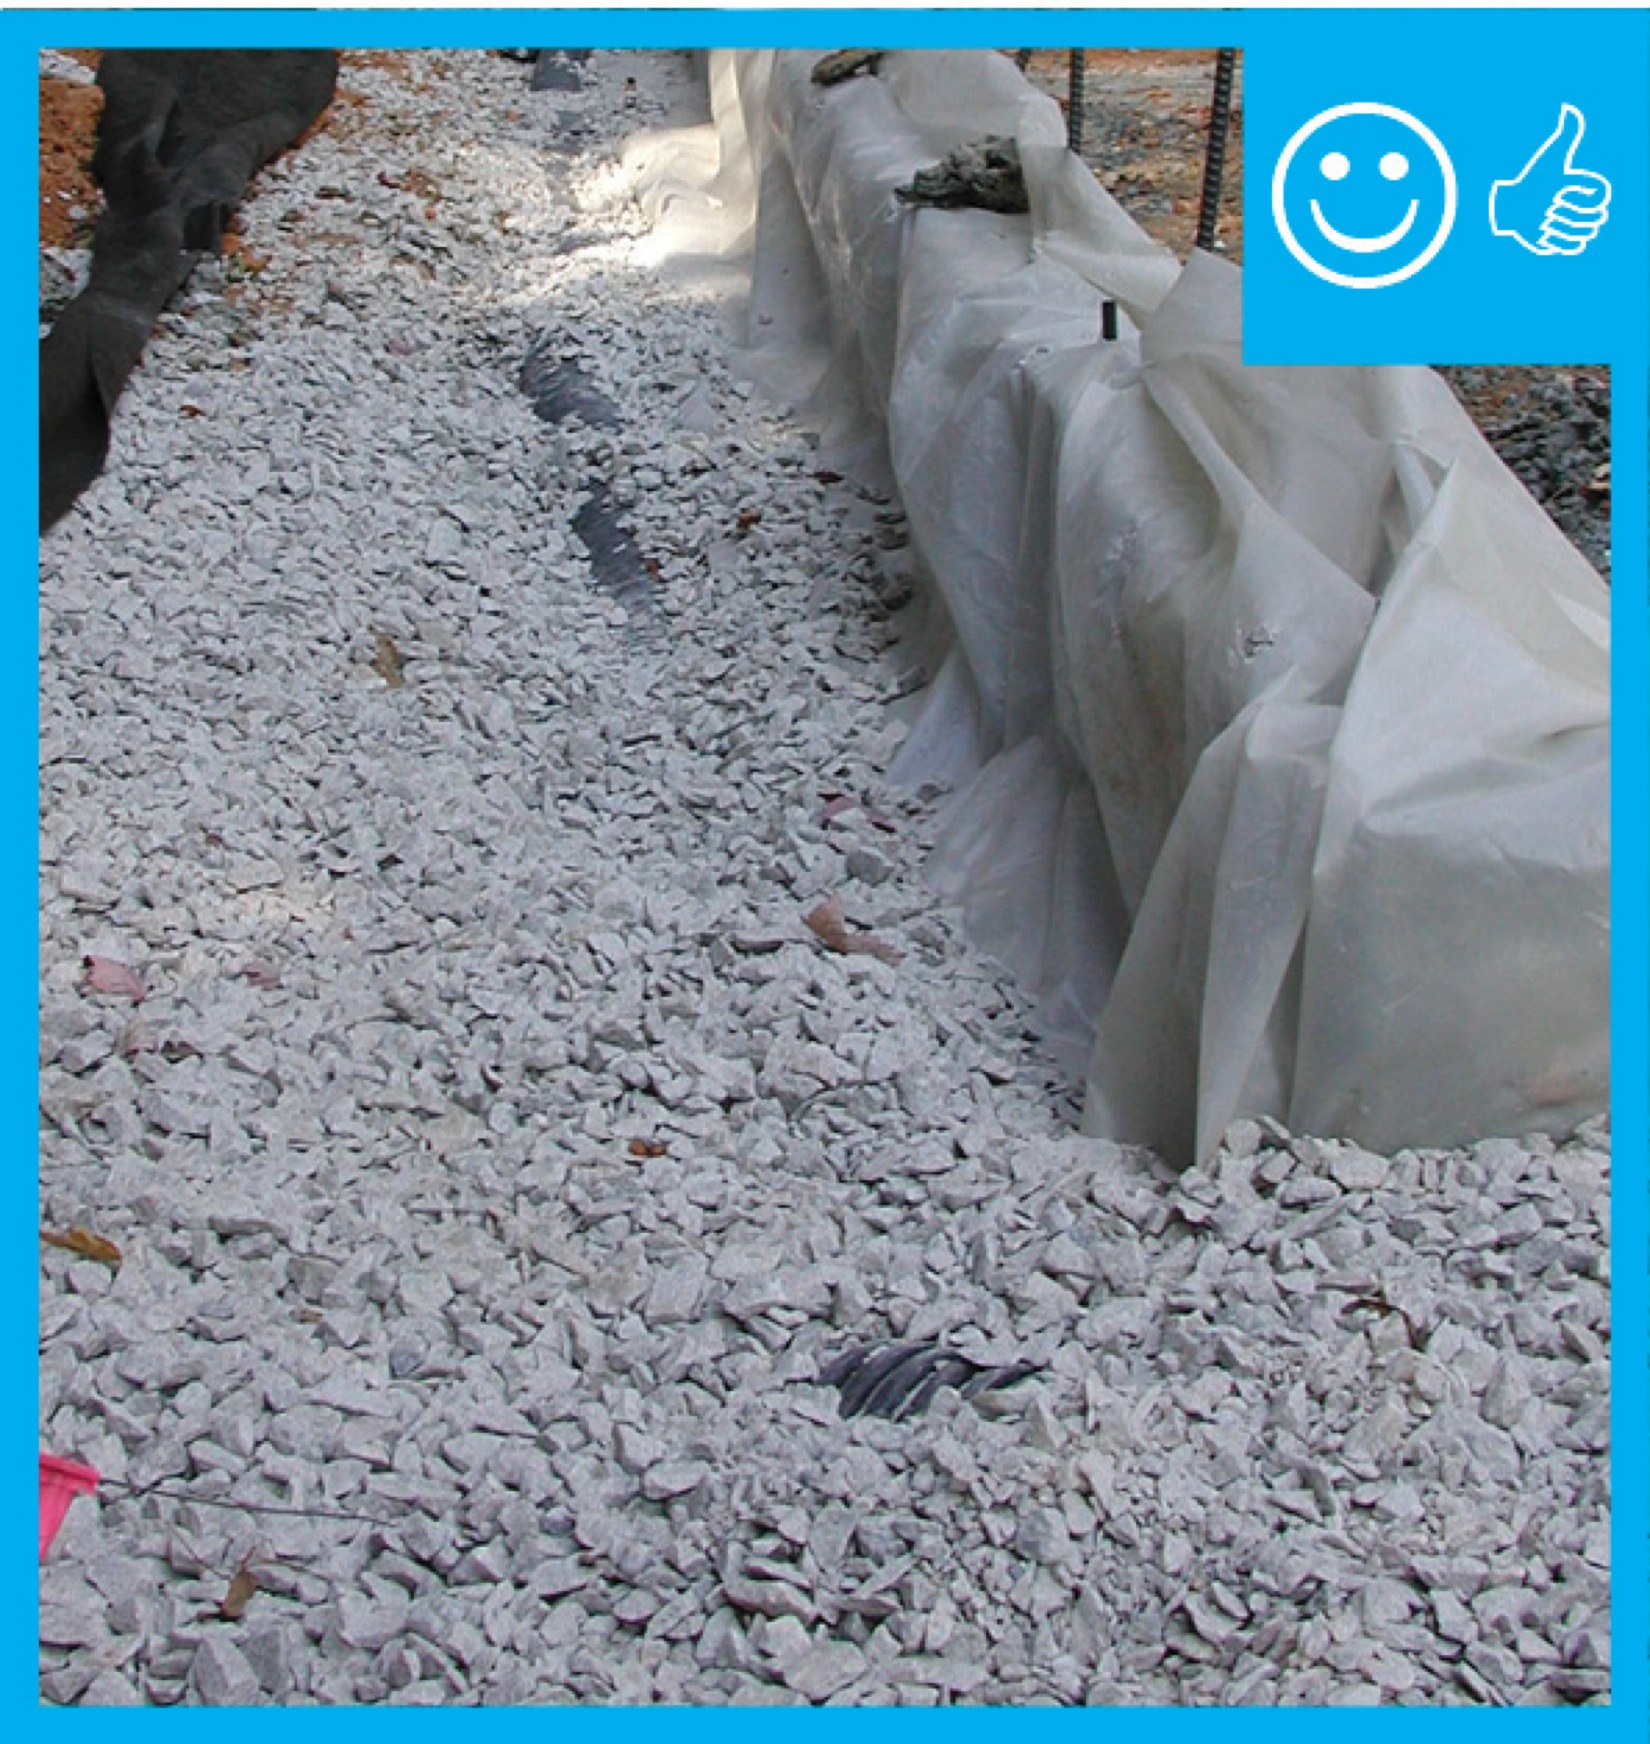
Right – House without gutters has waterproof liner, drain tile, and gravel bed extending more than 5 feet from foundation
Image
Image
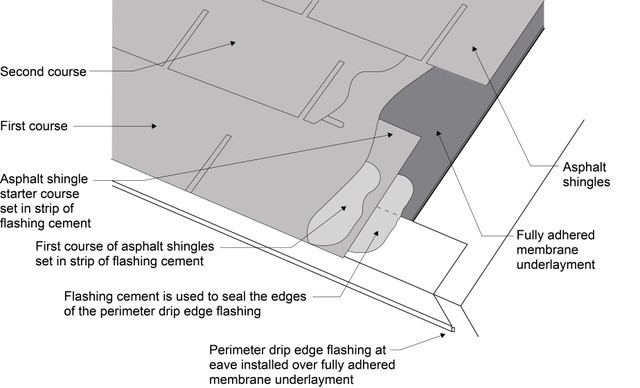
Right – If drip edge flashing is installed over fully adhered roof membrane at eaves, use flashing cement to seal the upper edge of the flashing
Image
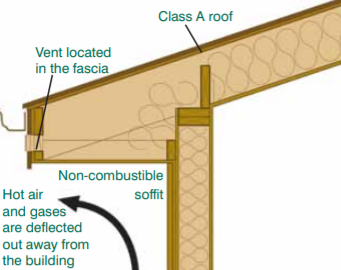
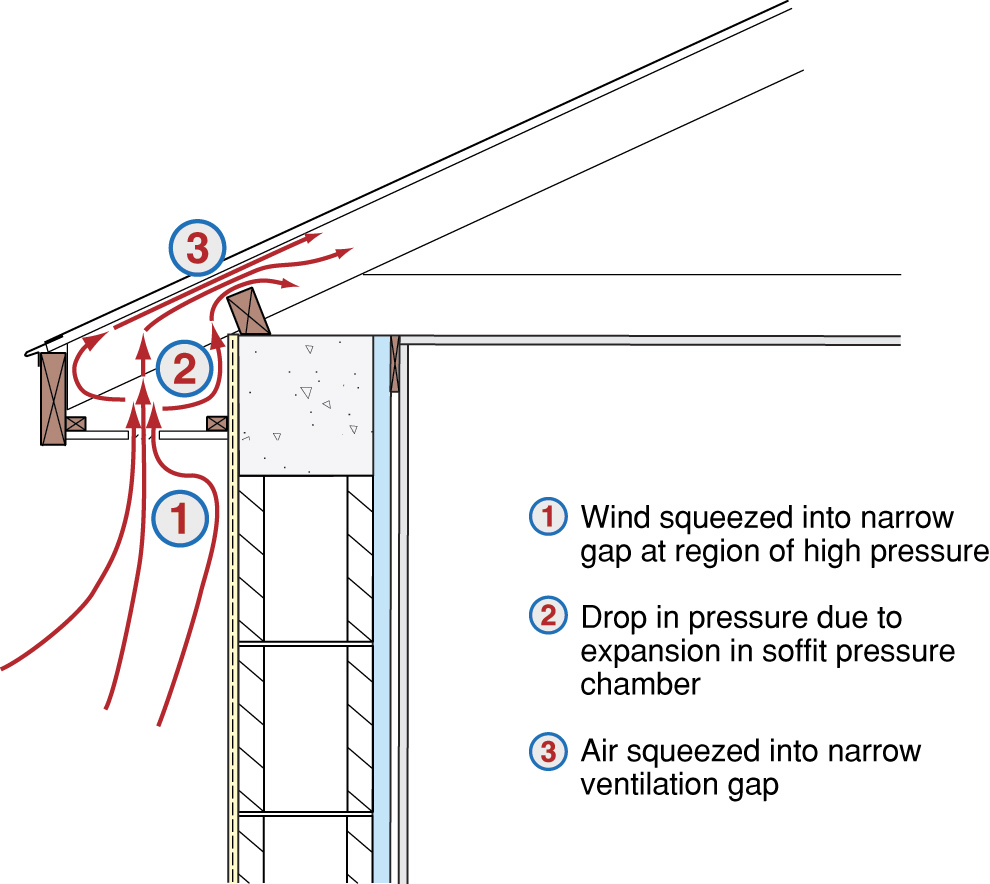
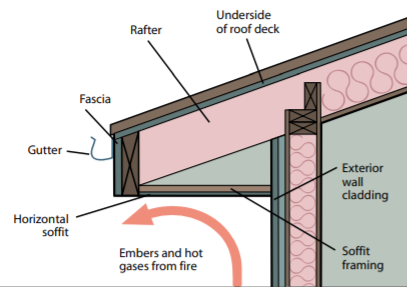
Right – In wildfire prone areas, using a flat soffit with venting on the fascia instead of an angled soffit with down-facing venting reduces the risk of catching rising embers.
Image
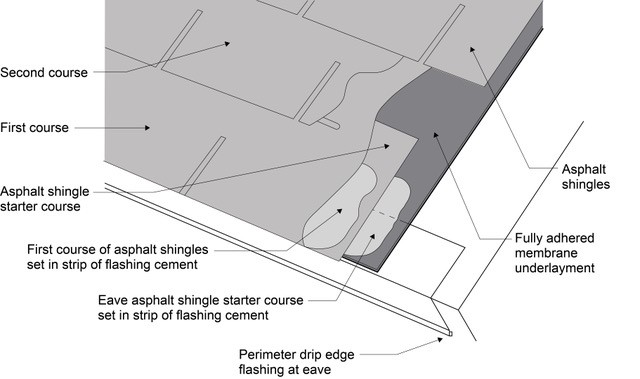
Right – Install asphalt shingles over a starter strip set in an 8-inch strip of flashing cement
Image
Image
Image
Image
Image
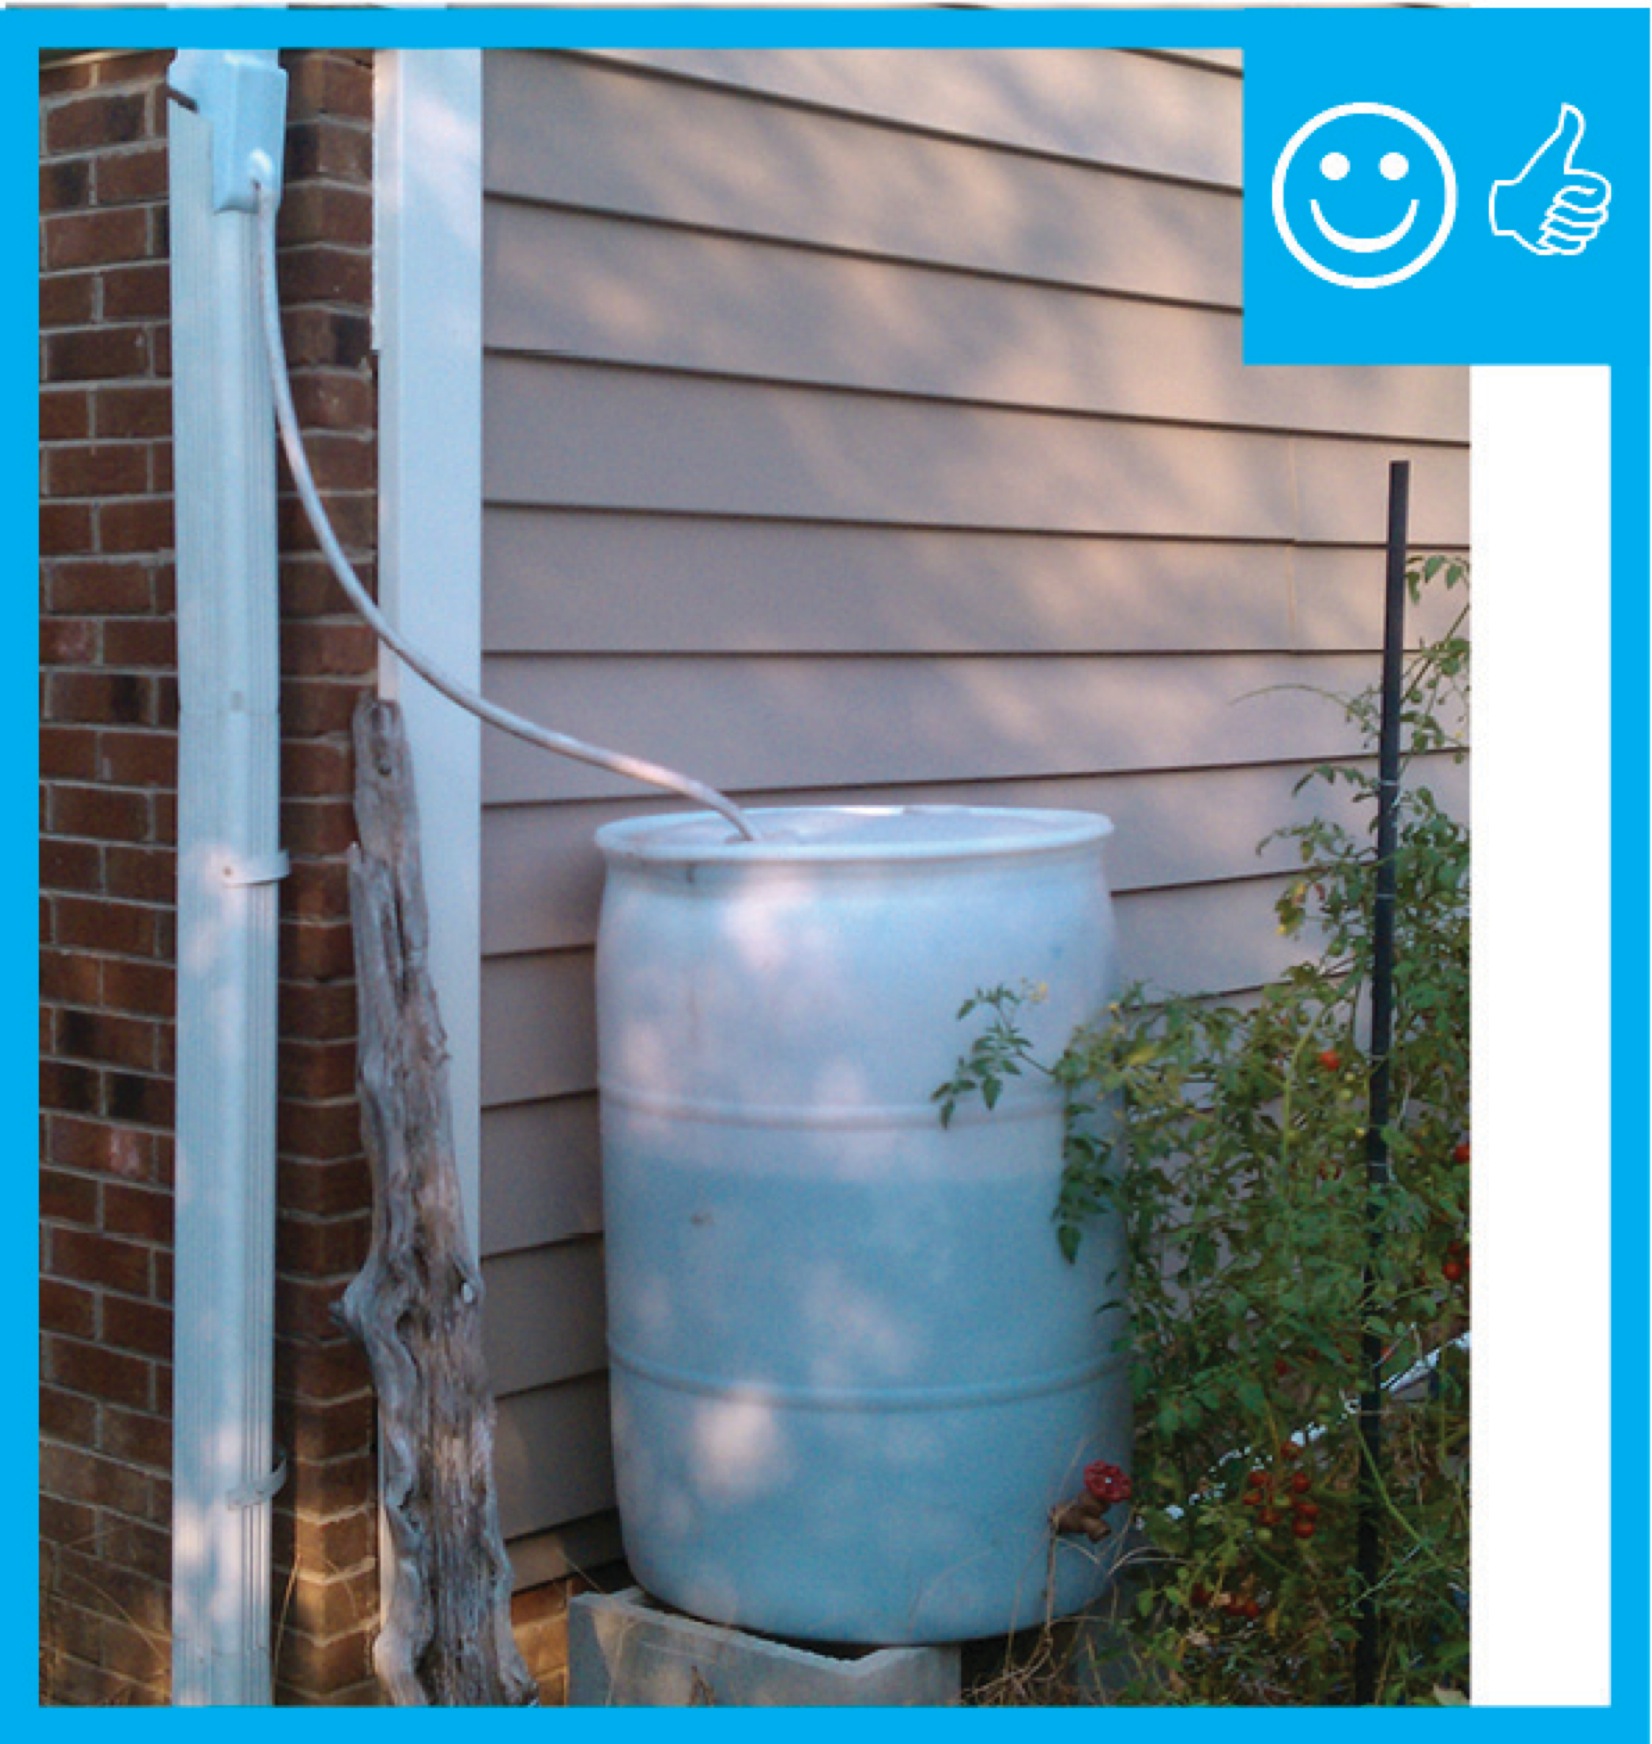
Right – Rain barrel installed with an overflow spout terminating at least 5 feet from foundation
Image
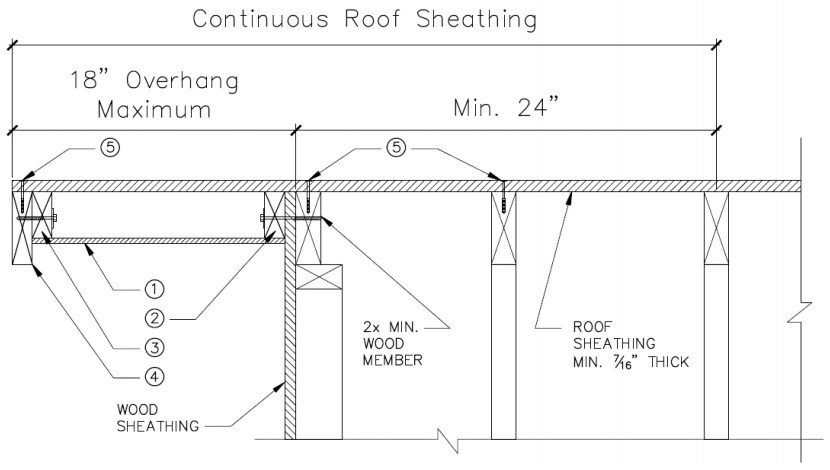
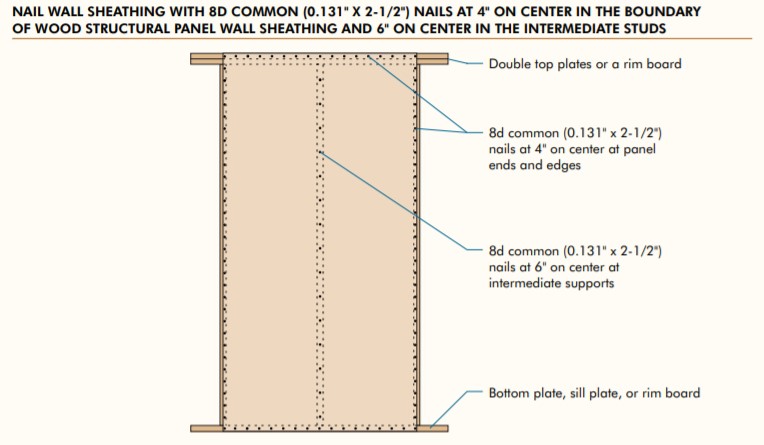
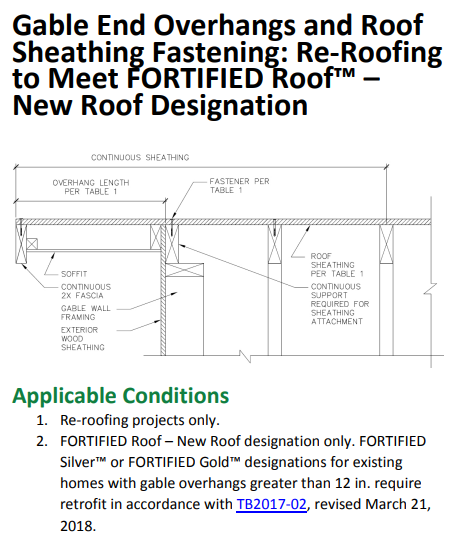
Right – Retrofit Specification for installing roof sheathing an 18-inch gable end overhang
Image

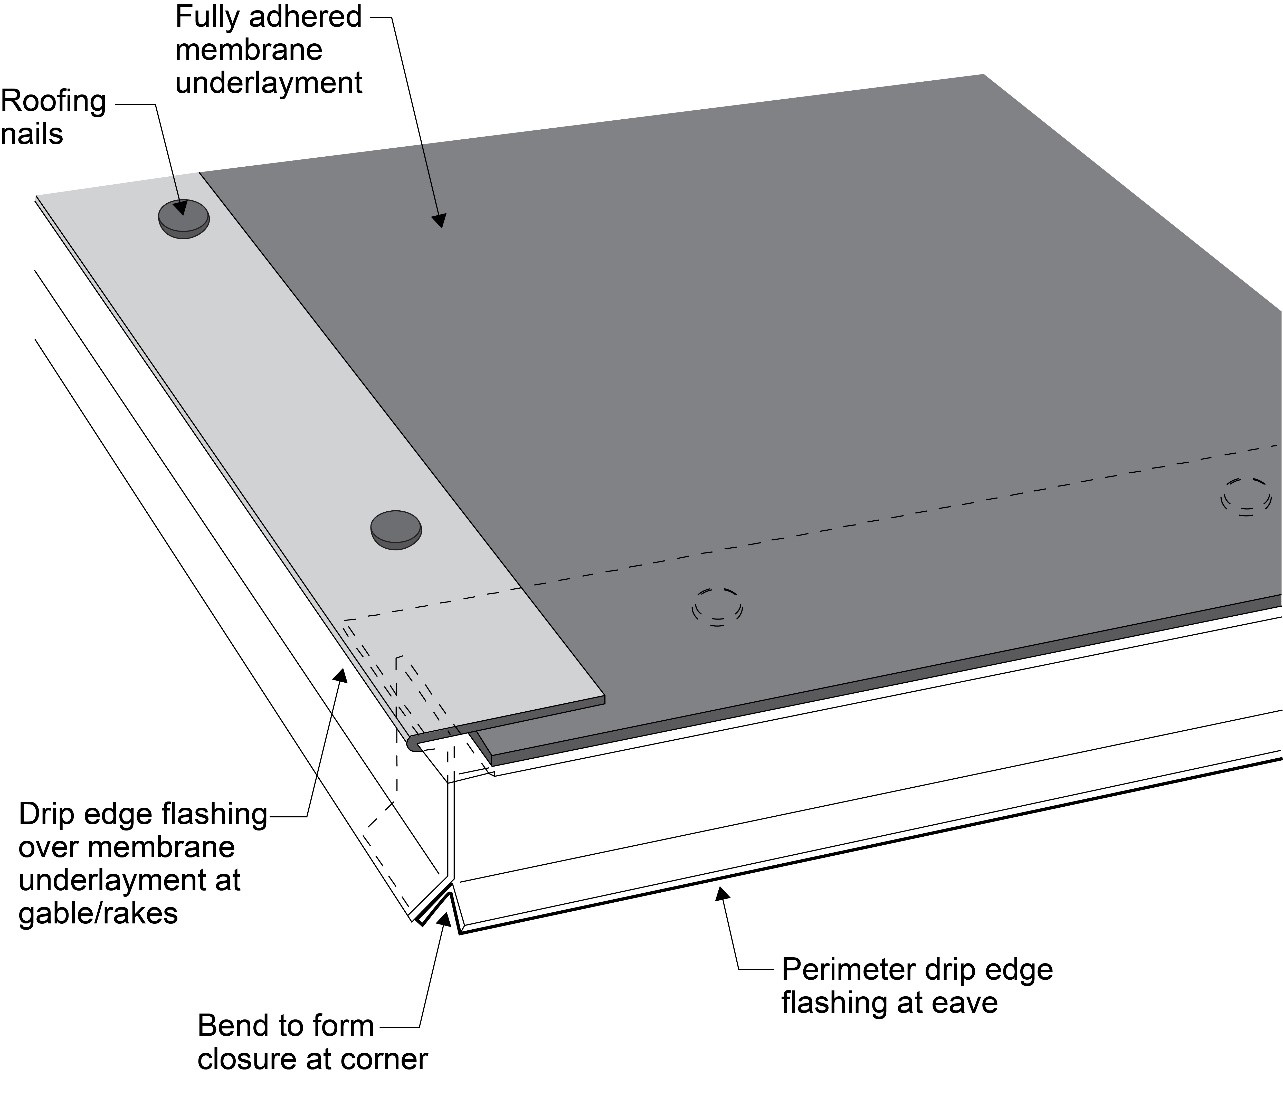
Right – Roof underlayment is fully adhered and roof deck seams are sealed so roof is resistant to high-wind events
Image
Right – Roof underlayment is fully adhered and roof deck seams are sealed so roof is resistant to high-wind events
Image
Image

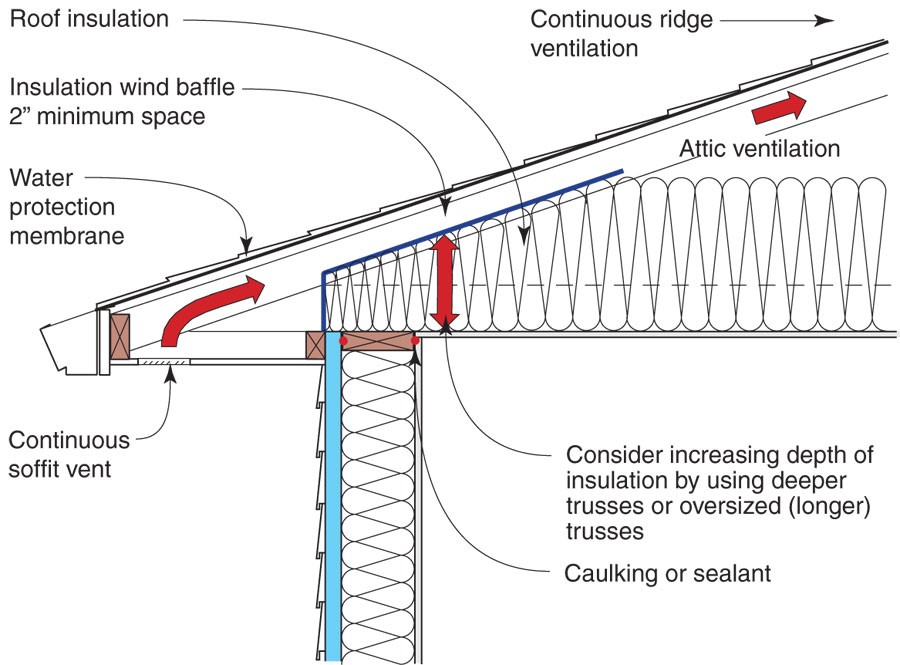
Right – Sheathing extends to rafters adding strength to soffit, baffles keep attic insulation from vent to maintain air flow
Image

Right – Start asphalt shingle installation with a starter strip set in an 8-inch strip of flashing cement