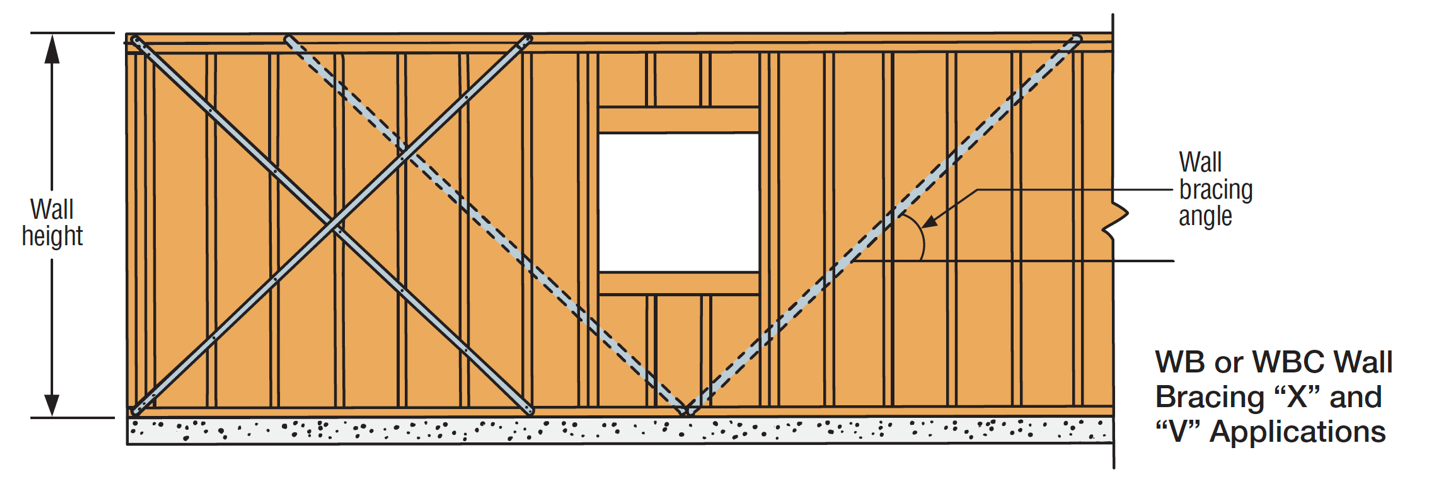
Showing results 1 - 34 of 34
Image
A masonry chimney is reconstructed to withstand seismic forces by adding an insert to the existing firebox
Image
A masonry chimney is reconstructed to withstand seismic forces by completely retrofitting the firebox and chimney using light-frame construction on the top of the foundation
Image
A masonry chimney is reconstructed to withstand seismic forces by maintaining the current firebox but replacing the chimney section with a metal flue and light-weight chimney enclosure.
Image
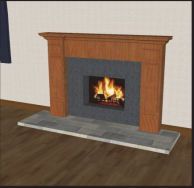
A masonry chimney is shortened and capped at roof level to reduce its chances of detaching in high winds or earthquakes; the fireplace can no longer be used.
Image
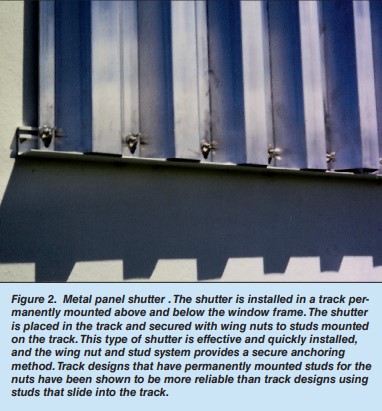
A metal storm panel is installed in a track permanently mounted above and below the window frame and secured with wing nuts to studs mounted on the track.
Image

Add metal connectors to strengthen framing connections in an existing wall from inside the home by removing drywall.
Image
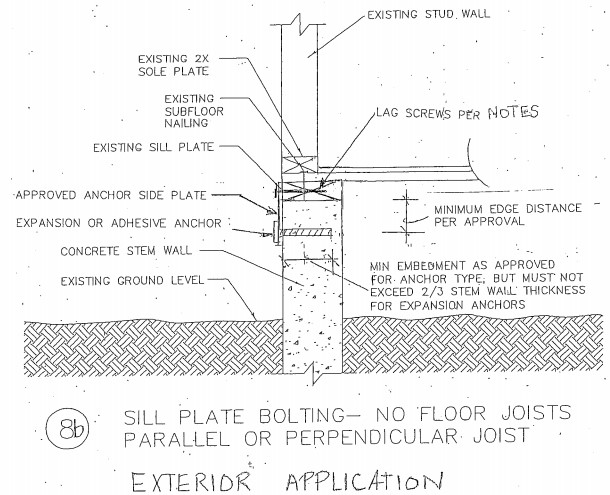
An anchor side plate is used to connect the concrete foundation to the sill plate from the exterior as part of a seismic retrofit when the sill plate is not accessible from the interior of the home
Image
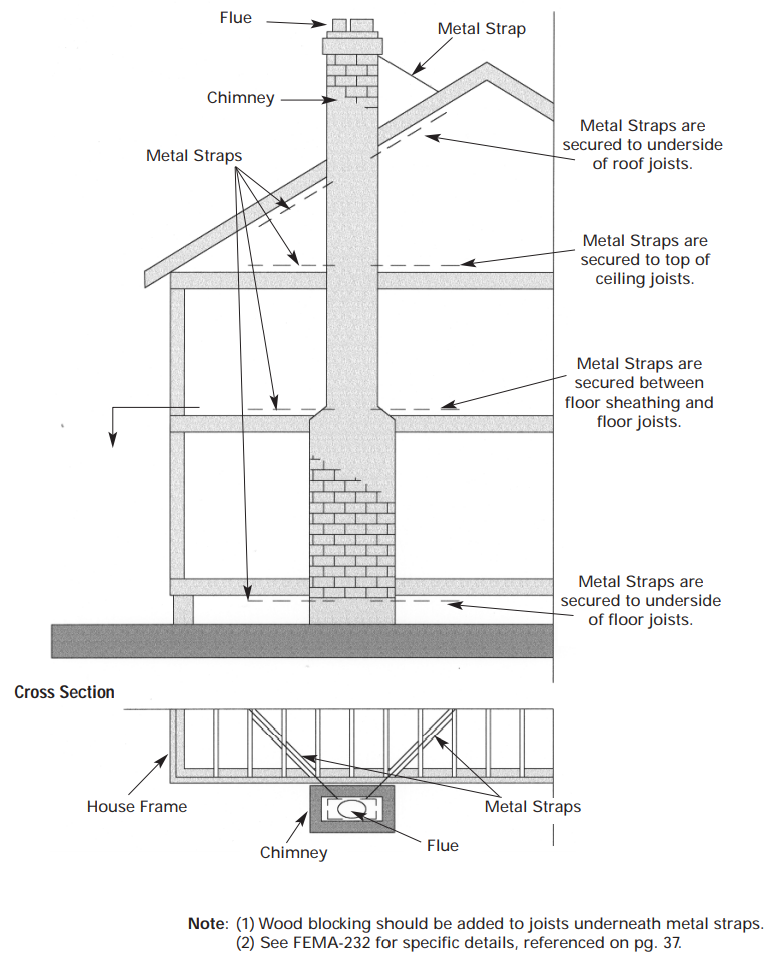
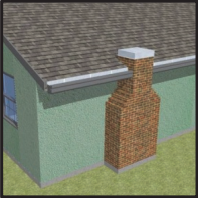
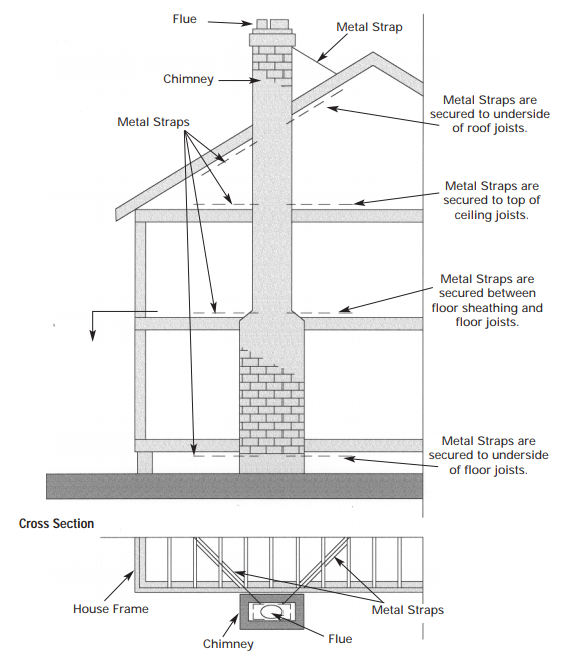
Chimney retrofit includes metal strap reinforcement at different levels of the home
Image
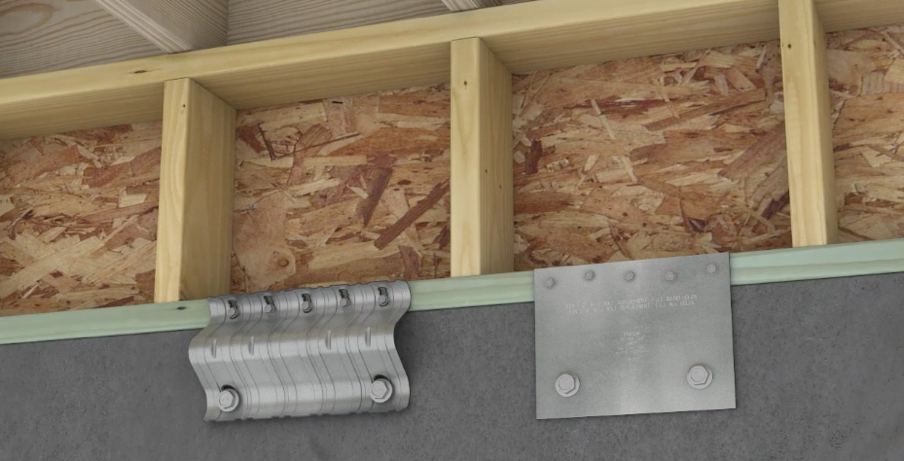
Correct seismic retrofit hardware for securing the sill plate to foundation wall
Image
Detail for reinforcing a cripple wall to resist earthquake movement by installing anchor bolts and plywood reinforcement.
Image
For seismic retrofit of crawlspace with posts and piers, add cross bracing to posts; add cross bracing and solid blocking between floor joists
Image
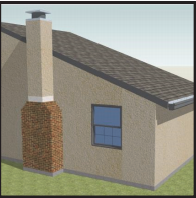
How to reinforce a chimney to resist earthquakes and high winds – side and top views.
Image
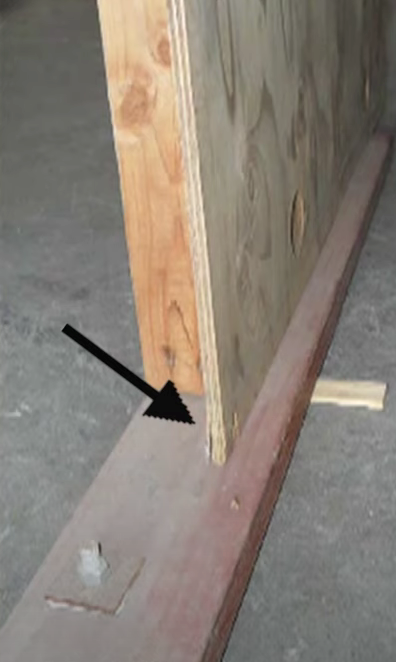
Incorrectly done seismic retrofit, the plywood sheathing is not nailed to the mud sill and therefore it is not providing any shear strength
Image

Image

Joist straps or hangers and metal connector plates can reinforce a post-and-pier foundation against seismic movement
Image
Image
Modern Low-E storm windows are typically kept up year-round but can be removed without damage to the existing window frame, an important consideration for historic preservation projects
Image

Image
Image
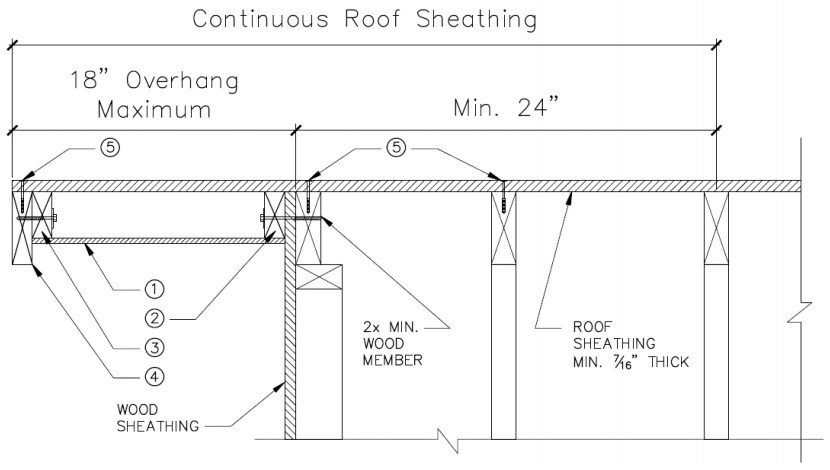
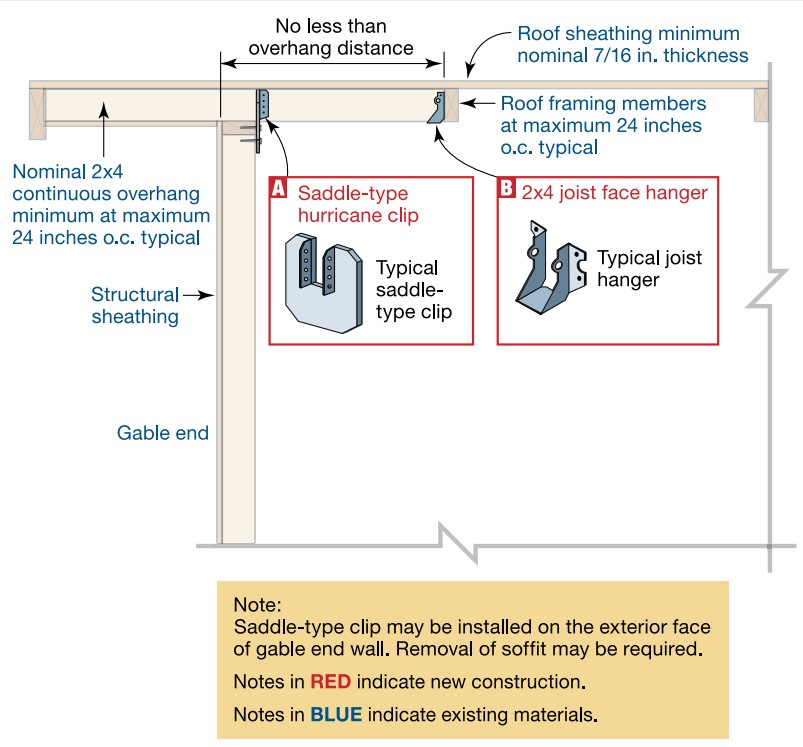
Right – Retrofit Specification for installing roof sheathing an 18-inch gable end overhang
Image
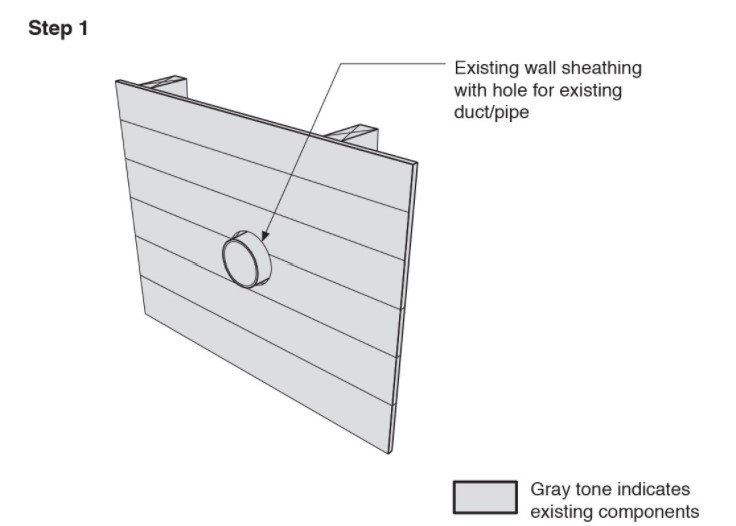
Step 1. Remove the existing wall cladding to prepare to retrofit an exterior wall.
Image
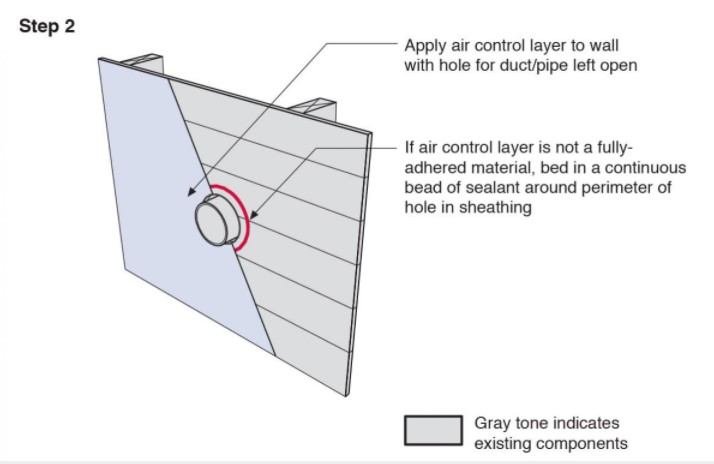
Step 2. Install a continuous air and water control layer over the existing wall sheathing.
Image
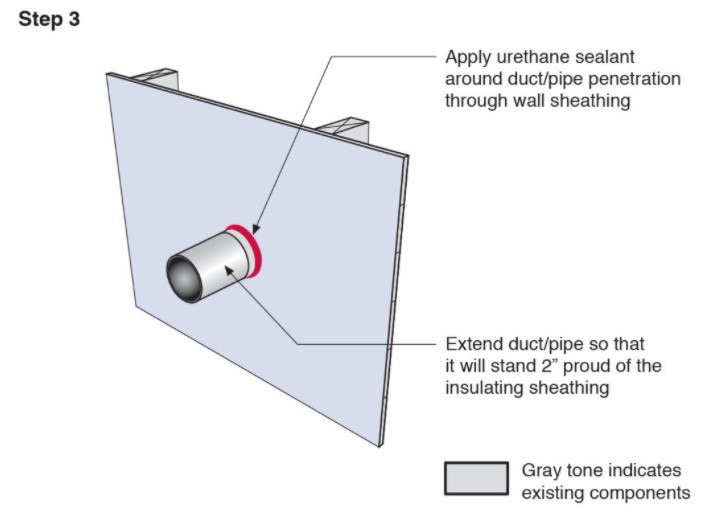
Step 3. Apply urethane sealant around the duct or pipe in the retrofitted exterior wall.
Image
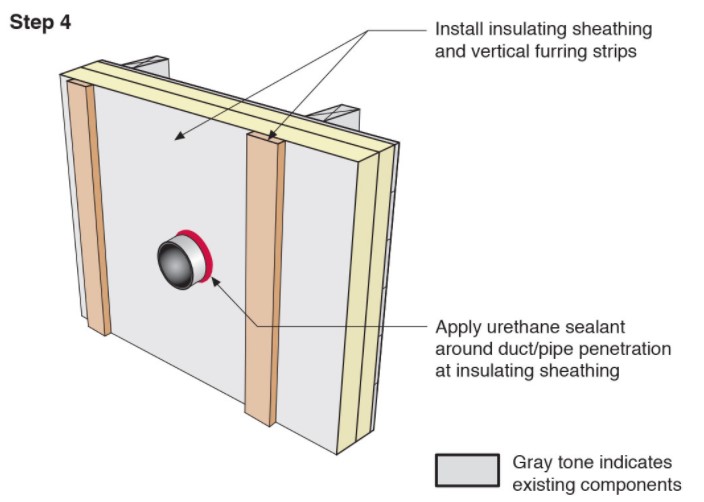
Step 4. Install insulating sheathing and vertical furring strips on the retrofitted exterior wall; seal around pipe or duct with urethane sealant.
Image
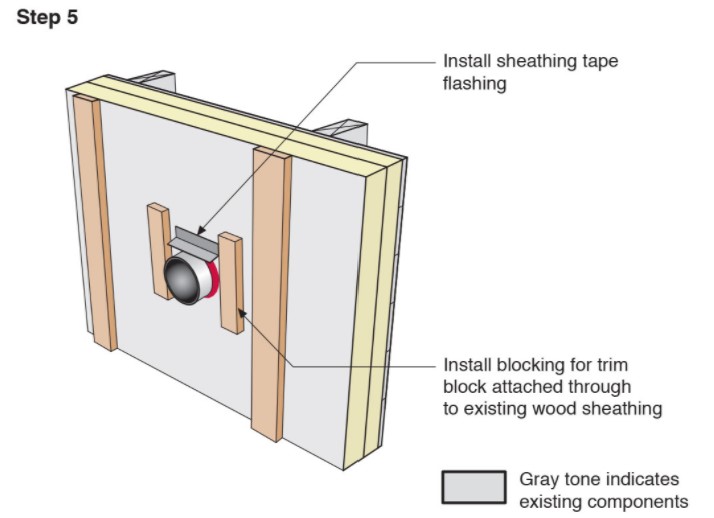
Step 5. Install sheathing tape flashing over the duct or pipe and wood blocking on either side for later attachment of trim.
Image
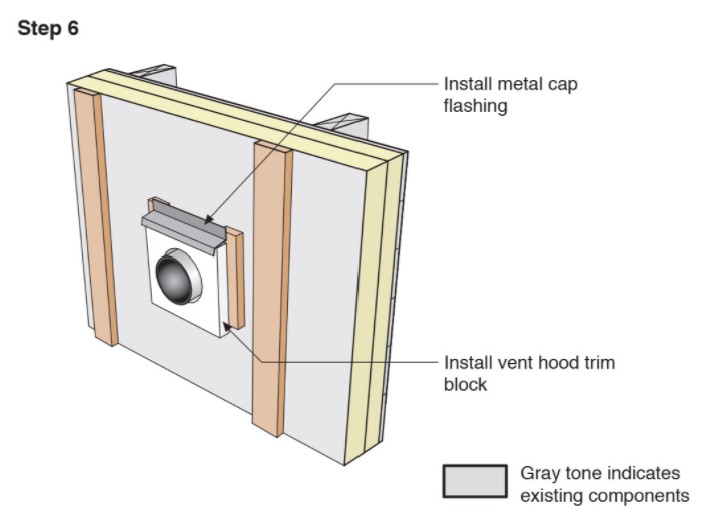
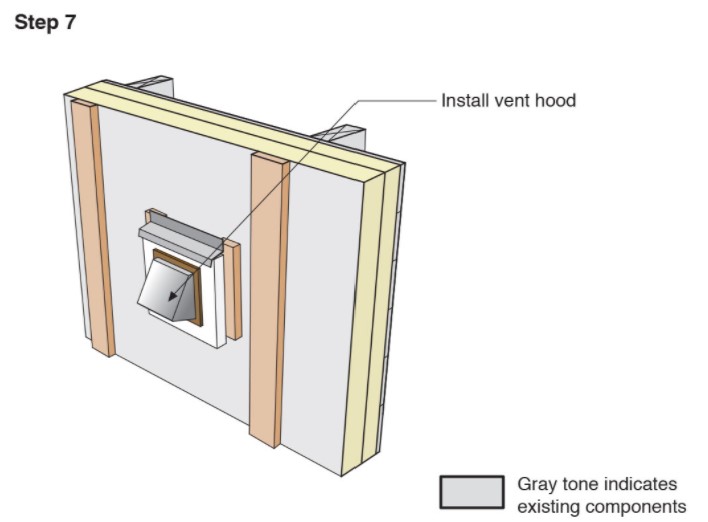
Step 6. Install vent hood trim block, metal cap flashing; seal top edge of flashing with sheathing tape.
Image
Image
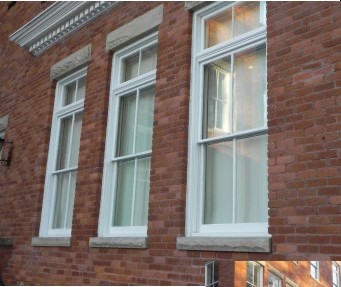
The addition of low-E permanent exterior storm windows is typically accepted for most historic preservation projects
Image
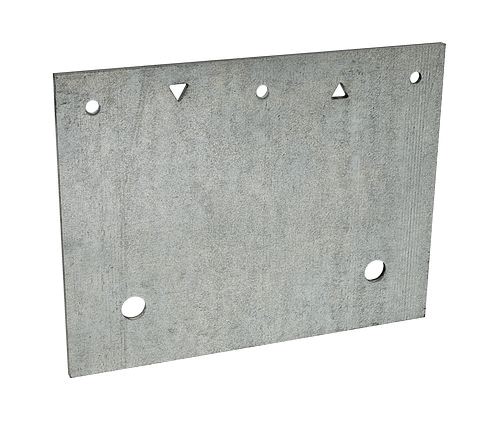
The flat retrofit foundation plate is used to connect the concrete foundation to the sill plate from the exterior of the building as part of a seismic retrofit
Image
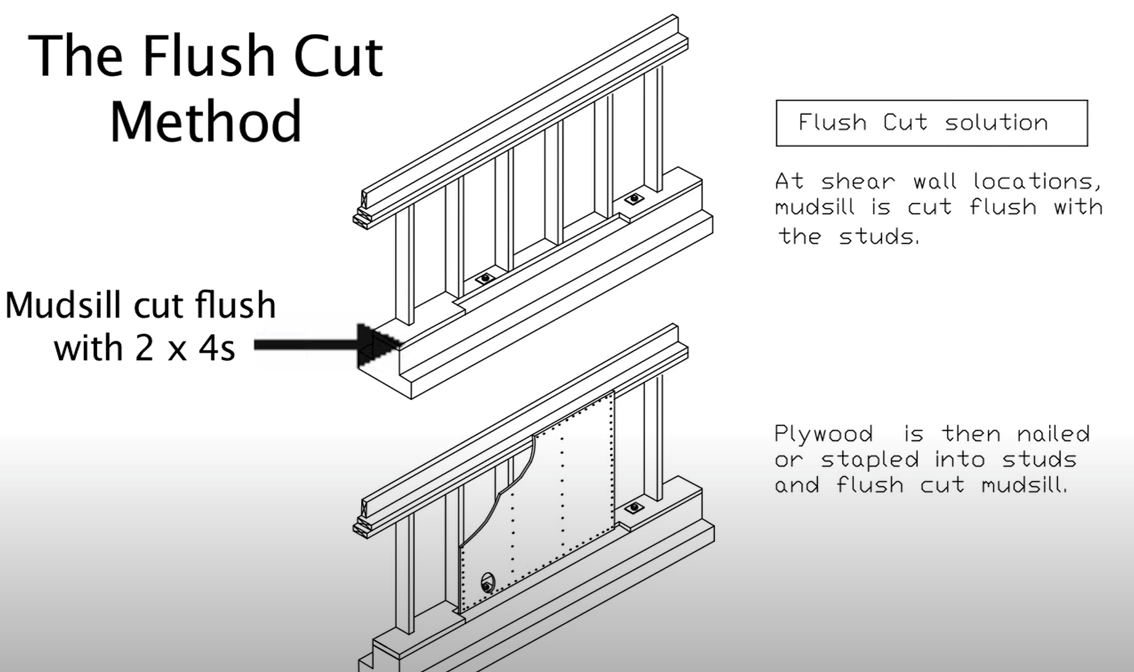
The flush cut method for seismic retrofit bracing of a cripple wall allows the plywood sheathing to be attached directly to both the cripple studs and the notched section of the mudsill
Image
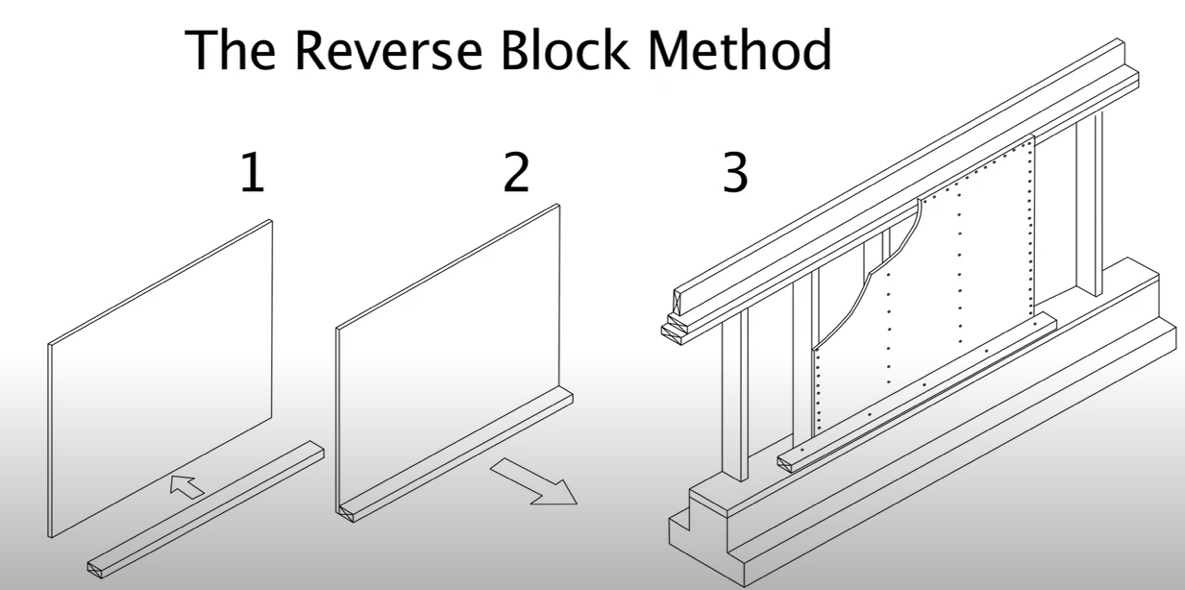
The reverse block method for seismic retrofit bracing of a cripple wall uses a 2x4 attached to the sill plate to provide a means to attach the plywood cripple wall sheathing to the sill plate
Image

The universal retrofit foundation plate is used to connect the concrete foundation to the sill plate as part of a seismic retrofit
Image
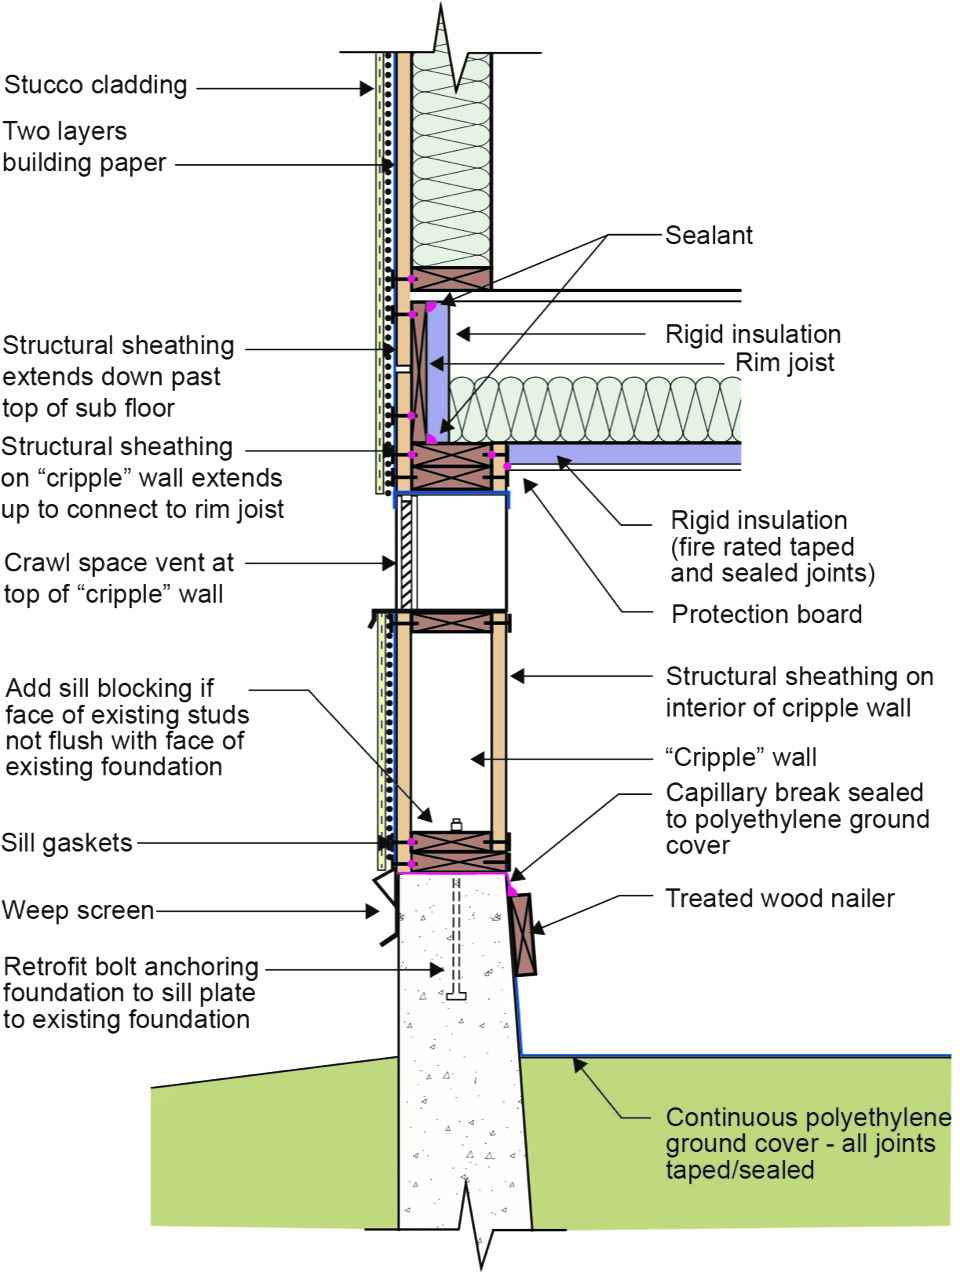
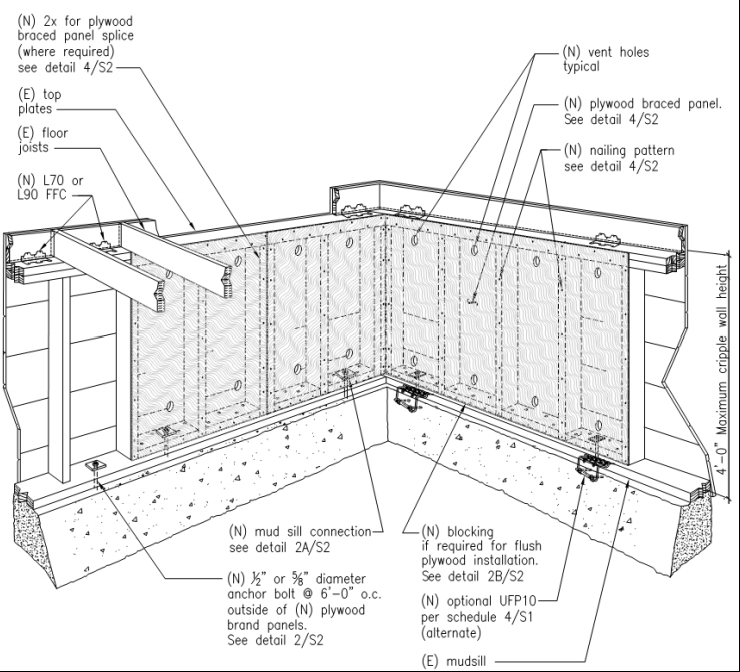
Vented crawlspace cripple wall has seismic retrofits – plywood is added on interior that fastens to extra blocking added at sill plate and connected to foundation with new anchor bolts
Image
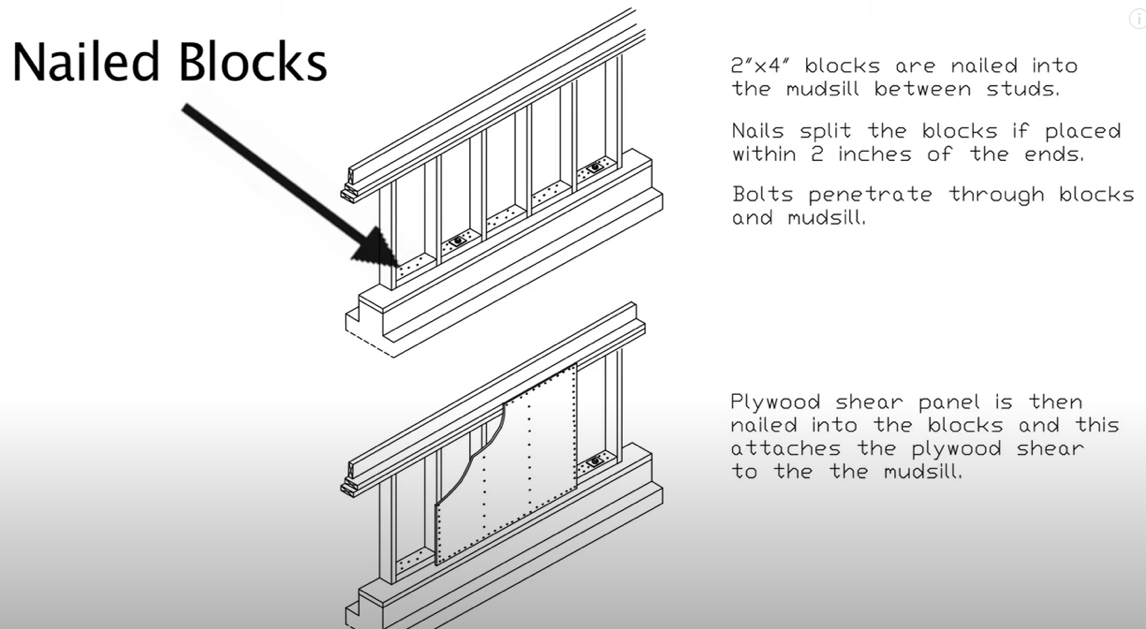
With the nailed block method, wood blocks are attached to the sill plate and the cripple wall plywood is attached to the block to provide shear strength for correctly bracing a cripple wall in a seismic retrofit