Showing results 601 - 700 of 1165
Image

Image
Image

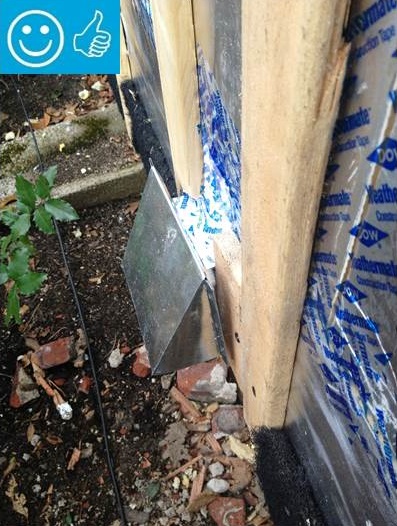
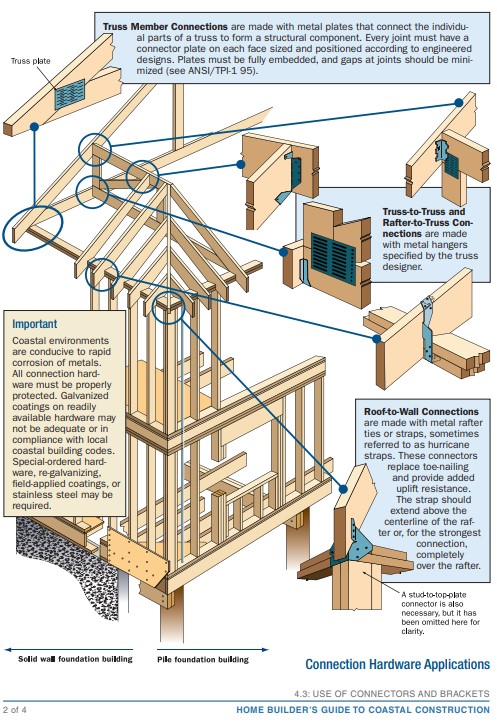
Right - The wall framing is connected to roof framing with metal ties for hurricane-resistant construction.
Image
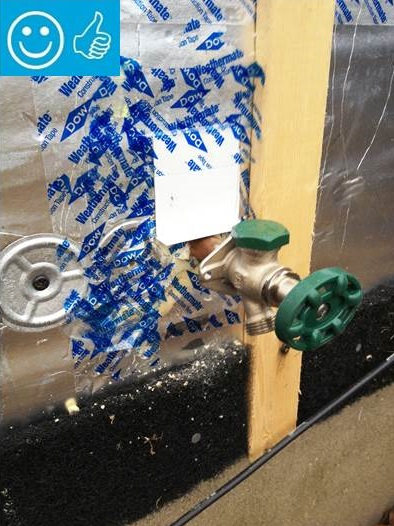
Right - The water and air control layers are properly integrated around the hose bib
Image
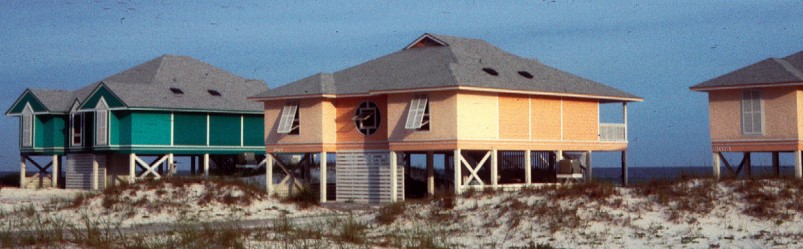
Right - These homes have hurricane shutters to protect against high winds and to provide solar control.
Image
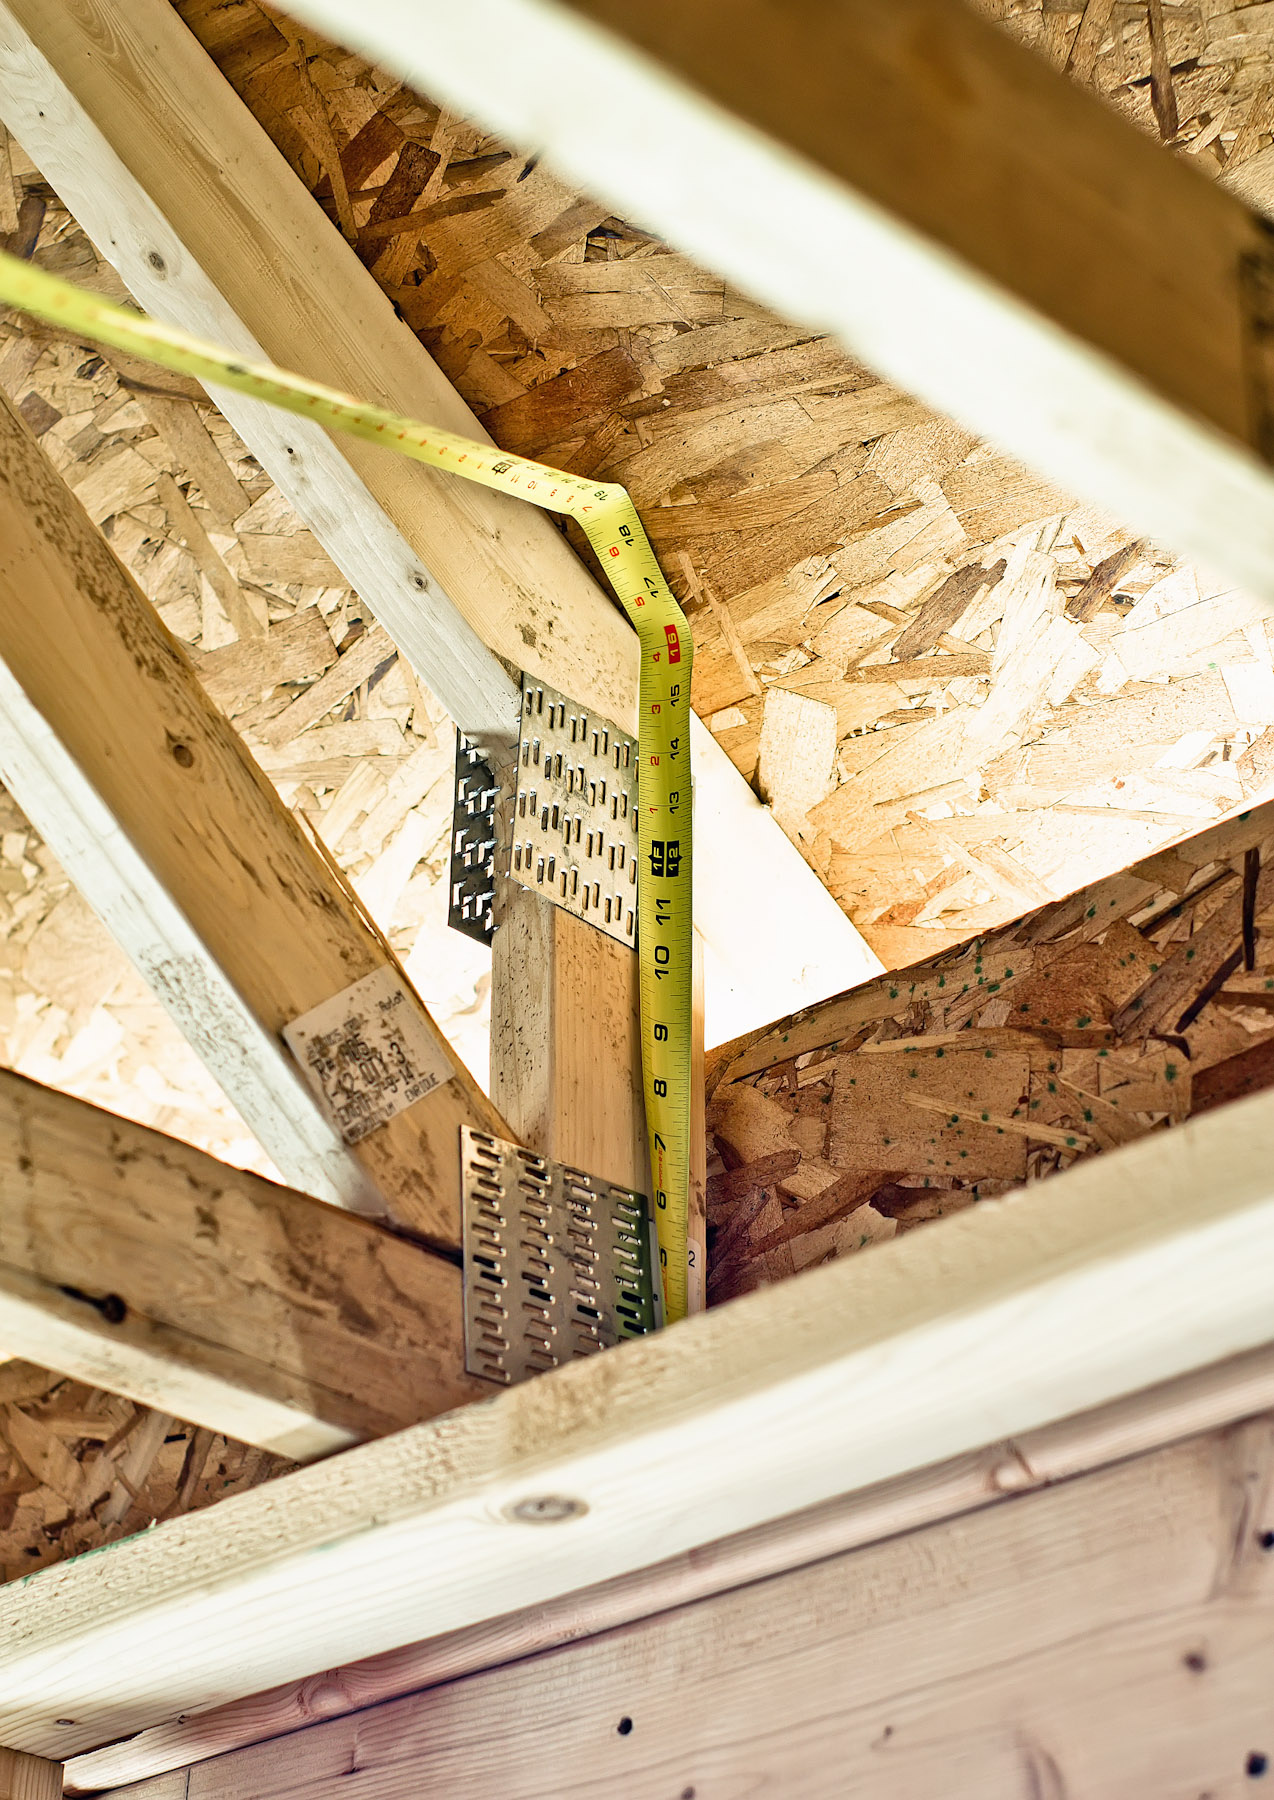
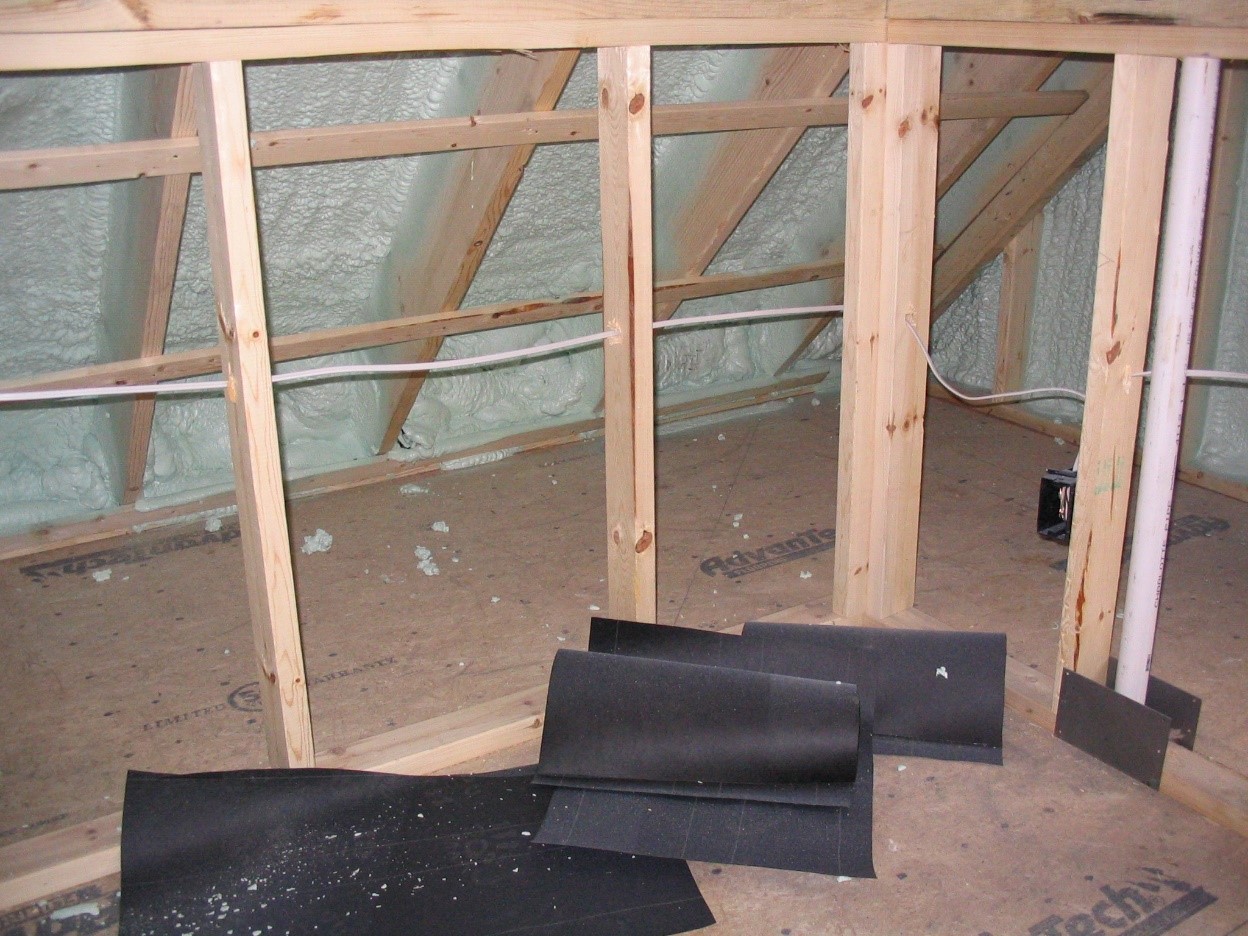
Right - These raised heel roof trusses provide 16 inches of space over the outer walls for full insulation coverage at the attic perimeter.
Image

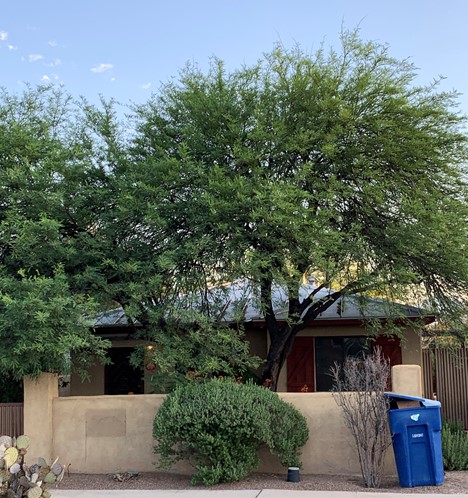
Right - This builder preserved the trees around this new urban-infill home, providing excellent shading in the summer.
Image
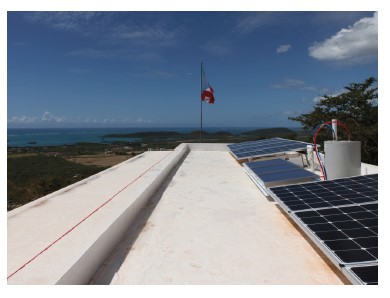
Right - This concrete roof is properly attached and reinforced to withstand hurricane winds.
Image
Image

Right - This duct penetration is properly flashed and integrated with the taped, foil-faced foam sheathing layer, which serves as the air and water barrier
Image
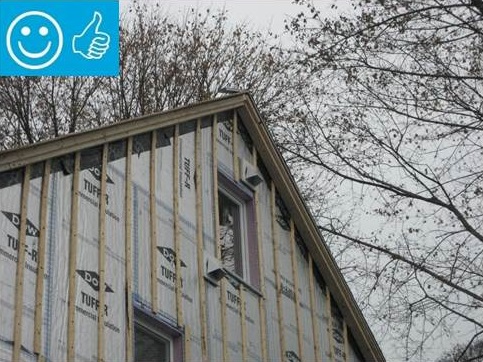
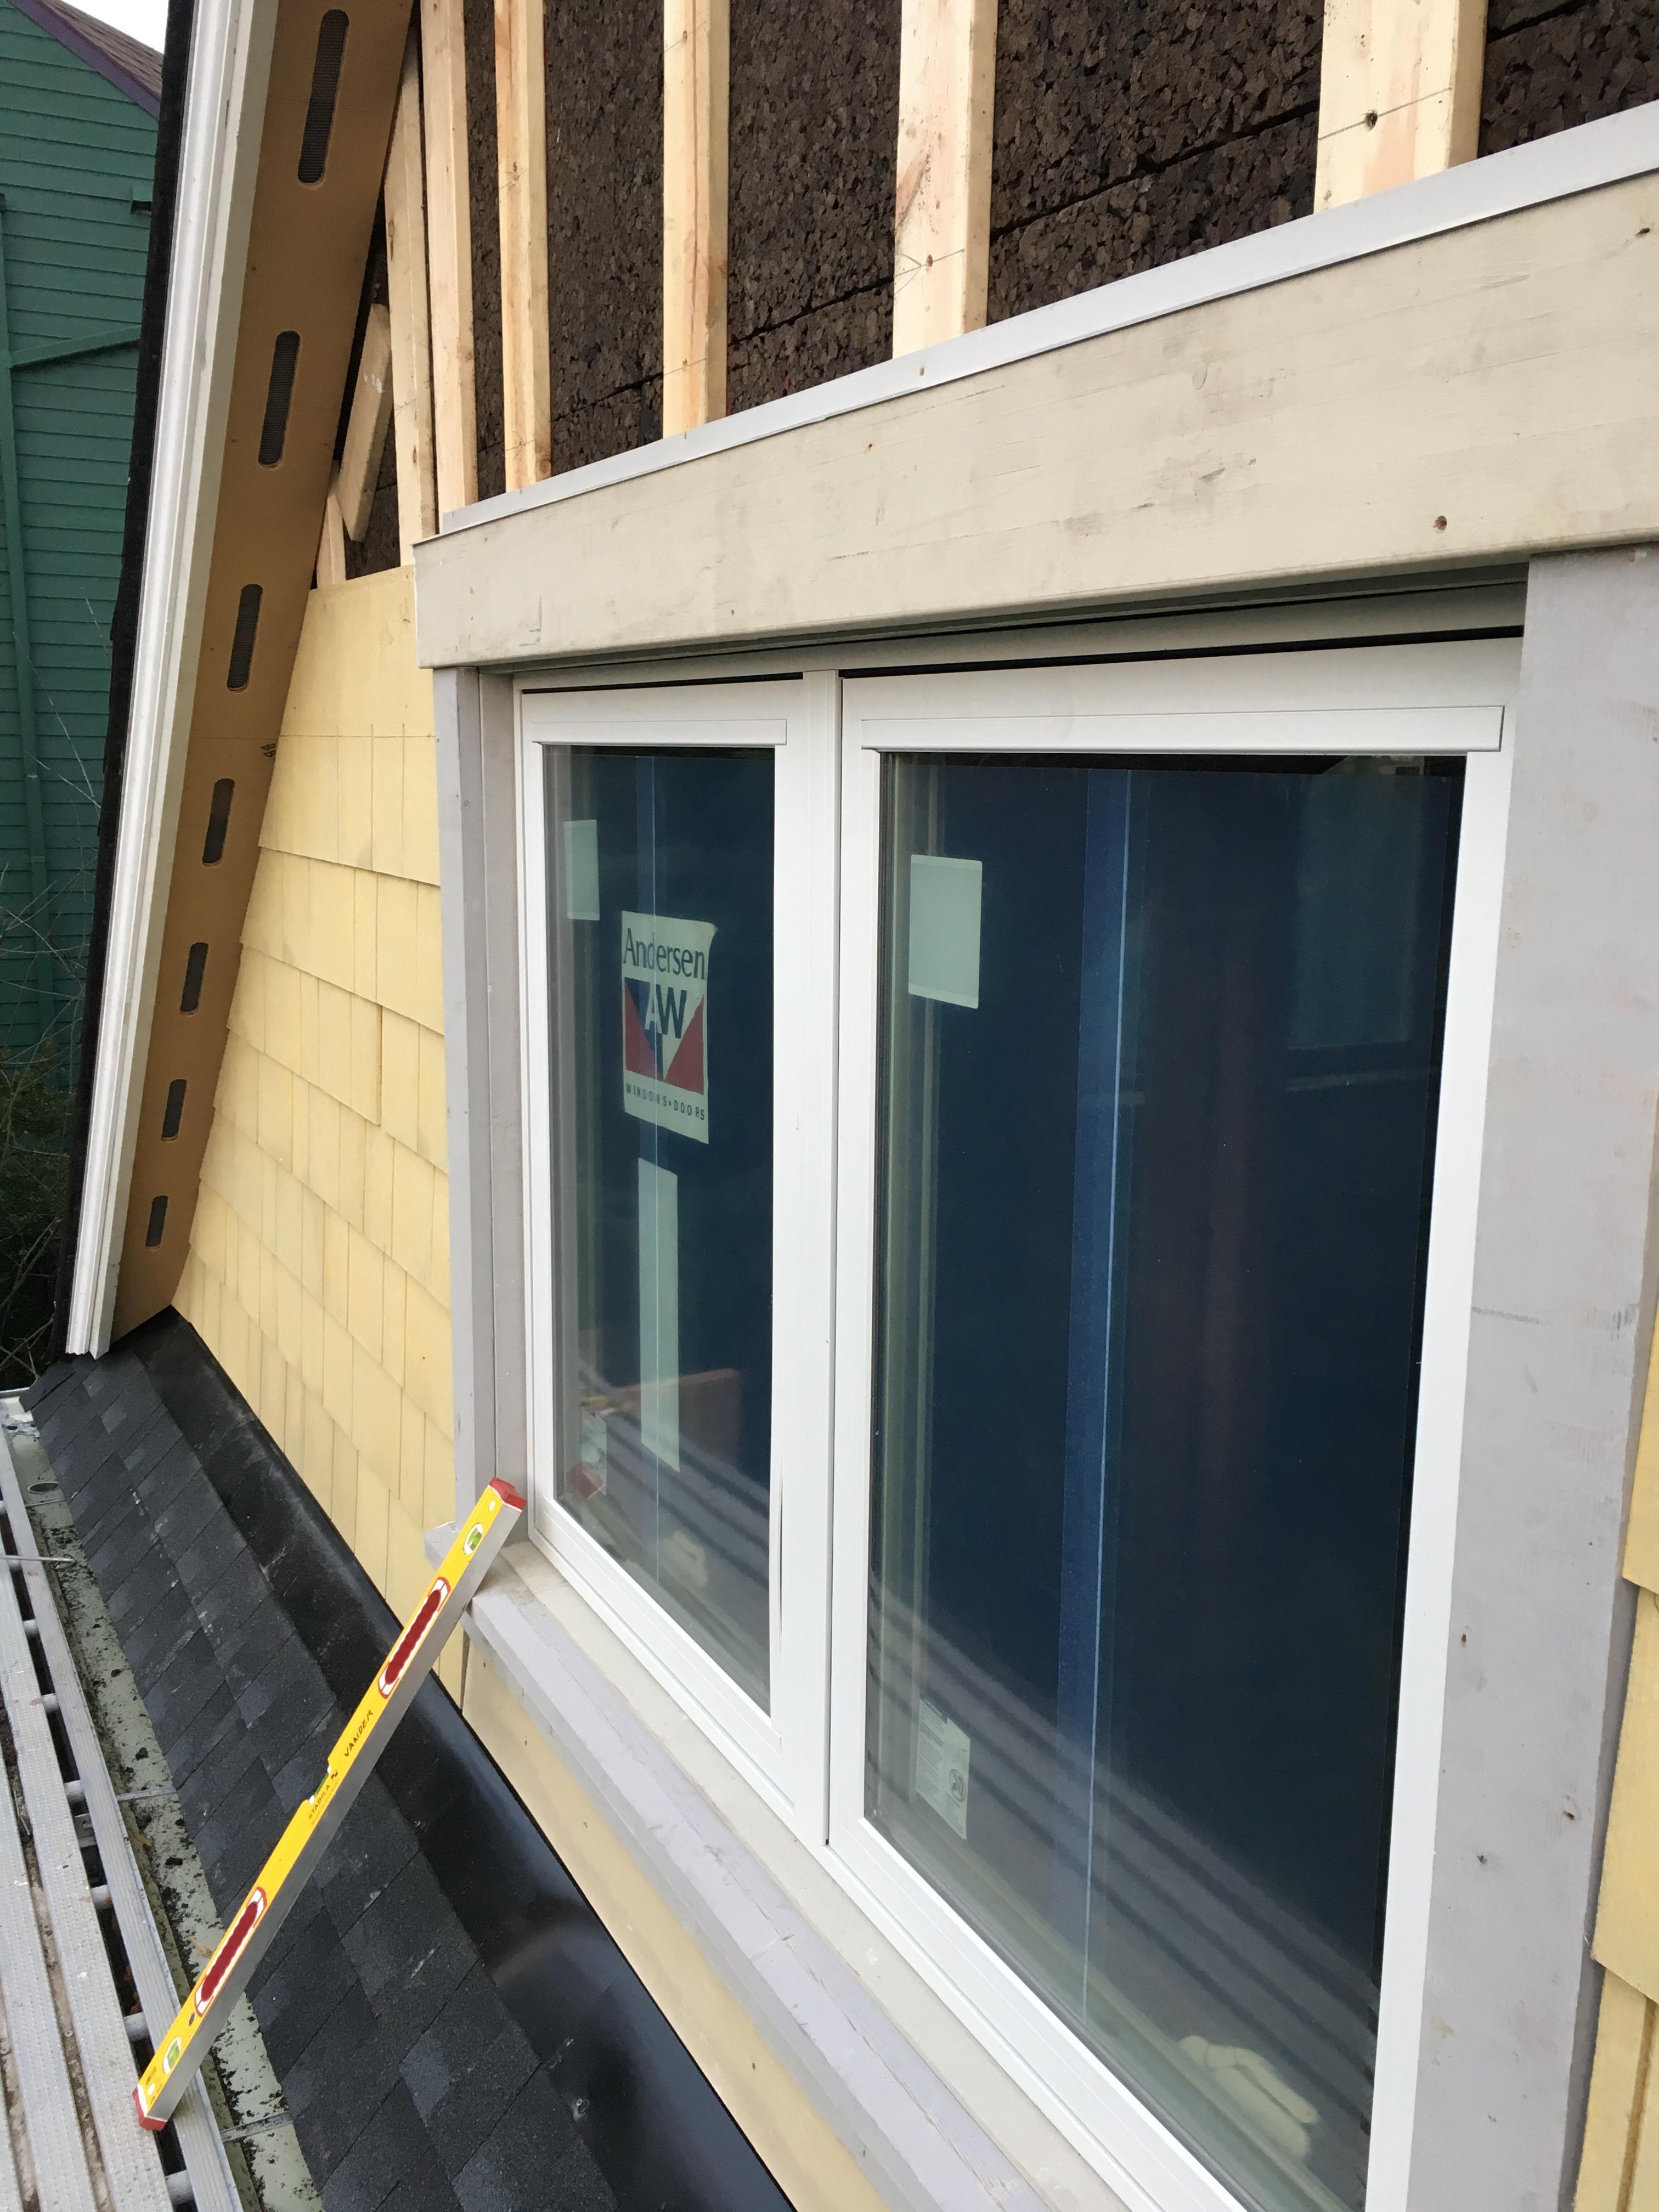
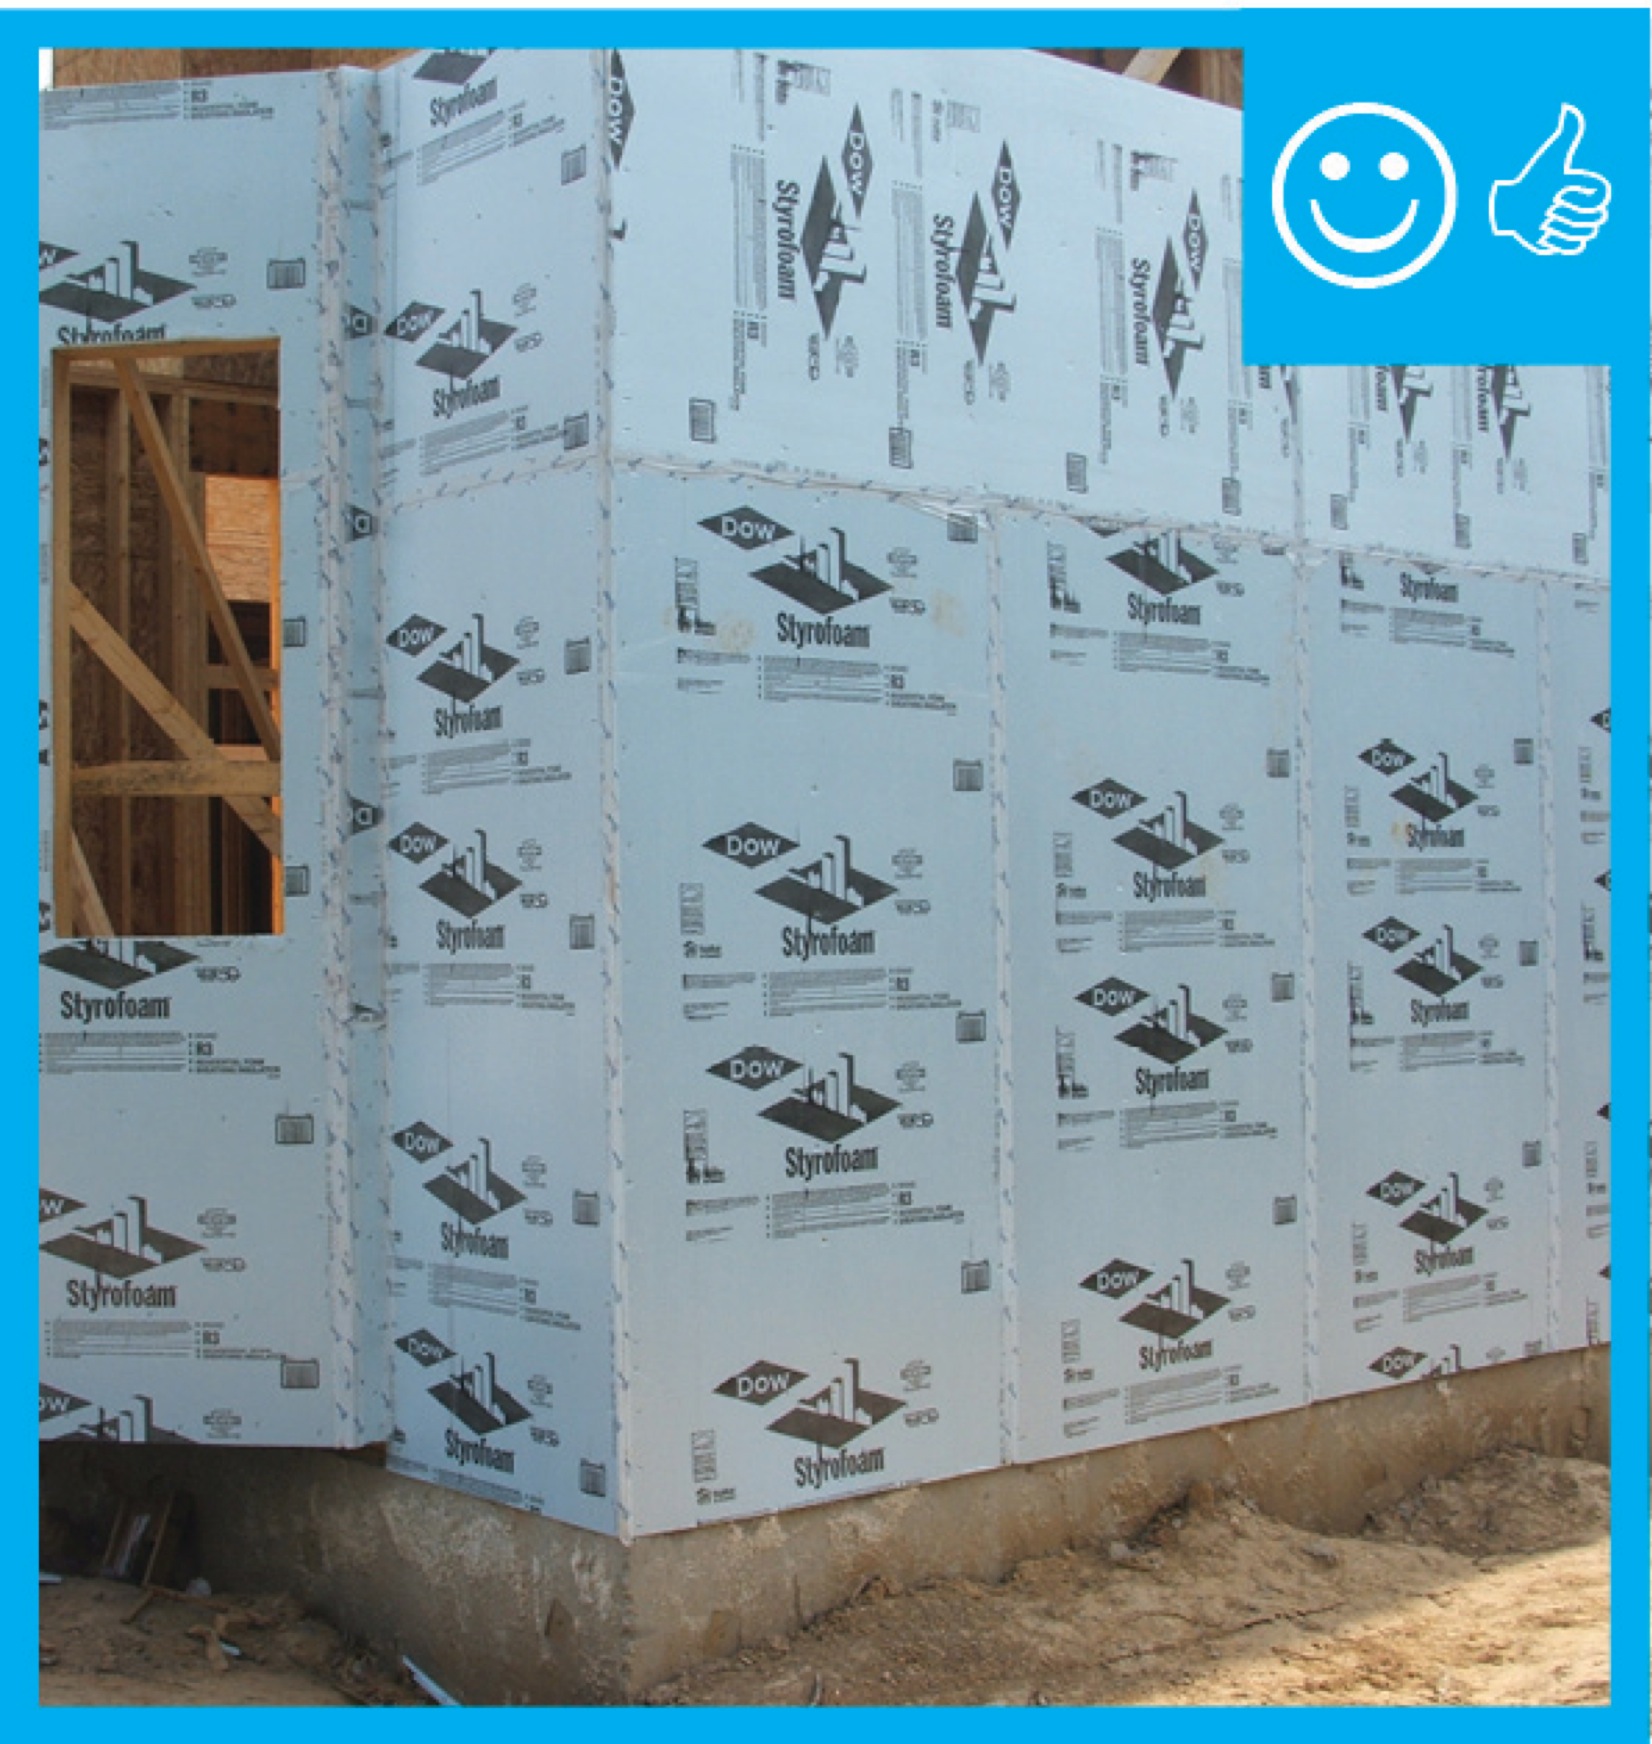
Right - This foil-faced polyisocyanurate rigid foam is installed on an existing exterior wall and the seams are taped so the rigid foam can serve as a water control layer
Image
Image
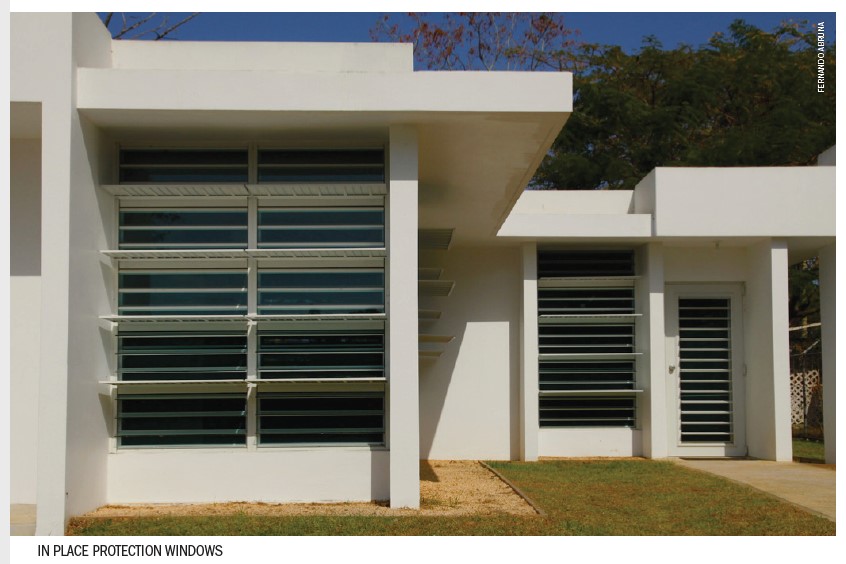
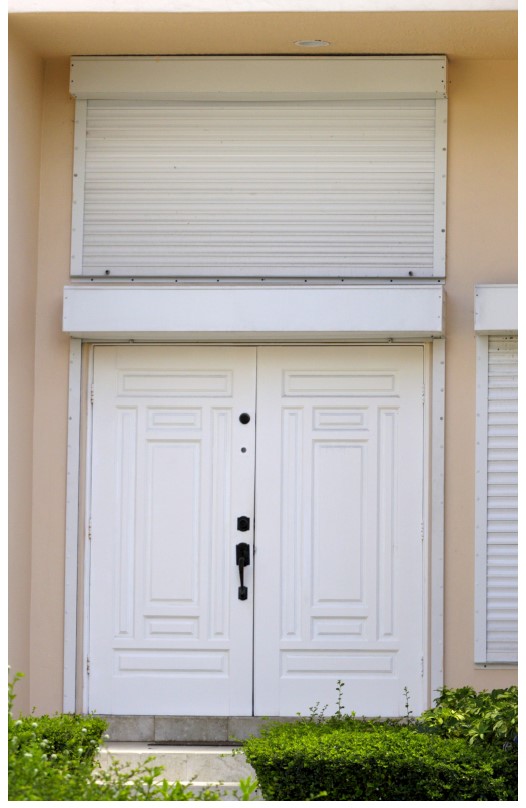
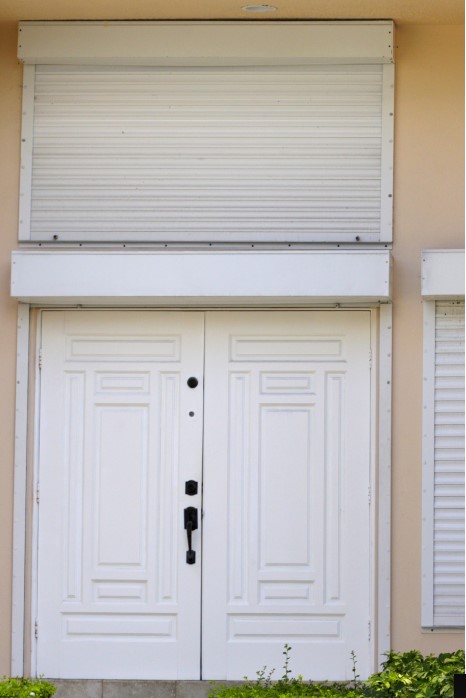
Right - This home's windows have protective coverings that are raised to provide shade in good weather and can drop to protect the windows during high wind events.
Image

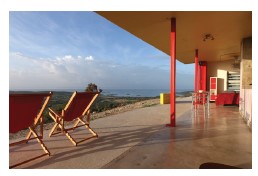
Right - This house has key features to block heat such as such as tree shading for the west wall and roof, minimized west-facing windows, and a porch roof, floor, and wing walls creating deep architectural overhangs and fins to shade south-facing windows
Image
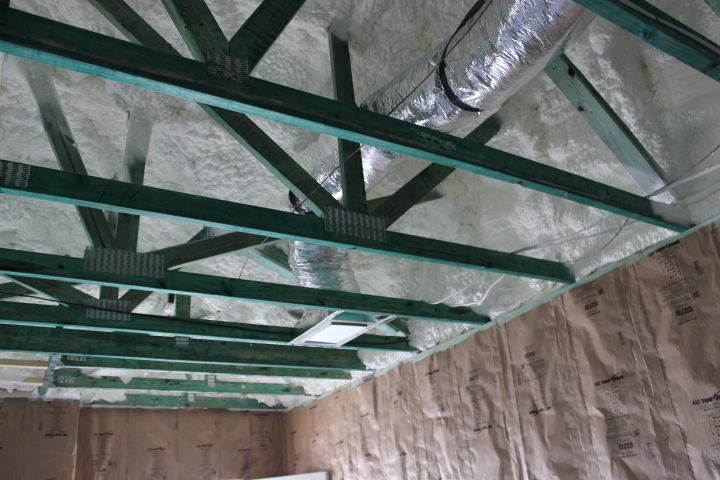
Right - This new sealed attic has 5.5 inches (R-20) of spray foam insulation along the underside of the roof deck providing a conditioned attic space for the heating and cooling ducts.
Image
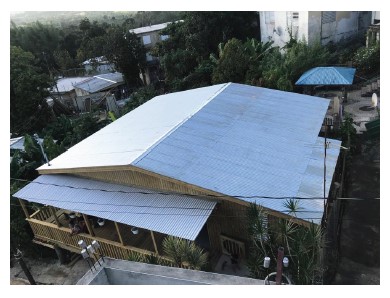
Right - This roof has a low gable and is secured to the wall framing to resist wind uplift.
Image
Right - Use flood-damage-resistant materials for decks and portions of the house below the design flood elevation.
Image
Image
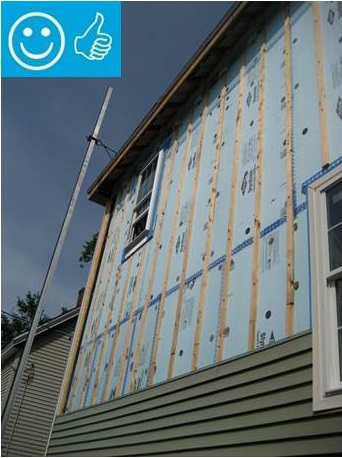
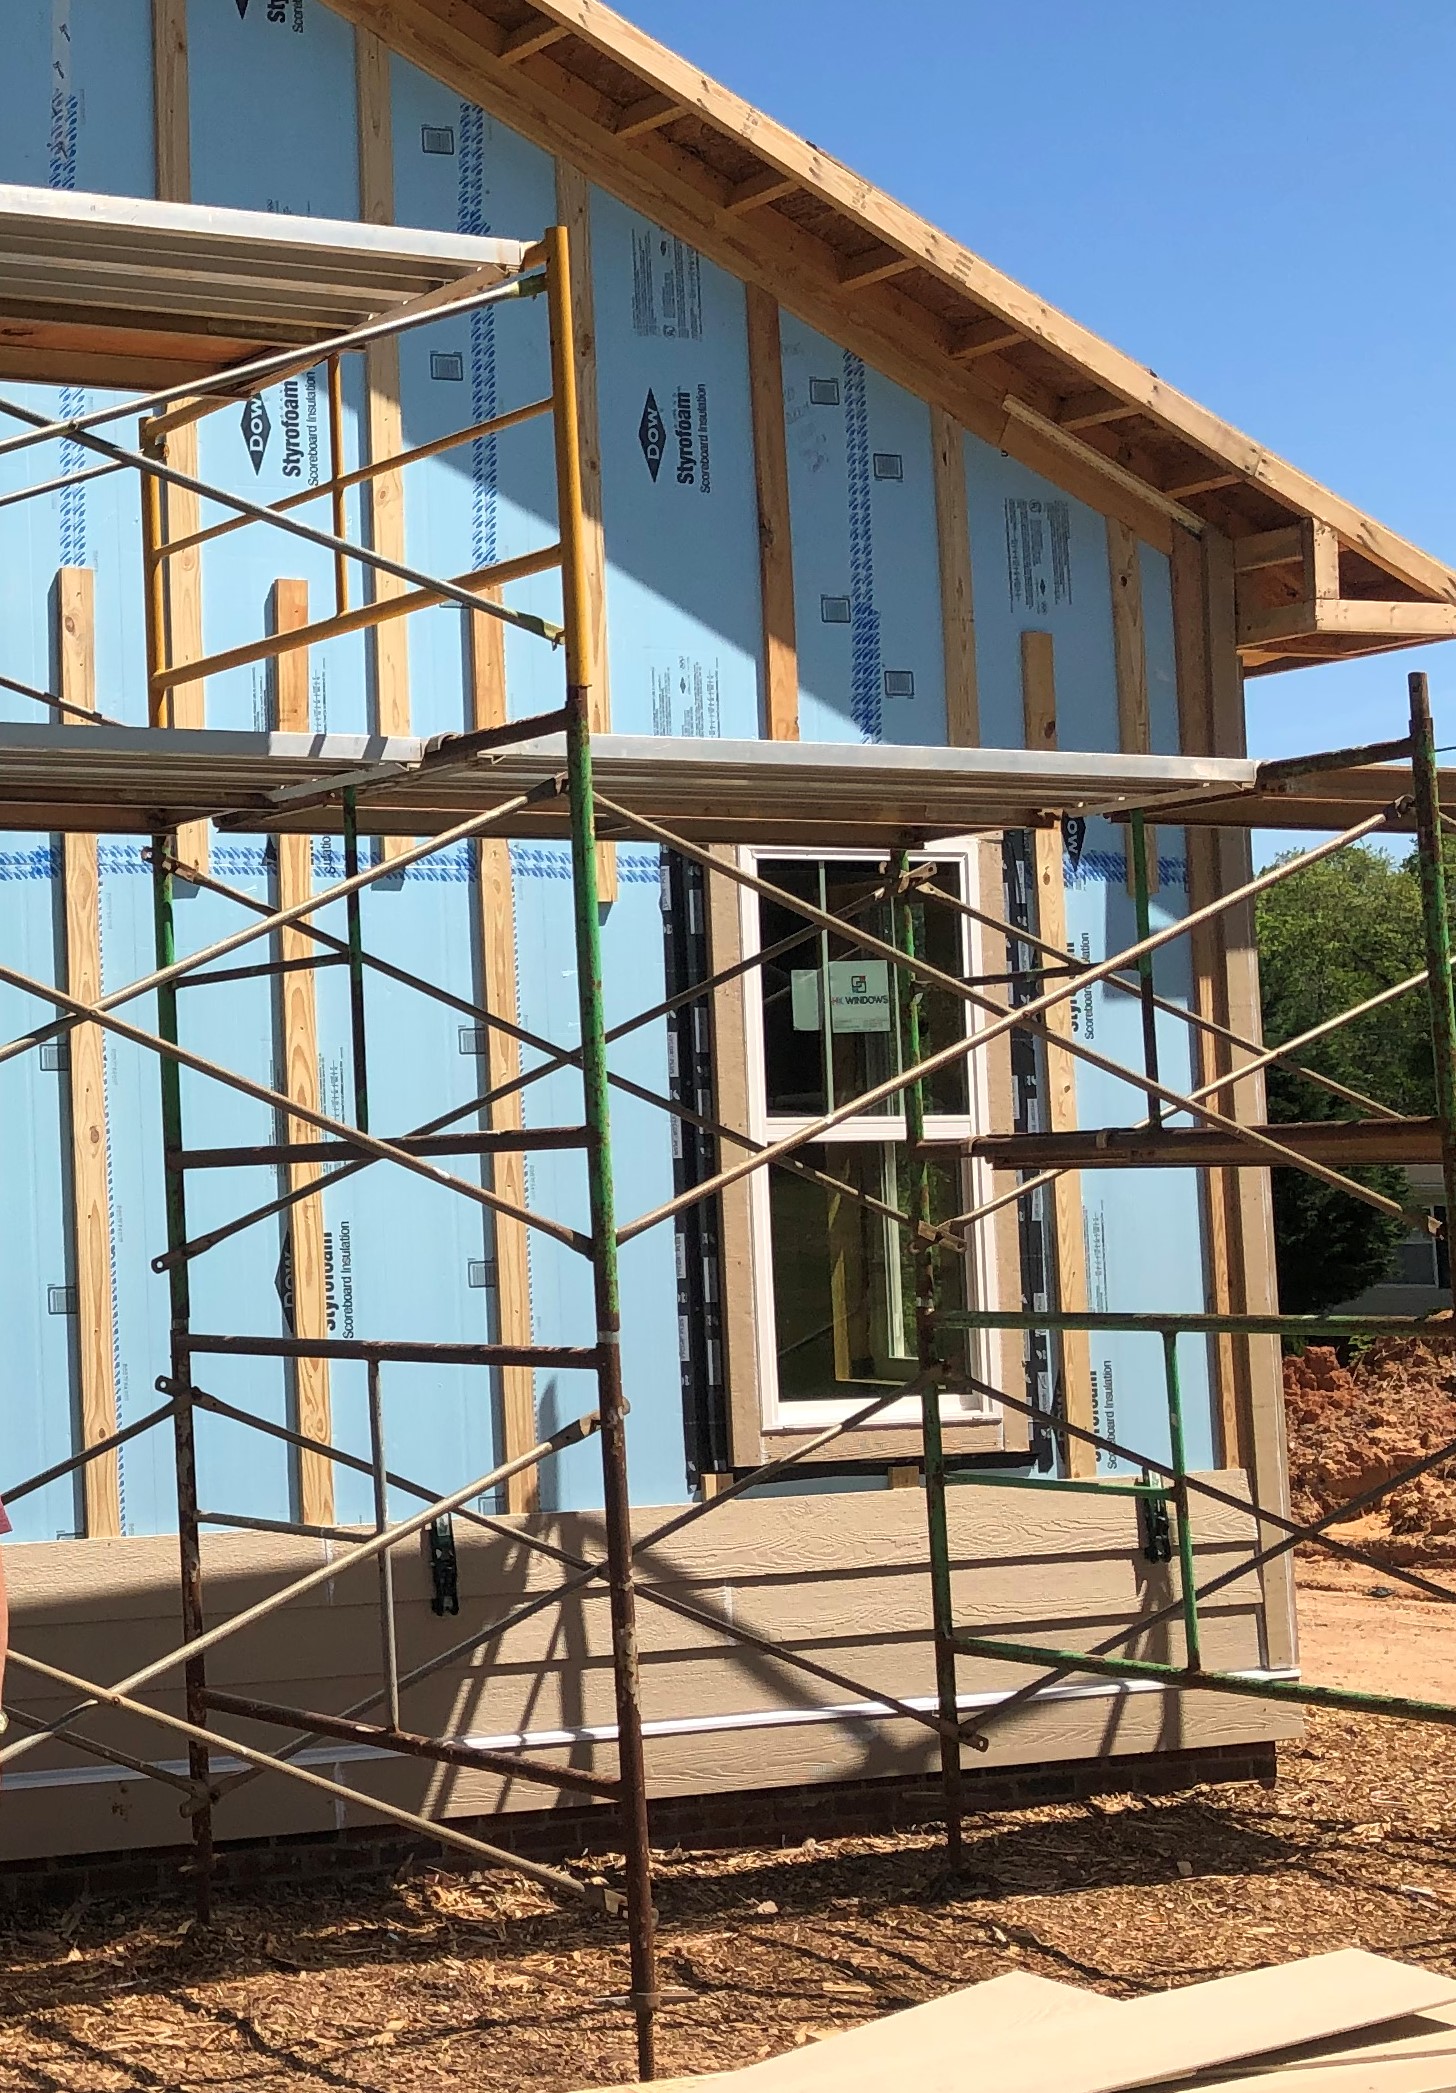
Right - XPS foam insulation is attached to the existing exterior wall with wood furring strips that serve as a nail base for the siding and are installed vertically to allow for drainage and drying behind the siding
Image
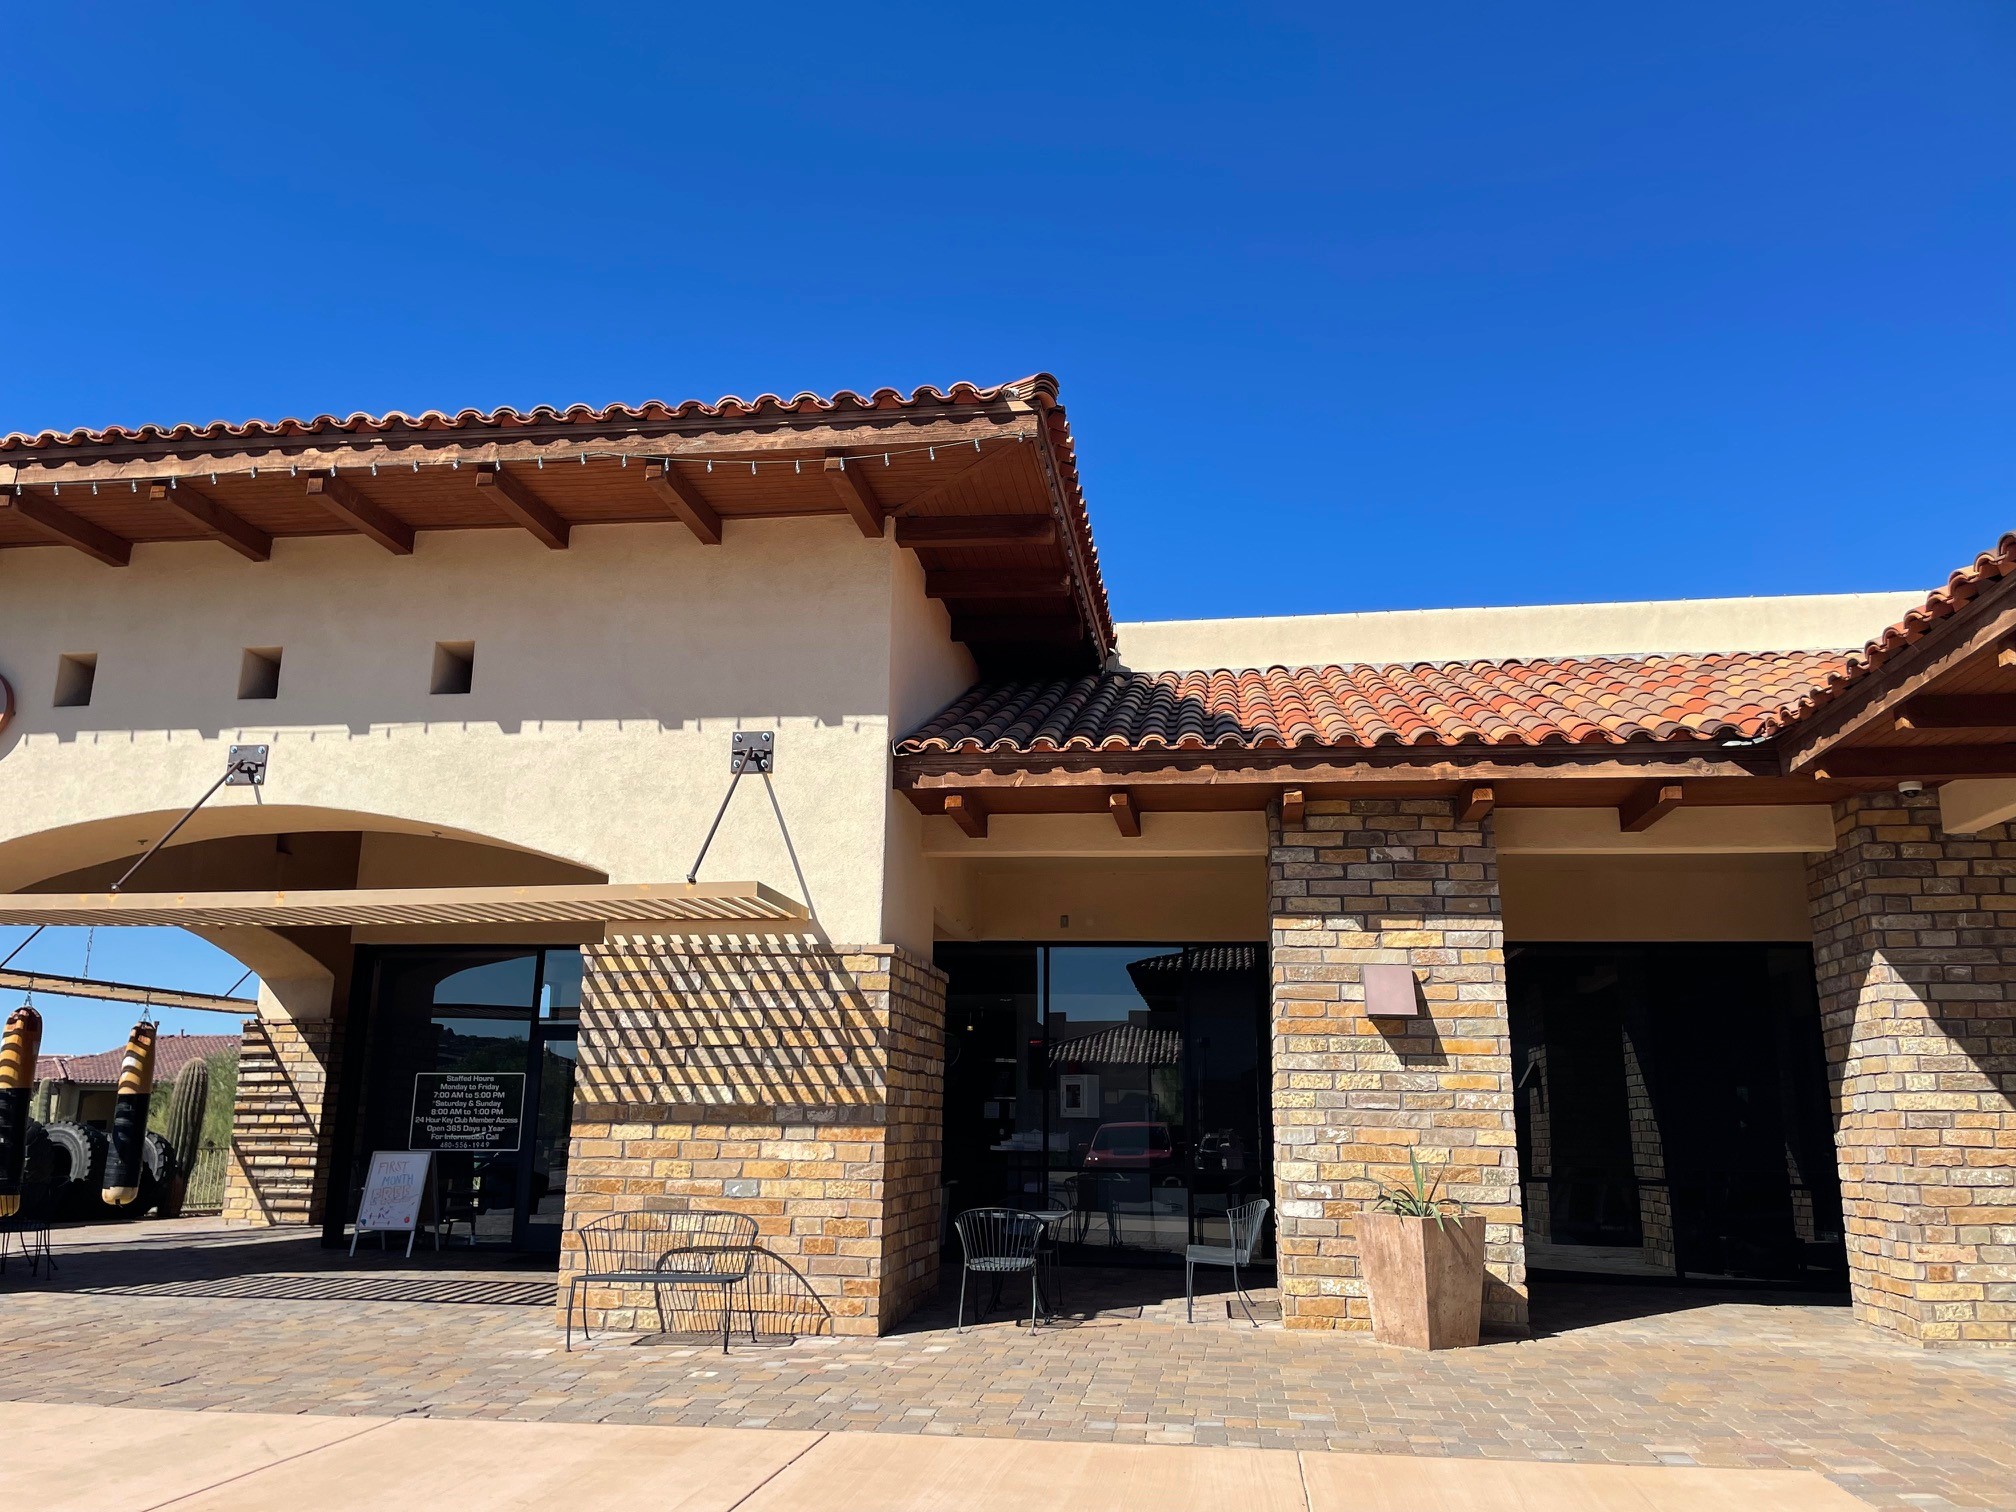
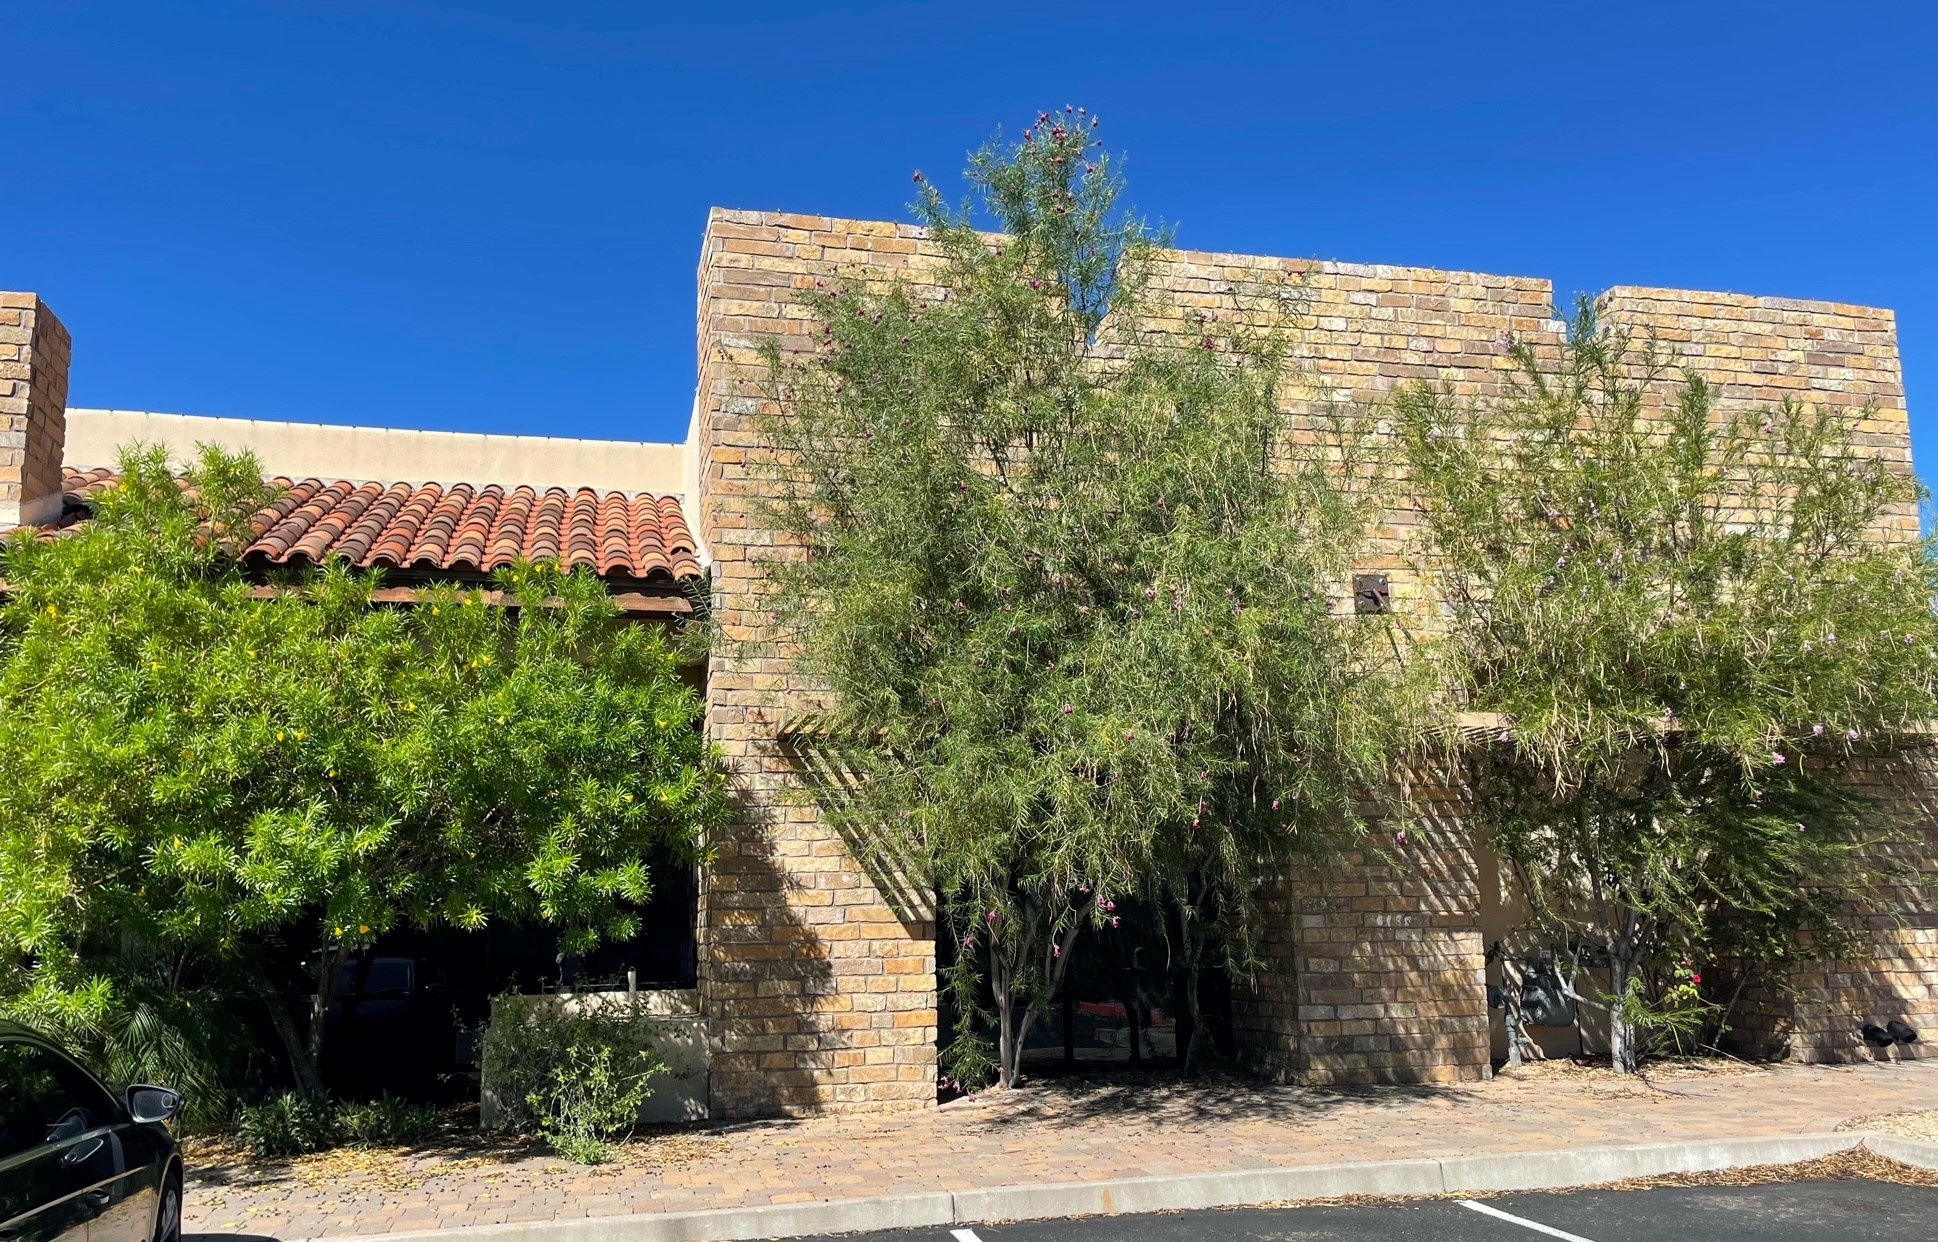
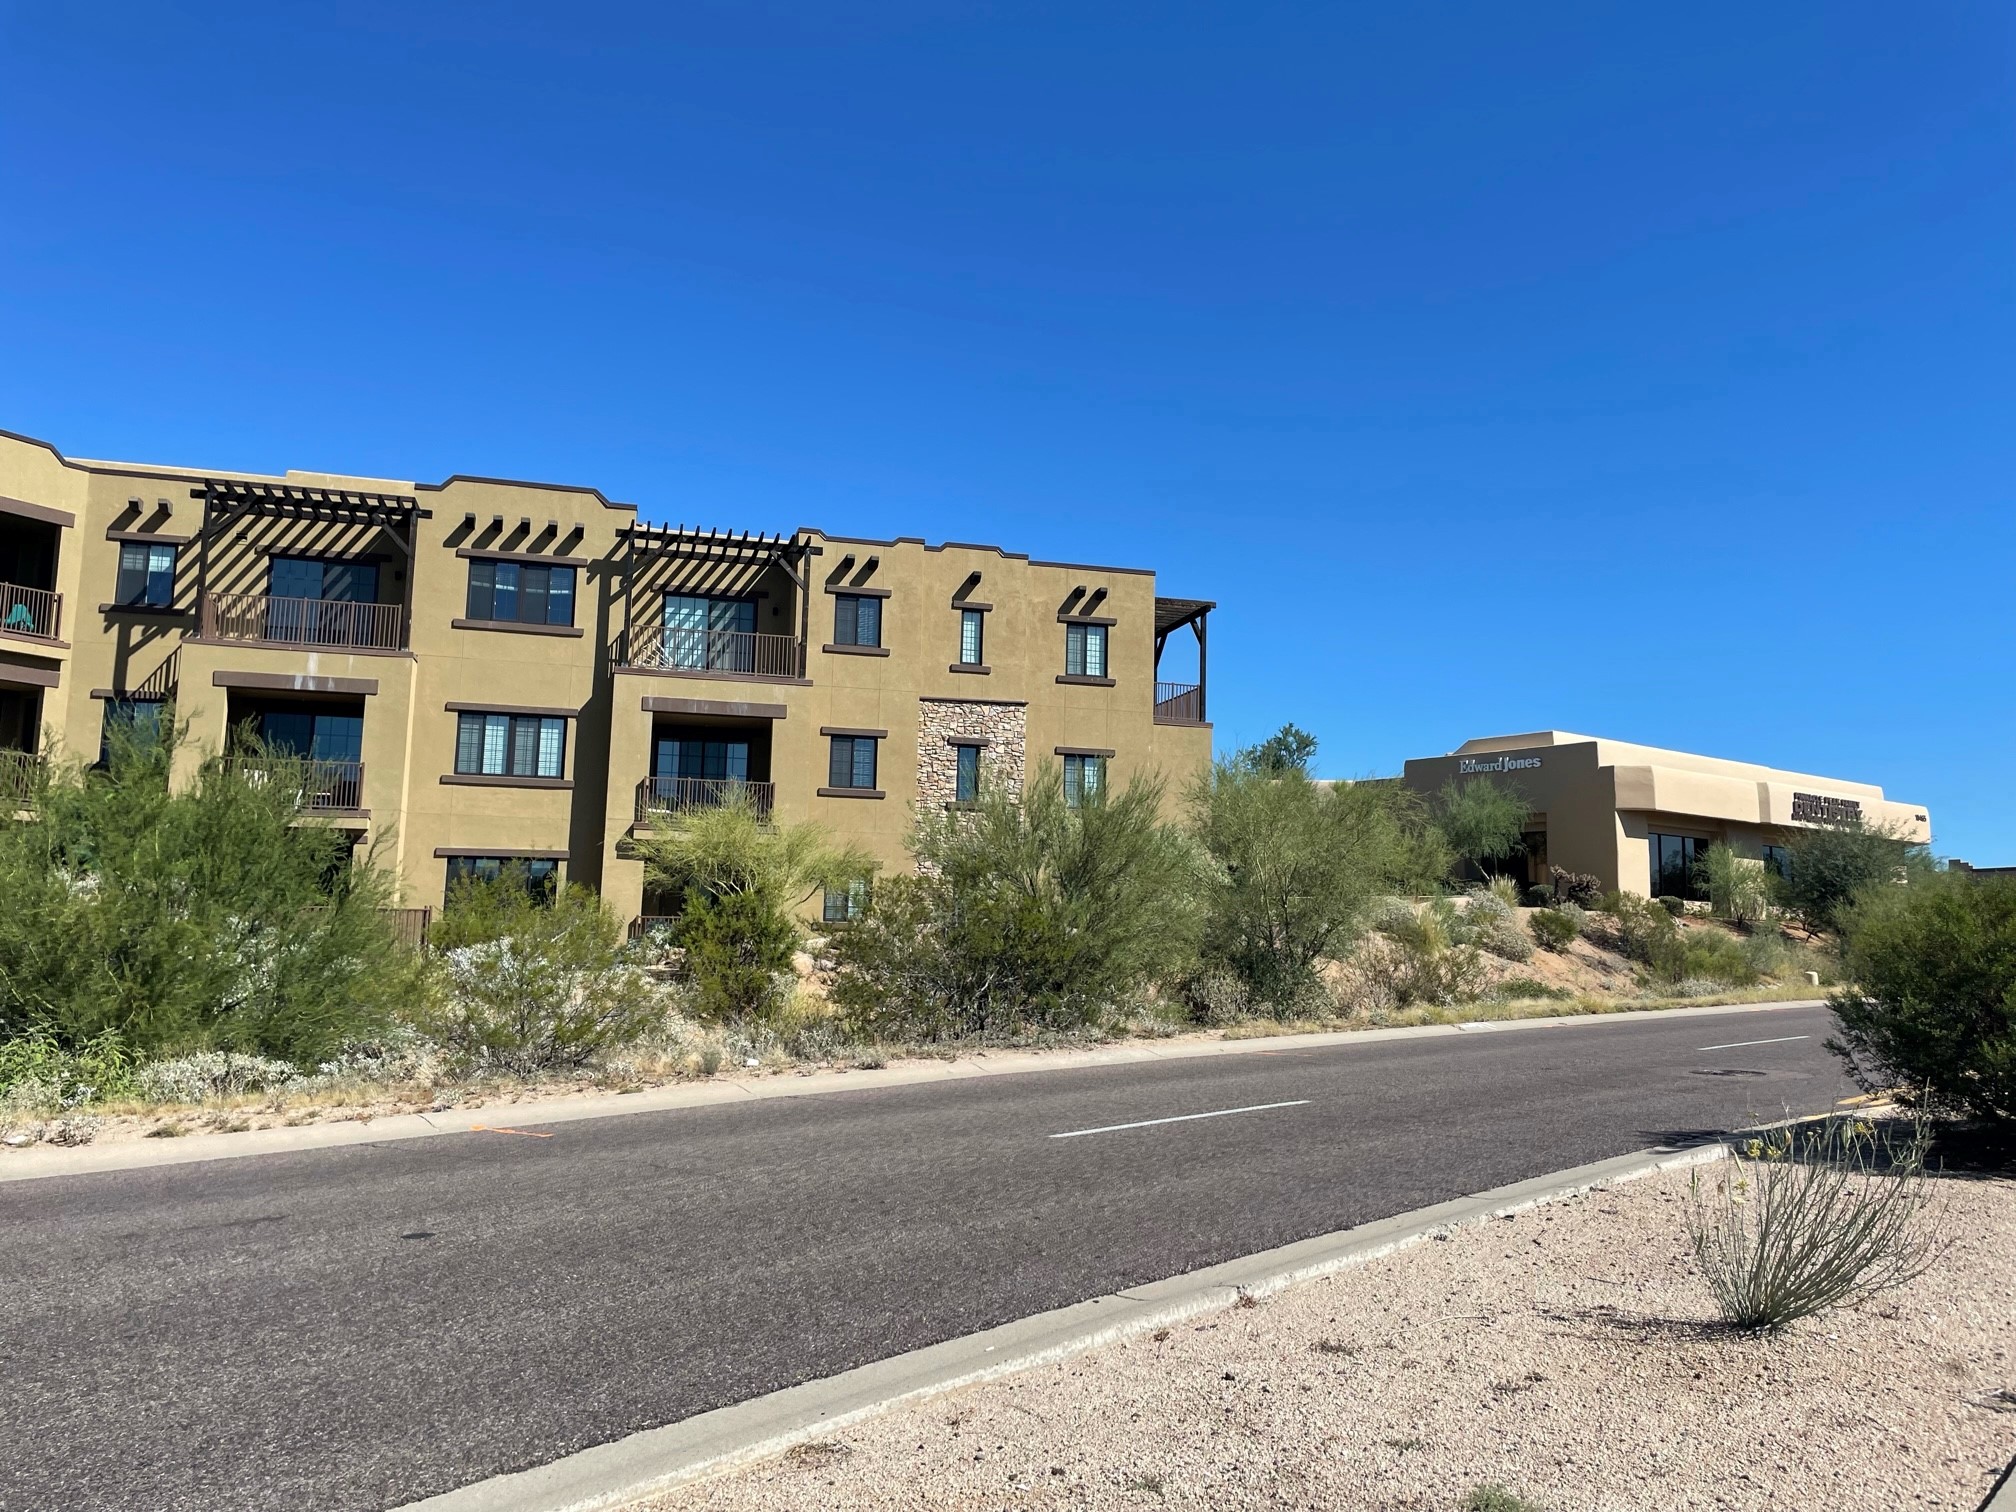
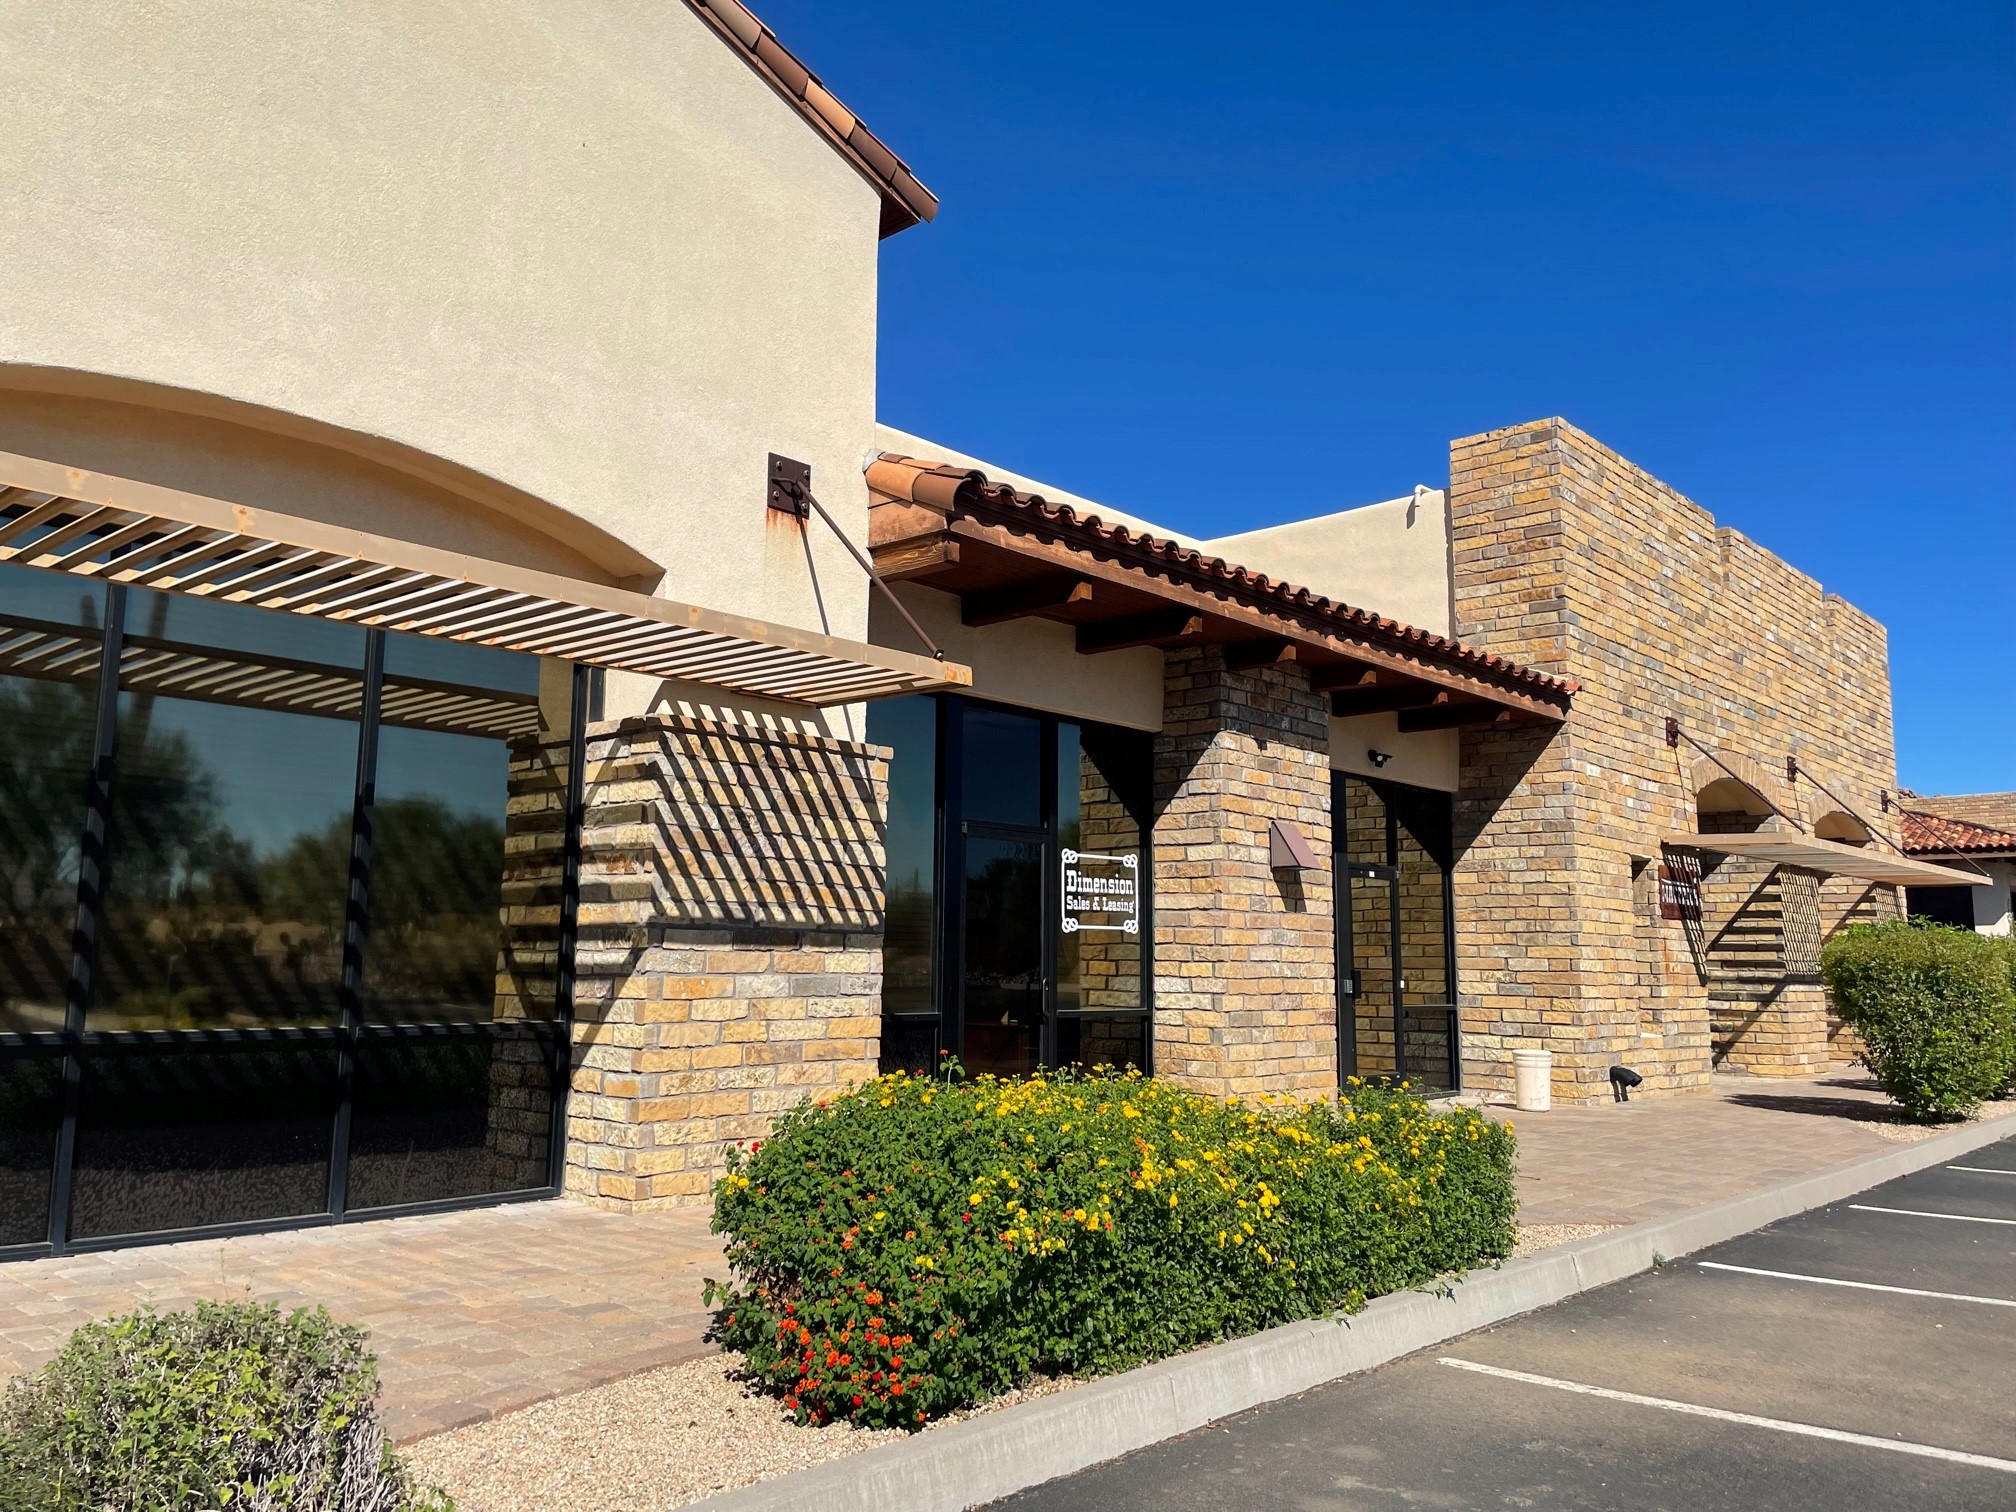
Right – Deep overhangs, pergolas, and covered entryways minimize heat gain in this commercial building in the hot-dry climate.
Image
Image
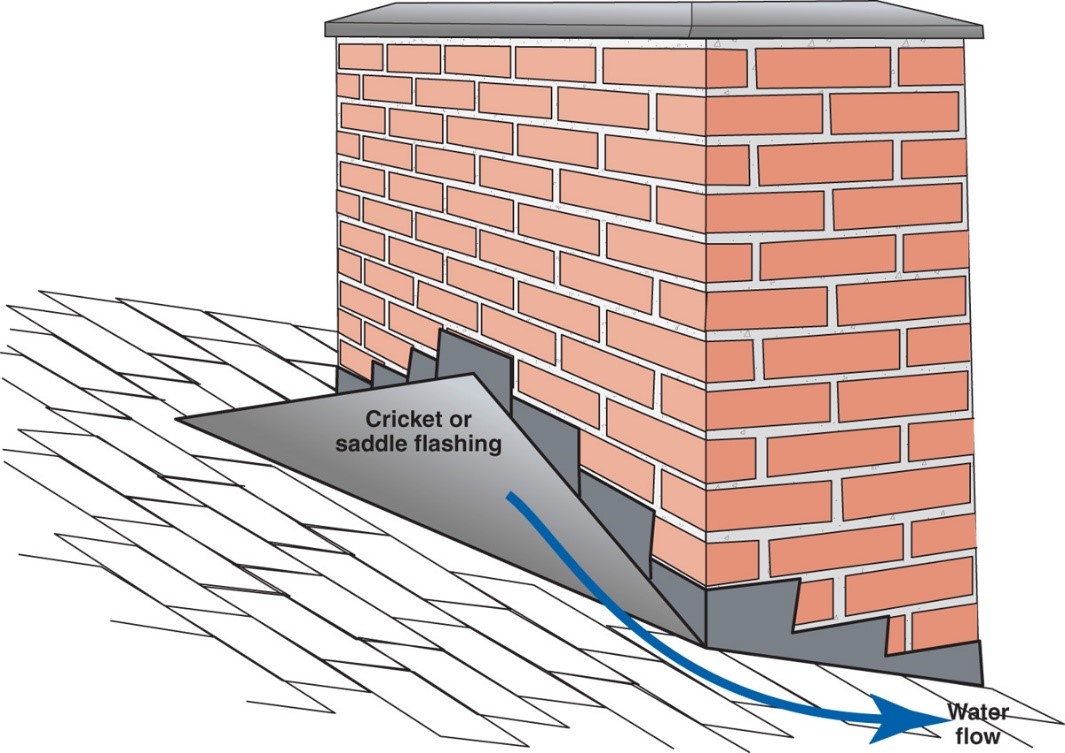
Right – A chimney cricket is installed and flashed to direct rainwater around the chimney
Image
Image
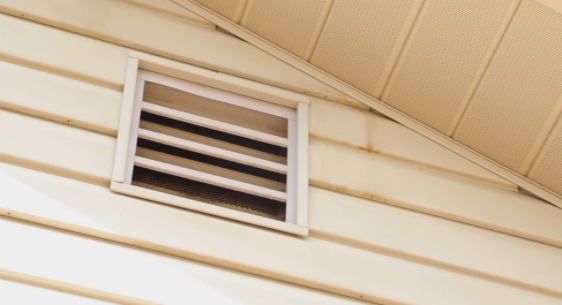
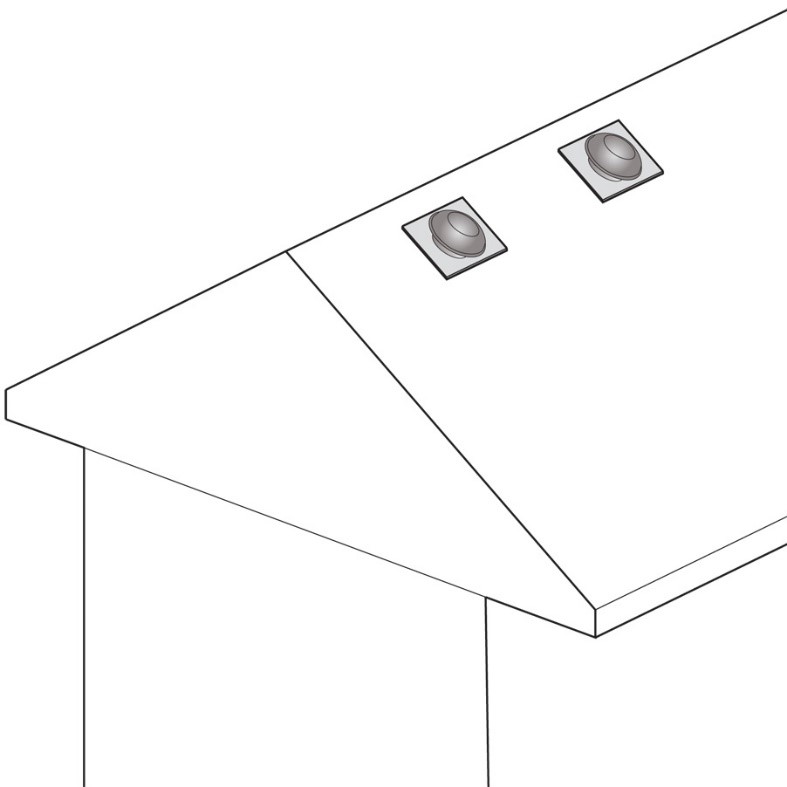
Right – A non-combustible 1/8-inch mesh screen is installed on vent openings to reduce the risk of ember intrusion.
Image

Right – A non-combustible 1/8-inch mesh screen is installed on vent openings to reduce the risk of fire from intrusion of wind-borne embers.
Image
Image
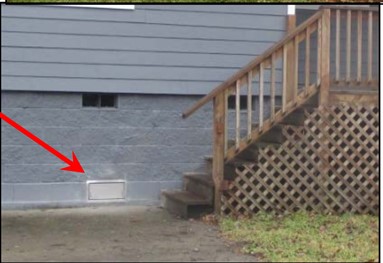
Right – Air vents near the top of the crawlspace wall are not used as flood vents, and flood vents are installed close to grade
Image

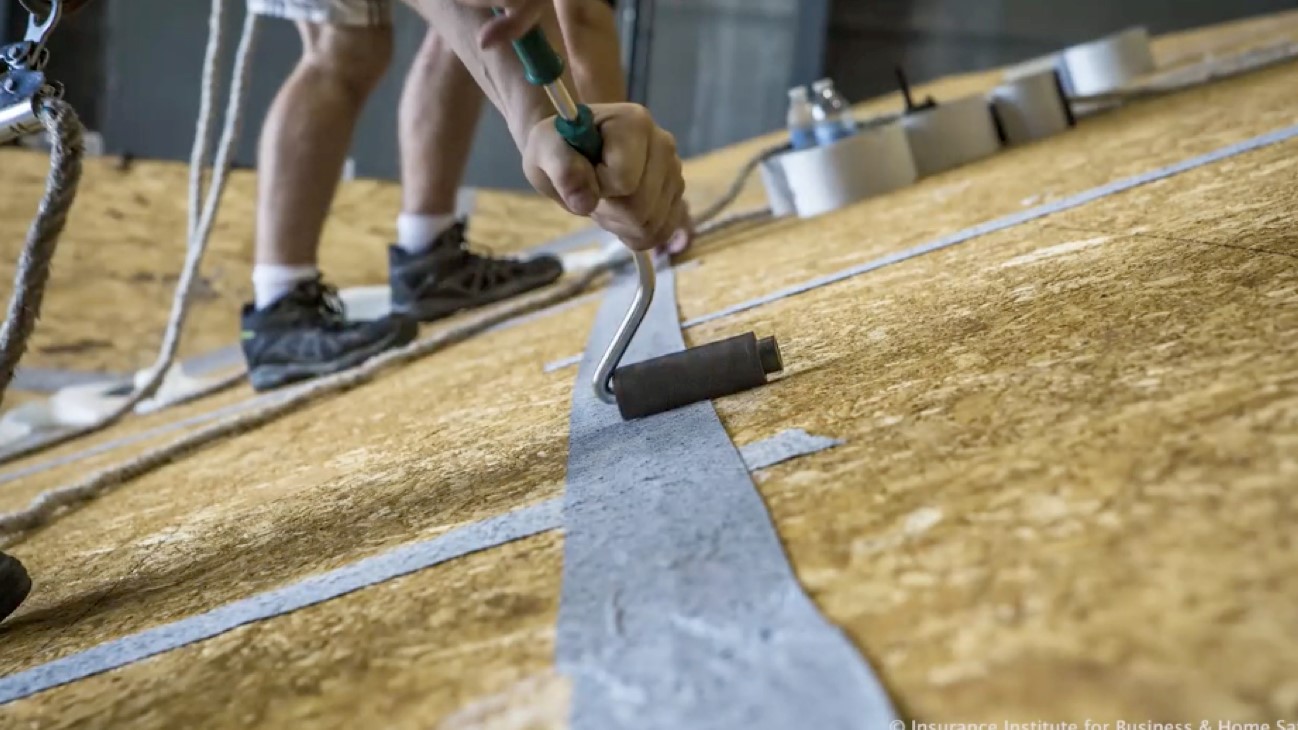
Right – All penetrations through the roof decking are sealed with paint-on flashing.
Image
Image
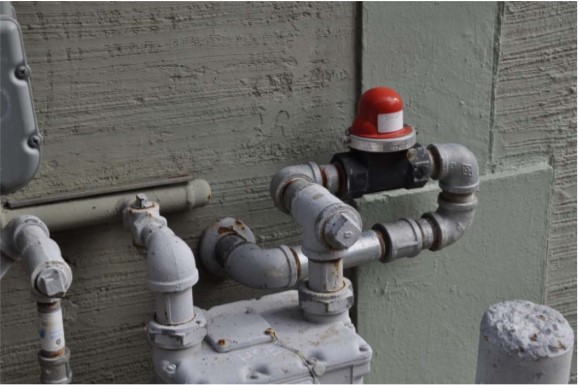
Right – Automatic gas shutoff valve is attached to the natural gas pipeline close to the meter
Image
Image
Image

Right – Closed-cell polyurethane foam is sprayed on the underside of the roof deck to provide structural connections and seal seams in the sheathing to increase wind resistance
Image
Image
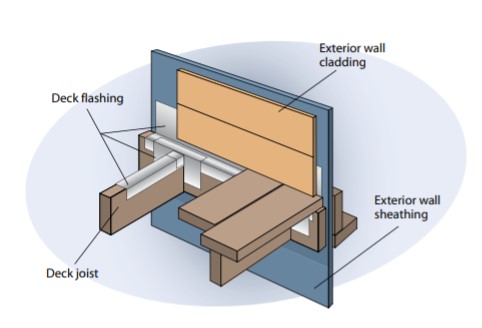
Right – Deck flashing protects the deck-to-wall connection from water and burning embers.
Image
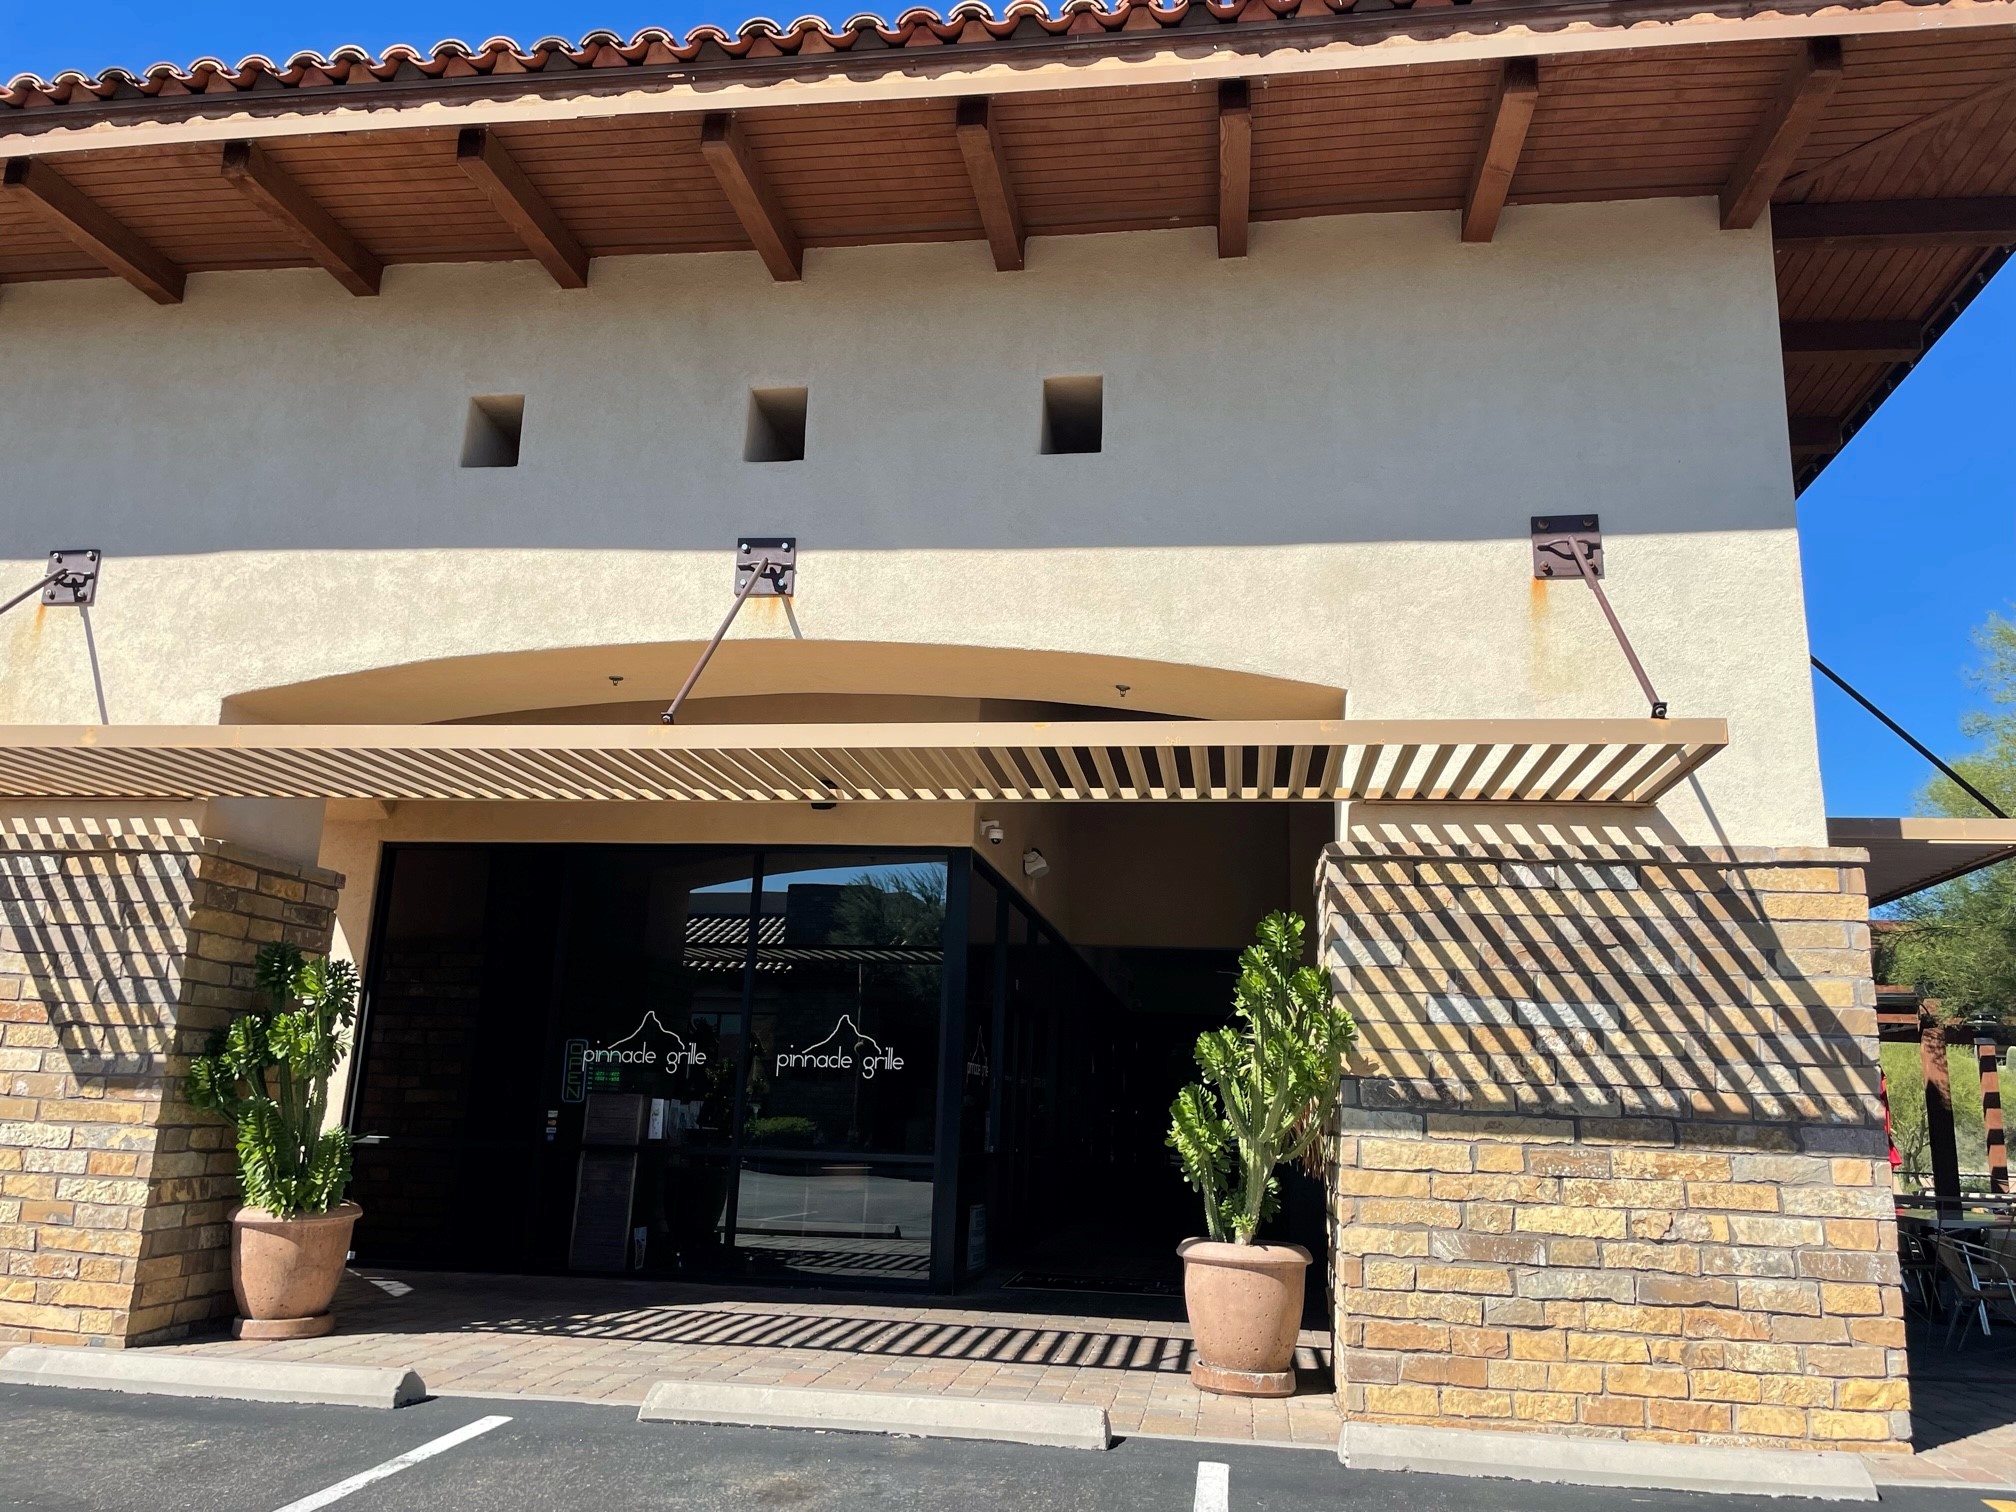
Right – deeply inset entryways and overhangs provide shade to reduce solar heat entry to this building.
Image

Image
Image
Image
Image
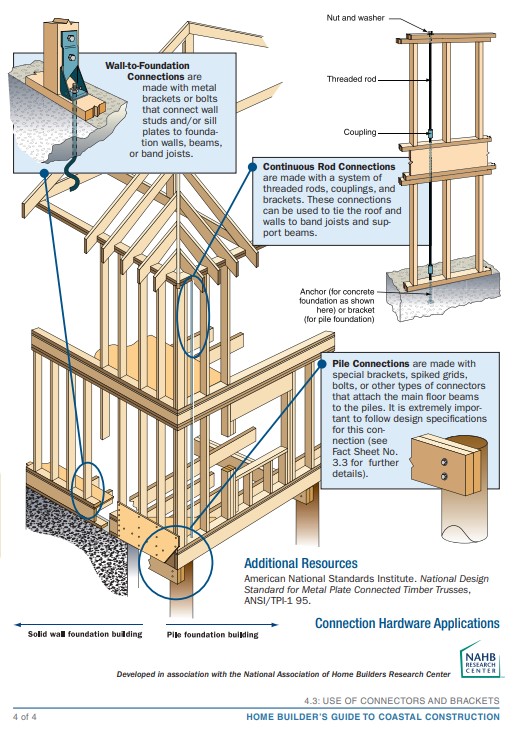
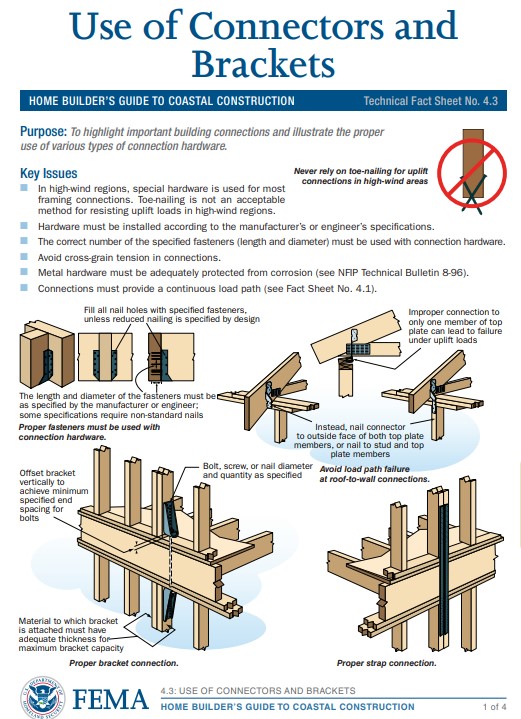
Right – Examples of wall stud to sill plate and foundation and wall rod connectors and brackets.
Image
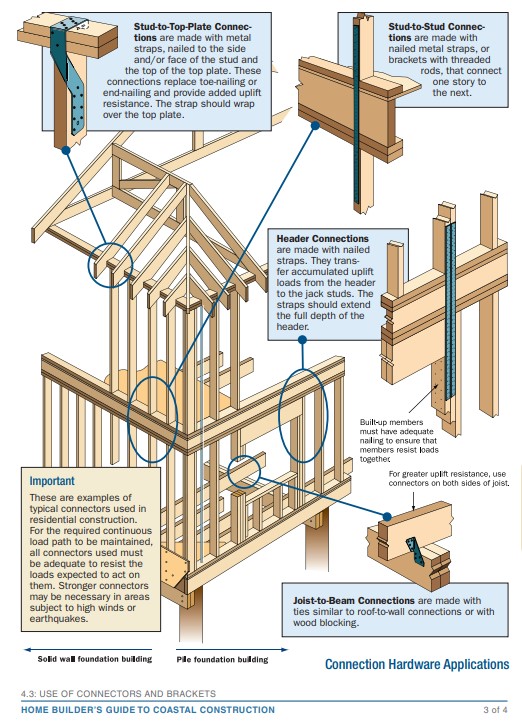
Right – Examples of wall stud to top plate and stud to rim joist framing connectors and brackets.
Image
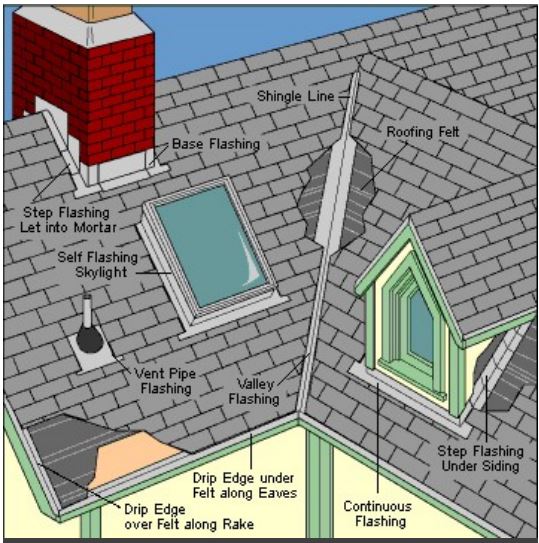
Right – Flashing is installed around chimney, skylight, vents, dormers, in valleys and at eaves
Image
Image
Image
Right – Furring strips provide a drainage and ventilation gap between the siding and the cork insulation.
Image
Right – Furring strips provide a drainage gap between the rigid foam and the siding.
Image
Image
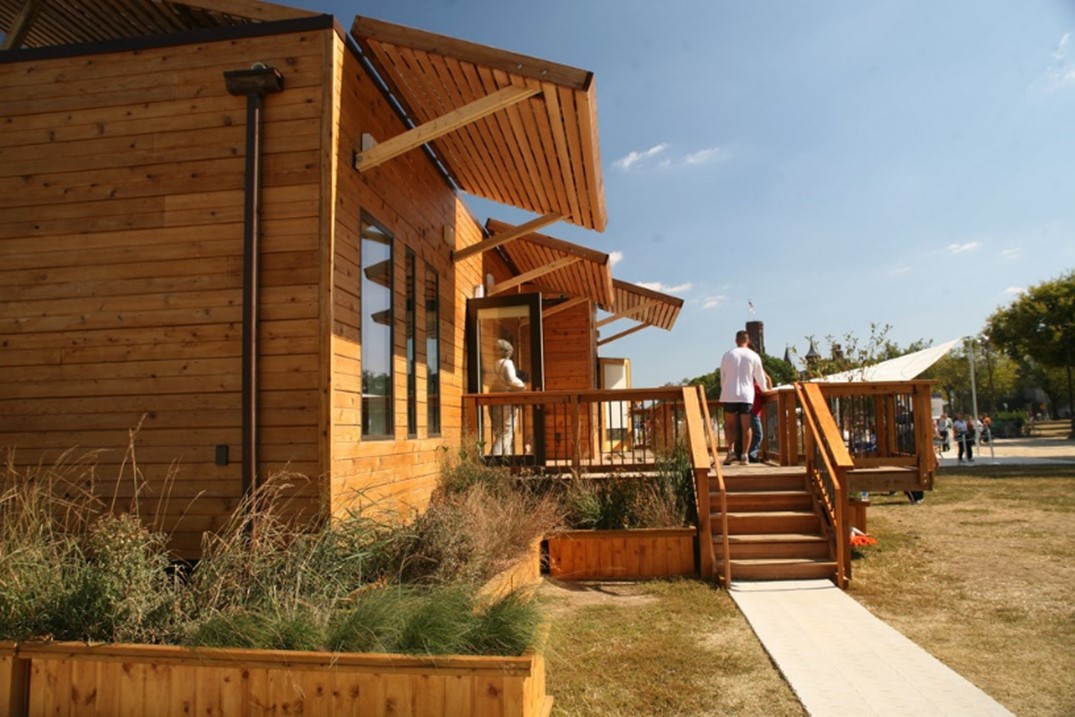
Right – Horizontal overhangs on this house block sunlight in the summer while allowing it in during winter
Image
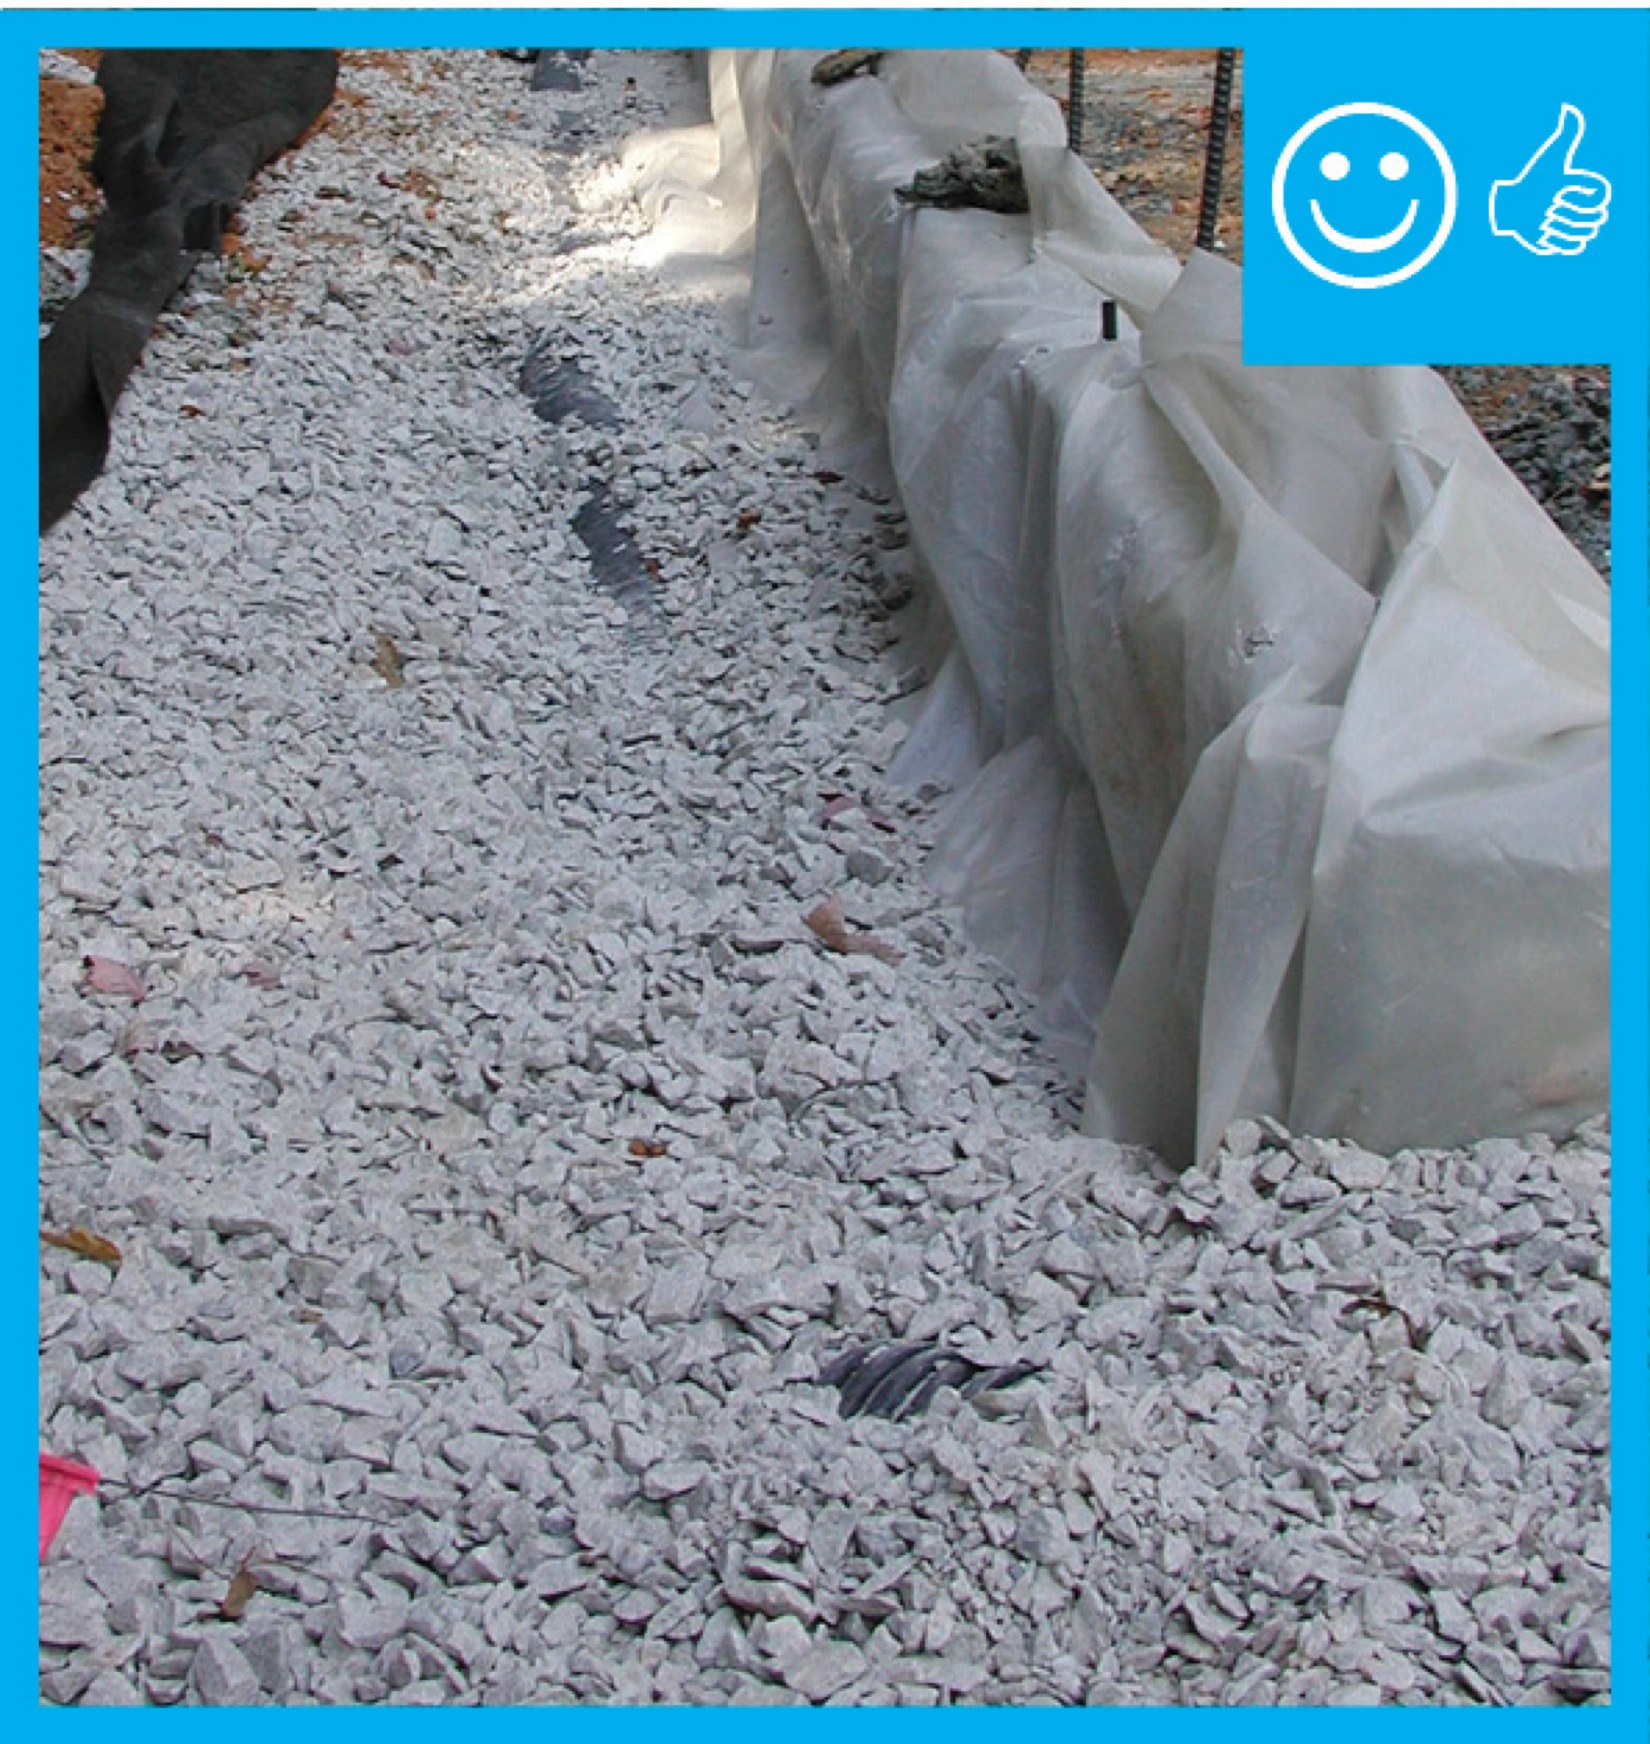
Right – House without gutters has waterproof liner, drain tile, and gravel bed extending more than 5 feet from foundation
Image
Image
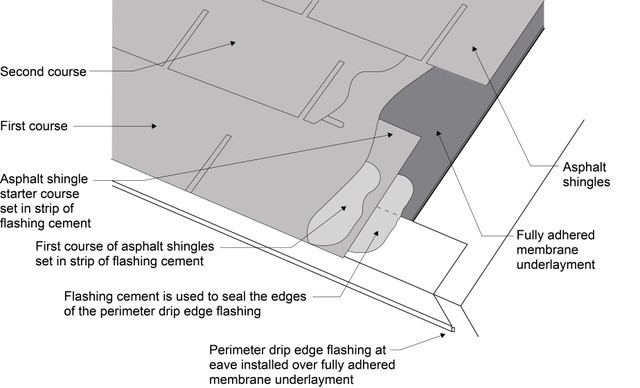
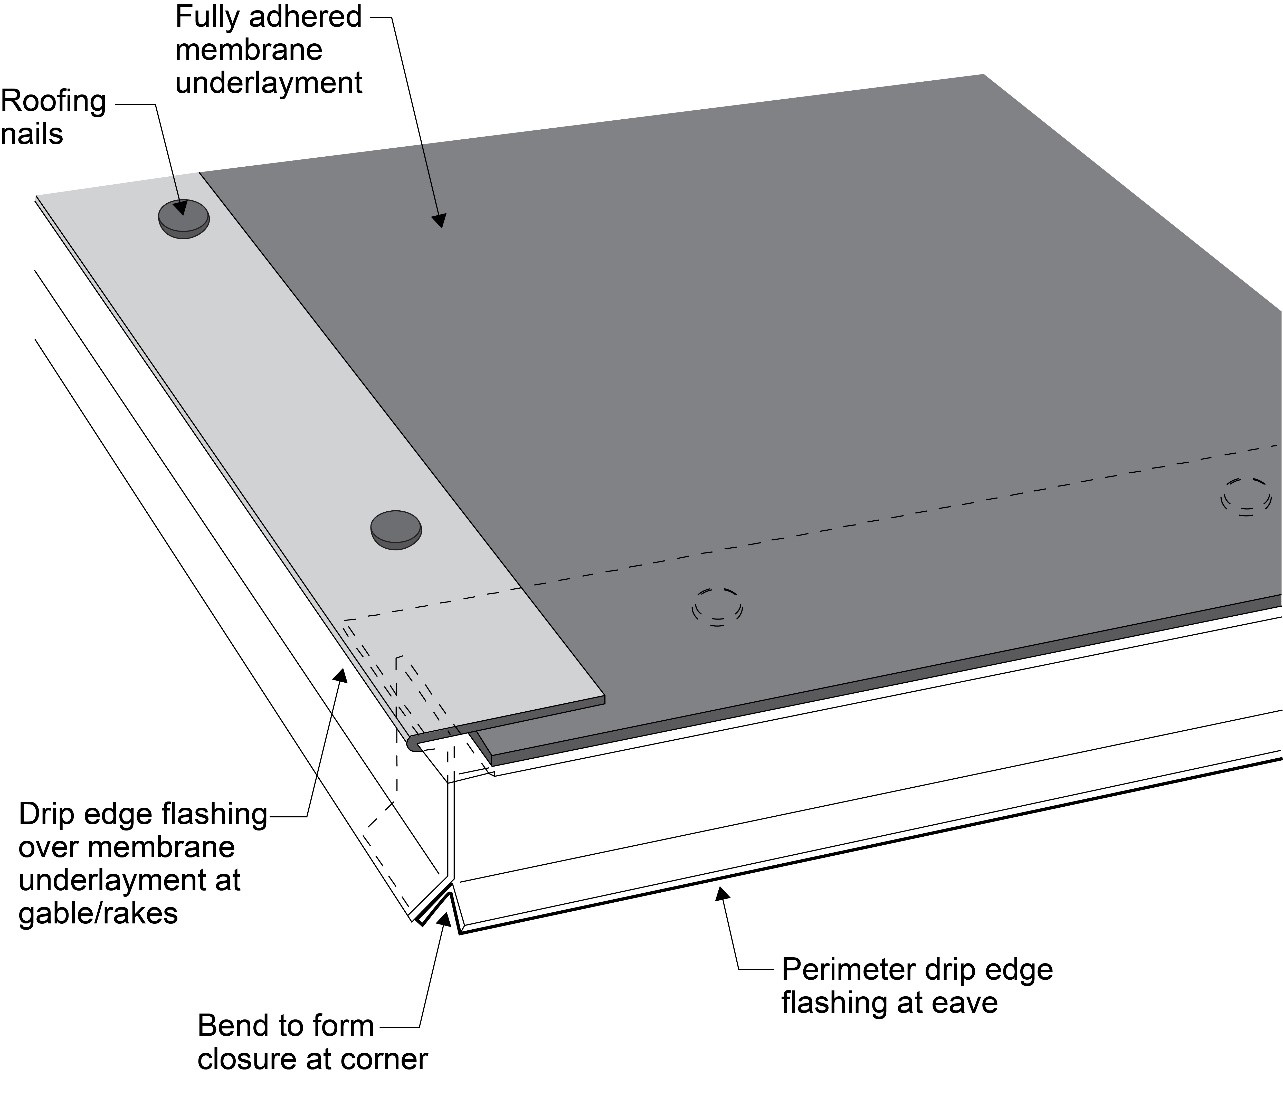
Right – If drip edge flashing is installed over fully adhered roof membrane at eaves, use flashing cement to seal the upper edge of the flashing
Image
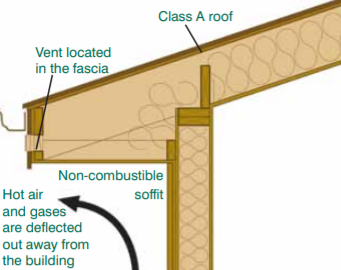
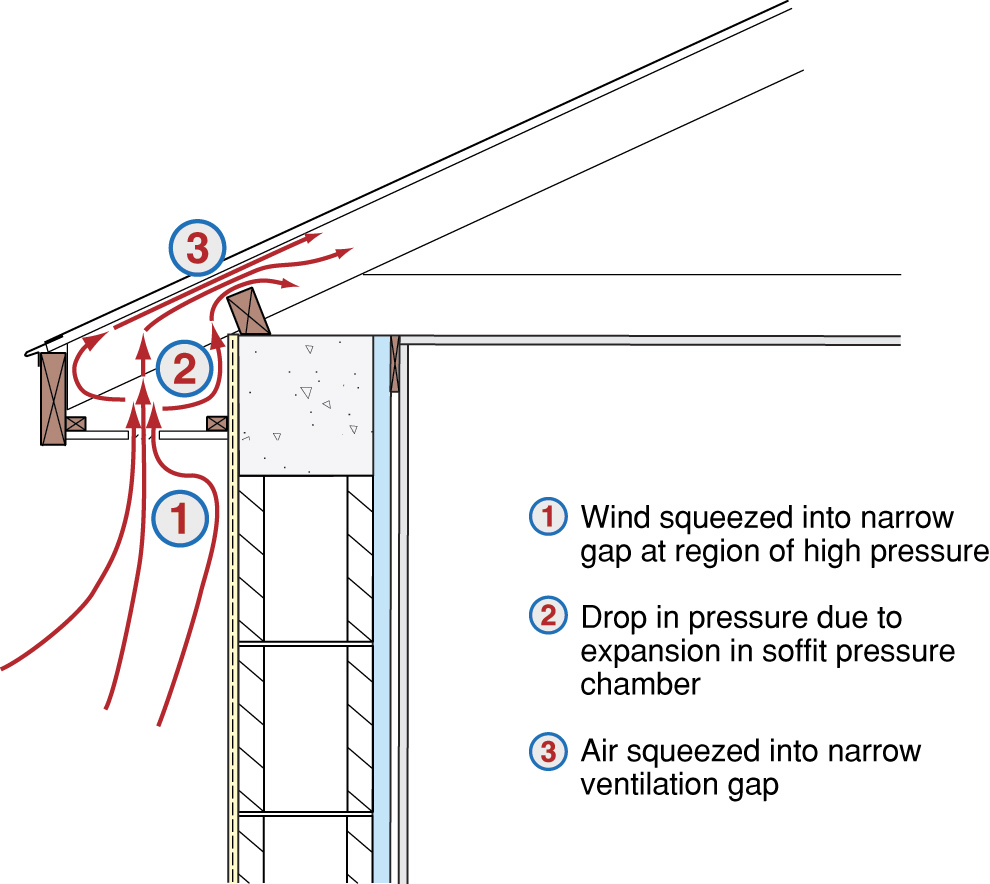
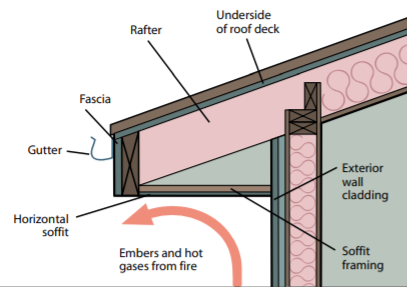
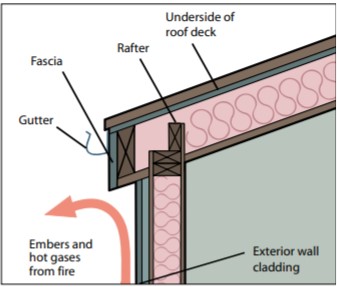
Right – In wildfire prone areas, using a flat soffit with venting on the fascia instead of an angled soffit with down-facing venting reduces the risk of catching rising embers.
Image
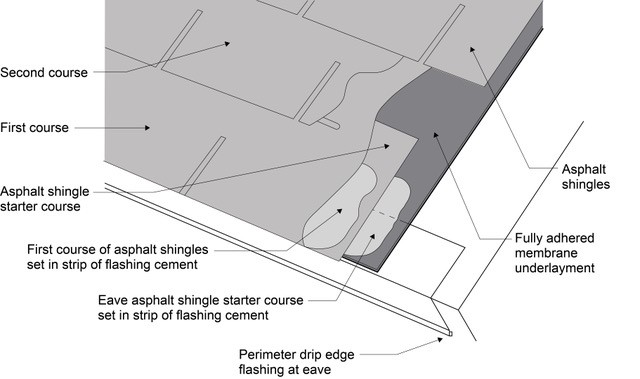
Right – Install asphalt shingles over a starter strip set in an 8-inch strip of flashing cement
Image
Image
Image
Right – Interior grade is elevated and flood vents are located slightly above interior grade
Image
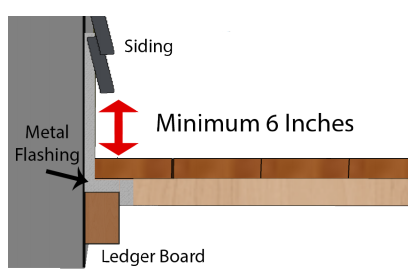
Right – Metal flashing is installed between the deck boards and house wall with the top of the flashing extending up behind the siding and the bottom of the flashing extending out and down over the ledger board
Image
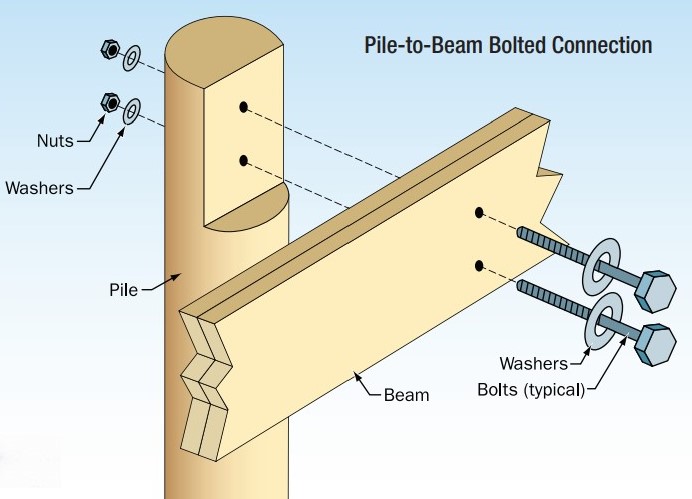
Right – Notch cut into pile takes less than 50% of cross section, cut is treated with wood preservative, and beam is installed with corrosion-resistant bolts.
Image
Image
Image
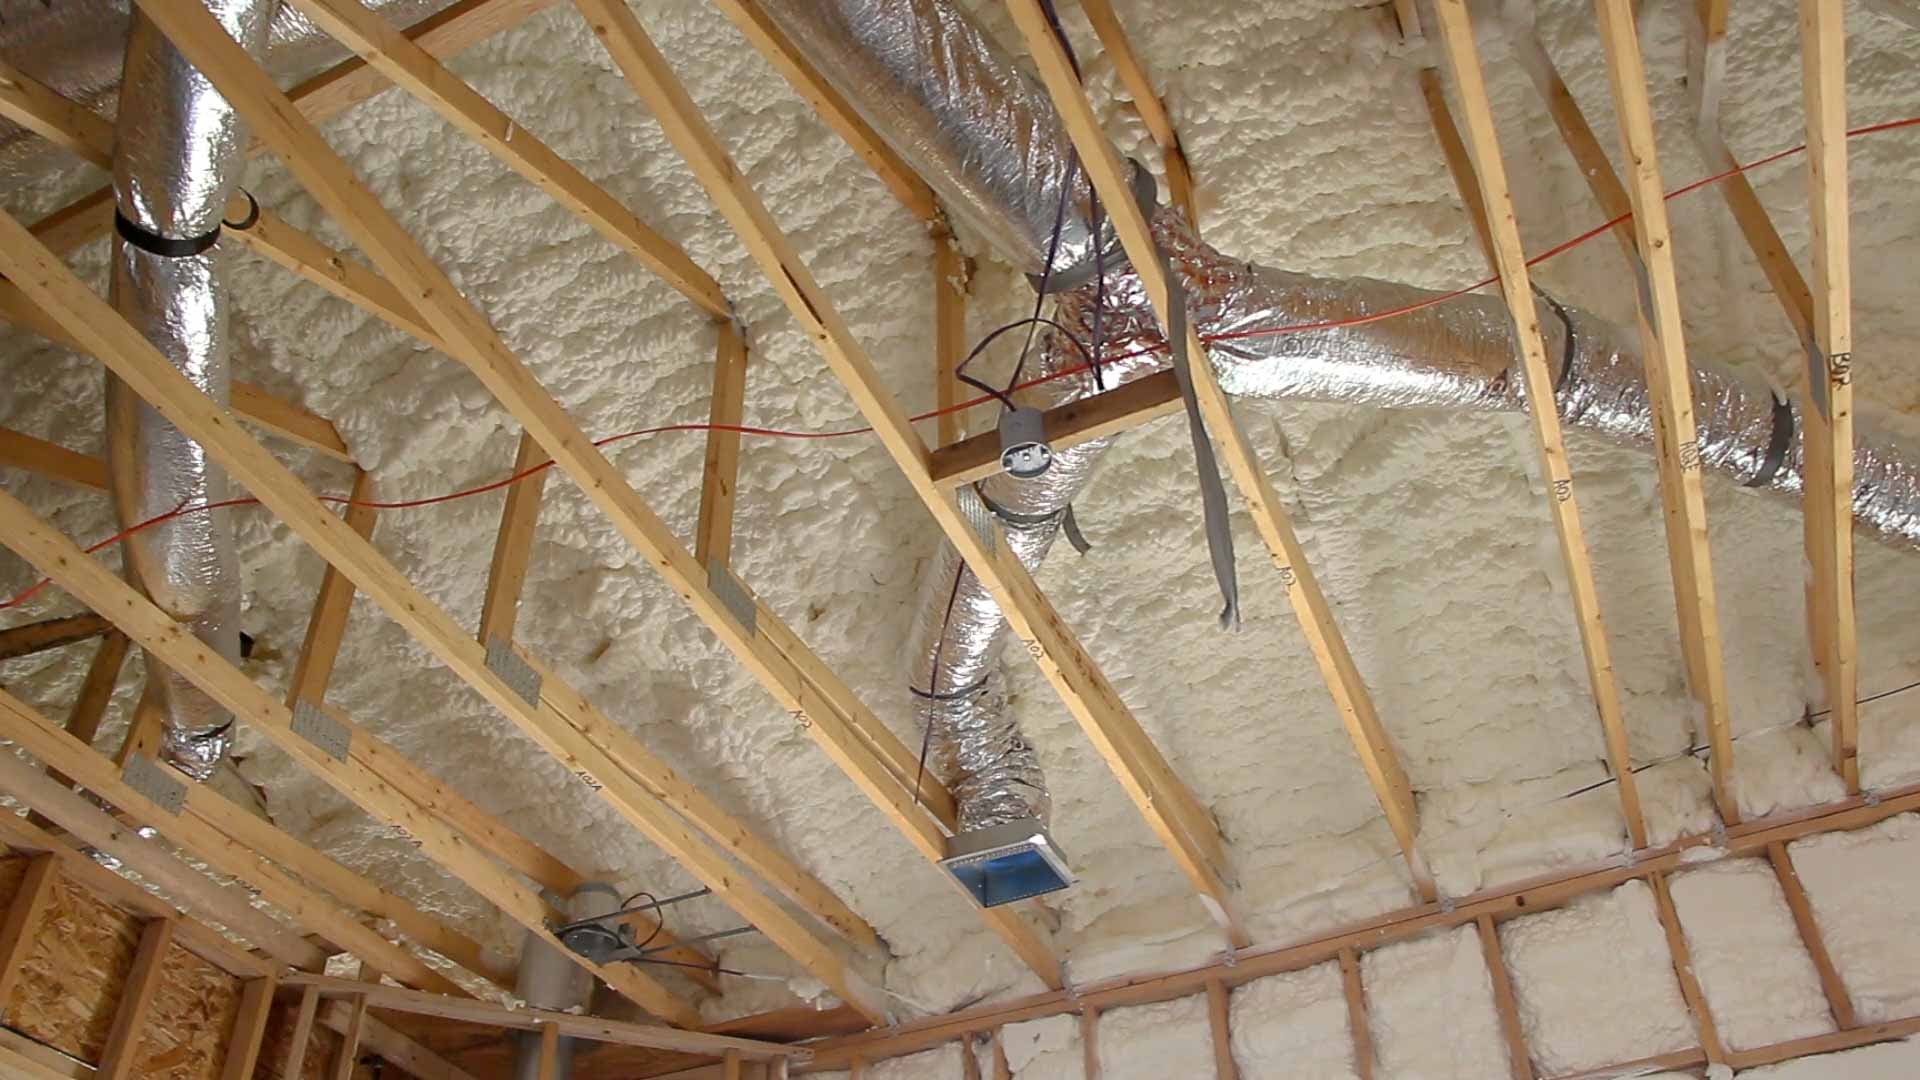
Right – R-25 of open-cell spray foam lines this new home’s attic ceiling, to protect HVAC ducts from heat and cold.
Image
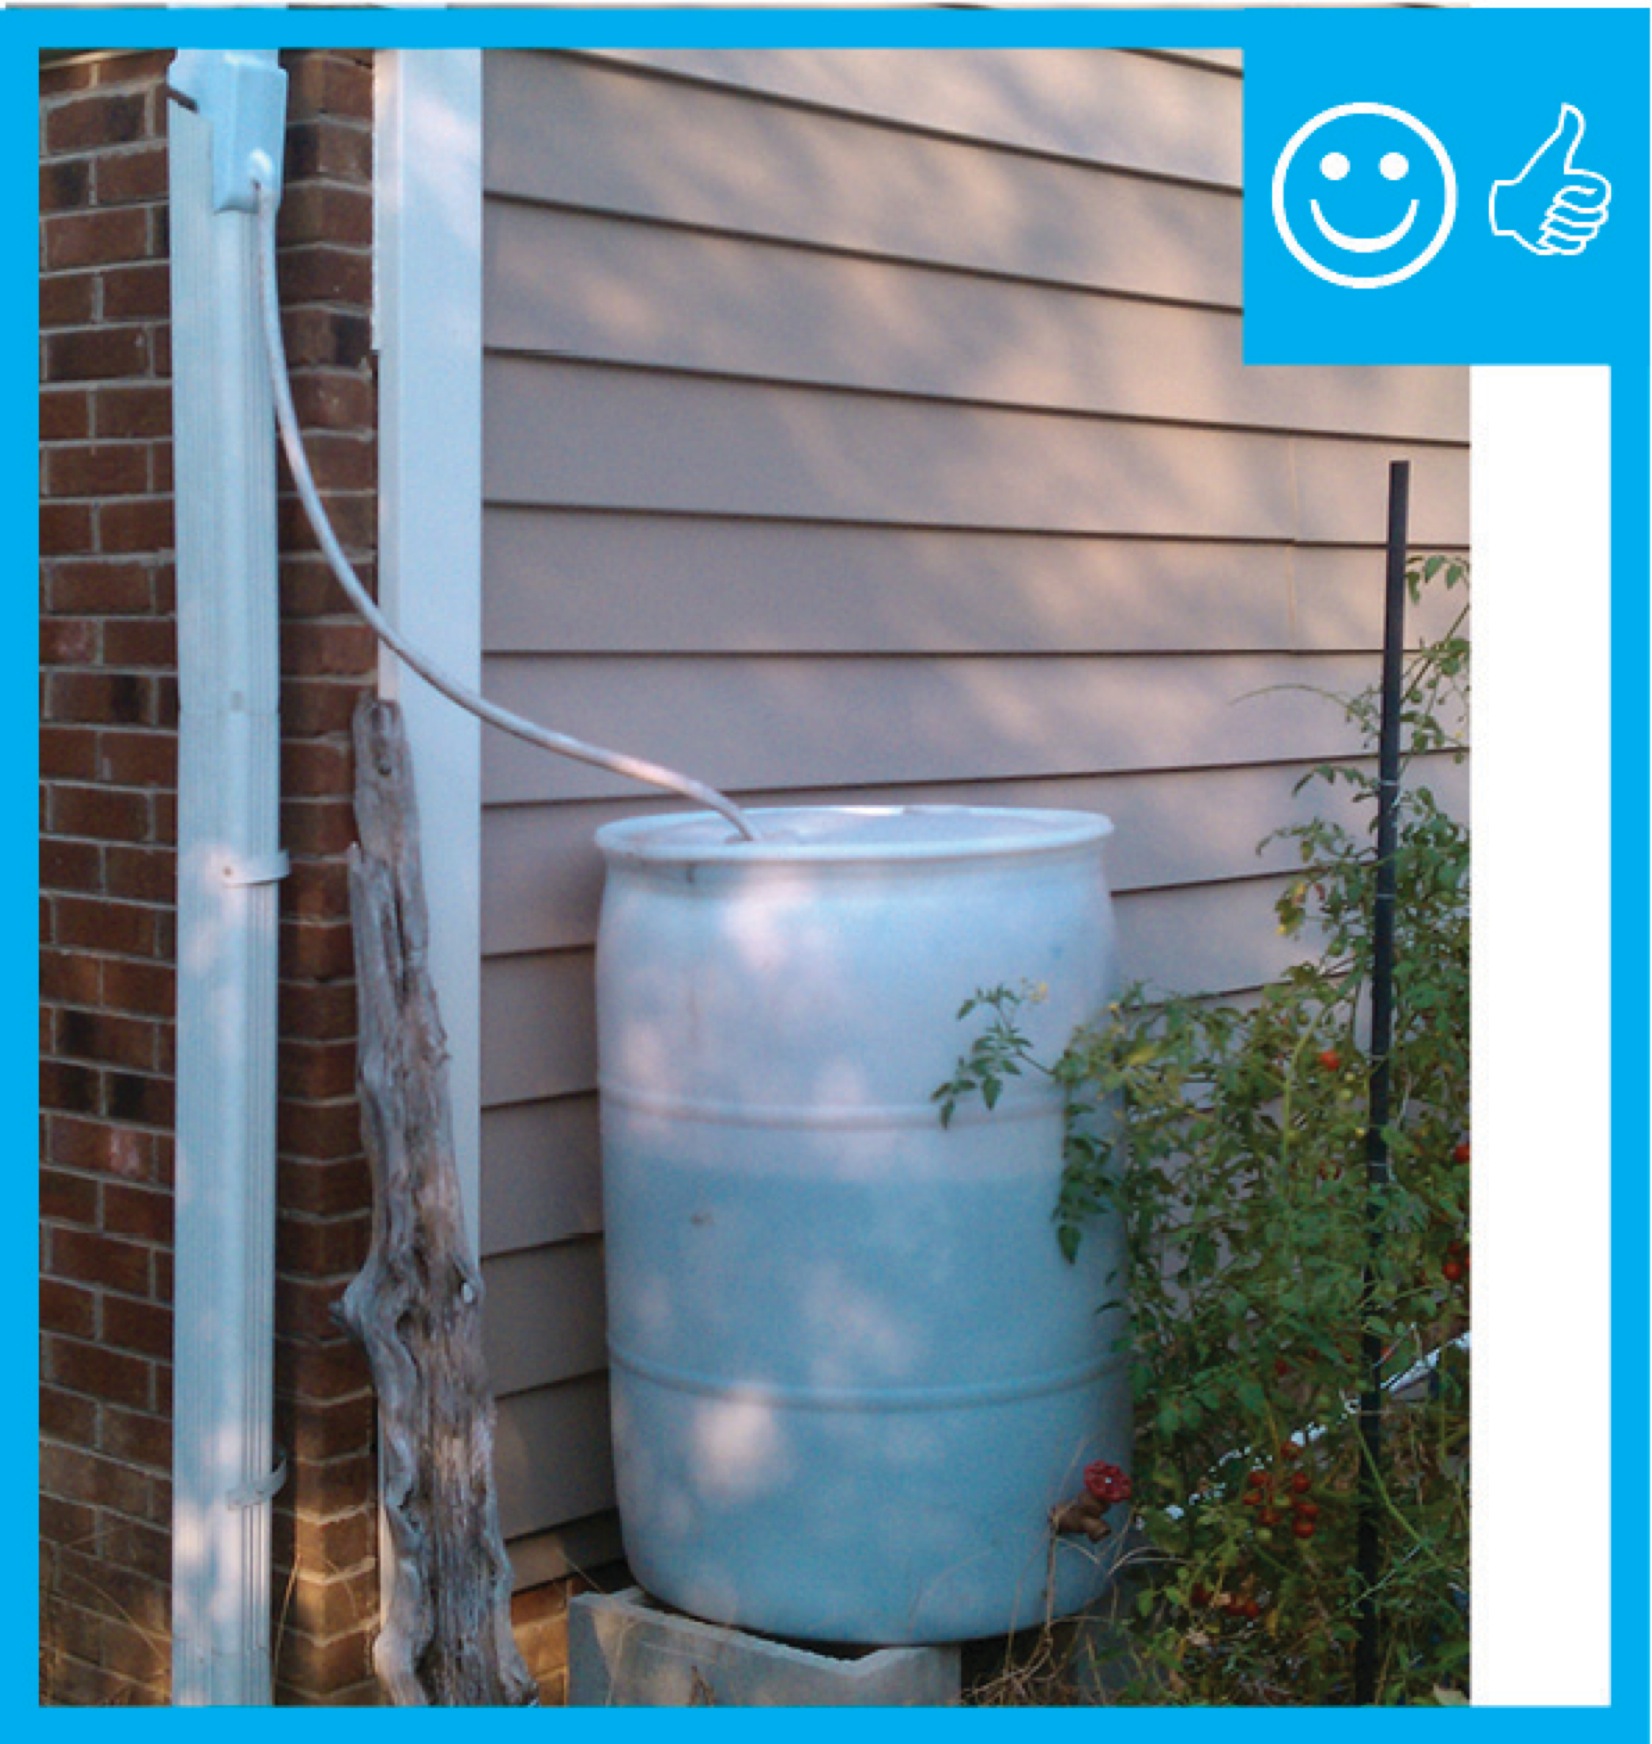
Right – Rain barrel installed with an overflow spout terminating at least 5 feet from foundation
Image
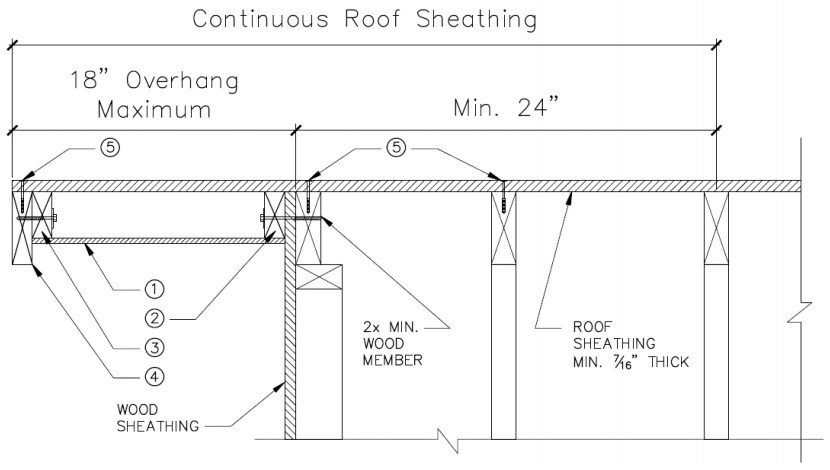
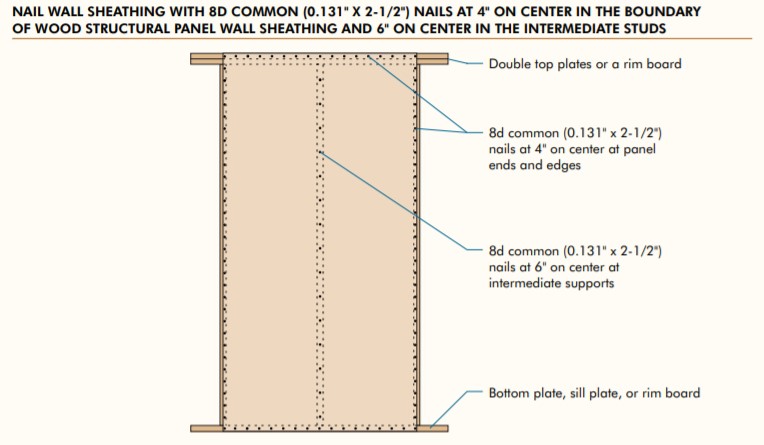
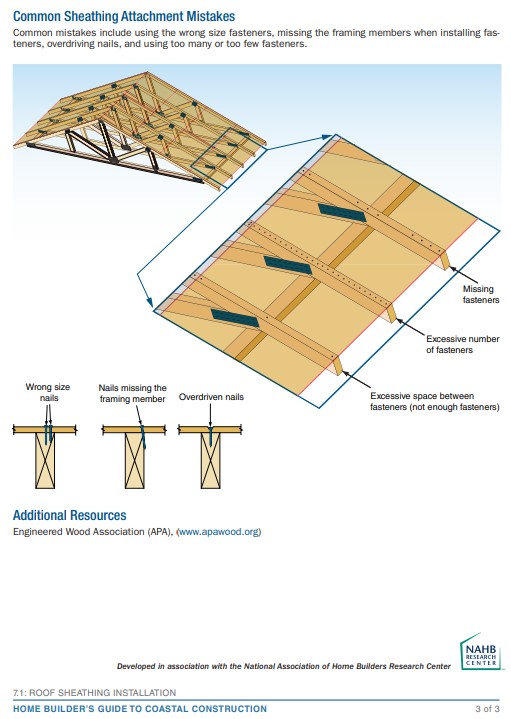
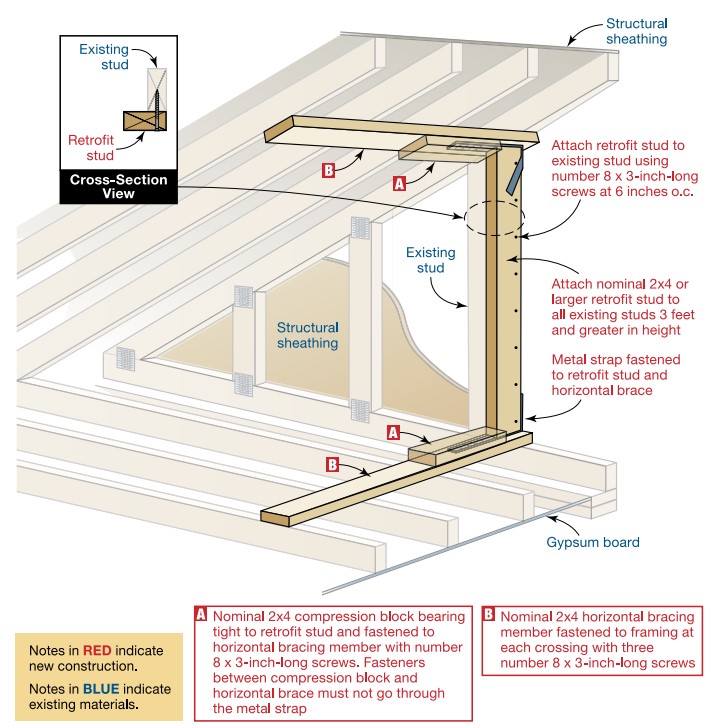
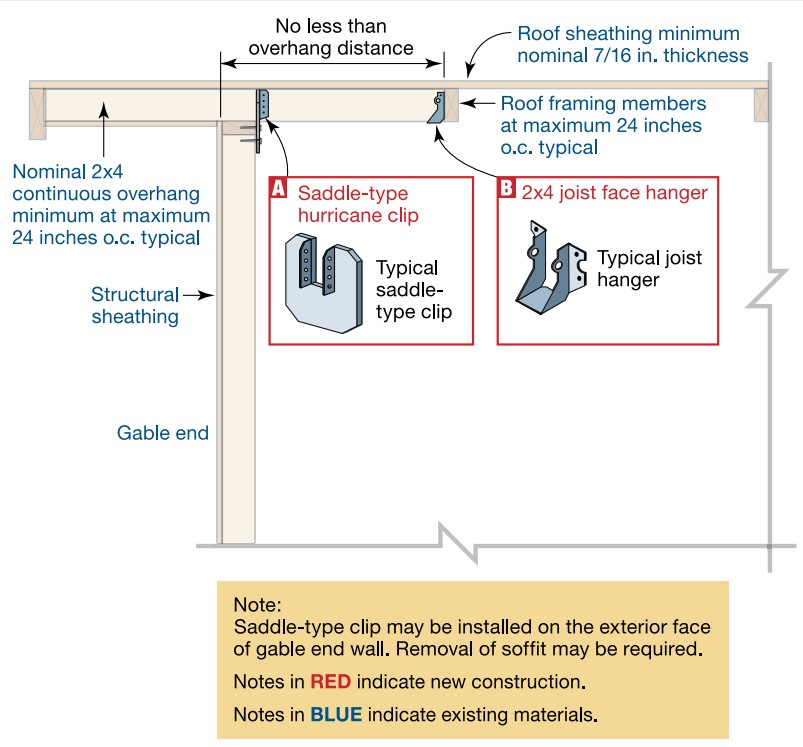
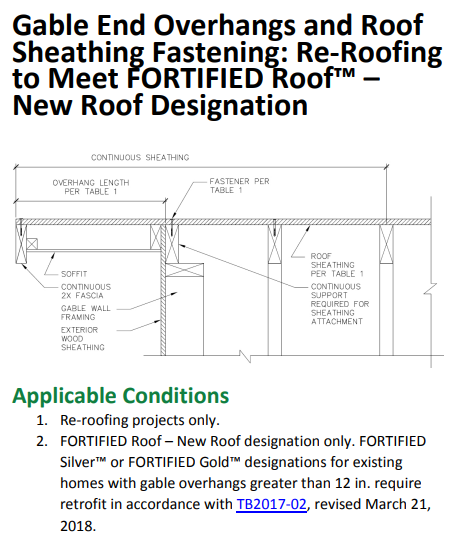
Right – Retrofit Specification for installing roof sheathing an 18-inch gable end overhang
Image
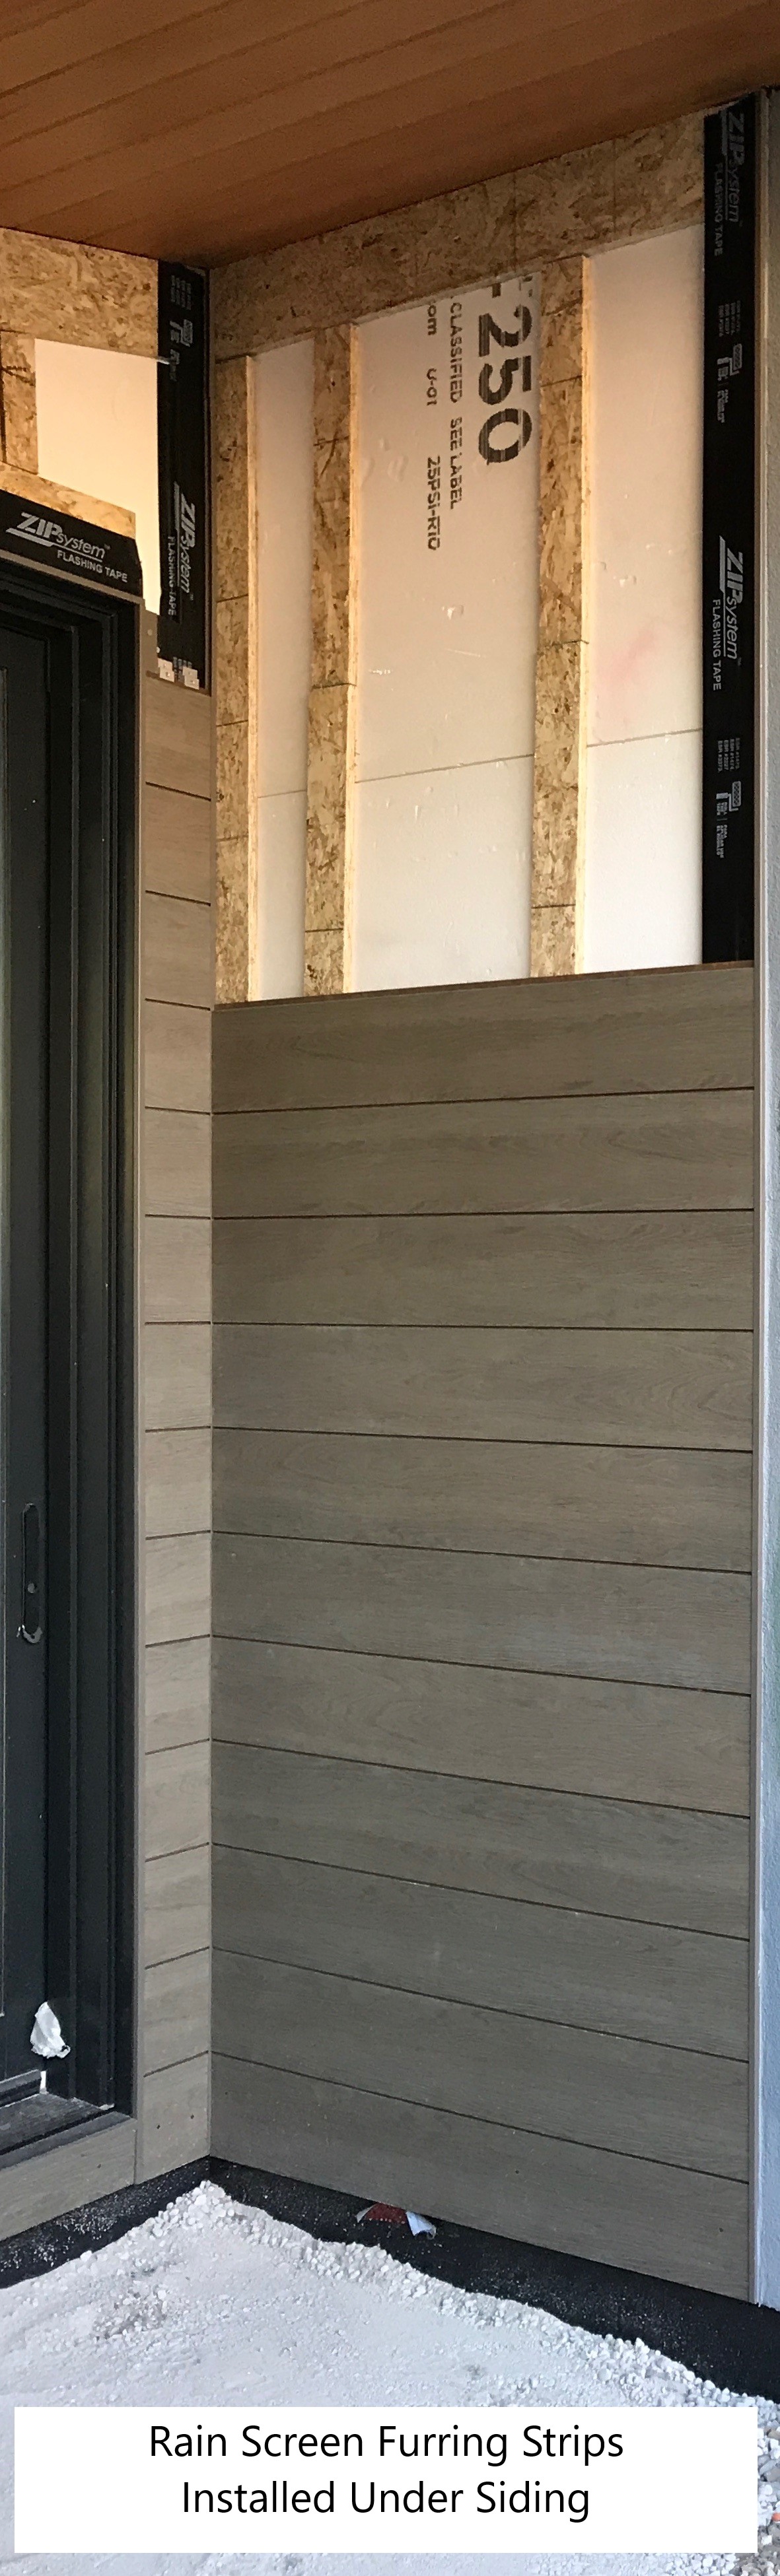
Right – Ripped OSB provides furring strips for a ventilation gap behind the wood siding.
Image

Right – Roof underlayment is fully adhered and roof deck seams are sealed so roof is resistant to high-wind events
Image
Right – Roof underlayment is fully adhered and roof deck seams are sealed so roof is resistant to high-wind events
Image
Image

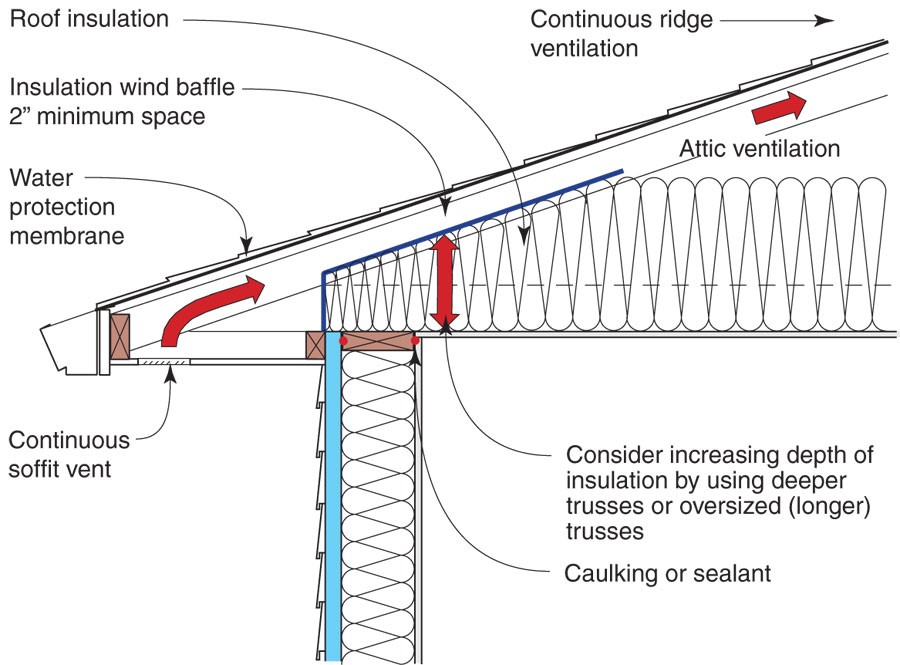
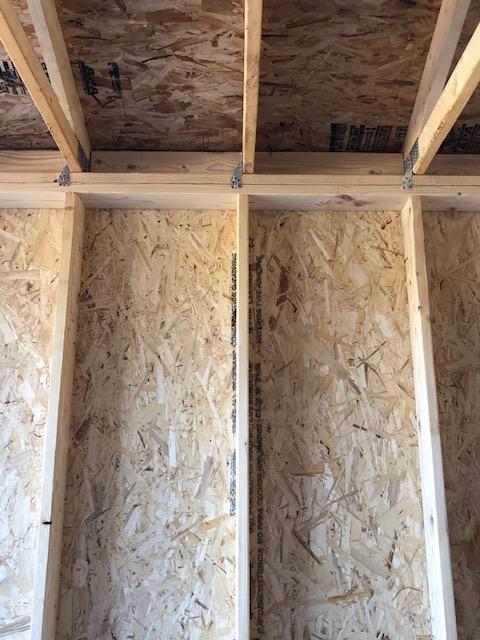
Right – Sheathing extends to rafters adding strength to soffit, baffles keep attic insulation from vent to maintain air flow
Image

Right – Start asphalt shingle installation with a starter strip set in an 8-inch strip of flashing cement
Image
Right – Strategically placed trees provide shade to the south-facing windows of this building.
Image
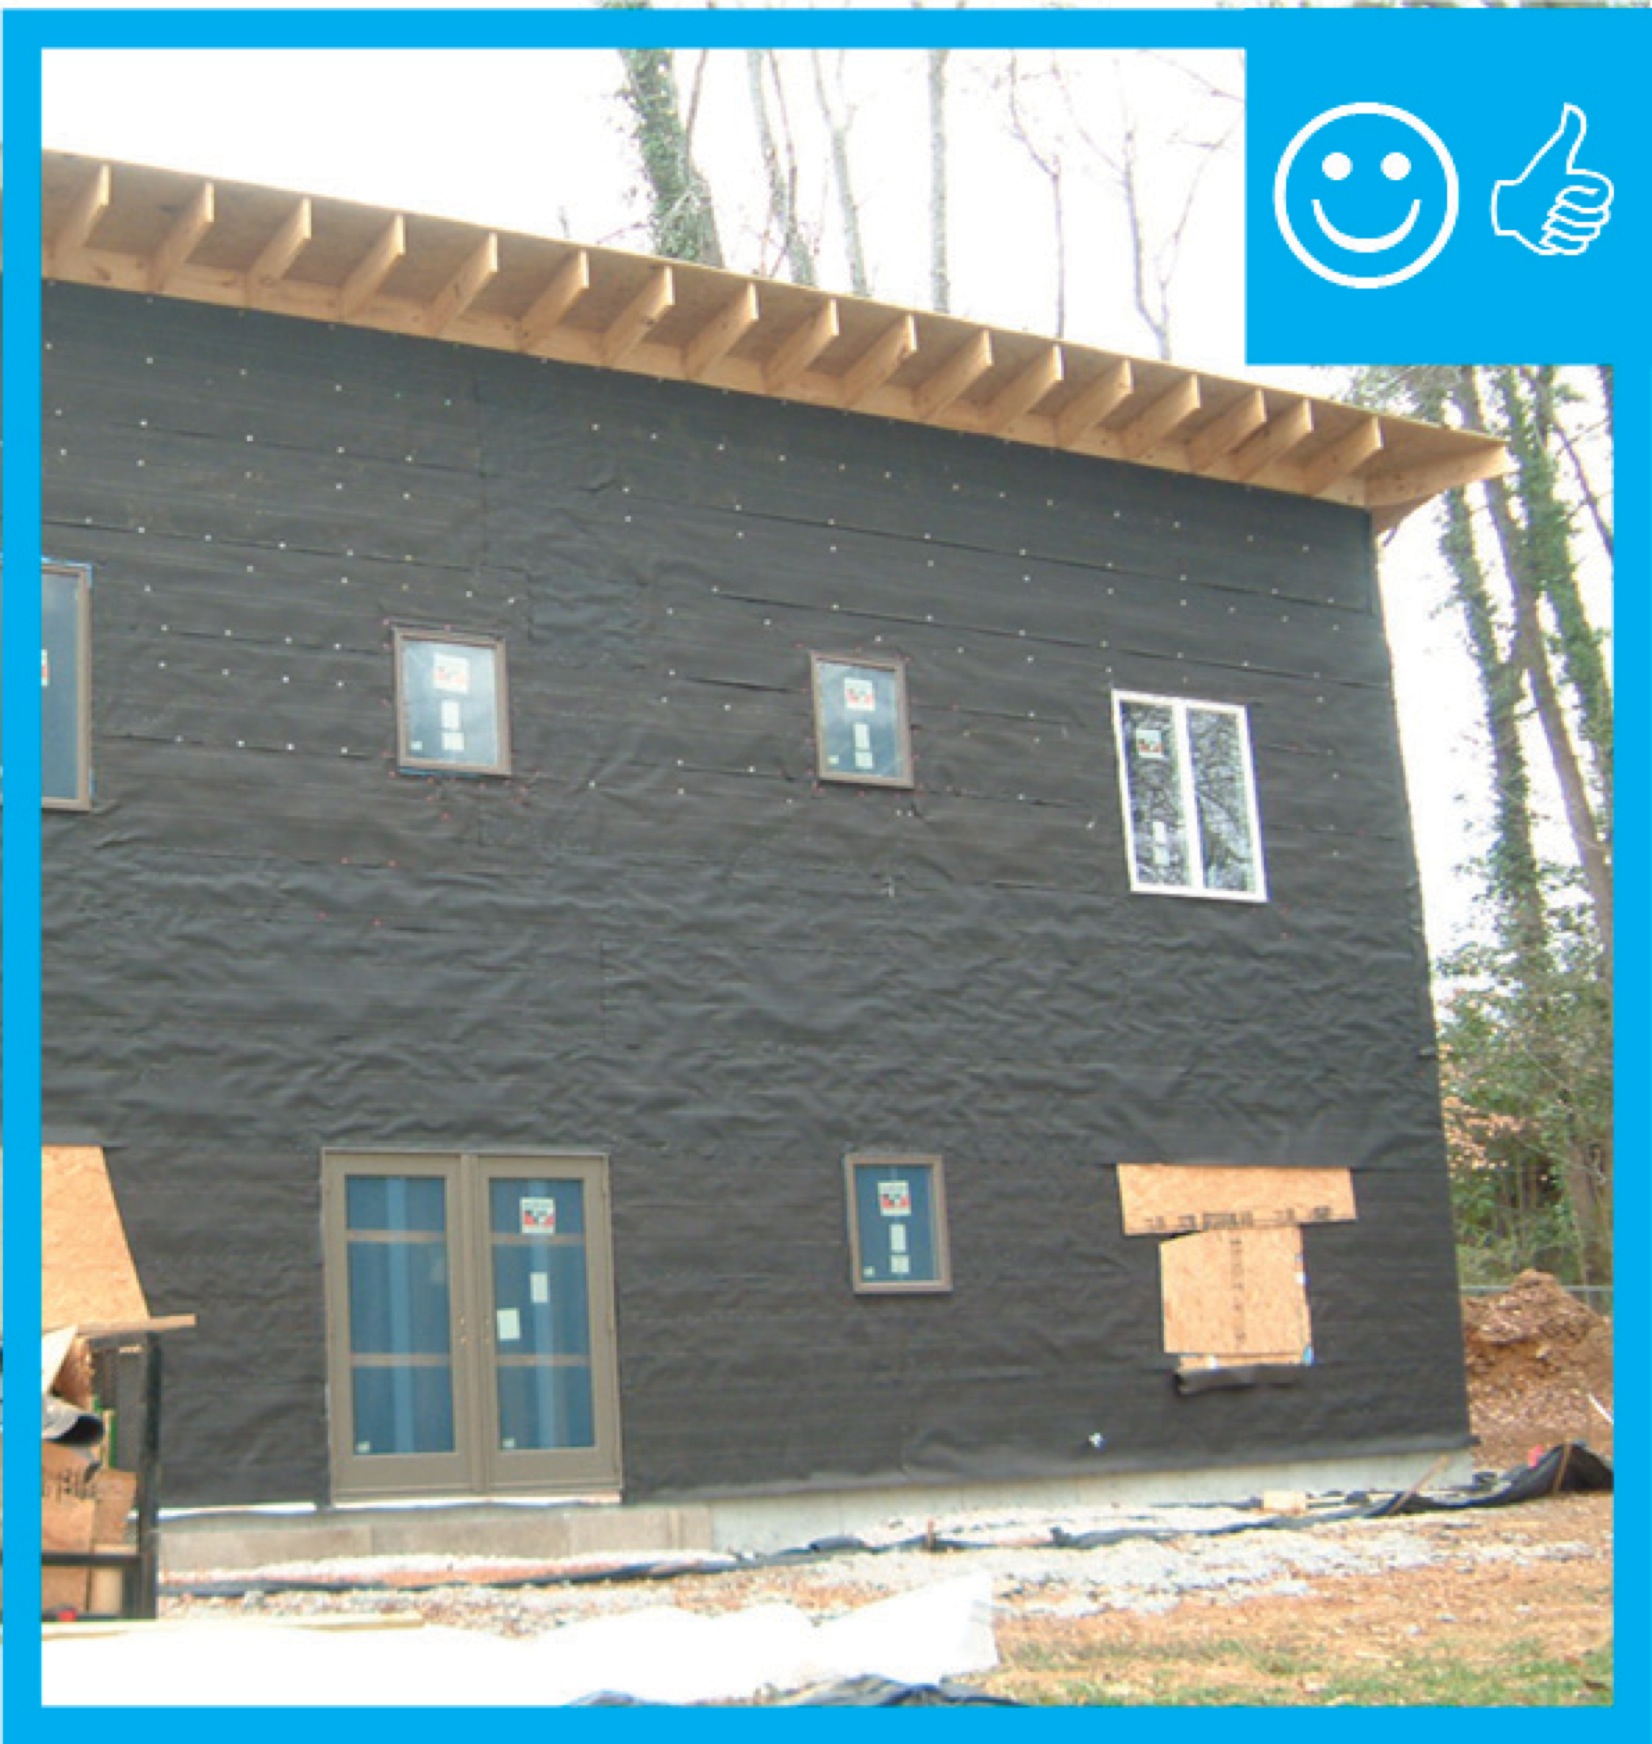
Right – The building felt is installed on all exterior walls and provides a complete drainage system
Image
Right – the building on the right employs light-colored walls, deep tinting, and deeply recessed windows to minimize solar heat gain
Image
Right – The canopy of this tree is high enough to allow views out the windows of this home while providing excellent shade to walls, windows, and roof.
Image
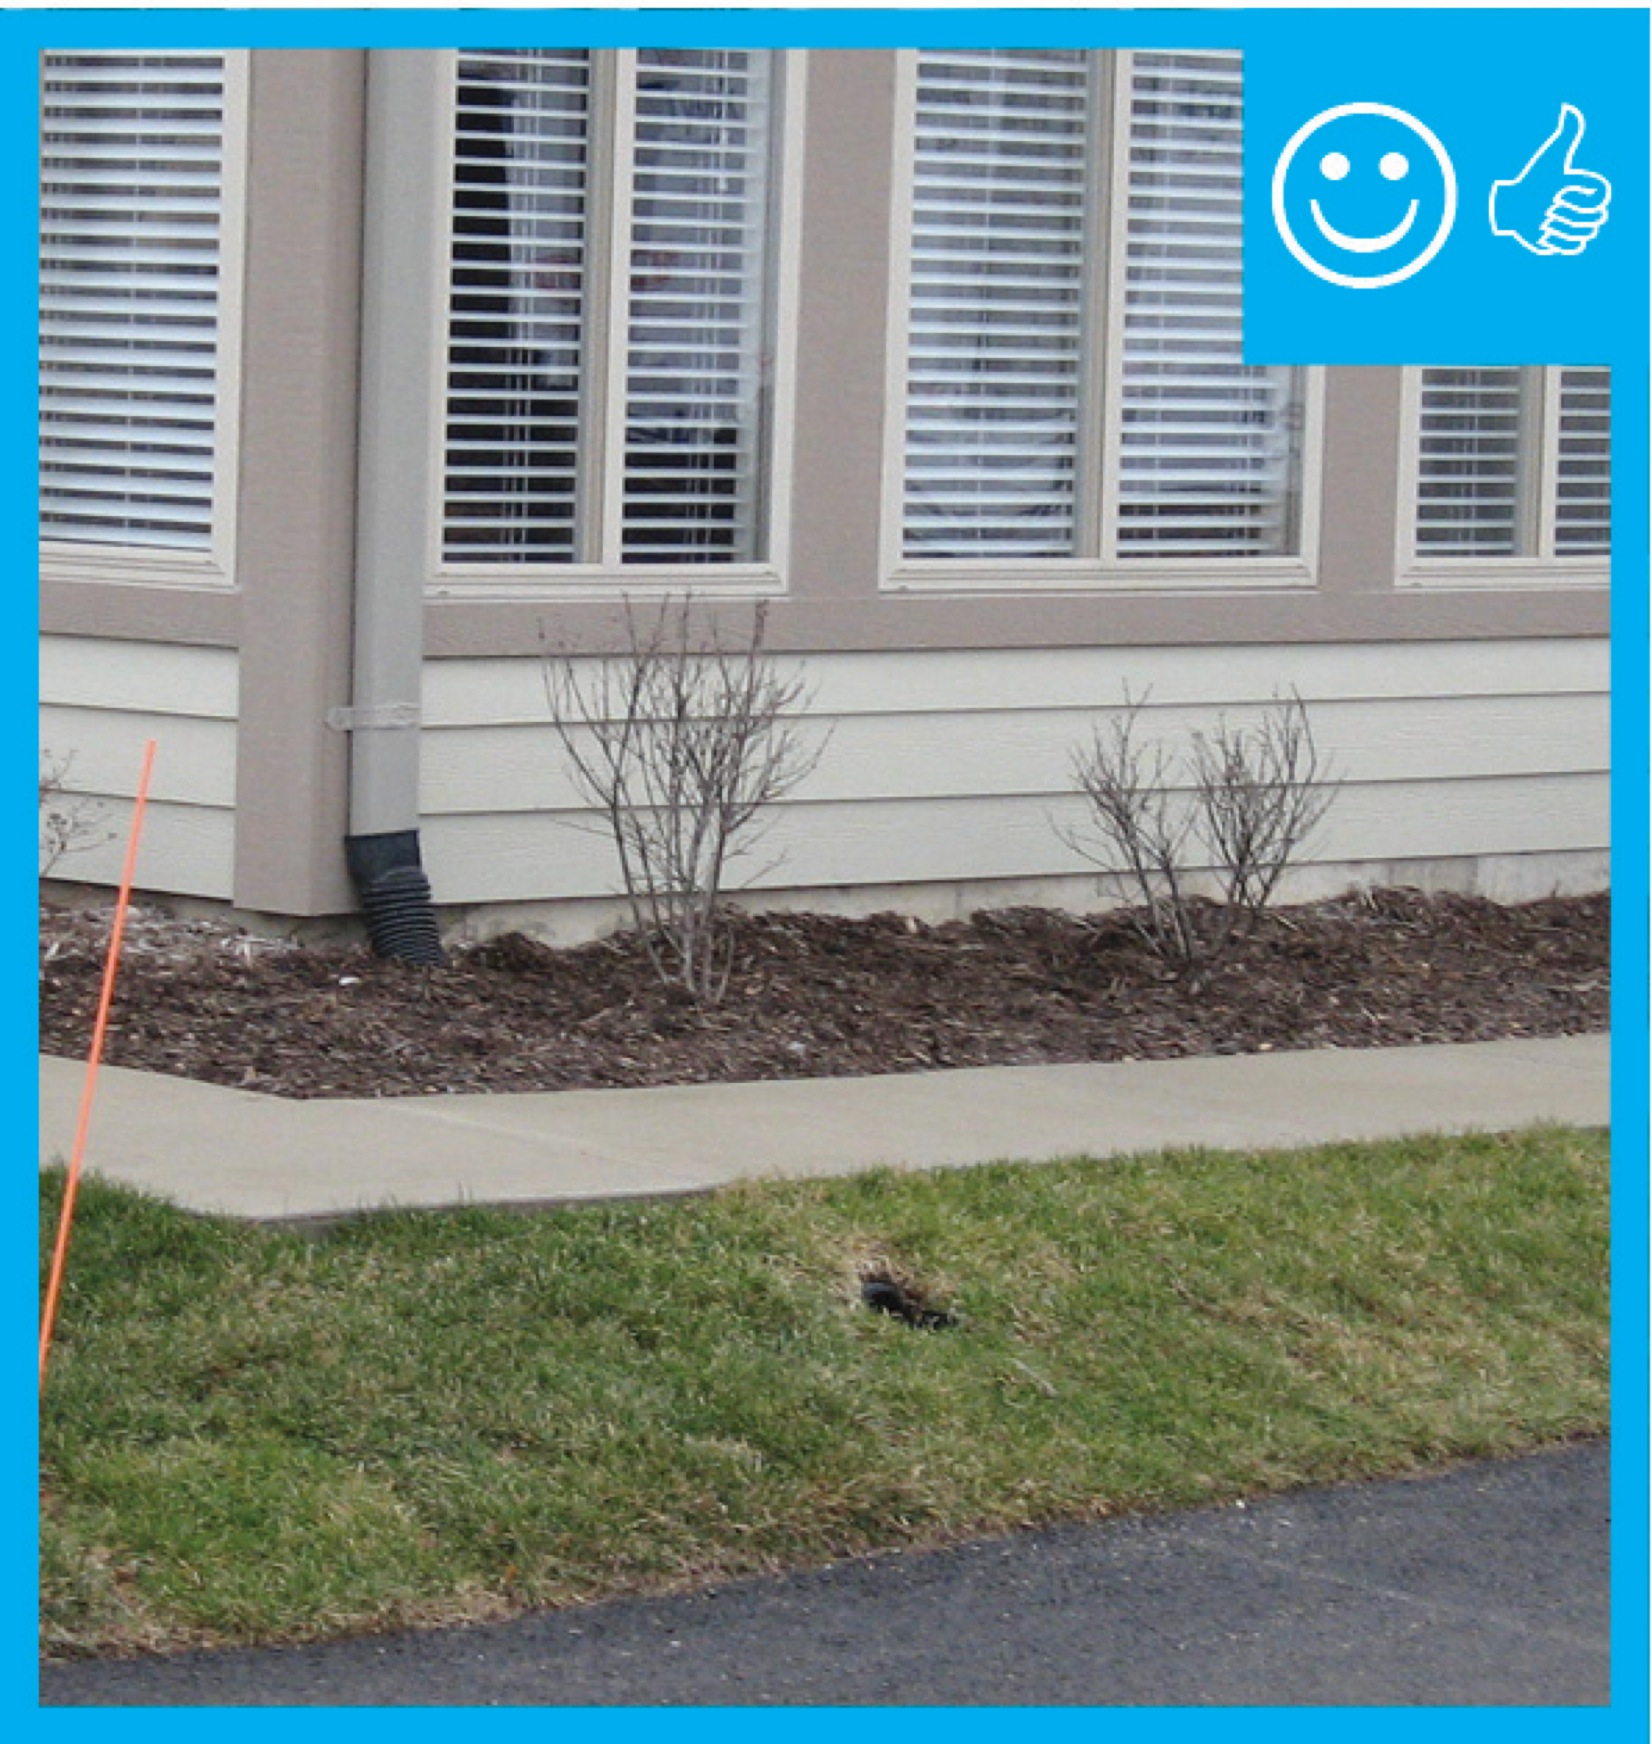
Right – The downspout pipe is far enough away from the foundation to prevent moisture problems
Image
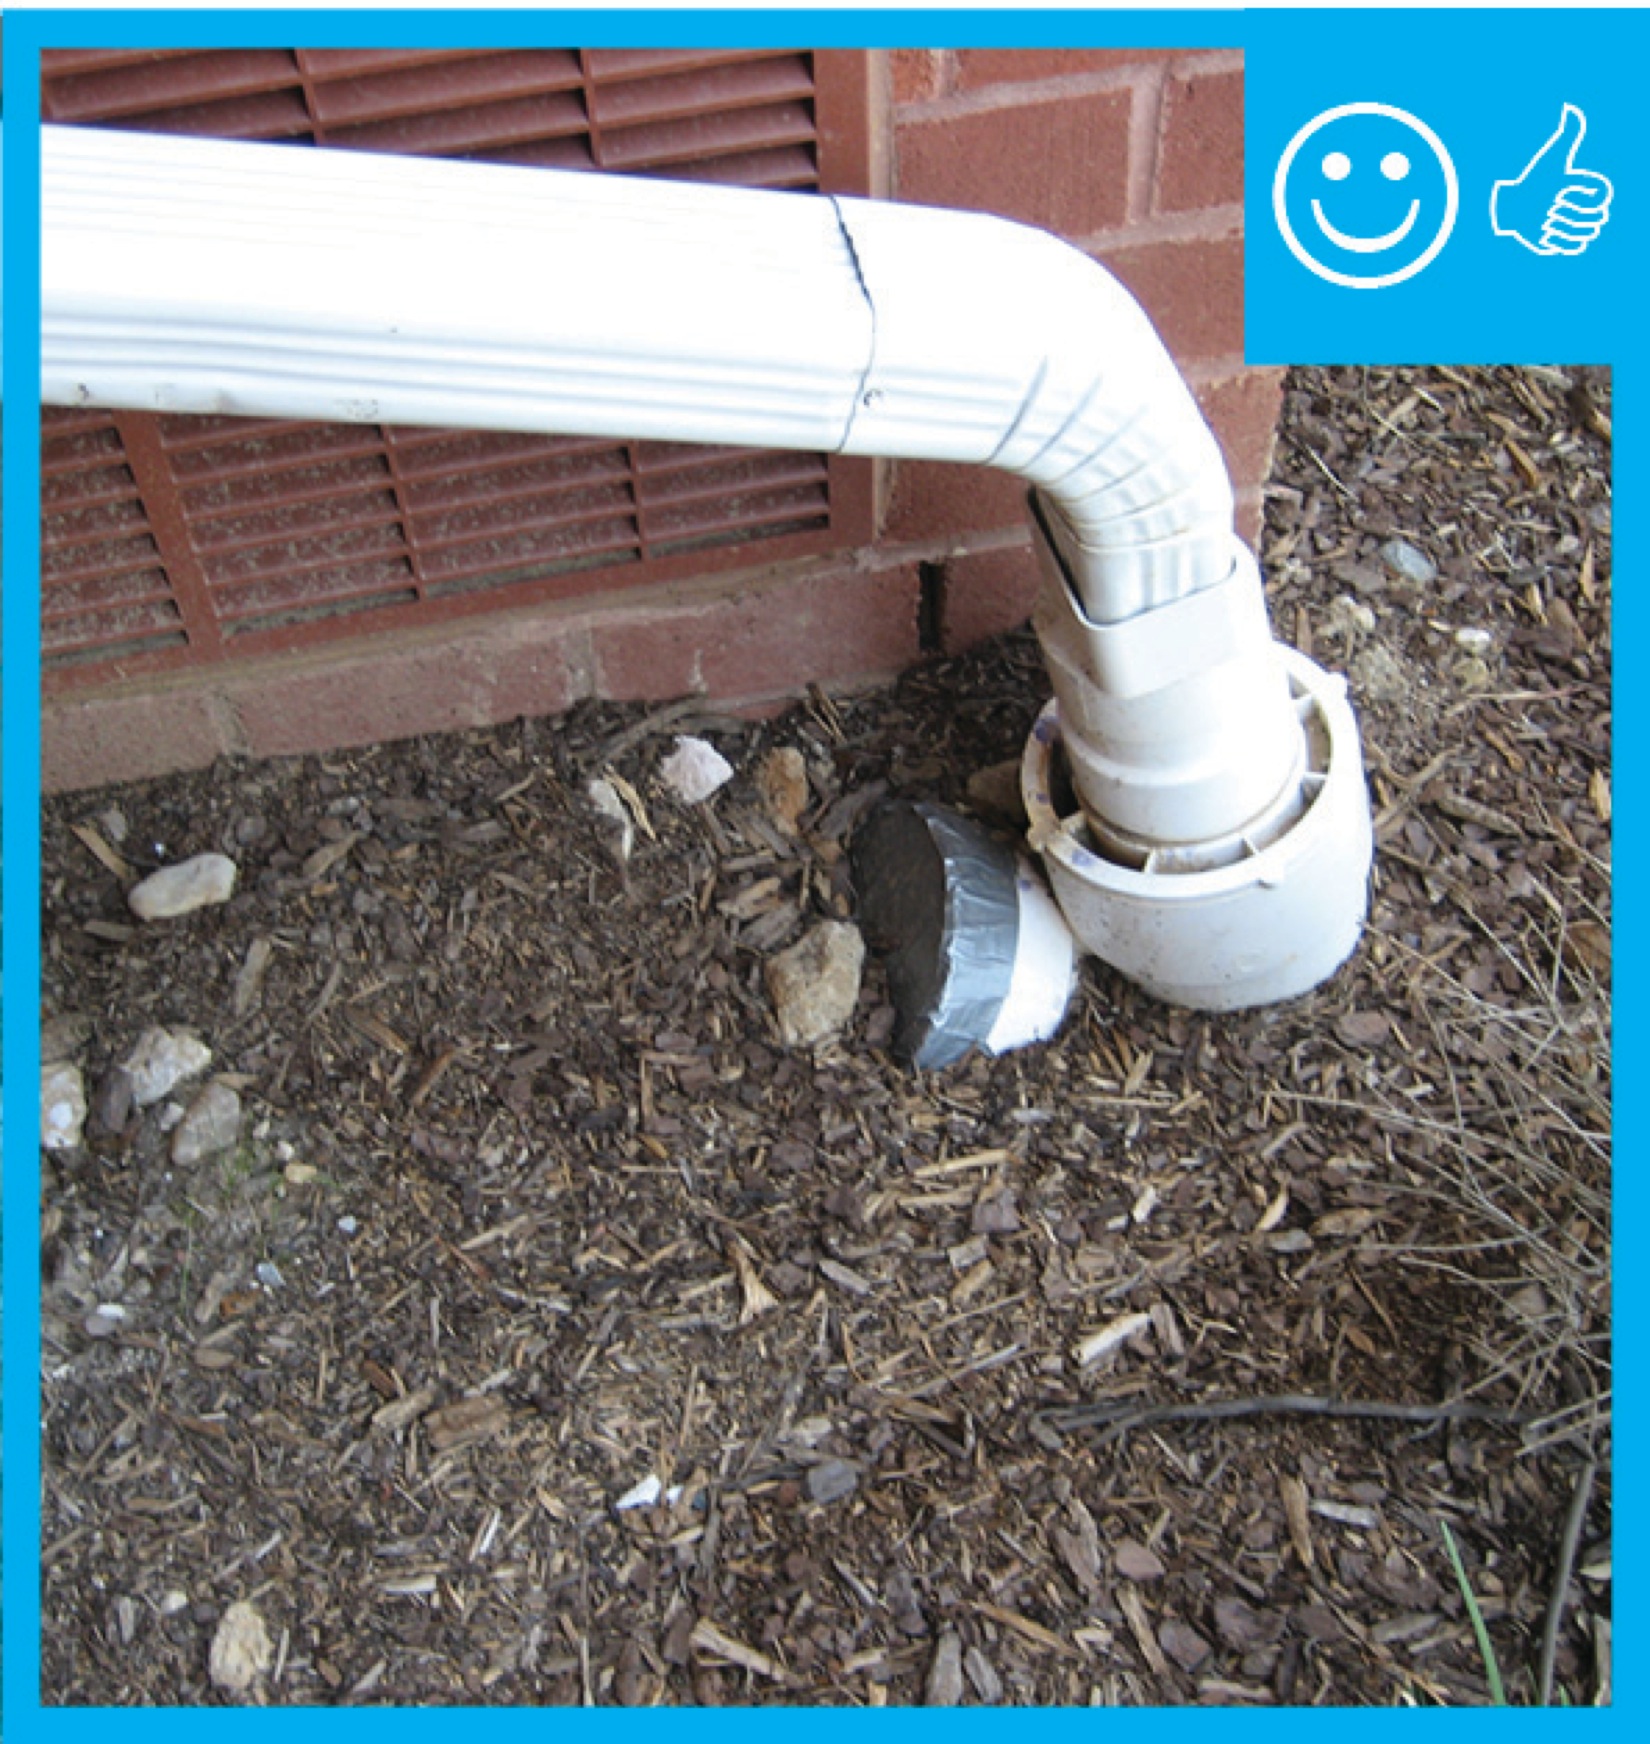
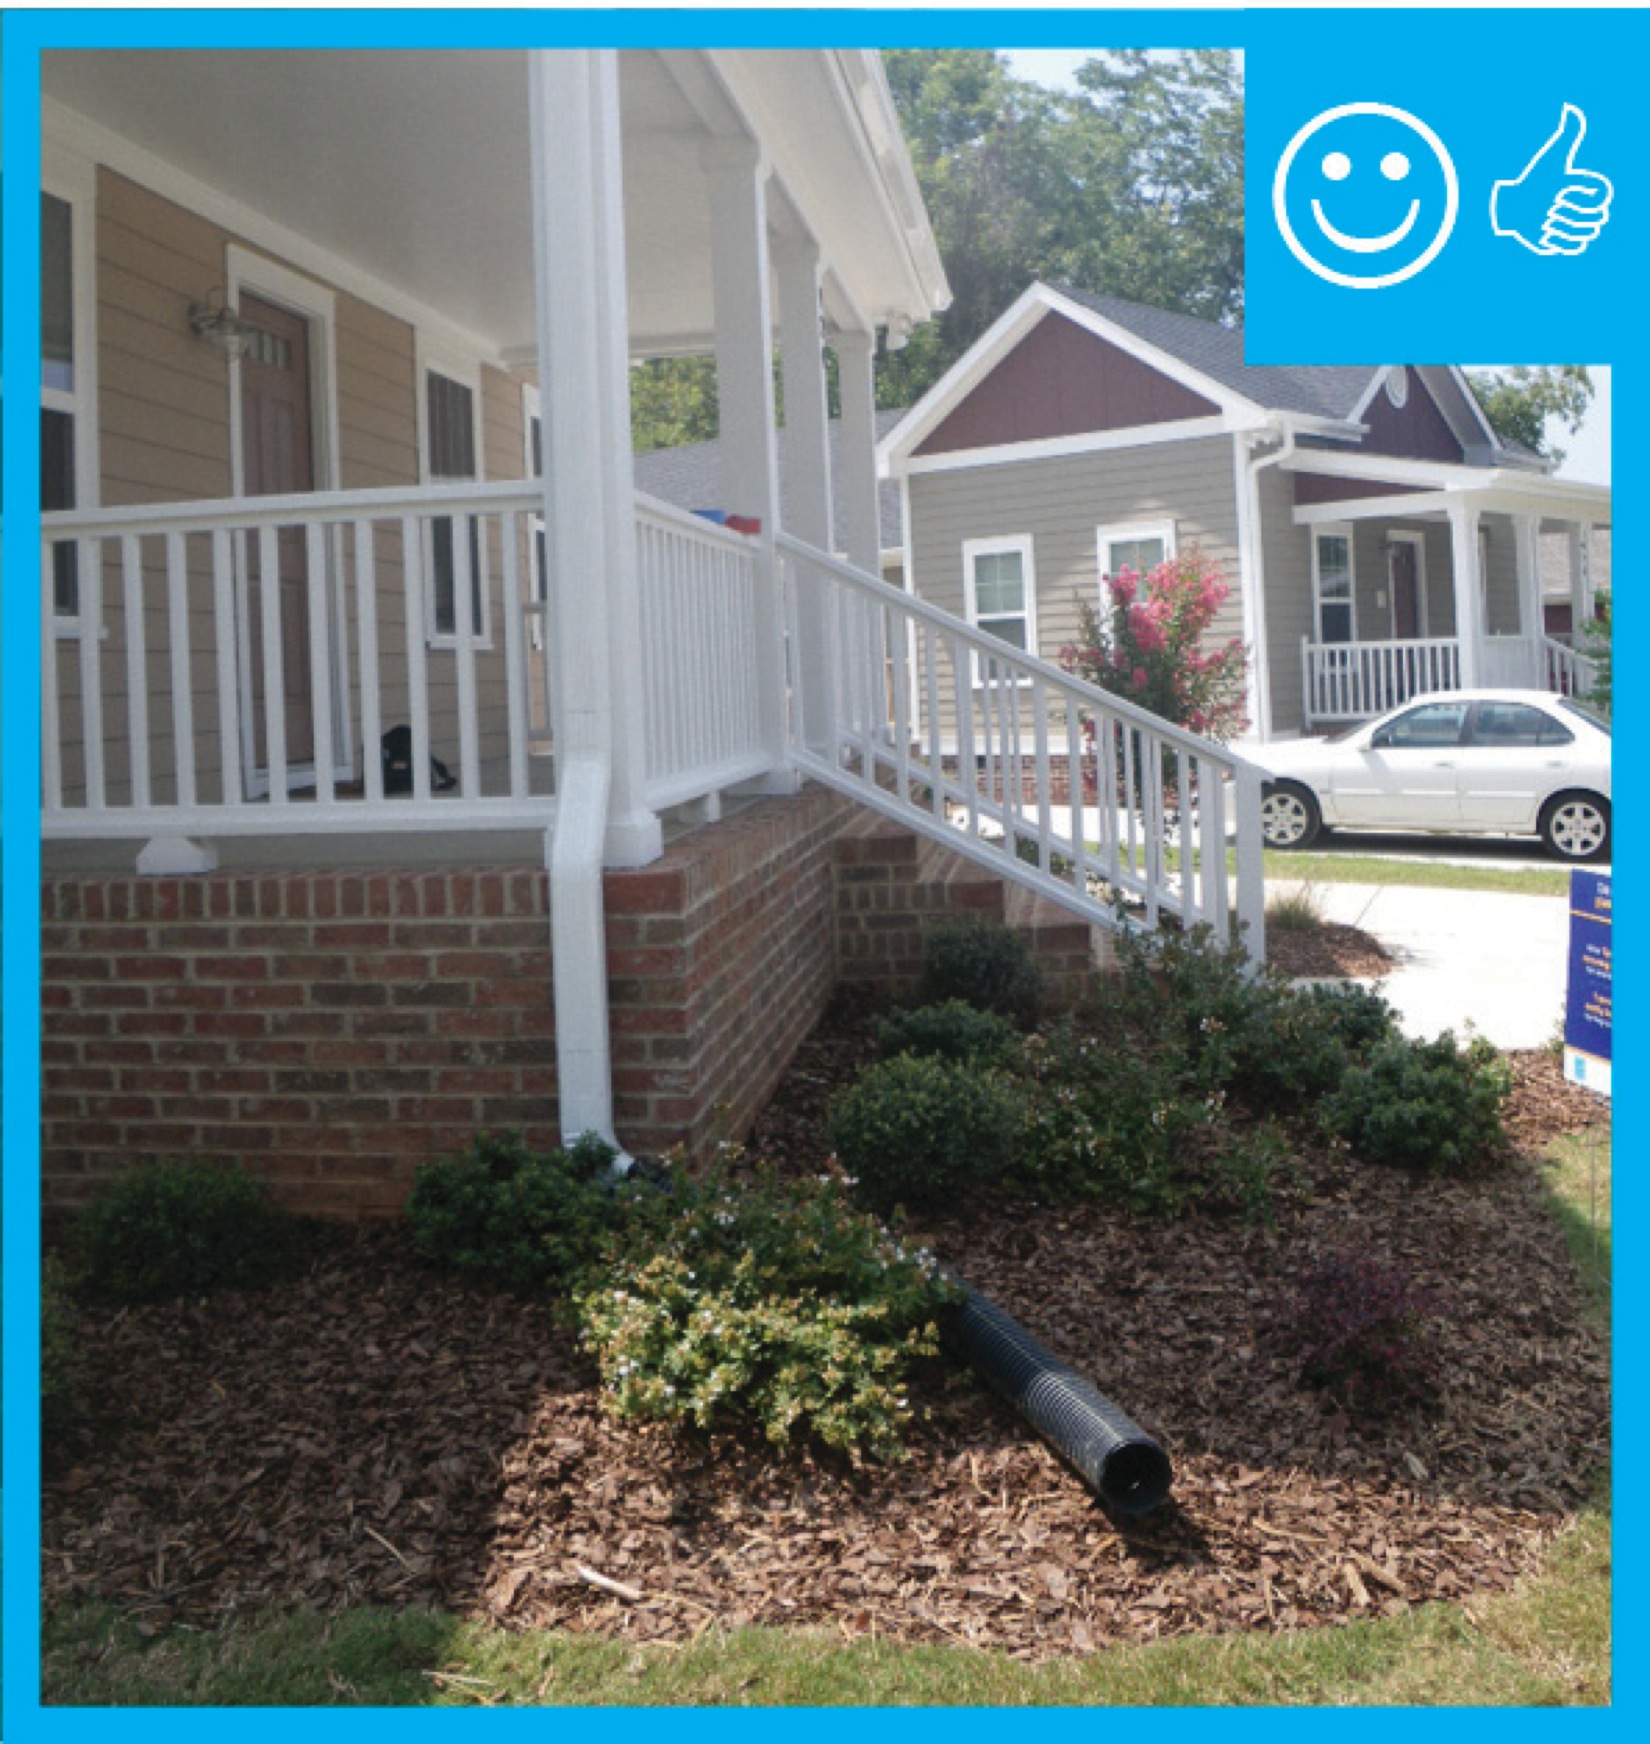
Right – The downspout terminates into a catchment system that moves water away from the foundation of the house
Image
Right – The drain slopes away from the foundation and terminates at the proper distance
Image

Image
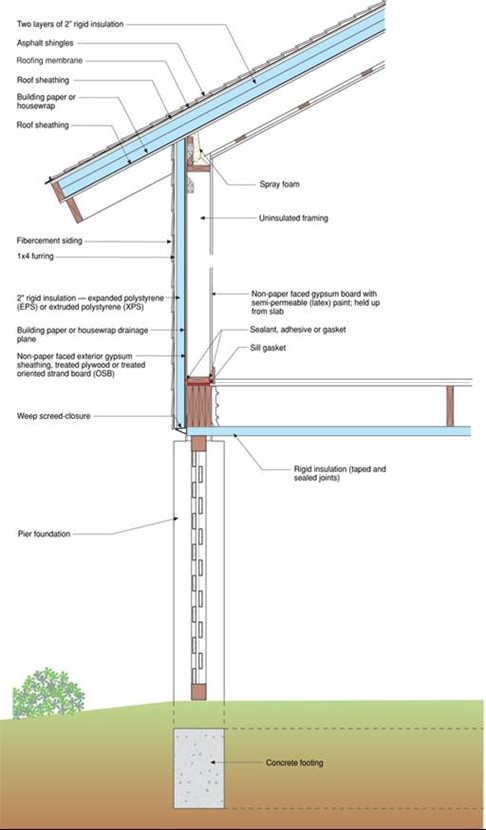
Right – The floor and wall system on this open-foundation home use rigid foam rather than fibrous cavity insulation to reduce risk of water damage.
Image
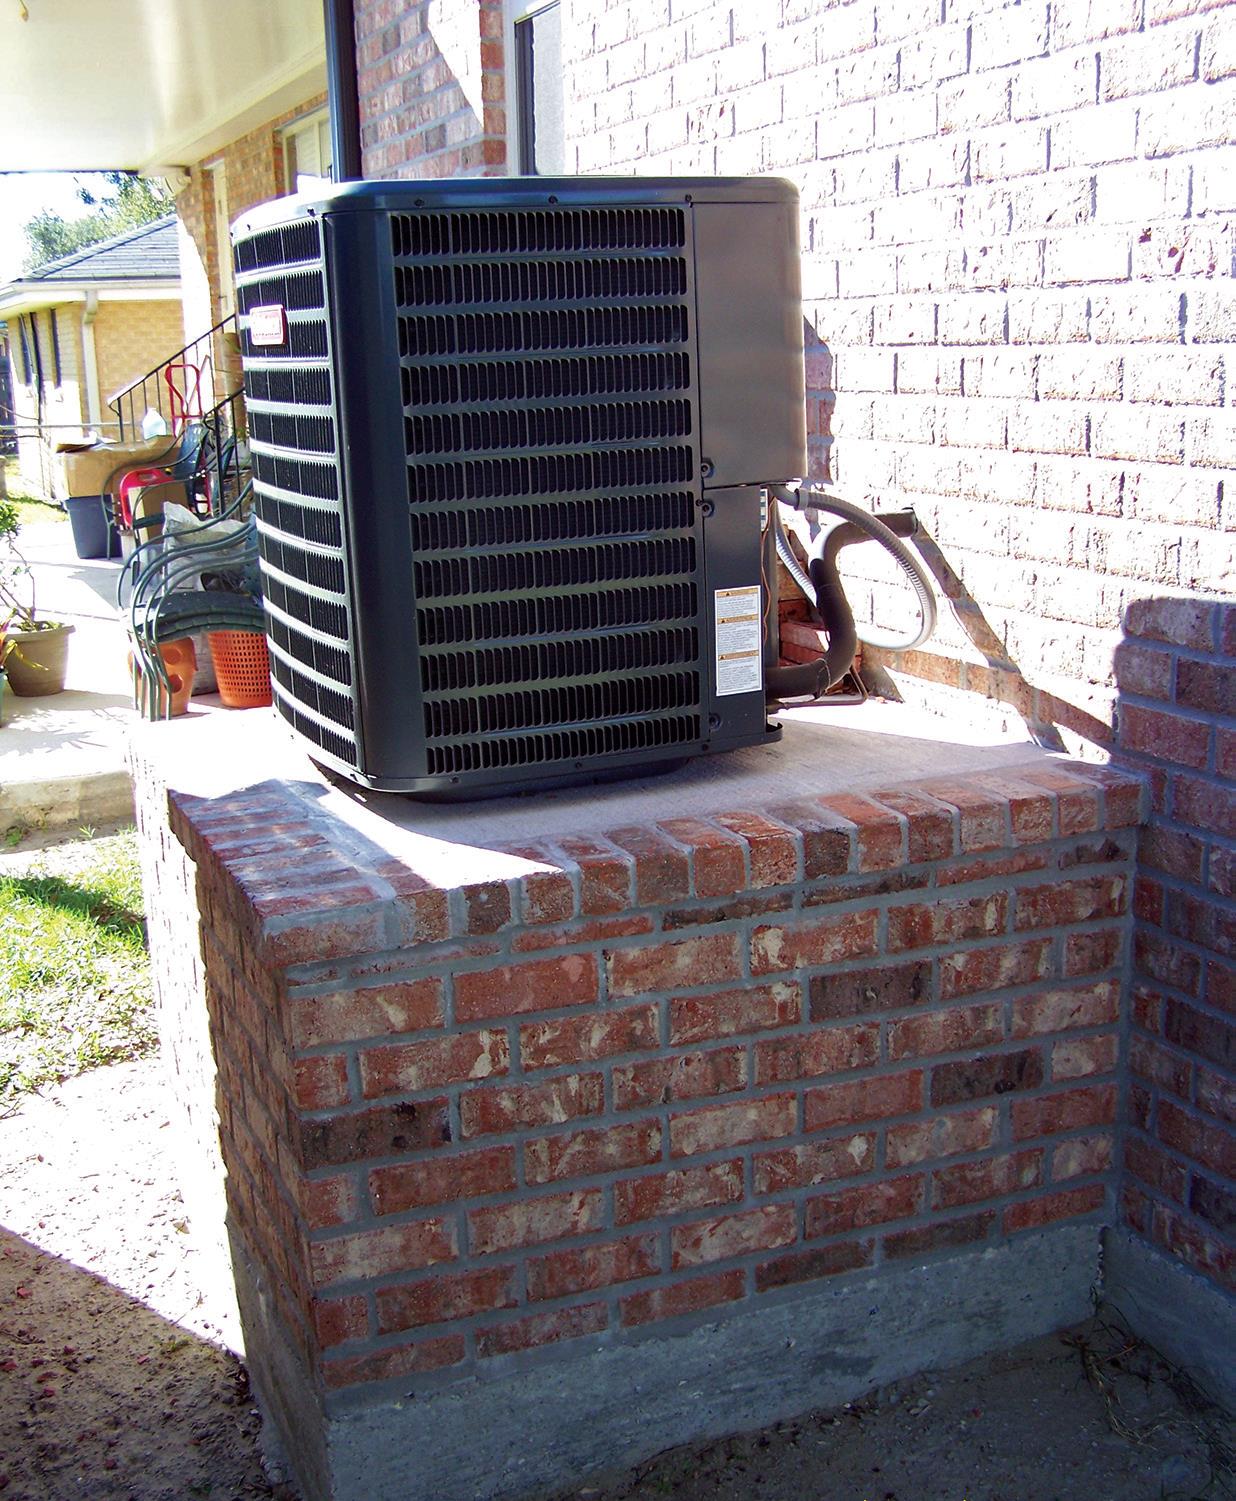
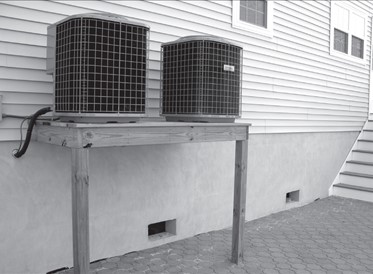
Right – The HVAC outdoor unit is anchored on a bed of masonry bricks, 1 foot or more above the base flood elevation.
Image
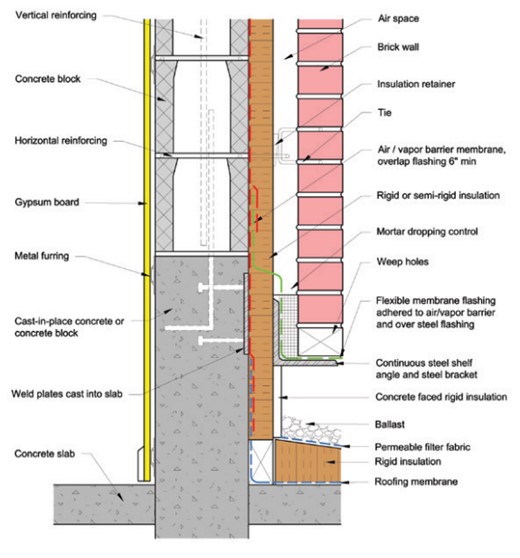
Right – The insulation has been located to the exterior of the thermal mass in this wall section
Image
Right – The latticework between columns in this raised foundation will allow free flow of water in the event of a flood
Image

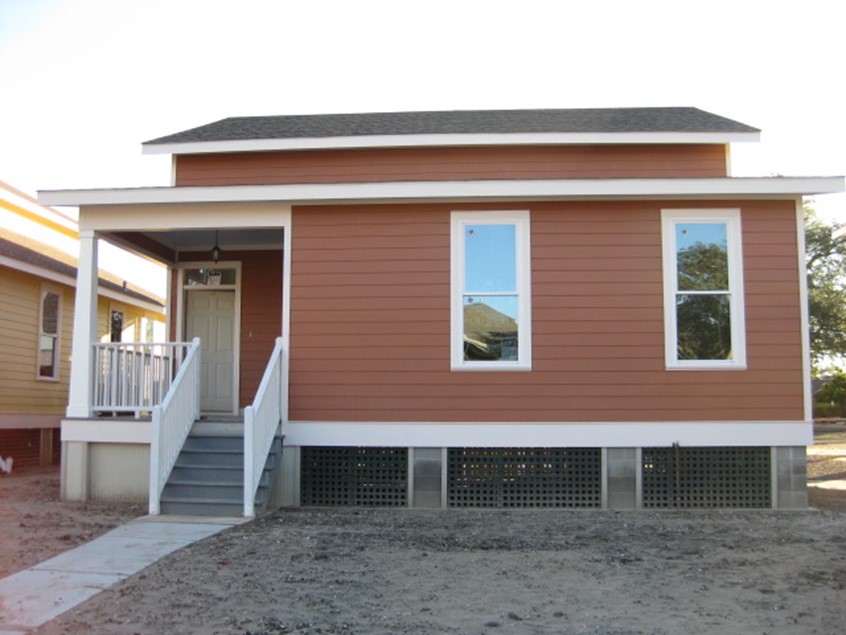
Right – The raised-slab, brick-and-block stem wall, above-grade walls, and roof of this house use flood damage-resistant materials, integrated water, vapor, and air control layers, and construction methods which promote good drainage and rapid drying
Image
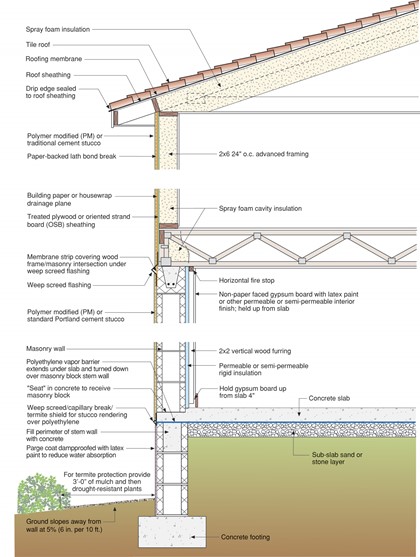
Right – The raised-slab, CMU block stem wall, above-grade walls, and roof of this house use flood damage-resistant materials, integrated water, vapor, and air control layers, and construction methods which promote good drainage and rapid drying
Image
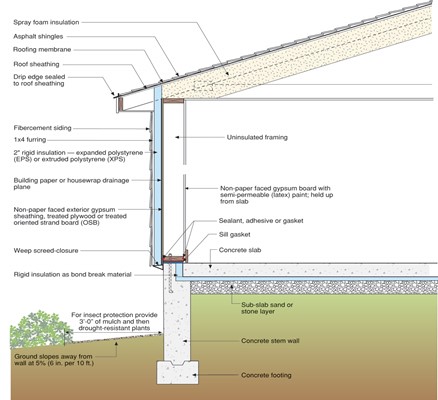
Right – The raised-slab, poured-concrete stem wall, above-grade walls, and roof of this house use flood damage-resistant materials, integrated water, vapor, and air control layers, and construction methods which promote good drainage and rapid drying
Image
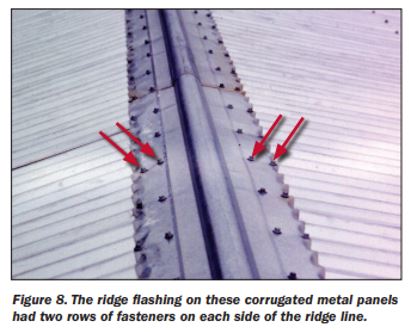
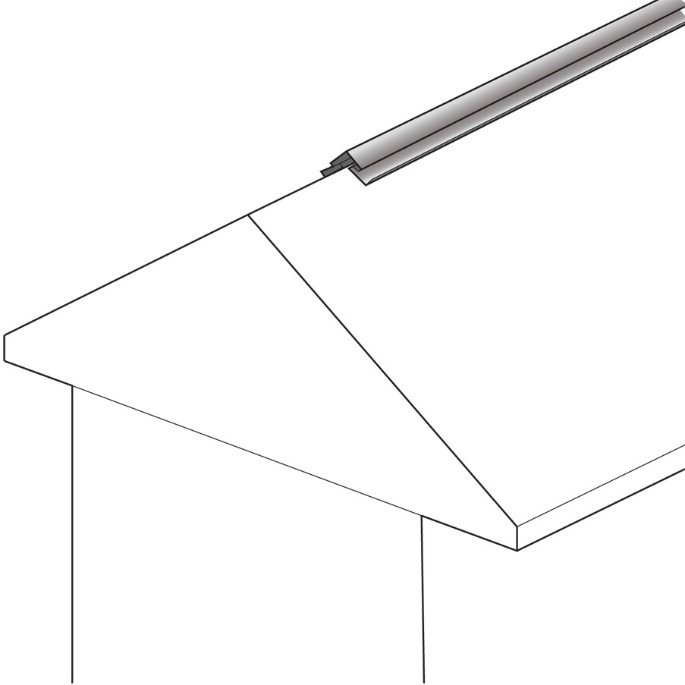
Right – The ridge flashing is secured with two rows of fasteners on each side of the ridge line
Image
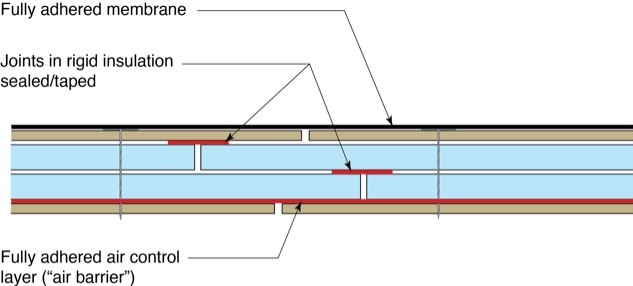
Right – The rigid insulation covers all exterior walls and all seams are taped to provide a complete drainage system
Image
Right – The roof membrane is fully adhered and deck seams are sealed so the membrane will not flutter and fail due to negative pressure from high winds
Image
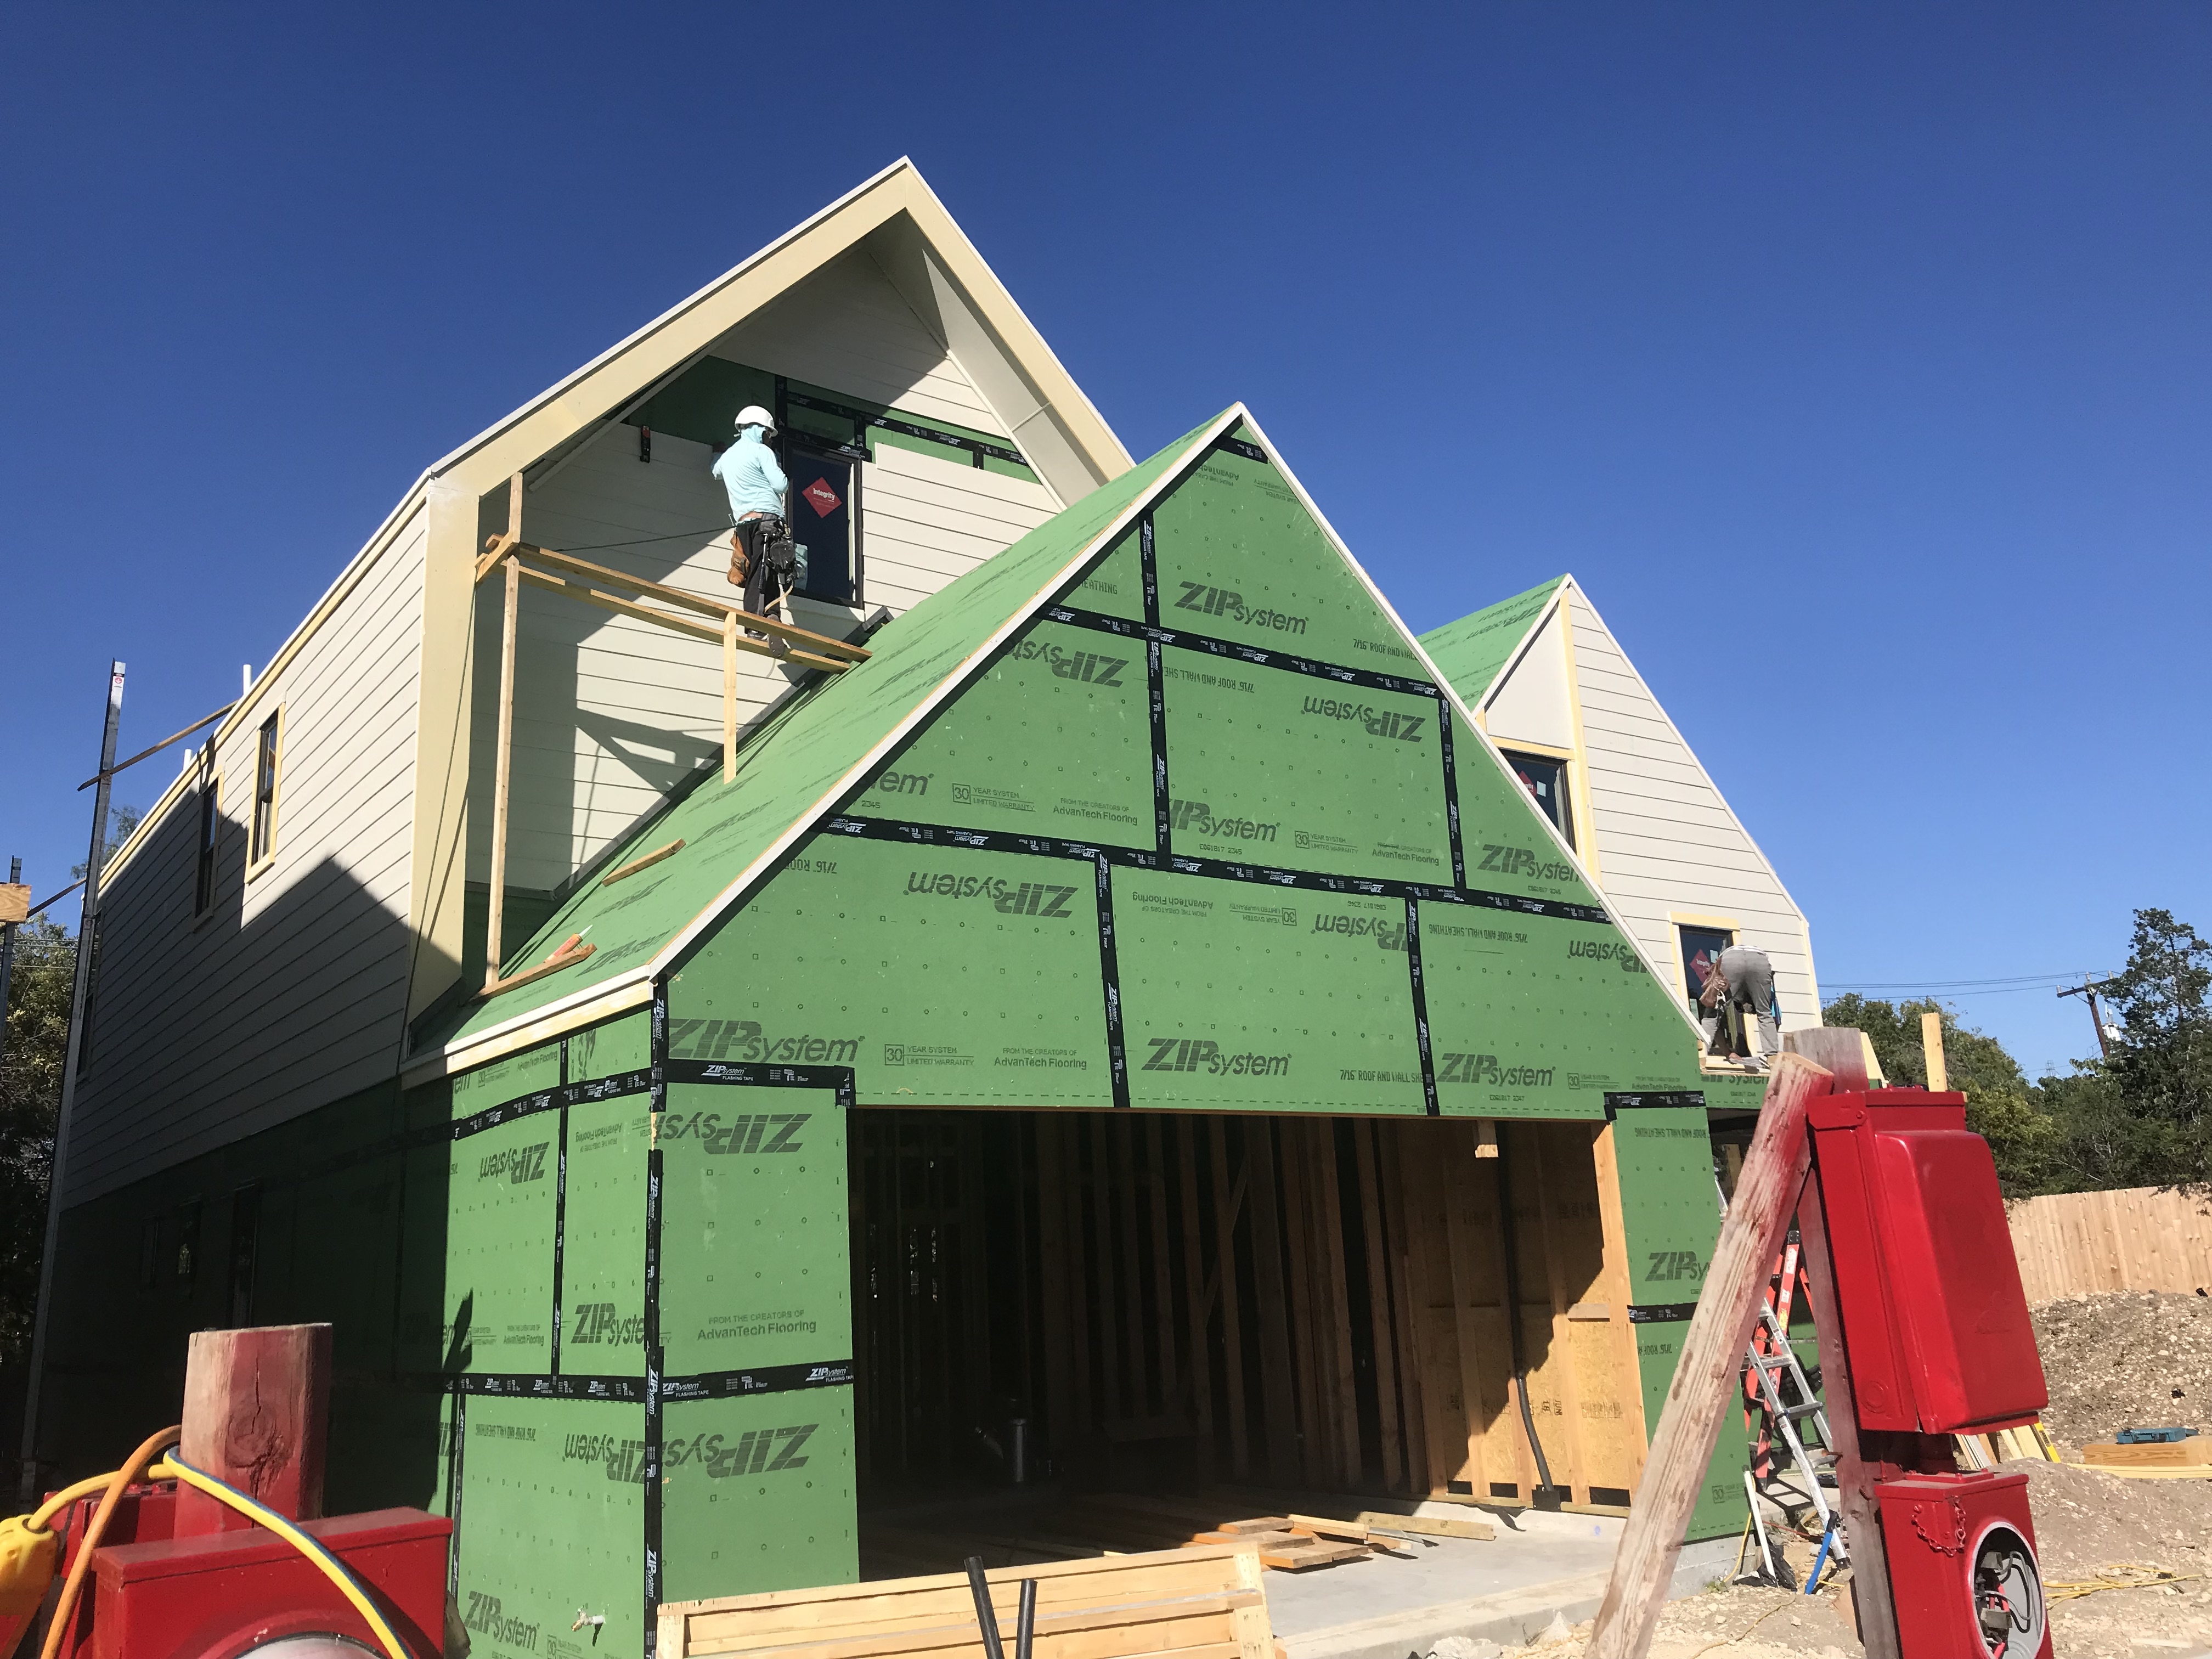
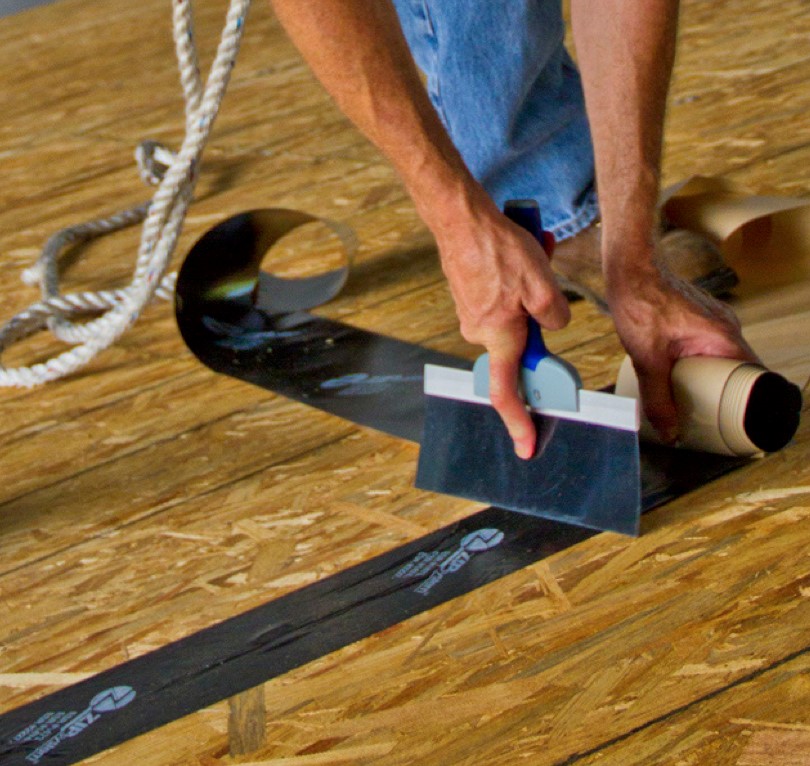
Right – The seams are taped on the coated OSB sheathing of this home to provide a complete air barrier.
Image

Image
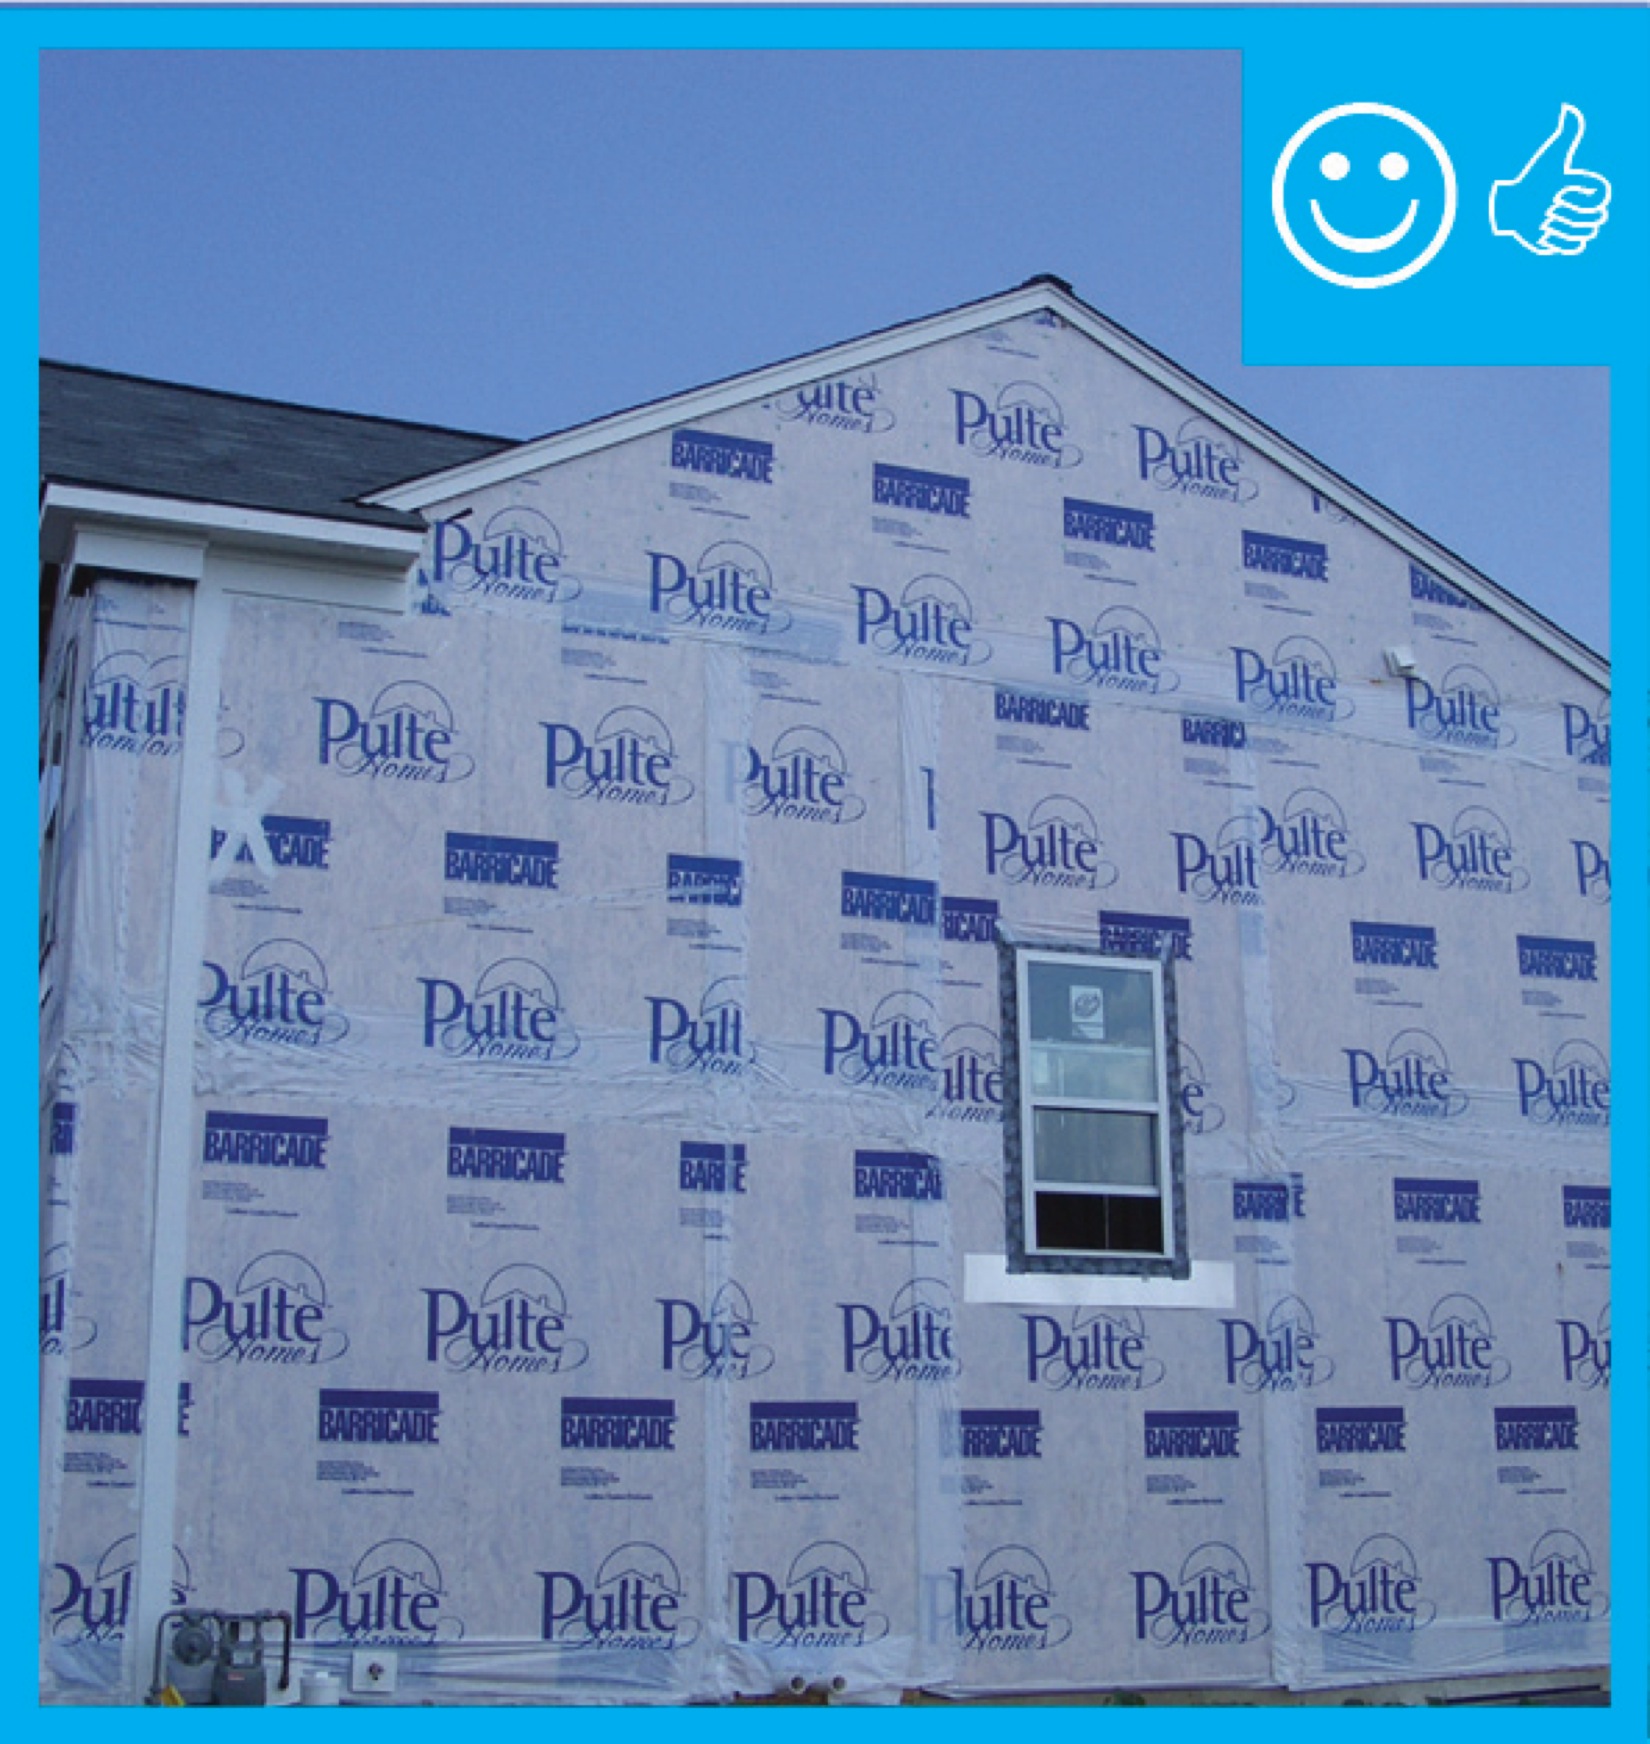
Right – The water-resistant barrier covers the entire house and the seams are taped to provide a complete drainage system
Image
Right – The water-resistant barrier is layered over the step flashing to provide a complete drainage system
Image
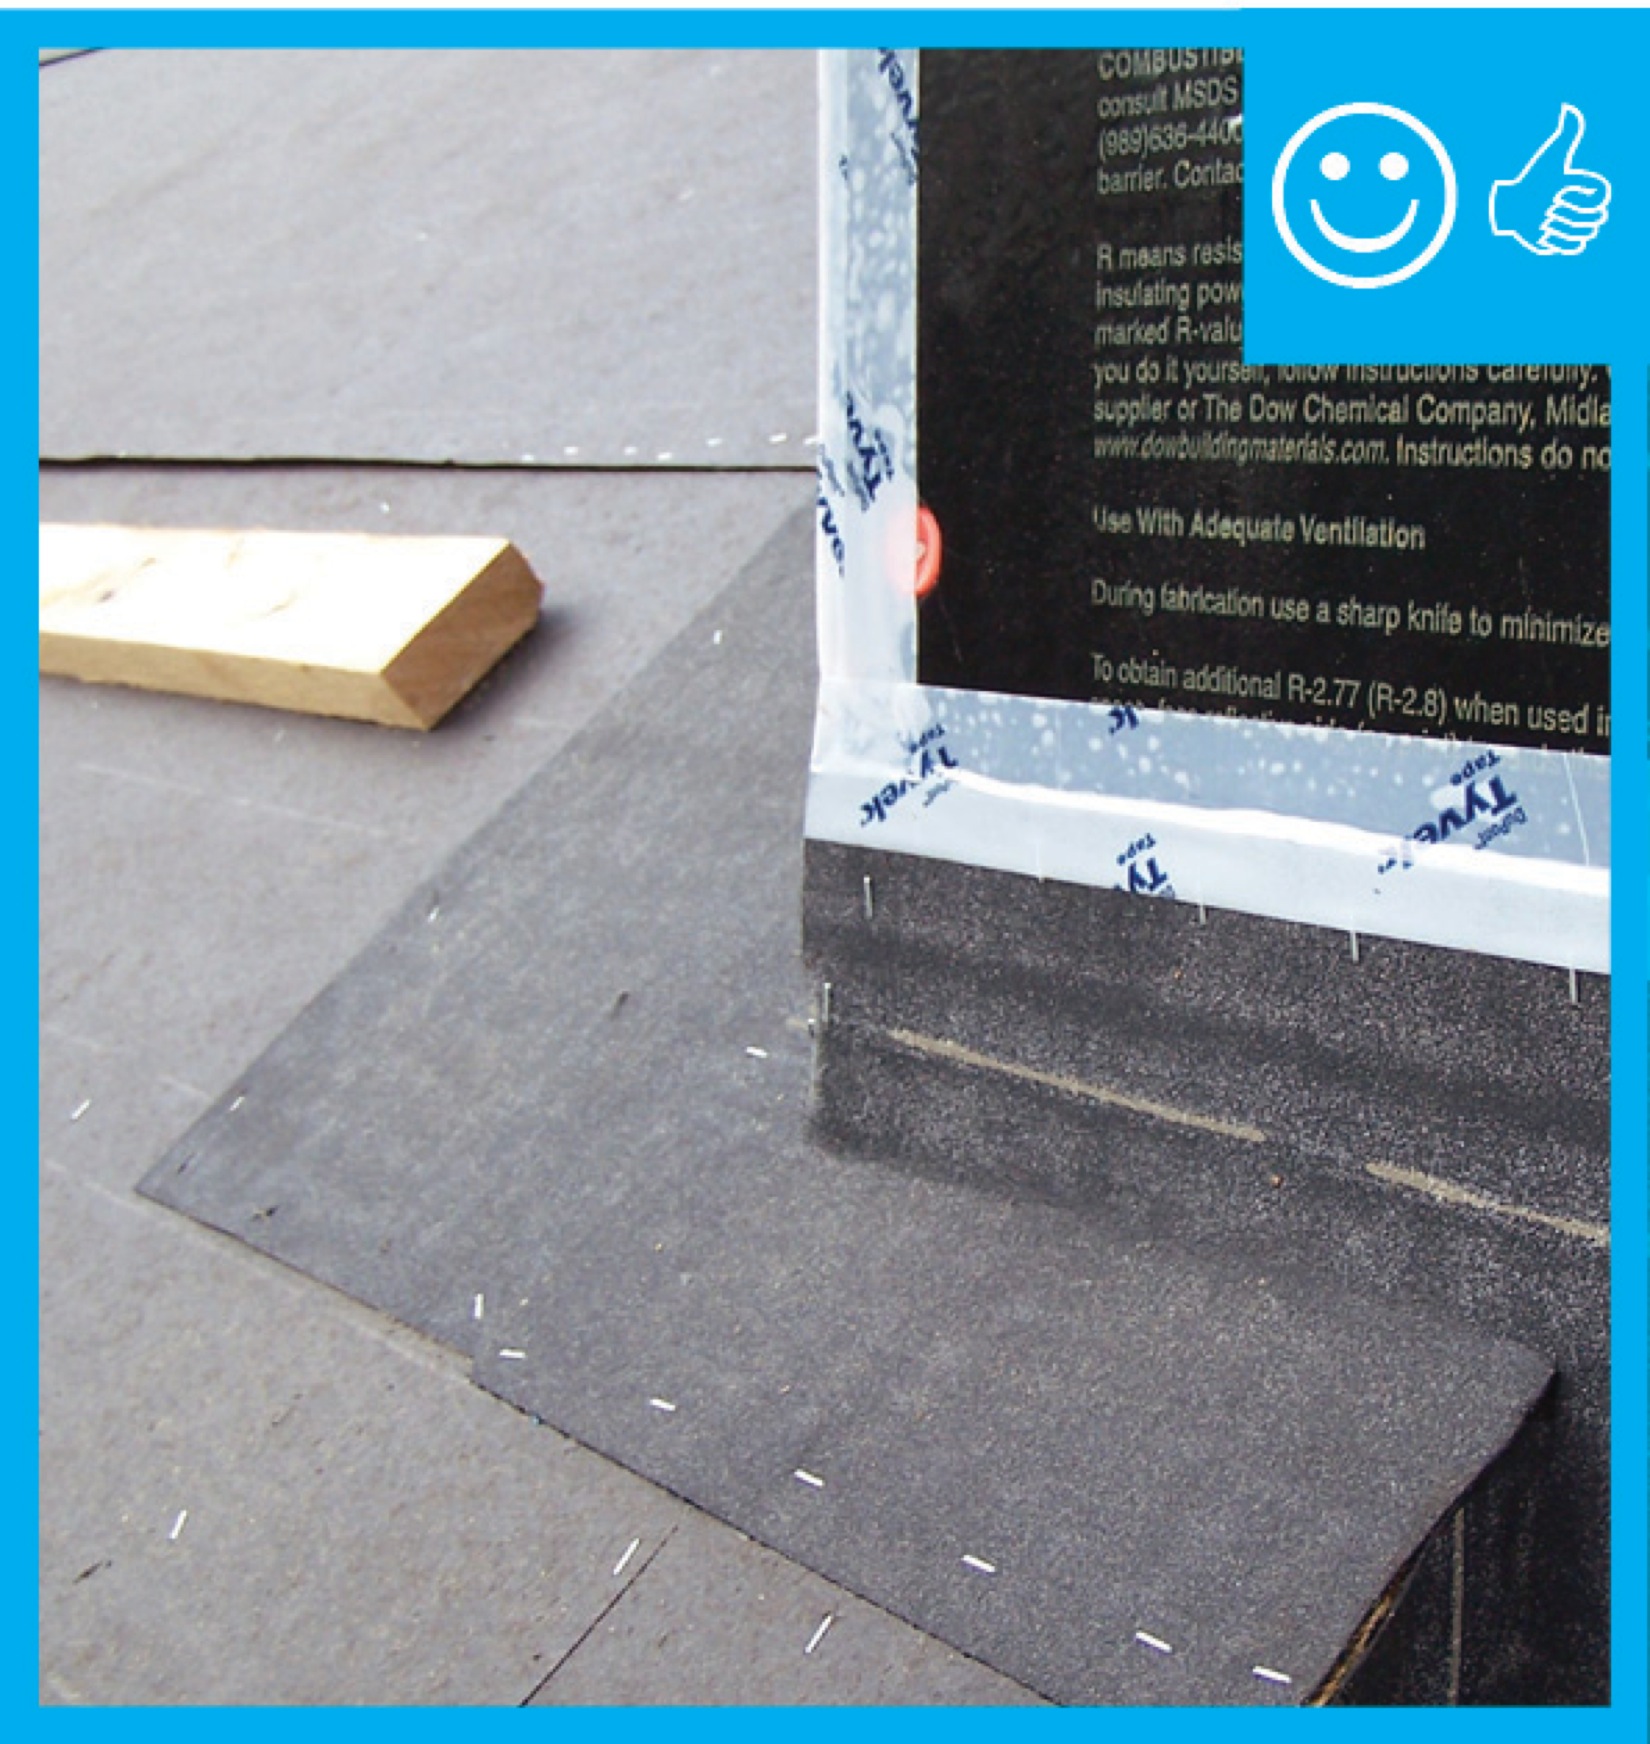
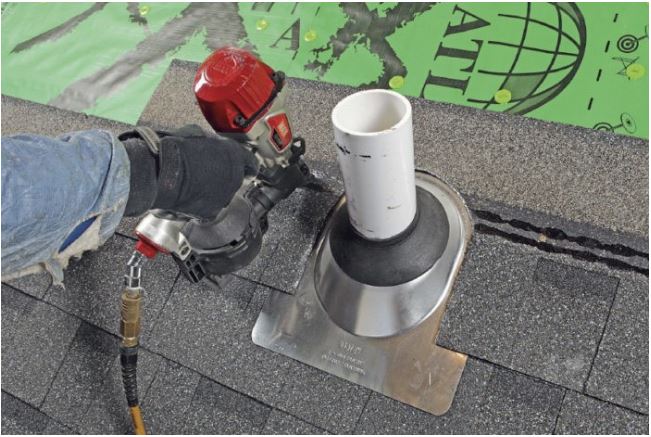
Right – There is a properly installed and layered self-sealing bituminous membrane at the roof penetration
Image
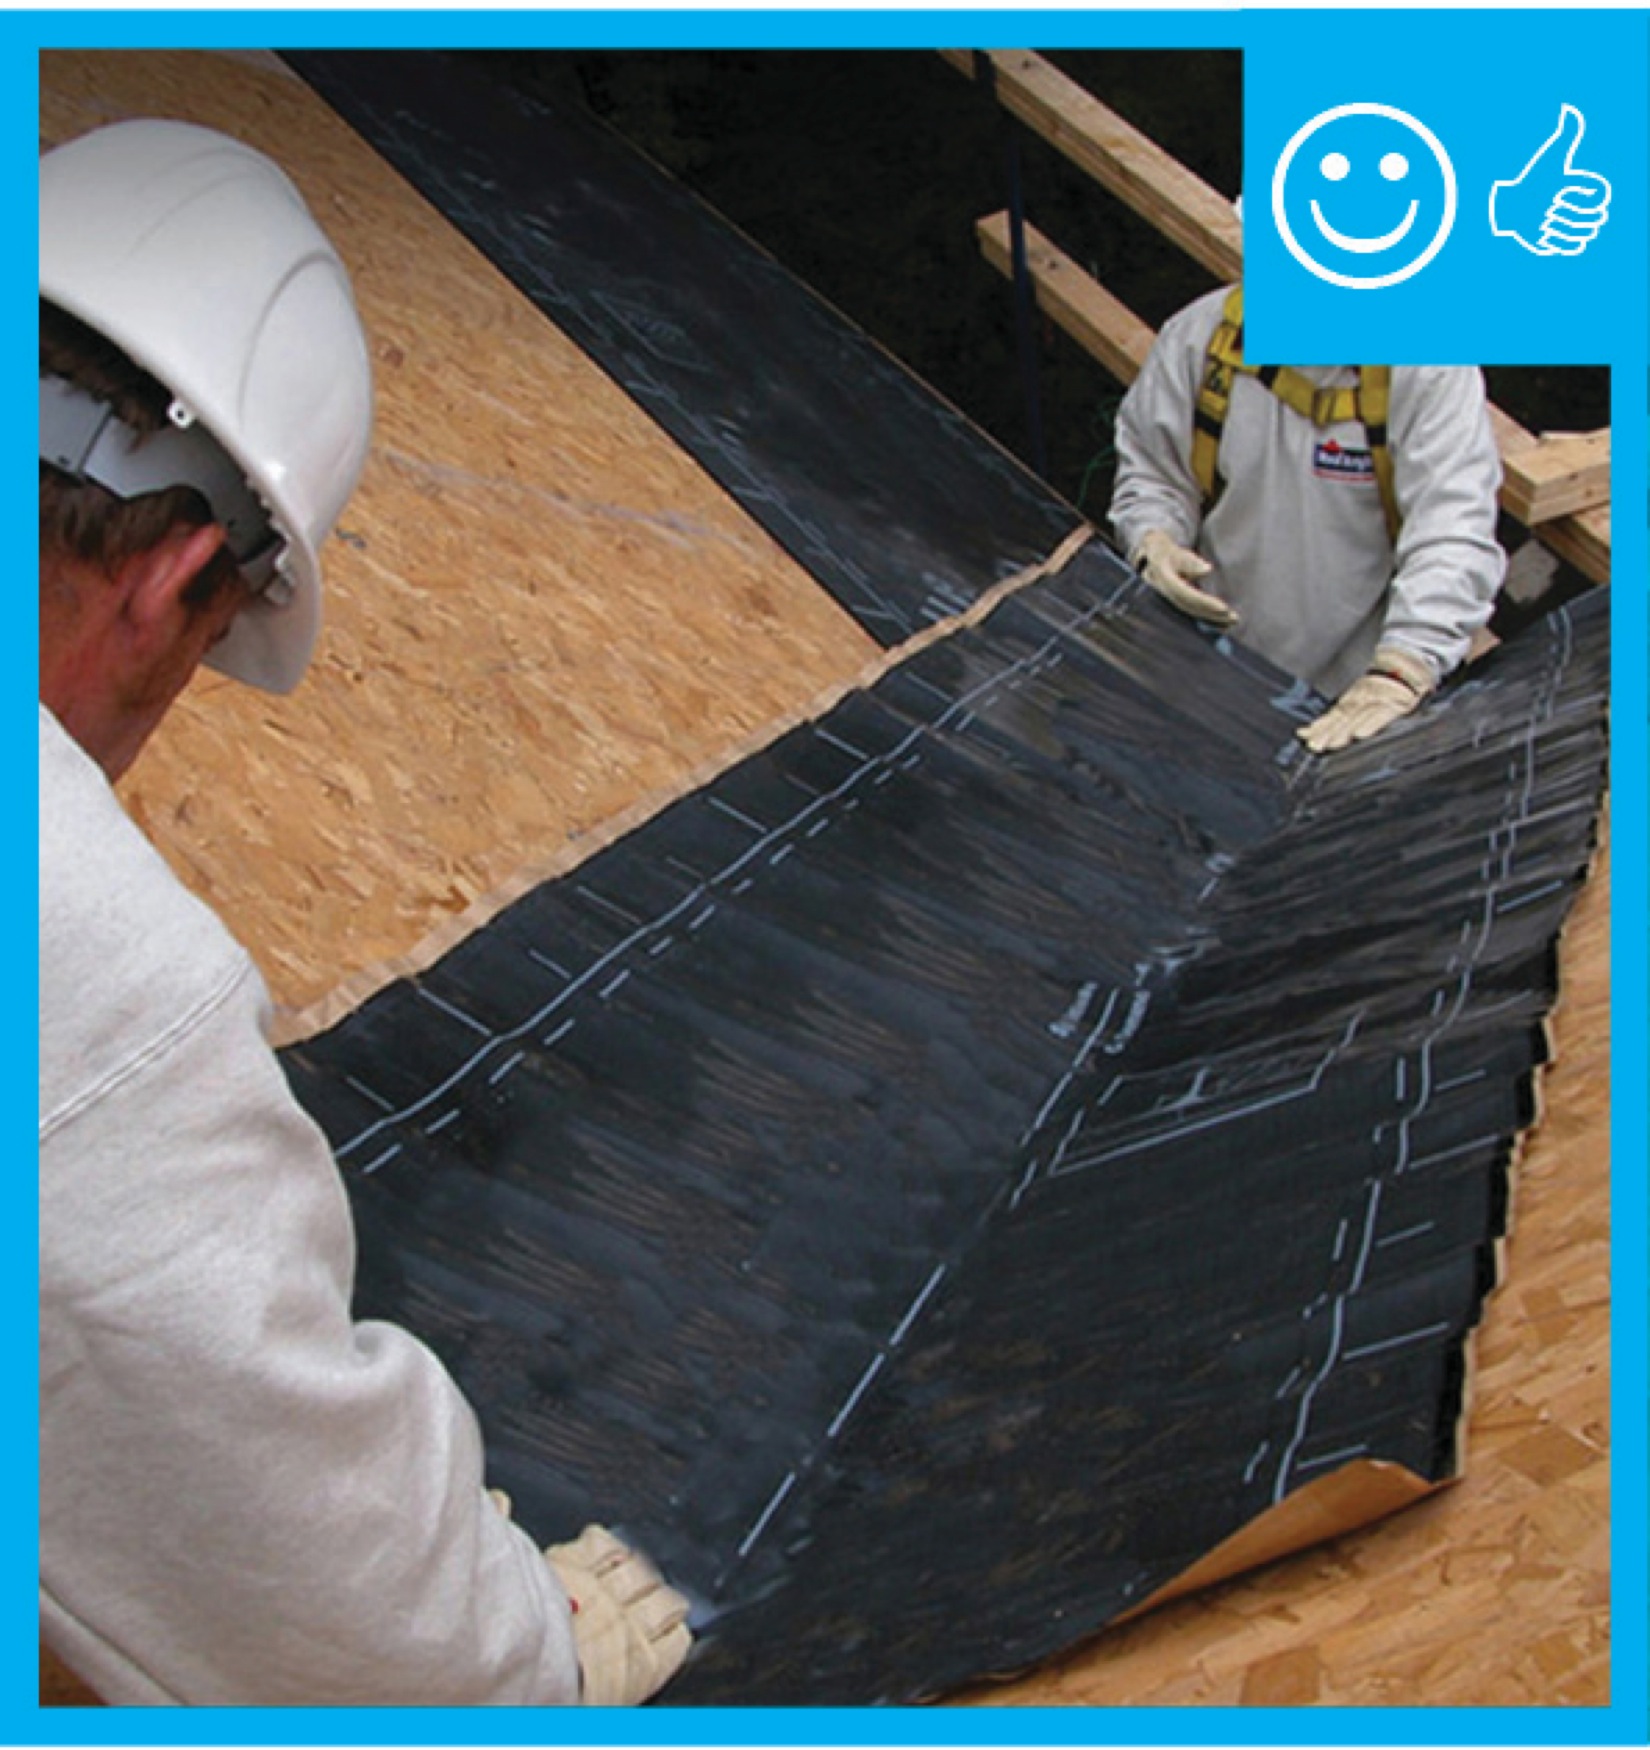
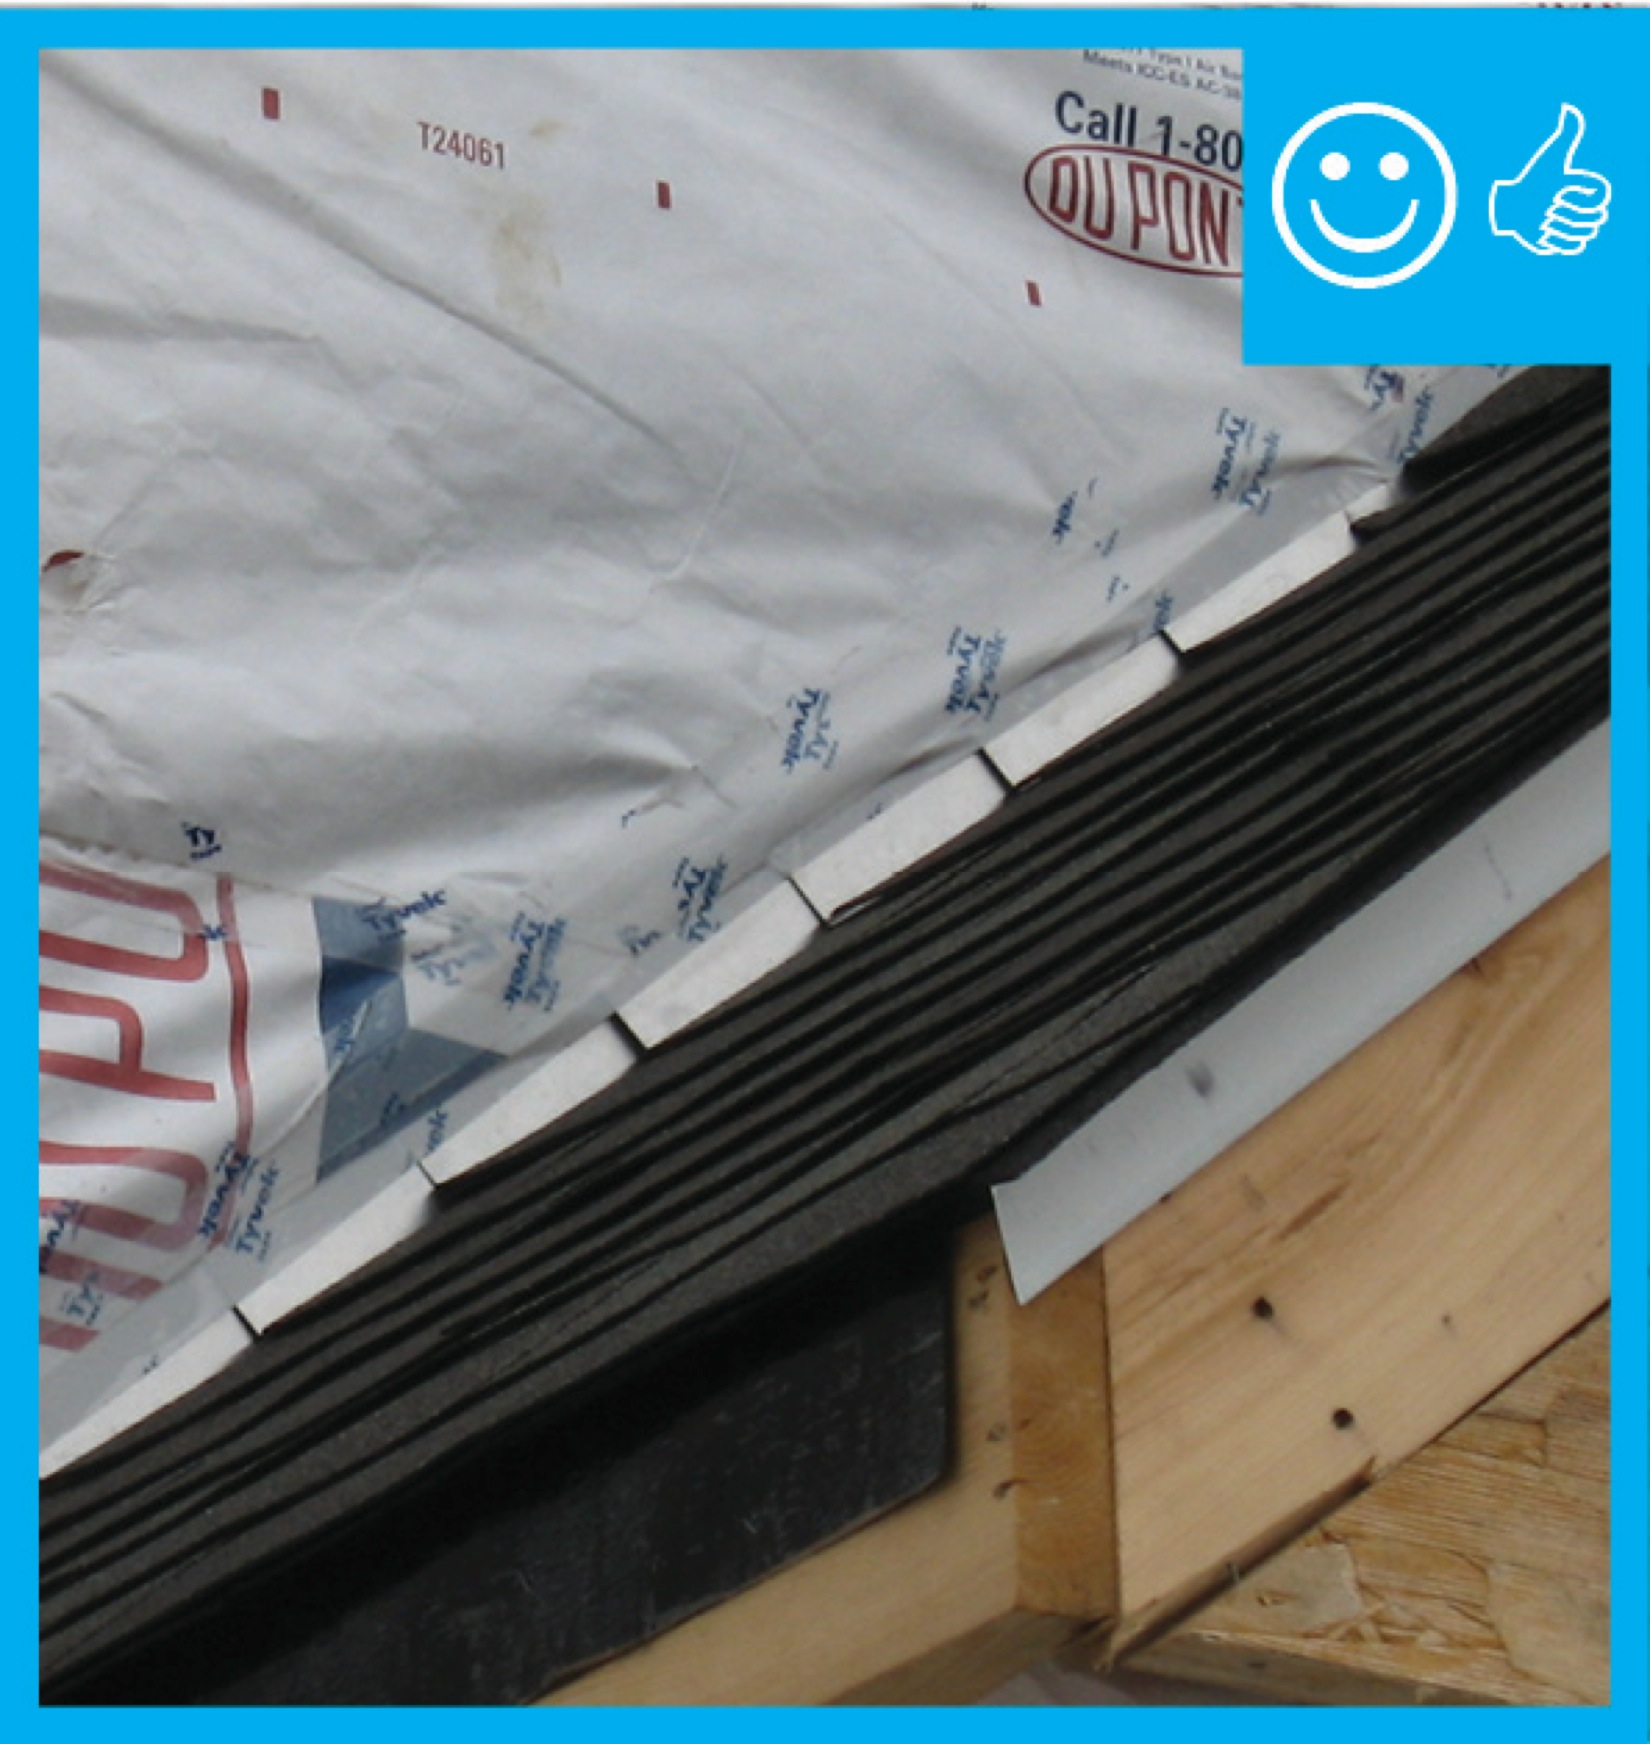
Right – There is a self-sealing bituminous membrane installed at the valley of the roof prior to the roof felt
Image
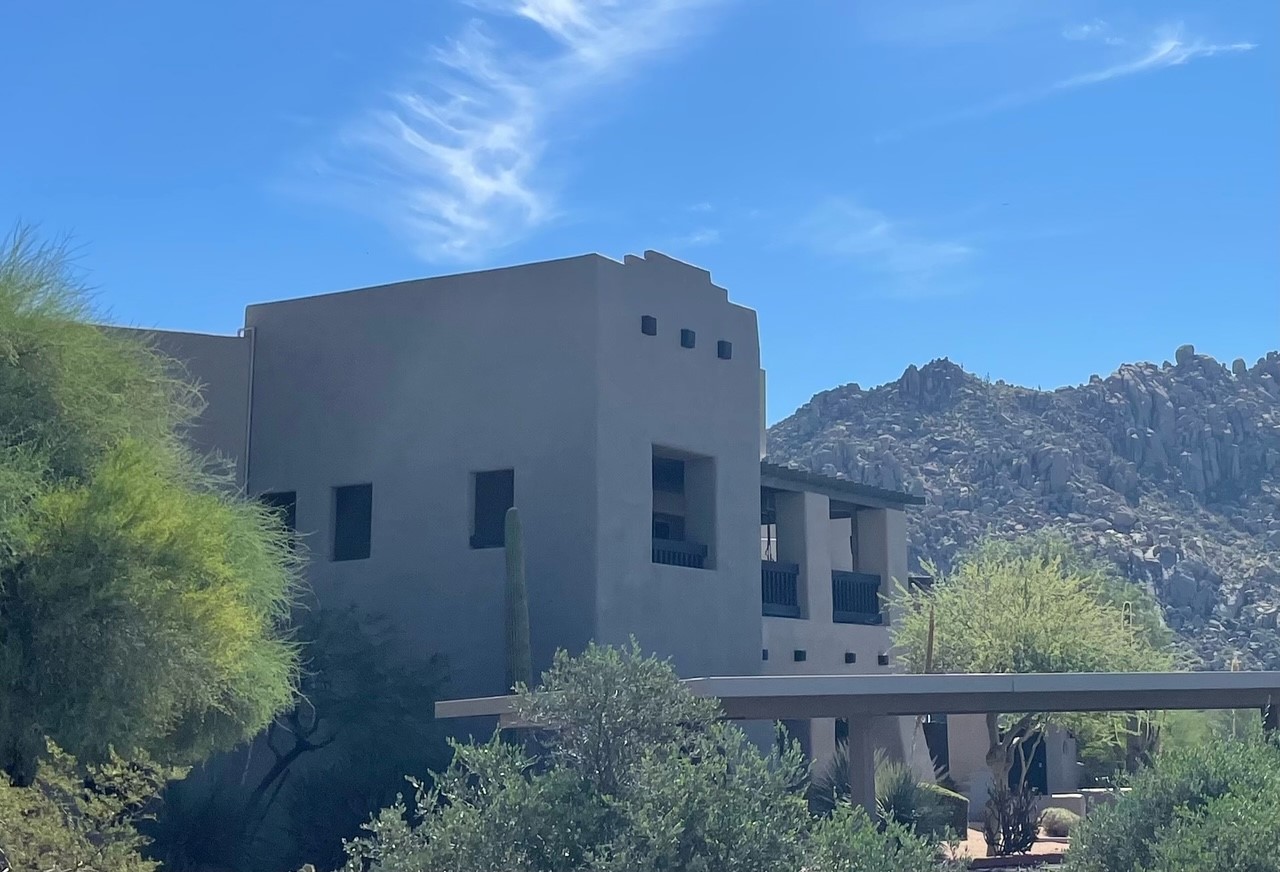
Right – thermal mass walls, small windows, and recessed porch and trees on the south side of this southwest home help to minimize solar heat gain.
Image
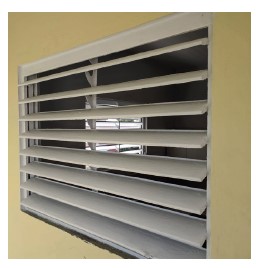
Right – This aluminum jalousie window provides solar control while allowing view and ventilation.
Image

Right – This column foundation has no HVAC equipment, piping, electrical components, or structural walls below the elevated floor system
Image
Right – this commercial building employs good techniques to resist solar heat gain: awnings and pergolas over windows, recessed windows and entryways, deep tinting on glass, and shade plants.
Image
Right – This exterior door is installed to swing out and has storm protection shutters.
Image
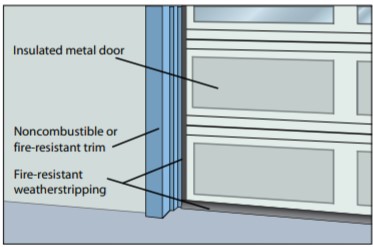
Right – This fire-rated wall assembly uses exterior gypsum board and an exterior siding of fiber-cement or metal to increase fire resistance.