Showing results 1 - 50 of 66
Image
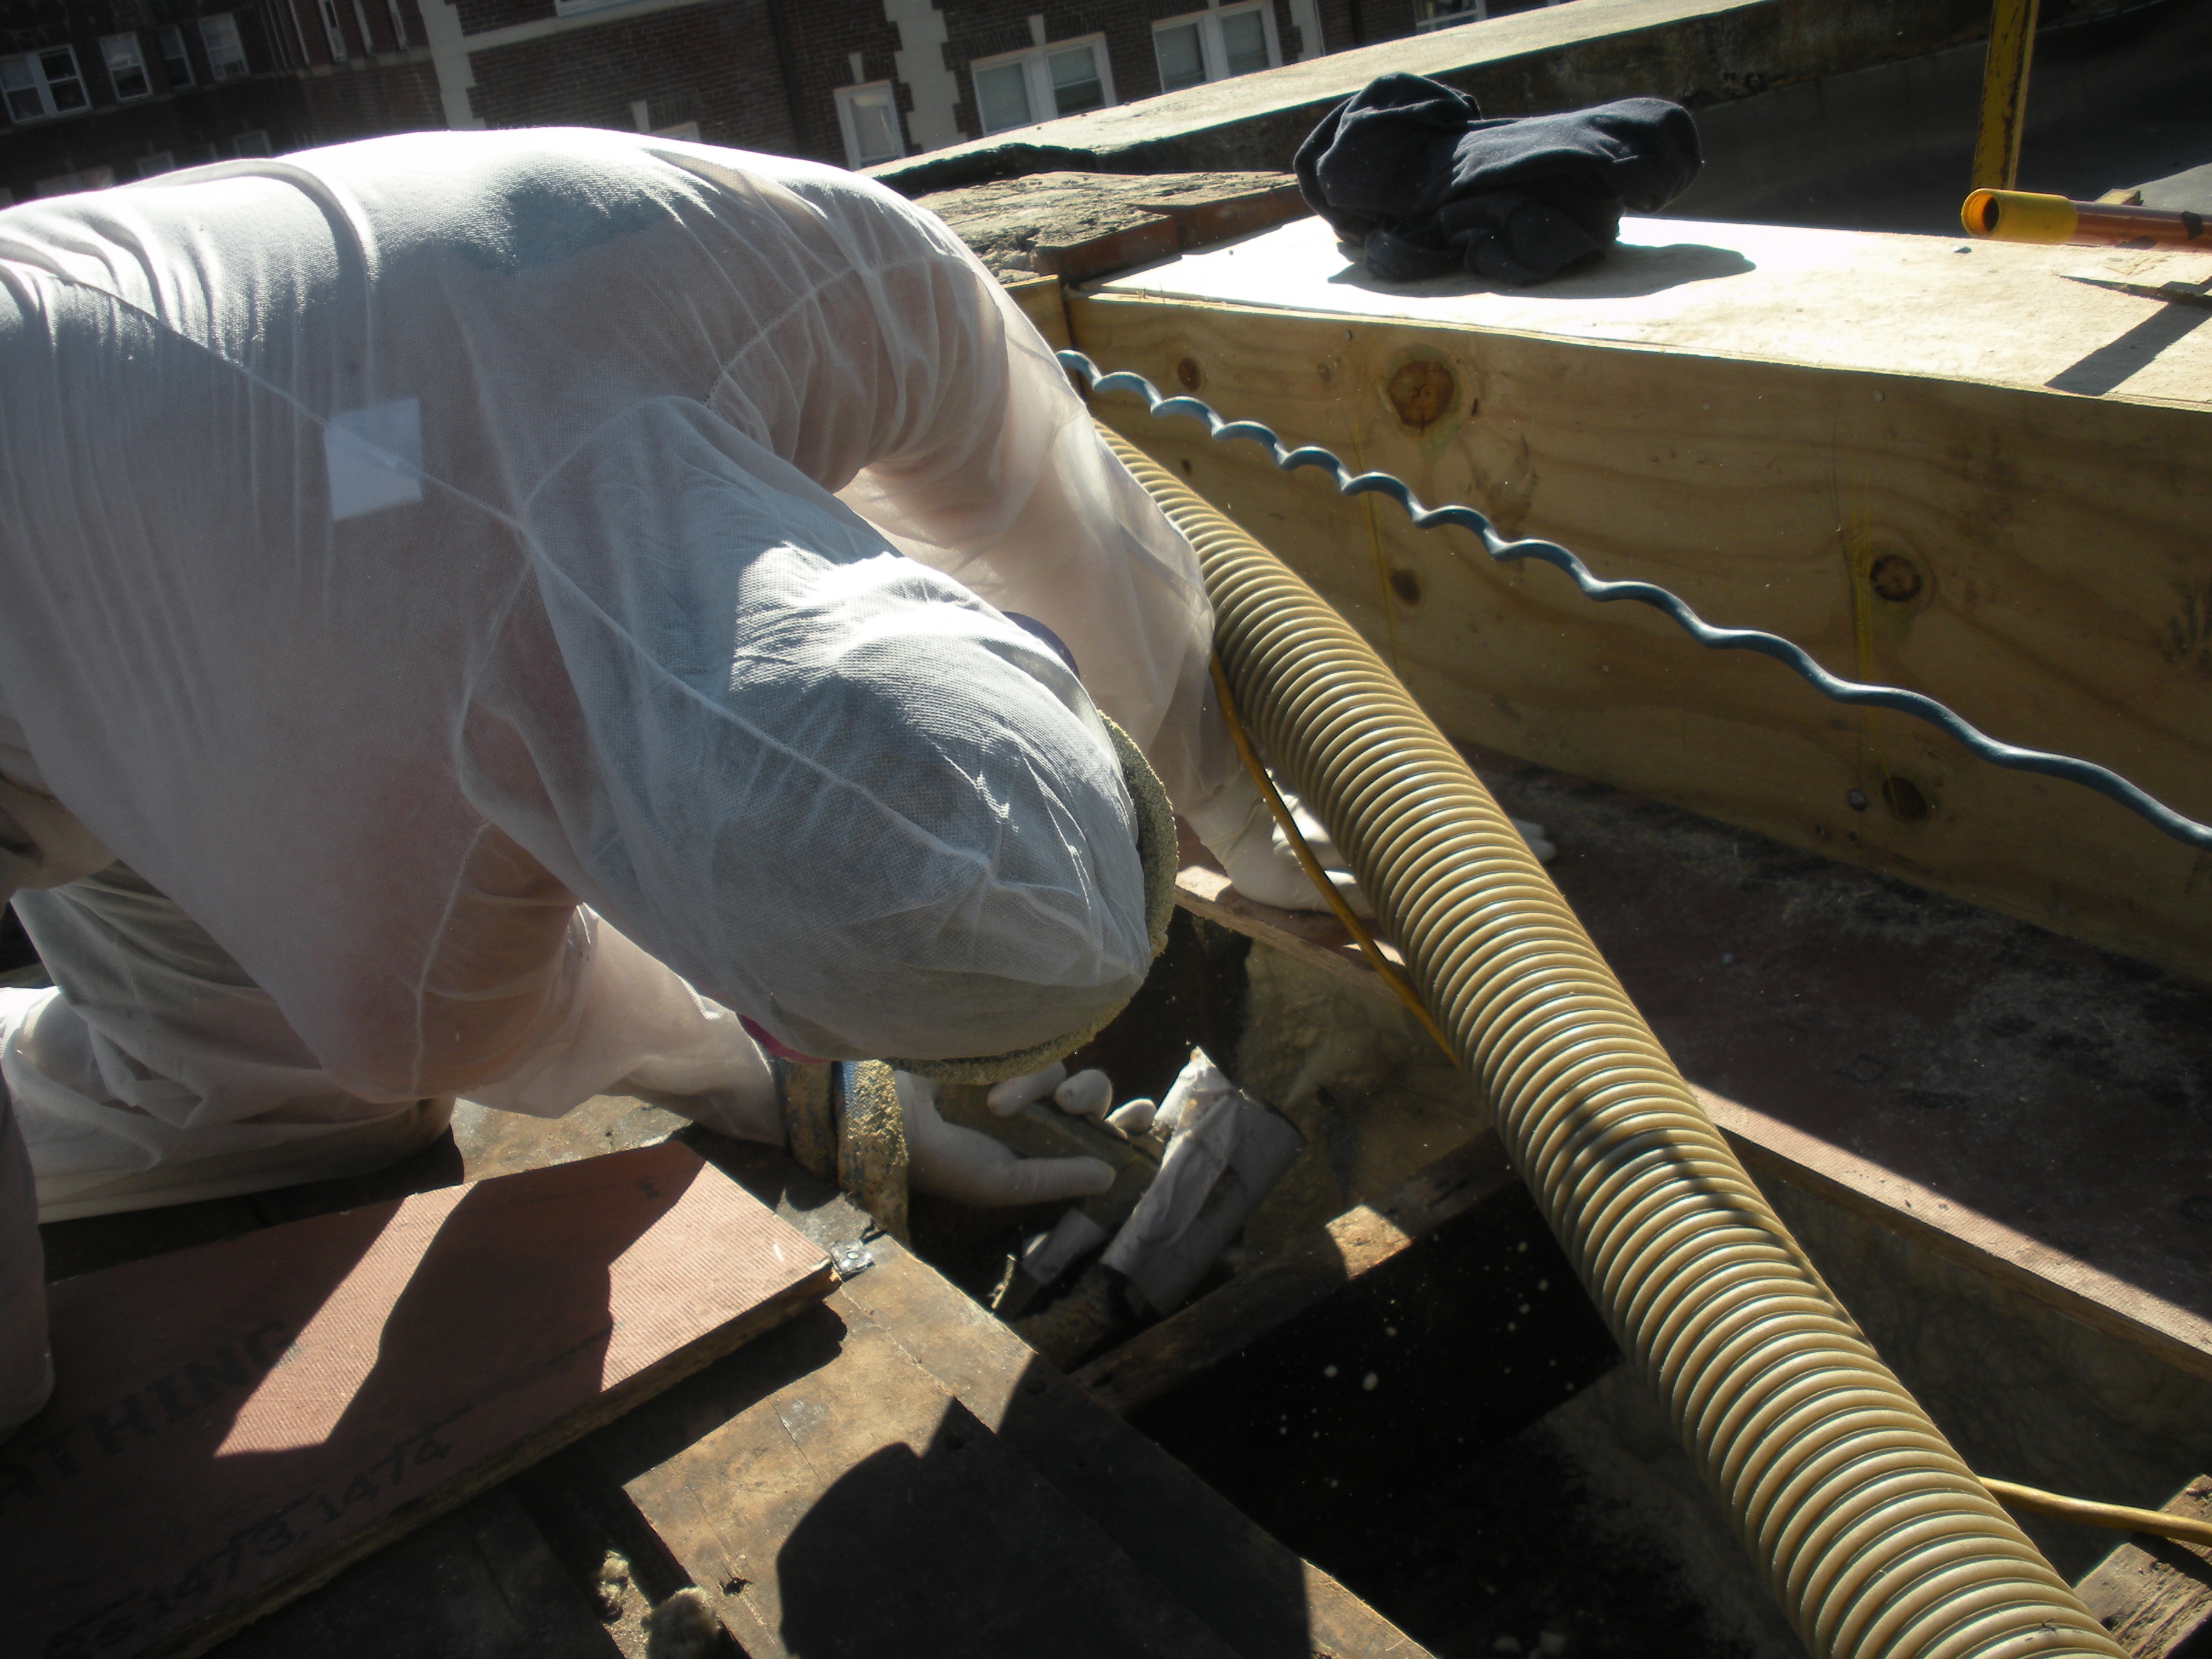
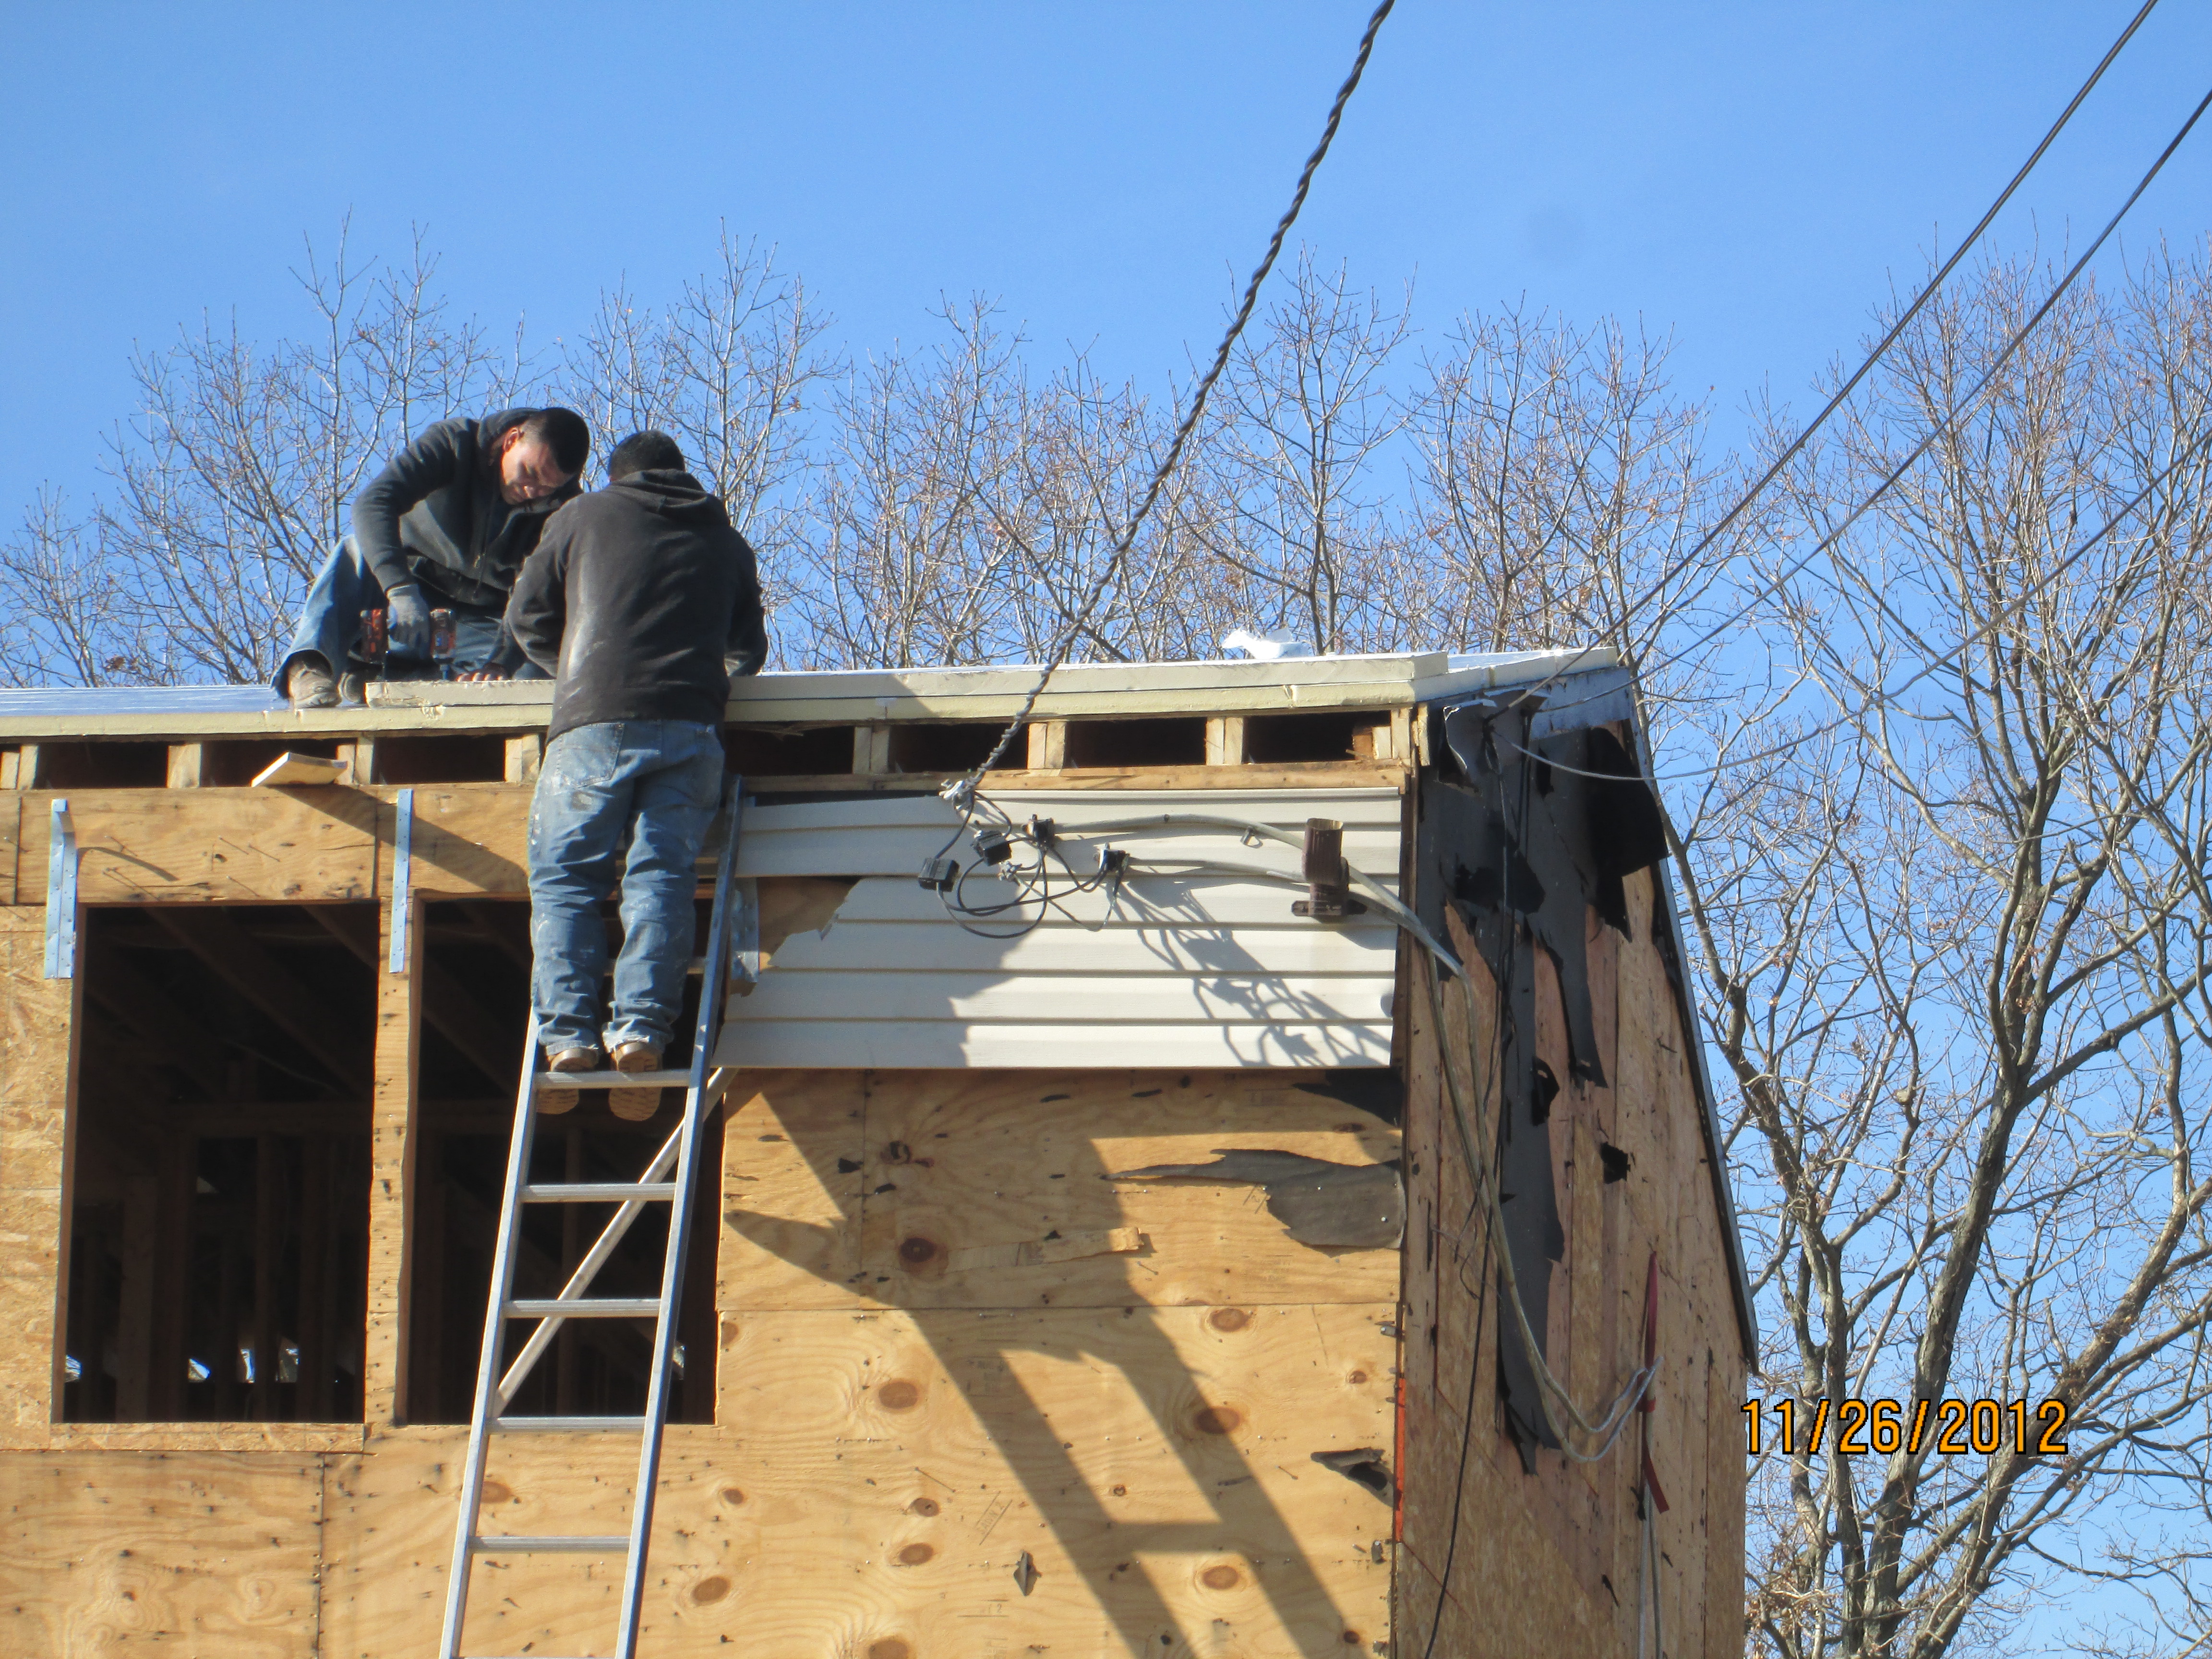
Closed-cell foam is sprayed into roof cavities along the masonry parapet wall to form a continuous air barrier between the wall and the sheathing of the flat roof
Image
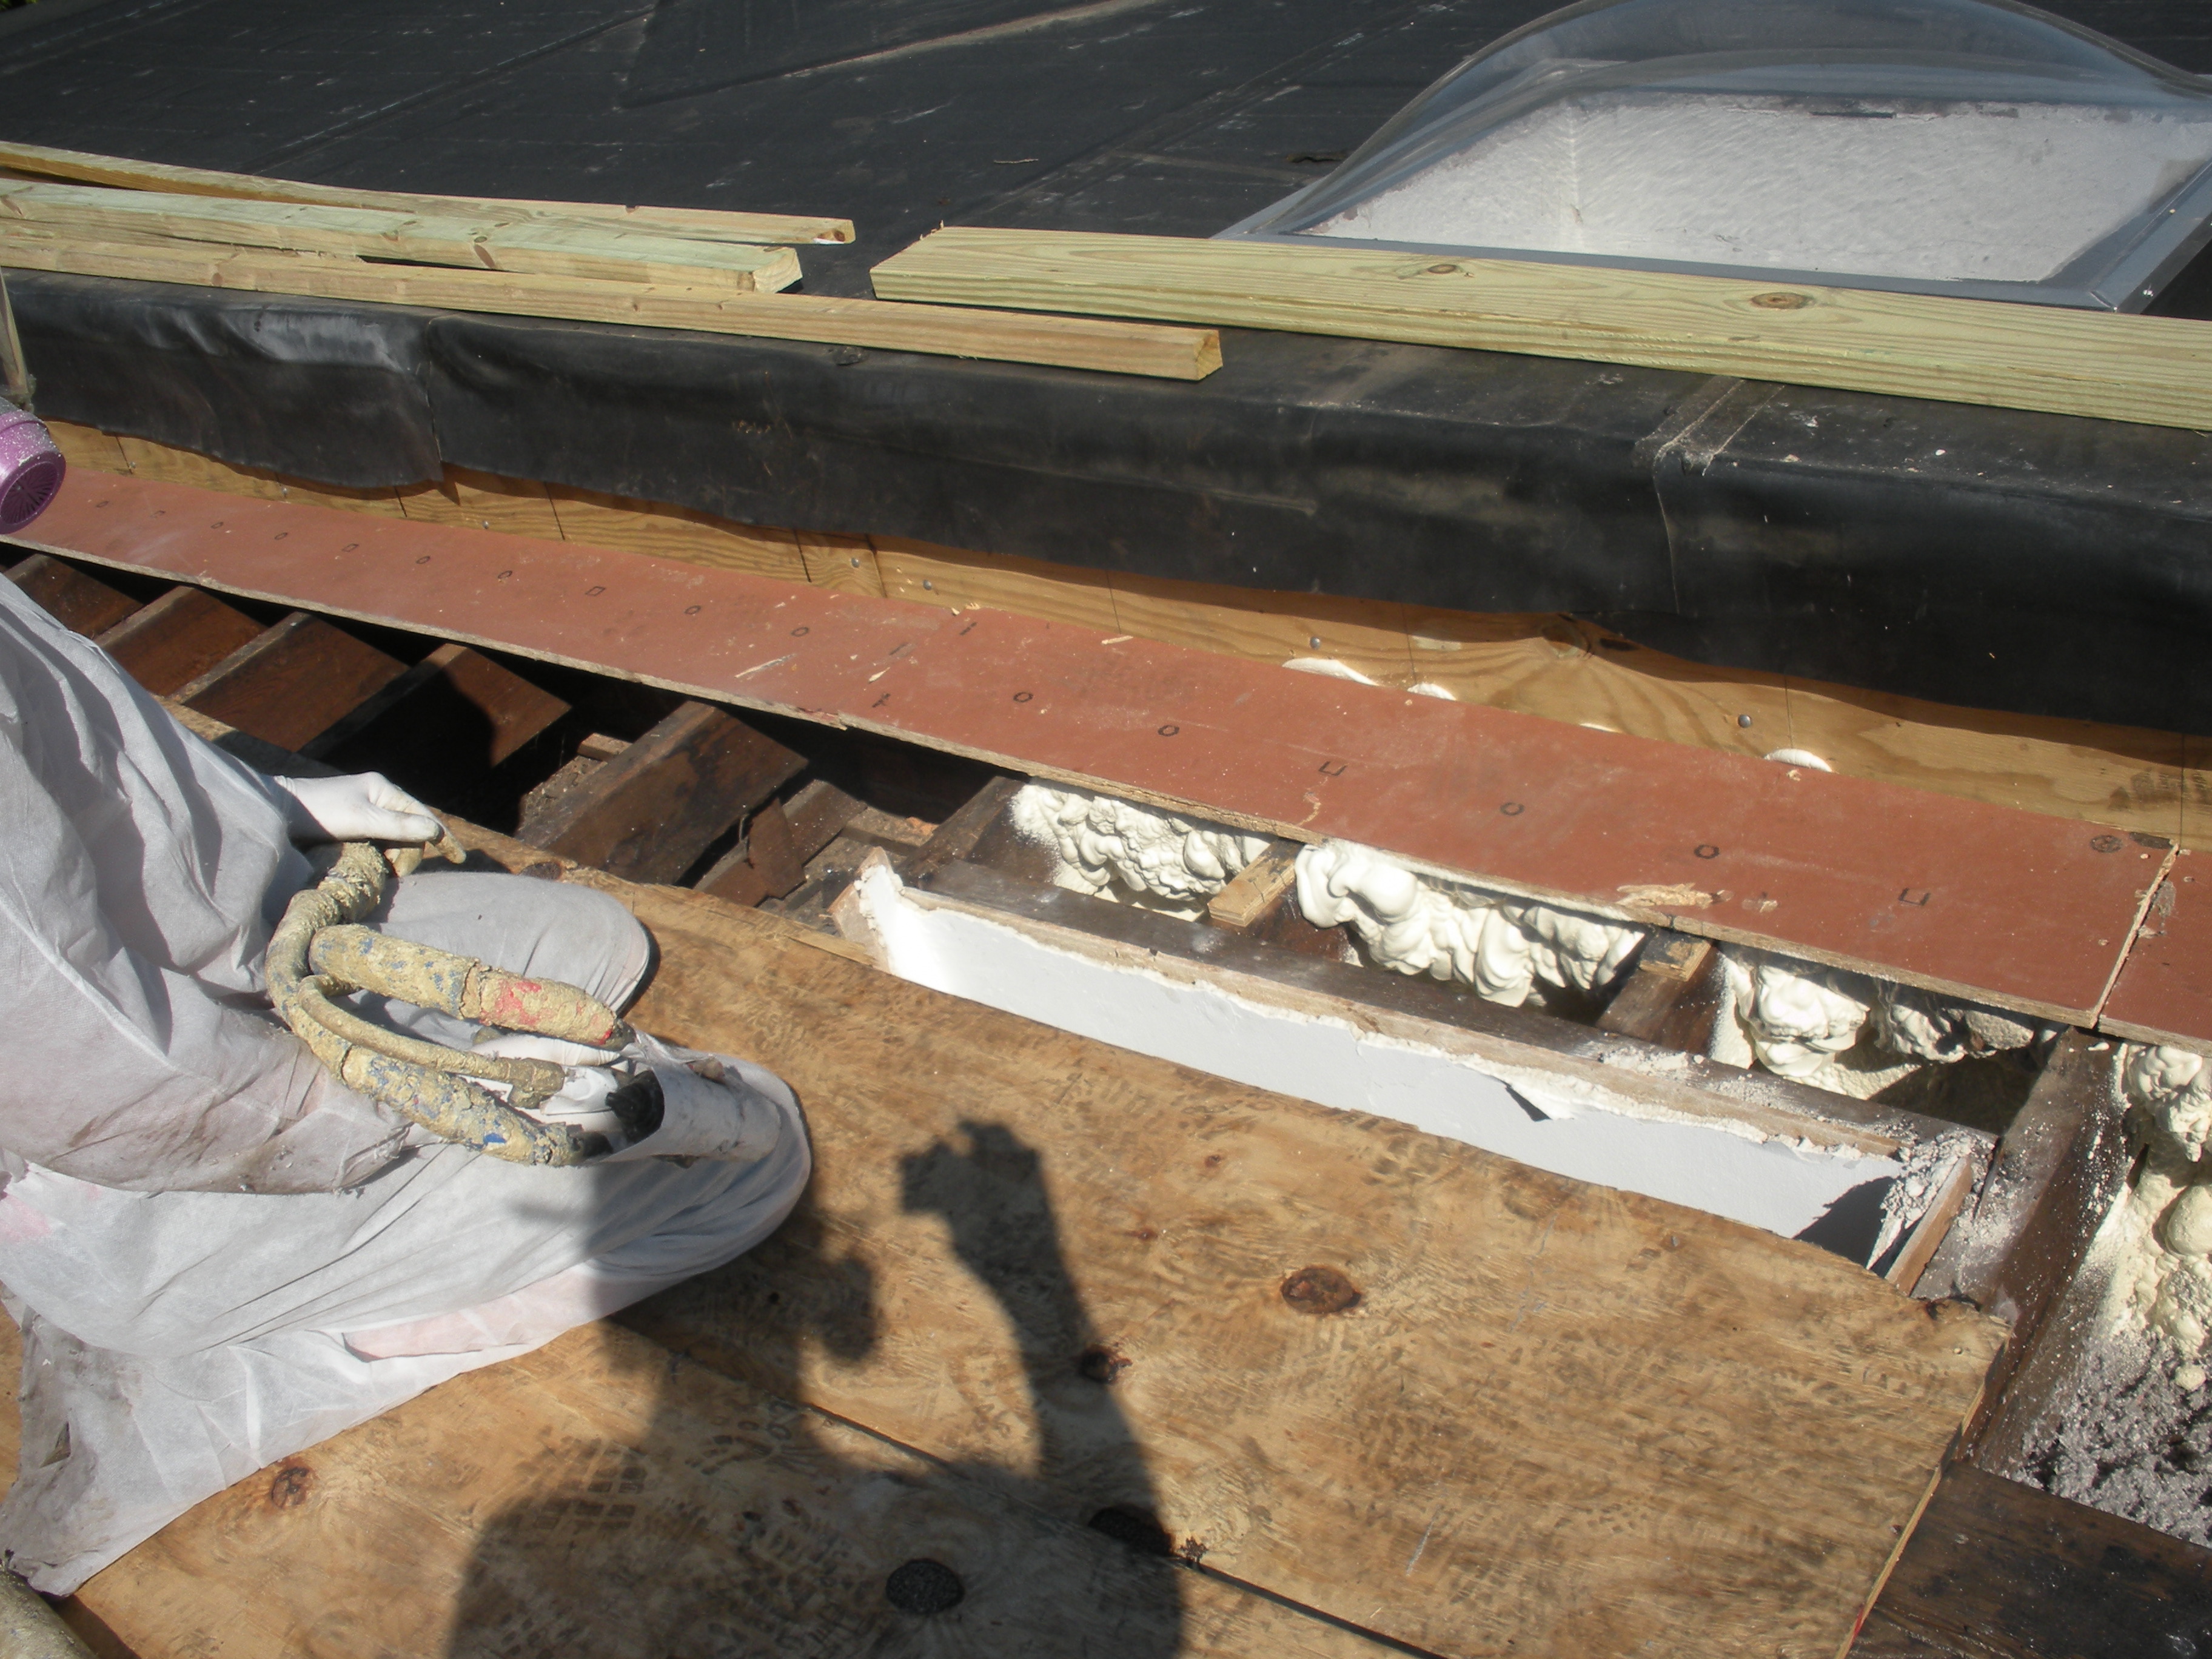
Closed-cell spray foam fills the roof joist cavities forming an air barrier between the masonry parapet wall and the roof sheathing
Image
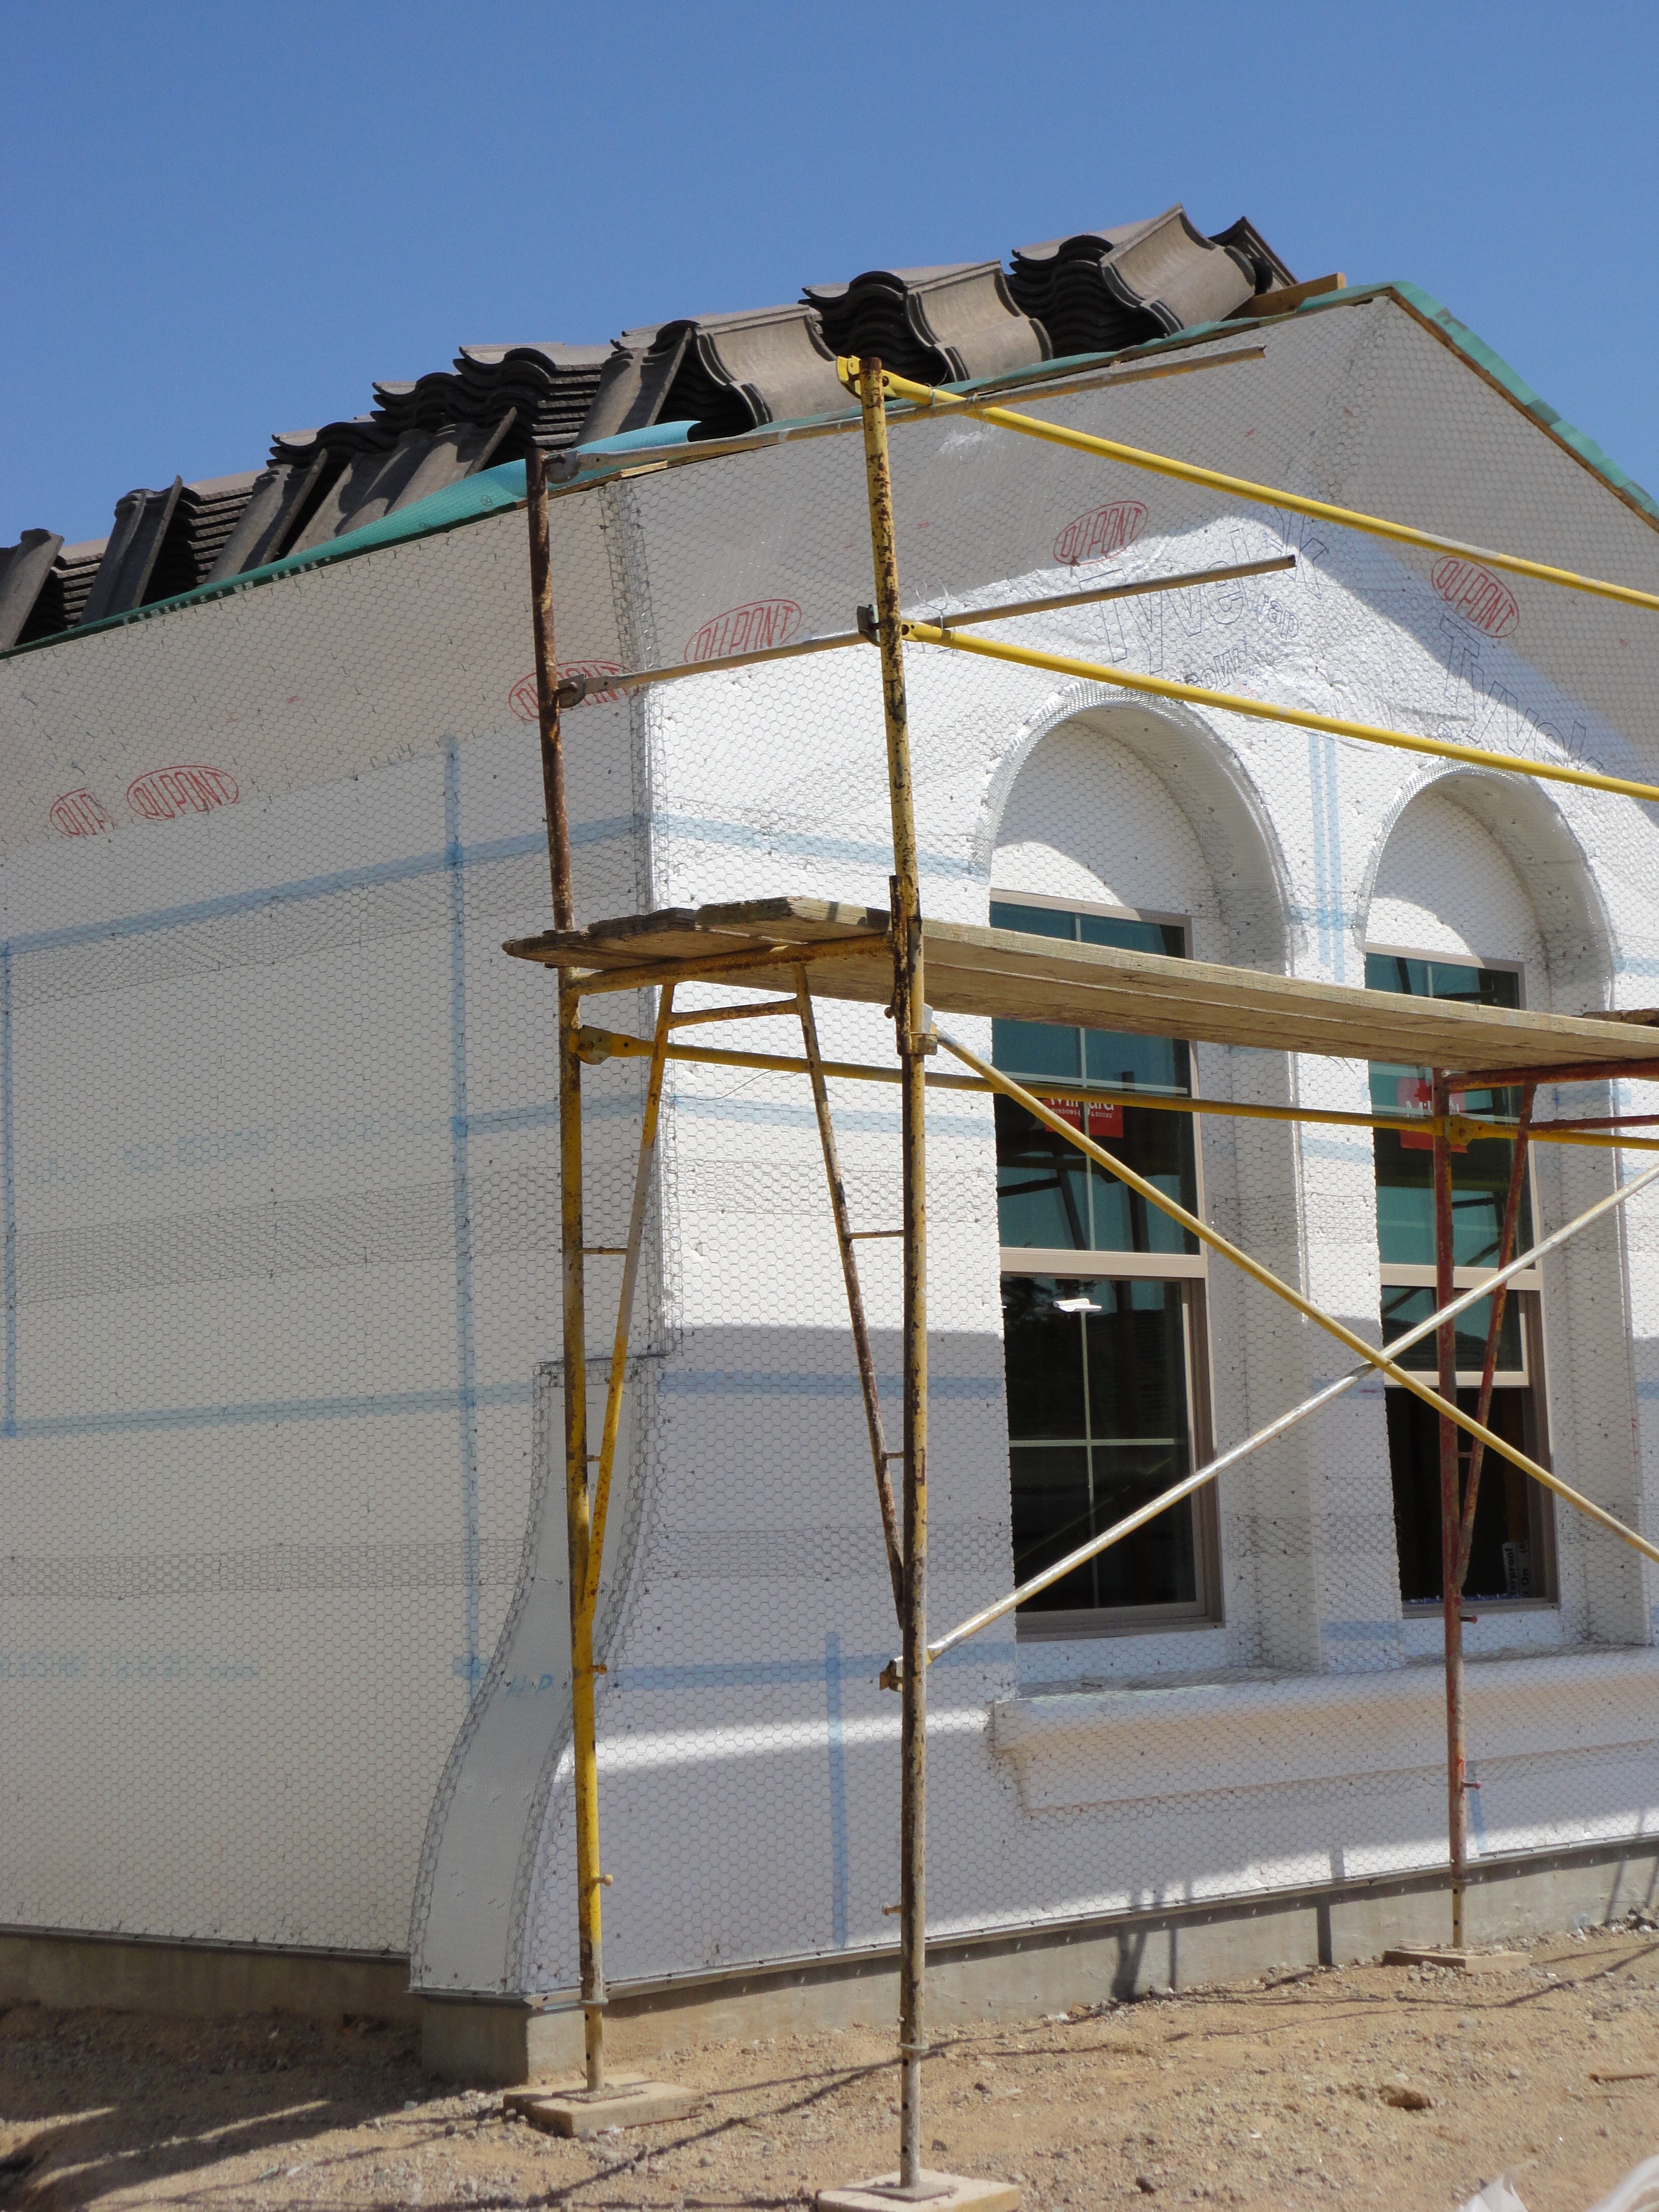
Expanded polystyrene insulation is installed with joints taped and lath attached in preparation for the application of stucco
Image
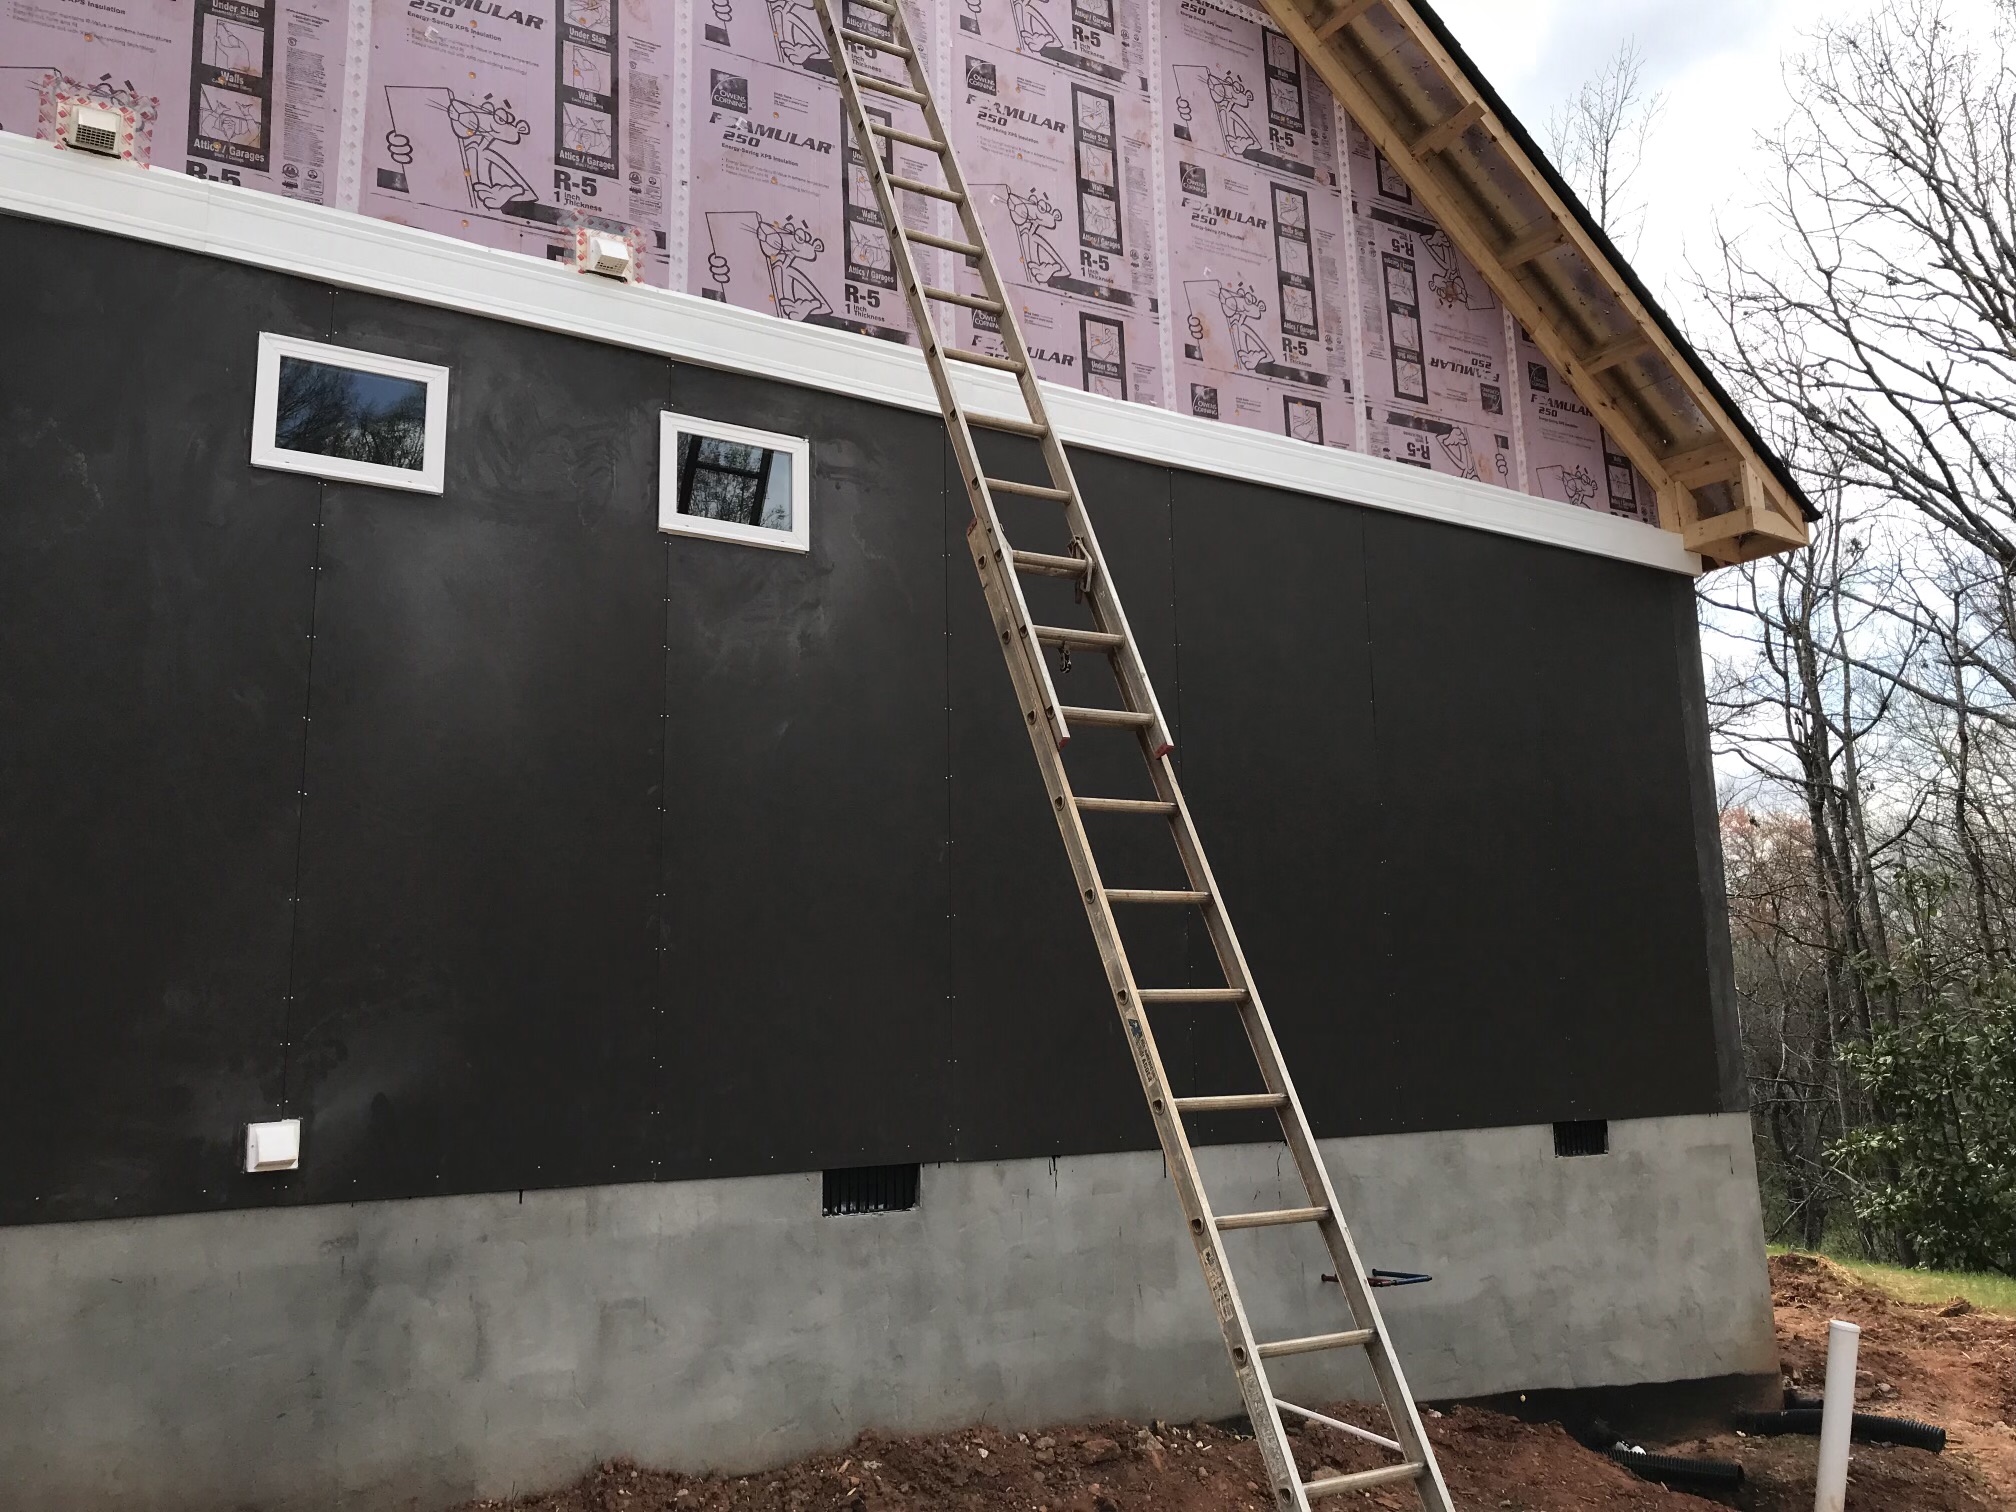
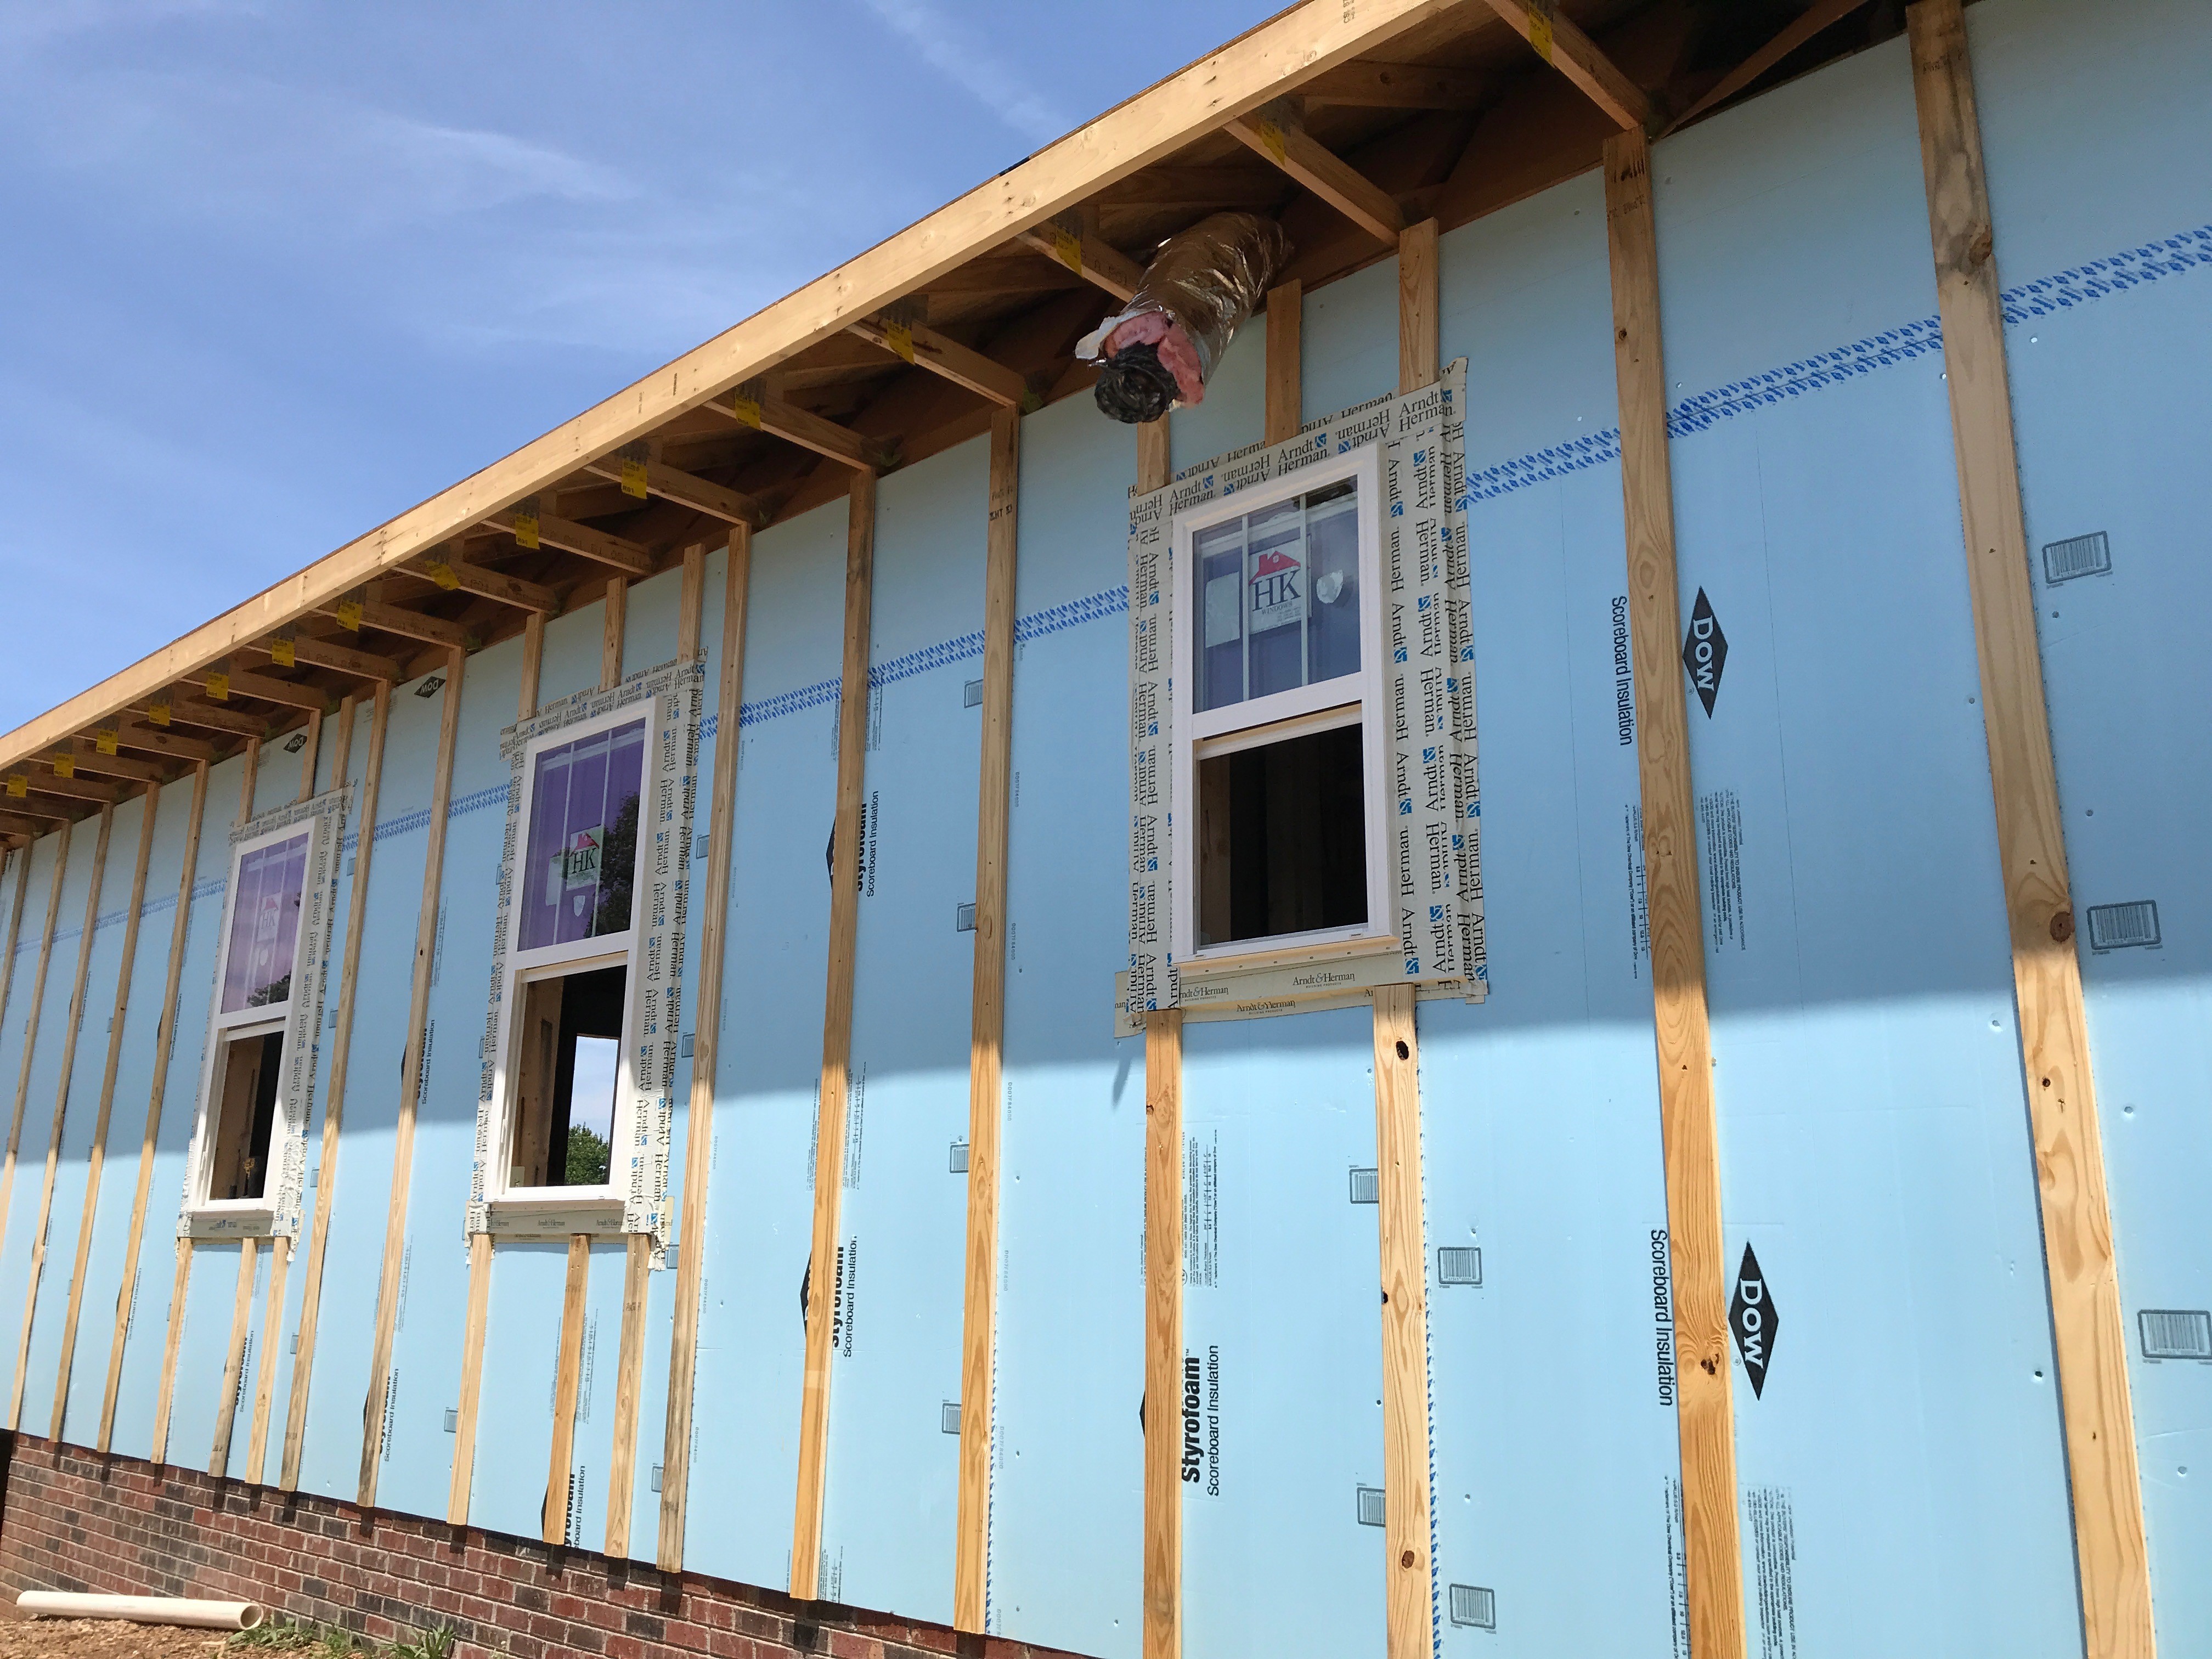
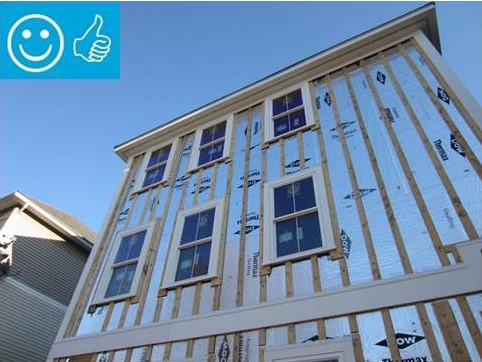
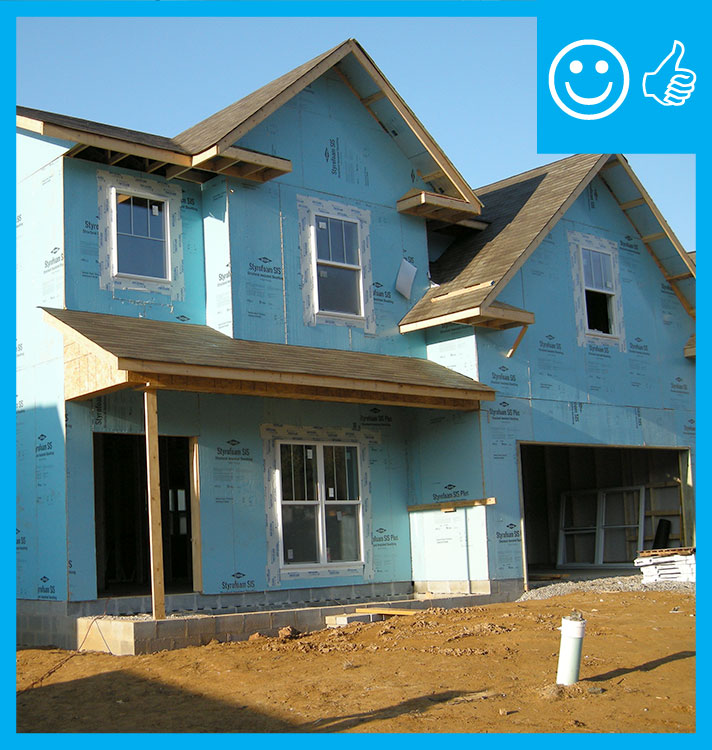
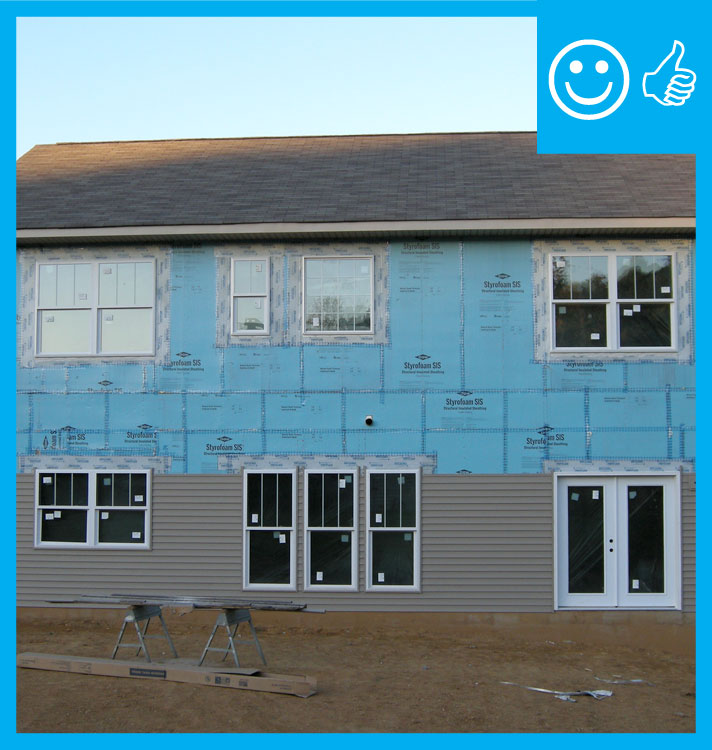
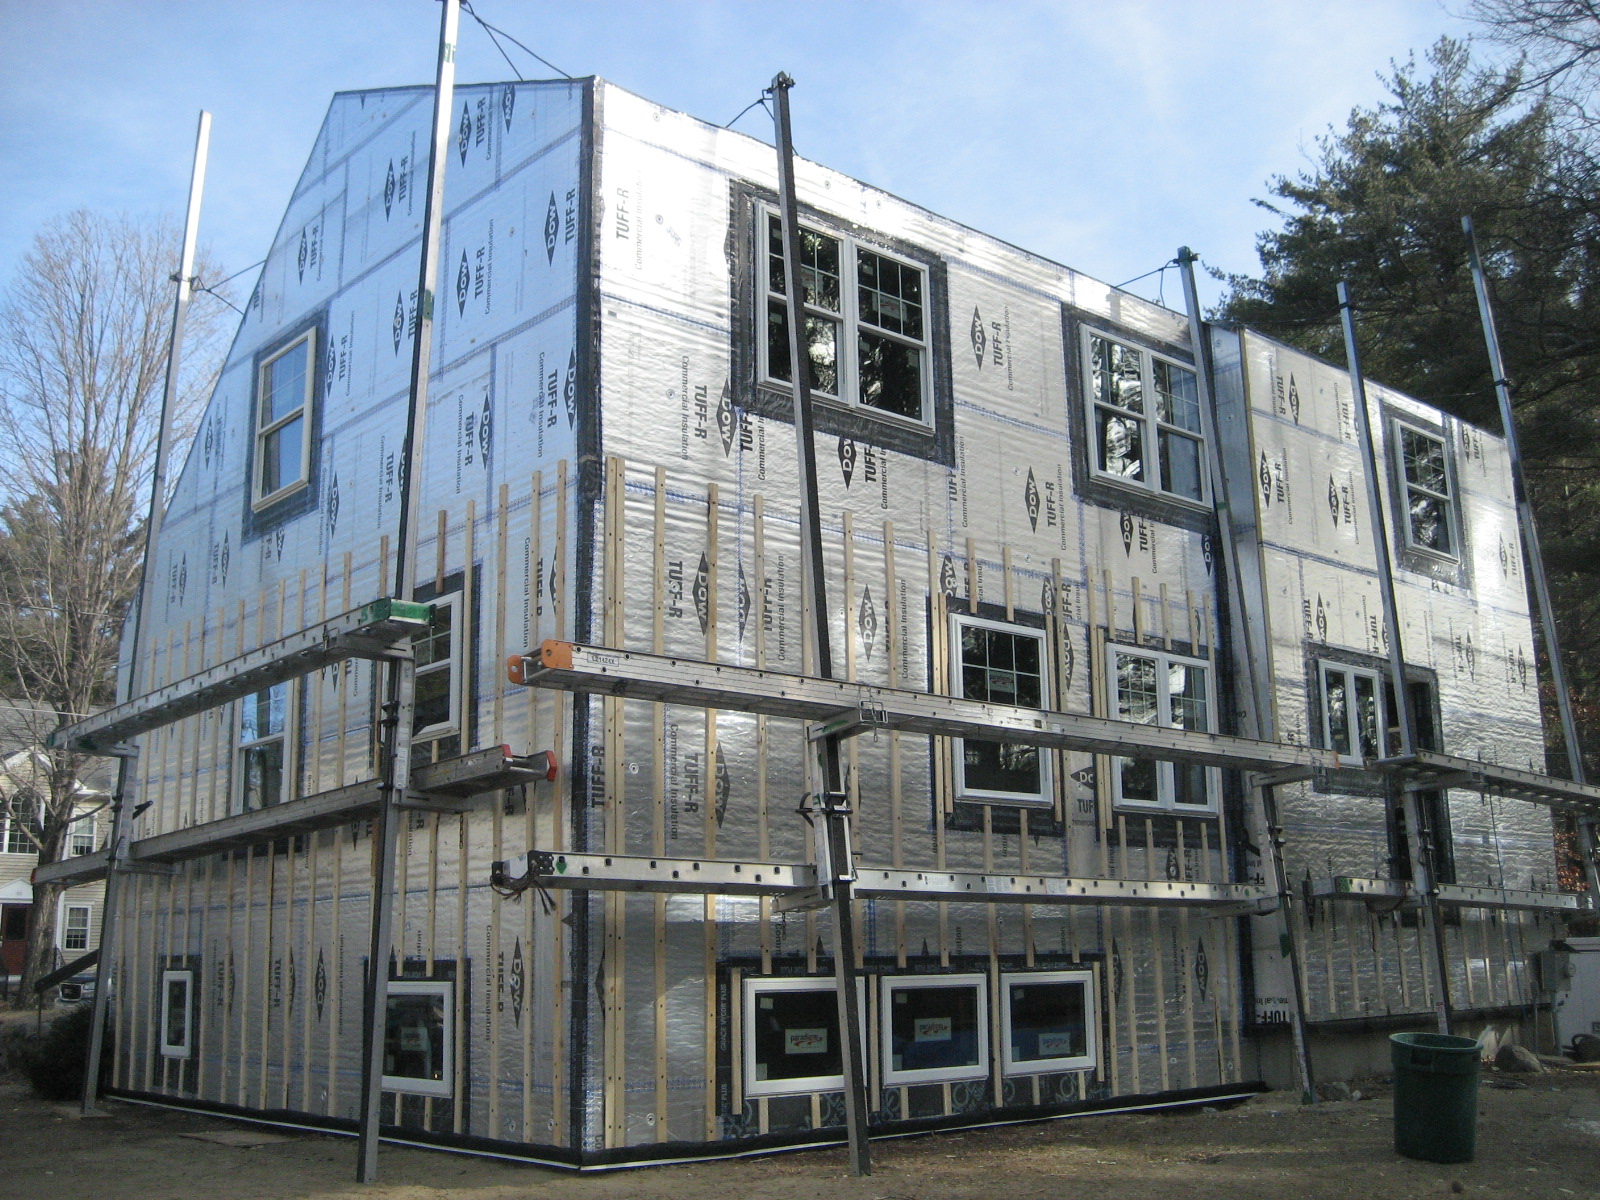
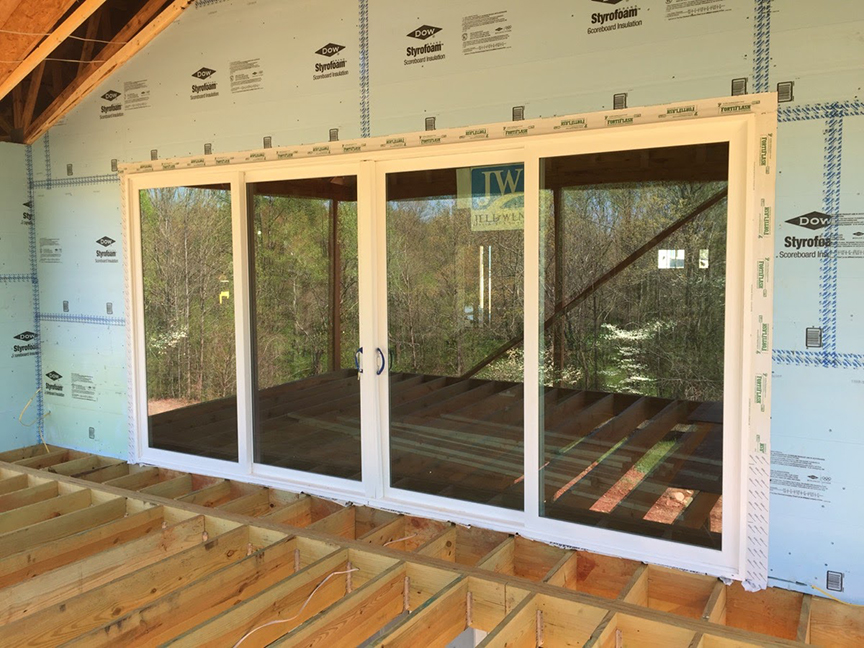
Extruded polystyrene (XPS) rigid foam is taped at the seams to provides a continuous air and weather-resistant barrier so no house wrap is needed; it also provides a continuous layer of insulation.
Image
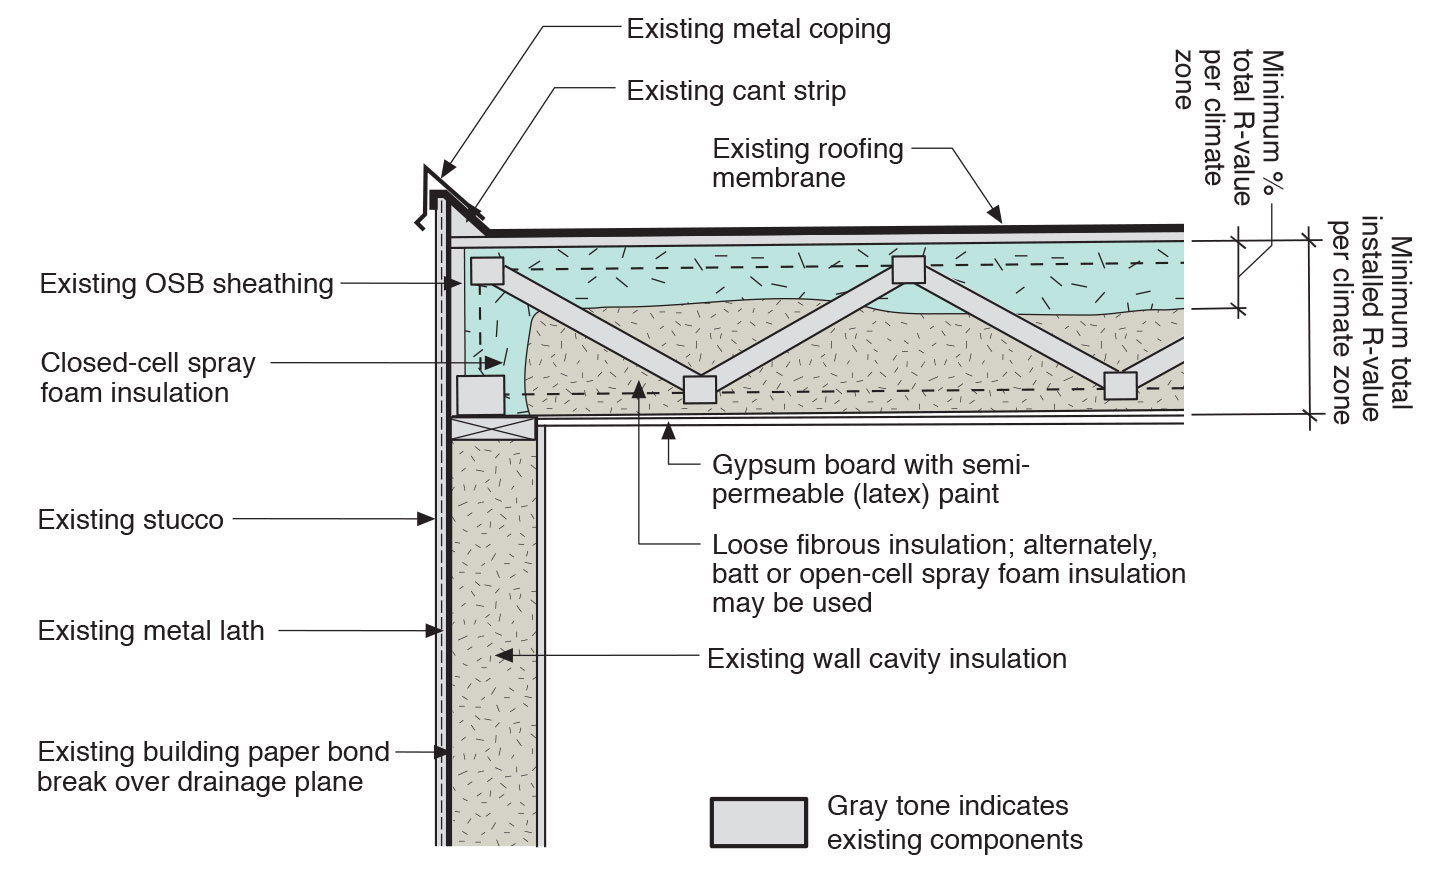
Flat roof with cavity spray foam plus loose-fill insulation and gypsum board thermal barrier.
Image
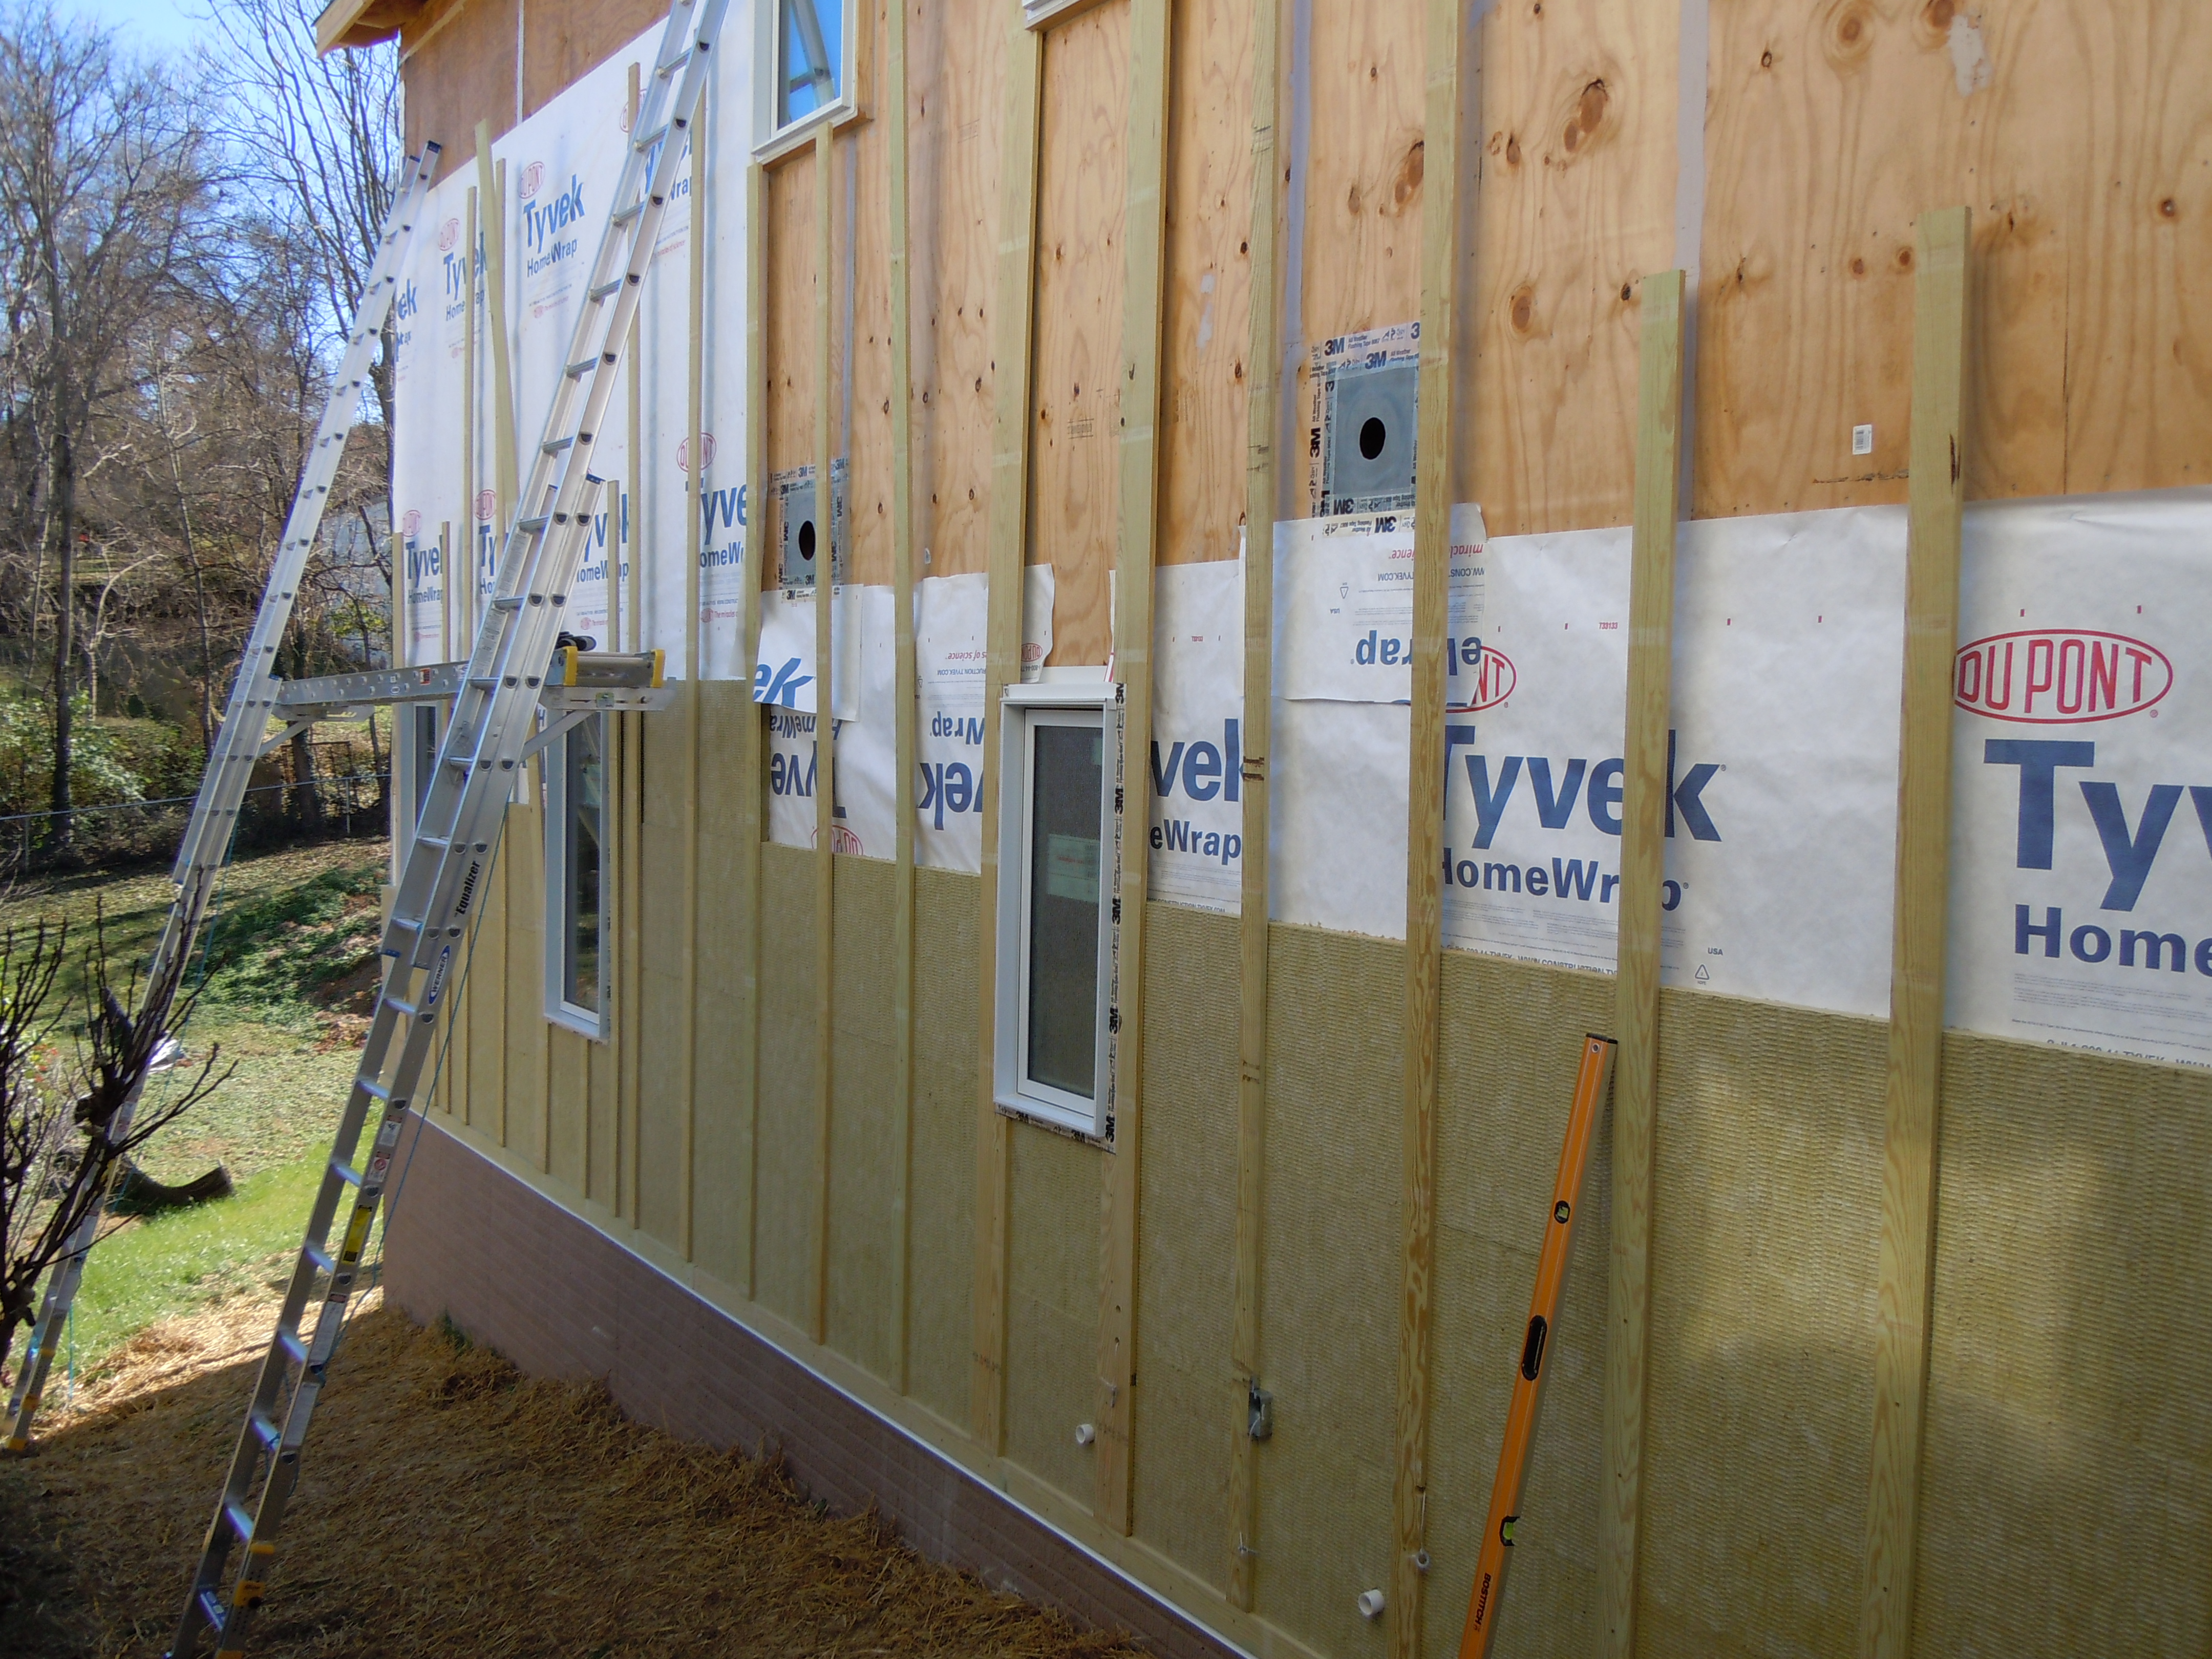
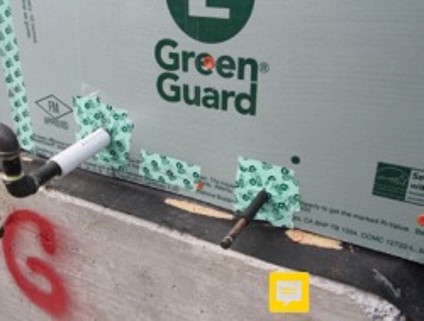
Holes in the exterior walls are flashed and flashing is integrated with housewrap before installing rigid mineral wool insulation.
Image
Install continuous rigid foam insulation or insulated siding to help reduce thermal bridging through wood- or metal-framed exterior walls.
Image

Image
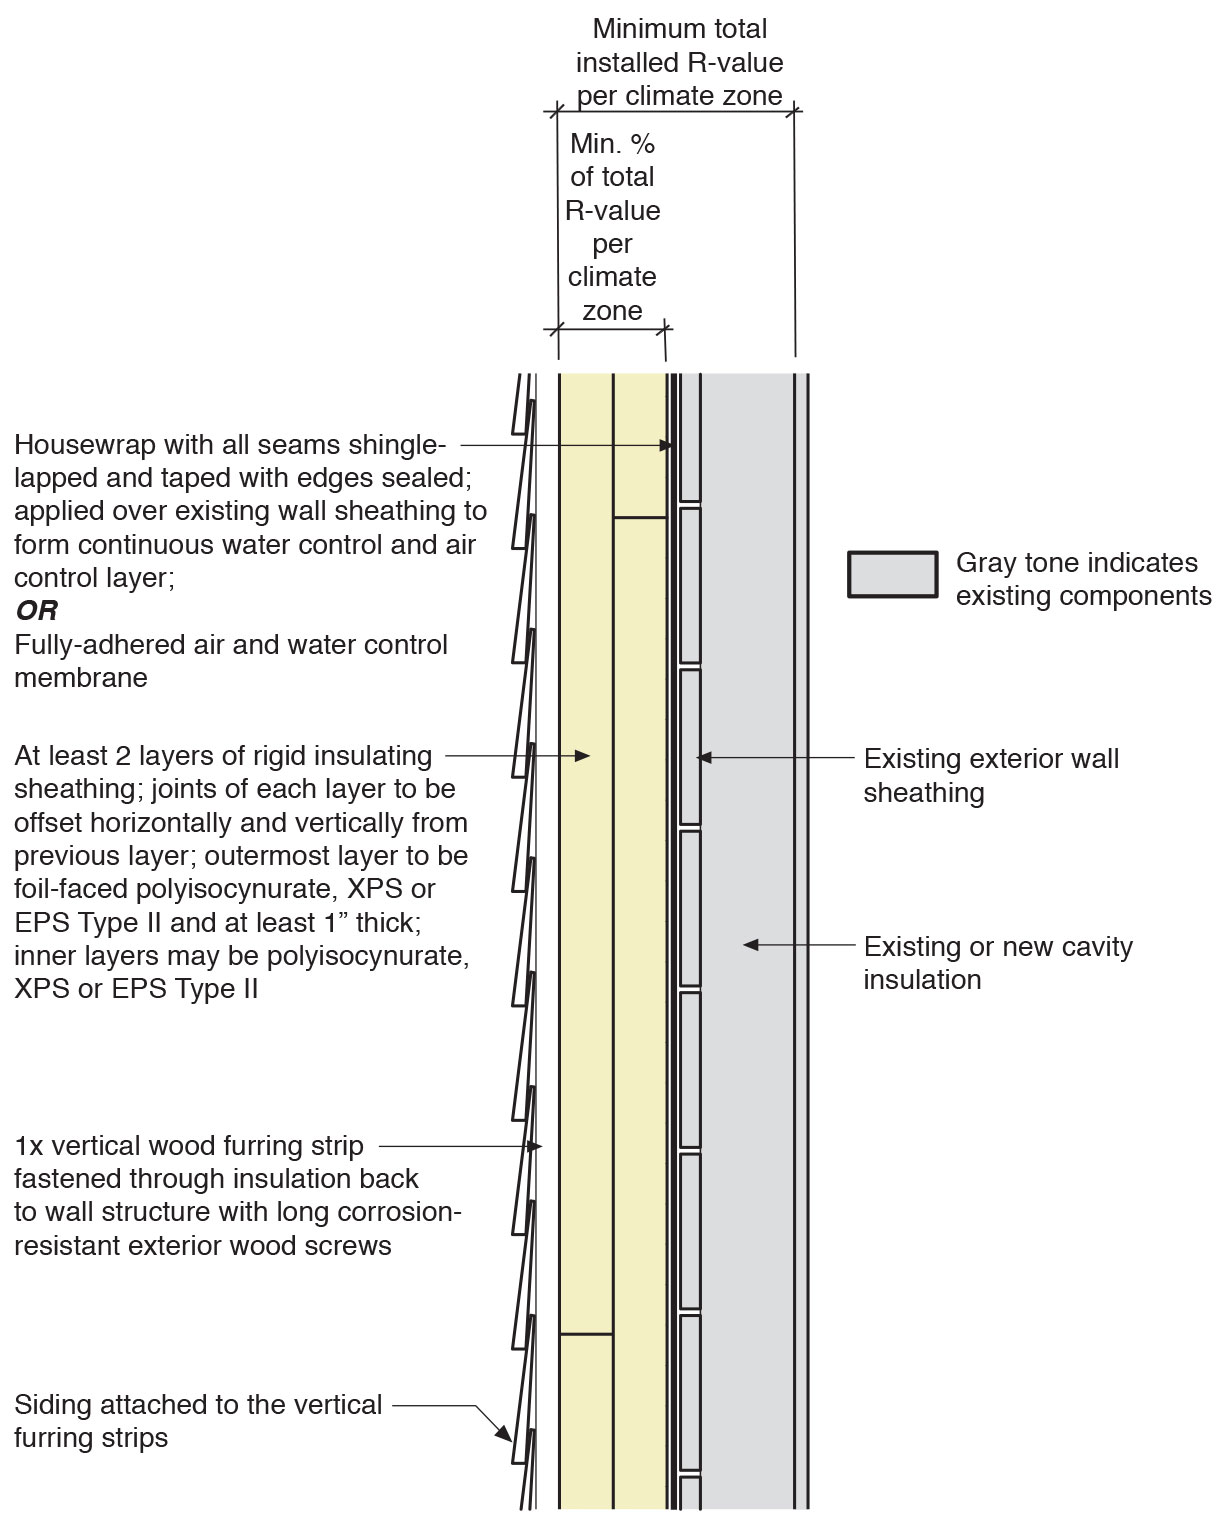
Insulating sheathing is installed on exterior of an existing framed wall with water control between existing sheathing and insulating sheathing
Image
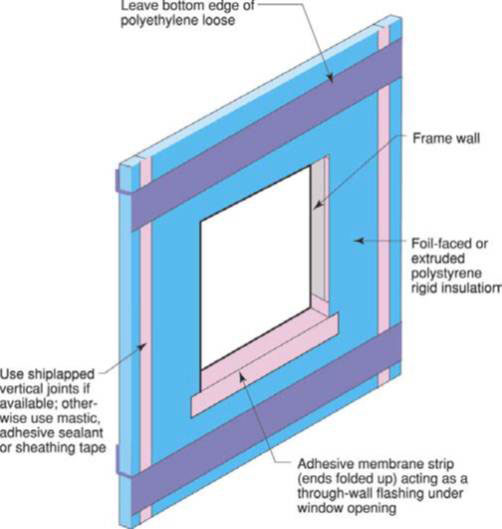
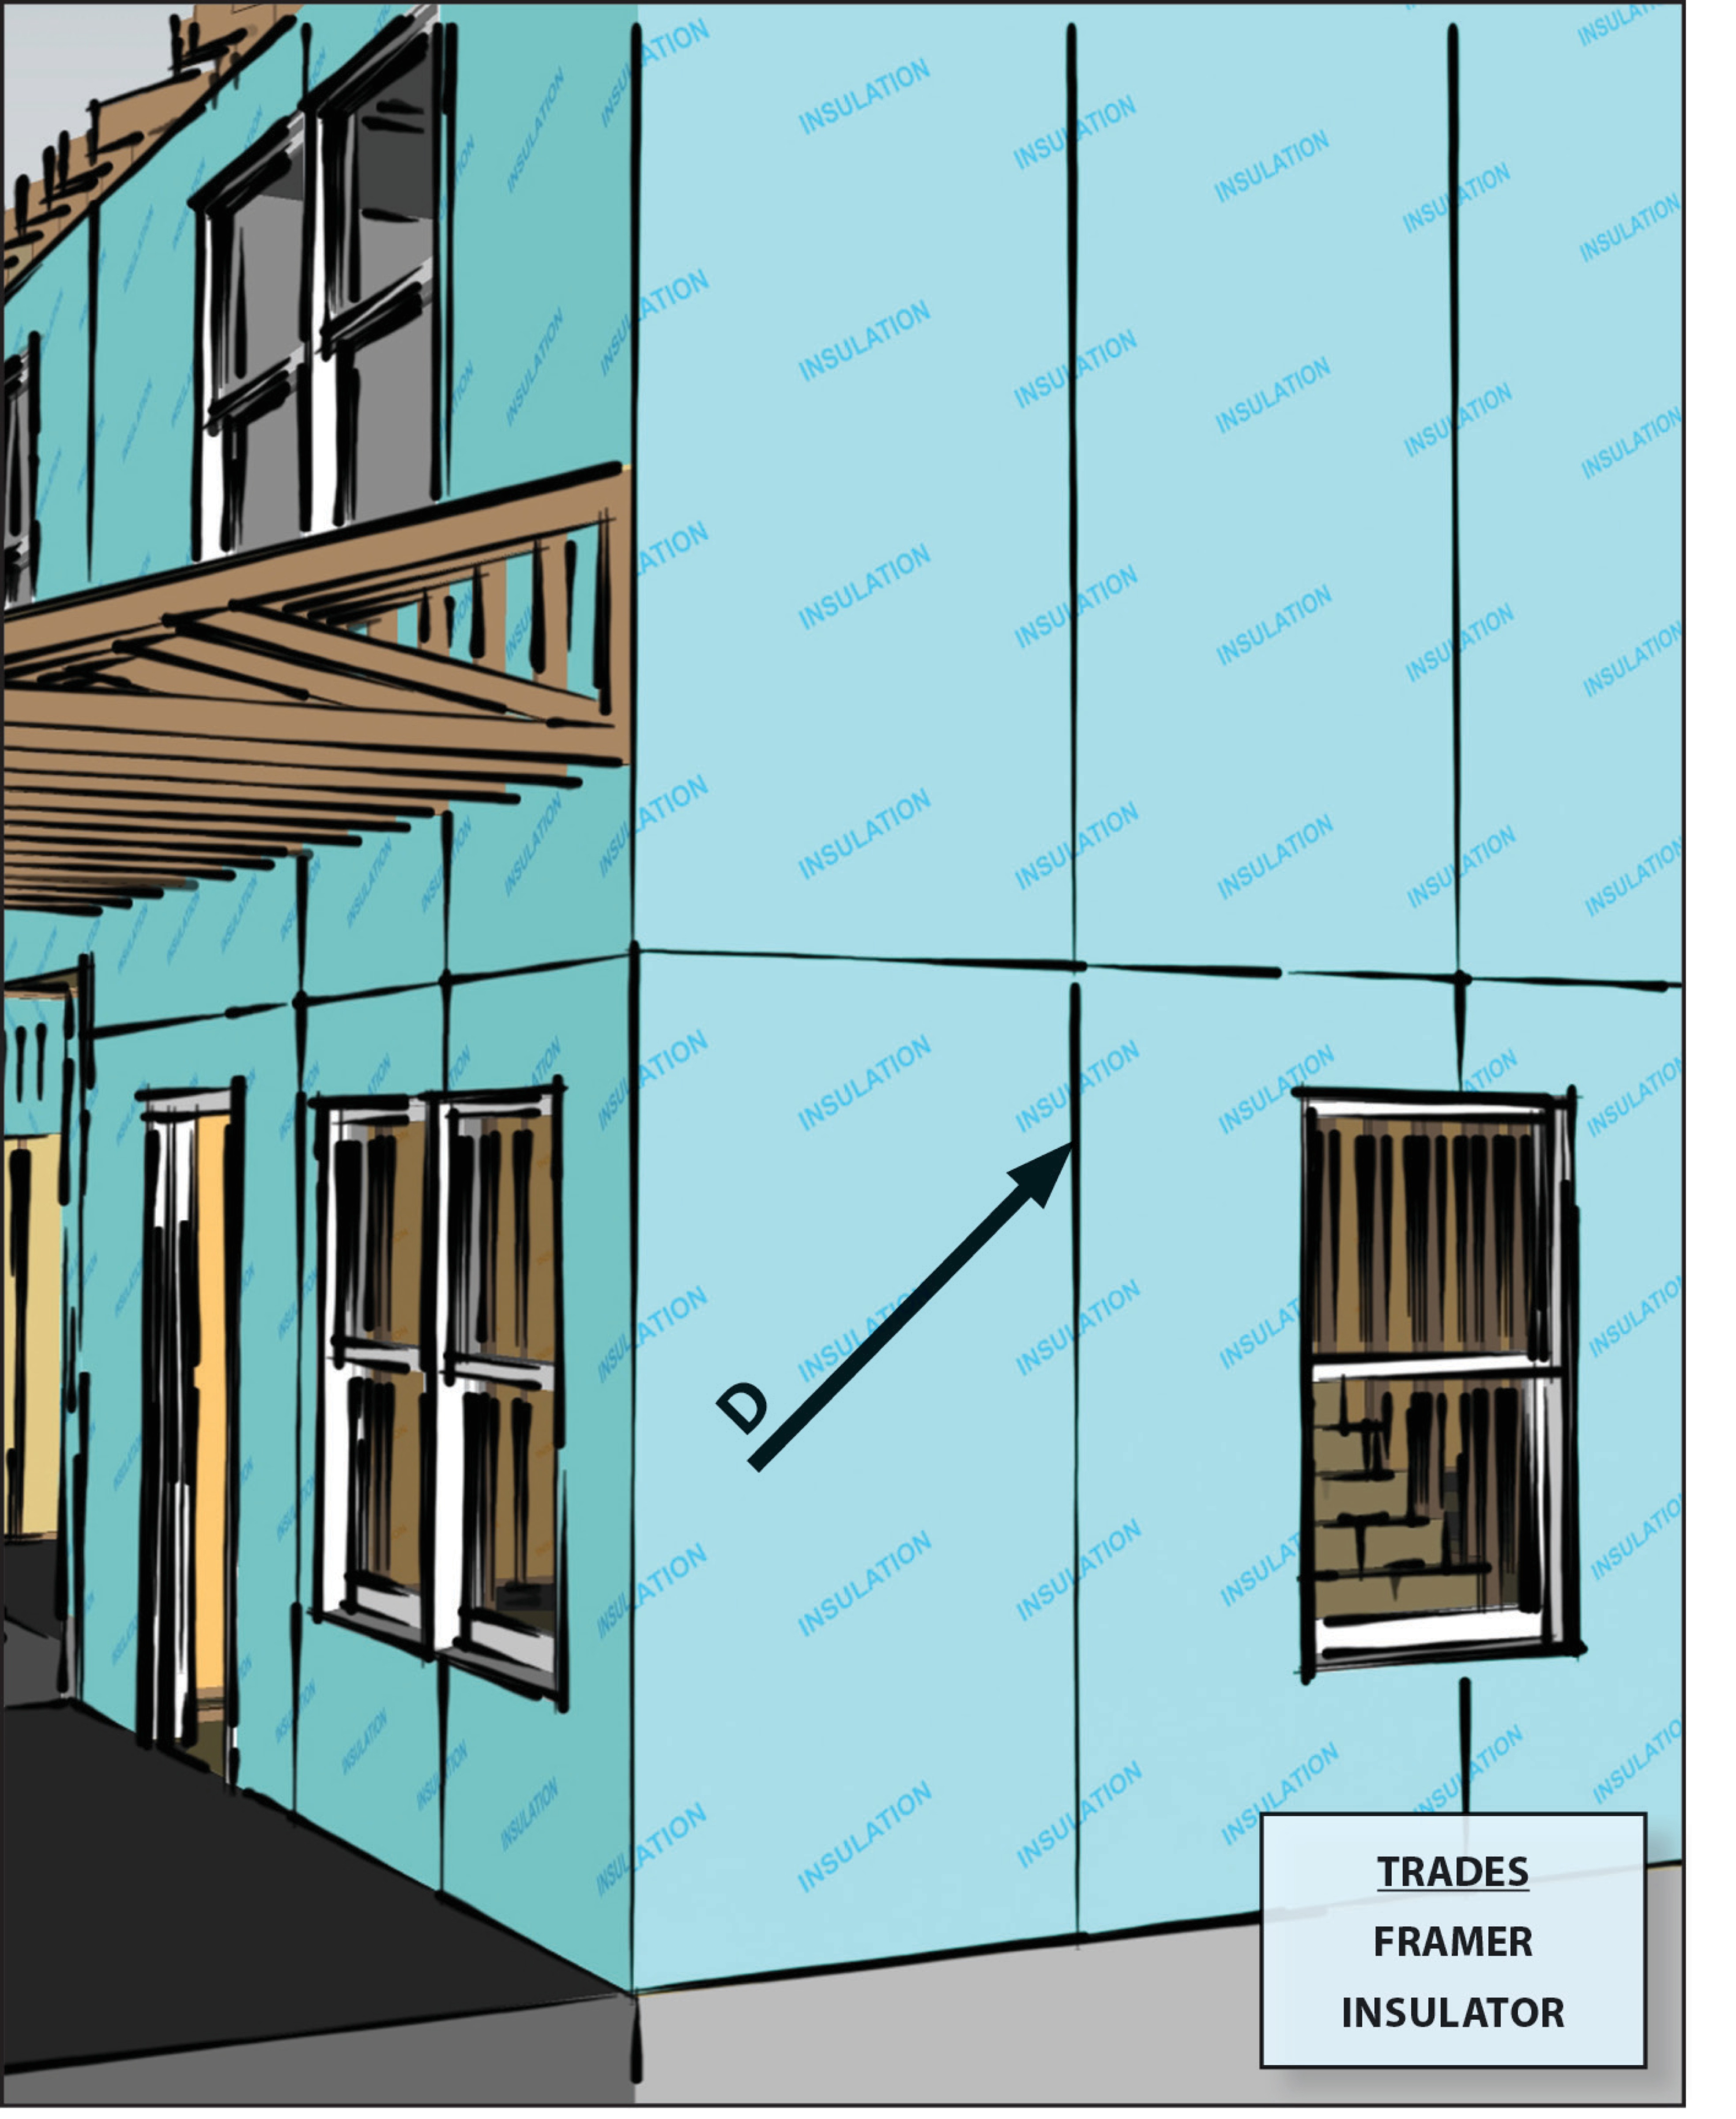
Lay out the rigid foam sheathing joints so they do not align with the window and door edges
Image
Image
Over the taped rigid foam board, 2x4 furring strips provide a ventilating air gap and drainage plane under the engineered wood lap siding. The furring strips were attached with structural screws to provide an attachment surface for the siding.
Image
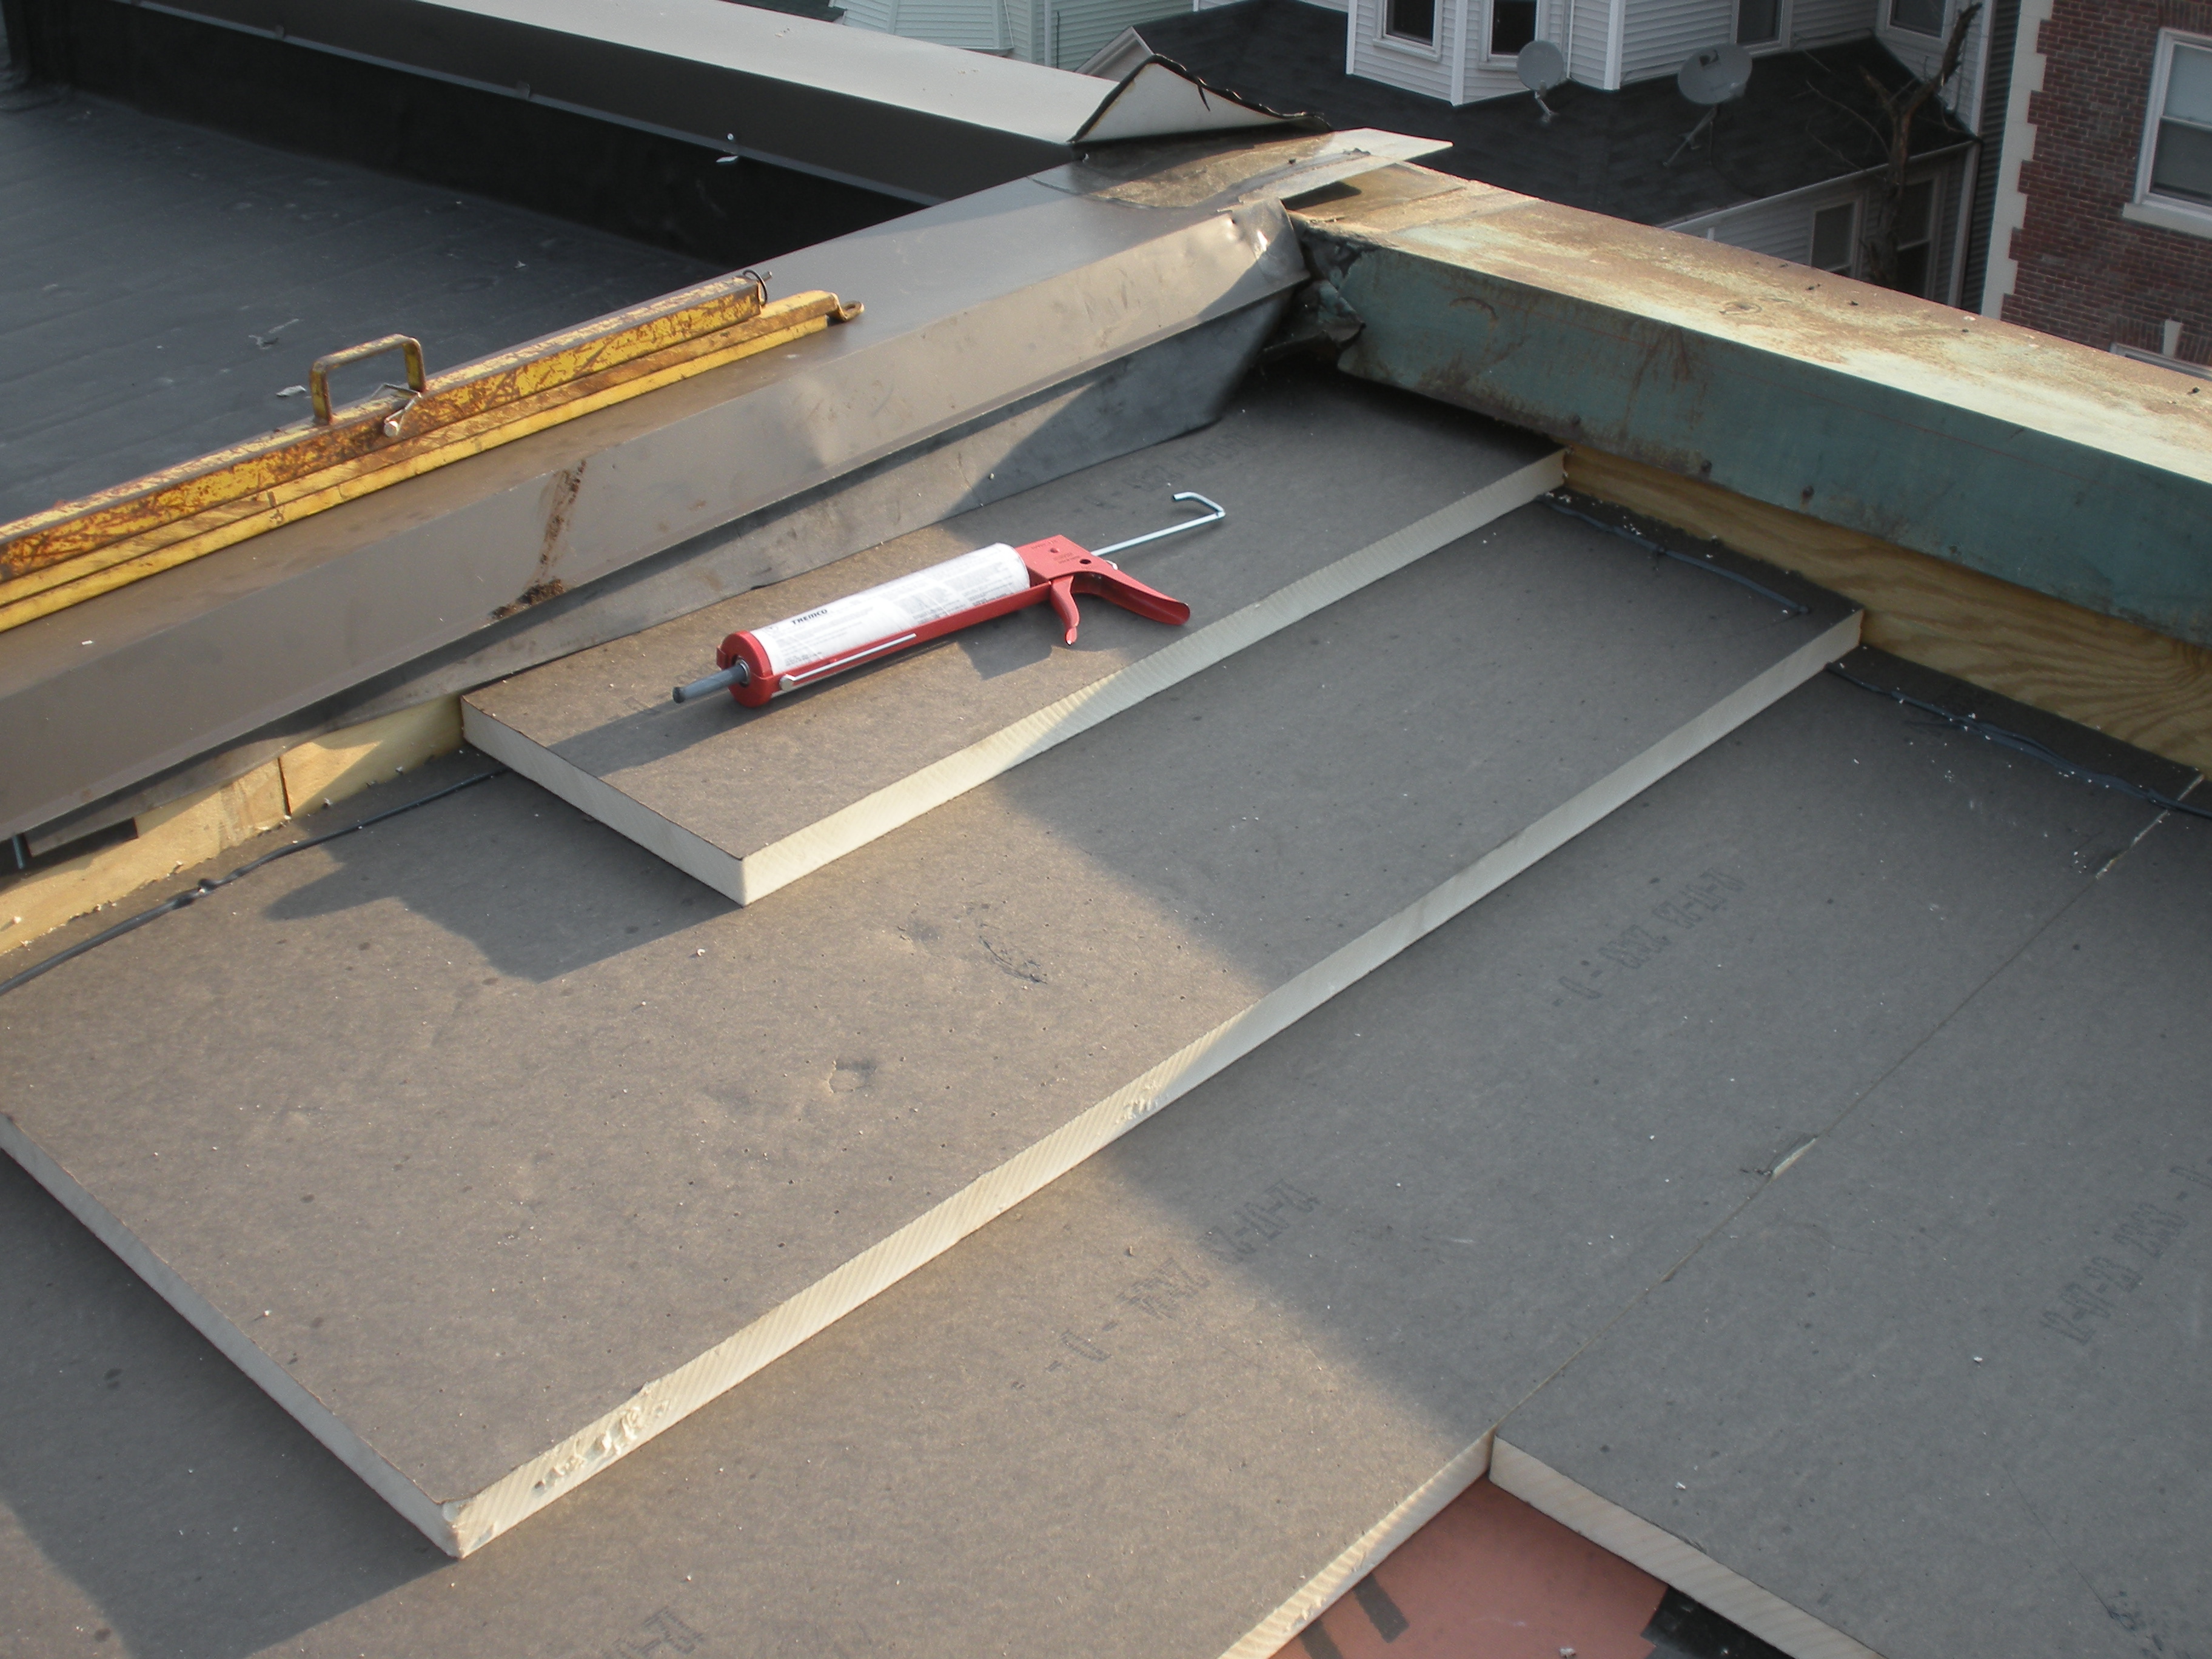
Polyisocyanurate rigid foam insulation is installed in multiple layers with staggered, taped seams over the flat roof
Image
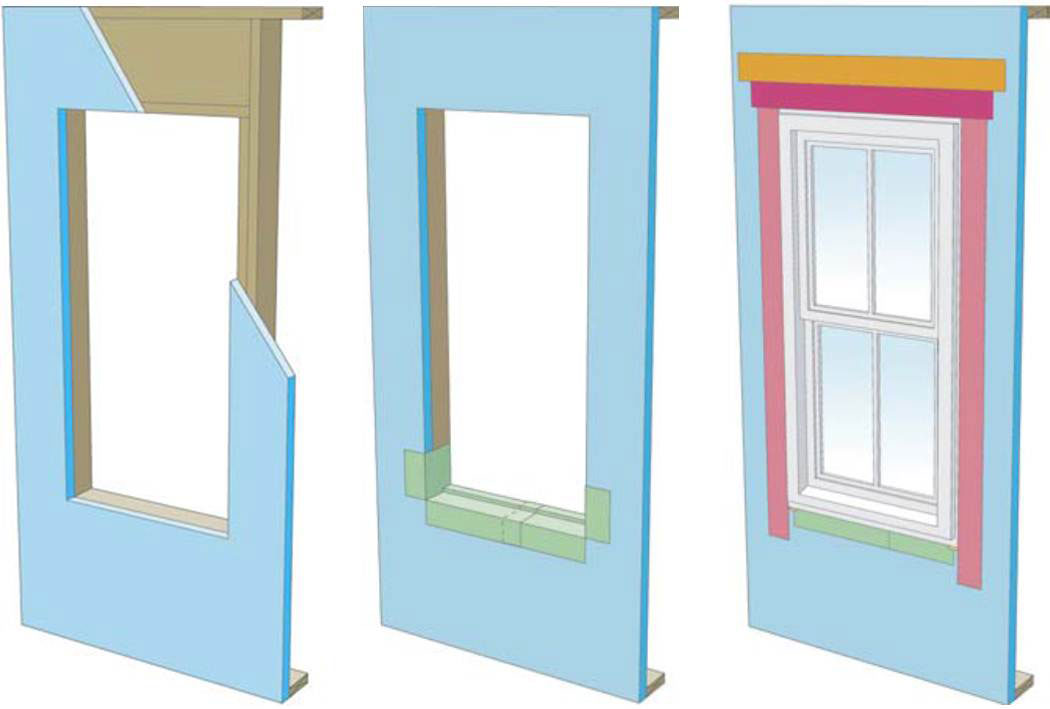
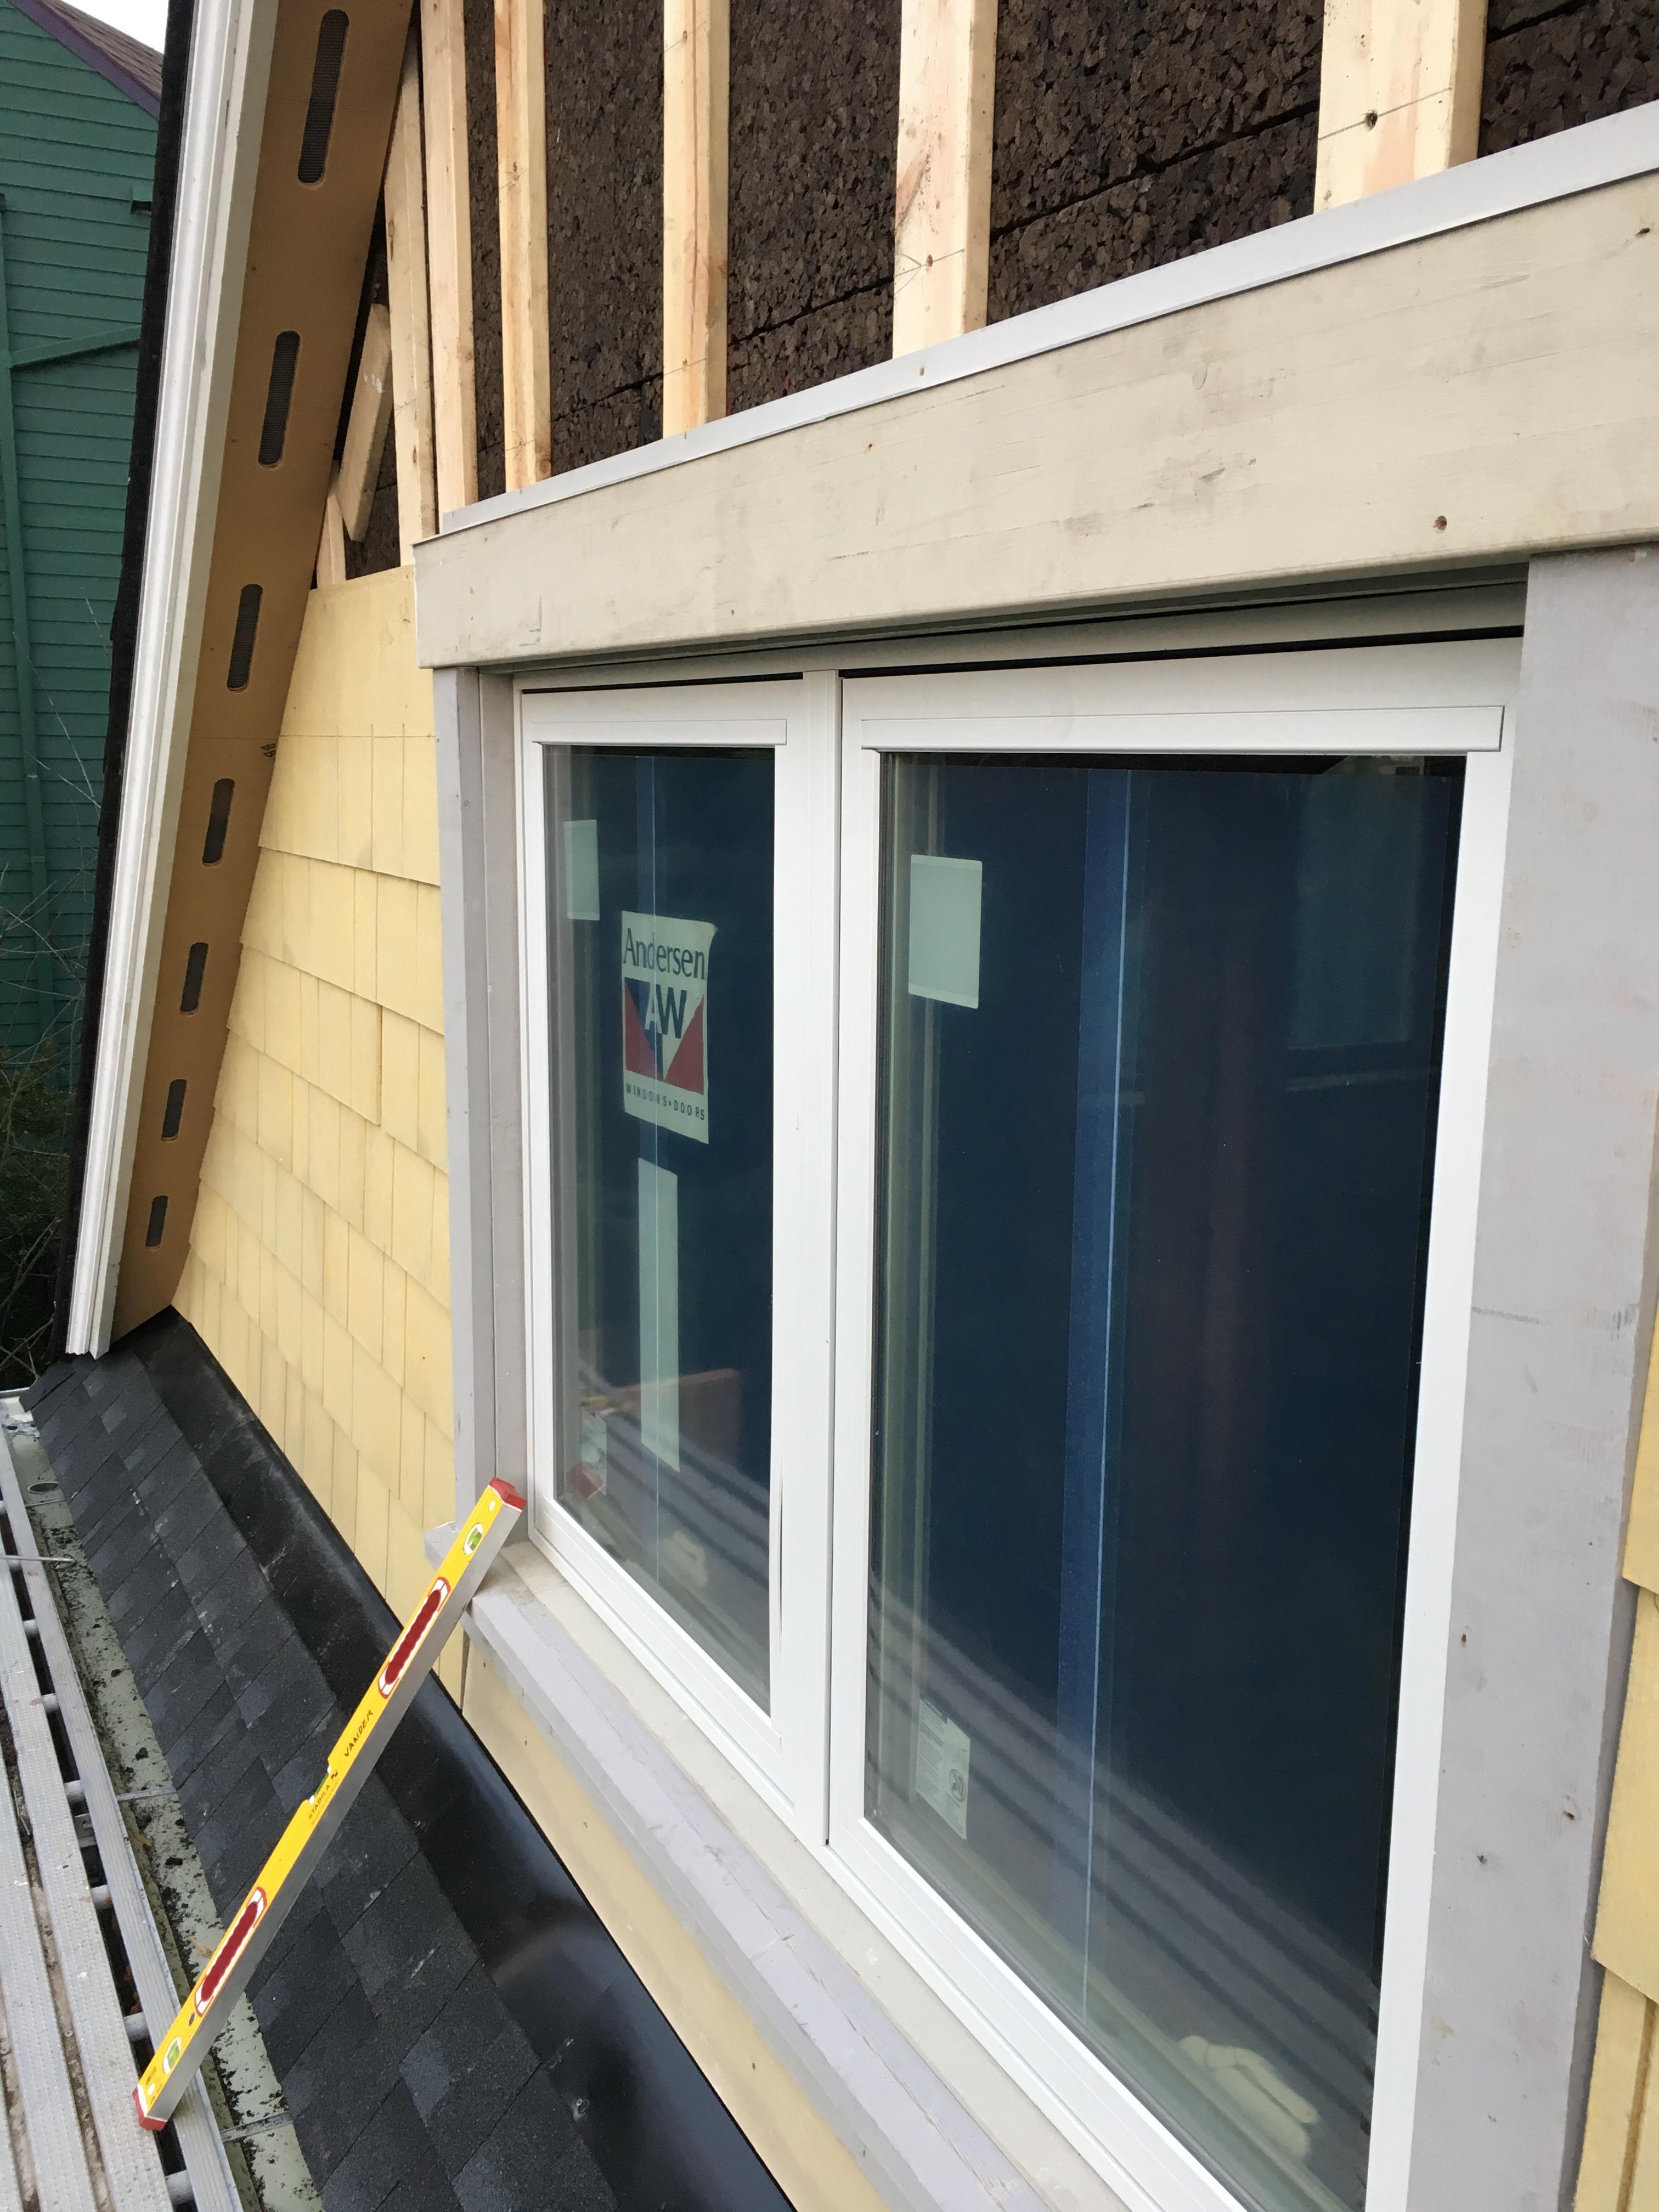
Proper flashing around windows is especially important when the rigid foam serves as the drainage plane in the wall
Image
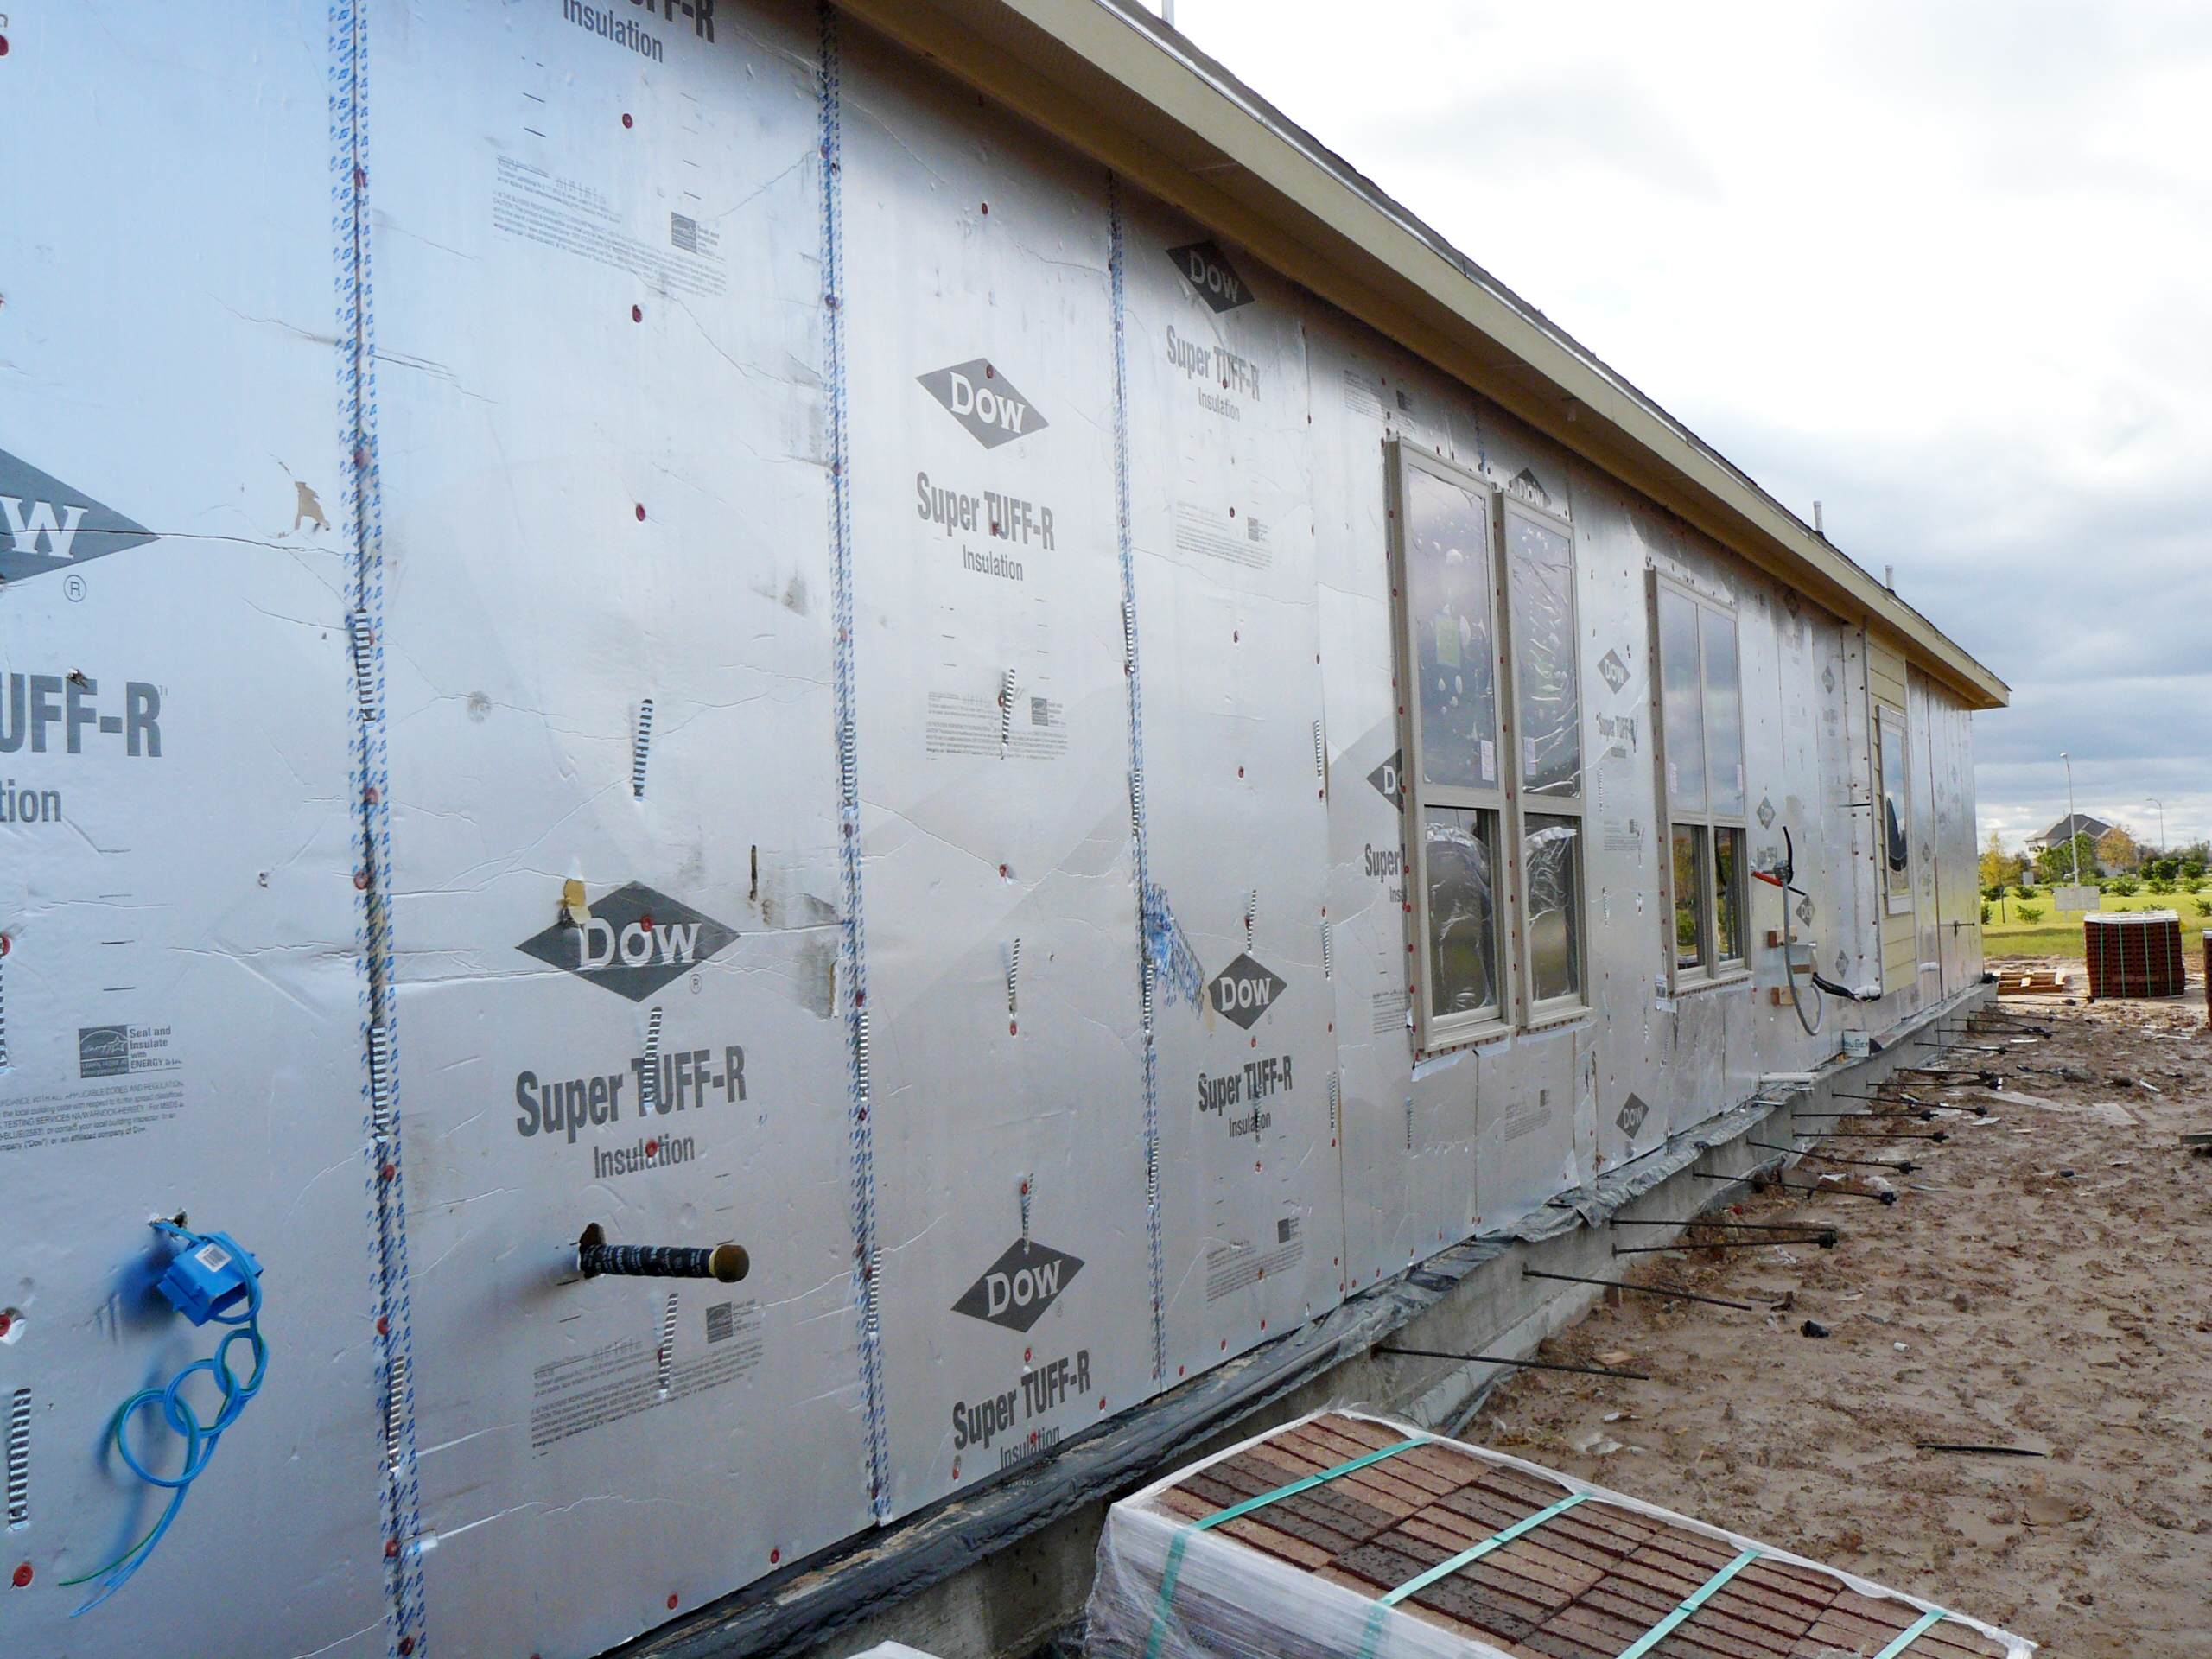
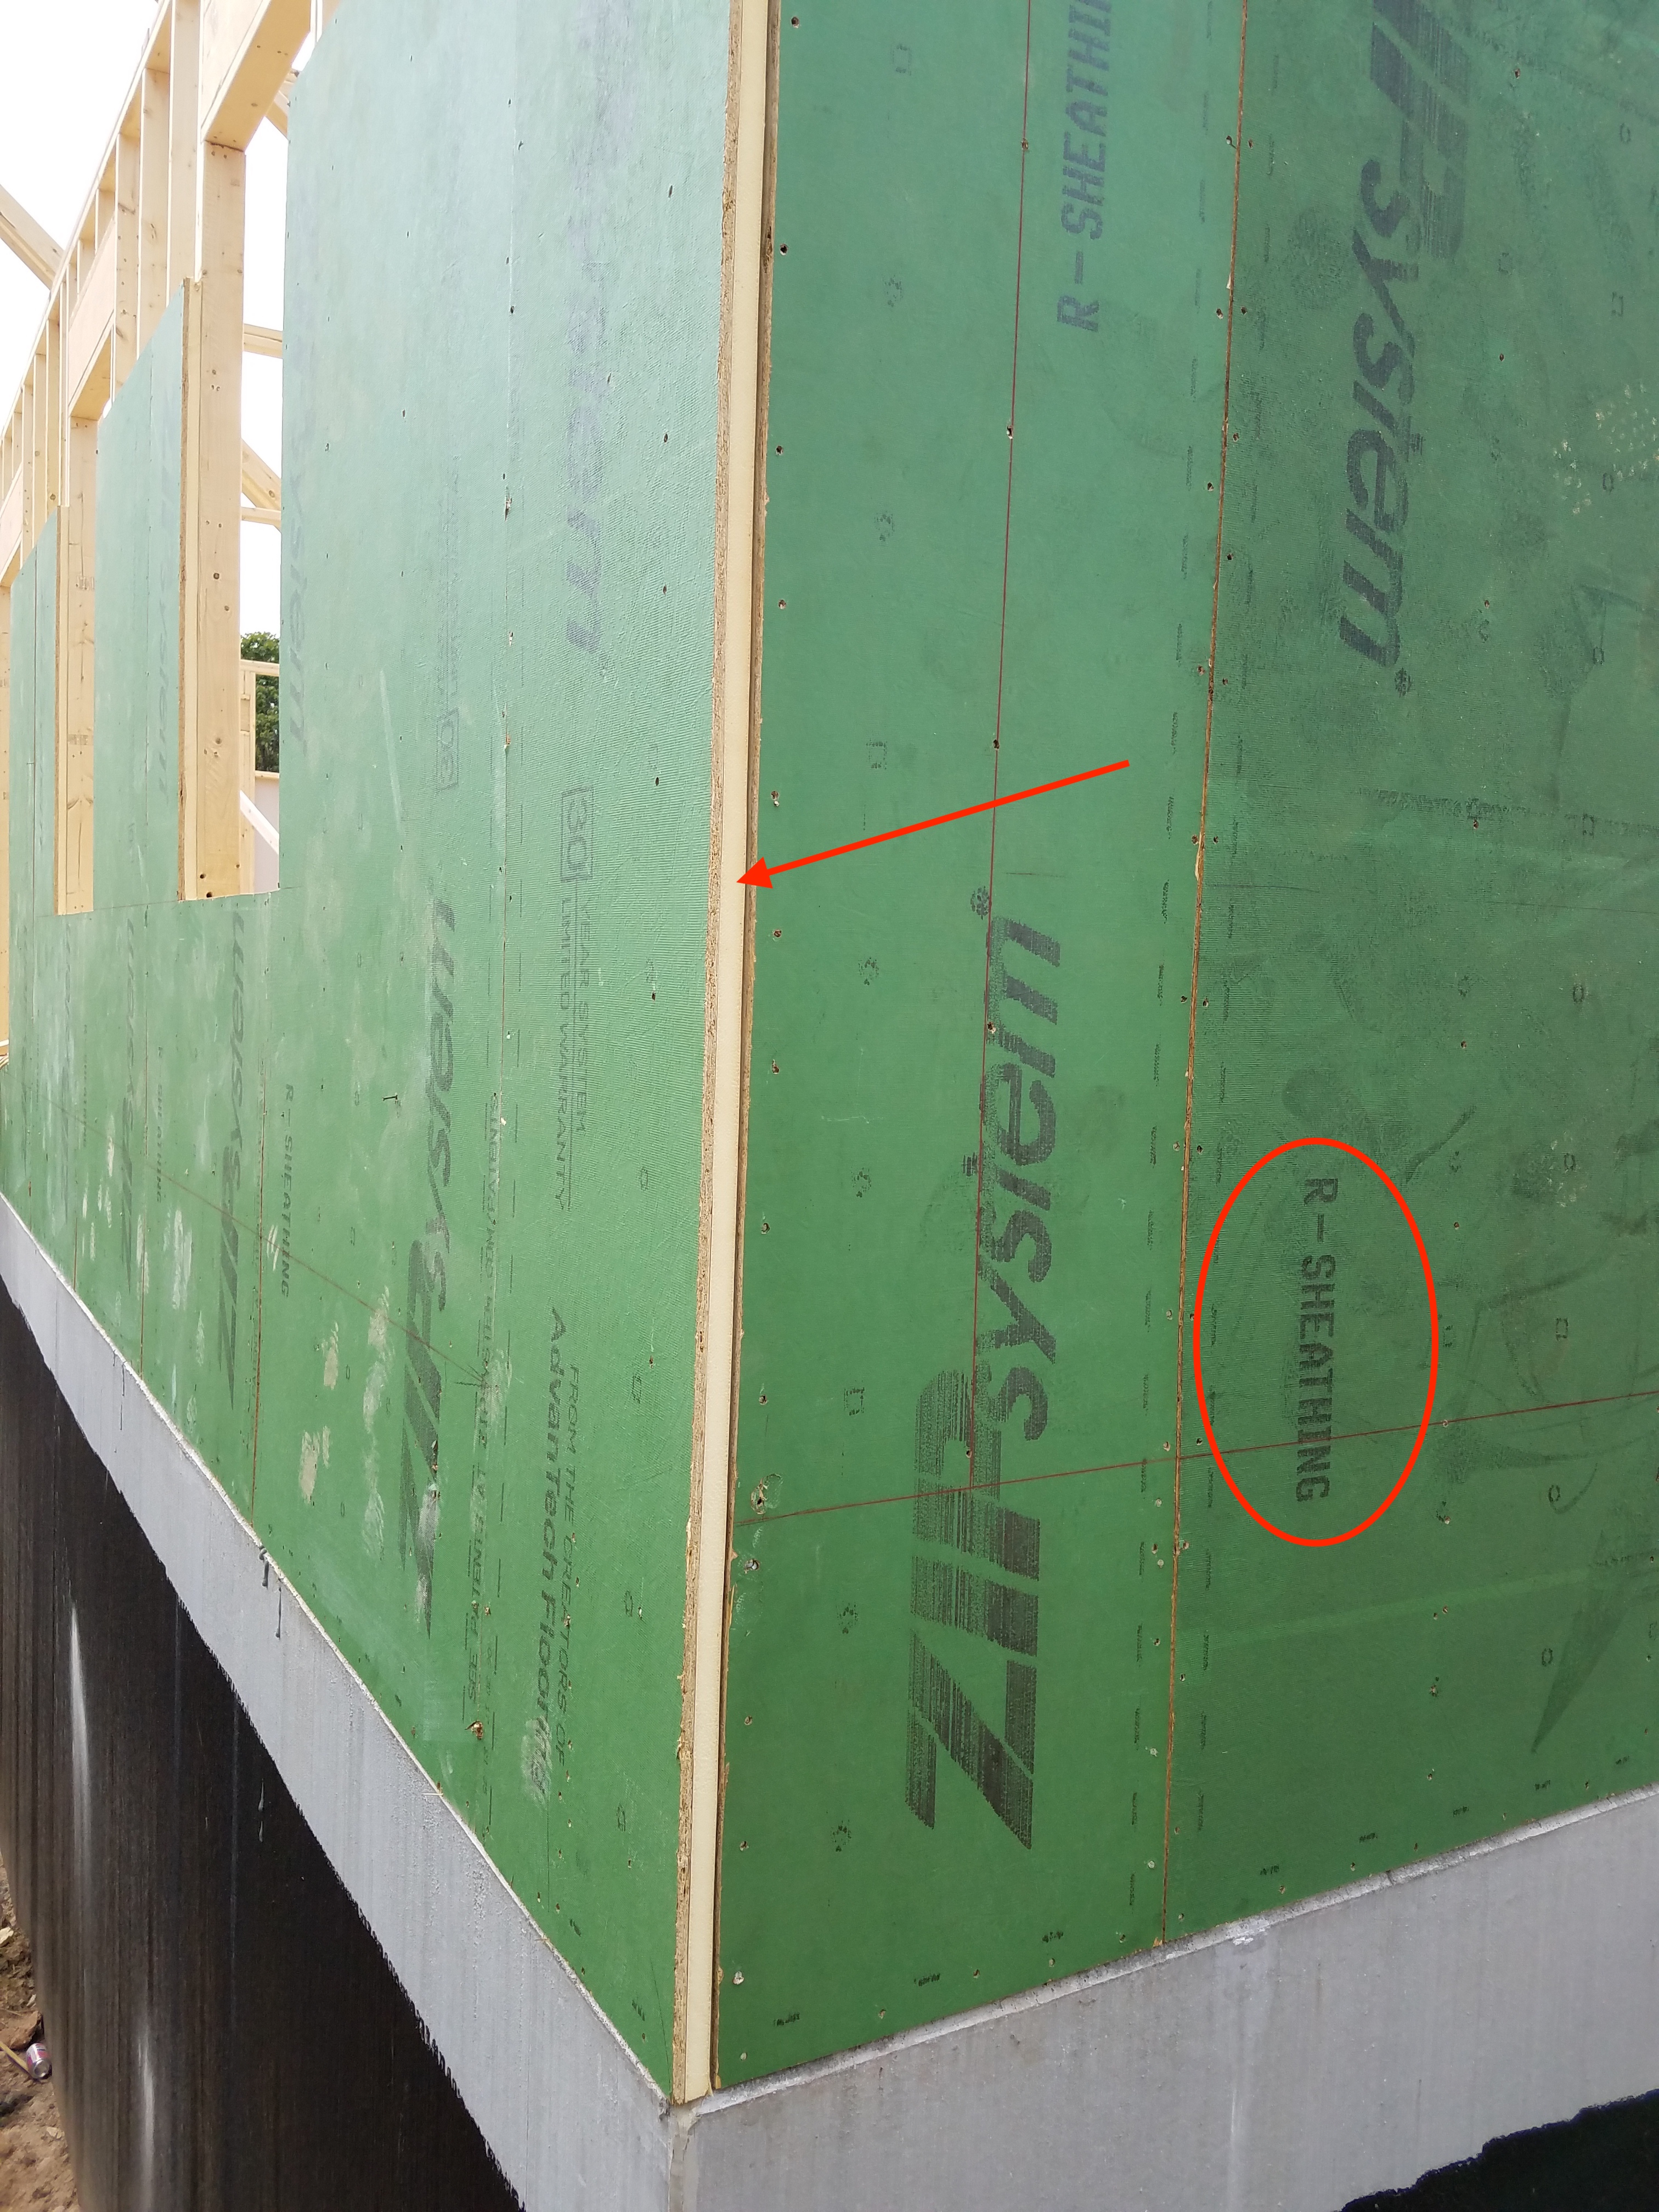
R-5 XPS rigid foam exterior sheathing provides an air seal, moisture barrier, and additional insulation value.
Image
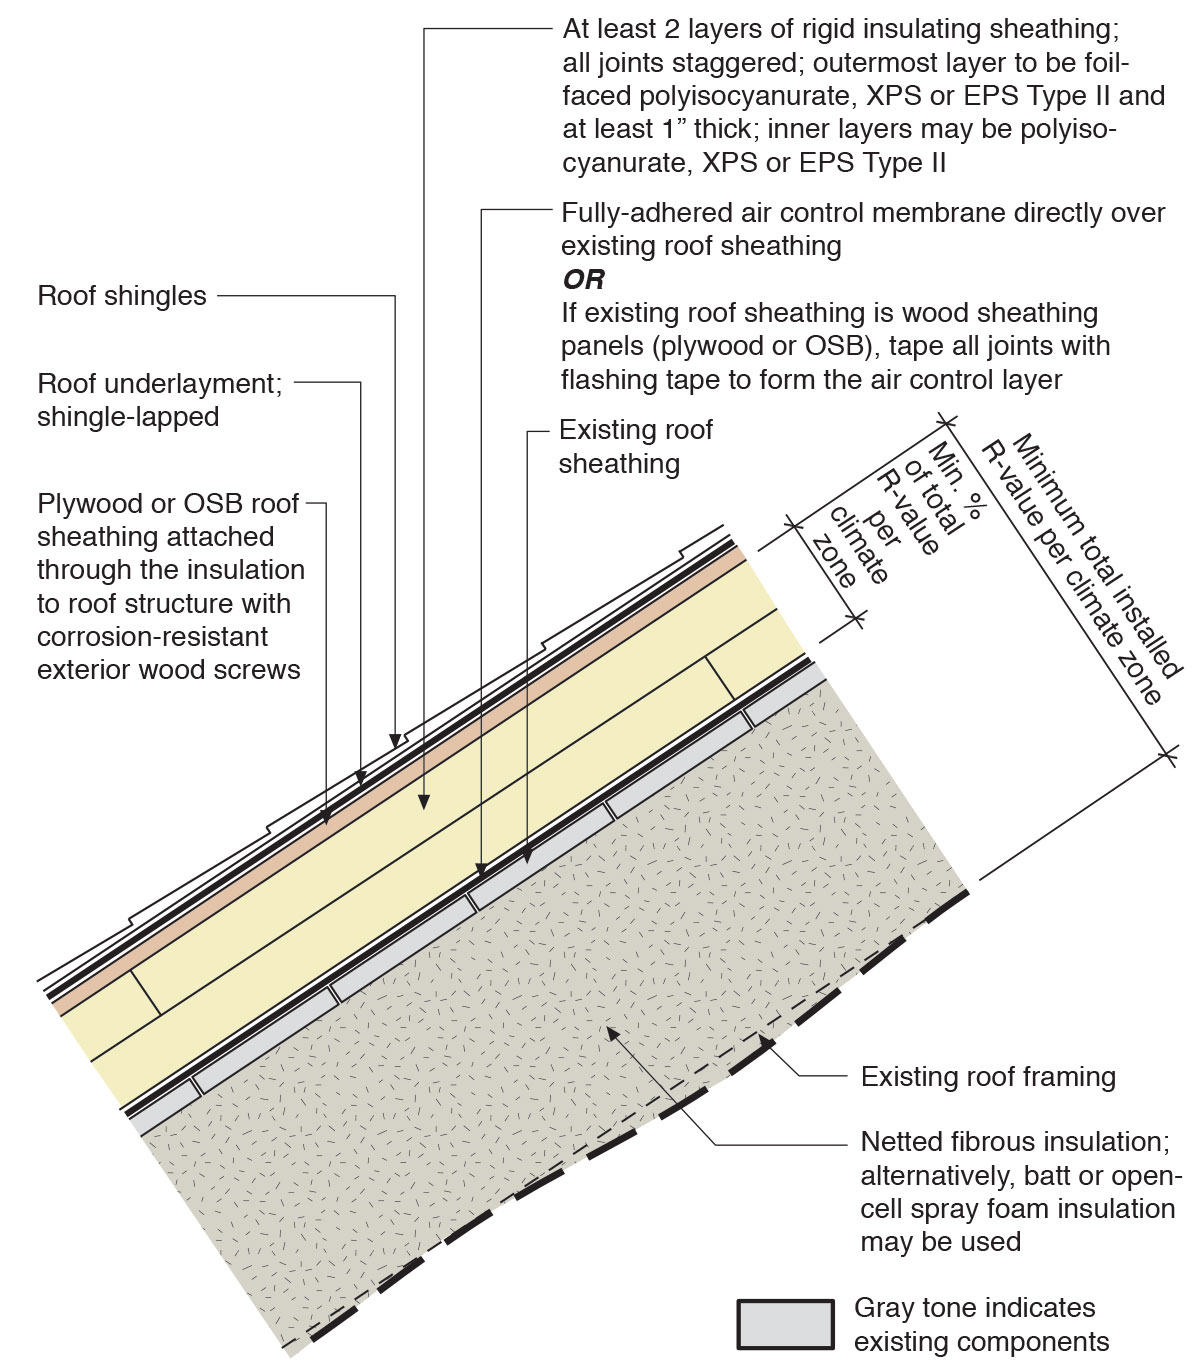
Retrofit an existing roof by installing rigid foam, new moisture and air control layers, new sheathing, and new cladding plus cavity insulation in the roof rafters to create an unvented attic
Image
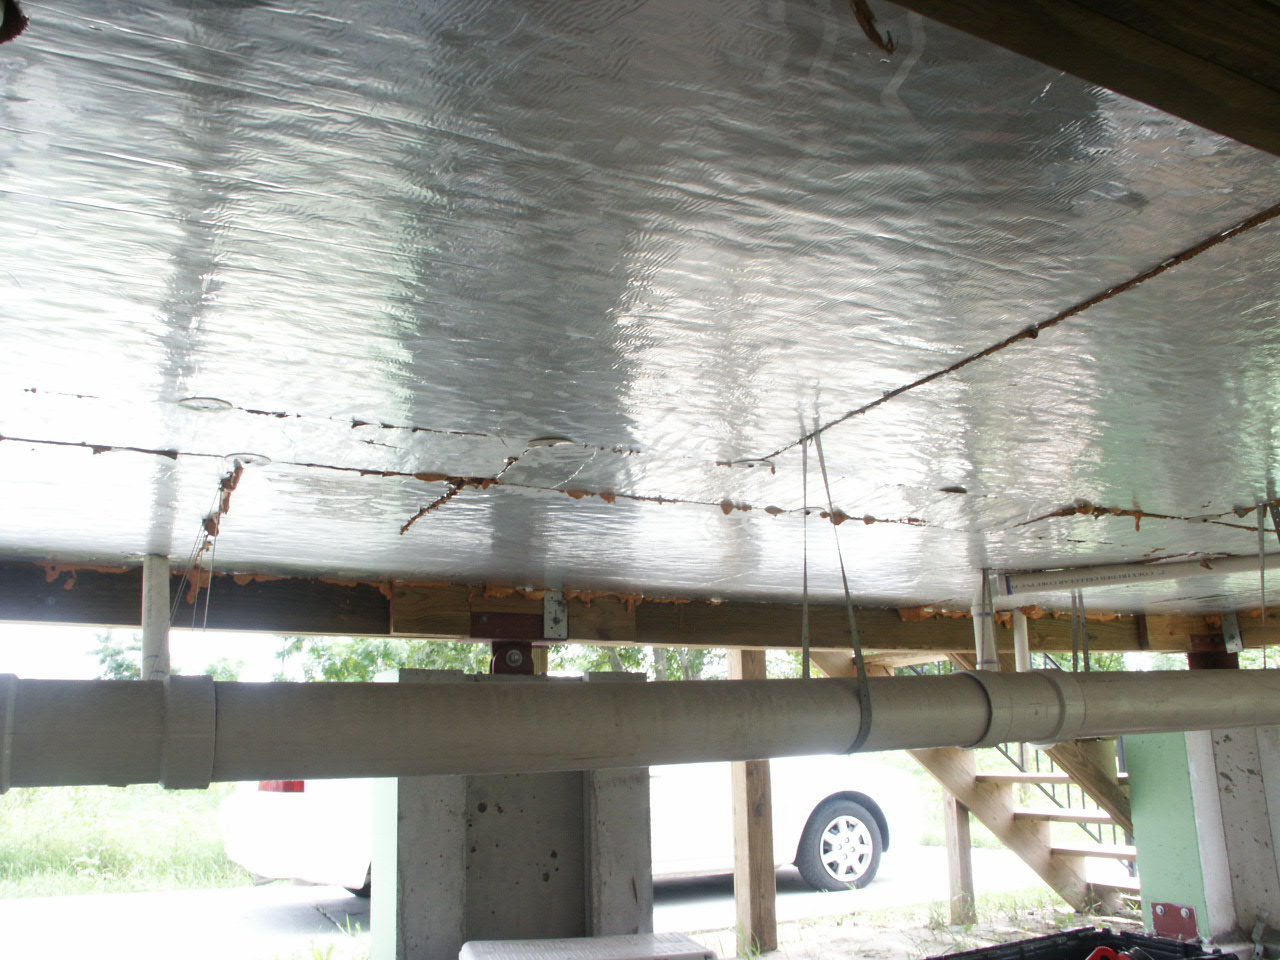
Right - Foil-faced polyisocyanurate insulating rigid foam sheathing is installed below the floor framing of this house built on piers; however, the seams should be sealed with metal taped and the plumbing elevated and protected.
Image
Right - Foil-faced polyisocyanurate rigid foam is attached to the existing exterior wall with vertical wood furring strips
Image
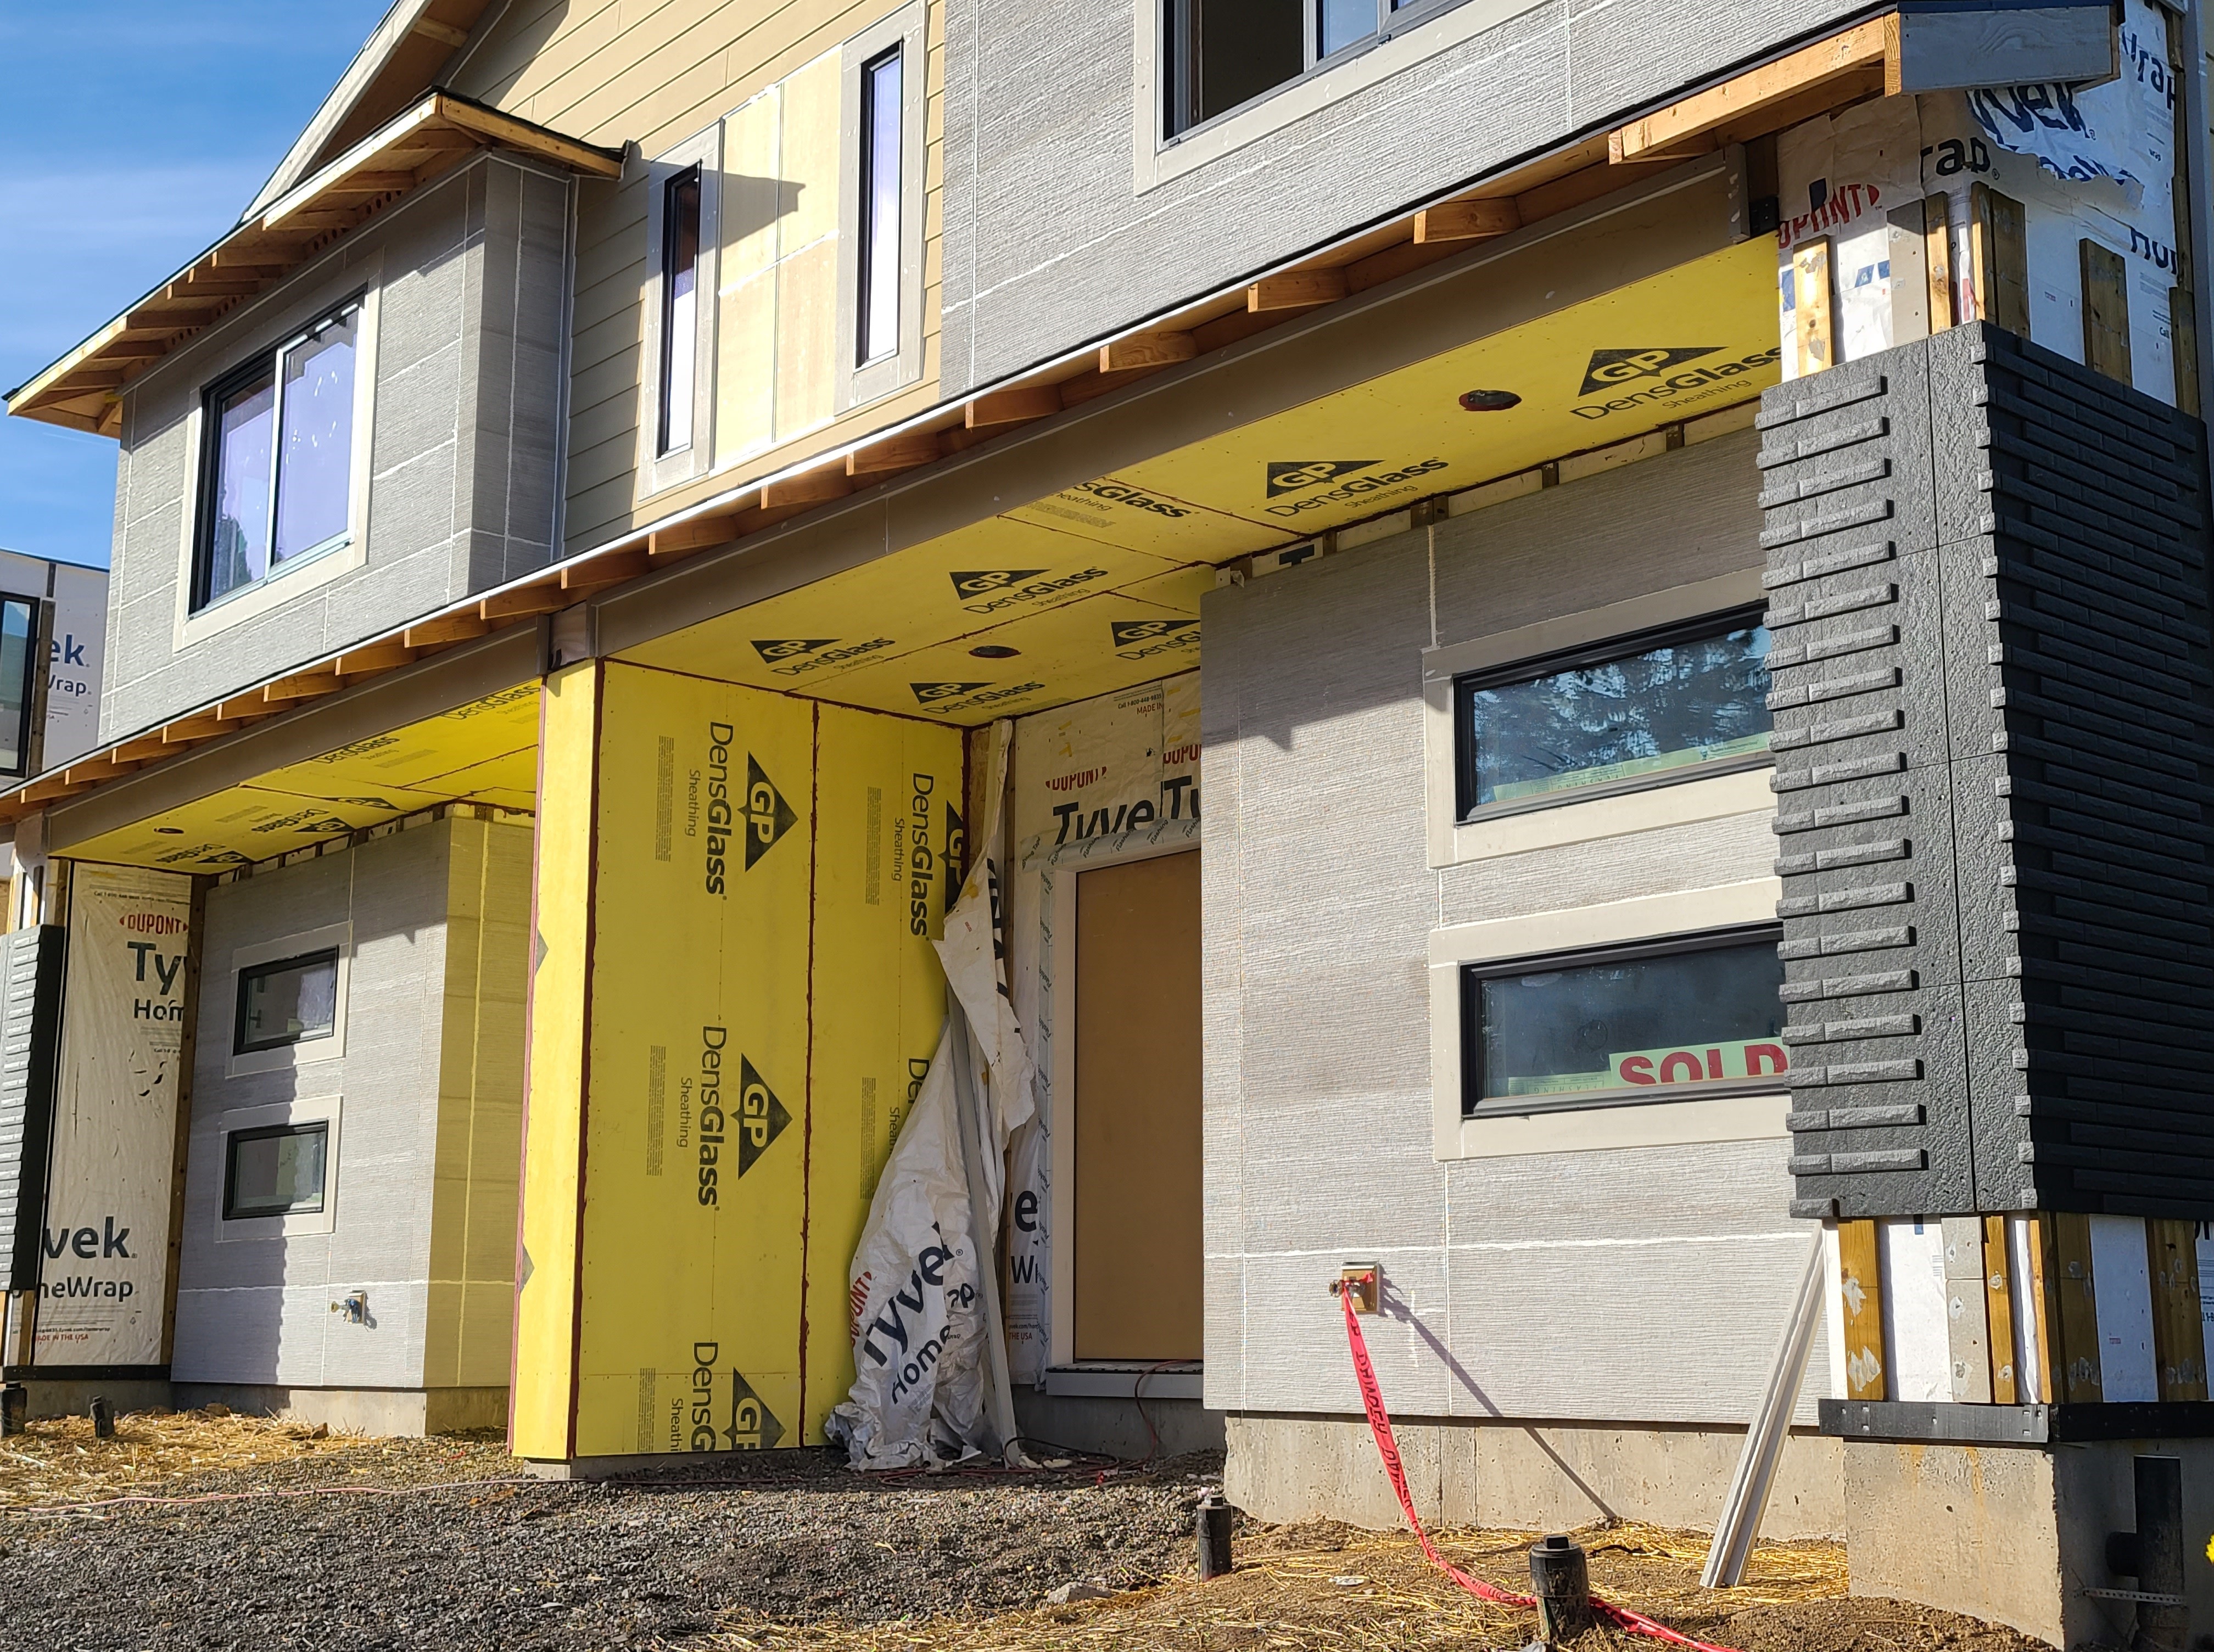
Right - Mold- and water-resistant fiber glass insulating sheathing is installed after panelized walls are assembled on site.
Image

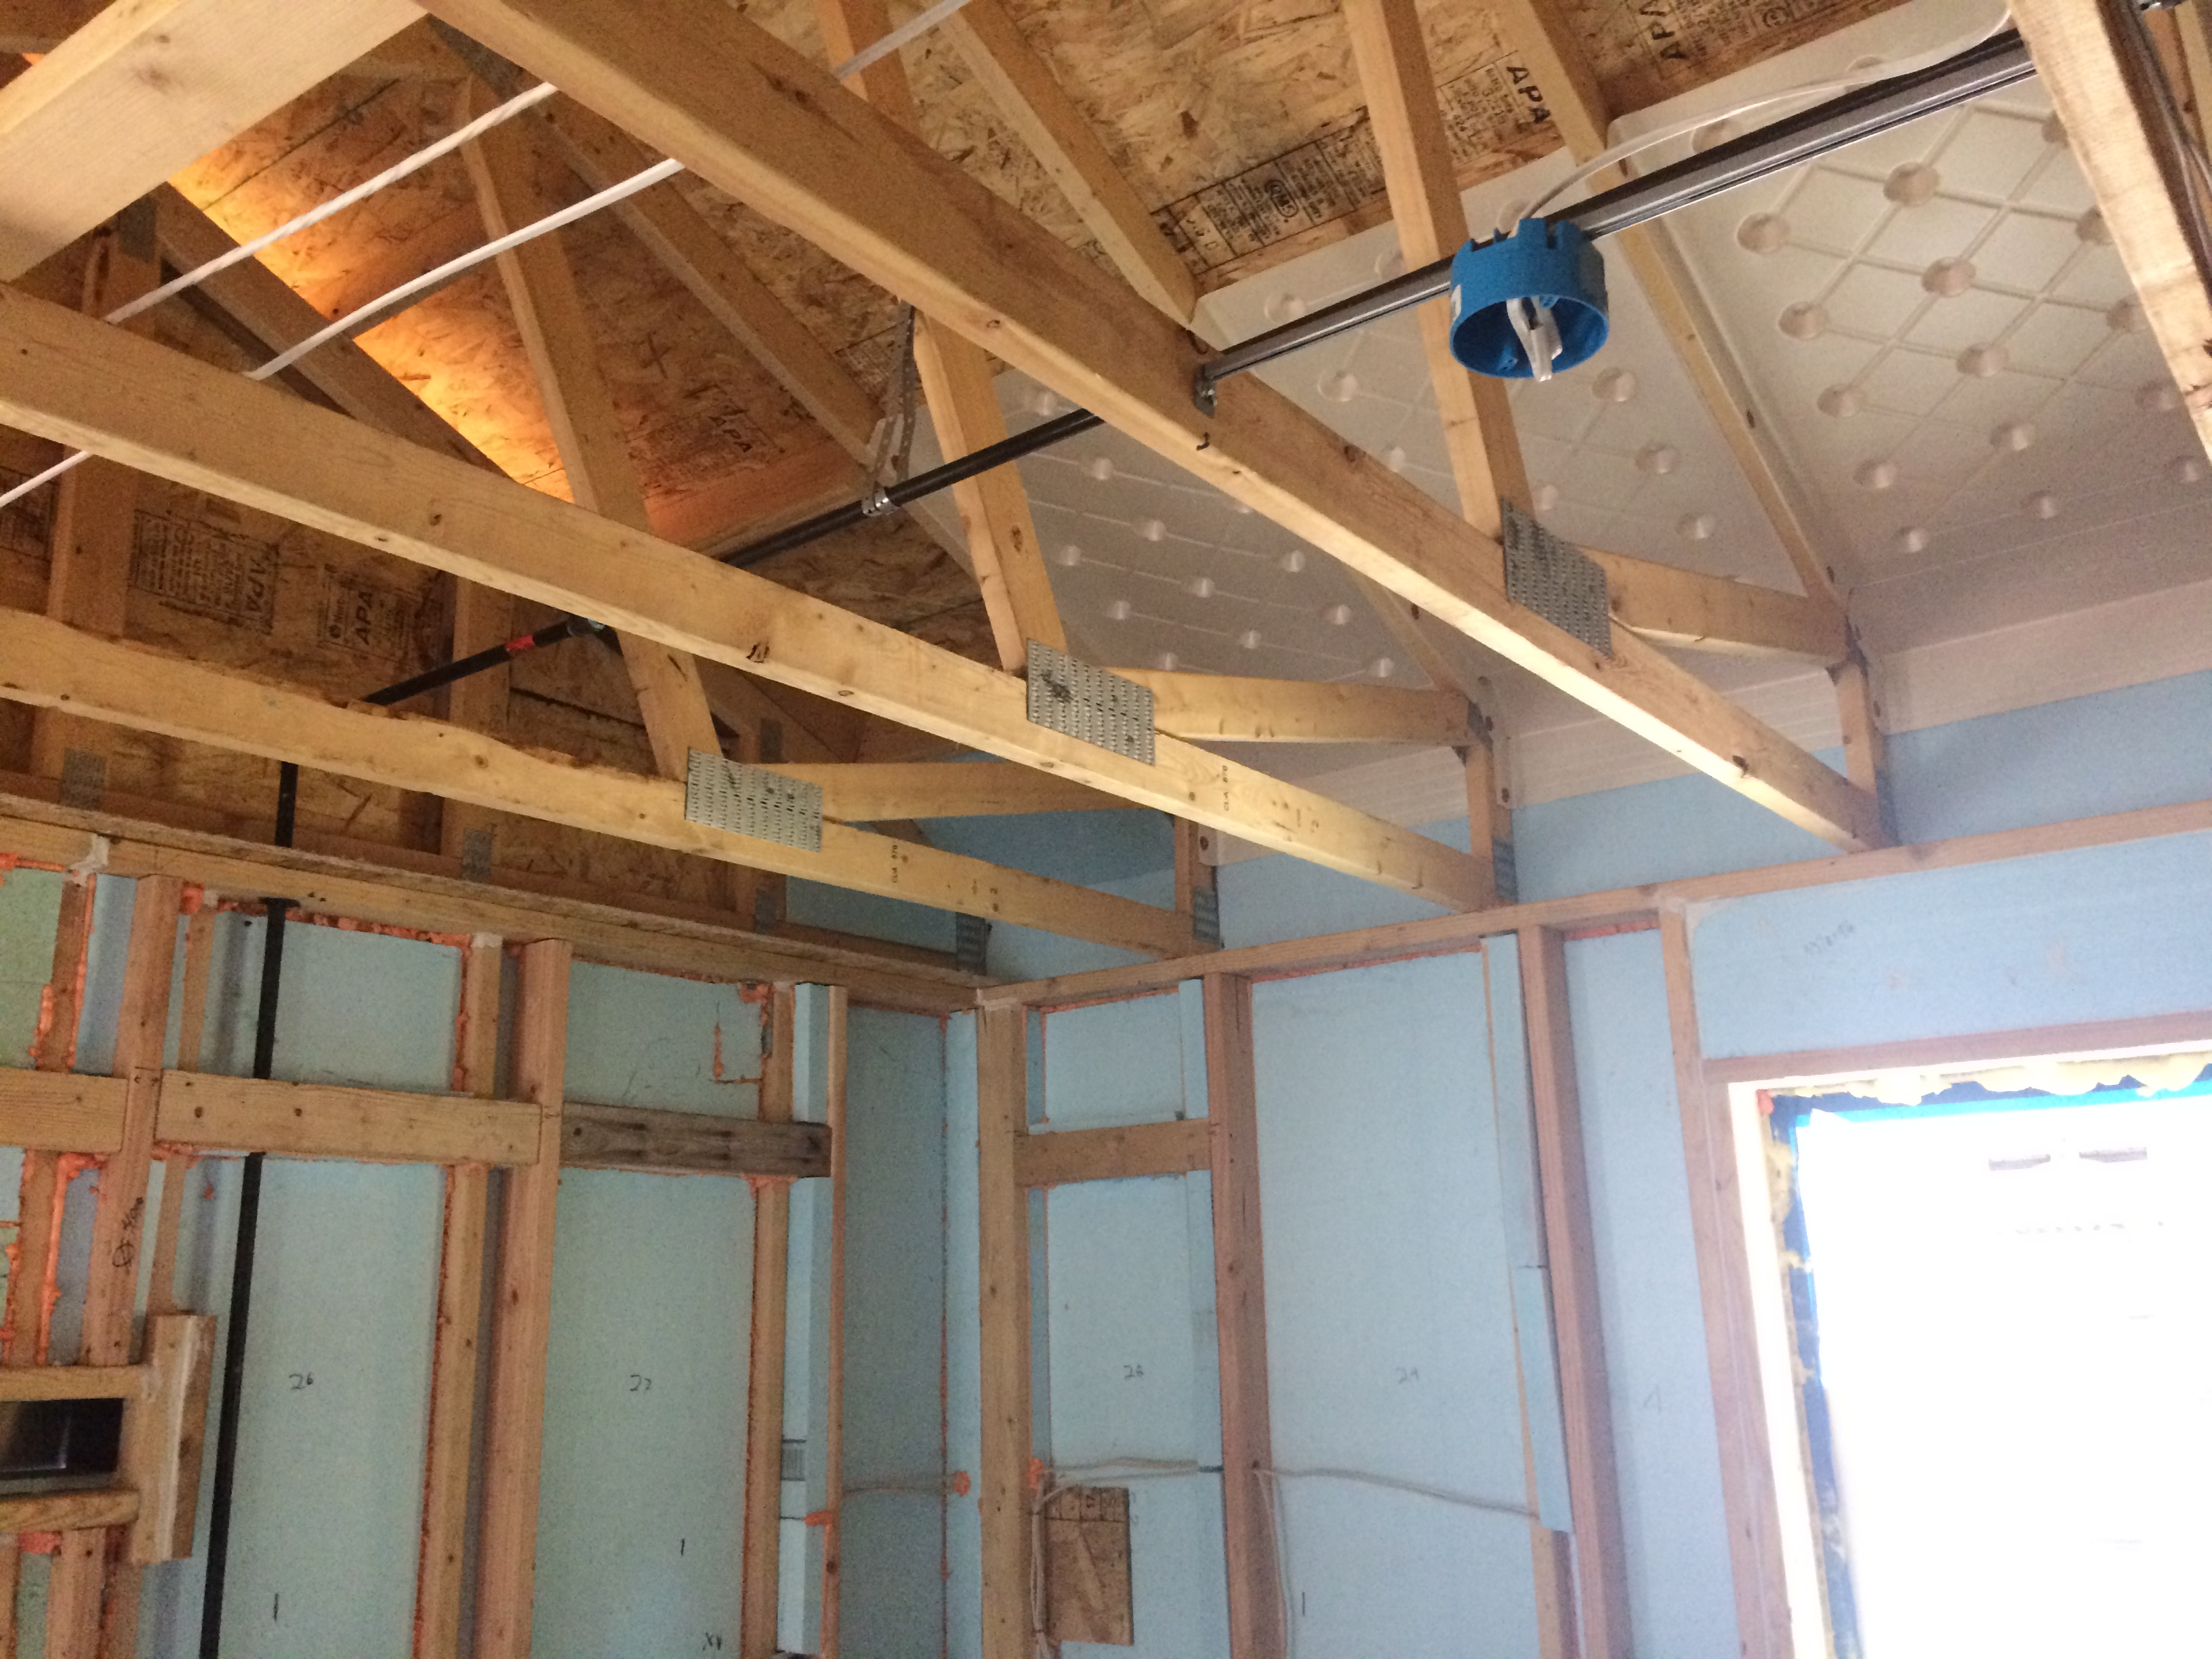
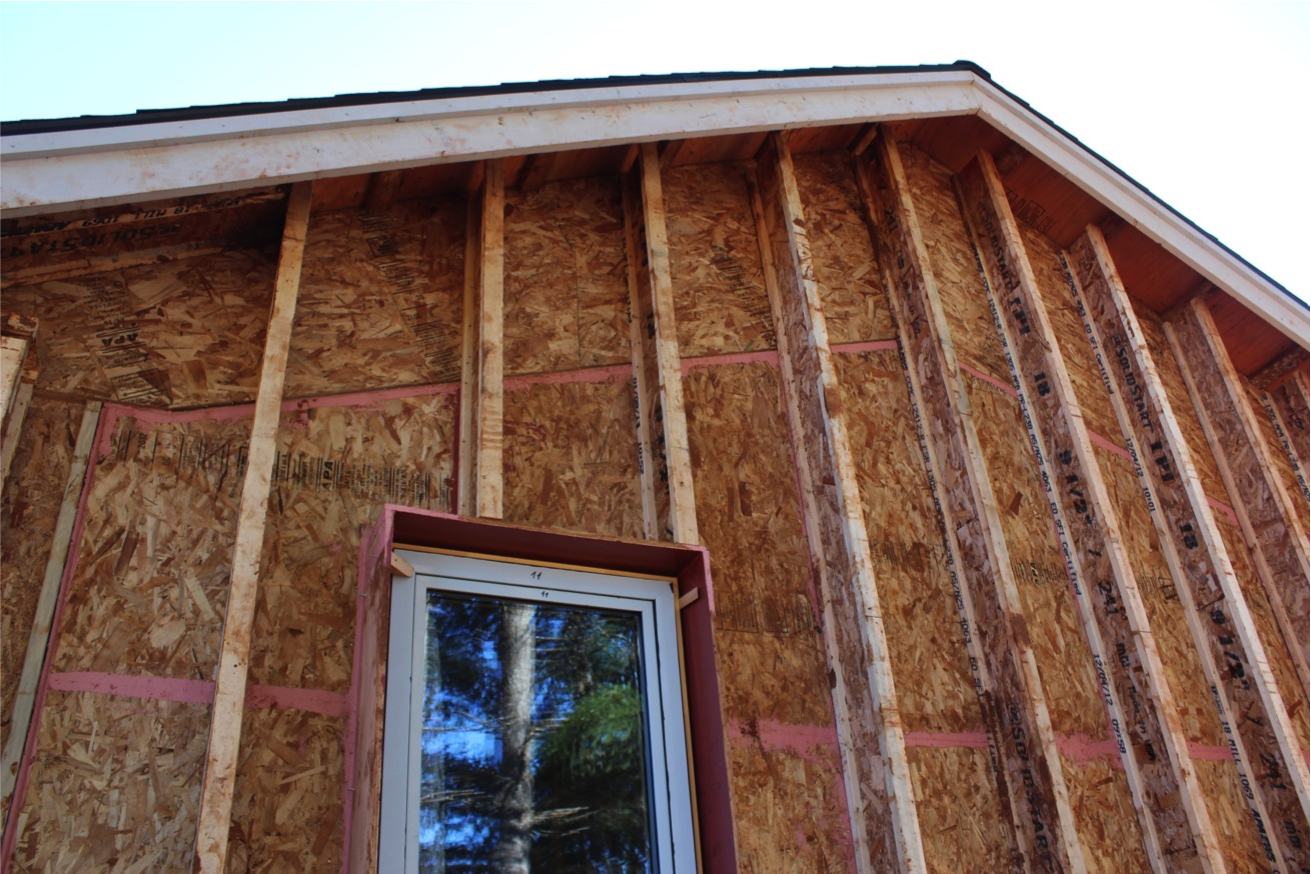
Right - Raised-heel trusses increase the roof height above the eaves allowing more space for insulation above exterior wall top plates; exterior wall sheathing extends up to keep wind from soffit vents from disrupting insulation.
Image
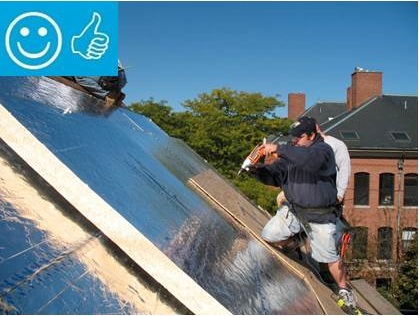
Right - These roof insulation panels are installed in multiple layers with joints offset both vertically and horizontally. The plywood nail base fastened to the roof framing holds the insulation layers together snuggly thus minimizing gaps
Image
Right - This foil-faced polyisocyanurate rigid foam is installed on an existing exterior wall and the seams are taped so the rigid foam can serve as a water control layer
Image
Right – All insulated sheathing boards are installed according to the manufacturer’s recommended fastening schedule and taping specifications
Image
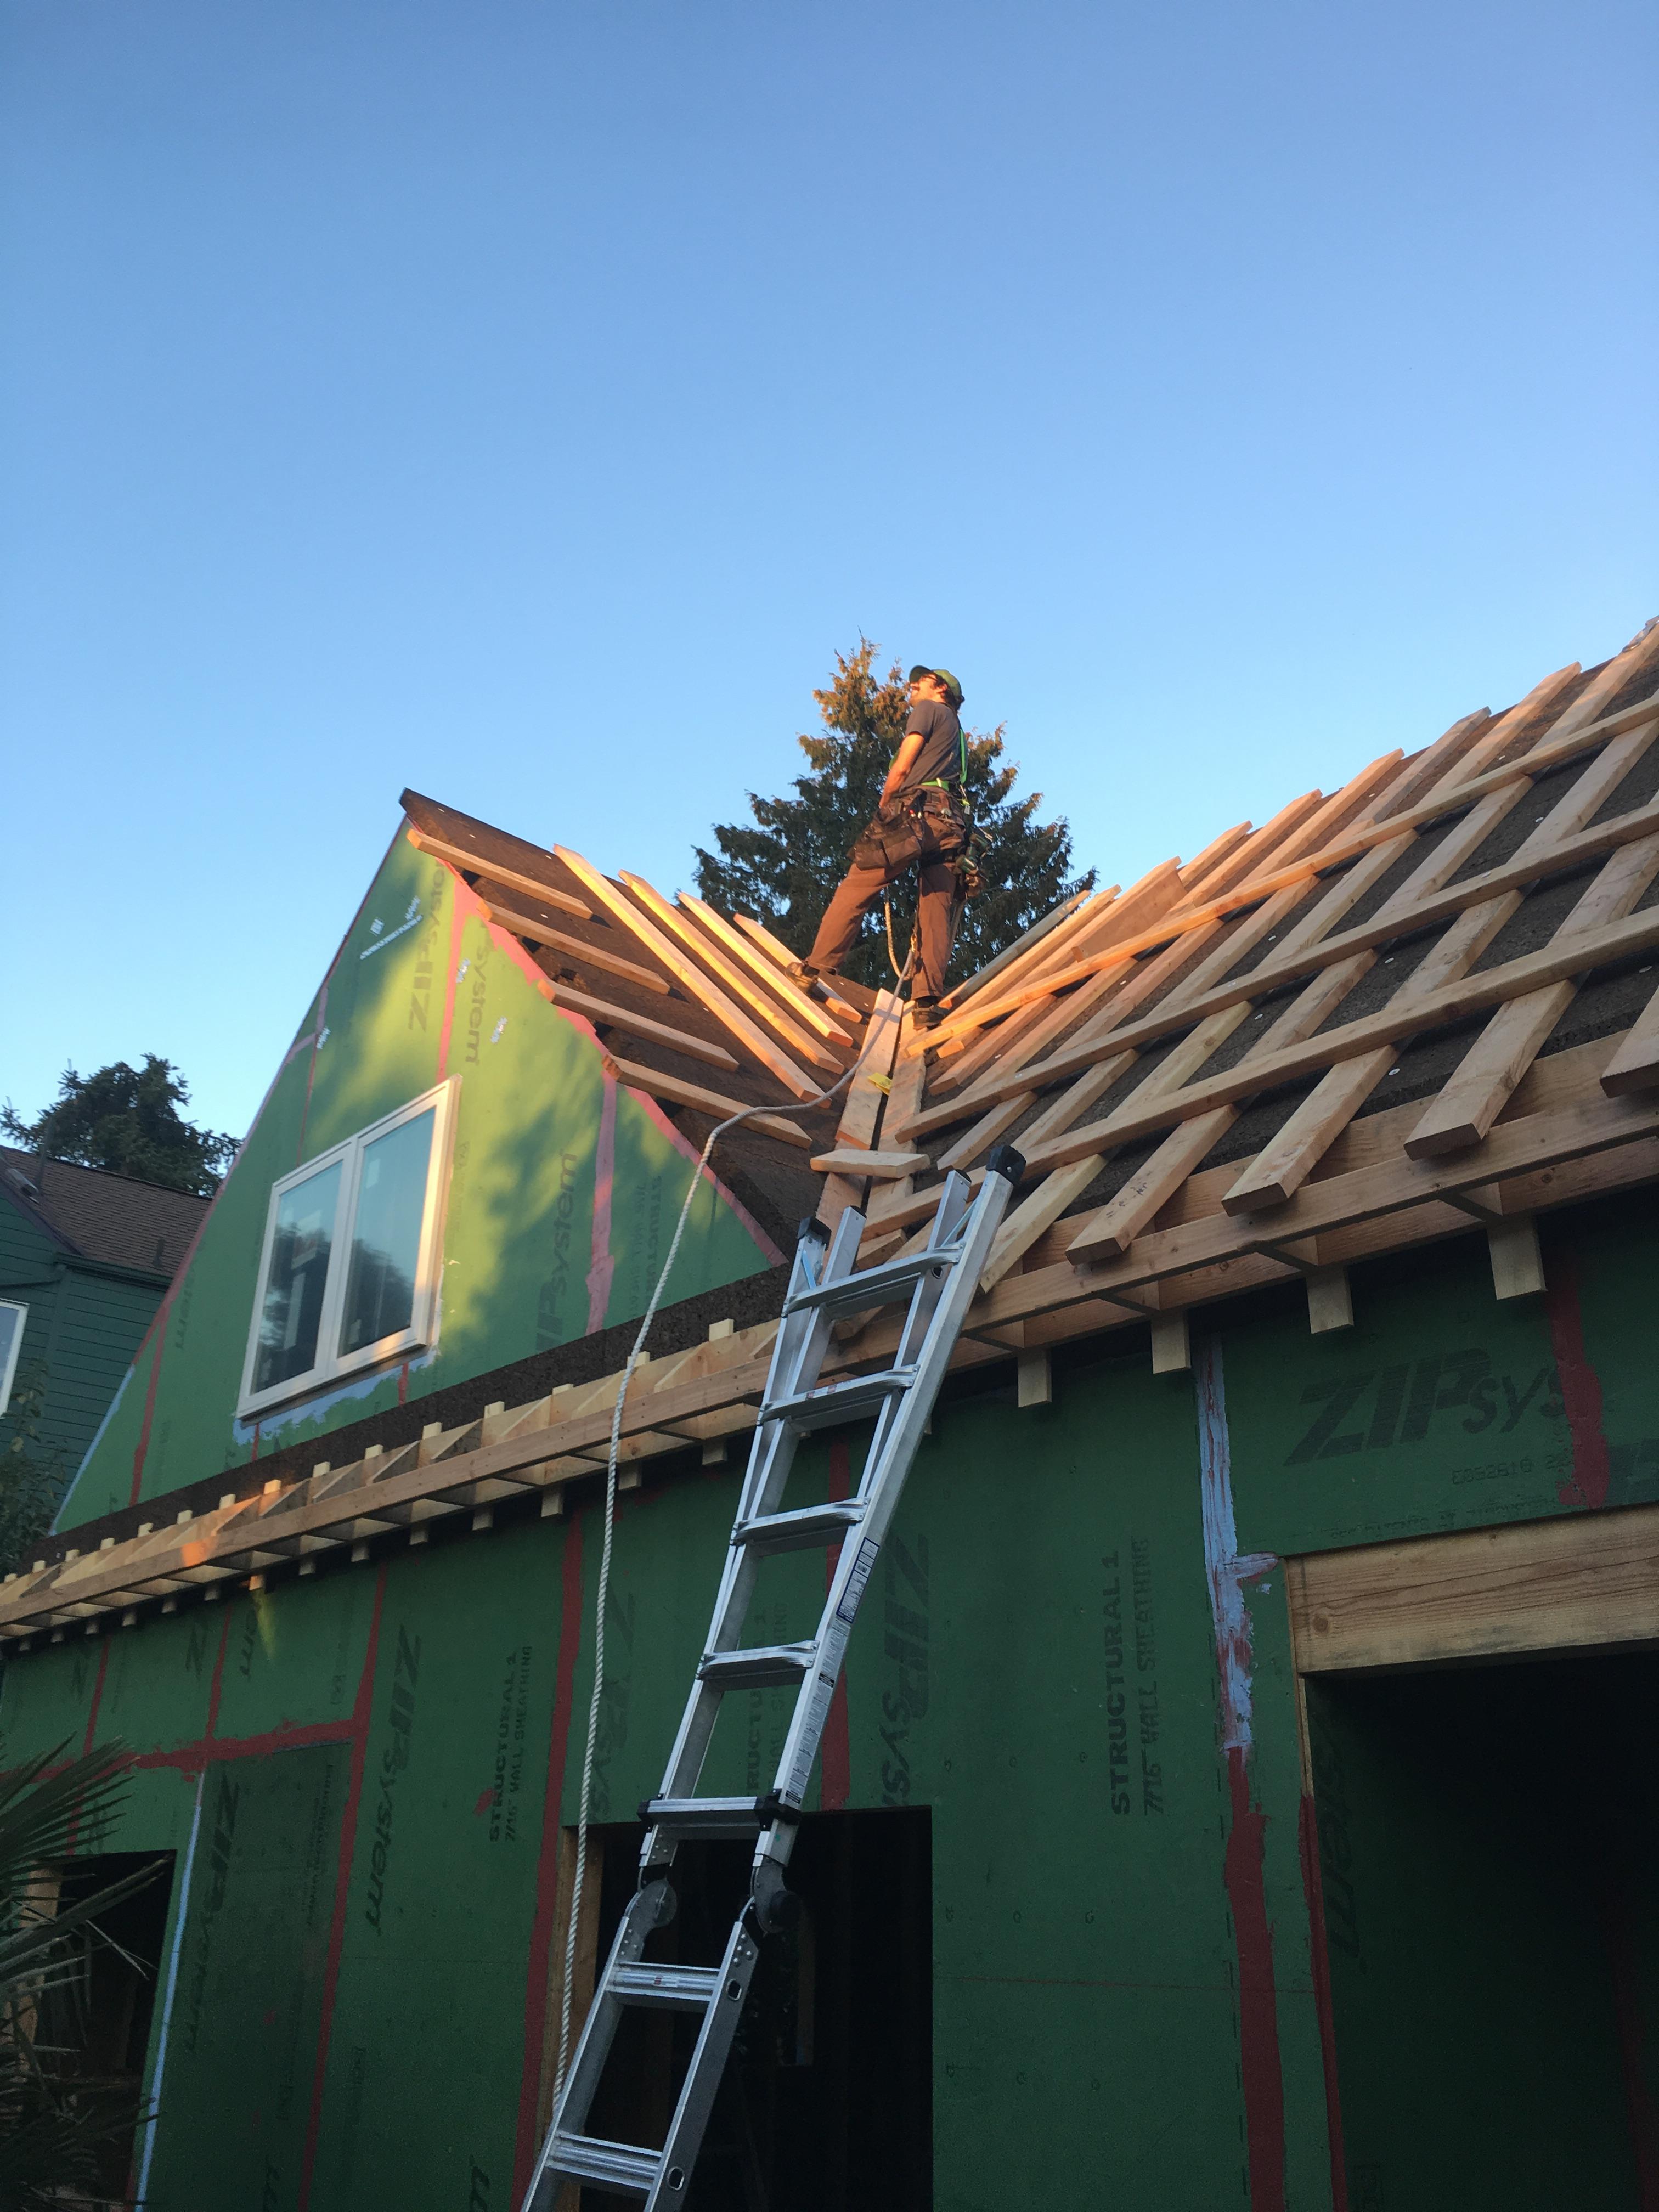
Right – Battens were installed above the cork insulation to provide a ventilating layer between the insulation and the roof sheathing on this “hot roof” design.
Image

Image
Right – Furring strips provide a drainage and ventilation gap between the siding and the cork insulation.
Image
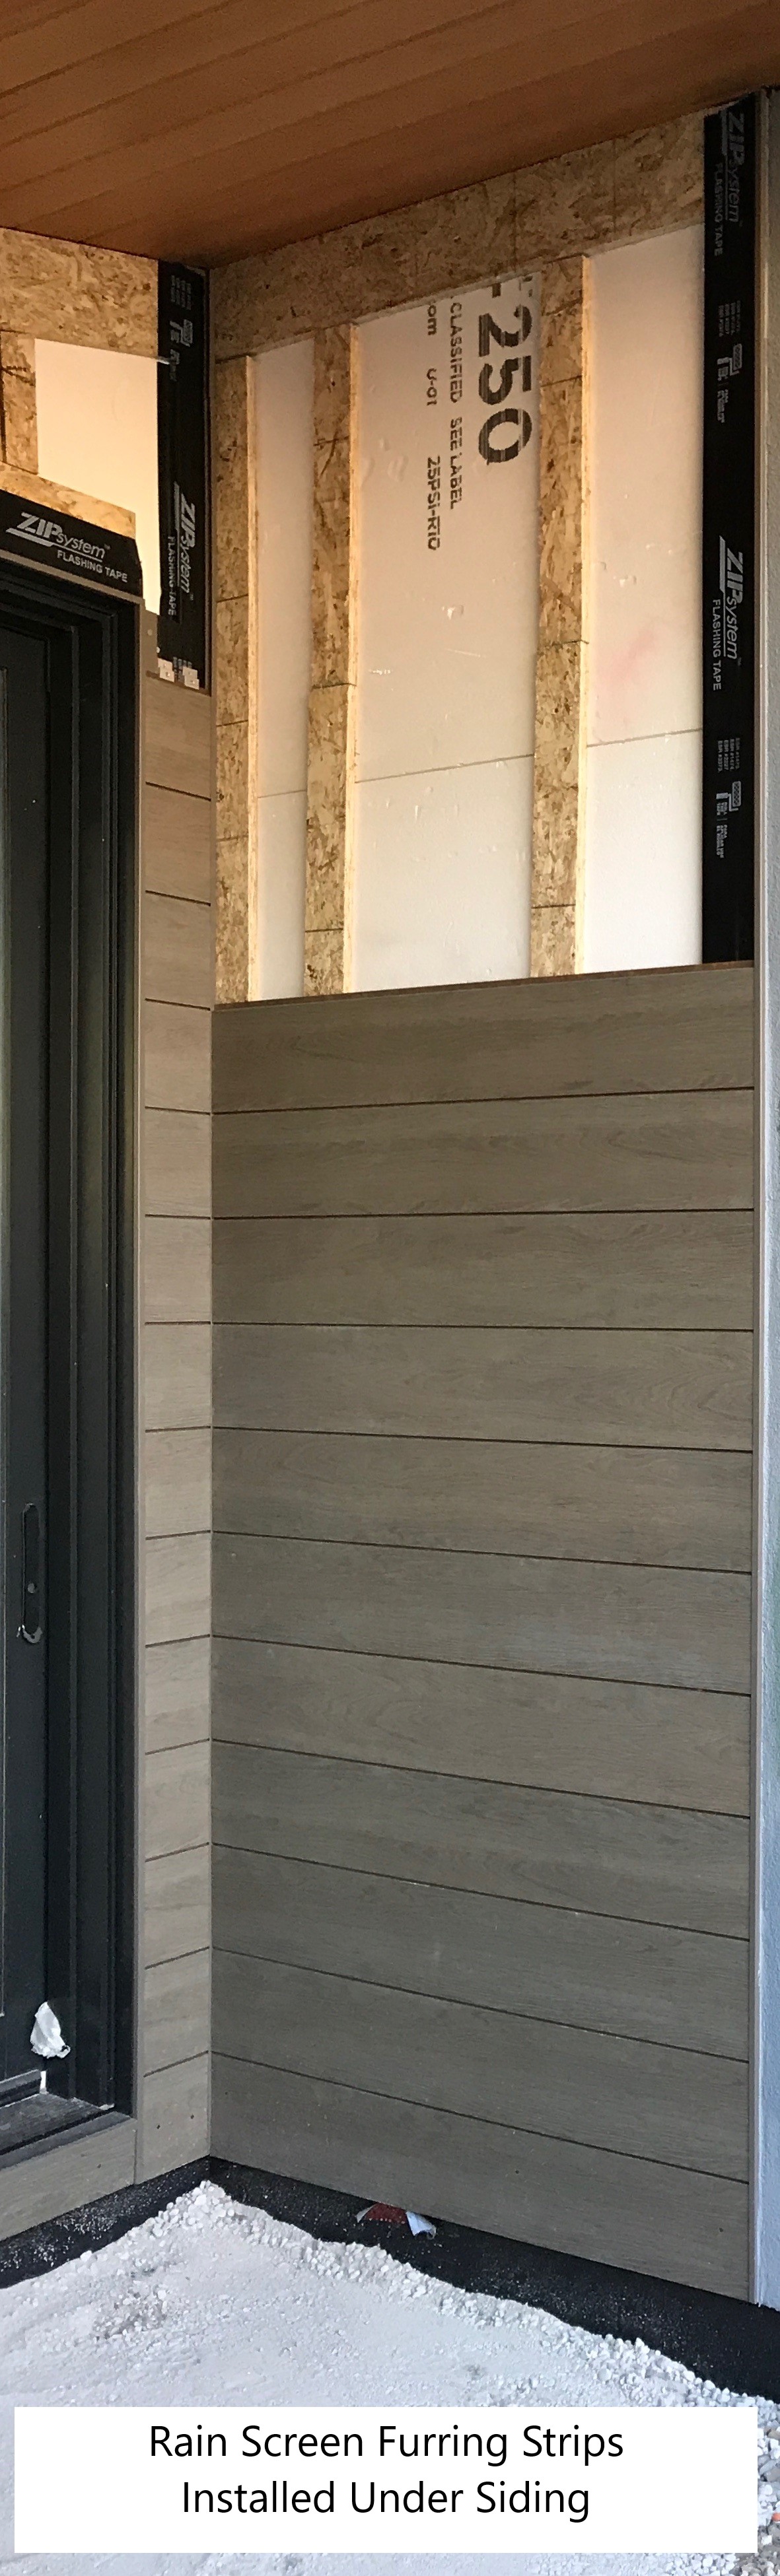
Right – Furring strips were installed to provide a 3/8-inch drainage plane over the rigid foam and under the fiber cement lap siding.
Image
Right – R-23 of blown fiberglass fills the walls and unvented vaulted attic cavities of this marine-climate home while an additional R-20 (4-inches) of graphite-enhanced expanded polystyrene is installed above the roof sheathing.
Image

Image
Right – Ripped OSB provides furring strips for a ventilation gap behind the wood siding.
Image
Right – Structural insulated sheathing can provide racking strength (lateral load resistance), and serve as an air barrier and thermal barrier if installed according to manufacturer’s specifications with taped, sealed seams
Image
Right – This coated OSB sheathing product is available with an integrated insulation layer.
Image
Right – This foil-faced foam sheathing has taped seams and proper flashing details so it can serve as a drainage plane.
Image
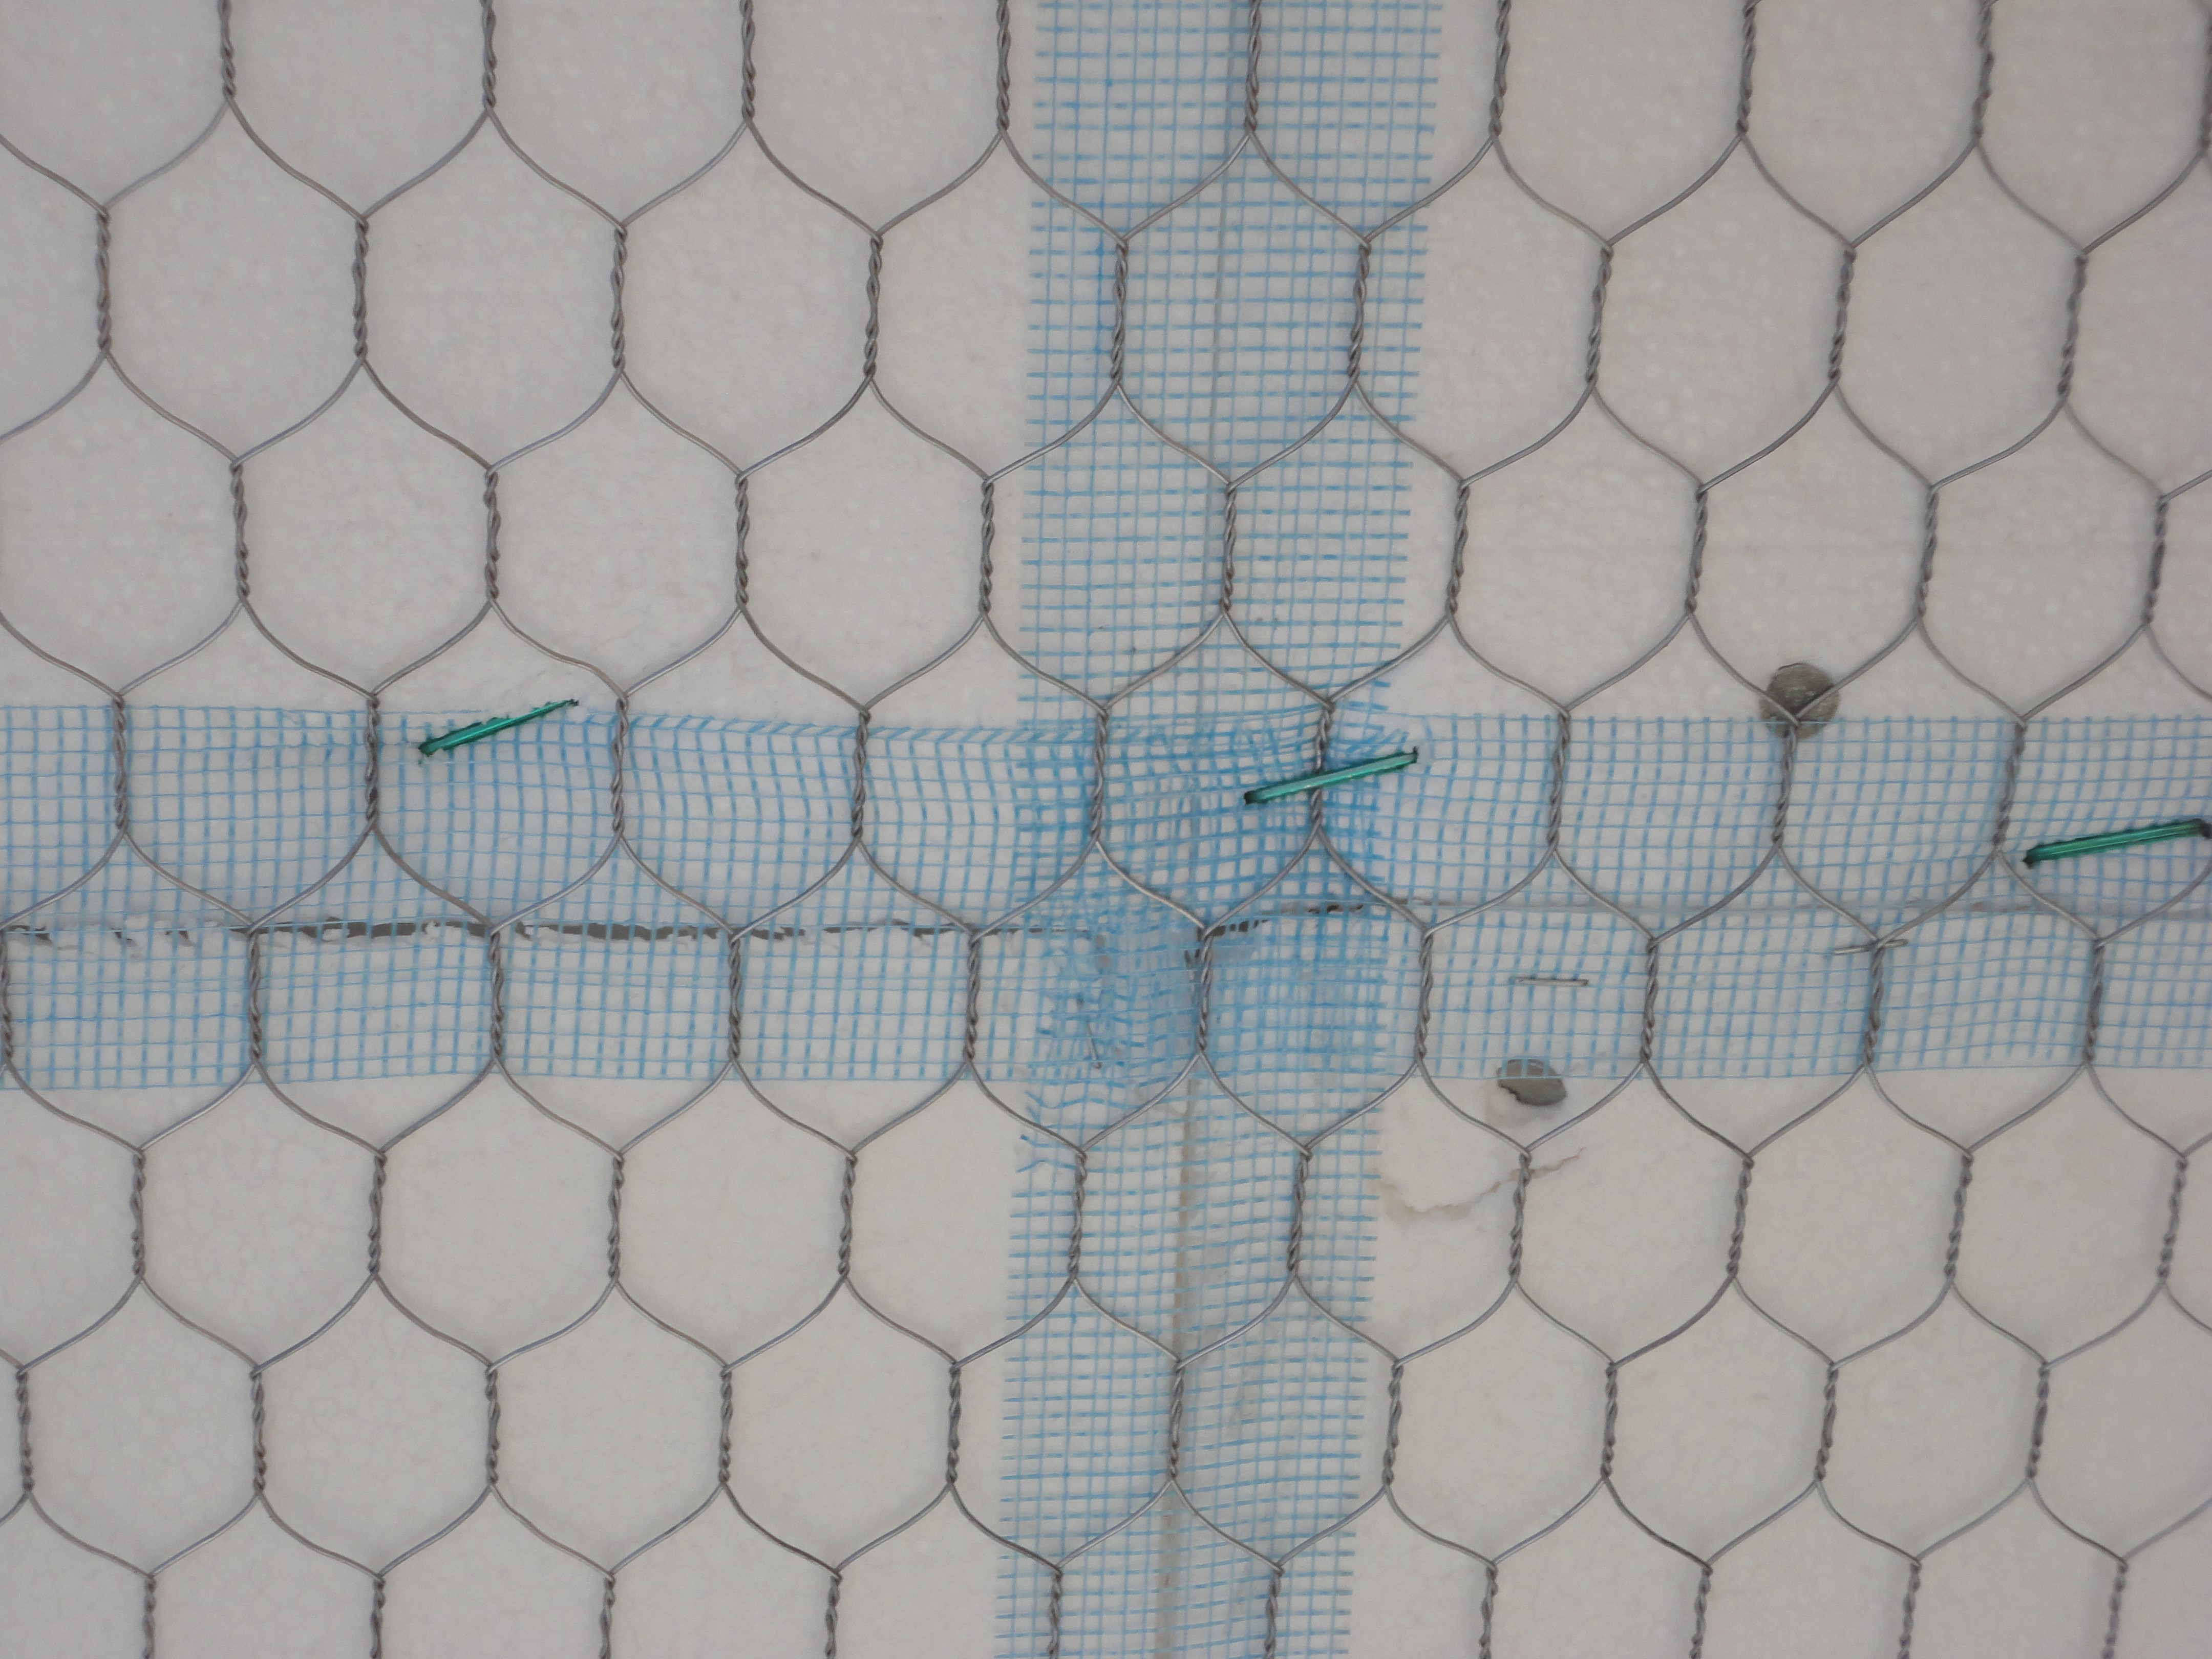
Right: All joints in the rigid foam are taped to keep stucco out of joints for even drying. Mesh tape (shown here) is used with expanded polystyrene (EPS); acrylic sheathing tape or self-adhered membrane is used with XPS
Image

Rigid foam insulated sheathing placed exterior to house wrap, interior to house wrap, or take the place of the house wrap
Image
Rigid foam serves as the sheathing on these 2x6 24-inch on center walls; plywood is used only at the corners for wind bracing.
Image
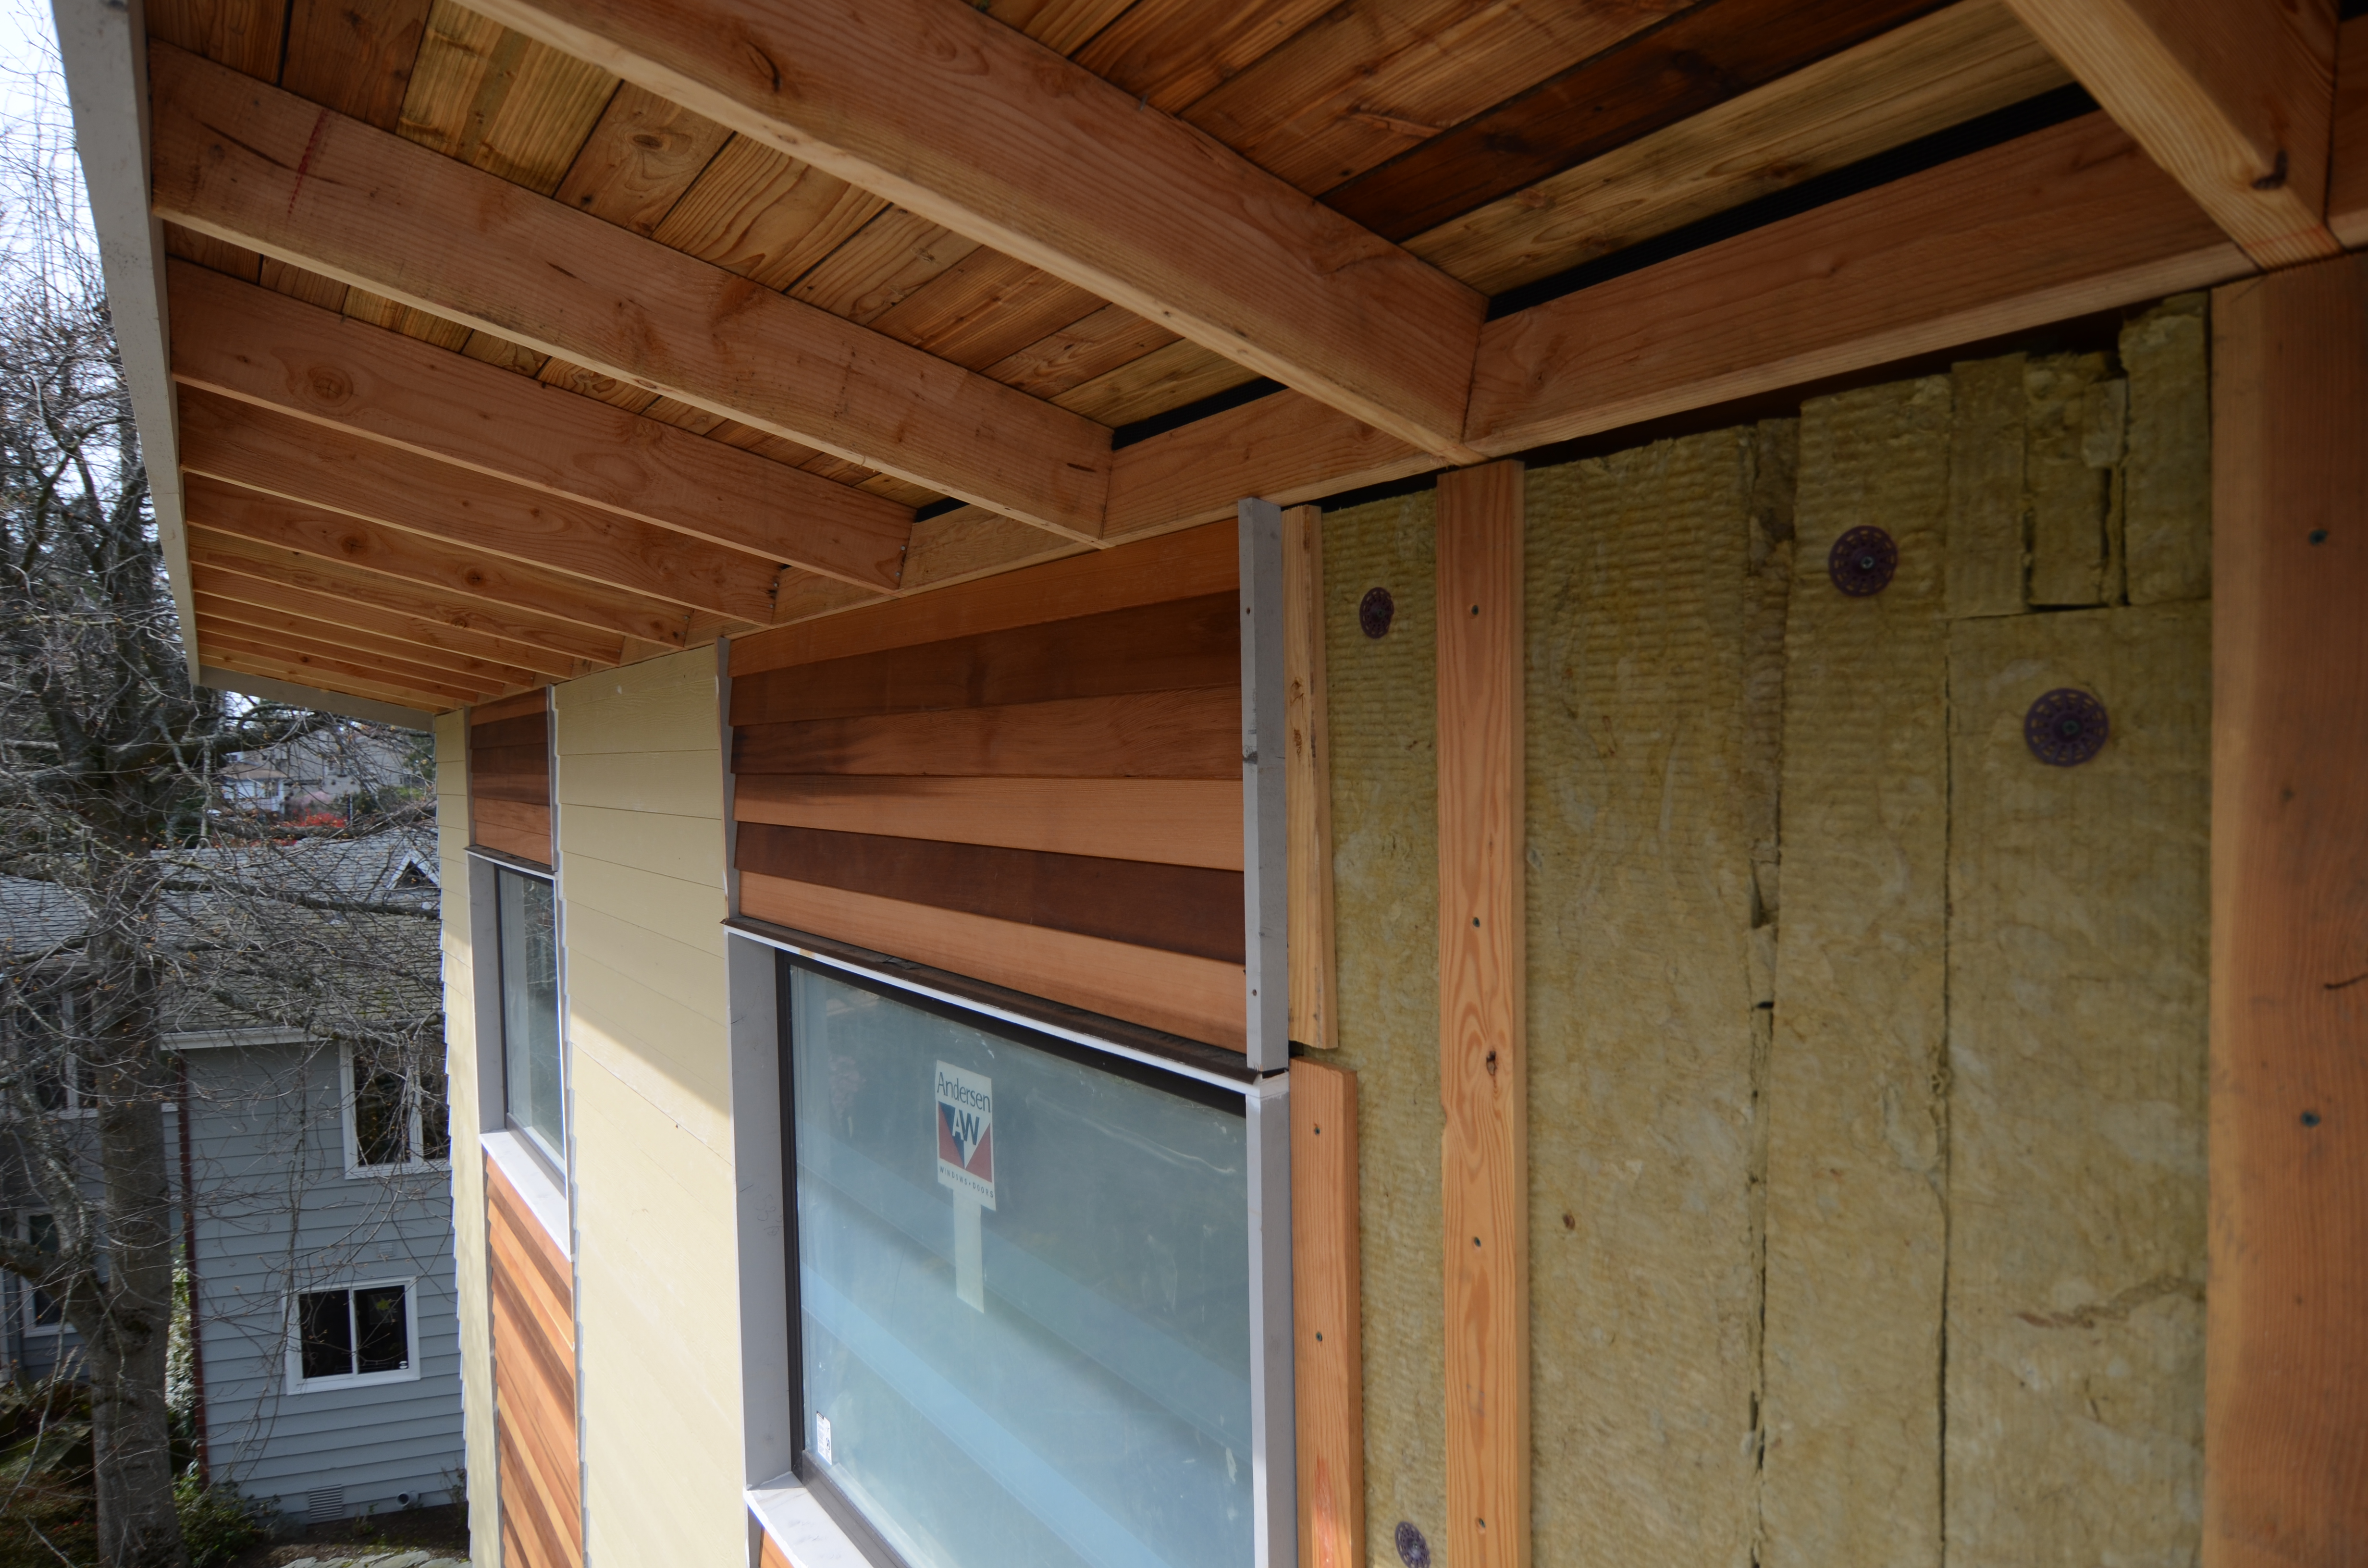
Rigid mineral wool insulation is covered with ¼-inch wood battens which provides a air and drainage gap under the cedar and fiber cement siding.
Image

Sloped roof with cavity spray foam insulation sprayed on underside of roof deck and covered with sprayed-on thermal or ignition barrier coating.
Image
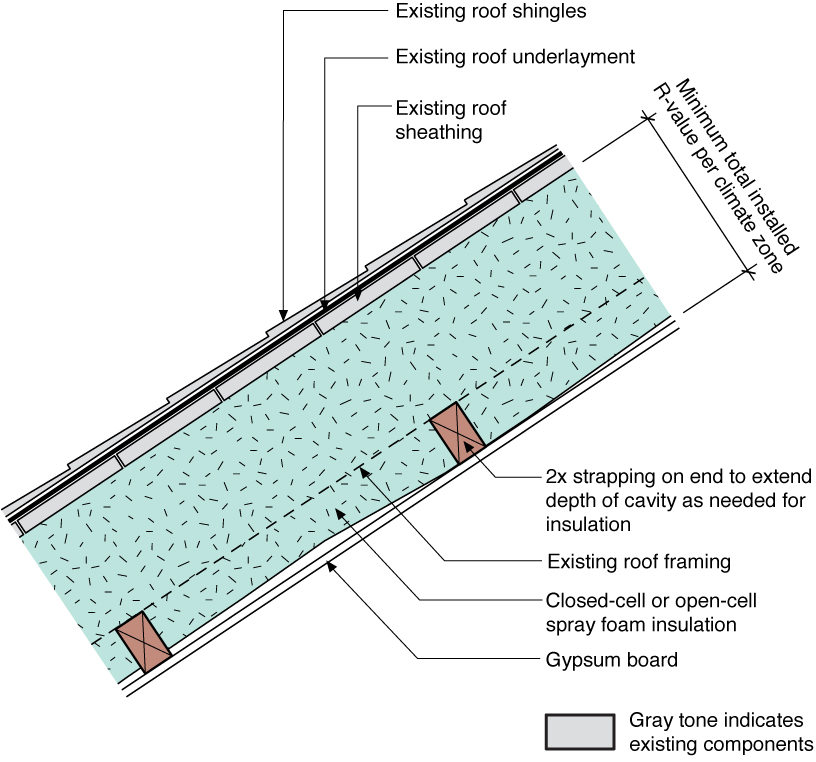
Sloped roof with cavity spray foam insulation, strapping, and gypsum board thermal barrier
Image
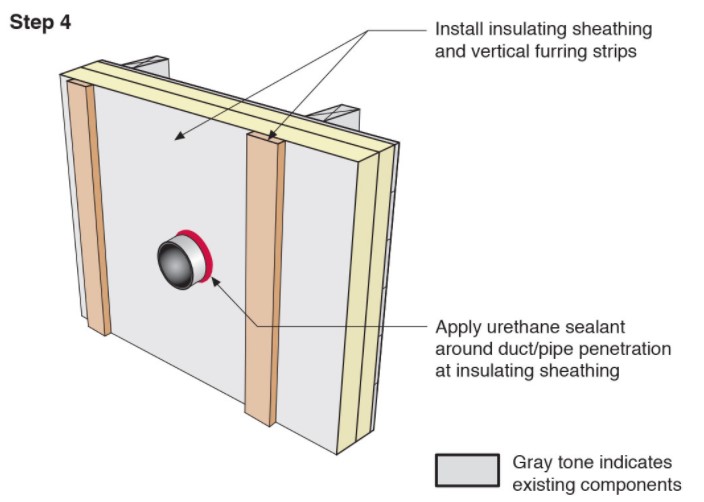
Step 4. Install insulating sheathing and vertical furring strips on the retrofitted exterior wall; seal around pipe or duct with urethane sealant.
Image
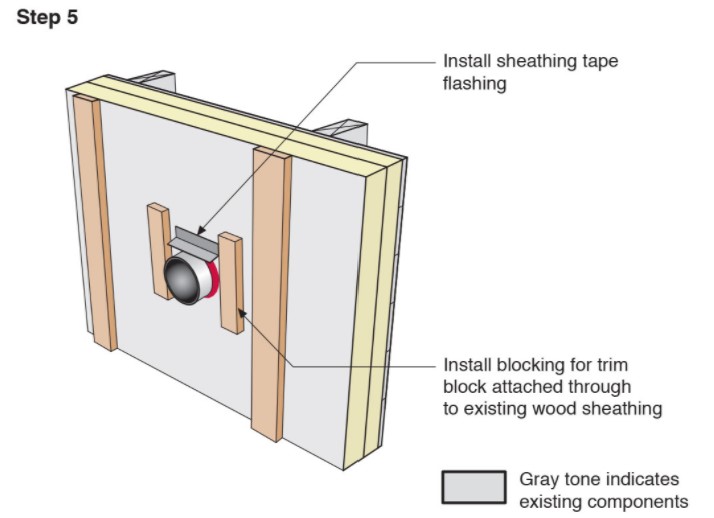
Step 5. Install sheathing tape flashing over the duct or pipe and wood blocking on either side for later attachment of trim.
Image
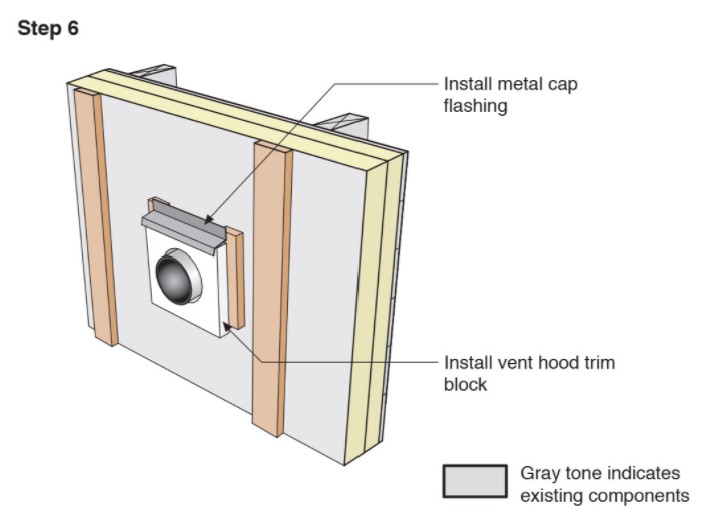
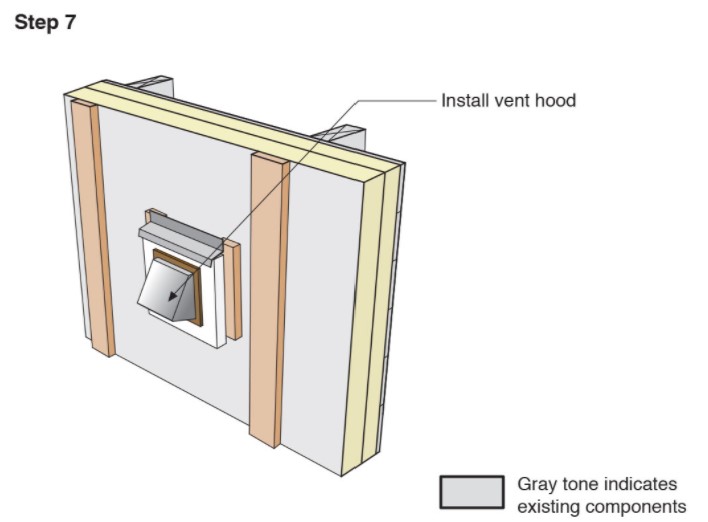
Step 6. Install vent hood trim block, metal cap flashing; seal top edge of flashing with sheathing tape.
Image
Image
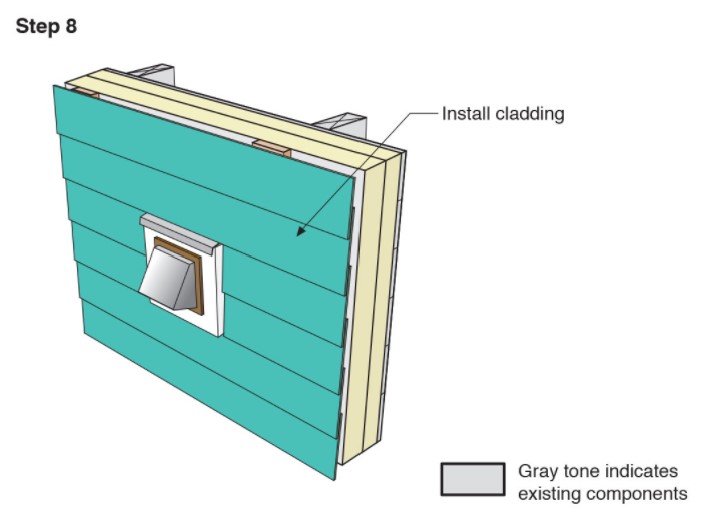
Step 8. Attach the new cladding to the furring strips over the rigid foam for the exterior wall retrofit.
Image
Stucco is installed over rigid insulation, which is installed over a drainage plane consisting of a drainage gap and building wrap layer over the sheathing
Image
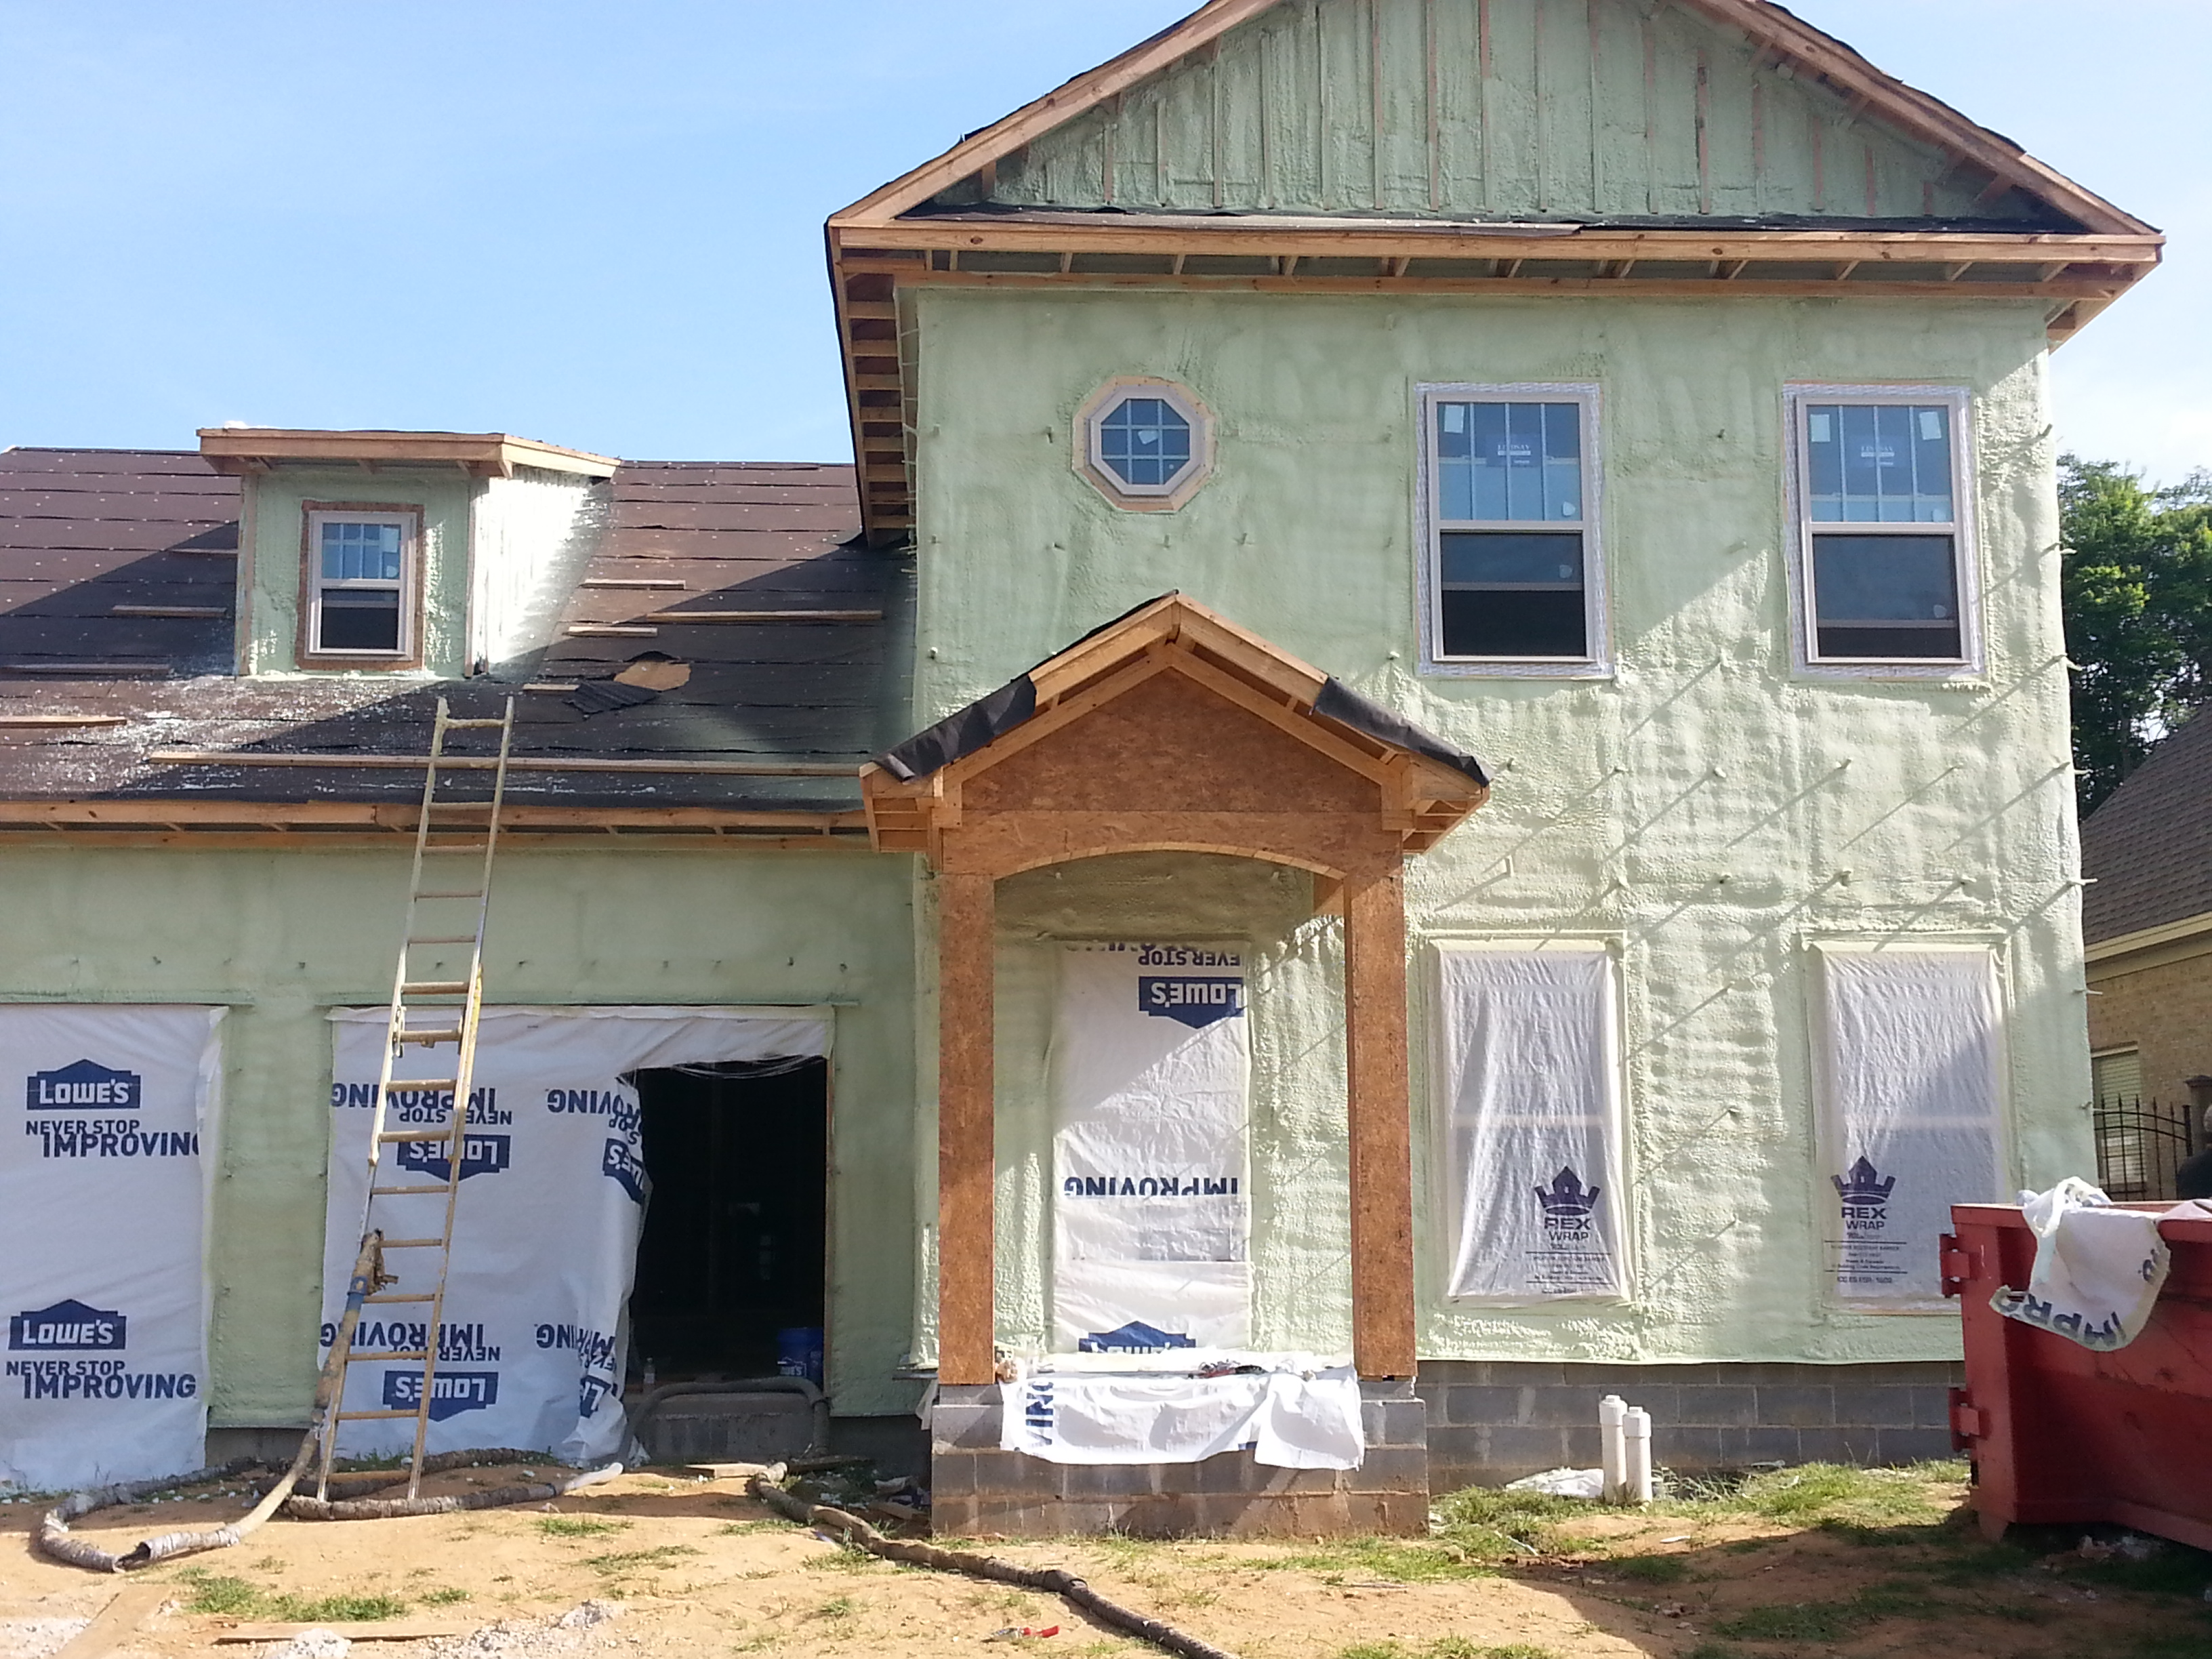
The builder installed 1.5 inches of soy-based spray foam on the outside of the walls over the OSB sheathing, then kept a ¾ inch gap between the foam and the brick veneer siding to allow moisture vapor from the bricks to dissipate.
Image
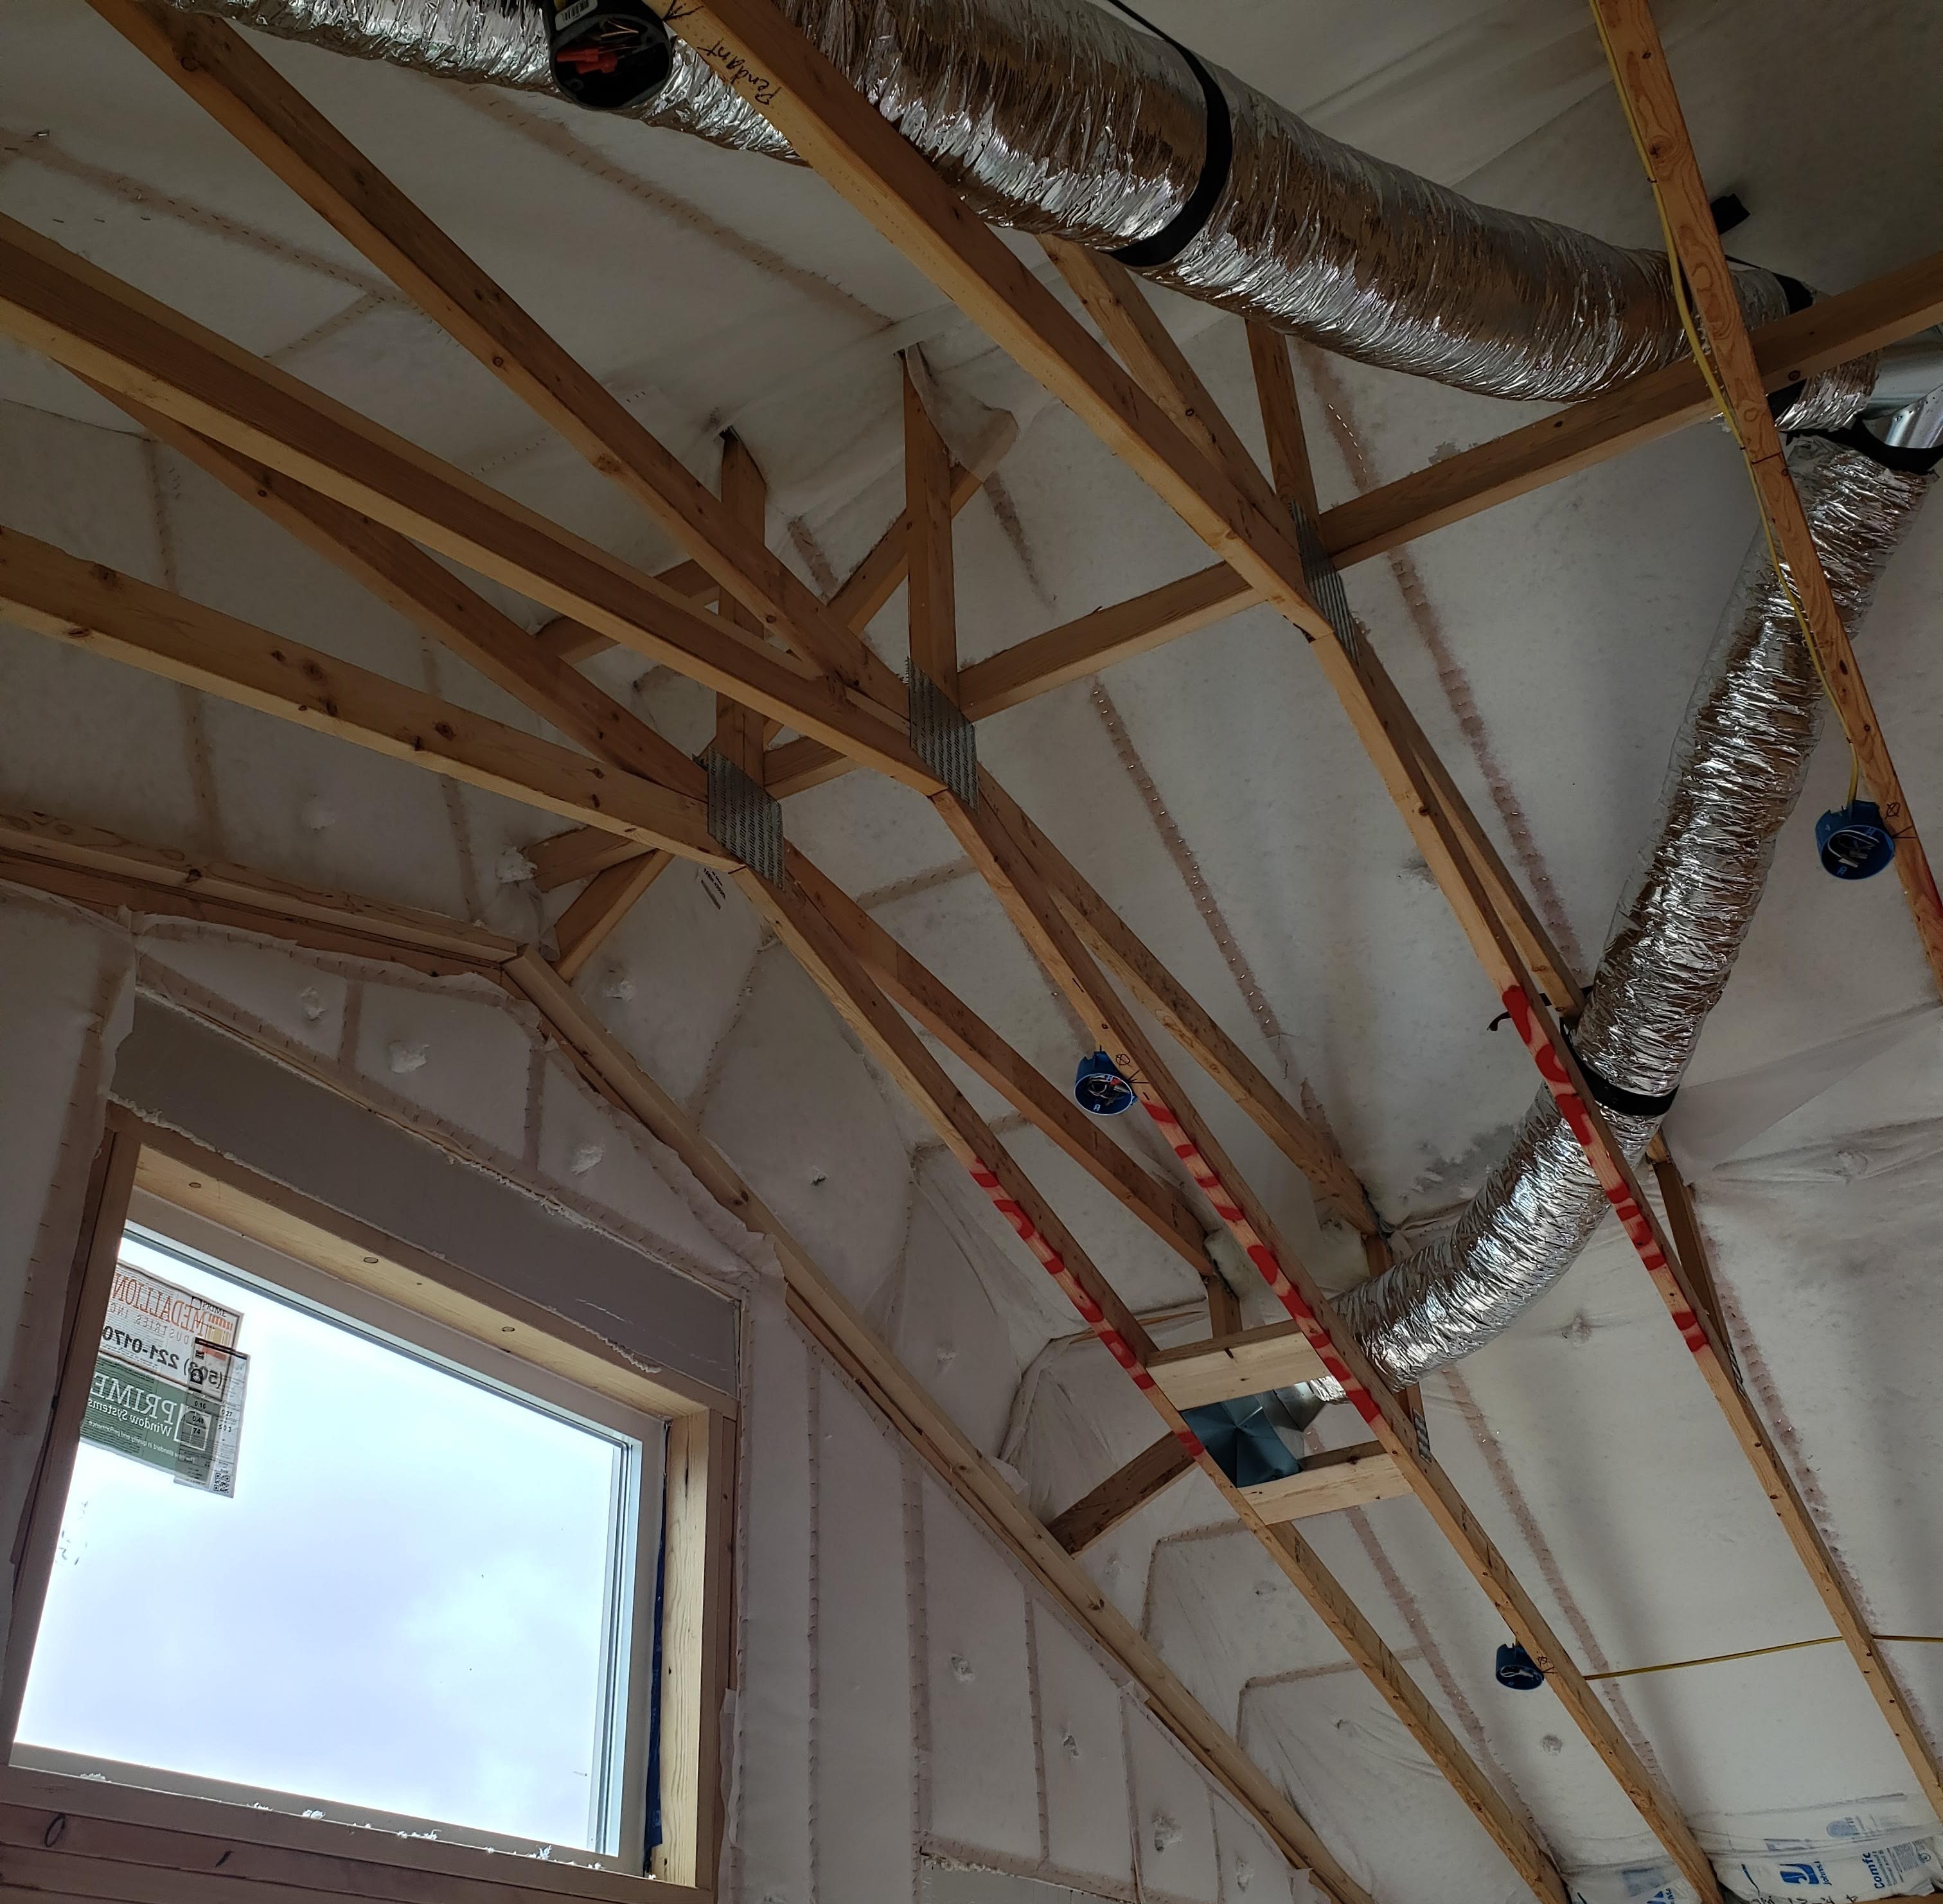
The existing 2x8 roof rafters were topped with OSB; two layers of 2-inch rigid foam; plywood; ice and water shield at rakes, eaves, and valleys; underlayment; and fiberglass shingles, plus 6 inches of open-cell foam under the decking.
Image
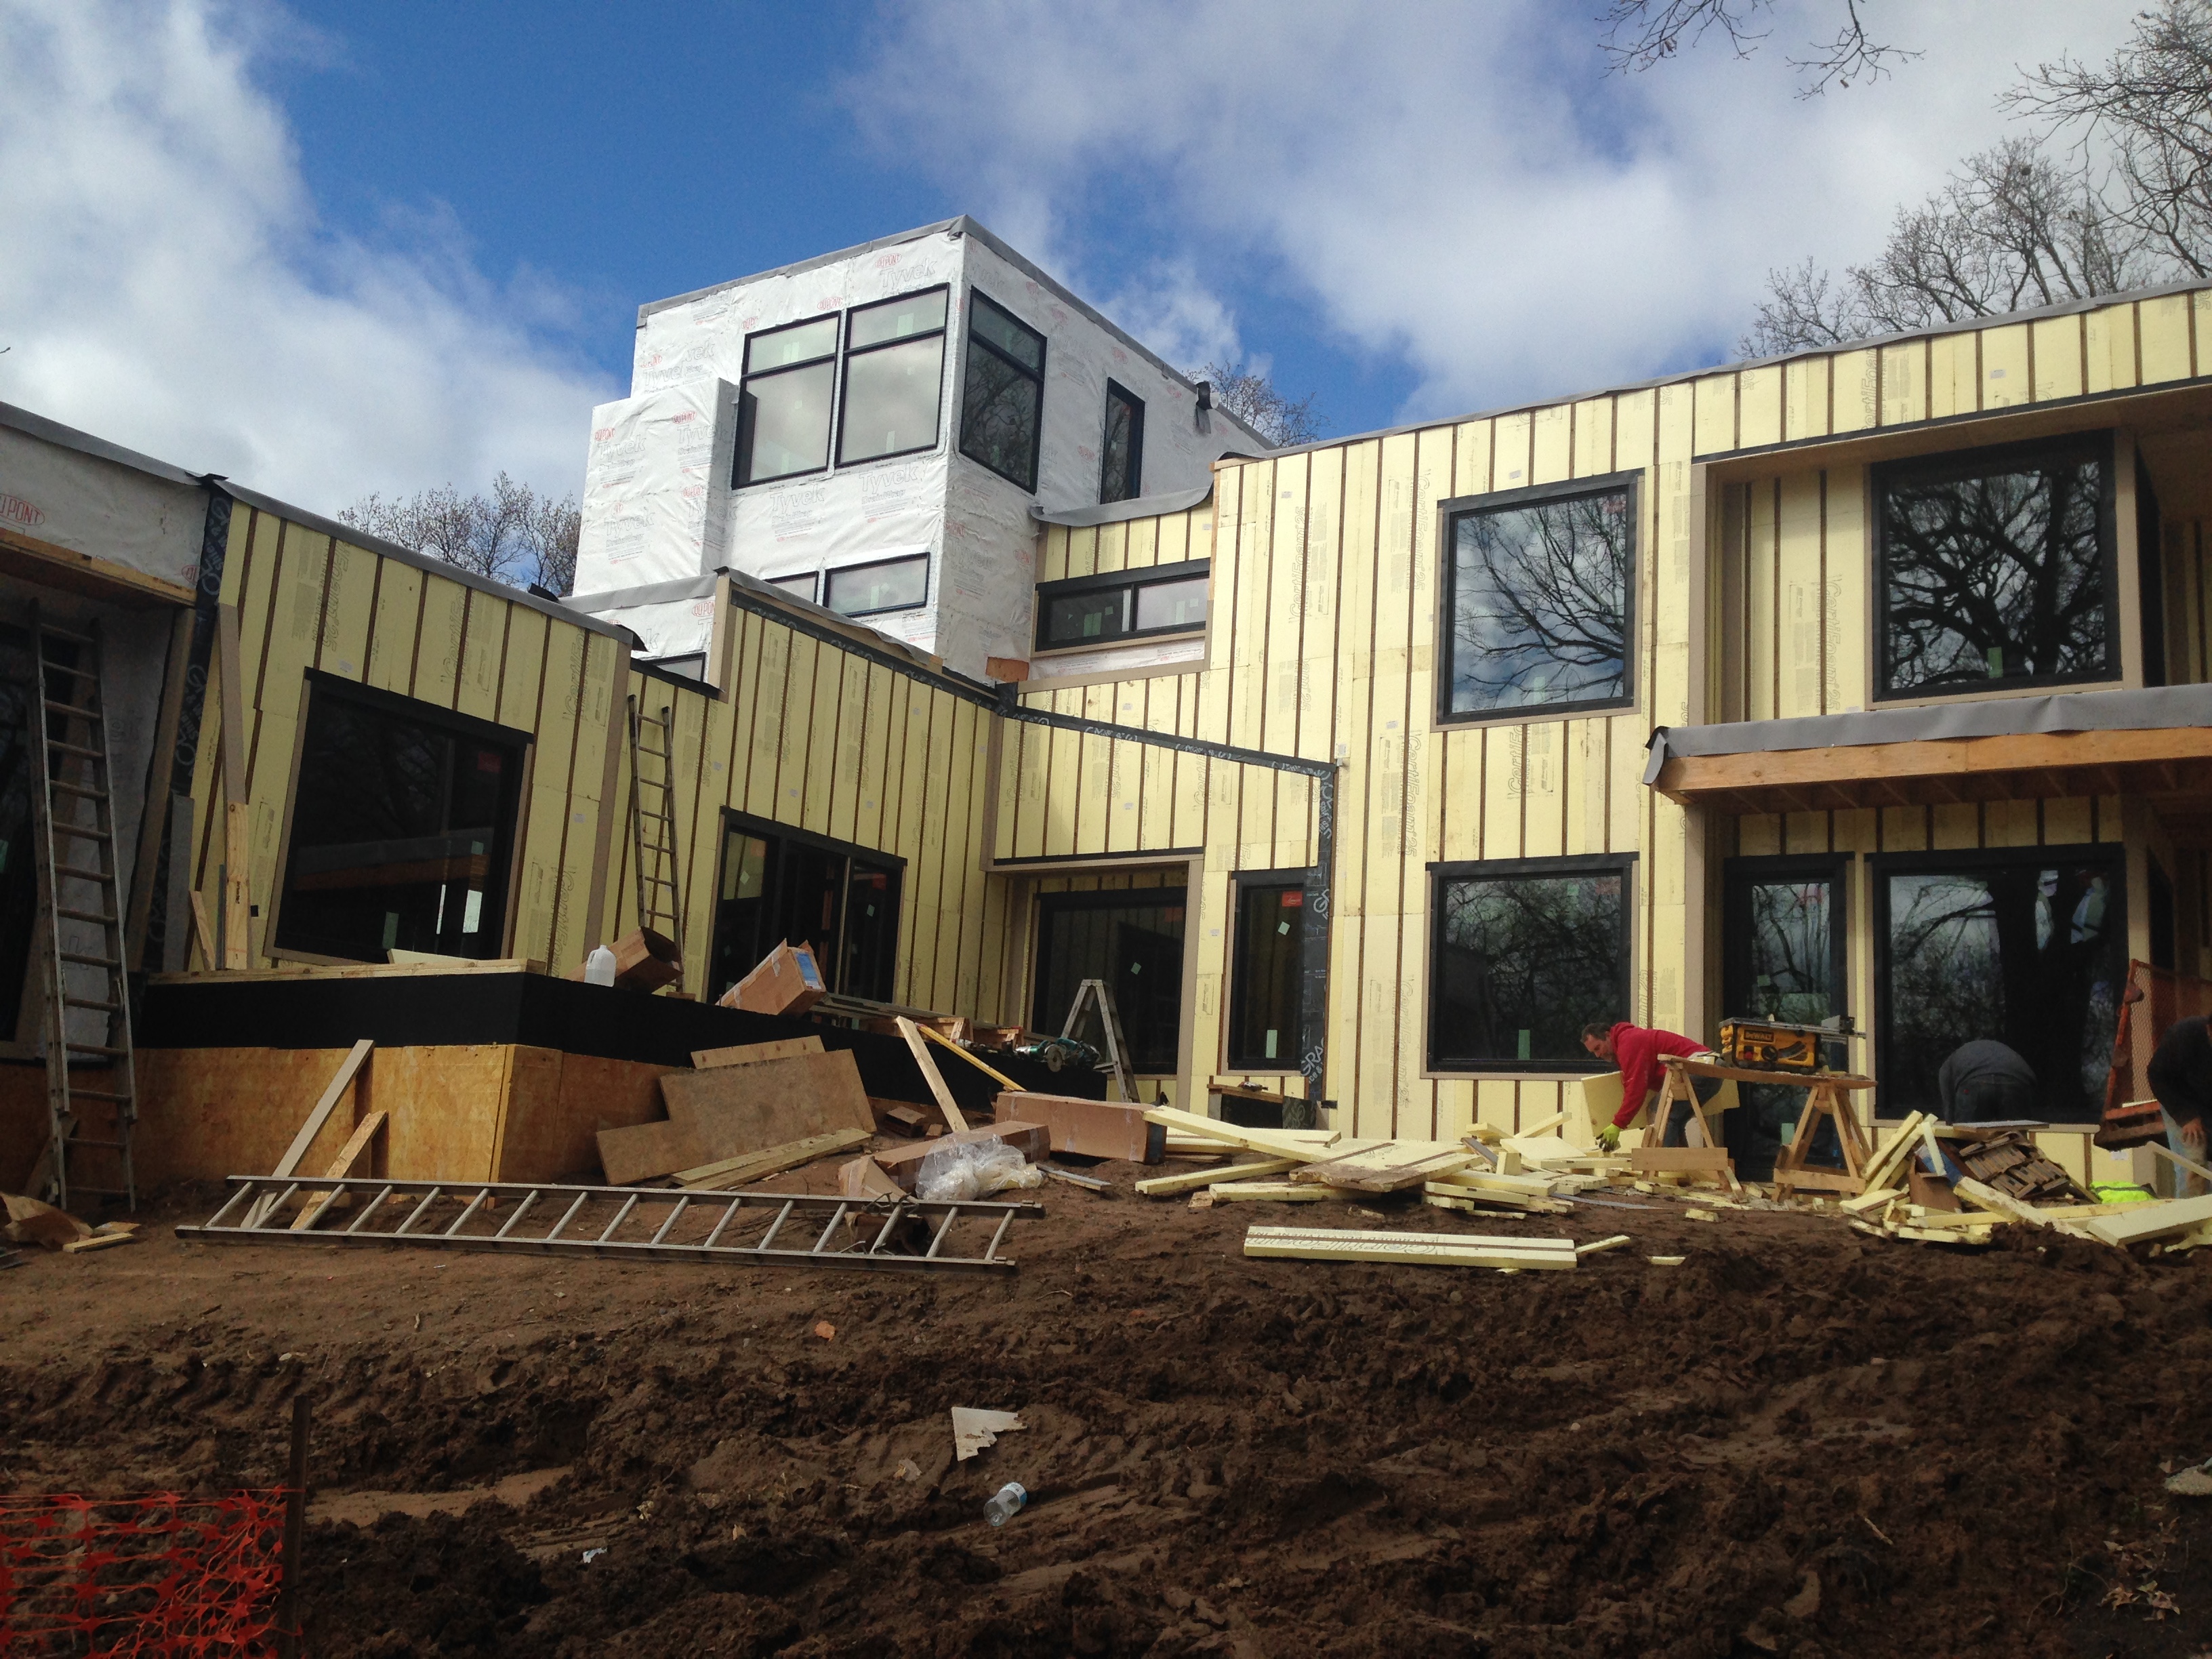
The exterior of the home is wrapped in a continuous layer of rigid foam with all seams taped to provide a thermal, air, and moisture barrier and serve as a drainage plane, eliminating the need for house wrap.
Image
The exterior walls of this home consist of two wall cavities: a 2x6 wall with plywood sheathing plus 8-inch I-joists sheathed with engineered wood; both cavities are dense-packed with cellulose for R-60 total.
Image
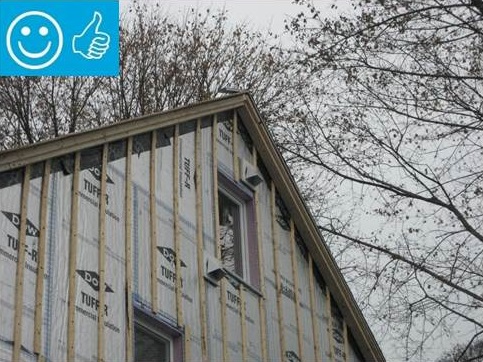
The home is sheathed with rigid foam insulation and all seams and holes are taped to provide a continuous air barrier.