Showing results 1 - 50 of 79
Image
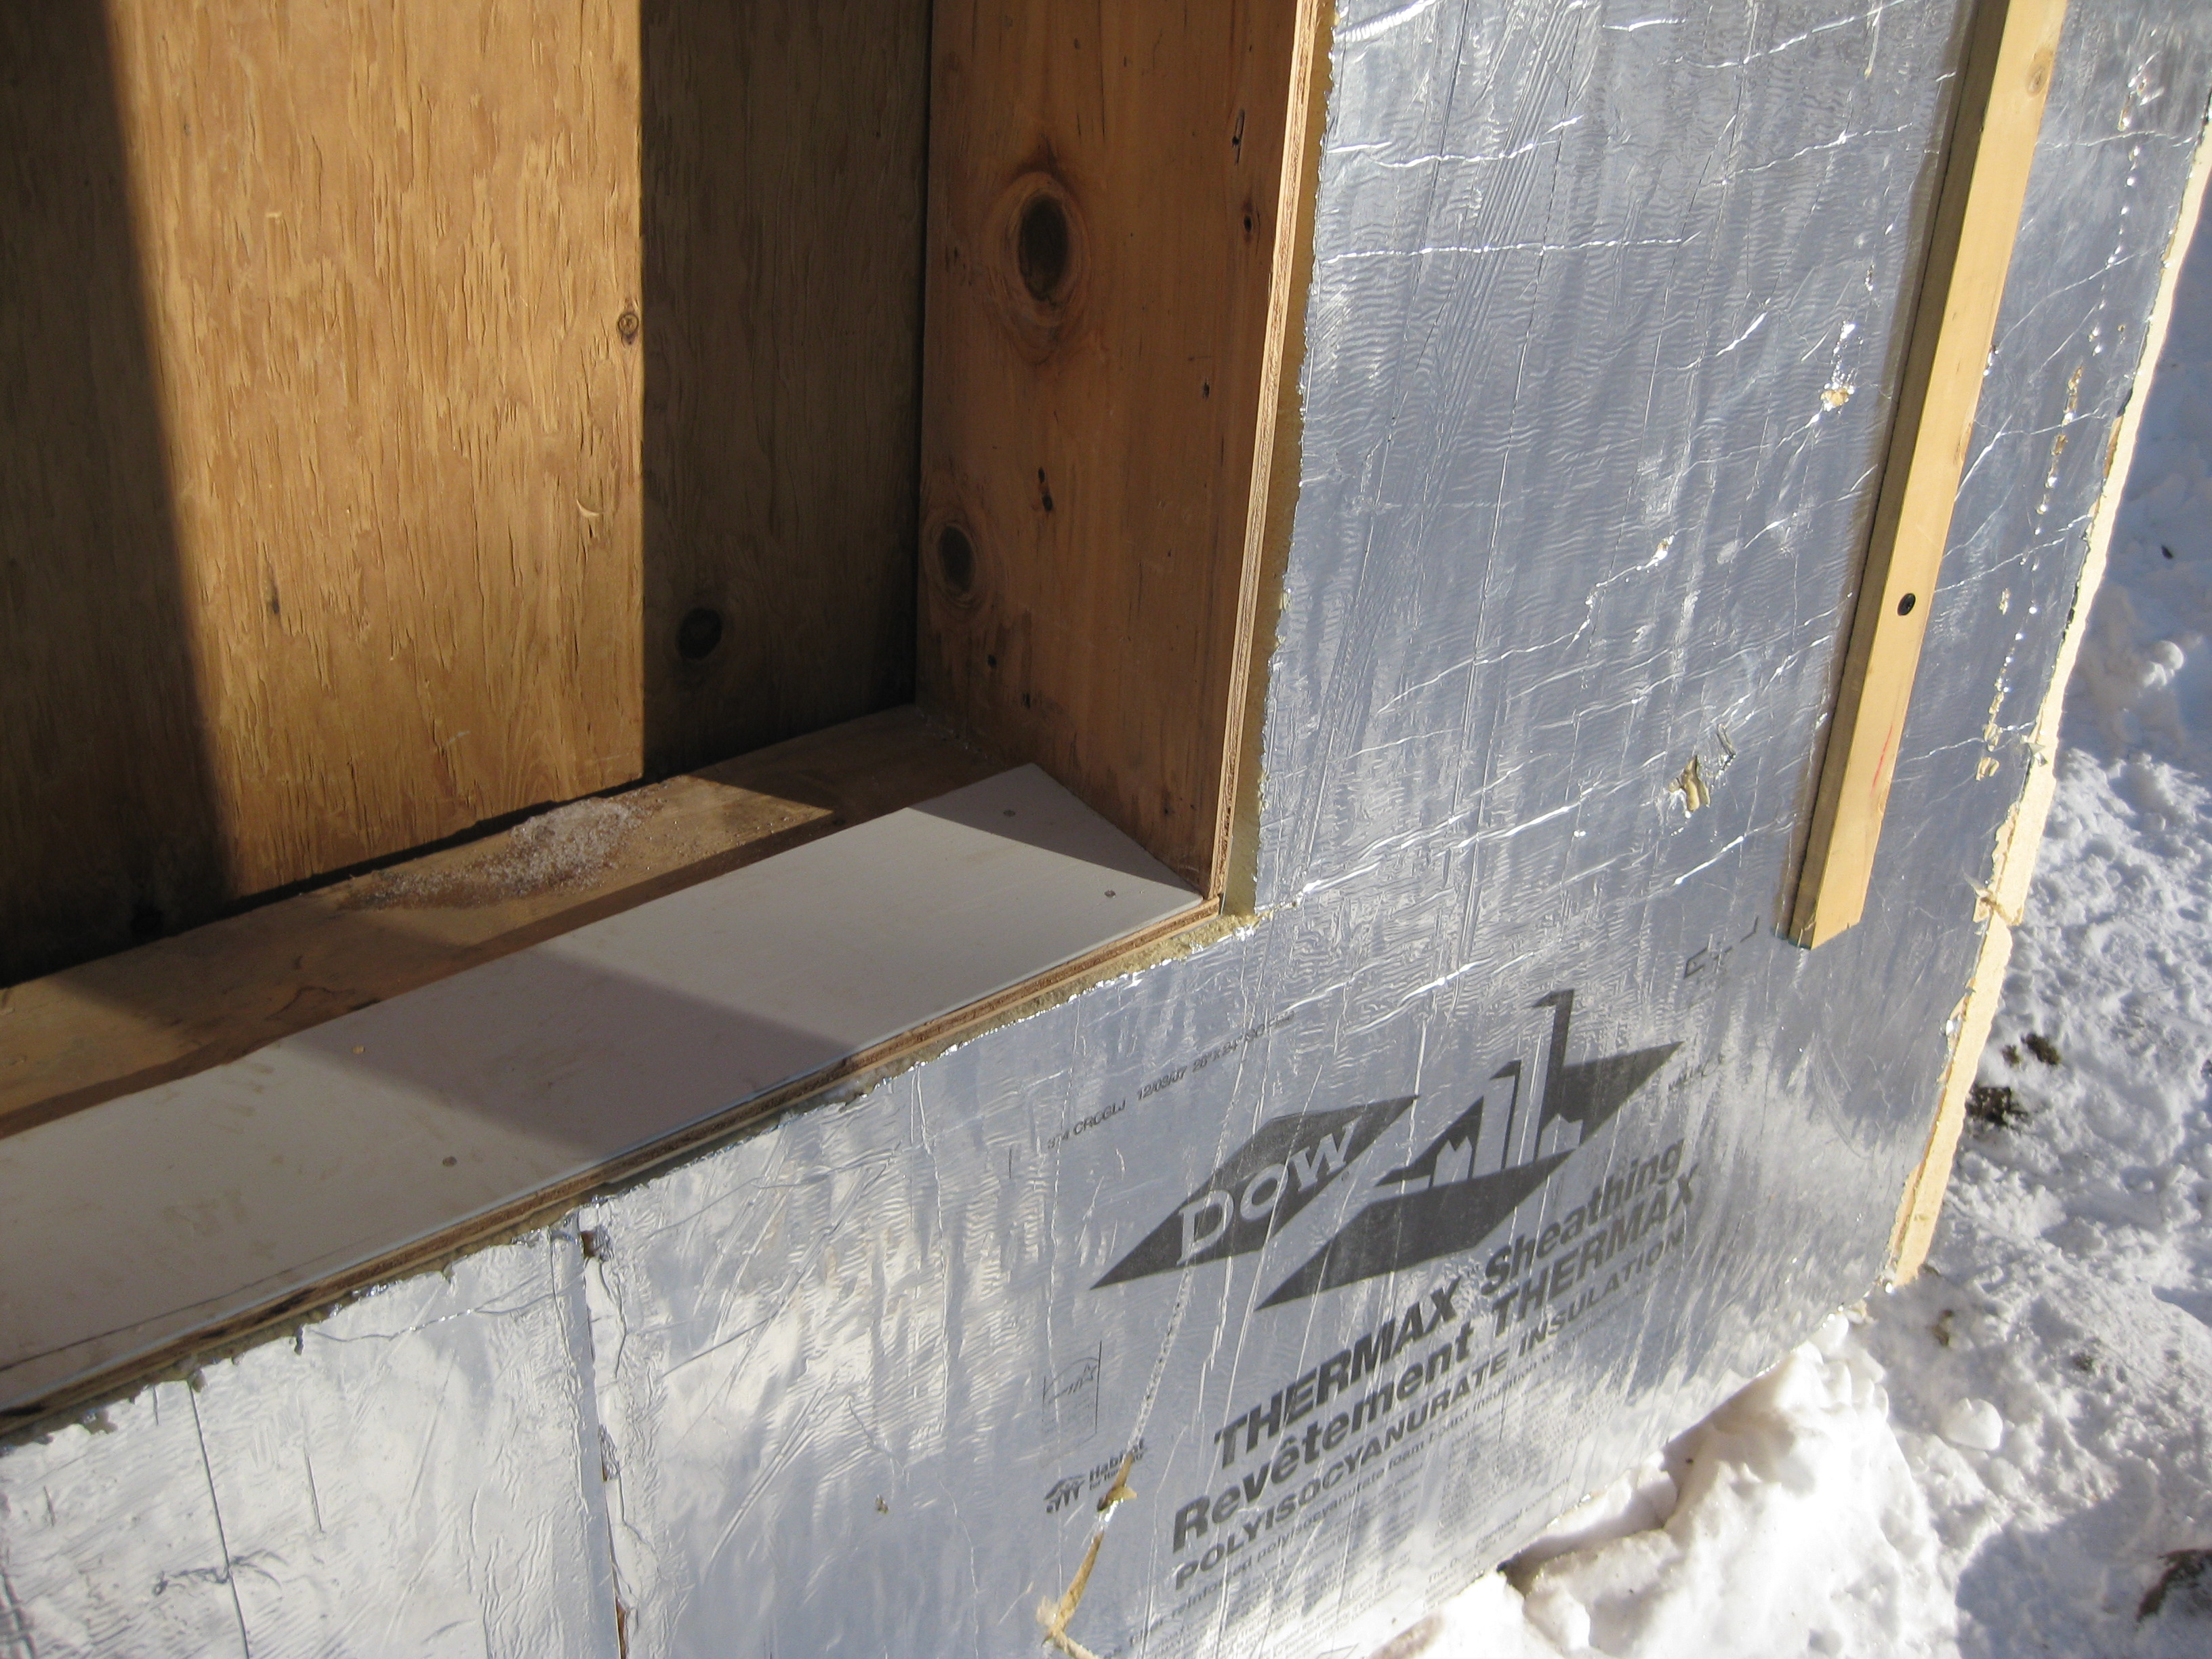
A piece of siding is used as sill extension and to provide slope in the opening for the window, which is deeper because exterior rigid foam has been added
Image
Image
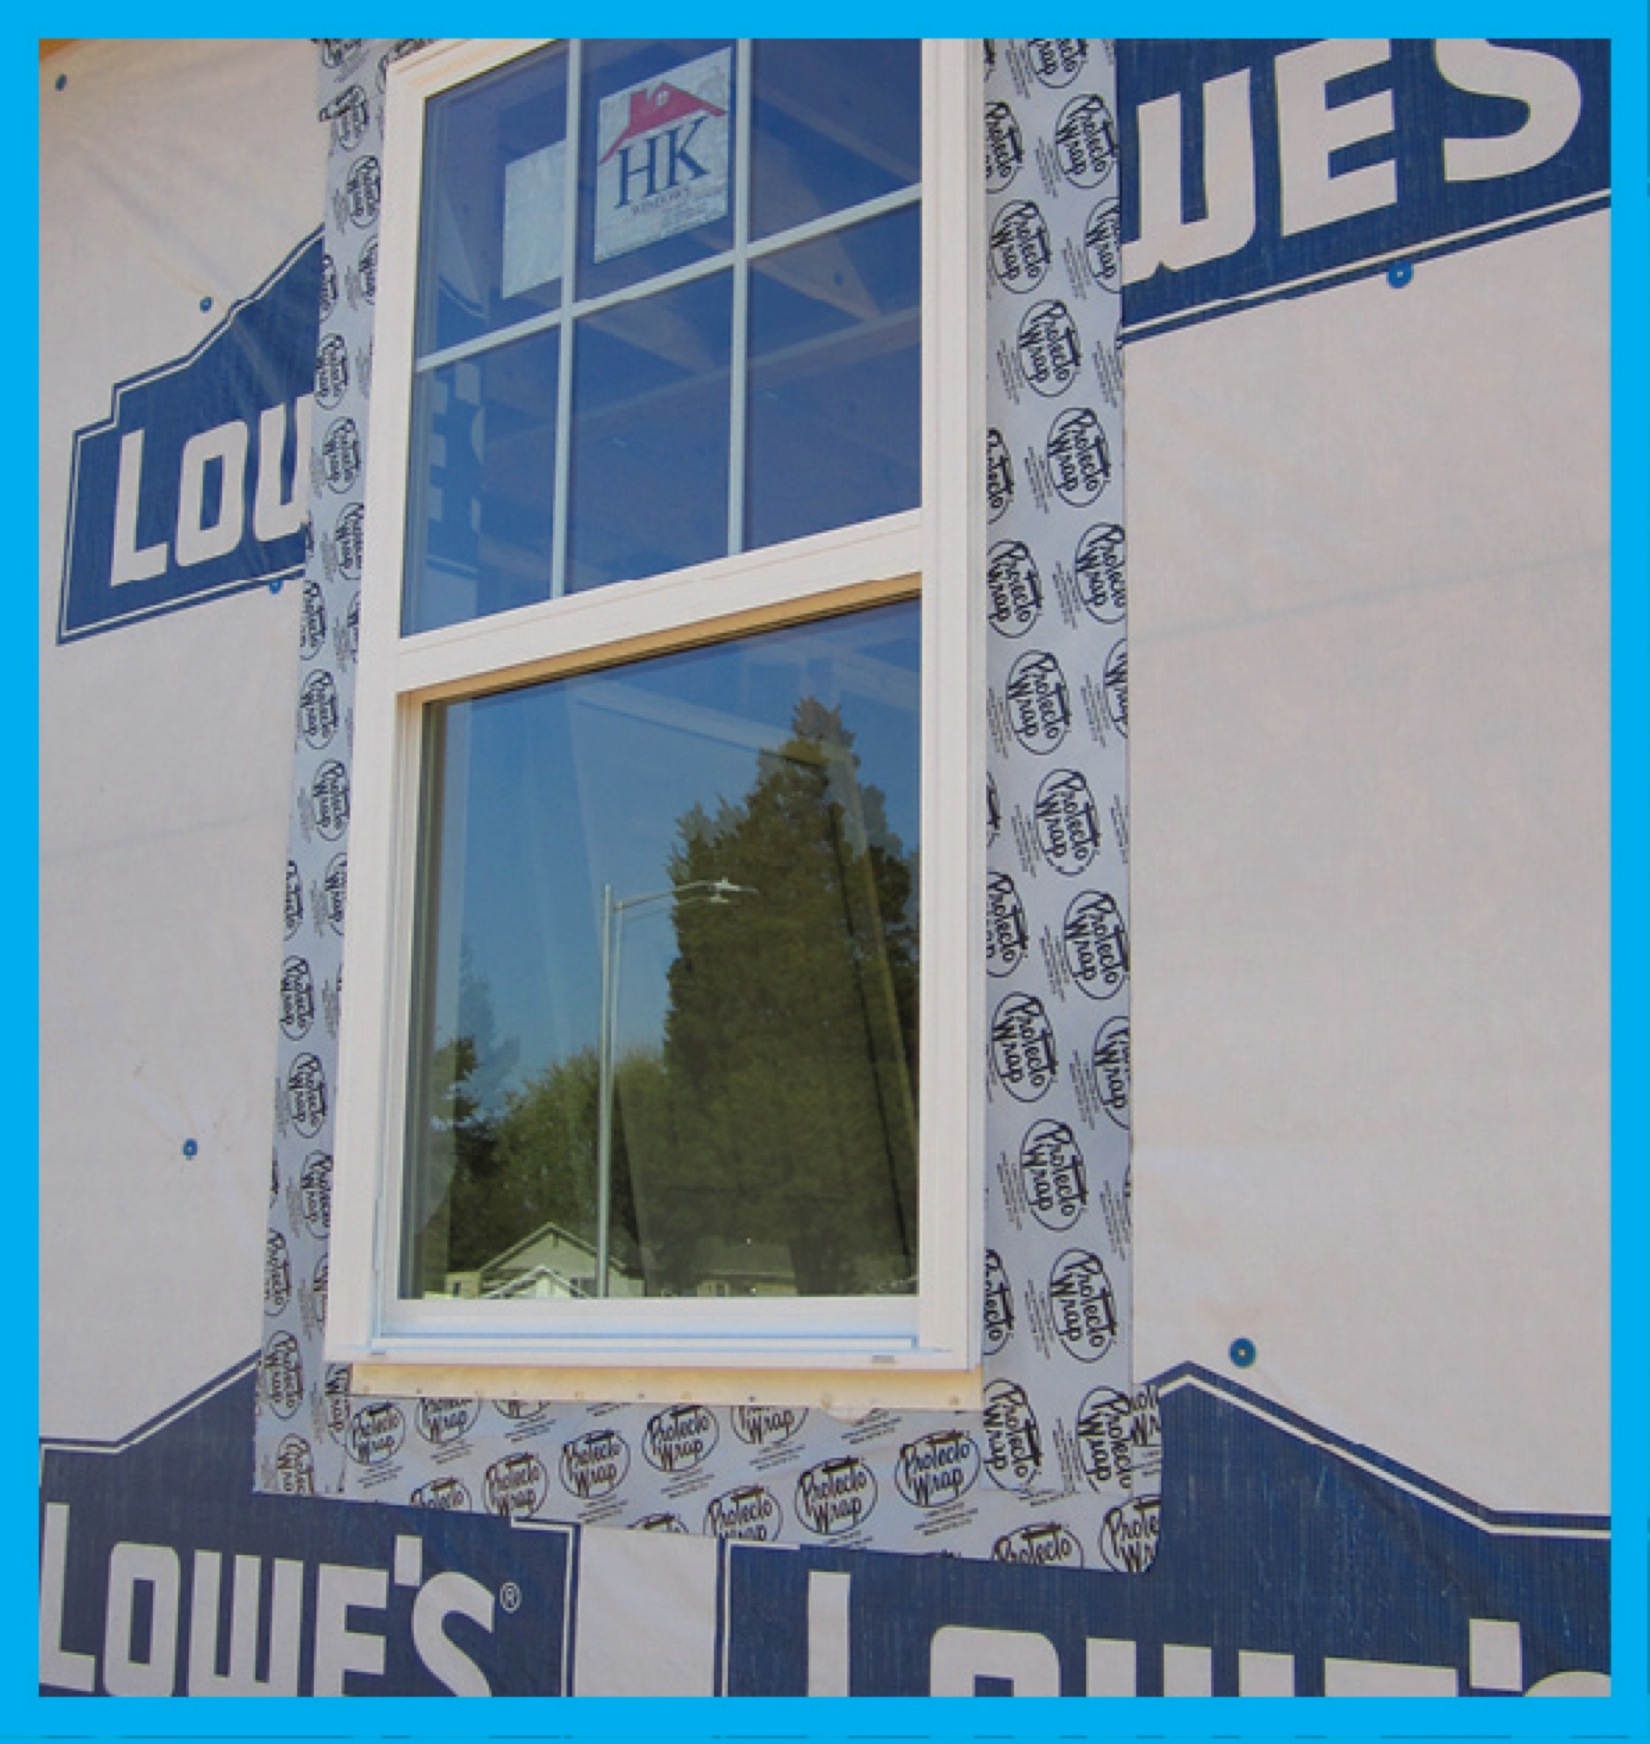
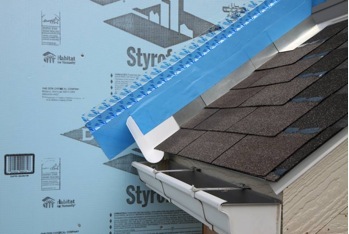
Apply self-adhesive flashing over top edge of the wall flashing, diverter, and housewrap
Image
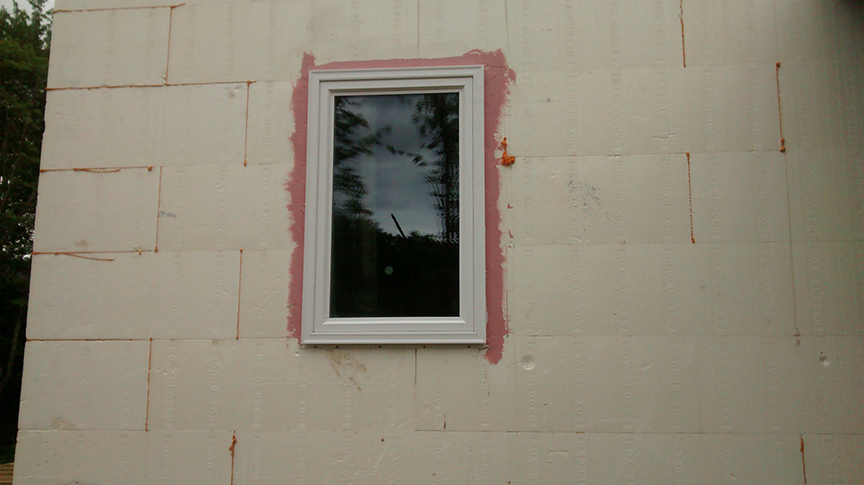
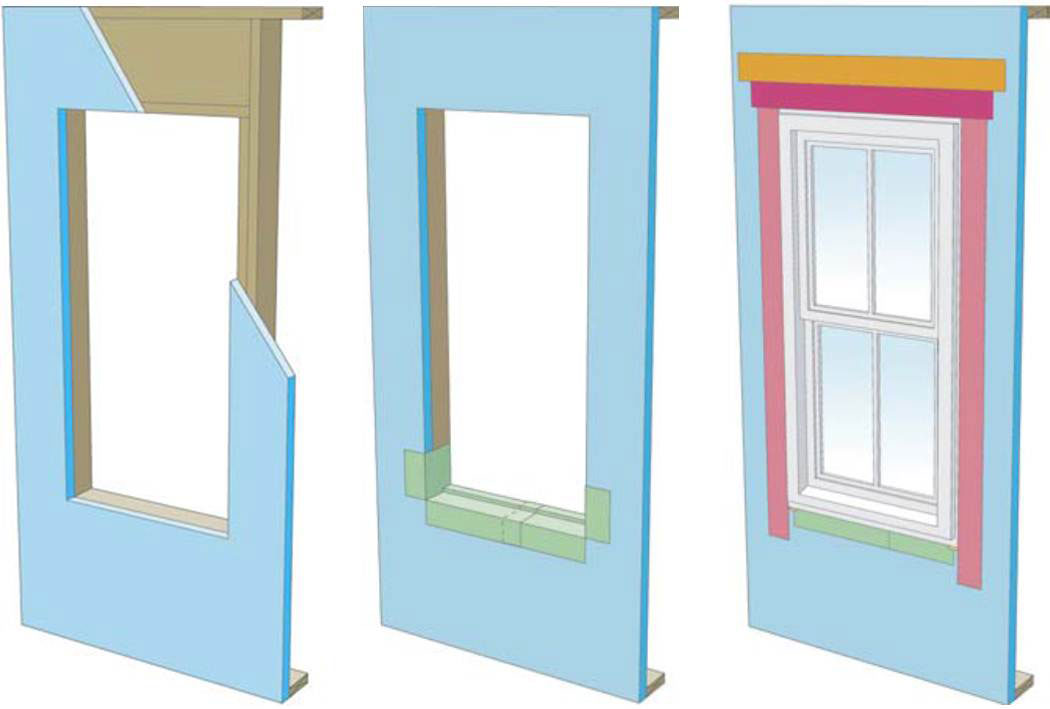
Before installing the windows, the window rough openings are sealed with a liquid-applied flashing that provides a seamless moisture and air barrier to protect the wall from water intrusion.
Image
Image
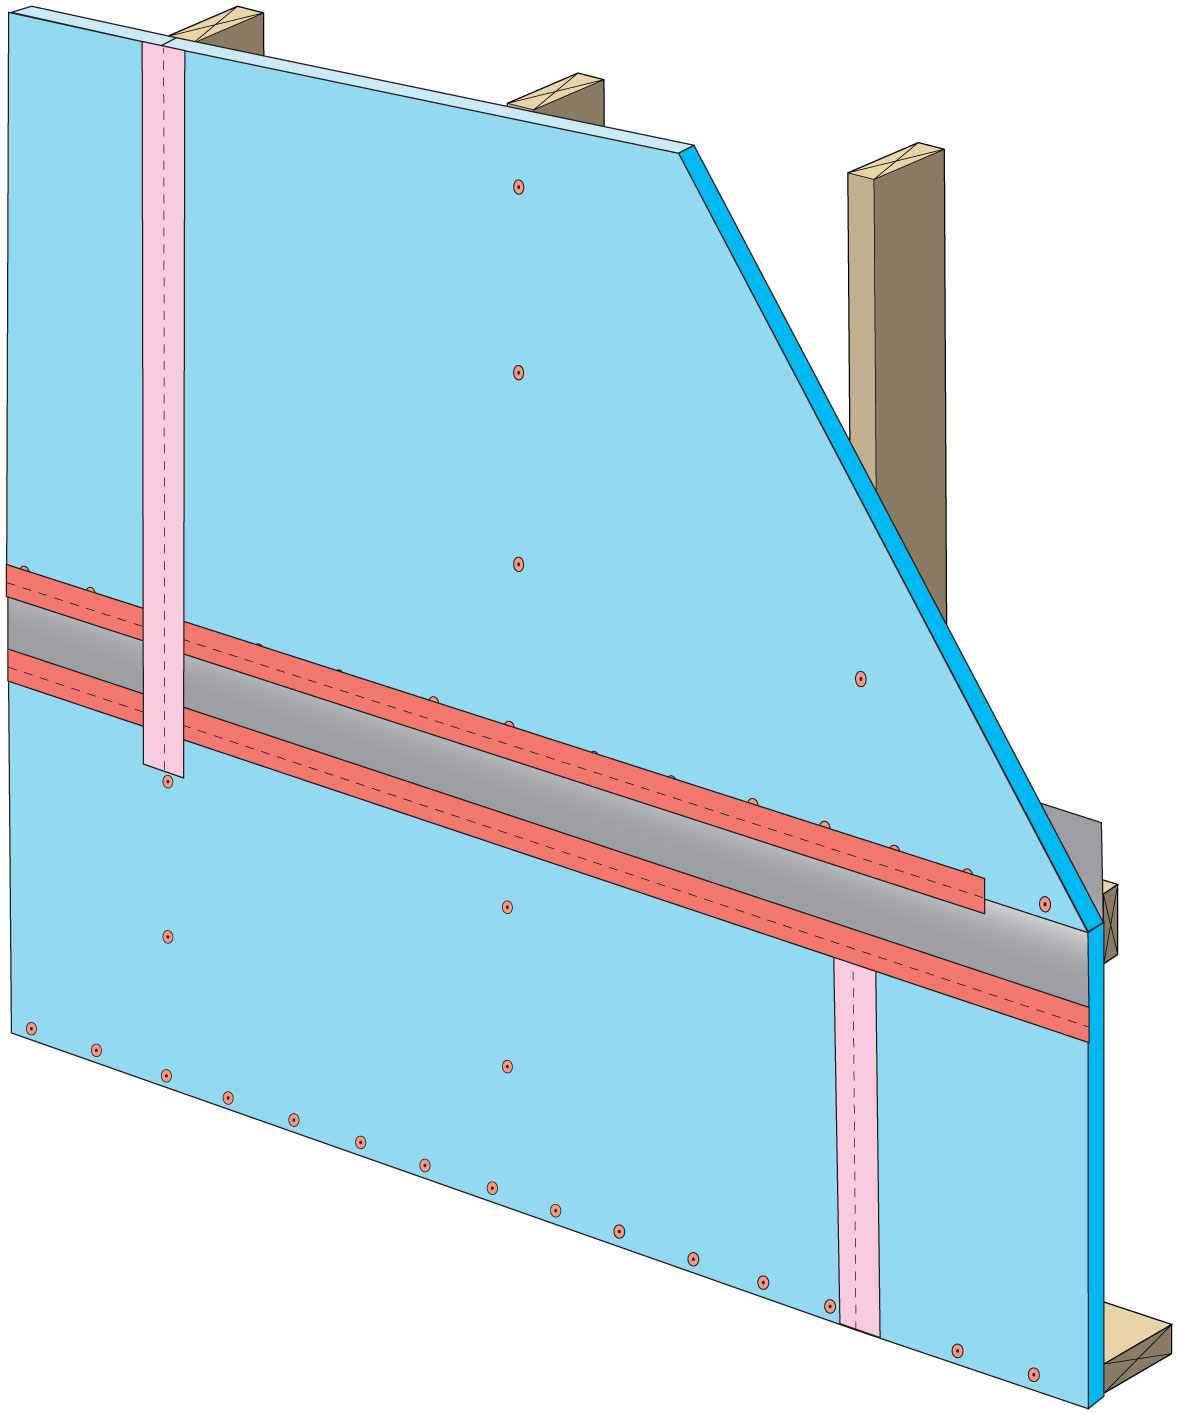
Clean taping areas and install 3" tape on vertical joint of upper insulation overlapping the horizontal joint
Image
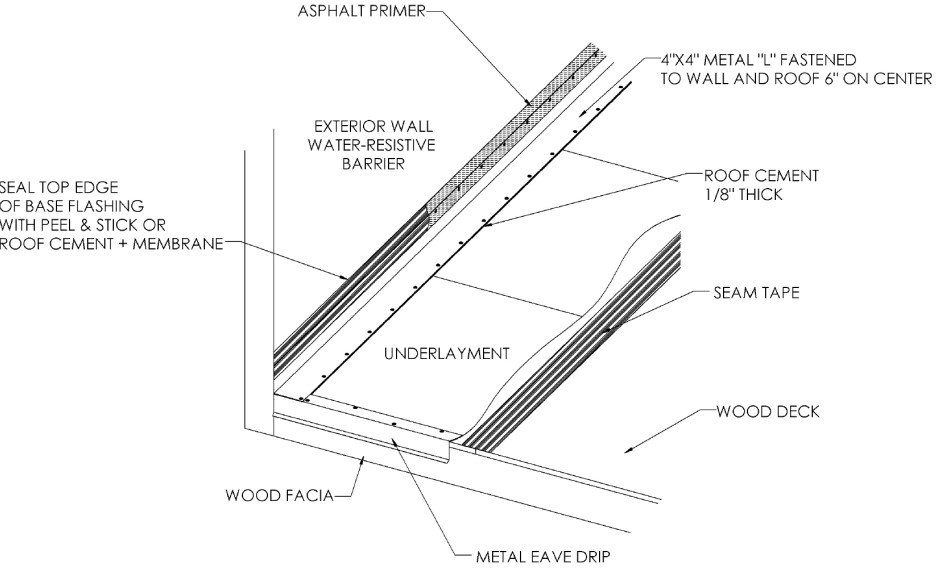
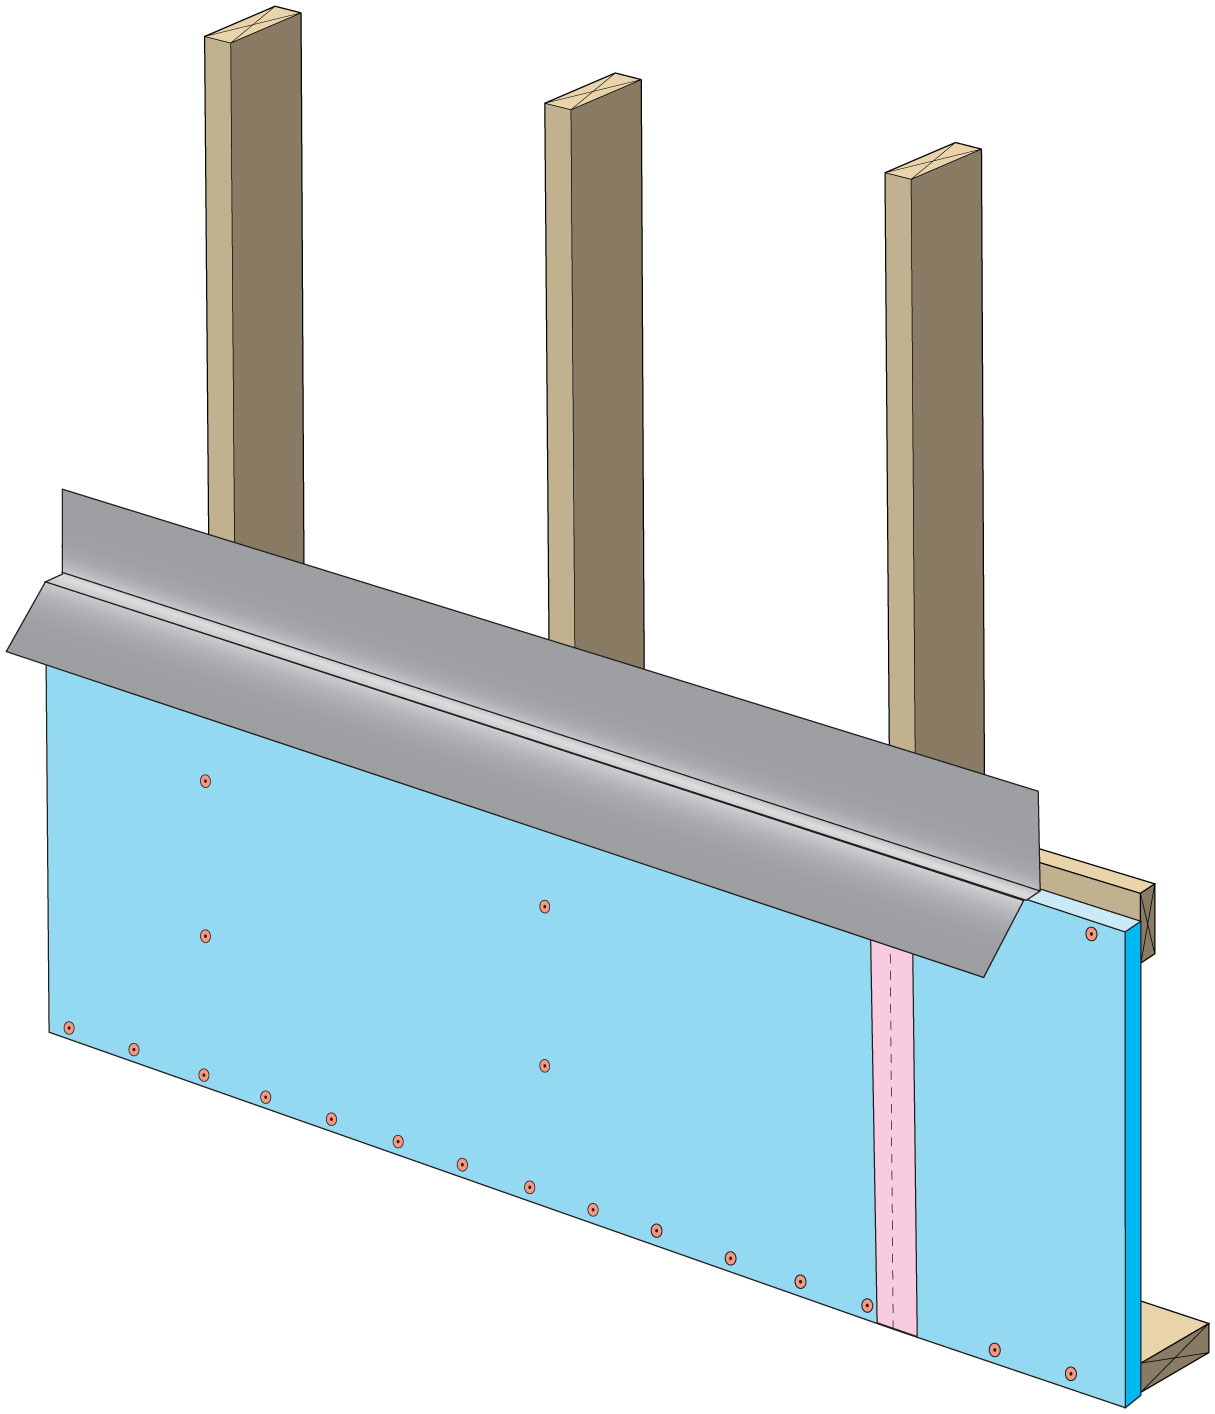
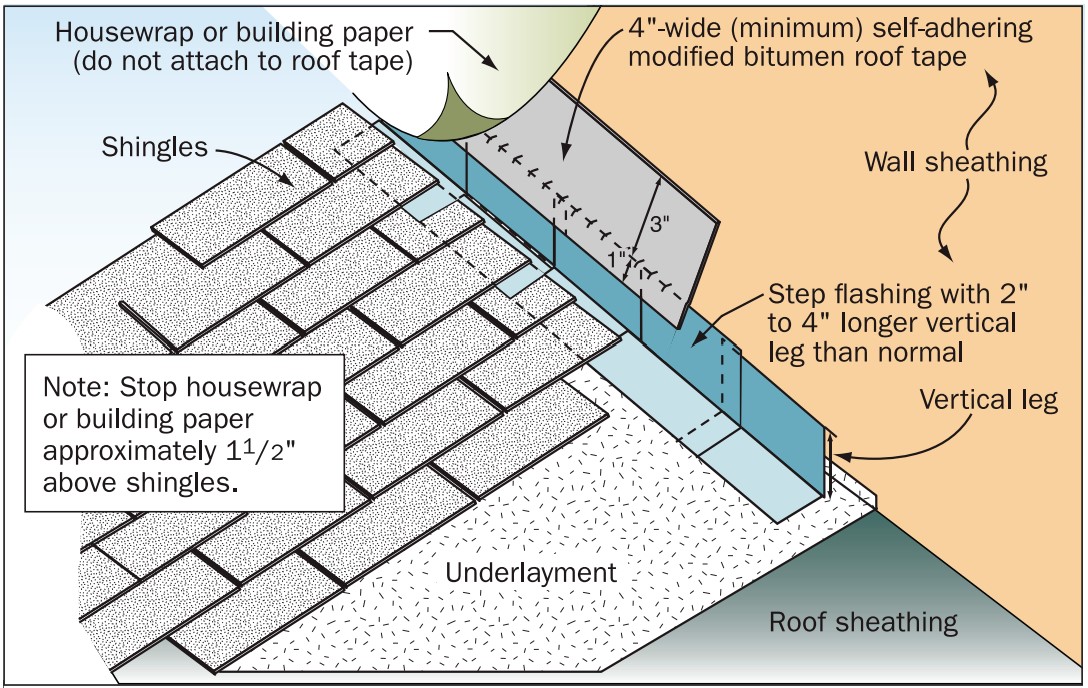
Continuous L-metal flashing integrated with underlayment at roof-wall intersections
Image
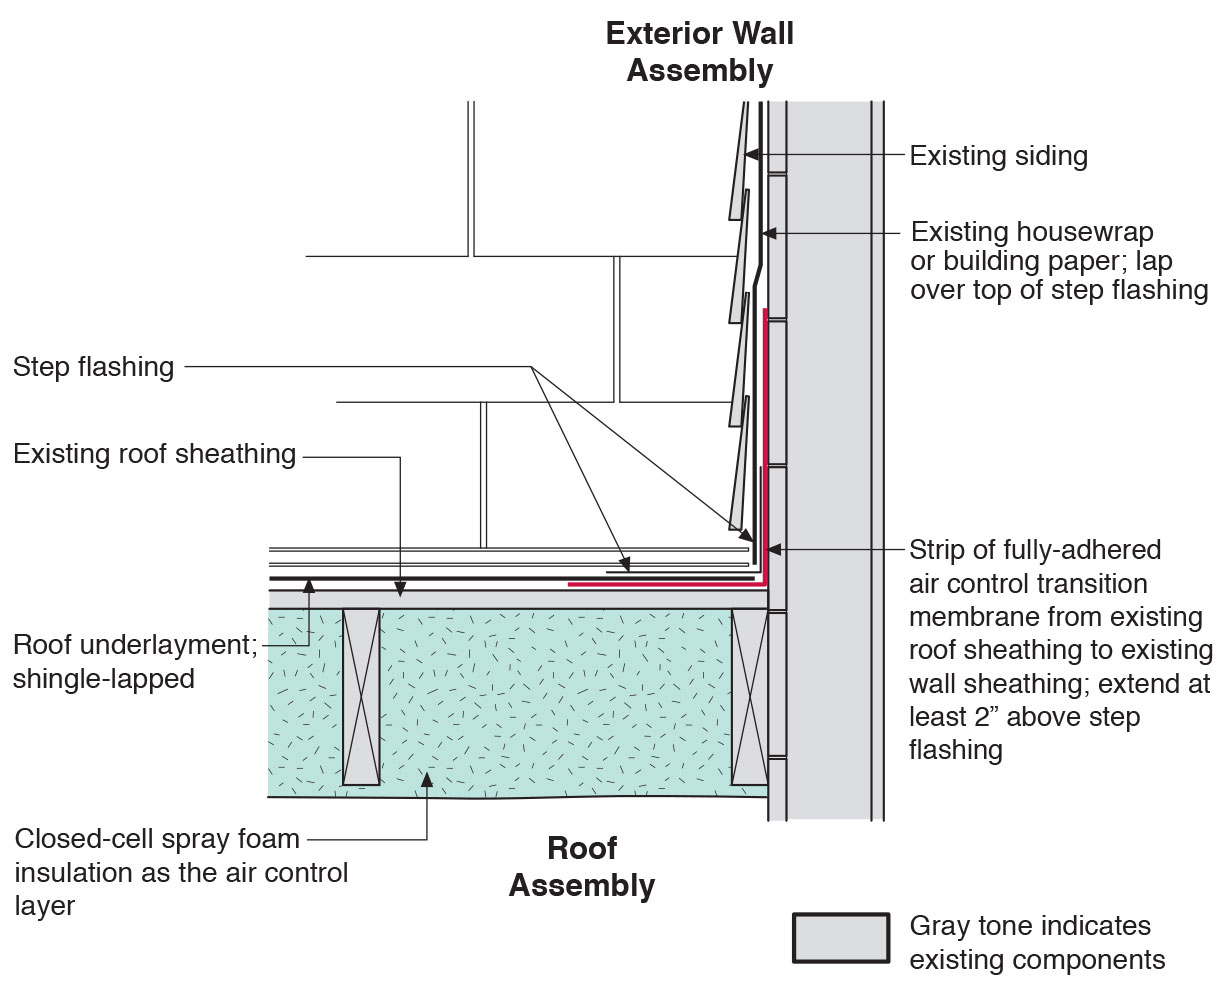
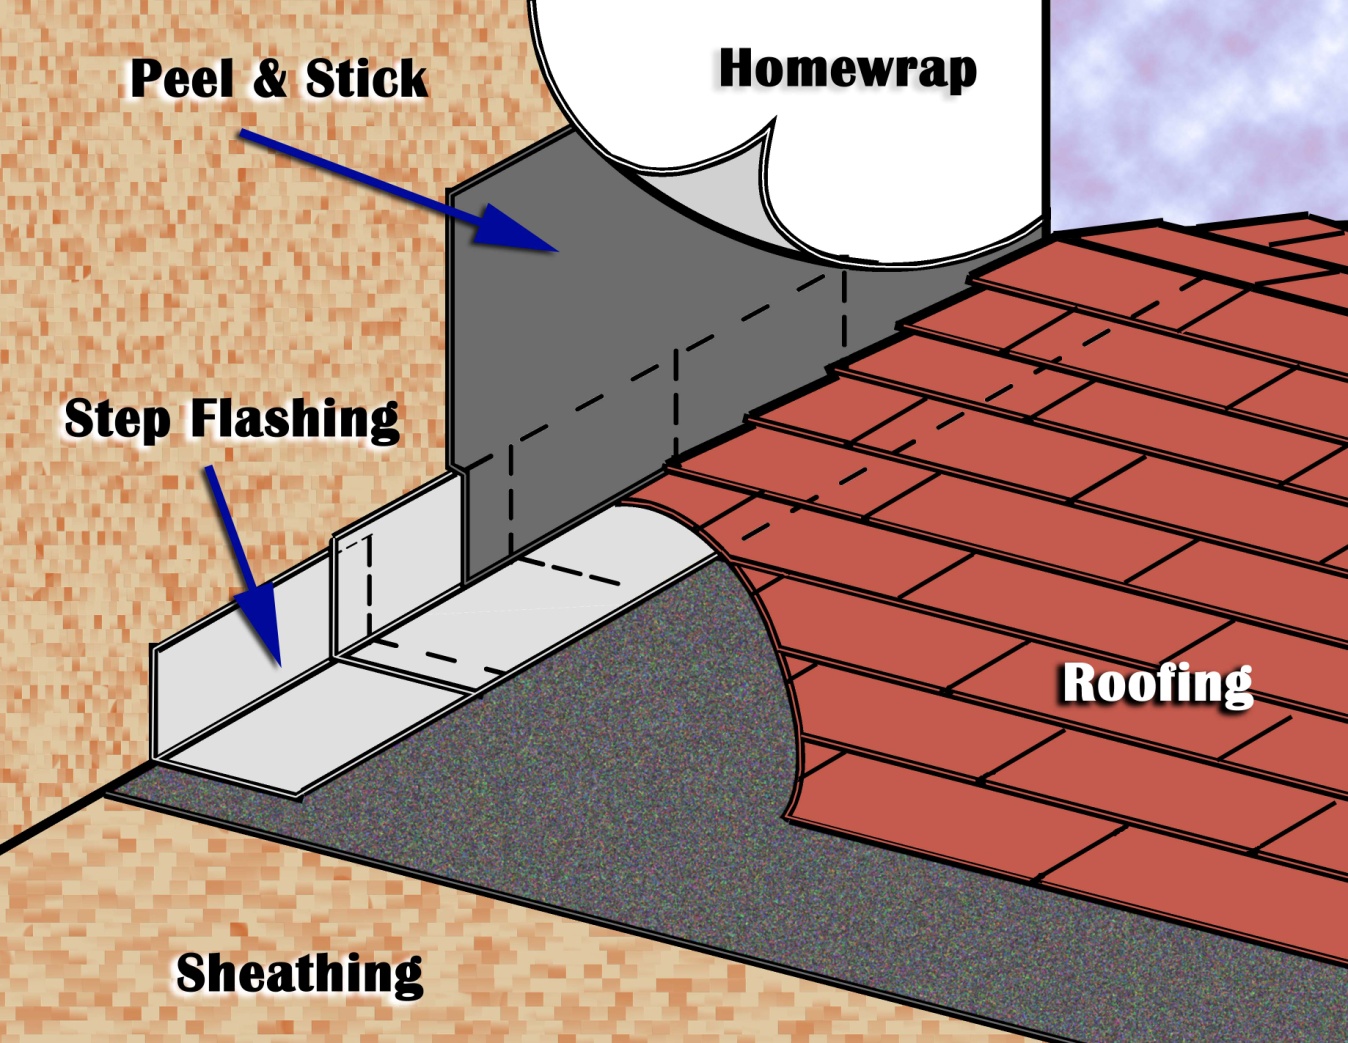
Existing wall-to-lower roof transition retrofitted with a new strip of fully adhered air control transition membrane, new step flashing, new roof underlayment, and new cladding
Image
Existing wall-to-lower roof transition with a new strip of fully adhered air control transition membrane, new step flashing, new roof underlayment, and new cladding – view from eave
Image
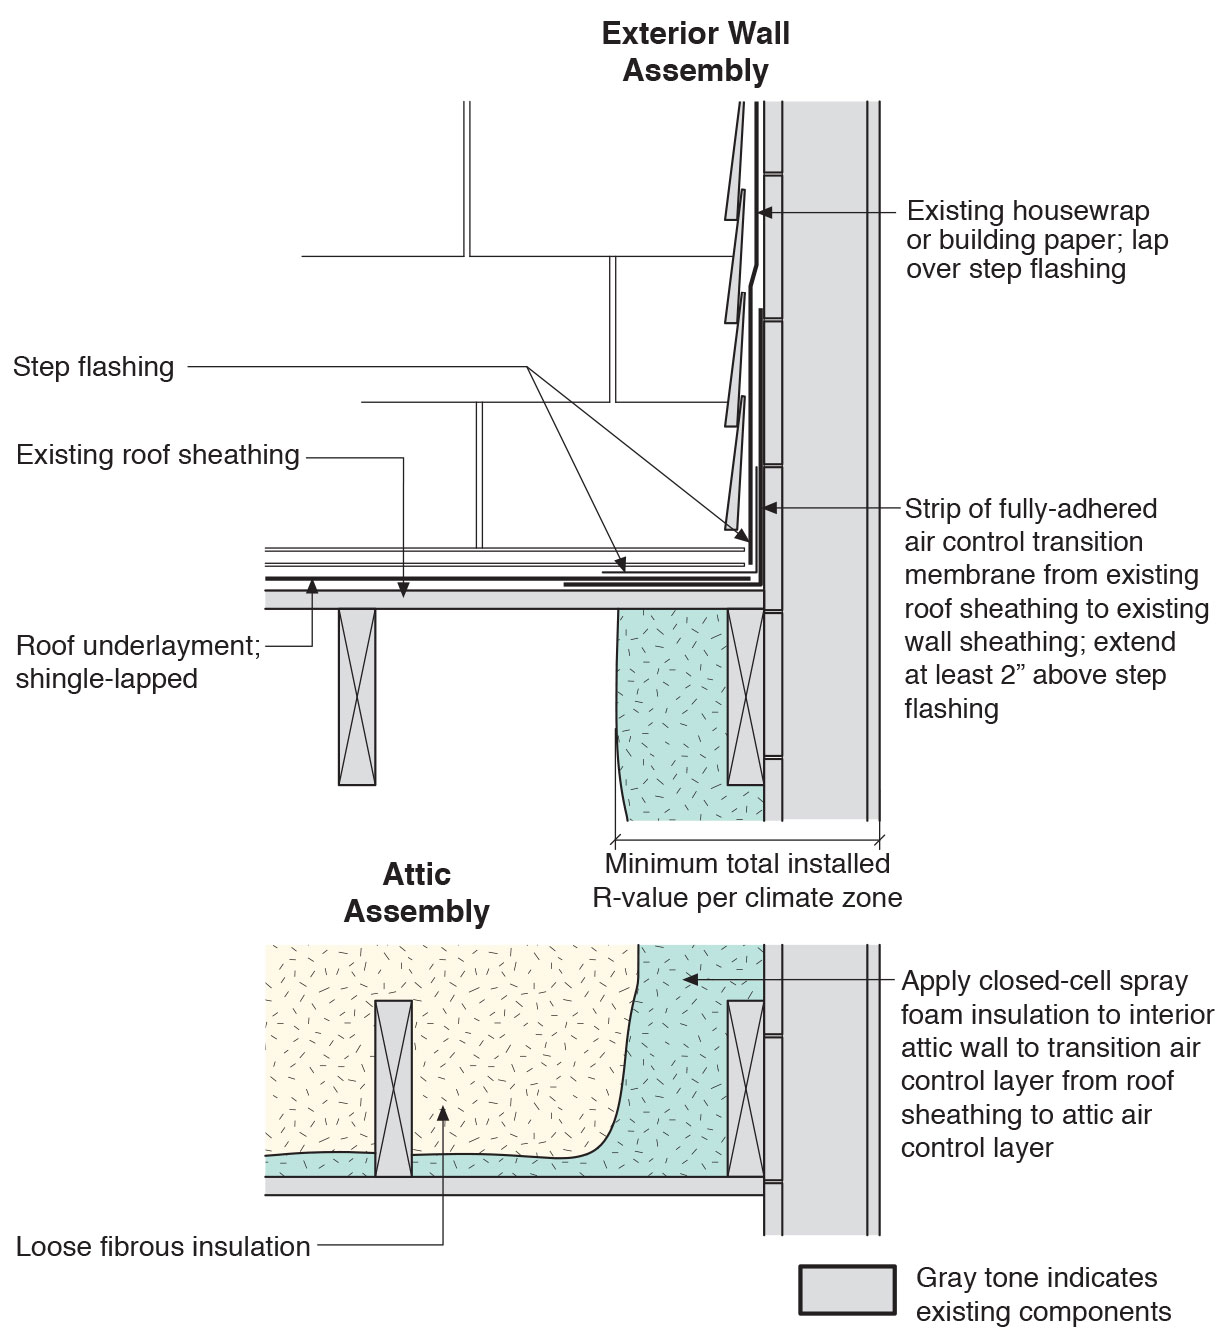
Existing wall-to-lower roof with attic transition with a new strip of fully adhered air control transition membrane, new step flashing, new roof underlayment, and new cladding – view from eave
Image

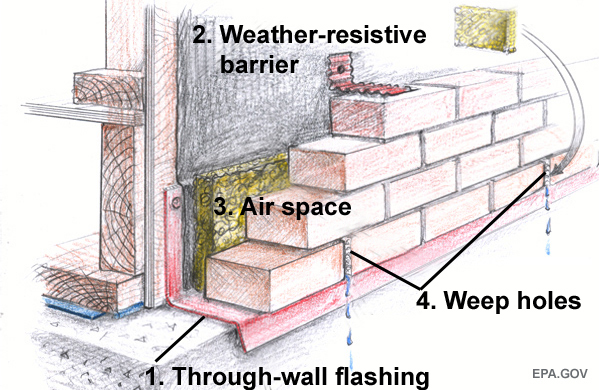
Flashing at bottom of exterior walls with weep holes included for masonry veneer and weep screed for stucco cladding systems, or equivalent drainage system
Image
Flashing at bottom of exterior walls with weep holes included for masonry veneer and weep screed for stucco cladding systems, or equivalent drainage system
Image
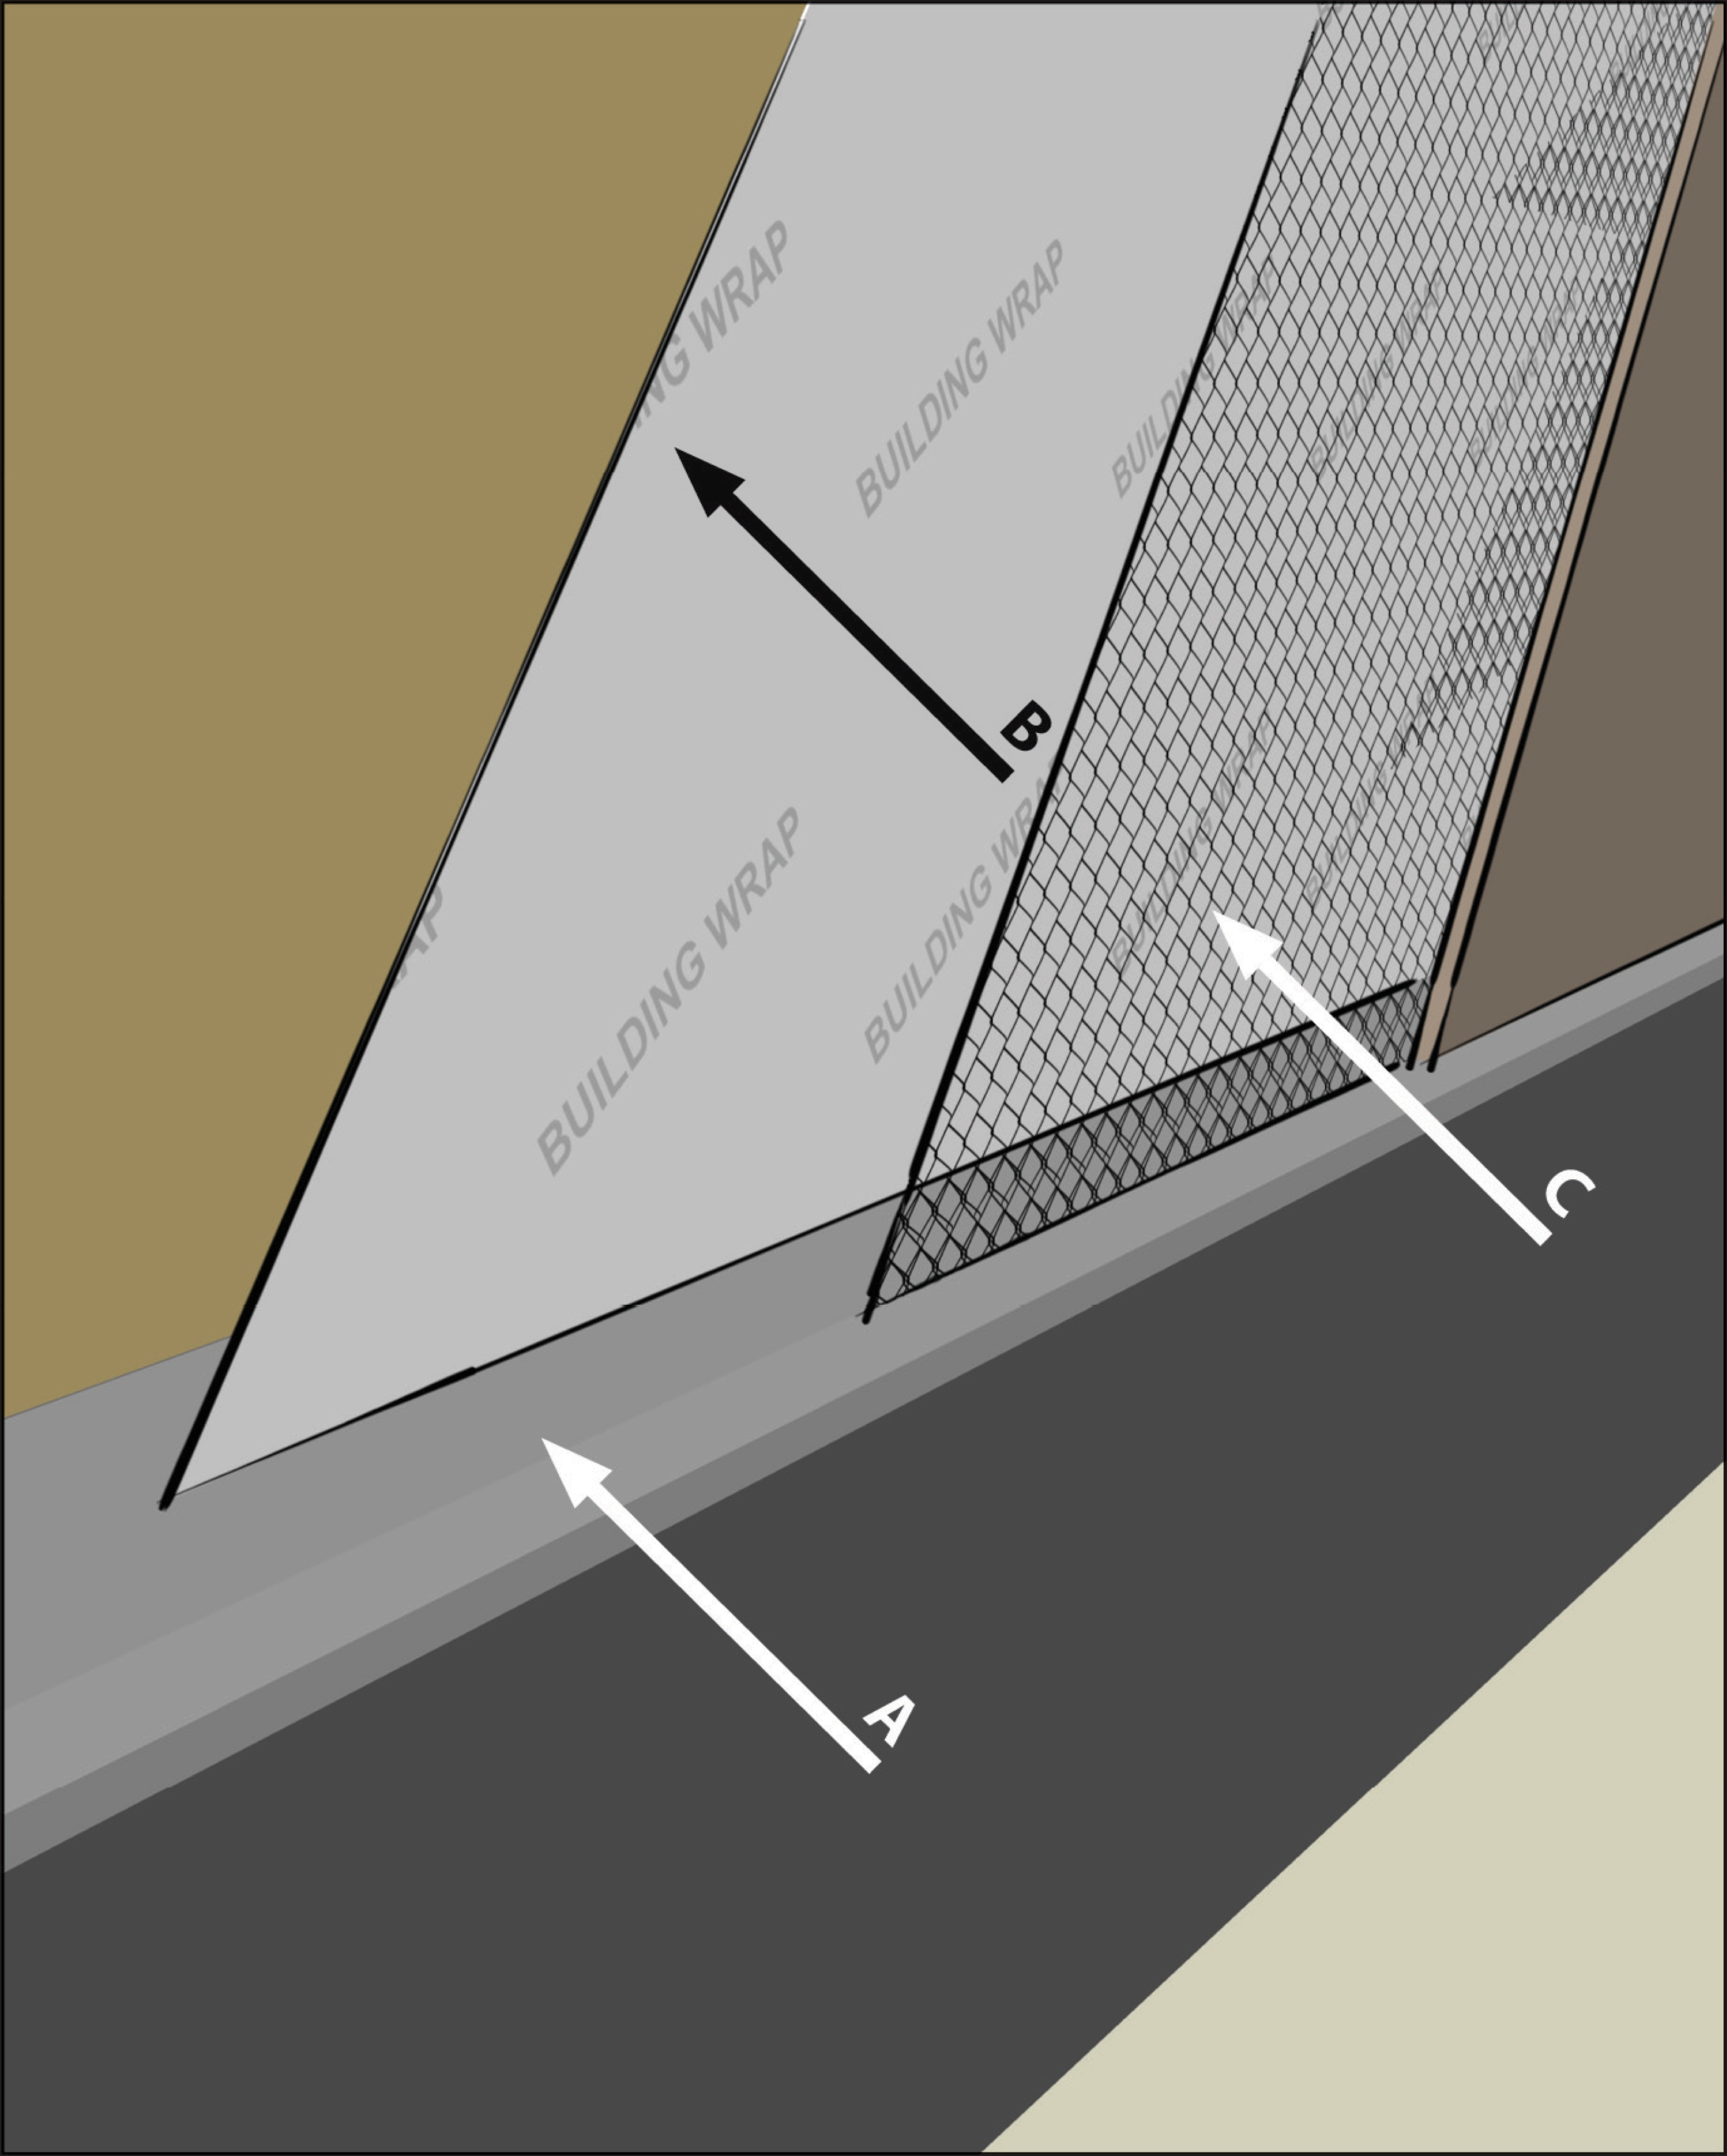
Flashing at bottom of exterior walls with weep holes included for masonry veneer and weep screed for stucco cladding systems, or equivalent drainage system
Image
Image
Image
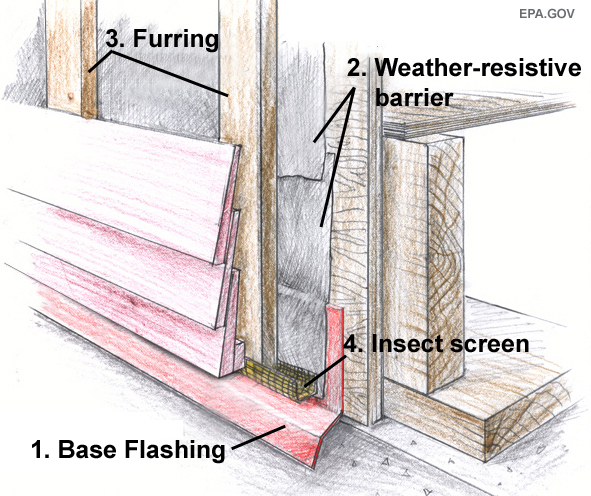
Furring strips provide drainage gap behind lap siding; screen is added at bottom and top to prevent entry of insects and wildfire embers.
Image
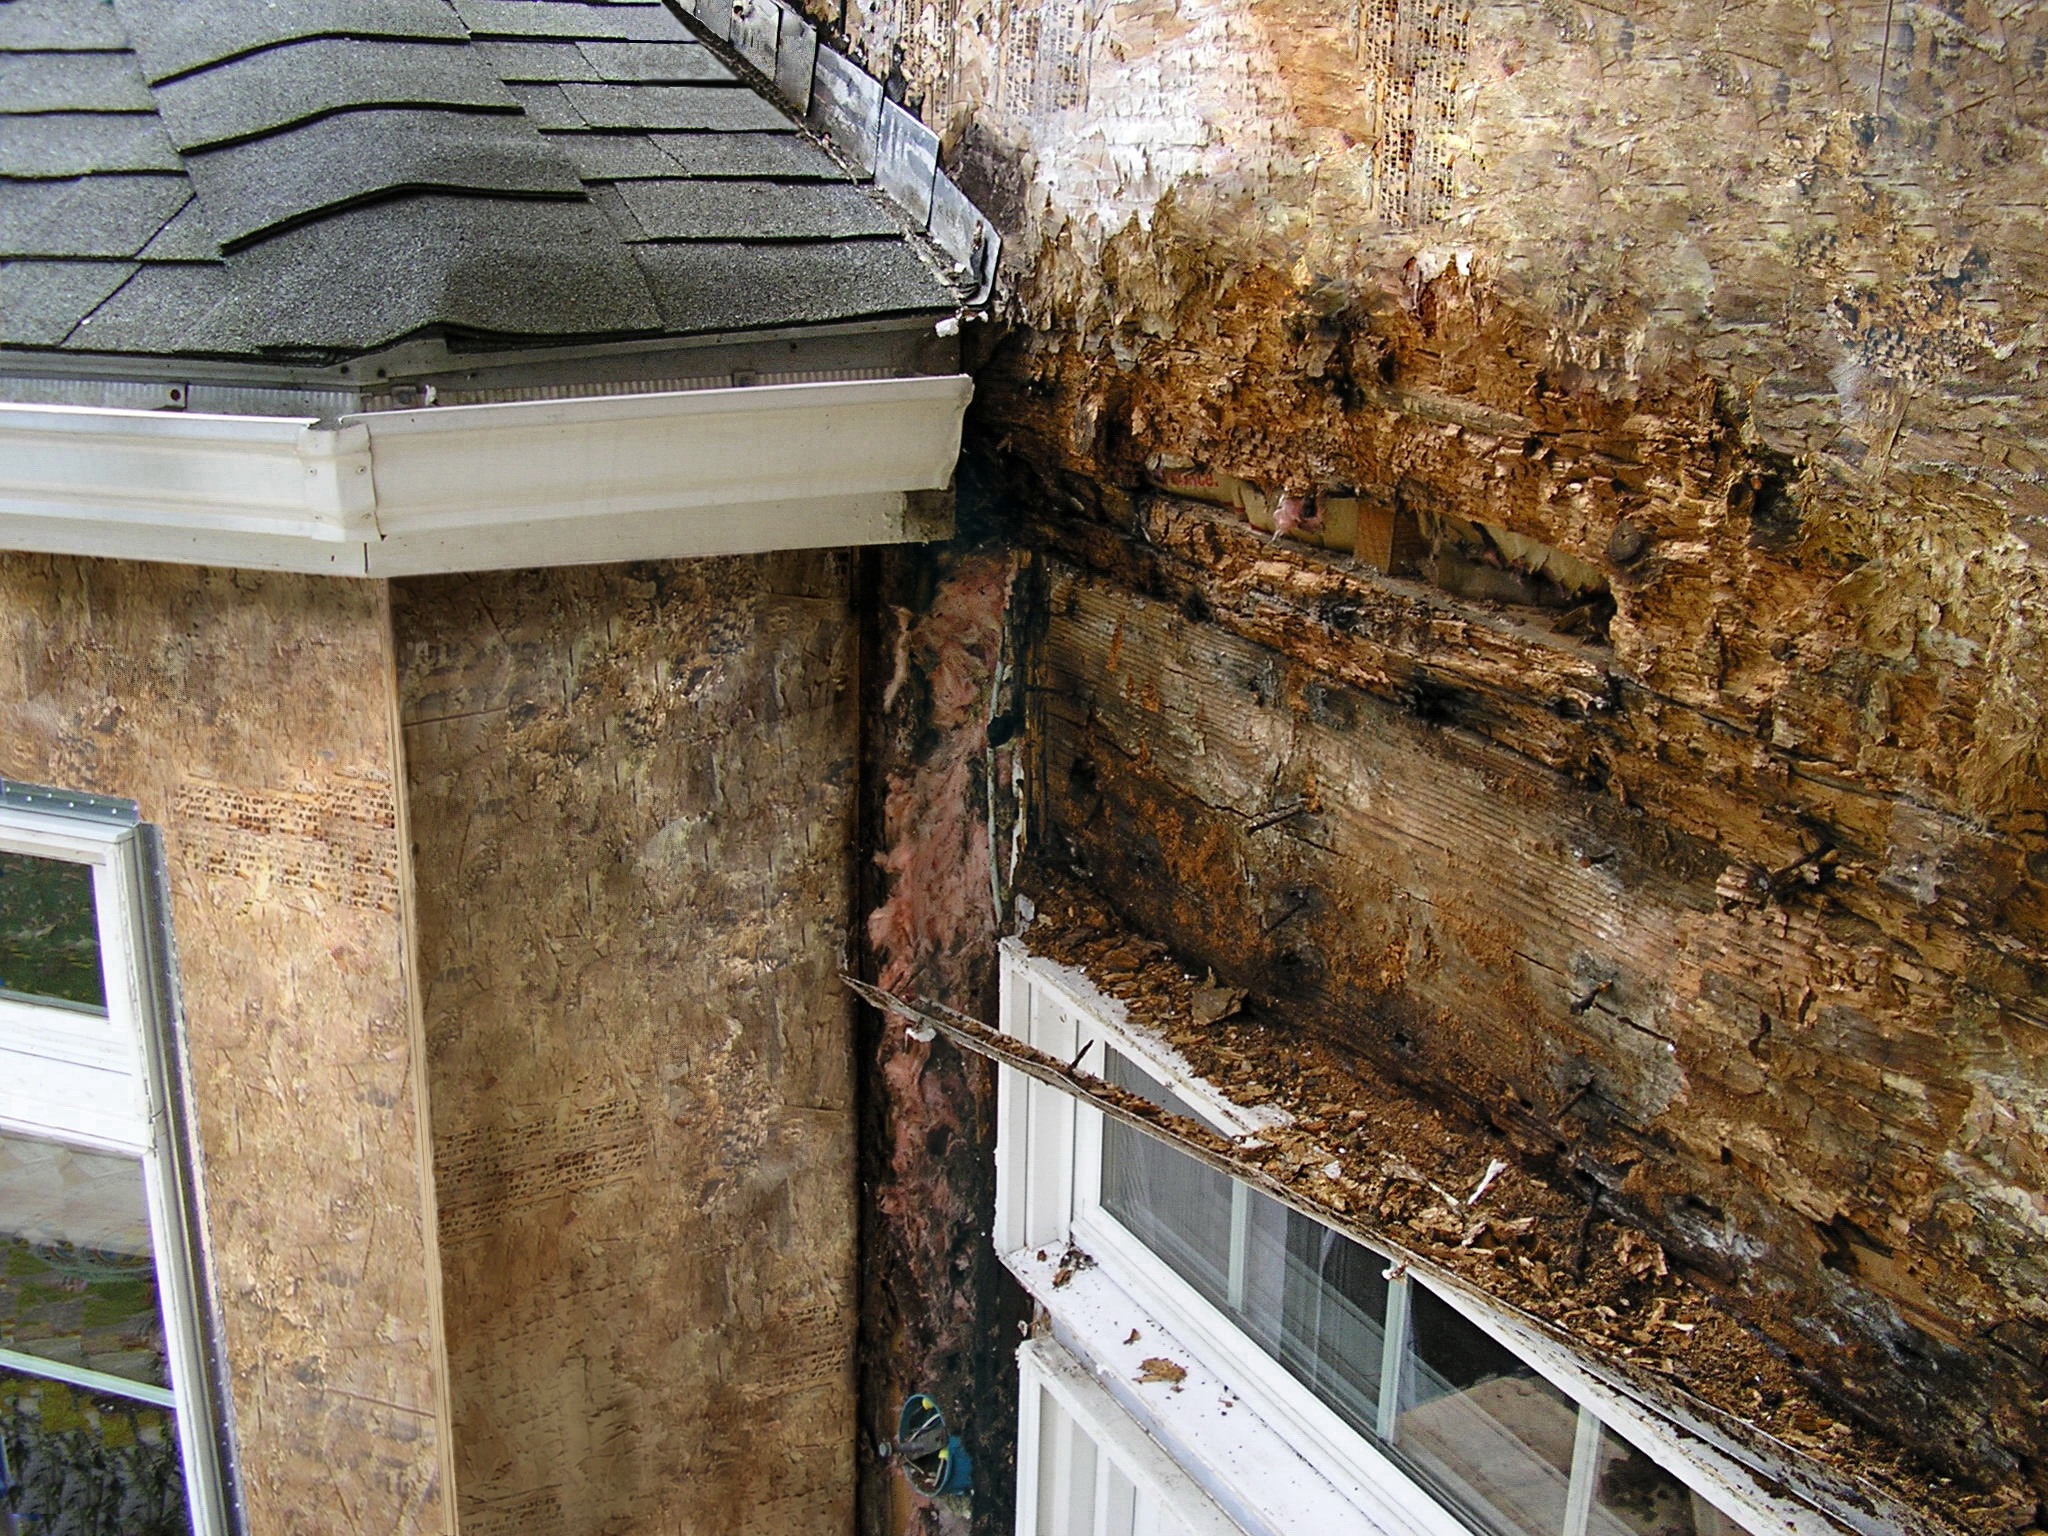
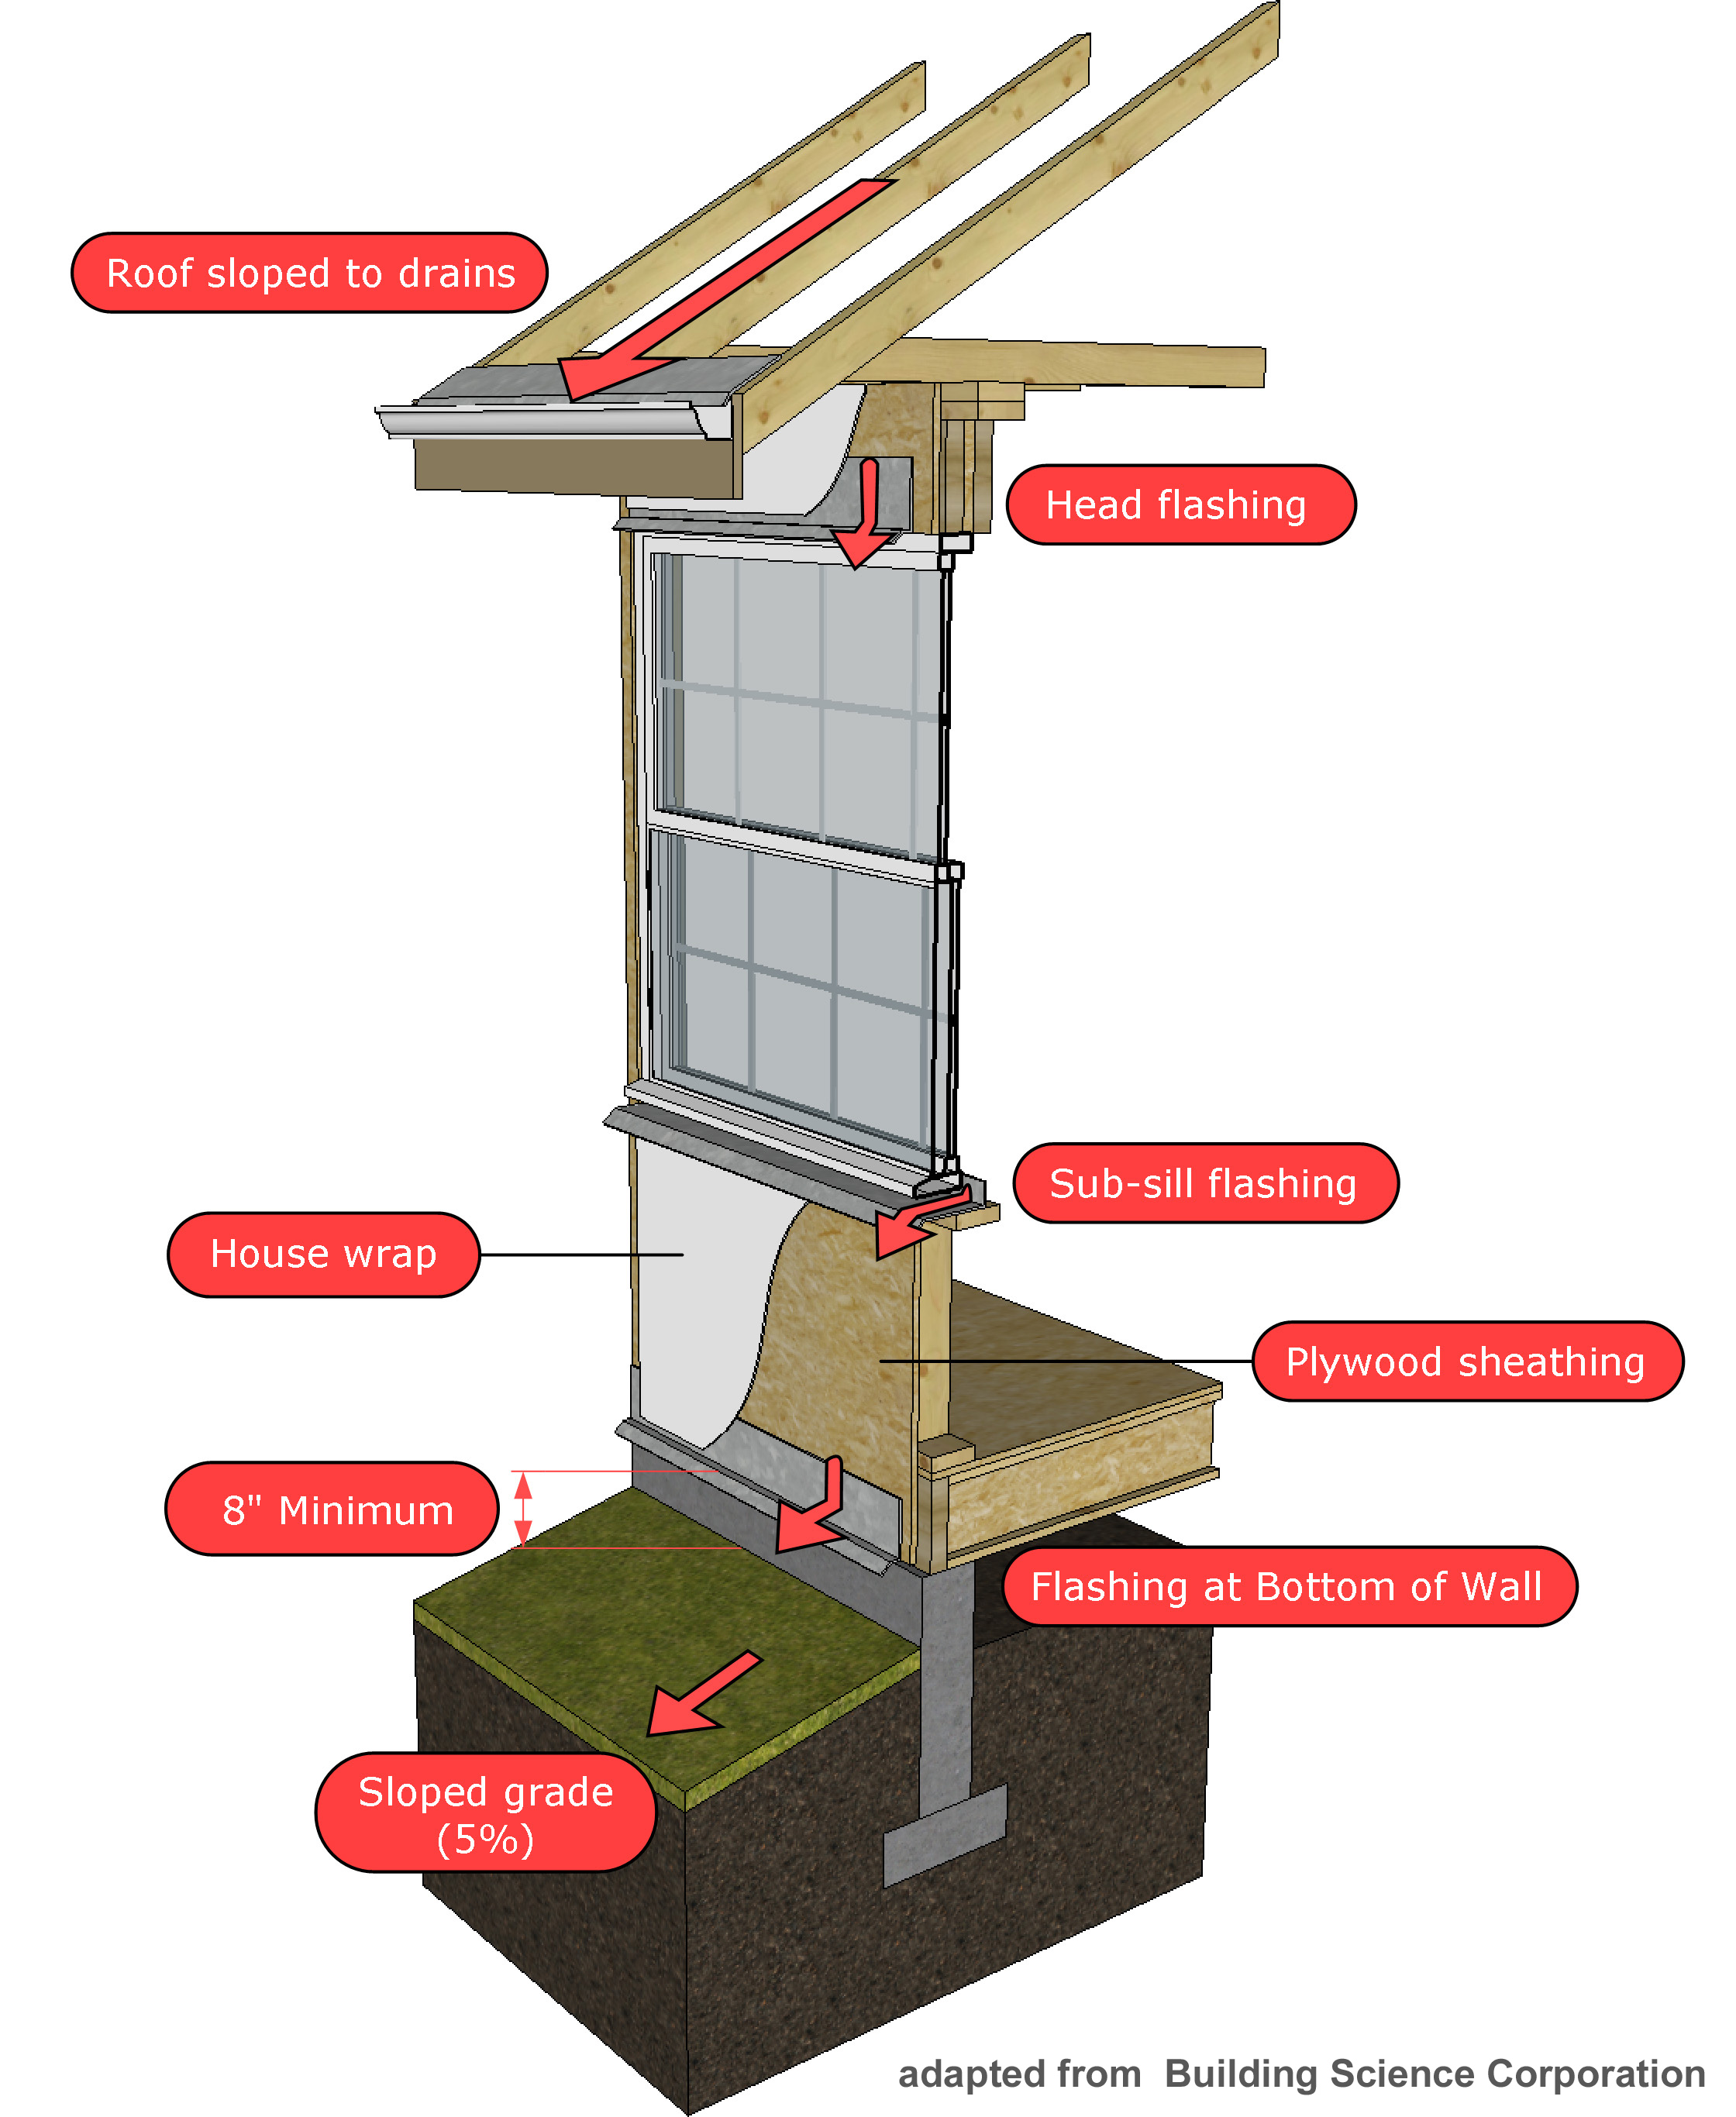
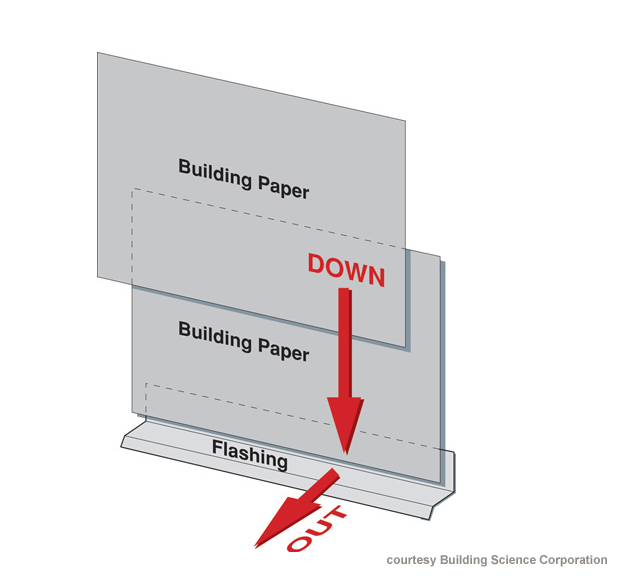
Improper flashing can allow rain water into walls, causing significant damage
Image
Image
Image
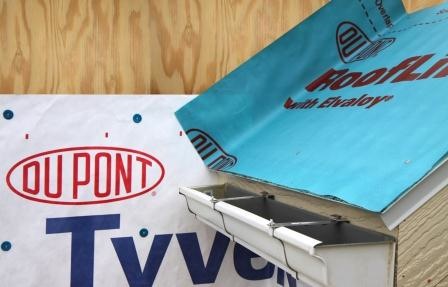
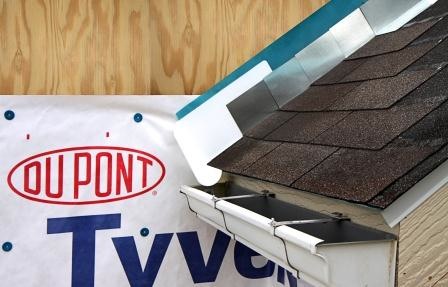
Install shingle starter strip then kick-out diverter; attach to roof deck but not sidewall
Image

Image

Image
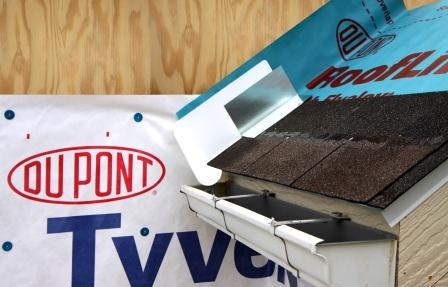
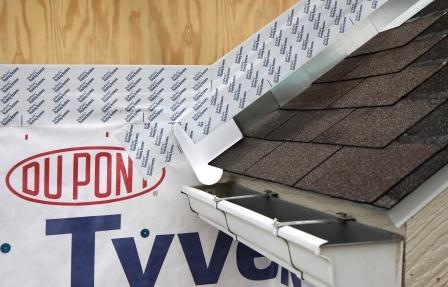
Place first shingle and next section of sidewall flashing over upper edge of diverter
Image
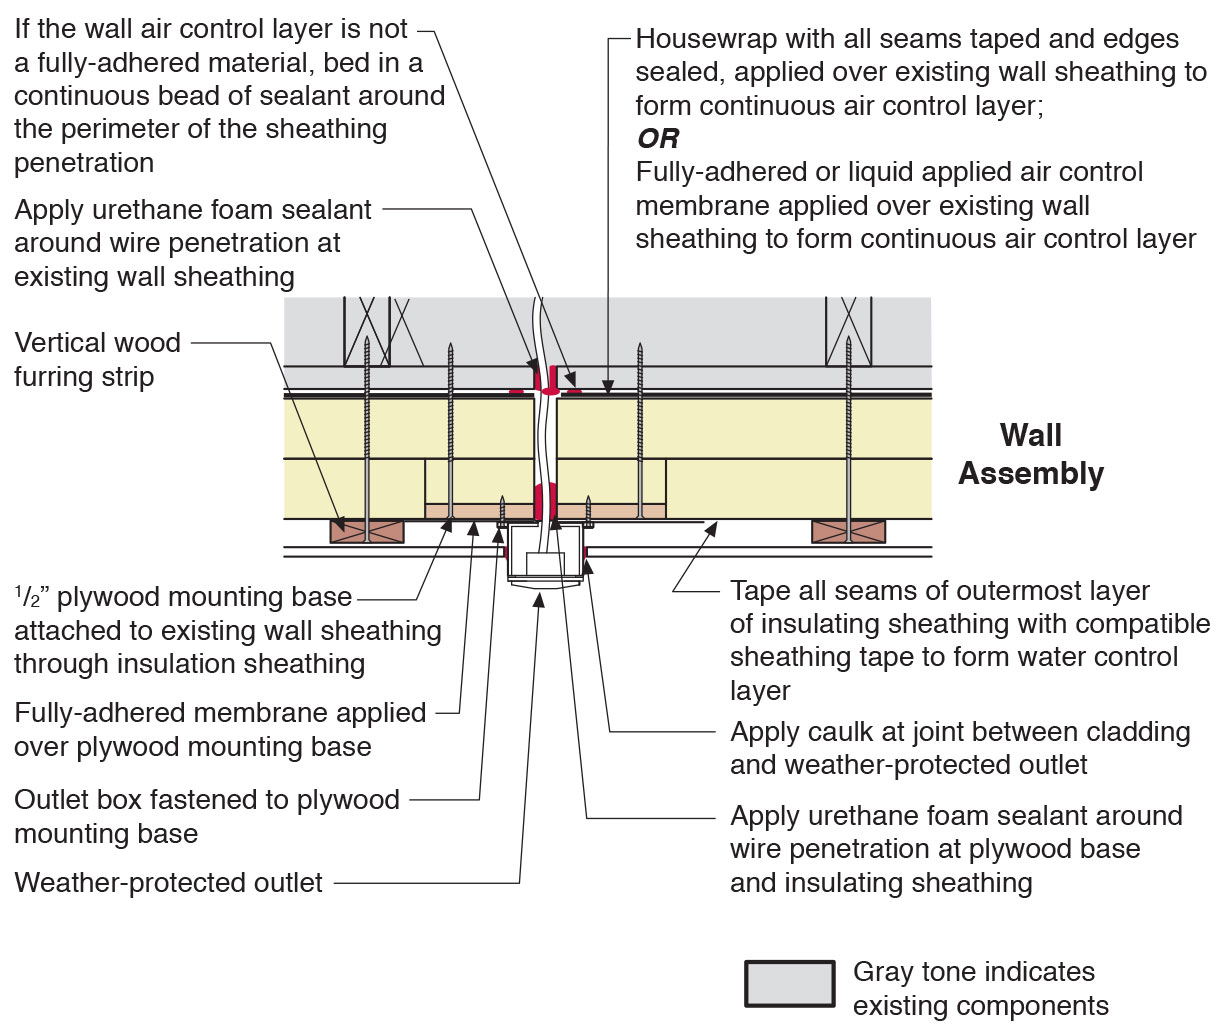
Plan view of electric box installation in exterior wall showing flashing and air sealing details
Image
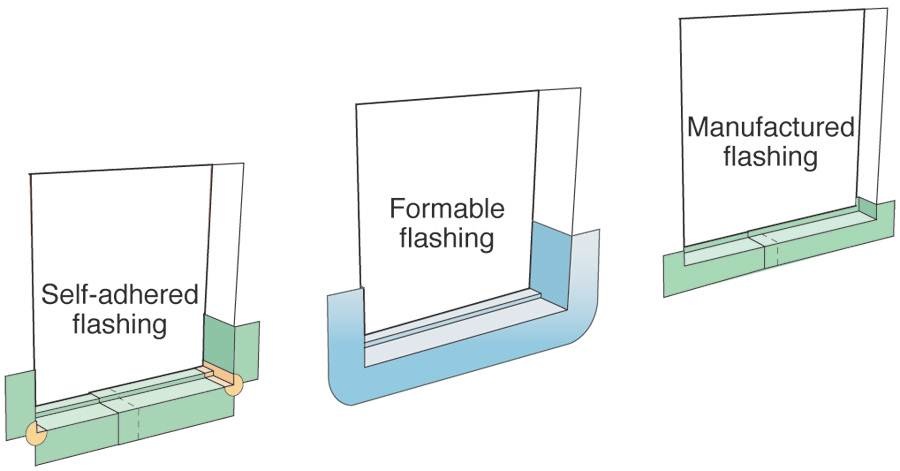
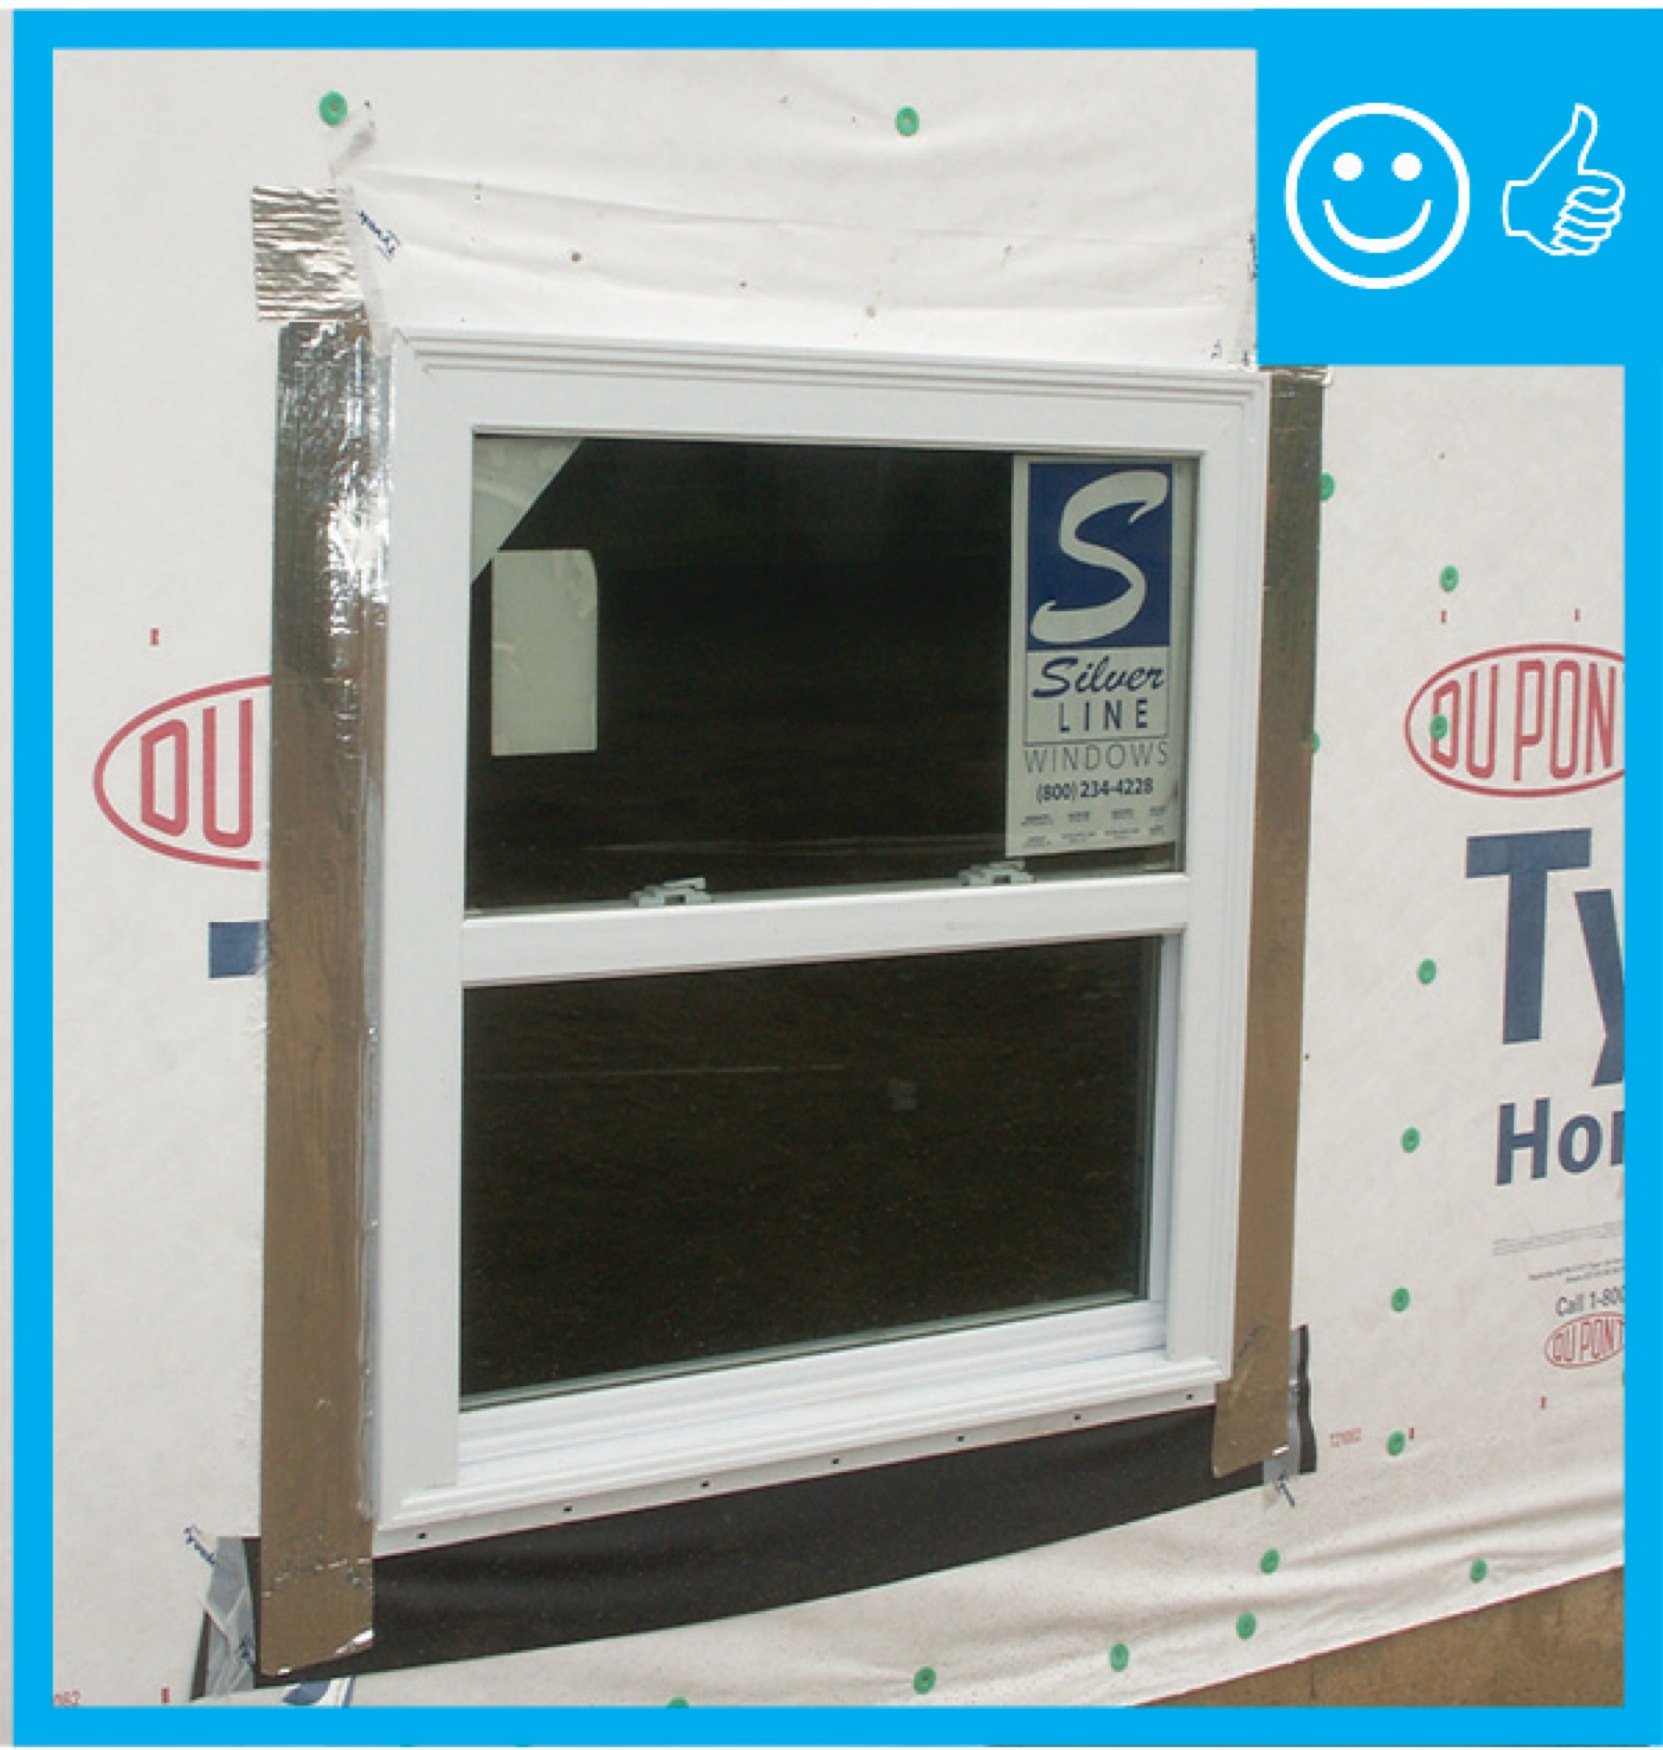
Proper flashing around windows is especially important when the rigid foam serves as the drainage plane in the wall
Image
Image
Image
Image

Right - Permeable rigid mineral wool insulation and appropriate water-management flashing details are integrated with new rigid foam siding to keep water away from the sill beam above the foundation wall
Image
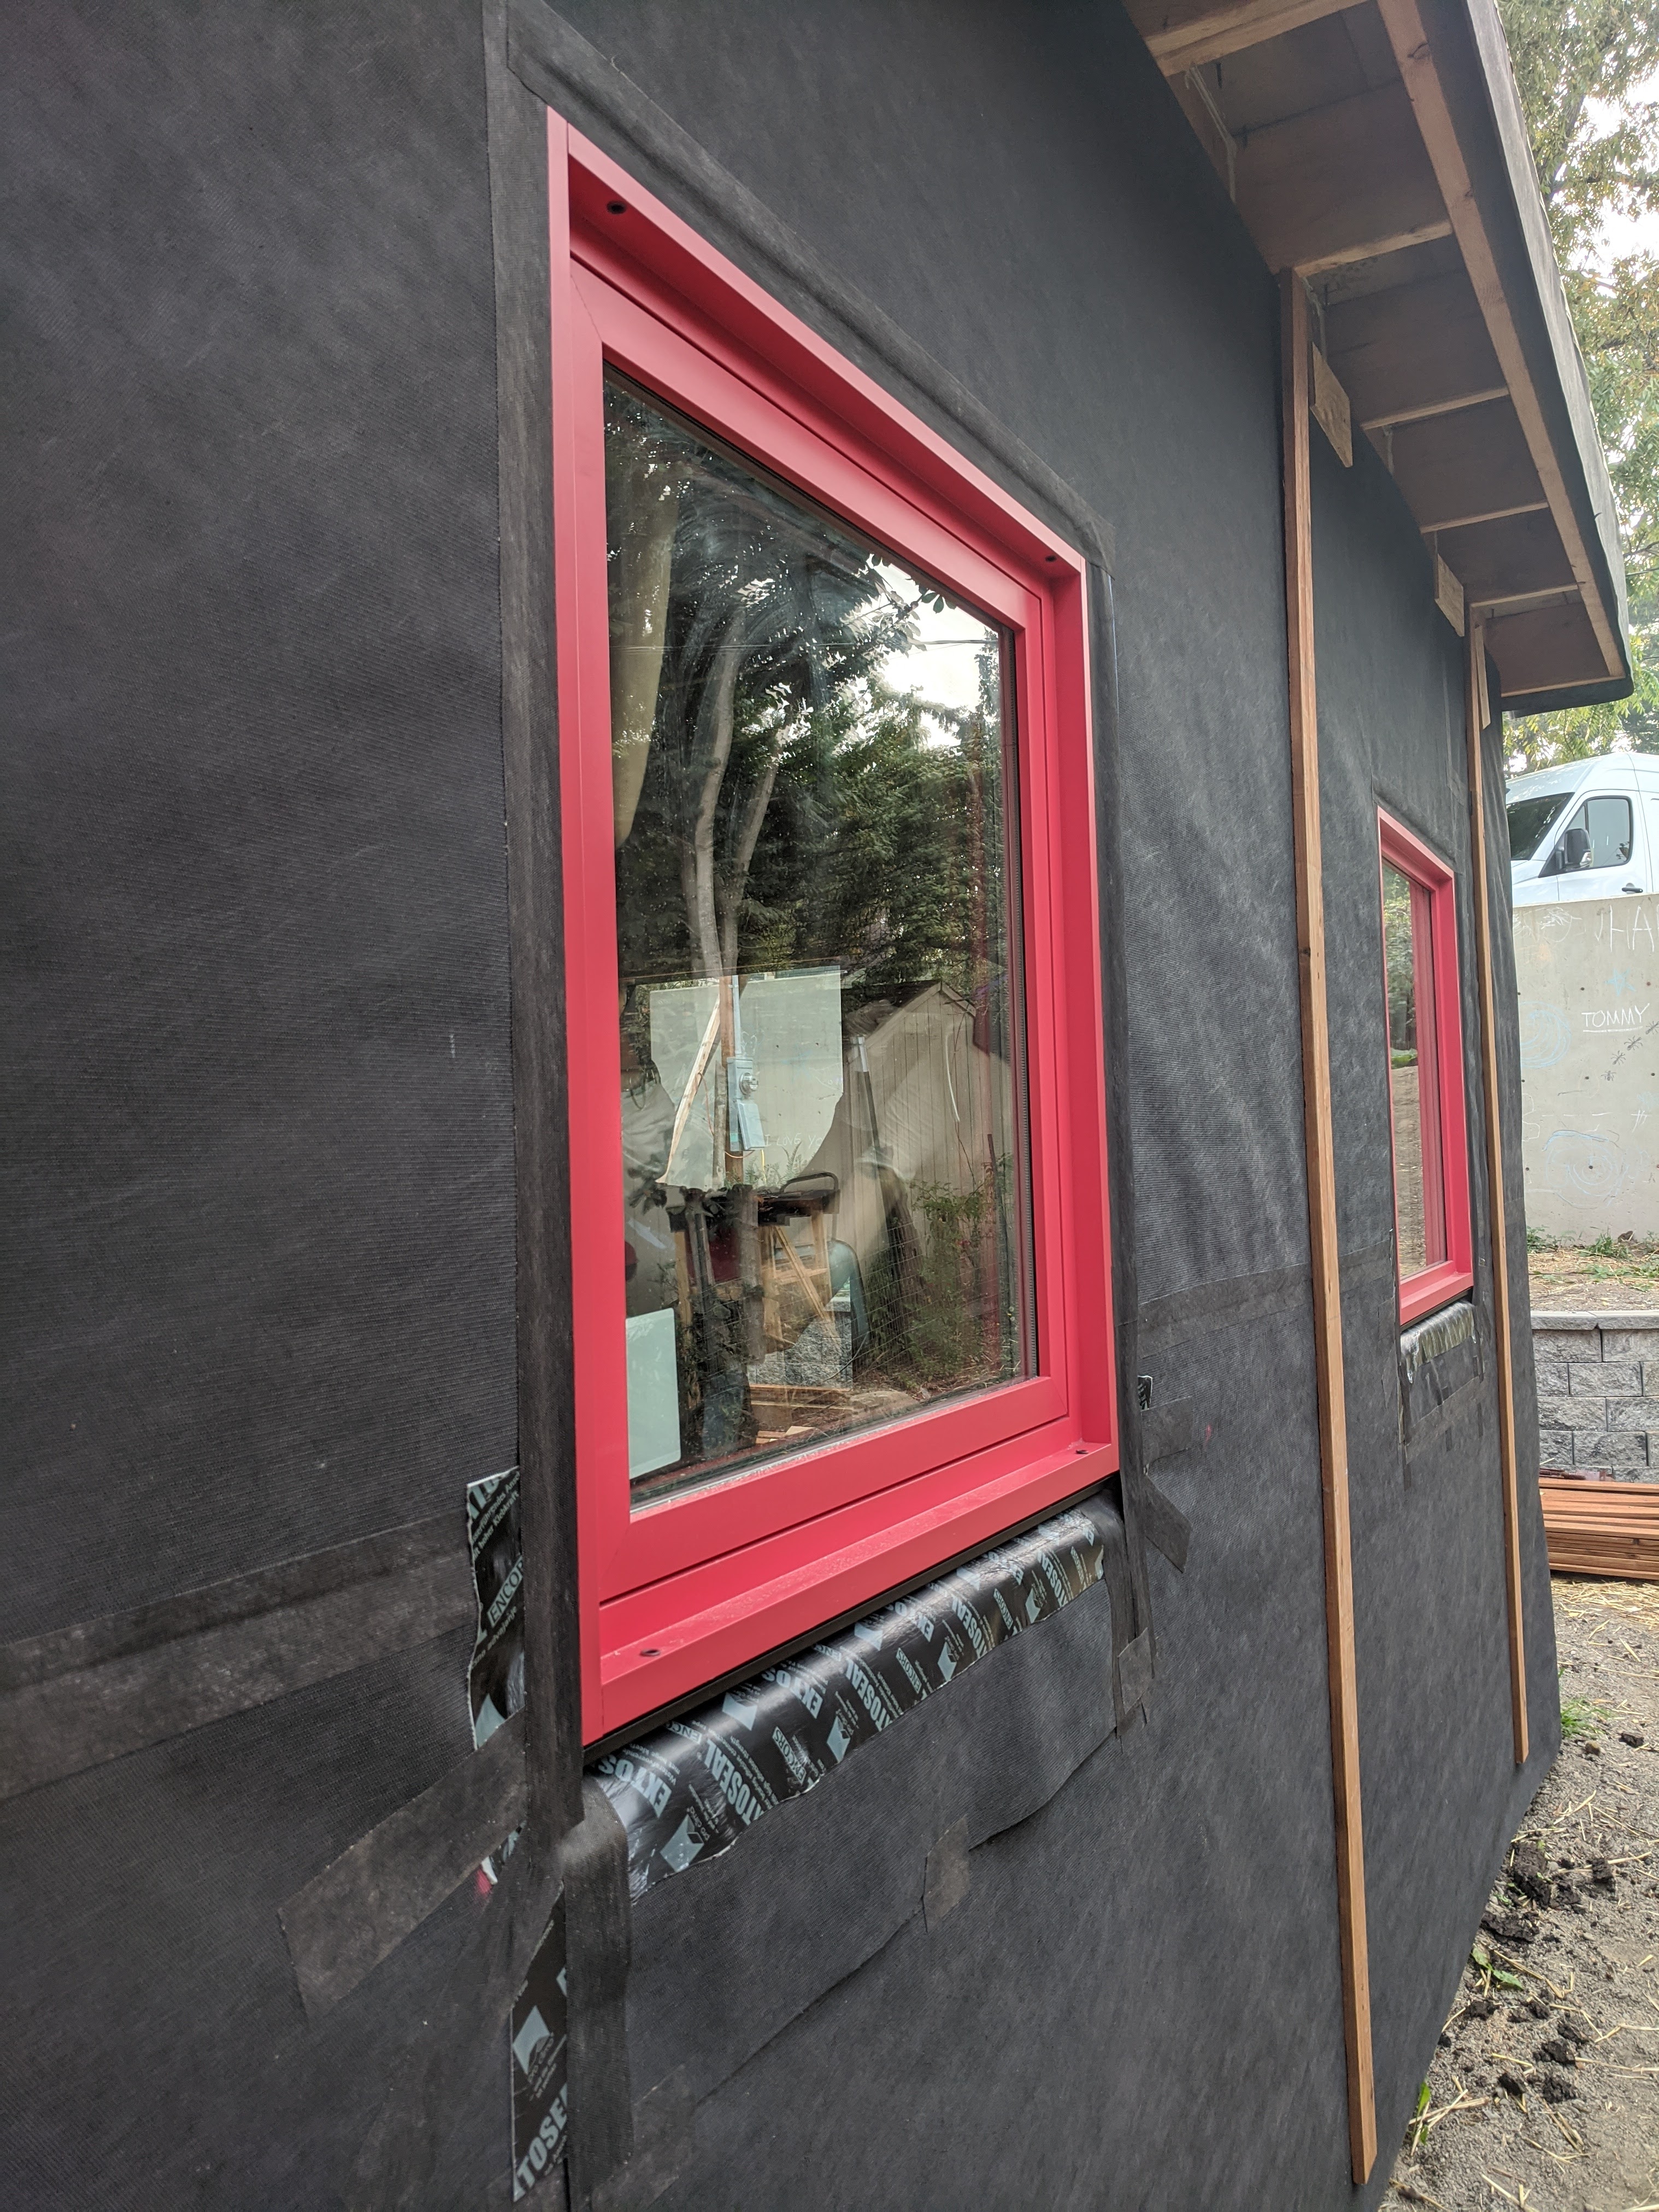
Right - Tape flashing keeps moisture out around and below the window; extra tape reinforces the corners to prevent tearing of the house wrap and to keep water out of this critical juncture.
Image
Image

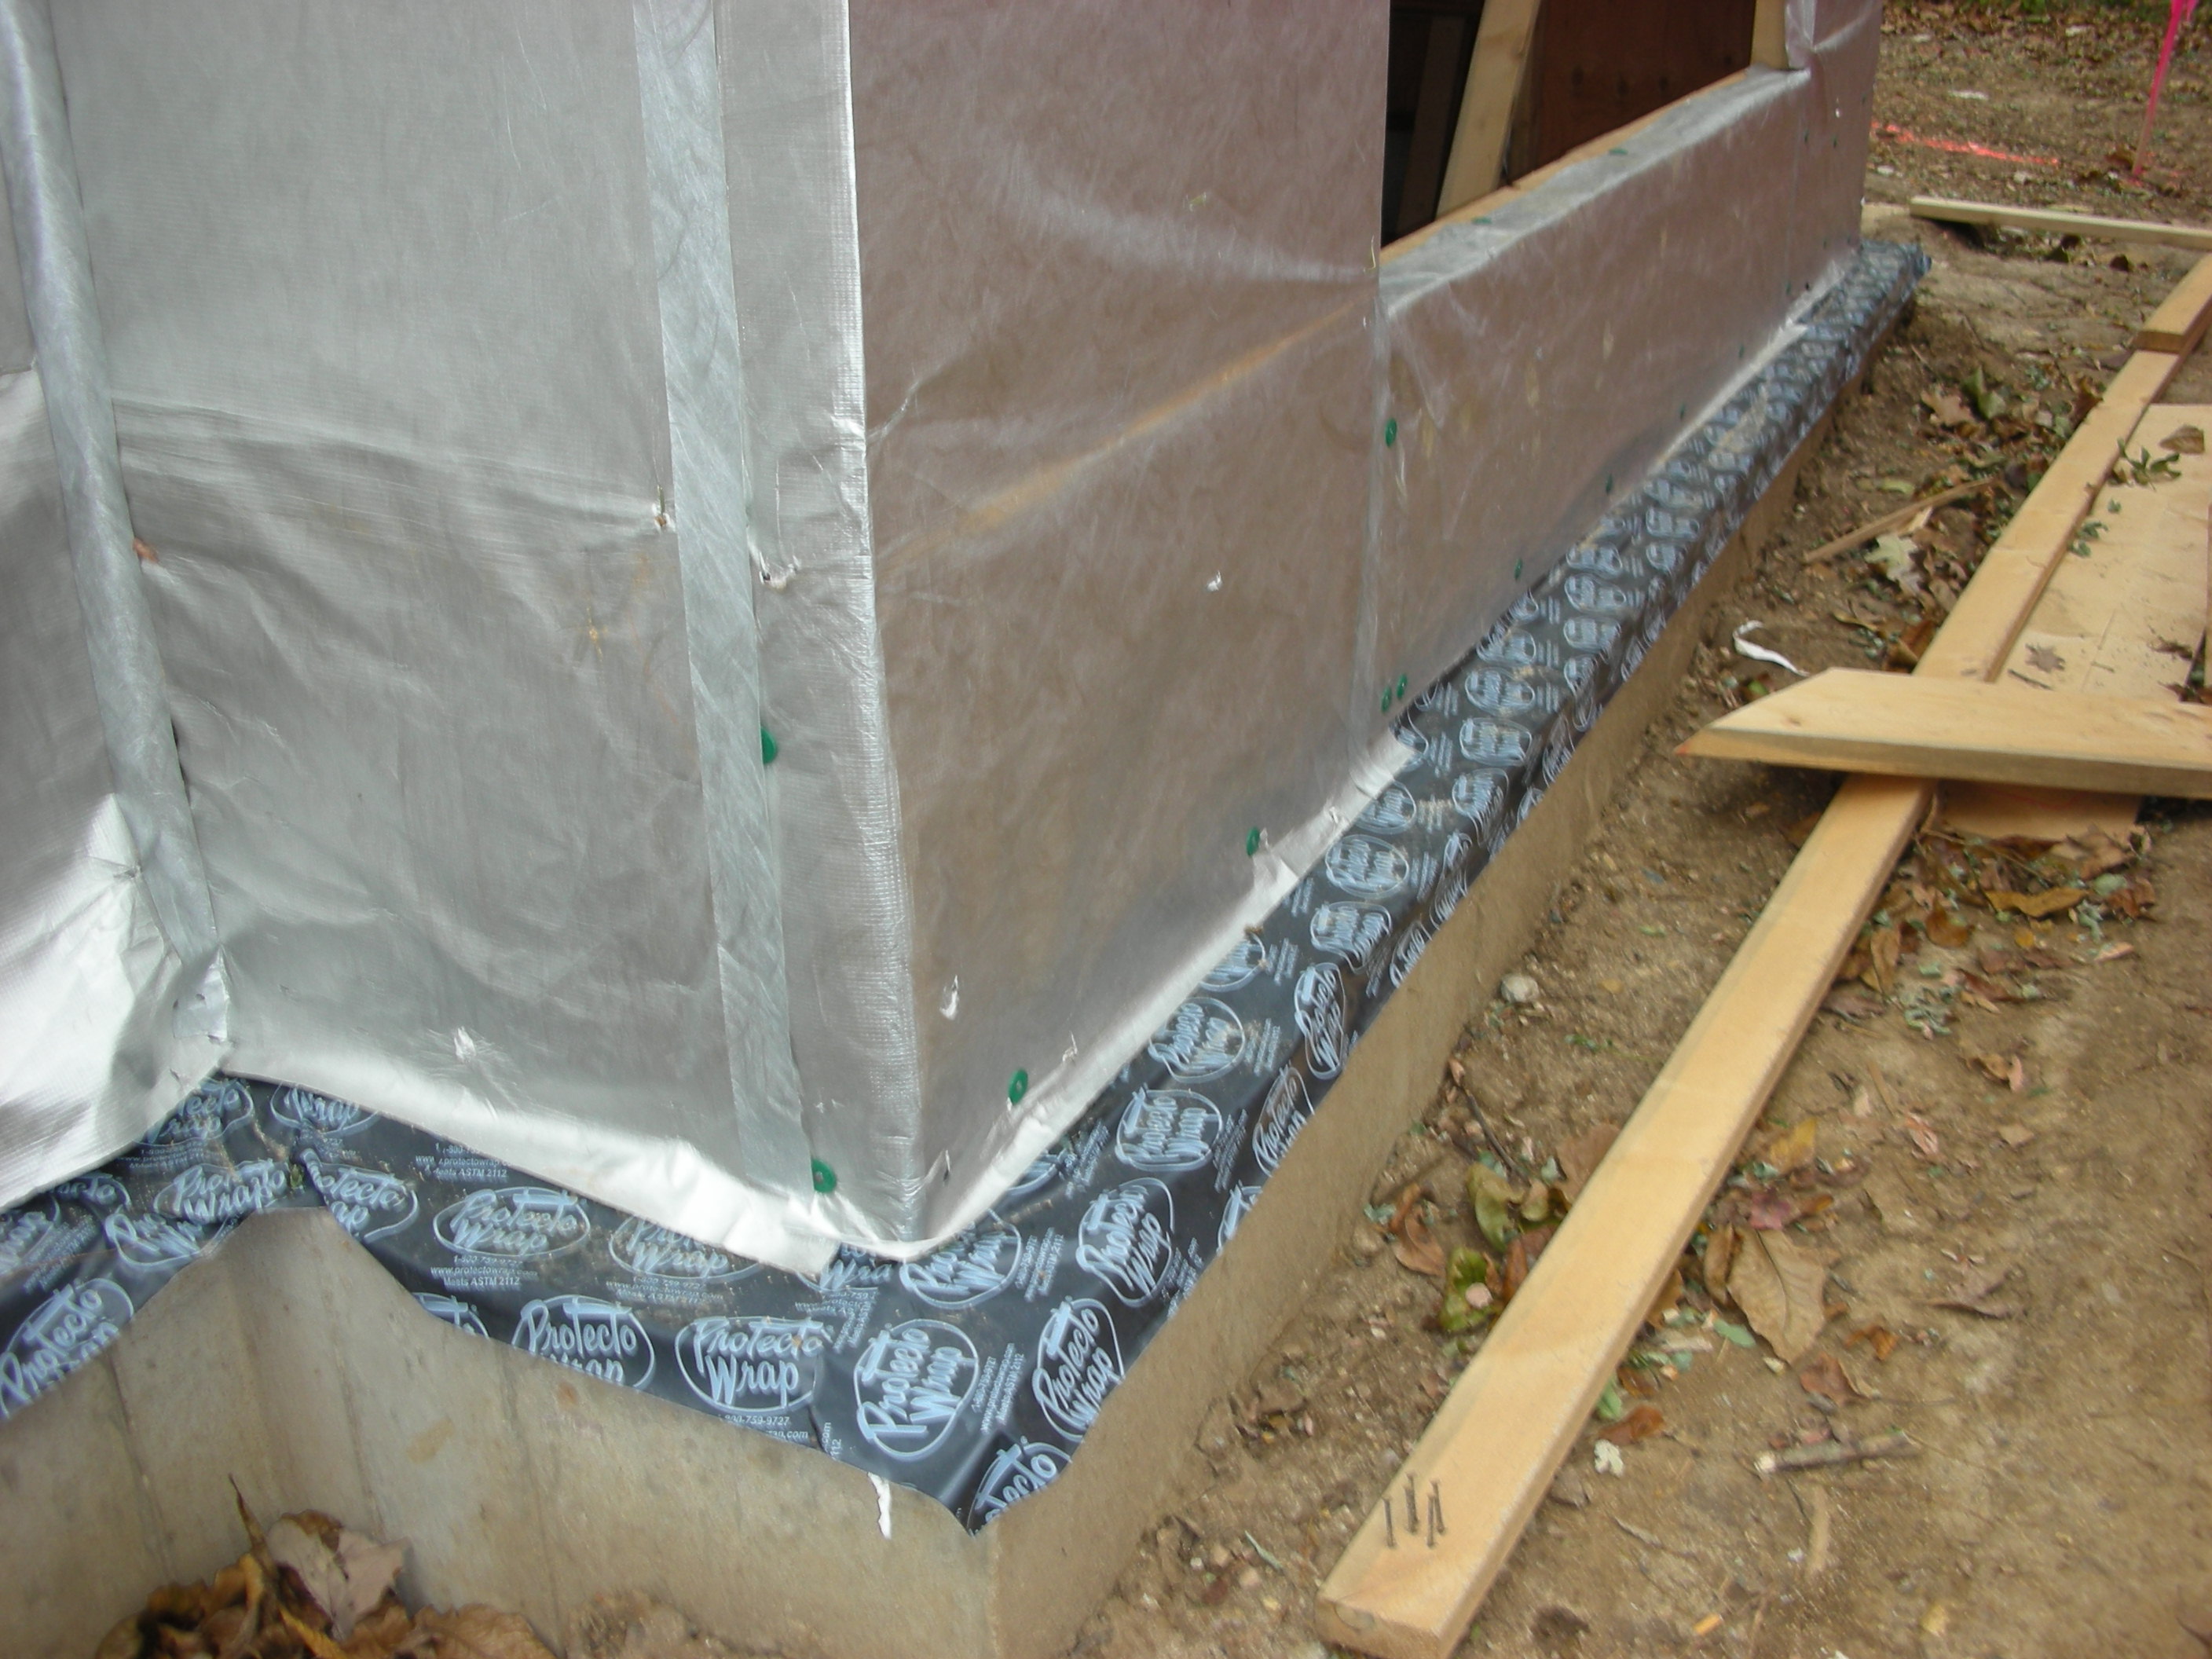
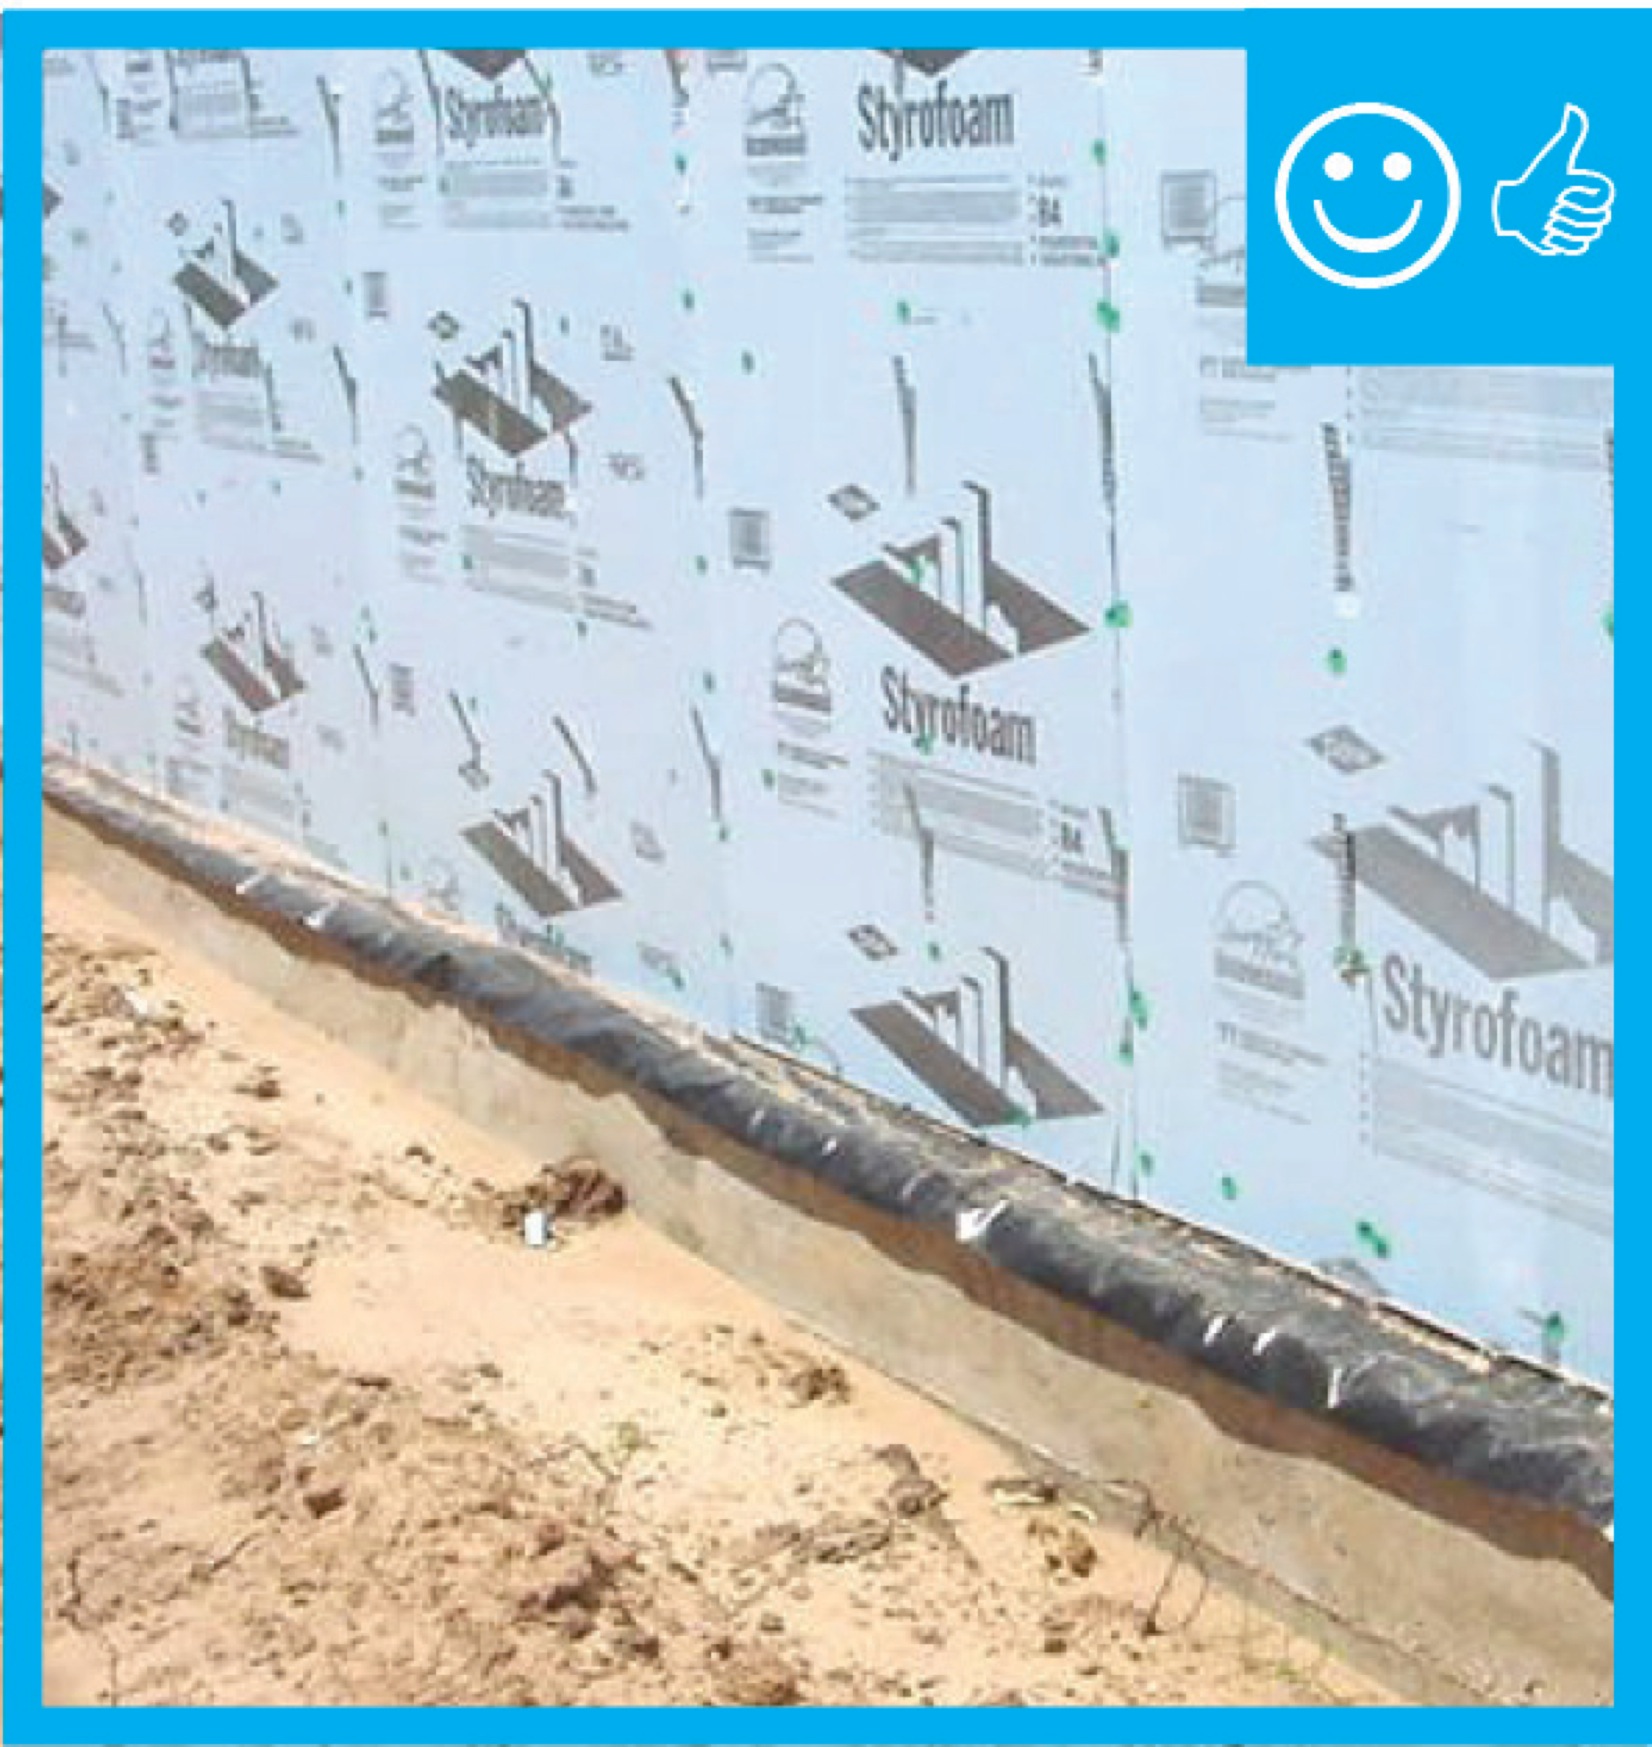
Right – The base of the wall is water proofed and the seam between the base of the wall and the sidewalk is air sealed.
Image

Right – The flashing is properly installed to create a complete drainage system with continuous rigid insulation sheathing/siding
Image

Image
Right – The water-resistant barrier is layered over the step flashing to provide a complete drainage system
Image
Right – There is flashing installed along the top of the window and the water-resistant barrier is layered over to create a complete drainage system
Image
Right – There is flashing installed at the bottom of the wall to create a satisfactory drainage system
Image
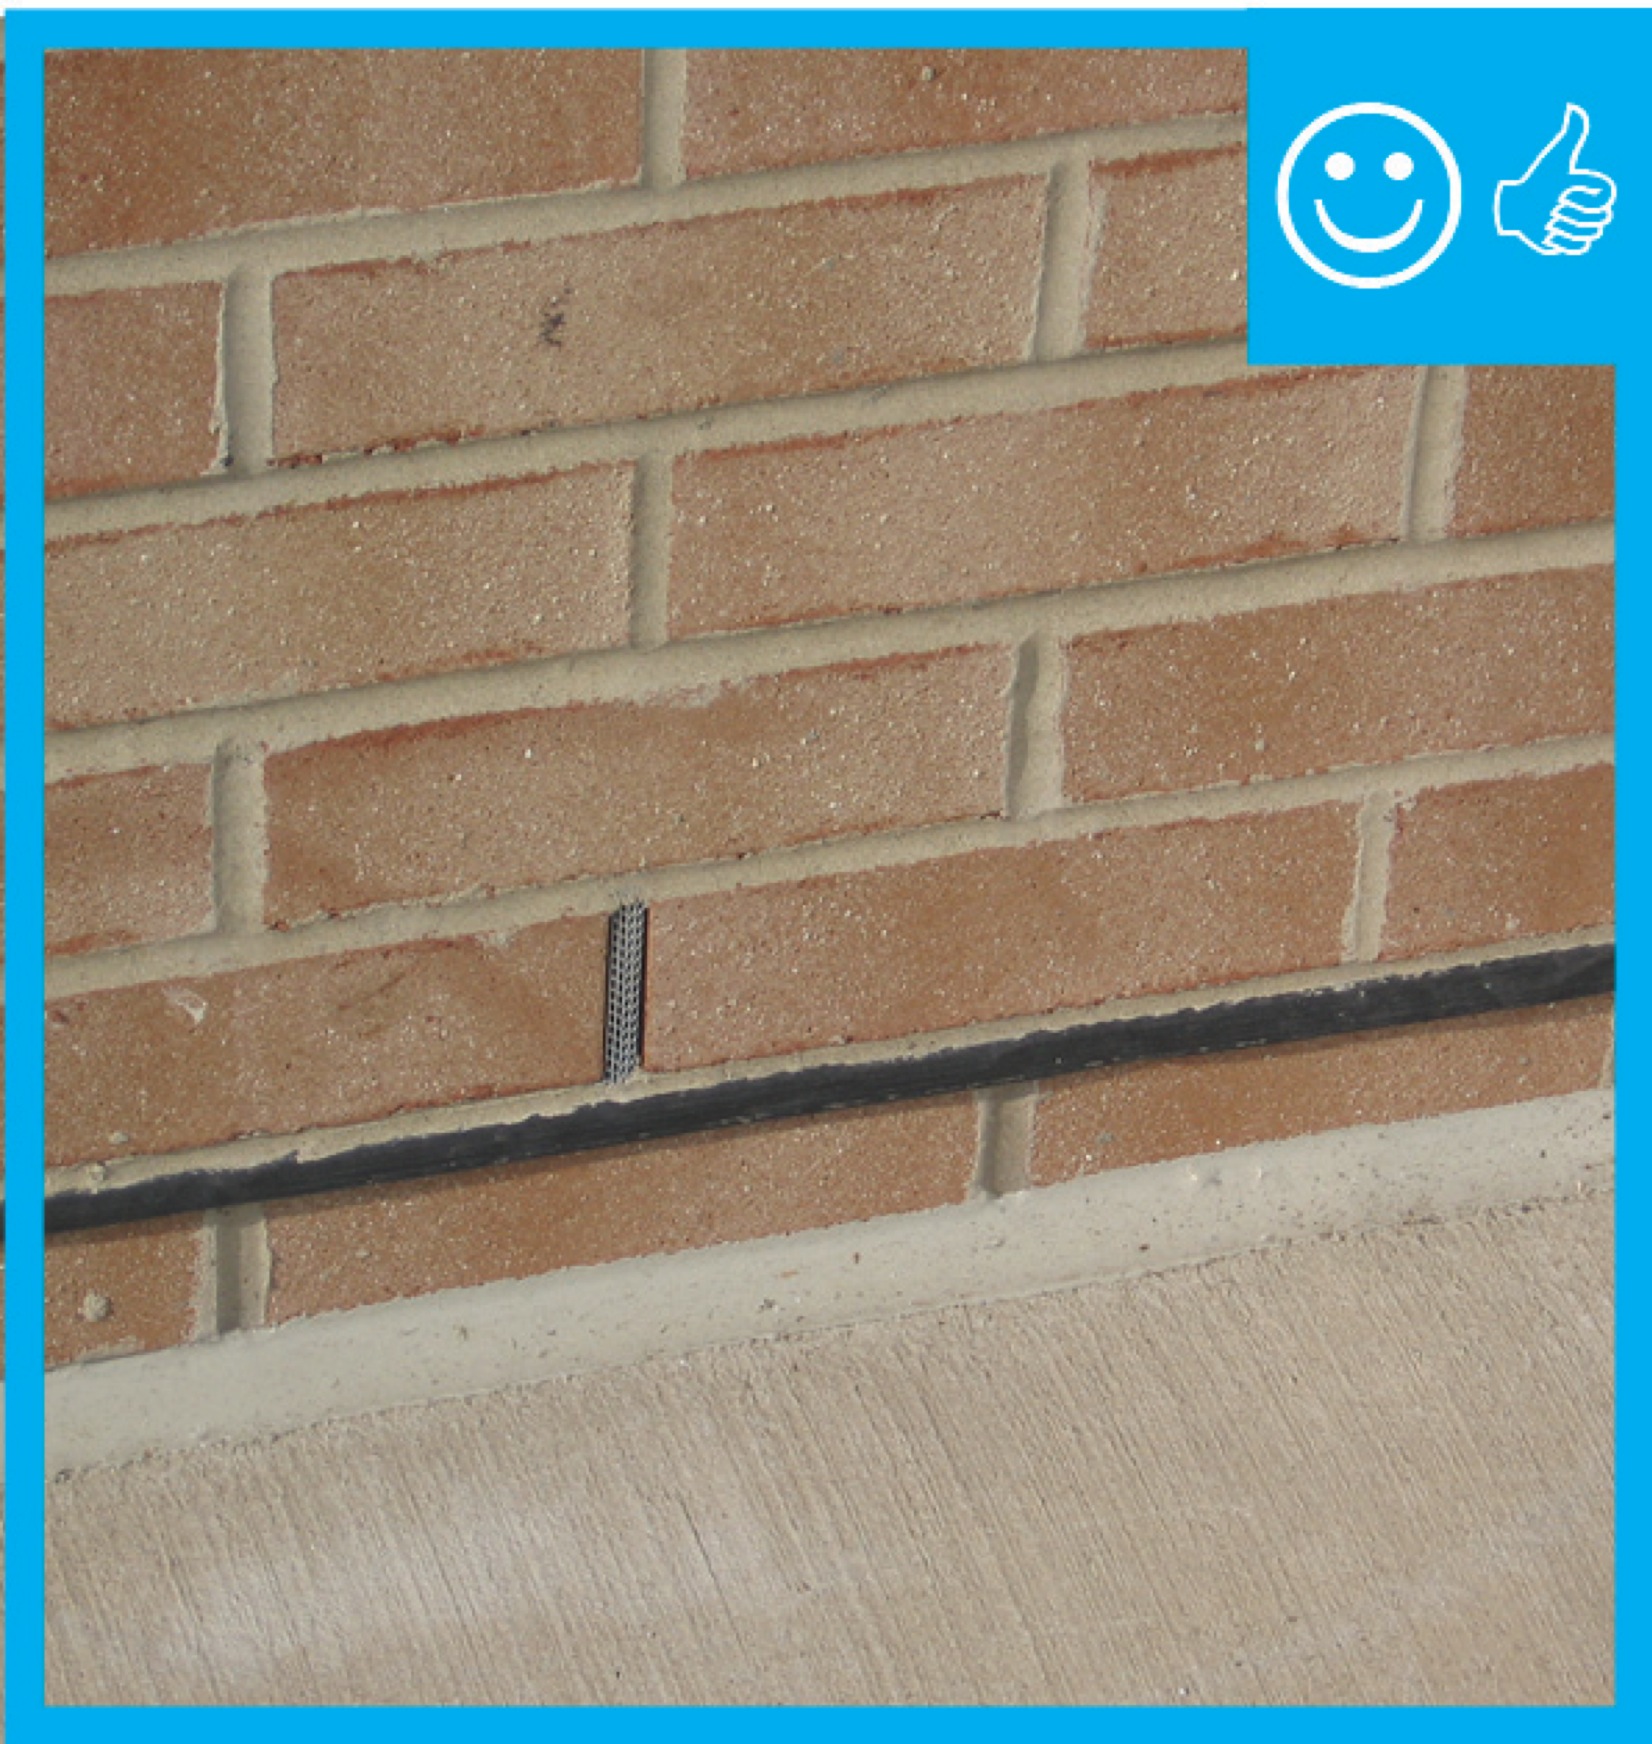
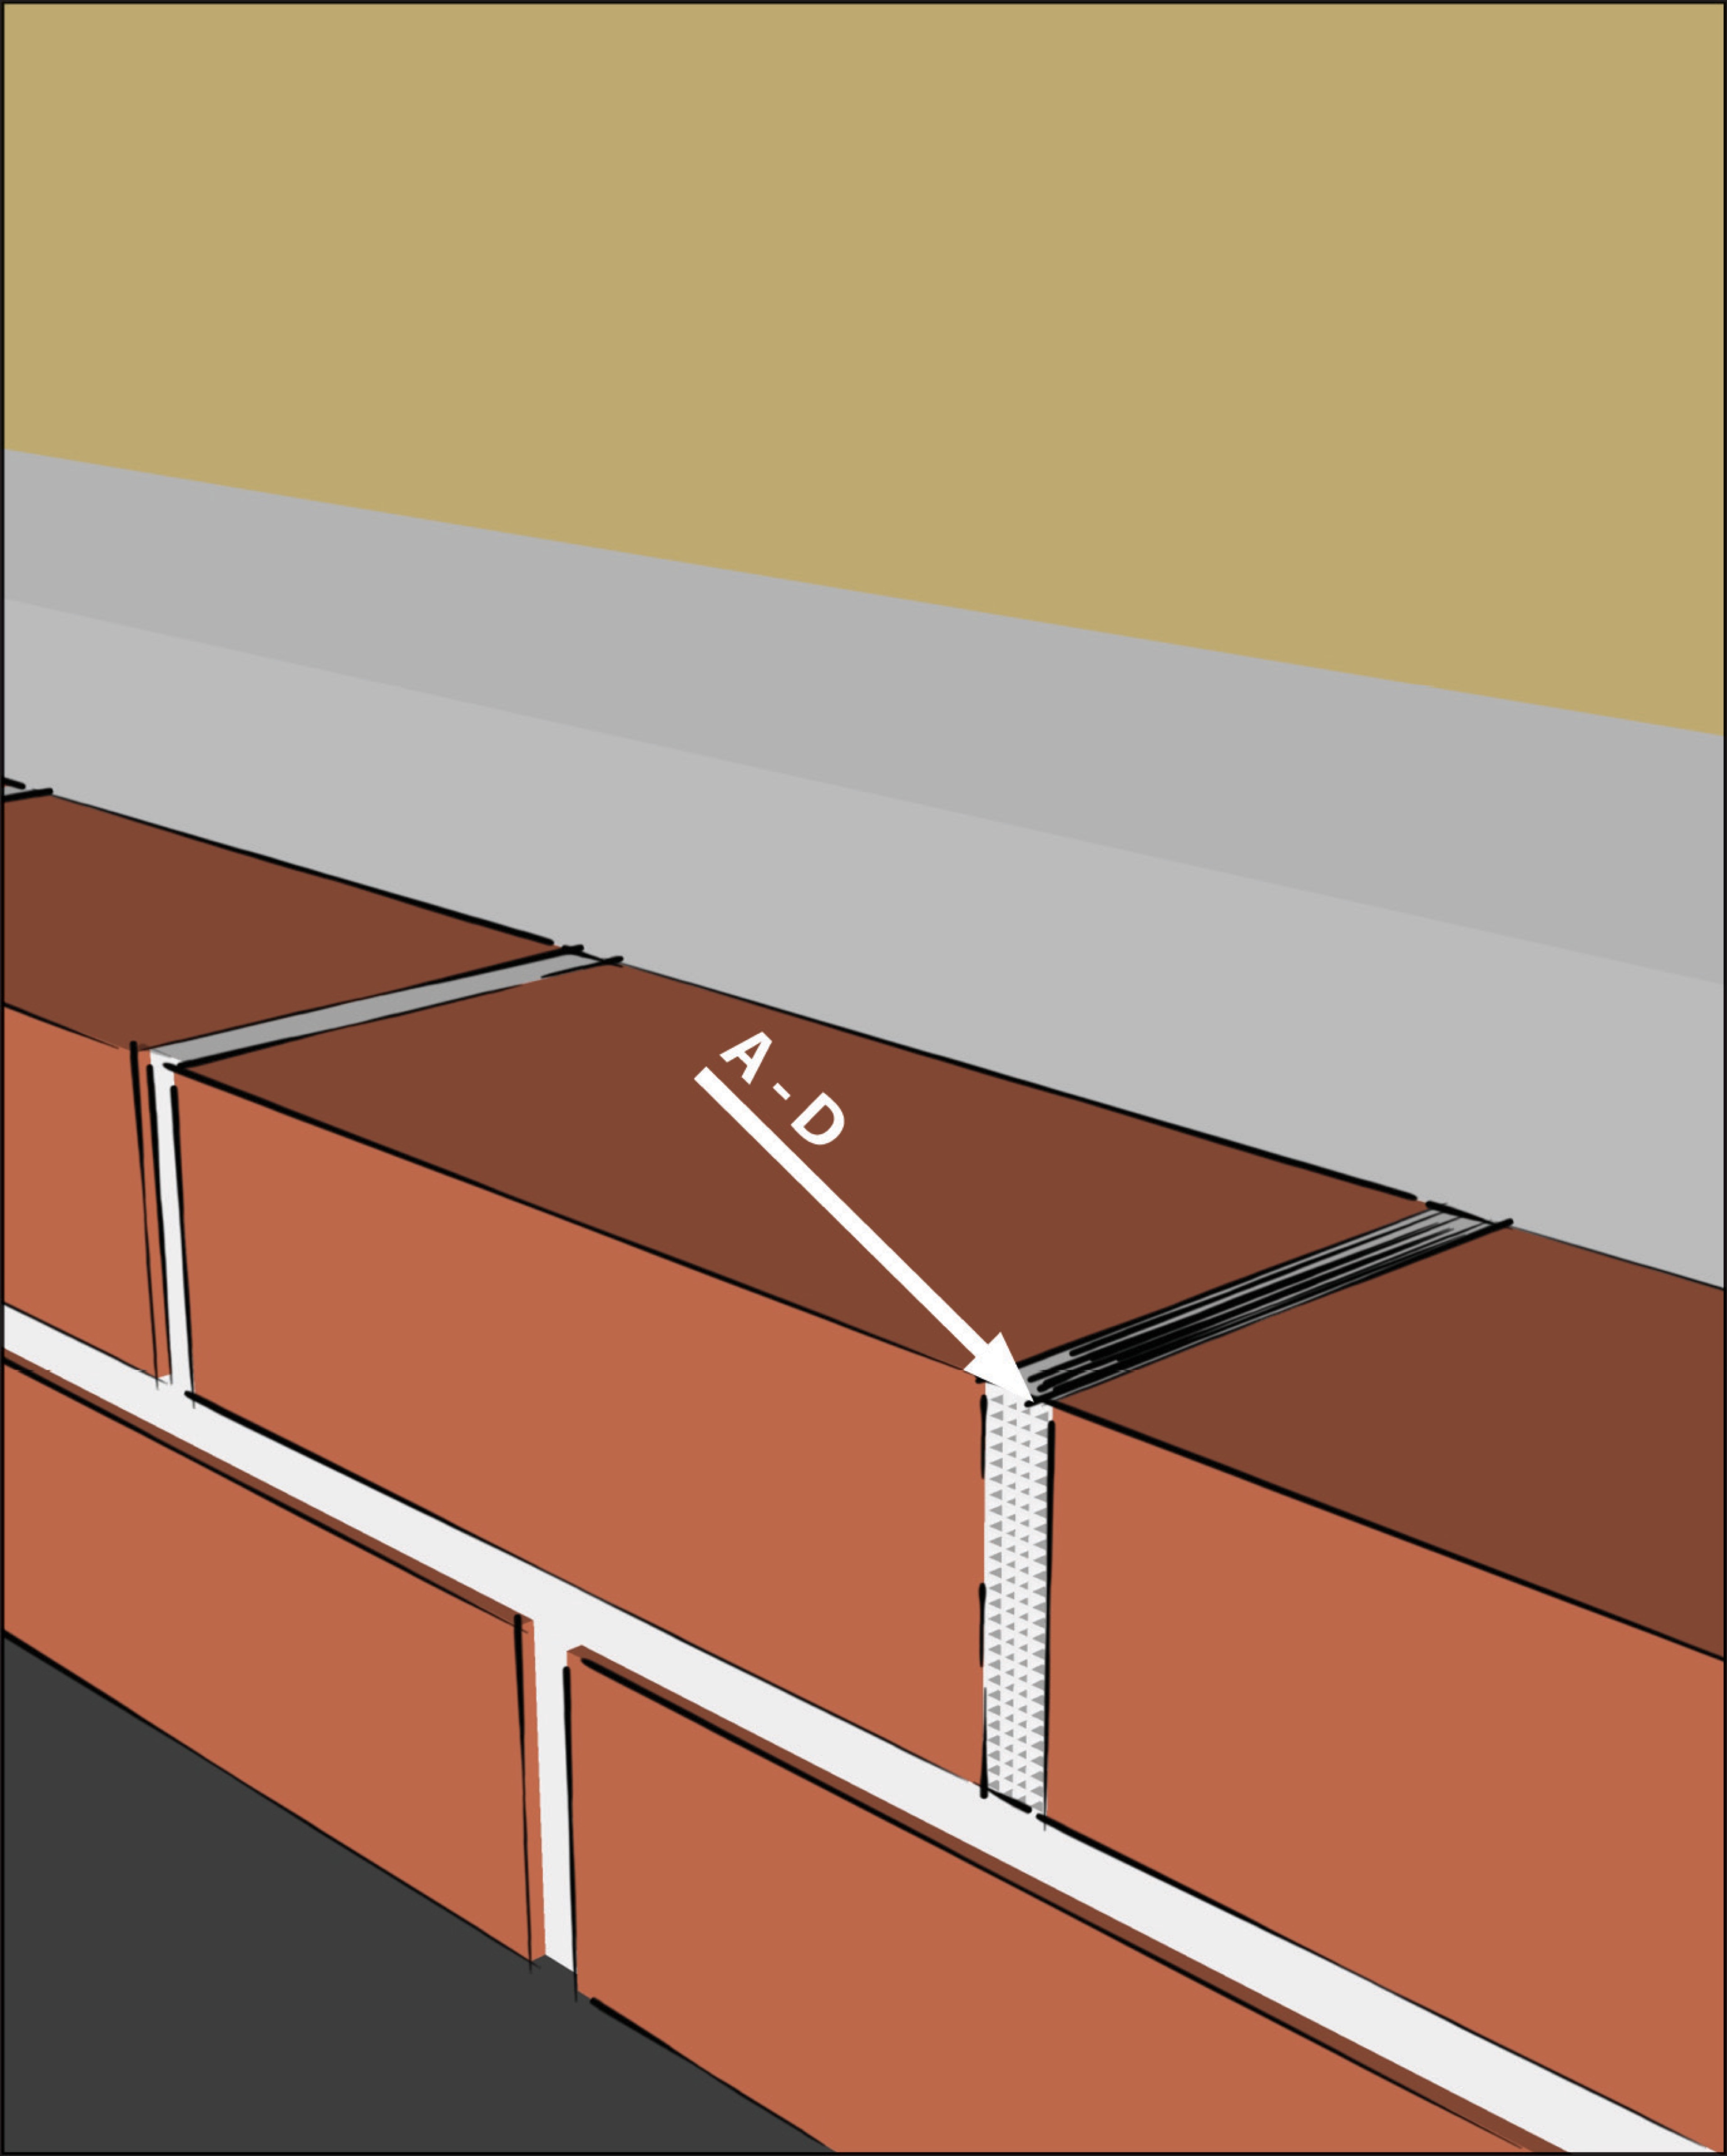
Right: Brick veneer is flashed correctly with weep holes and a fine mesh screen is installed to prevent pest entry.
Image
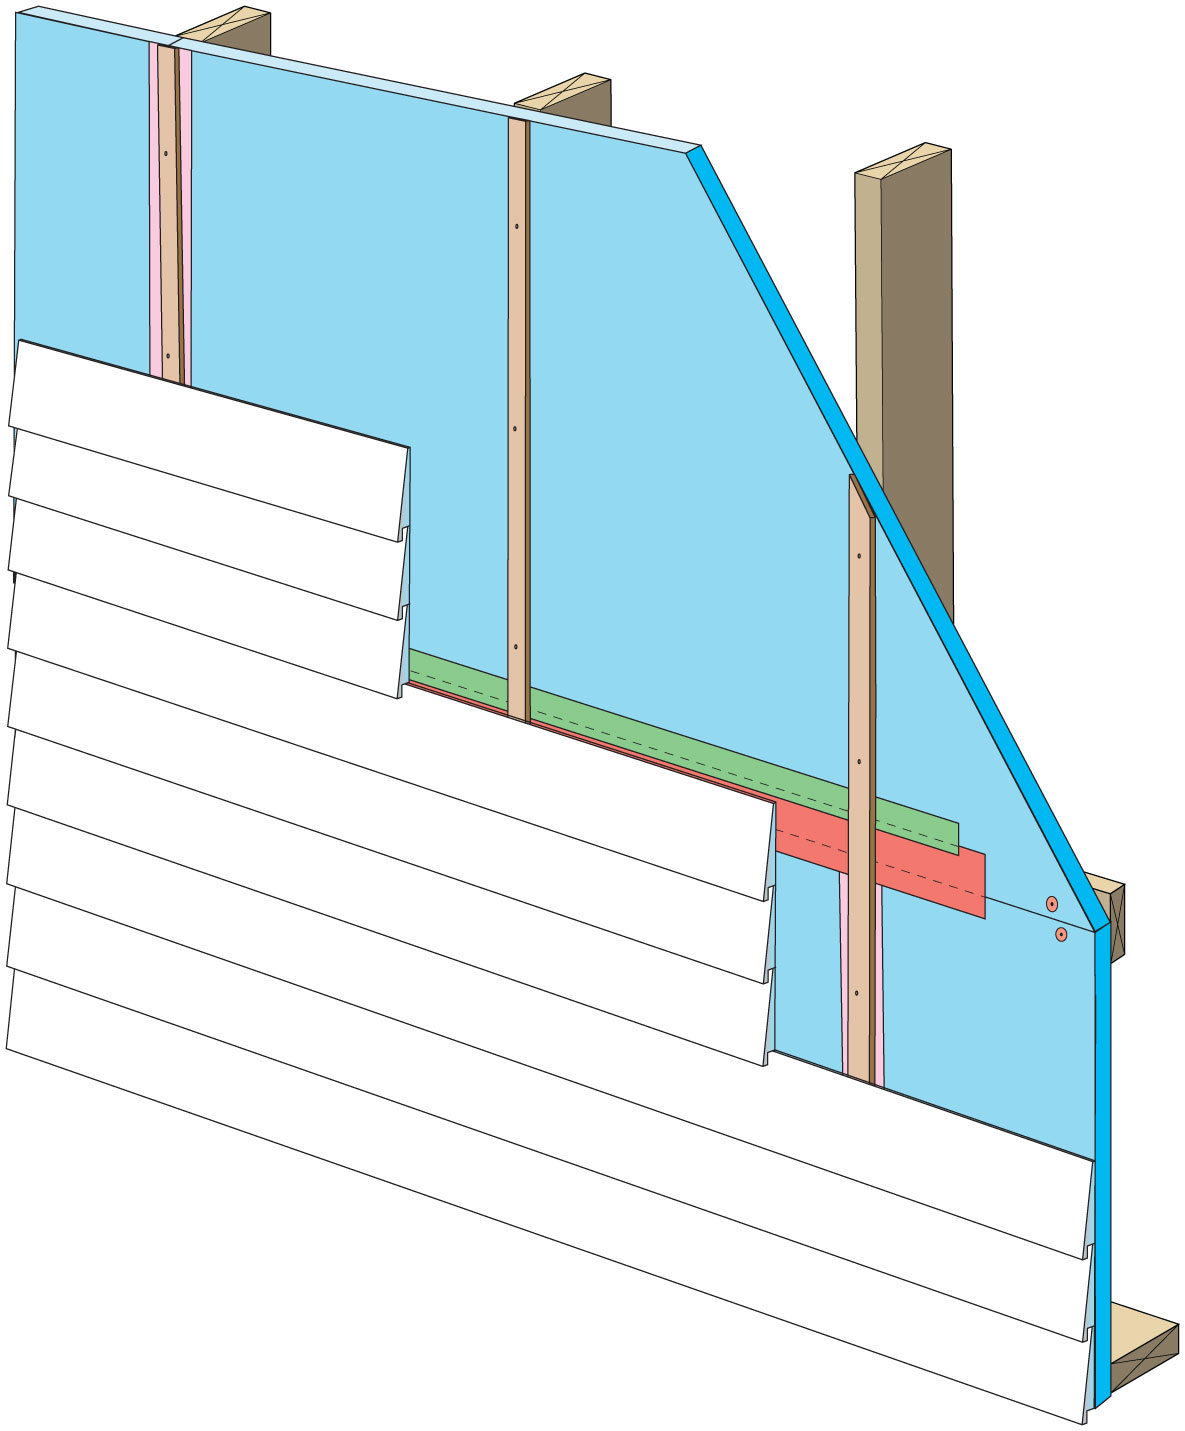
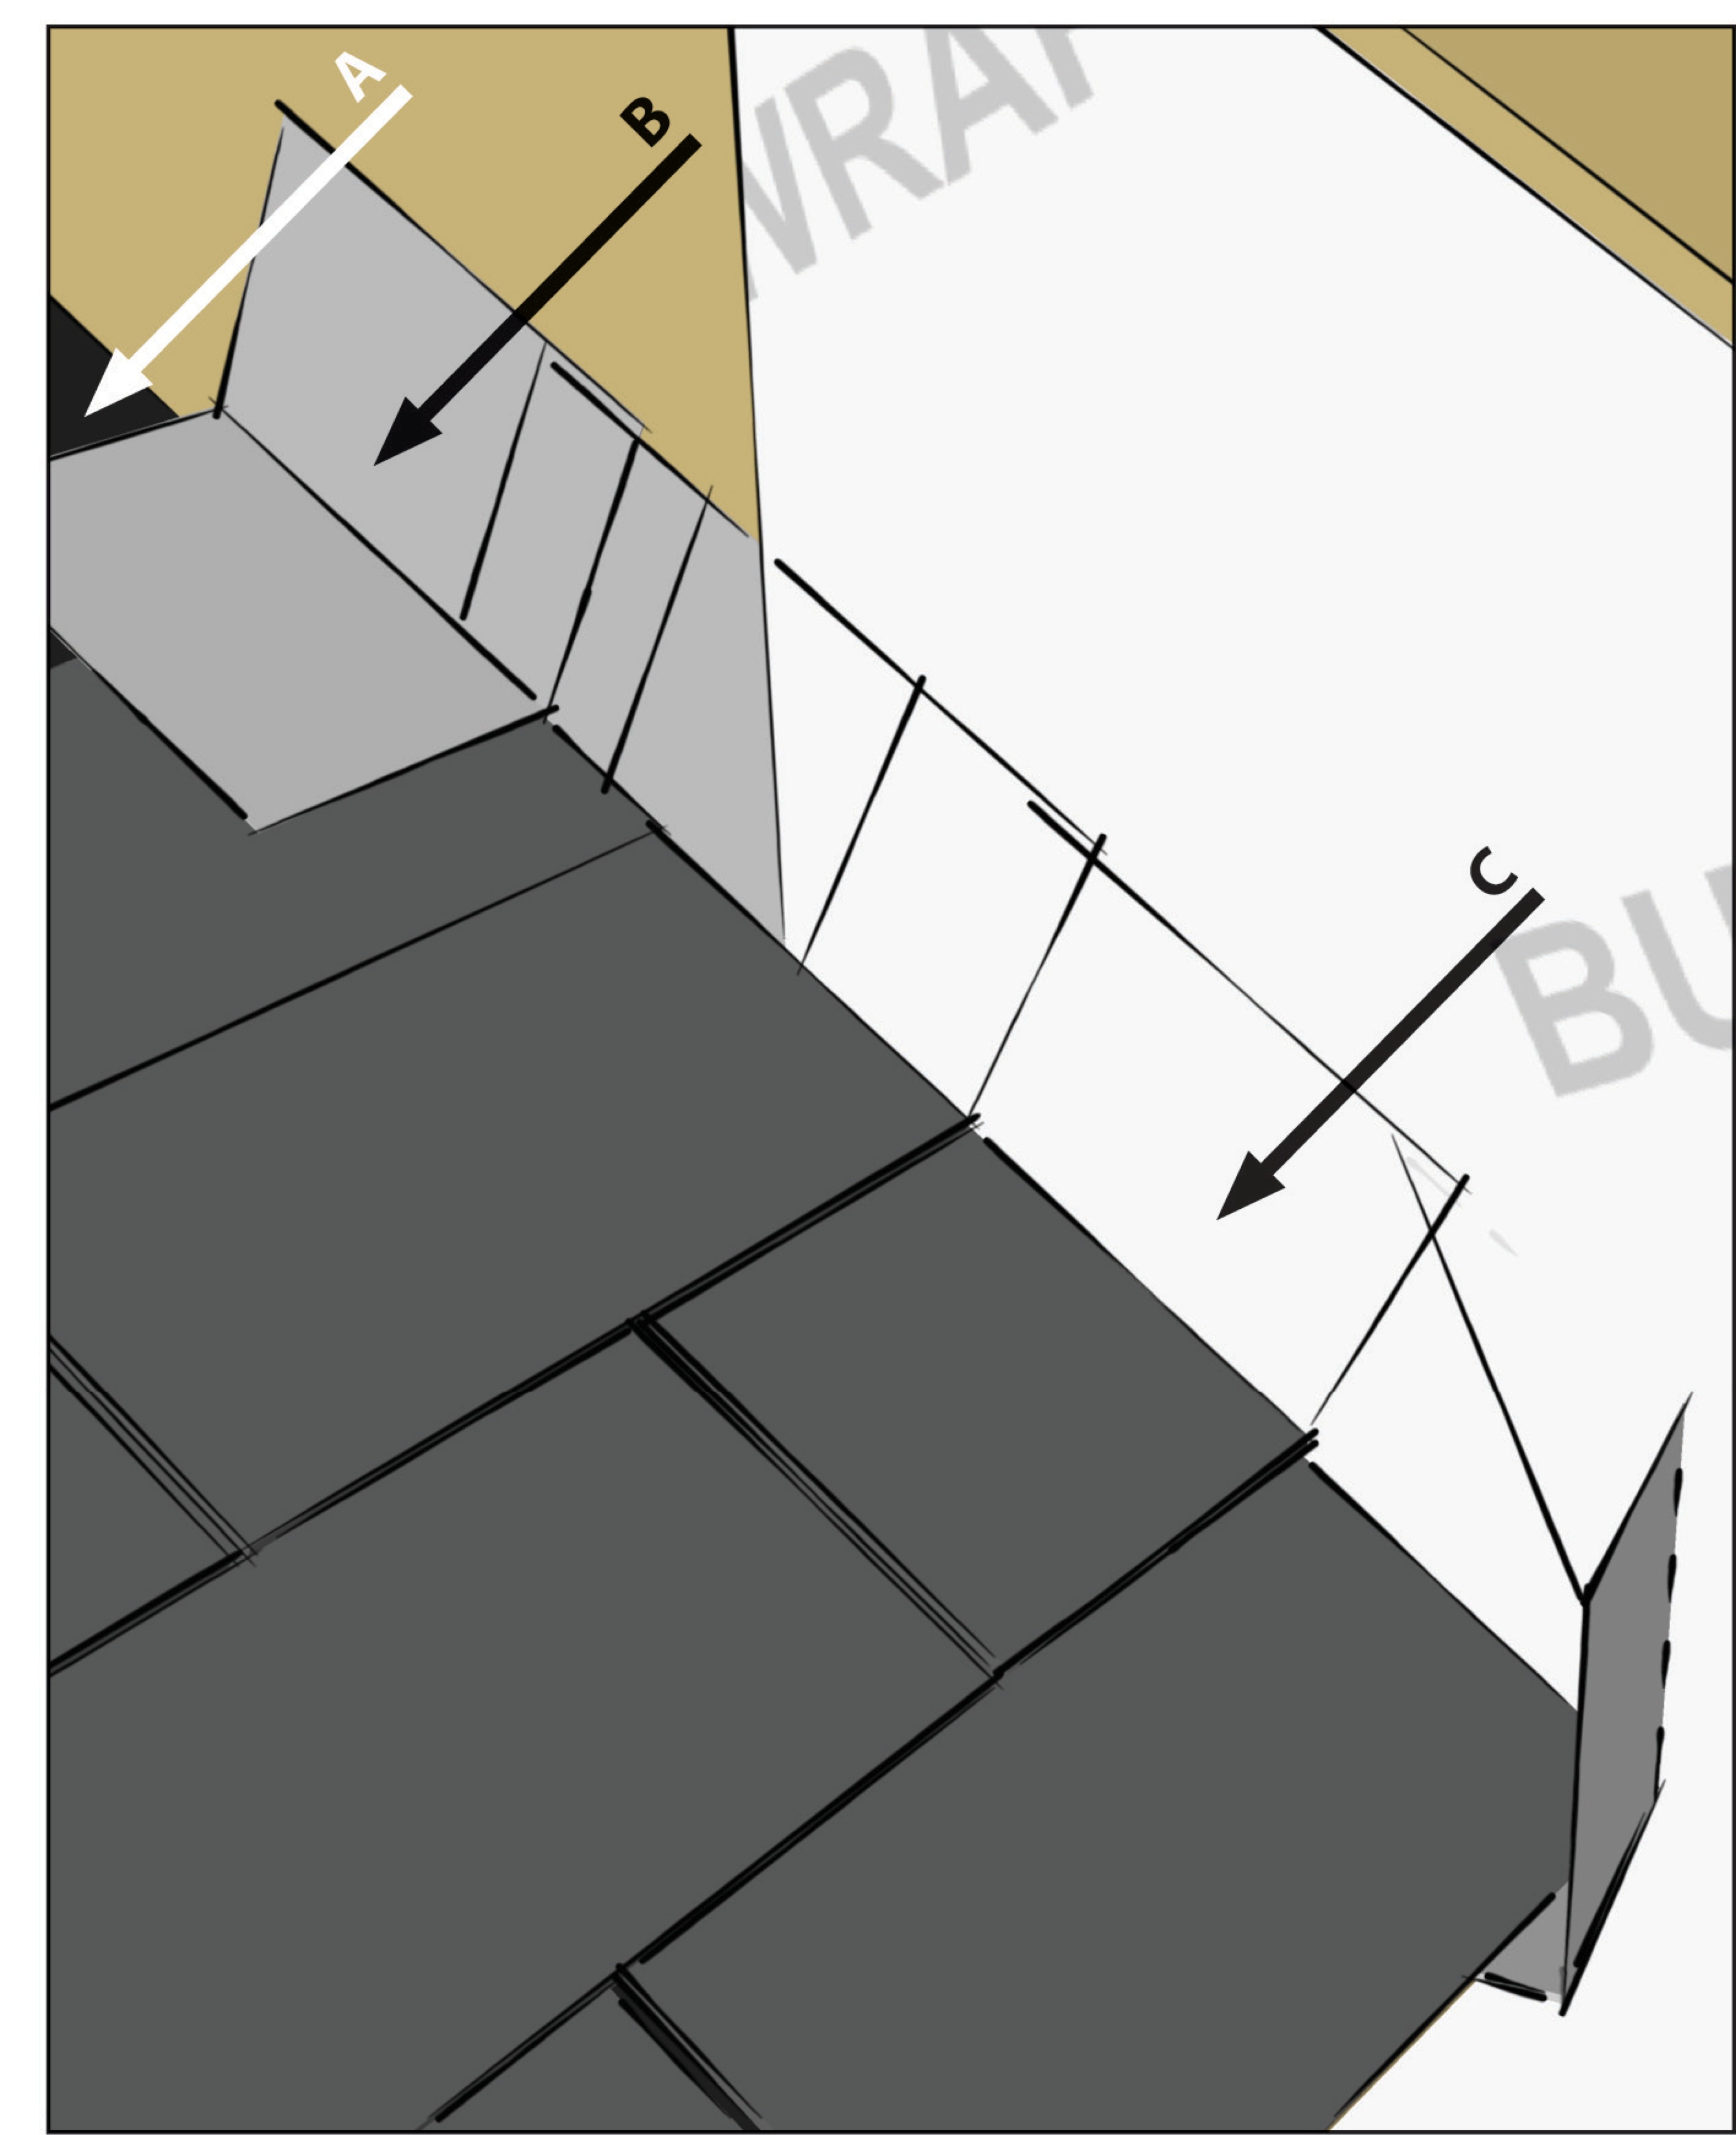
Rigid foam insulation can serve as the drainage plane when all seams are taped. Furring strips provide an air gap behind the cladding.
Image
Image
Image
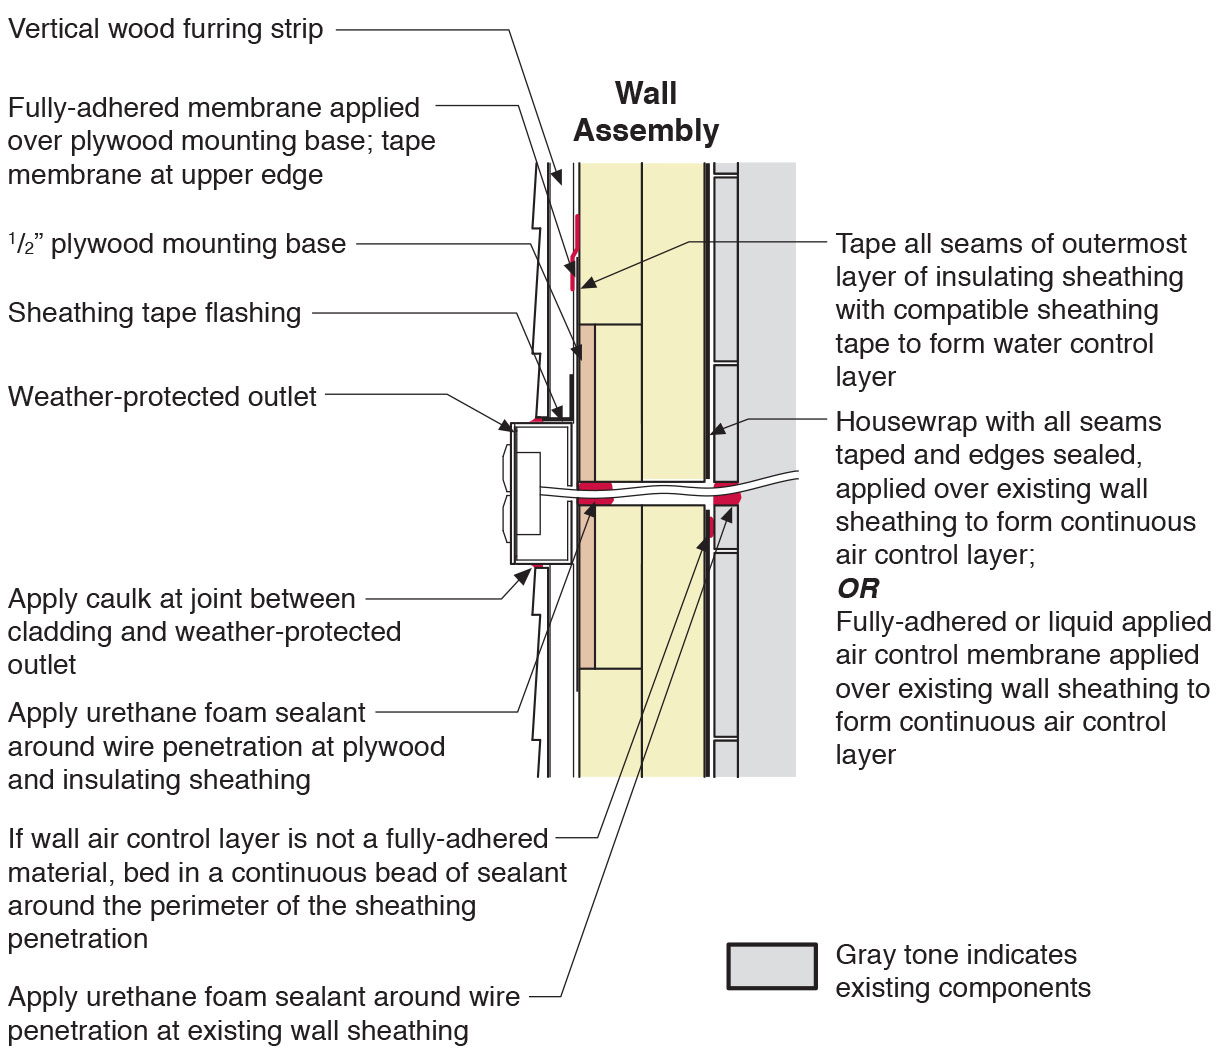
Section view of electric box installation in exterior wall showing flashing and air sealing details
Image

Image
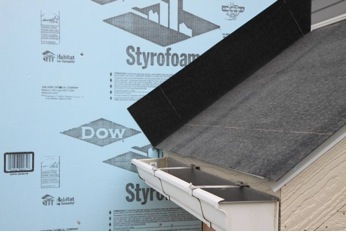
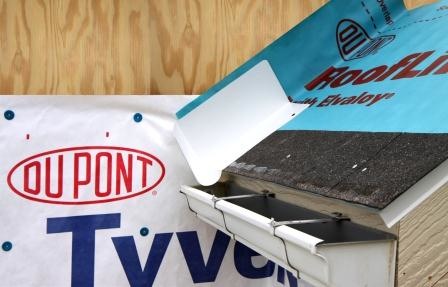
Step 1. Apply roof underlayment over roof deck and up the sidewall over the rigid foam insulation
Image
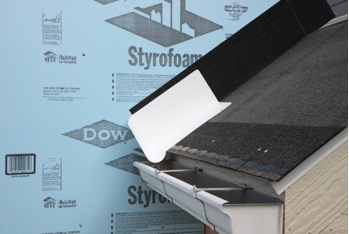
Step 2. Install shingle starter strip then kick-out diverter as first piece of step flashing.
Image
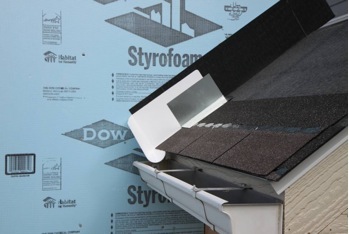
Step 3. Place the first shingle and the next section of sidewall flashing over upper edge of diverter
Image

Step 4. Install remaining sidewall flashing, appropriate counter flashing, and shingles
Image
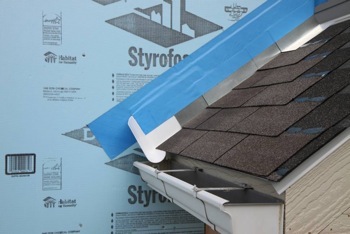
Step 5. Apply self-adhesive flashing over top edge of the wall flashing, diverter, and rigid foam insulation
Image
Image
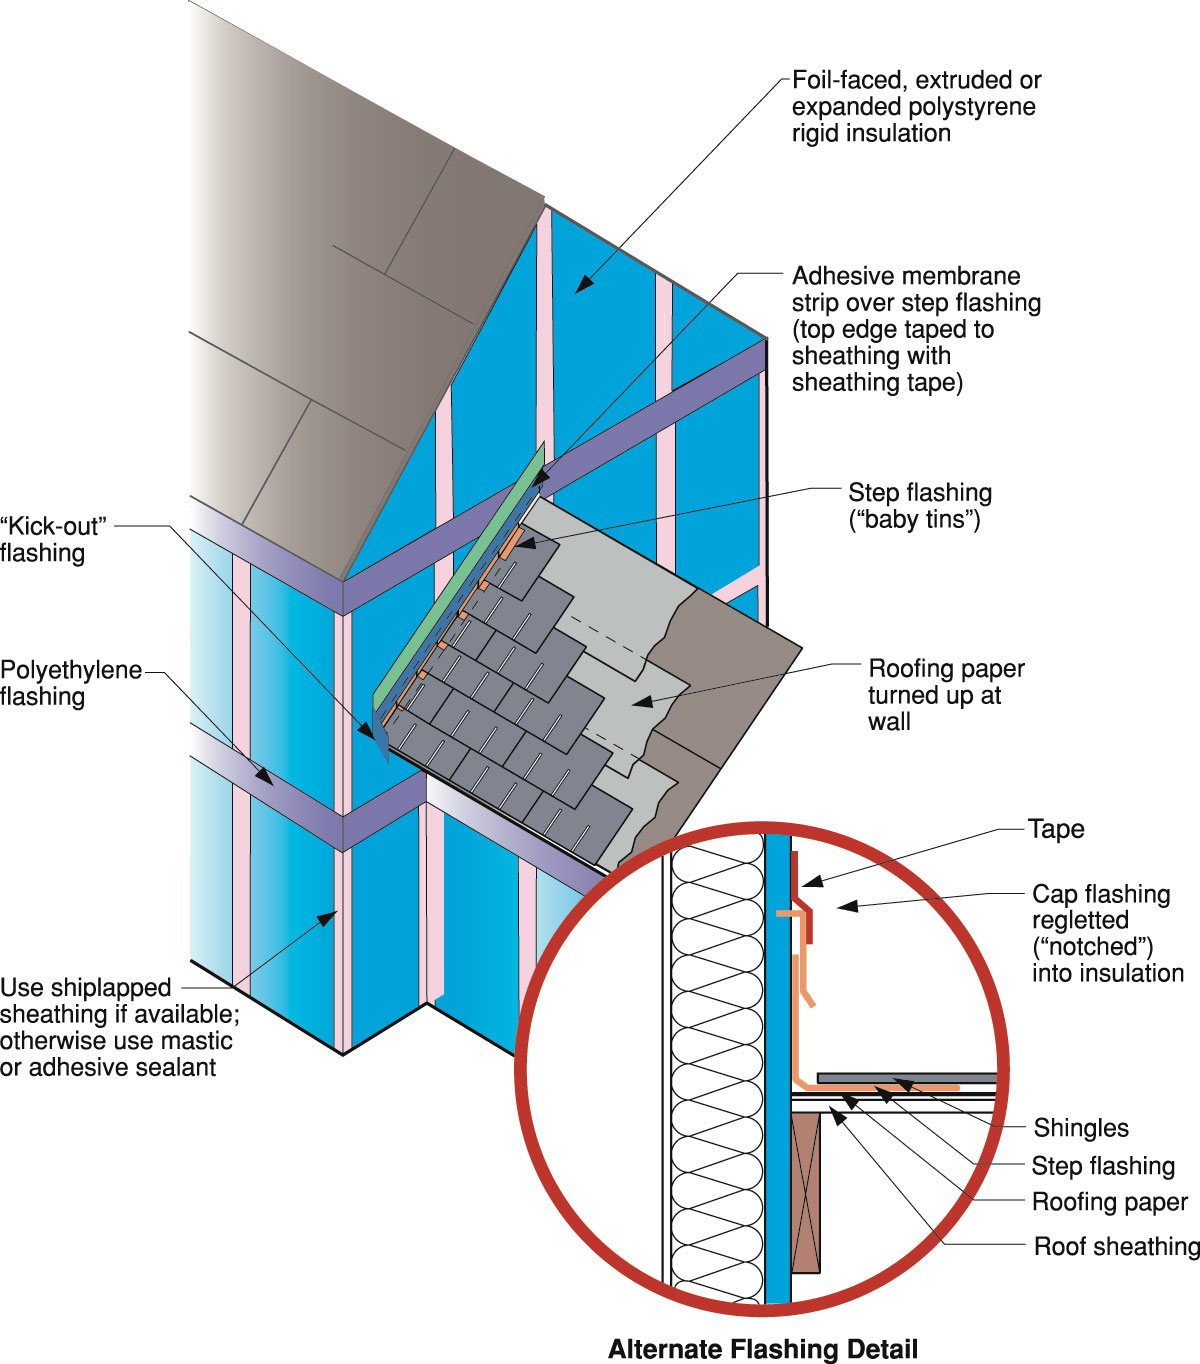
Step and kick-out flashing at all roof-wall intersections extending ≥ 4 in. on wall surface above roof deck and integrated with drainage plane above