Showing results 1 - 36 of 36
Image
Image
Apply self-adhesive flashing over top edge of the wall flashing, diverter, and housewrap
Image
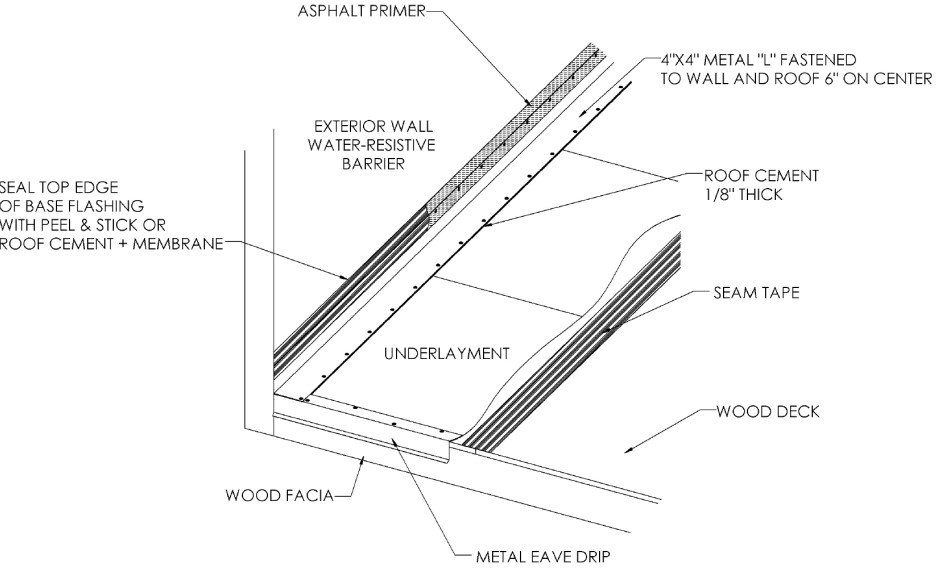
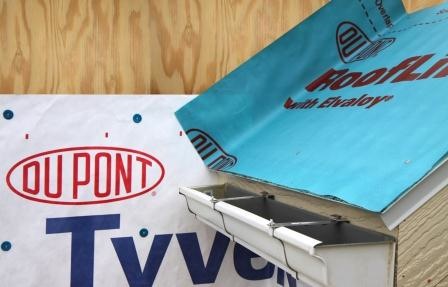
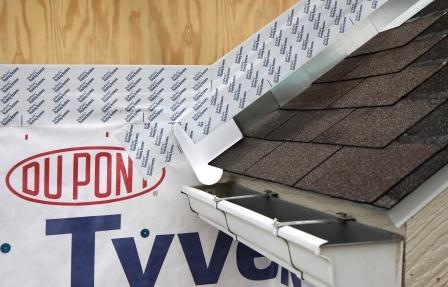
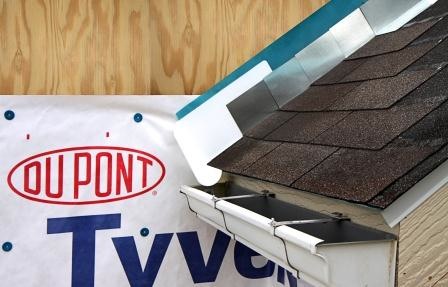
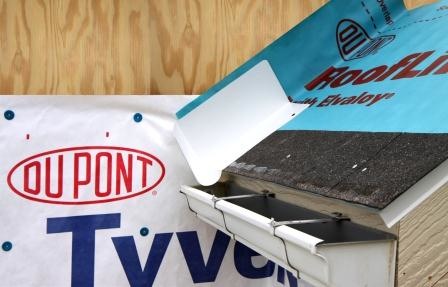
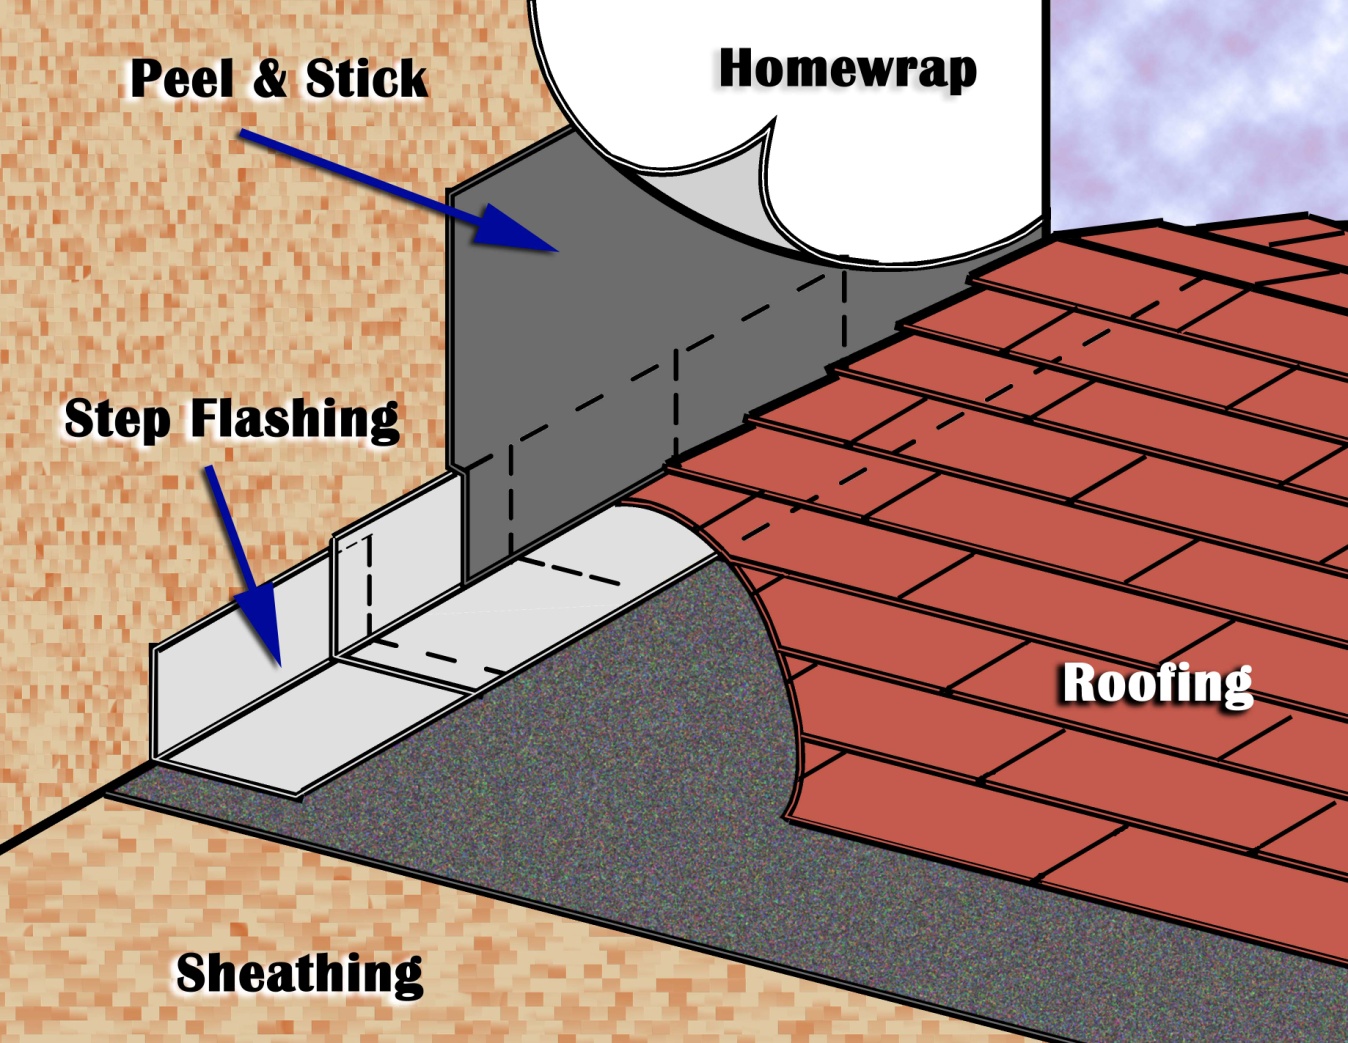
Continuous L-metal flashing integrated with underlayment at roof-wall intersections
Image
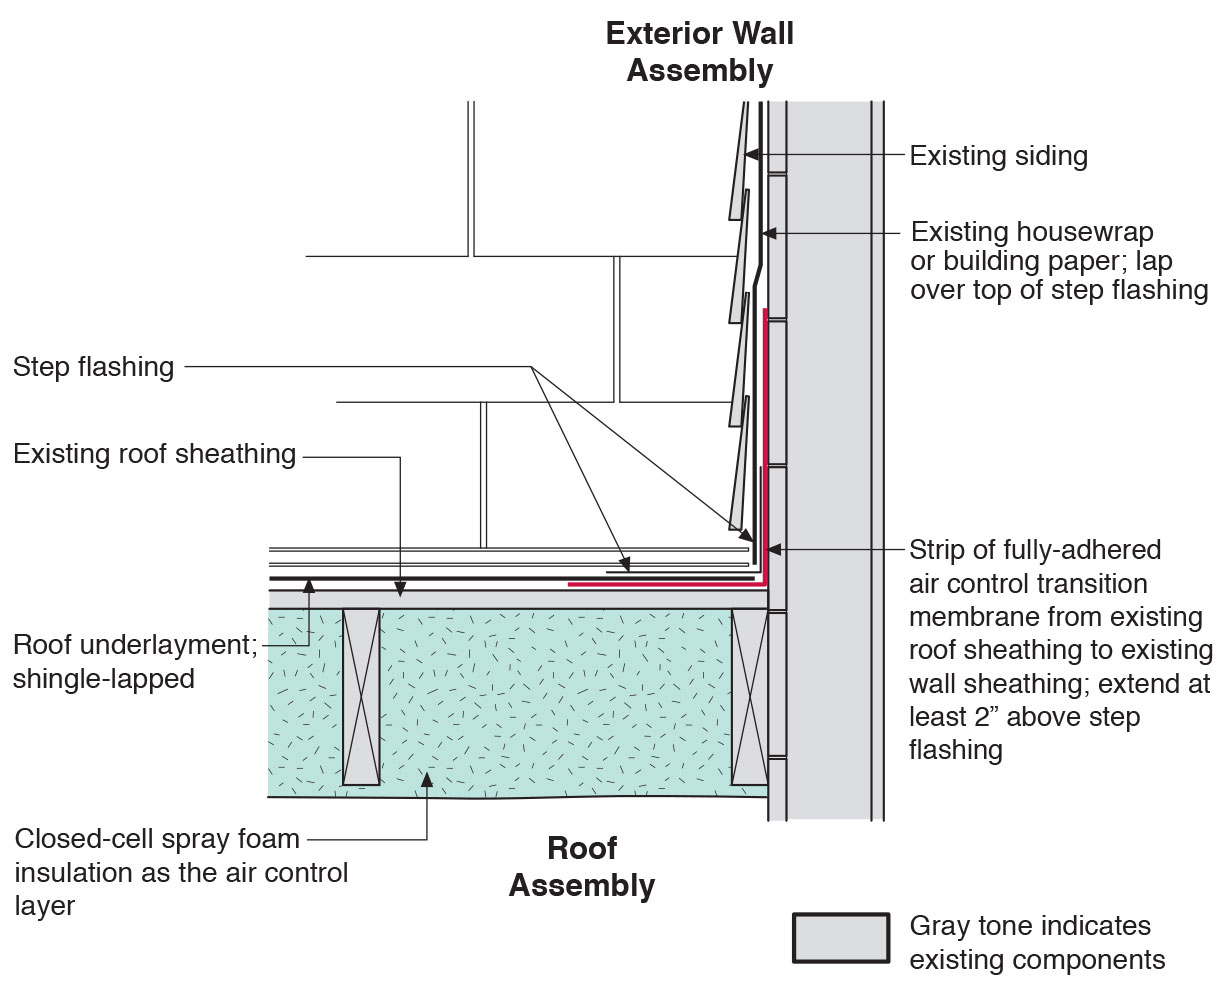
Existing wall-to-lower roof transition retrofitted with a new strip of fully adhered air control transition membrane, new step flashing, new roof underlayment, and new cladding
Image
Existing wall-to-lower roof transition with a new strip of fully adhered air control transition membrane, new step flashing, new roof underlayment, and new cladding – view from eave
Image
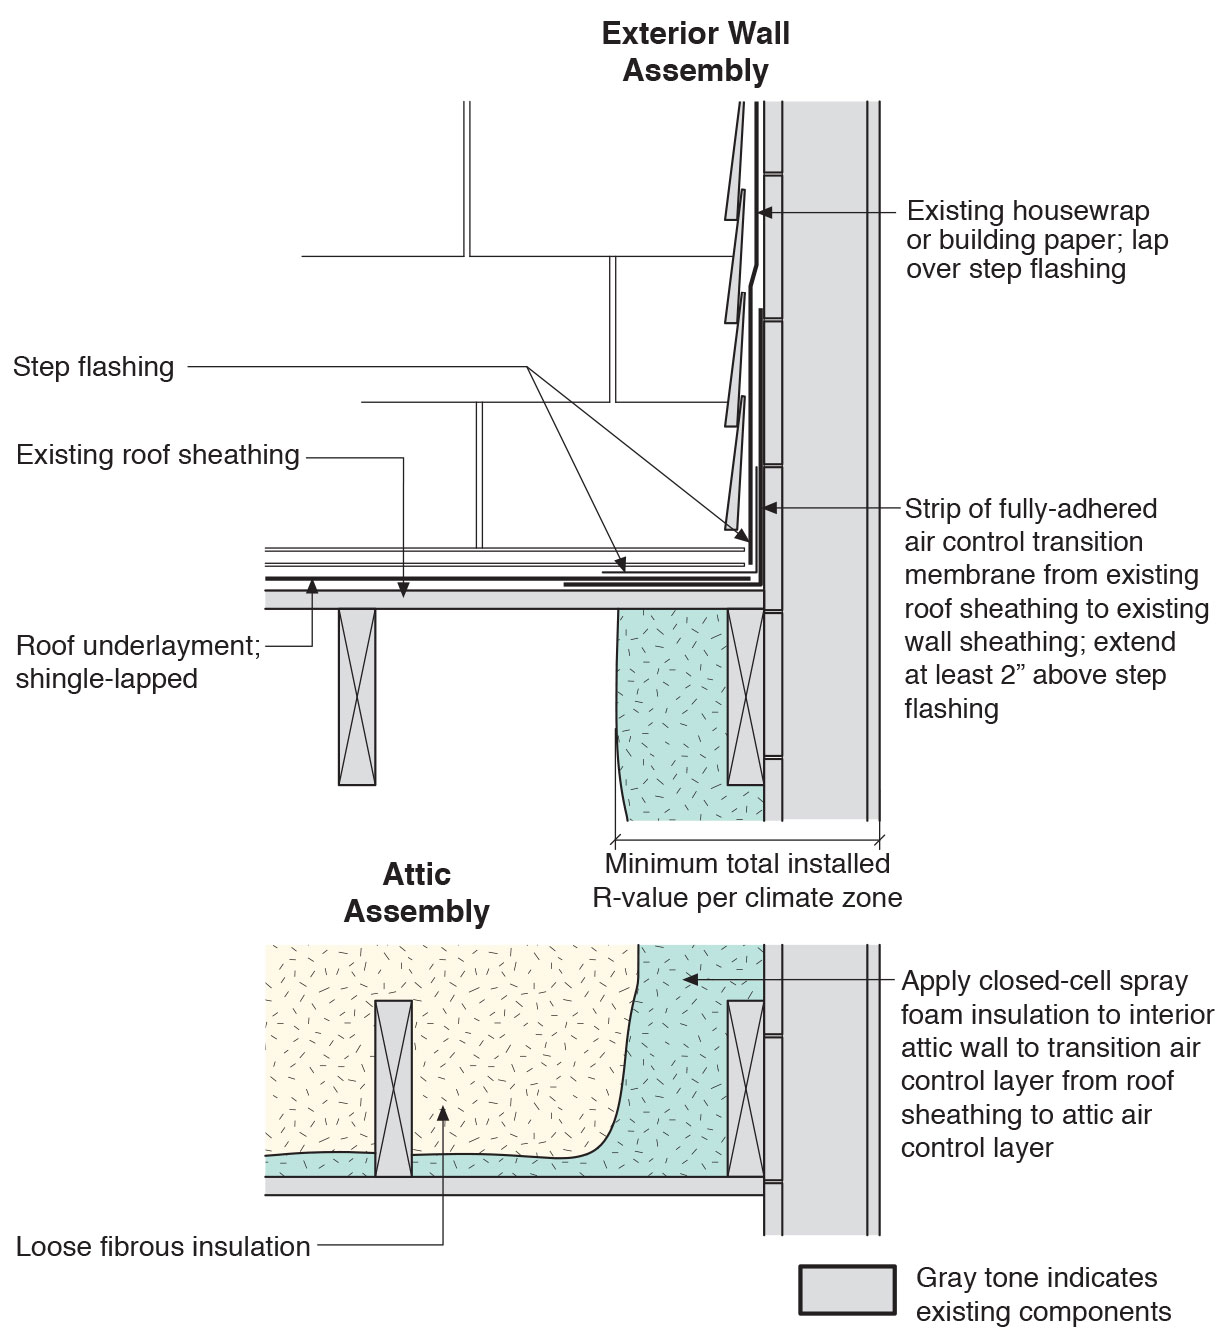
Existing wall-to-lower roof with attic transition with a new strip of fully adhered air control transition membrane, new step flashing, new roof underlayment, and new cladding – view from eave
Image
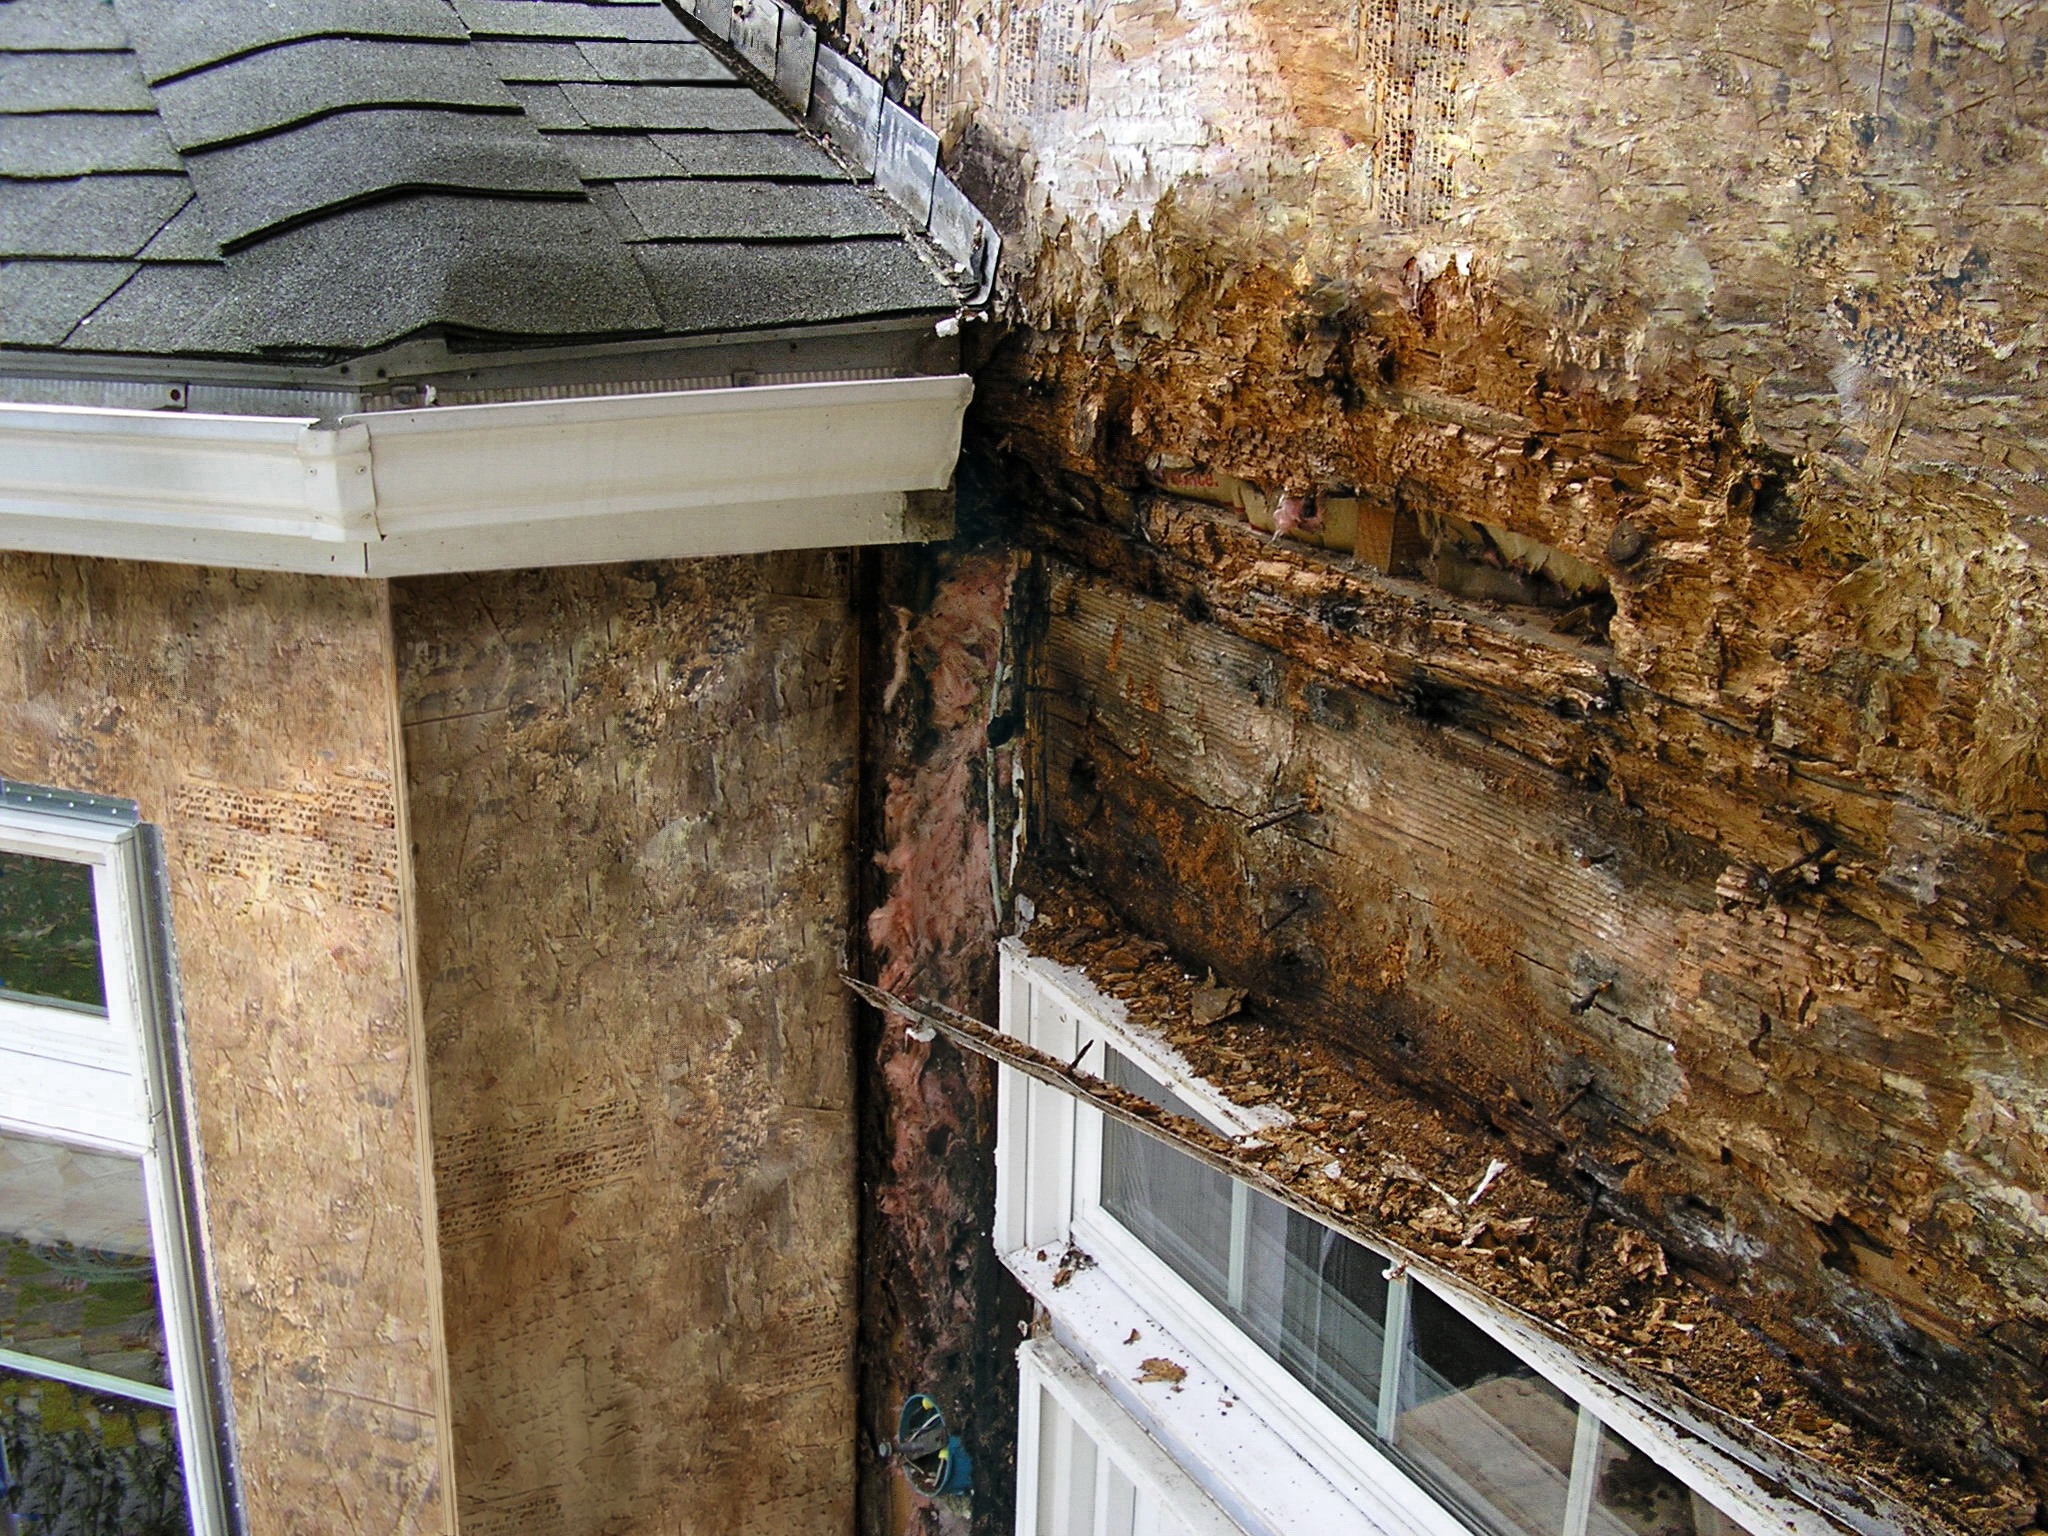
Improper flashing can allow rain water into walls, causing significant damage
Image
Image
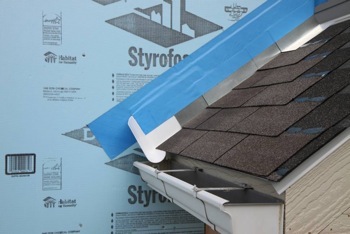
Install shingle starter strip then kick-out diverter; attach to roof deck but not sidewall
Image

Image
Metal cap flashing is installed over the roof parapet and extends down over the roofing membrane
Image
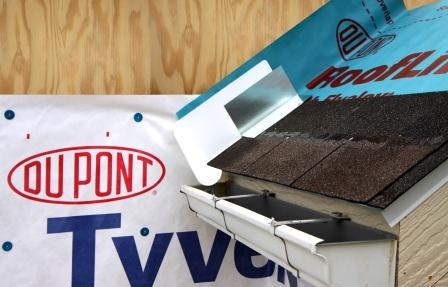
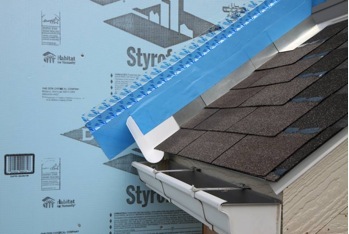
Place first shingle and next section of sidewall flashing over upper edge of diverter
Image
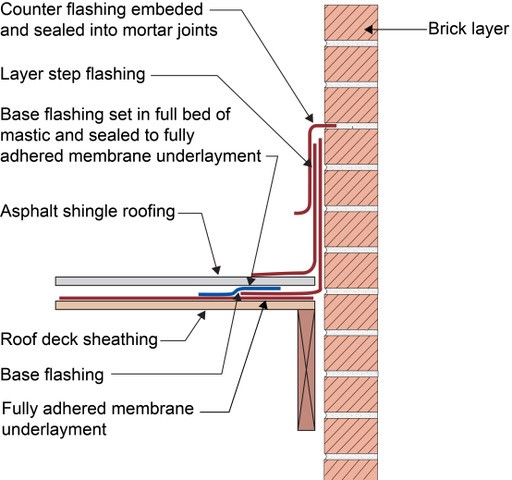
Right - Counterflashing tops a layer of step flashing which comes down above the asphalt shingle and a layer of L-shaped base flashing which comes down and extends below the shingle; the base flashing is adhered to the roof underlayment with mastic, shown
Image
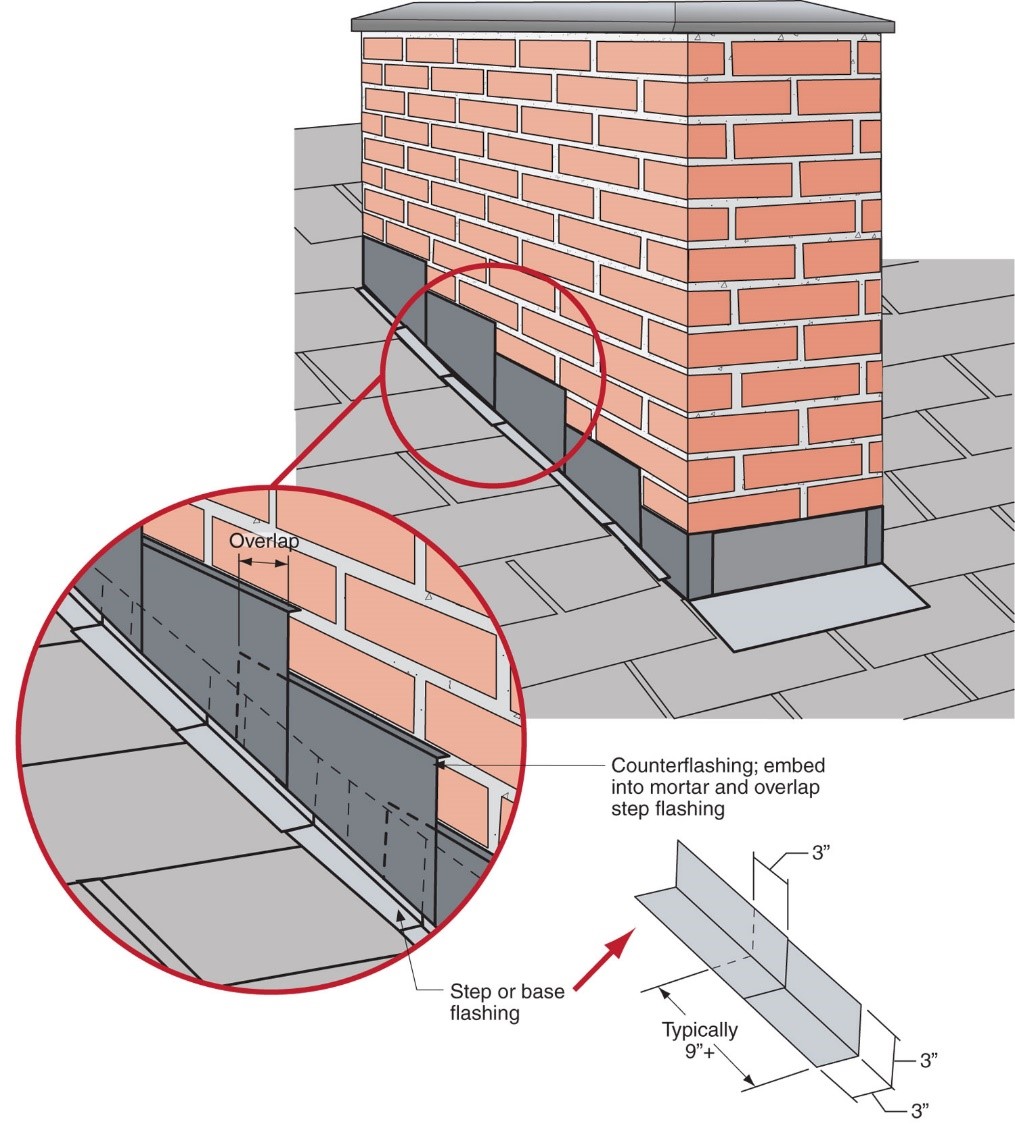
Right - Step flashing along a chimney is integrated in a layered manner with asphalt shingle roofing and topped with counterflashing that is embedded into brick mortar joint above
Image
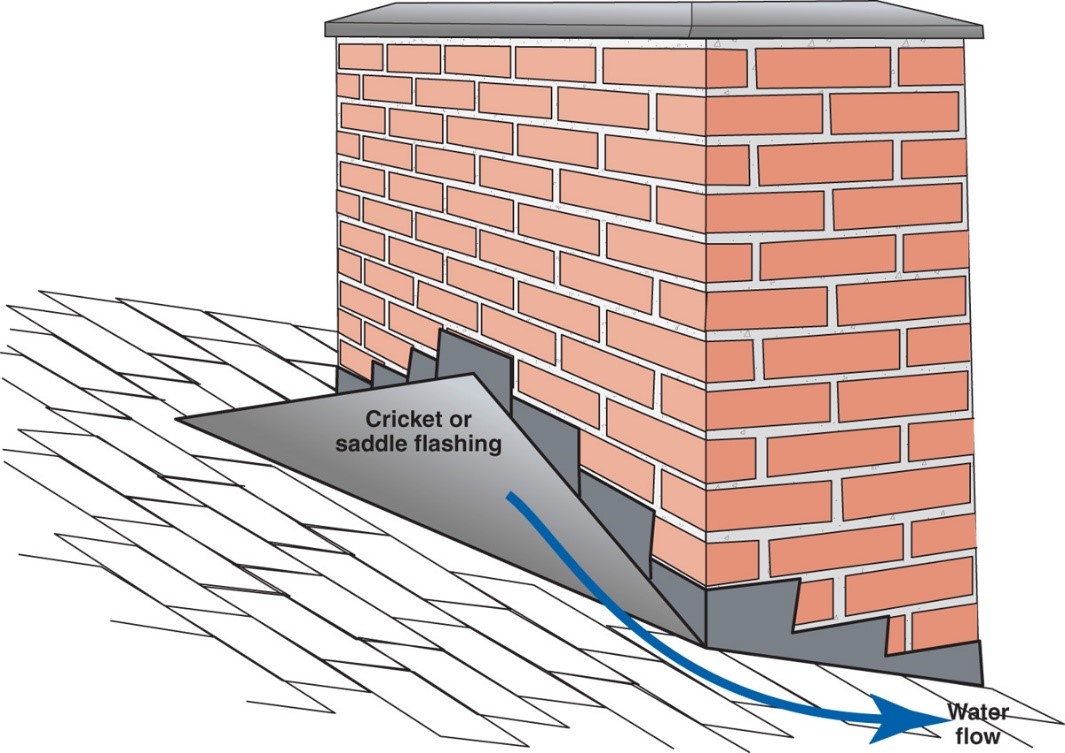
Right – A chimney cricket is installed and flashed to direct rainwater around the chimney
Image

Image
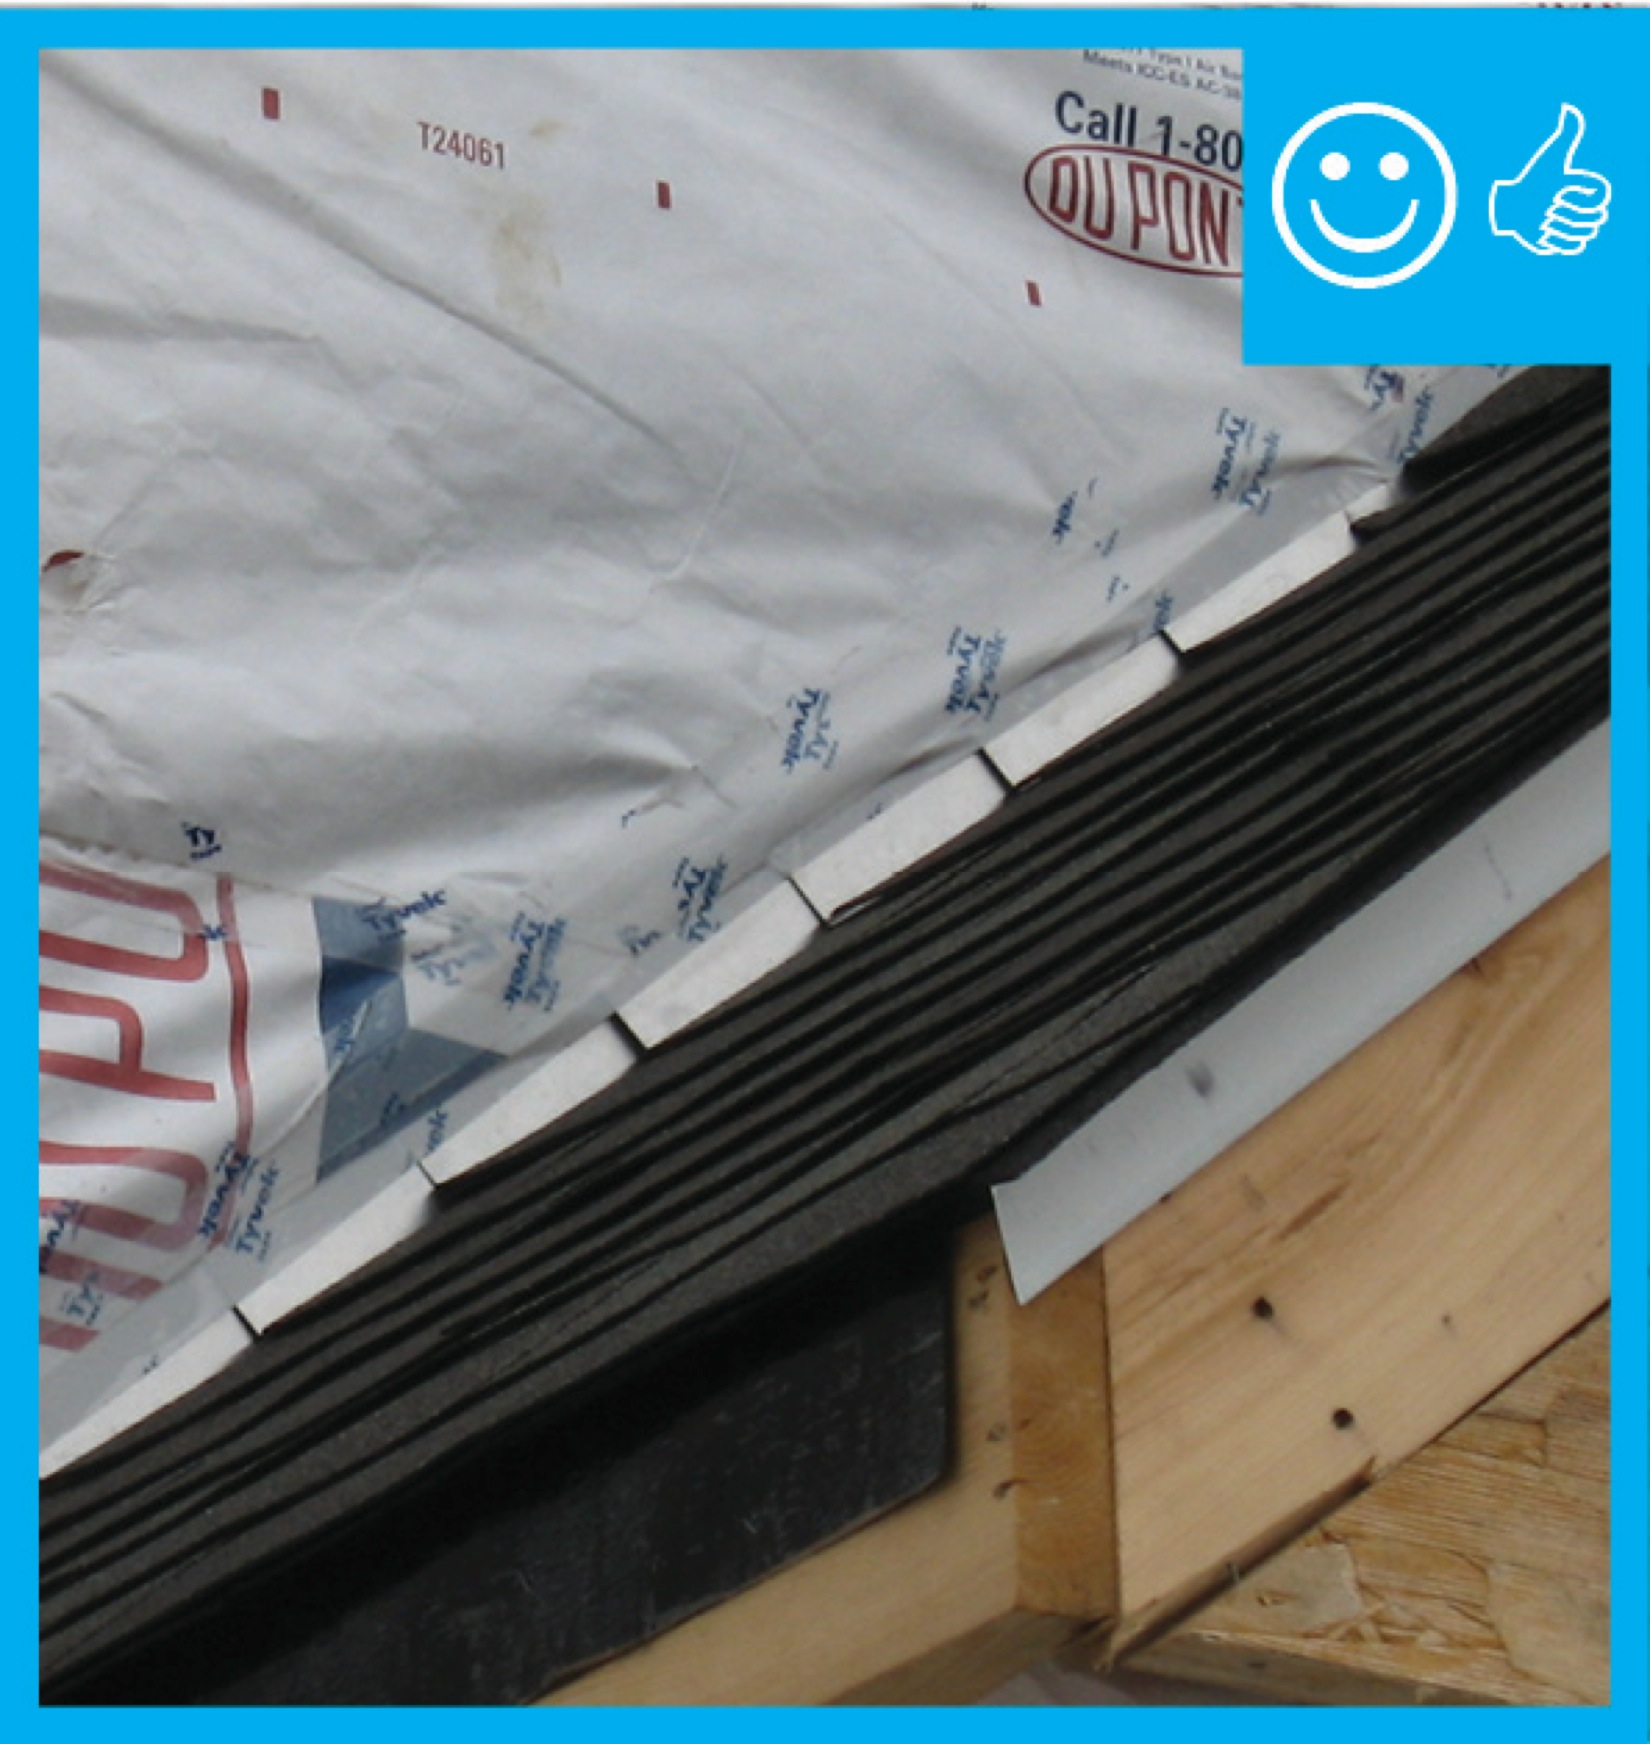
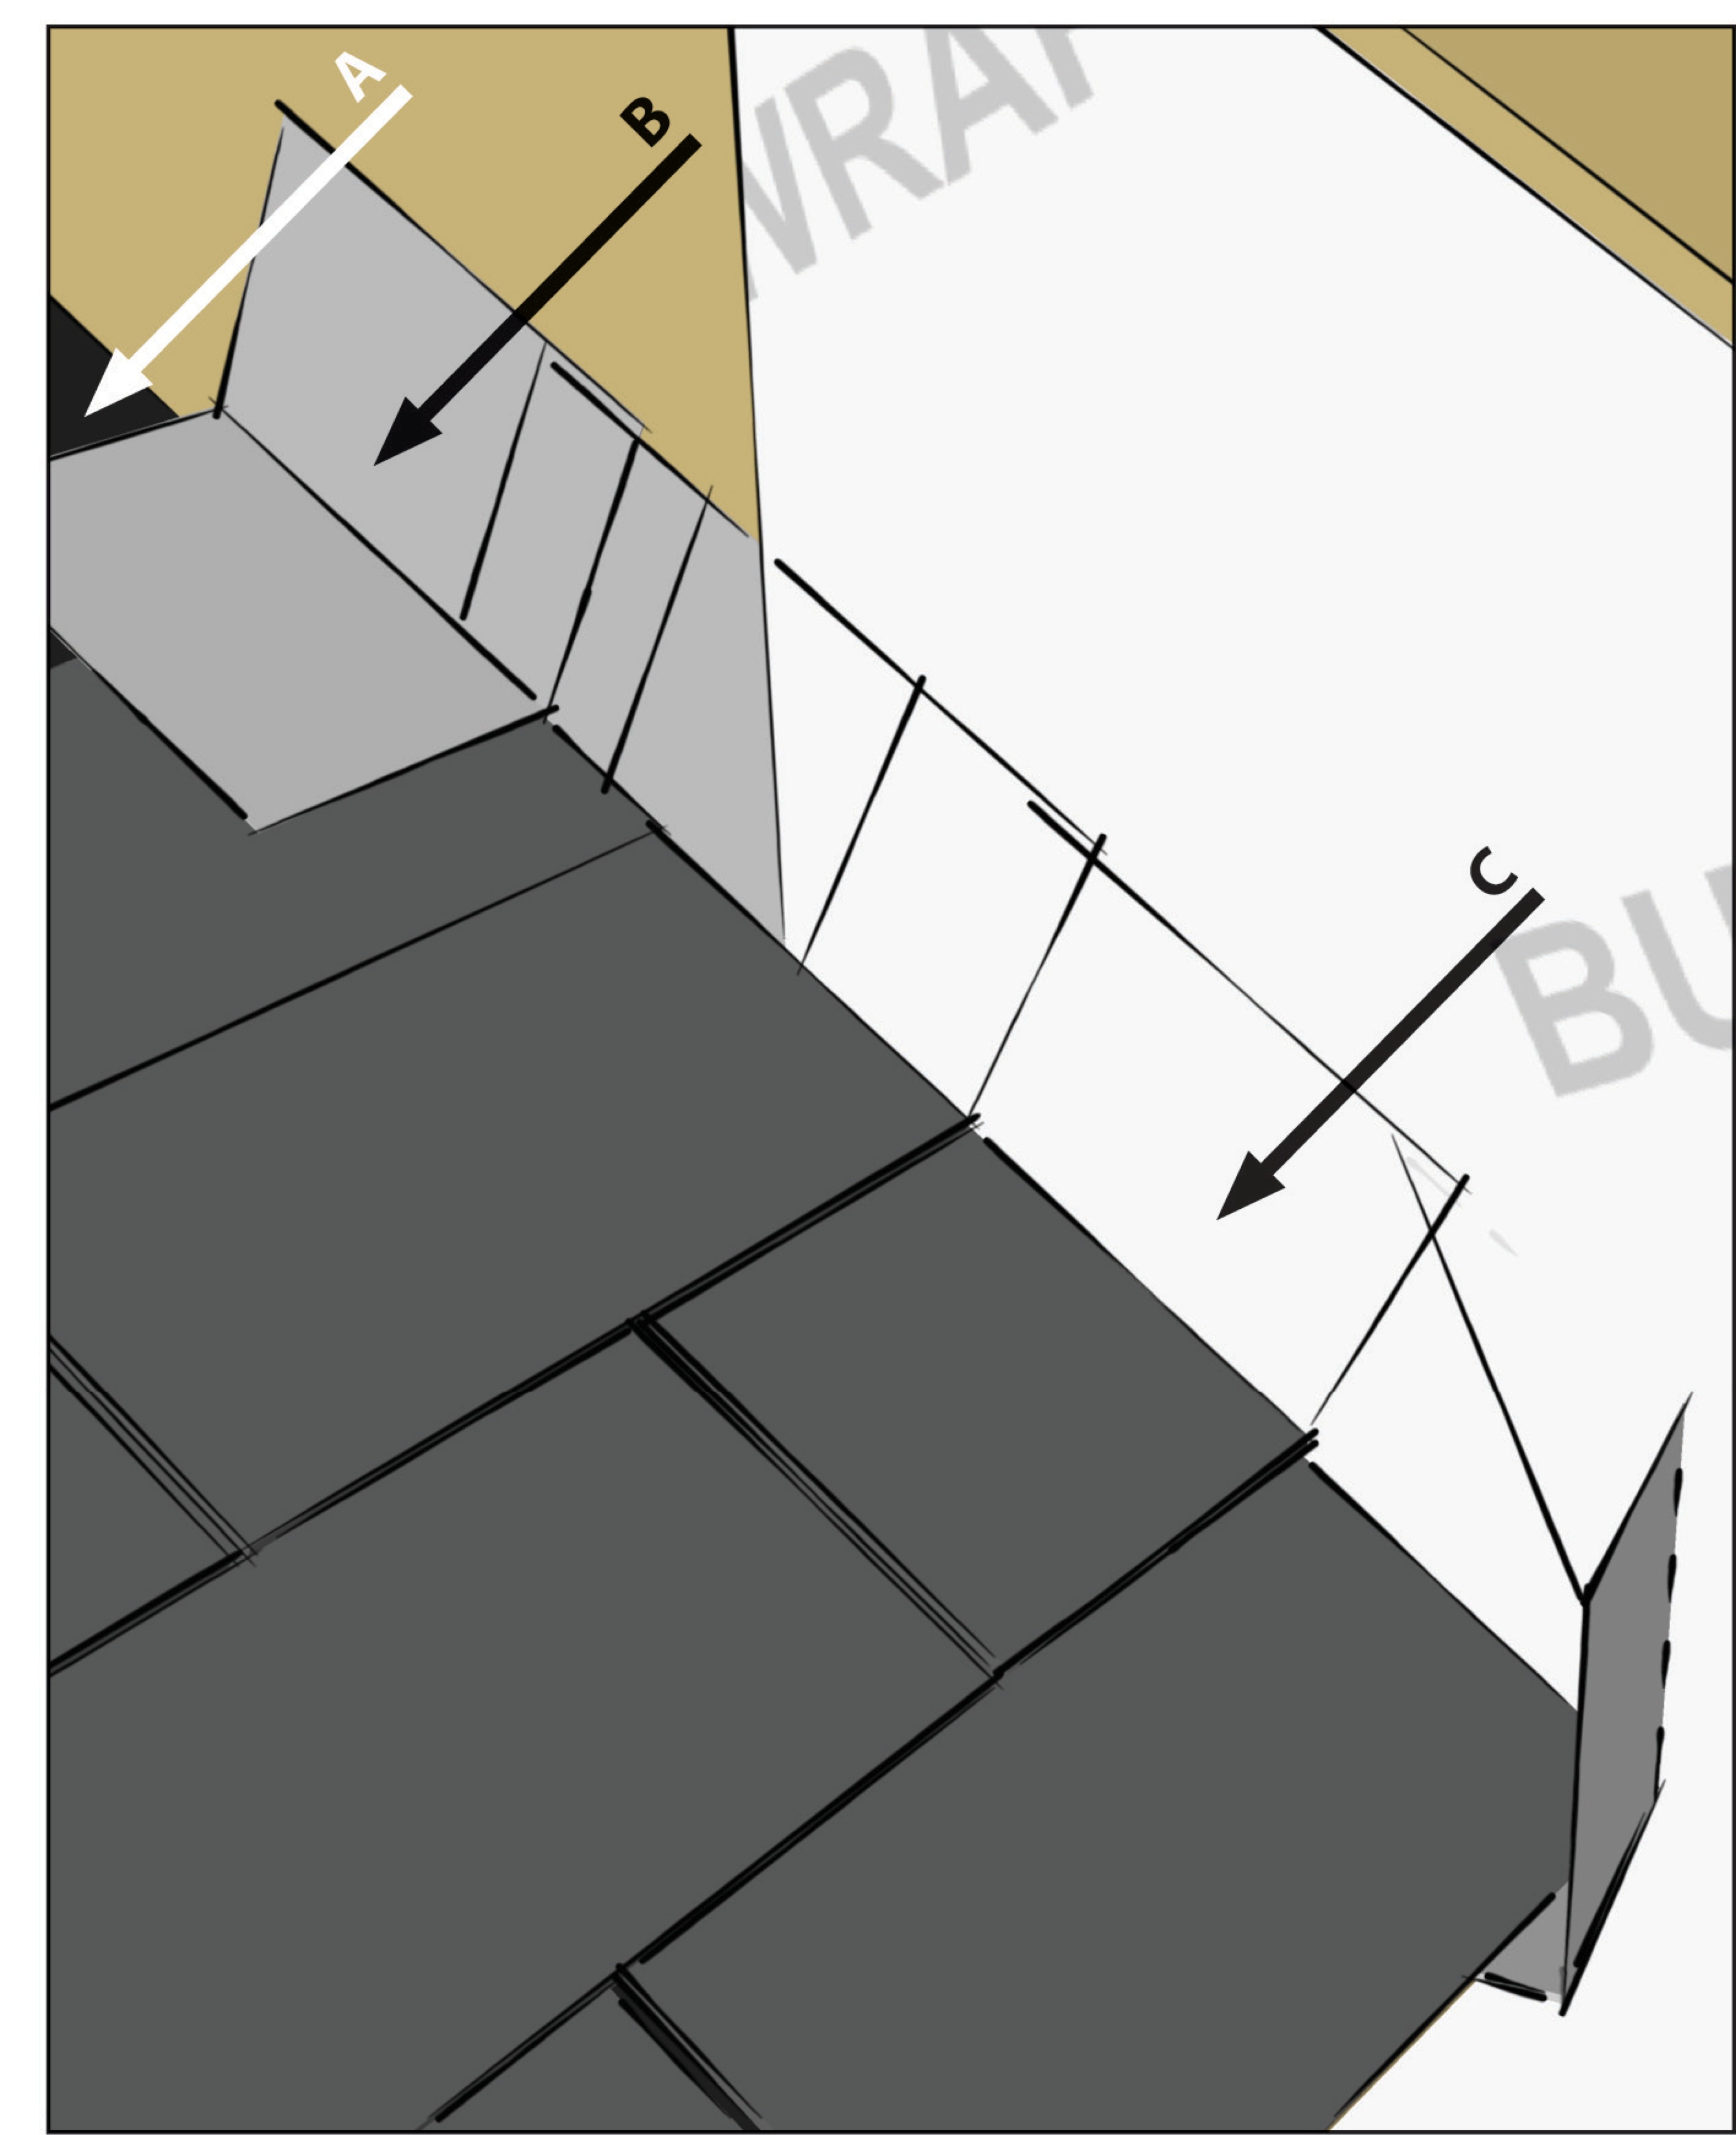
Right – The water-resistant barrier is layered over the step flashing to provide a complete drainage system
Image
Image
Image
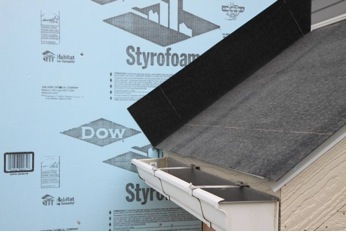
Step 1. Apply roof underlayment over roof deck and up the sidewall over the rigid foam insulation
Image
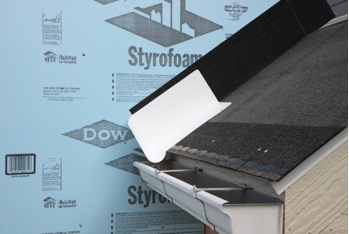
Step 2. Install shingle starter strip then kick-out diverter as first piece of step flashing.
Image
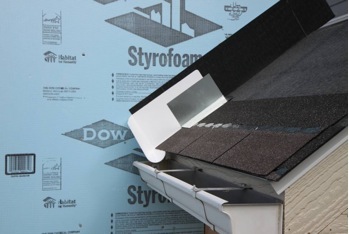
Step 3. Place the first shingle and the next section of sidewall flashing over upper edge of diverter
Image

Step 4. Install remaining sidewall flashing, appropriate counter flashing, and shingles
Image
Step 5. Apply self-adhesive flashing over top edge of the wall flashing, diverter, and rigid foam insulation
Image
Image
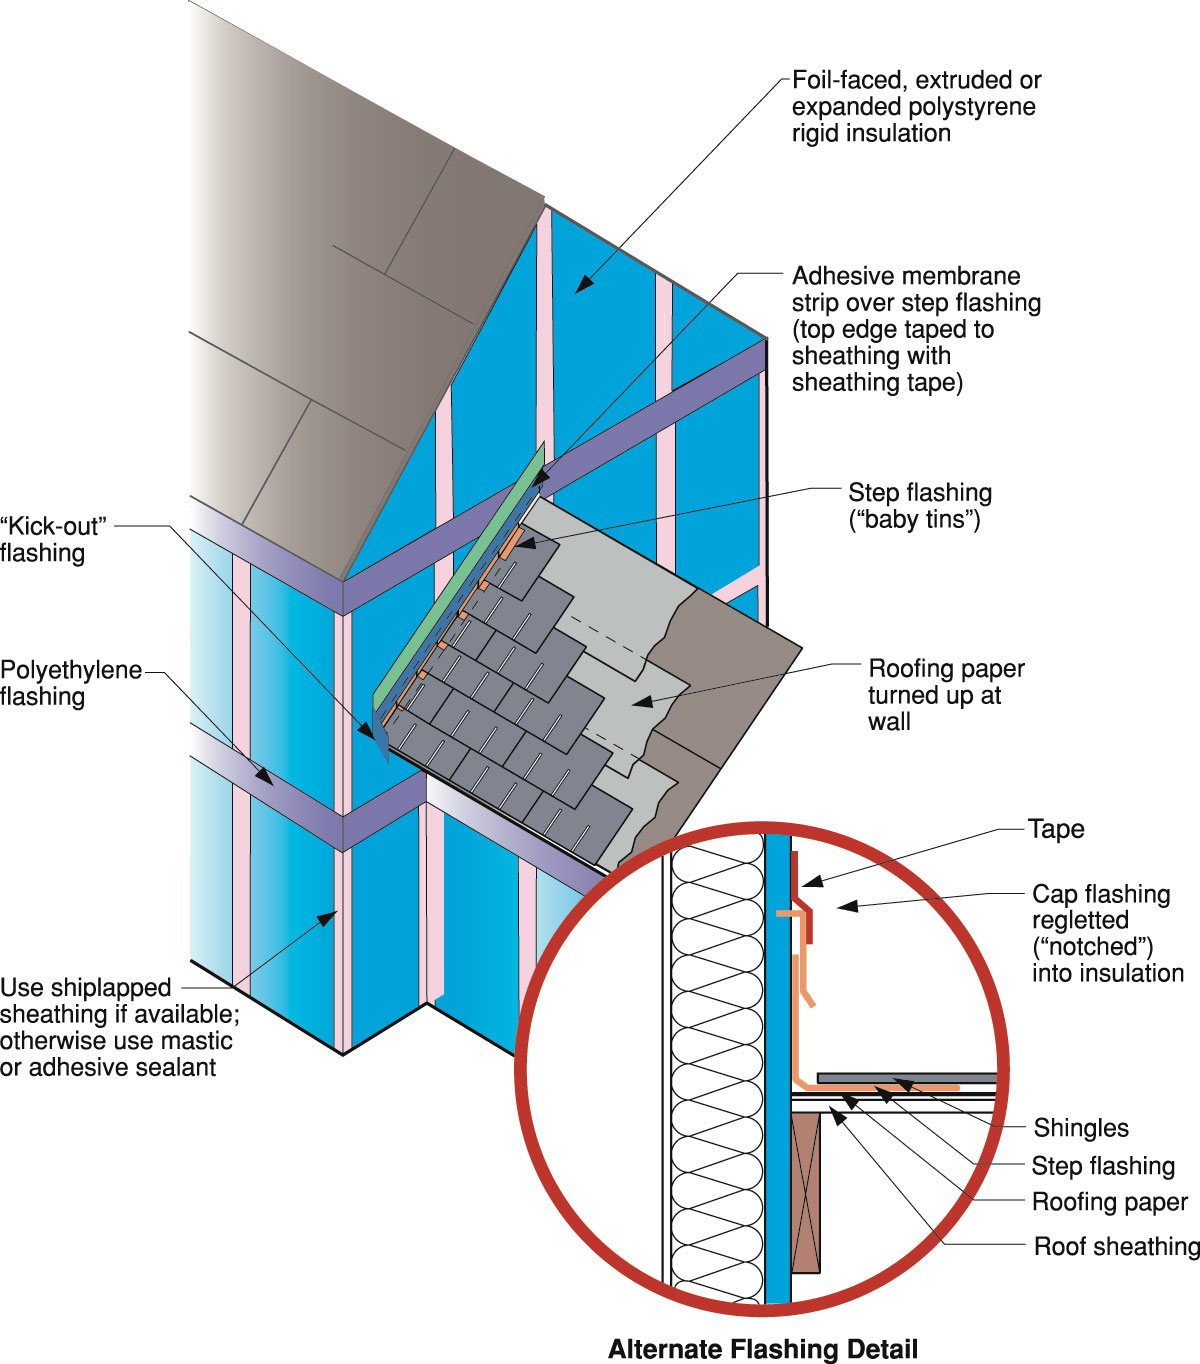
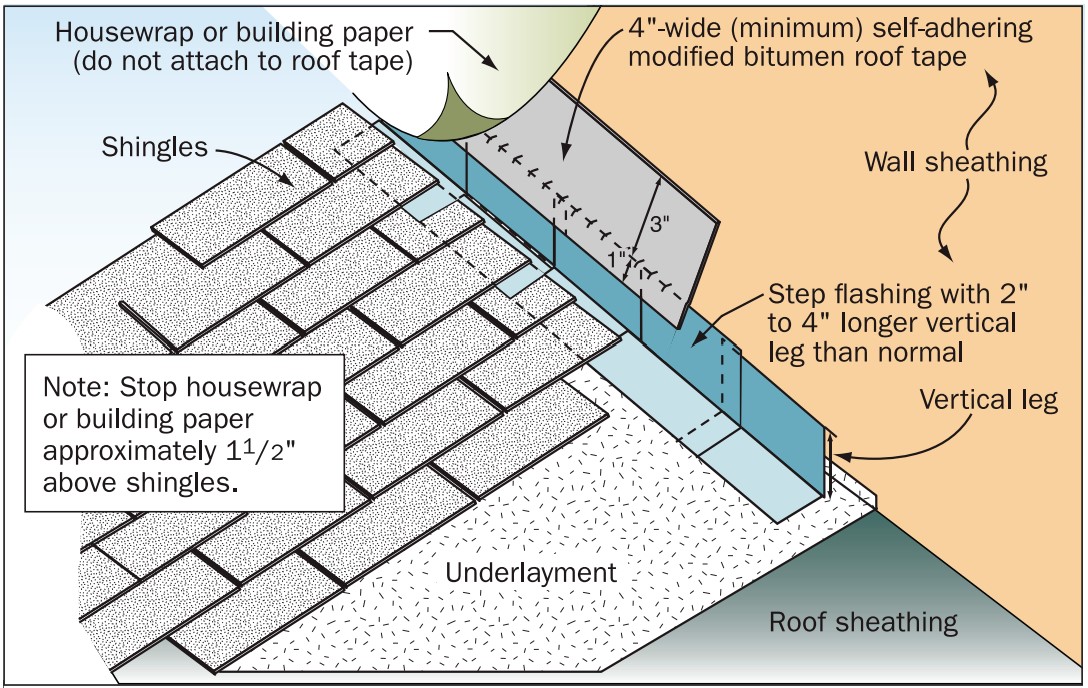
Step and kick-out flashing at all roof-wall intersections extending ≥ 4 in. on wall surface above roof deck and integrated with drainage plane above
Image

Strips of roofing membrane are used to flash around a skylight on a flat roof retrofit
Image

The blocking is completely flashed with roofing membrane before the PV rack hardware is attached on a flat roof
Image
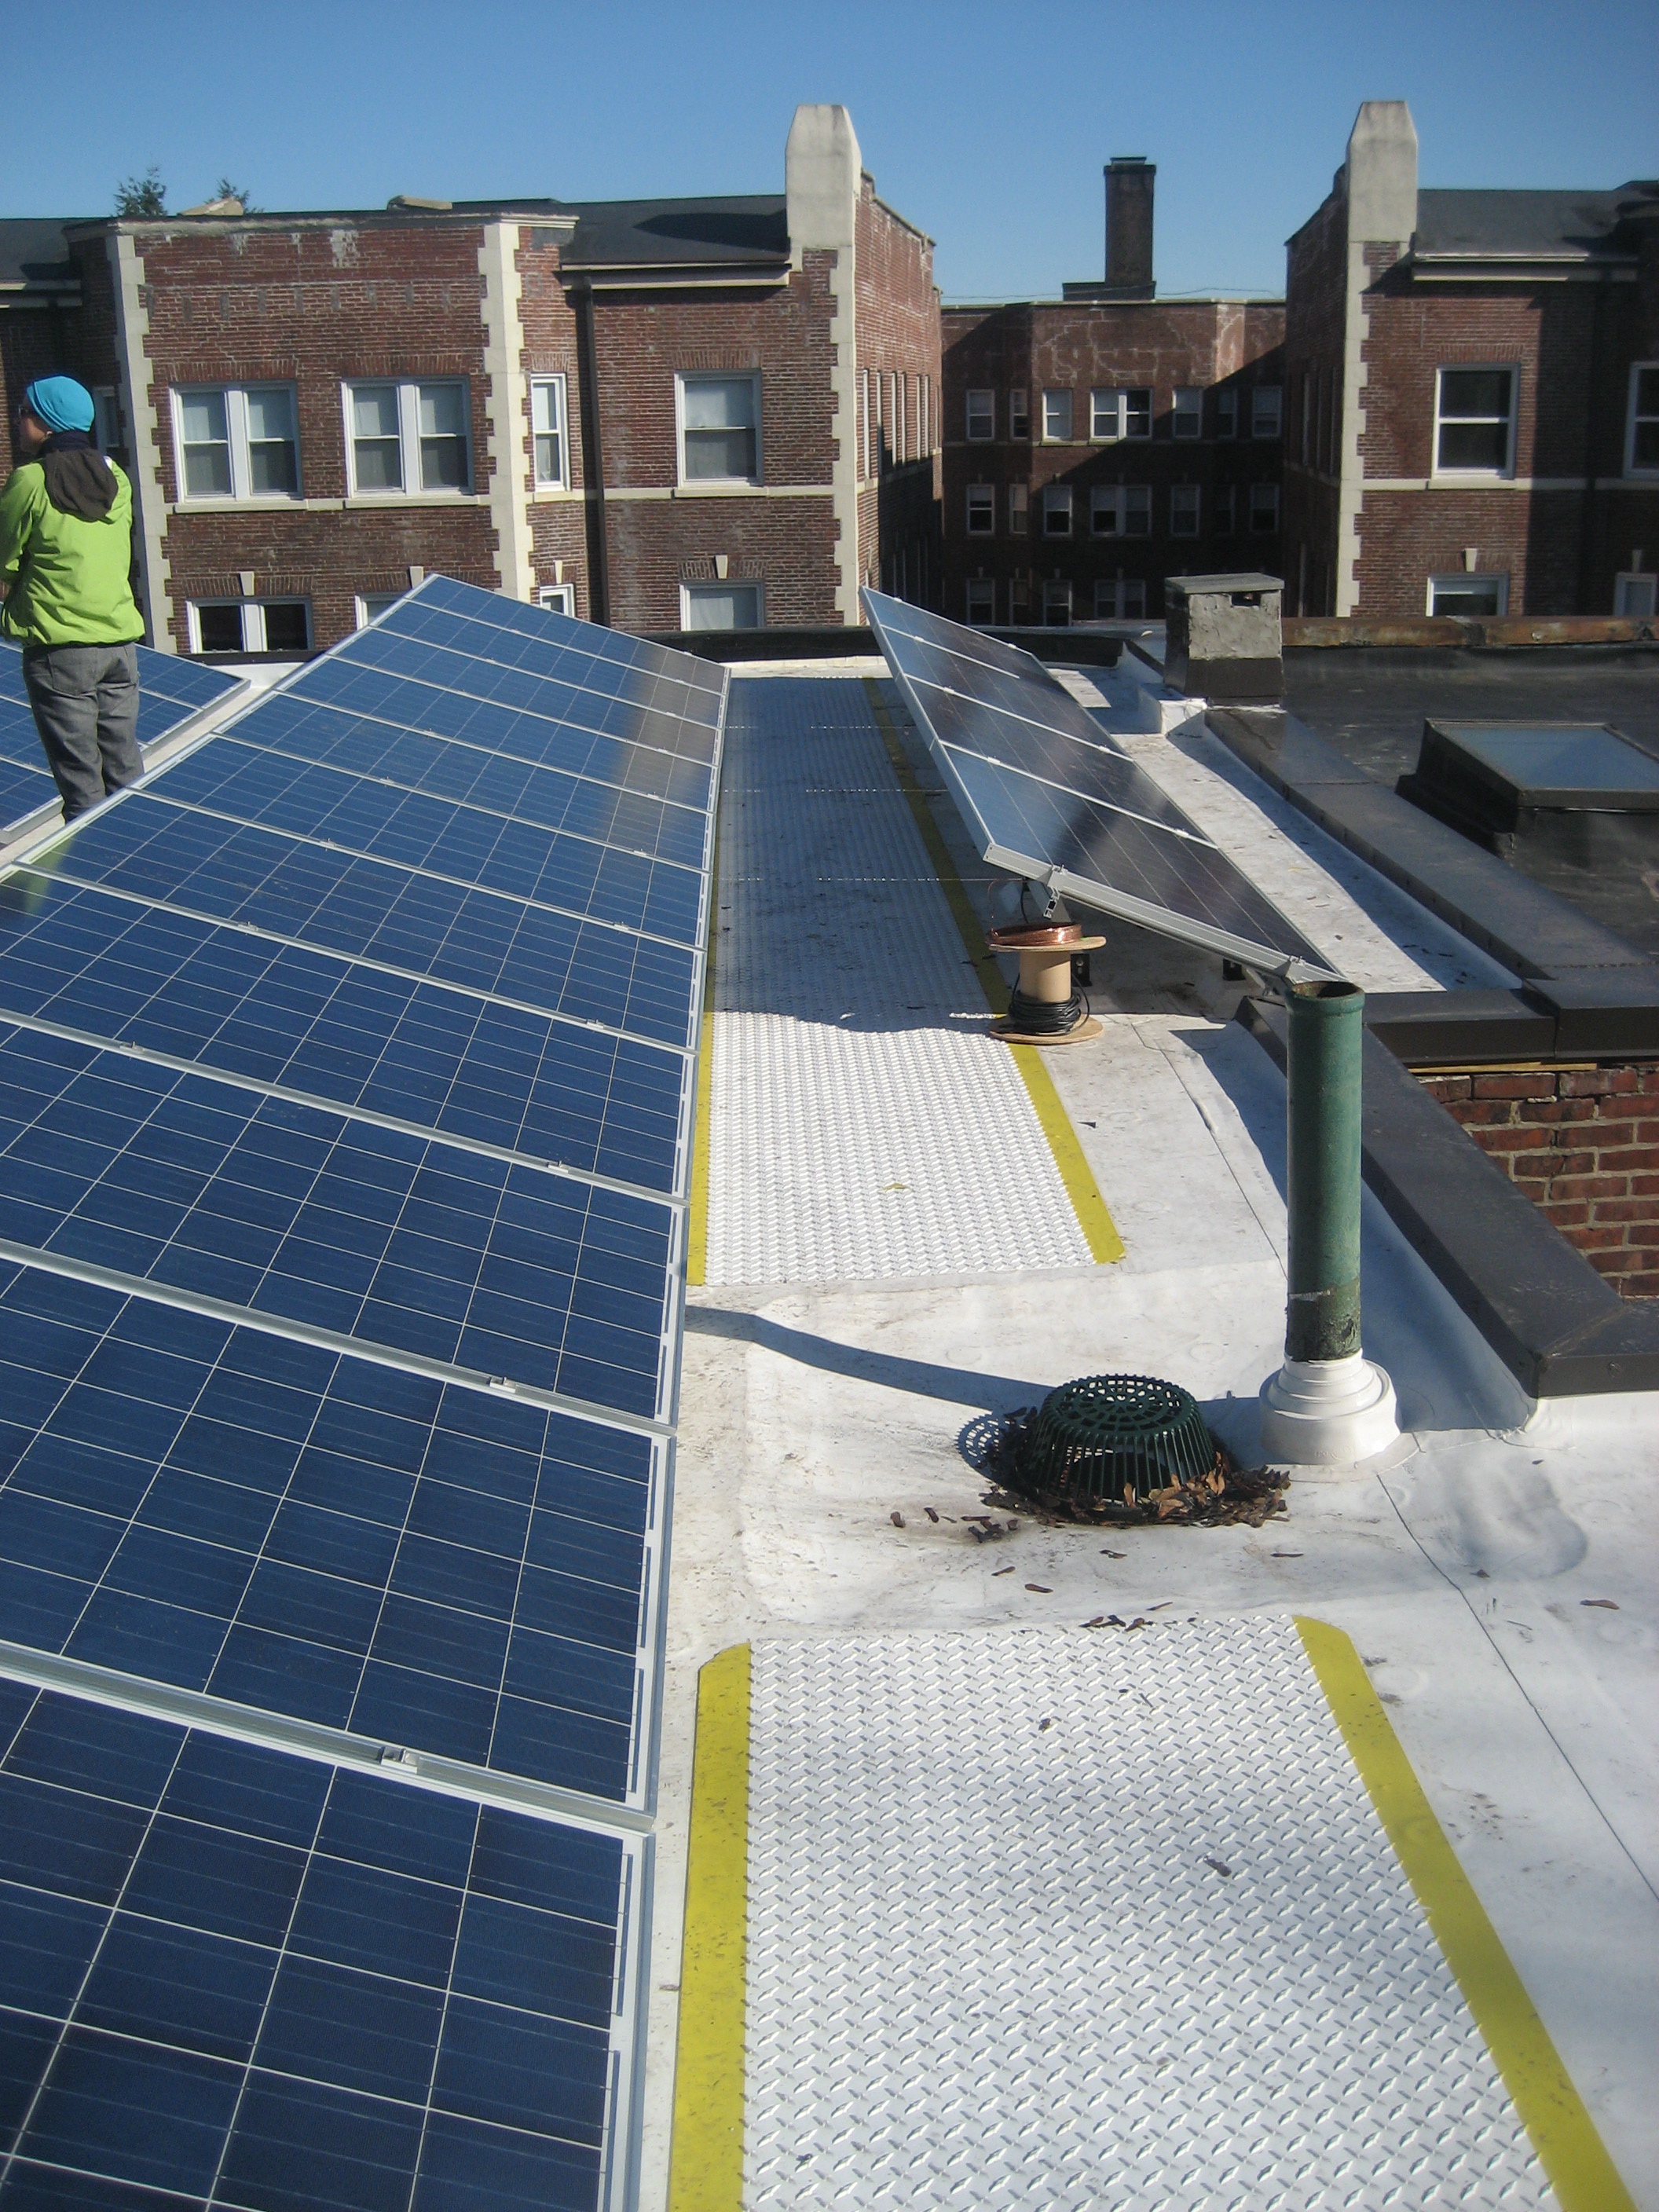
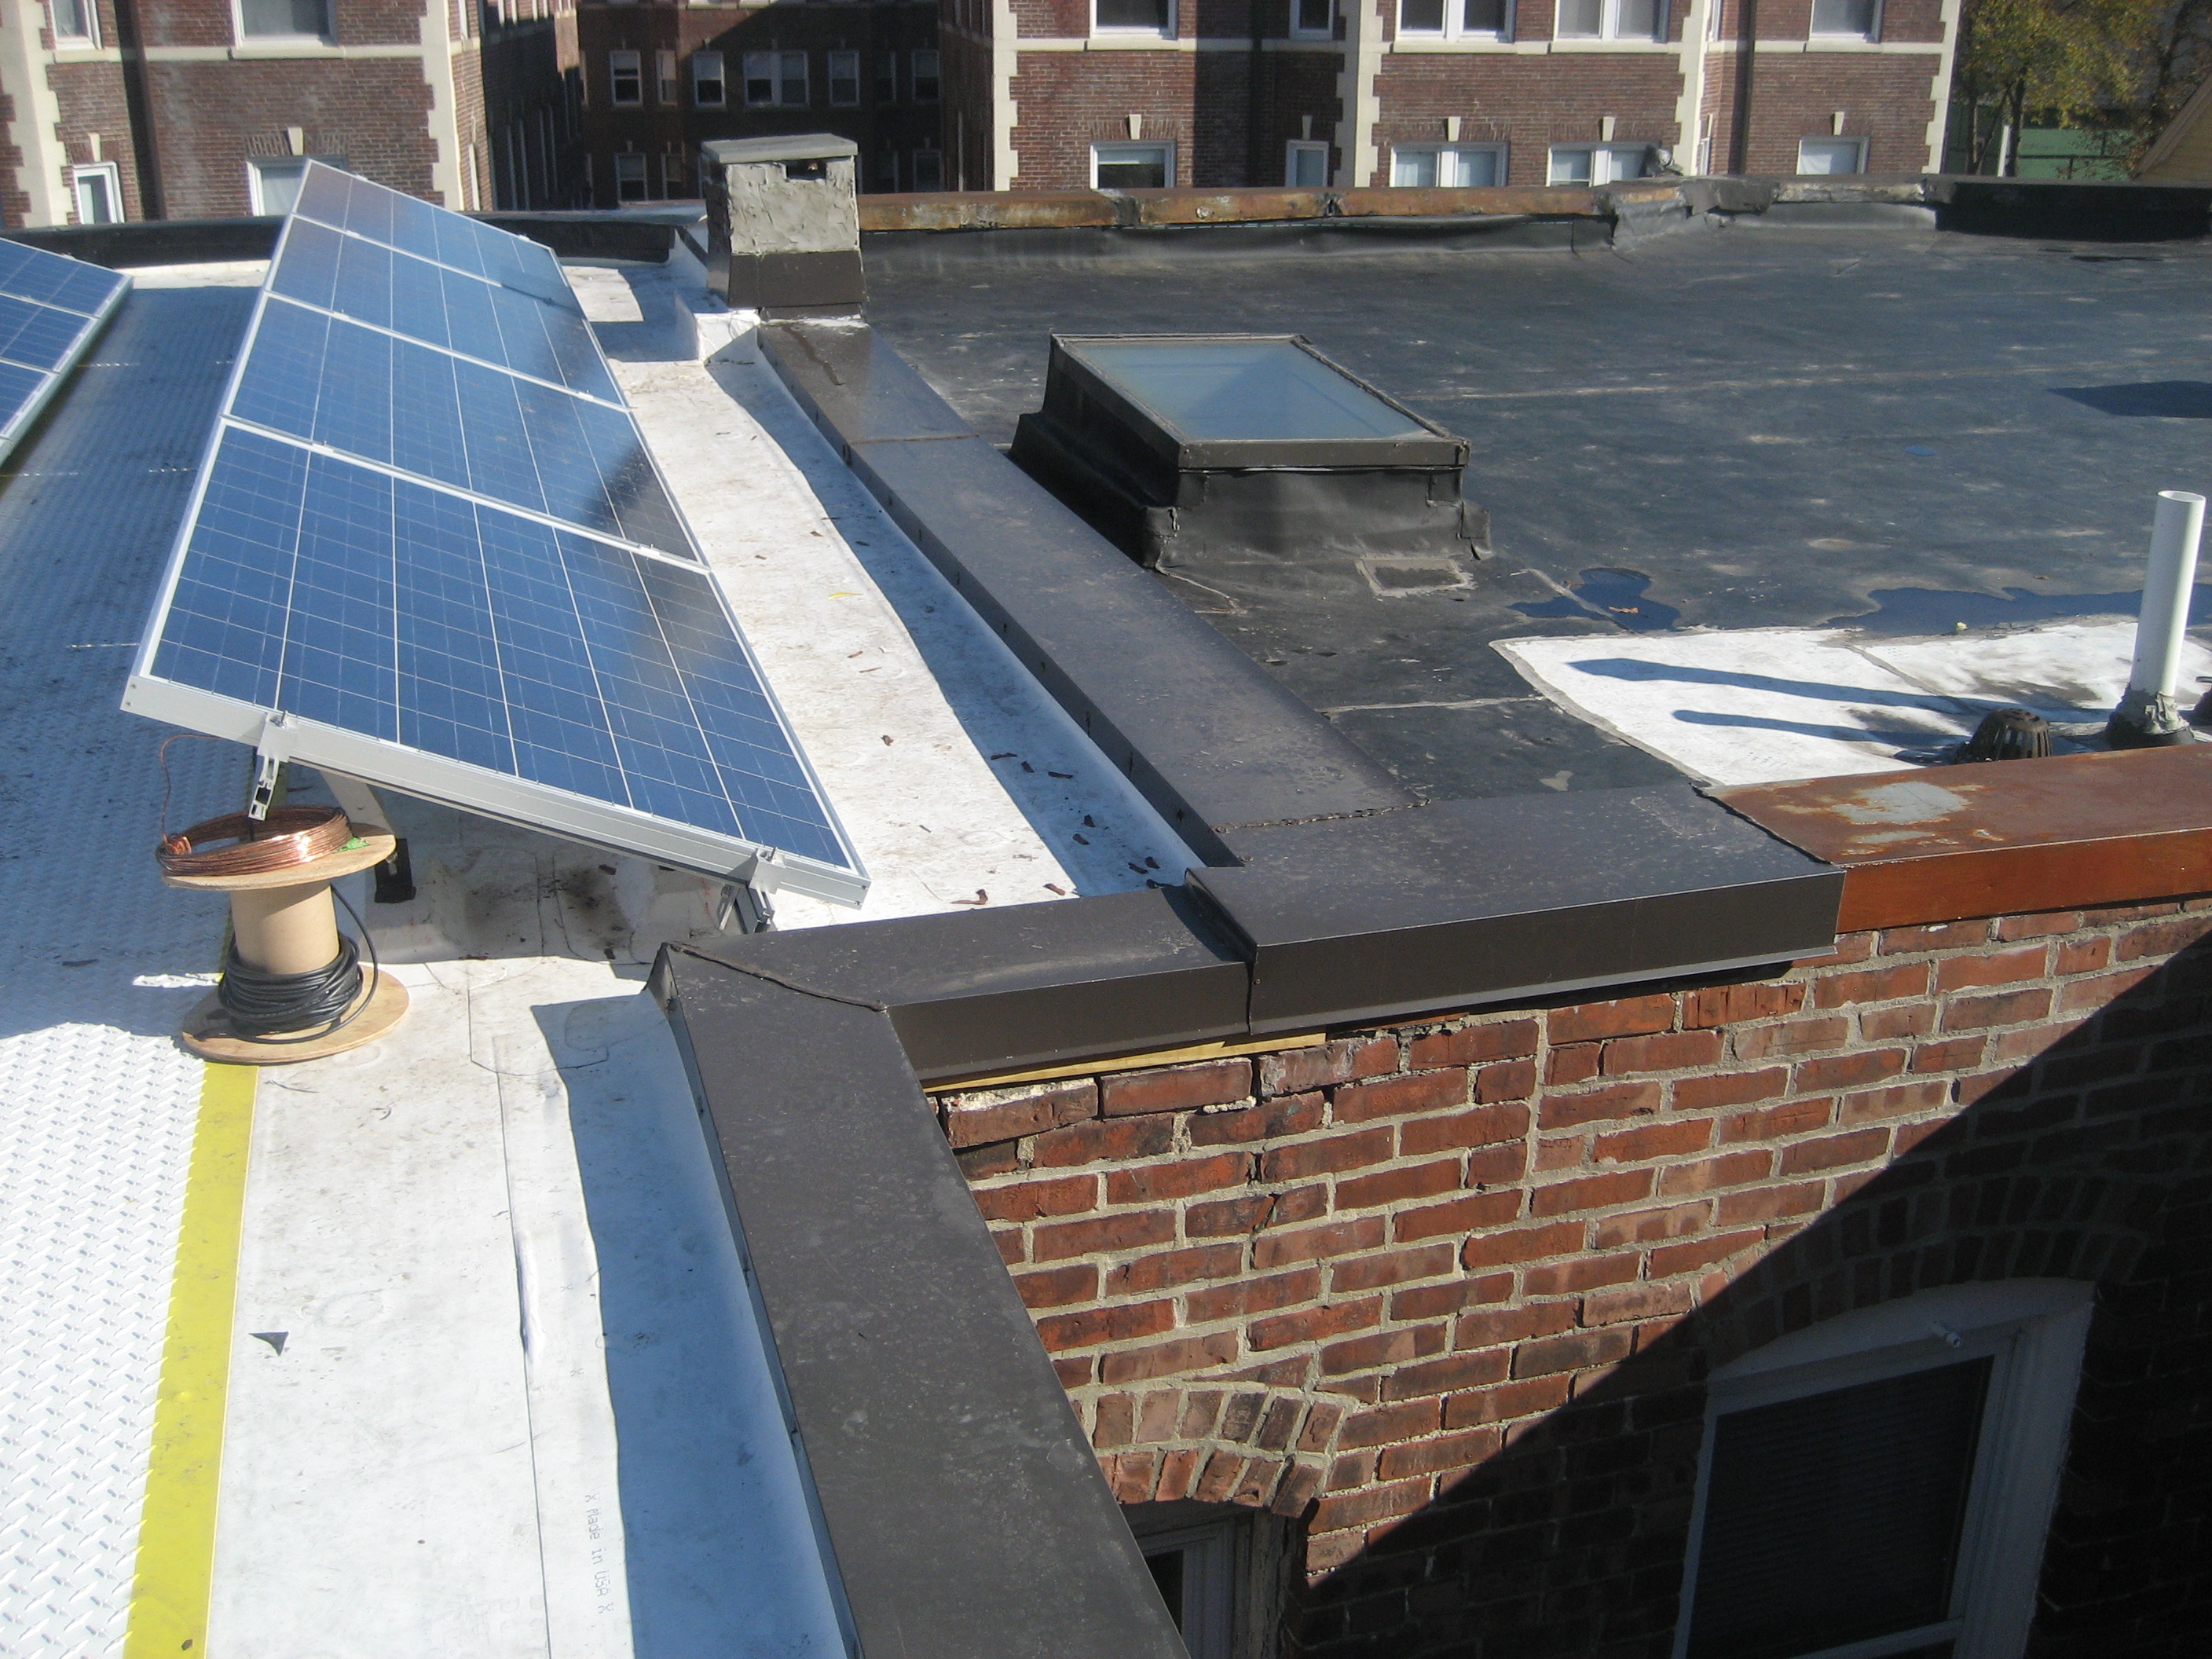
The retrofitted flat roof has PV panels and walking mats installed over the roofing membrane
Image
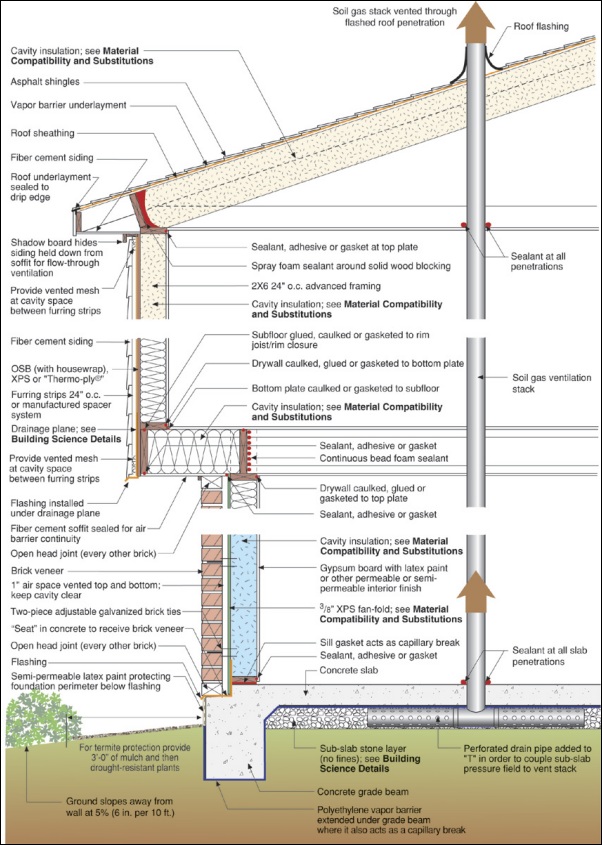
This house design in the Hot-Humid climate uses a slab foundation, masonry walls, and an Exterior Insulation Finish System (EIFS) cladding.
Image
Image
Wrong - Step flashing is missing where the gable meets roof and the valley flashing is incorrectly on top of rather than under shingles.
Image

Wrong - The siding on the chimney is rotten because there is no metal step flashing at the base of the chimney.
Image

Wrong - There is no step flashing along the base of the gable and the right window is missing sill trim.
Image
Image
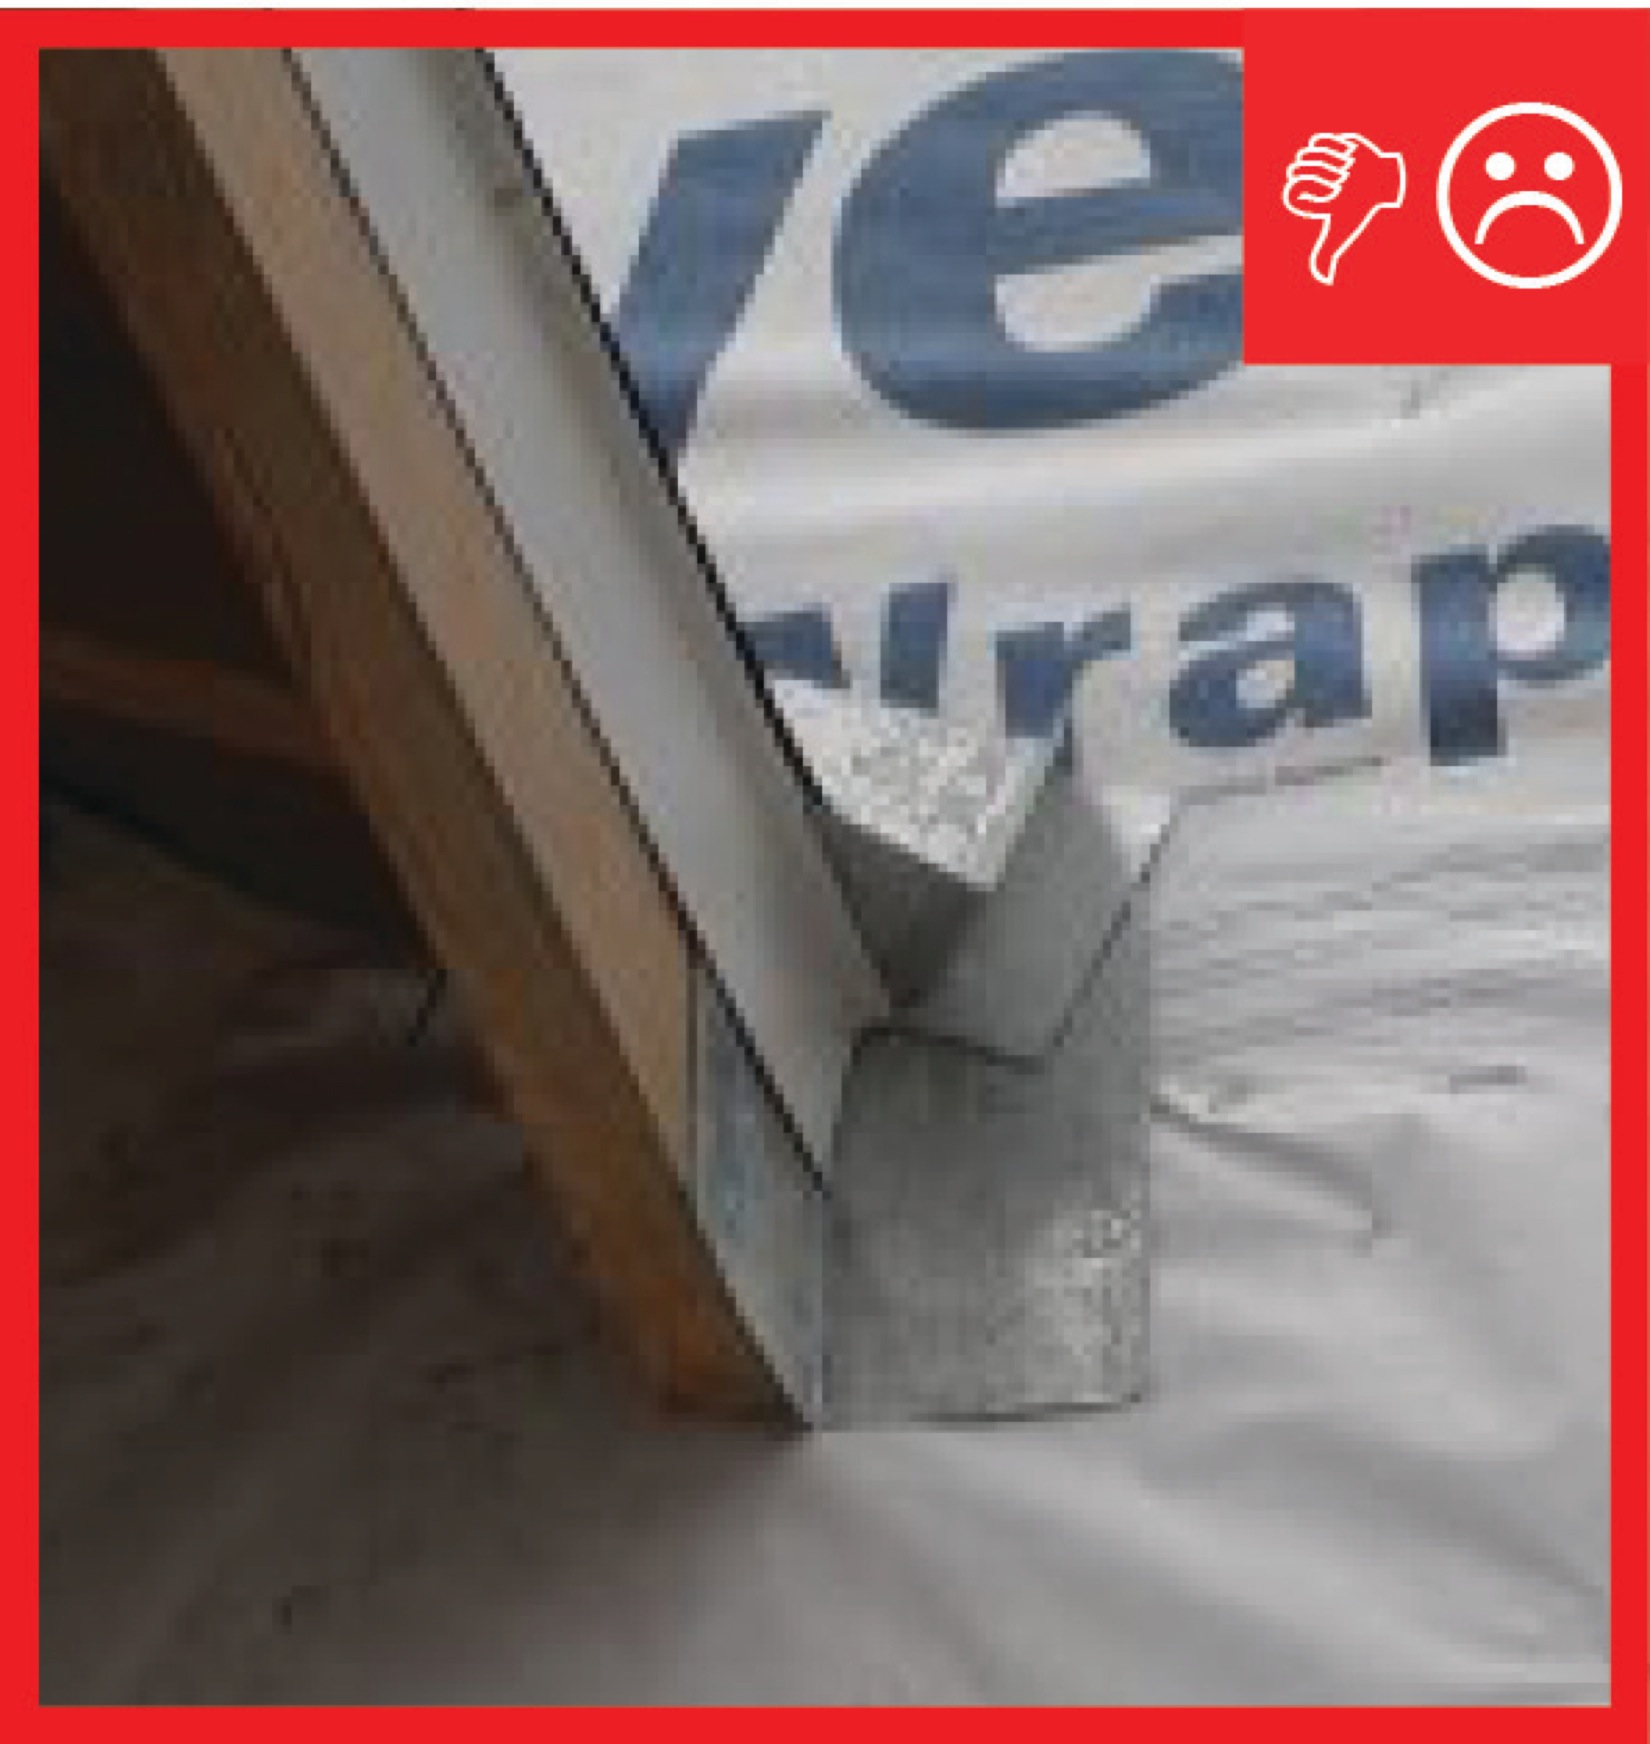
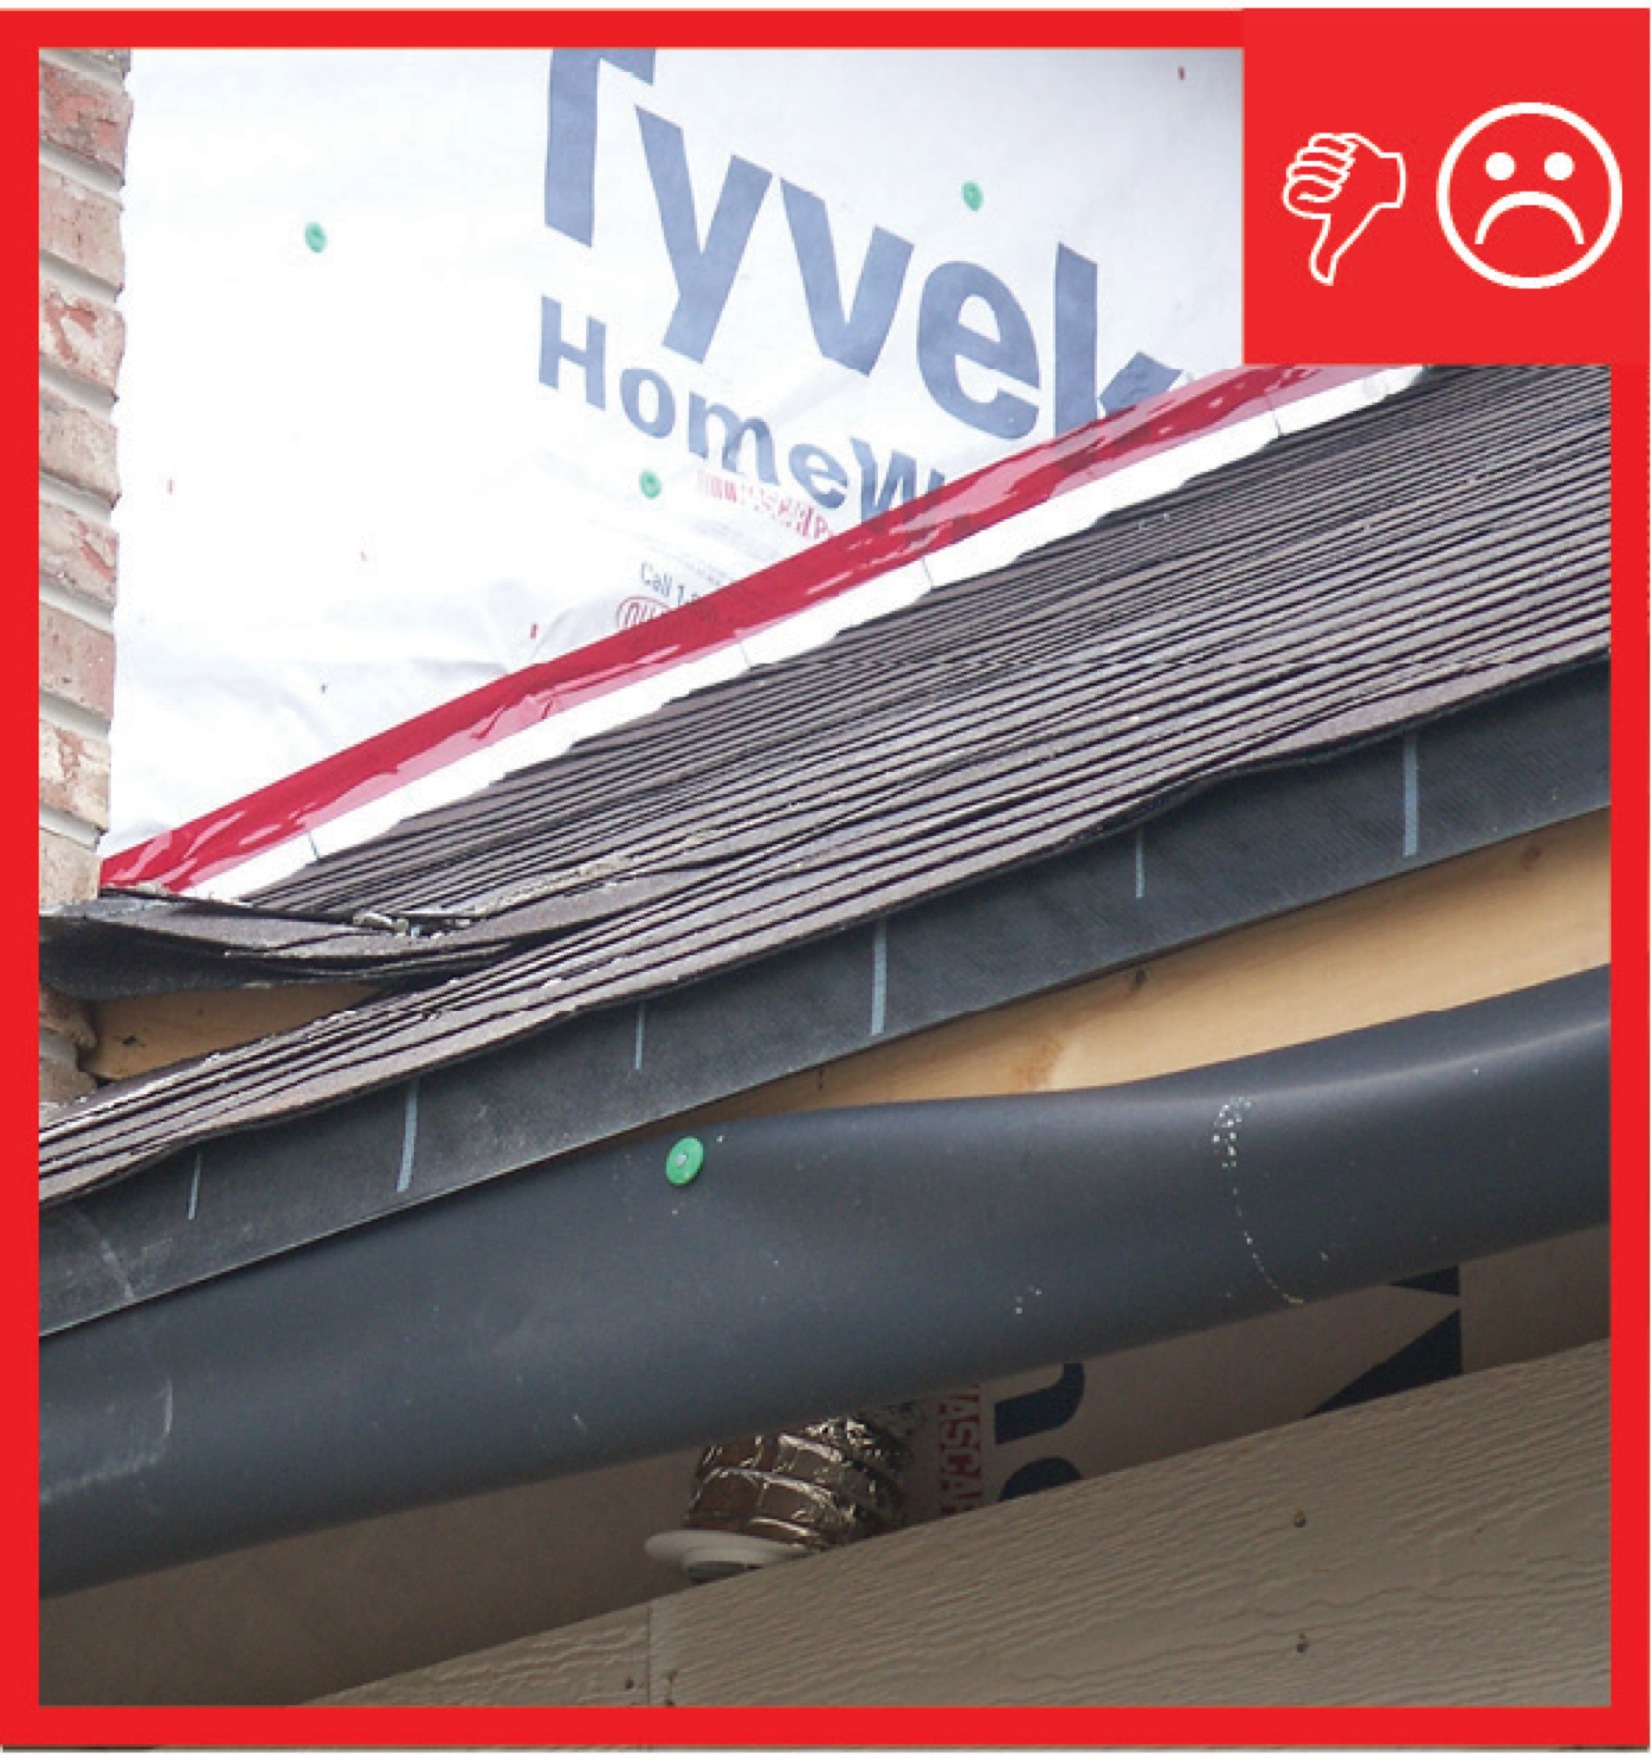
Wrong – the water-resistant barrier is layered underneath the step flashing, which could allow water to get behind the step flashing and into the wall.