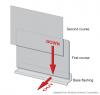
Image Install all layers of the drainage plane to overlap, not underlap, to direct bulk water down and out of the wall. Publication Date Thu, 11/01/2007 - 12:00
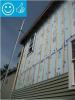
Image Right - XPS foam insulation is attached to the existing exterior wall with wood furring strips that serve as a nail base for the siding and are installed vertically to allow for drainage and drying behind the siding
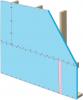
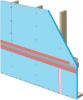
Image Upper wall insulation installation with butyl z-flashing Publication Date Mon, 09/01/2014 - 12:00
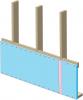
Image Tape the joint between the top insulation sheet and the Z-flashing with 2" wide tape to improve air tightness Publication Date Mon, 09/01/2014 - 12:00
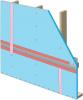
Image Clean taping areas and install 3" tape on vertical joint of upper insulation overlapping the horizontal joint Publication Date Mon, 09/01/2014 - 12:00
Image Tape horizontal joint with minimum 3" wide tape placing tape offset high on the joint, adhearing to the upper sheet without wrinkles Publication Date Mon, 09/01/2014 - 12:00
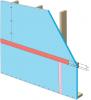
Image Terminate 4" tape with 2" wide tape placing tape offset high on the joint, 2/3 of the tape should be adhered to the sheet of insulation Publication Date Mon, 09/01/2014 - 12:00
Rigid Foam Insulation for Existing Exterior Walls Description Guide describing how to apply an air control layer directly over existing wall sheathing and cover with two layers of insulating sheathing held in place by vertical furring strips.