Showing results 3101 - 3200 of 4973
Image
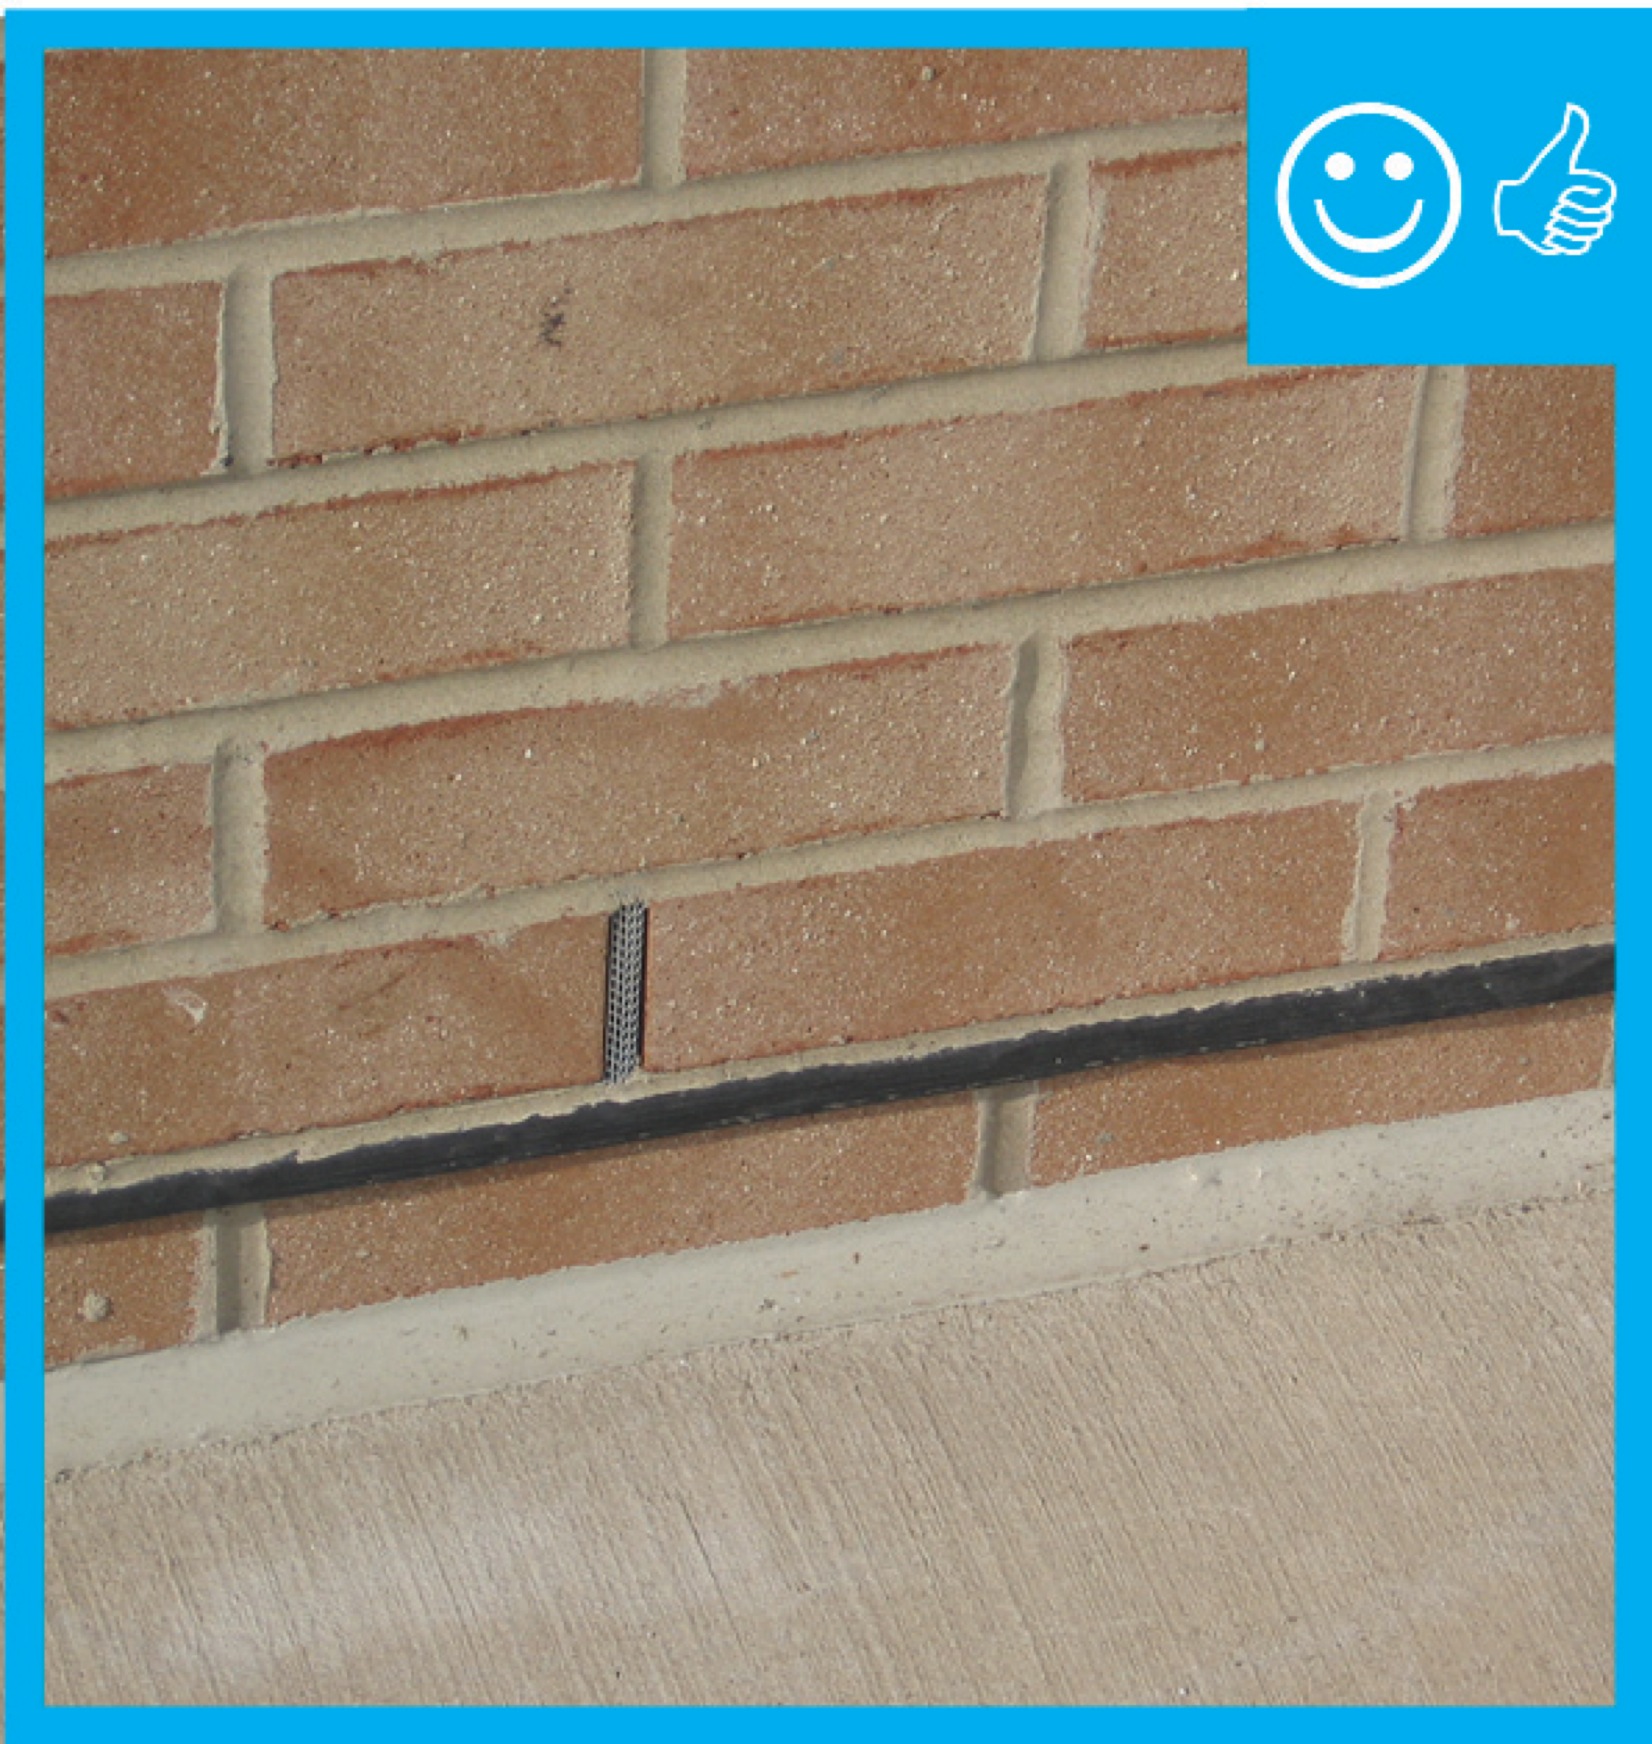
Right: Brick veneer is flashed correctly with weep holes and a fine mesh screen is installed to prevent pest entry.
Image
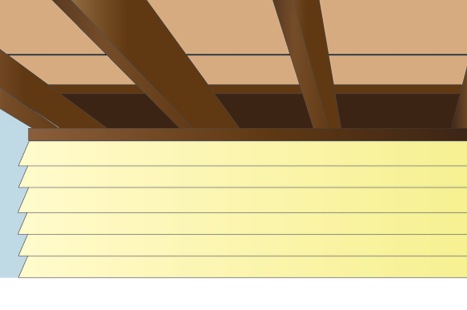
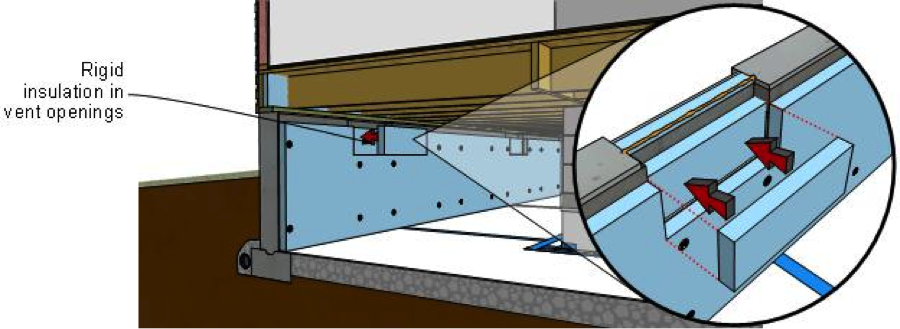
Right: Ducts are completely buried beneath insulation to the depth specified in the plans
Image
Right: ductwork is fully encapsulated with ccSPF prior to ceiling installation and burial
Image
Right: Ductwork is installed in direct contact with lower truss cords. In this picture the main trunk is laying on the truss cords and branch ducts are temporarily held with strapping across truss cords. Ducts are well sealed with mastic
Image
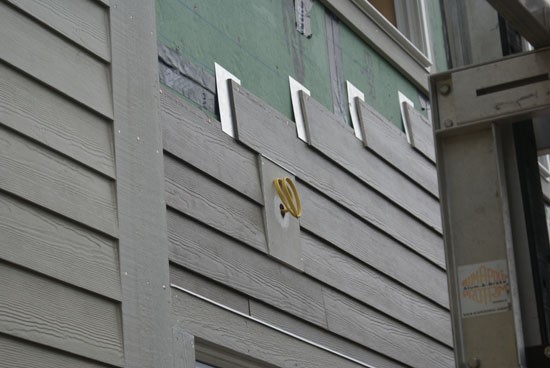
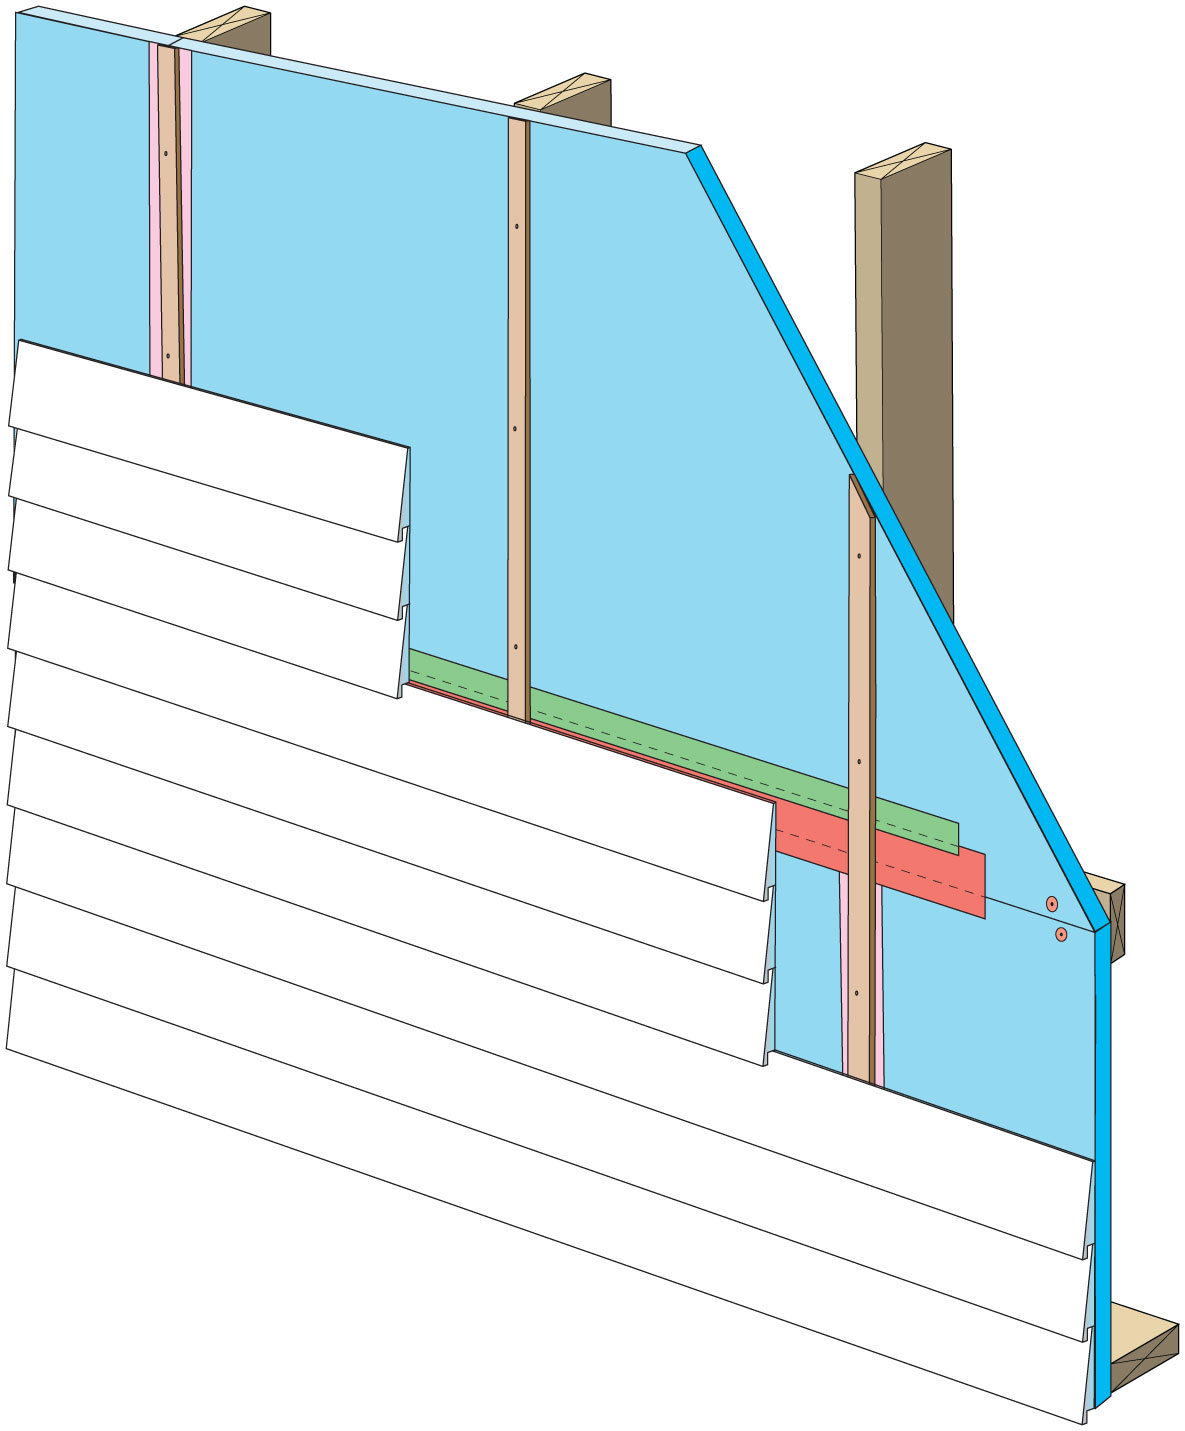
Right: Flashing the butt joints in lap siding installations is a better practice than relying on caulk to seal the joints.
Image
Right: If existing straps are narrower than 1.5 inches, add sheet metal saddles to keep the duct from sagging and pinching
Image
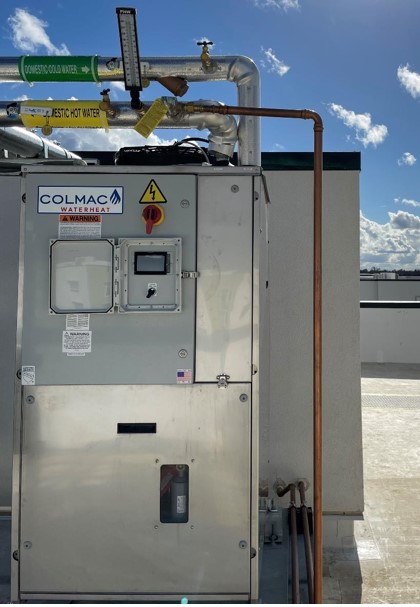
Right: Maintenance valves are installed at the inlet and outlet of this central heat pump water heater
Image
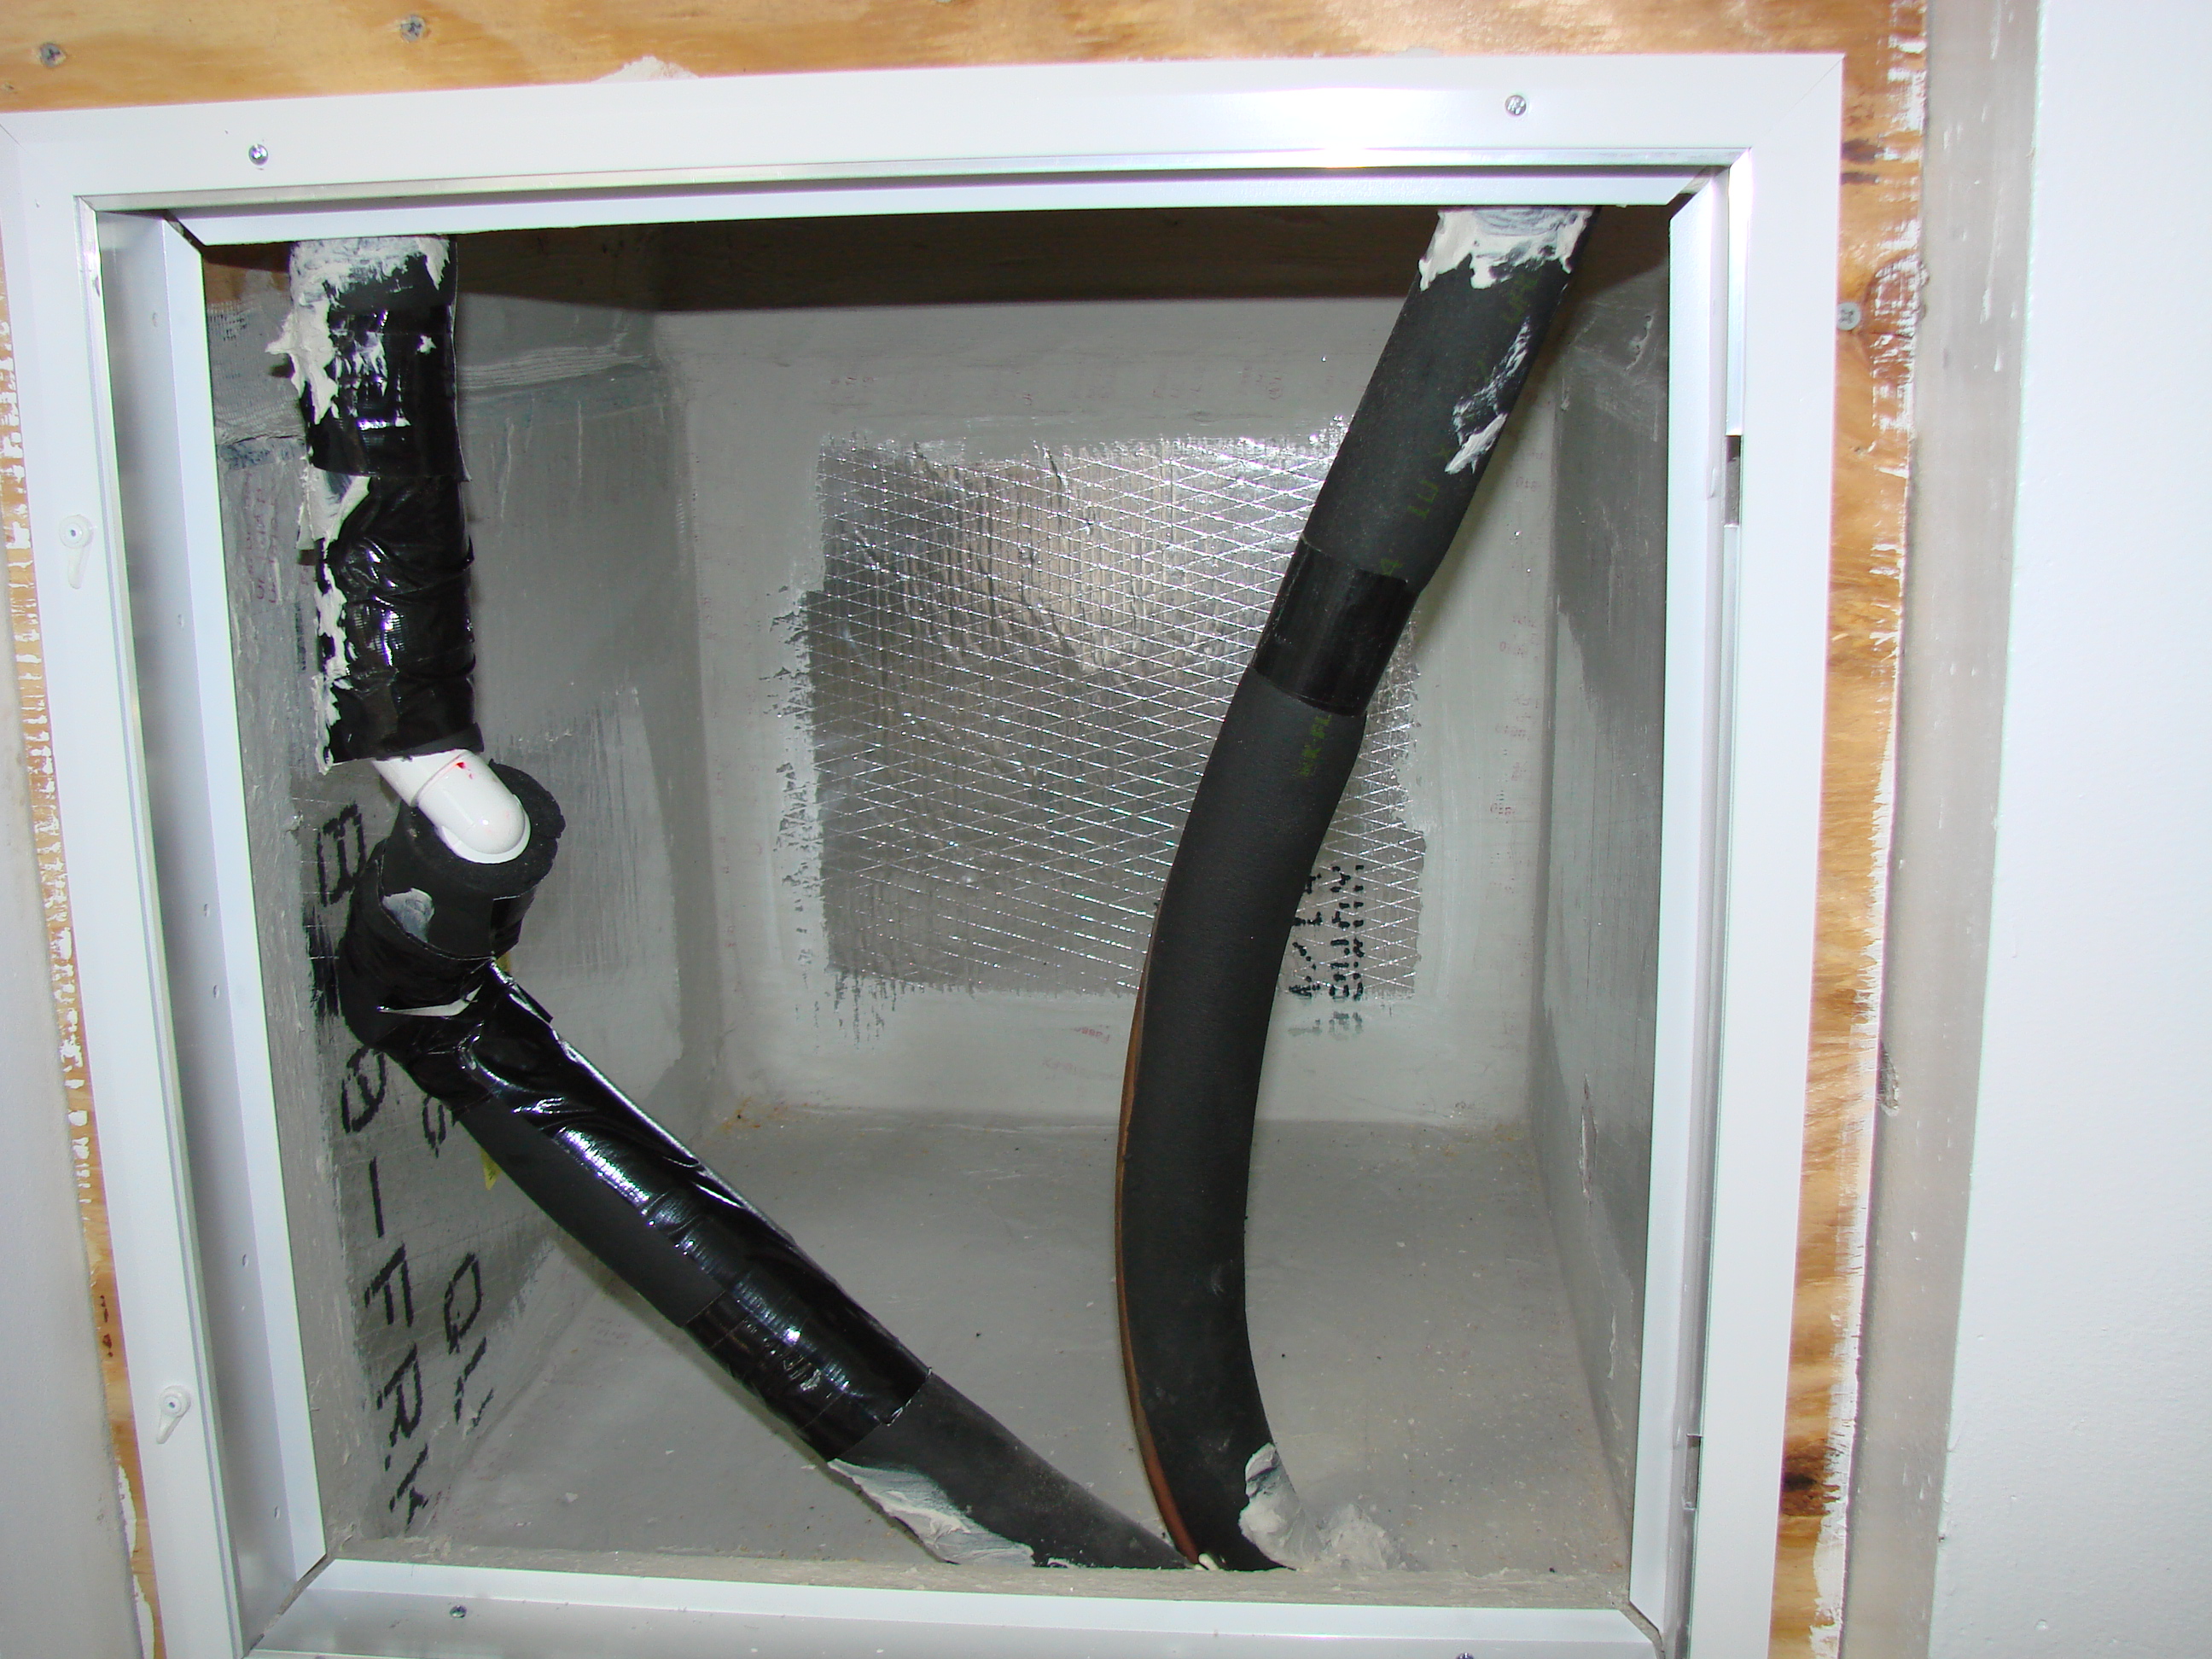
Right: Refrigerant piping is sealed where it exits the return plenum
Image

Image
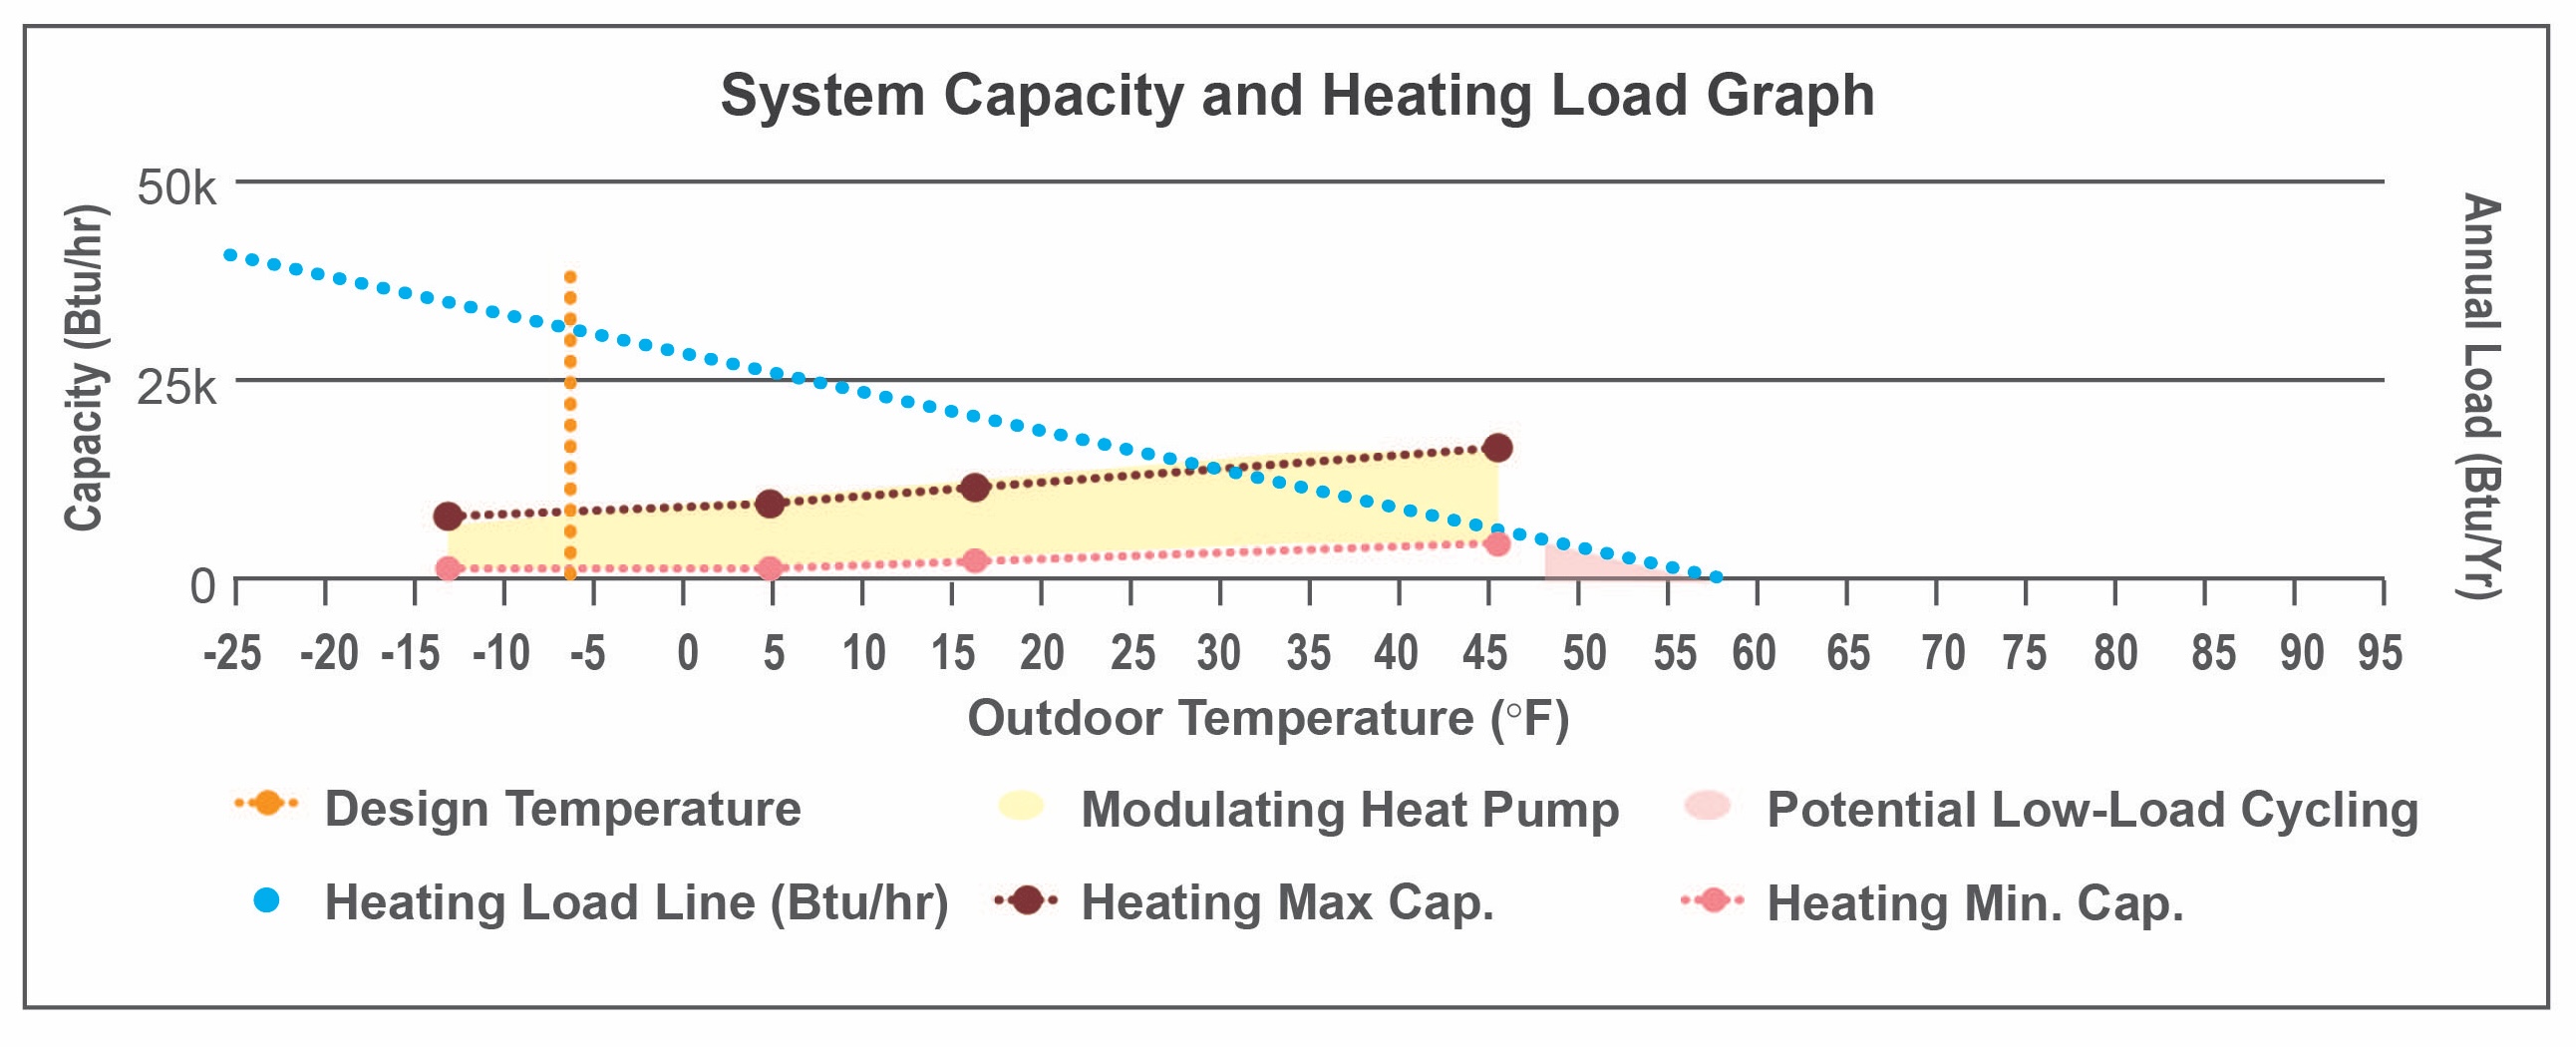
Right: Sized per Approach 1, this heat pump will have minimal short-cycling; since sized using Approach 1, it will require backup heat when temp is below 30°F but could still contribute significant heating down to heating design temp (-6°F) and lower
Image
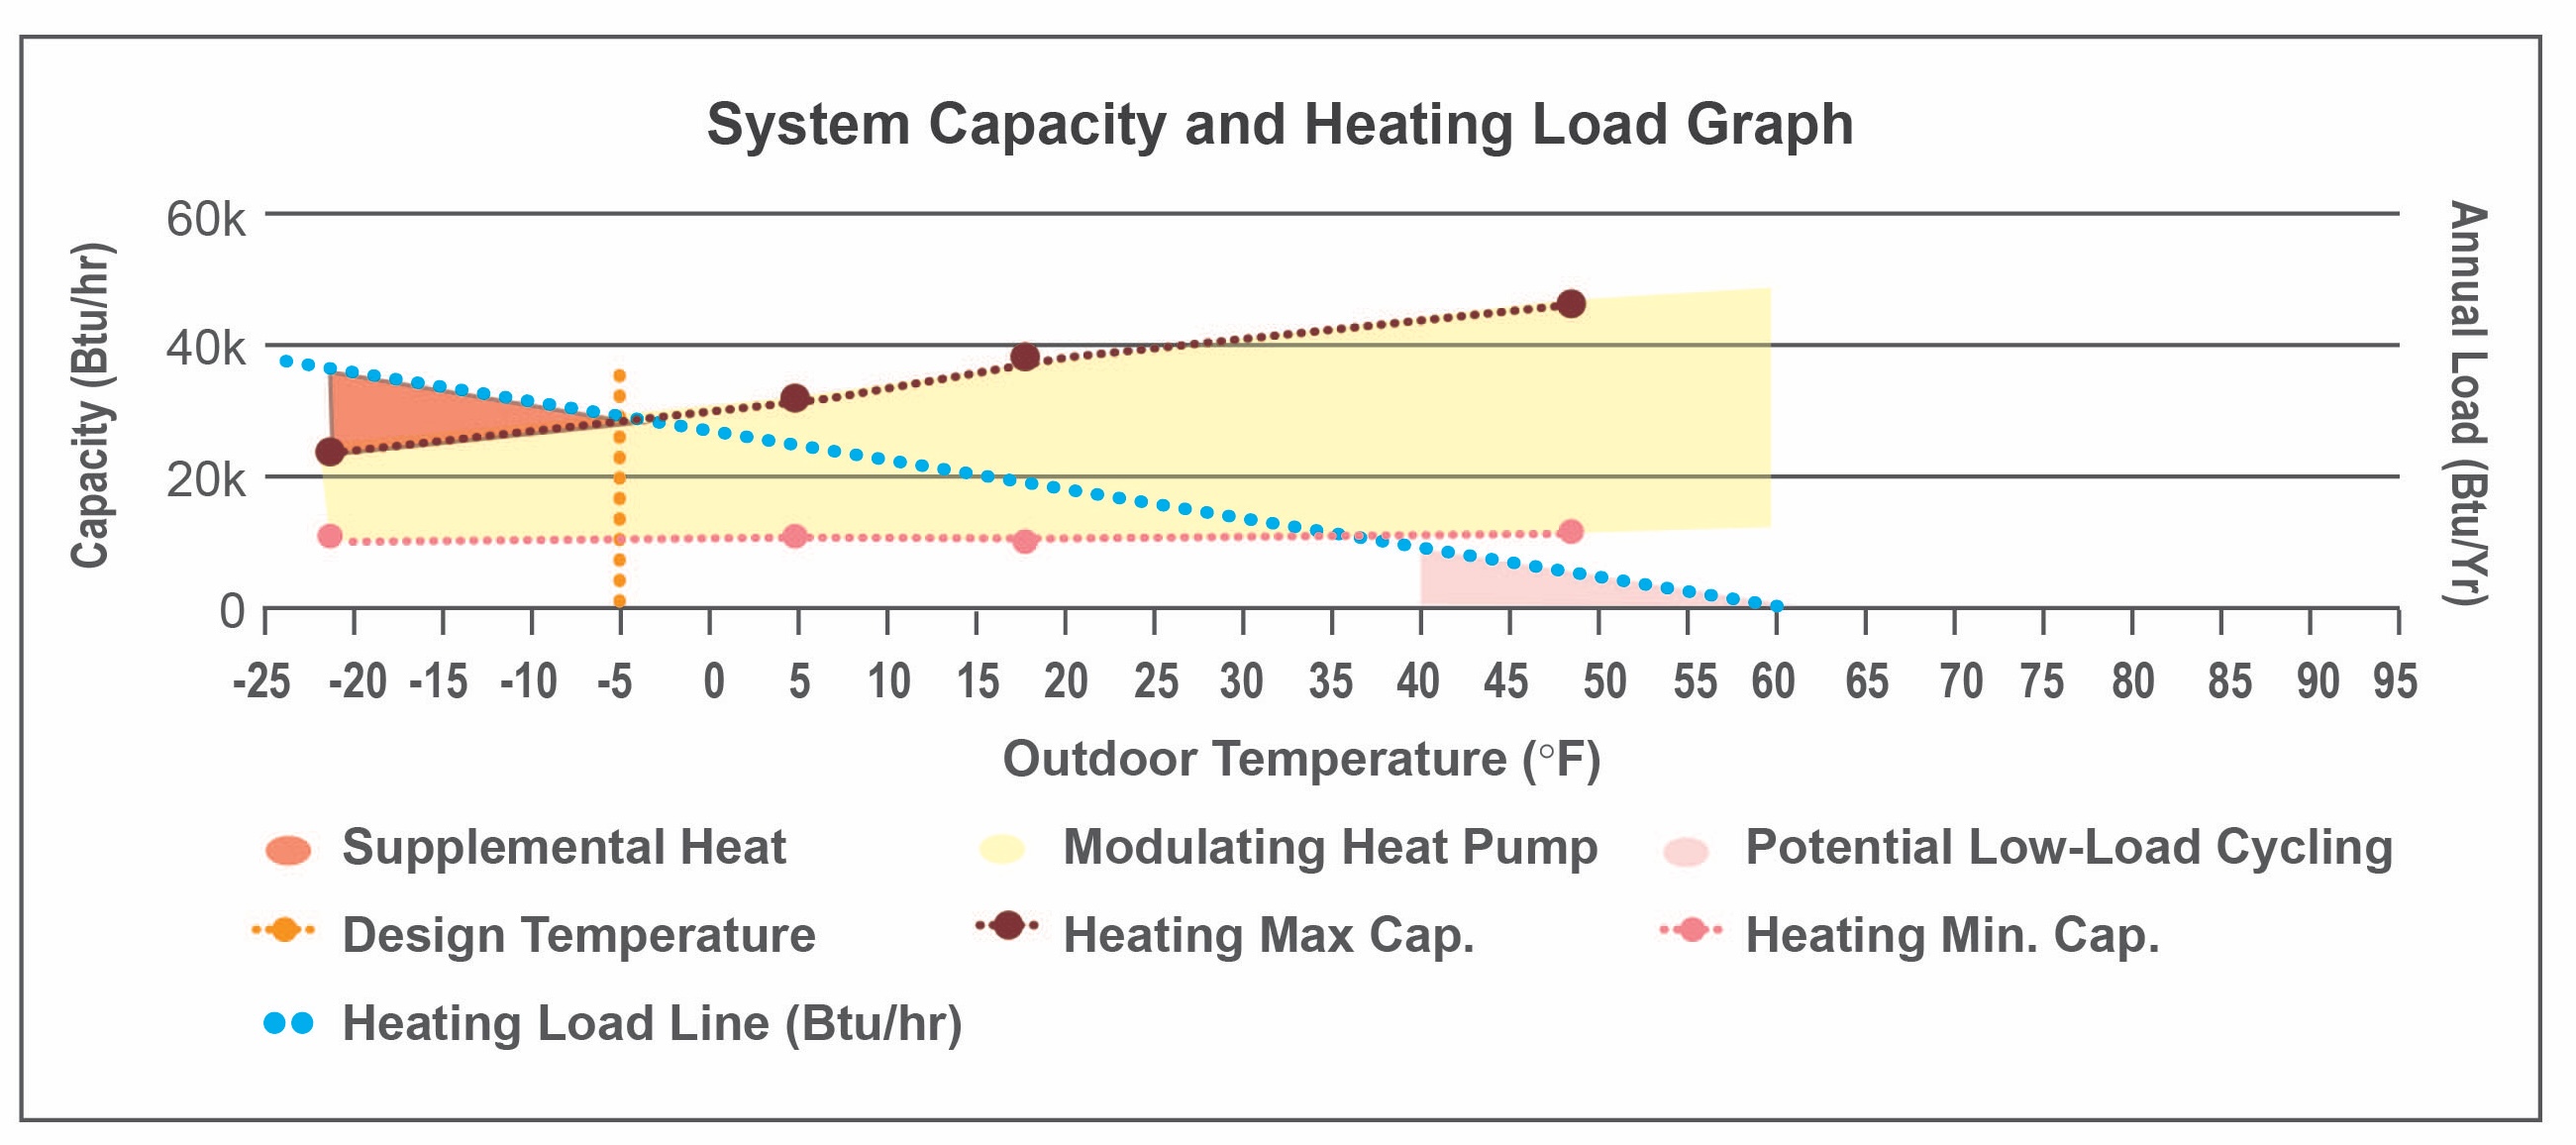
Right: Sized per Approach 3 or 4, this heat pump’s modulating zone has a large overlap with the home’s heating load line, resulting in minimal short-cycling; the unit may require a small amount of backup heat during the very coldest hours of winter.
Image

Right: Sized per Approach 3, this heat pump’s modulating zone has a large overlap with the home’s heating load line; it will require backup heating but could still contribute significant heating for all hours of the heating season
Image
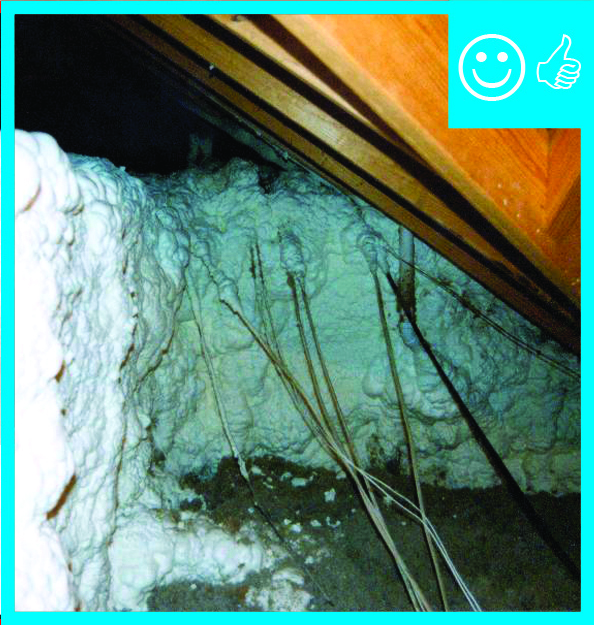
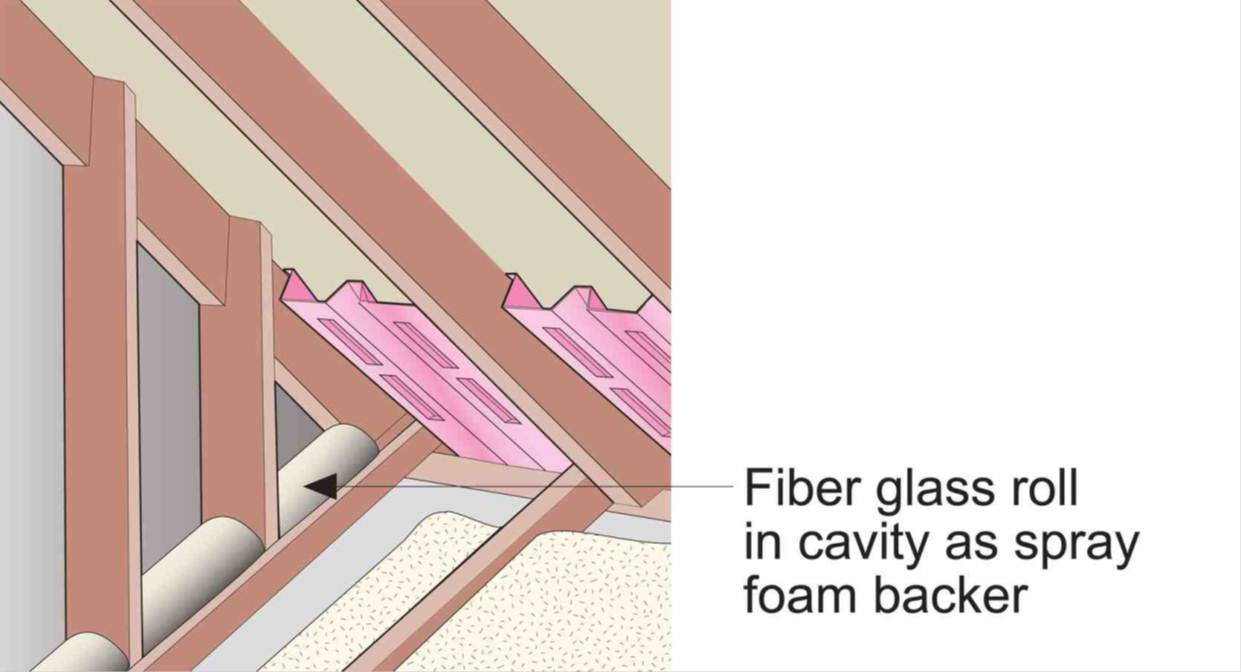
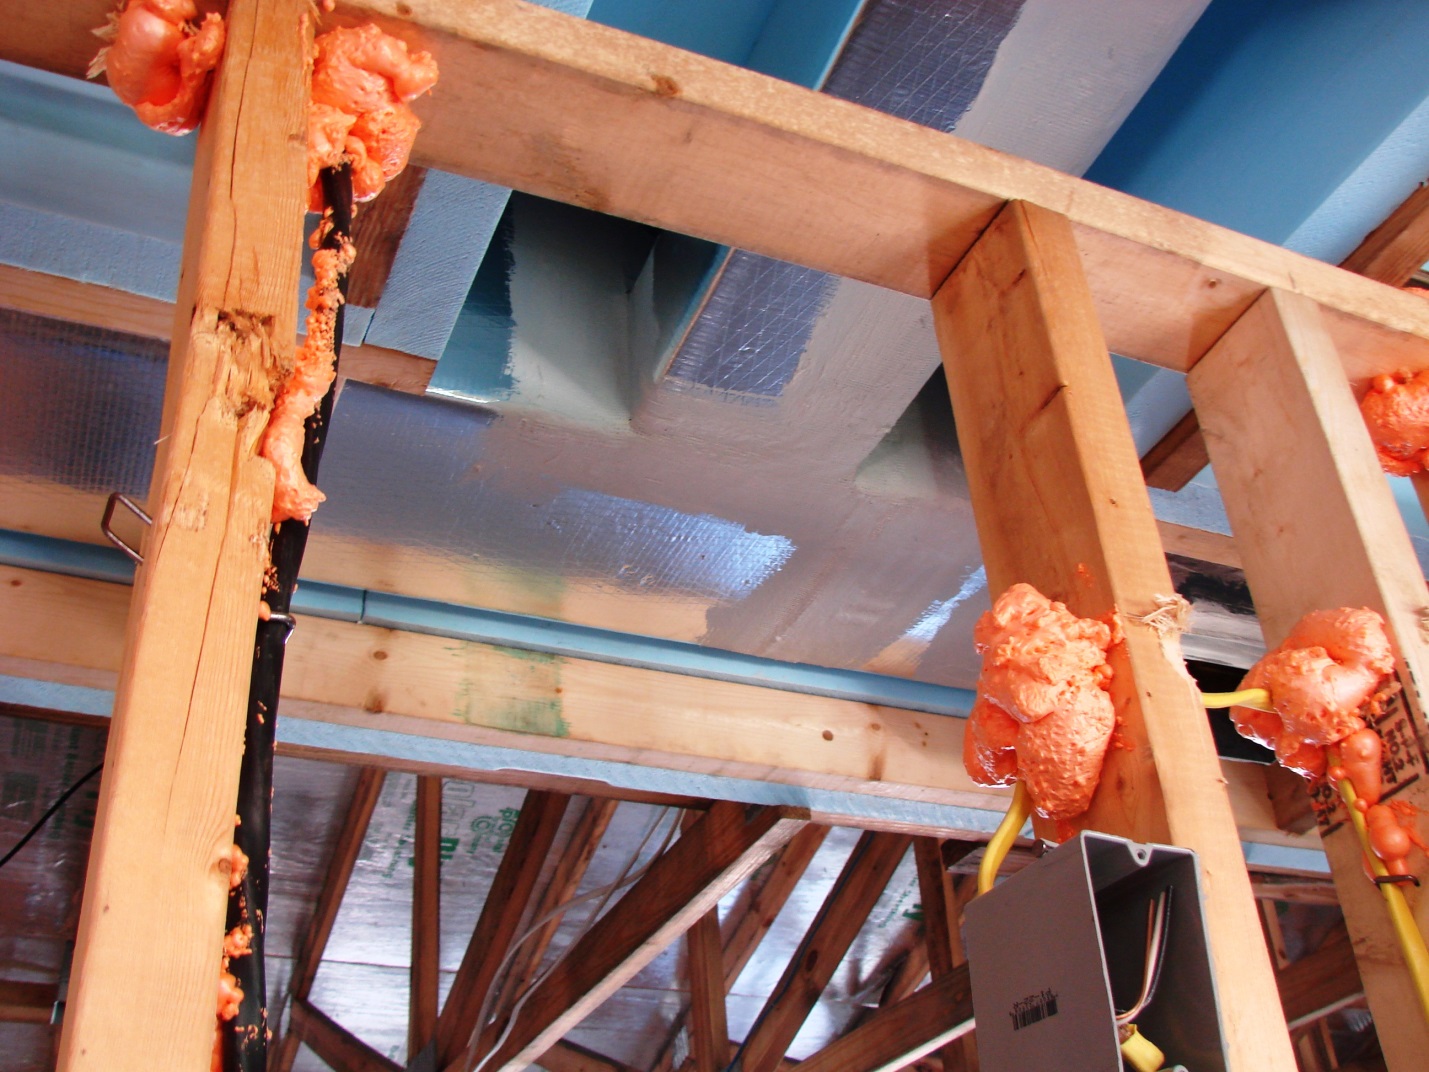
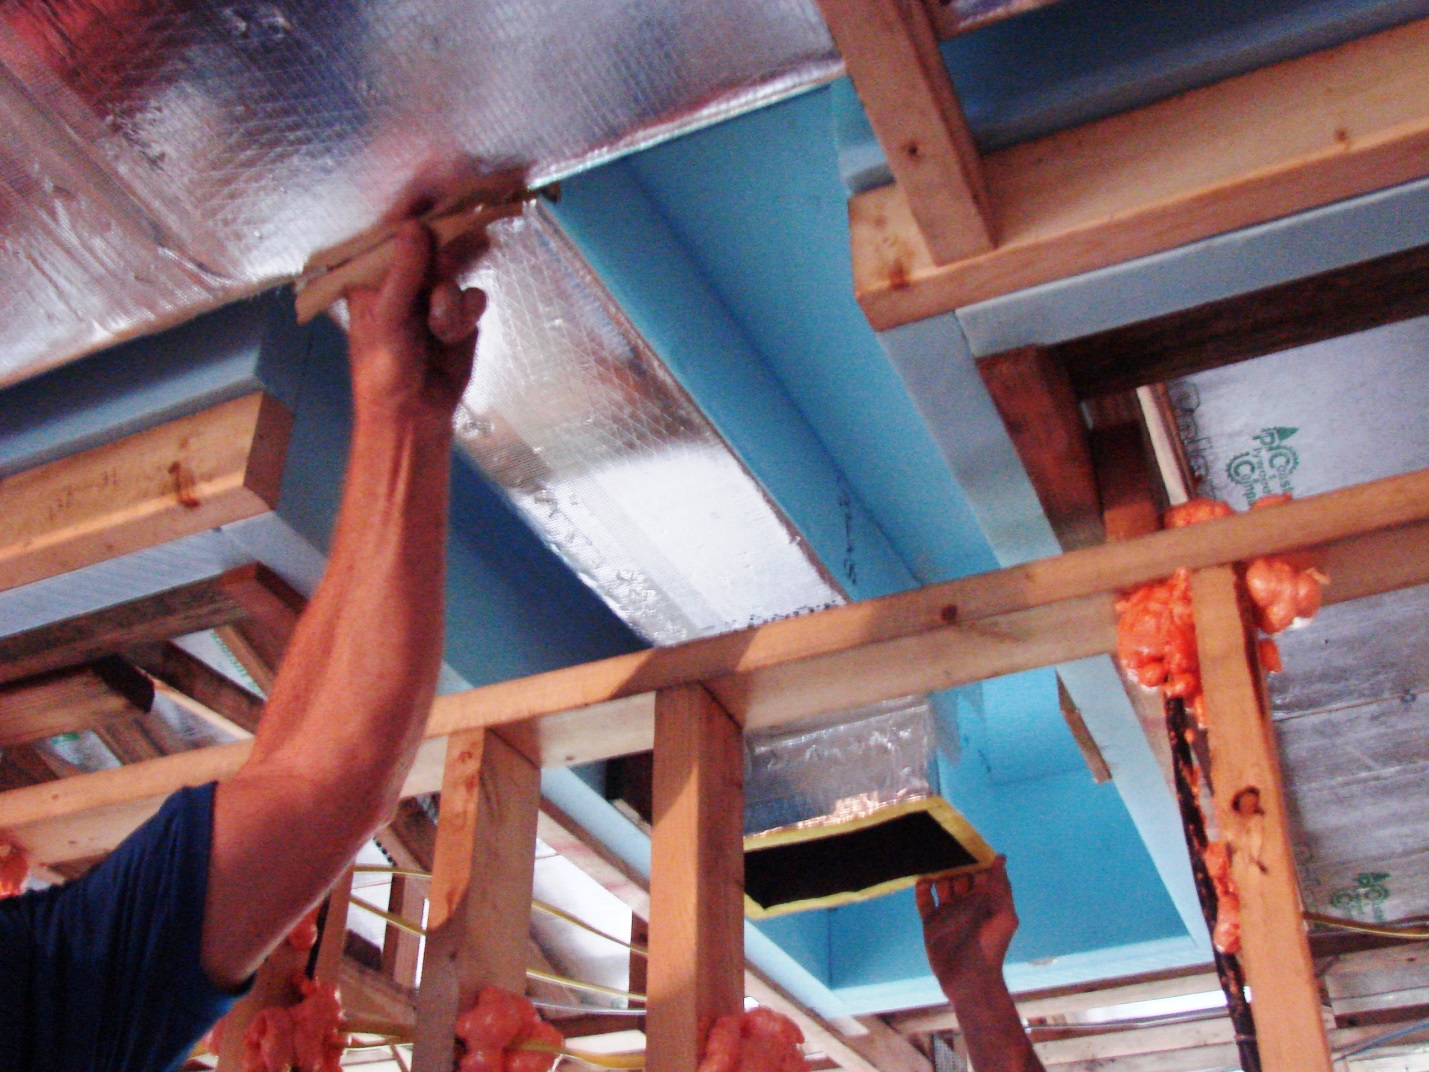
Right: Spray foam air seals and insulates raised ceiling duct chase
Image

Right: The bottom of the air handler cabinet is well sealed to the return platform
Image
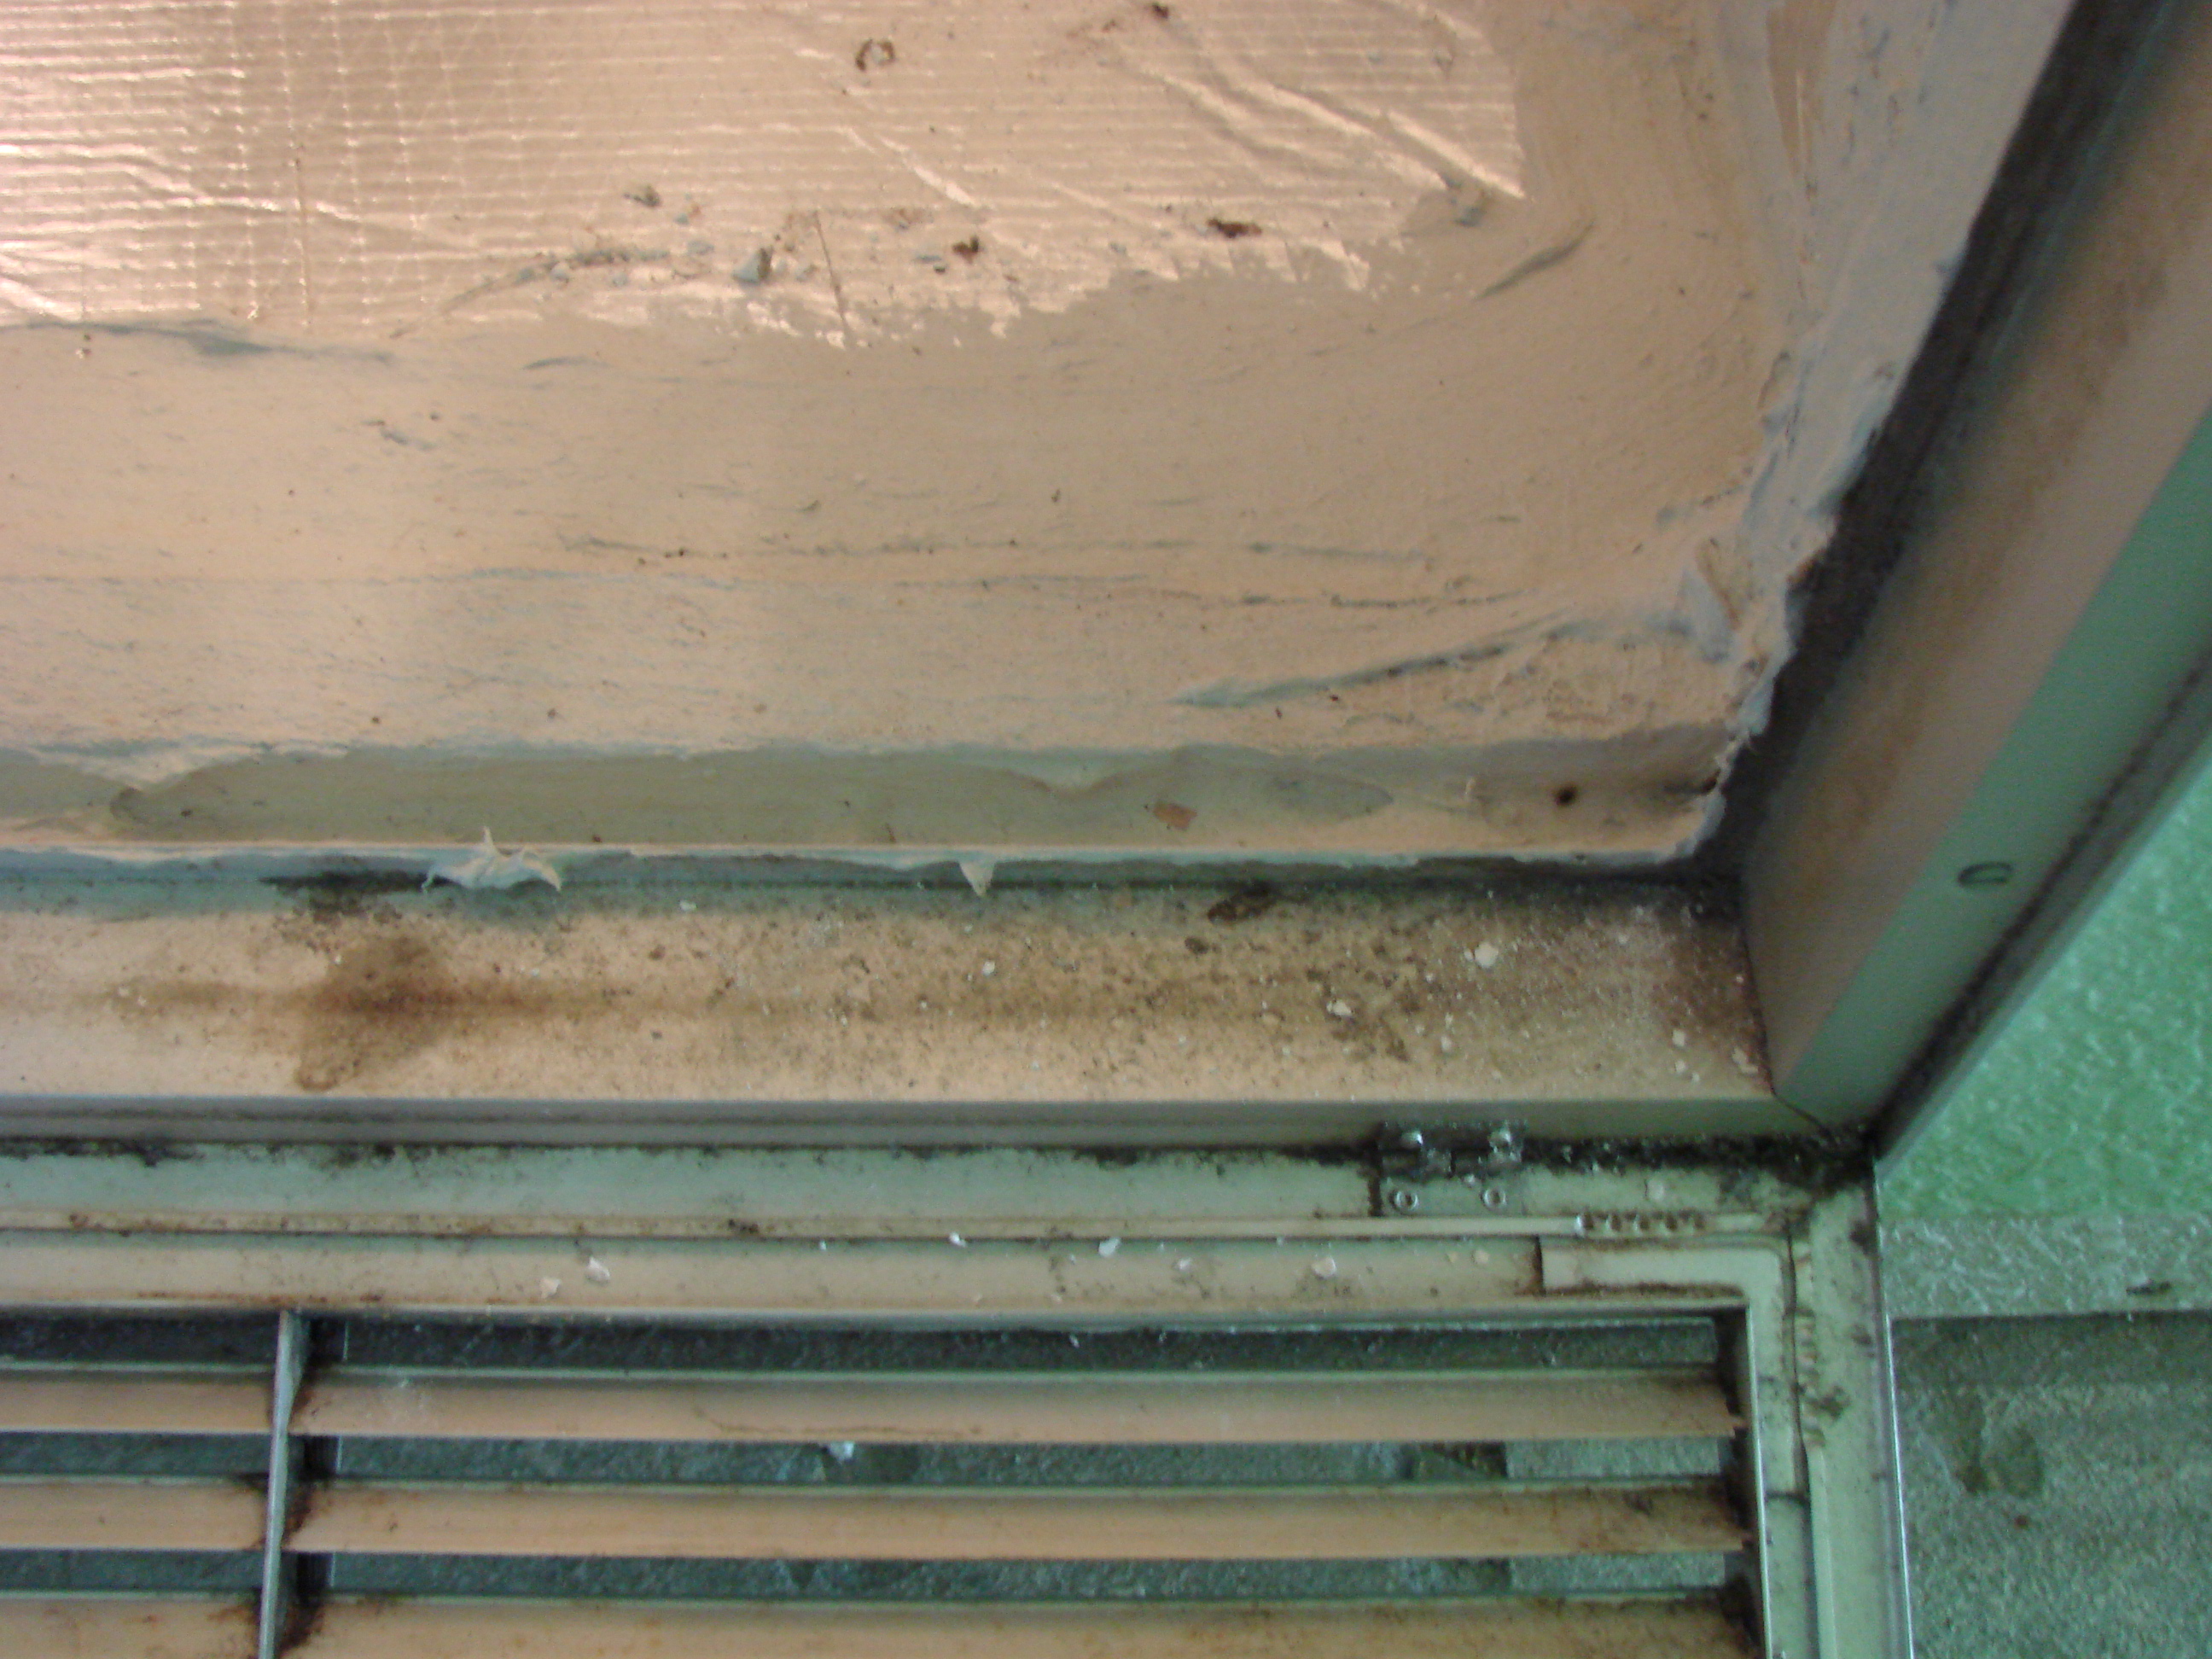
Right: The plenum liner is well sealed to the filter-backed grille
Image
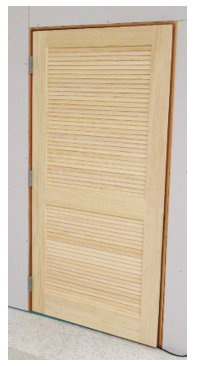
Right: This closet door for a heat pump water heater is louvered to allow warm air to enter and exhaust air to leave the closet
Image
Right: This heat pump water heater is in a basement within the thermal boundary but not actively conditioned. It has over 770 ft² of space with easy access to the control panel and clearance for airflow to the air intake (top) and exhaust (side)
Image
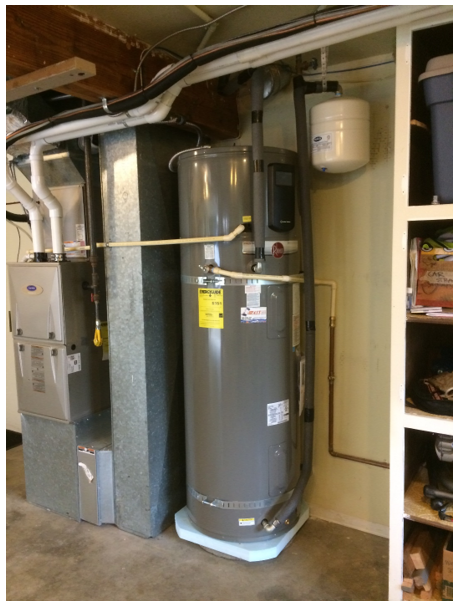
Right: This heat pump water heater is installed in a garage next to the furnace where there is a lot of space for accessing the unit, and for intake and exhaust; a foam pad insulates the base; the condensate line is correctly drained and pipe insulation
Image
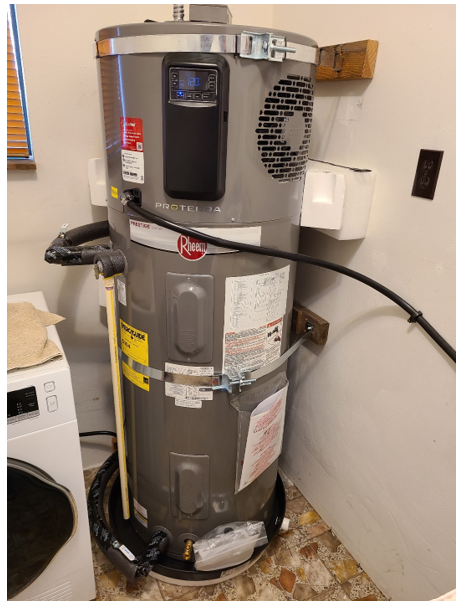
Right: This heat pump water heater is installed in a laundry room with enough space for the control panel and vents to be clear of obstructions; The HPWH can use heat from the dryer to heat water, but the seismic straps should be lower
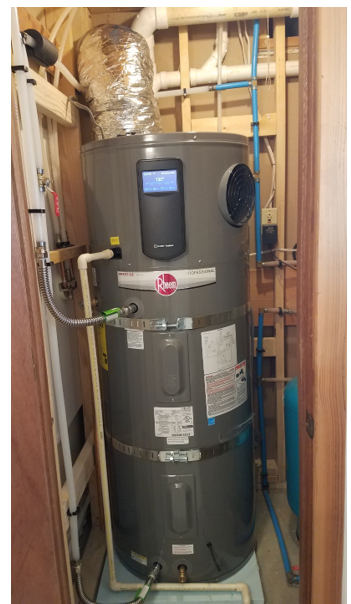
Image

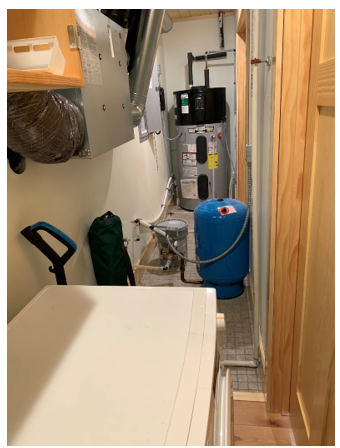
Right: This heat pump water heater is installed in a small space so the, intake air is ducted from an adjacent room; the water heater since on a pad of foam insulation and has a good drain line configuration but the waterpipes lack insulation
Image
Right: This heat pump water heater is installed in a utility closet where it can use heat from the clothes washer and heat pump clothes dryer and has access to a floor drain for condensate
Image
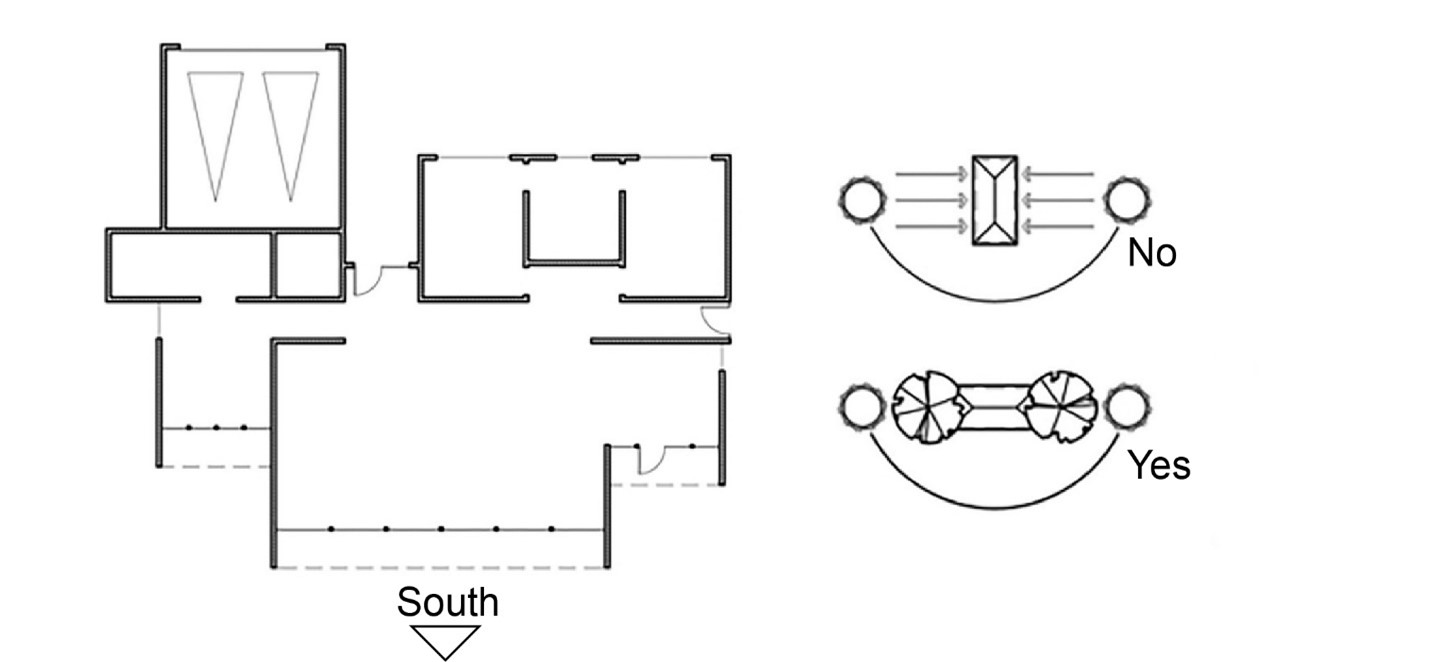
Right: This house plan orients broad building surfaces away from the west and east, trees are used to shade the west and east, and large overhangs shade windows on the south wall
Image

Right: This vent was correctly flashed providing proper waterproofing detailing for this siding penetration.
Image
Right: Use mastic to air seal the return air plenum and to seal around refrigerant lines coming from the slab in the floor of the return
Image
Image
Image

Rigid foam extends under the full slab and lines the inside edges of the foundation walls.
Image

Rigid foam forms an insulating bond break between the foundation wall and the slab
Image

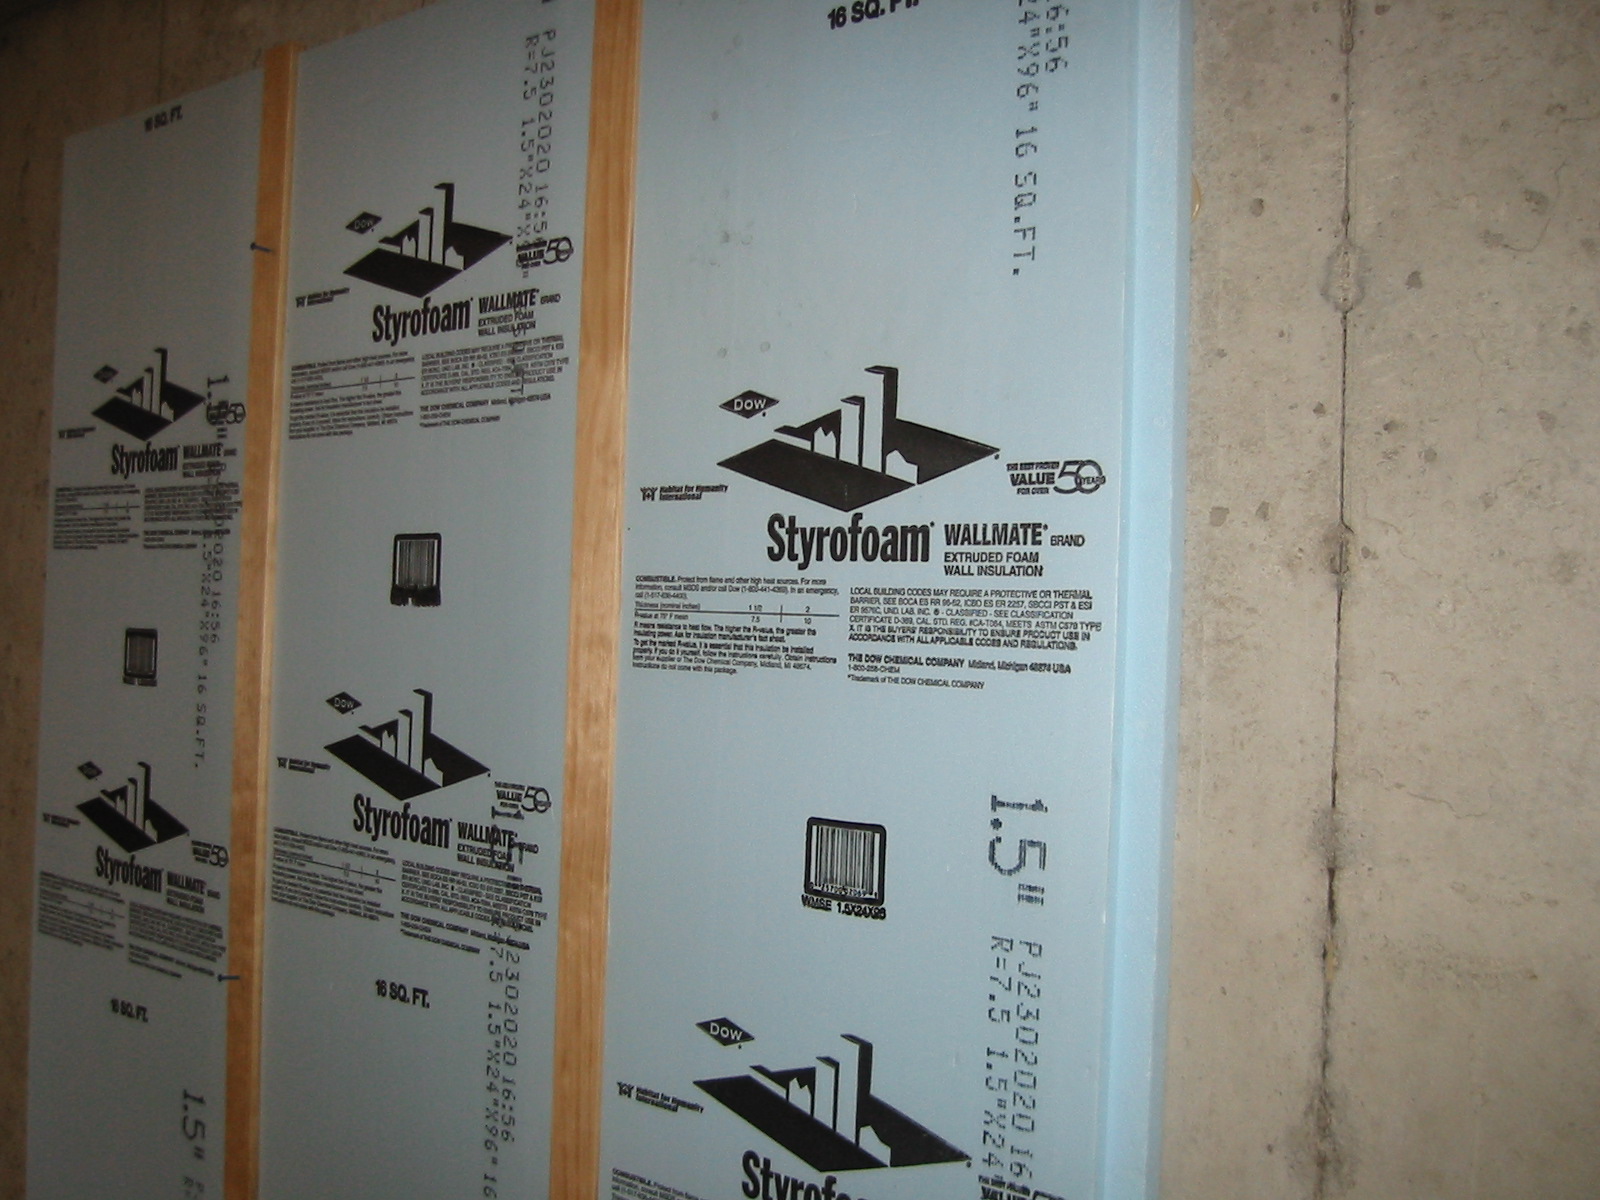
Rigid foam insulated sheathing placed exterior to house wrap, interior to house wrap, or take the place of the house wrap
Image
Rigid foam insulates the interior of masonry walls behind the fireplace in this Building America home by Castle and Cooke in Winter Garden, Florida.
Image
Rigid foam insulating sheathing installed over an existing garage ceiling with retrofits to air seal exterior wall before adding exterior wall insulating sheathing
Image

Rigid foam insulating sheathing is installed on existing garage ceiling and covered with a new gypsum board fire protection layer installed over the foam.
Image
Rigid foam insulation and a thin slab were installed over the dirt and gravel of this sealed crawlspace
Image

Rigid foam insulation applied to the crawlspace walls, allowing a 3-in. pest control inspection strip at the top
Image
Rigid foam insulation can serve as the drainage plane when all seams are taped. Furring strips provide an air gap behind the cladding.
Image
Image
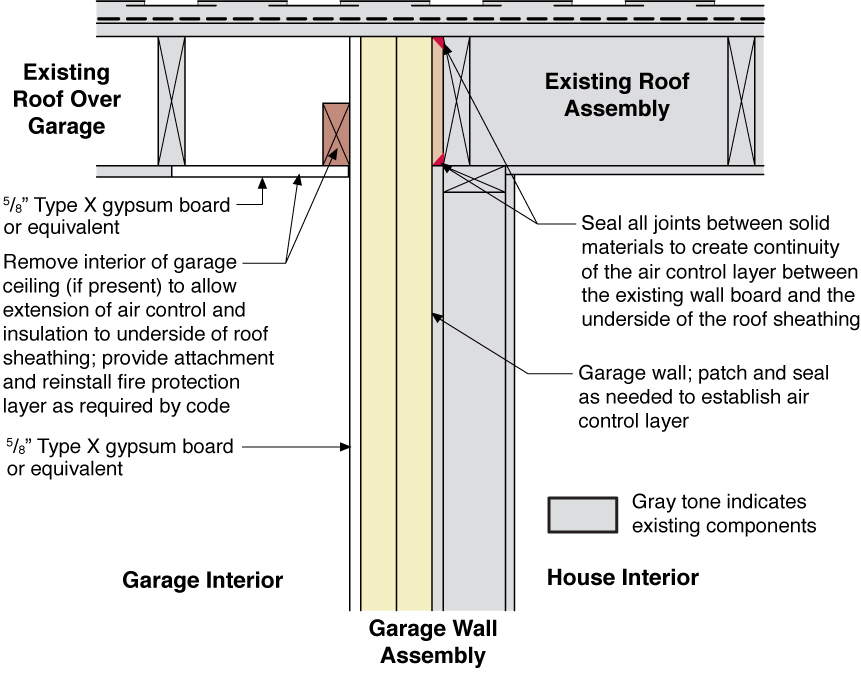
Rigid foam insulation is installed on the garage side of the shared garage wall and roof of an existing home
Image
Rigid foam insulation was installed at the perimeter of the one-level apartments before installing ceiling drywall to ensure a minimum R-21 attic perimeter insulation.
Image
Image

Image
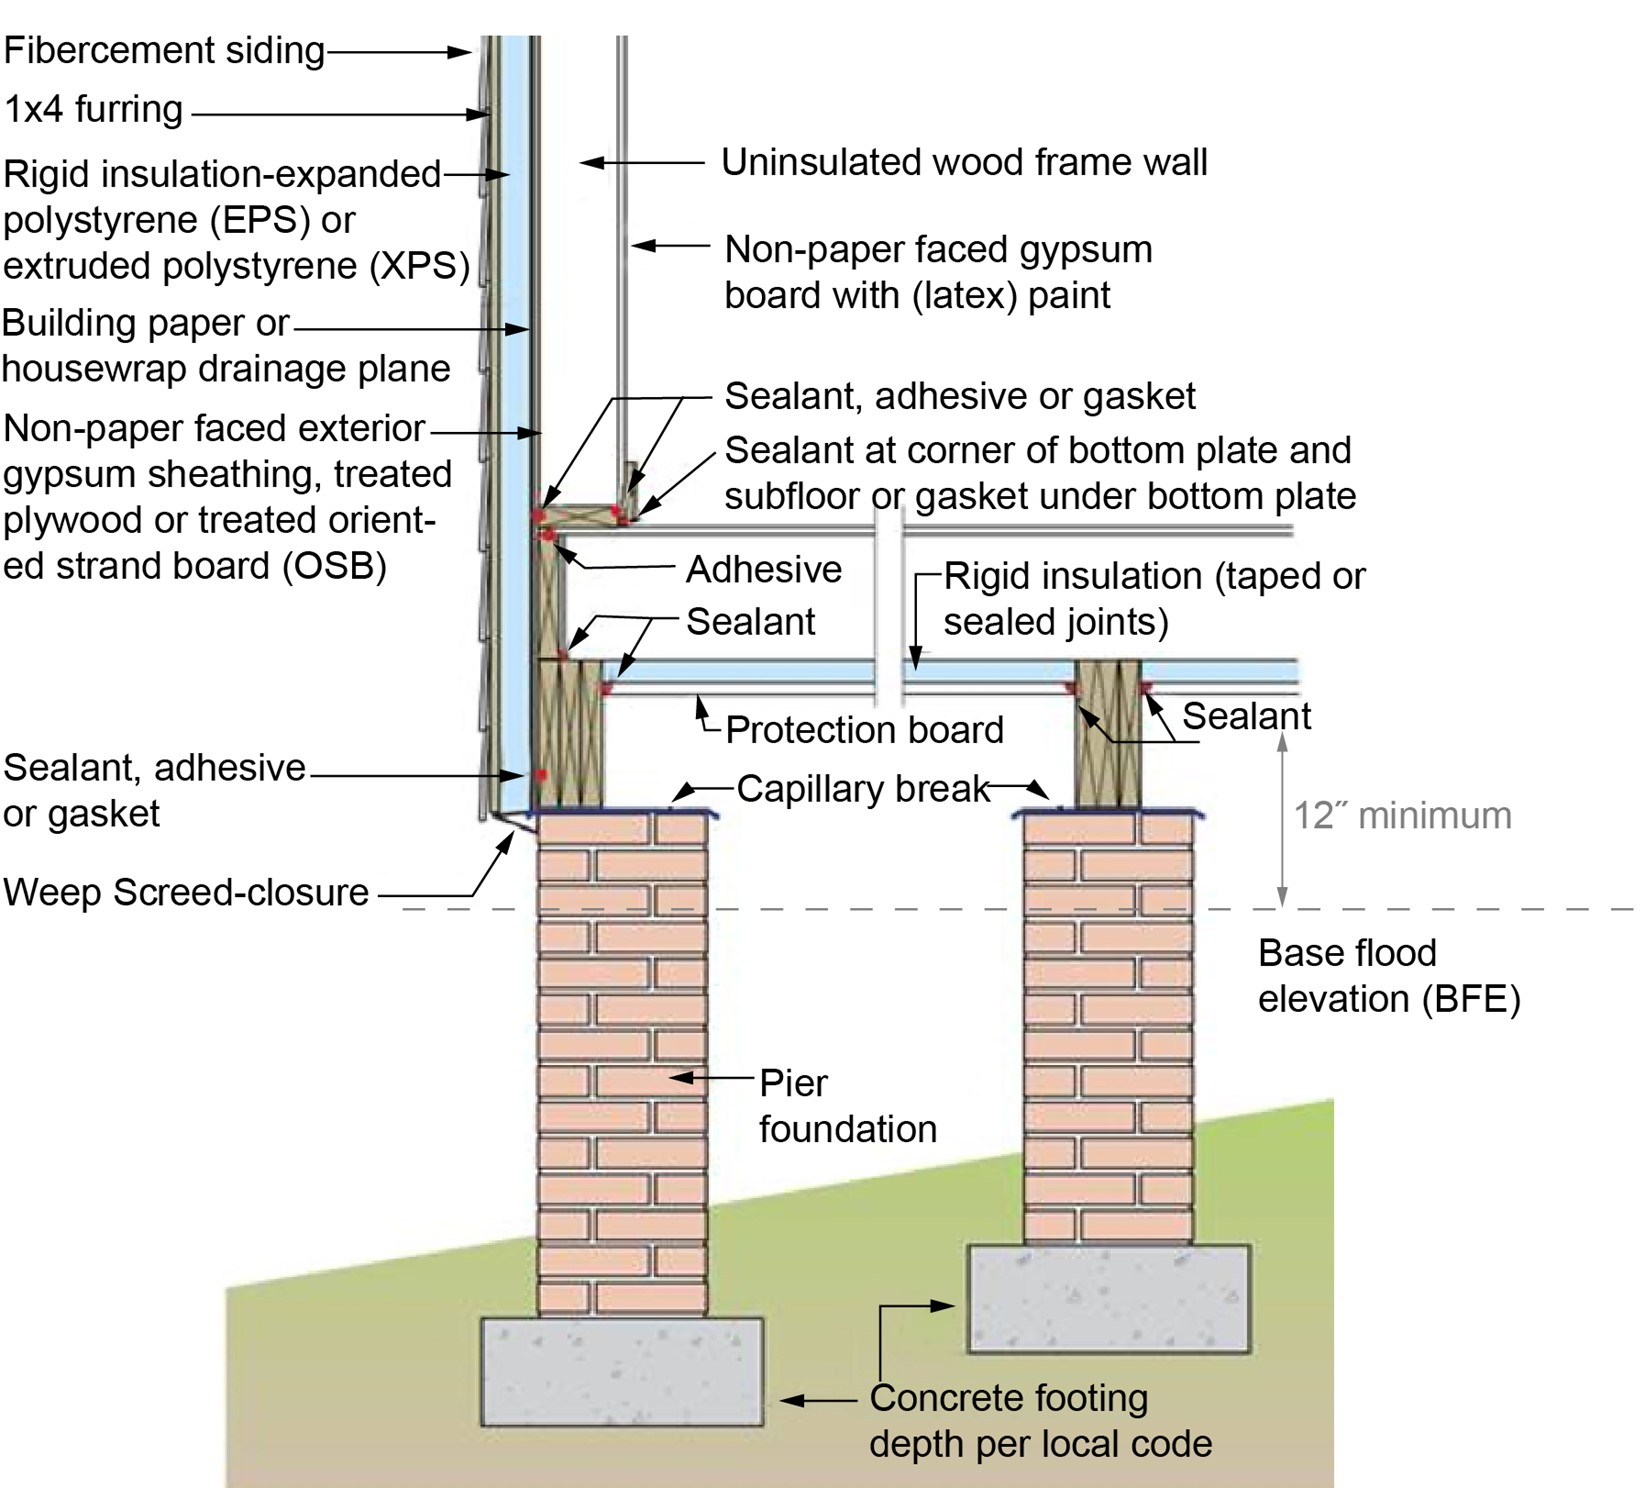
Rigid foam provides the code-required insulation values for this floor and wall assembly so that fibrous cavity insulation can be avoided, reducing risk of floodwater damage
Image
Rigid foam serves as the sheathing on these 2x6 24-inch on center walls; plywood is used only at the corners for wind bracing.
Image

Image

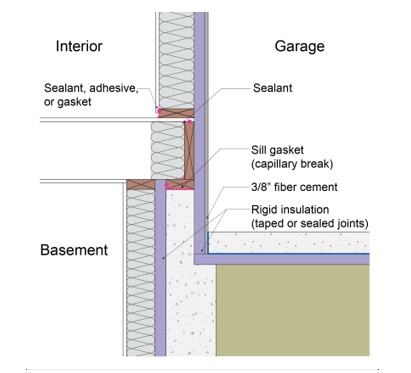
Rigid insulation and air-sealing can be used to thermally isolate garages from interior occupied space in multifamily row houses/townhouses.
Image
Rigid insulation and air-sealing can be used to thermally isolate garages from multifamily row houses/town houses with basement foundations in IECC Climate Zones 3 or higher.
Image
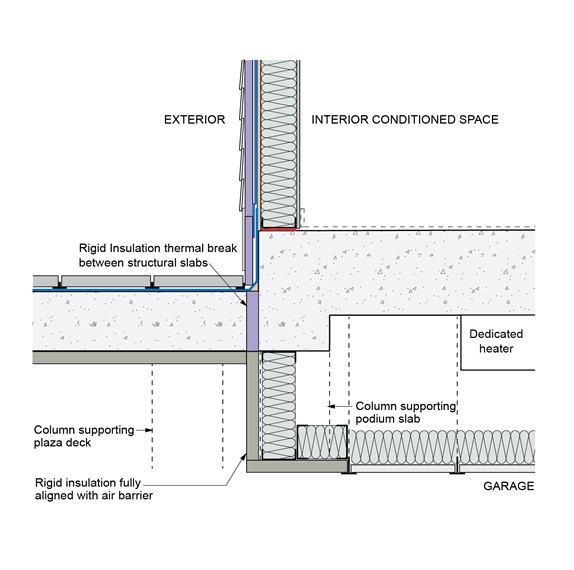
Rigid insulation and water control layers are installed on the exterior of a flat foundation wall; spray foam insulates the rim joist
Image
Rigid insulation can be used as a thermal break between a garage slab with a heated plenum space and a separately cast garage slab without a heated plenum space.
Image
Image
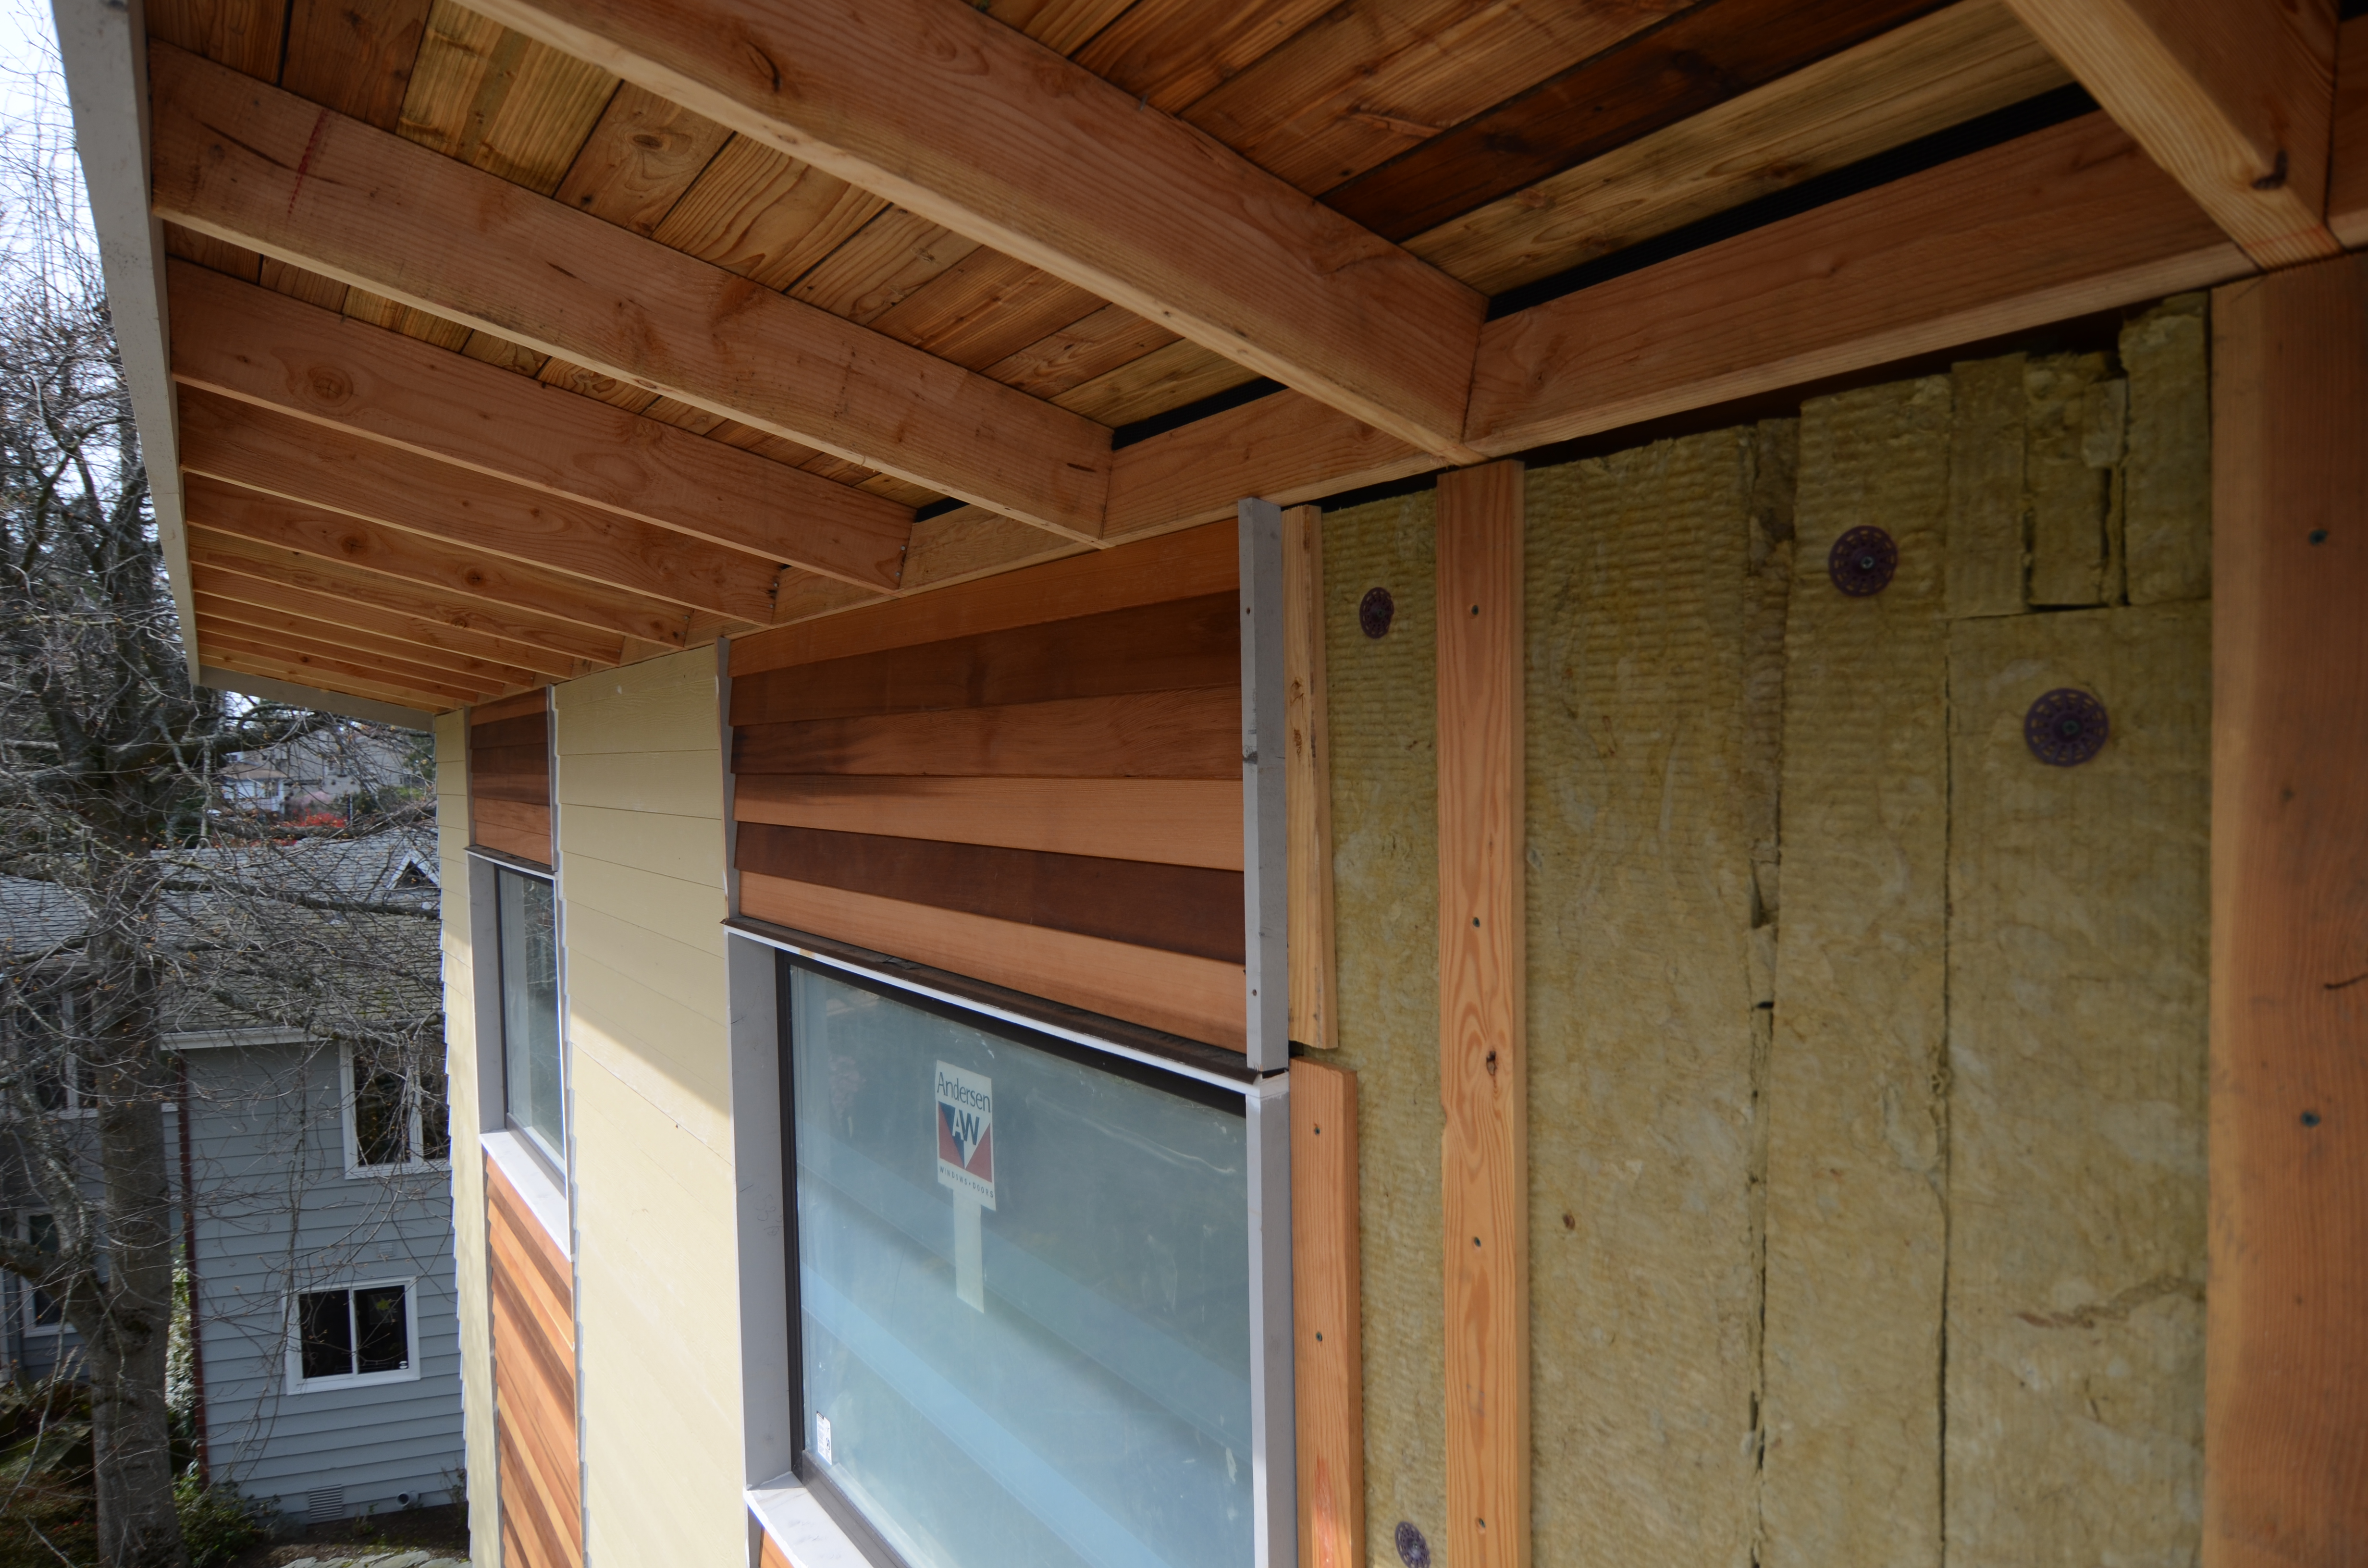
Rigid mineral wool insulation is covered with ¼-inch wood battens which provides a air and drainage gap under the cedar and fiber cement siding.
Image
Rim joists are insulated with R-20 of open-cell spray foam which is air sealing and insulating but vapor permeable.
Image
Image
Image
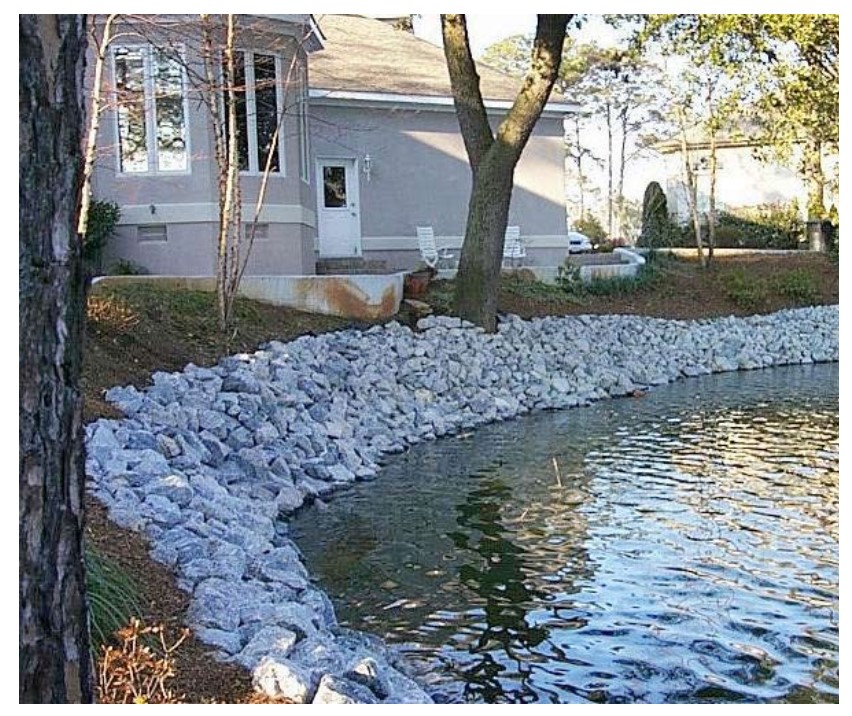
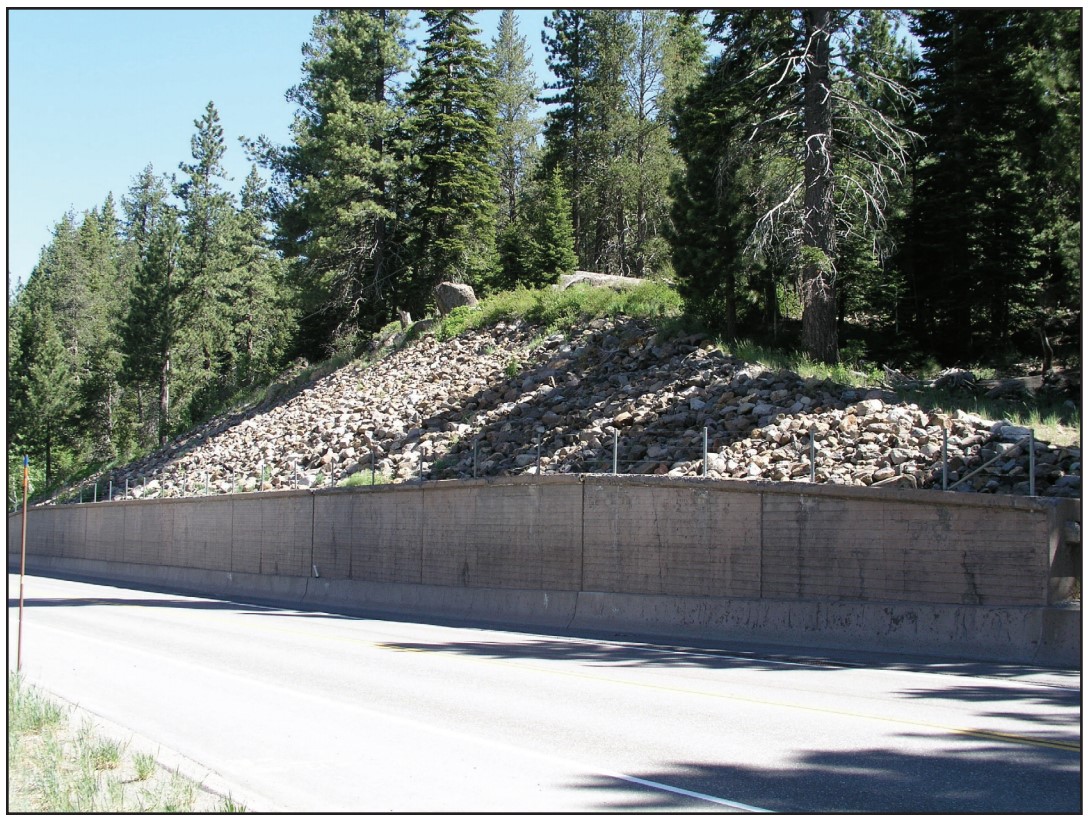
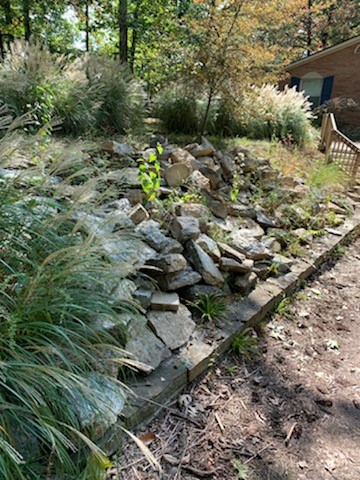
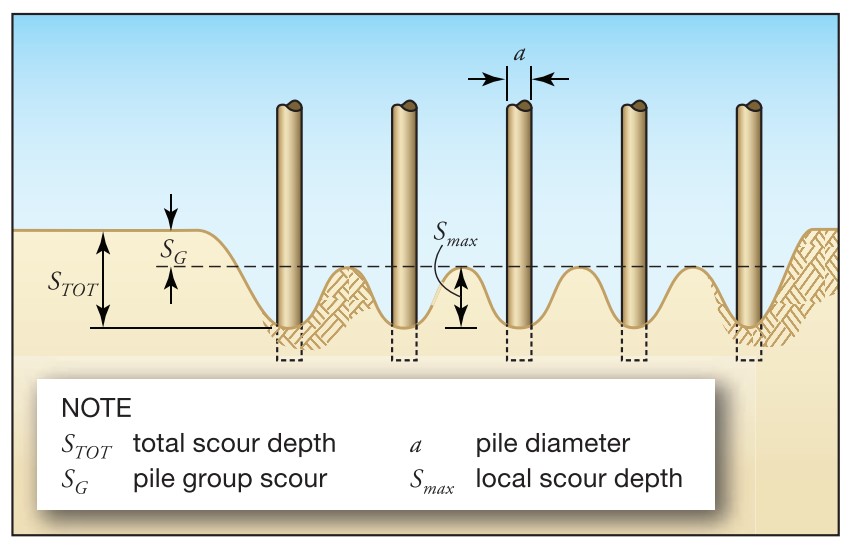
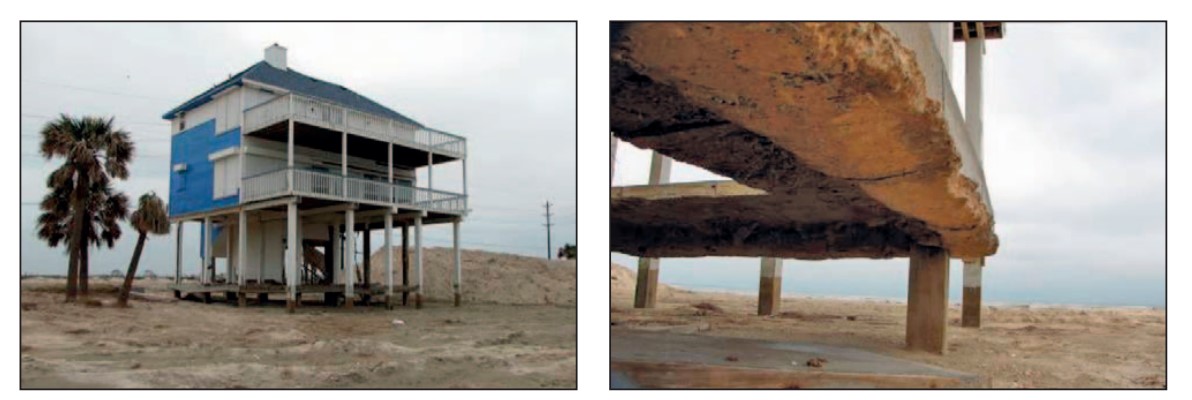
Riprap is used as a common erosion control technique along beachfronts and streambanks
Image
Image
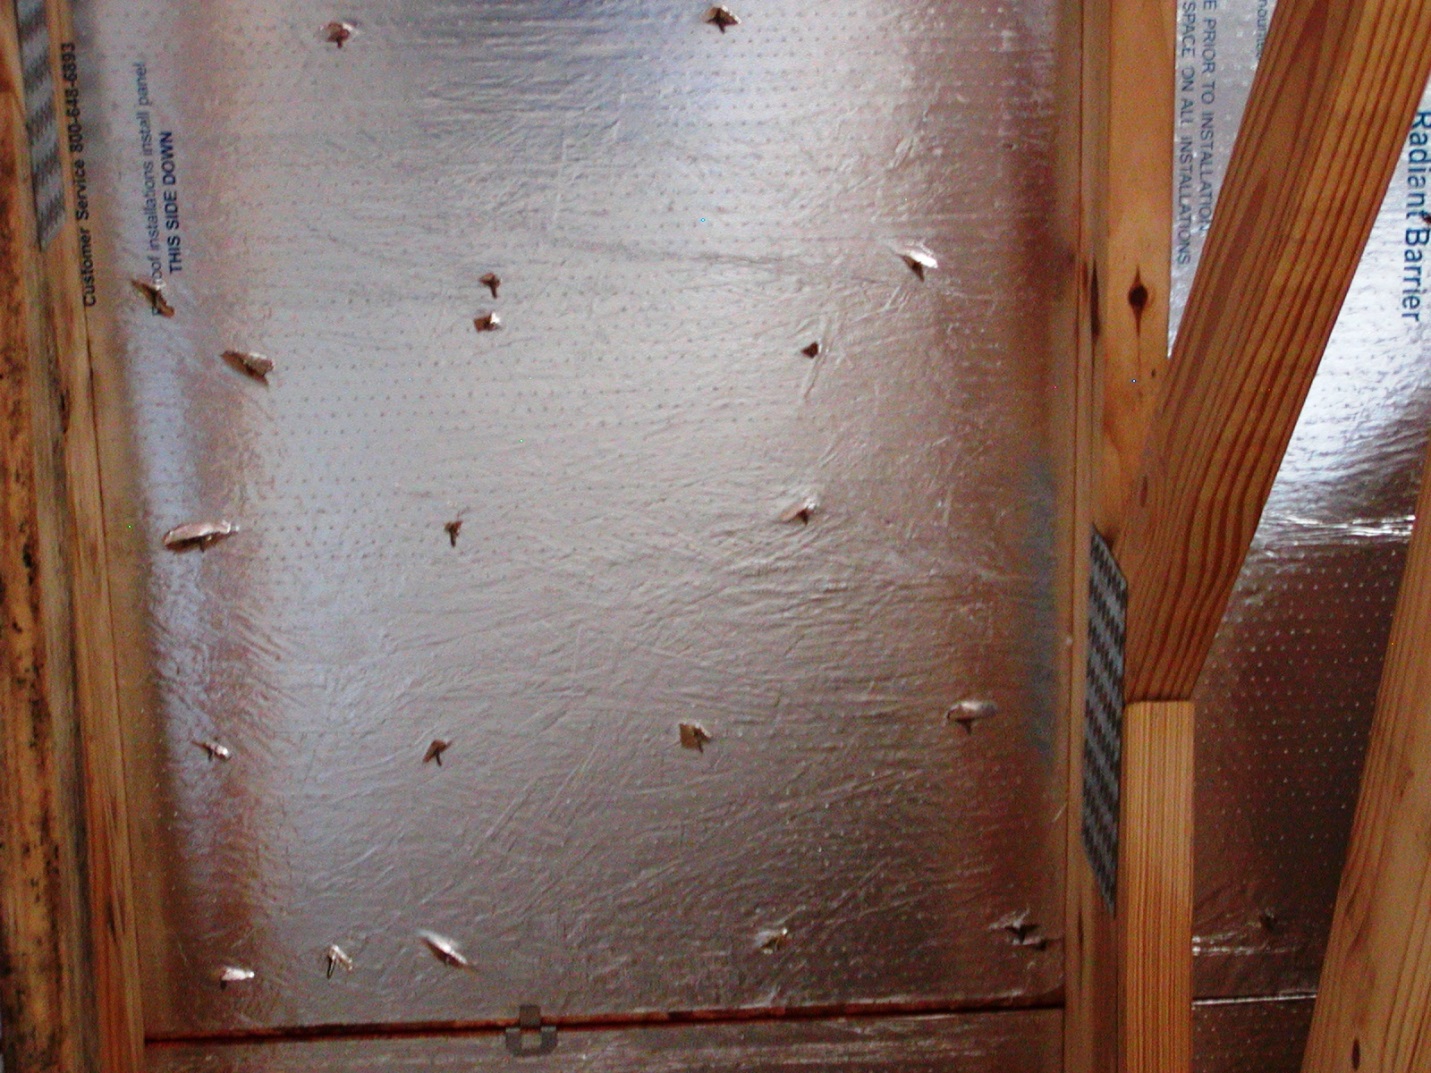
Roof decking has adhered radiant barrier that is perforated, in addition to the nail holes
Image
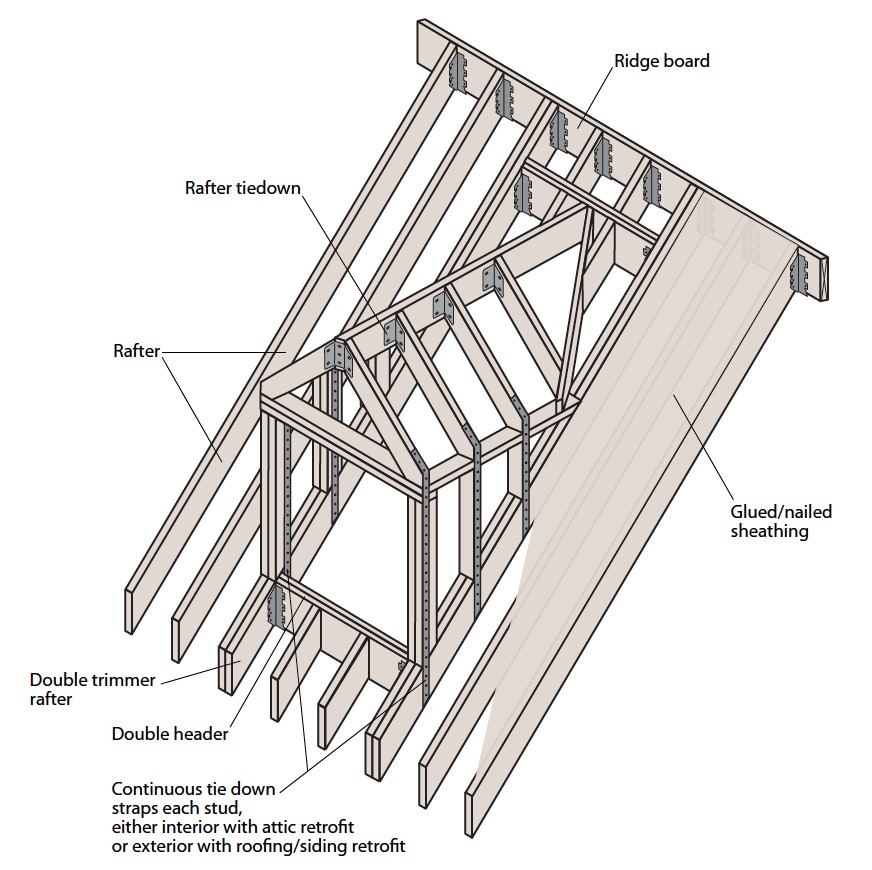
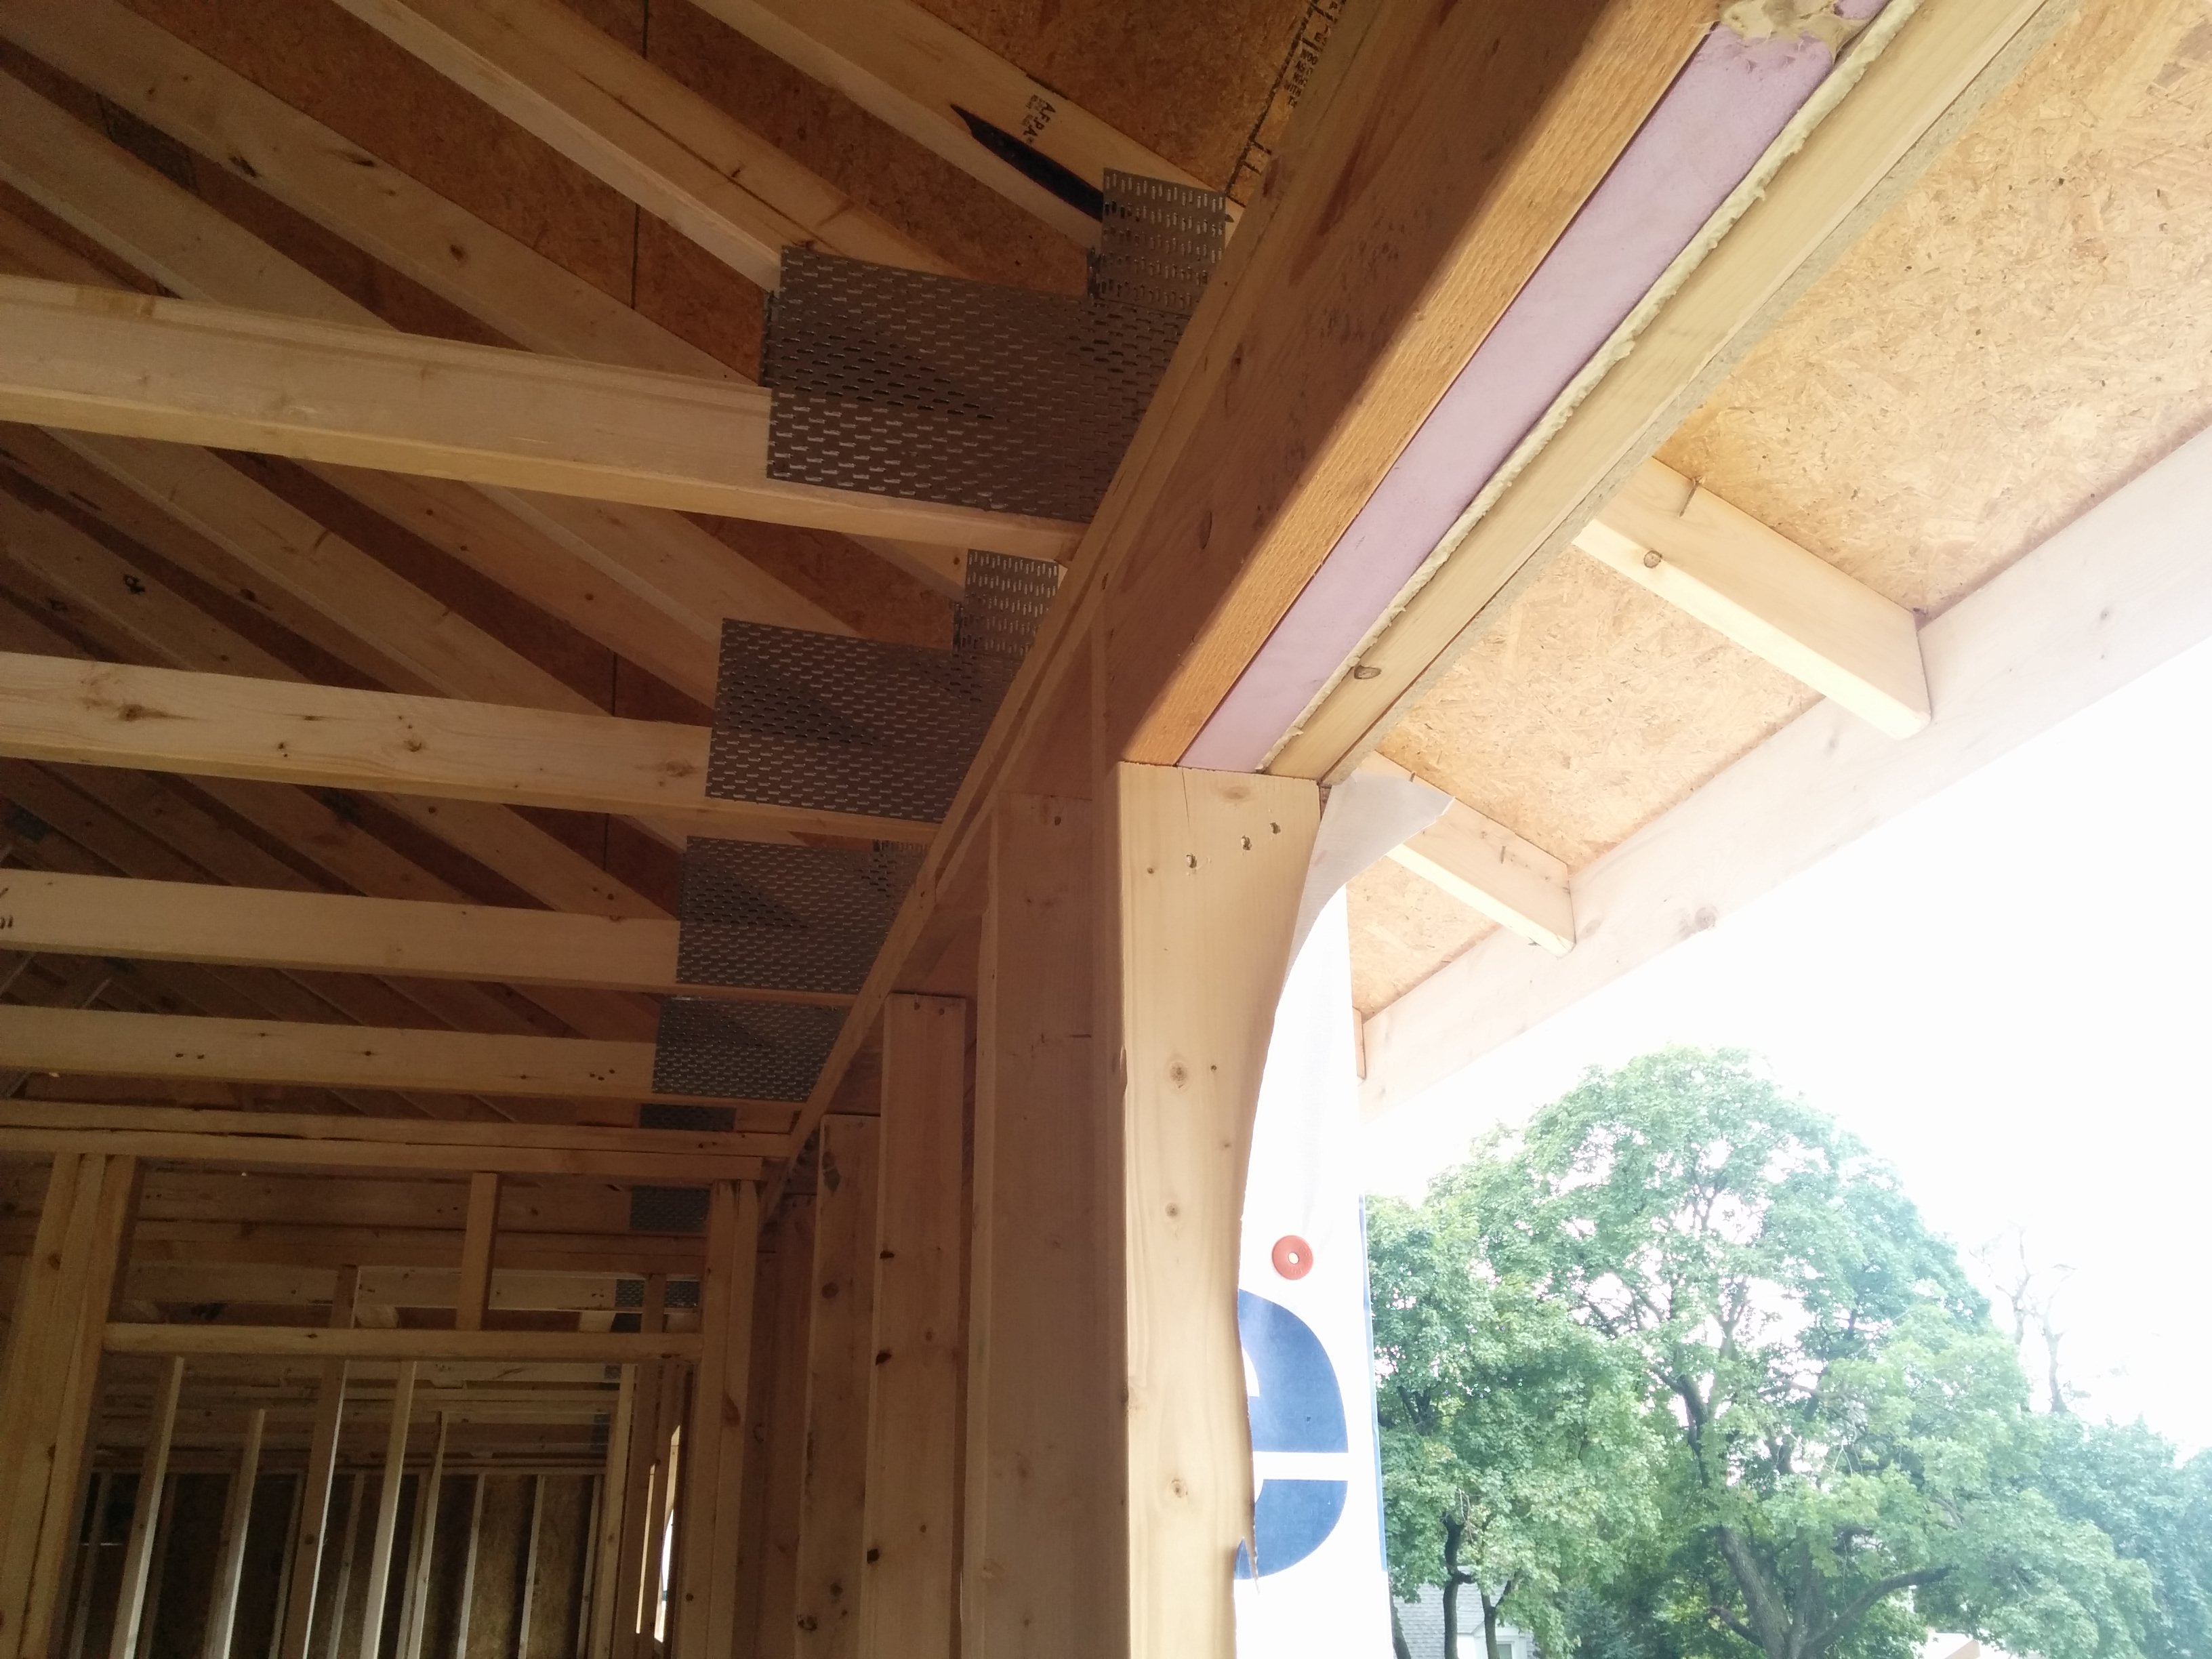
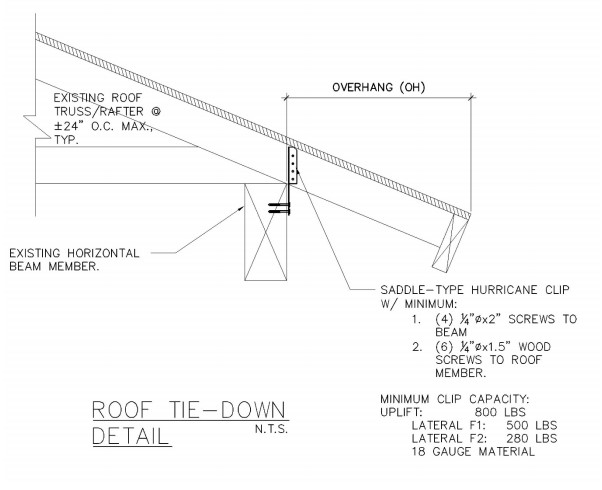
Roof dormer is braced with steel connectors and strapping to increase its resistance to uplift
Image
Image
Image
Image
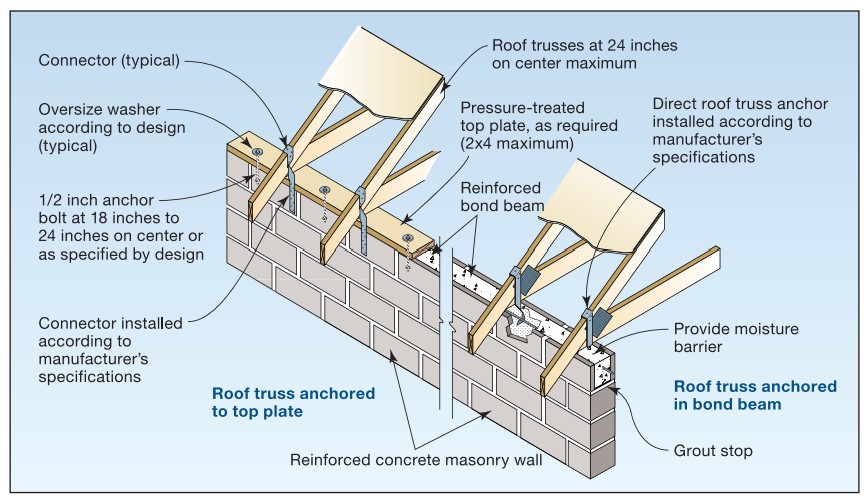
Roof truss-to-masonry wall connectors embedded into concrete-filled or grouted masonry cell (left-hand side image has a top plate installed while the right-hand side does not).
Image

Image
Roof weather barrier wraps downward onto the walls to direct moisture down and away from the structure.
Image
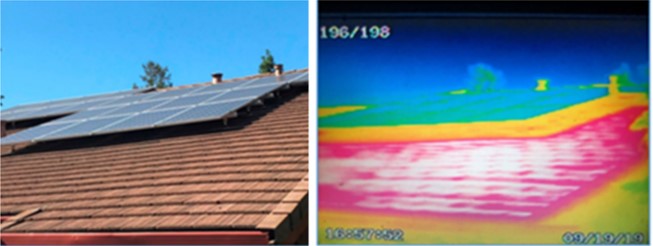
Roof-mounted solar panels shade the roof below them (left), significantly reducing the roof’s surface temperature (thermal image on the right - yellow region under the panels is cooler than the red and white region on the exposed portion of the roof)
Image
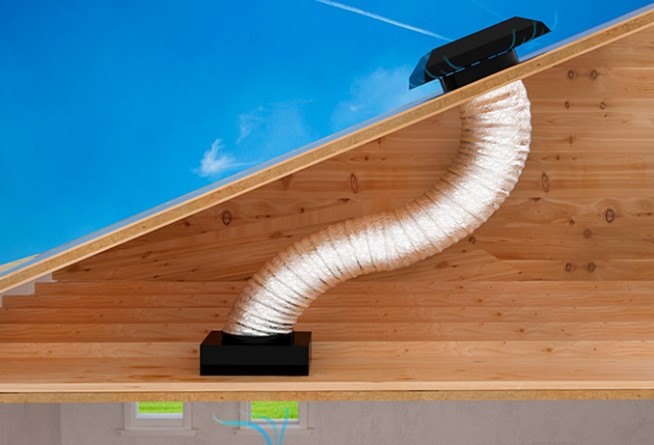
Roof-mounted whole-house fans mount directly to the roof, so they are appropriate for use with unvented attic assemblies.
Image
Image
Image
Roofing membrane is installed over polyisocyanurate rigid foam insulation and insulation cover board that has been cut to fit around locations for blocking for the PV system rack
Image
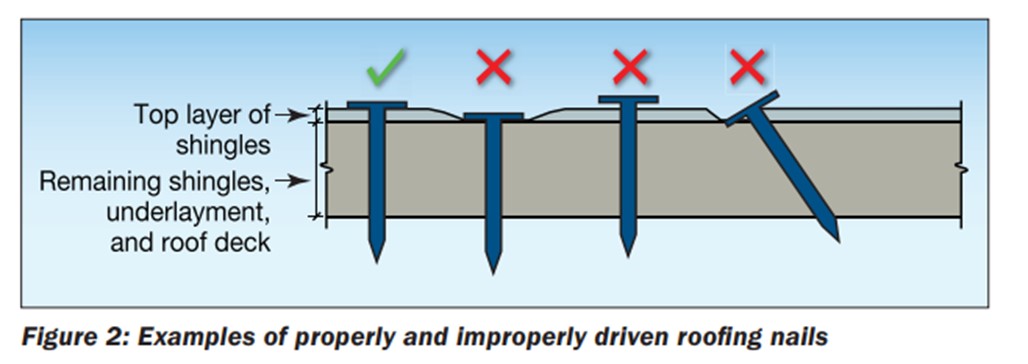
Roofing nails should be driven in straight and flush, not overdriven, underdriven, or angled
Image
Roofing paper protects the top of the new plywood parapet while the base of the parapet is air sealed with spray foam and fibrous insulation is installed in the rafter cavities in this flat roof retrofit
Image
Image
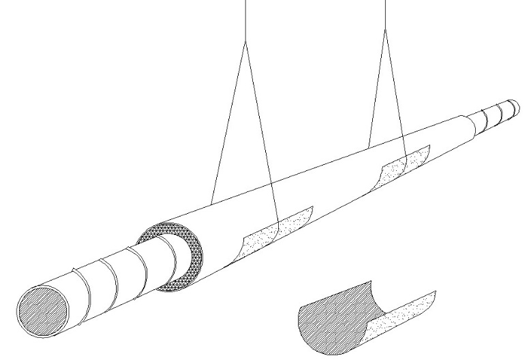
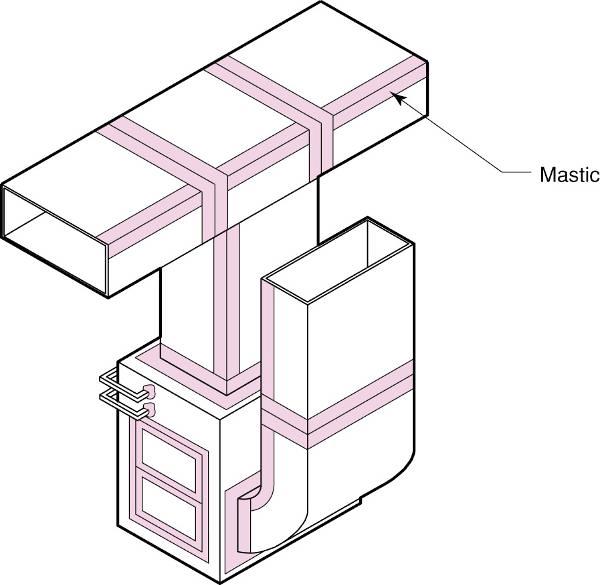
Run-out duct is sealed with mastic
Image
Run-out ducts are installed over partition walls
Image
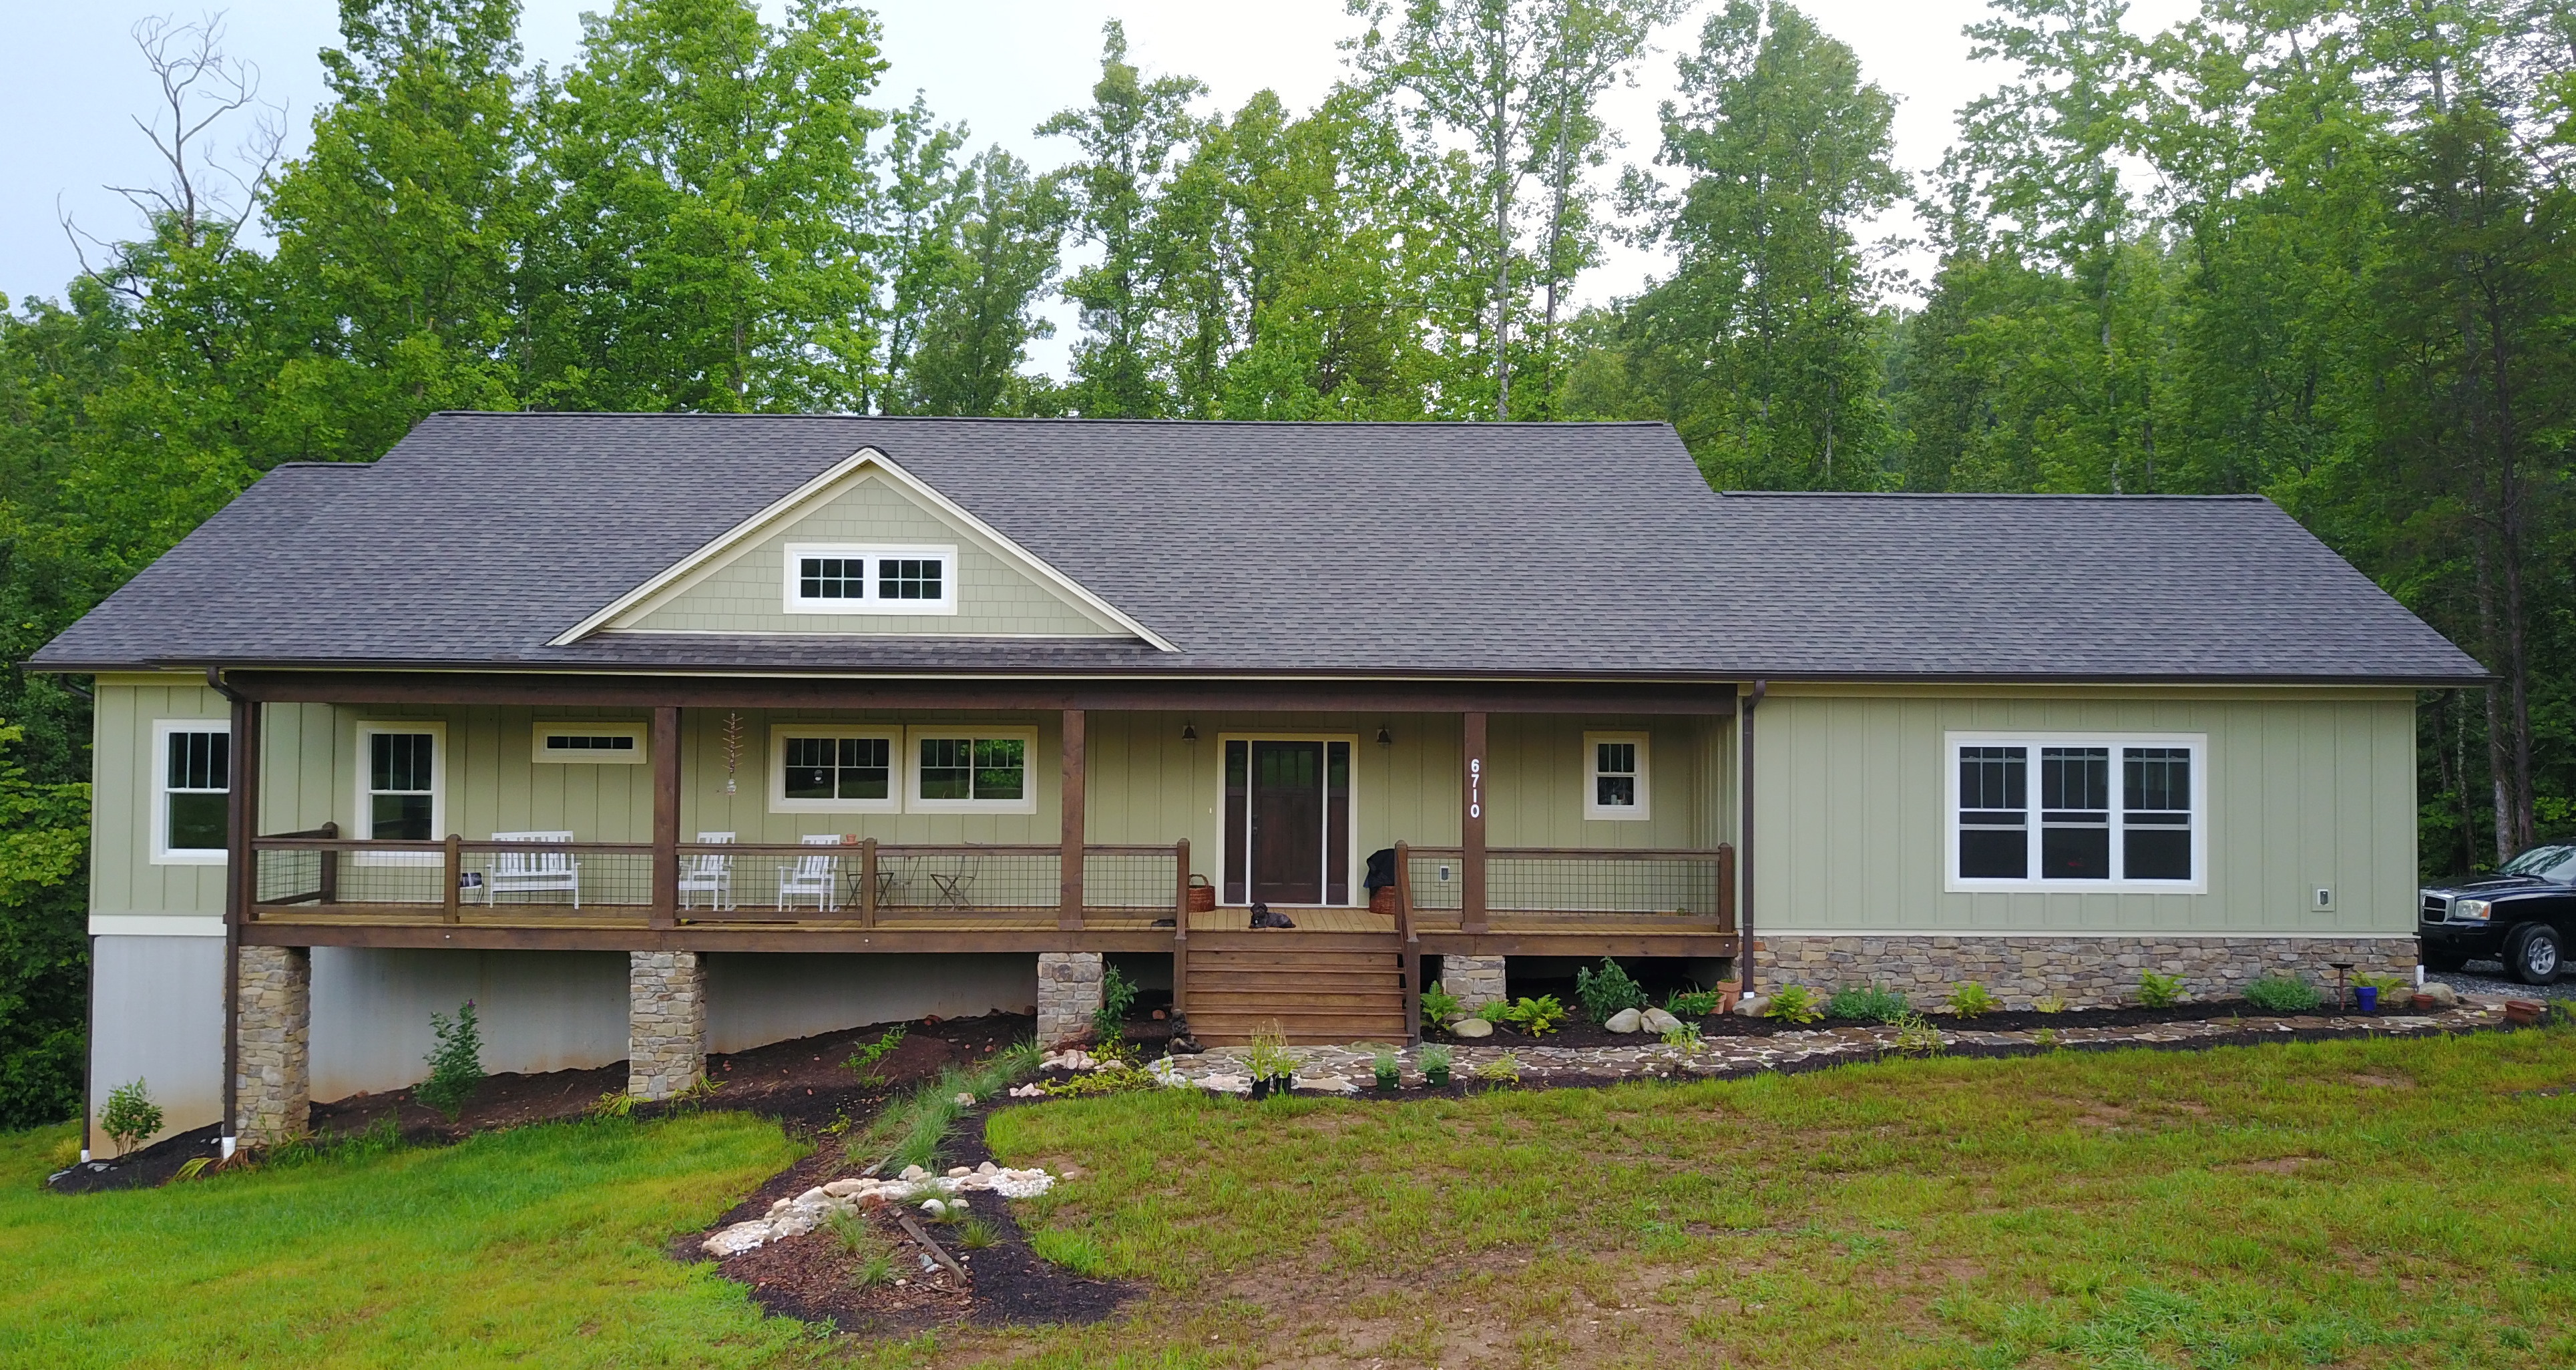
S.D. Jessup Construction built this custom for buyer home in the mixed-humid climate in Pilot Mountain, NC, and certified it to DOE Zero Energy Ready Home specifications in 2021.
Image
S.D. Jessup Construction built this custom for buyer home in the mixed-humid climate in Pinnacle, NC, and certified it to DOE Zero Energy Ready Home specifications in 2019.
Image
S.D. Jessup Construction built this custom for buyer home in the mixed-humid climate in Tobaccoville, NC, and certified it to DOE Zero Energy Ready Home specifications in 2017.
Image

S.D. Jessup Construction, Inc. built this custom for buyer home in the mixed-humid climate in Pinnacle, NC, and certified it to DOE Zero Energy Ready Home specifications in 2020.
Image
Image
Image
Image
Image

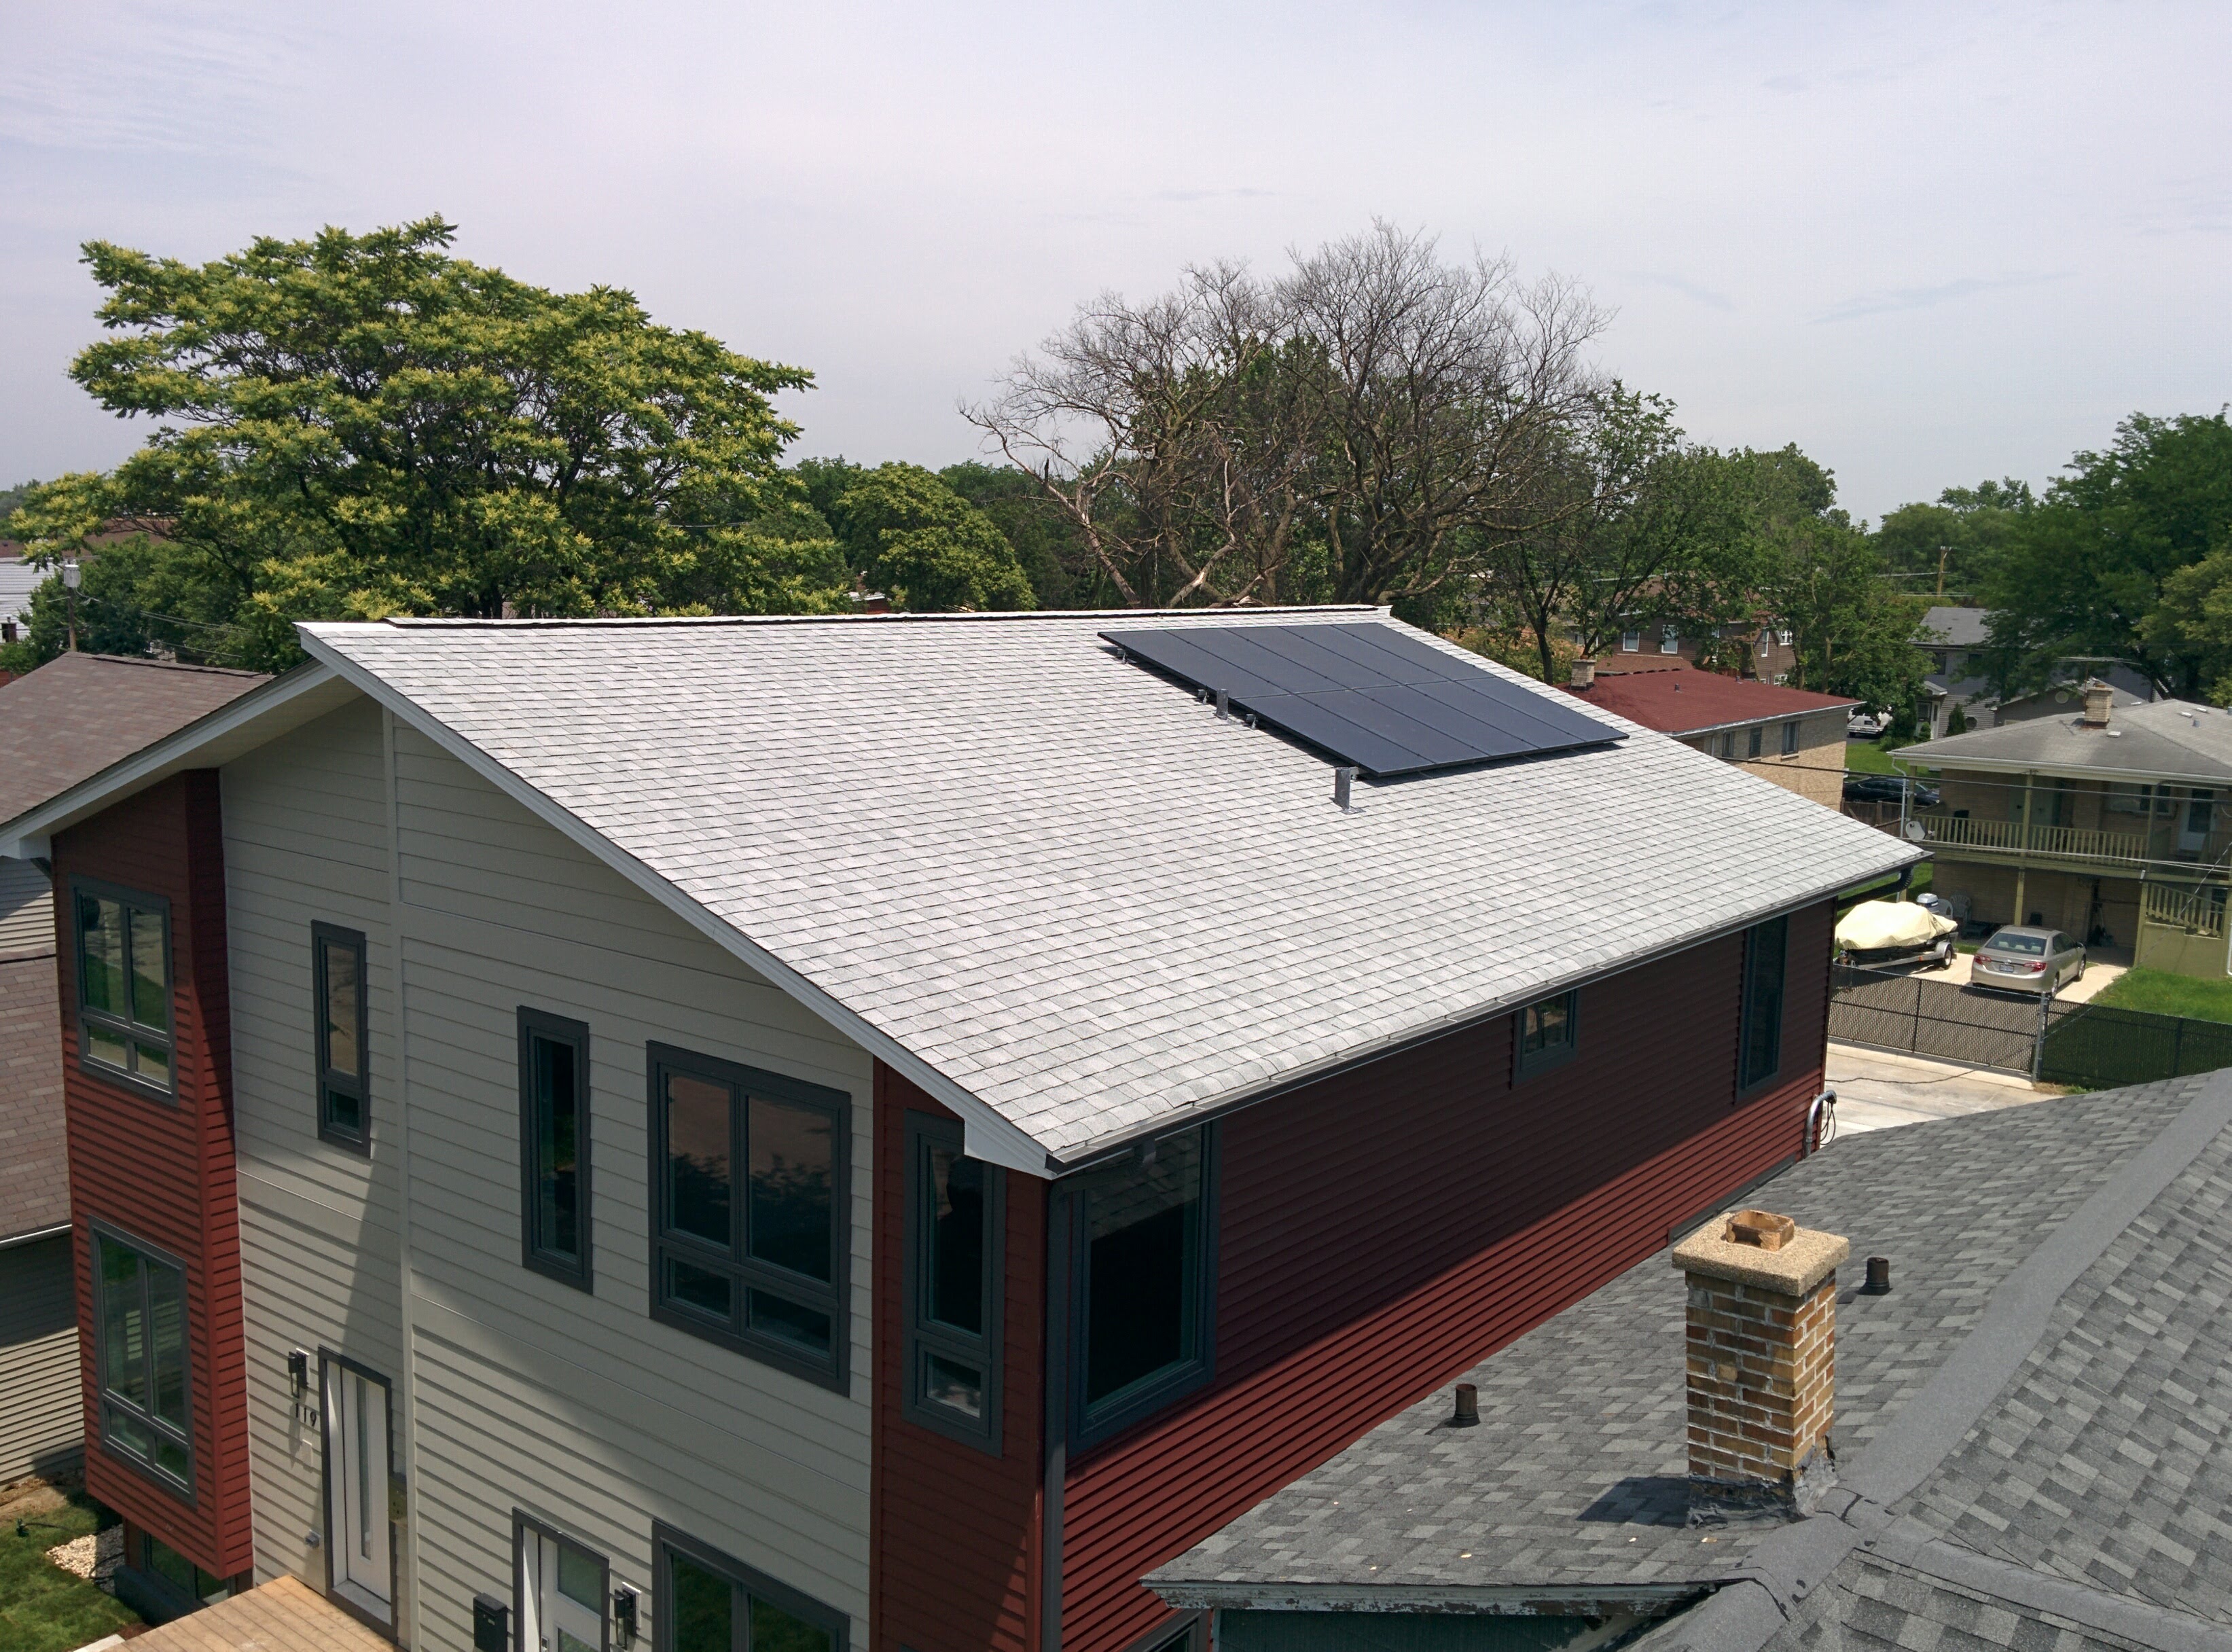
Sareth Builders built this custom spec home in the cold climate in Lorain, OH, and certified it to DOE Zero Energy Ready Home specifications in 2019.
Image
Sareth Builders built this custom spec home in the cold climate in Lorain, OH, and certified it to DOE Zero Energy Ready Home specifications in 2019.
Image
Image
Scaffolding is continually raised as courses of foam brick are added so that the pour man can see both sides of the wall during the pour.
Image

Image

Image
Image
Image

Screw-in LED light bulbs are a highly efficient alternative to residential incandescent bulbs.
Image
Image
Image
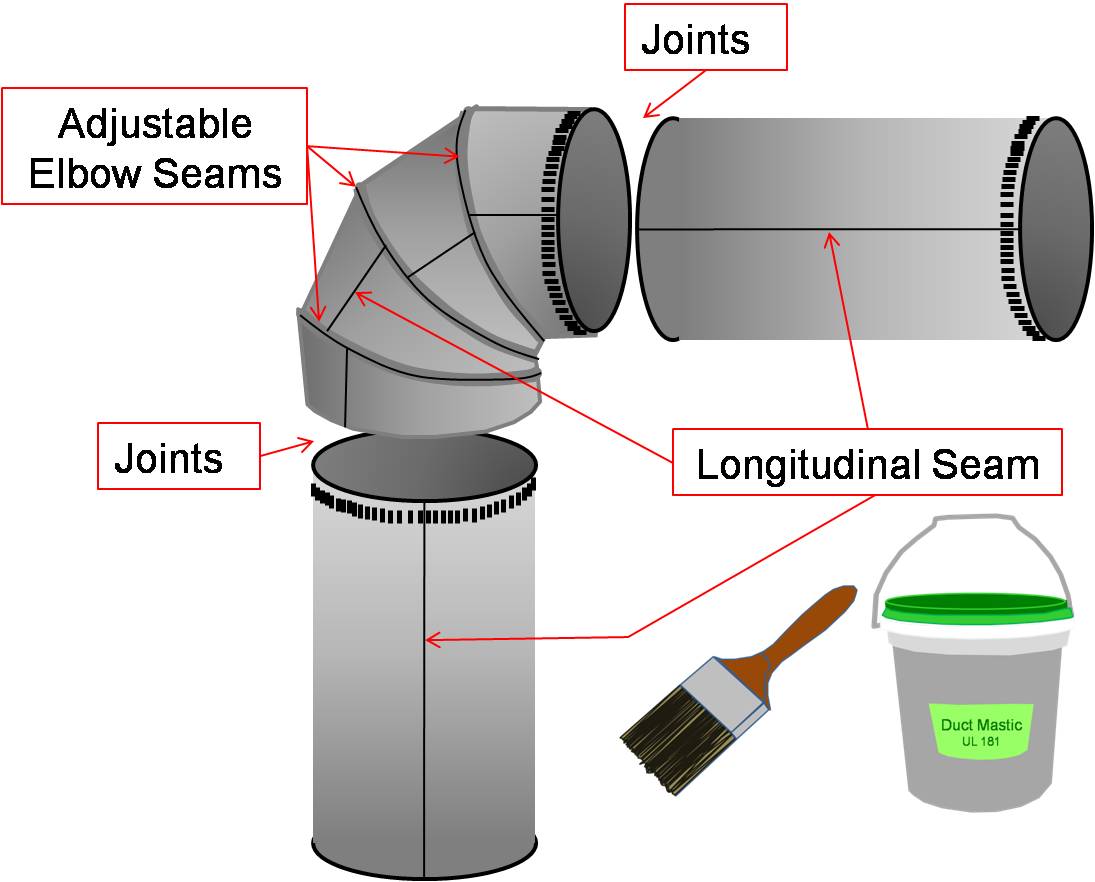
Seal all joints and seams in the metal ductwork with mastic before installing insulation
Image

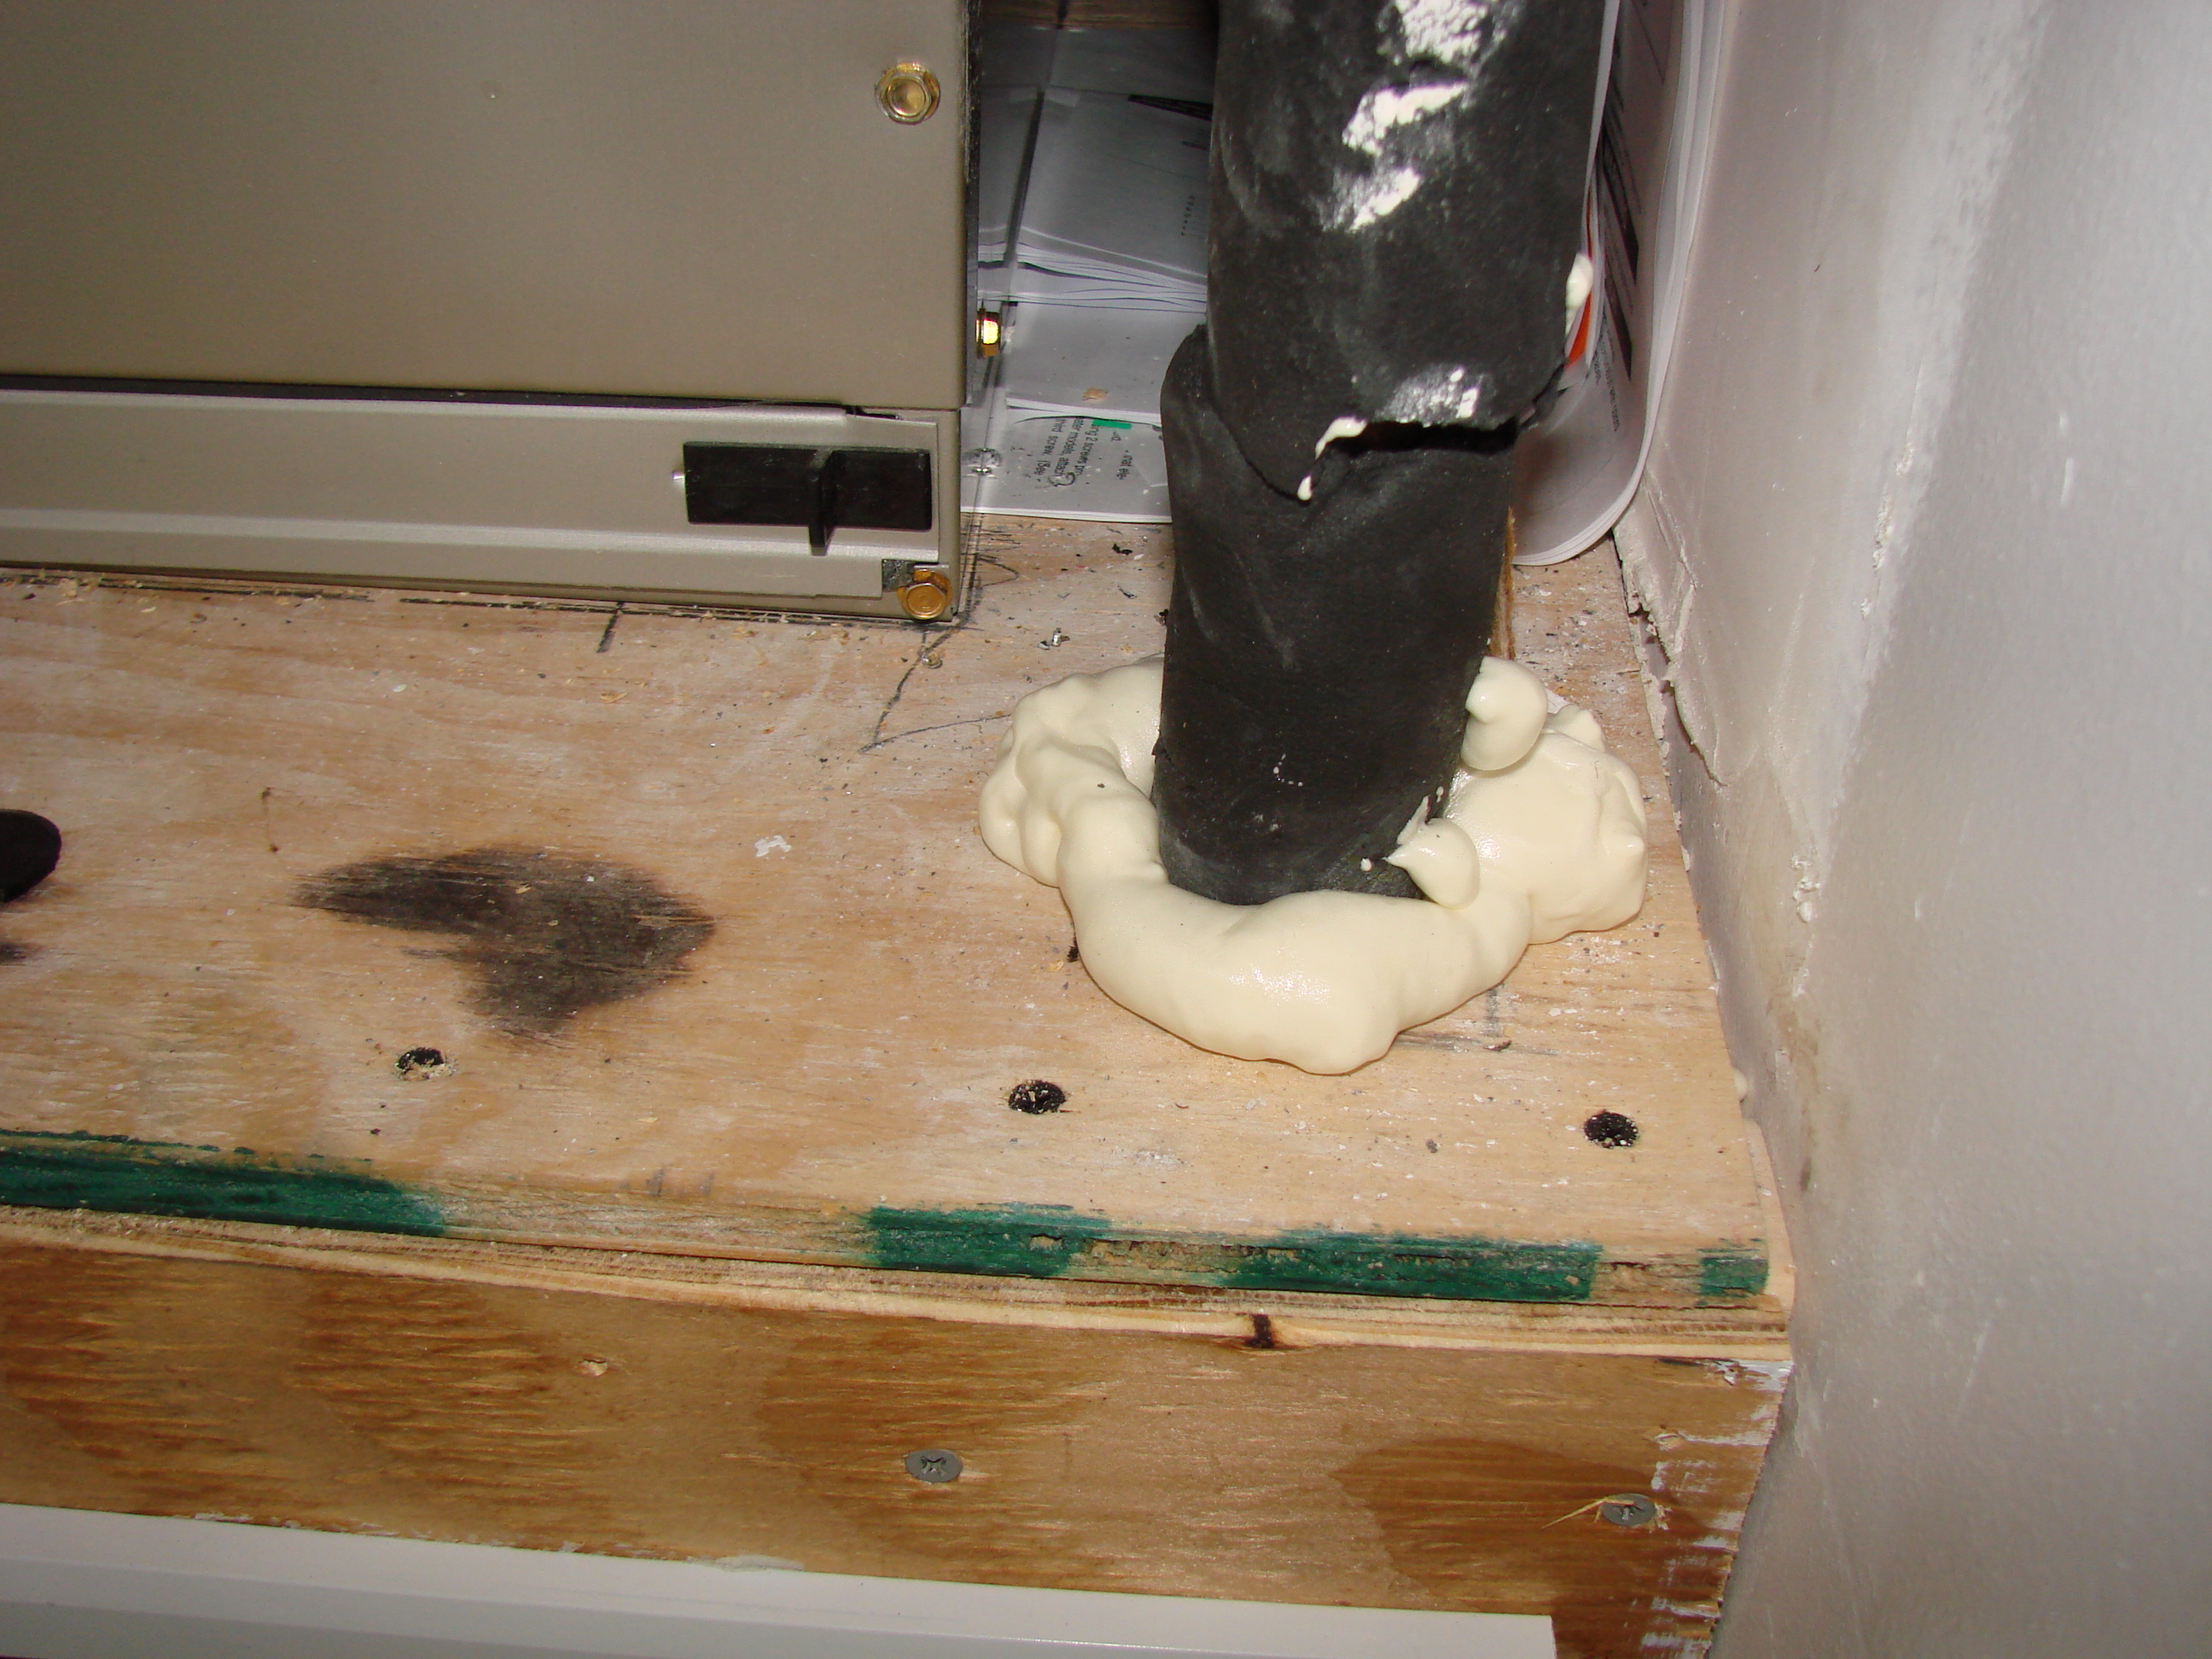
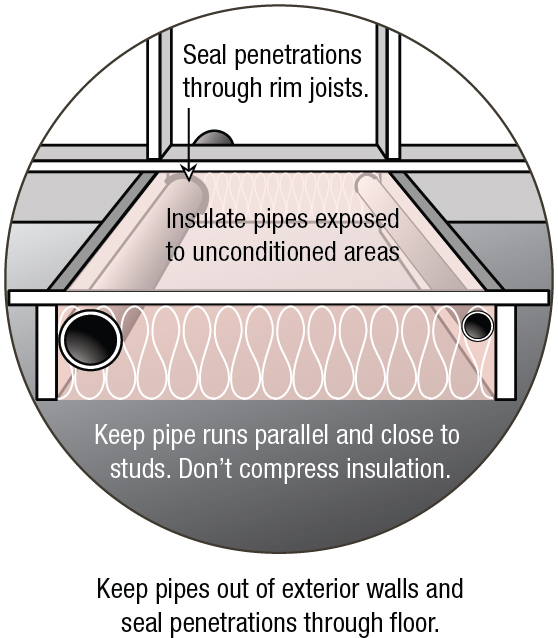
Seal all penetrations through the band joist
Image
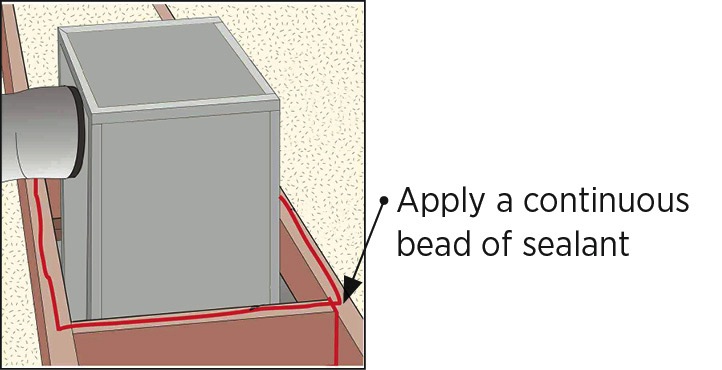
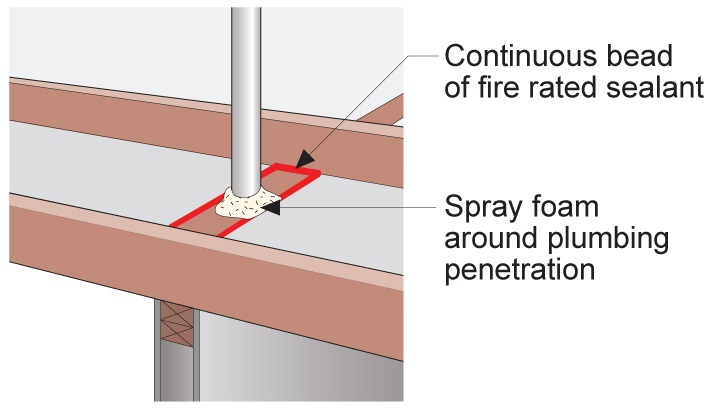
Seal all wood framing joints surrounding the chase with sealant and lay a bead of sealant along top edge of chase framing
Image
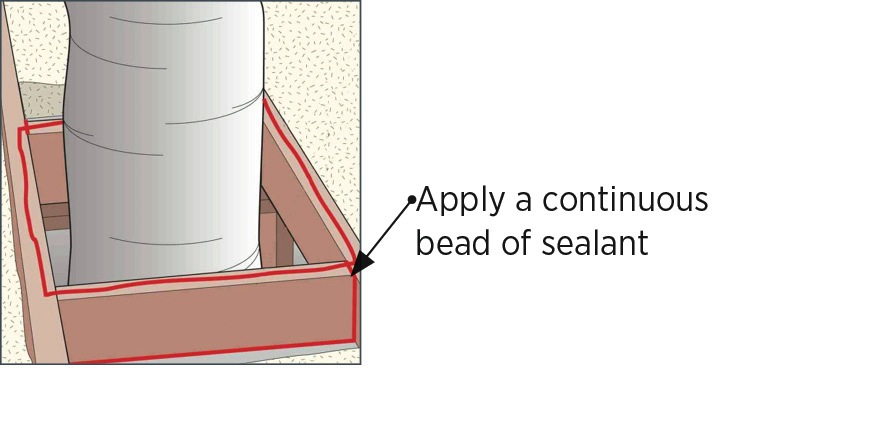
Seal all wood framing joints surrounding the chase with sealant and lay a bead of sealant on top edge of chase framing
Image
Seal bottom layer of rigid insulation with adhesive, tape and nails
Image
Image

Image
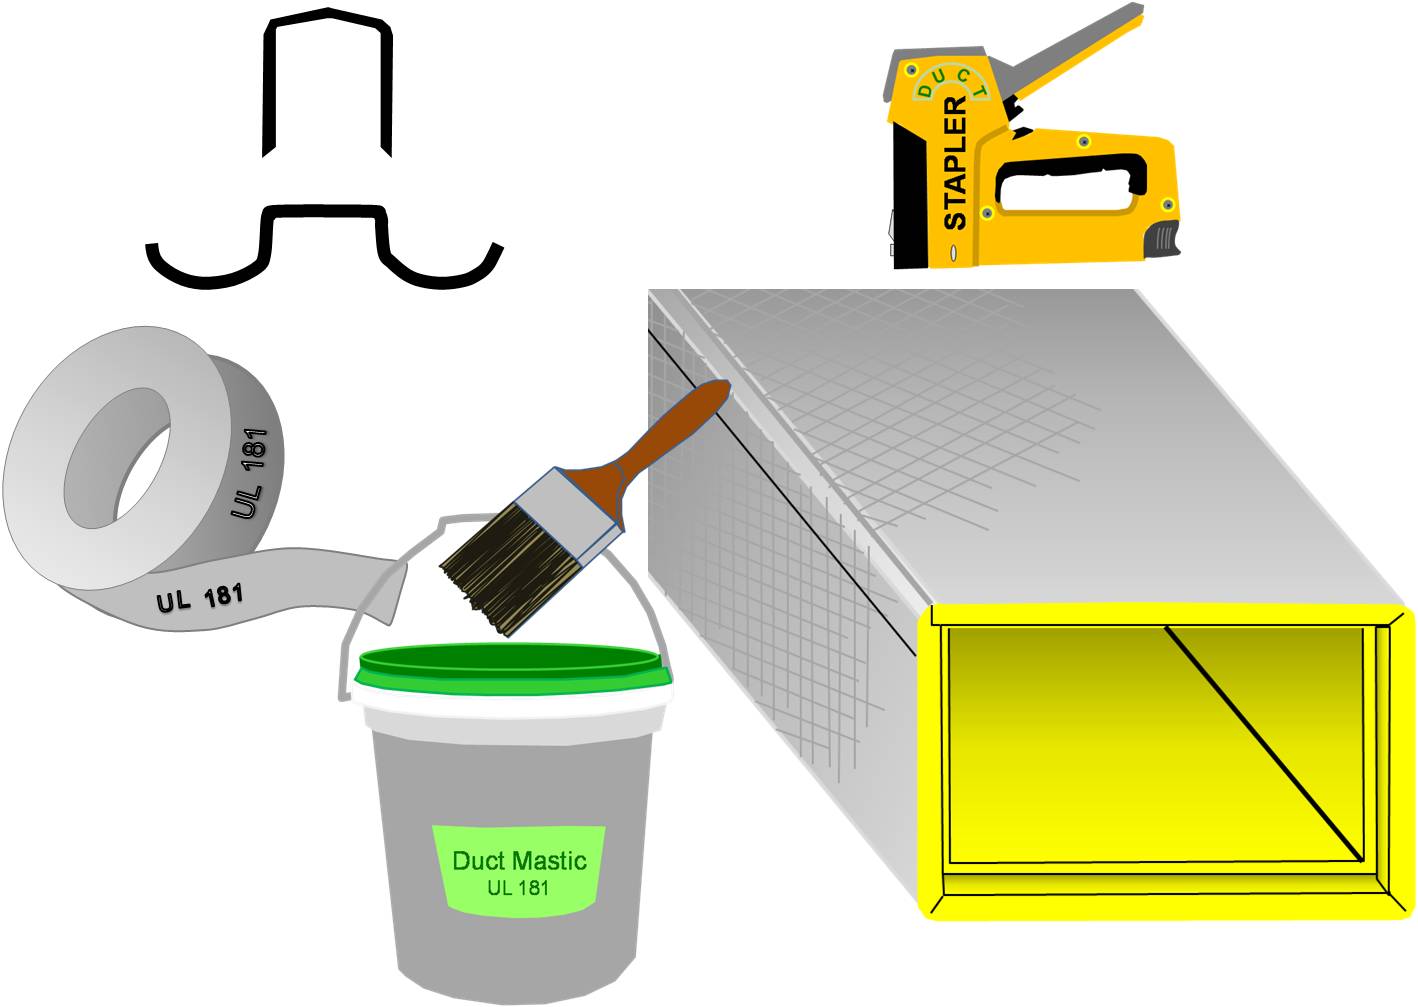
Seal seams in fiber board ducts with out-clinching staples, UL-181A-approved tape, and mastic
Image
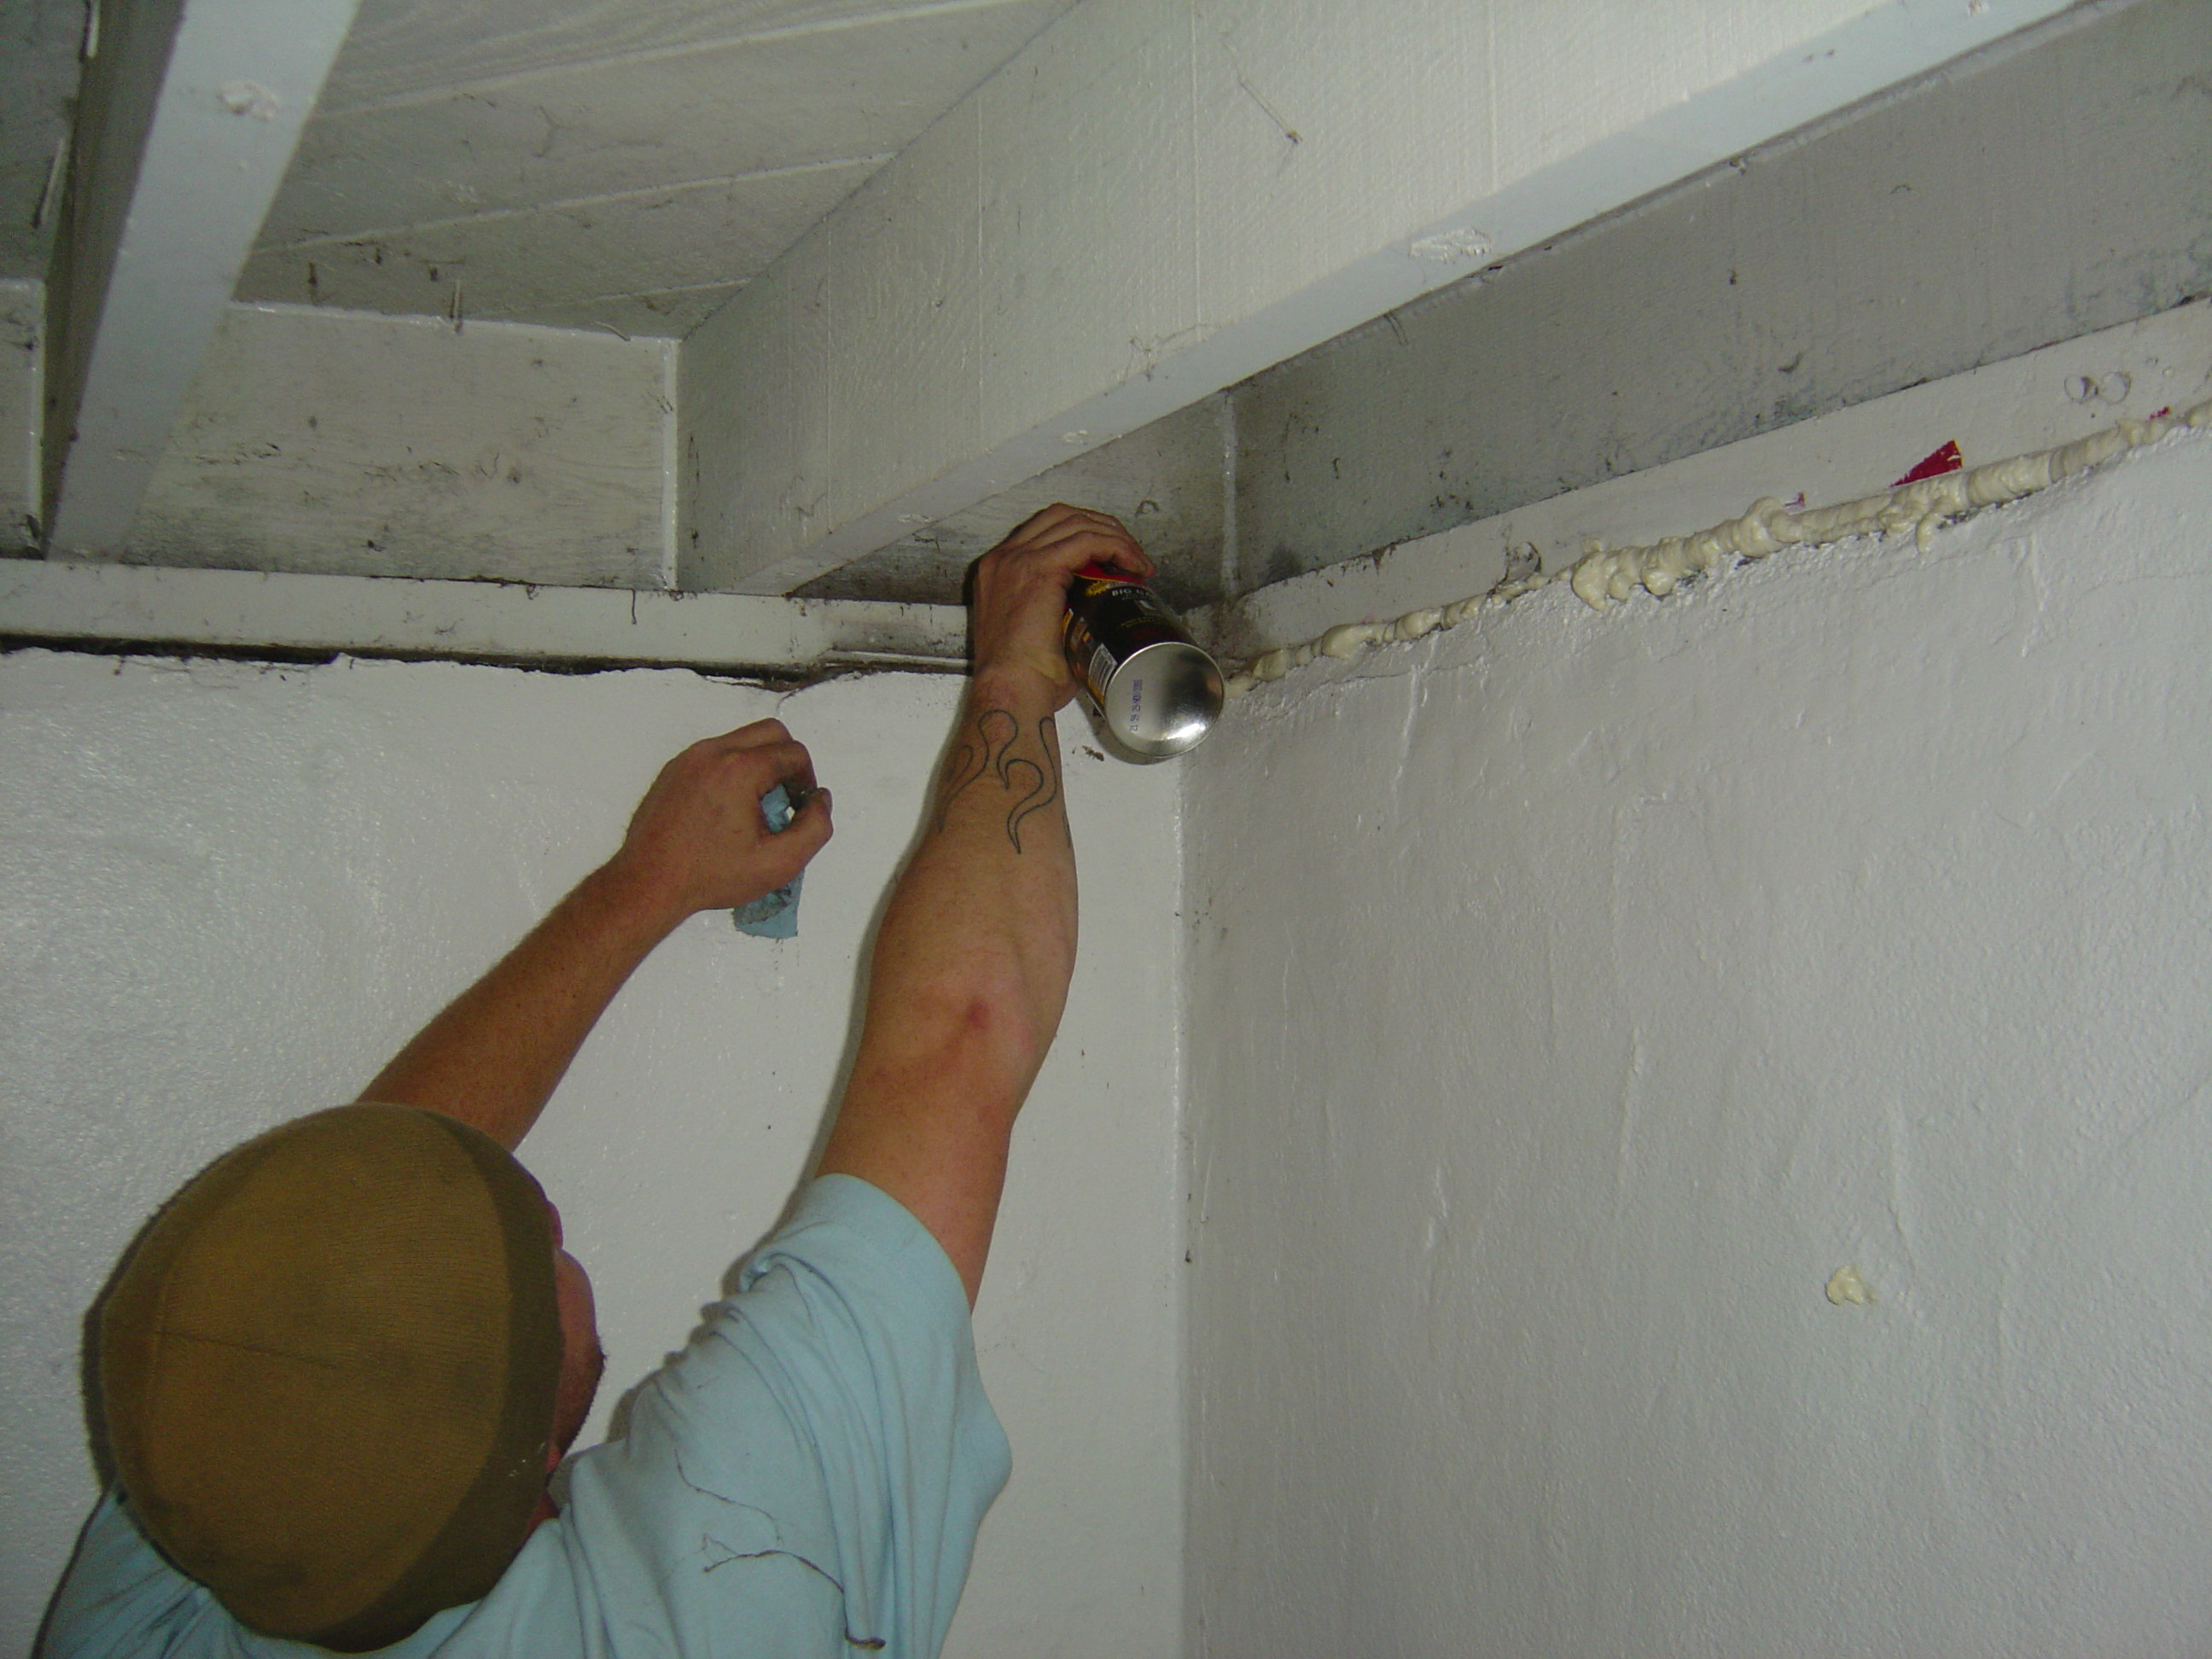
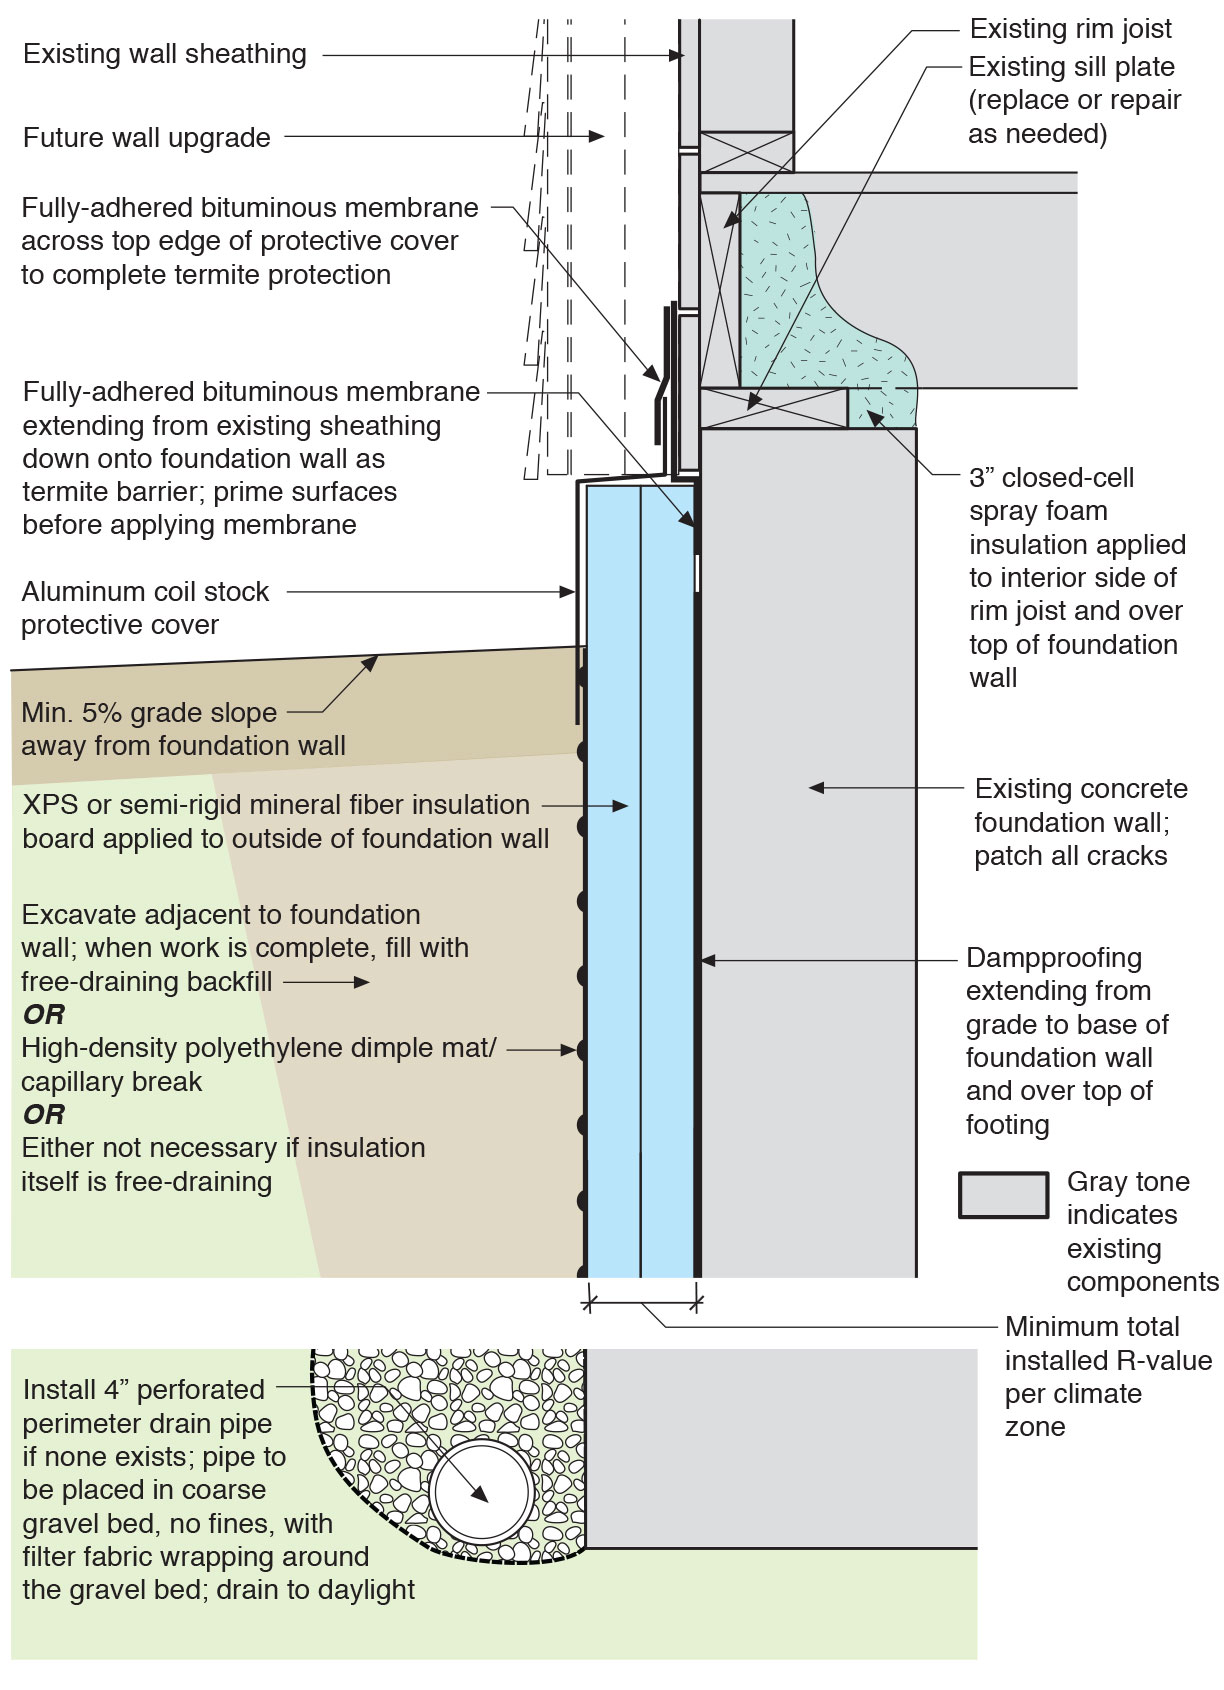
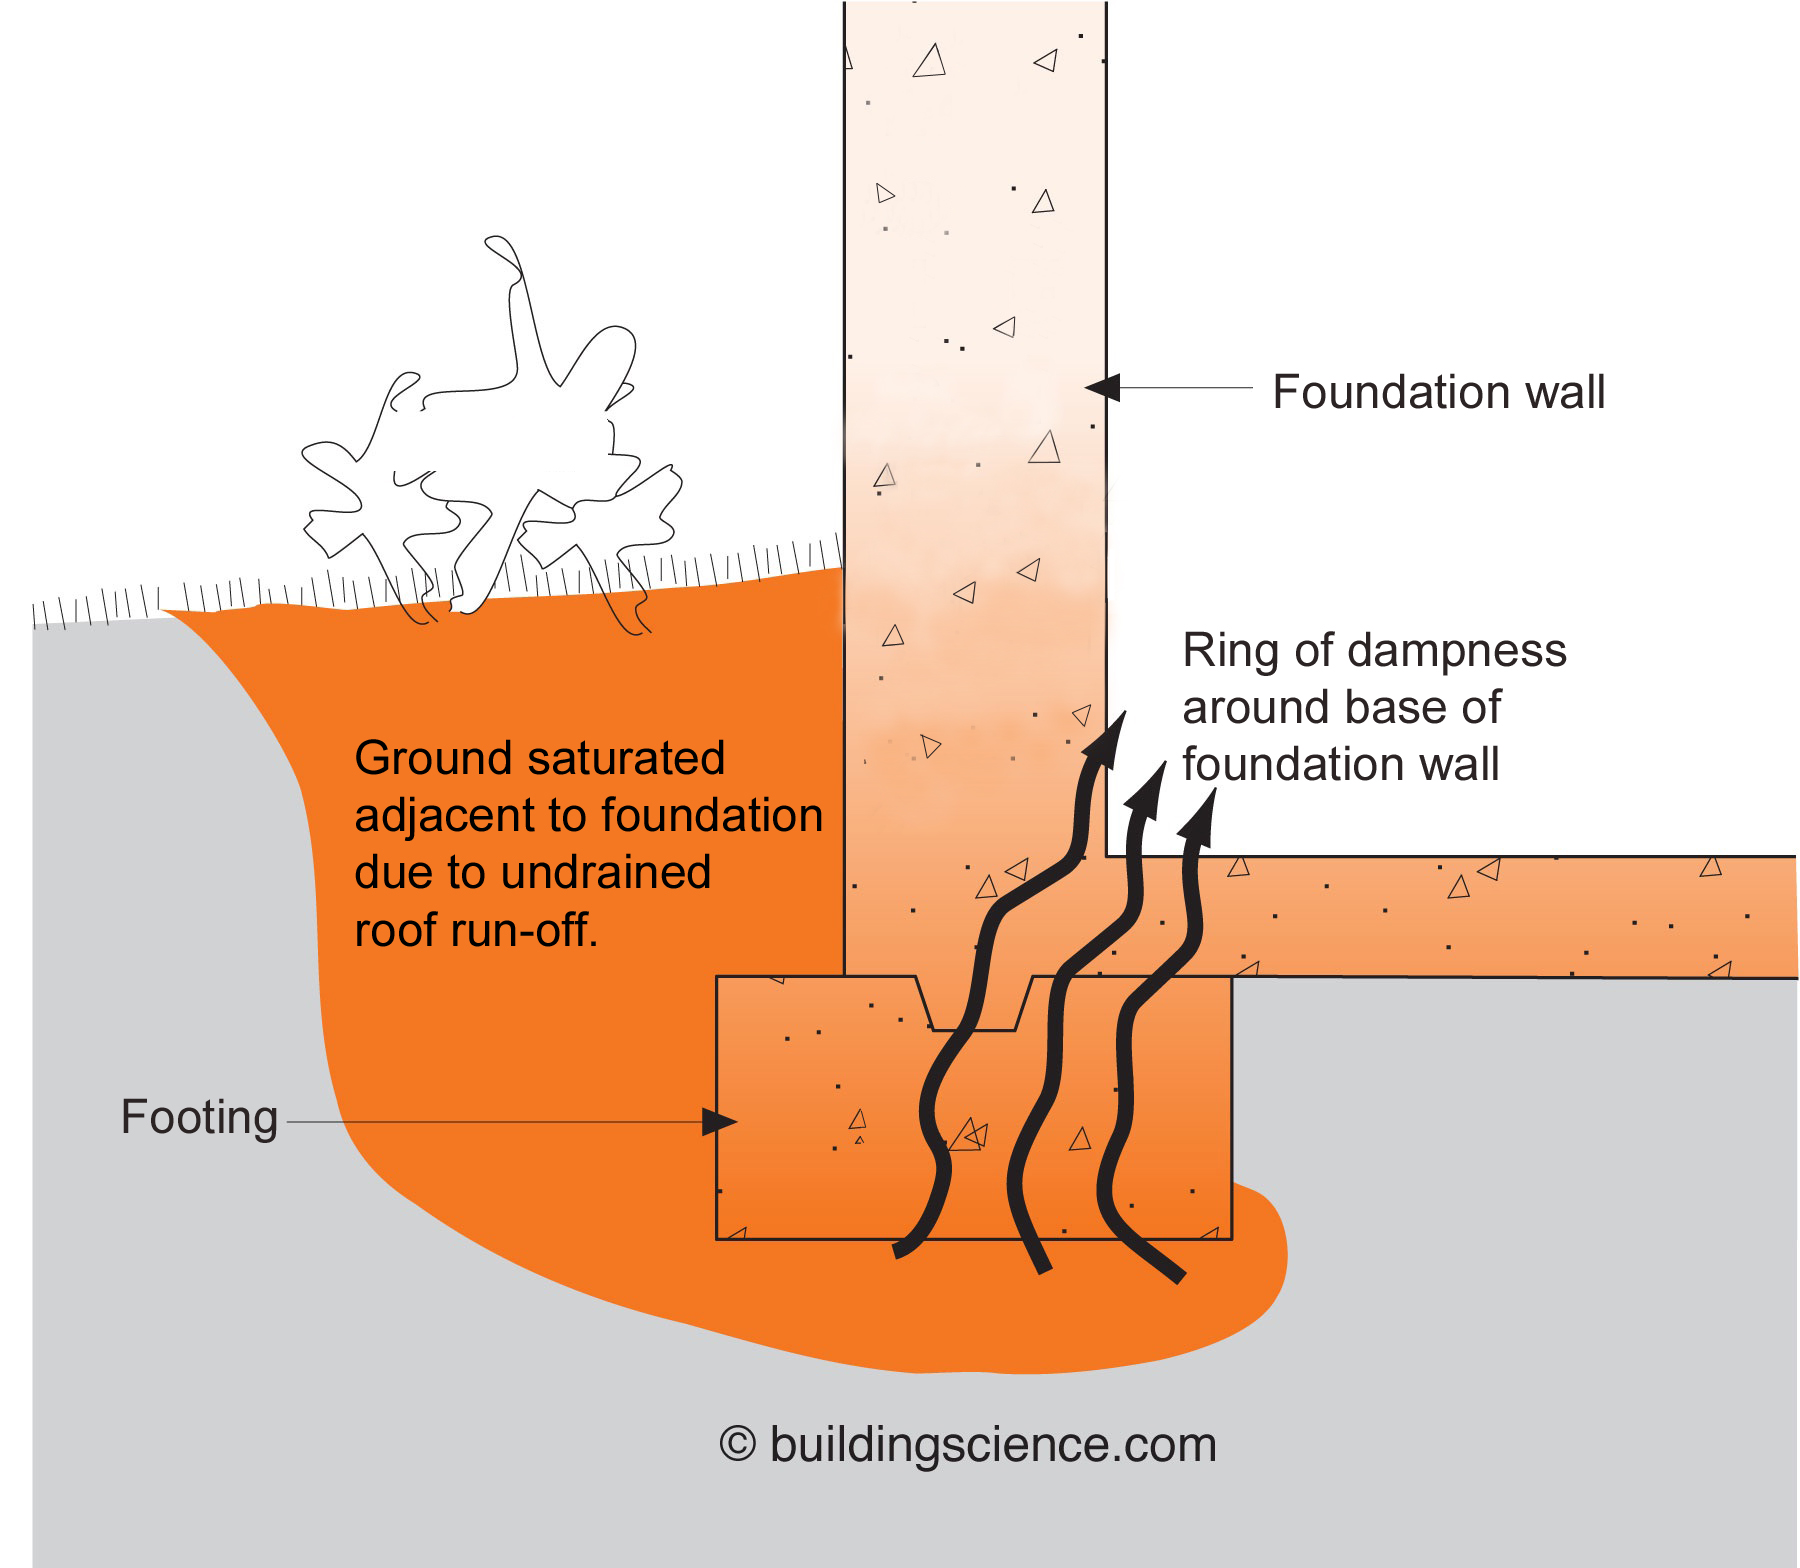
Seal the crack between the sill plate and the foundation wall