Showing results 301 - 350 of 688
Image

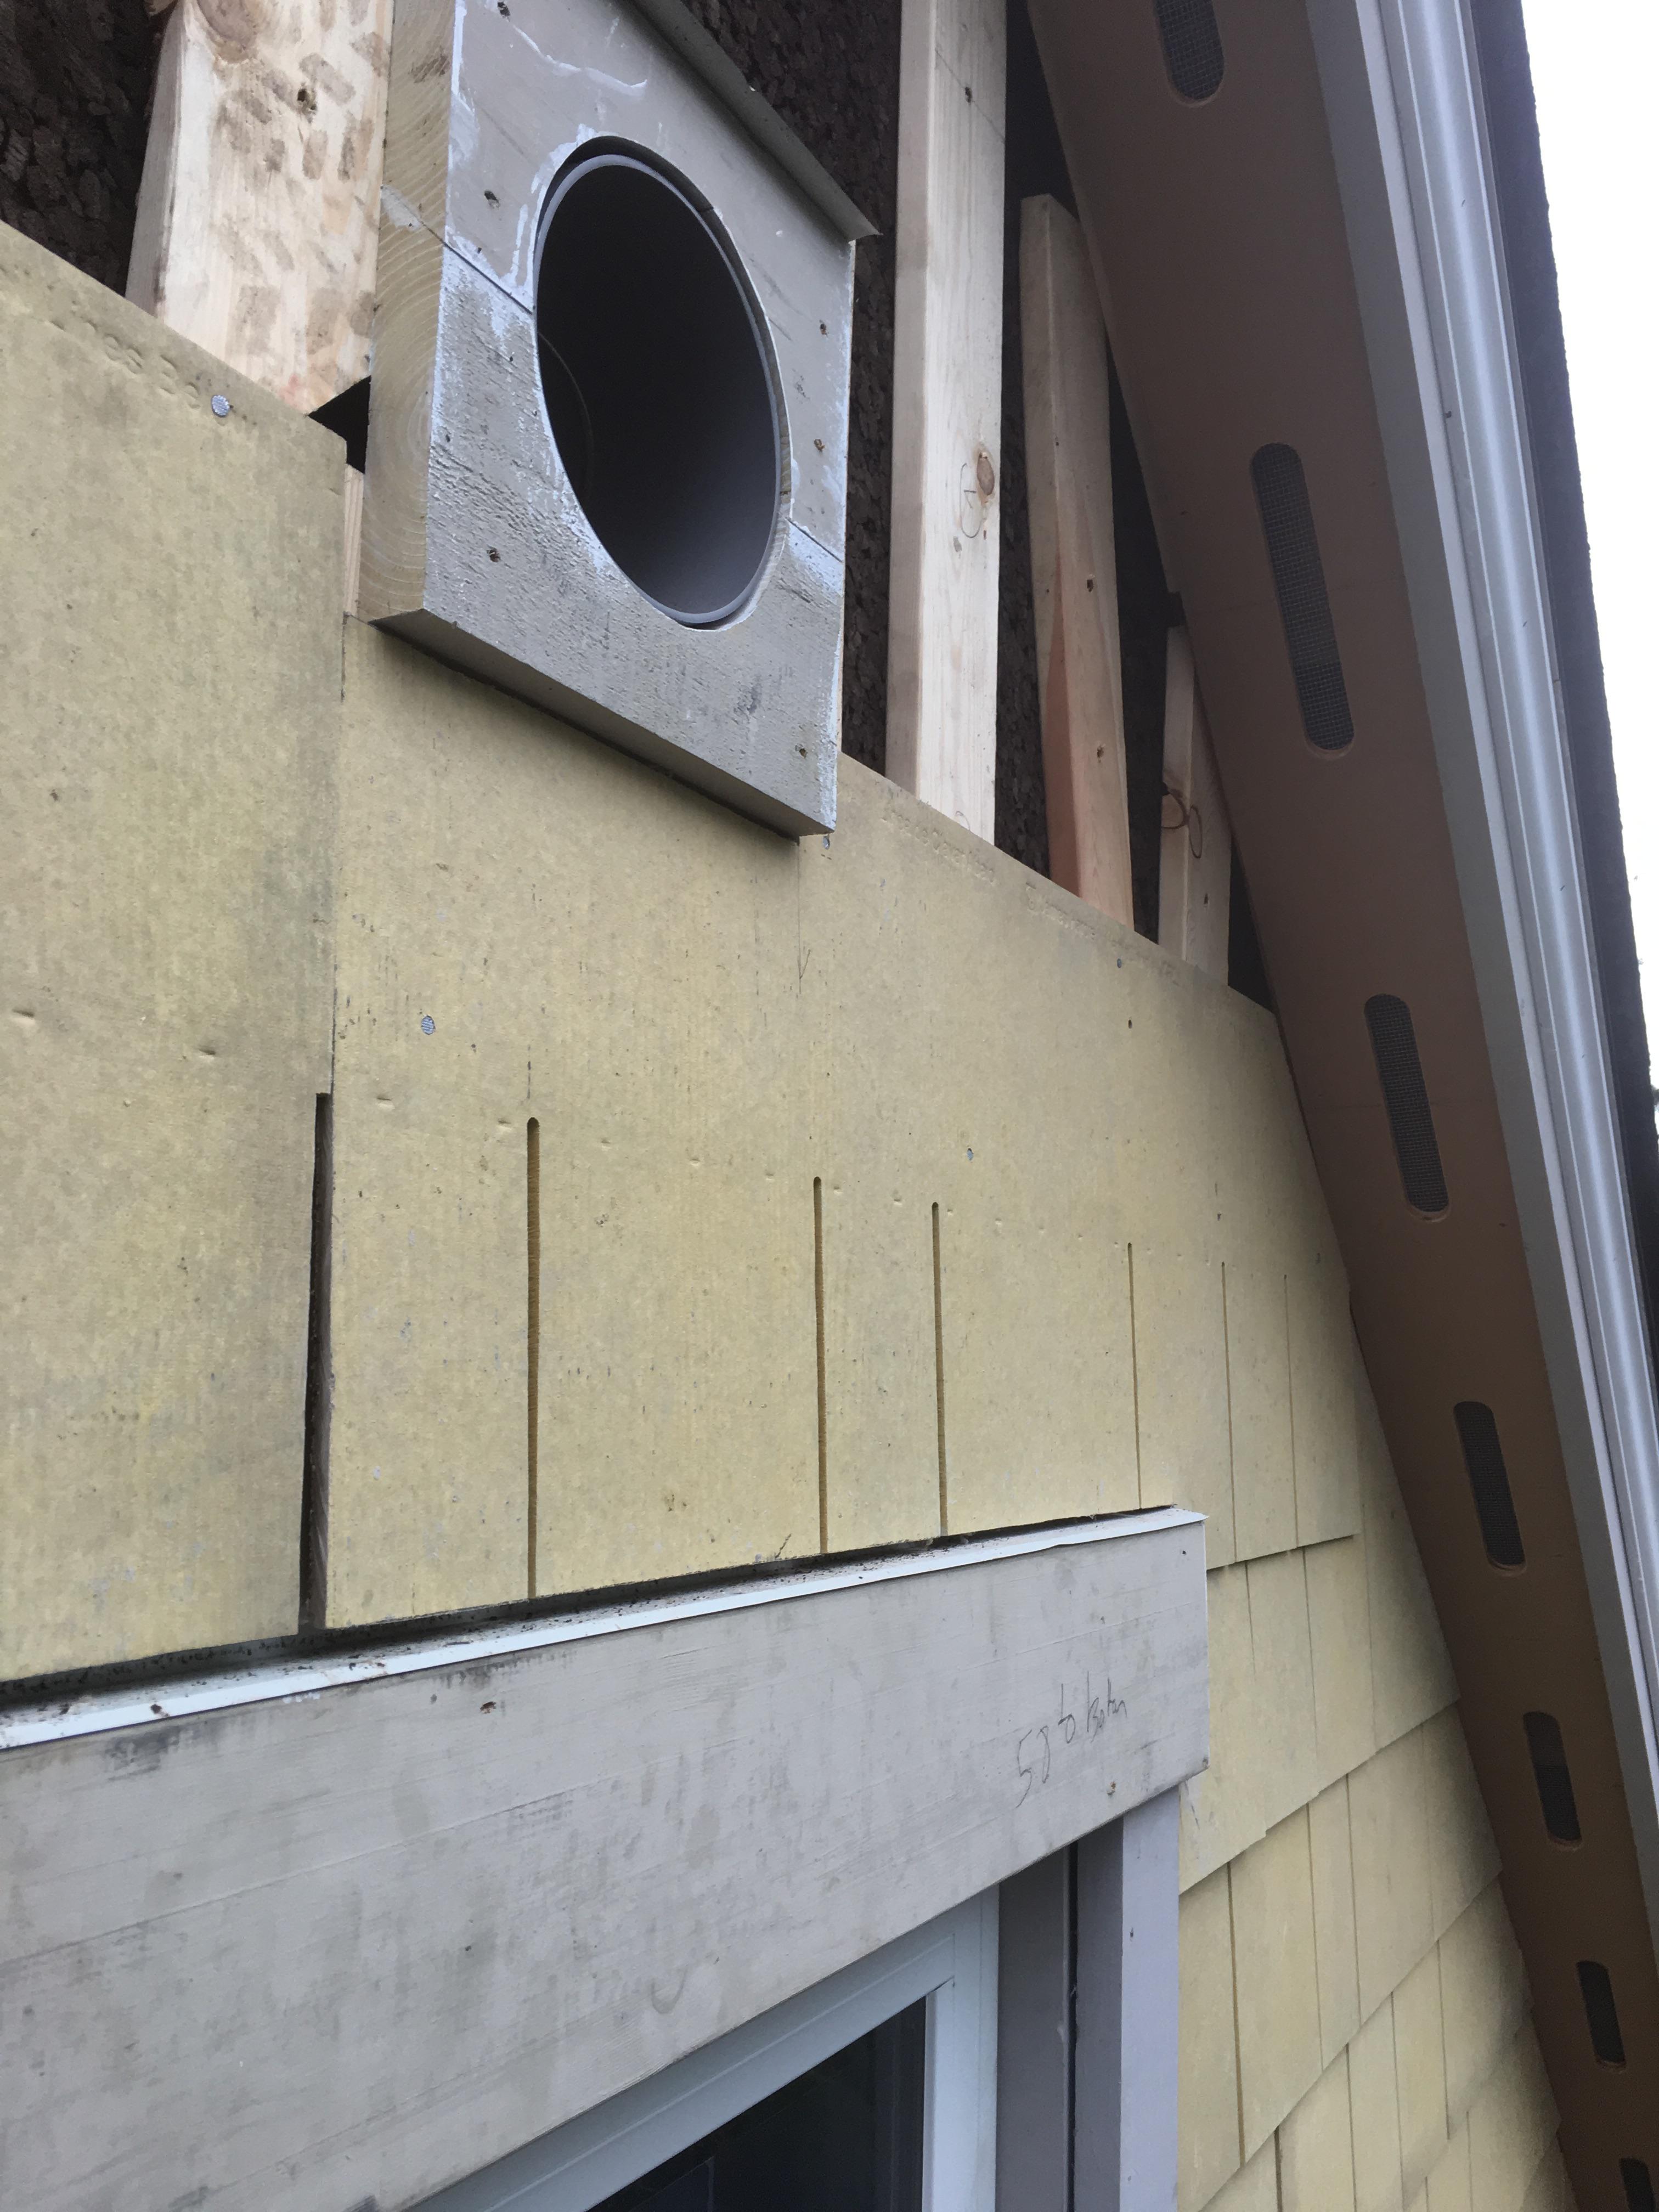
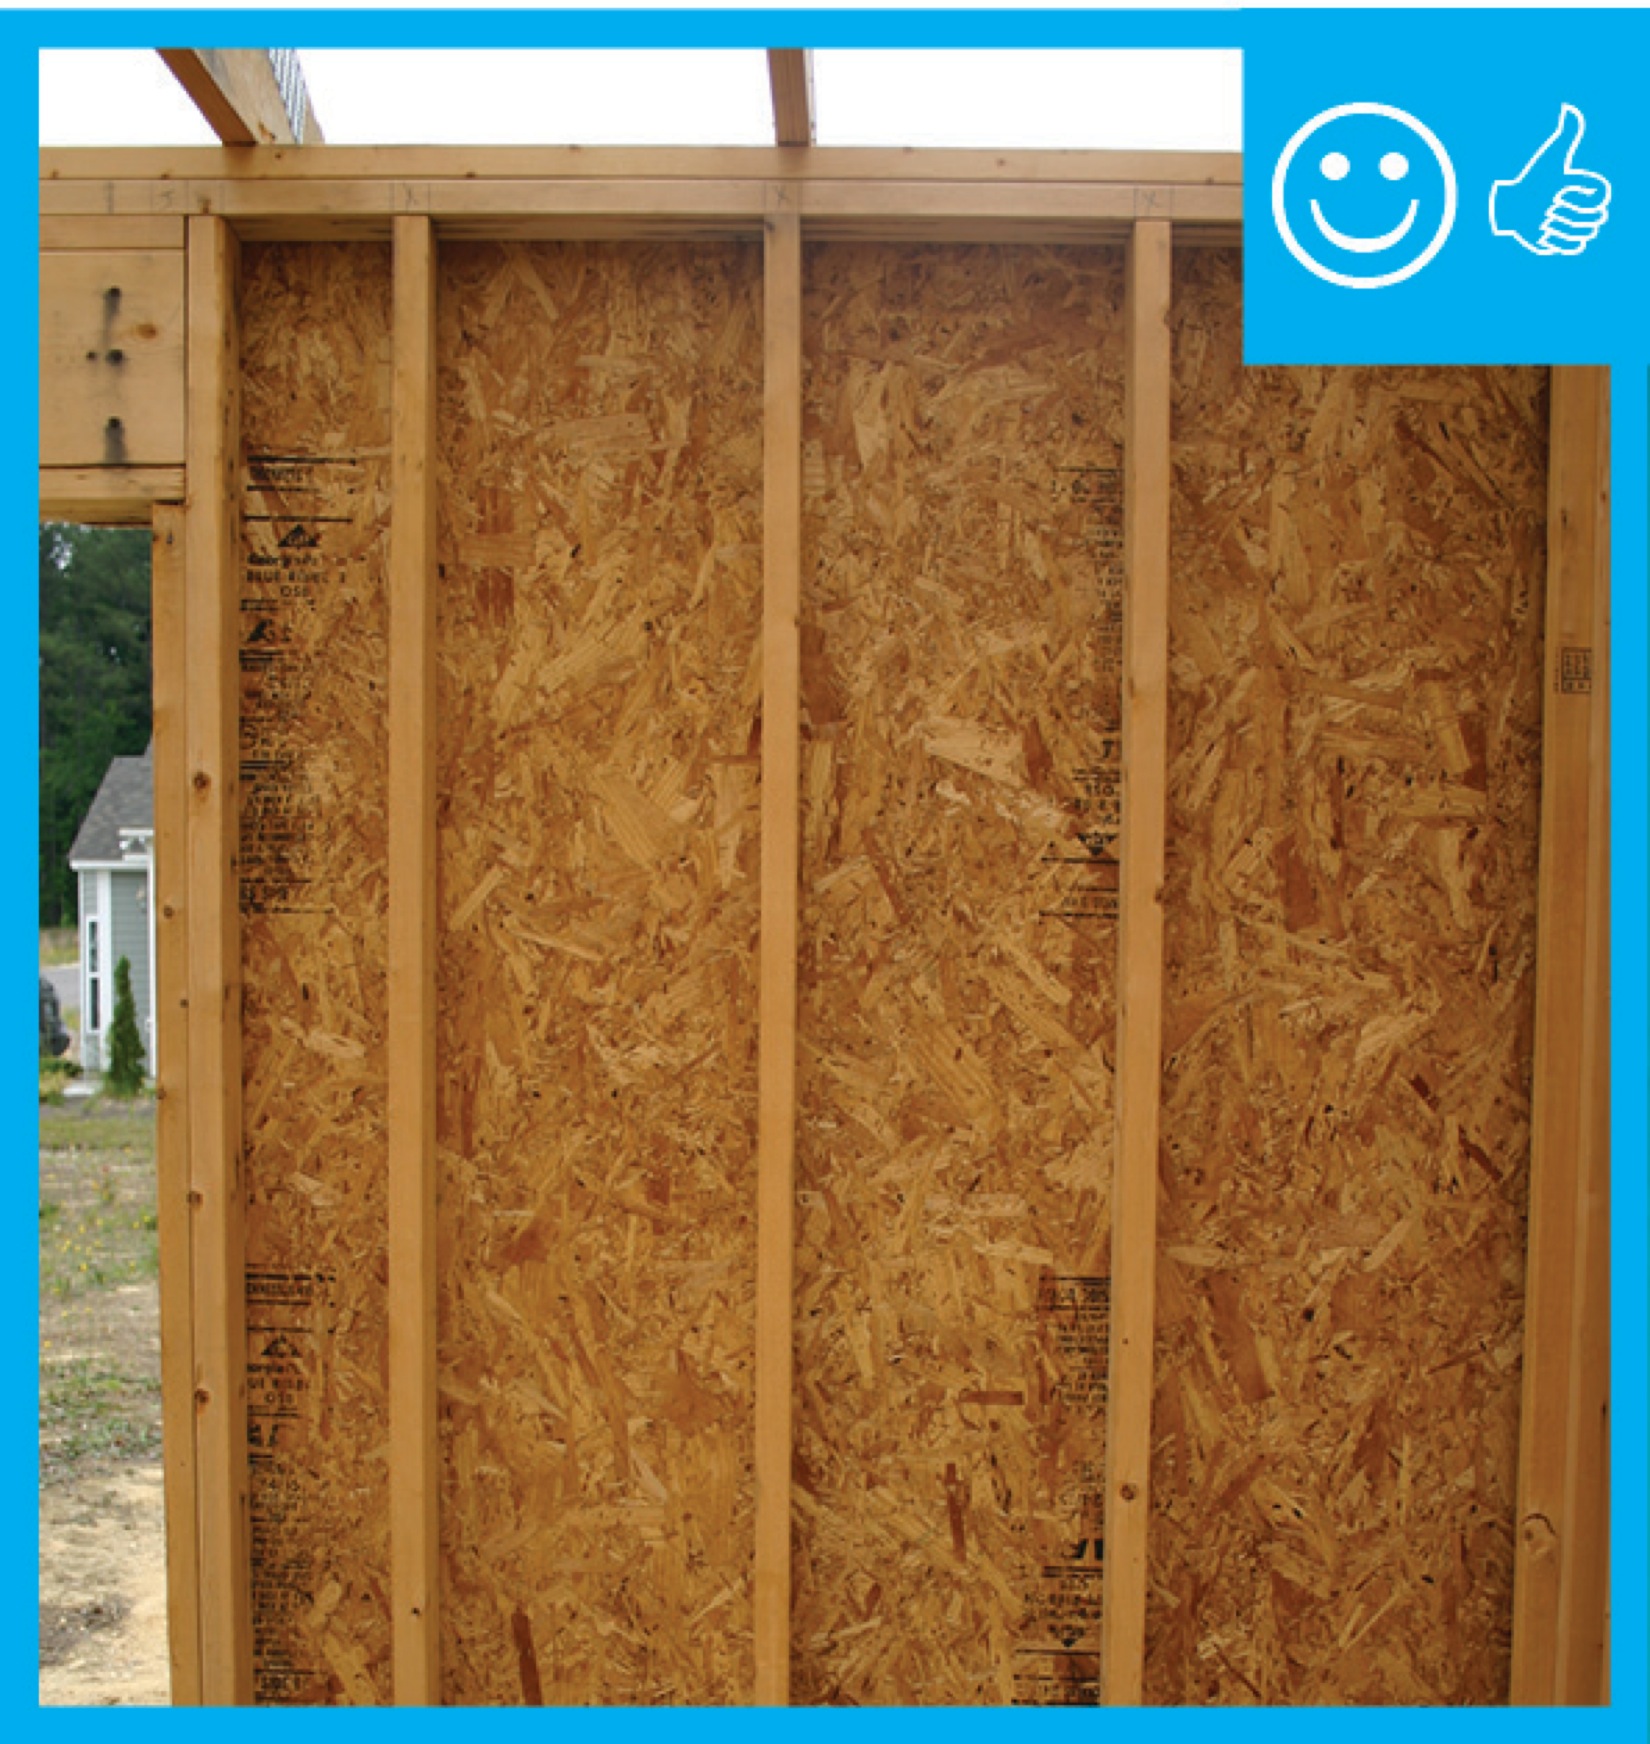
Right - This duct penetration is properly flashed and integrated with the taped, foil-faced foam sheathing layer, which serves as the air and water barrier
Image
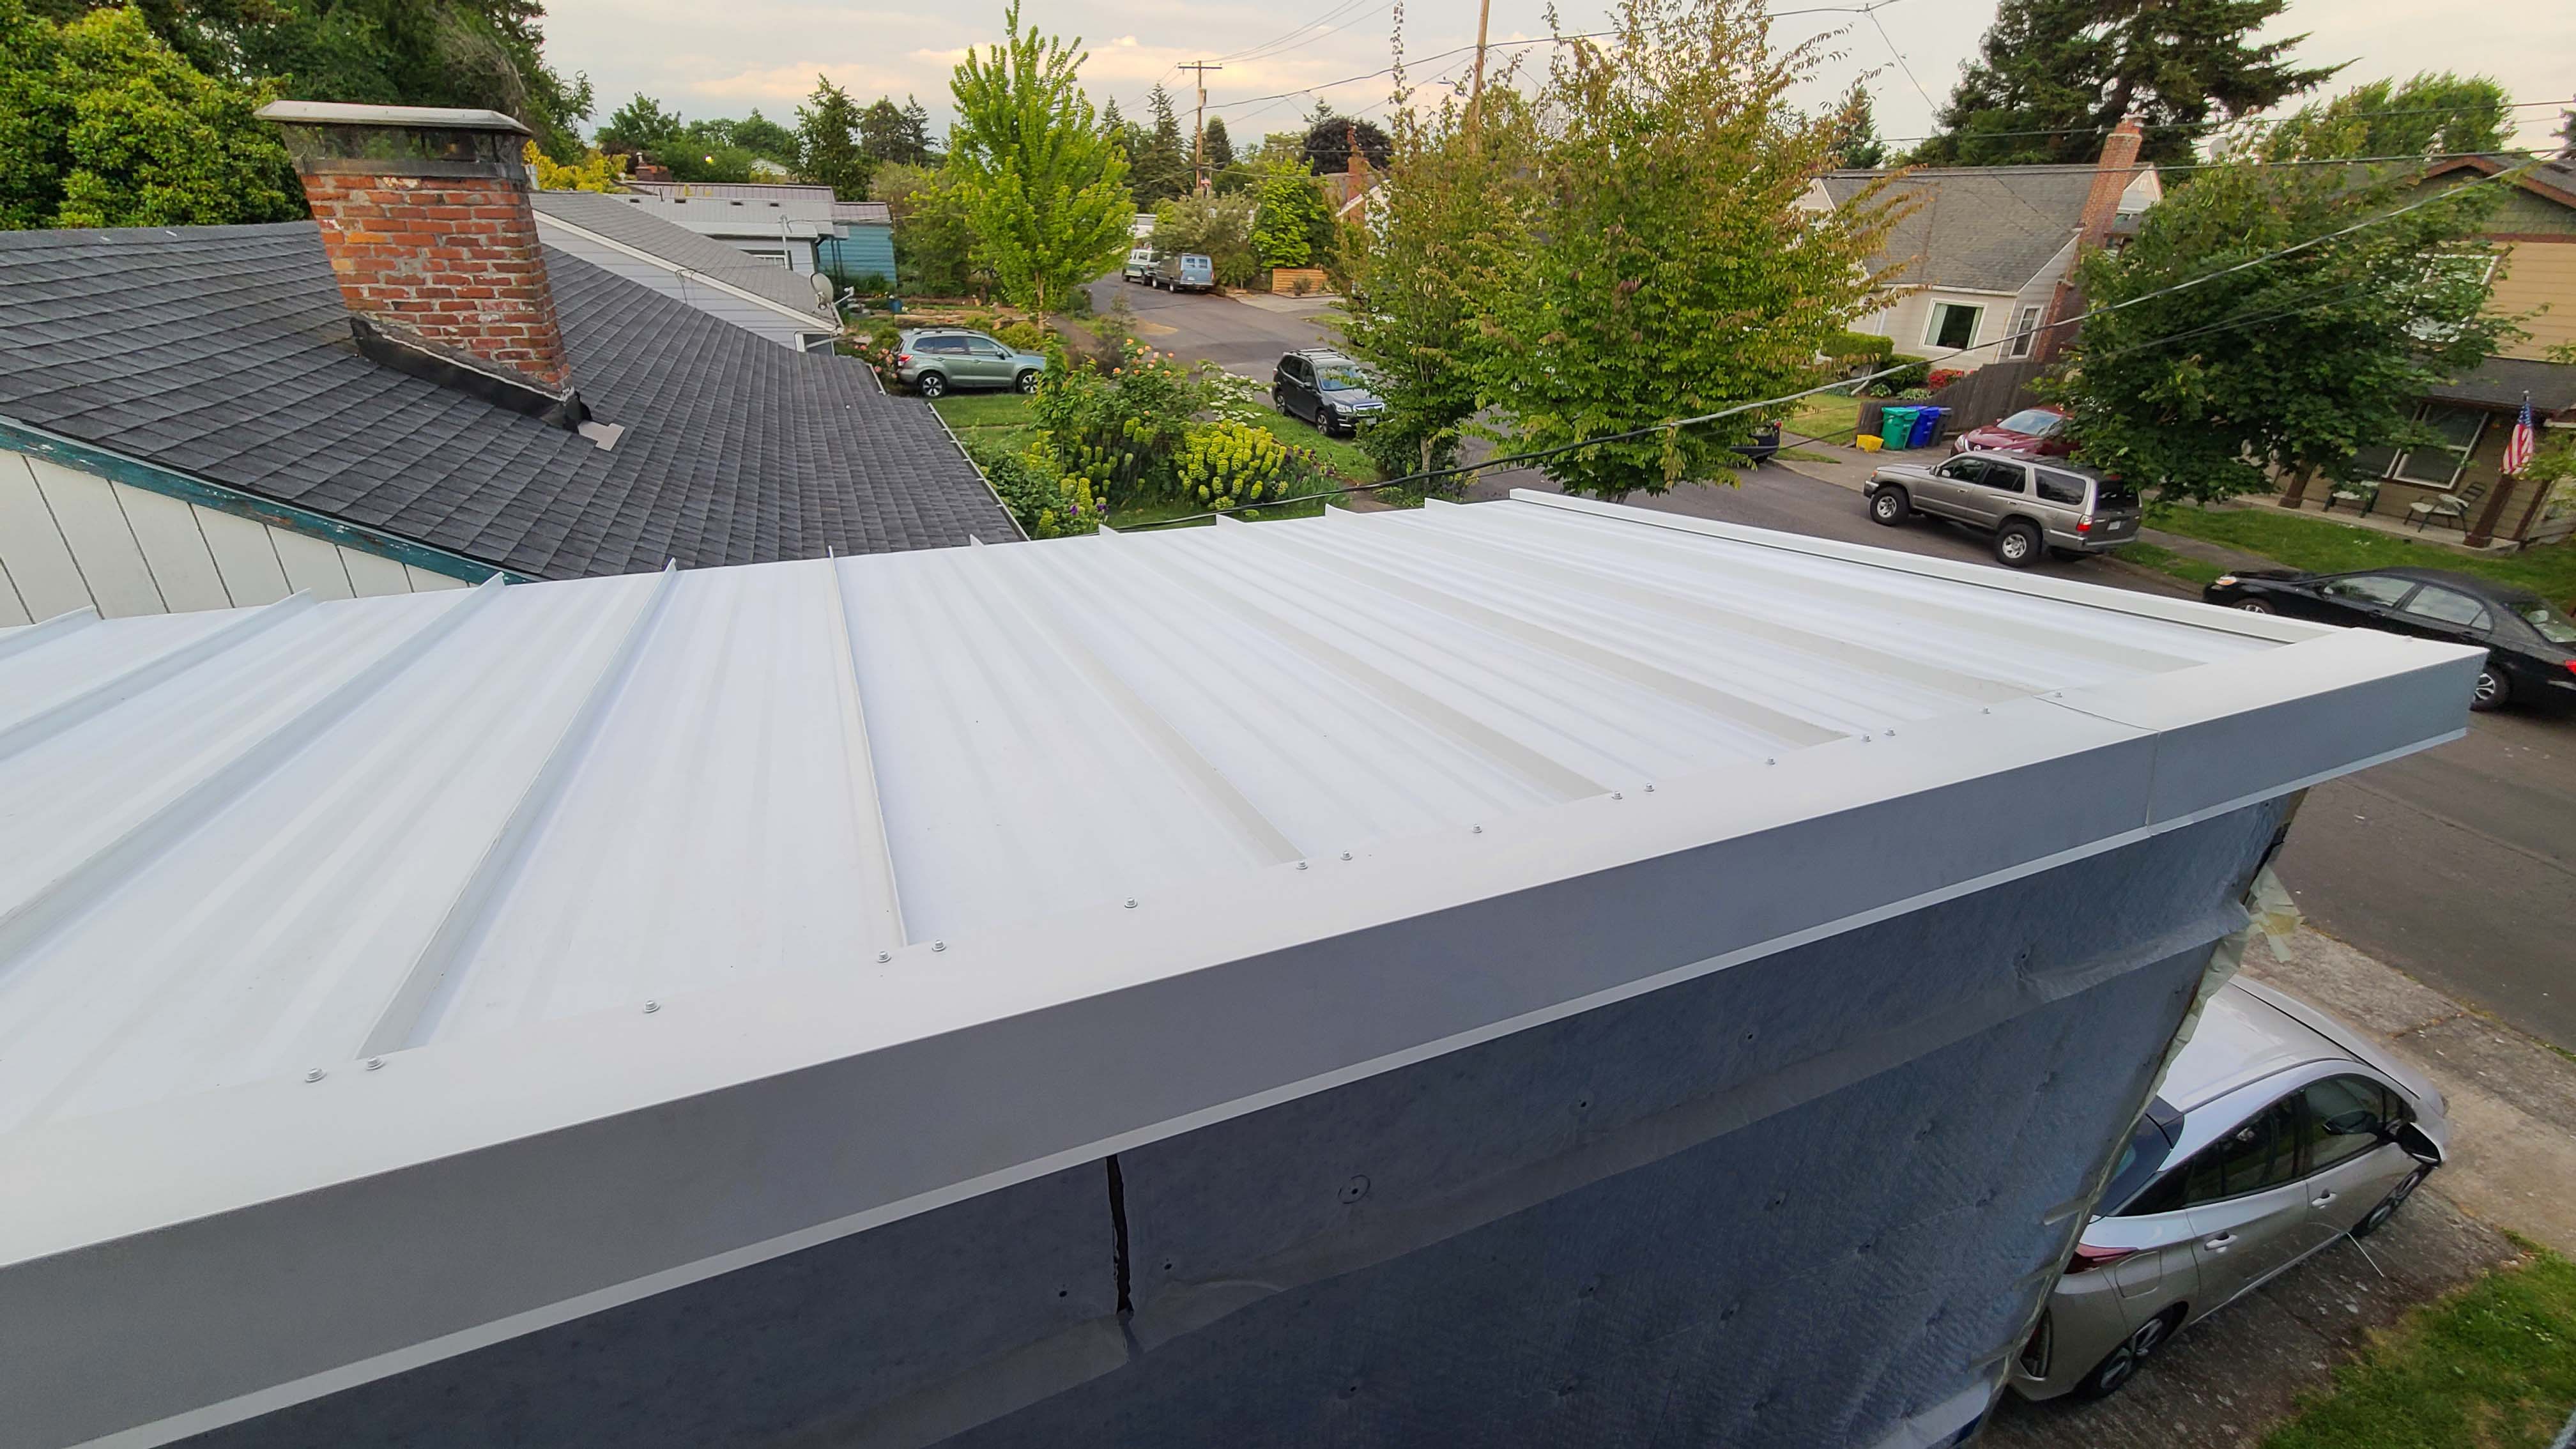
Right - This shed roof is constructed with 1X4 furring strips installed over the decking and underlayment for ventilation beneath the metal roofing.
Image
Right - This tiny house has a mono-sloped shed roof angled toward the sun to provide maximum space for solar panels.
Image
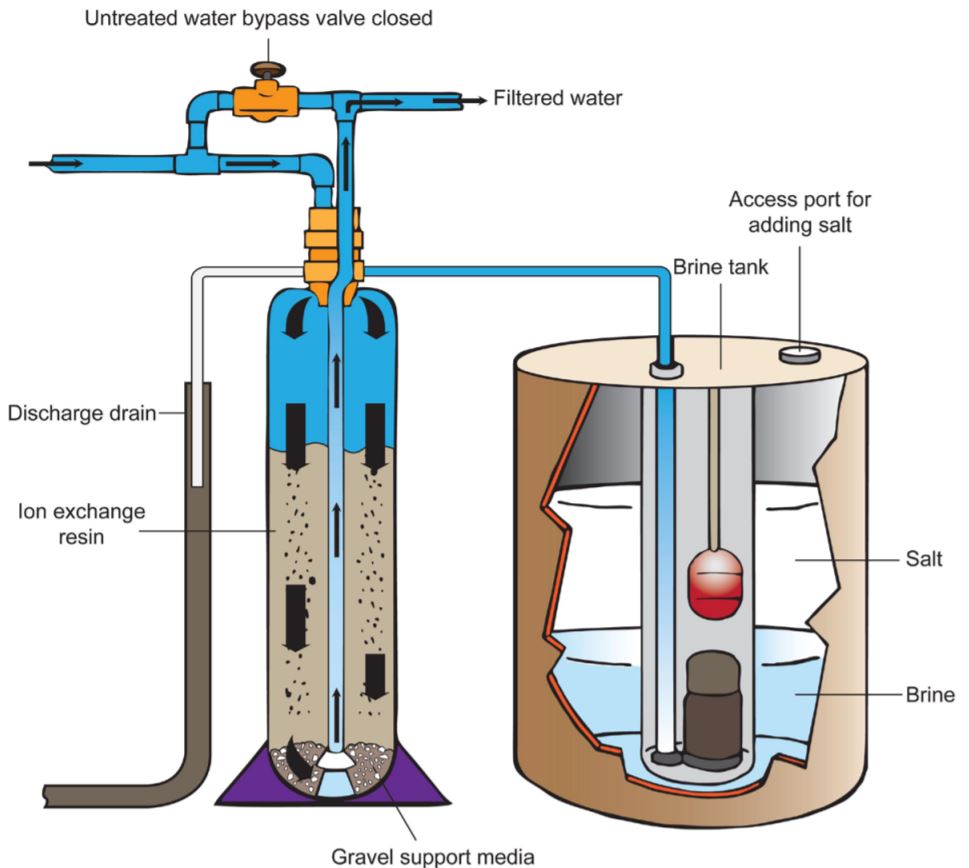
Right - This water softener filters hard water through a mineral-collecting medium before delivering water to the main plumbing system.
Image
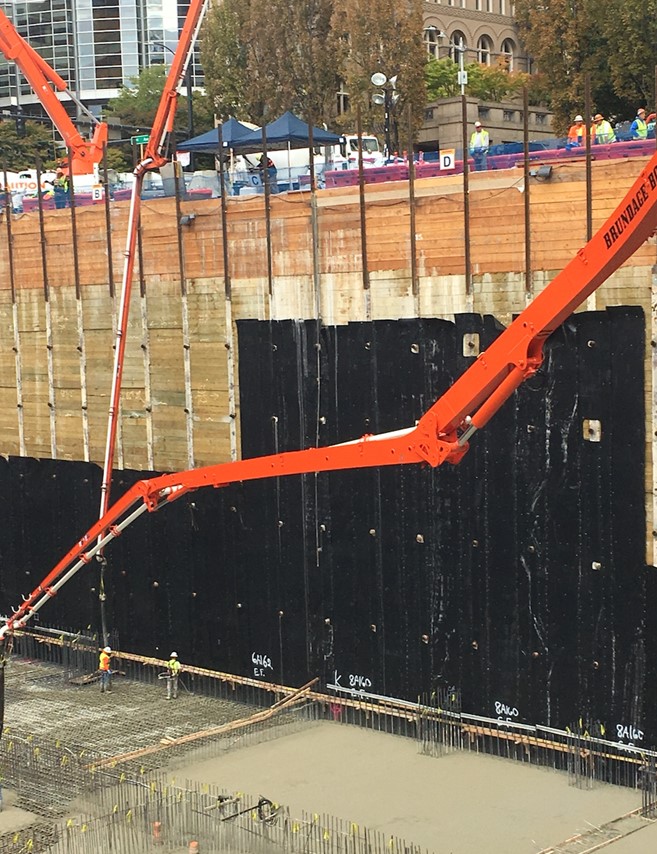
Right - This waterproofing membrane on the interior of a deep soldier pile foundation with wood lagging is continuous, and penetrations through the membrane have been sealed.
Image
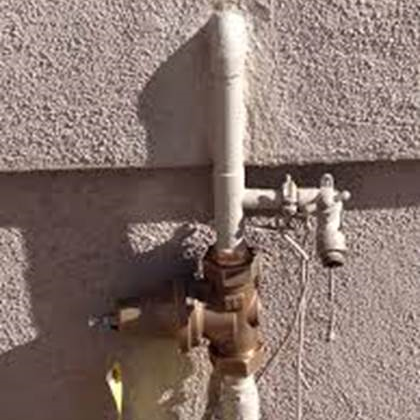
Right - Water pressure reducing valves should be installed prior to fixture piping such as where water enters the home.
Image

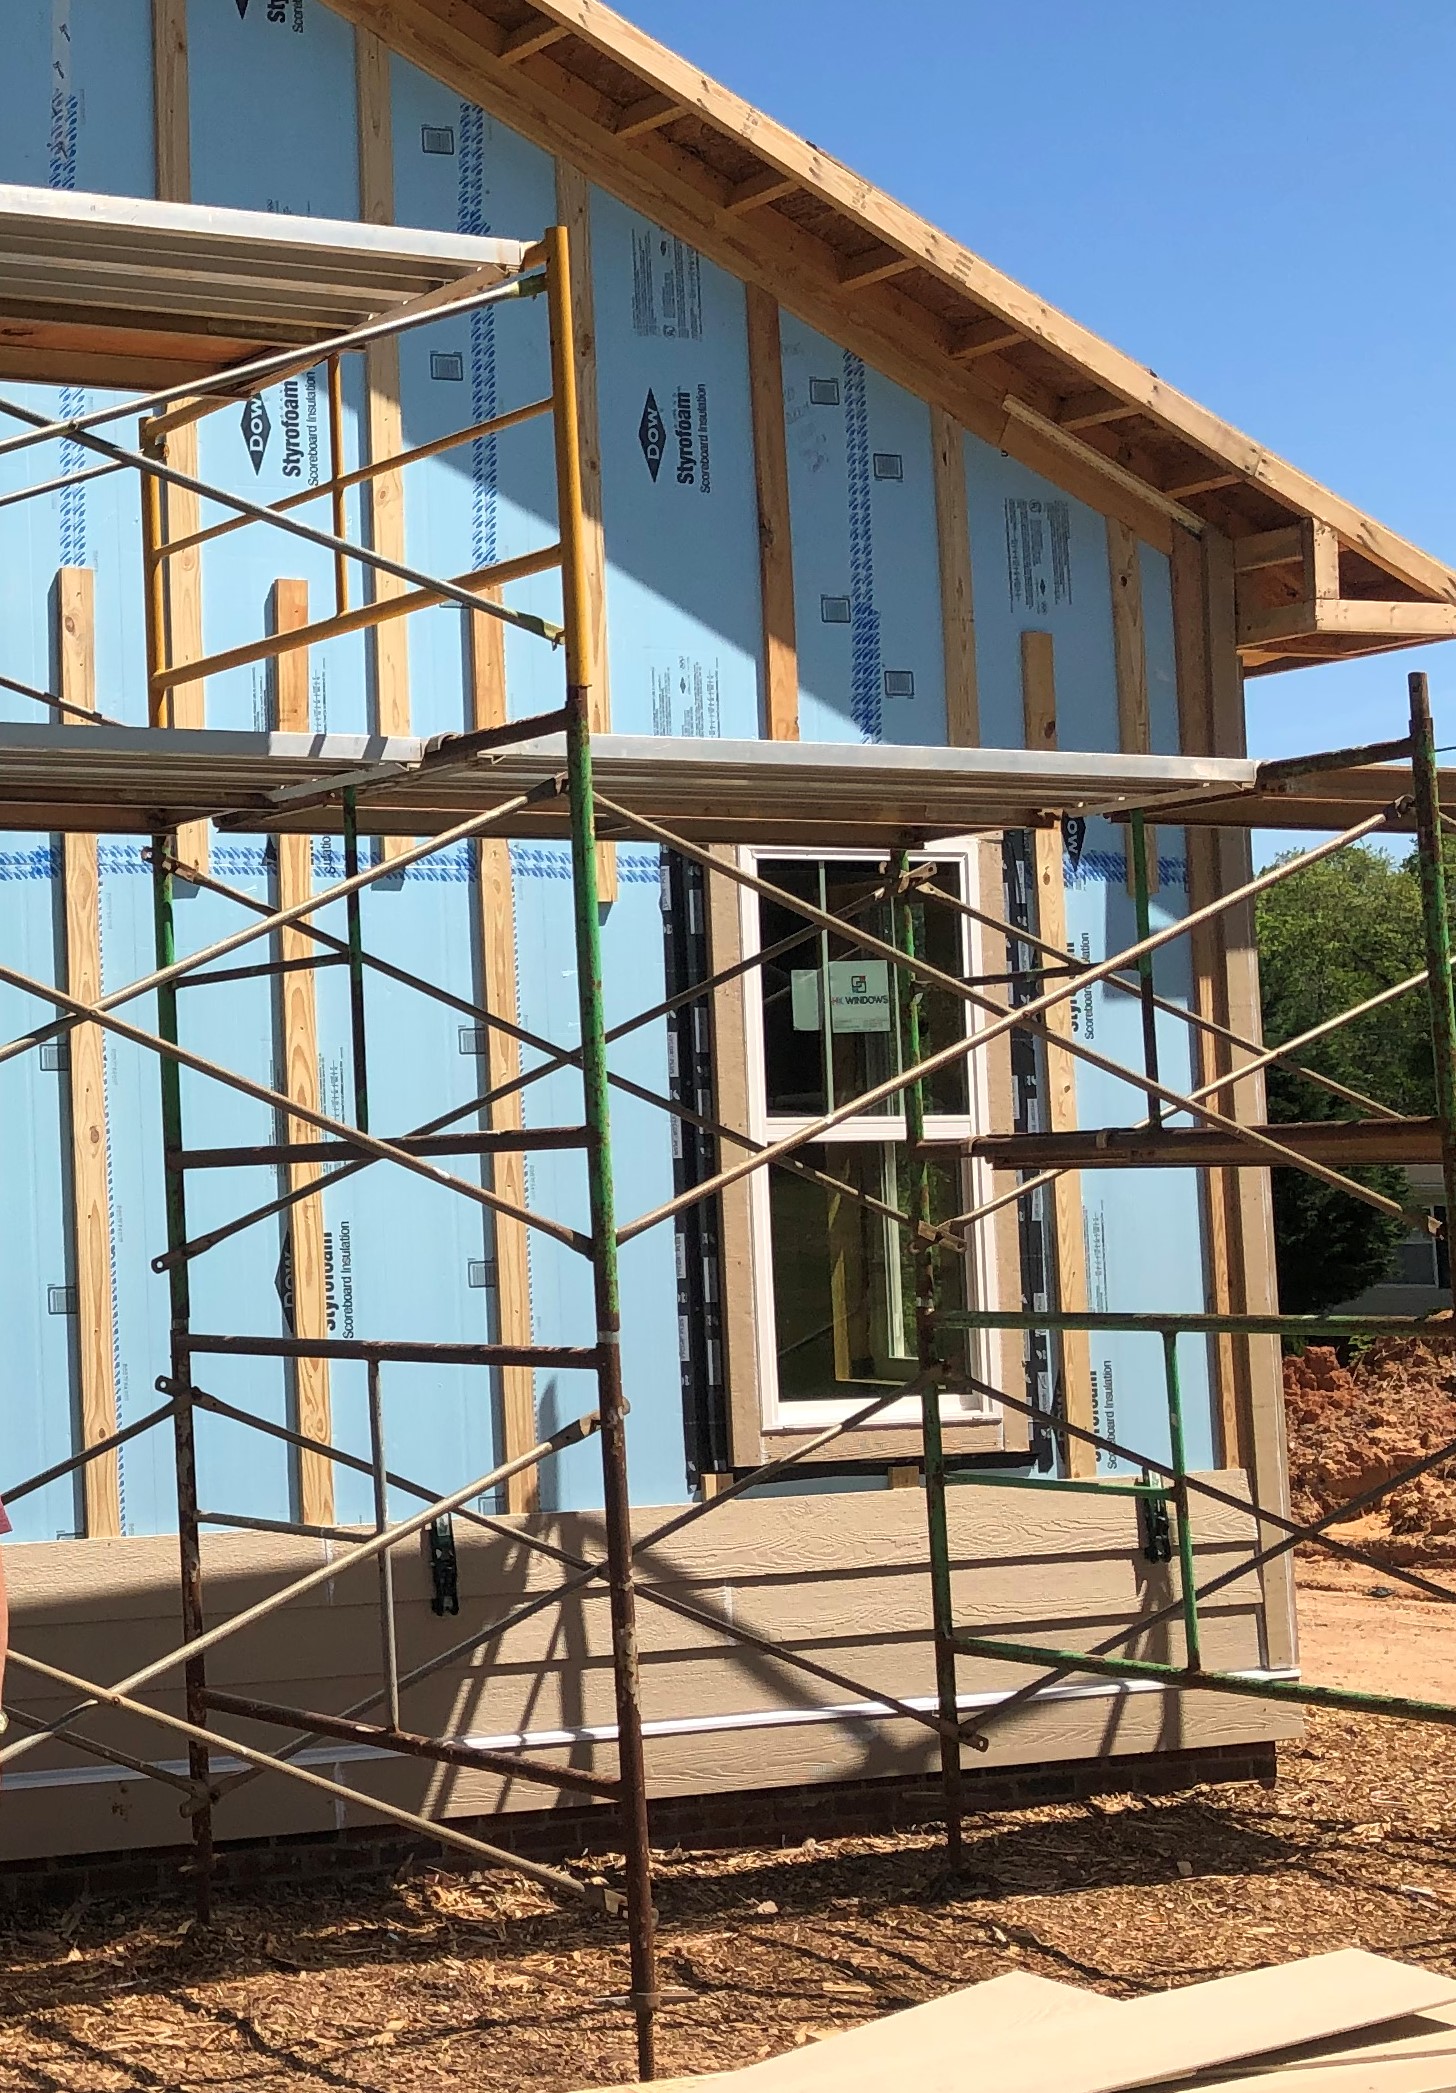
Right – A 1-inch layer of XPS rigid foam covers the 2x6 wall studs and is topped by ½-inch-thick plywood sheathing, which is covered with draining house wrap and serves as a nailing surface for siding and trim.
Image
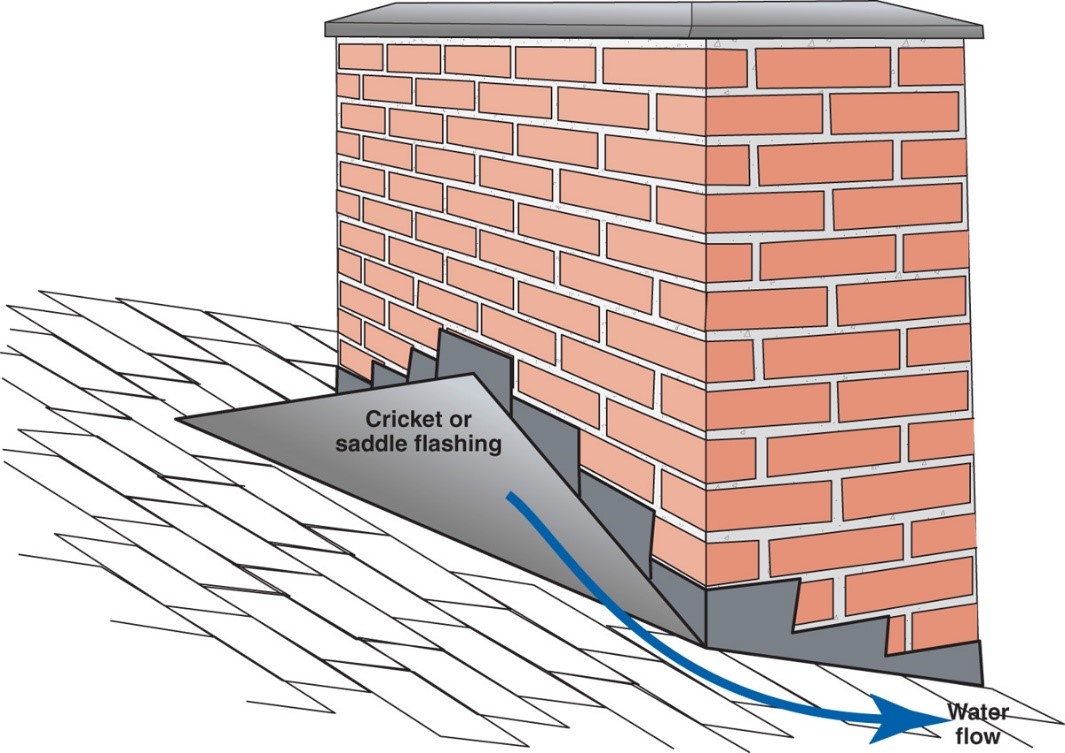
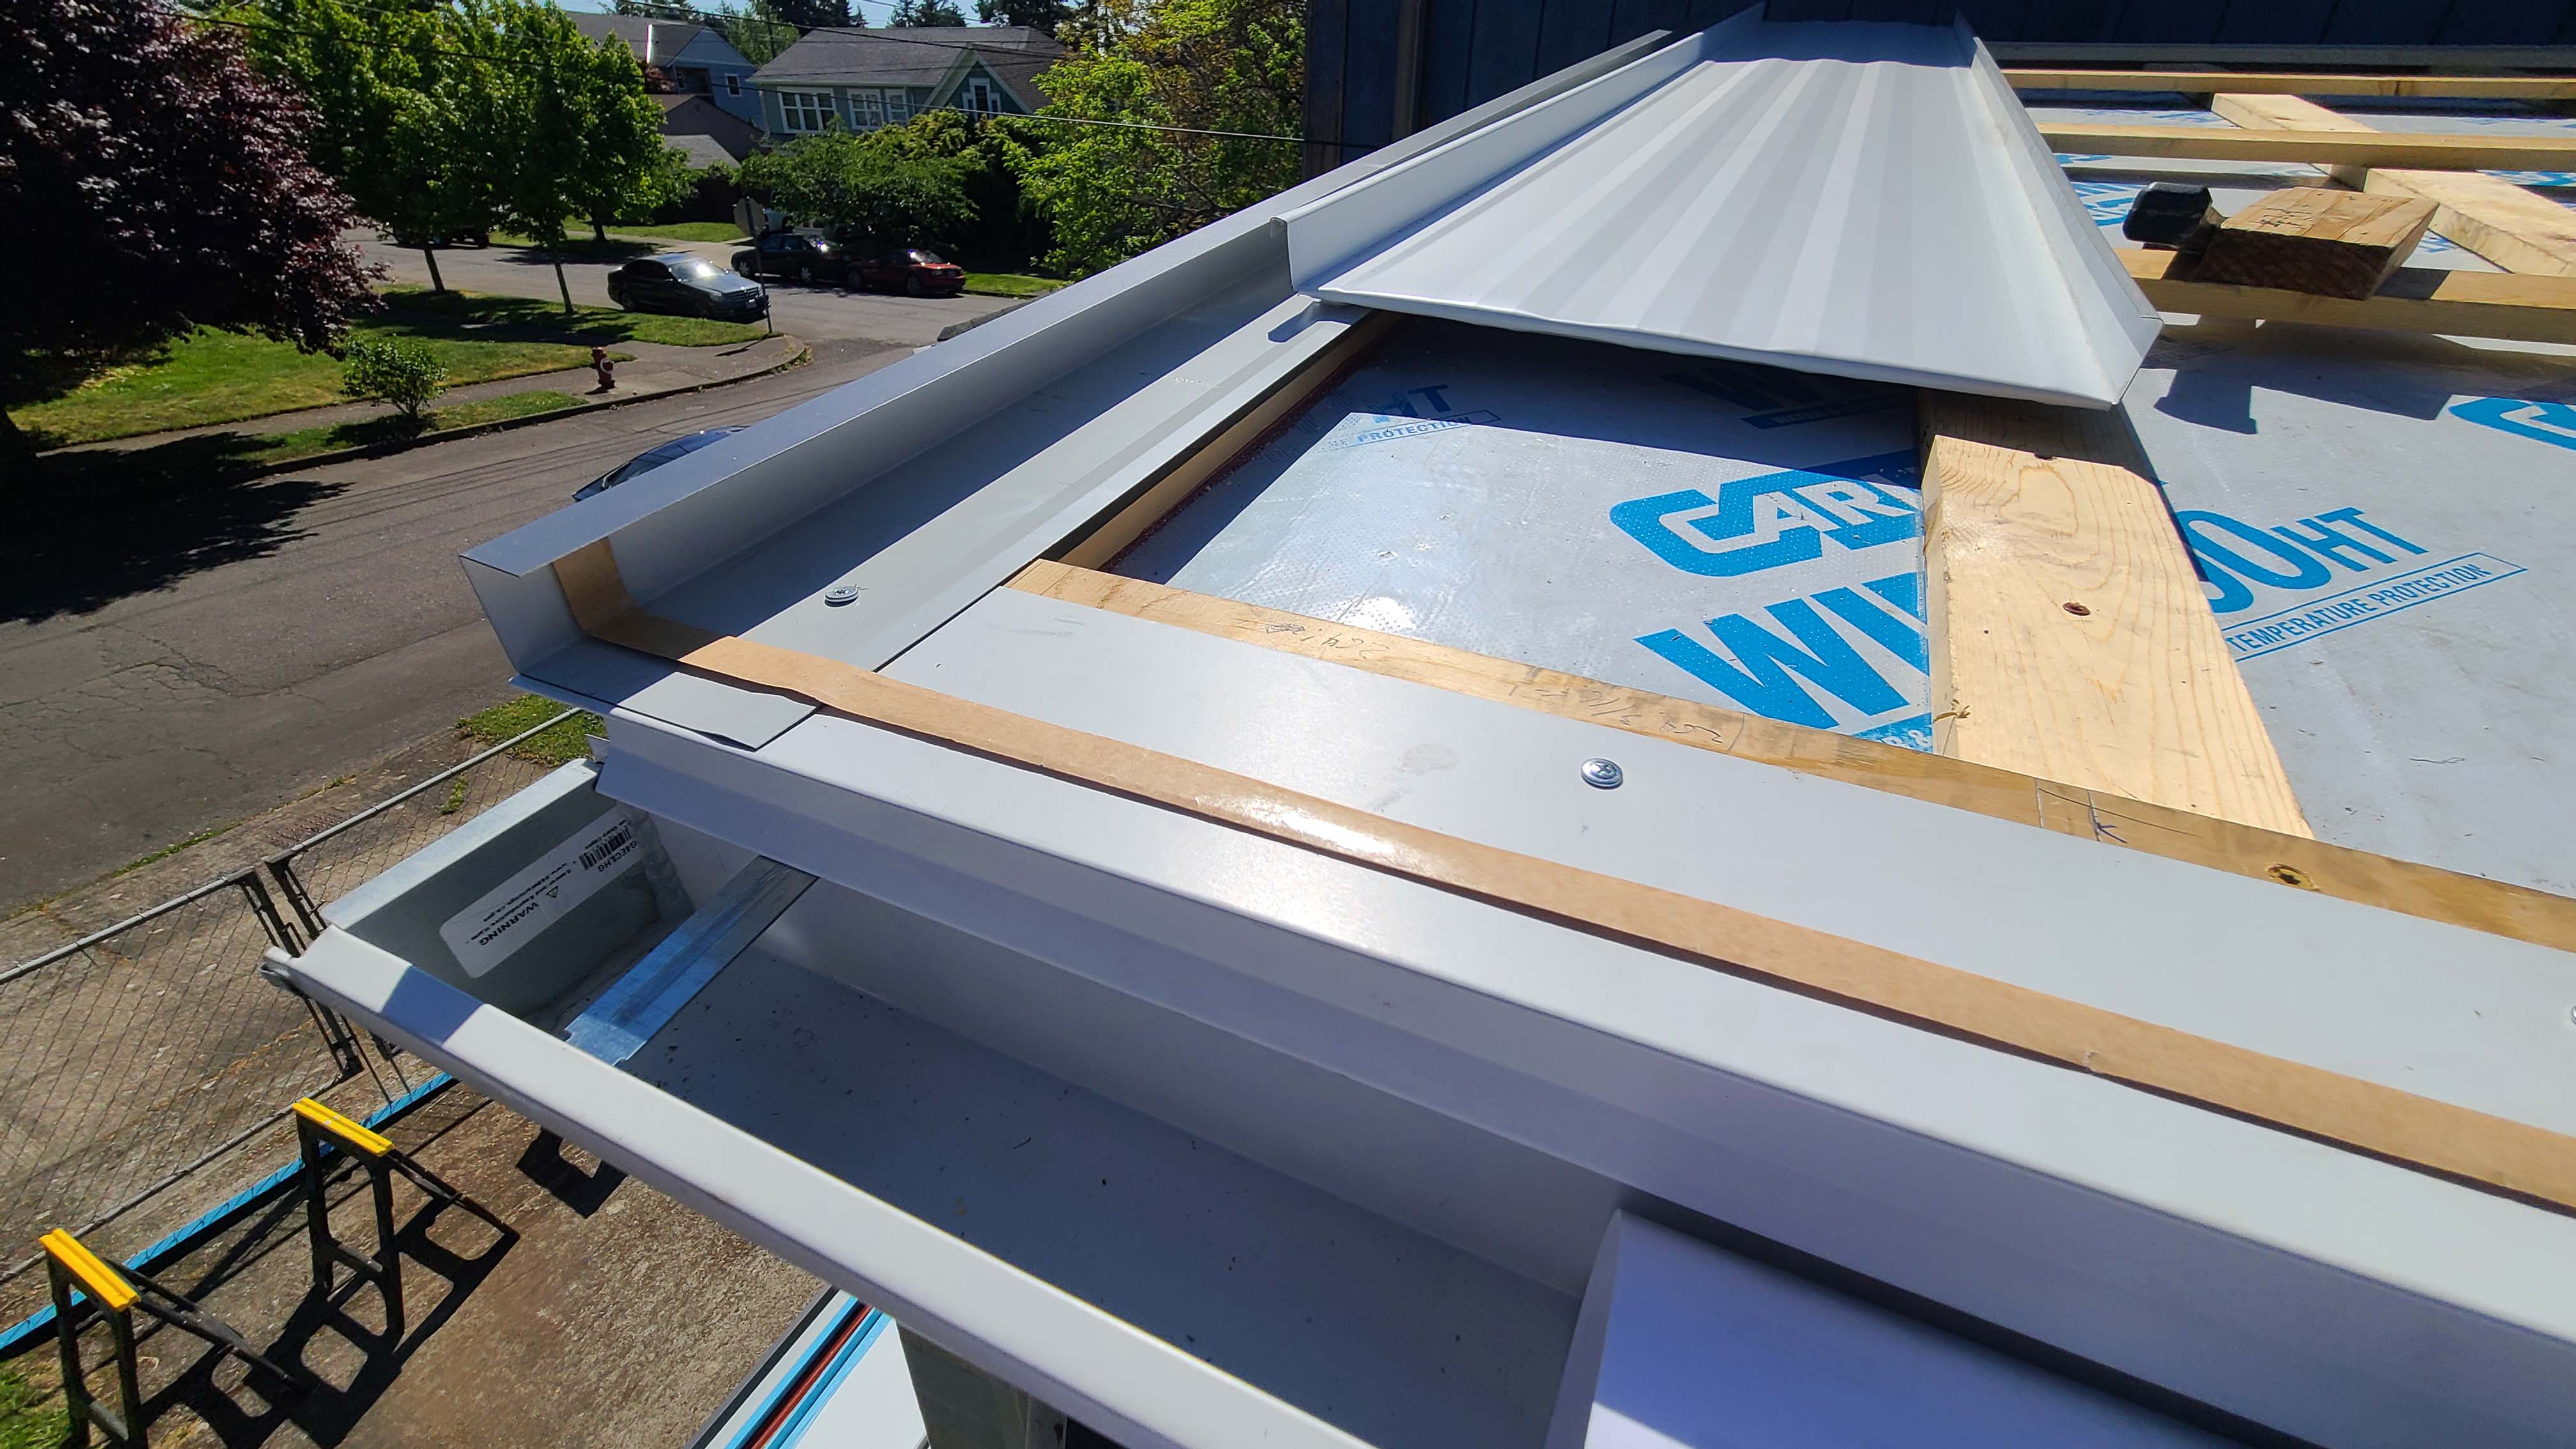
Right – A chimney cricket is installed and flashed to direct rainwater around the chimney
Image

Right – A deep porch provides shade and keeps sun off sliding glass doors in this Arizona home while artificial turf and xeriscaping minimize irrigation usage.
Image
Right – A dimpled plastic rainscreen product is installed over liquid-applied waterproofing on the exterior of the ICF foundation walls, directing water down the wall to the perimeter drain tile, thus encouraging drainage around the foundation.
Image
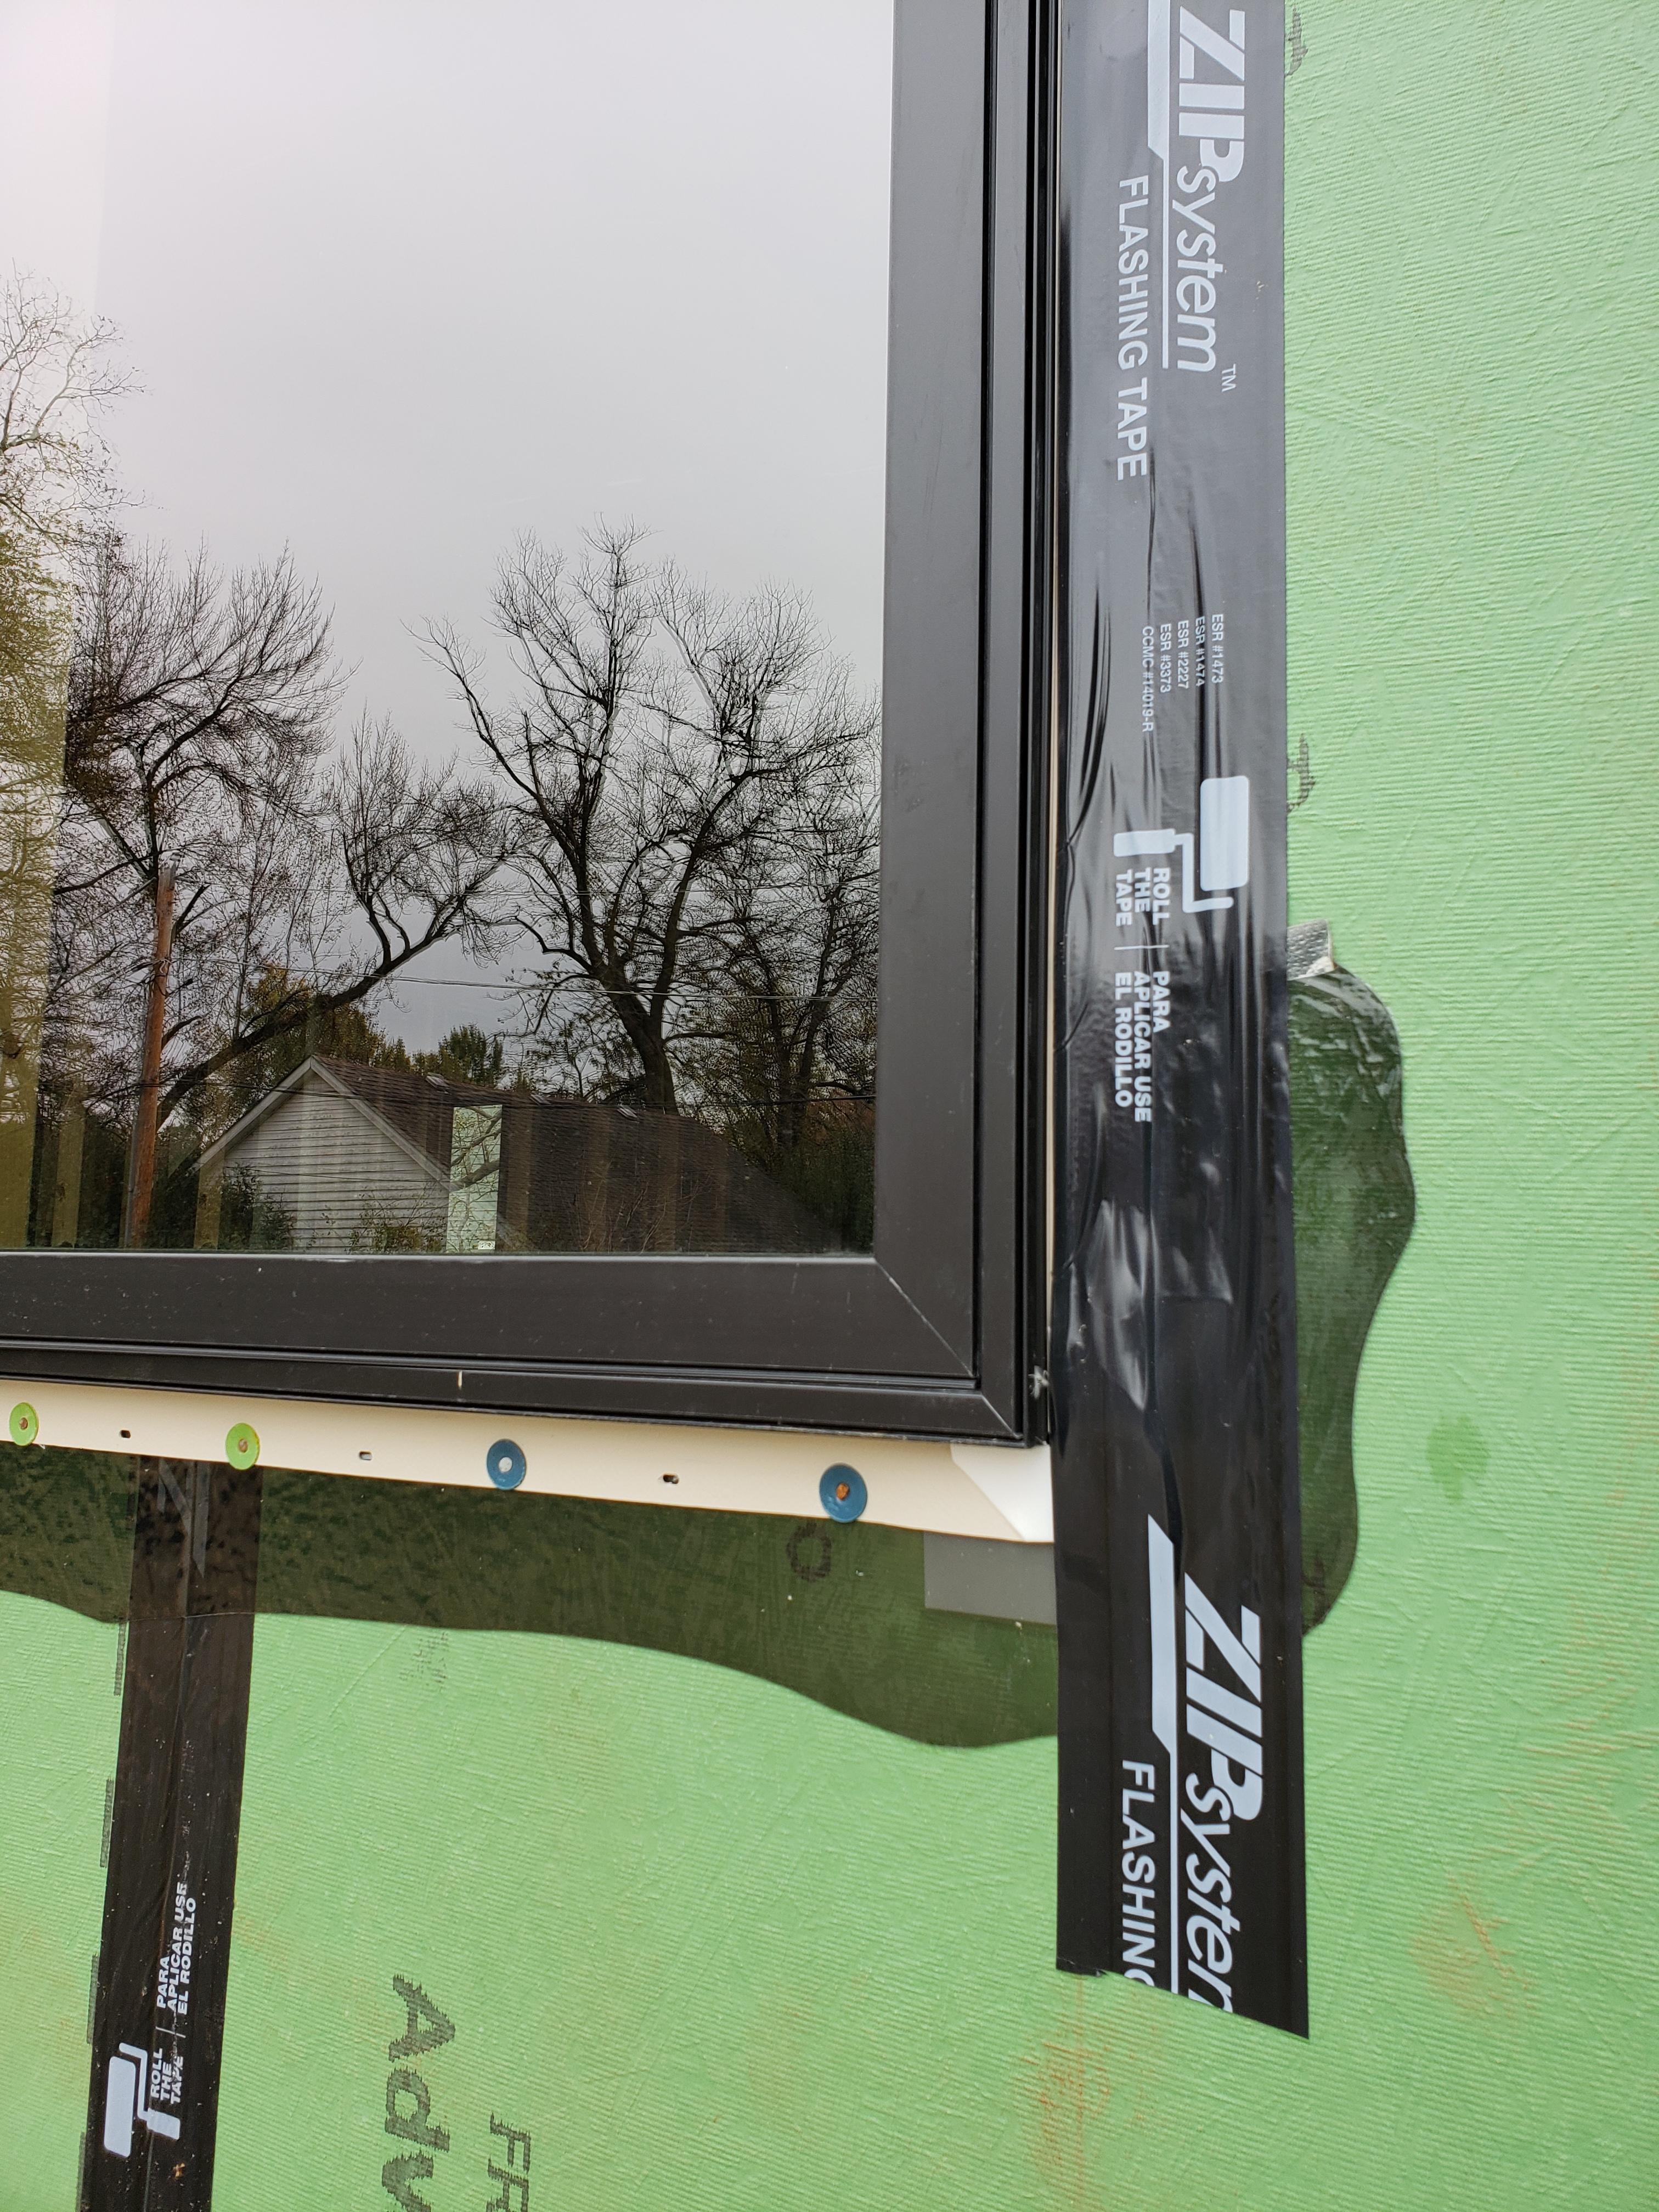
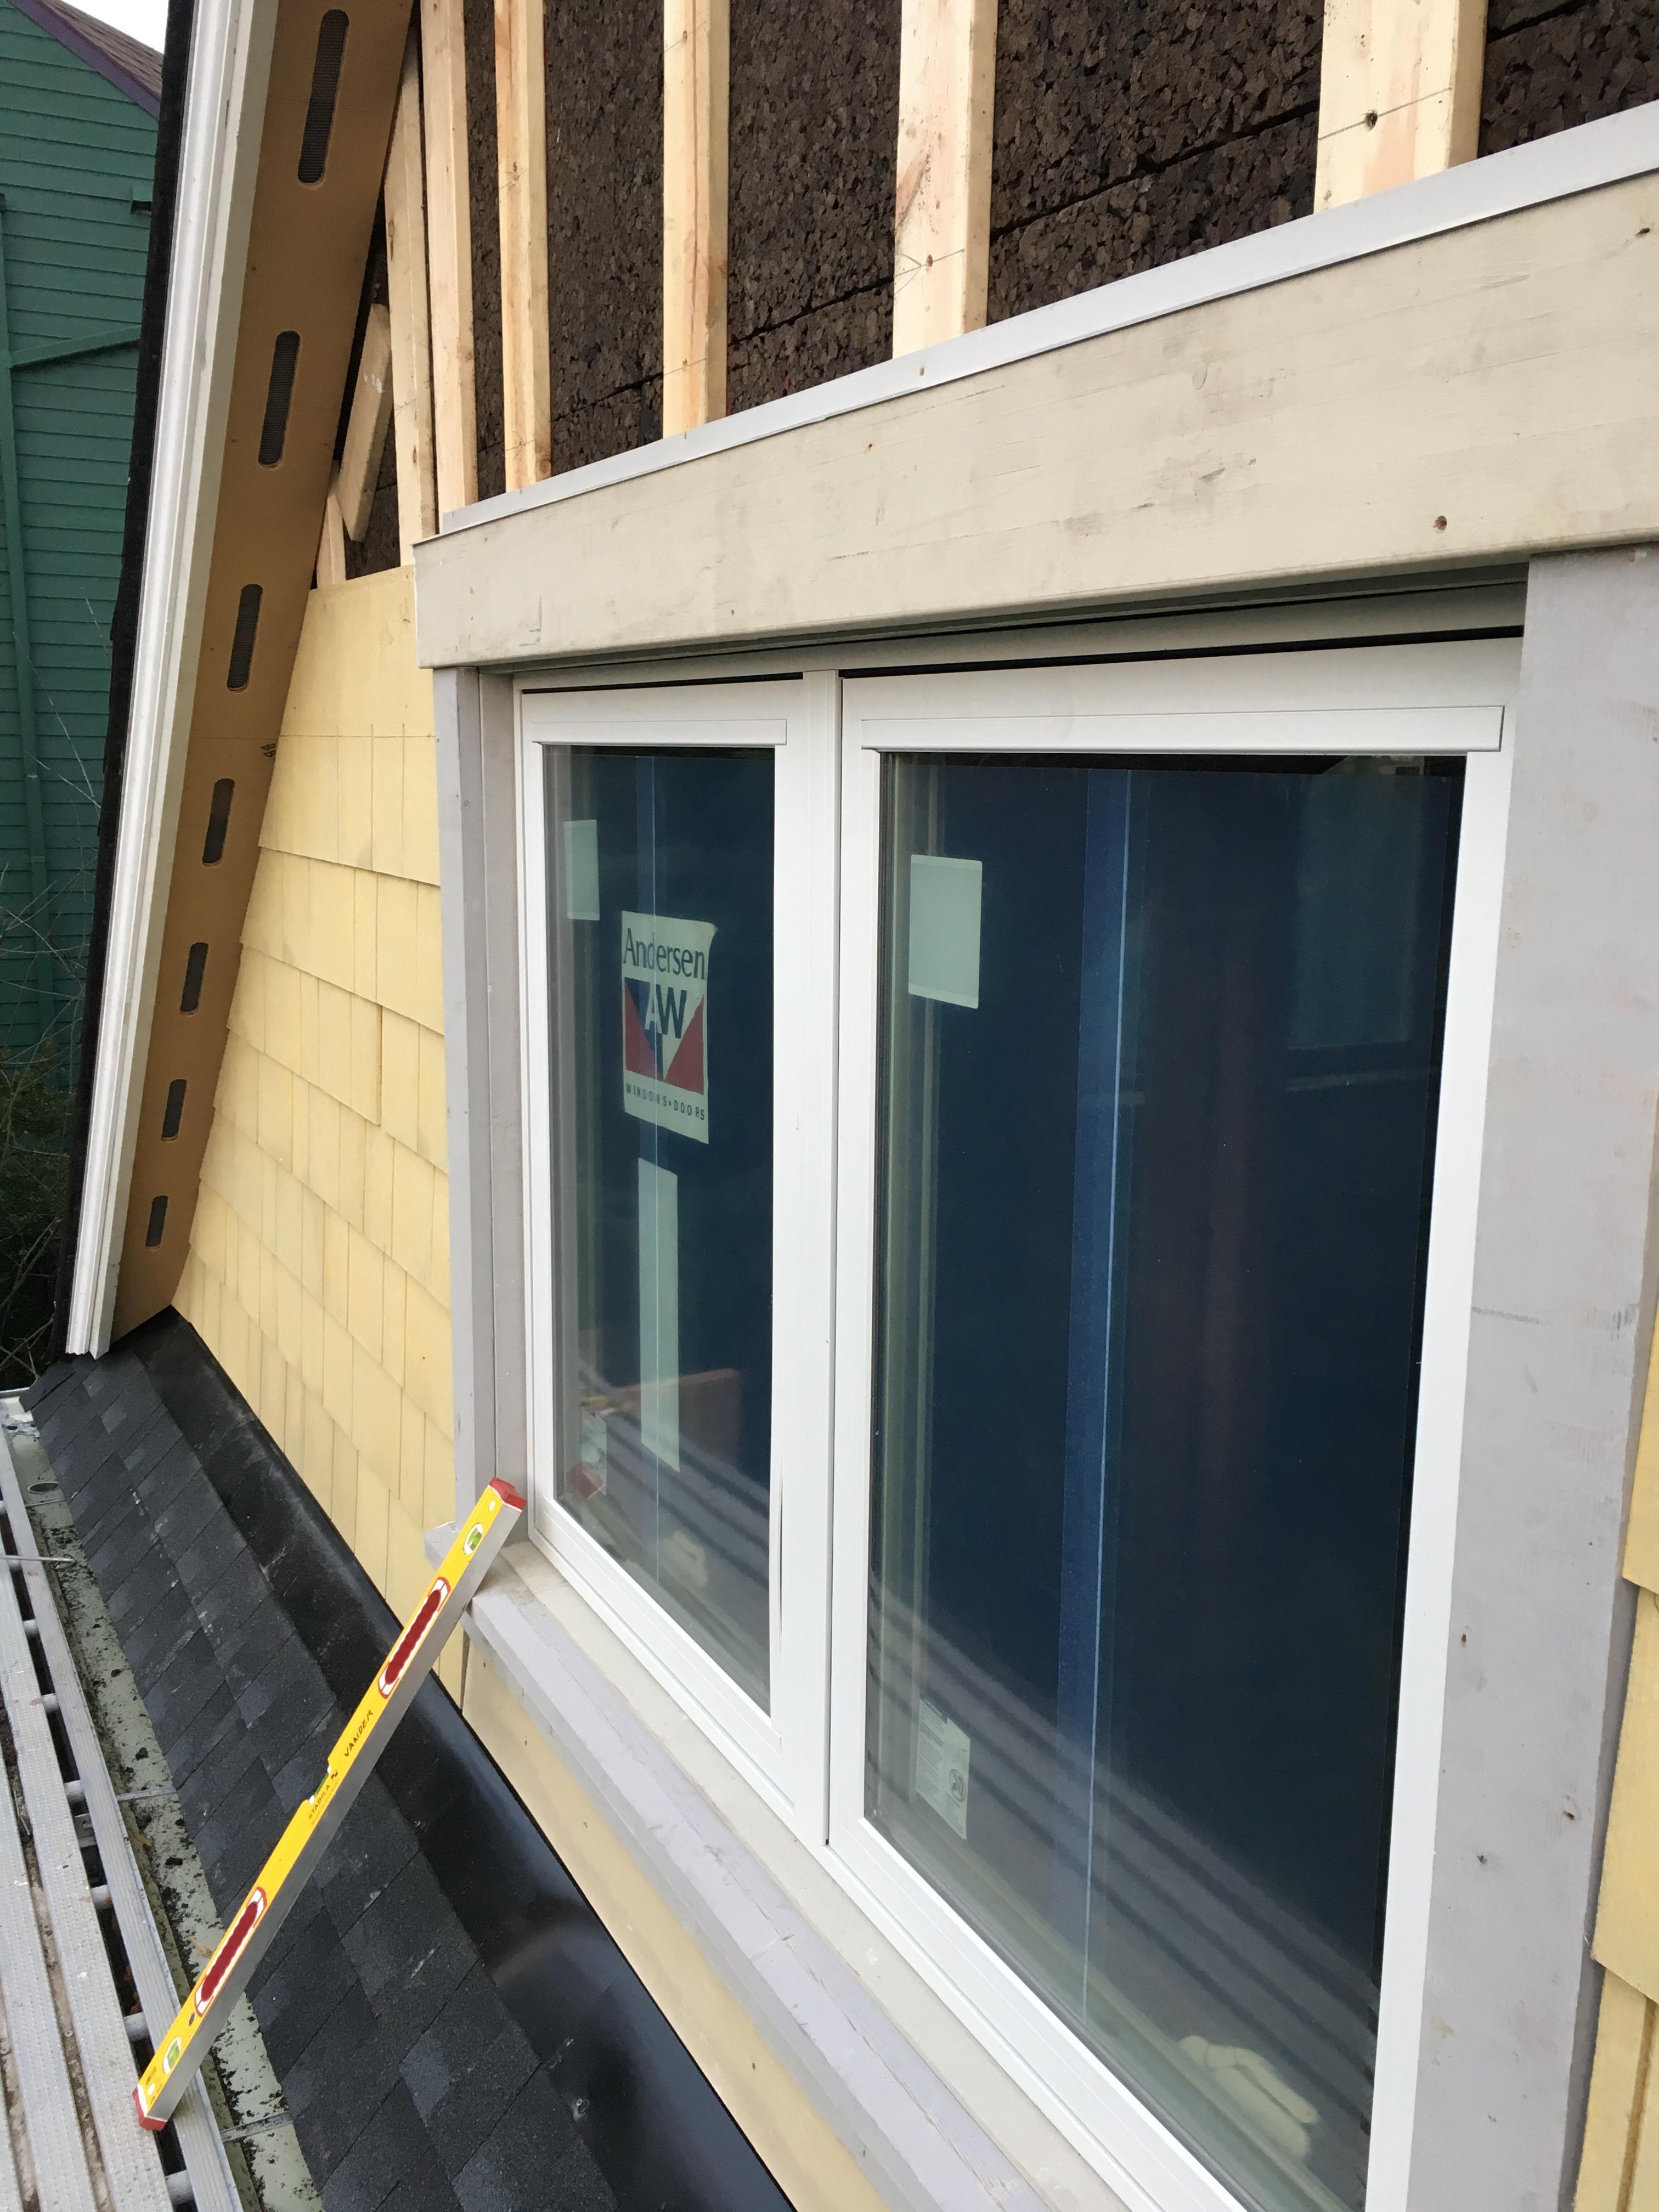
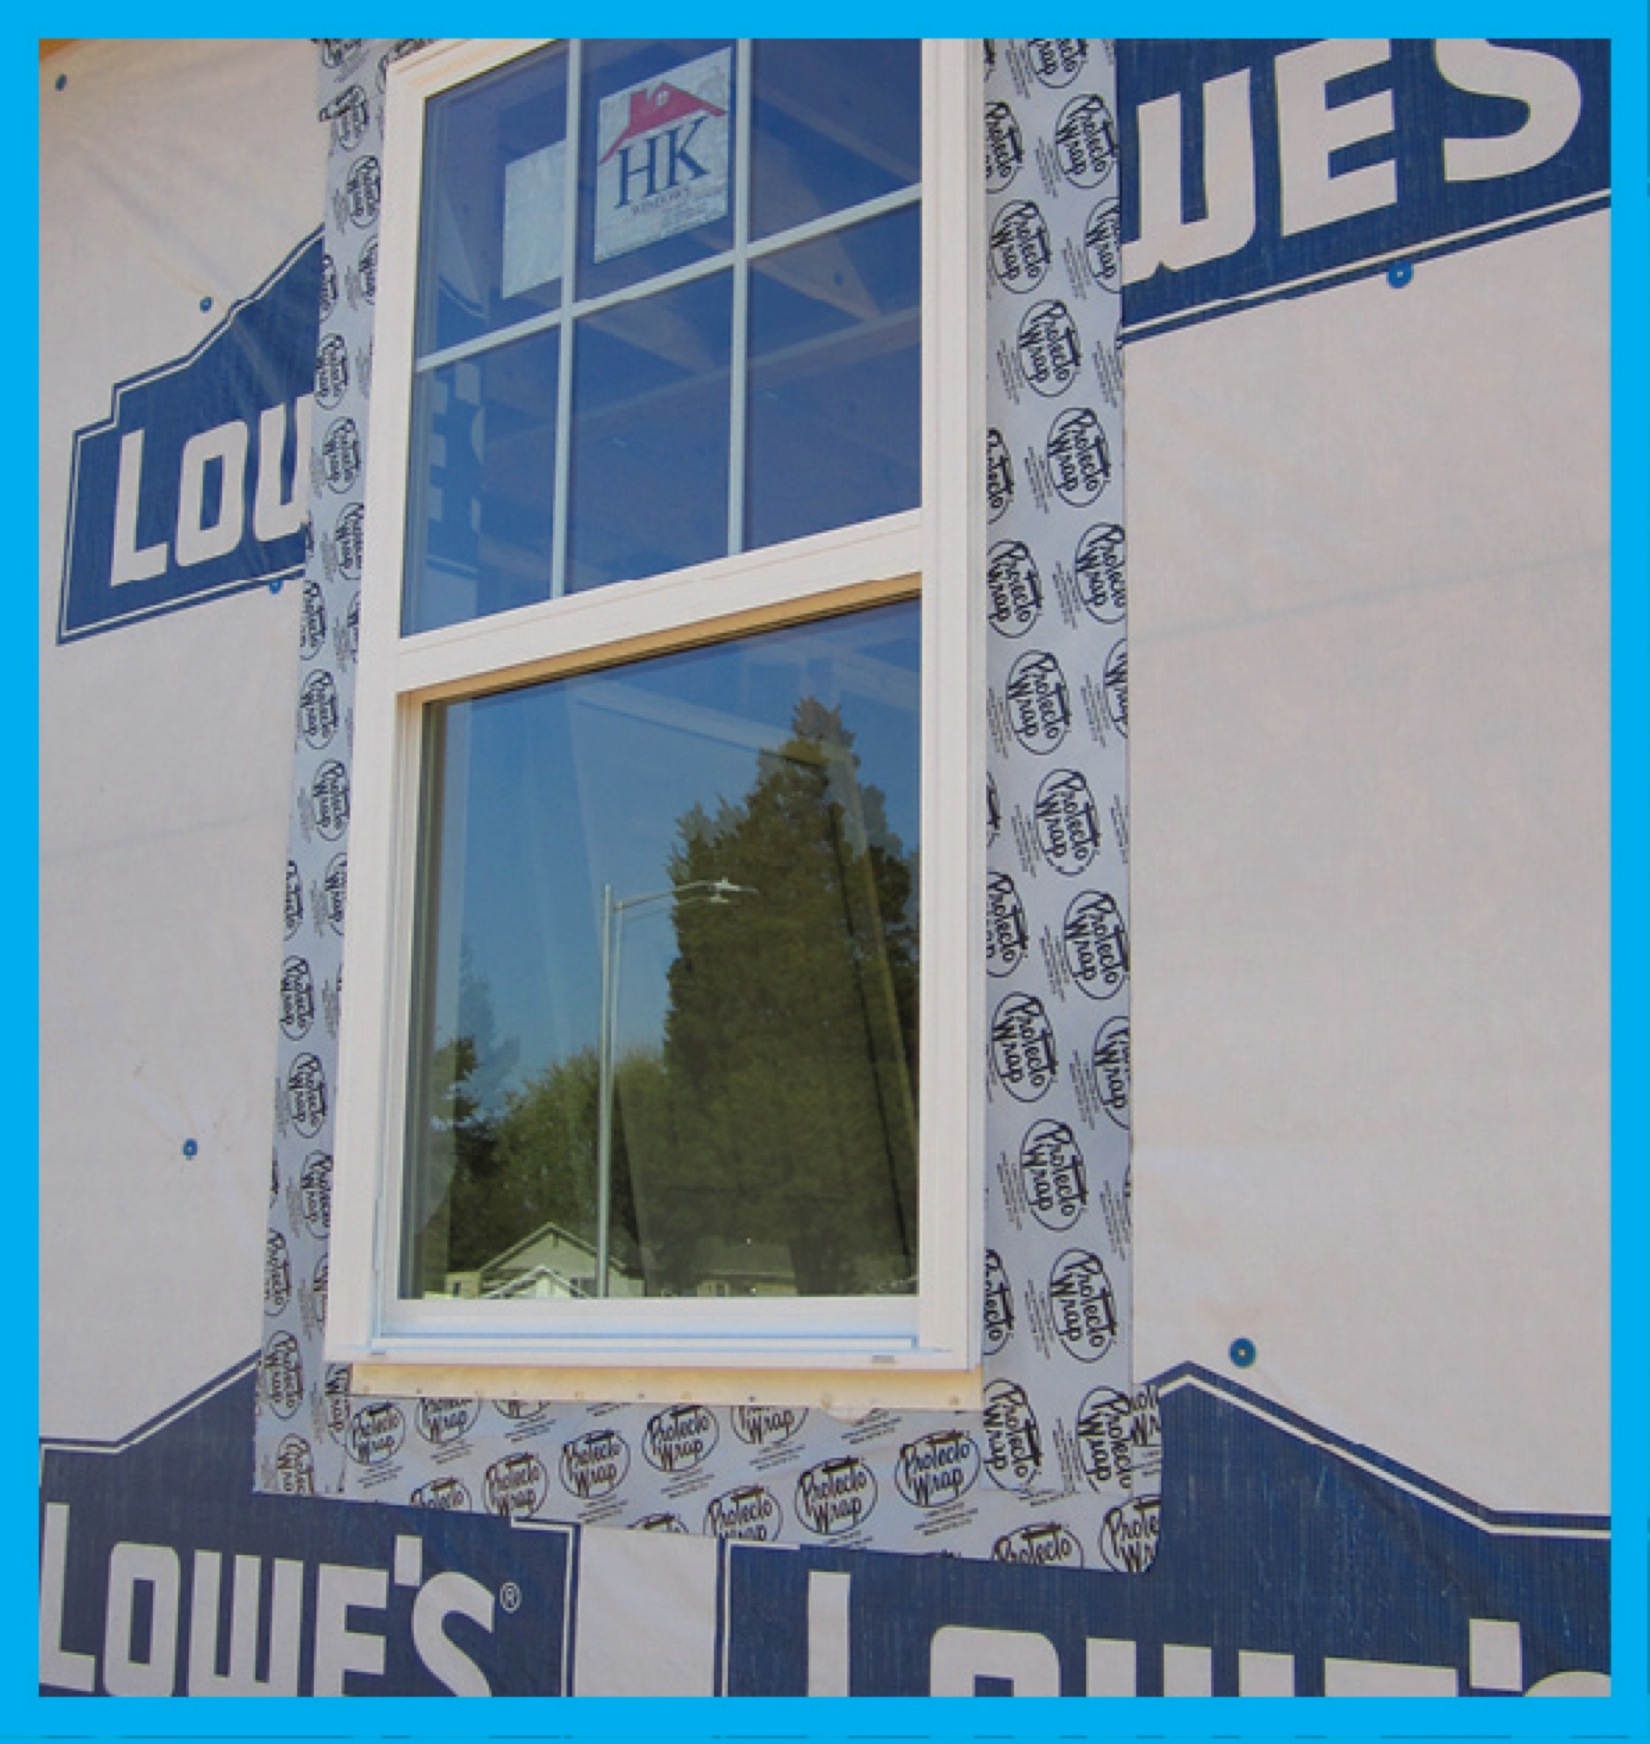
Right – A flexible flashing product is installed around the corners of the window sill before installing the windows.
Image
Right – A fully adhered roof membrane provides thorough water and wind protection in this mountain top location.
Image
Right – A metal flashing was installed behind the first row of siding above the windows to guide water over the trim.
Image
Right – A protective membrane has been installed in the valleys and at the eaves of this roof before installing underlayment.
Image
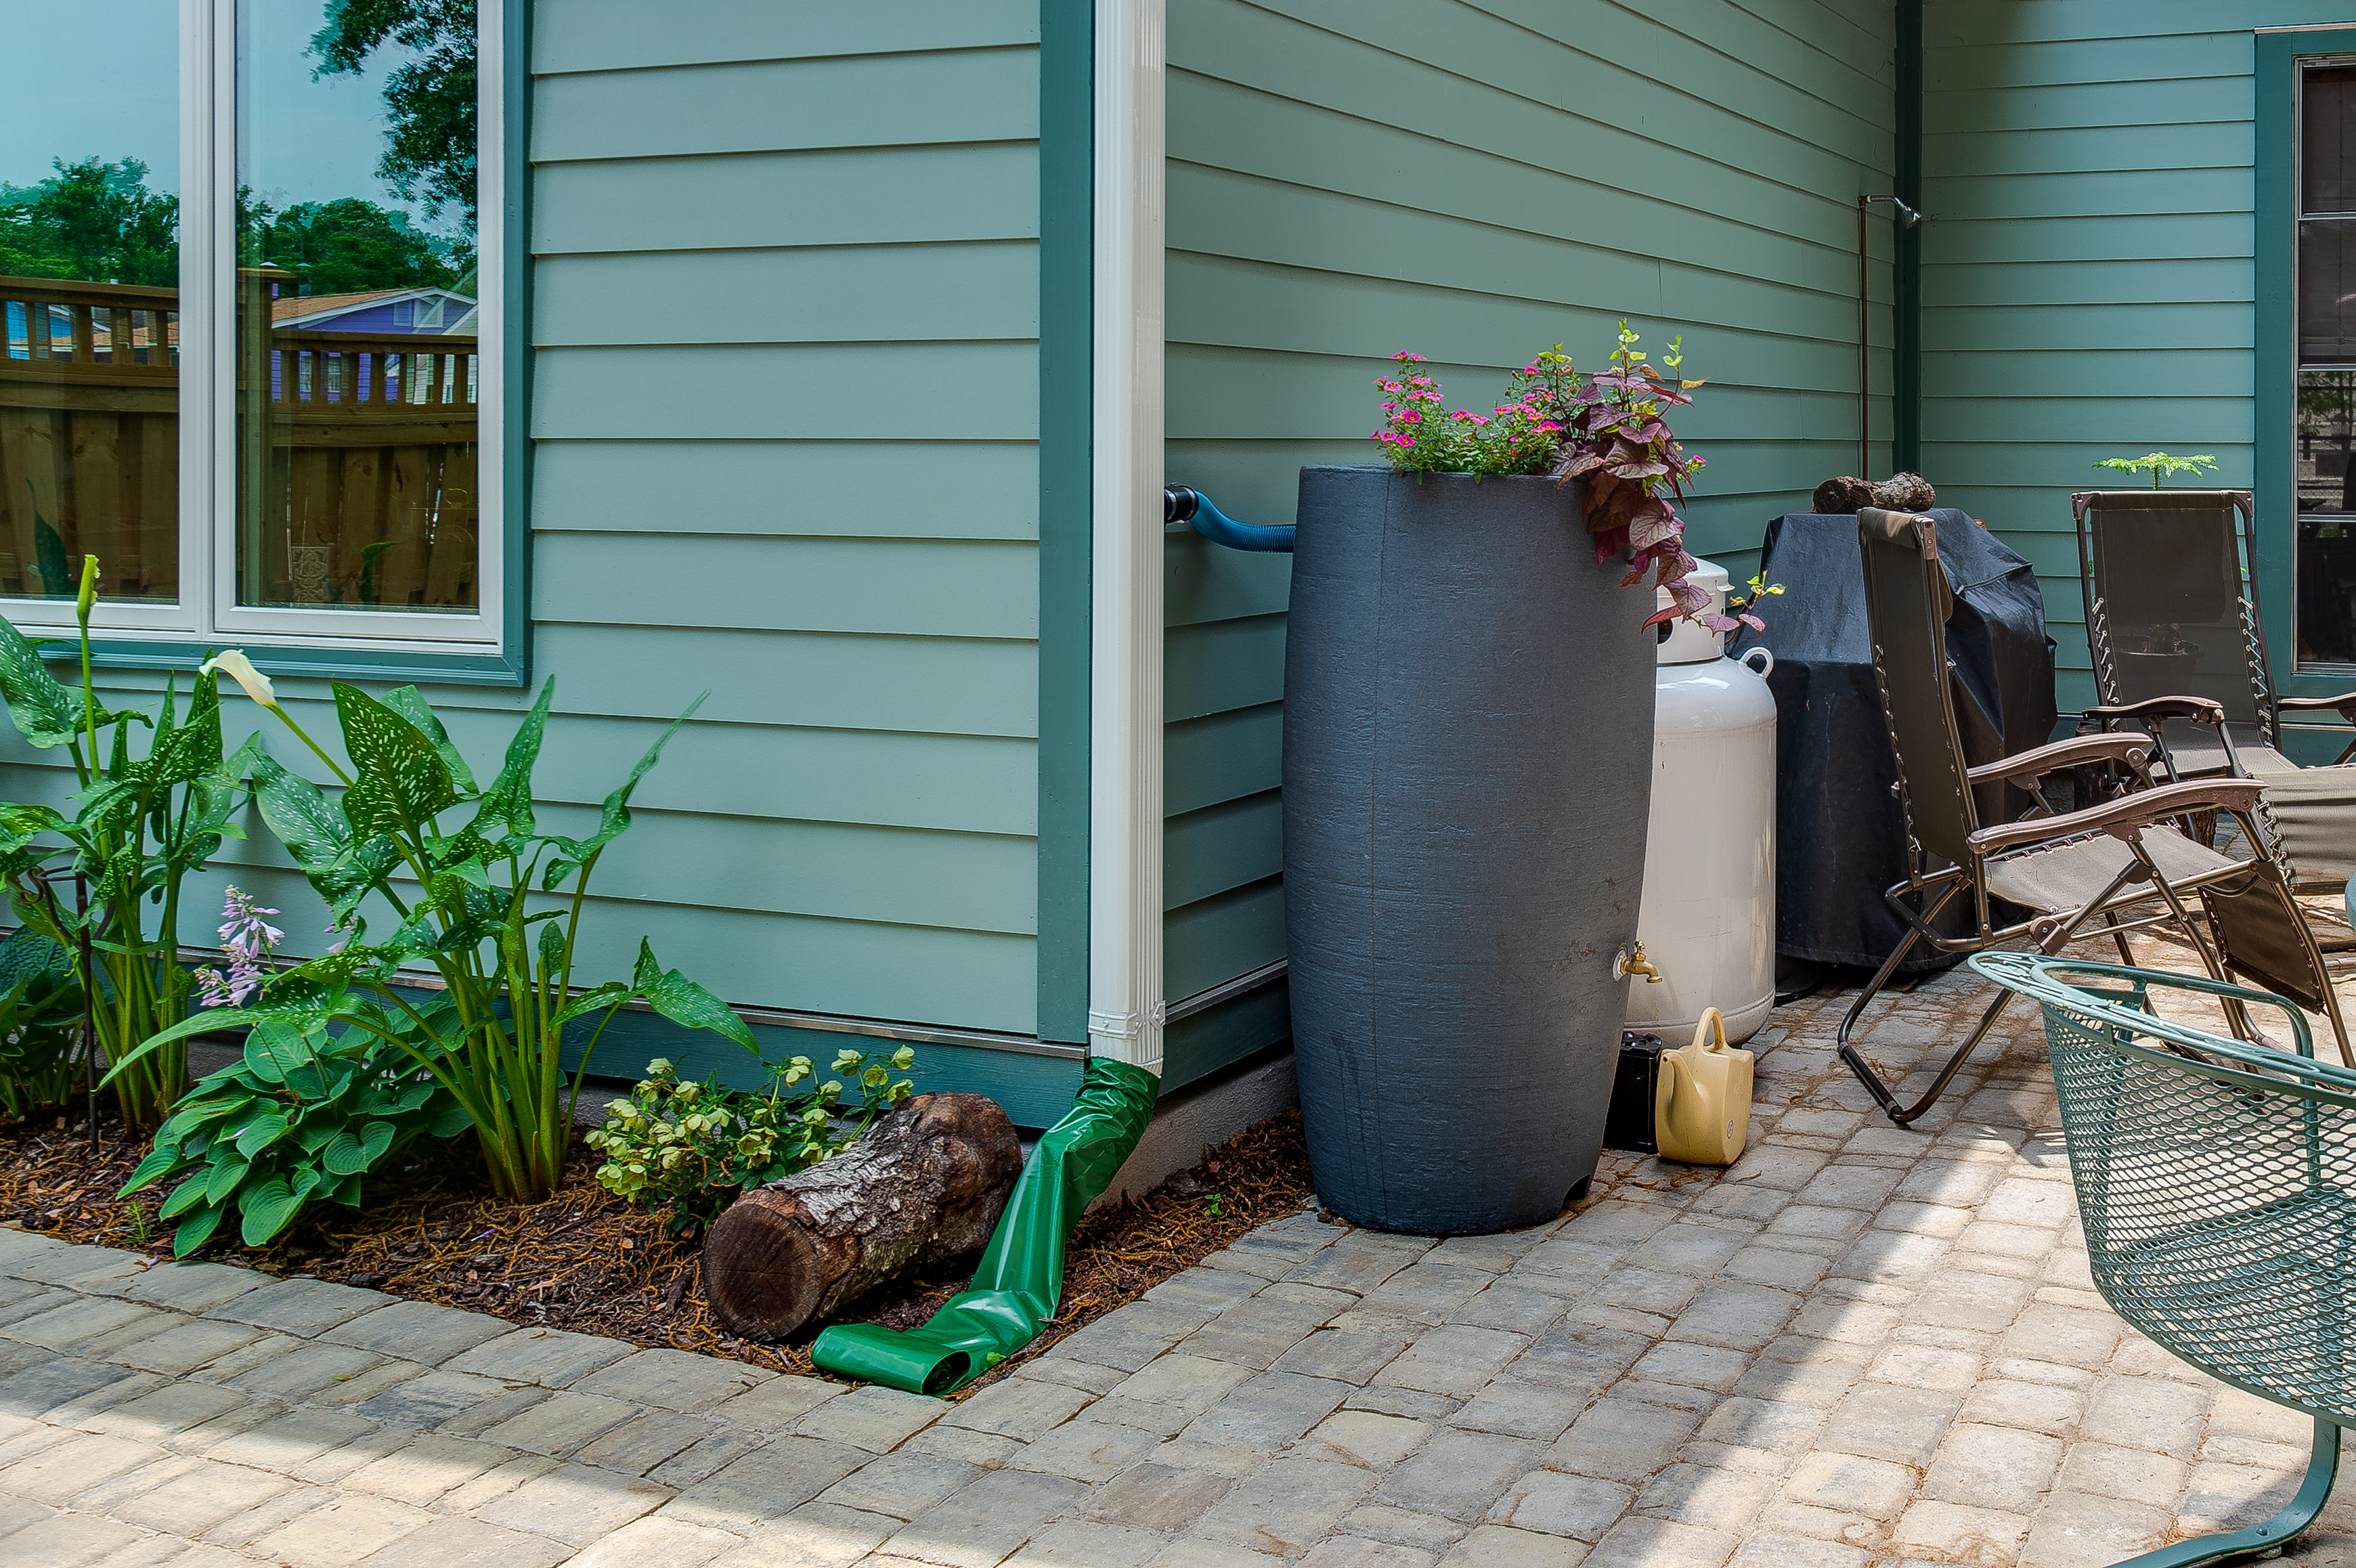
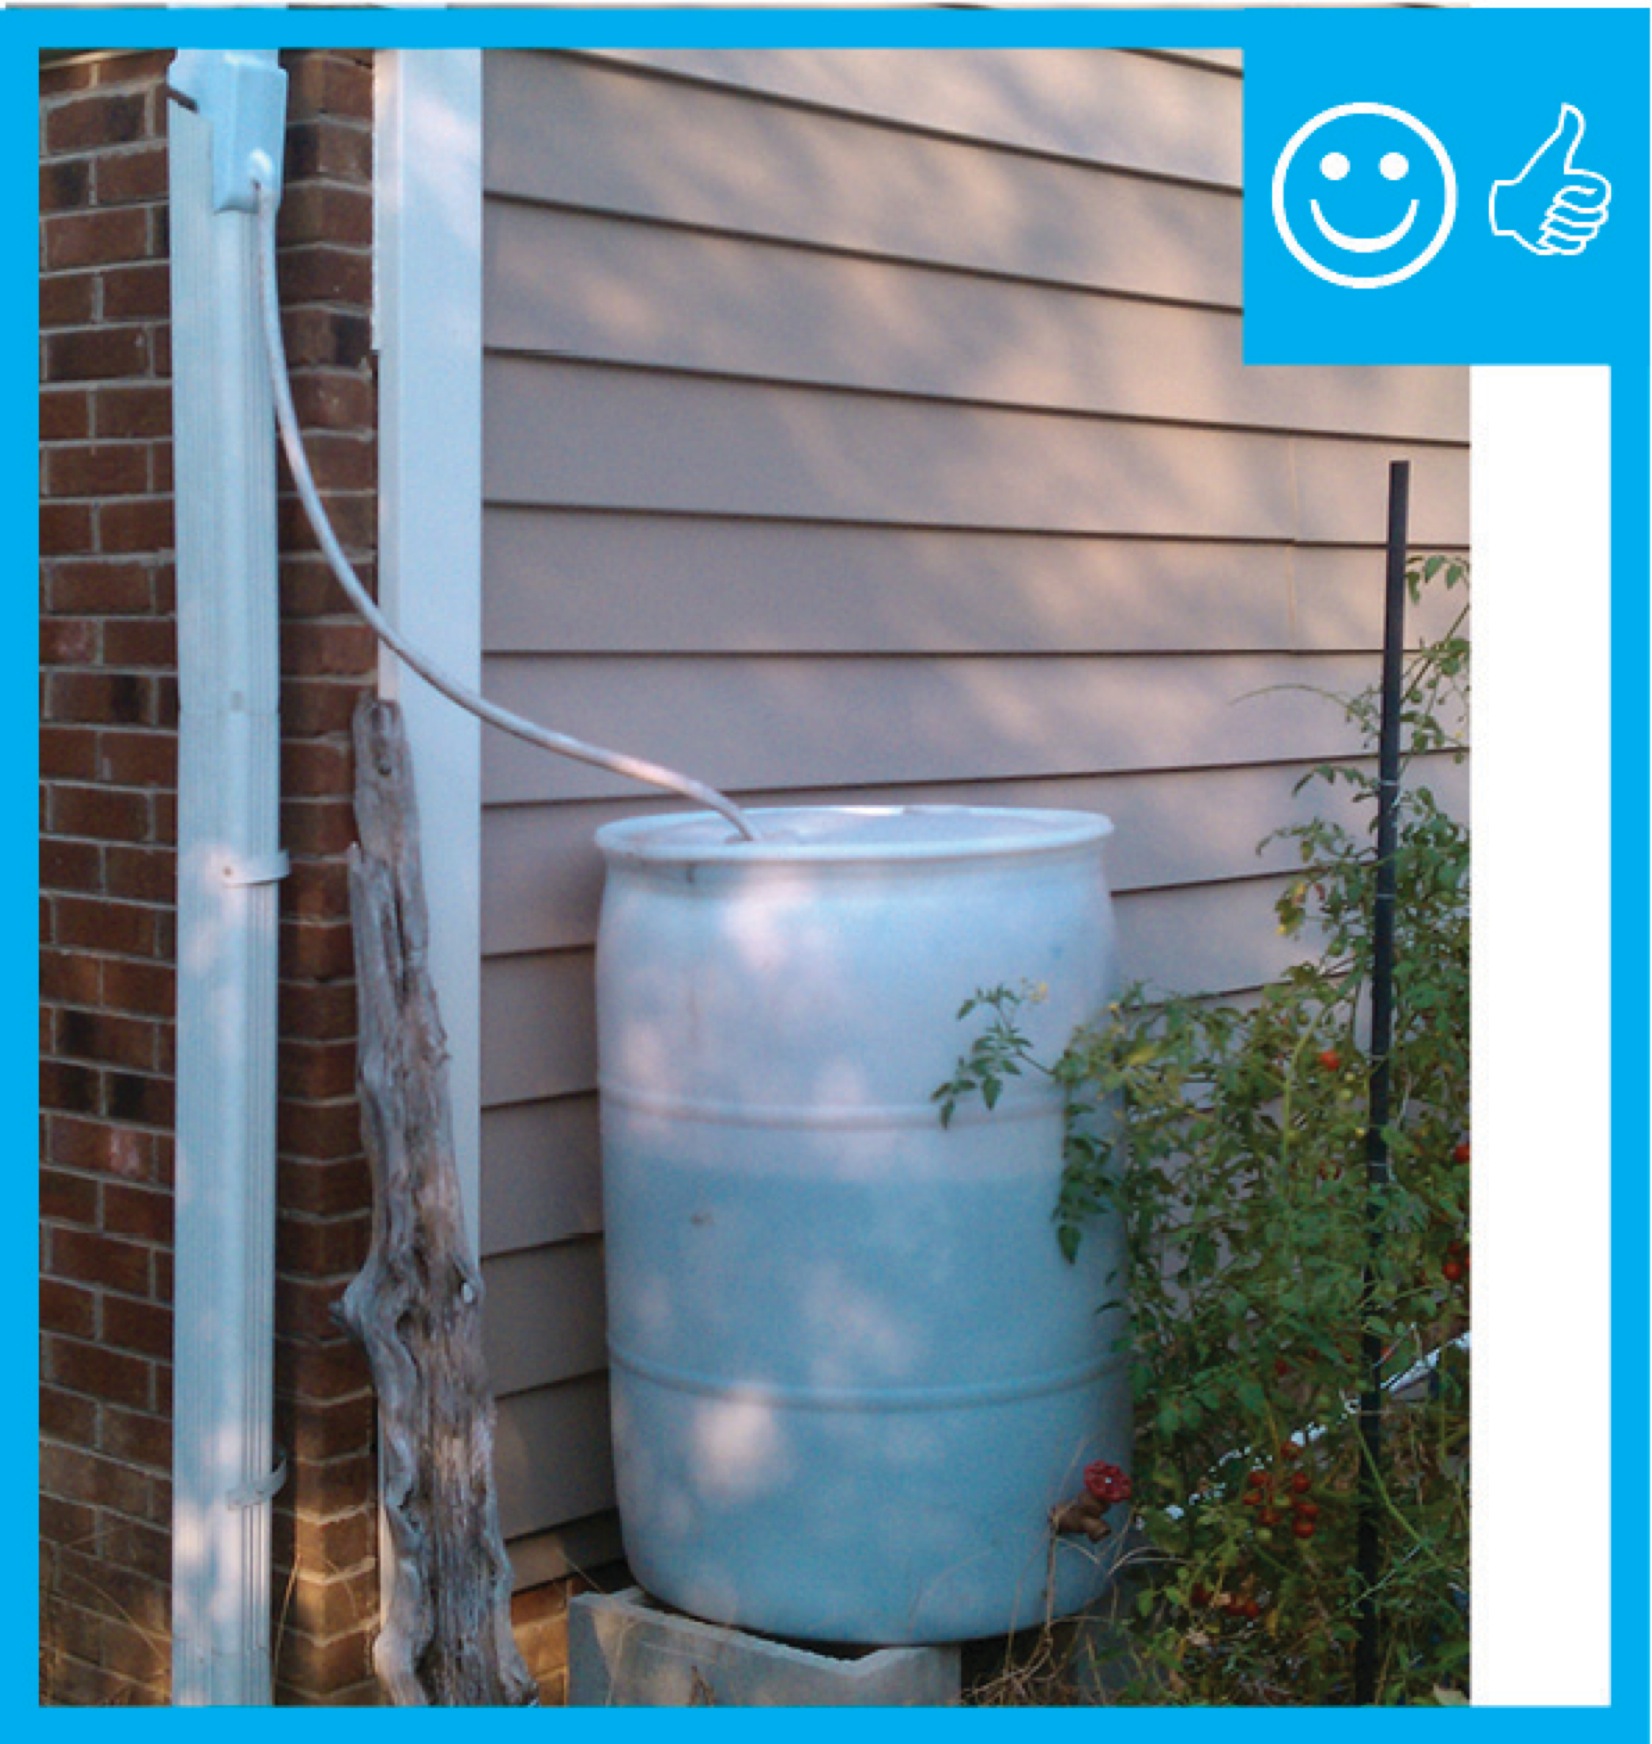
Right – A rain barrel is connected to the downspout of this home while a roll-up run-out on the downspout carries excess water several feet from the home during heavy rainfalls.
Image
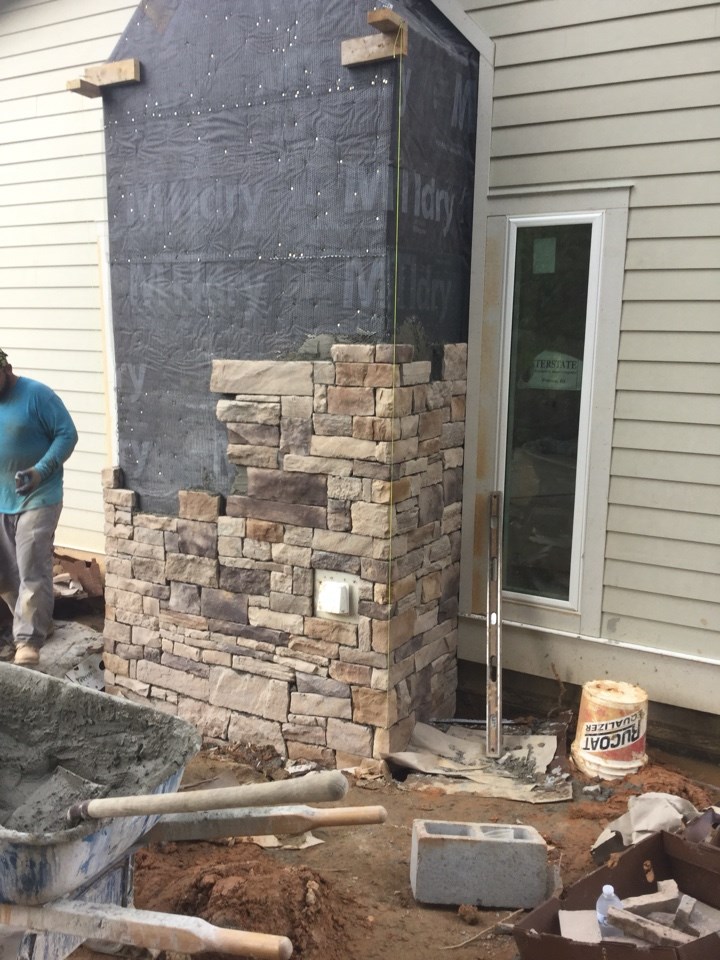
Right – A rigid corrugated rain screen product is installed shingle-fashion with overlapping edges behind rock veneer.
Image
Right – A rigid rain screen product completely covers the wall behind the cladding and window framing.
Image
Image
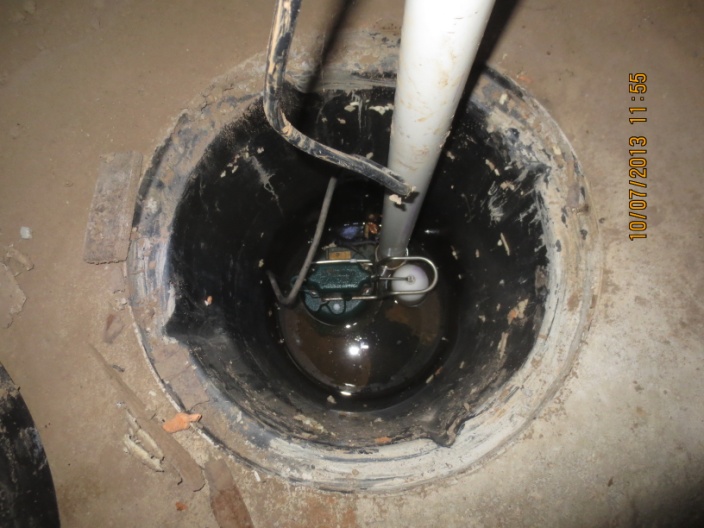
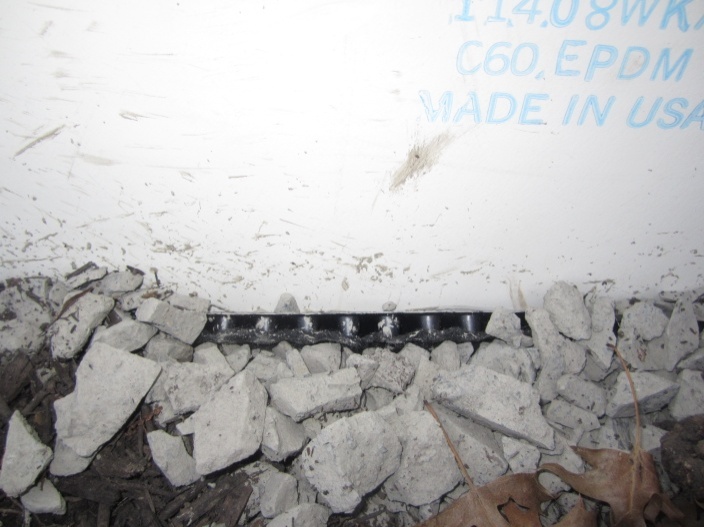
Right – A sump pump with a perforated sump pit was installed in the crawlspace slab to reduce water accumulation under the slab
Image
Right – Because this home is in a coastal location that may flood the crawlspace is vented and the home is constructed on metal piers.
Image
Image

Image
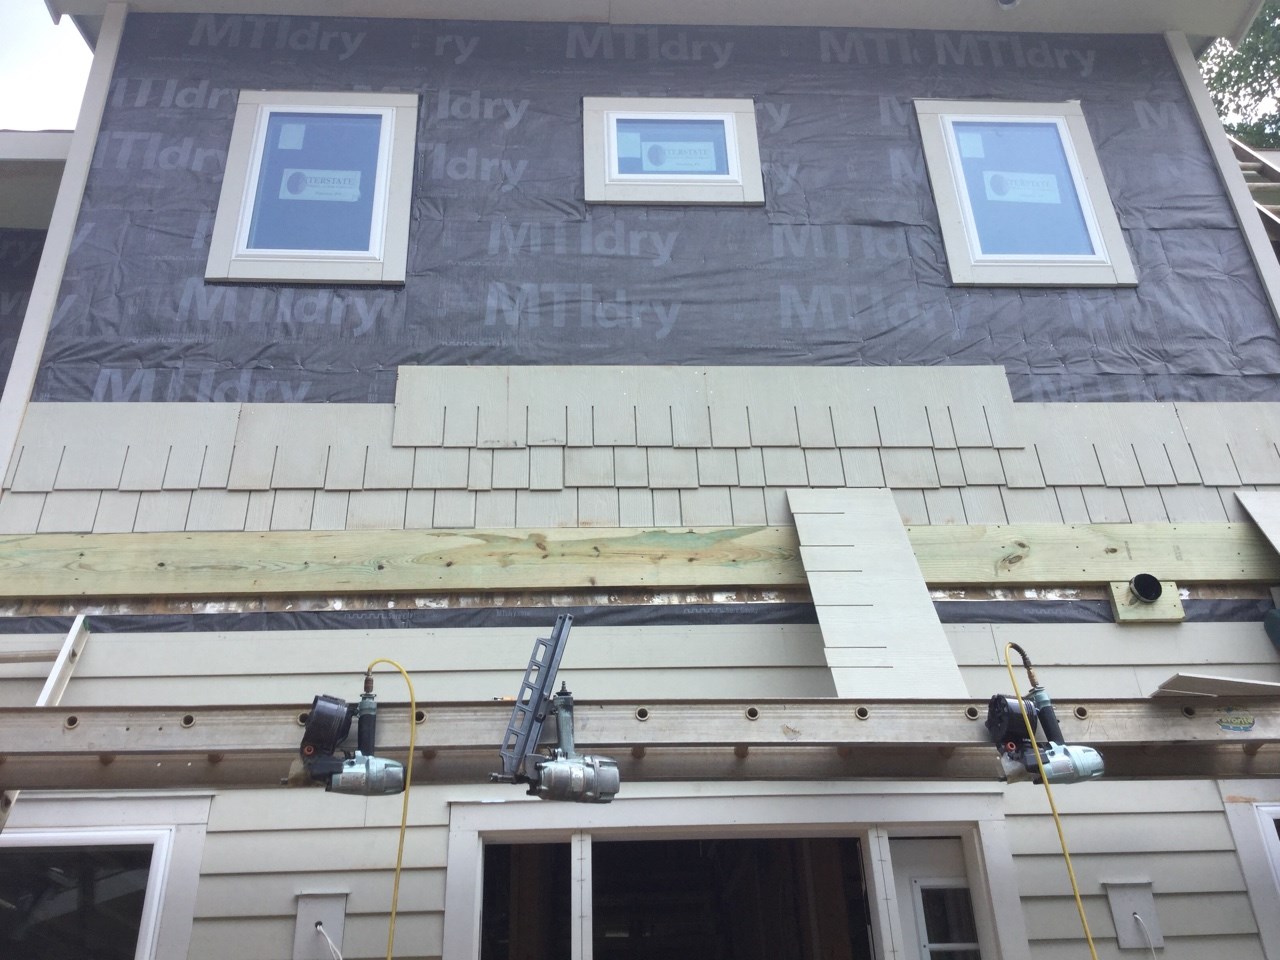
Right – Even house wrap is installed in the factory for these modular homes where each floor is factory assembled.
Image
Image

Right – Foil-faced insulation was added after the crawlspace was dried and sealed by diverting water runoff, sealing off crawlspace windows and vents, and adding sump pumps and exhaust fan ventilation
Image
Right – Foundation drainage mat was installed over the waterproof membrane that covers the sealed crawlspace window
Image
Right – Furring strips provide a drainage and ventilation gap between the siding and the cork insulation.
Image
Right – Furring strips provide a drainage gap between the rigid foam and the siding.
Image
Right – Furring strips were installed to provide a 3/8-inch drainage plane over the rigid foam and under the fiber cement lap siding.
Image

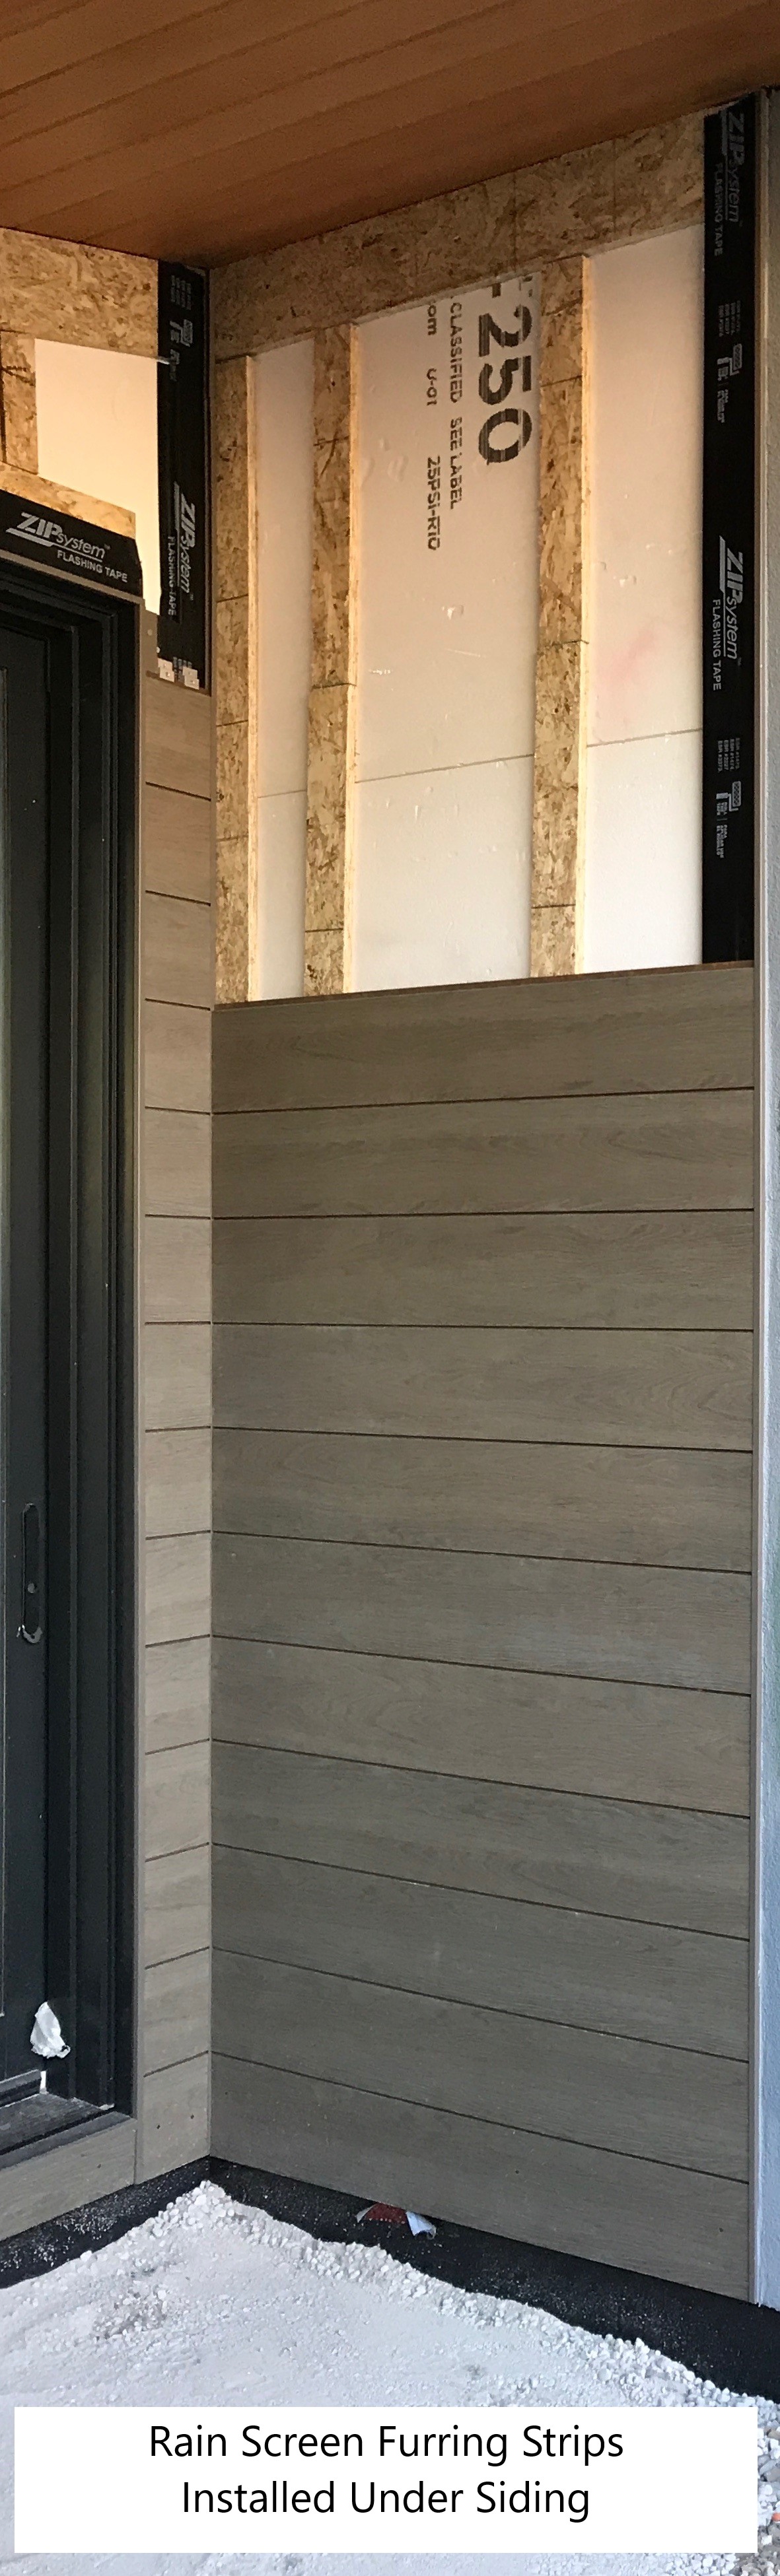
Right – Half-inch furring strips provide a rain screen and air gap between the weather-resistant membrane and the fiber cement siding on the exterior walls of this marine-climate home.
Image
Right – House without gutters has waterproof liner, drain tile, and gravel bed extending more than 5 feet from foundation
Image
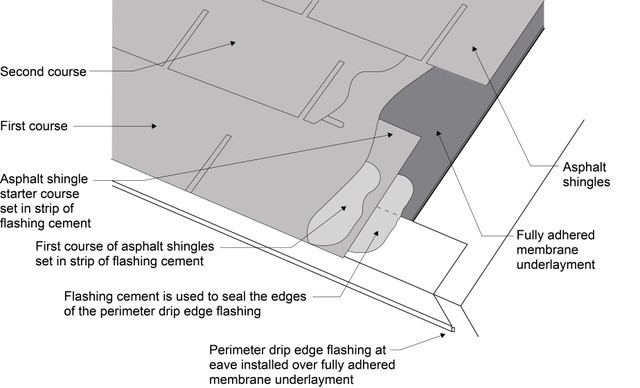
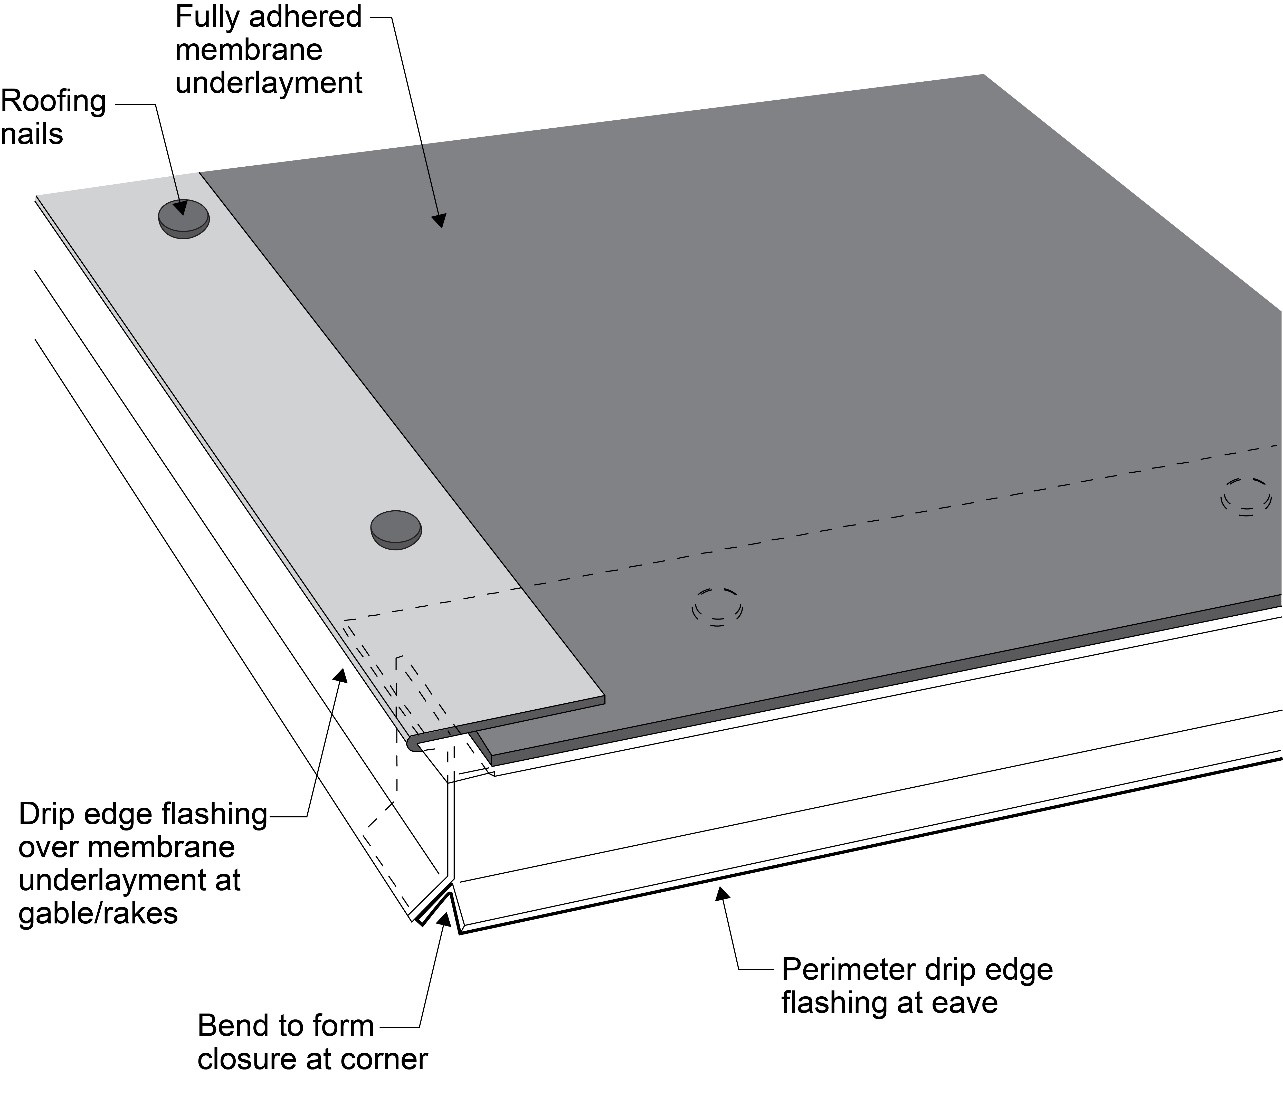
Right – If drip edge flashing is installed over fully adhered roof membrane at eaves, use flashing cement to seal the upper edge of the flashing
Image
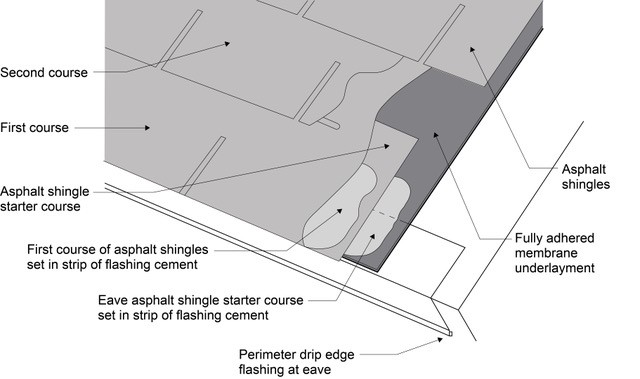
Right – Install asphalt shingles over a starter strip set in an 8-inch strip of flashing cement
Image
Image
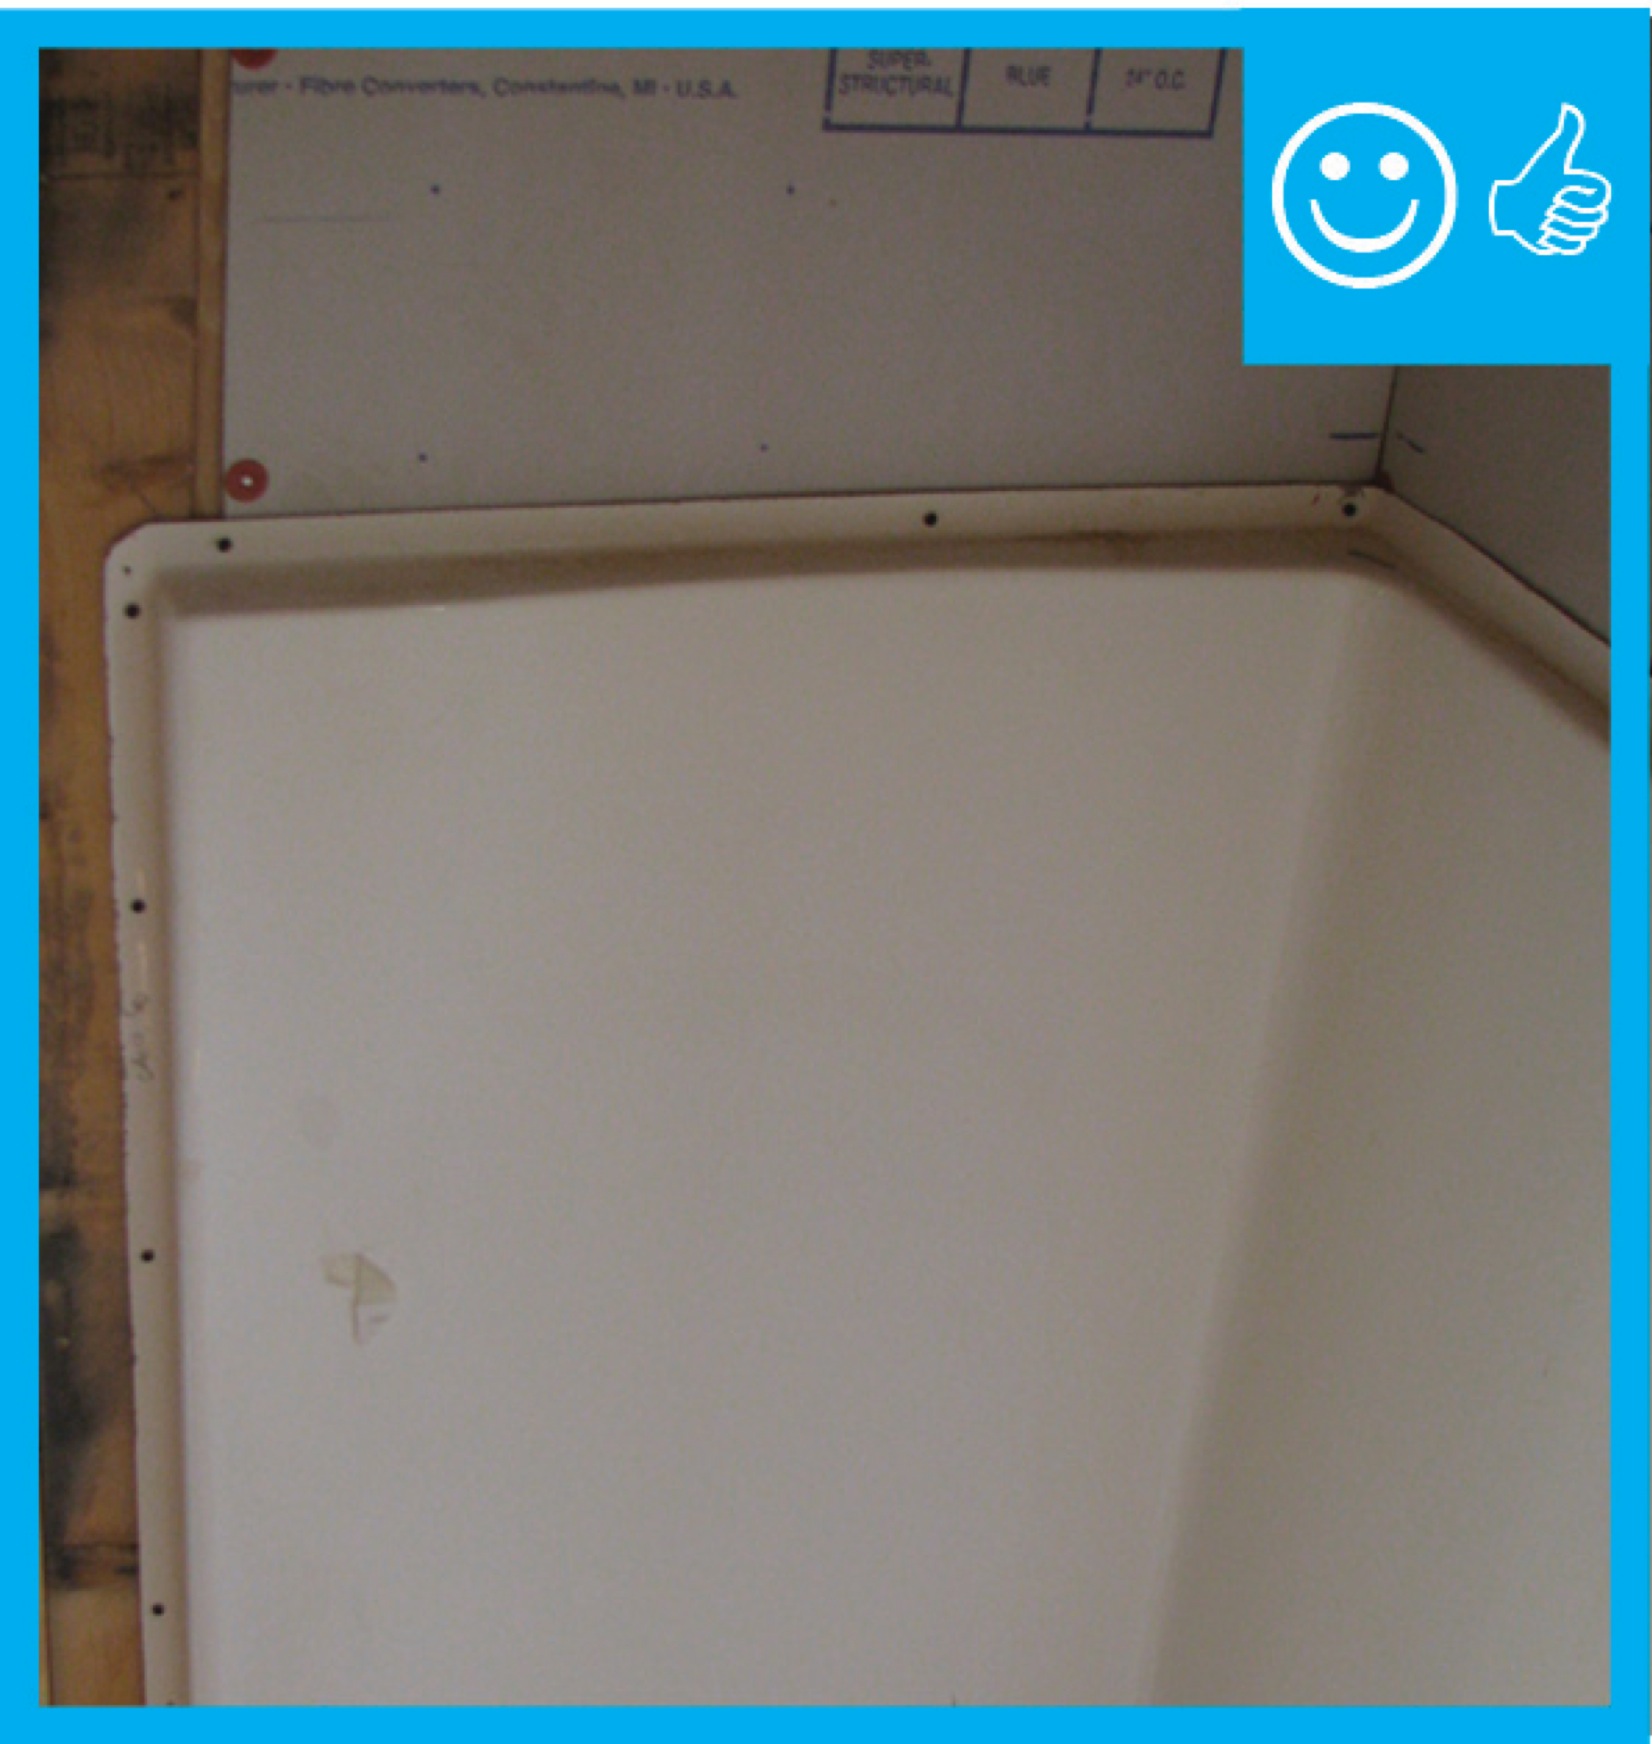
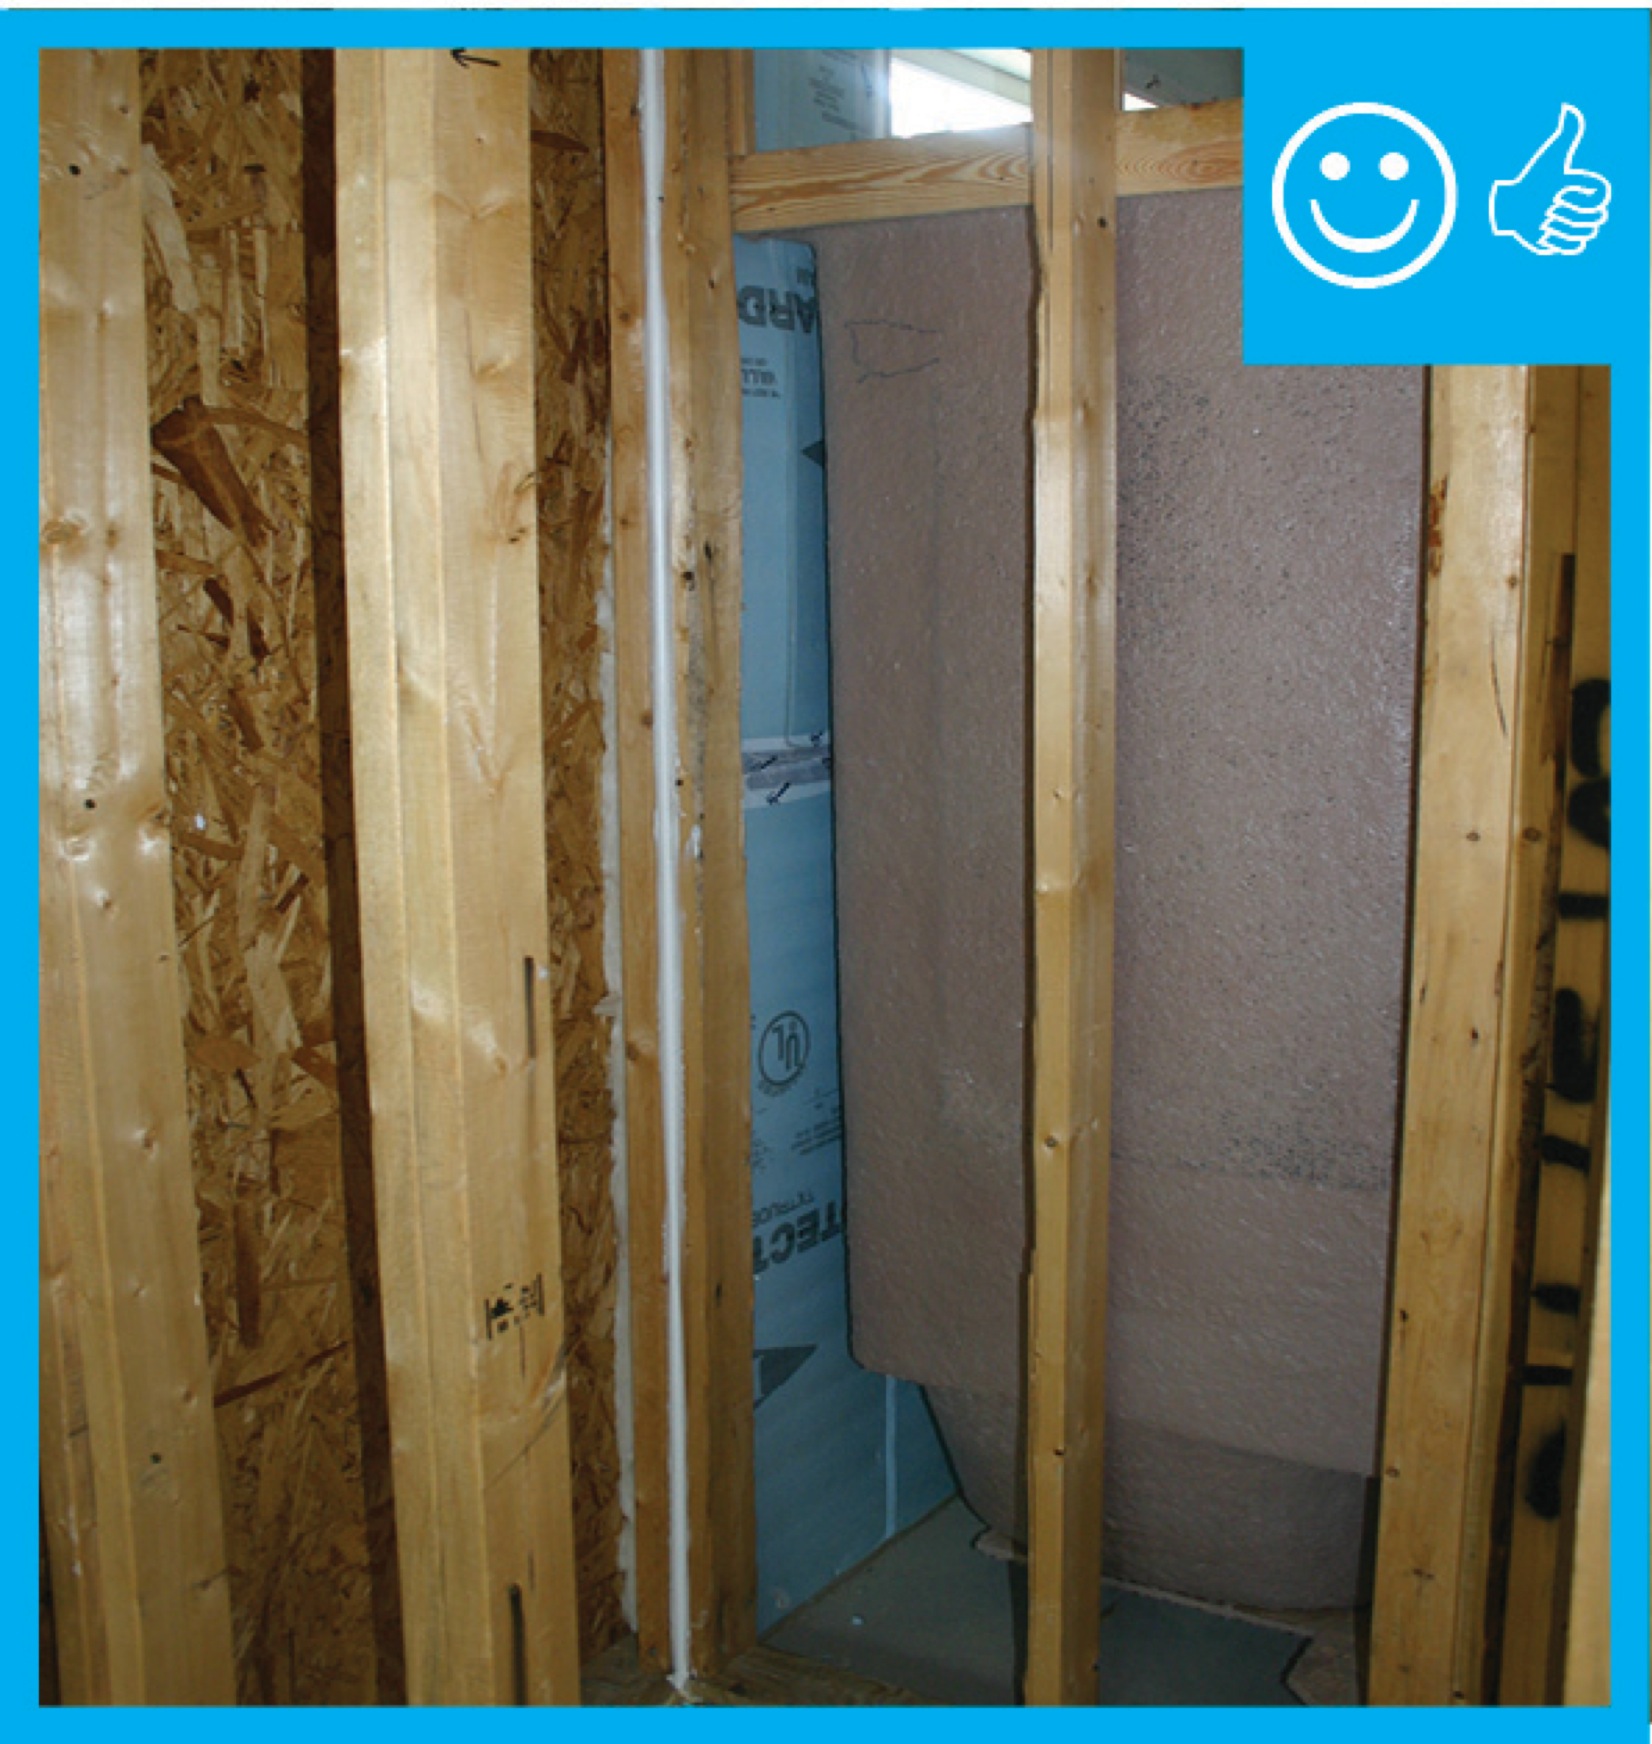
Right – Moisture-resistant backing material has been used above and behind the tub enclosure.
Image
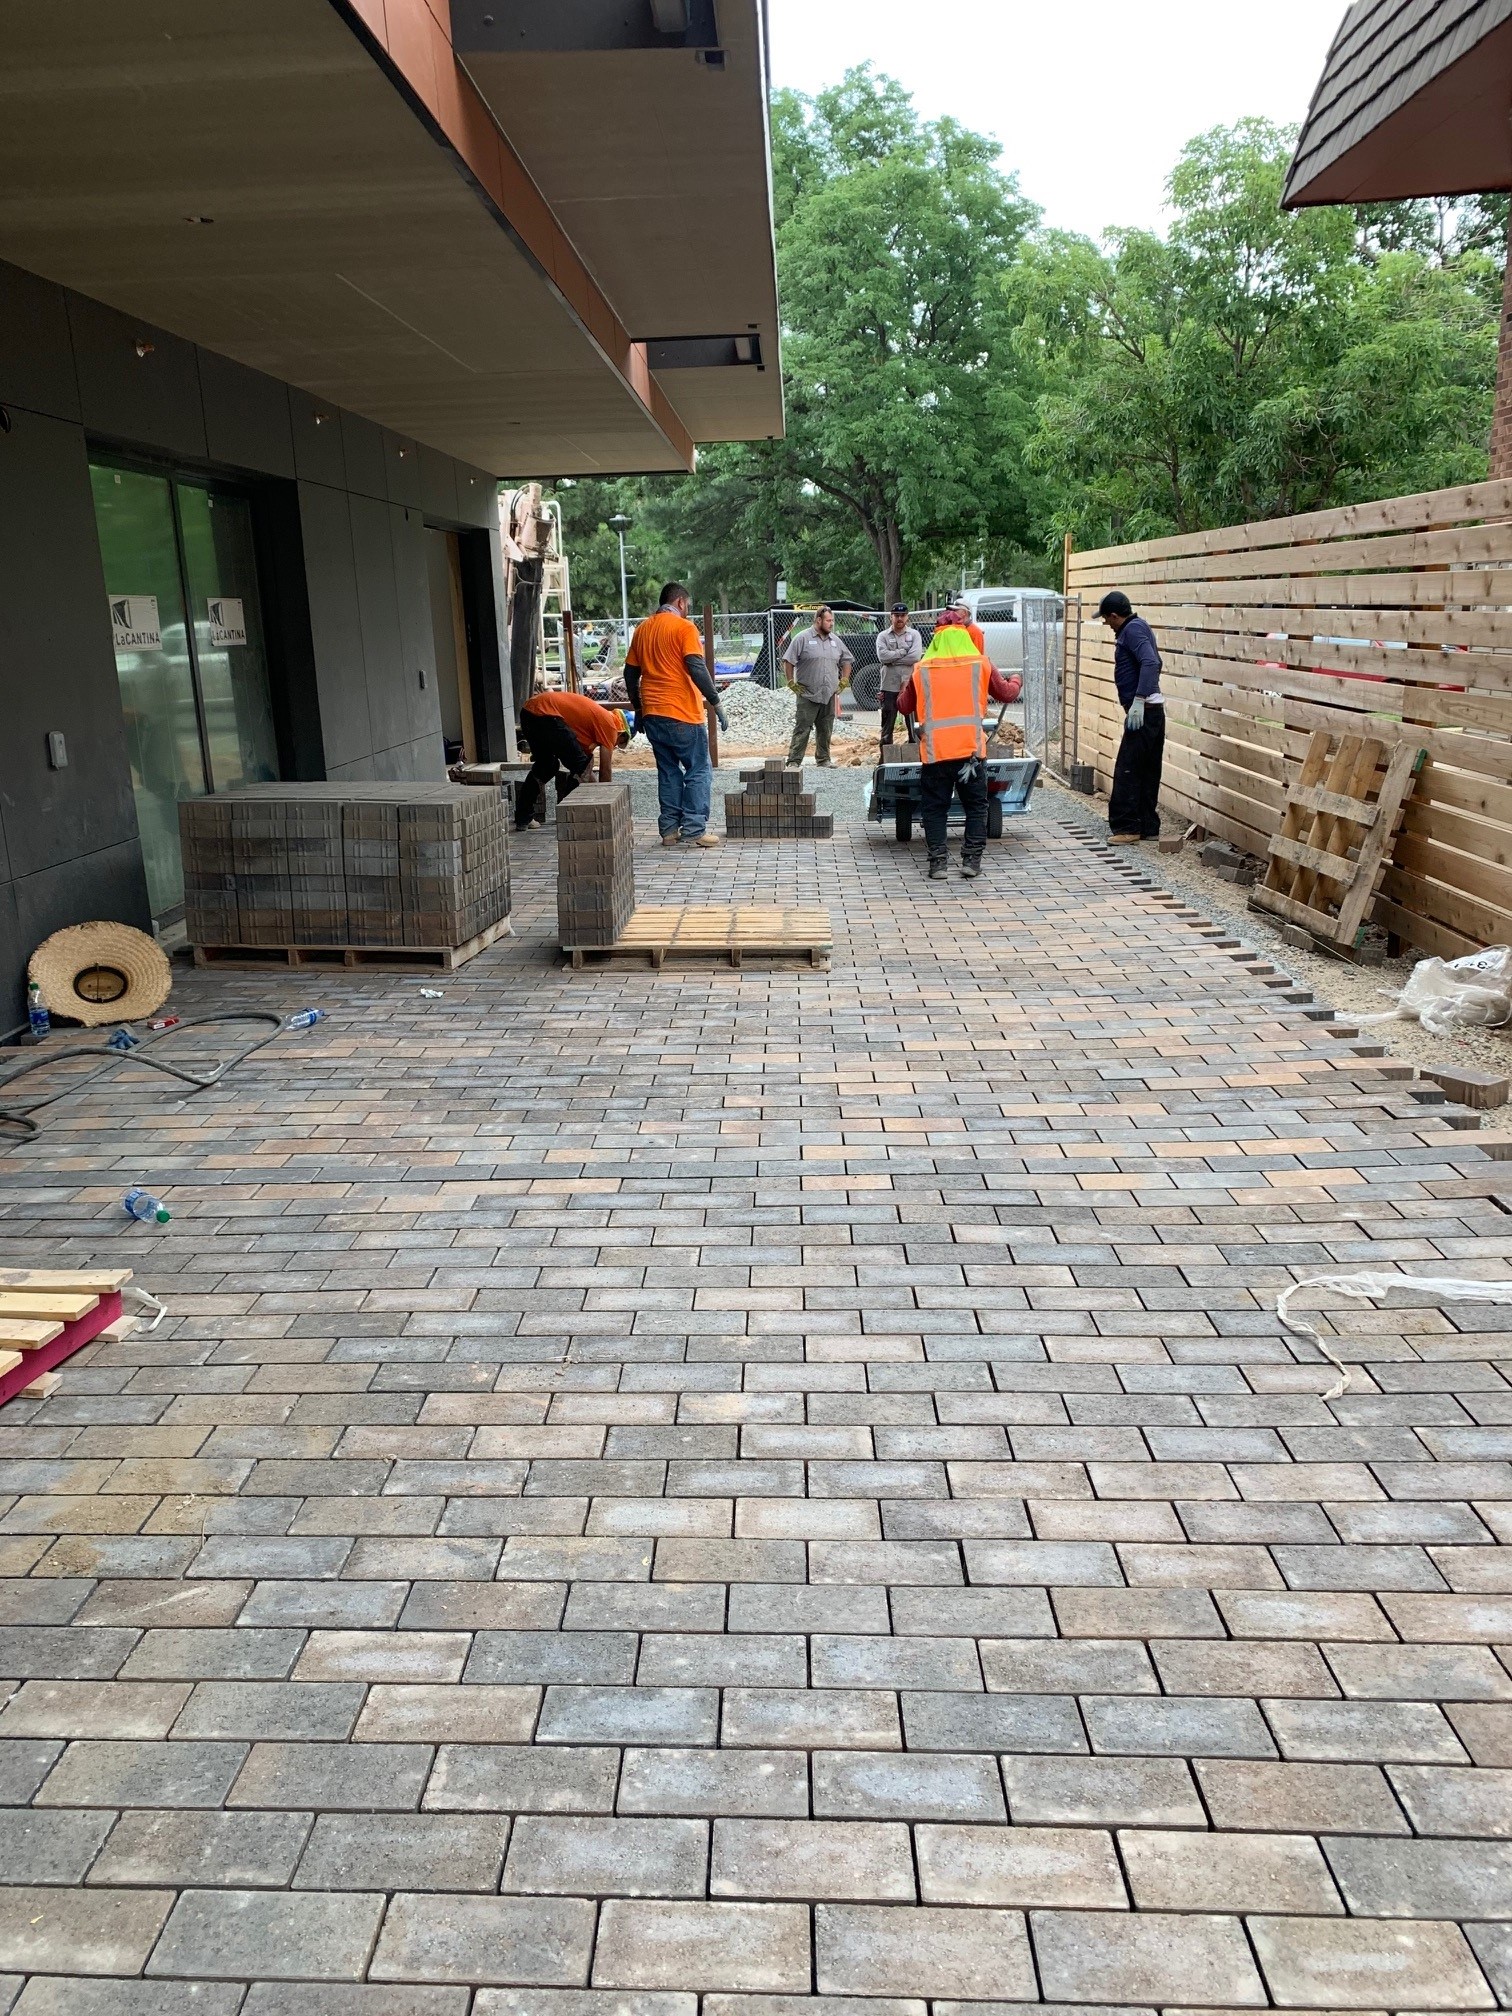
Right – Pavers provide a pervious ground surface allowing storm runoff to drain through to a gravel filtration and stormwater retention area below.
Image
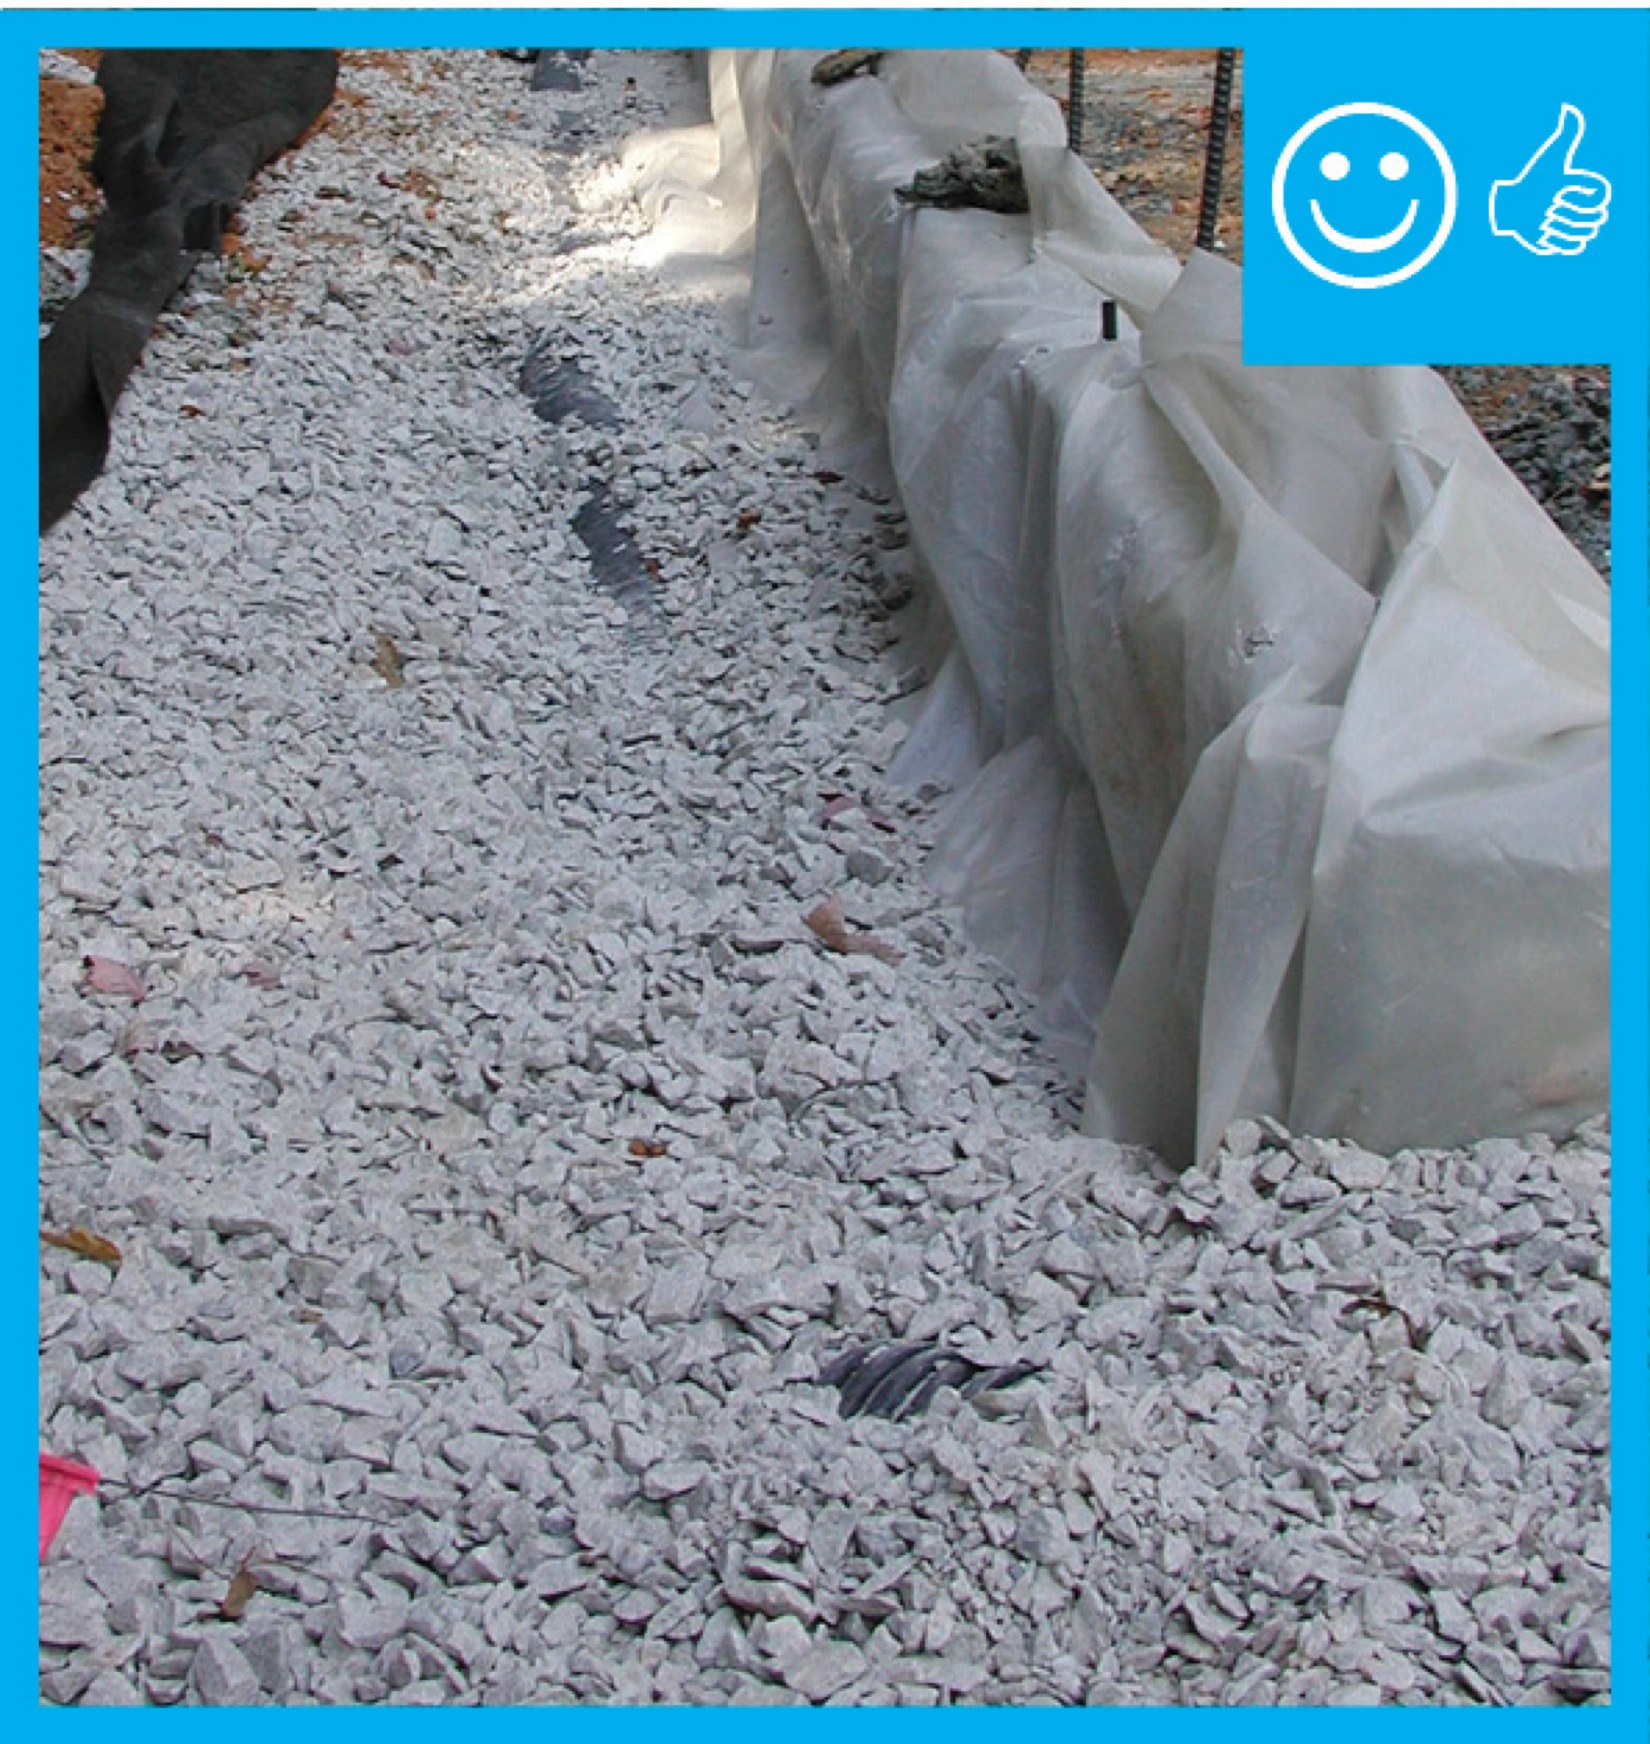
Right – Polyethylene sheeting completely covers the aggregate and the footing with no tears or open seams
Image

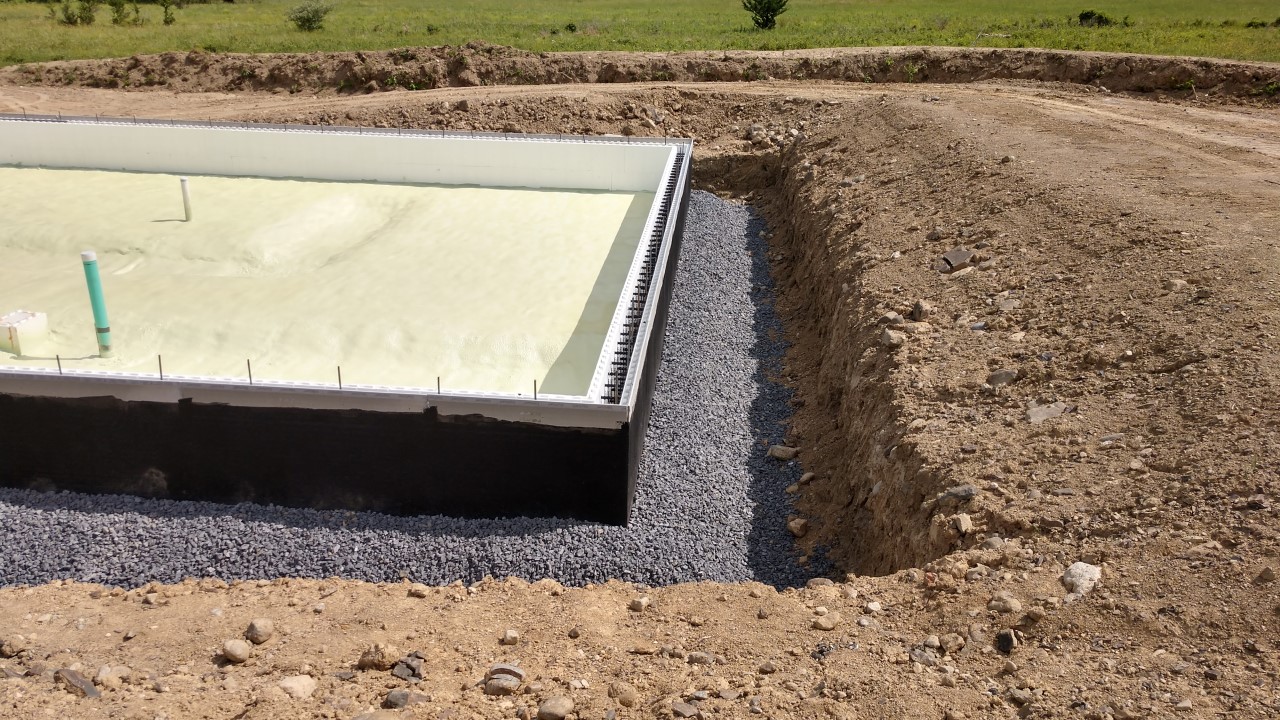
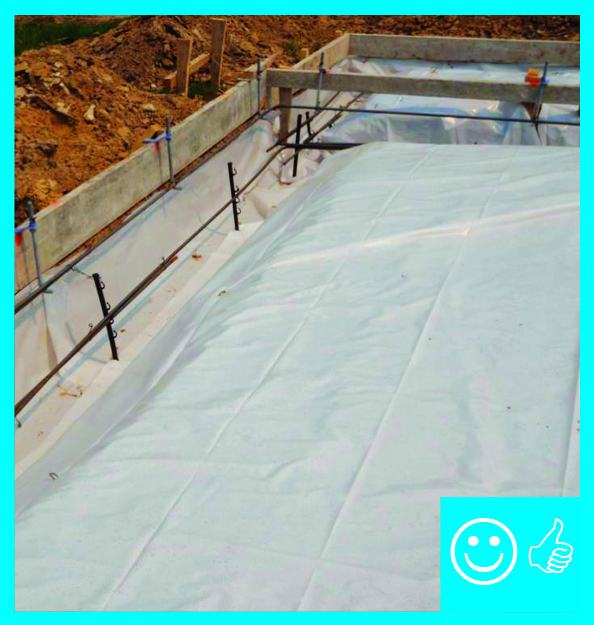
Right – Polyethylene sheeting is laid over aggregate and over footing to provide a capillary break between the ground and the slab and between the footing and the stem wall
Image
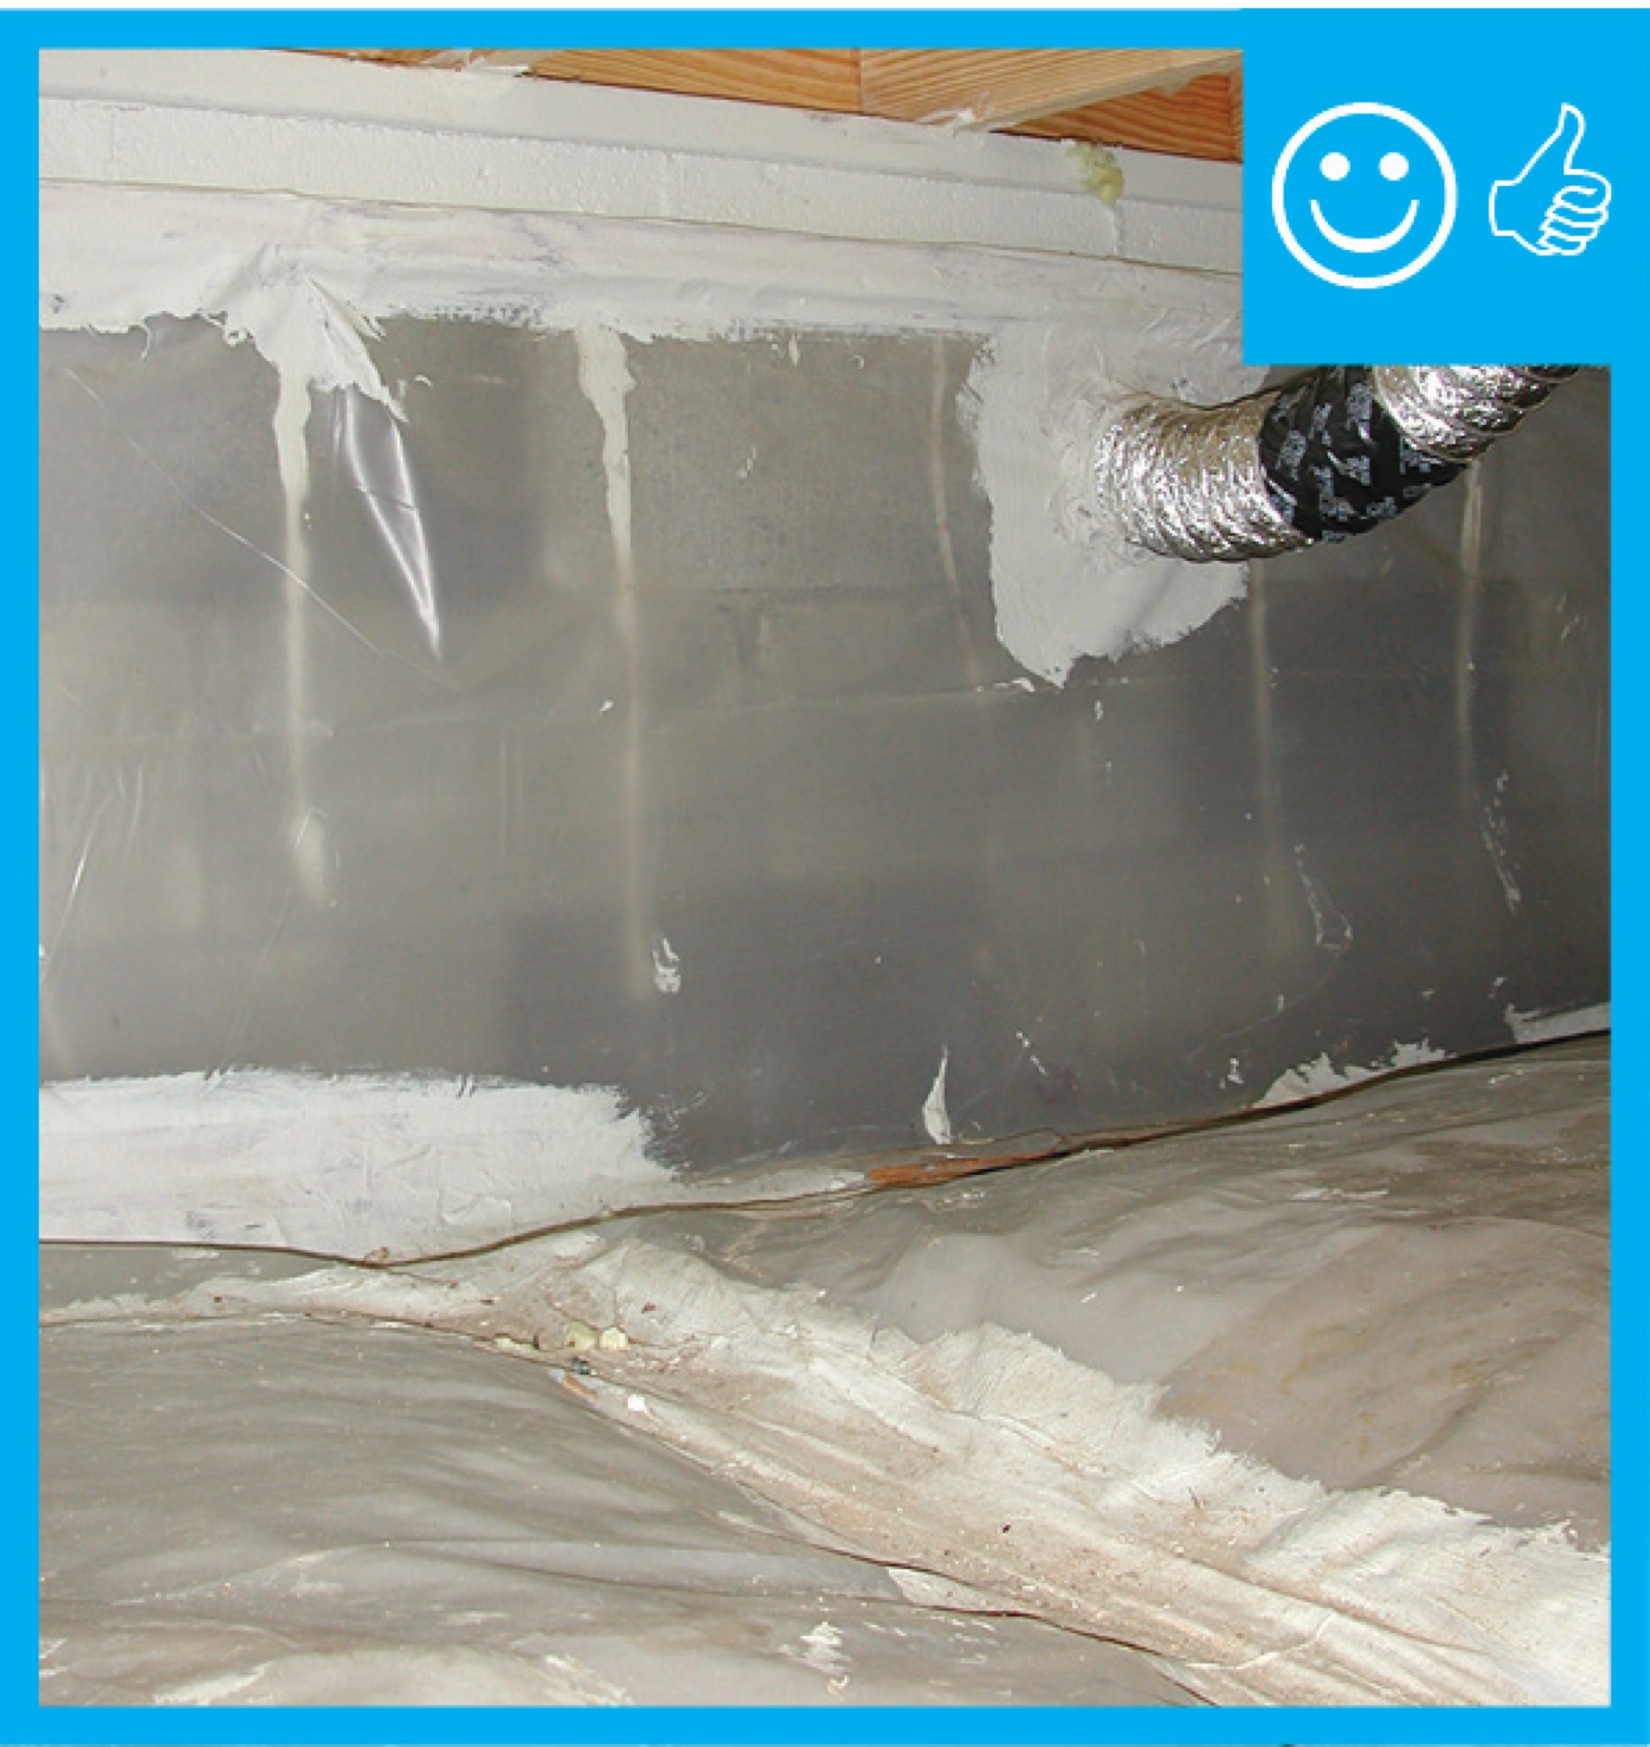
Right – Polyethylene sheeting vapor barrier is installed and sealed to the crawlspace walls with mastic
Image
Image
Right – Rain barrel installed with an overflow spout terminating at least 5 feet from foundation
Image
Right – Ripped OSB provides furring strips for a ventilation gap behind the wood siding.
Image
Image
Image
Image

Right – Start asphalt shingle installation with a starter strip set in an 8-inch strip of flashing cement
Image
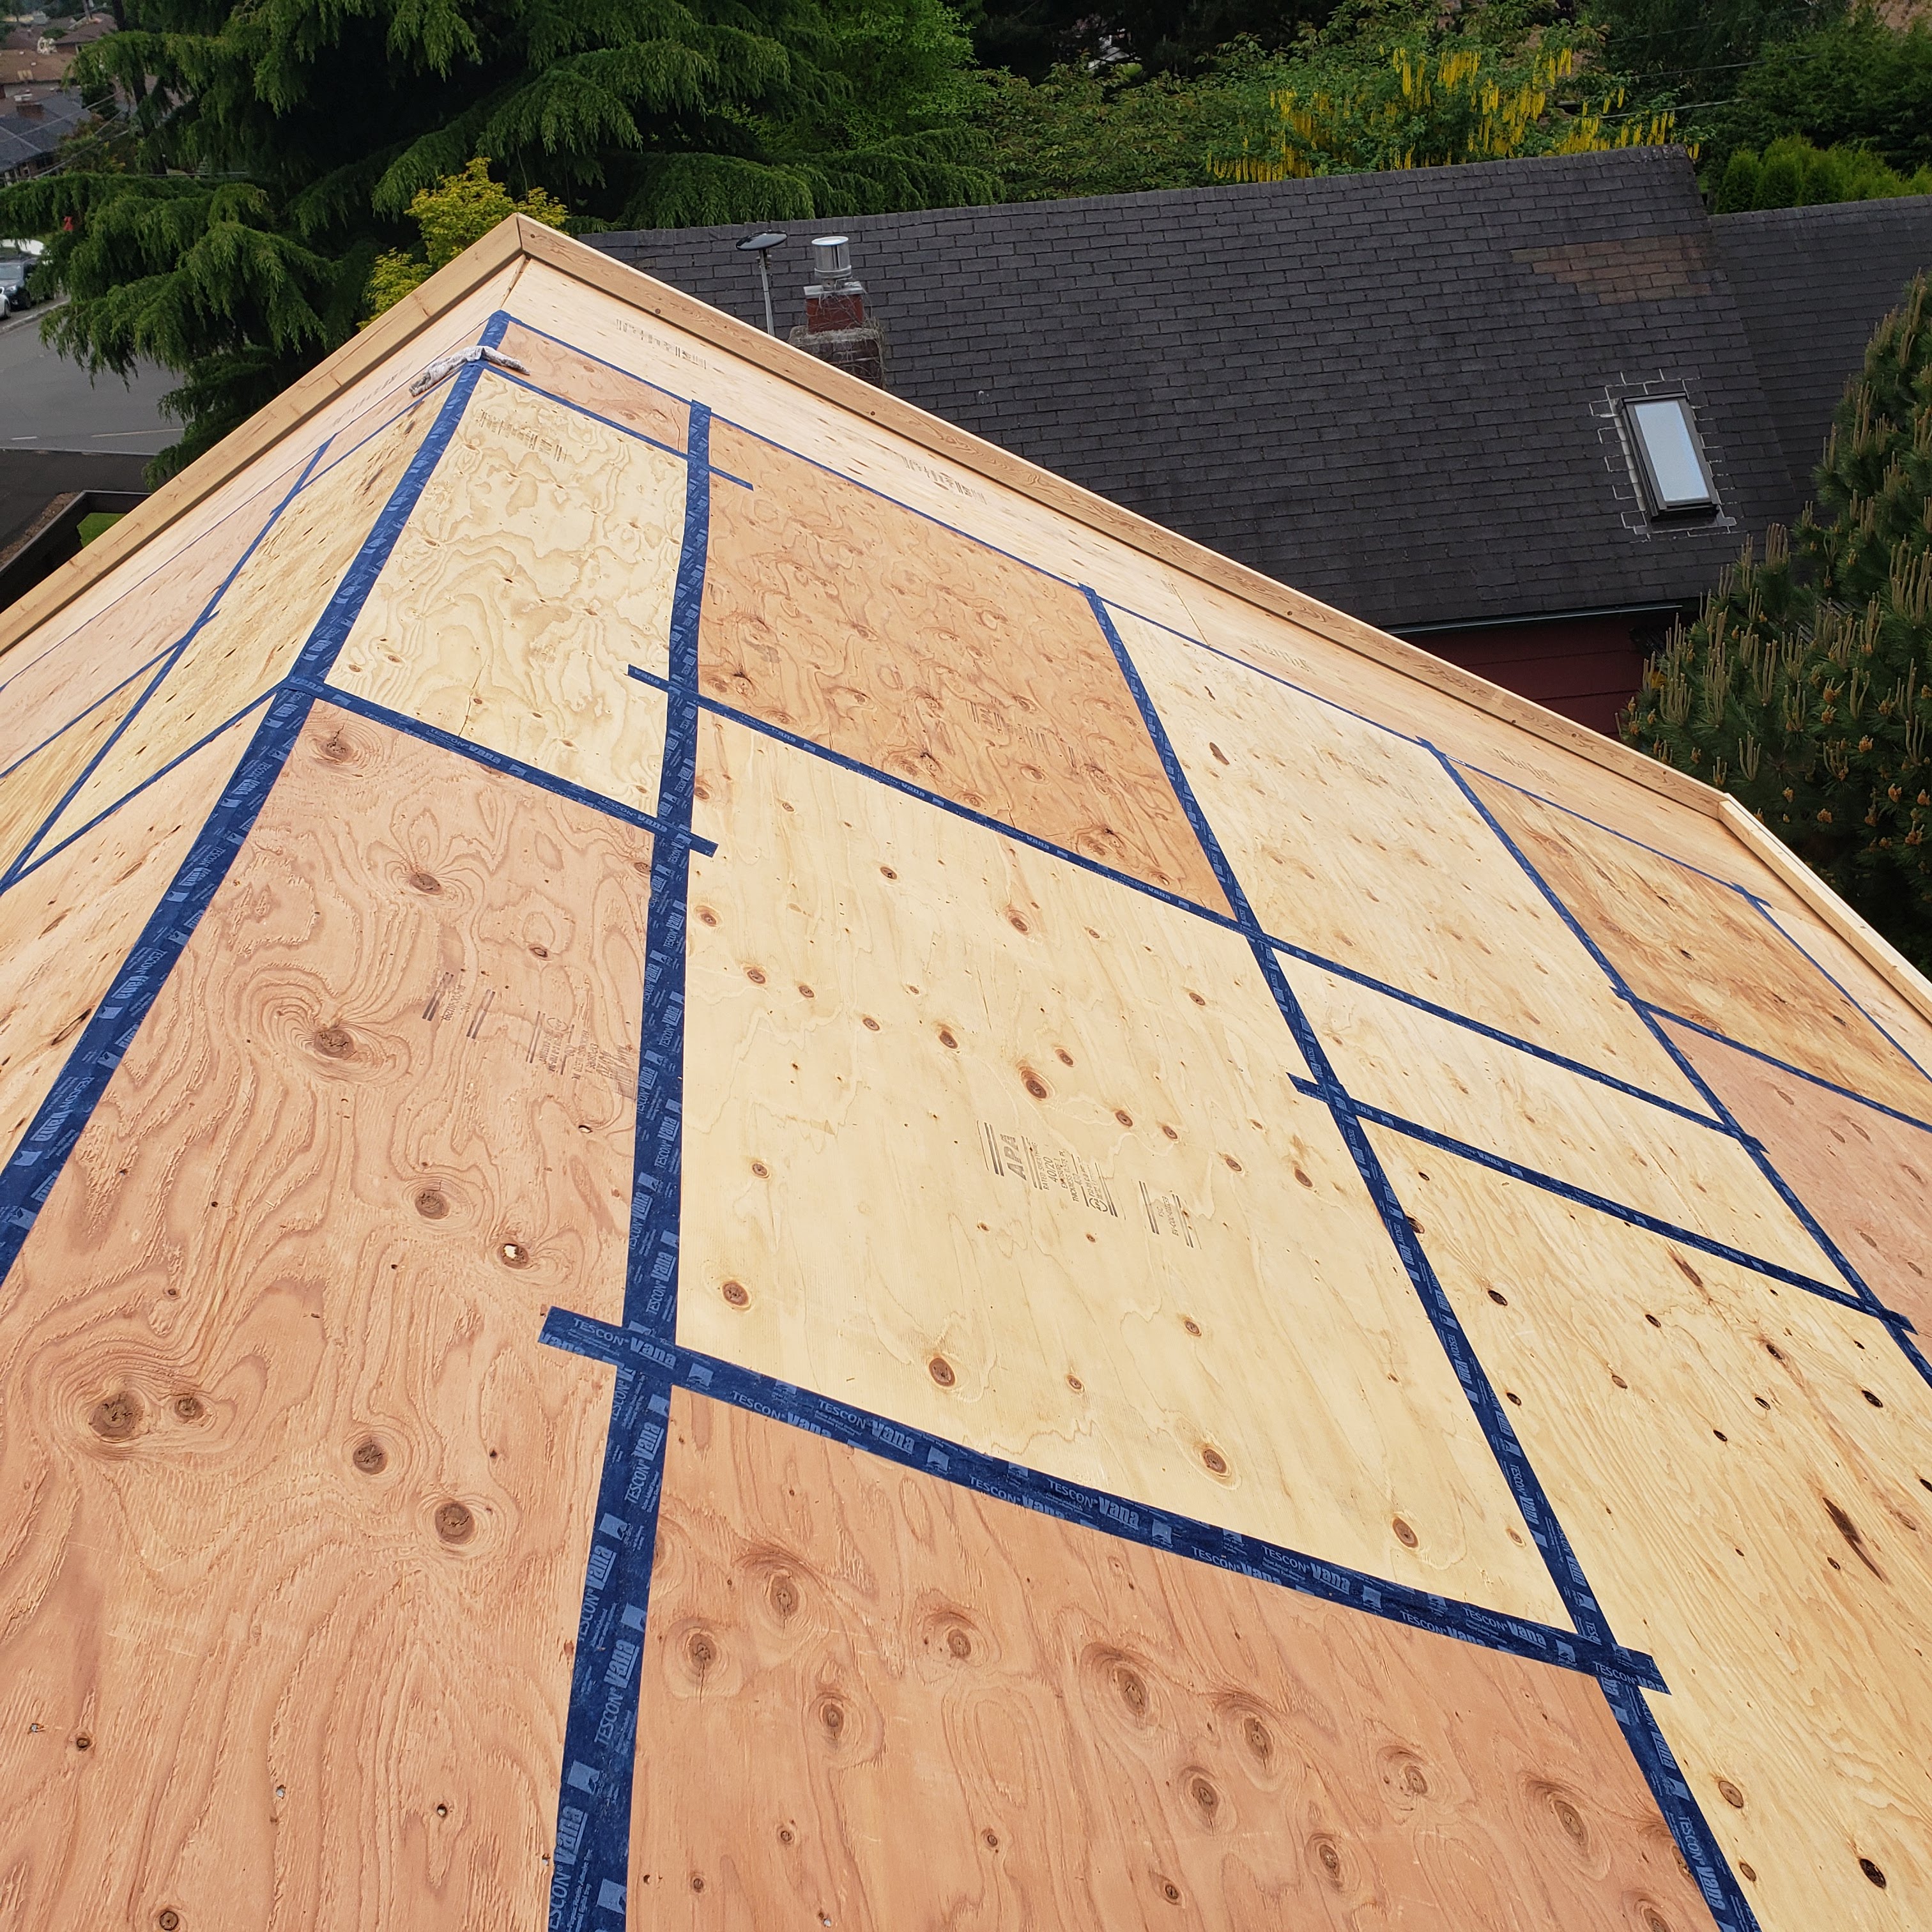
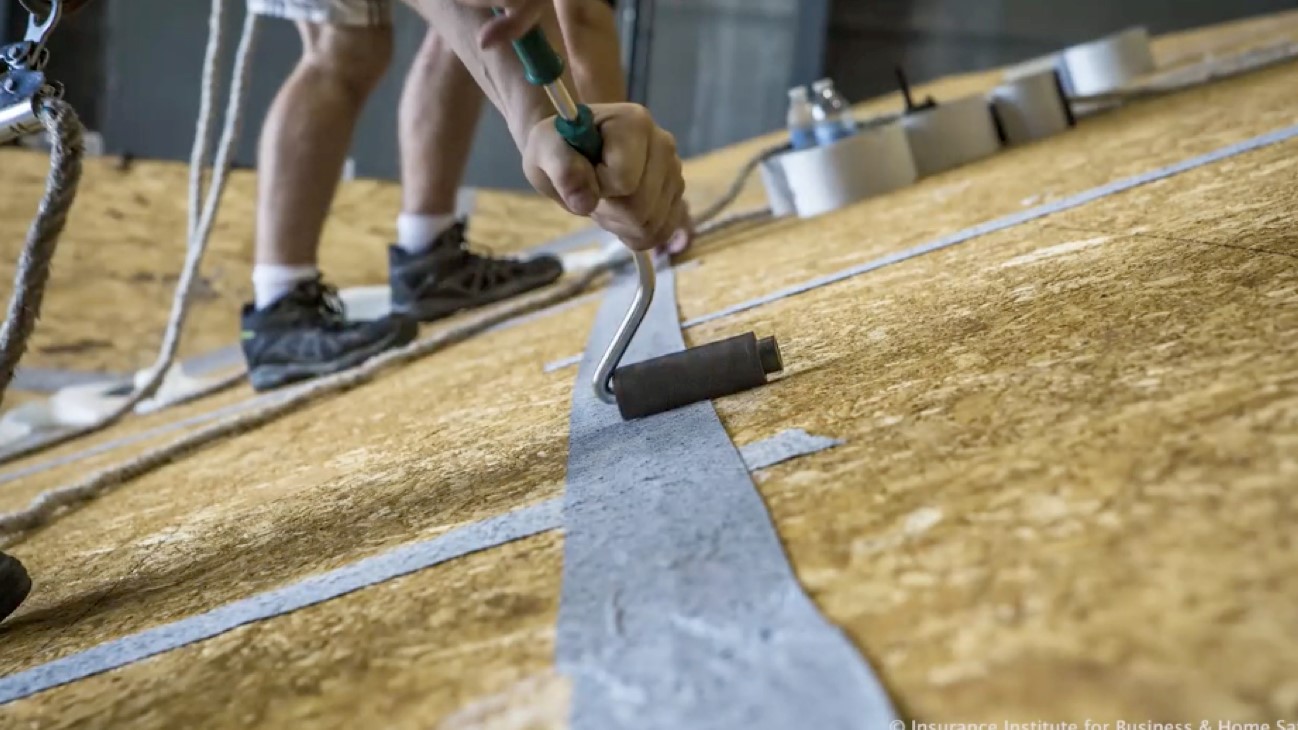
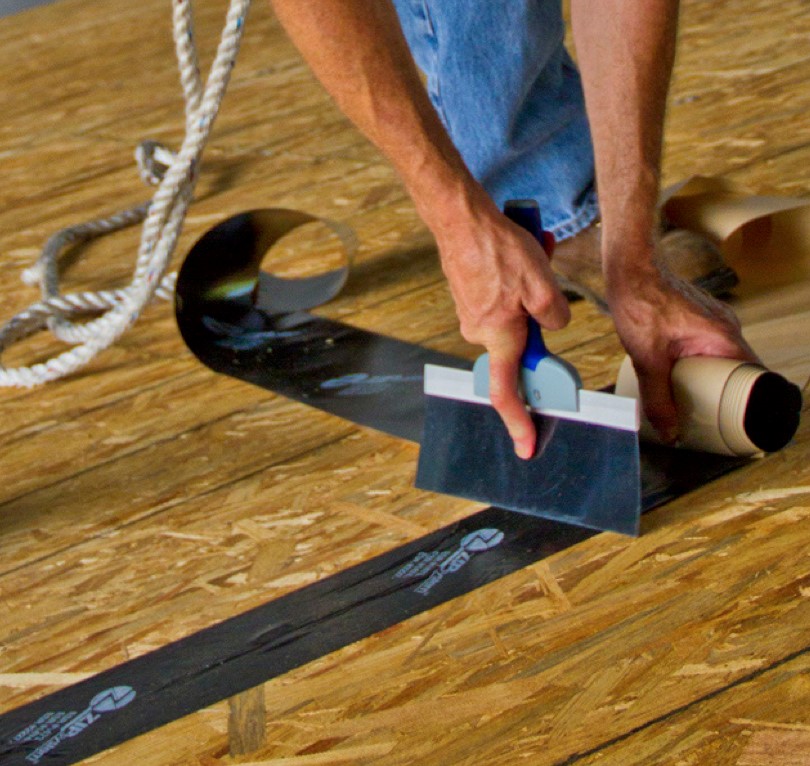
Right – Taping the roof sheathing seams can greatly decrease the likelihood of water infiltration into a home in the event of a hurricane.
Image

Right – The base of the wall is water proofed and the seam between the base of the wall and the sidewalk is air sealed.
Image
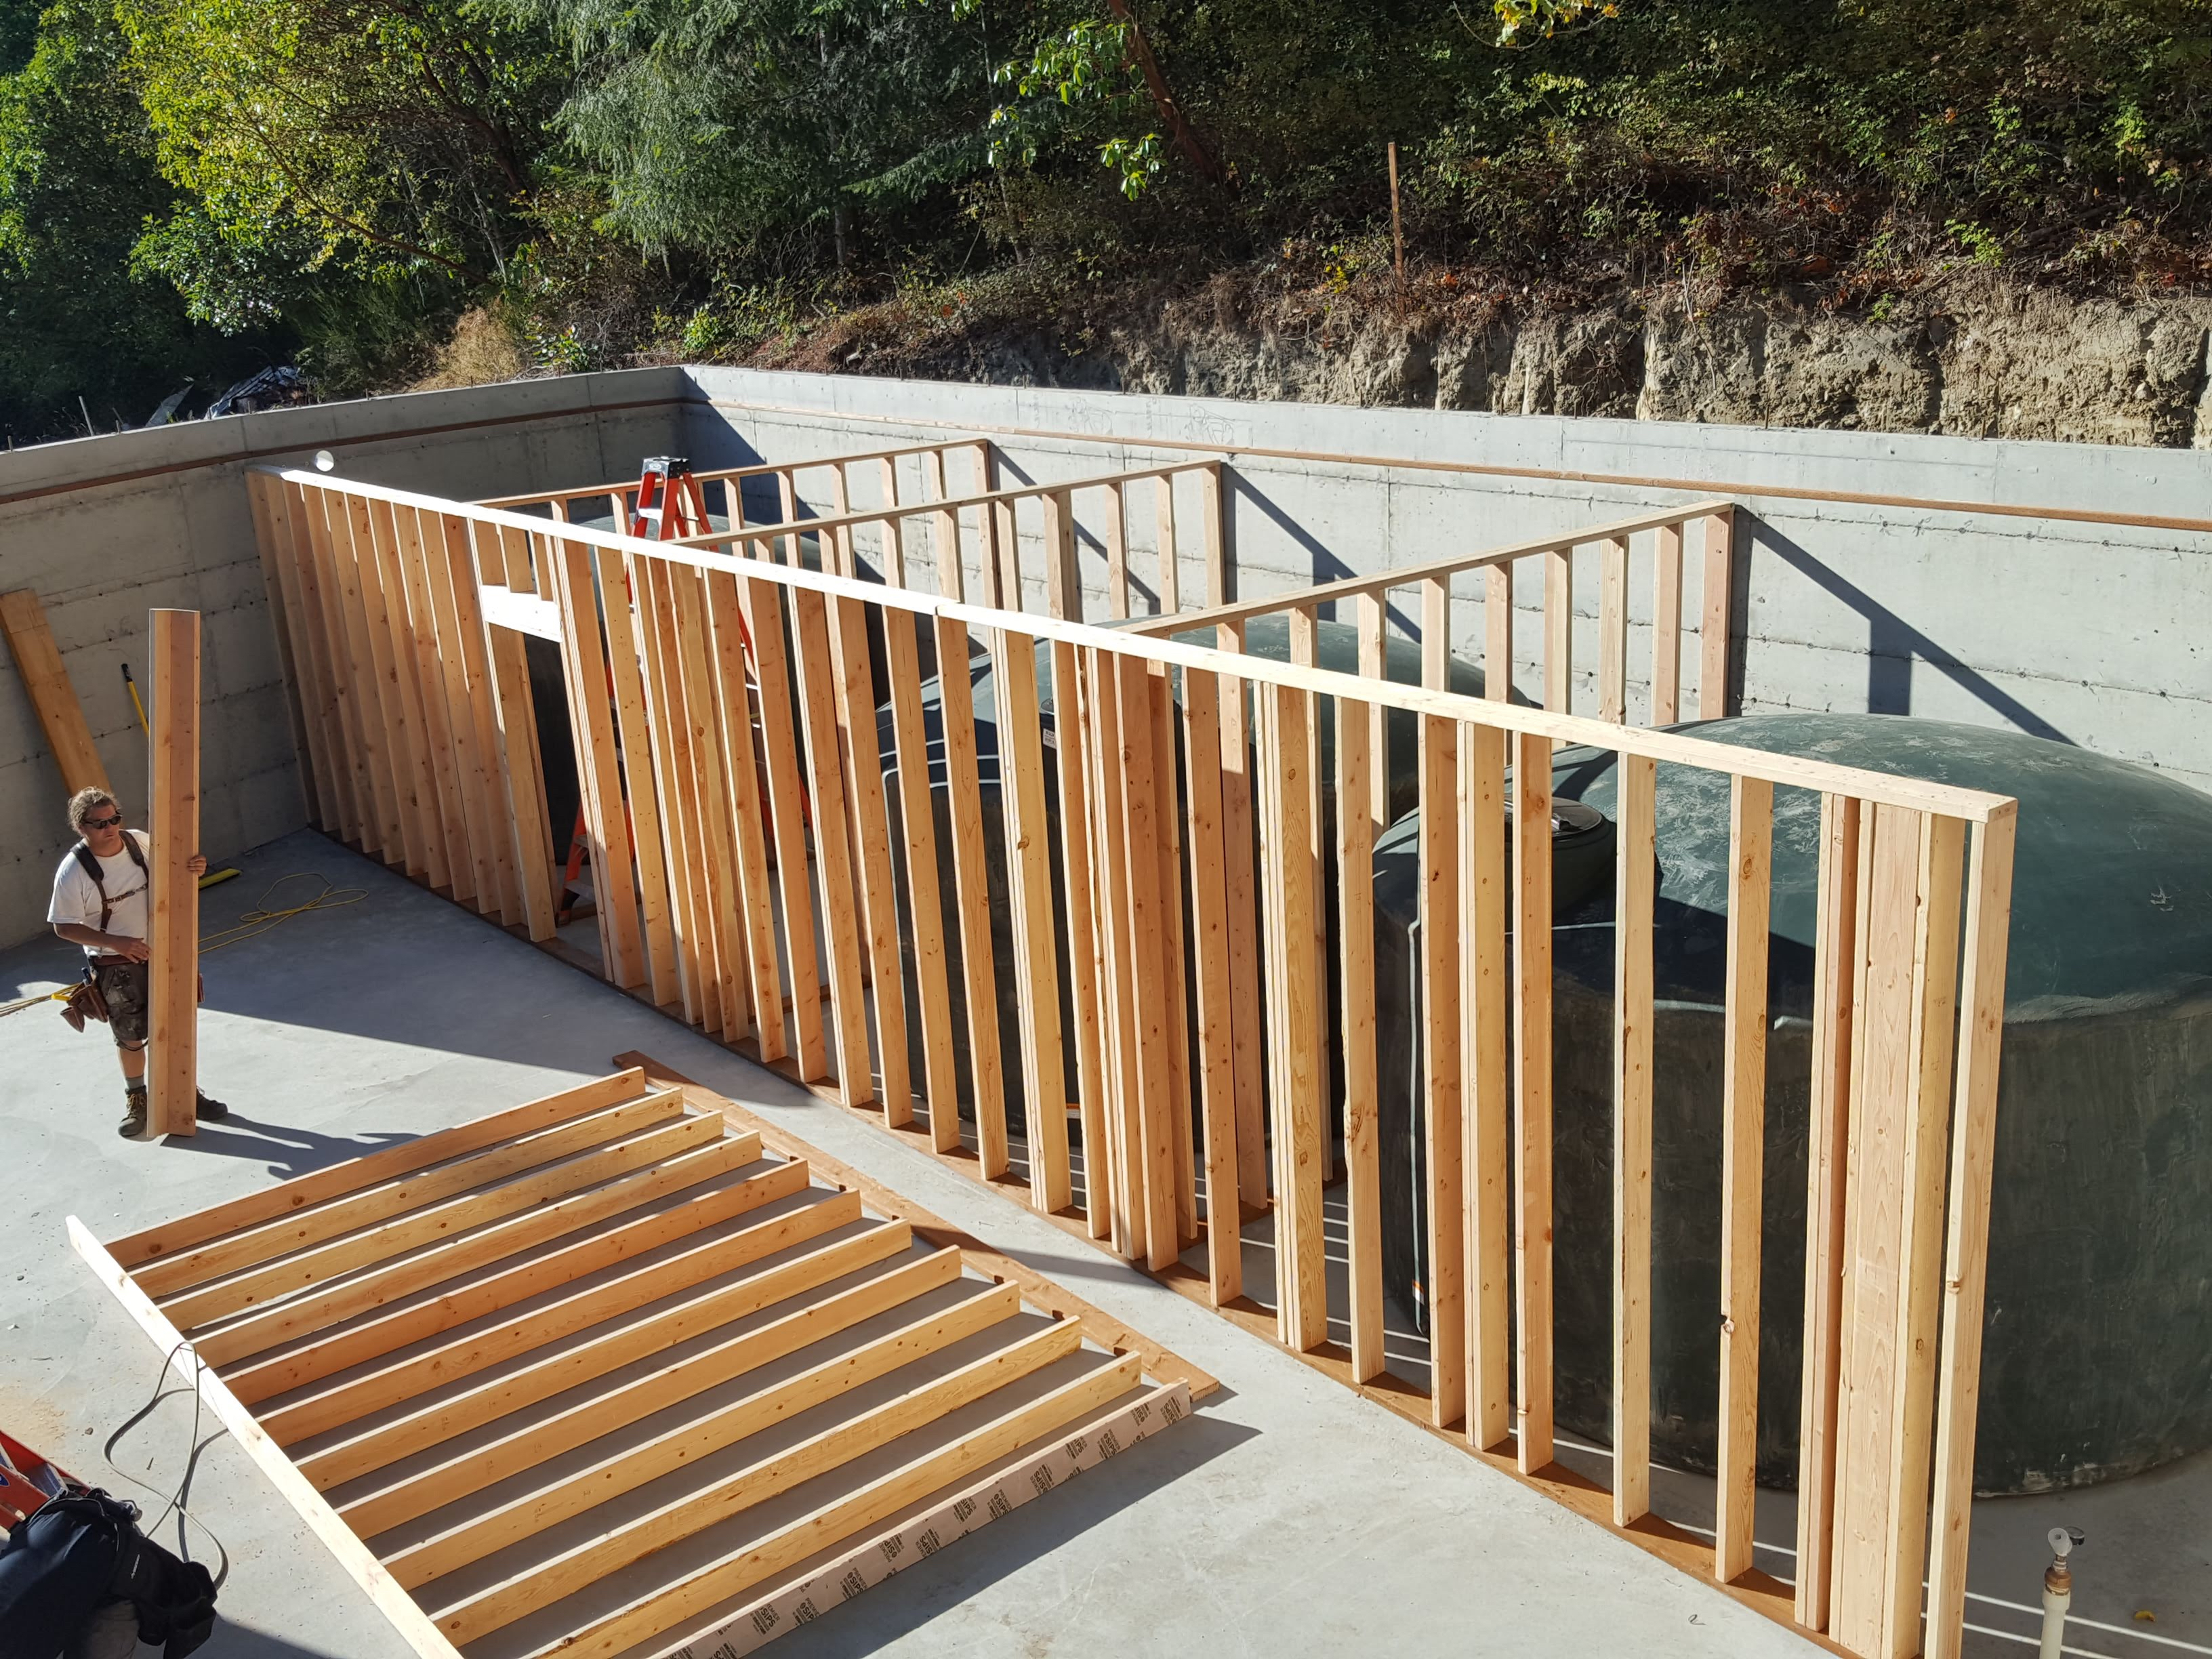
Right – The basement contains four 5,000-gallon rainwater holding tanks for this home which meets all of its water needs with rainwater.
Image
