Showing results 201 - 300 of 688
Image
Image

Look for this EPA WaterSense logo to find fixtures that meet WaterSense criteria.
Image
Image
Image
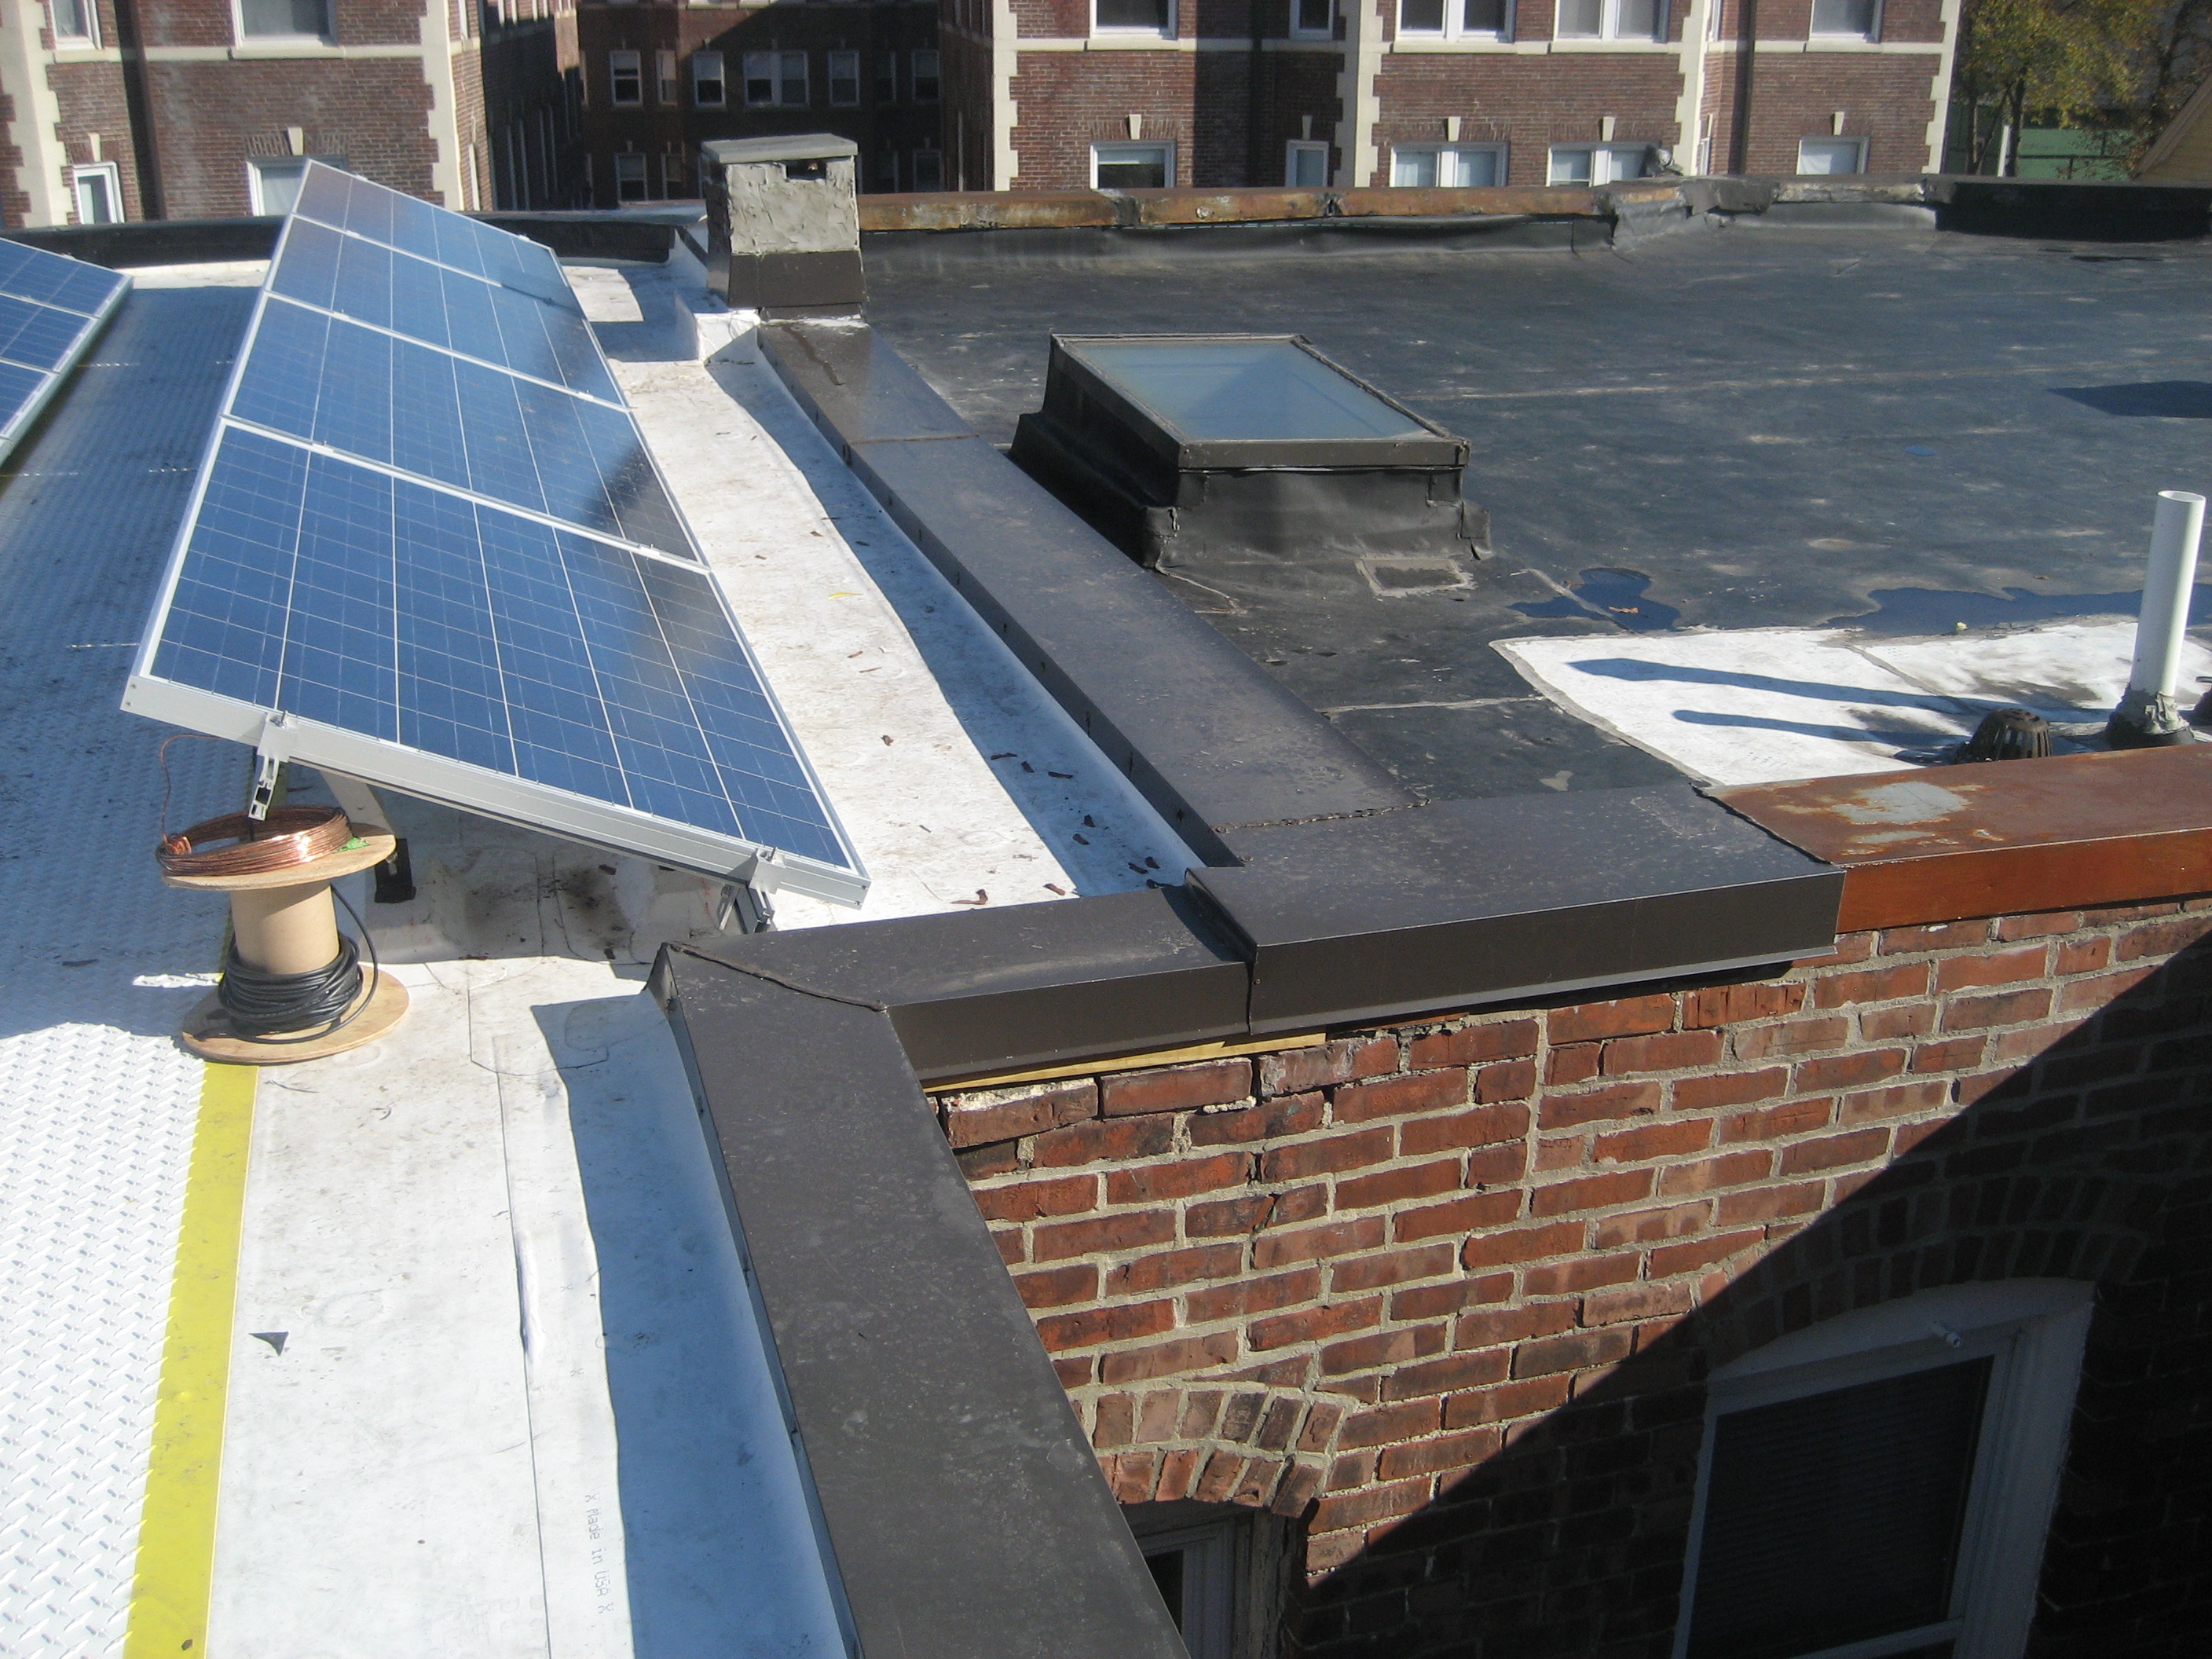
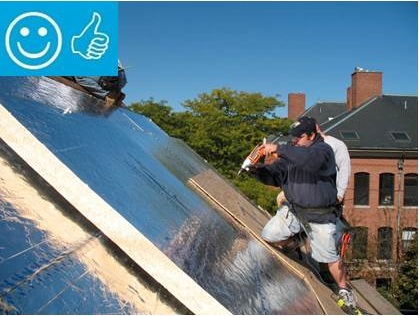
Metal cap flashing is installed over the roof parapet and extends down over the roofing membrane
Image
Image
Image
Image

Image

Image
Image

Mulch can provide many benefits to a landscape.
Image

Image
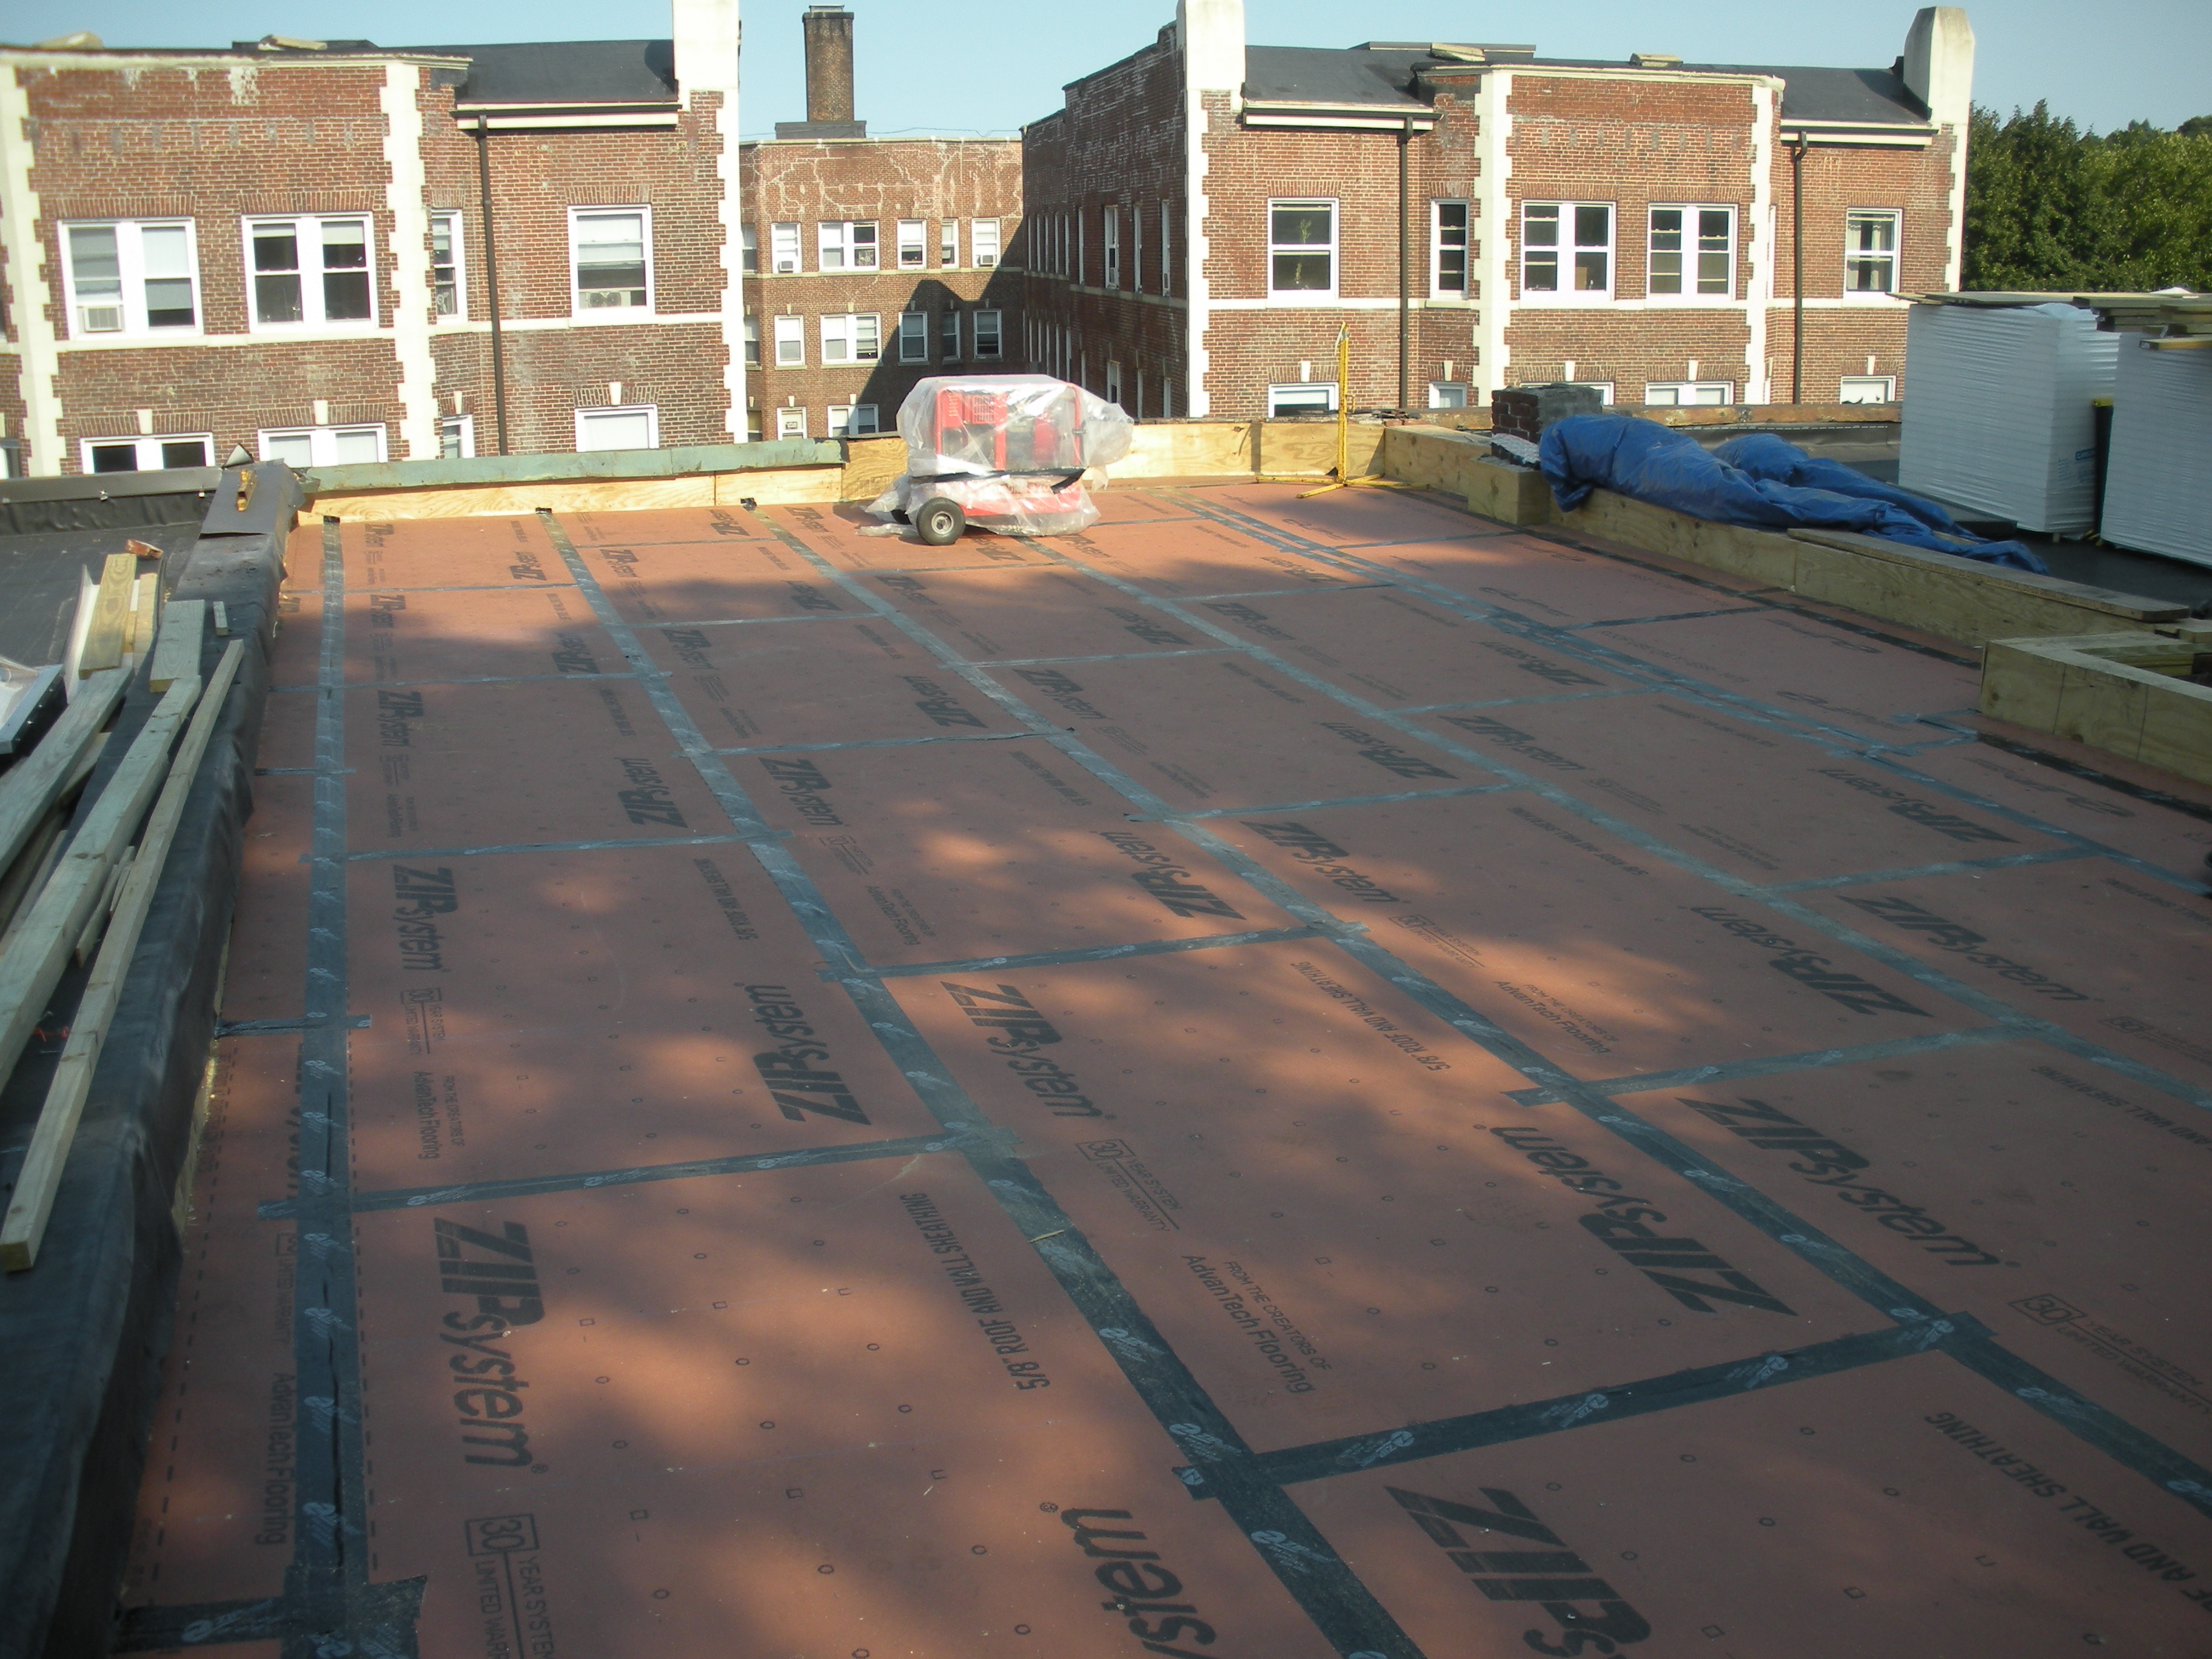
New coated OSB roof sheathing is installed over the existing sheathing of the flat roof and taped at the seams to provide a continuous air barrier
Image
Image
Image
Image
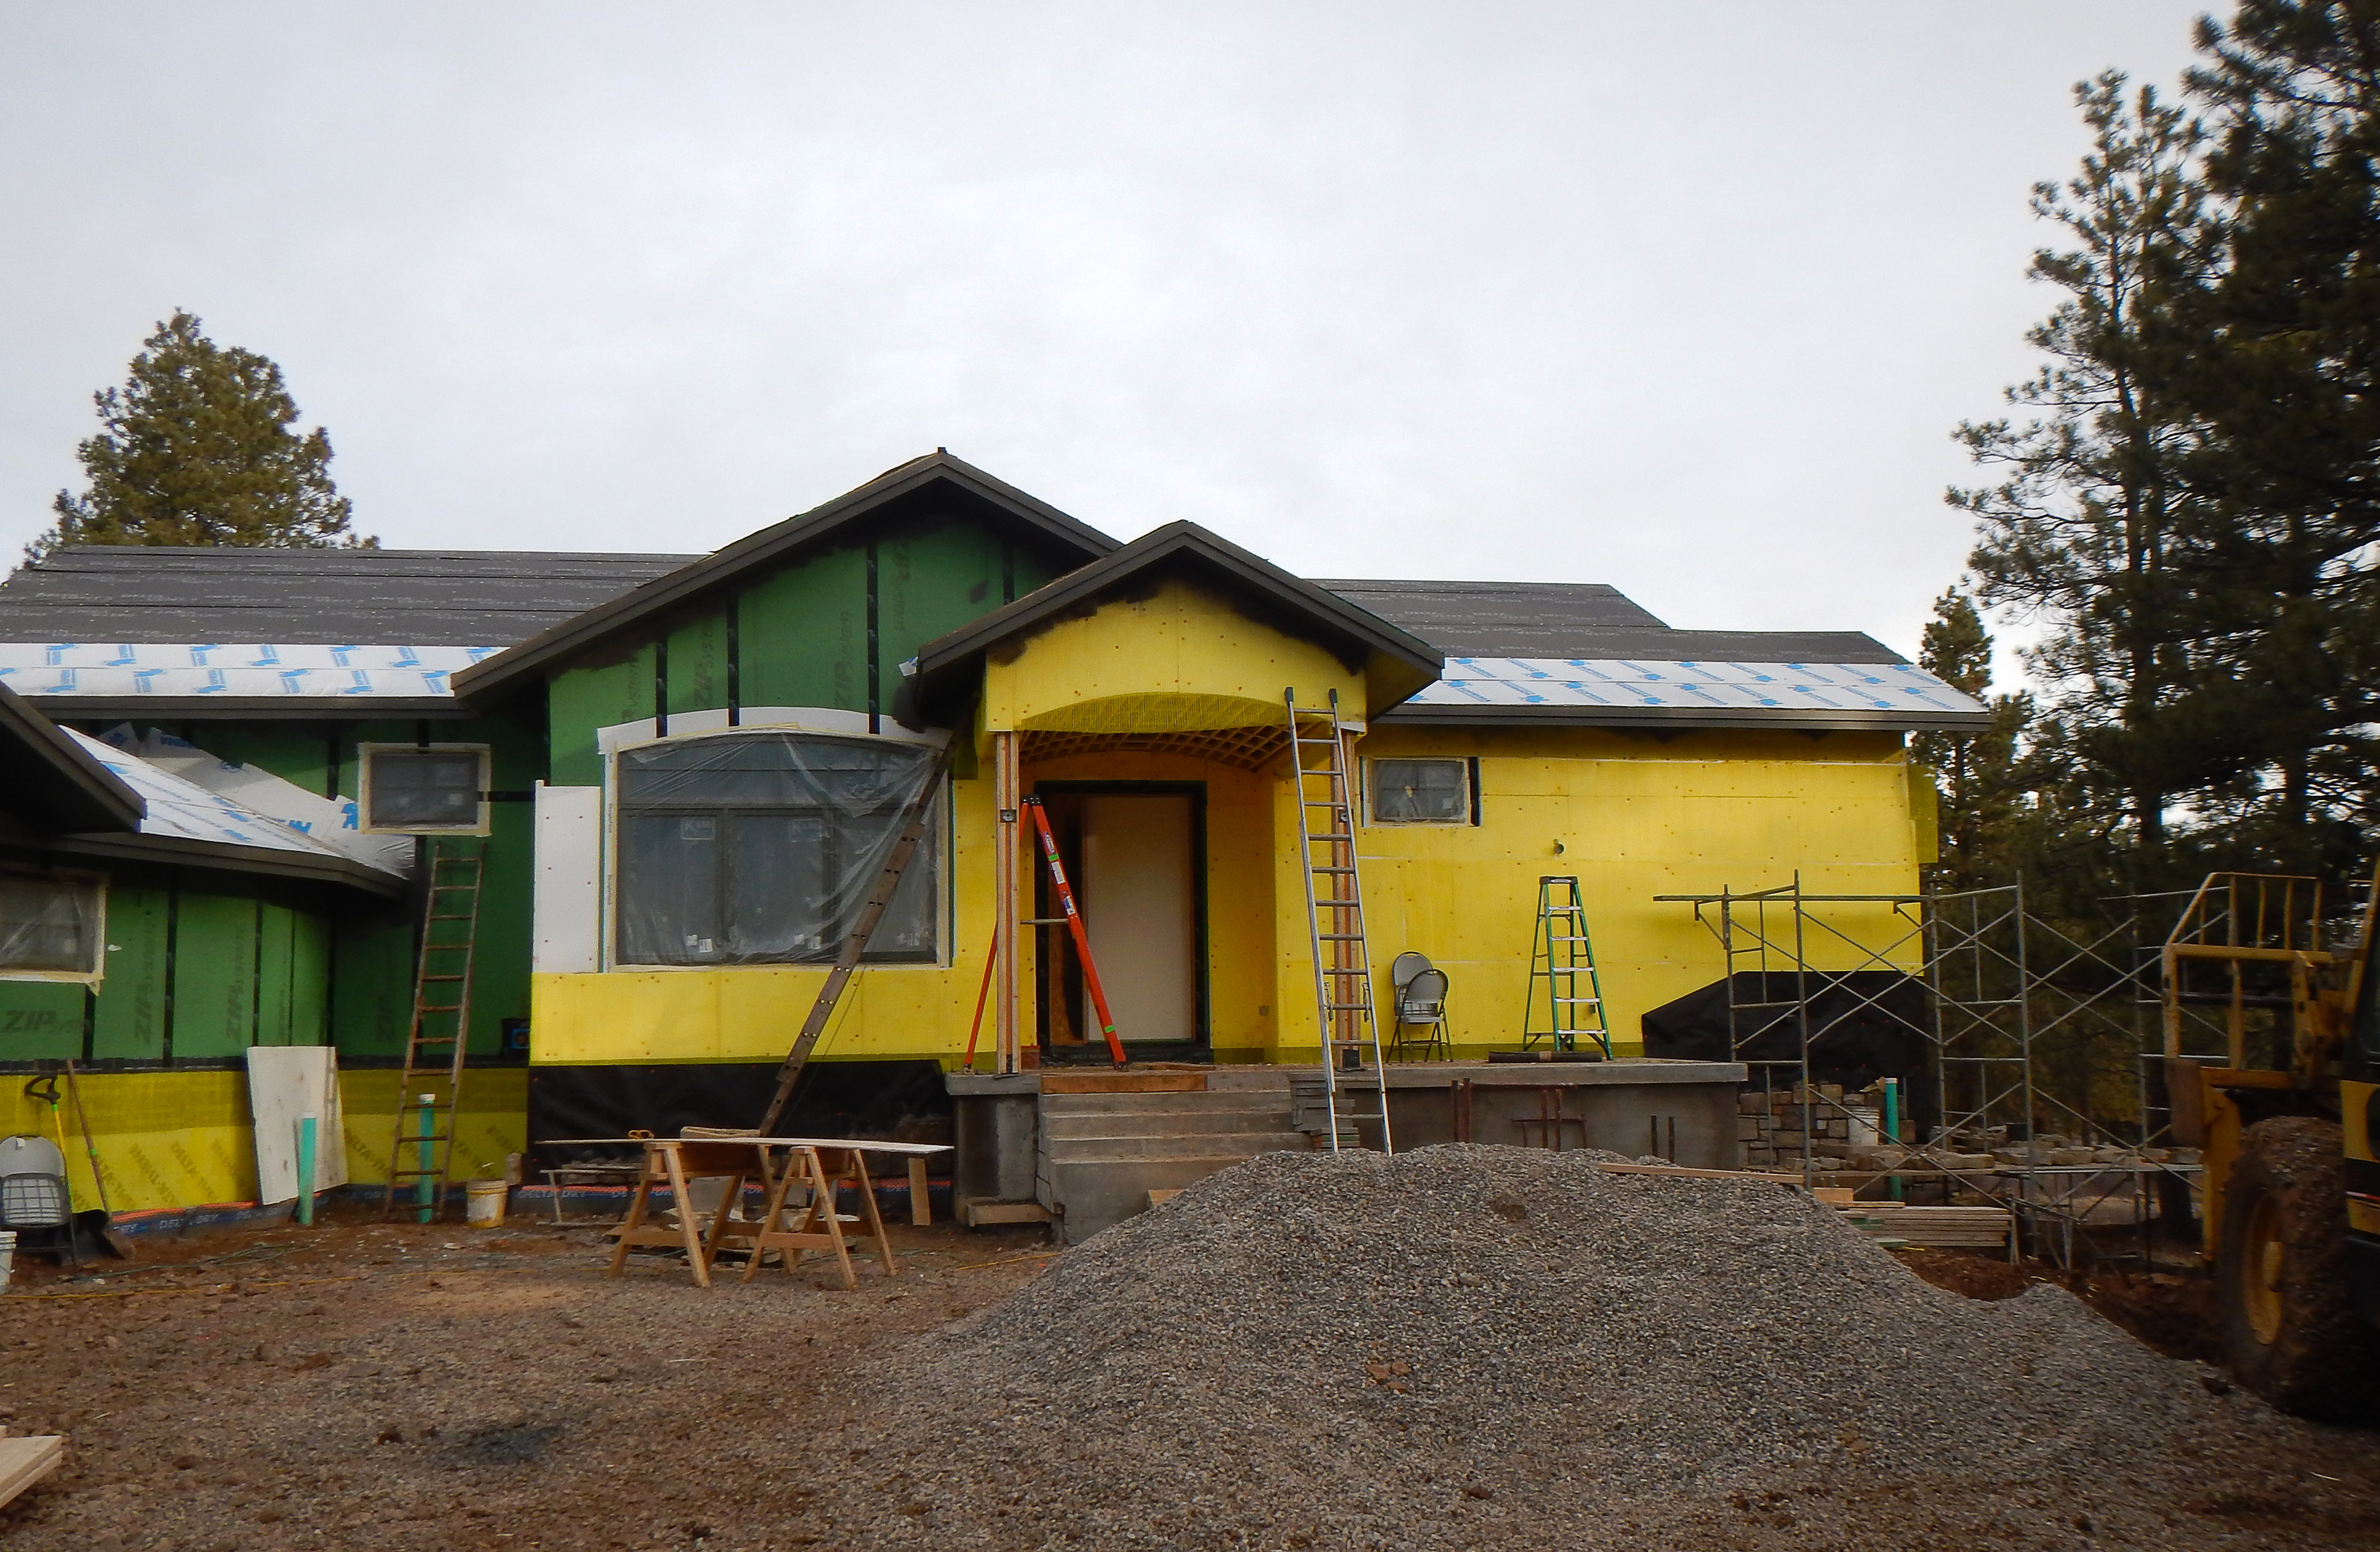
Over the coated sheathing air barrier, the builder installed a continuous layer of 2-inch rigid foam and then covered this with a yellow mesh rain screen layer.
Image
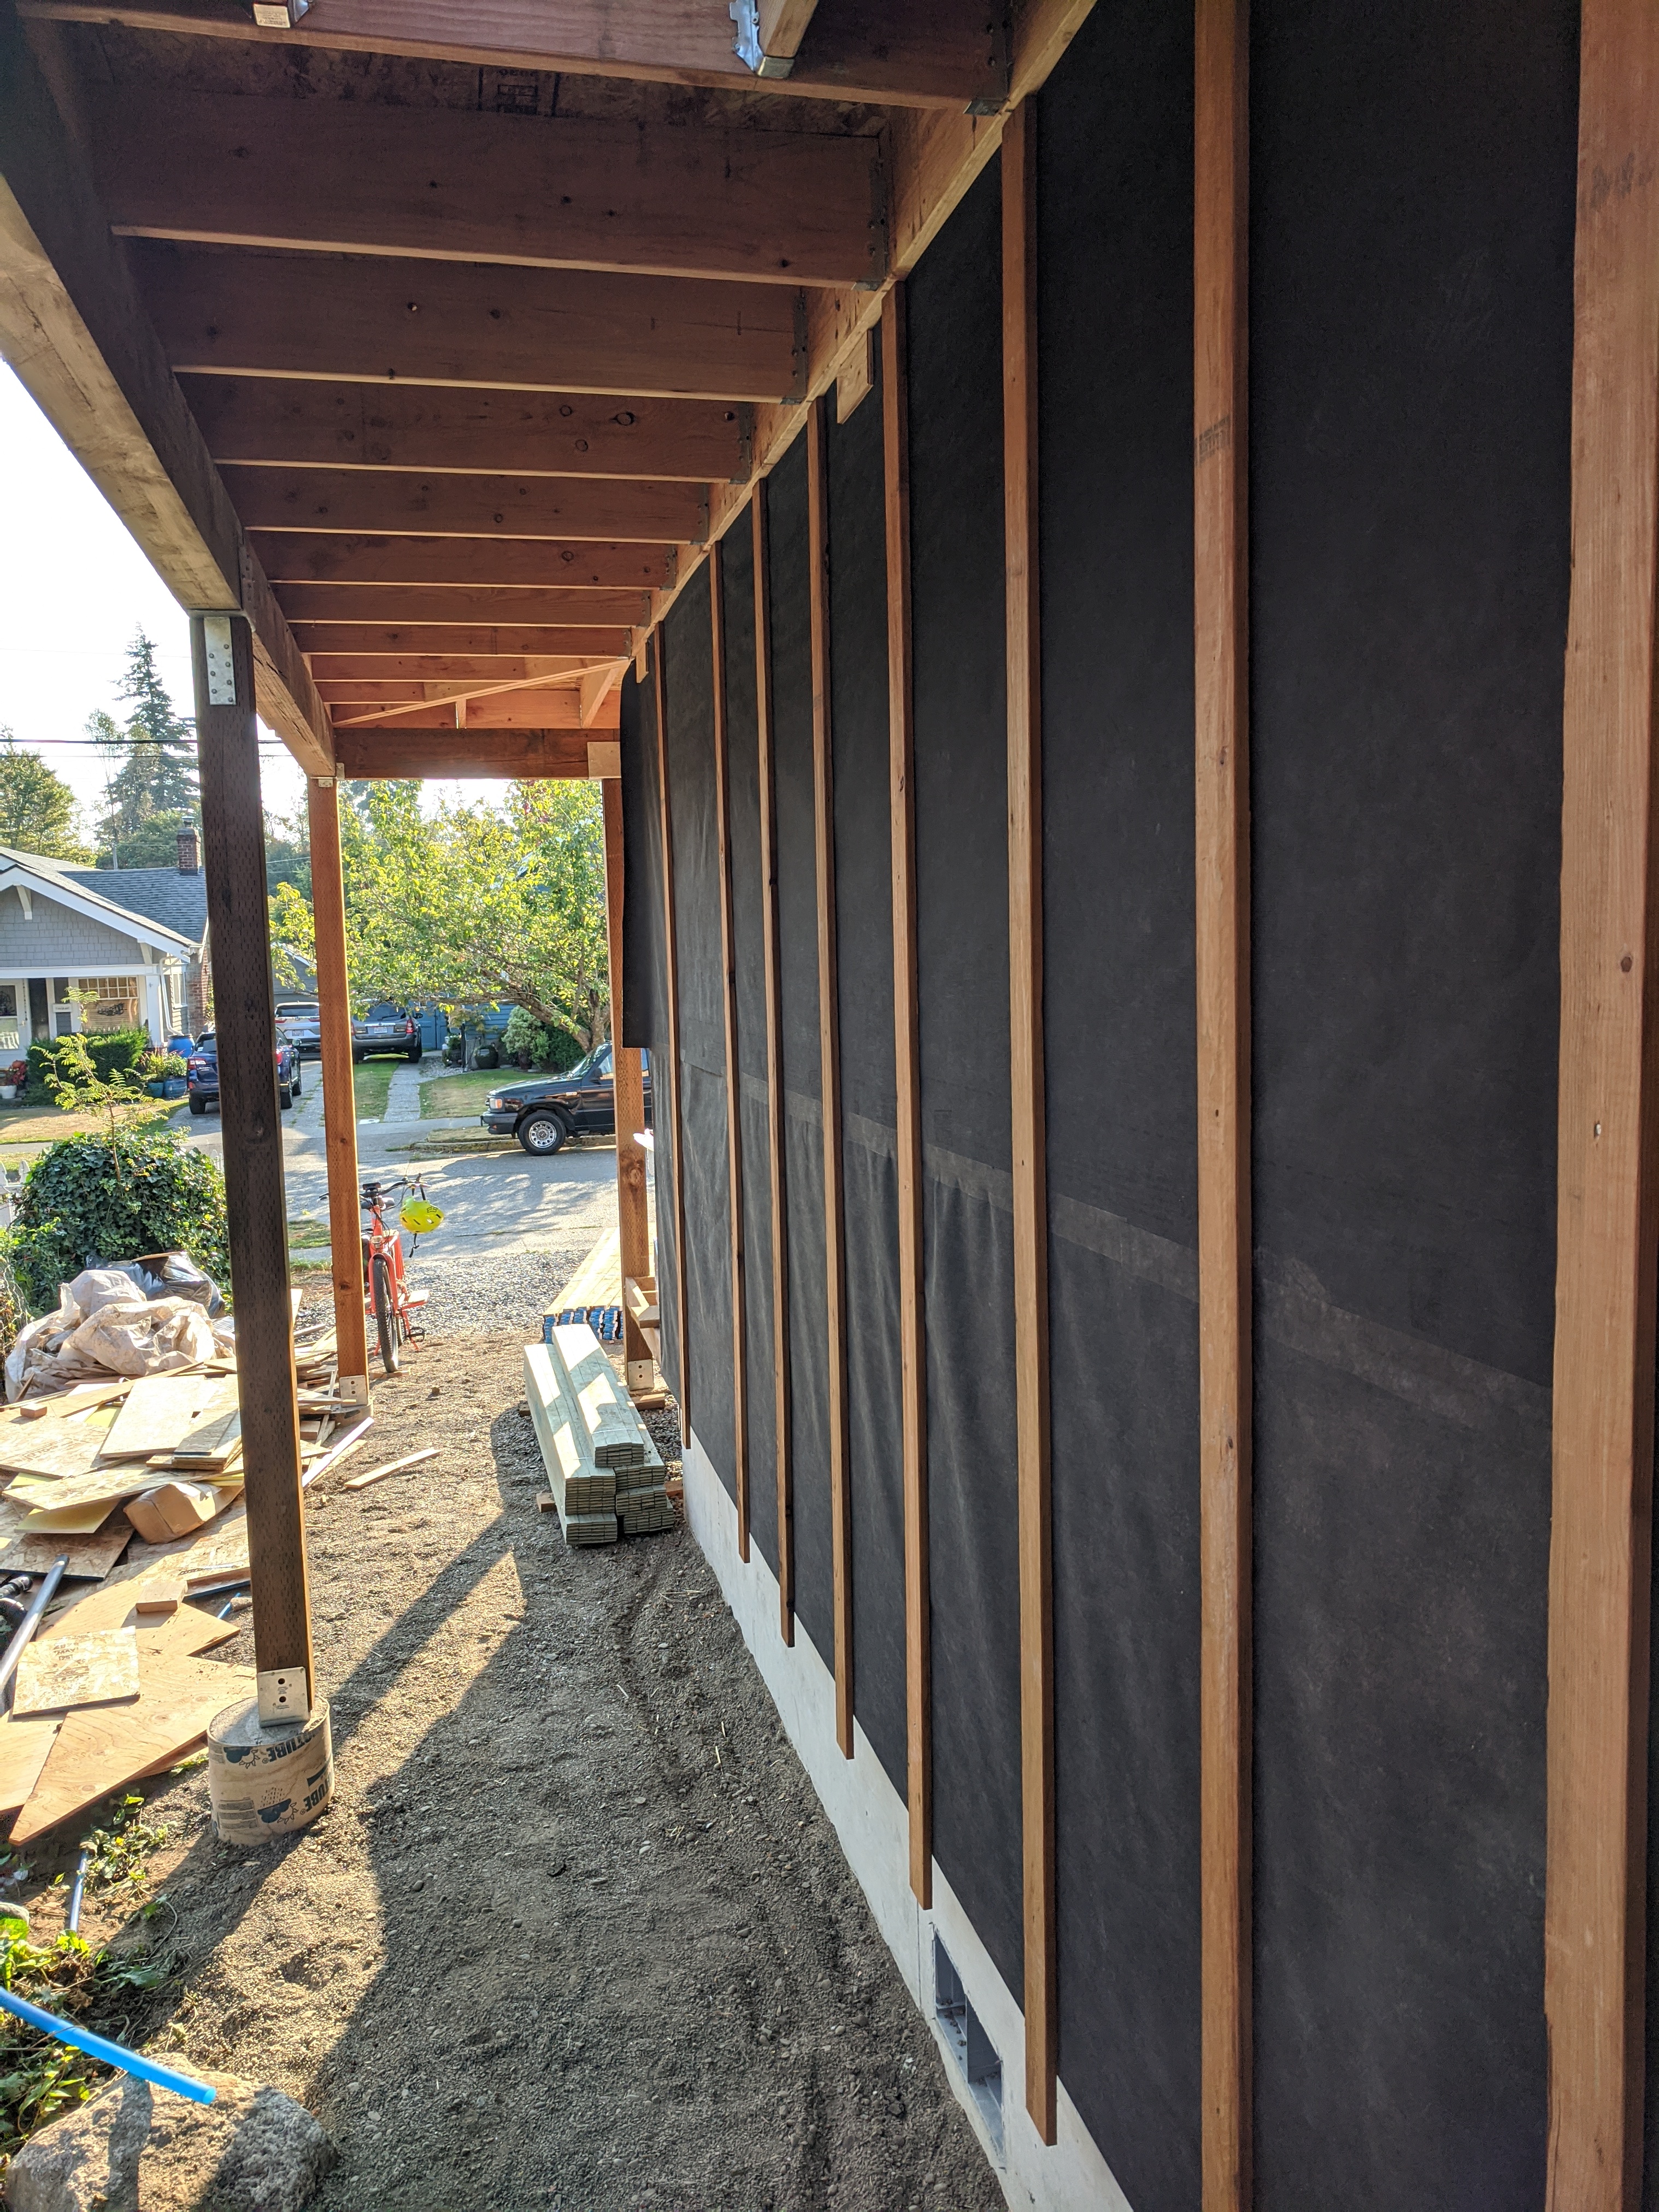
Over the taped rigid foam board, 2x4 furring strips provide a ventilating air gap and drainage plane under the engineered wood lap siding. The furring strips were attached with structural screws to provide an attachment surface for the siding.
Image

Patio slabs, porch slabs, walks, and driveways sloped ≥ 0.25 in. per ft. away from home to edge of surface, or 10 ft., whichever is less
Image
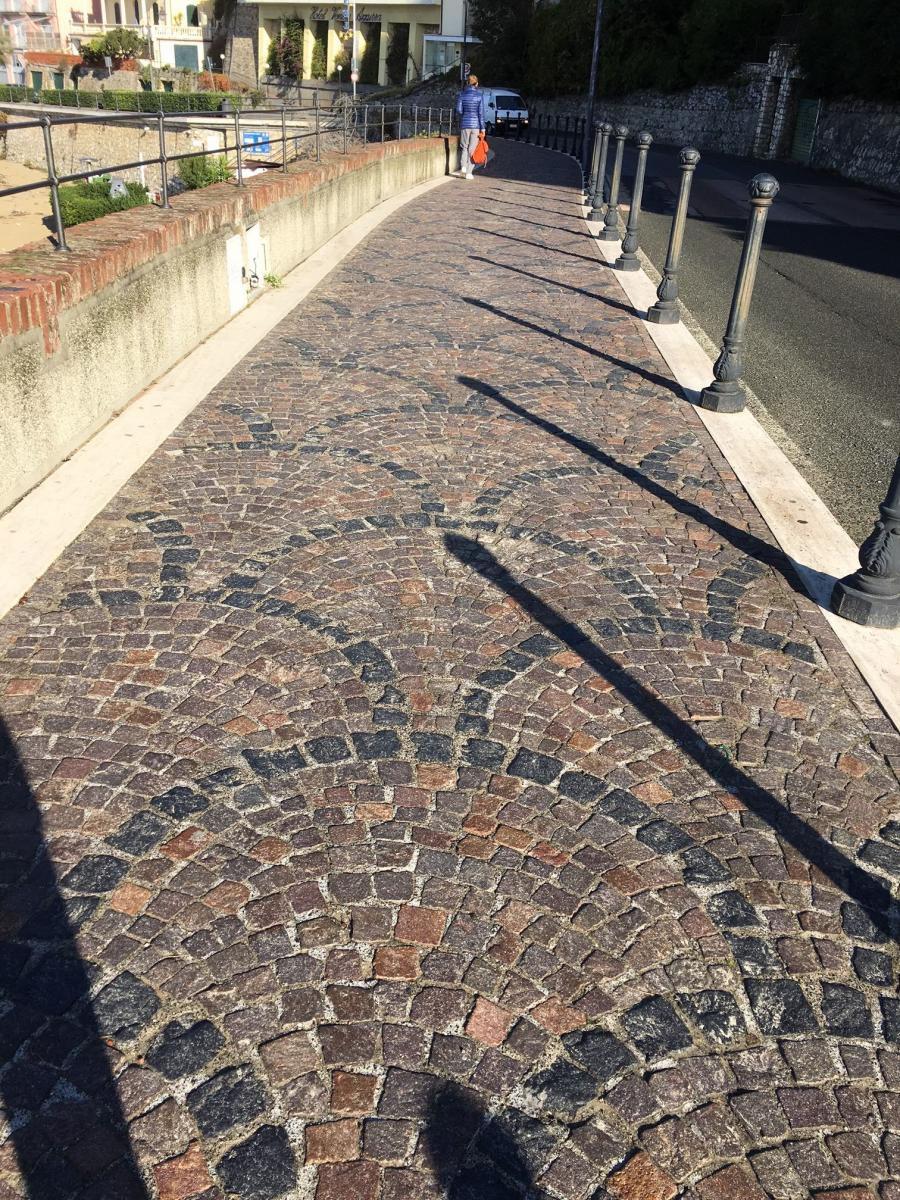
Pavers, gravel, stone, and other permeable surfaces allow rainwater some opportunity to drain minimizing storm water runoff.
Image

Image
Image
Image
Pest prevention can be as simple as 4 inch thick gravel or crushes stone around the perimeter and extending two feet out from the house.
Image
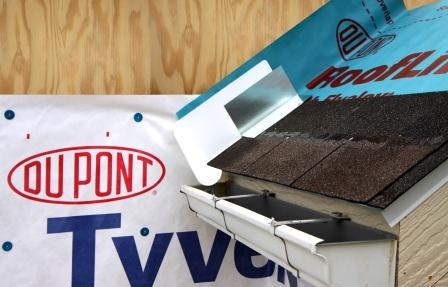
Place first shingle and next section of sidewall flashing over upper edge of diverter
Image
Image
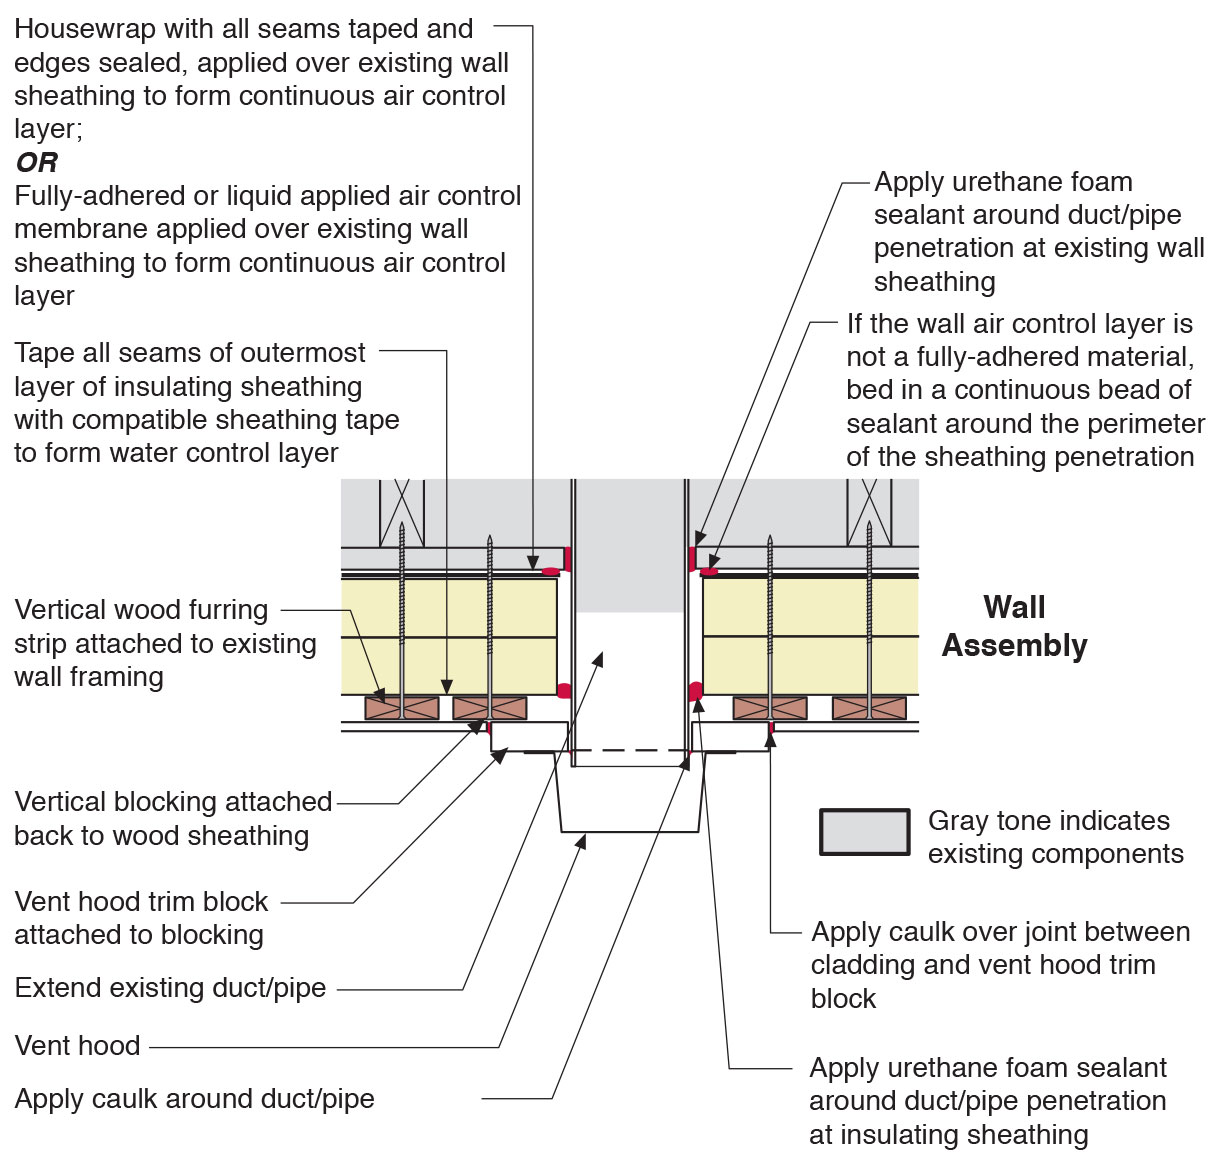
Plan view of duct or pipe penetration through exterior wall showing flashing and air sealing details
Image
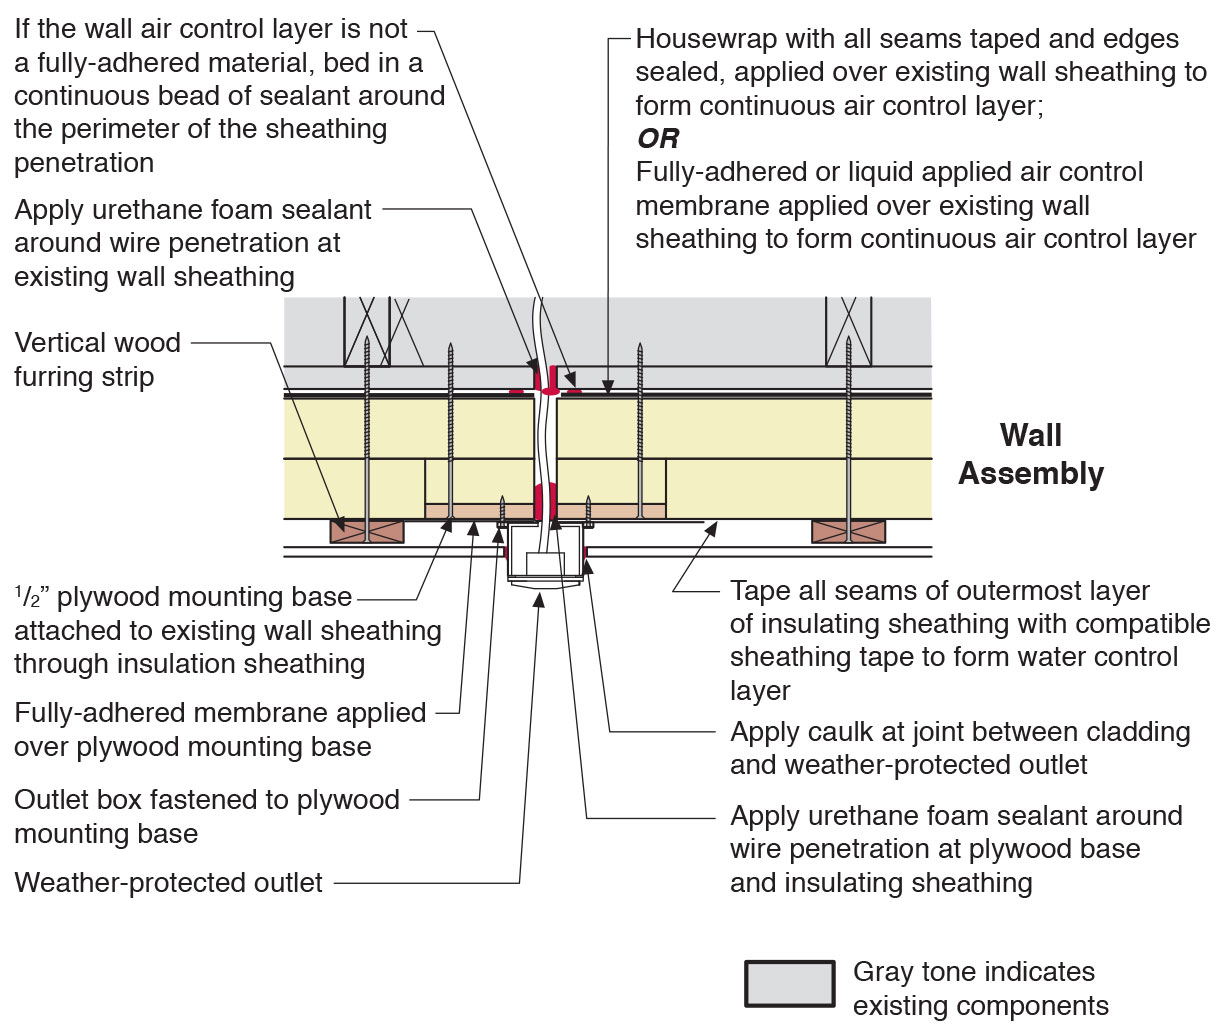
Plan view of electric box installation in exterior wall showing flashing and air sealing details
Image
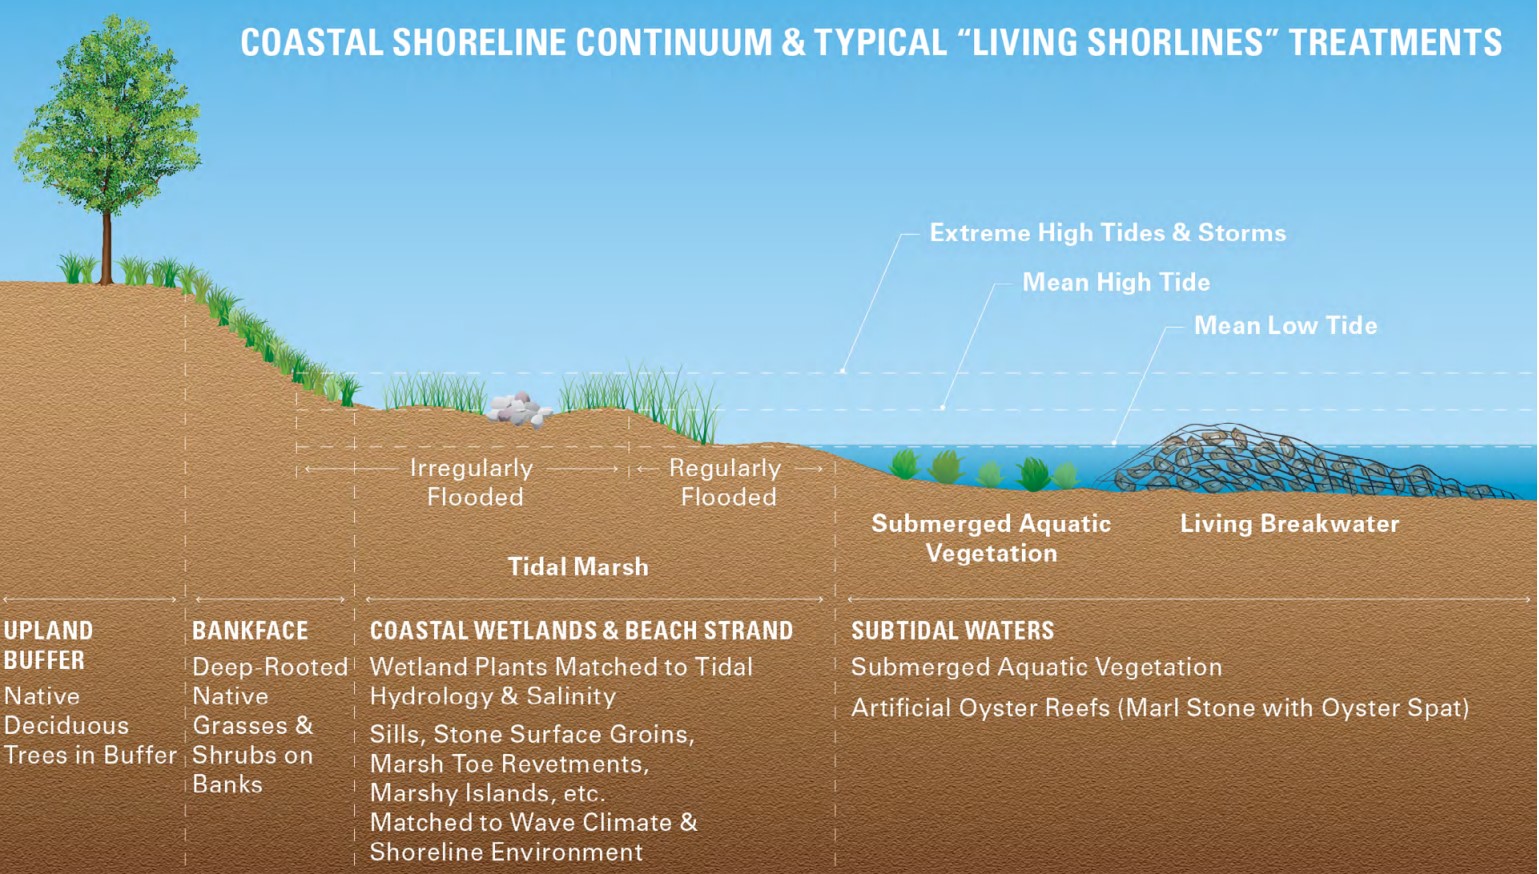
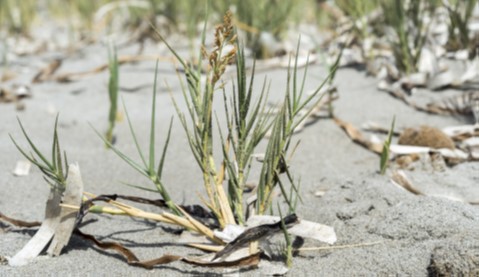
Planting deep-rooted native grasses and shrubs on the banks of shorelines can help reduce the effects of erosion on sandy slopes
Image
Image
Image
Image
Image
Image
Image
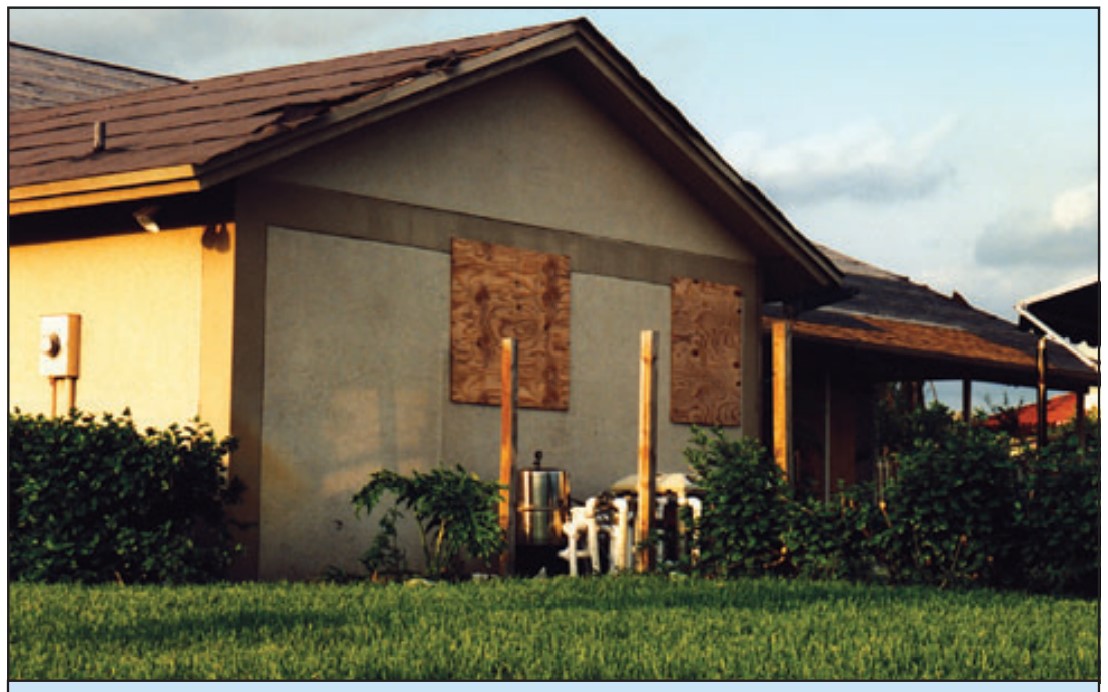
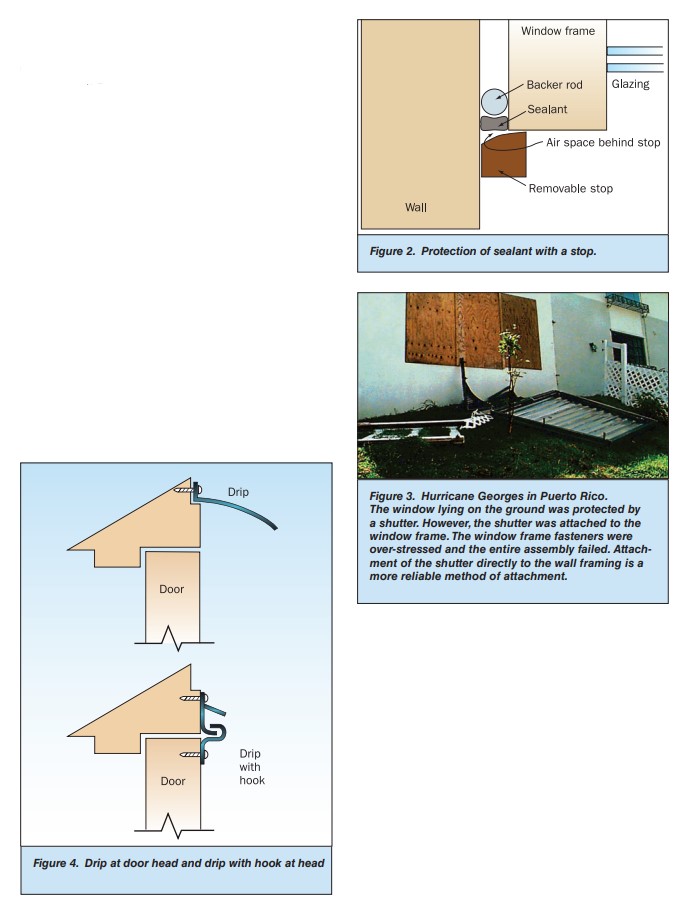
Plywood or OSB panels are a cost-effective way to protect windows from wind-borne debris.
Image
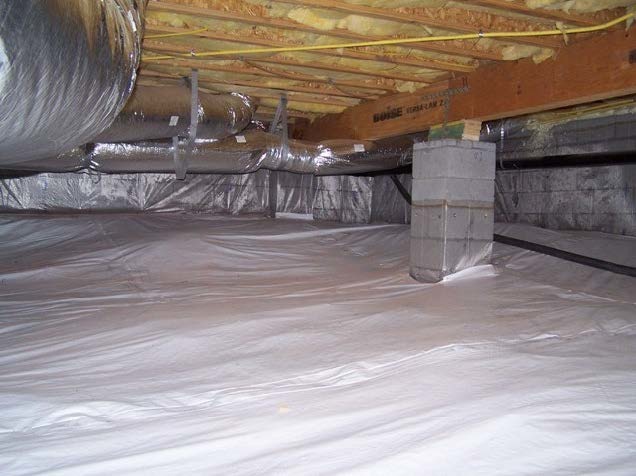
Polyethylene completely covers the floor of this crawlspace and is attached to the walls and piers as well
Image
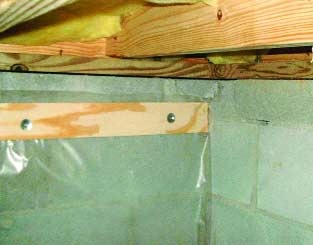
Polyethylene is being attached to the crawlspace floor and walls with plywood furring strips
Image

Image
Image
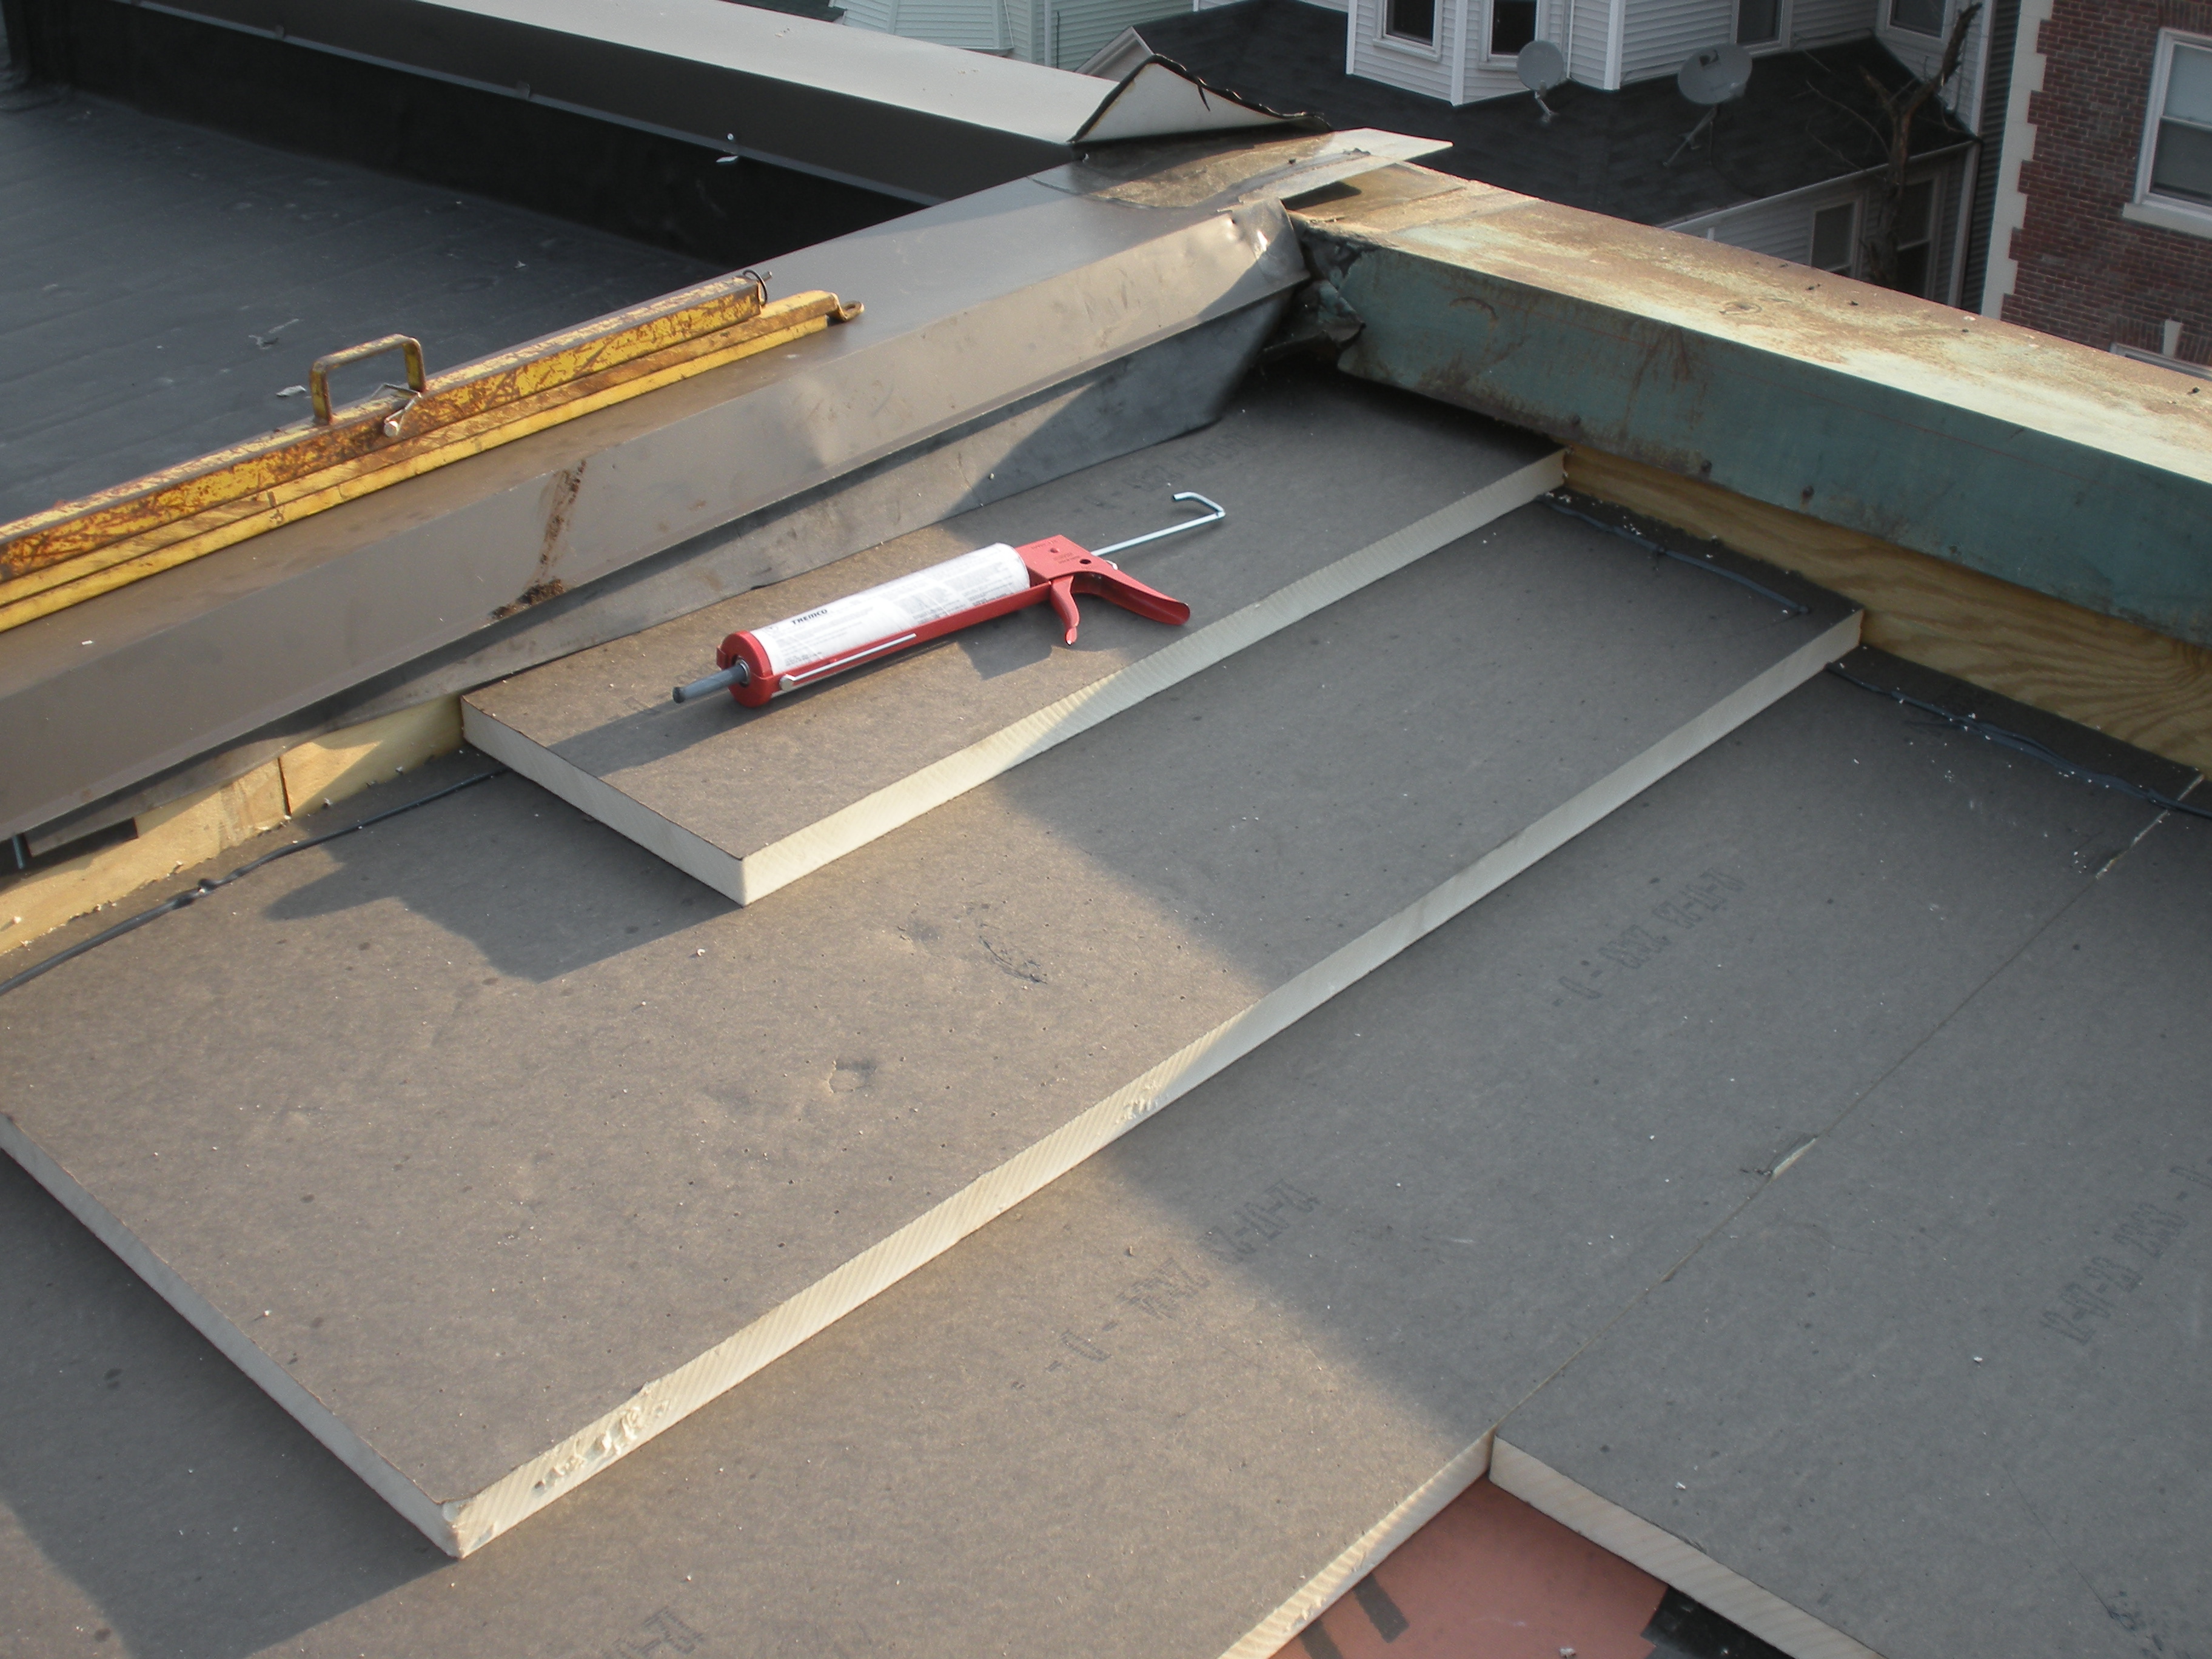
Polyisocyanurate rigid foam insulation is installed in multiple layers with staggered, taped seams over the flat roof
Image
Image

Porous surfaces like pavers allow water to pass through and percolate slowly into the soil
Image

Image
Image
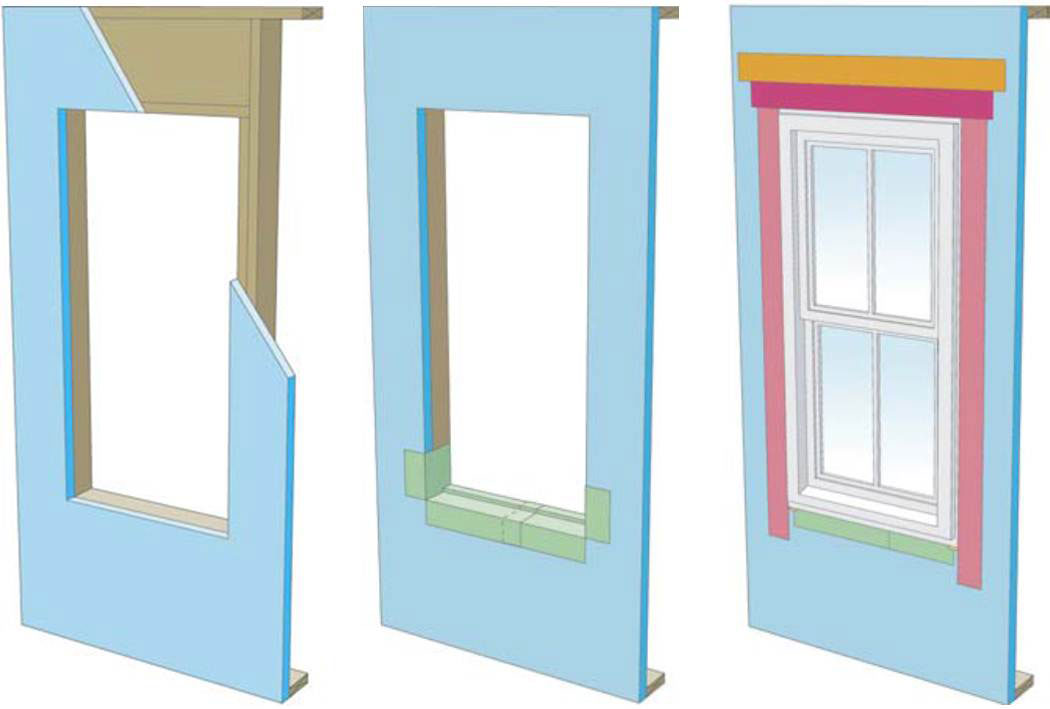
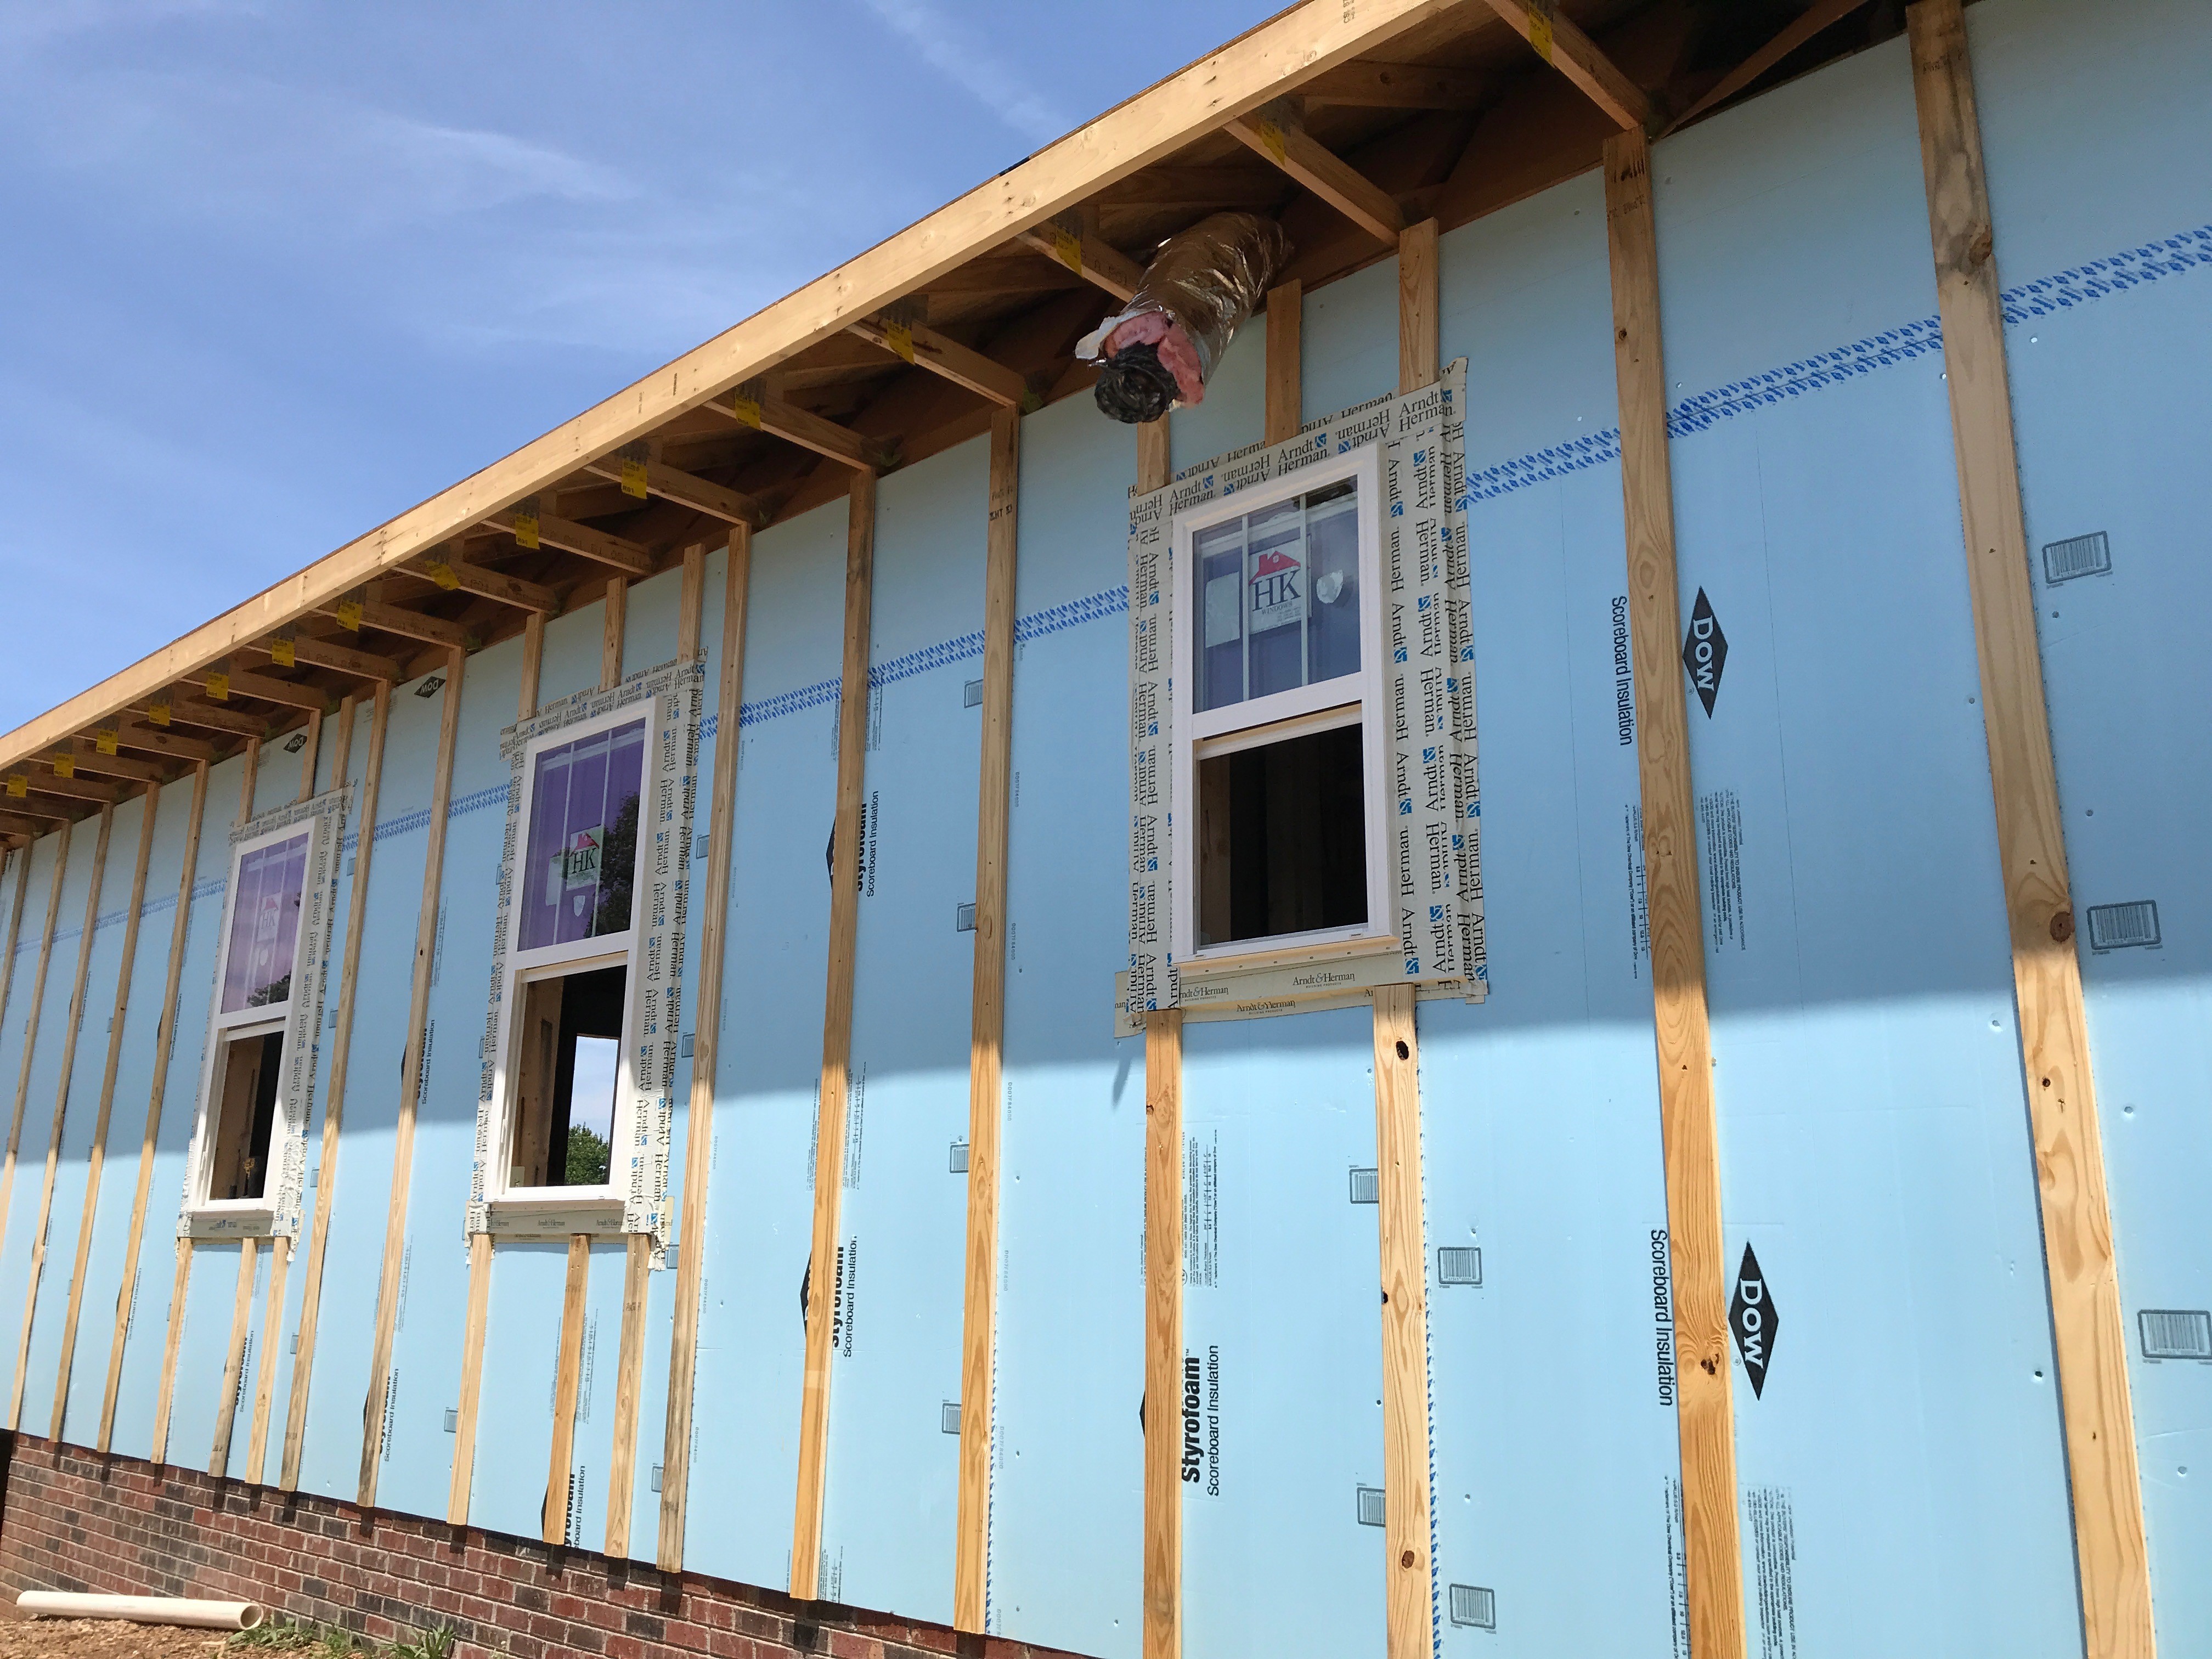
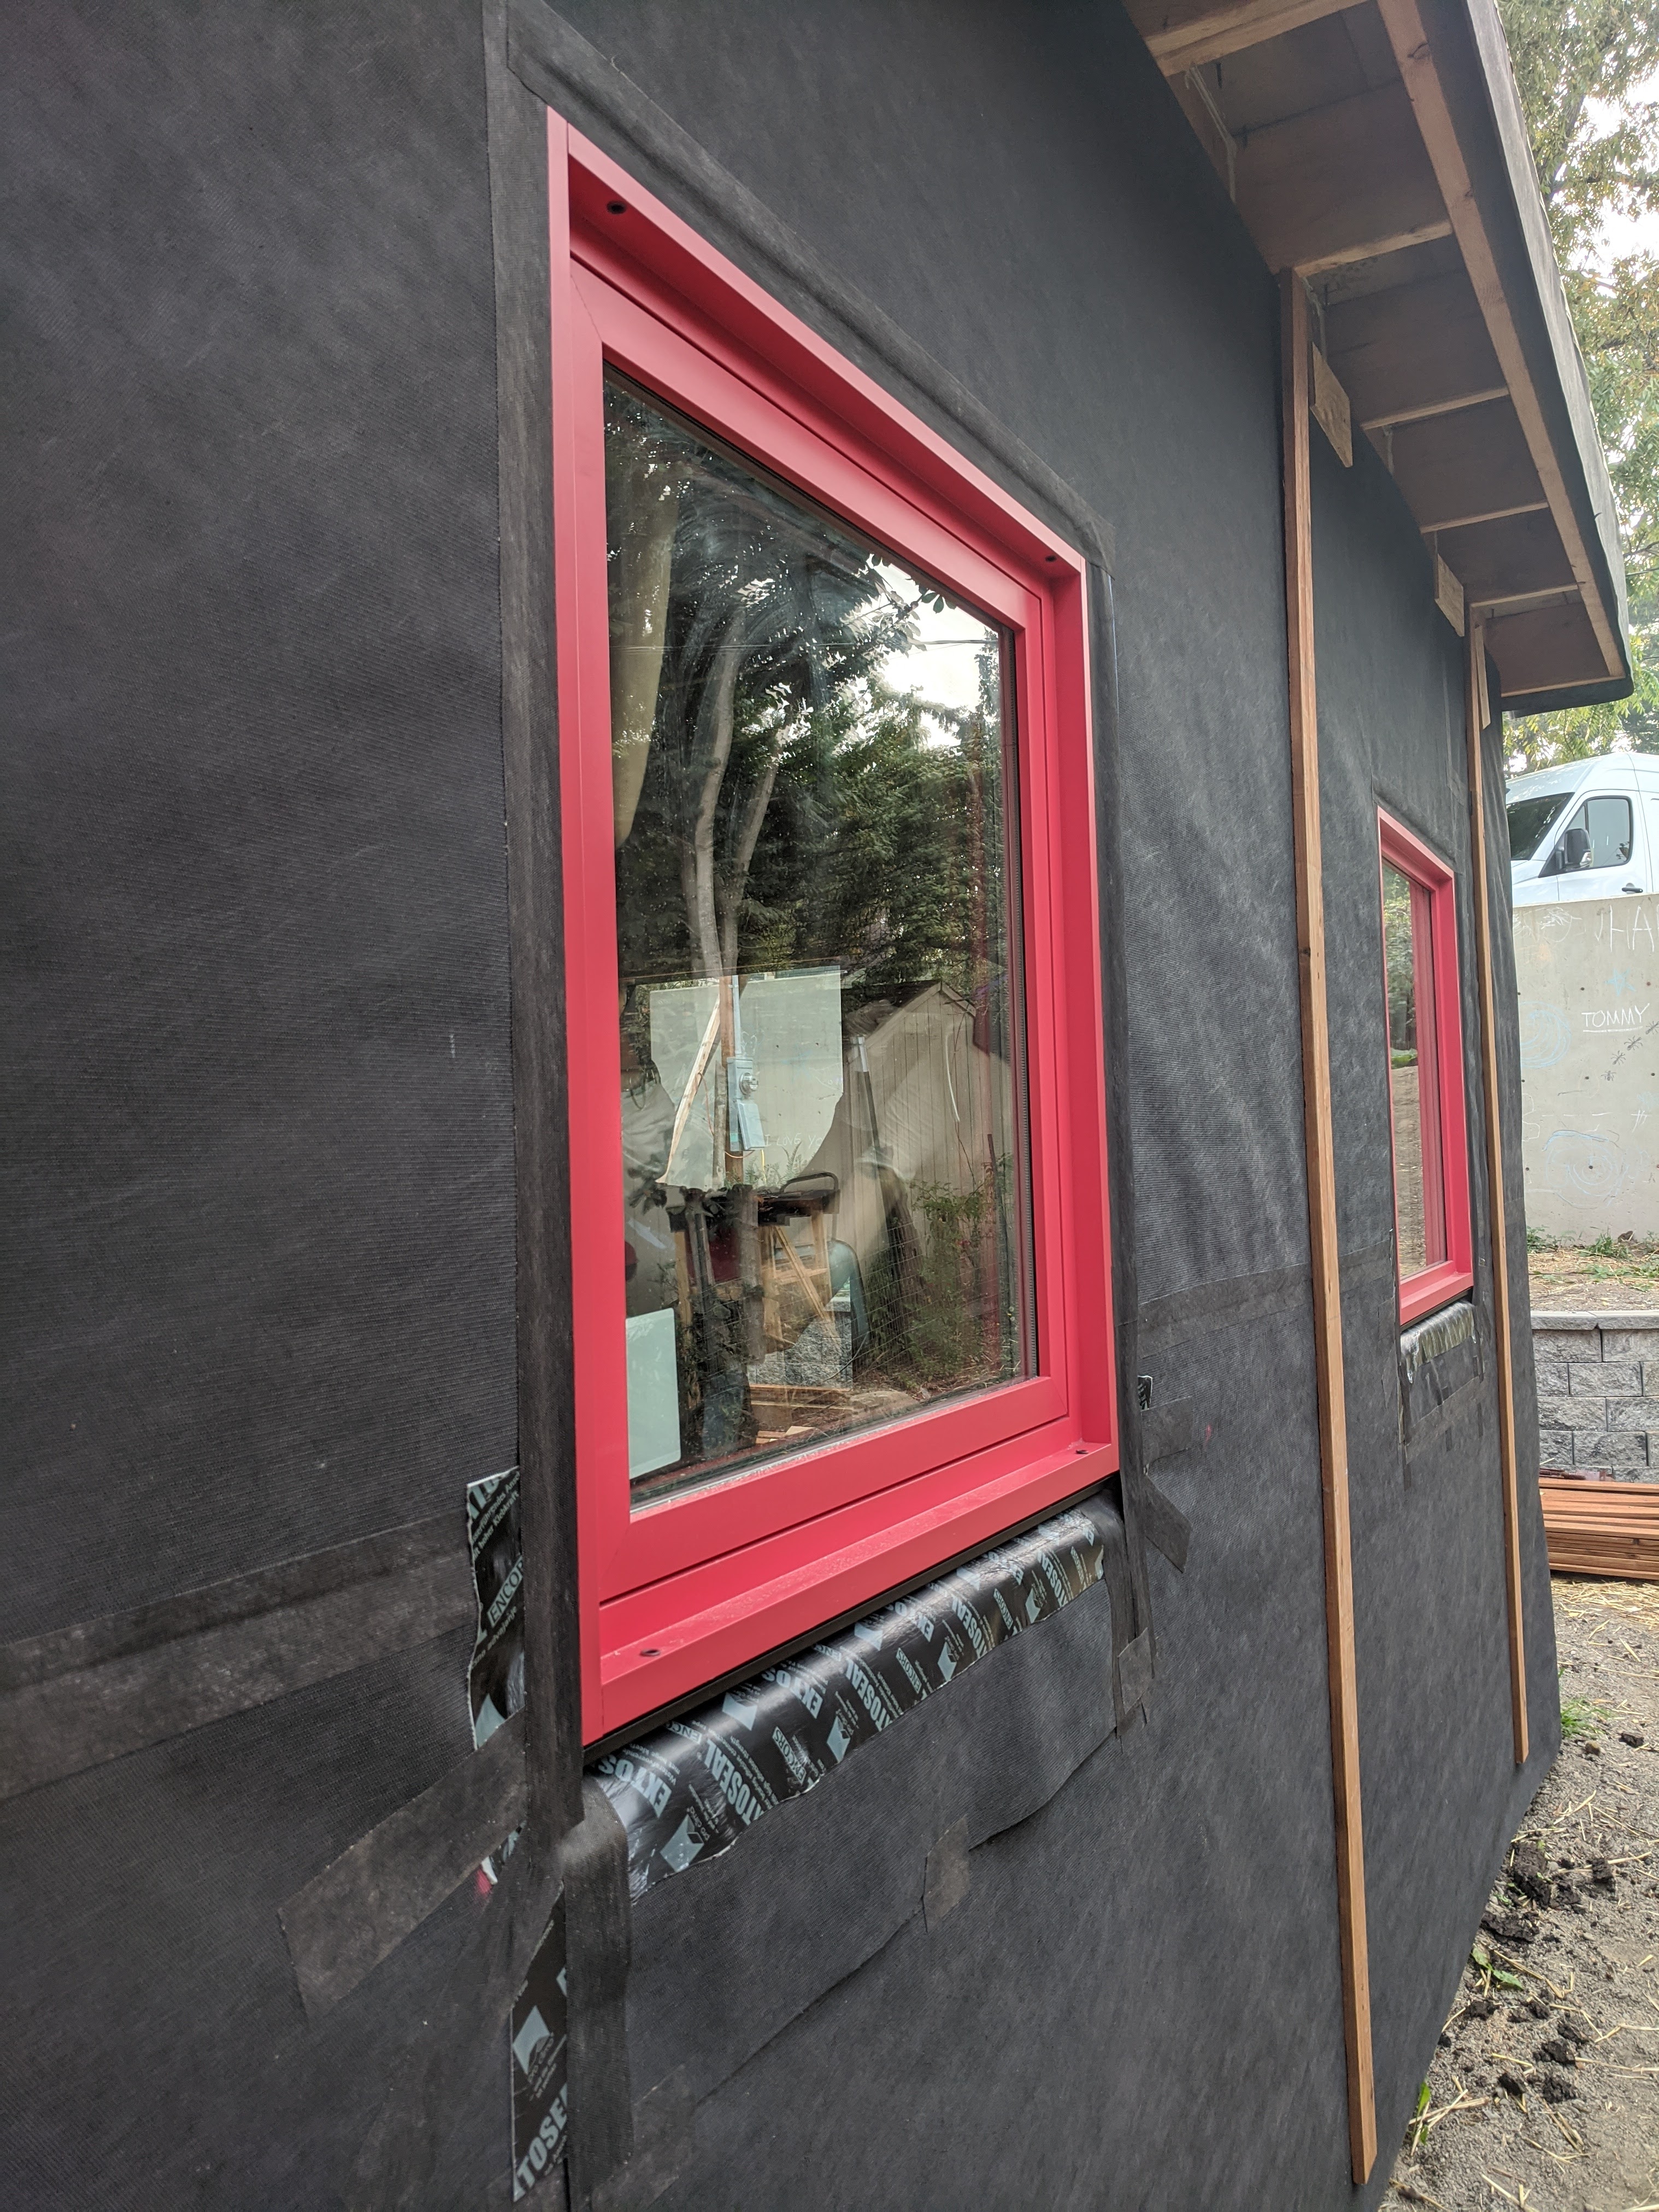
Proper flashing around windows is especially important when the rigid foam serves as the drainage plane in the wall
Image
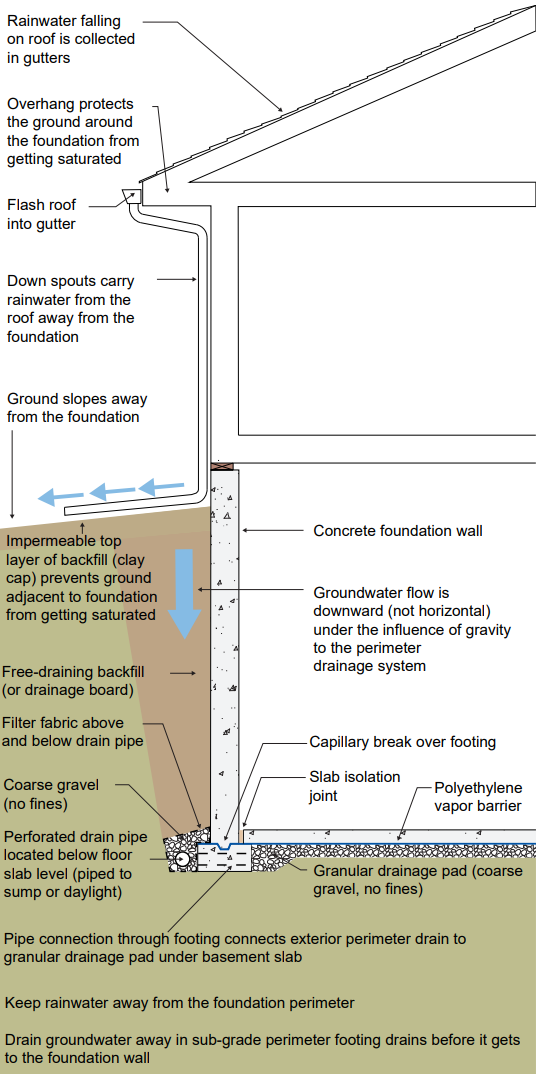
Proper gutter and downspout system terminates with final grade sloping away from the home
Image
Image
Image
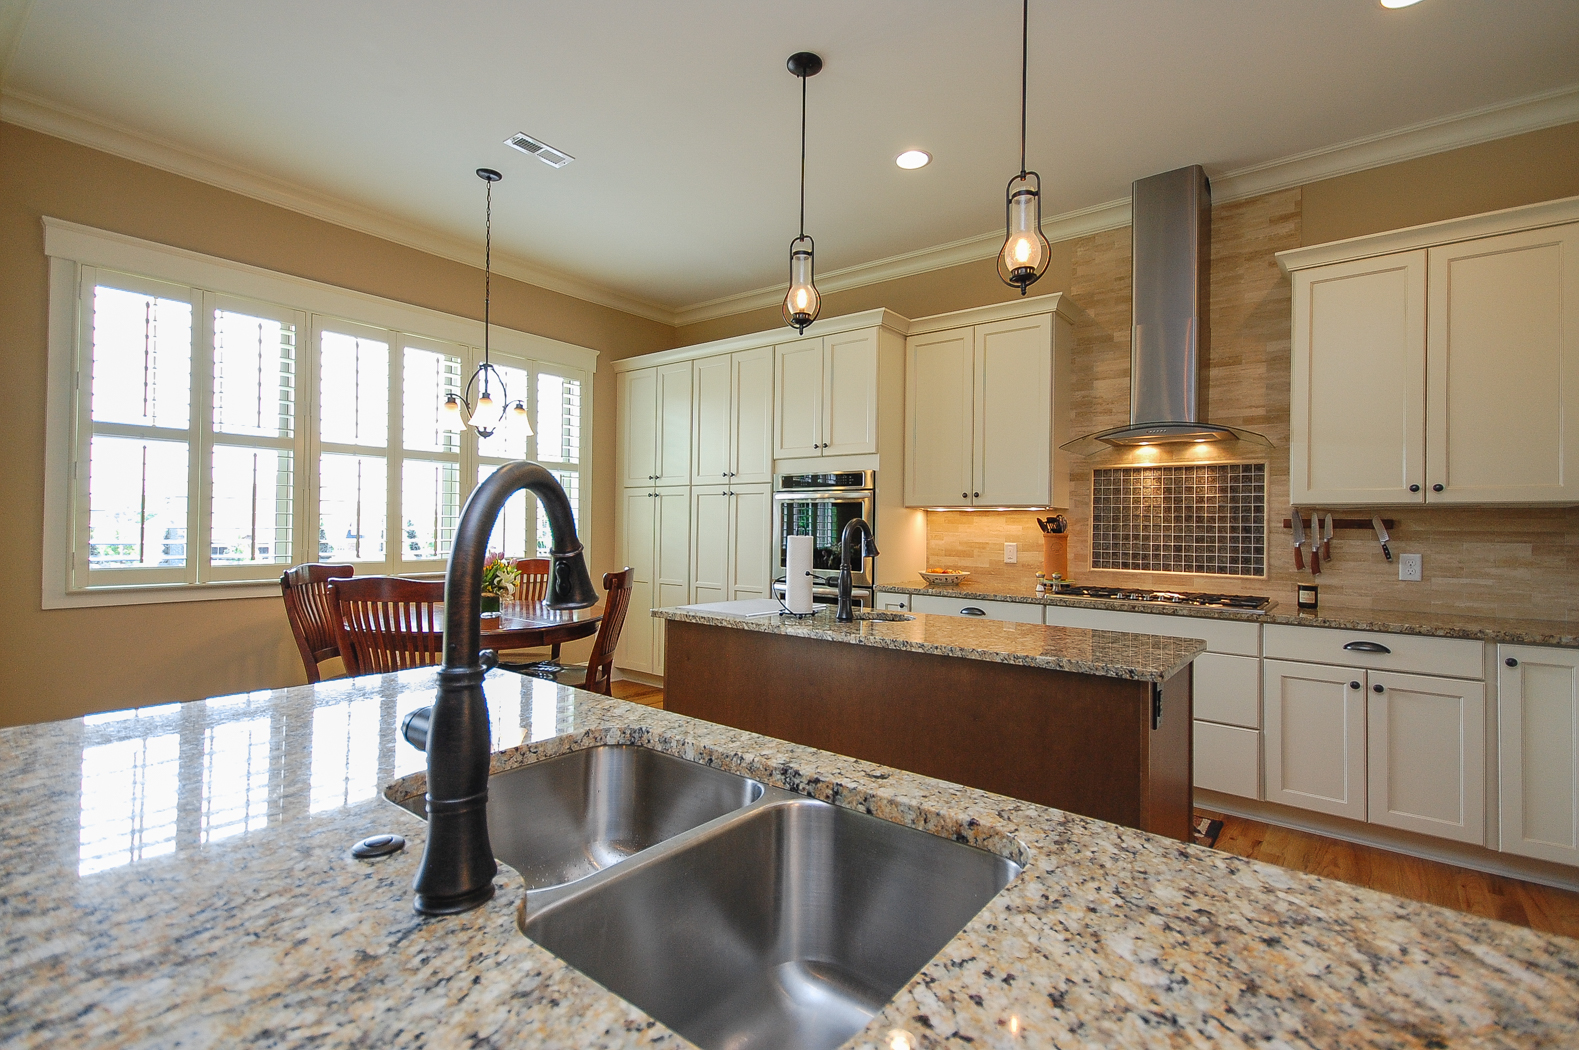
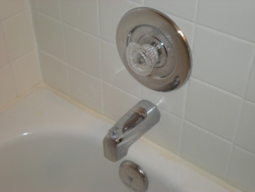
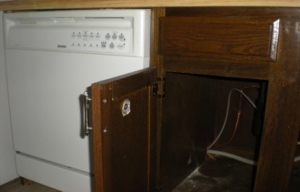
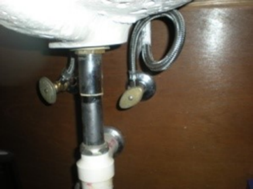
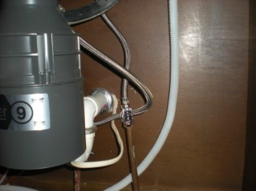
Properly install all water-using fixtures, equipment, and appliances such that there are no leaks.
Image
Image
Image
Image
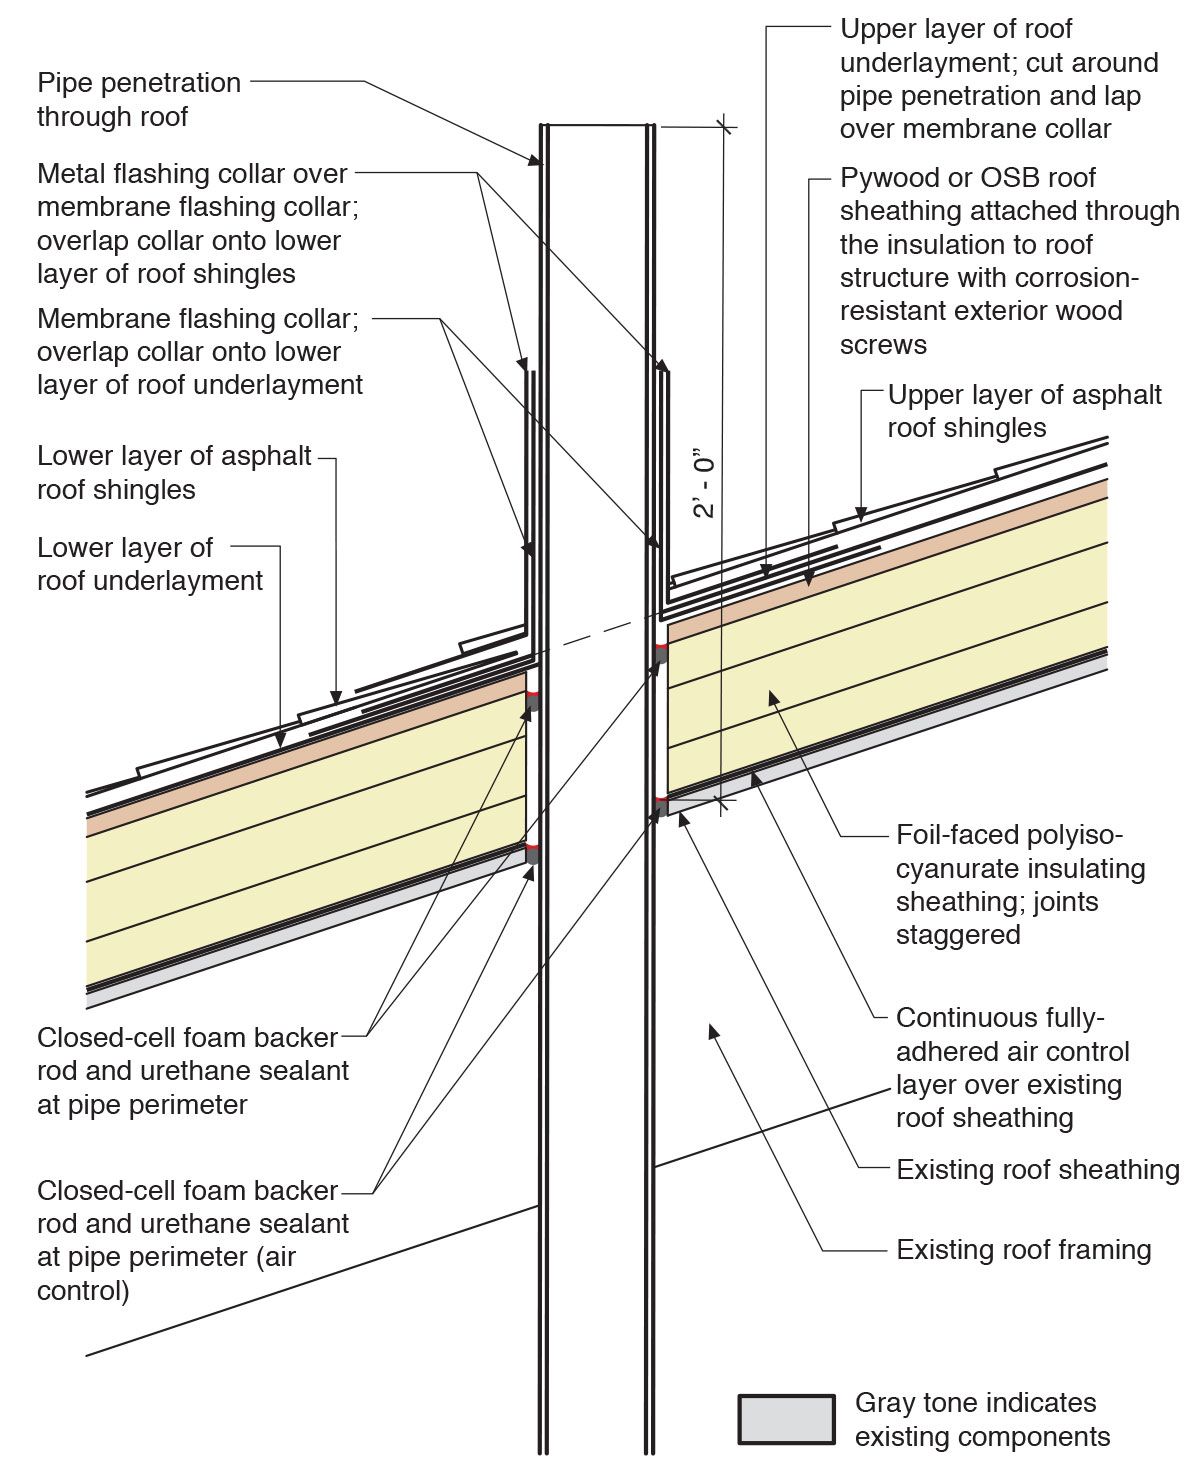
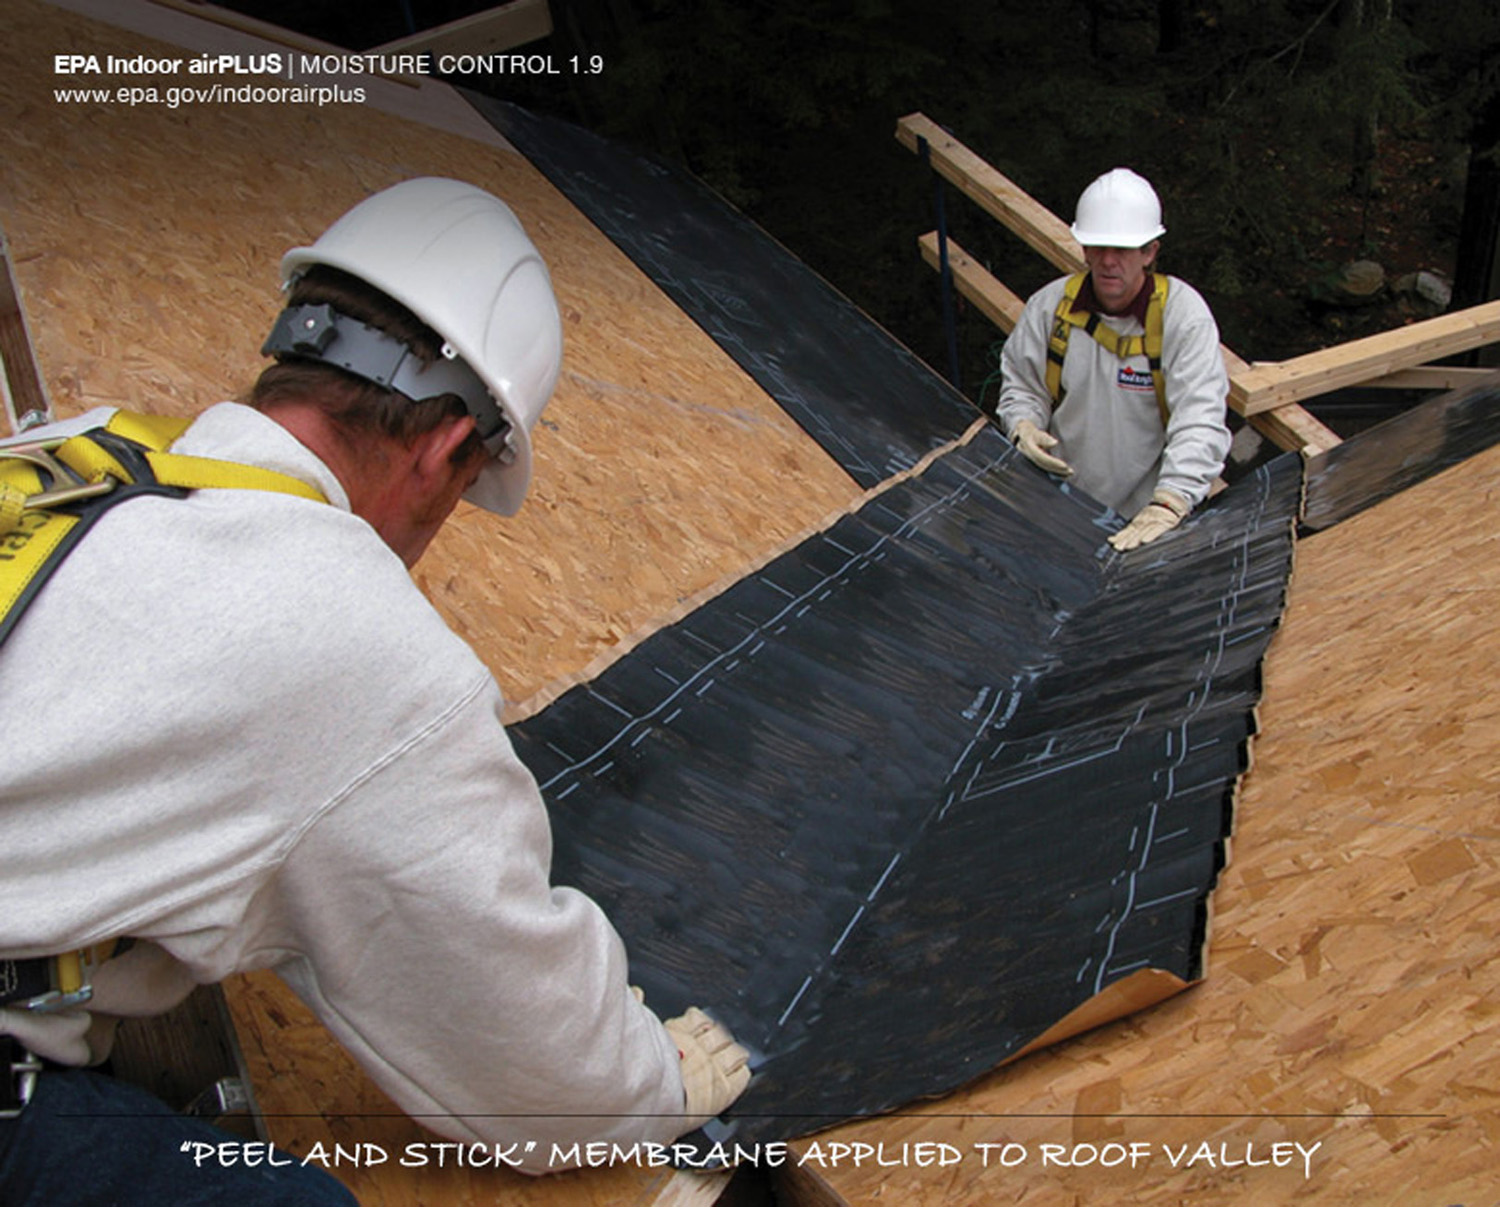
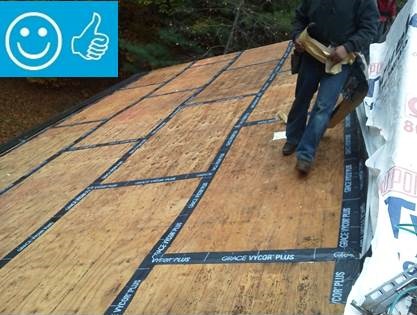
Provide flashing and sealing integrated with the air and water control layers for vents and other roof penetrations
Image
Image
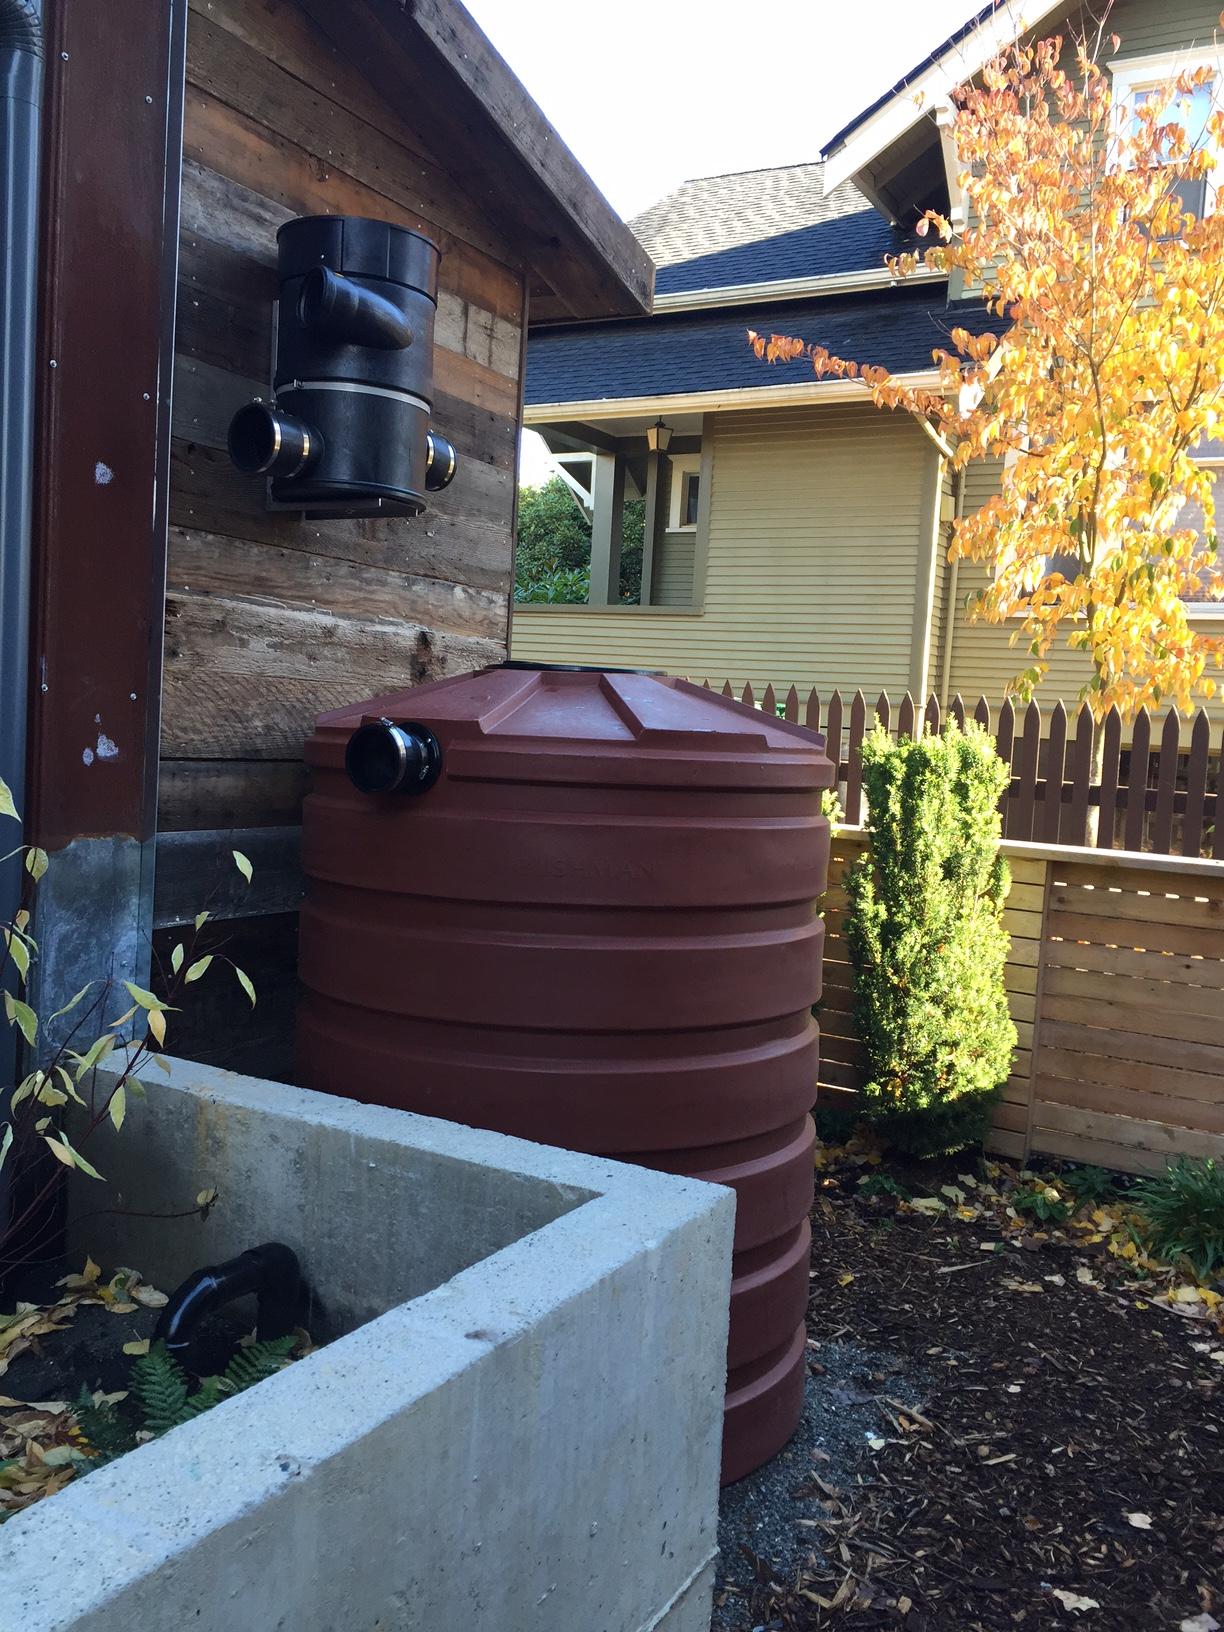
Rain barrels and cisterns collect rainwater for landscape irrigation.
Image
Image

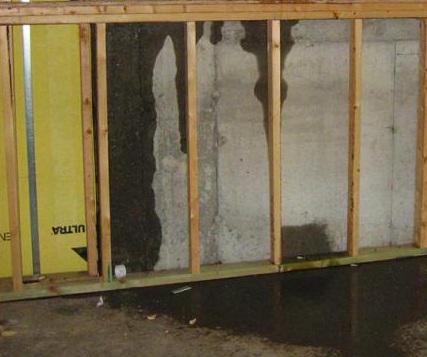
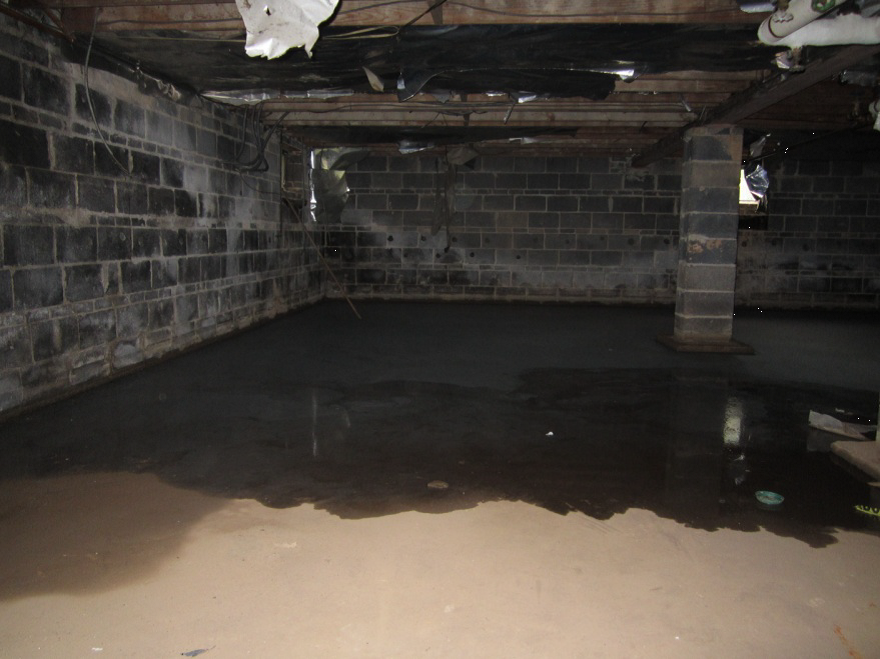
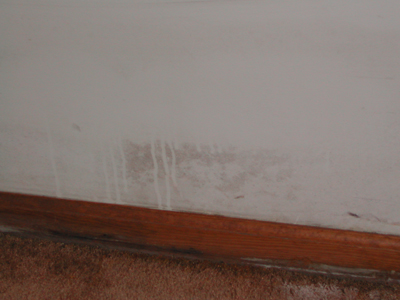
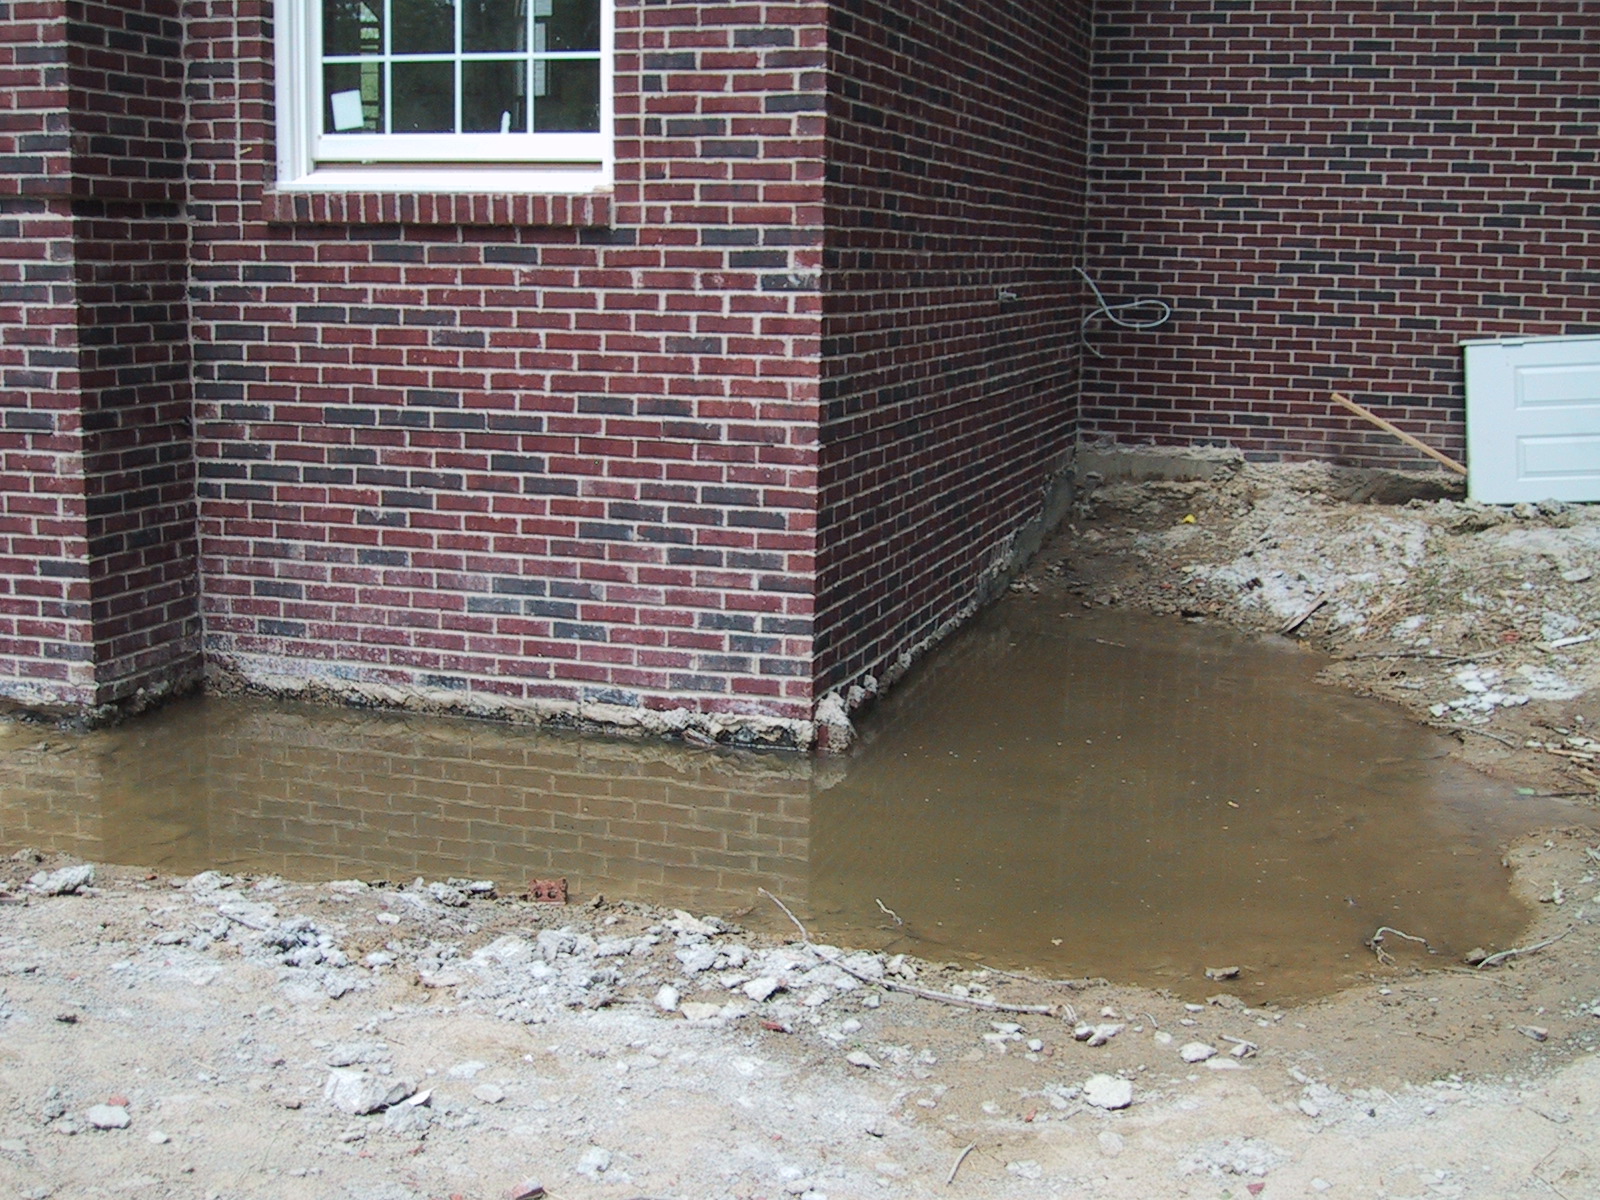
Repair leaks and cracks, and cover holes in foundation floors and walls to minimize water and vapor entry.
Image
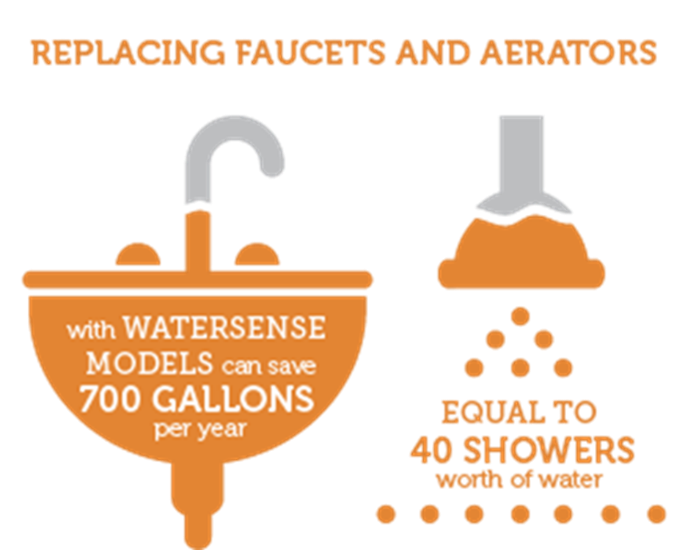
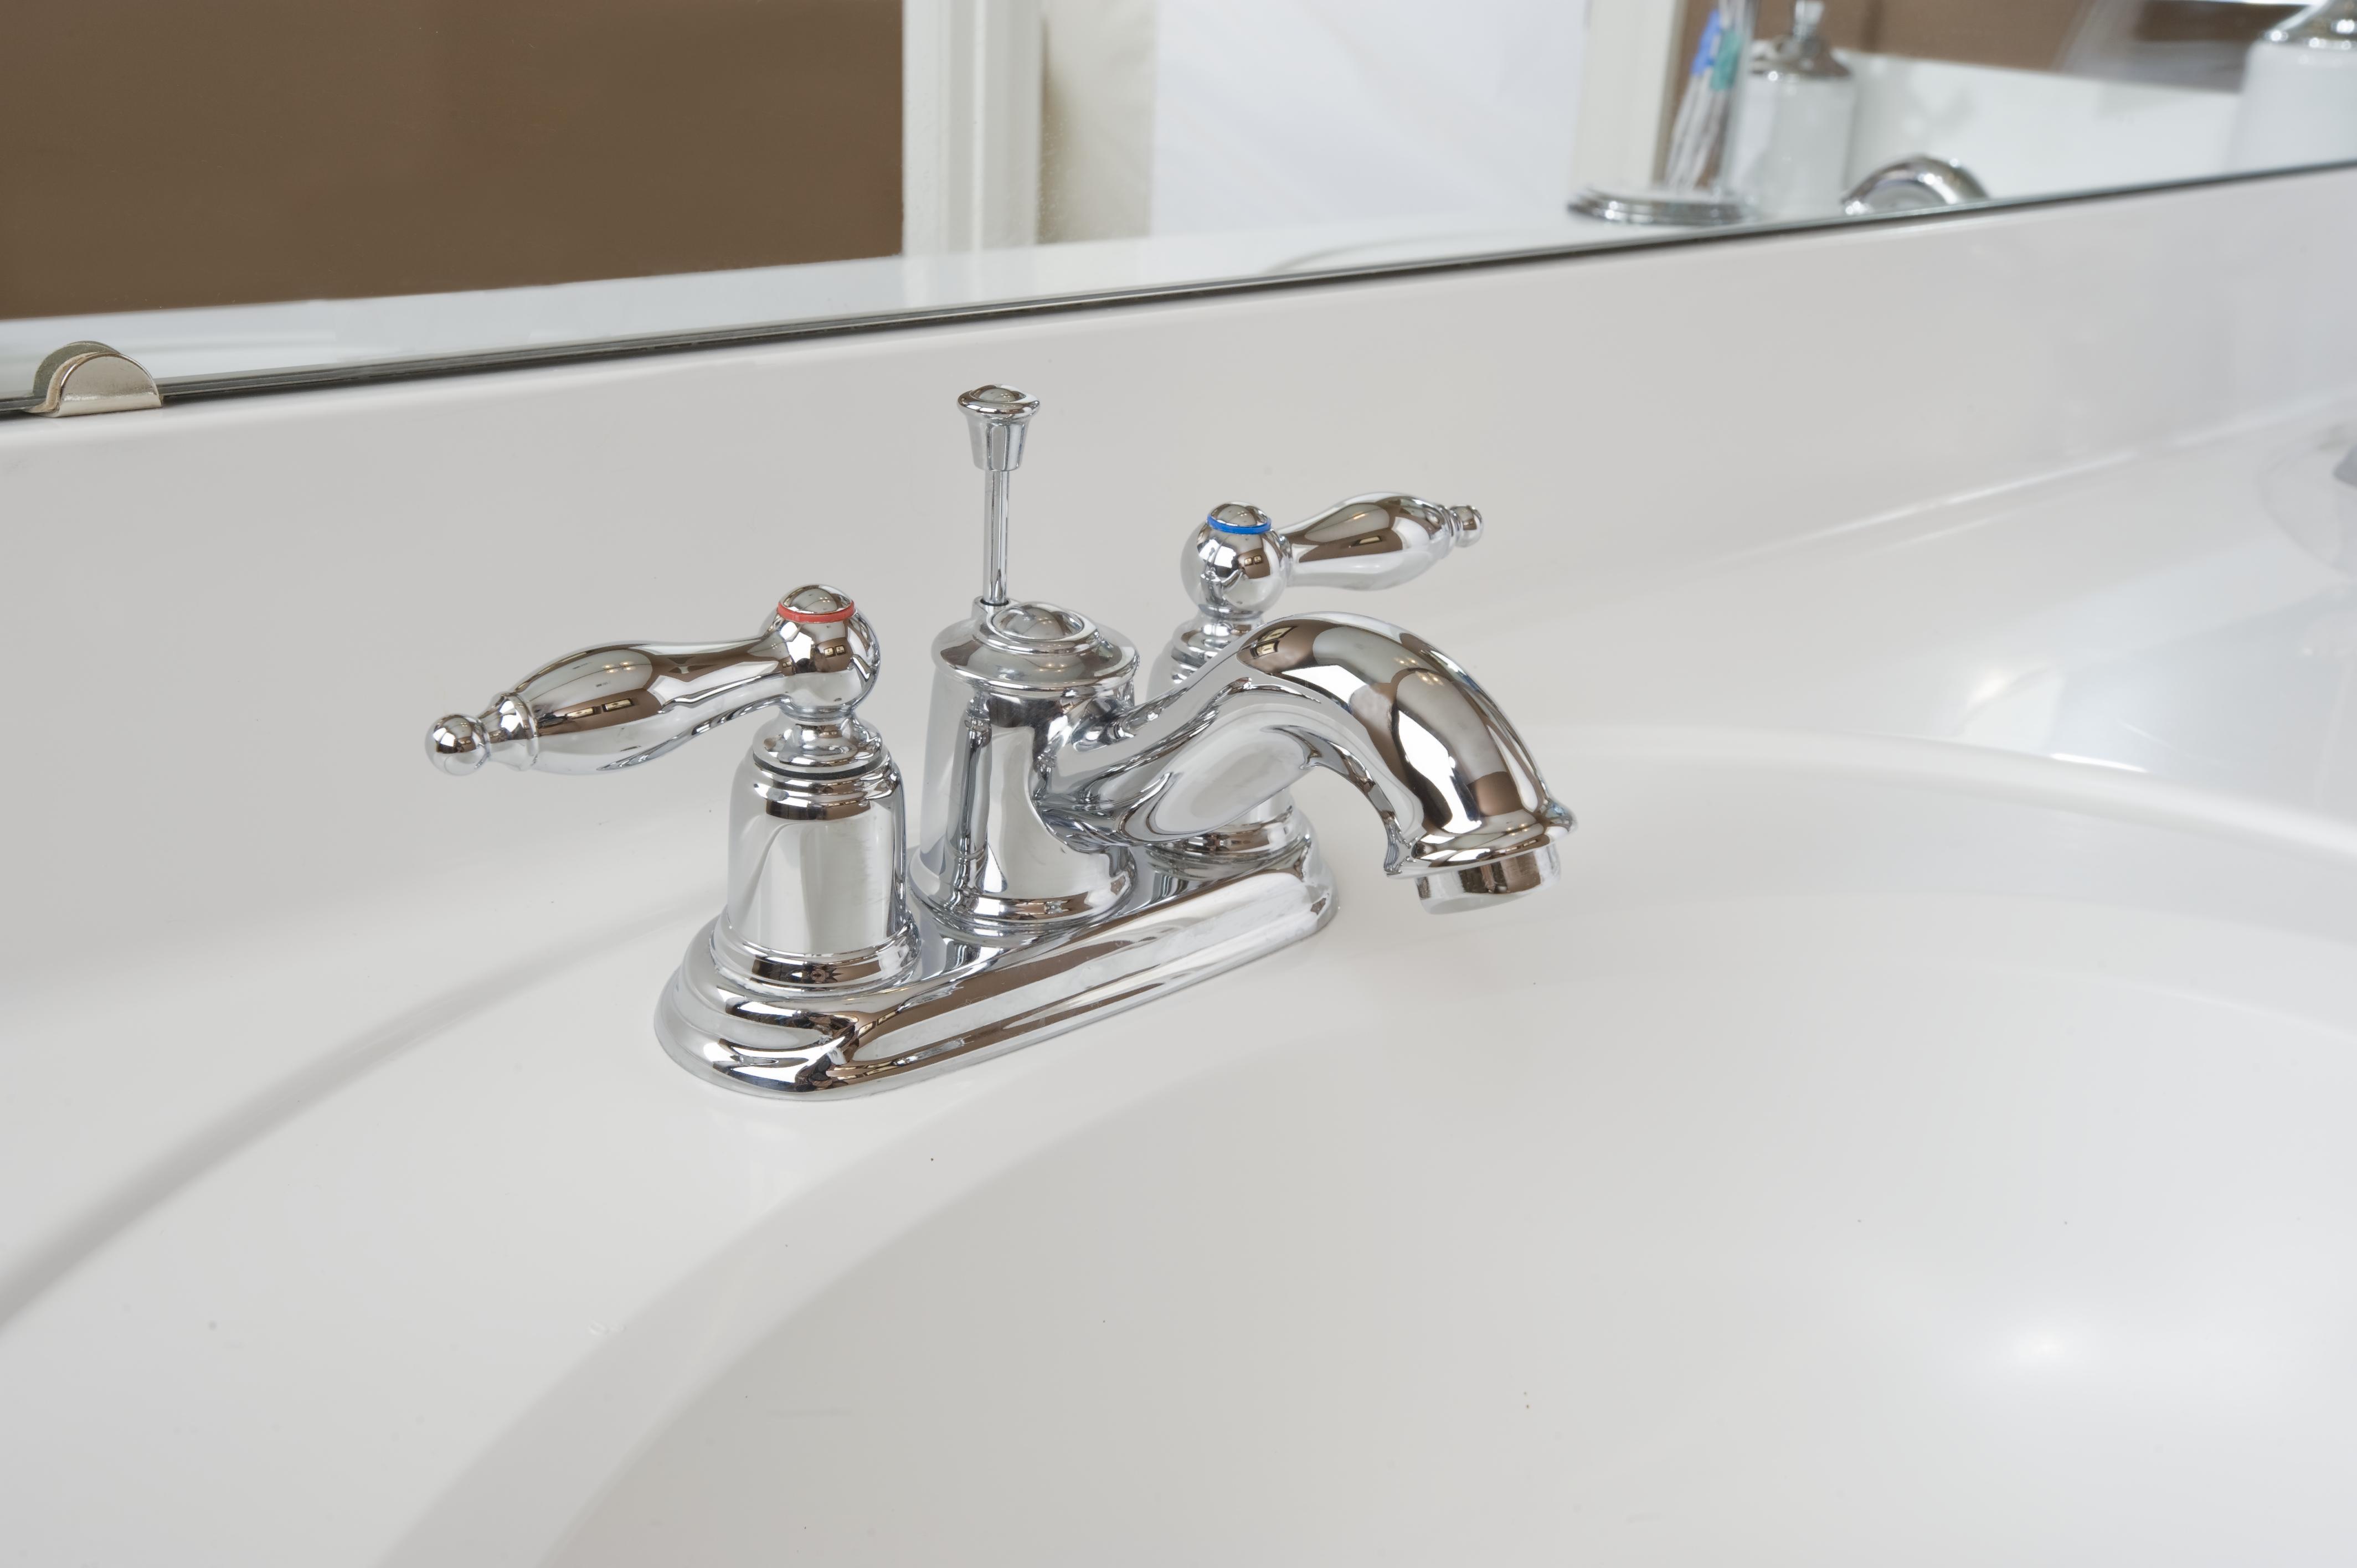
Replacing faucets and aerators with WaterSense models can save 700 gallons per year - equal to 40 showers worth of water.
Image
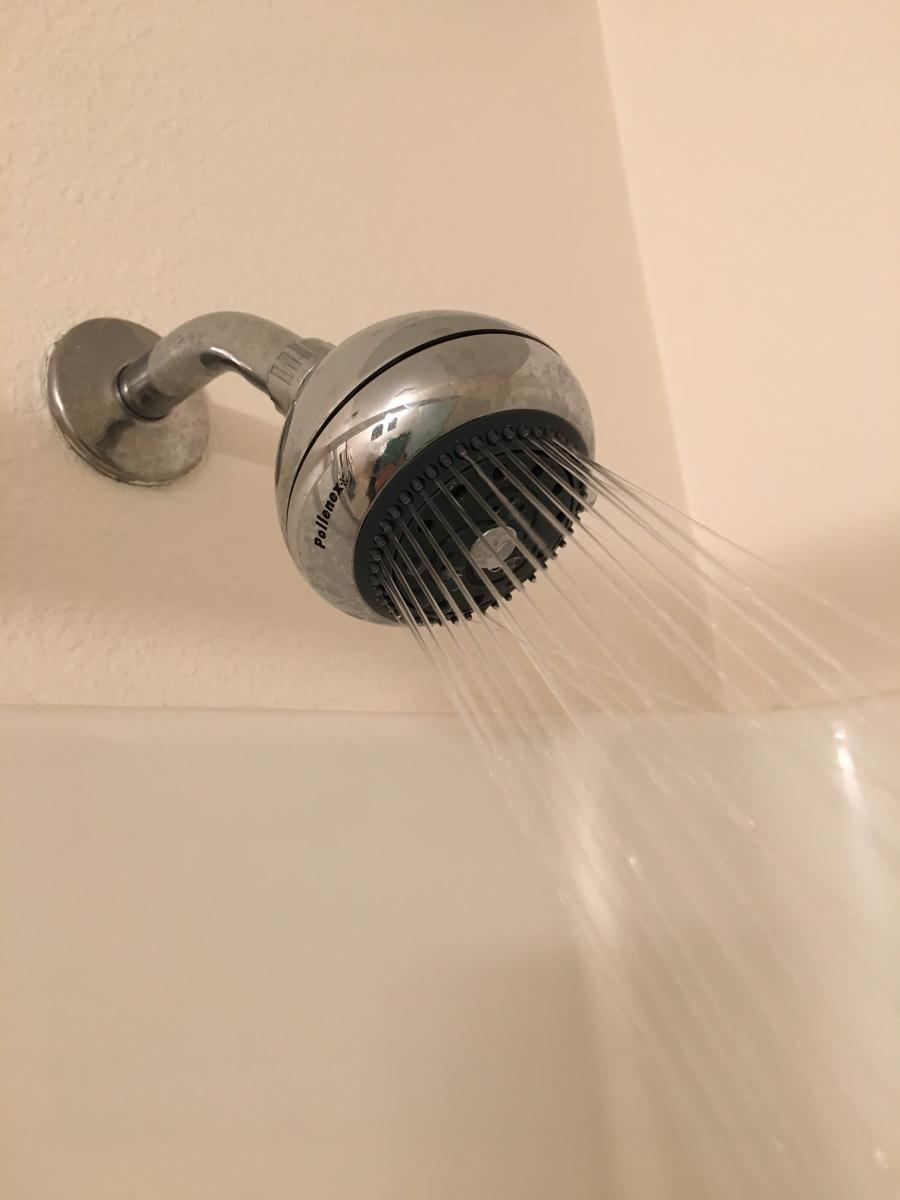
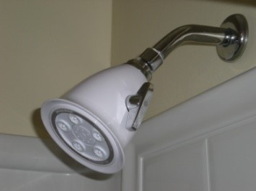
Replacing your old showerhead with a new low-flow showerhead can save hundreds of gallons of water each year.
Image
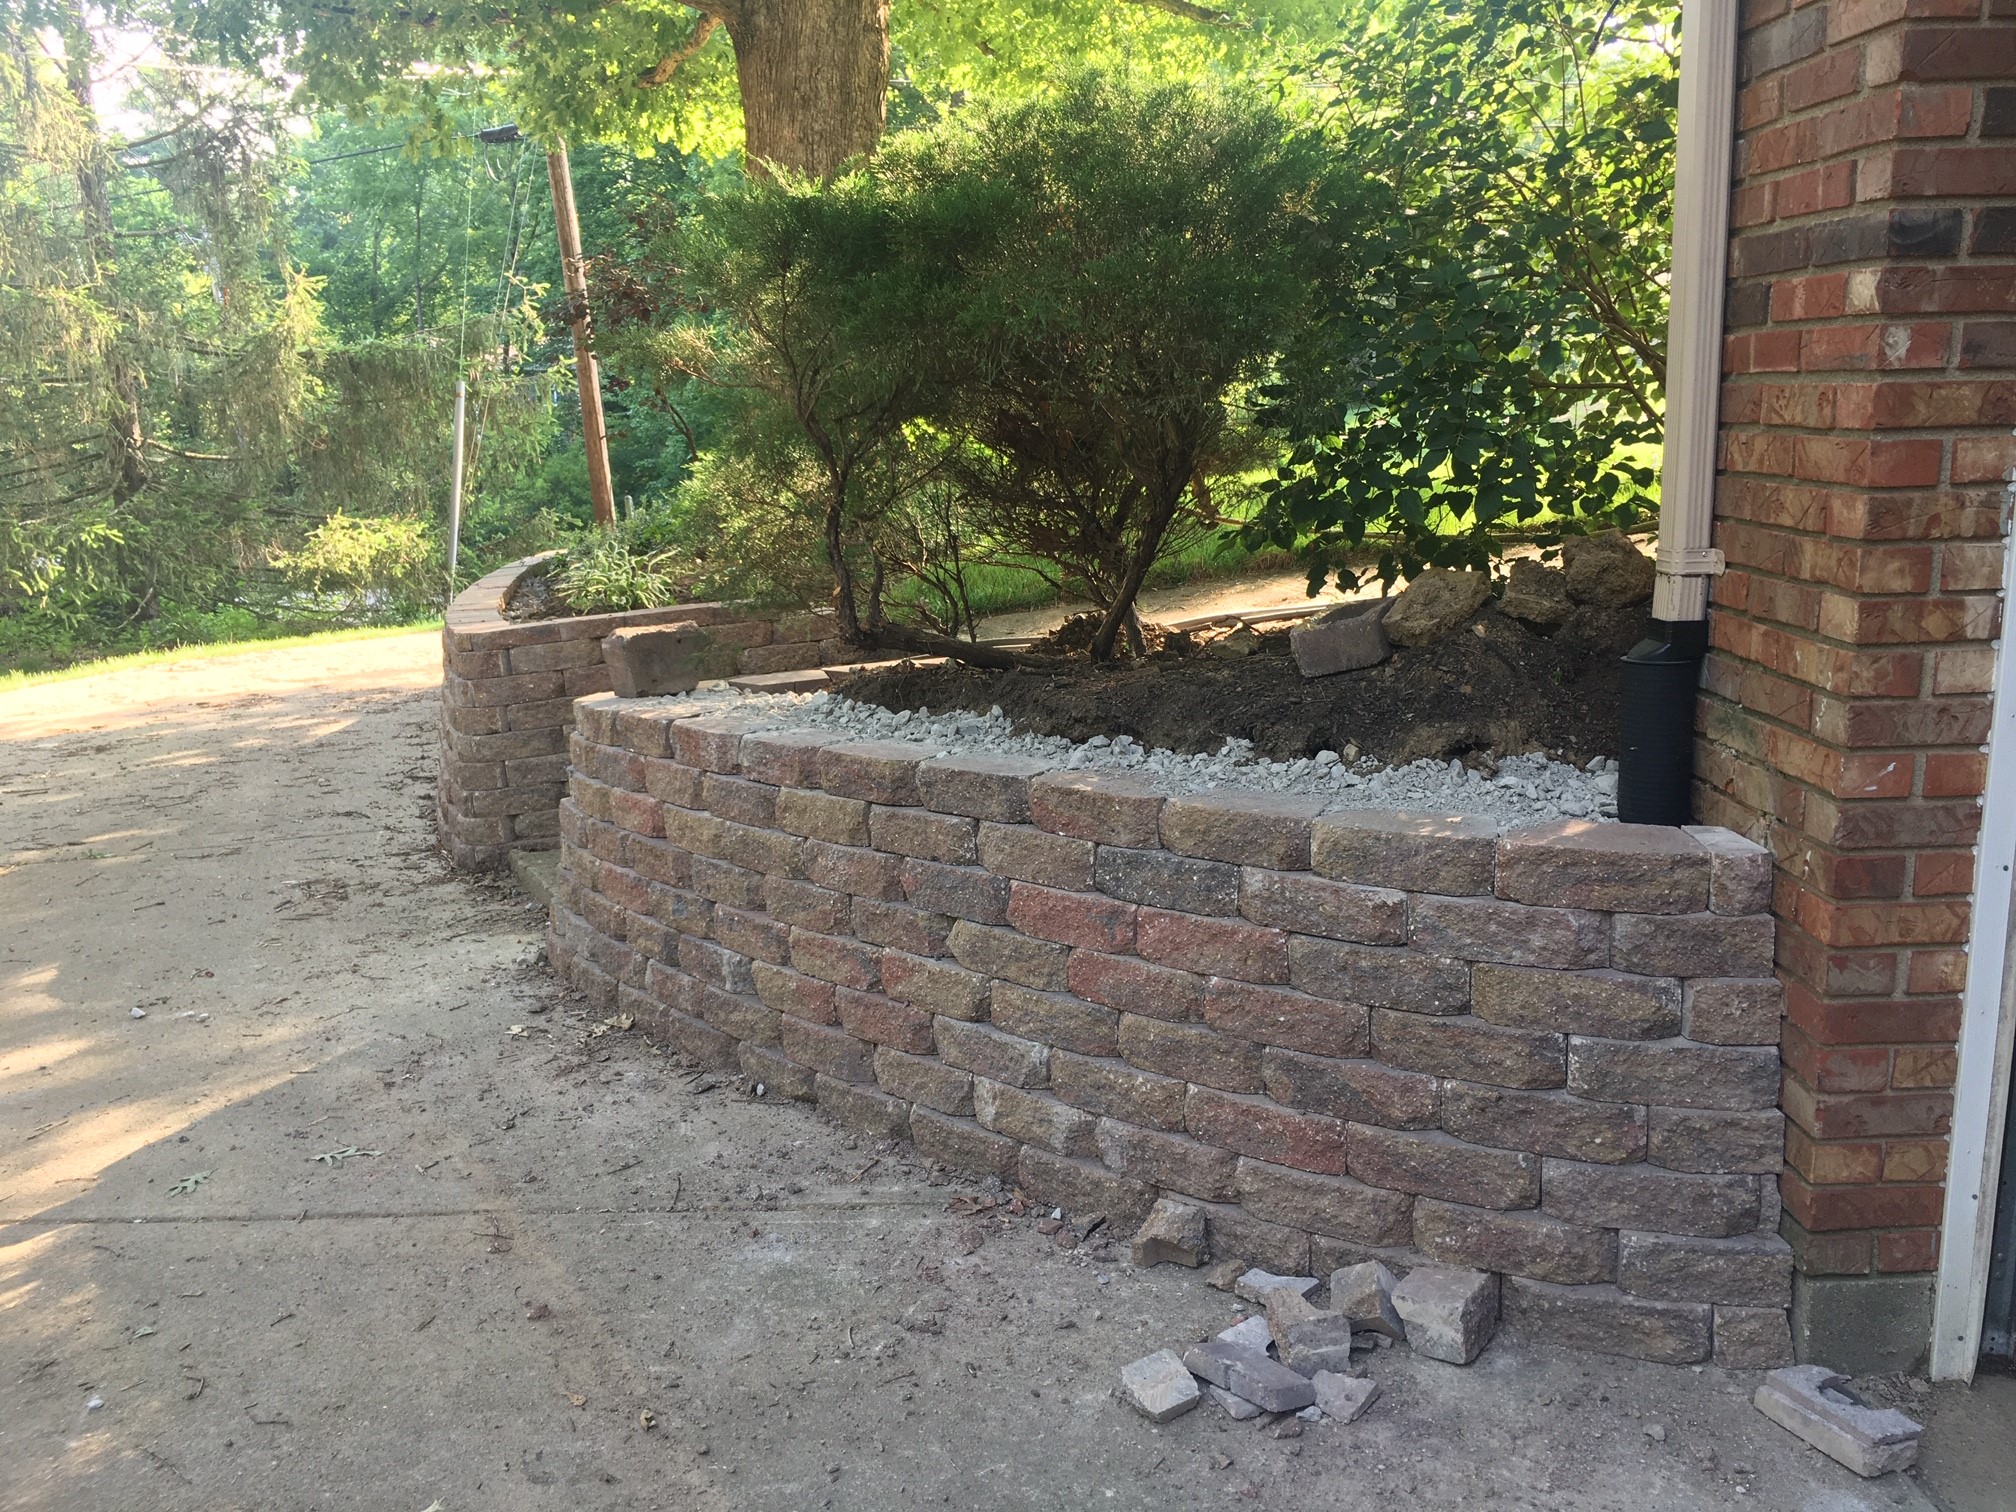
Retaining walls can prevent erosion and landslides and maintain access to critical infrastructure
Image
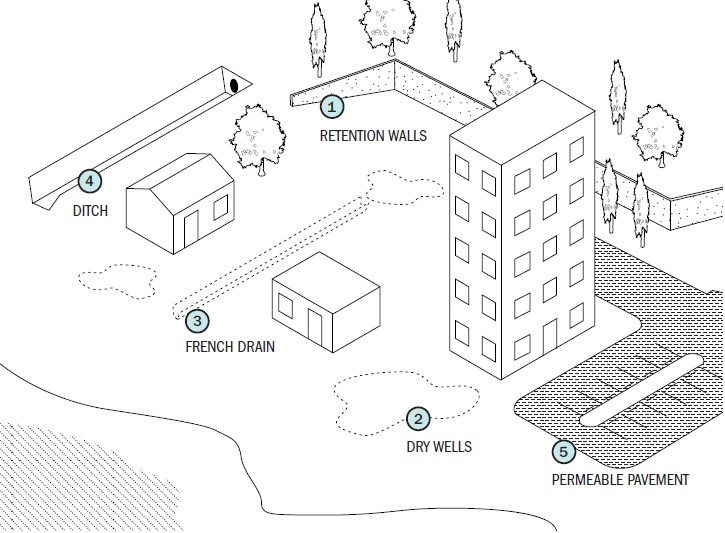
Retention walls, permeable pavement, french drains, drywells, and ditches all help to divert, collect, and manage the flow of stormwater on a site.
Image
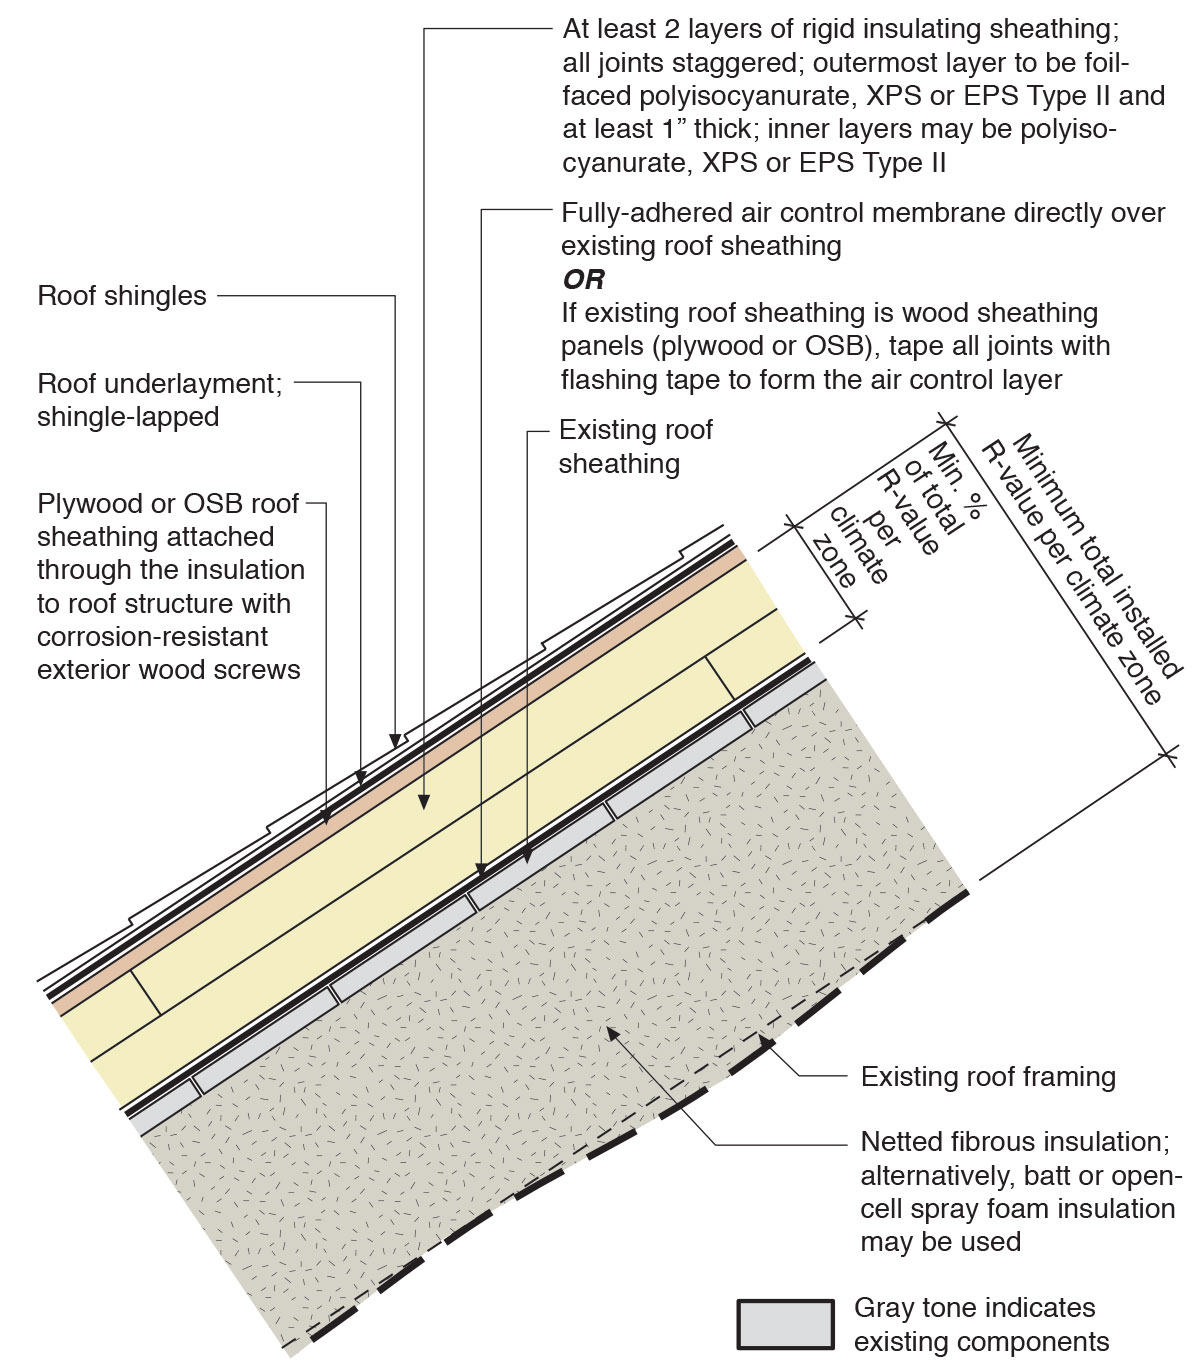
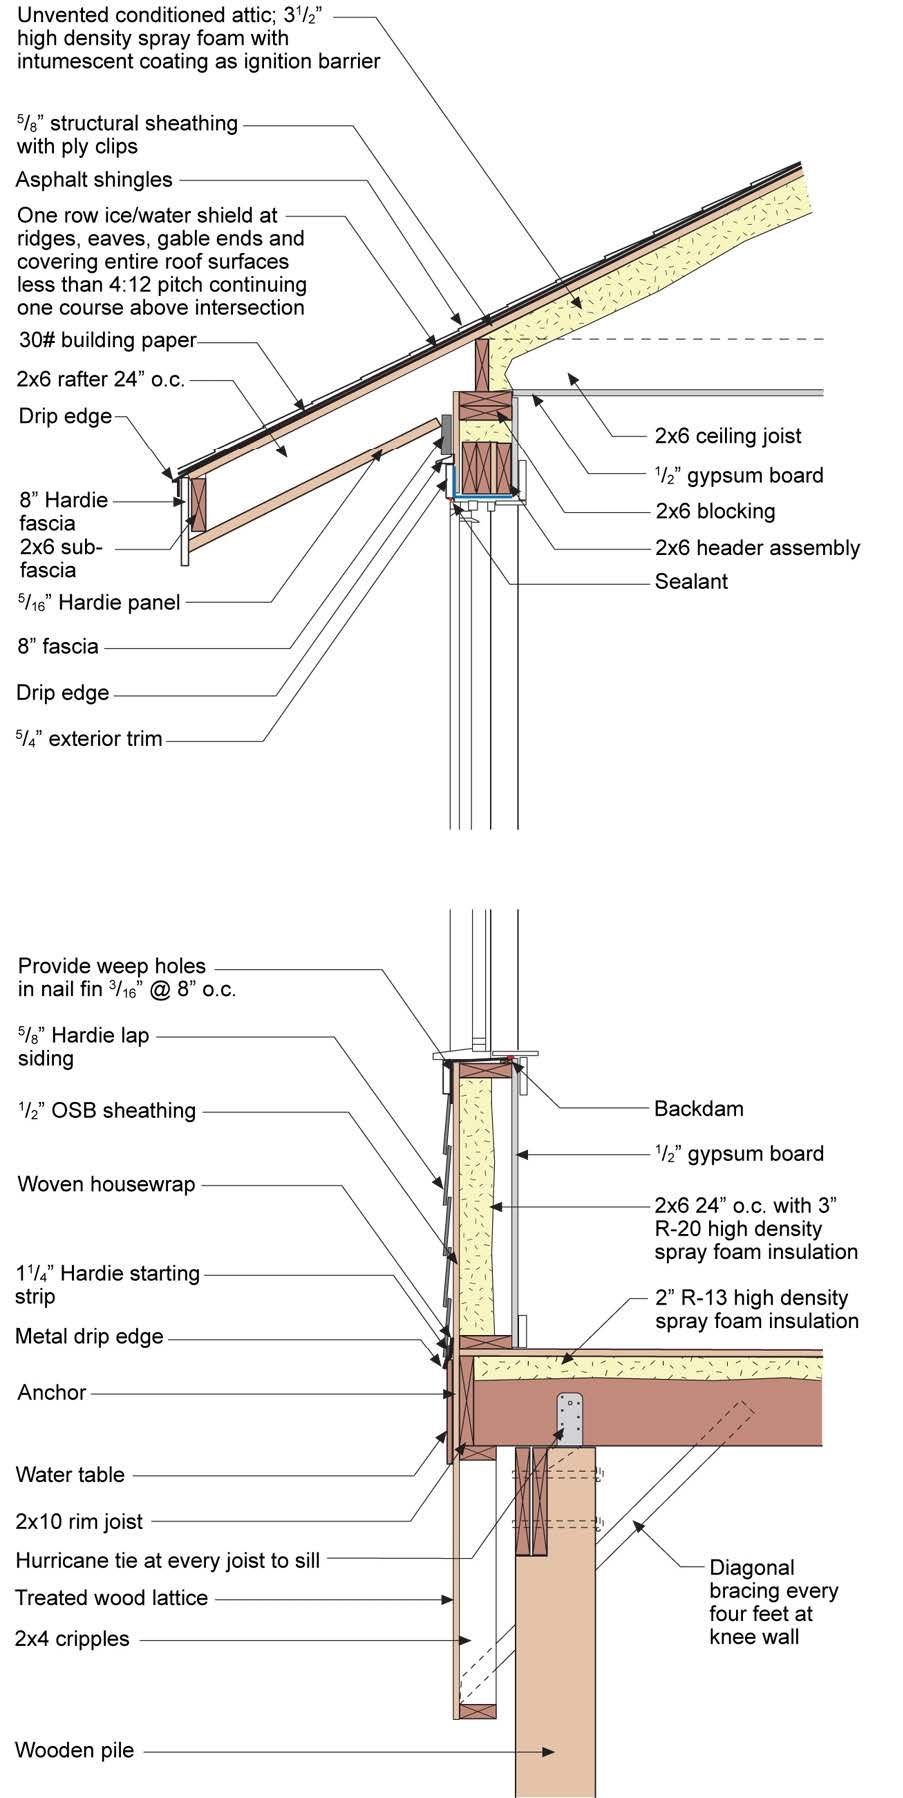
Retrofit an existing roof by installing rigid foam, new moisture and air control layers, new sheathing, and new cladding plus cavity insulation in the roof rafters to create an unvented attic
Image
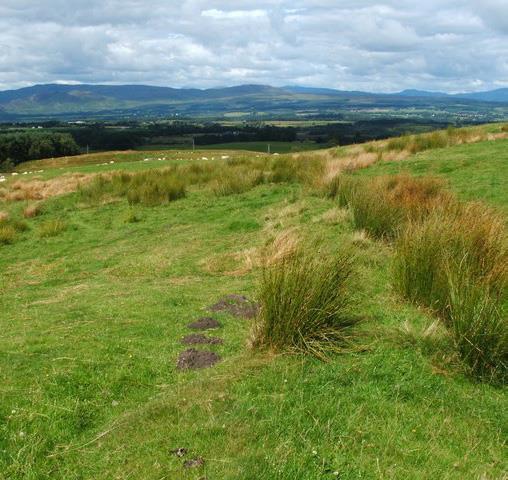
Ridges can be constructed and planted to slow the downward flow of water and stabilize slopes.
Image
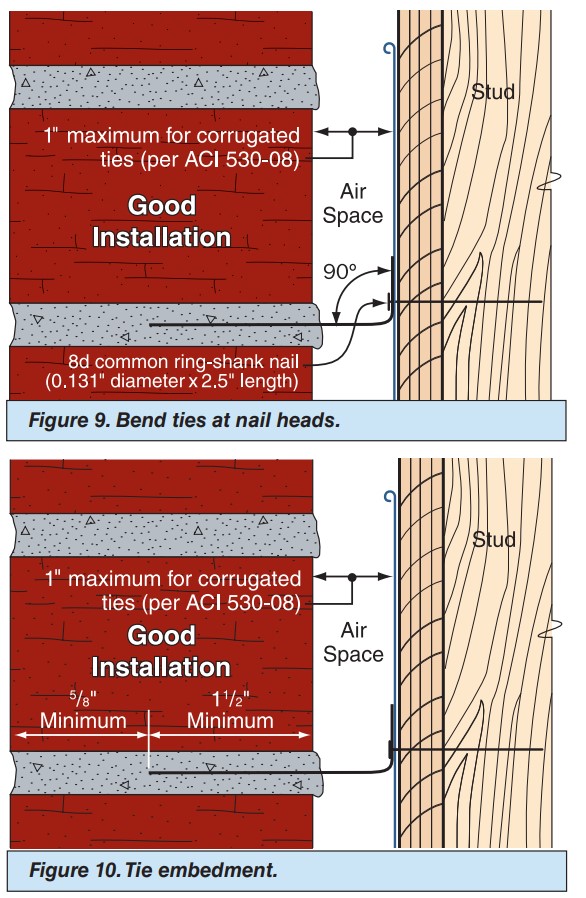
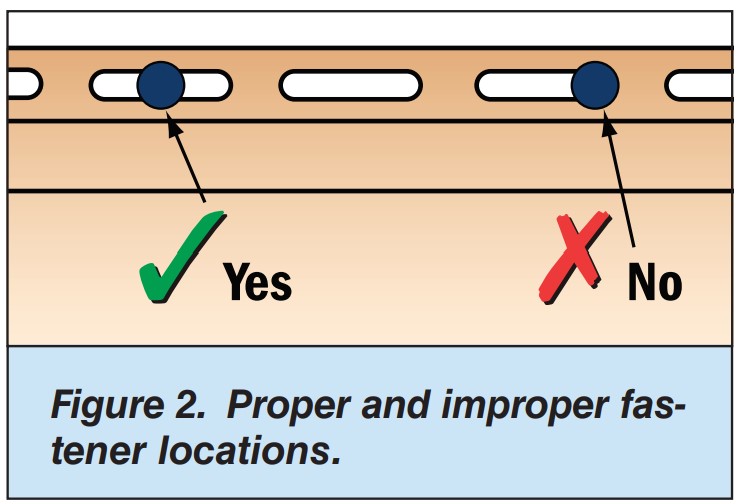
Right – The ties are bent at a 90 degree angle at the nail head and embedded into the mortar joint at least 1.5 inches.
Image
Right – The ties are bent at a 90 degree angle at the nail head and embedded into the mortar joint at least 1.5 inches.
Image

Right - A dimpled-plastic geotextile mat covers the below-grade insulated concrete form (ICF) foundation to help keep water out of the foundation and to reduce hydrostatic pressure on the foundation during freeze-thaw cycles in winter.
Image
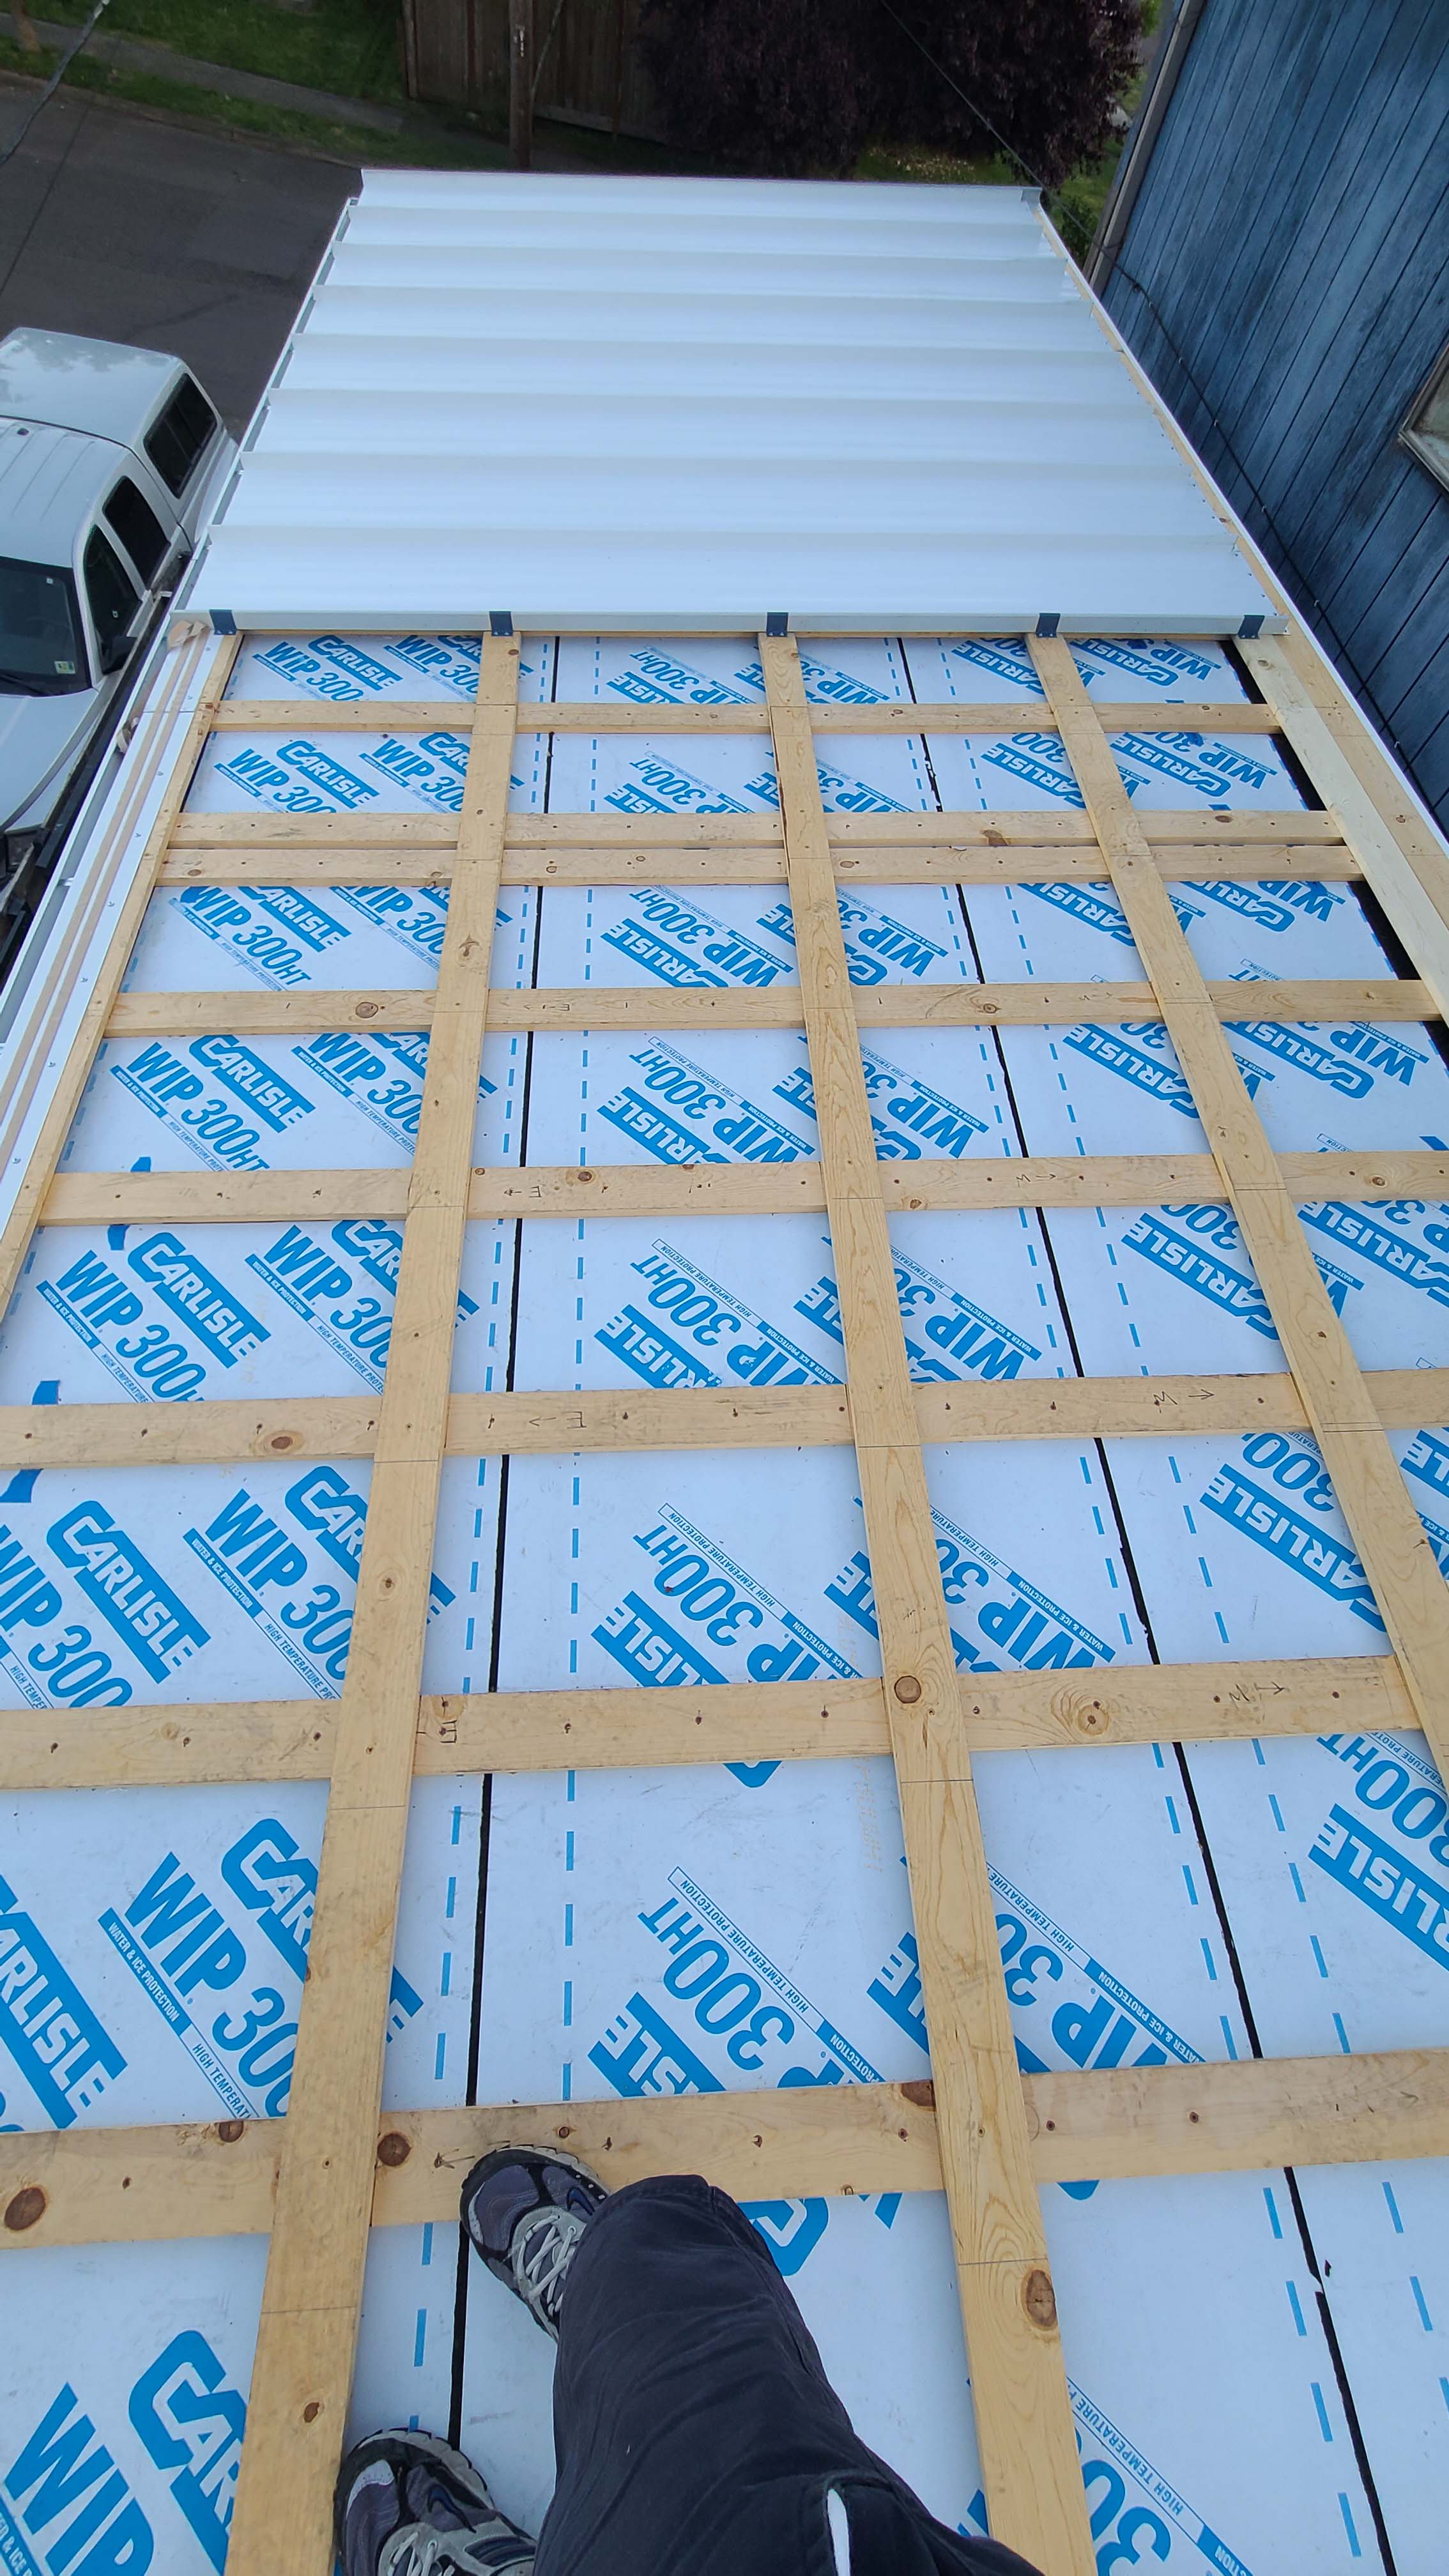
Right - A lattice of 1X4 furring strips provides a ventilation gap between the decking and metal roofing for this shed roof.
Image
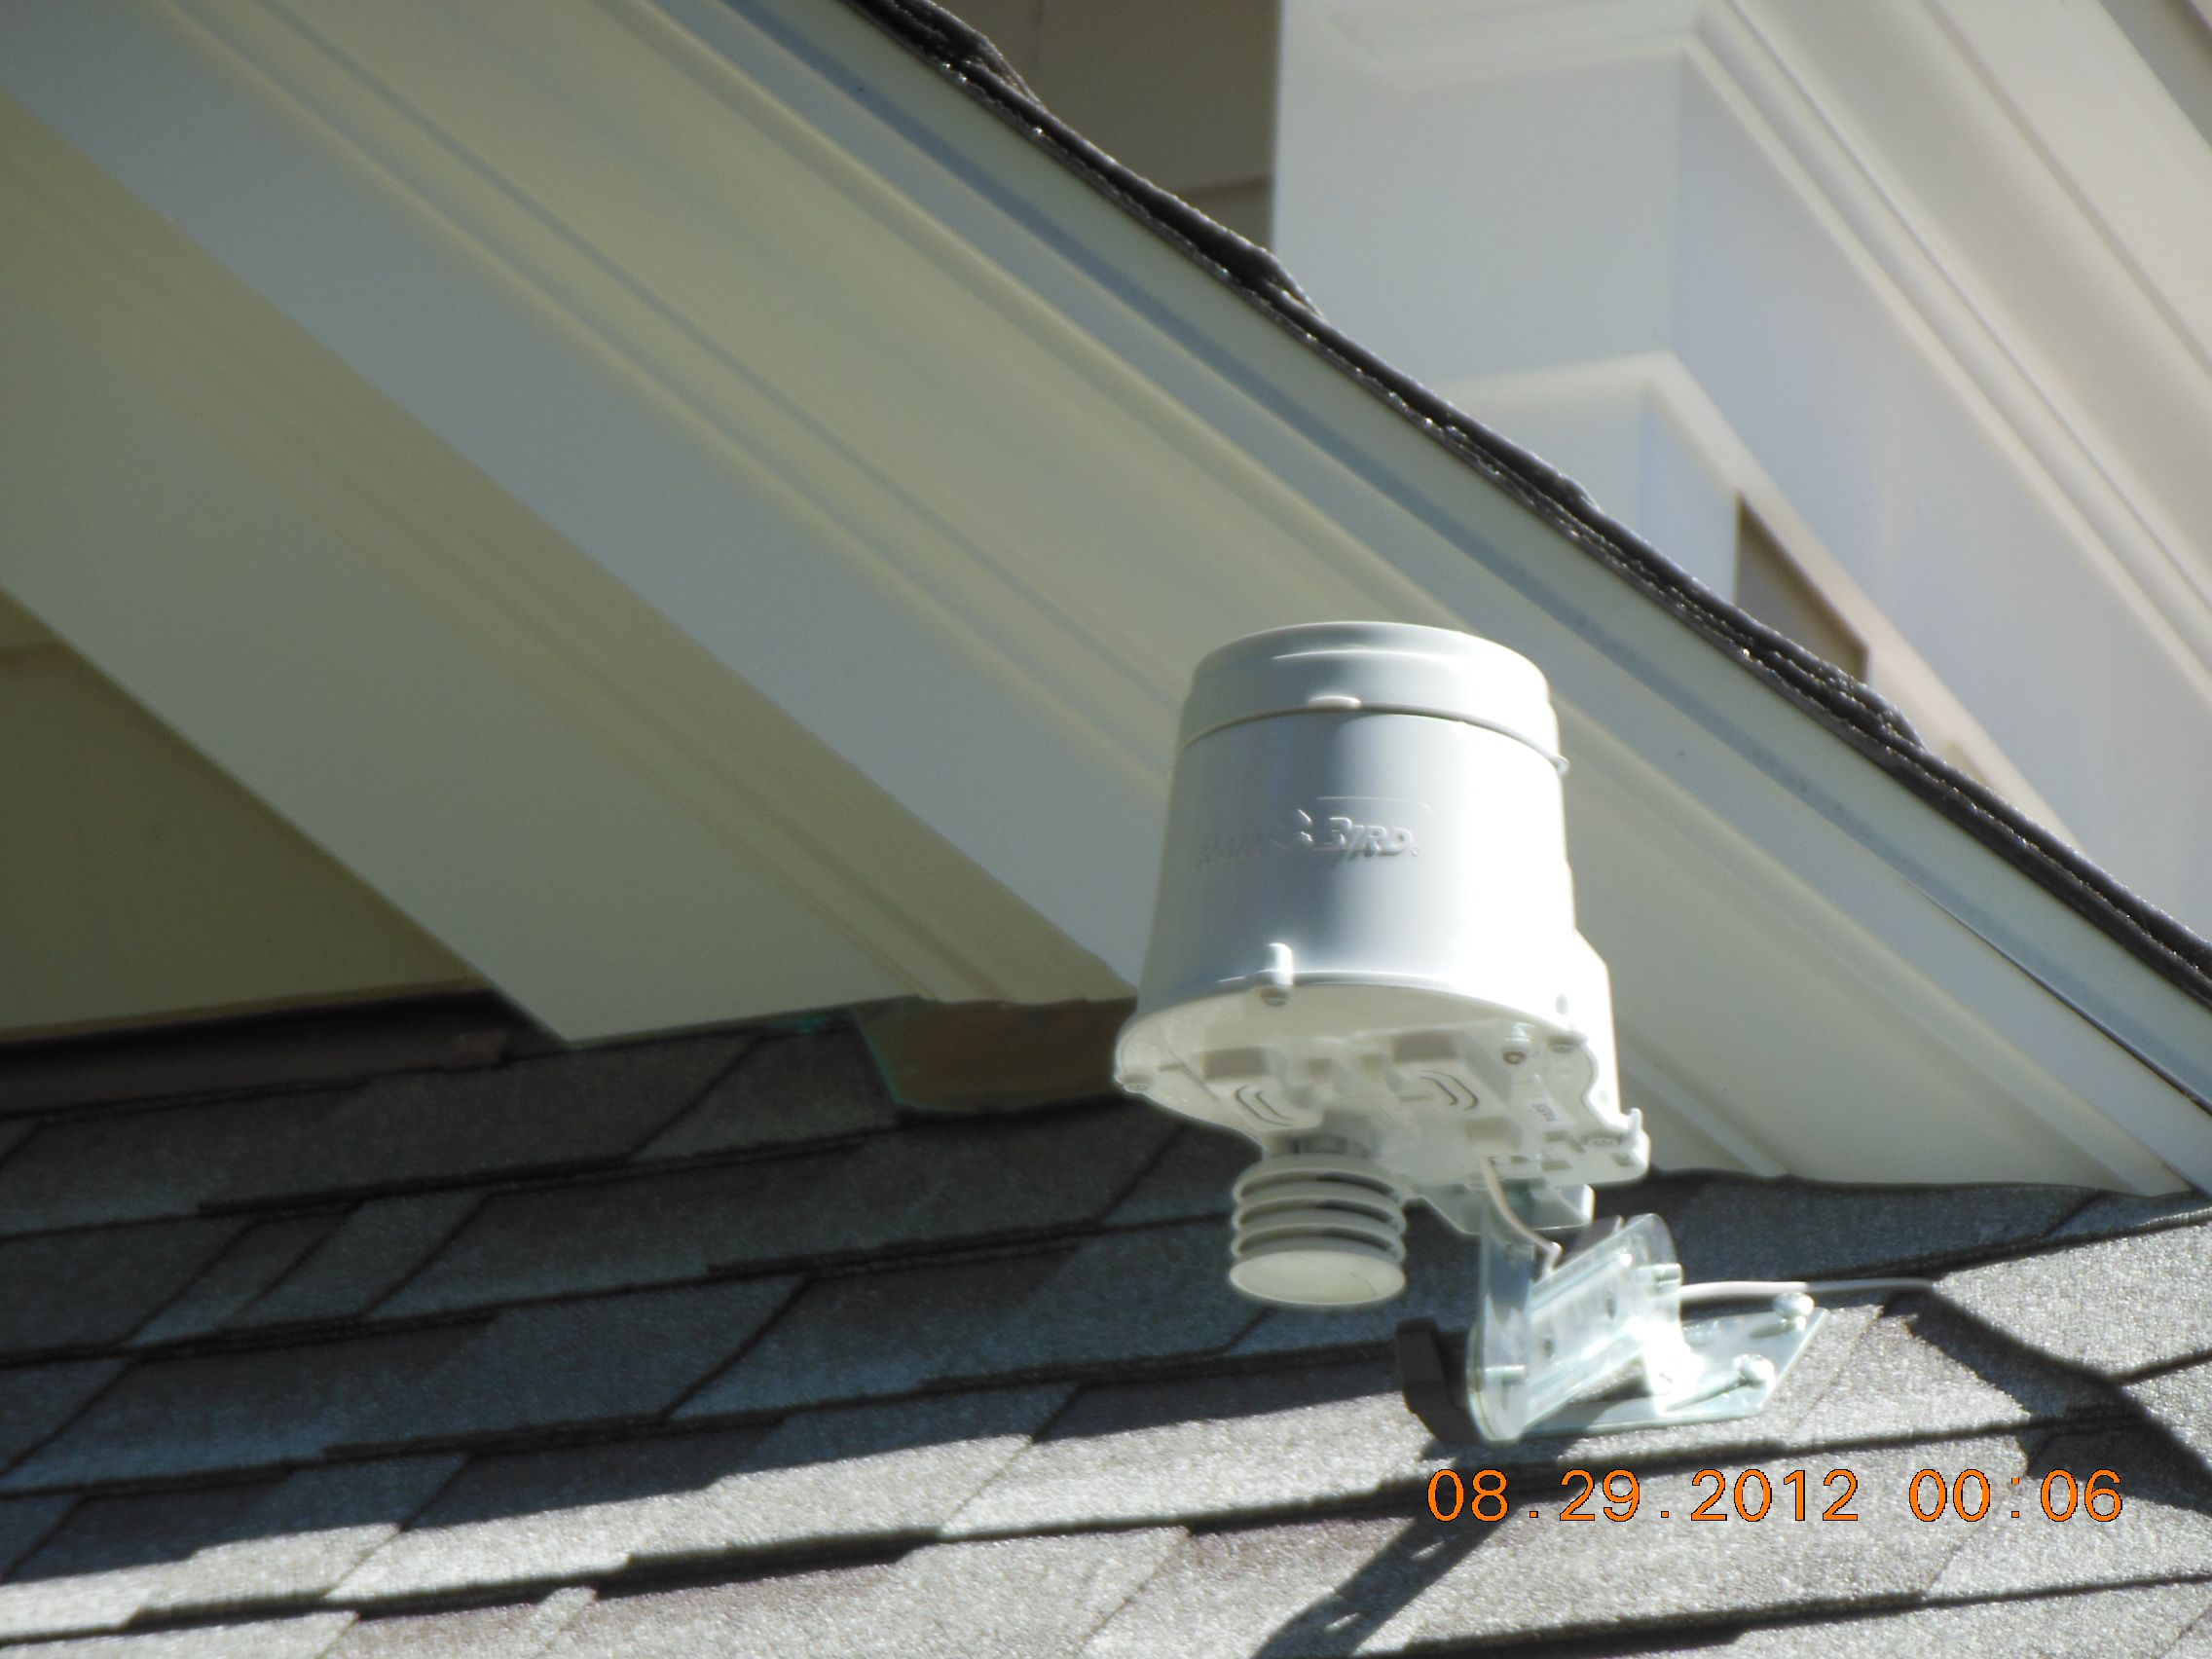
Right - A moisture sensor is installed on the roof to control the sprinkler system.
Image

Right - A second layer of flashing tape is applied over the EPDM gasket and first layer of tape at sides and top around the duct; 14 of 14.
Image

Right - After installing the EPDM gasket around the HRV duct, first the lower edge, then the sides of the gasket are taped; 11 of 14.
Image
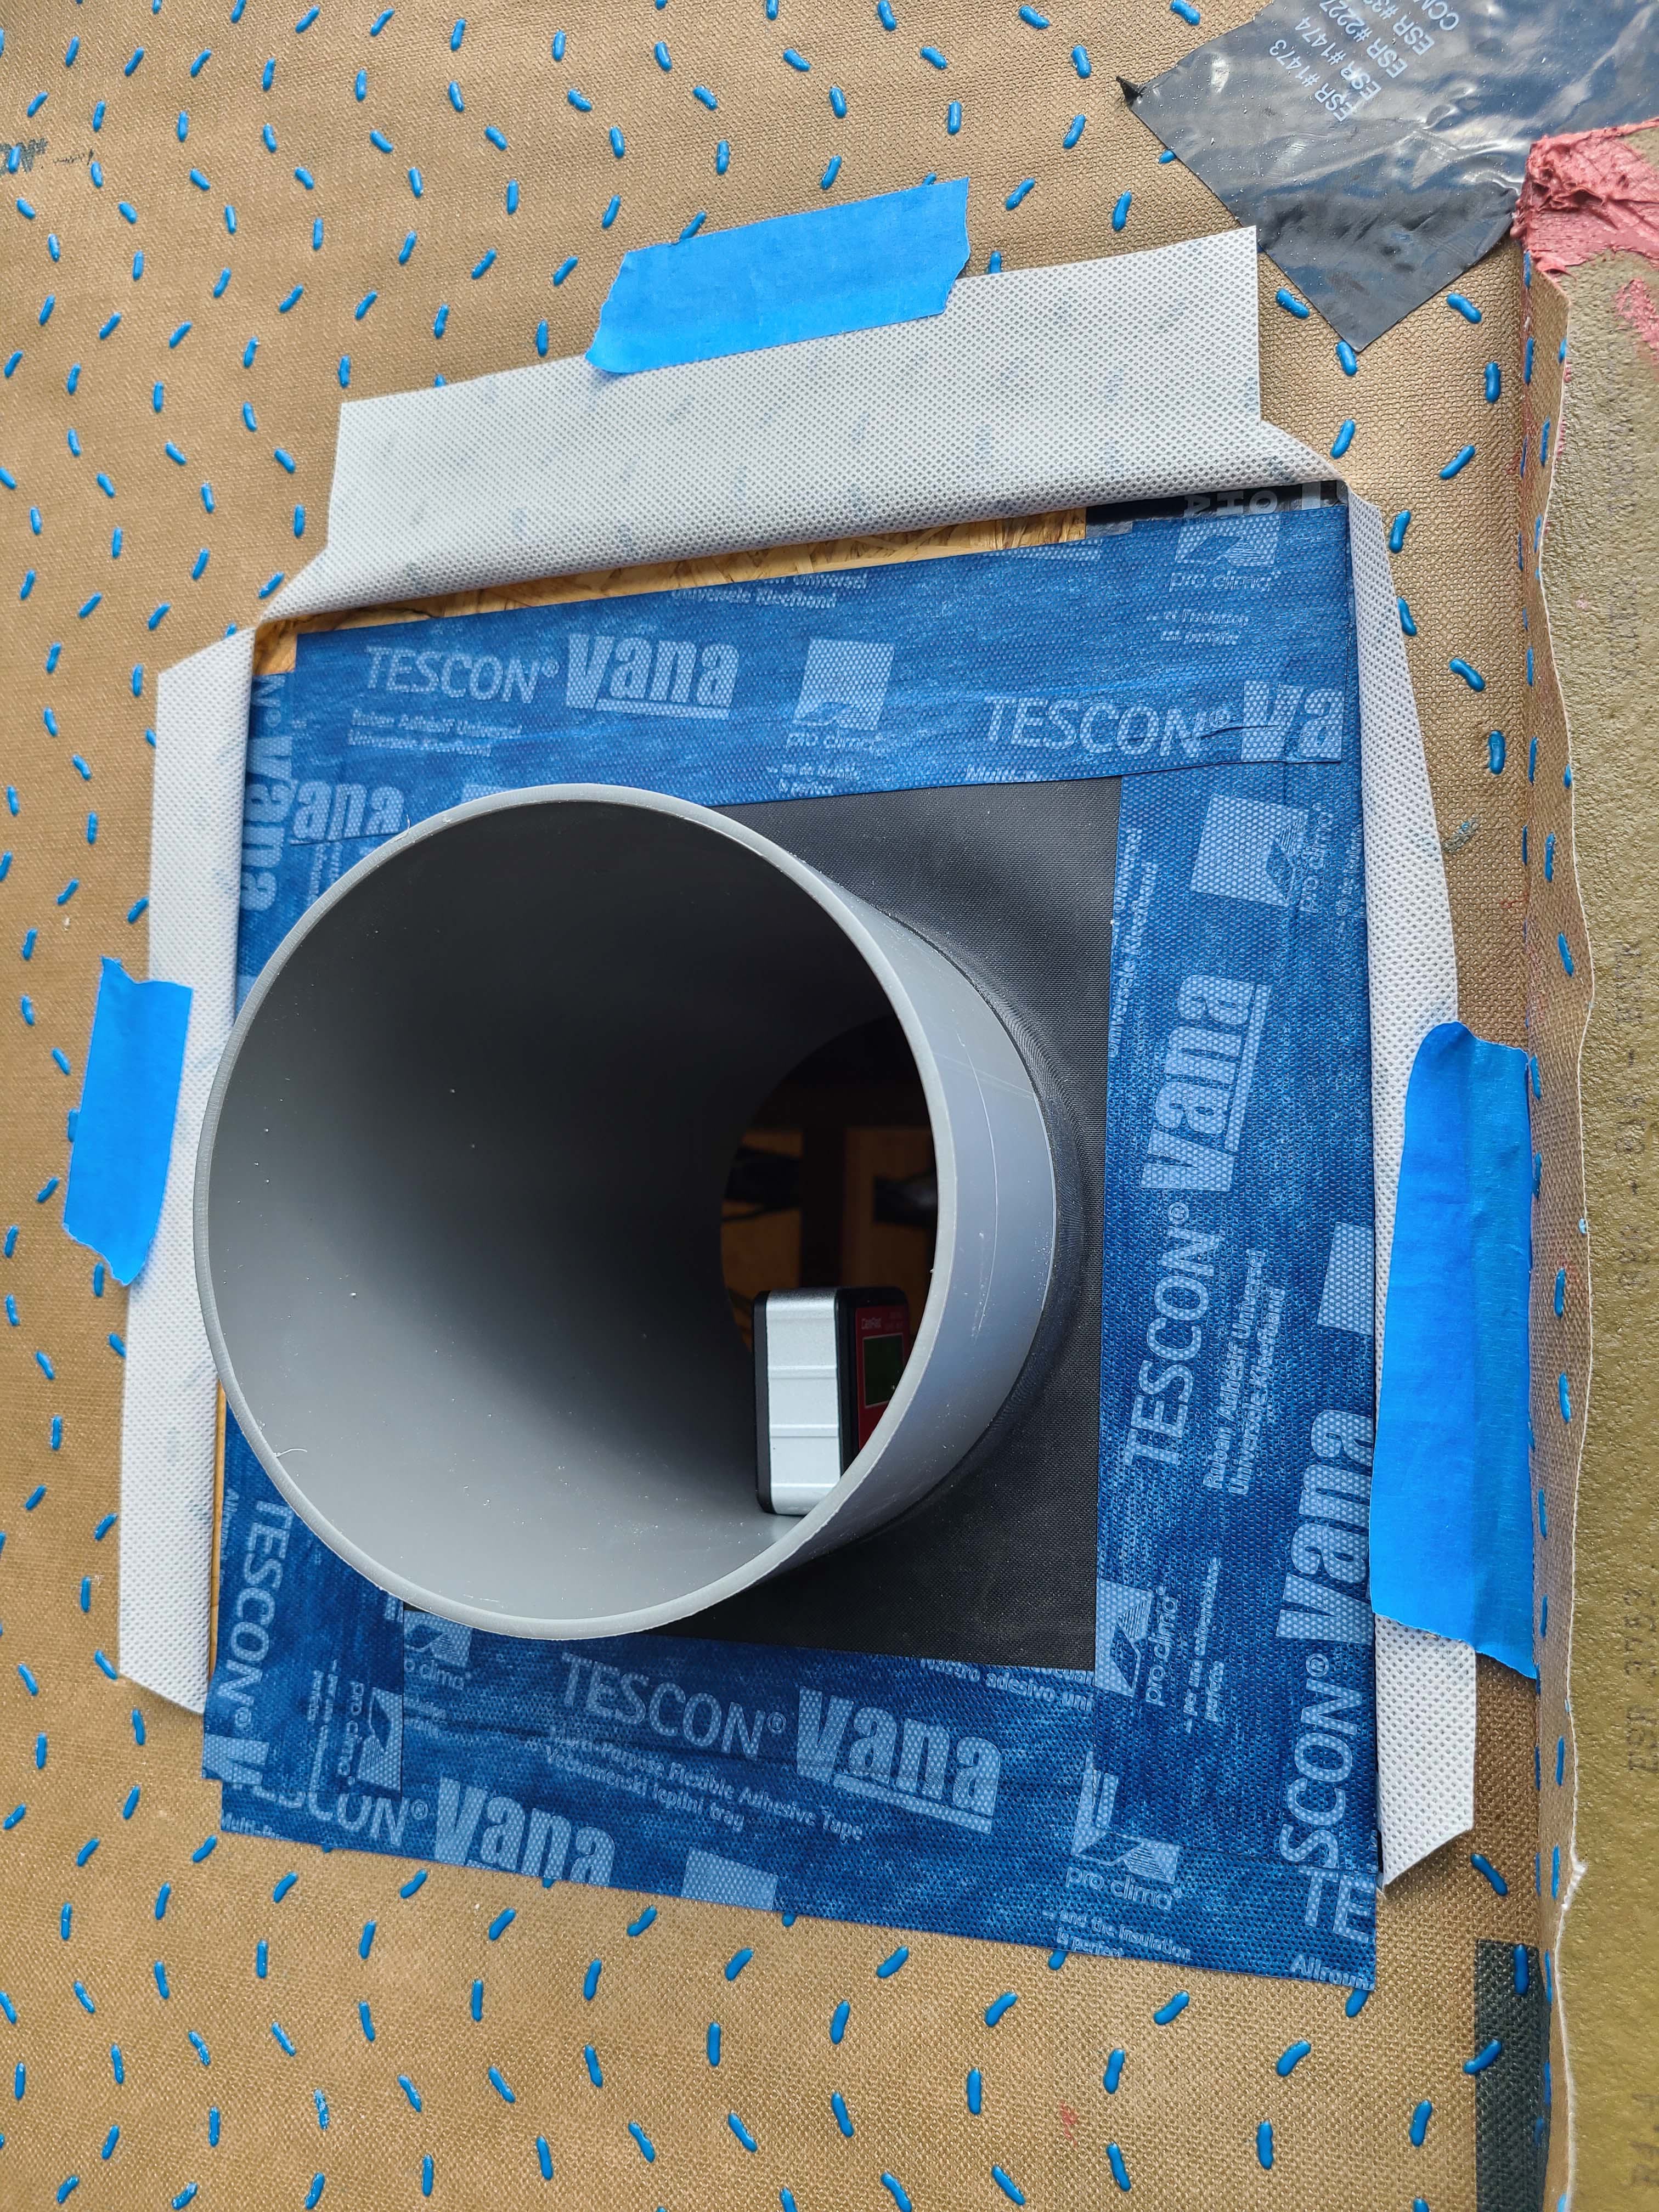
Right - After installing the EPDM gasket around the HRV duct, first the lower edge, then the sides, then the top of the gasket are taped; 12 of 14.
Image
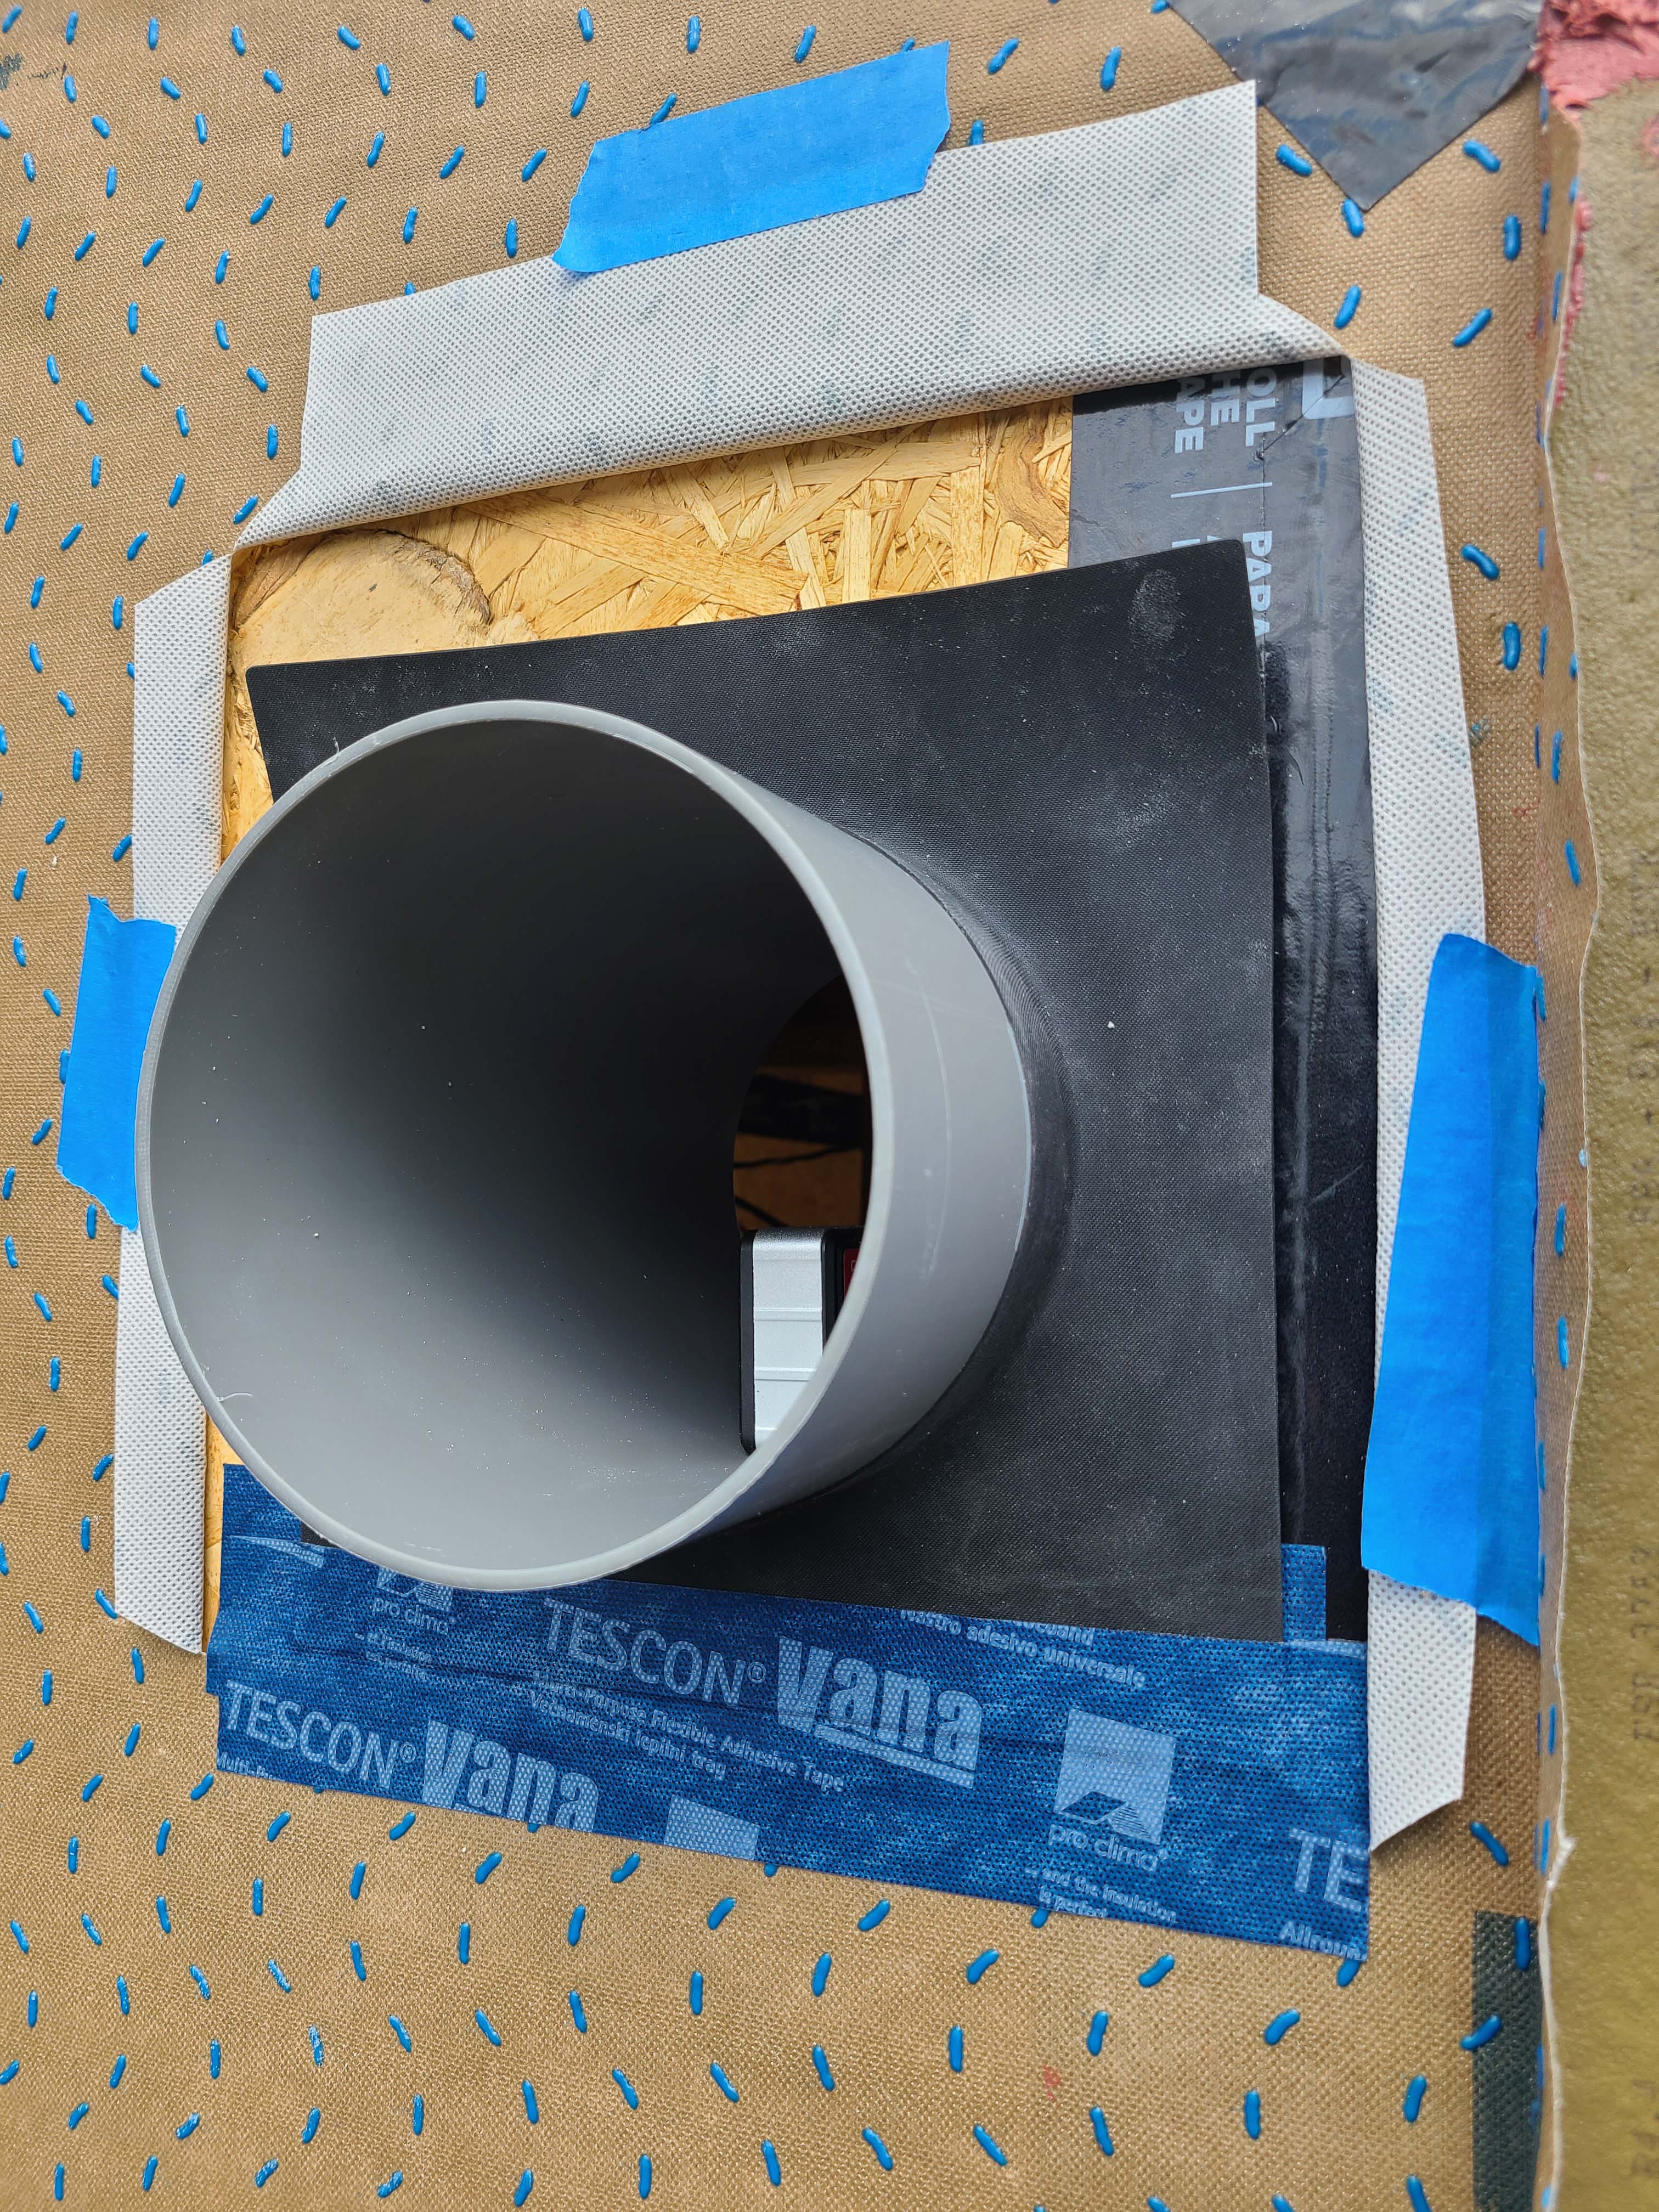
Right - After installing the EPDM gasket around the HRV duct, the lower edge of the gasket is taped first before taping the other edges of the gasket; 10 of 14.
Image
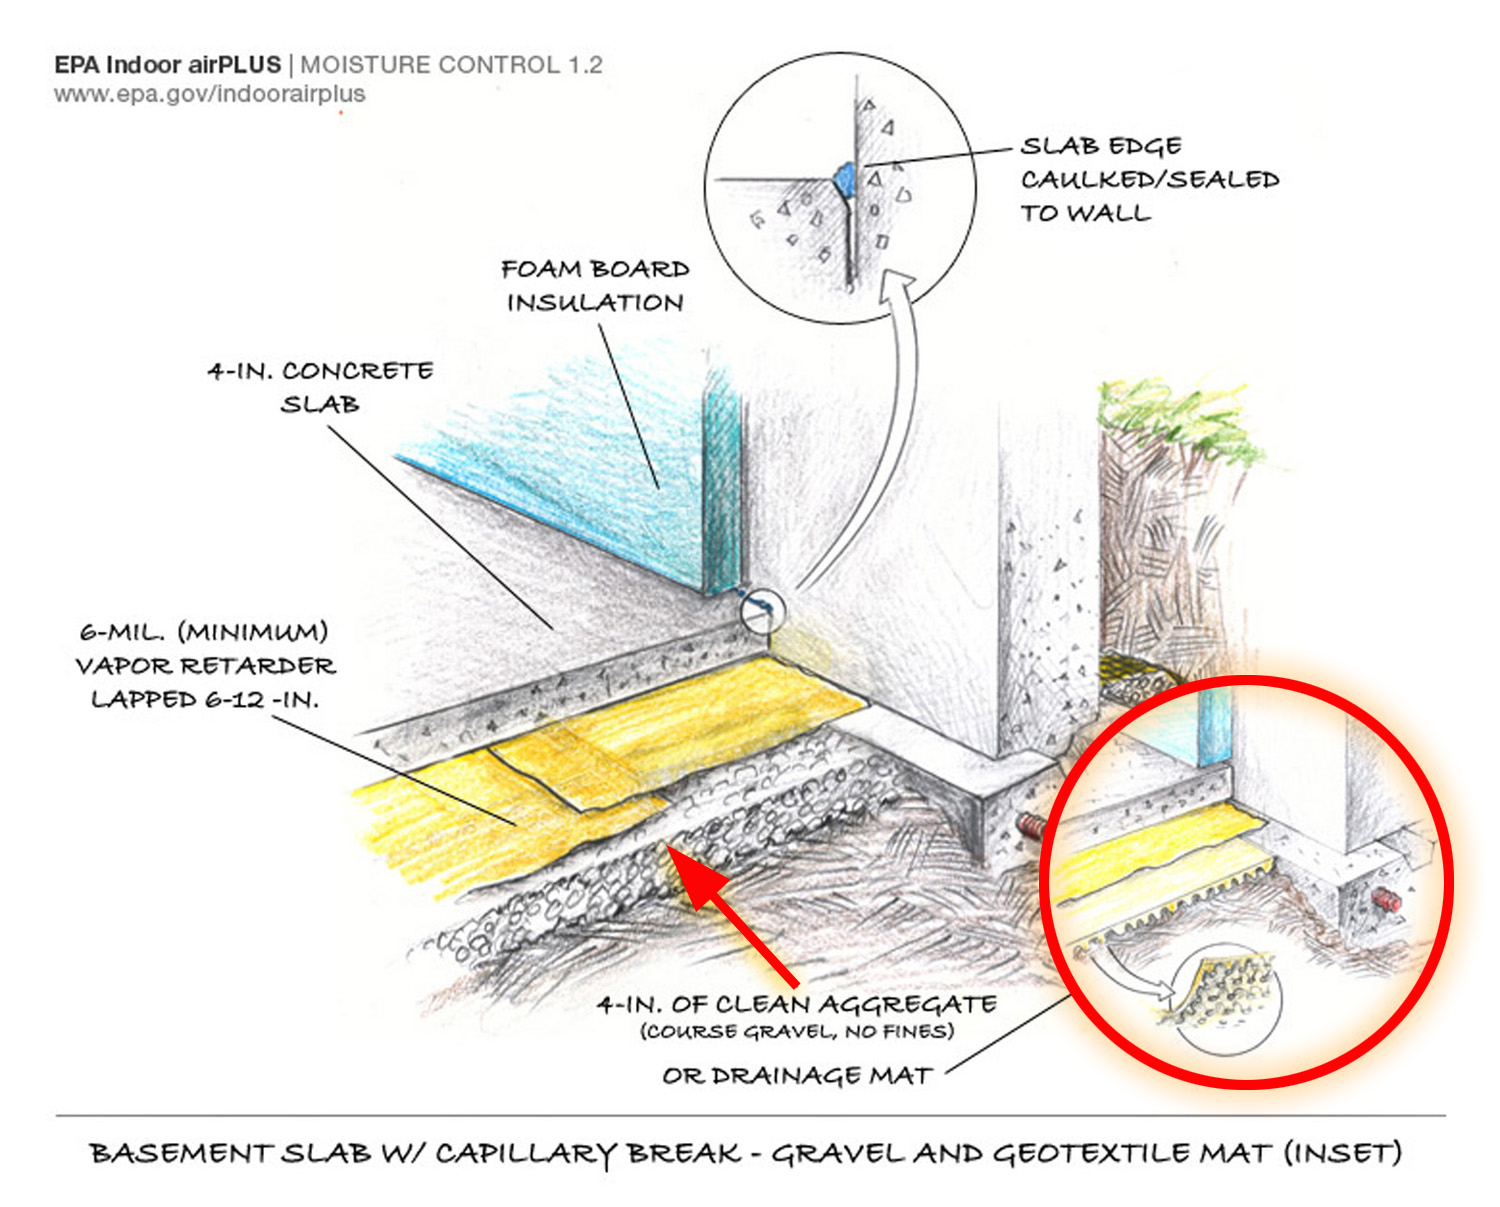
Right - Basement slab with a capillary break of either gravel or a drainage mat.
Image
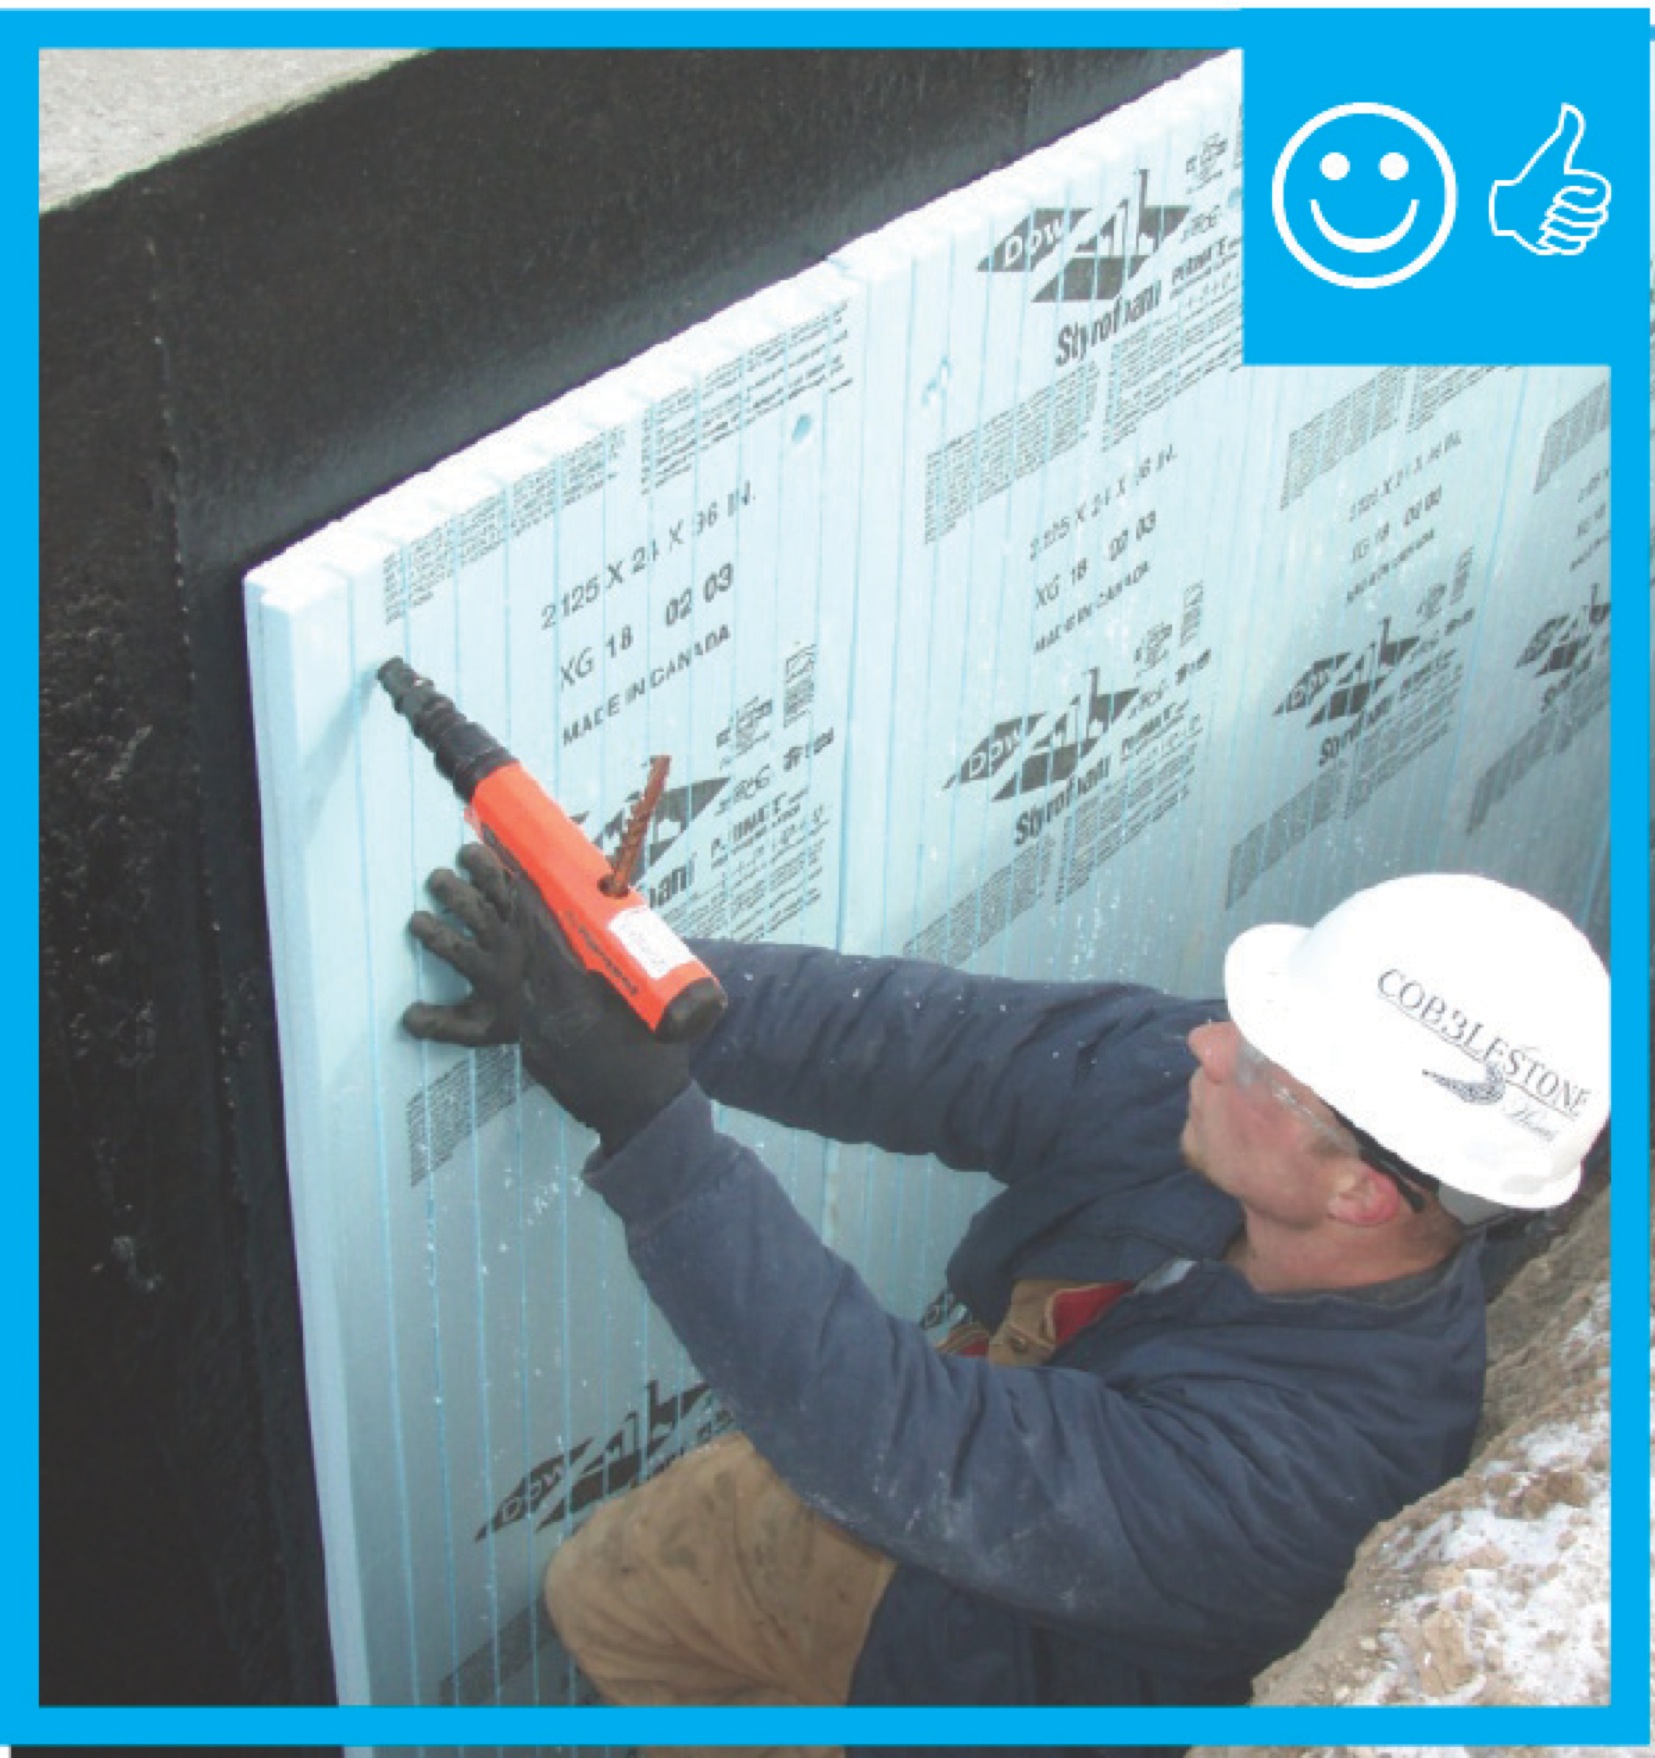
Right - Below-grade concrete has been properly sealed against moisture and is now having insulation installed.
Image
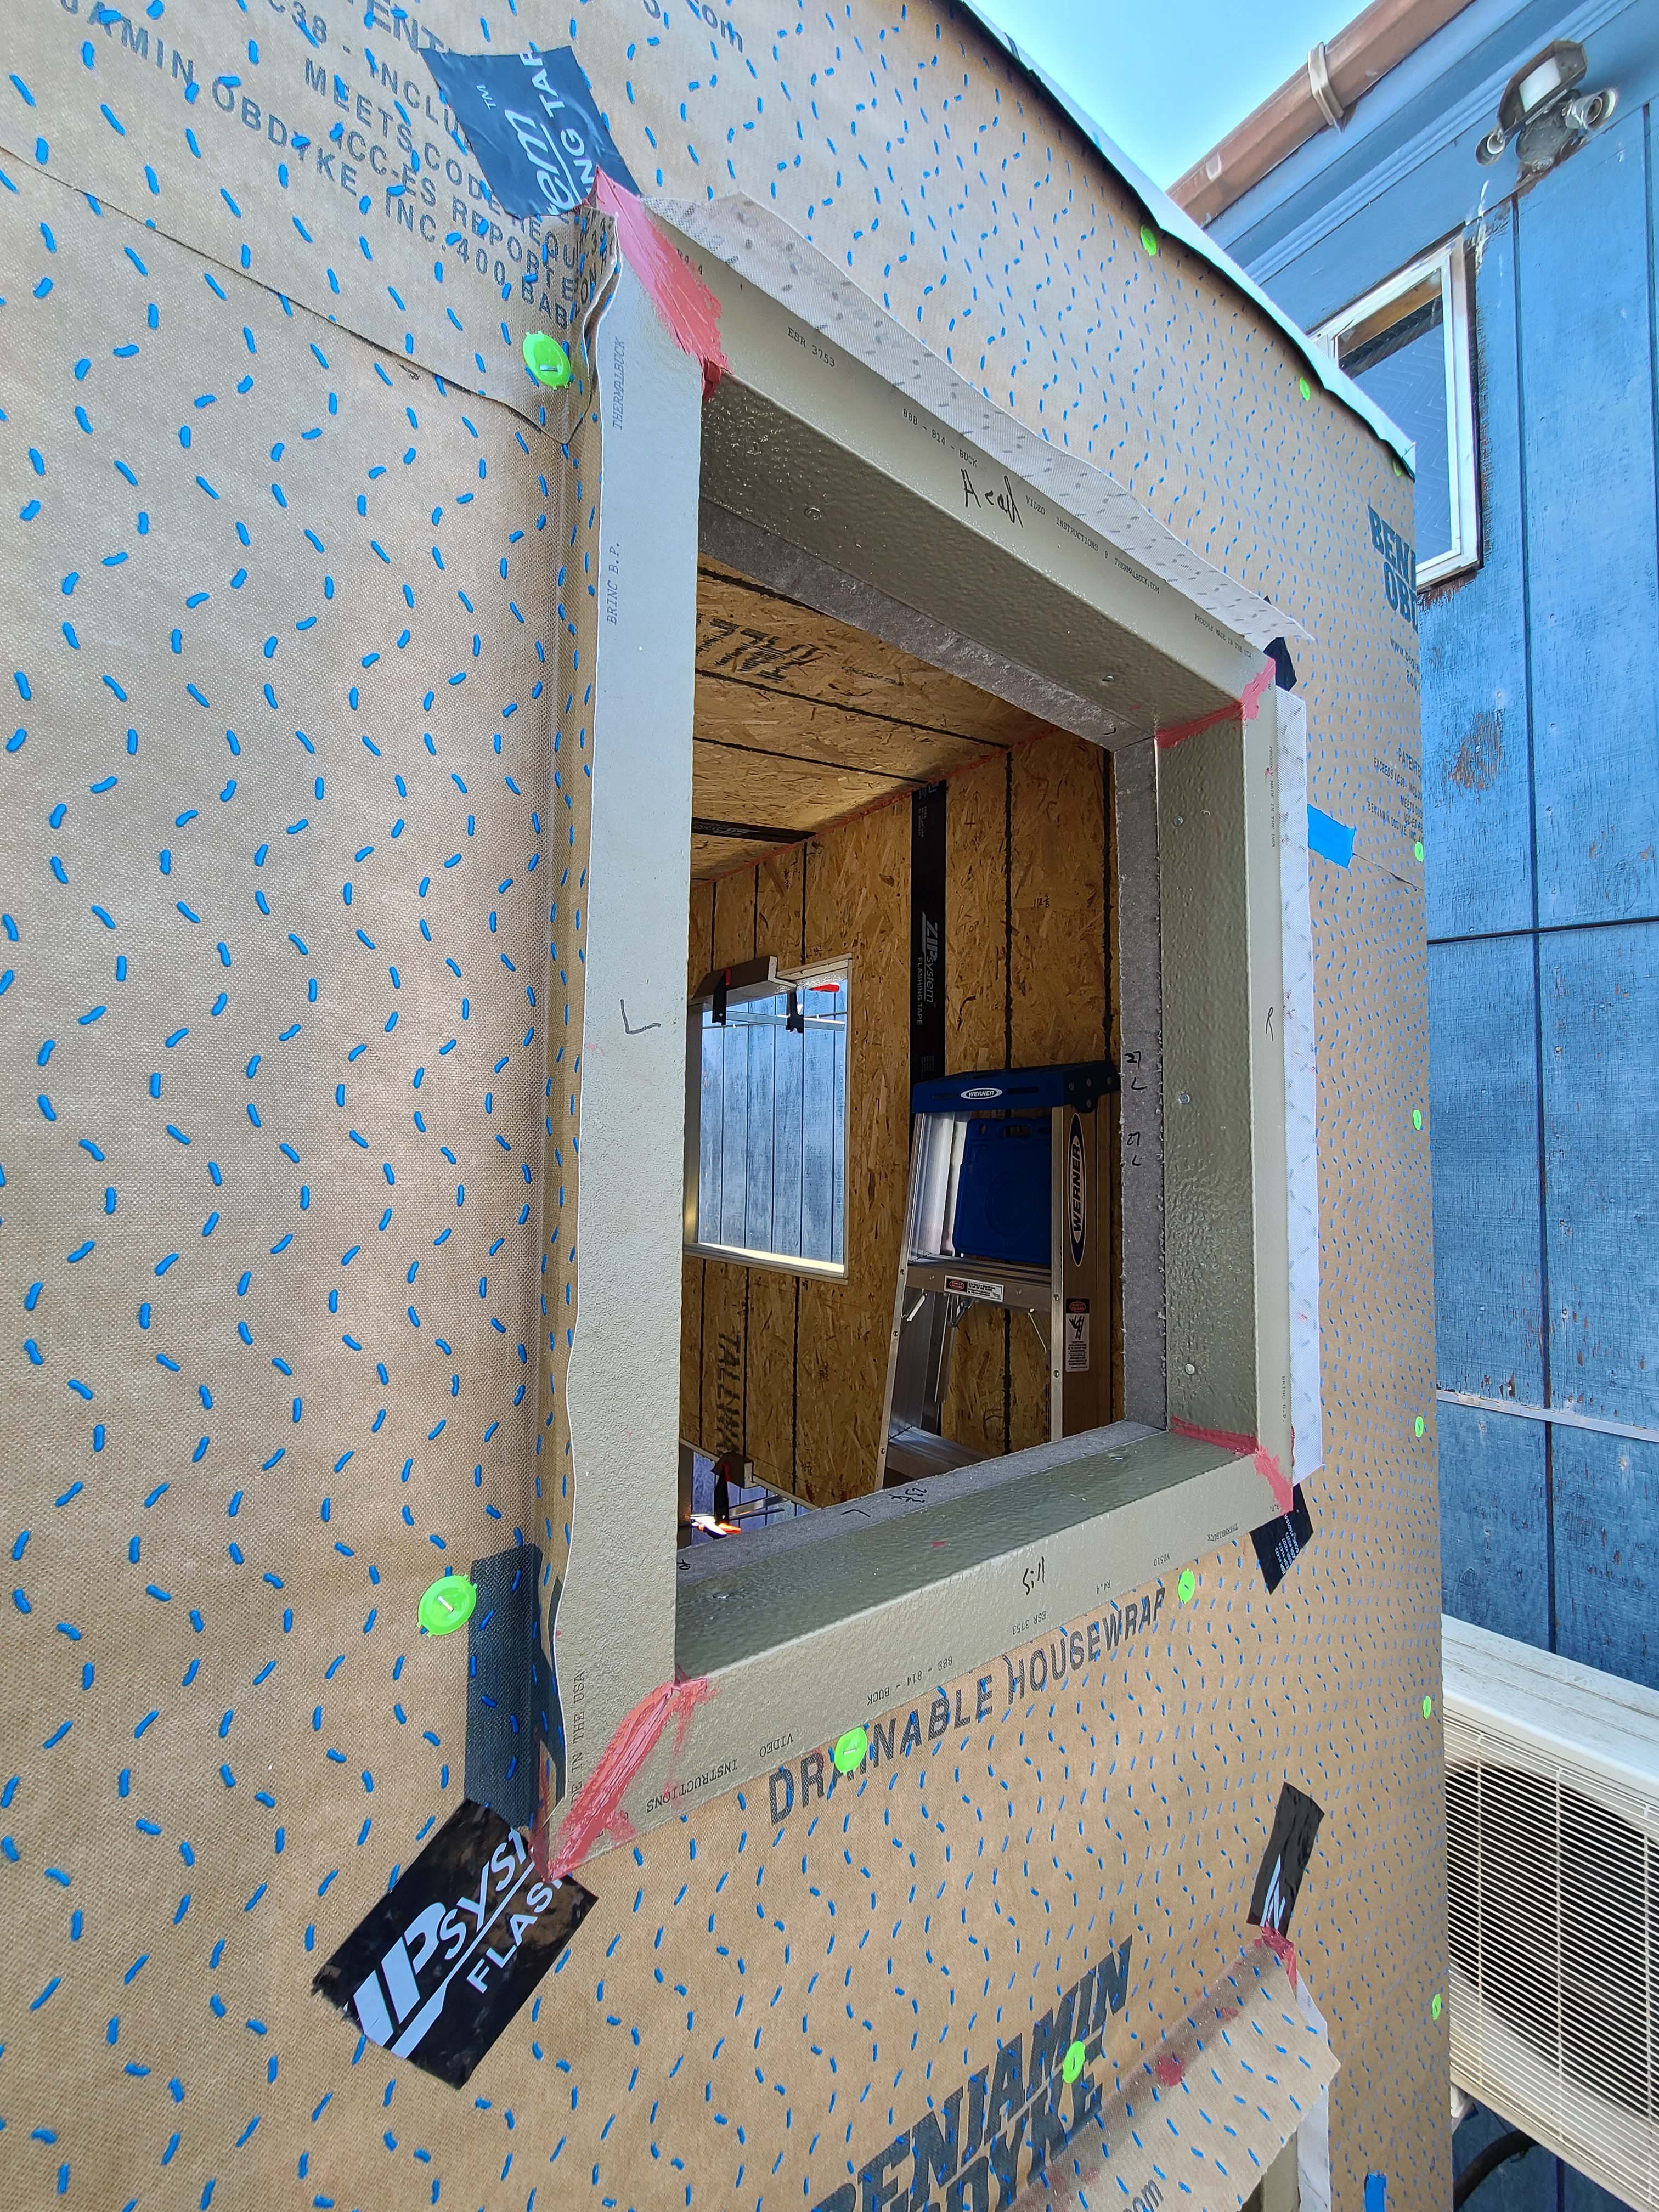
Right - Corners of window are protected with draining house wrap that laps onto the sides of the window trim, paint-on flashing at window trim corners, and self-adhered flashing to reinforce corners.
Image
Right - Corrugated house wrap is installed over the sheathing (in this case SIPs) and overlapped and taped at all seams.
Image
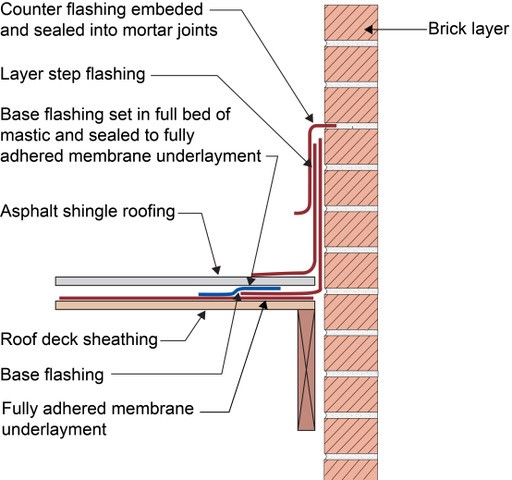
Right - Counterflashing tops a layer of step flashing which comes down above the asphalt shingle and a layer of L-shaped base flashing which comes down and extends below the shingle; the base flashing is adhered to the roof underlayment with mastic, shown
Image
Image
Right - Furring strips create an air gap to allow penetrating moisture to drain instead of wicking into walls; they also provide a nailing surface for siding.
Image
Right - Here, air control is established by taping the seams of the plywood panel sheathing. The roof sheathing is also trimmed flush with the wall sheathing to allow a simple and airtight connection between the roof and wall assemblies
Image

Right - House wrap is lapped back over first layer of flashing tape, then a second layer of flashing tape is applied to the sides around the duct; 13 of 14.
Image

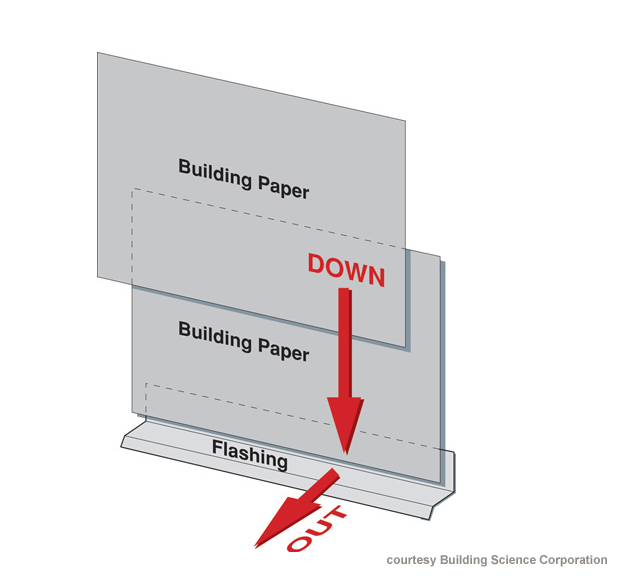
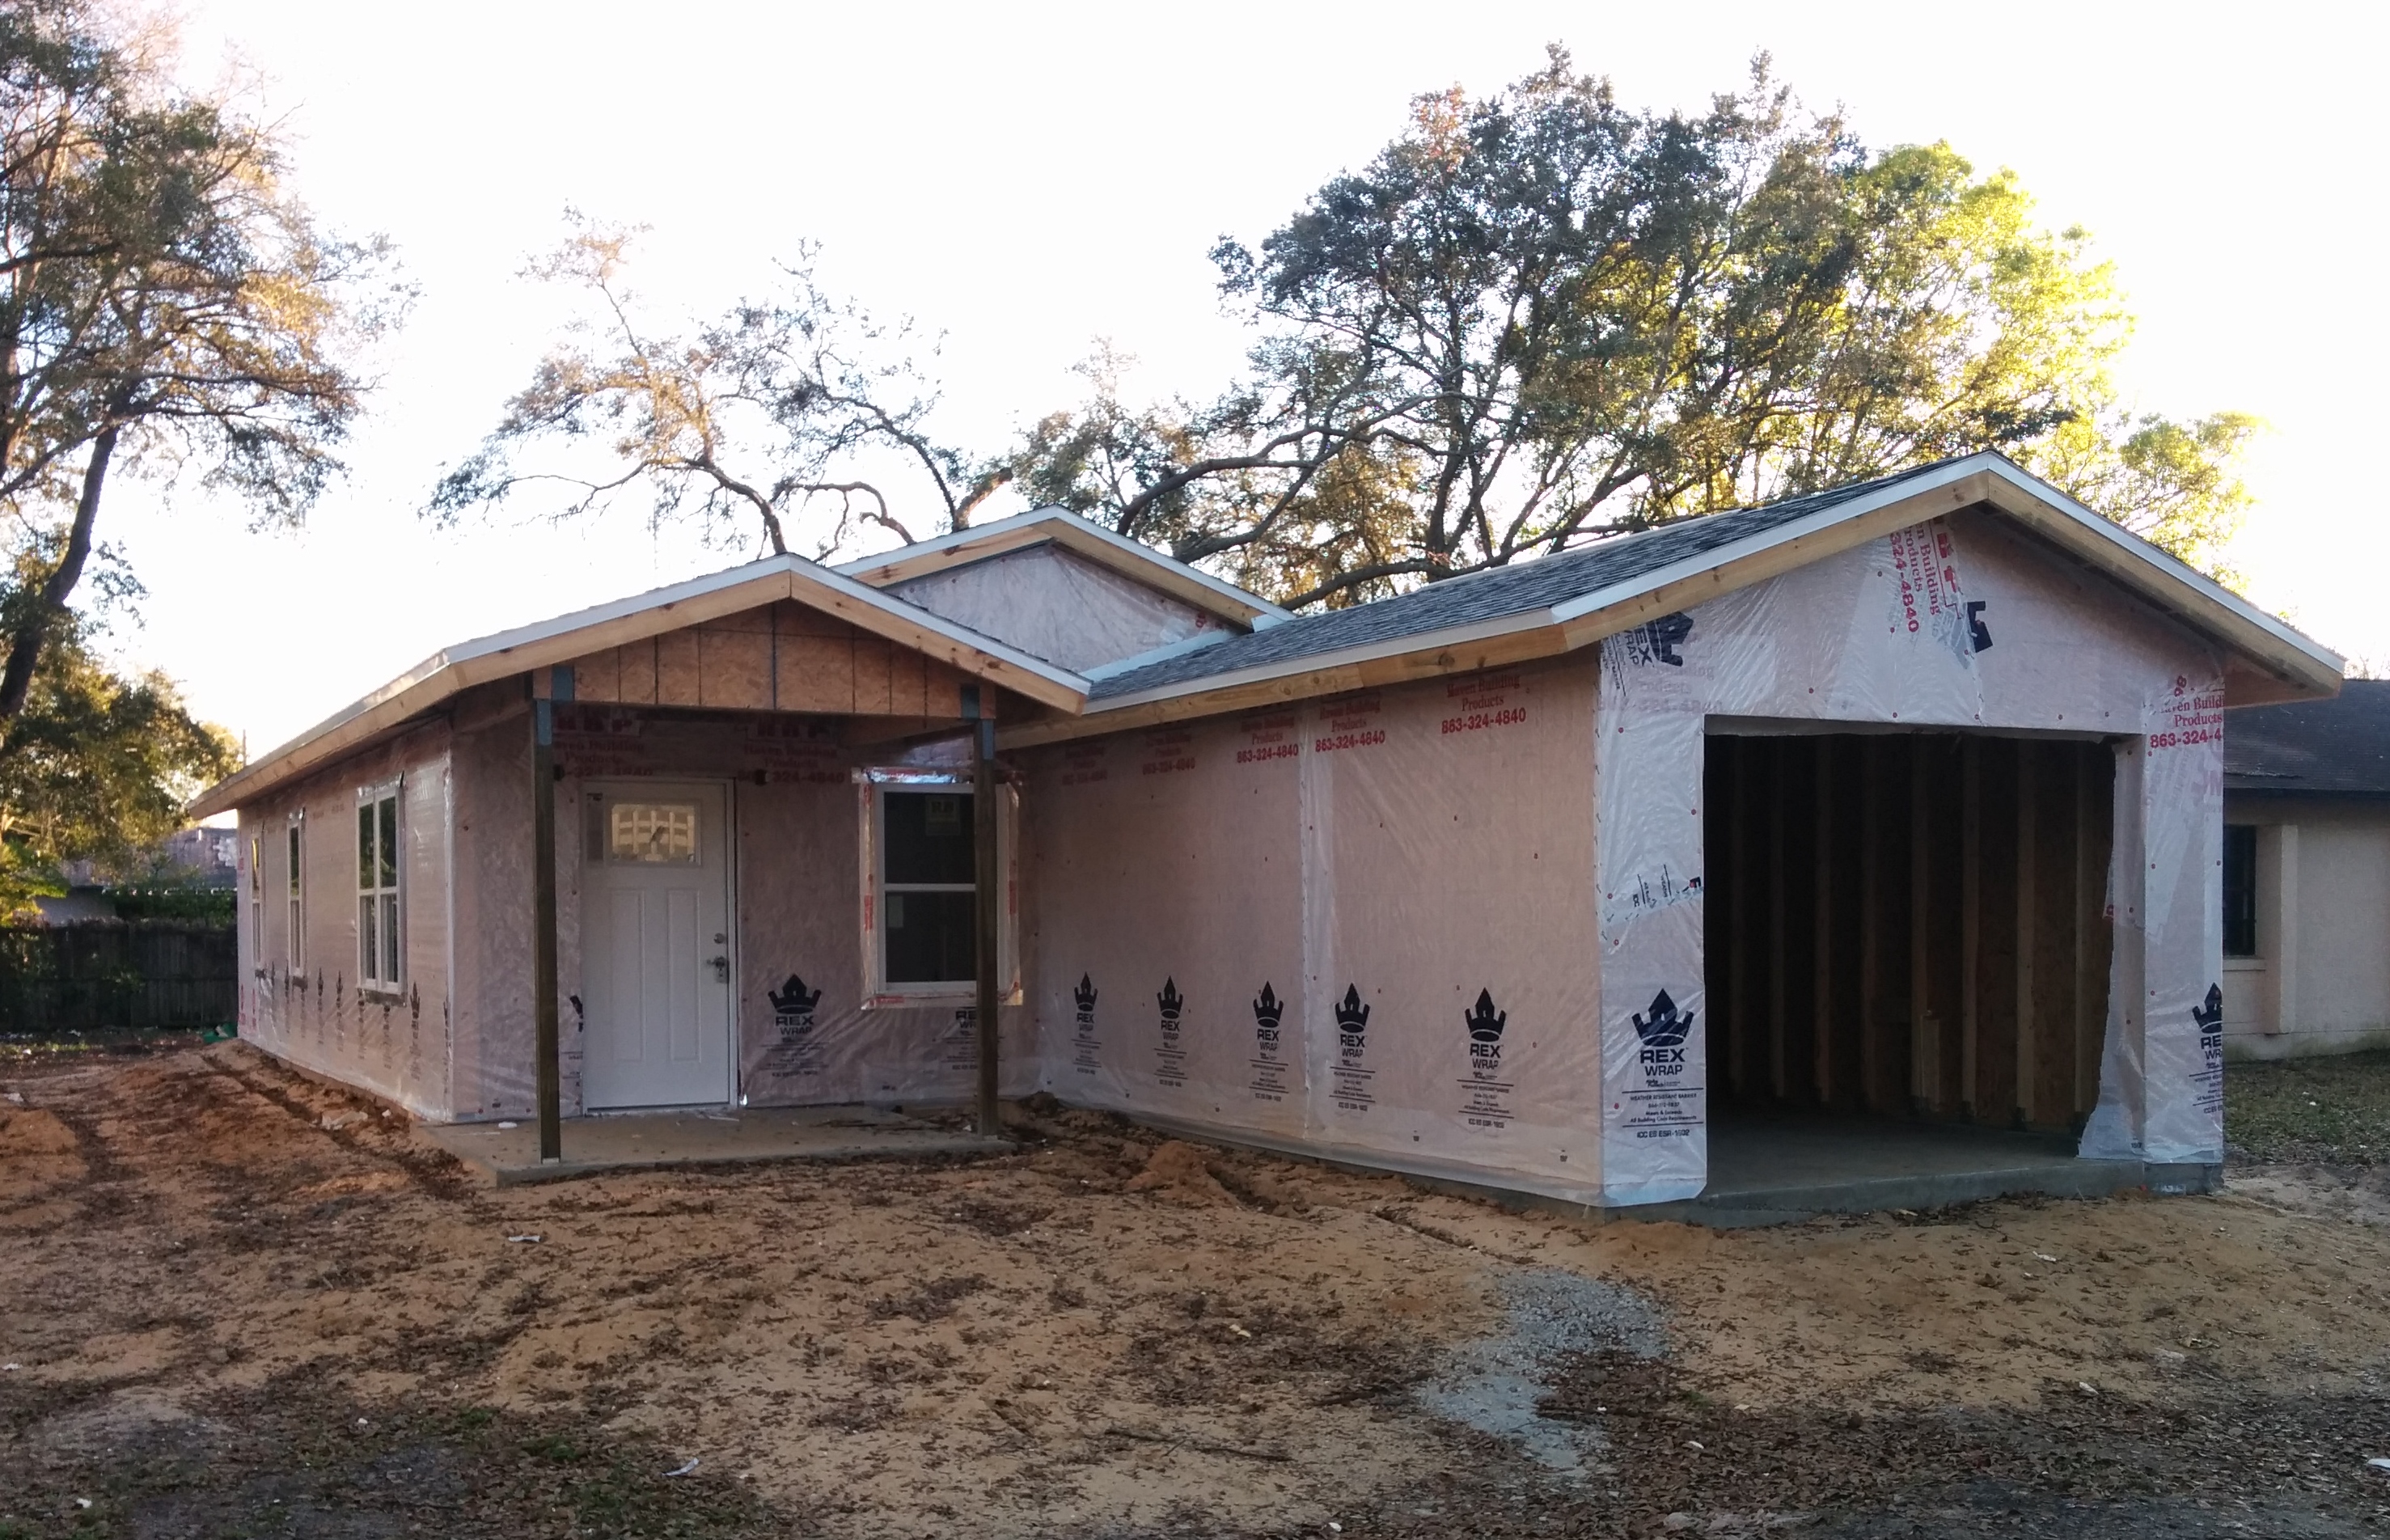
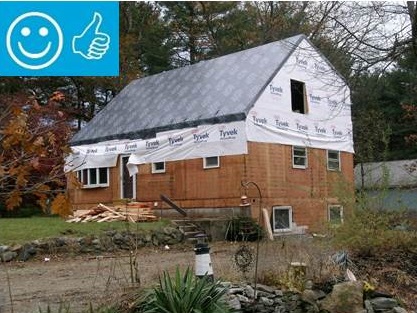
Right - House wrap is overlapped “shingle” style to direct moisture down and away from the house; seams will be taped so house wrap serves as both an air and weather barrier.
Image
Right - Open-web floor and ceiling trusses provide space for ducts in conditioned space.
Image

Right - Permeable rigid mineral wool insulation and appropriate water-management flashing details are integrated with new rigid foam siding to keep water away from the sill beam above the foundation wall
Image
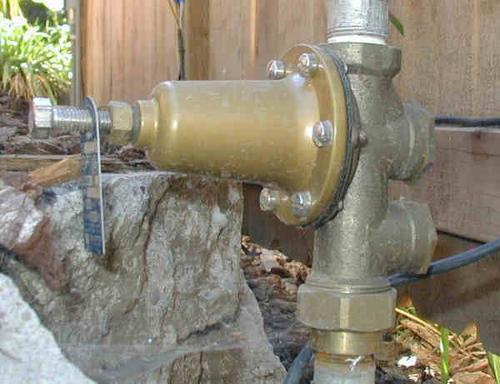
Right - Pressure reducing valves installed outside the home reduce water pressure before water is distributed to fixtures.
Image
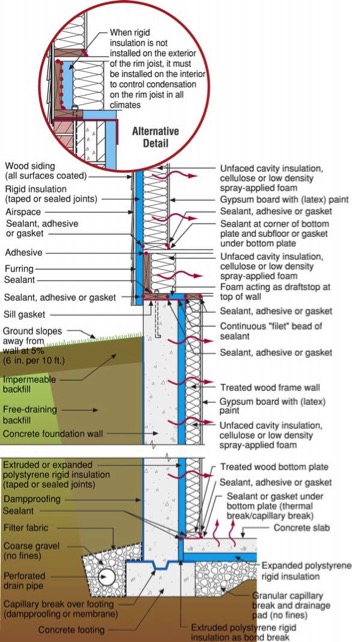
Right - Prevent condensation in fibrous insulation-filled basement wall cavities by installing rigid or spray foam between the frame wall and the concrete foundation wall and by not installing a Class I vapor retarder over the framed wall.
Image
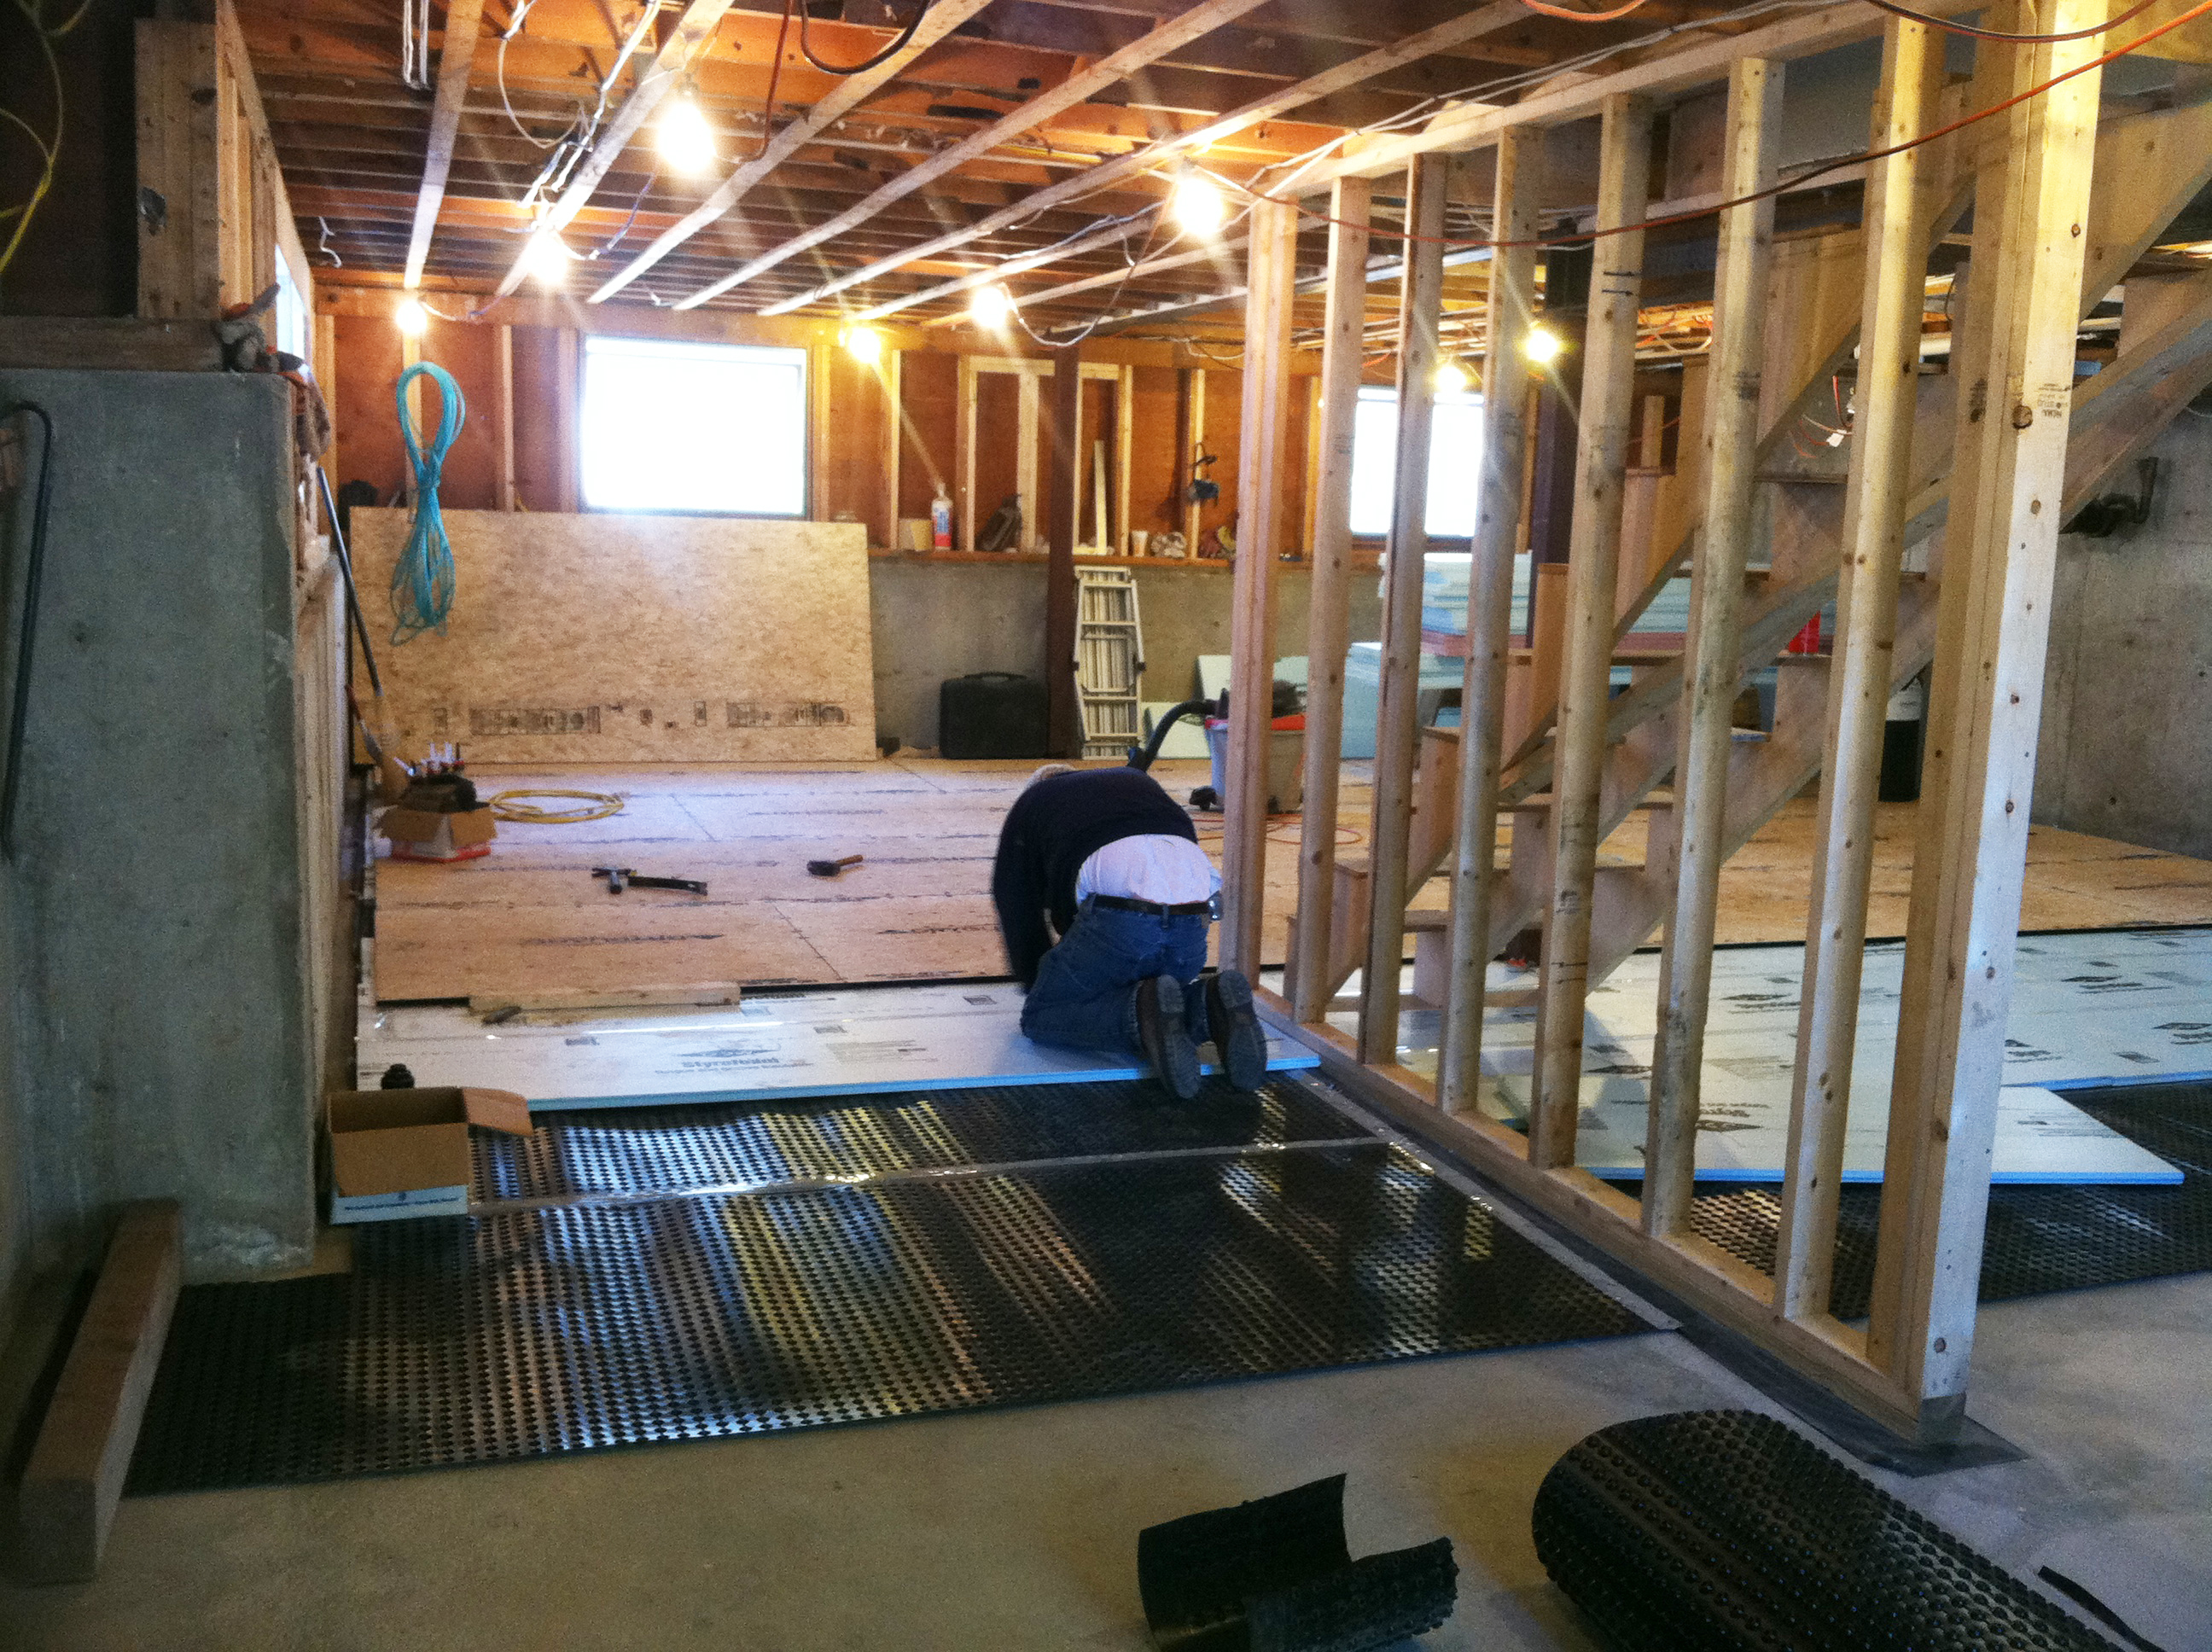
Right - Retrofit of an existing basement slab by adding dimple plastic mat, rigid foam insulation, and a floating subfloor.
Image
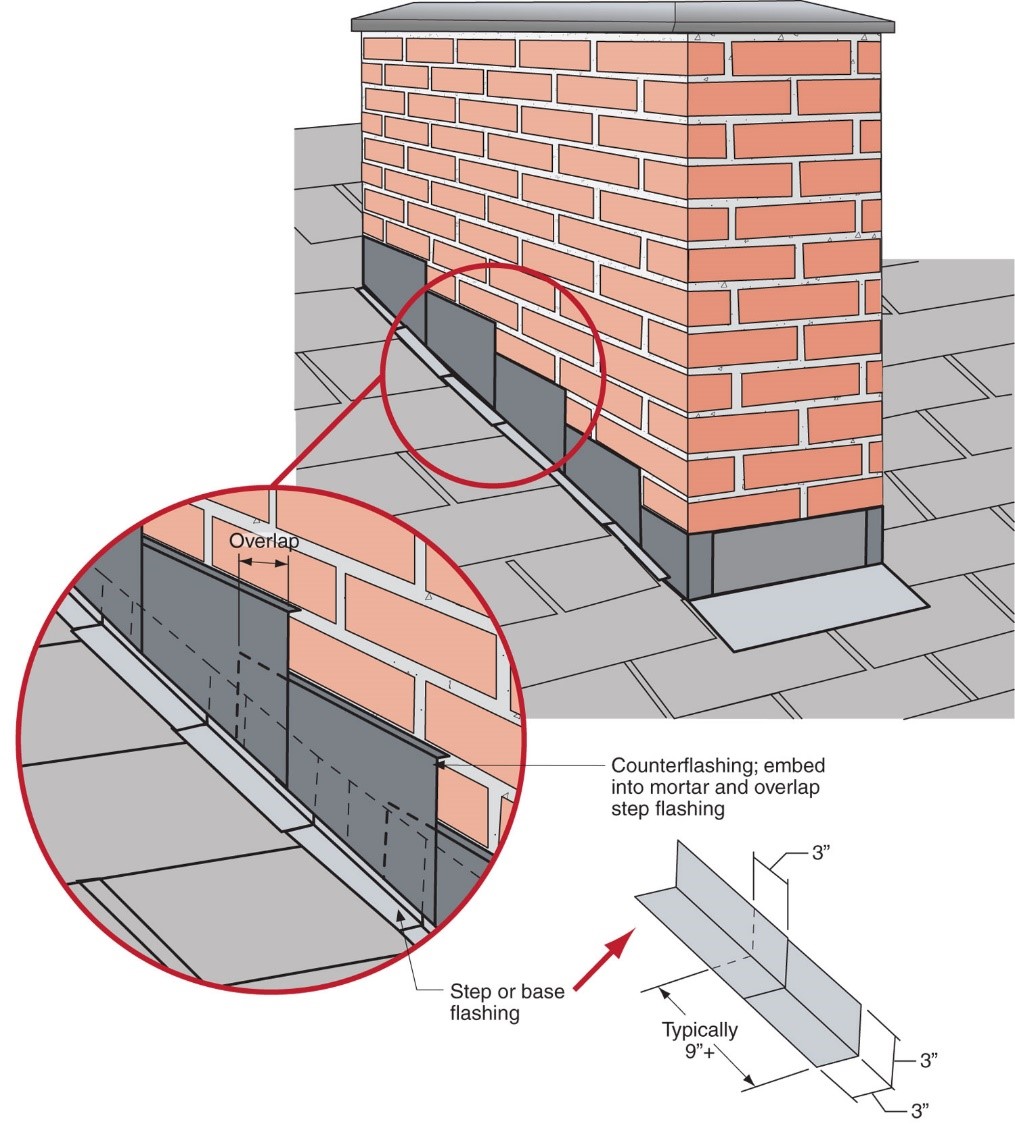
Right - Step flashing along a chimney is integrated in a layered manner with asphalt shingle roofing and topped with counterflashing that is embedded into brick mortar joint above
Image
Right - Tape flashing keeps moisture out around and below the window; extra tape reinforces the corners to prevent tearing of the house wrap and to keep water out of this critical juncture.
Image
Right - The air control membrane installed over the roof sheathing is continuous. It connects to the air control of the wall around the entire perimeter without interruption. The roof overhangs have been cut off to make this connection continuous
Image

Right - The basement walls are wrapped with 3 inches of XPS rigid foam that will be taped at the seams then covered with a dimpled plastic water barrier.
Image
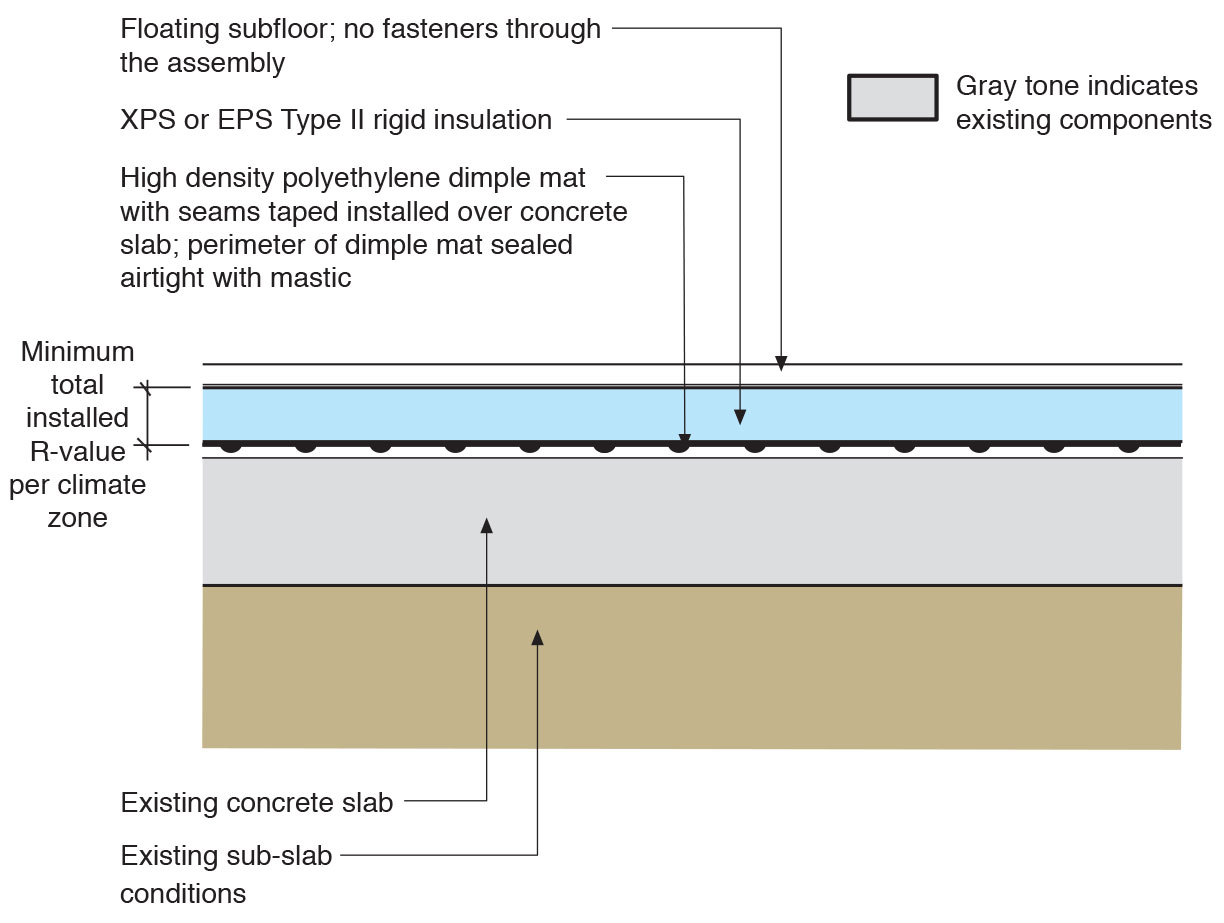
Right - The existing basement slab is retrofitted by installing a dimple plastic drainage mat, rigid foam insulation, and a floating subfloor.
Image
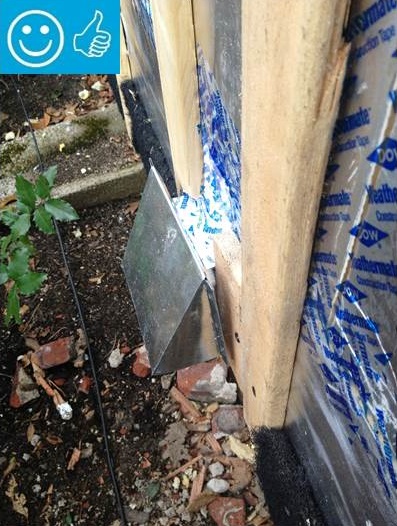
Right - The pipe penetration is properly flashed and furring strips are installed on each side in preparation for installing cladding
Image
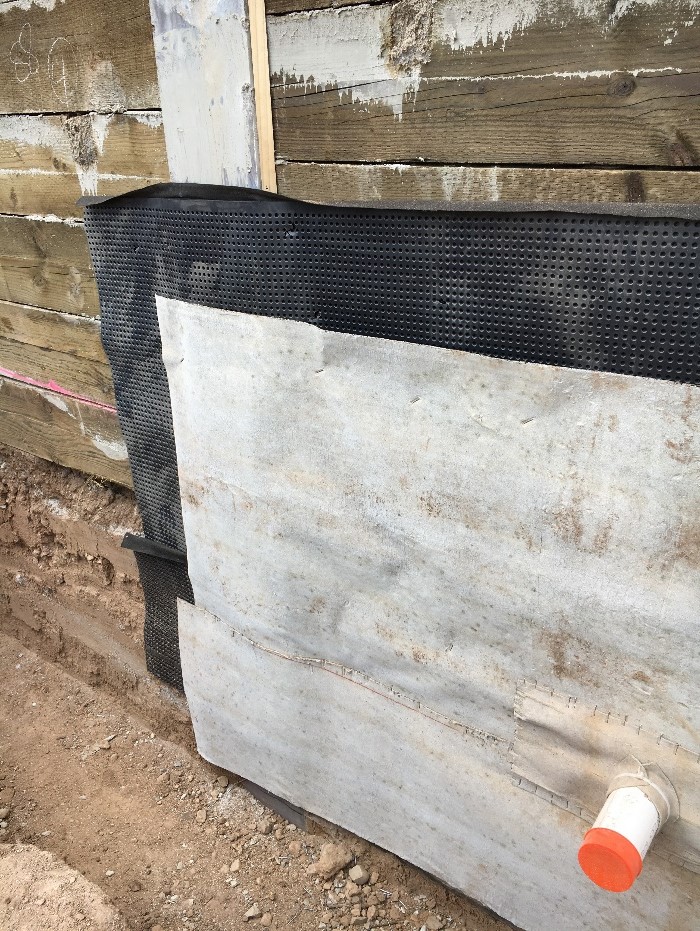
Right - The service penetration in the waterproofing membrane is well-sealed, and there is a drainage mat acting as a protective layer on the interior of the soldier piles and wood lagging.
Image
Image
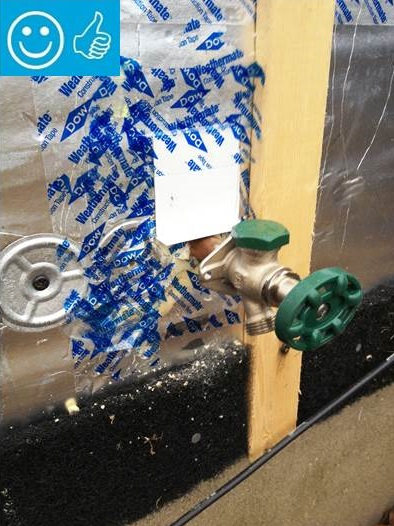
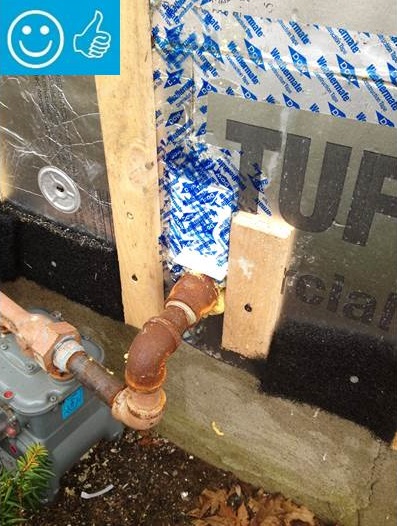
Right - The water and air control layers are properly integrated around the hose bib
Image
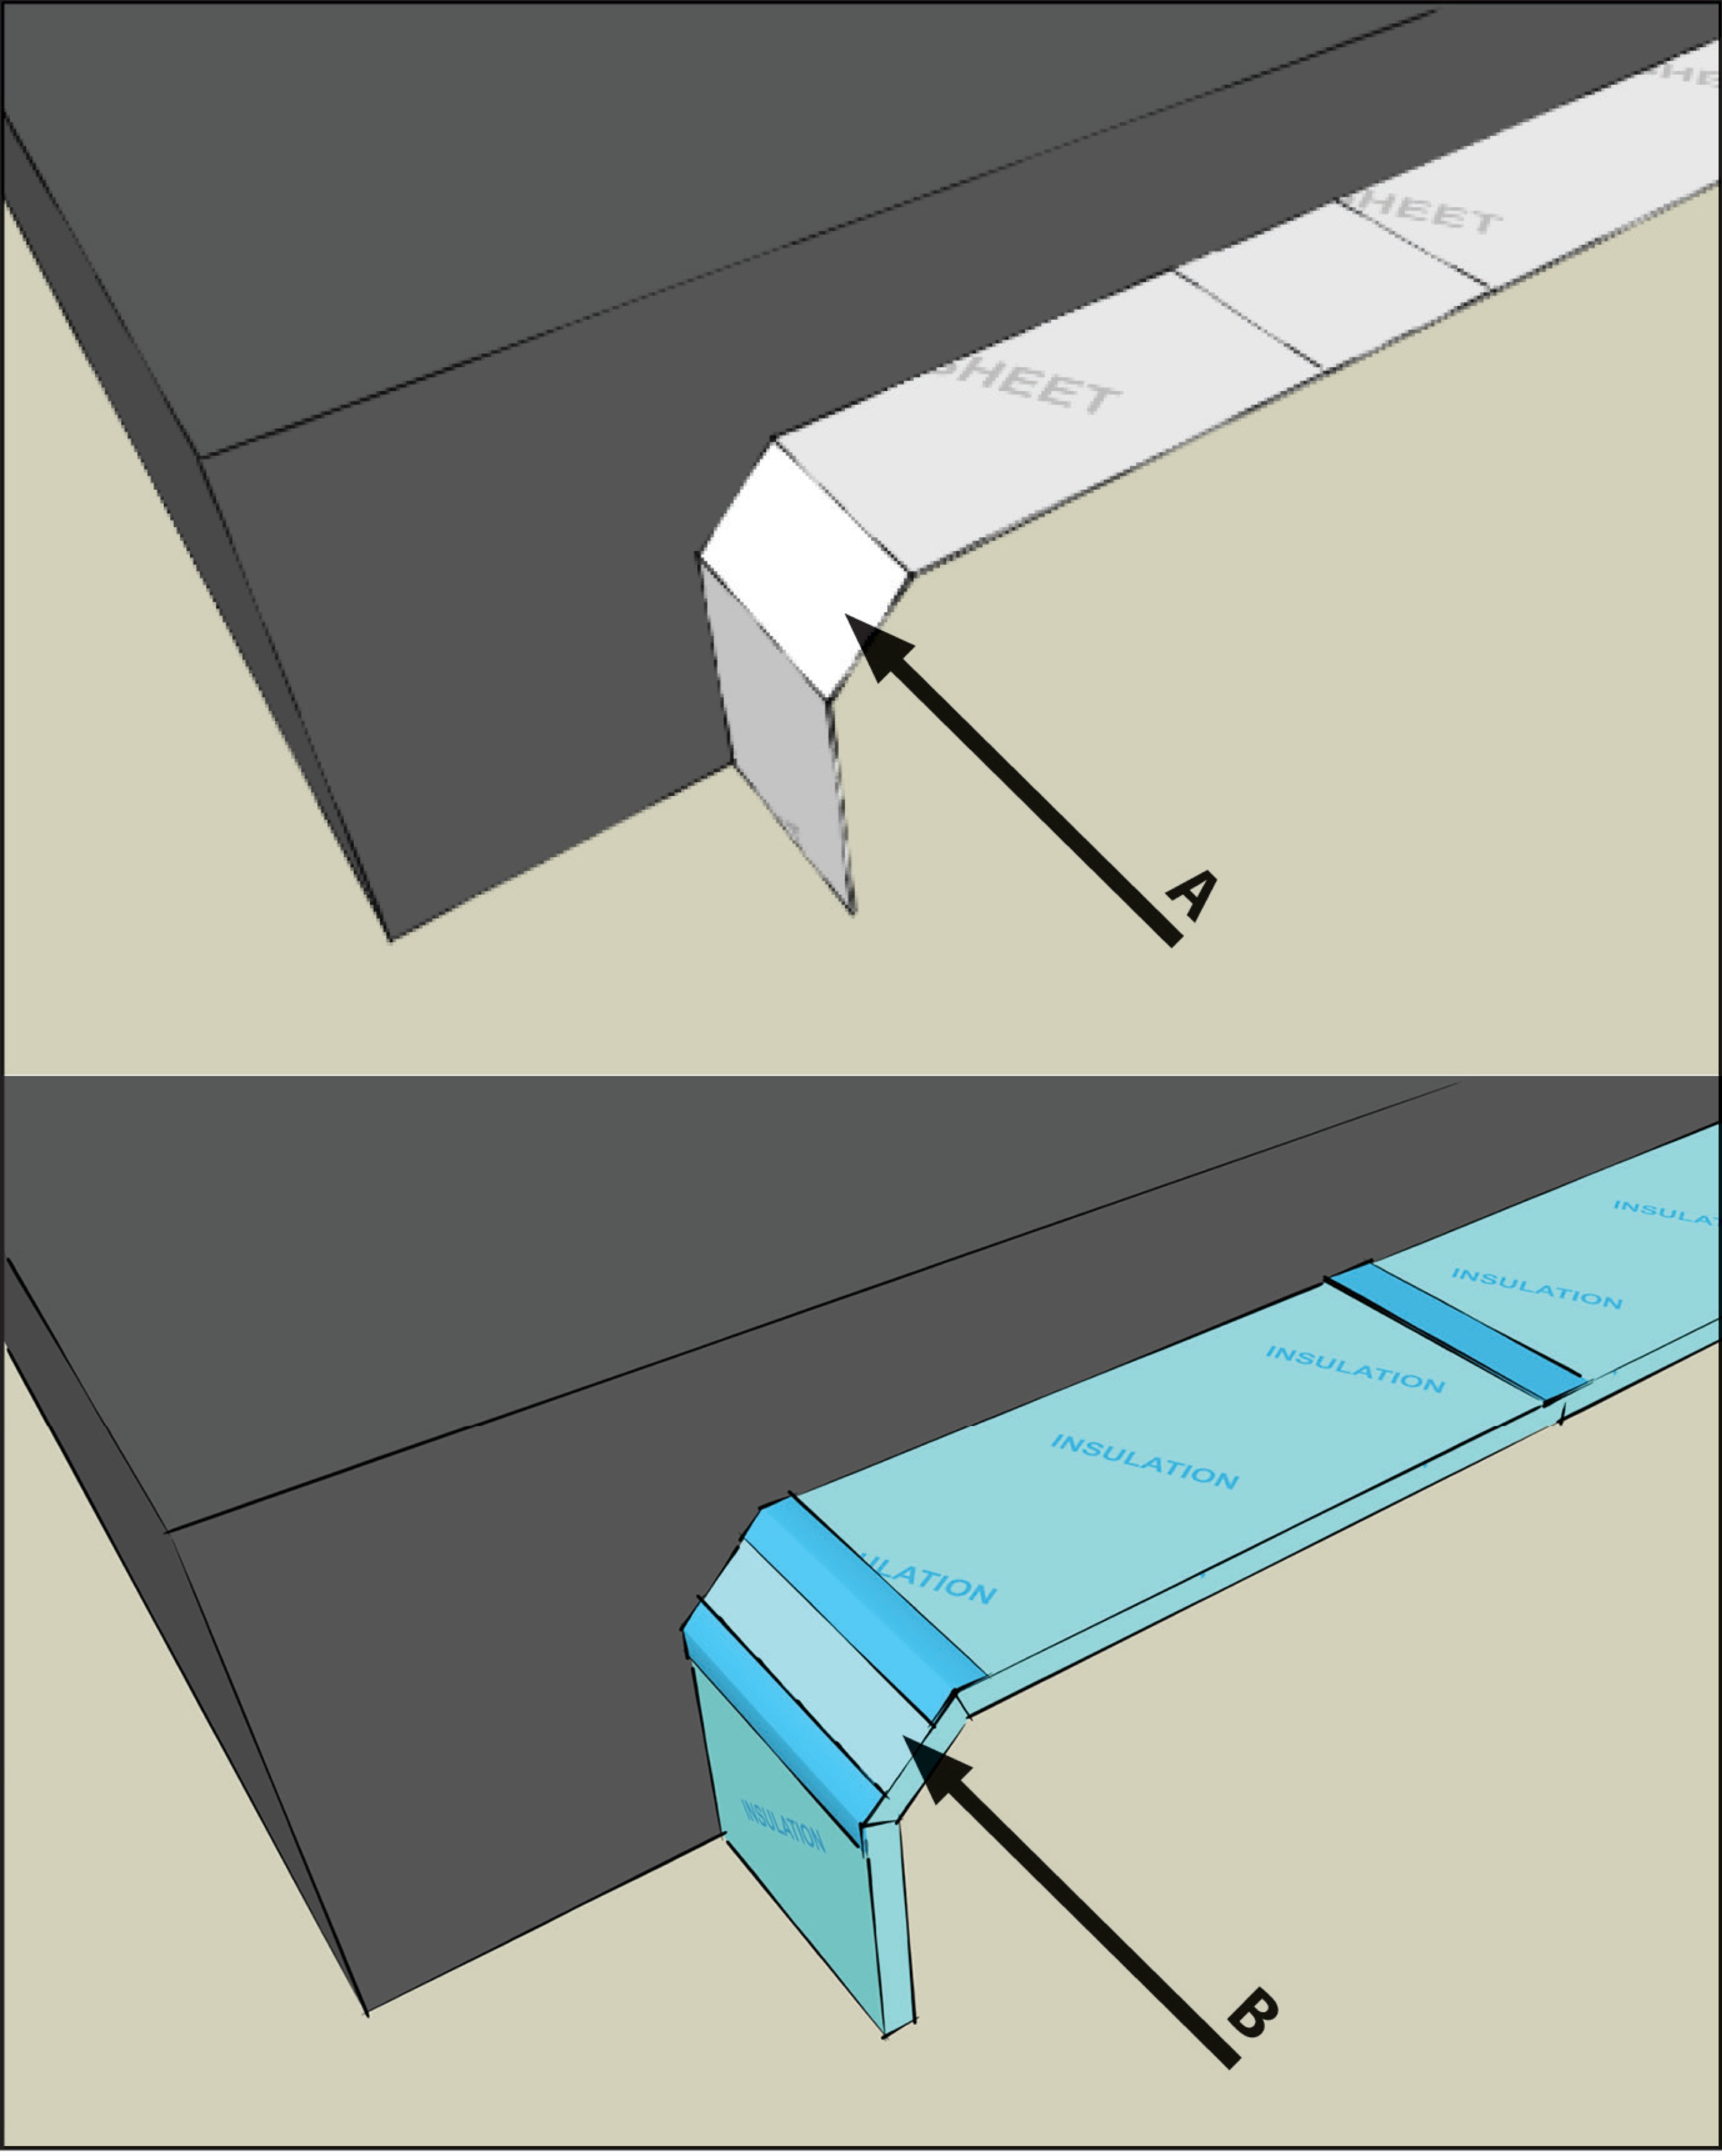
Right - These roof insulation panels are installed in multiple layers with joints offset both vertically and horizontally. The plywood nail base fastened to the roof framing holds the insulation layers together snuggly thus minimizing gaps
Image

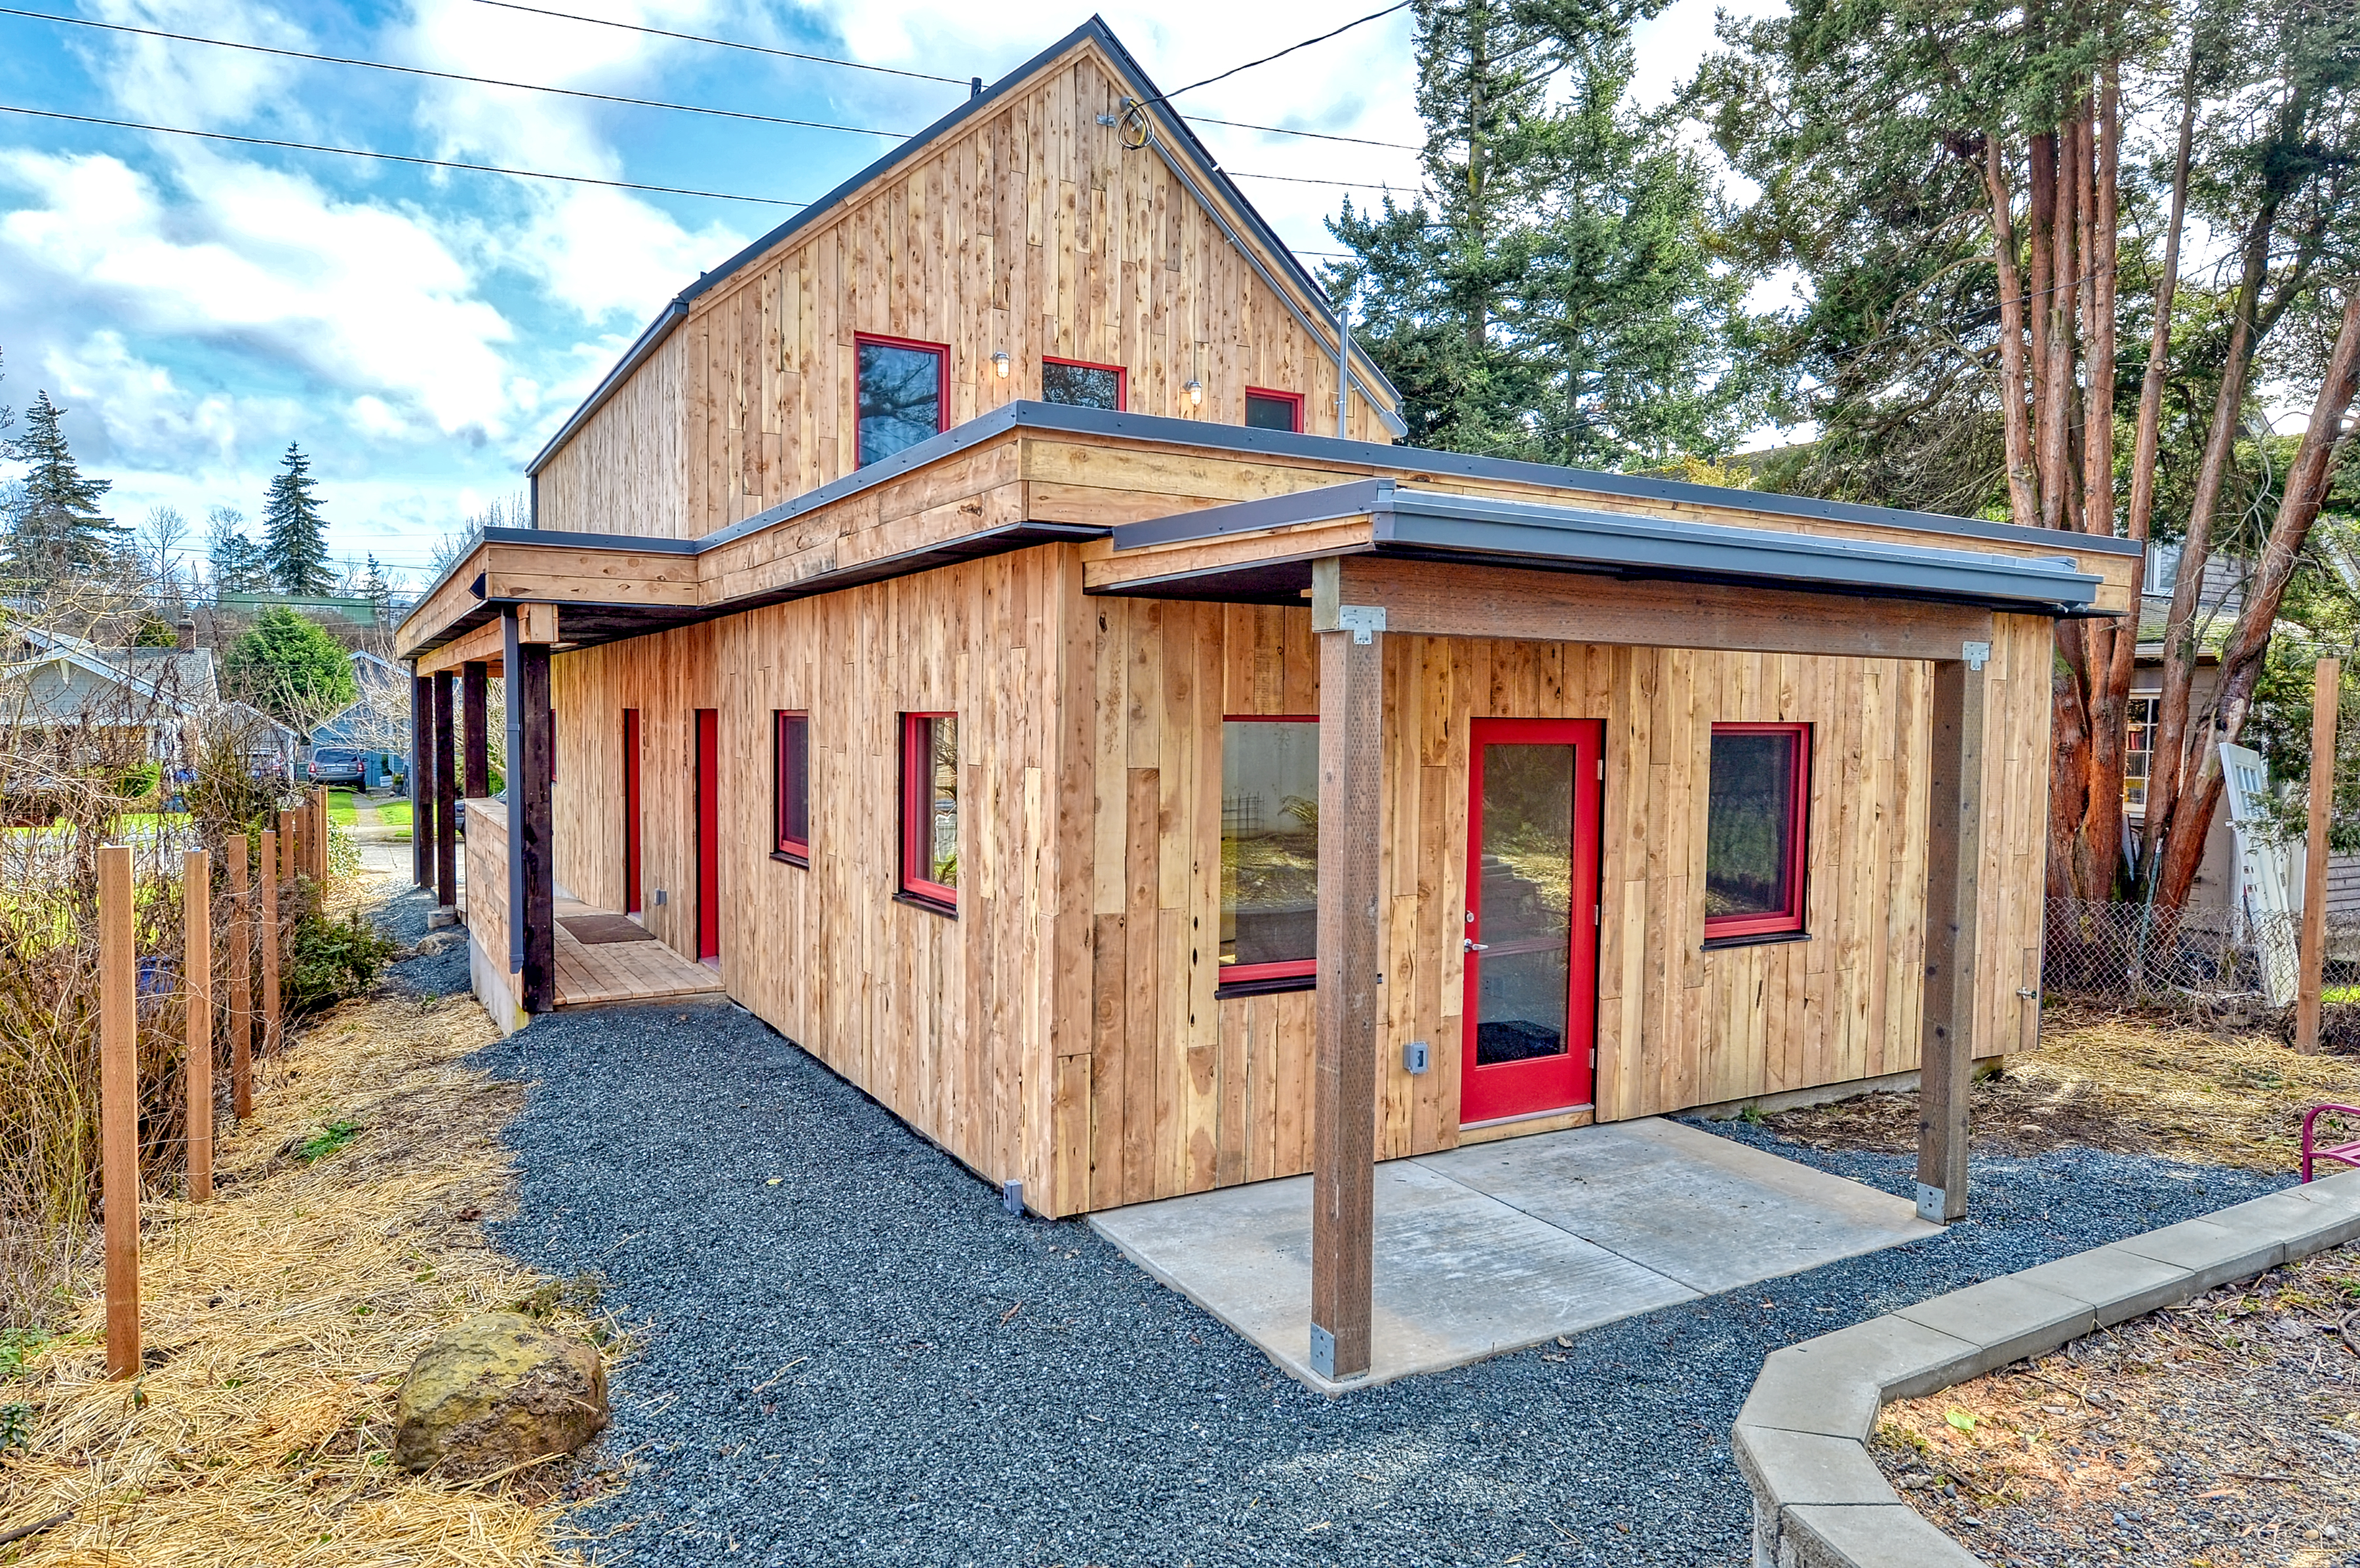
Right - This cedar siding is installed over furring strips which allow an air and drainage gap behind the siding.