Showing results 701 - 750 of 1073
Image
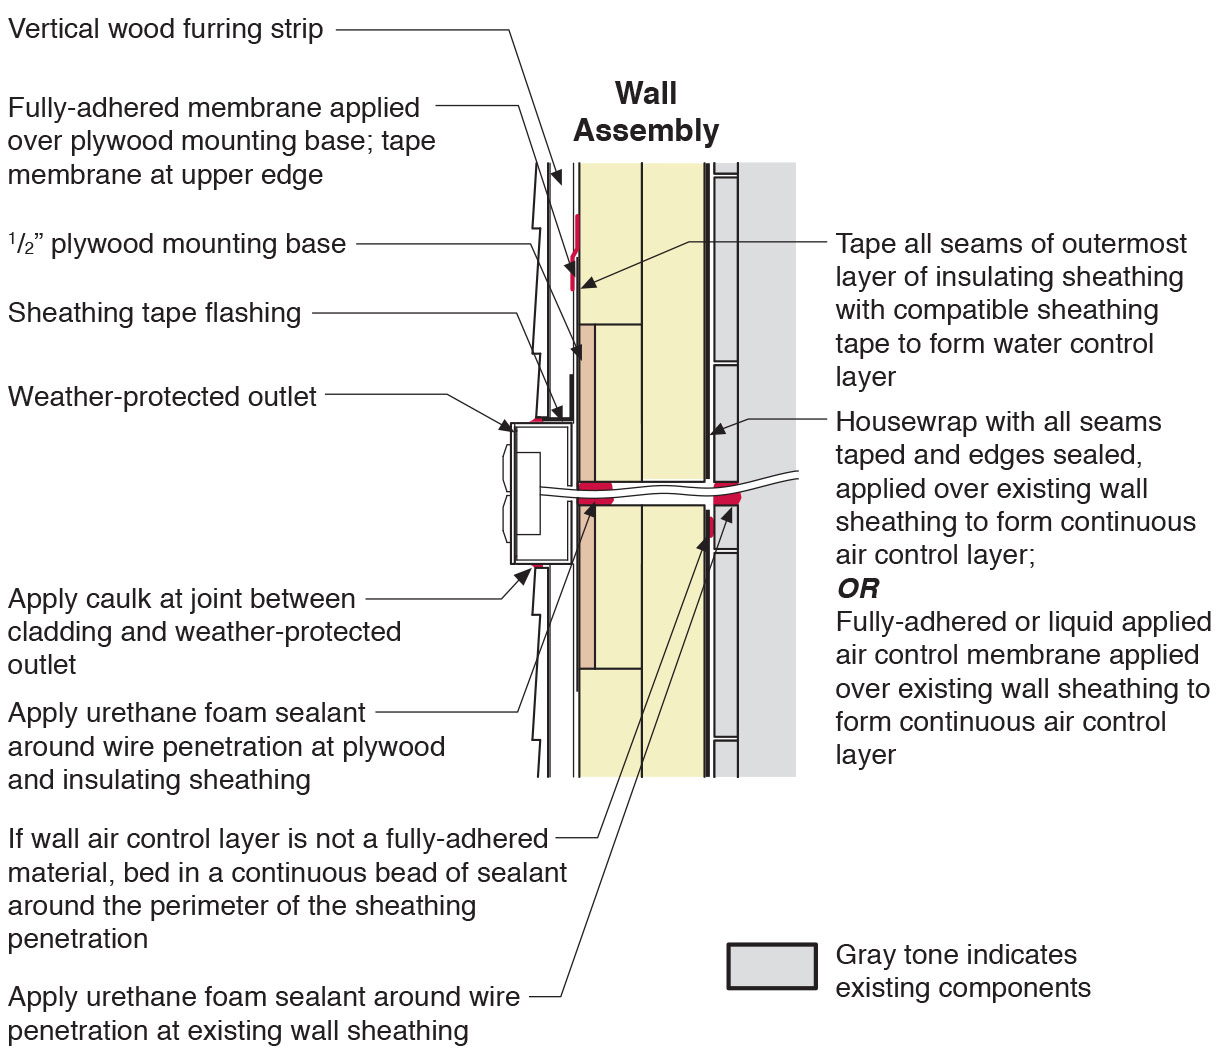
Section view of electric box installation in exterior wall showing flashing and air sealing details
Image
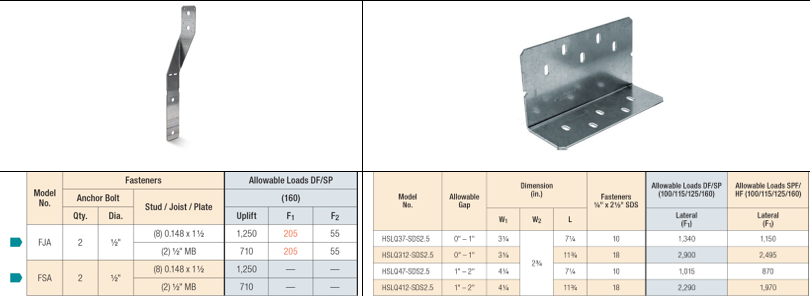
Shear Strength Comparison Between a Foundation Stud Anchor (on left) and a Shear Transfer Angle (on right)
Image
Image
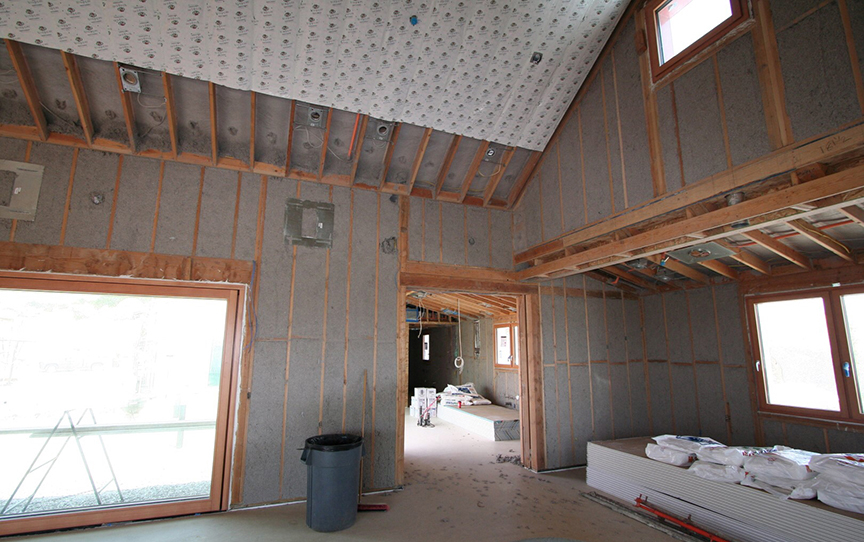
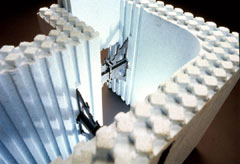
Sheets of phase-change material are installed over the cellulose insulation to help even out interior temperatures.
Image
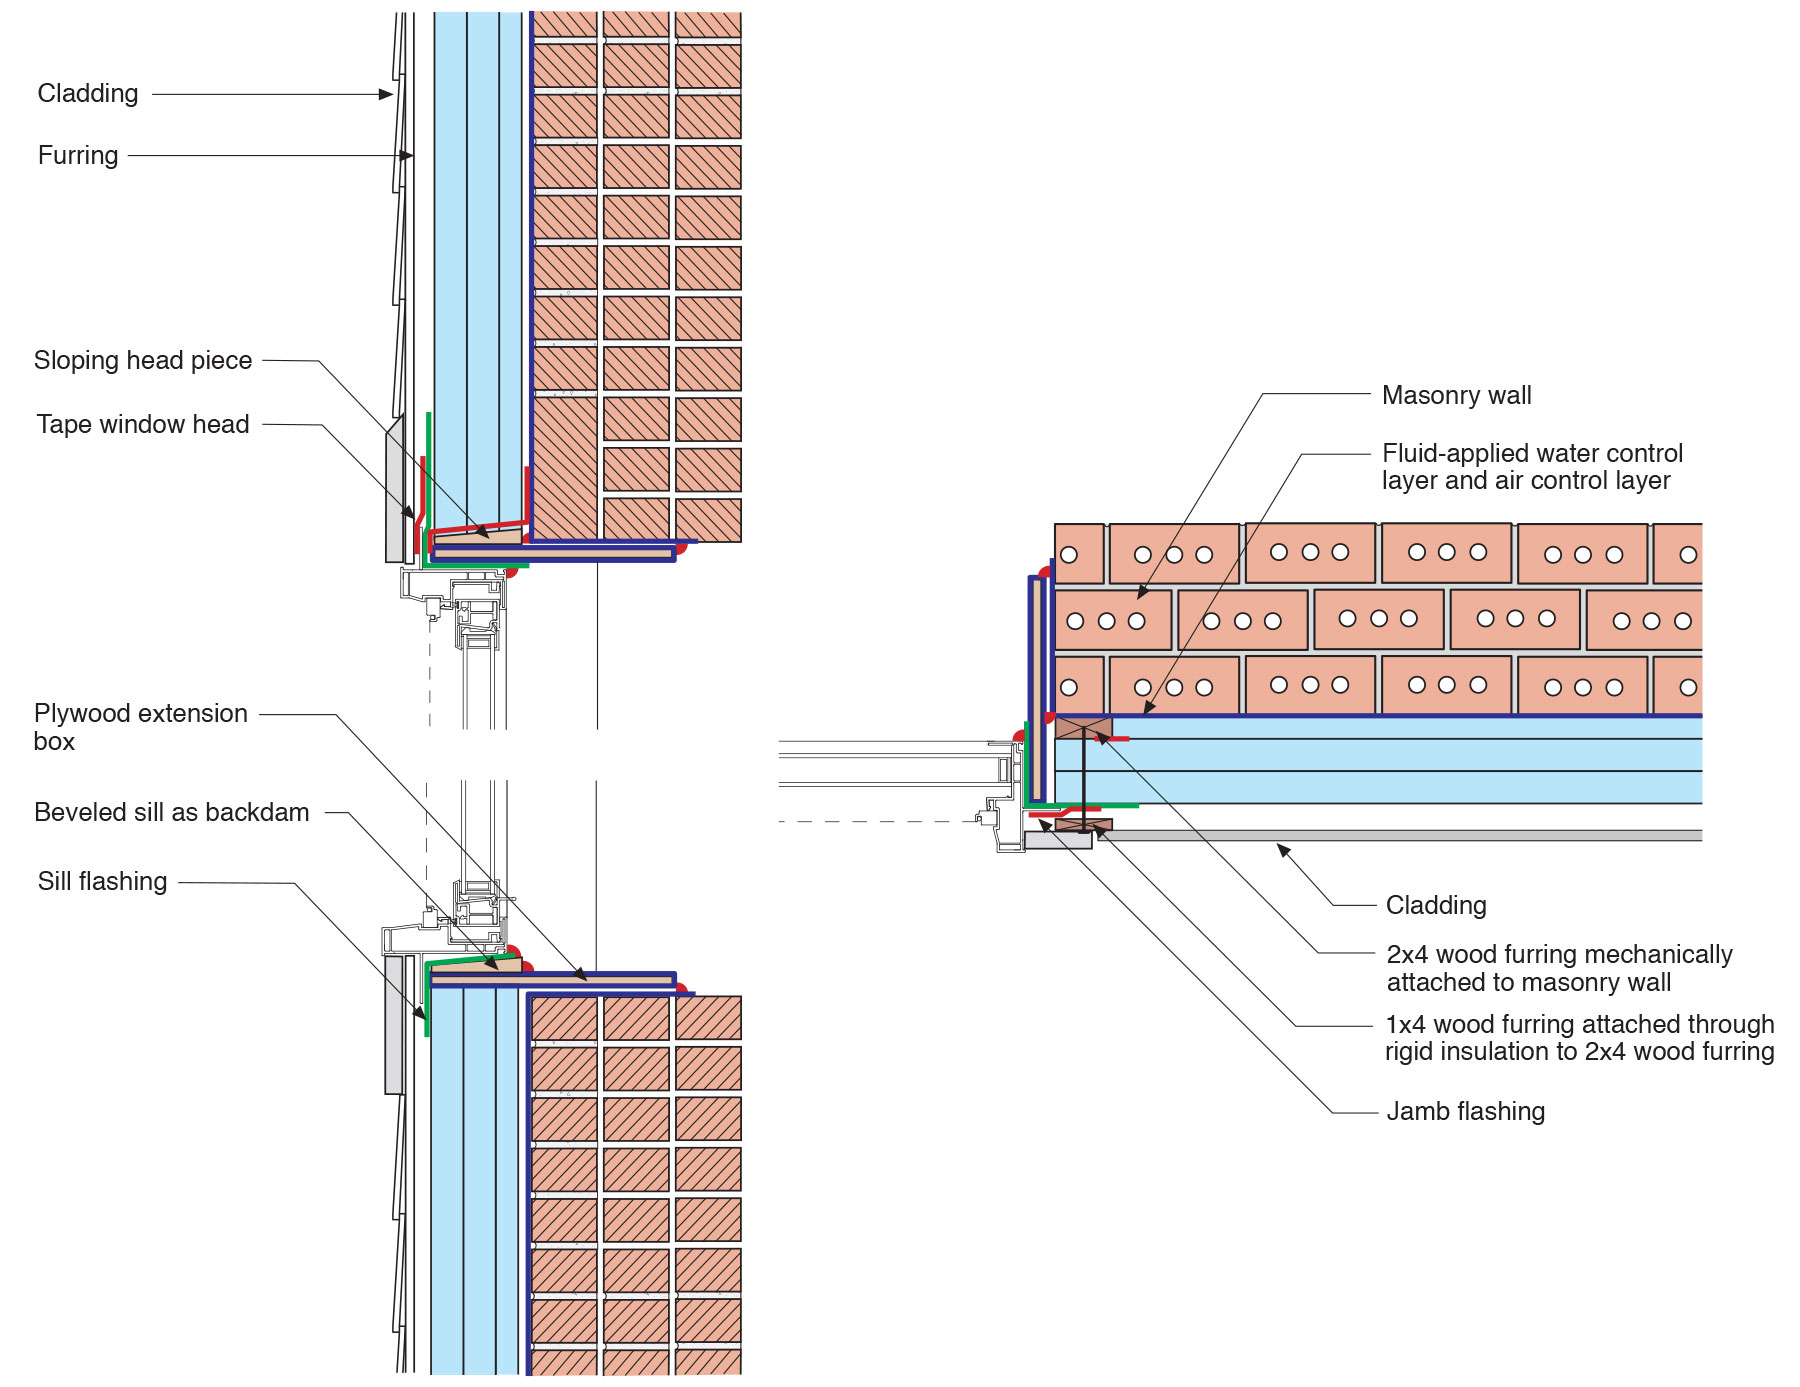
Side and plan views of window-to-wall interface in masonry wall retrofit including three layers of rigid foam exterior insulation, box extensions, and flashing around new windows.
Image

Side view showing air-sealing and rigid foam insulation is installed over existing wall and ceiling under a room above, then covered with new gypsum board.
Image
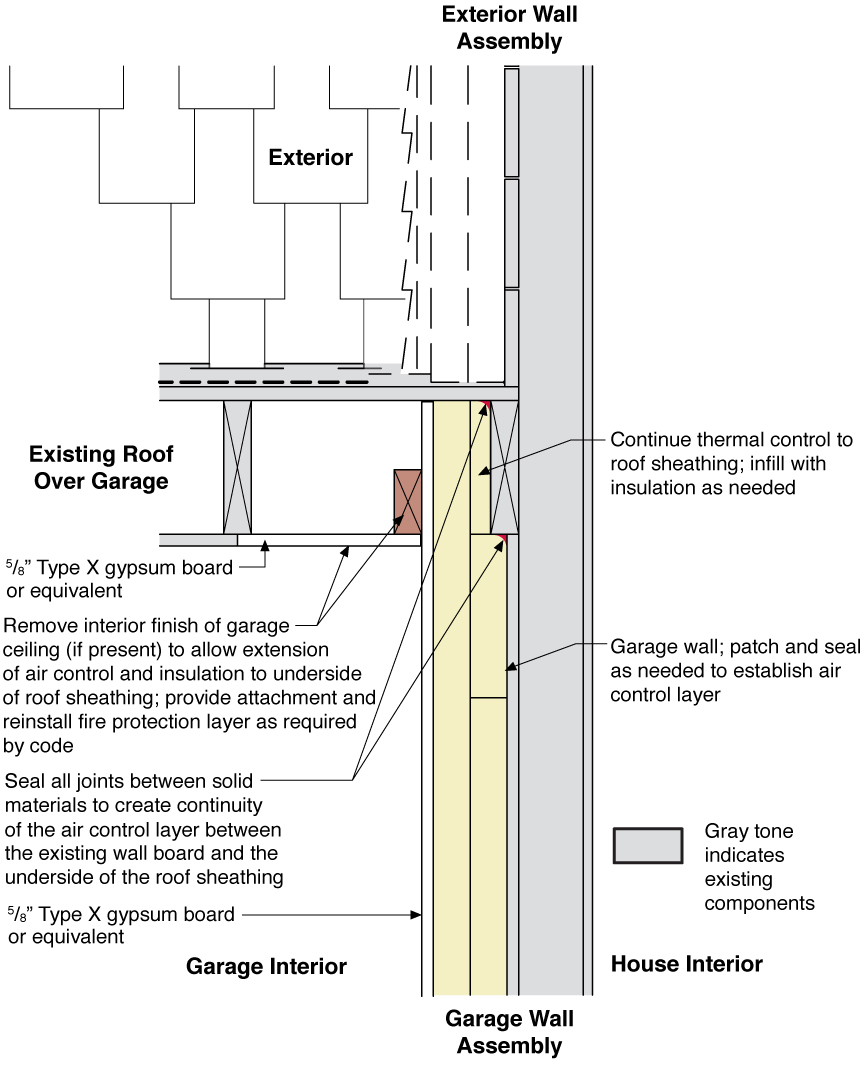
Side view showing how the existing garage wall and ceiling are air-sealed prior to installing rigid foam insulation on the garage side of the shared wall of an existing home.
Image
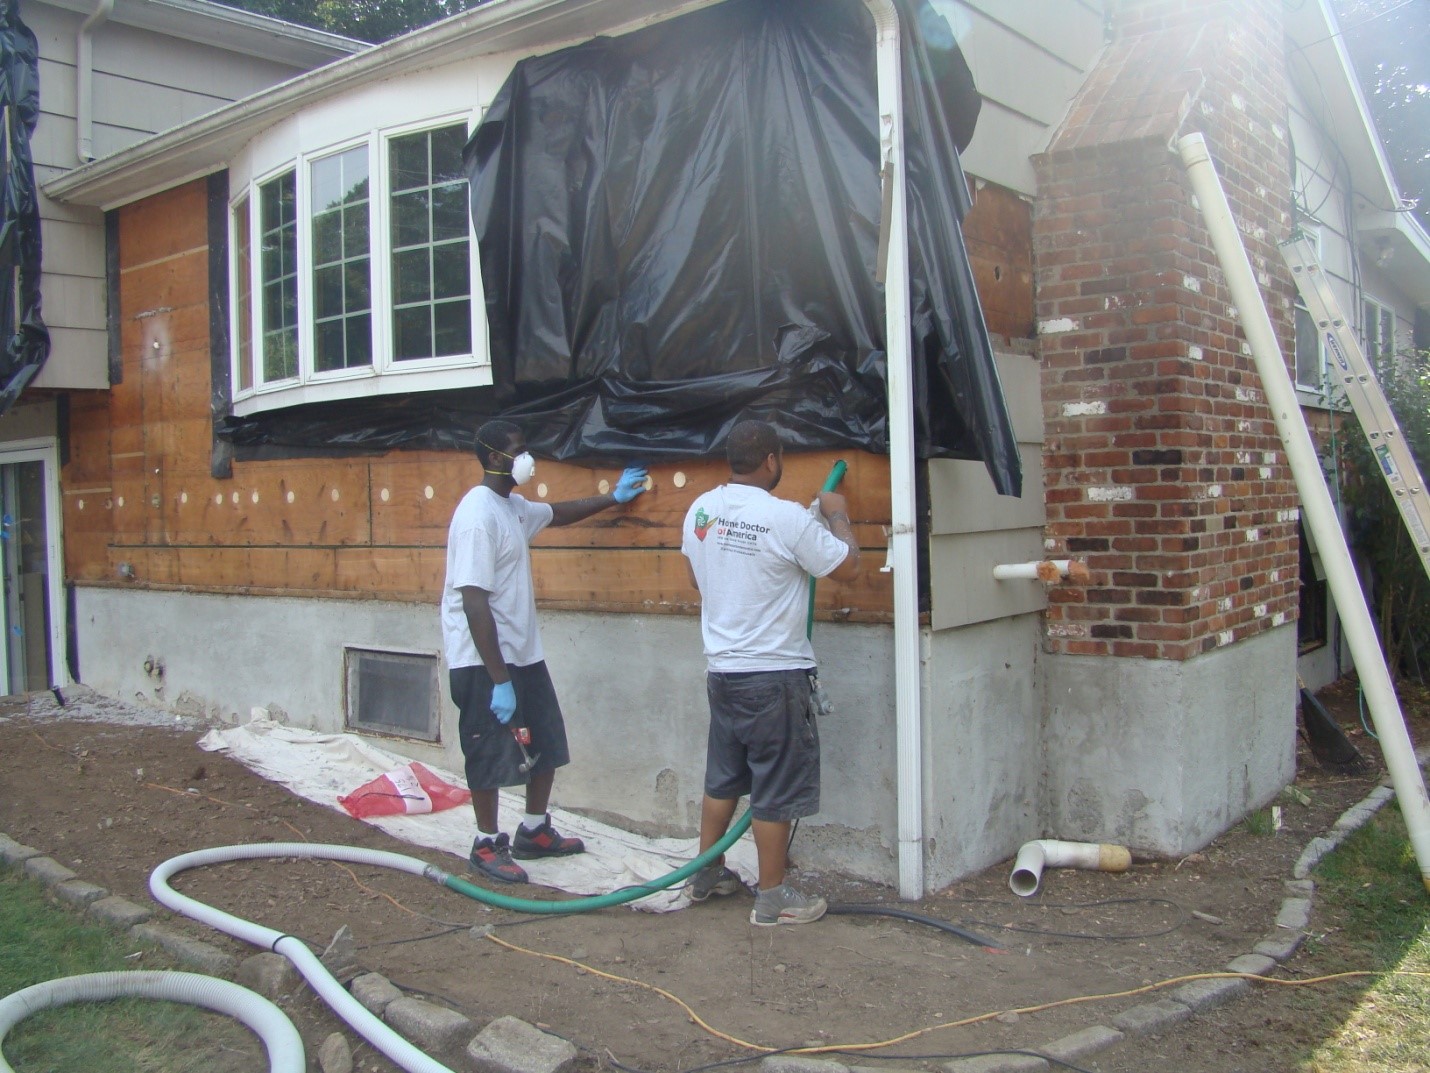
Siding has been removed so cellulose insulation can be dense-packed into the exterior walls of this home
Image
Single framed wall converted to double wall and insulated with closed-cell spray foam
Image
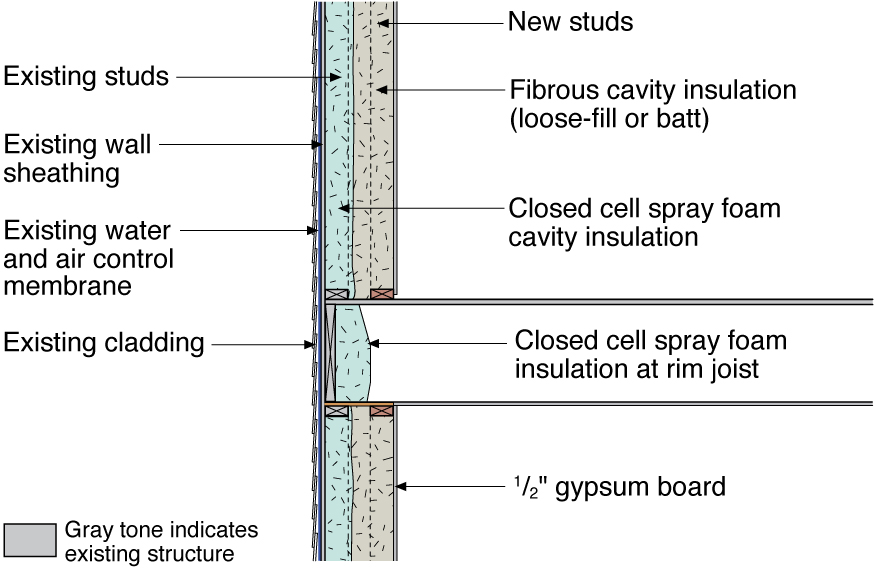
Single framed wall converted to double wall and insulated with closed-cell spray foam and loose-fill fibrous insulation
Image
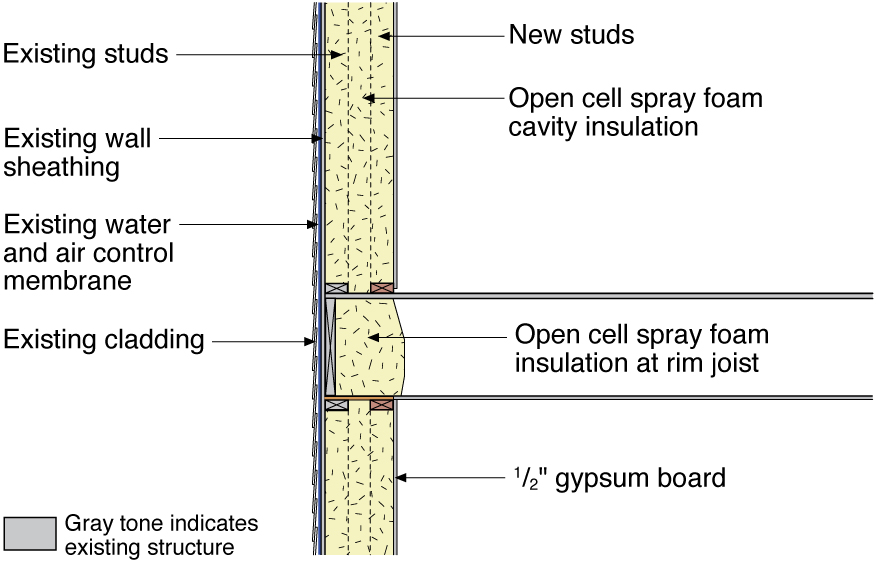
Single framed wall converted to double wall and insulated with open-cell spray foam
Image

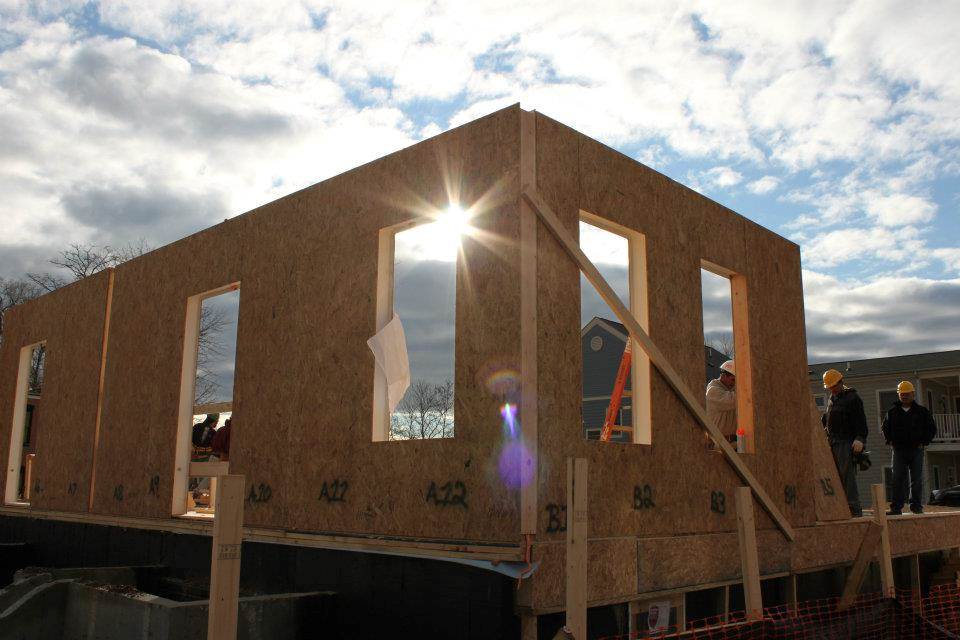
SIP panel walls are less susceptible to air leakage and convection issues than stick-built walls
Image
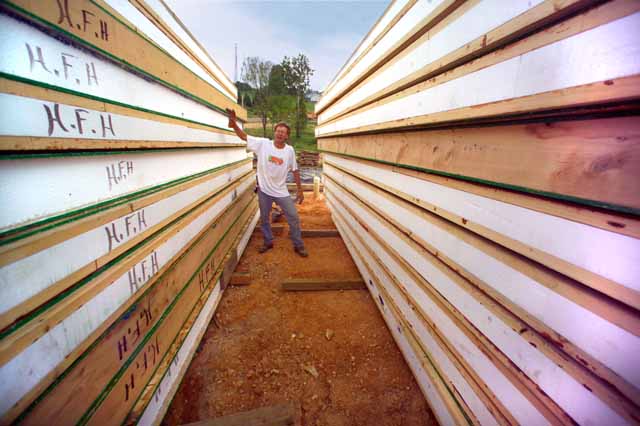
SIP panels should be stacked high, dry, and flat
Image
Image
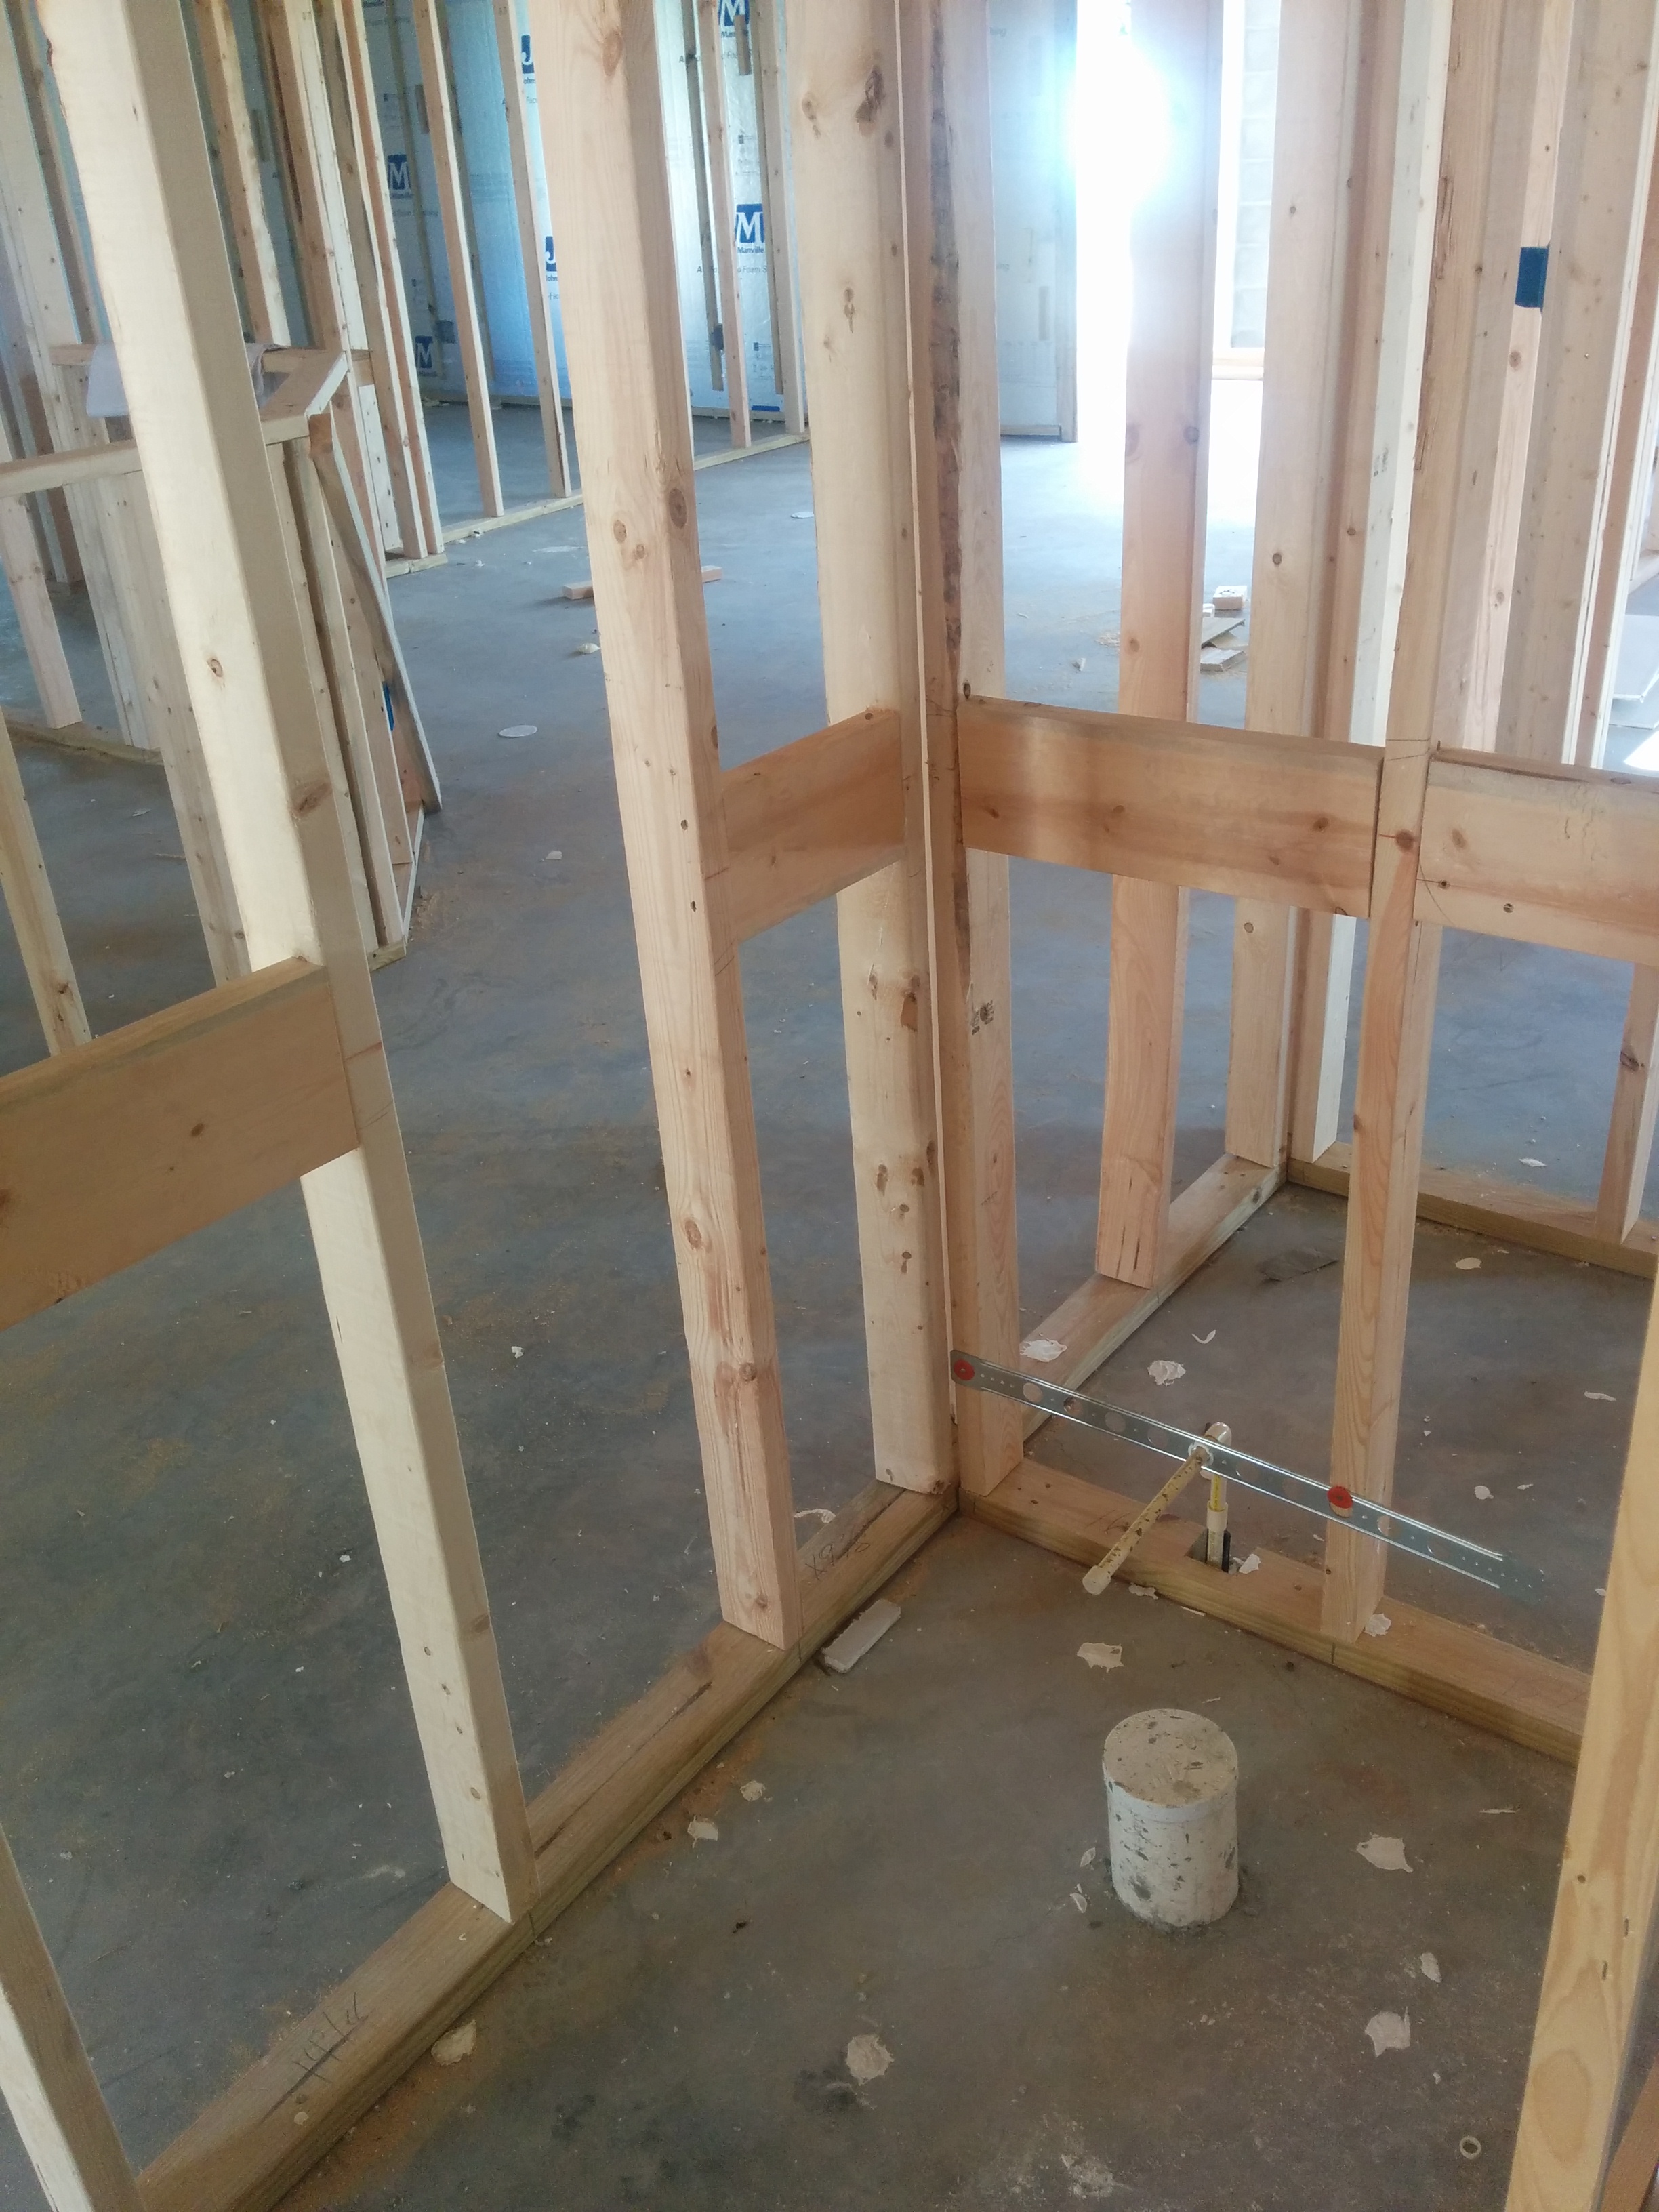
Solid wood blocking was installed in the walls to accommodate future grab bars in both bathrooms.
Image
Sources of heat gain in a house include solar gains, infiltration, conduction through walls and roof, occupants, and internal equipment
Image
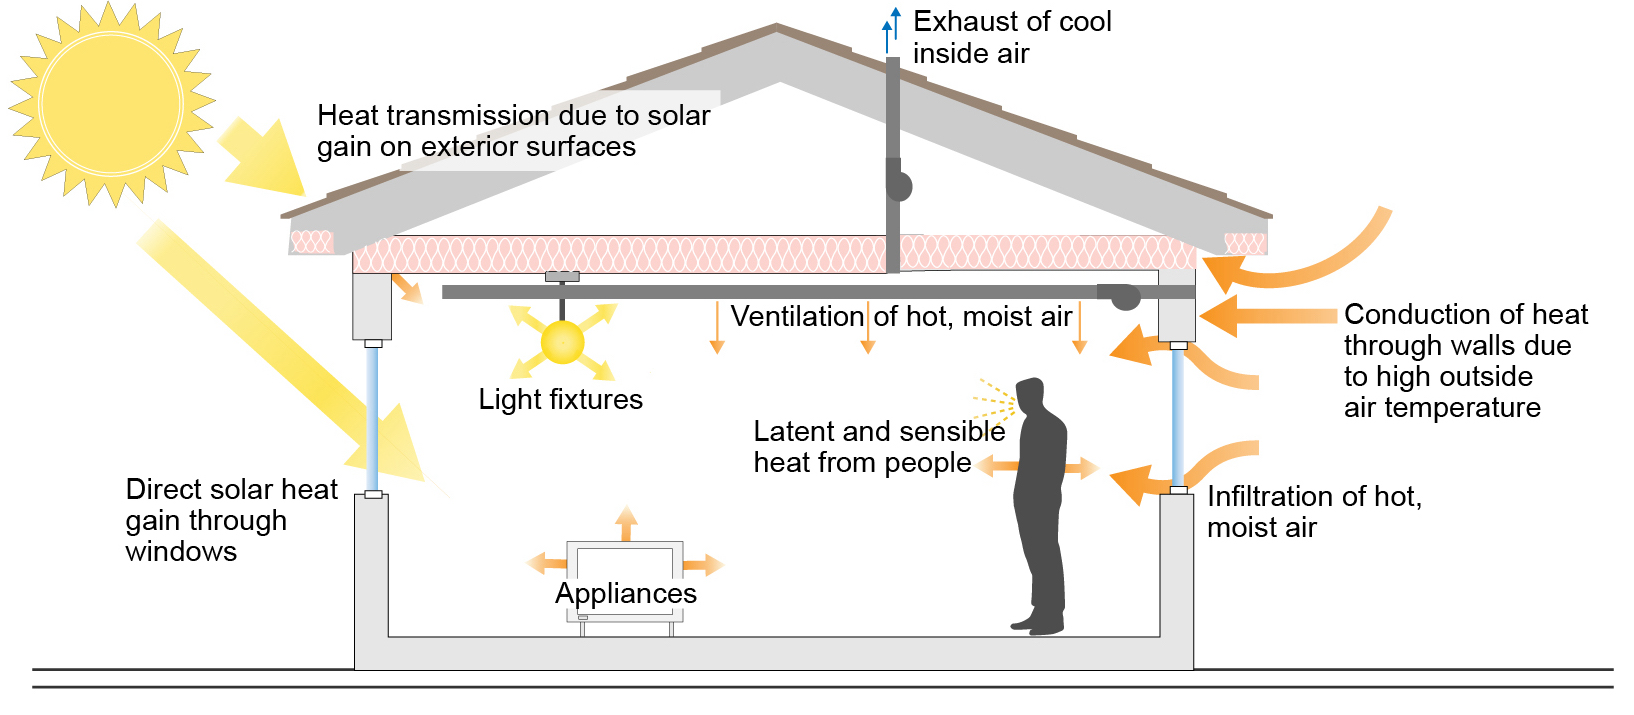
Sources of heat gain in a house include solar gains, infiltration, conduction through walls and roof, occupants, and internal equipment
Image
Special molded corners provide continuous insulation layer at the corners to improve structural strength and minimize thermal bridging
Image
Image
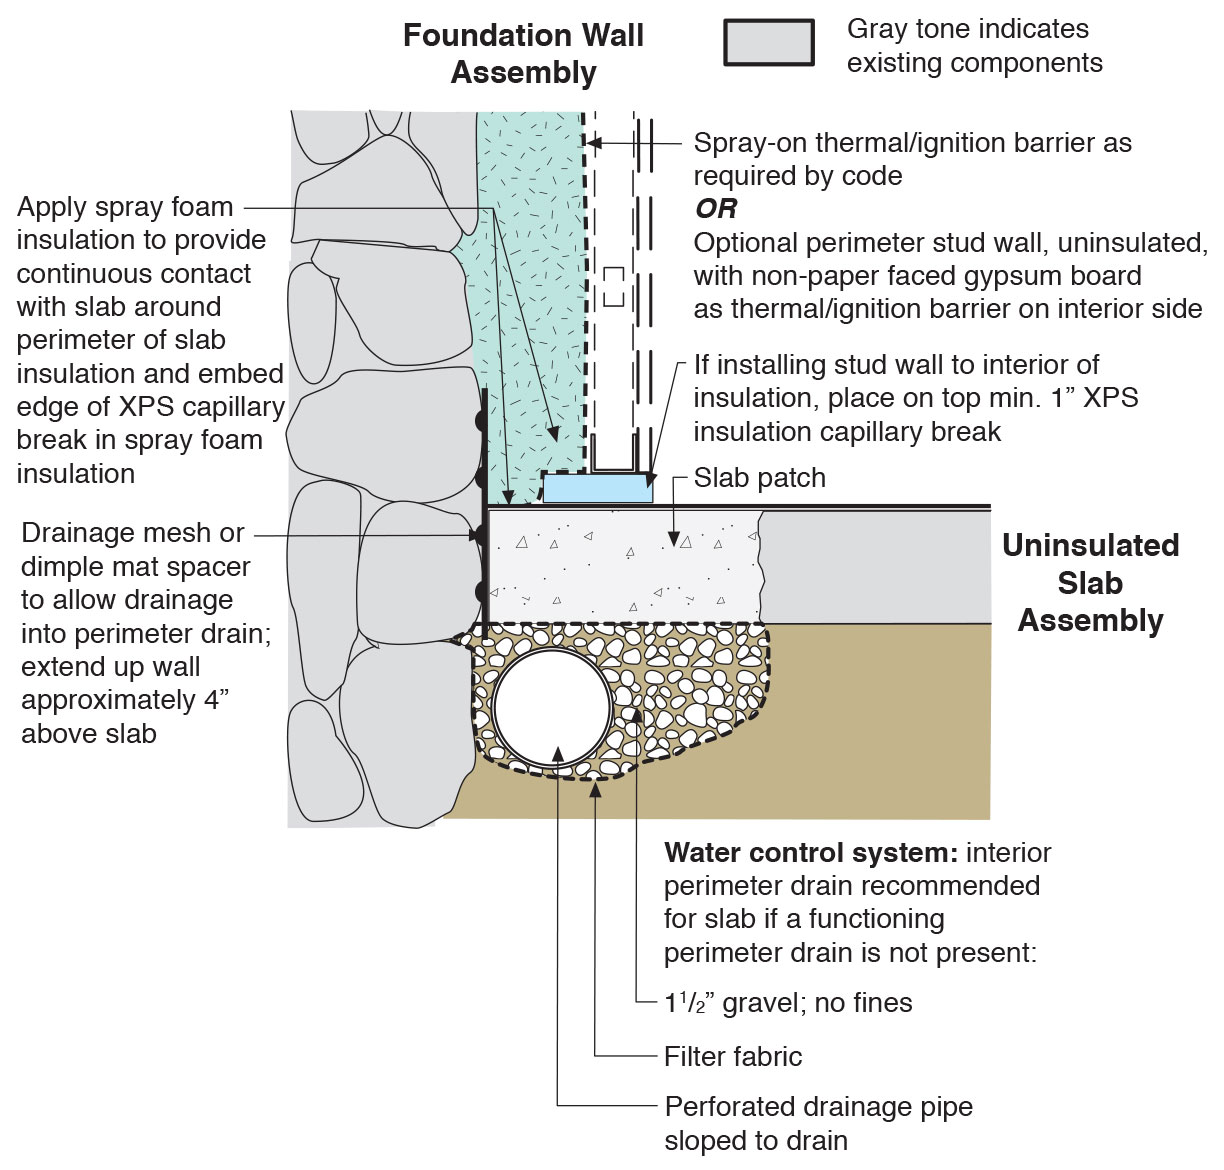
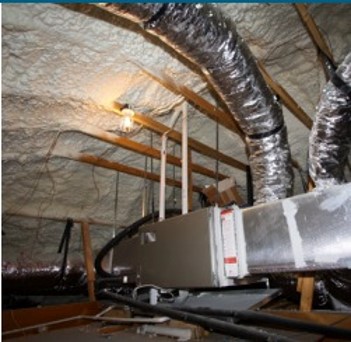
Spray foam extends down the inside of the foundation wall to the uninsulated slab; because the wall lacked exterior perimeter drainage, the slab was cut and an interior footing drain was installed.
Image
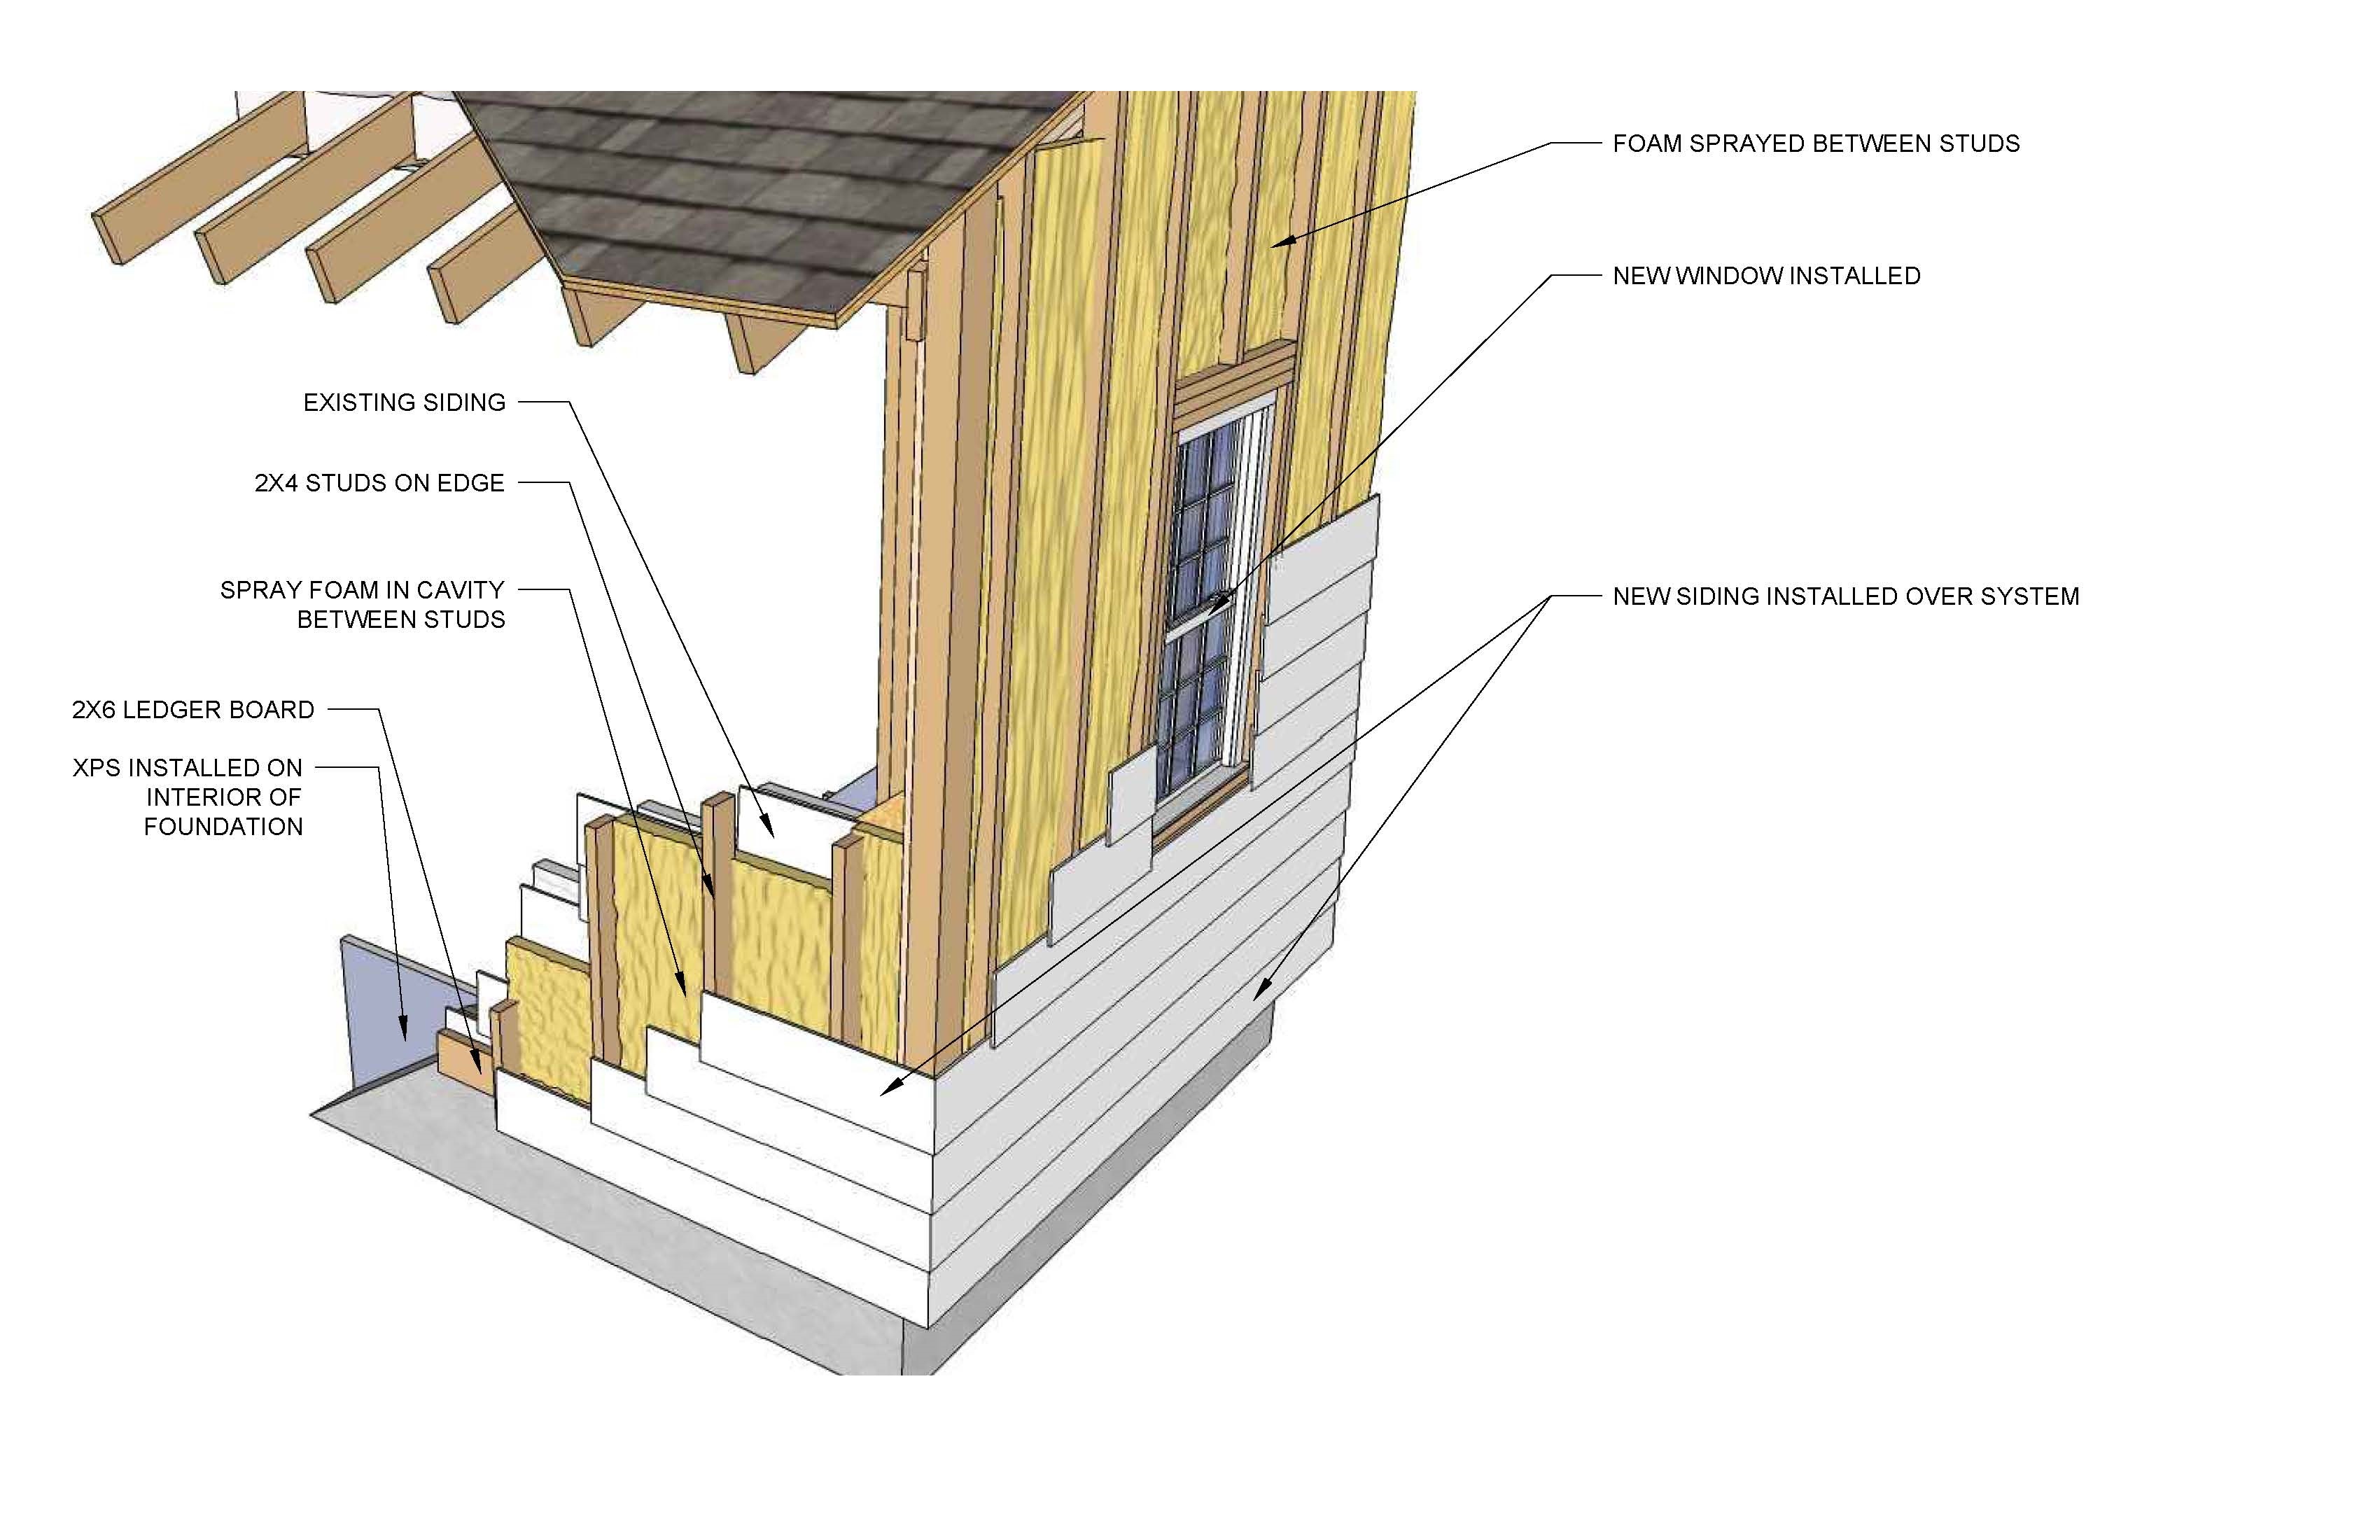
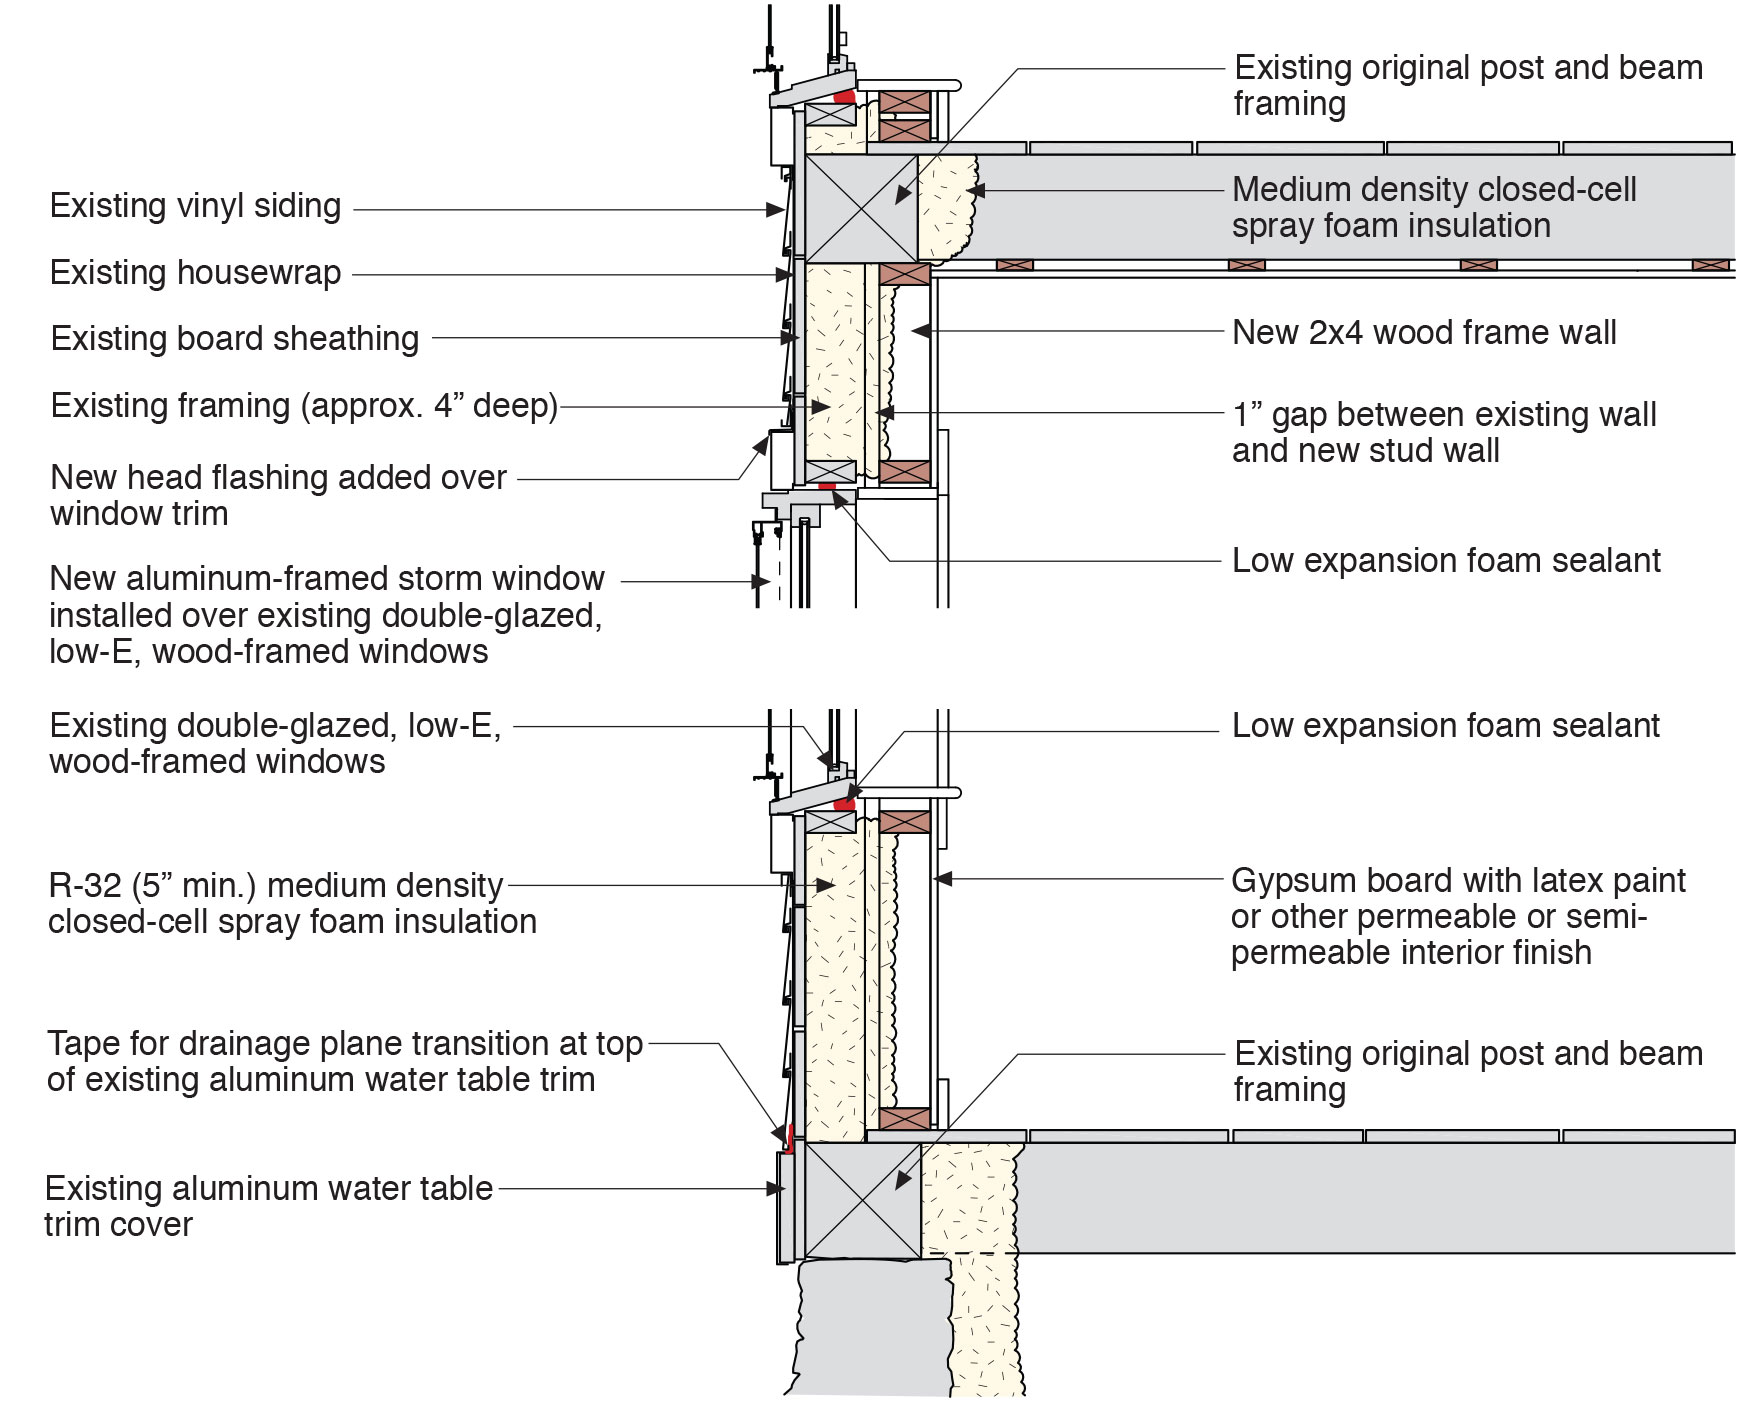
Spray foam is installed between new studs over the existing siding in this deep energy retrofit
Image
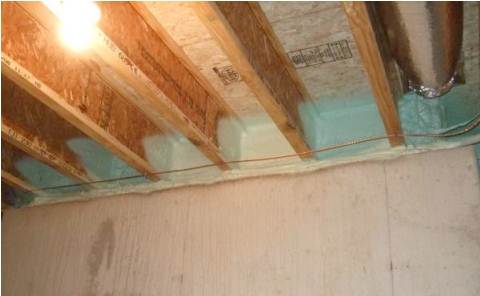
Spray foam provides a critical seal between the subfloor, rim joist, and sill plate
Image

Image
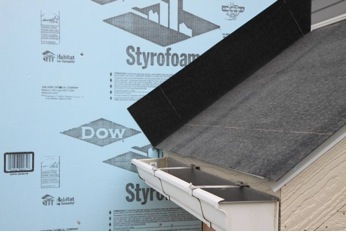
Step 1. Apply roof underlayment over roof deck and up the sidewall over the rigid foam insulation
Image
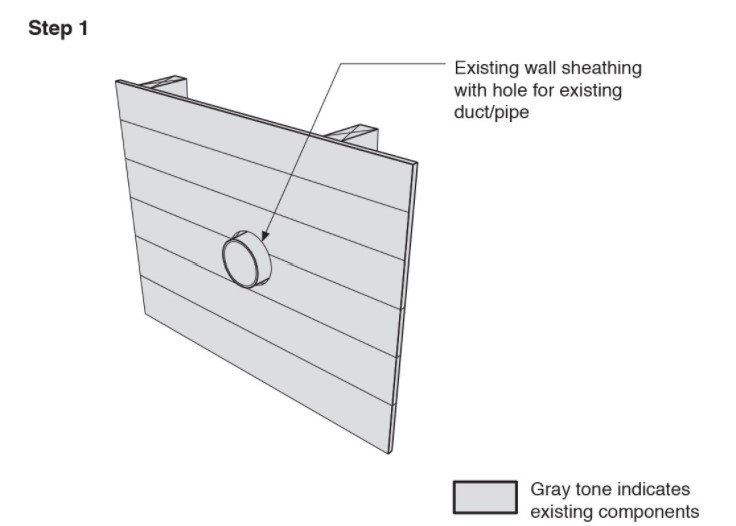
Step 1. Remove the existing wall cladding to prepare to retrofit an exterior wall.
Image
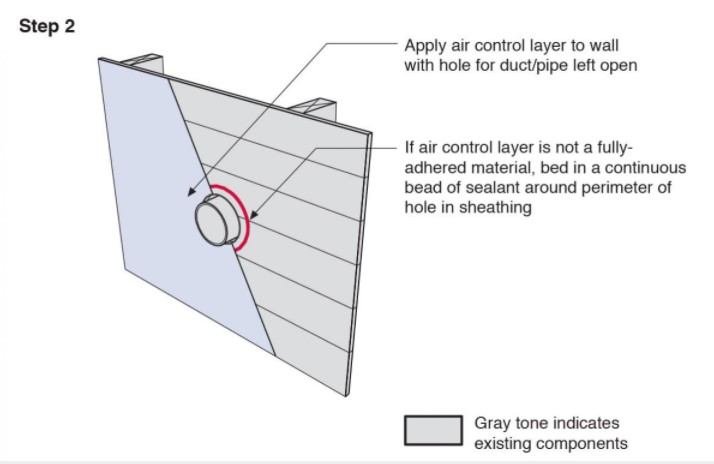
Step 2. Install a continuous air and water control layer over the existing wall sheathing.
Image
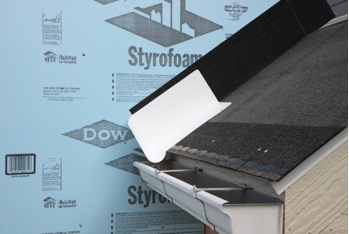
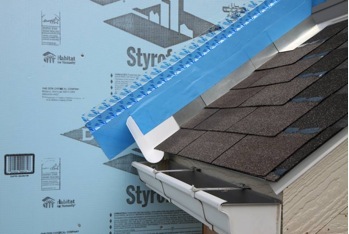
Step 2. Install shingle starter strip then kick-out diverter as first piece of step flashing.
Image
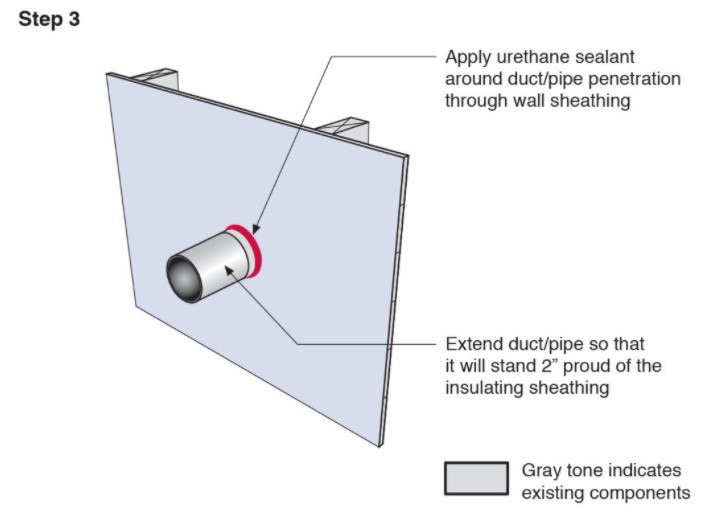
Step 3. Apply urethane sealant around the duct or pipe in the retrofitted exterior wall.
Image
Step 3. Place the first shingle and the next section of sidewall flashing over upper edge of diverter
Image
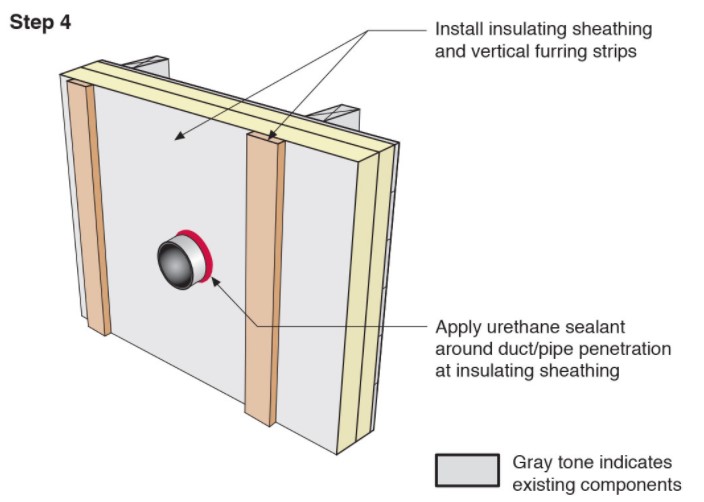
Step 4. Install insulating sheathing and vertical furring strips on the retrofitted exterior wall; seal around pipe or duct with urethane sealant.
Image

Step 4. Install remaining sidewall flashing, appropriate counter flashing, and shingles
Image
Step 5. Apply self-adhesive flashing over top edge of the wall flashing, diverter, and rigid foam insulation
Image
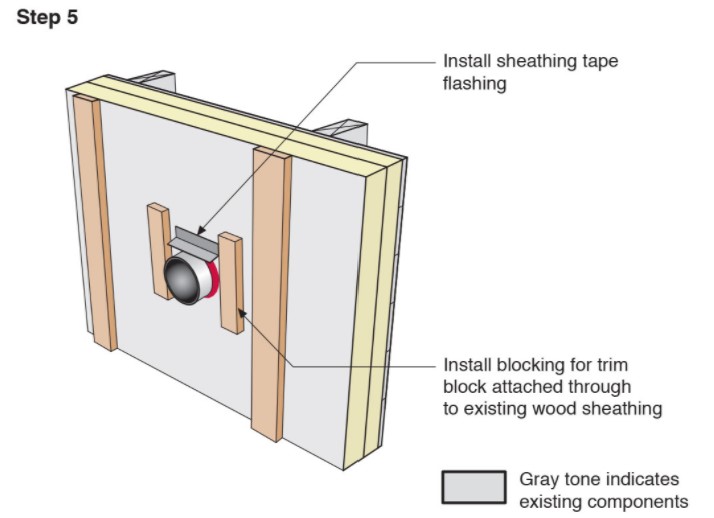
Step 5. Install sheathing tape flashing over the duct or pipe and wood blocking on either side for later attachment of trim.
Image
Image
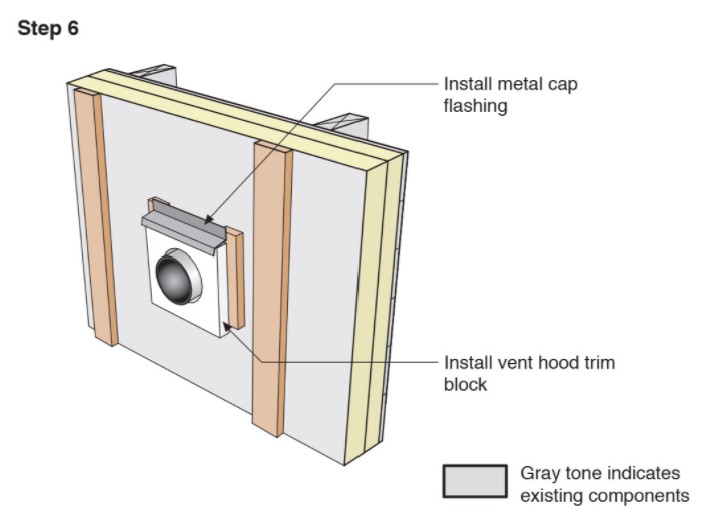
Step 6. Install vent hood trim block, metal cap flashing; seal top edge of flashing with sheathing tape.
Image
Image
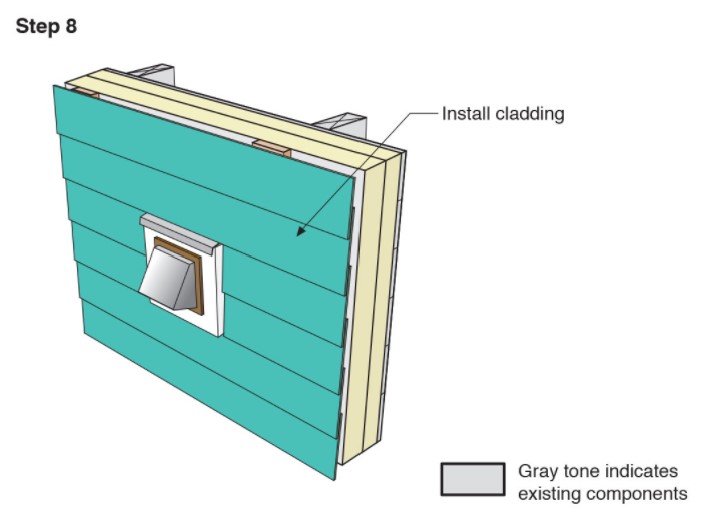
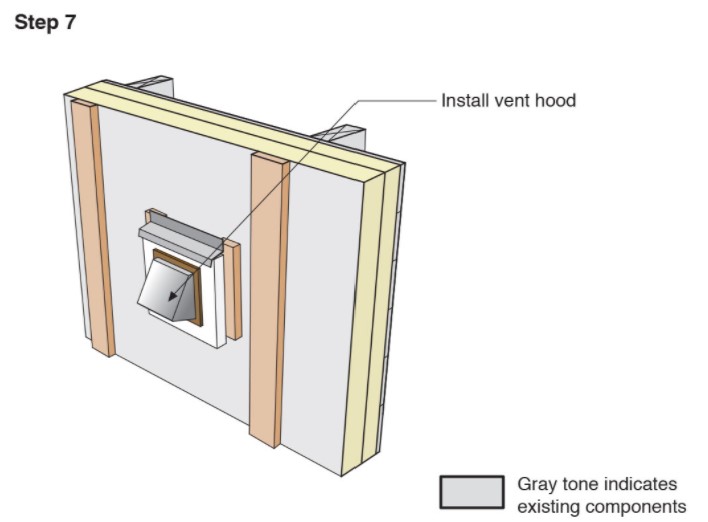
Step 8. Attach the new cladding to the furring strips over the rigid foam for the exterior wall retrofit.
Image
Step and kick-out flashing at all roof-wall intersections extending ≥ 4 in. on wall surface above roof deck and integrated with drainage plane above
Image
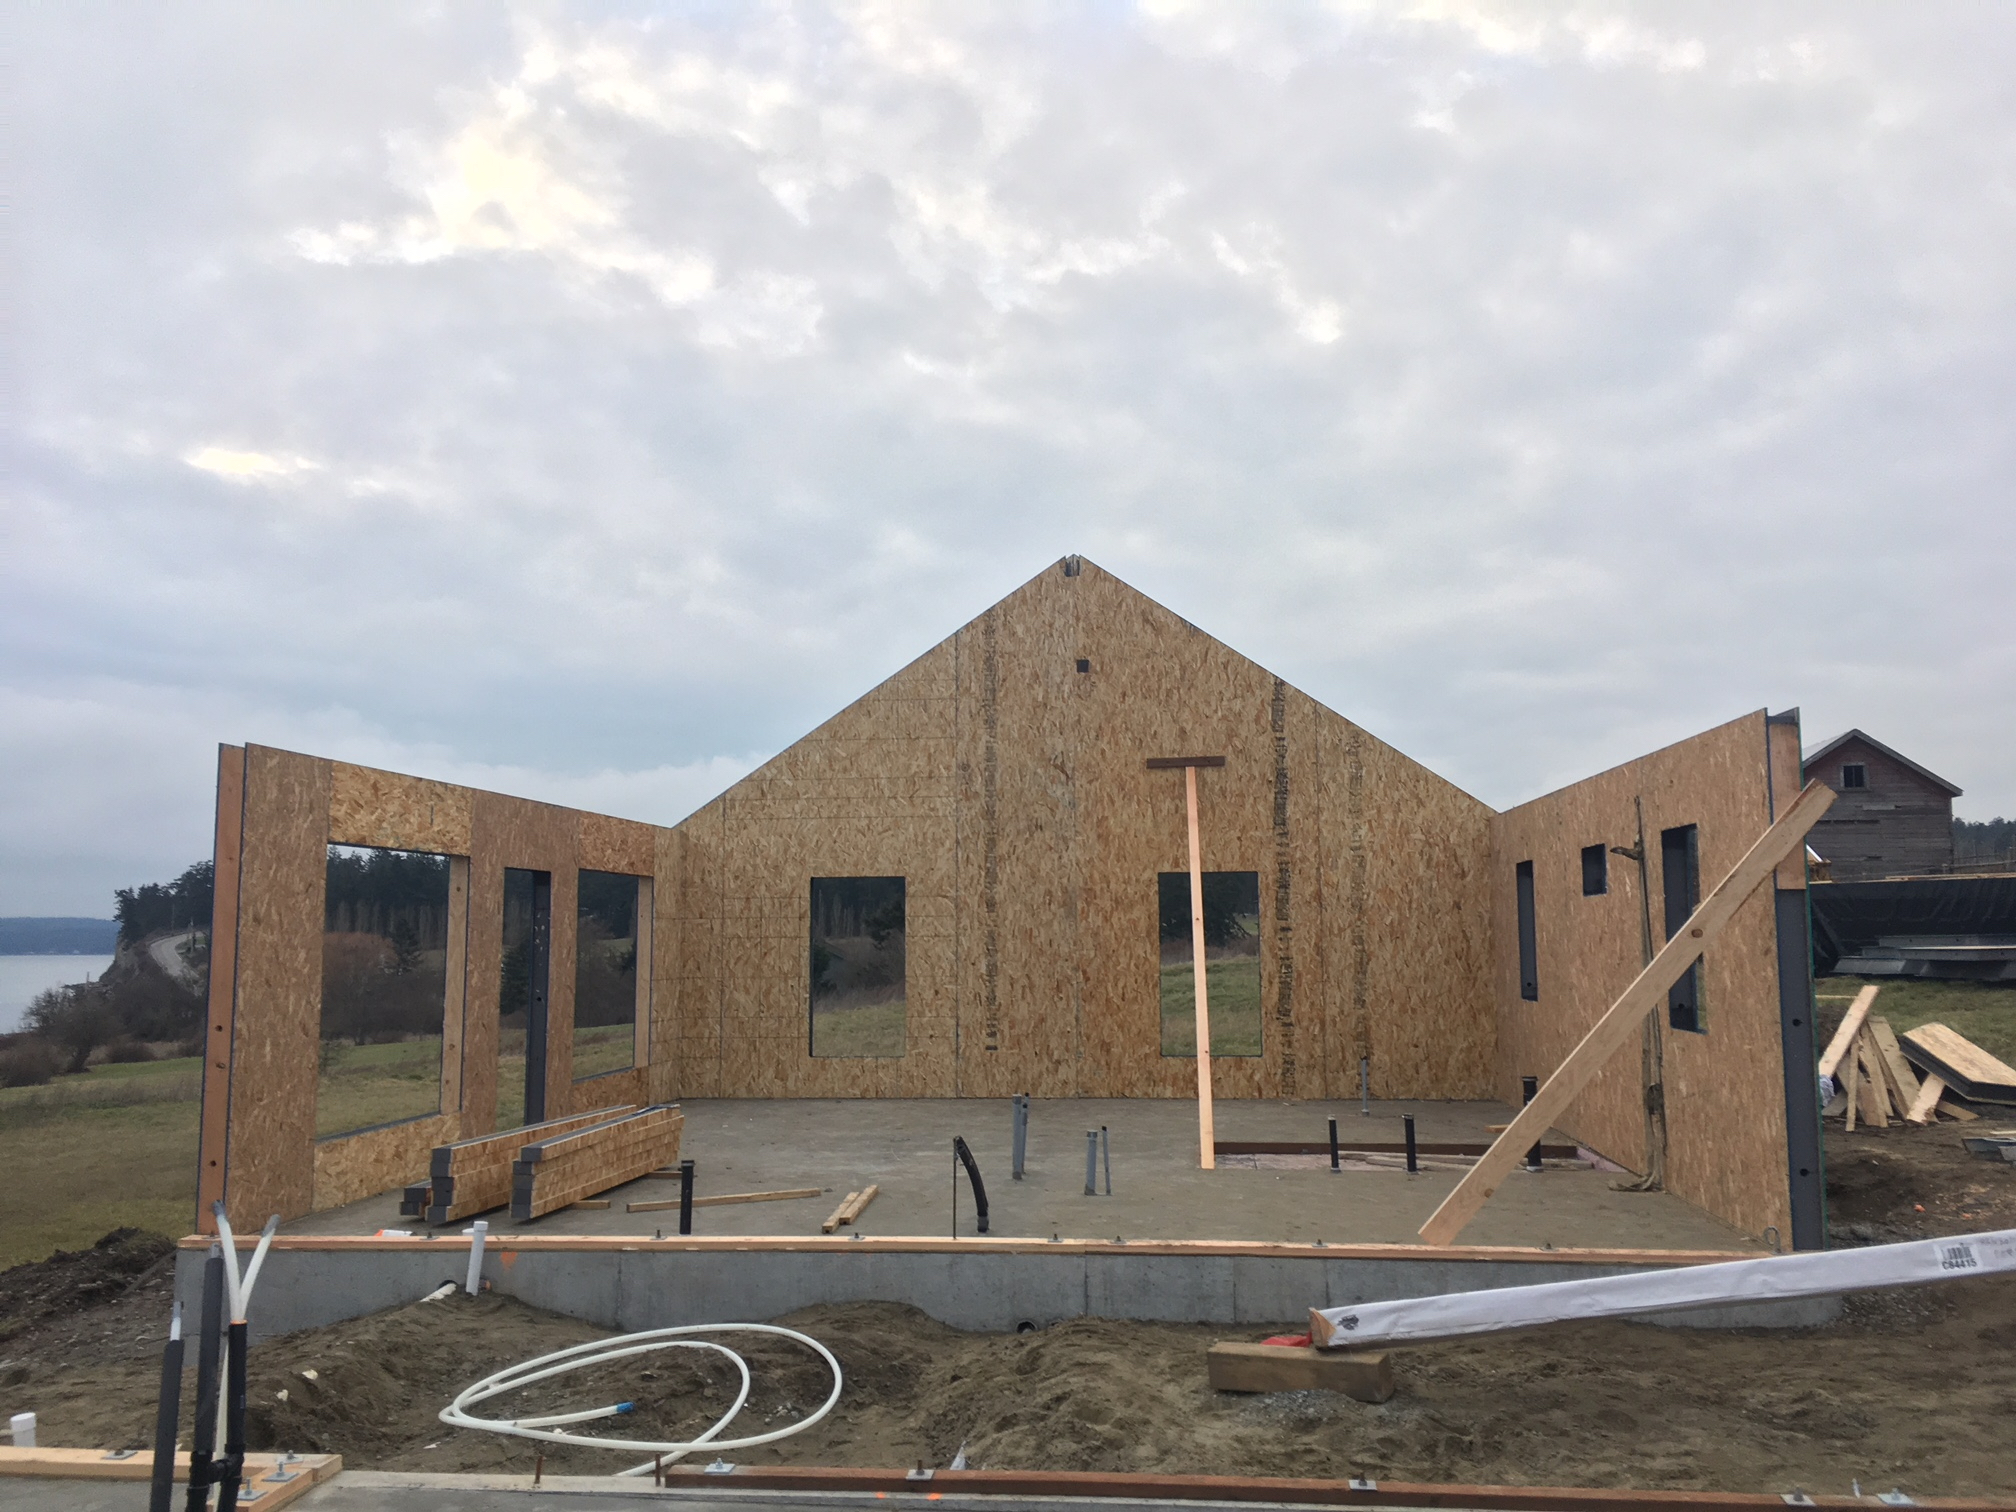
Structural insulated panels offer a continuous layer of thermal protection and draft resistance around the home and come from the factory precut for fast assembly.
Image
Structural insulated panels provide a continuous layer of insulation sandwiched between two continuous layers of OSB for thermal protection and sturdy construction.
Image
Image
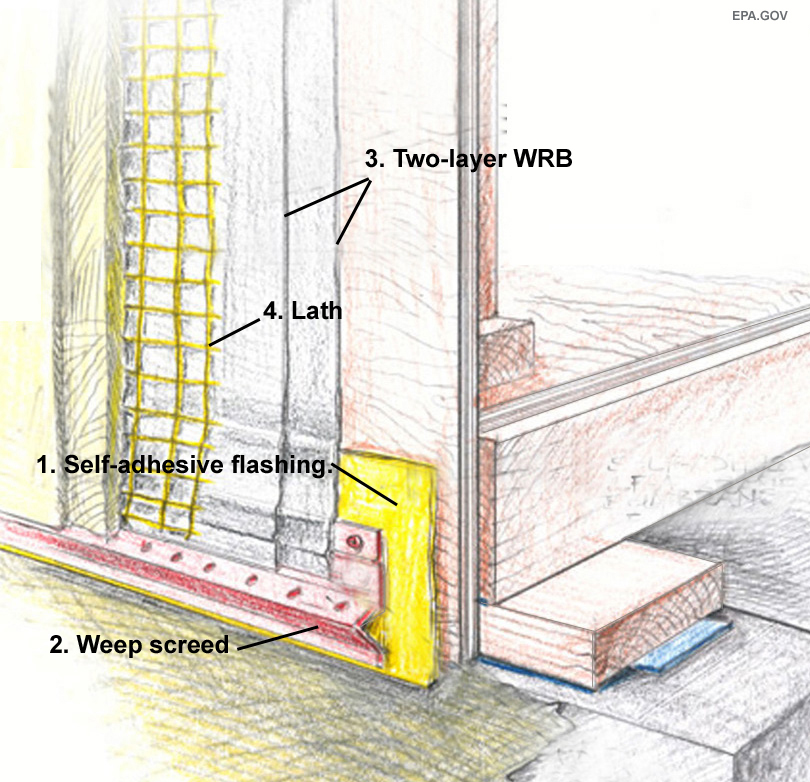
Stucco is installed over rigid insulation, which is installed over a drainage plane consisting of a drainage gap and building wrap layer over the sheathing
Image
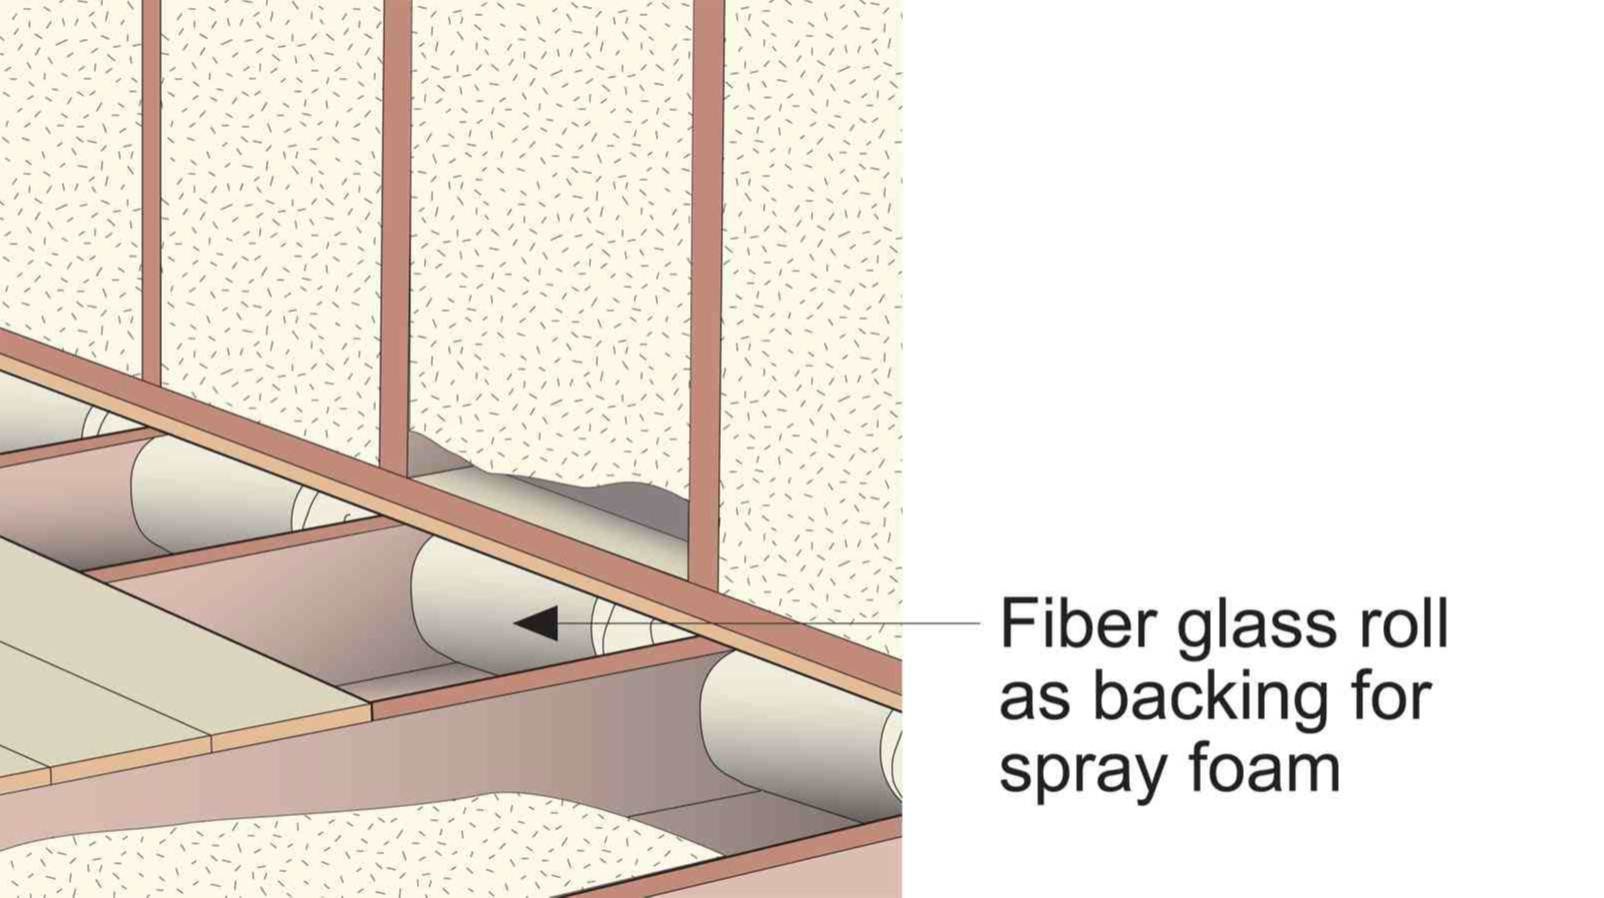
Stuff cavities under kneewalls with rolls of fiberglass batt and spray foam in place
Image

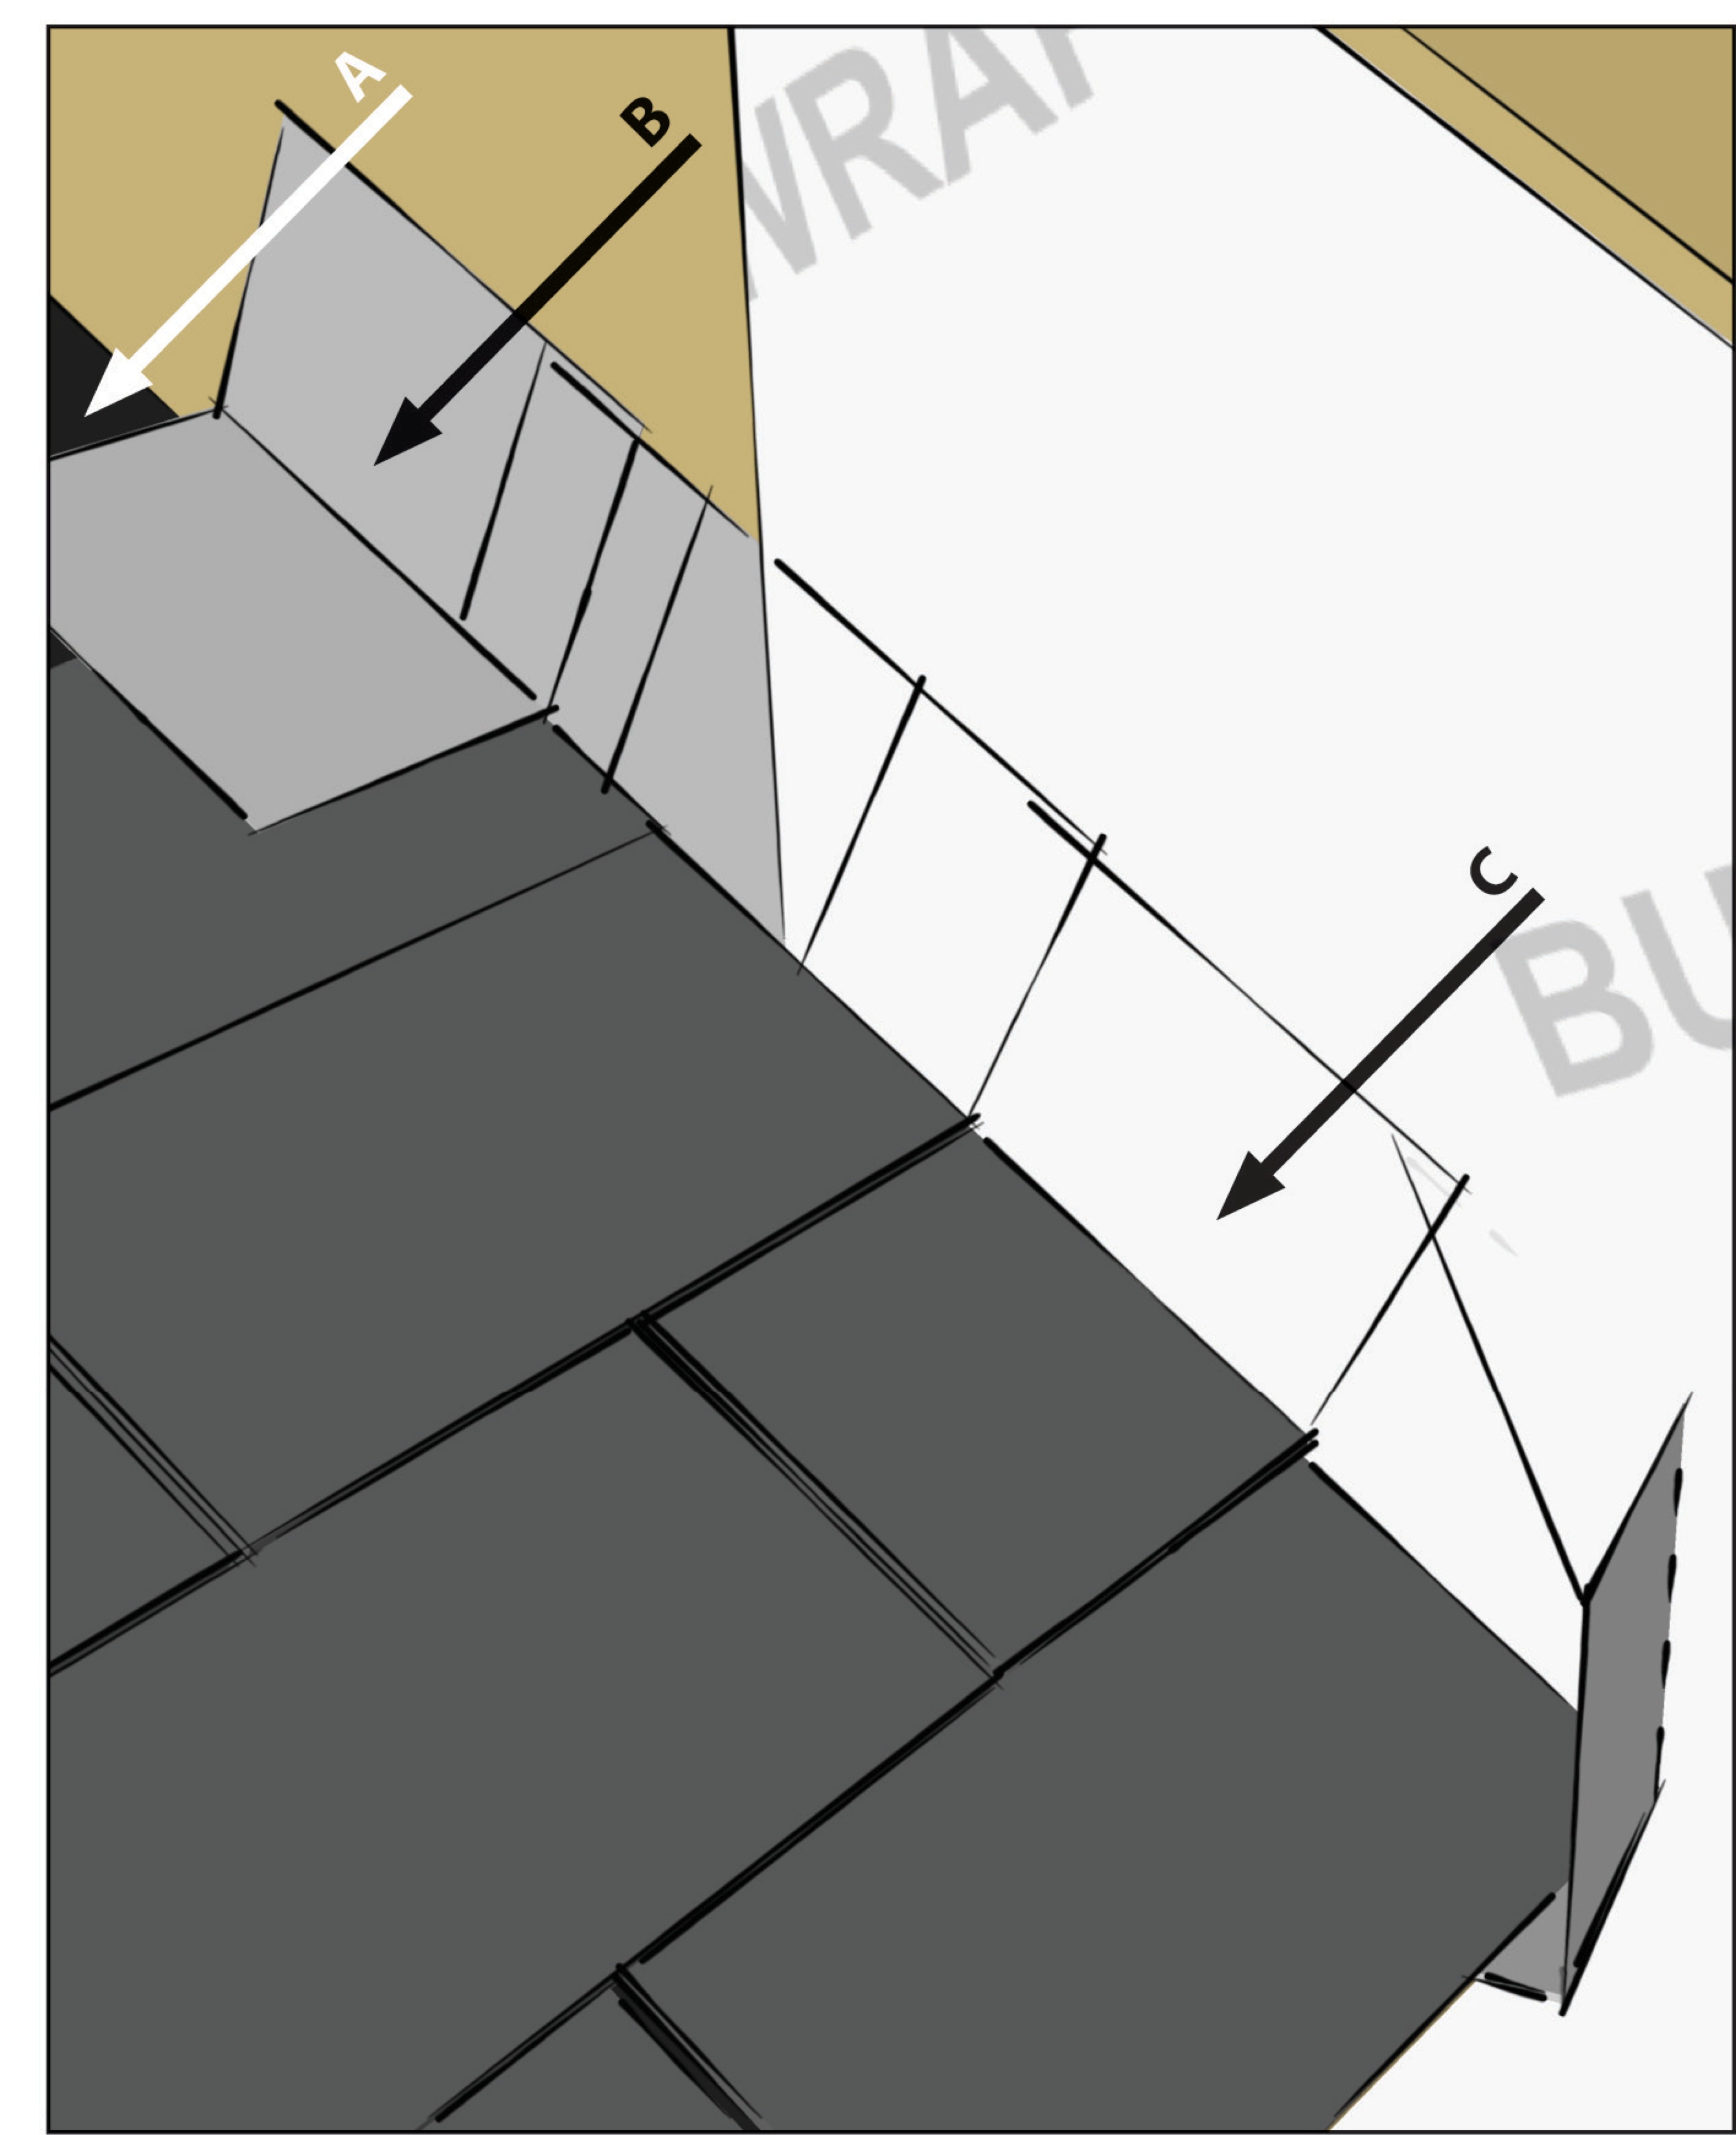
Tape horizontal joint with minimum 3" wide tape placing tape offset high on the joint, adhearing to the upper sheet without wrinkles
Image
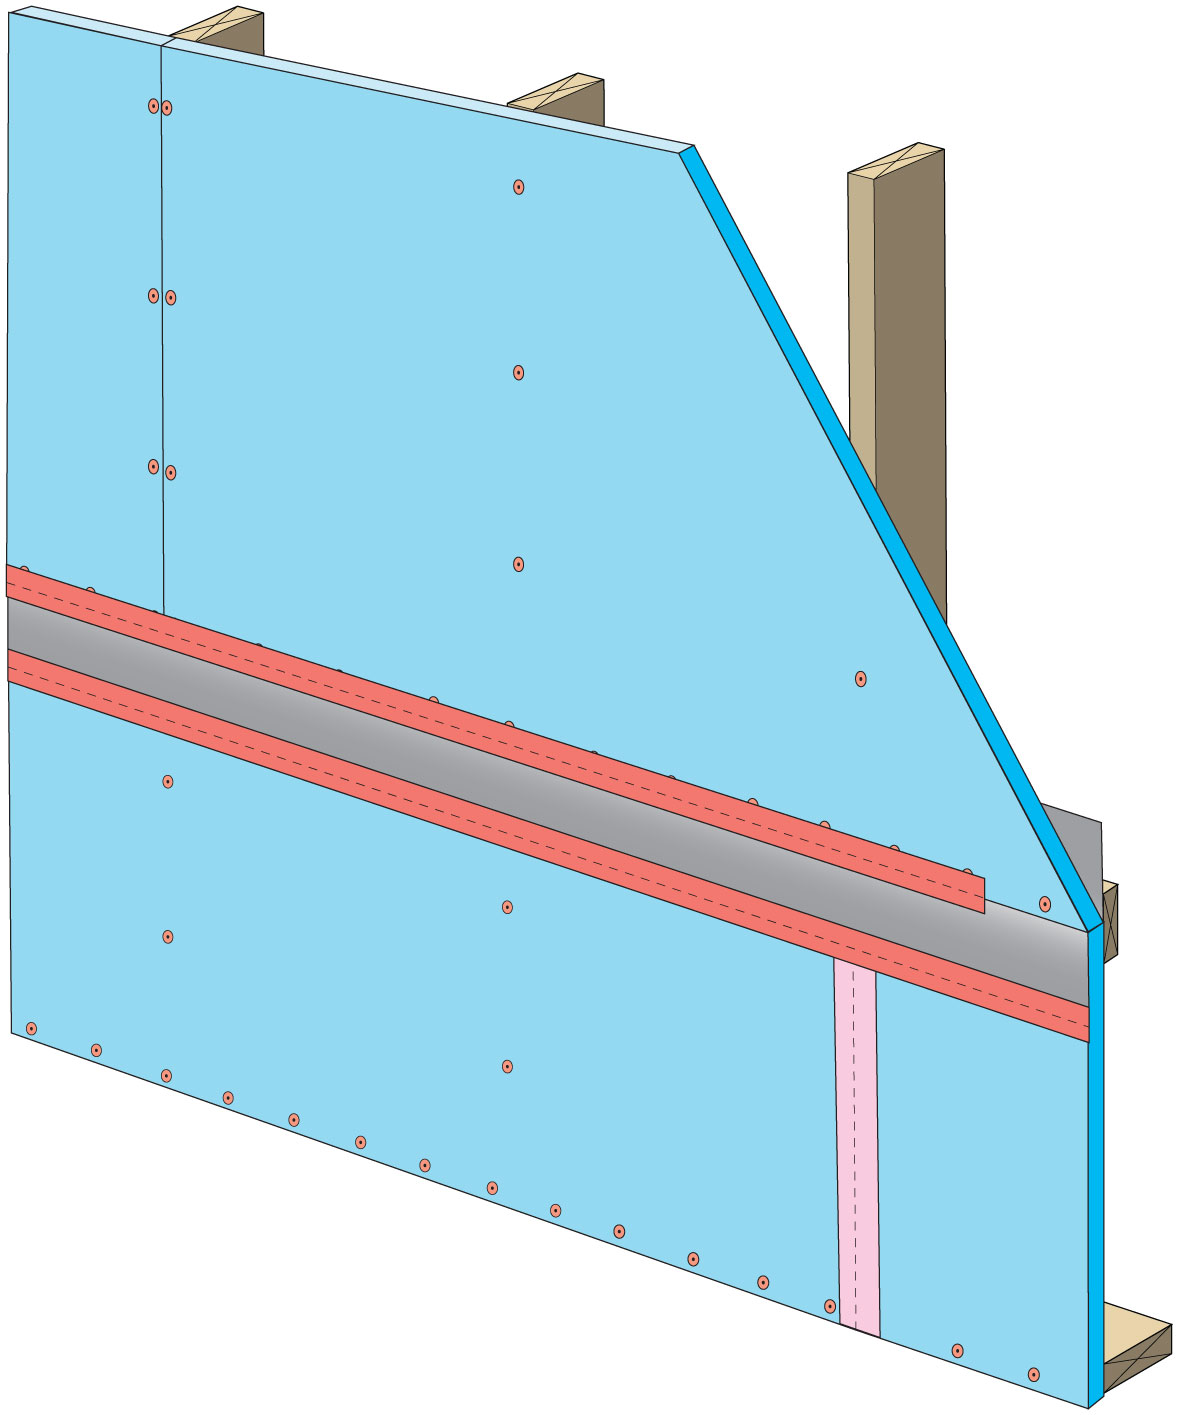
Tape the joint between the top insulation sheet and the Z-flashing with 2" wide tape to improve air tightness
Image
Image
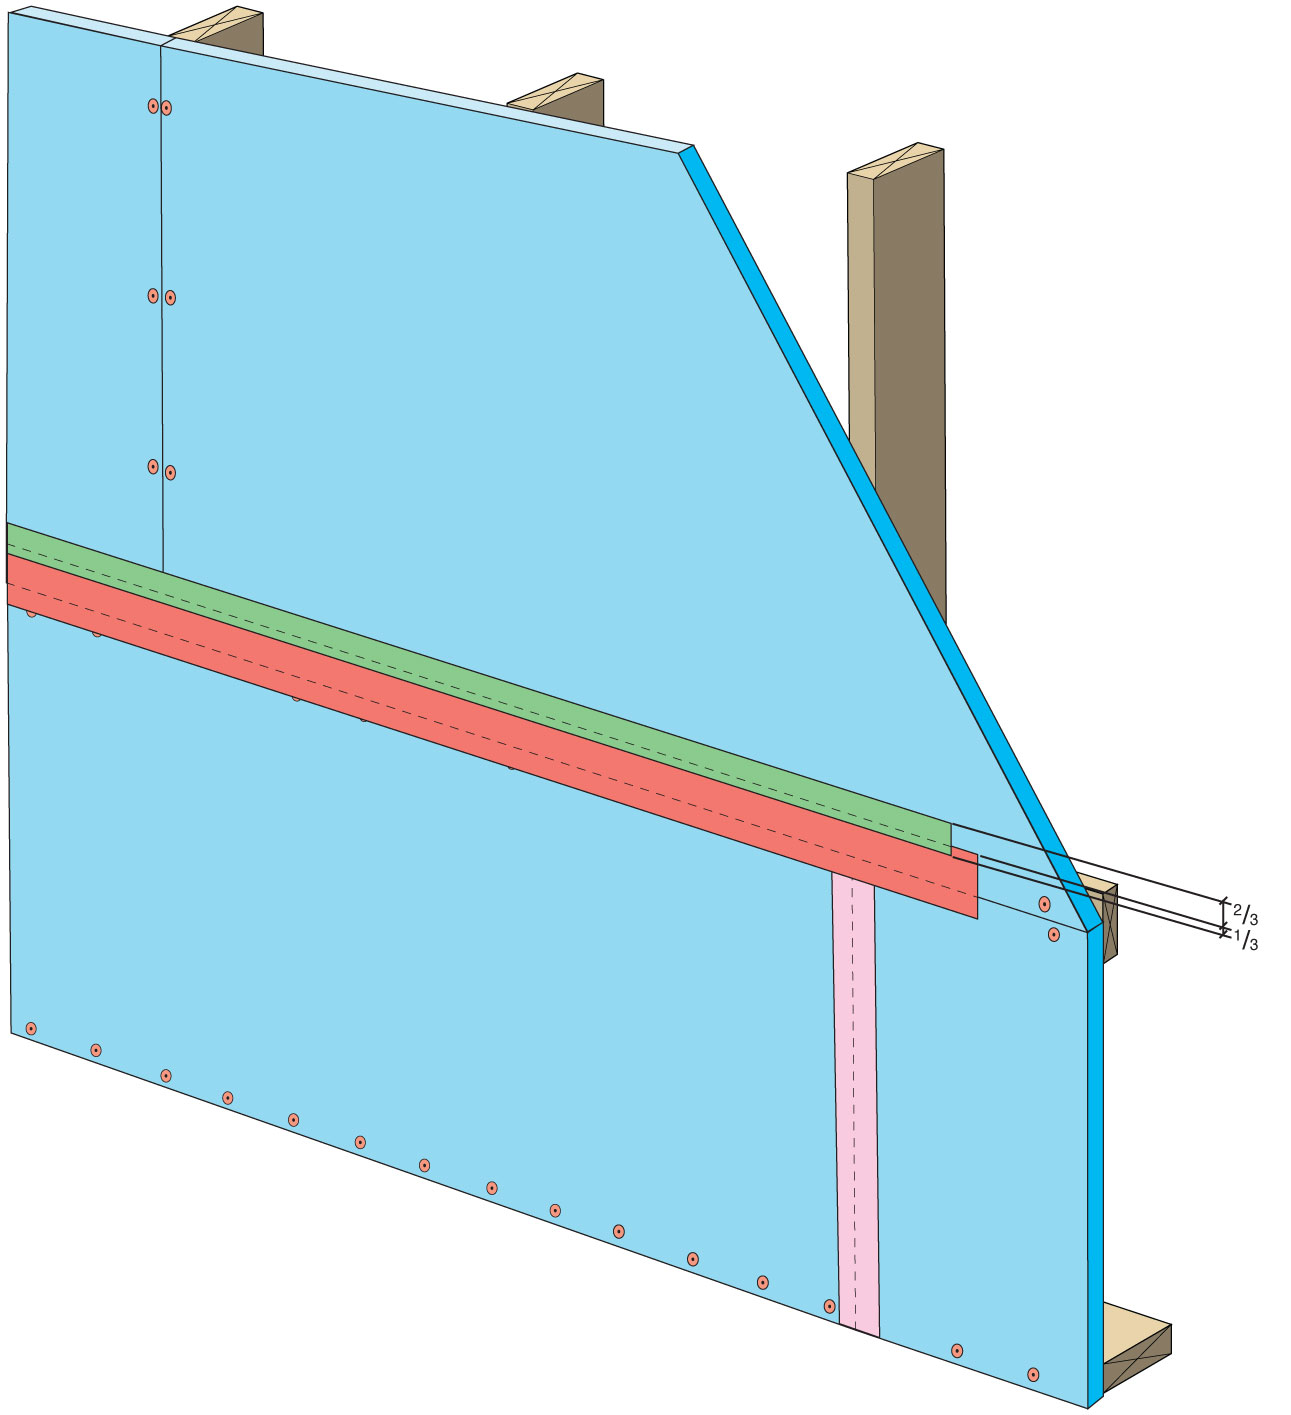
Terminate 4" tape with 2" wide tape placing tape offset high on the joint, 2/3 of the tape should be adhered to the sheet of insulation
Image
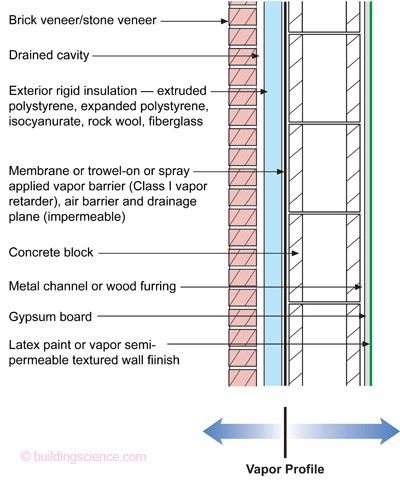
The “institutional” perfect wall works in all climate zones; water, air, vapor, and thermal control layers are exterior of the sheathing, assembly allows drying to interior and exterior
Image
Image

The 2x4 wall studs are staggered along the 2x6 sill plate providing space to weave insulation around each stud to stop thermal bridging through the wall.