Showing results 101 - 150 of 192
Image
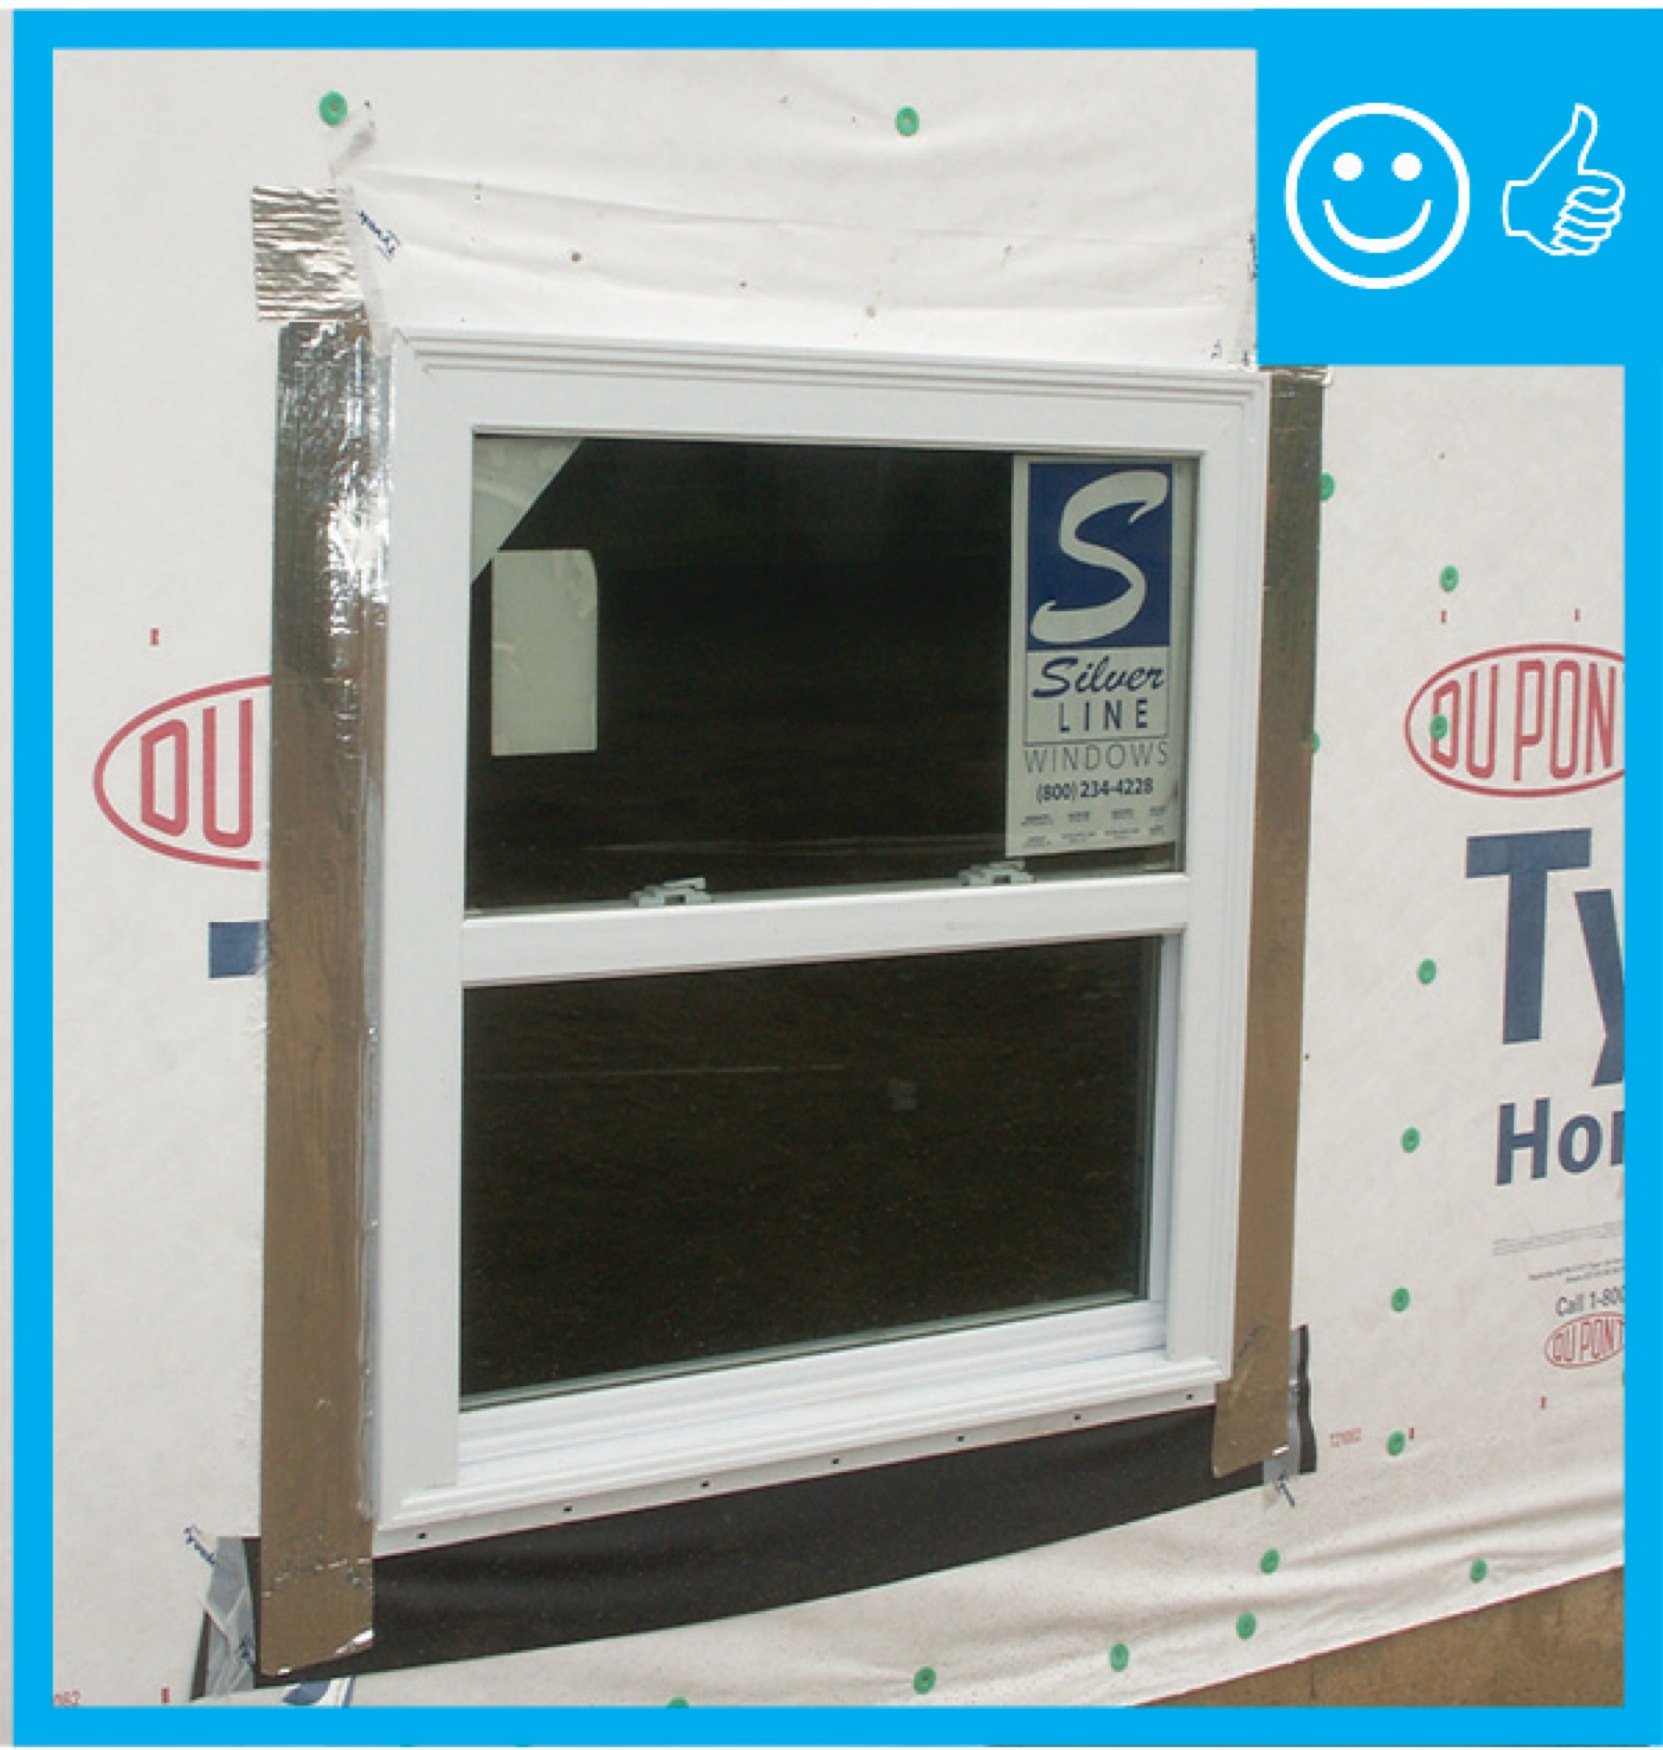
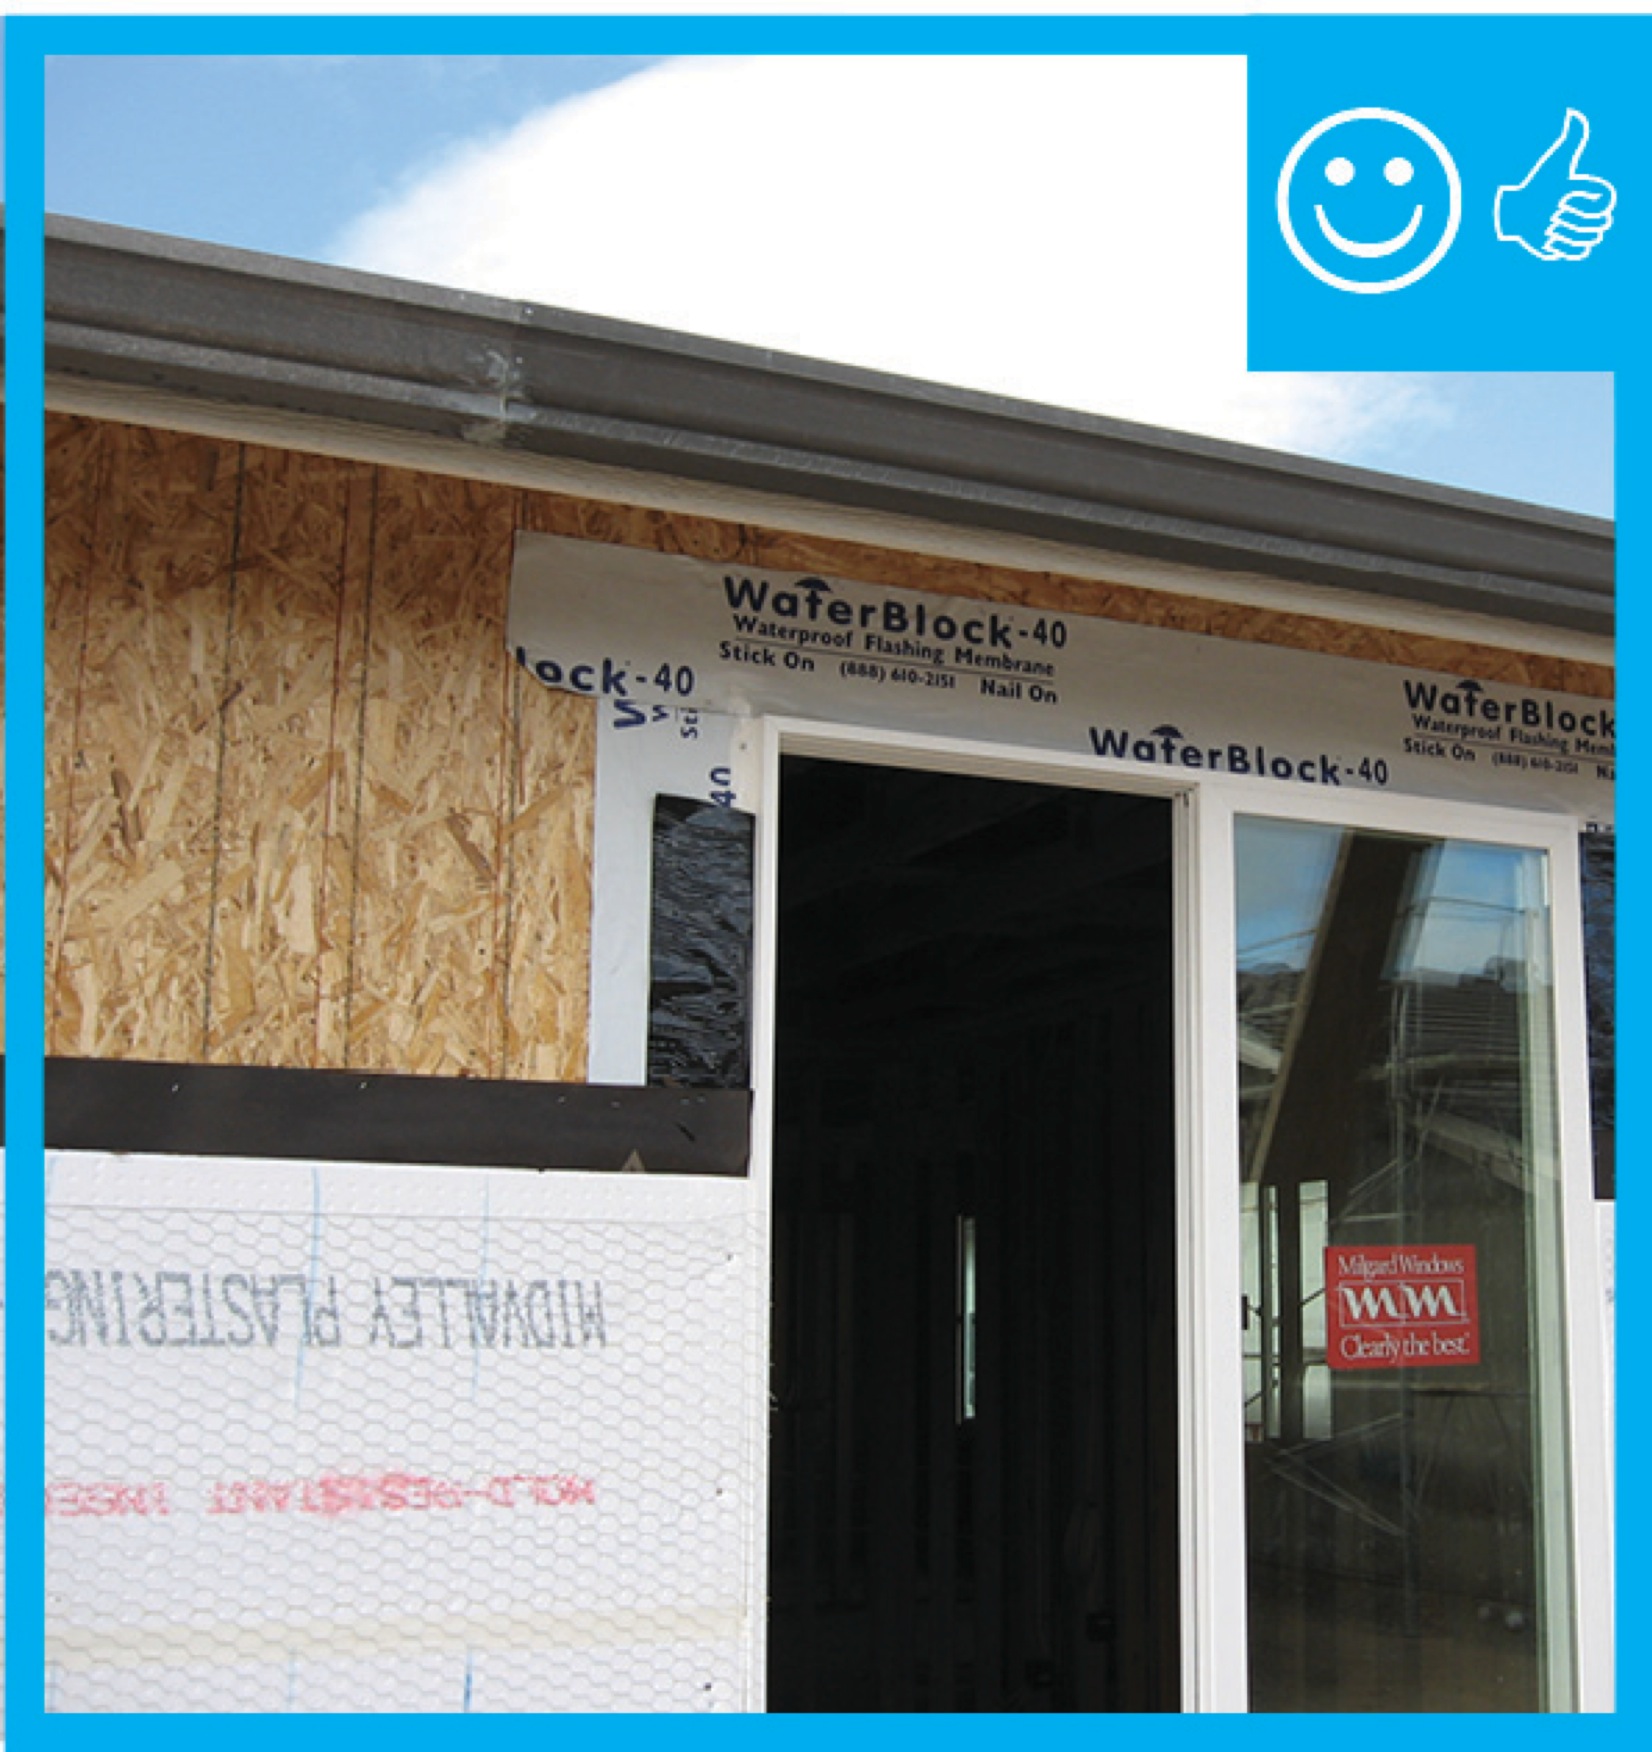
Right – There is flashing installed along the top of the window and the water-resistant barrier is layered over to create a complete drainage system
Image
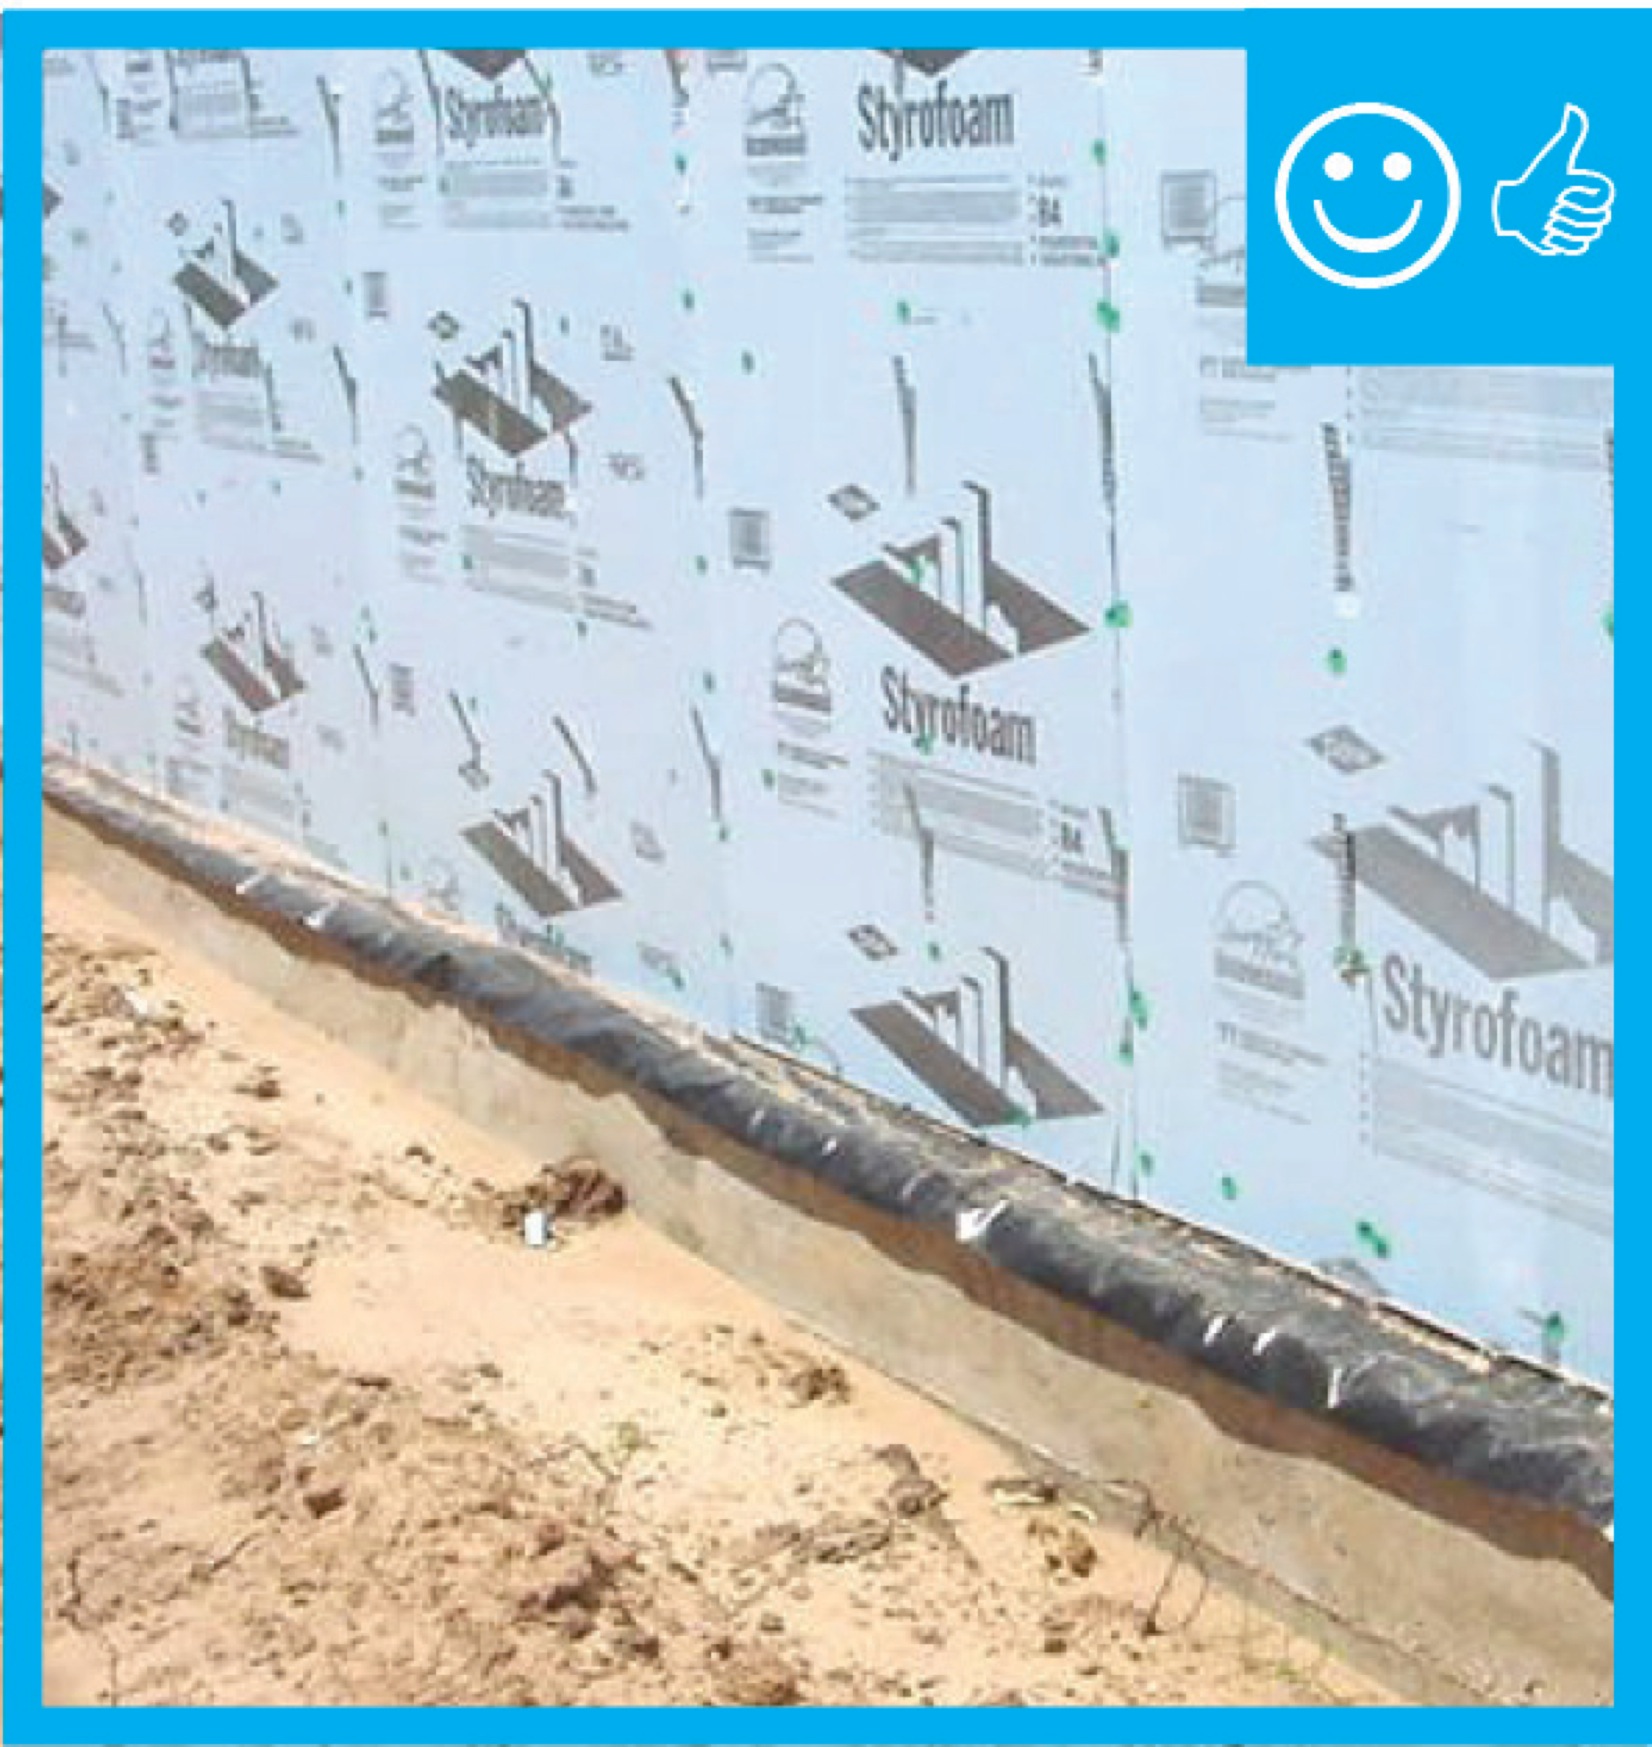
Right – There is flashing installed at the bottom of the wall to create a satisfactory drainage system
Image

Right – This low-slope roof and parapet assembly has continuity of both the air and water barriers
Image
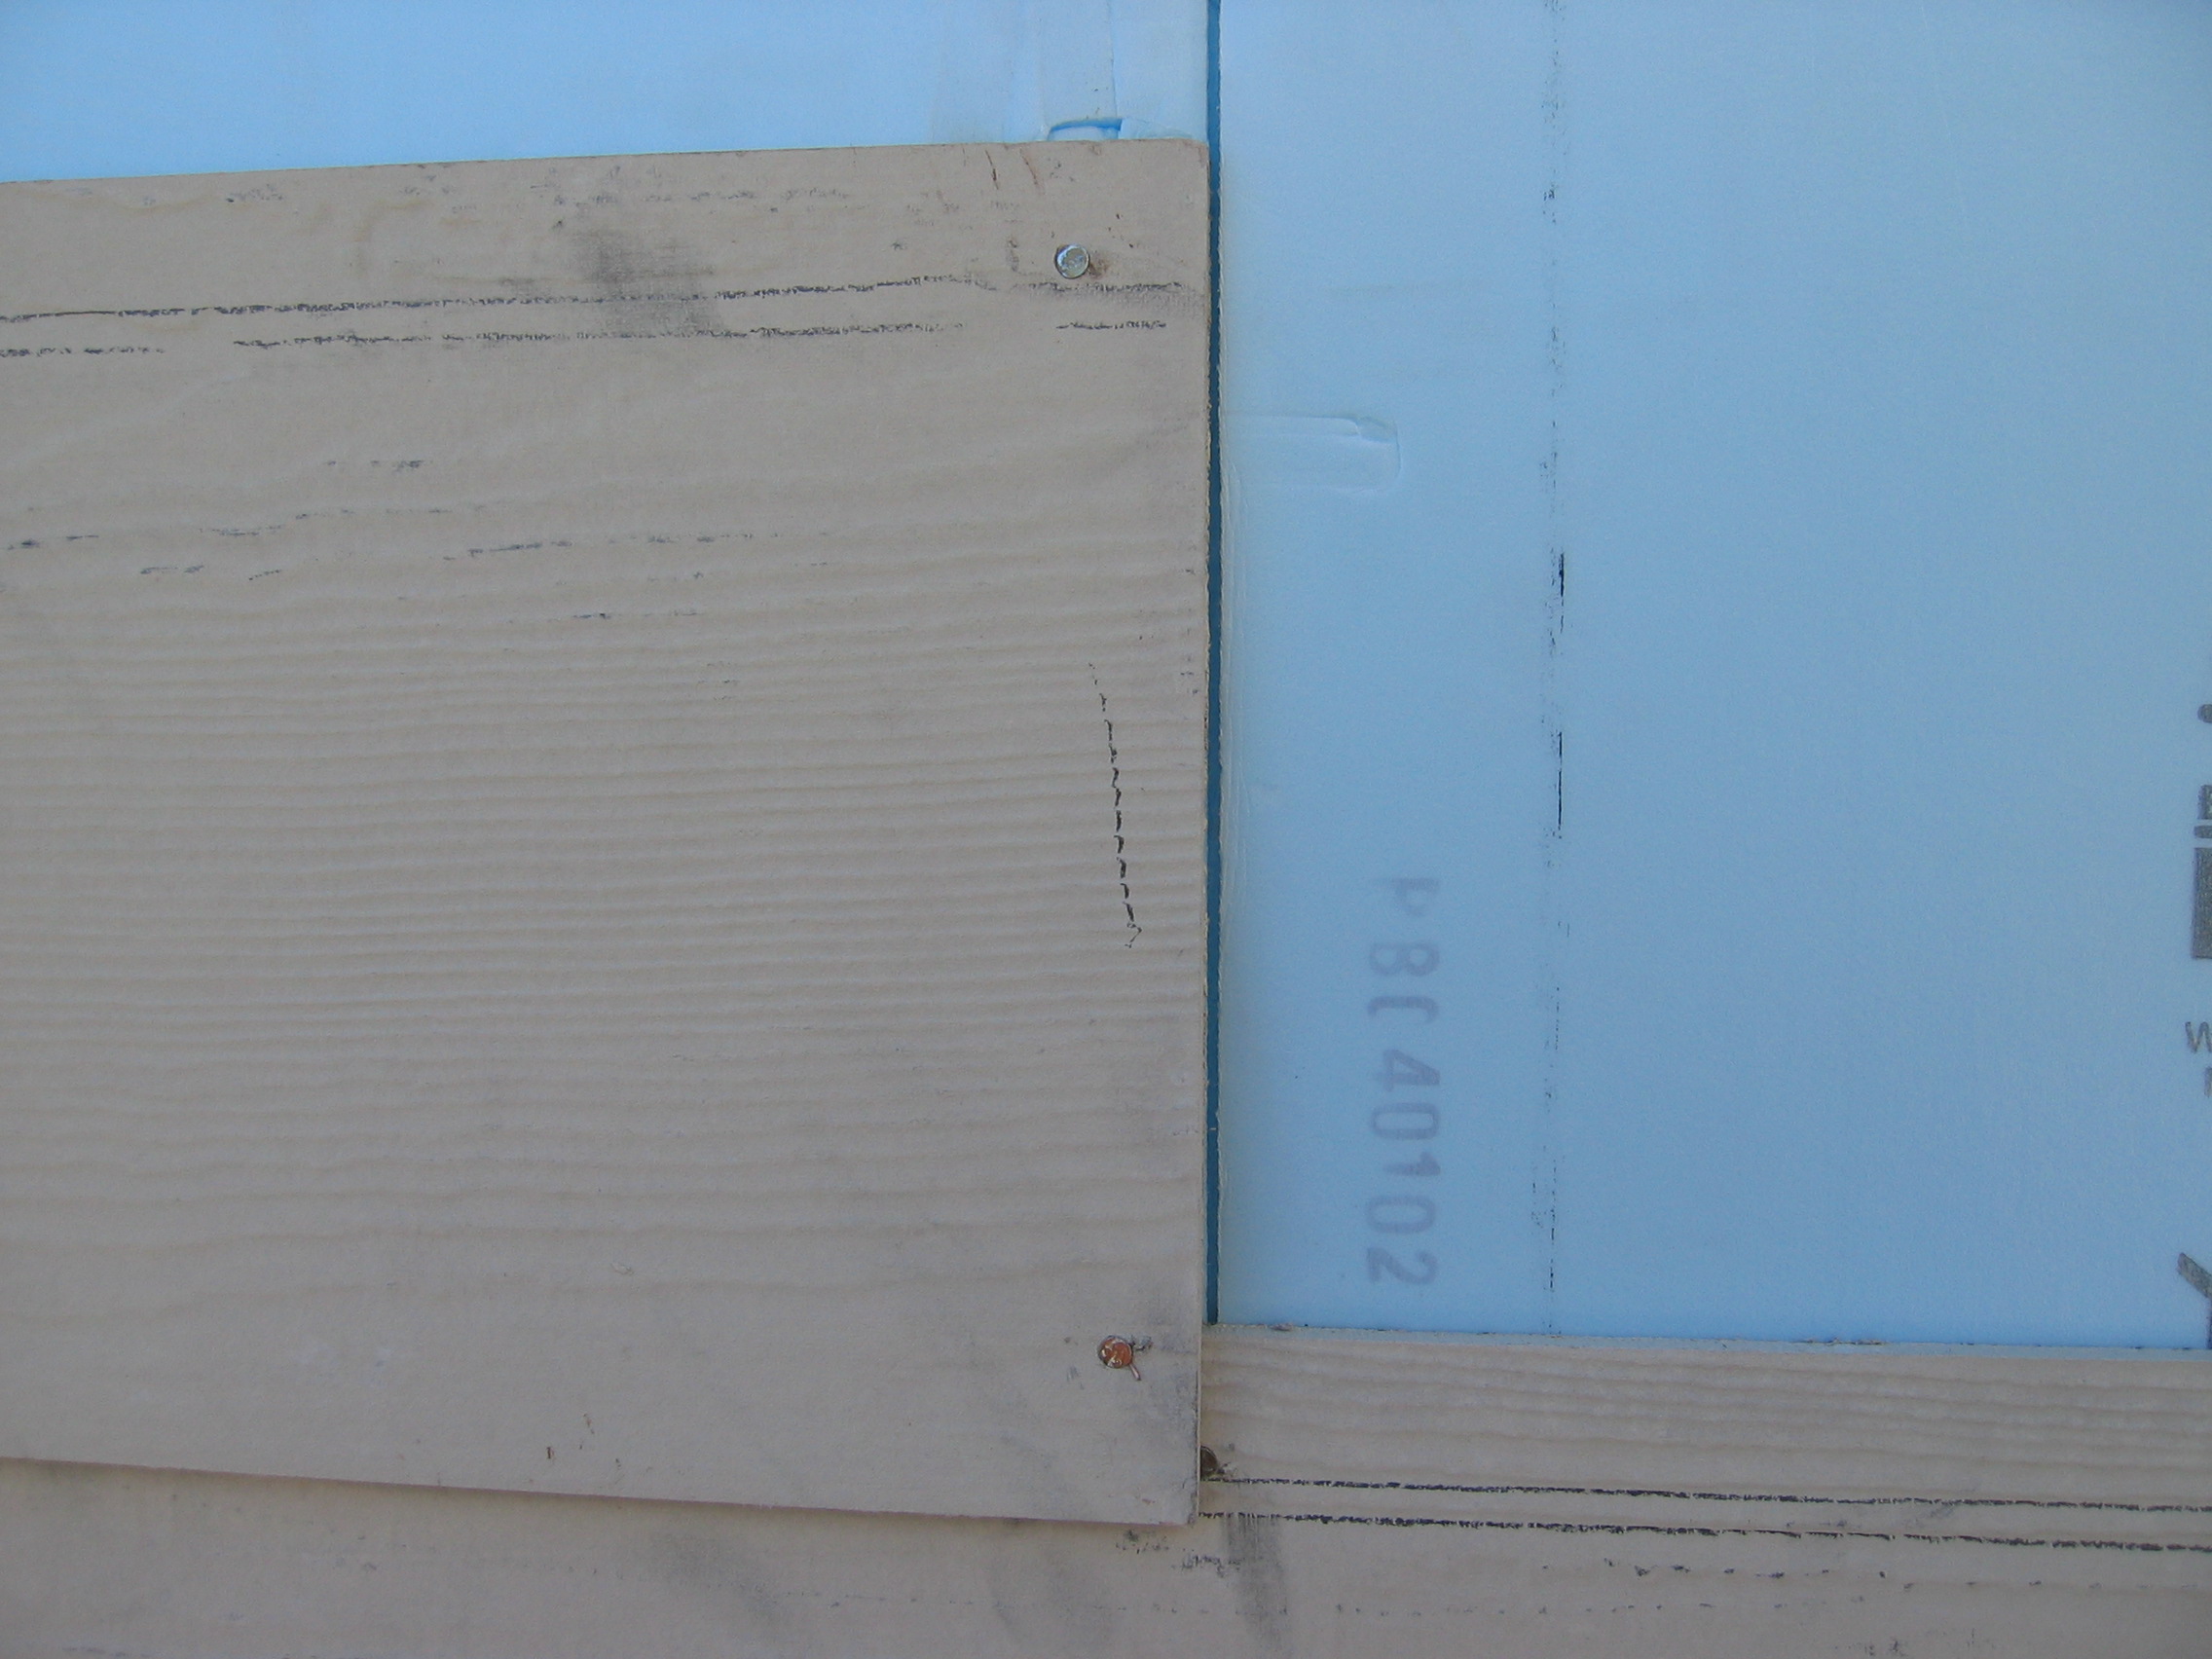
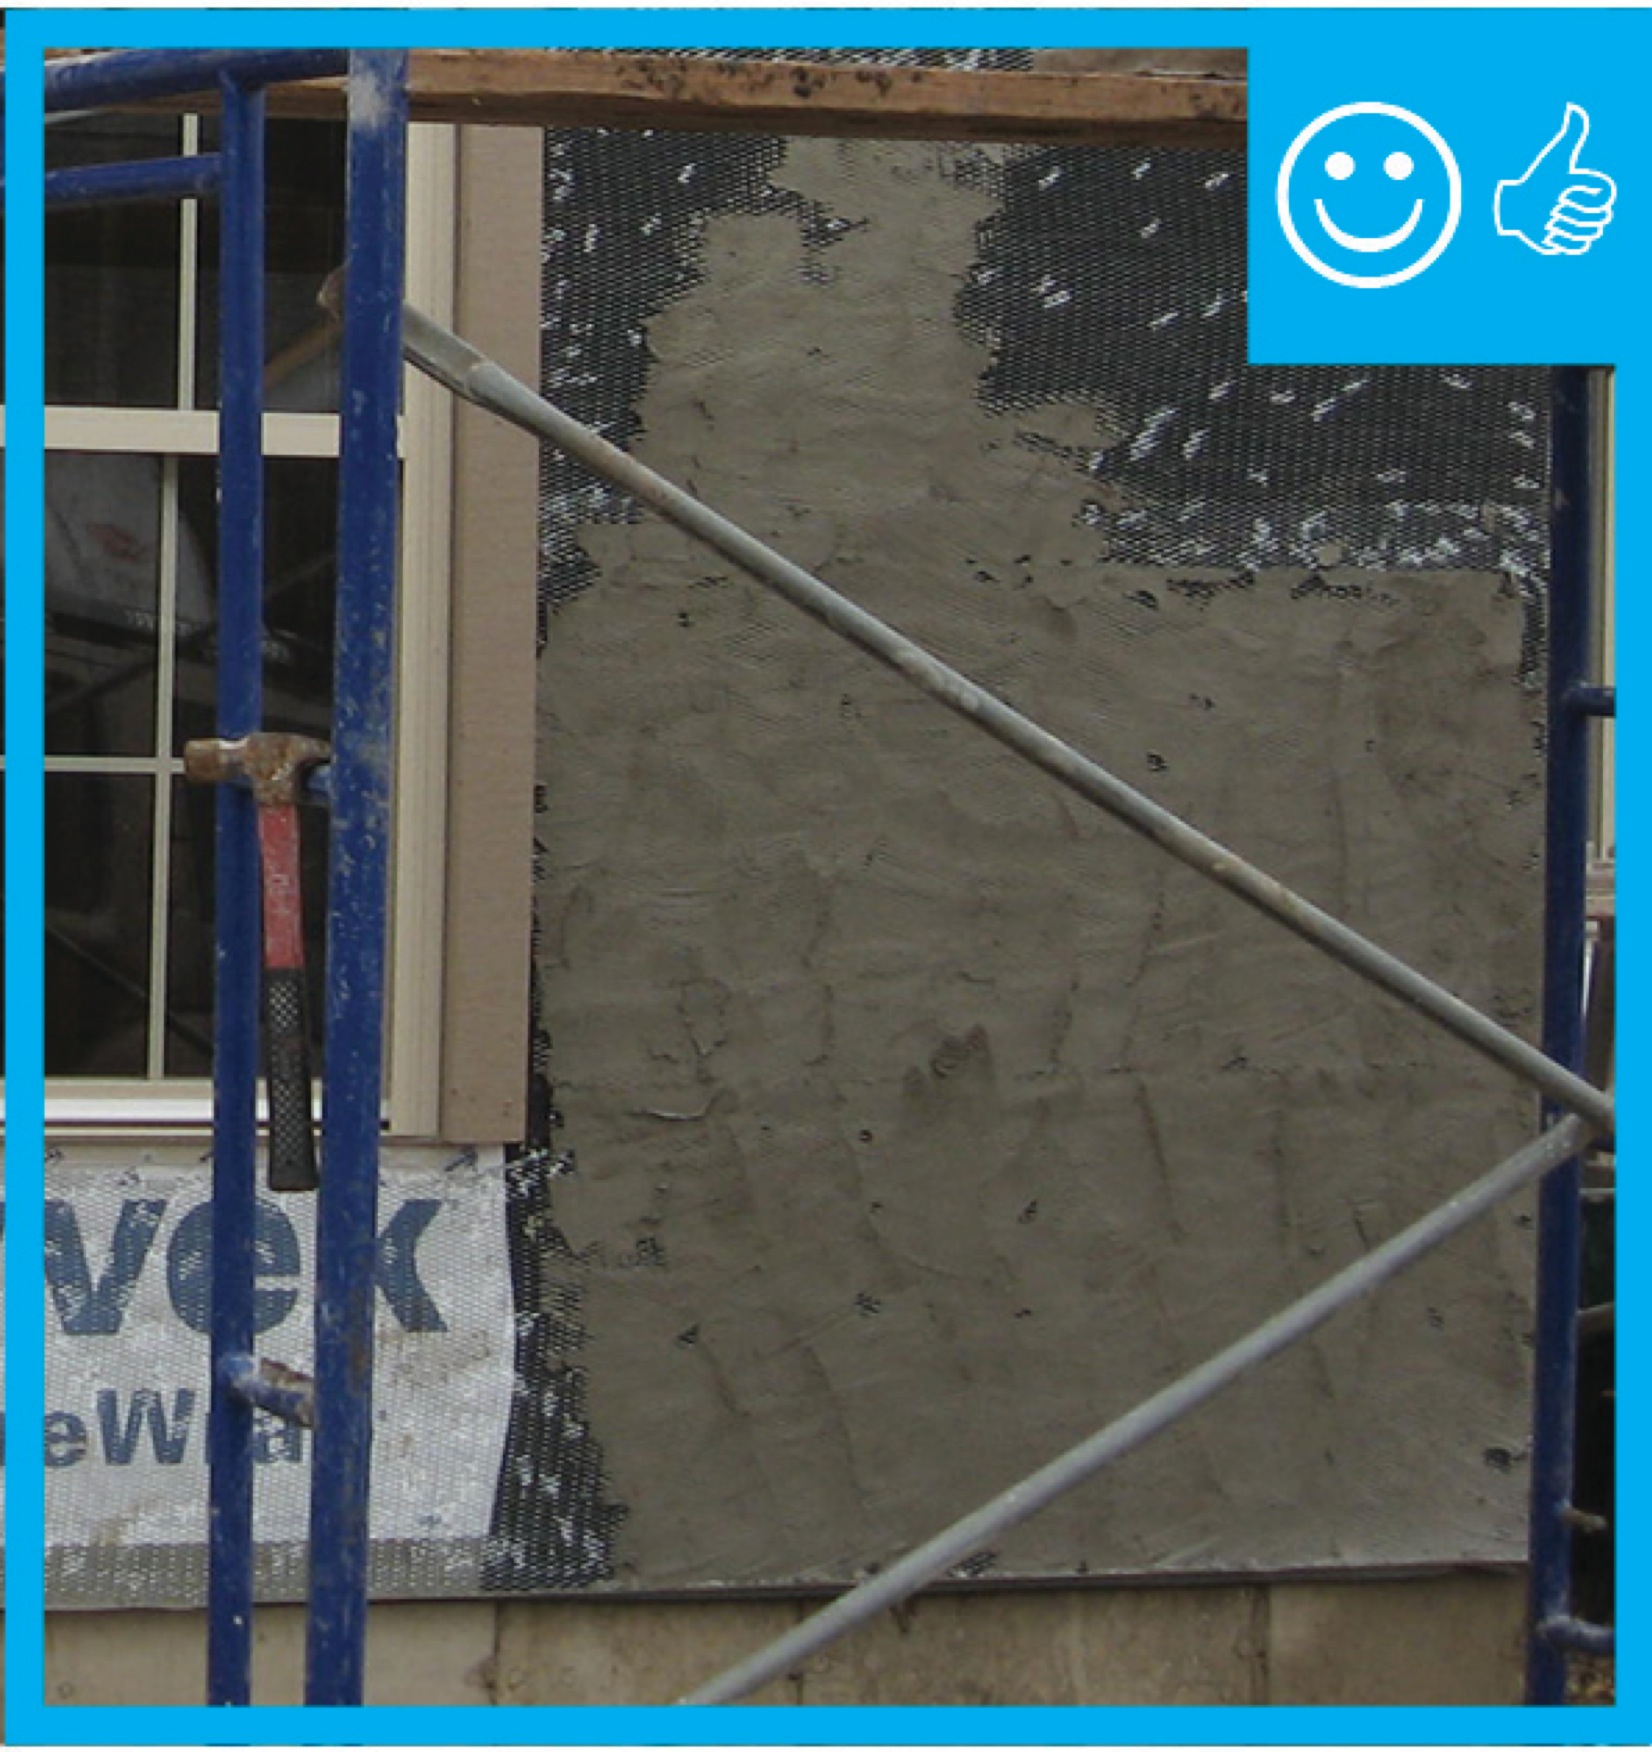
Right: All joints in the rigid foam are taped to keep stucco out of joints for even drying. Mesh tape (shown here) is used with expanded polystyrene (EPS); acrylic sheathing tape or self-adhered membrane is used with XPS
Image
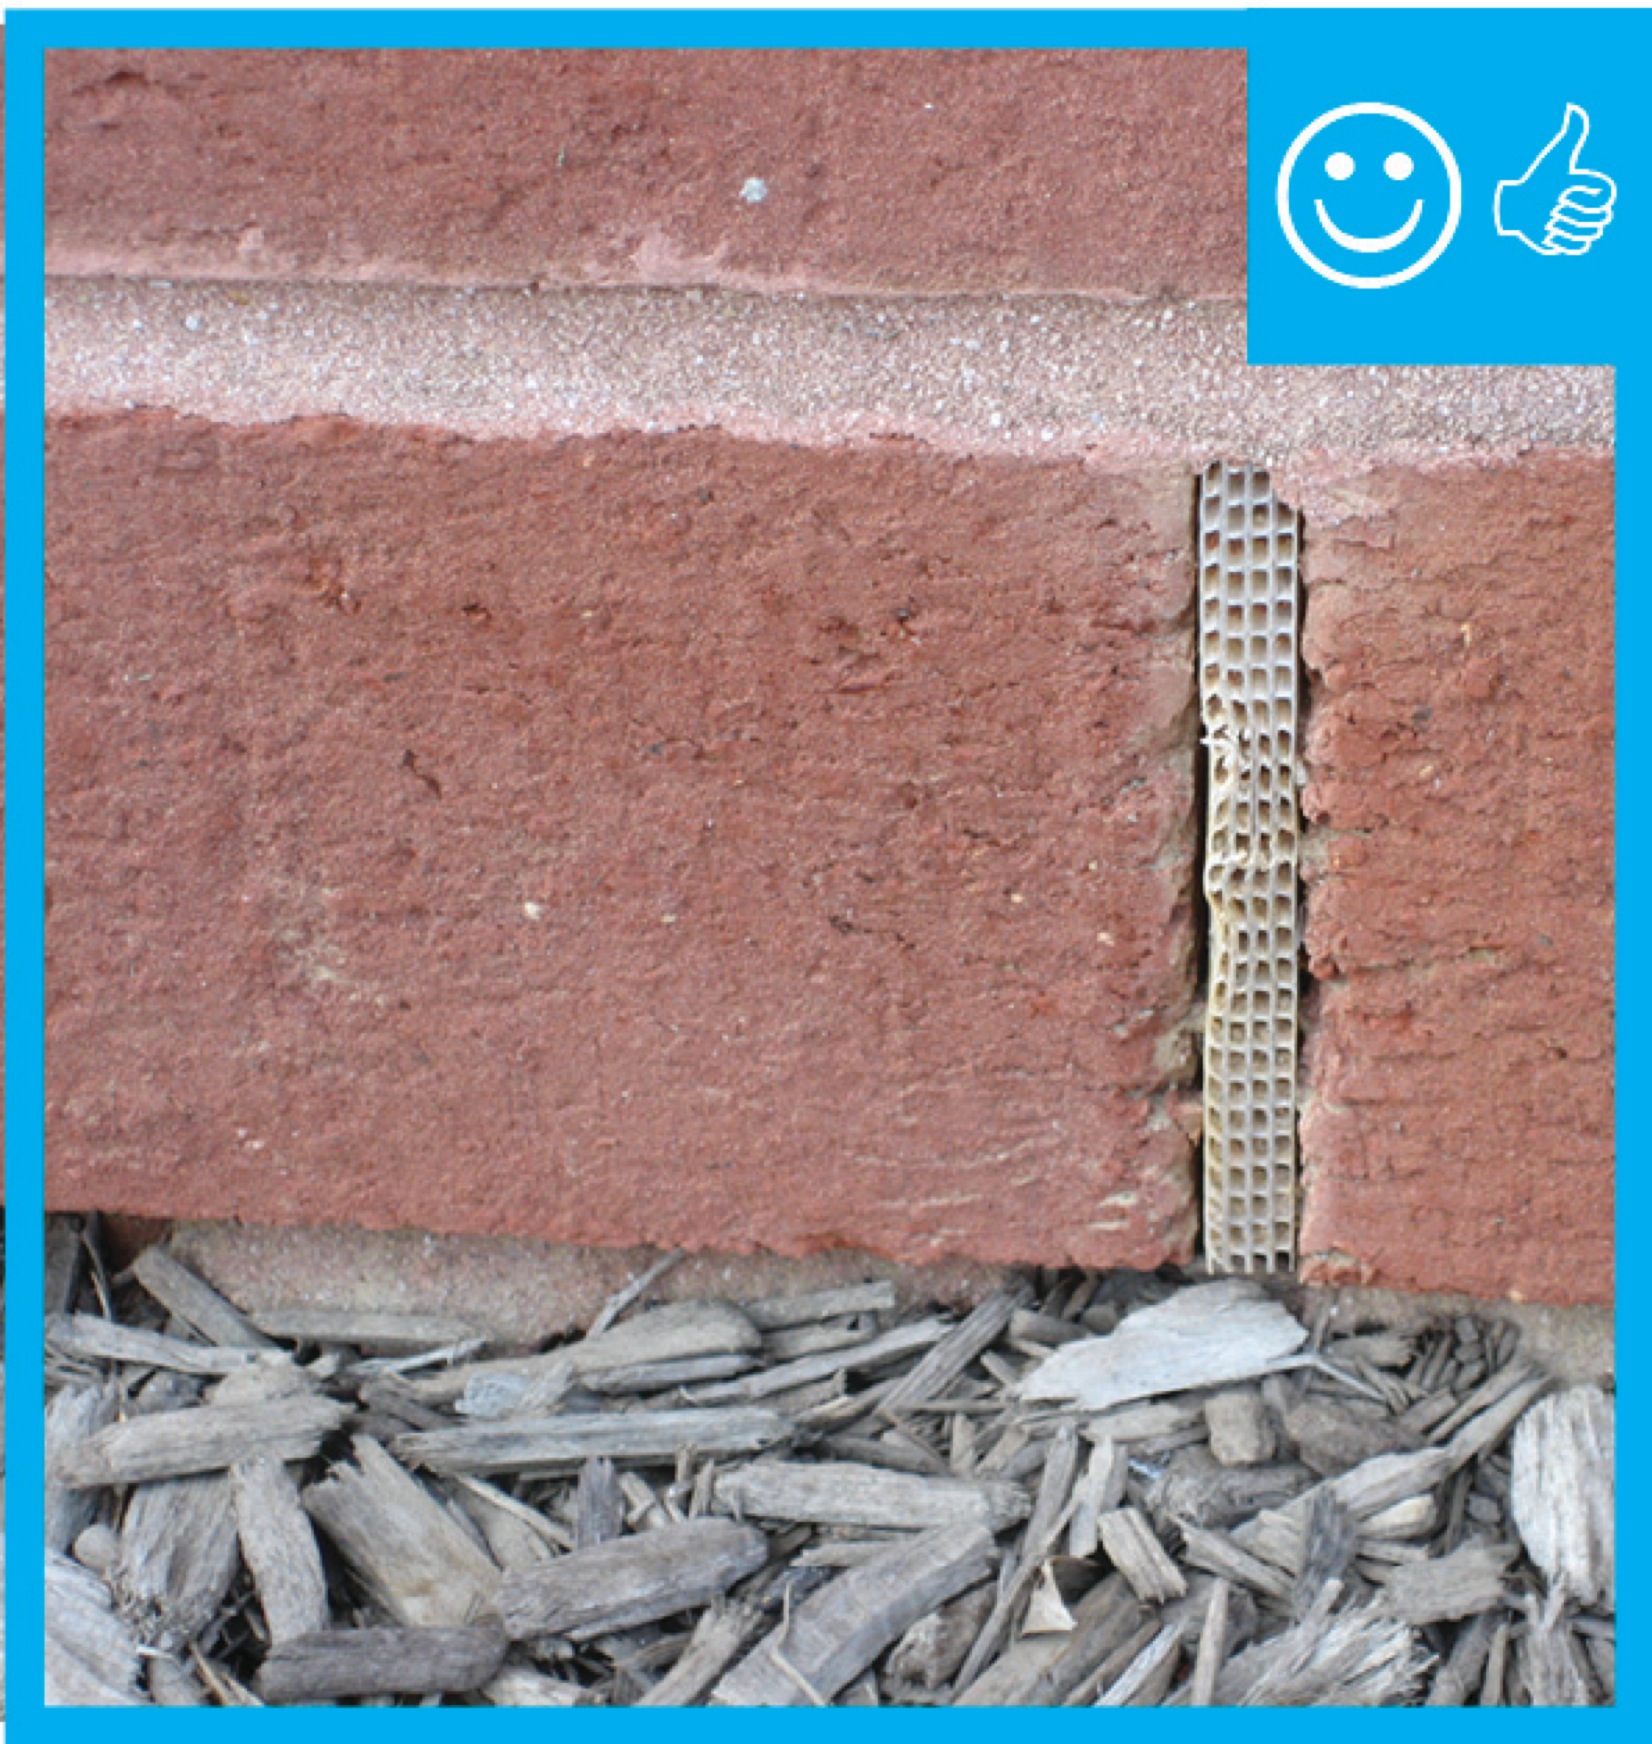
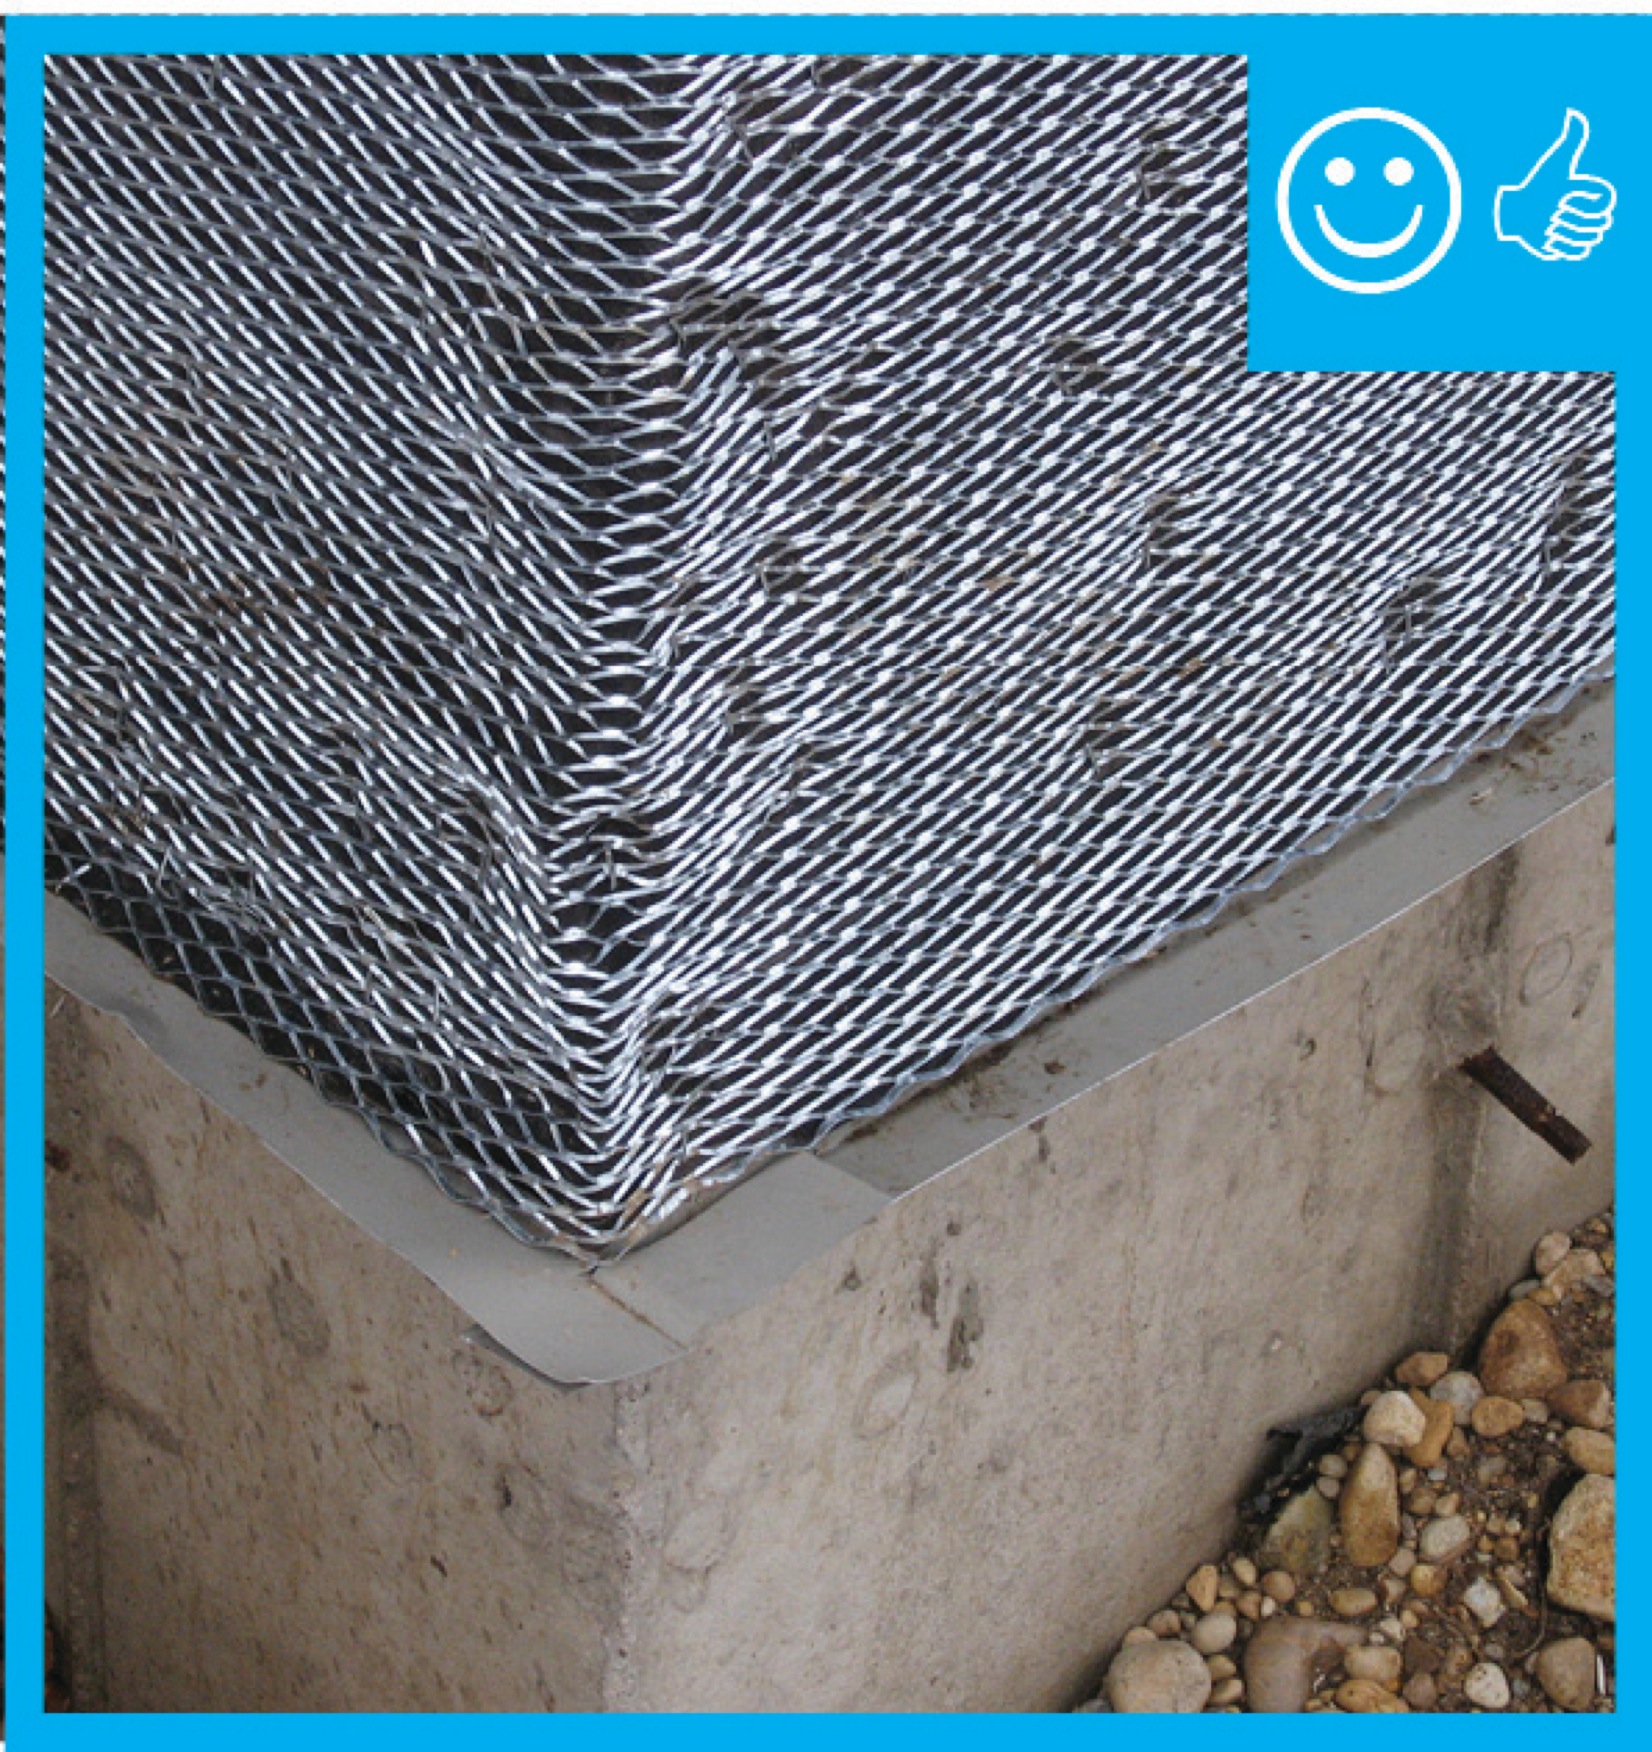
Right: Brick veneer is flashed correctly with weep holes and a fine mesh screen is installed to prevent pest entry.
Image
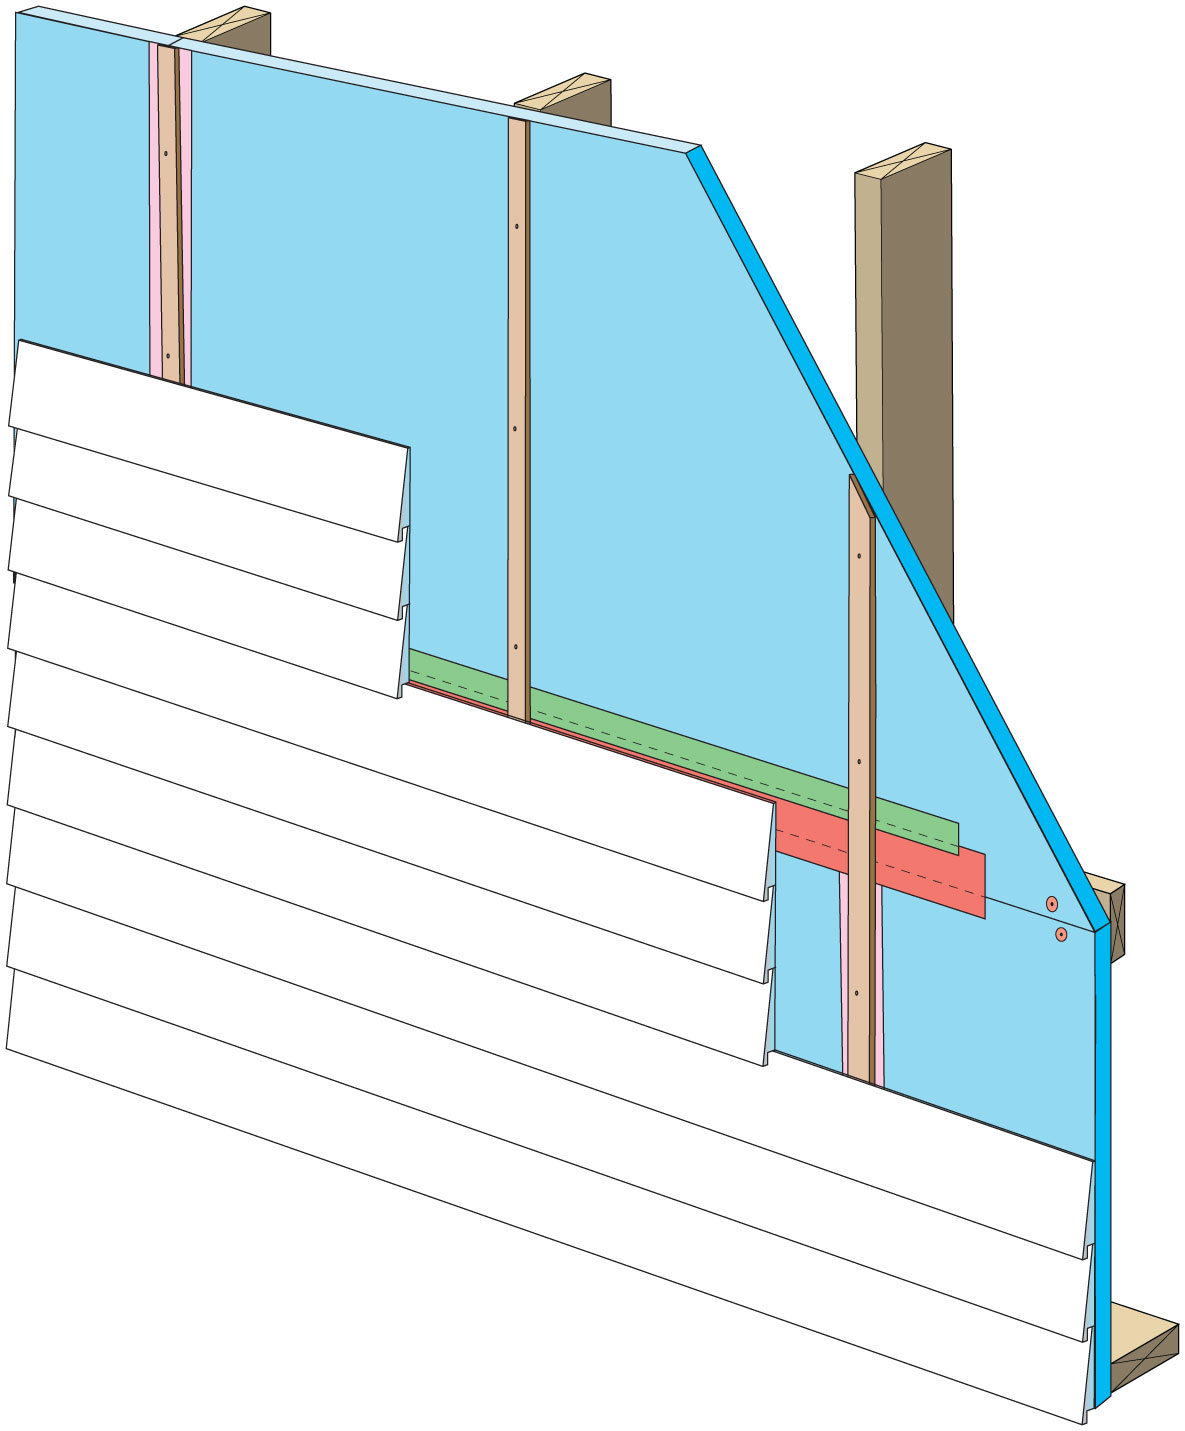
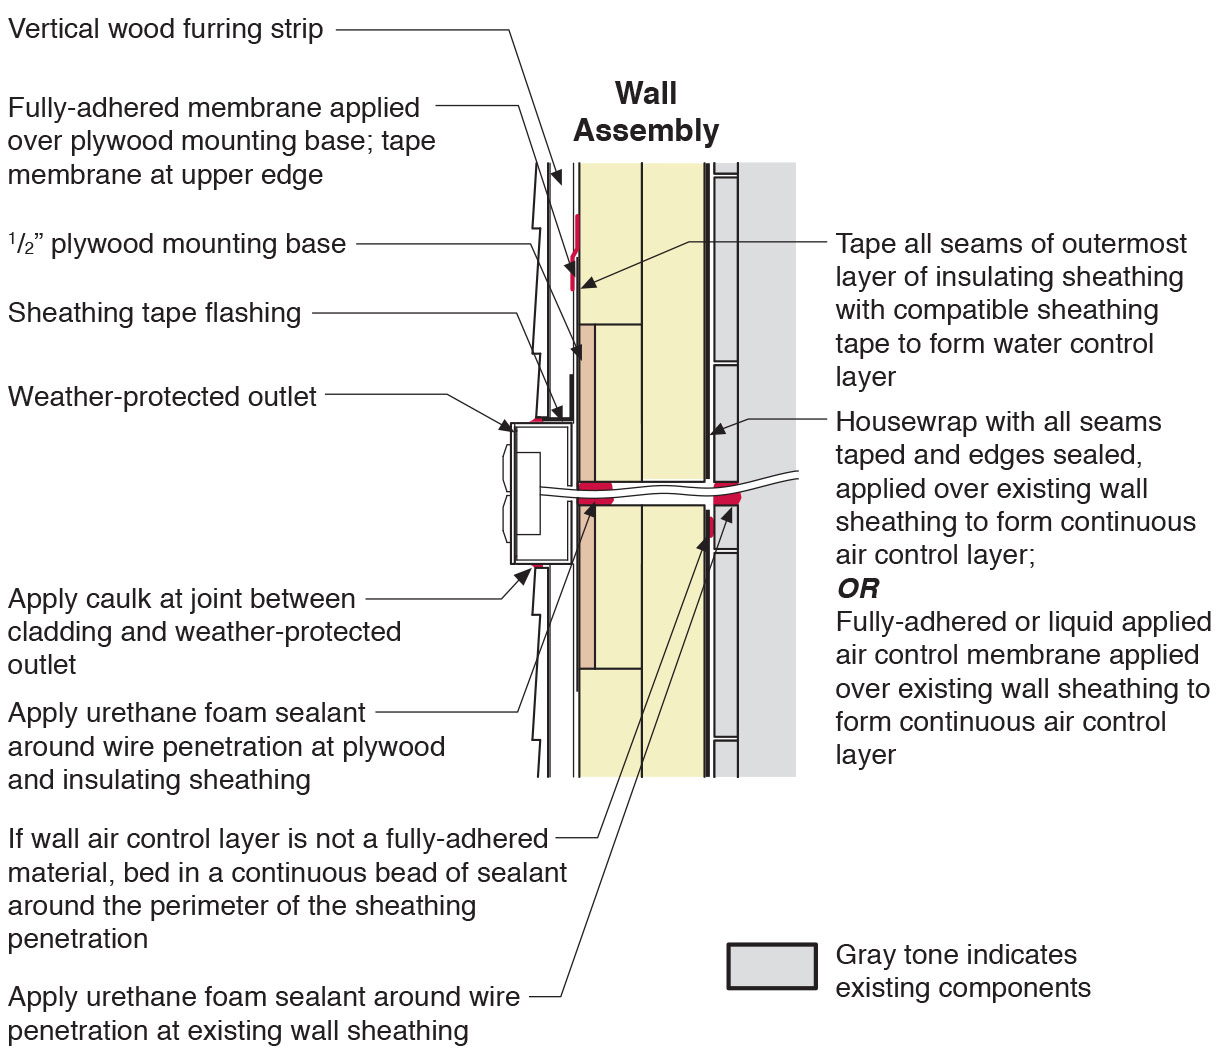
Rigid foam insulation can serve as the drainage plane when all seams are taped. Furring strips provide an air gap behind the cladding.
Image
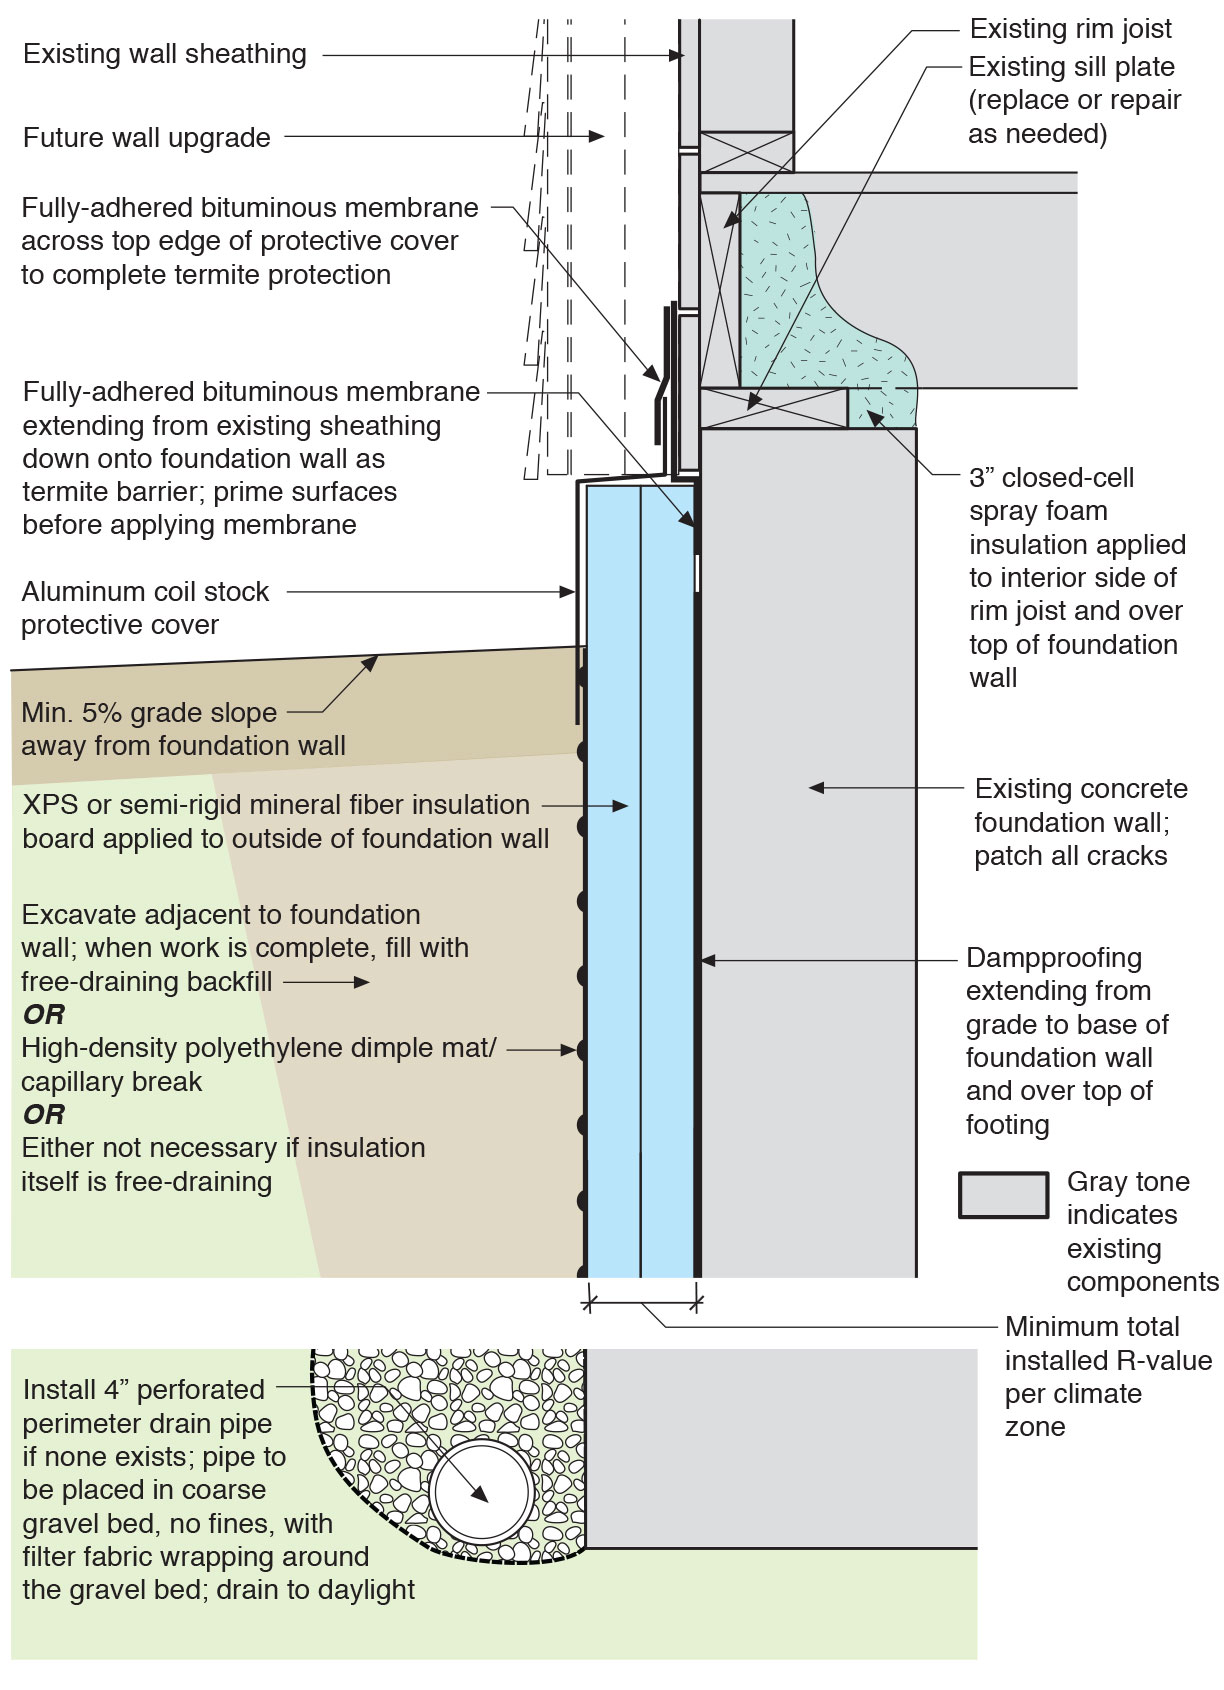
Rigid insulation and water control layers are installed on the exterior of a flat foundation wall; spray foam insulates the rim joist
Image
Image
Image

Seams in the ICF block are sealed so the EPS foam surface can serve as the drainage plane; no house wrap is needed.
Image
Section view of electric box installation in exterior wall showing flashing and air sealing details
Image
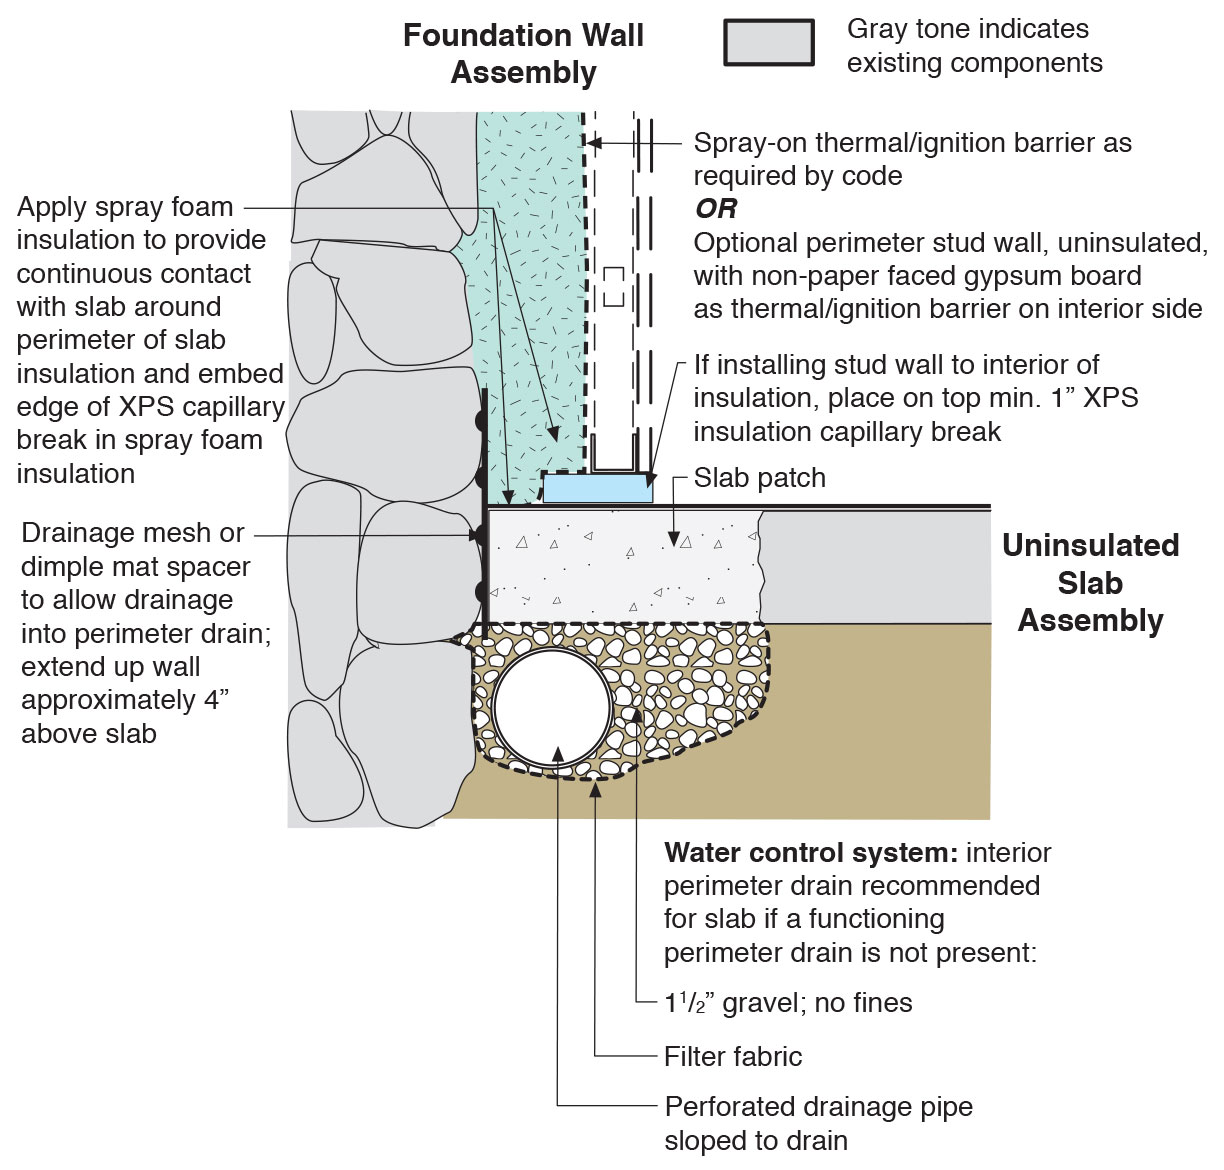
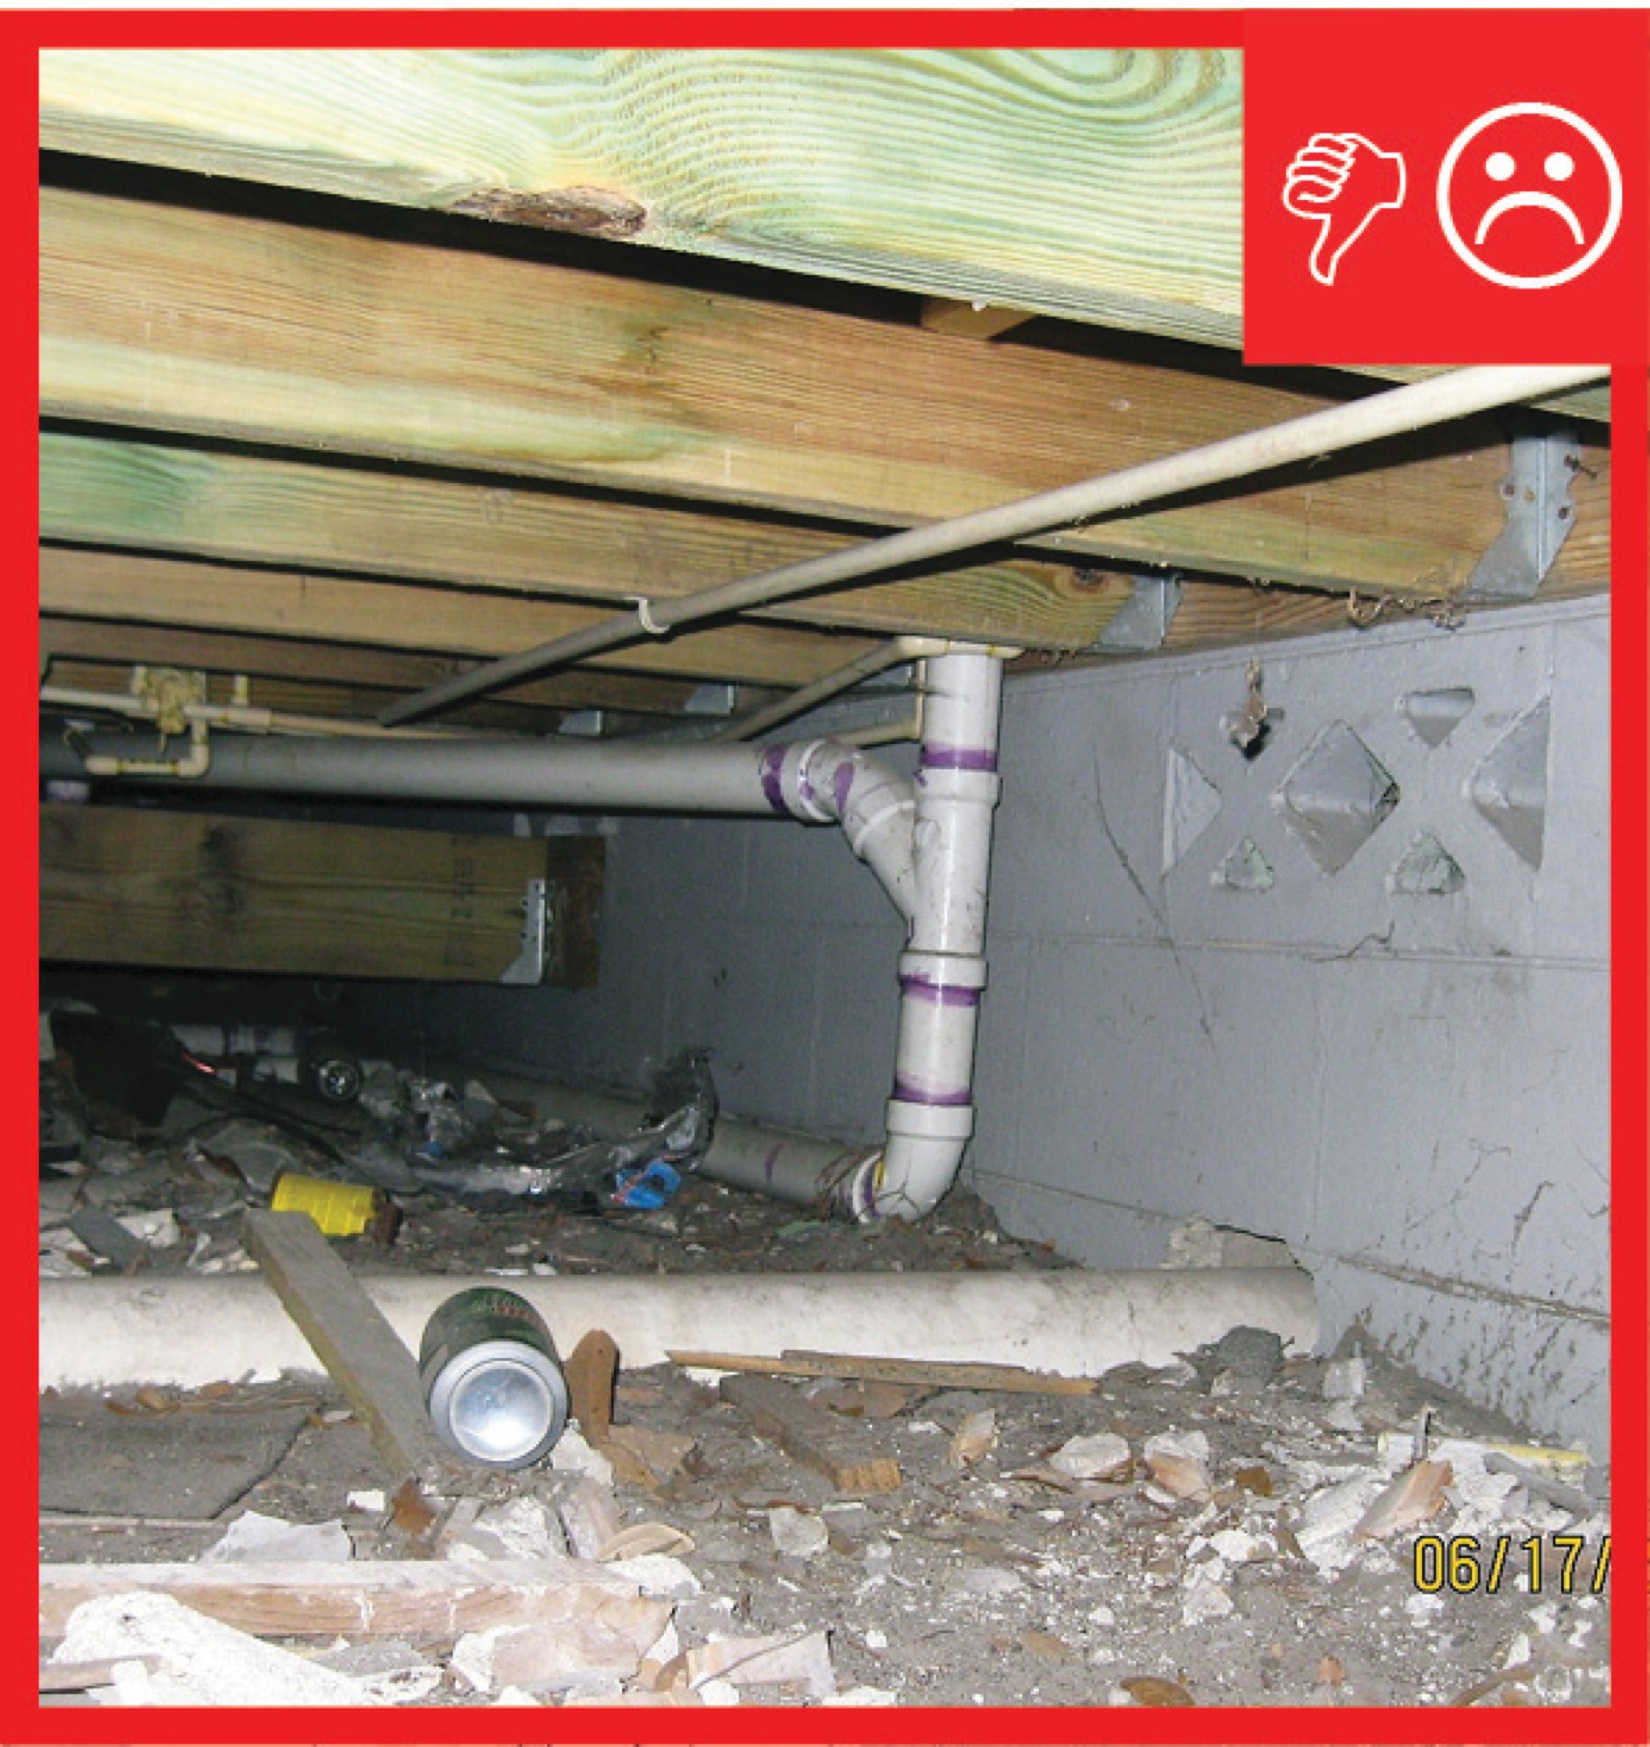
Spray foam extends down the inside of the foundation wall to the uninsulated slab; because the wall lacked exterior perimeter drainage, the slab was cut and an interior footing drain was installed.
Image

Image
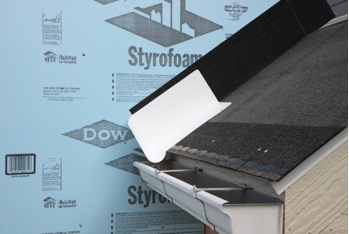
Step 1. Apply roof underlayment over roof deck and up the sidewall over the rigid foam insulation
Image
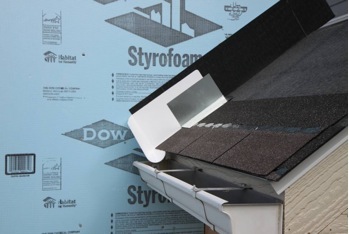
Step 2. Install shingle starter strip then kick-out diverter as first piece of step flashing.
Image
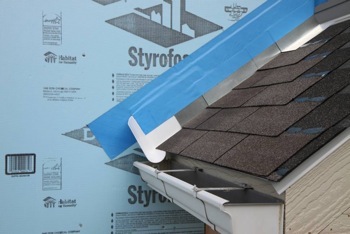
Step 3. Place the first shingle and the next section of sidewall flashing over upper edge of diverter
Image

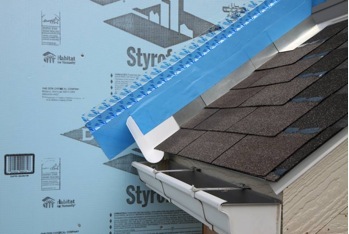
Step 4. Install remaining sidewall flashing, appropriate counter flashing, and shingles
Image
Step 5. Apply self-adhesive flashing over top edge of the wall flashing, diverter, and rigid foam insulation
Image
Image
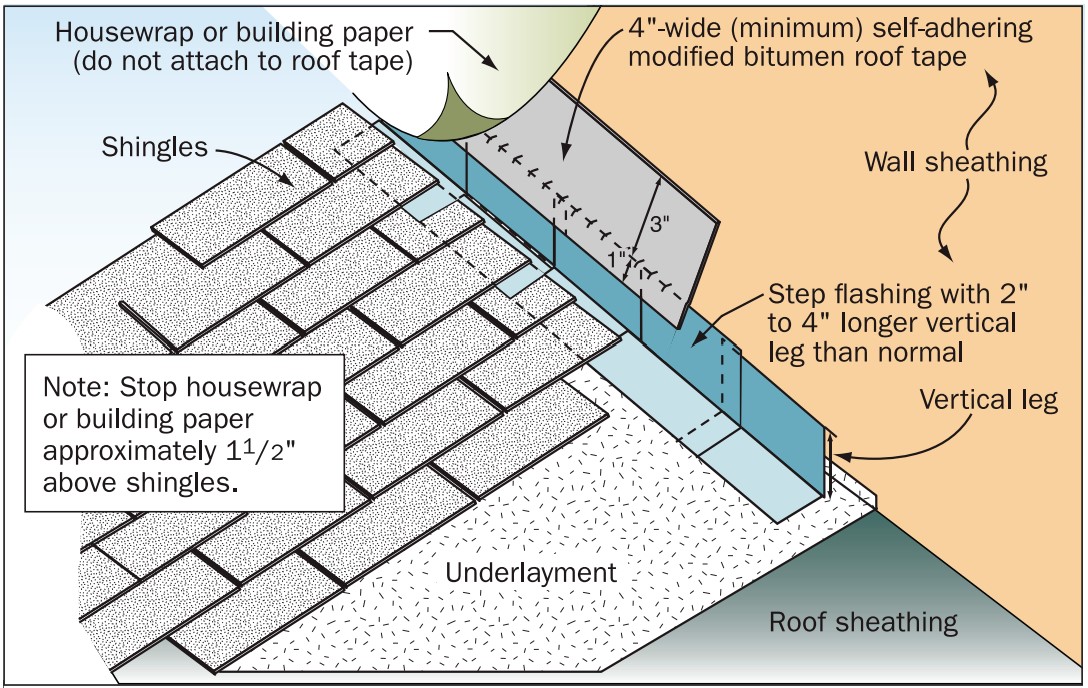
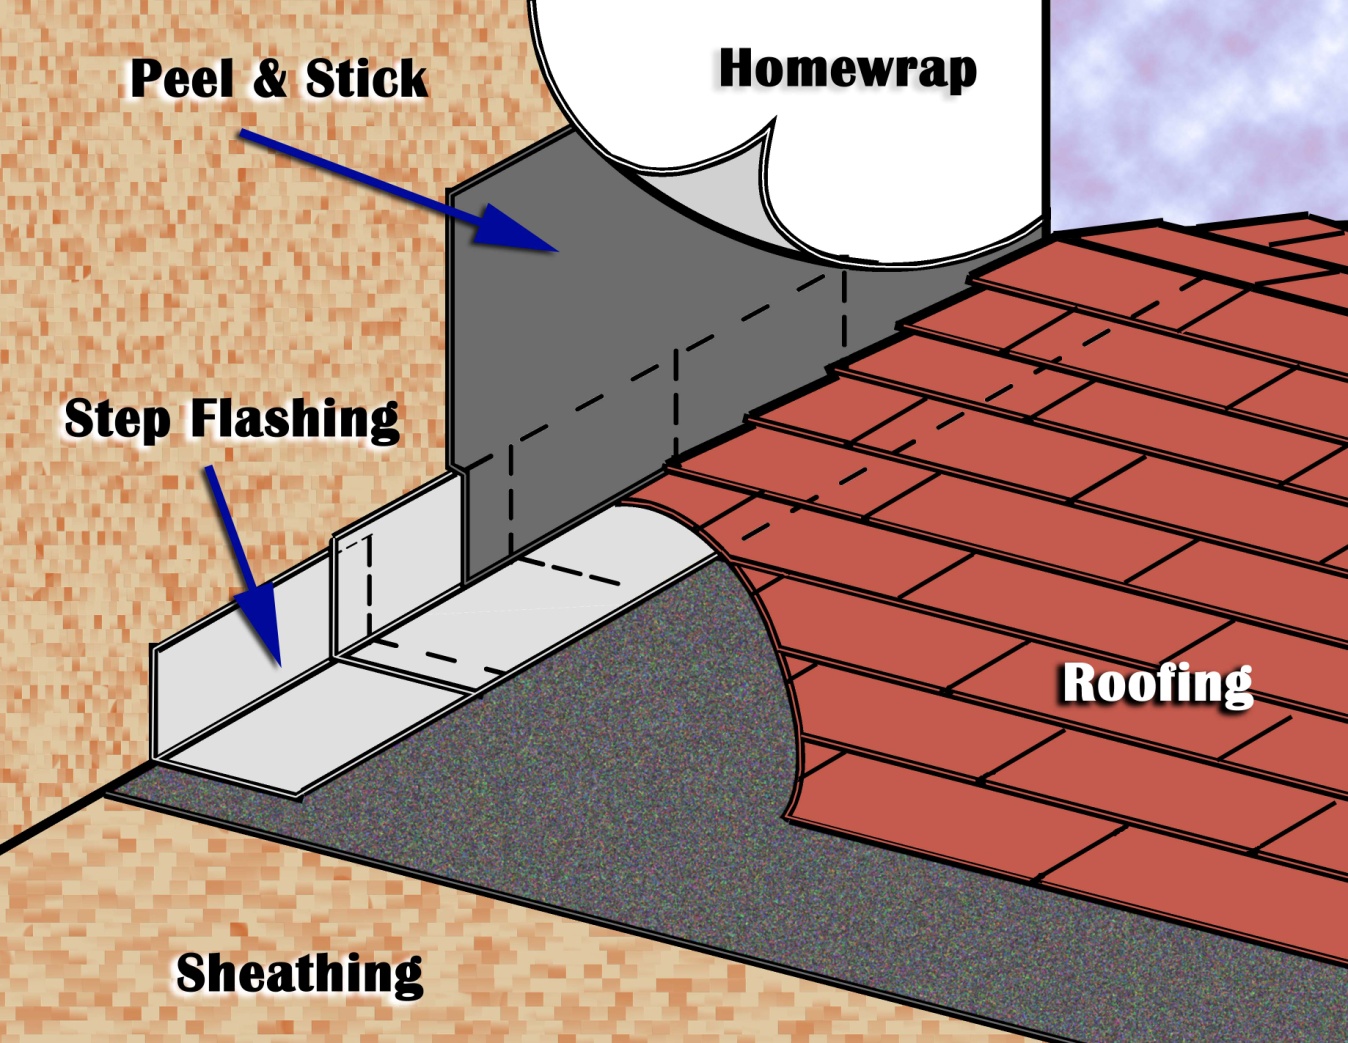
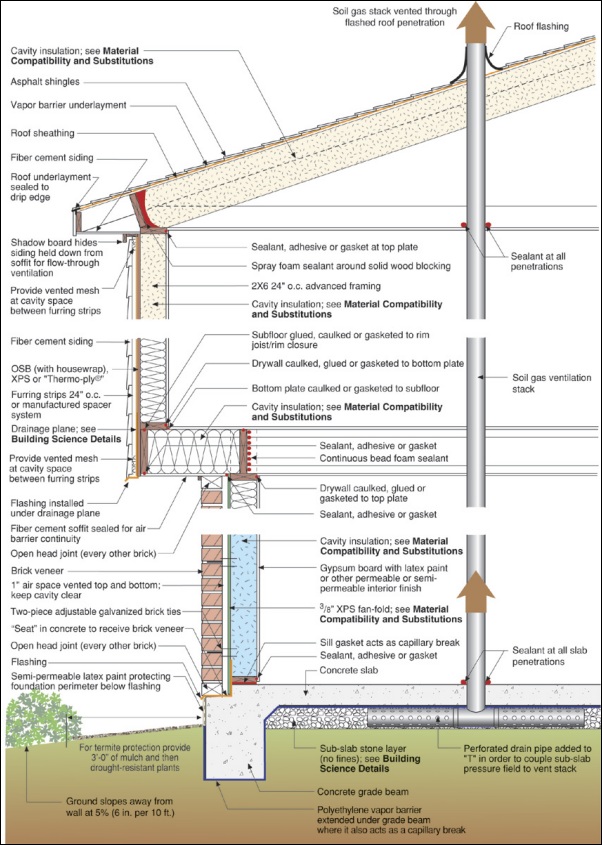
Step and kick-out flashing at all roof-wall intersections extending ≥ 4 in. on wall surface above roof deck and integrated with drainage plane above
Image
Image

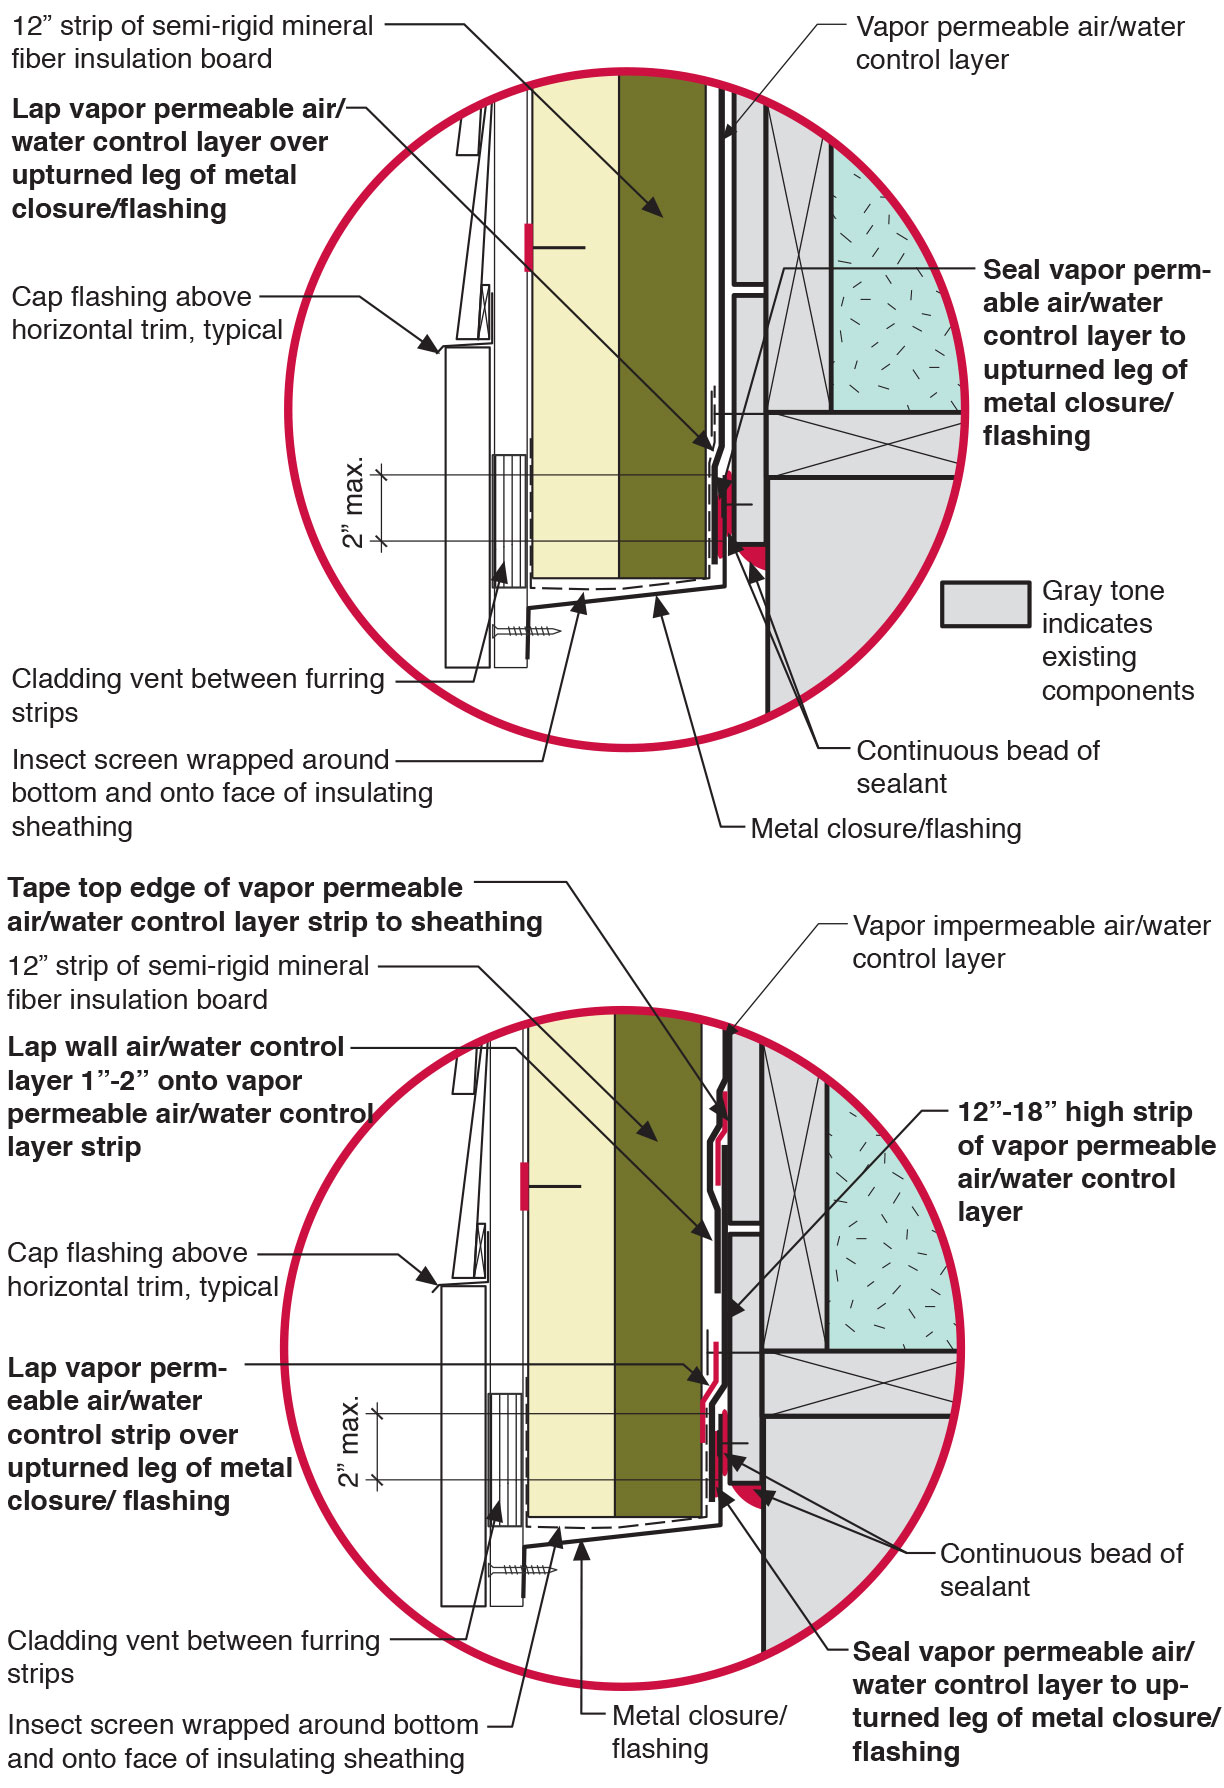
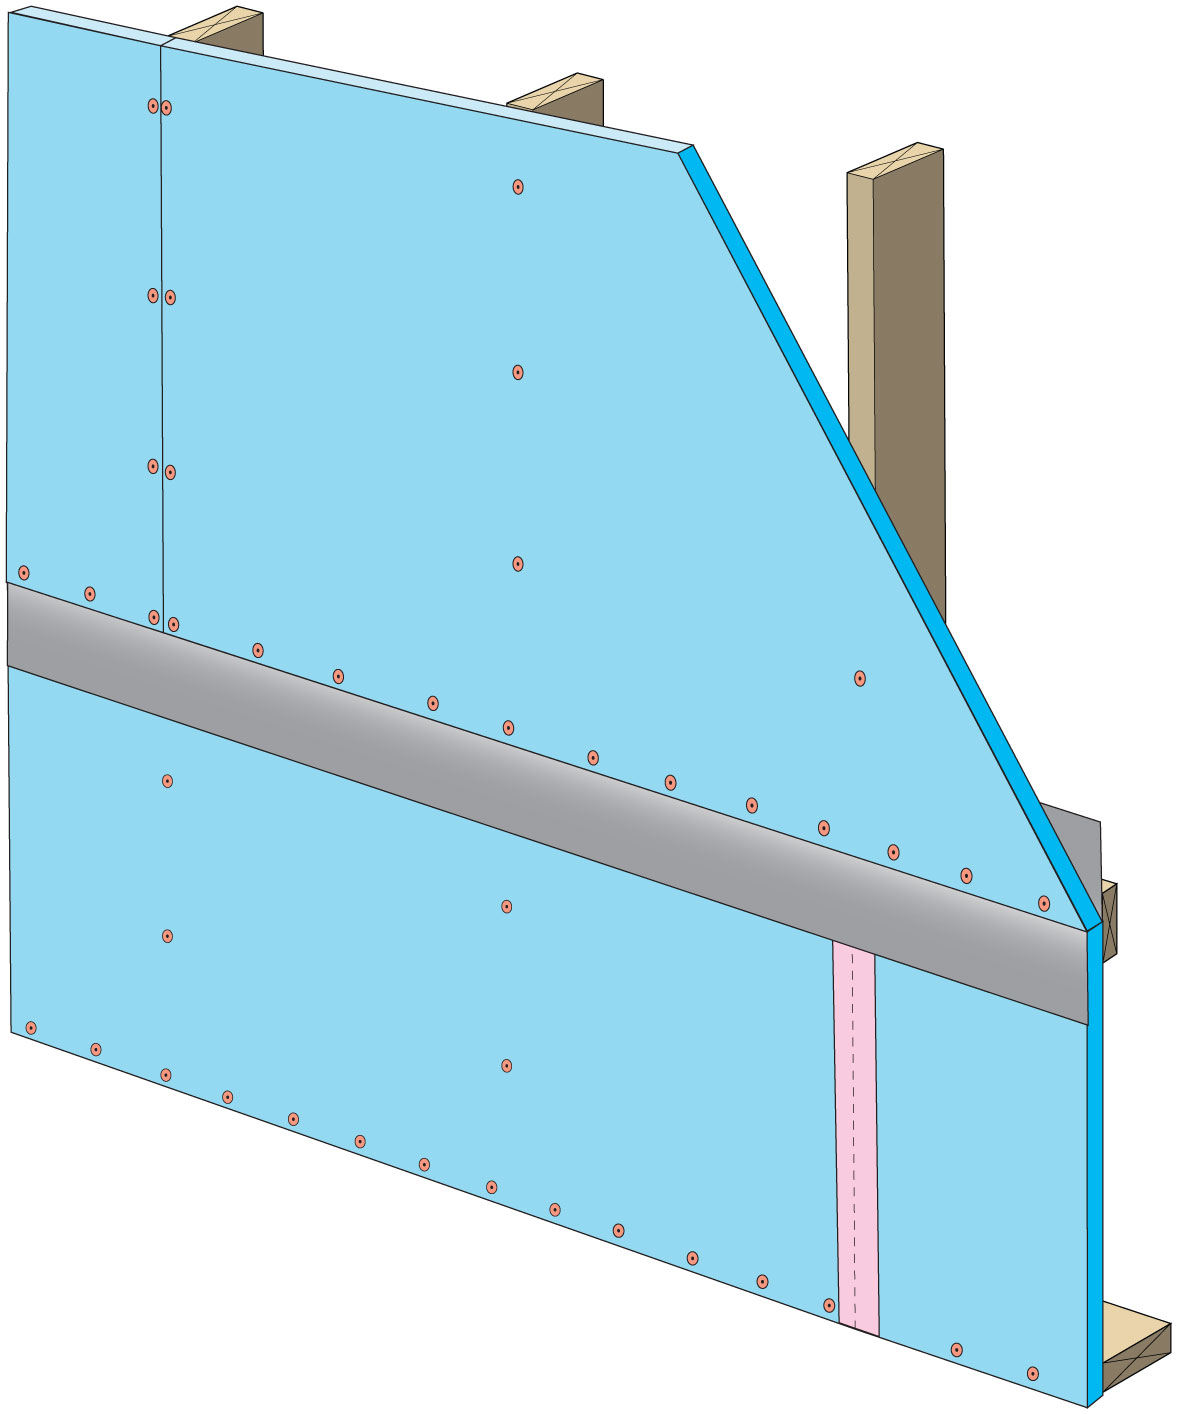
Tape horizontal joint with minimum 3" wide tape placing tape offset high on the joint, adhearing to the upper sheet without wrinkles
Image
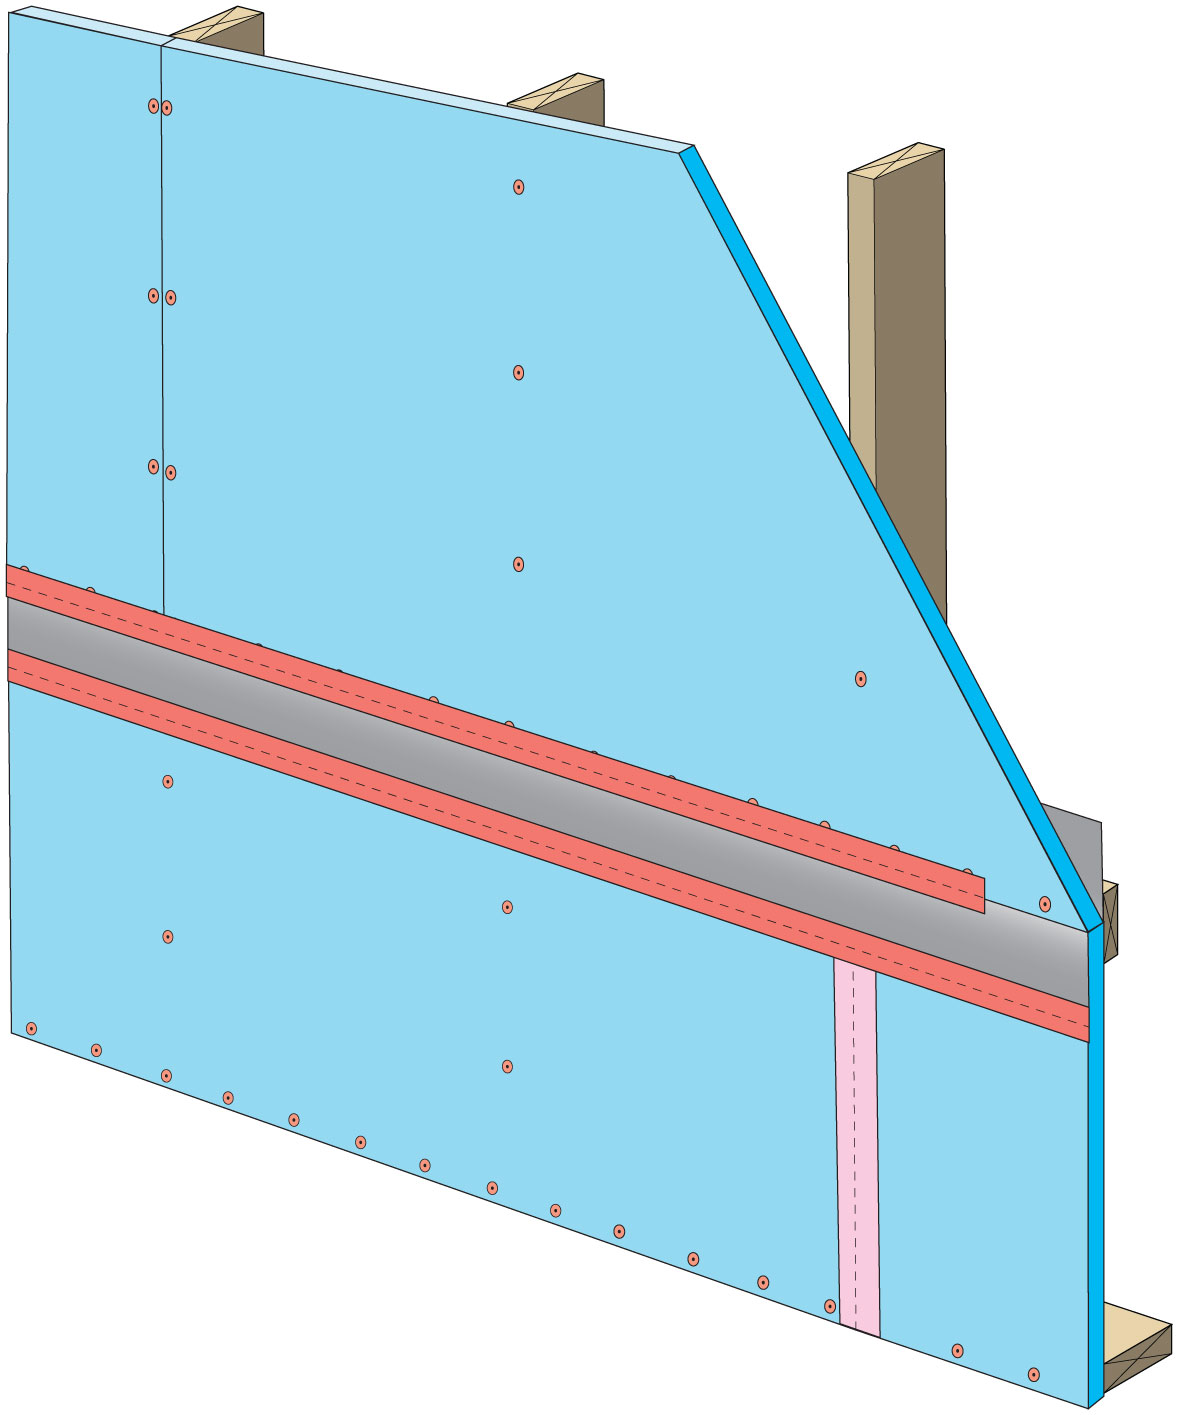
Tape the joint between the top insulation sheet and the Z-flashing with 2" wide tape to improve air tightness
Image
Image
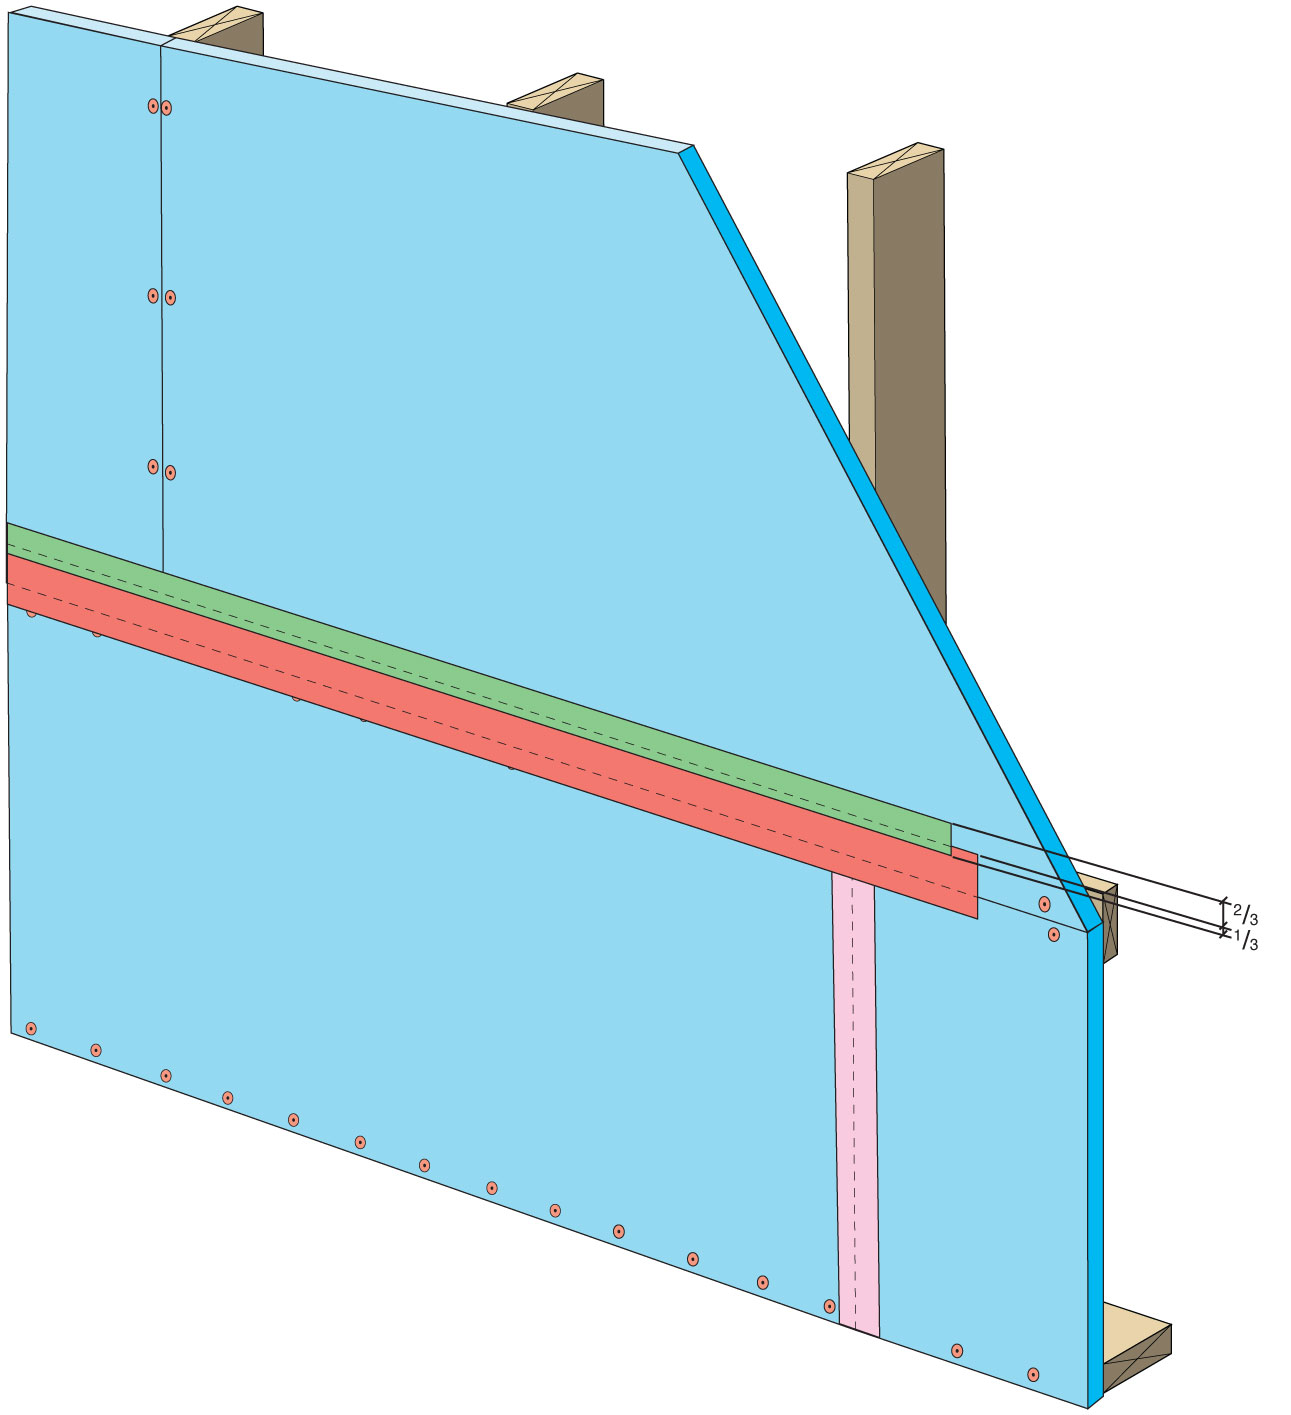
Terminate 4" tape with 2" wide tape placing tape offset high on the joint, 2/3 of the tape should be adhered to the sheet of insulation
Image
Image
Image
Image
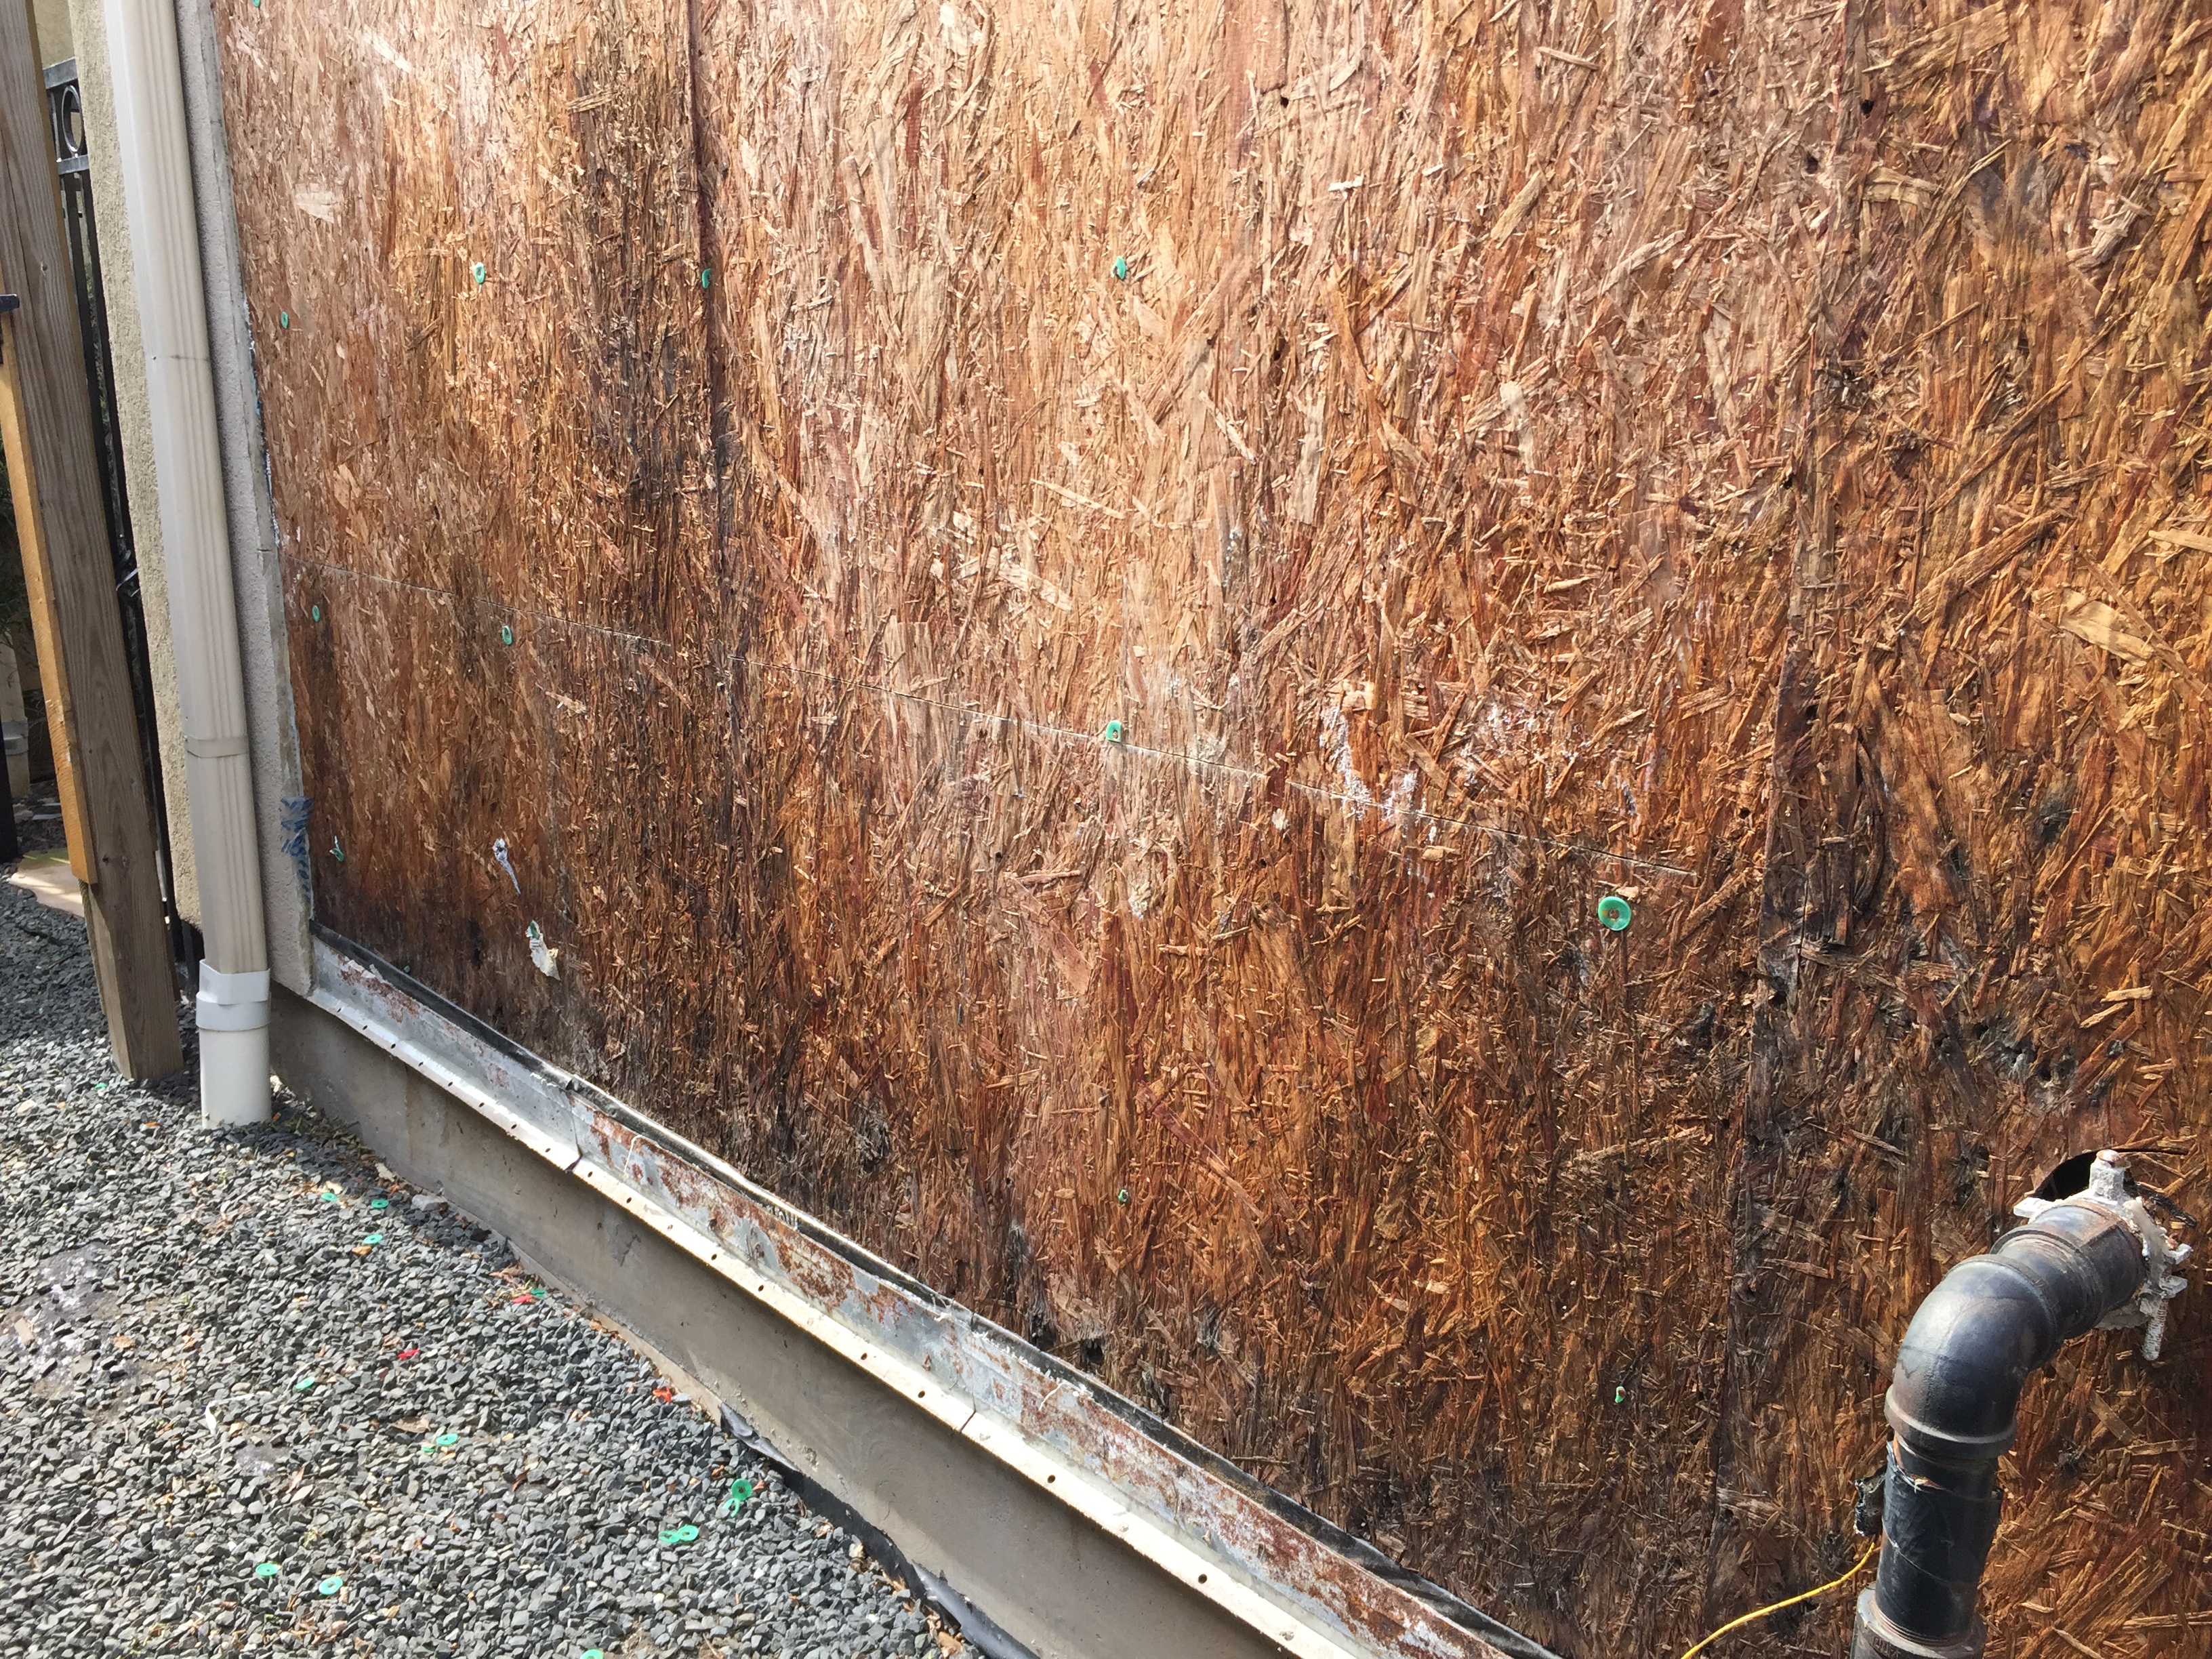
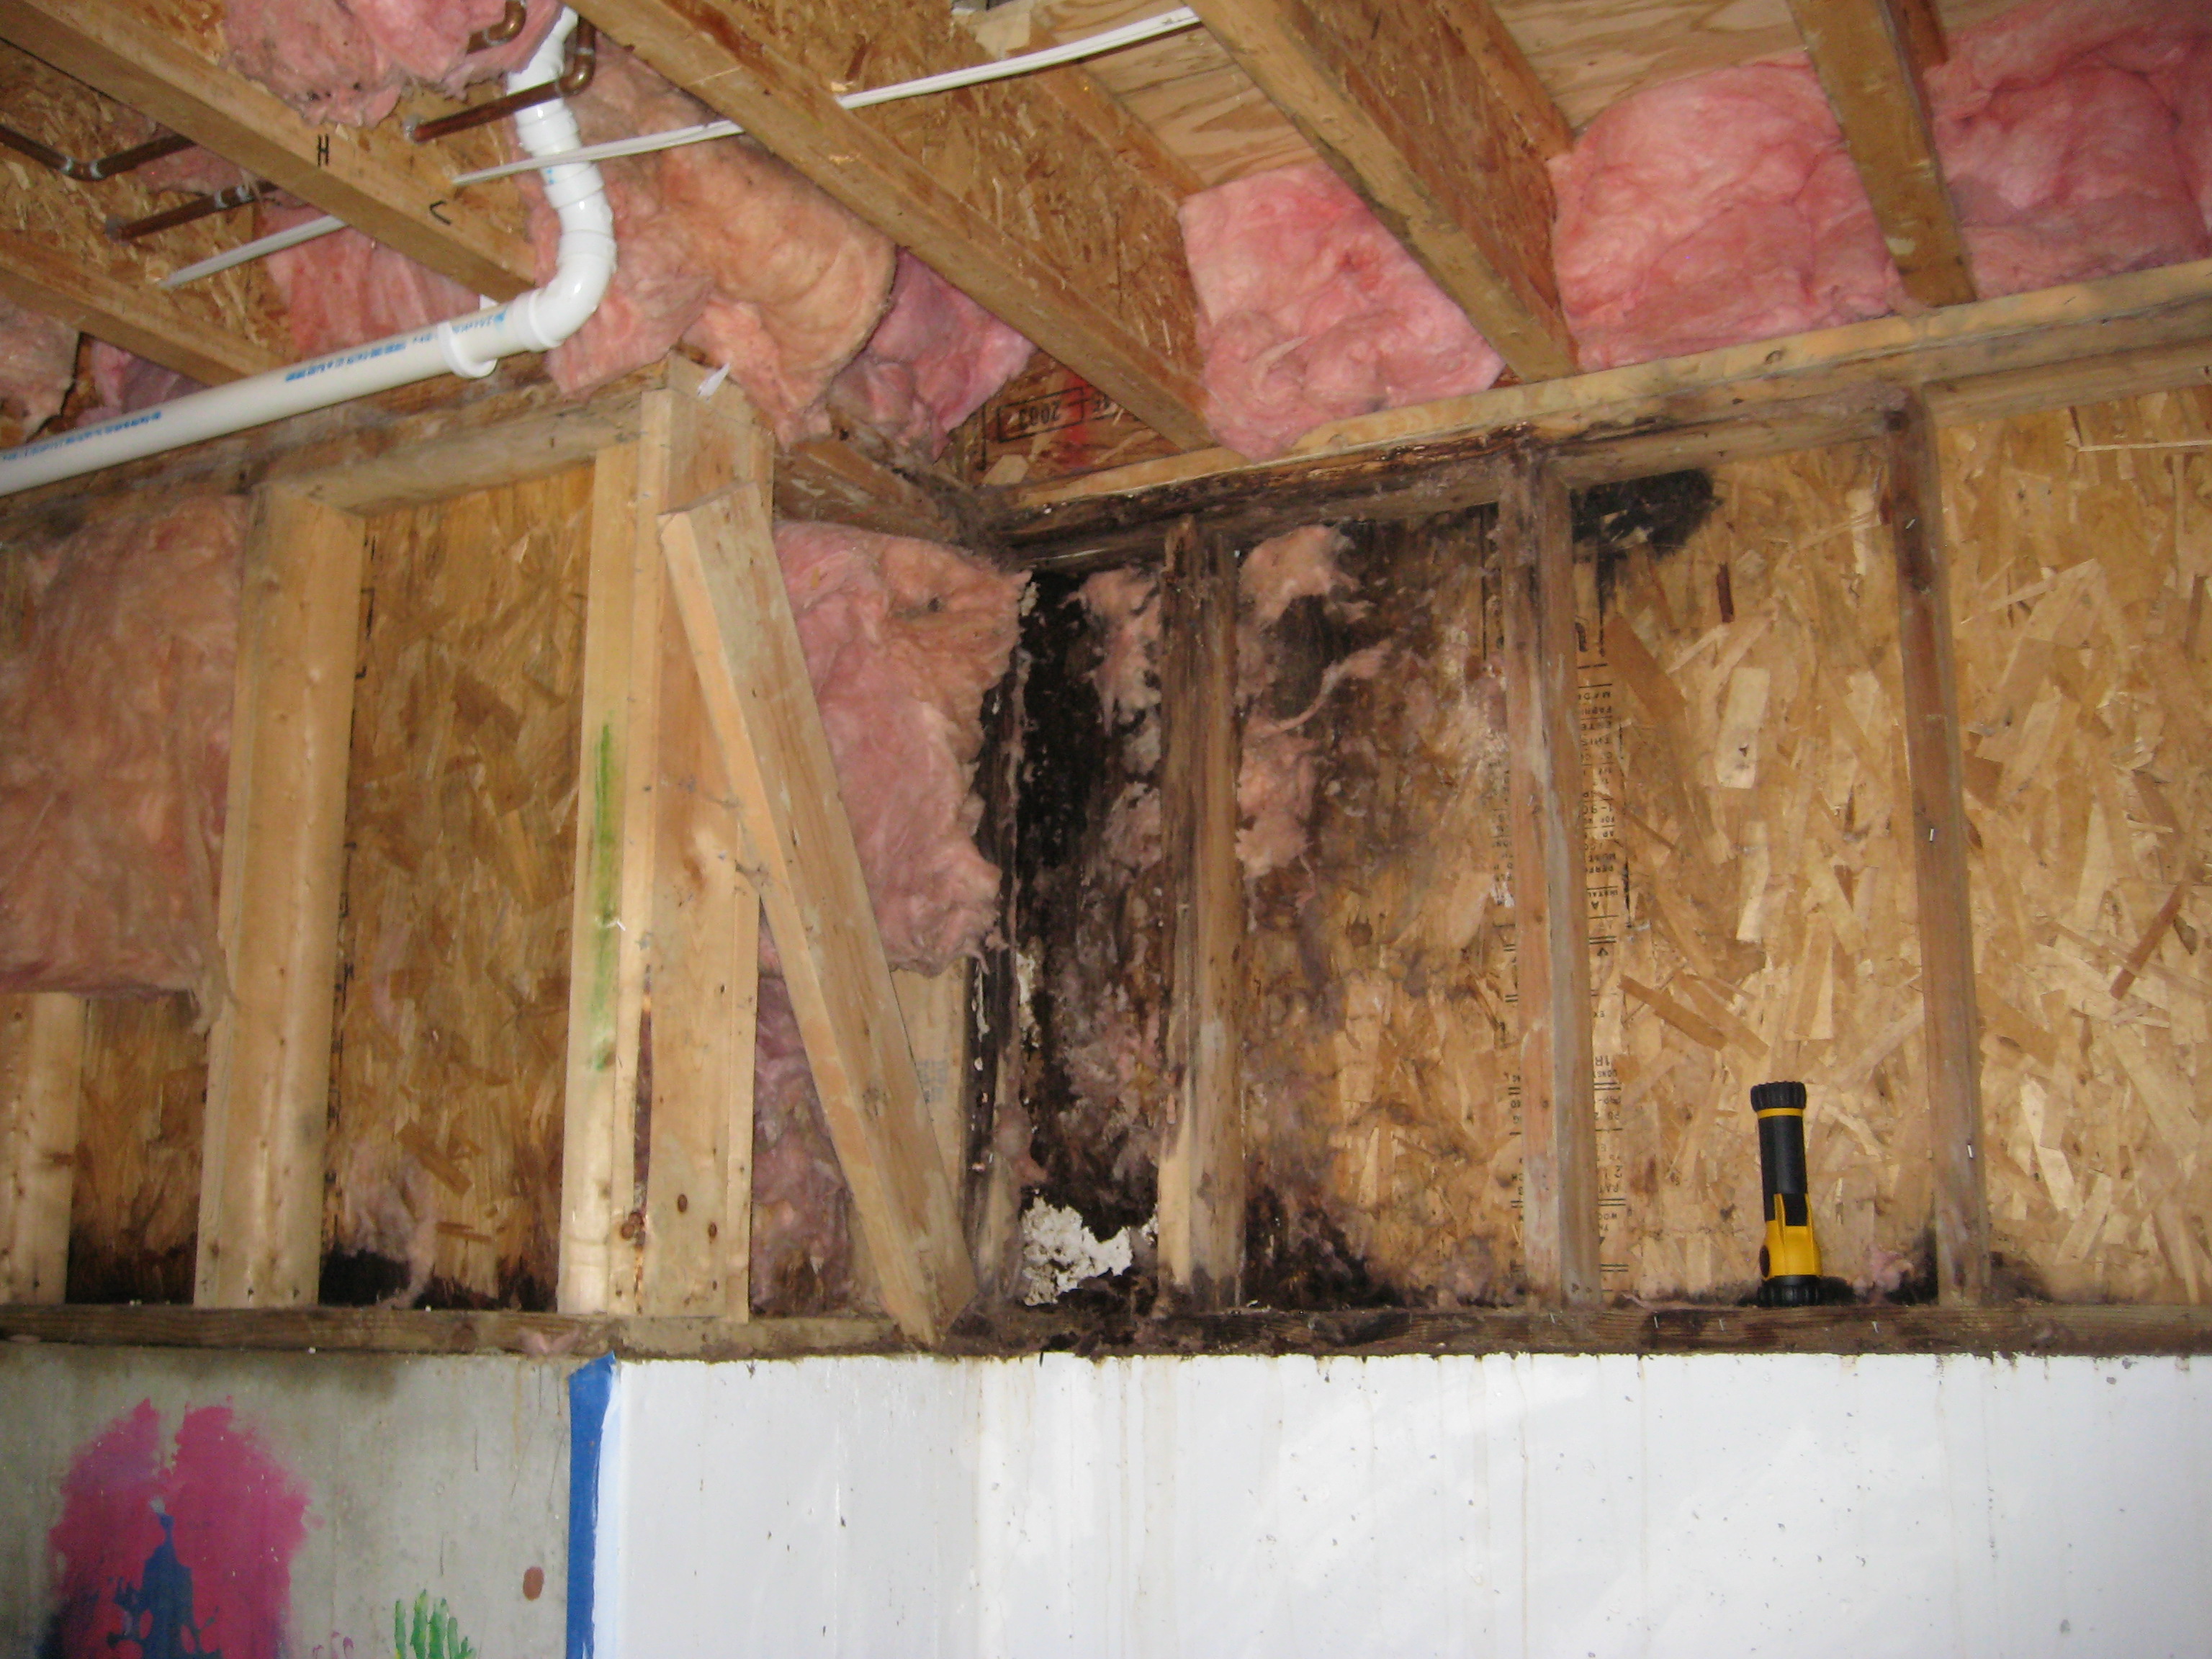
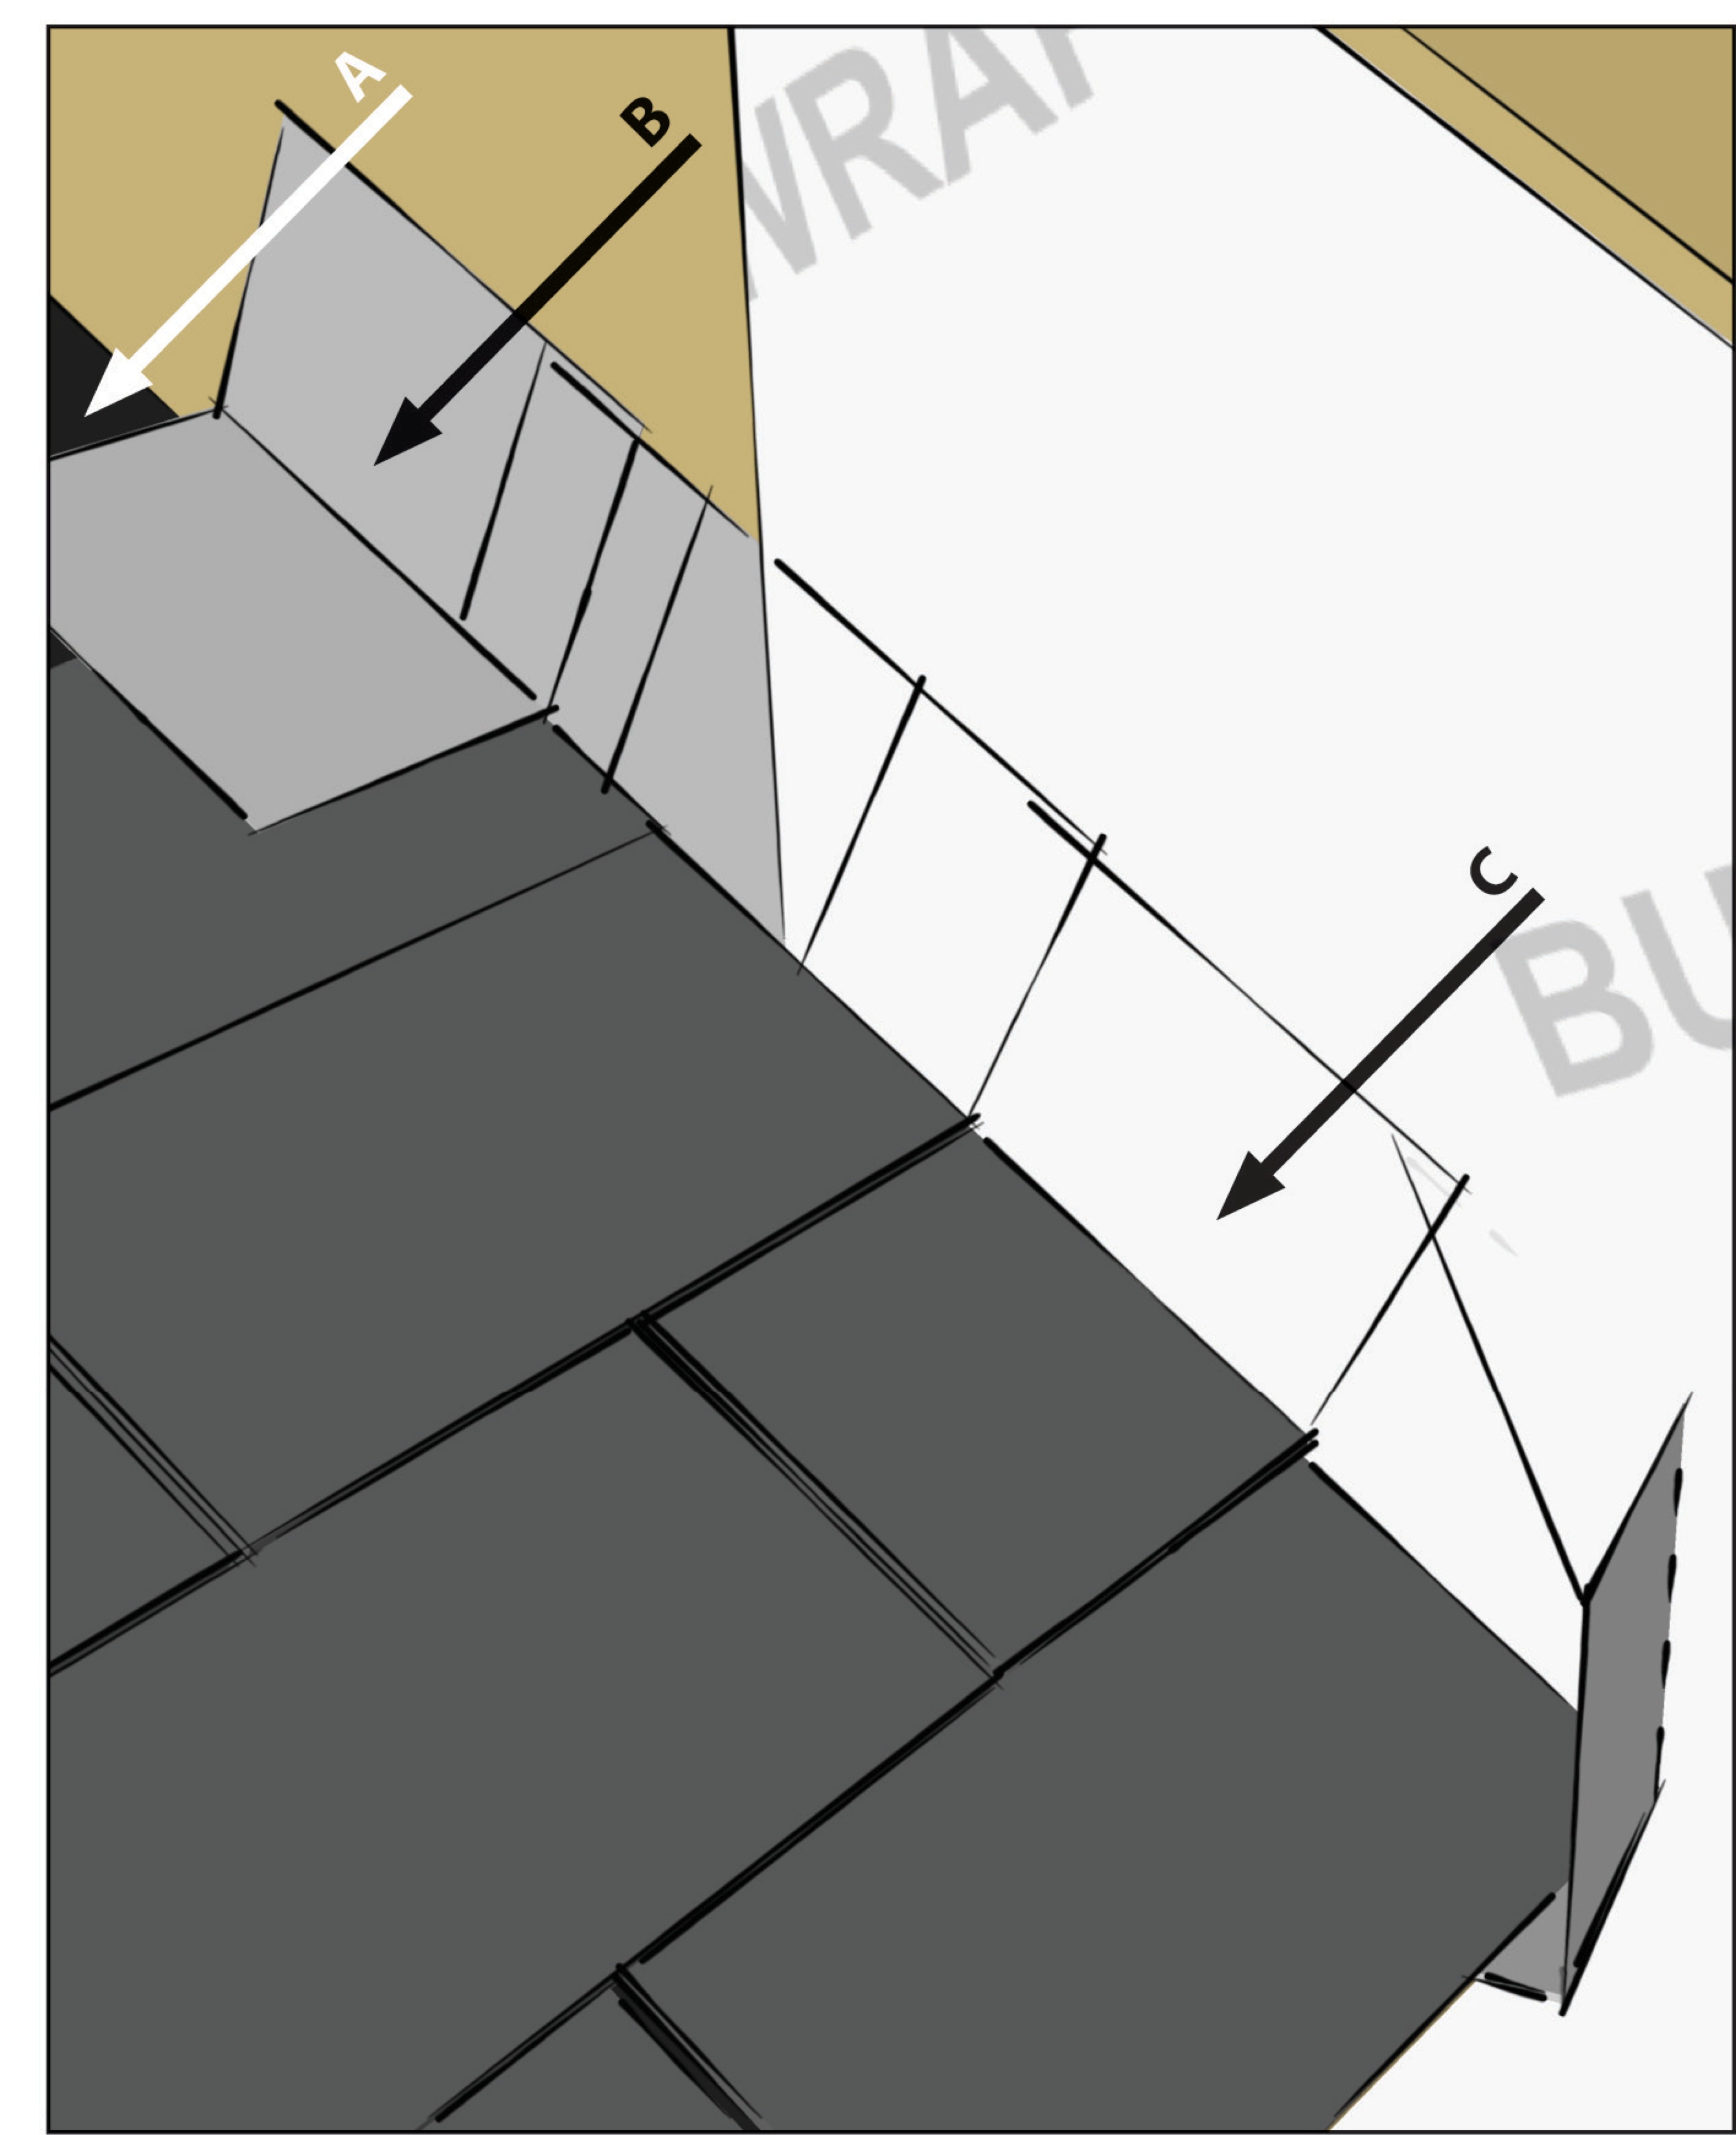
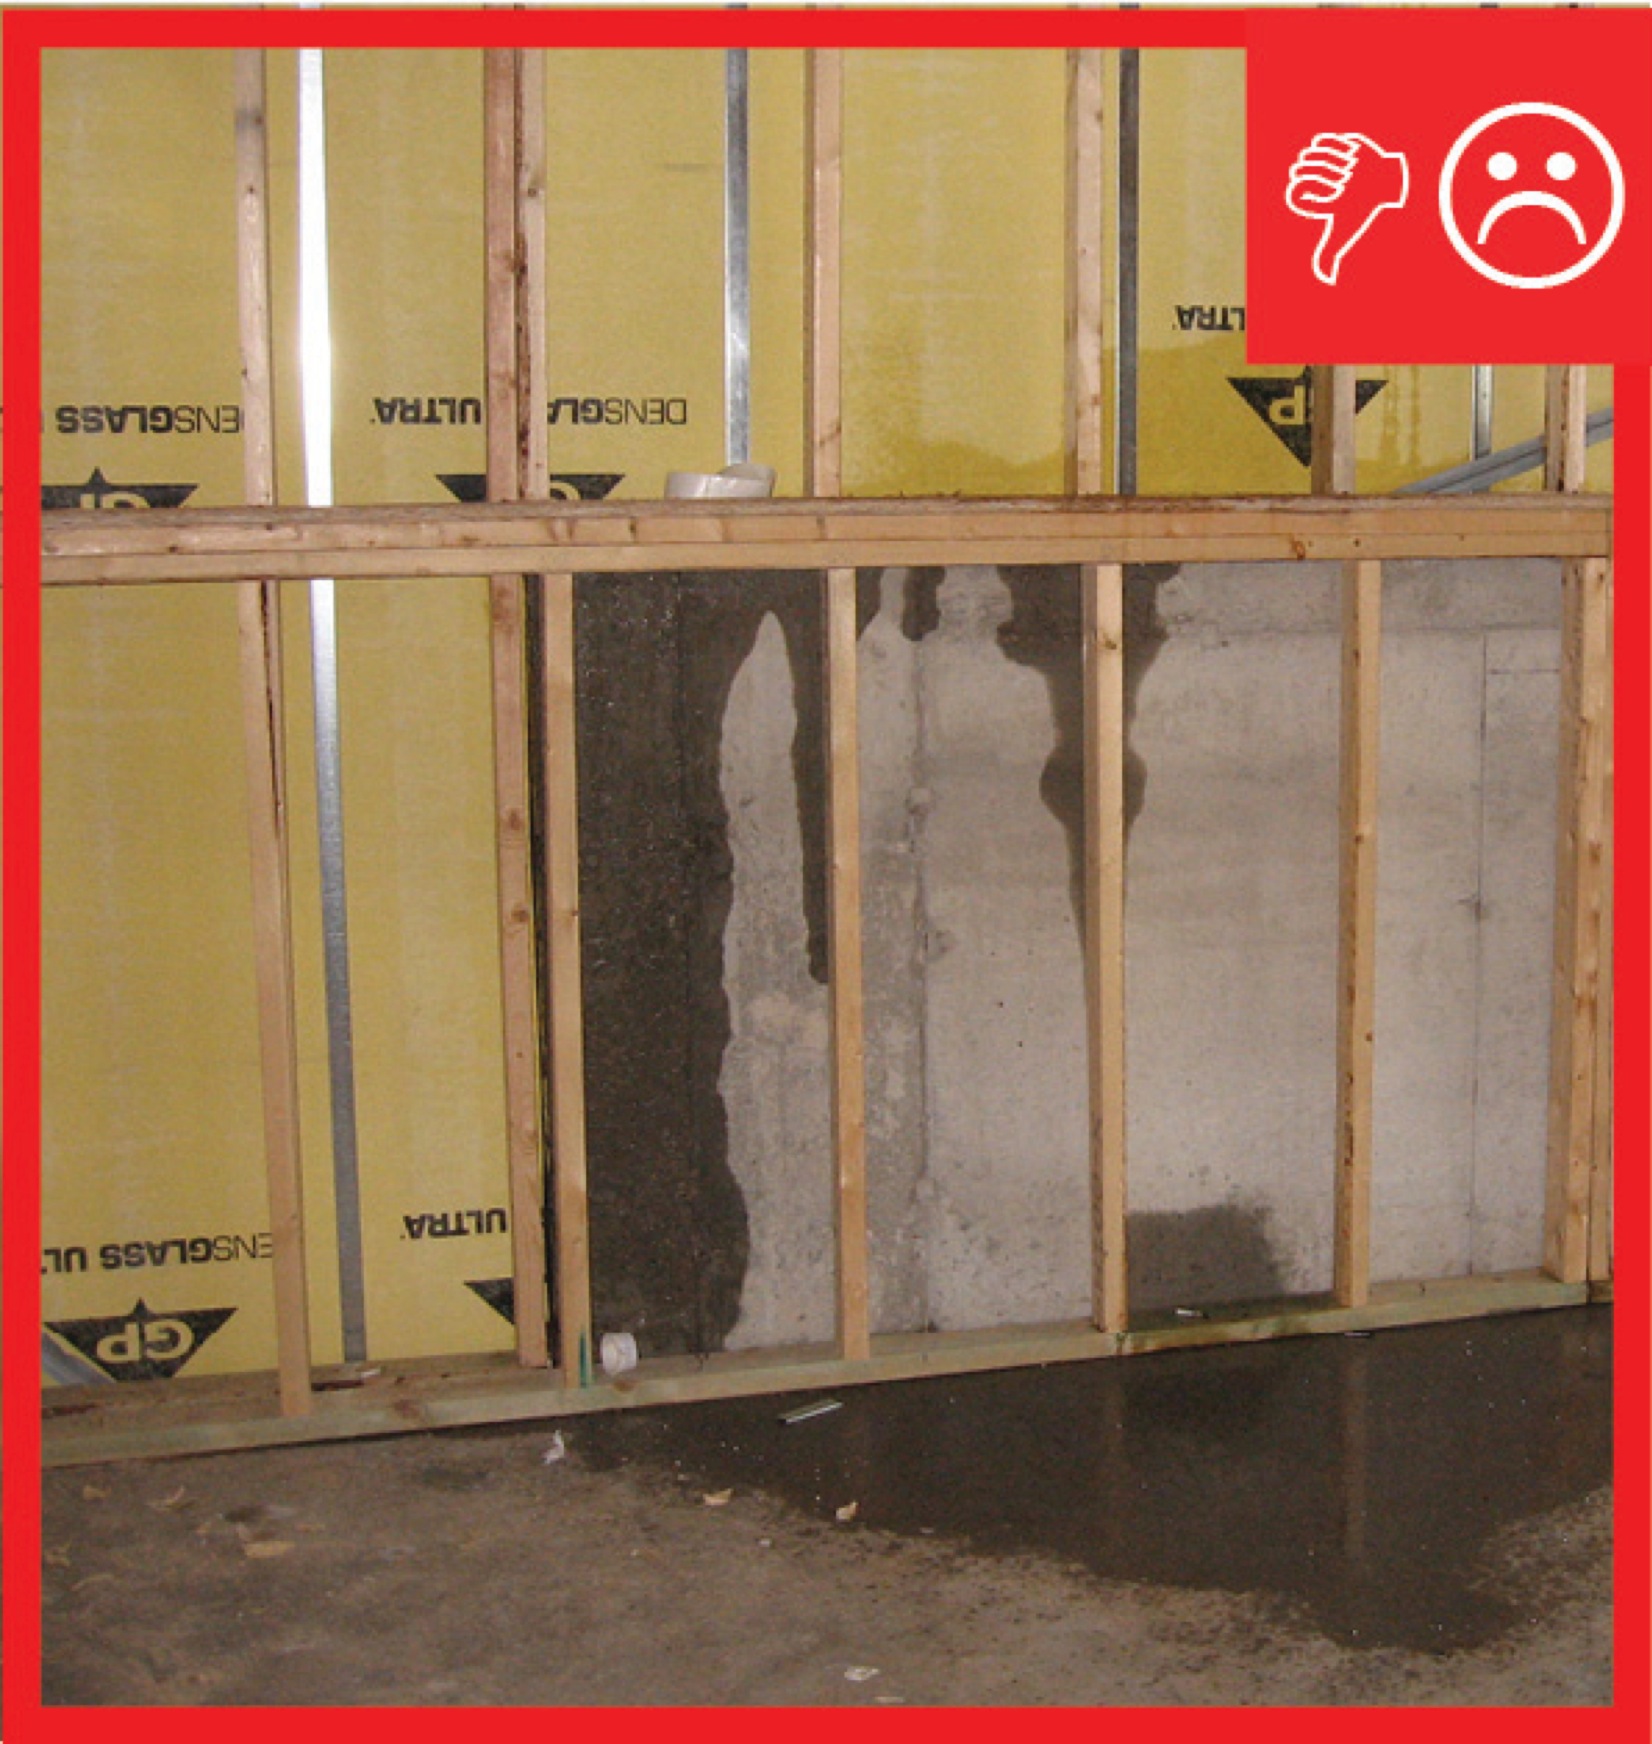
The sheathing has rotted because there was not a sufficient drainage gap behind the stucco cladding
Image
The walls of this mixed-humid location home are constructed with moisture-resistant steel-framed expanded polystyrene R-34 wall panels that are designed to withstand winds up to 200 mph and level D seismic forces.
Image

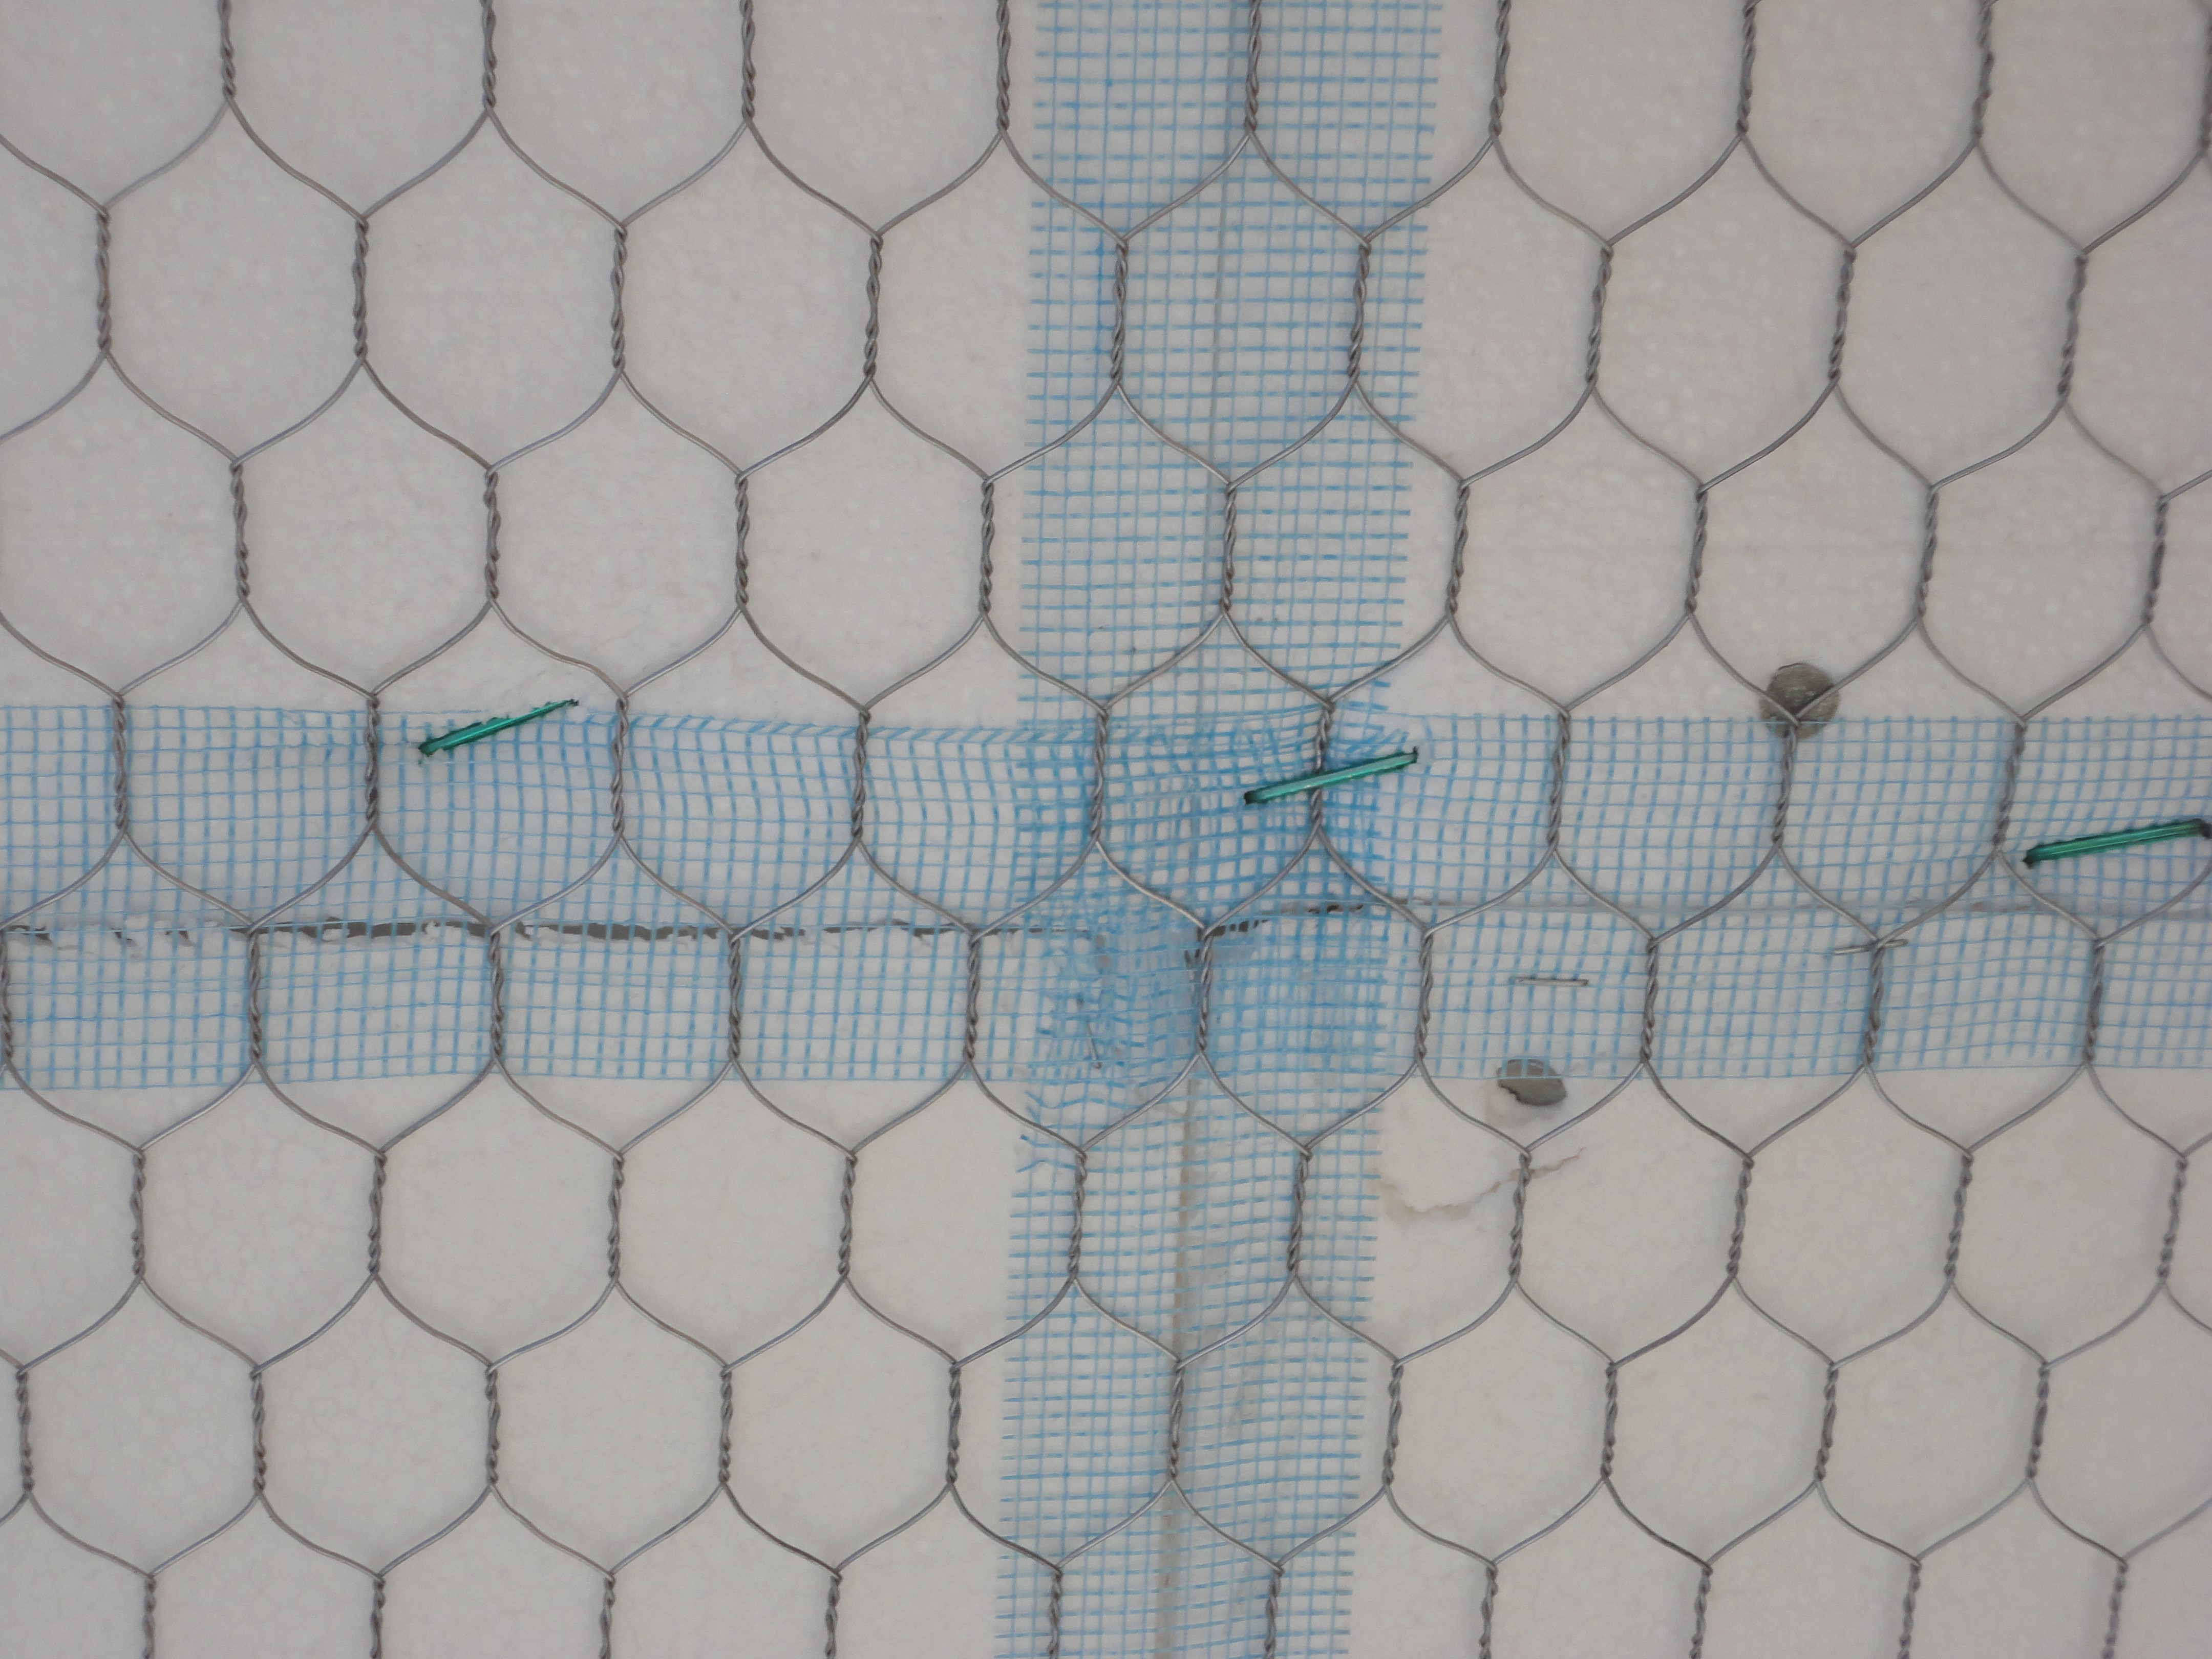
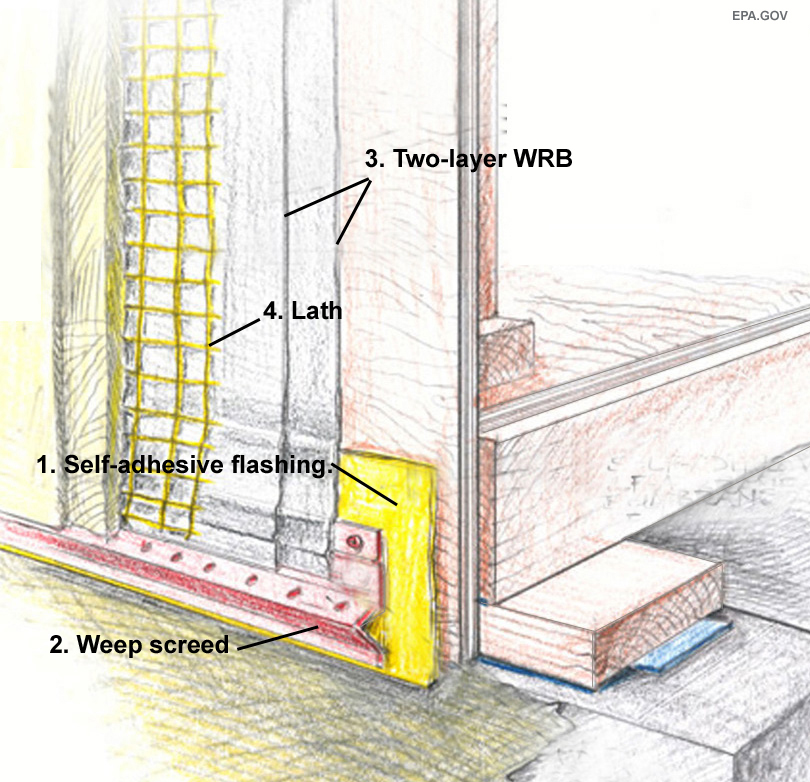
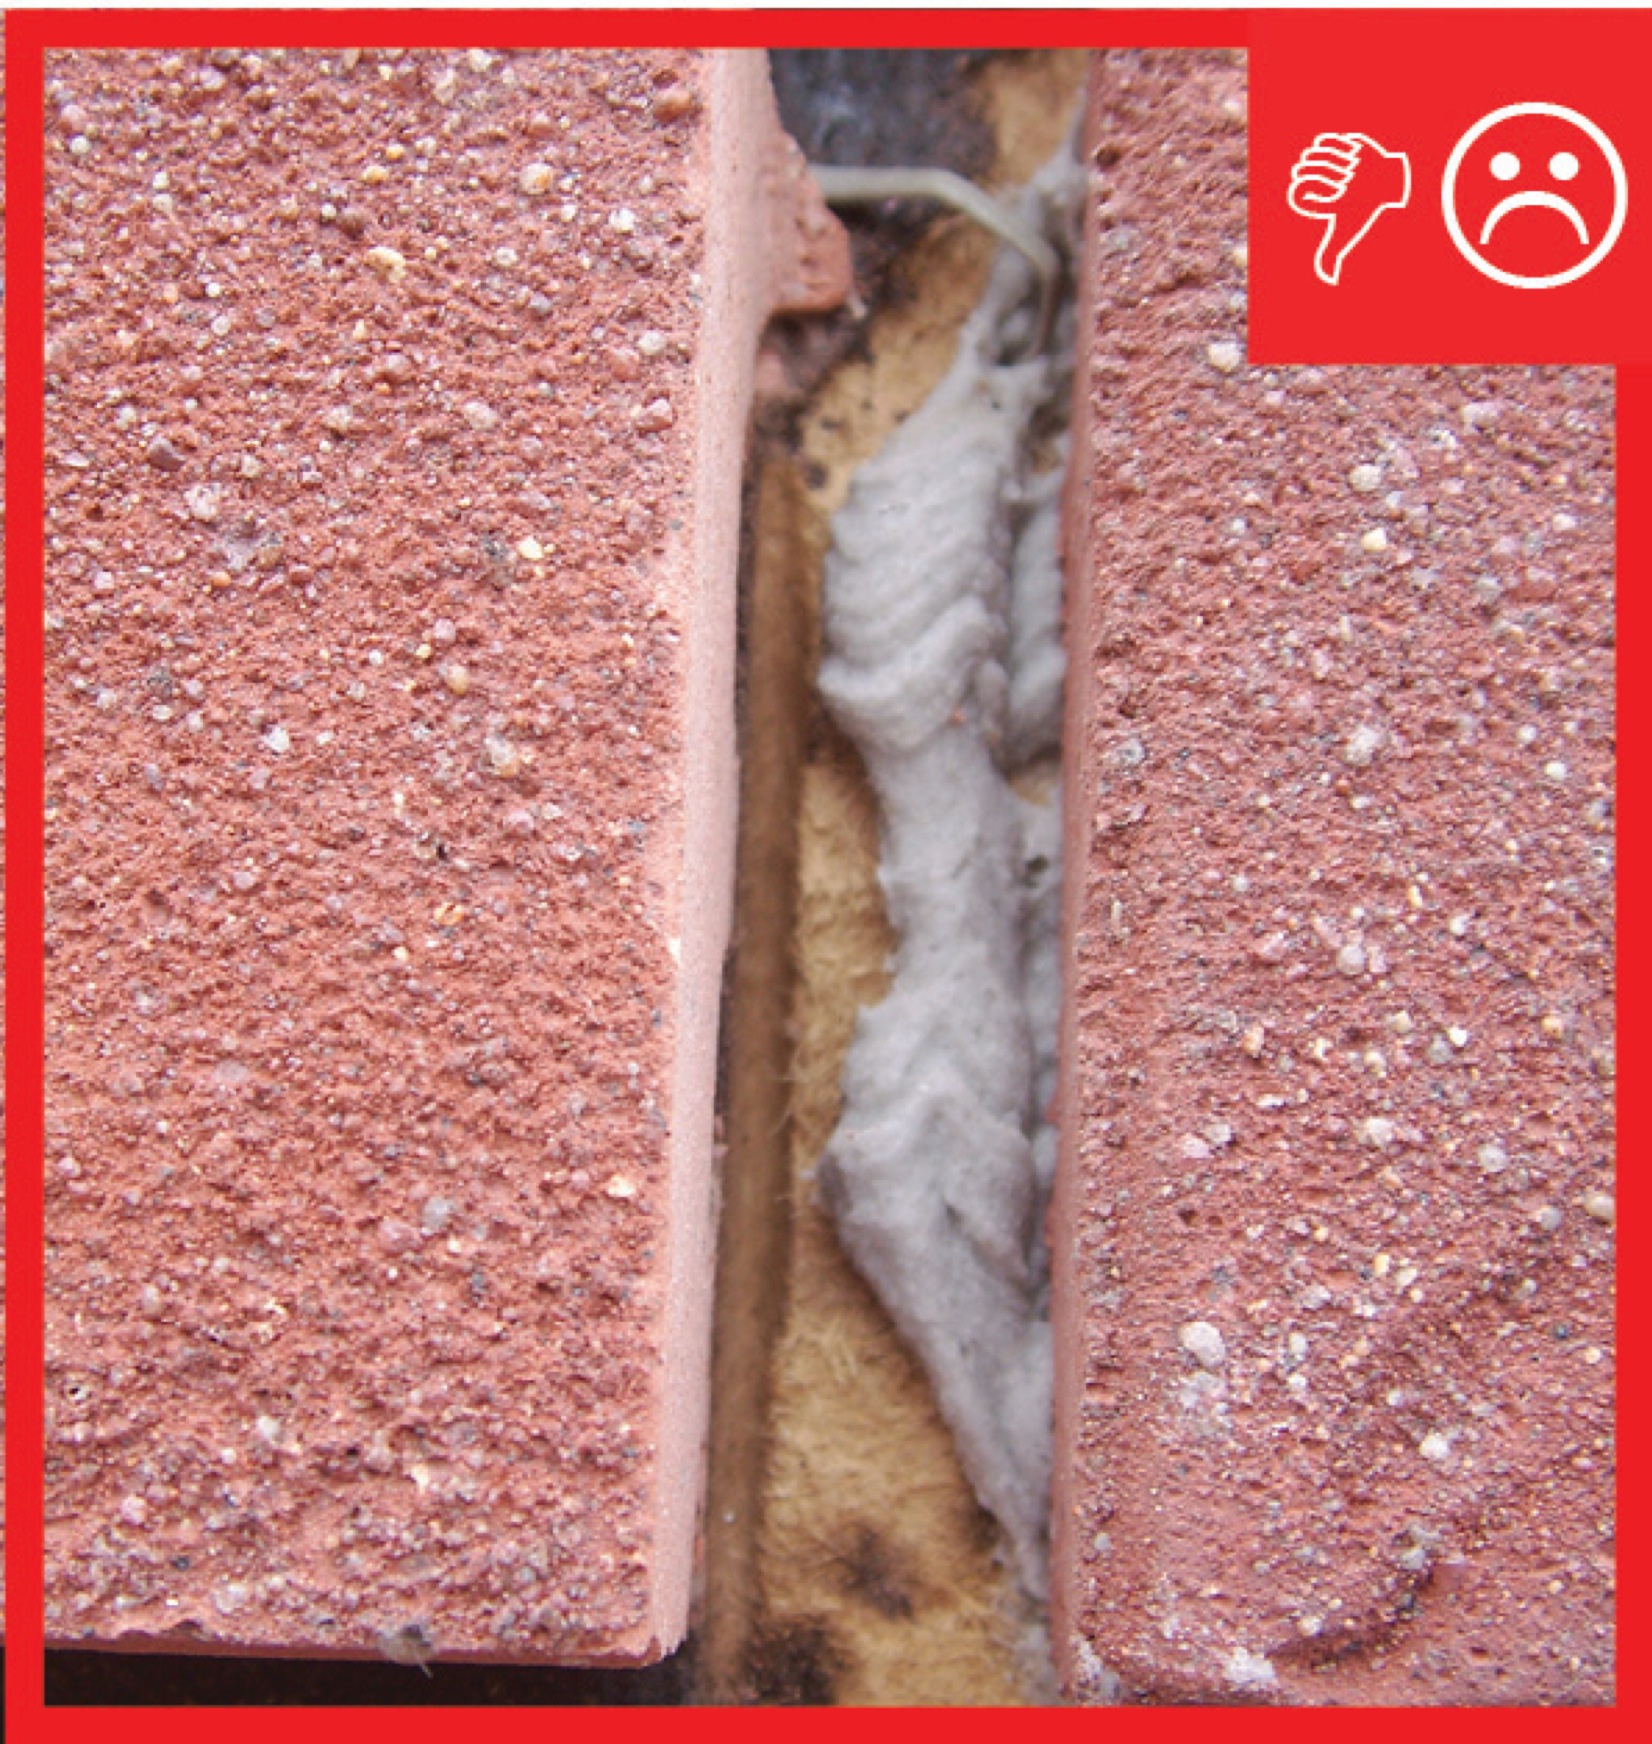
The water-resistant barrier, weep screed, and stucco lathe are not properly layered
Image
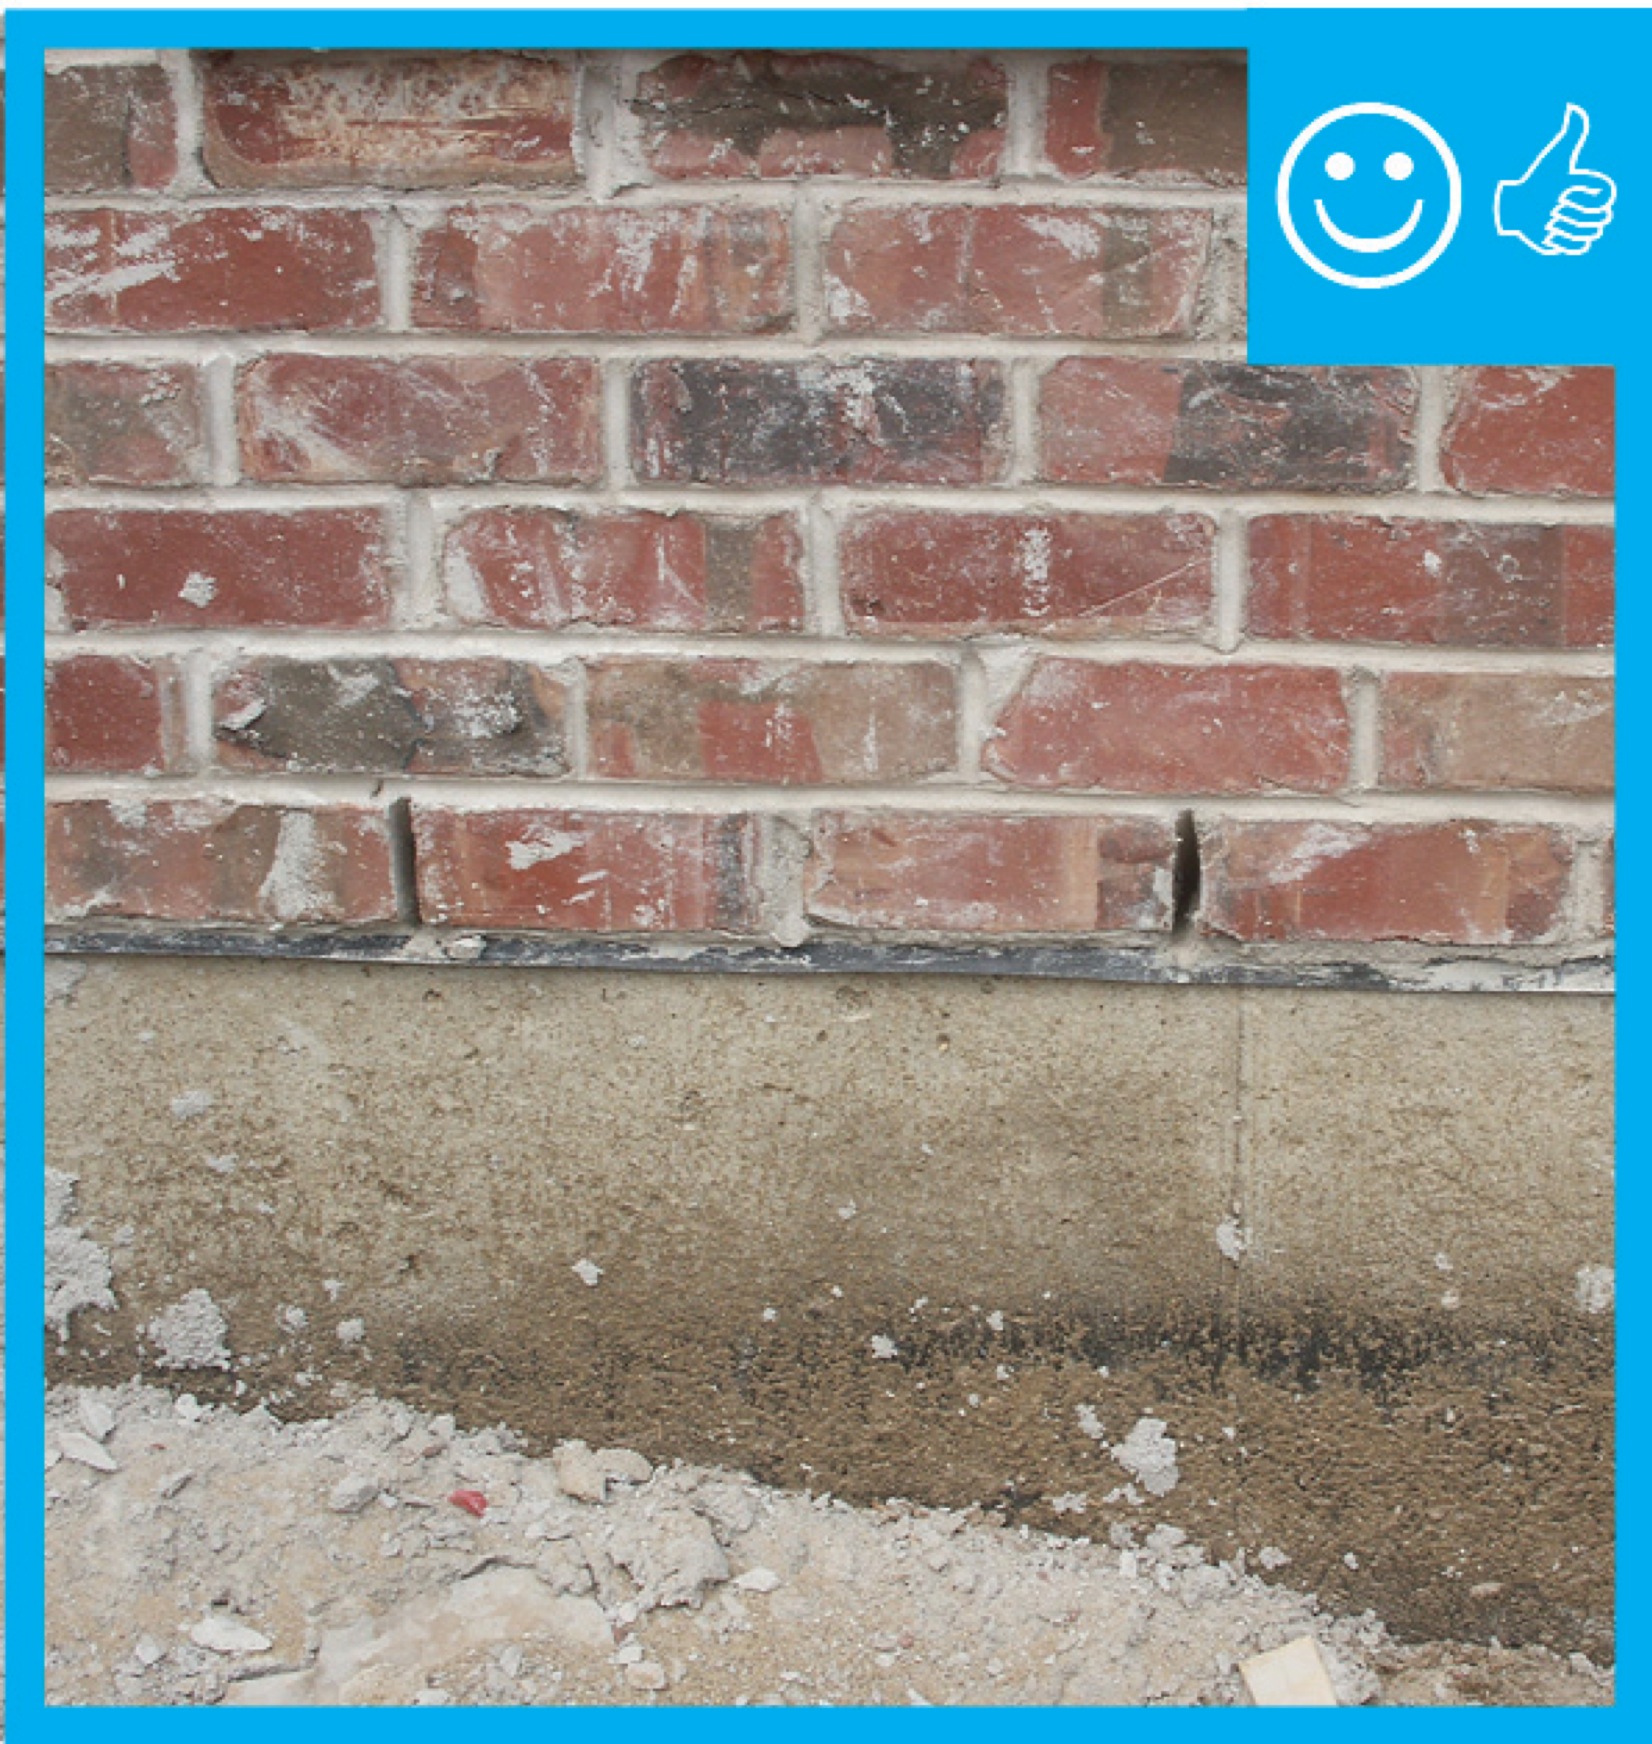
The water-resistant barrier, weep screed, and stucco lathe are properly layered and will create a complete drainage system
Image
Image
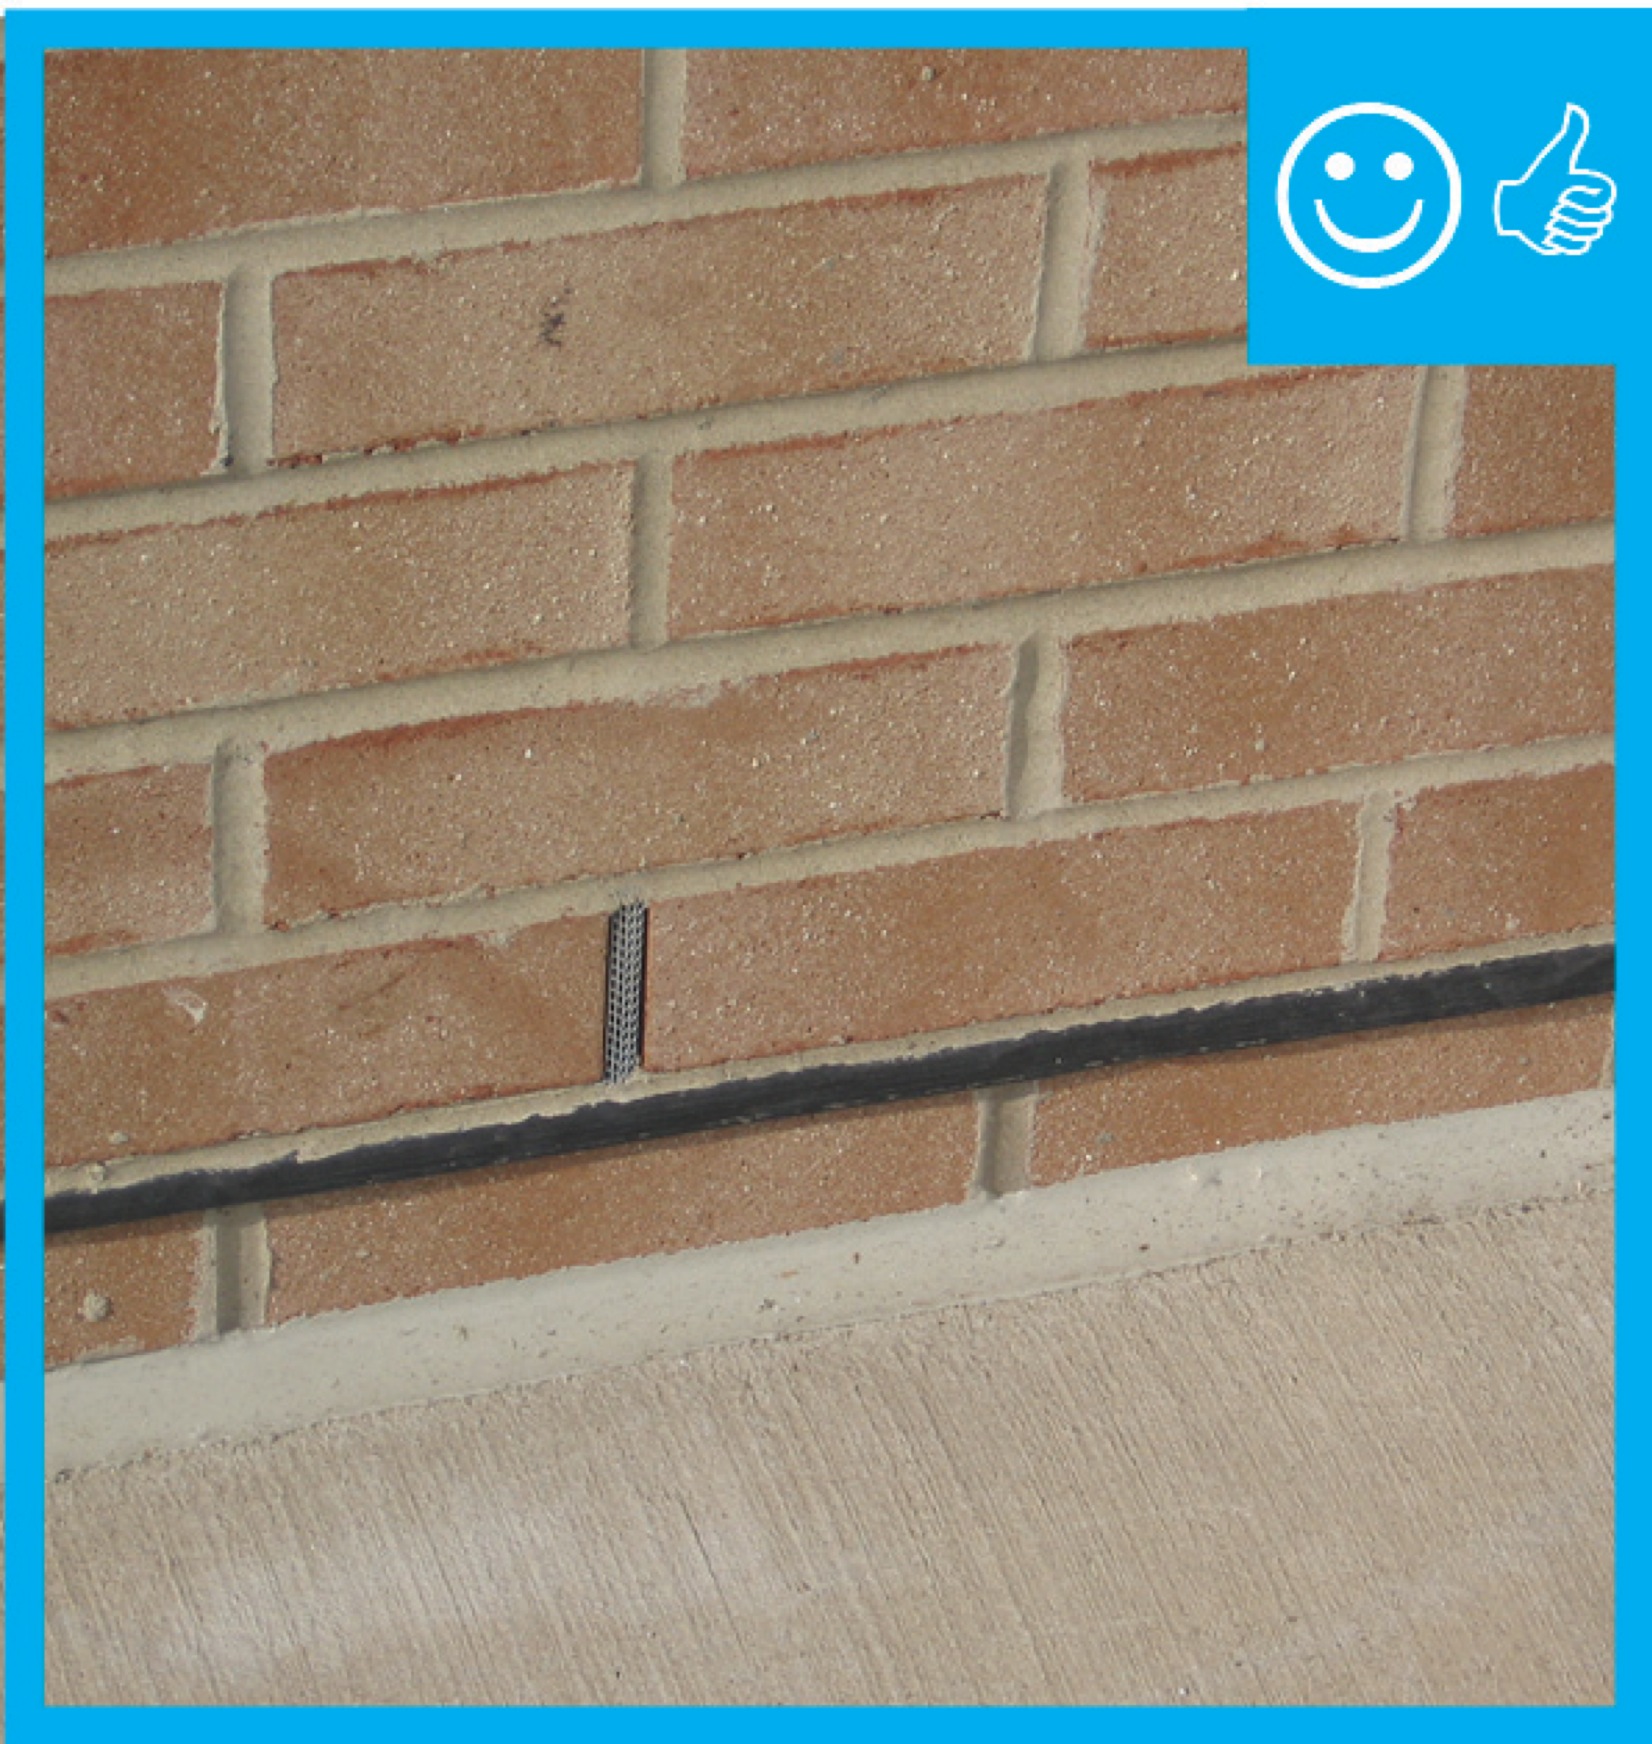
The weep holes are spaced at the correct distance to provide a complete drainage system
Image

Image
Image

Image
Image
Image
Image
Image
This exterior wall retrofit permits drying to the exterior of a sill plate installed on an untreated flat foundation wall
Image
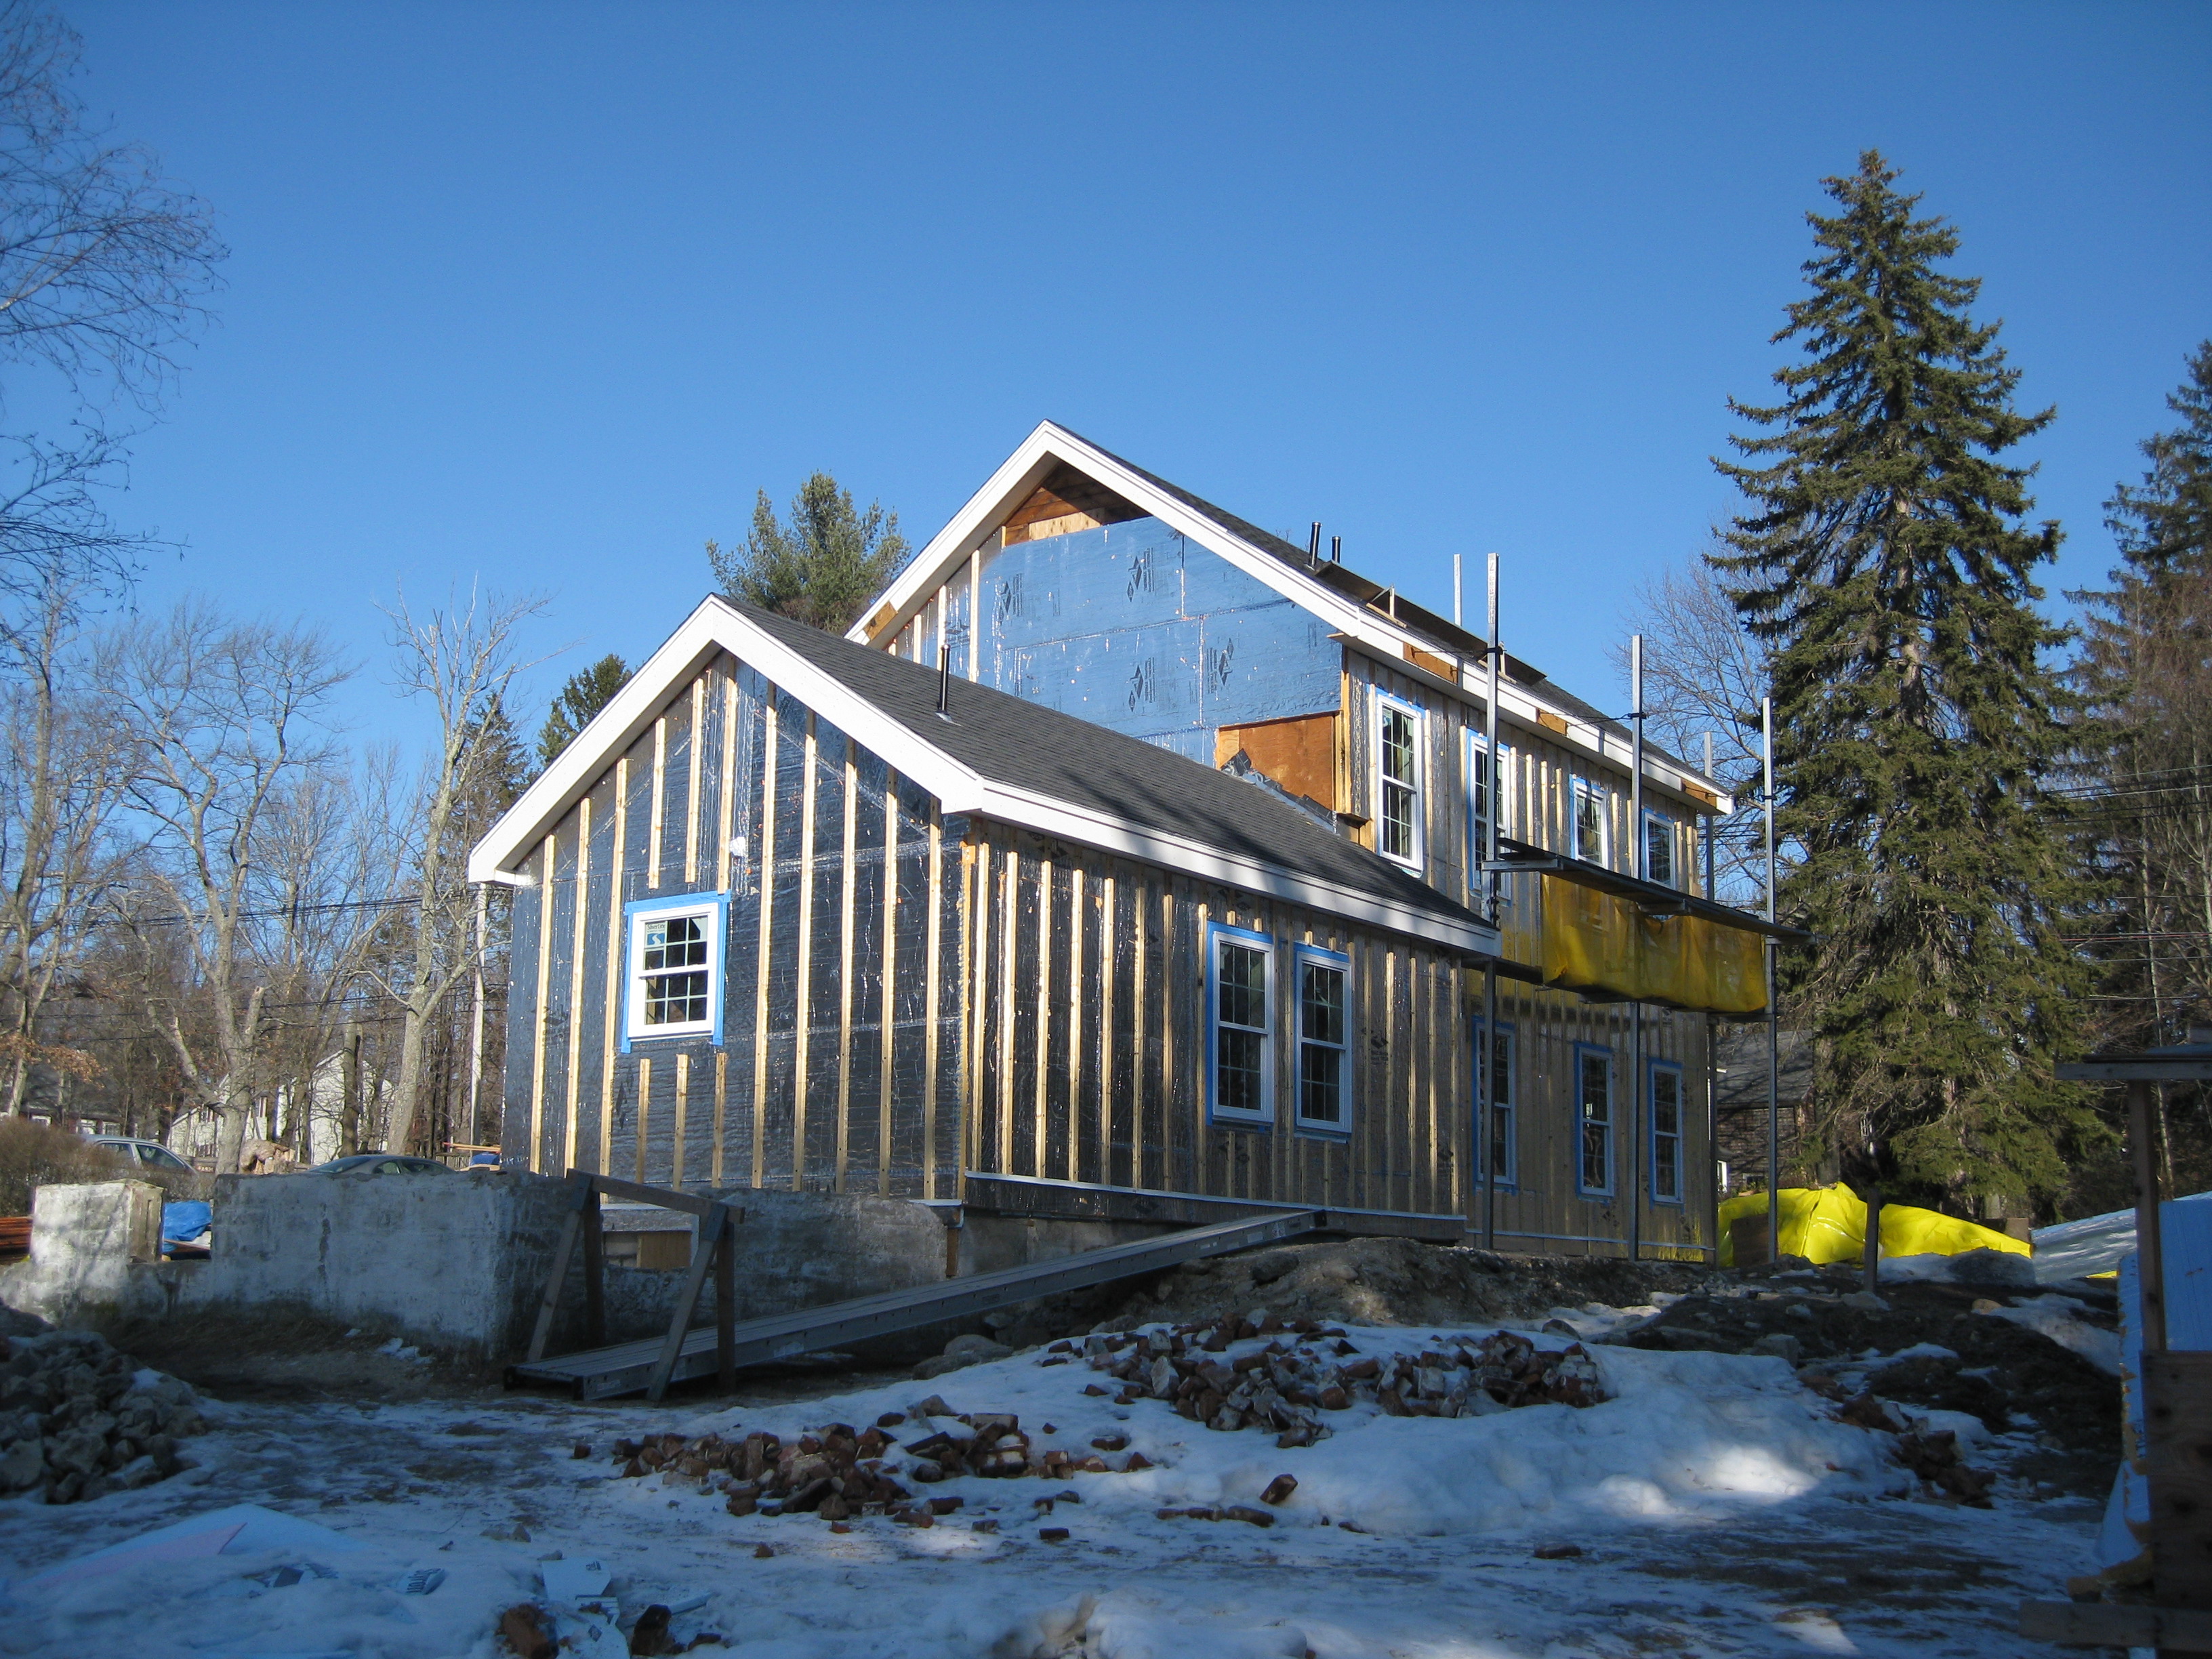
This farmhouse was retrofit by removing the existing siding and adding taped insulated sheathing and battens before installing new siding
Image
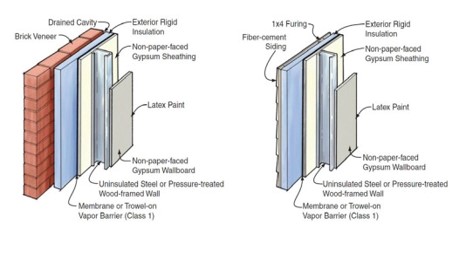
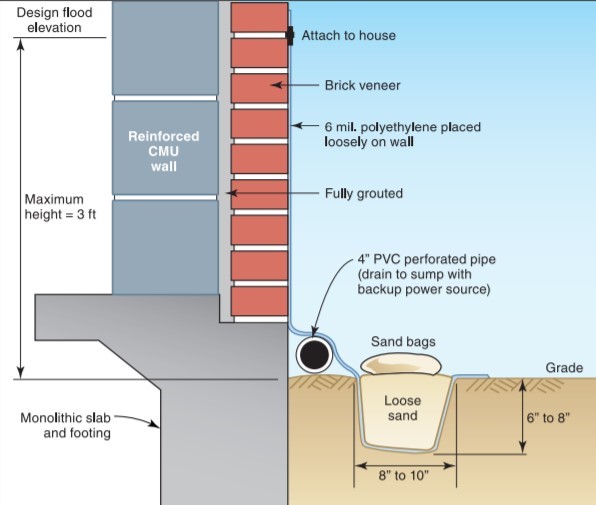
This flood-resistant exterior wall with brick or fiber-cement siding will limit moisture damage in exterior walls.
Image
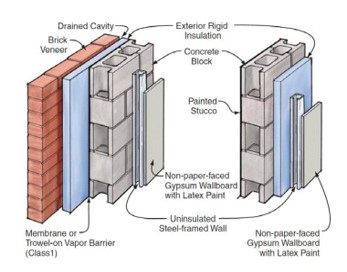
This flood-resistant masonry wall design with metal framing and rigid foam insulation will limit moisture damage in exterior walls.
Image
This house design in the Hot-Humid climate uses a slab foundation, masonry walls, and an Exterior Insulation Finish System (EIFS) cladding.
Image
Image
Image

Vapor-permeable mineral wool insulation is installed on the exterior side of the sill beam during an exterior wall retrofit to allow the sill beam to dry to the outside
Image