Showing results 151 - 200 of 256
Image
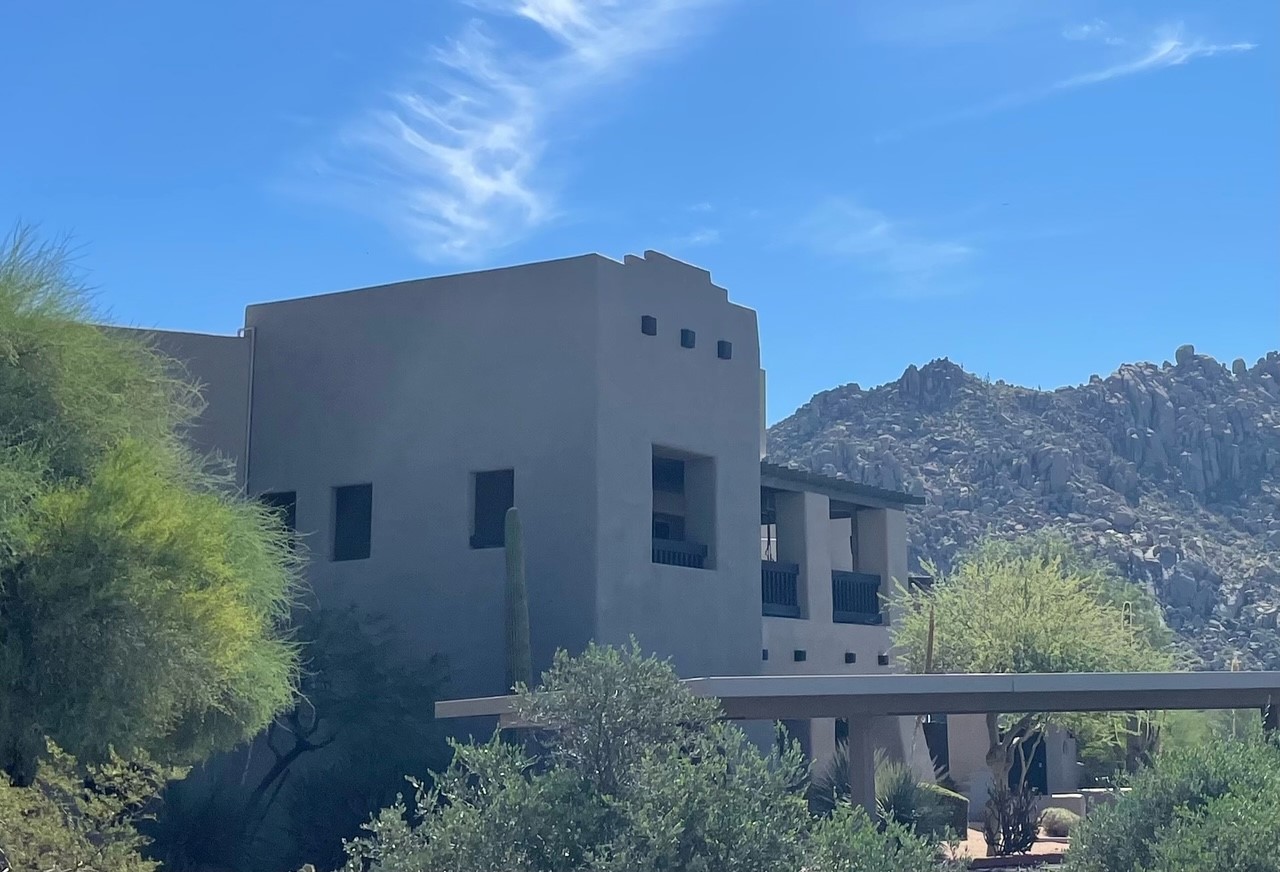
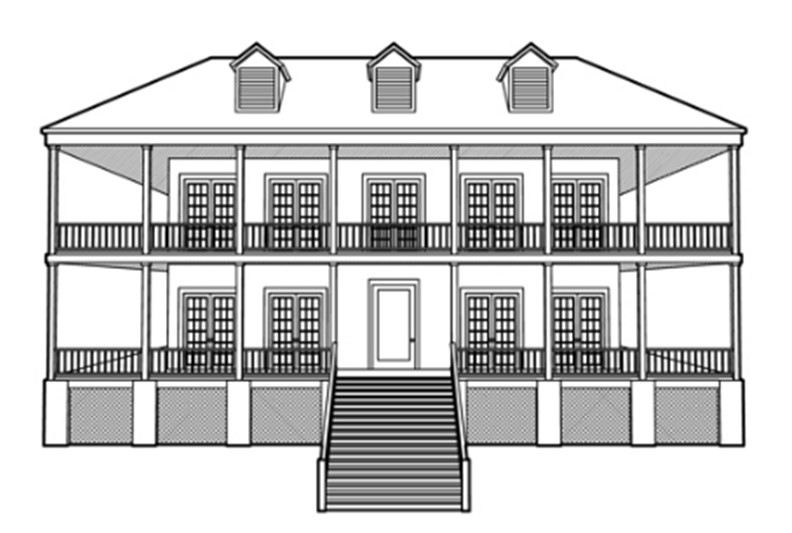
Right – thermal mass walls, small windows, and recessed porch and trees on the south side of this southwest home help to minimize solar heat gain.
Image
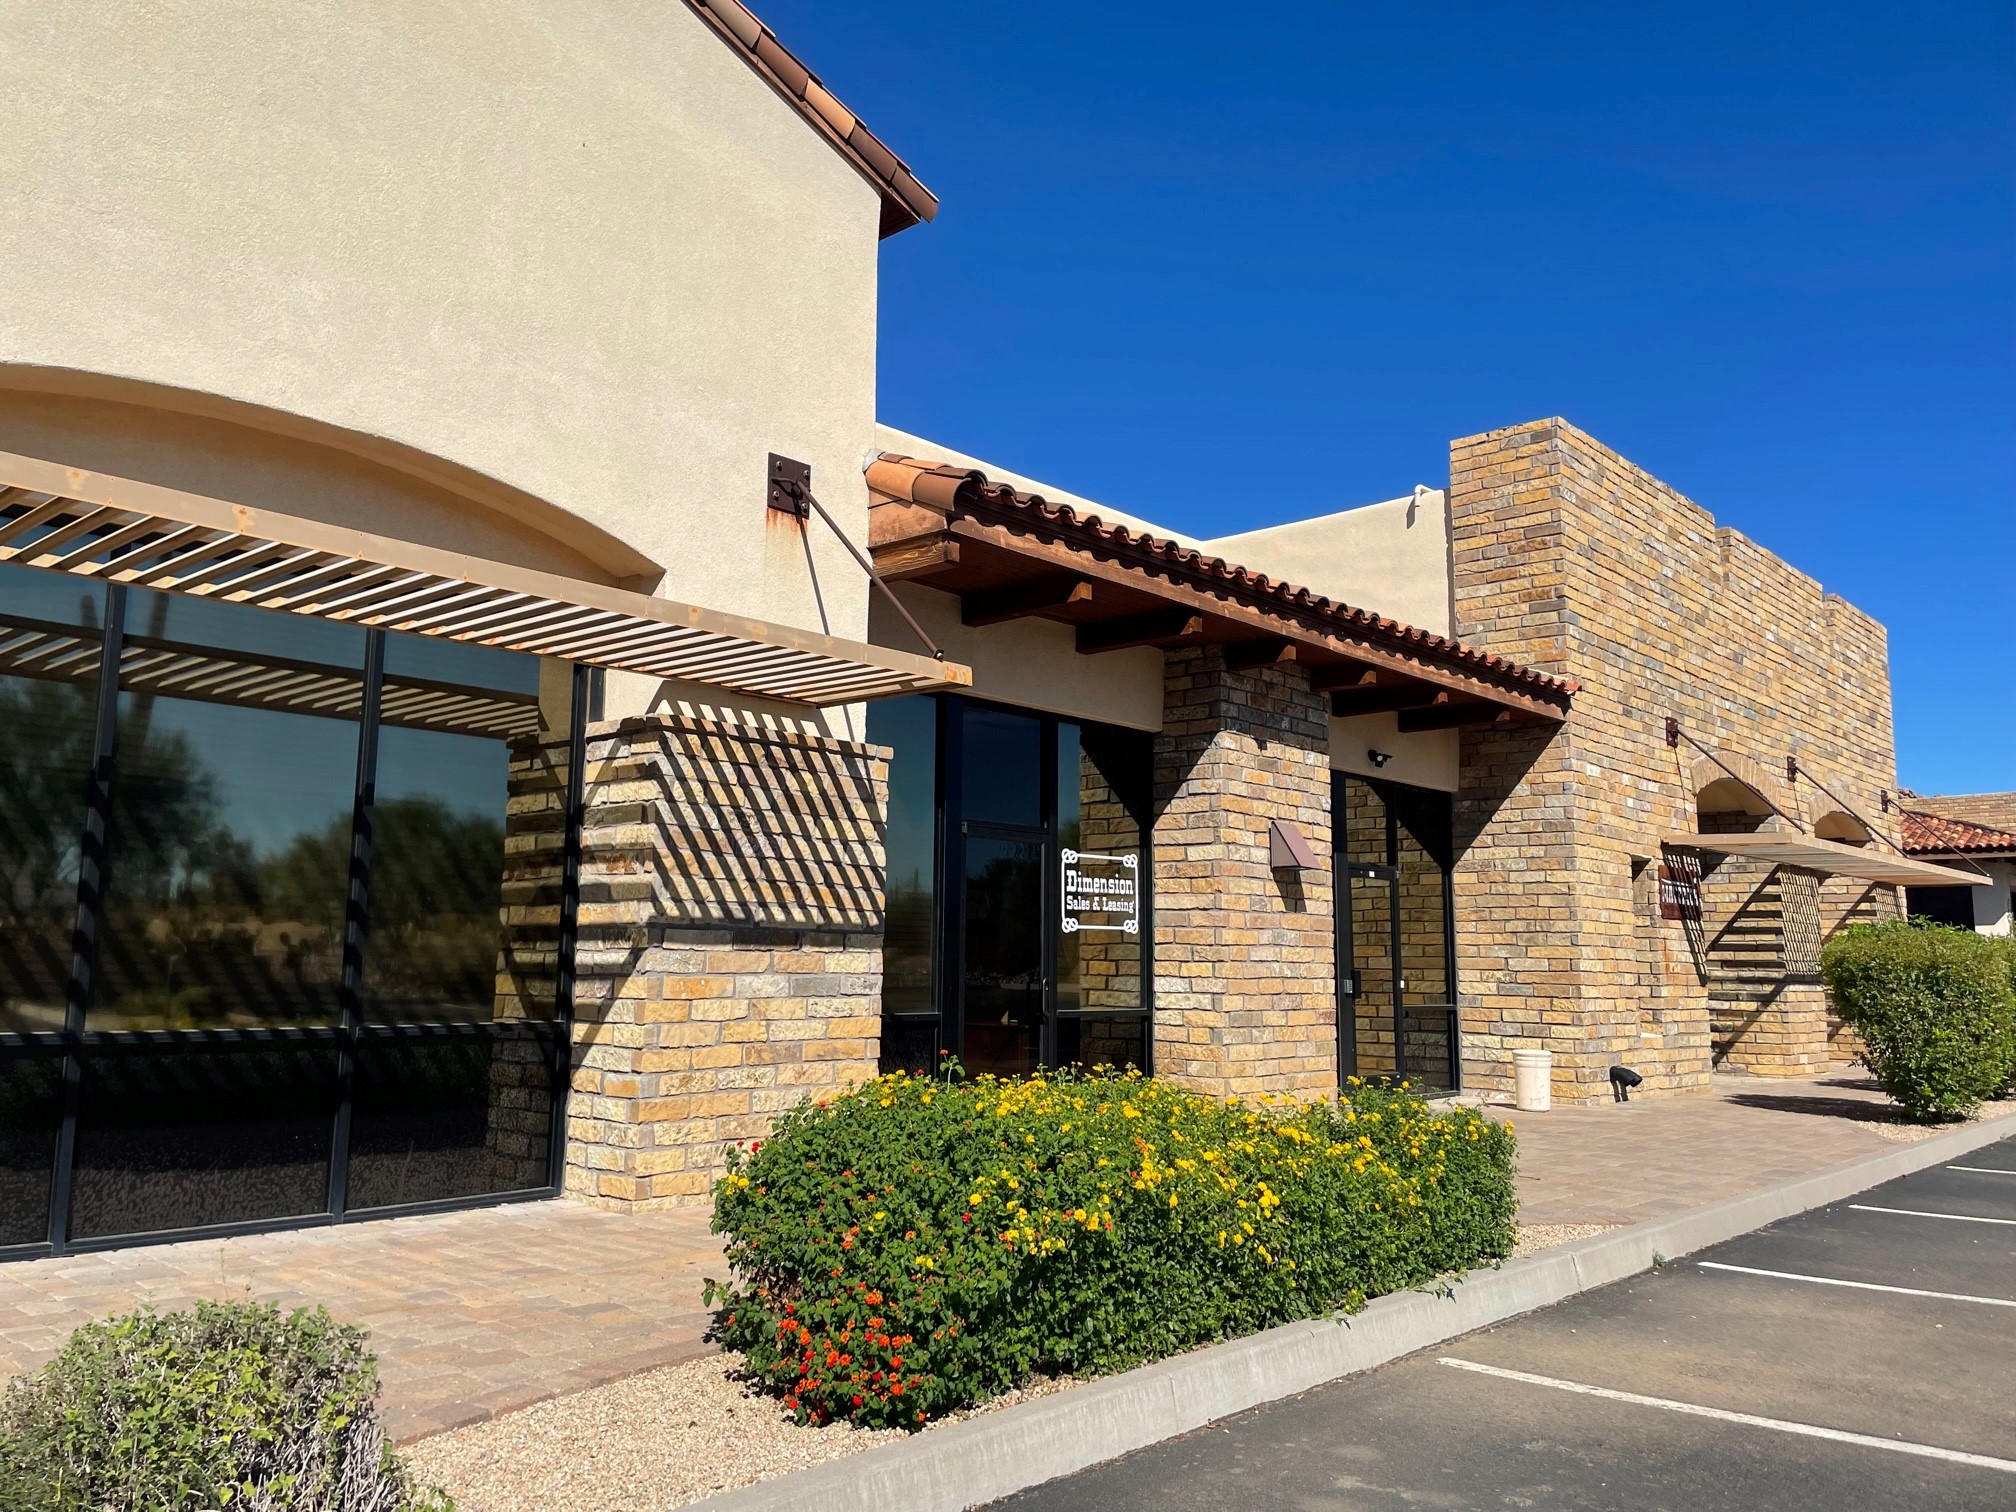
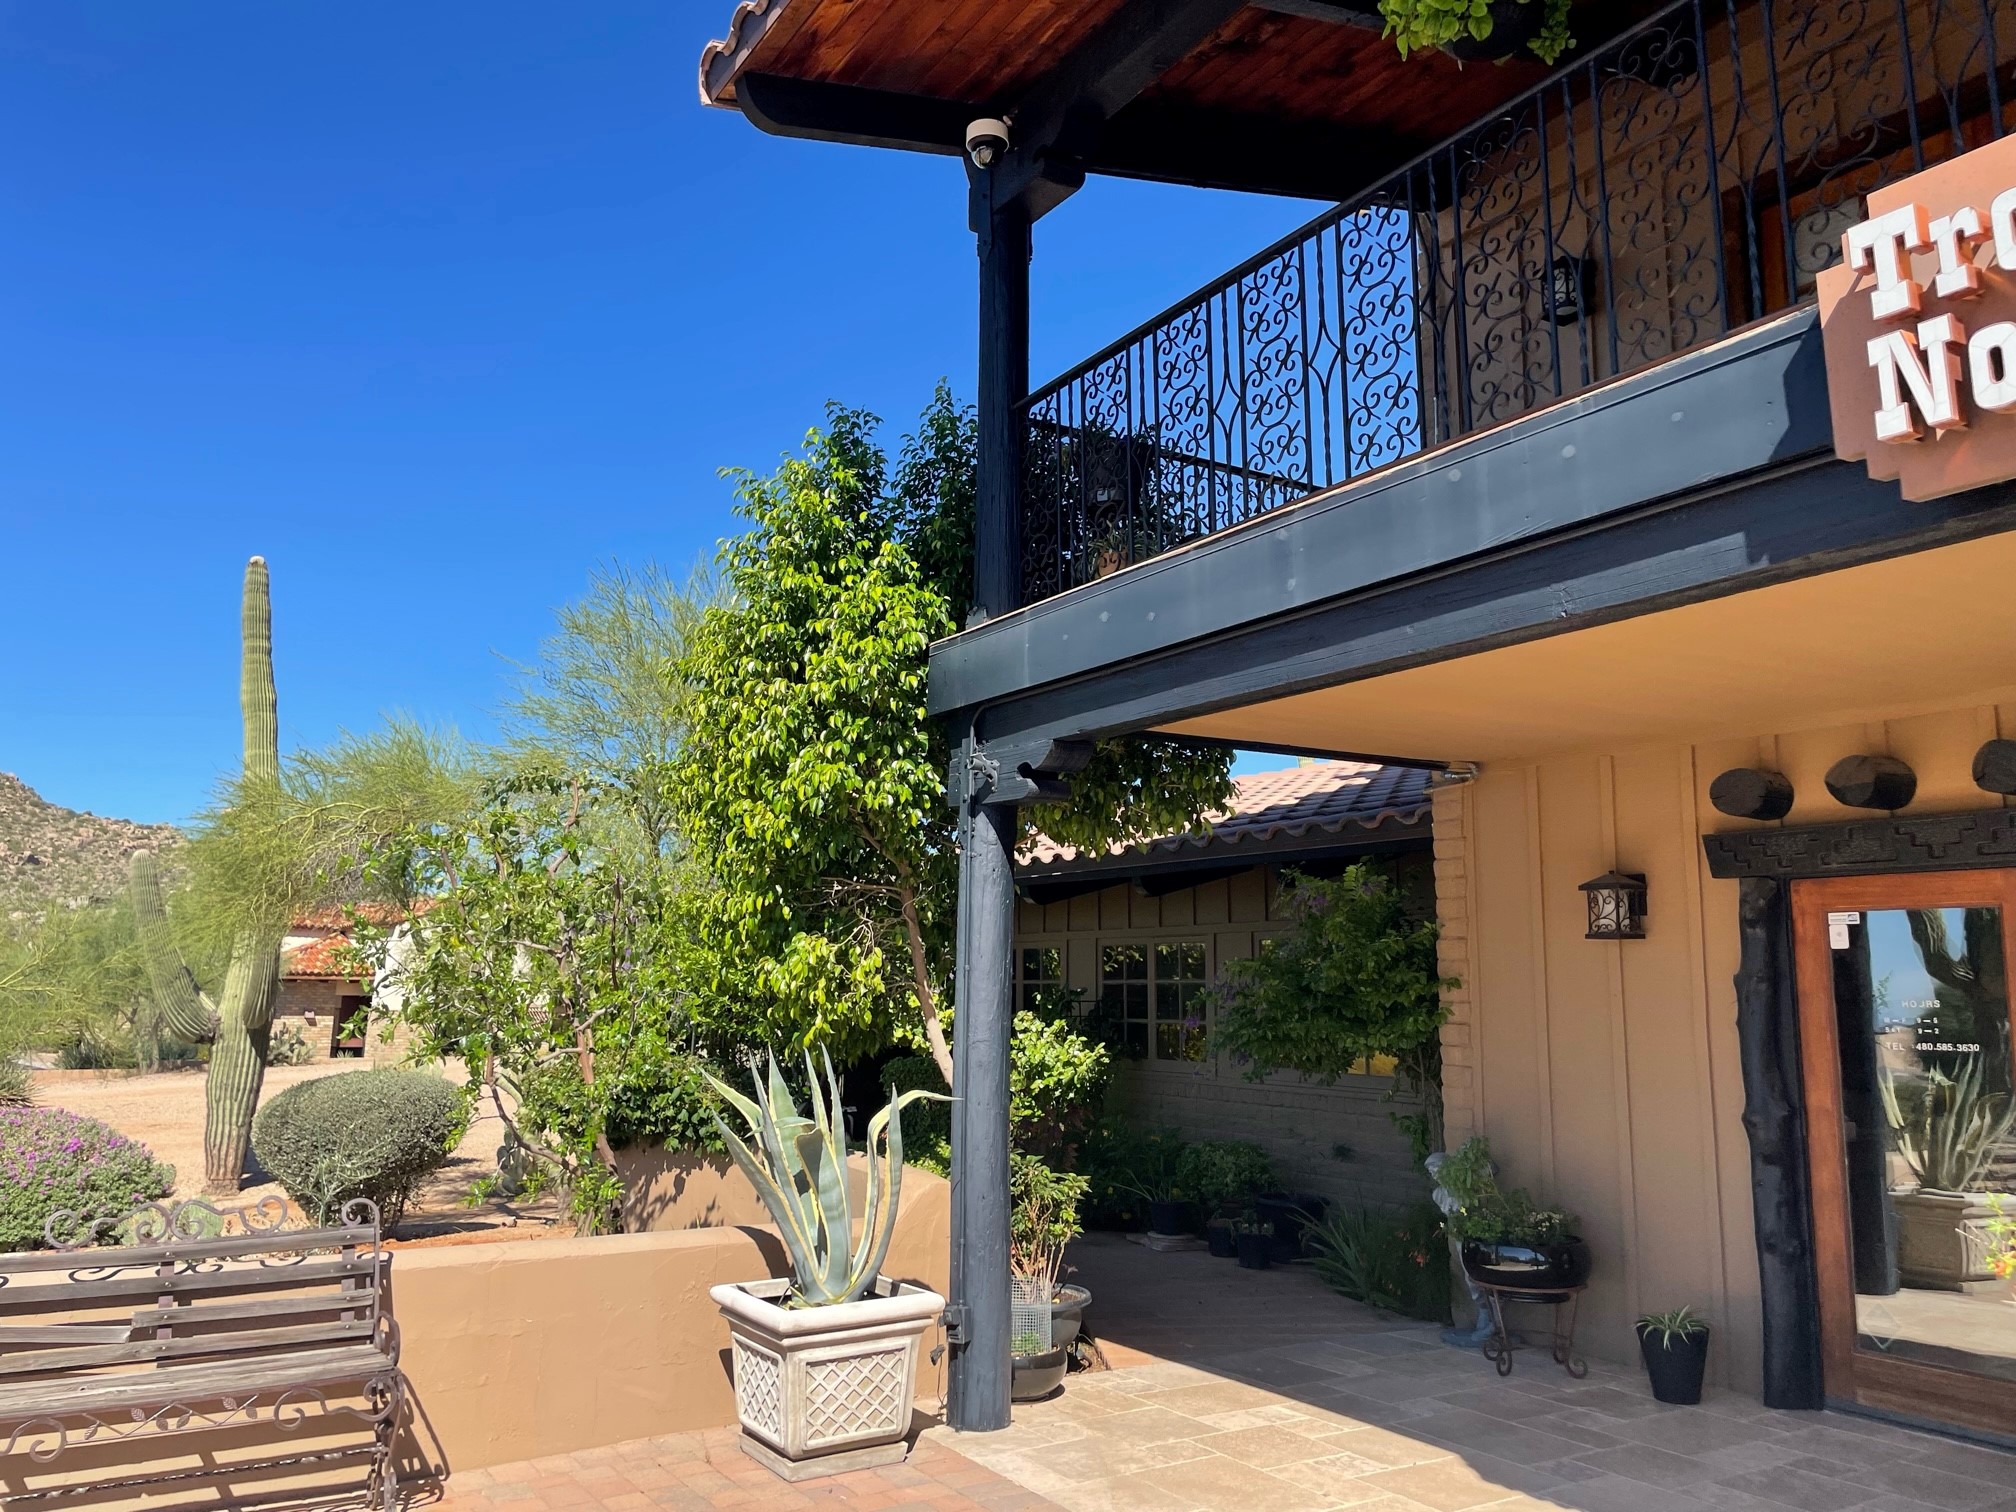
Right – this commercial building employs good techniques to resist solar heat gain: awnings and pergolas over windows, recessed windows and entryways, deep tinting on glass, and shade plants.
Image
Right – This fire-rated wall assembly uses exterior gypsum board and an exterior siding of fiber-cement or metal to increase fire resistance.
Image
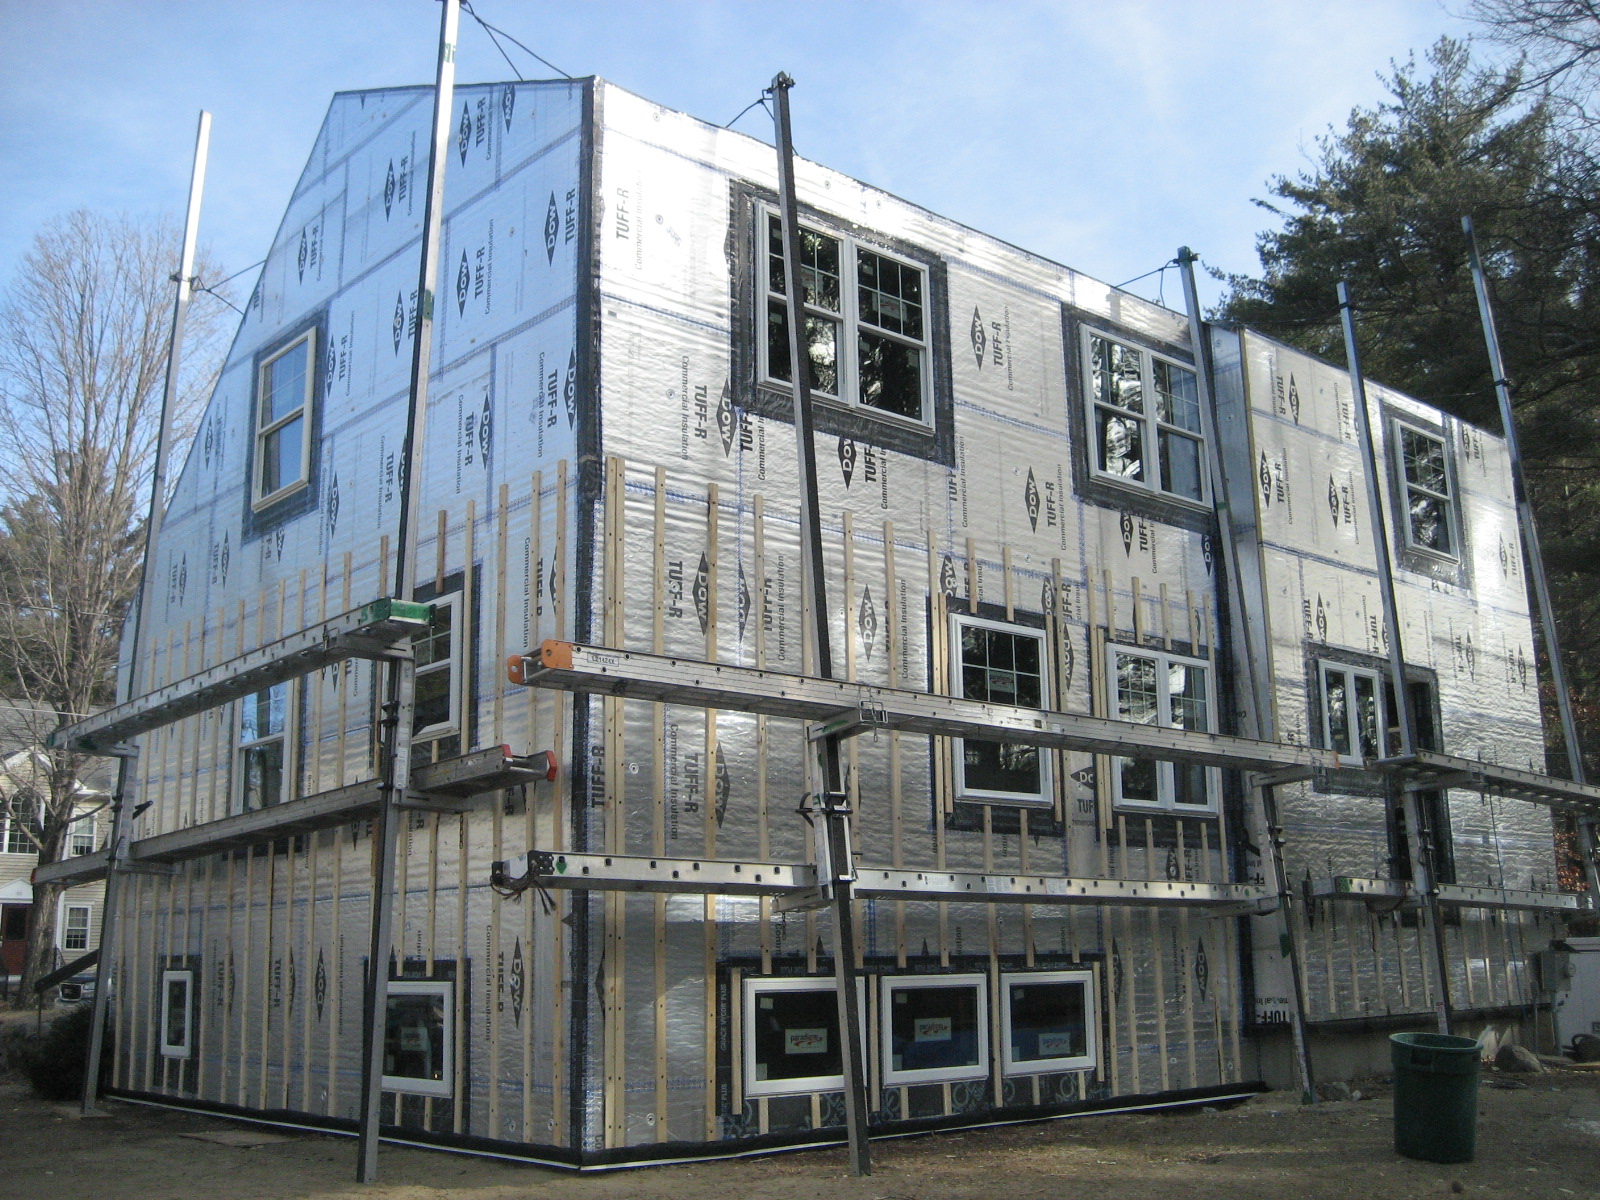
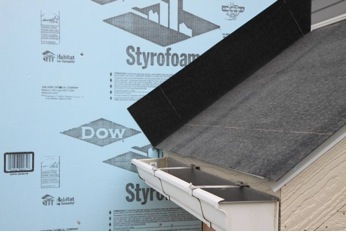
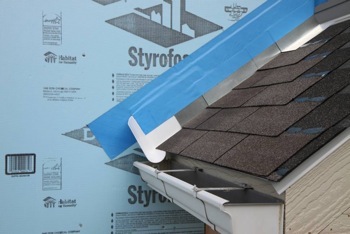
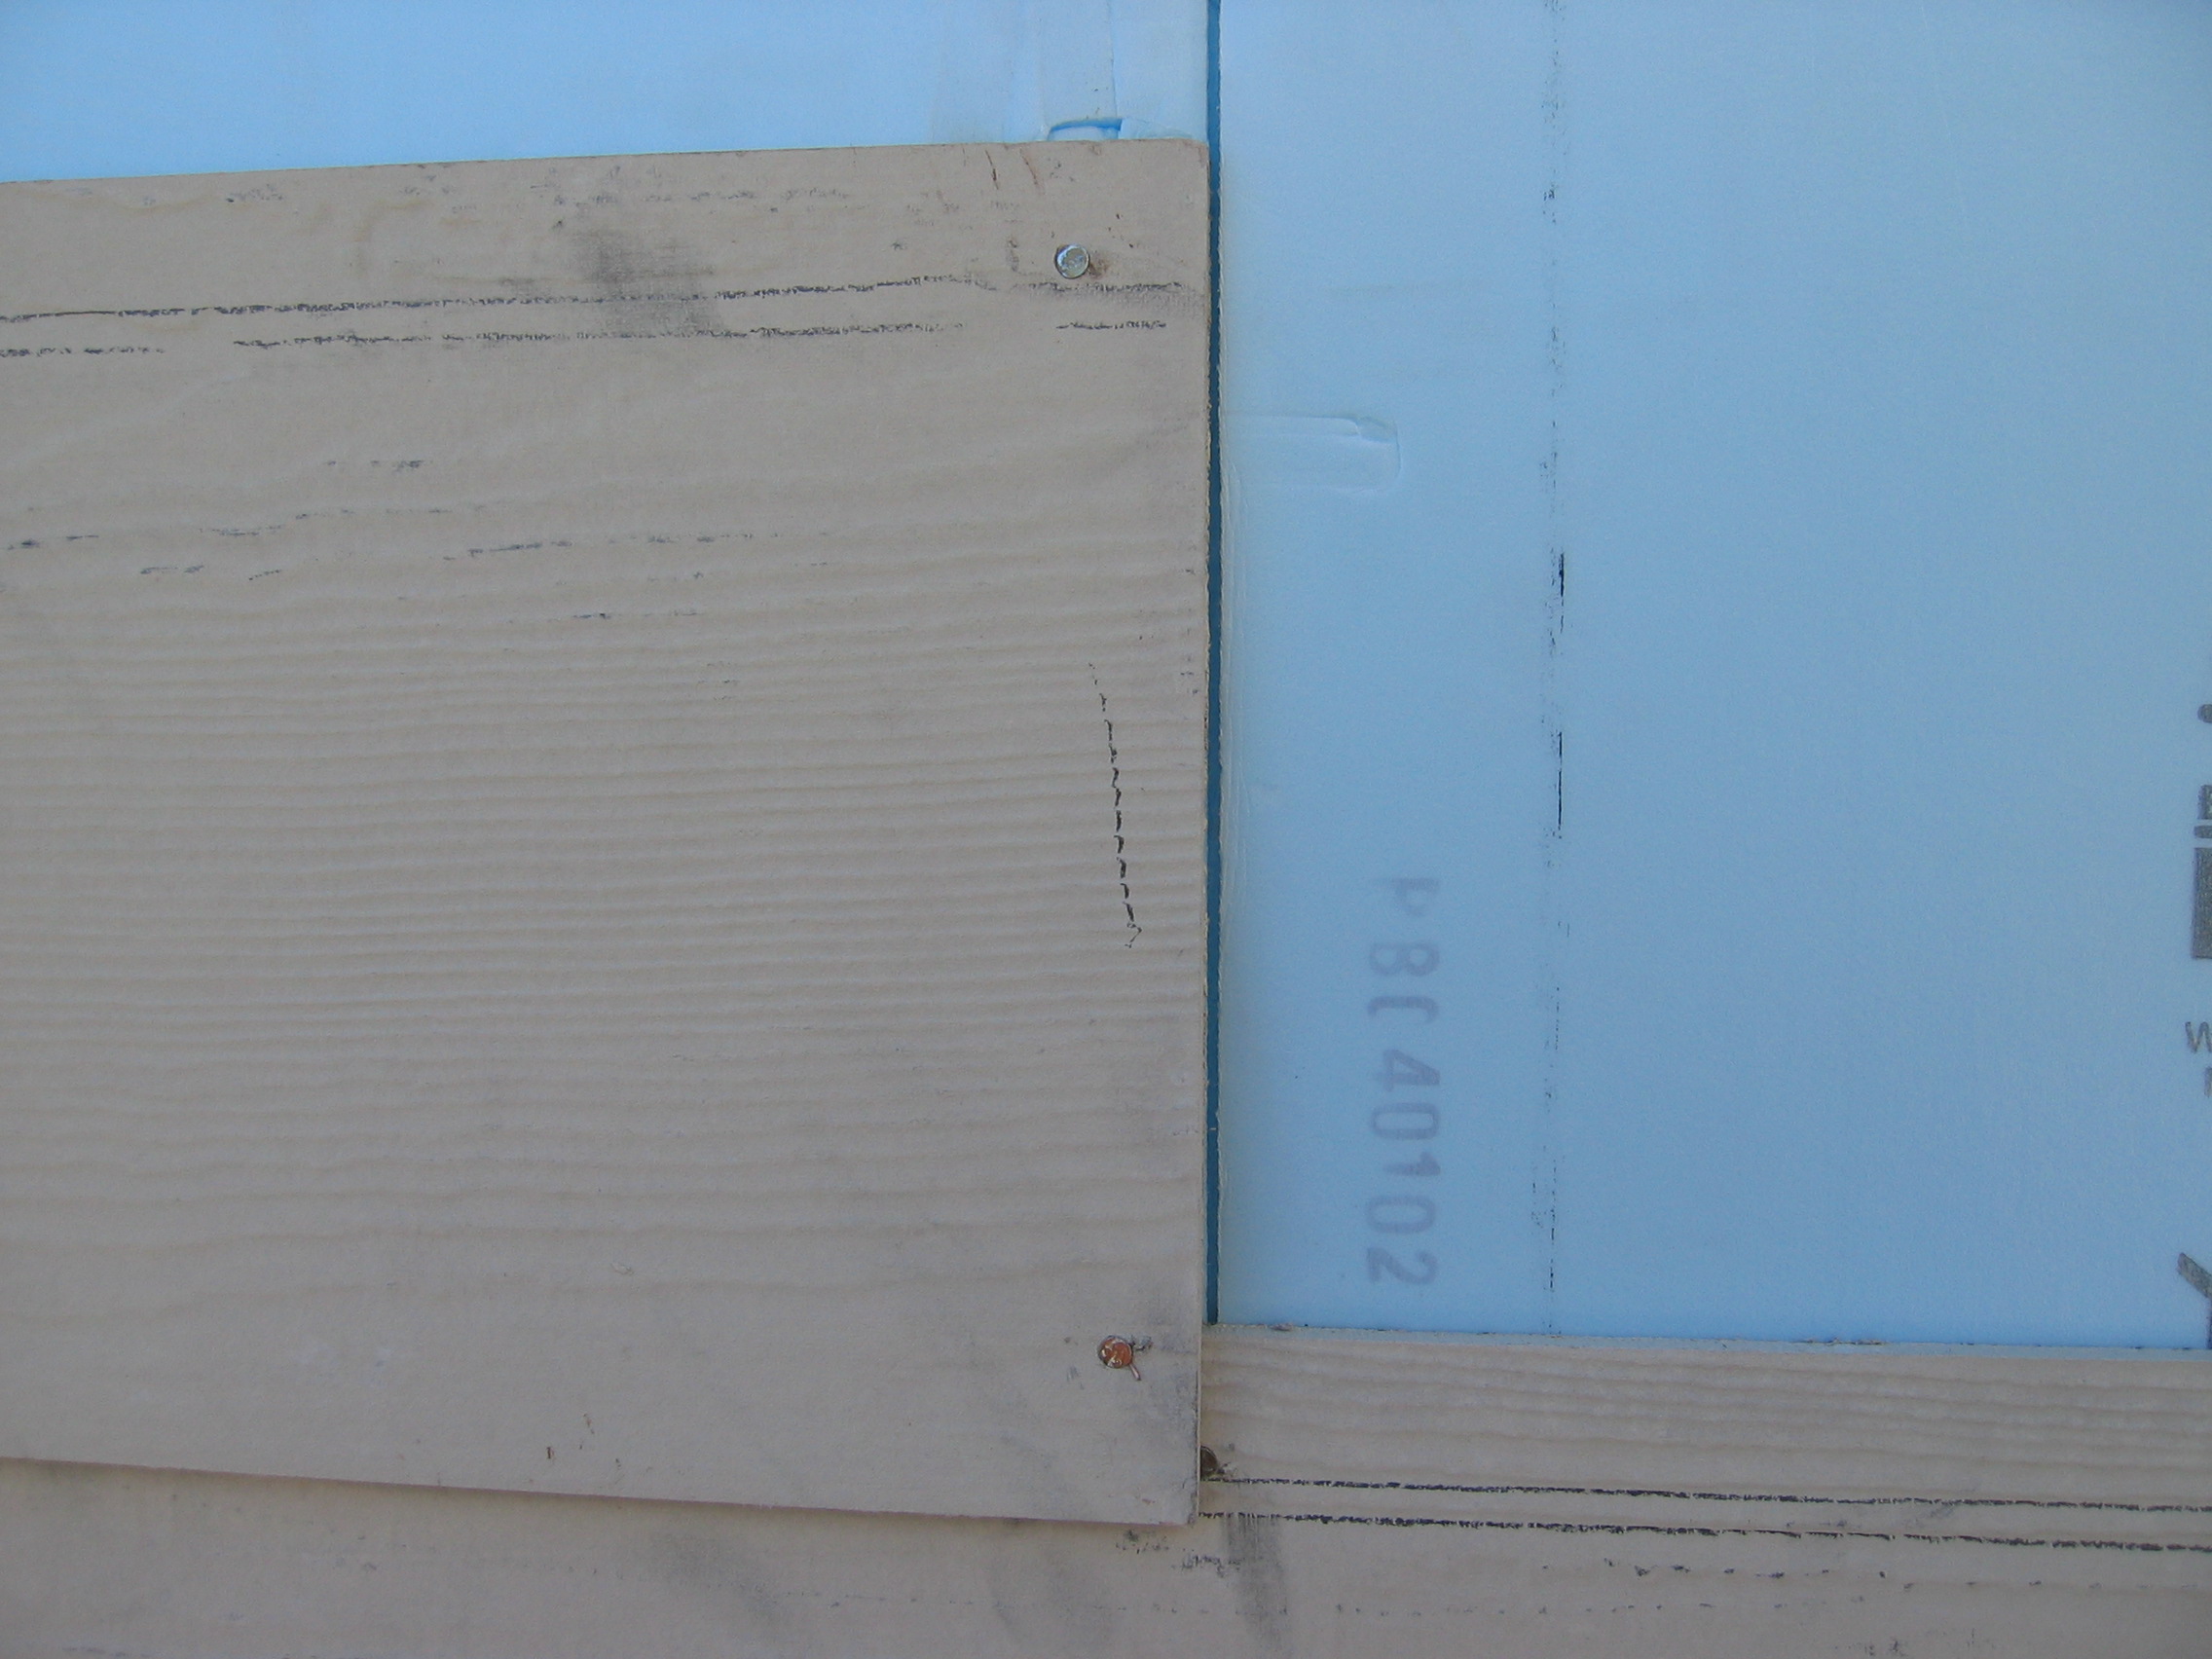
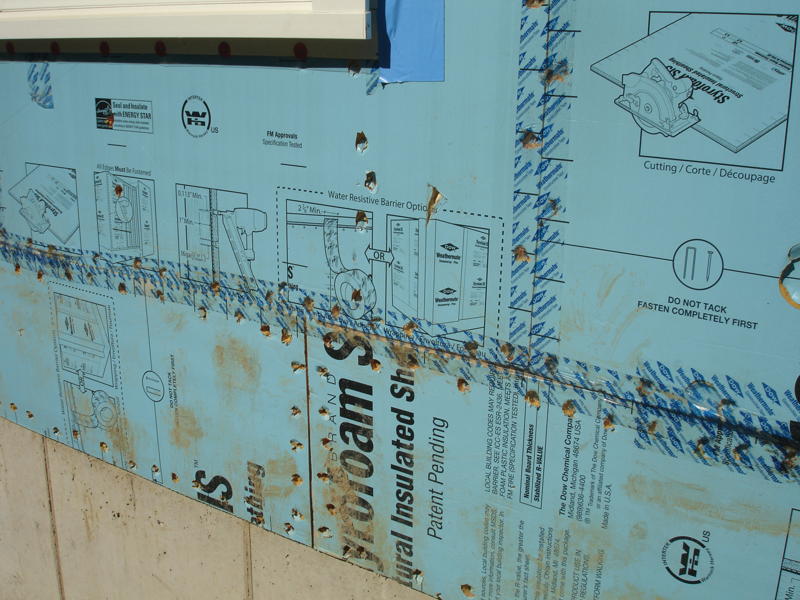
Right – This foil-faced foam sheathing has taped seams and proper flashing details so it can serve as a drainage plane.
Image
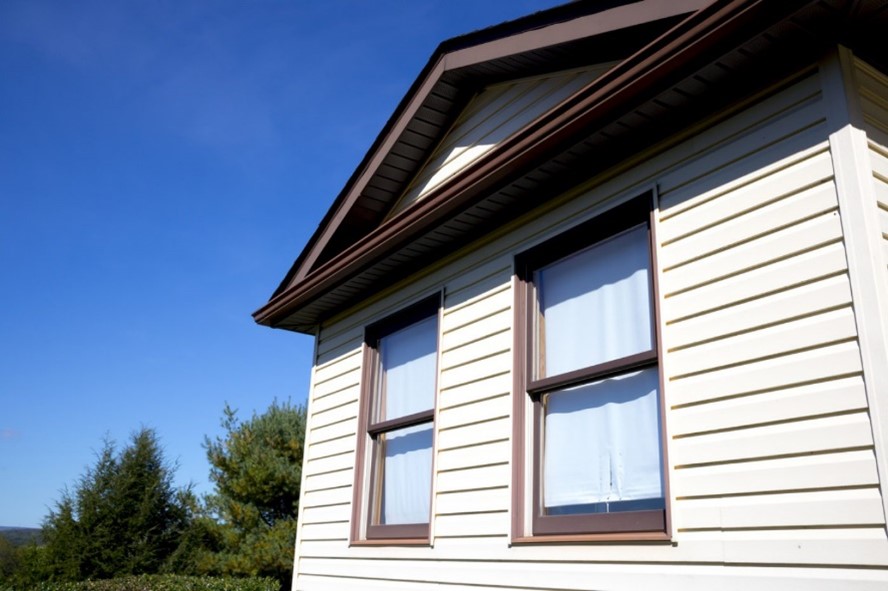
Right – This home uses a light-colored exterior wall to reduce solar heat gain
Image
Image
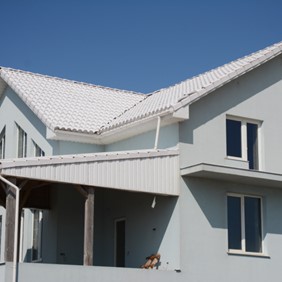
Right – This home uses light tan stucco and white trim to reduce solar heat gain.
Image

Right – This low-slope roof and parapet assembly has continuity of both the air and water barriers
Image
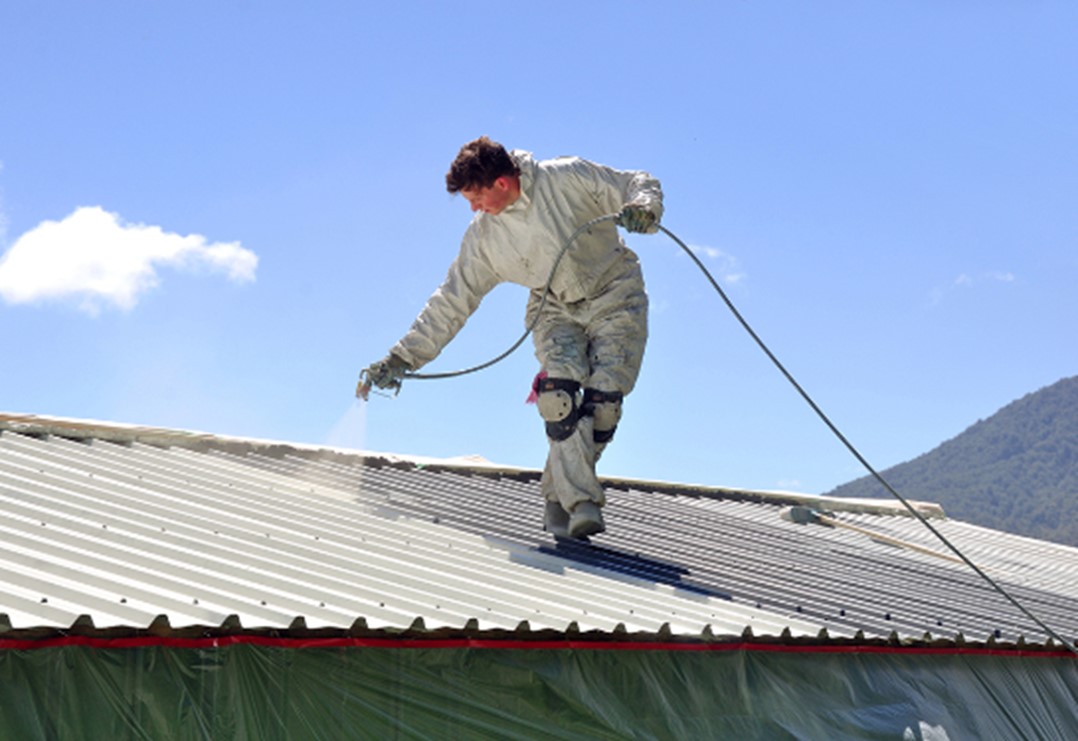
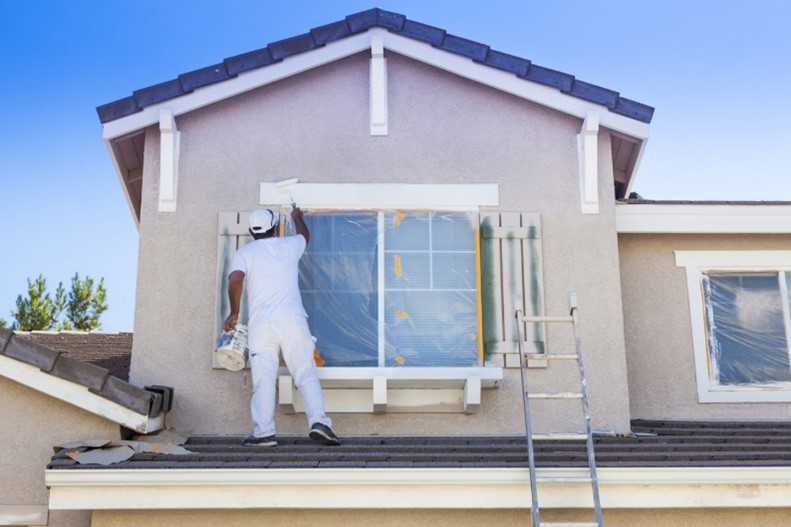
Right – This metal roof is being coated with a cool (high SRI) coating to reduce solar heat gain
Image
Right- Landscaping shades the entry on the south west corner of this hot dry climate building.
Image
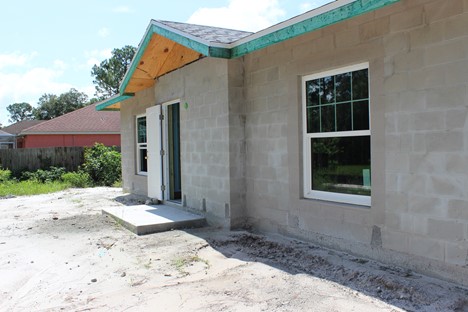
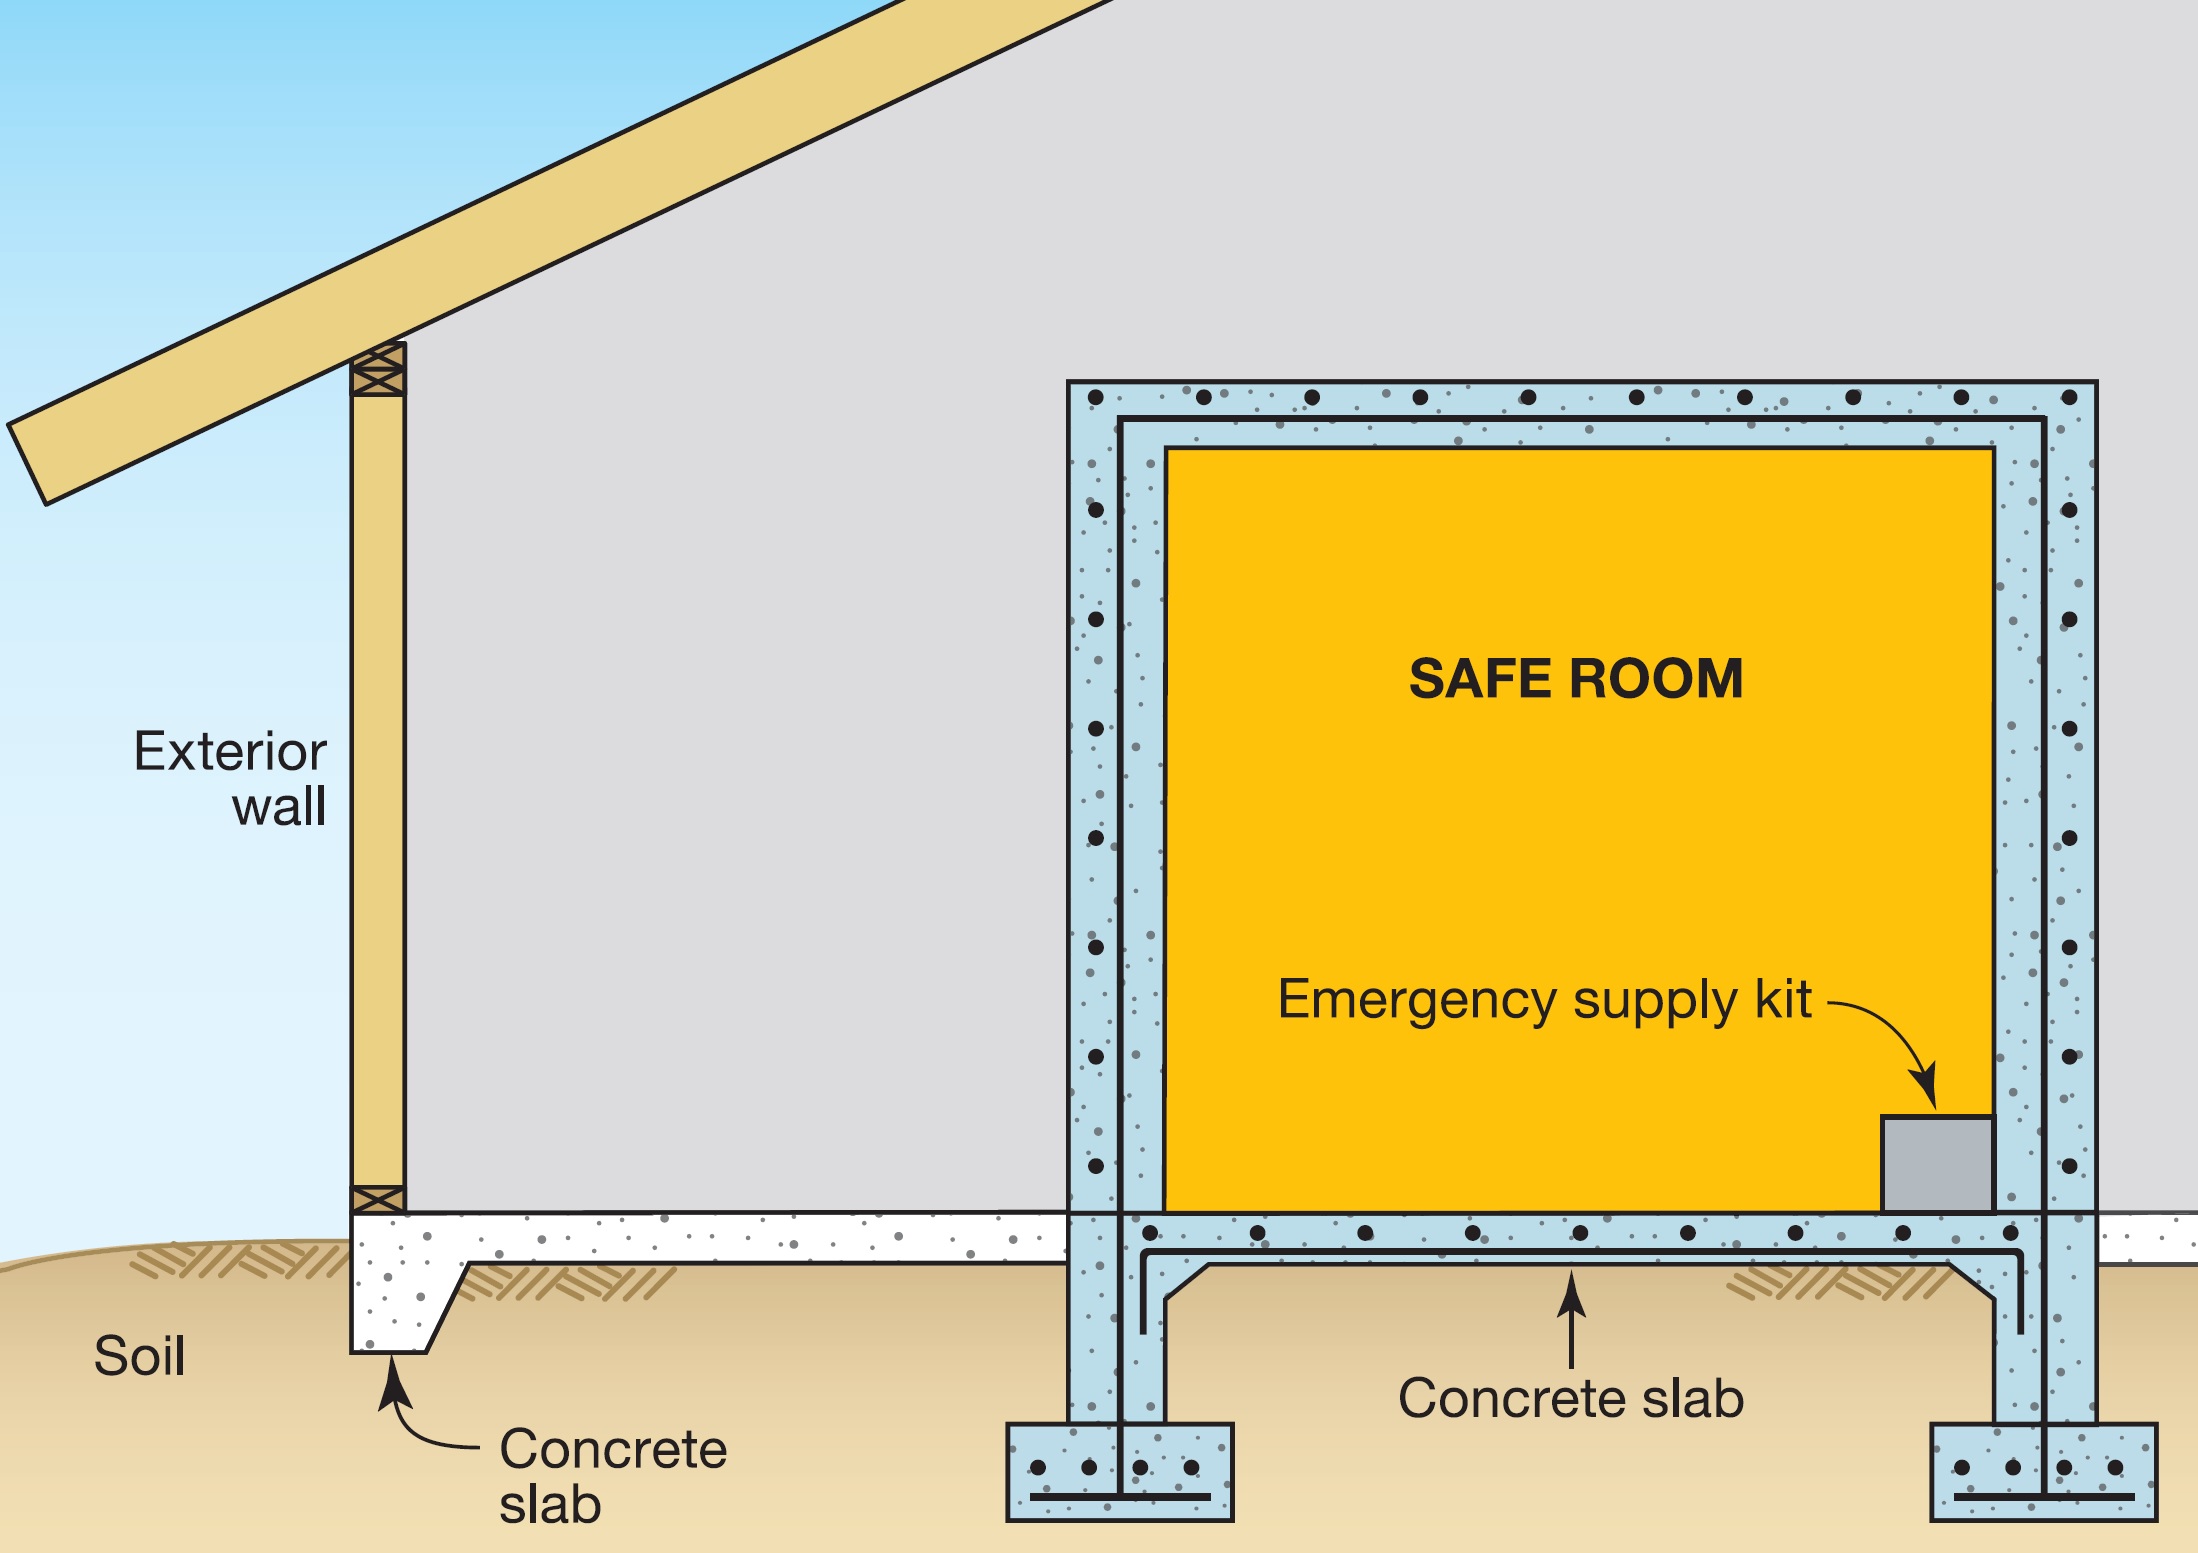
Right- This house uses CMU construction for flood and termite resistance as well as thermal mass
Image
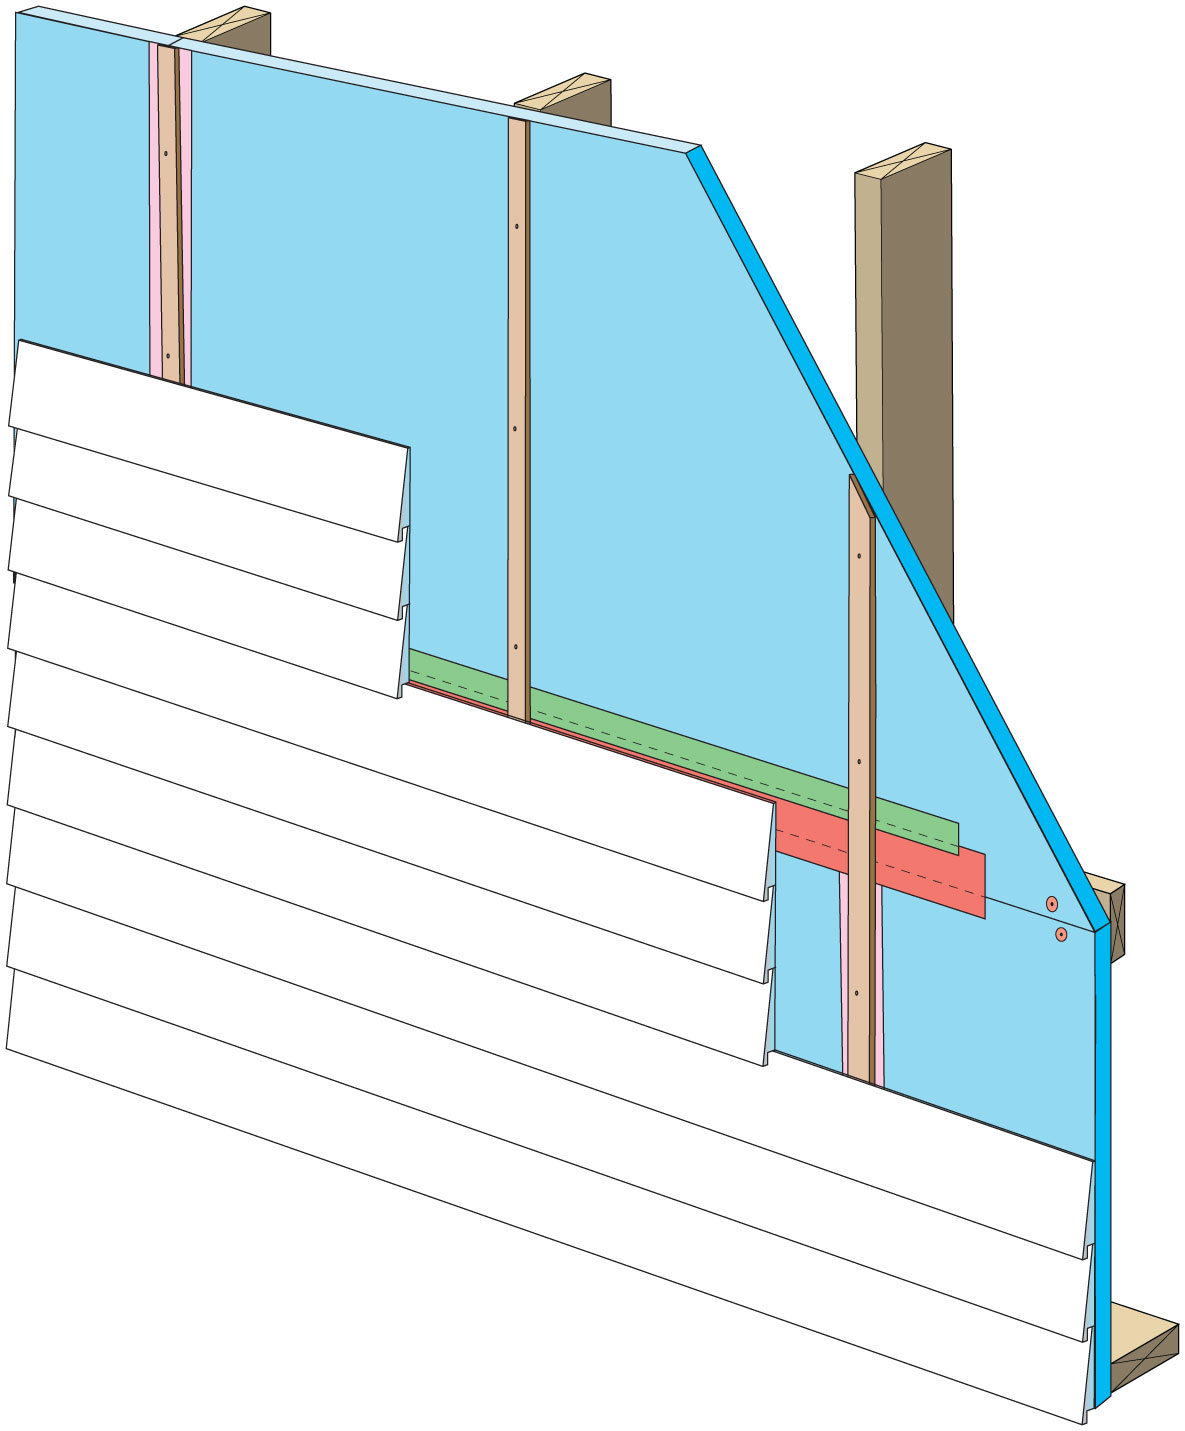
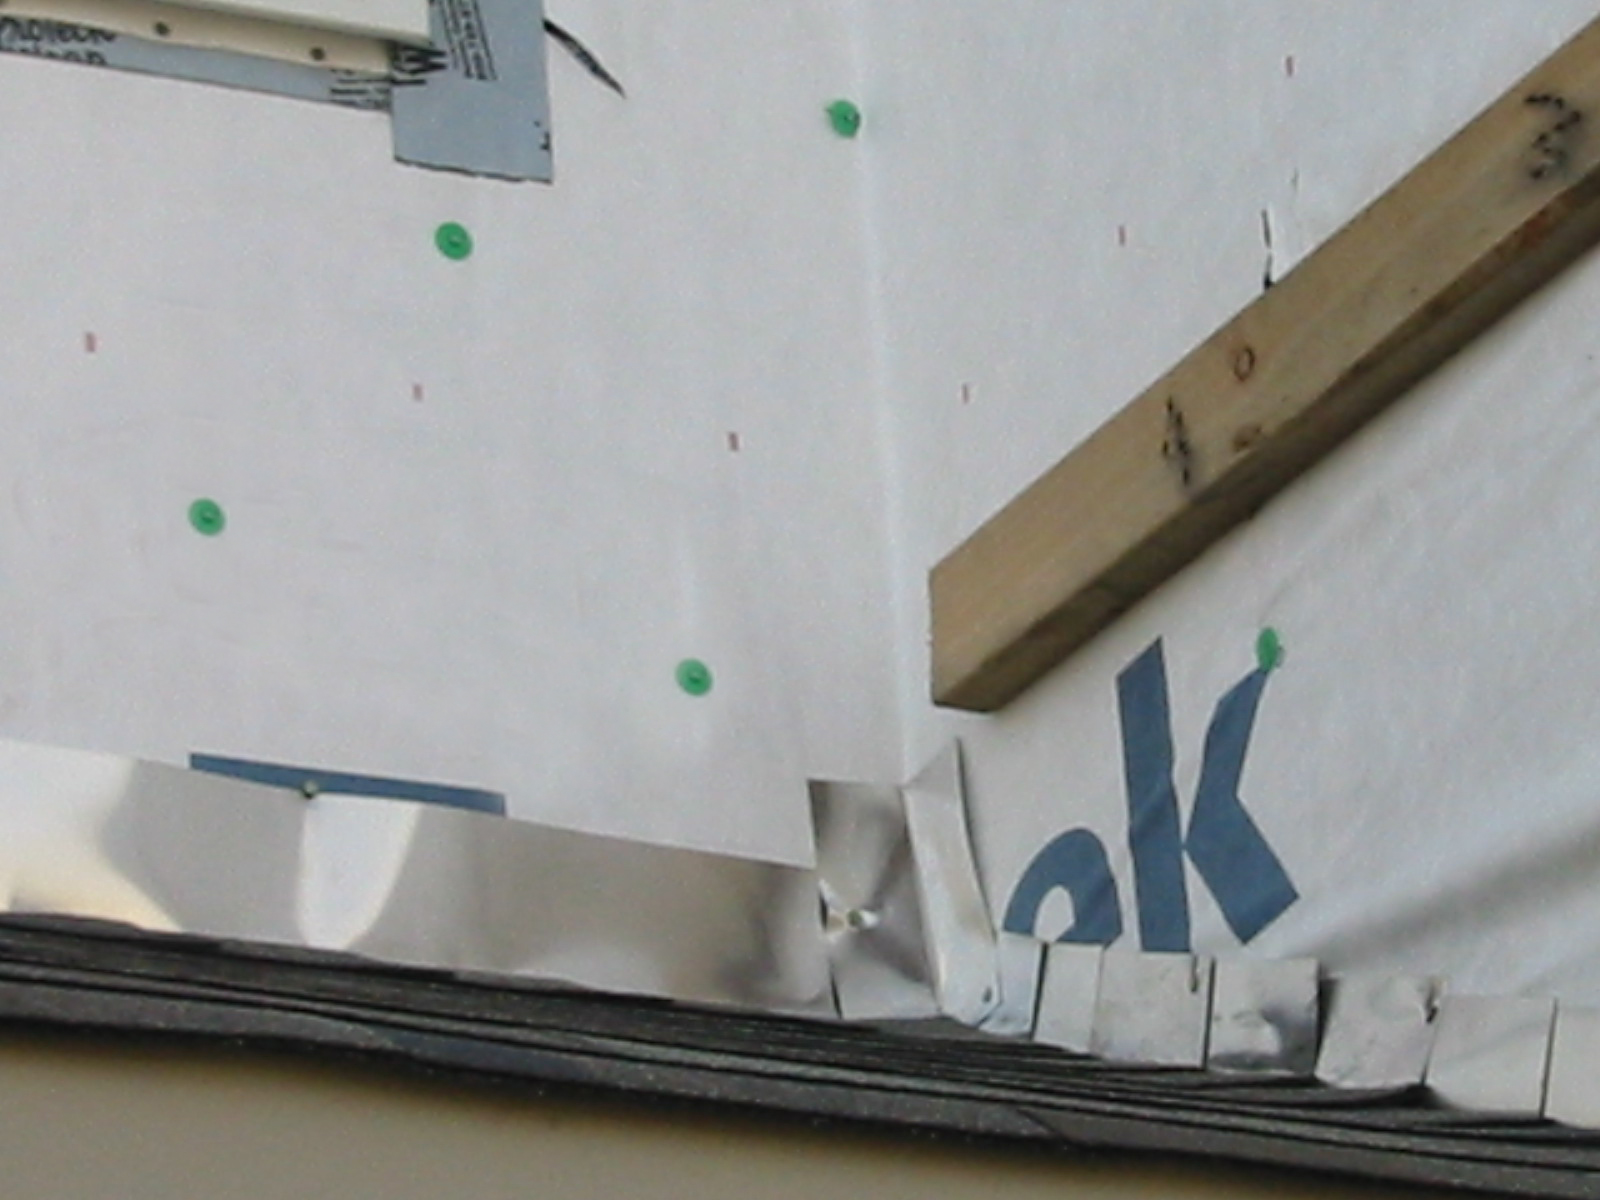
Rigid foam insulation can serve as the drainage plane when all seams are taped. Furring strips provide an air gap behind the cladding.
Image
Image
Image
Image
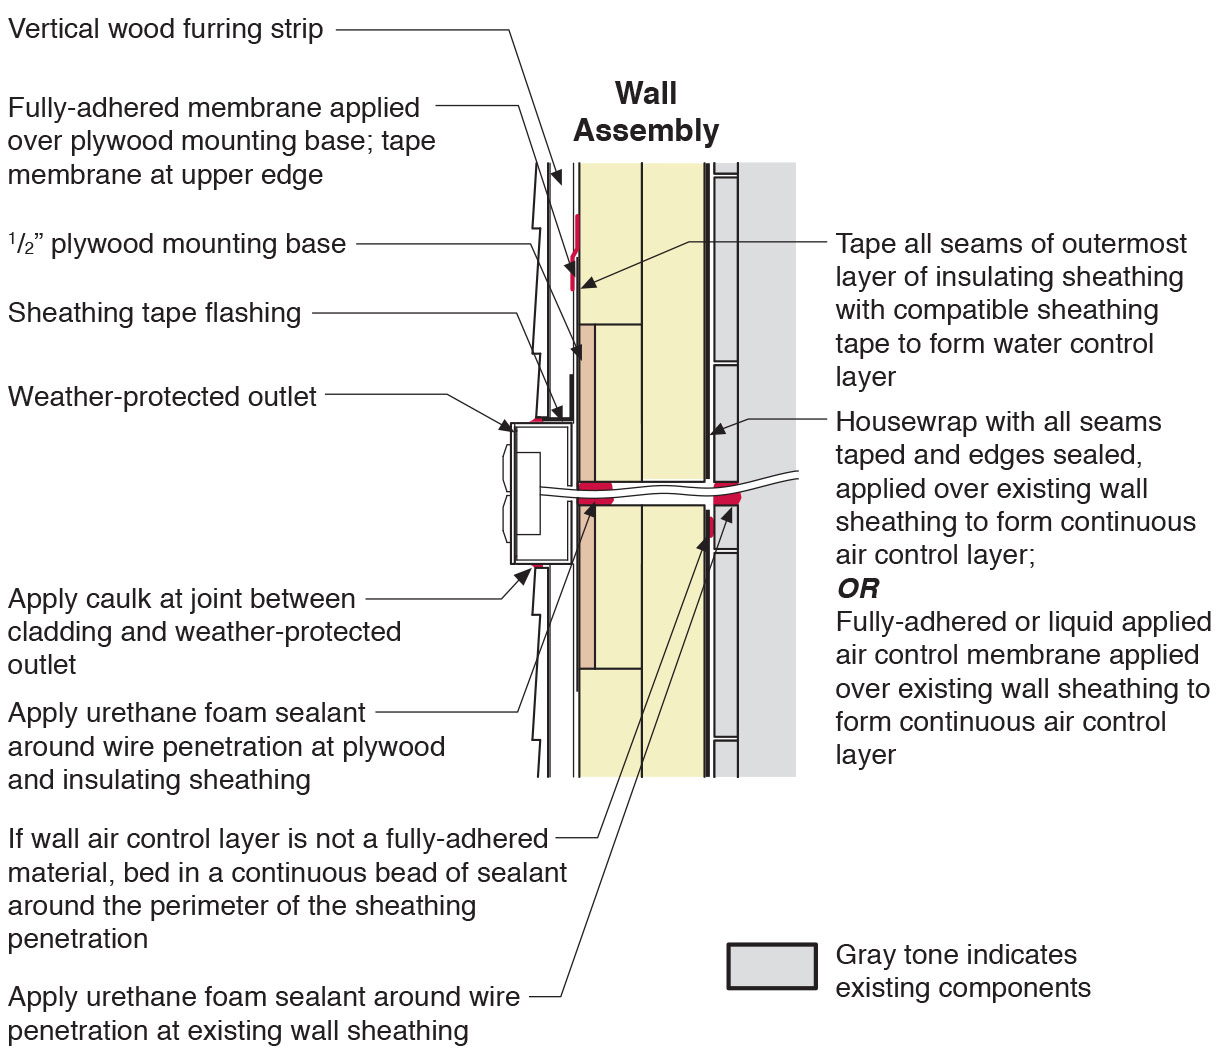
Section view of electric box installation in exterior wall showing flashing and air sealing details
Image
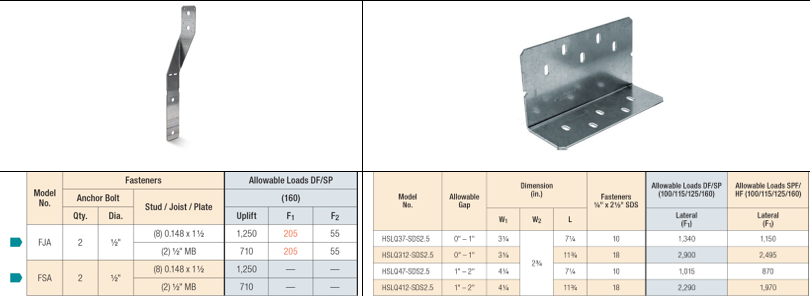
Shear Strength Comparison Between a Foundation Stud Anchor (on left) and a Shear Transfer Angle (on right)
Image
Image
Sources of heat gain in a house include solar gains, infiltration, conduction through walls and roof, occupants, and internal equipment
Image
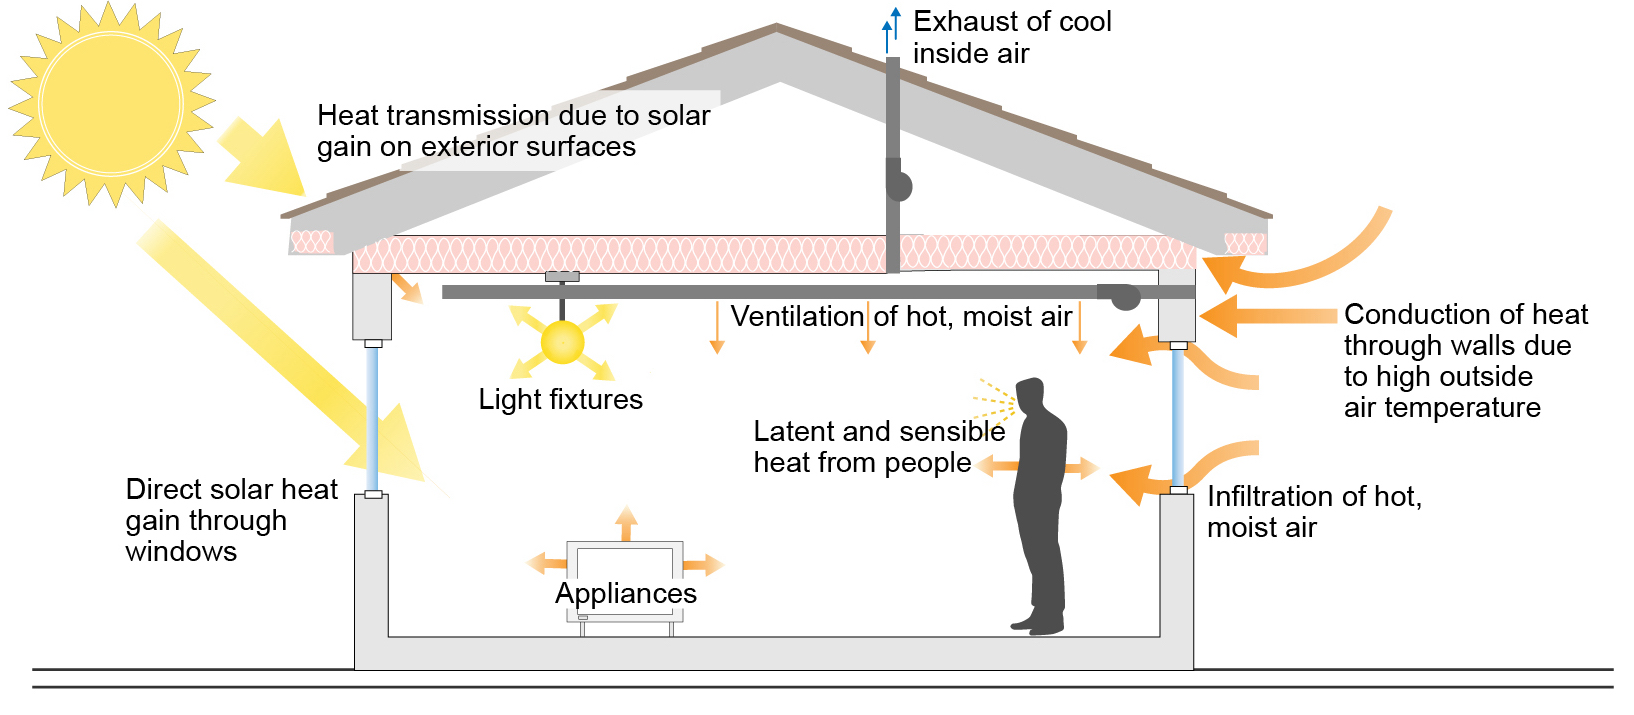
Sources of heat gain in a house include solar gains, infiltration, conduction through walls and roof, occupants, and internal equipment
Image
Step 1. Apply roof underlayment over roof deck and up the sidewall over the rigid foam insulation
Image
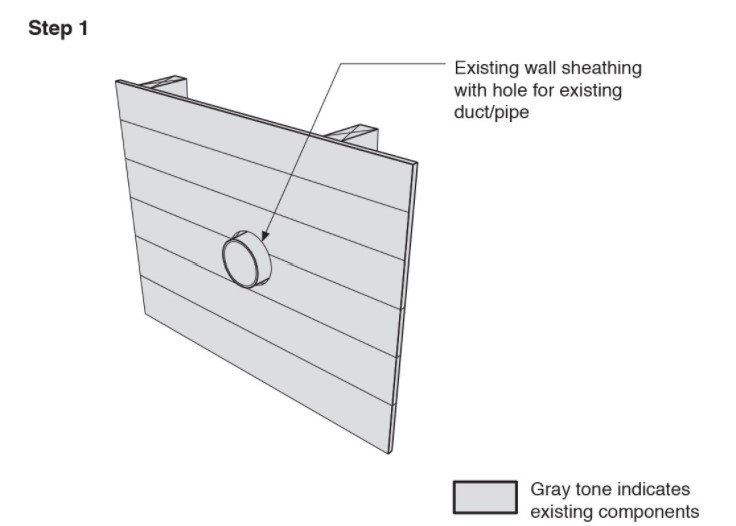
Step 1. Remove the existing wall cladding to prepare to retrofit an exterior wall.
Image
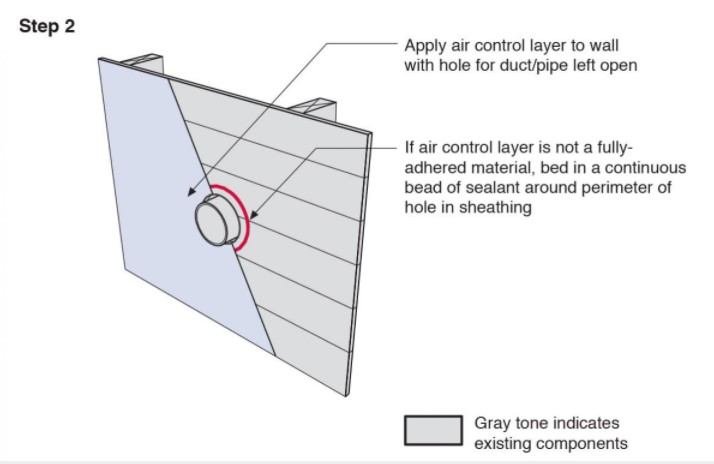
Step 2. Install a continuous air and water control layer over the existing wall sheathing.
Image
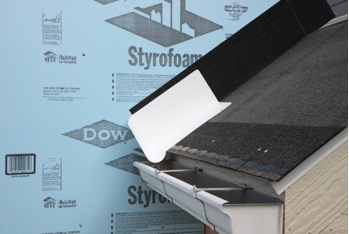
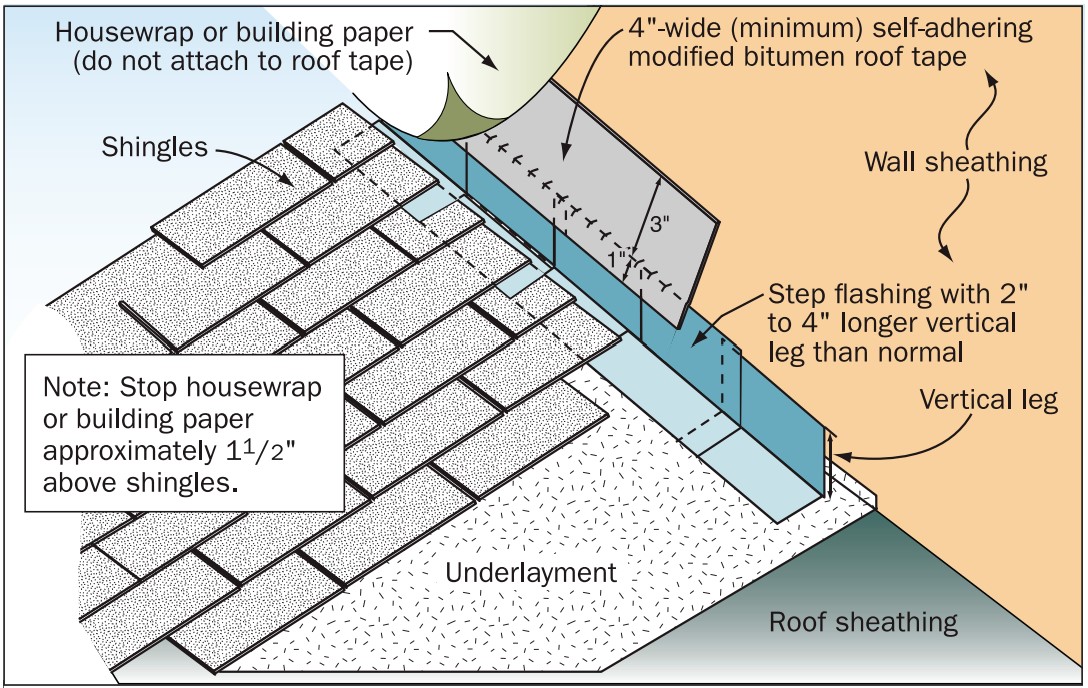
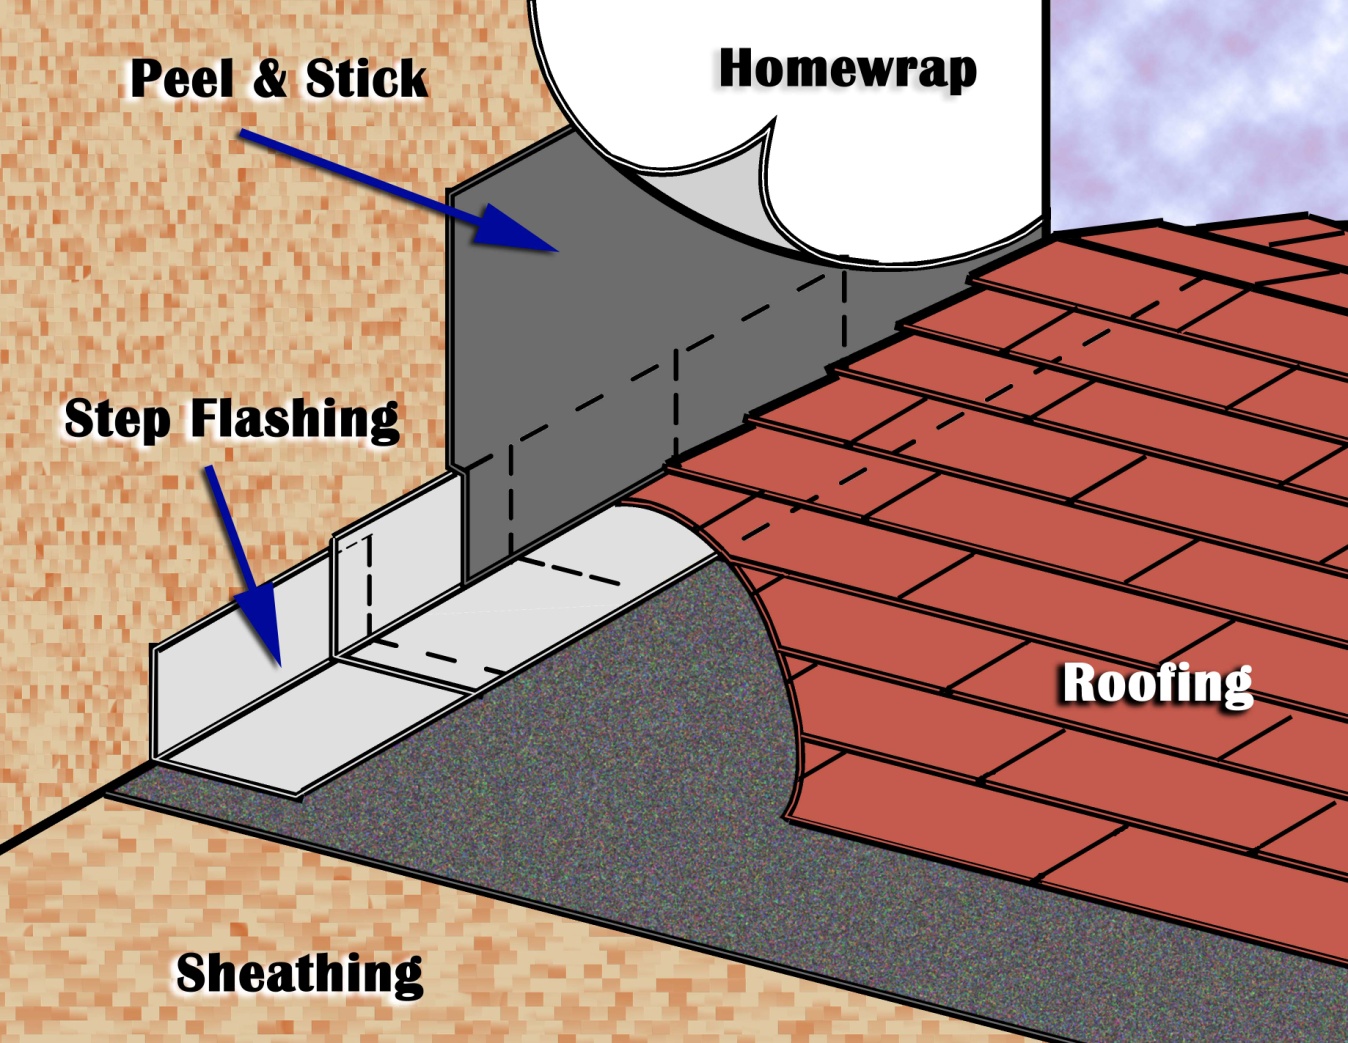
Step 2. Install shingle starter strip then kick-out diverter as first piece of step flashing.
Image
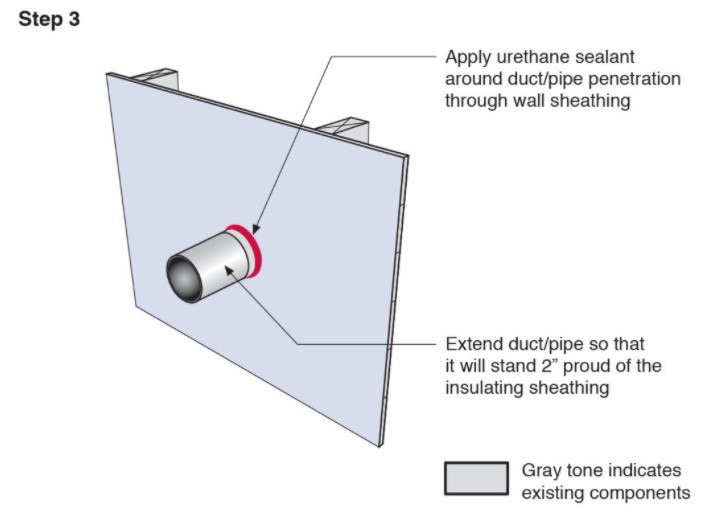
Step 3. Apply urethane sealant around the duct or pipe in the retrofitted exterior wall.
Image
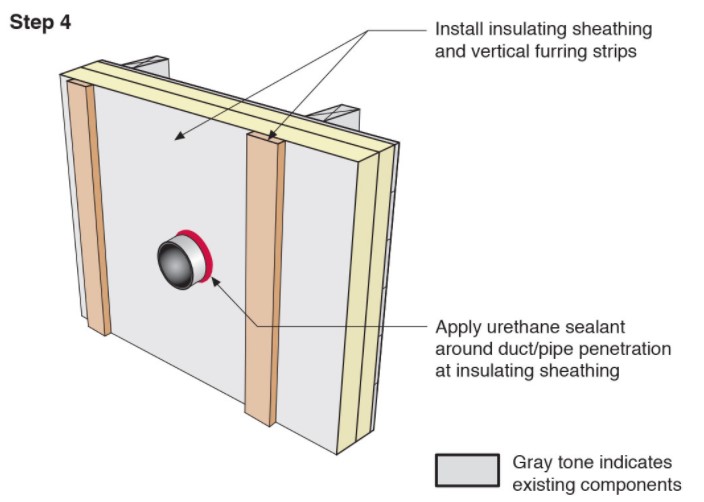
Step 4. Install insulating sheathing and vertical furring strips on the retrofitted exterior wall; seal around pipe or duct with urethane sealant.
Image

Step 4. Install remaining sidewall flashing, appropriate counter flashing, and shingles
Image
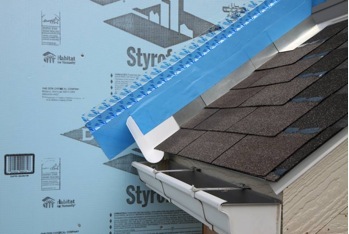
Step 5. Apply self-adhesive flashing over top edge of the wall flashing, diverter, and rigid foam insulation
Image
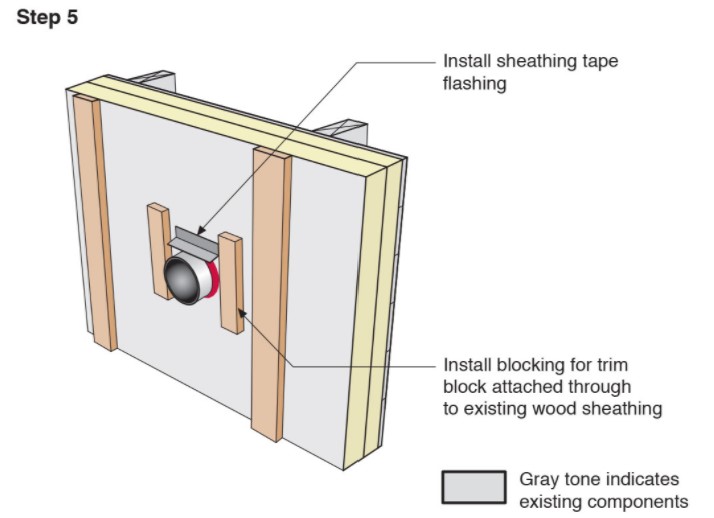
Step 5. Install sheathing tape flashing over the duct or pipe and wood blocking on either side for later attachment of trim.
Image
Image
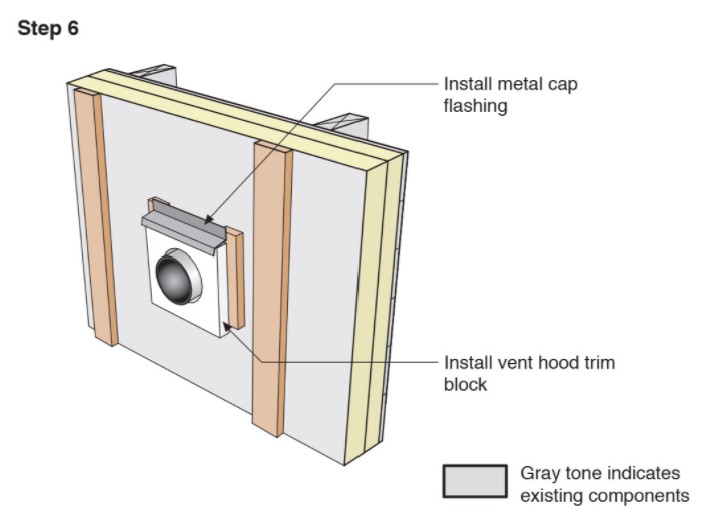
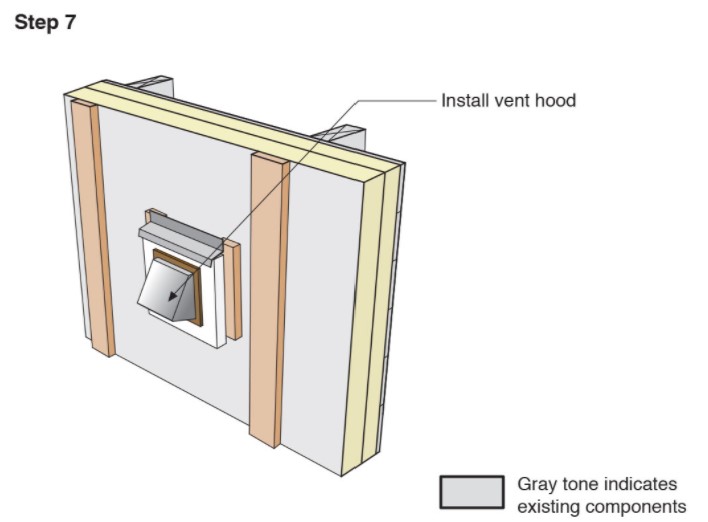
Step 6. Install vent hood trim block, metal cap flashing; seal top edge of flashing with sheathing tape.
Image
Image
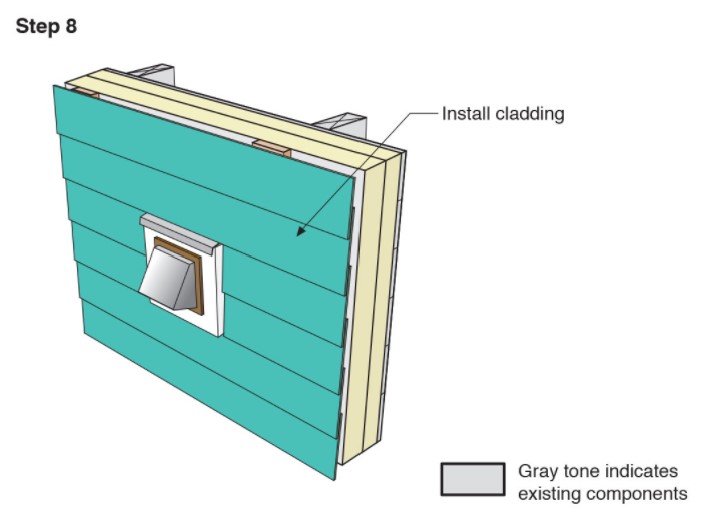
Step 8. Attach the new cladding to the furring strips over the rigid foam for the exterior wall retrofit.
Image

Tape horizontal joint with minimum 3" wide tape placing tape offset high on the joint, adhearing to the upper sheet without wrinkles
Image
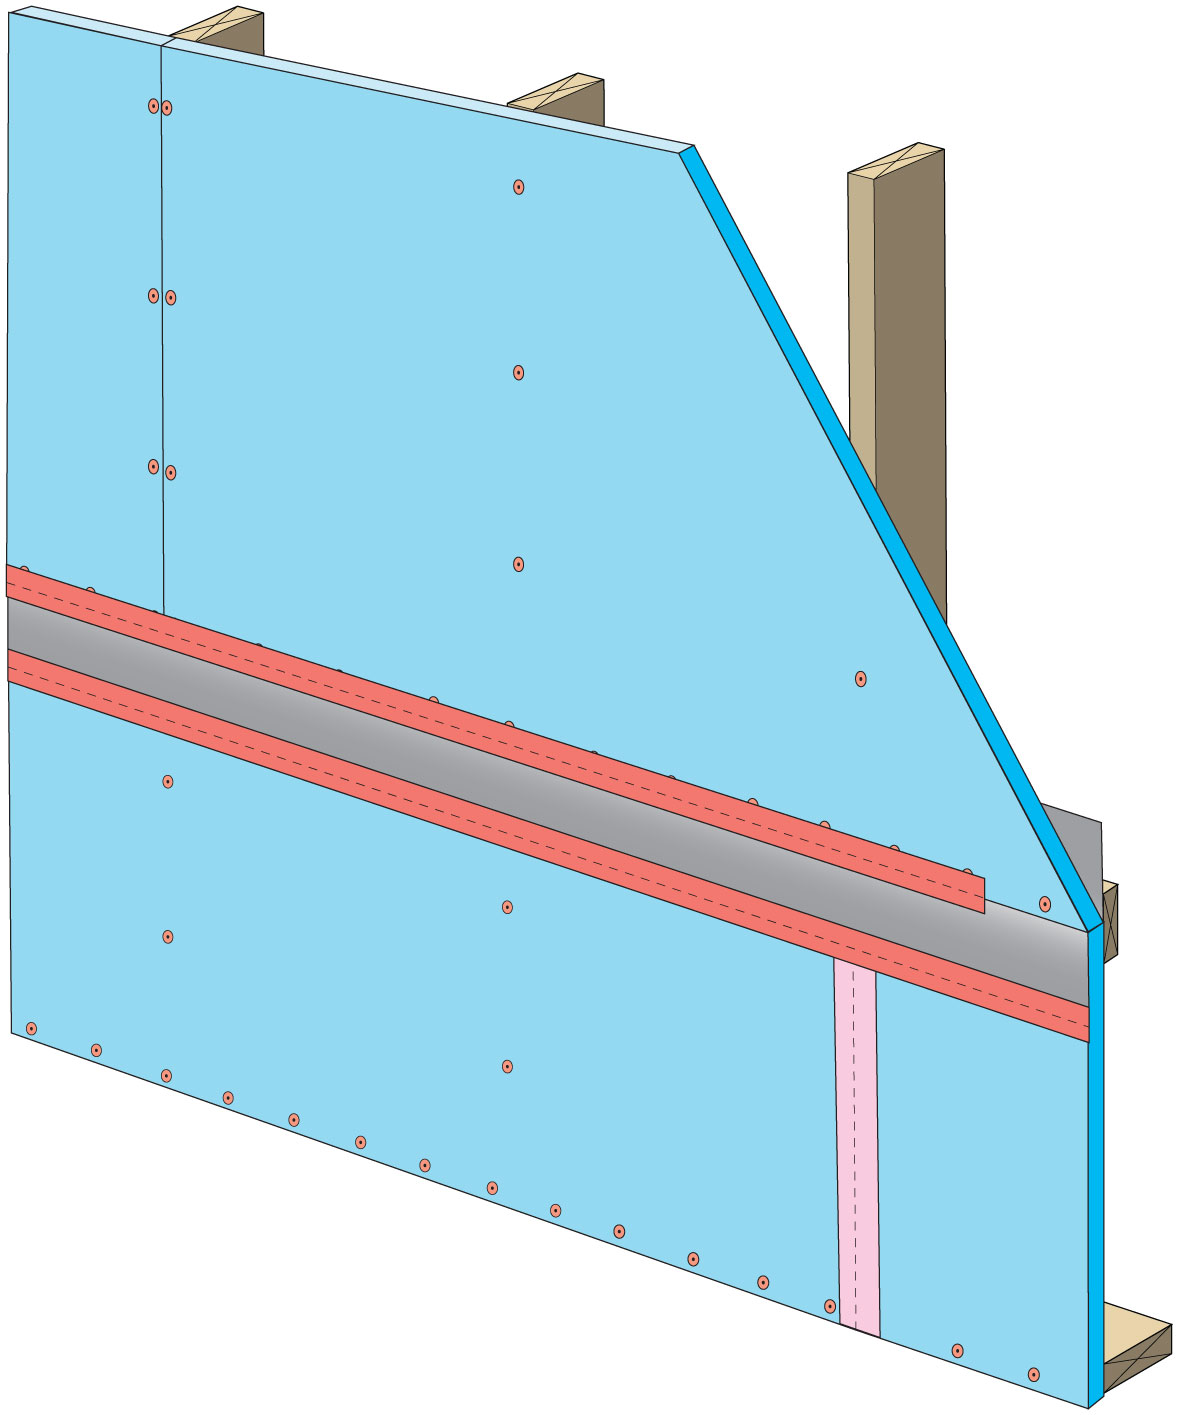
Tape the joint between the top insulation sheet and the Z-flashing with 2" wide tape to improve air tightness
Image
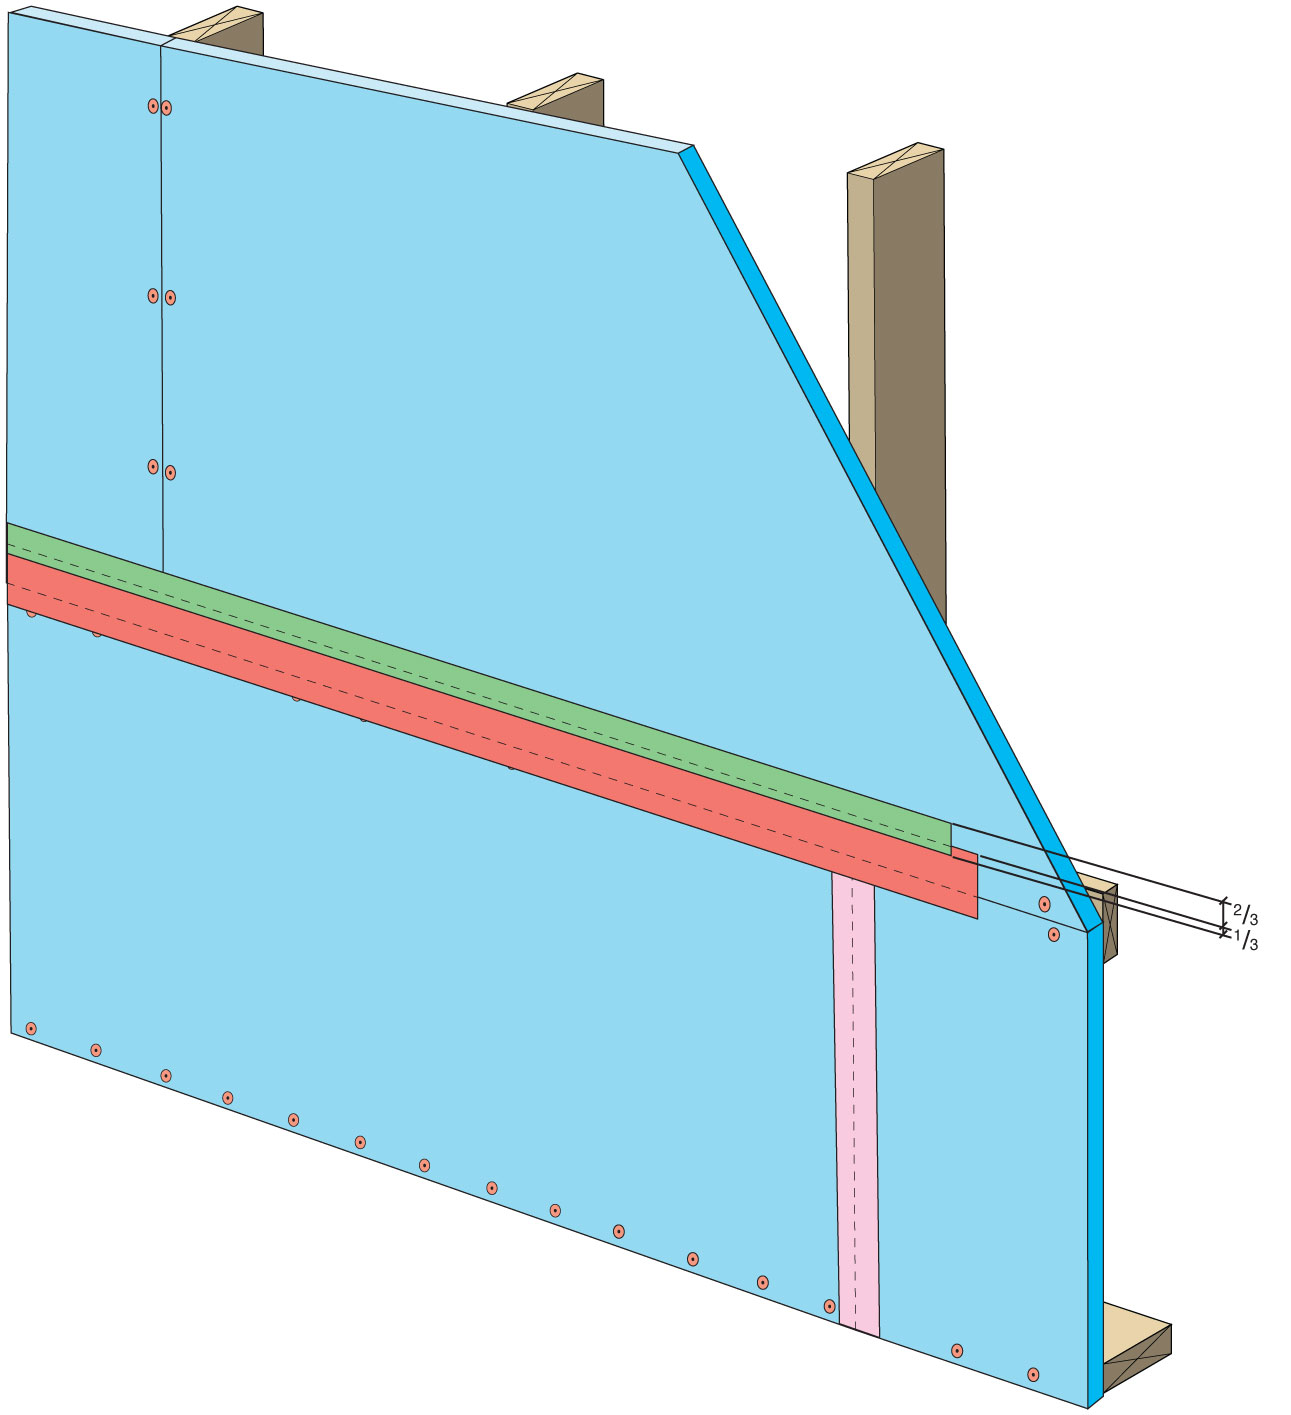
Terminate 4" tape with 2" wide tape placing tape offset high on the joint, 2/3 of the tape should be adhered to the sheet of insulation
Image
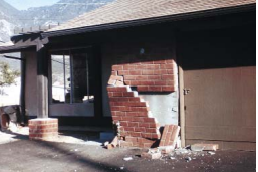
The brick veneer lacked adequate ties to keep the brick from peeling off the wall in an earthquake.
Image
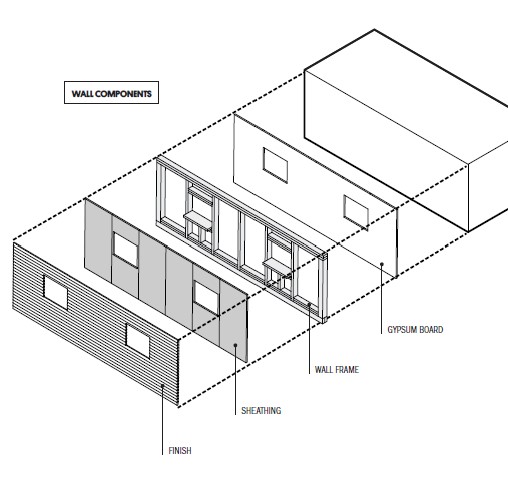
The components of a framed wall include from inside to out: gypsum, wood studs, OSB or plywood sheathing, and siding.
Image

The cripple wall hiding the post-and-pier foundation of this wood framed house toppled when the house was shifted partially off its piers by an earthquake
Image
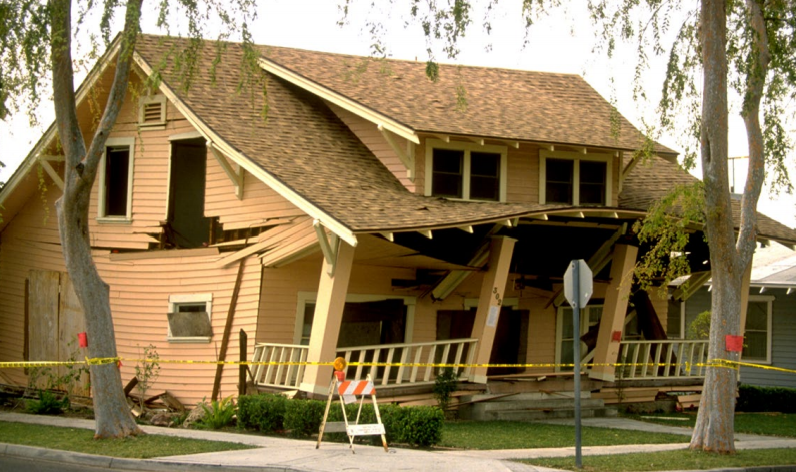
The cripple walls in this home gave way in the 1994 Northridge Earthquake, causing the walls to partially collapse.
Image
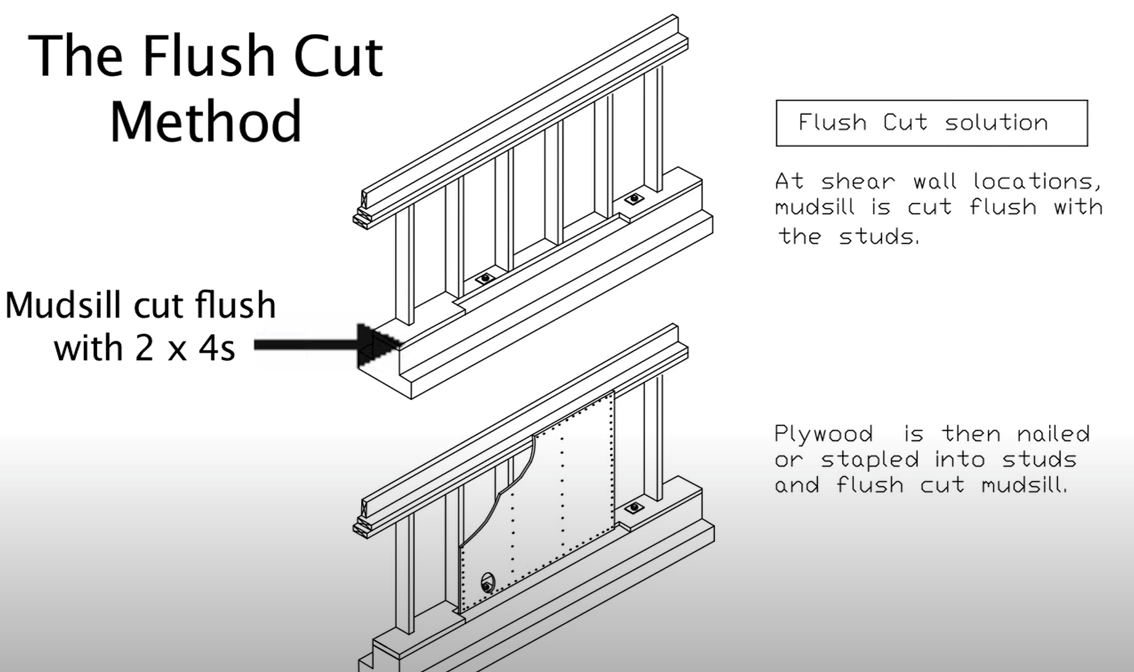
The flush cut method for seismic retrofit bracing of a cripple wall allows the plywood sheathing to be attached directly to both the cripple studs and the notched section of the mudsill
Image
Image
Image
Image
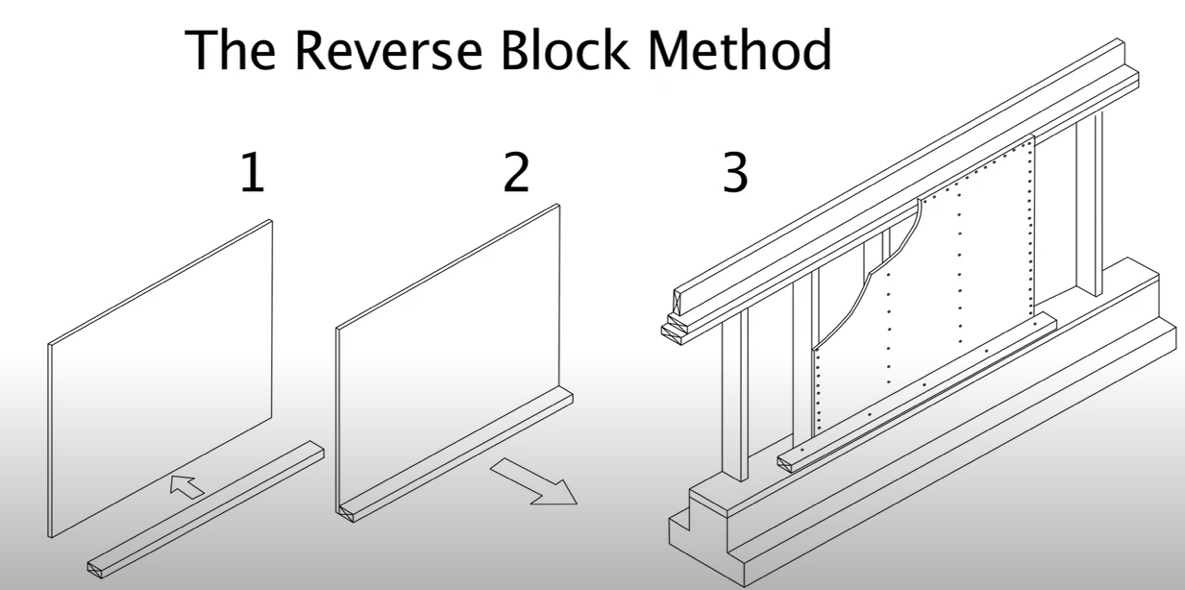
The reverse block method for seismic retrofit bracing of a cripple wall uses a 2x4 attached to the sill plate to provide a means to attach the plywood cripple wall sheathing to the sill plate
Image
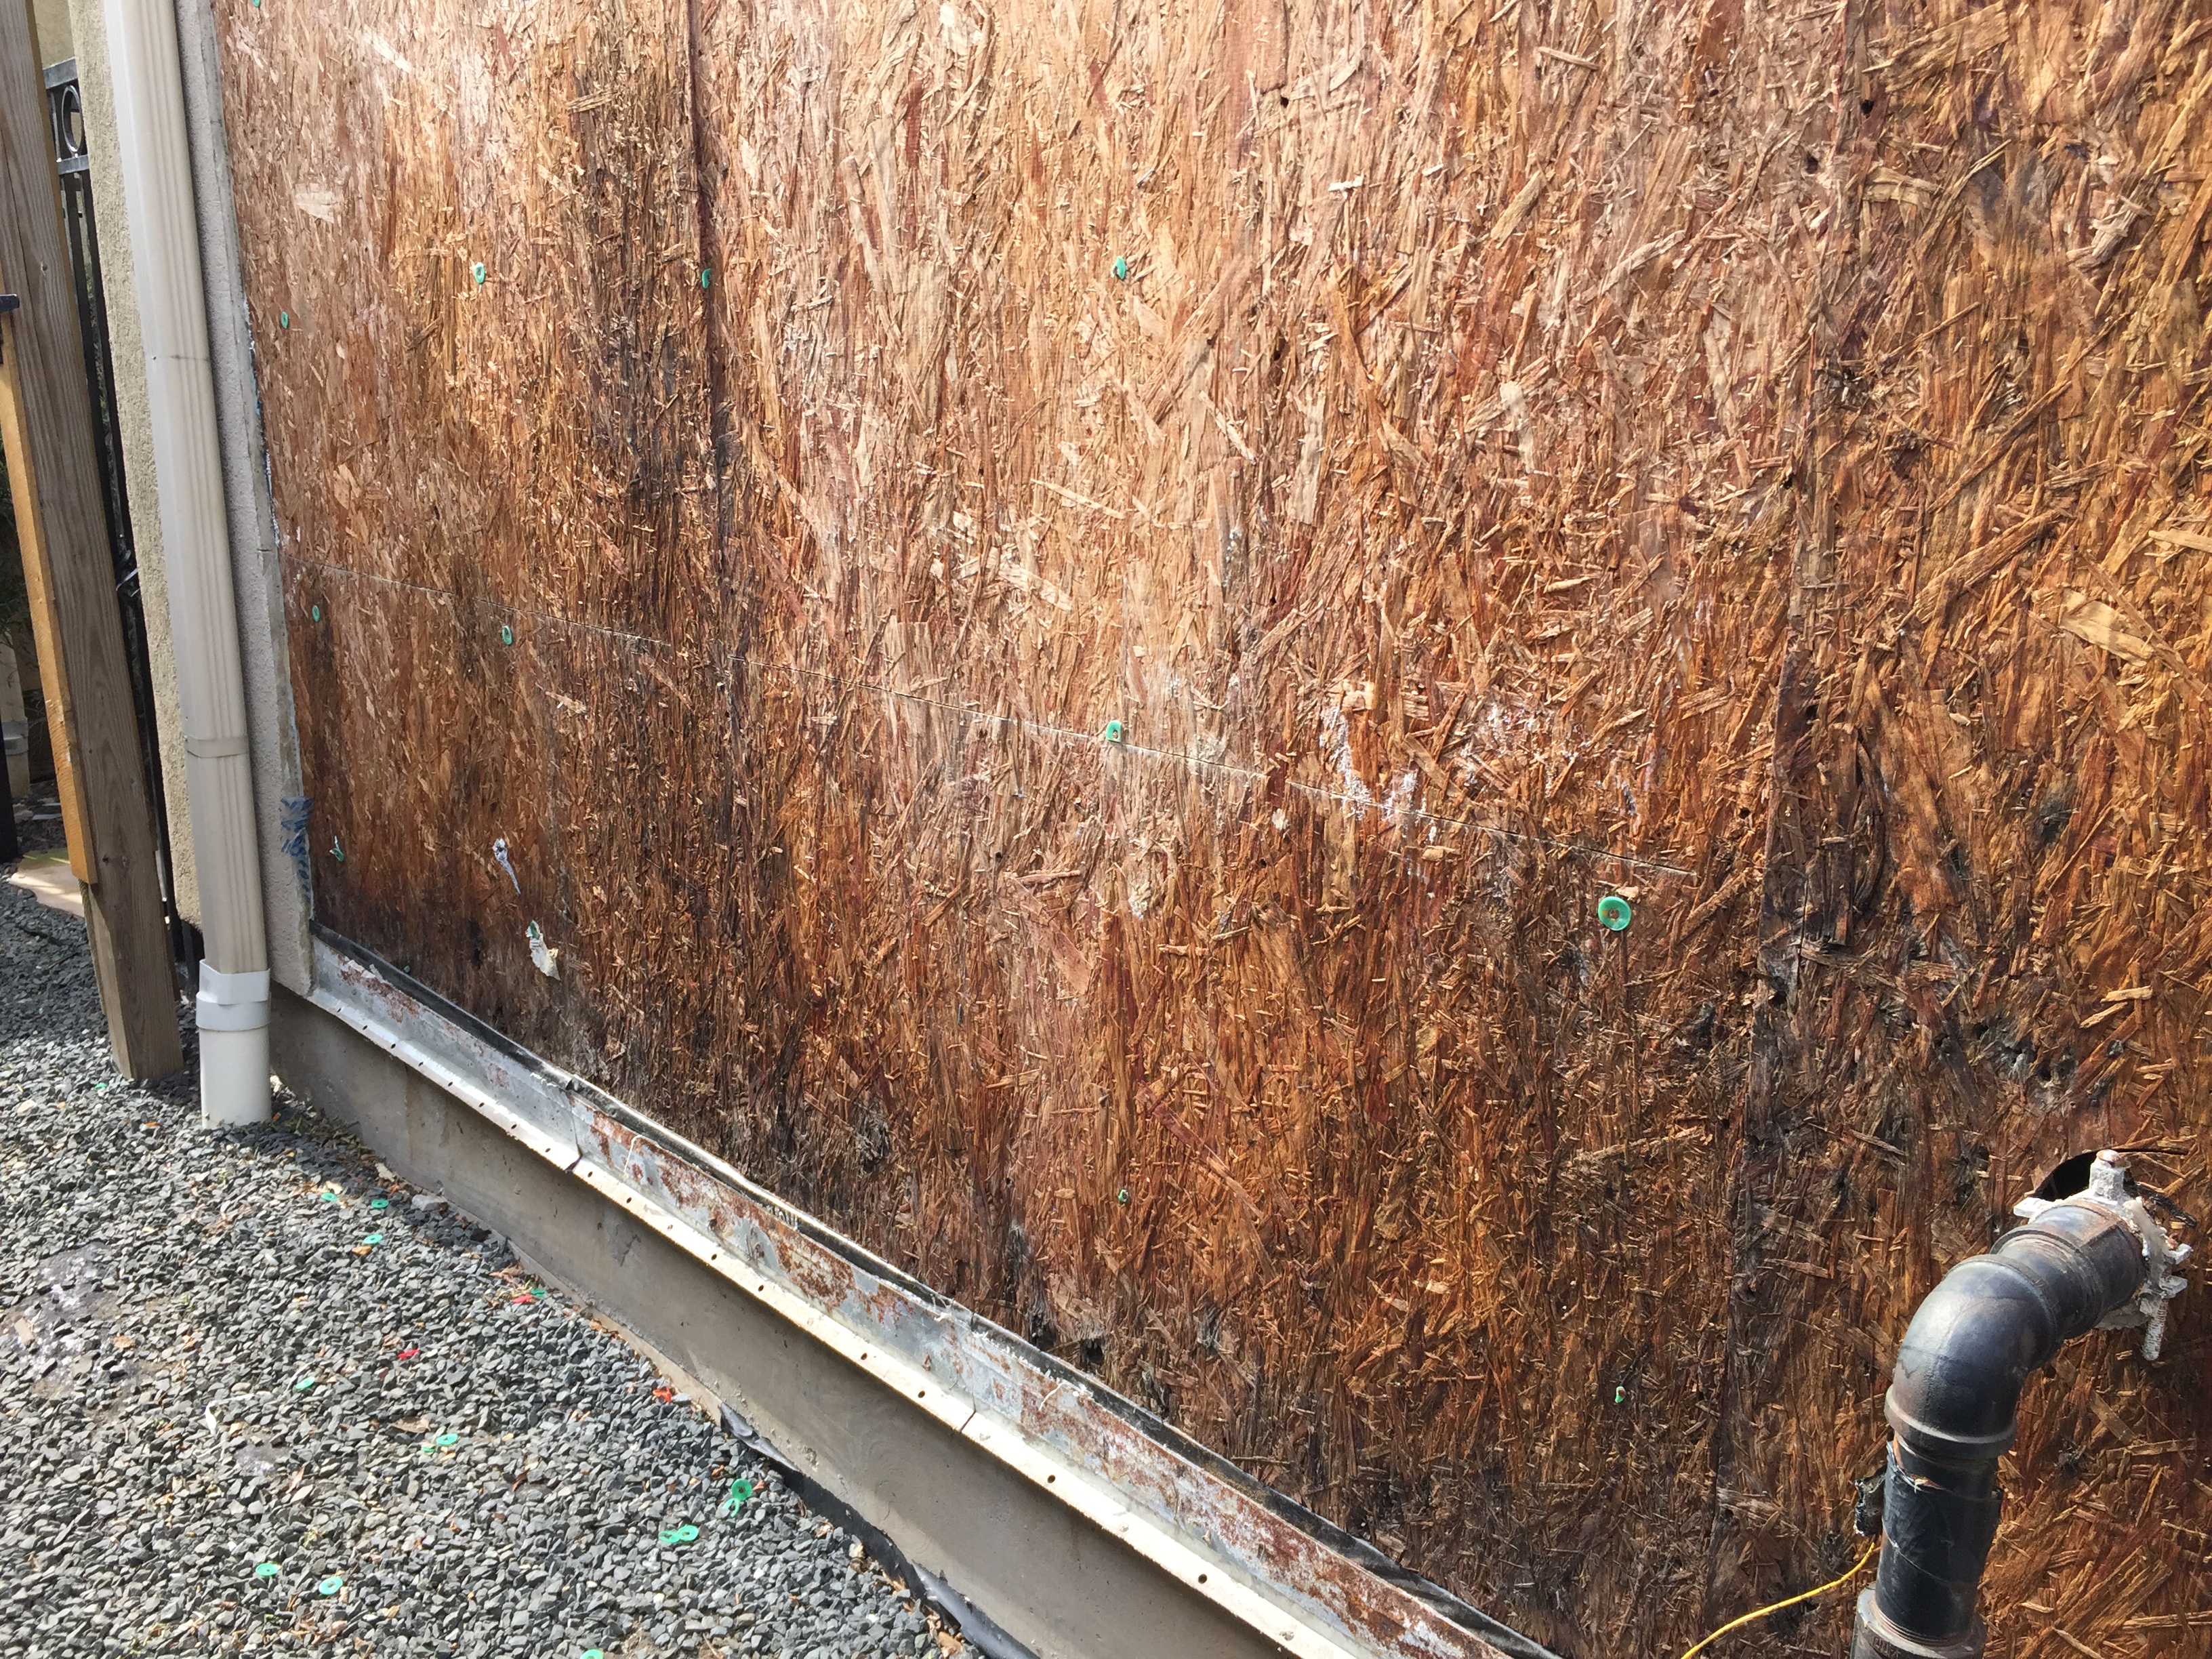
The sheathing has rotted because there was not a sufficient drainage gap behind the stucco cladding
Image

Image

This basement is insulated on the exterior with rigid foam over dampproofing, with granular backfill and footing drains to facilitate drainage away from the foundation, a termite shield to protect from pests, and cellular PVC to protect the rigid foam.
Image
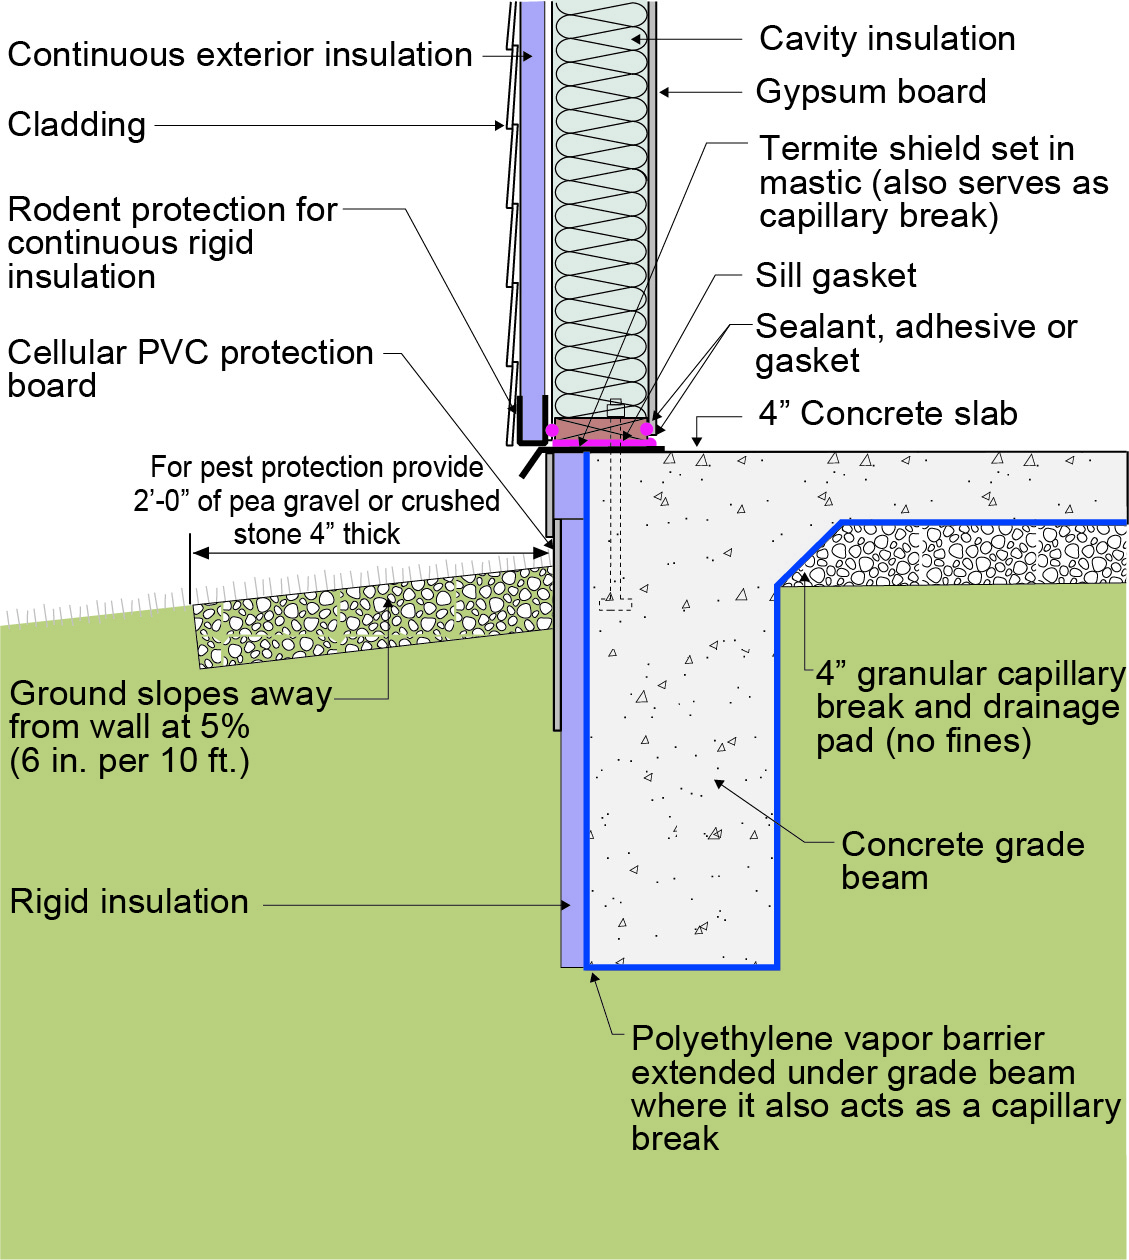
This exterior insulated slab-on-grade monolithic grade beam foundation is protected from pests by termite shield at the sill plate, borate-treated framing, flashing at end of wall insulation, brick veneer over slab-edge insulation, and rock ground cover.
Image
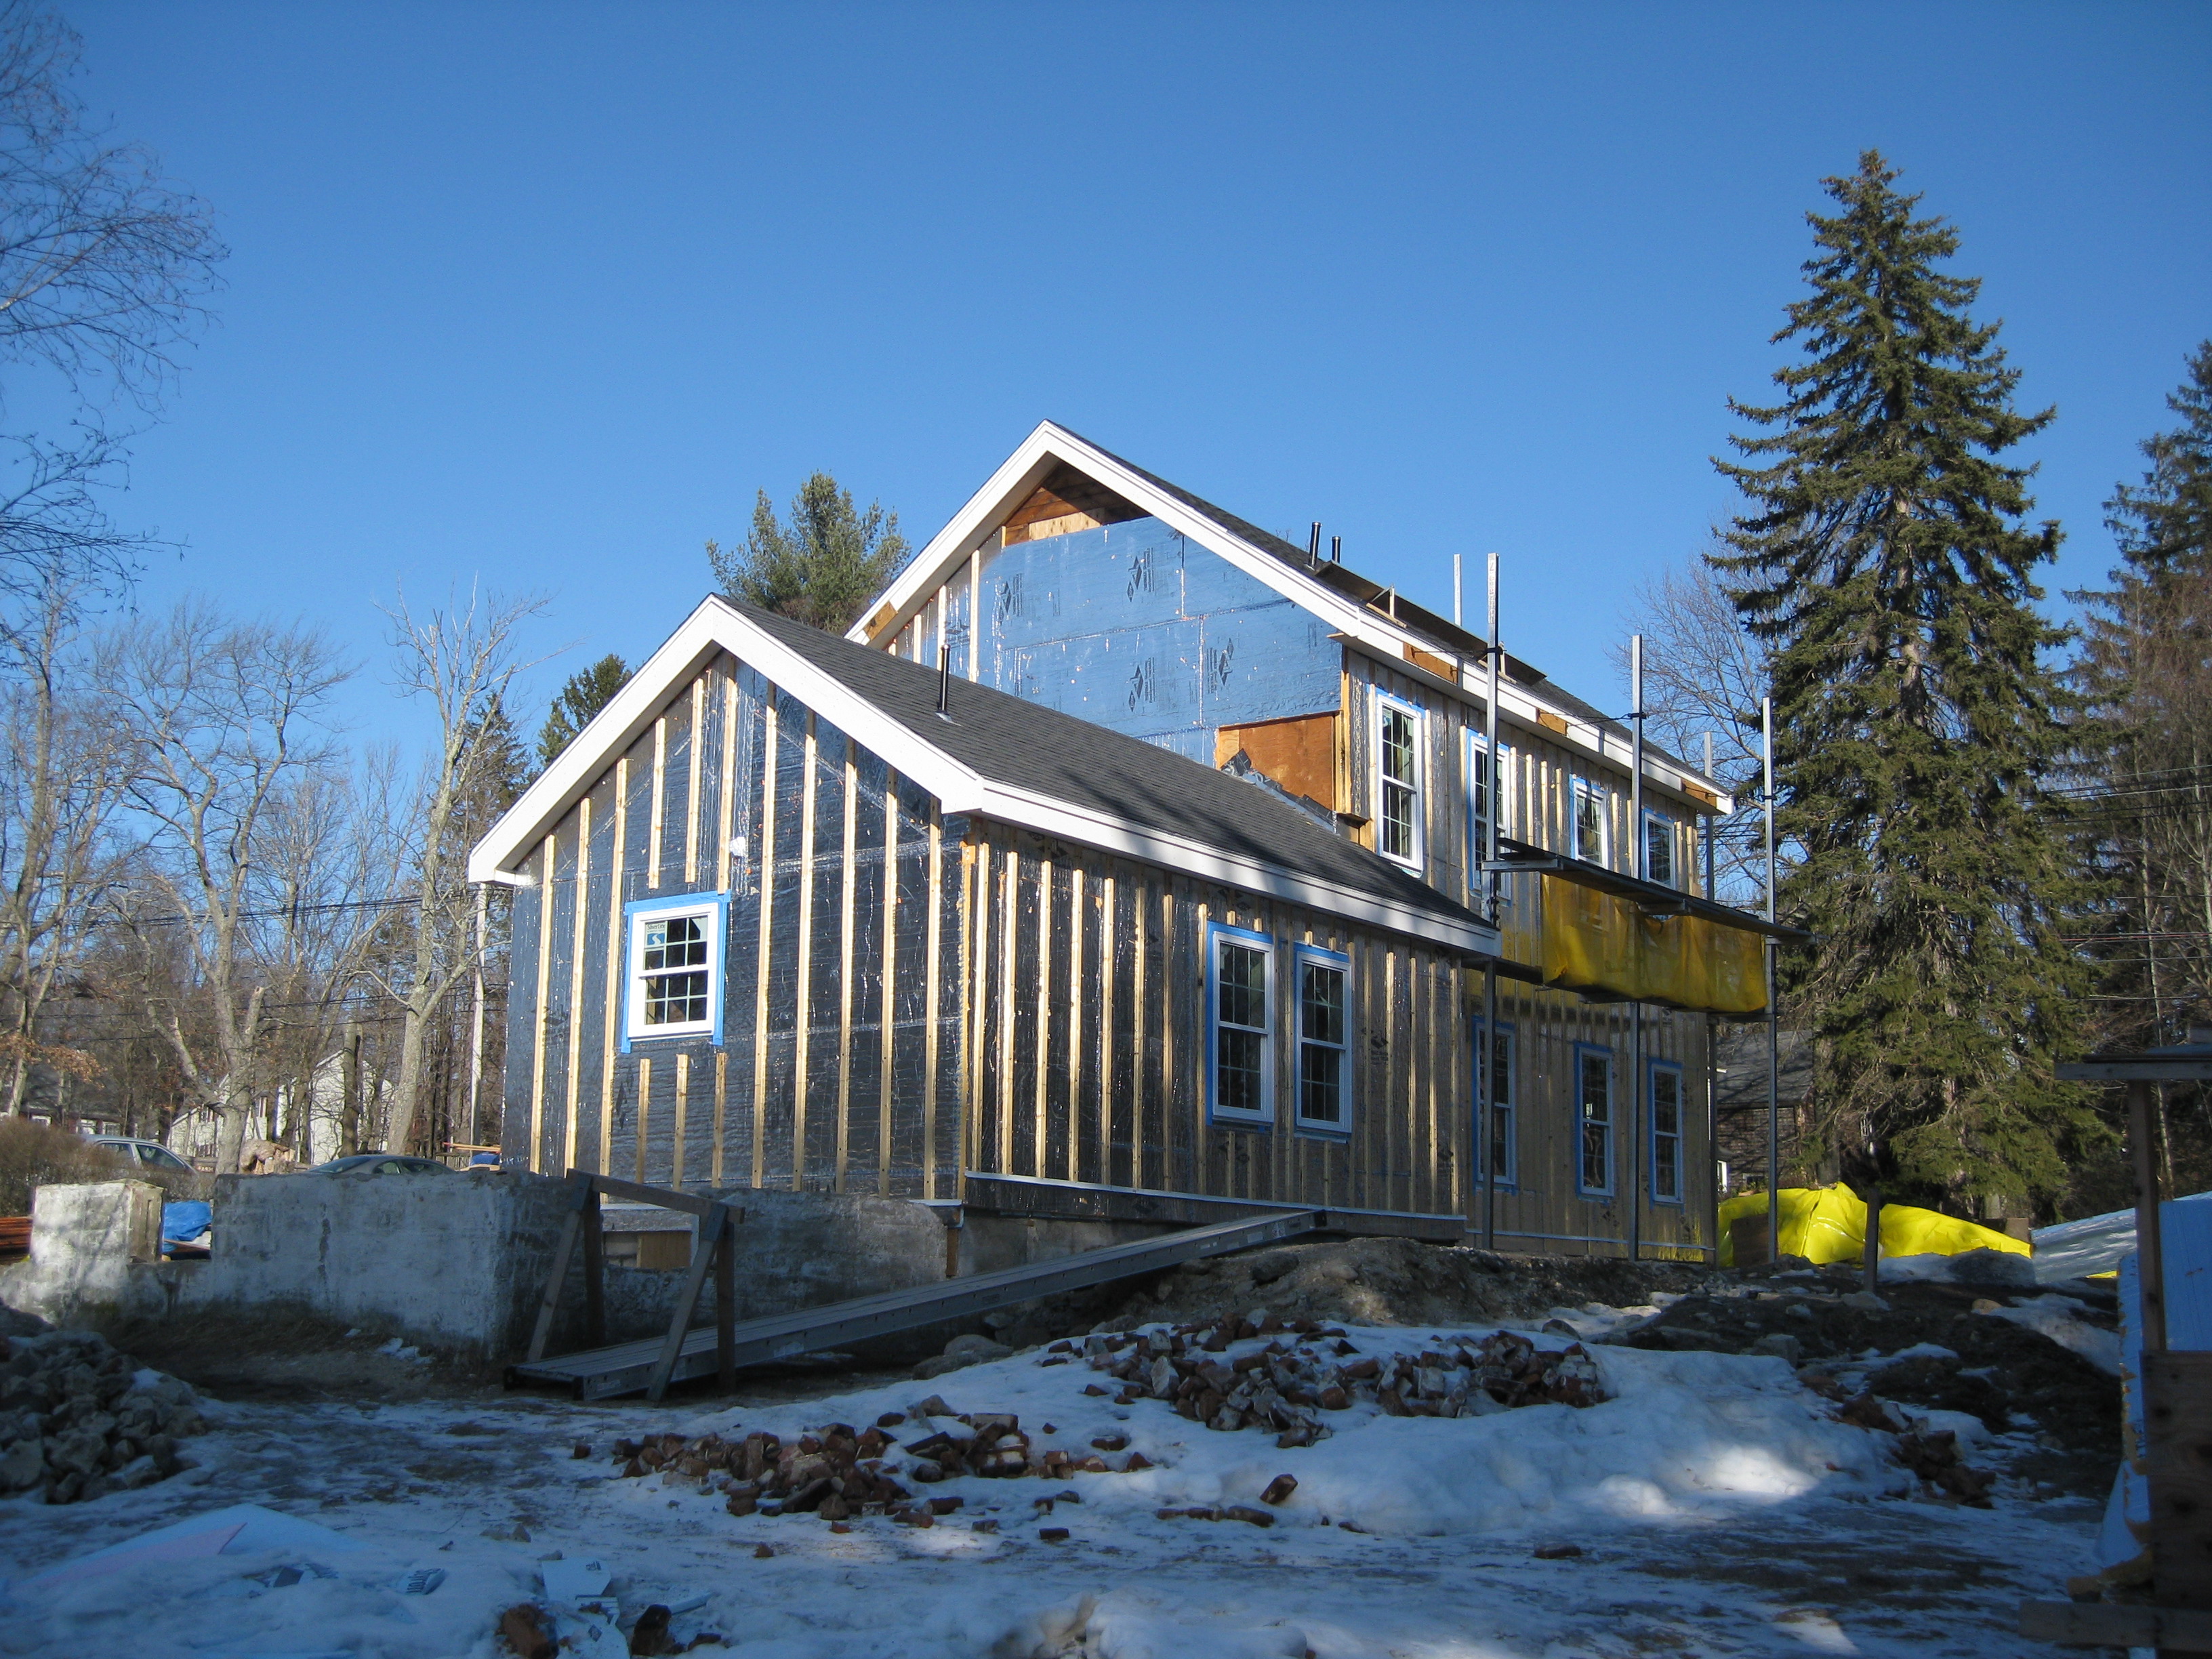
This farmhouse was retrofit by removing the existing siding and adding taped insulated sheathing and battens before installing new siding