Showing results 201 - 235 of 235
Image
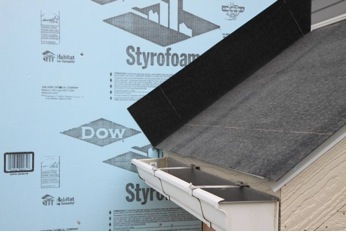
Step 1. Apply roof underlayment over roof deck and up the sidewall over the rigid foam insulation
Image
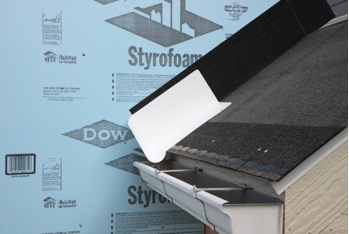
Step 2. Install shingle starter strip then kick-out diverter as first piece of step flashing.
Image
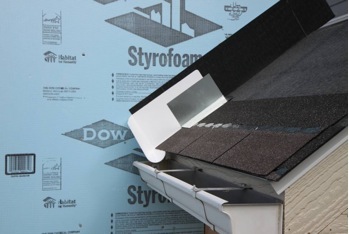
Step 3. Place the first shingle and the next section of sidewall flashing over upper edge of diverter
Image

Step 4. Install remaining sidewall flashing, appropriate counter flashing, and shingles
Image
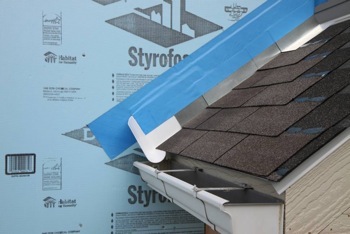
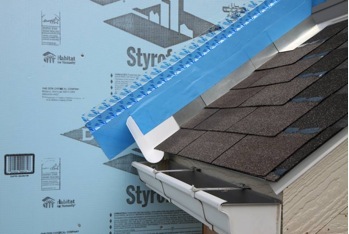
Step 5. Apply self-adhesive flashing over top edge of the wall flashing, diverter, and rigid foam insulation
Image
Image
Step and kick-out flashing at all roof-wall intersections extending ≥ 4 in. on wall surface above roof deck and integrated with drainage plane above
Image
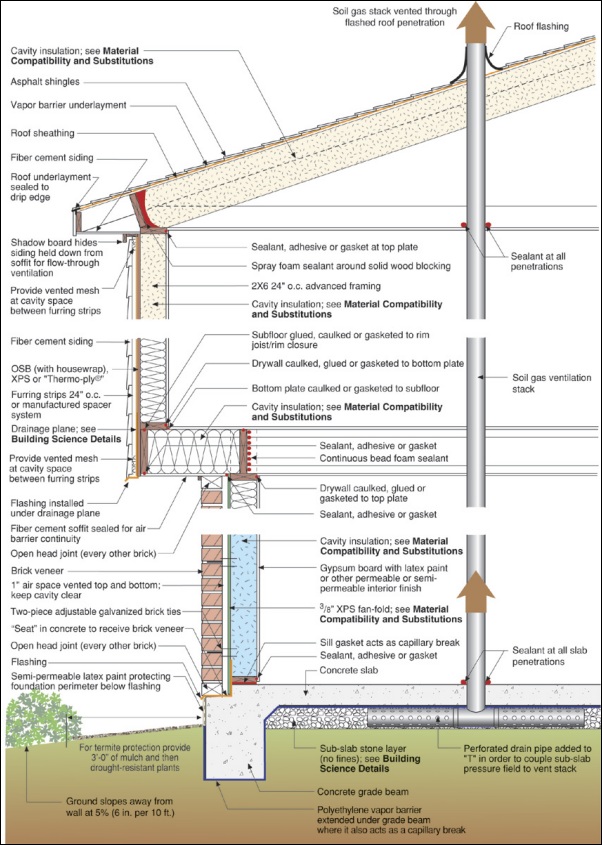
The OSB roof decking product comes with an adhered radiant foil barrier which helps to prevent heat transfer in or out of the vented attic, while R-13 unfaced fiberglass fills the advanced-framed 2x6 walls.
Image
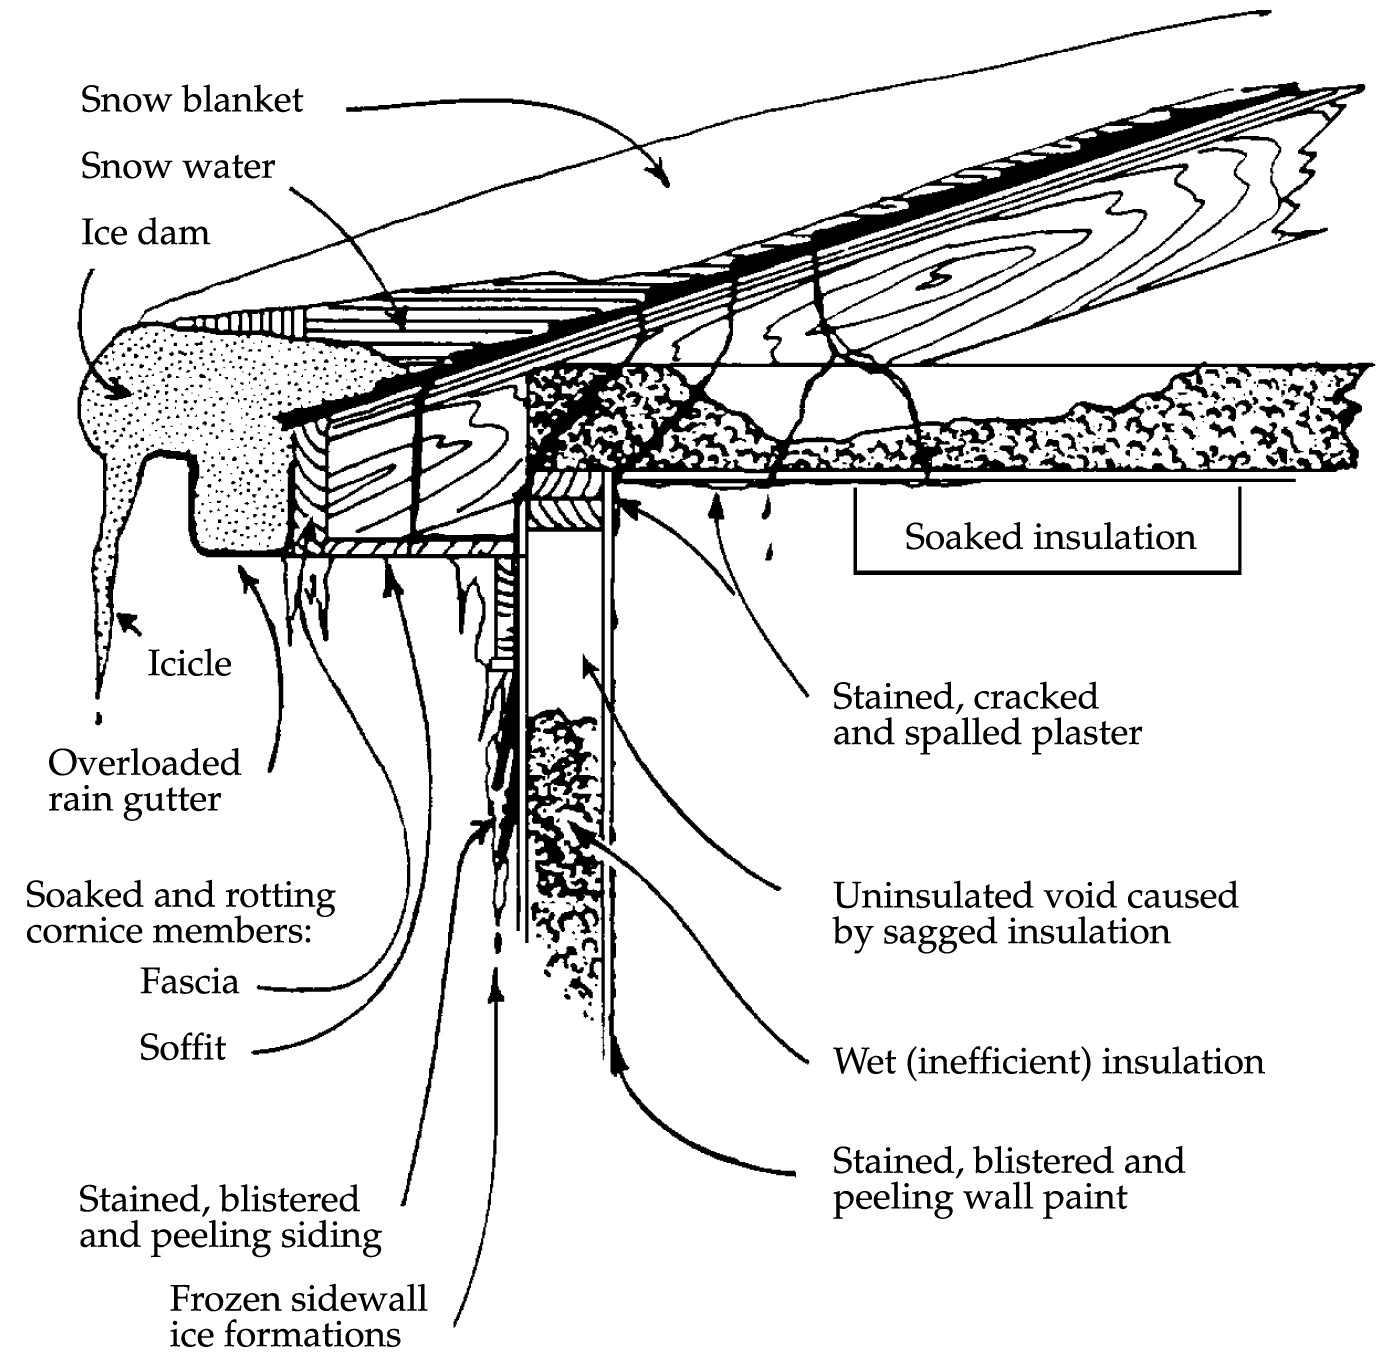
This home has heat loss through the roof, leading to ice dam formation and structural issues during winter months.
Image

This home uses light-colored standard paints and finishes on siding and roofing materials to reduce cooling loads without adding material cost.
Image
This house design in the Hot-Humid climate uses a slab foundation, masonry walls, and an Exterior Insulation Finish System (EIFS) cladding.
Image
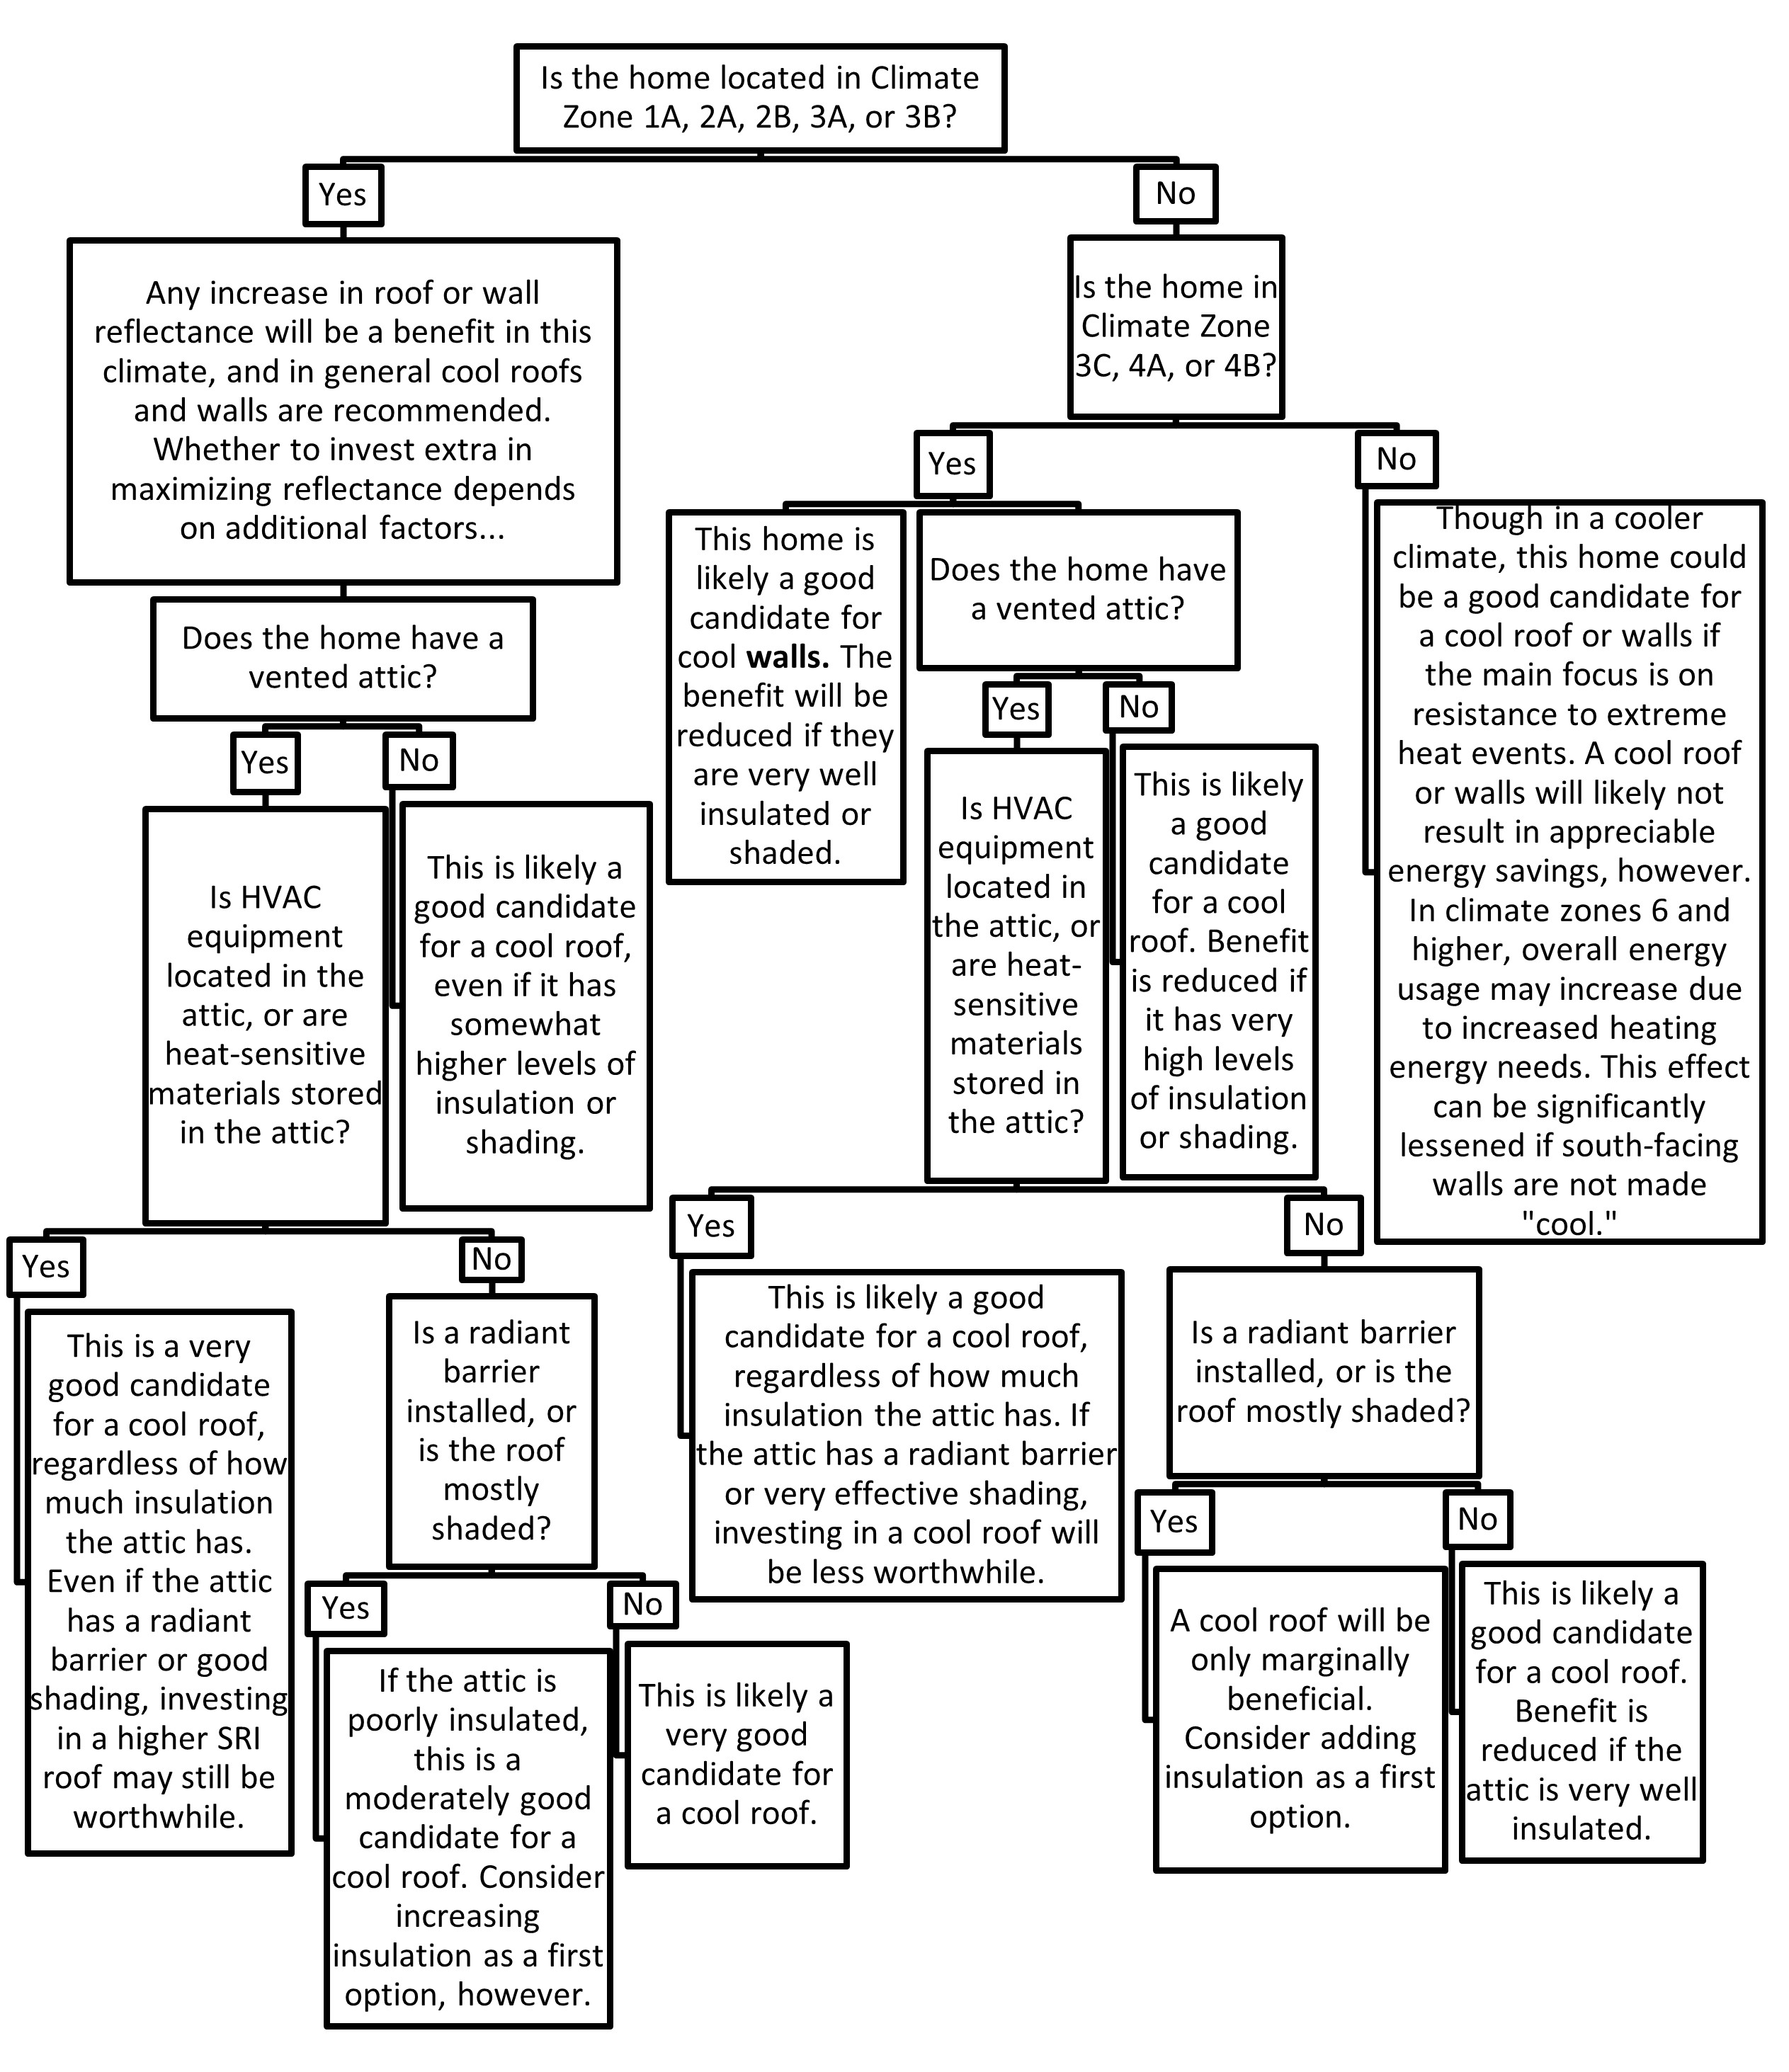
This simplified decision tree can help a homeowner or contractor assess how appropriate a cool roof or wall will be for a particular home
Image
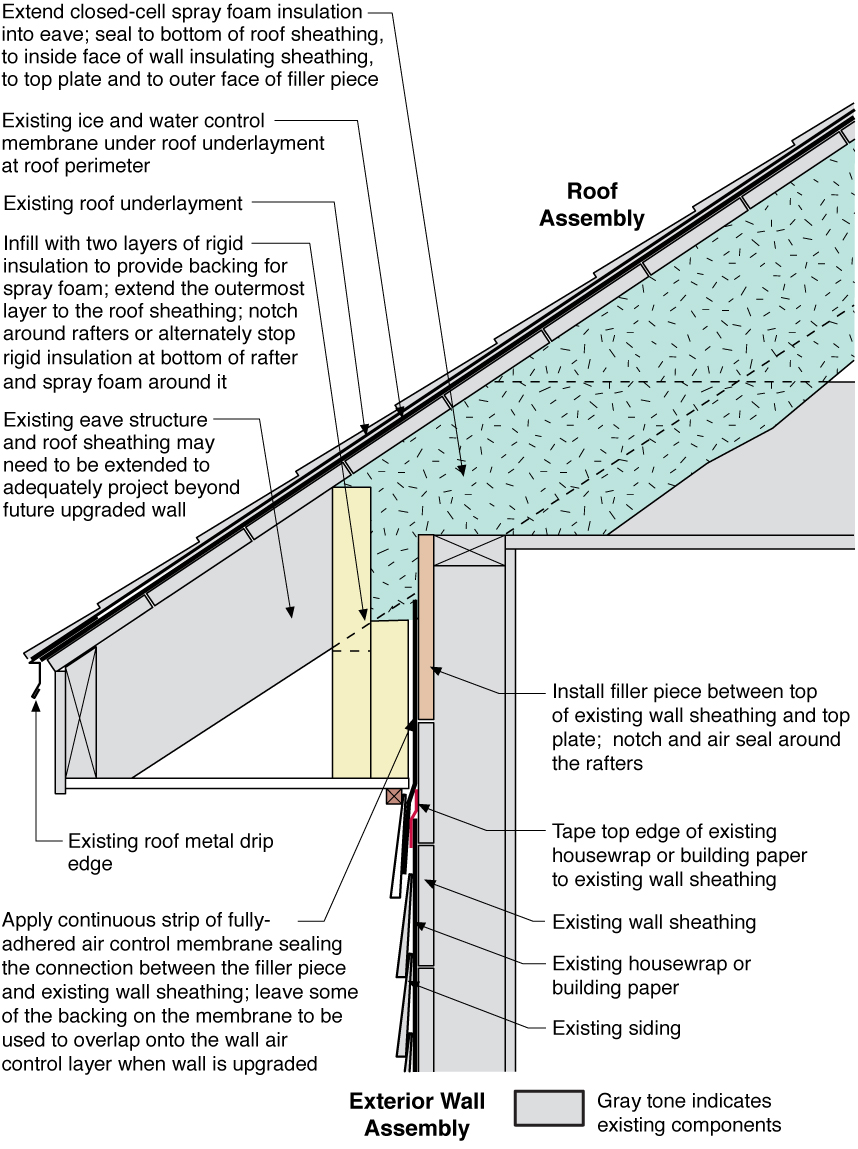
Unvented roof assembly at eave retrofitted with rigid foam, spray foam, and a fully adhered membrane seal at the top of wall-to-roof transition
Image
Unvented roof assembly at eave retrofitted with rigid foam, spray foam, and taped top edge of existing house wrap or building paper
Image
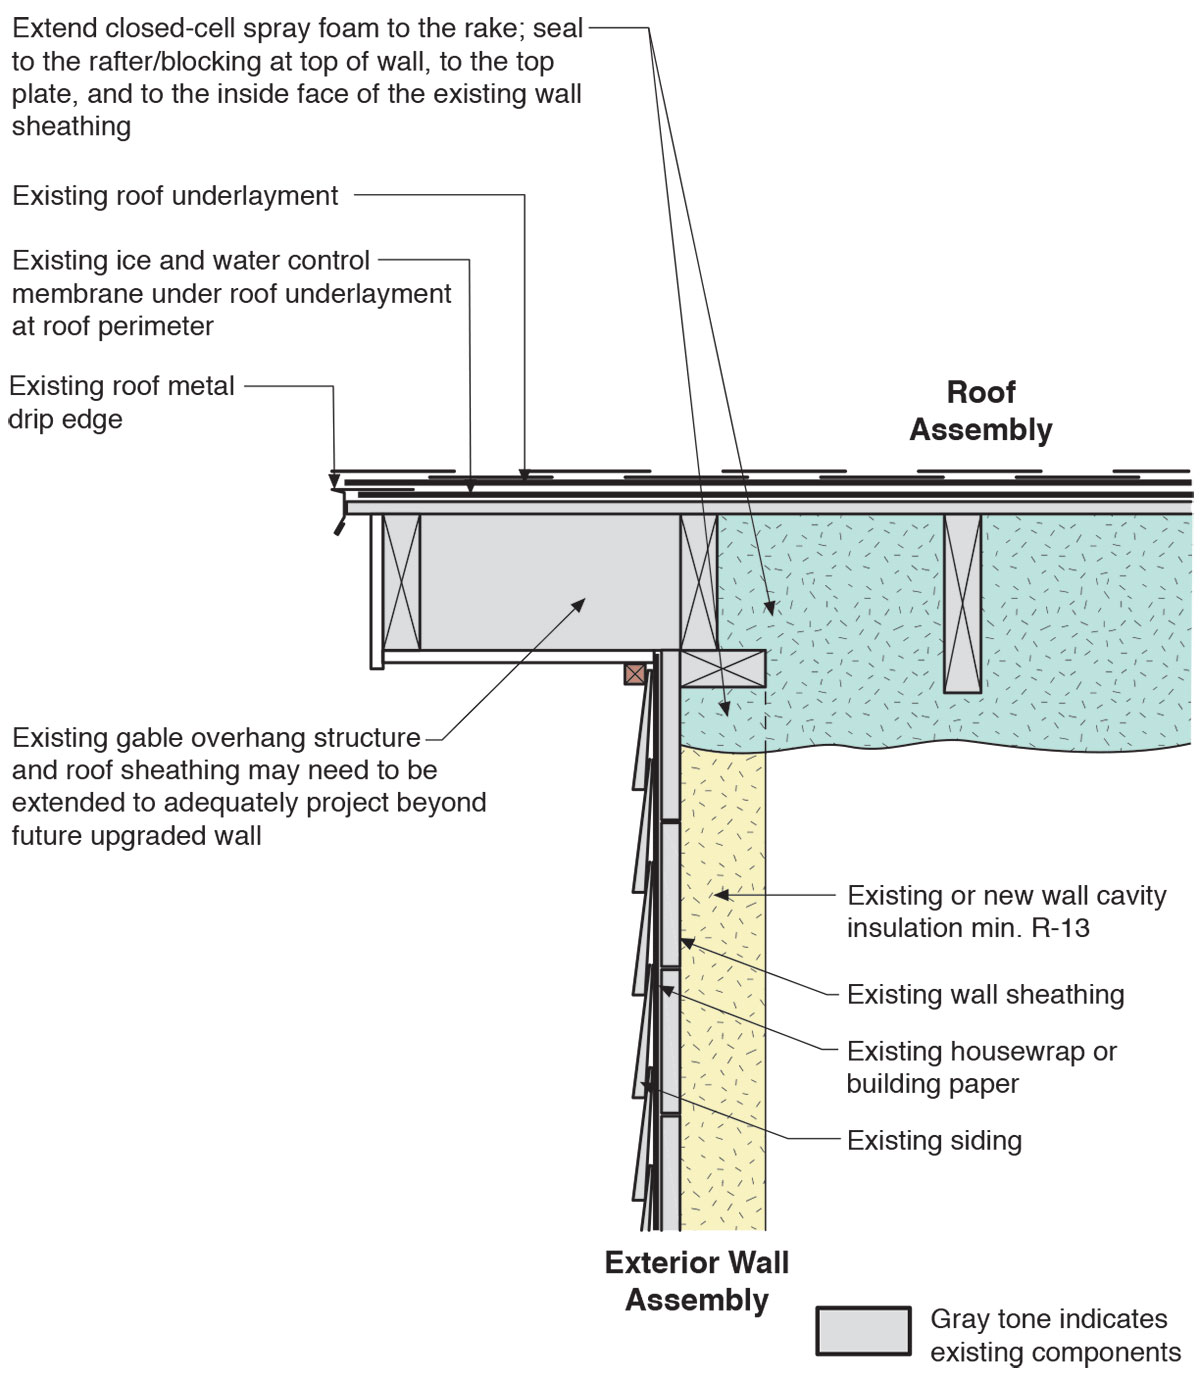
Unvented roof assembly at rake retrofitted with spray foam installed along the underside of the roof deck and extended to the rake edge to insulate and air seal the attic
Image
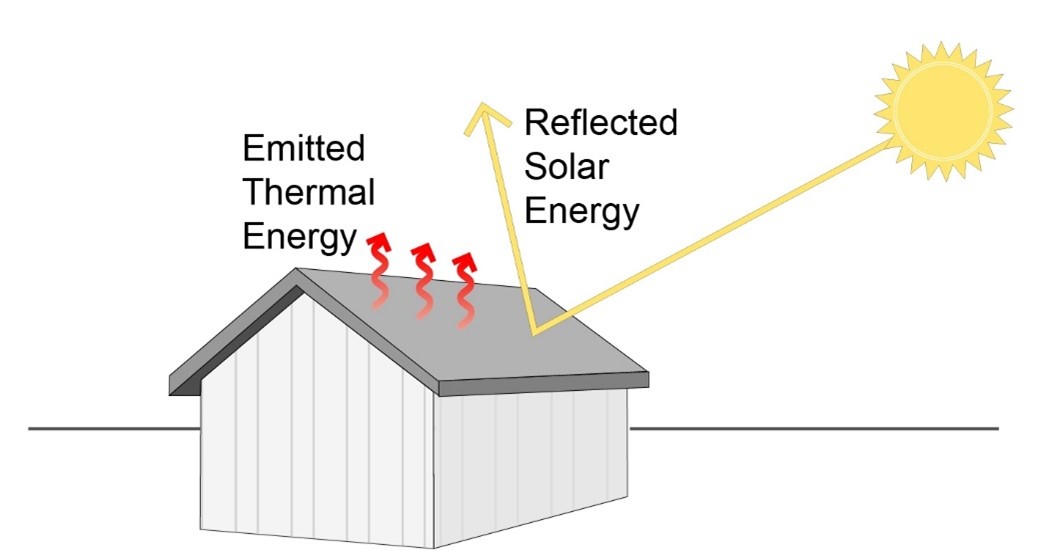
Using roof and wall materials with a high Solar Reflectance Index (SRI) will reduce heat gains.
Image

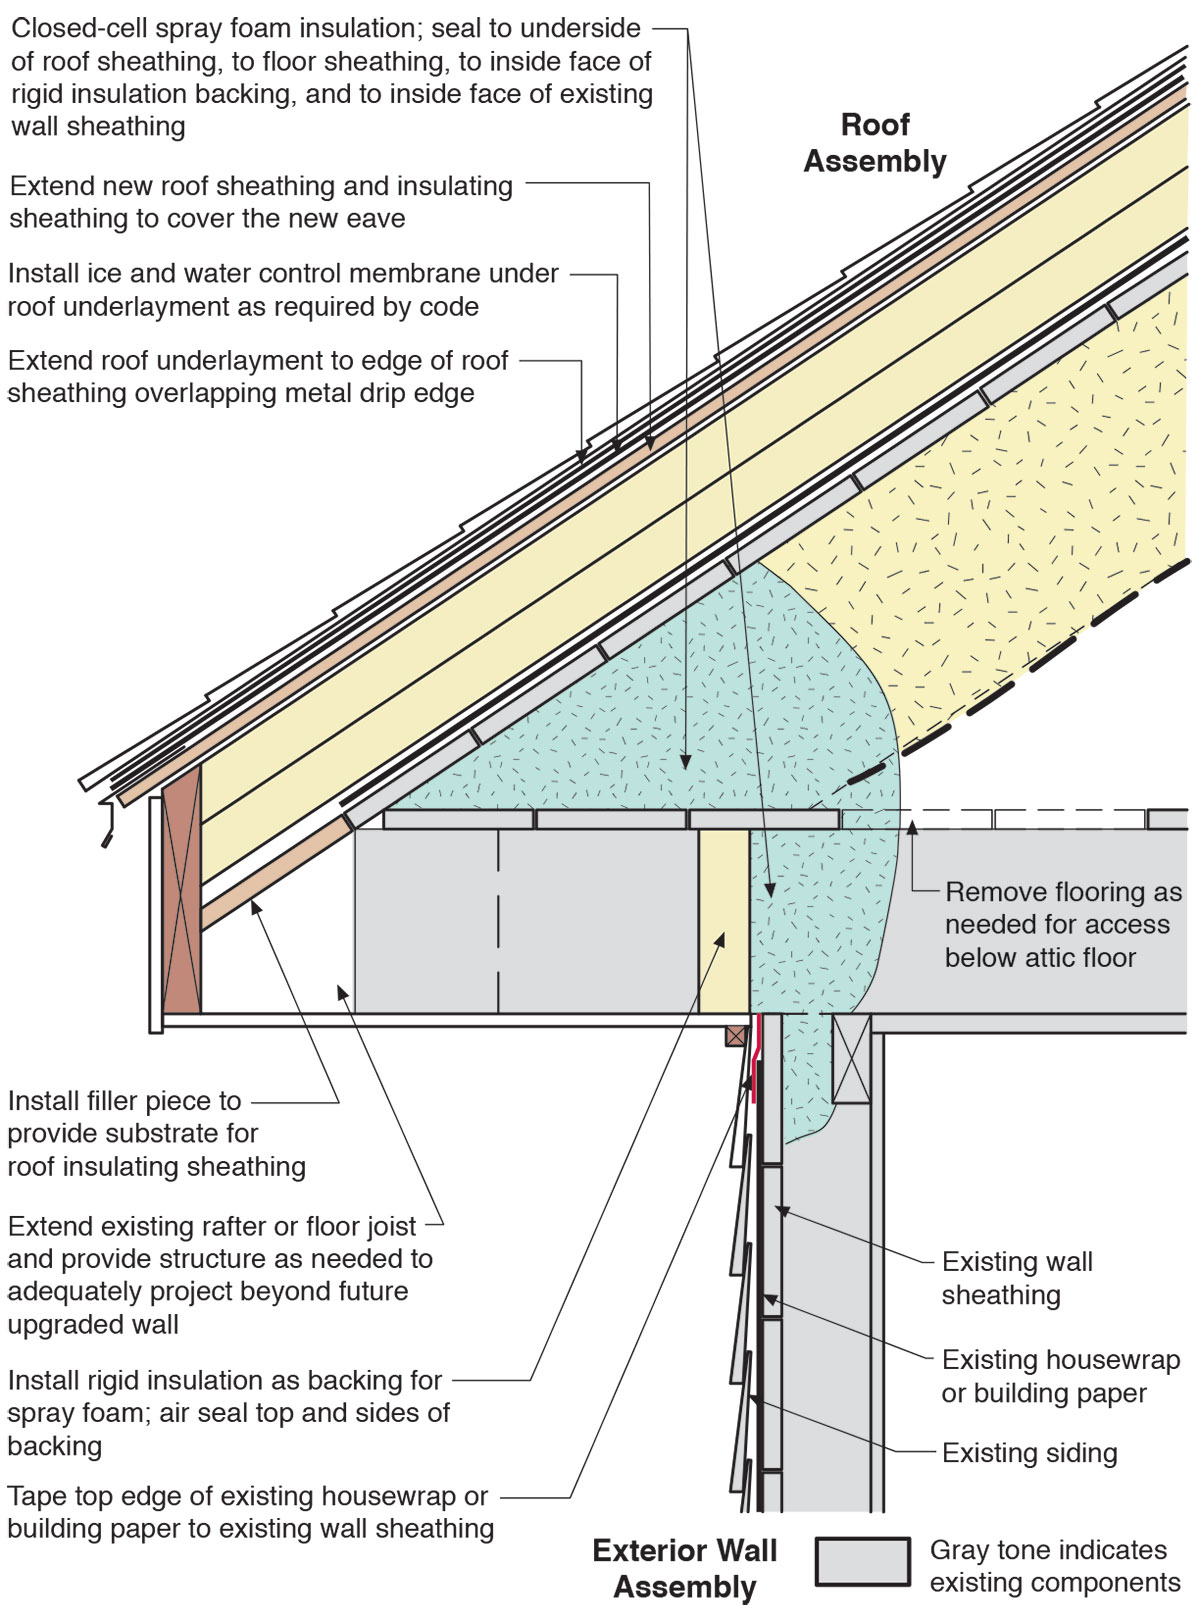
Vented roof assembly at eave retrofitted with rigid foam, spray foam, and fully adhered membrane to air seal the top of wall-to-roof transition
Image
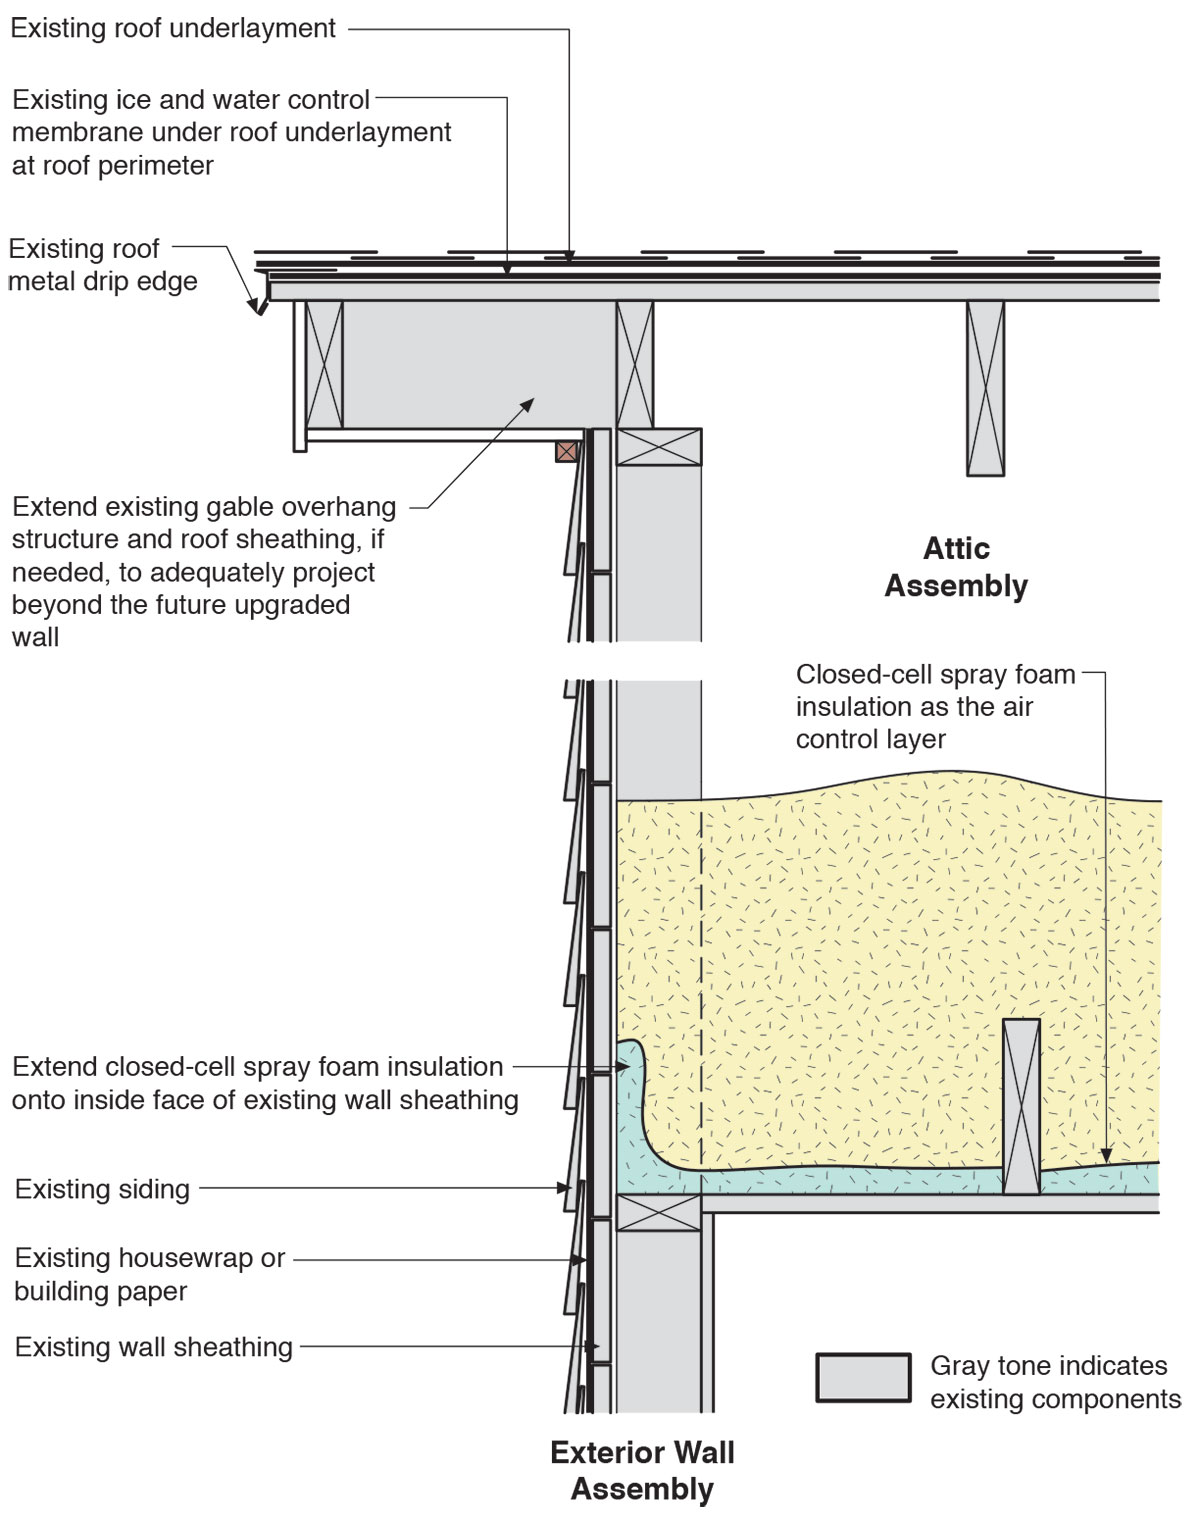
Vented roof assembly at rake retrofitted with spray foam and additional insulation installed at the attic floor and extended to the rake edge
Image
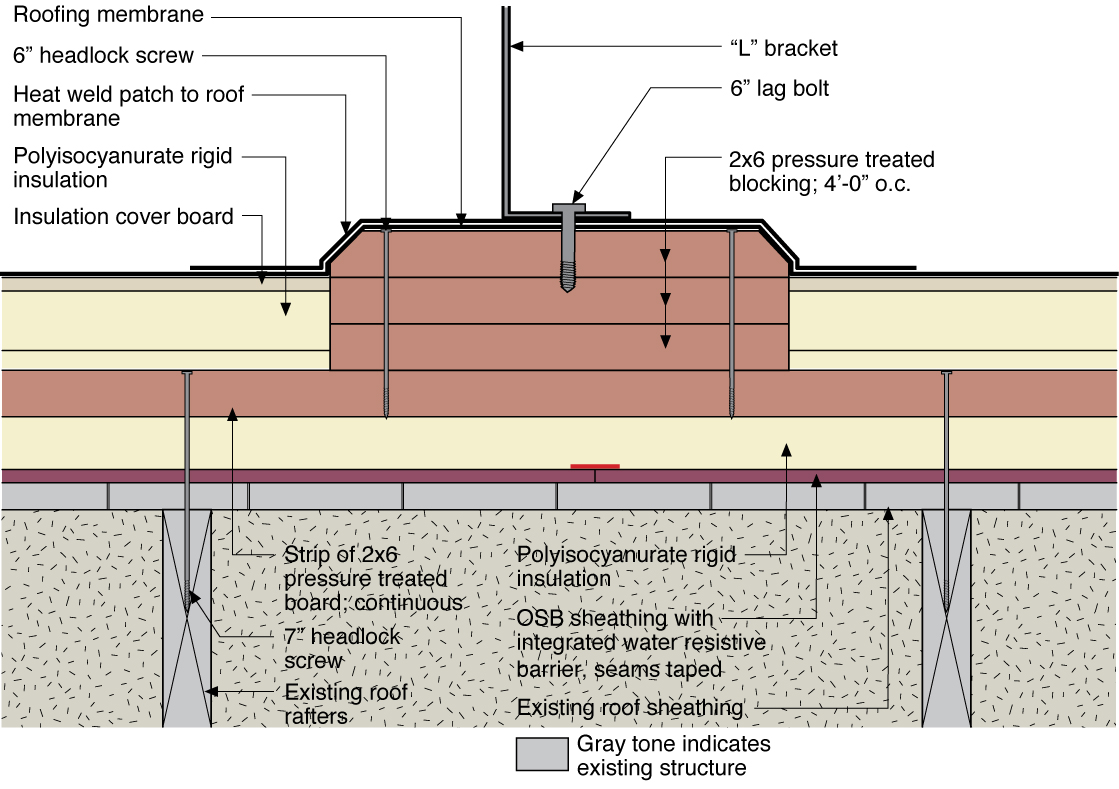
Water management detail for a solar panel rack mounting block installed in rigid foam that was installed over an existing roof
Image
Image
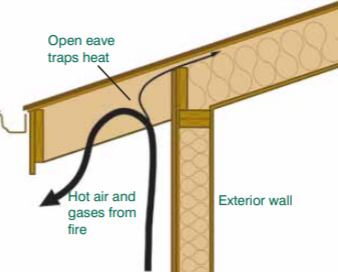
Wrong - An open eave with no soffit covering can trap rising hot air and embers from a wildfire.
Image
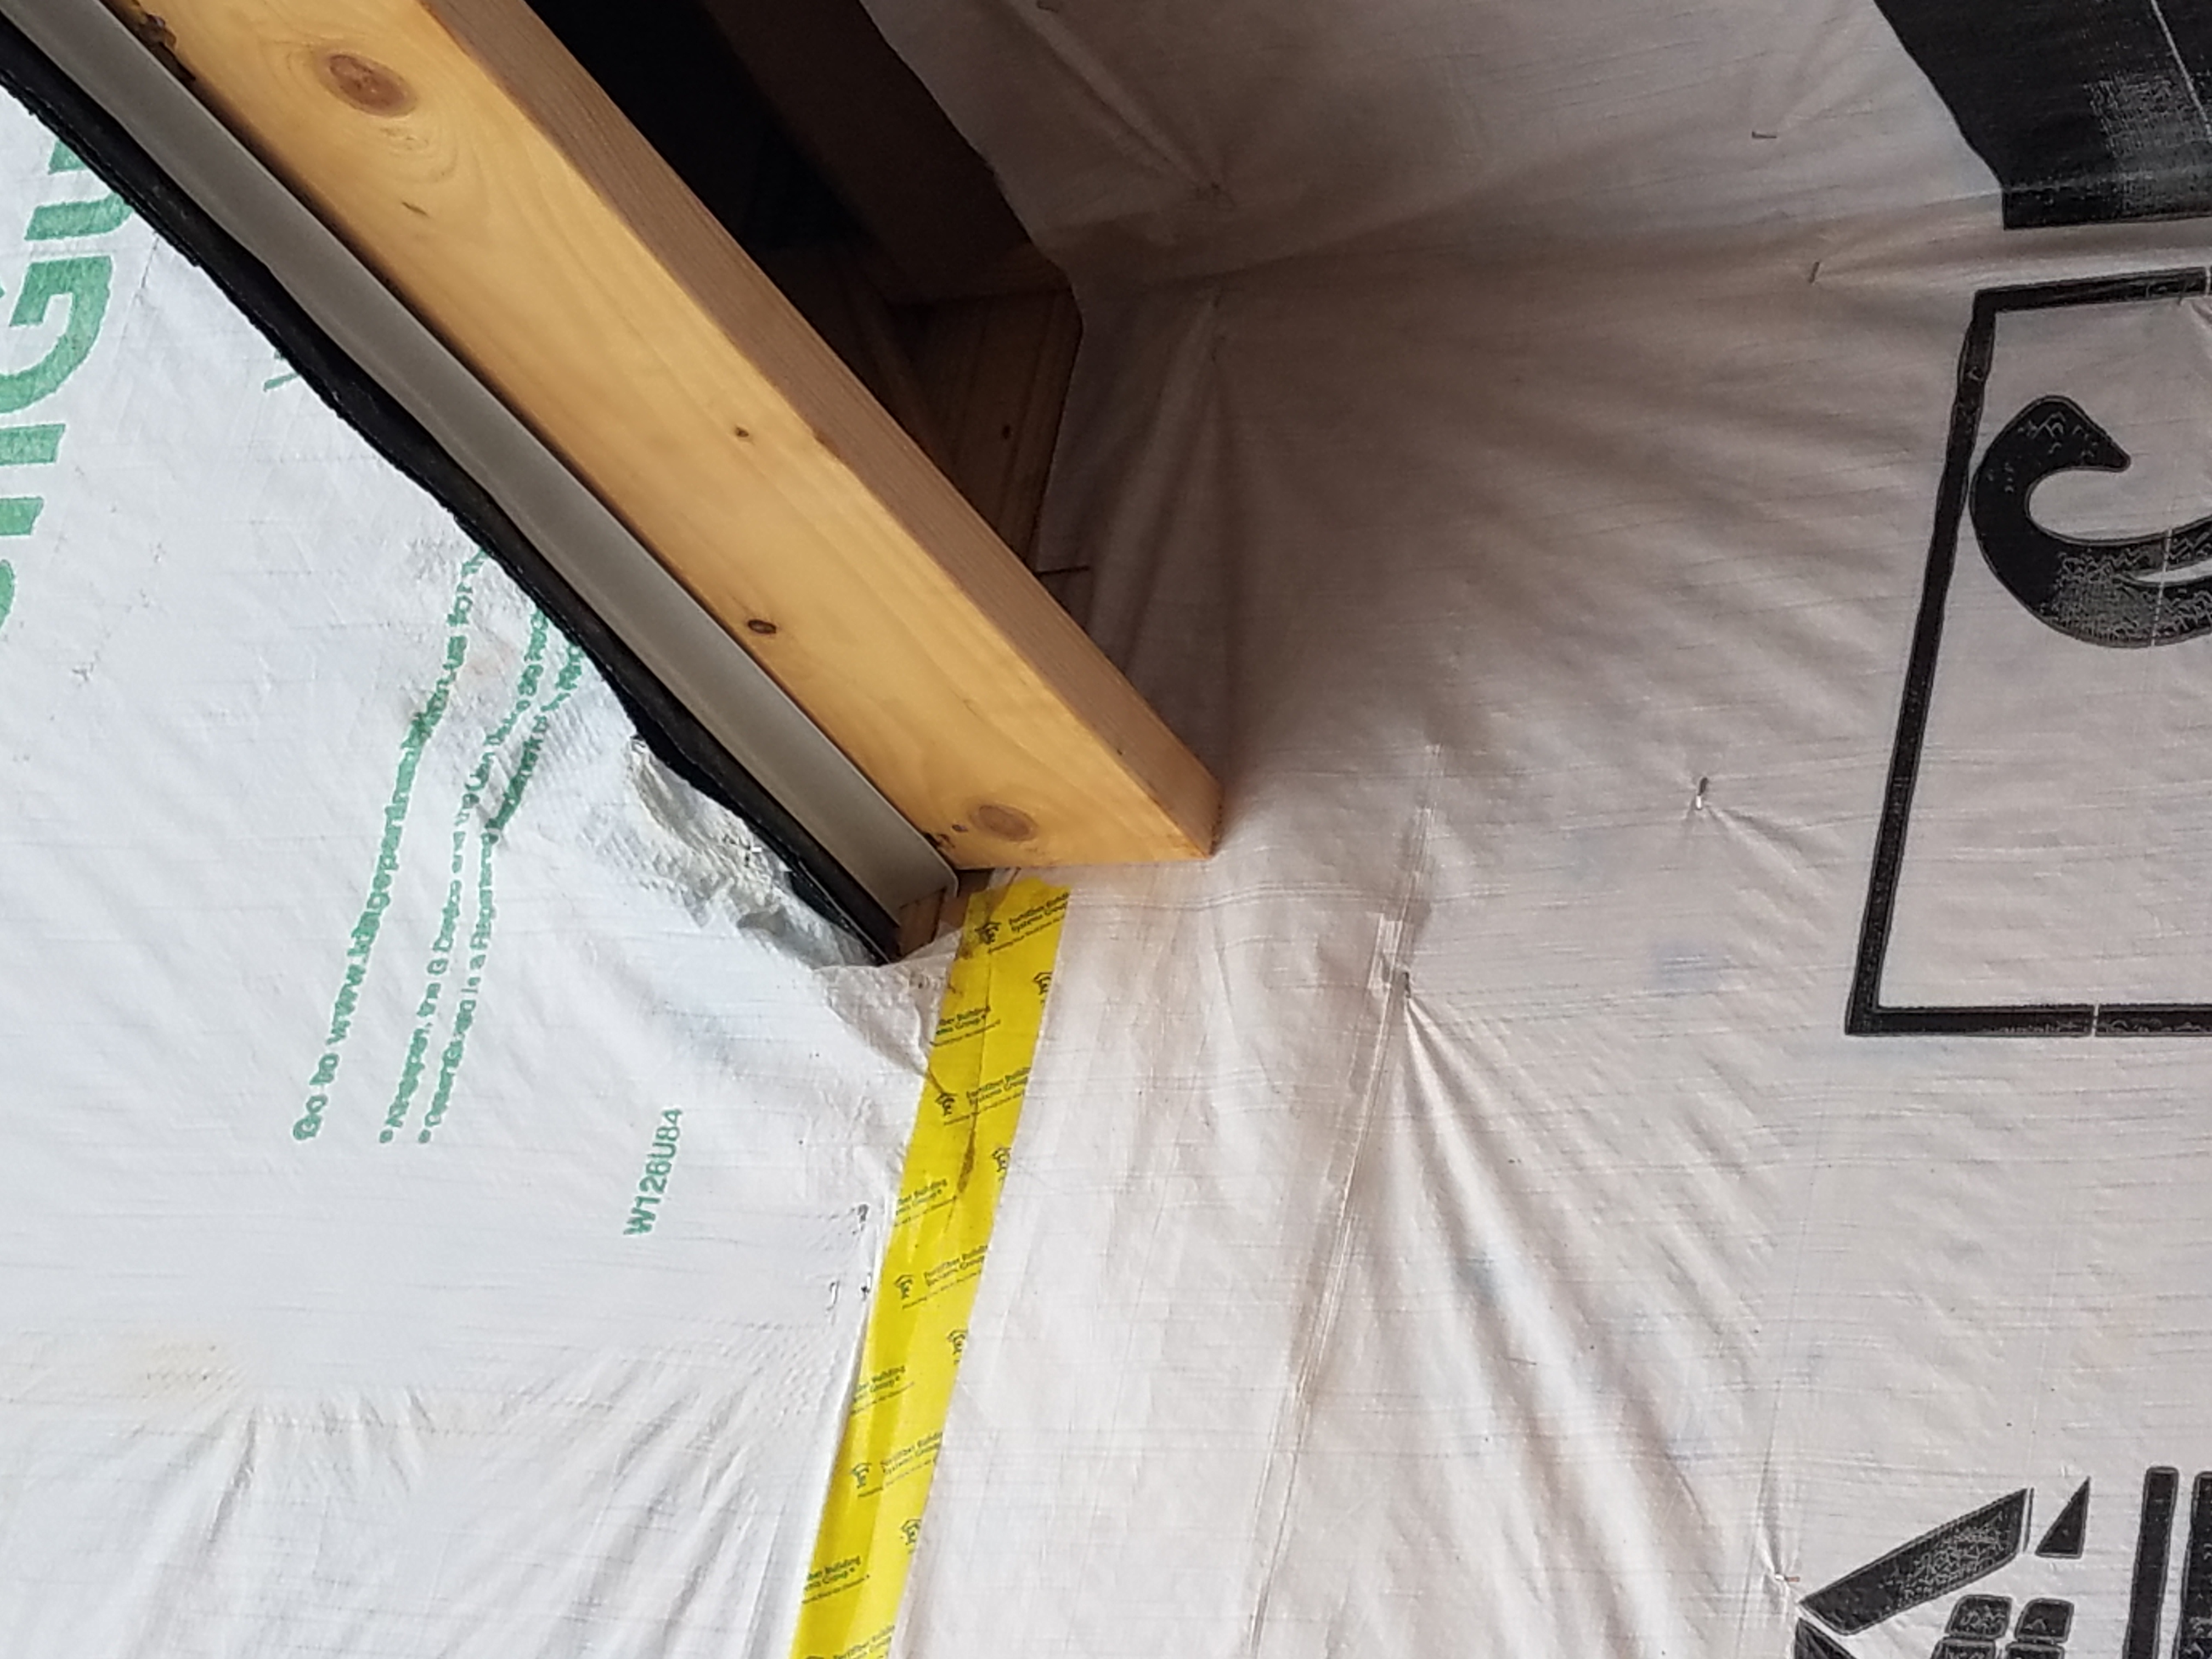
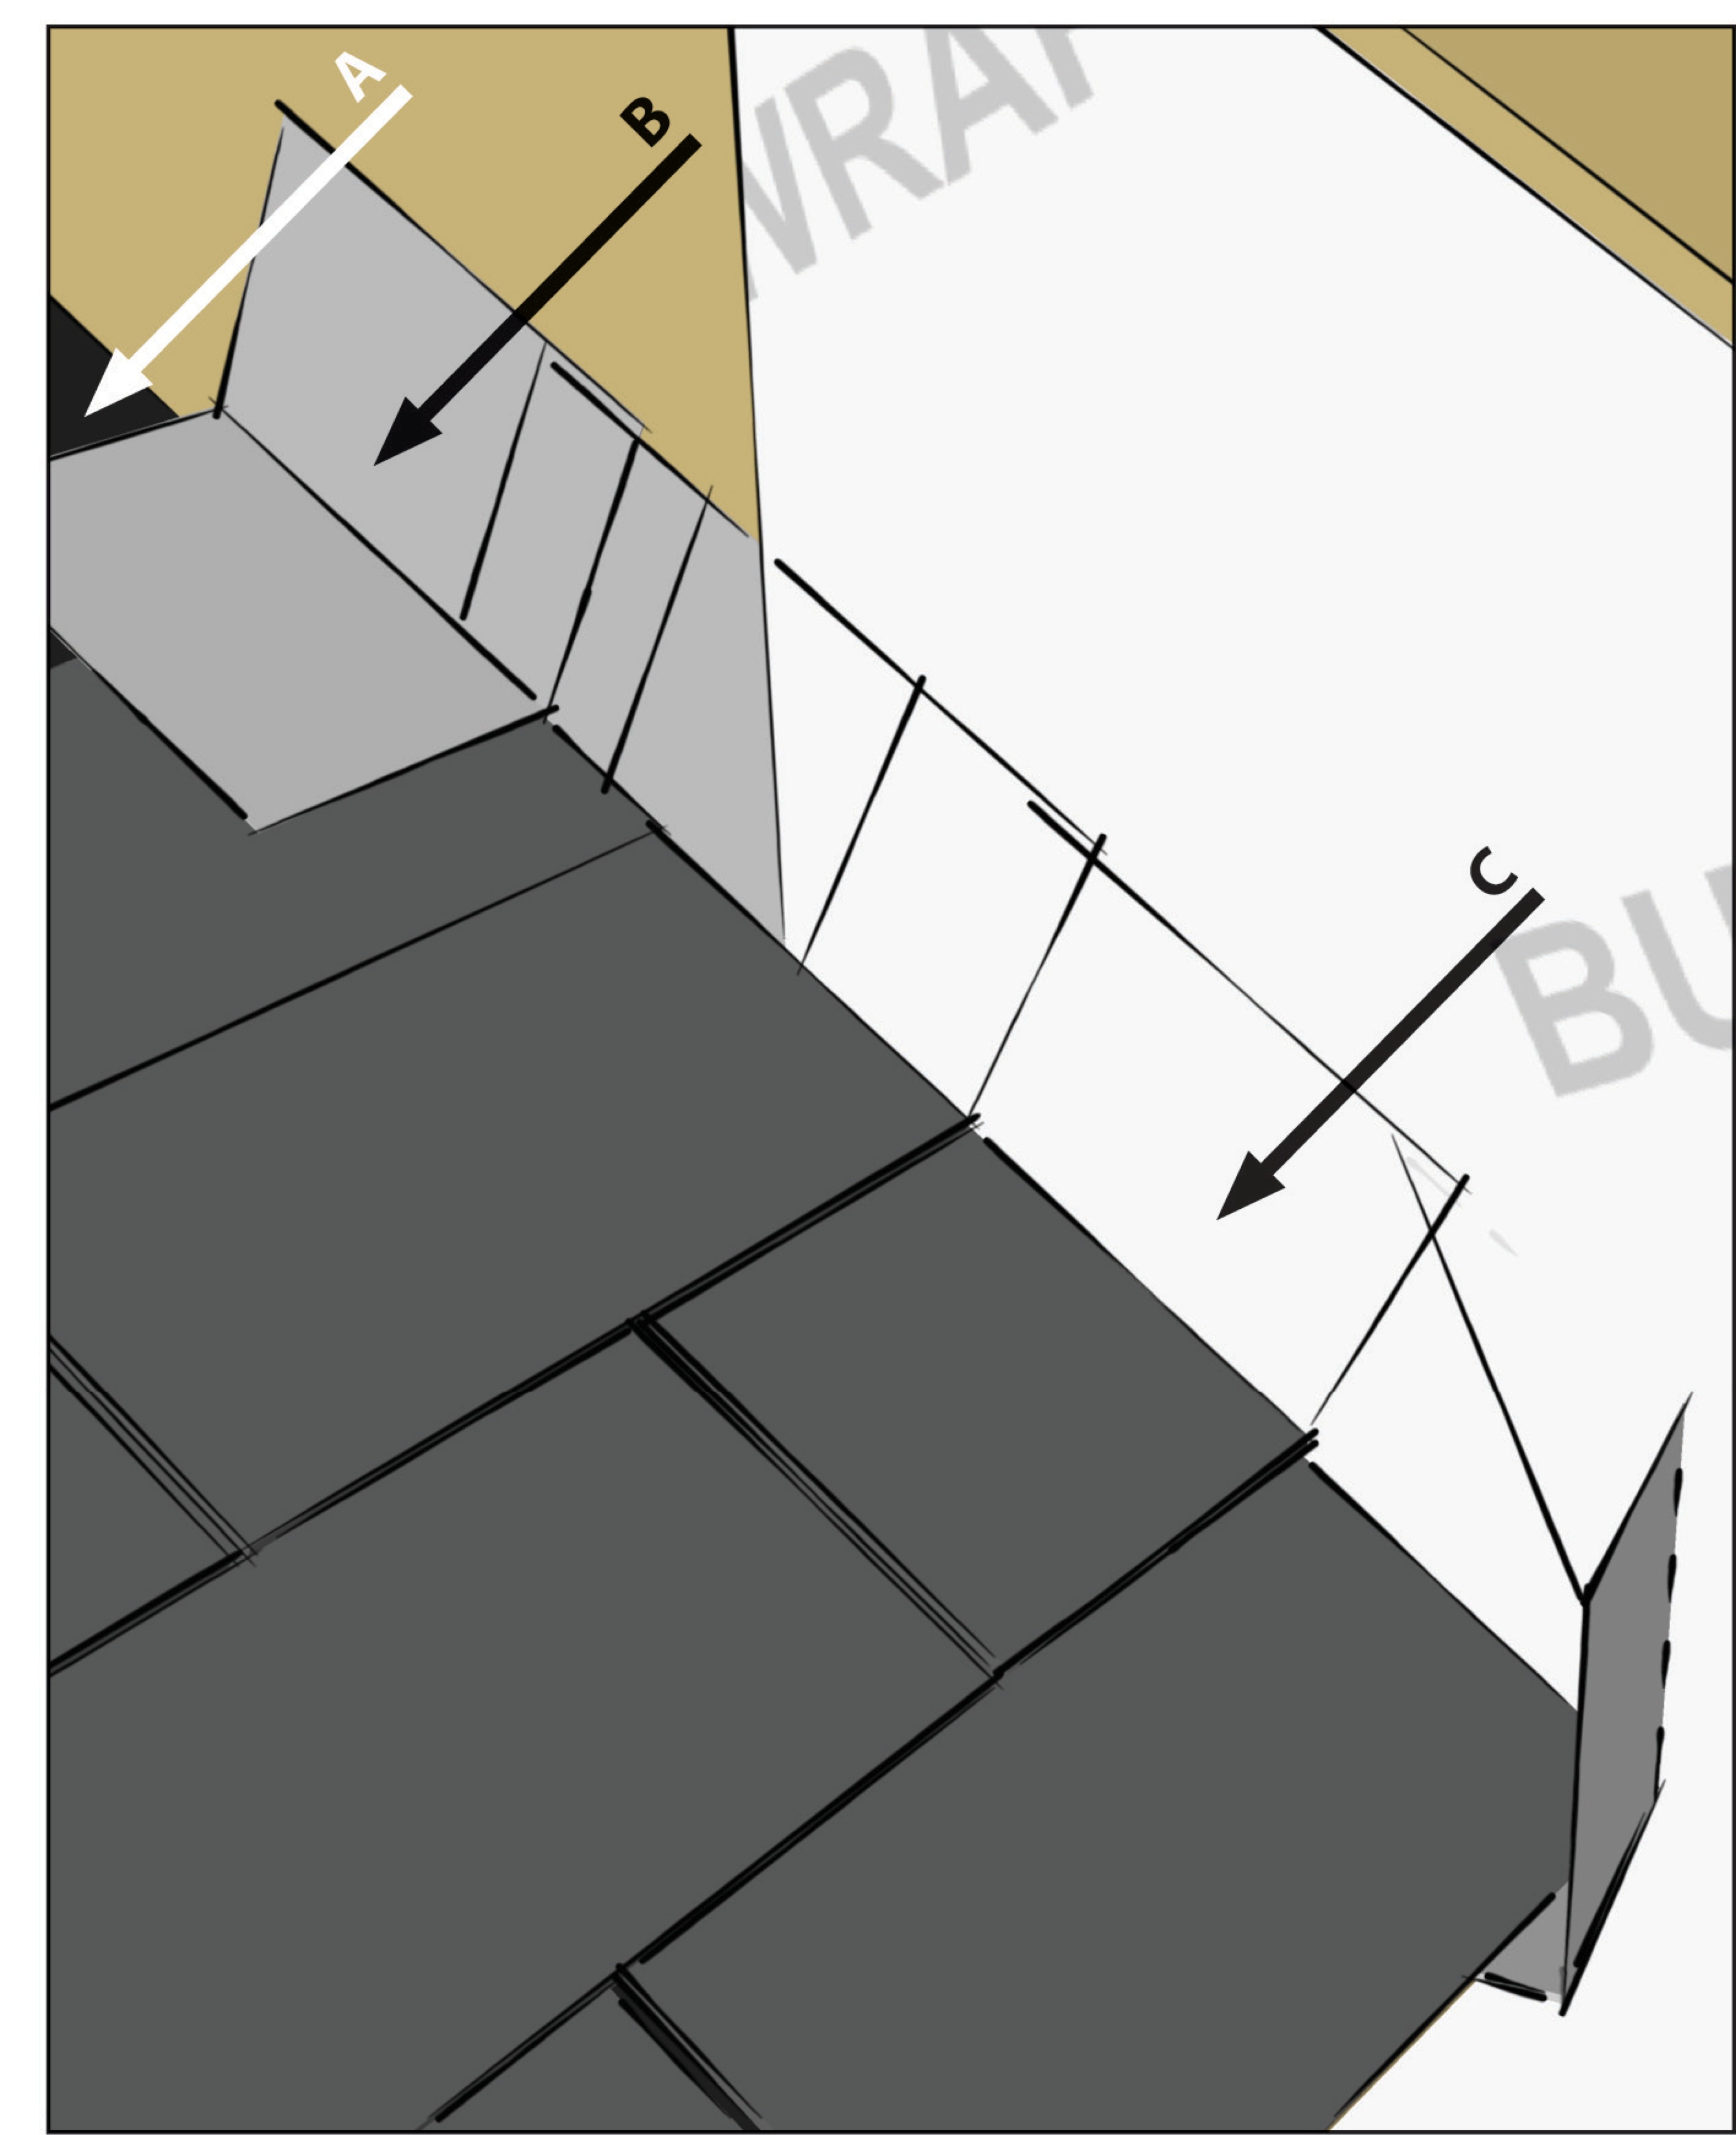
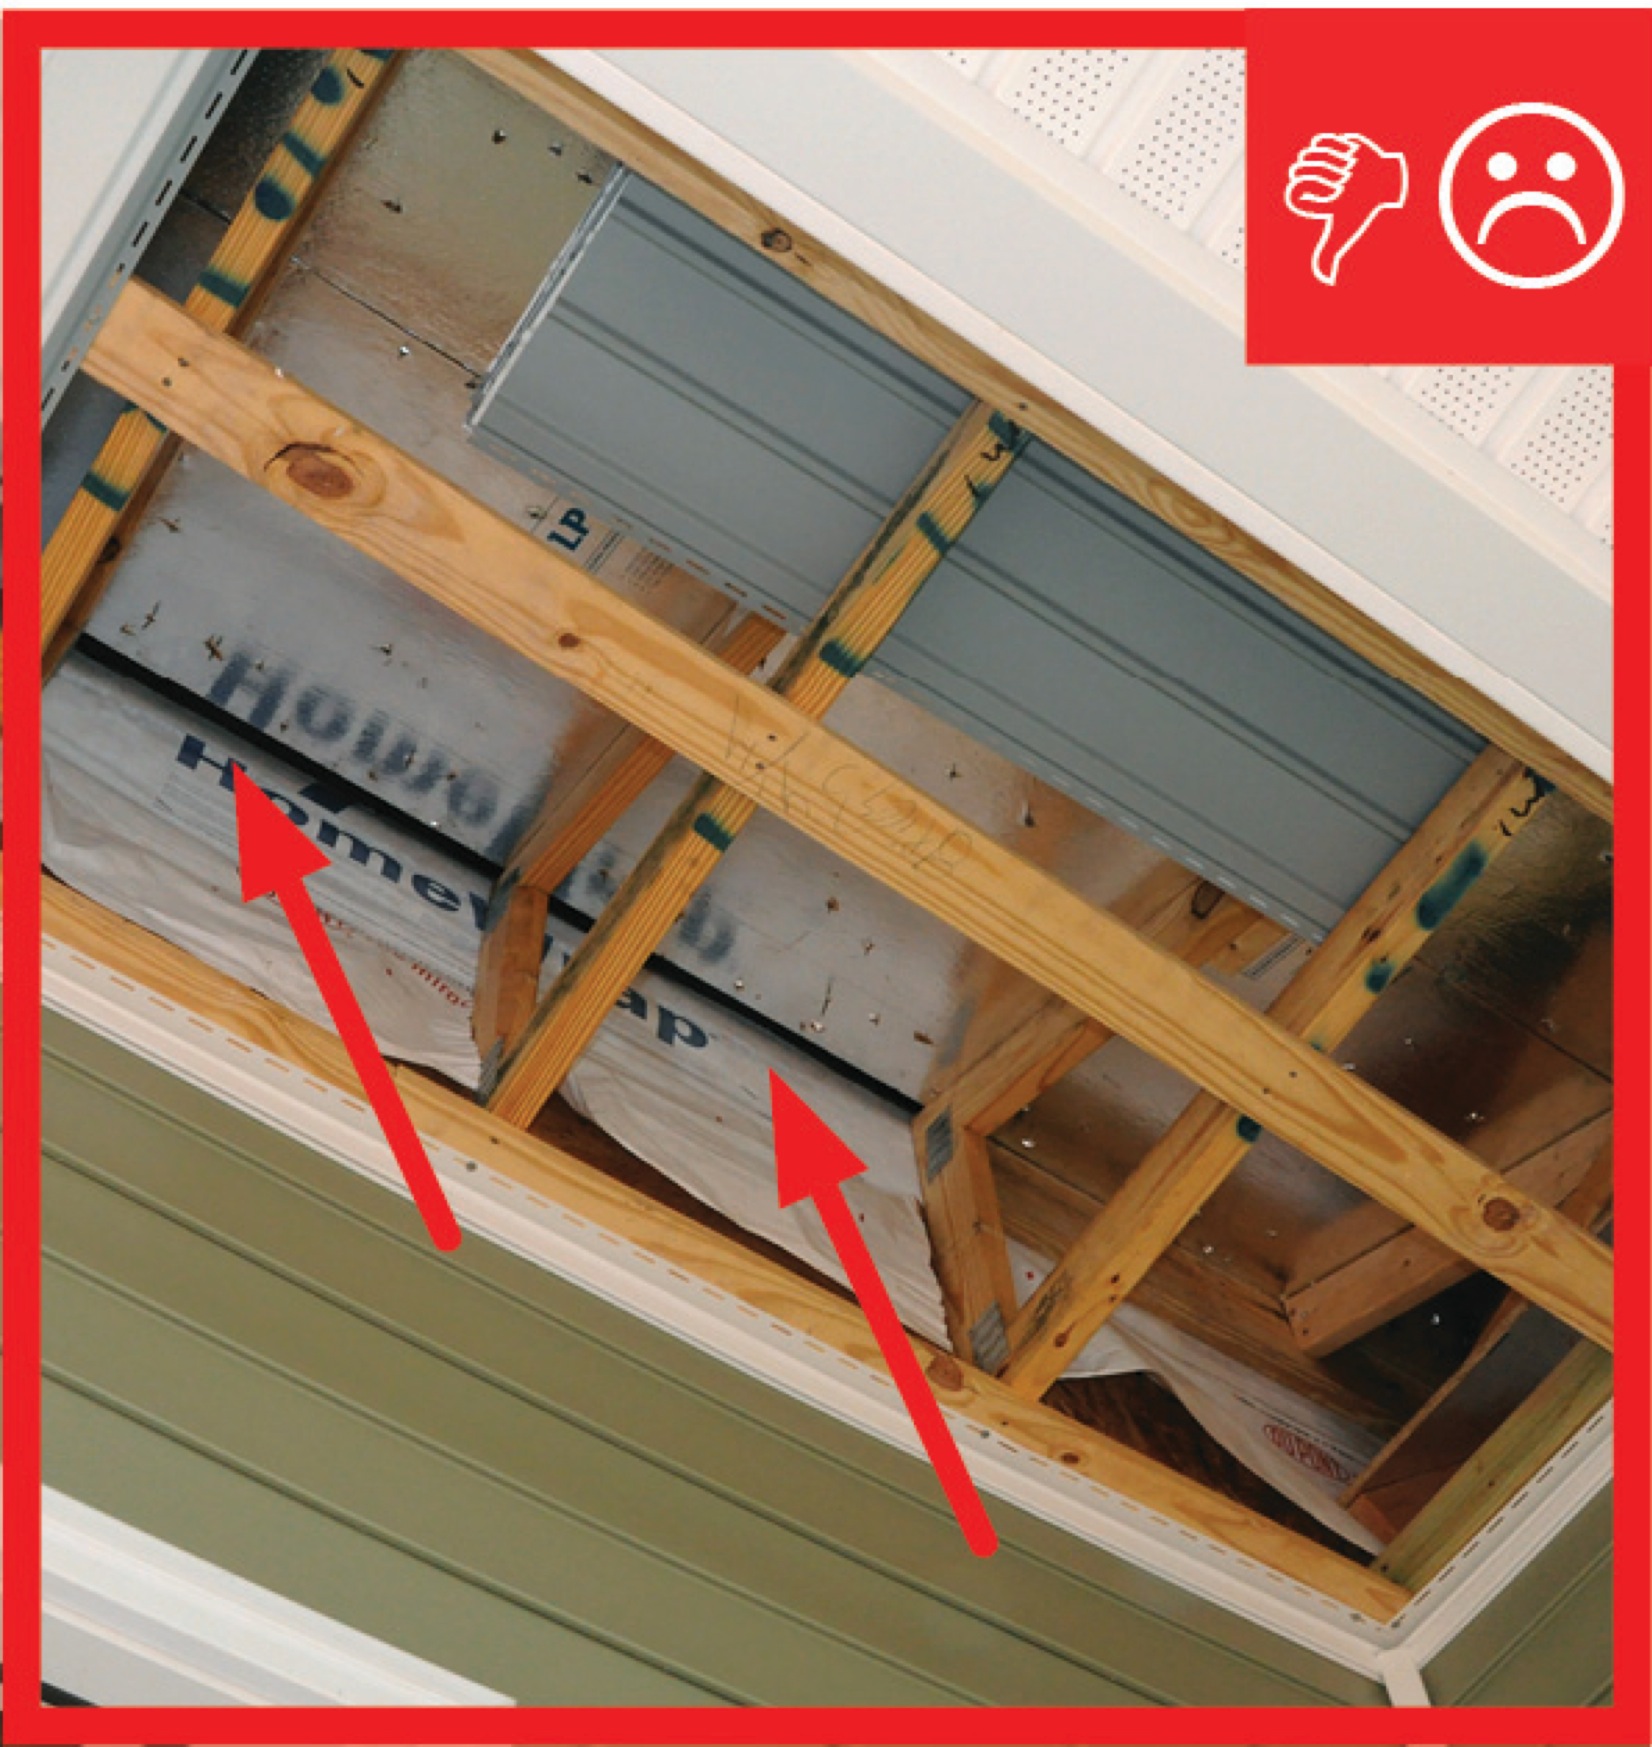
Wrong - House wrap was not properly cut and adhered where the roof meets the wall so water is likely to get behind the house wrap.
Image
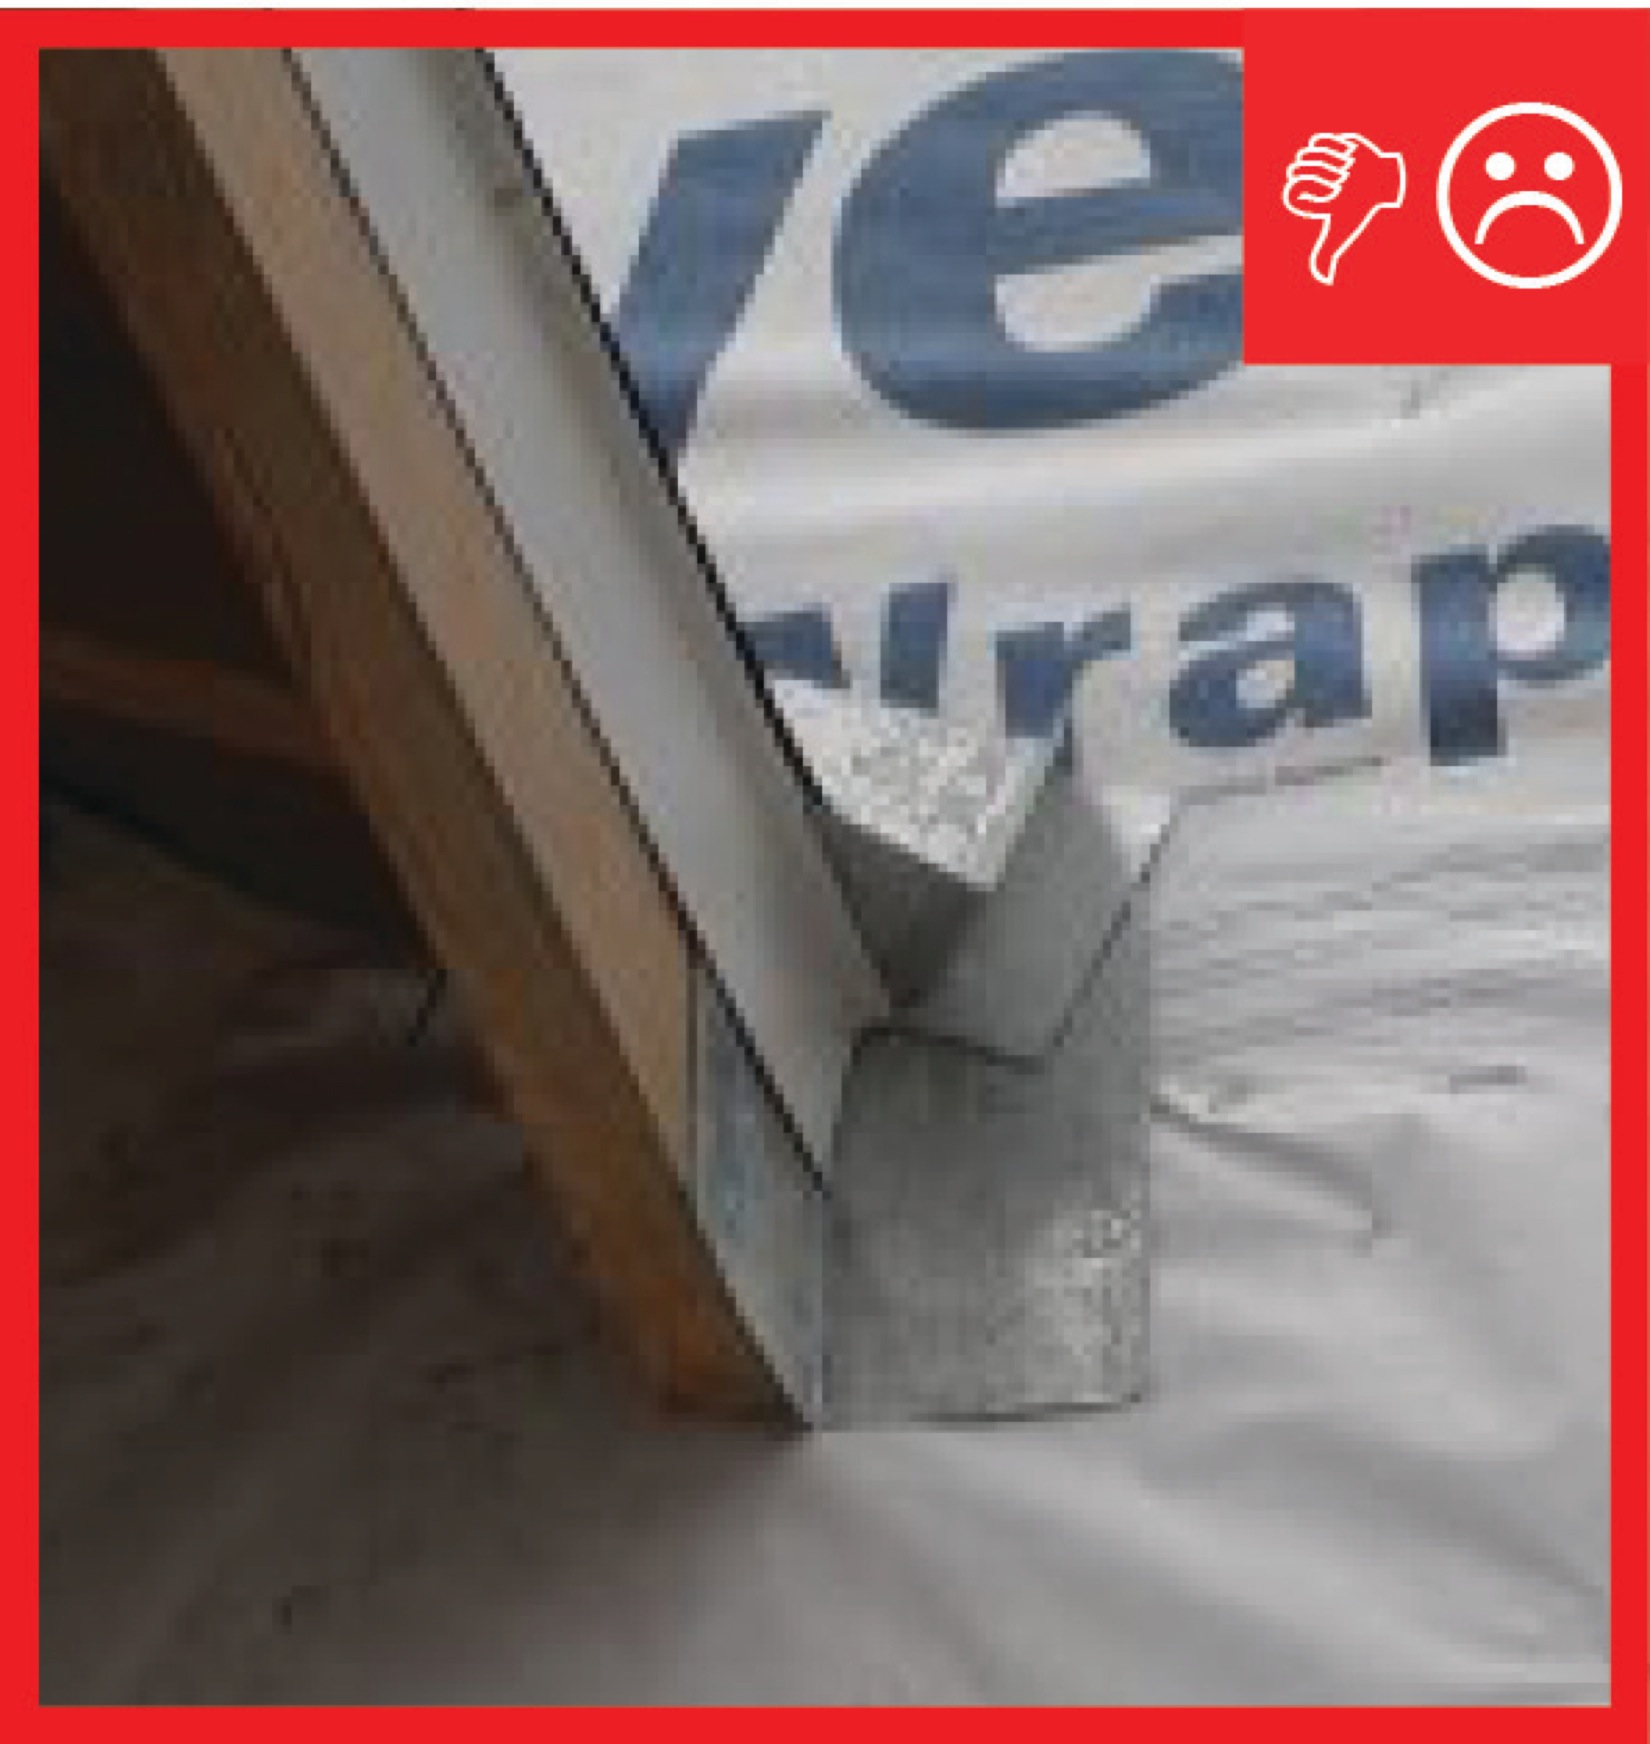
Wrong - House wrap was poorly cut at wall interface and not taped leaving wood exposed and vulnerable to water entry.
Image
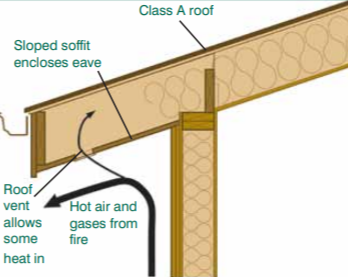
Wrong - If the soffit is applied directly to the rafter eave, it forms a sloping soffit, which creates a pocket that can trap hot air and embers from a wildfire.
Image

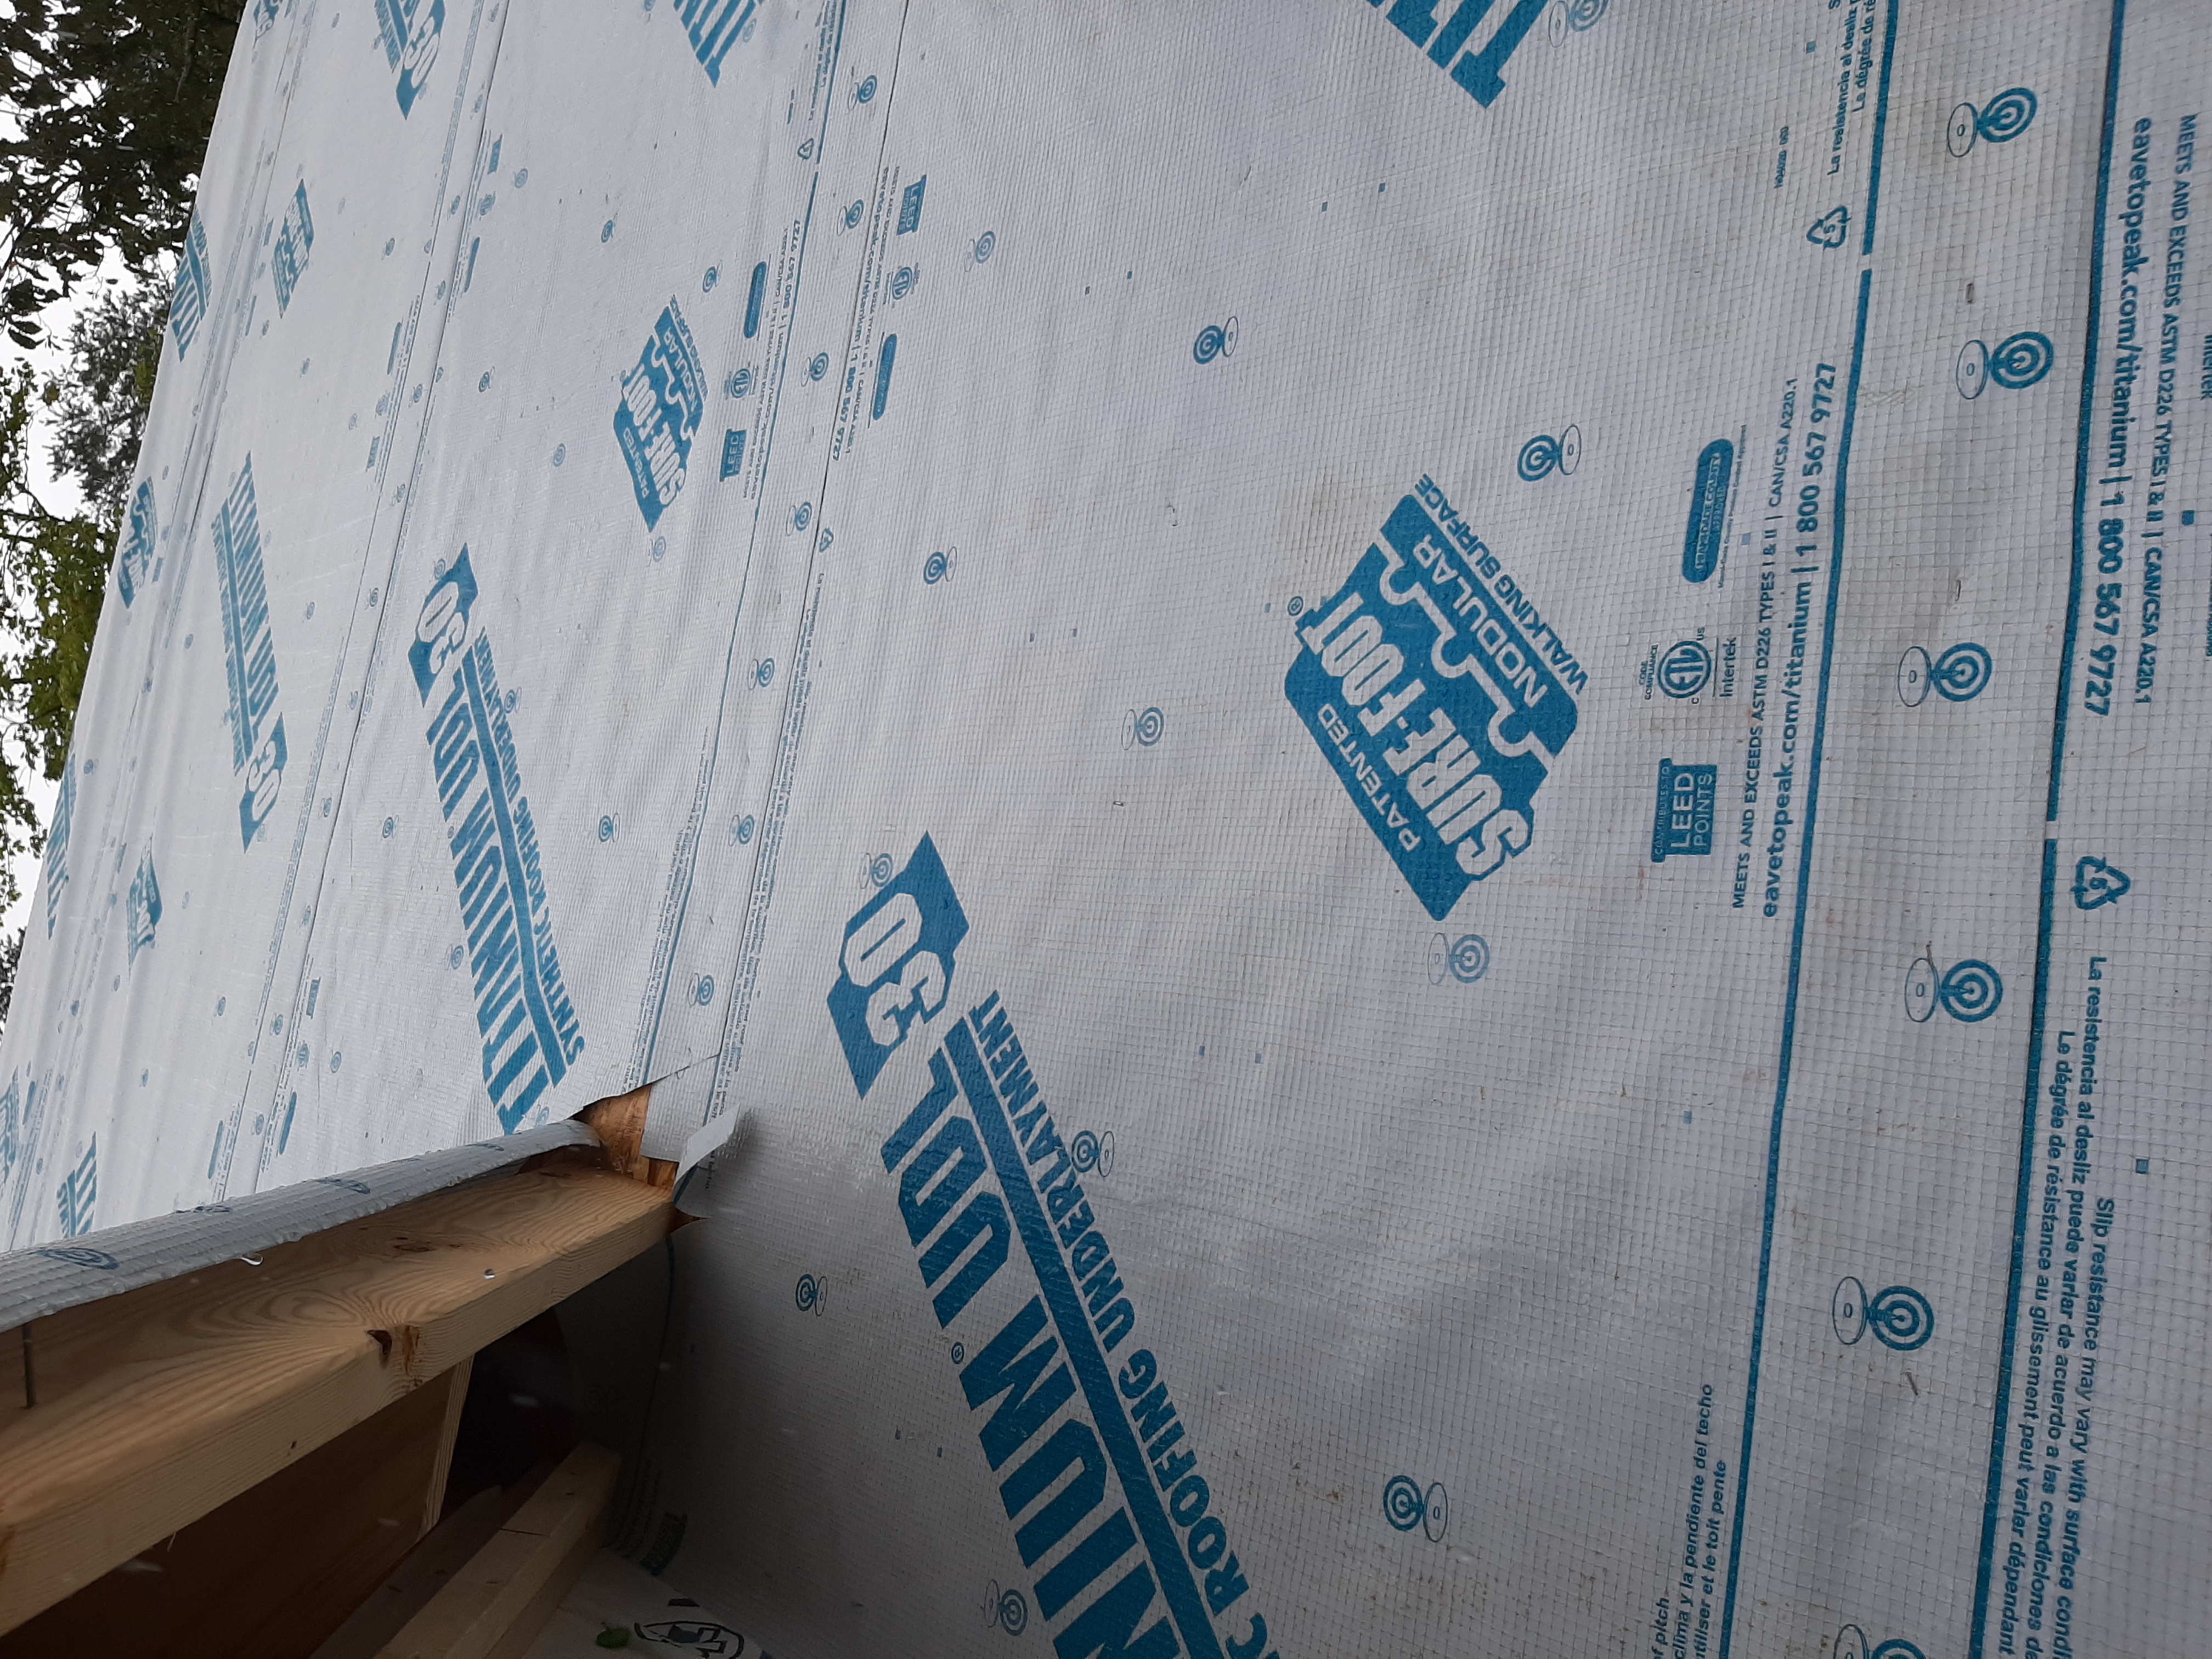
Wrong - Roof is missing metal drip edge to cover the edge of OSB roof decking, roof underlayment should be trimmed back, and asphalt shingles are poorly installed.
Image
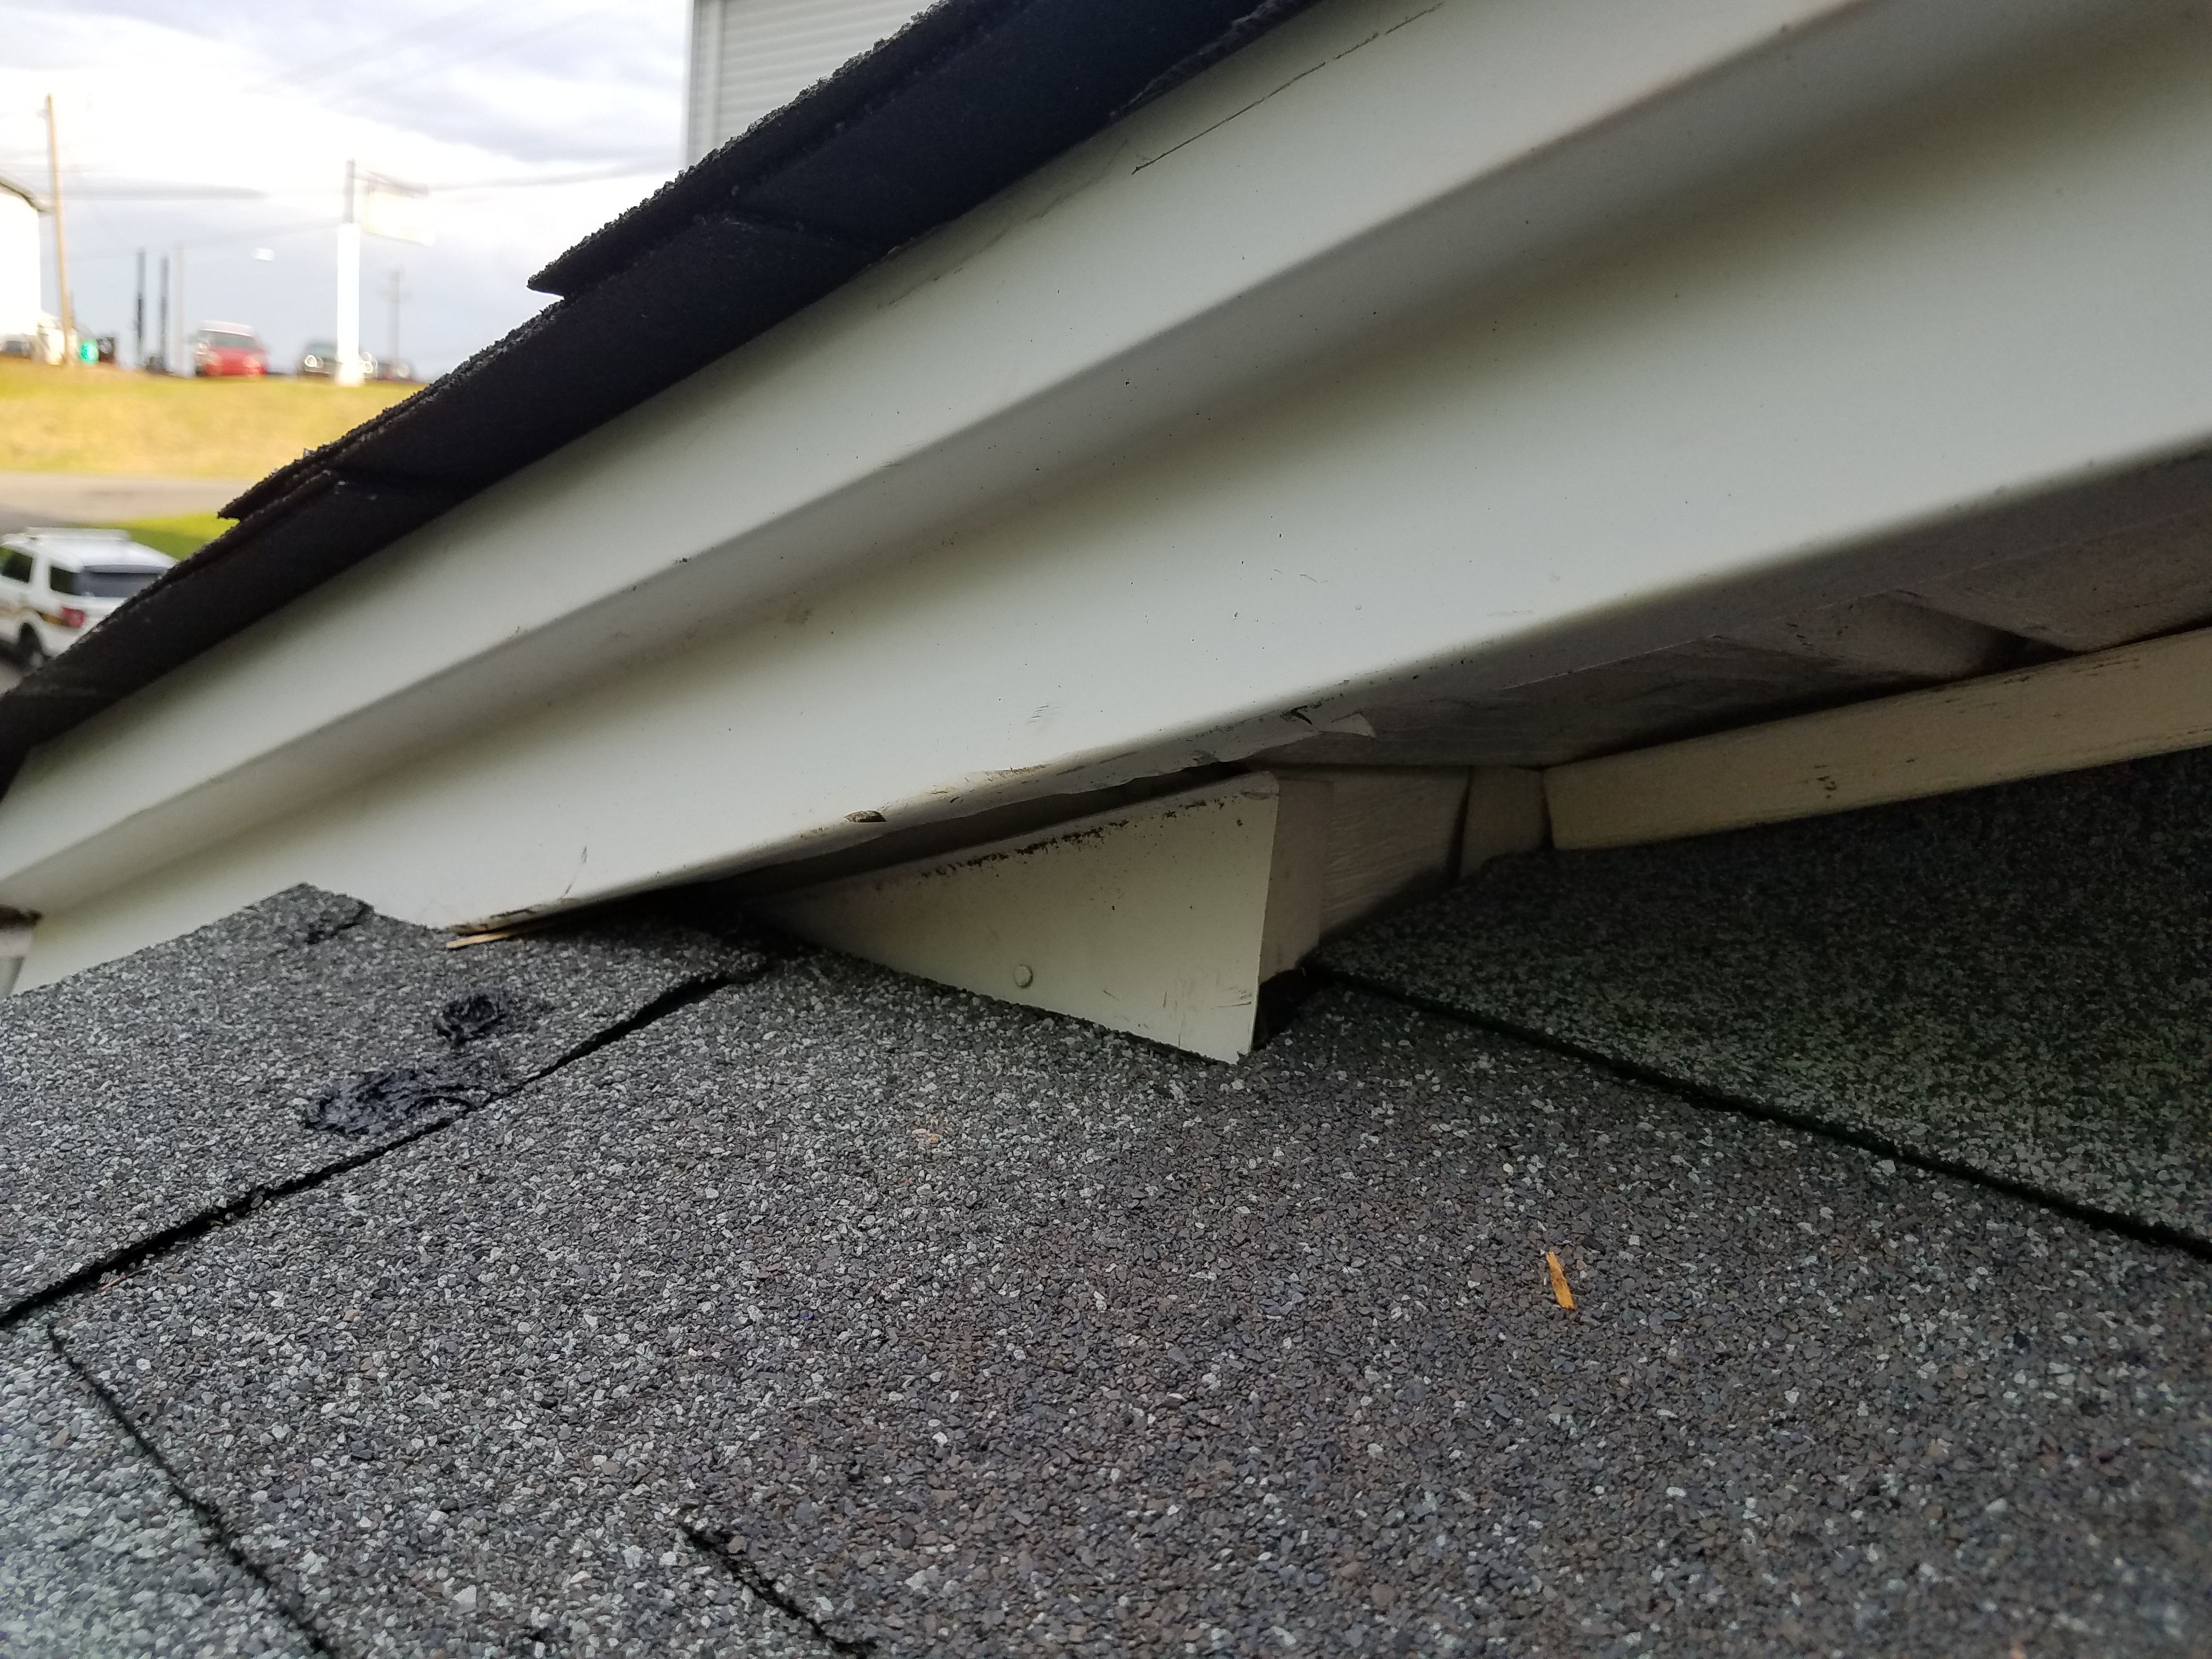
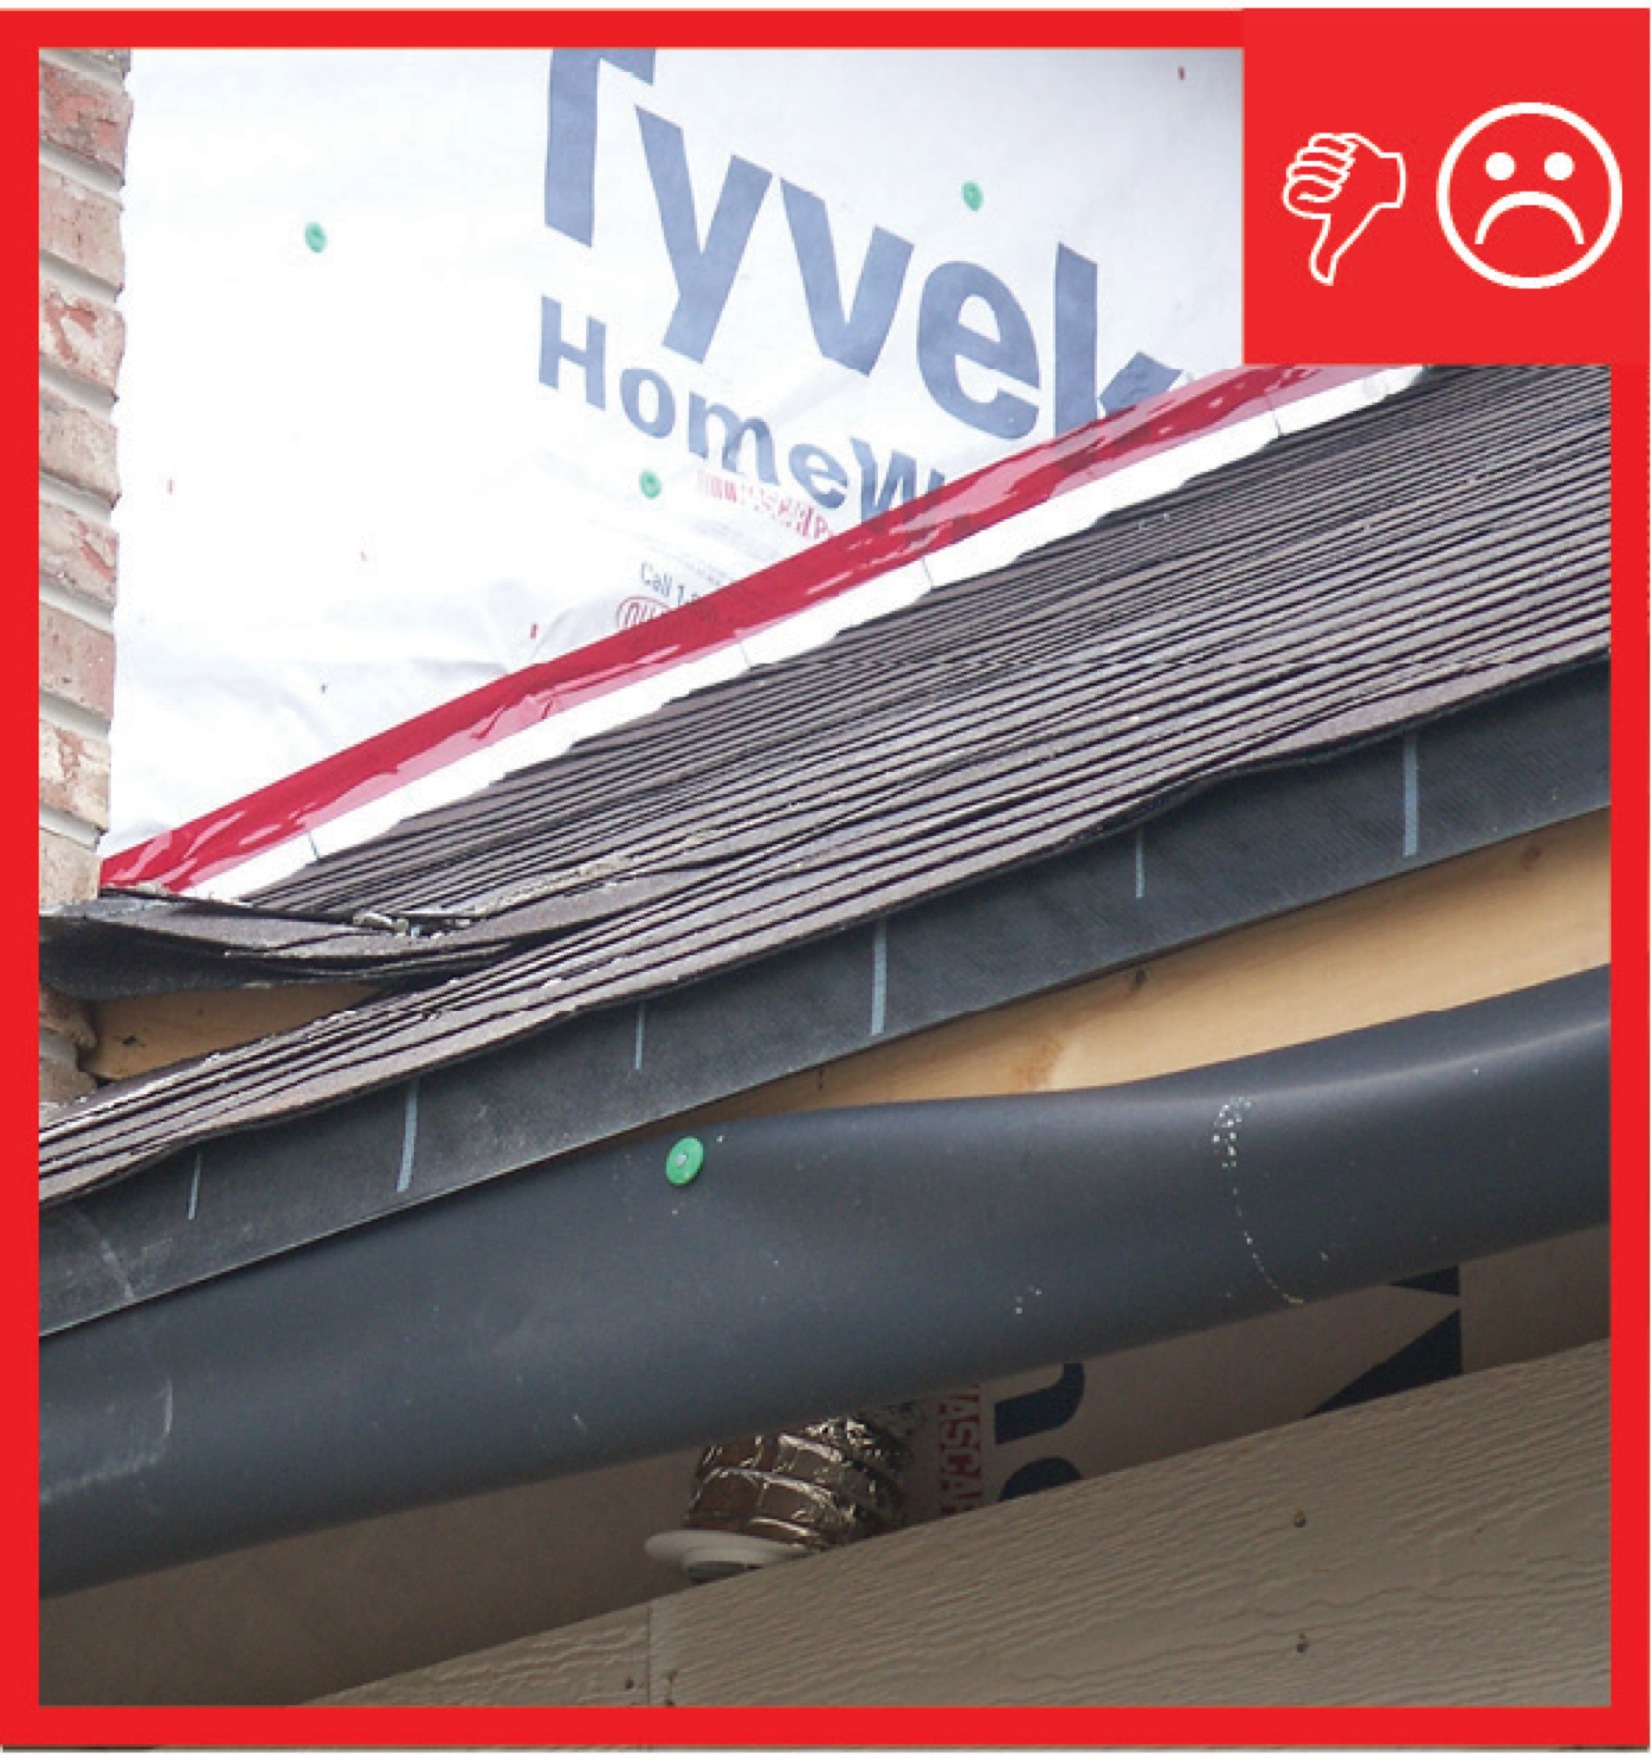
Wrong - Roof-wall juncture lacks metal flashing and is poorly designed, thus encouraging water entry.
Image

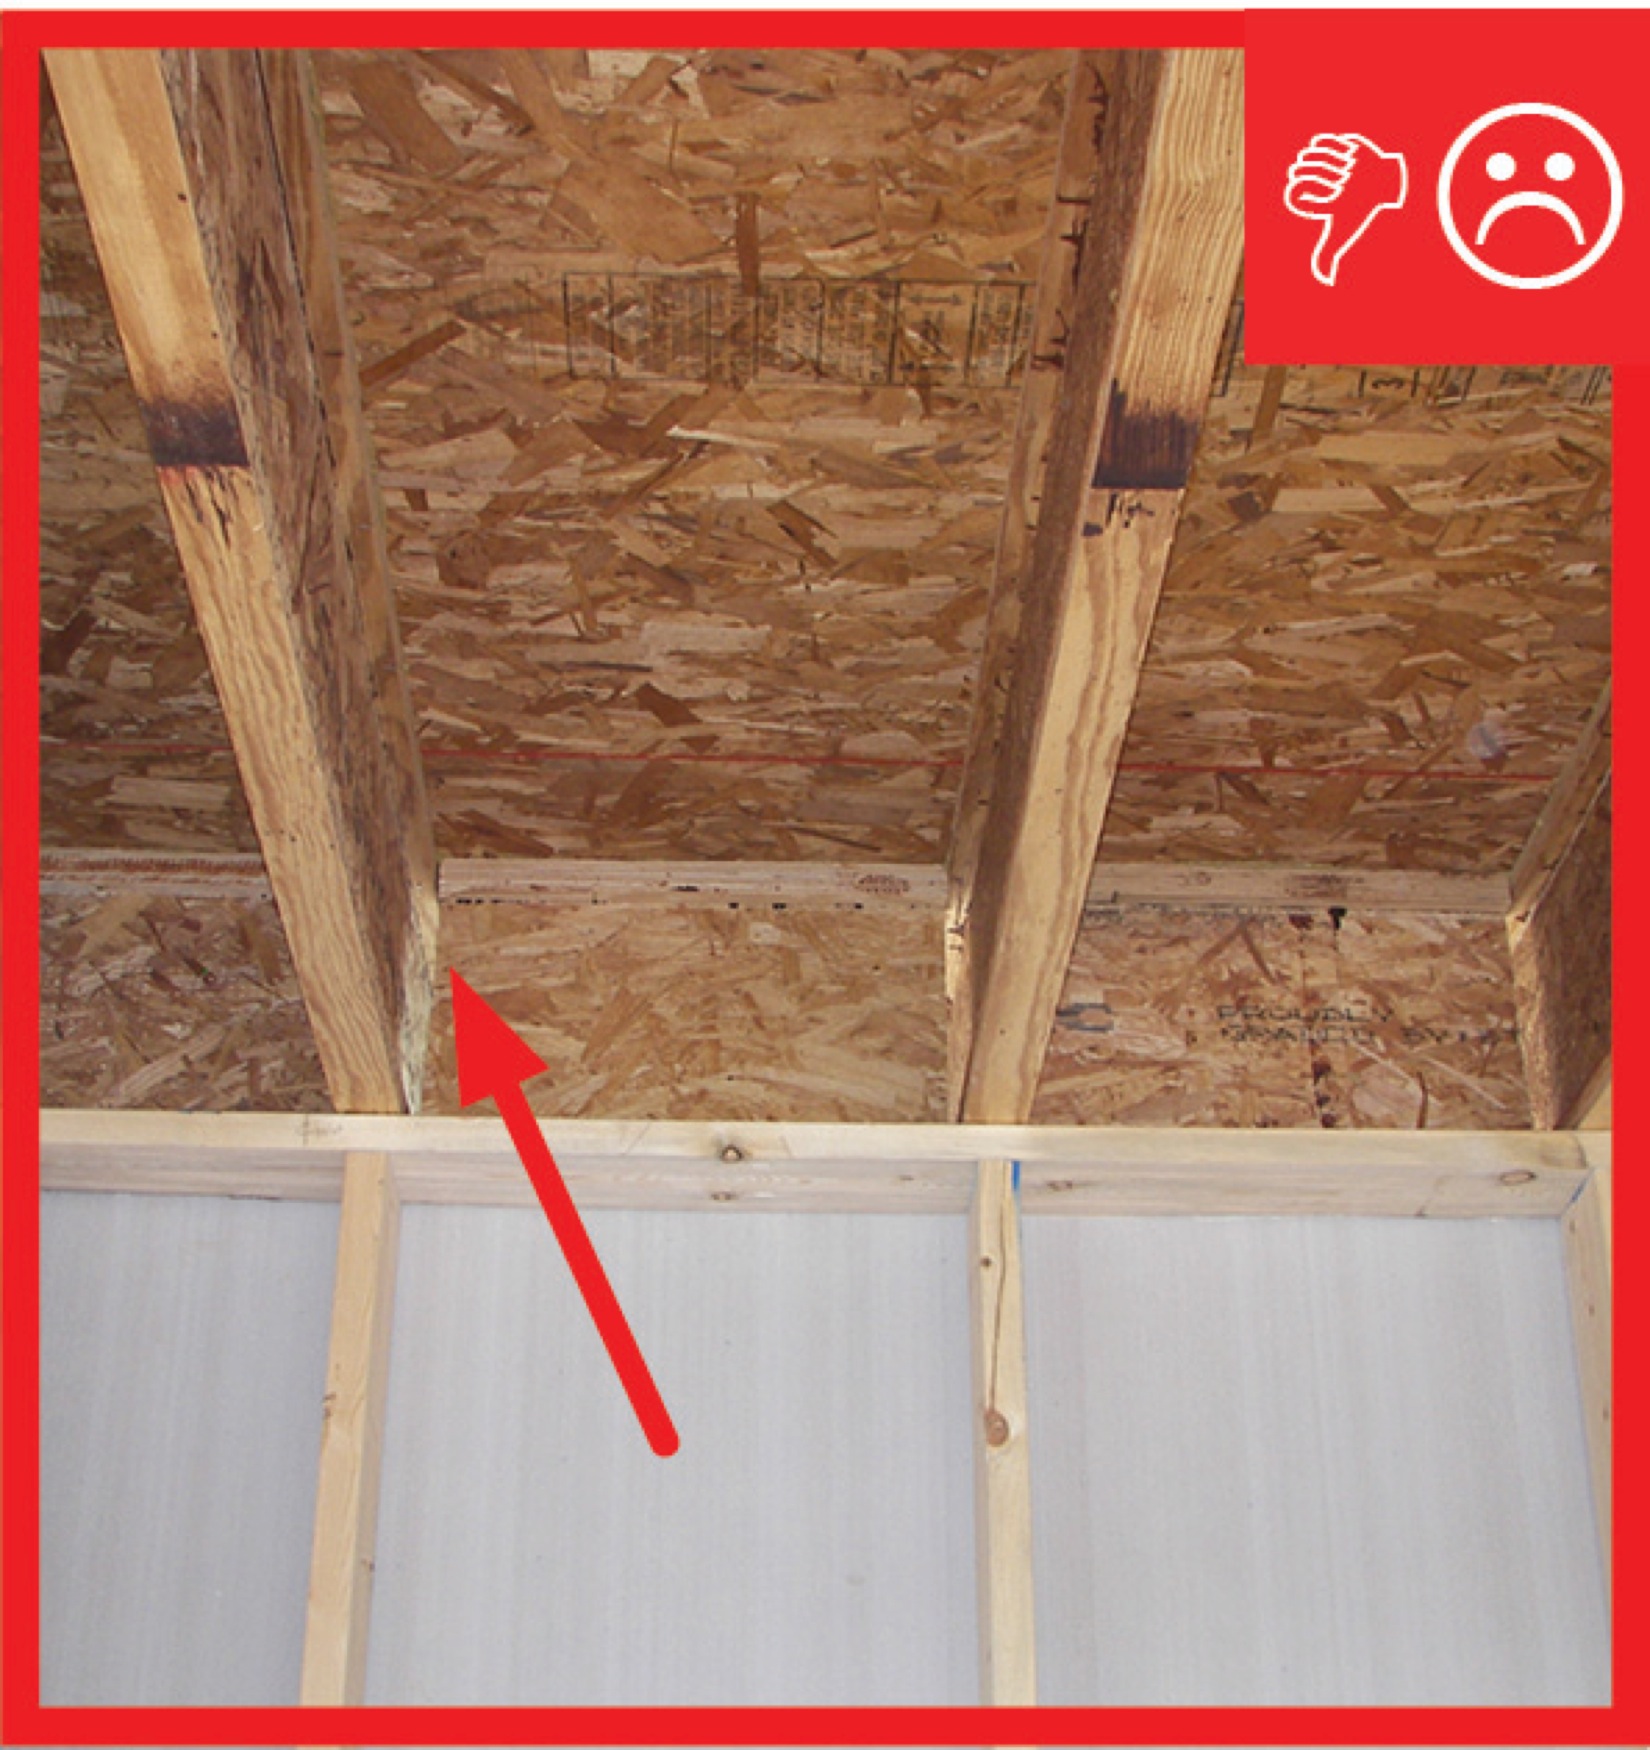
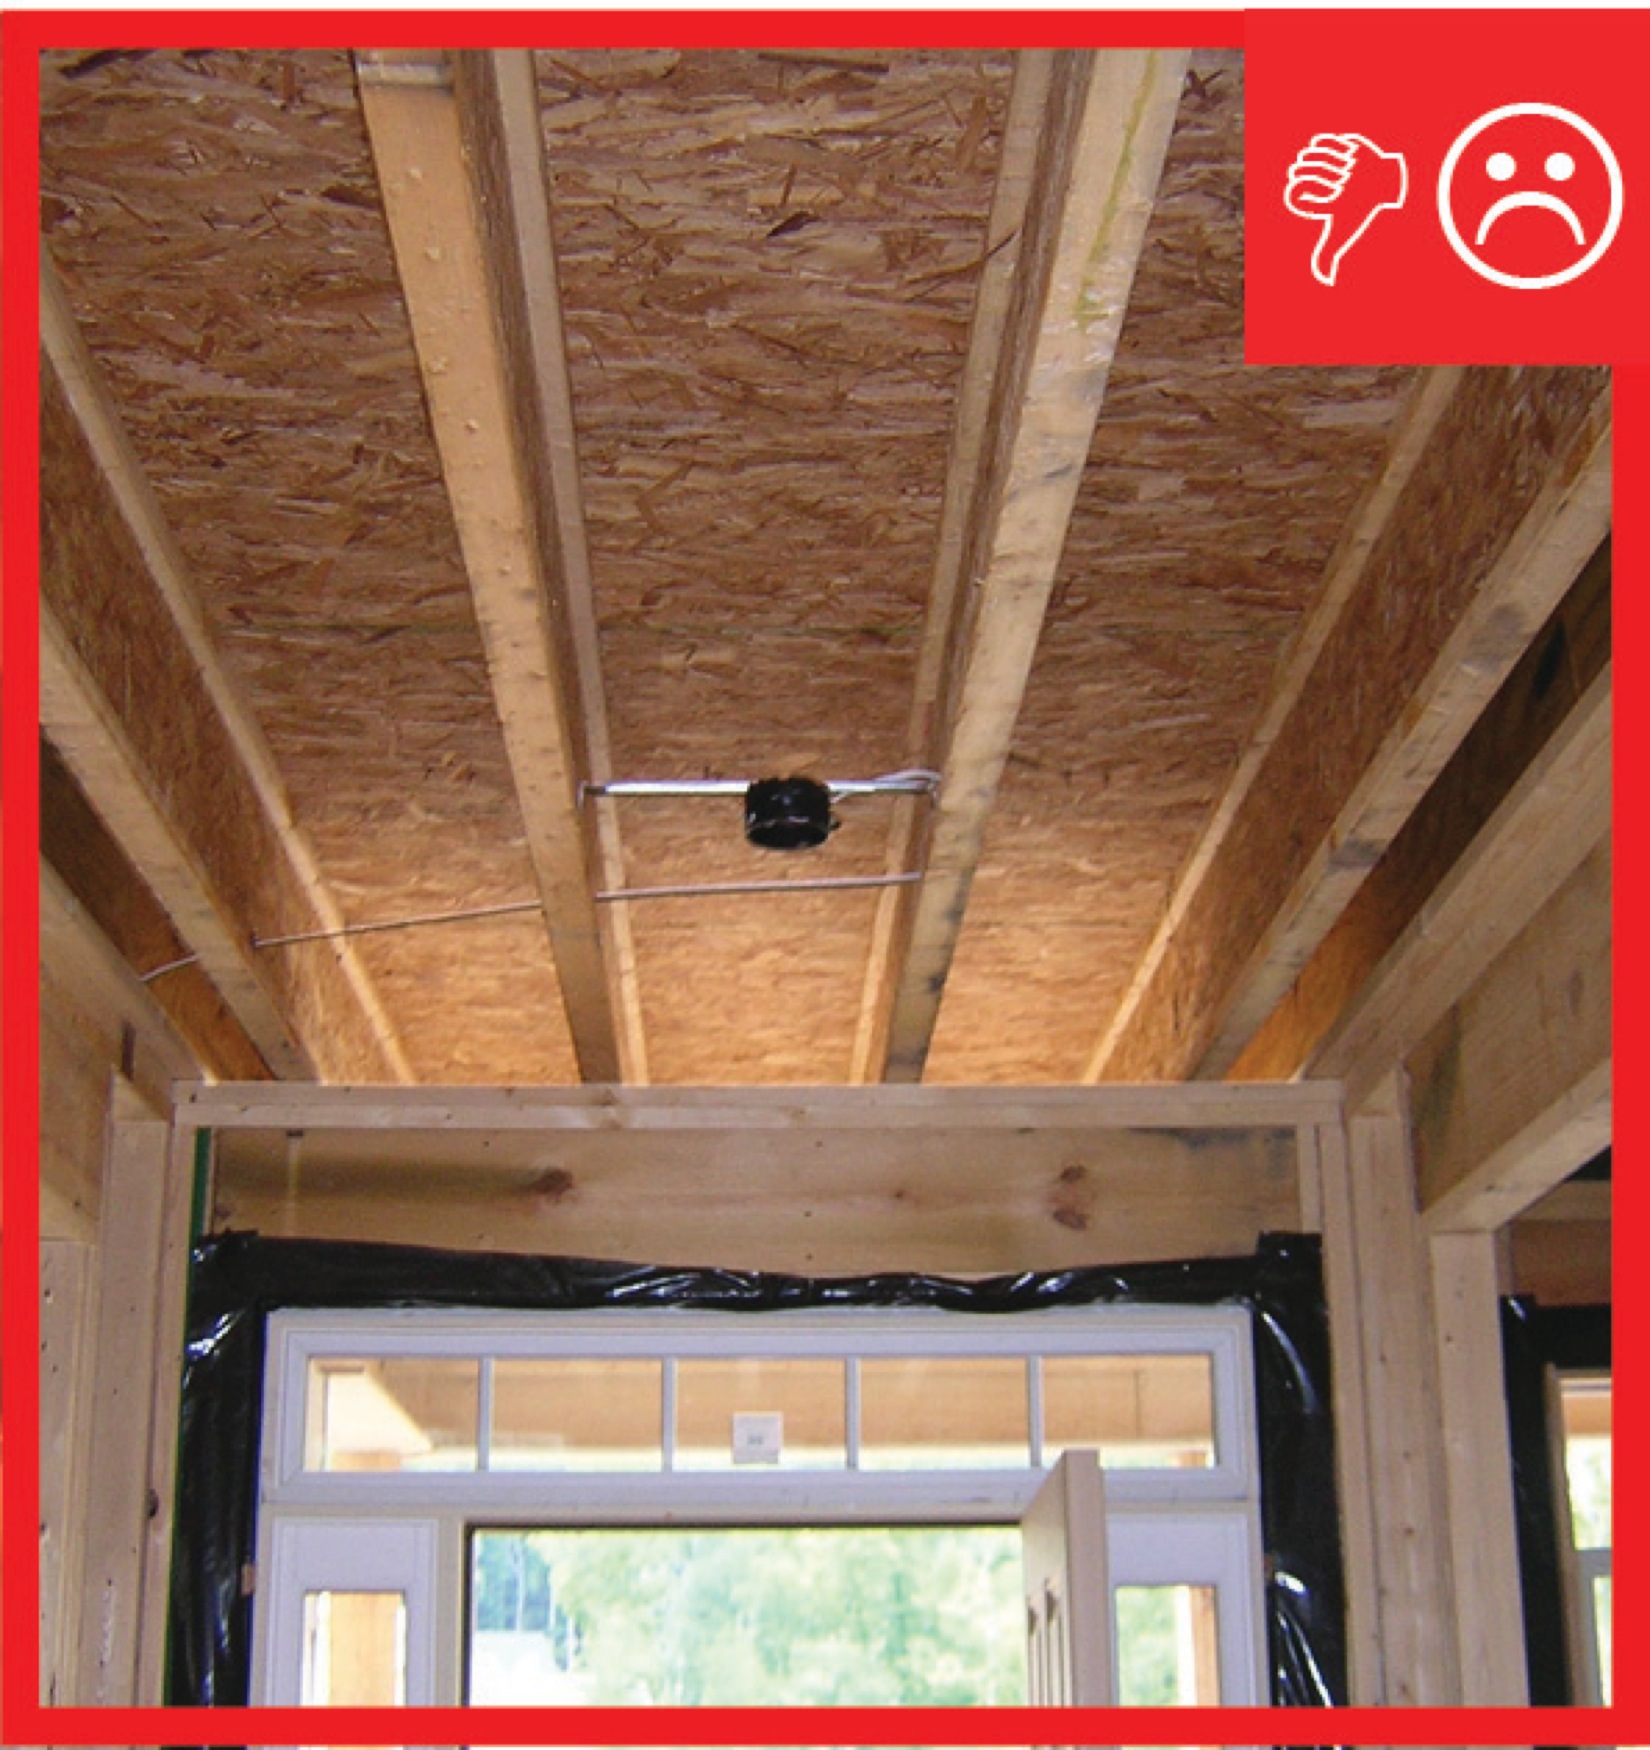
Wrong - The studs added for support were cut at an angle providing weak support where the stud meets the compression block.
Image
Image
Image
Image
Image
Image
Wrong – the water-resistant barrier is layered underneath the step flashing, which could allow water to get behind the step flashing and into the wall.
Image
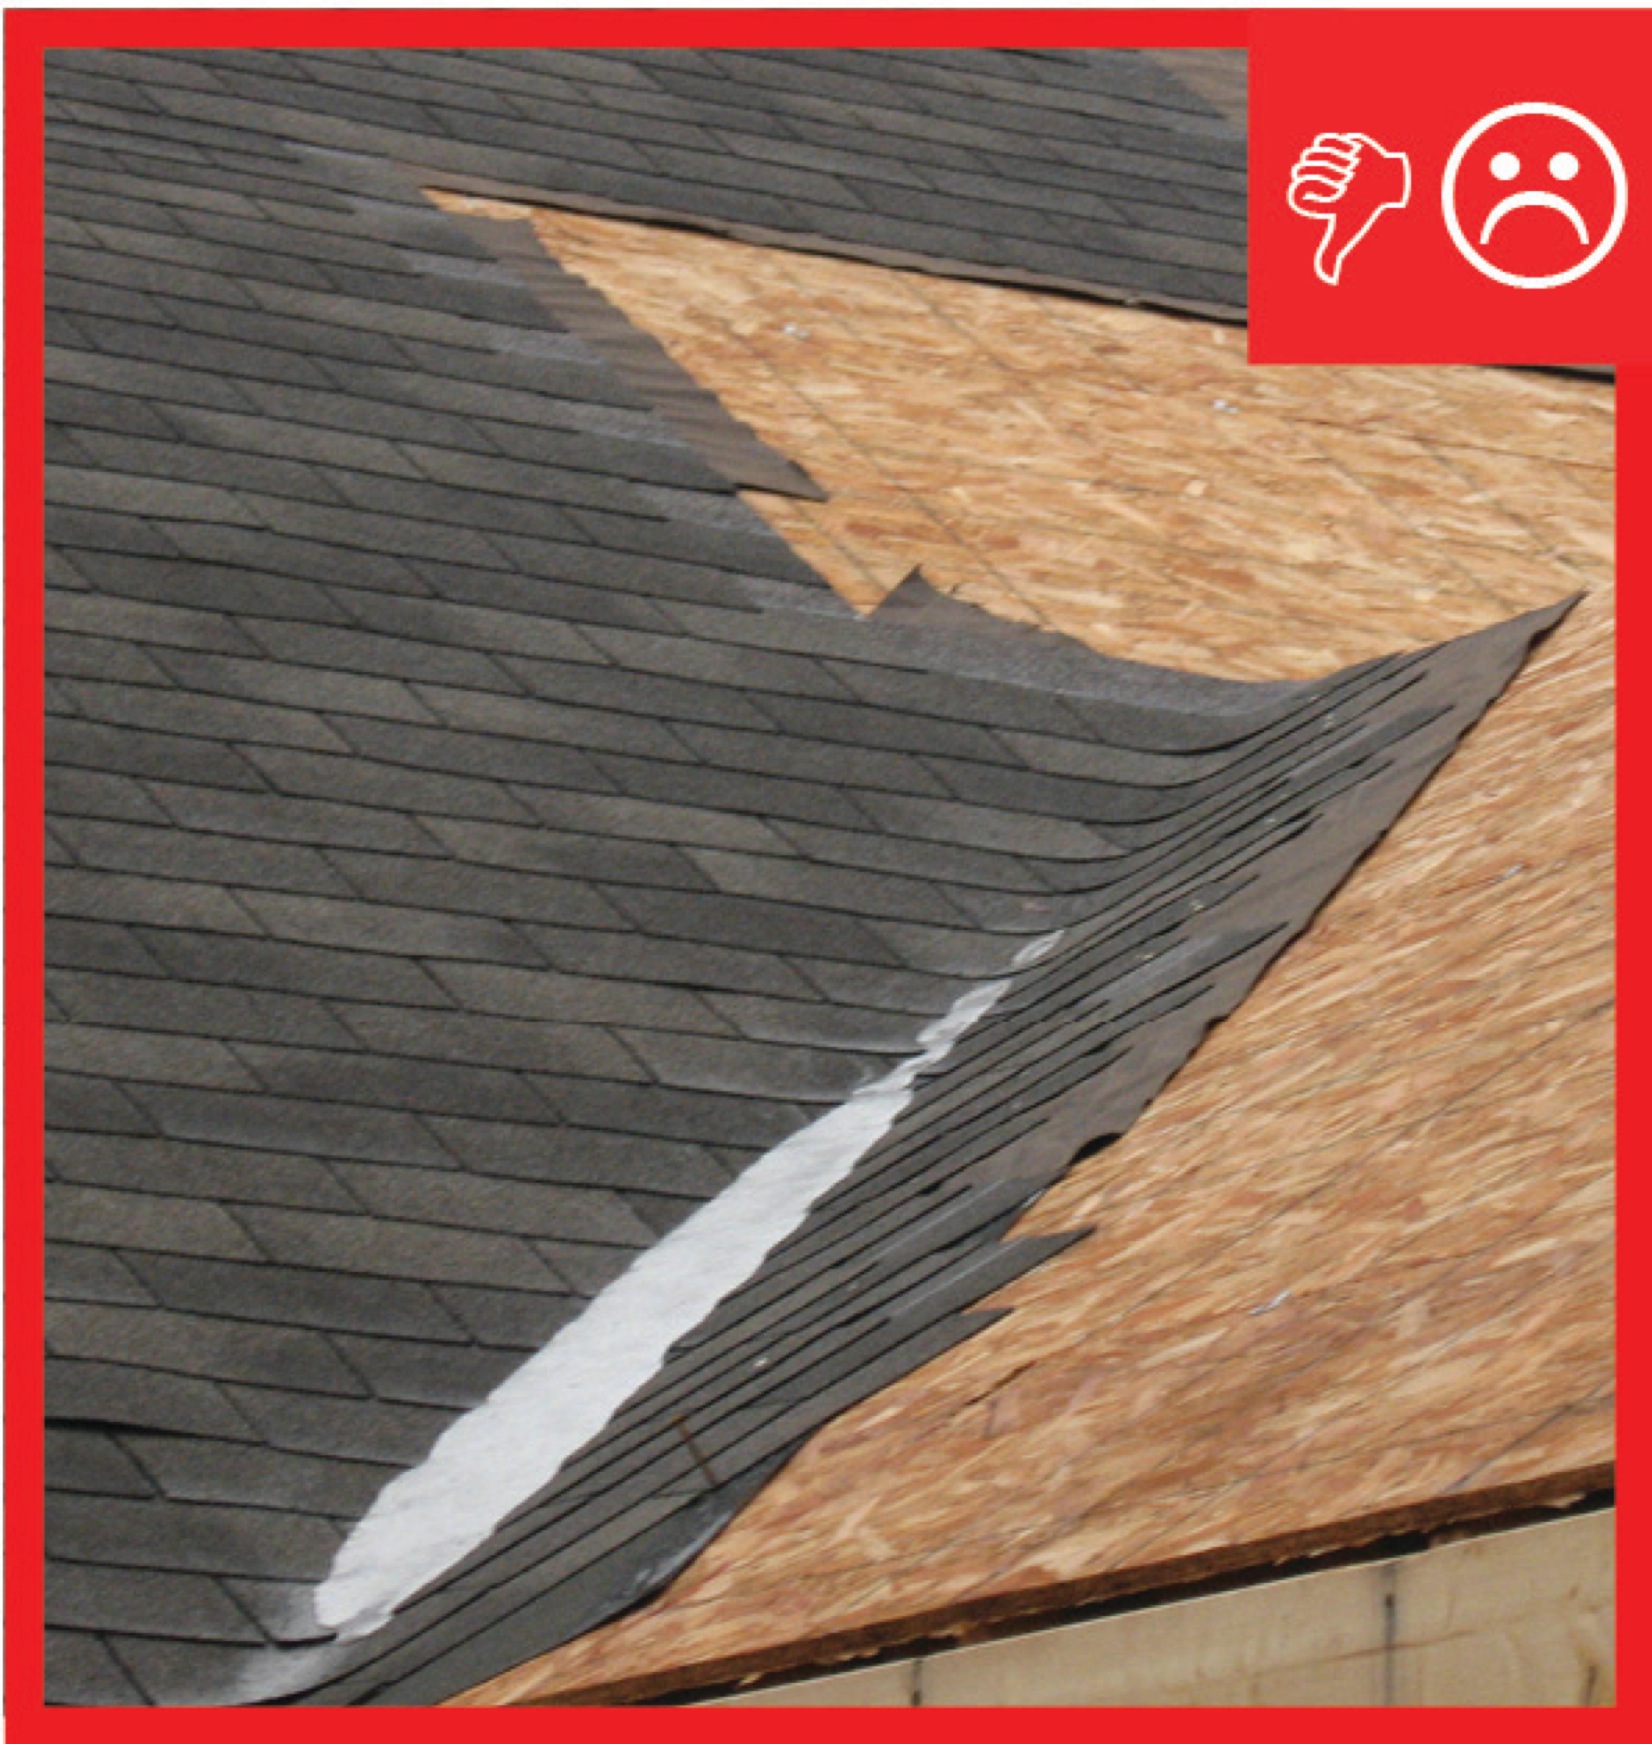
Wrong – There is not a self-sealing bituminous membrane installed at the valley of the roof
Image
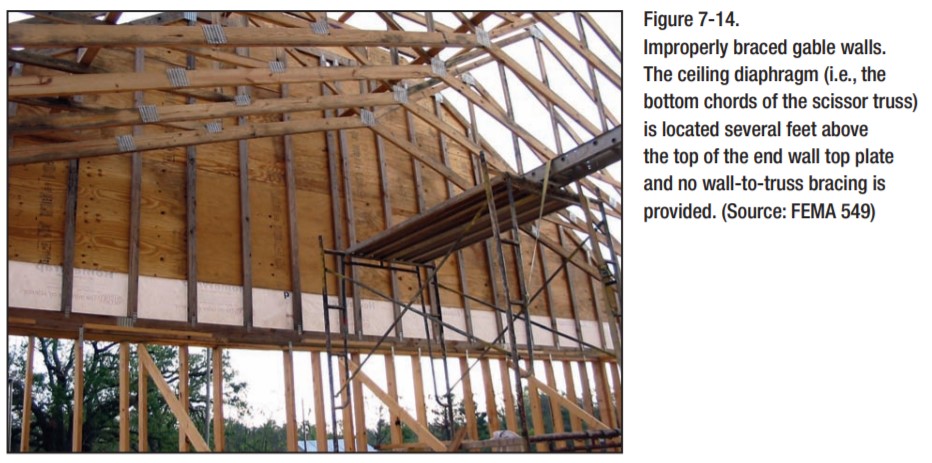
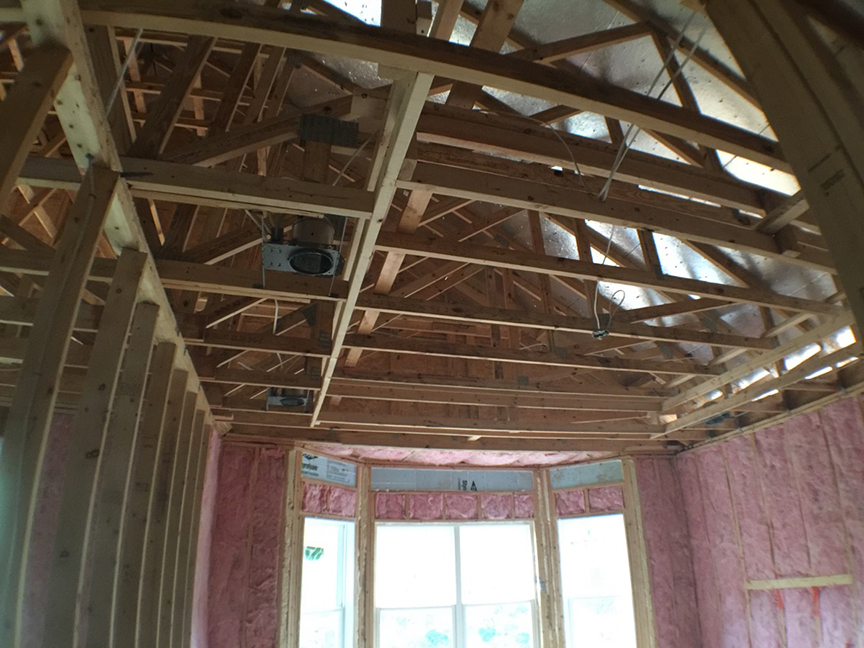
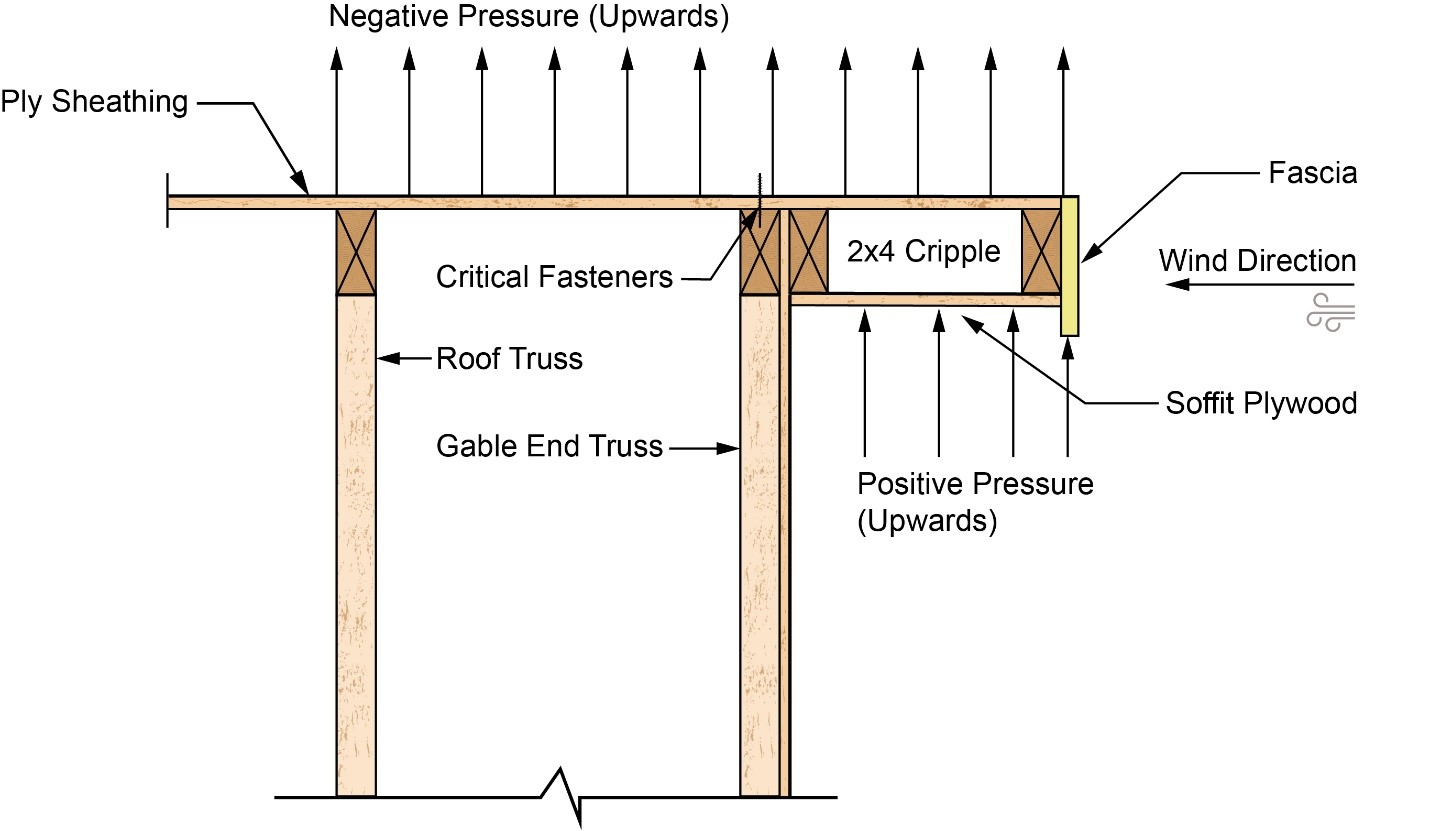
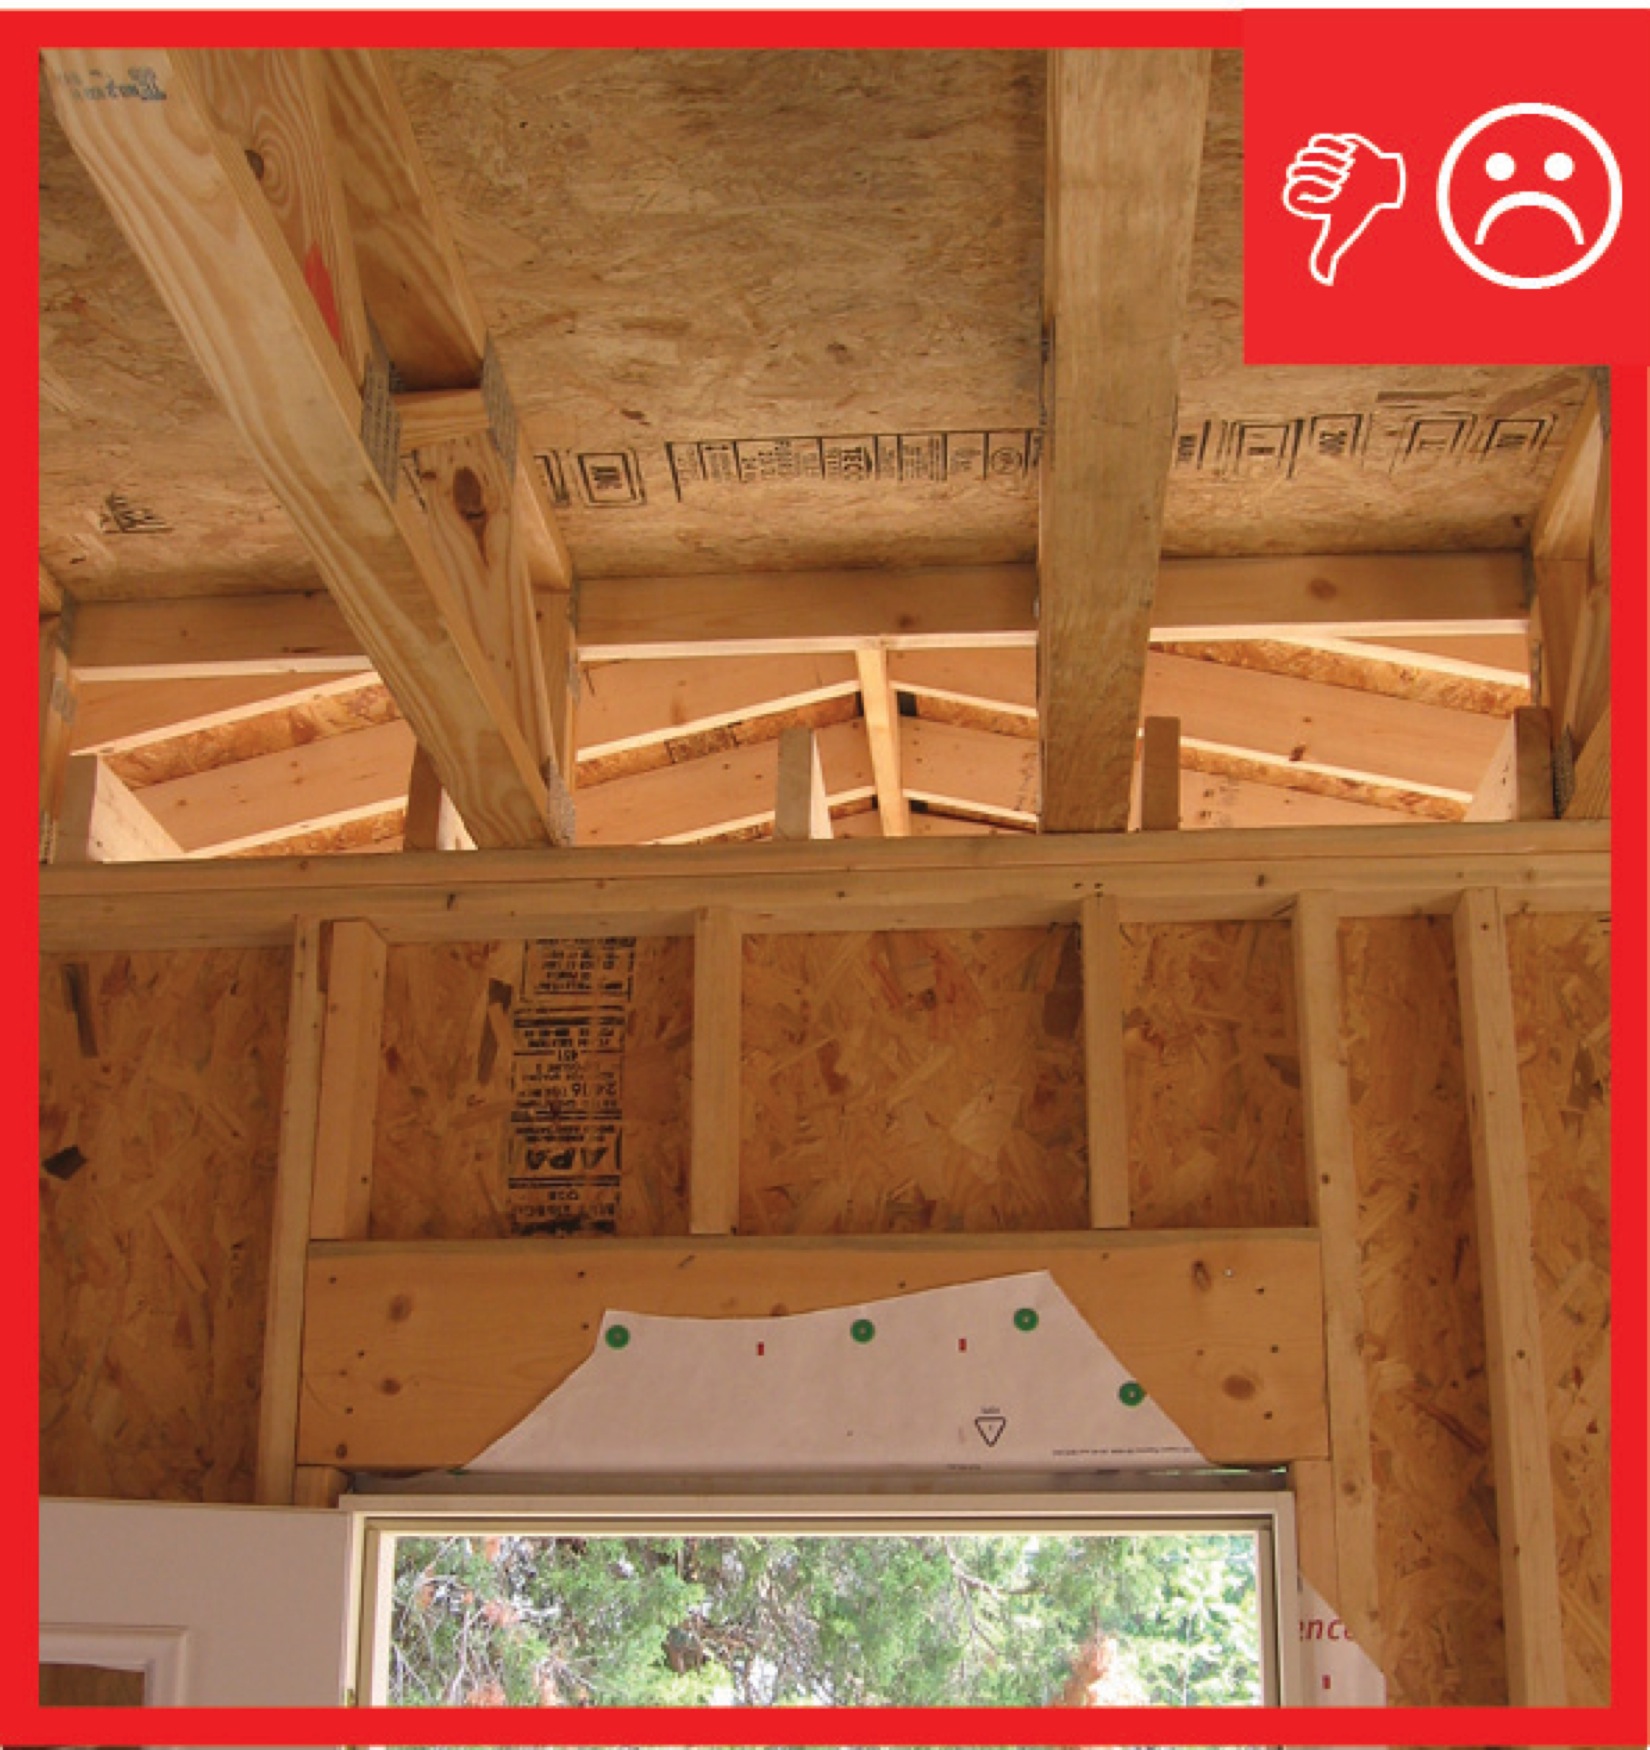
Wrong – This house under construction is lacking wall to truss bracing and the bottom chord of the scissor trusses is several feet above the top of the end wall top plate