Showing results 1 - 16 of 16
Image

Add metal connectors to strengthen framing connections in an existing wall from inside the home by removing drywall.
Image
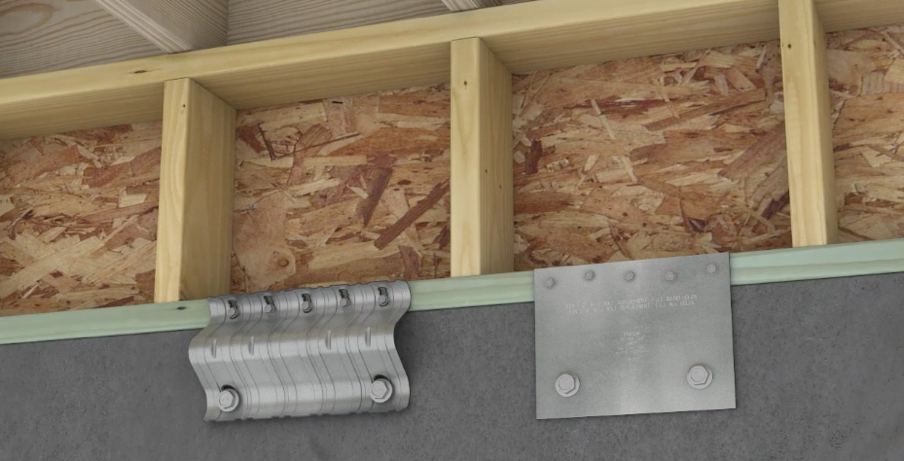
Correct seismic retrofit hardware for securing the sill plate to foundation wall
Image
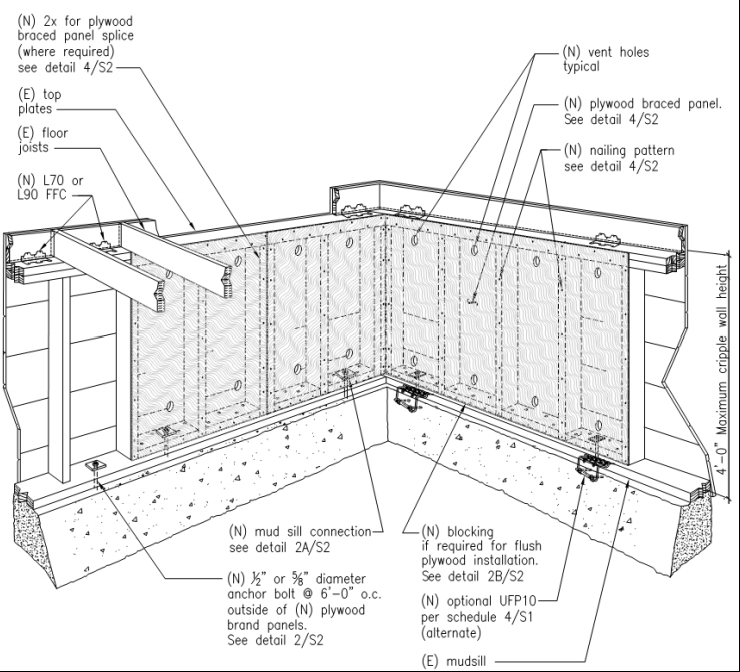
Detail for reinforcing a cripple wall to resist earthquake movement by installing anchor bolts and plywood reinforcement.
Image
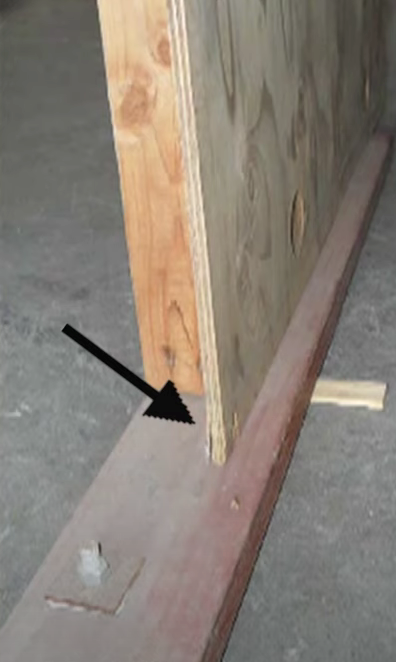
Incorrectly done seismic retrofit, the plywood sheathing is not nailed to the mud sill and therefore it is not providing any shear strength
Image
Image
Image
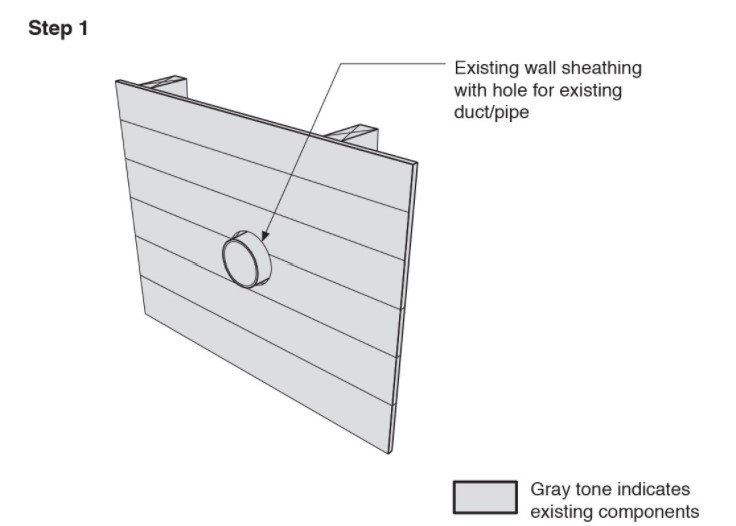
Step 1. Remove the existing wall cladding to prepare to retrofit an exterior wall.
Image
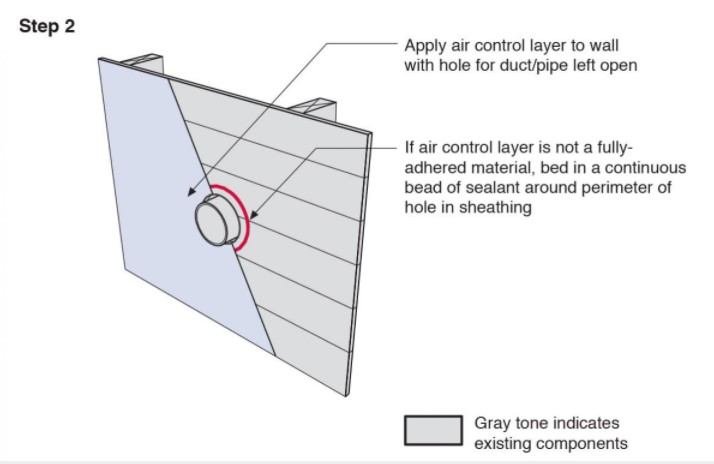
Step 2. Install a continuous air and water control layer over the existing wall sheathing.
Image
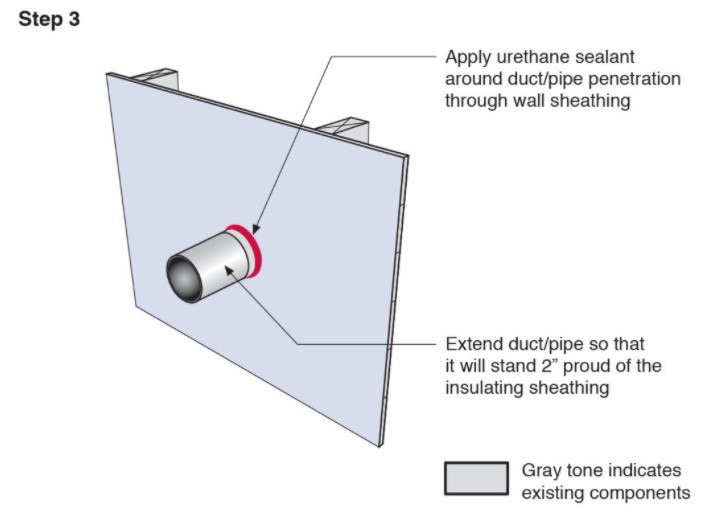
Step 3. Apply urethane sealant around the duct or pipe in the retrofitted exterior wall.
Image
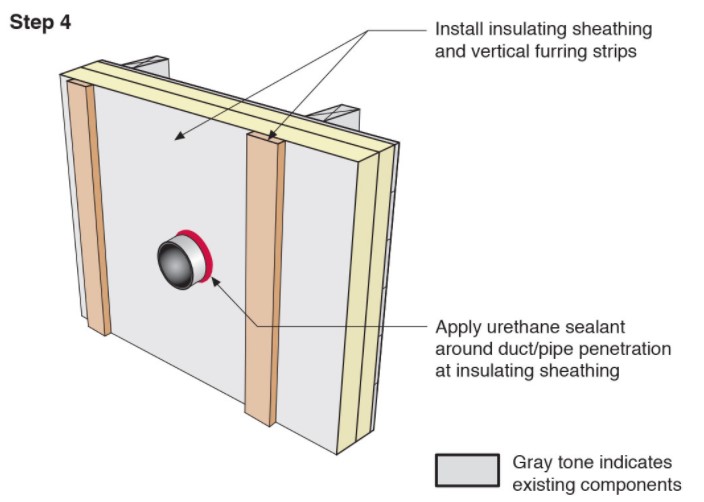
Step 4. Install insulating sheathing and vertical furring strips on the retrofitted exterior wall; seal around pipe or duct with urethane sealant.
Image
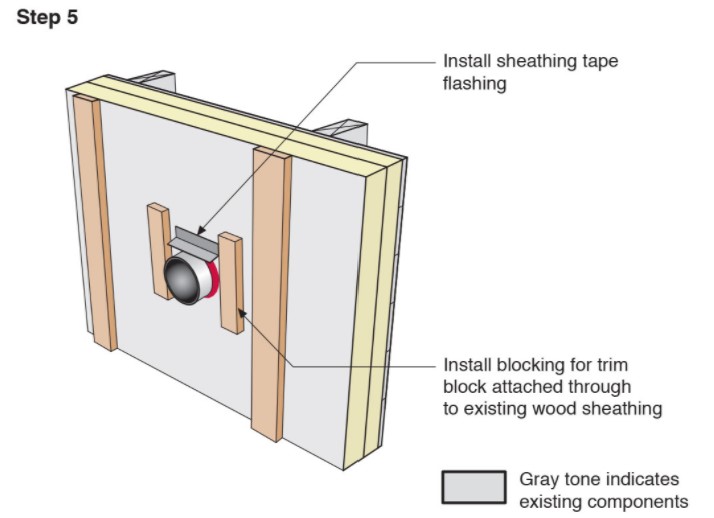
Step 5. Install sheathing tape flashing over the duct or pipe and wood blocking on either side for later attachment of trim.
Image
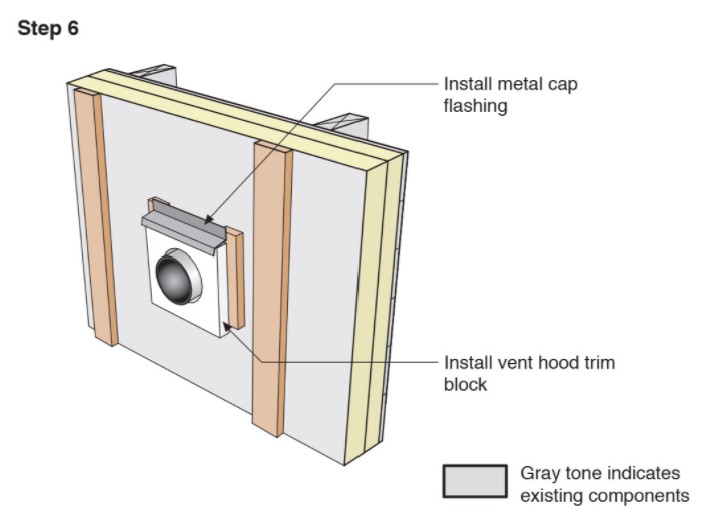
Step 6. Install vent hood trim block, metal cap flashing; seal top edge of flashing with sheathing tape.
Image
Image
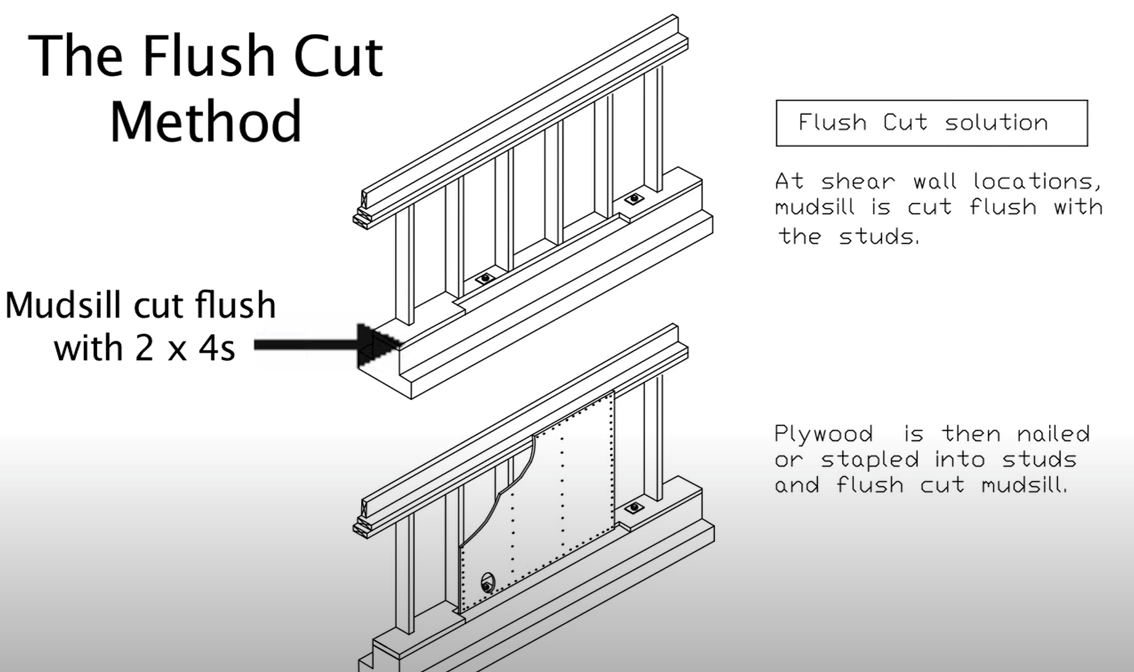
The flush cut method for seismic retrofit bracing of a cripple wall allows the plywood sheathing to be attached directly to both the cripple studs and the notched section of the mudsill
Image
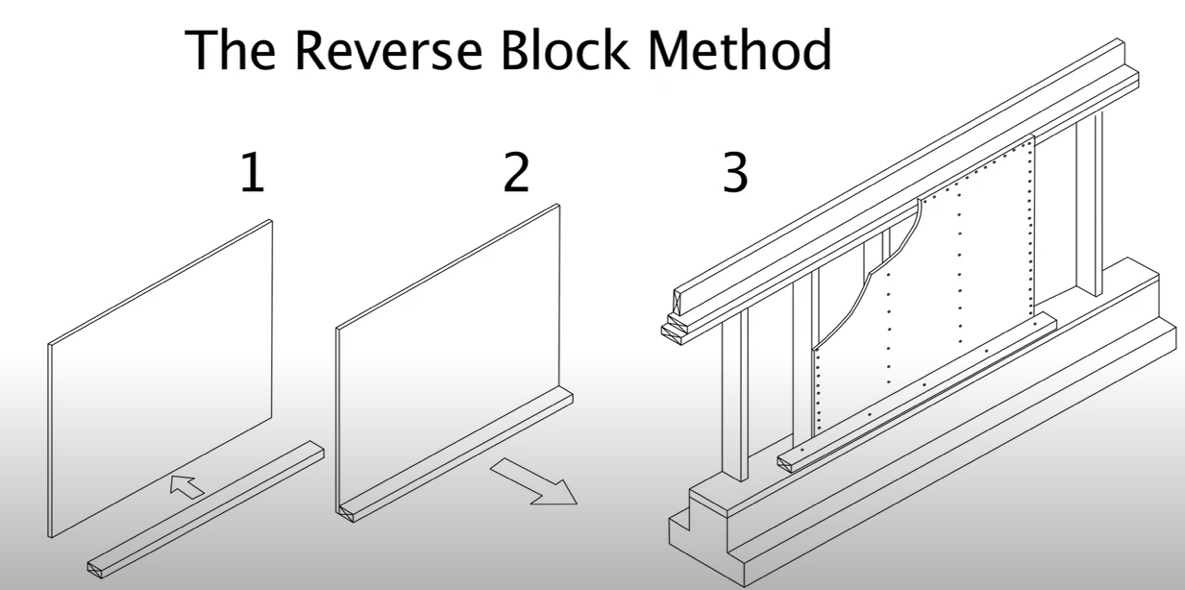
The reverse block method for seismic retrofit bracing of a cripple wall uses a 2x4 attached to the sill plate to provide a means to attach the plywood cripple wall sheathing to the sill plate
Image
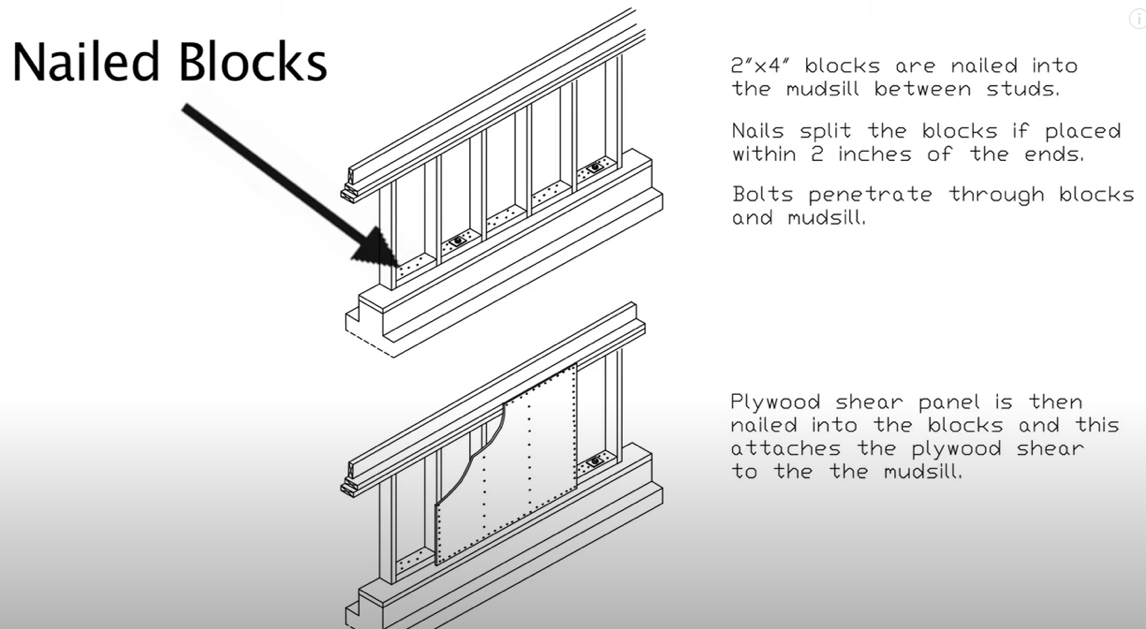
With the nailed block method, wood blocks are attached to the sill plate and the cripple wall plywood is attached to the block to provide shear strength for correctly bracing a cripple wall in a seismic retrofit