Showing results 301 - 350 of 489
Image

Image
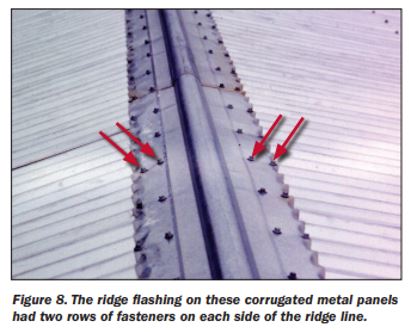
Right – The ridge flashing is secured with two rows of fasteners on each side of the ridge line
Image
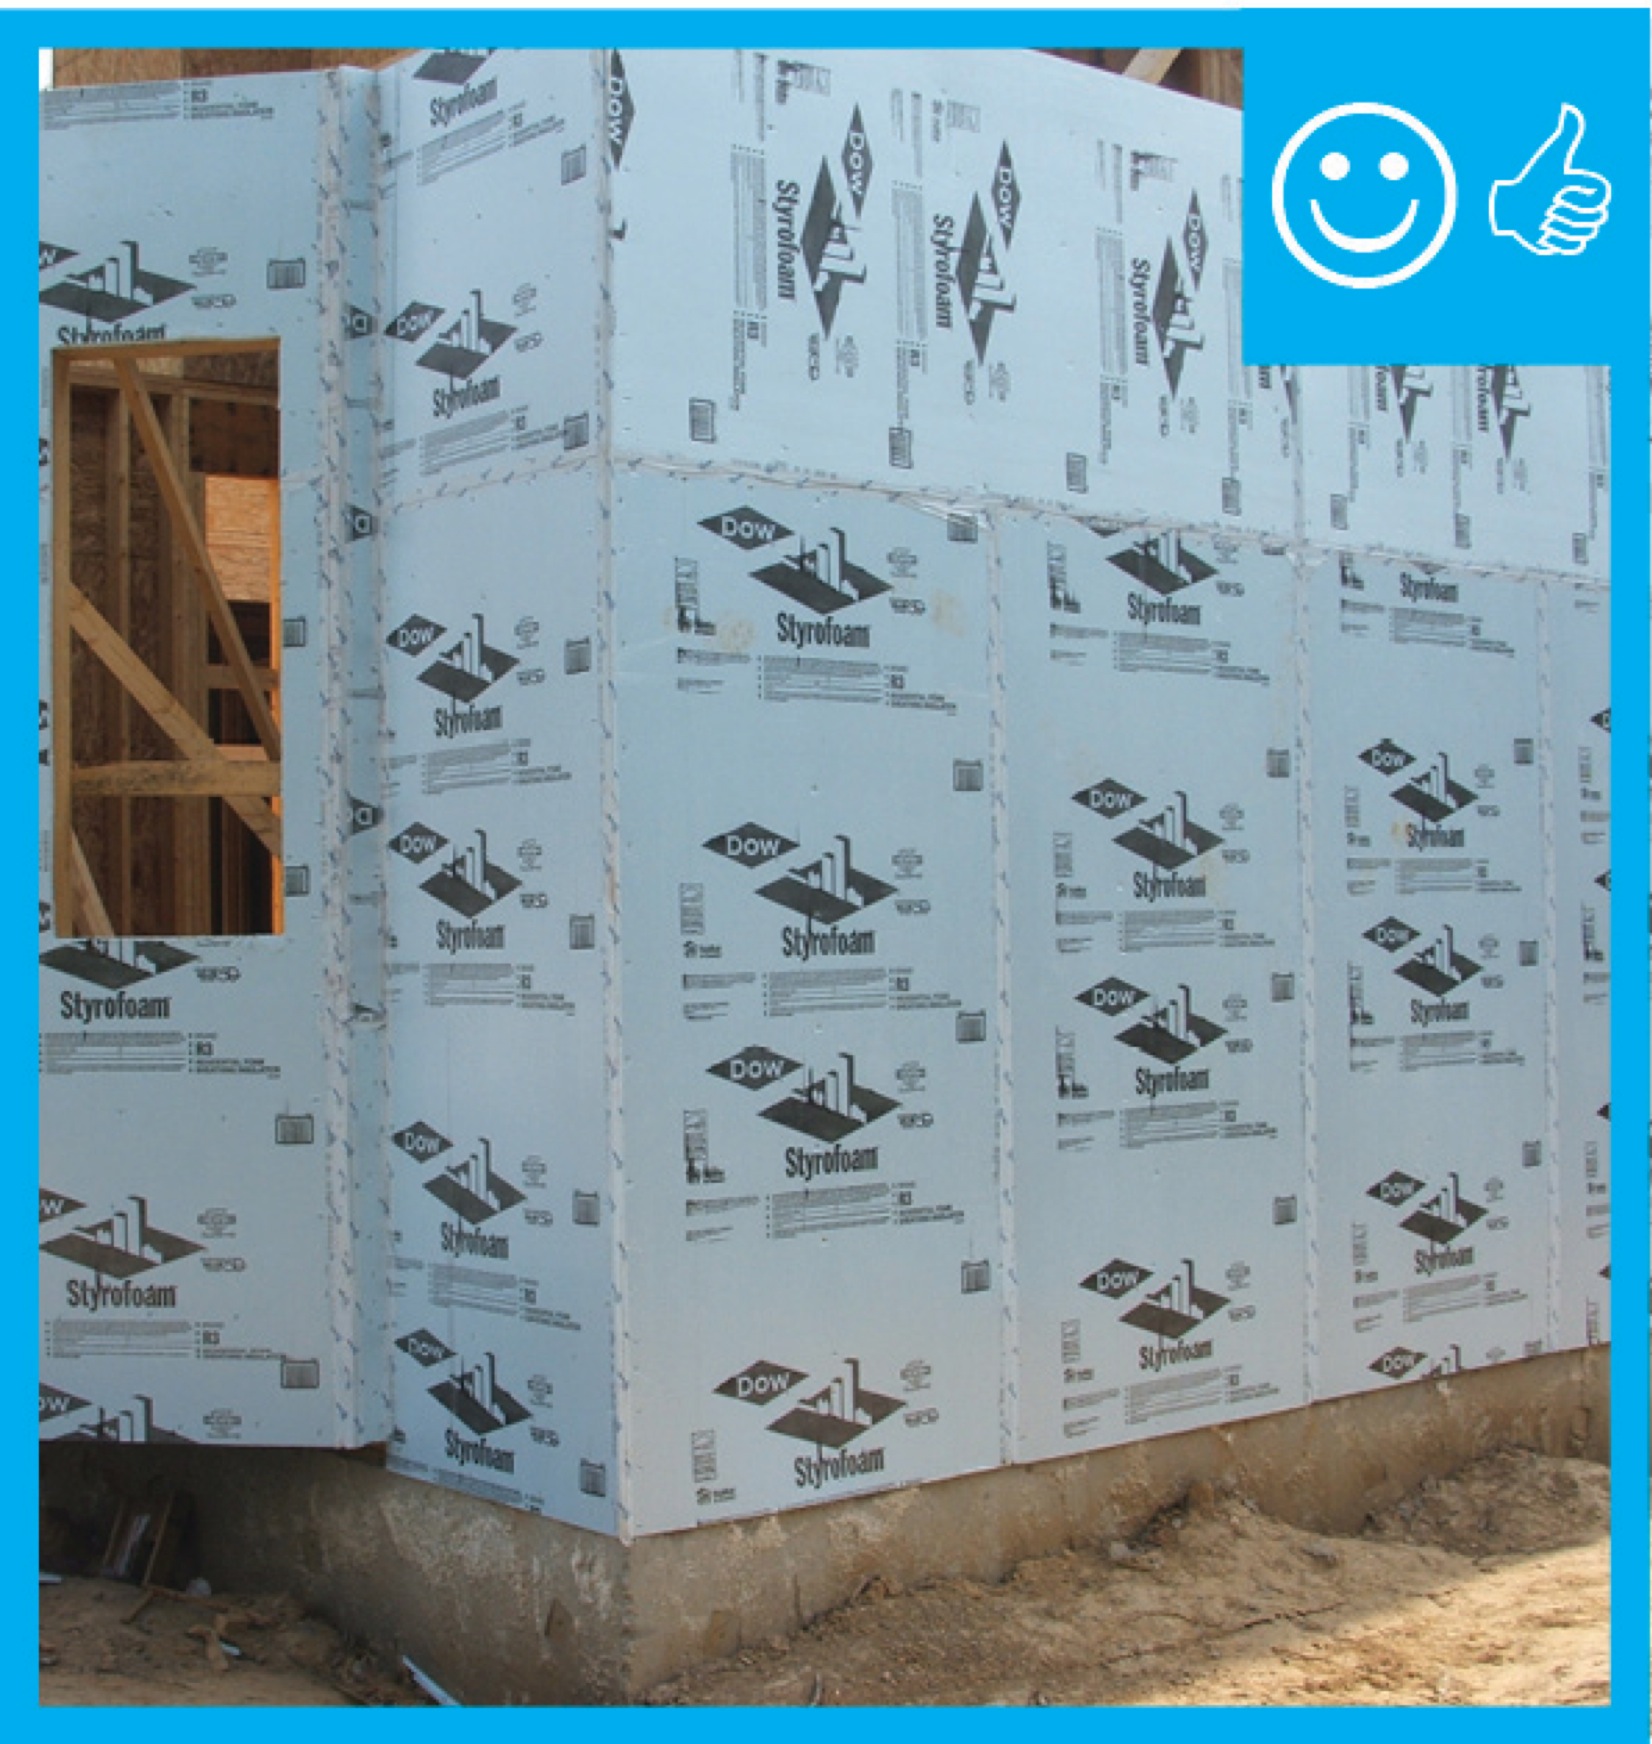
Right – The rigid insulation covers all exterior walls and all seams are taped to provide a complete drainage system
Image
Right – The roof membrane is fully adhered and deck seams are sealed so the membrane will not flutter and fail due to negative pressure from high winds
Image
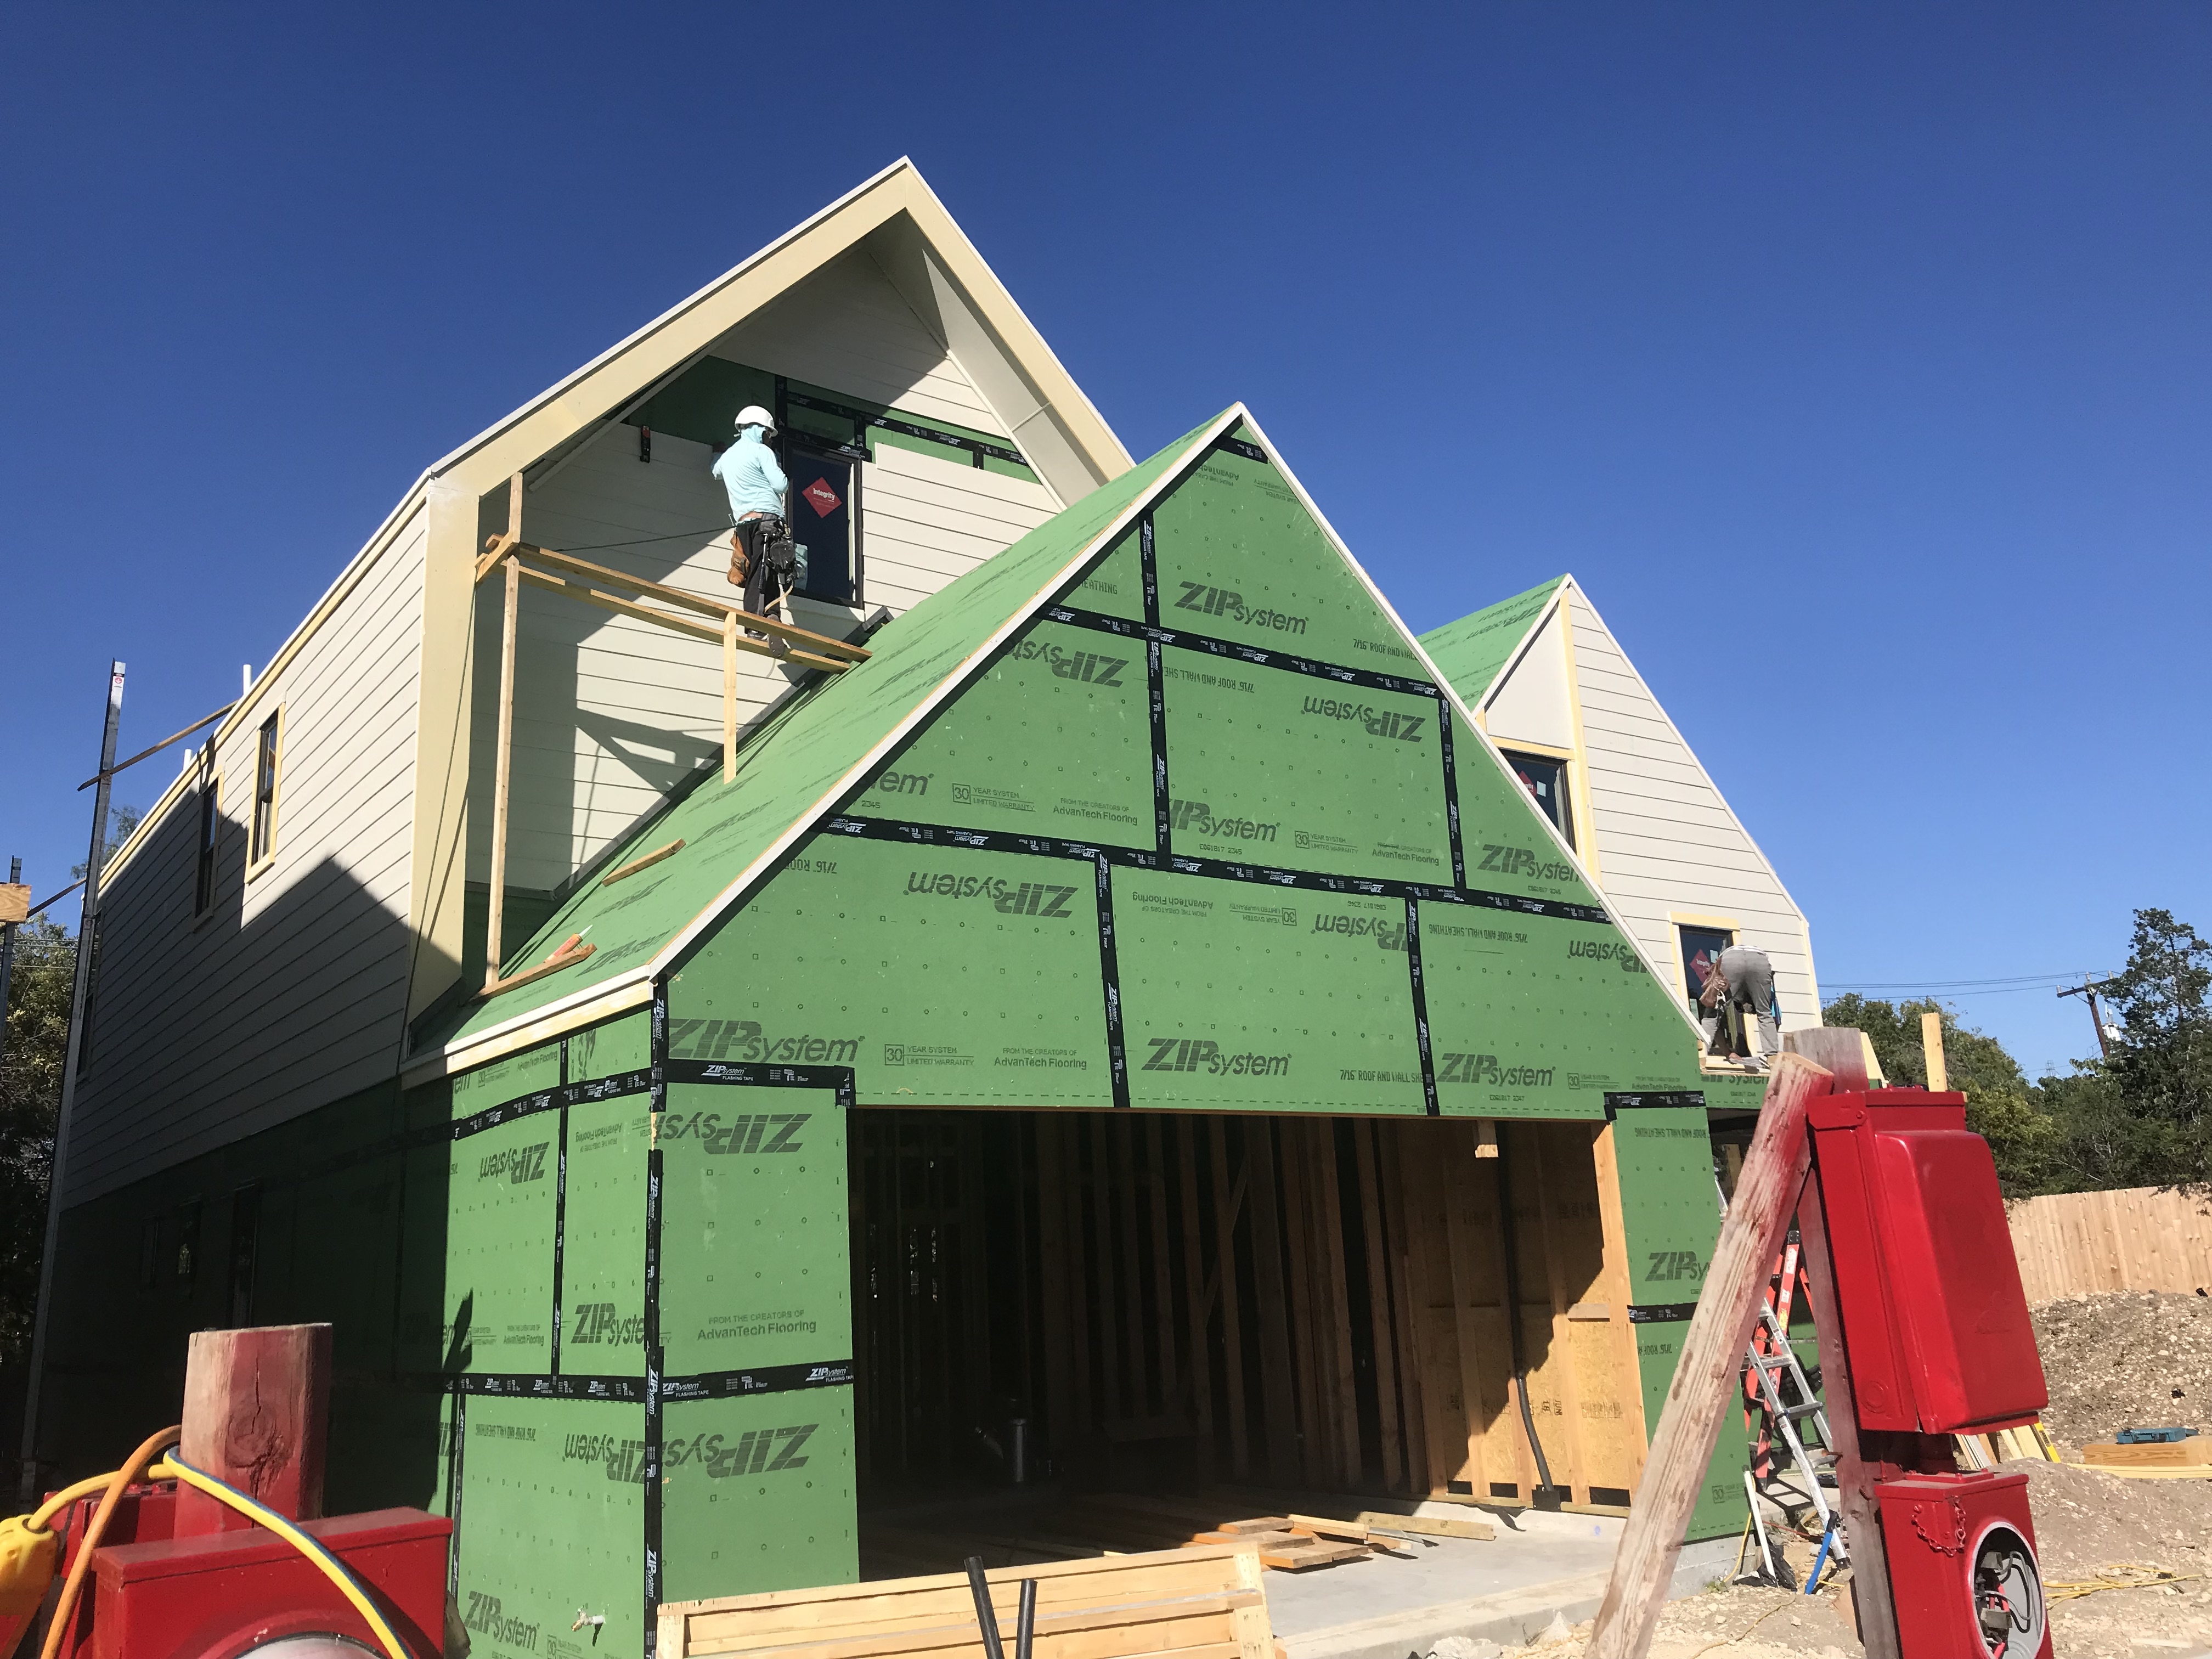
Right – The seams are taped on the coated OSB sheathing of this home to provide a complete air barrier.
Image
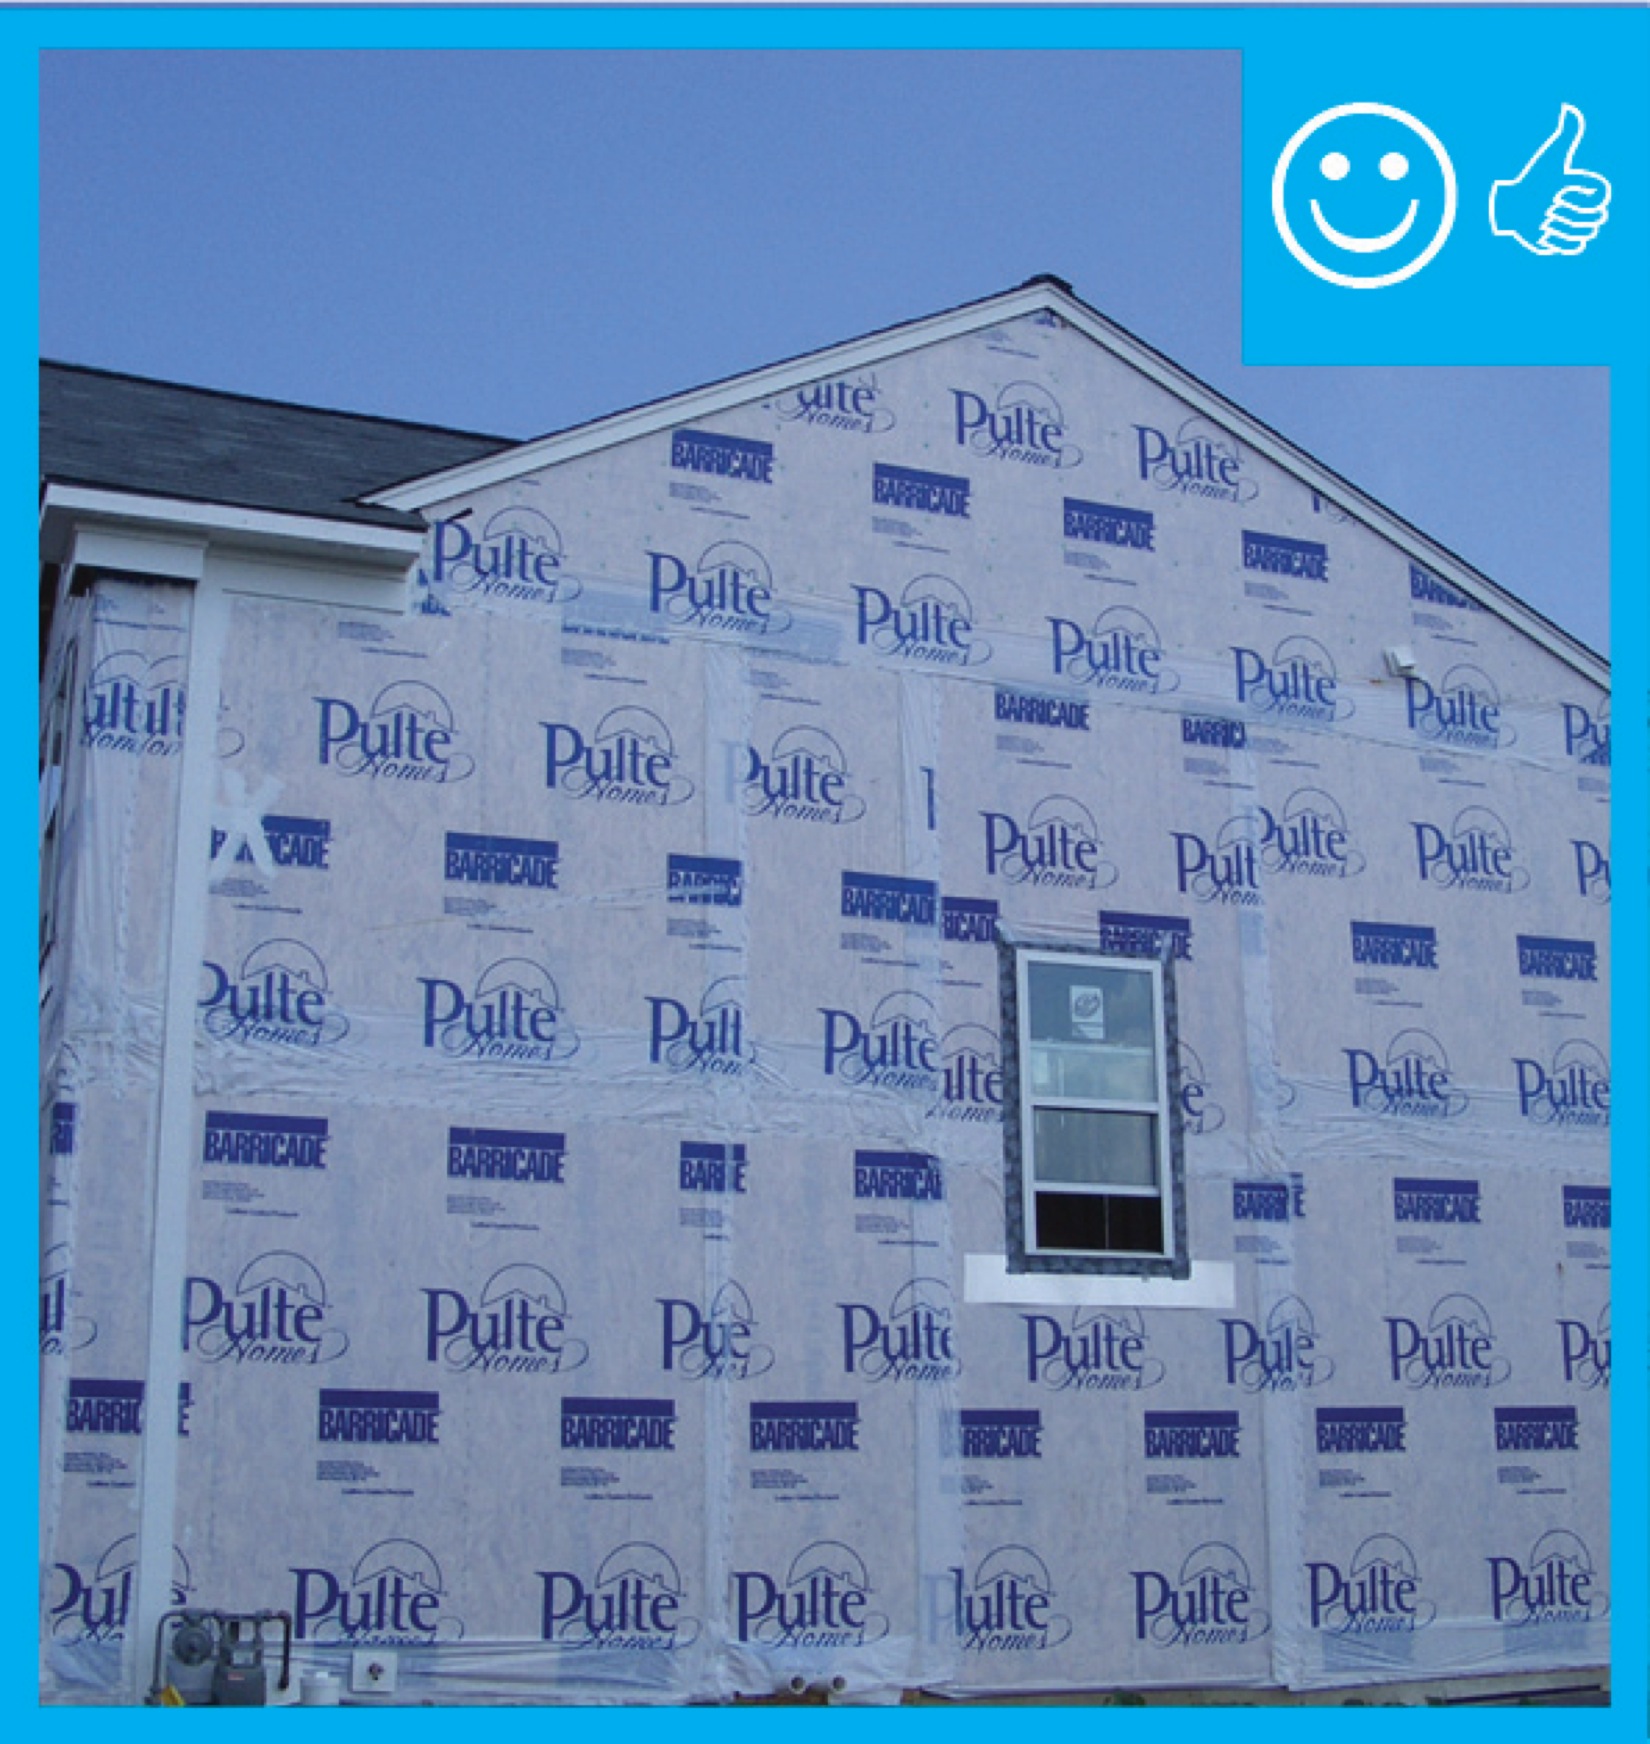
Right – The water-resistant barrier covers the entire house and the seams are taped to provide a complete drainage system
Image
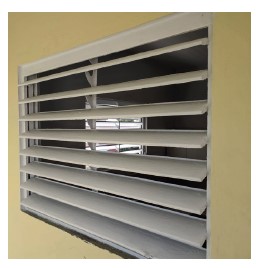
Right – This aluminum jalousie window provides solar control while allowing view and ventilation.
Image
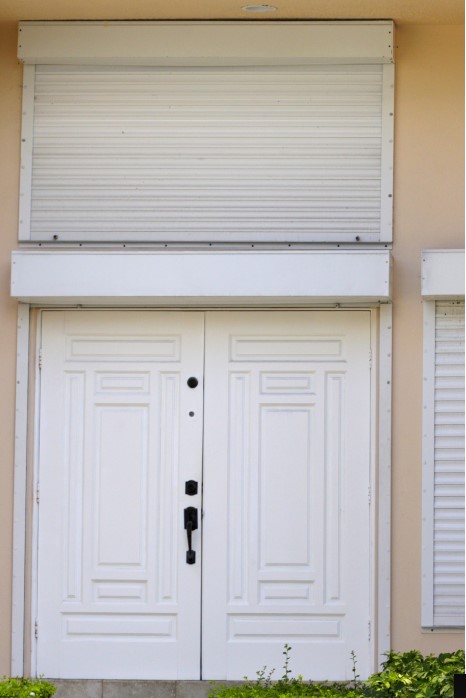
Right – This exterior door is installed to swing out and has storm protection shutters.
Image

Right – This hot-humid climate home employs several hurricane- and termite-resistant features including concrete block construction, borate-treated framing, a hip roof design with metal drip edge, impact-rated windows, and an unvented attic.
Image

Right – This low-slope roof and parapet assembly has continuity of both the air and water barriers
Image
Right – This metal panel window shutter is installed in a track permanently mounted above and below the window frame and is secured with wing nuts to studs mounted on the track.
Image
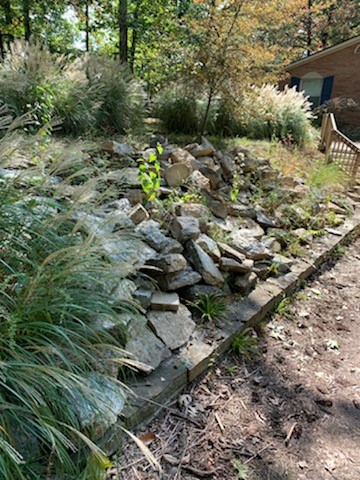
Right – This swale has sloped sides with appropriate vegetation to filter rainwater.
Image
Image

Right – Weatherstripping has been installed and remains in contact when the door is closed.
Image
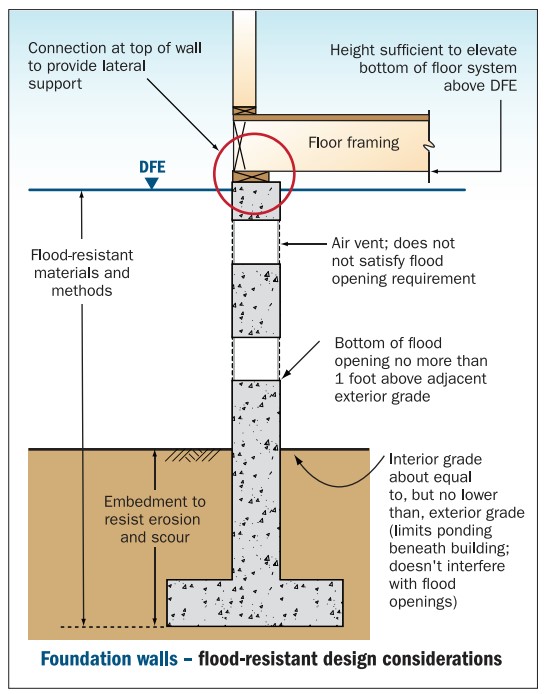
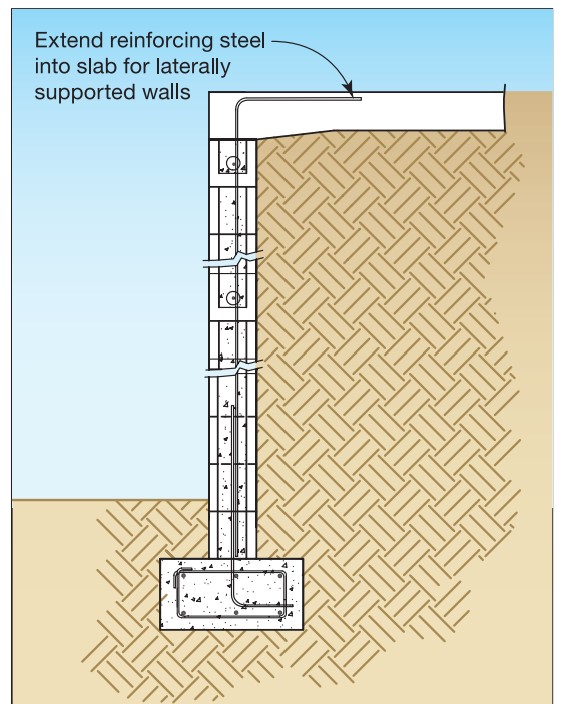
Right-Flood resistant foundation walls lift the floor framing above the DFE and include flood openings to let flood waters pass through.
Image
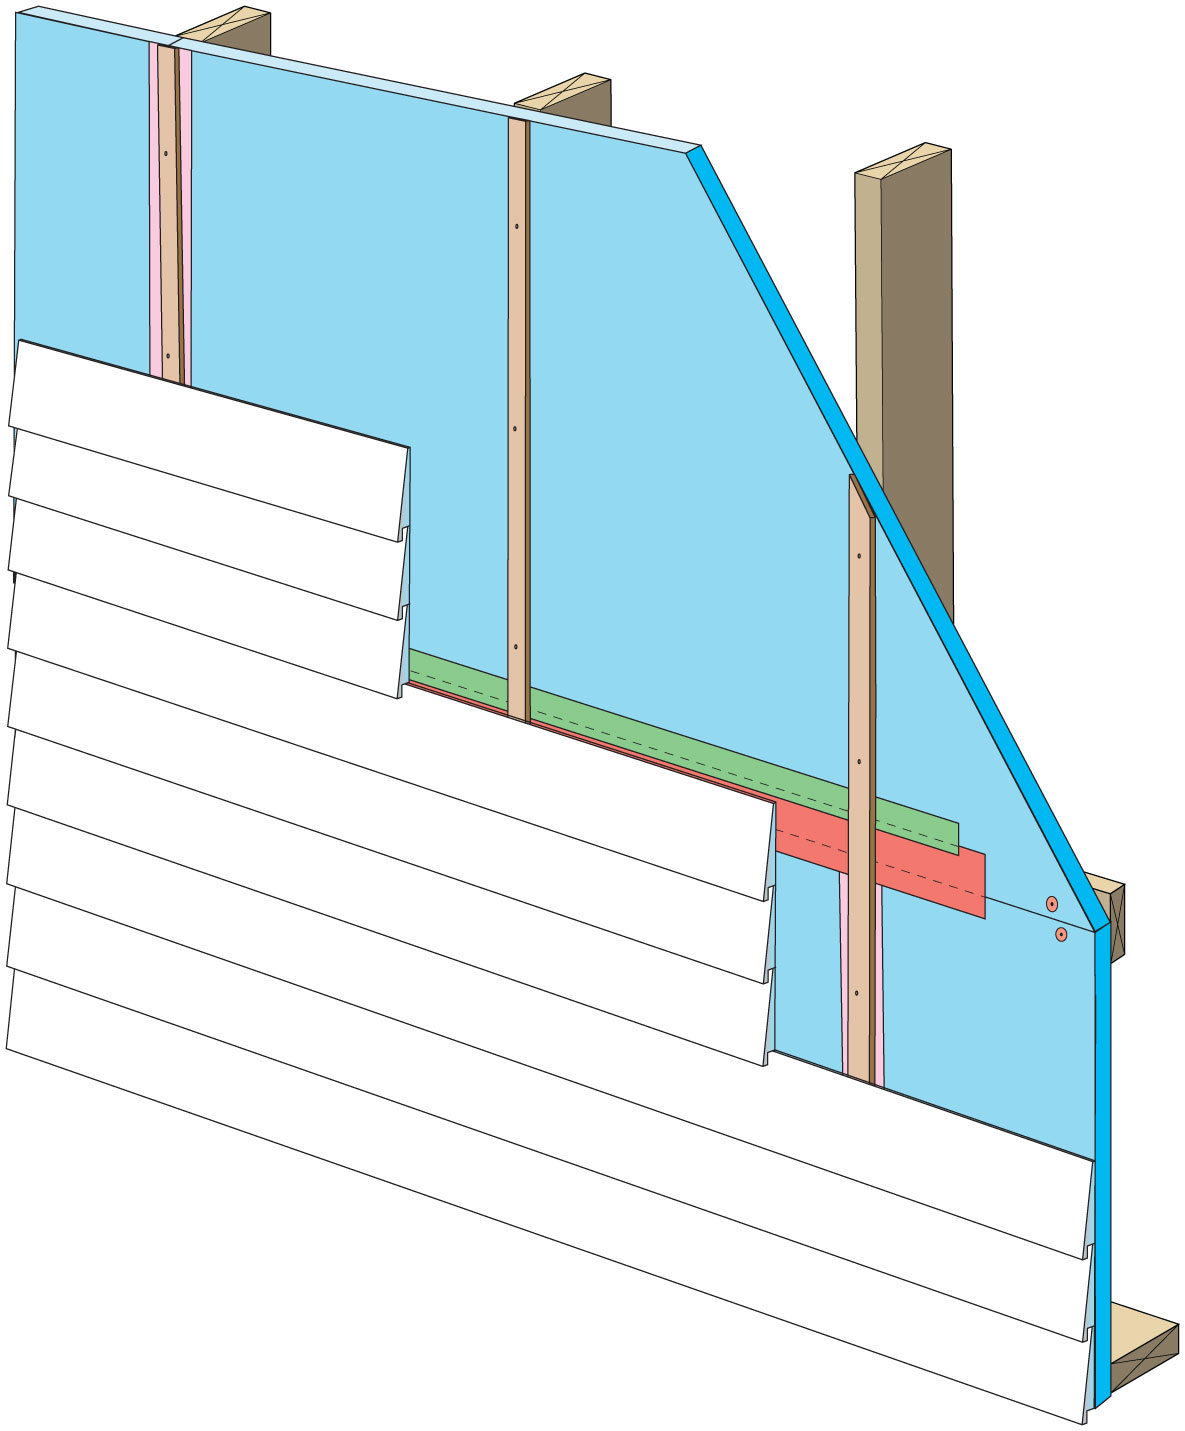
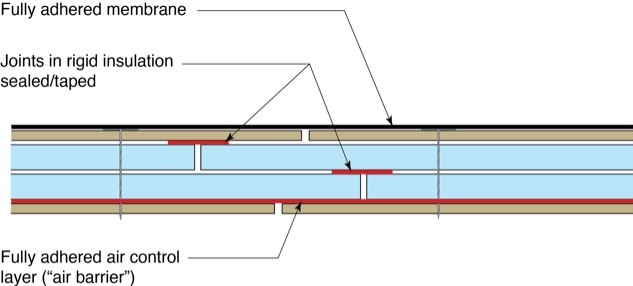
Rigid foam insulation can serve as the drainage plane when all seams are taped. Furring strips provide an air gap behind the cladding.
Image
Image
Image
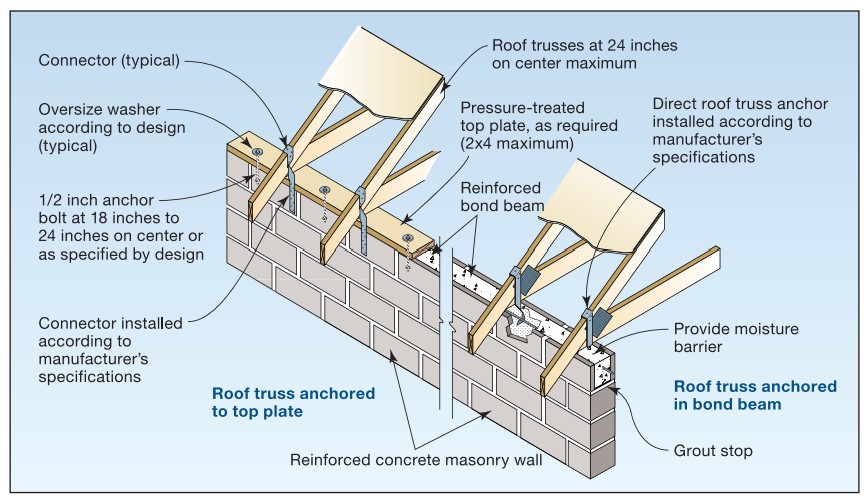
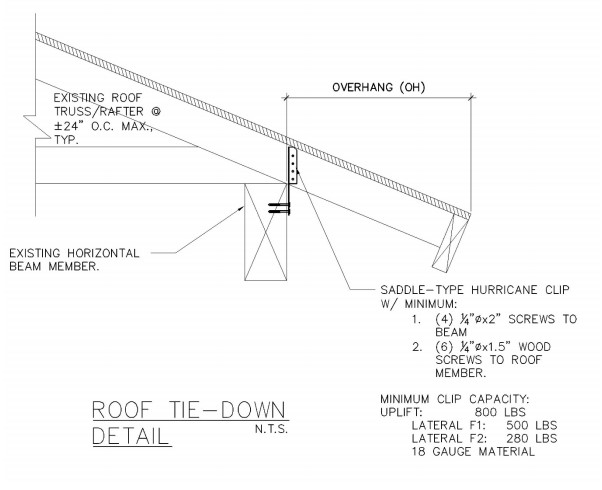
Roof truss-to-masonry wall connectors embedded into concrete-filled or grouted masonry cell (left-hand side image has a top plate installed while the right-hand side does not).
Image
Image
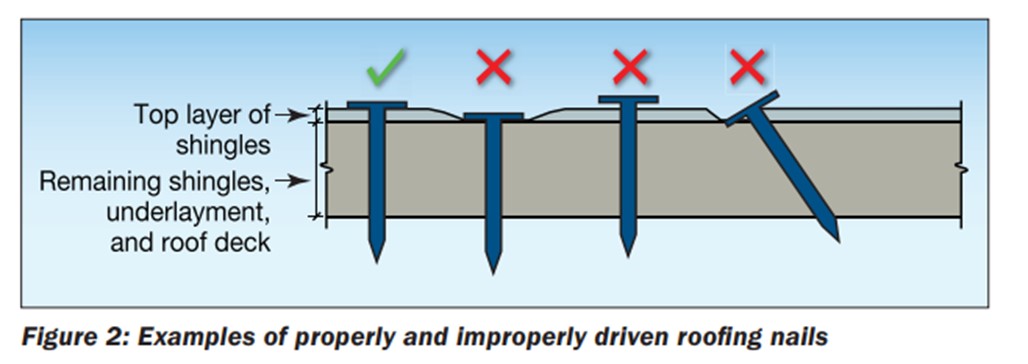
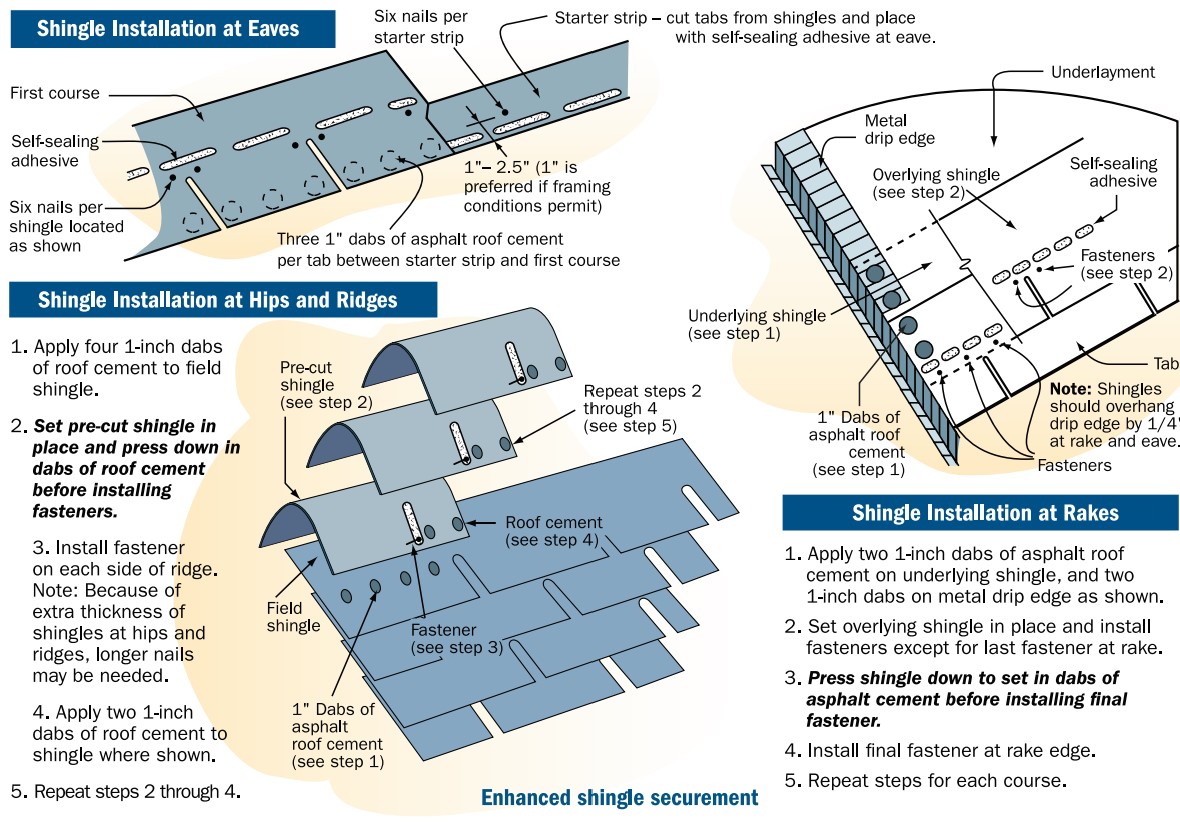
Roofing nails should be driven in straight and flush, not overdriven, underdriven, or angled
Image
Image

Image
Image
Image
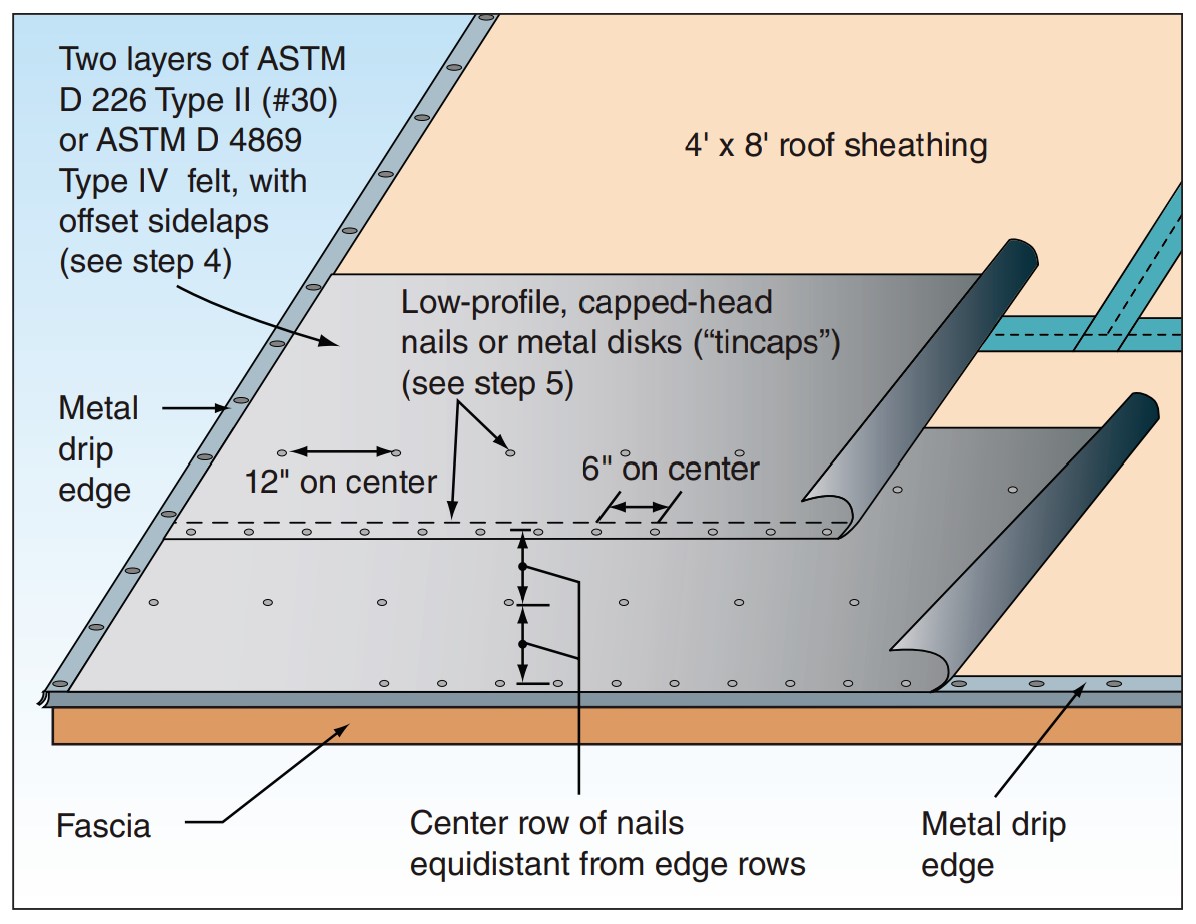
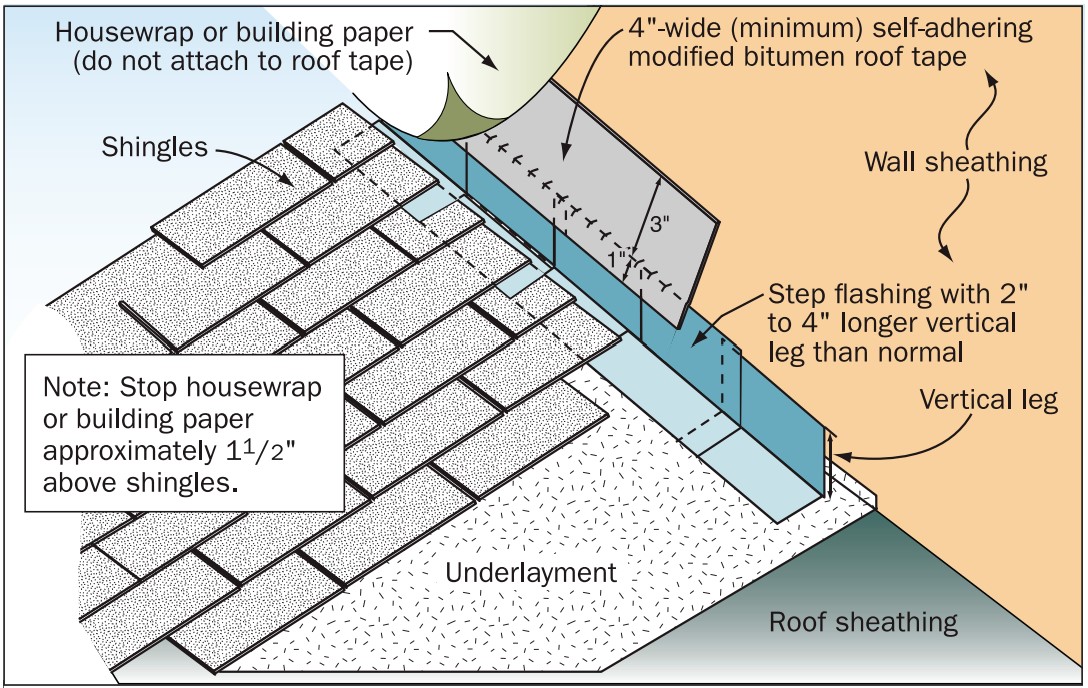
Seal the roof deck as follows: Sweep roof decking, tape seams, and cover underlayment or roofing felt as shown.
Image
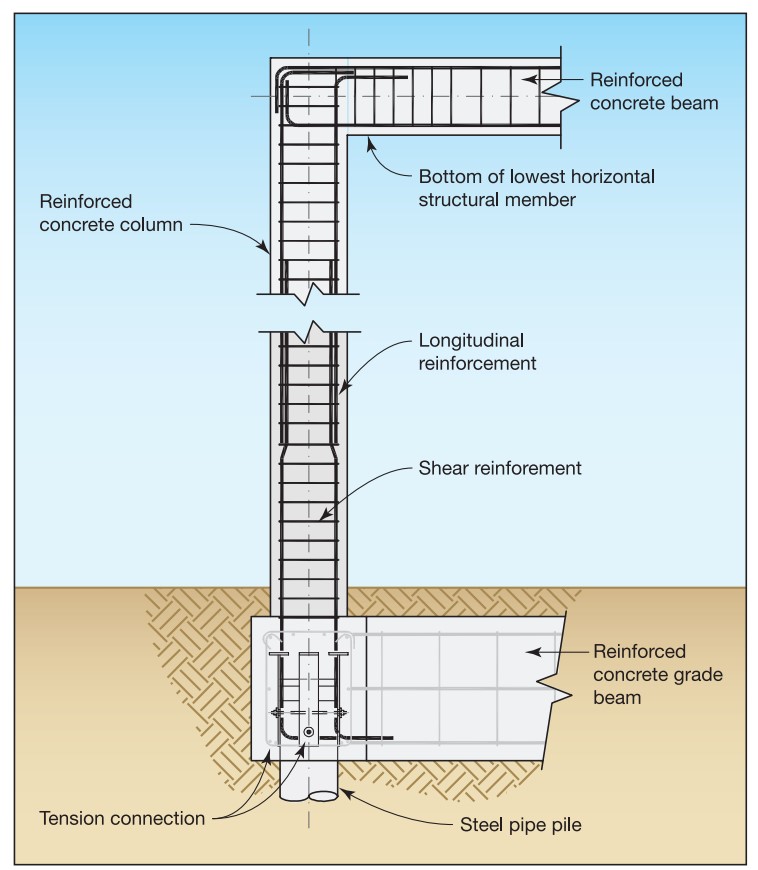
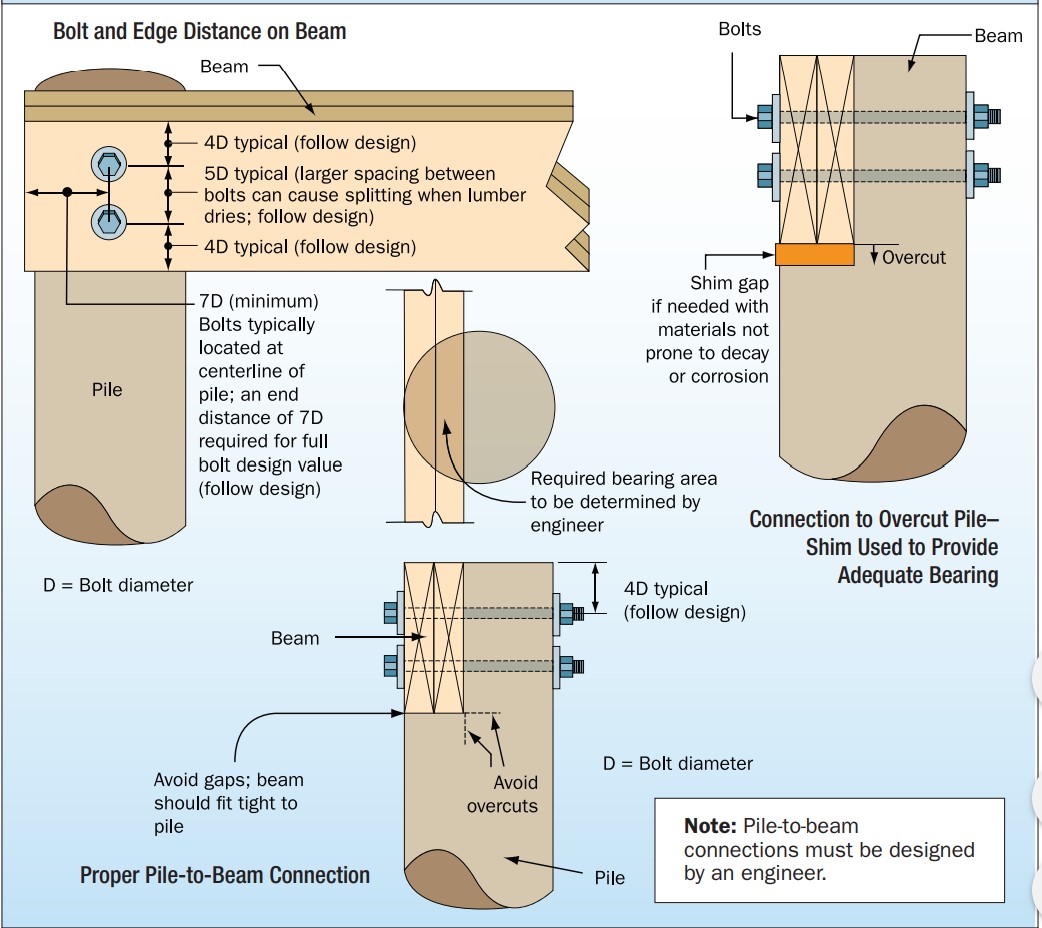
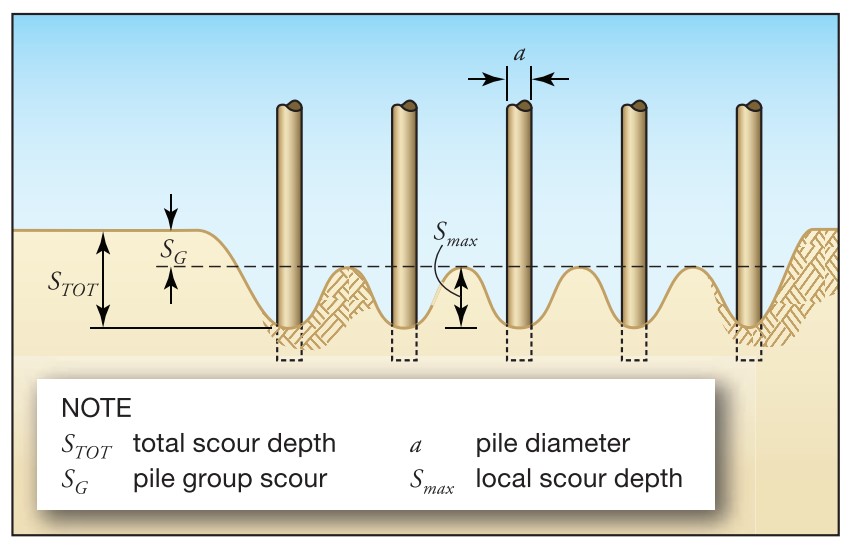
Section view of a deep pile foundation system constructed with reinforced concrete beams and columns to create portal frames, adapted from FEMA P-550, 2nd ed., case FEMA P-550, 2nd ed., case H.
Image
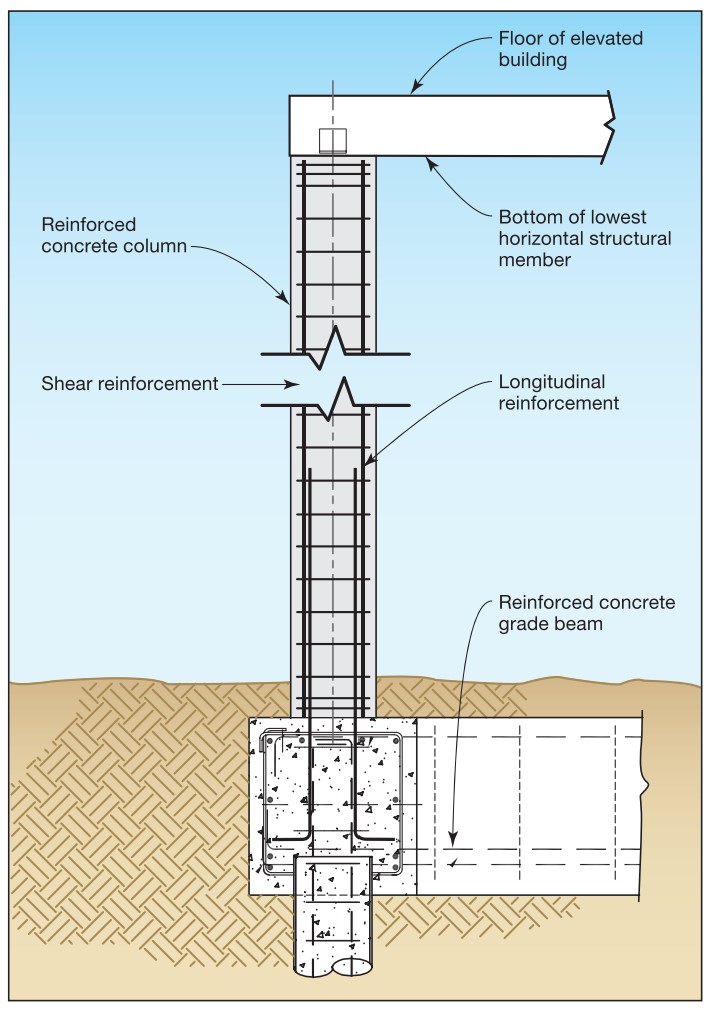
Section view of a steel pipe pile with concrete column and grade beam foundation type, adapted from FEMA P-550, case B.
Image
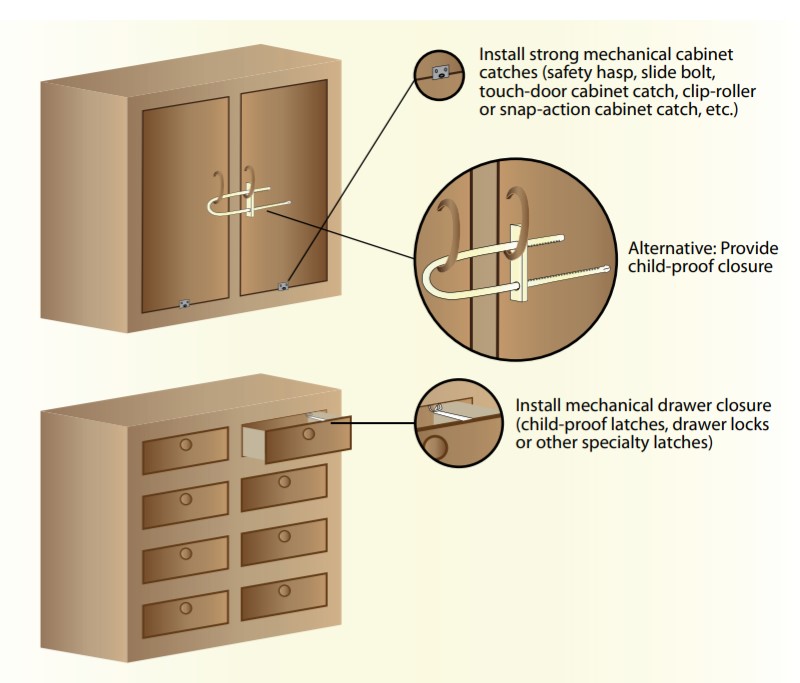
Self-locking drawers and cabinets can be installed to protect against damage from seismic events.
Image
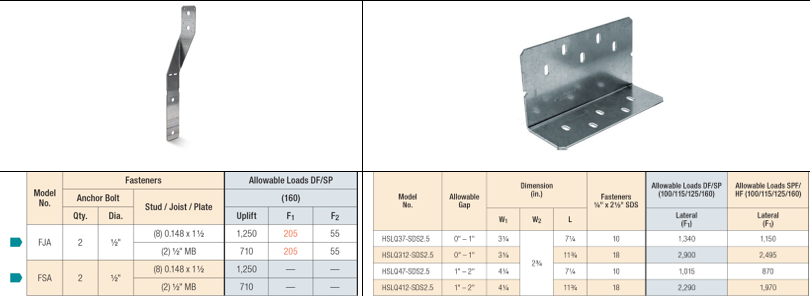
Shear Strength Comparison Between a Foundation Stud Anchor (on left) and a Shear Transfer Angle (on right)
Image
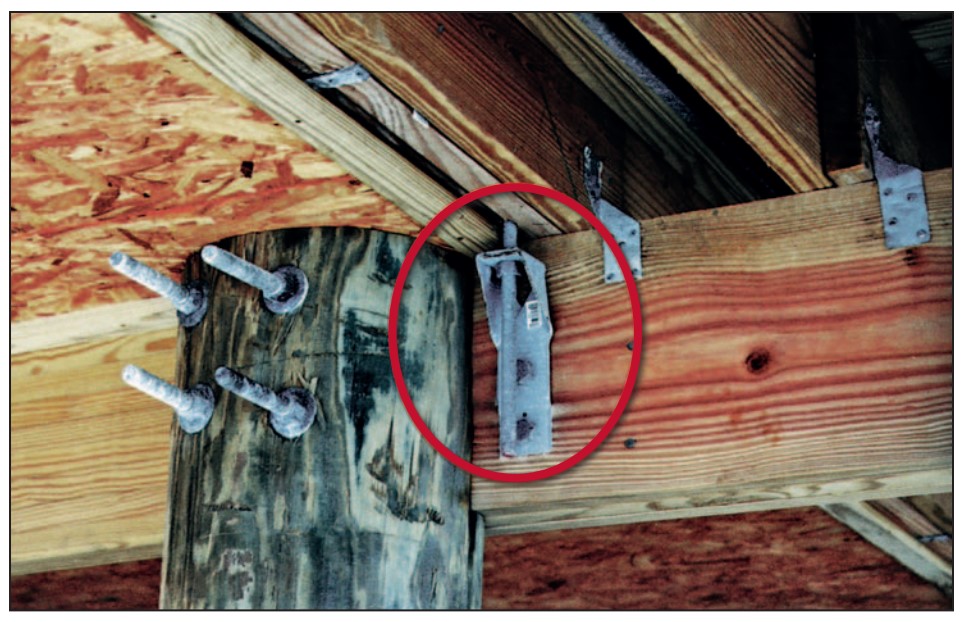
Shear wall hold-down connector with bracket attached to a wood beam for a home built on a pile foundation.
Image
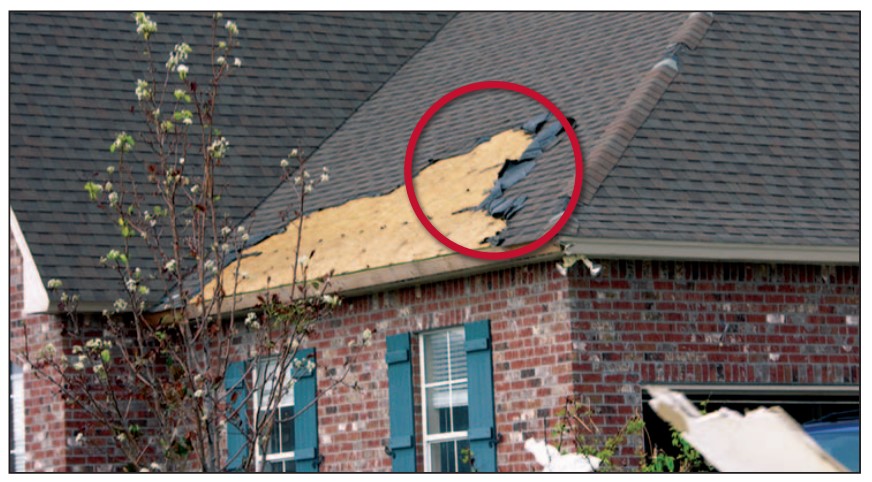
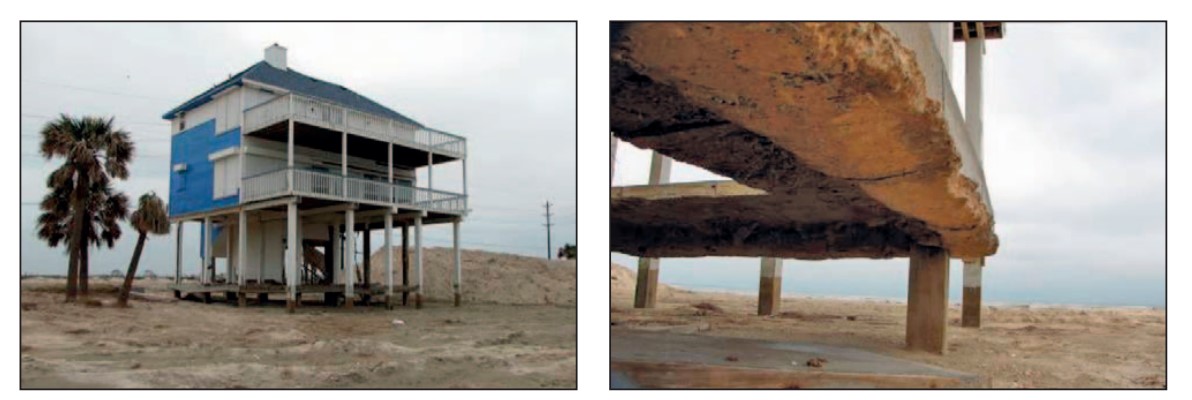
Shingle blow-off often starts at the eaves, as shown here after exposure to 115-mph hurricane winds.
Image

Shrubs, trees, and herbs create a tight network of roots and stems that bind the soil and slow the flow of water down hillsides.
Image
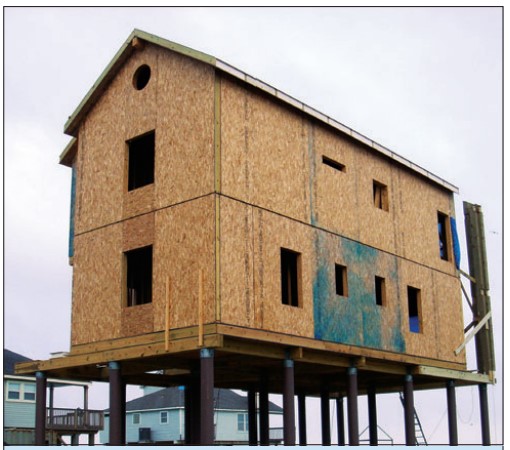
SIP homes built in coastal locations should be constructed so that the lowest level is well above the BFE.
Image
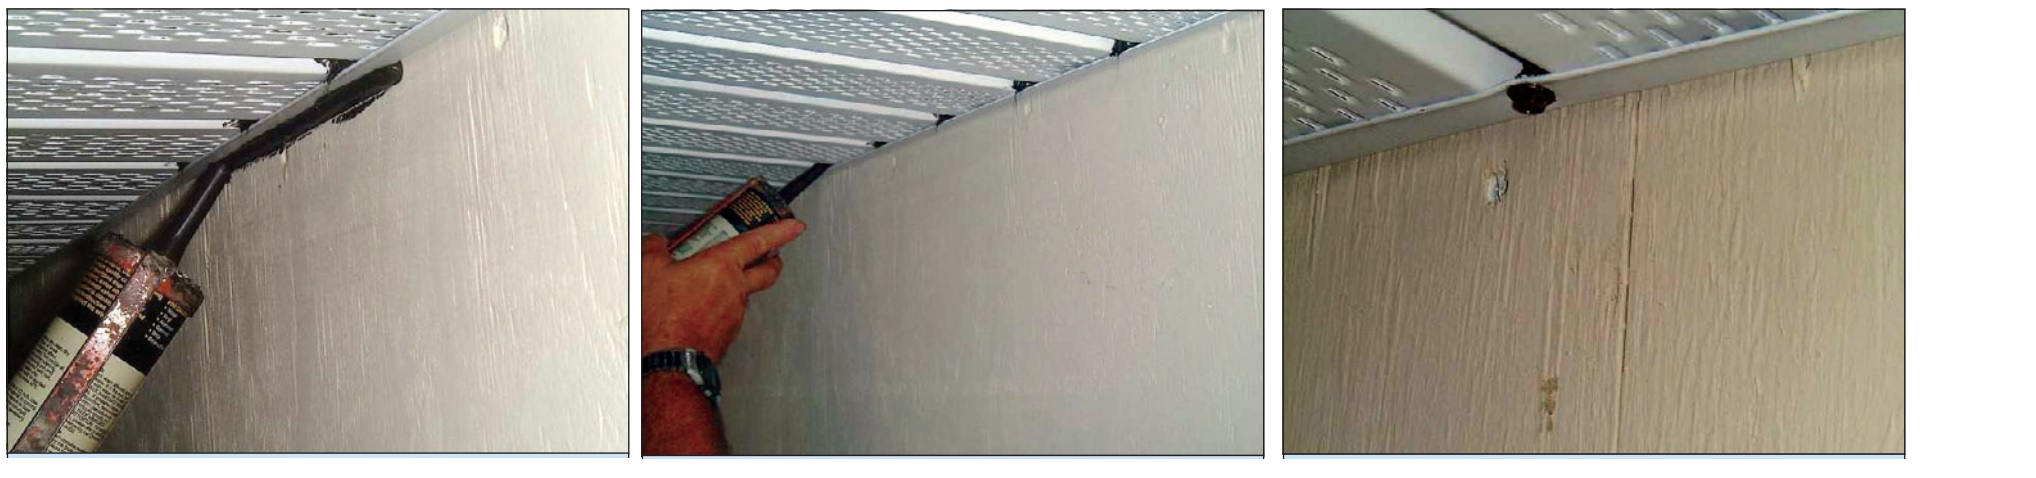
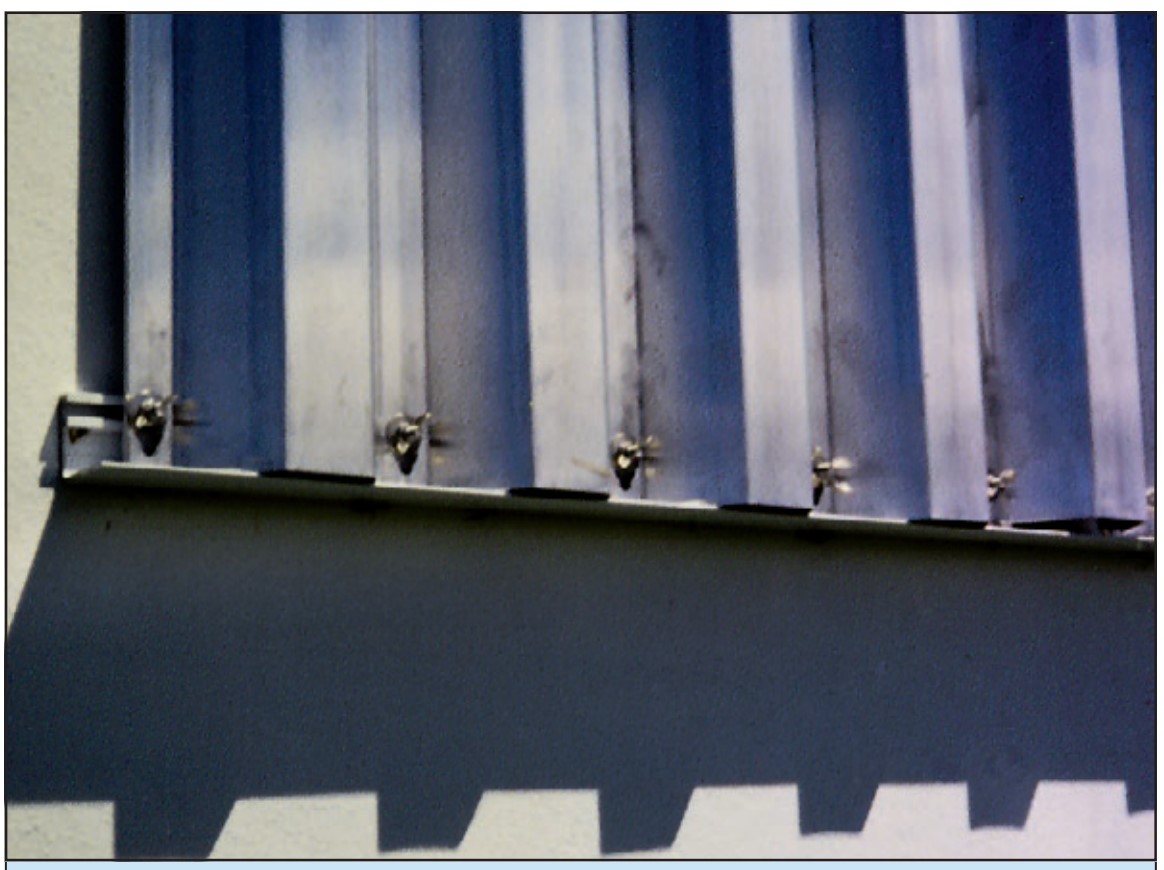
Soffits can be secured by caulking to the wall, sealing between each soffit panel and the wall channel, and screwing the wall channel to the soffit panels.
Image

Soil types include sand, silt, and clay- the more sand, the more quickly the soil drains.
Image
Stem wall foundation design, including additional reinforcement to resist moving floodwaters and short (1.5-ft) breaking waves (Source: Adapted from FEMA P-550, Case F).
Image
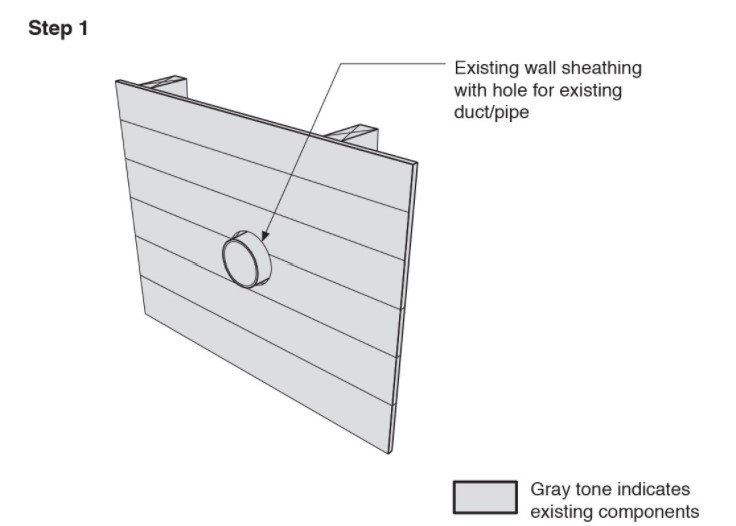
Step 1. Remove the existing wall cladding to prepare to retrofit an exterior wall.
Image
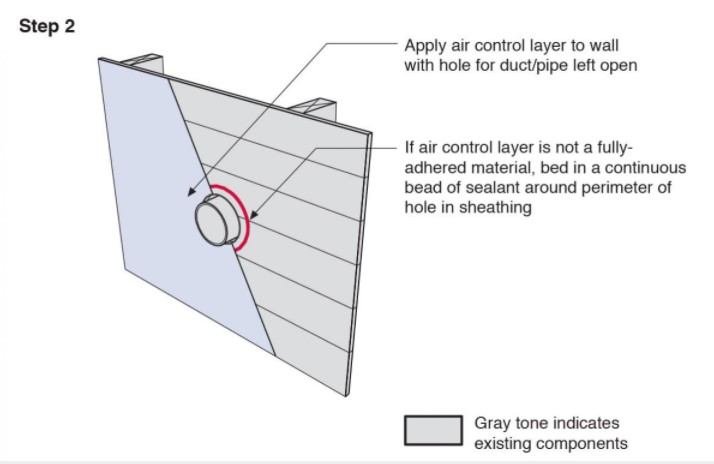
Step 2. Install a continuous air and water control layer over the existing wall sheathing.
Image
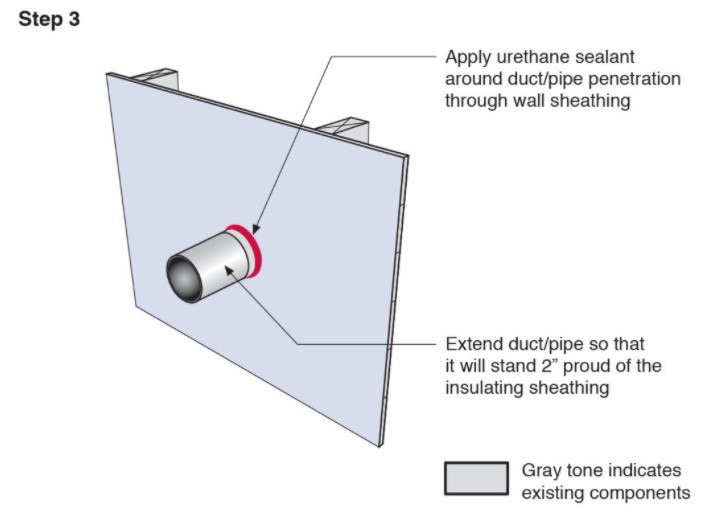
Step 3. Apply urethane sealant around the duct or pipe in the retrofitted exterior wall.
Image
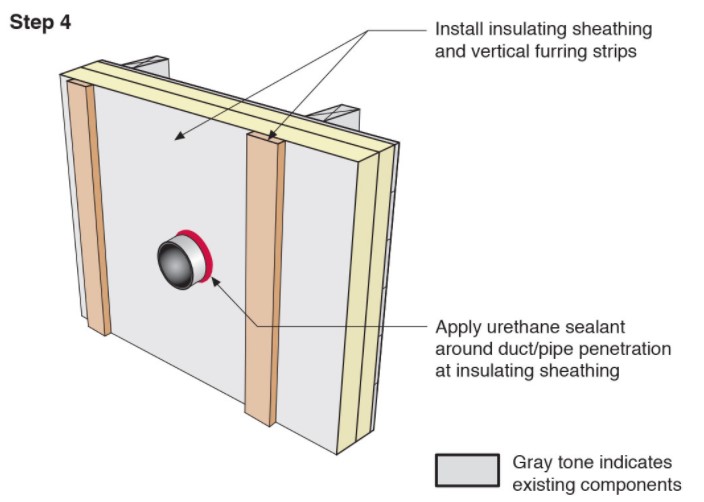
Step 4. Install insulating sheathing and vertical furring strips on the retrofitted exterior wall; seal around pipe or duct with urethane sealant.
Image
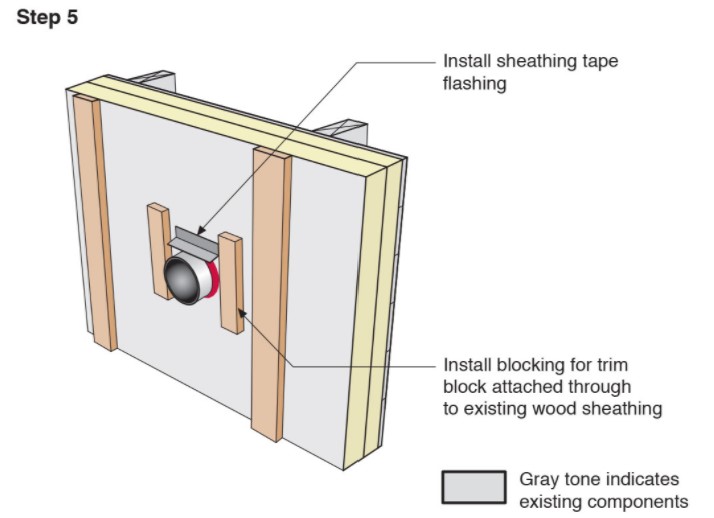
Step 5. Install sheathing tape flashing over the duct or pipe and wood blocking on either side for later attachment of trim.
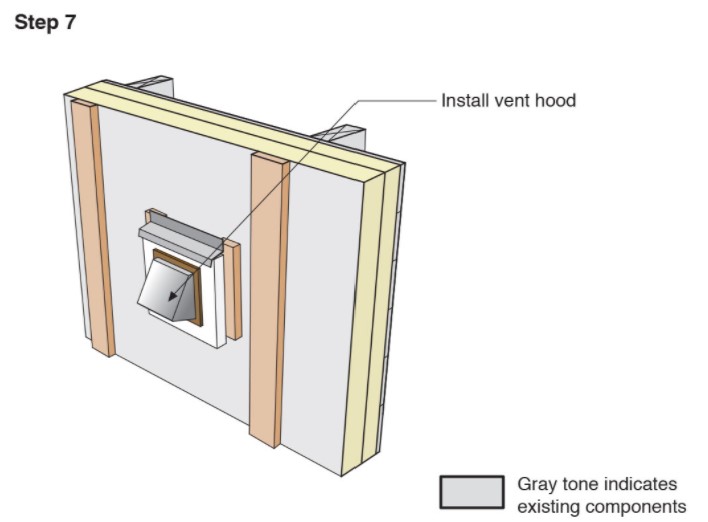
Image
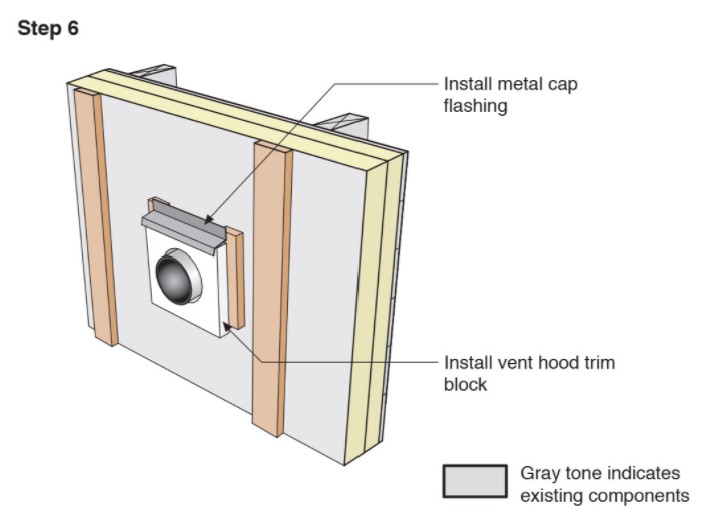
Step 6. Install vent hood trim block, metal cap flashing; seal top edge of flashing with sheathing tape.
Image
Image
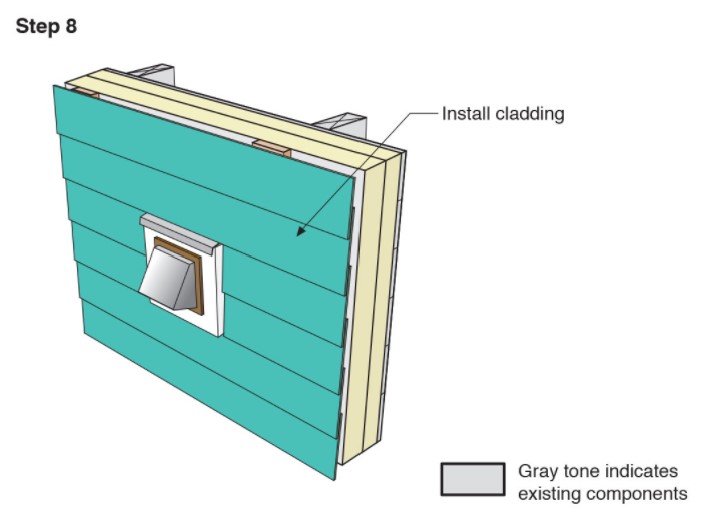
Step 8. Attach the new cladding to the furring strips over the rigid foam for the exterior wall retrofit.
Image
Image

Storm-blown shingles reveal that the starter strip was incorrectly installed; rather than cutting off the tabs of the starter, the starter was rotated 180 degrees (right arrow) so the exposed portion of the first course of shingles (left arrow) was...
Image
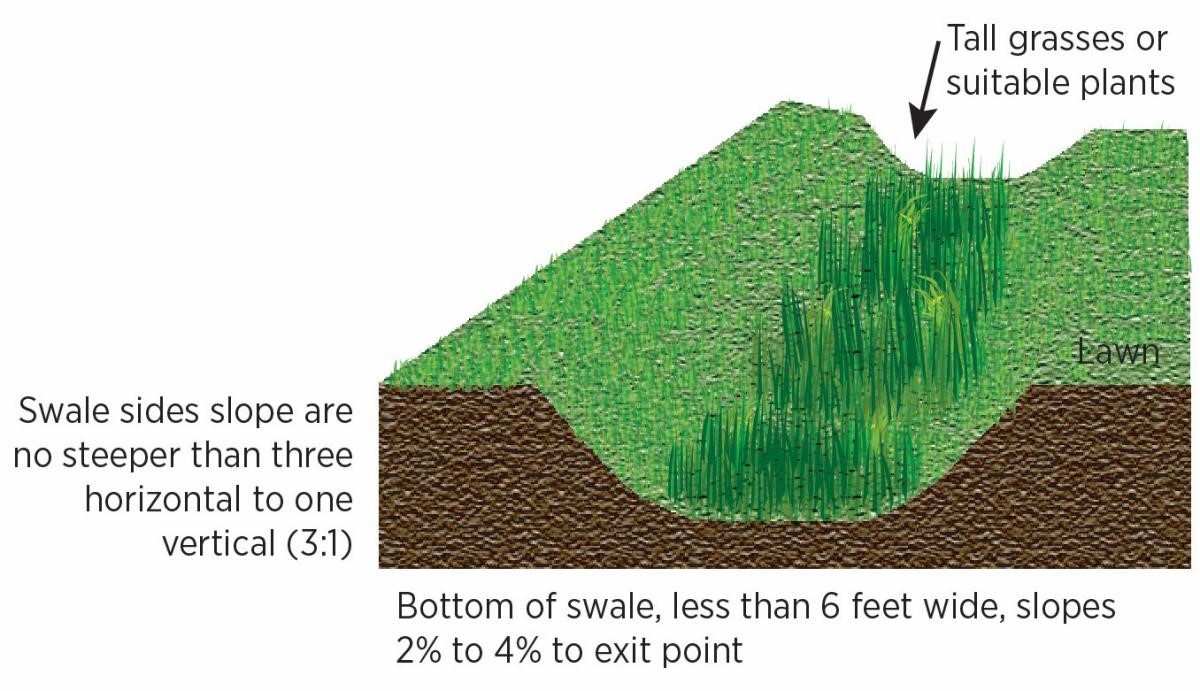
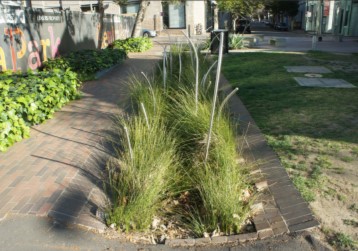
Swales are trapezoidal channels dug to receive storm-water overflow, with specific vegetation planted to improve aesthetics, filter stormwater runoff, and prevent erosion.
Image

Swales are troughs that collect site stormwater and filter it with vegetation, soil, and gravel layers.
Image