Showing results 451 - 500 of 898
Image
Right - This concrete basement wall has exterior rigid insulation and comprehensive moisture management details.
Image
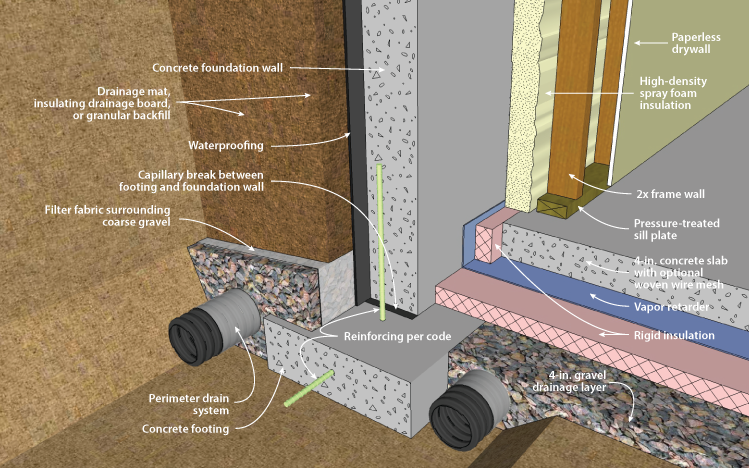
Right - This concrete basement wall is insulated on the interior basement walls with spray foam and under the slab with rigid foam; footing details are shown.
Image
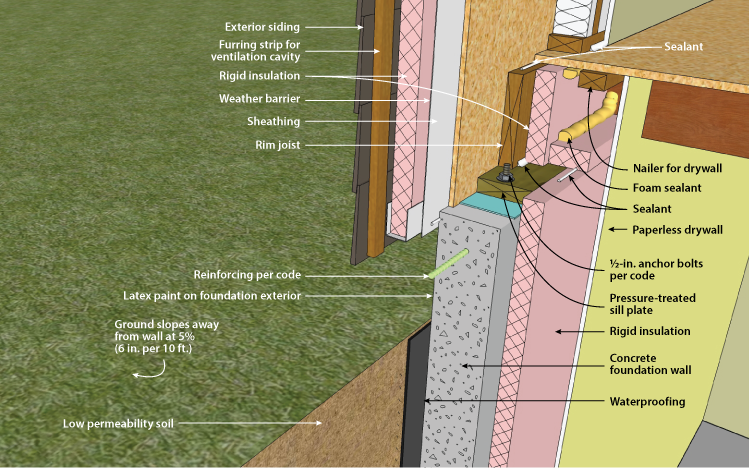
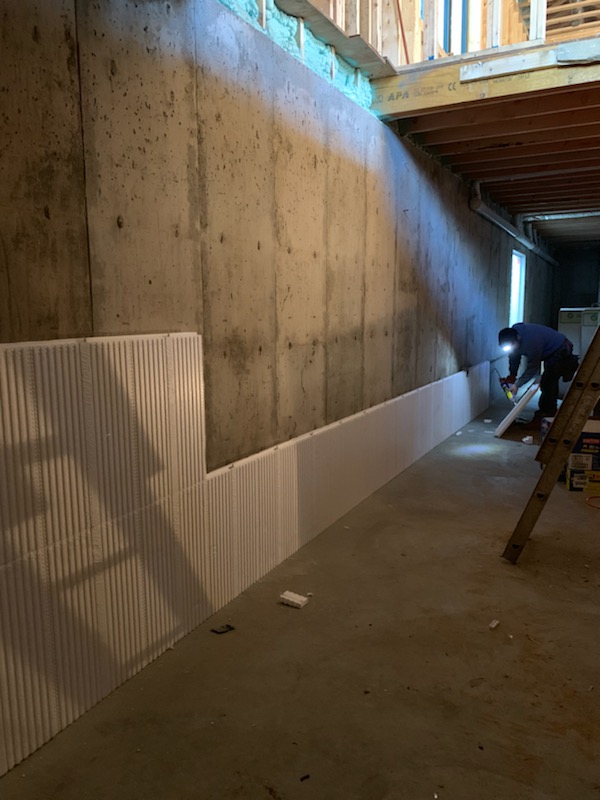
Right - This concrete basement wall is insulated on the interior with rigid insulation; sill details are shown.
Image
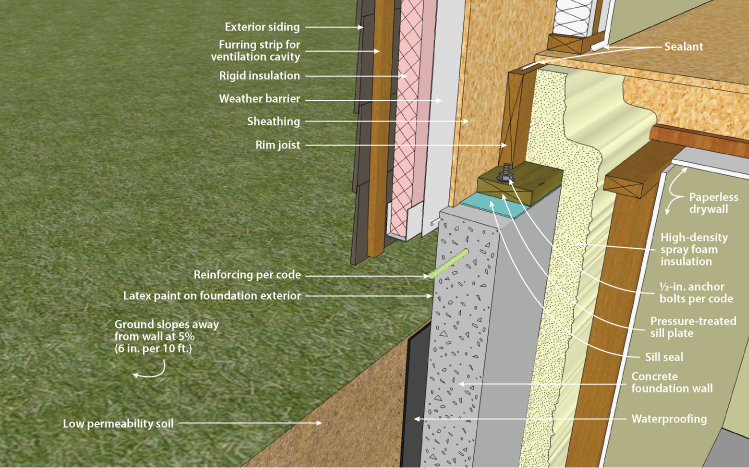
Right - This concrete basement wall is insulated on the interior with spray foam insulation; sill detail are shown.
Image
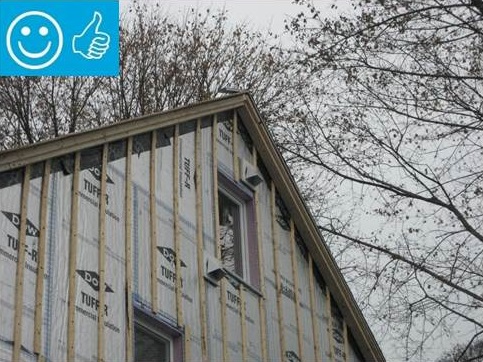
Right - This foil-faced polyisocyanurate rigid foam is installed on an existing exterior wall and the seams are taped so the rigid foam can serve as a water control layer
Image

Image
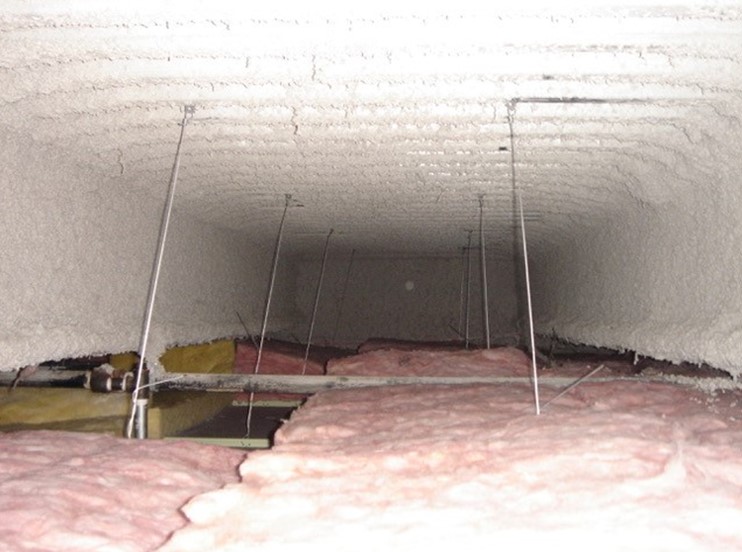
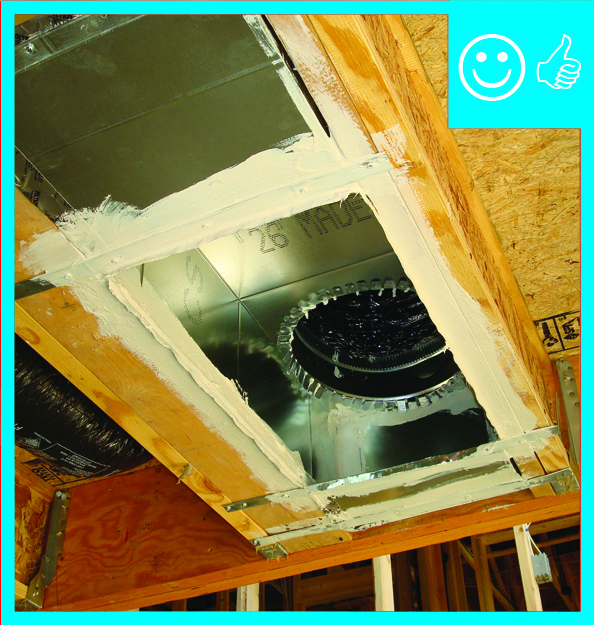
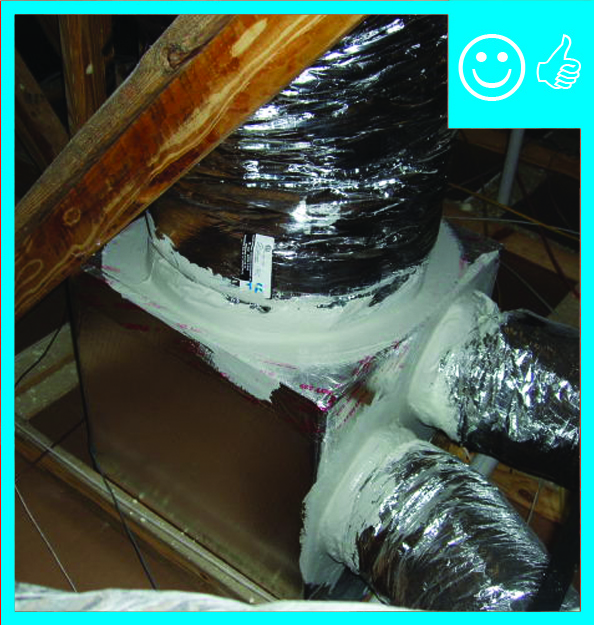
Right - This heated garage plenum is insulated along the bottom of the plenum space.
Image

Right - This heated garage plenum is insulated and has an opening to access the interior, allowing for repairs and maintenance.
Image

Right - This high-thermal-mass home uses masonry construction to naturally regulate temperatures inside the house
Image
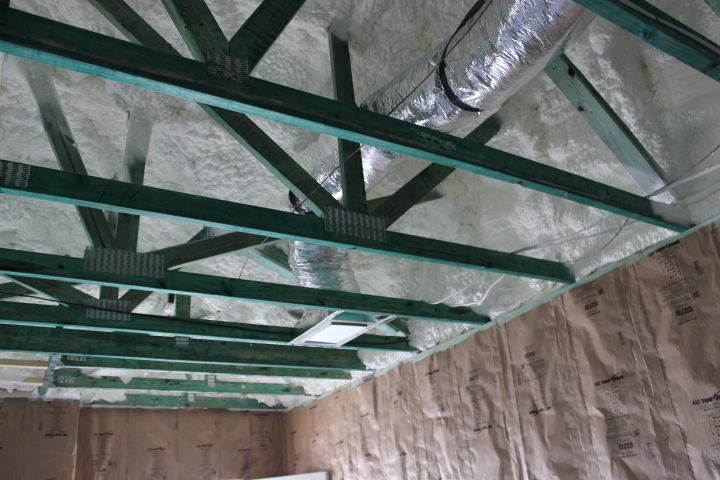
Right - This new sealed attic has 5.5 inches (R-20) of spray foam insulation along the underside of the roof deck providing a conditioned attic space for the heating and cooling ducts.
Image
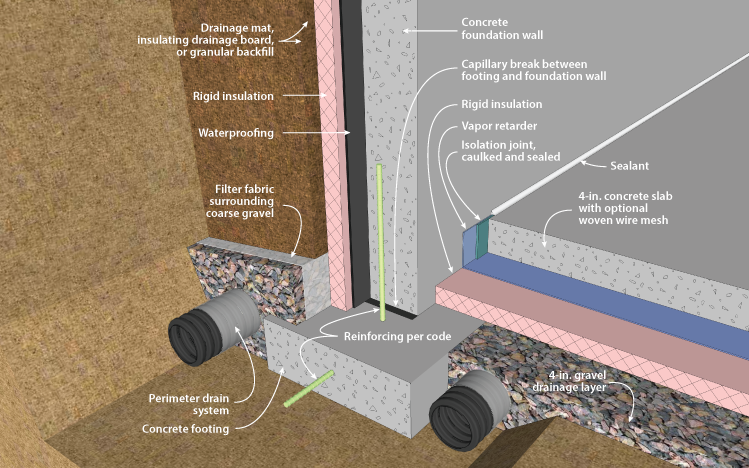
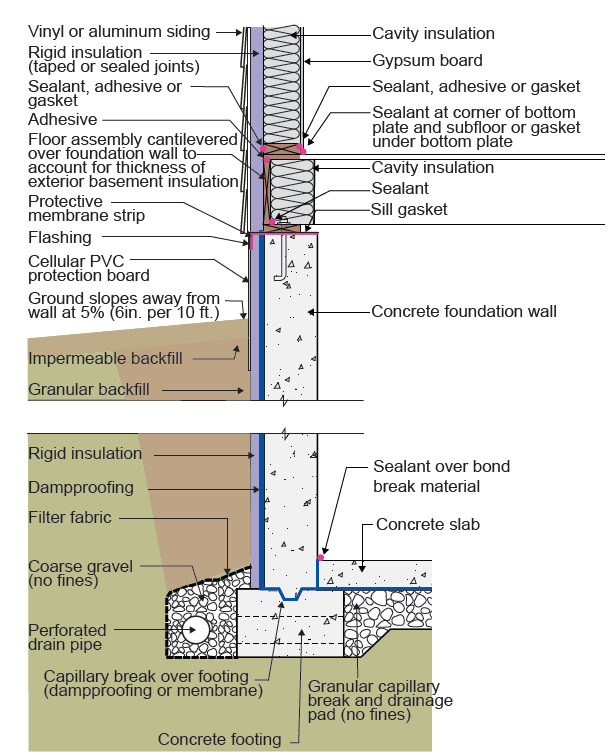
Right - This poured concrete basement wall is insulated on the exterior and under the slab with rigid insulation; footing details include interior and exterior footing drain pipe.
Image
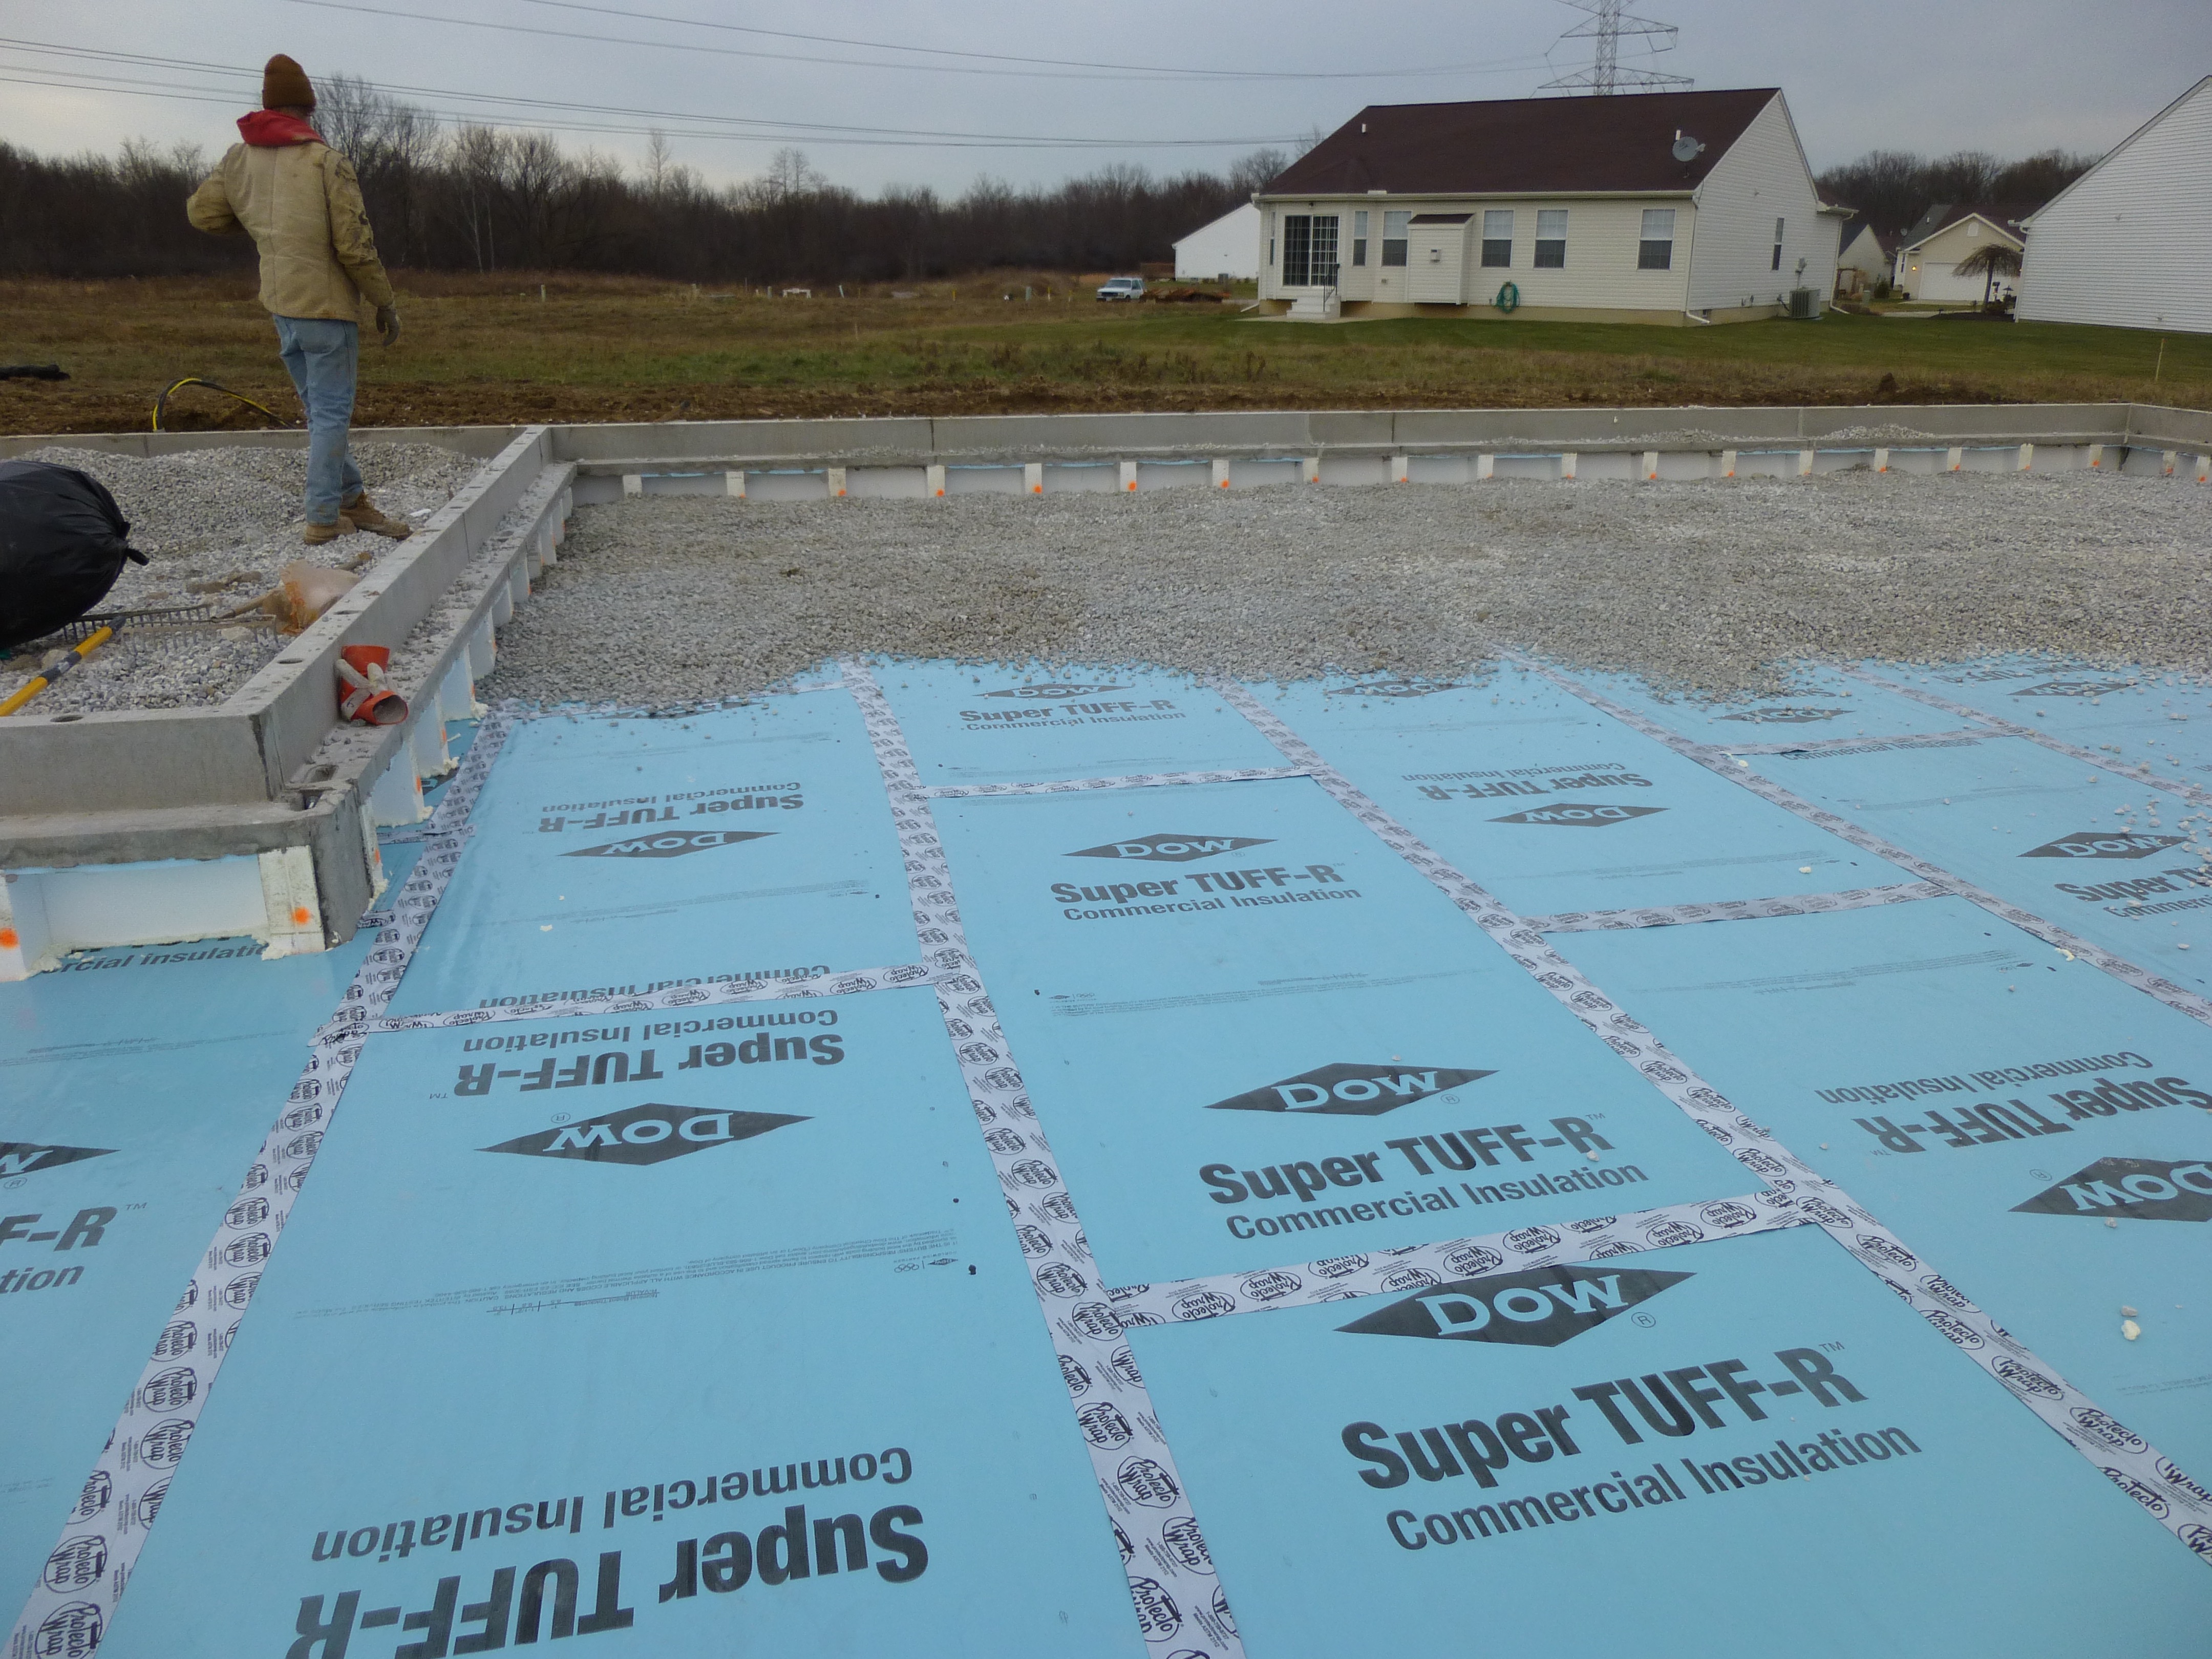
Right - This rigid insulation is correctly installed in a level layer over aggregate; the seams will be taped
Image

Right - This unvented crawlspace is insulated along interior walls with rigid foam and air-sealed by covering the floor with vapor retarder that is sealed to the rigid foam which is taped at the seams.
Image

Right - This unvented crawlspace is insulated along the walls and between the floor joists with 2-inch foil-faced polyisocyanurate; a termite inspection gap is visible above of the wall insulation and below the band joist.
Image
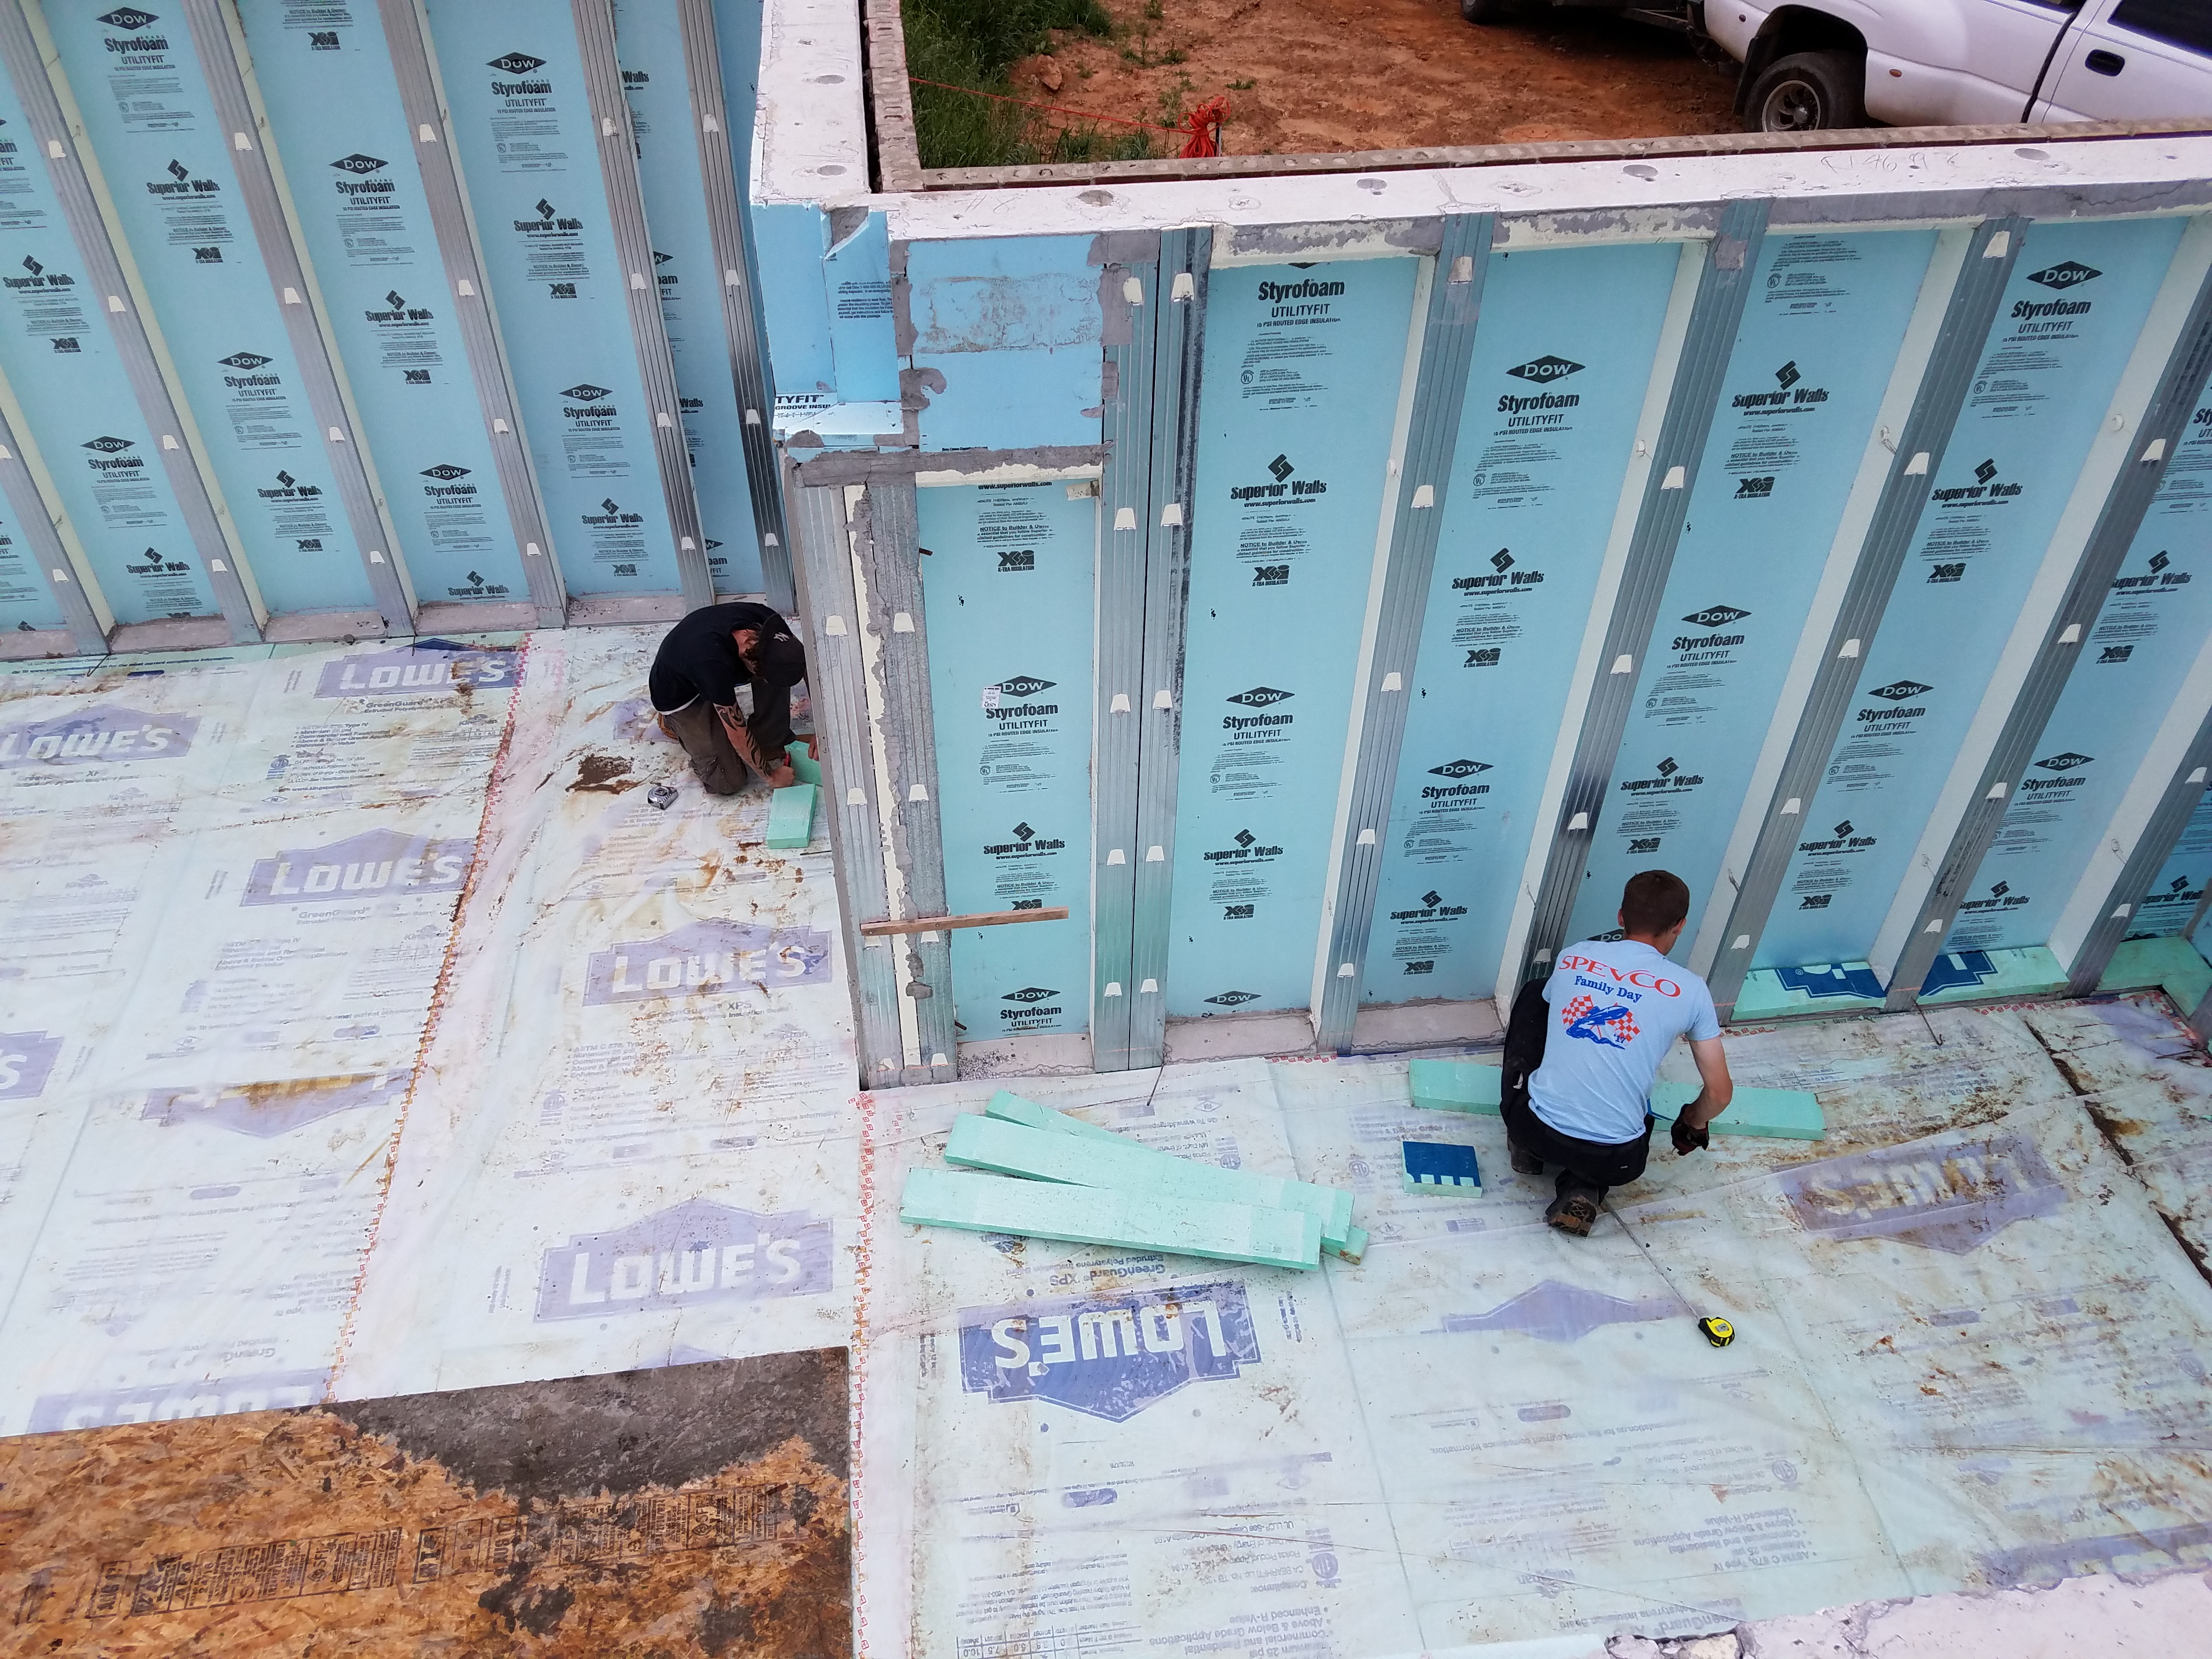
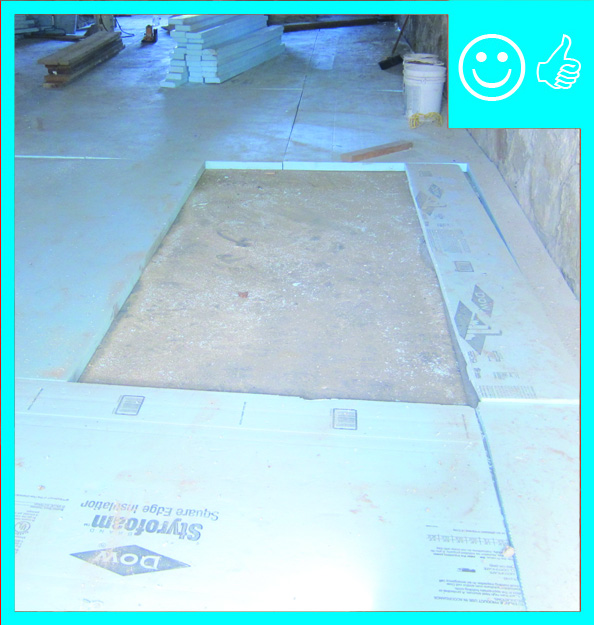
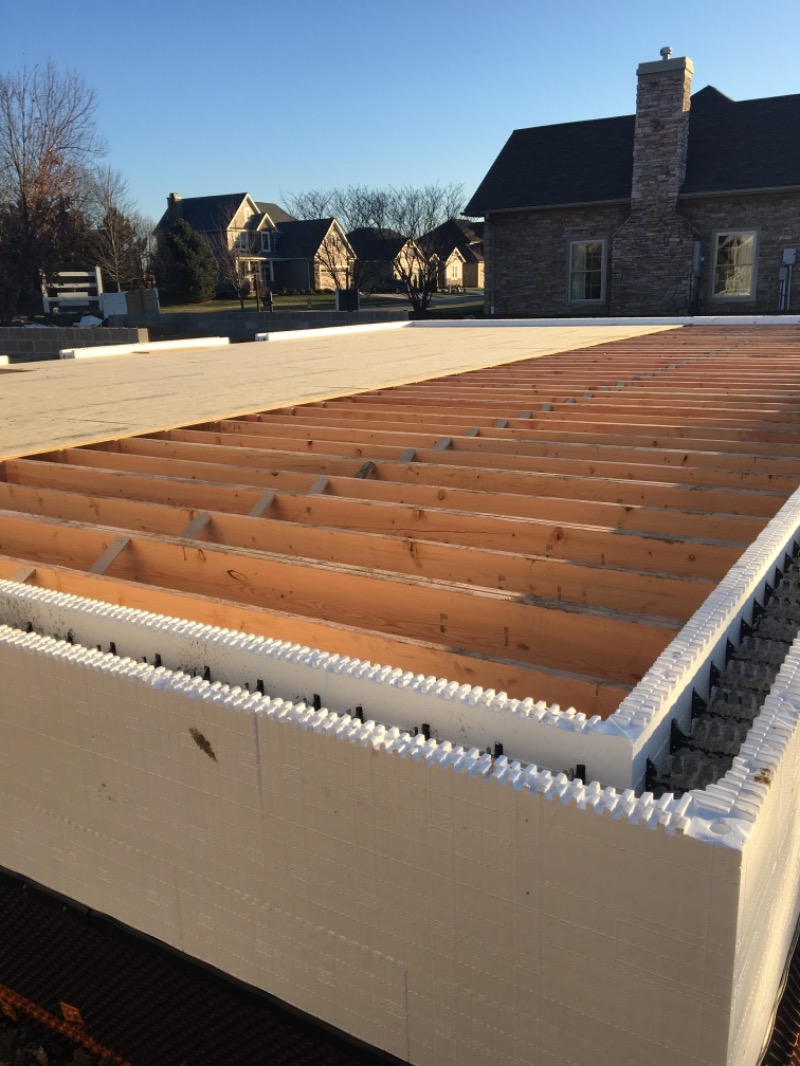
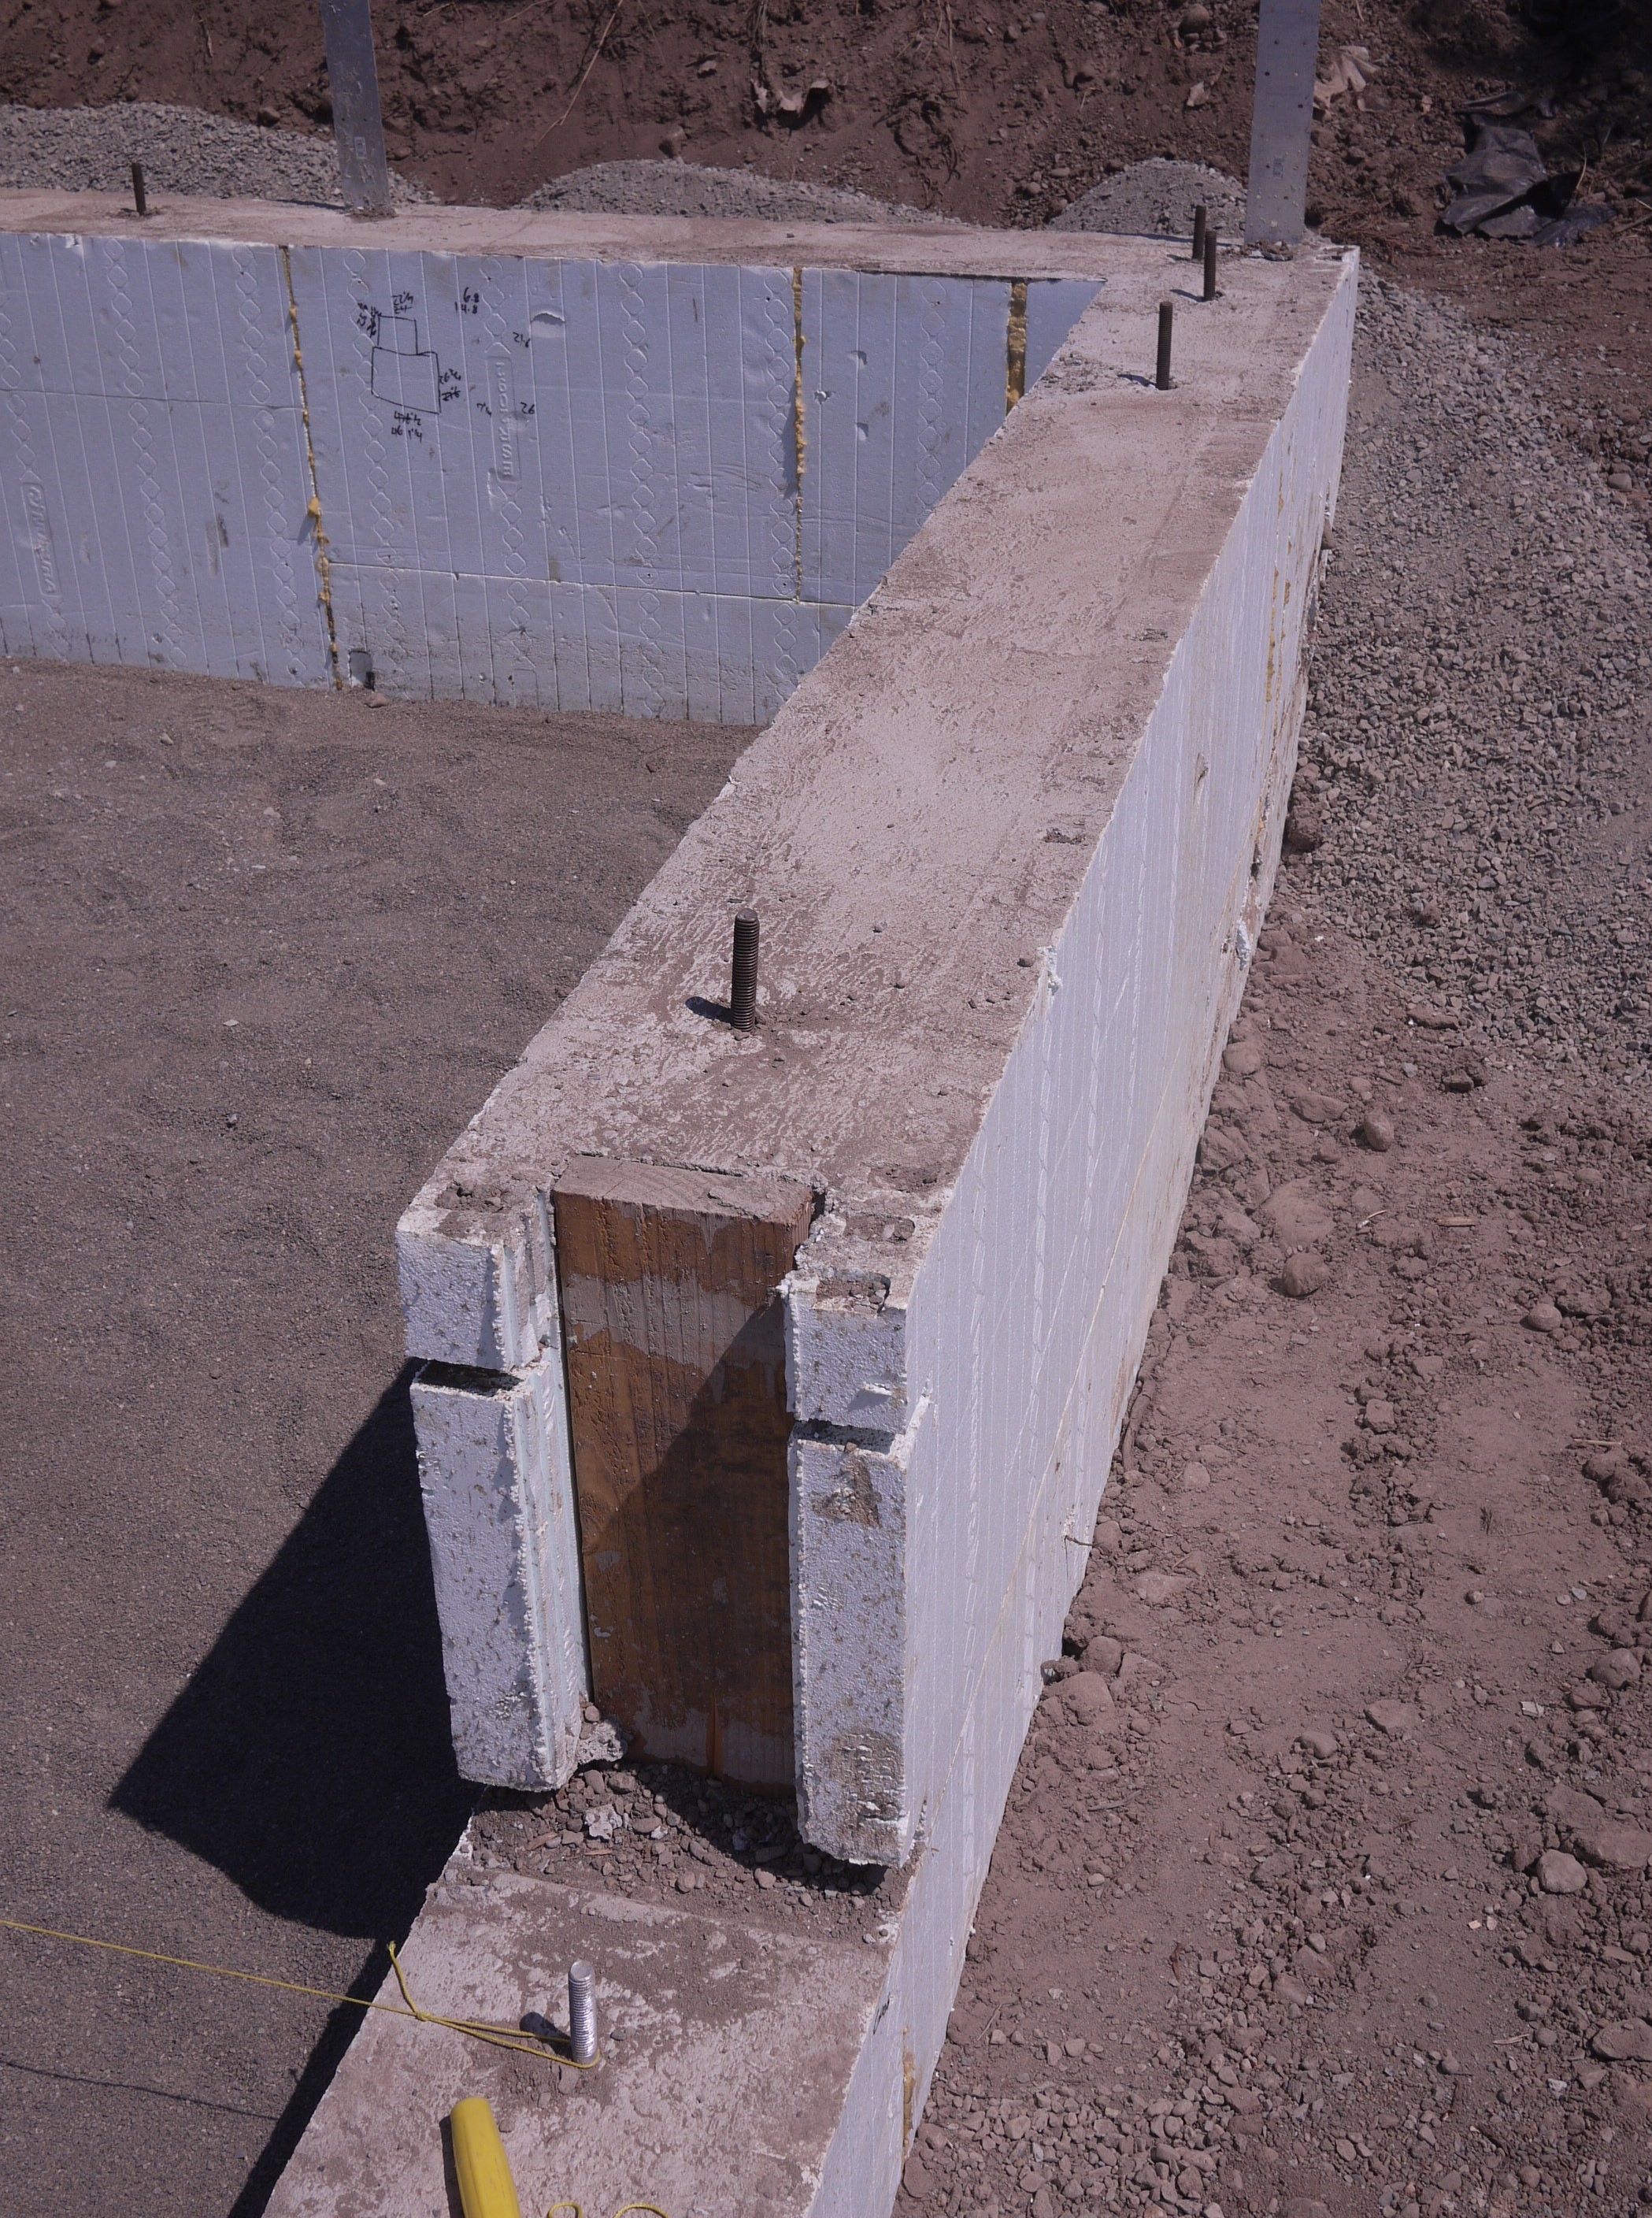
Right - Workers installed rigid foam on the floor and the sill plates of these pre-cast, pre-insulated concrete wall panels to provide a continuous layer of insulation under and around the not-yet-poured basement floor slab.
Image
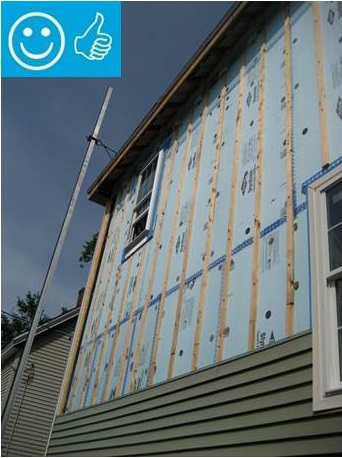
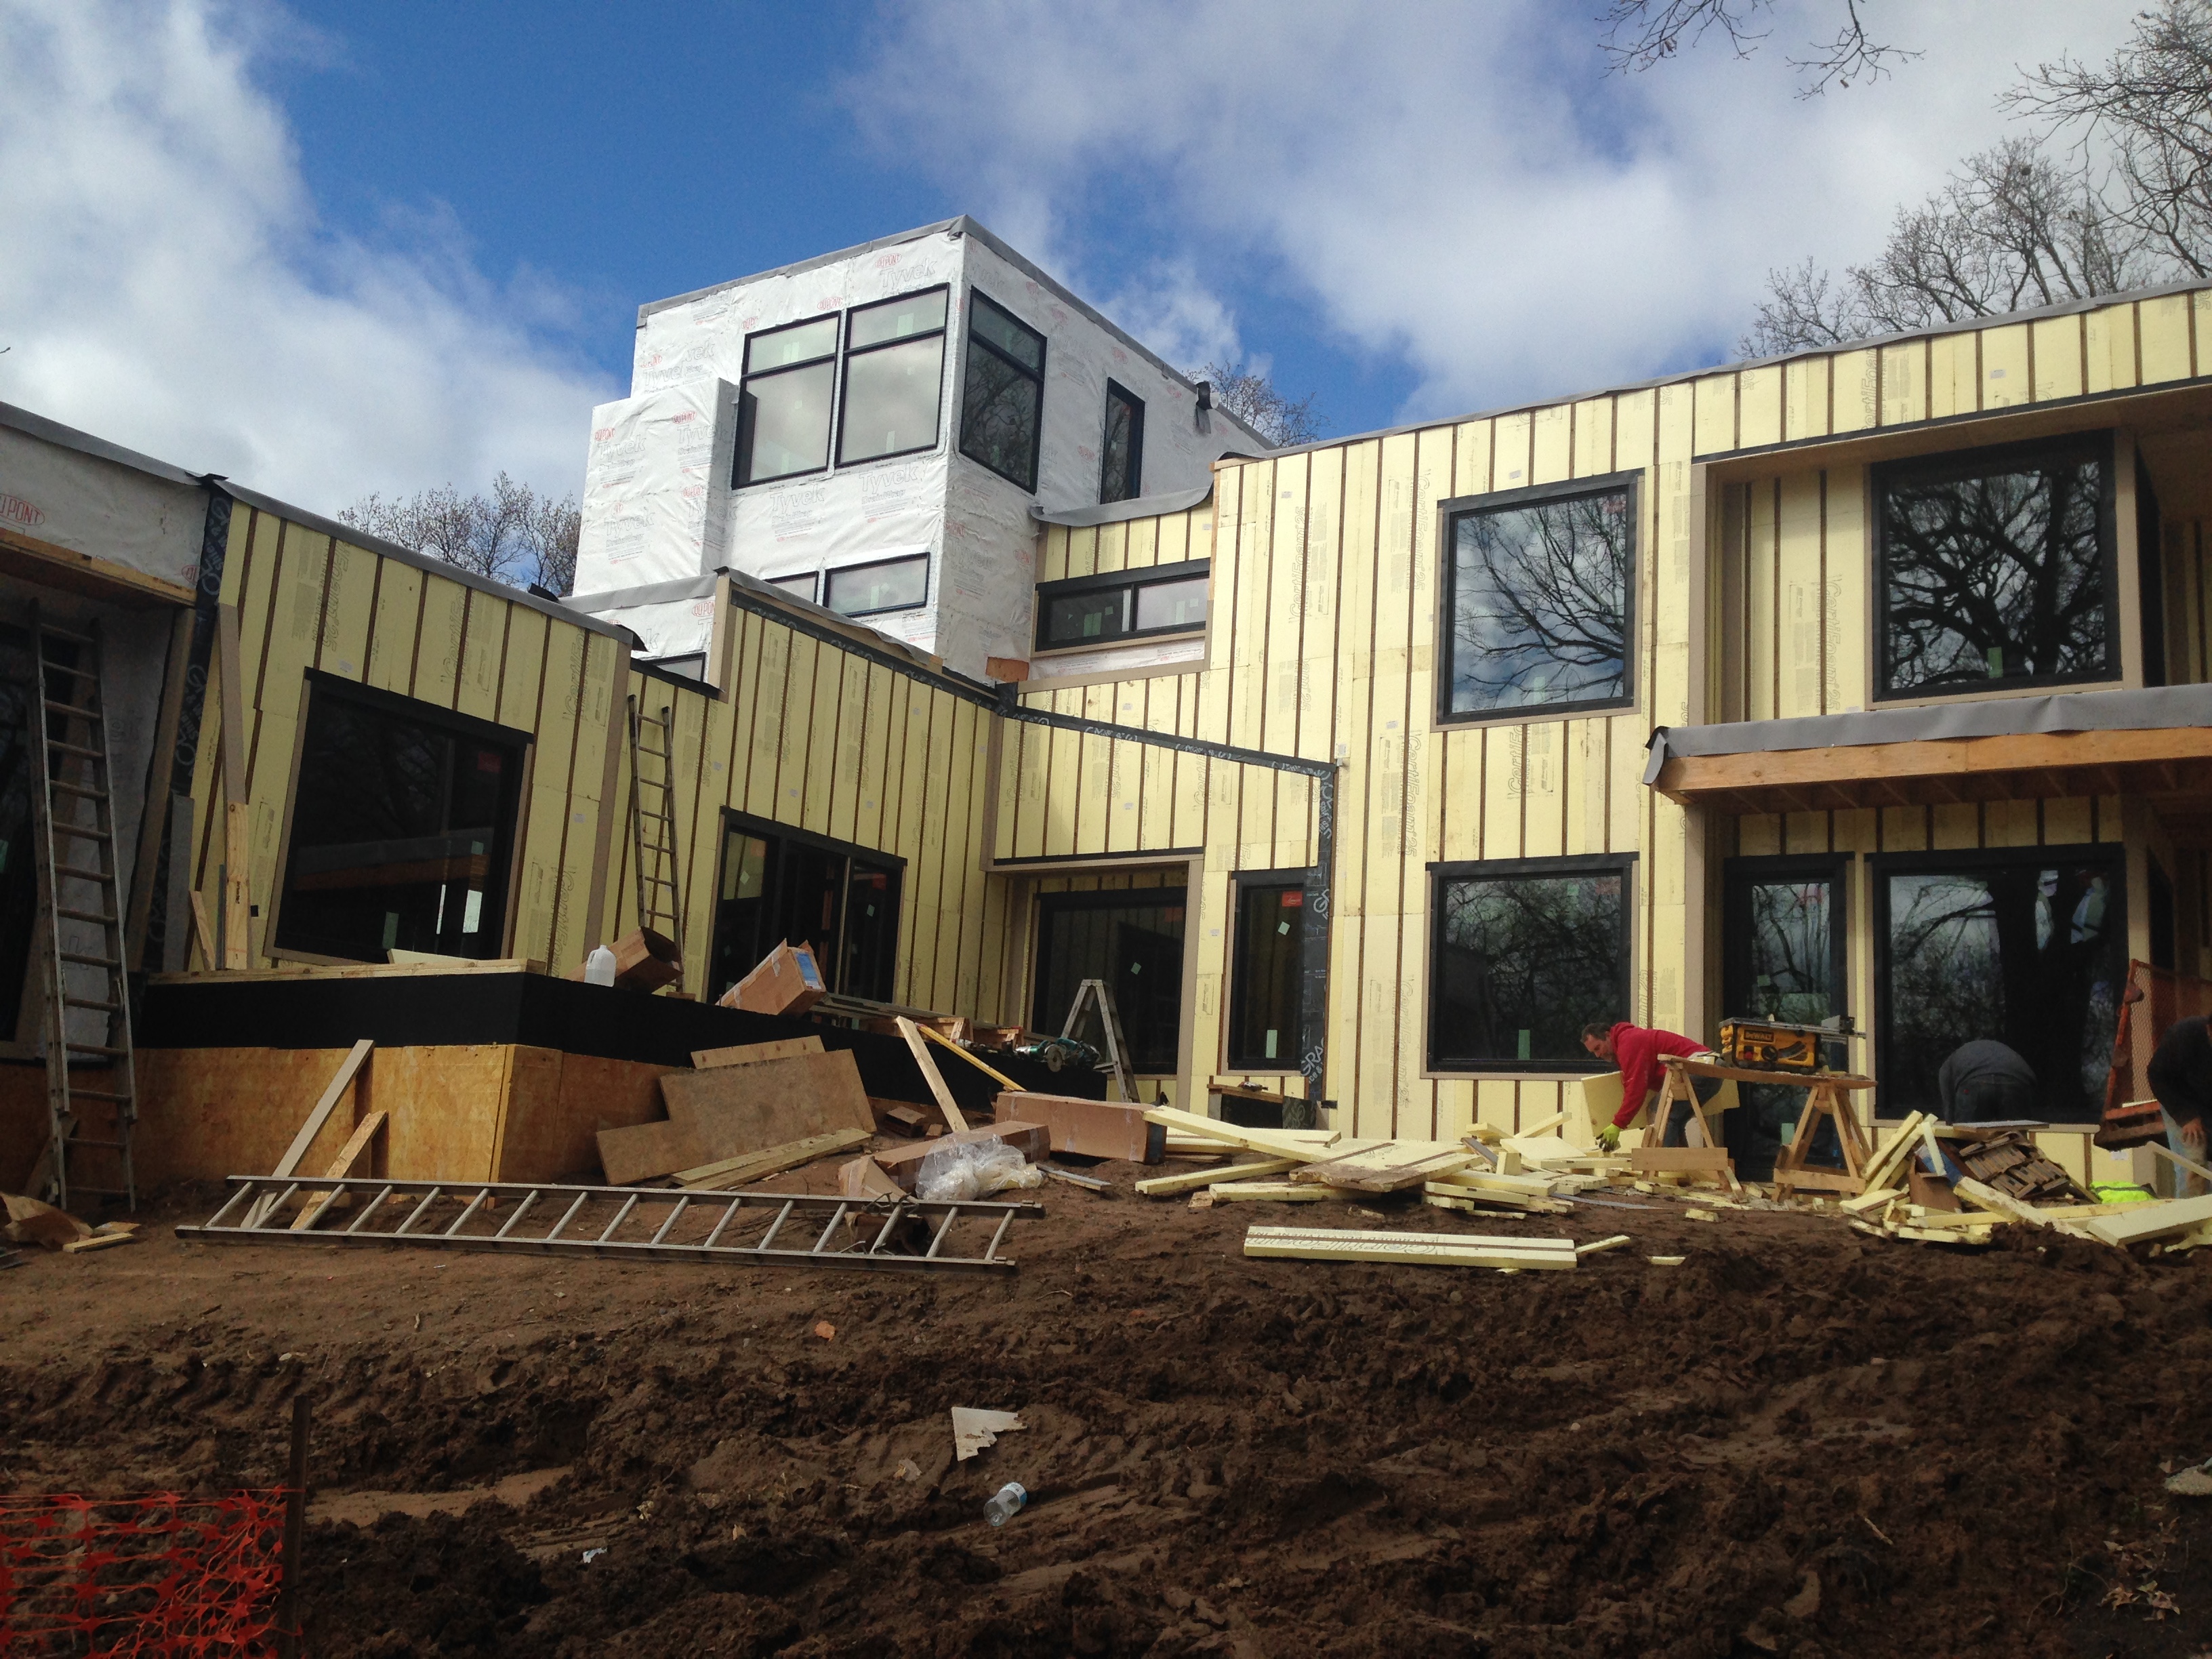
Right - XPS foam insulation is attached to the existing exterior wall with wood furring strips that serve as a nail base for the siding and are installed vertically to allow for drainage and drying behind the siding
Image
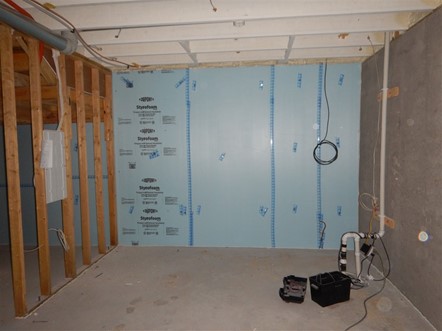
Right - XPS rigid foam board is tightly installed against a concrete foundation wall and seams are sealed with tape prior to installing fibrous blanket insulation.
Image

Right – Attic access hatch has been properly insulated by attaching a fiberglass batt, gasketed, and opening has blocking
Image
Right – 11-inch ICFs provide R-50 of wall insulation from the footing to the roof on this cold-climate home.
Image

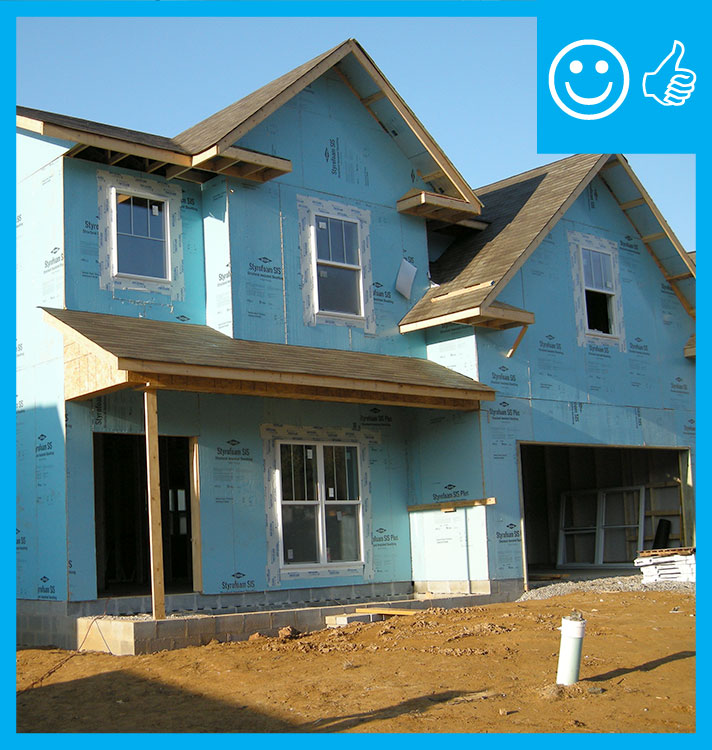
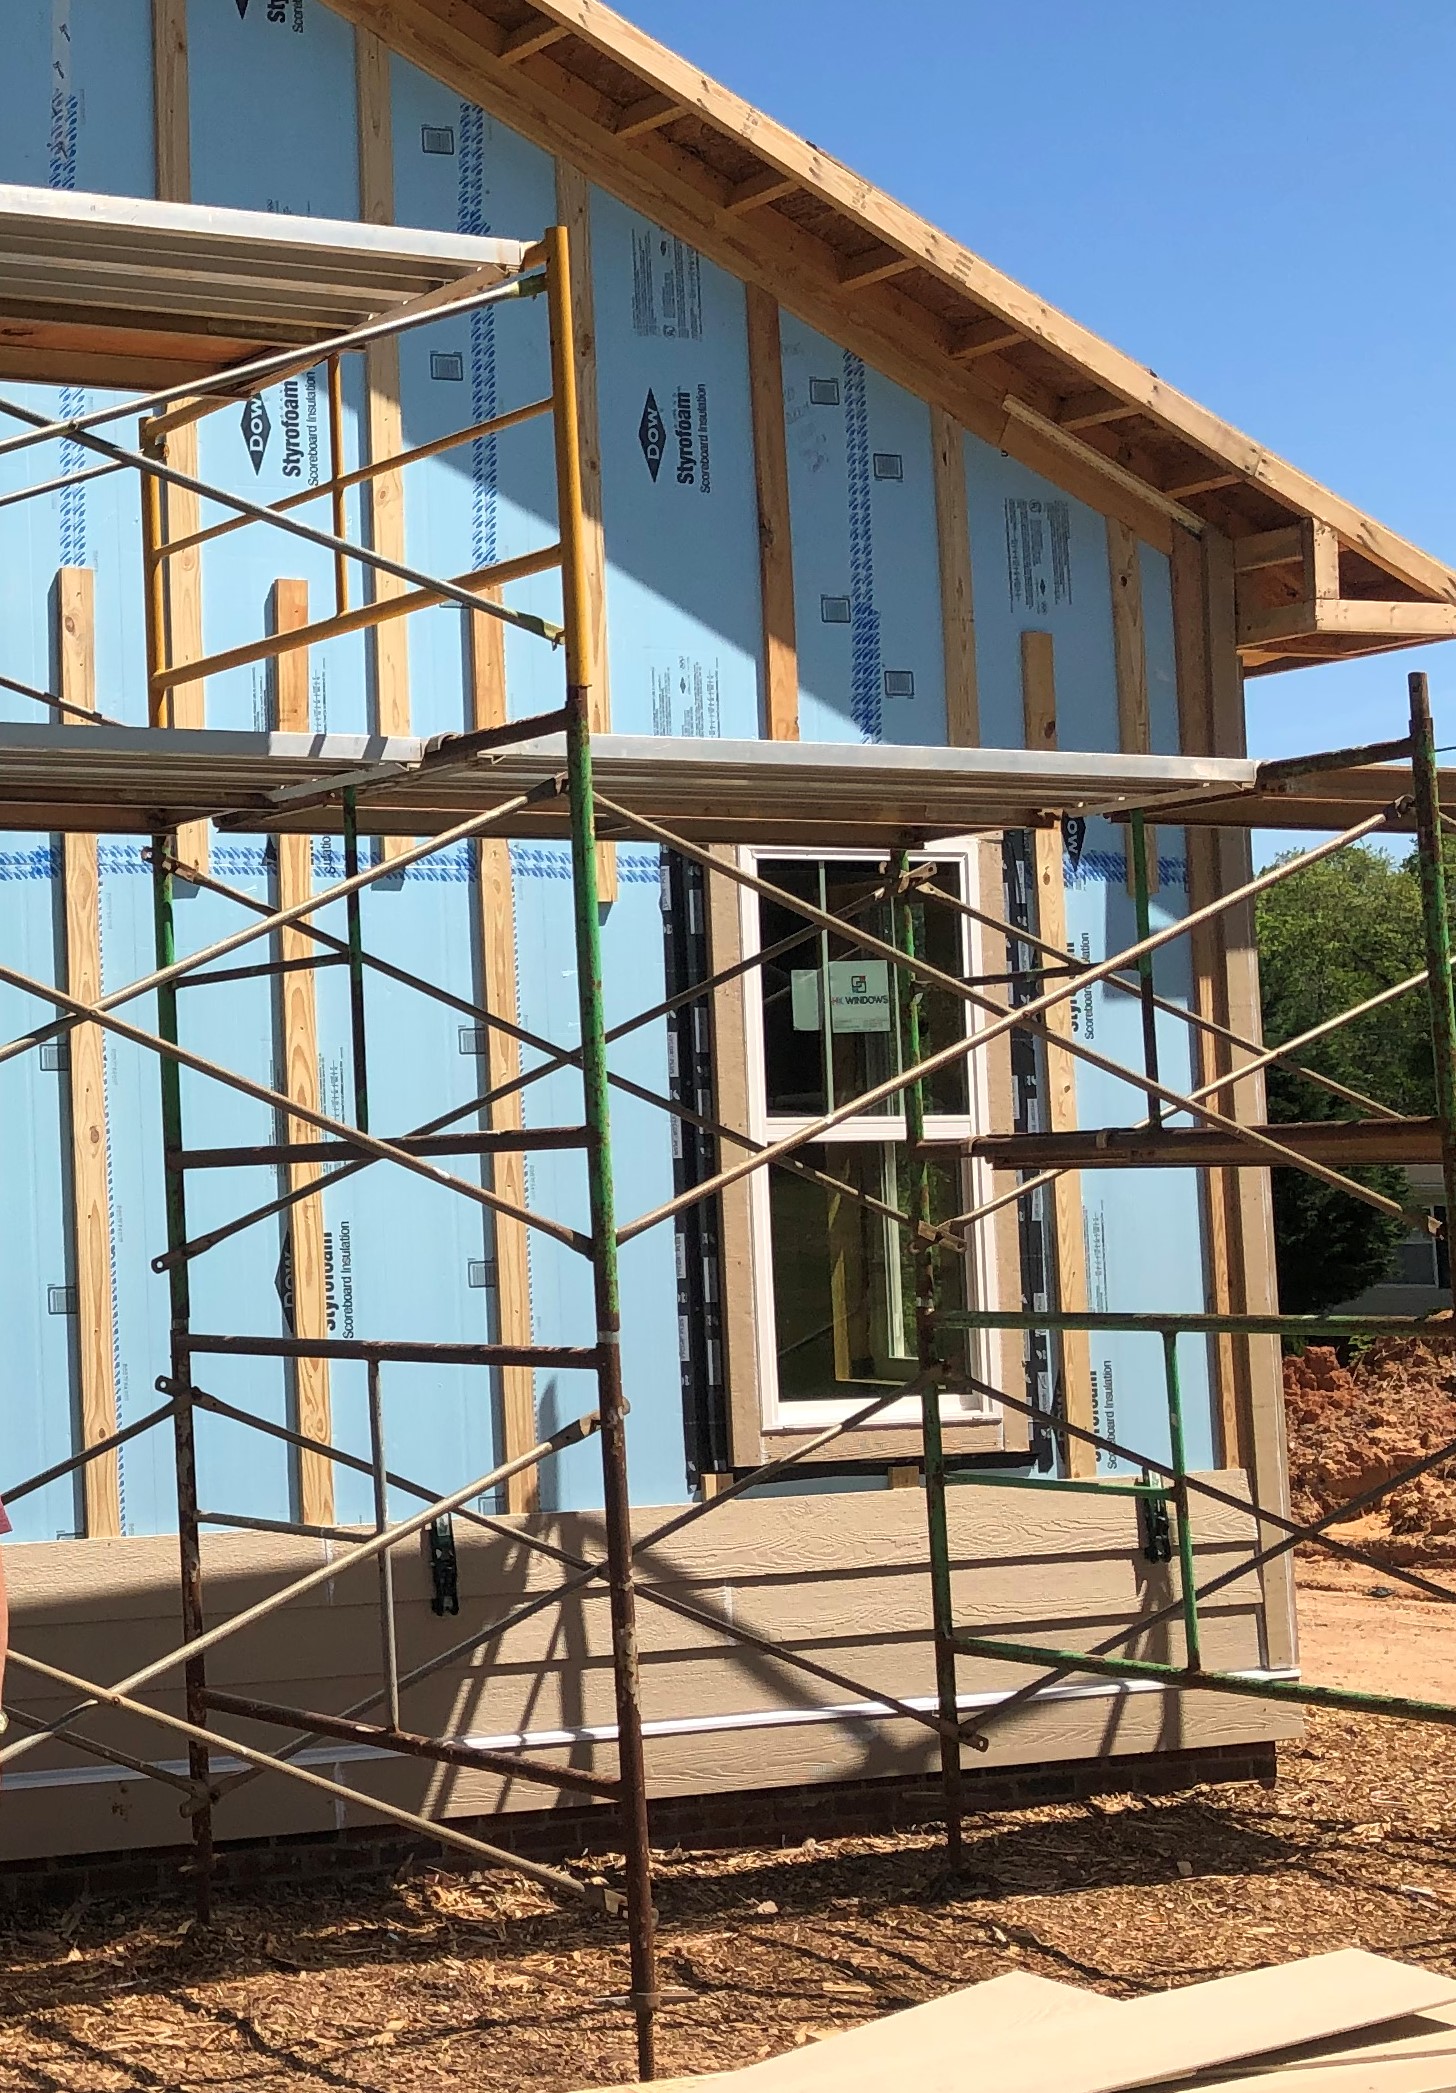
Right – A 1-inch layer of XPS rigid foam covers the 2x6 wall studs and is topped by ½-inch-thick plywood sheathing, which is covered with draining house wrap and serves as a nailing surface for siding and trim.
Image

Right – A termite inspection gap is left at the top of the rigid foam board basement wall insulation.
Image
Right – After installing the insulated concrete foundation wall panels, the builder installed underslab rigid foam, which was topped by 4 inches of crushed rock then the poured slab.
Image
Right – All insulated sheathing boards are installed according to the manufacturer’s recommended fastening schedule and taping specifications
Image
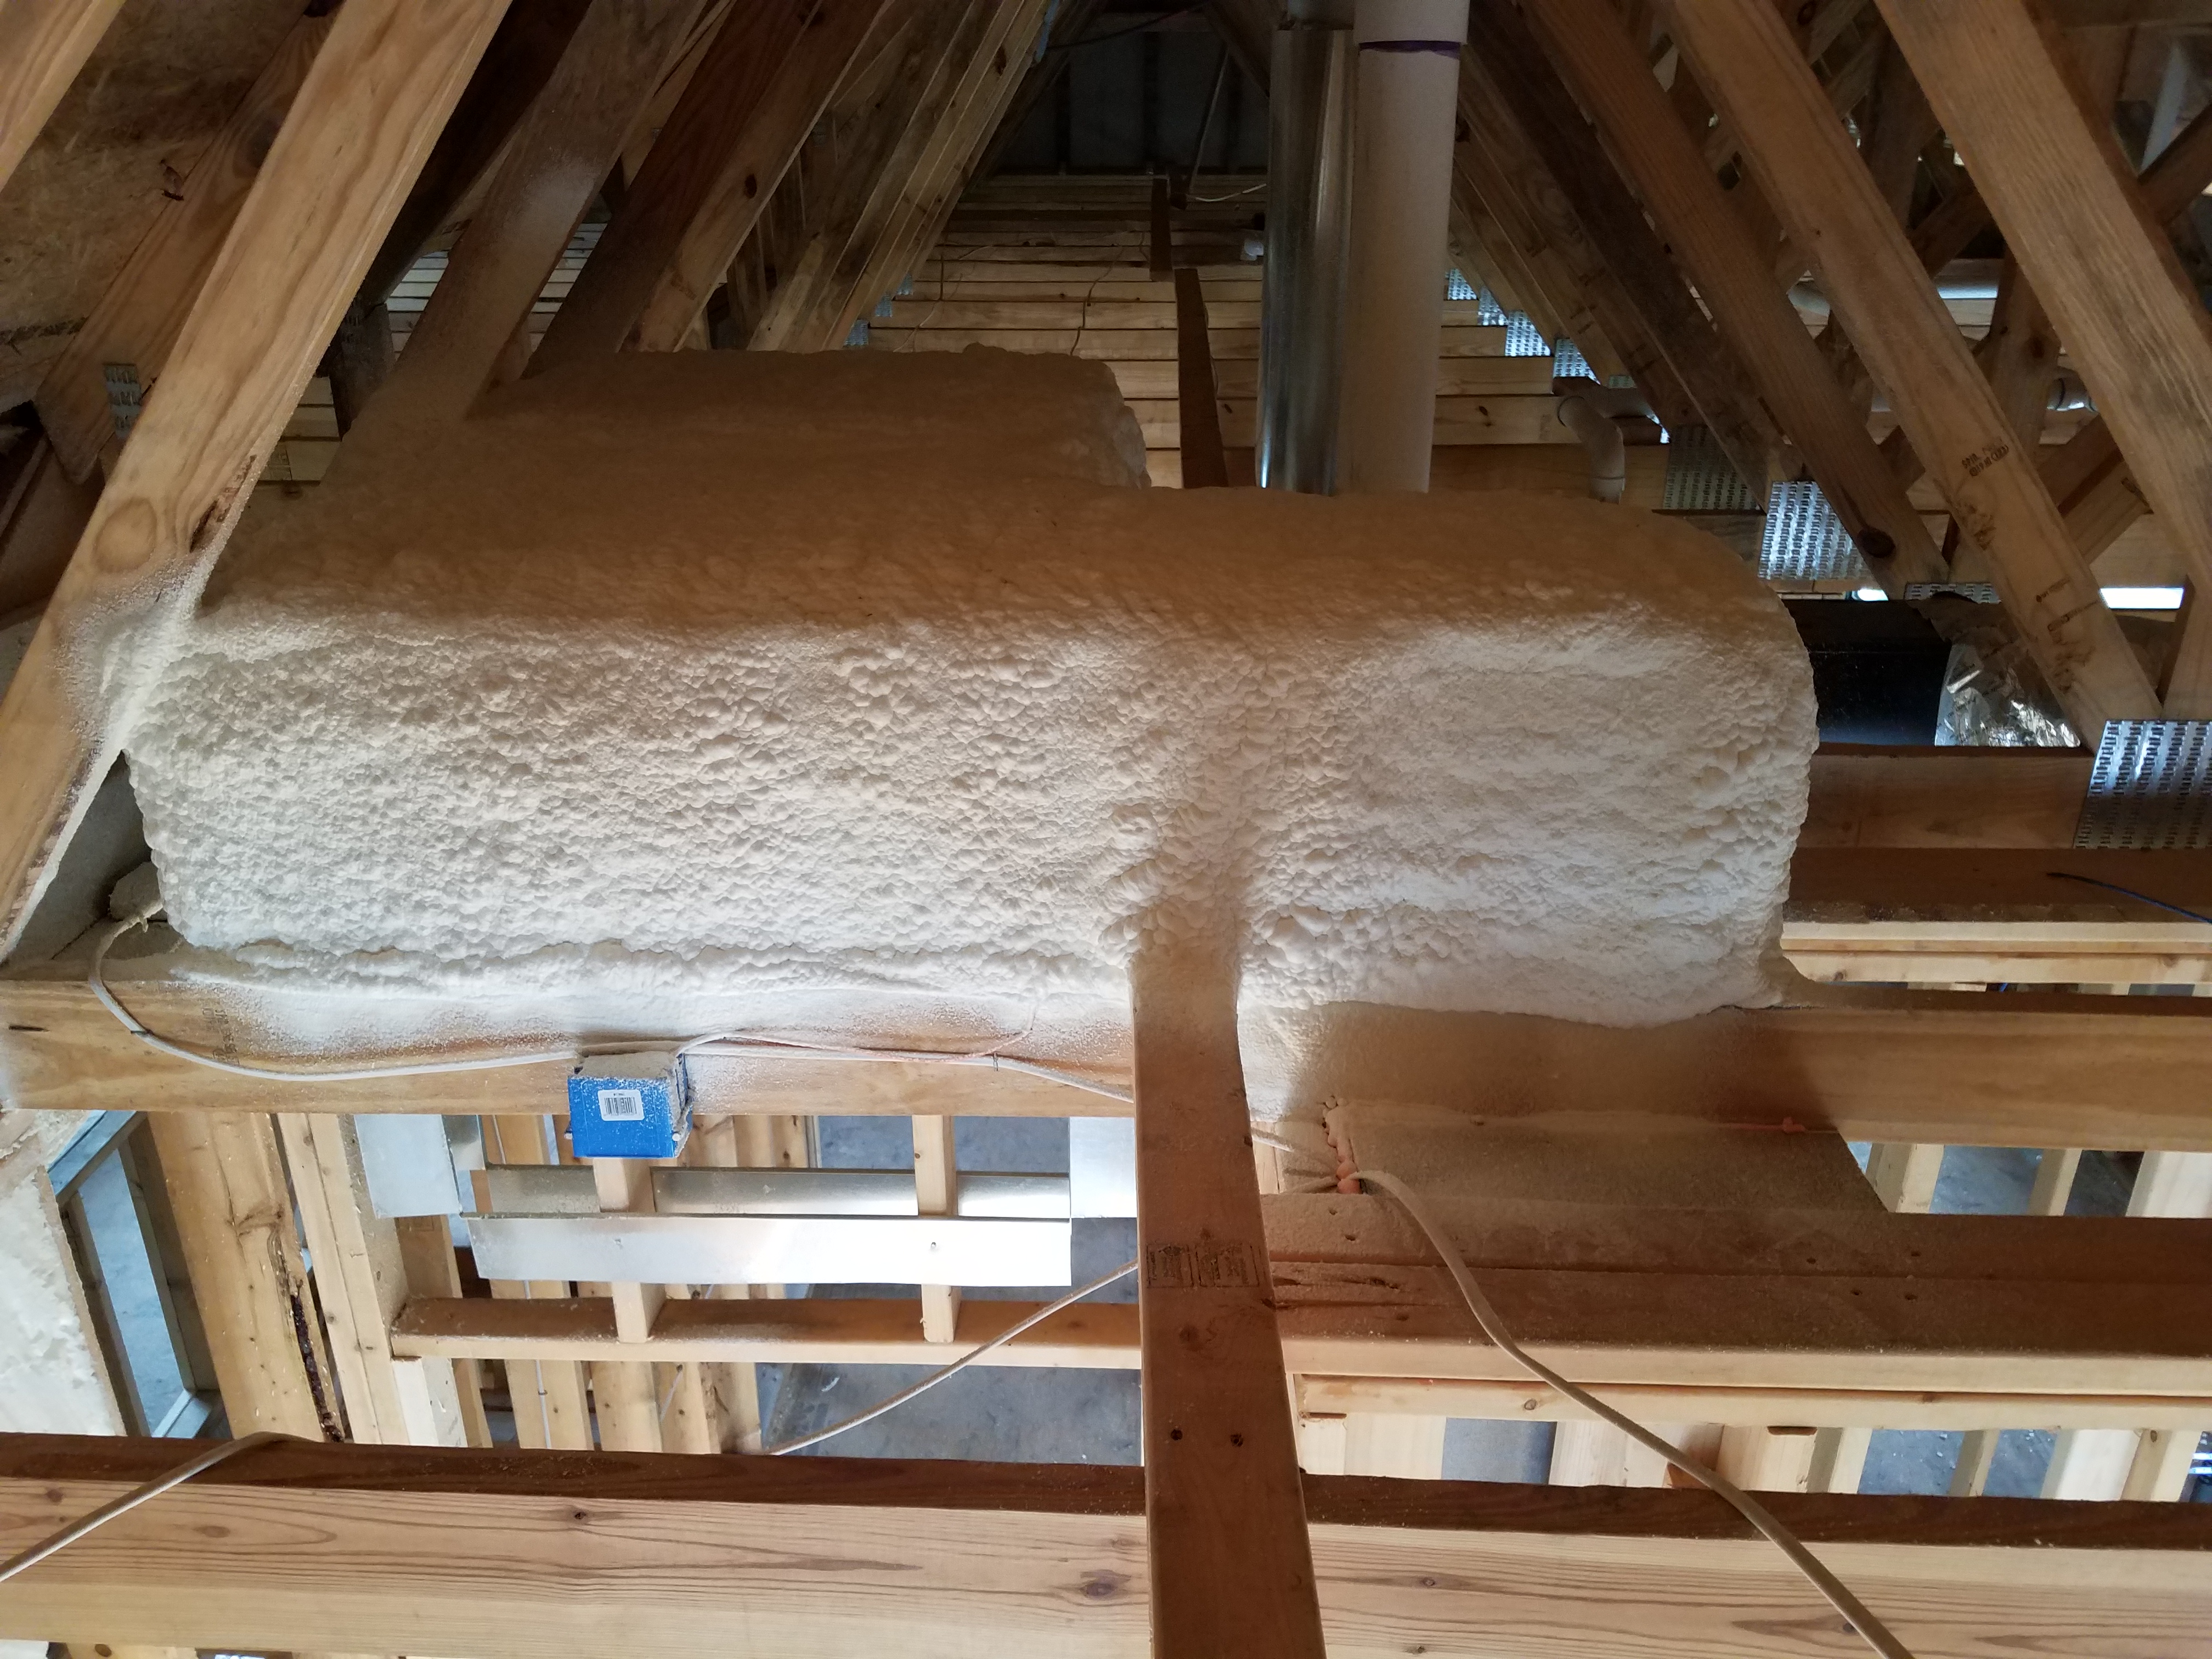
Right – All supply ducts in this home were located in conditioned space; any return ducts that were located in the attic were insulated with closed-cell spray foam and buried in the blown-in attic insulation to prevent air leakage and heat loss.
Image
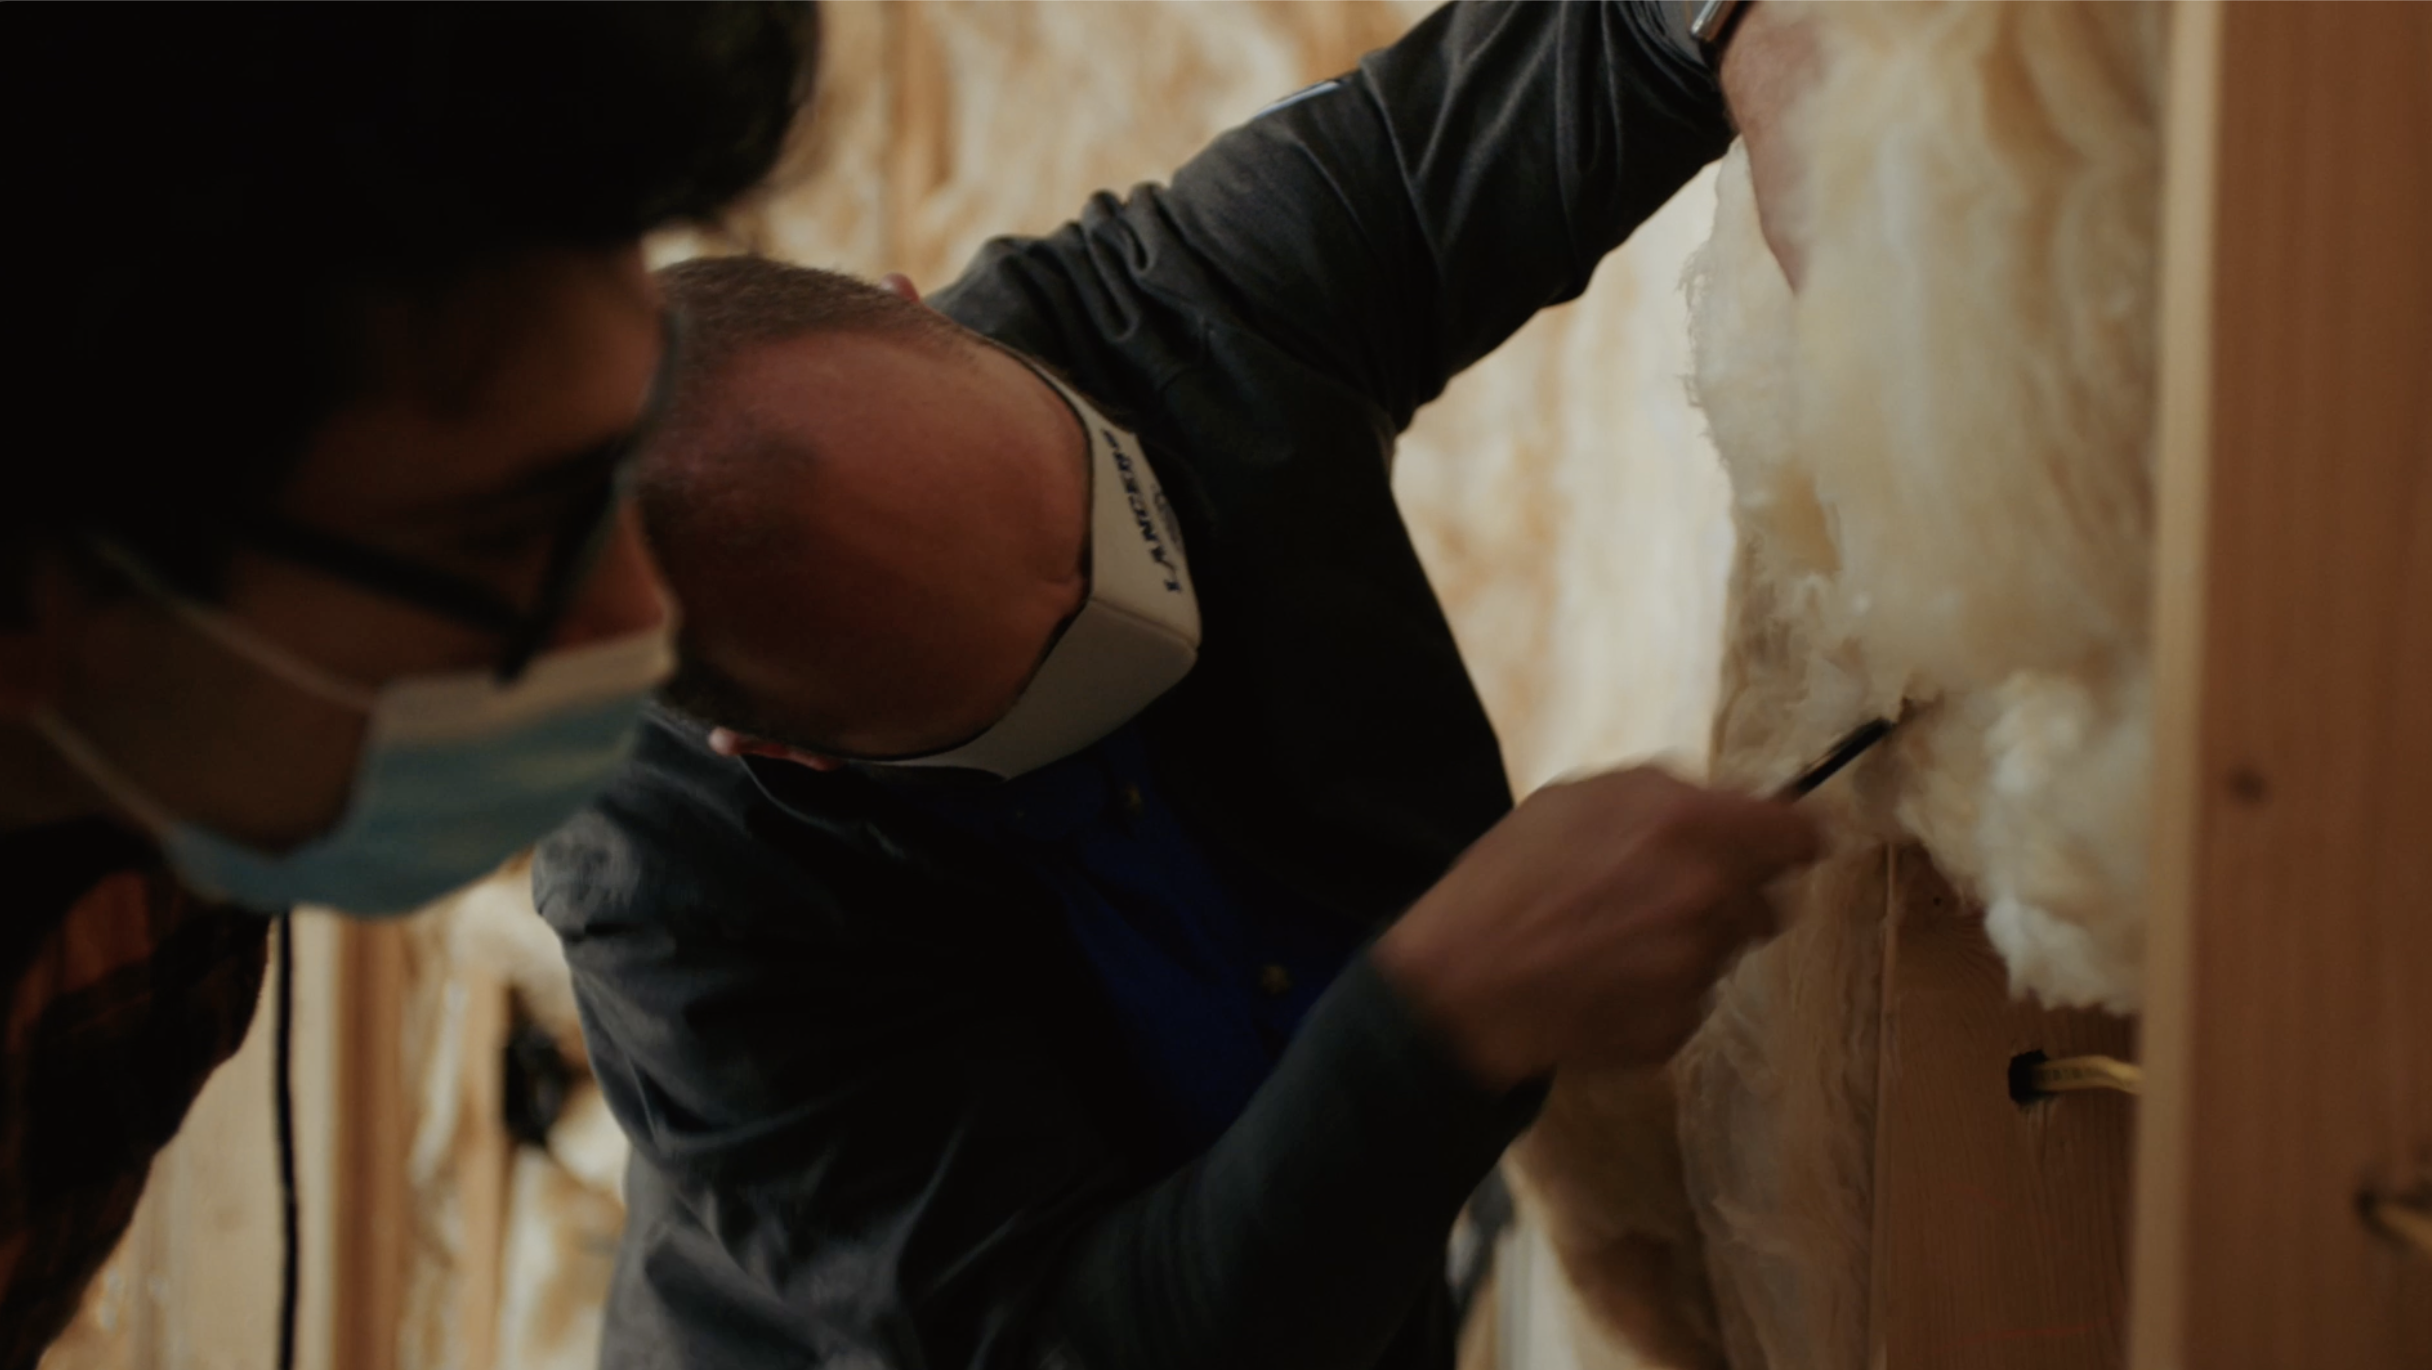
Right – an instructor shows a student how to cut batt insulation around wiring rather than compressing the batt behind the wiring.
Image
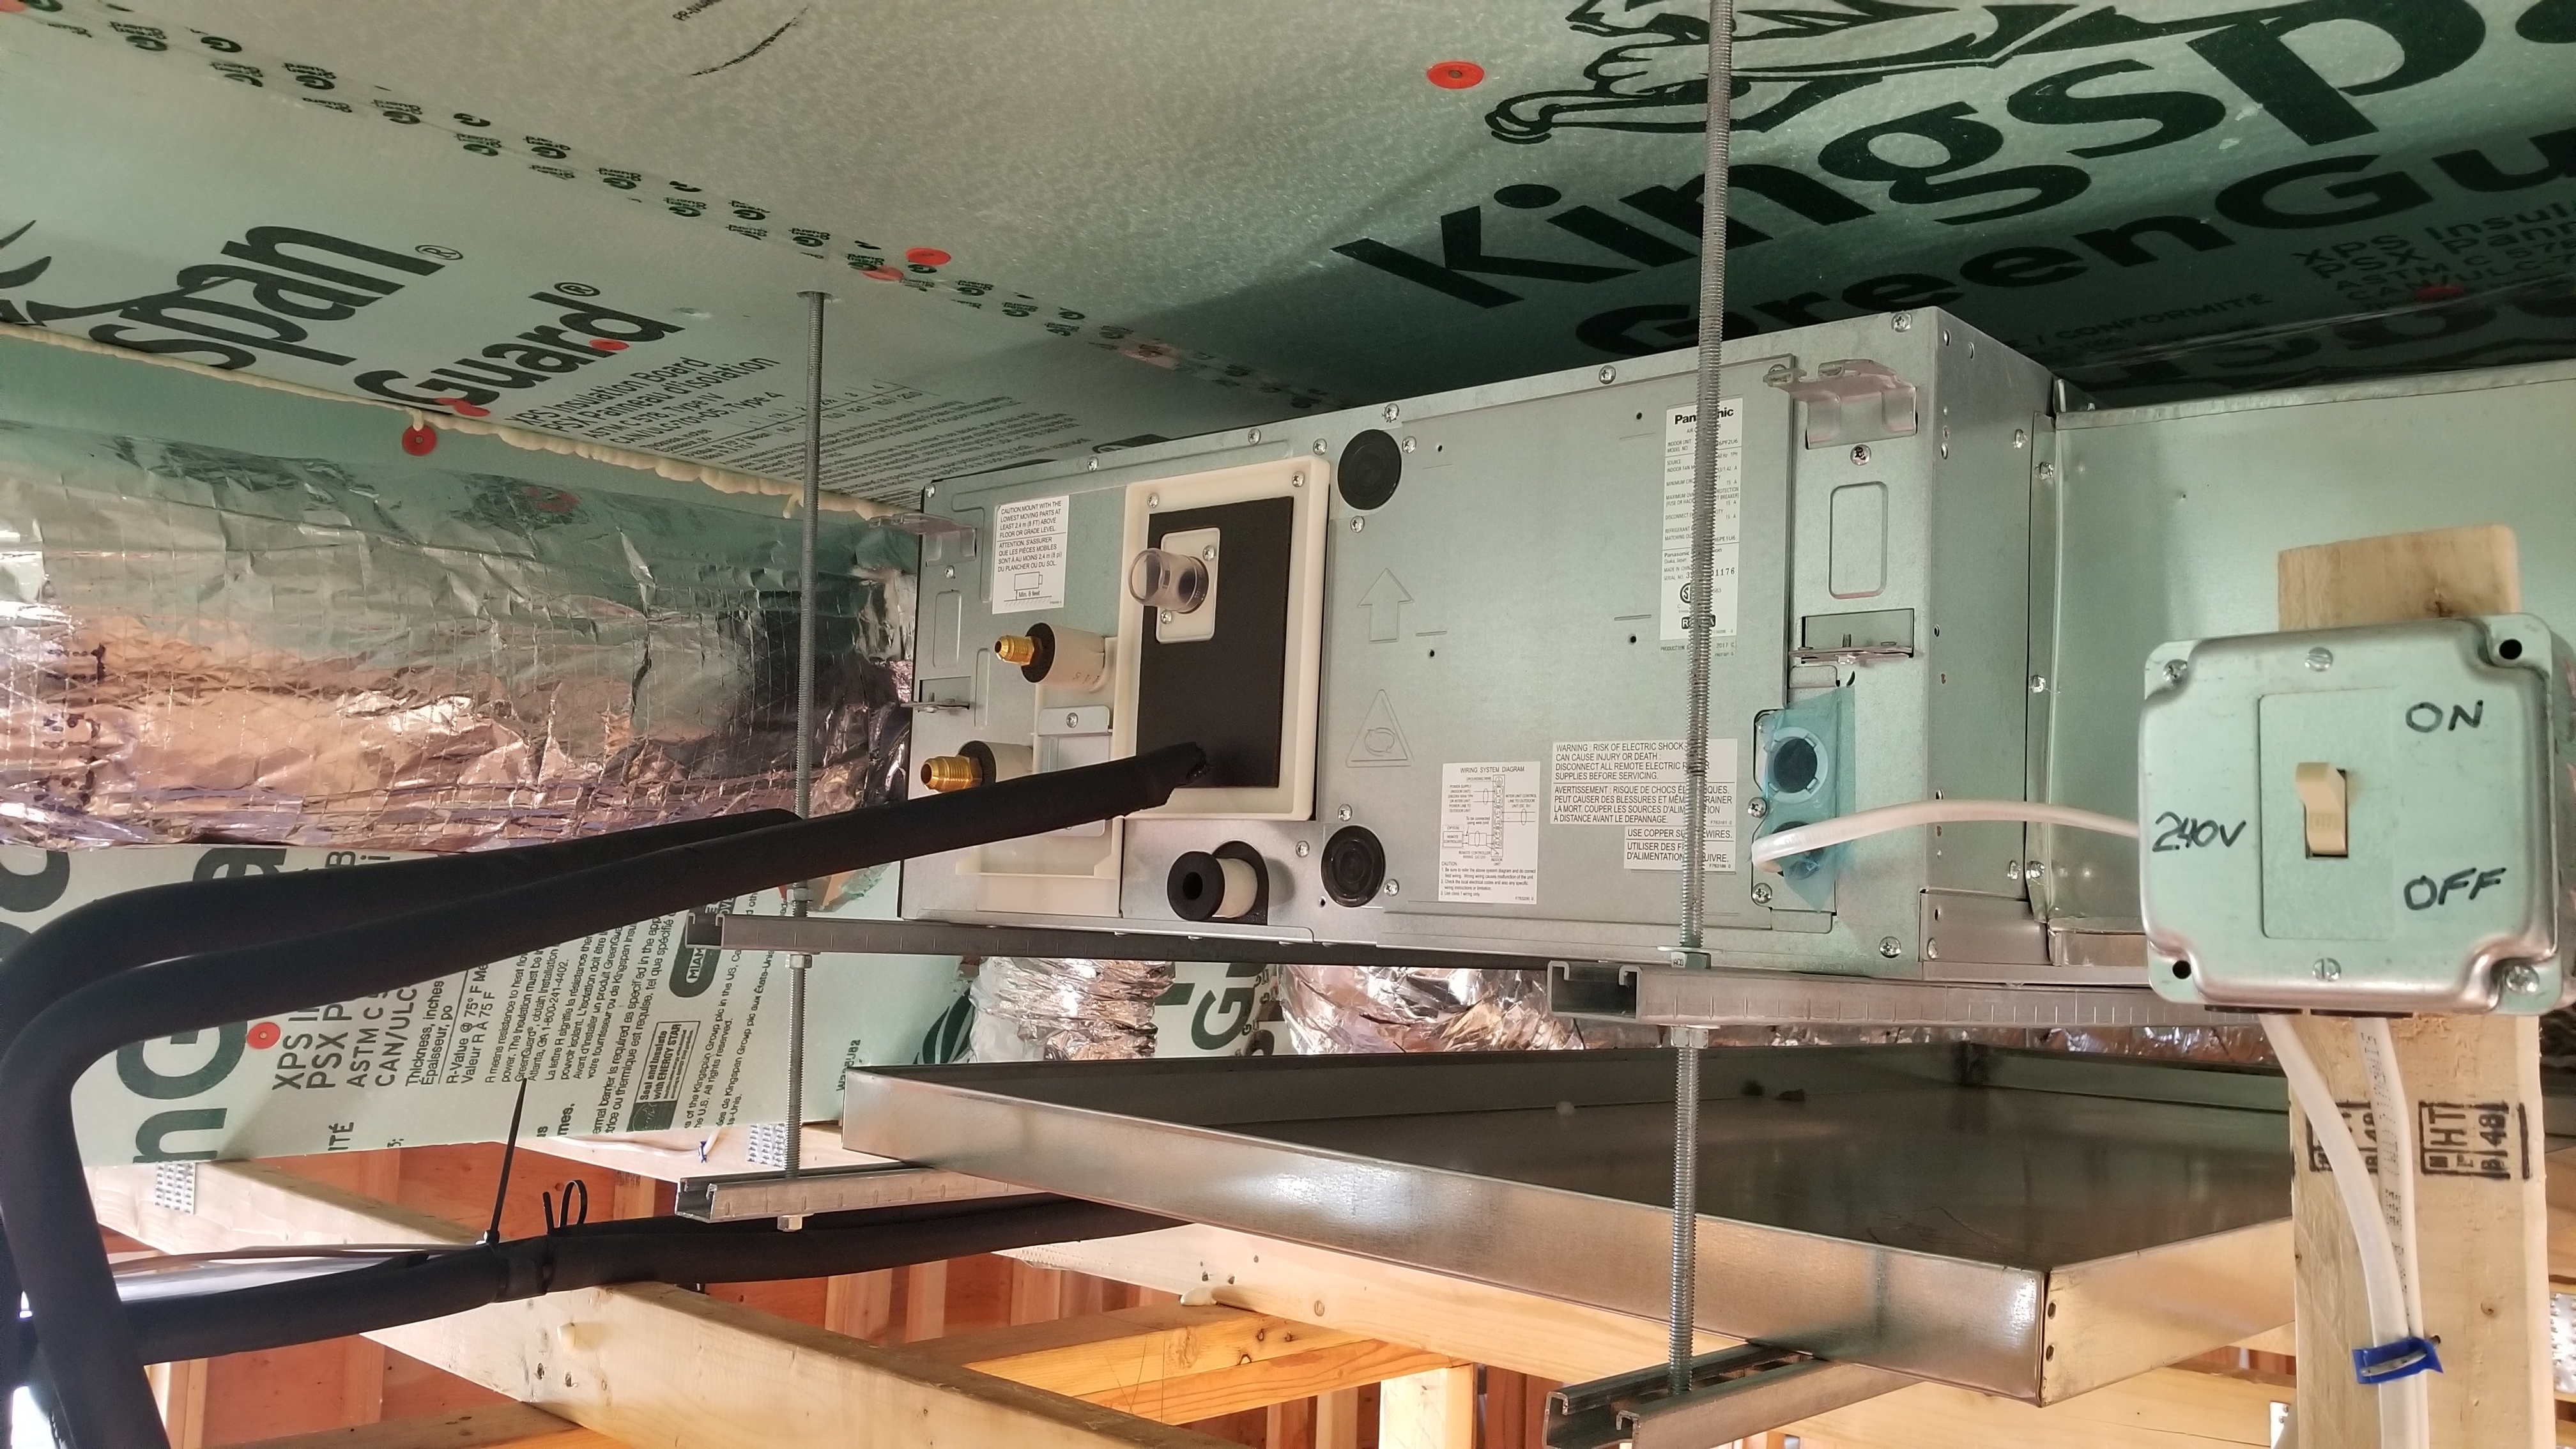
Right – An insulated space is provided in the home’s attic to house the HVAC equipment.
Image
Right – Attic access door has foam and rubber weatherstripping installed that remains in contact when closed.
Image
Image
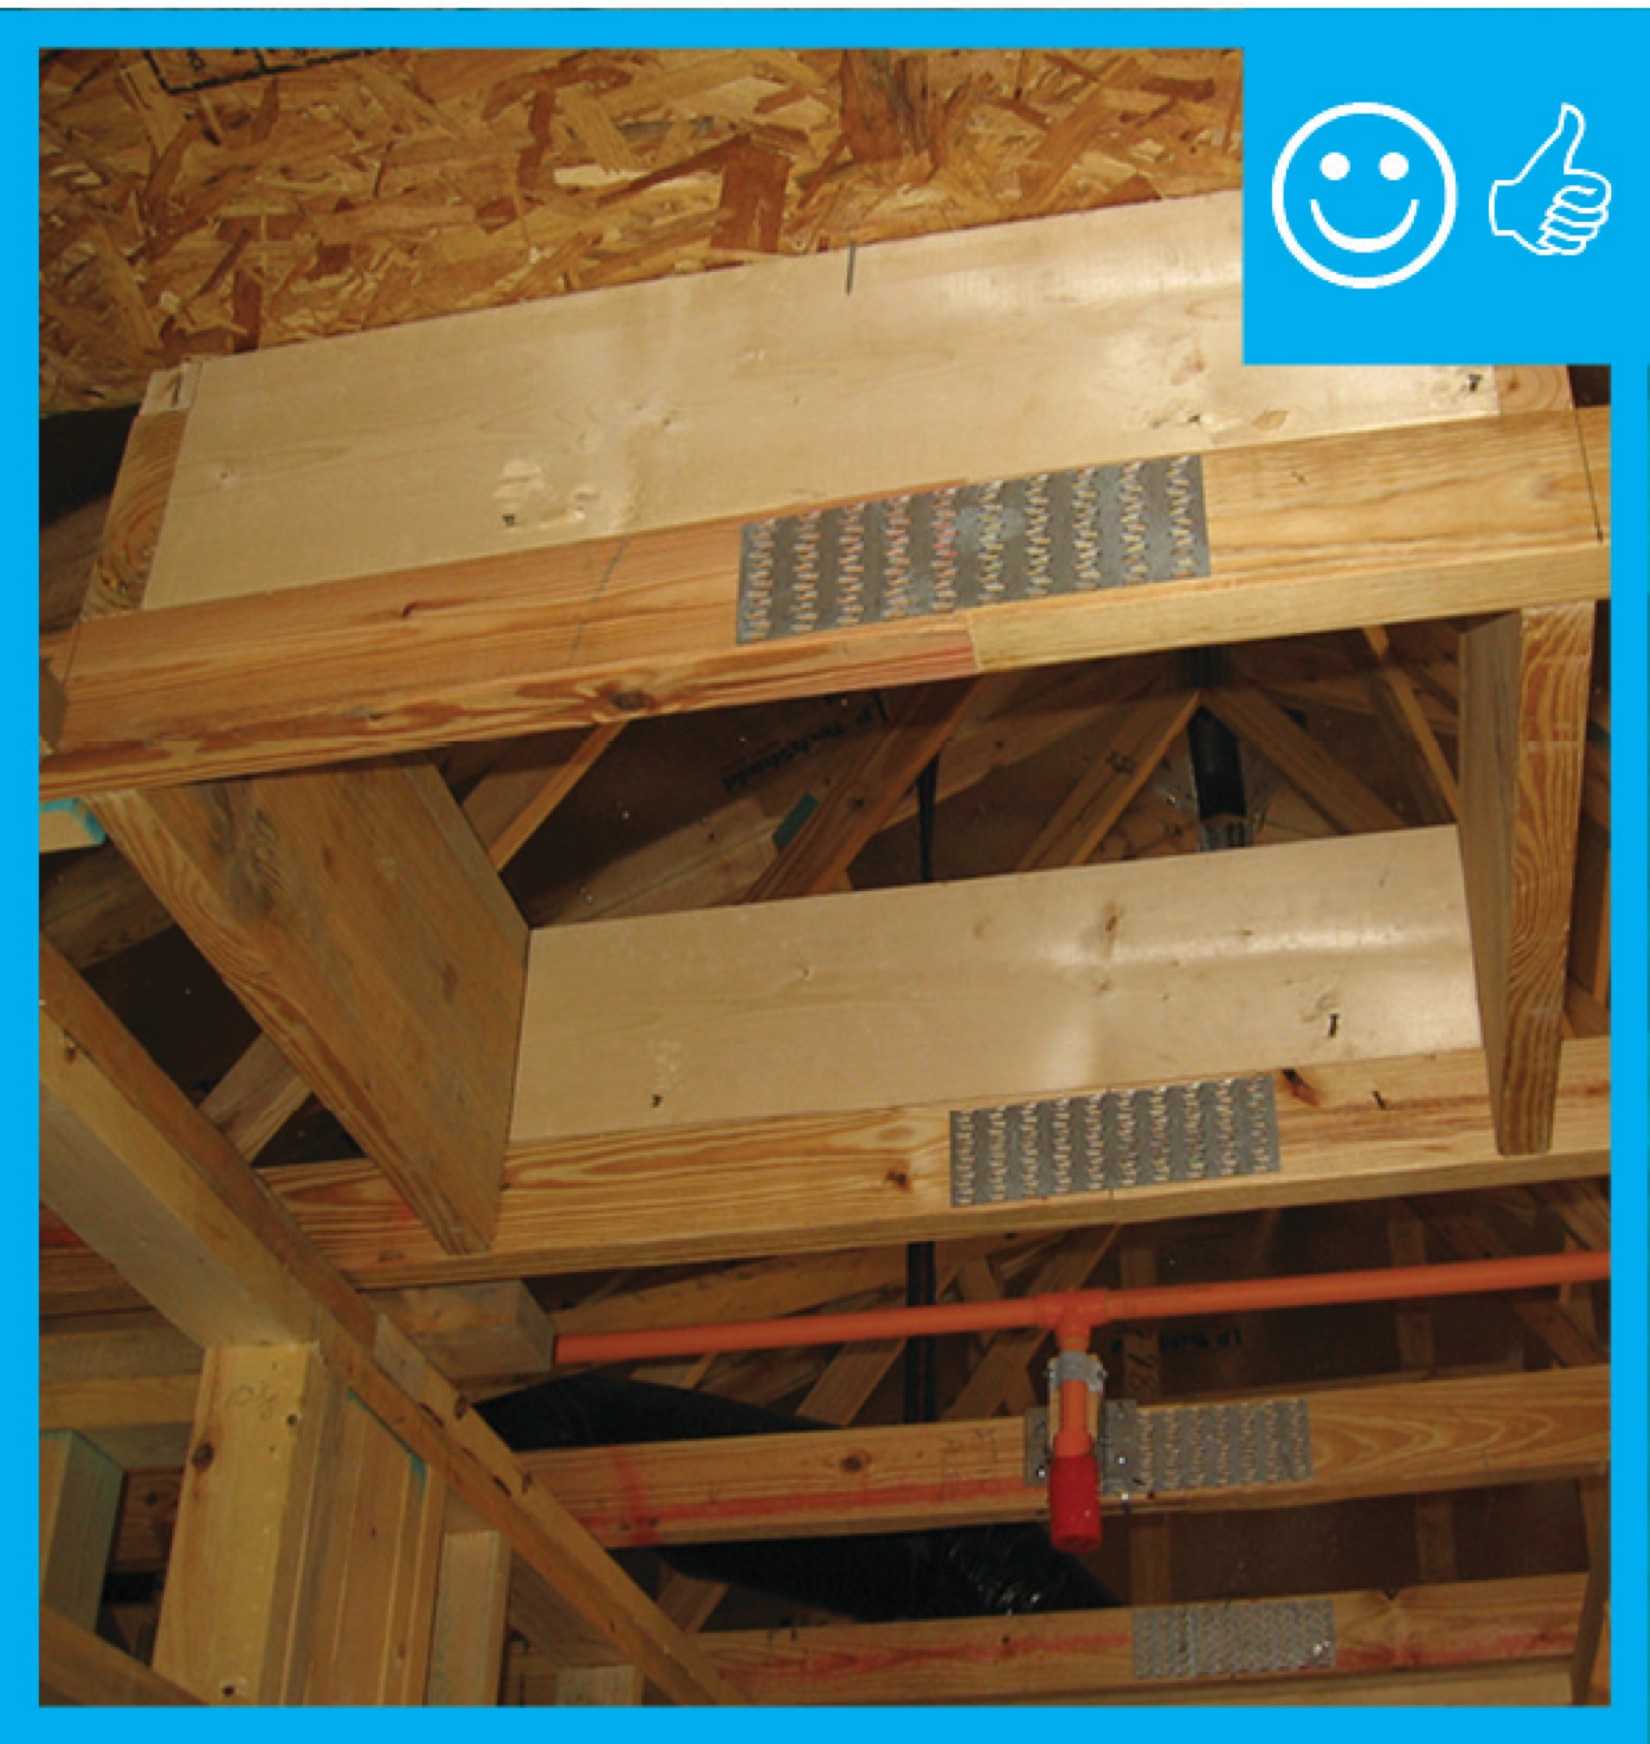
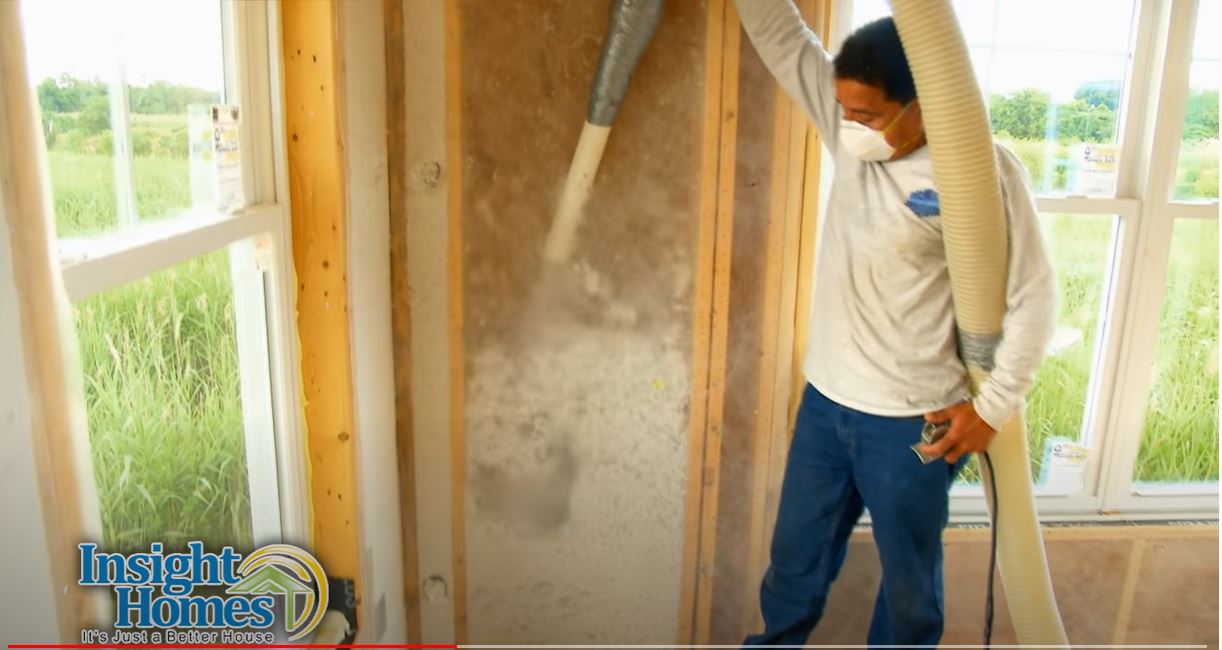
Right – Batt insulation provides additional insulation for the home’s main duct chase.
Image
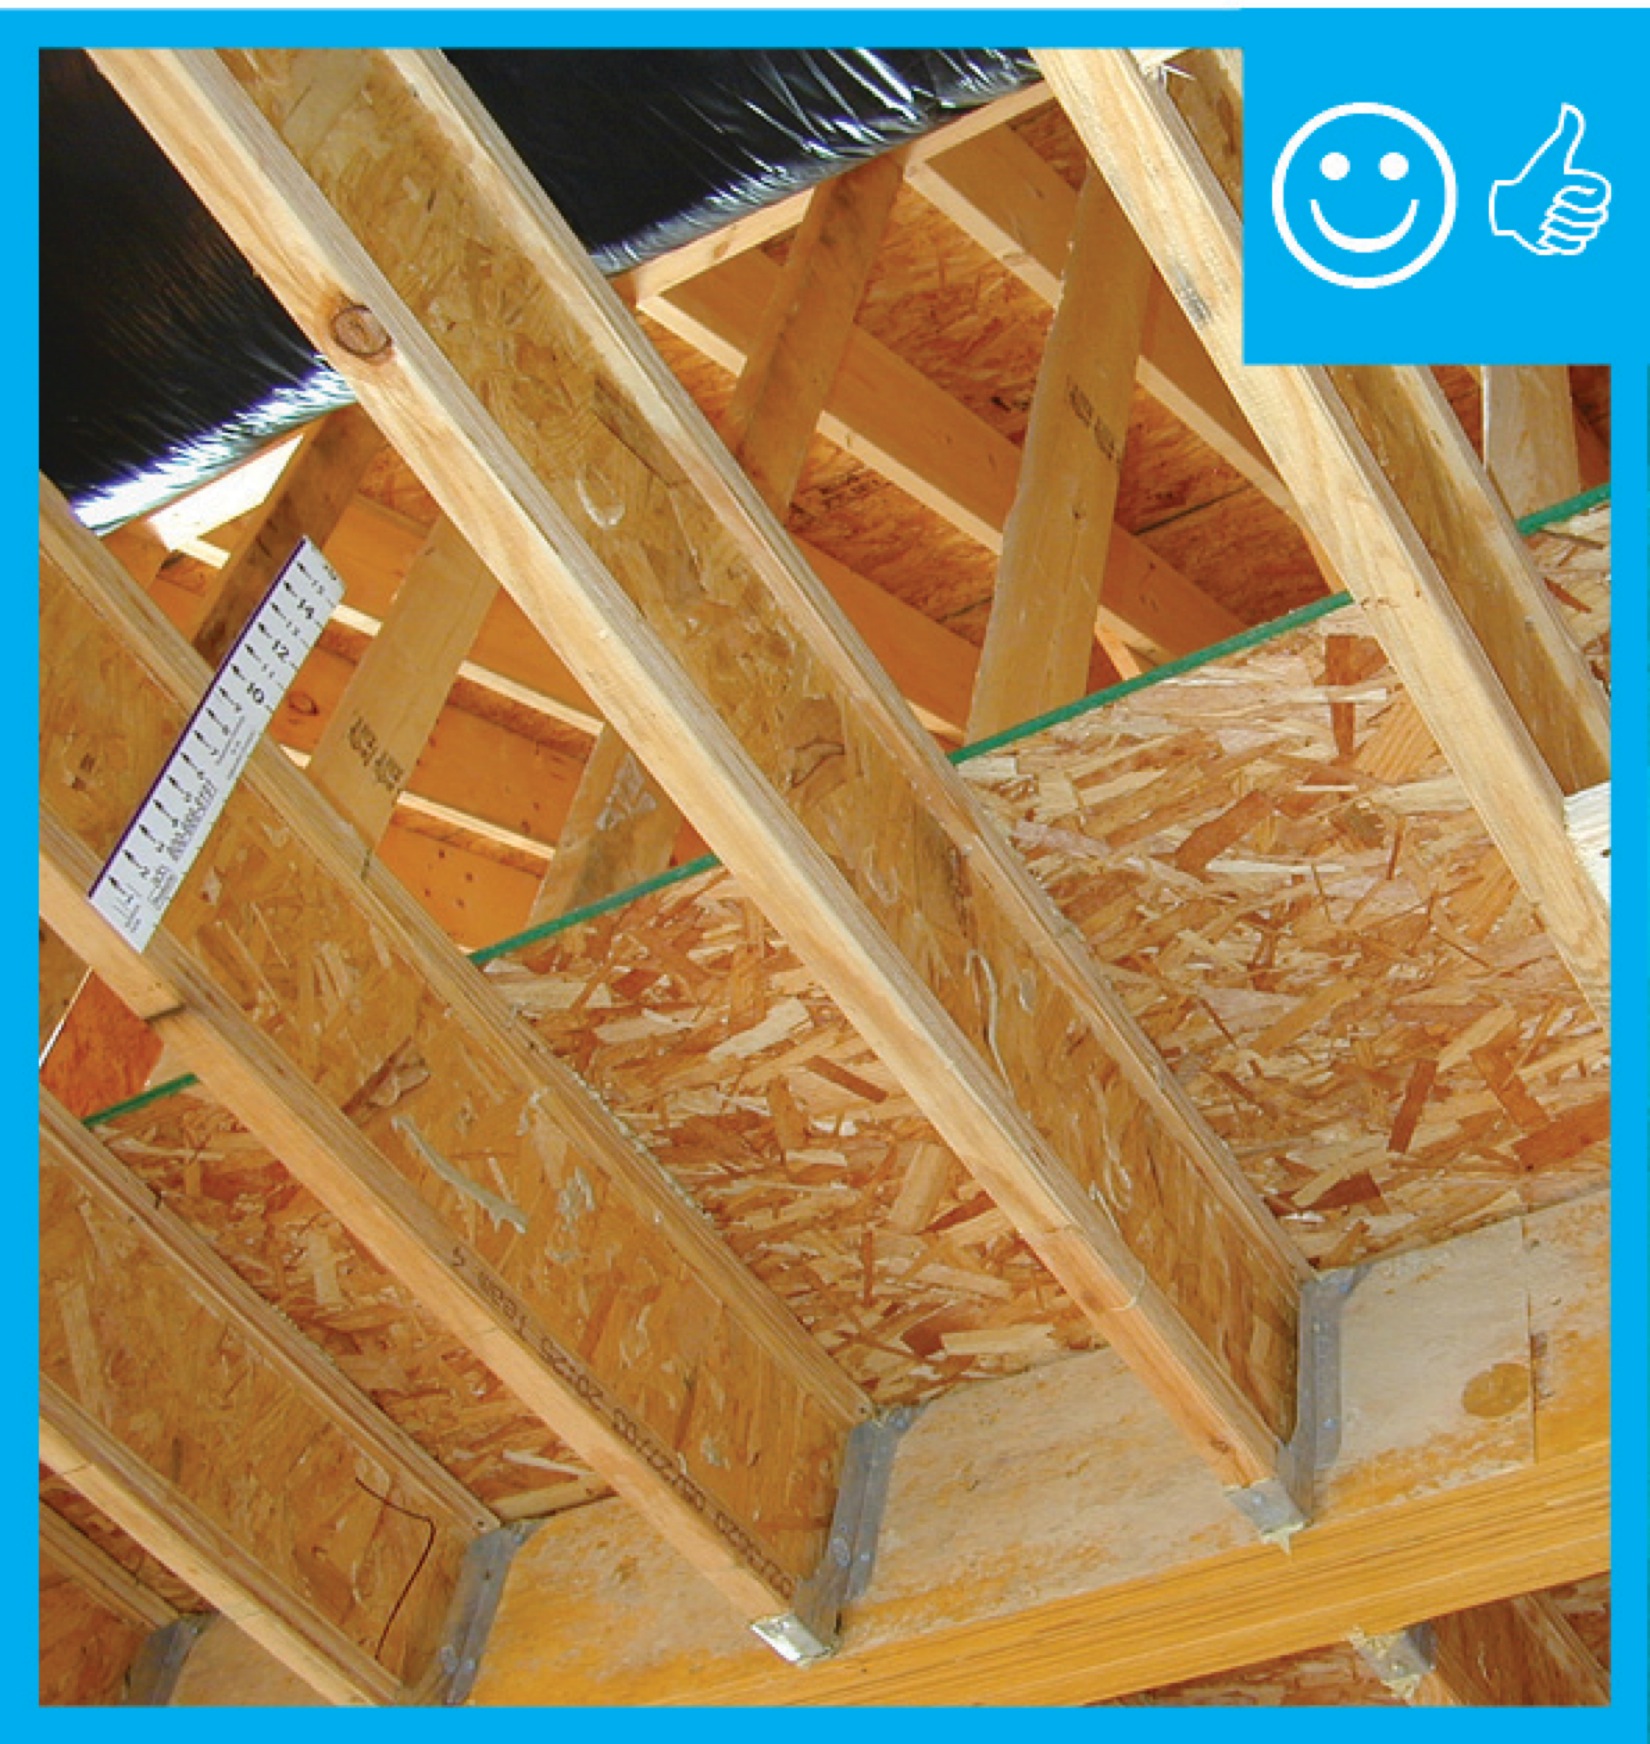
Right – Battens were installed above the cork insulation to provide a ventilating layer between the insulation and the roof sheathing on this “hot roof” design.
Image
Right – Blocking has been installed around the perimeter of this attic access to prevent insulation falling into the house
Image

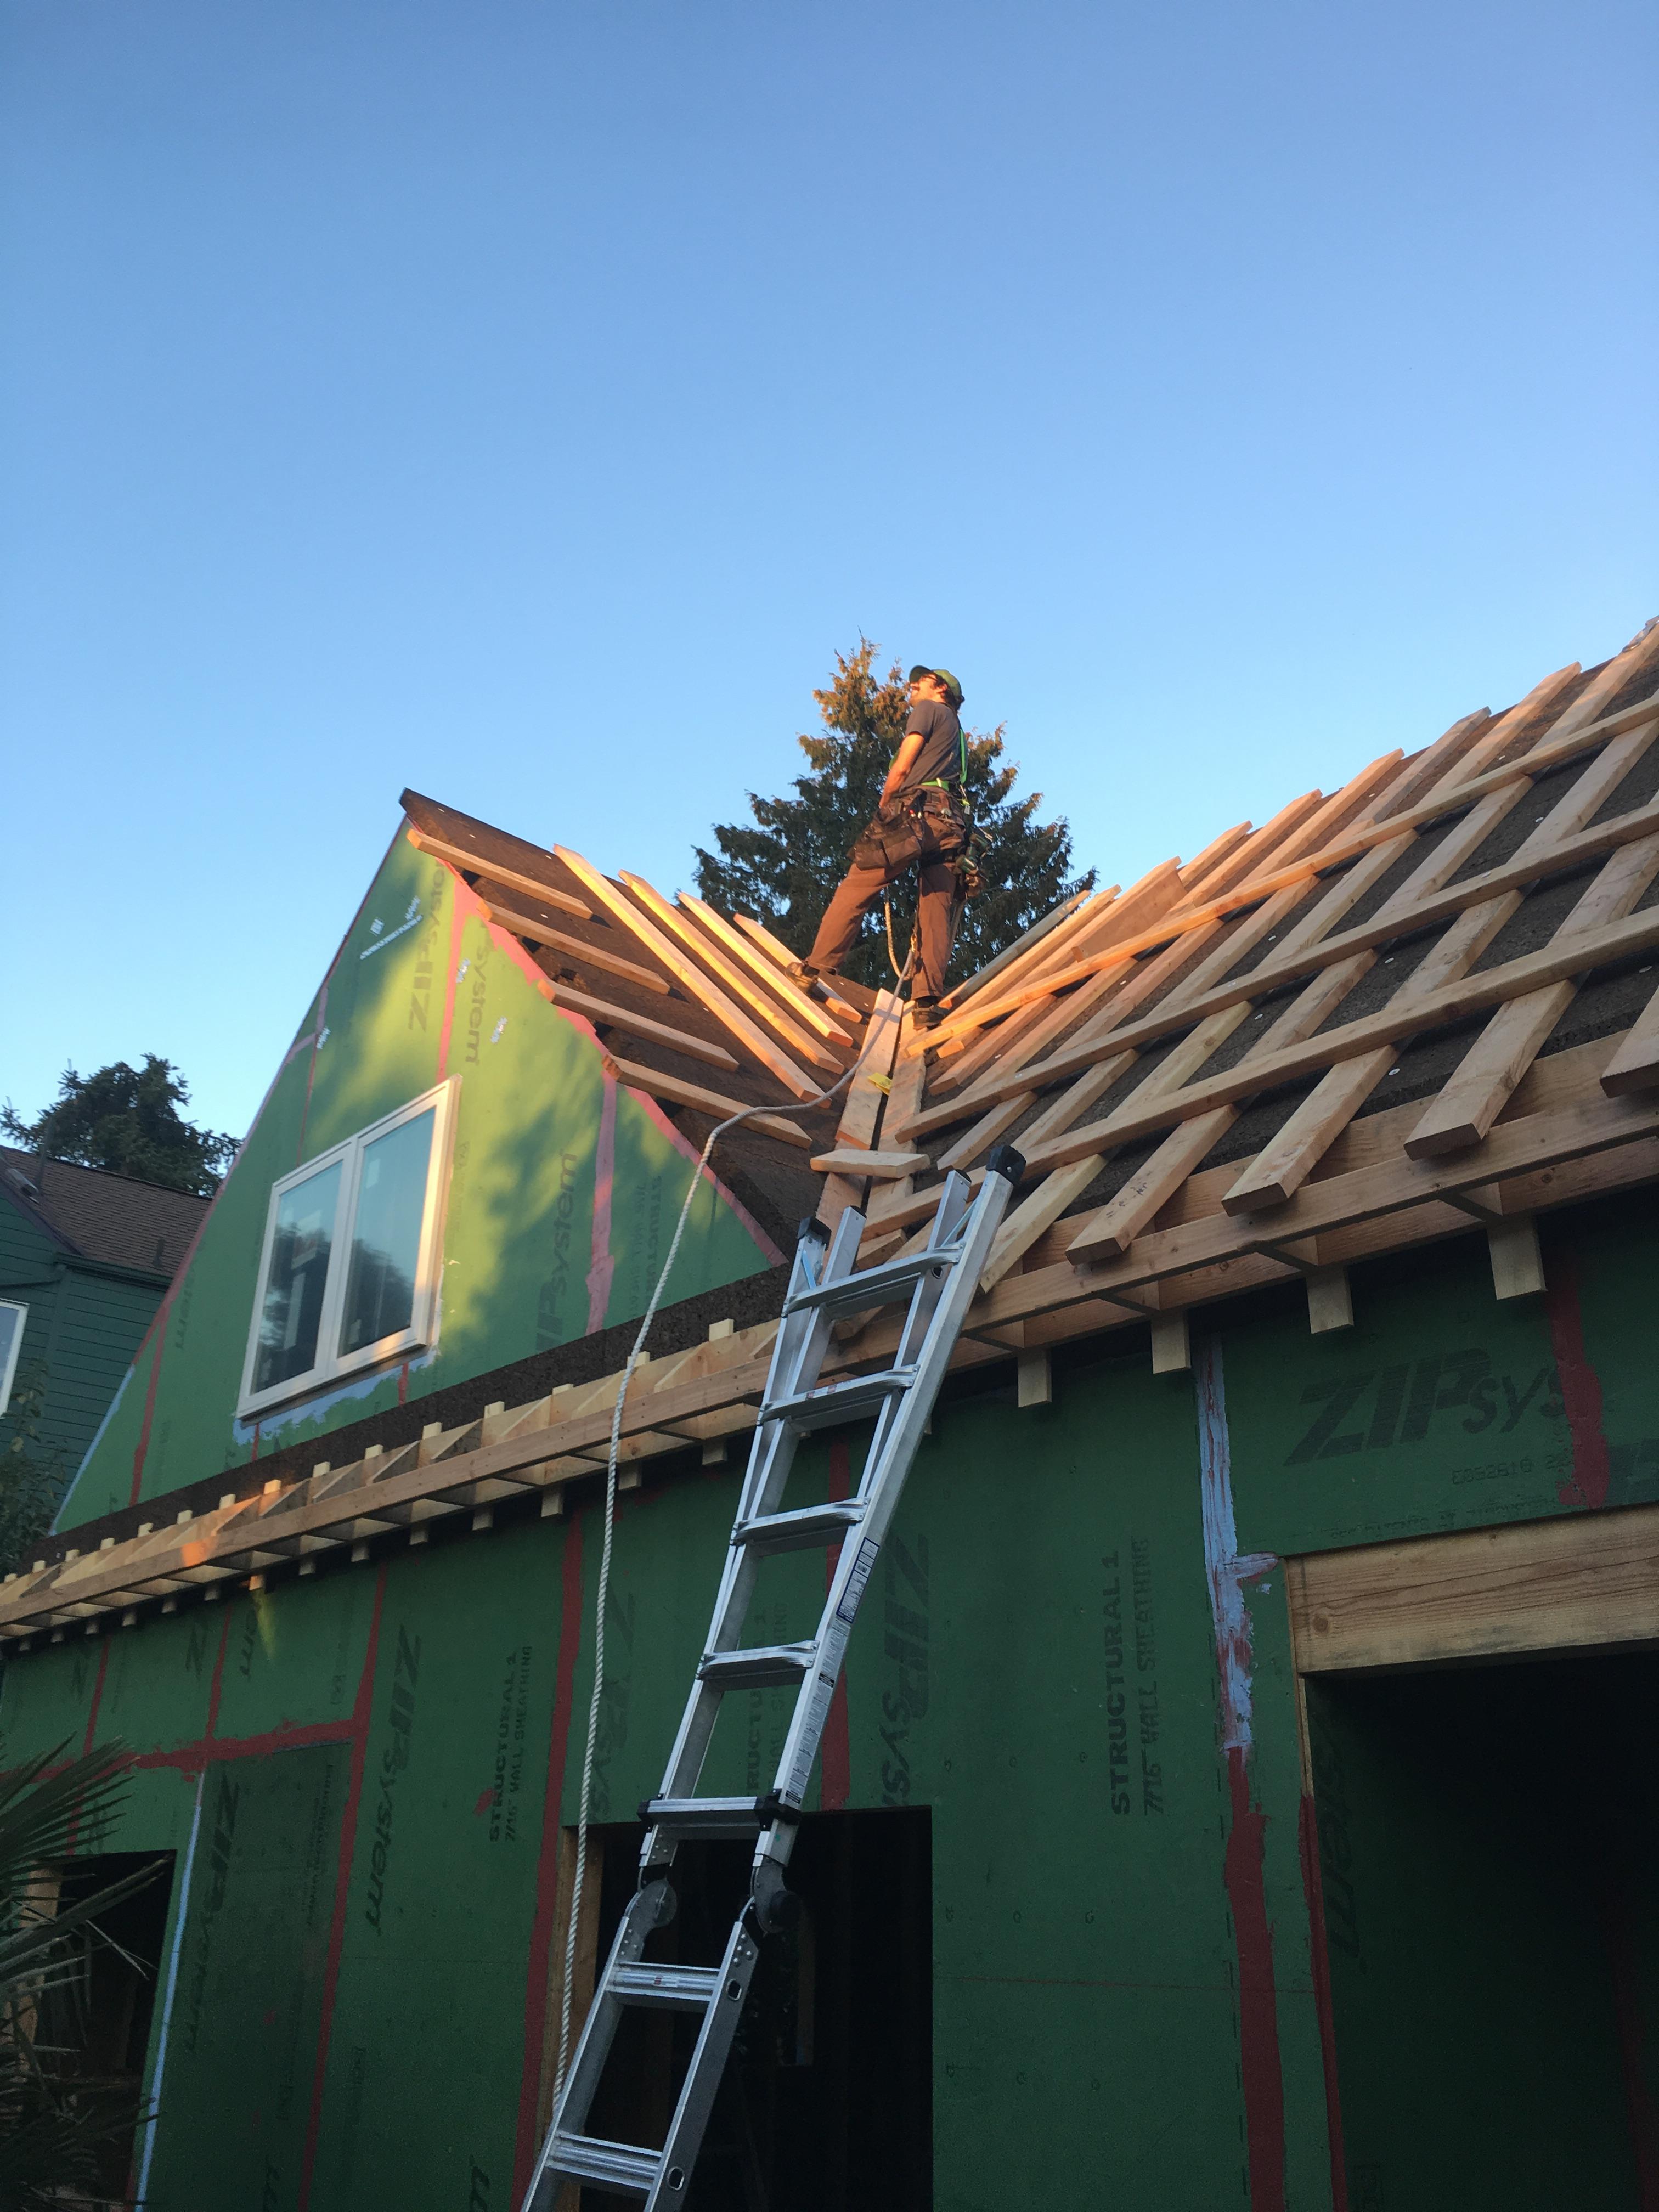
Right – Closed-cell polyurethane foam is sprayed on the underside of the roof deck to provide structural connections and seal seams in the sheathing to increase wind resistance
Image
Image
Right – Construction adhesive is applied to the rigid foam panels that will be installed on the interior basement walls.
Image

Image
Image
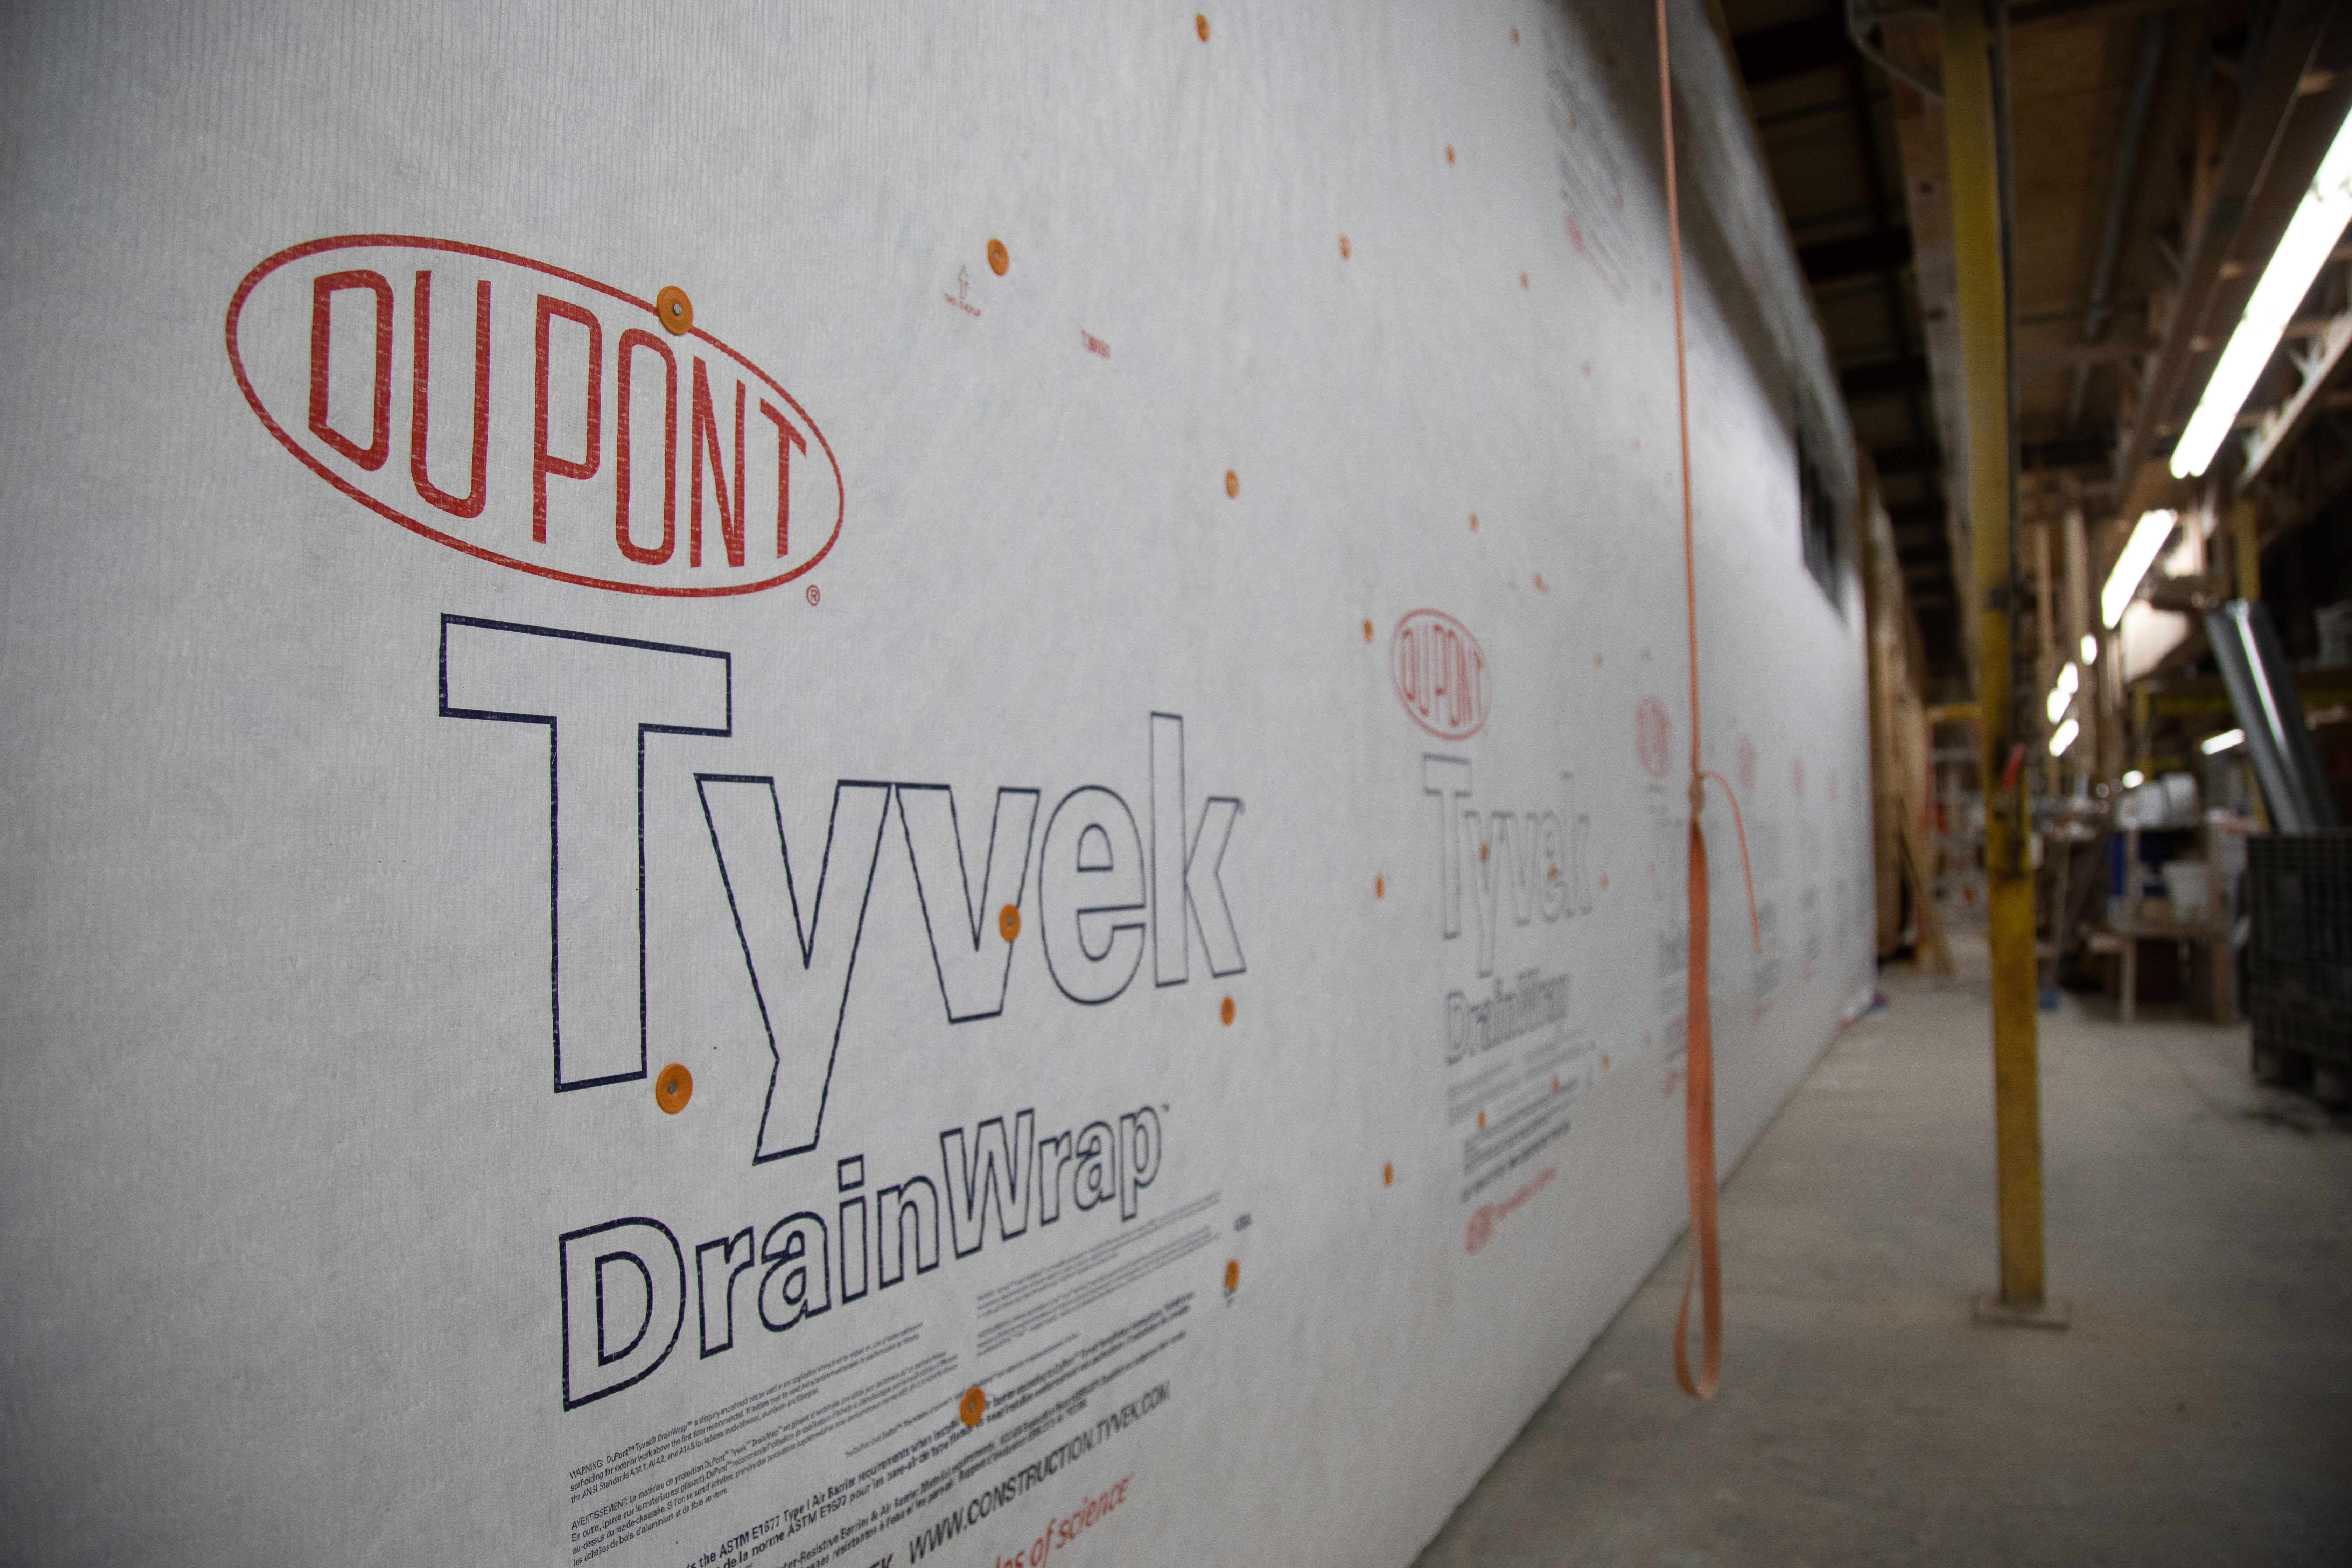
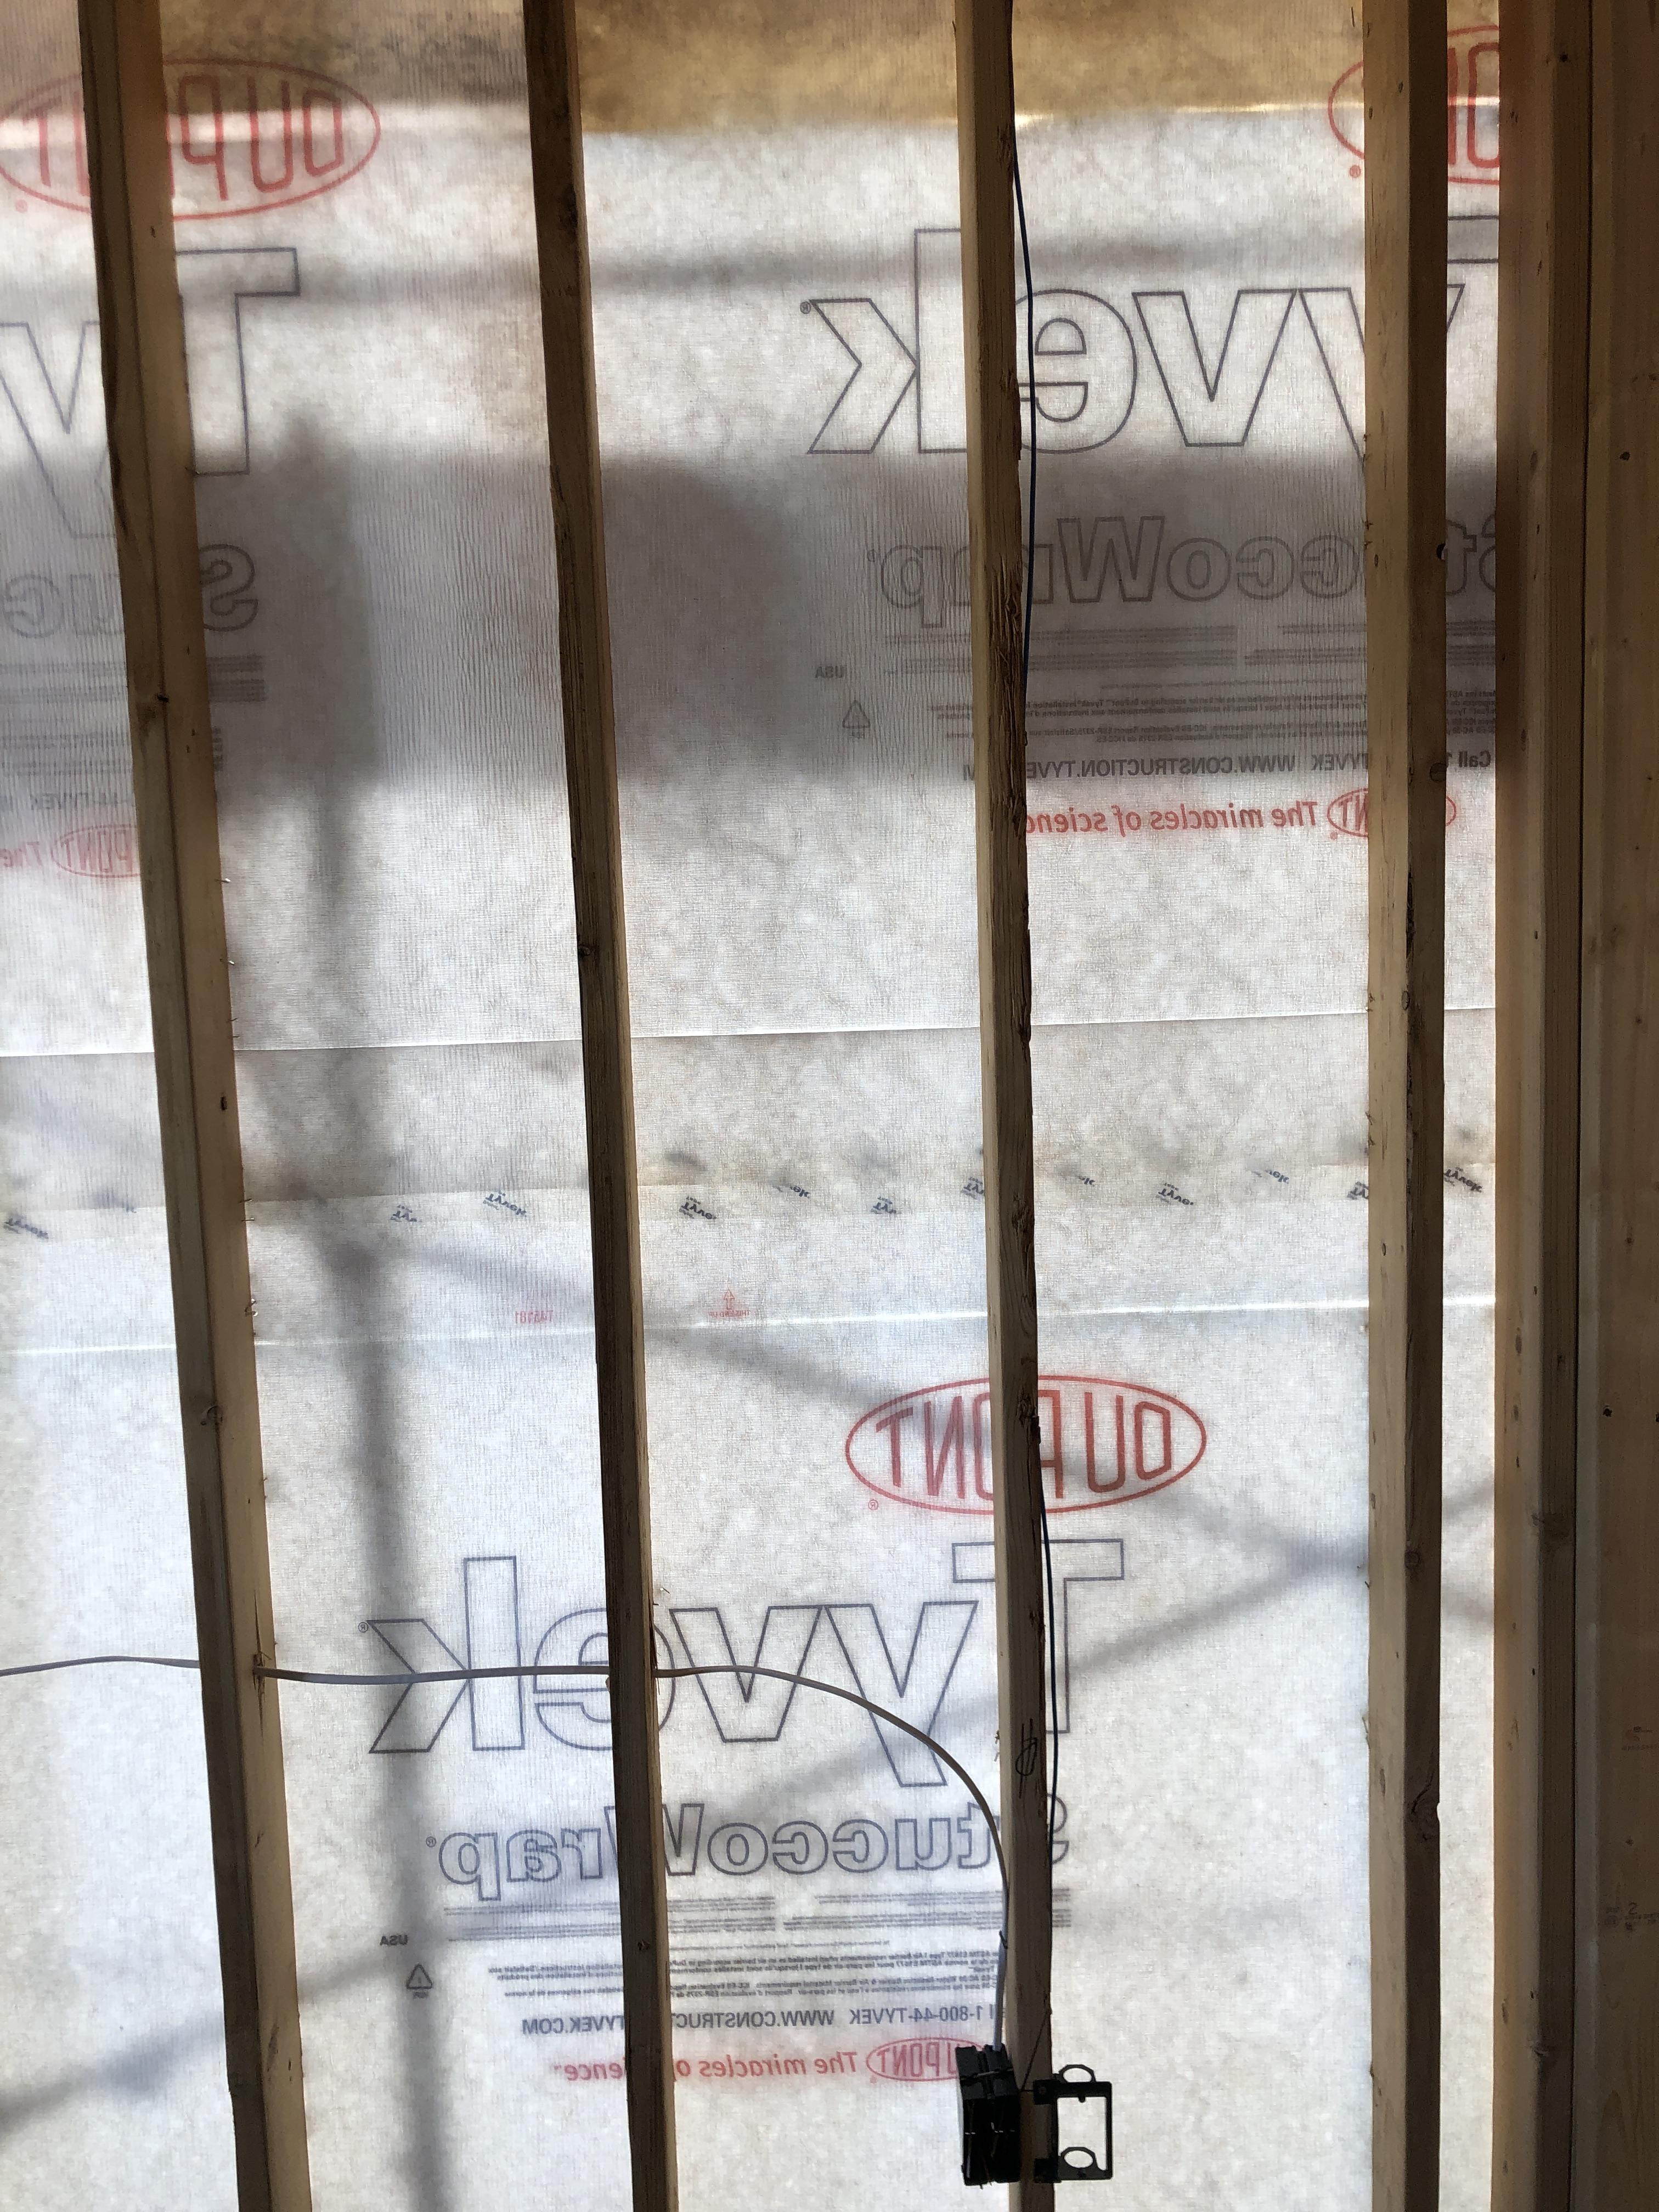
Right – Even house wrap is installed in the factory for these modular homes where each floor is factory assembled.
Image

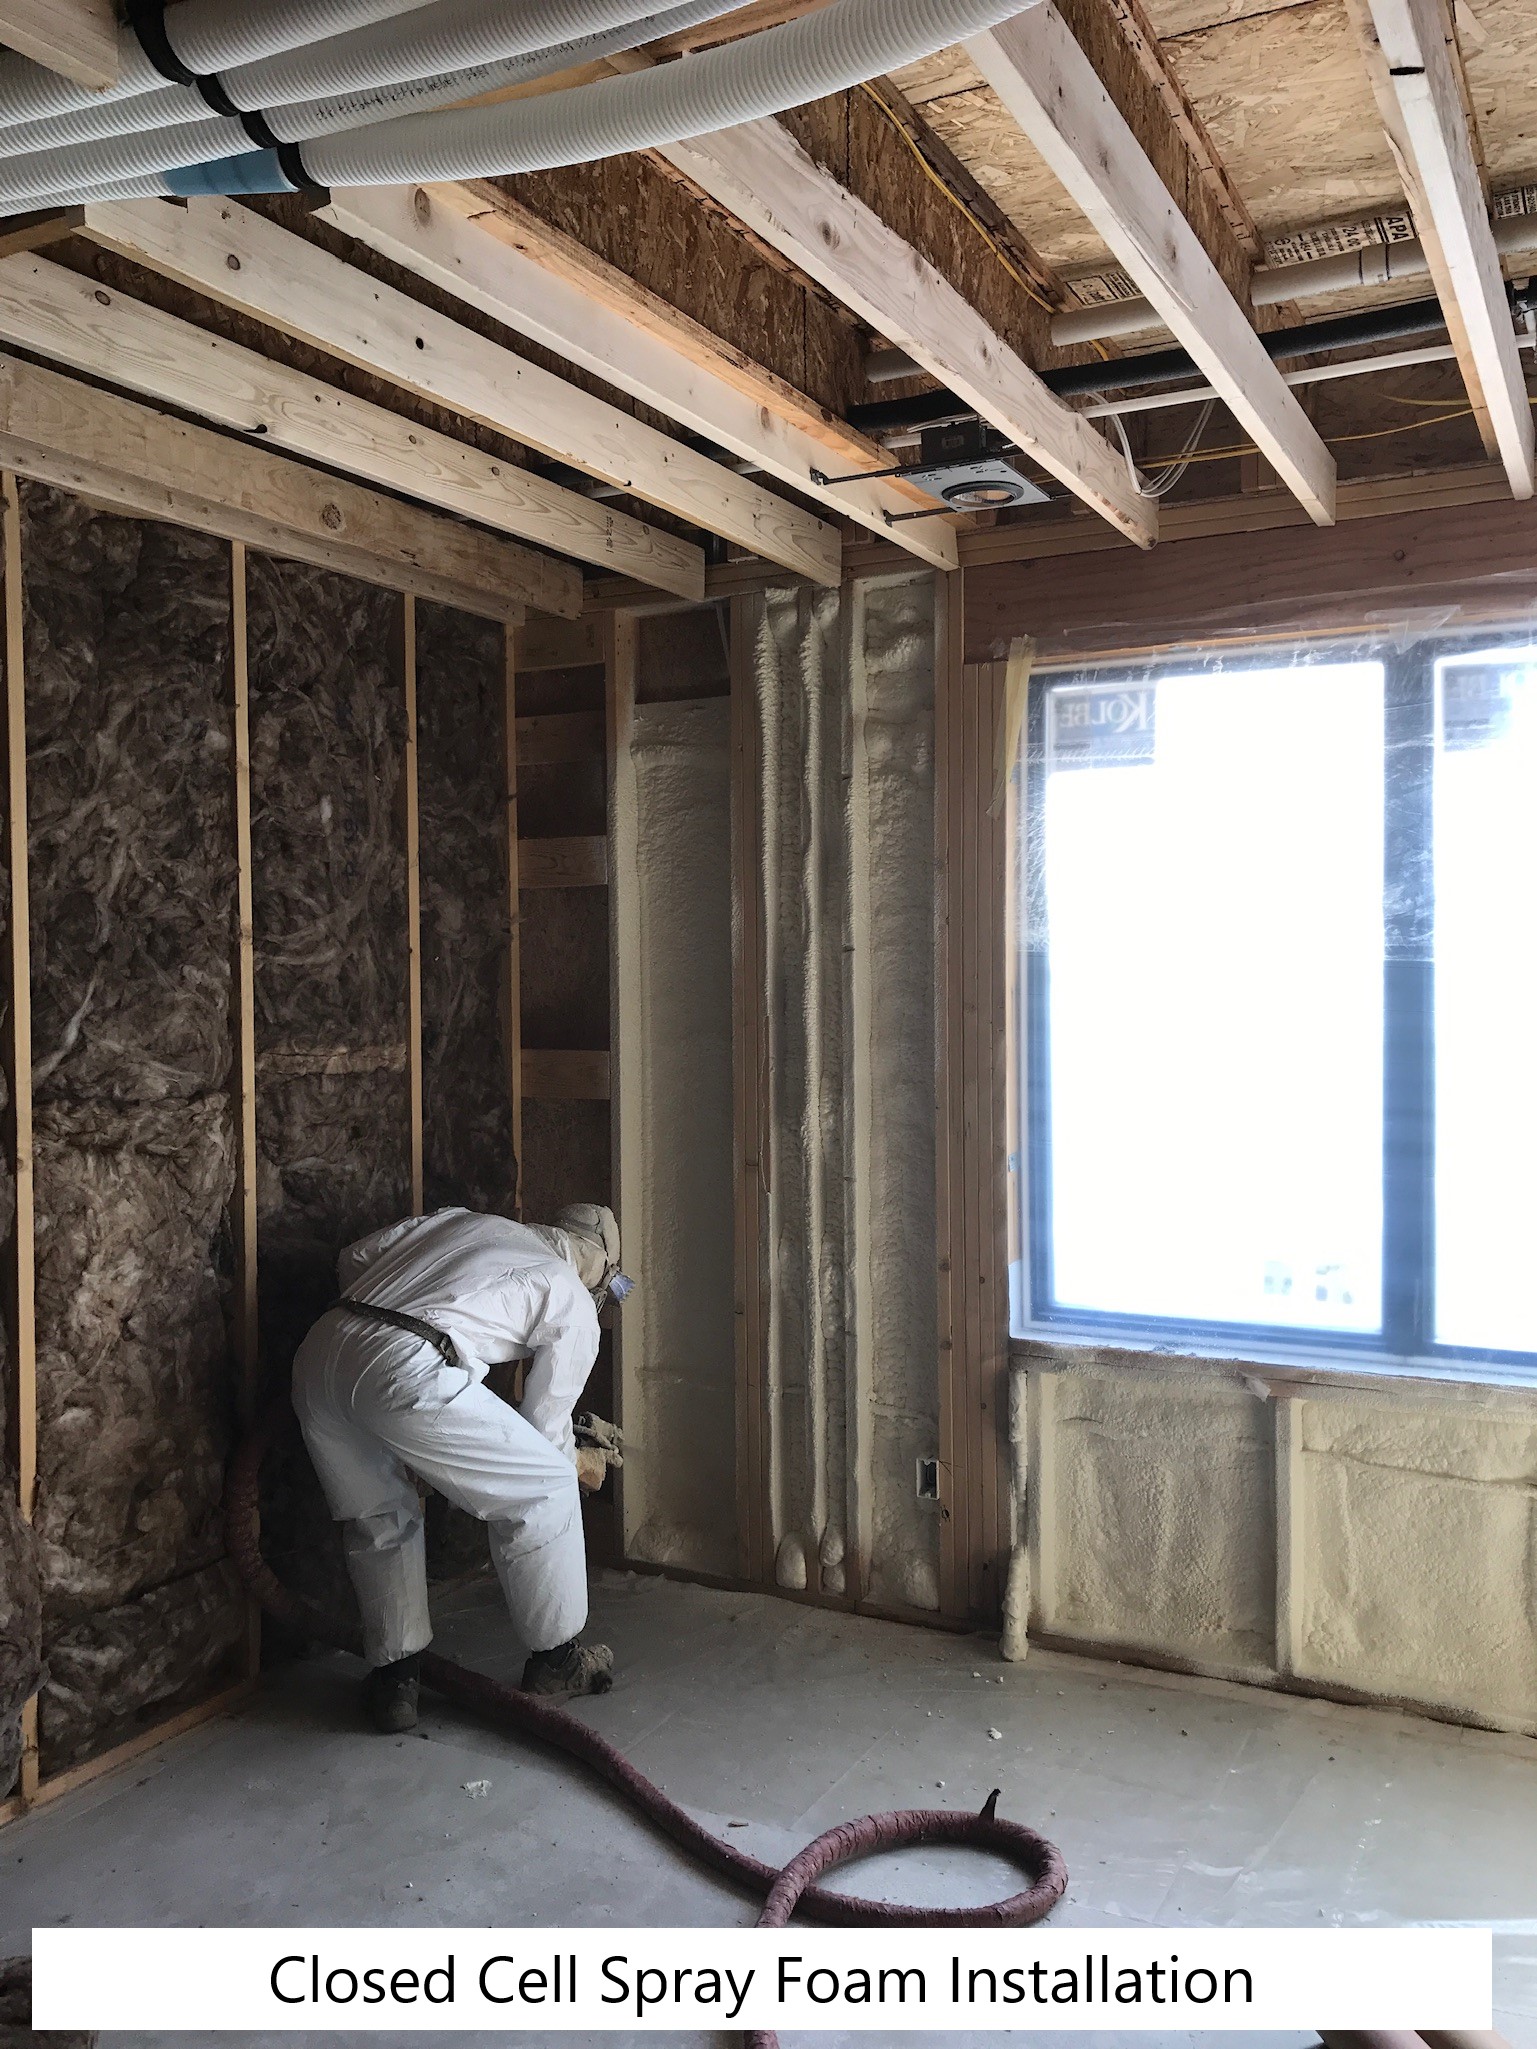
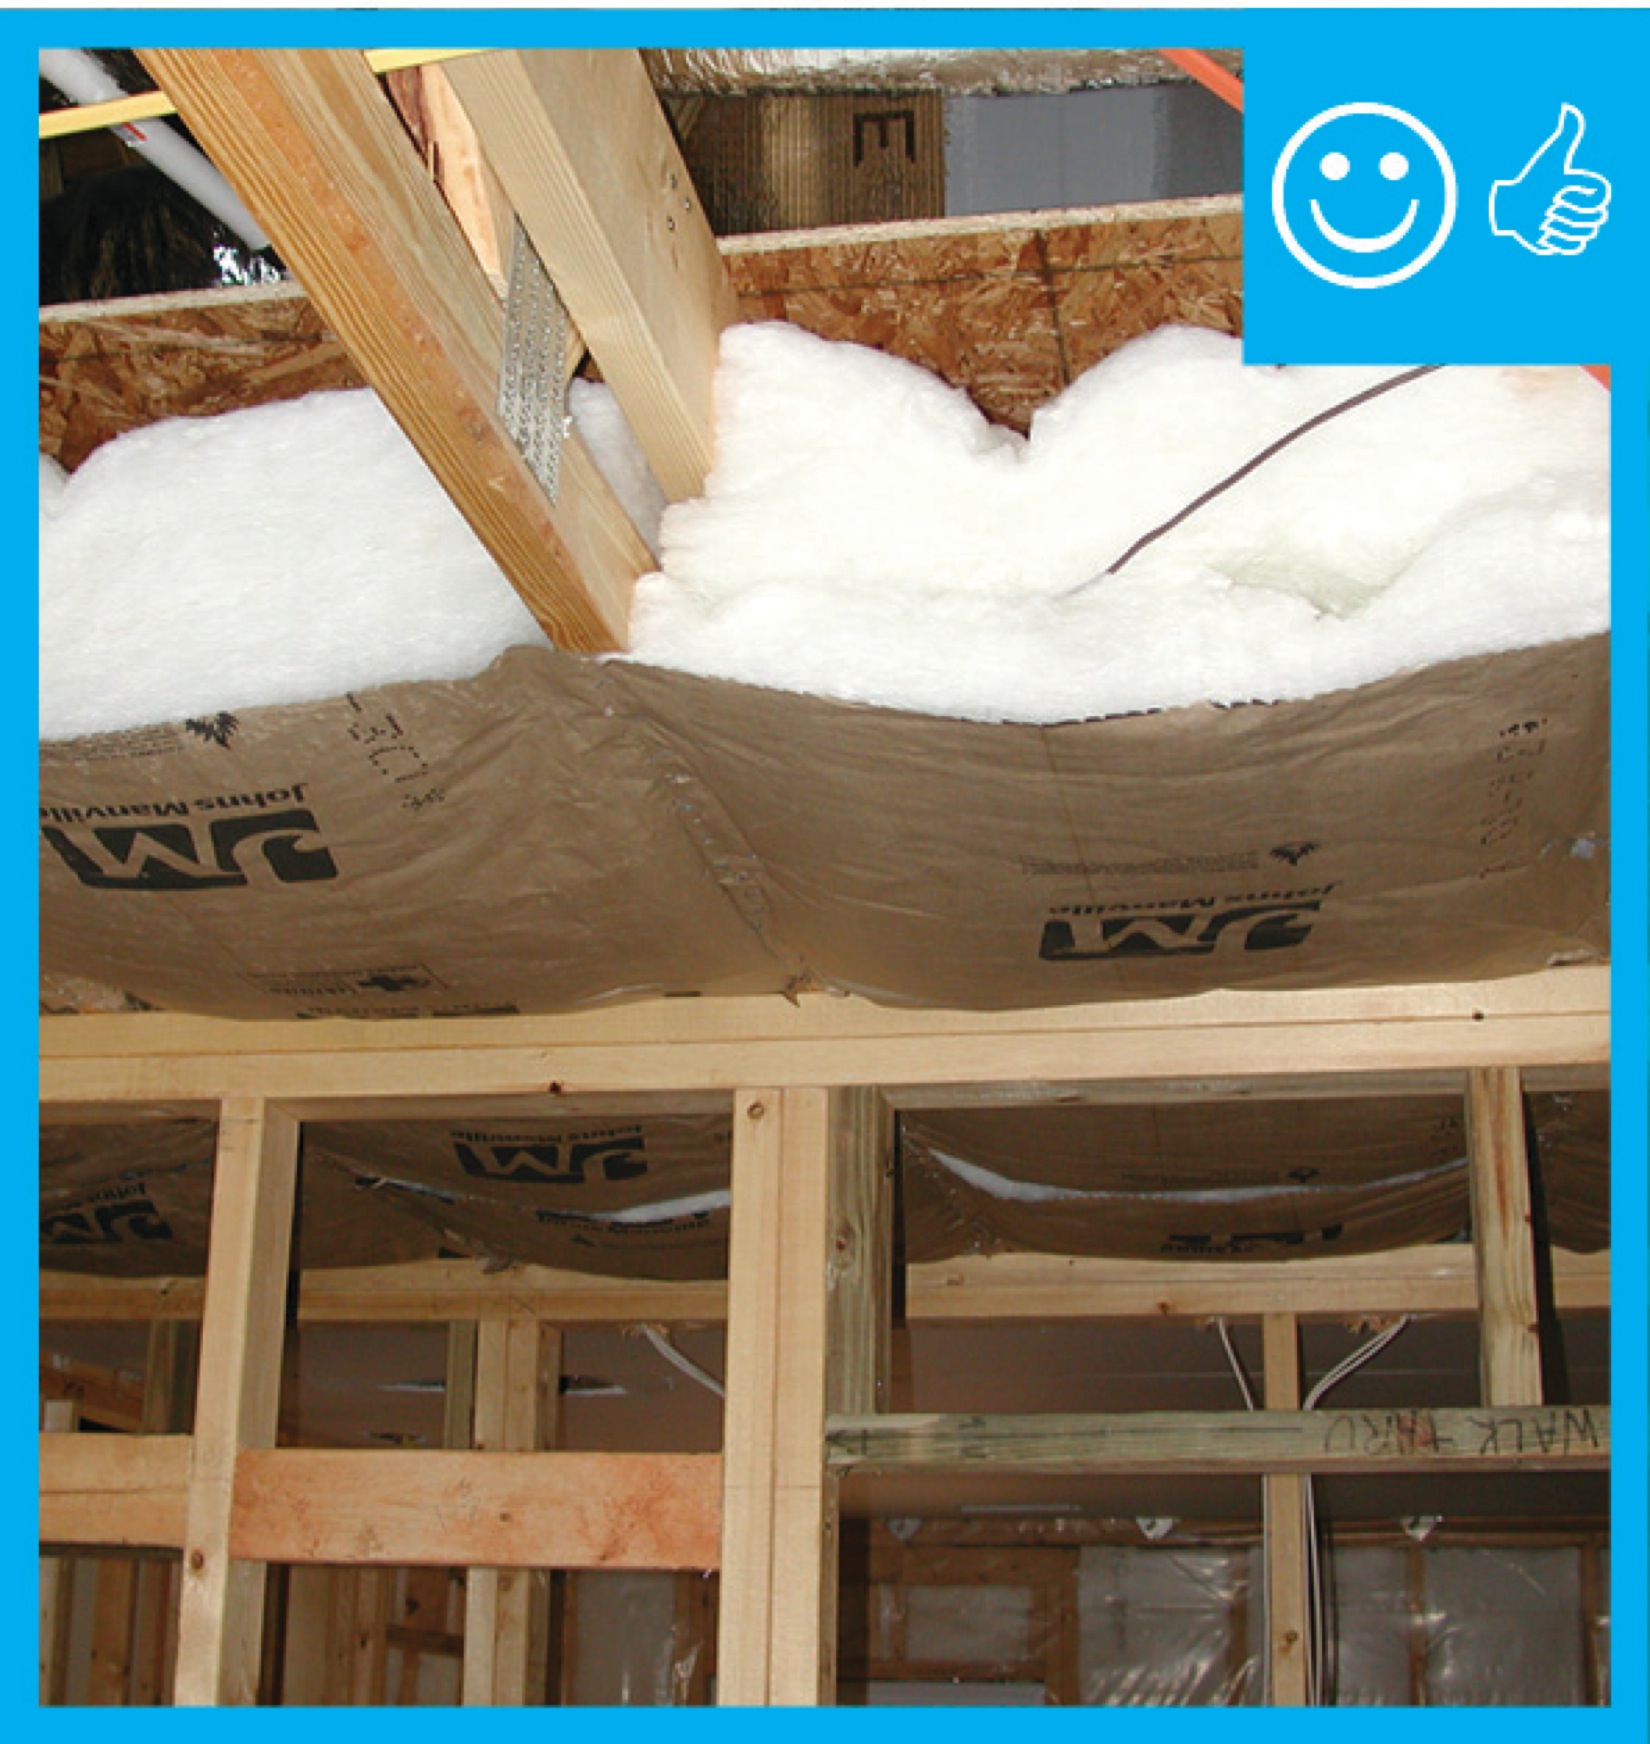
Right – Fiberglass batt insulation fills the walls while the floor joists above are insulated with spray foam insulation to both insulate and air seal this transition space.
Image
Image
Image
Image

Image
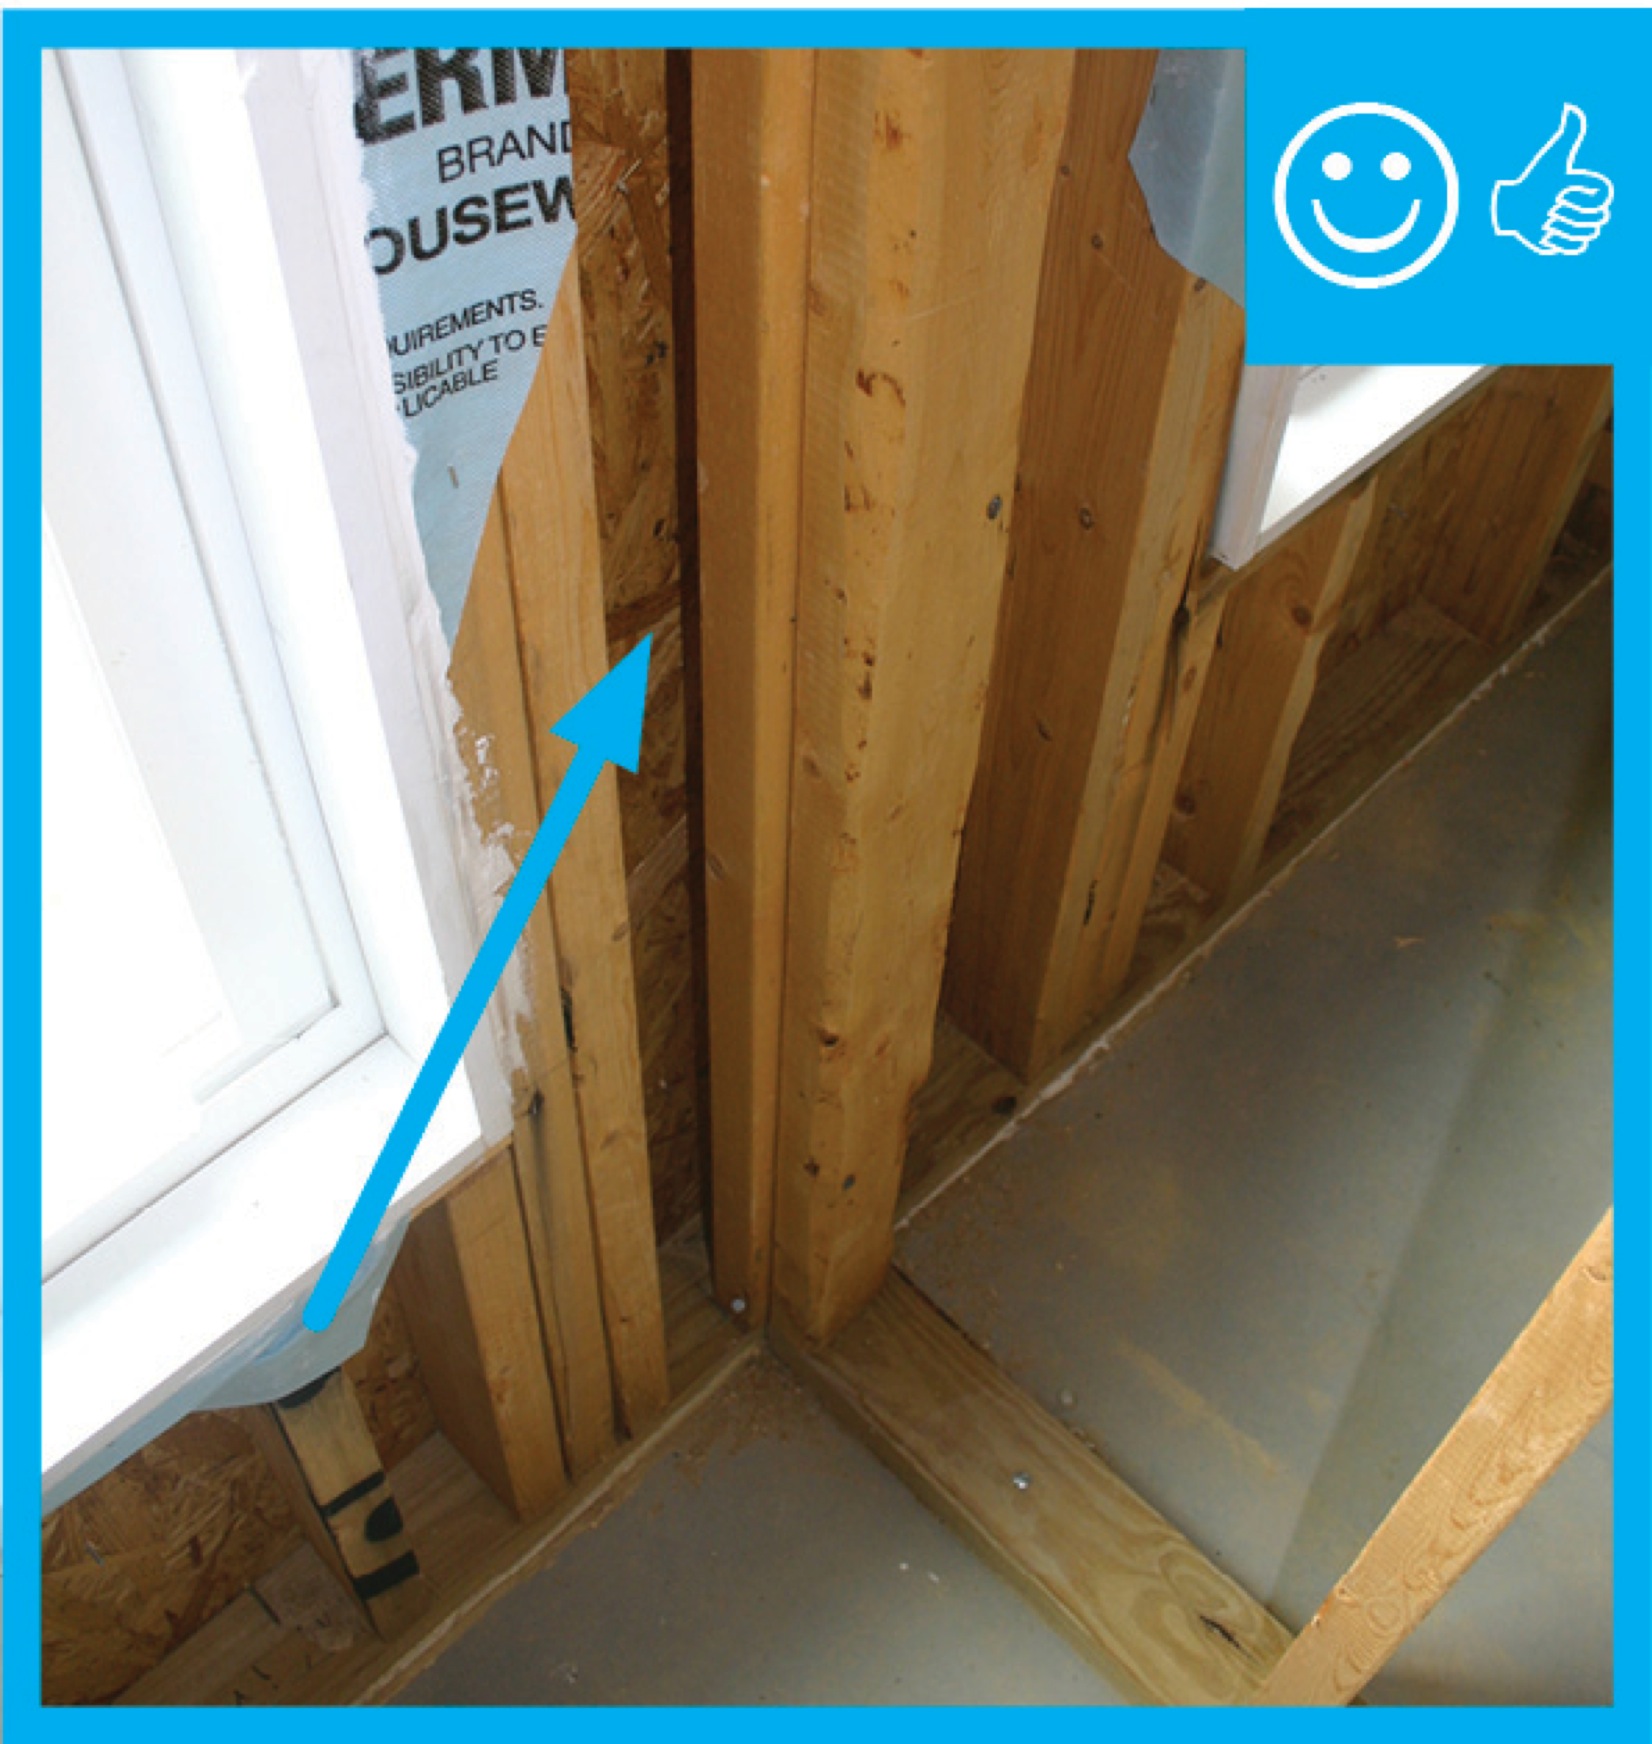
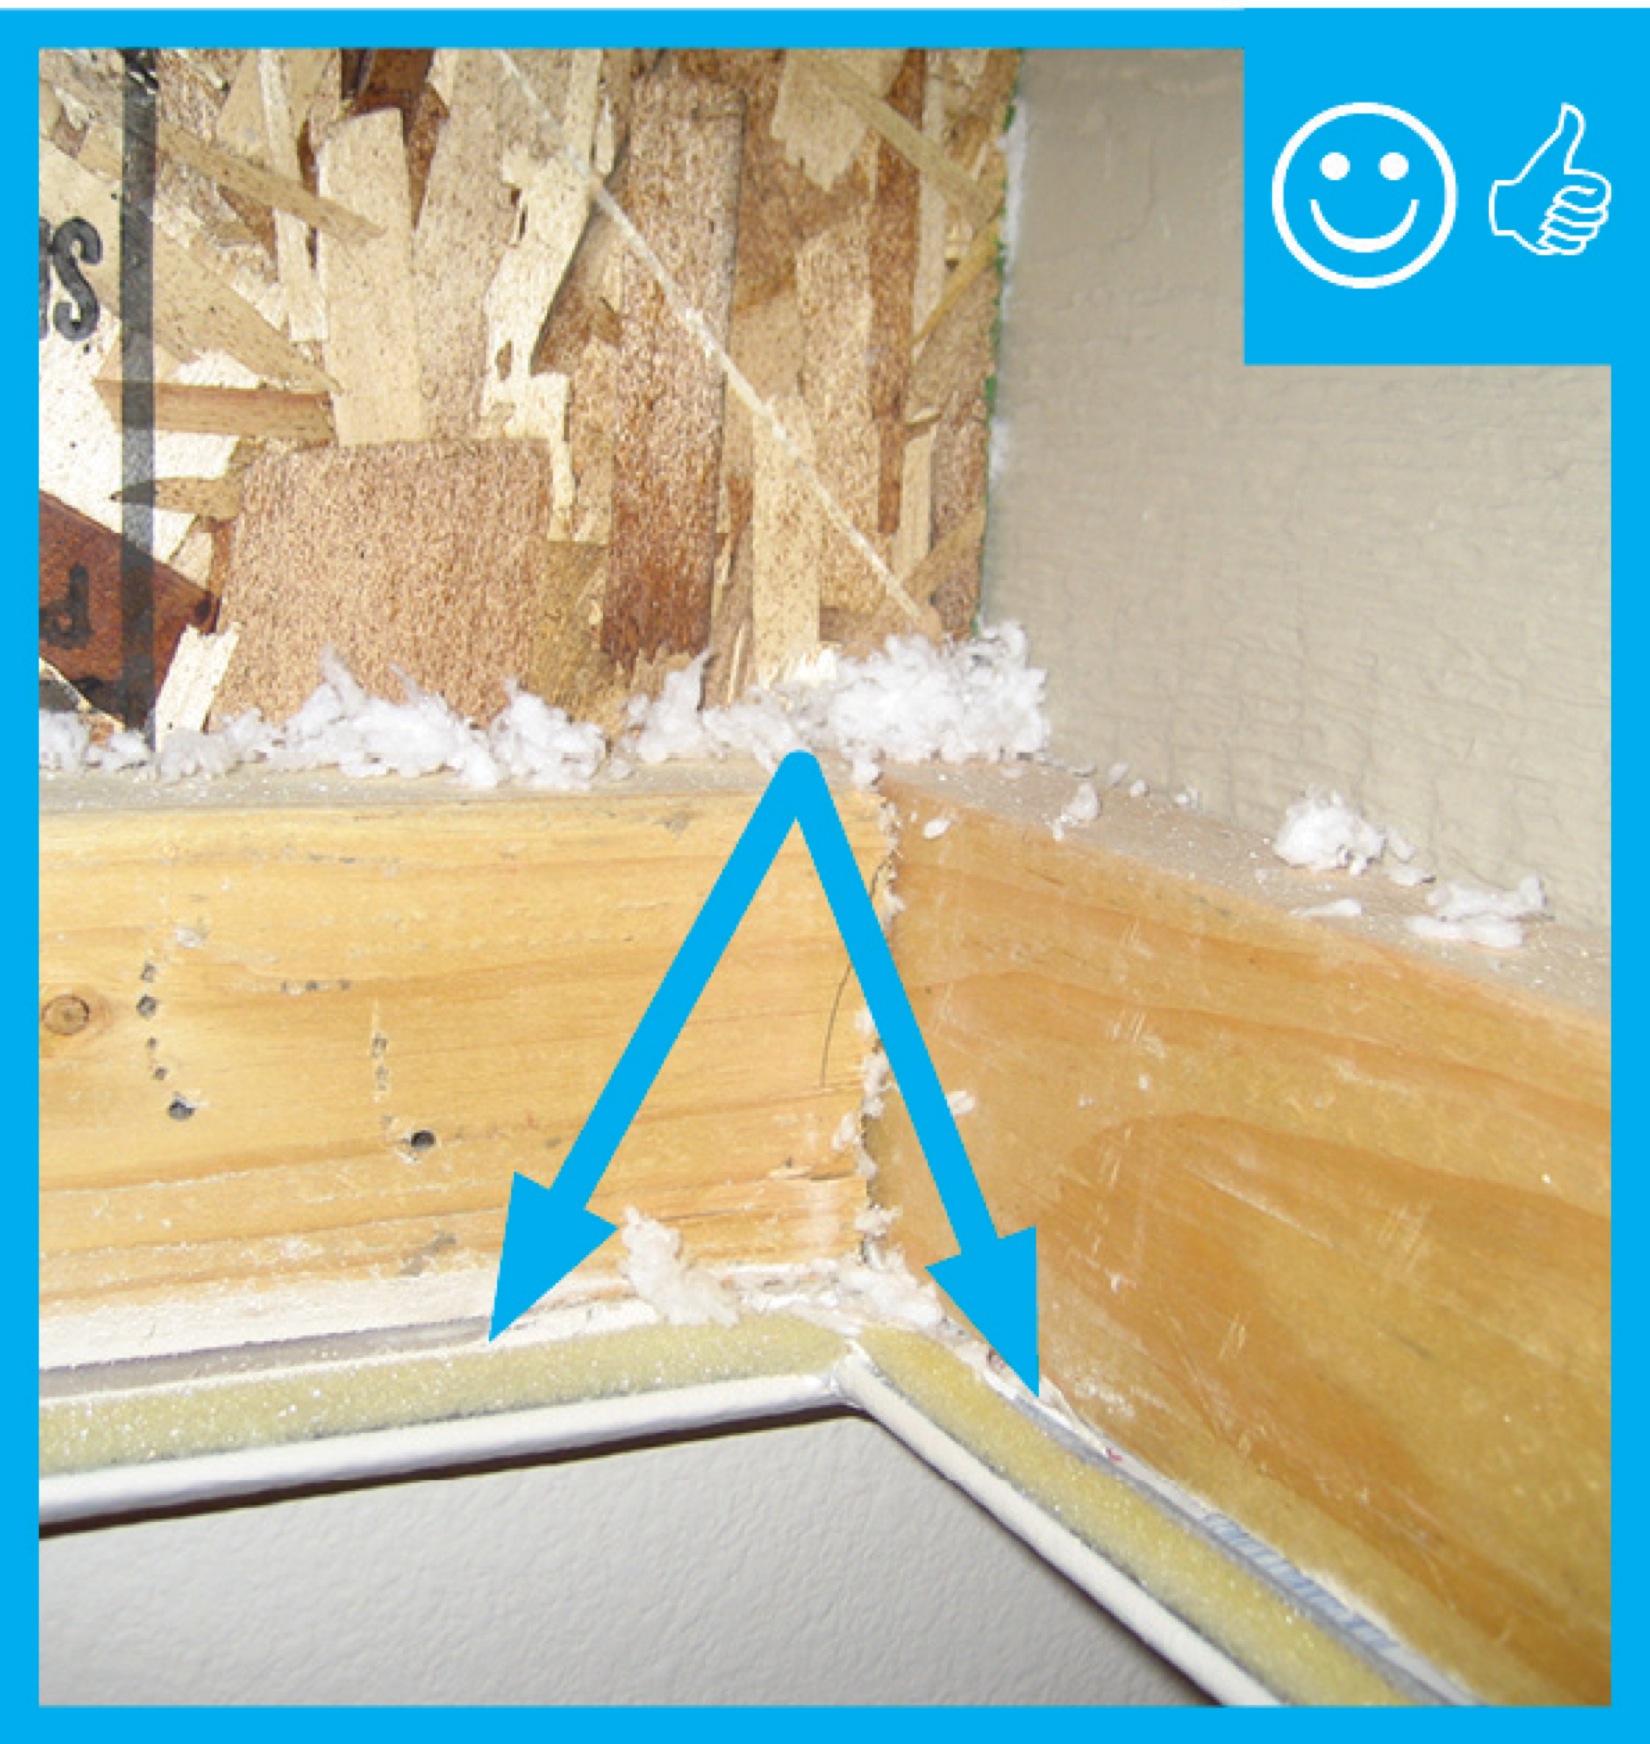
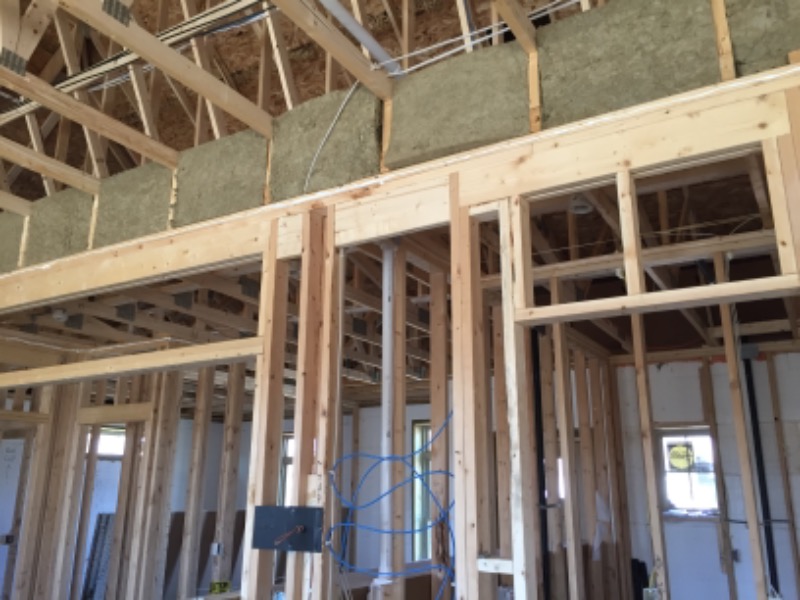
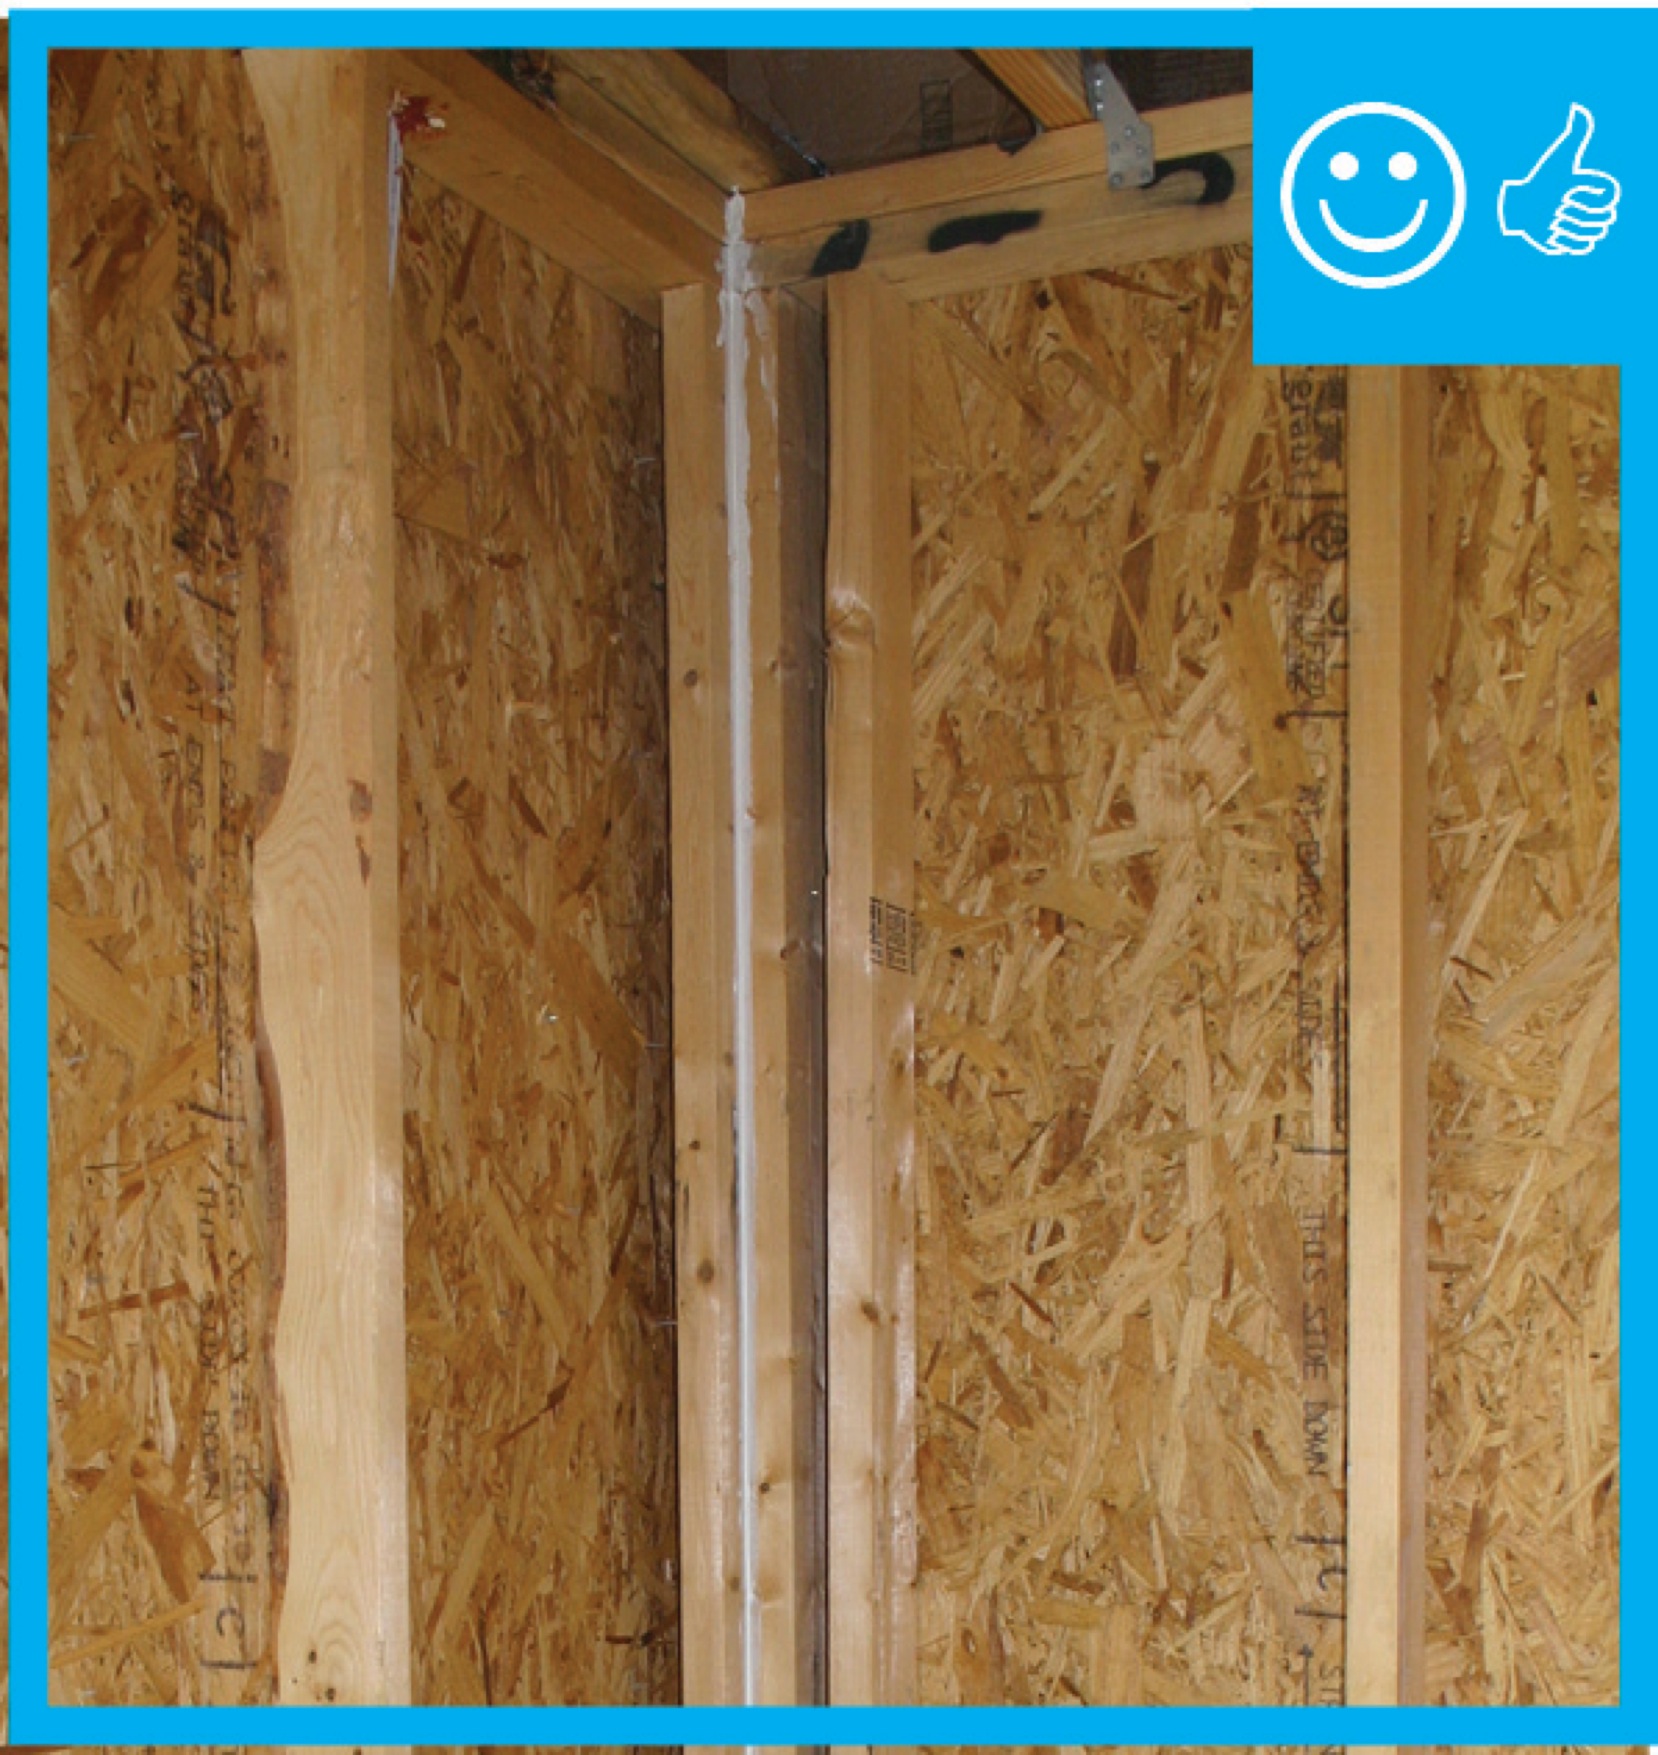
Right – Full length 2x6 nailer has been installed to allow space for insulation at wall intersection
Image
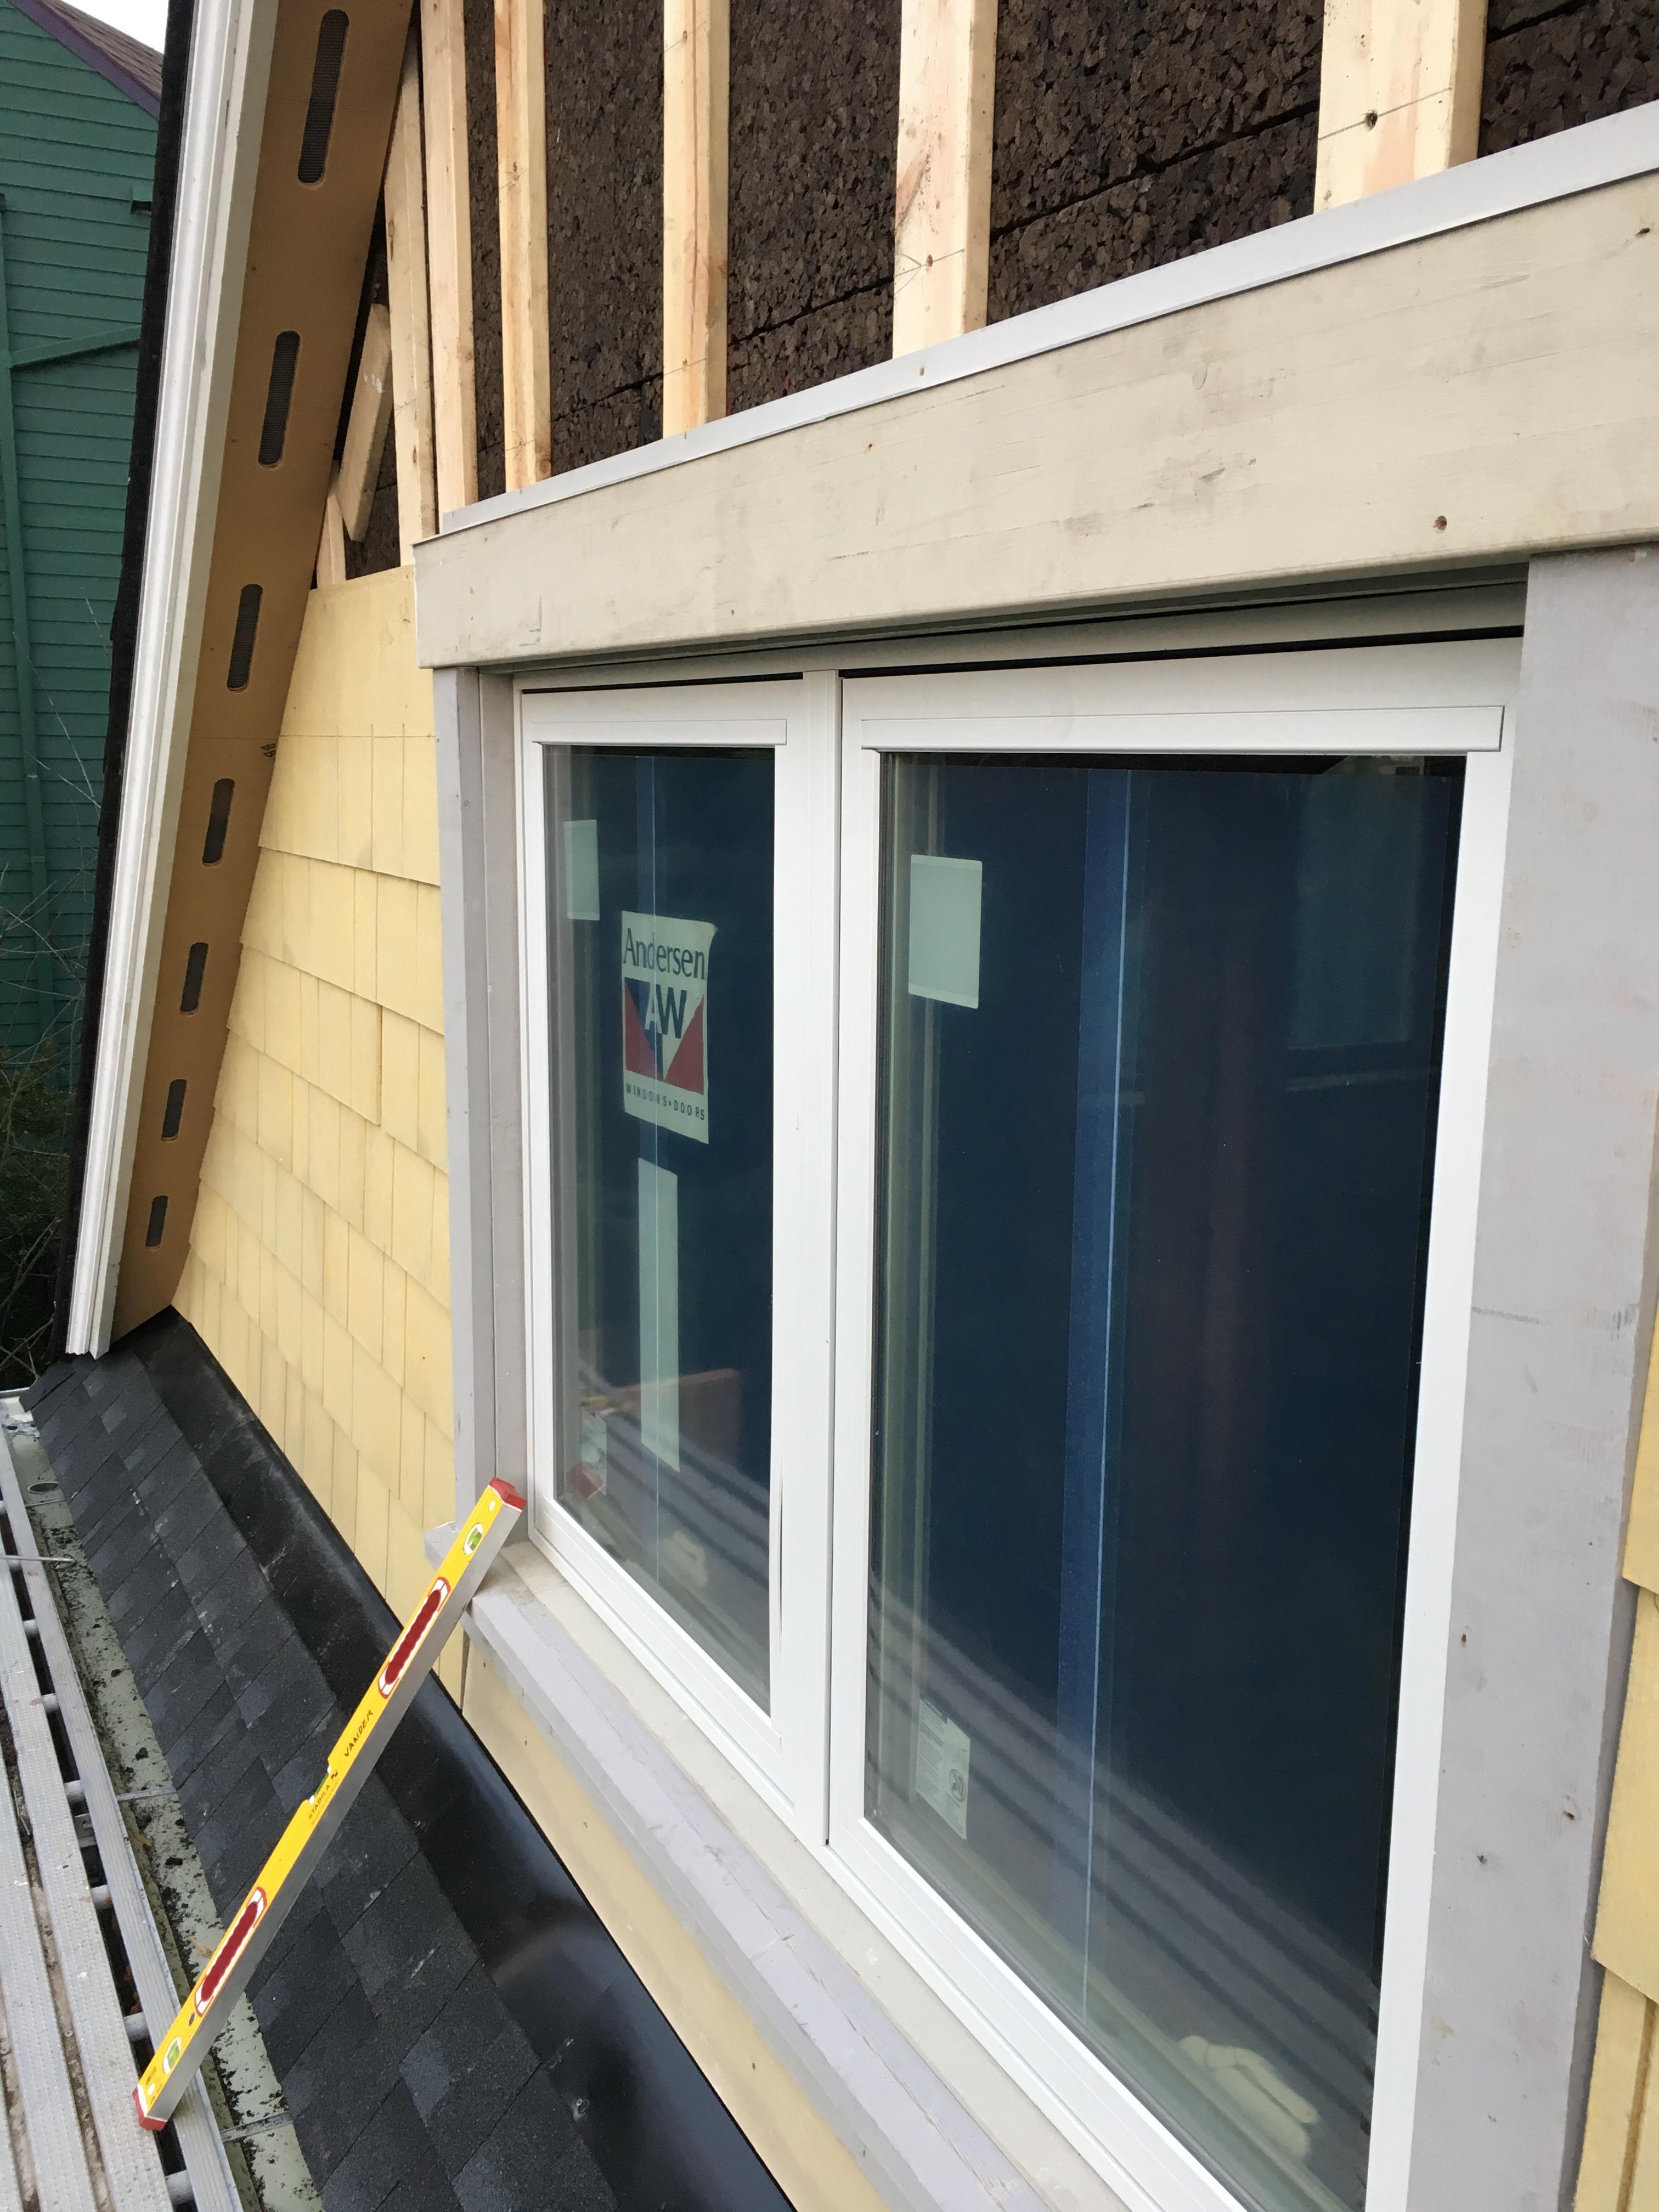
Right – Furring strips provide a drainage and ventilation gap between the siding and the cork insulation.
Image
Right – Furring strips provide a drainage gap between the rigid foam and the siding.
Image
Right – Furring strips were installed to provide a 3/8-inch drainage plane over the rigid foam and under the fiber cement lap siding.
Image
Right – Housewrap was properly shingled and taped on this wall assembly which places the housewrap beneath the rigid foam sheathing; wall cavities will be filled with spray foam.
Image
Image
Right – Insulated concrete forms (ICFs) provide the insulated stem wall for the slab-on-grade foundation for this SIP house.
Image
Right – Insulation installed to correct depth and will be aligned with air barrier