Showing results 501 - 600 of 898
Image
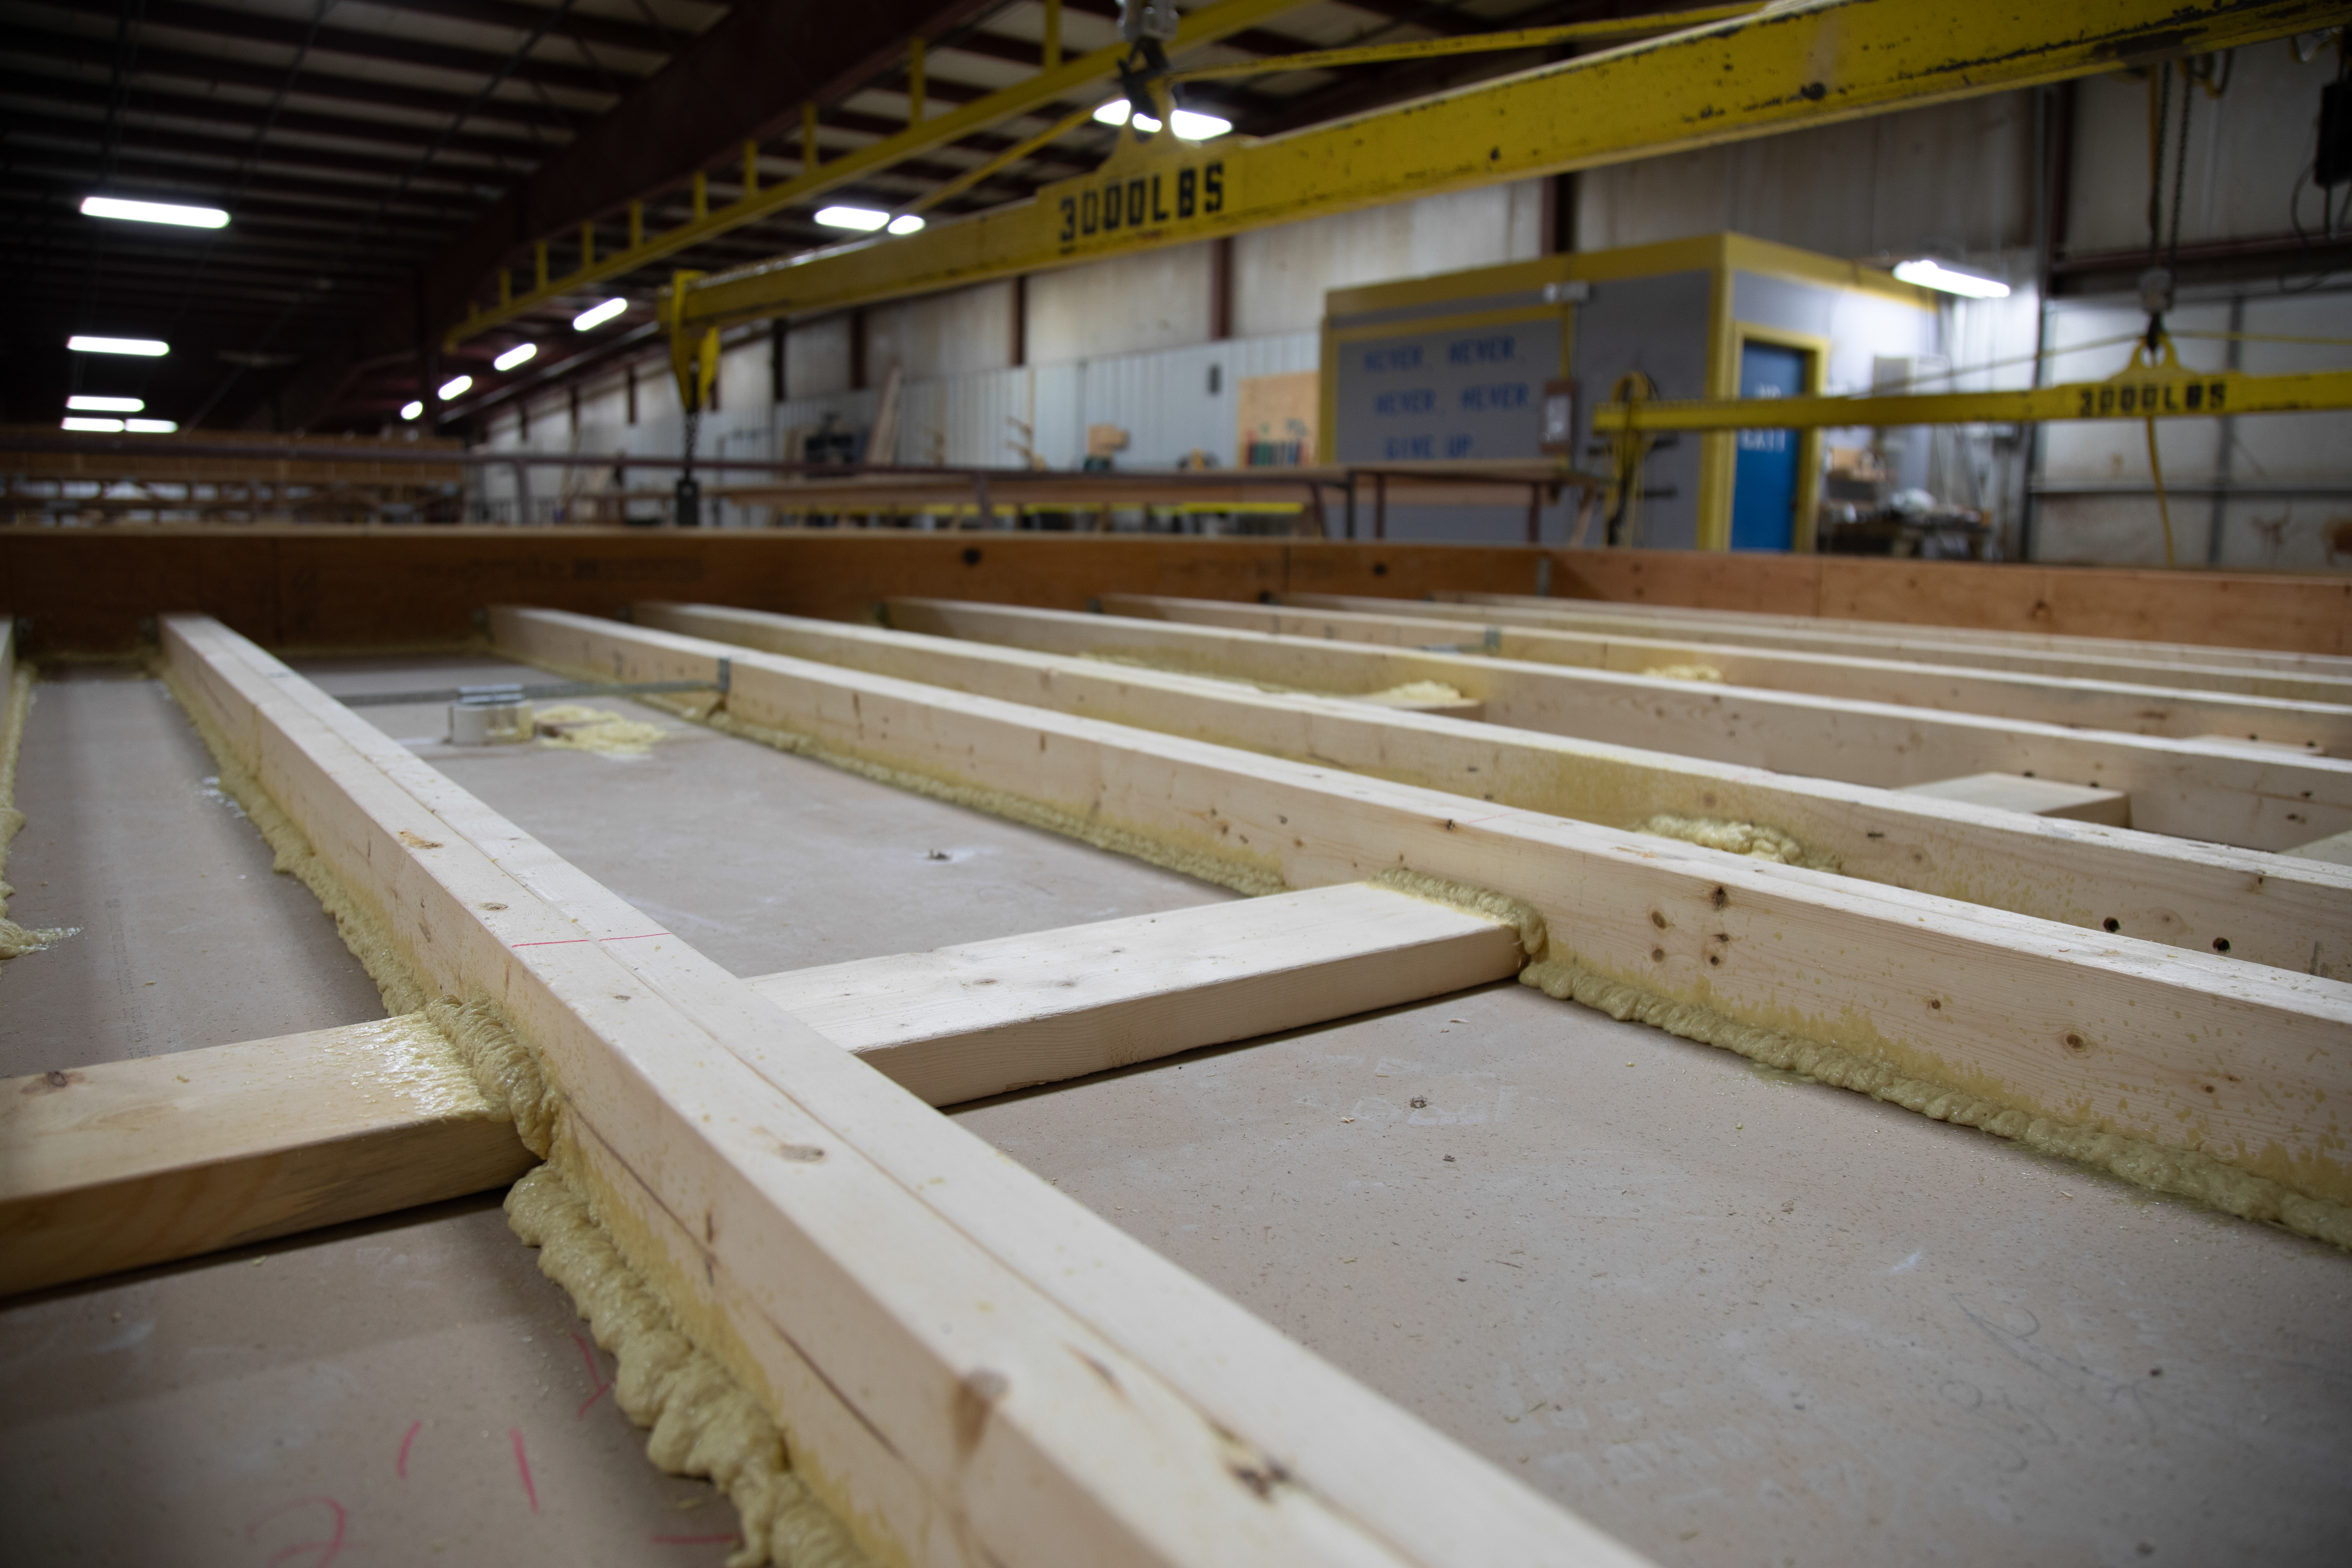
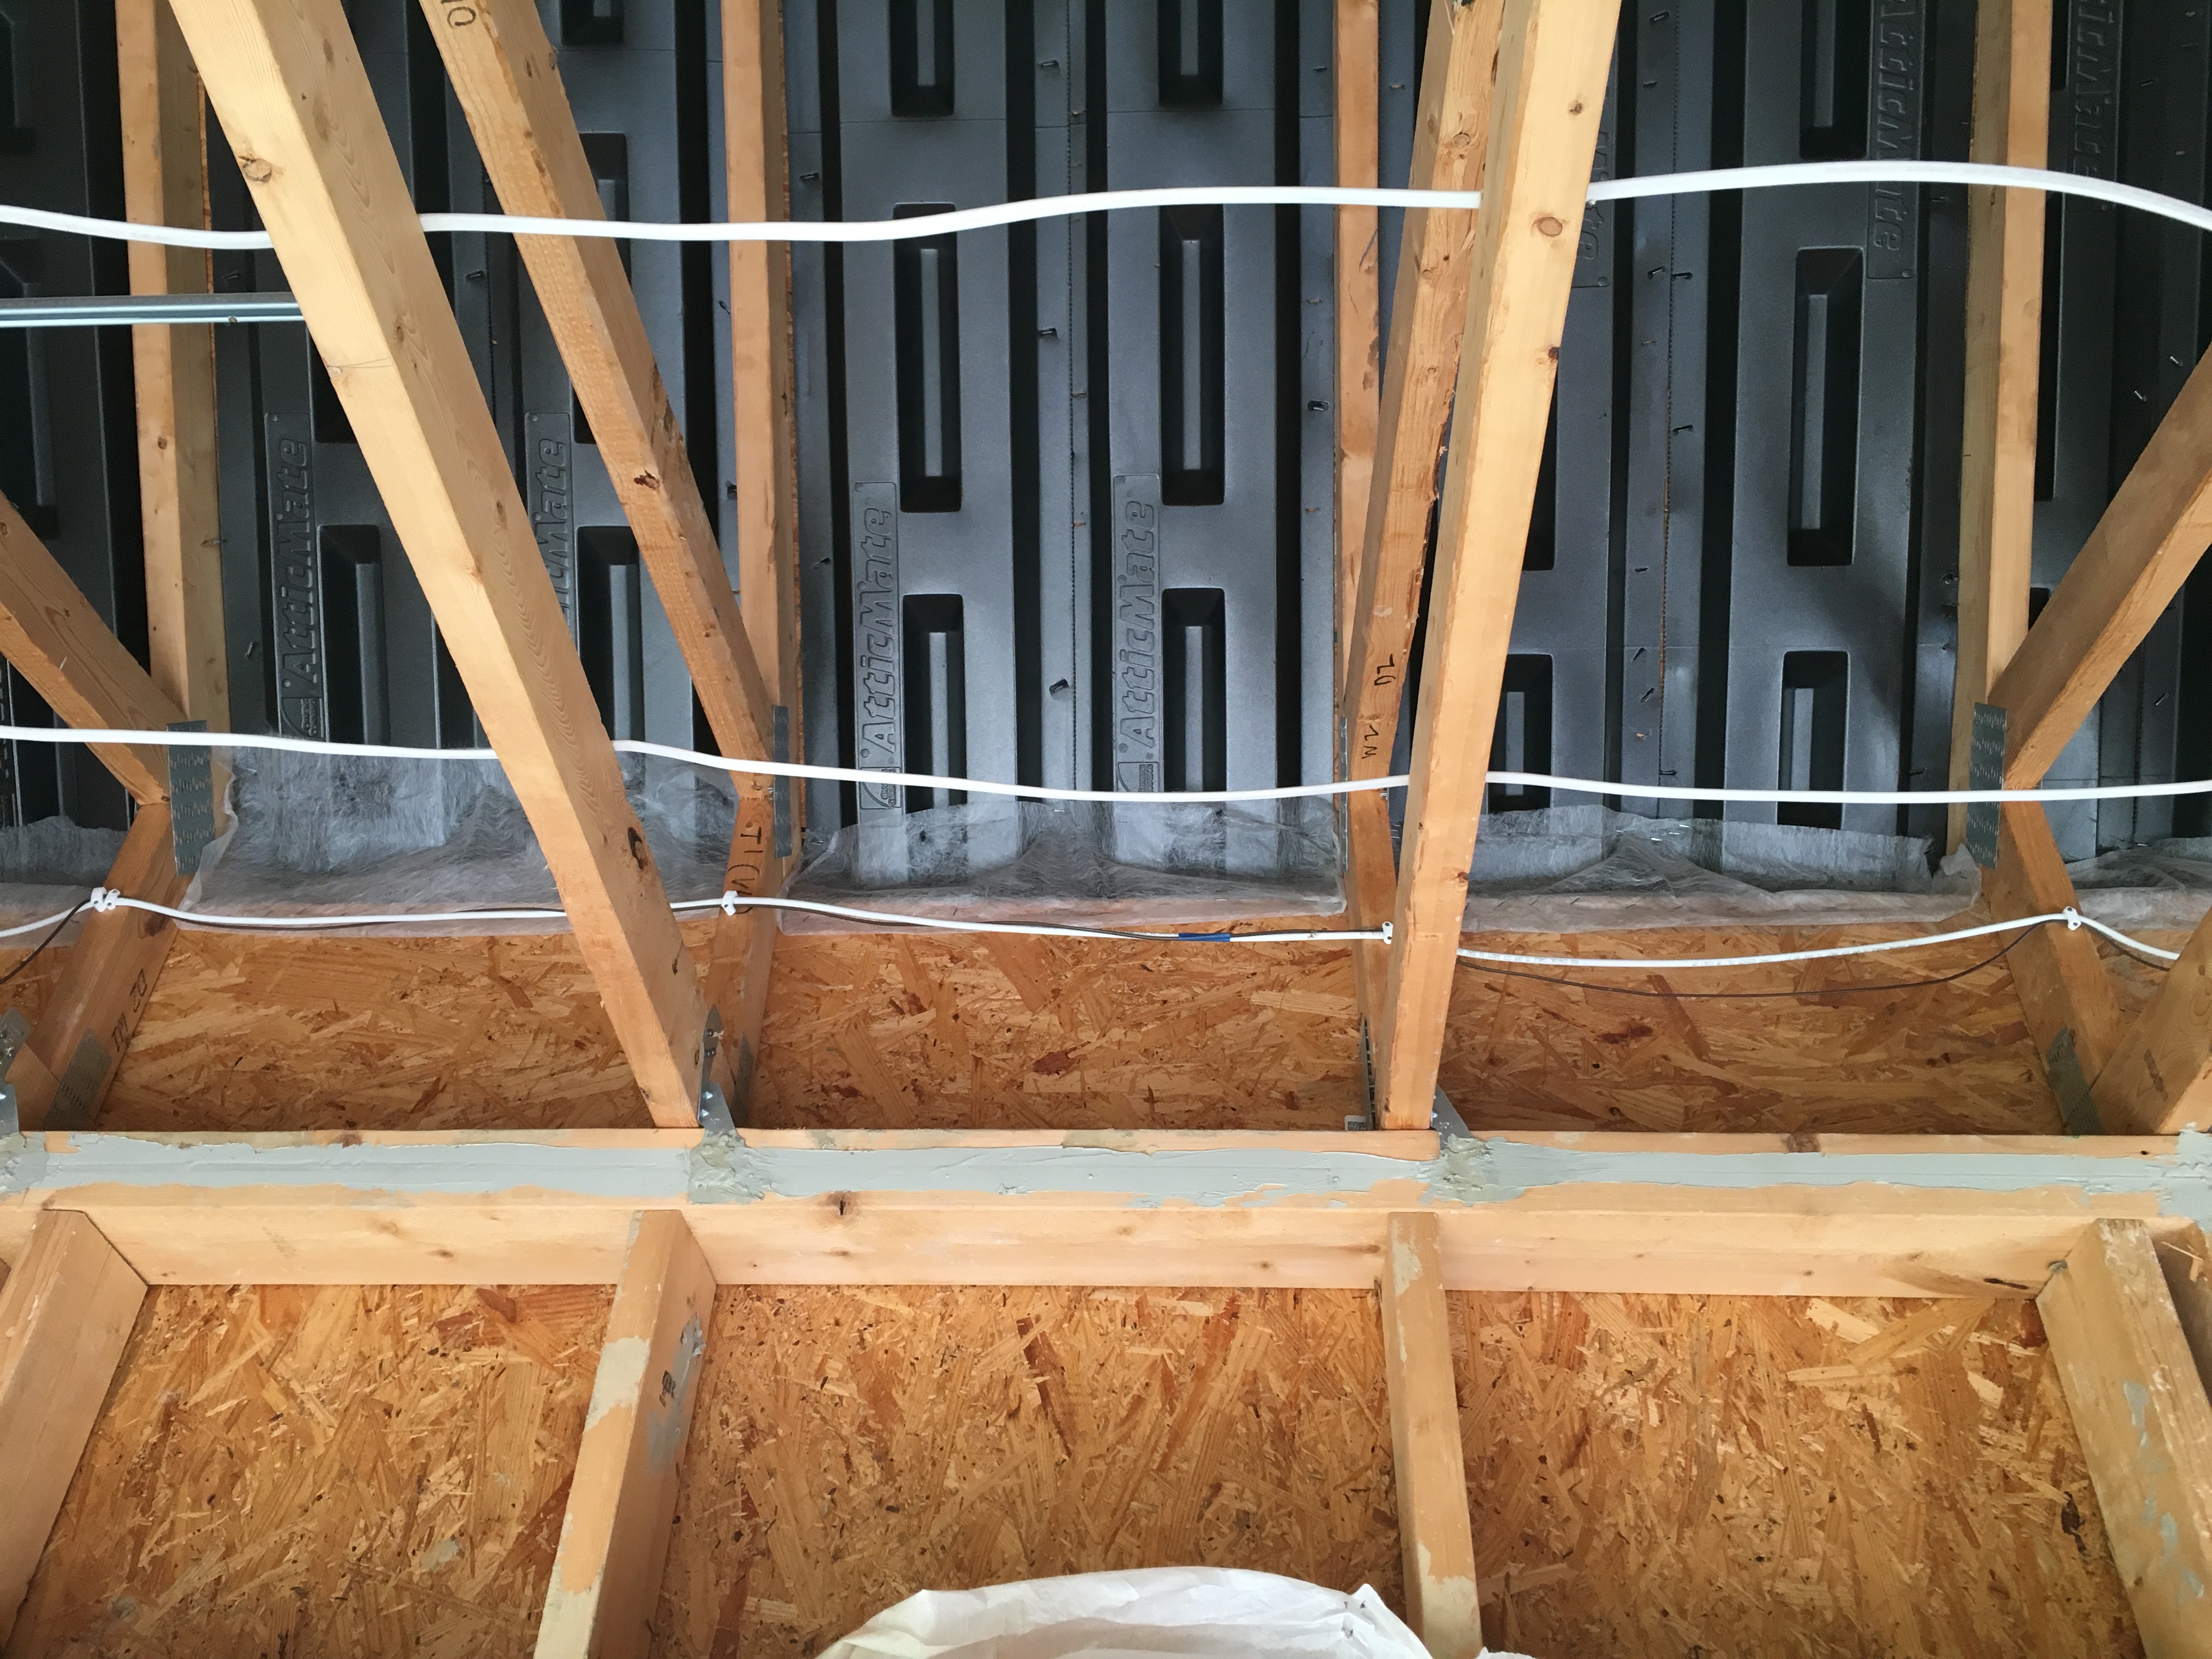
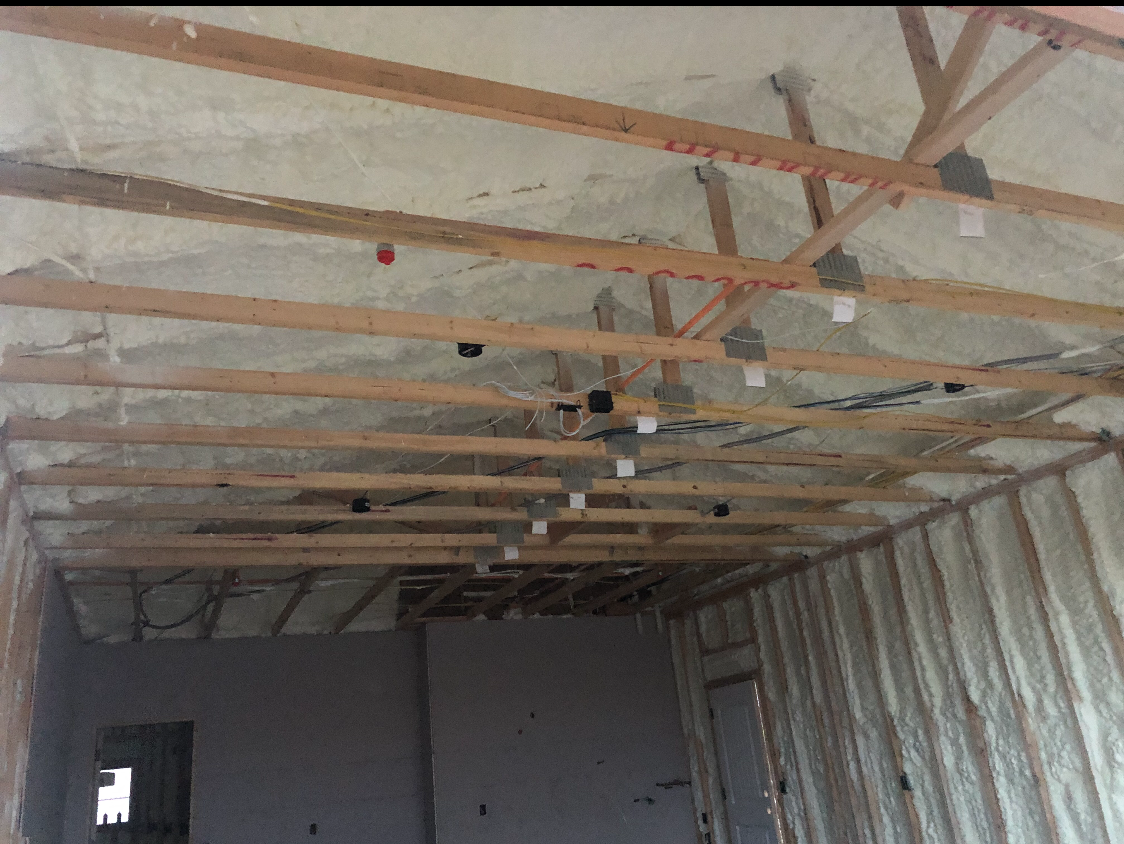
Right – Joists between floors are air sealed to the ceiling drywall with canned spray foam along each joist-to-drywall-seam.
Image
Image
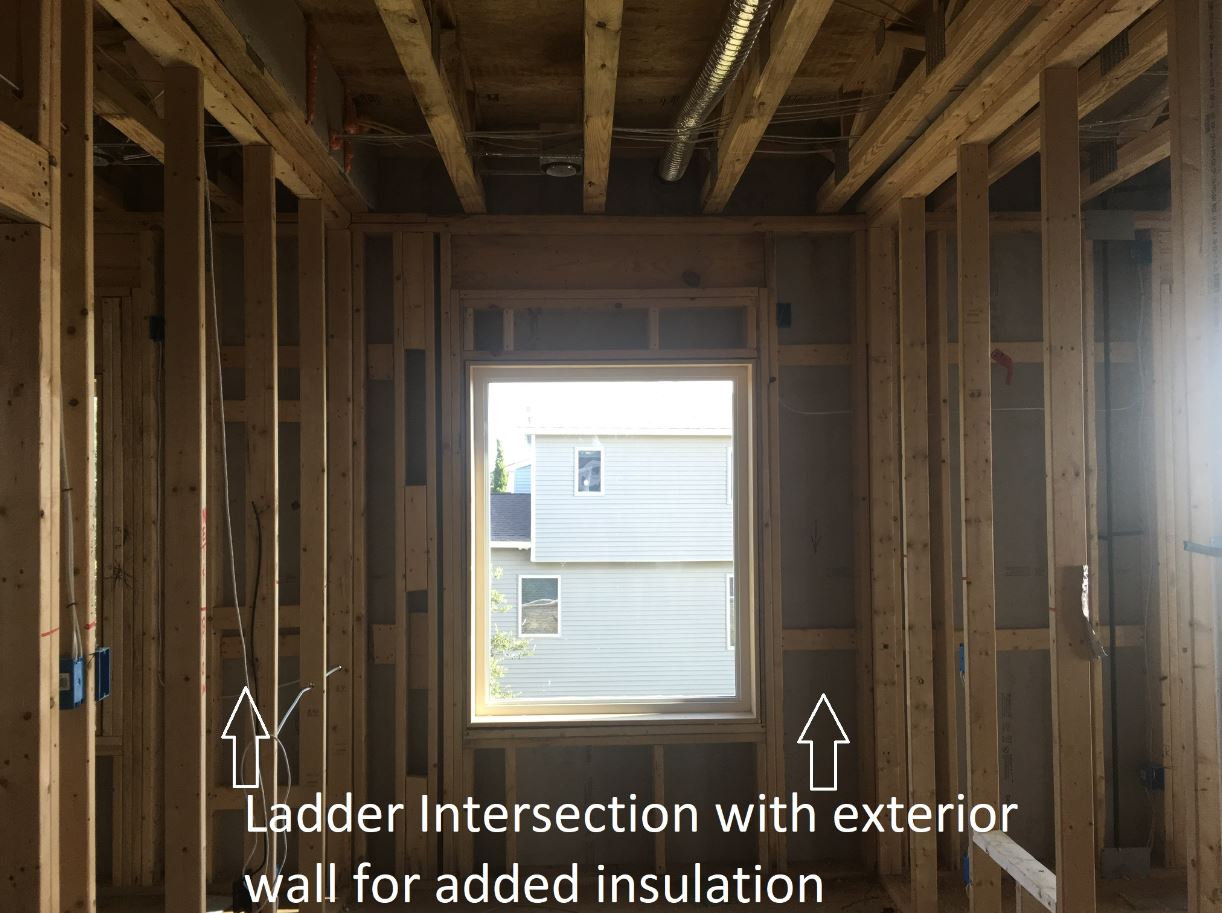
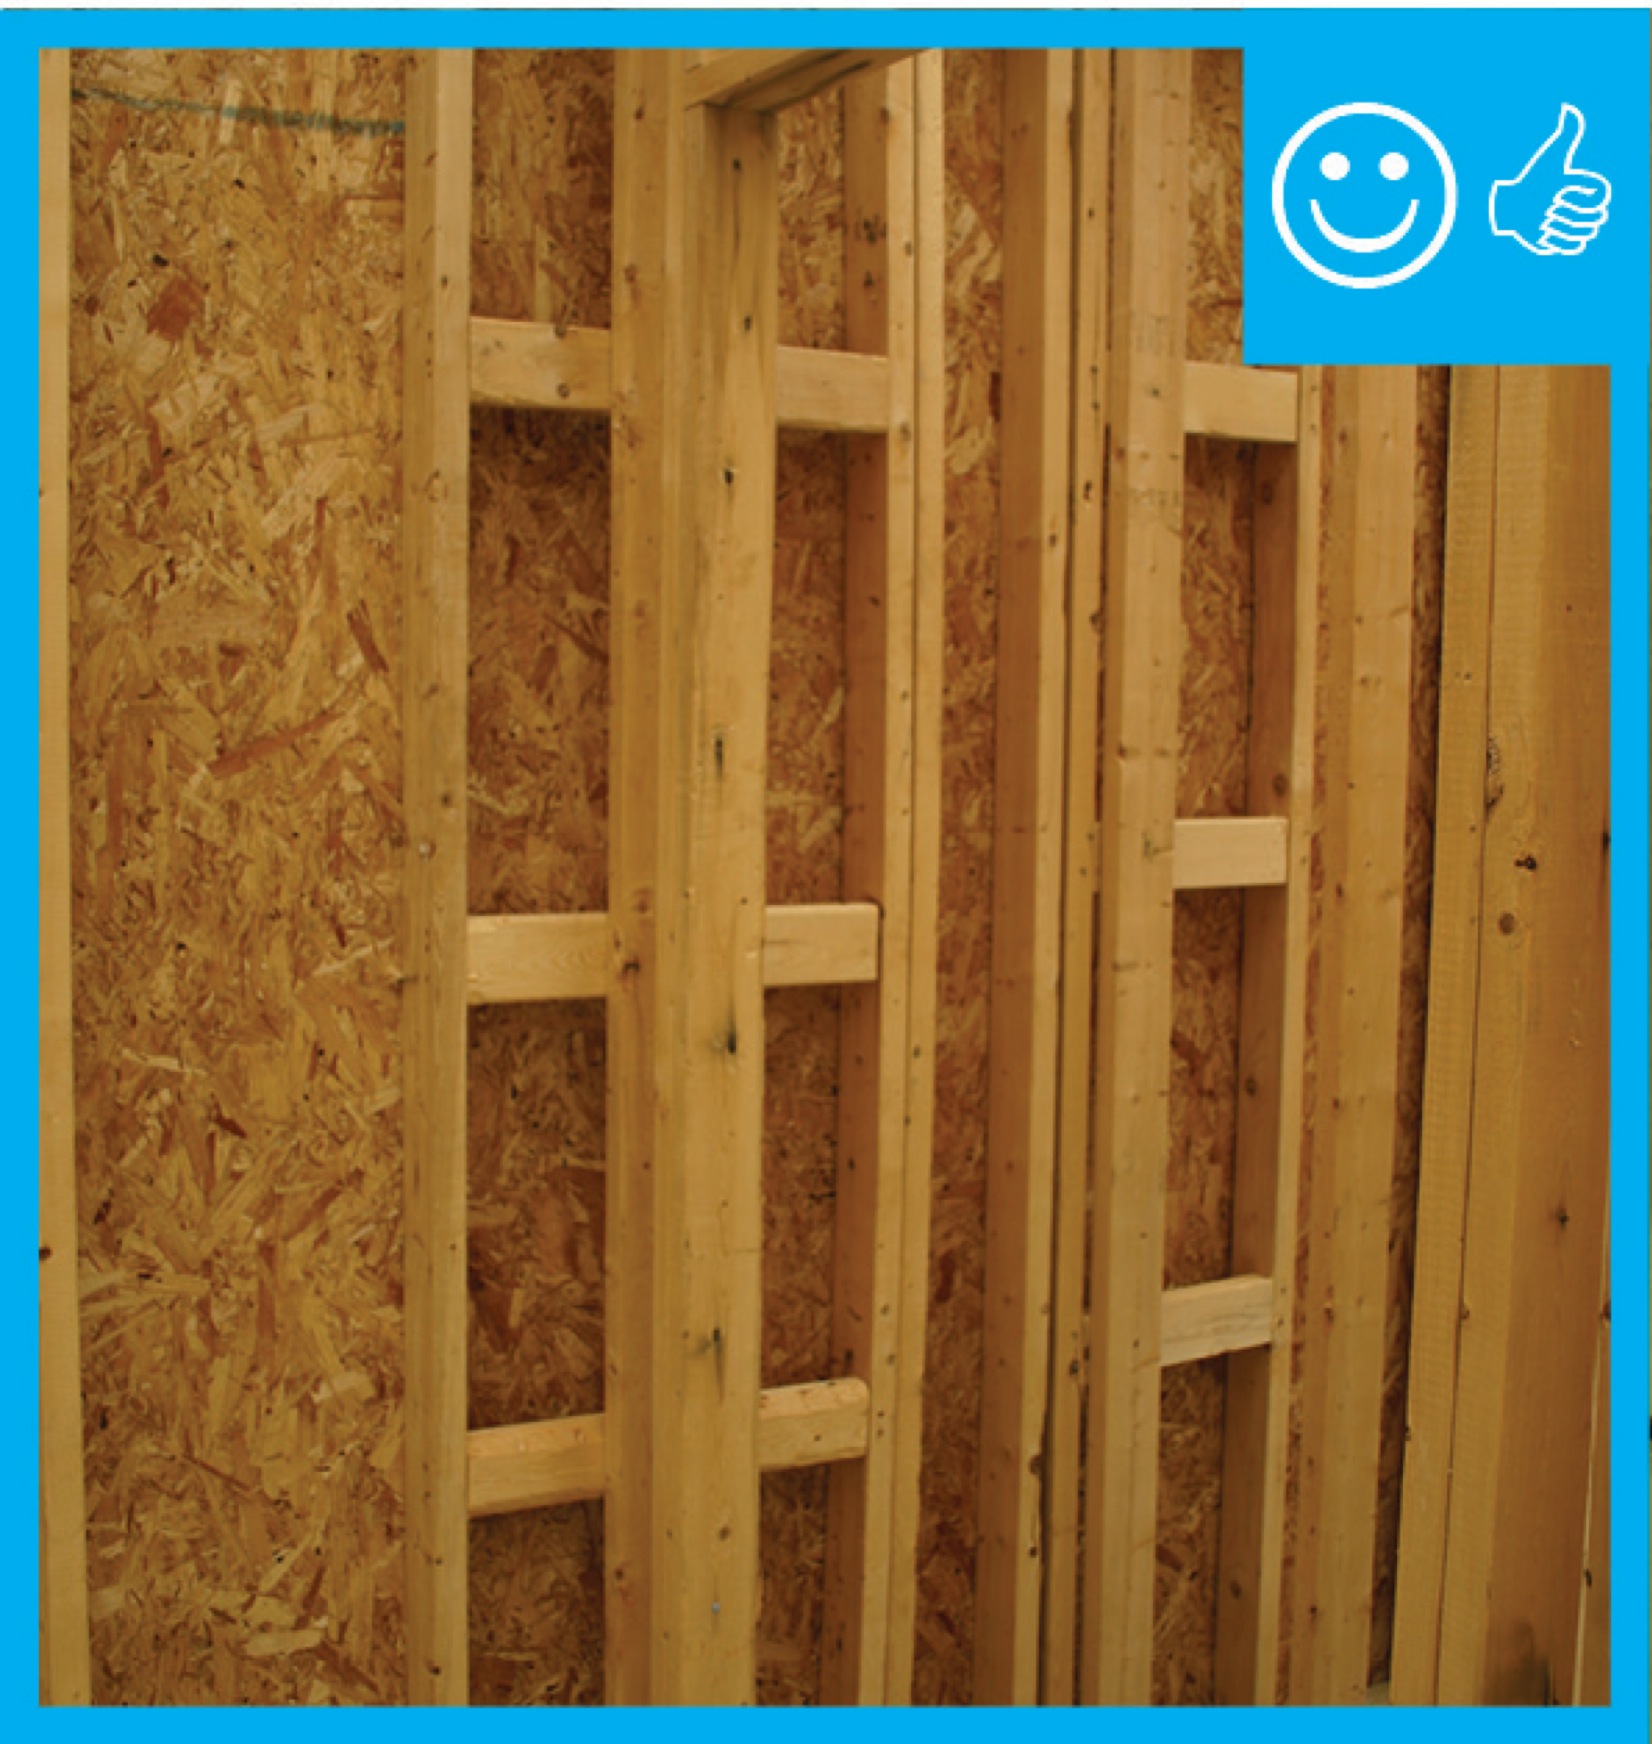
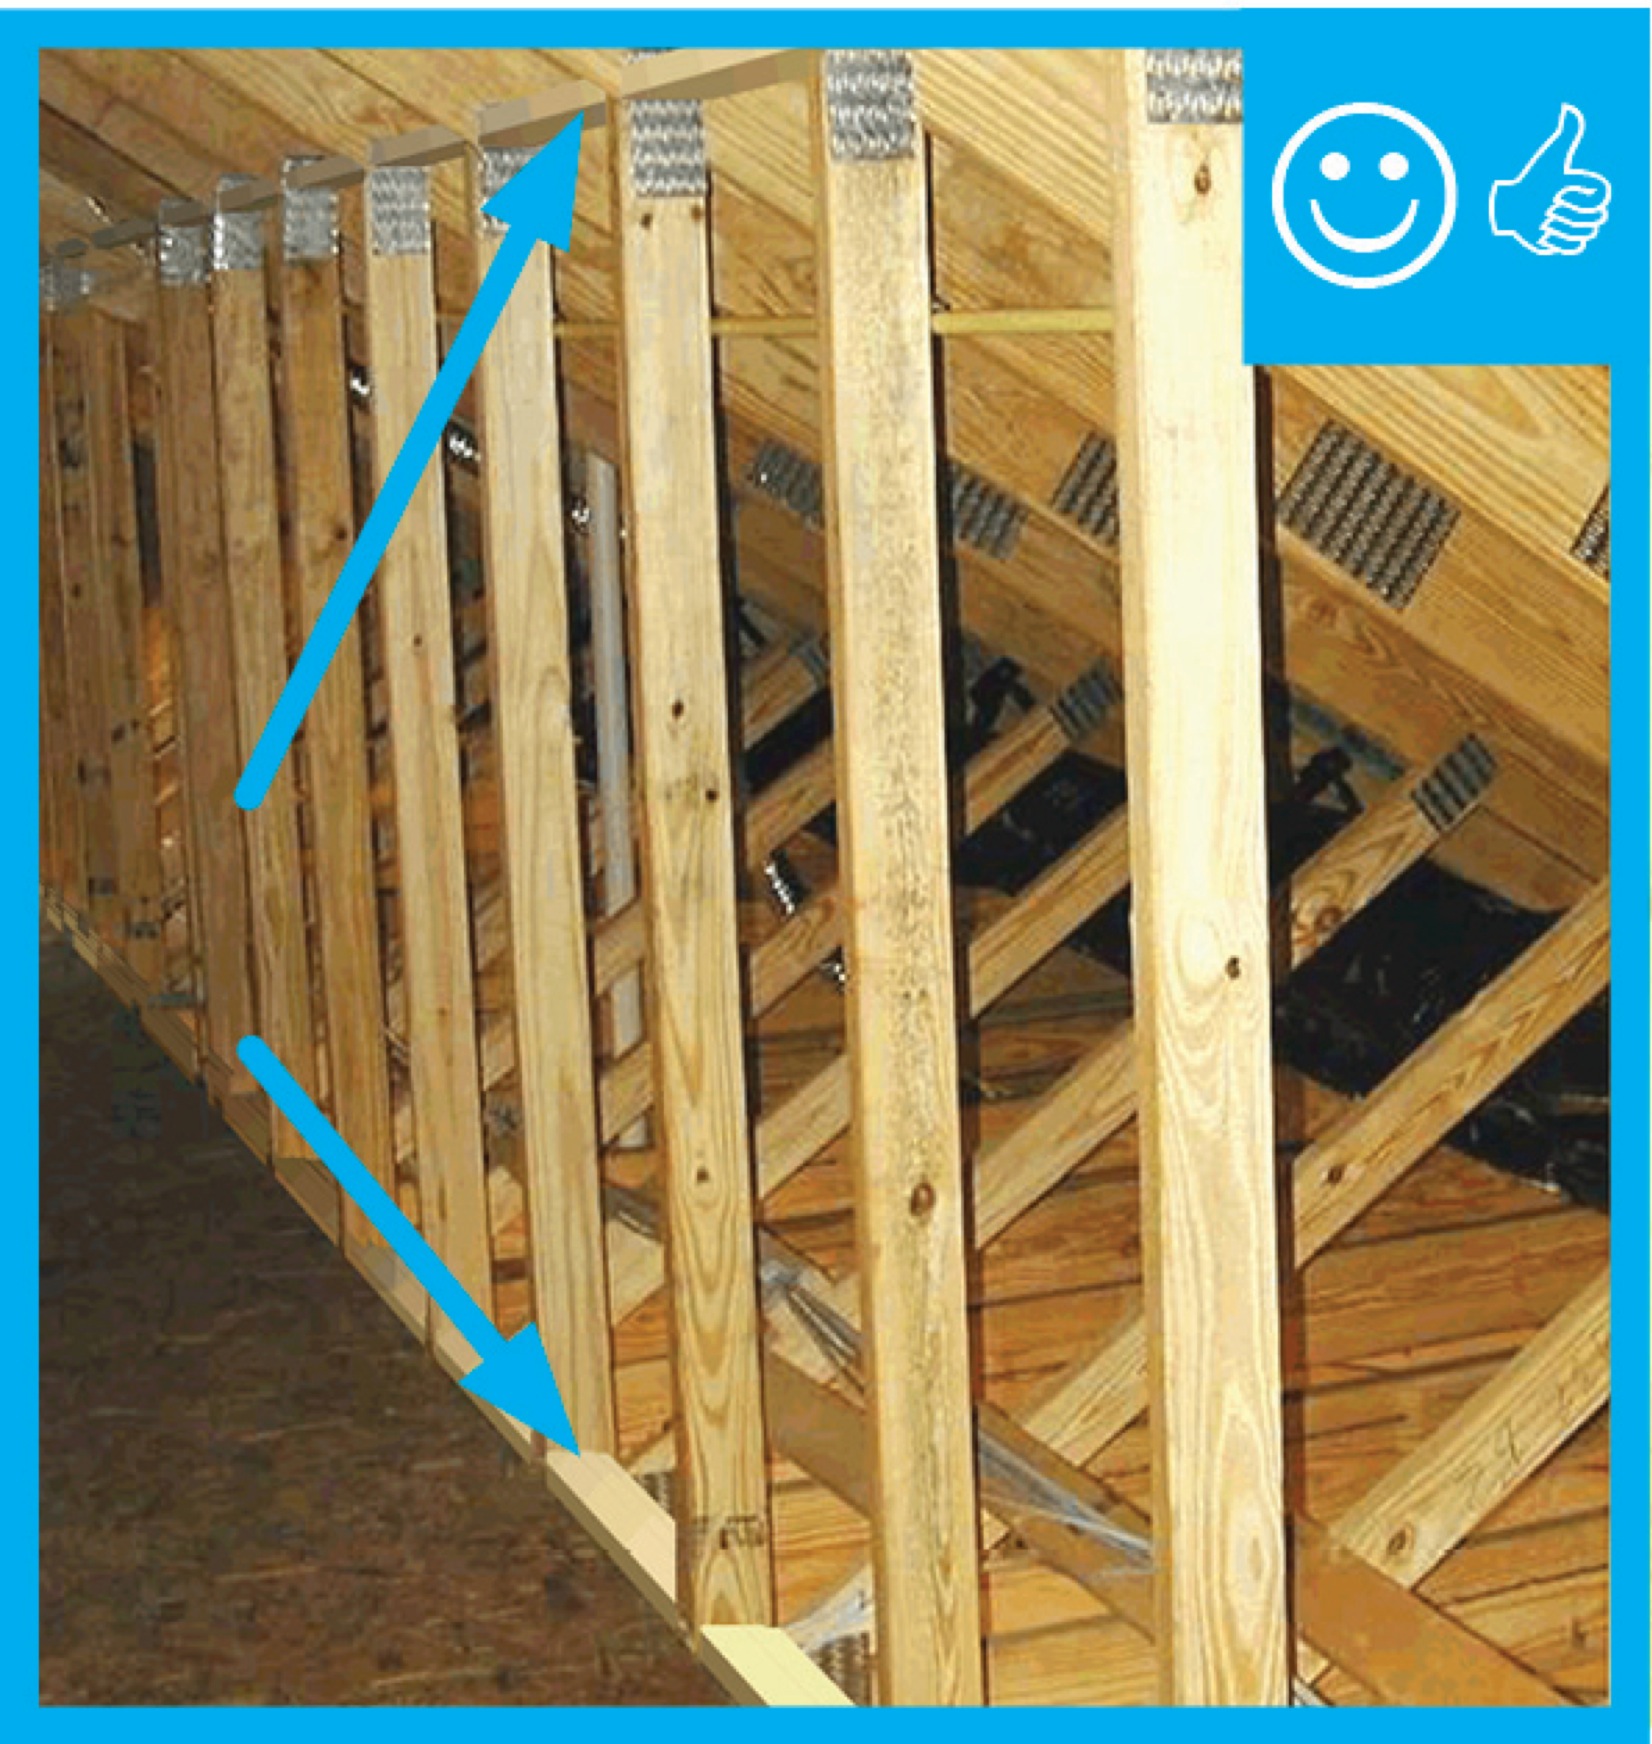
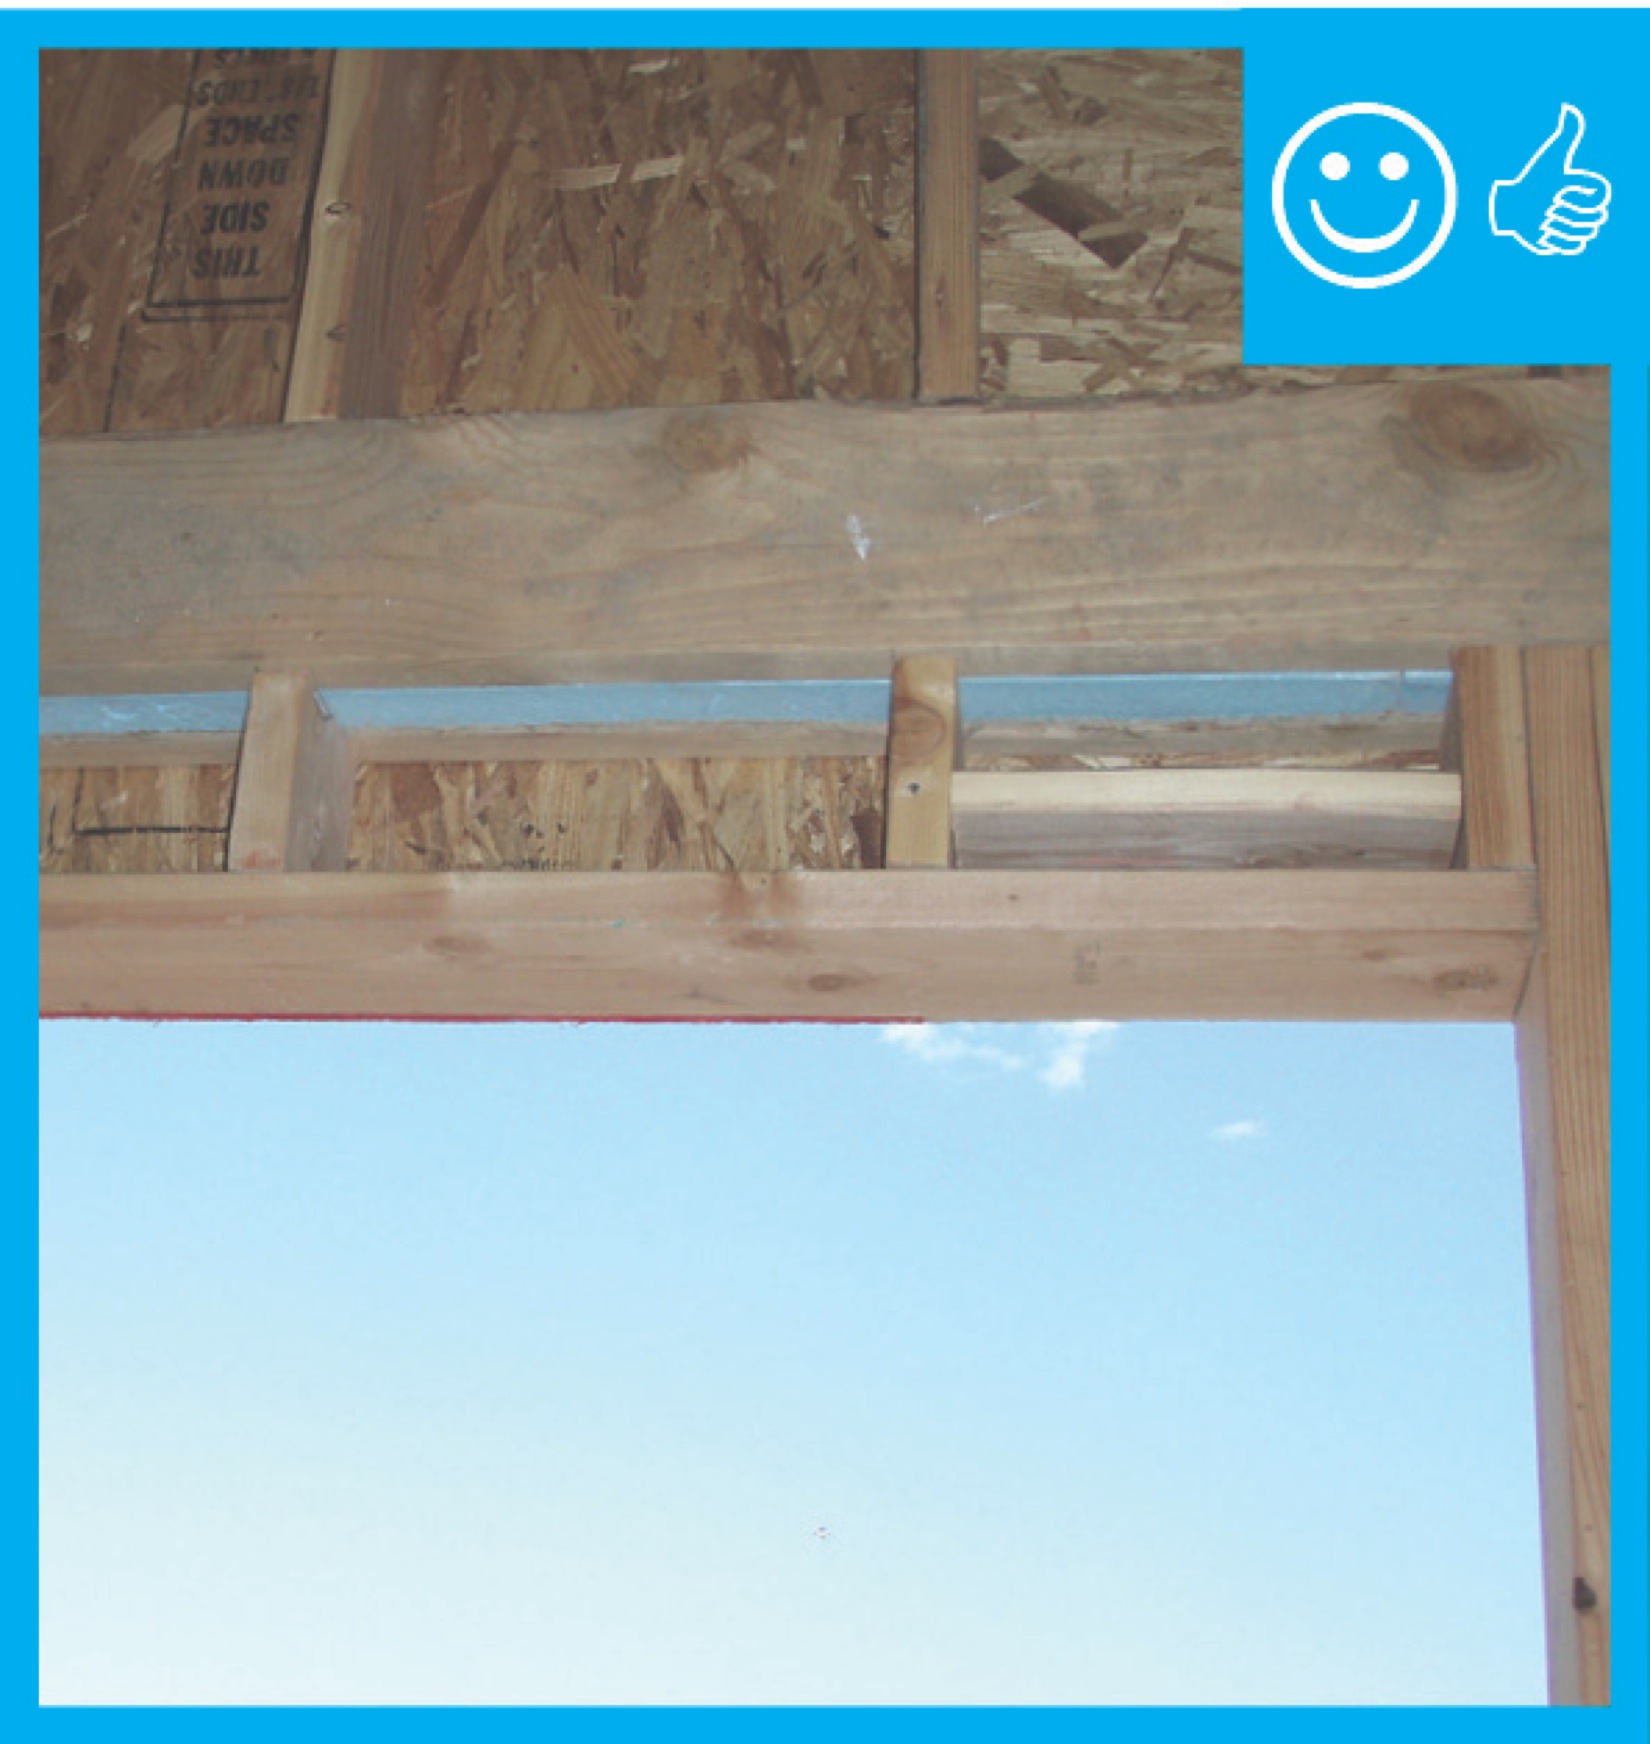
Right – Ladder blocking allows the exterior wall to be insulated where intersected by an interior wall.
Image

Image
Image

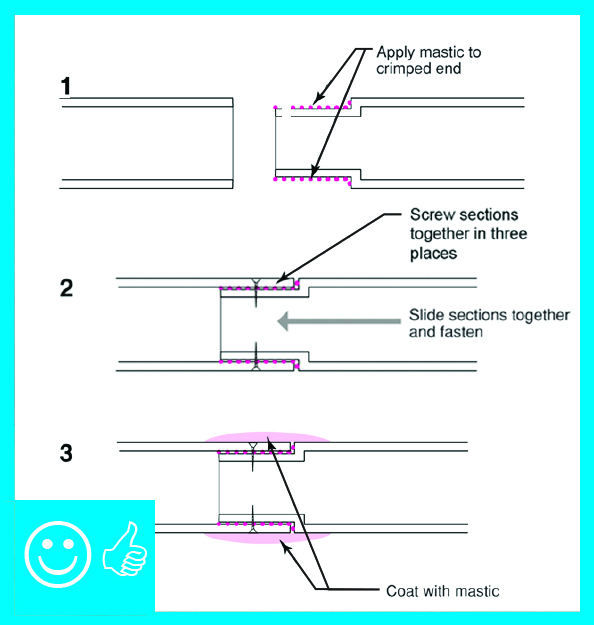
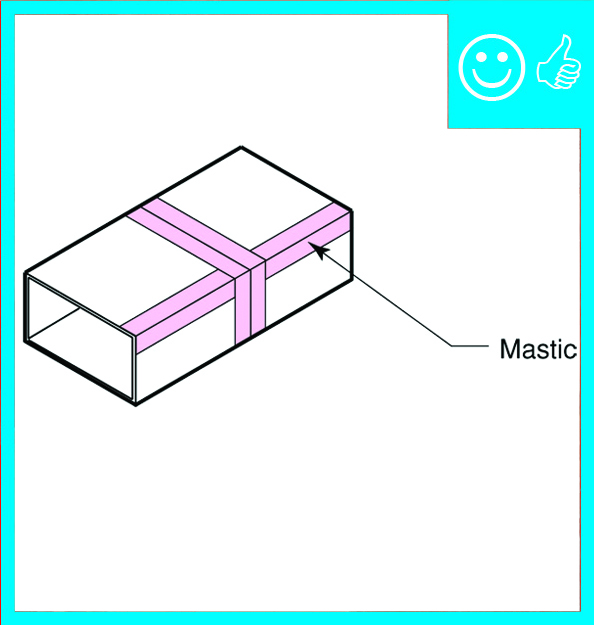
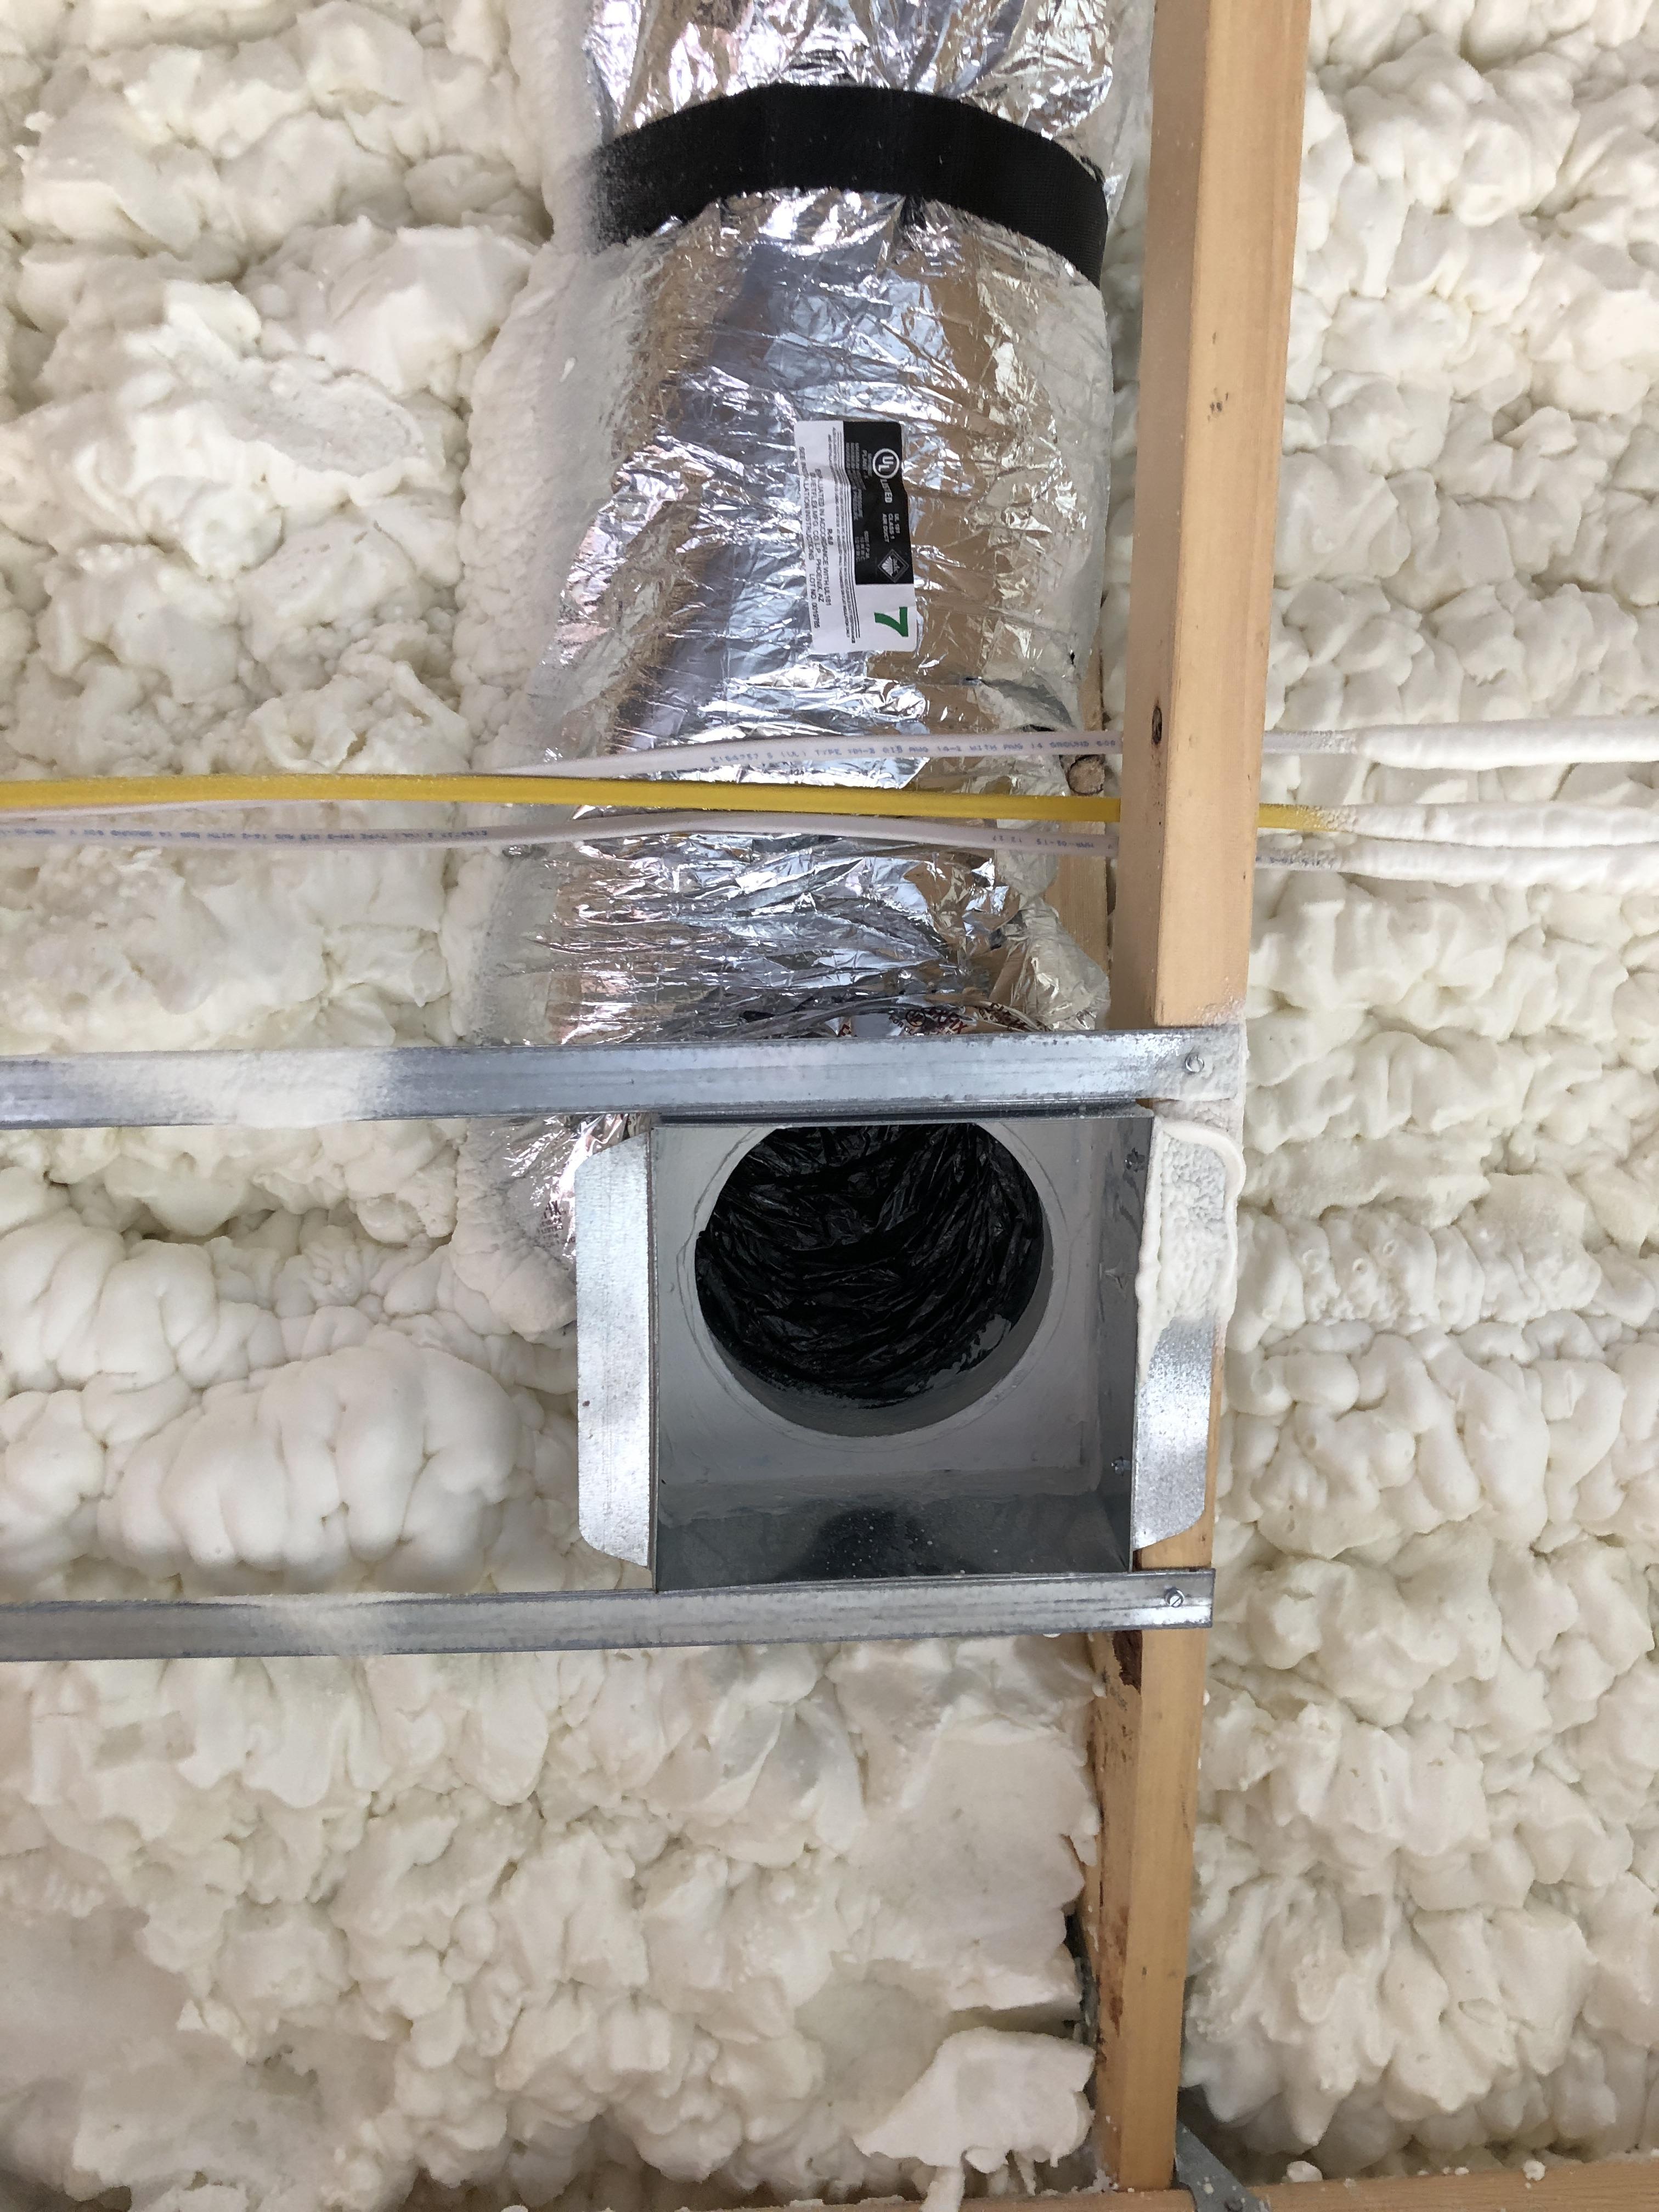
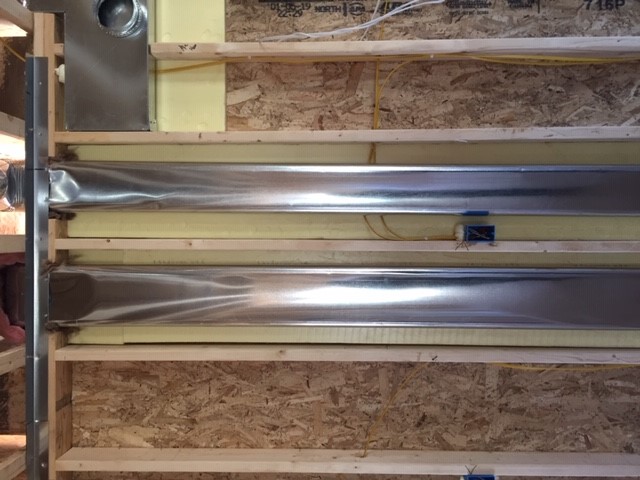
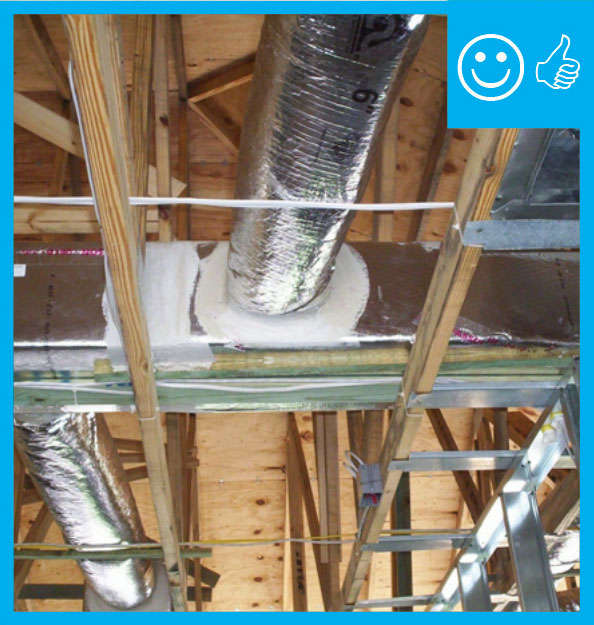
Right – Metal or fiberboard duct is mastic sealed at junction with duct register box
Image
Image
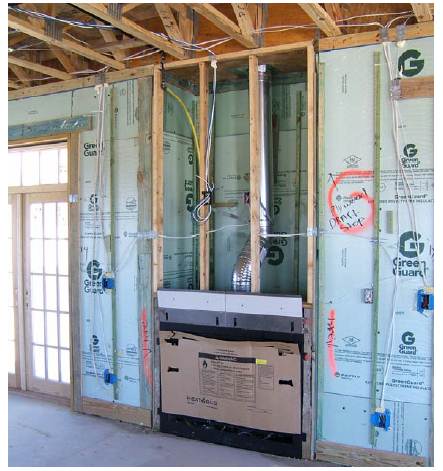
Right – Mineral wool batt insulation is cut to fit snuggly and to fully fill wall cavities with minimal voids and gaps.
Image
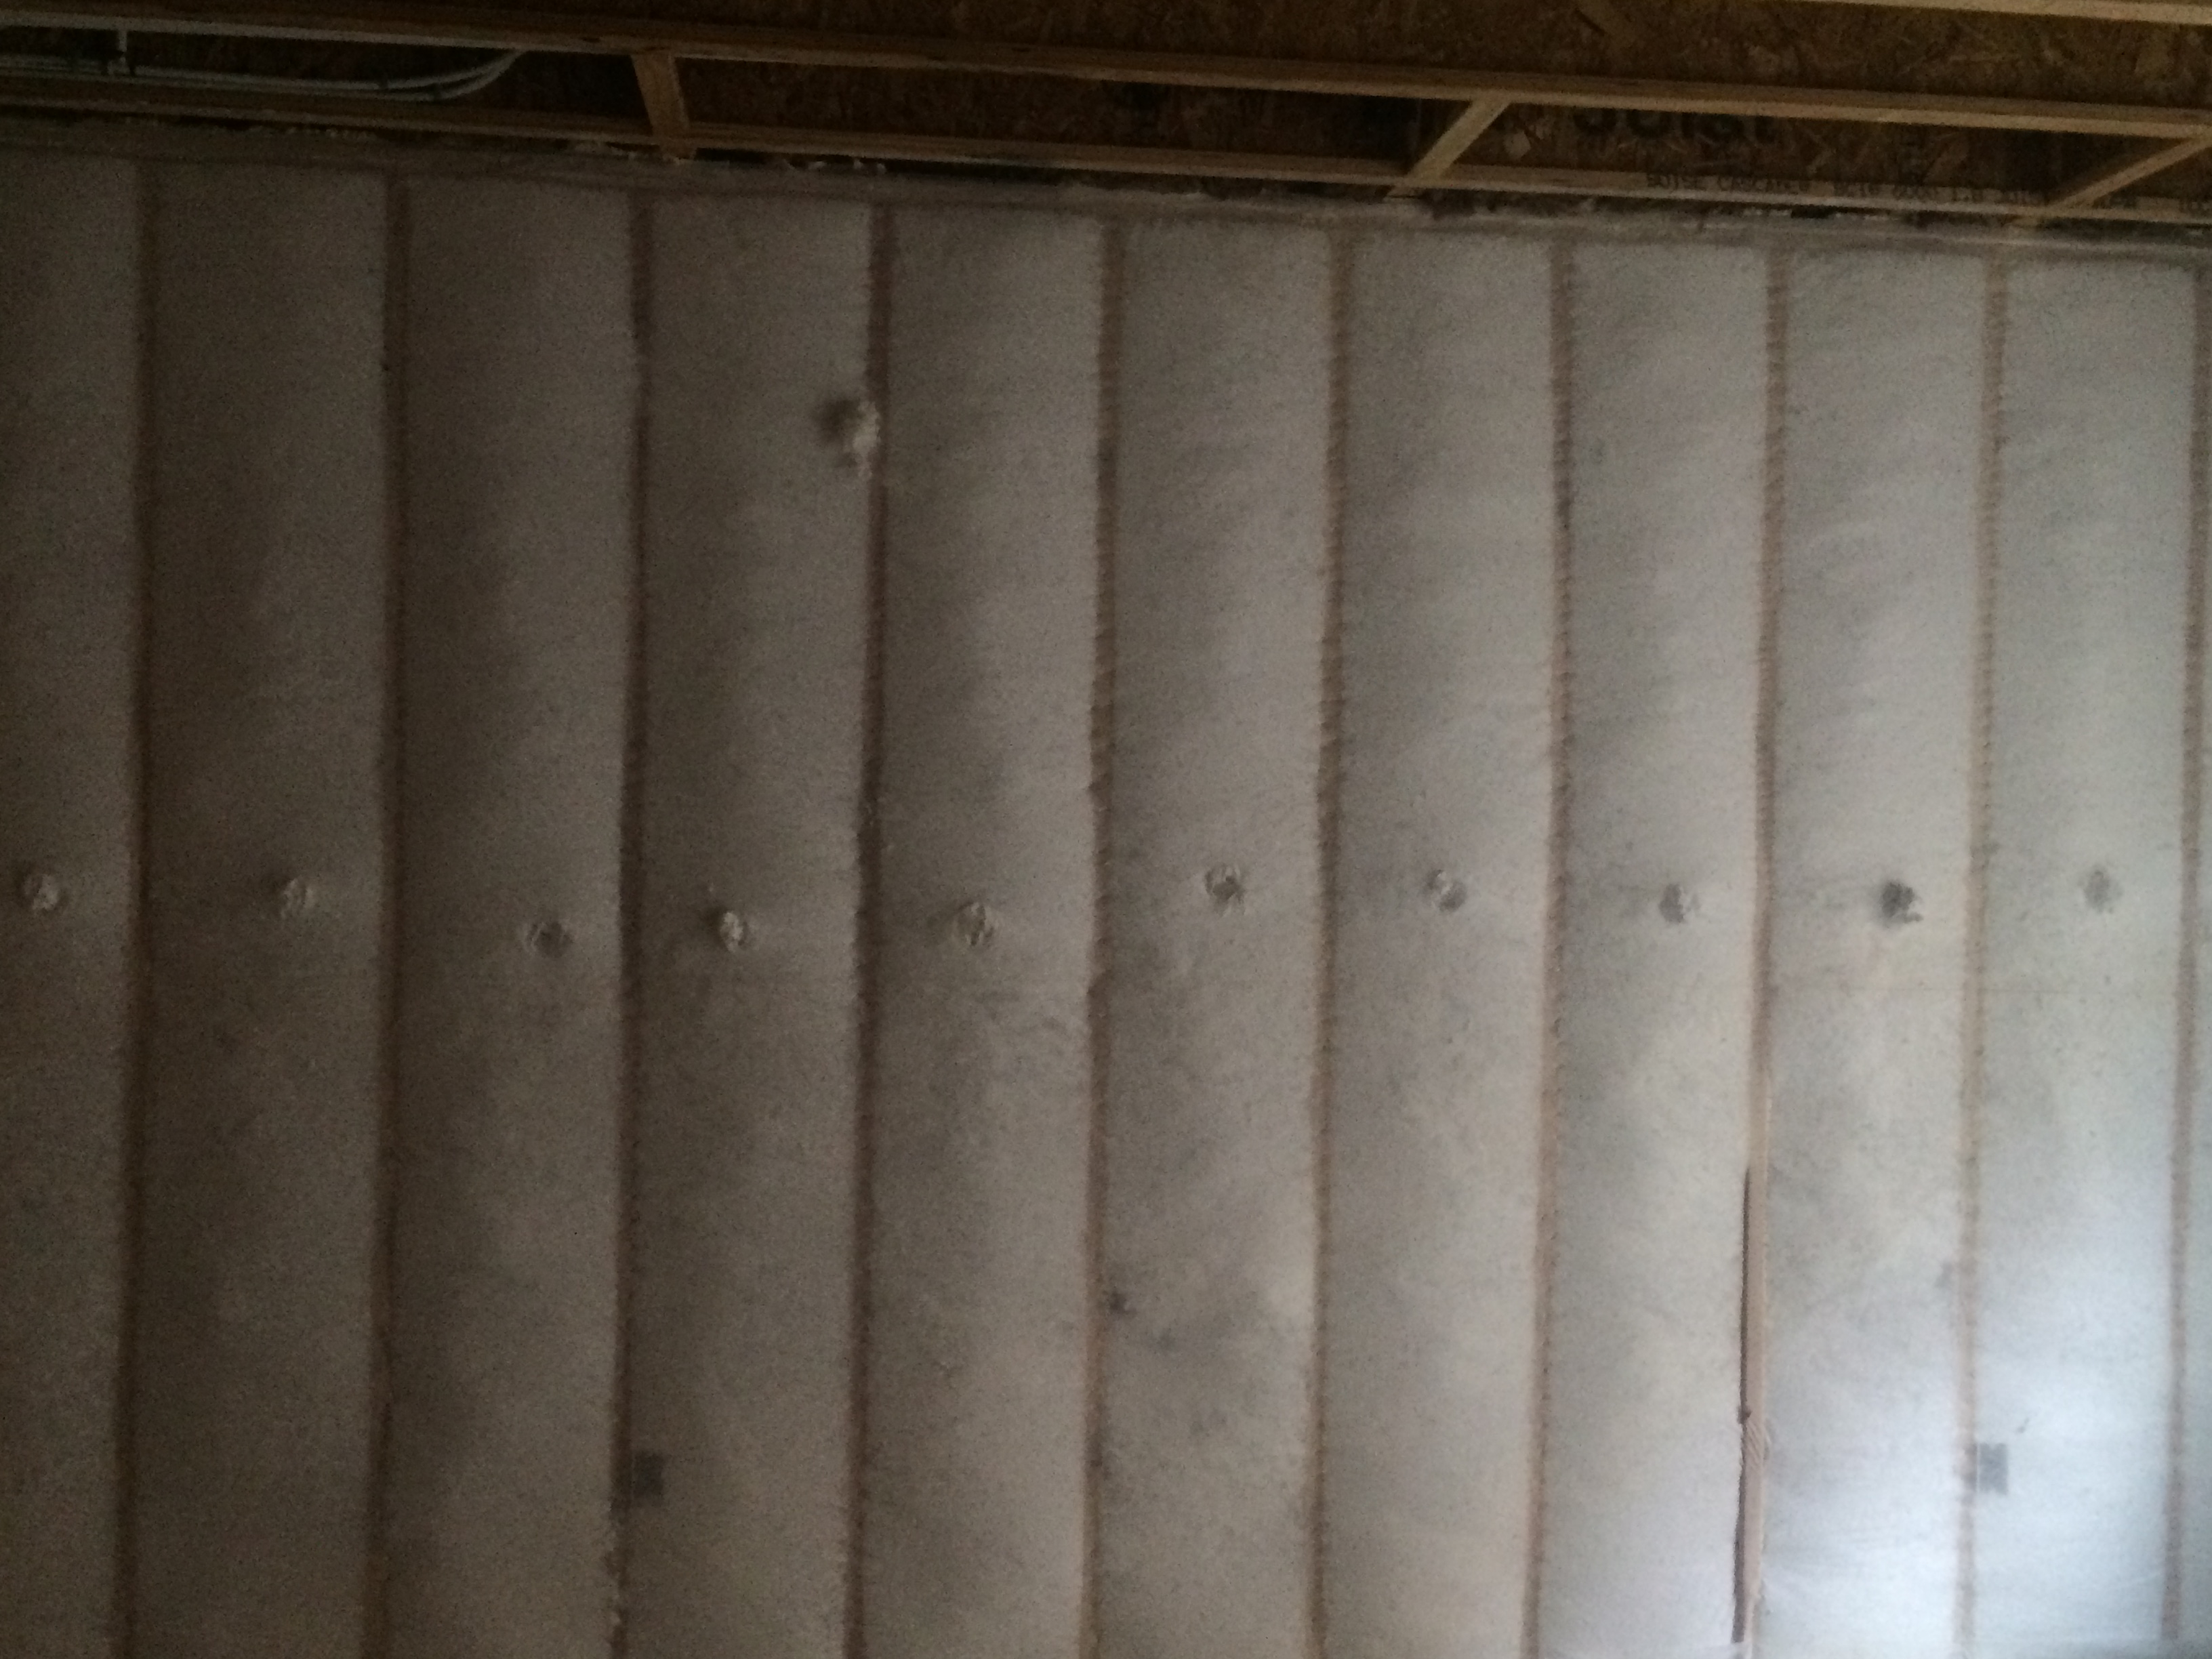
Right – Netted blown fiberglass insulation completely fills the wall cavities with no gaps or voids.
Image
Image
Image
Image
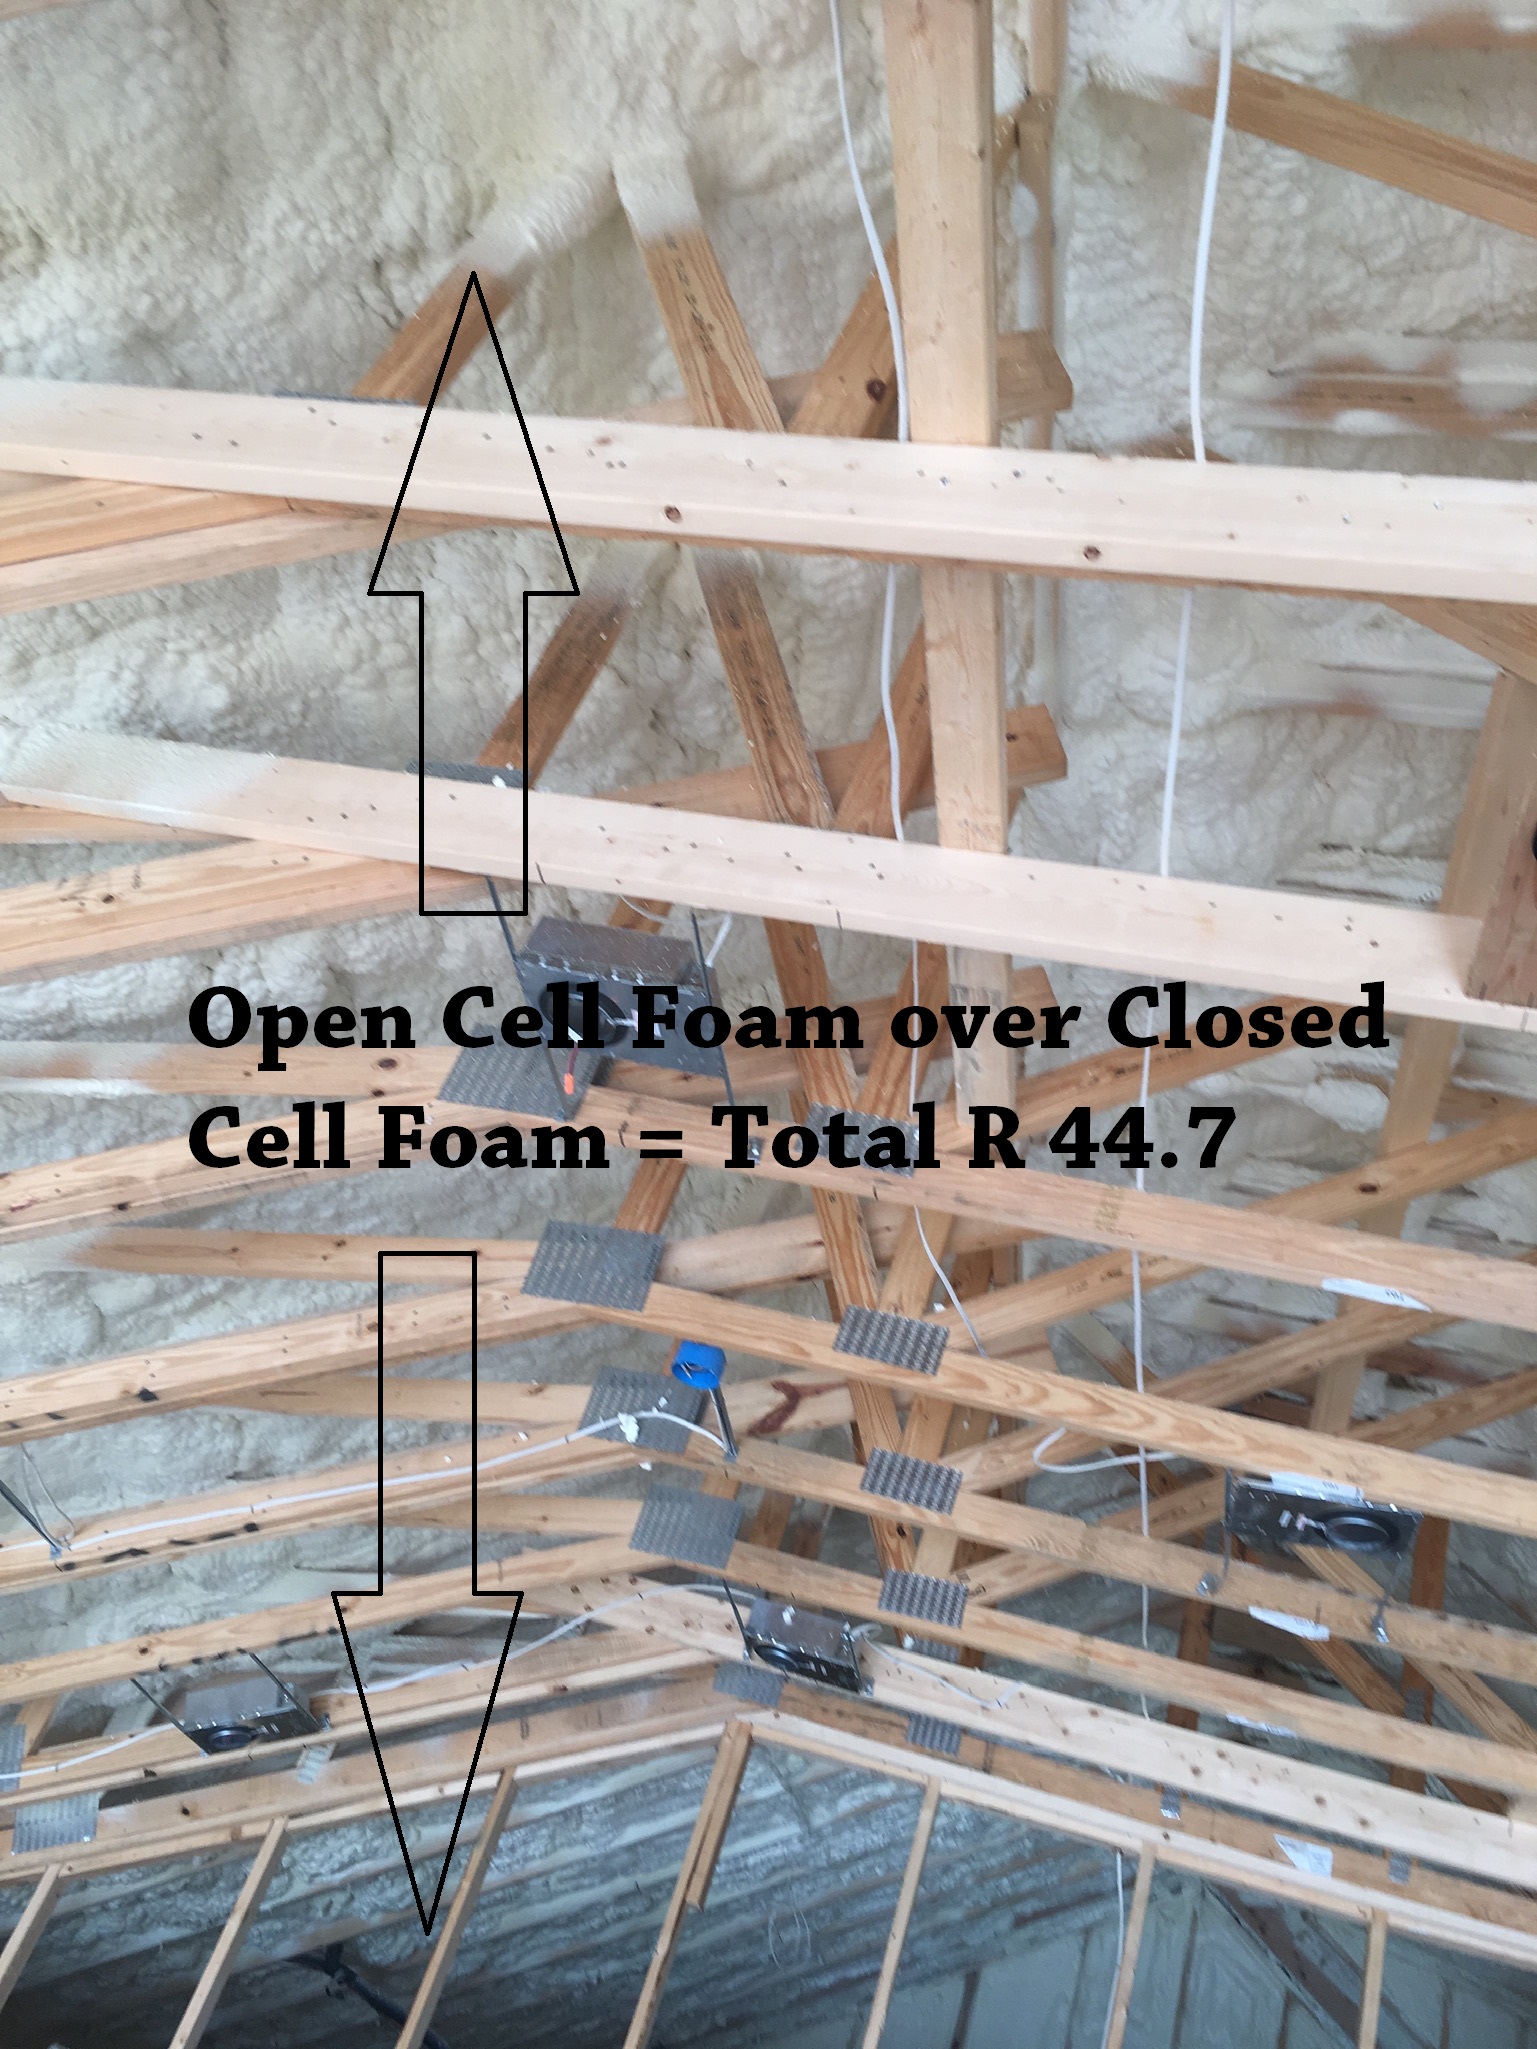
Right – Open-cell spray foam is installed over closed-cell spray foam in this hybrid approach to achieve adequate attic ventilation while allowing some vapor permeability.
Image
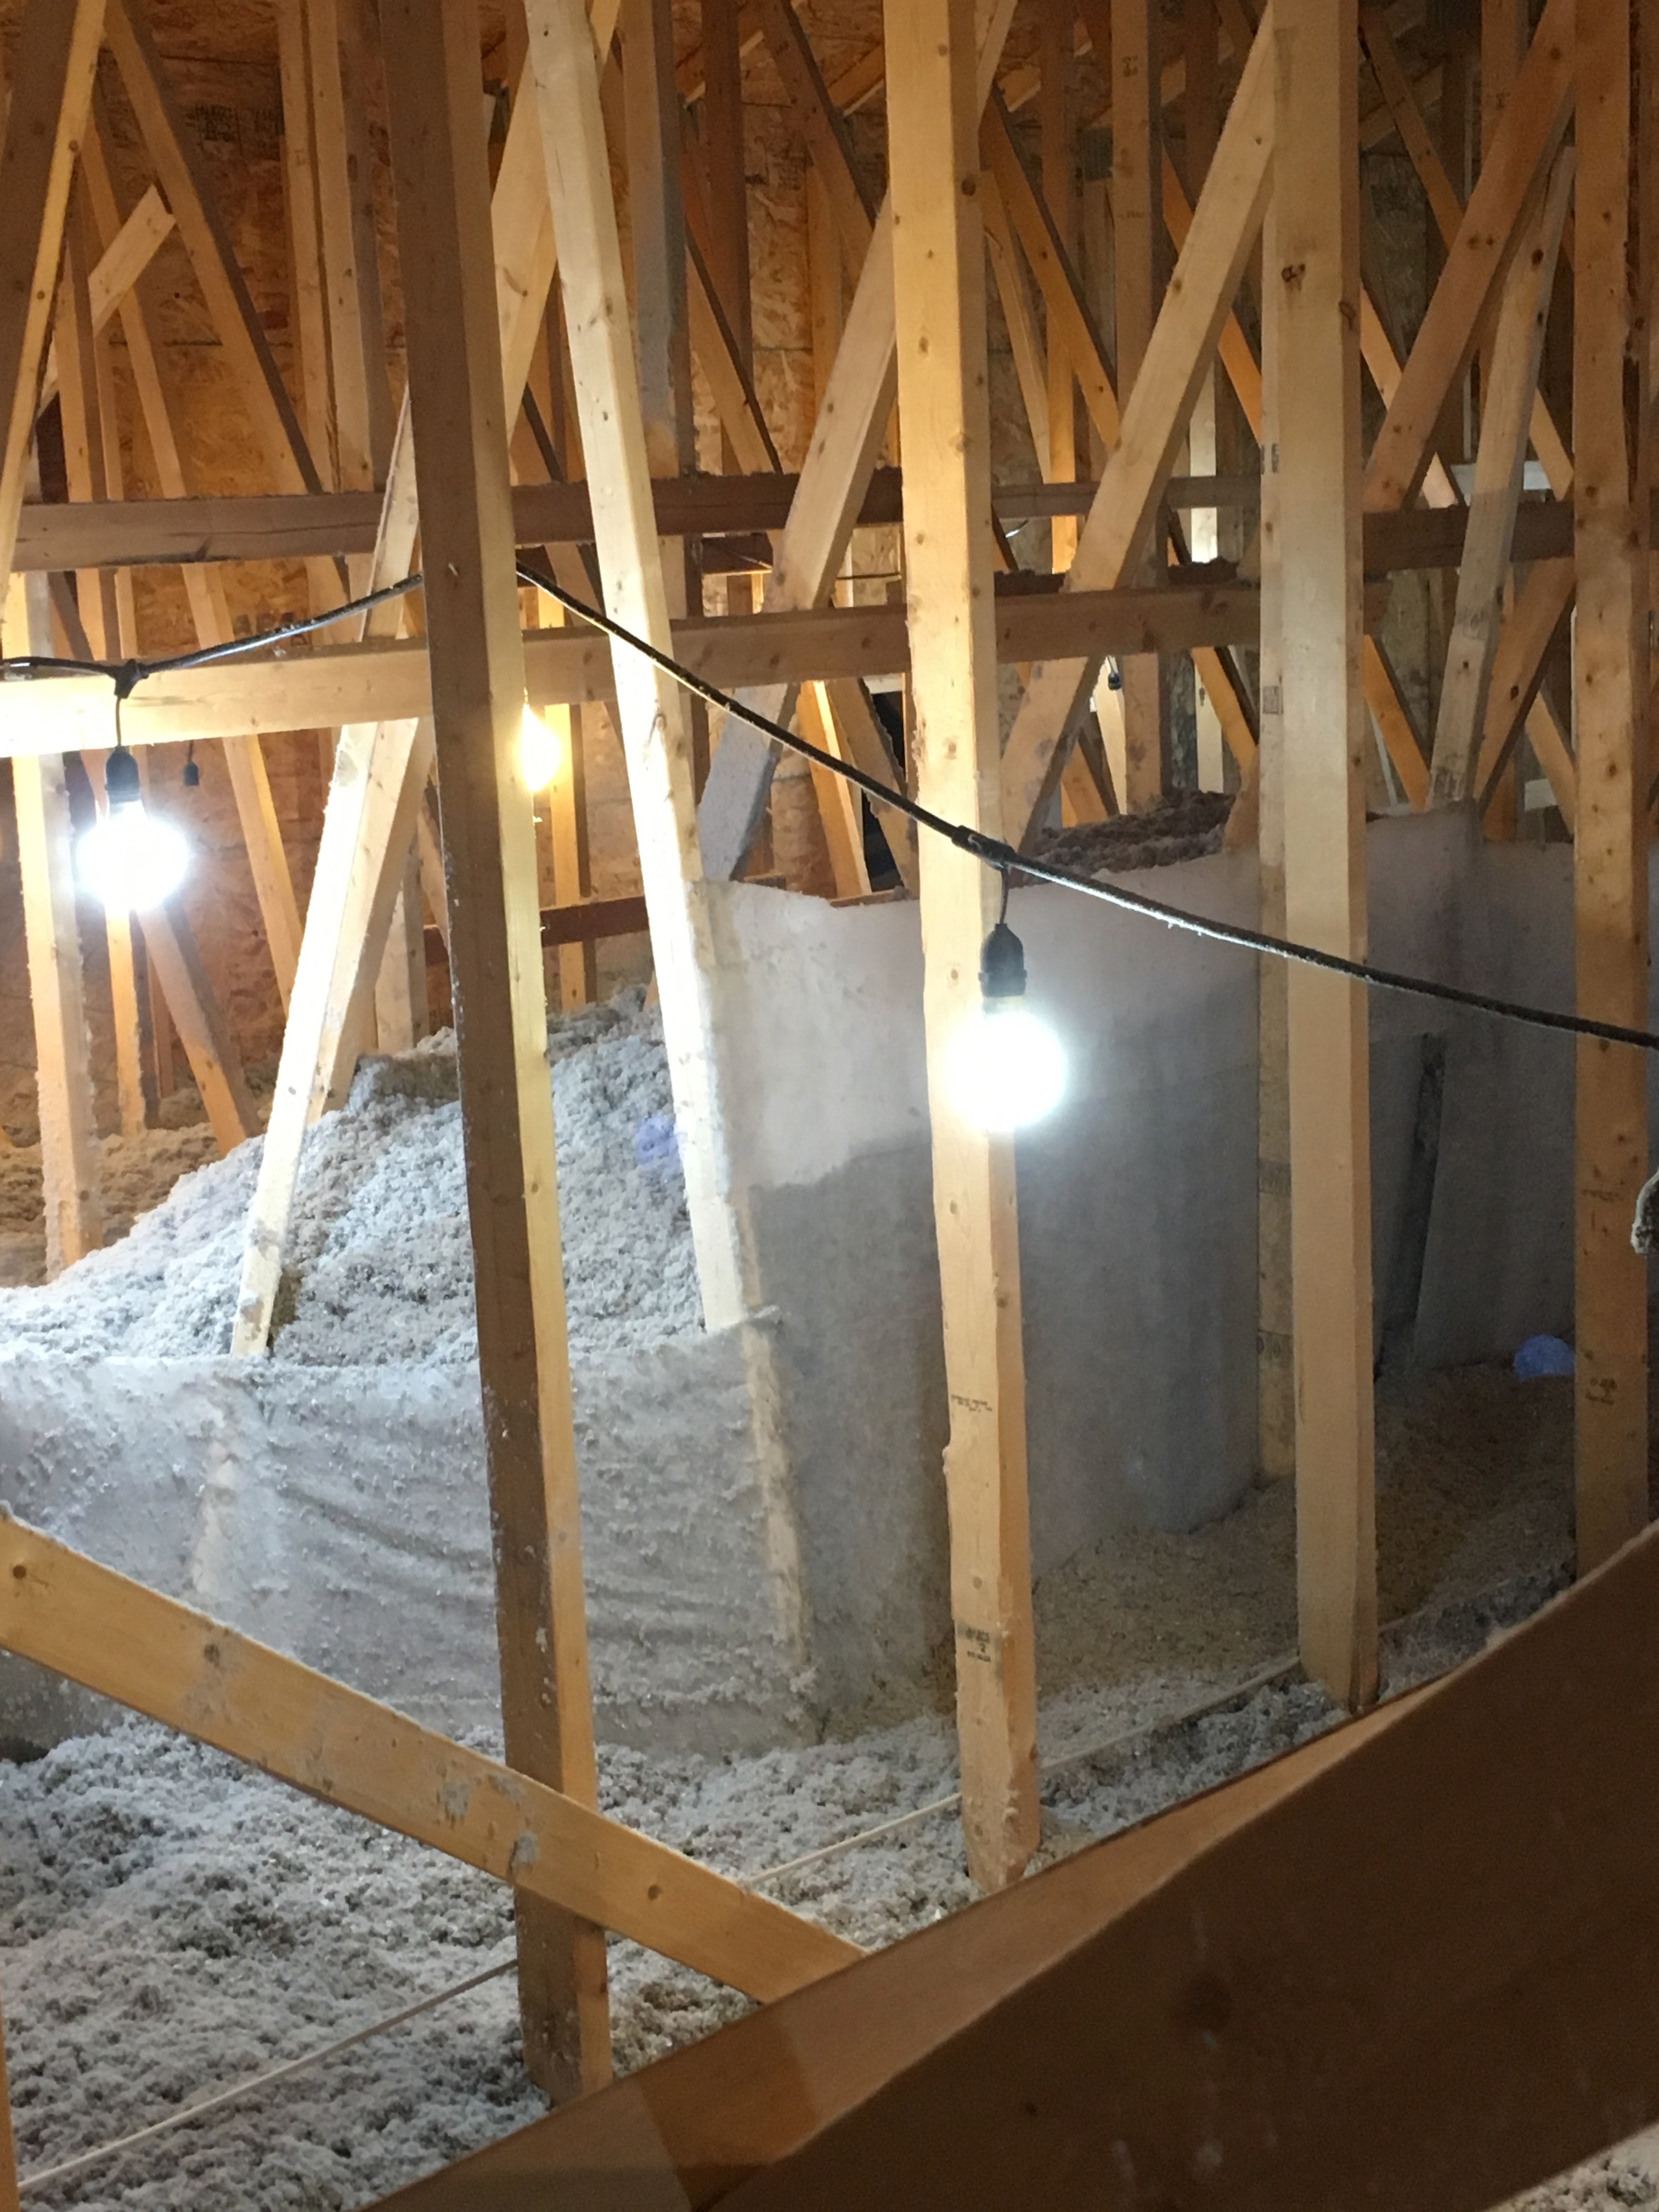
Right – Plastic tenting increases the height of the insulation above ducts that are located in the attic.
Image
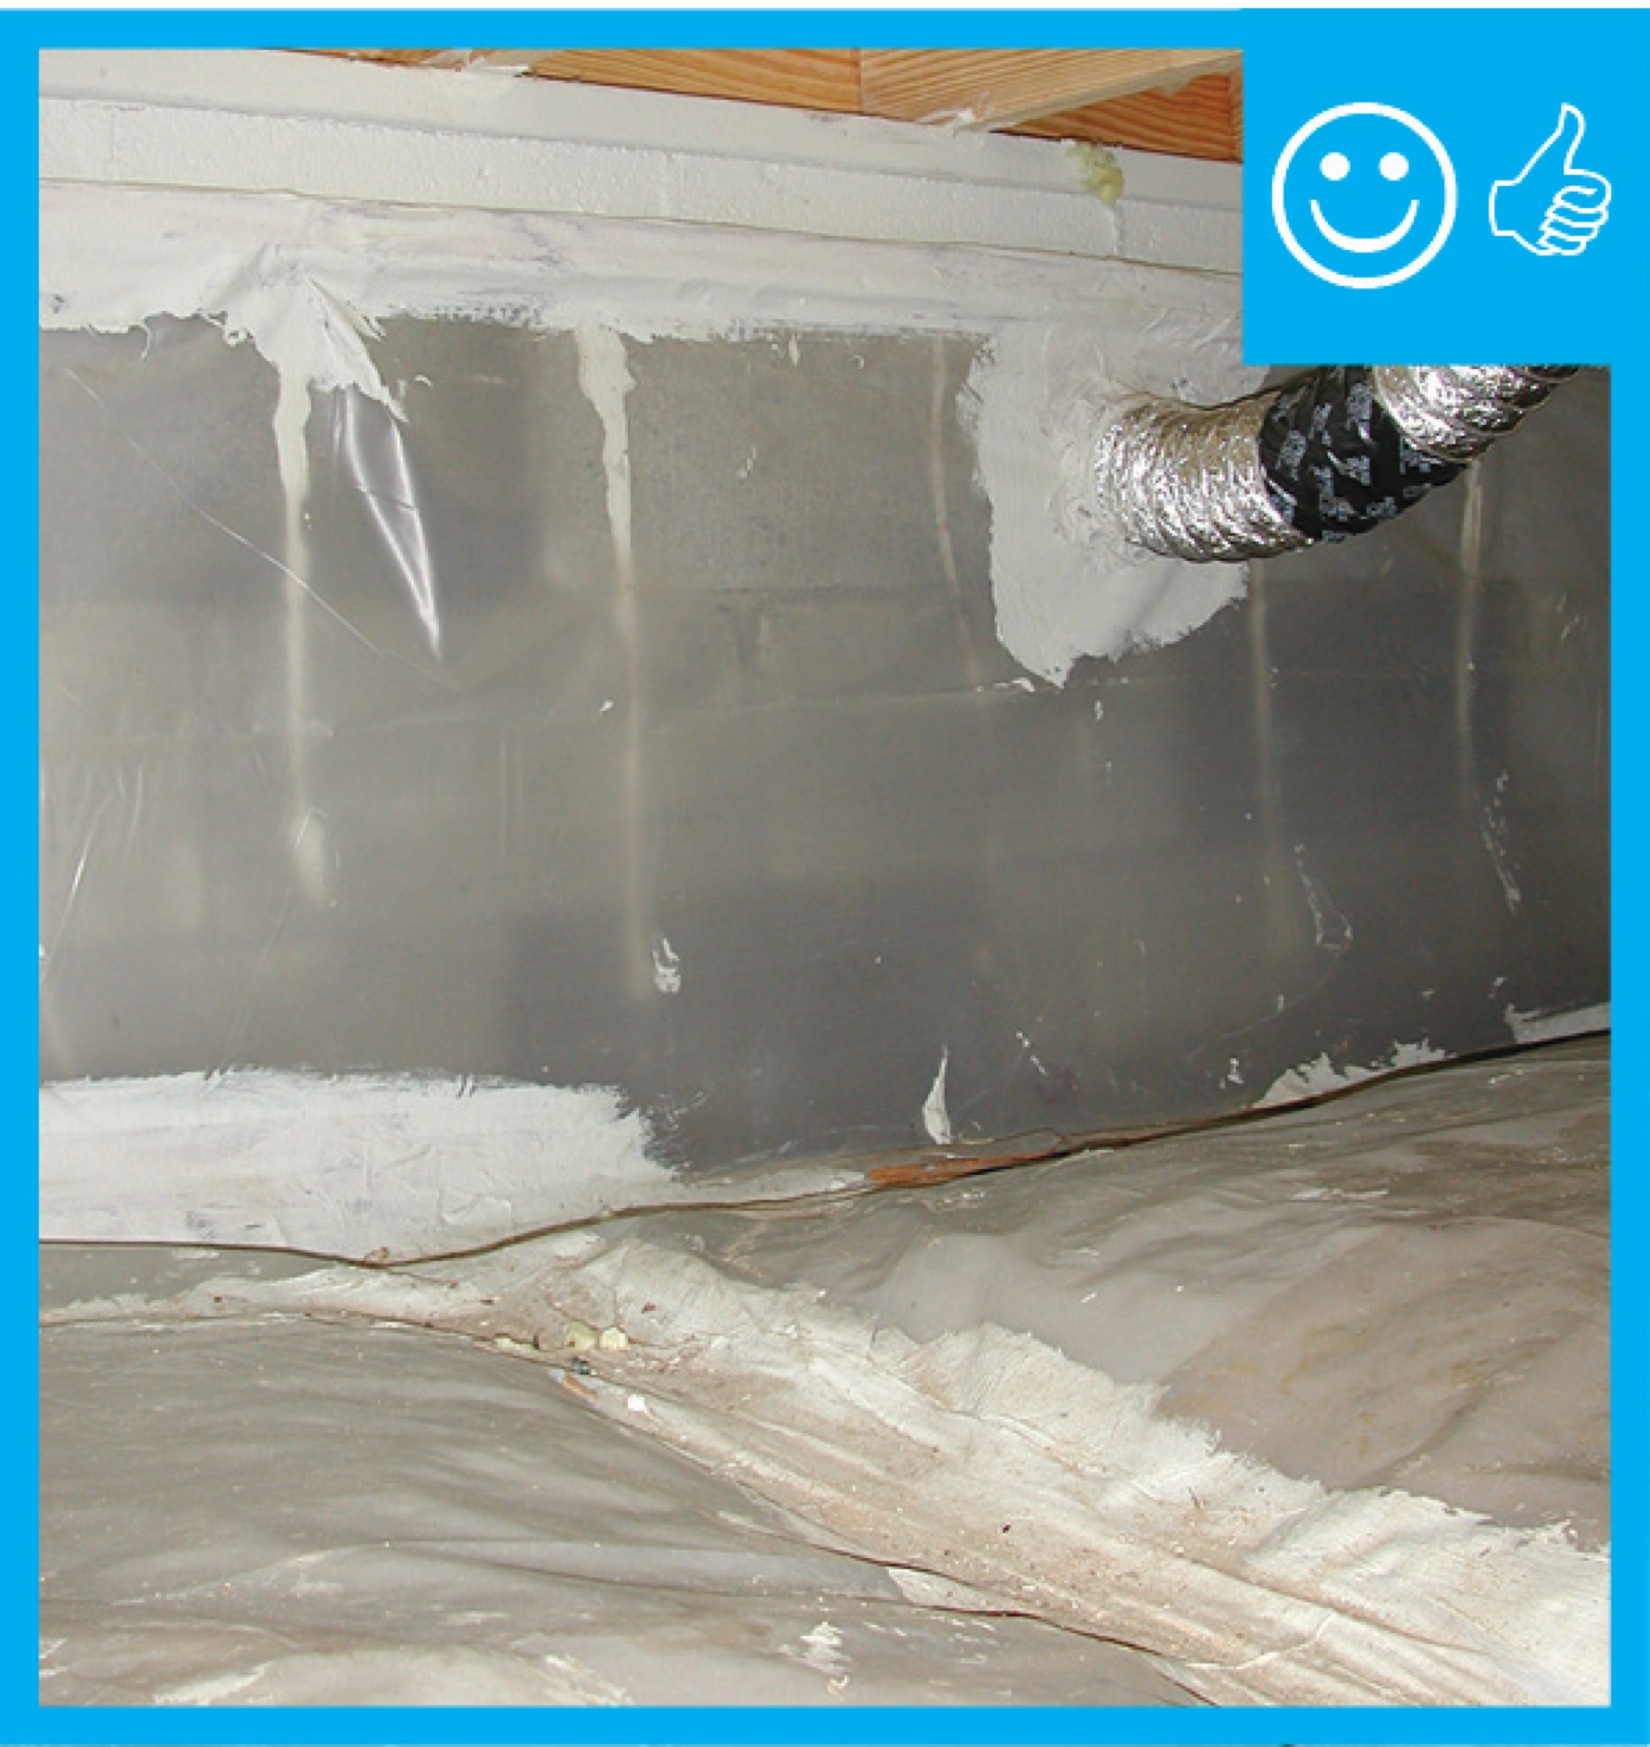
Right – Polyethylene sheeting vapor barrier is installed and sealed to the crawlspace walls with mastic
Image
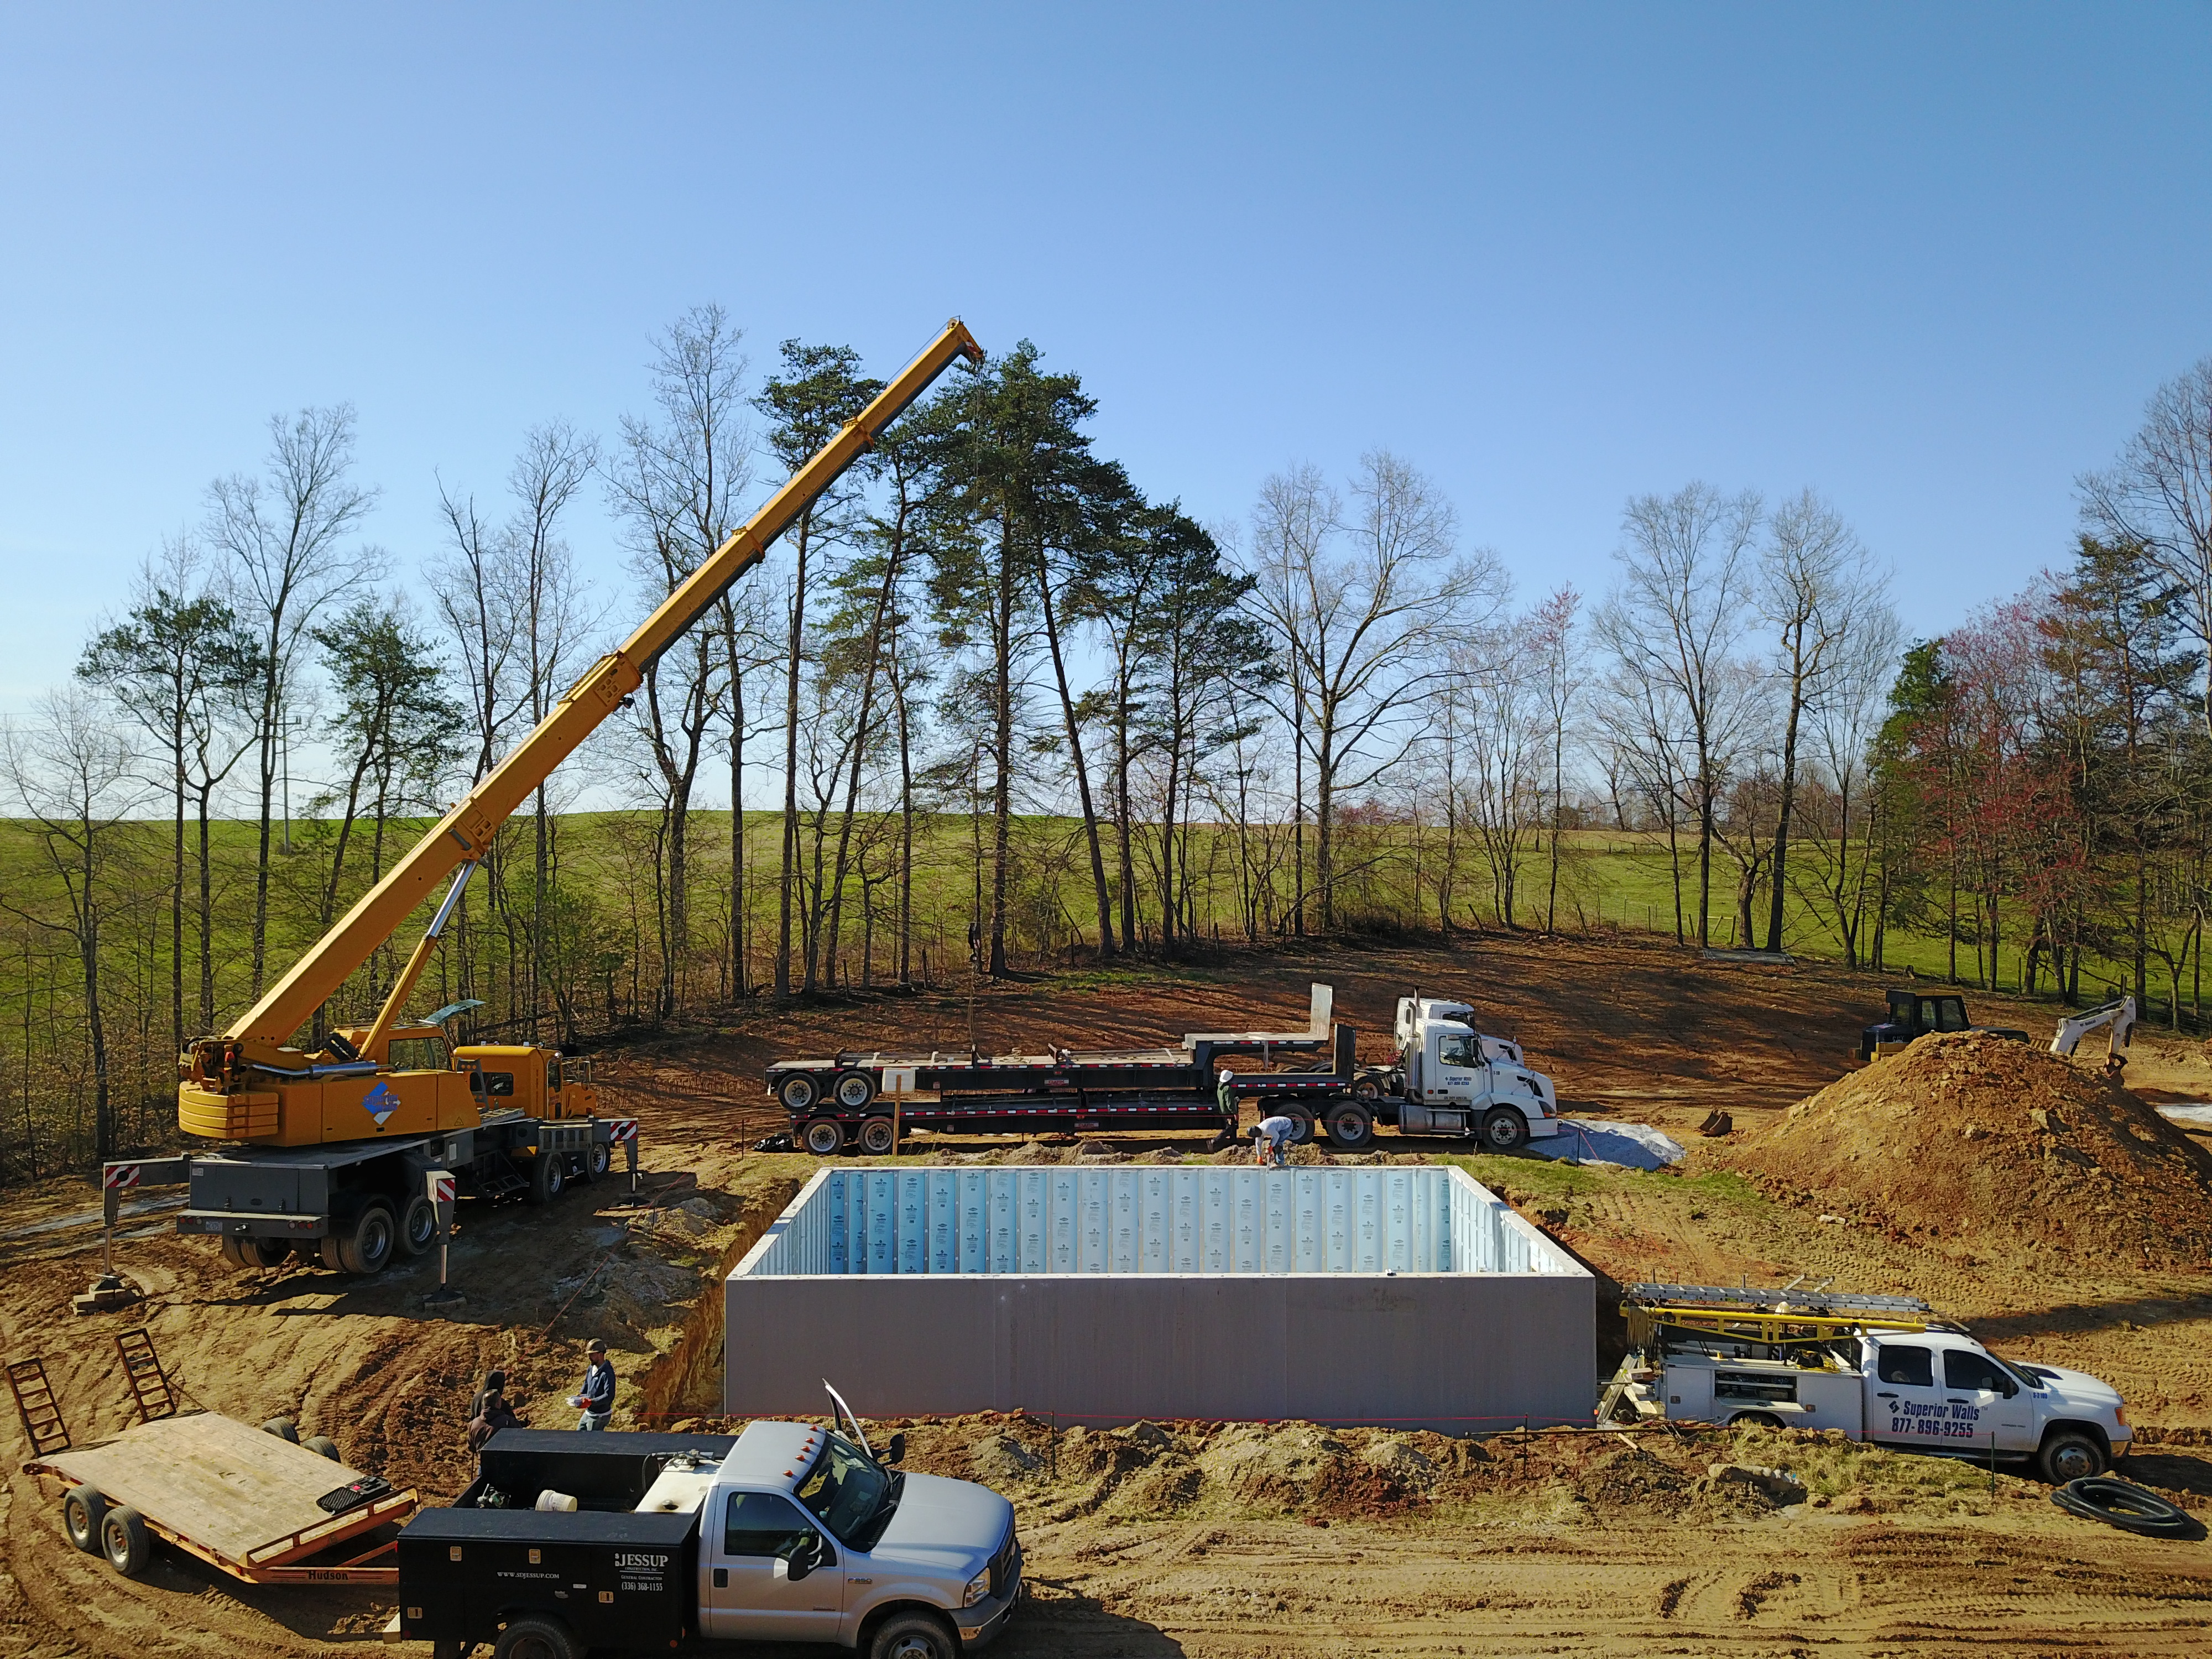
Right – Precast concrete basement walls come to the site with integrated insulation and steel-faced concrete studs.
Image
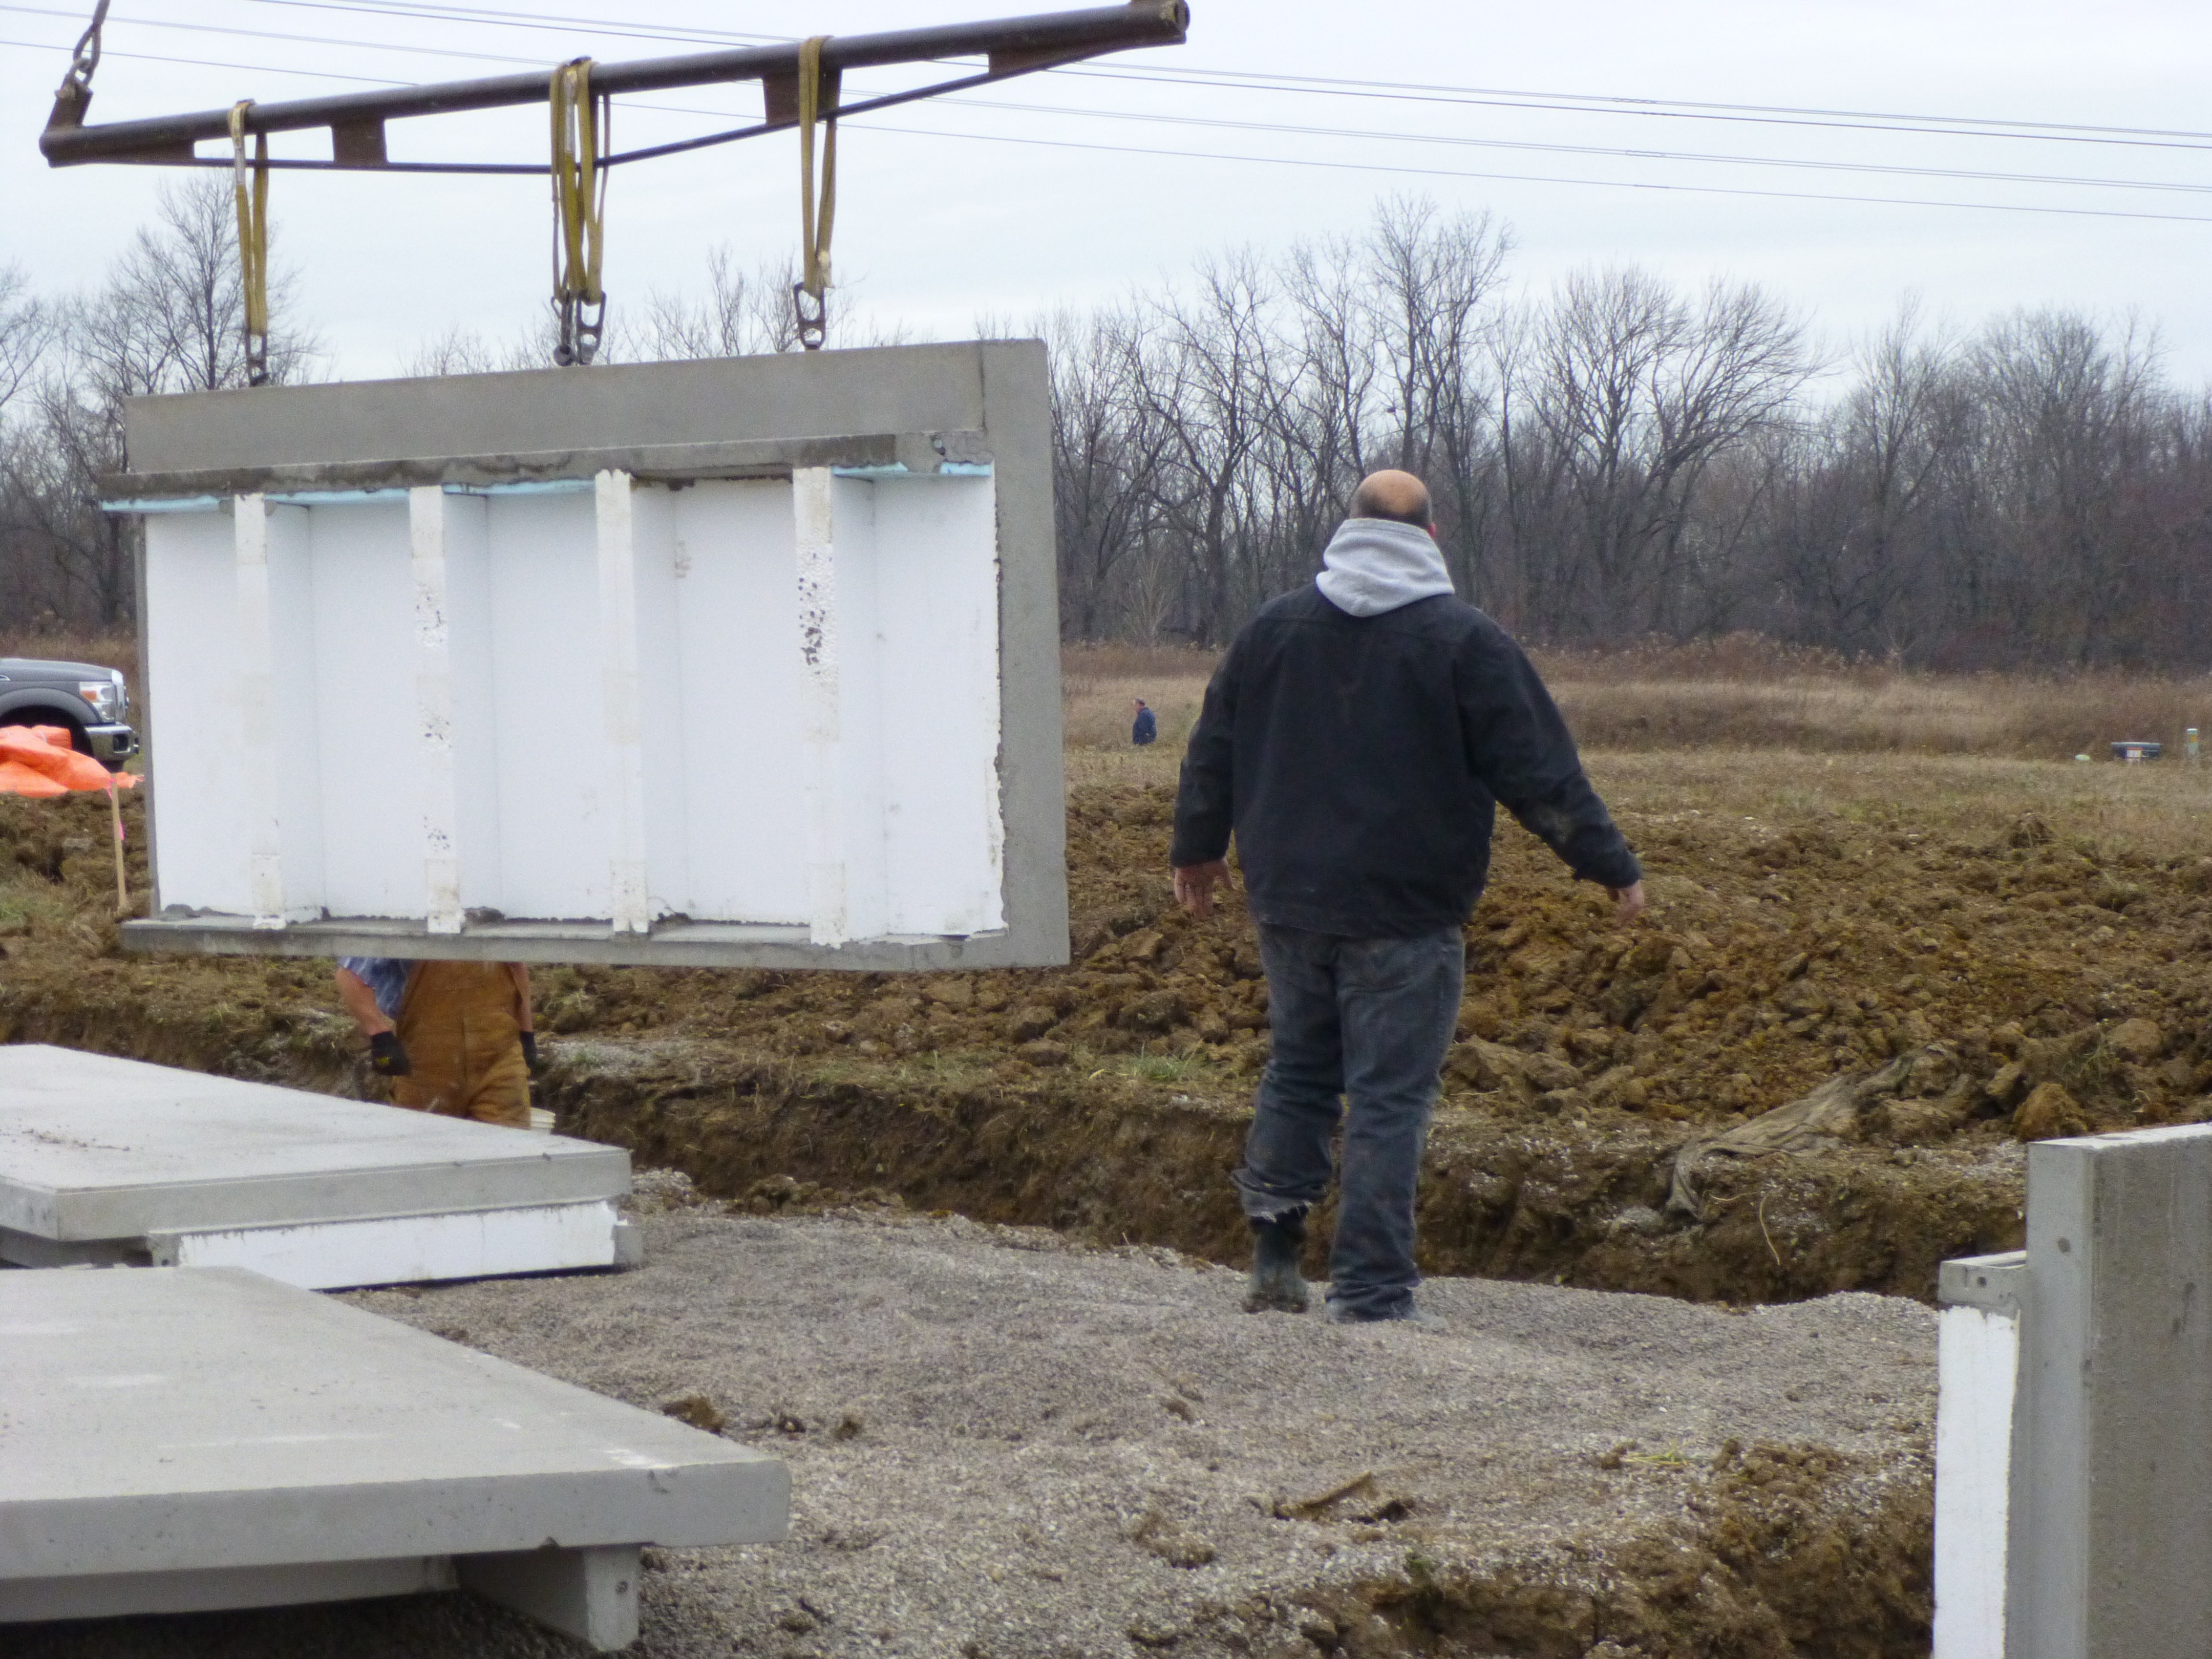
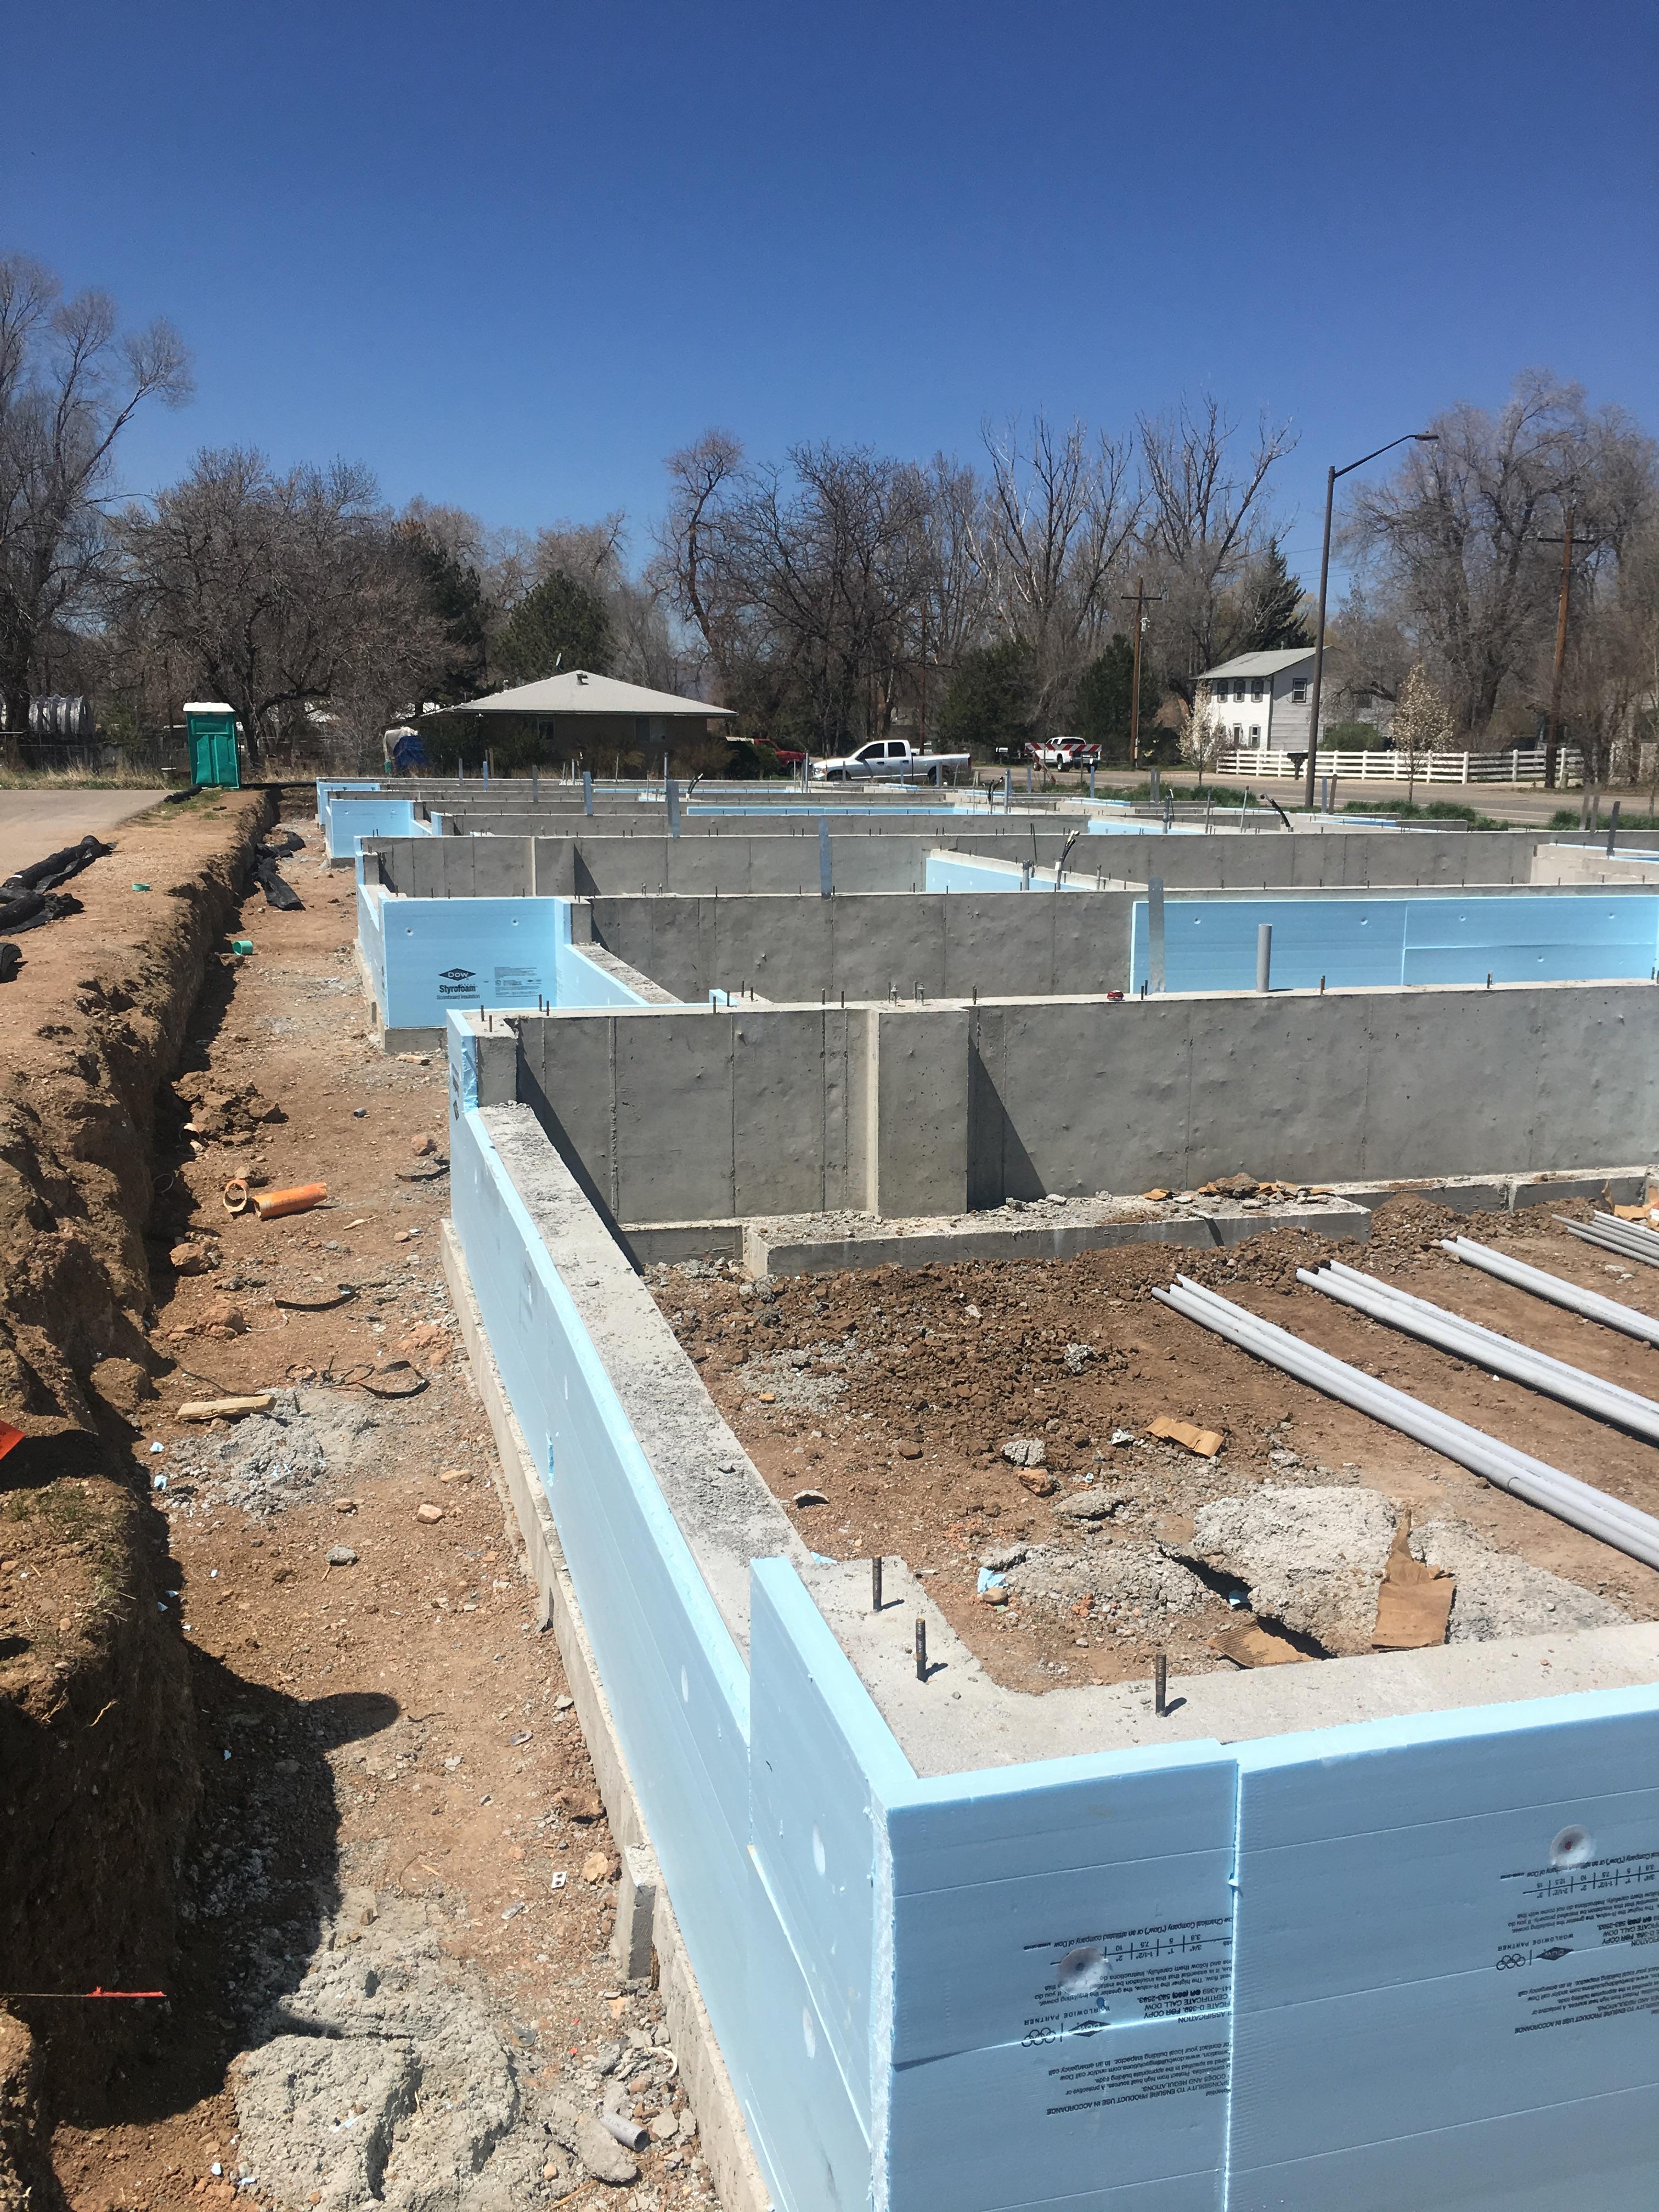
Right – Prepoured foundation panels with integrated insulation and vapor barrier are installed in place.
Image
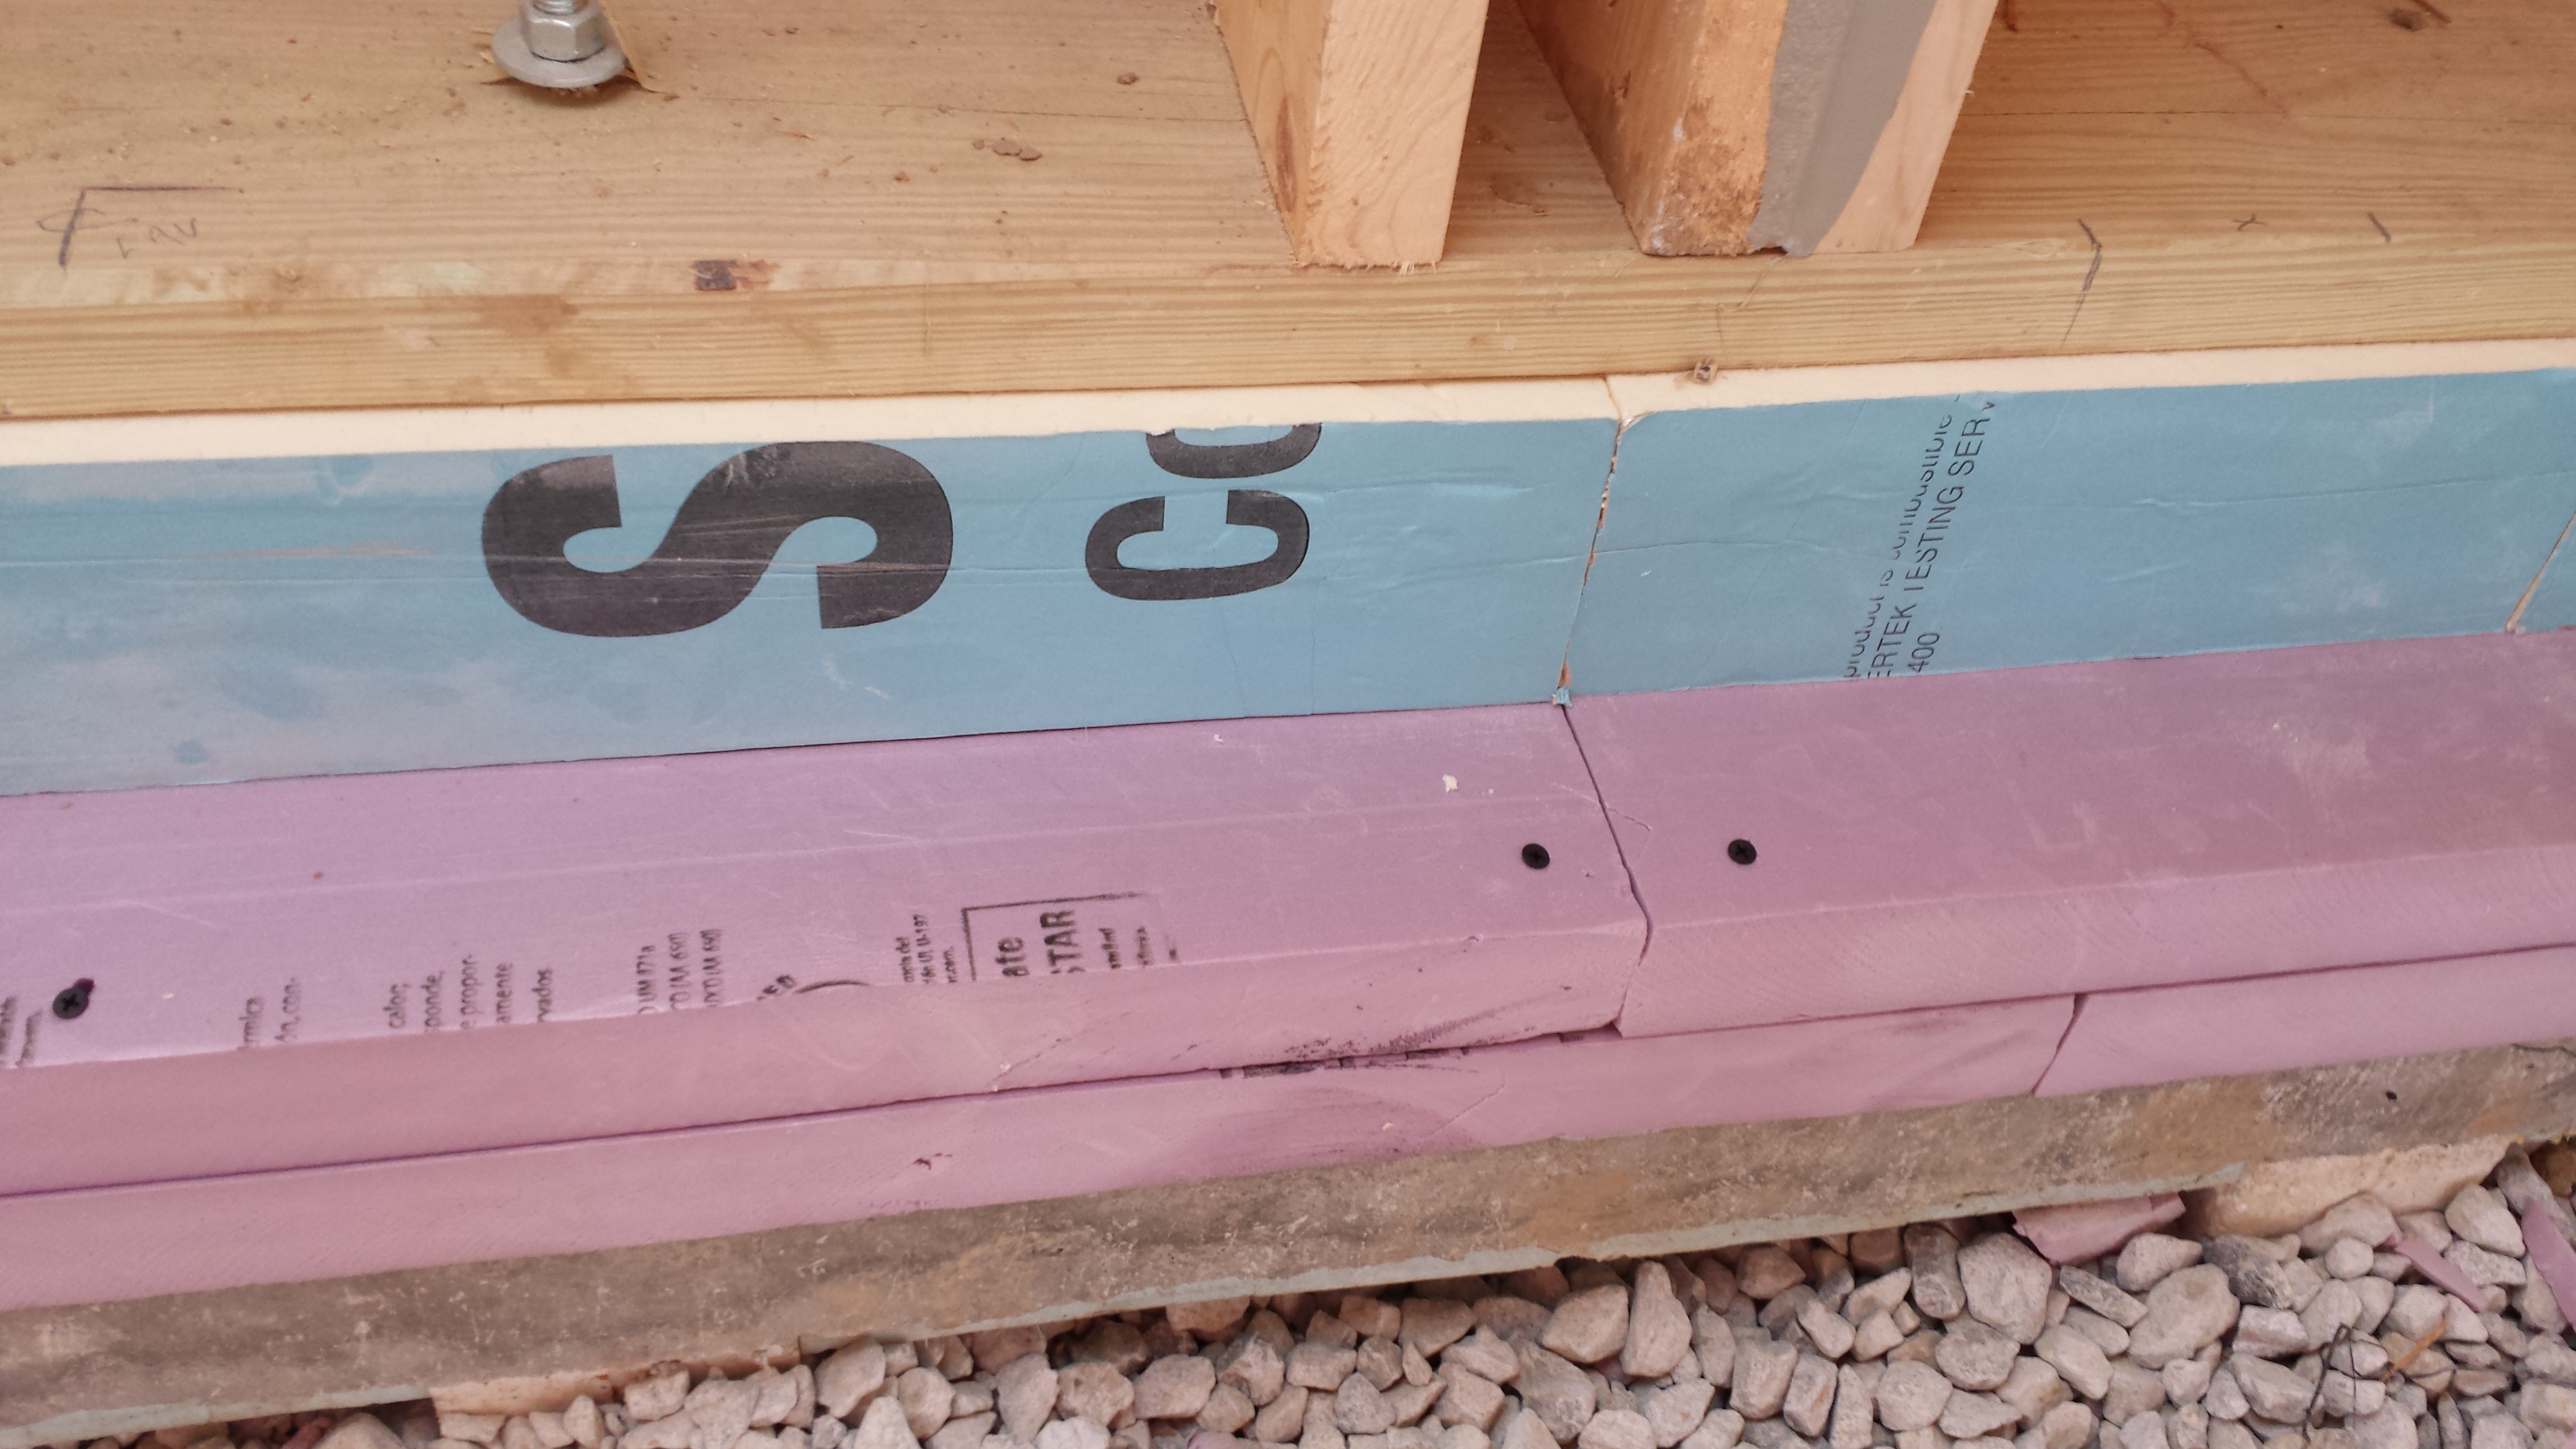
Right – R-20 of XPS and polyiso rigid foam were added on the slab shelf that is part of this precast foundation wall system.
Image
Right – R-23 of blown fiberglass fills the walls and unvented vaulted attic cavities of this marine-climate home while an additional R-20 (4-inches) of graphite-enhanced expanded polystyrene is installed above the roof sheathing.
Image
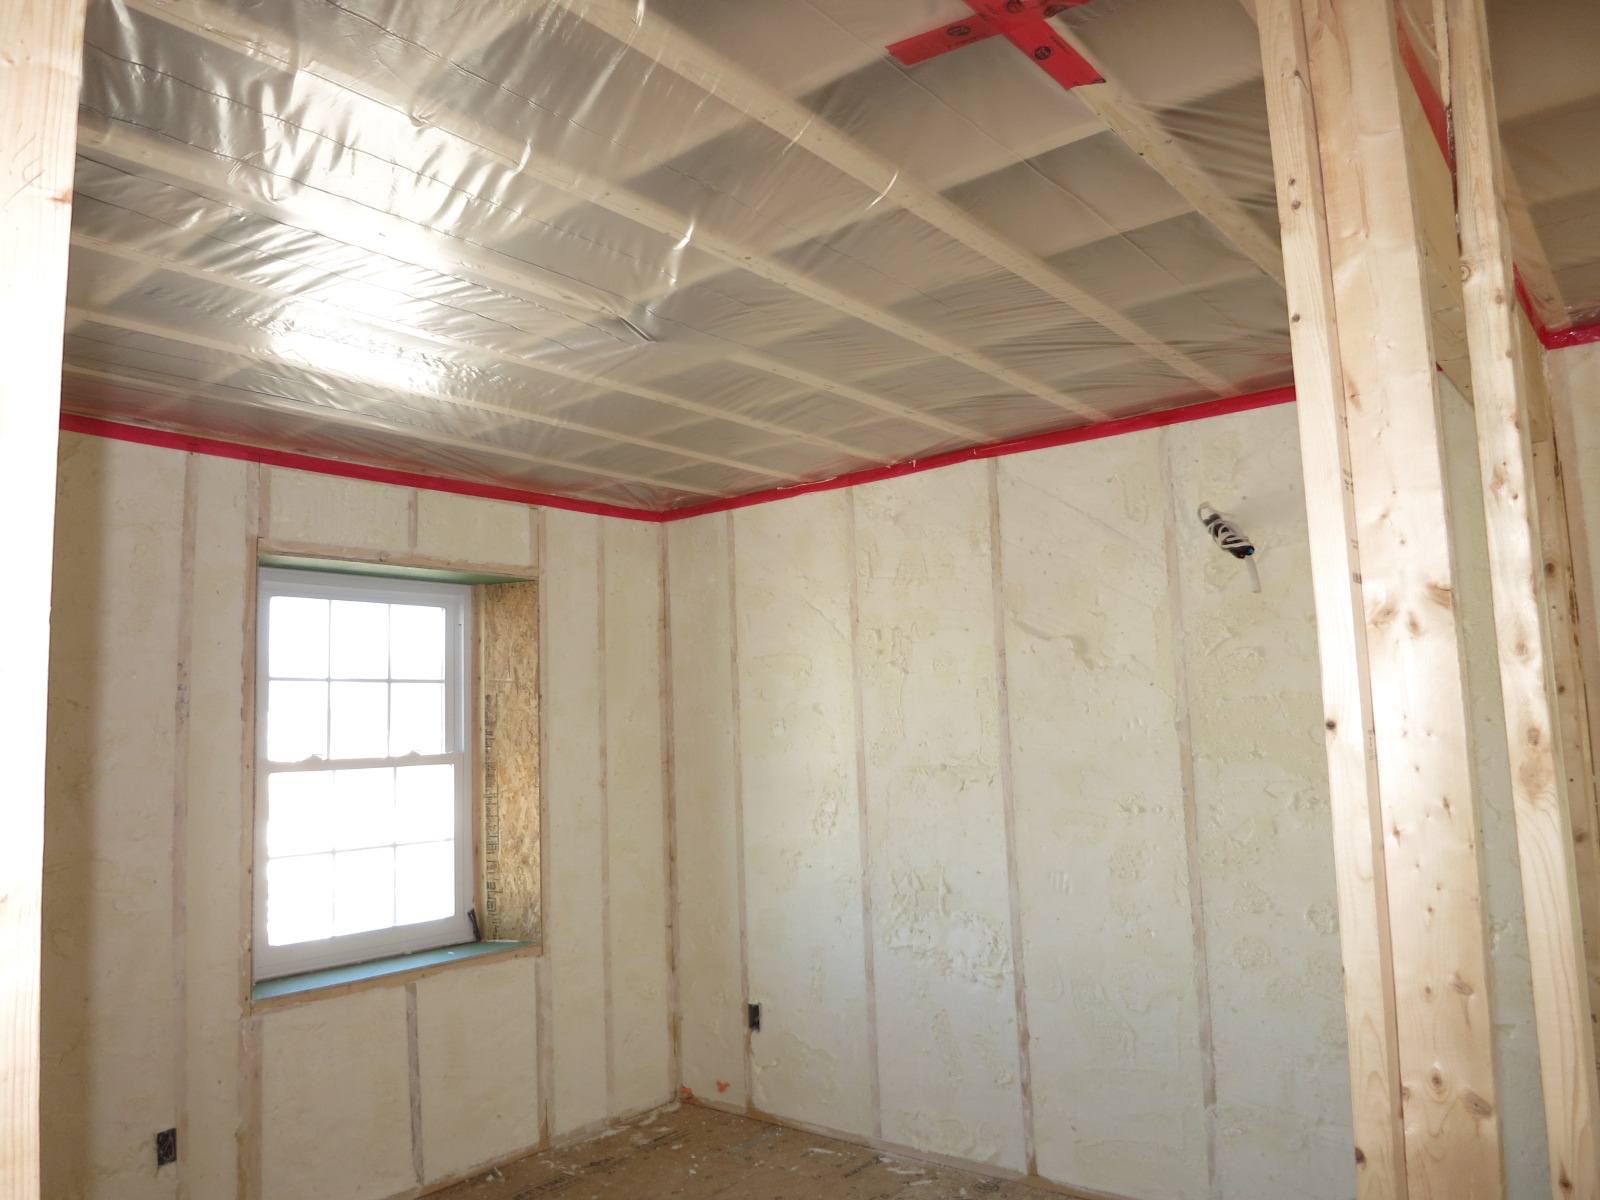
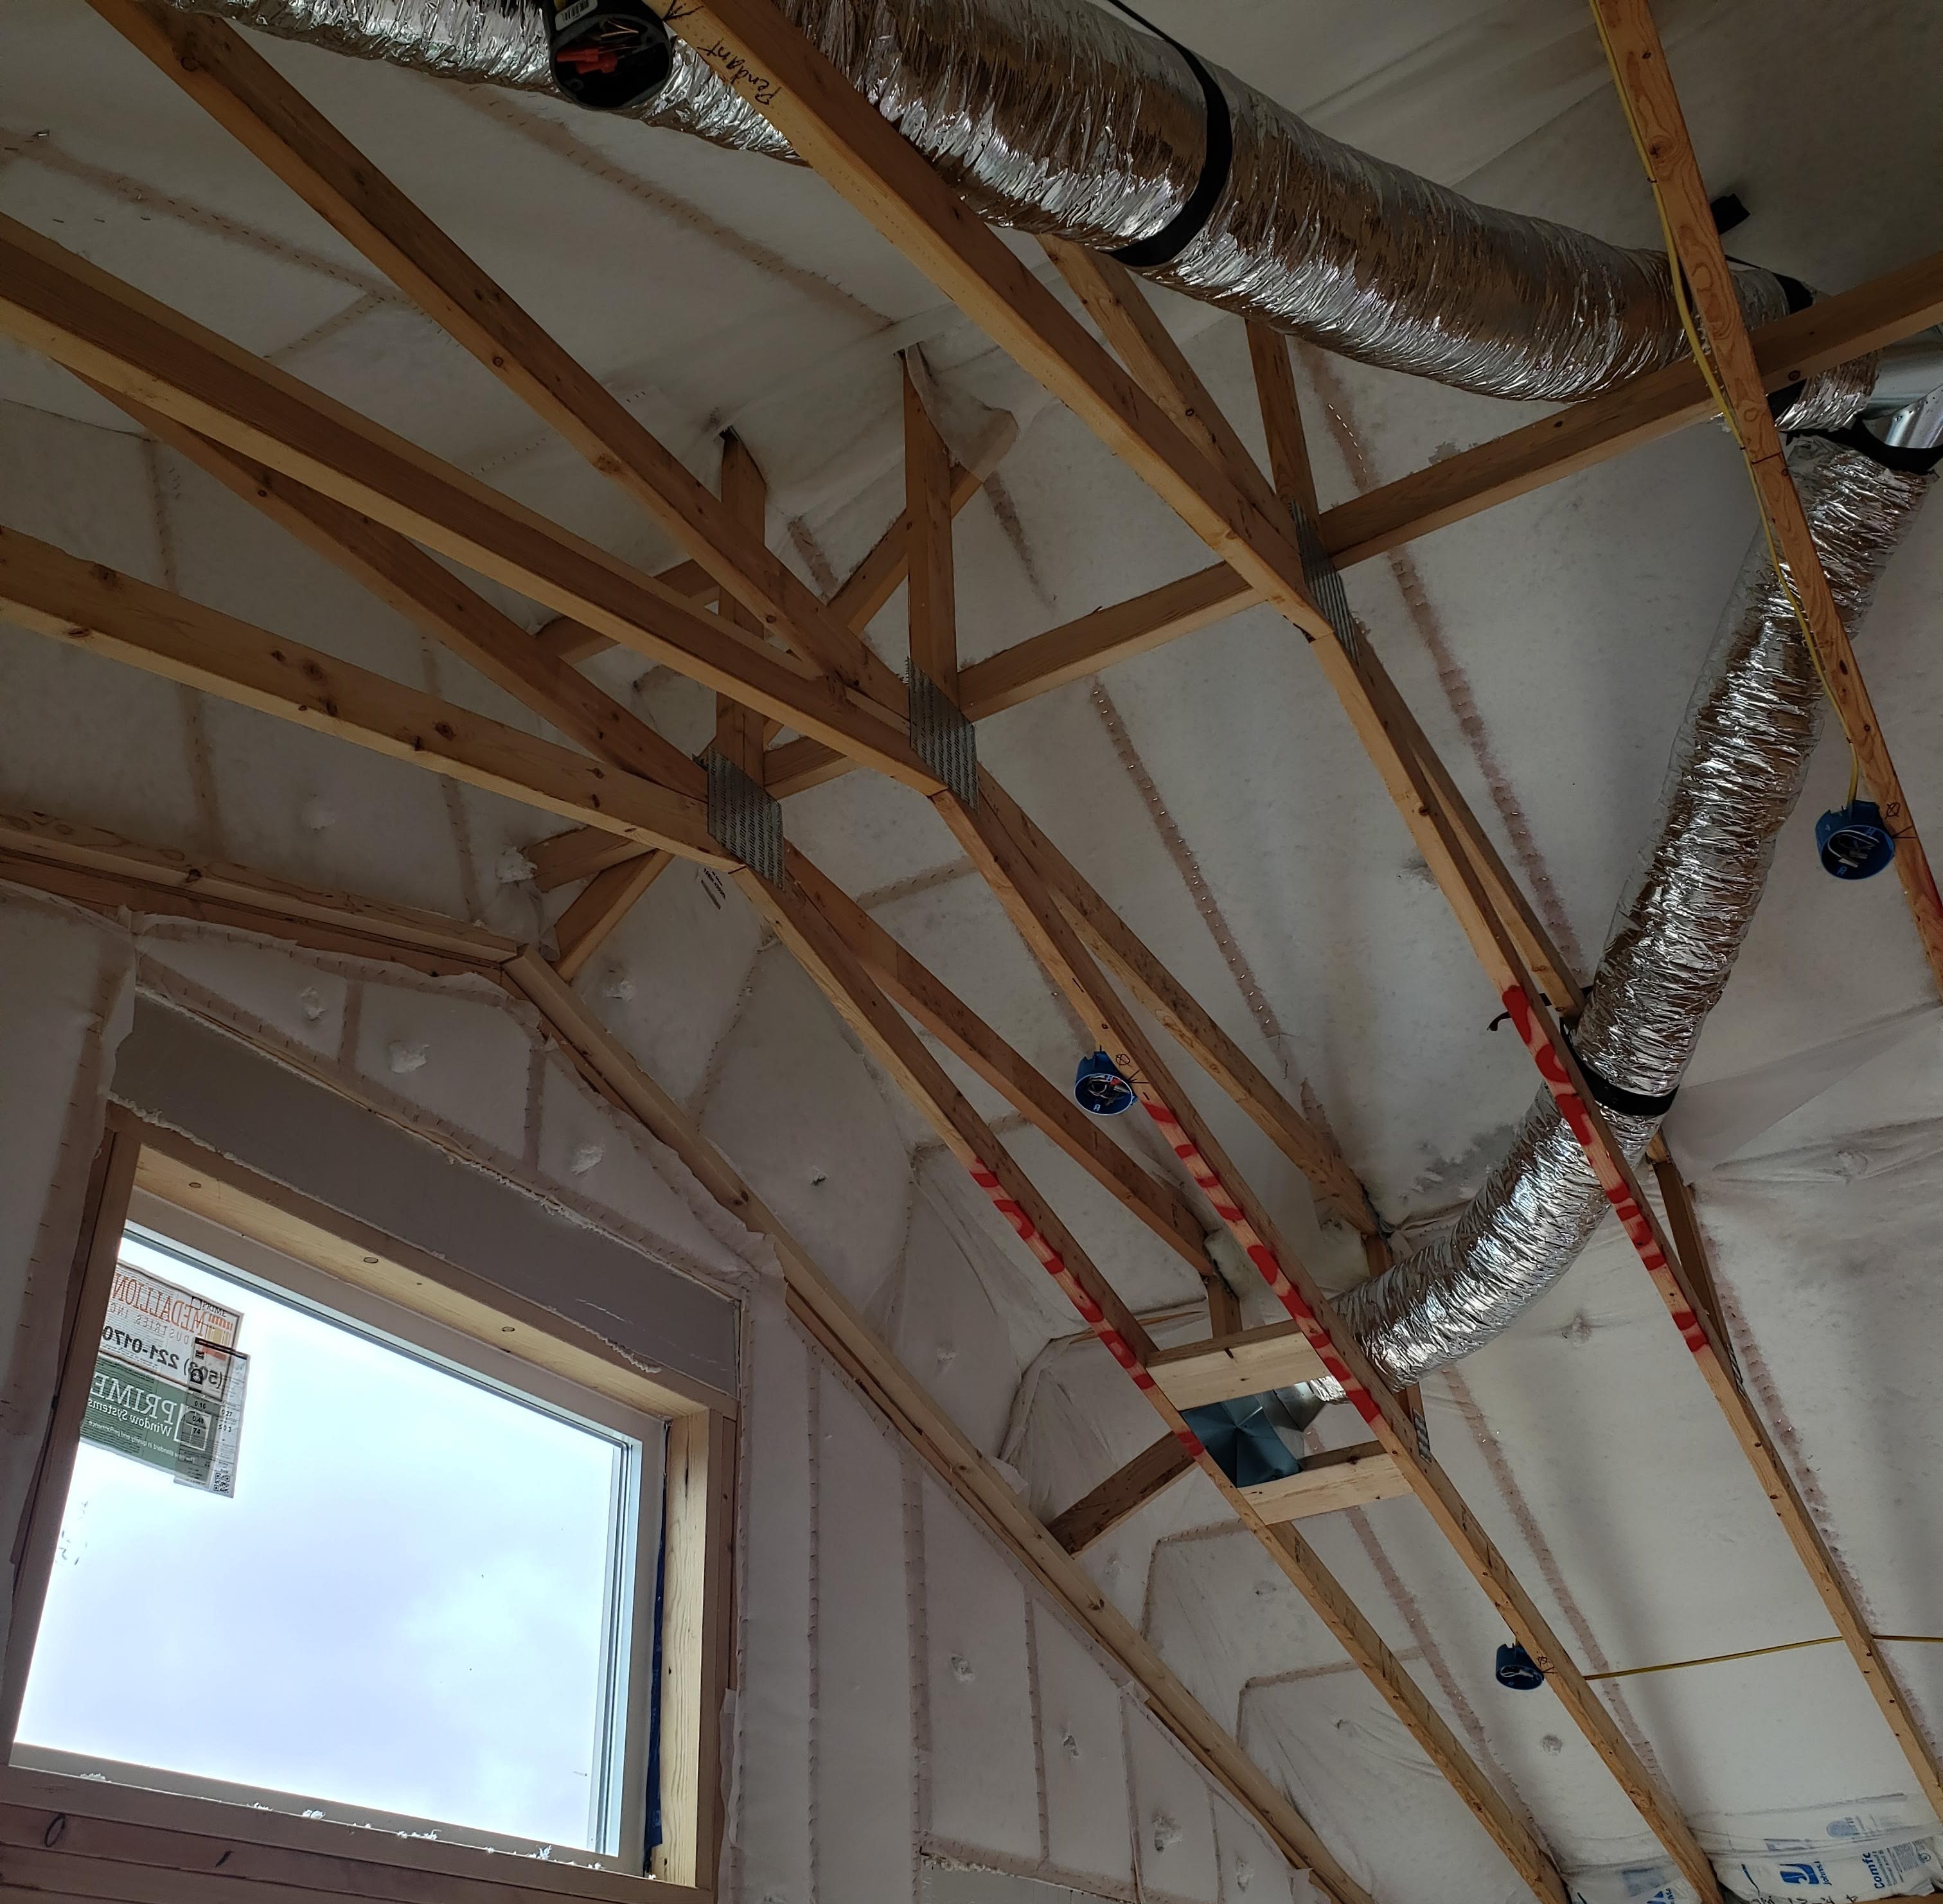
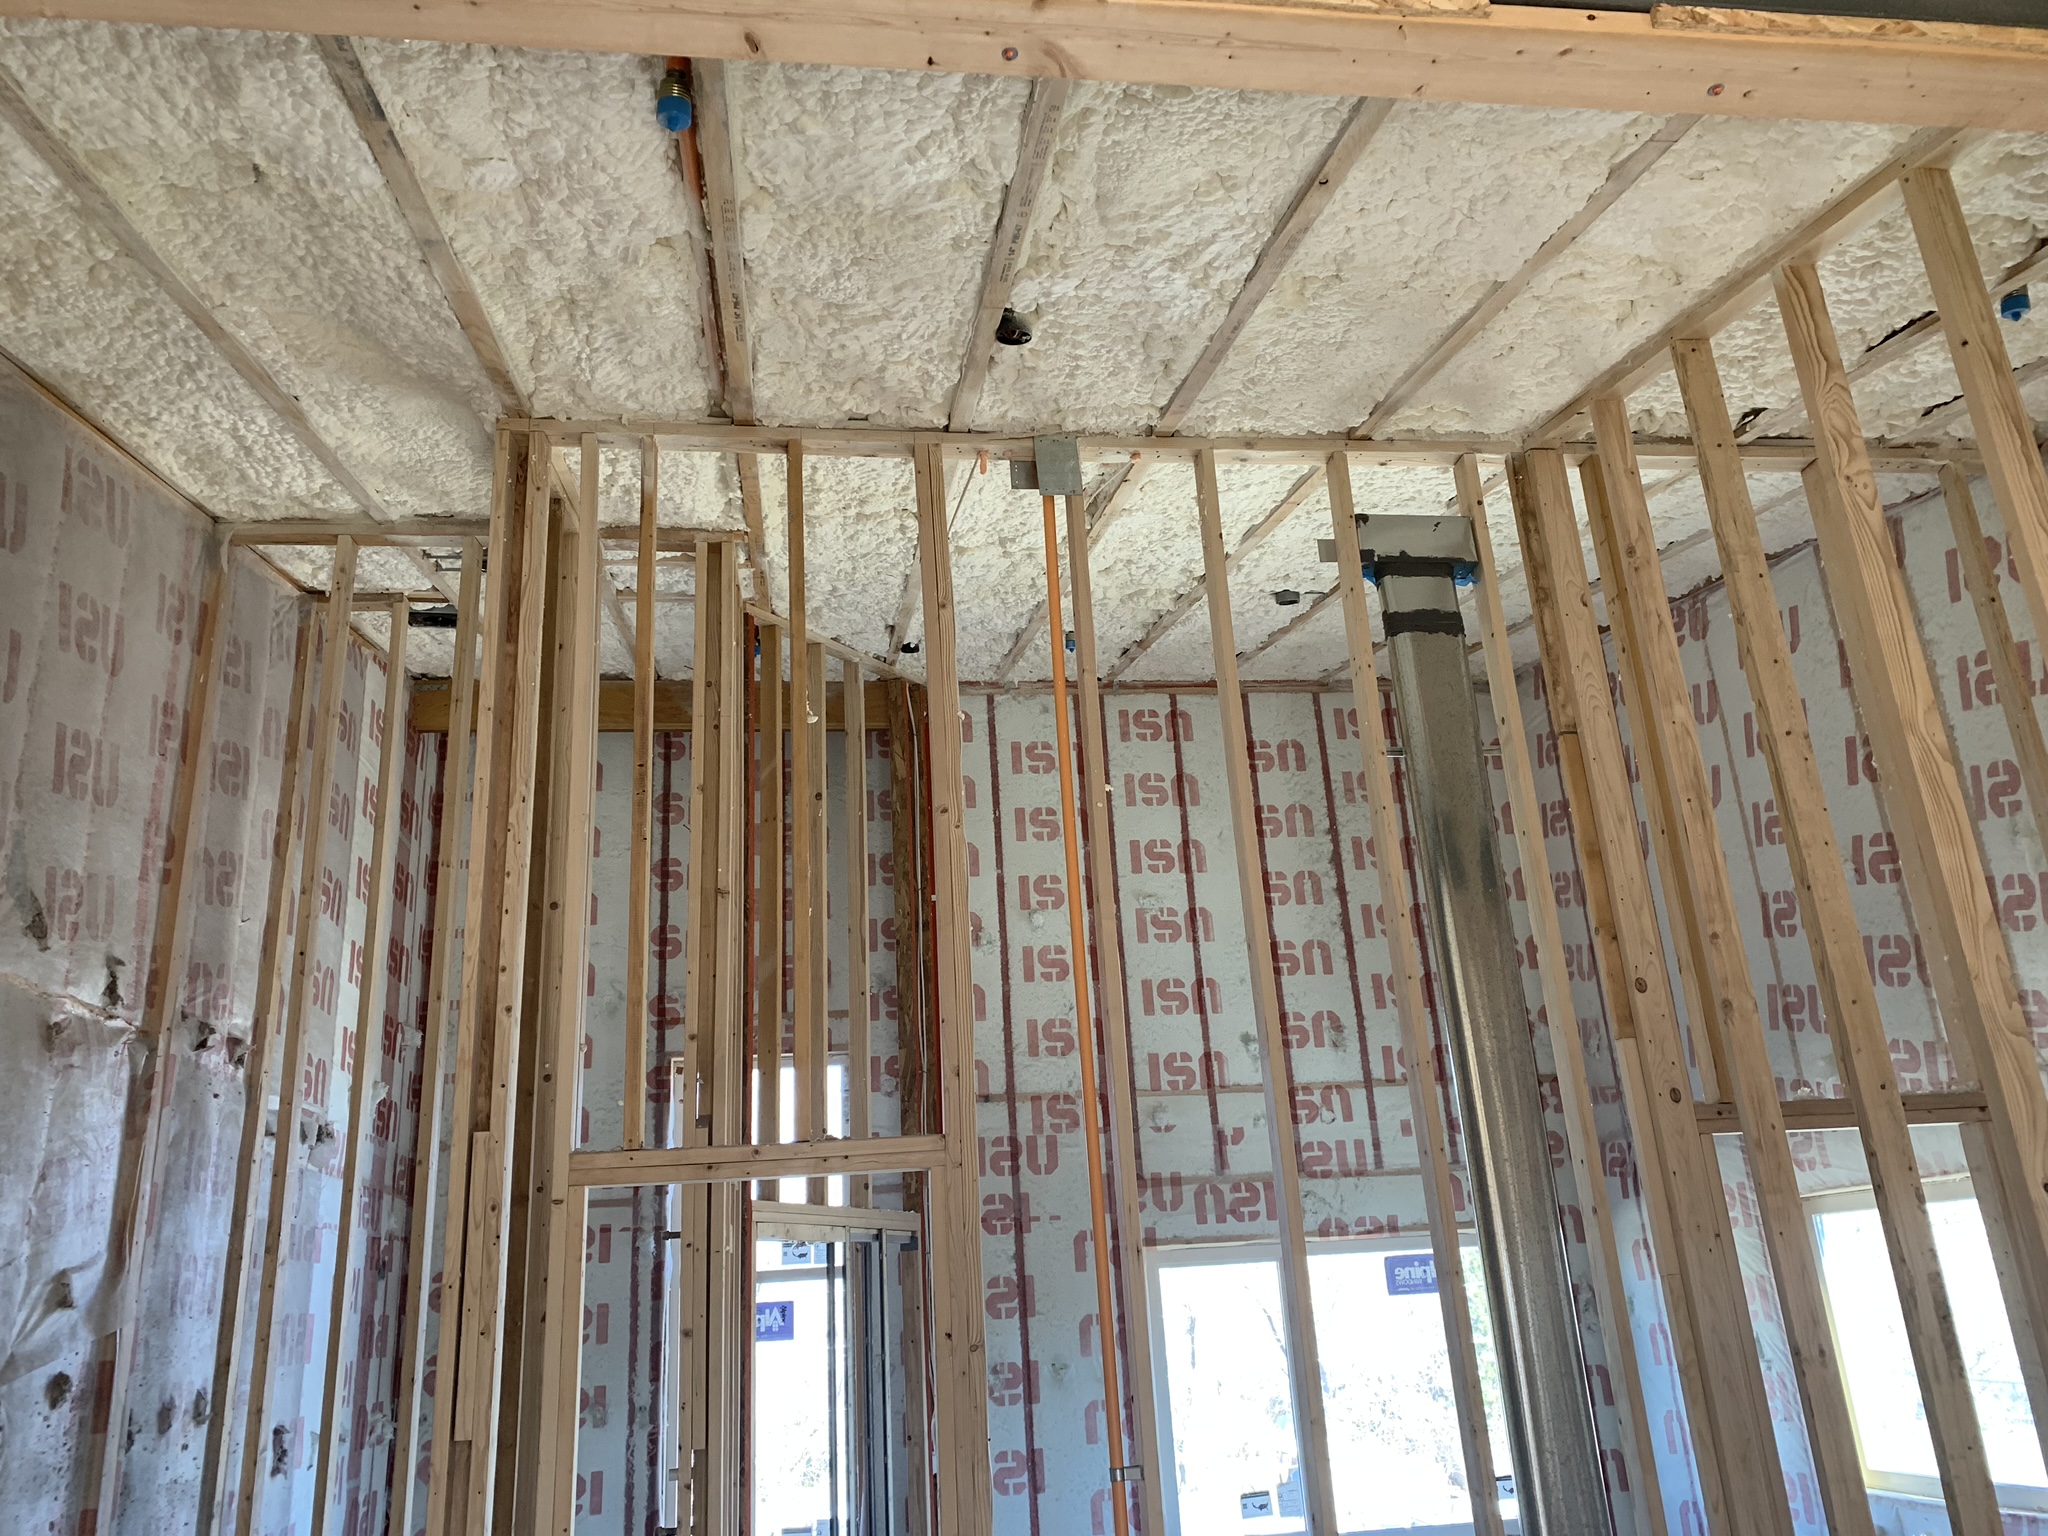
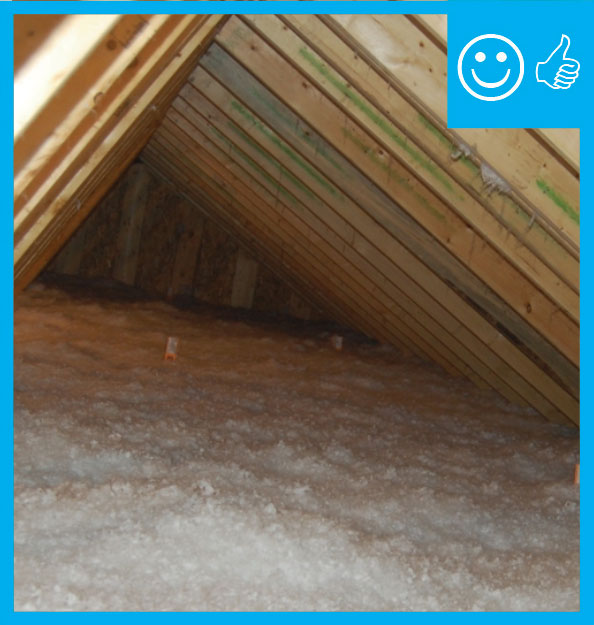
Right – R-25 of open-cell spray foam lines this new home’s attic ceiling, to protect HVAC ducts from heat and cold.
Image

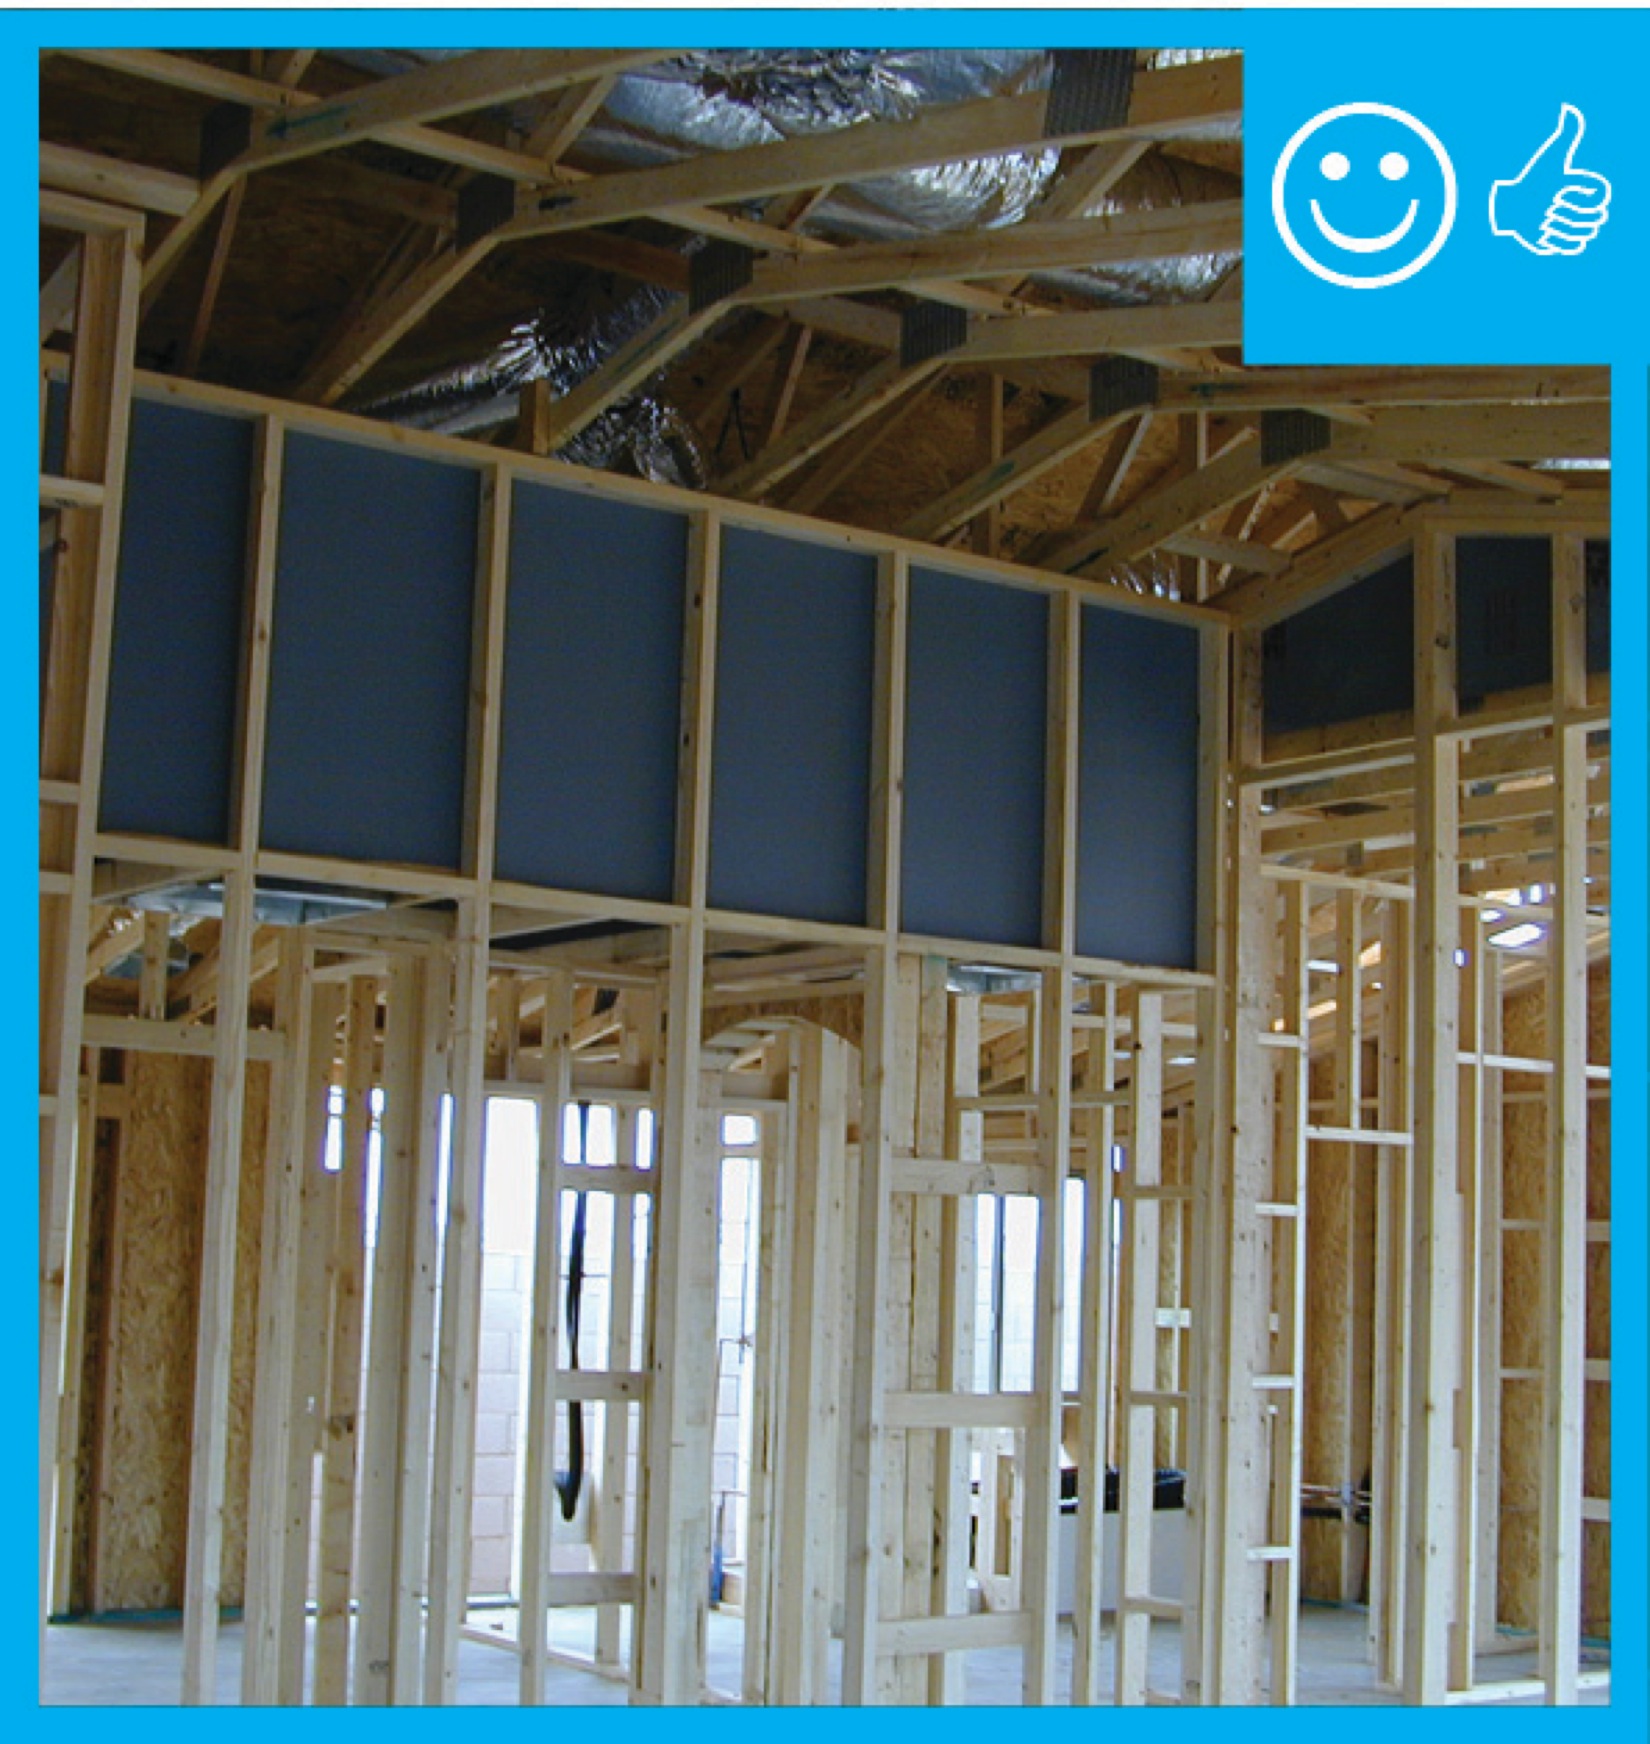
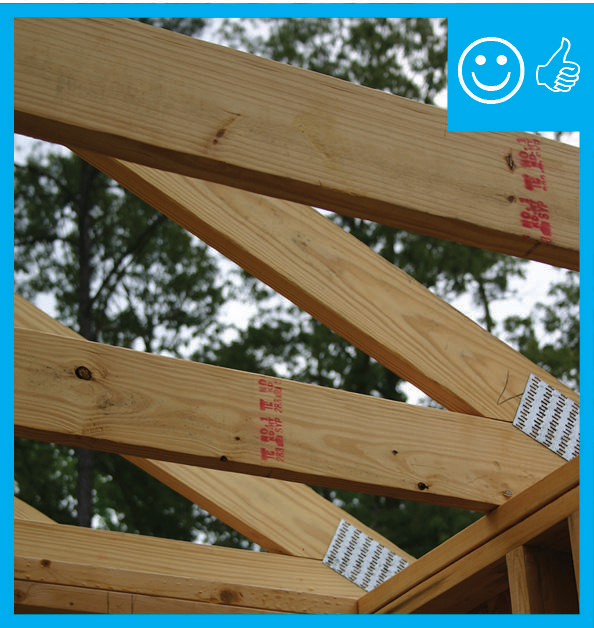
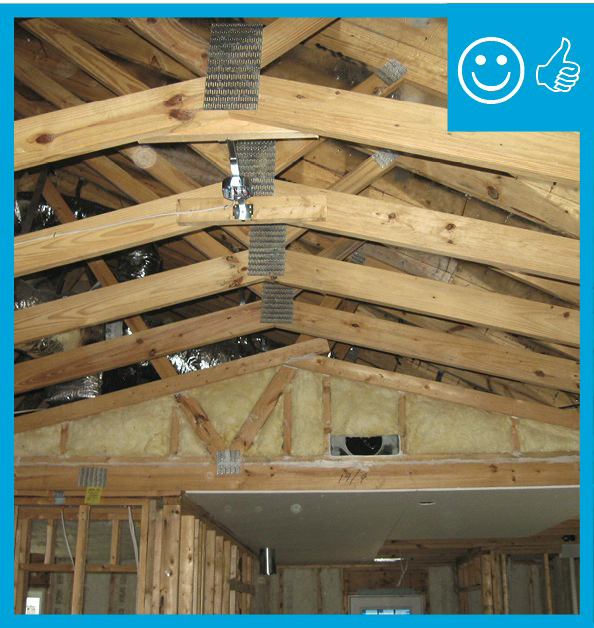
Right – Raised heel trusses allow for full-height insulation over exterior wall top plates.
Image

Image
Image
Image
Image
Image
Image
Right – Rigid foam is installed behind HVAC ducts to provide additional insulation to the ducts which are installed within the conditioned space.
Image
Right – Rigid foam was attached to the tops of the precast foundation walls to form an insulated edge for the floor slab.
Image

Image
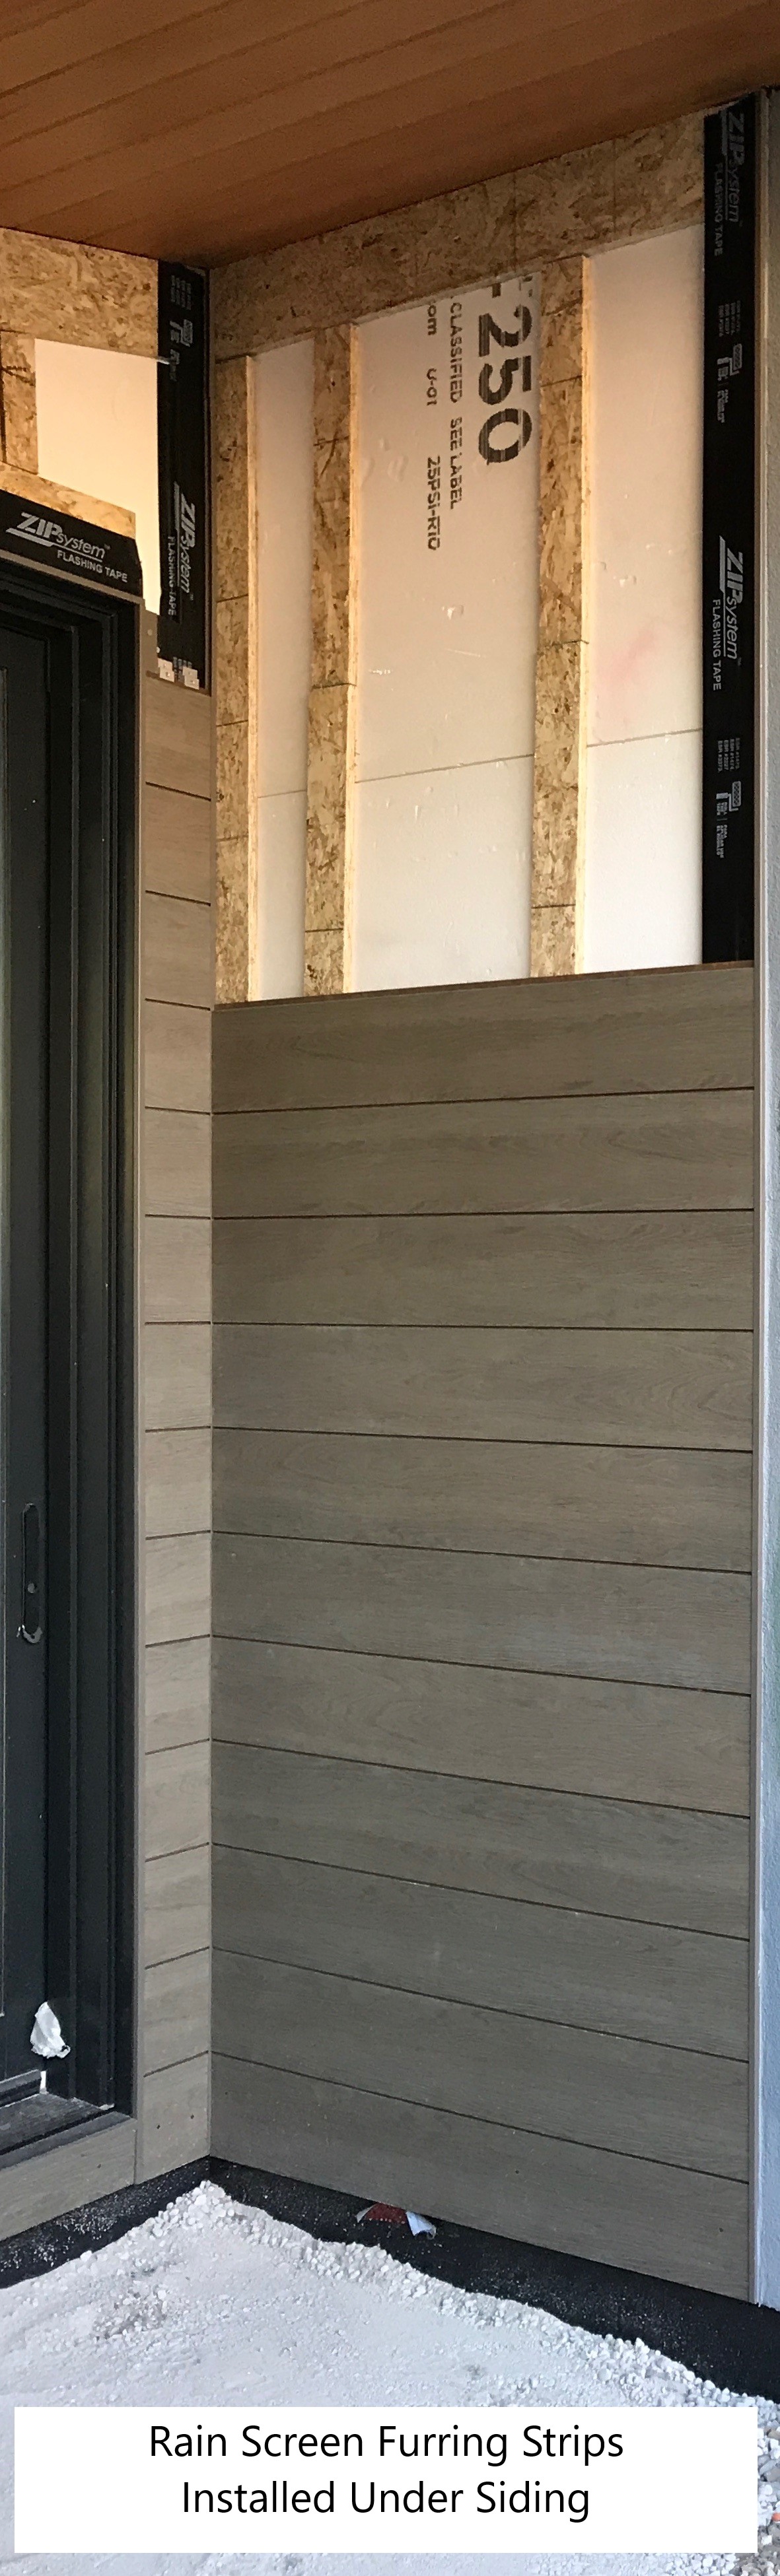
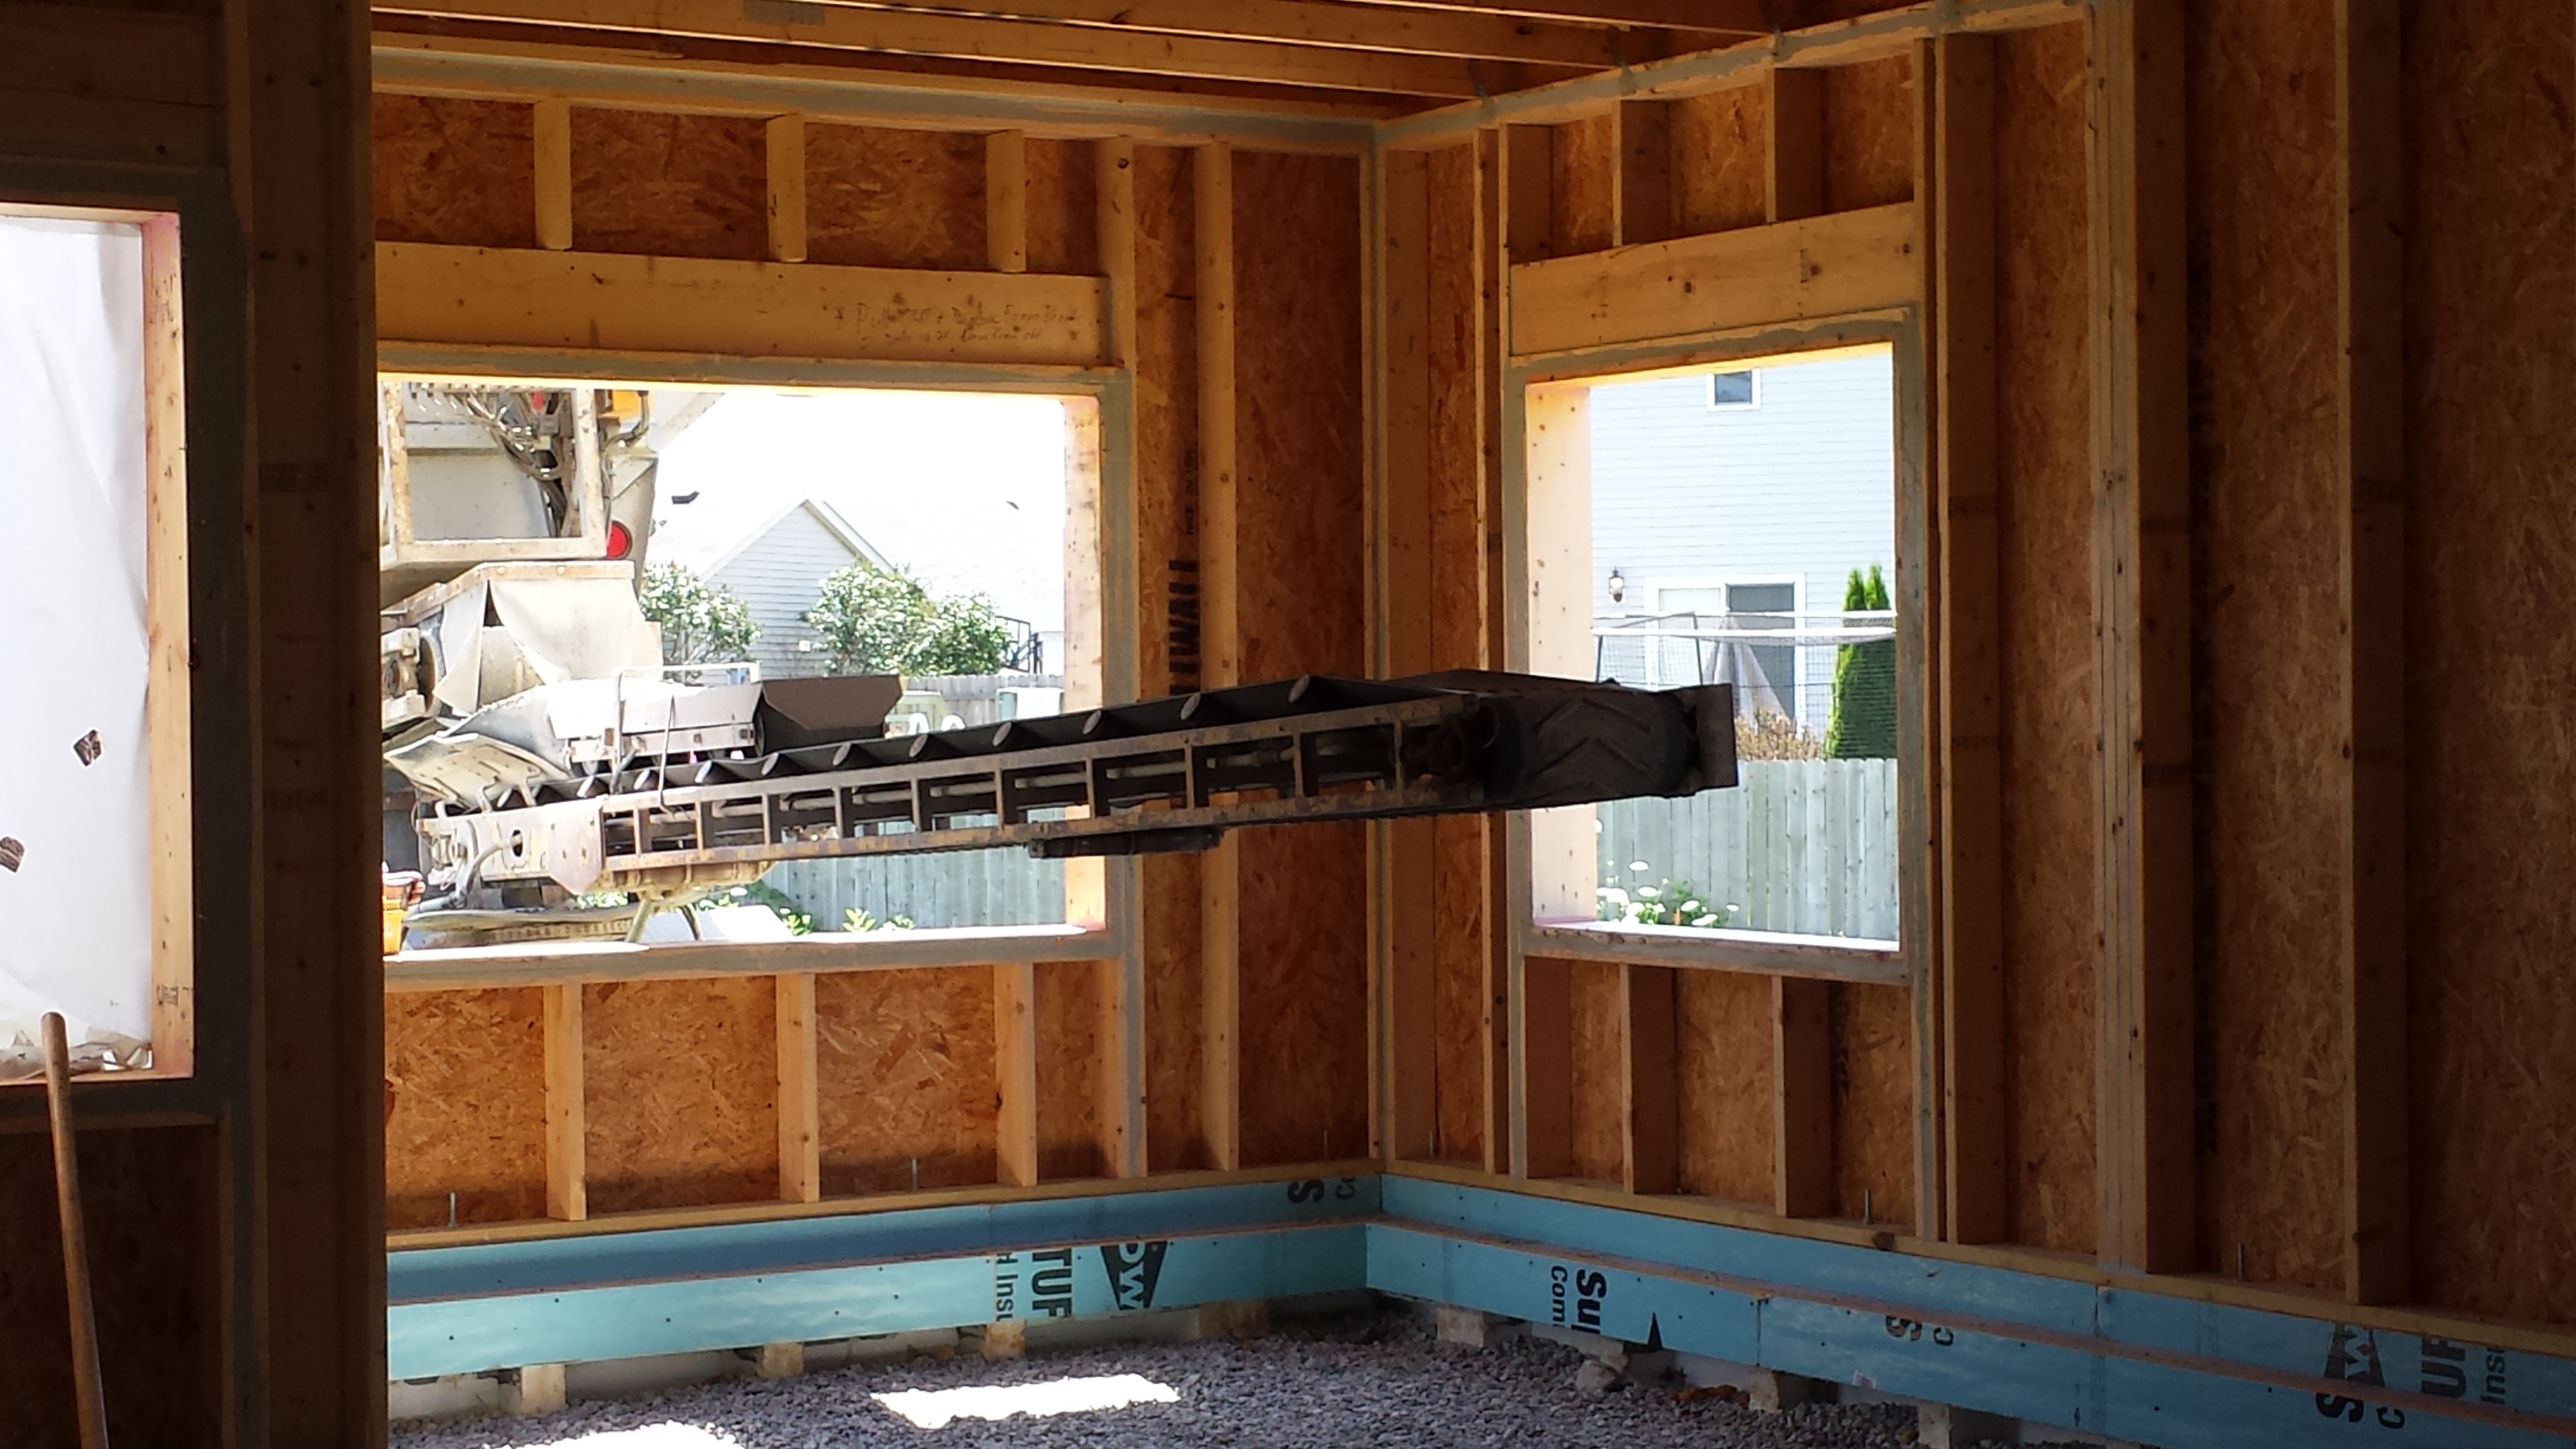
Right – Ripped OSB provides furring strips for a ventilation gap behind the wood siding.
Image

Right – Roof underlayment is fully adhered and roof deck seams are sealed so roof is resistant to high-wind events
Image
Right – Roof underlayment is fully adhered and roof deck seams are sealed so roof is resistant to high-wind events
Image
Image

Image
Right – Spray foam air seals and insulates the walls including the walls behind the fireplace and covers the underside of the roof deck of this mixed-dry climate home to provide an insulated attic space for HVAC ducts.
Image
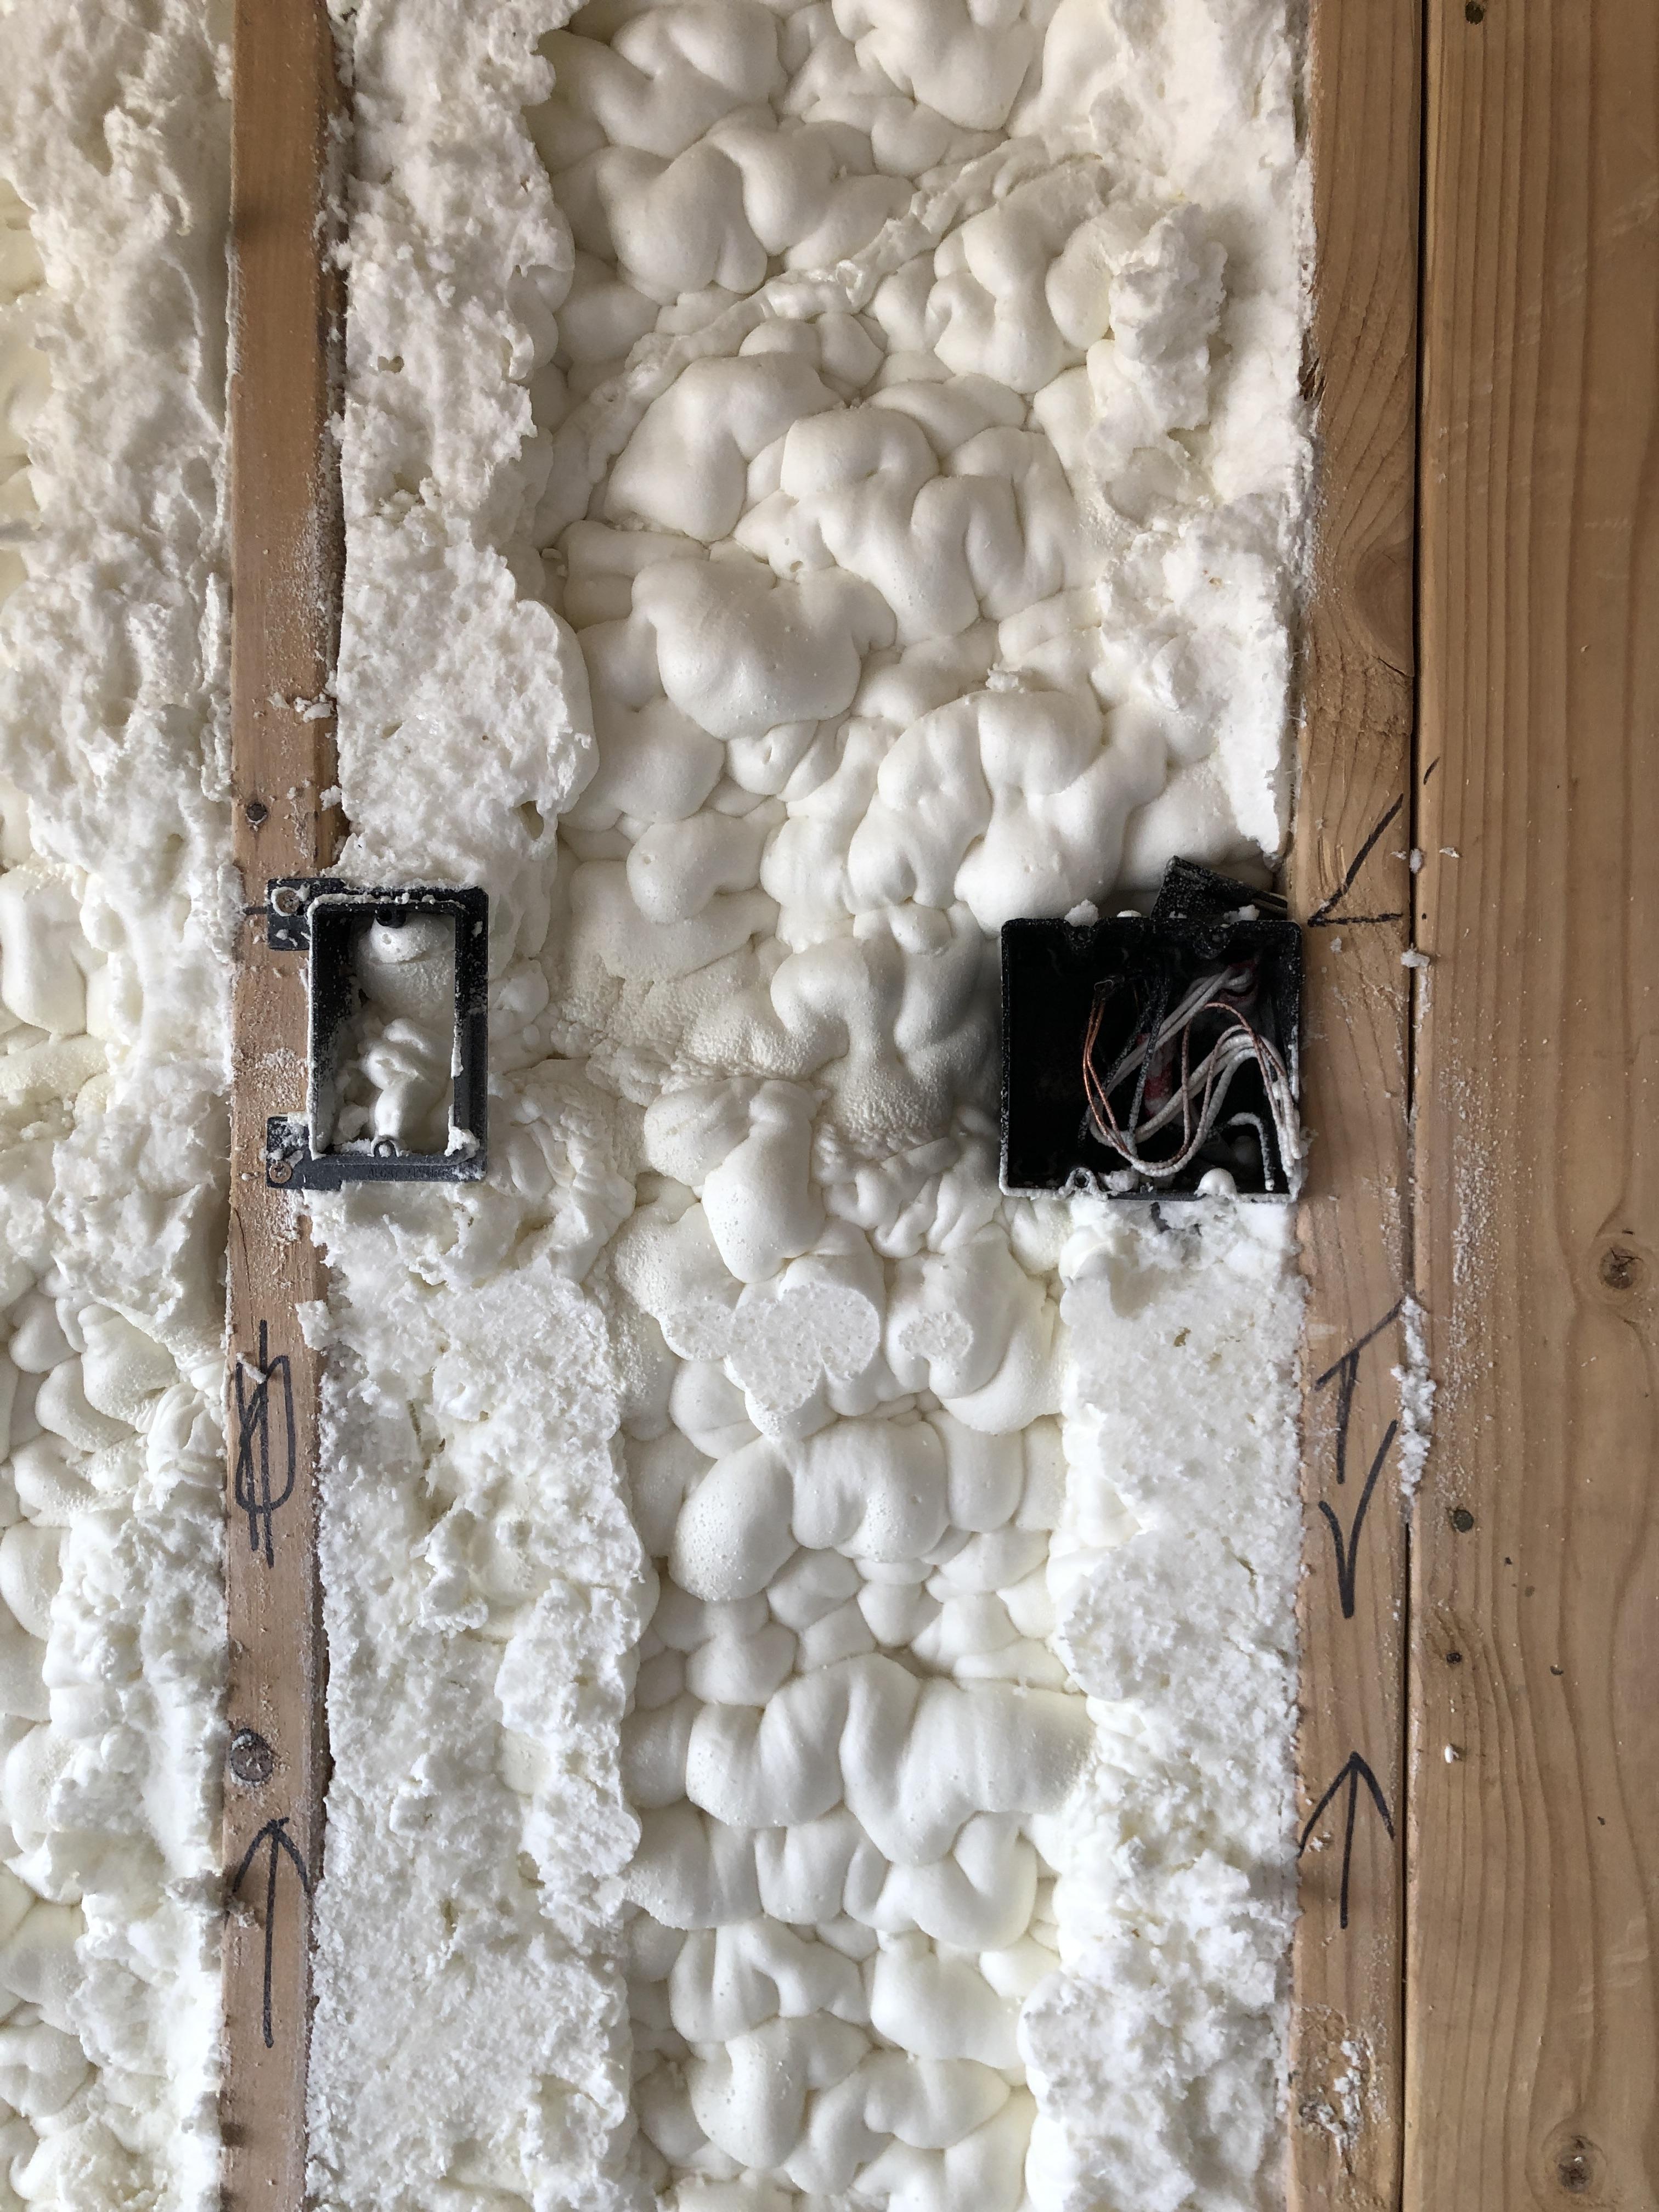
Right – Spray foam completely fills the wall cavities, providing a thorough layer of insulation behind electrical boxes.
Image
Image
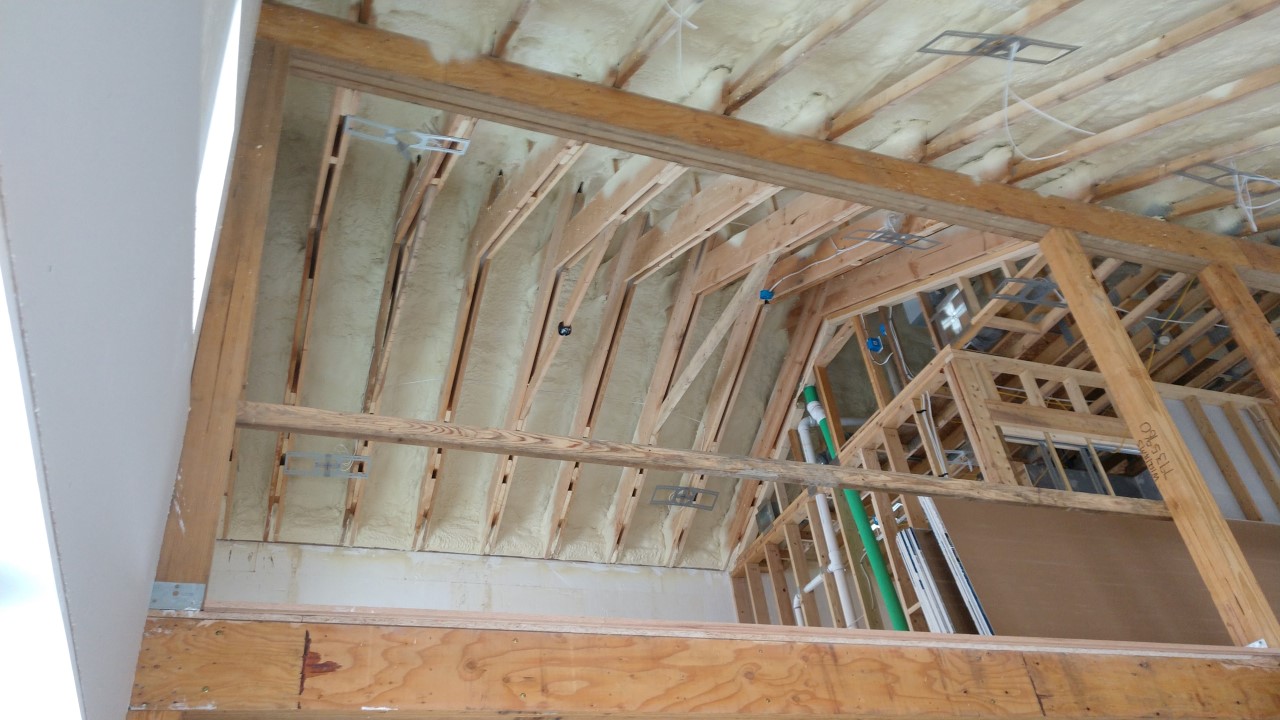
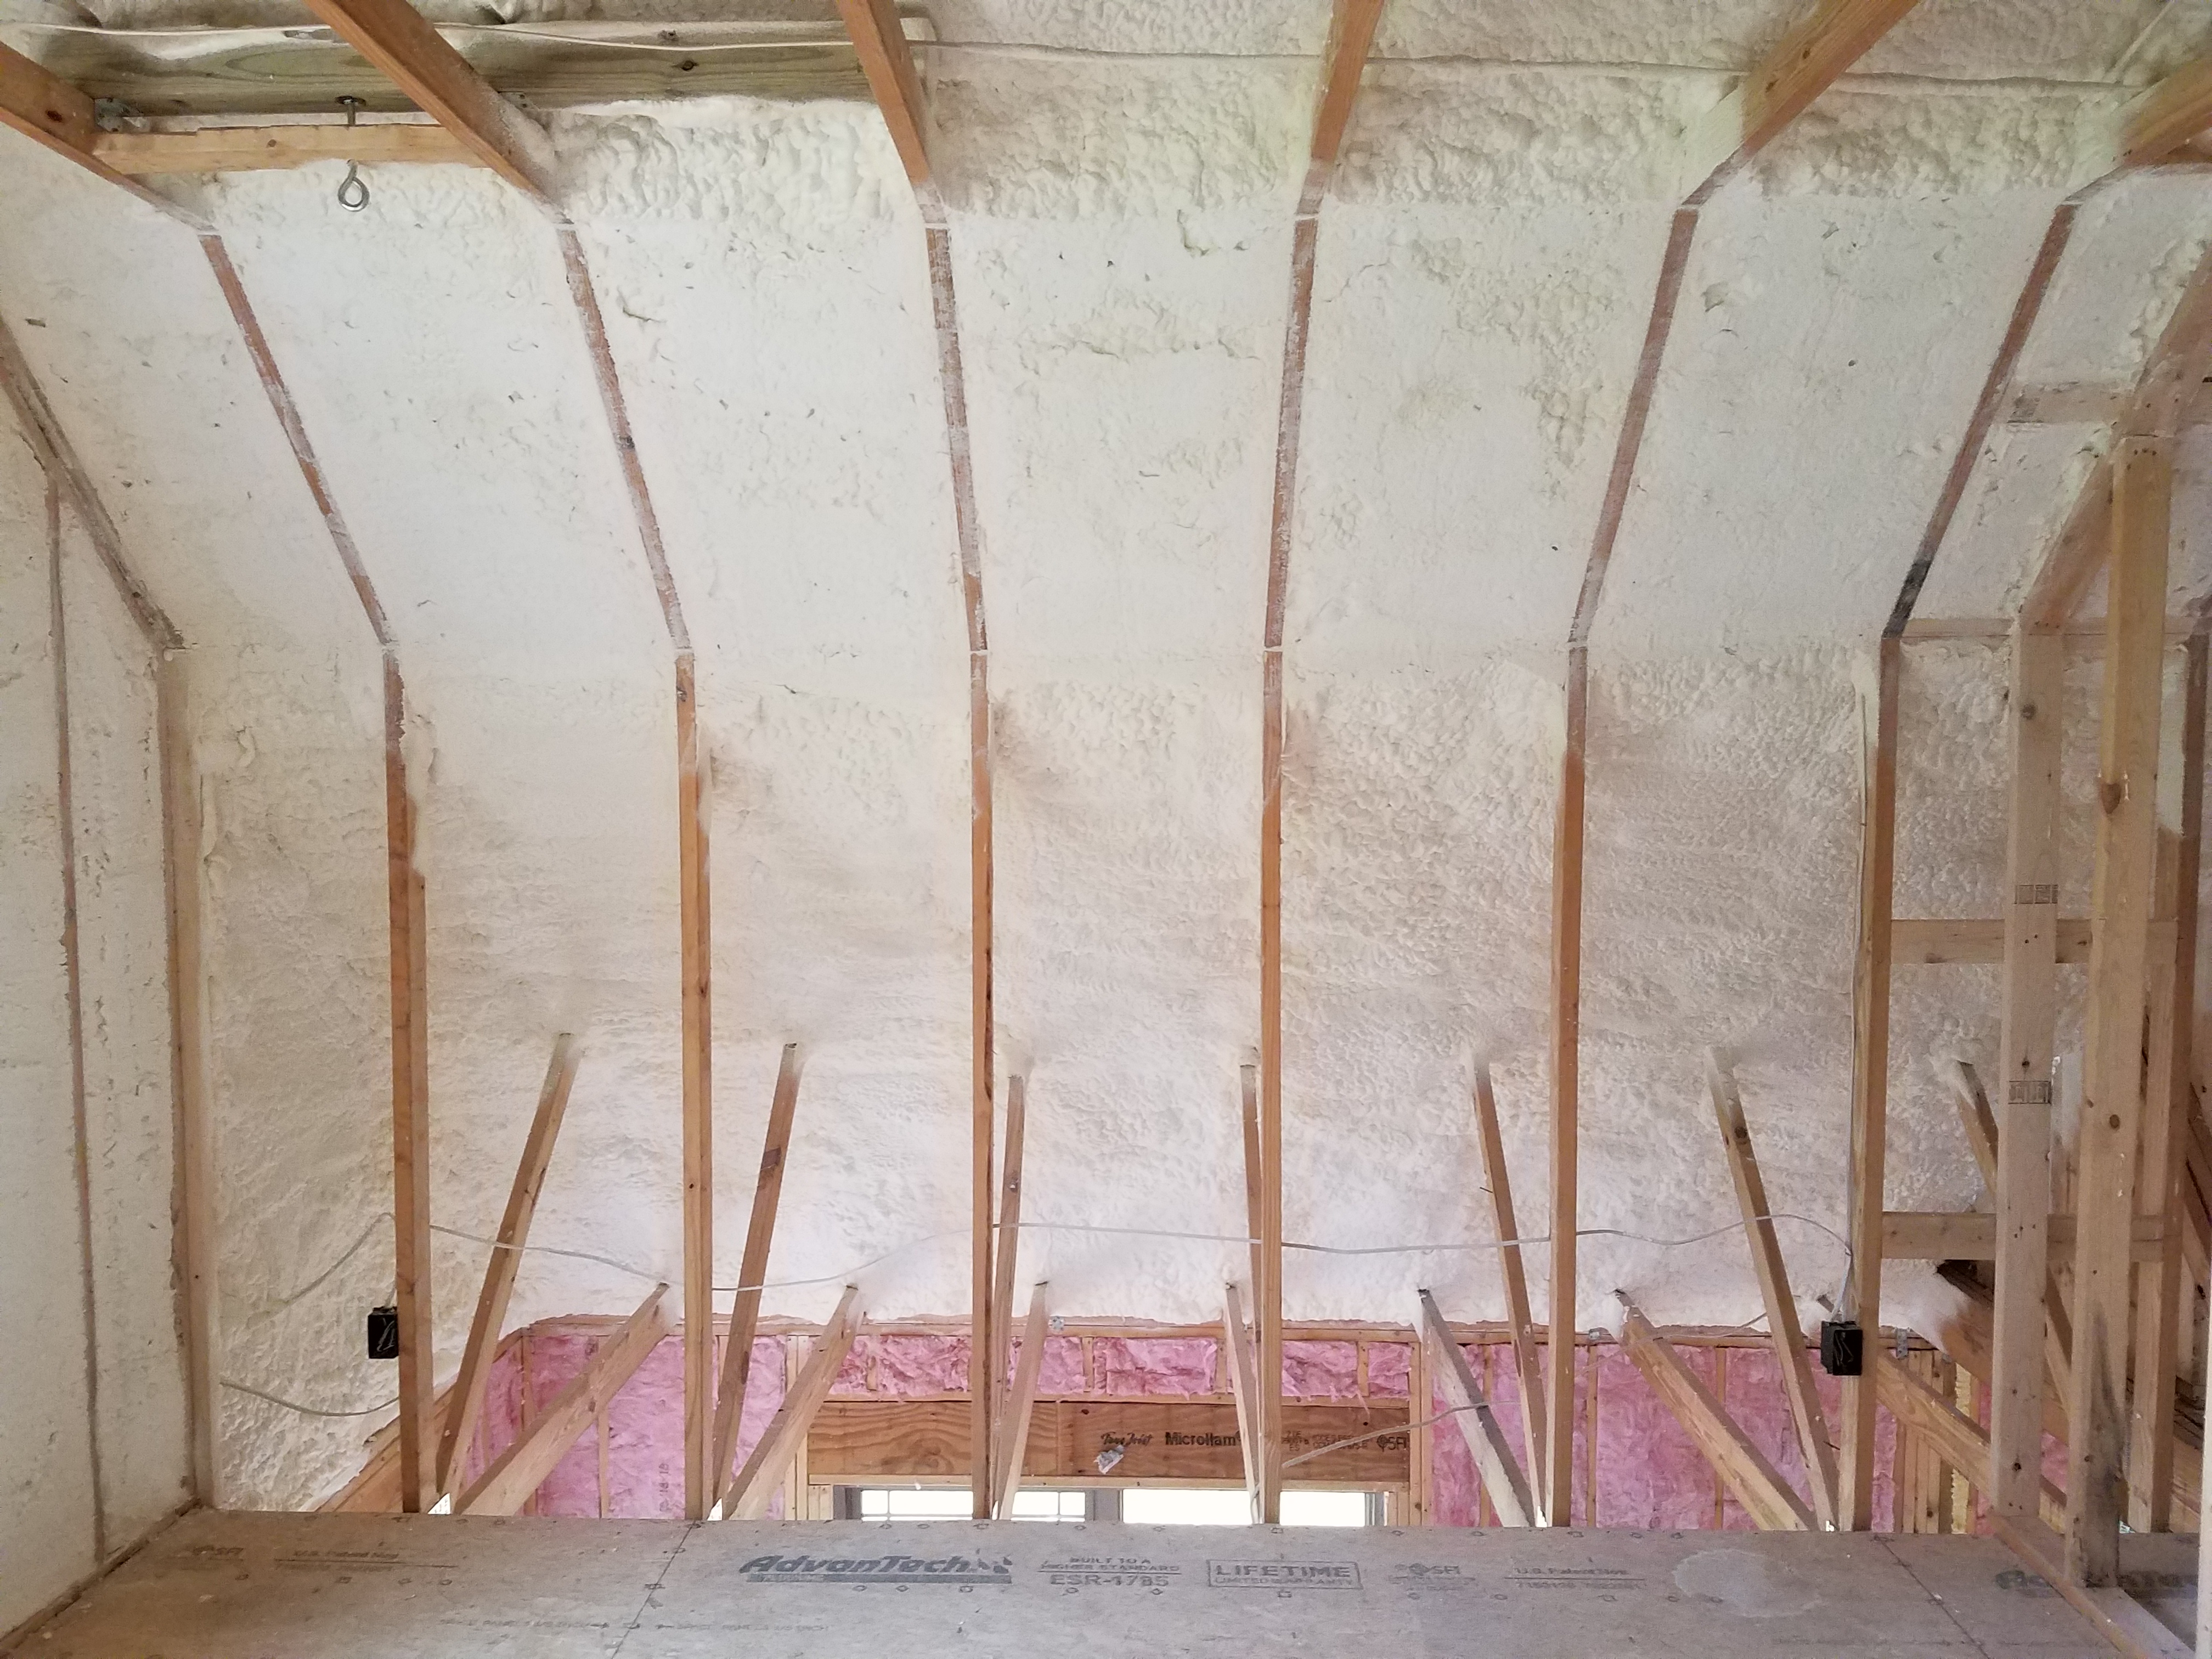
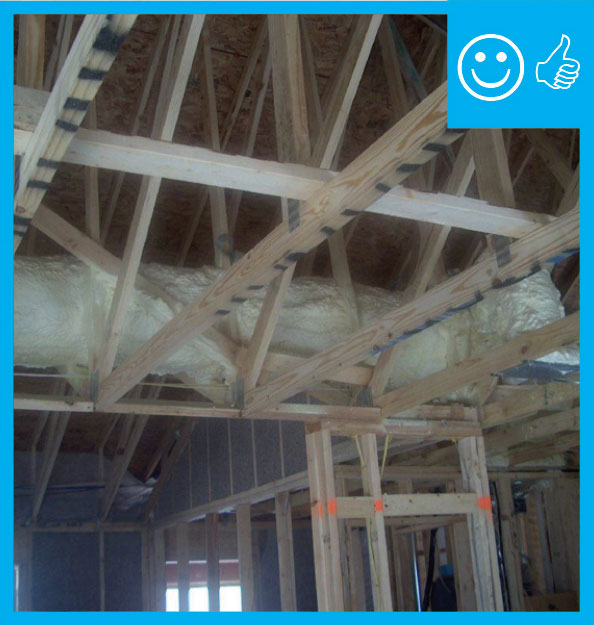
Right – Spray foam fills the roof joist cavities of this vaulted, unvented attic.
Image
Image
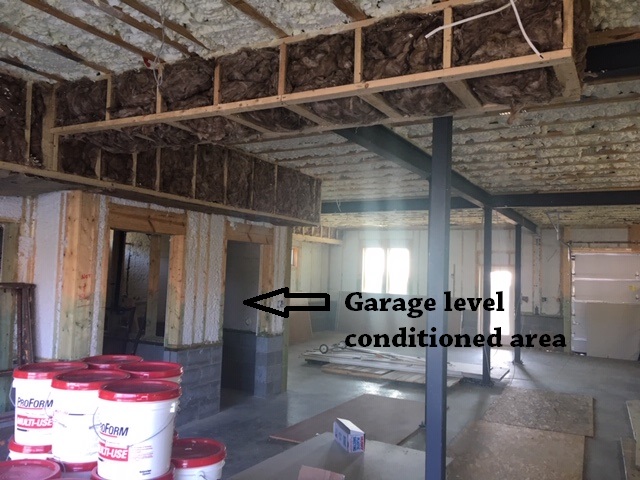
Right – Spray foam insulates the walls and ceilings separating the garage from the home.
Image
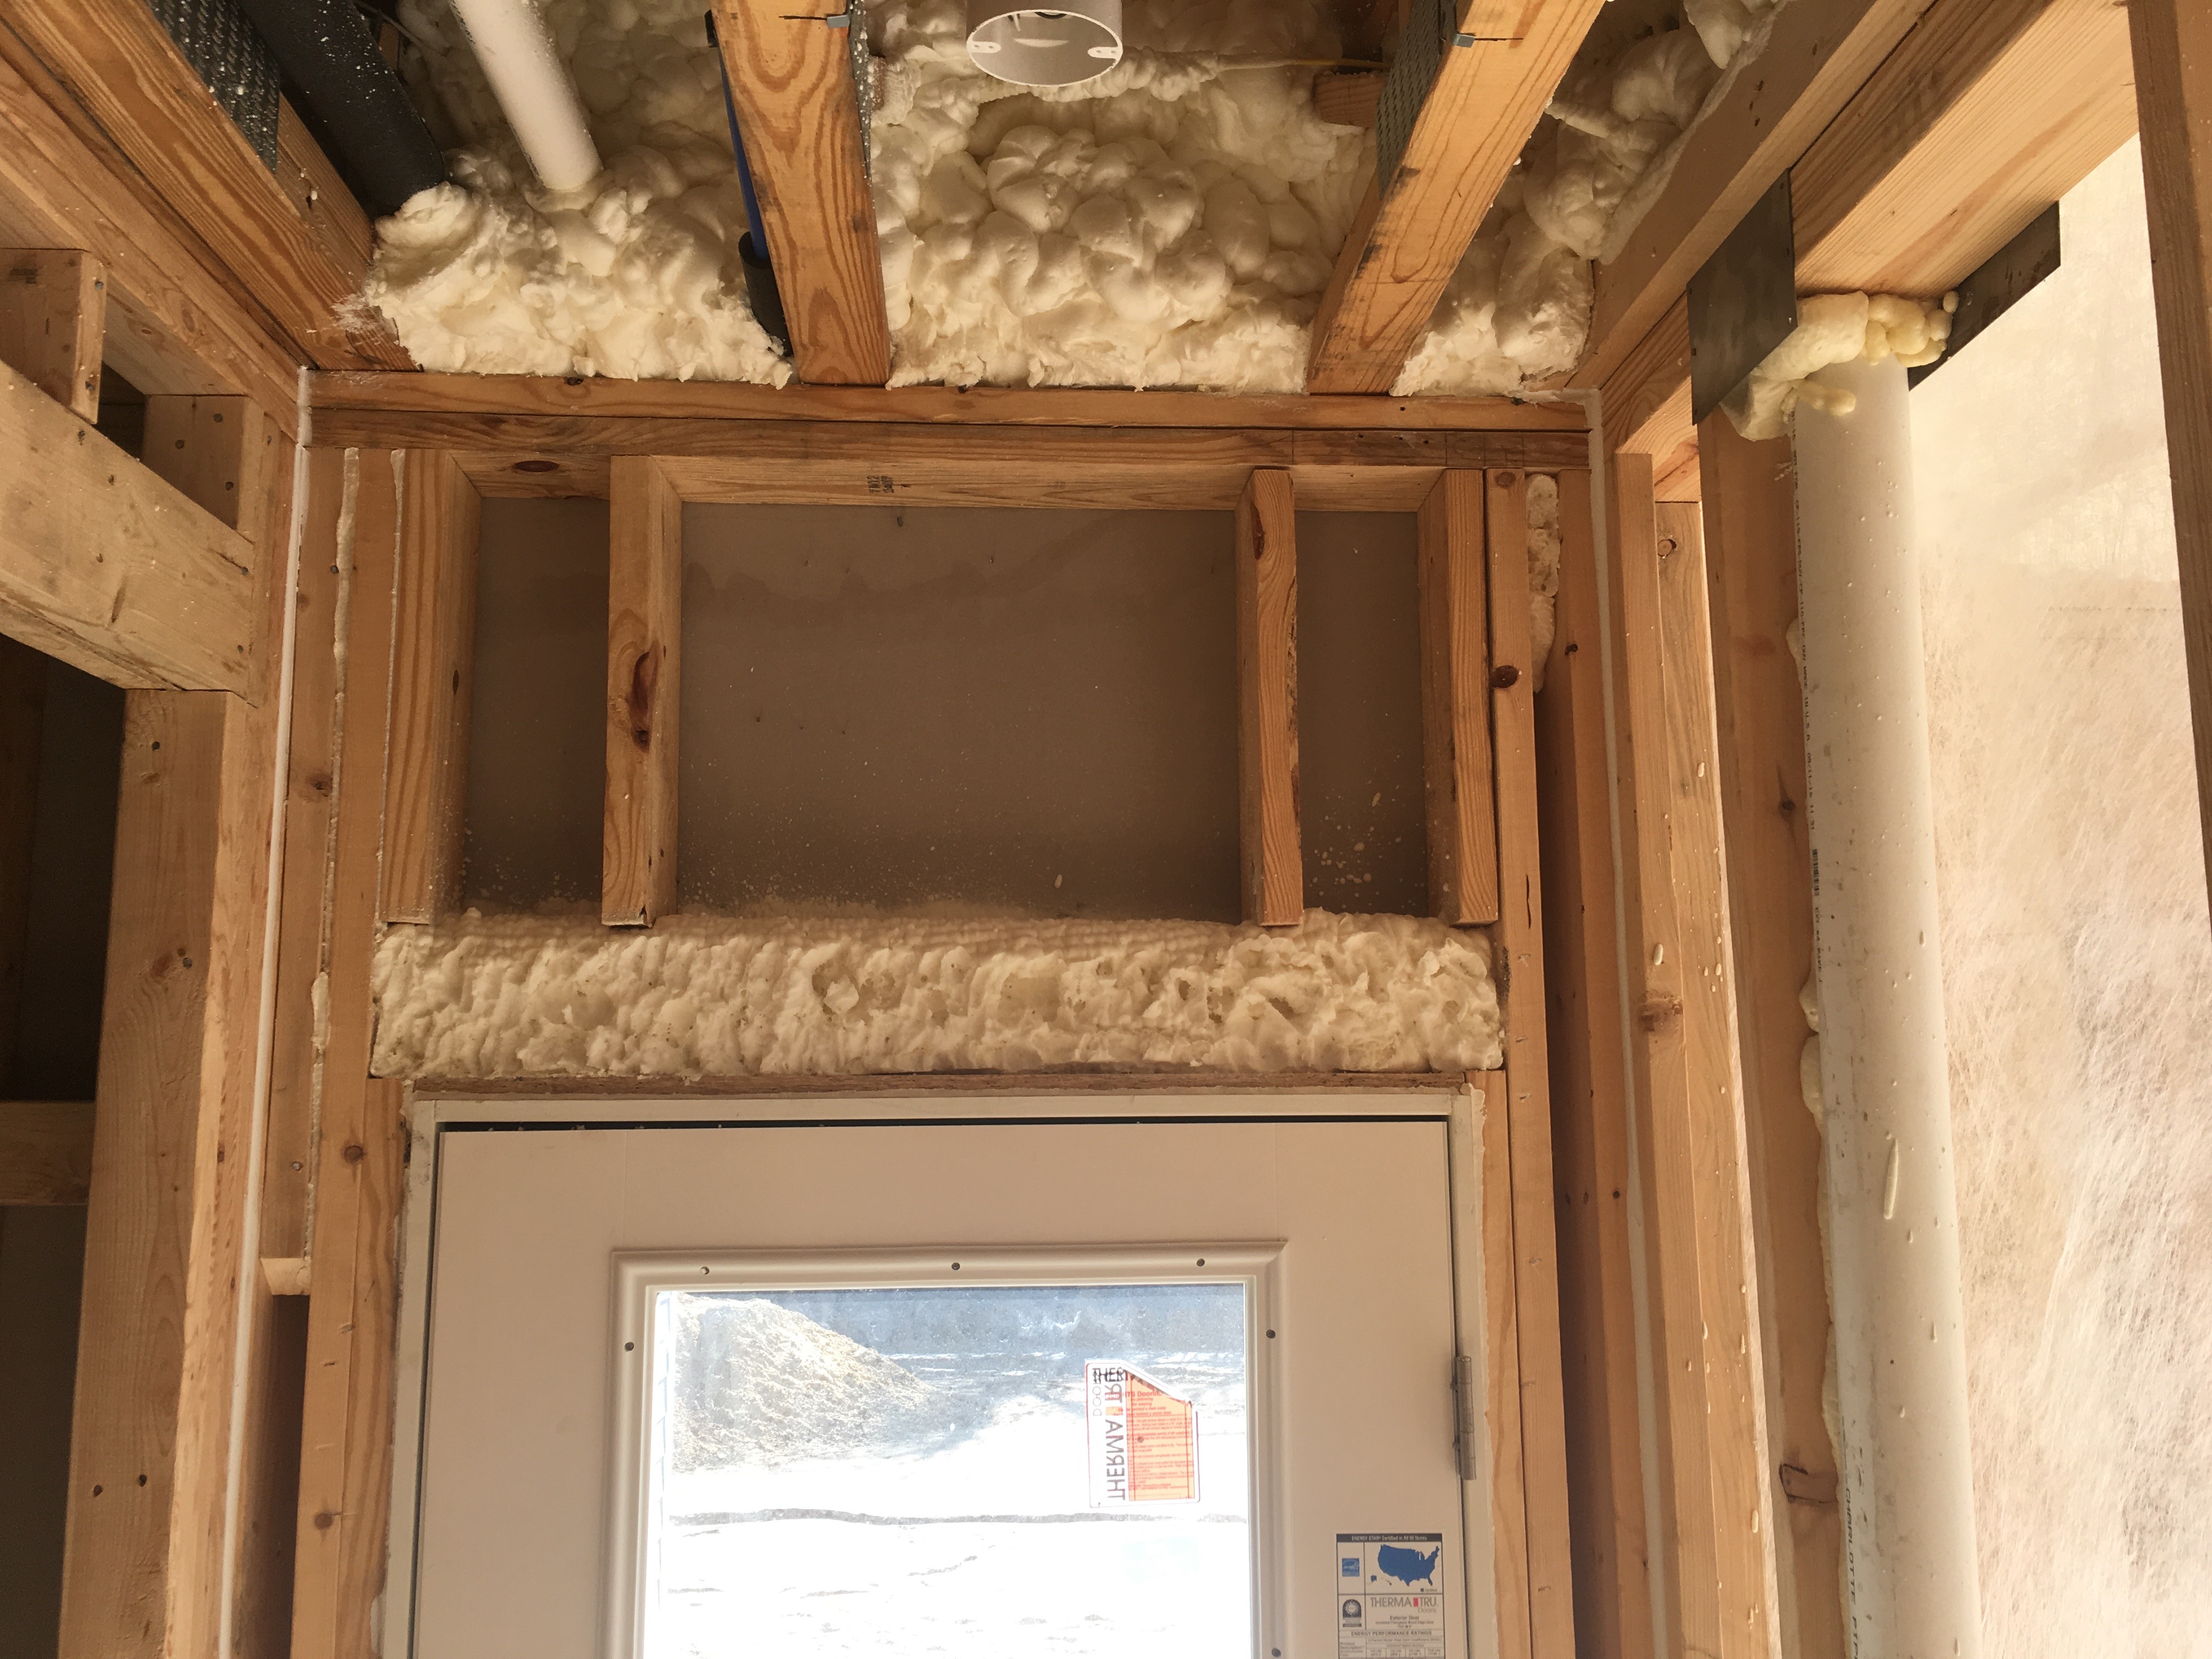
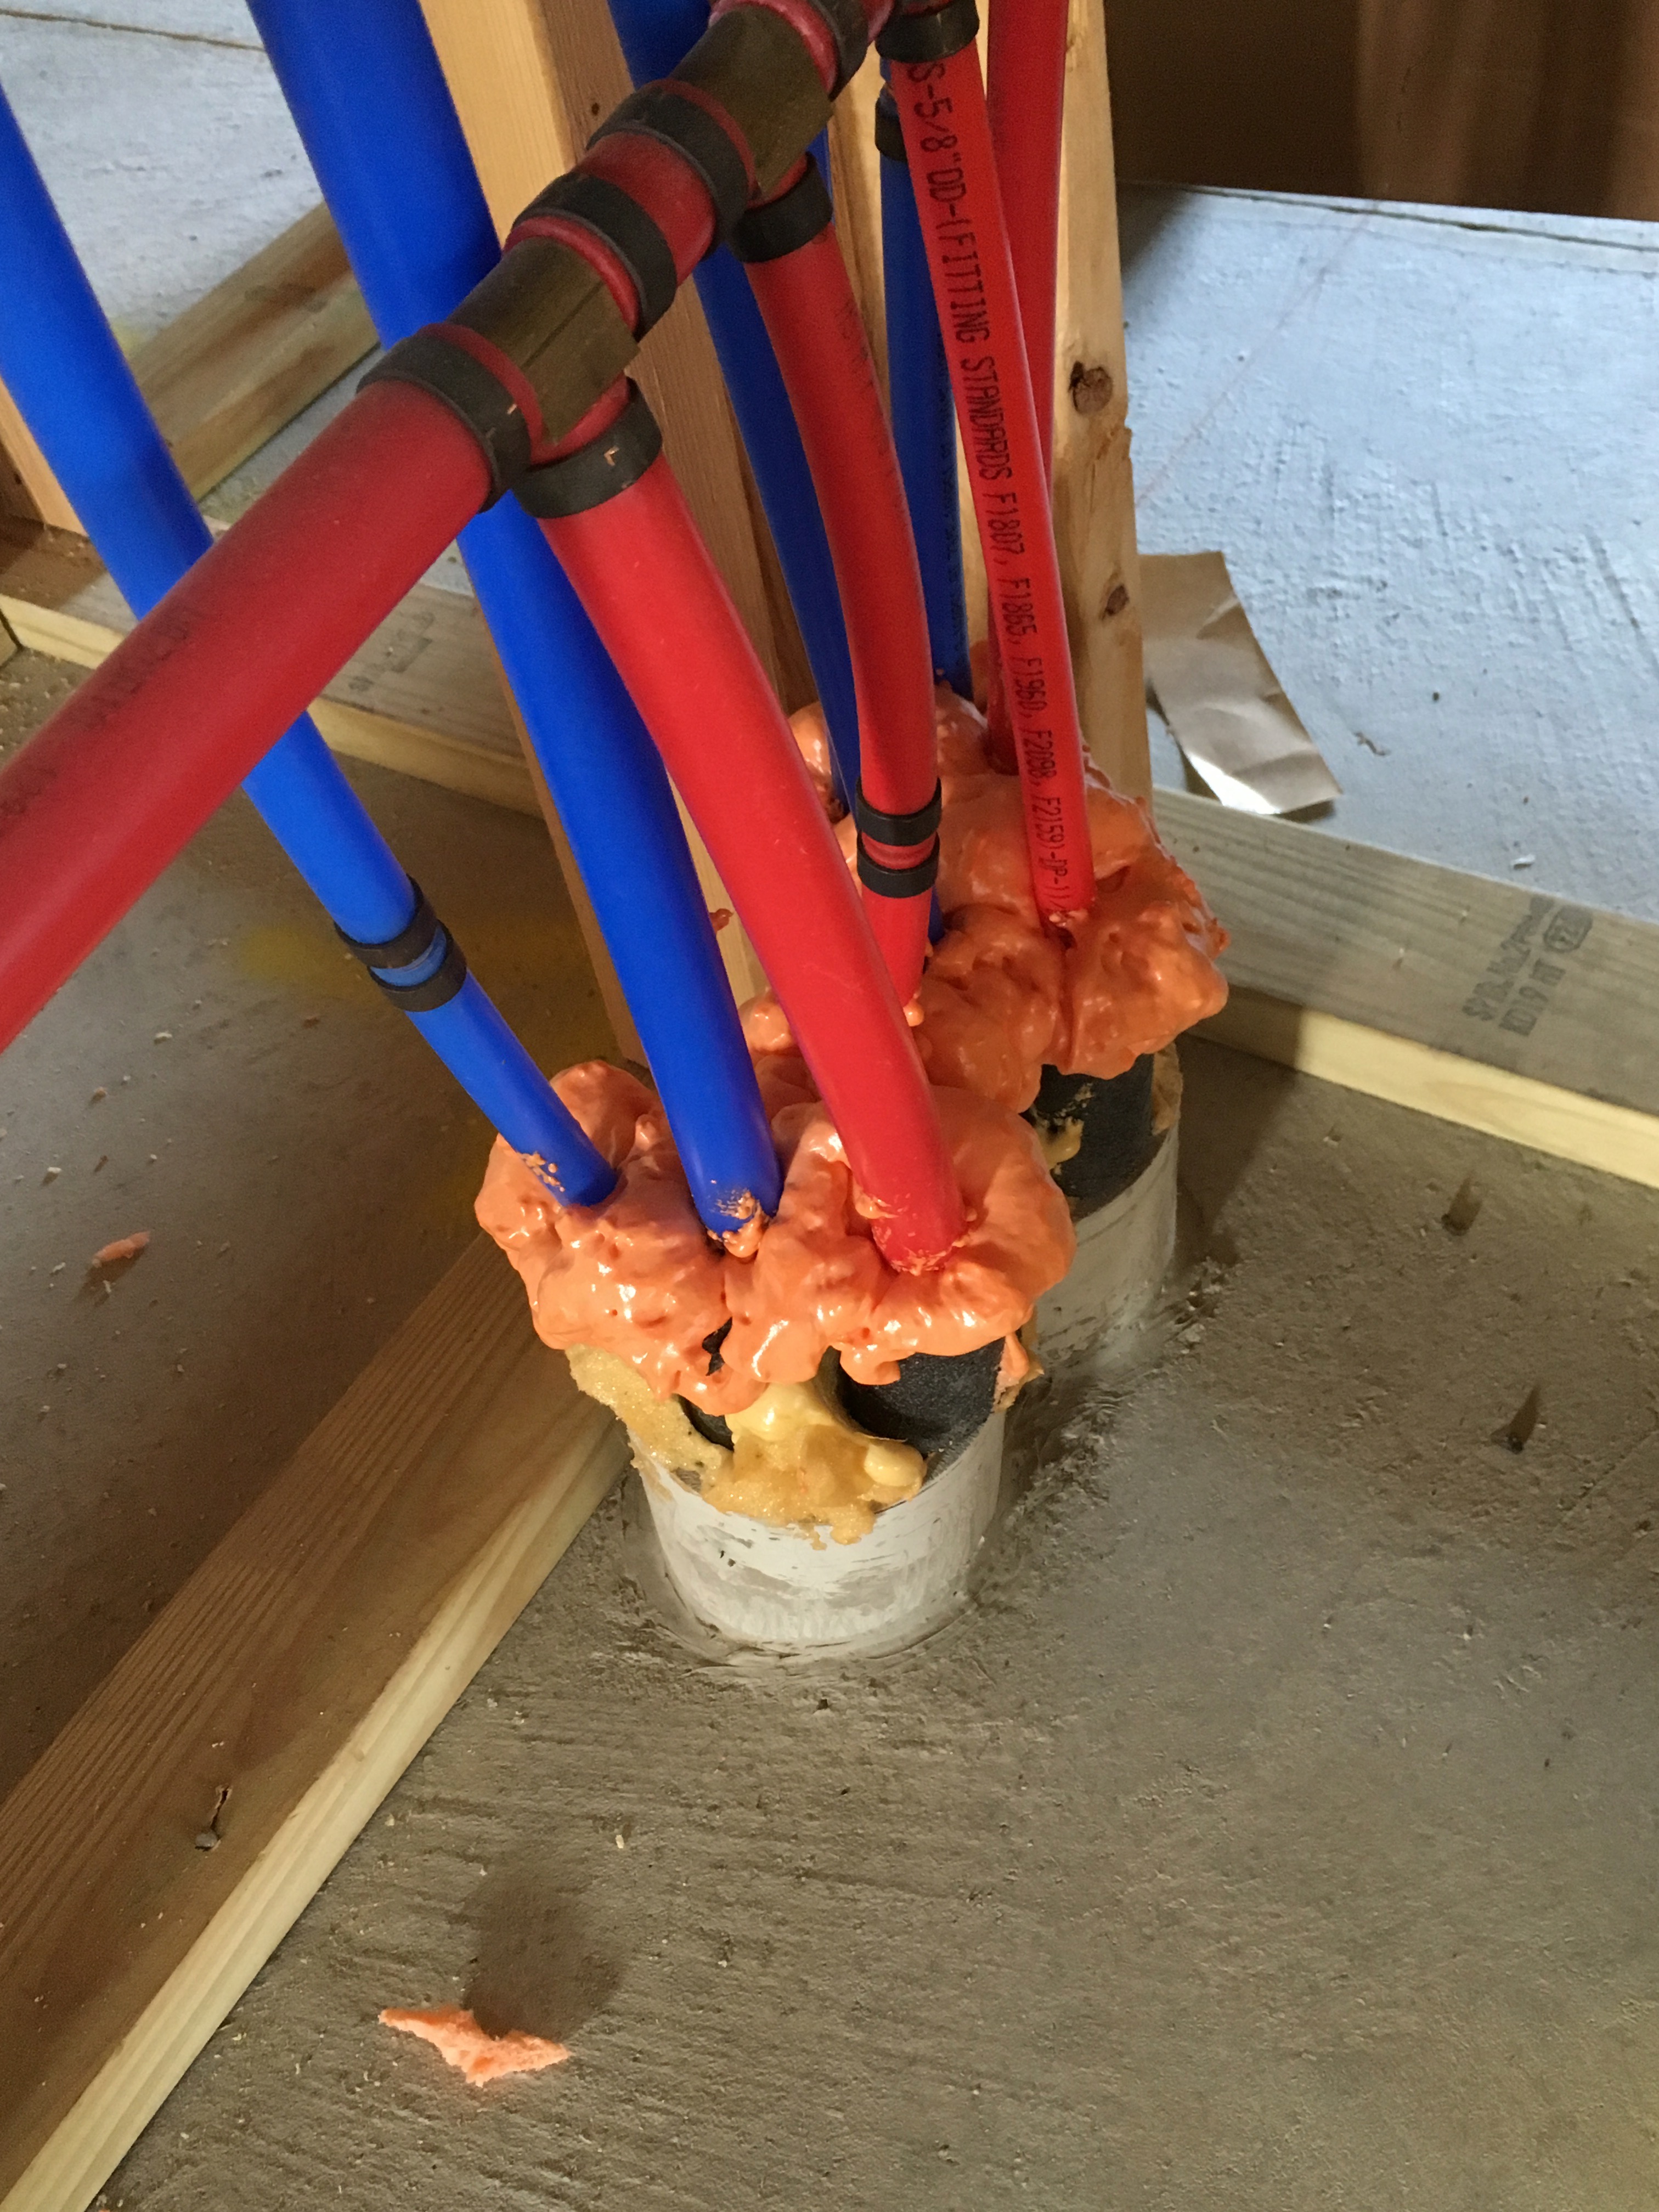
Right – Spray foam insulation fills the header above the door and fills the rim joist between floors.
Image
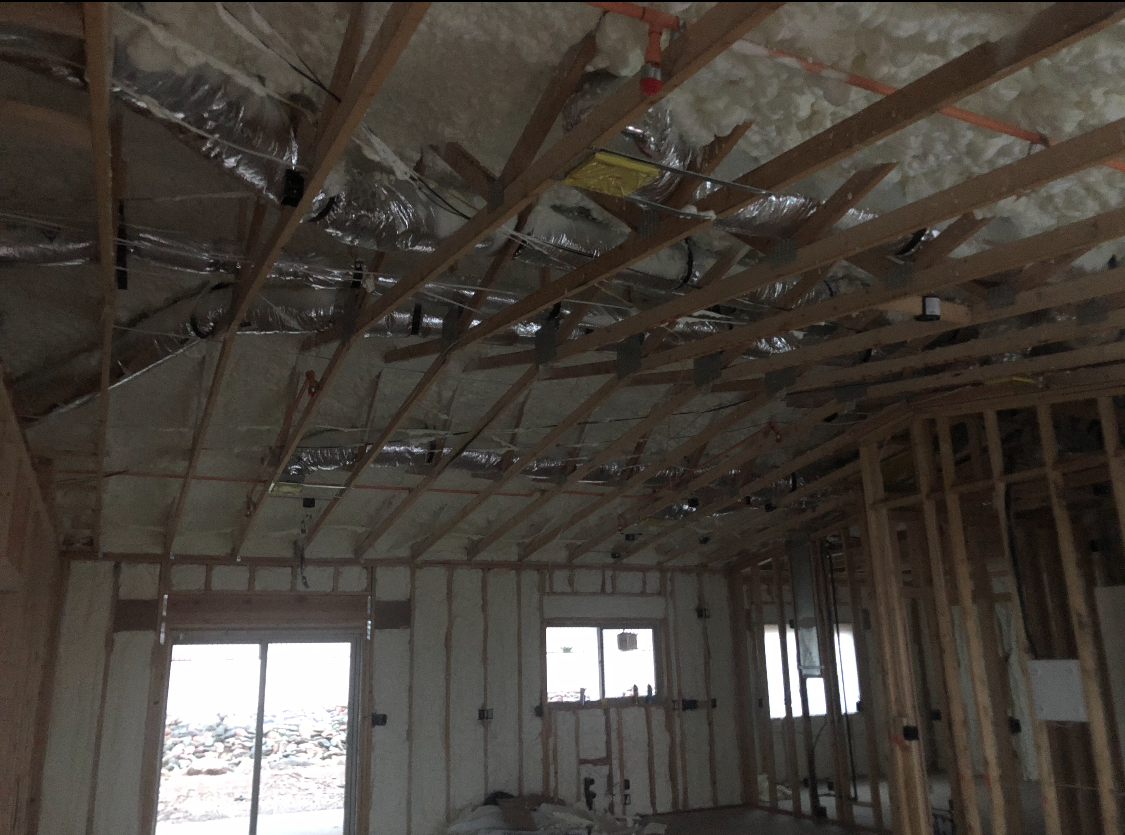
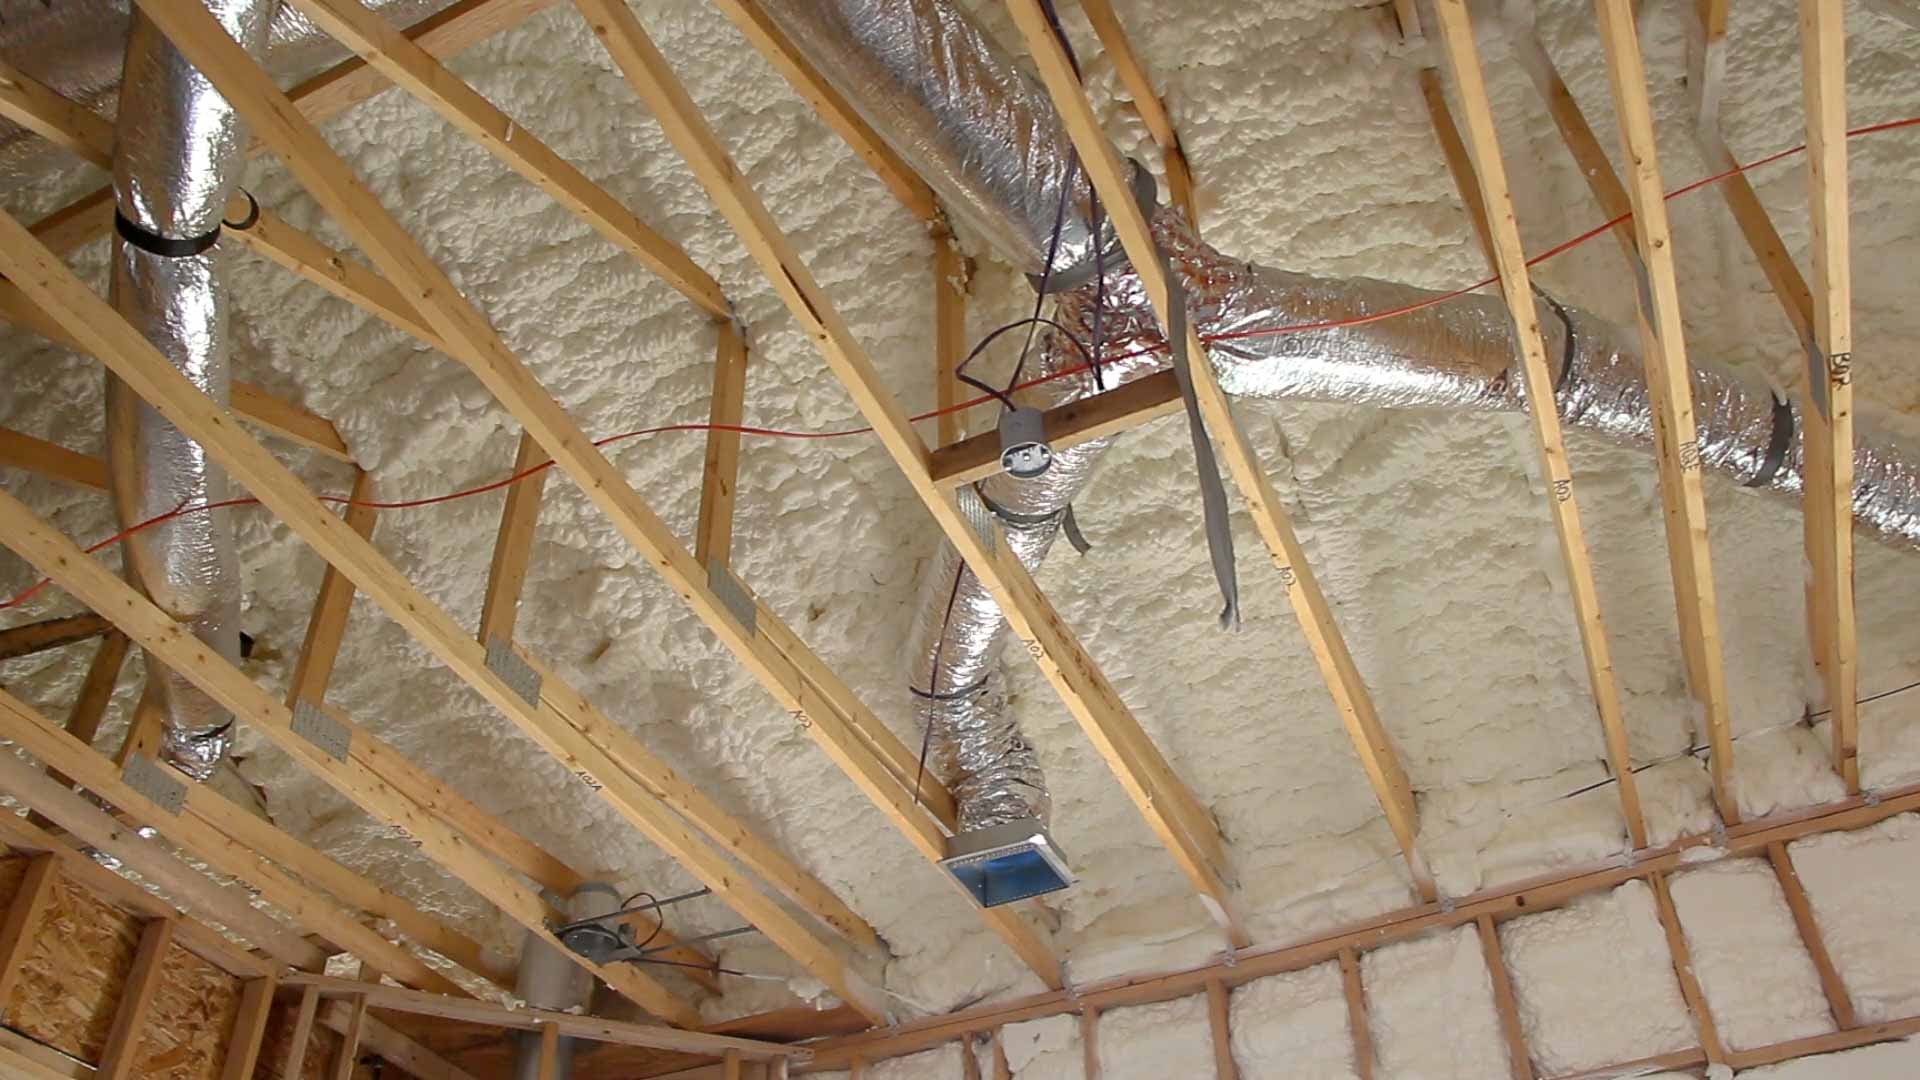
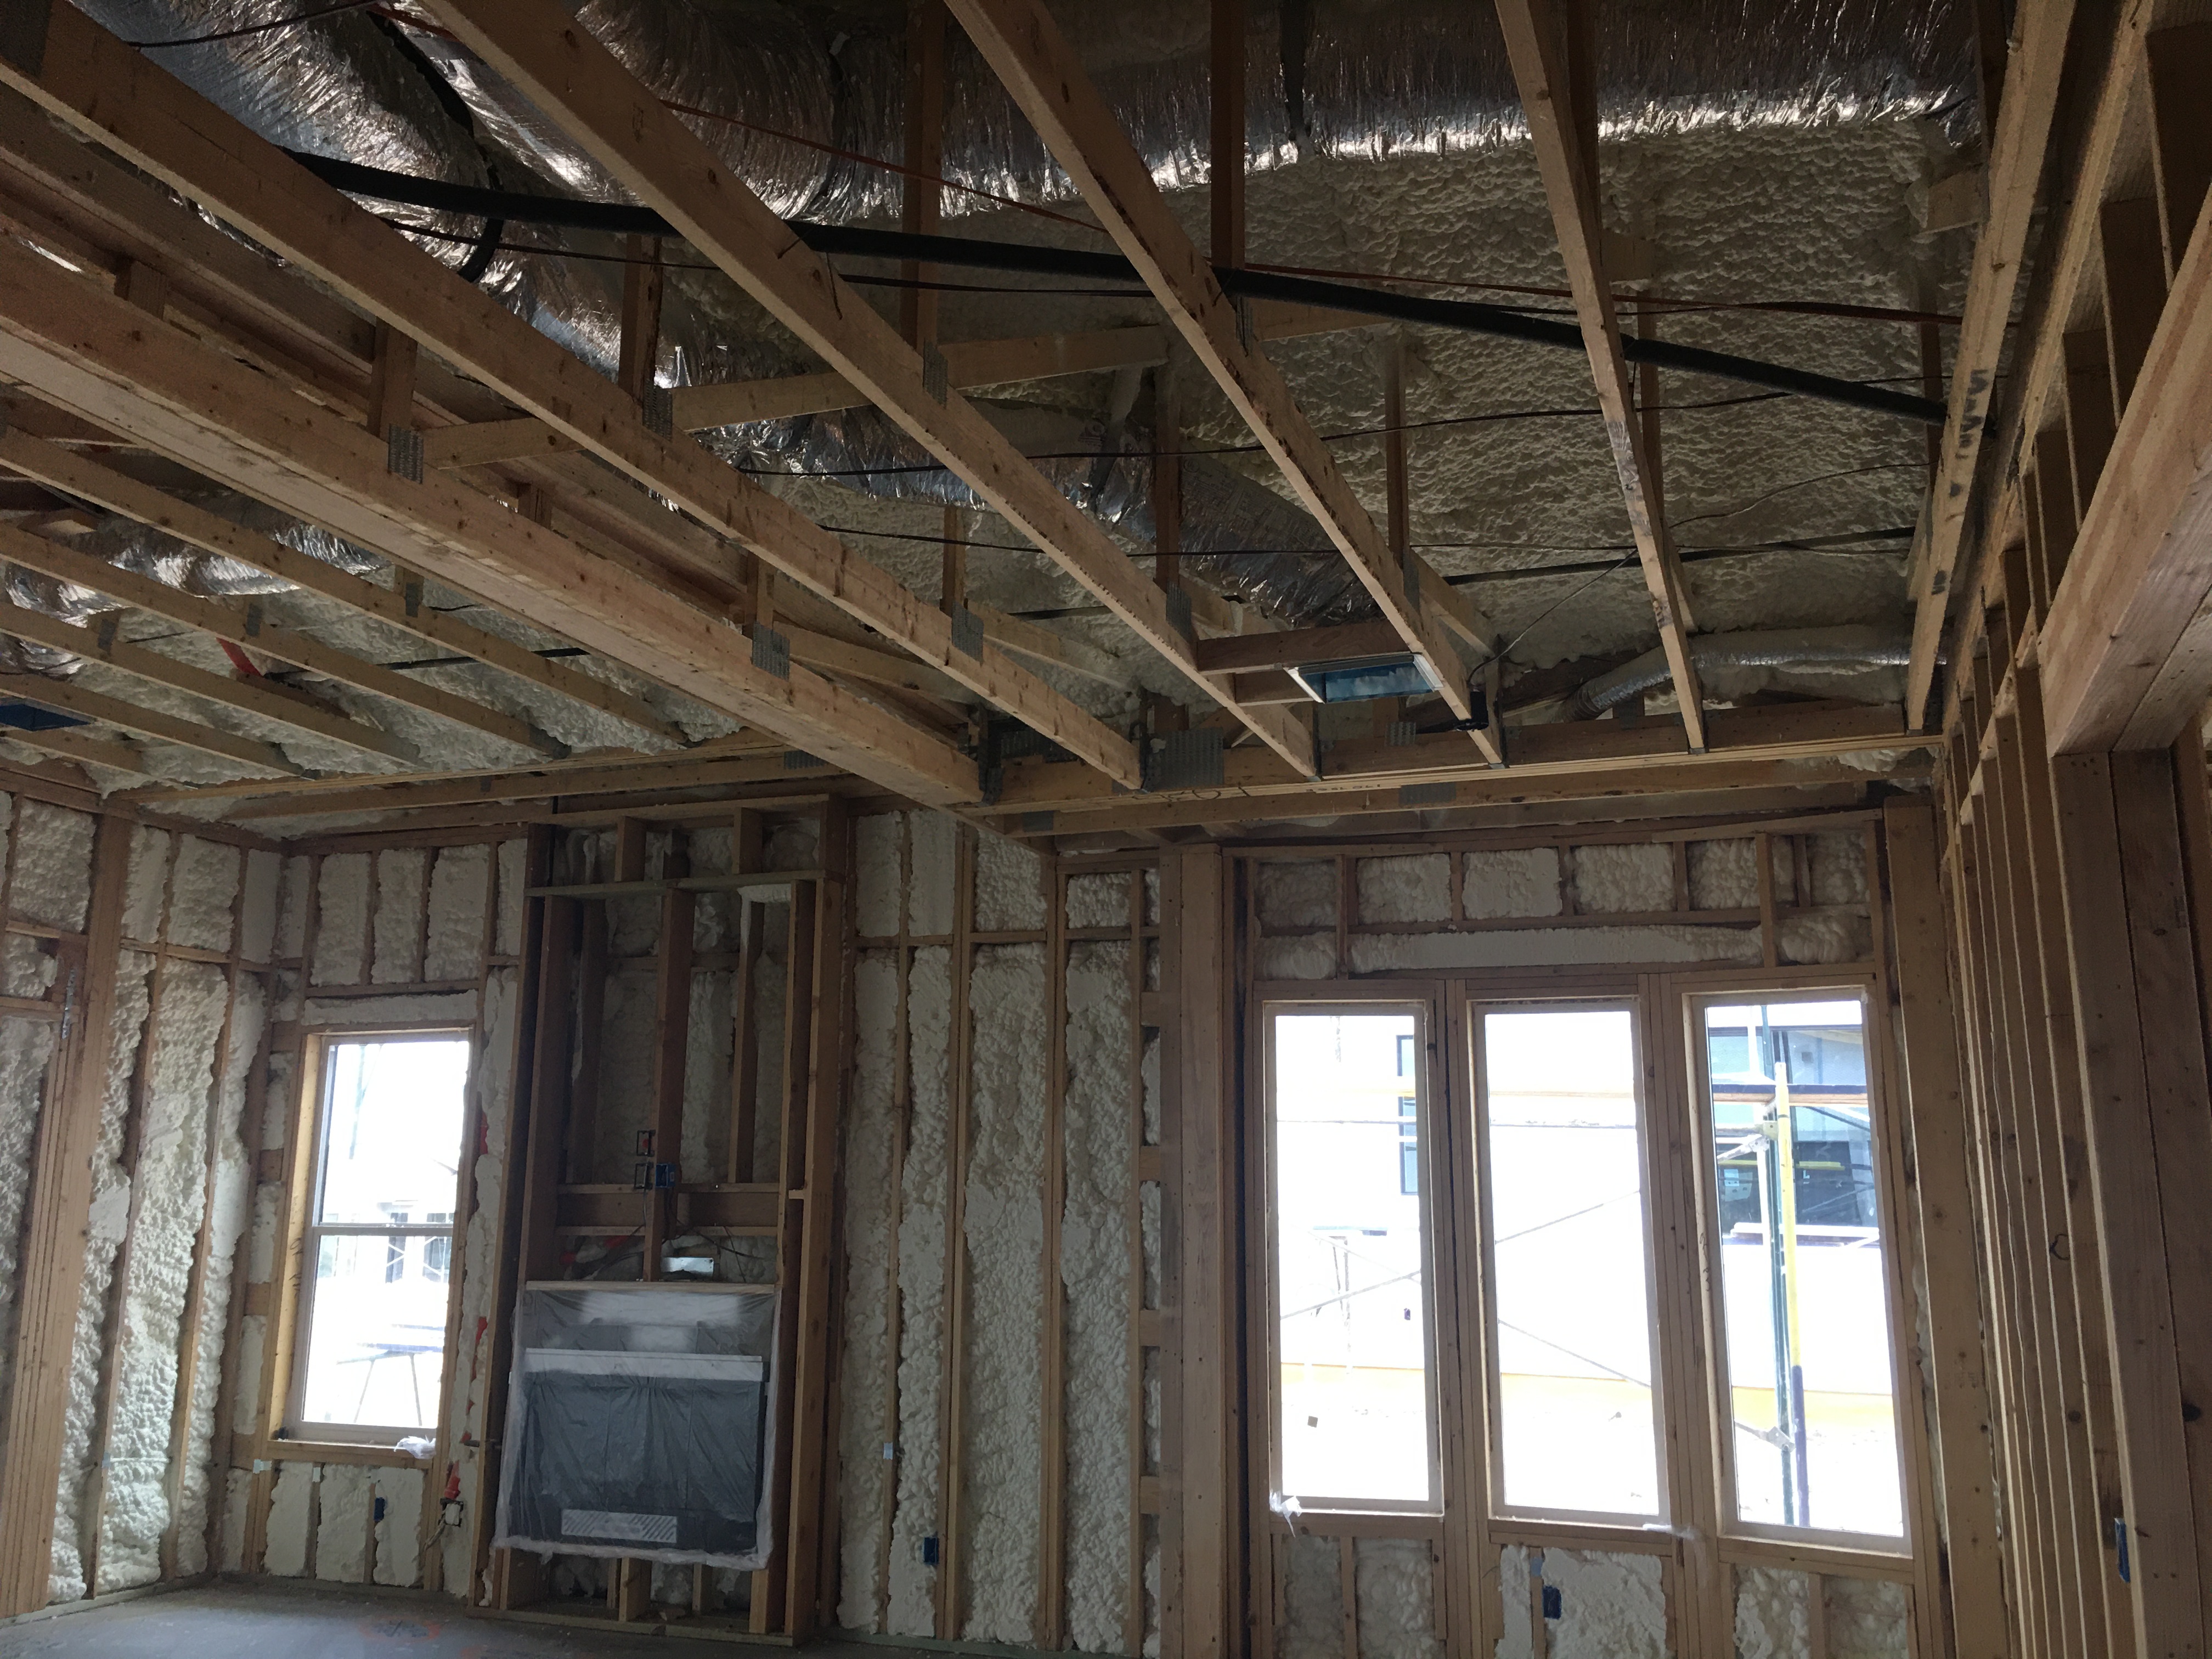
Right – Spray foam insulation is sprayed on the underside of the roof deck to provide a conditioned space in this low attic for the HVAC ducts.
Image

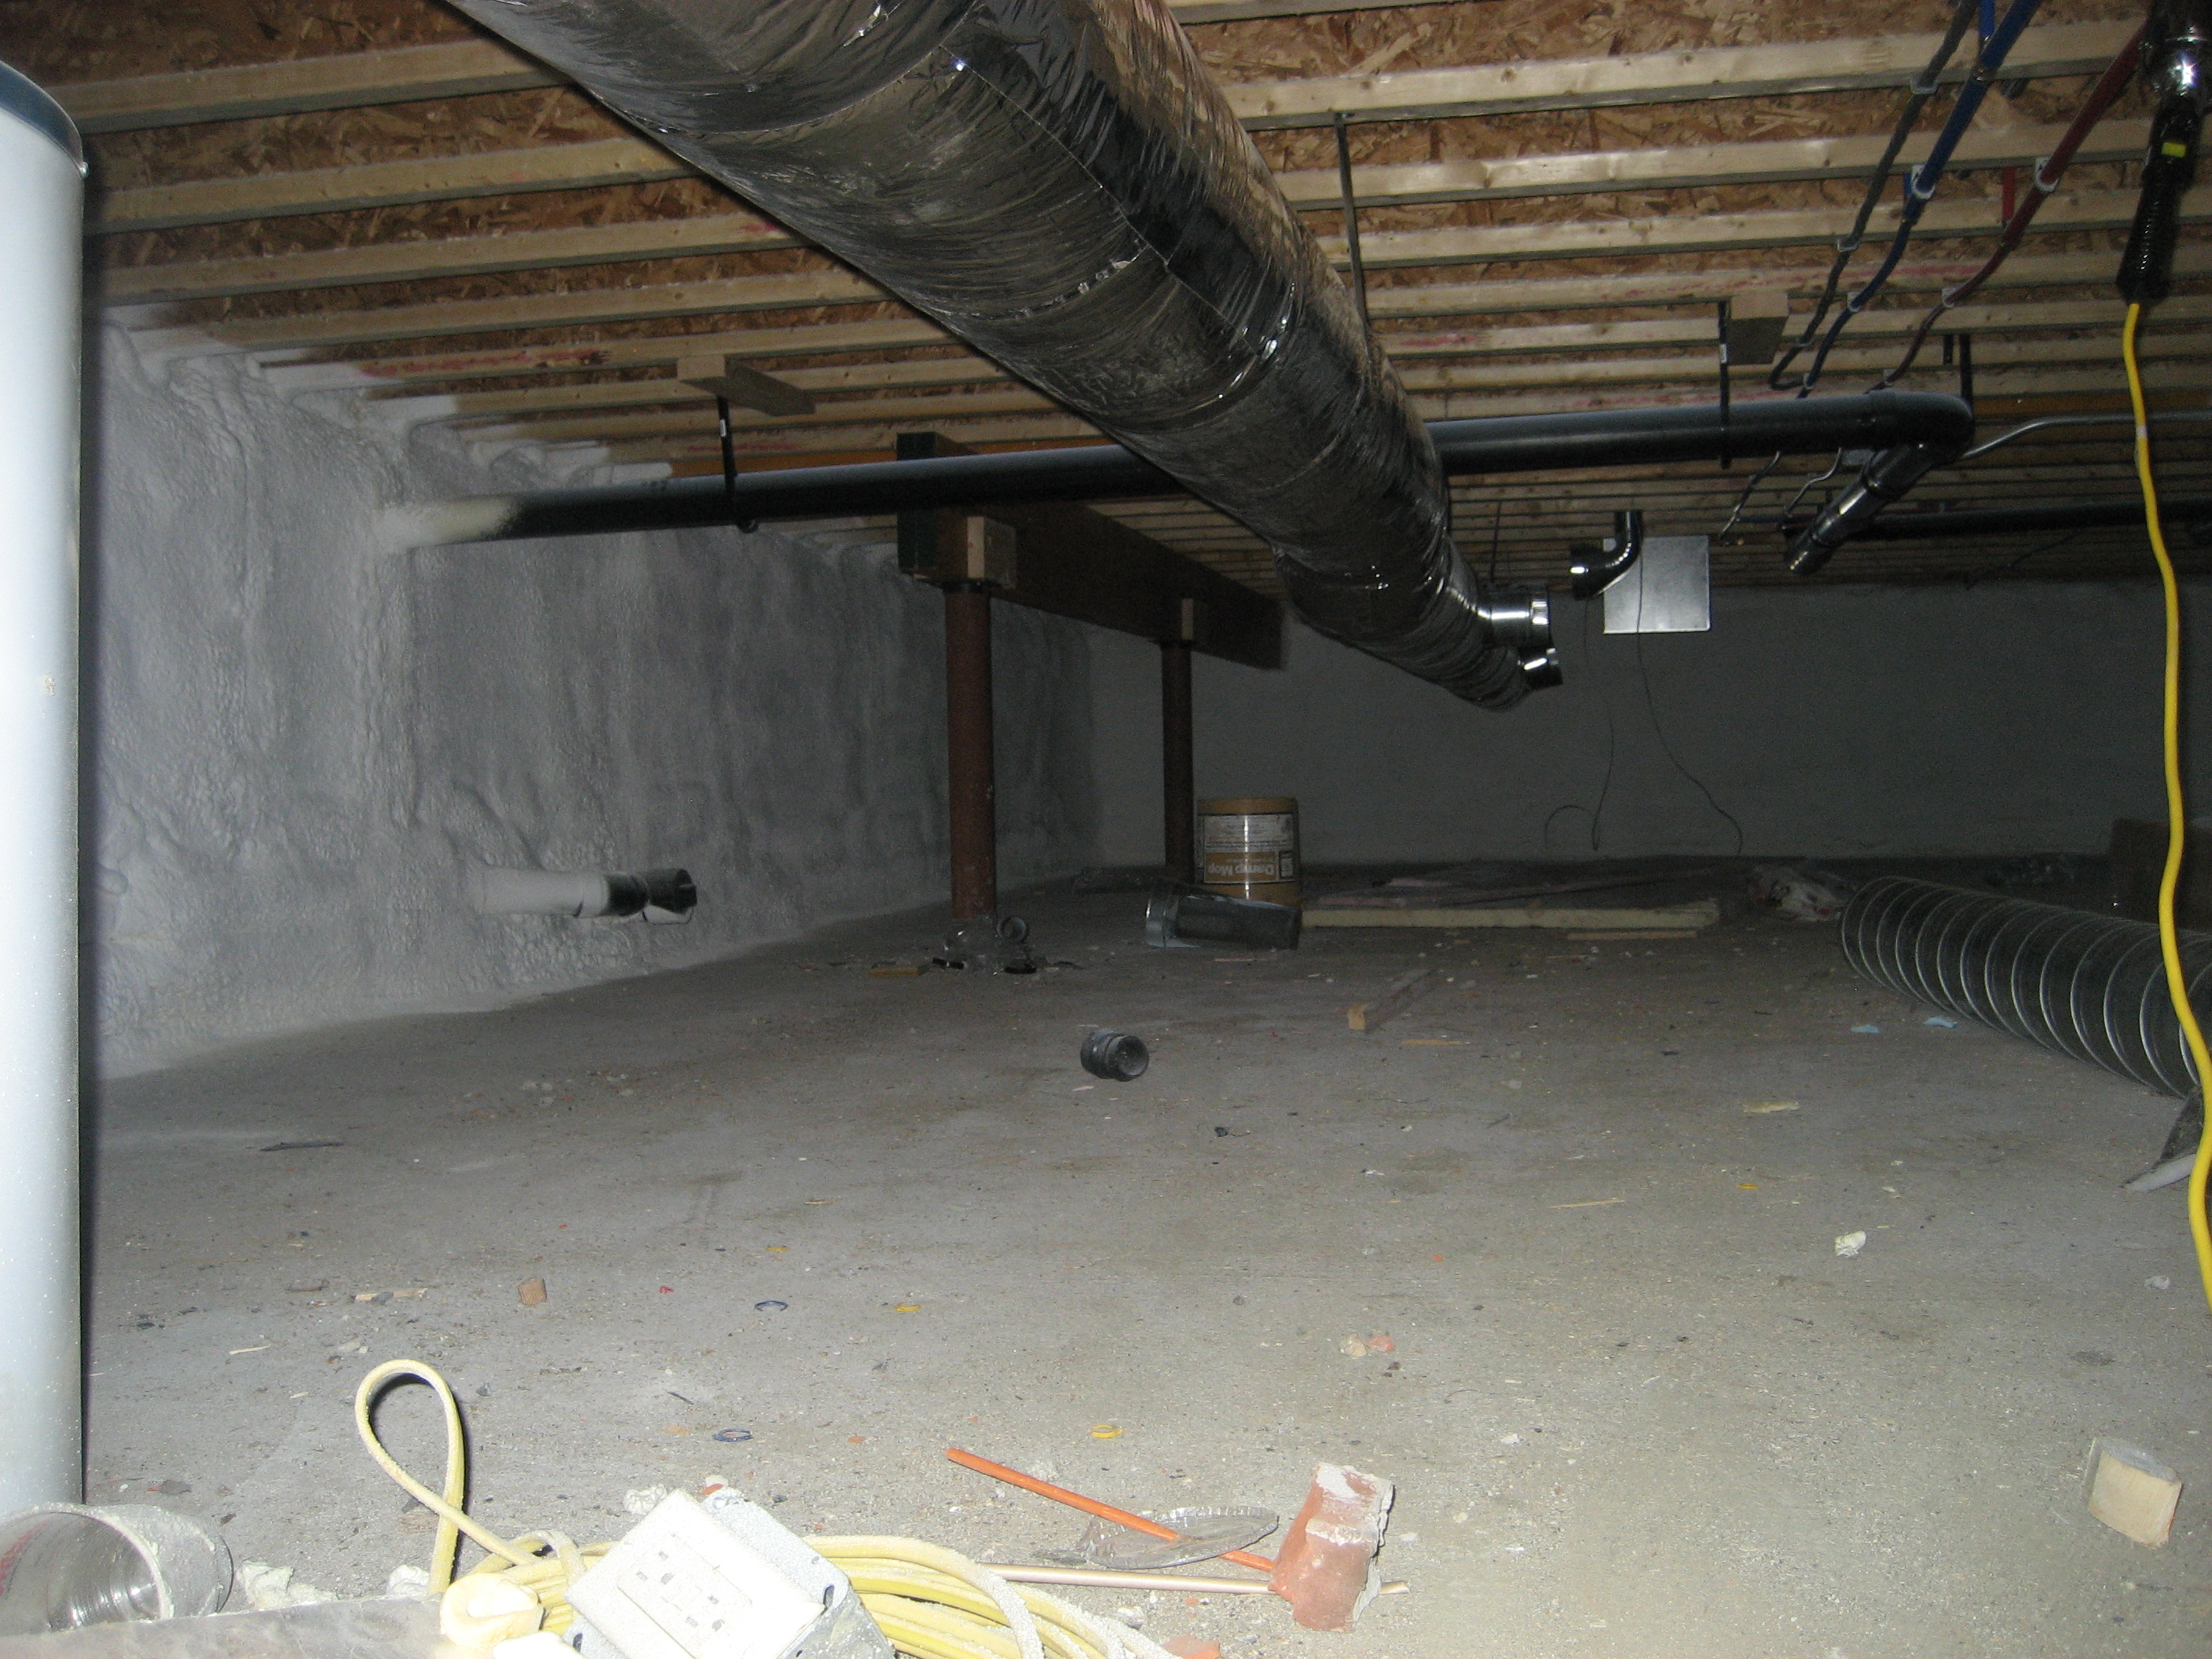
Right – Spray foam insulation was sprayed onto the ground and along the sides of the foundation walls and piers of this insulated crawl space.
Image
Image

Image
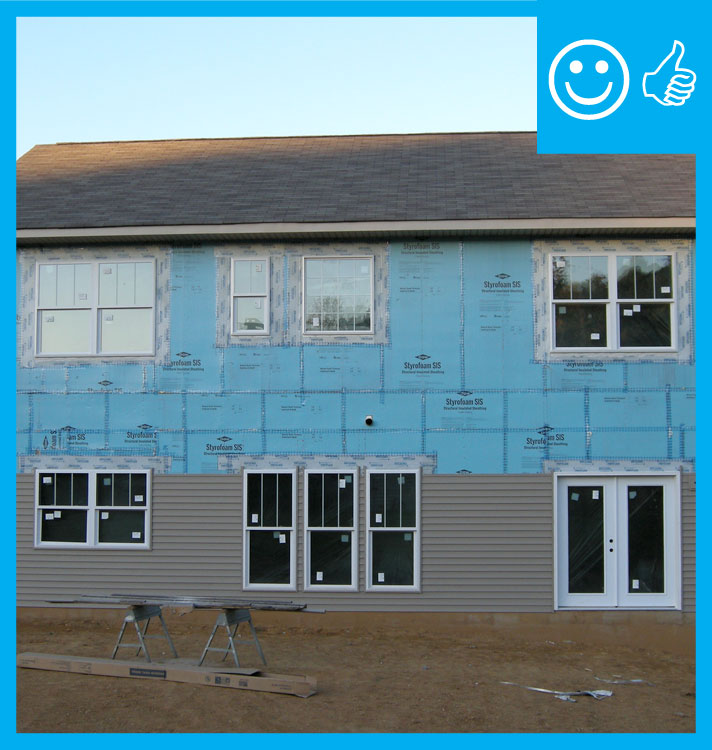
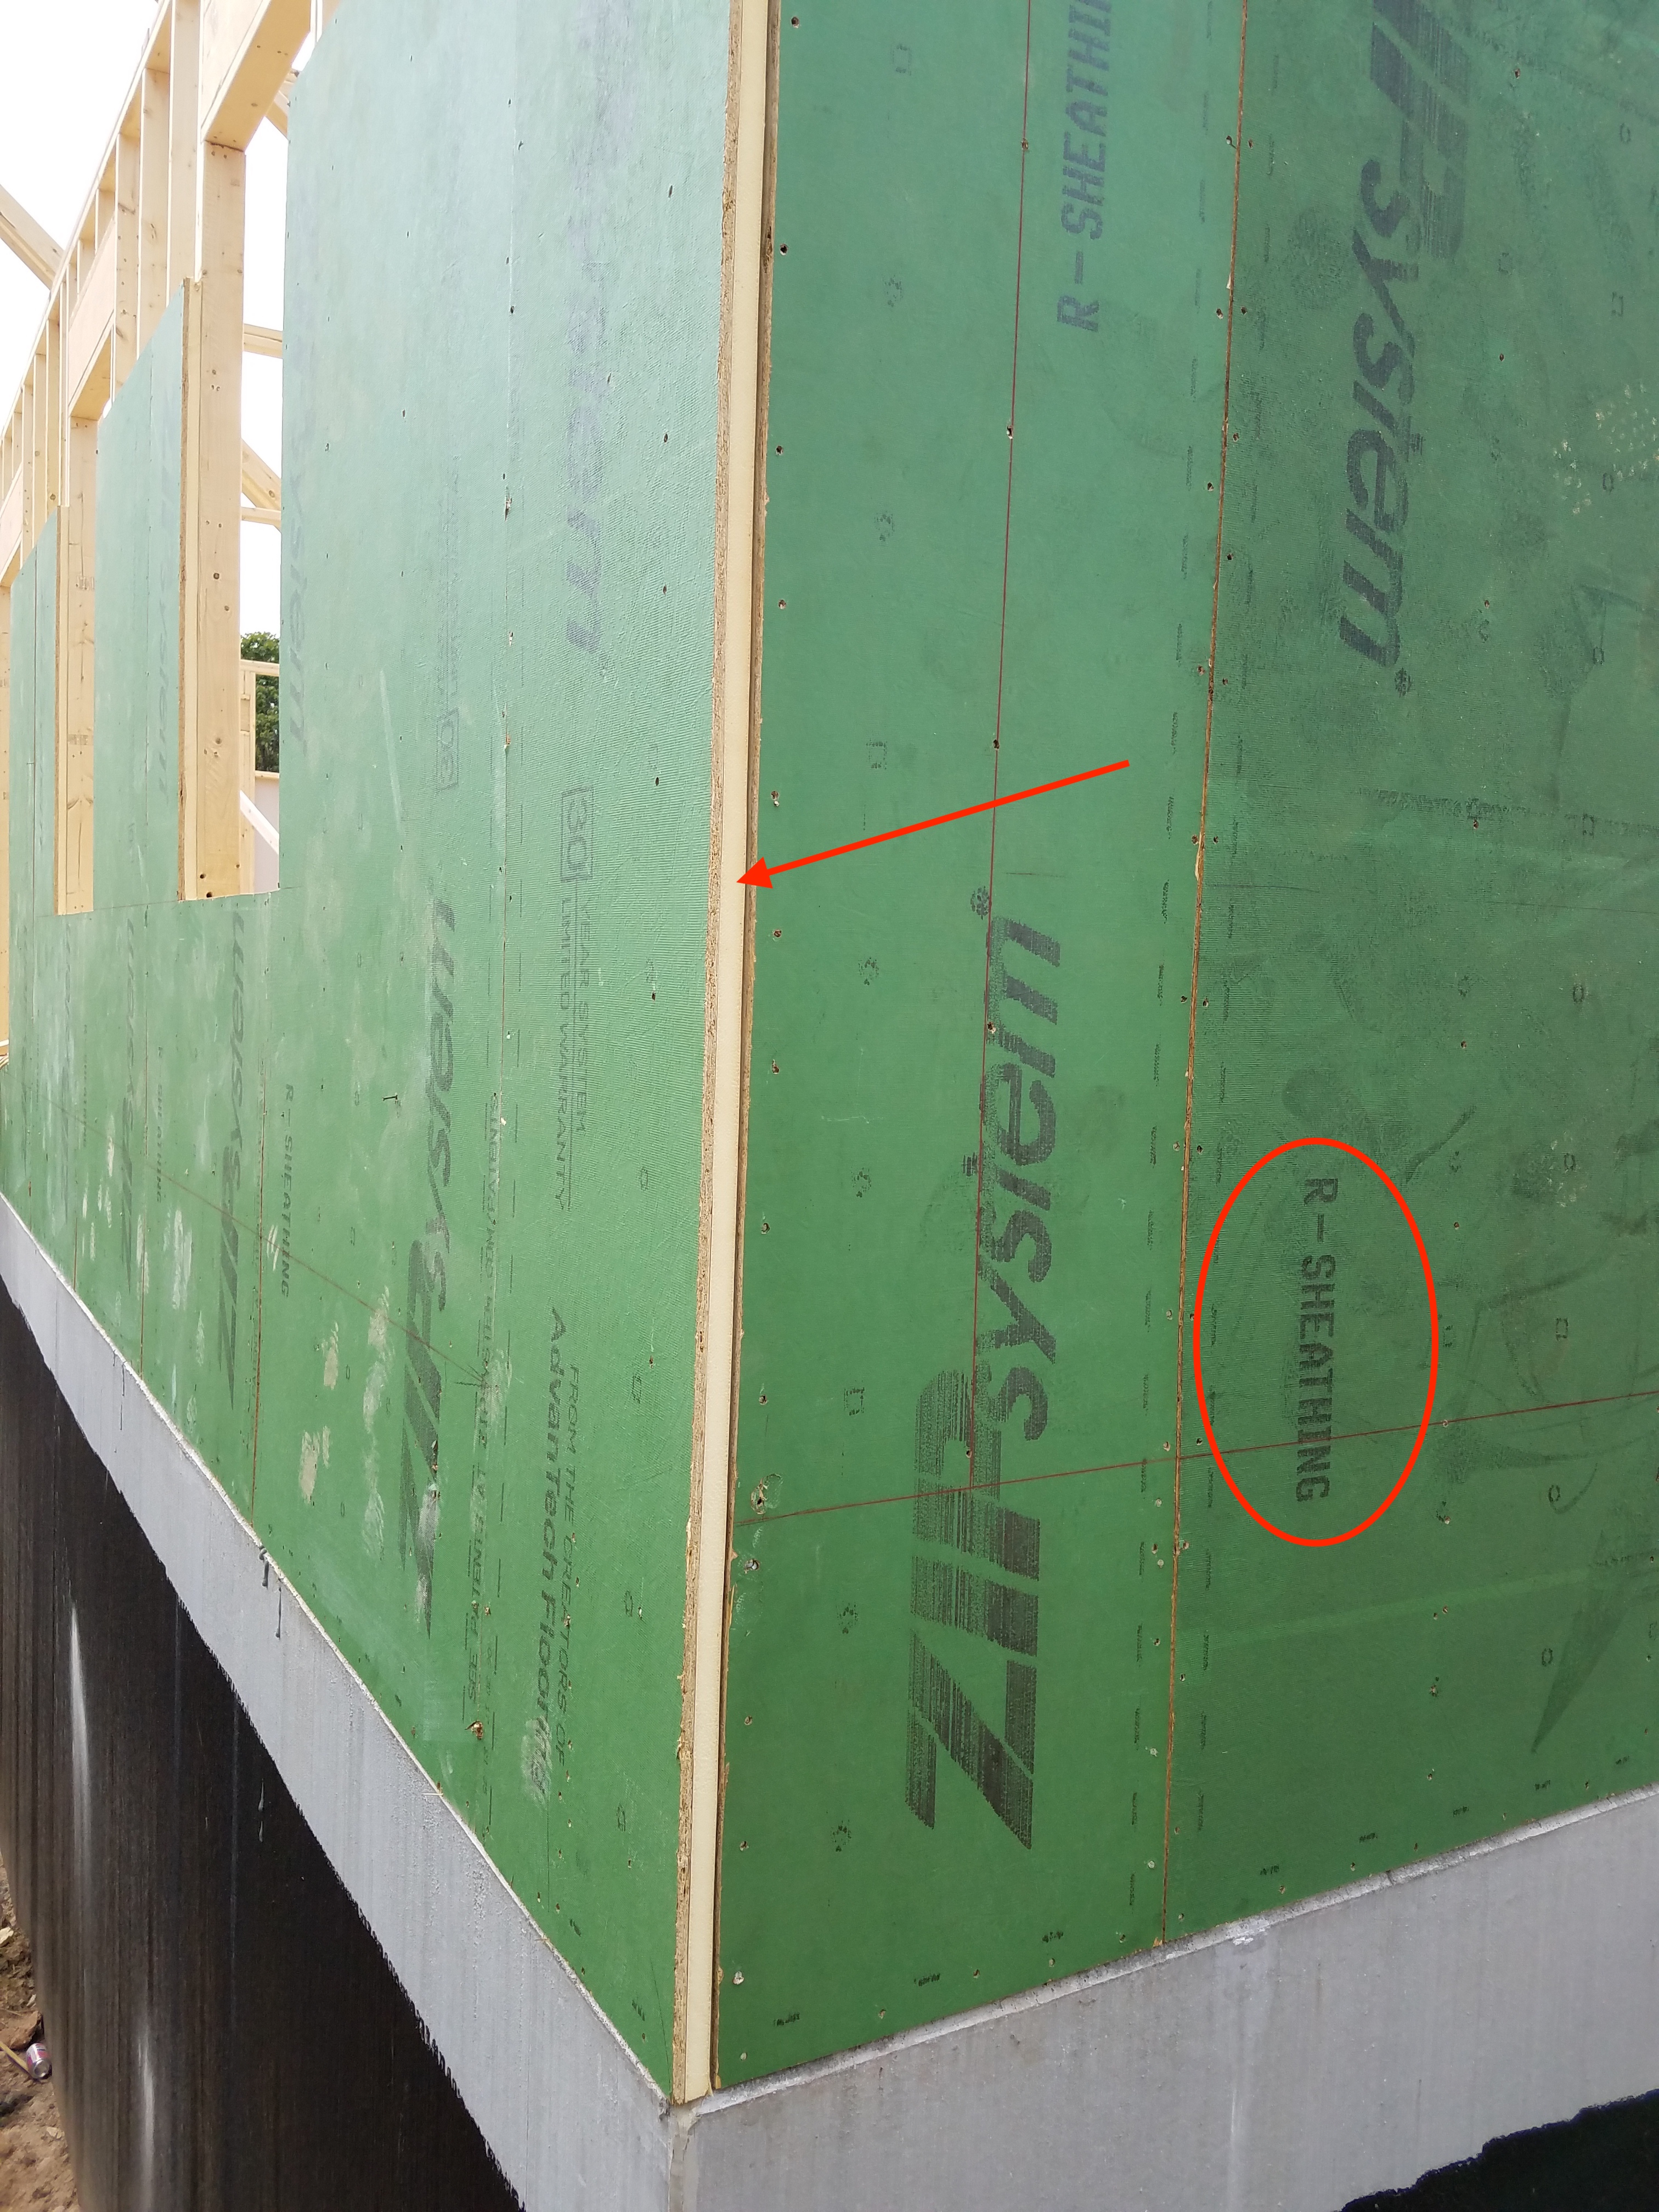
Right – Structural insulated sheathing can provide racking strength (lateral load resistance), and serve as an air barrier and thermal barrier if installed according to manufacturer’s specifications with taped, sealed seams
Image

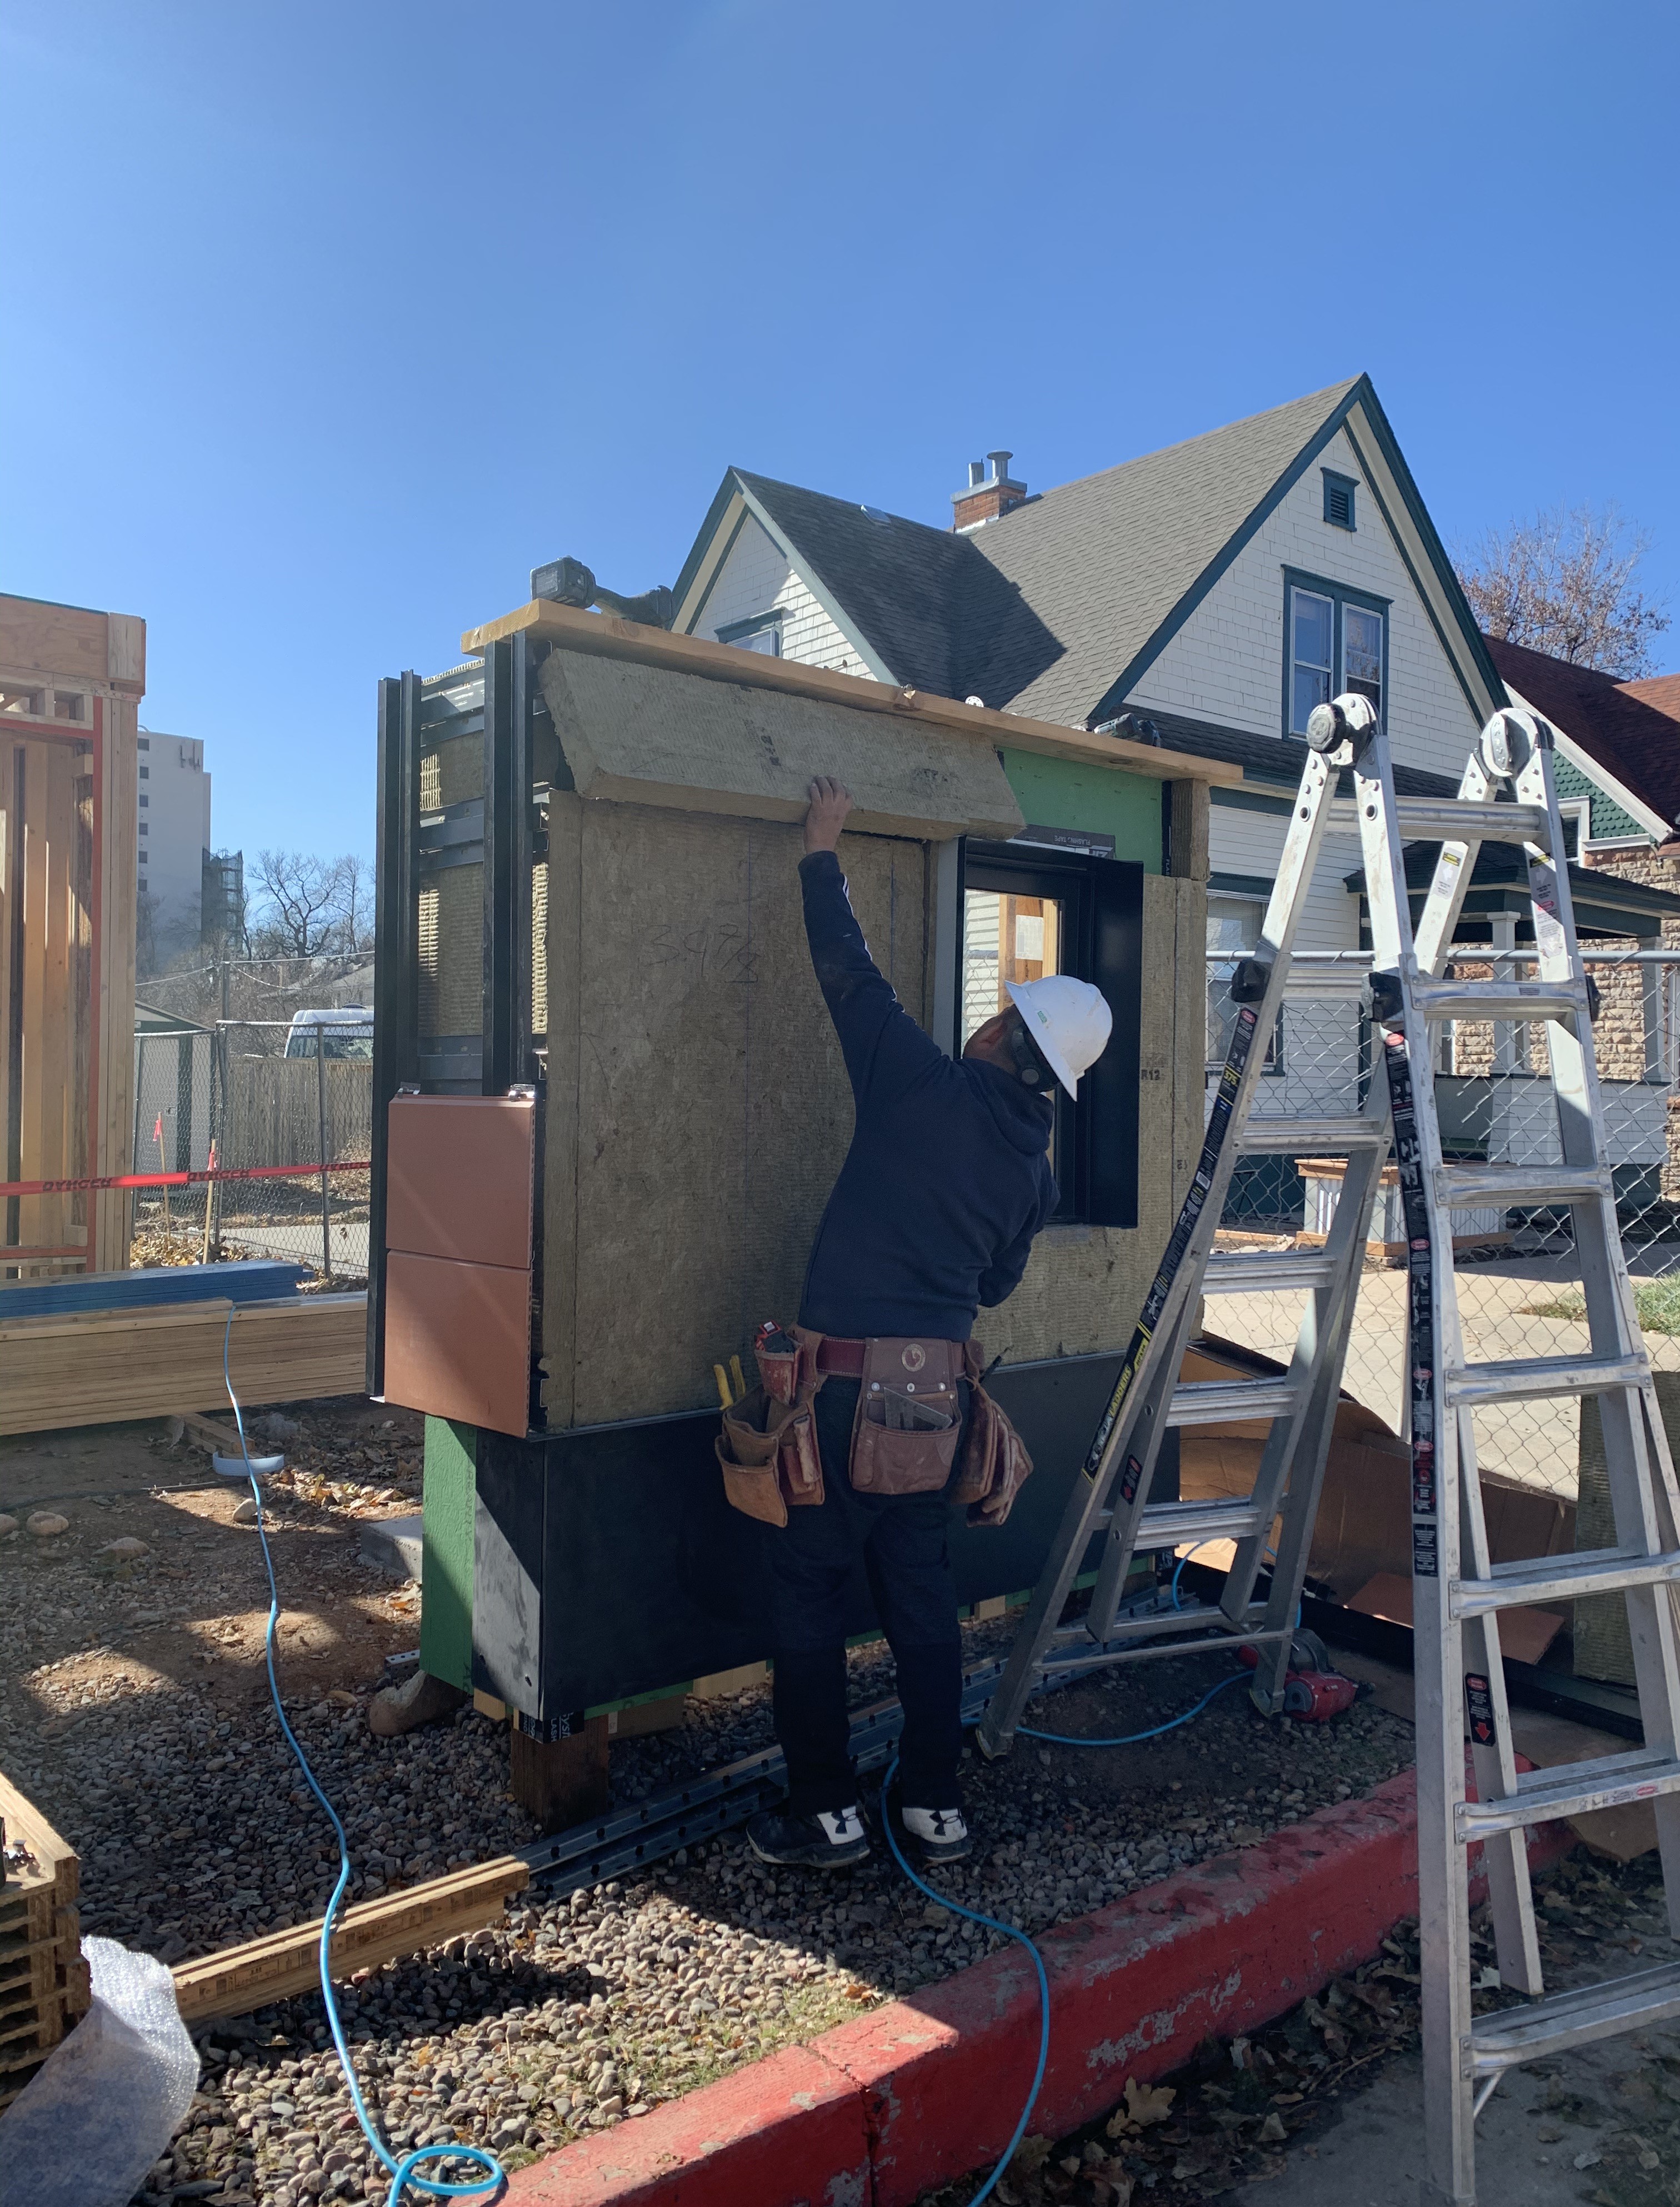
Right – Terra cotta tiles are attached to horizontal metal furring strips as the exterior cladding over mineral wool insulation on this multi-family building in Colorado.
Image
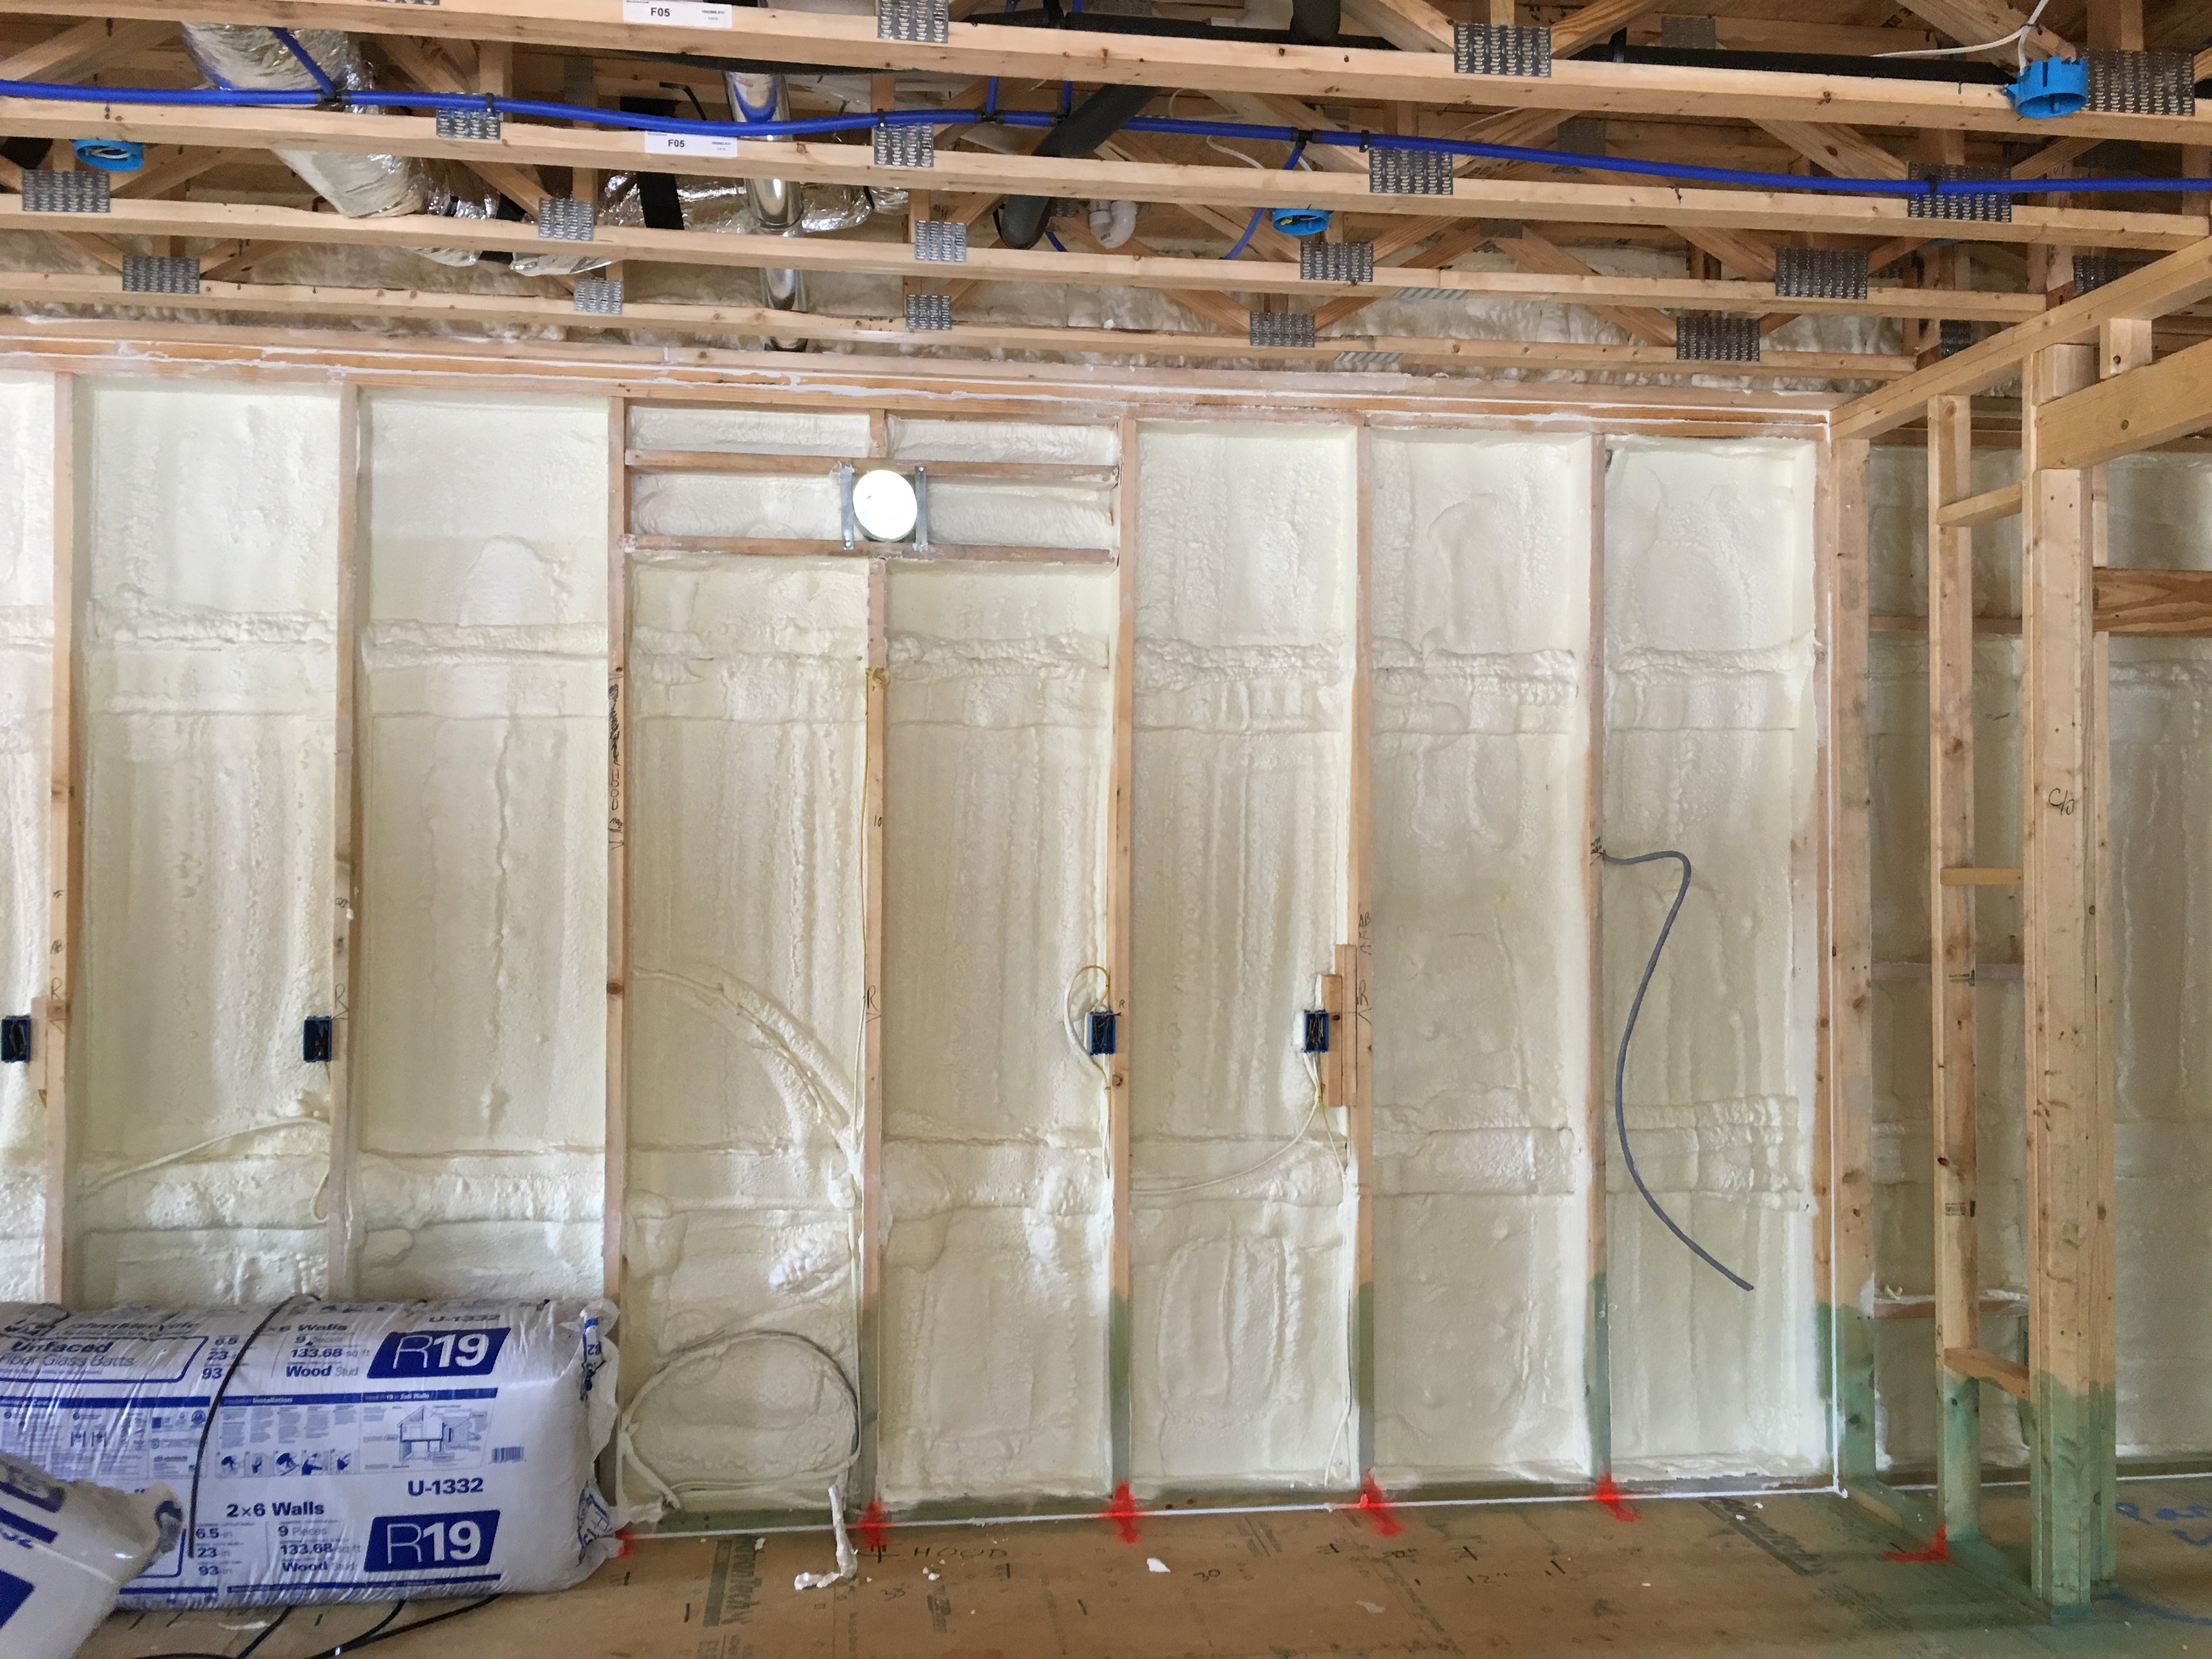
Right – the 2x6 walls are insulated with a flash-and-batt approach that includes spraying the wall cavities with one inch of open-cell foam to seal the sheathing to the framing then filling the wall cavities with R-19 fiberglass batts that are compressed
Image
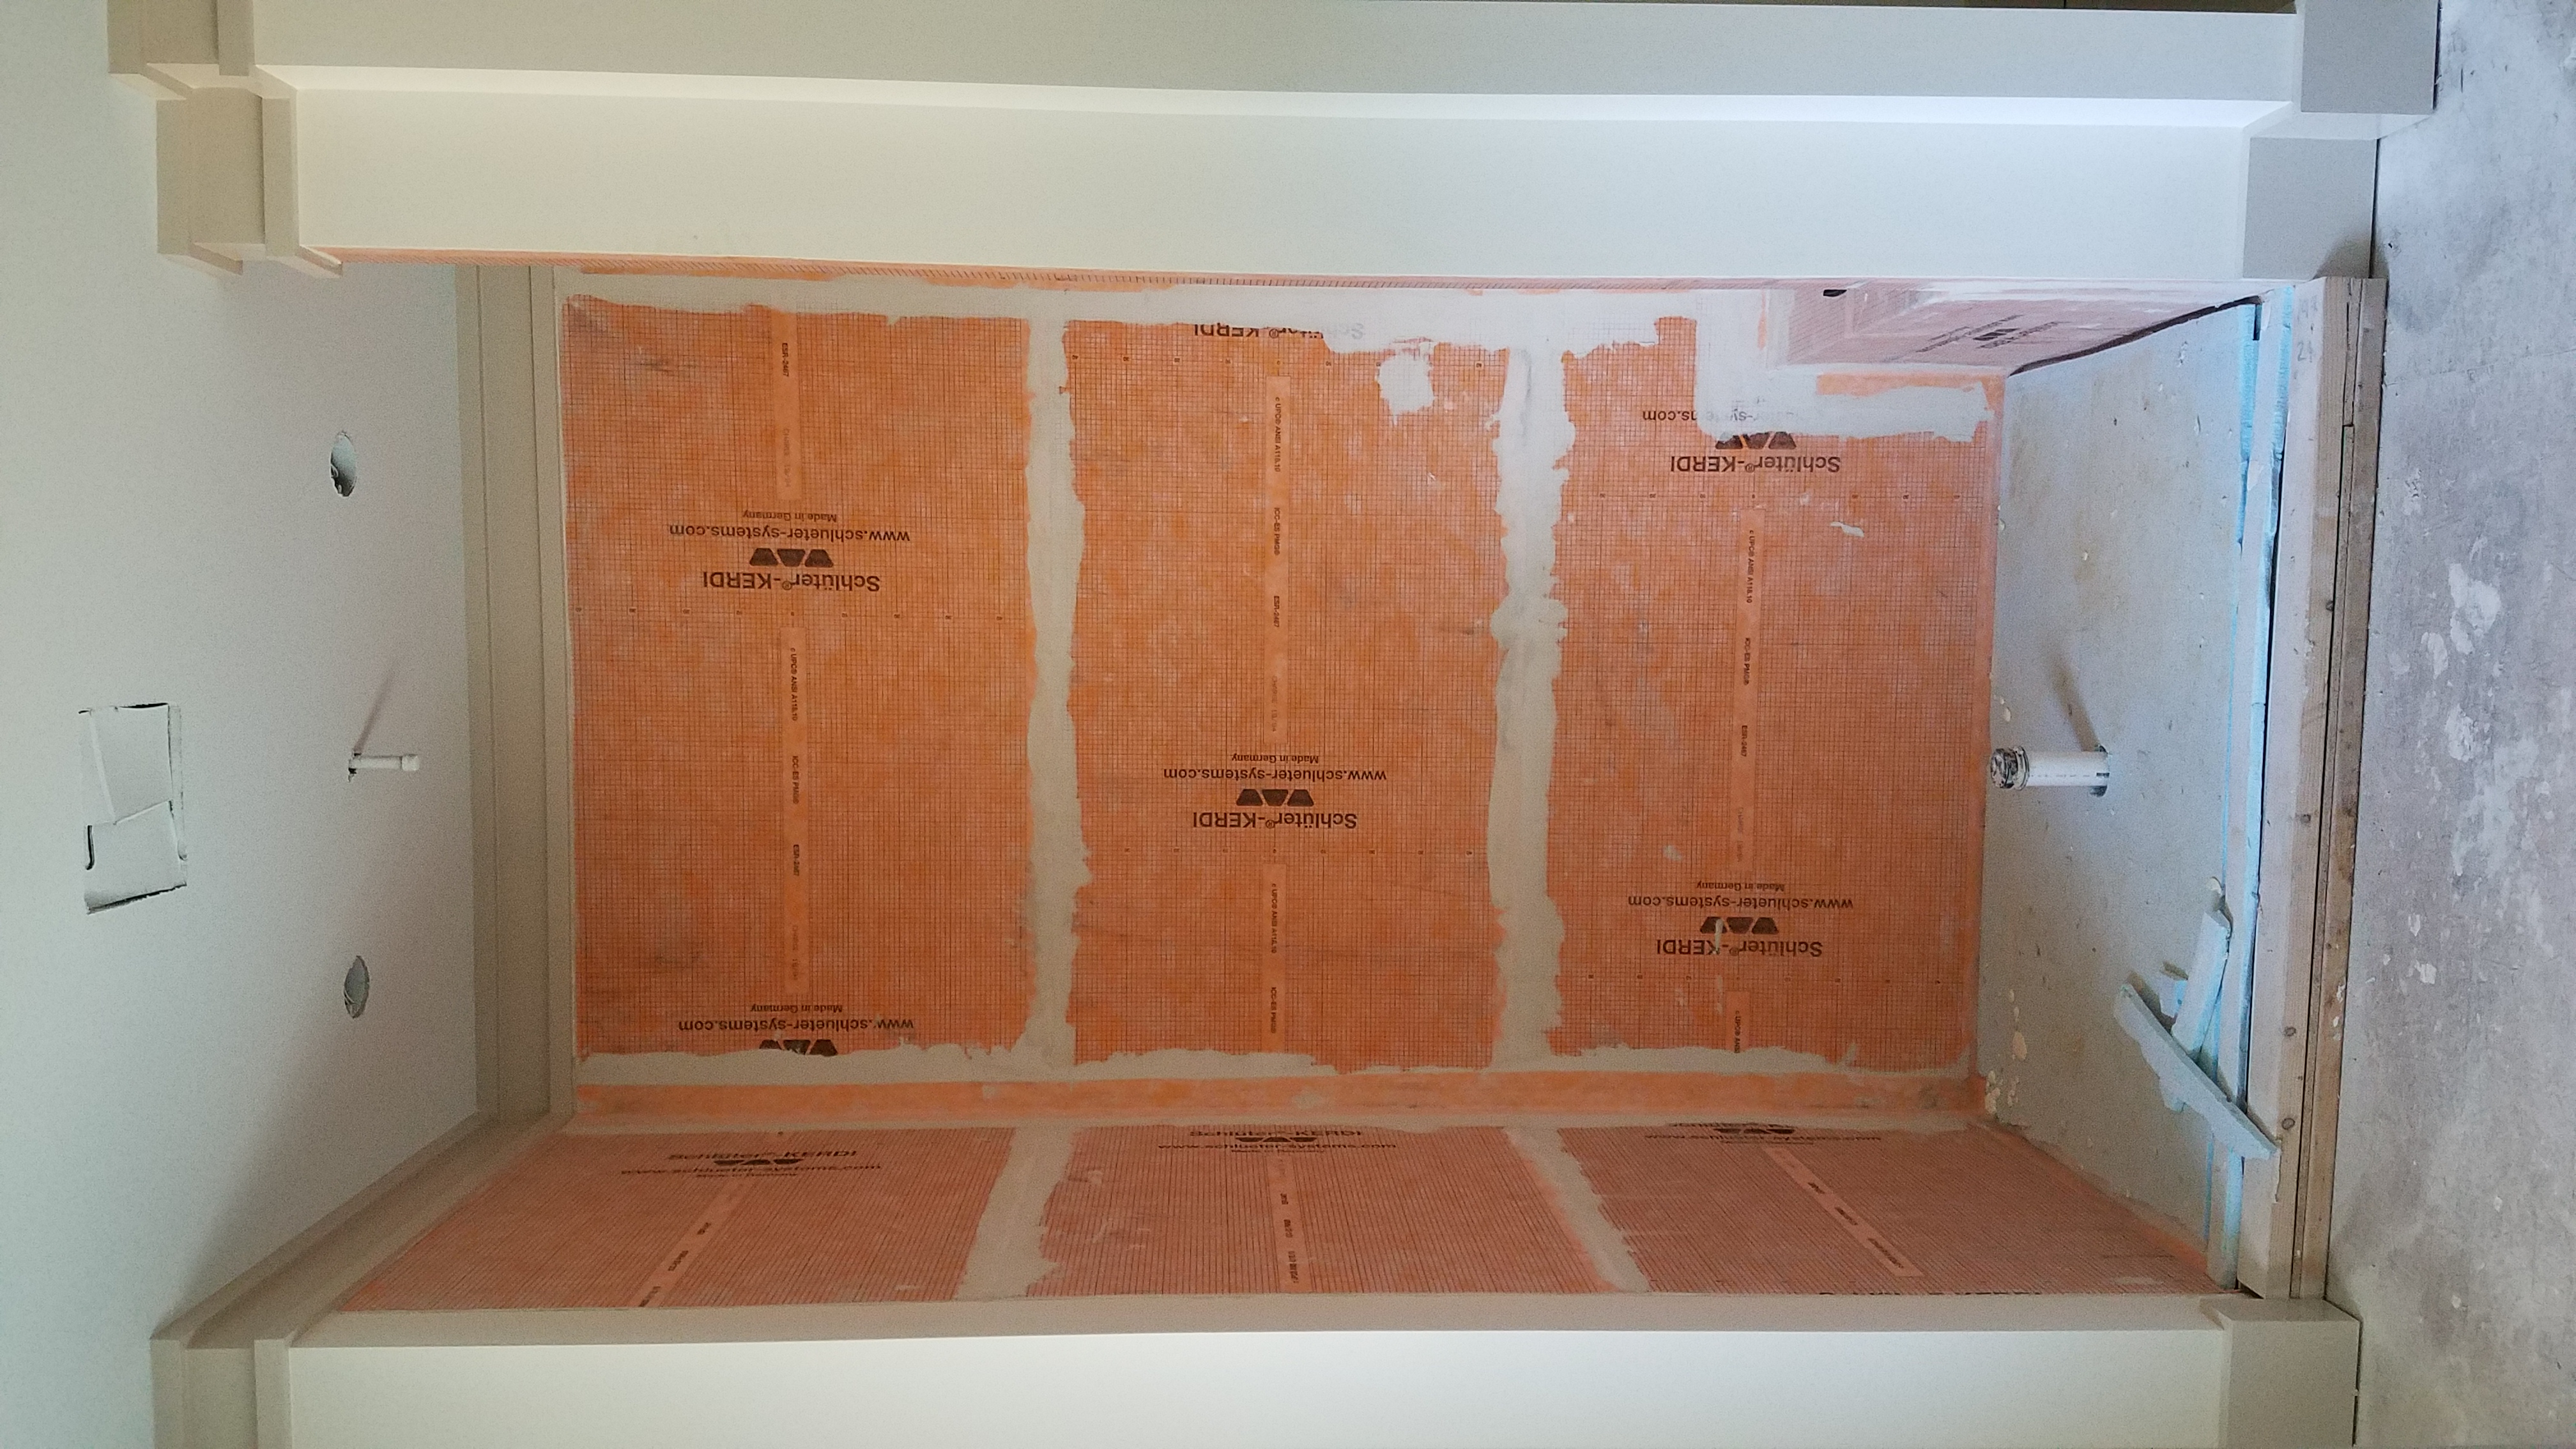
Right – The air- and water-barrier material lining the shower stall is mastic sealed to prevent leakage and rigid foam insulation is installed on the floor of the shower.
Image
Image
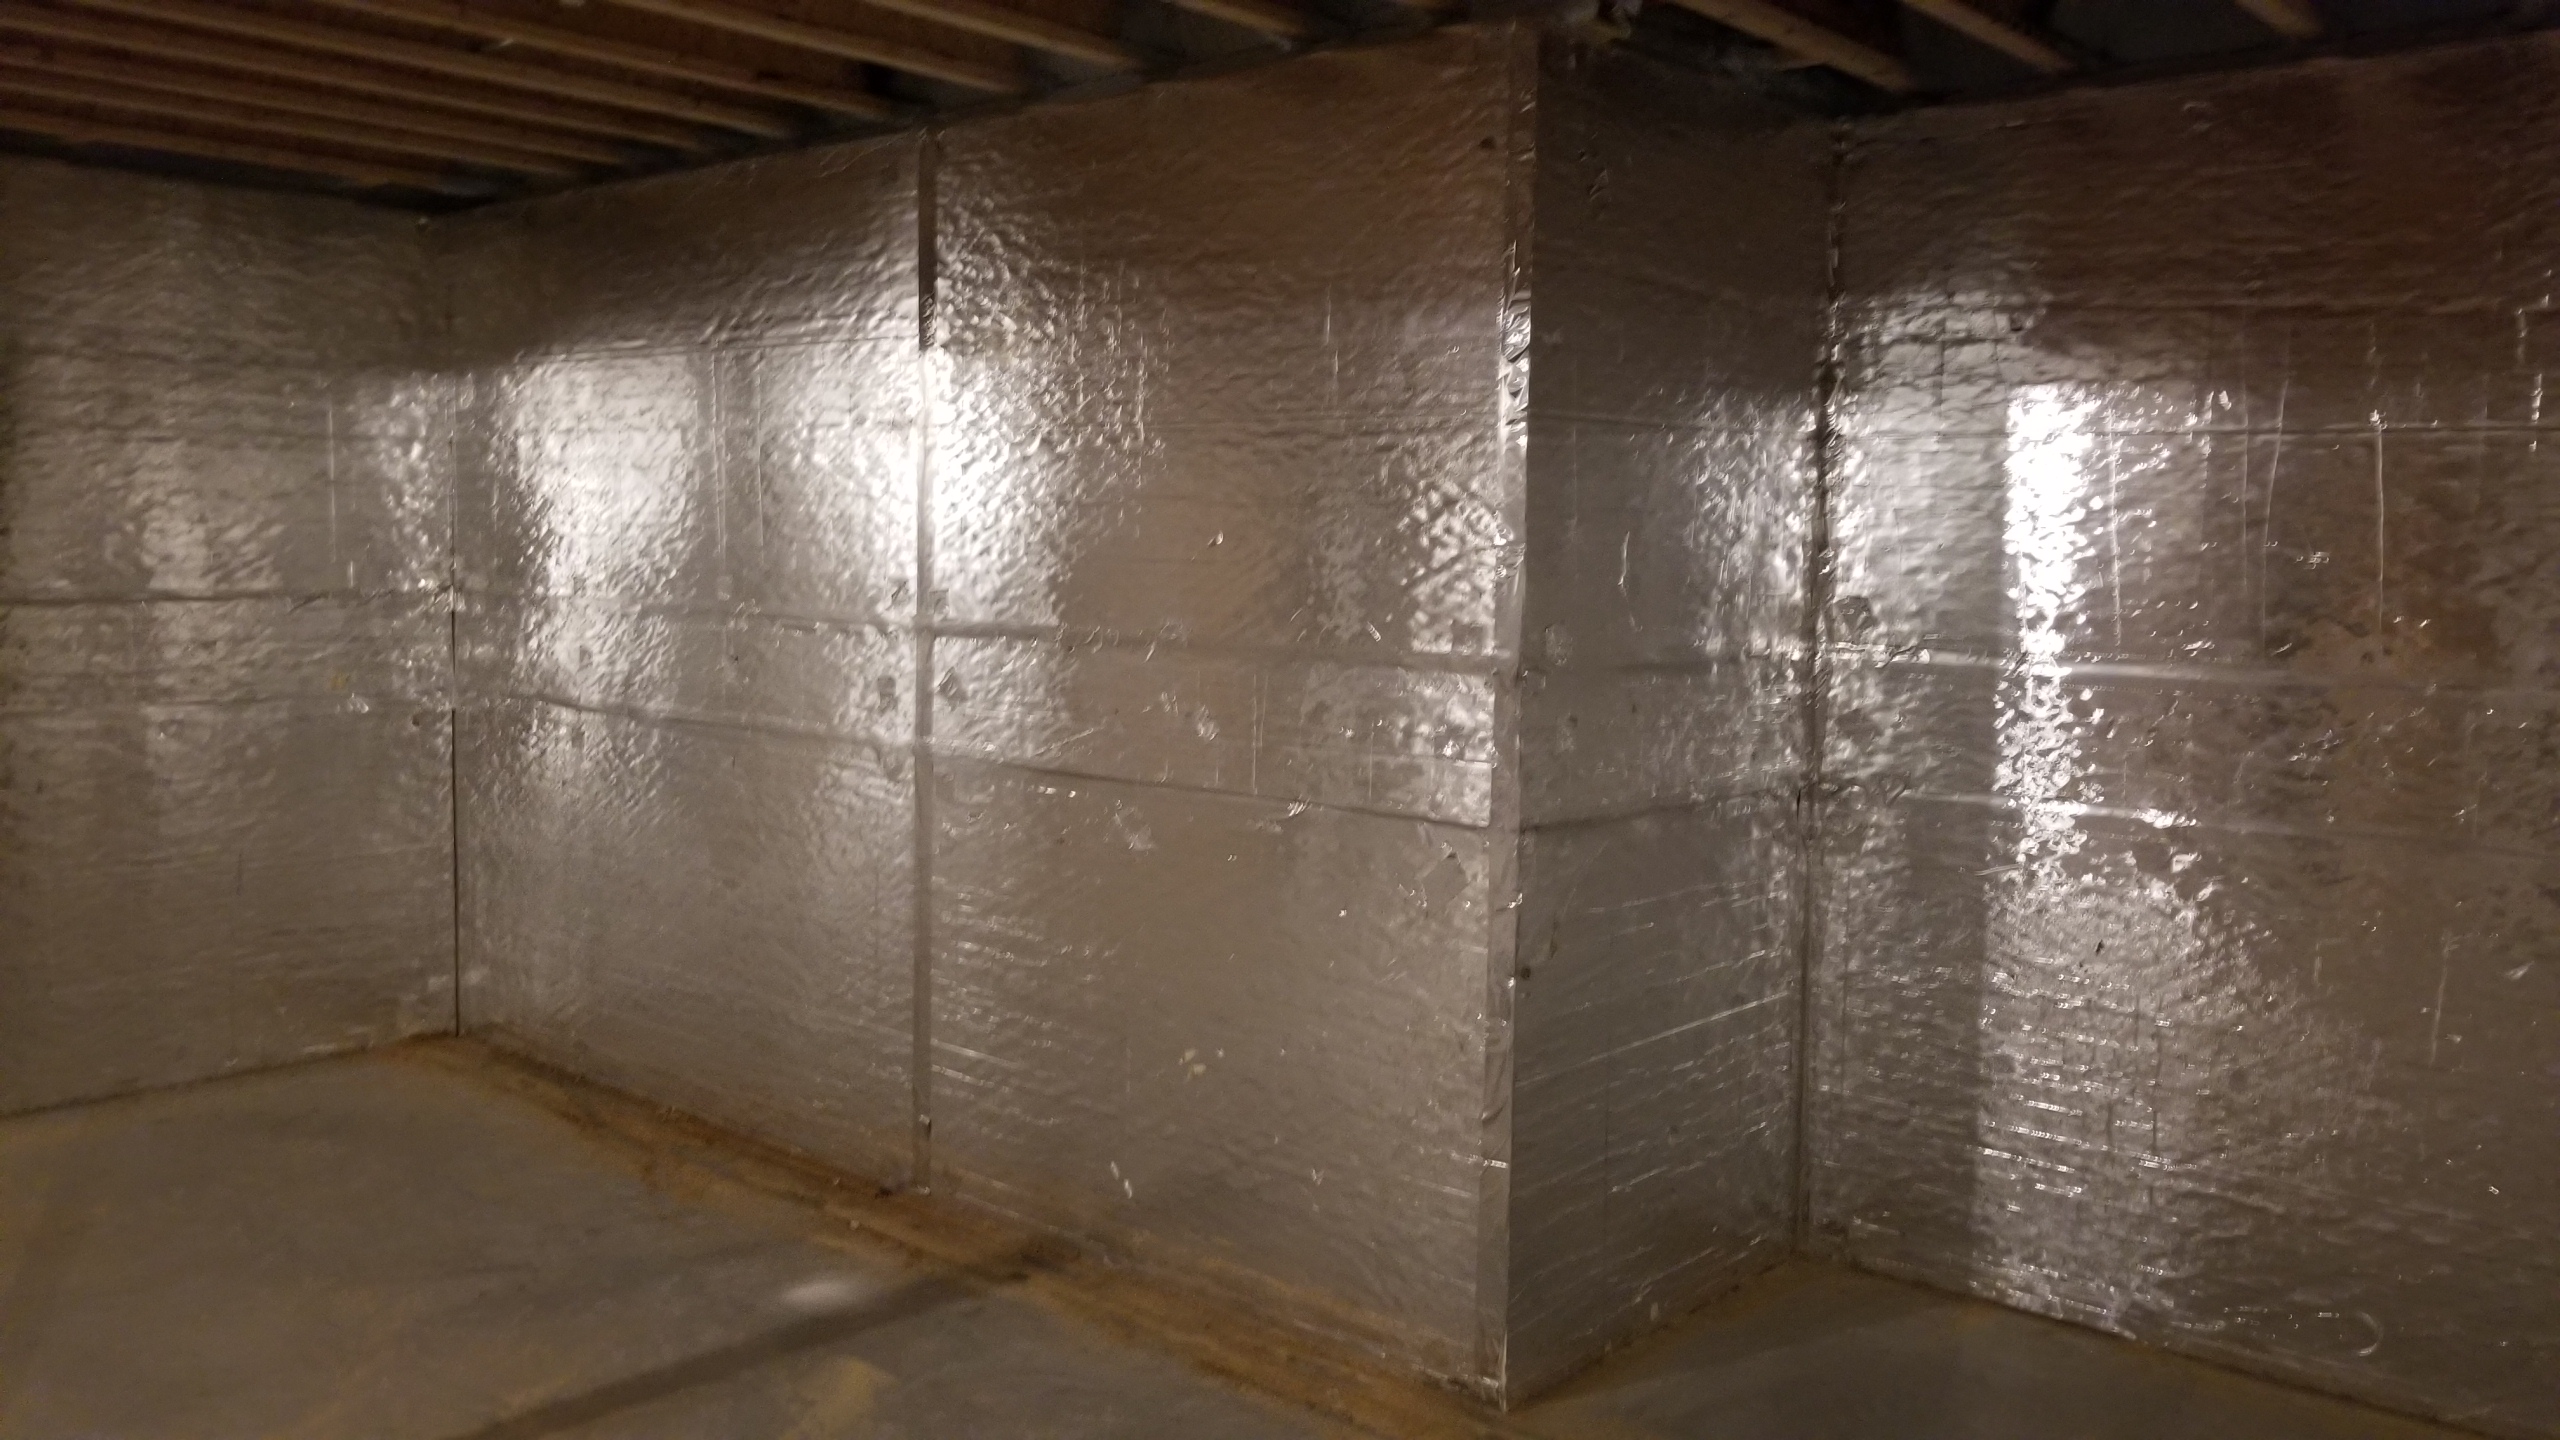
Right – The basement of this cold-climate home is insulated along interior walls with 2 inches of foil-faced rigid foam; finished basement walls also have a 2x4 interior wall insulated with R-19 blown-in fiberglass insulation and a poly vapor barrier.
Image
Right – The builder constructed a mock up of the wall assembly for this multi-family building.
Image
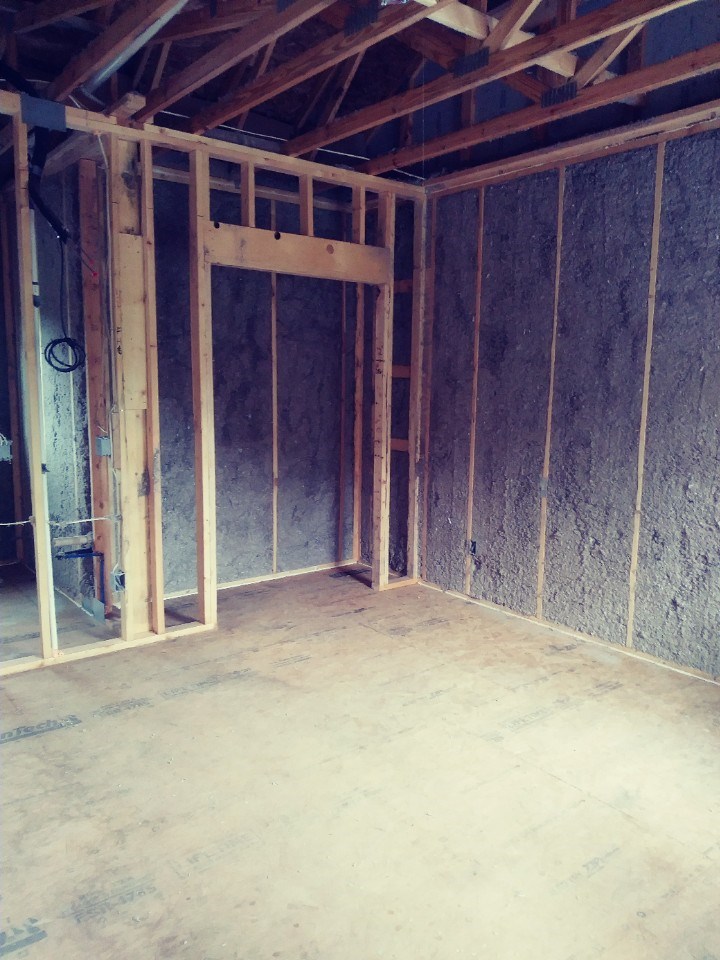
Right – The exterior wall cavities are completely filled with dense-packed cellulose.
Image
Image
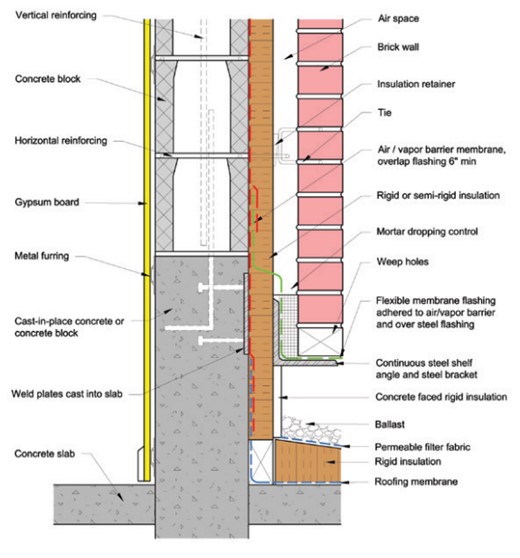
Right – The insulation has been located to the exterior of the thermal mass in this wall section
Image
Image

Image
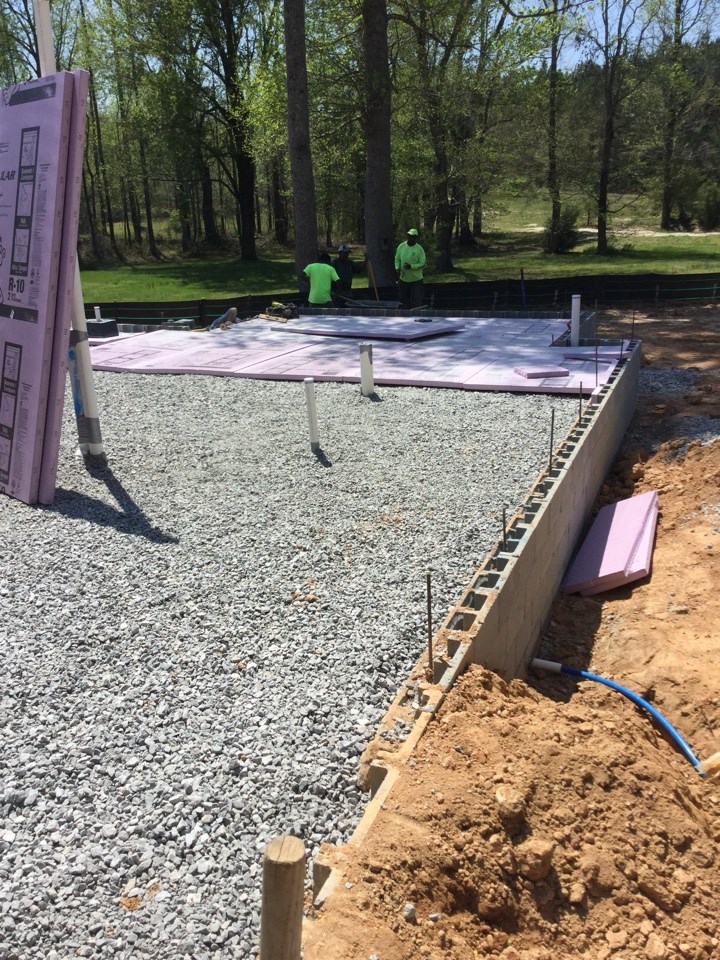
Right – The raised slab foundation has a 3-ft stem wall of filled concrete block, then is back-filled with compacted dirt and crushed rock, then insulated with 1” rigid foam covered with taped vapor barrier, under a floor slab.
Image
Right – The underside of this low-sloped roof is insulated with open-cell spray foam in this dry climate to achieve the code-required R-value; the builder used the same foam to insulate exterior walls.
Image
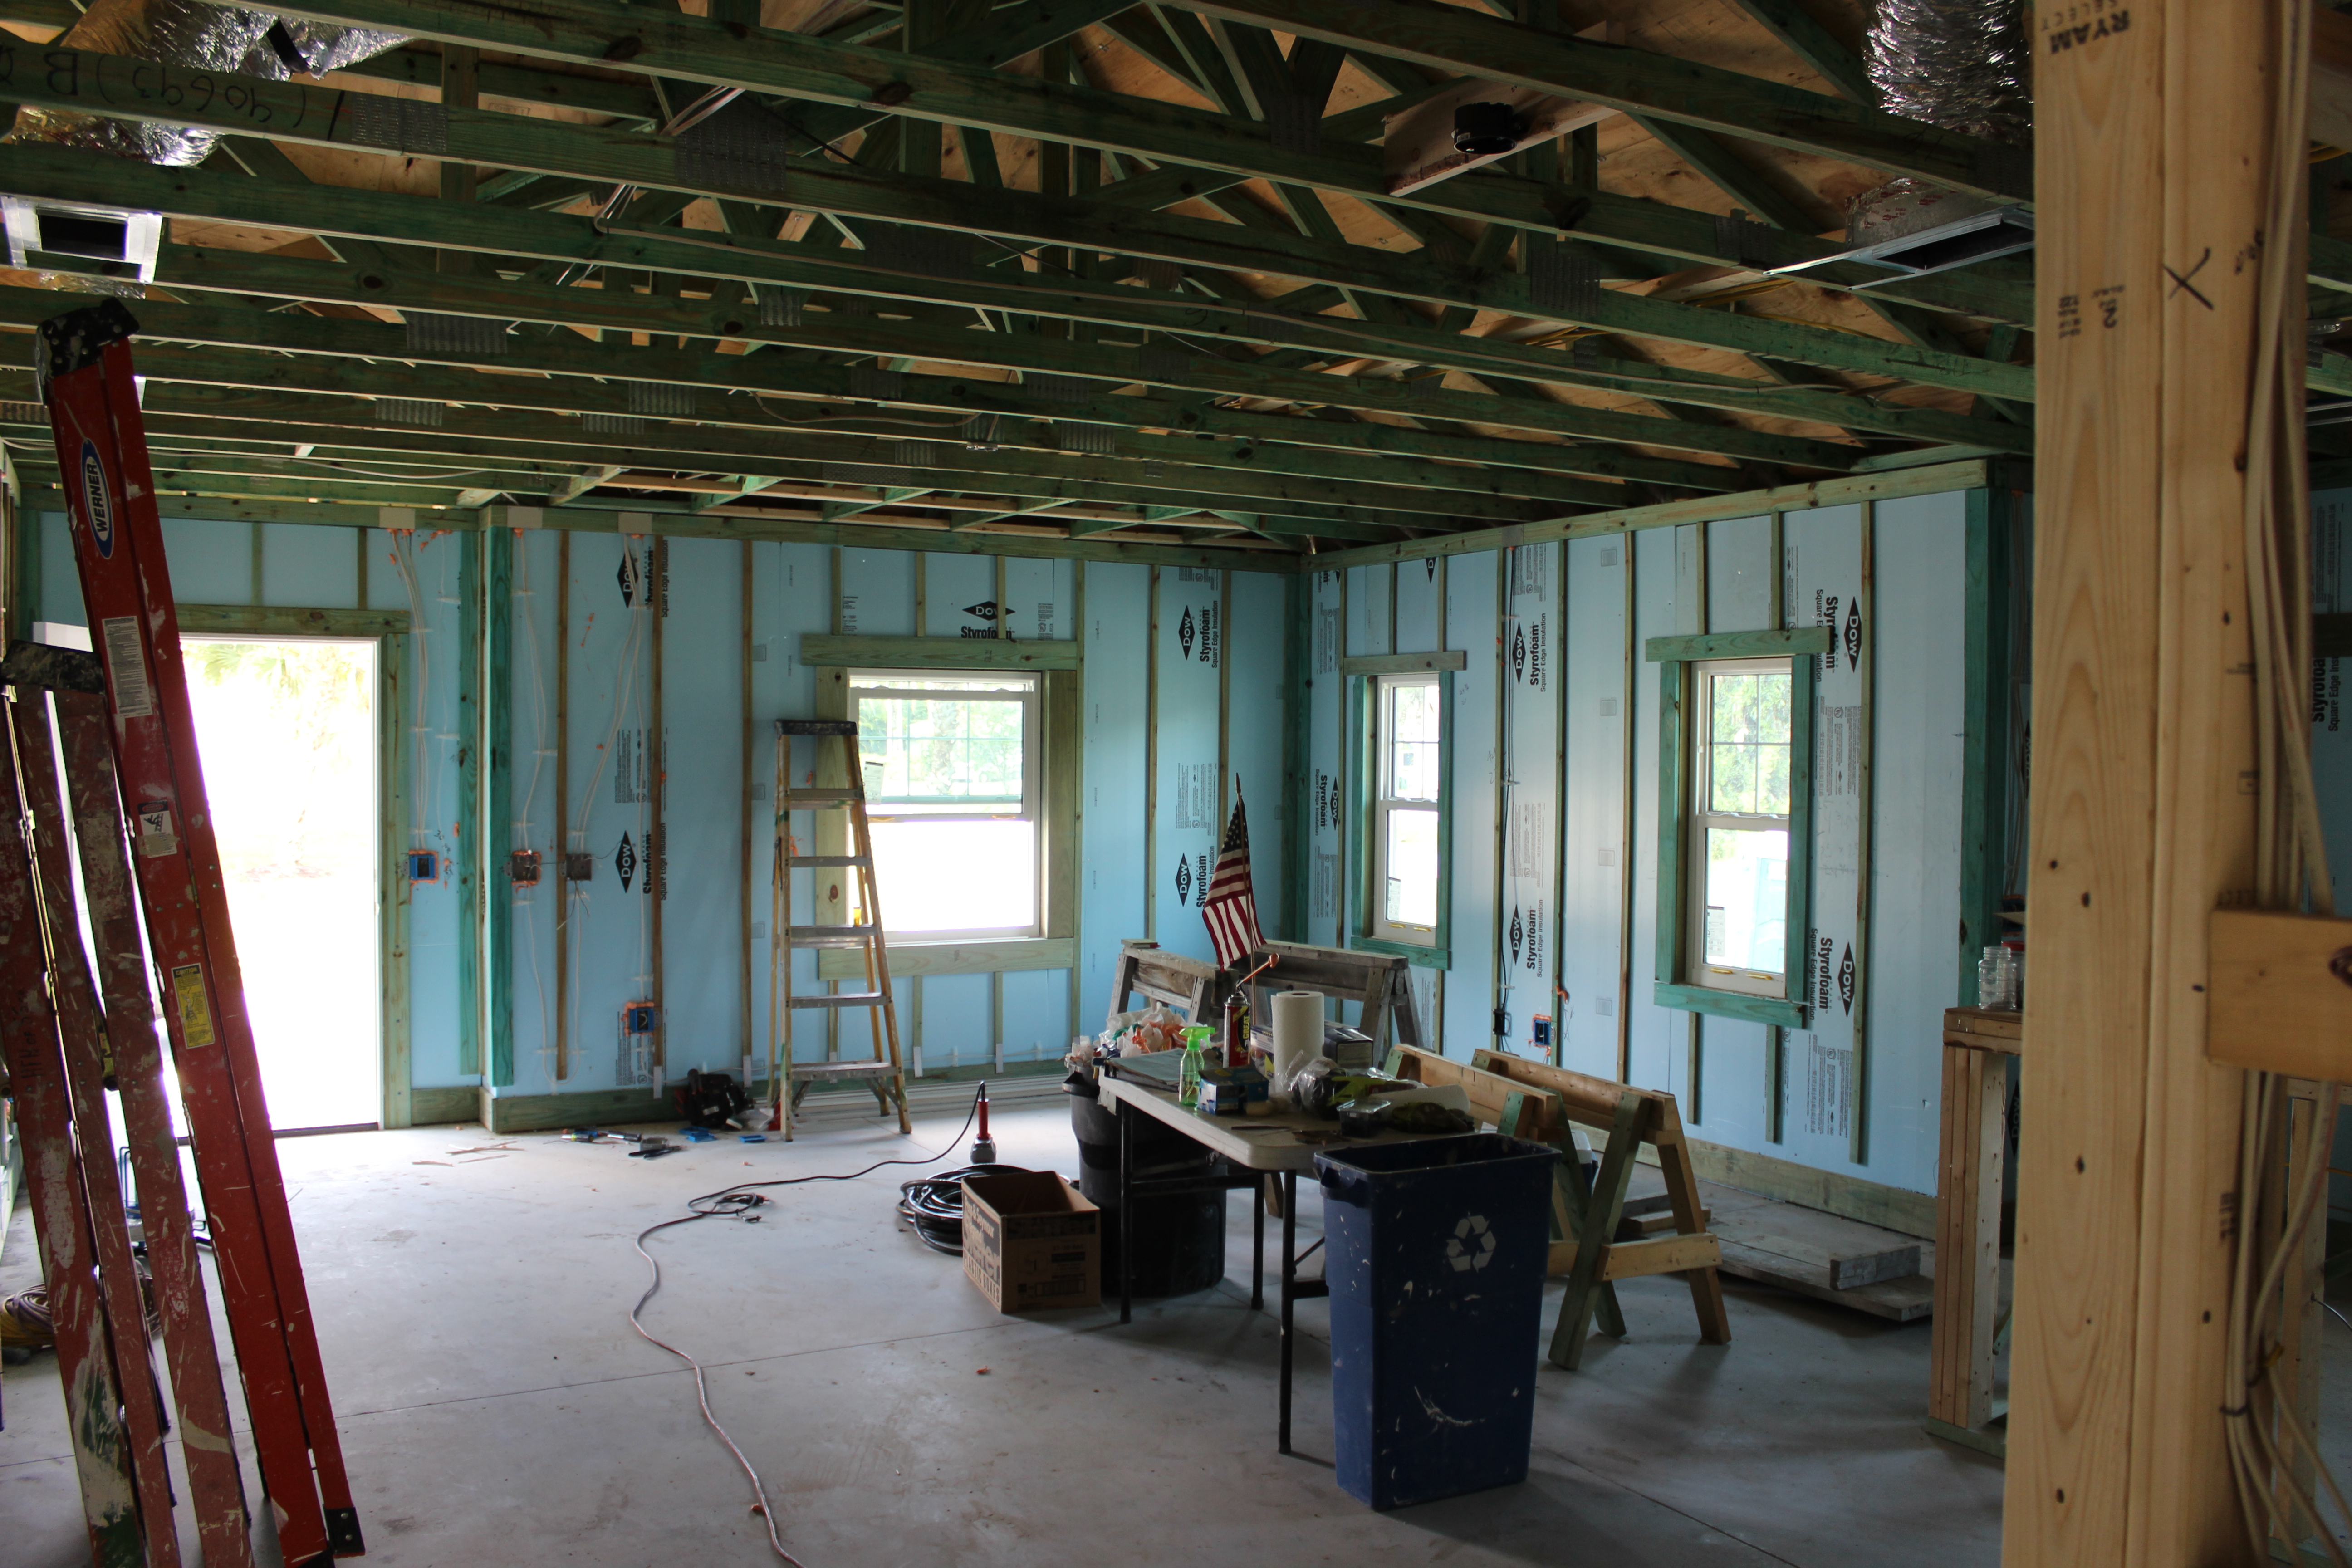
Right – The walls of this home were constructed with “insulated studs” fashioned on site by adding 2-inch-thick strips of rigid foam to the inside face of 2x4 studs then topping that with a plywood nailing surface.
Image
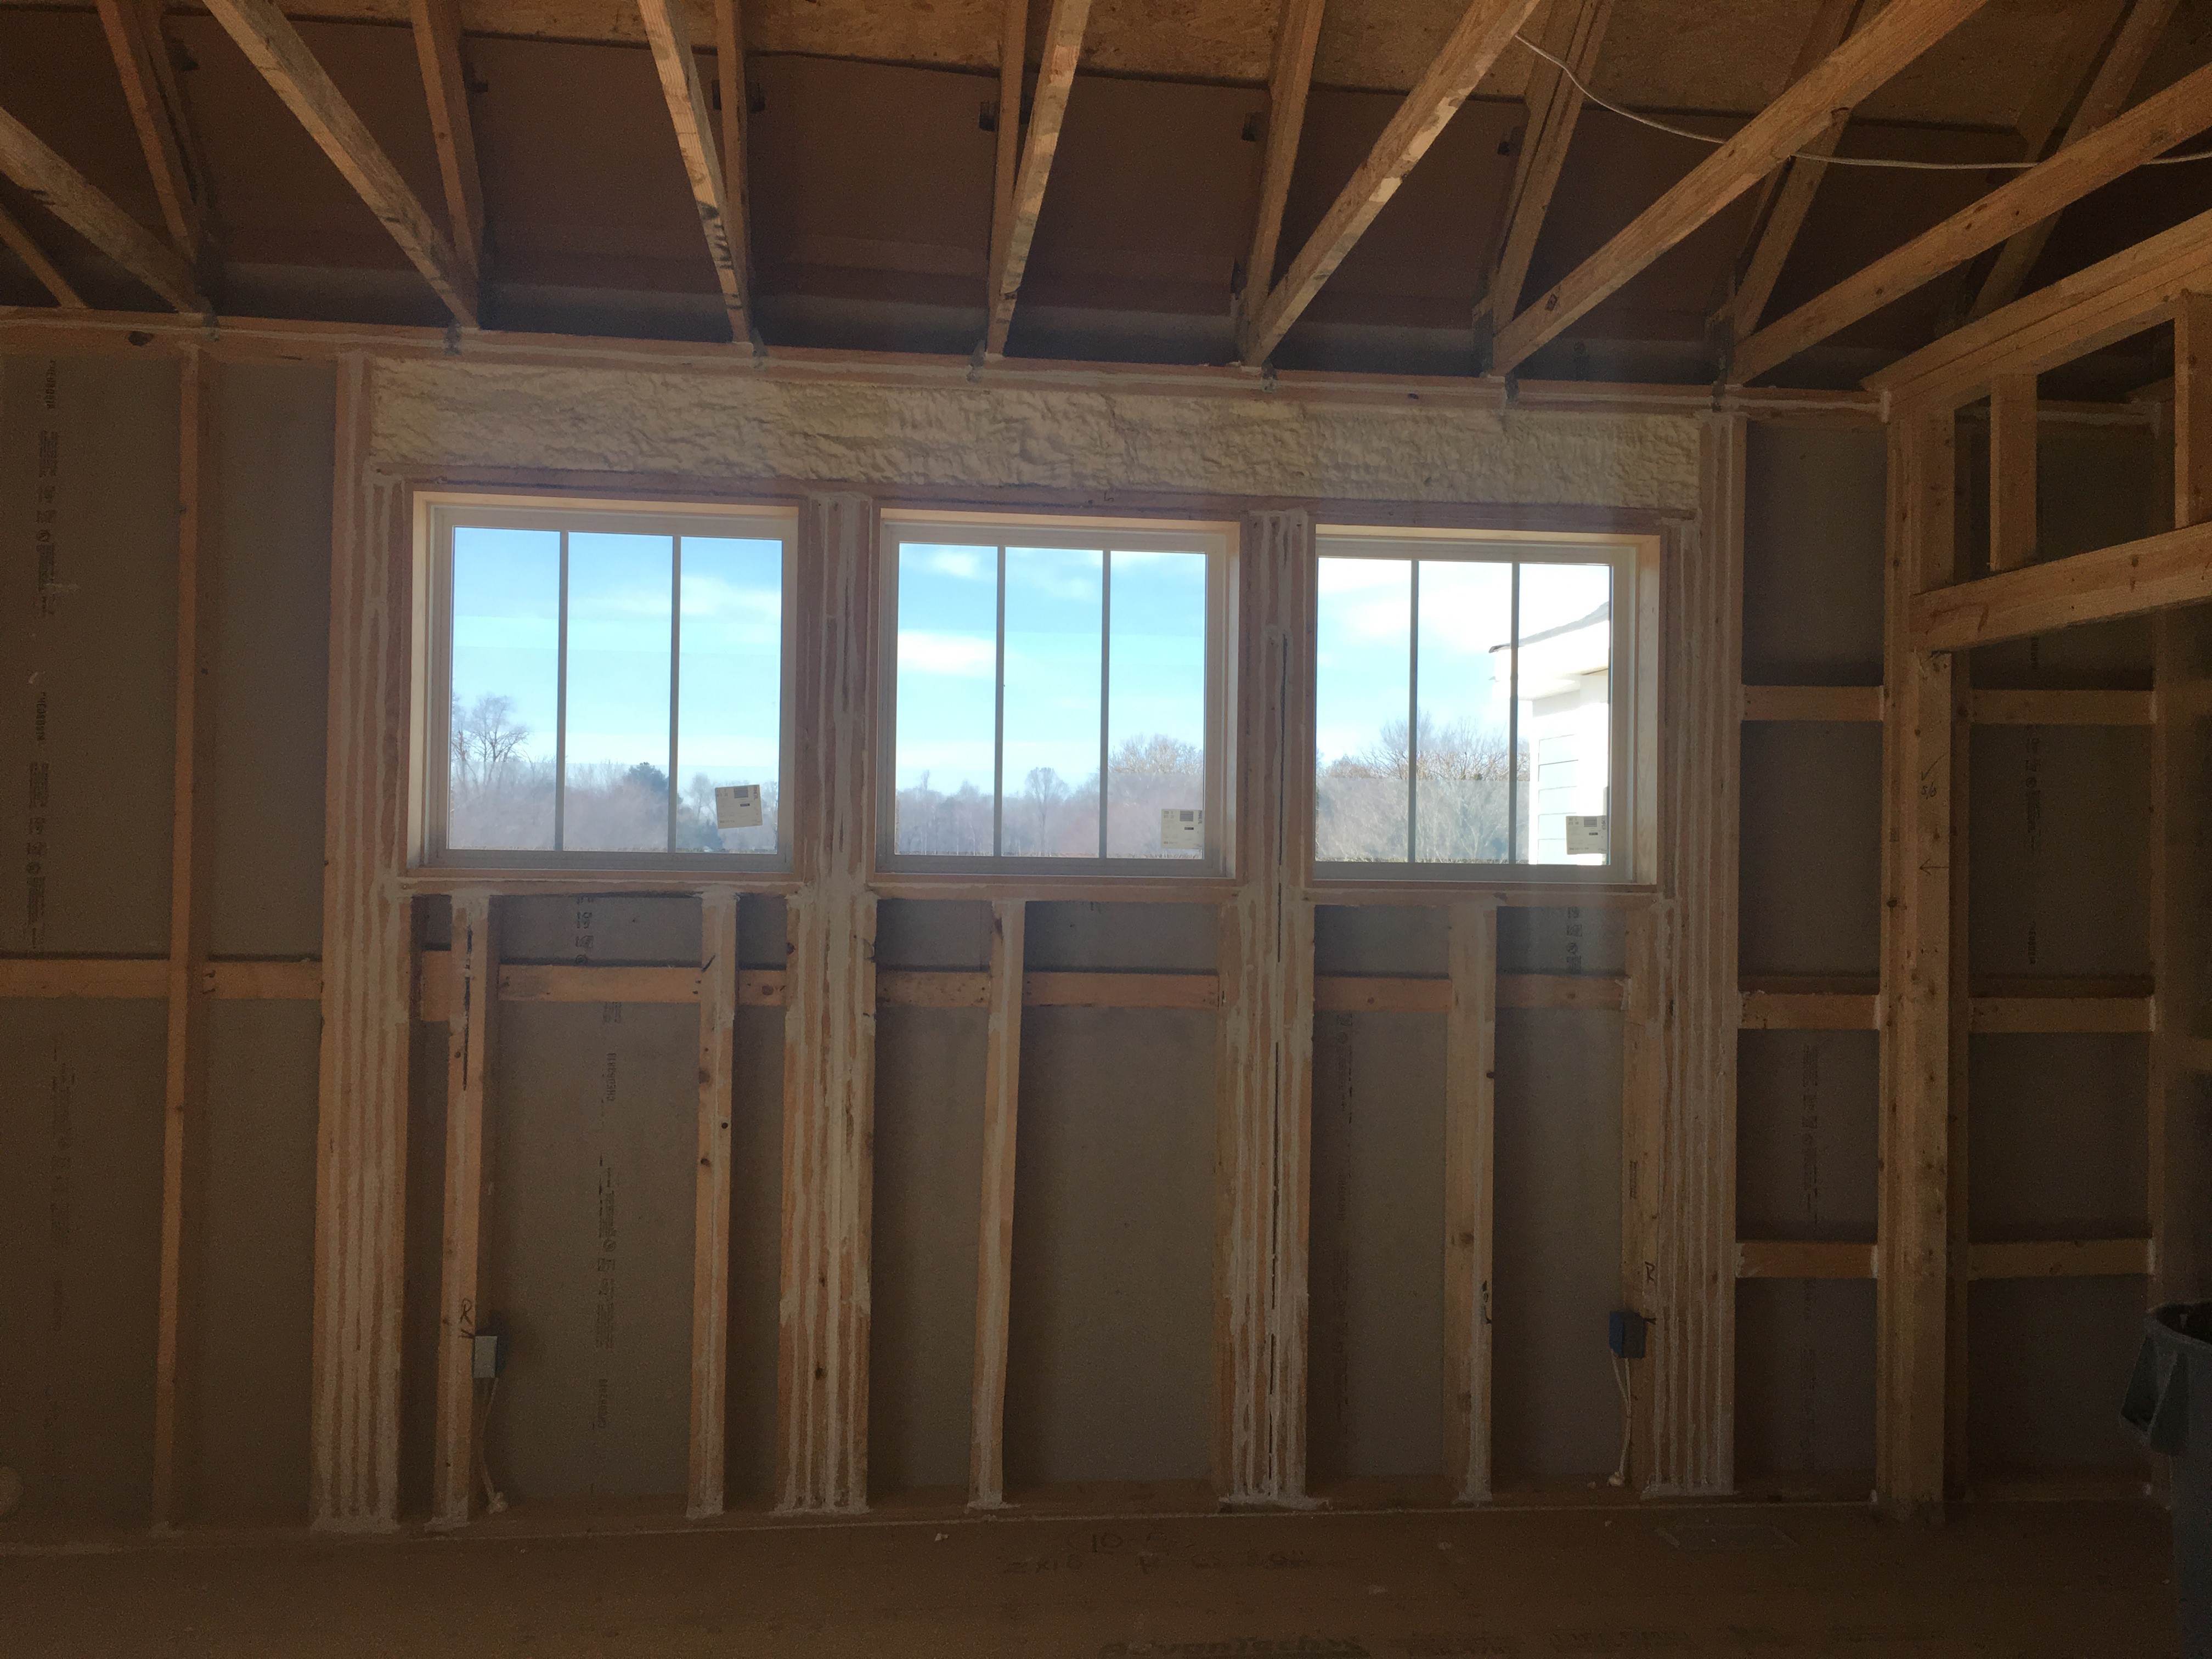
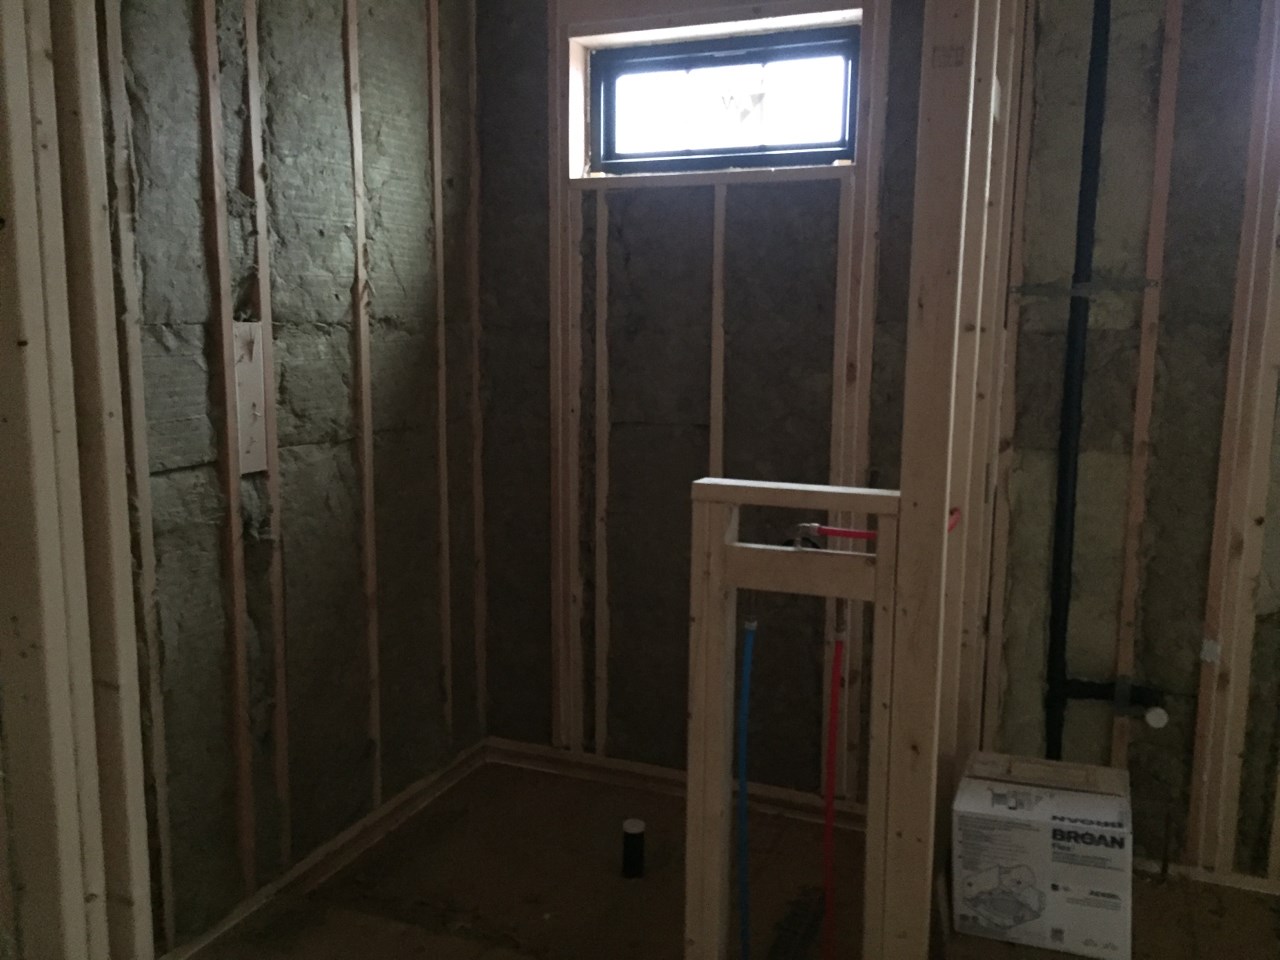
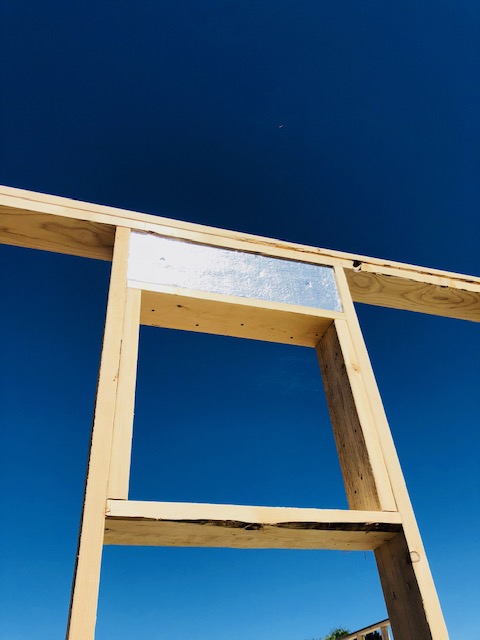
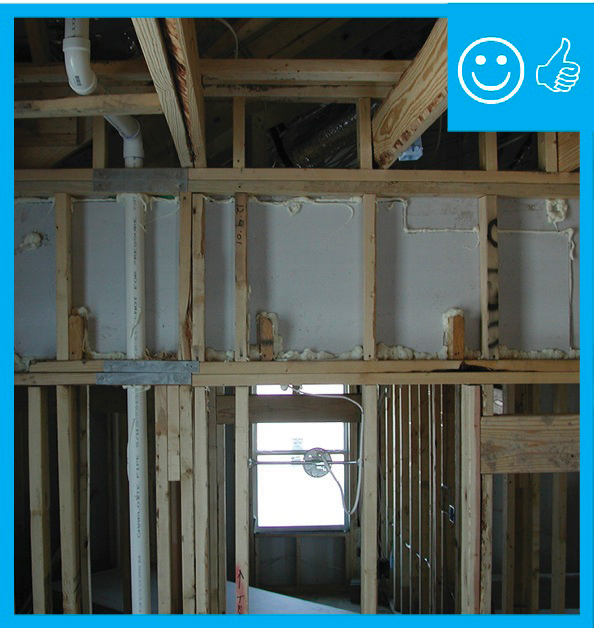
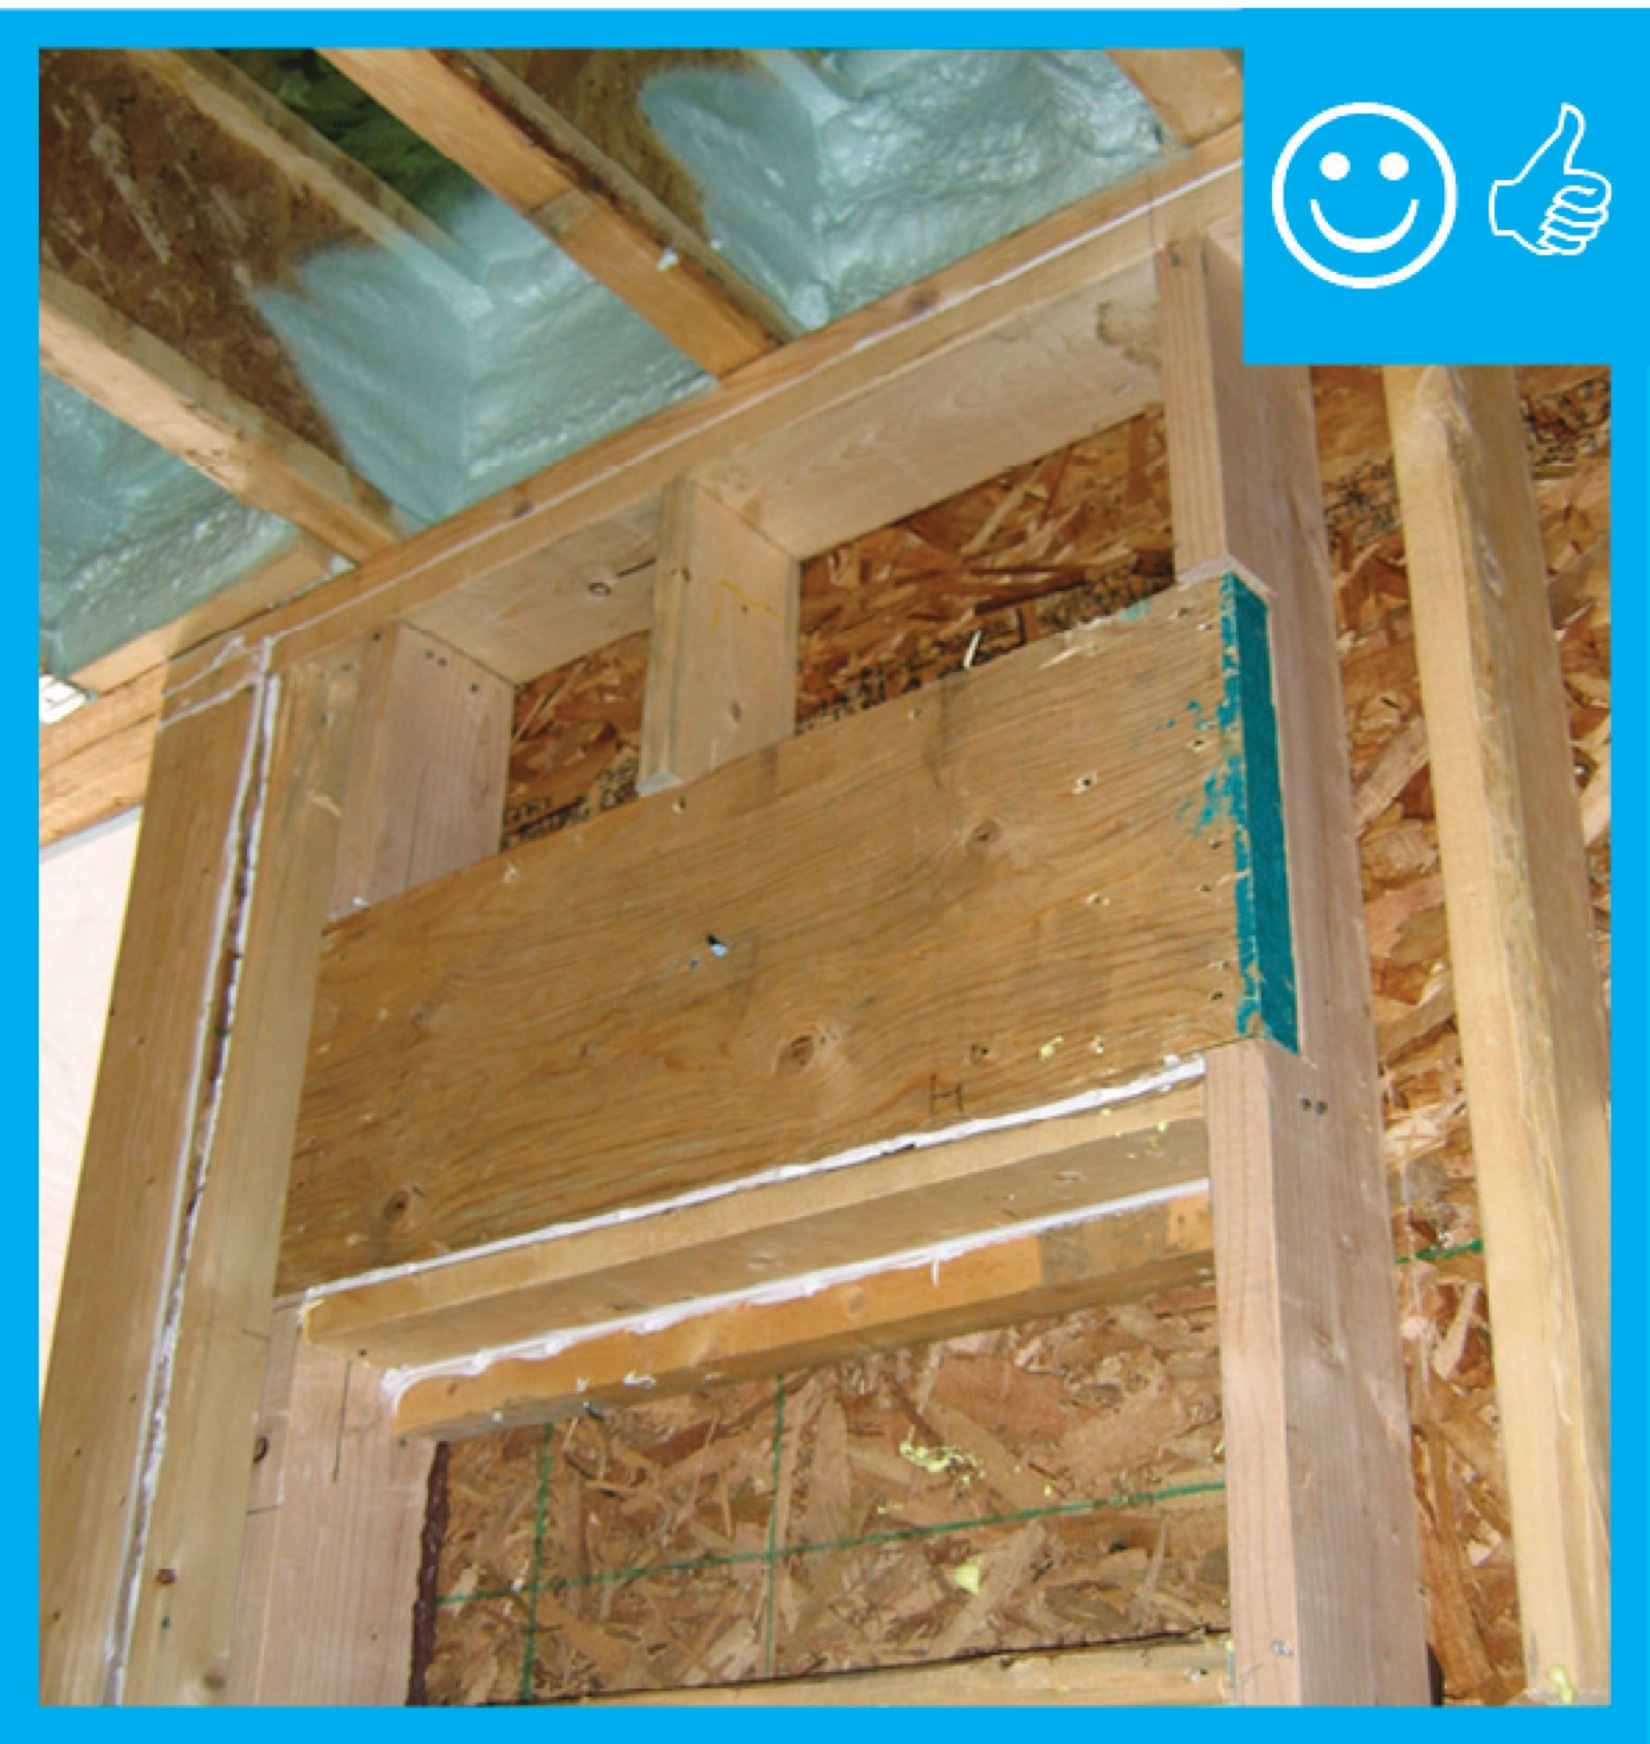
Right – The window header is filled with spray foam and sealant is used to air seal wood-to-wood seams; however, it would be preferable to design the wall to avoid so many stacked studs around the windows because they prevent wall insulation installation.
Image

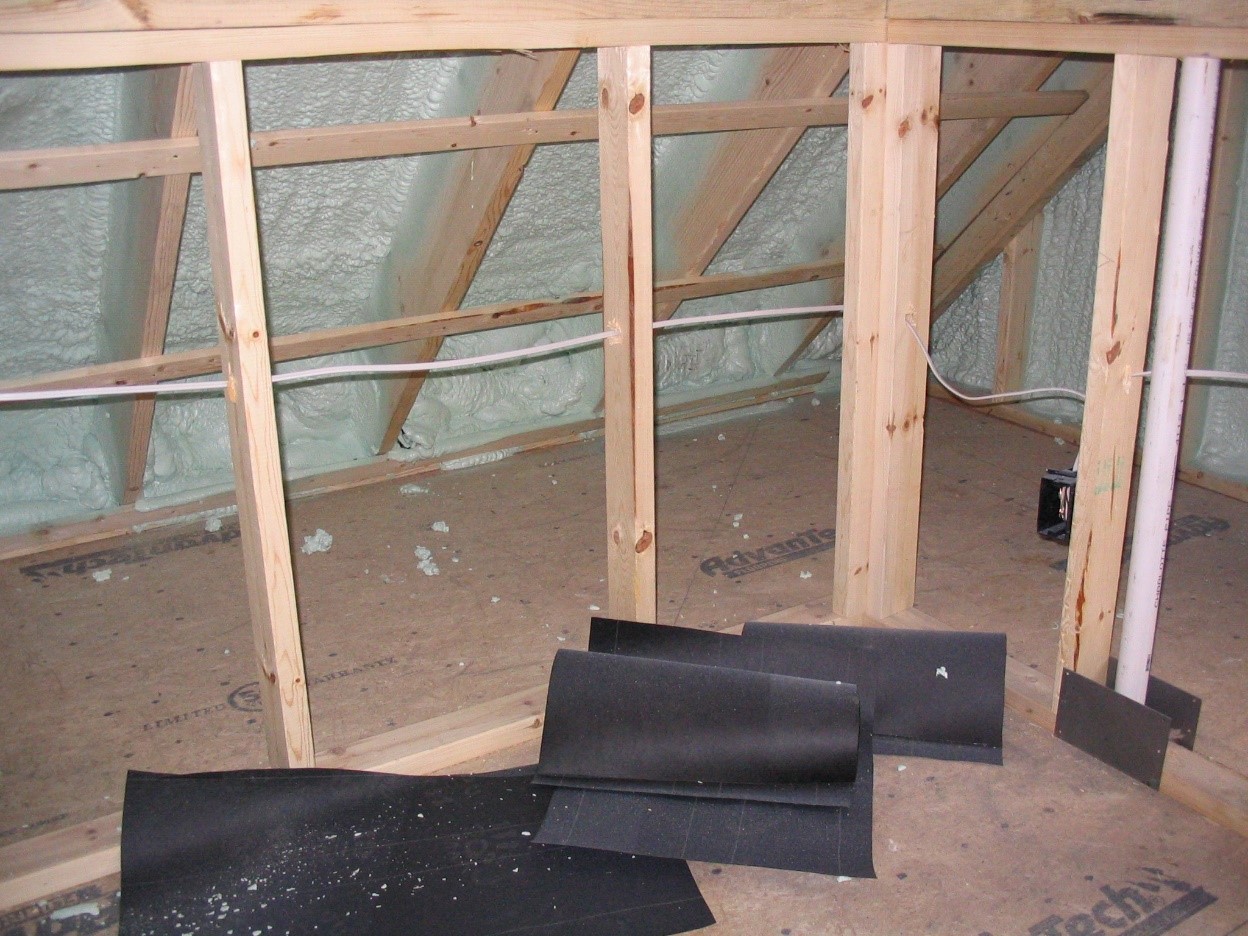
Right – This attic knee wall and the floor joist cavity openings beneath it are being sealed and insulated with spray foam.
Image
Right – This builder installs 1 inch of XPS rigid foam on the exterior of the 2x6 walls then covers the foam with ½-inch plywood sheathing, which serves as a nailing surface for siding and trim.
Image
Right – This coated OSB sheathing product is available with an integrated insulation layer.
Image
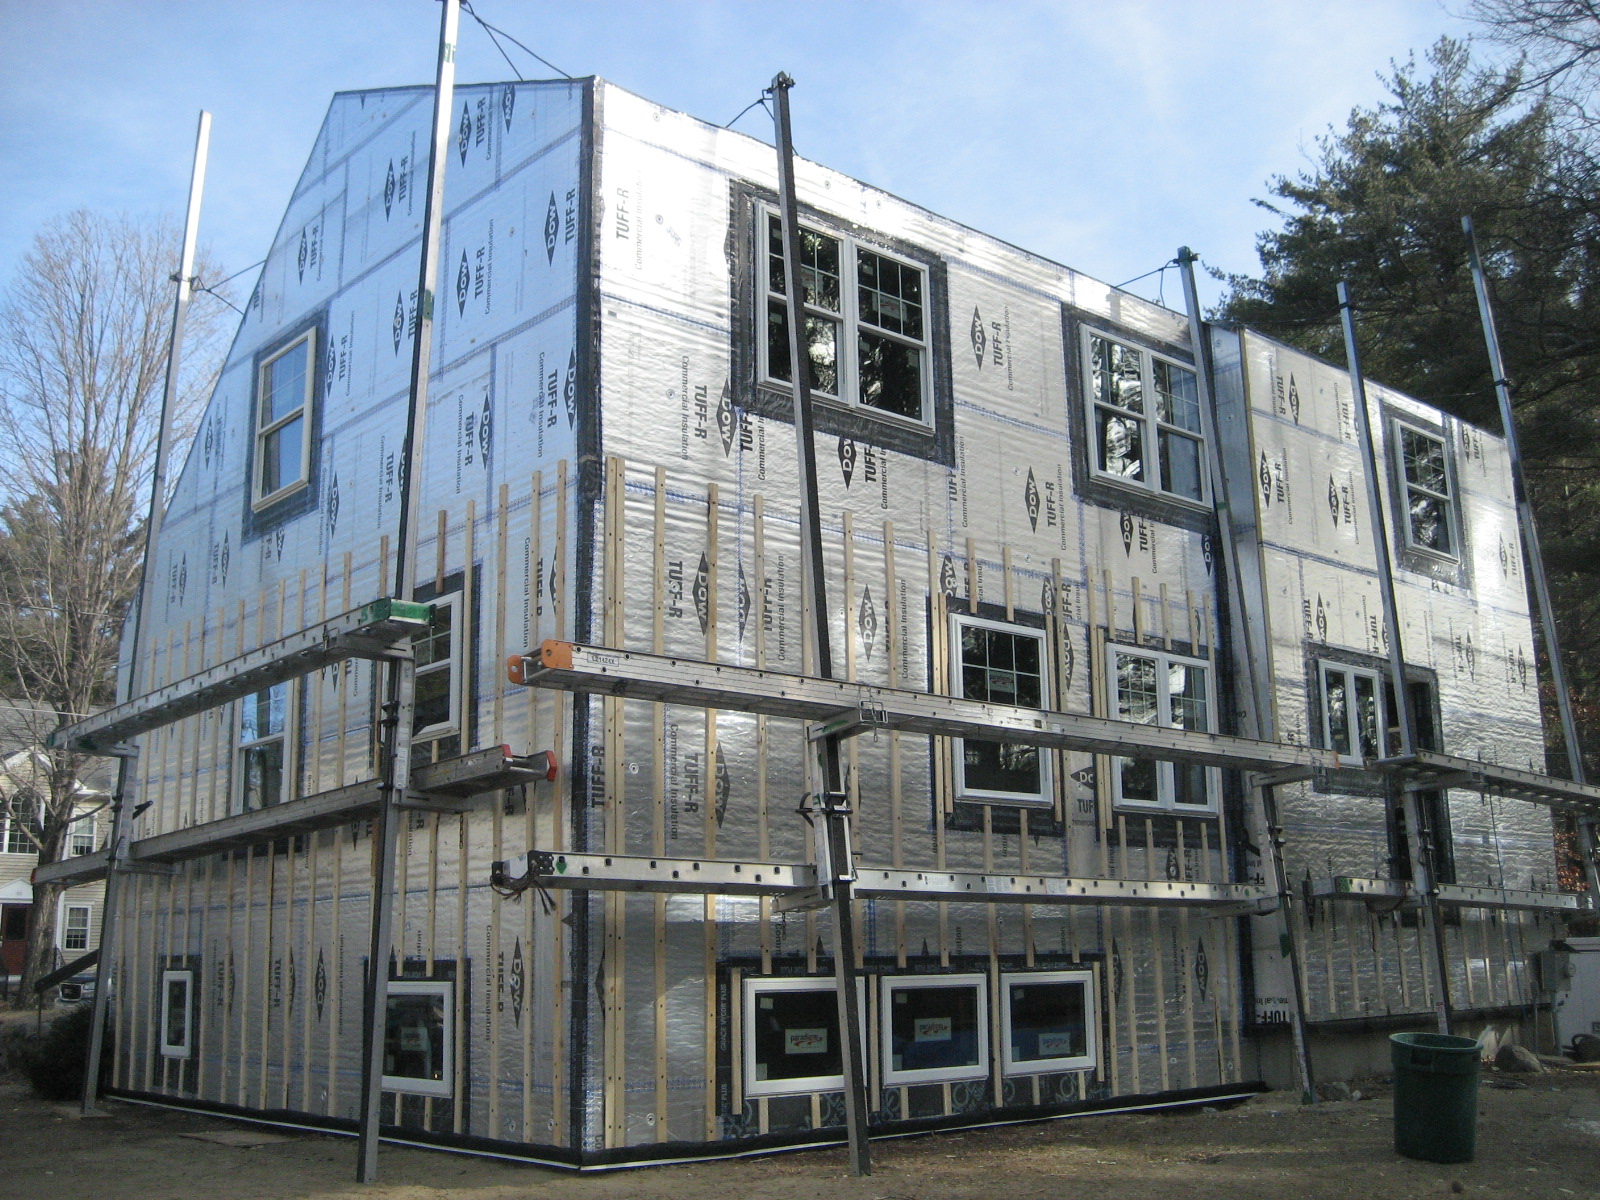
Right – This foil-faced foam sheathing has taped seams and proper flashing details so it can serve as a drainage plane.
Image

Right – This home is framed with double walls – two 2x4 walls set next to each other then sheathed with OSB on the exterior and netted on the interior face to create an extra-deep wall cavity that can be filled with blown-in insulation.
Image
Image
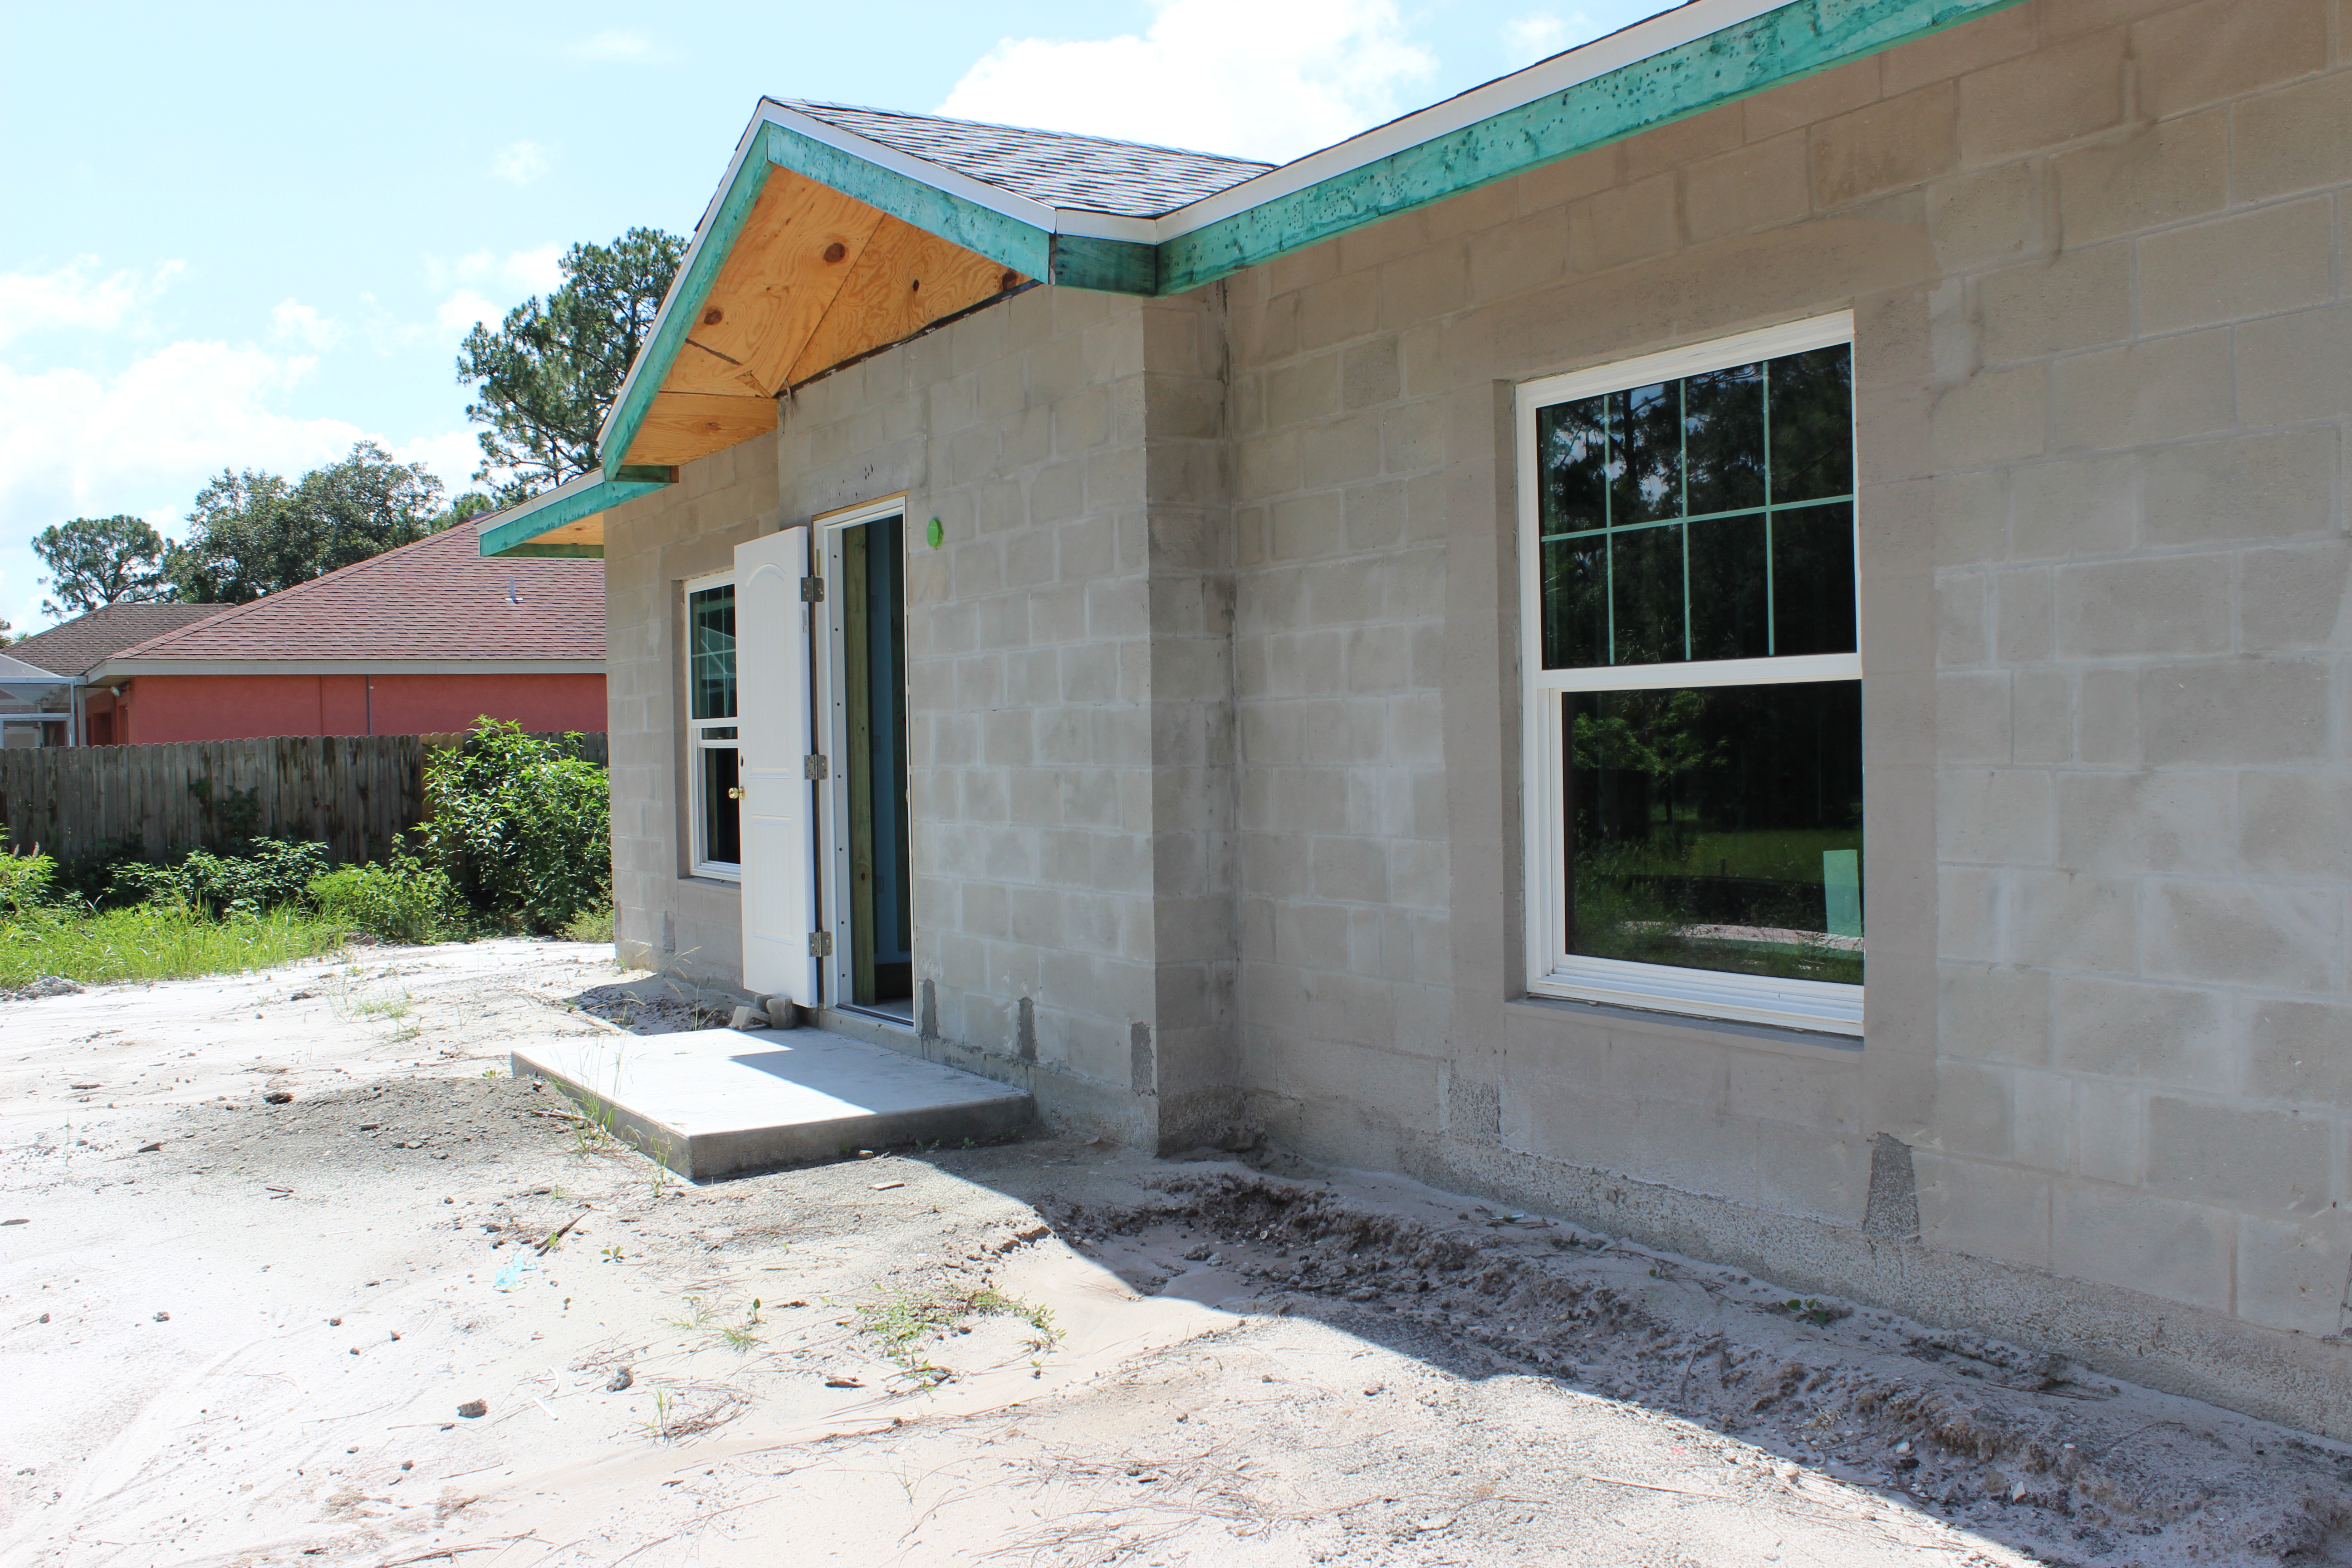
Right – This hot-humid climate home is constructed with concrete block that is insulated on the inside with rigid foam; the framing is borate-treated lumber; the roof design is a high-wind-resistant hip roof with only one small gable over the entry.
Image
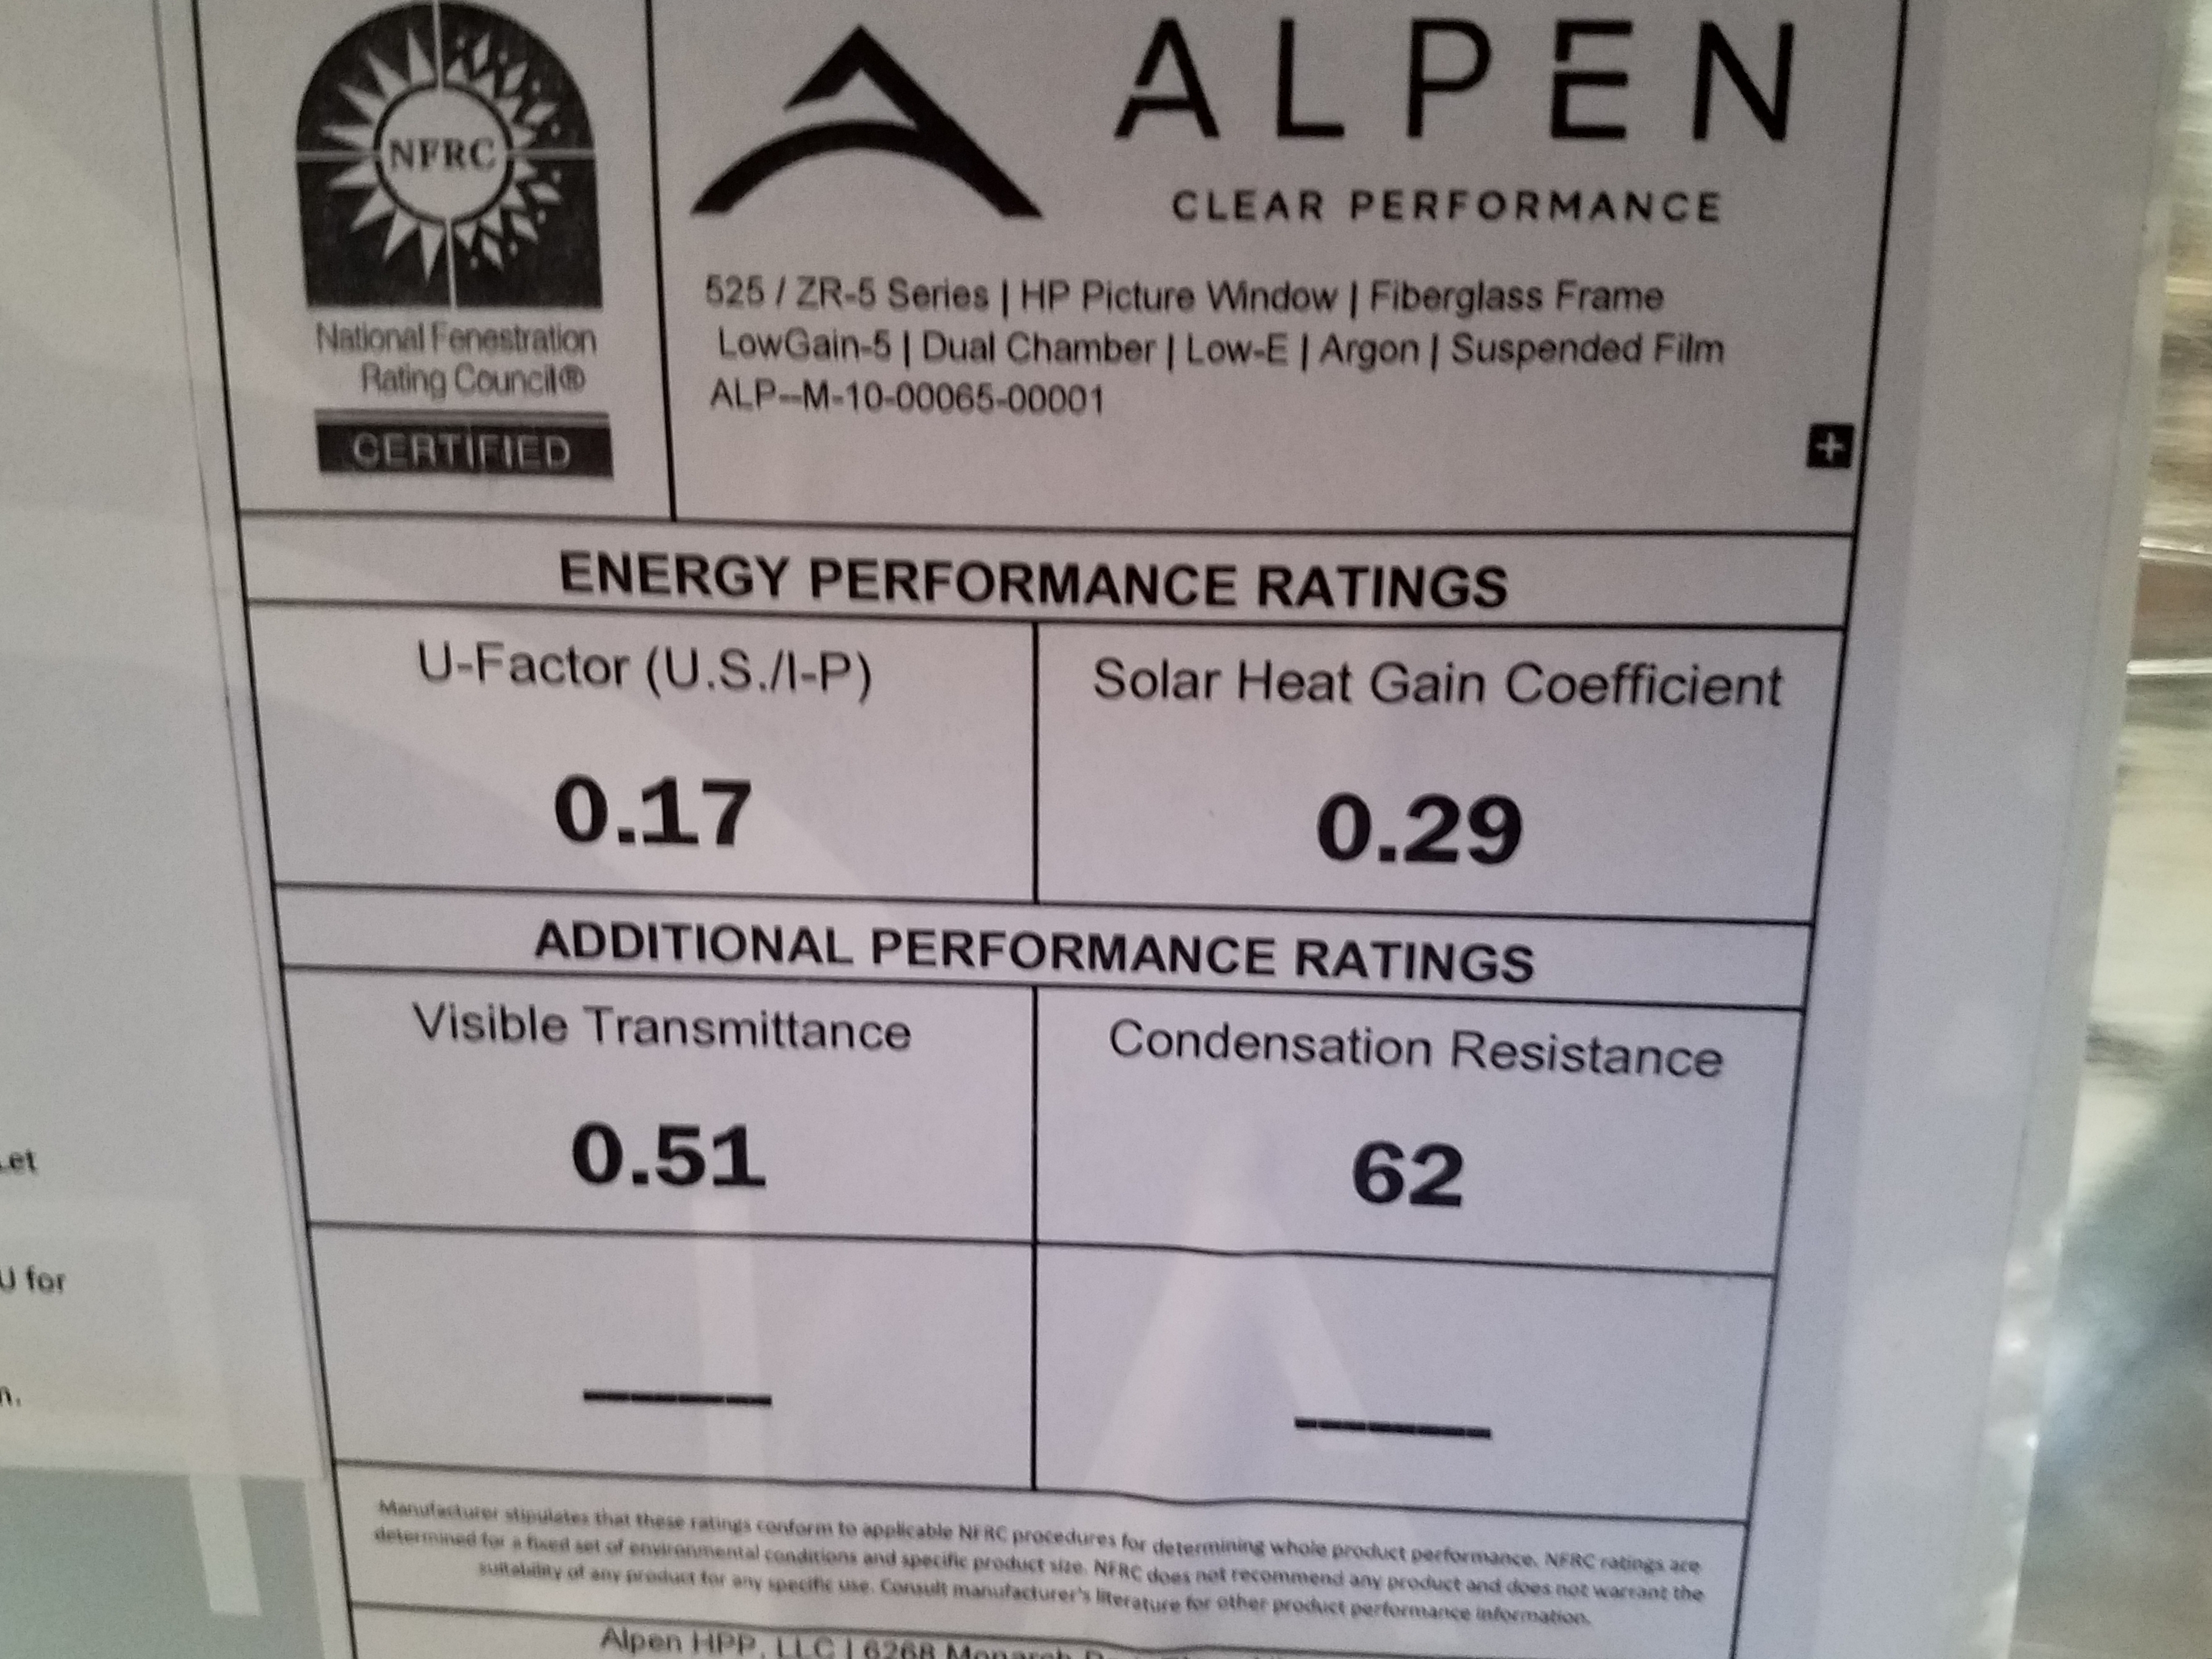
Right – This National Fenestration Rating Council (NFRC) label shows the insulation U-Factor, solar heat gain coefficient, visible transmittance, and condensation resistance for this triple-pane window.
Image

Right – This three studs in this corner are positioned to allow insulation against more of the exterior wall than standard three-stud corners.
Image
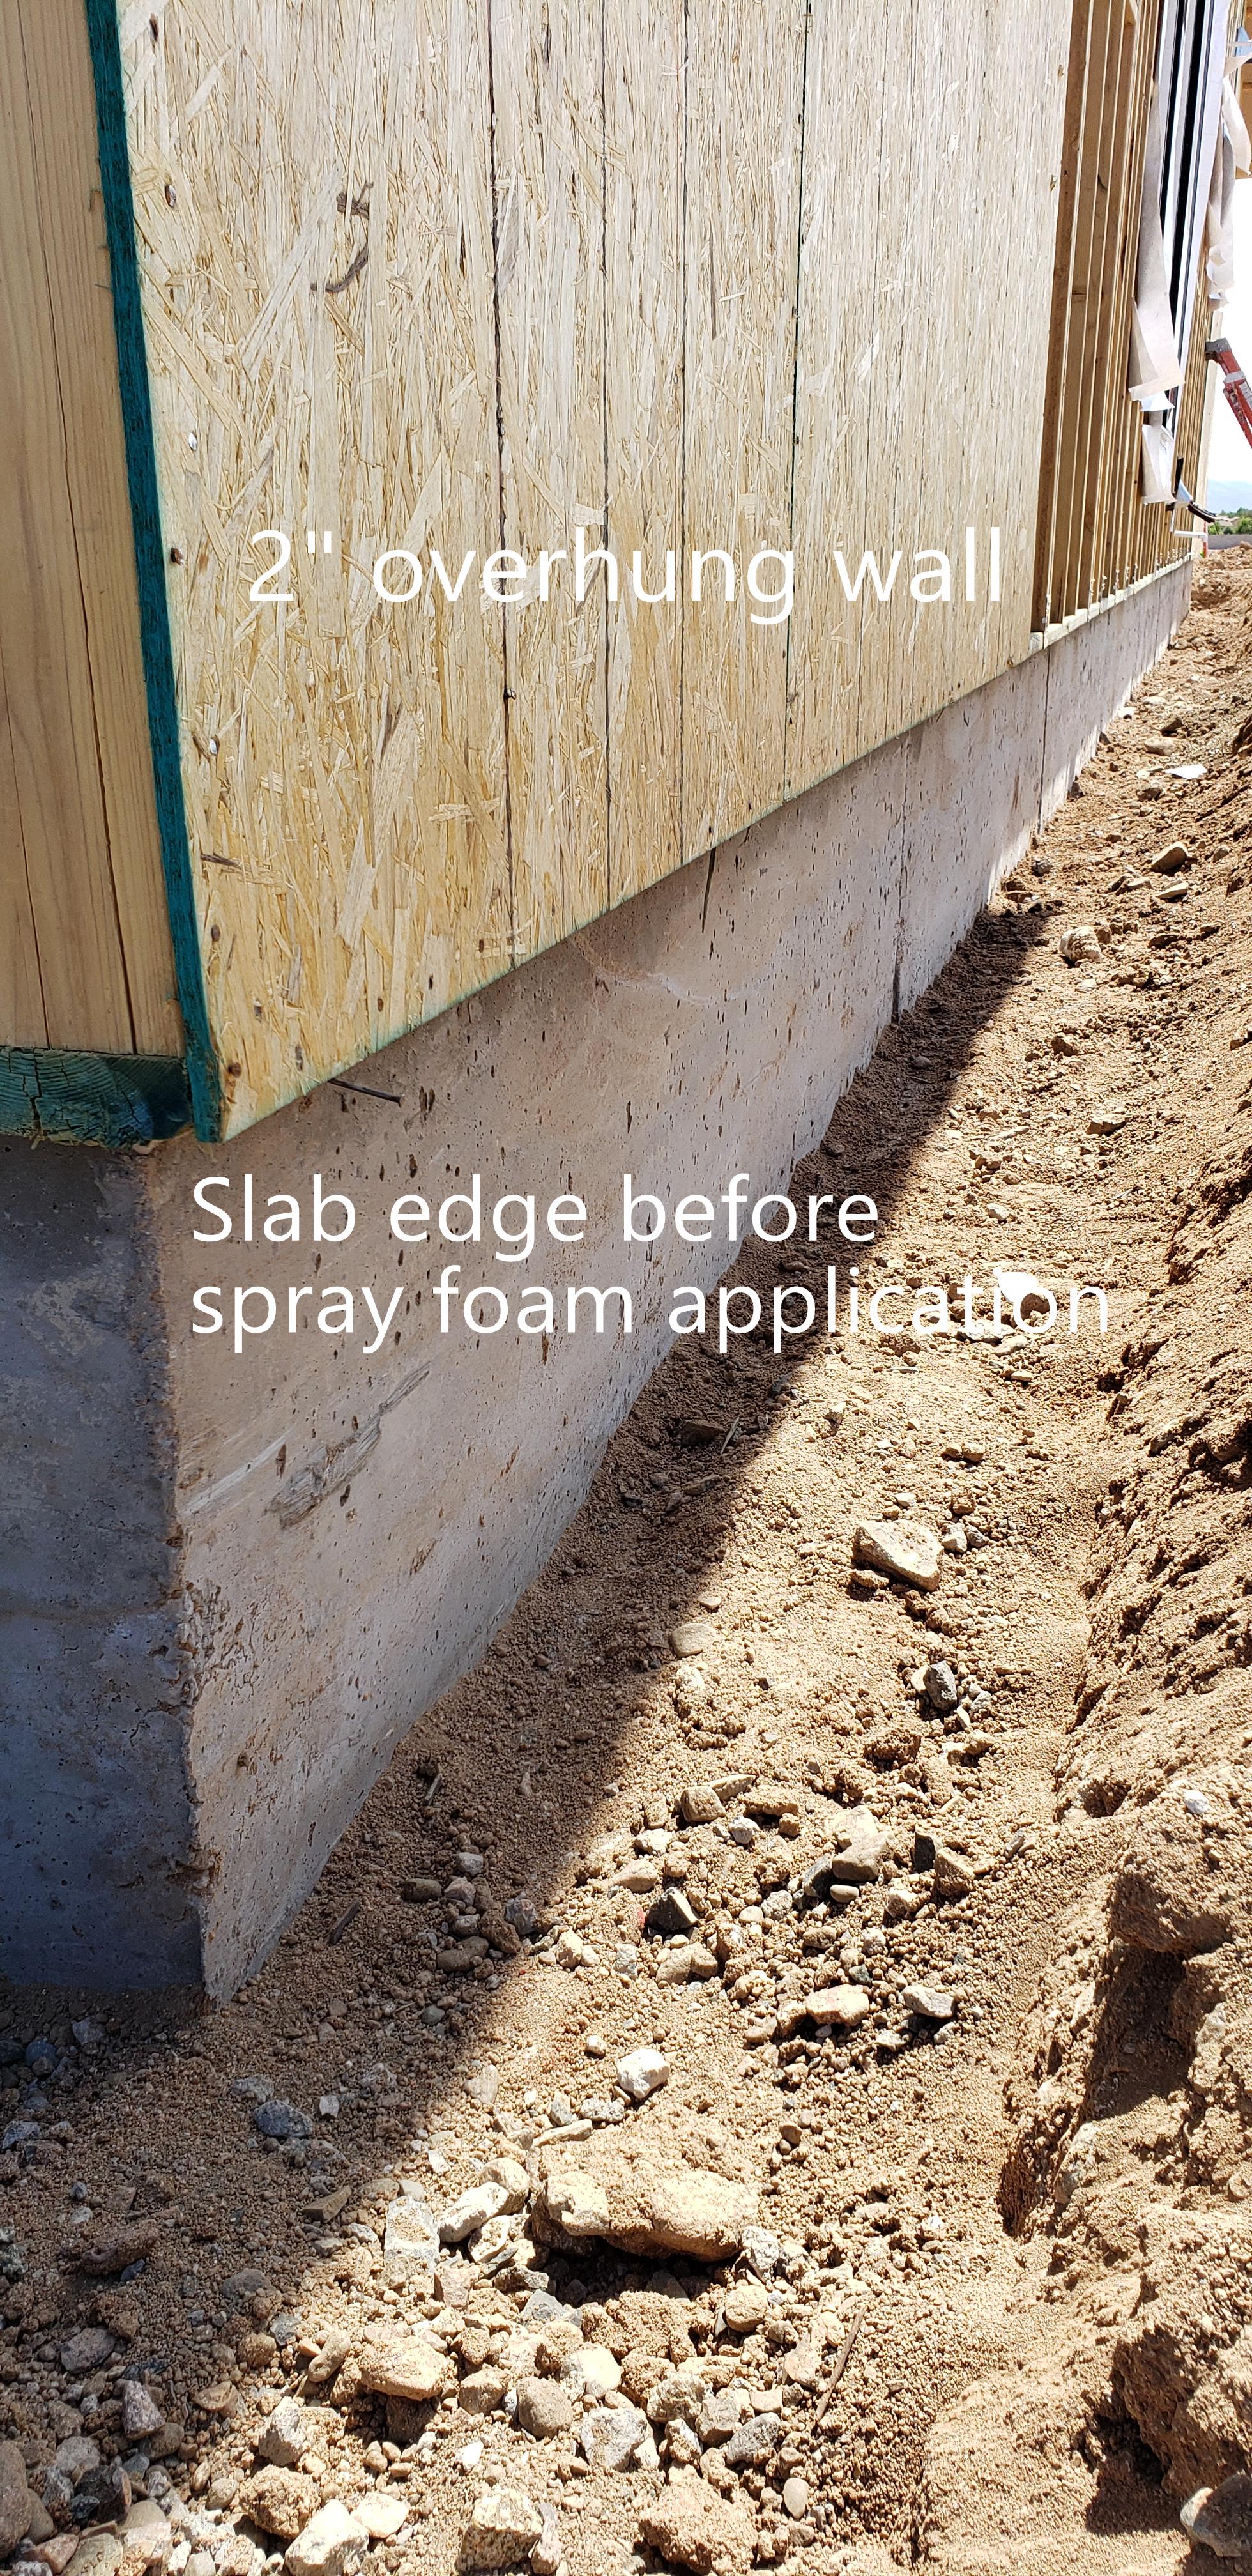
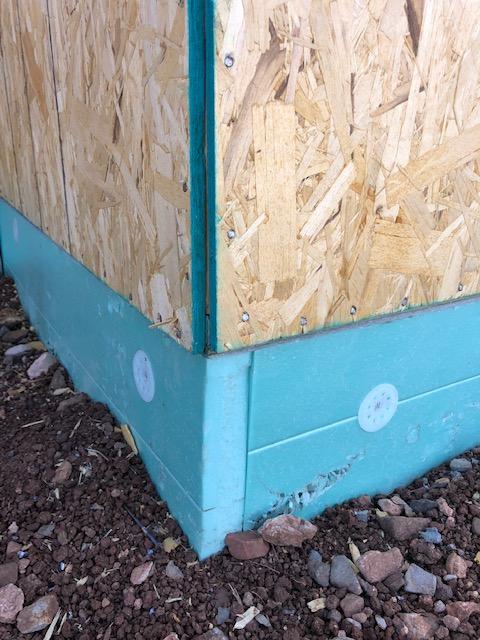
Right – This wall is constructed with the sill plate overhanging the top of the foundation wall so that when rigid foam is installed on the exterior of the foundation wall, its surface will align with the surface of the wall sheathing.
Image
Image

Right – Two inches of rigid foam was installed on the ground before pouring the basement floor slab while precast, pre-insulated concrete panels comprise the basement walls.
Image

Image
Image
Image

Image
Image
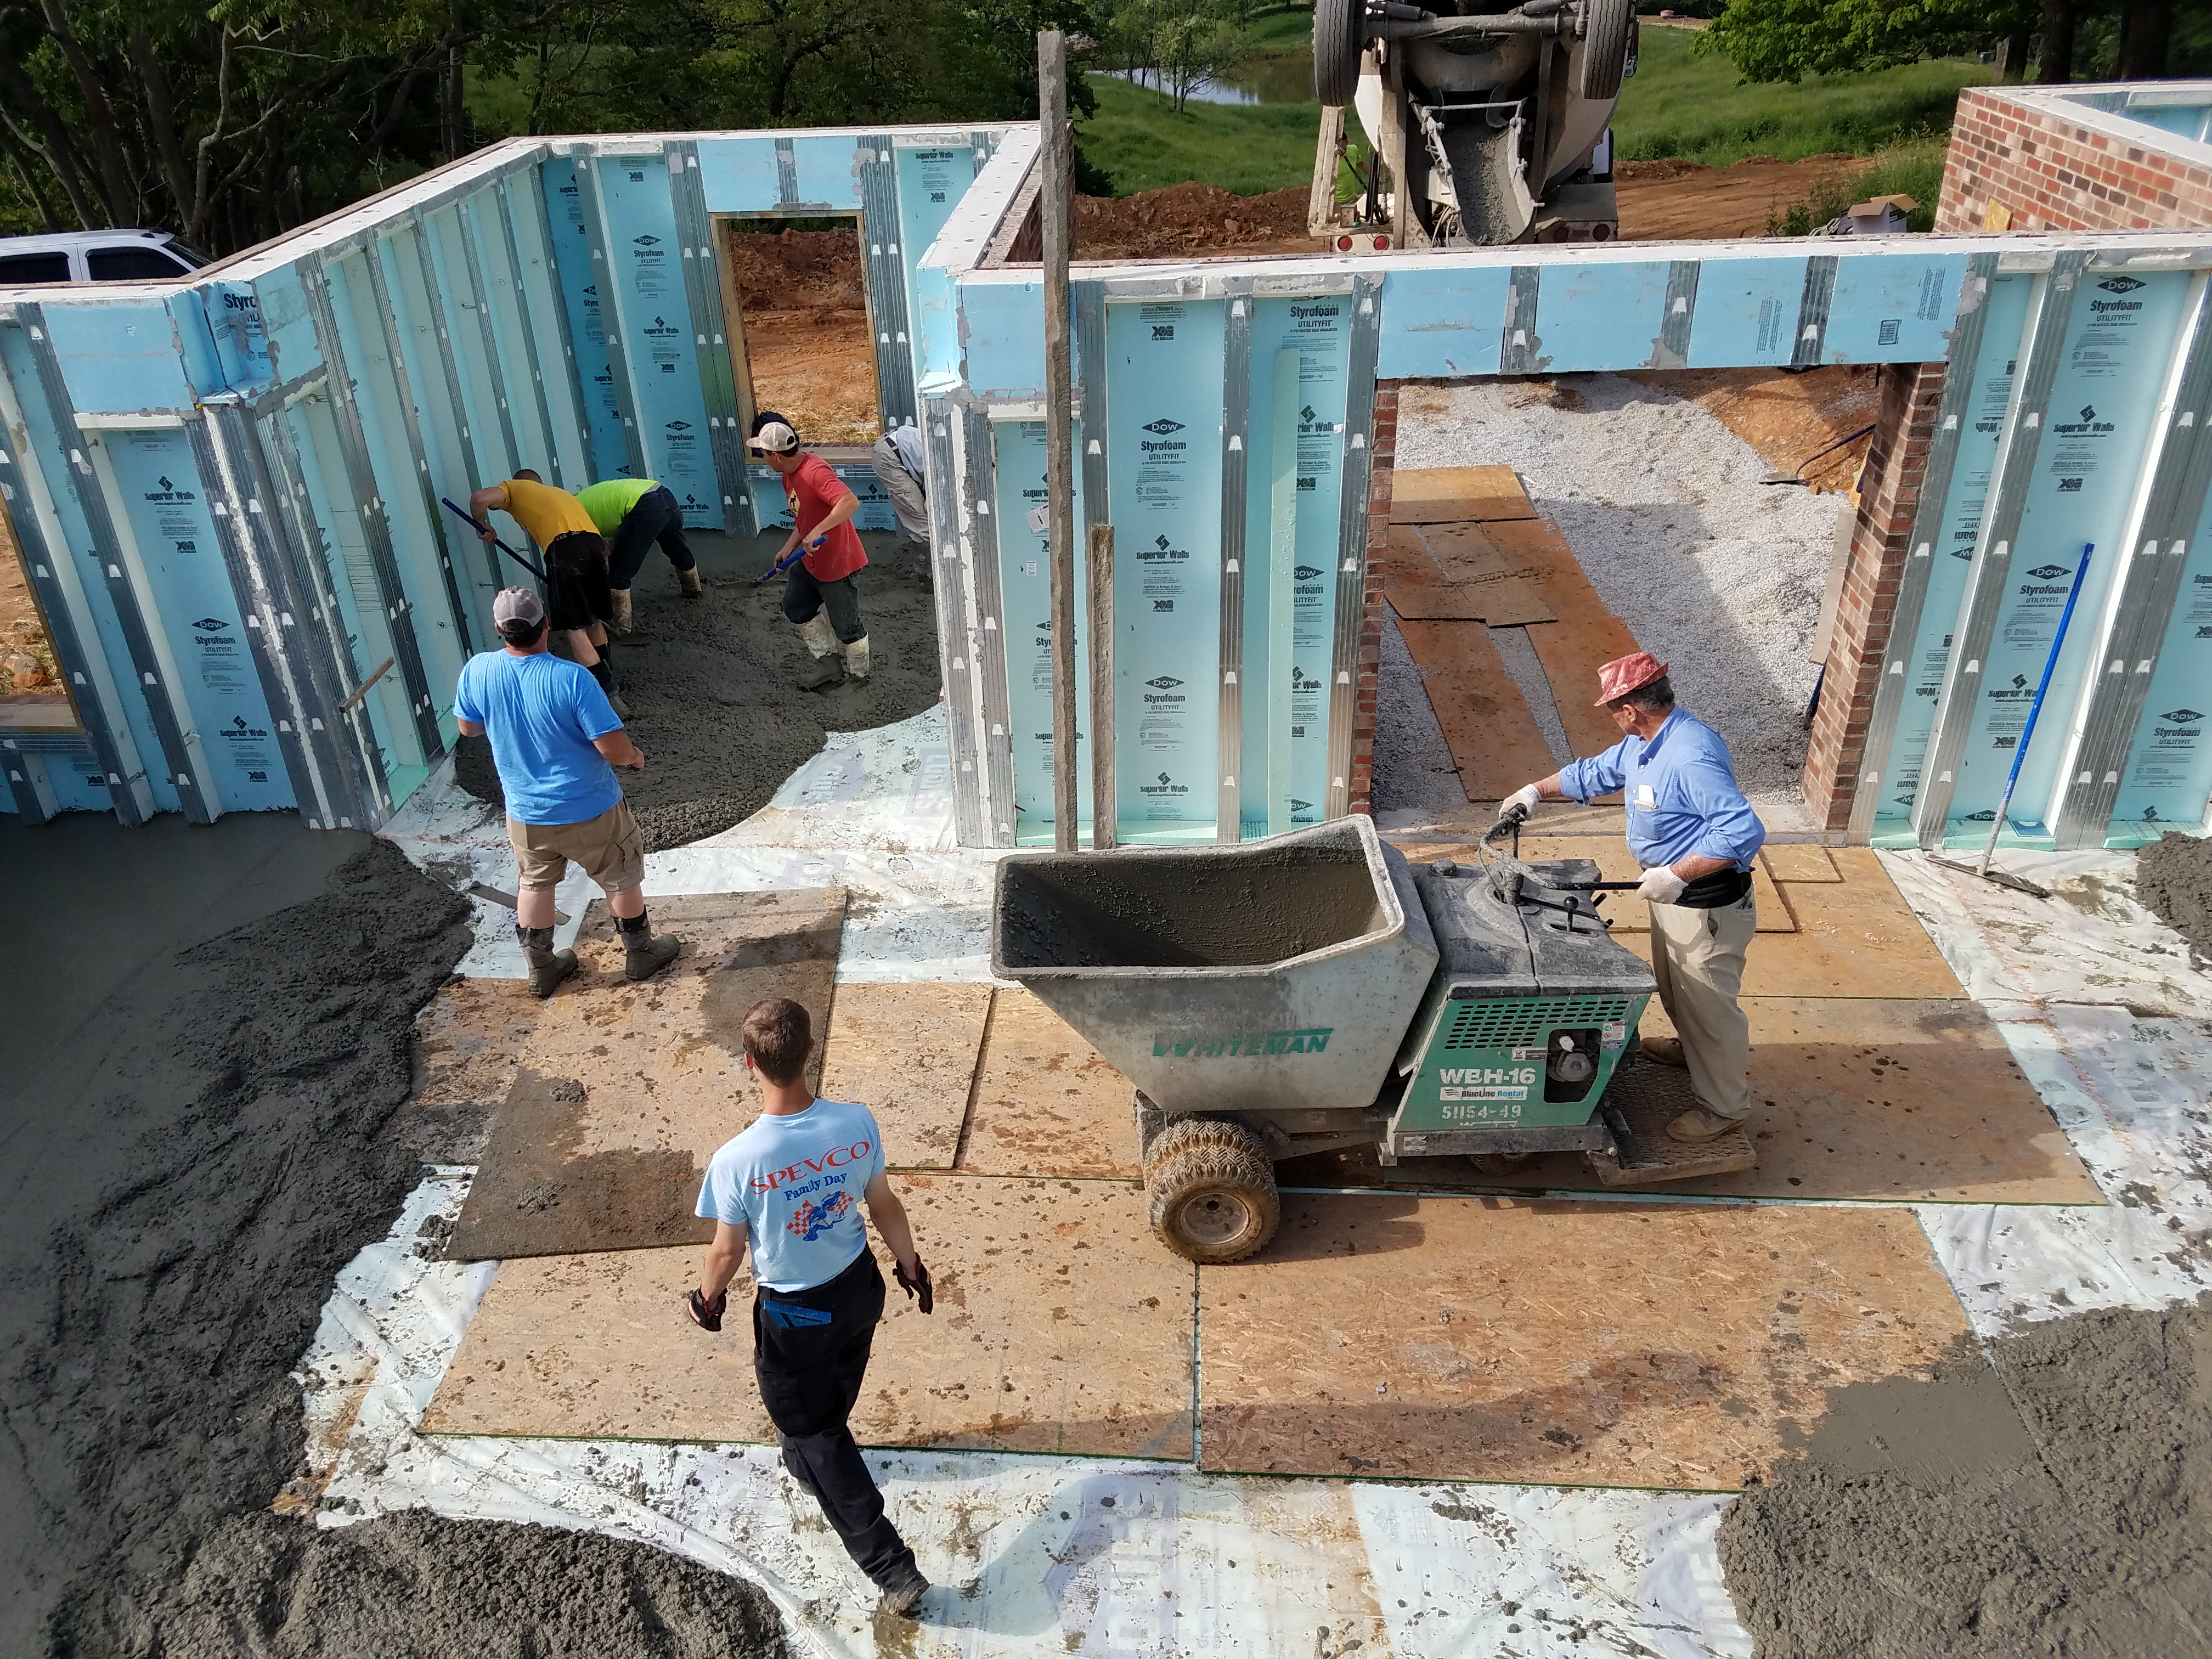
Right – Workers pour the concrete for the basement floor slab over a vapor barrier installed over rigid foam.
Image
Right- This concrete block home in the hot-humid climate is insulated on the interior with rigid EPS foam; all framing uses mold- and termite-resistant borate-treated lumber.
Image
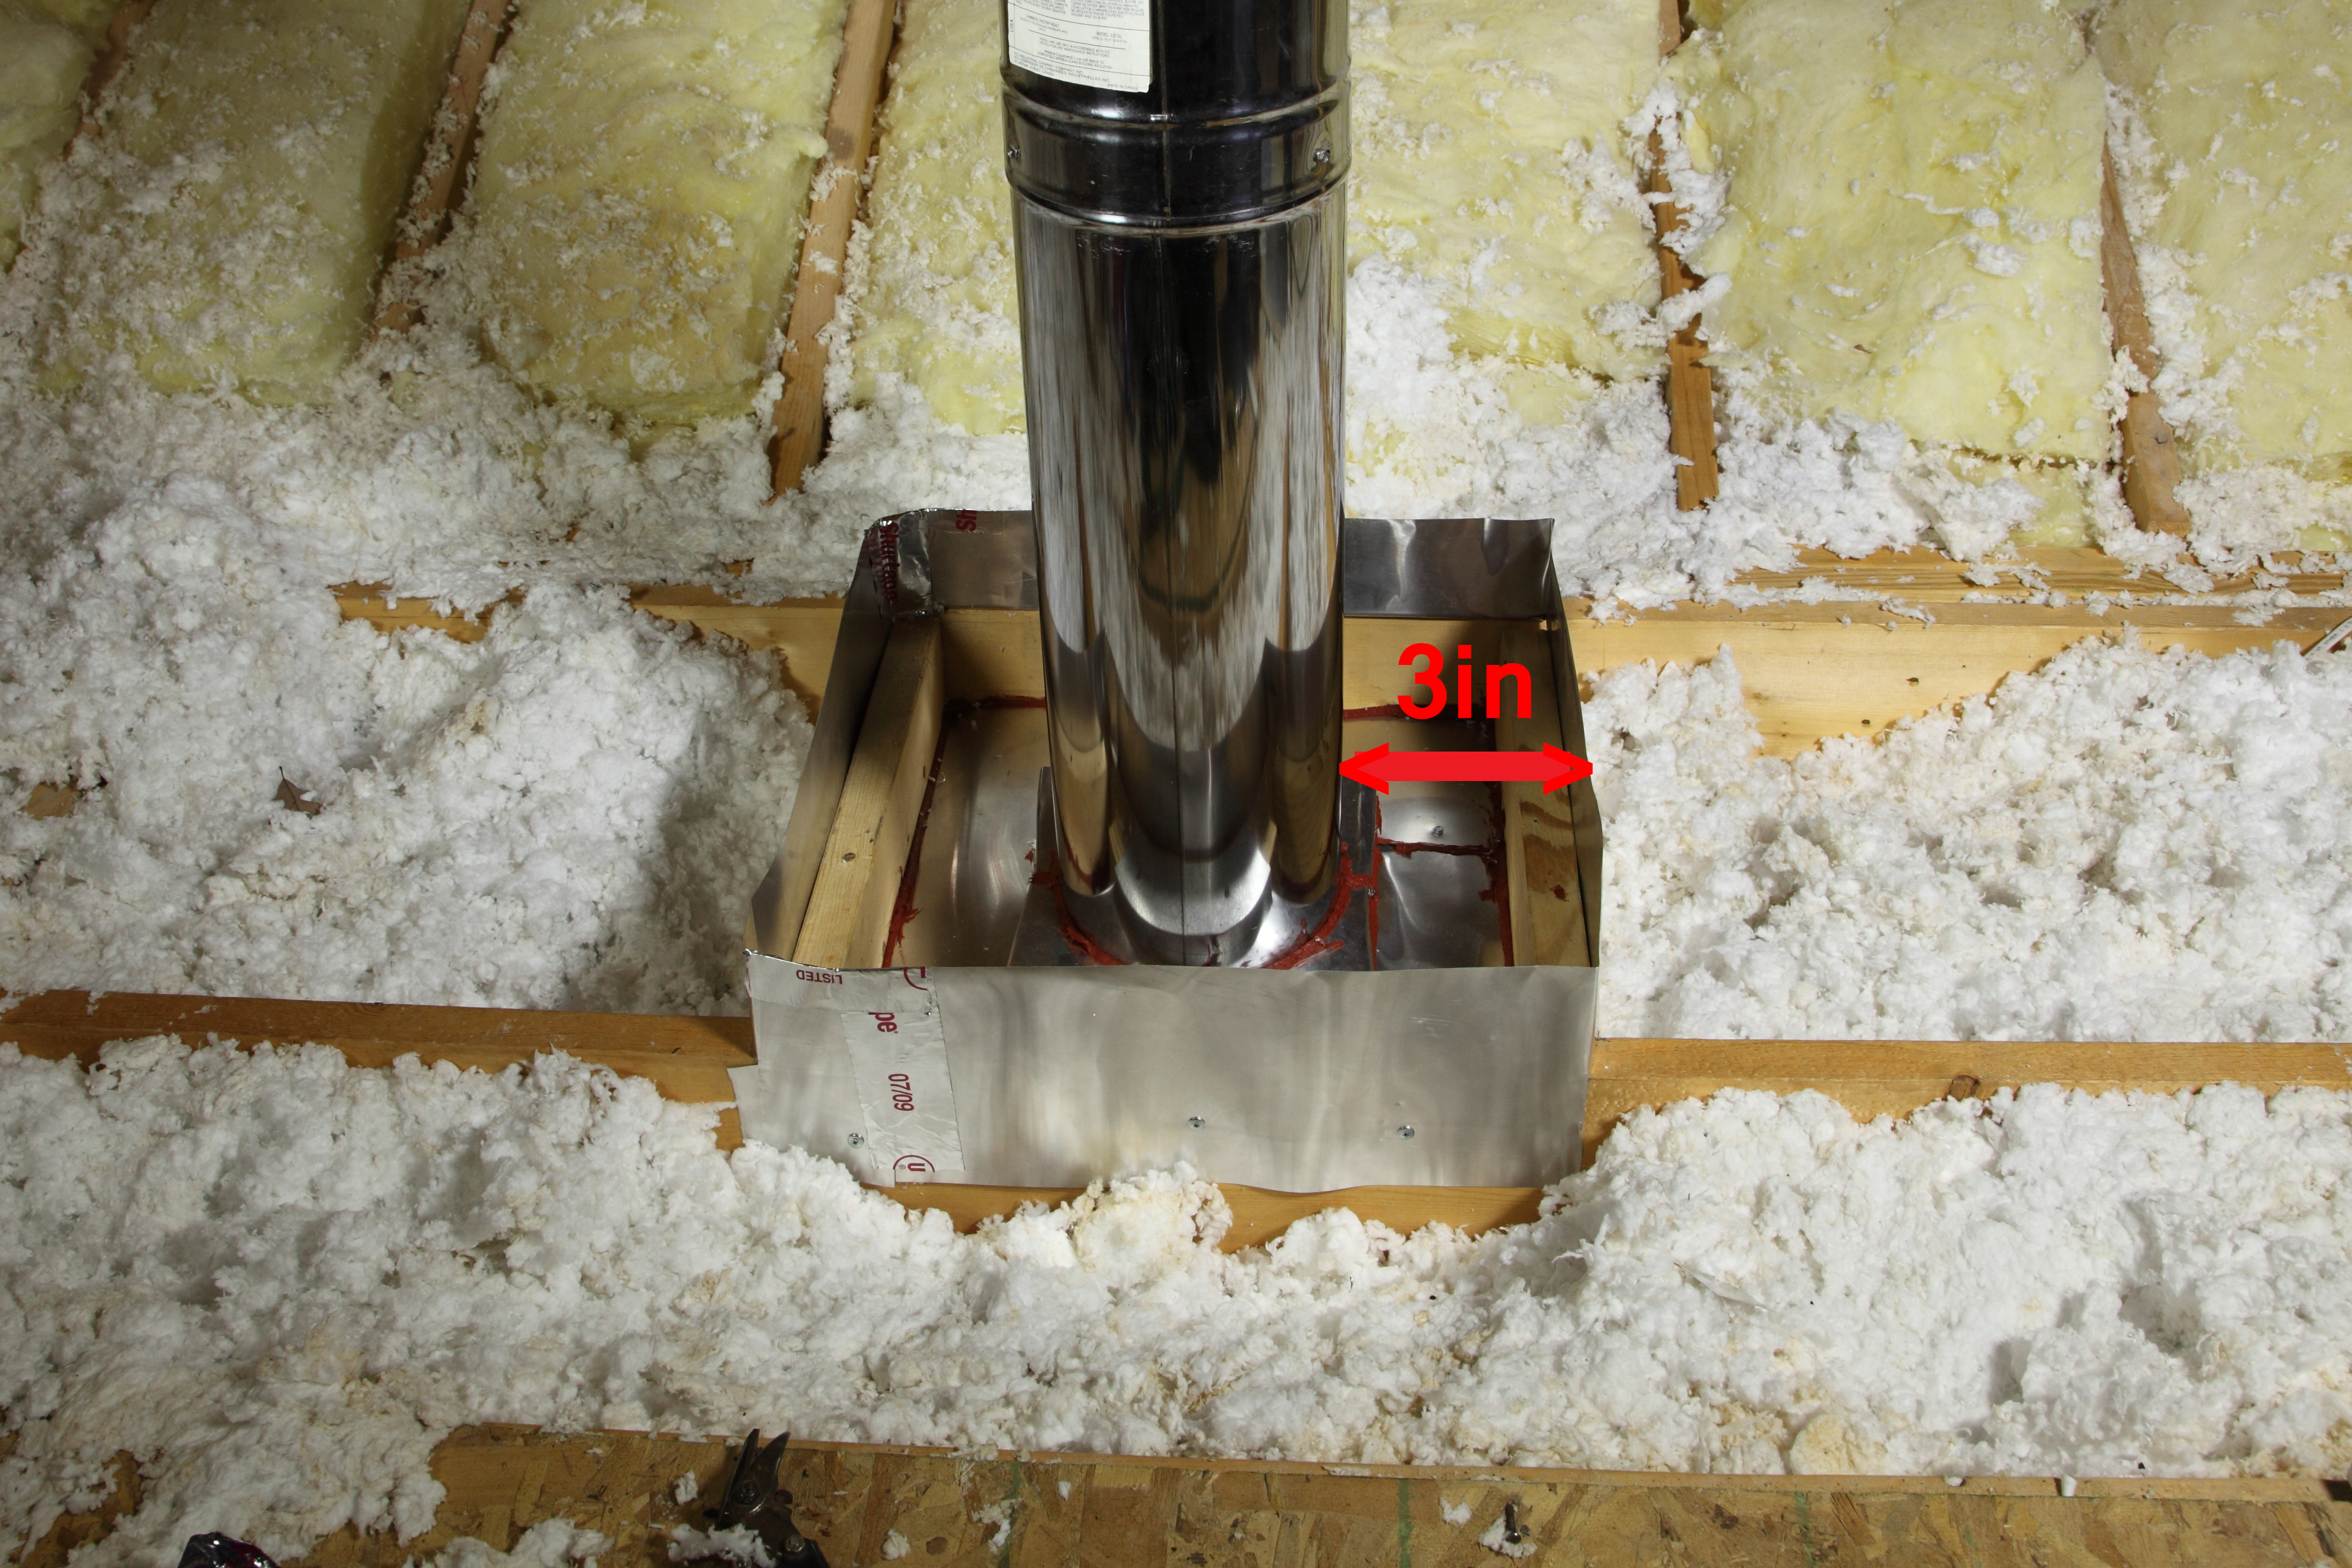
Right- This flue pipe has been air sealed with sheet metal and fire-rated caulk and an insulation dam has been constructed to keep insulation from touching the hot flue pipe
Image
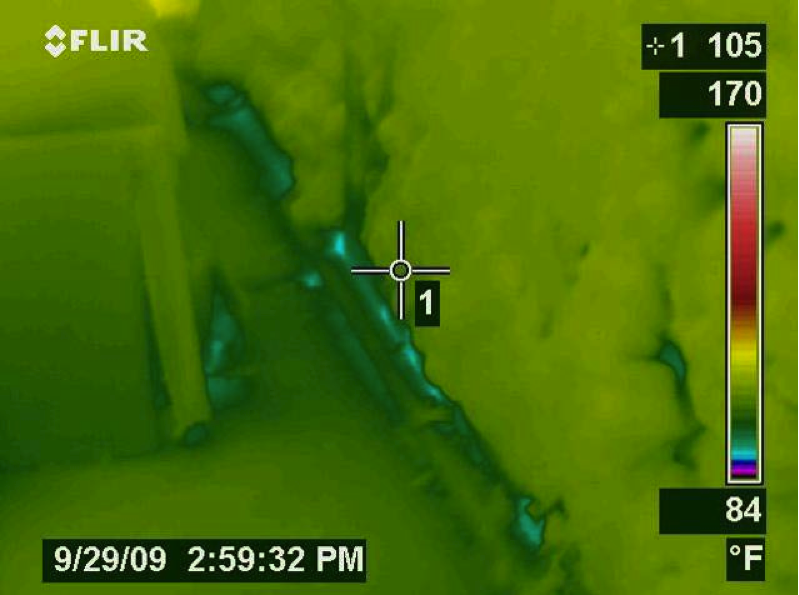
Right-- IR photo shows how effectively spray foam insulated/air sealed attic kneewall and the floor cavities under kneewall
Image
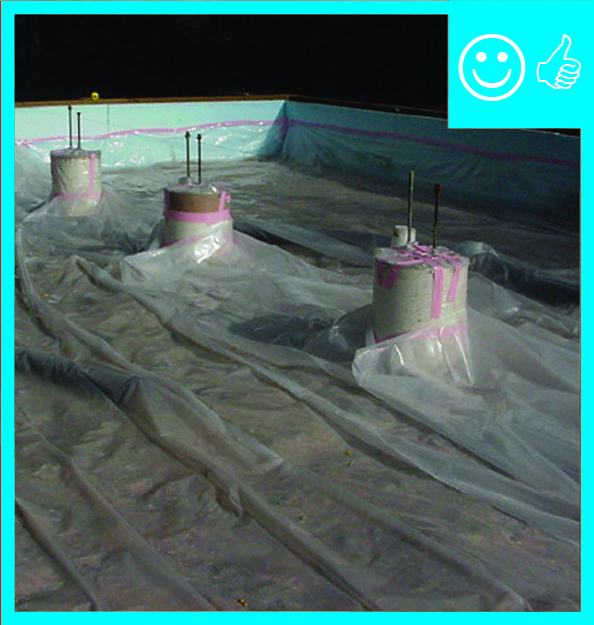
Right-Polyethylene sheeting is correctly installed over aggregate and taped to pillars and foundation wall
Image
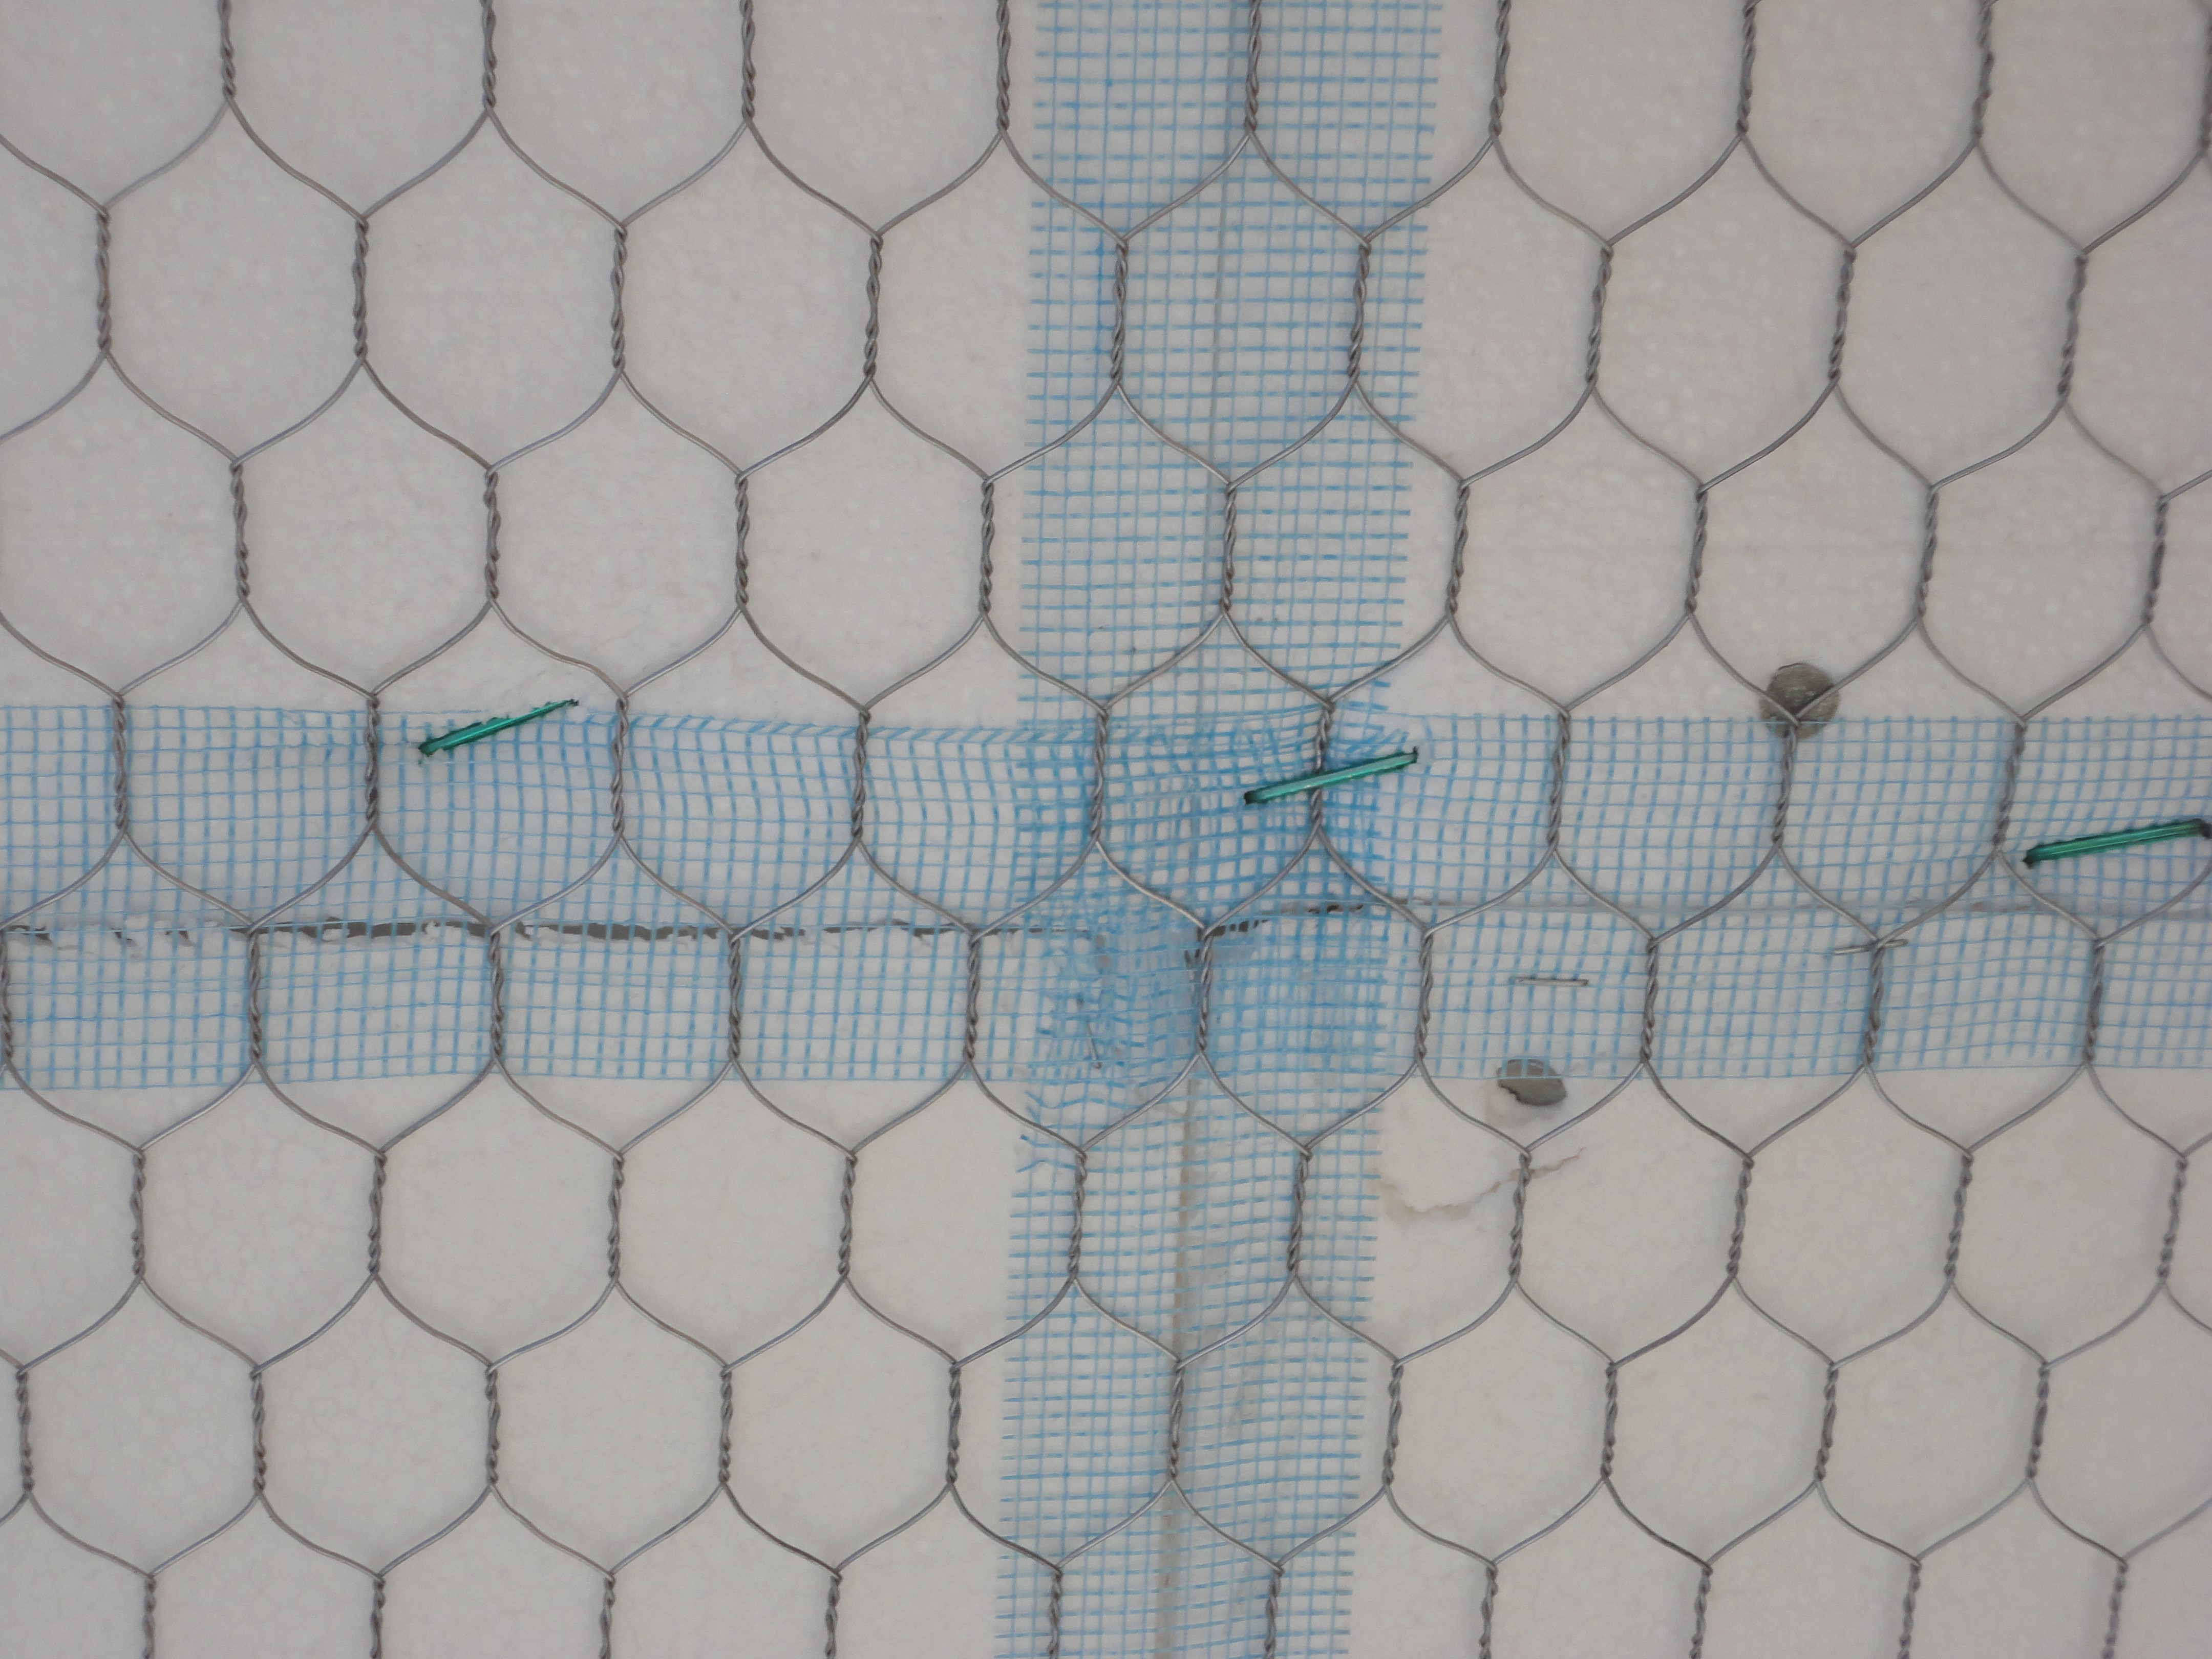
Right: All joints in the rigid foam are taped to keep stucco out of joints for even drying. Mesh tape (shown here) is used with expanded polystyrene (EPS); acrylic sheathing tape or self-adhered membrane is used with XPS
Image
Right: Ducts are completely buried beneath insulation to the depth specified in the plans
Image
Right: ductwork is fully encapsulated with ccSPF prior to ceiling installation and burial
Image
Right: Ductwork is installed in direct contact with lower truss cords. In this picture the main trunk is laying on the truss cords and branch ducts are temporarily held with strapping across truss cords. Ducts are well sealed with mastic
Image

Image

Rigid foam extends under the full slab and lines the inside edges of the foundation walls.
Image

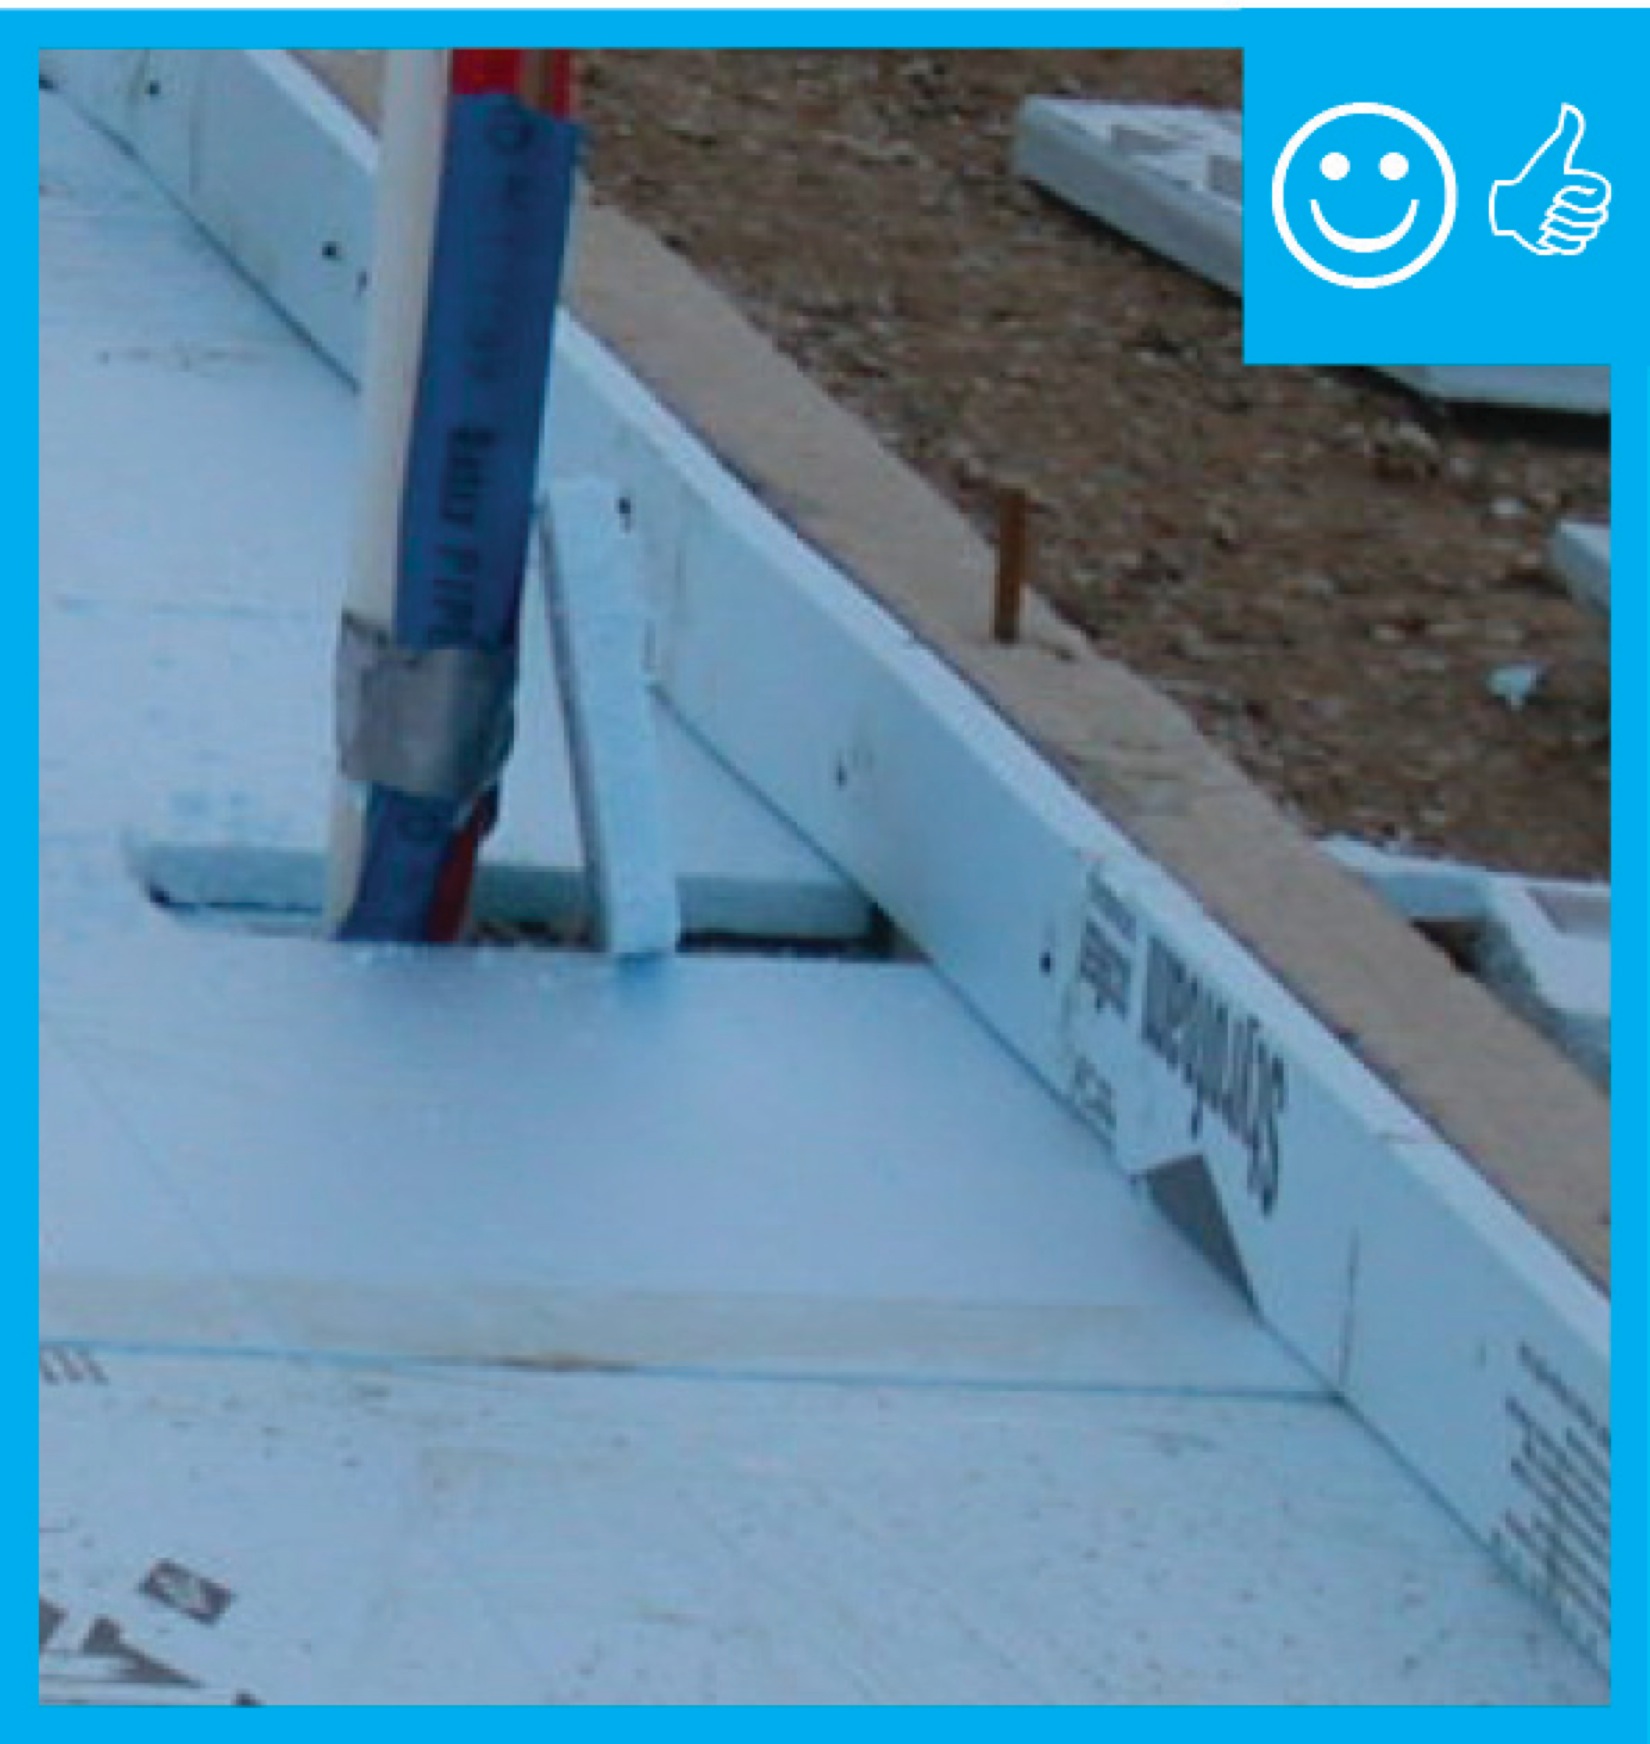
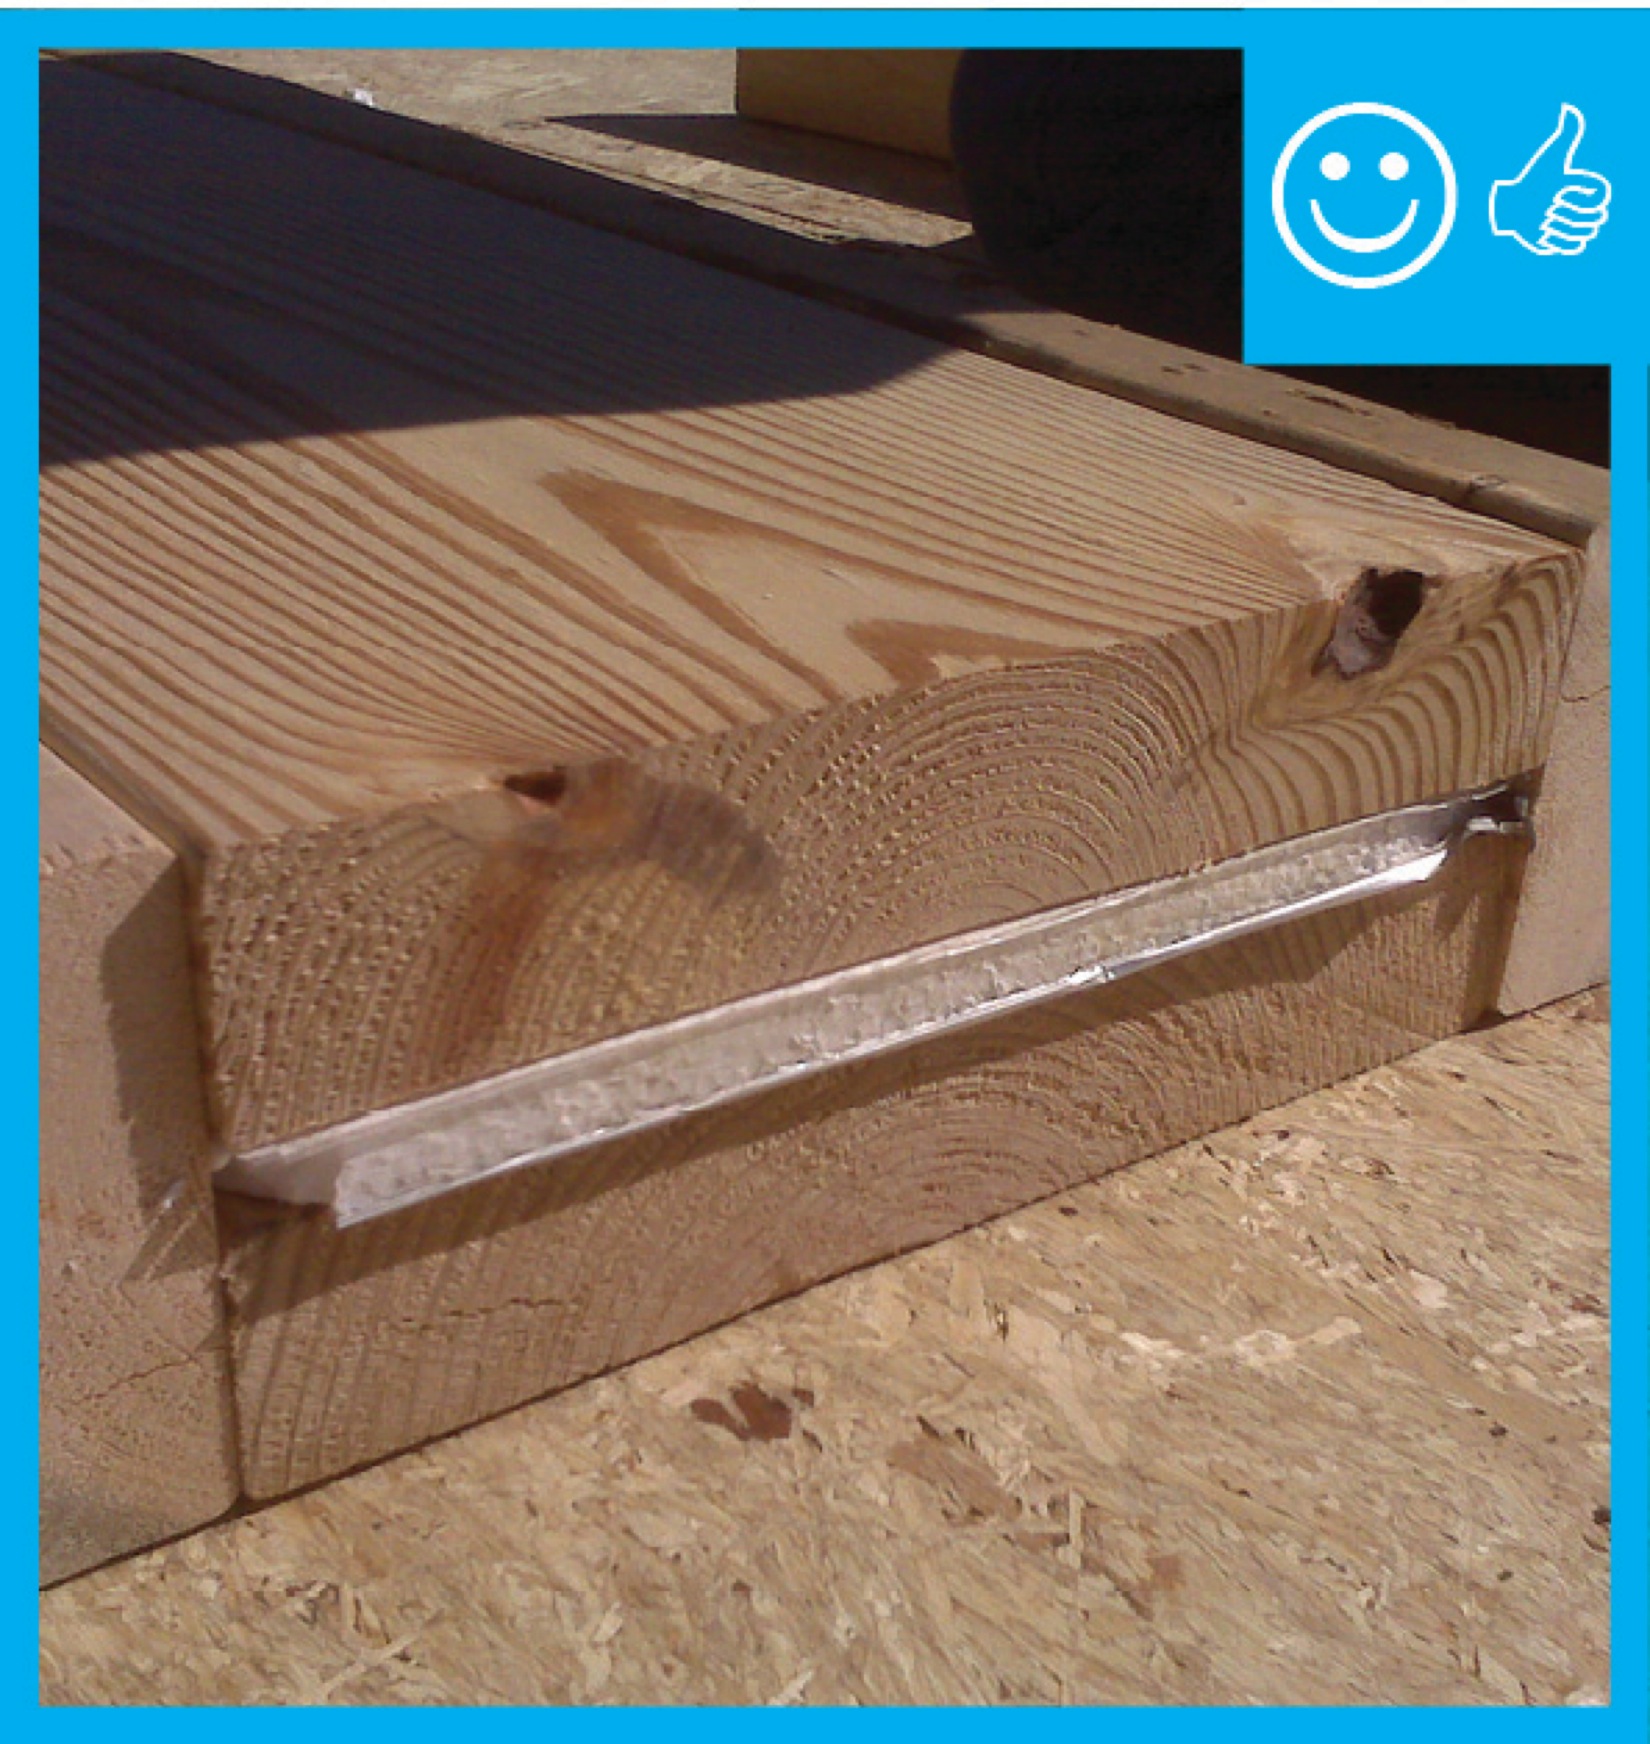
Rigid foam forms an insulating bond break between the foundation wall and the slab
Image

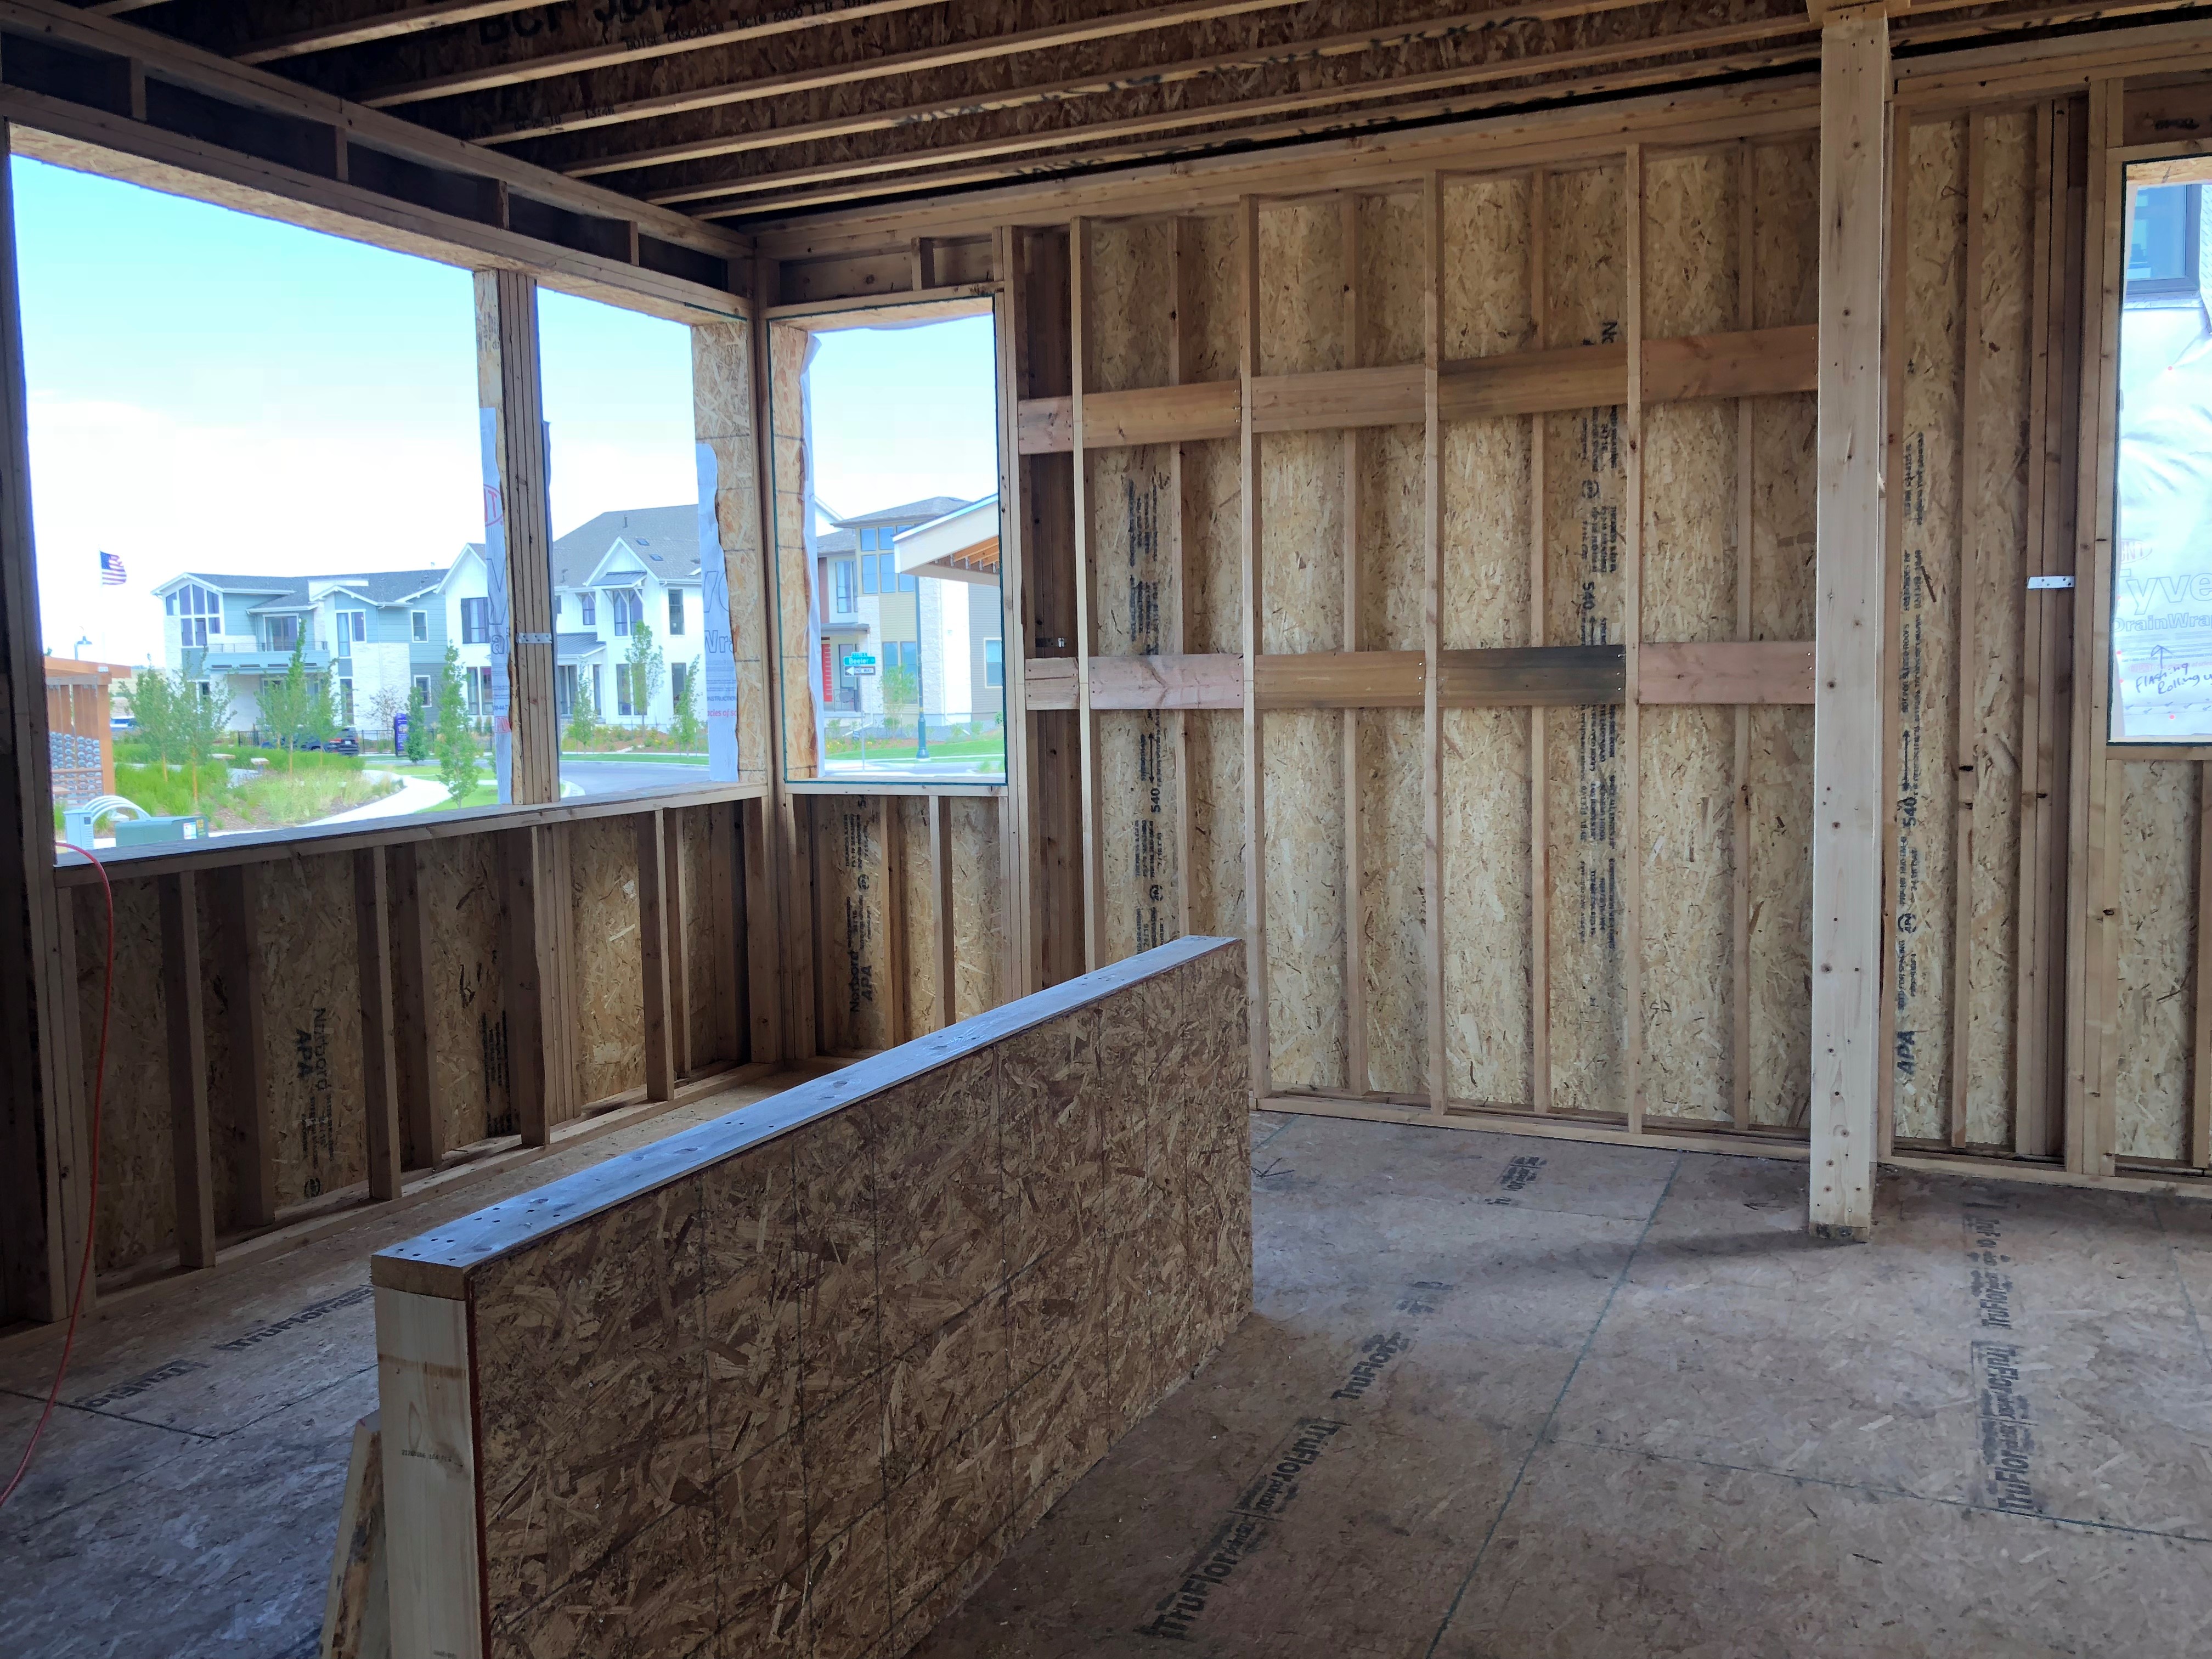
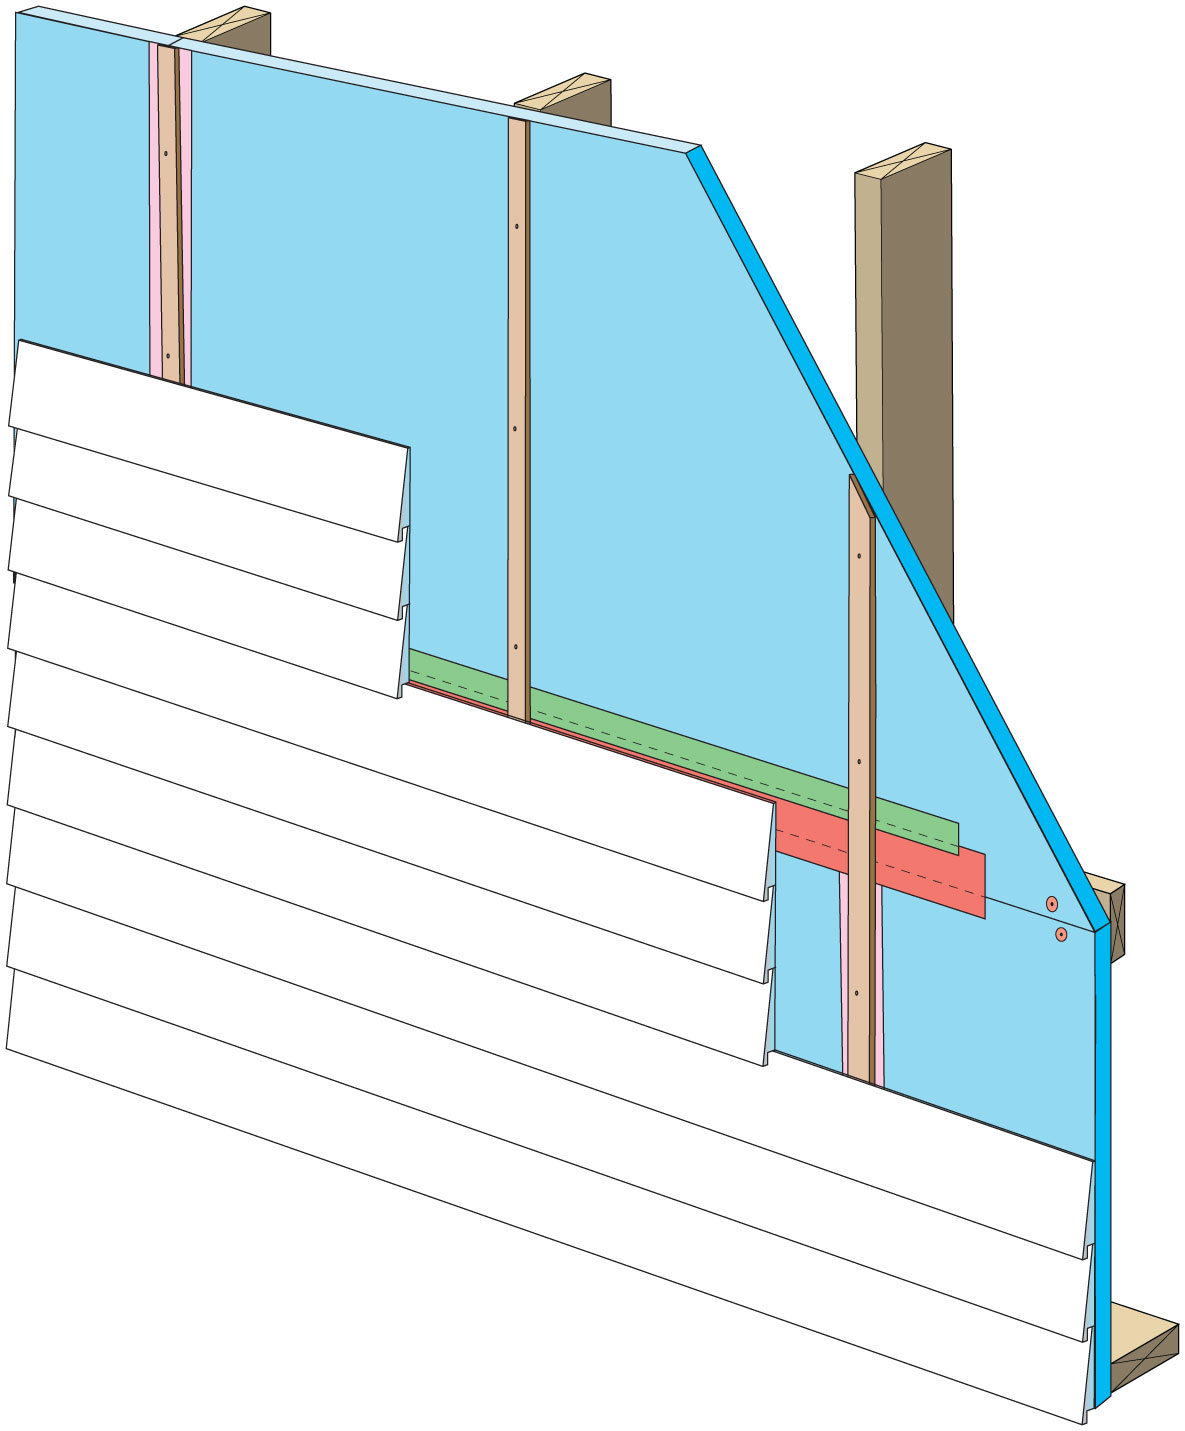
Rigid foam insulated sheathing placed exterior to house wrap, interior to house wrap, or take the place of the house wrap
Image
Rigid foam insulates the interior of masonry walls behind the fireplace in this Building America home by Castle and Cooke in Winter Garden, Florida.
Image
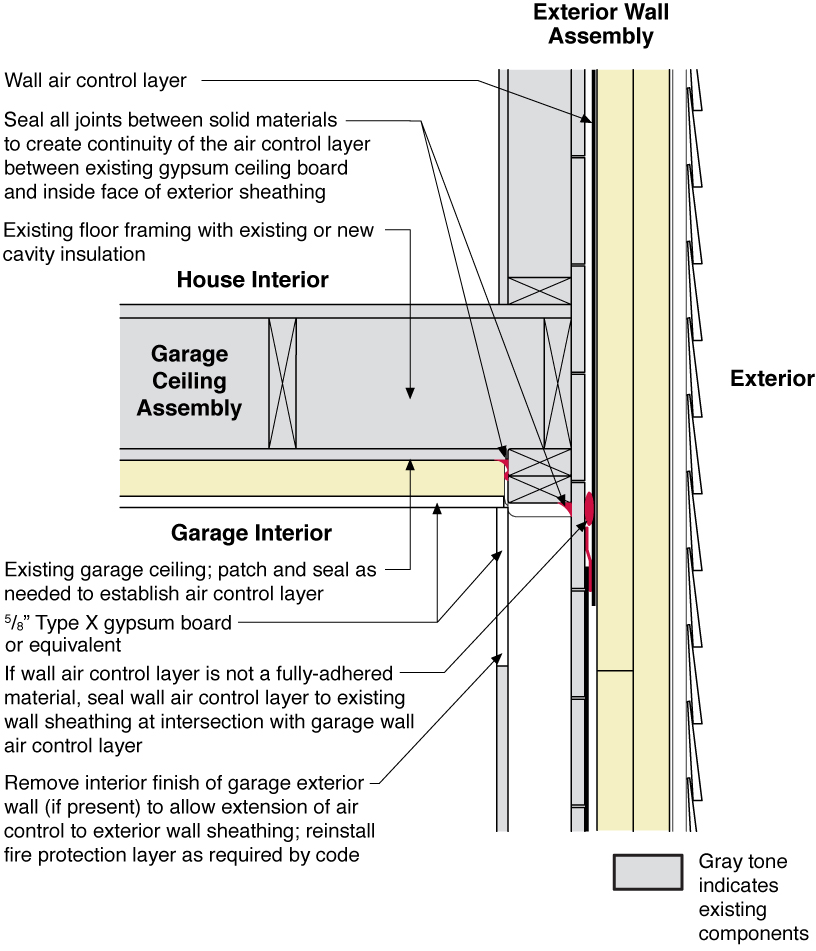
Rigid foam insulating sheathing installed over an existing garage ceiling with retrofits to air seal exterior wall before adding exterior wall insulating sheathing
Image

Rigid foam insulating sheathing is installed on existing garage ceiling and covered with a new gypsum board fire protection layer installed over the foam.
Image
Rigid foam insulation and a thin slab were installed over the dirt and gravel of this sealed crawlspace
Image

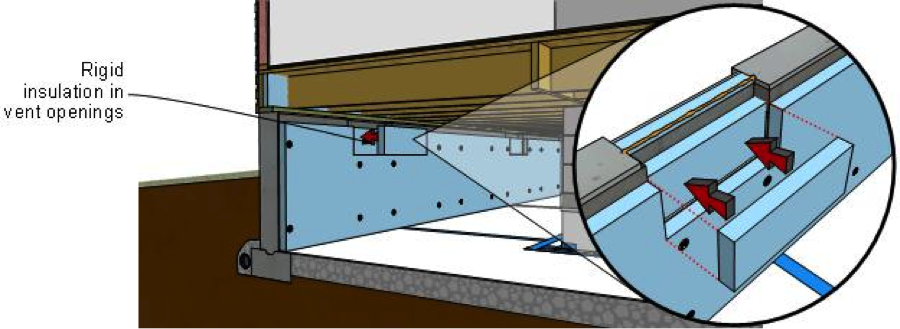
Rigid foam insulation applied to the crawlspace walls, allowing a 3-in. pest control inspection strip at the top
Image
Rigid foam insulation can serve as the drainage plane when all seams are taped. Furring strips provide an air gap behind the cladding.
Image
Image
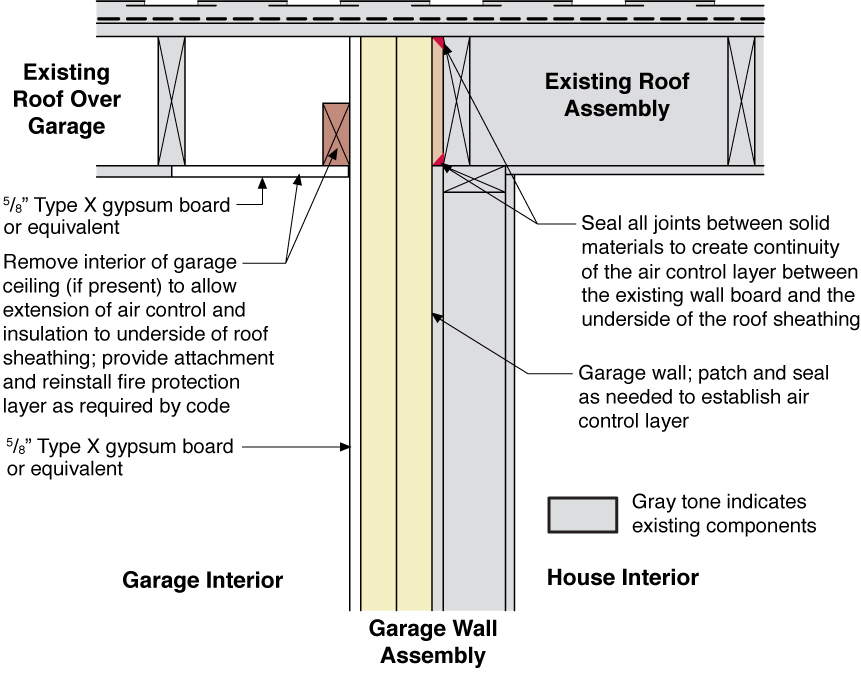
Rigid foam insulation is installed on the garage side of the shared garage wall and roof of an existing home