Showing results 151 - 200 of 281
Image
Right - Closed-cell spray foam covers the interior of the foundation wall and wall framing is placed to the inside of the spray foam.
Image
Right - Closed-cell spray foam is used to retrofit an existing rubble basement foundation wall.
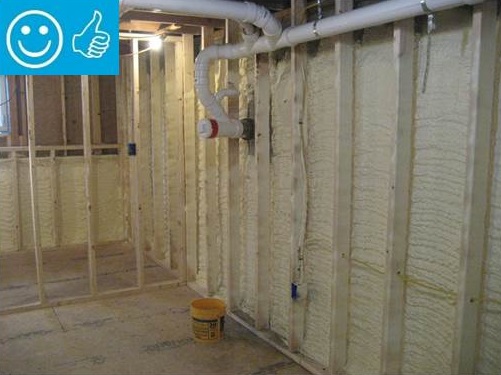
Image
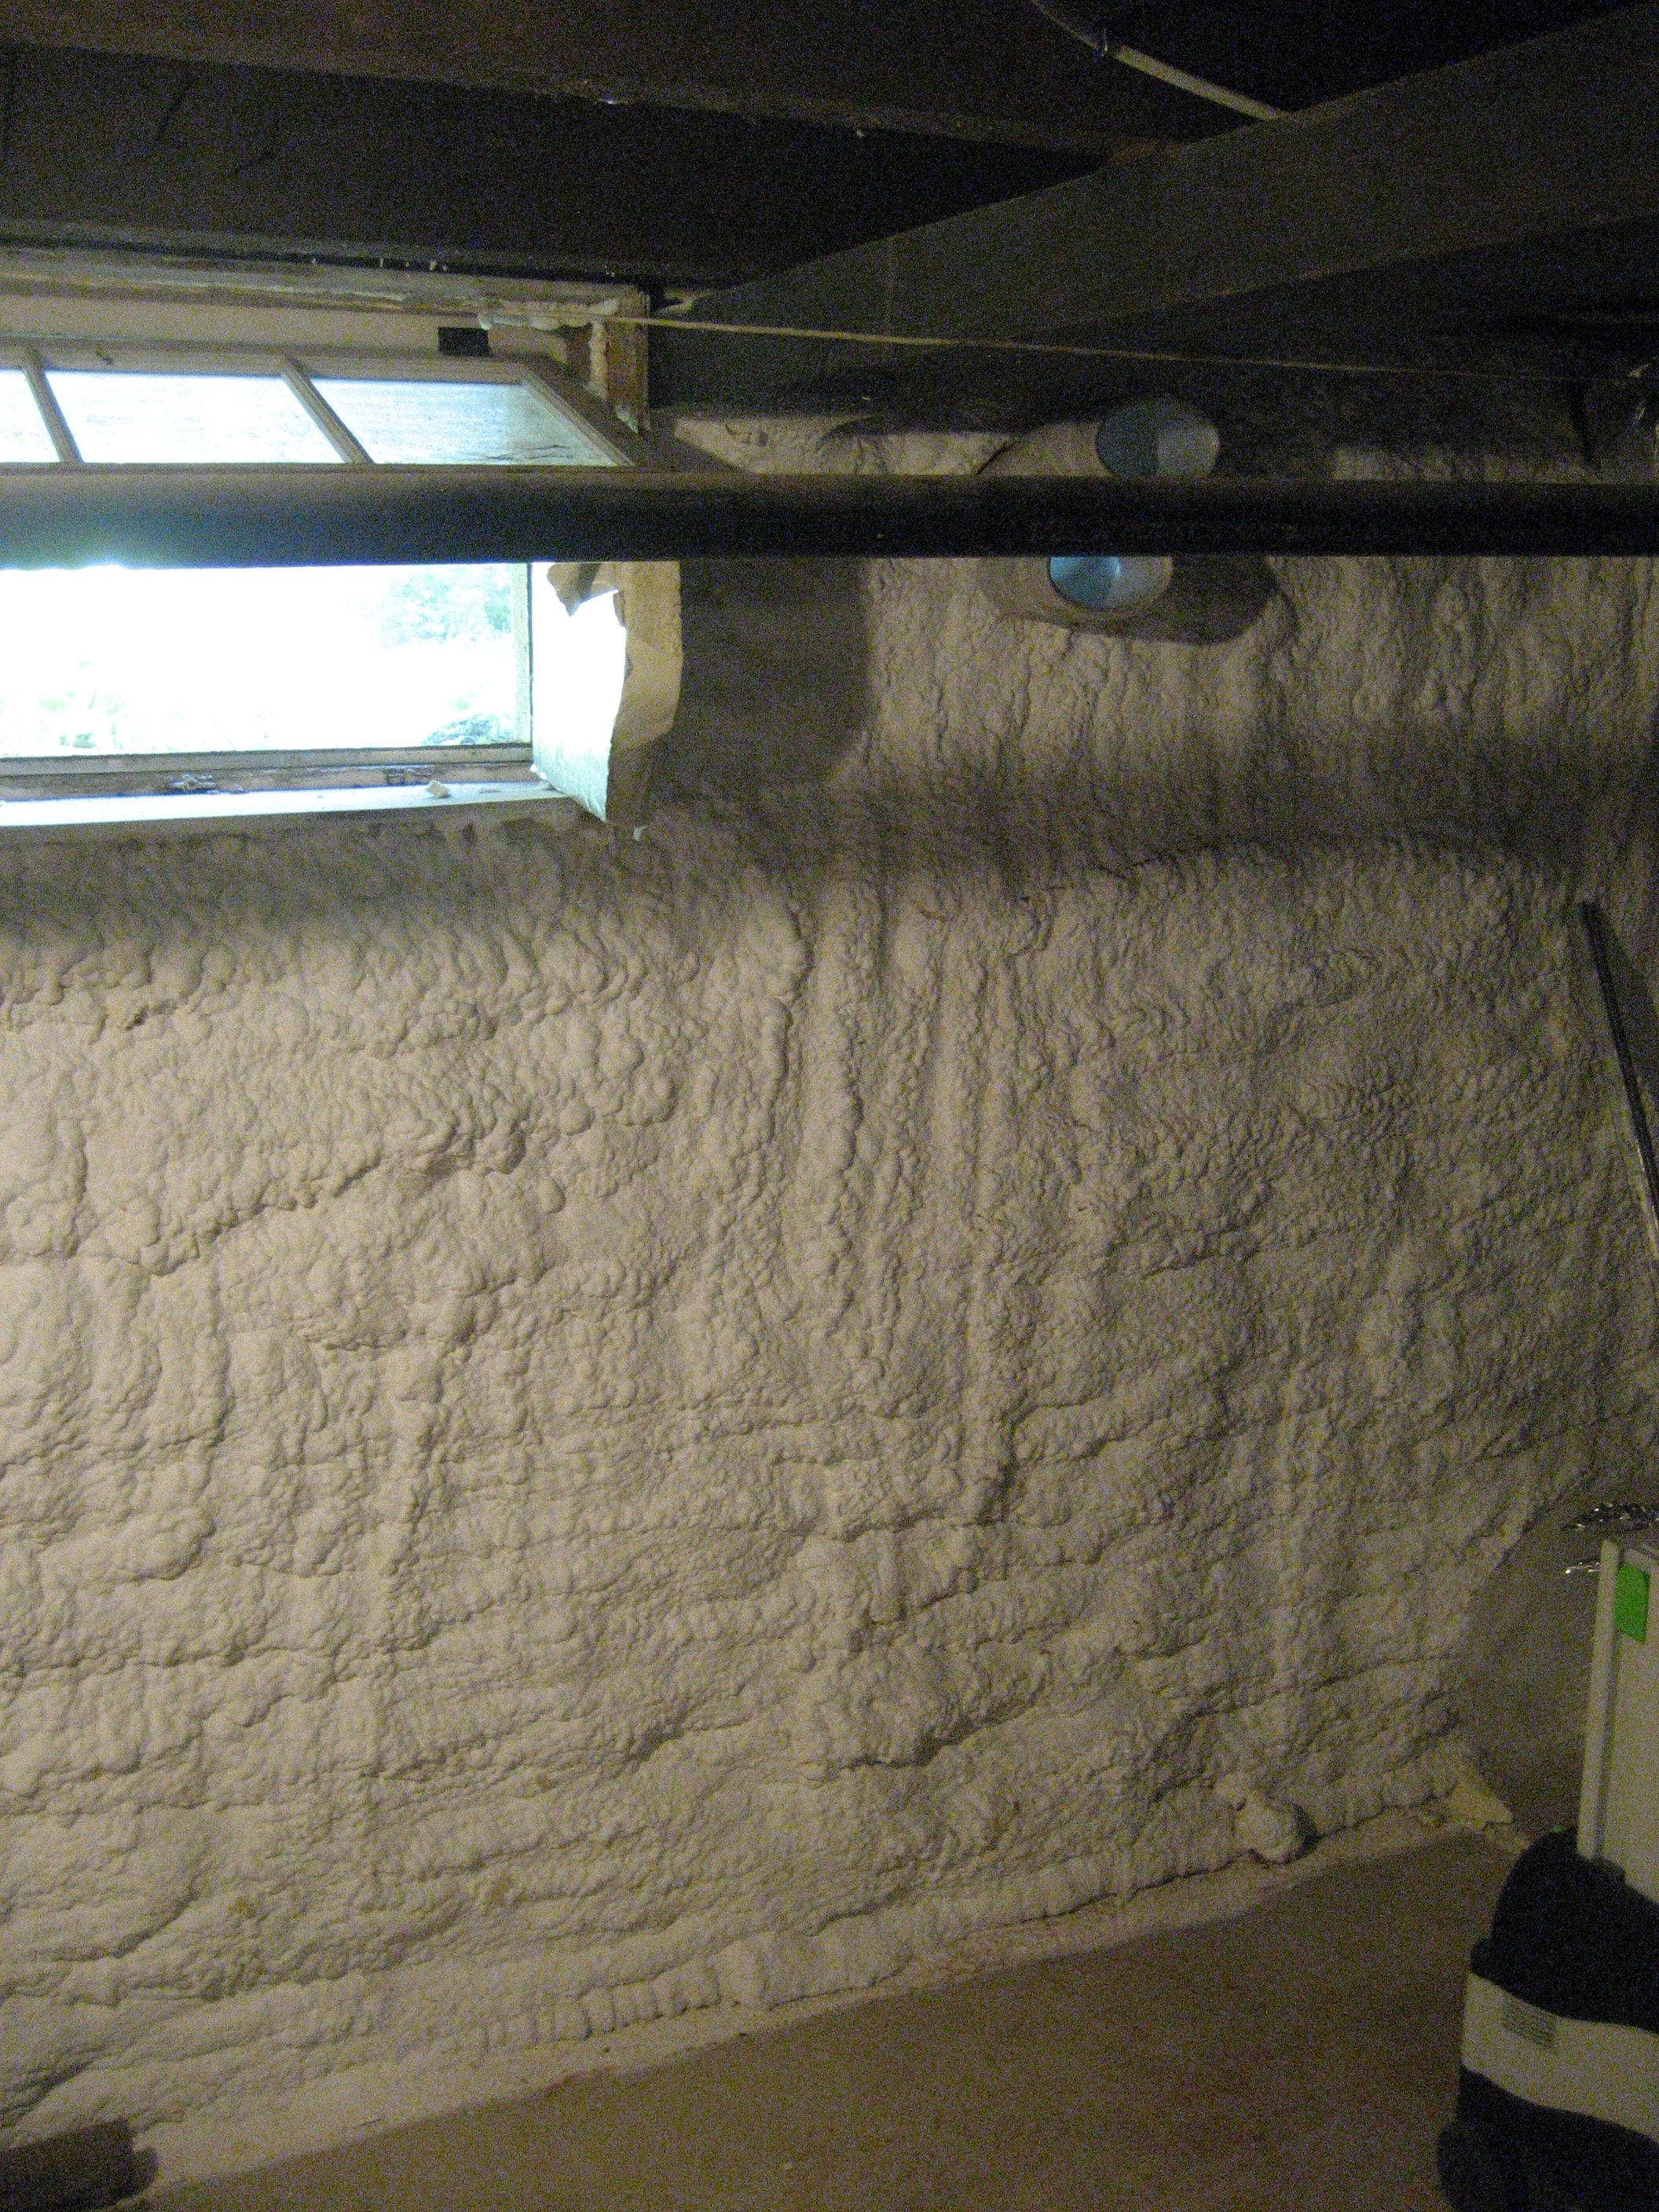
Right - Closed-cell spray foam was applied to the interior of a foundation wall.
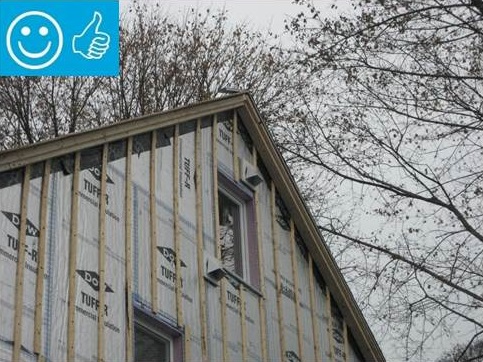
Image
Right - Foil-faced polyisocyanurate rigid foam is attached to the existing exterior wall with vertical wood furring strips
Image
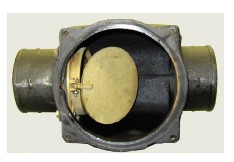
Right - Install backflow prevention devices on plumbing pipes to prevent wastewater from entering the home's plumbing system.
Image
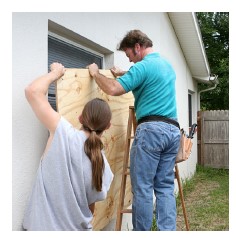
Right - Panels of 7/16-inch treated plywood are inexpensive but take time to install and are difficult to install on higher windows.
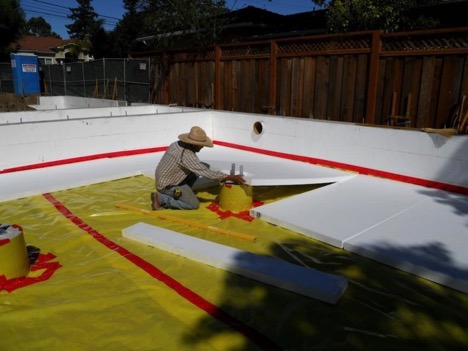
Image
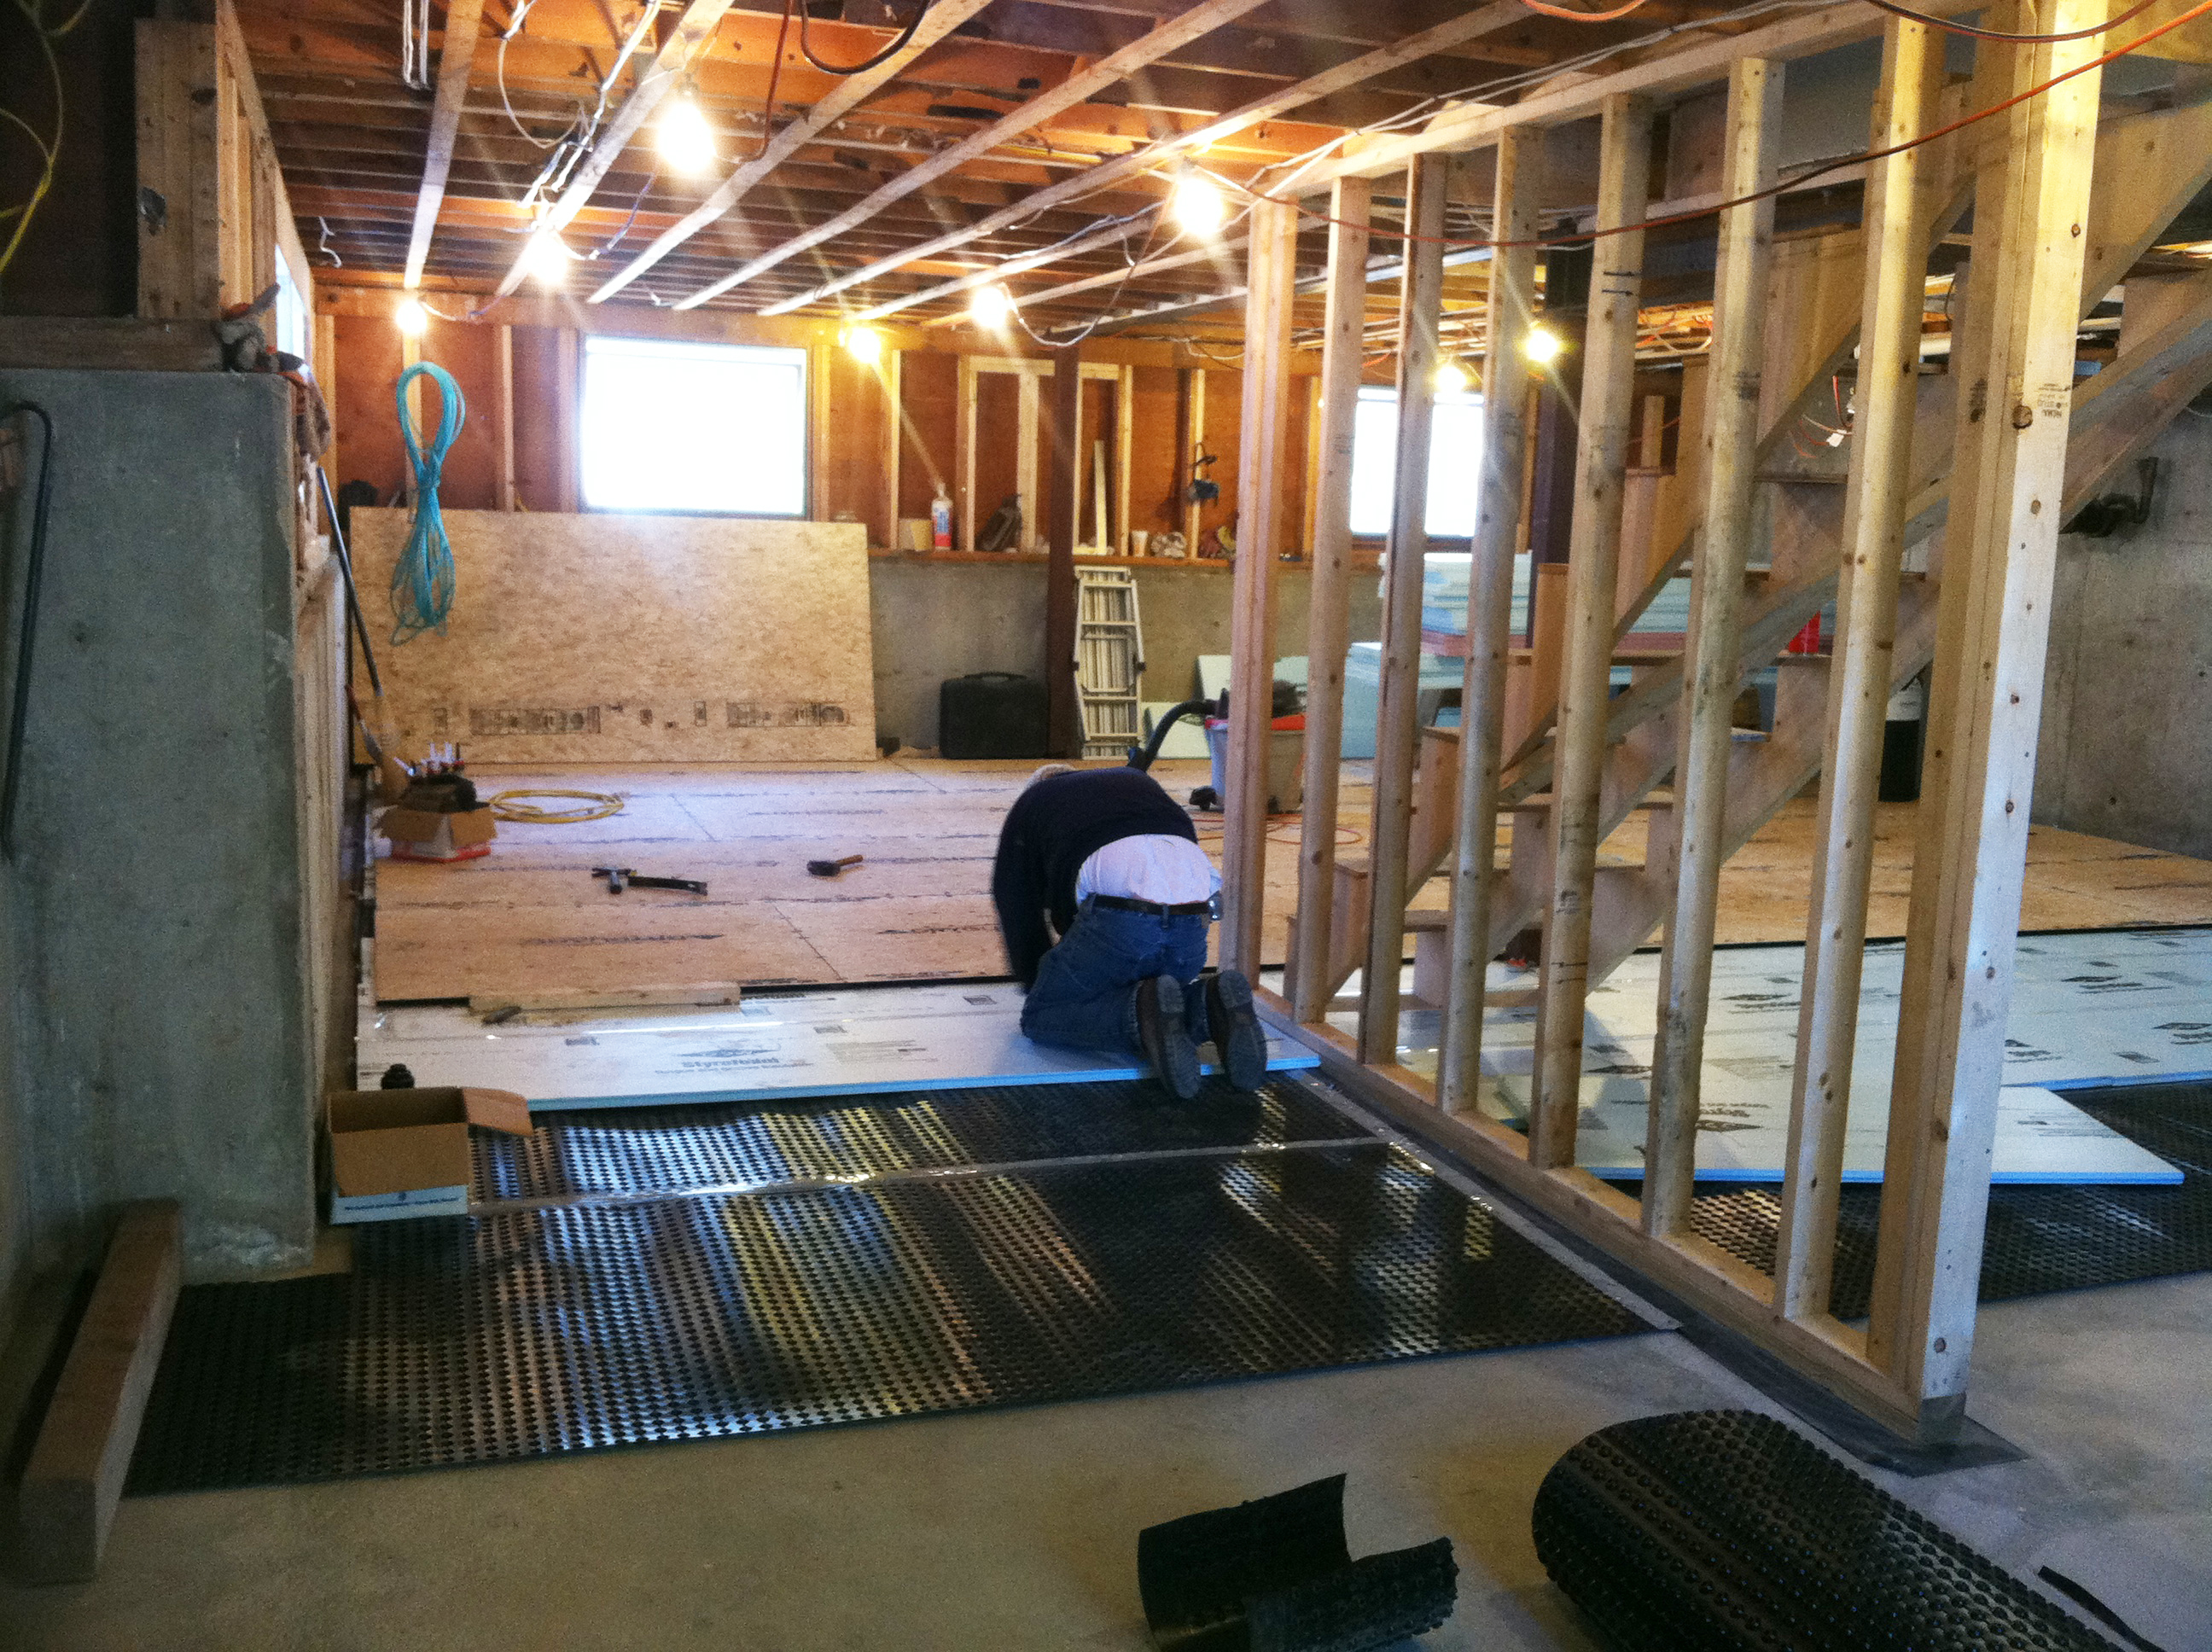
Right - Retrofit of an existing basement slab by adding dimple plastic mat, rigid foam insulation, and a floating subfloor.
Image
Right - Rigid foam slab edge insulation is installed along the exterior edge of a monolithic slab foundation.
Image
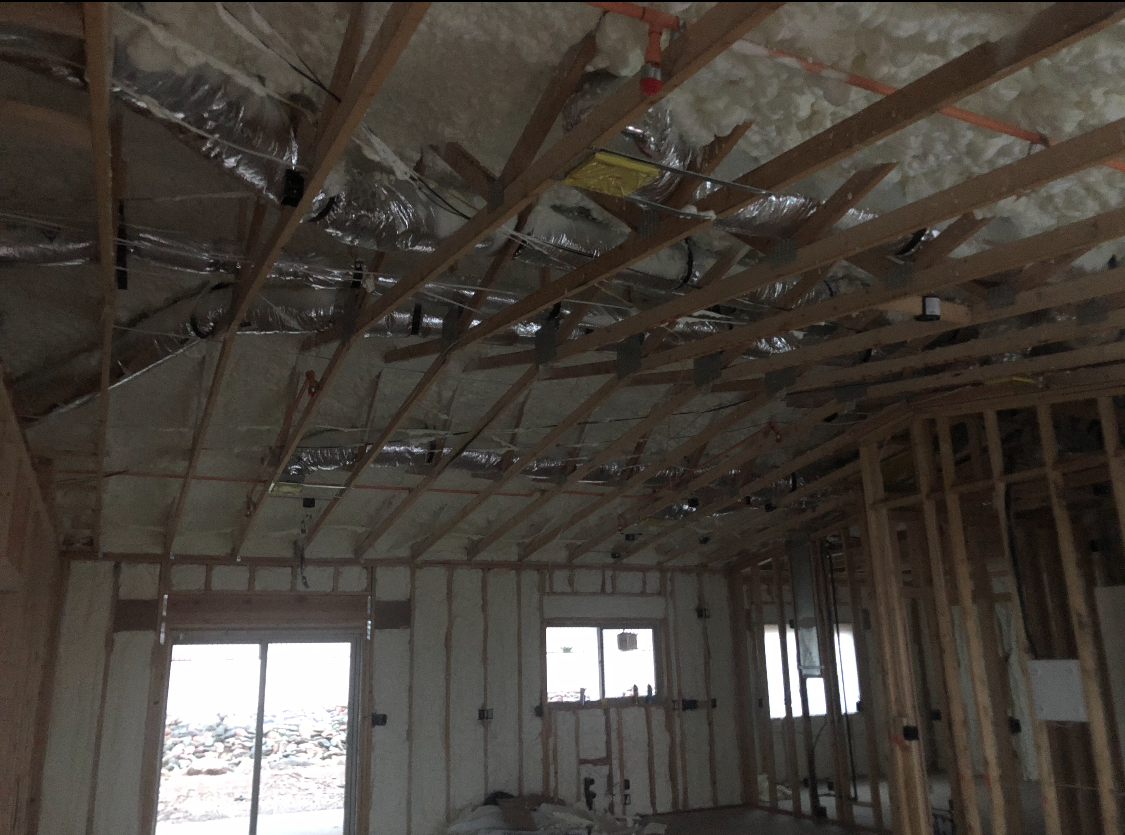
Right - Spray foam insulation air-seals the ceiling-to-drywall seams at the wall top plate.
Image
Right - Spray foam insulation has been sprayed onto the underside of the sloped roof and the gable end wall to provide a sealed, insulated attic for housing the HVAC ducts
Image

Right - The wall top plates are sealed with foam before installing insulation on the ceiling deck.
Image

Right - These roof insulation panels are installed in multiple layers with joints offset both vertically and horizontally. The plywood nail base fastened to the roof framing holds the insulation layers together snuggly thus minimizing gaps
Image
Right - This foil-faced polyisocyanurate rigid foam is installed on an existing exterior wall and the seams are taped so the rigid foam can serve as a water control layer
Image
Right - XPS foam insulation is attached to the existing exterior wall with wood furring strips that serve as a nail base for the siding and are installed vertically to allow for drainage and drying behind the siding
Image
Right – an instructor shows a student how to cut batt insulation around wiring rather than compressing the batt behind the wiring.
Image
Image
Image
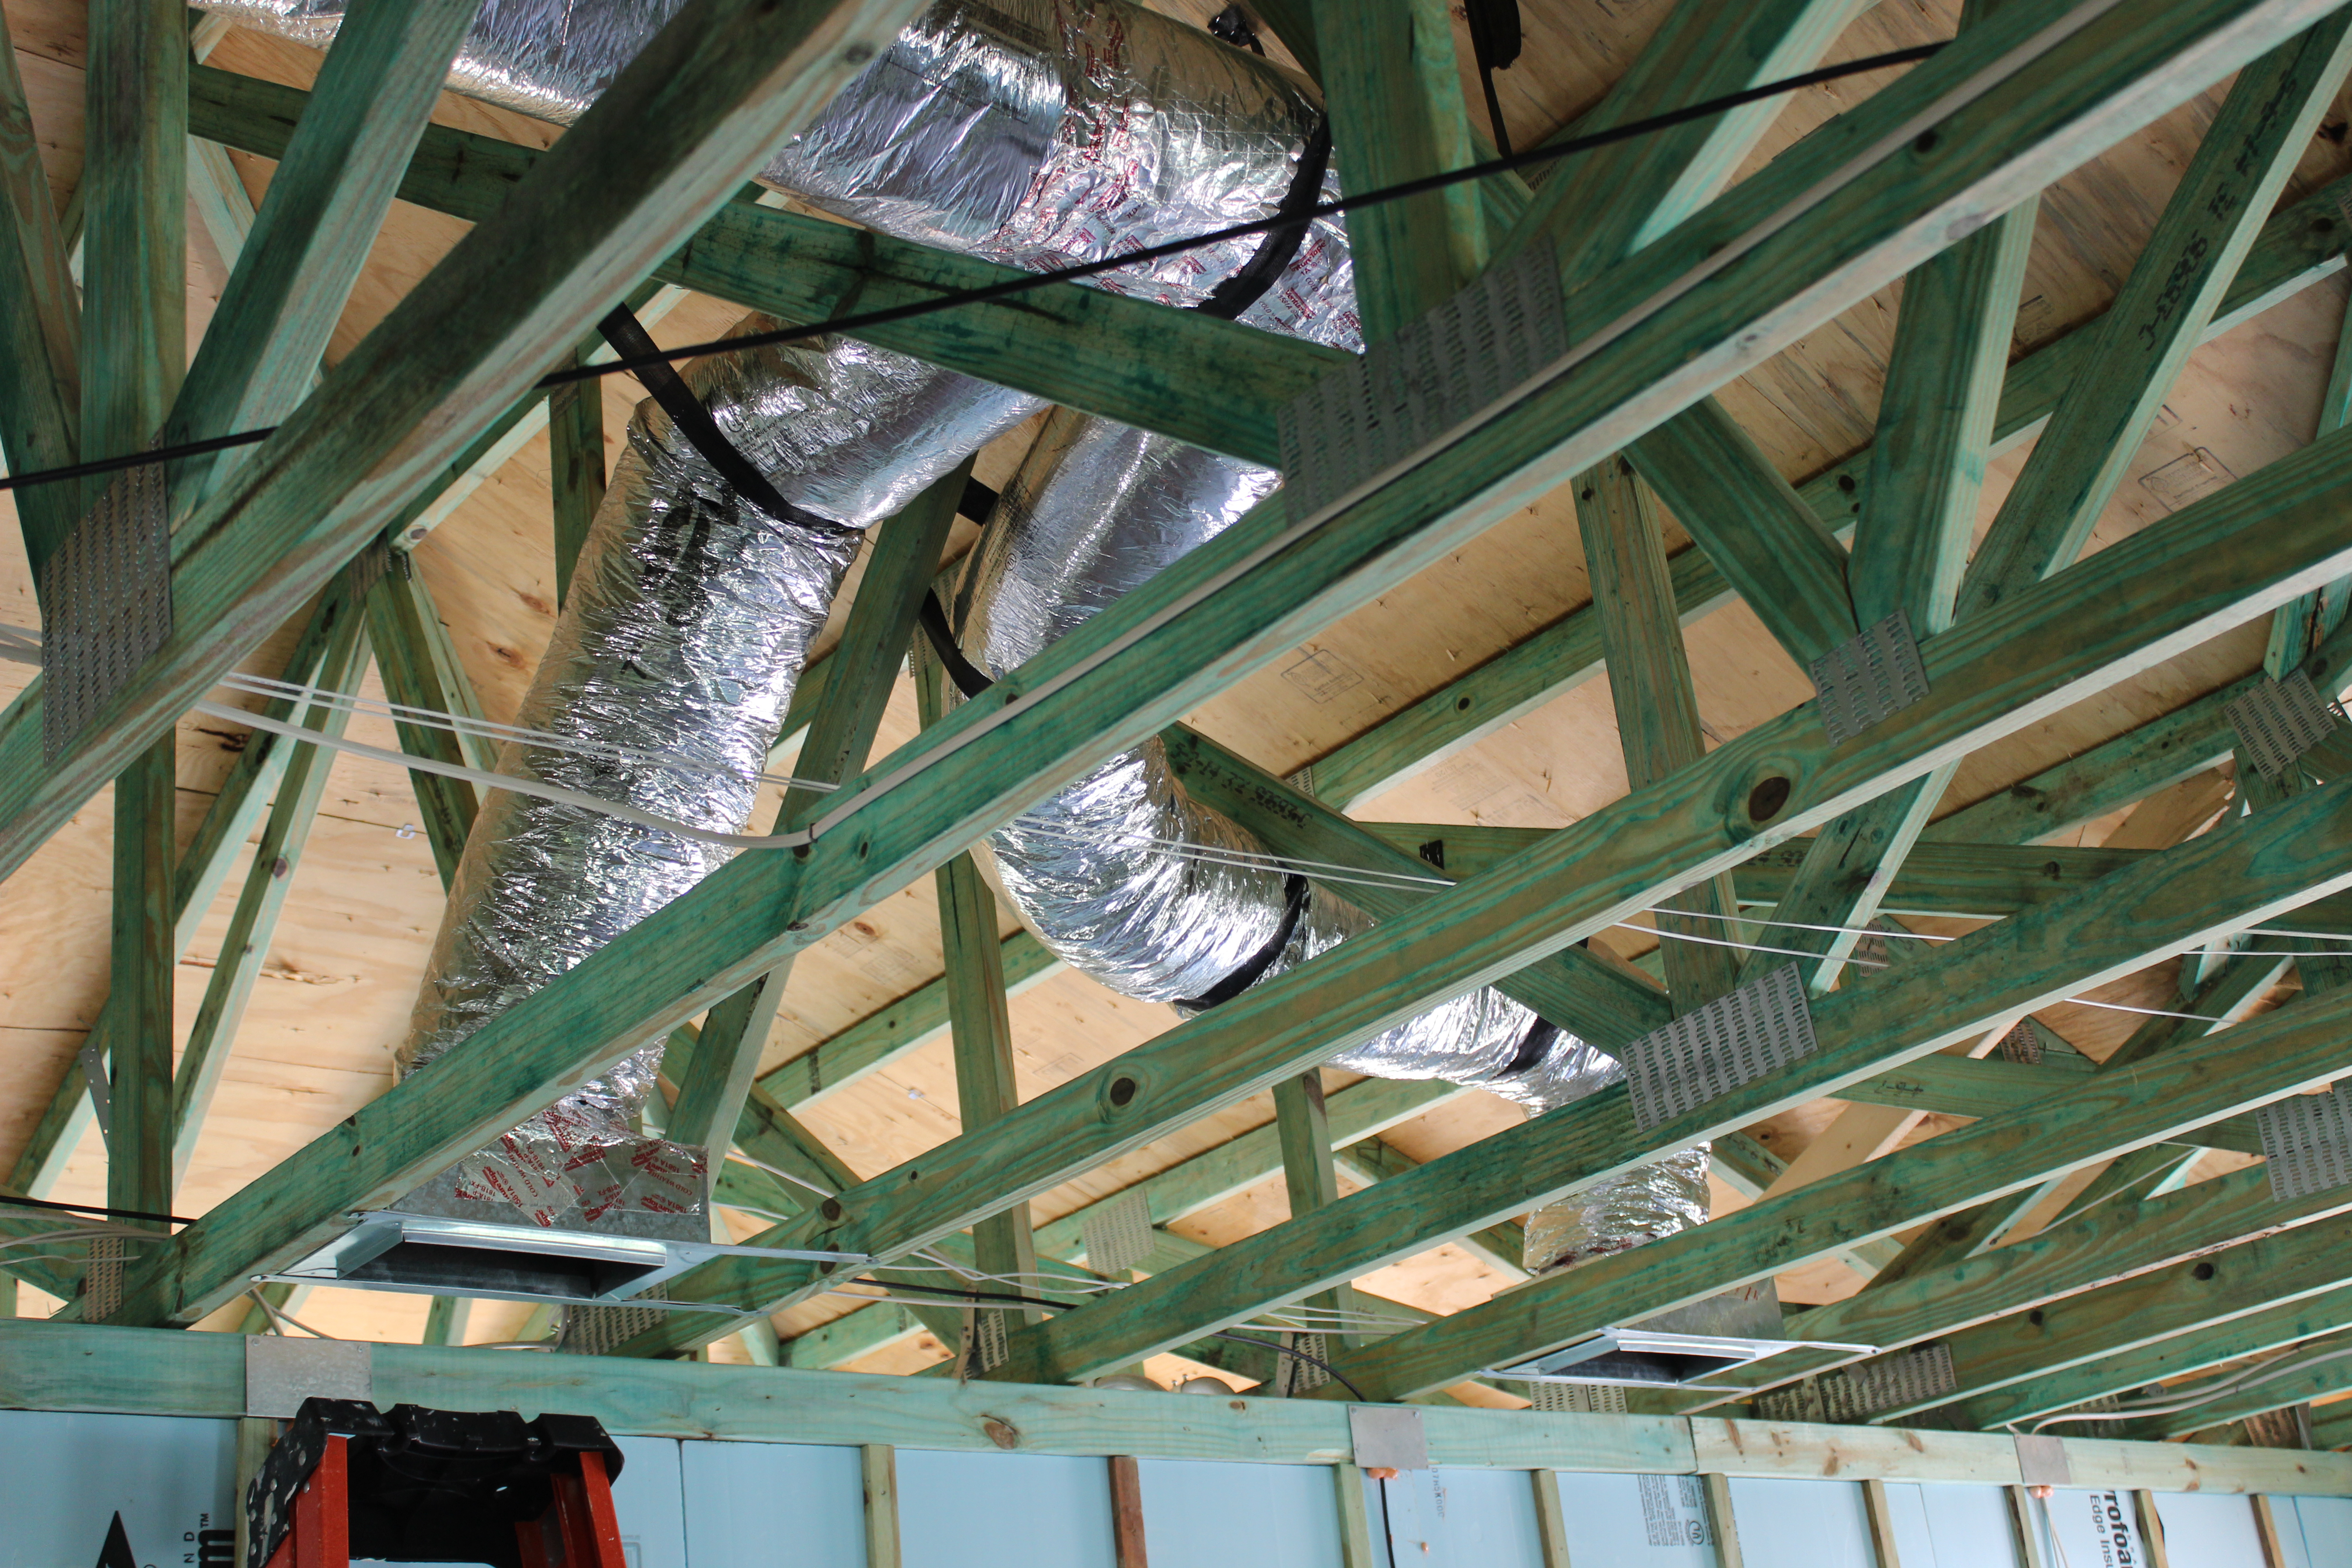
Right – Flex ducts are properly supported with straps that don’t pinch the insulation; closed-cell spray foam will be applied to the underside of the roof deck of this hot-humid climate home to provide an insulated attic space for the HVAC ducts.
Image

Image
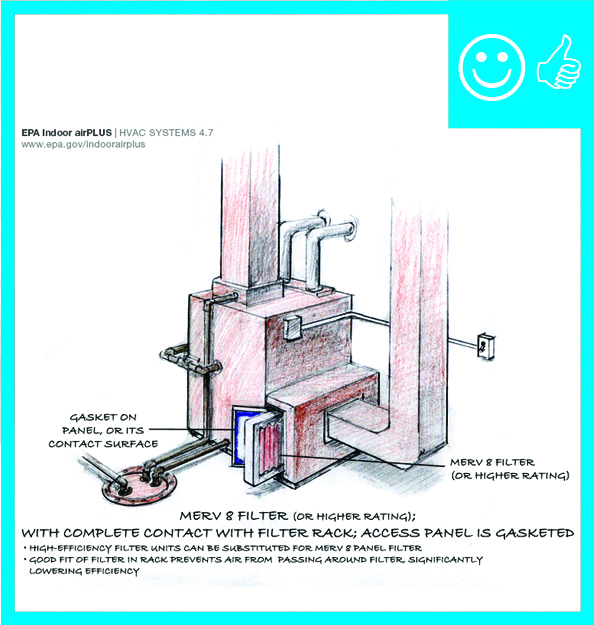
Right – HVAC furnace filter is properly installed in cabinet with gasketed cover to prevent air leakage
Image
Image
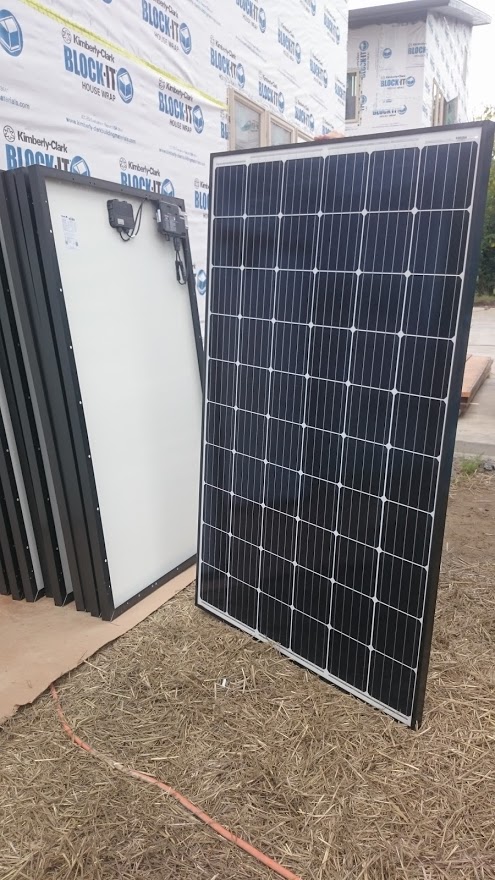
Right – Photovoltaic solar panels are ready for installation on the roof of a DOE Zero Energy Ready certified home.
Image
Image
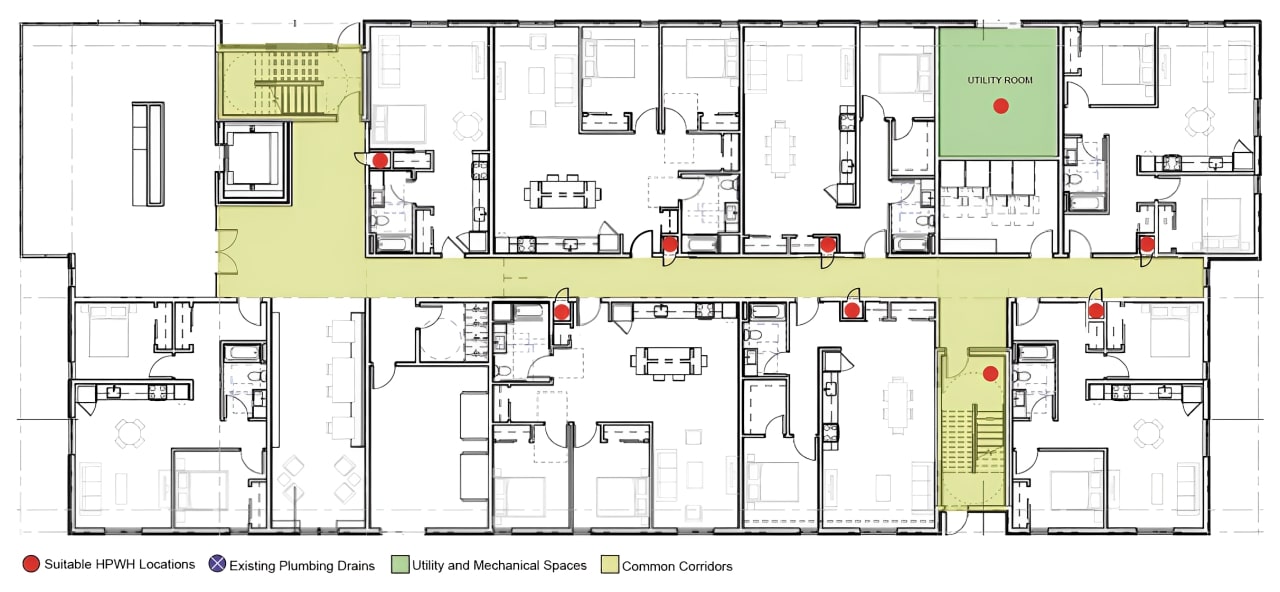
Right – Possible Heat Pump Water Heater Locations on a Multifamily Floorplan including an interior corridor, eight apartments, and meeting rooms
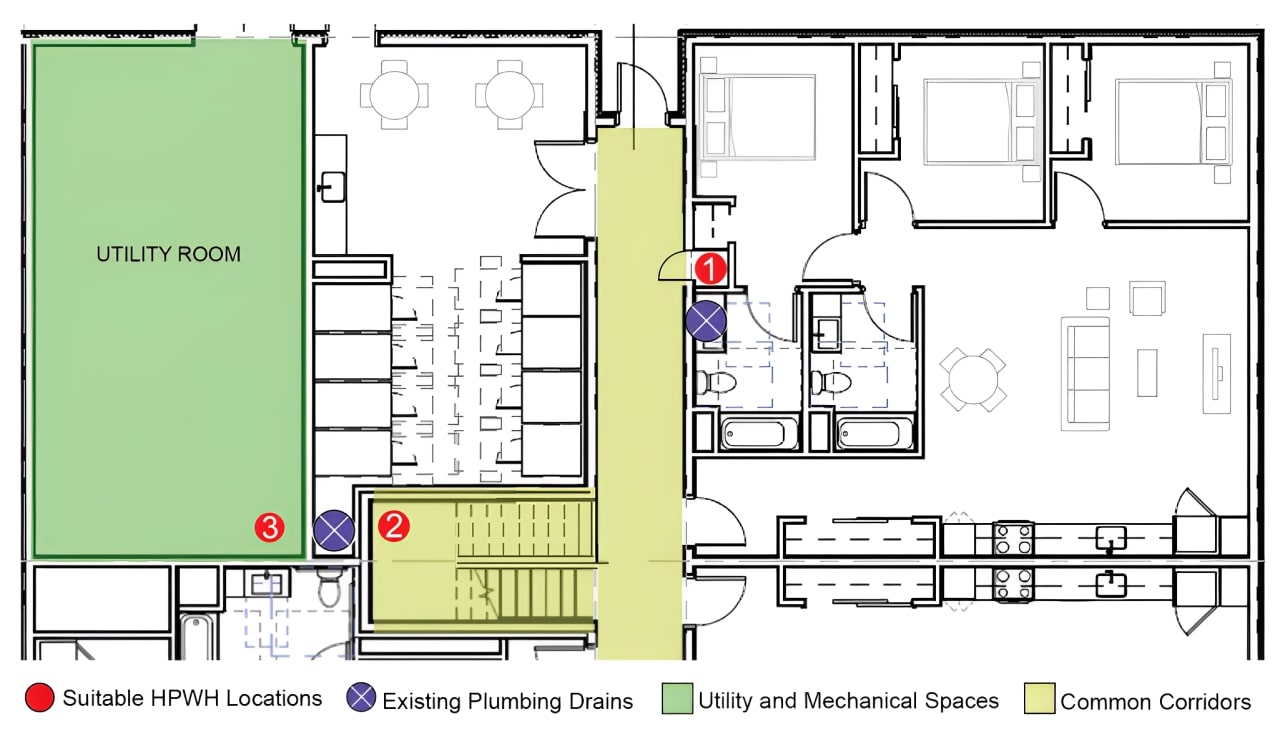
Image
Right – Possible Heat Pump Water Heater Locations on a Multifamily Floorplan including interior corridor closets, under-stair closes, and utility rooms
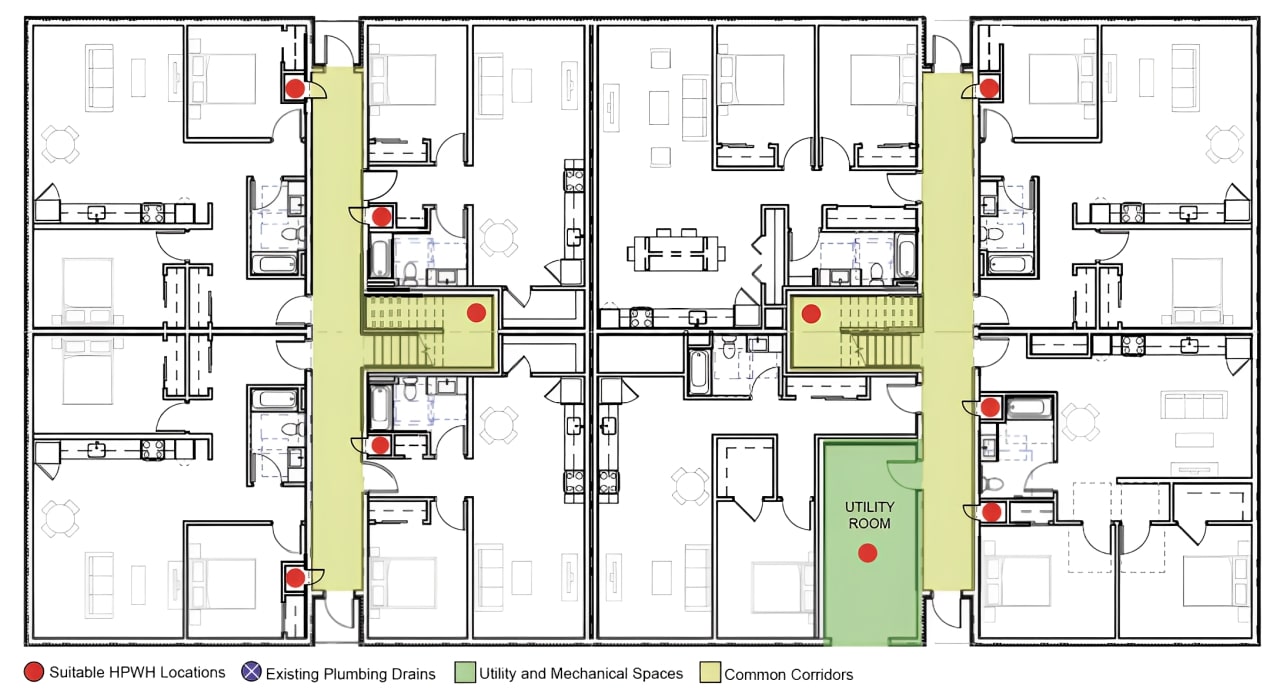
Image

Right – Possible Heat Pump Water Heater Locations on Full Plate Floorplan in a Multifamily Building
Image

Image
Image
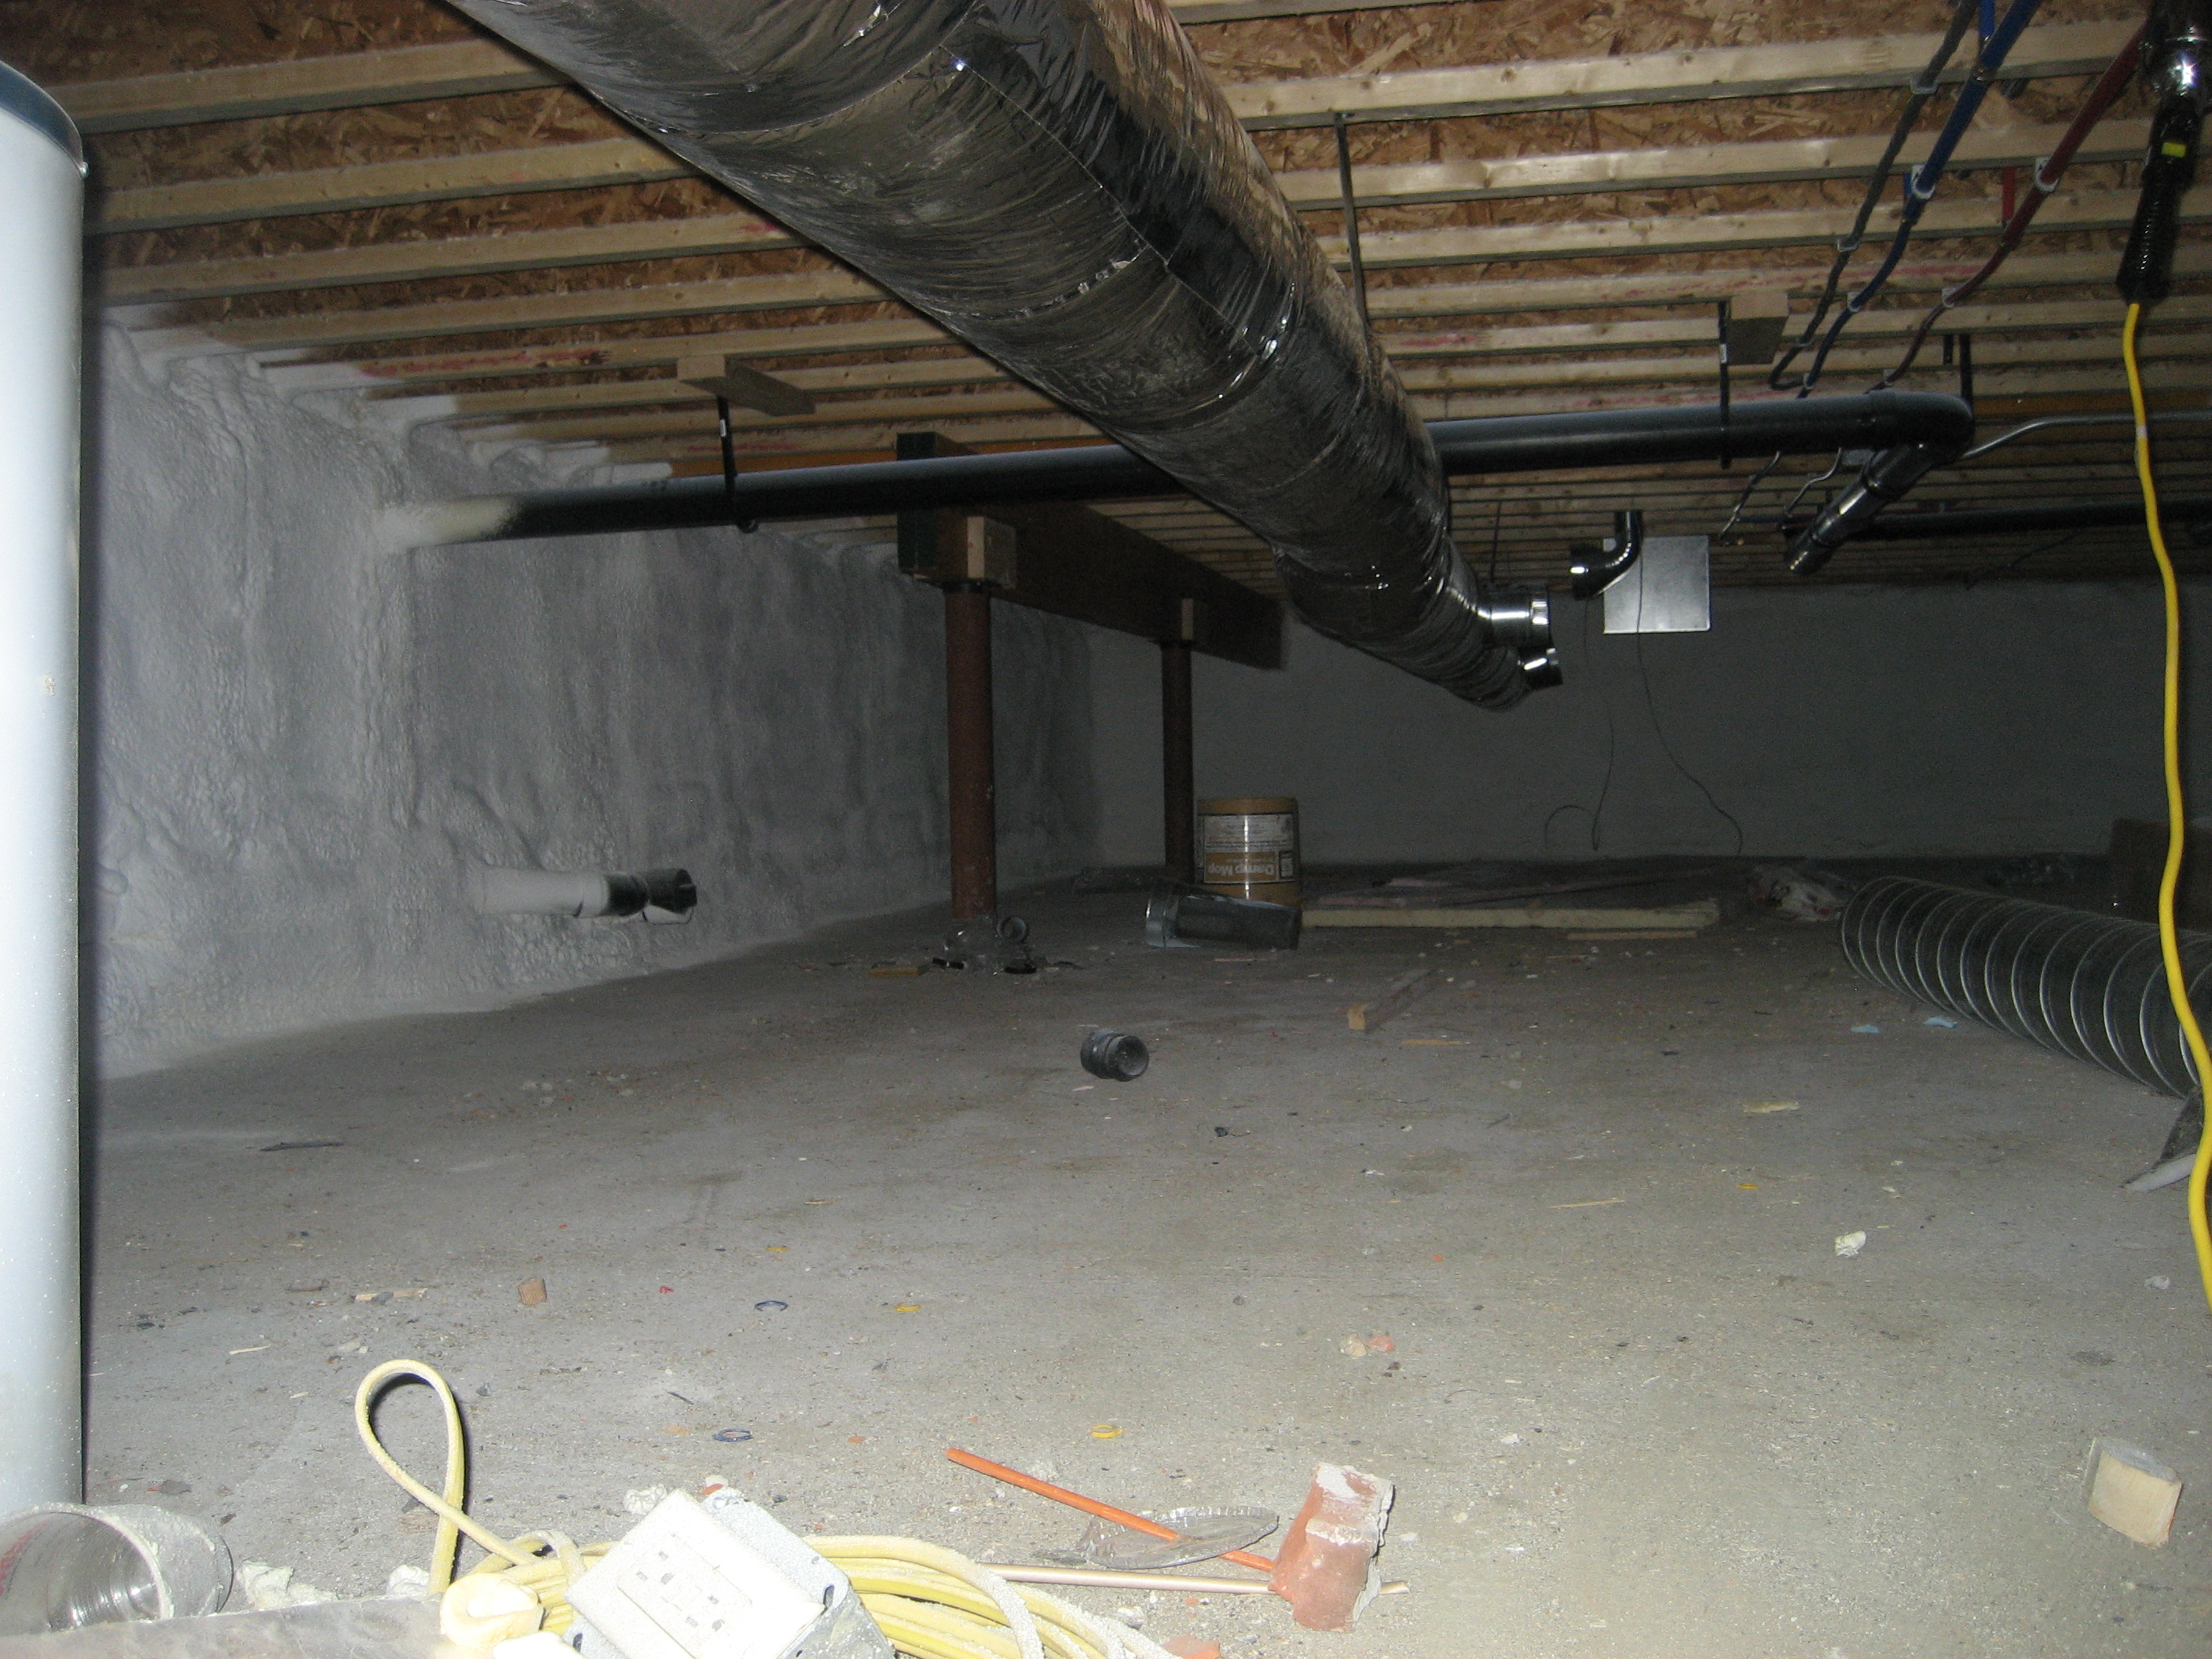
Right – Spray foam insulation is sprayed on the underside of the roof deck to provide a conditioned space in this low attic for the HVAC ducts.
Image

Right – Subfloors are installed in a clean, dry, well-lit factory setting for these modular, factory-built homes.
Image
Right – The walls of this home were constructed with “insulated studs” fashioned on site by adding 2-inch-thick strips of rigid foam to the inside face of 2x4 studs then topping that with a plywood nailing surface.
Image

Right – This attic knee wall and the floor joist cavity openings beneath it are being sealed and insulated with spray foam.
Image
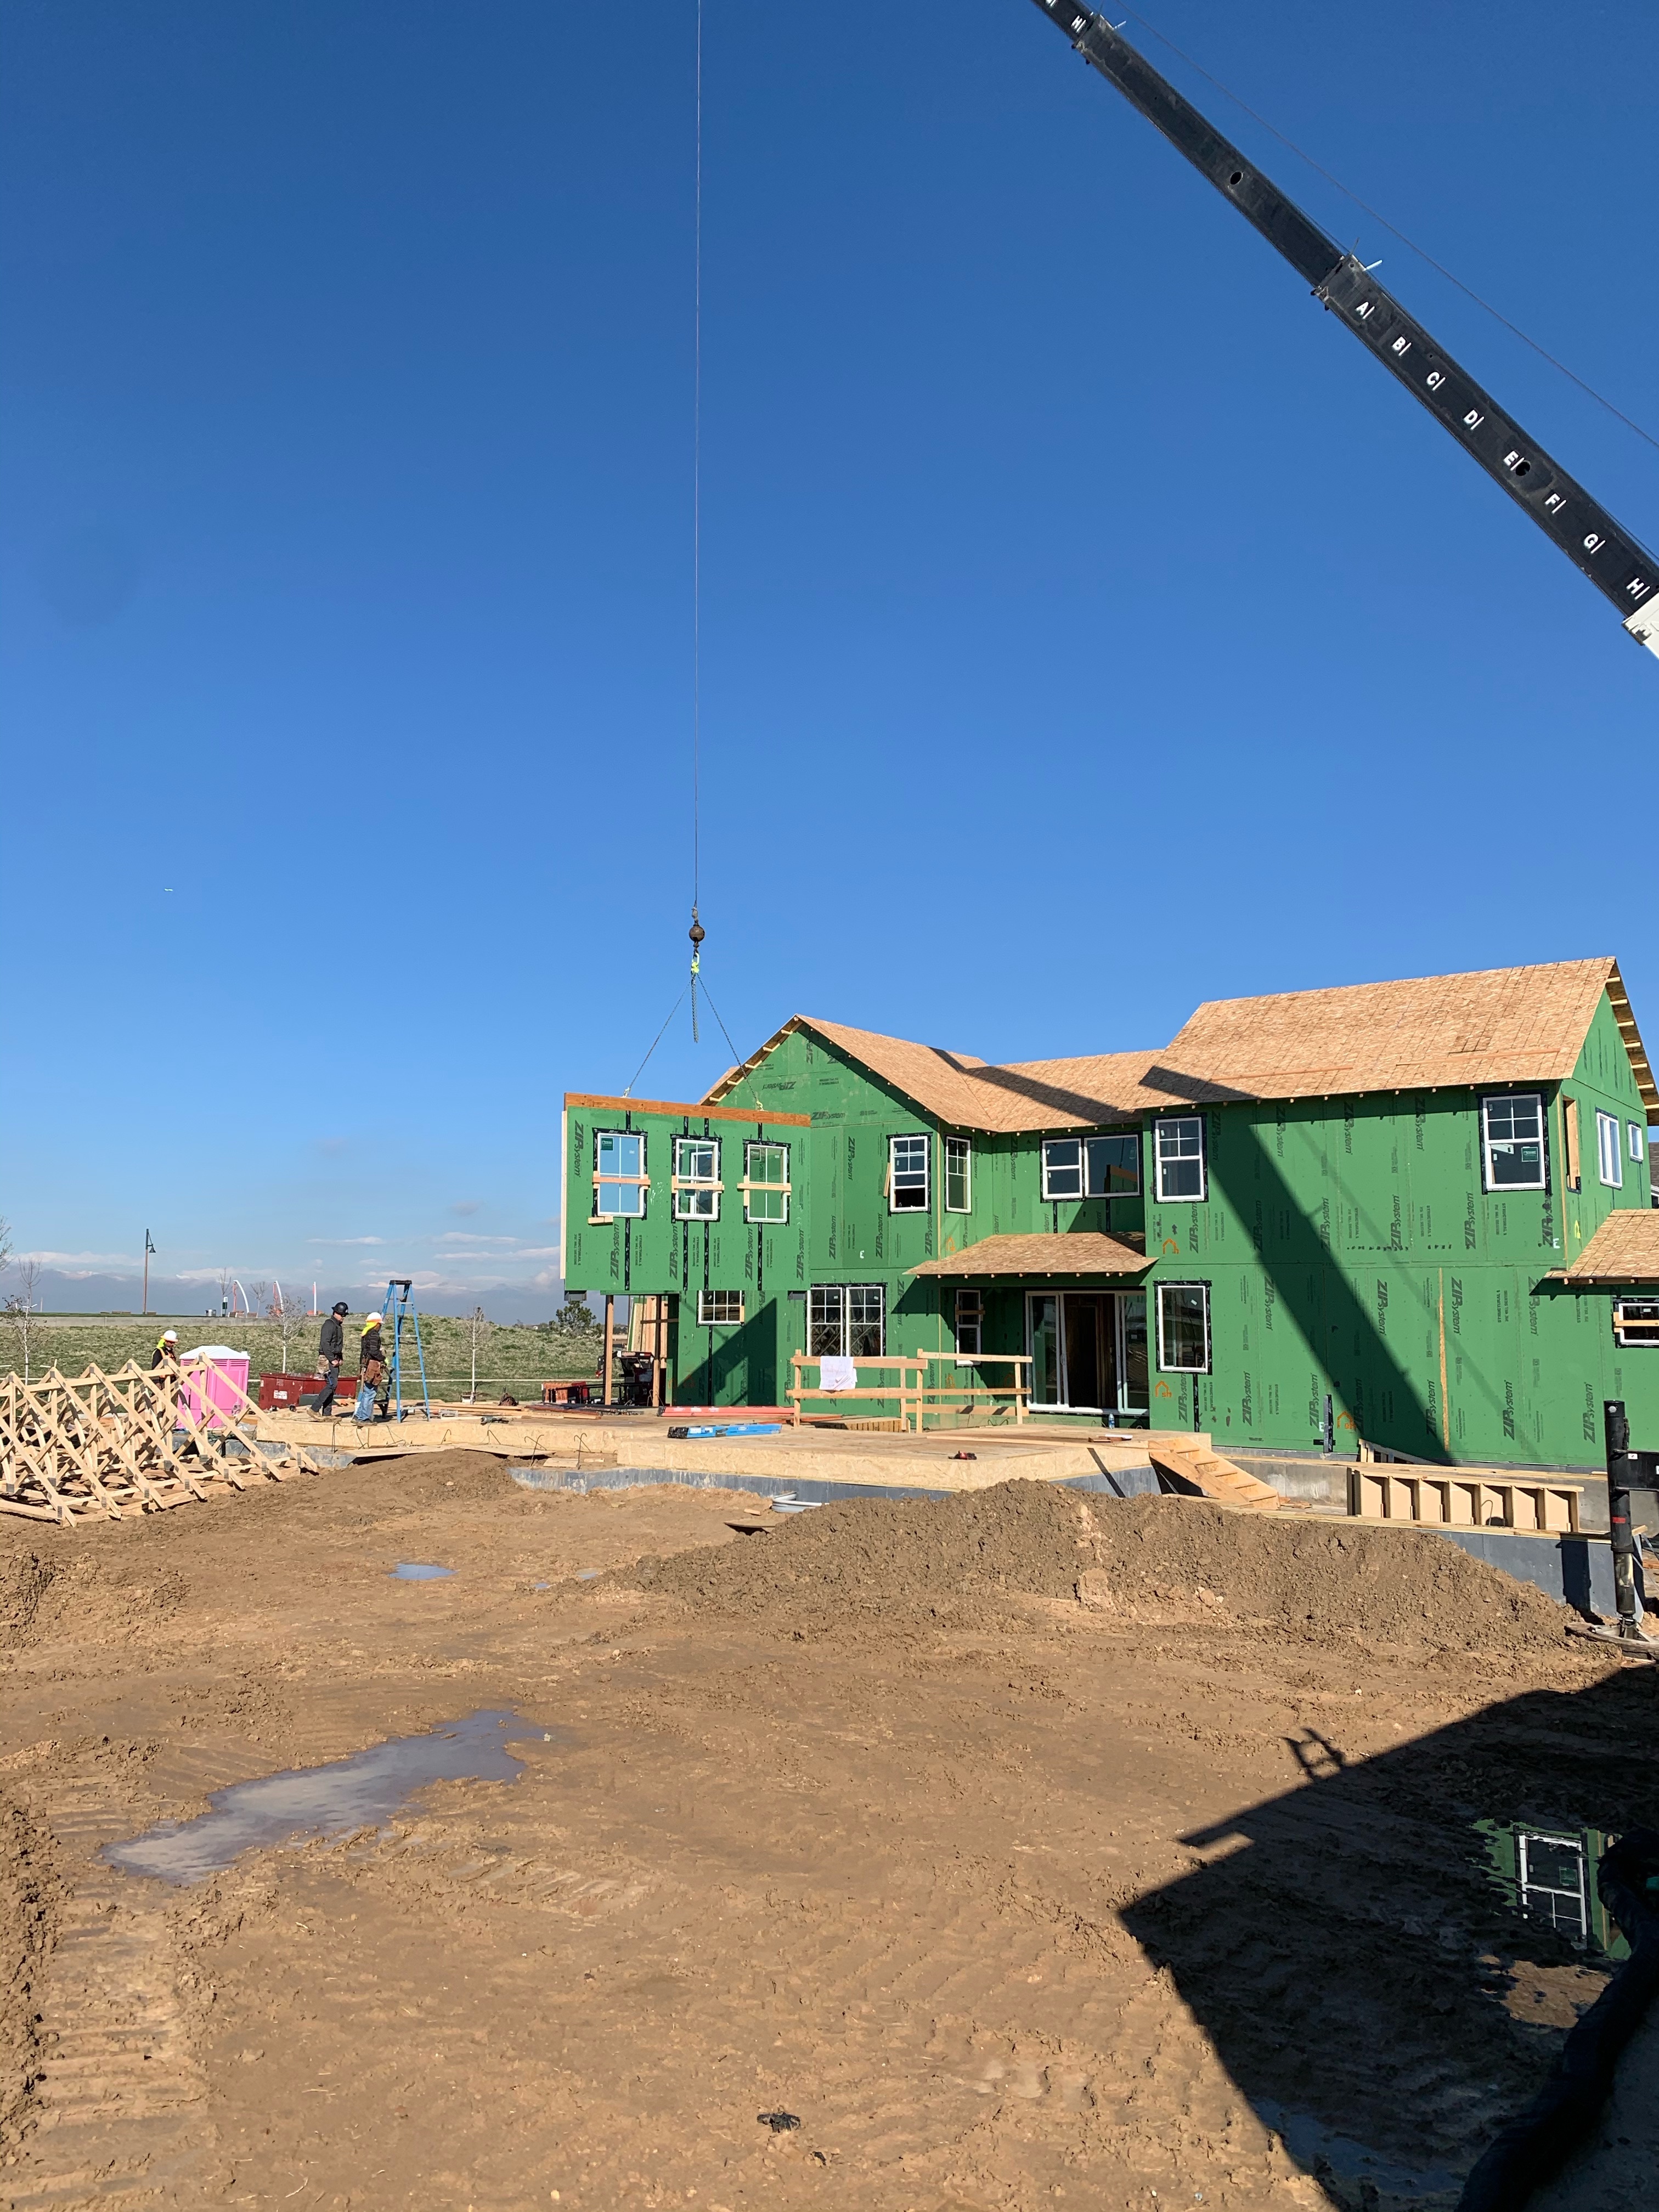
Right – This home’s above-grade walls are constructed in a factory where wall panels of 2x6 studs are assembled and sheathed with a coated OSB product, then windows are installed and flashed before shipping the panels to the site for assembly by crane.
Image

Right – Walls, windows, and wiring are installed in the factory for these modular homes, which are installed at the site on basement foundations made of insulated concrete wall panels.
Image
Right – Windows are installed and flashed in the factory for these modular homes.
Image
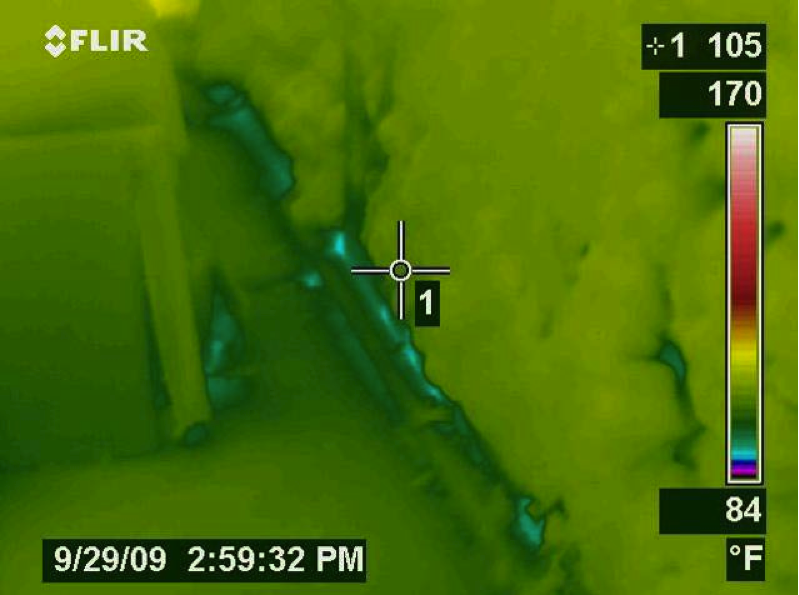
Right-- IR photo shows how effectively spray foam insulated/air sealed attic kneewall and the floor cavities under kneewall
Image
Right--The polyethylene ground cover for this insulated crawlspace is taped at seams and around posts before the insulation and slab are installed.
Image
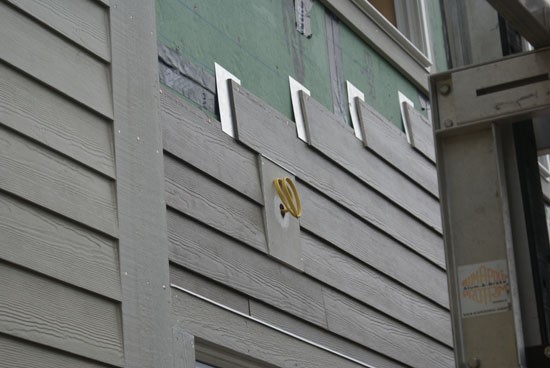
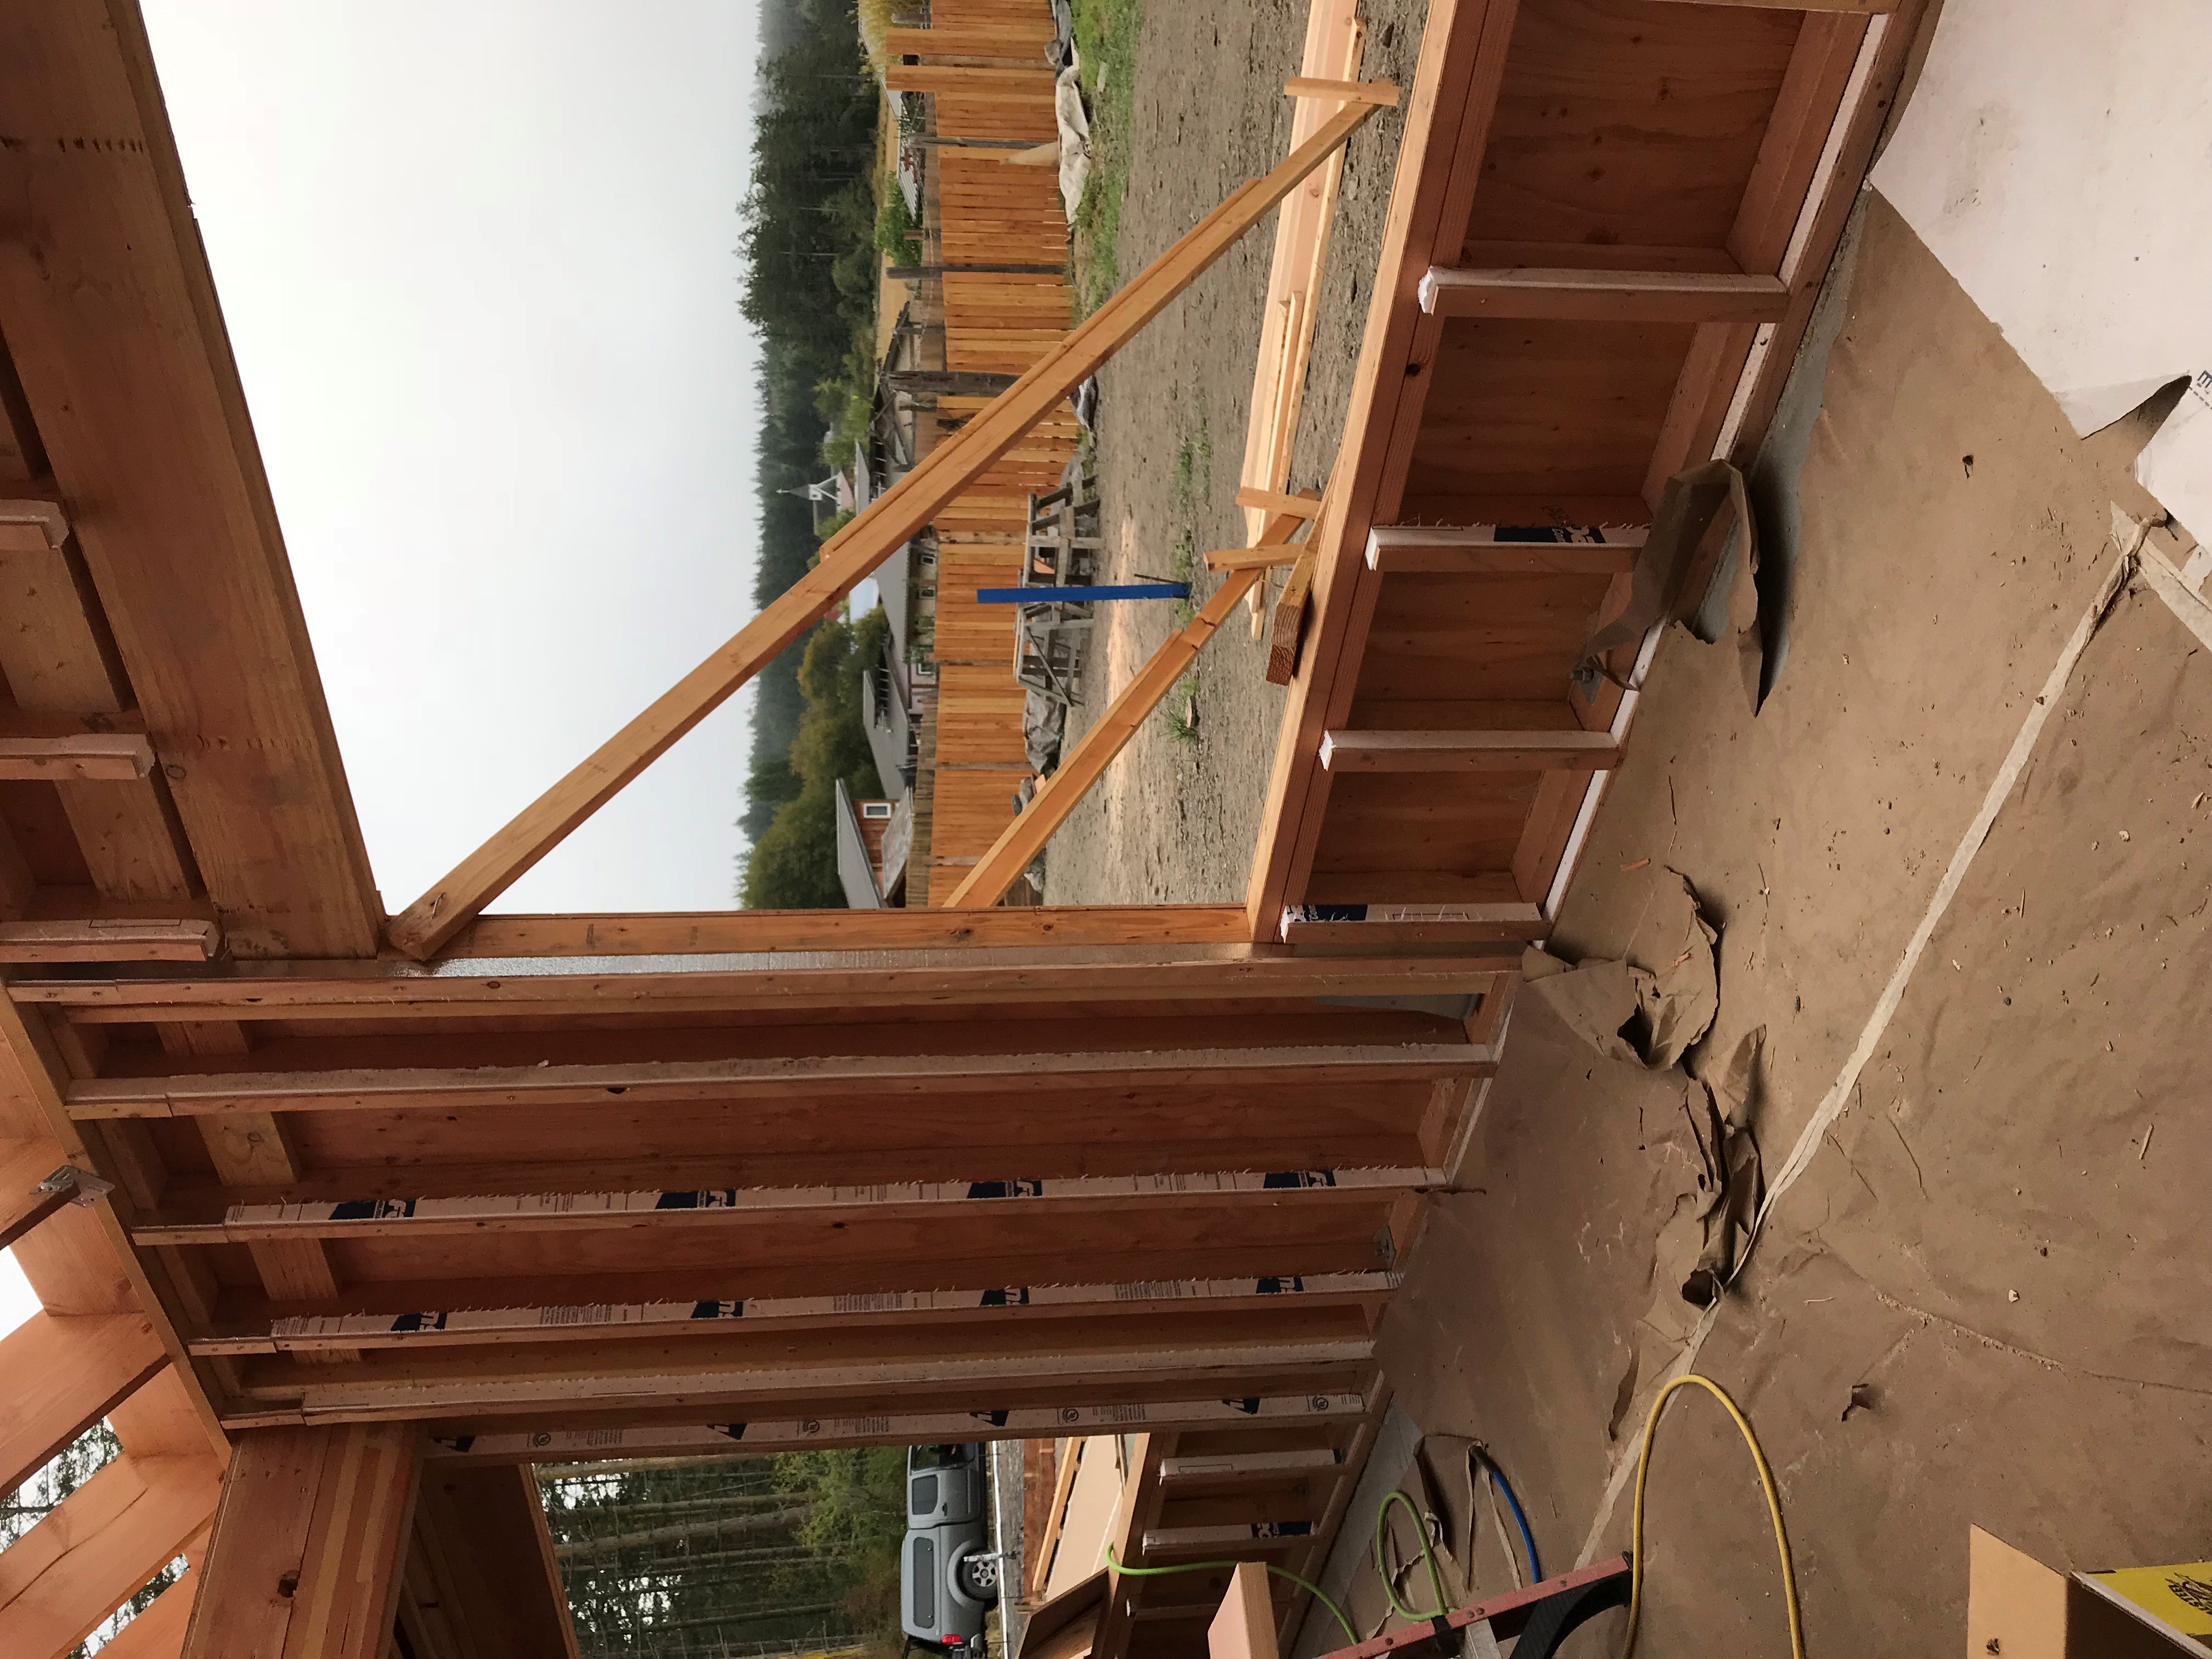
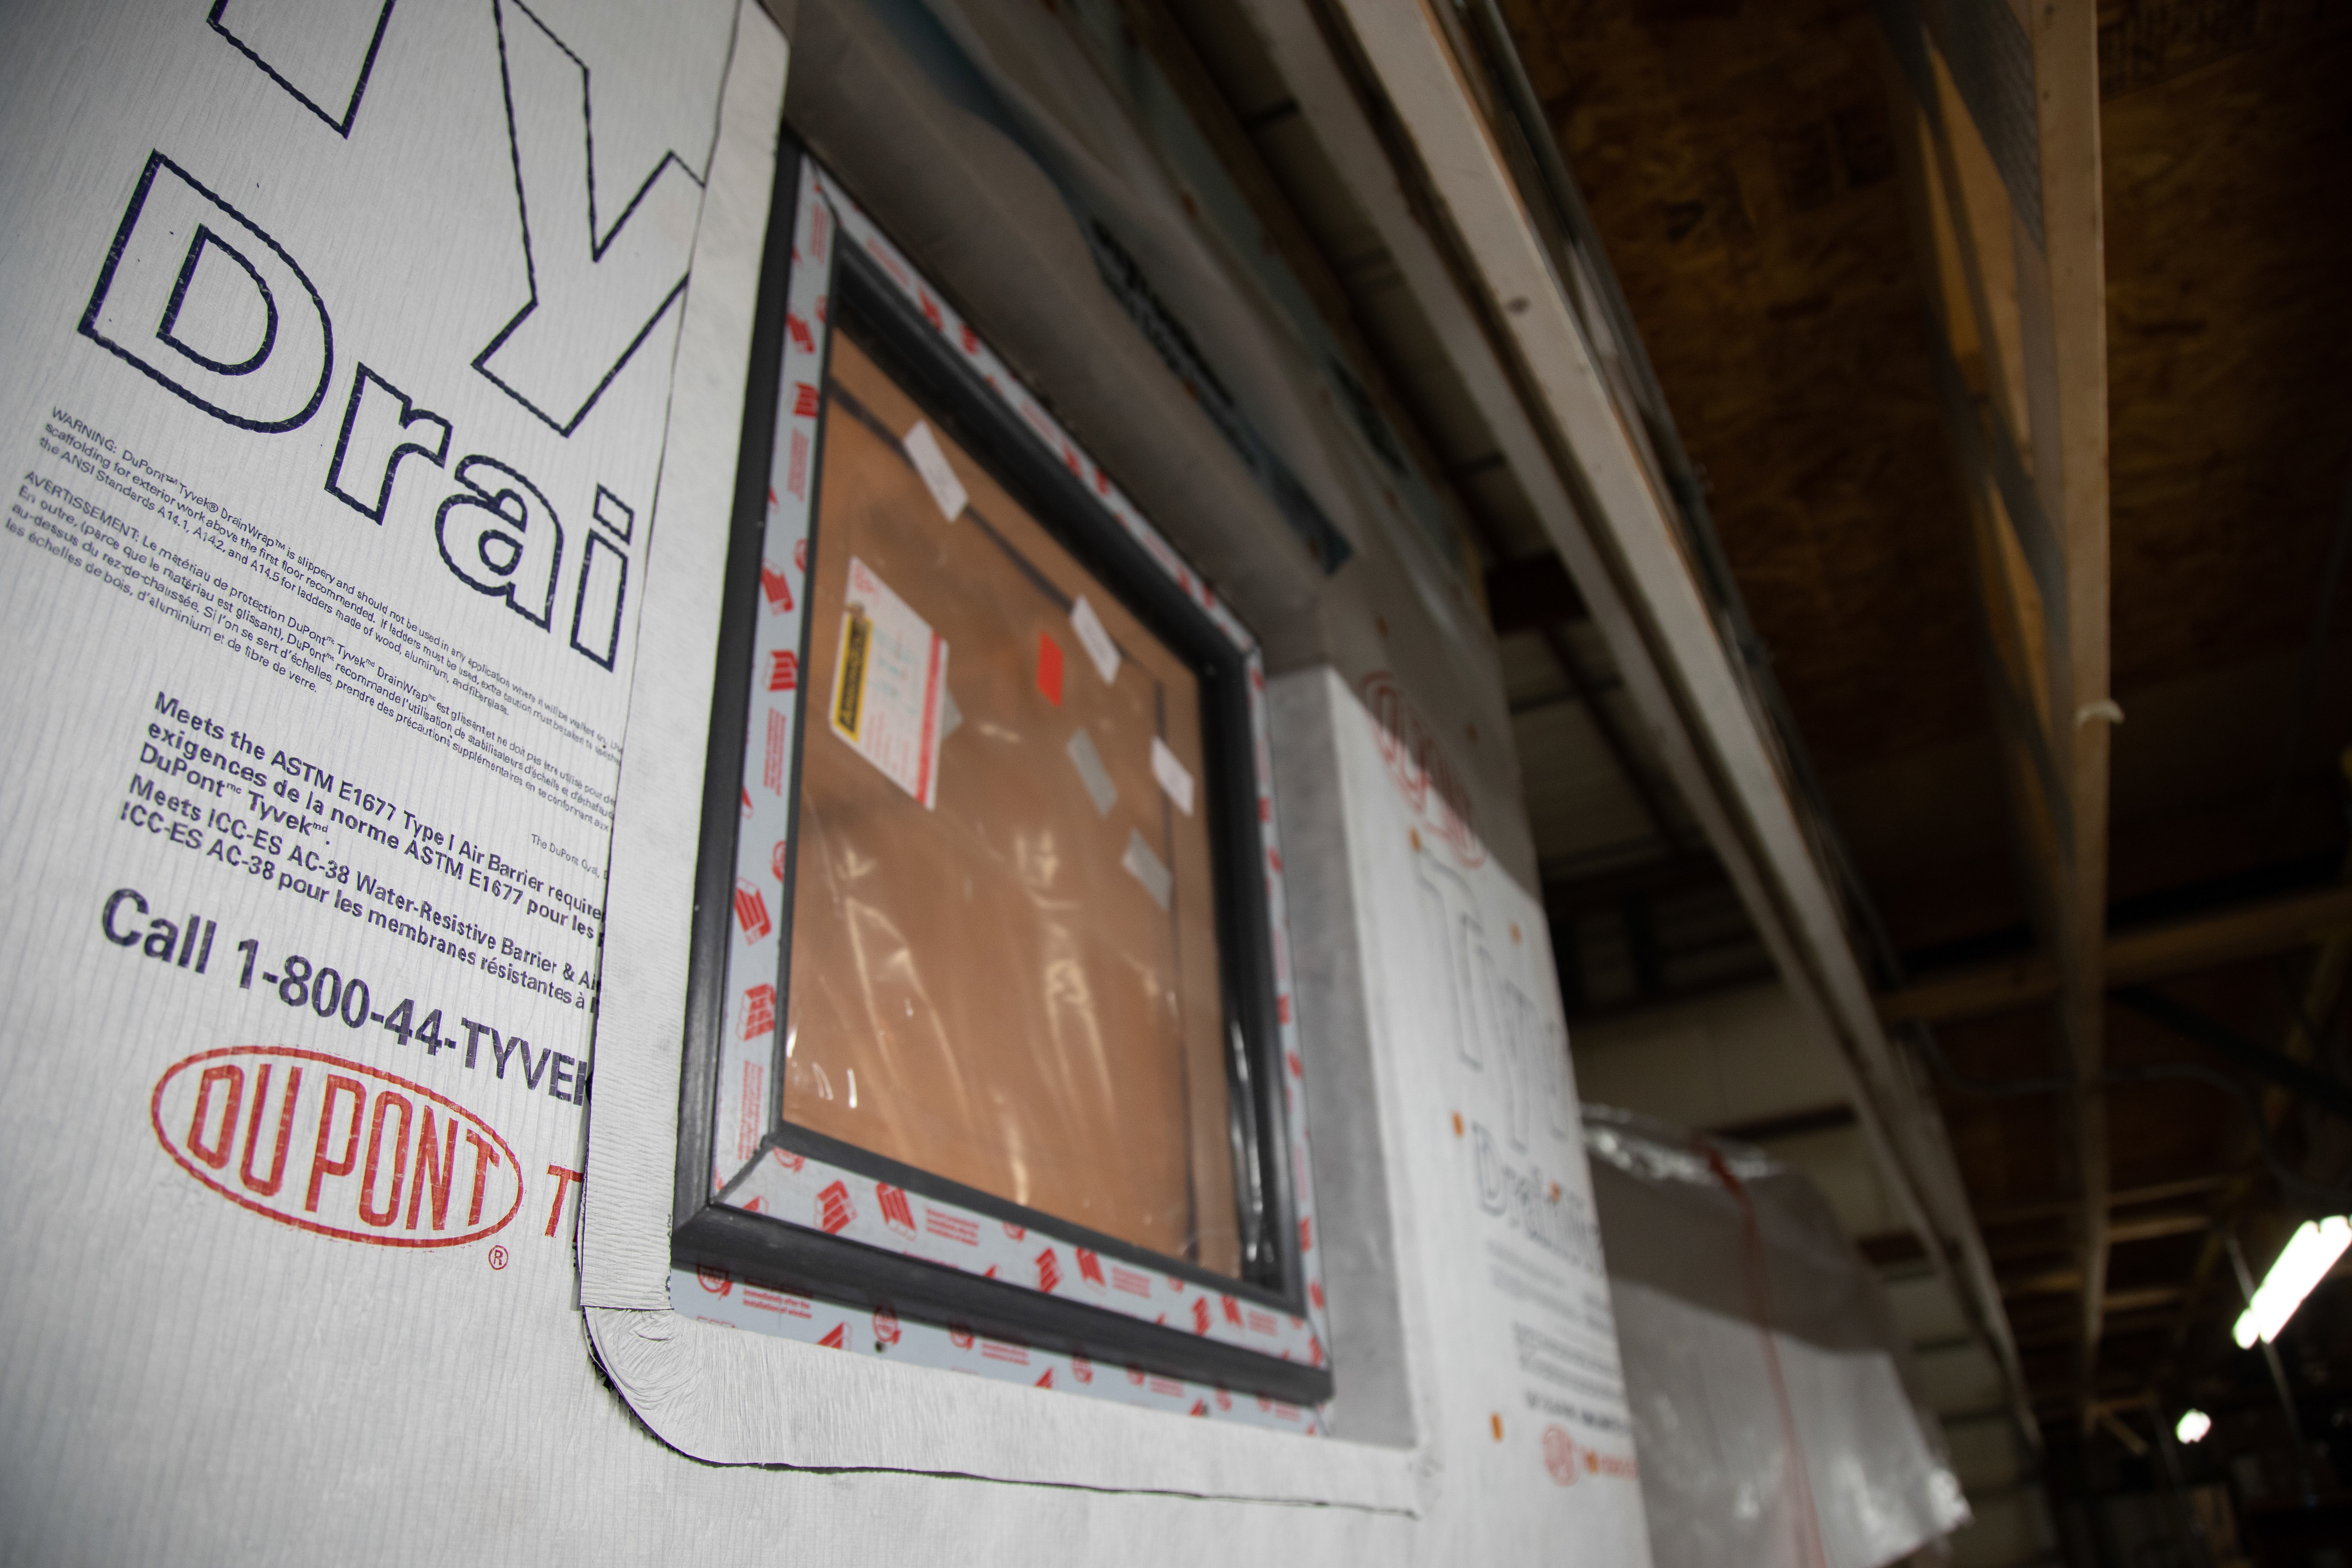
Right: Flashing the butt joints in lap siding installations is a better practice than relying on caulk to seal the joints.
Image
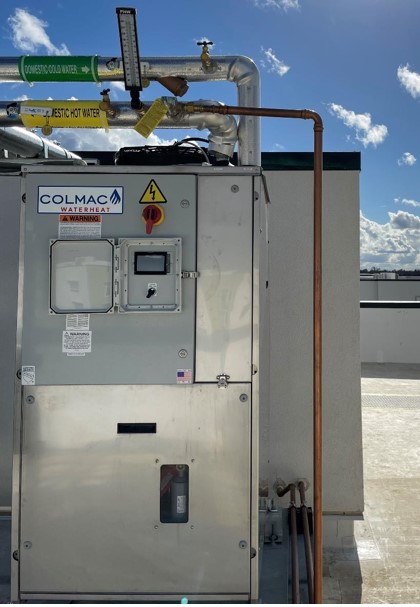
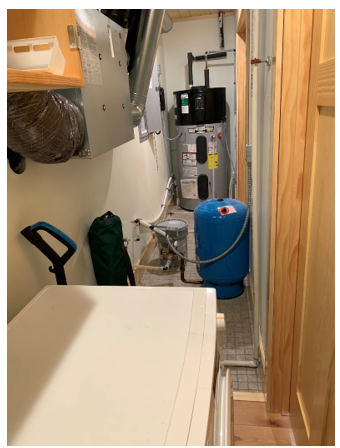
Right: Maintenance valves are installed at the inlet and outlet of this central heat pump water heater
Image
Right: This heat pump water heater is in a basement within the thermal boundary but not actively conditioned. It has over 770 ft² of space with easy access to the control panel and clearance for airflow to the air intake (top) and exhaust (side)
Image

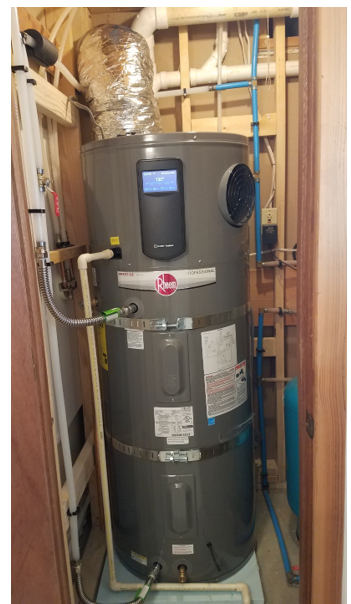
Right: This heat pump water heater is installed in a small space so the, intake air is ducted from an adjacent room; the water heater since on a pad of foam insulation and has a good drain line configuration but the waterpipes lack insulation
Image
Right: This heat pump water heater is installed in a utility closet where it can use heat from the clothes washer and heat pump clothes dryer and has access to a floor drain for condensate
Image

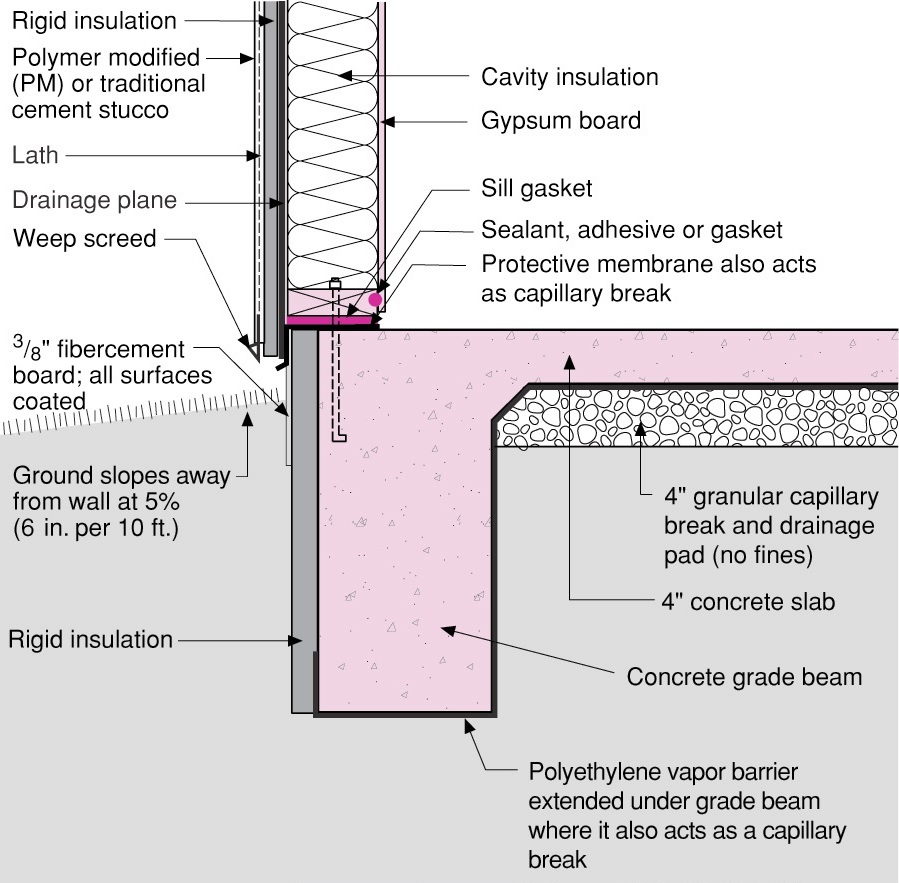
Rigid foam forms an insulating bond break between the foundation wall and the slab
Image
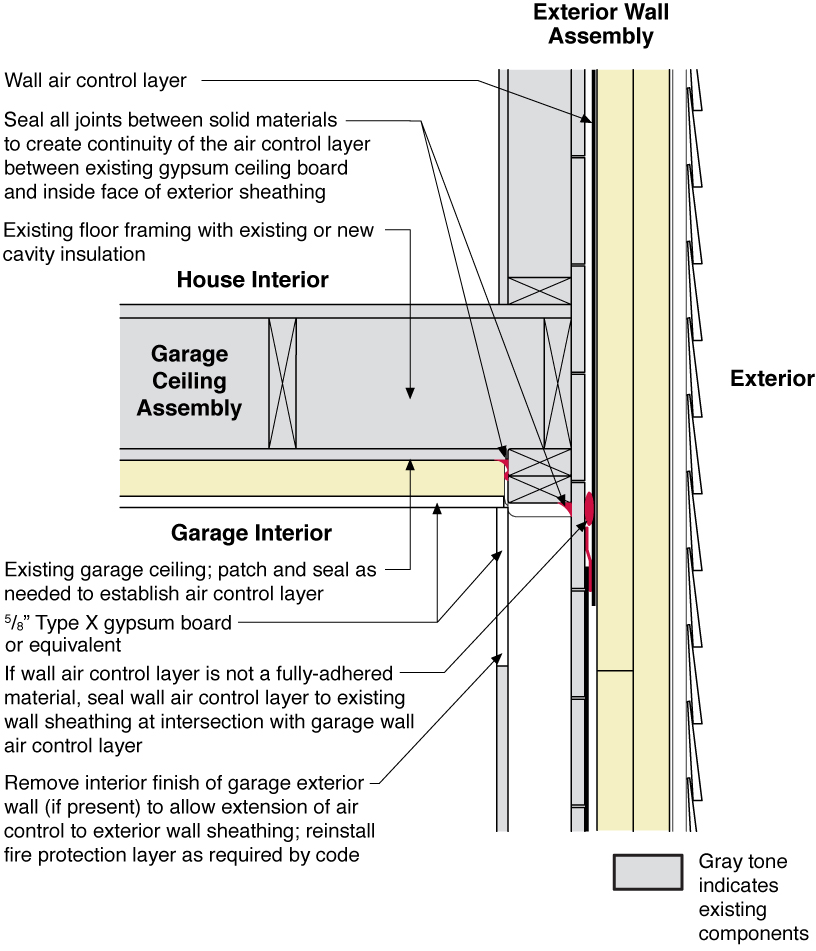
Rigid foam insulating sheathing installed over an existing garage ceiling with retrofits to air seal exterior wall before adding exterior wall insulating sheathing
Image

Rigid foam insulating sheathing is installed on existing garage ceiling and covered with a new gypsum board fire protection layer installed over the foam.
Image
Rigid foam insulation and a thin slab were installed over the dirt and gravel of this sealed crawlspace
Image
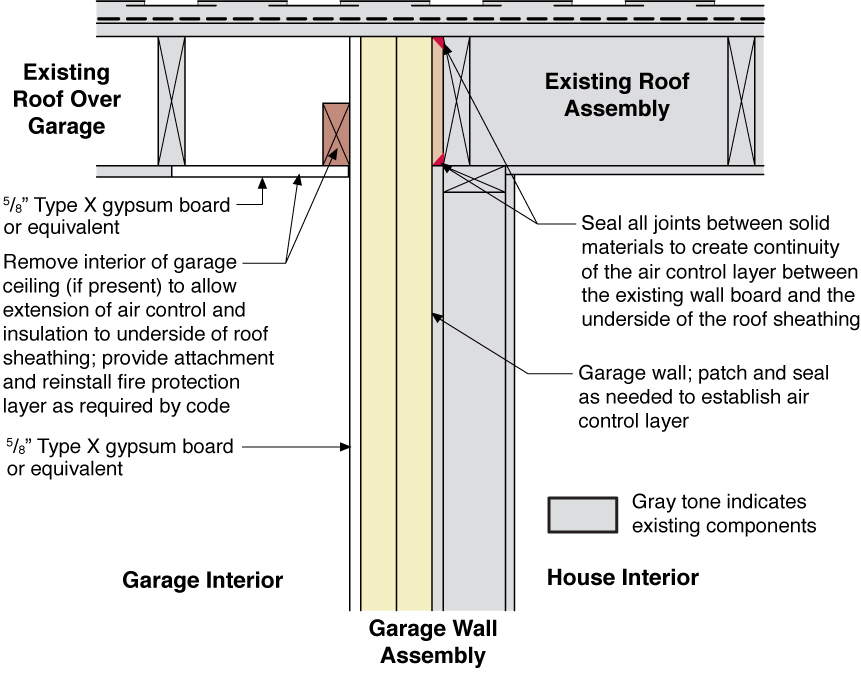
Rigid foam insulation is installed on the garage side of the shared garage wall and roof of an existing home
Image
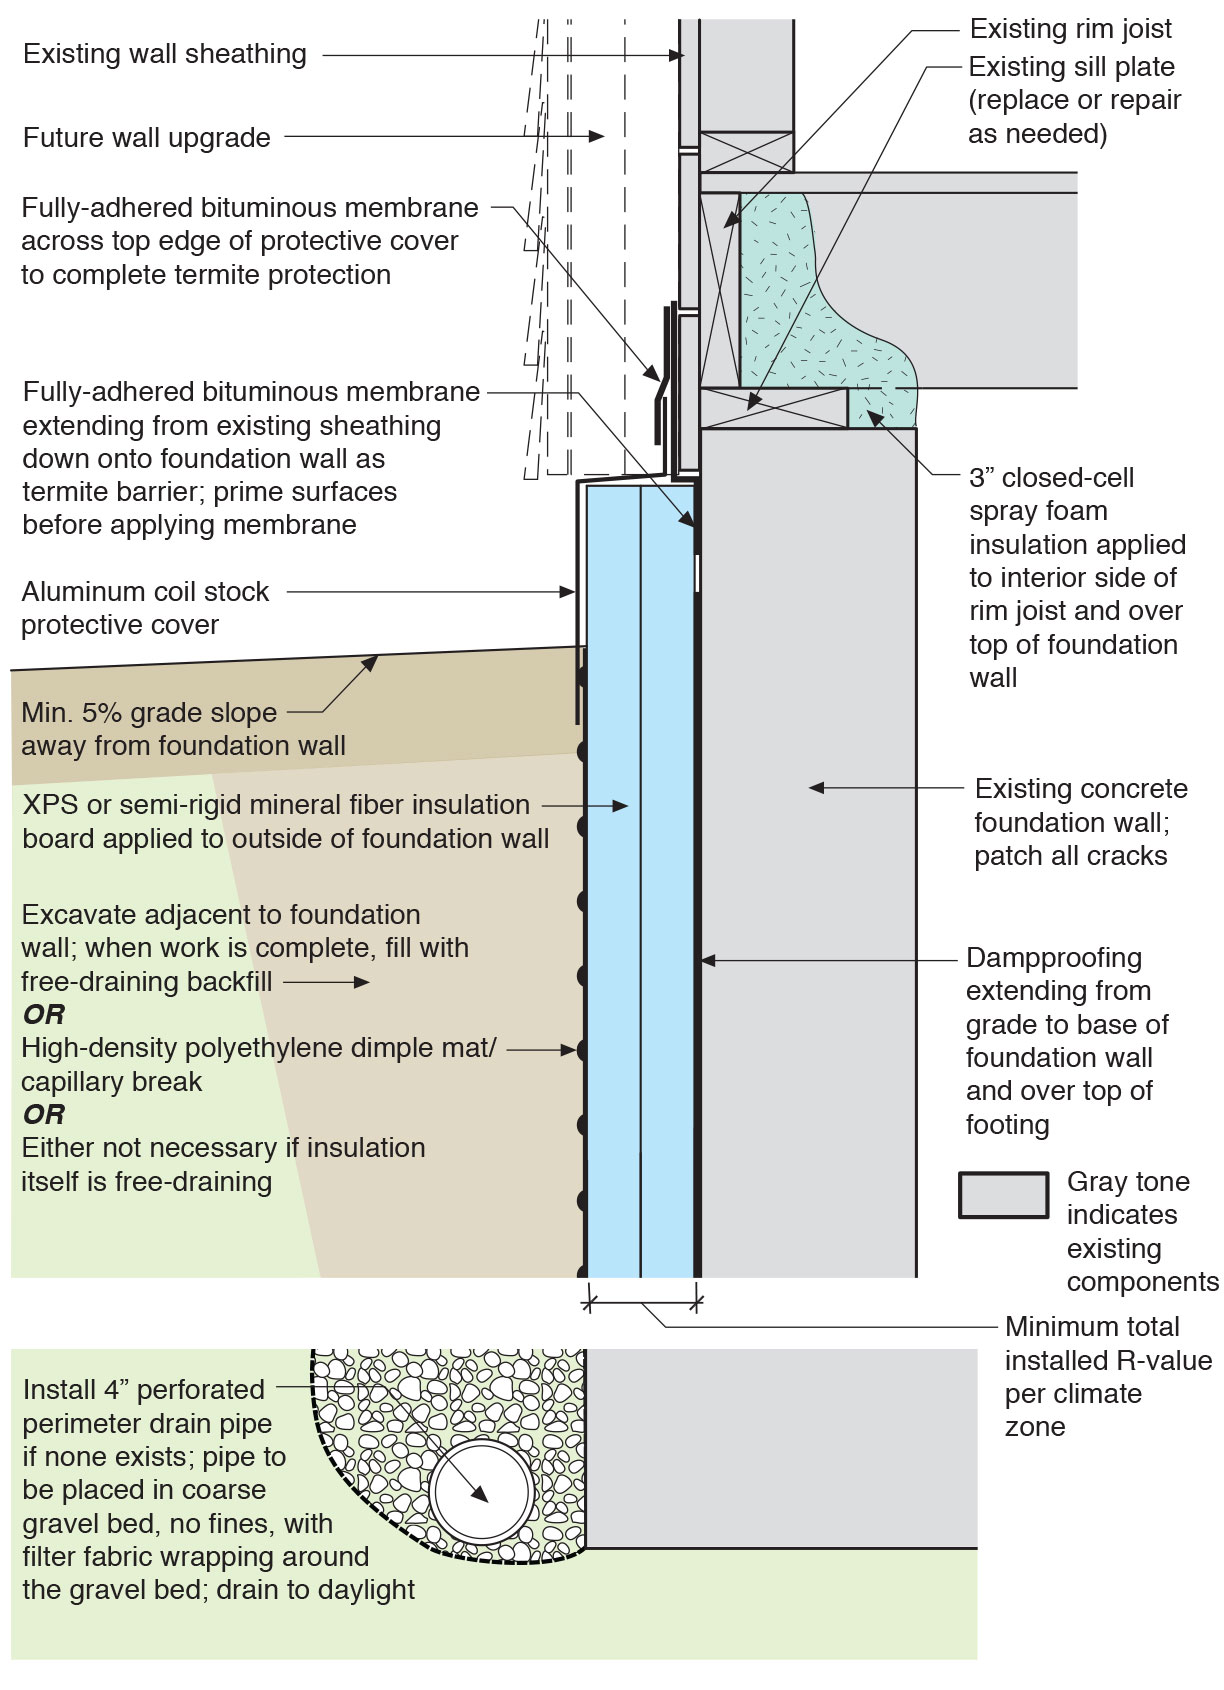
Rigid insulation and water control layers are installed on the exterior of a flat foundation wall; spray foam insulates the rim joist
Image
Image