Showing results 51 - 100 of 211
Image

Right - After installing the EPDM gasket around the HRV duct, first the lower edge, then the sides of the gasket are taped; 11 of 14.
Image
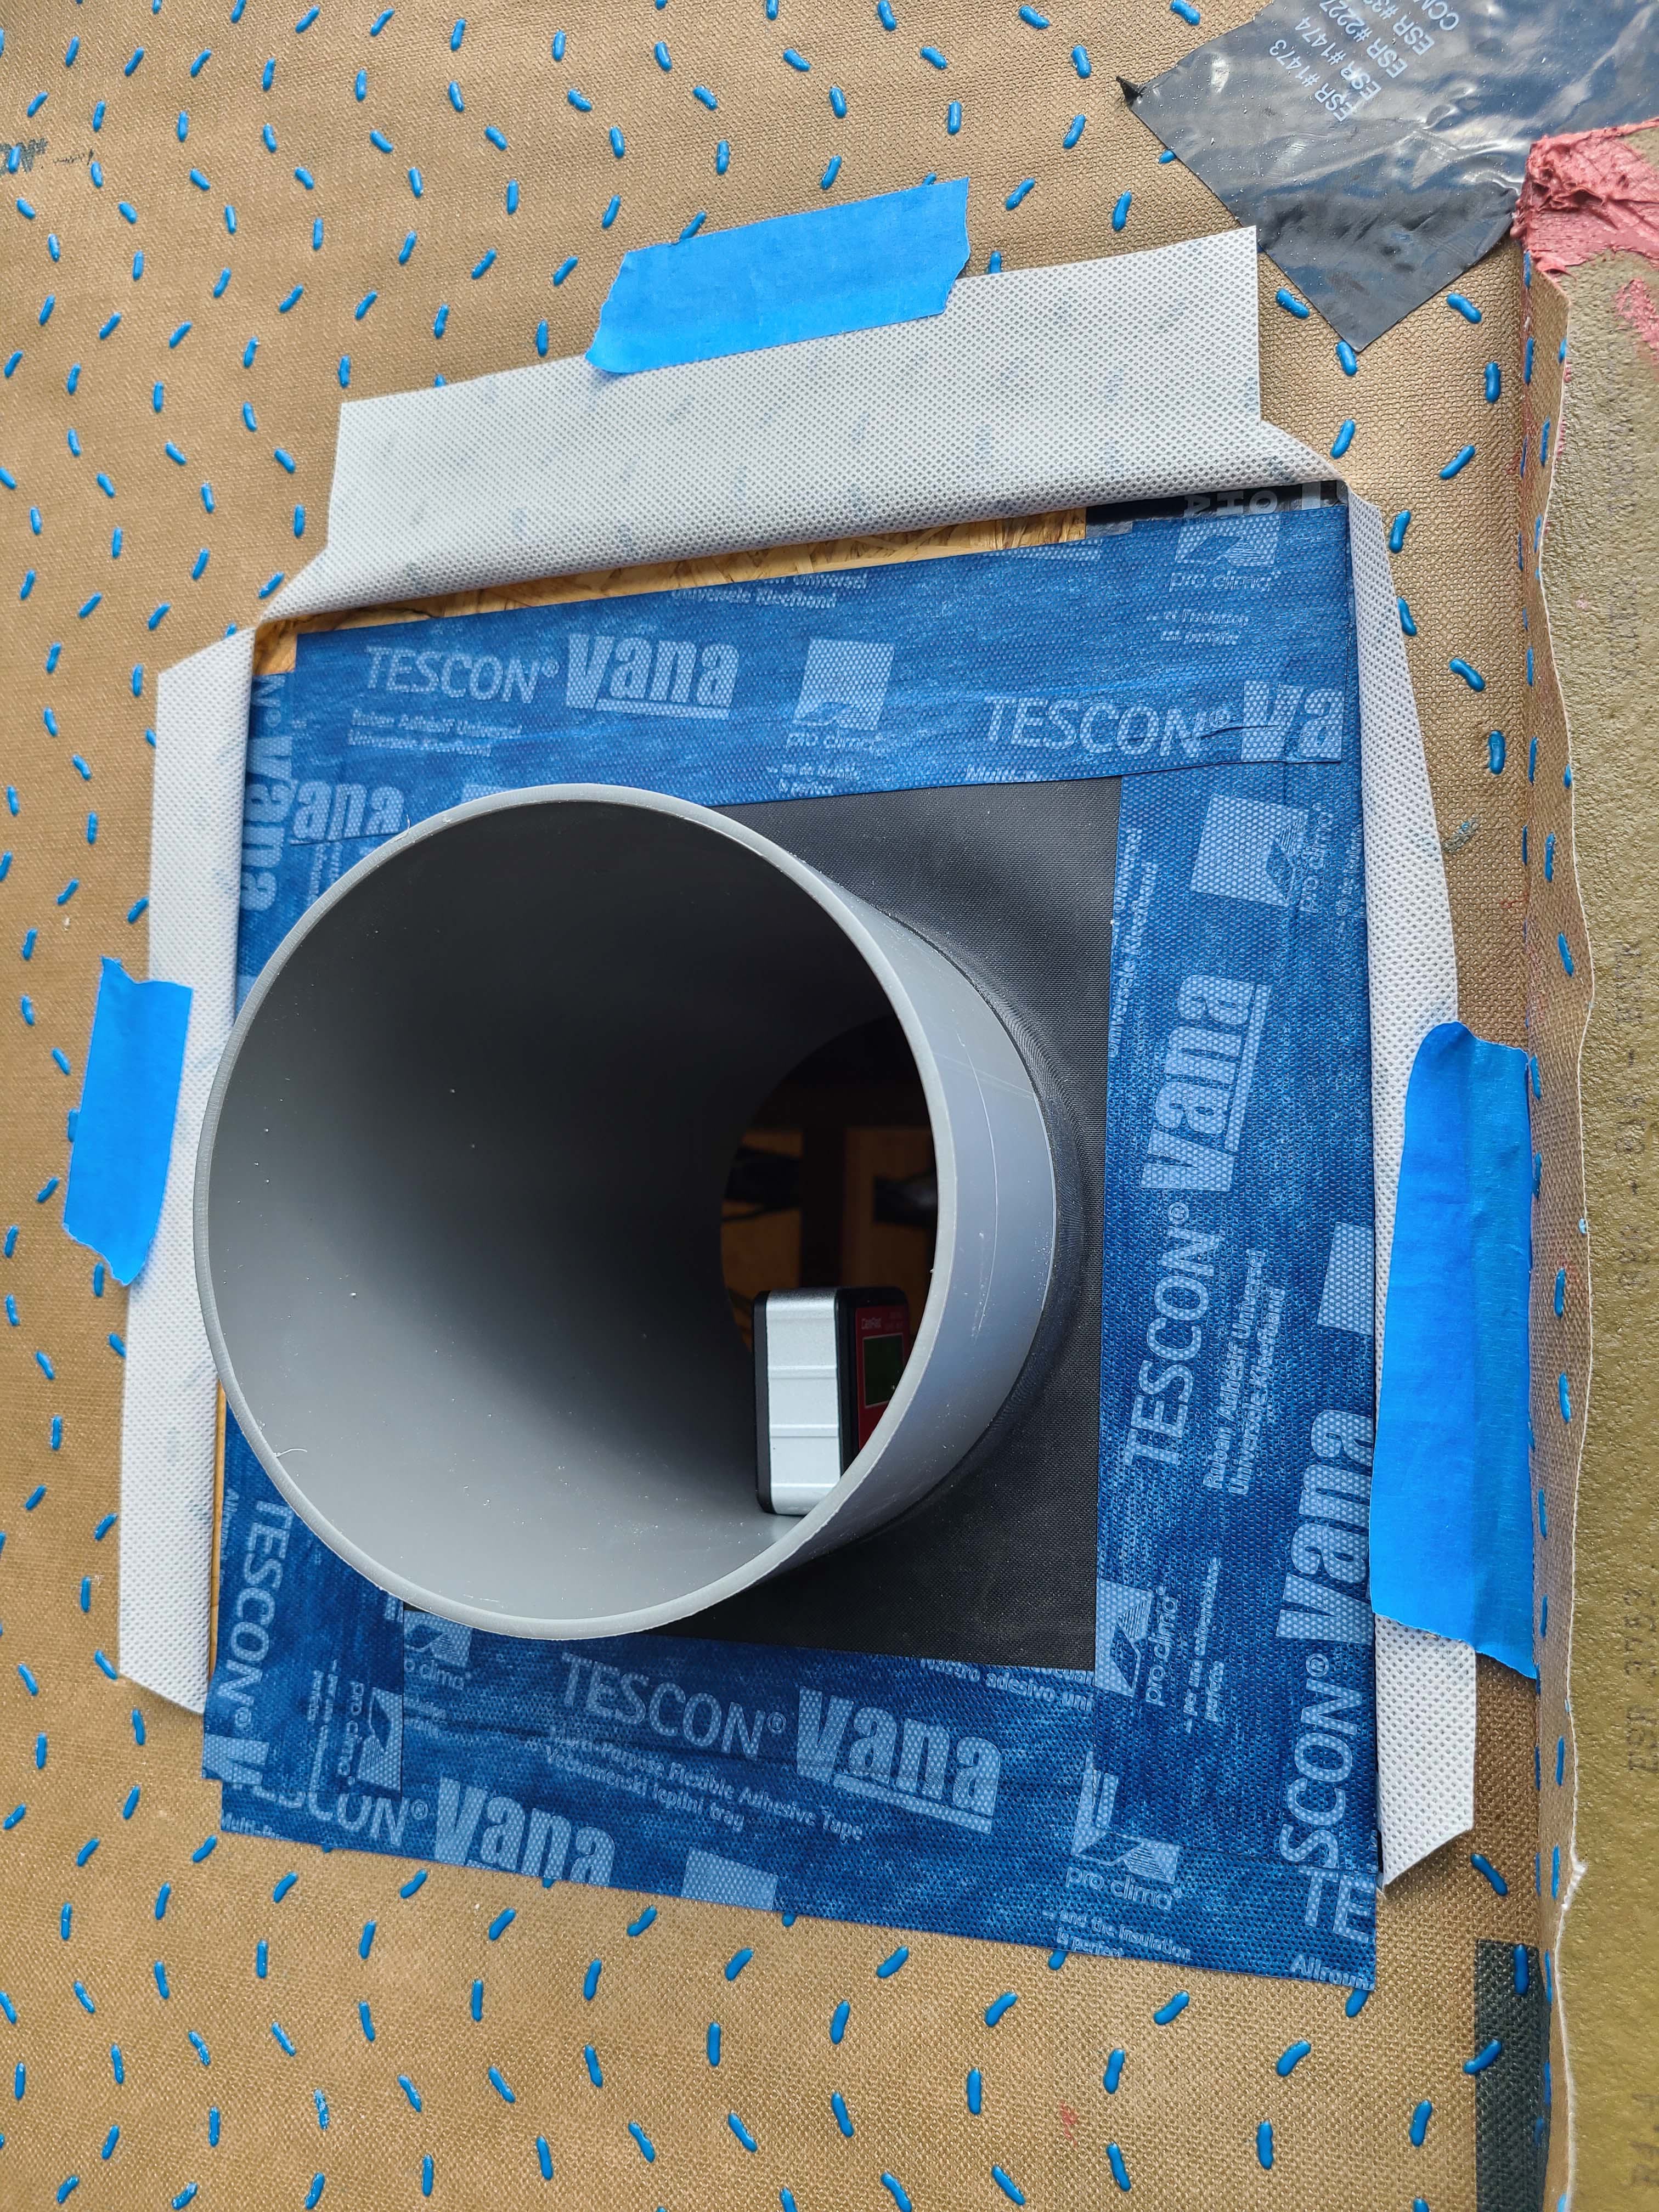
Right - After installing the EPDM gasket around the HRV duct, first the lower edge, then the sides, then the top of the gasket are taped; 12 of 14.
Image
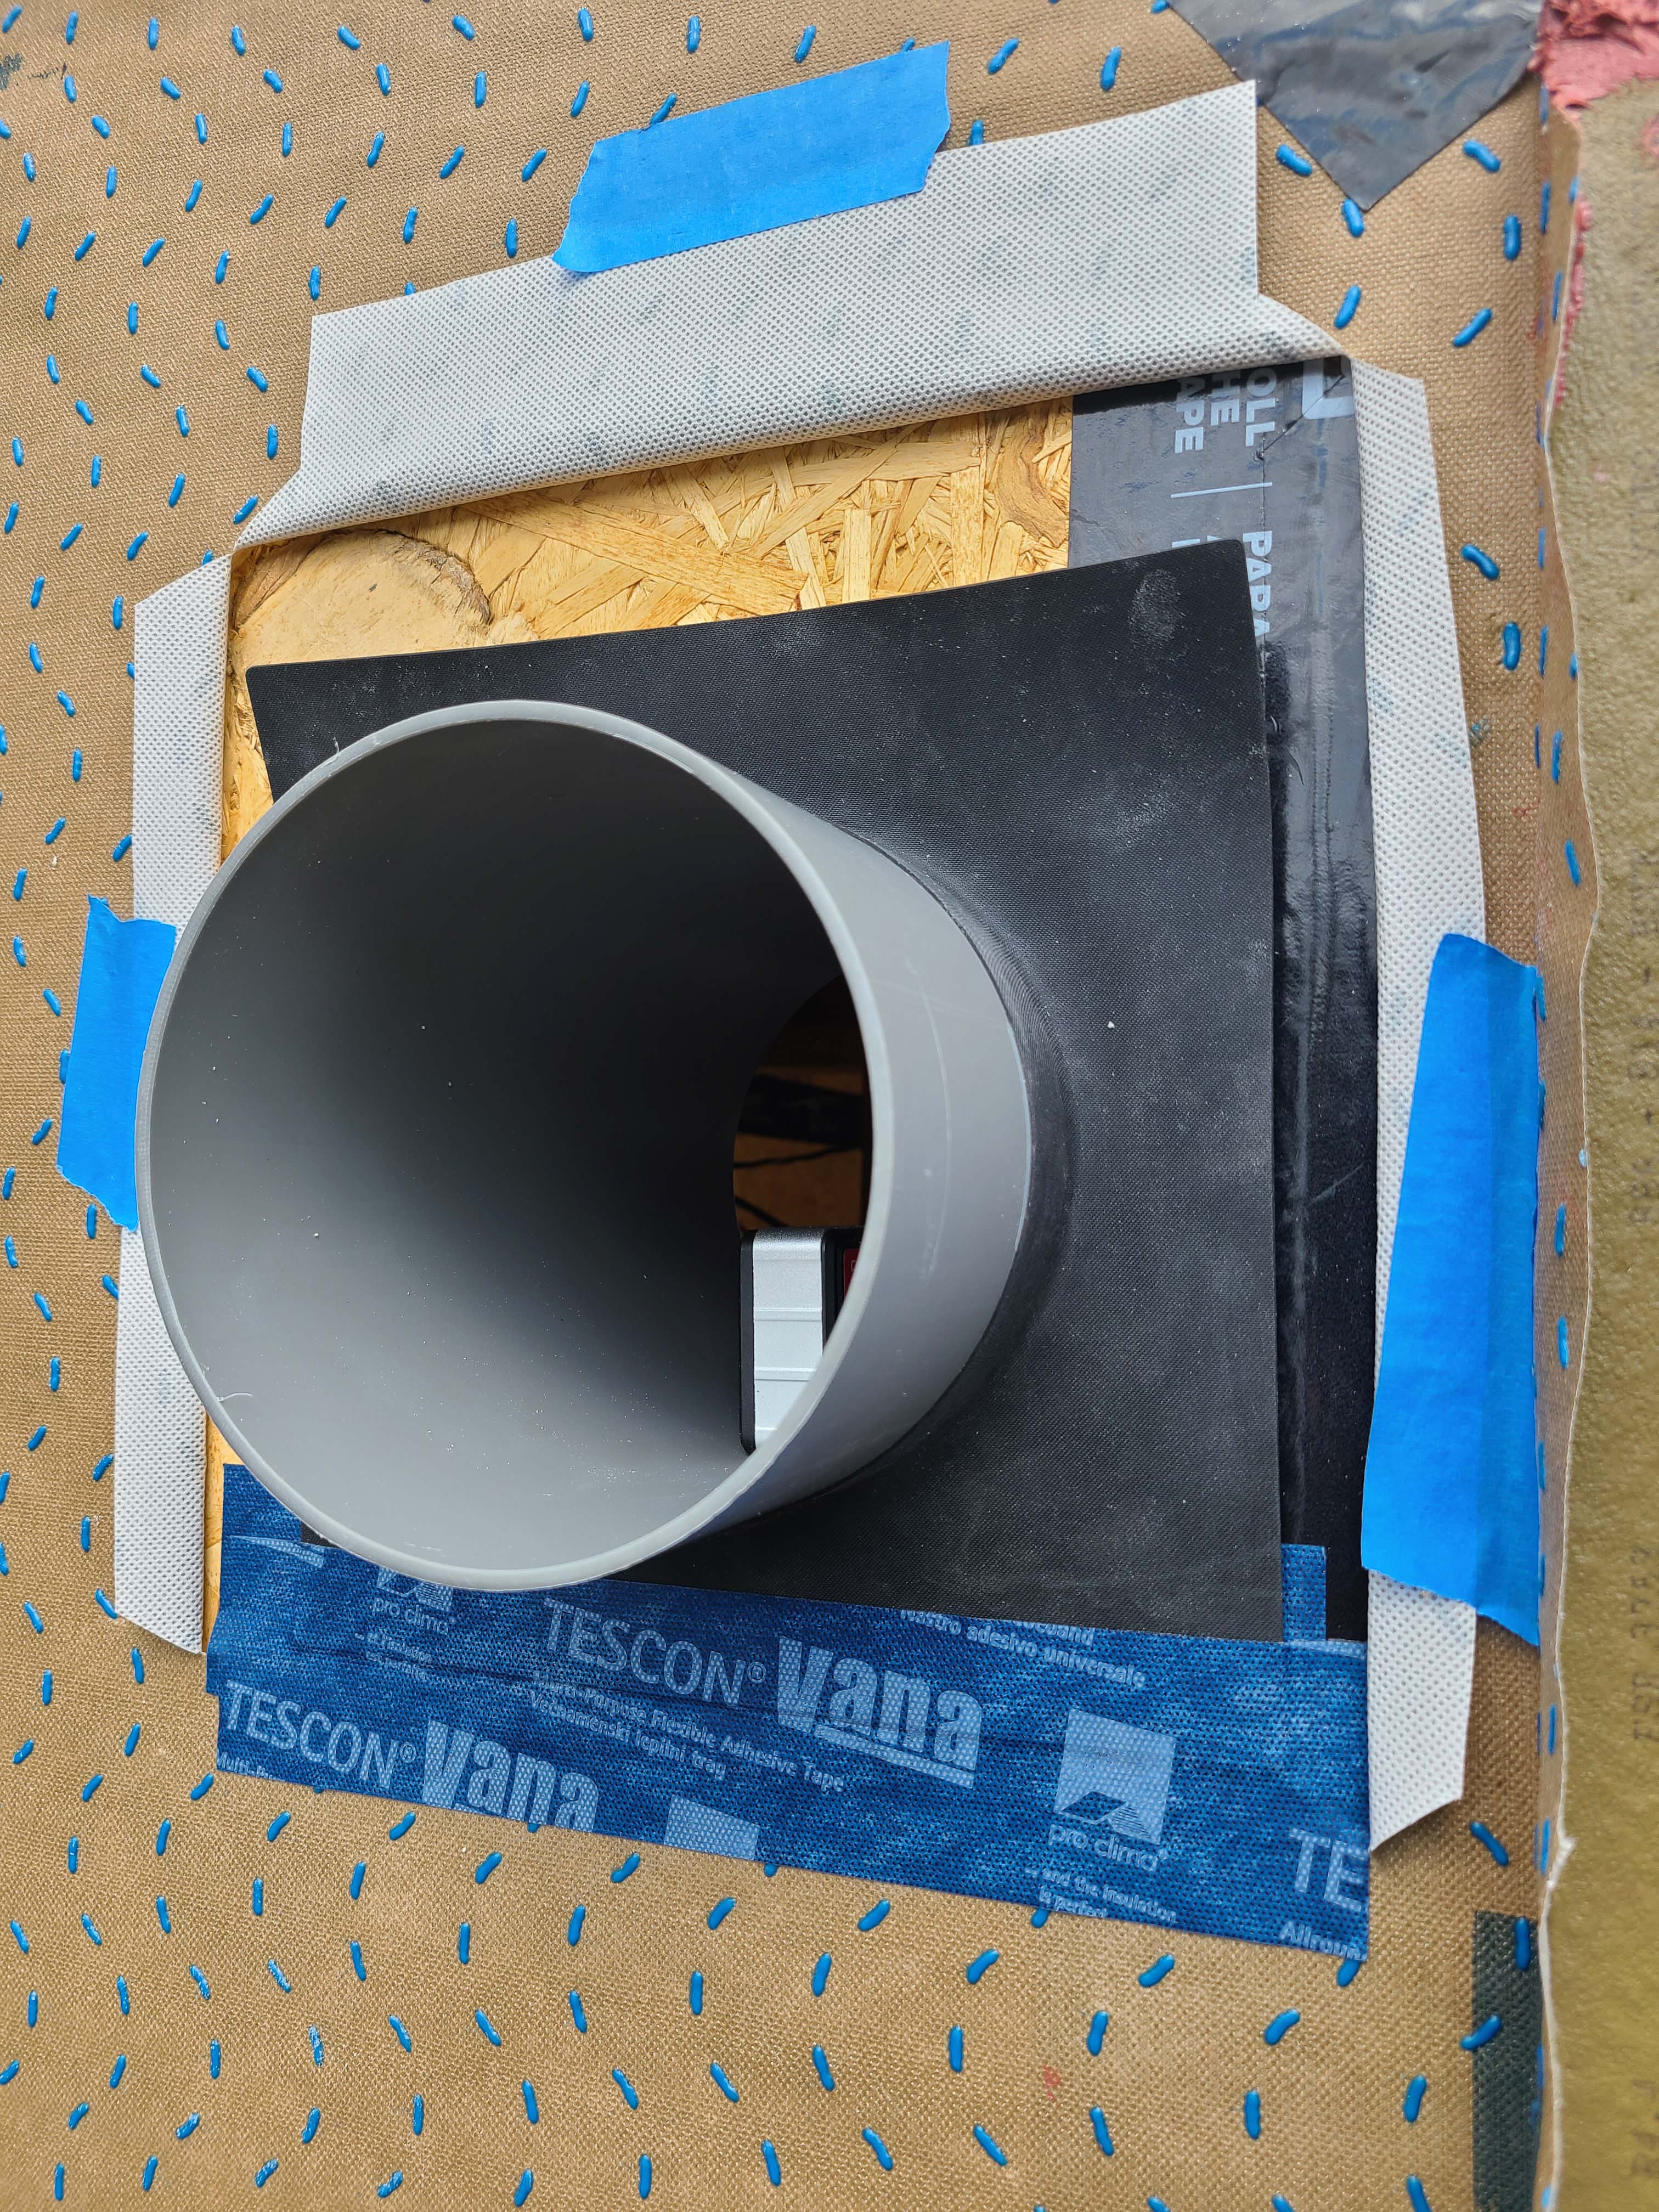
Right - After installing the EPDM gasket around the HRV duct, the lower edge of the gasket is taped first before taping the other edges of the gasket; 10 of 14.
Image
Image
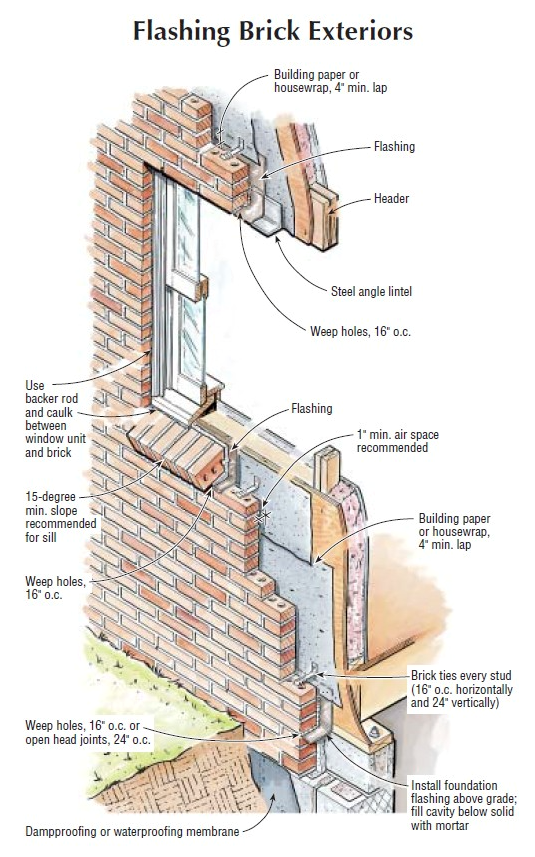
Right - Brick veneer is installed with a 1-inch air space behind the brick, metal flashing and weep holes above and below the windows and at the base of the wall to direct out water that gets behind the brick.
Image
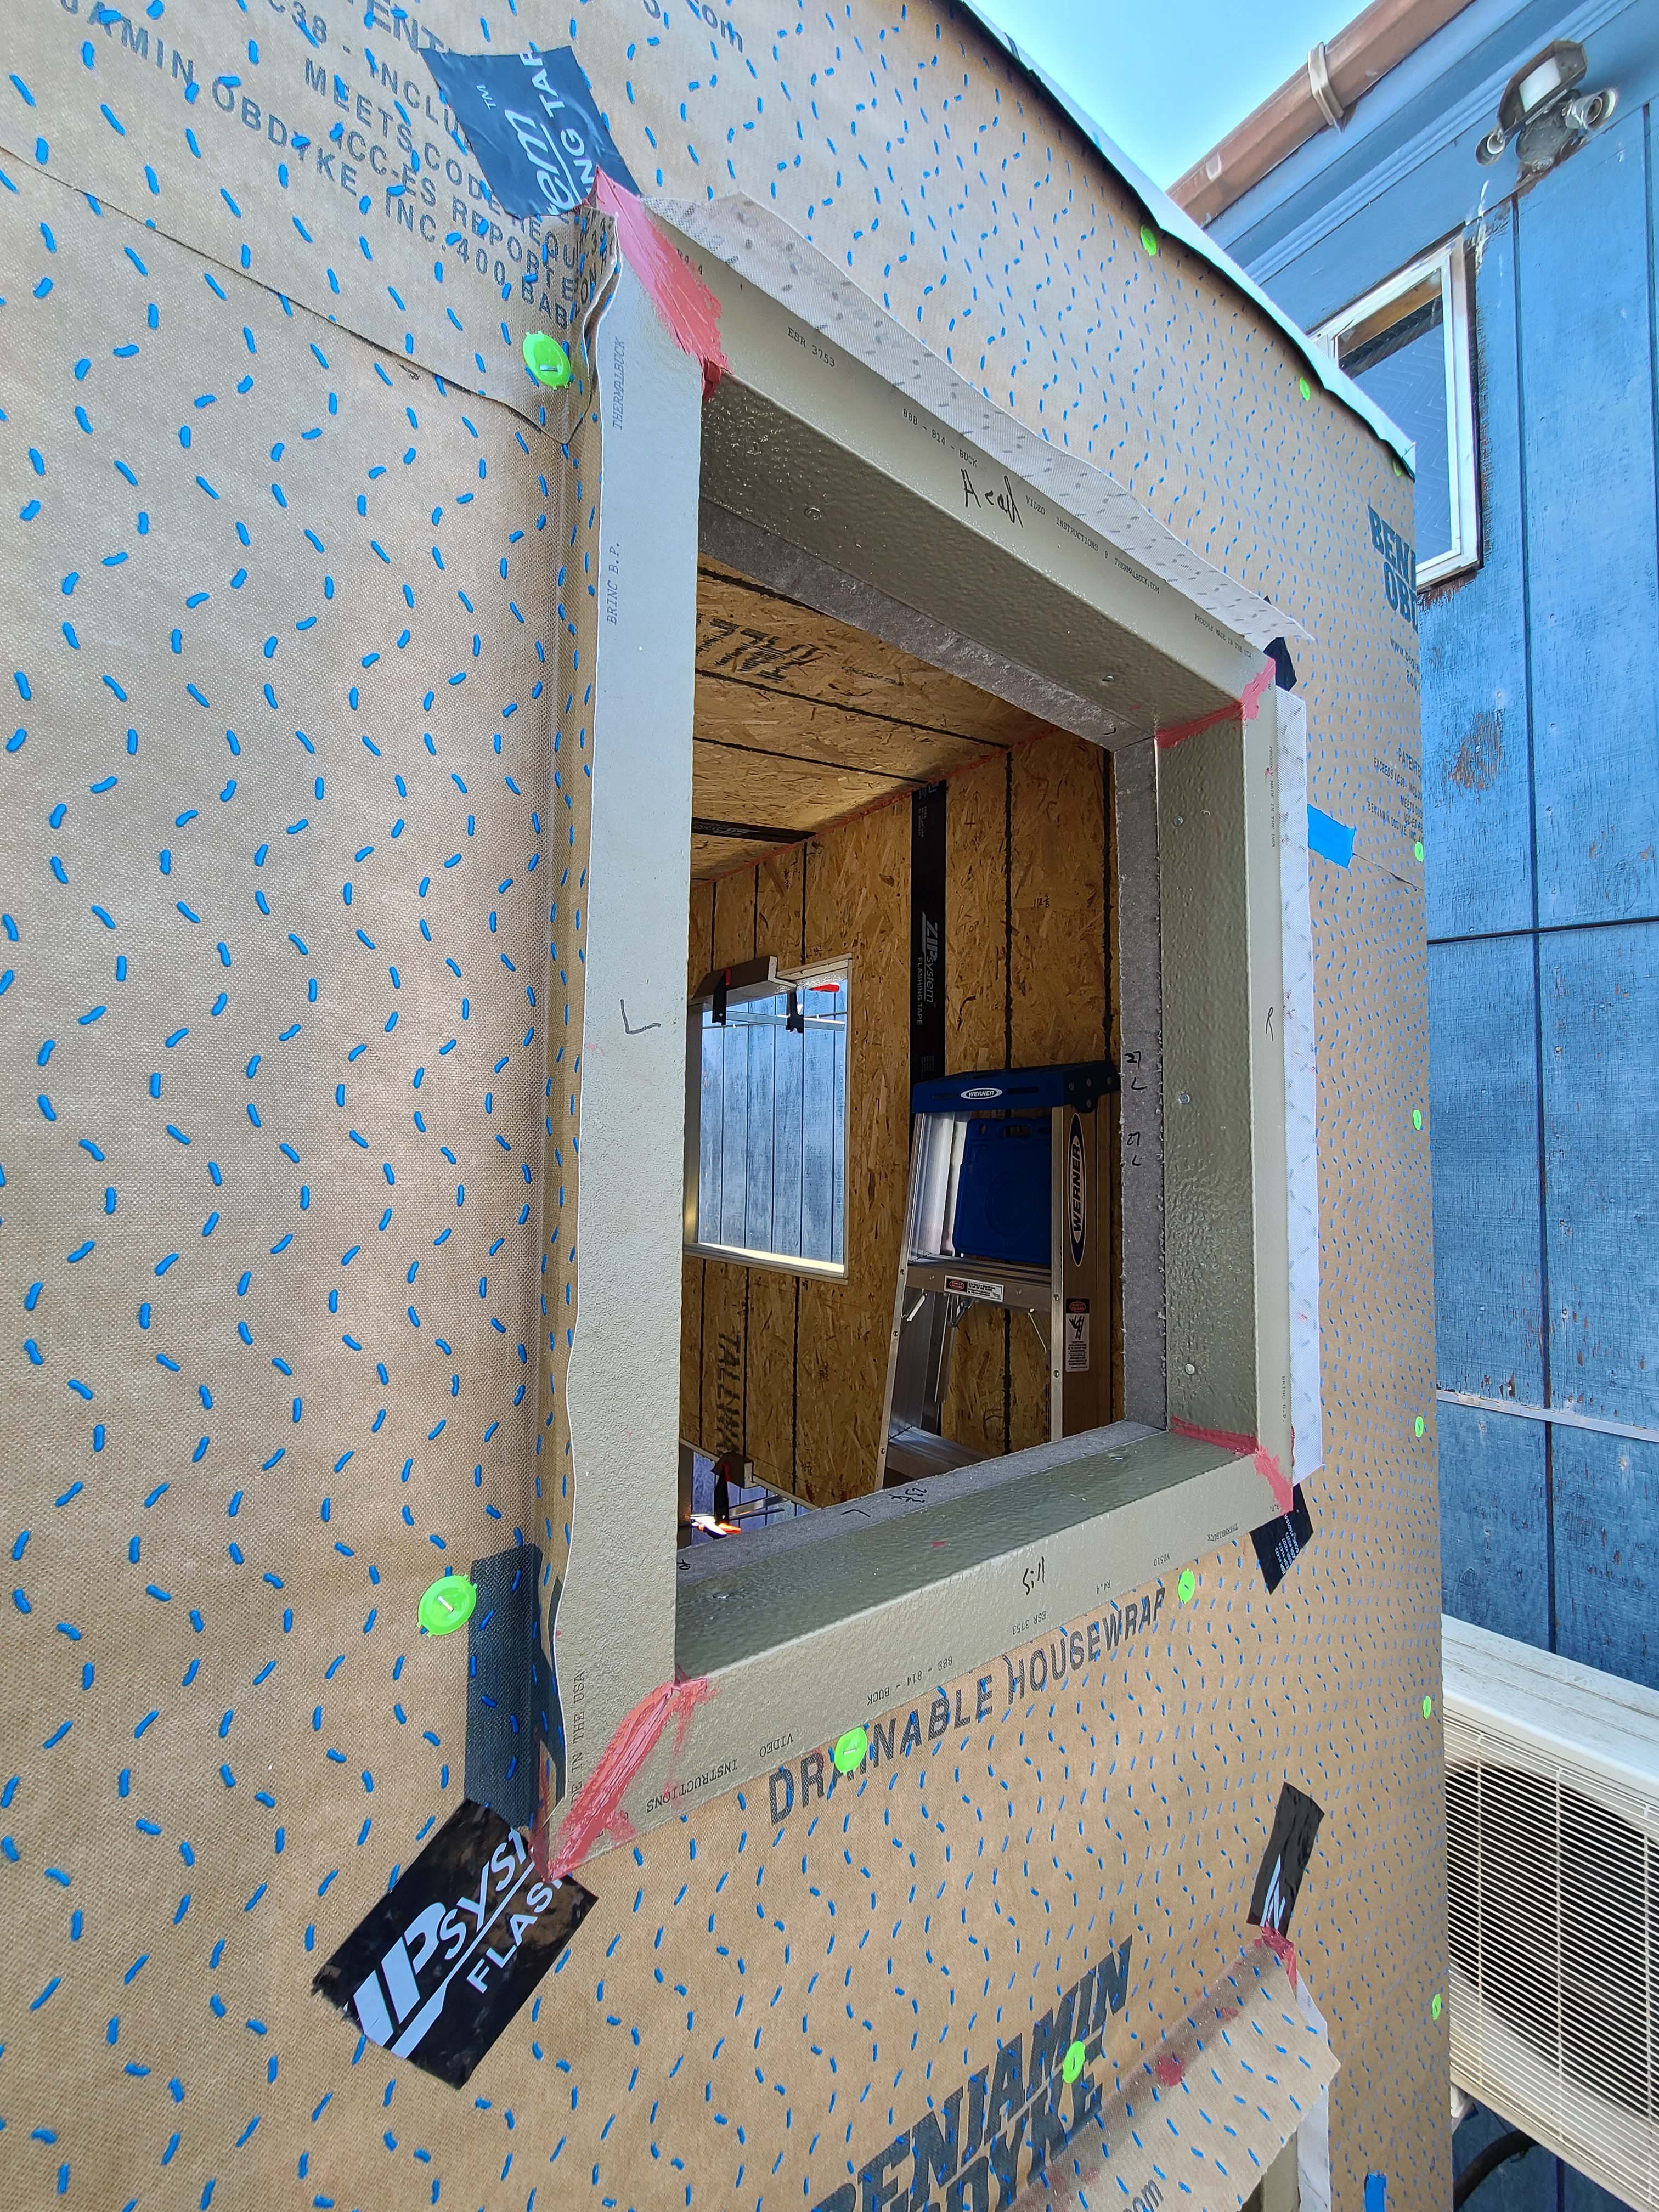
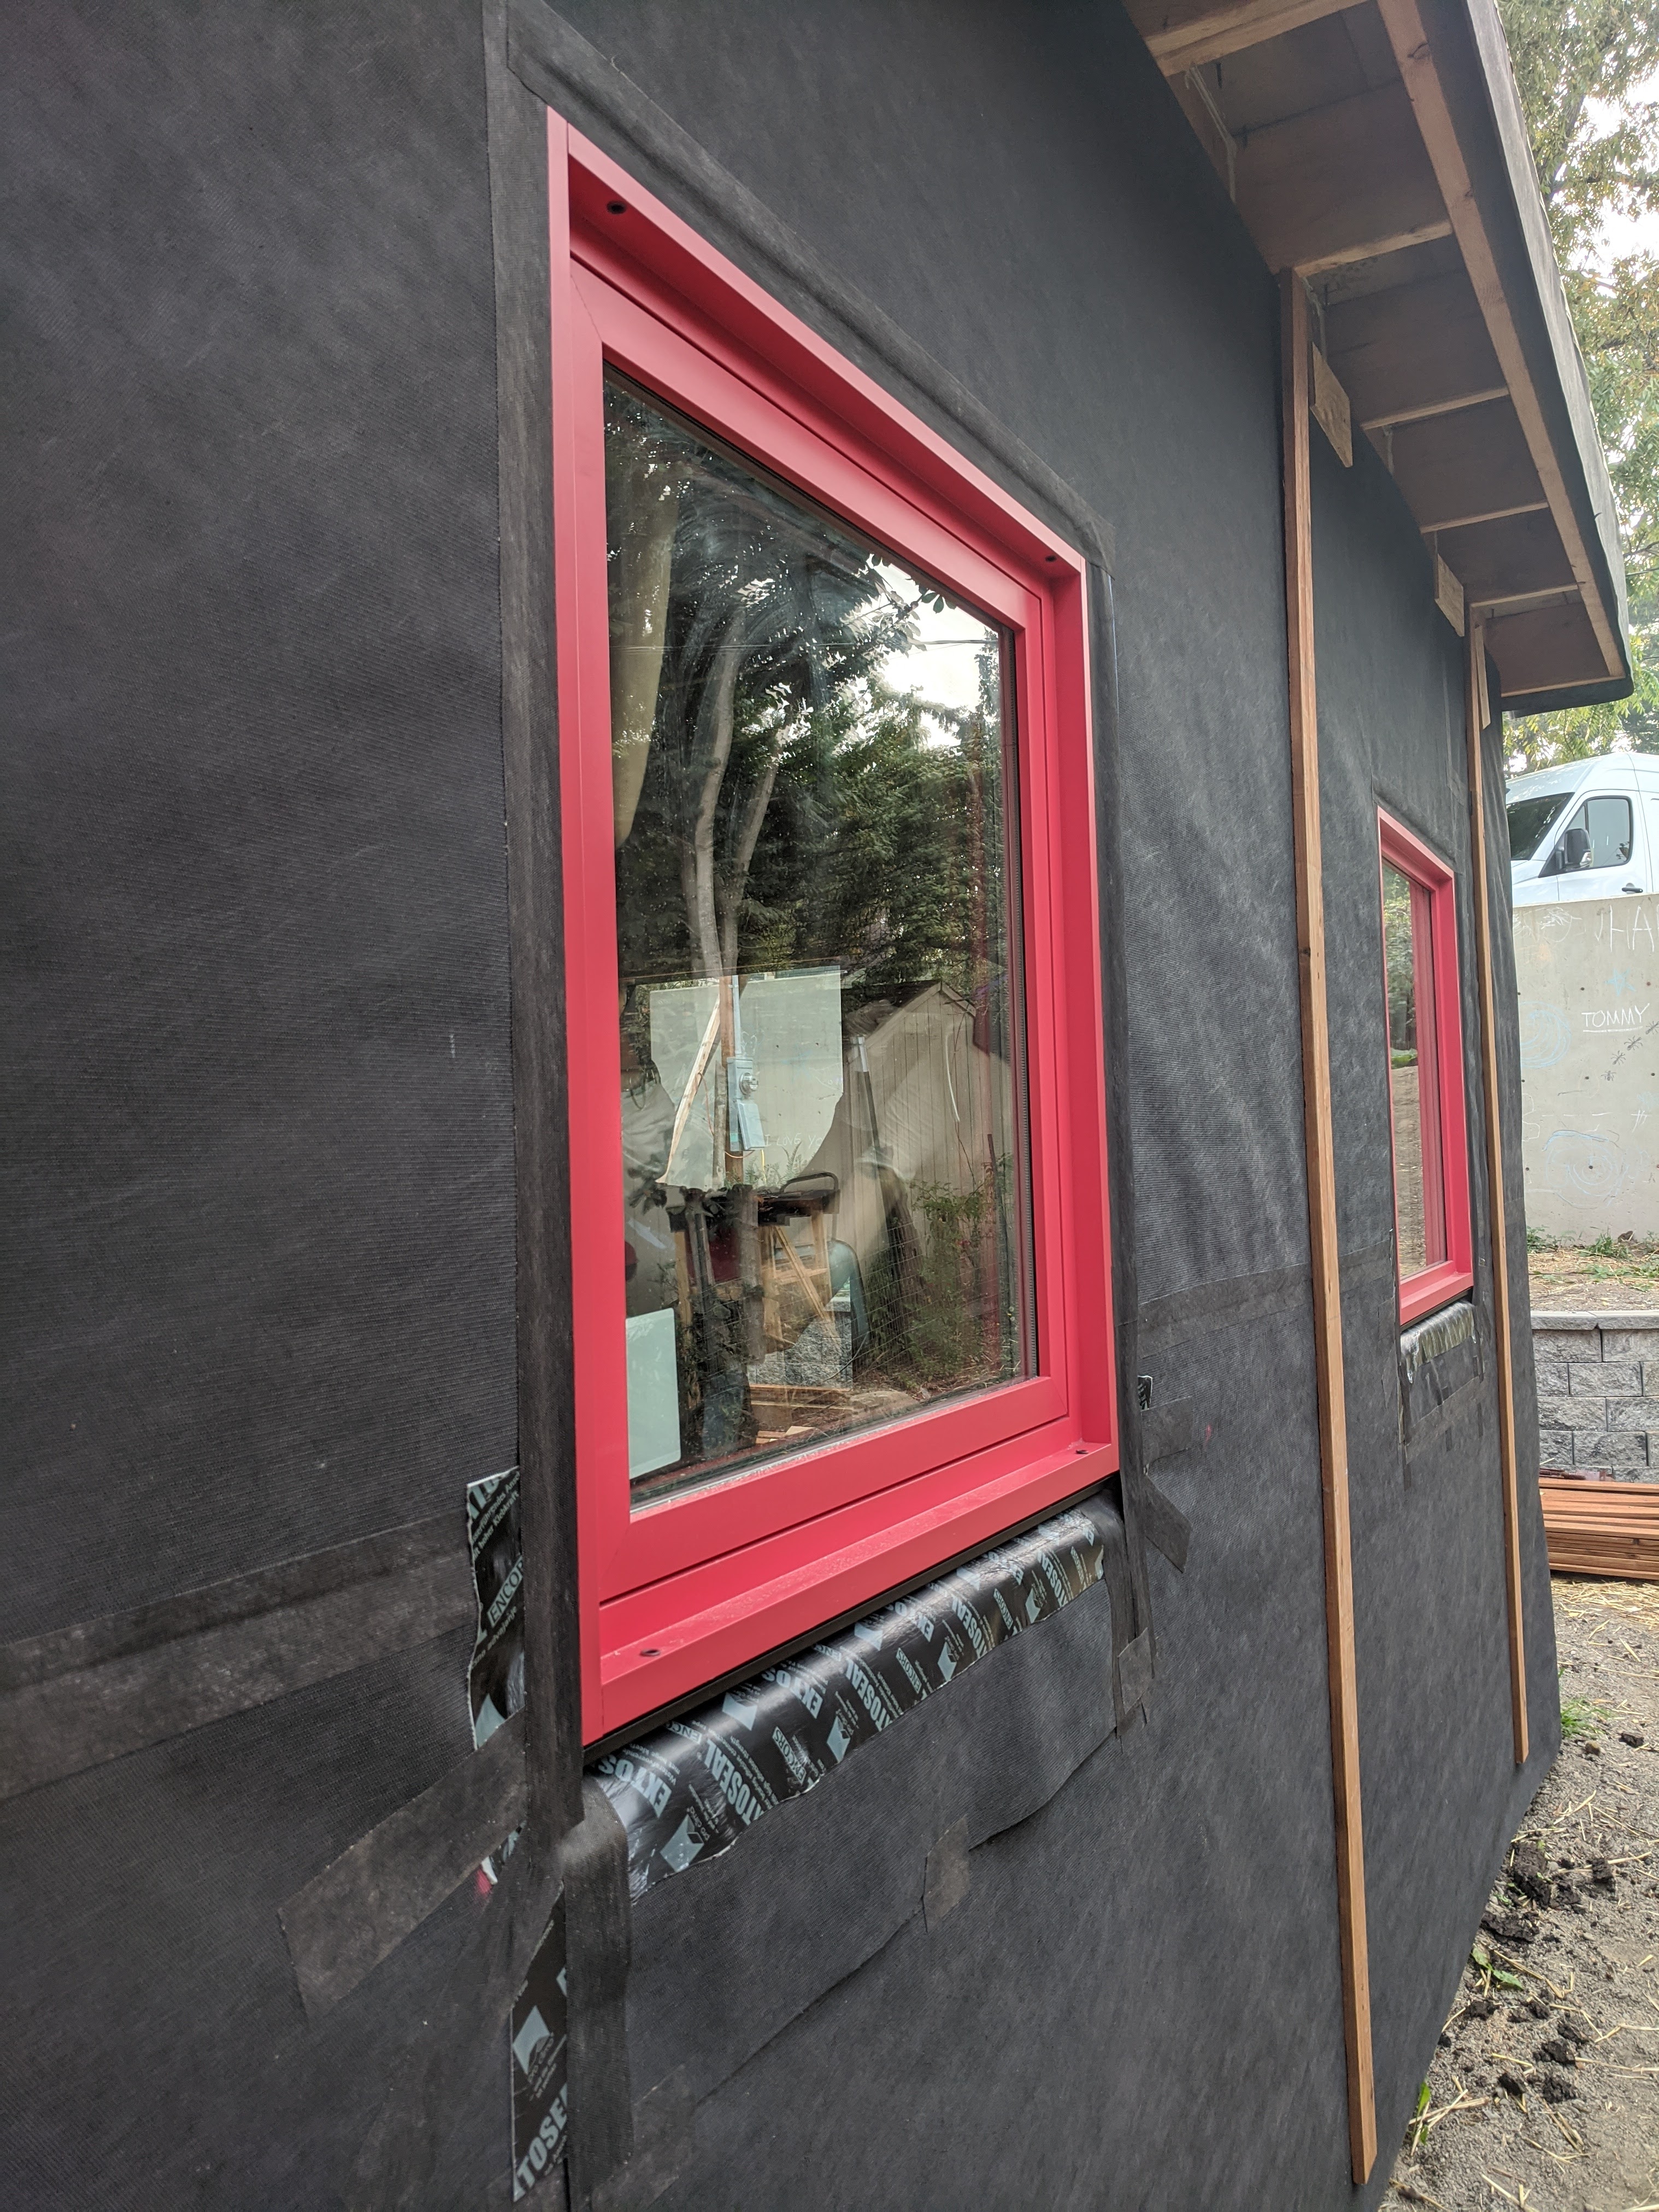
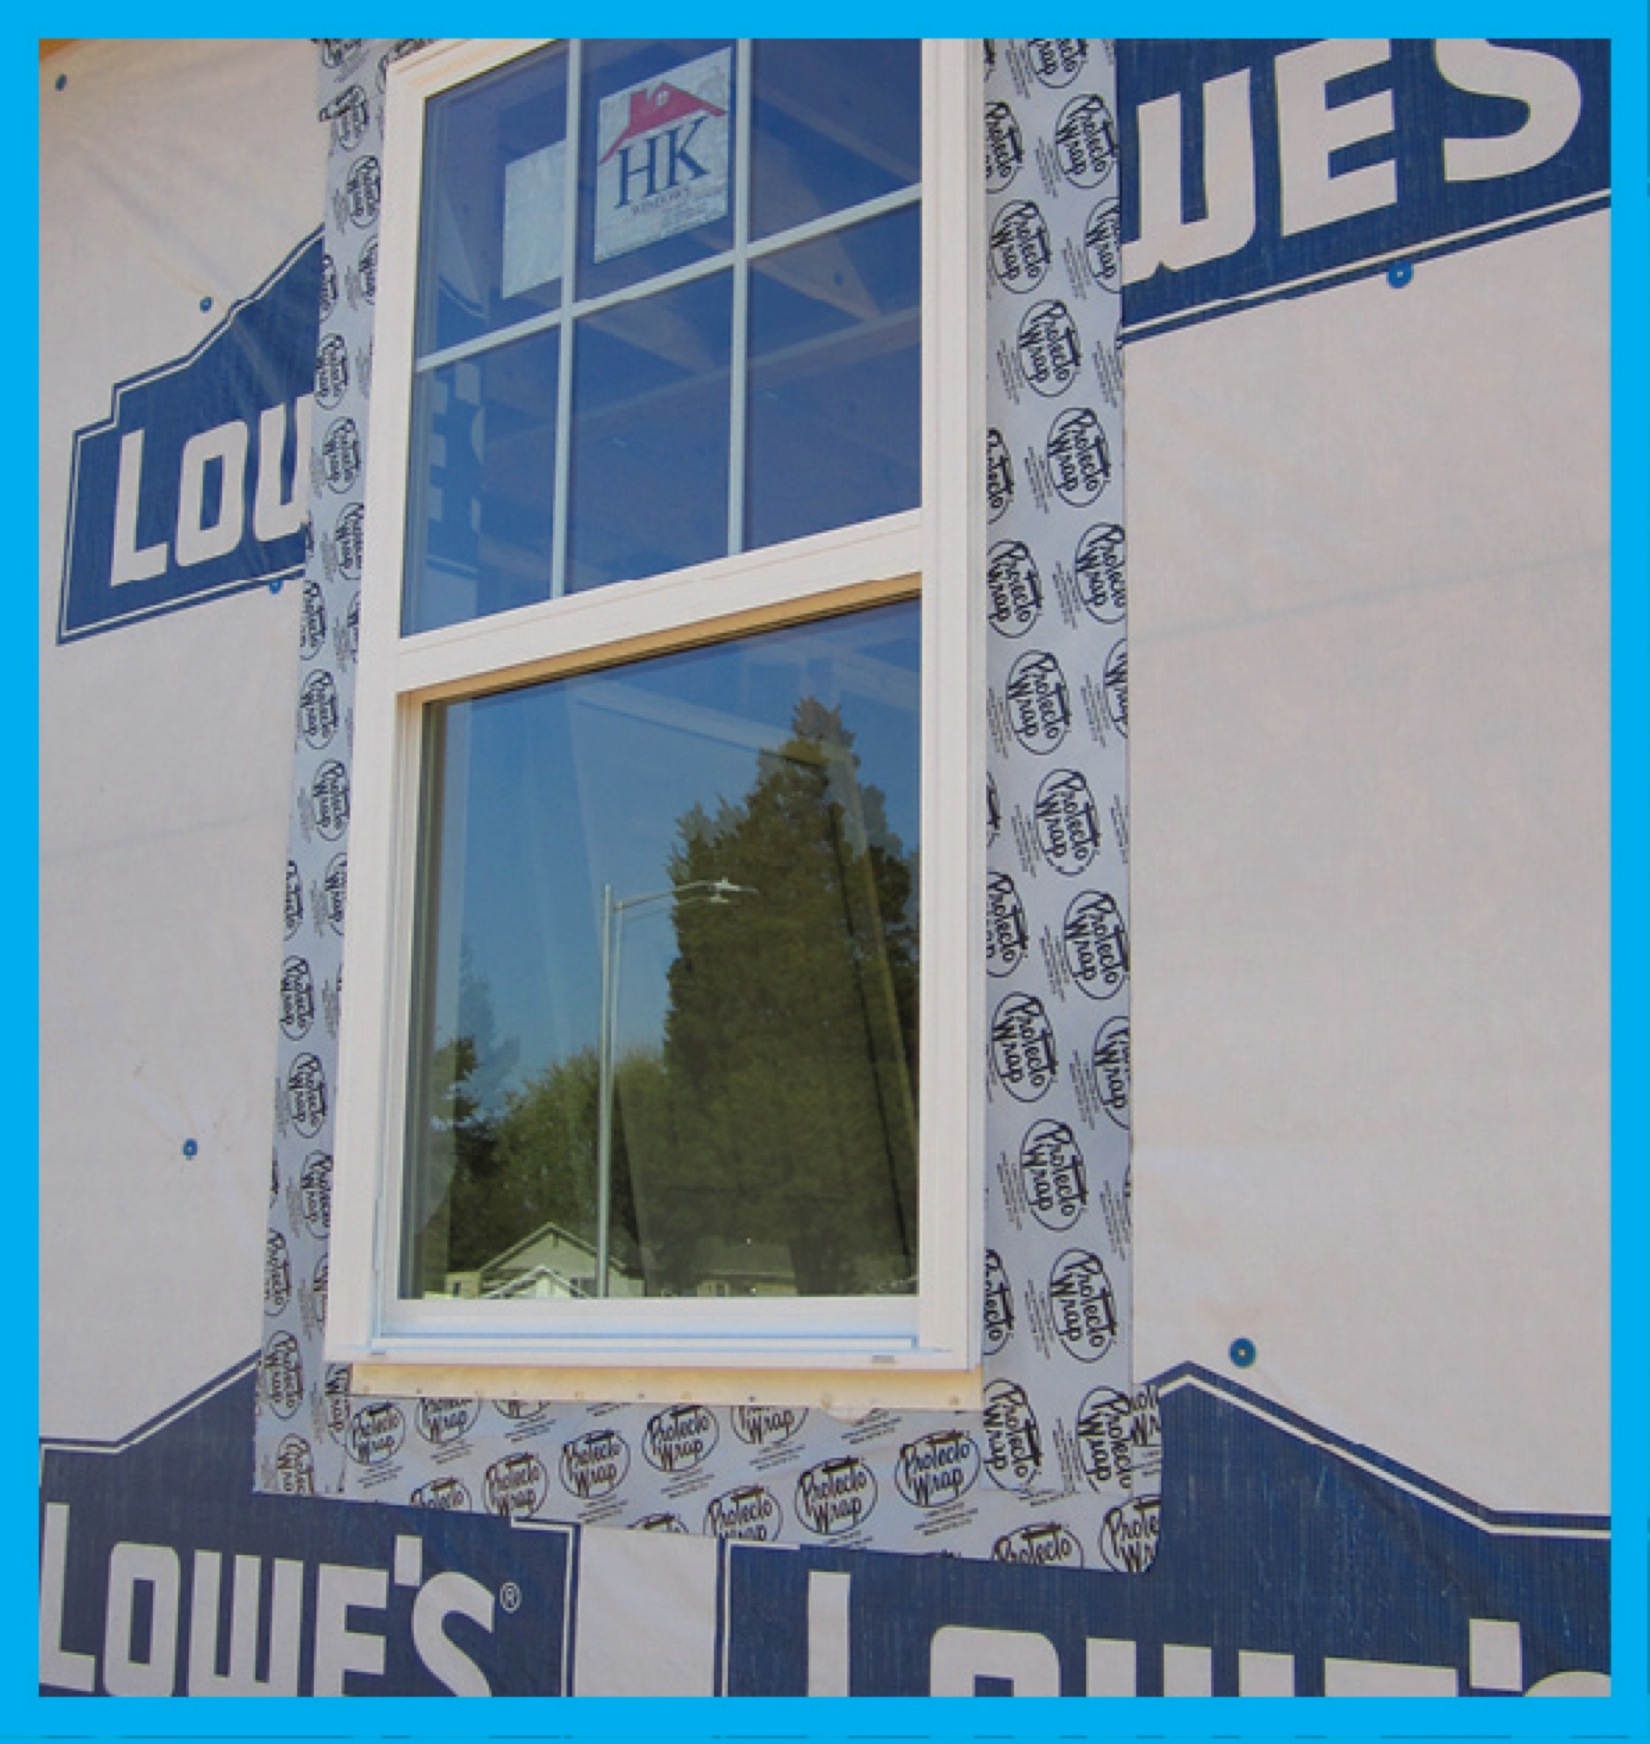
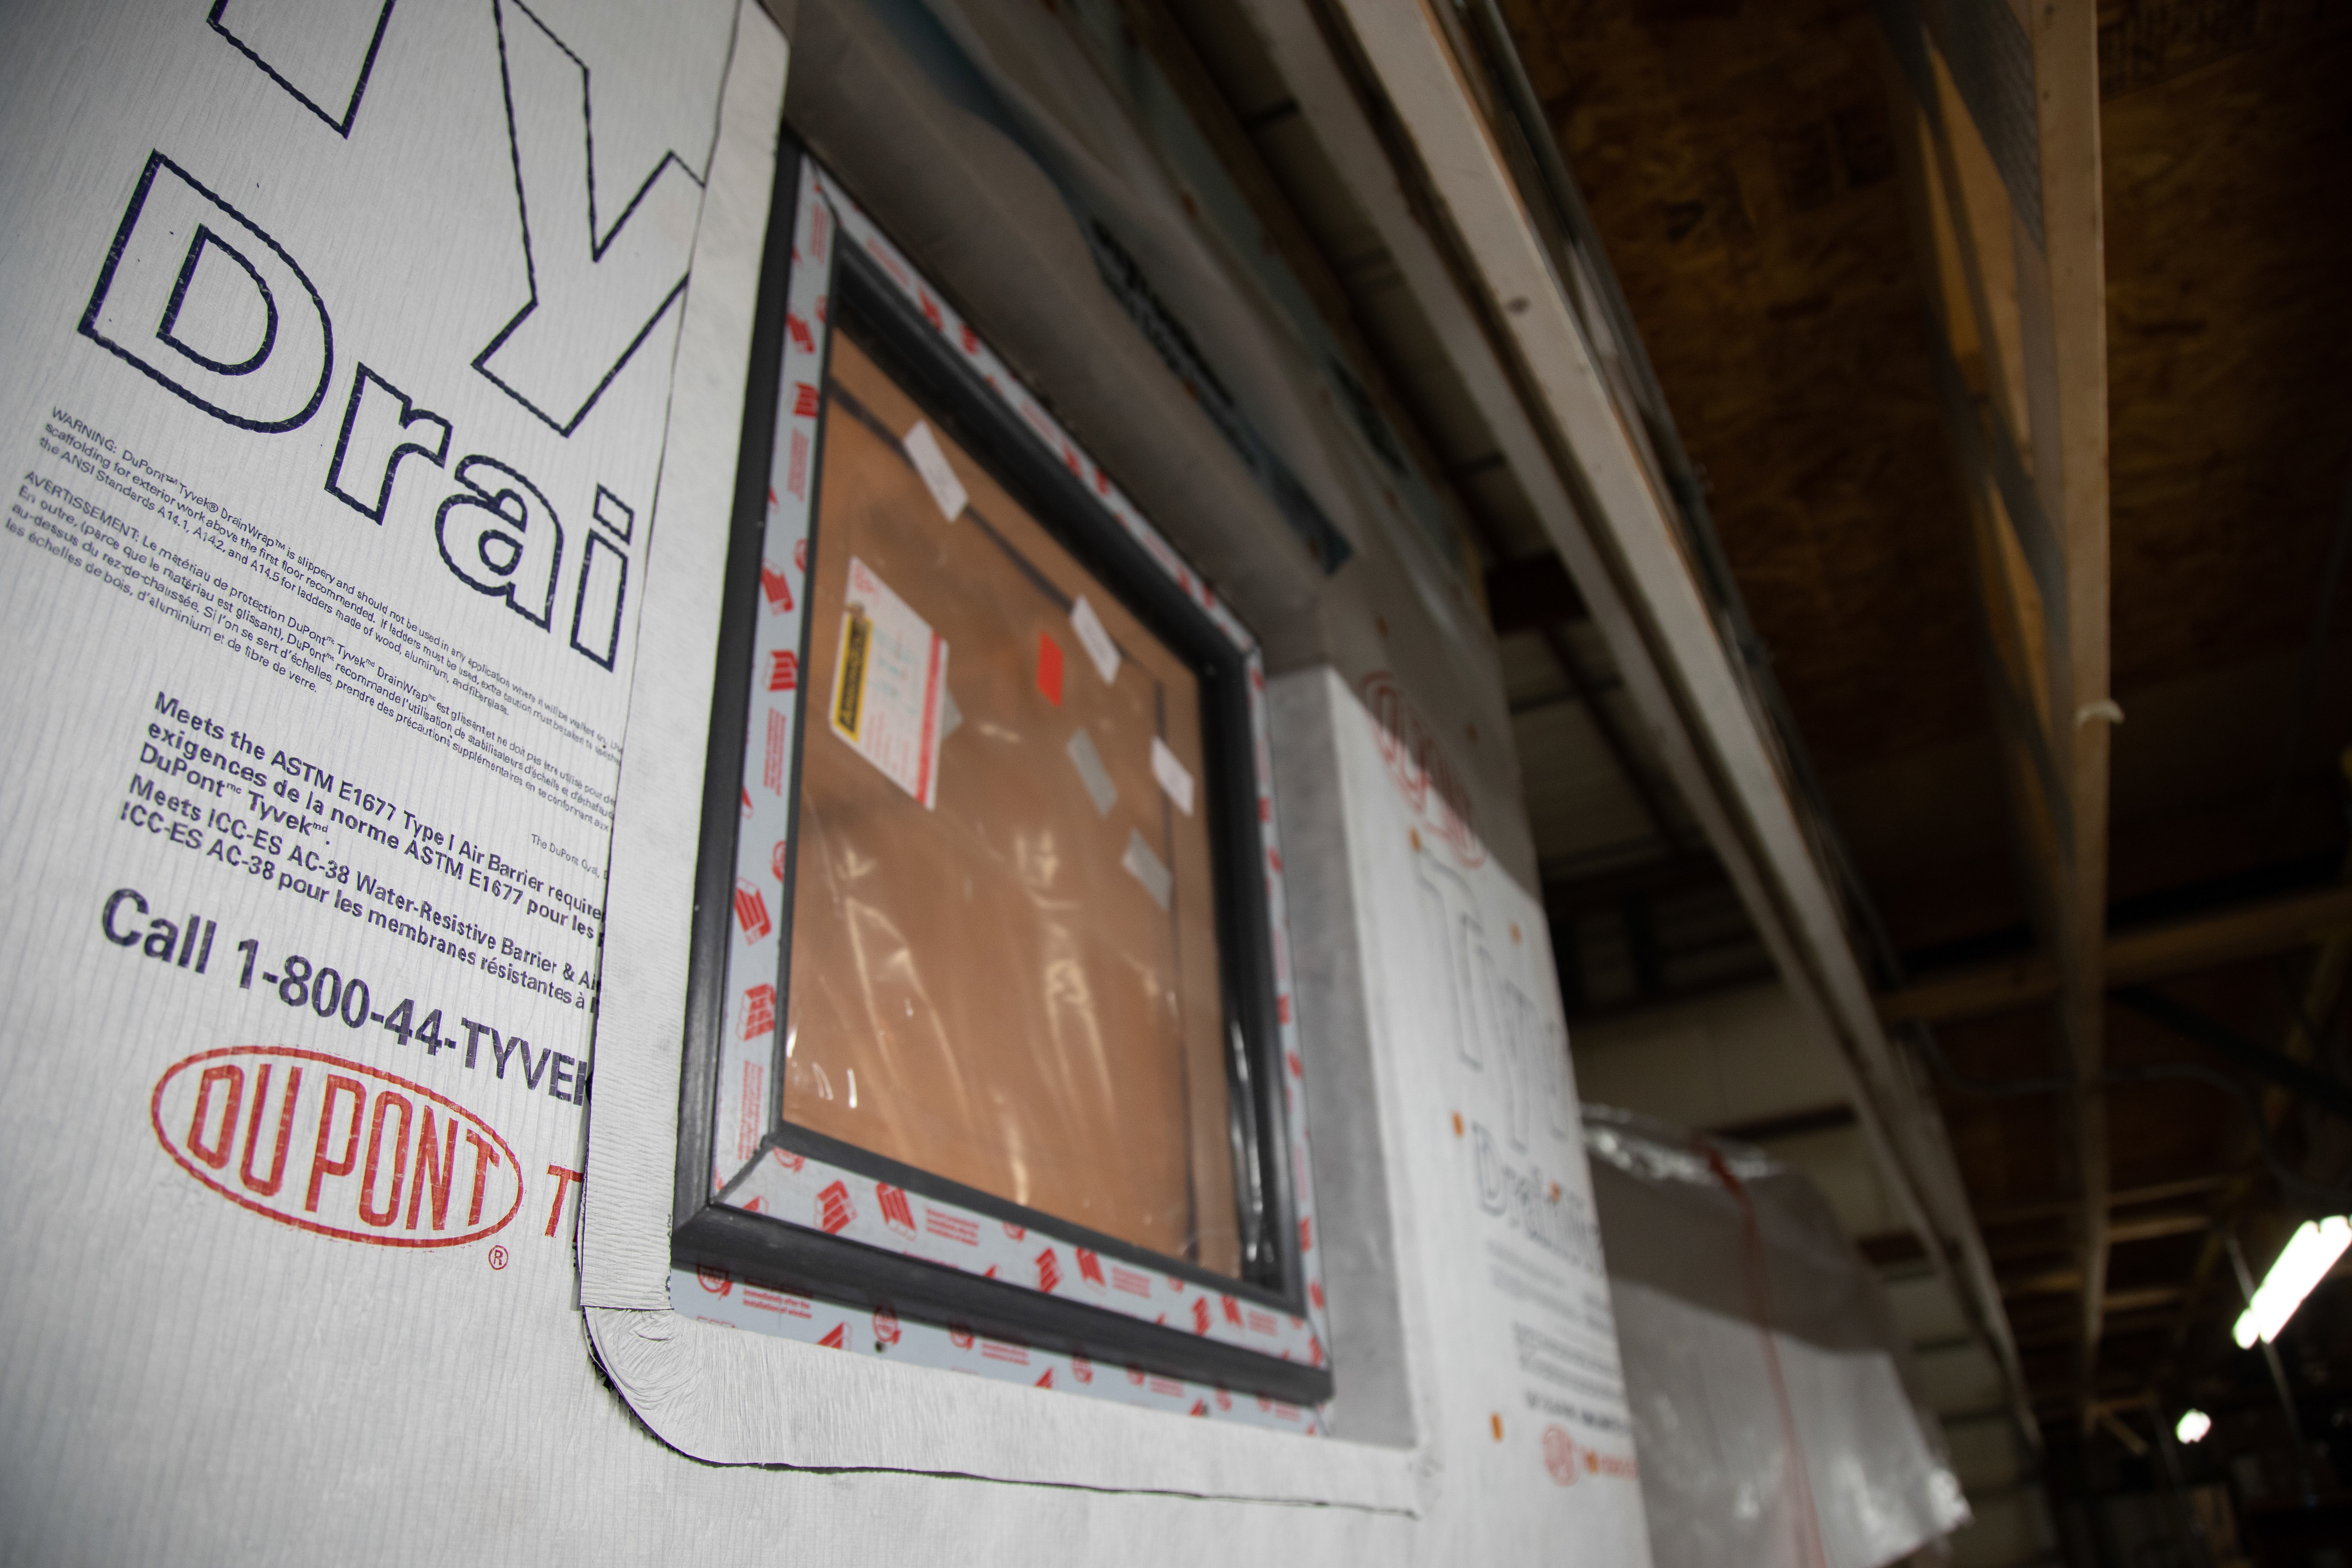
Right - Corners of window are protected with draining house wrap that laps onto the sides of the window trim, paint-on flashing at window trim corners, and self-adhered flashing to reinforce corners.
Image
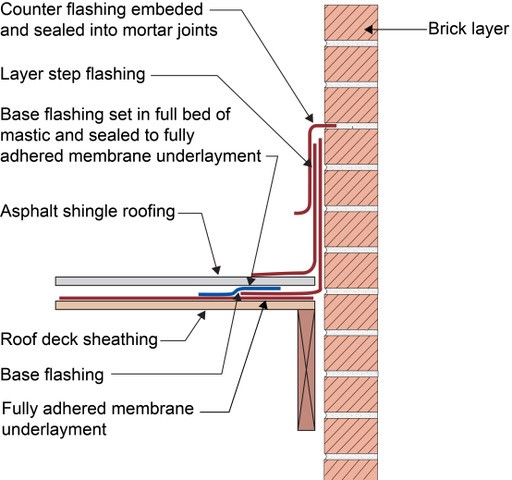
Right - Counterflashing tops a layer of step flashing which comes down above the asphalt shingle and a layer of L-shaped base flashing which comes down and extends below the shingle; the base flashing is adhered to the roof underlayment with mastic, shown
Image
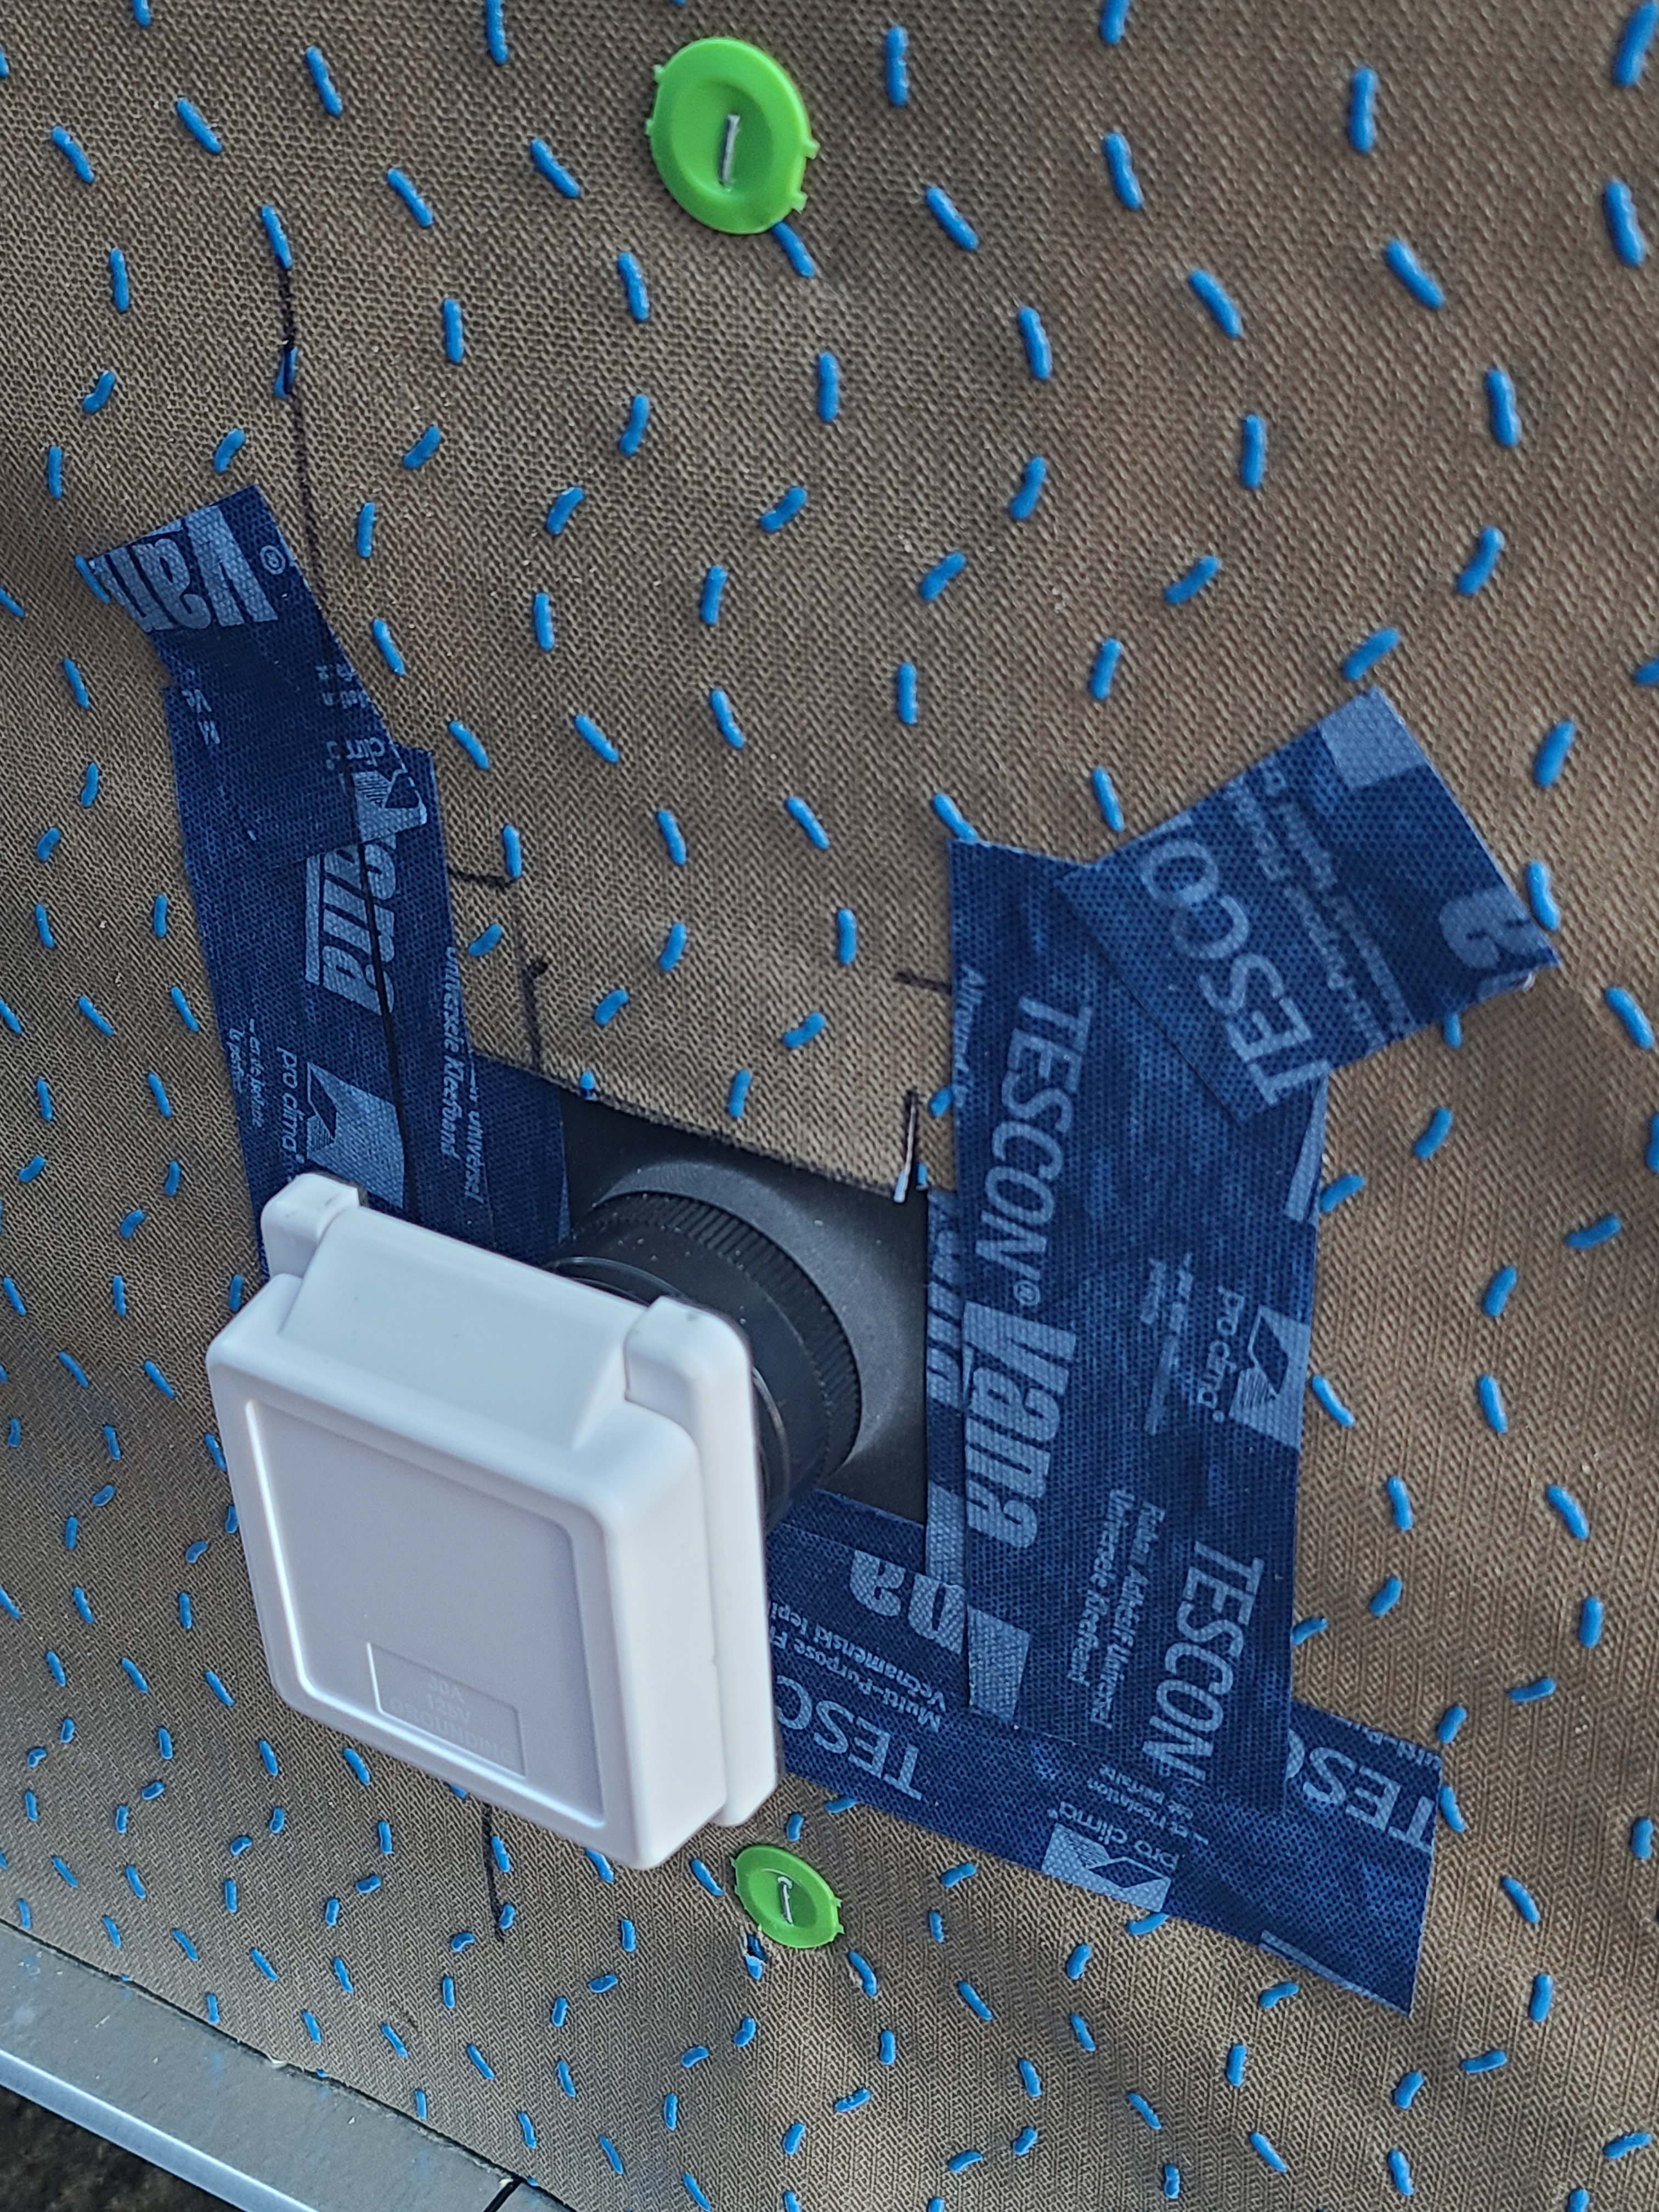
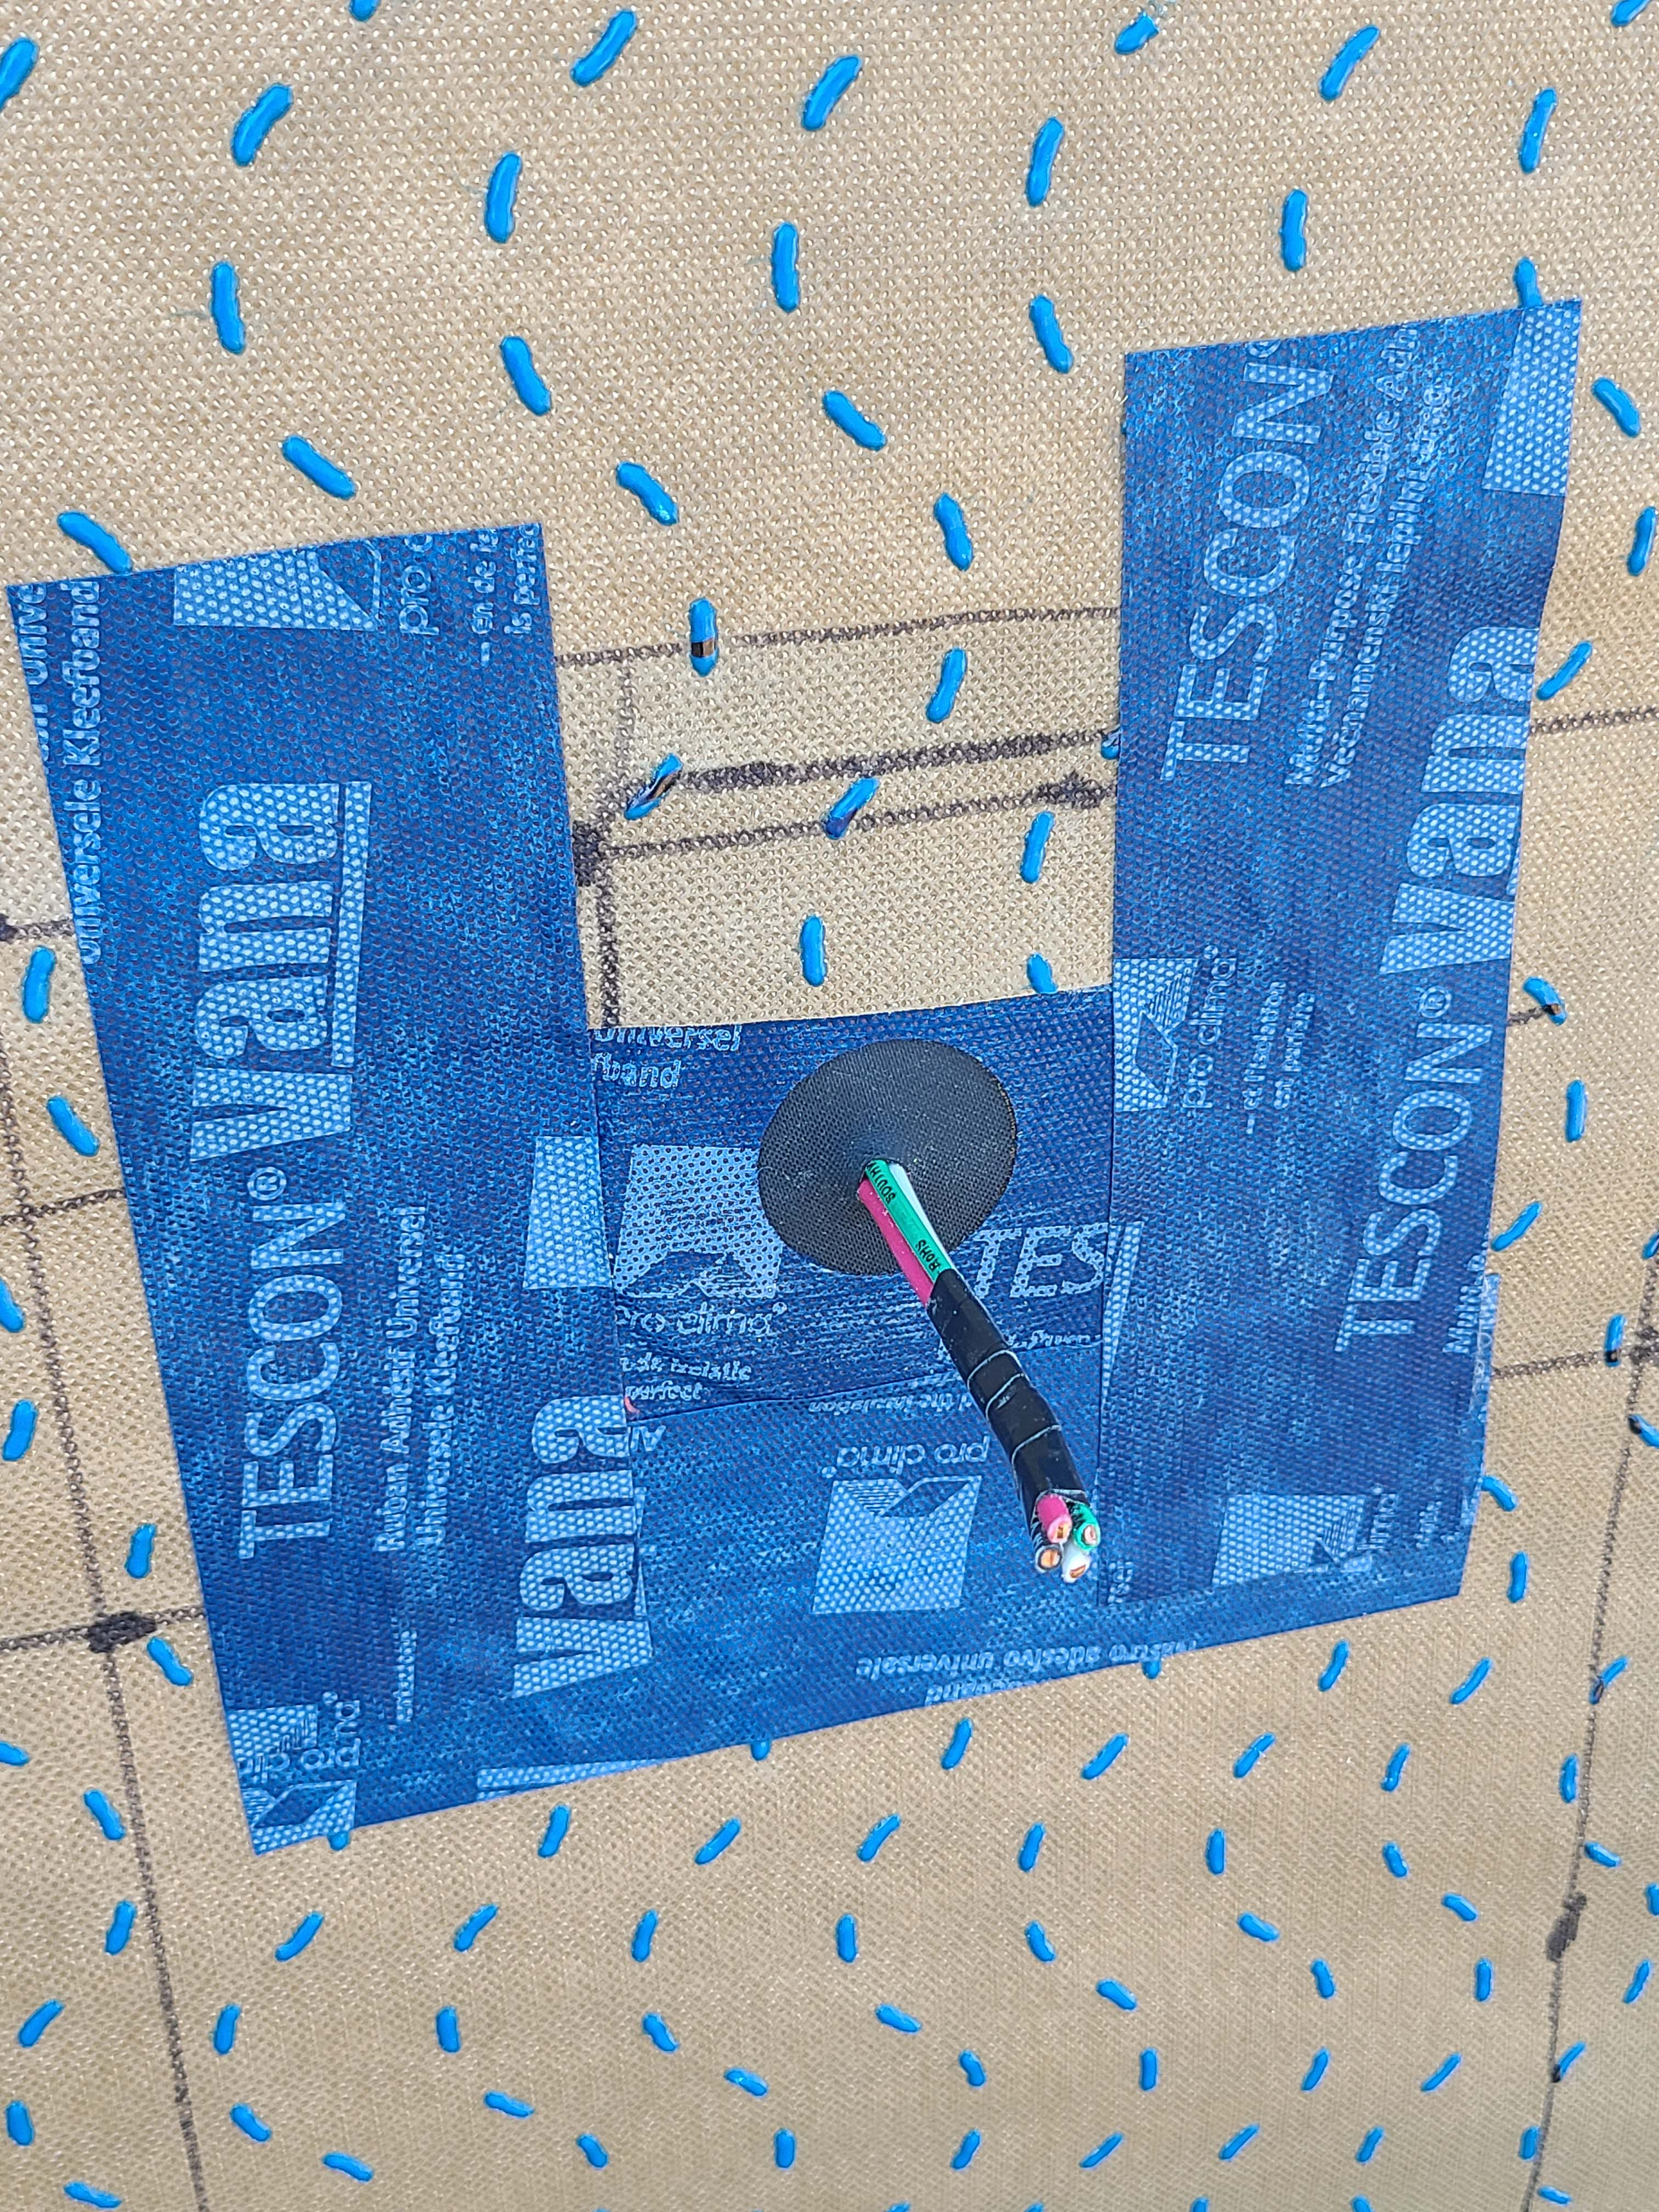
Right - External outlet wall penetration is flashed with tape that is properly layered with house wrap.
Image
Image

Right - House wrap is lapped back over first layer of flashing tape, then a second layer of flashing tape is applied to the sides around the duct; 13 of 14.
Image
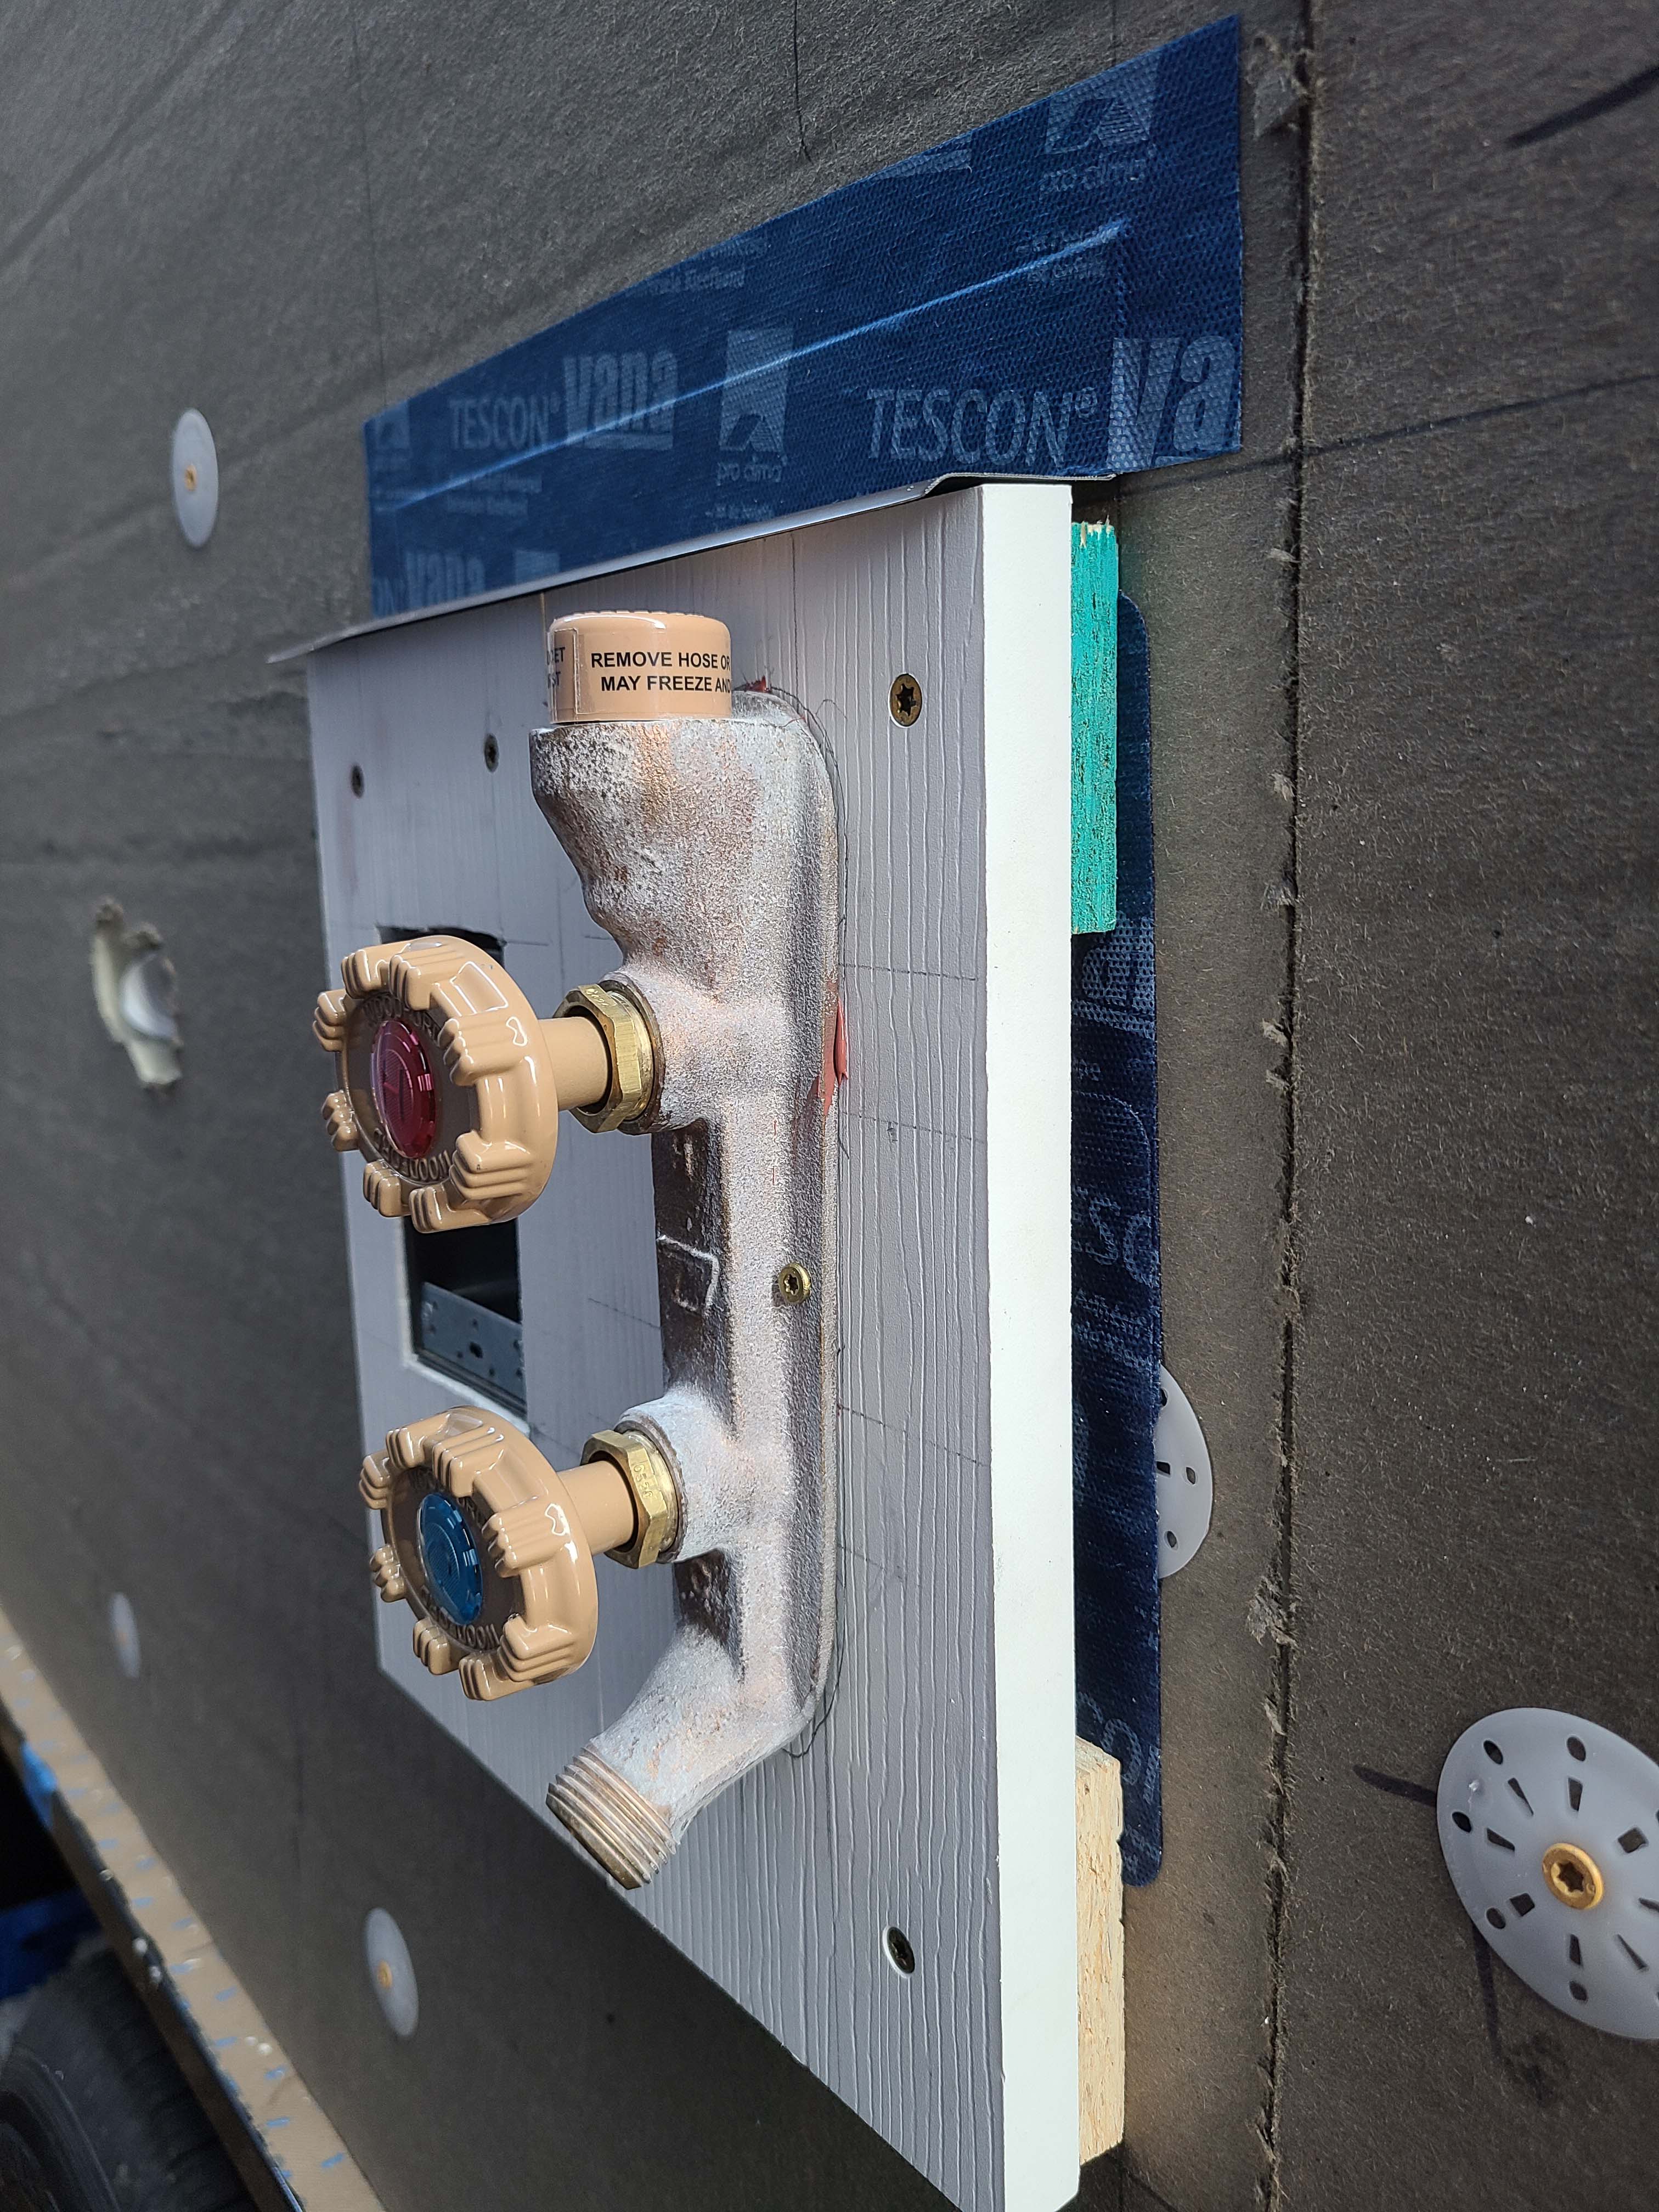
Right - Metal drip edge flashing is installed above hose bib and top of metal flashing is taped to wall.
Image
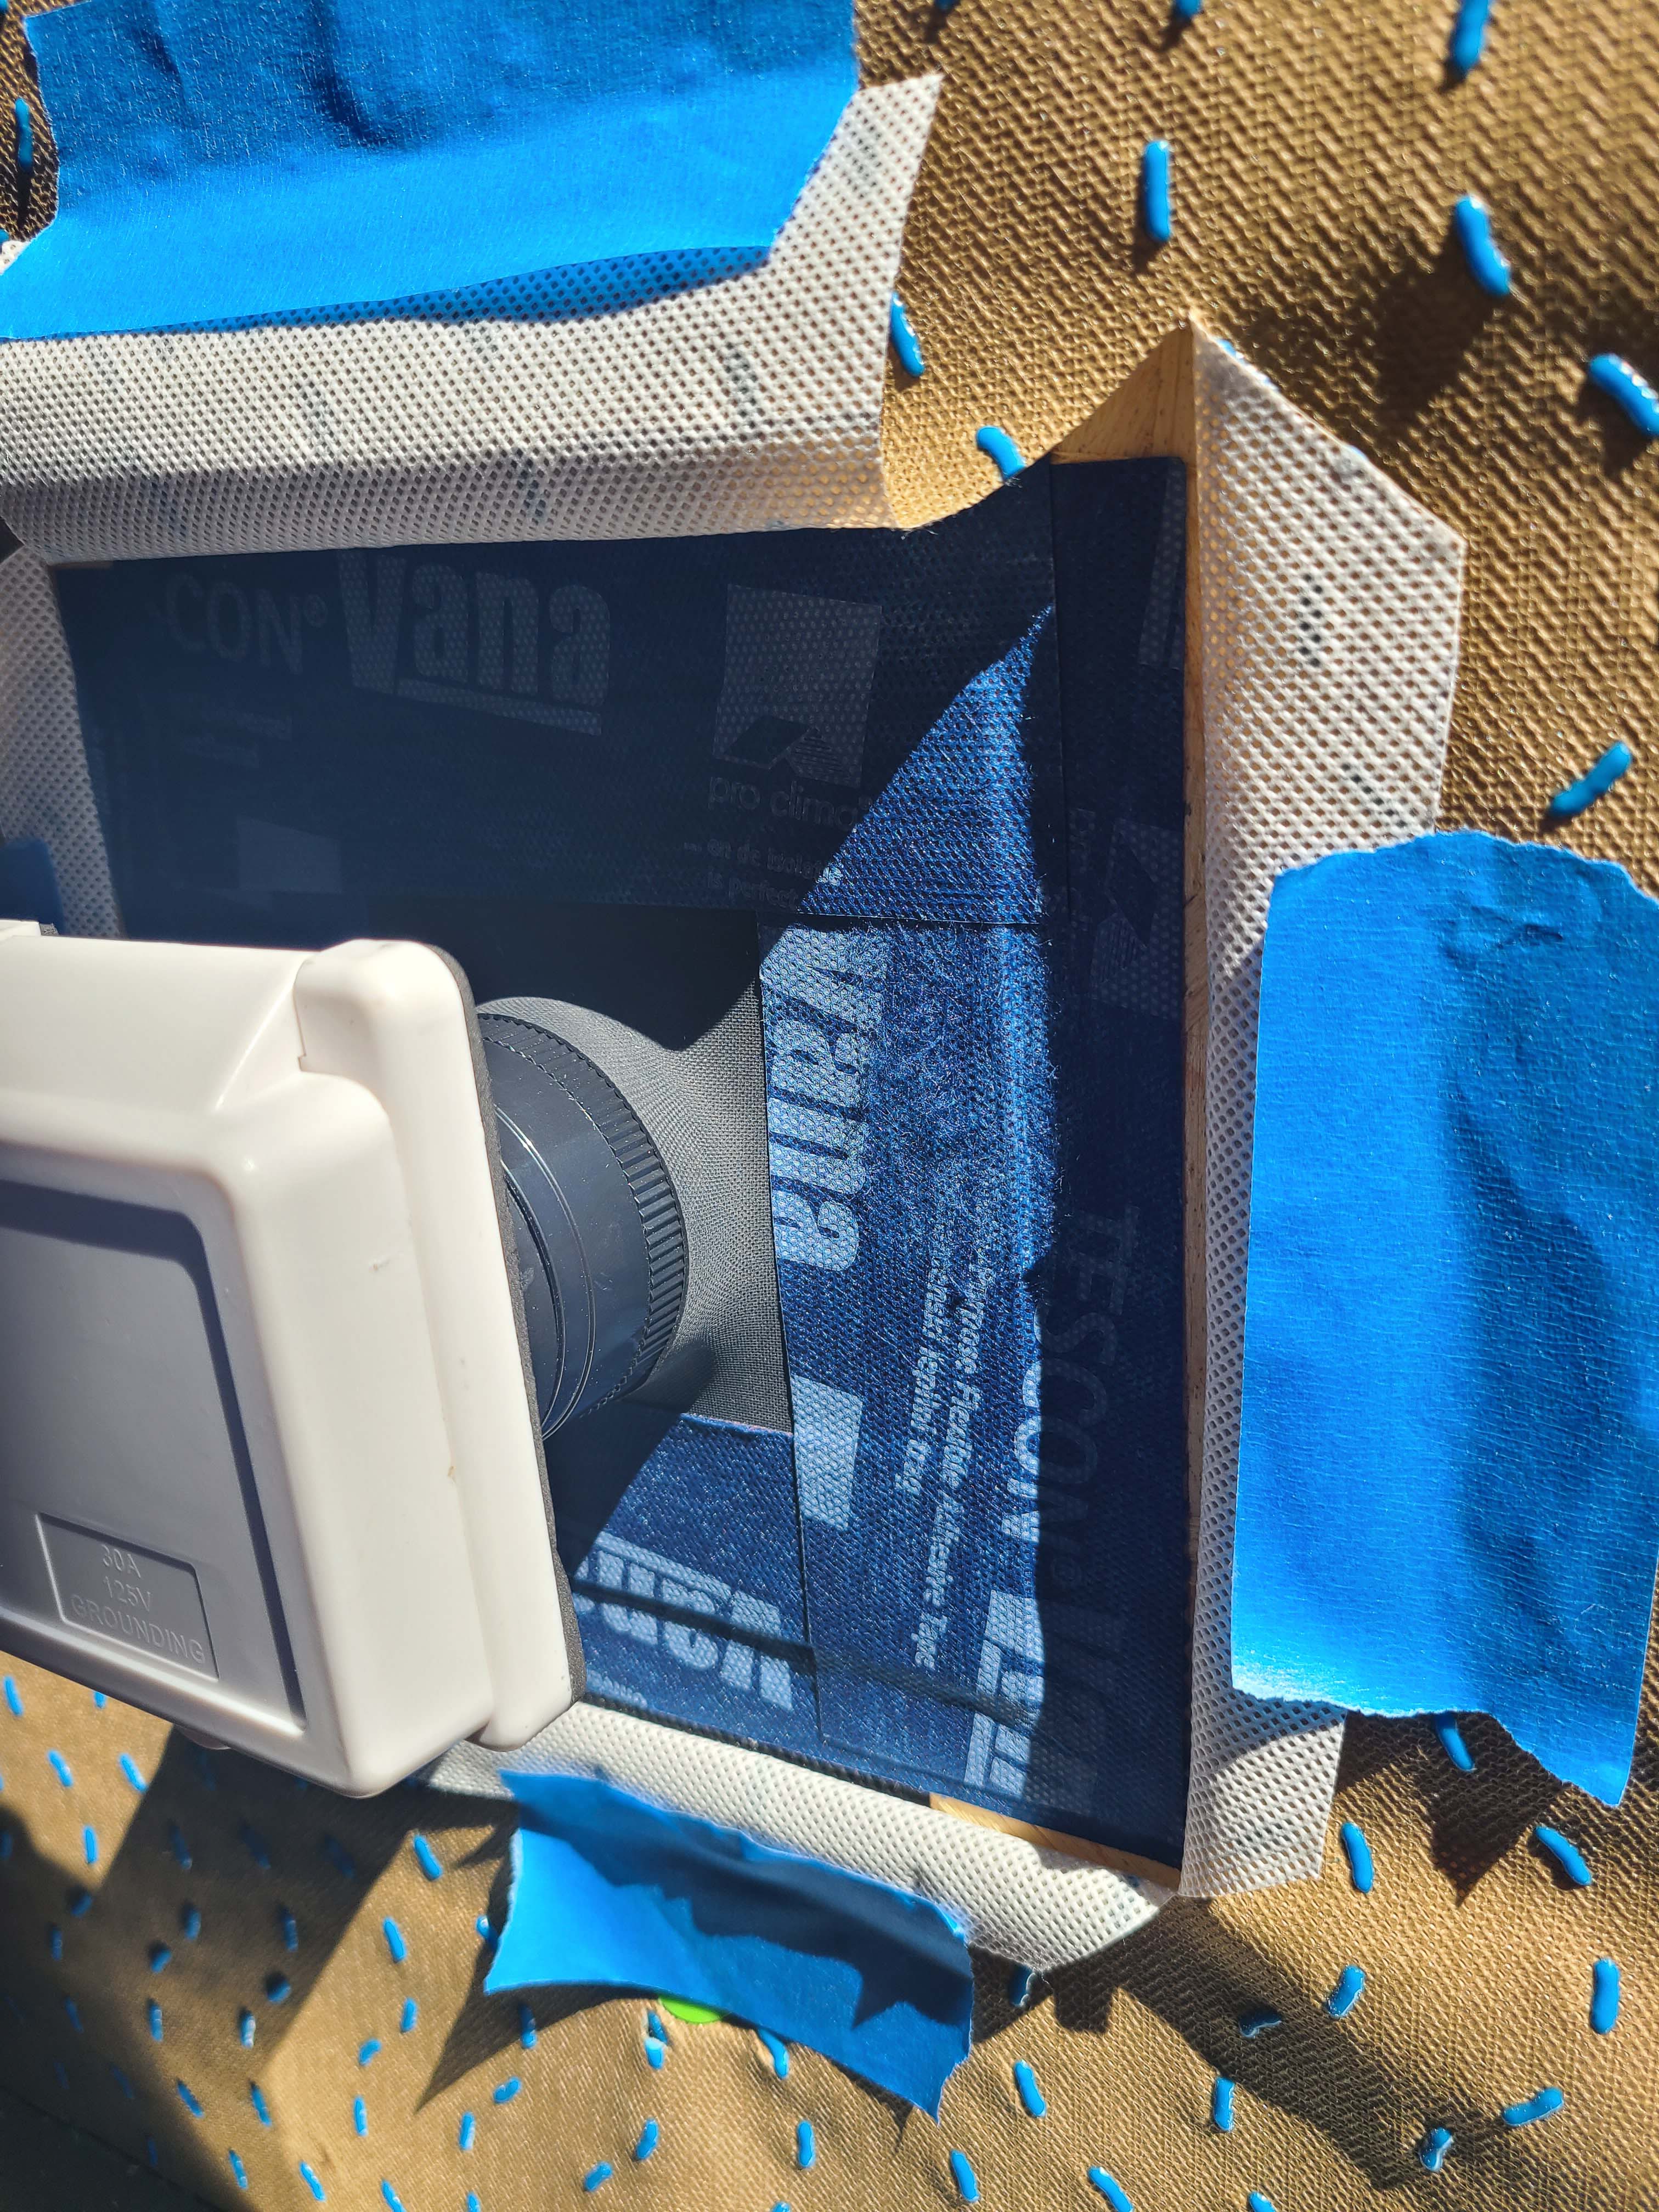
Right - Painter's tape is used to hold back house wrap while flashing layers are completed around the electric outlet.
Image

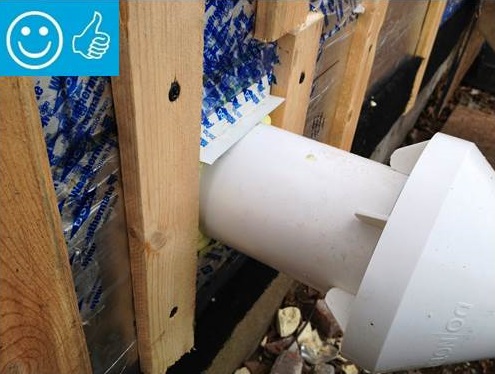
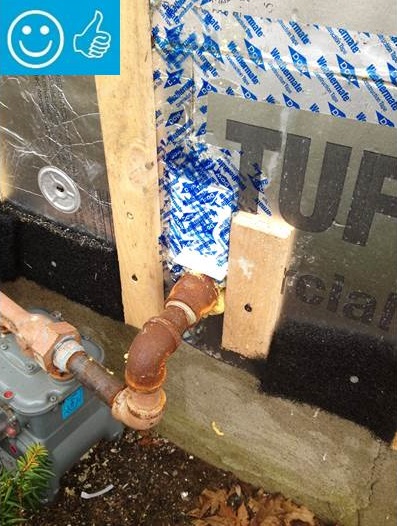
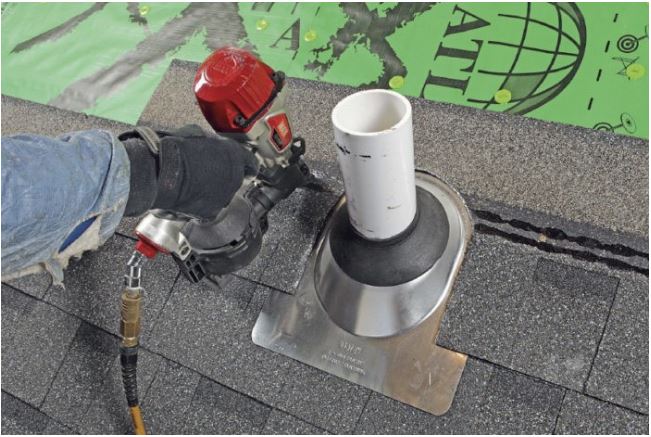
Right - Peel and stick flashing and flashing tape seal a plumbing pipe that penetrates an exterior wall.
Image

Right - Permeable rigid mineral wool insulation and appropriate water-management flashing details are integrated with new rigid foam siding to keep water away from the sill beam above the foundation wall
Image
Right - Pieces of metal flashing are installed under each tile course along the valley centerline to prevent debris accumulation between and below concrete roof tiles.
Image
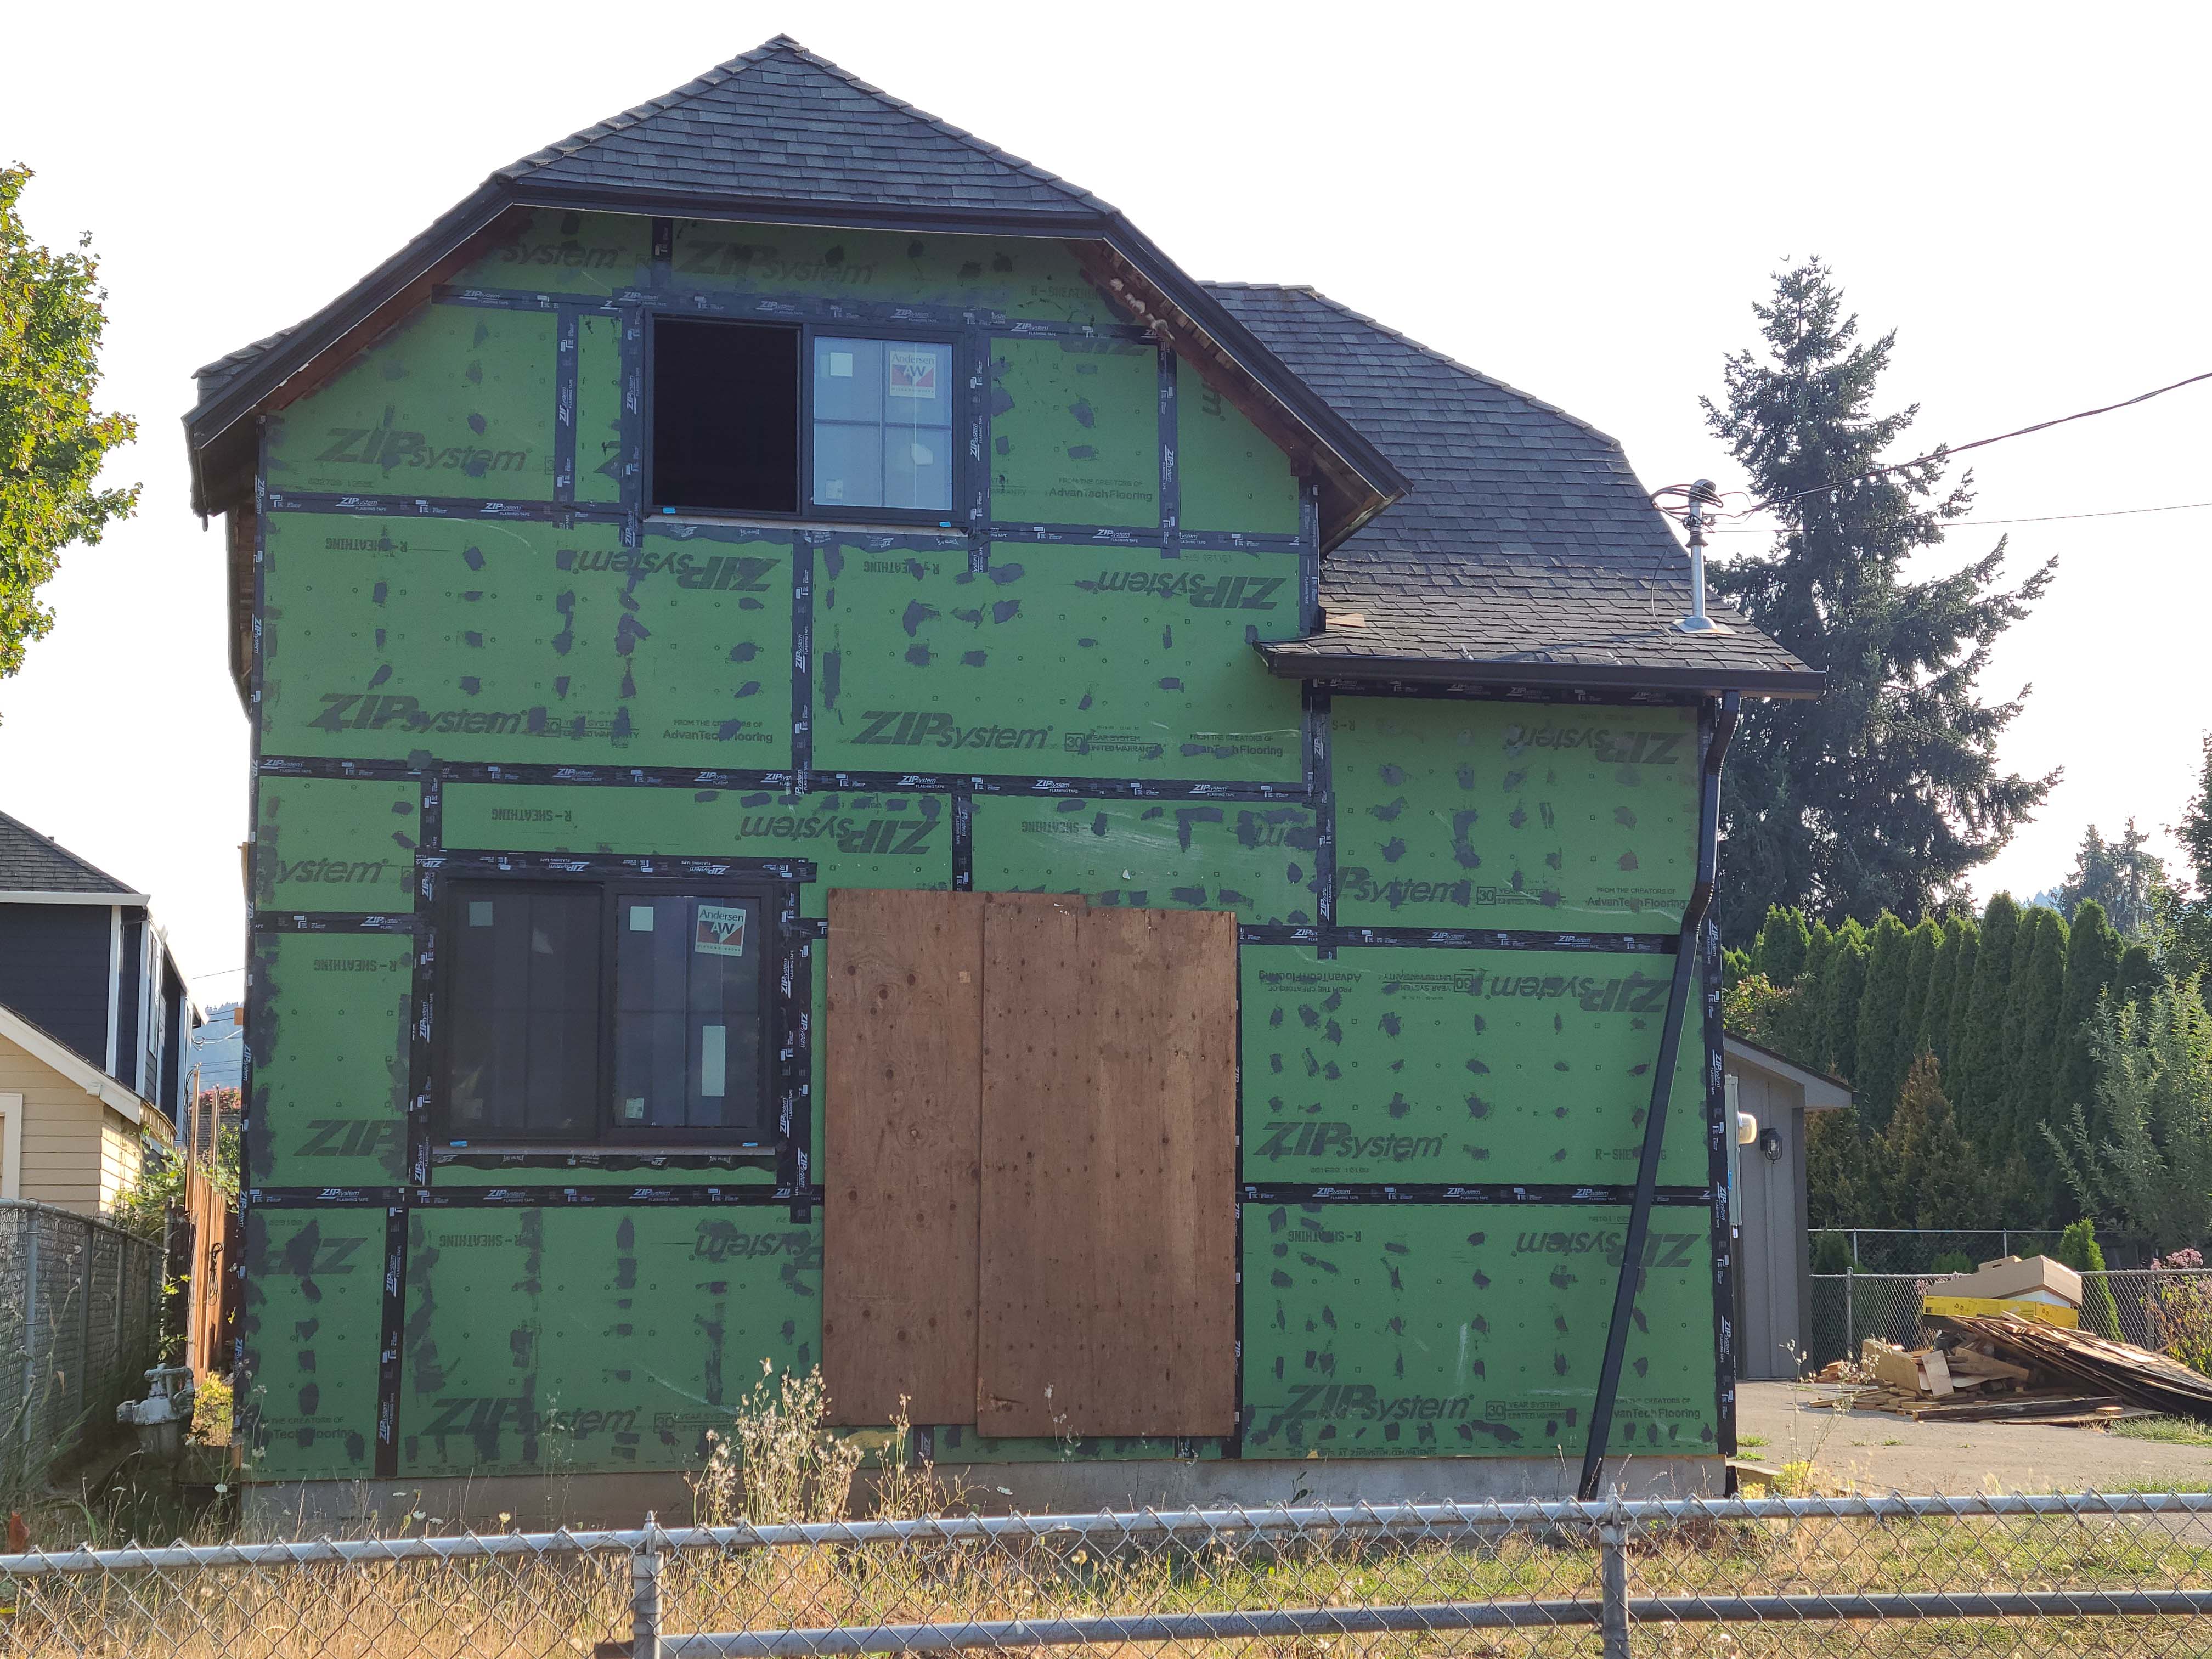
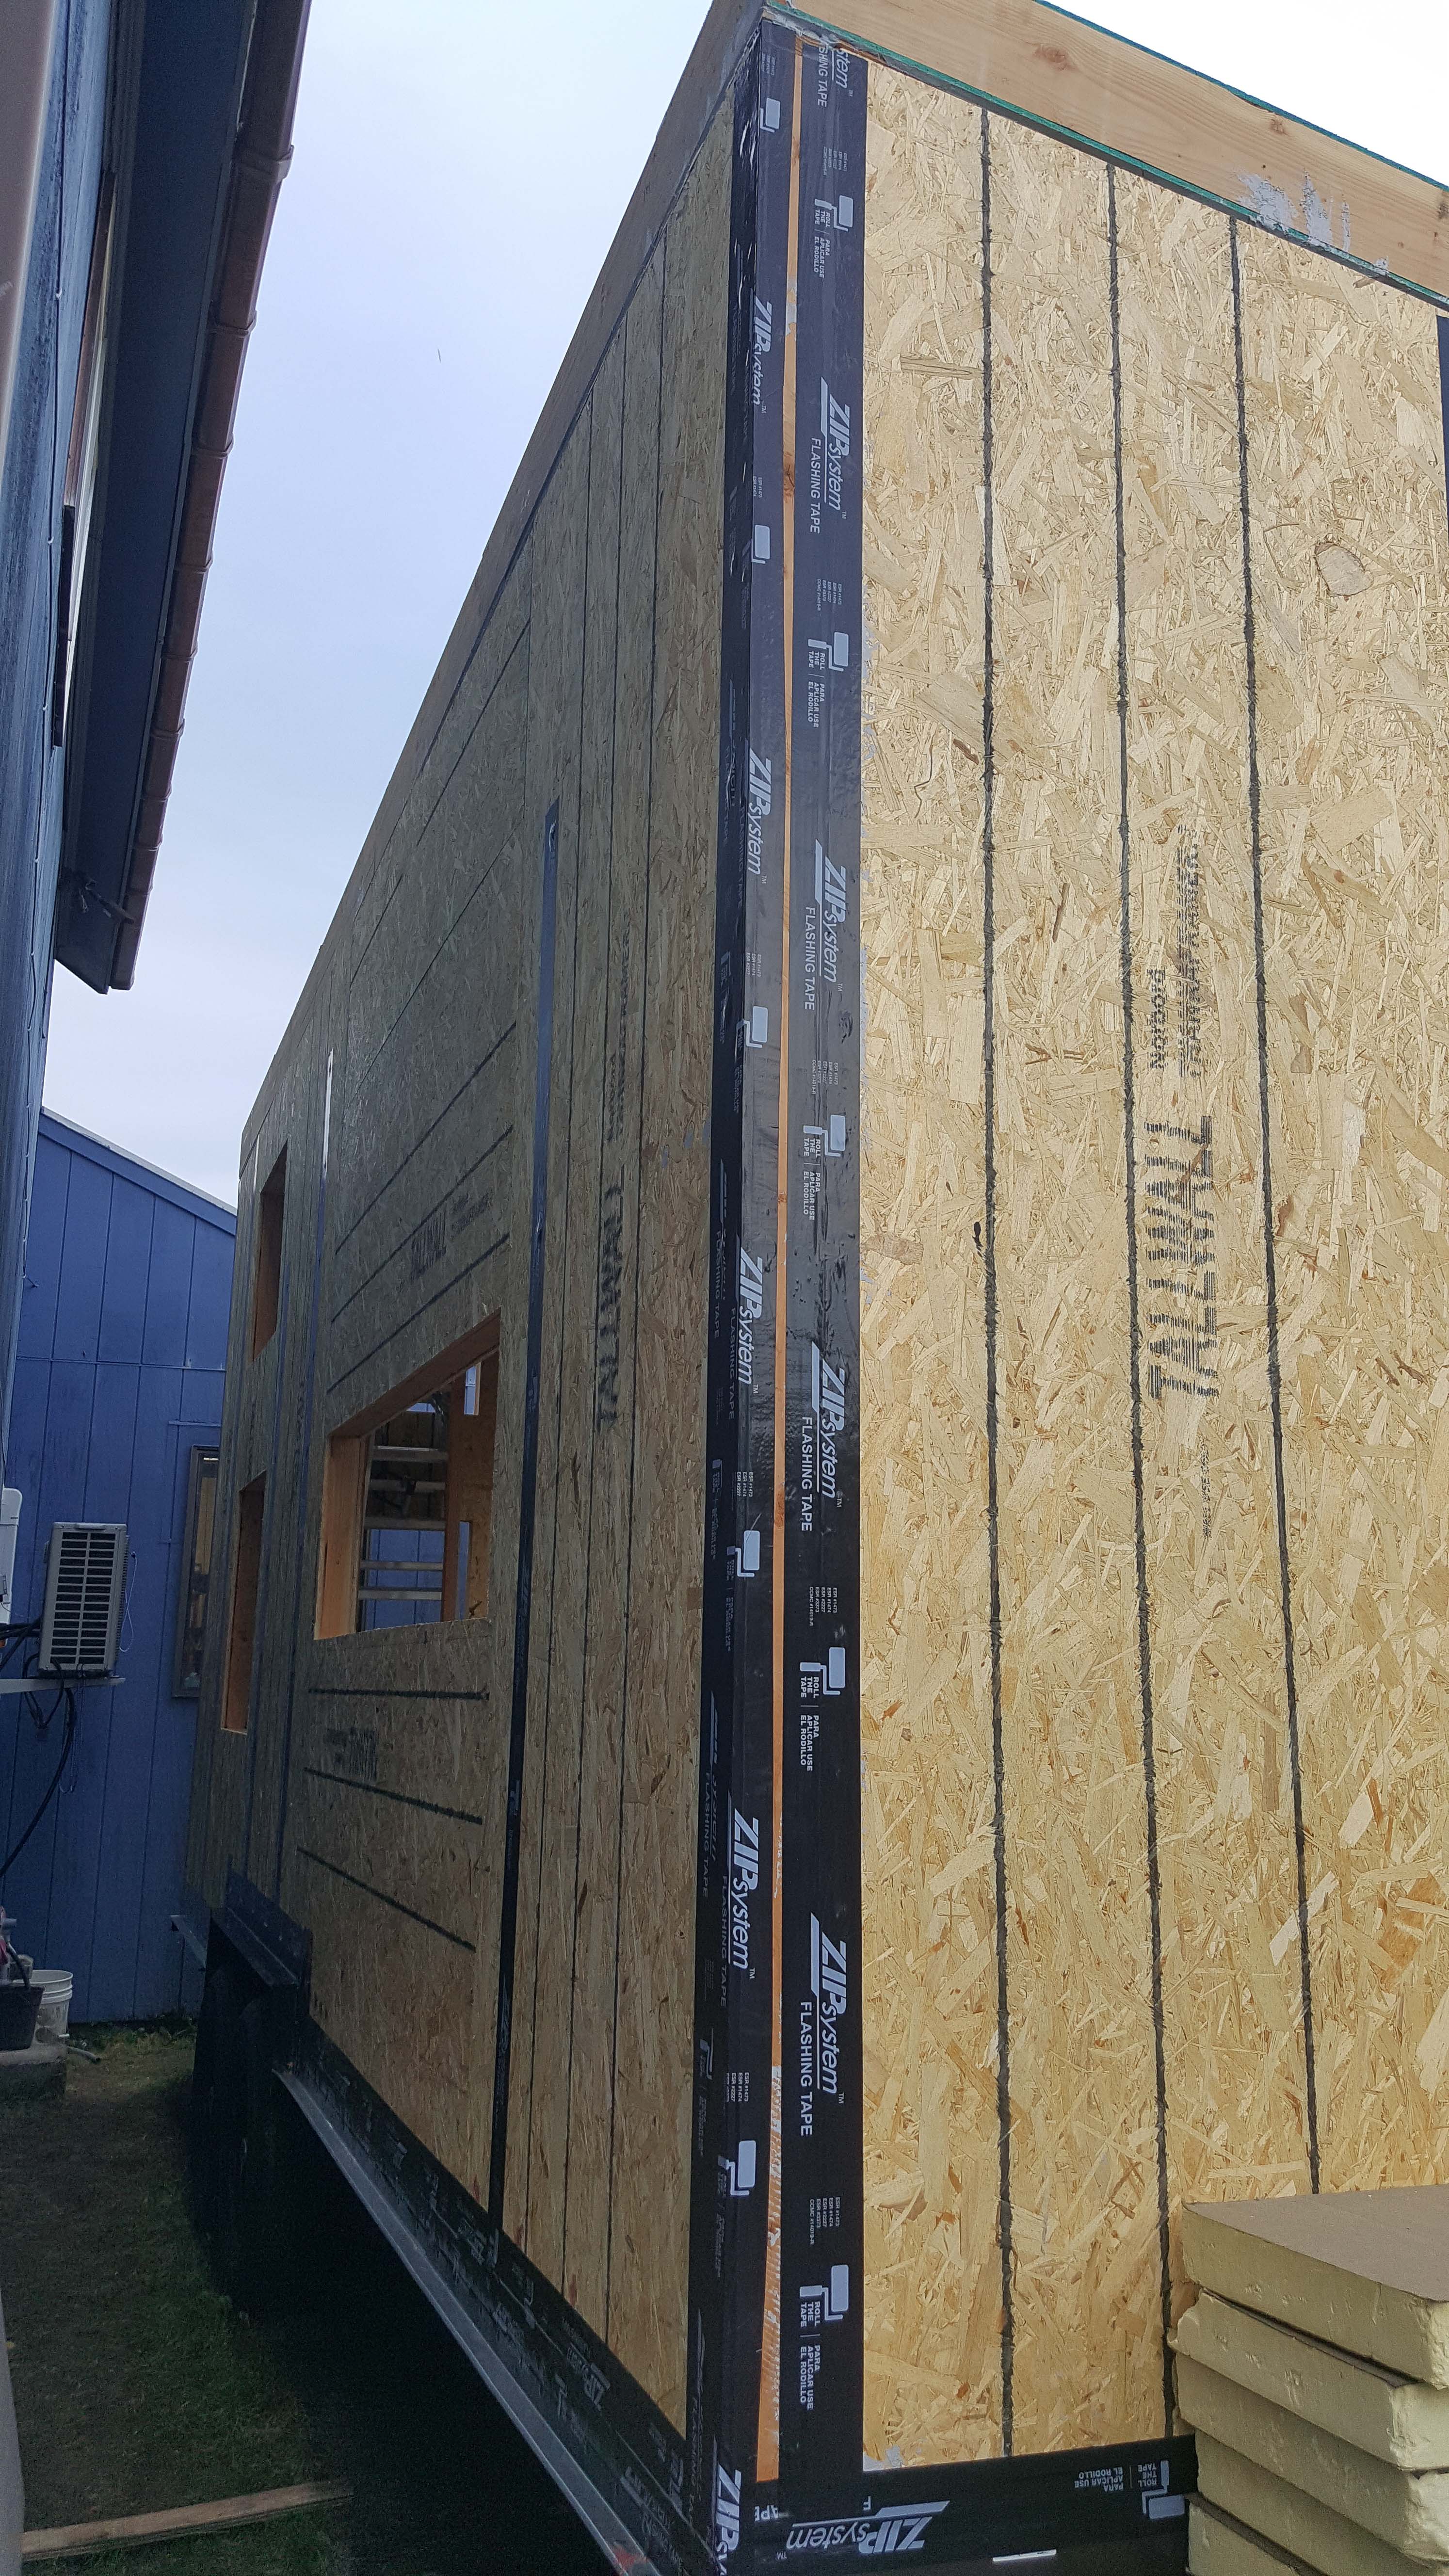
Right - Seams in coated sheathing and joints around window are properly sealed and flashed with tape and all nail holes are covered with paint-on sealant.
Image
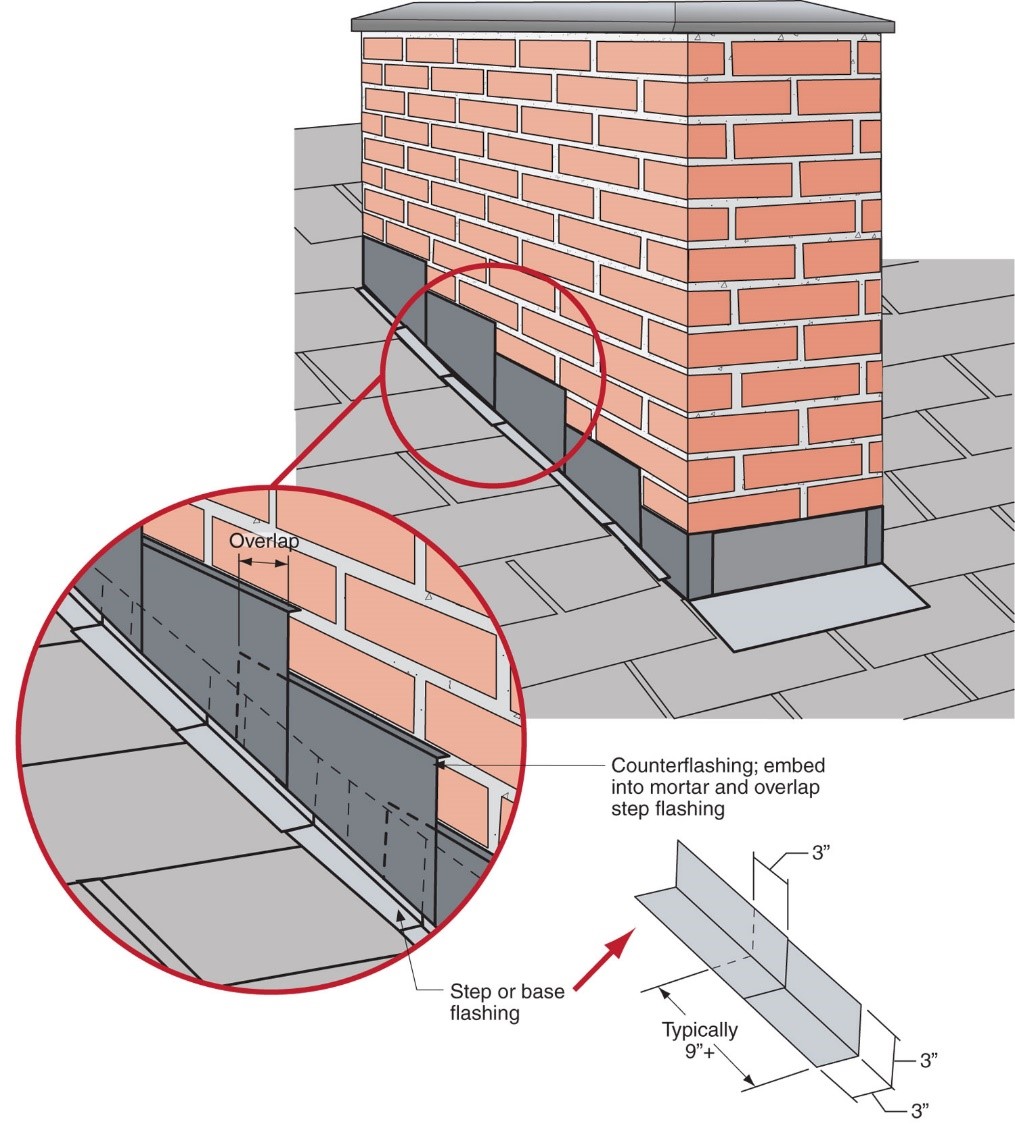
Right - Step flashing along a chimney is integrated in a layered manner with asphalt shingle roofing and topped with counterflashing that is embedded into brick mortar joint above
Image
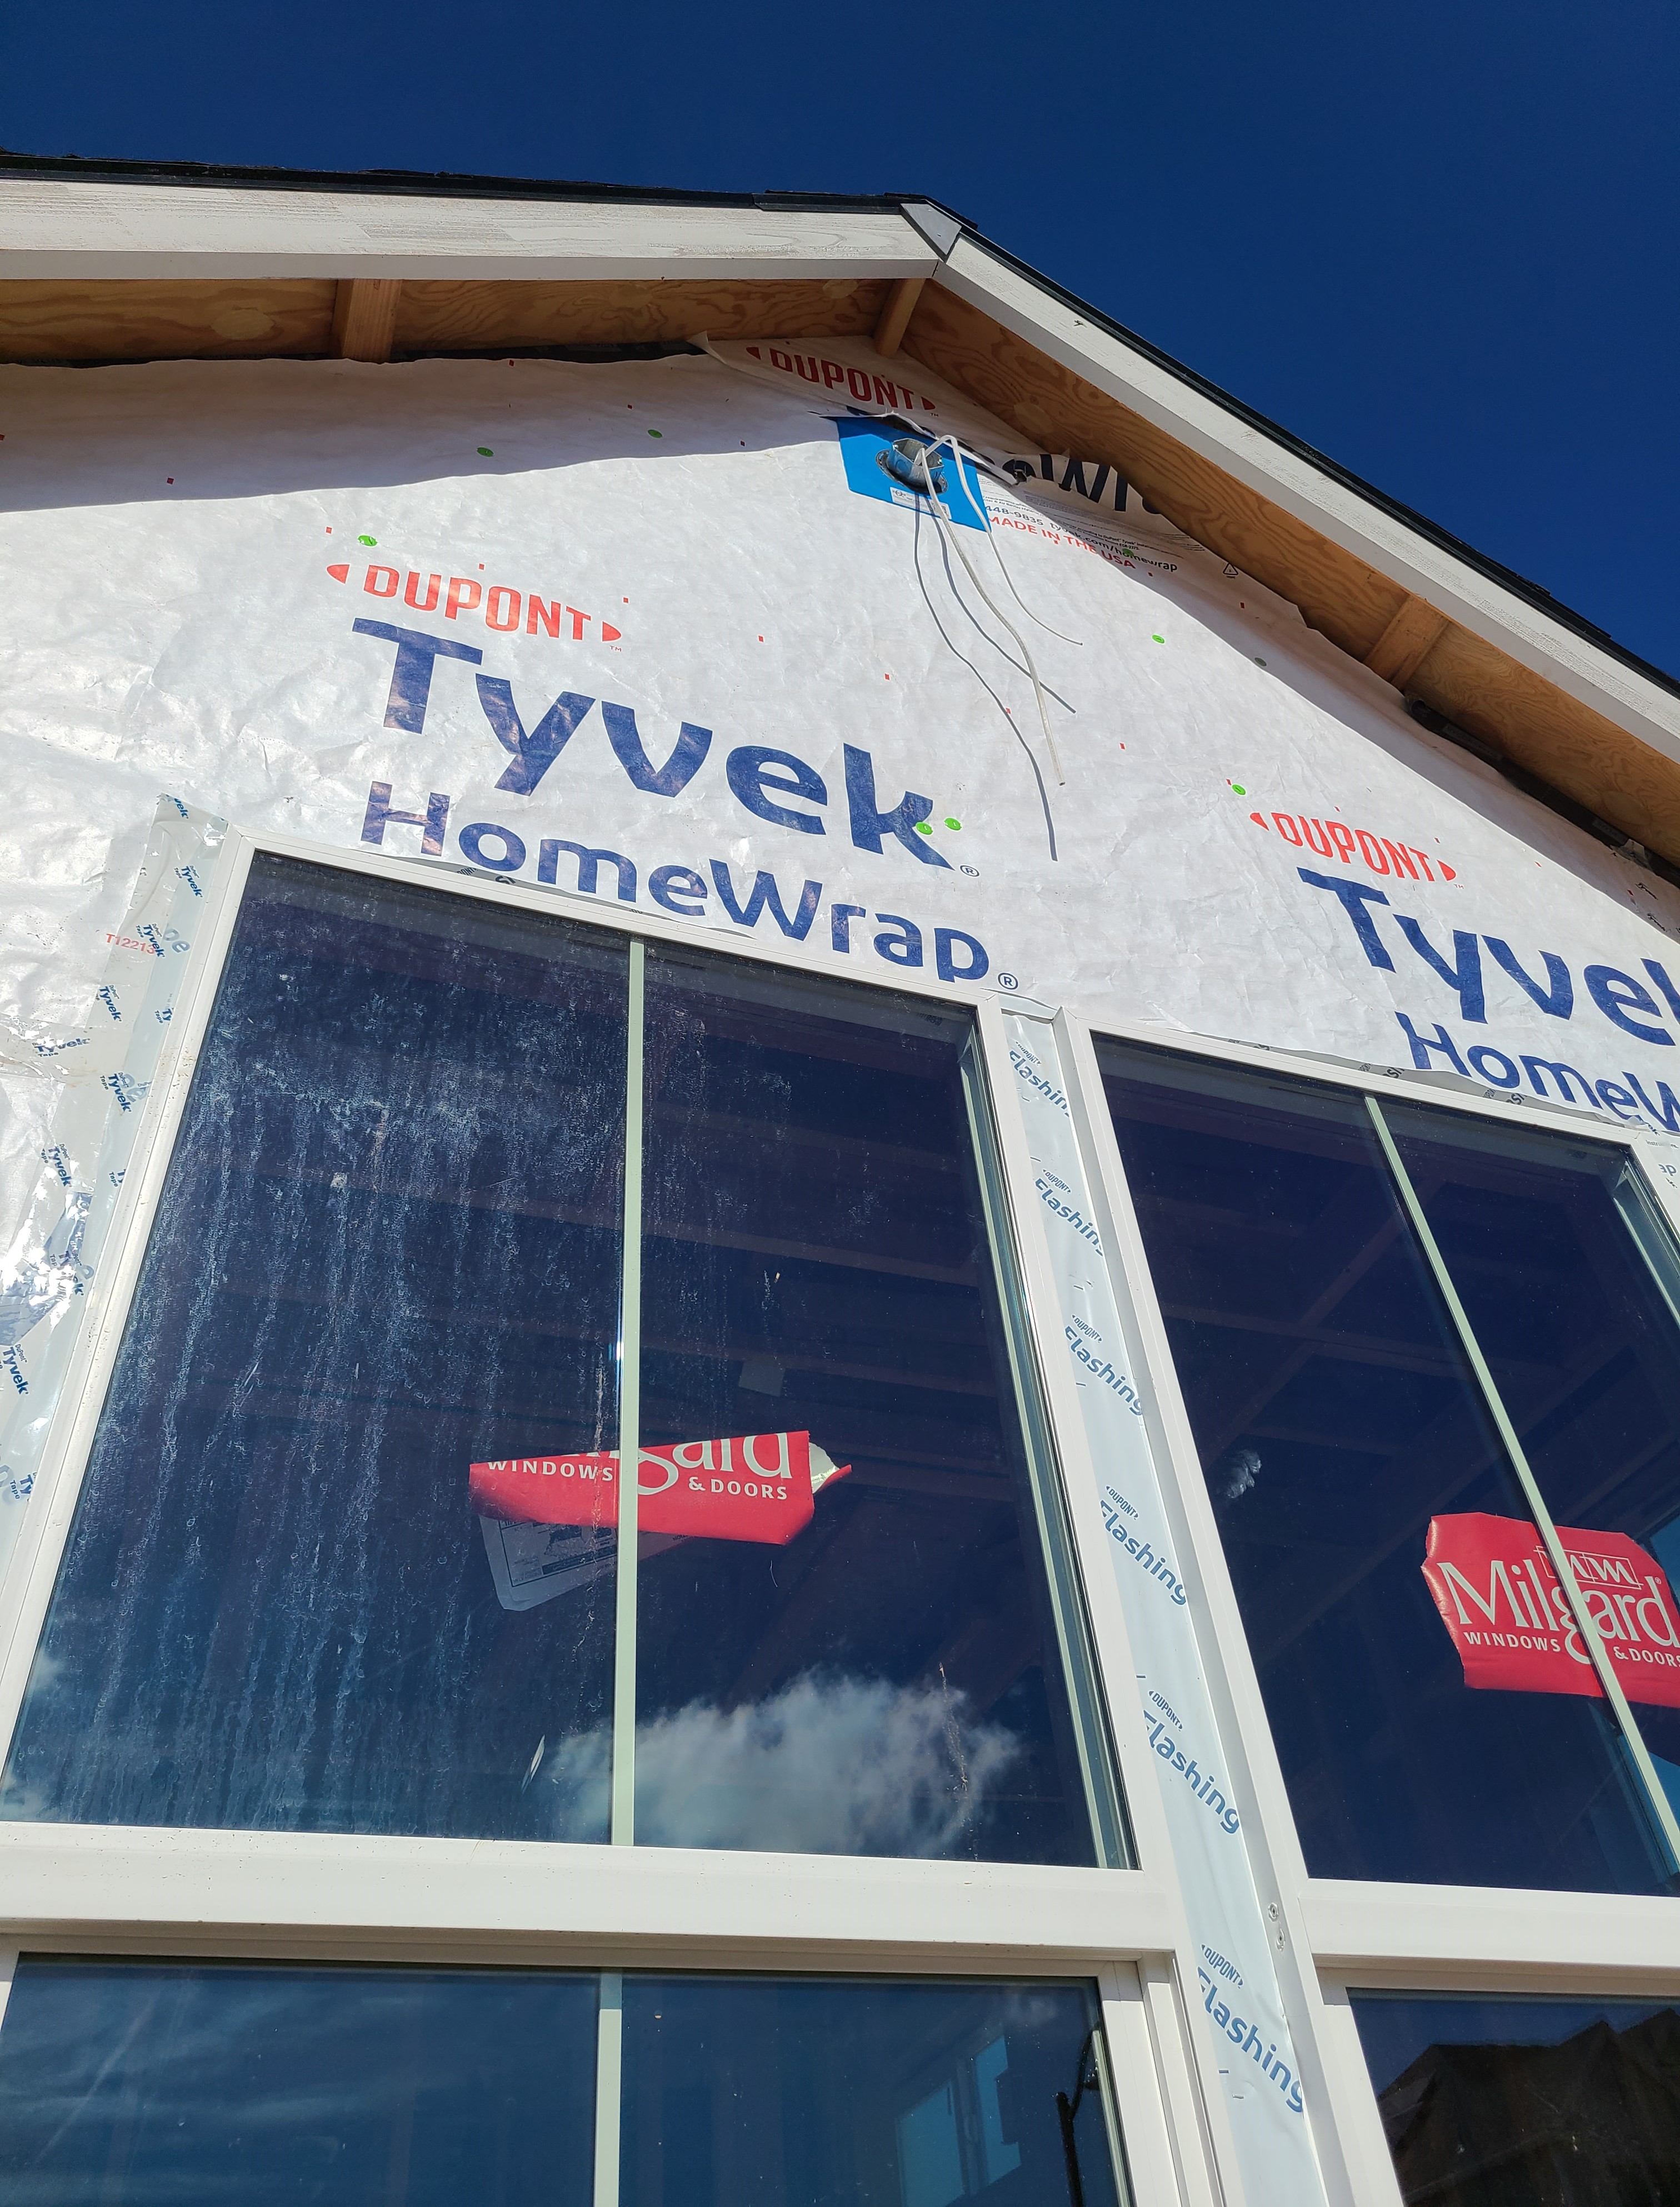
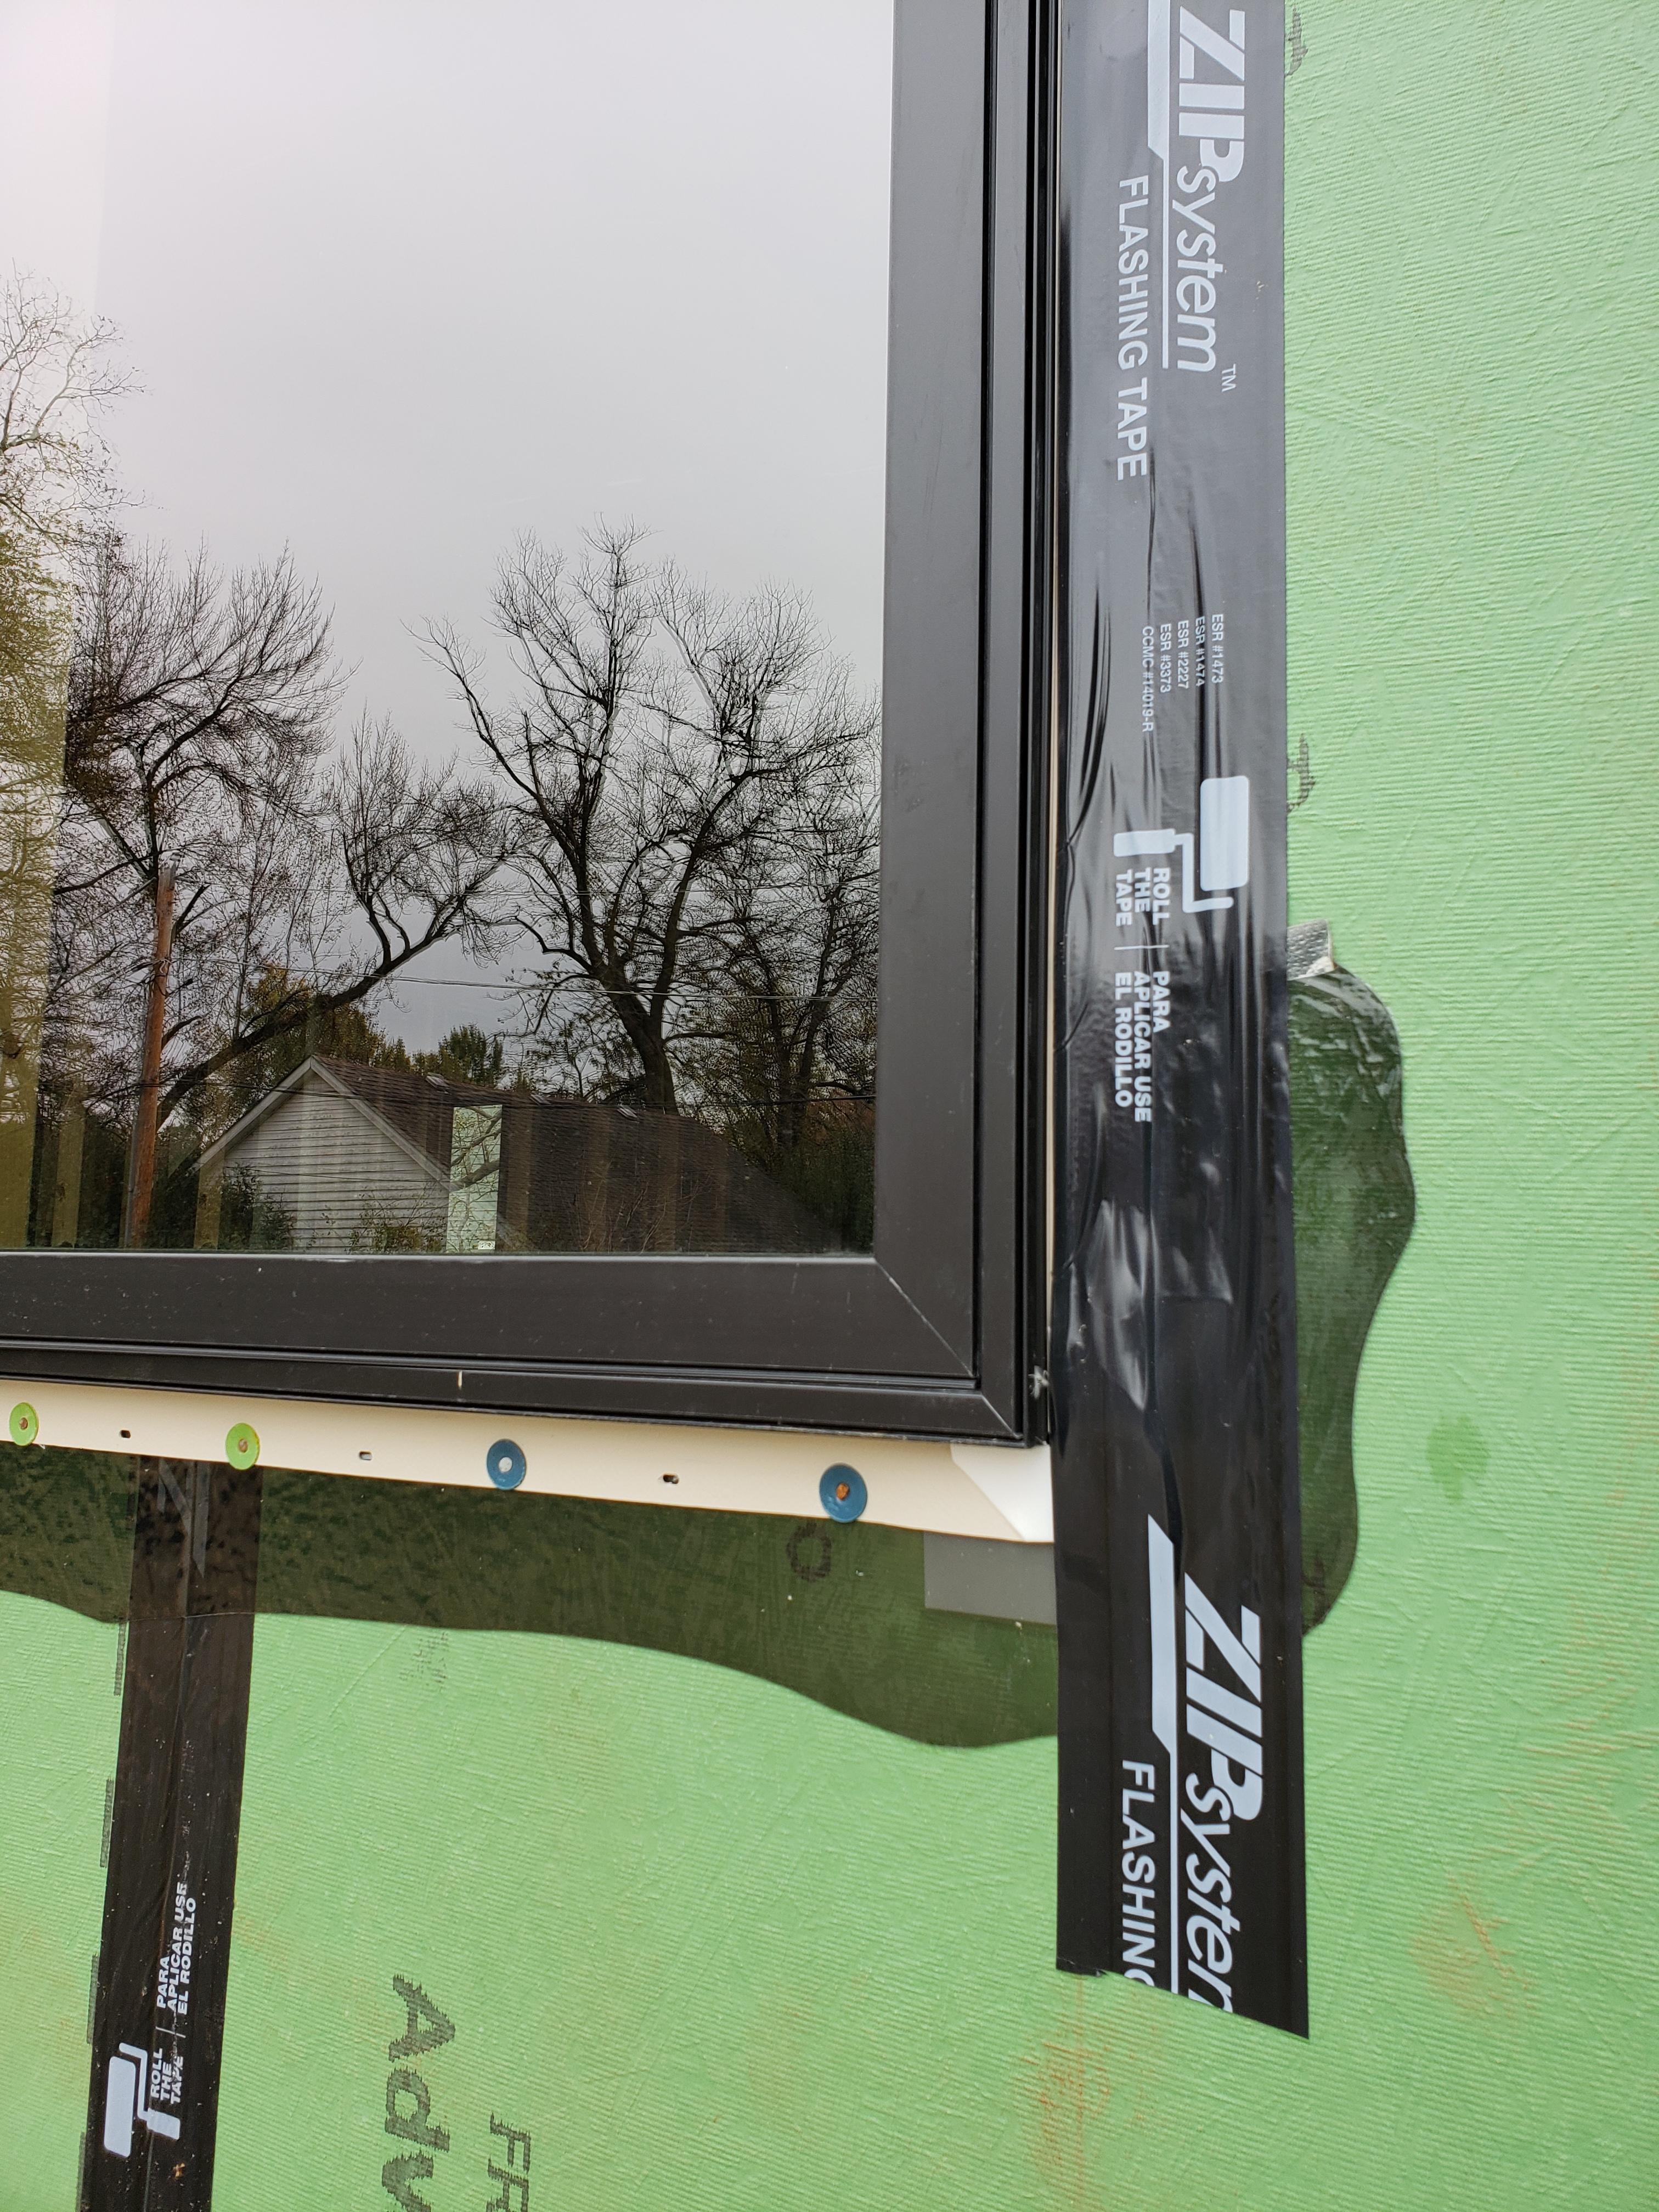
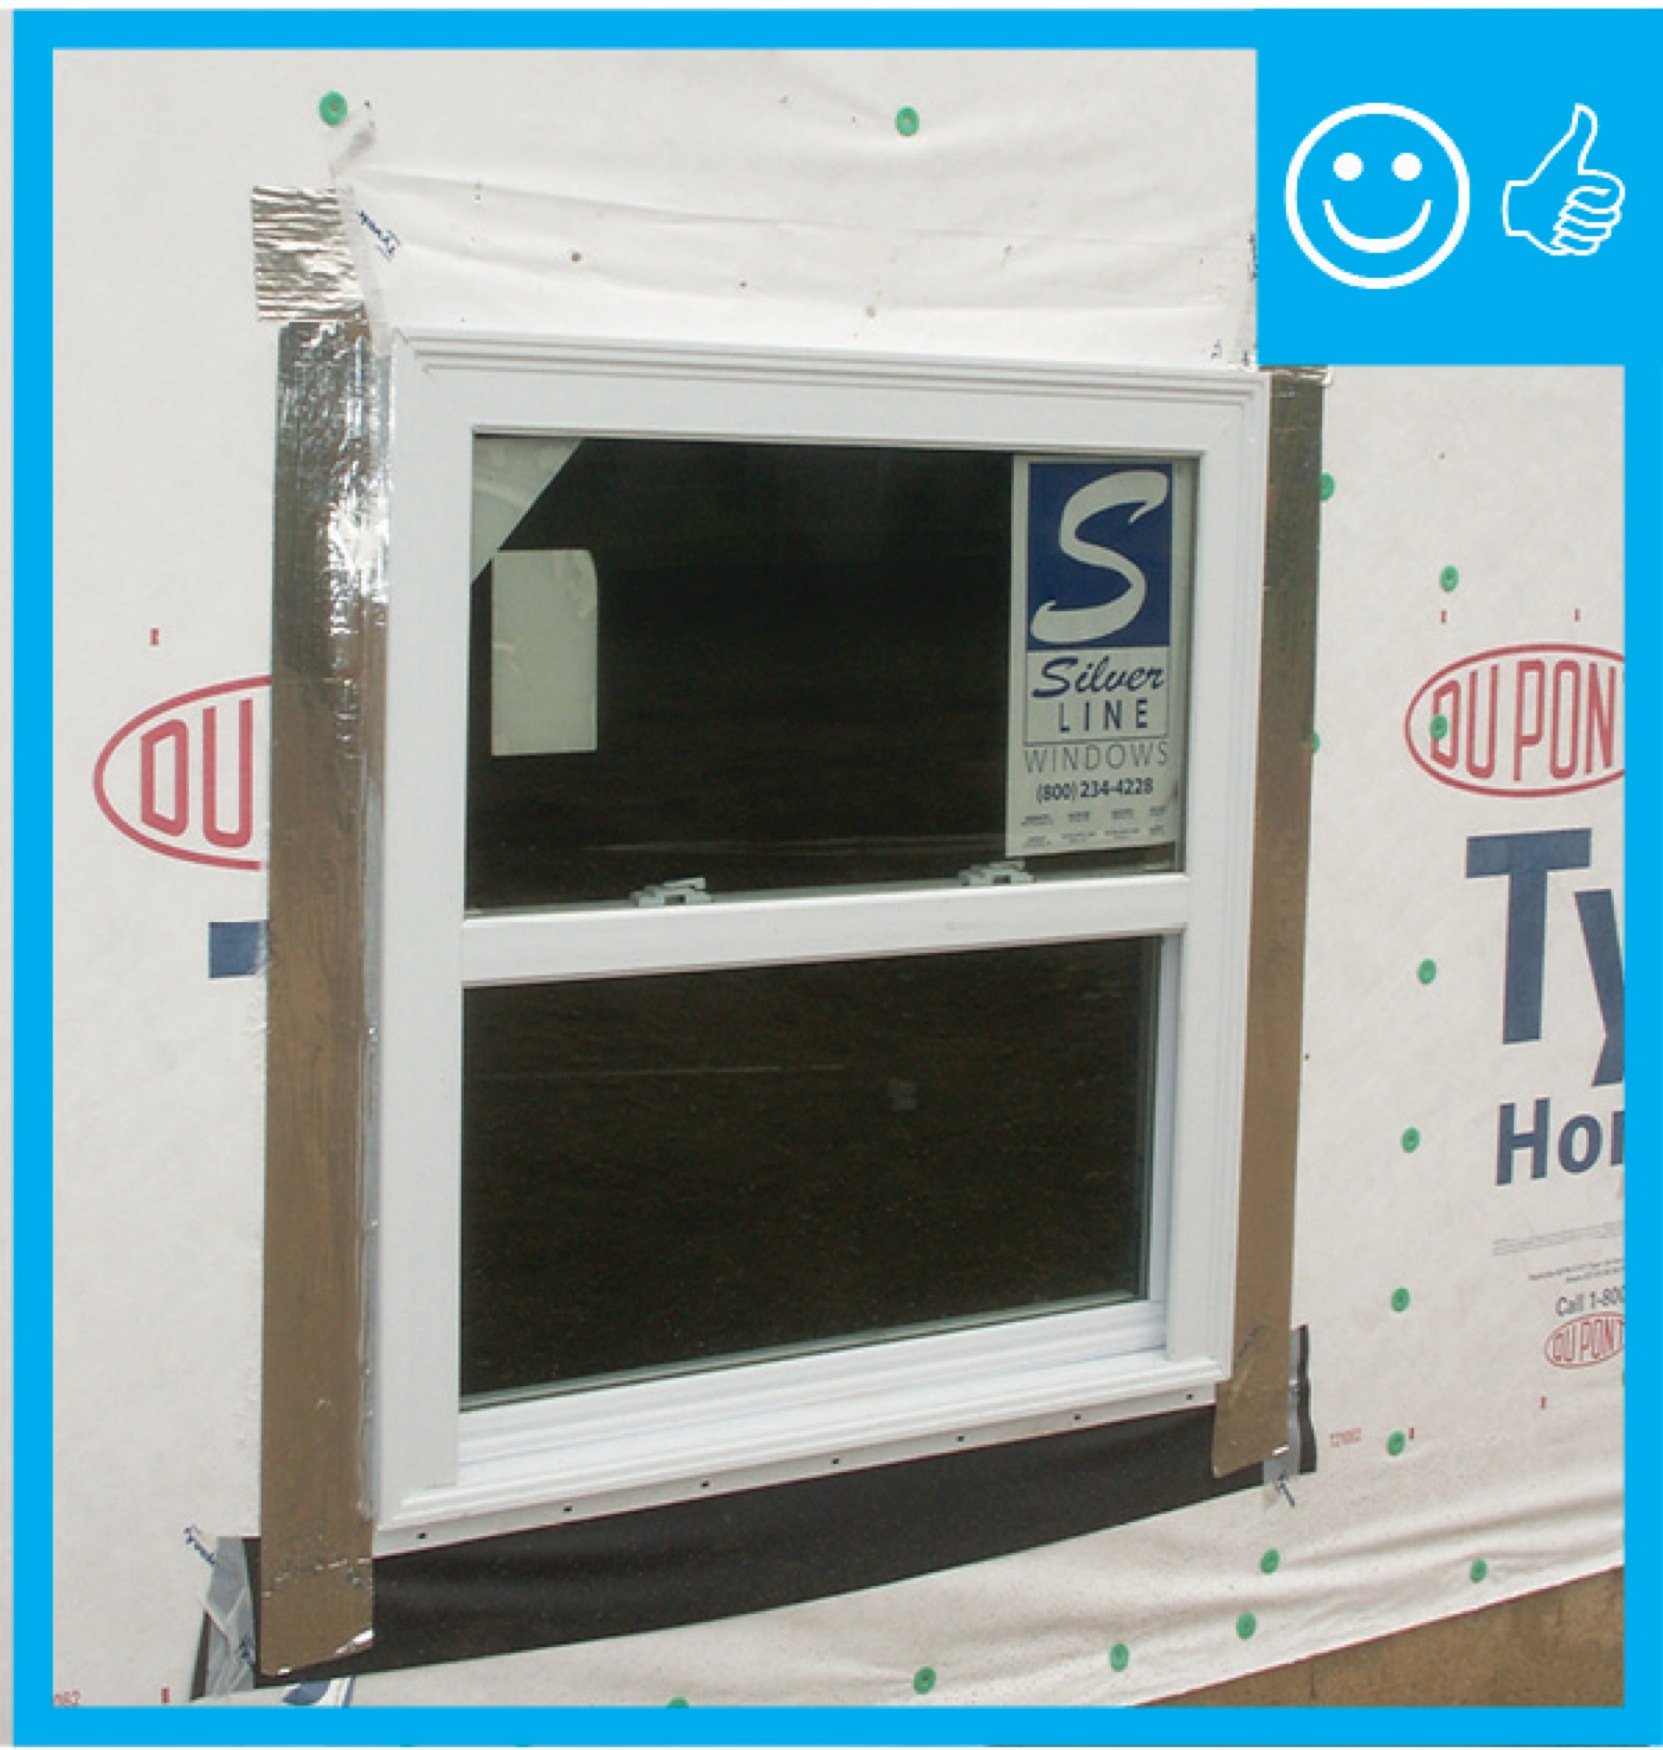
Right - Tape flashing keeps moisture out around and below the window; extra tape reinforces the corners to prevent tearing of the house wrap and to keep water out of this critical juncture.
Image
Right - The duct shows redundant sealing including the caulk, tape, and flashing
Image
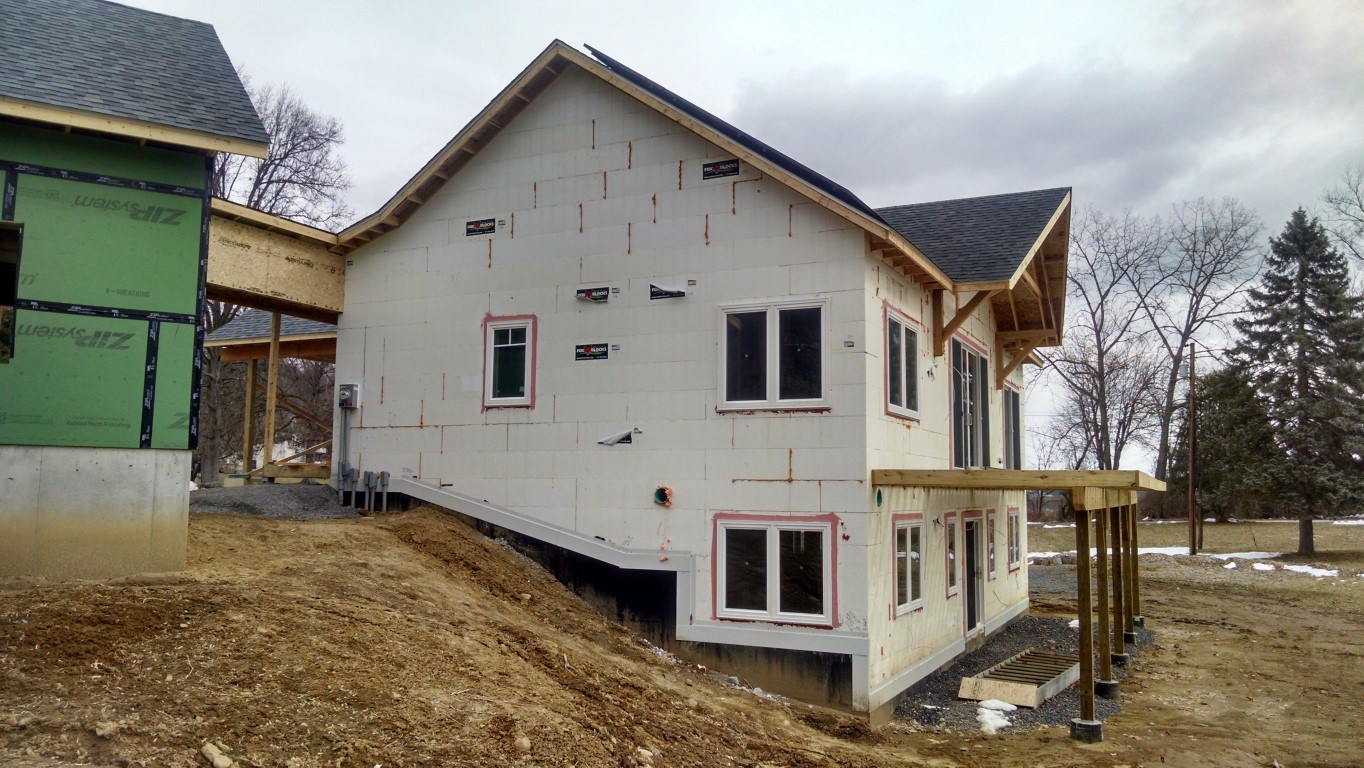
Right - The house wrap is properly flashed and taped, and all penetrations are properly flashed.
Image
Right - The pipe penetration is properly flashed and furring strips are installed on each side in preparation for installing cladding
Image
Image
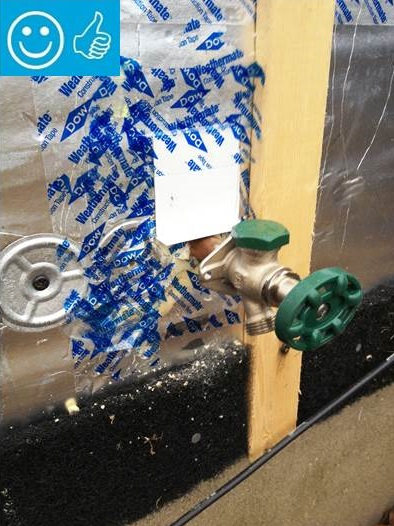
Right - The water and air control layers are properly integrated around the hose bib
Image

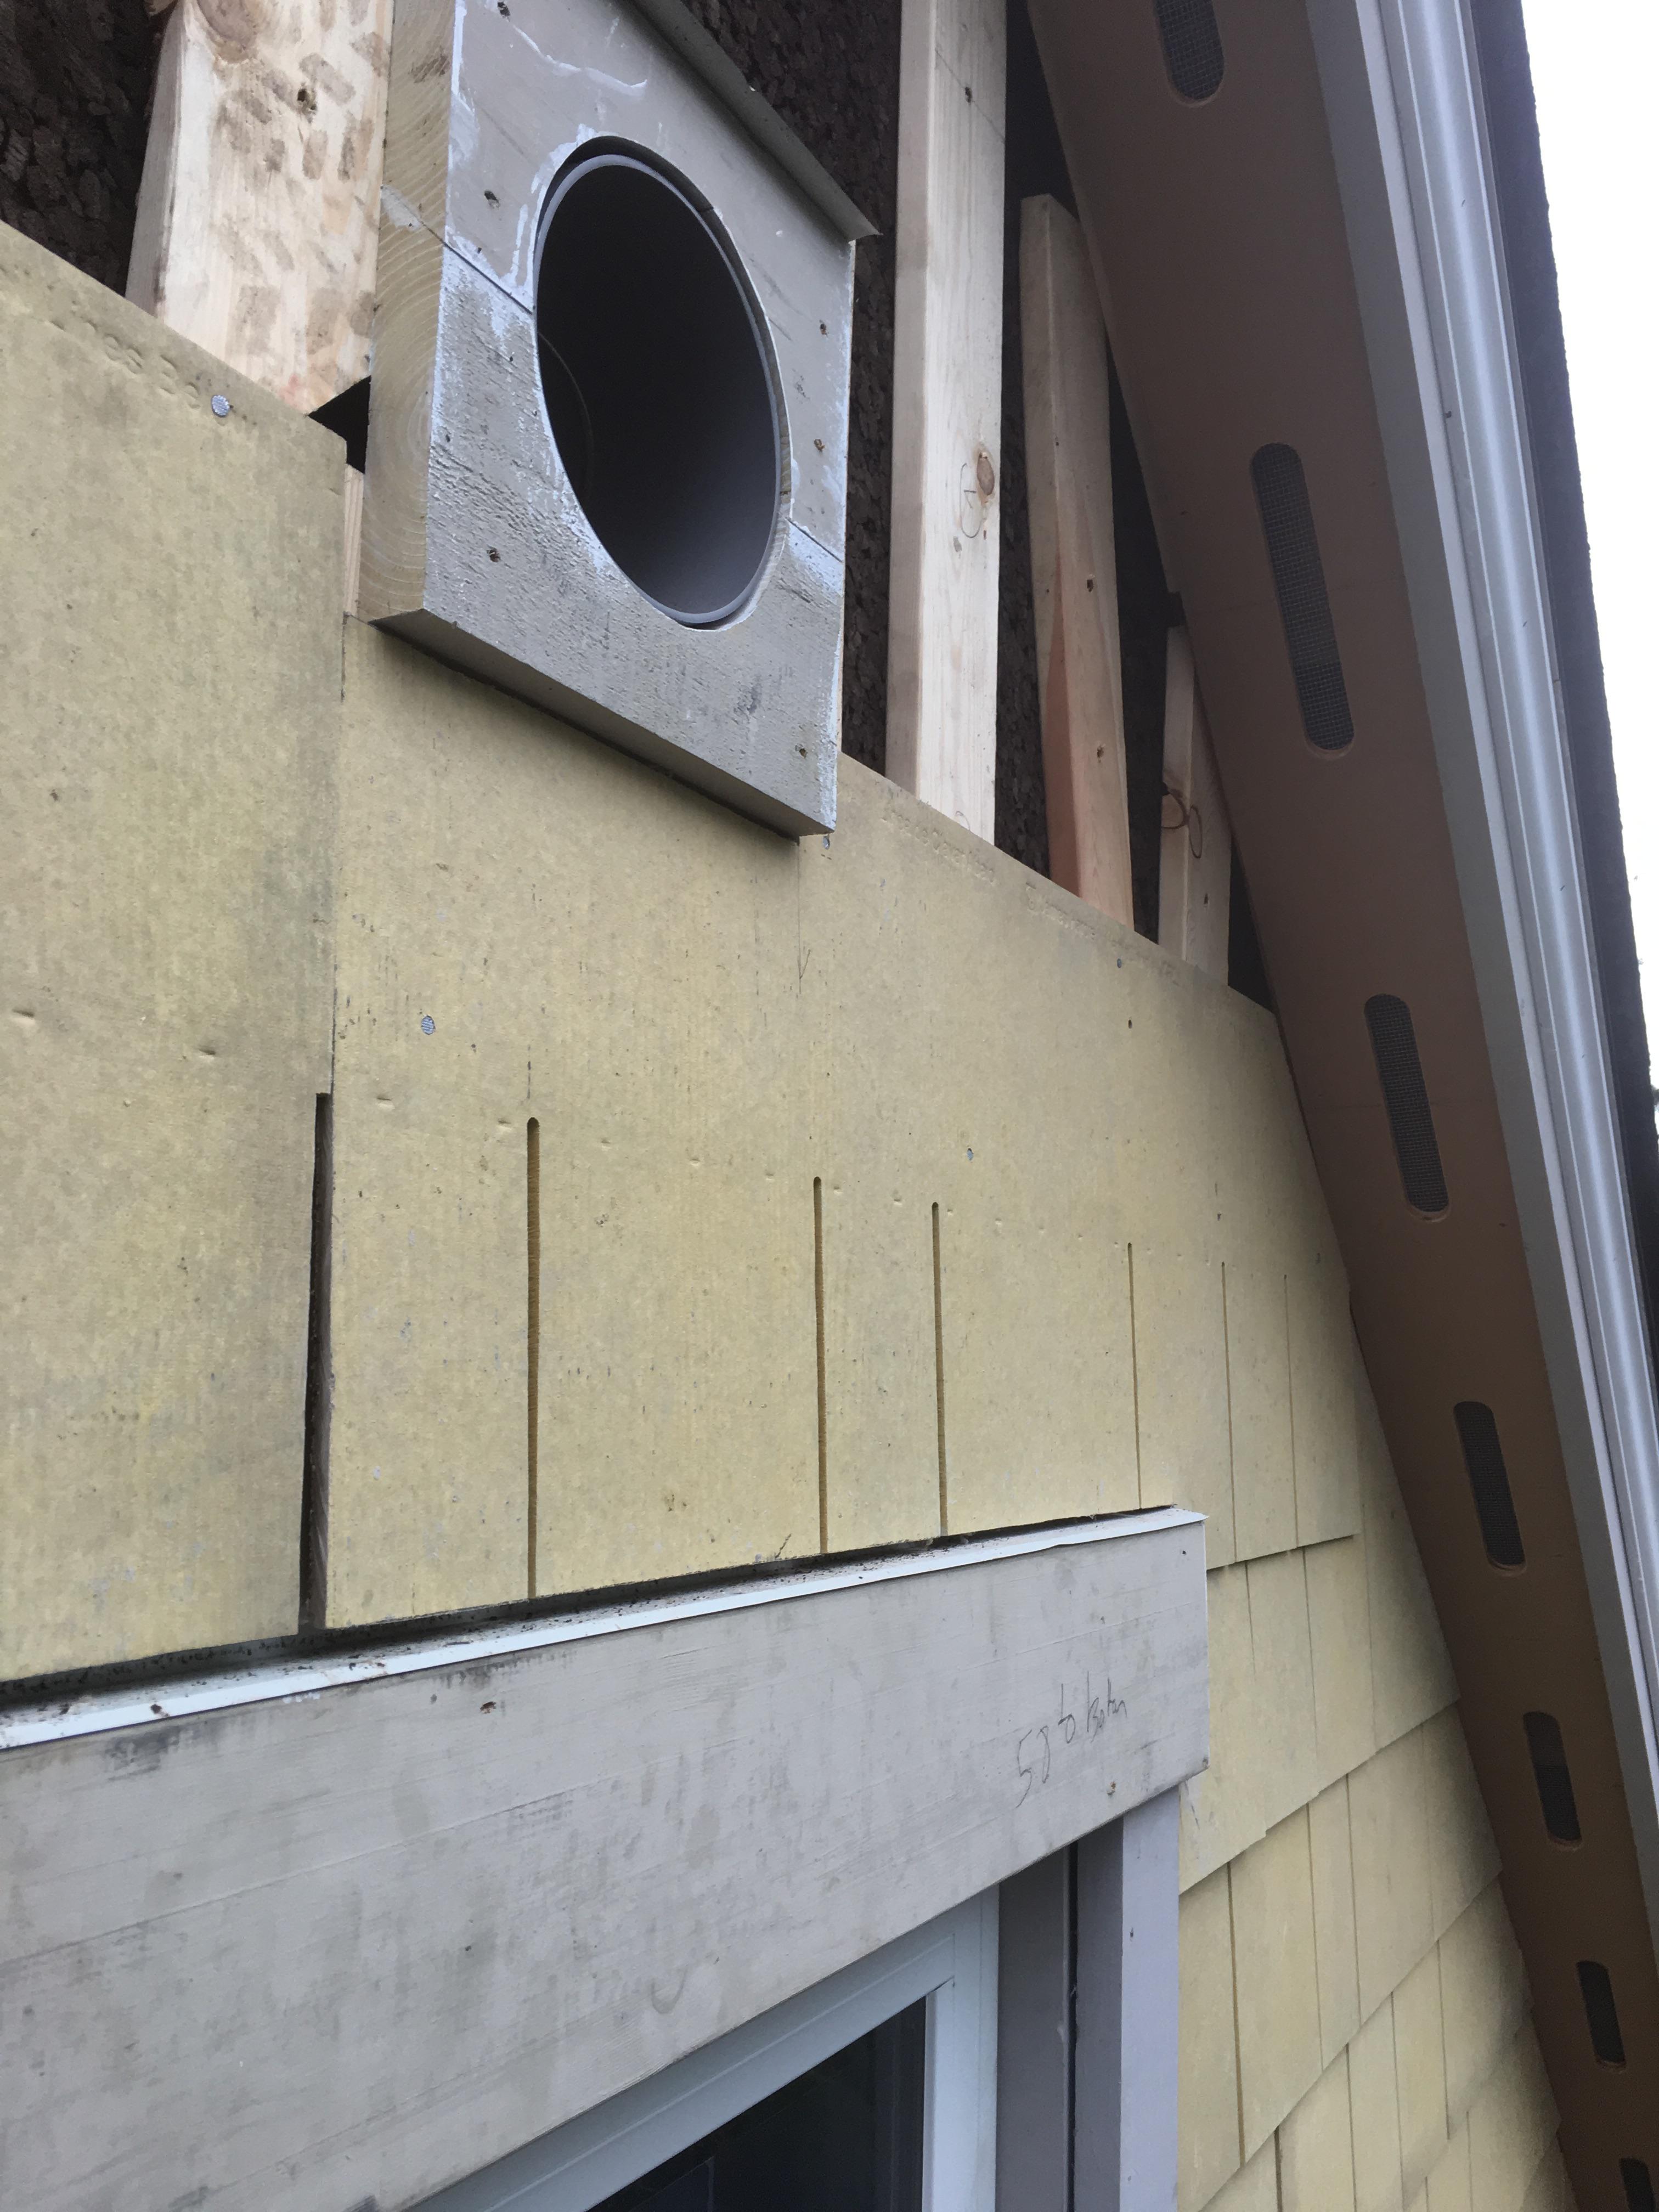
Right - This duct penetration is properly flashed and integrated with the taped, foil-faced foam sheathing layer, which serves as the air and water barrier
Image
Image
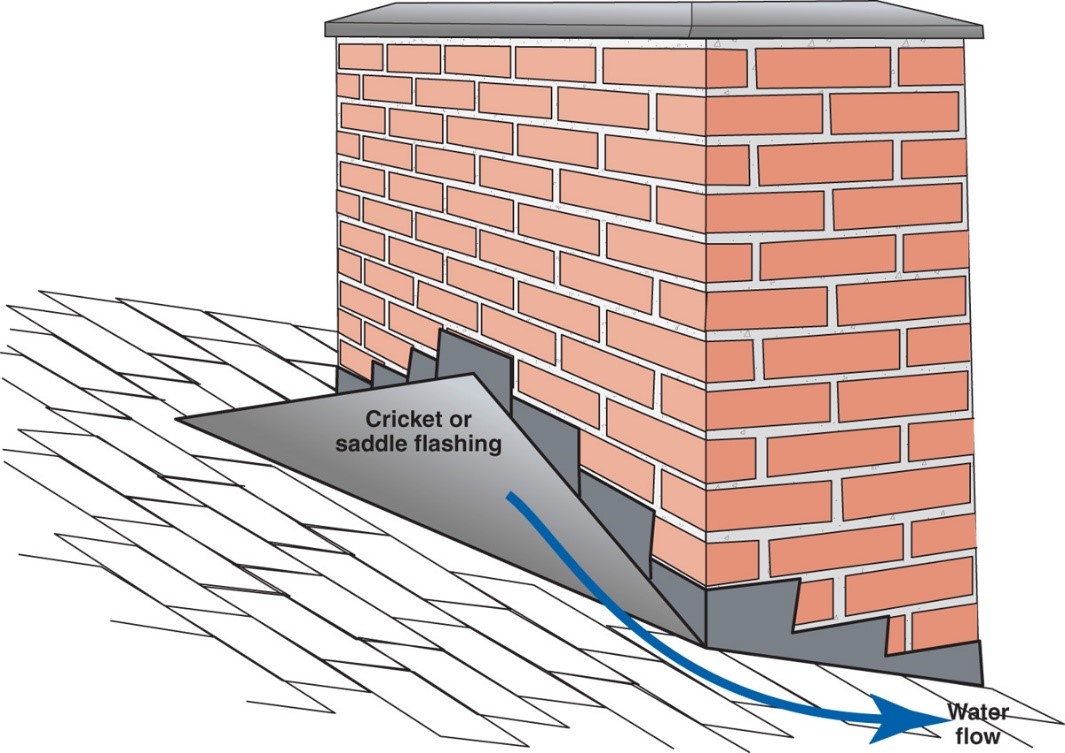
Right – A chimney cricket is installed and flashed to direct rainwater around the chimney
Image
Right – A flexible flashing product is installed around the corners of the window sill before installing the windows.
Image
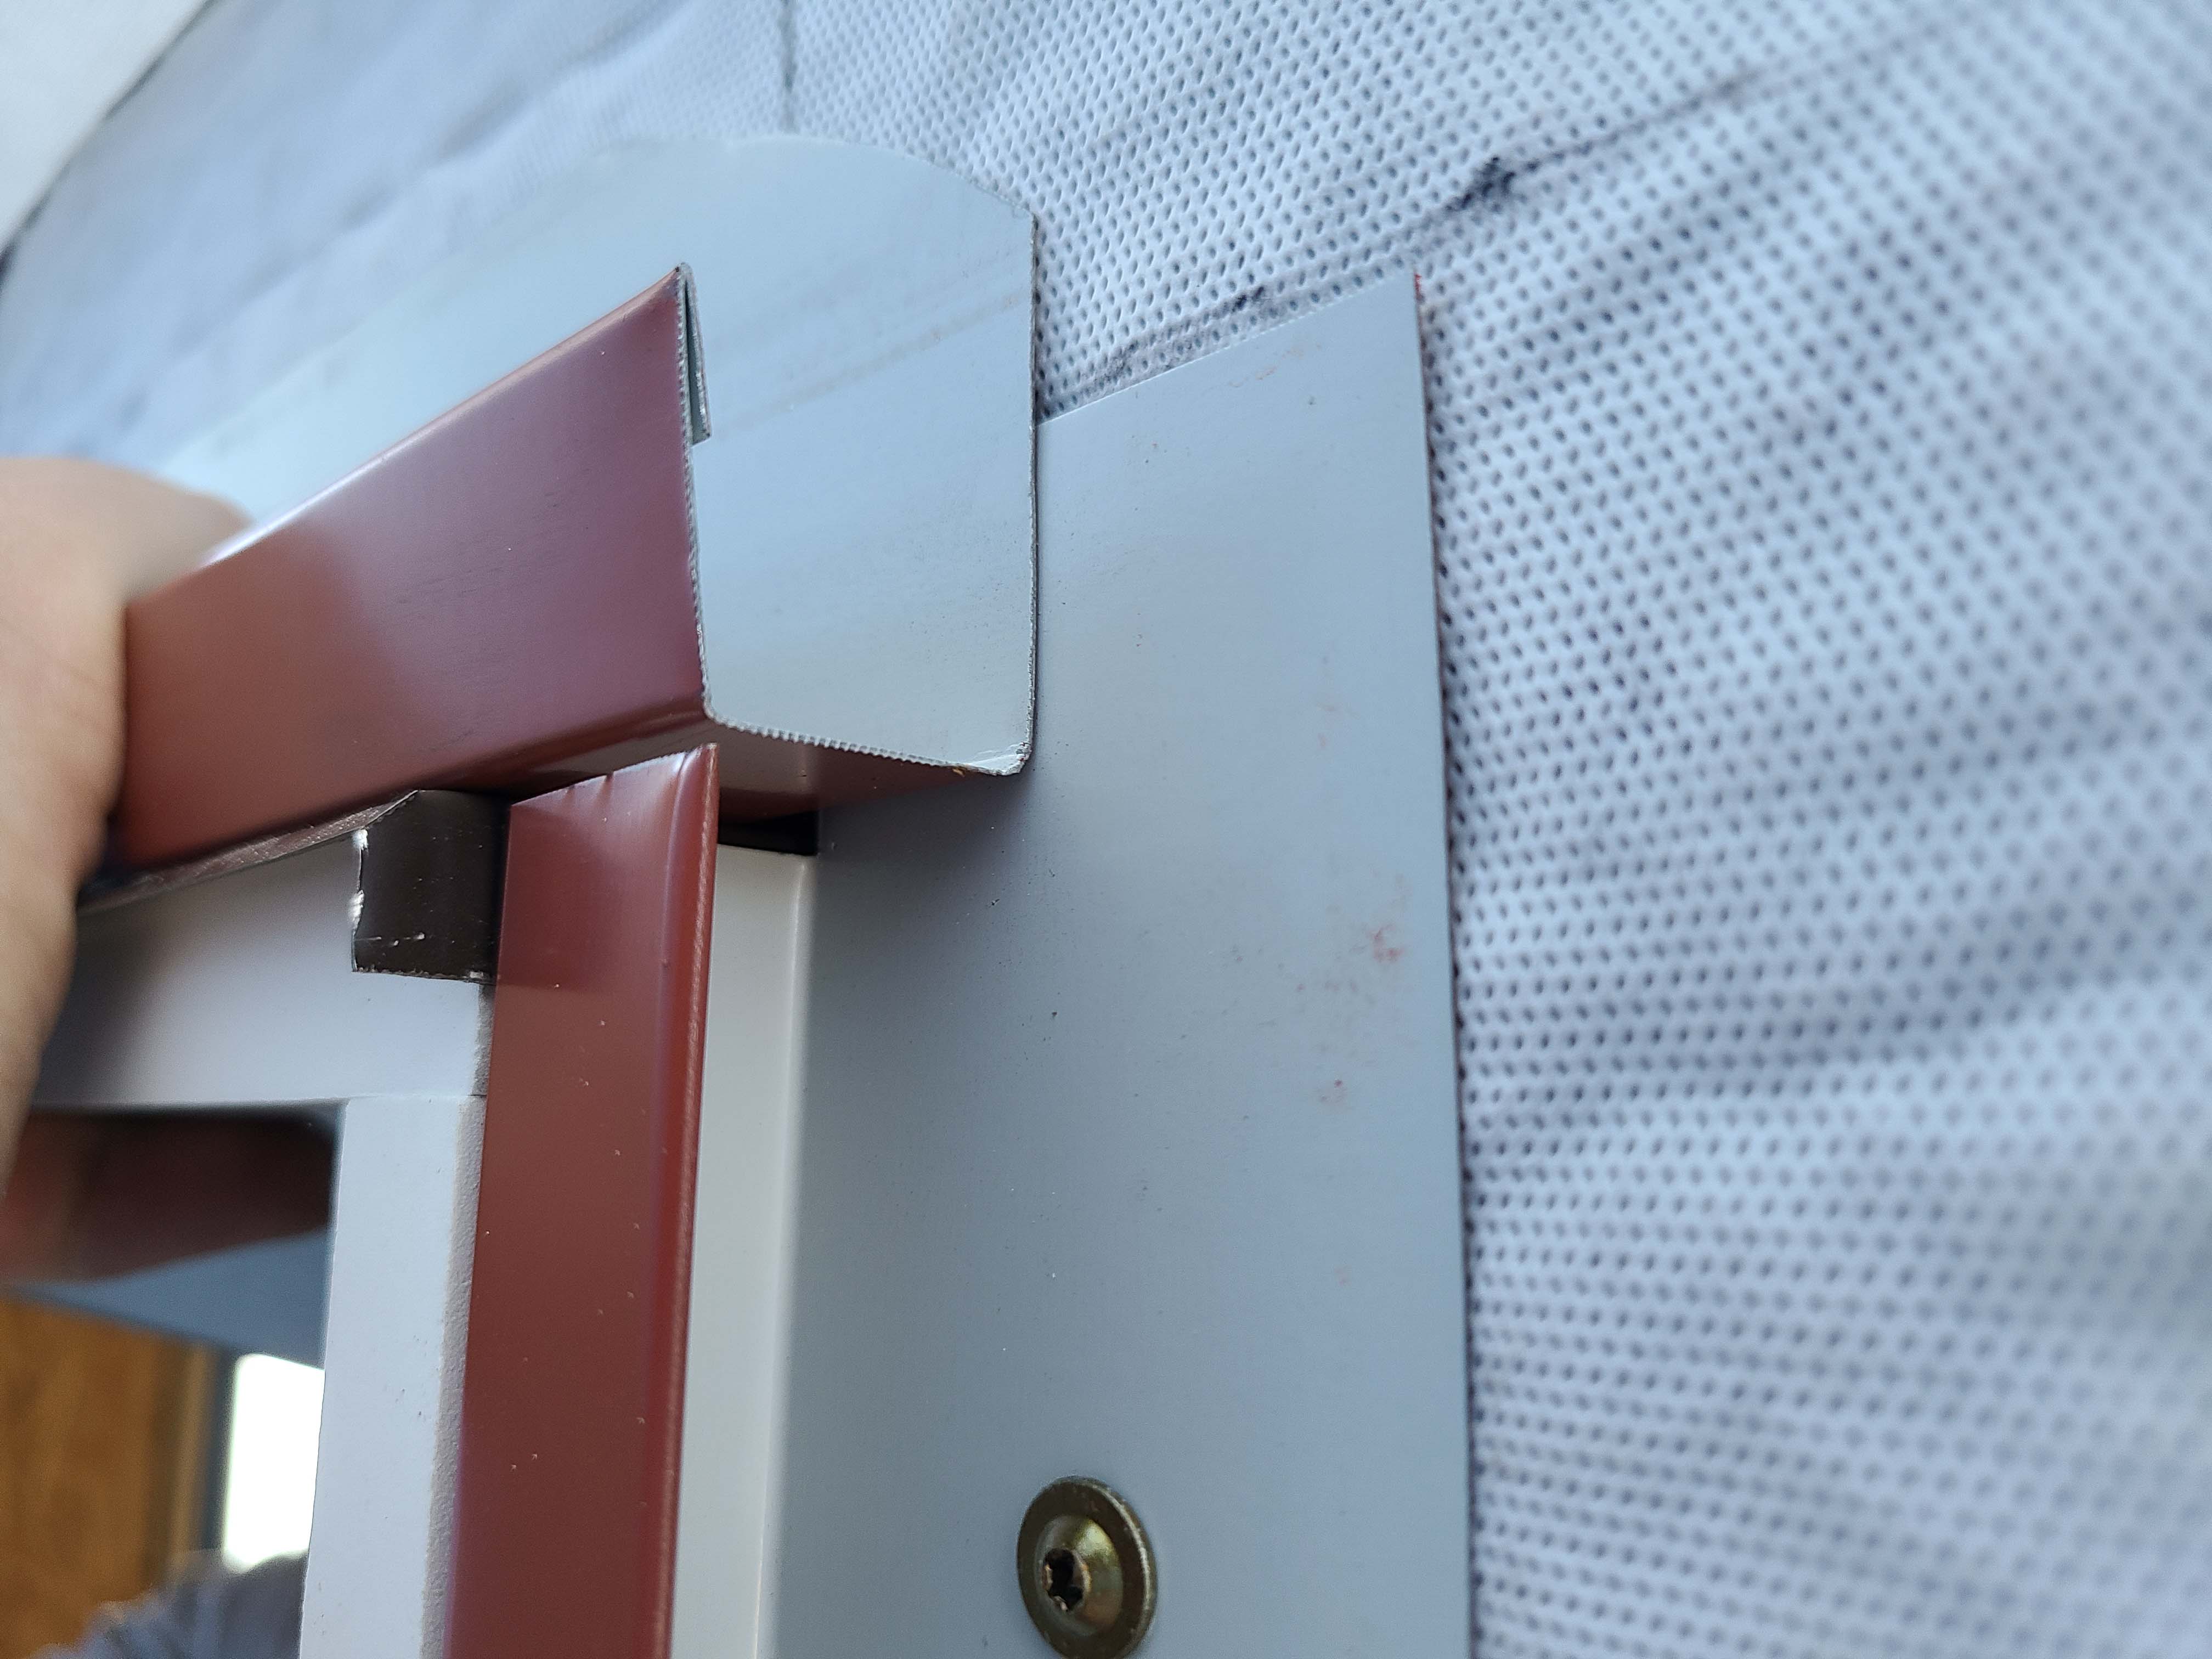
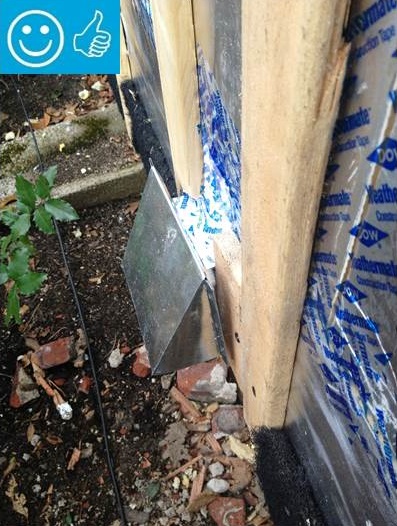
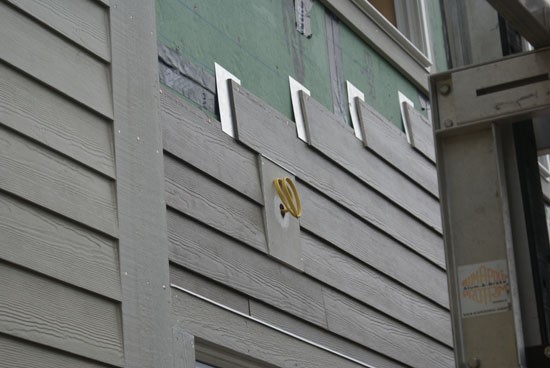
Right – A metal flashing was installed behind the first row of siding above the windows to guide water over the trim.
Image
Right – A paint-on flashing was applied to the window frames of this ICF house before installing the windows.
Image

Right – All penetrations through the roof decking are sealed with paint-on flashing.
Image
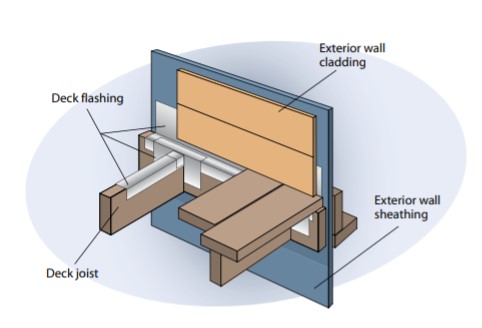
Right – Deck flashing protects the deck-to-wall connection from water and burning embers.
Image
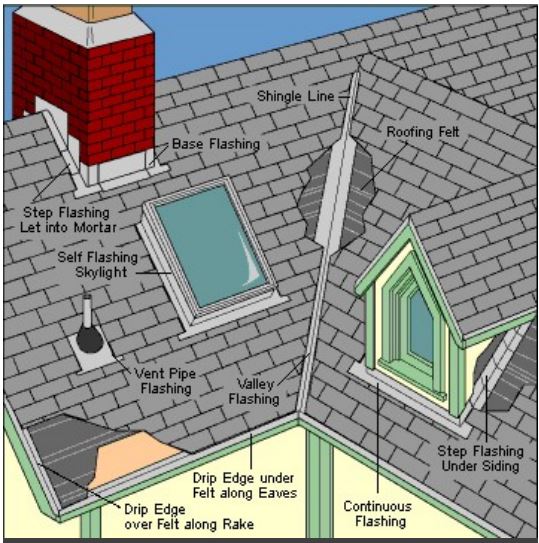
Right – Flashing is installed around chimney, skylight, vents, dormers, in valleys and at eaves
Image
Image
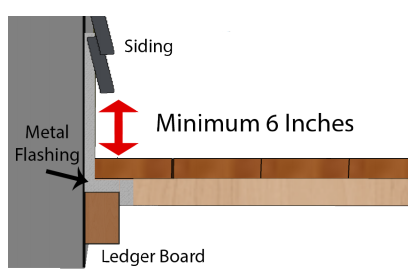
Right – Metal flashing is installed between the deck boards and house wall with the top of the flashing extending up behind the siding and the bottom of the flashing extending out and down over the ledger board
Image
Image

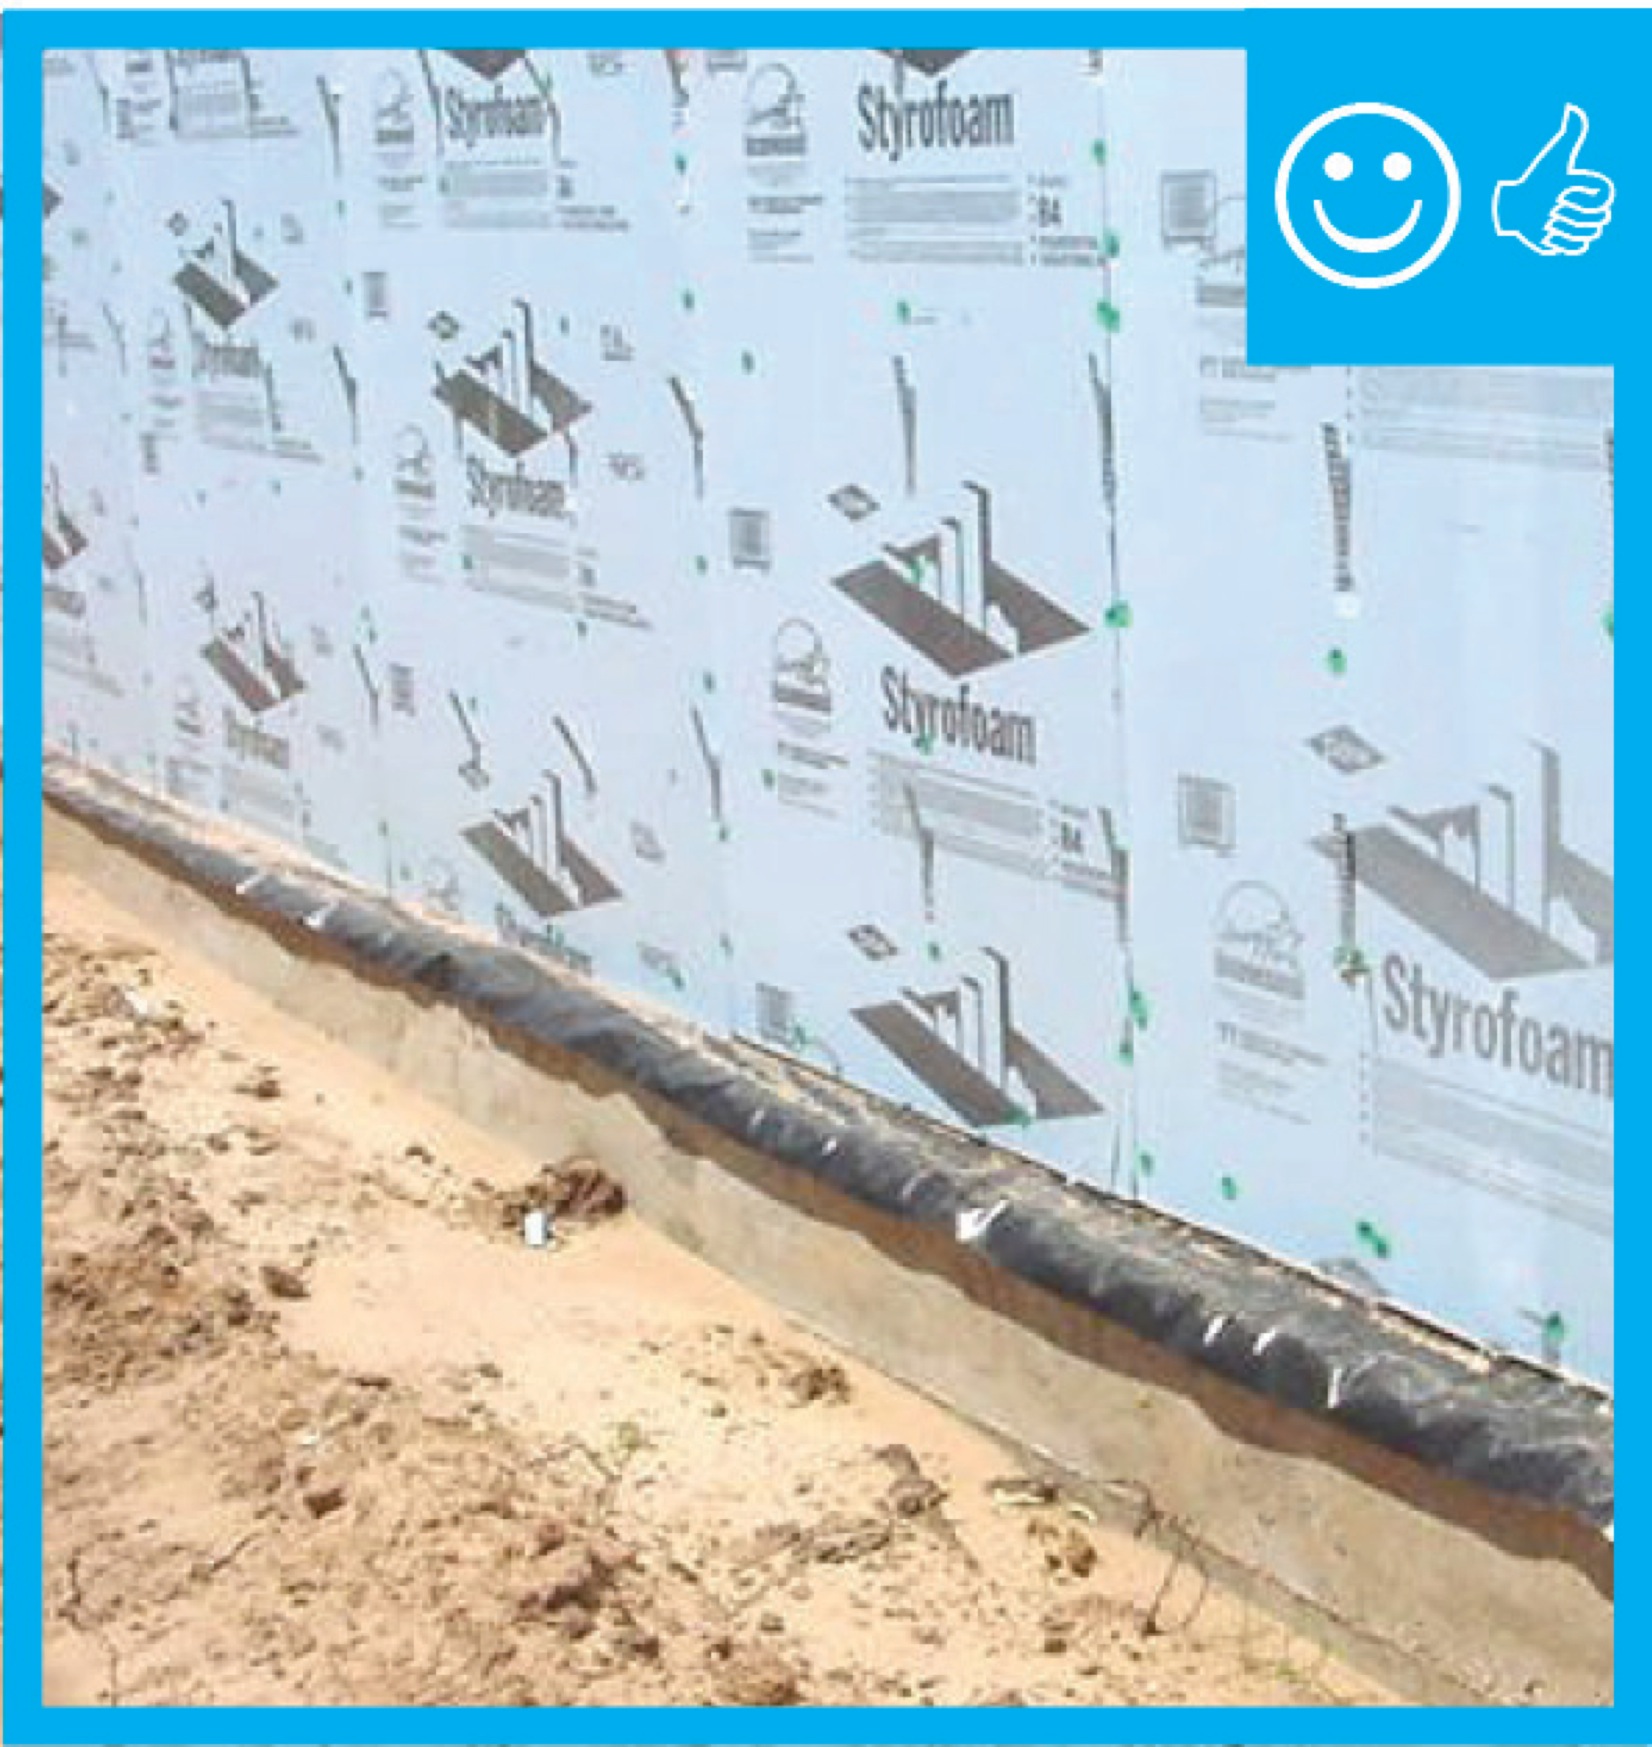
Right – The base of the wall is water proofed and the seam between the base of the wall and the sidewalk is air sealed.
Image

Right – The flashing is properly installed to create a complete drainage system with continuous rigid insulation sheathing/siding
Image
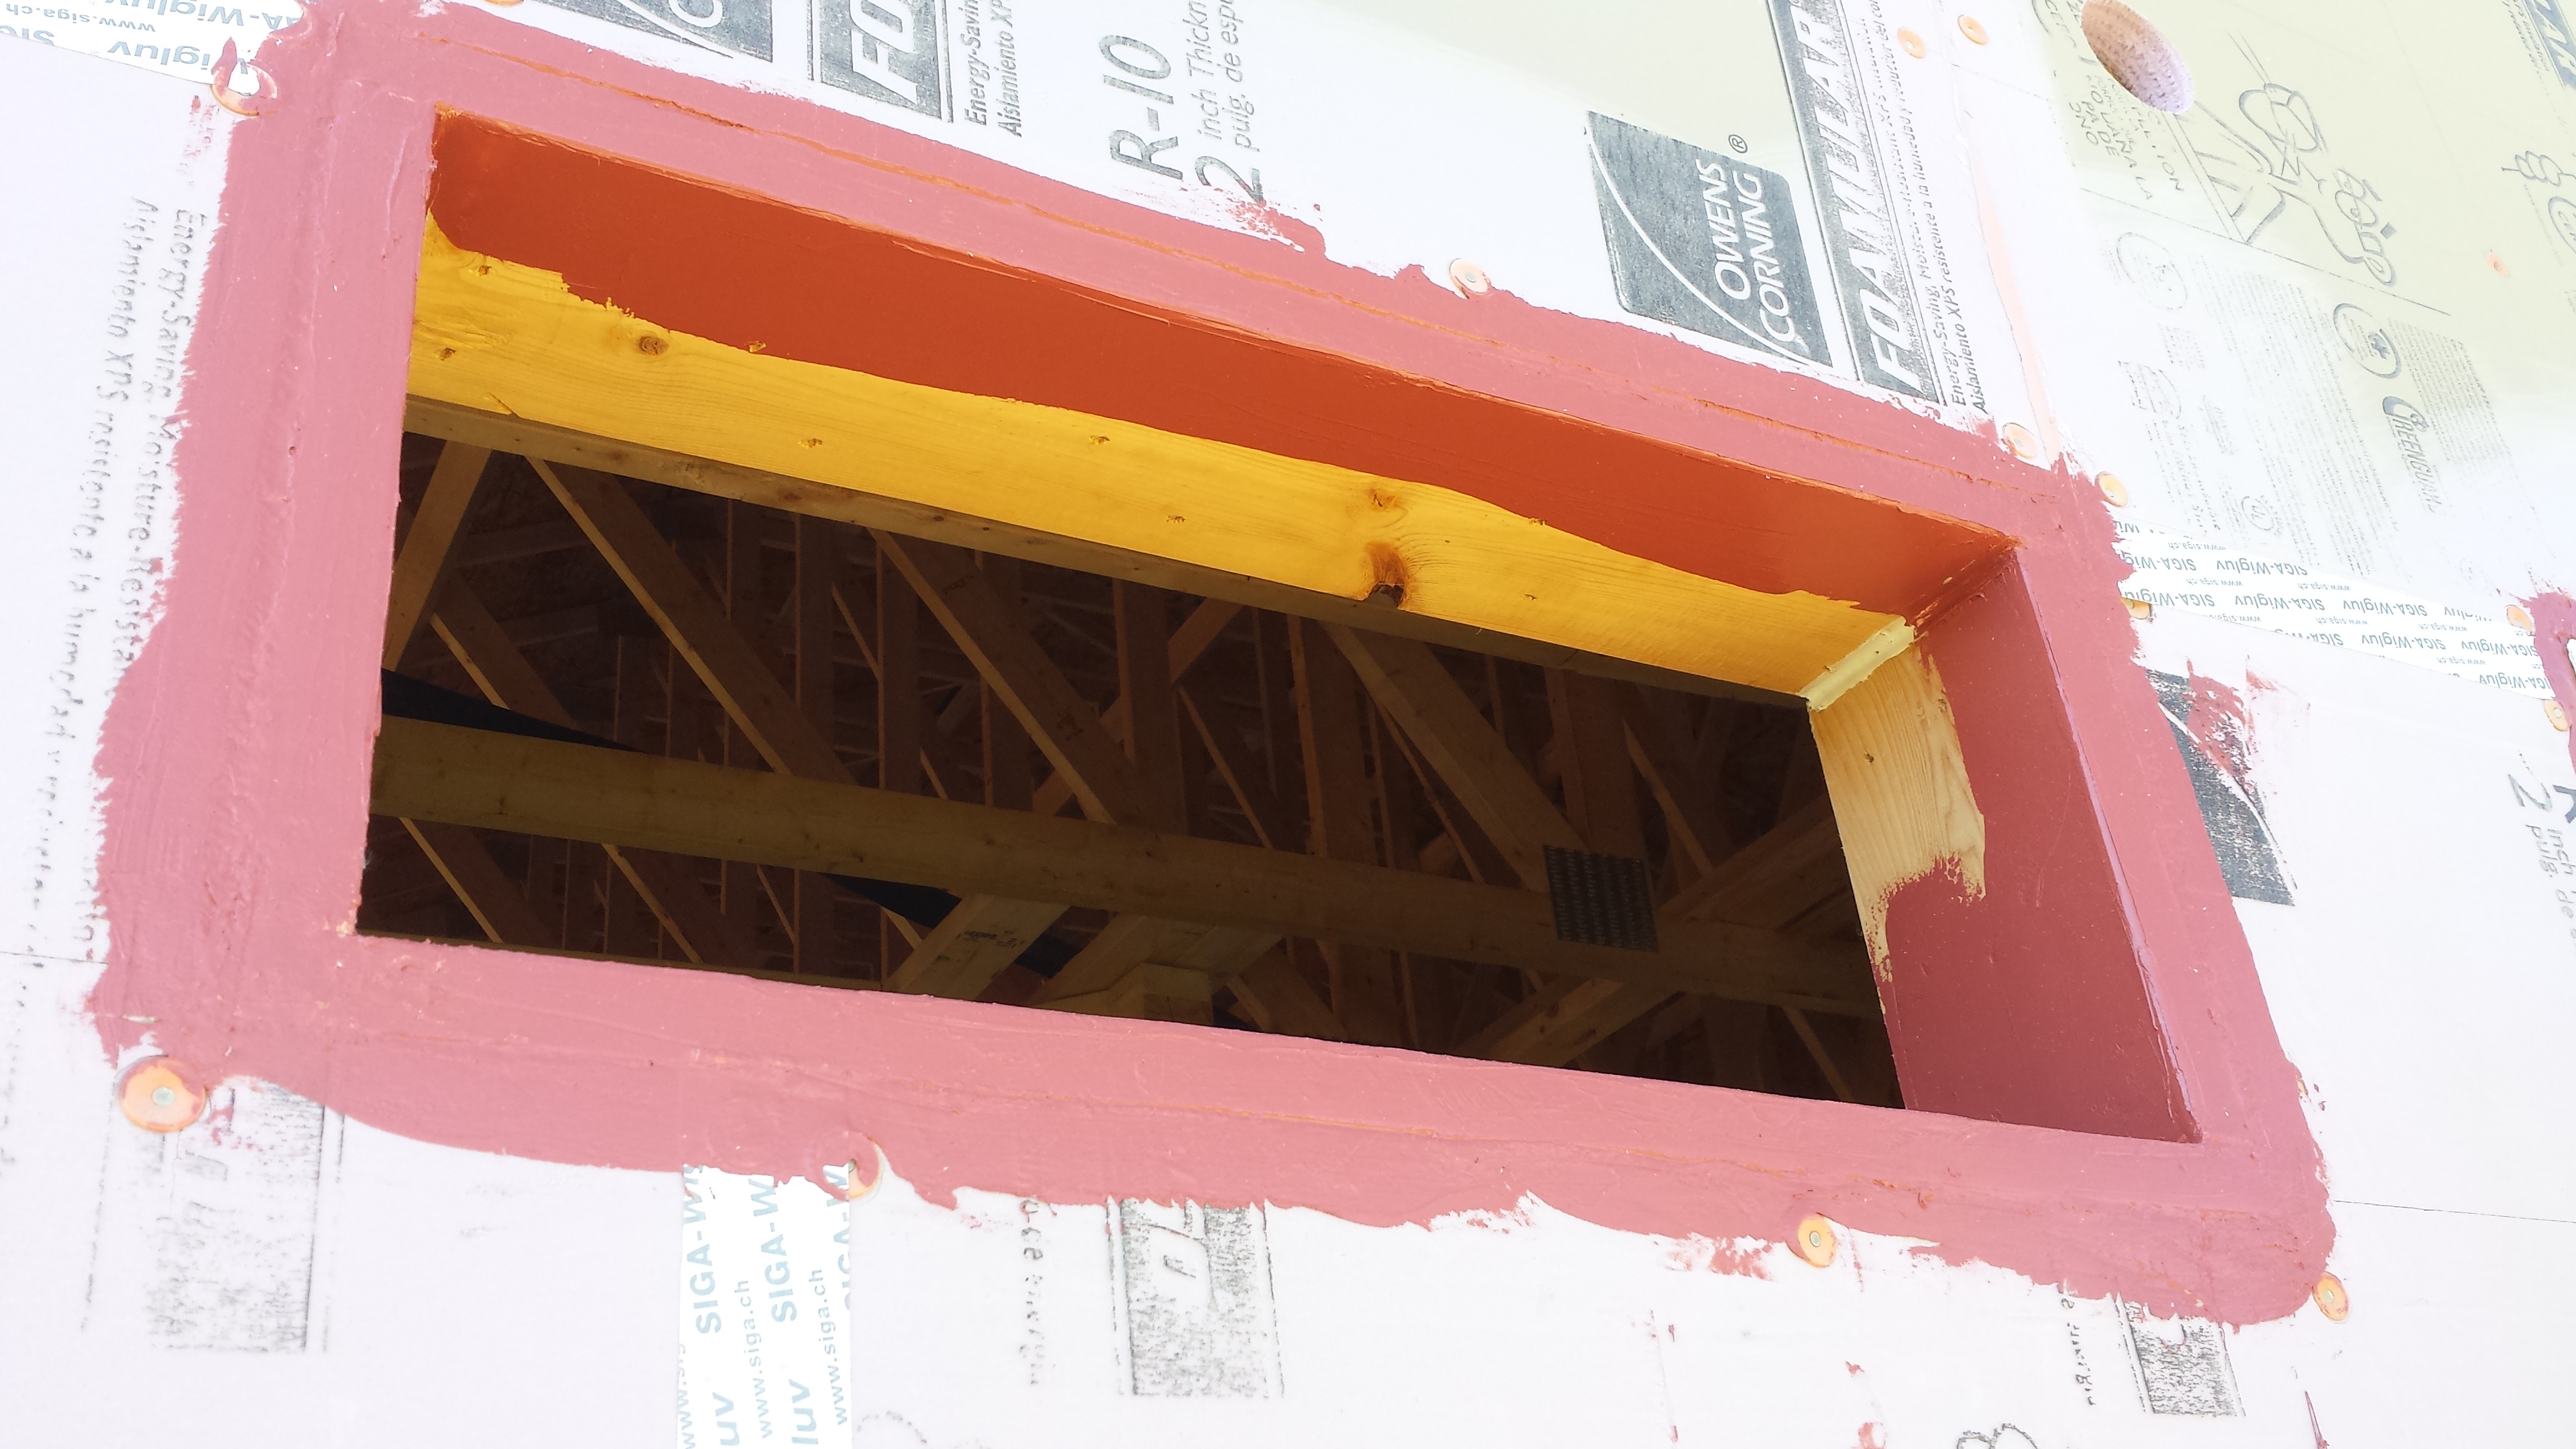
Right – The framing around the window is thoroughly flashed with liquid flashing.
Image

Right – The hard metal ducts are located in conditioned space between floor joists and all seams are sealed with approved metal tape.
Image

Image

Image
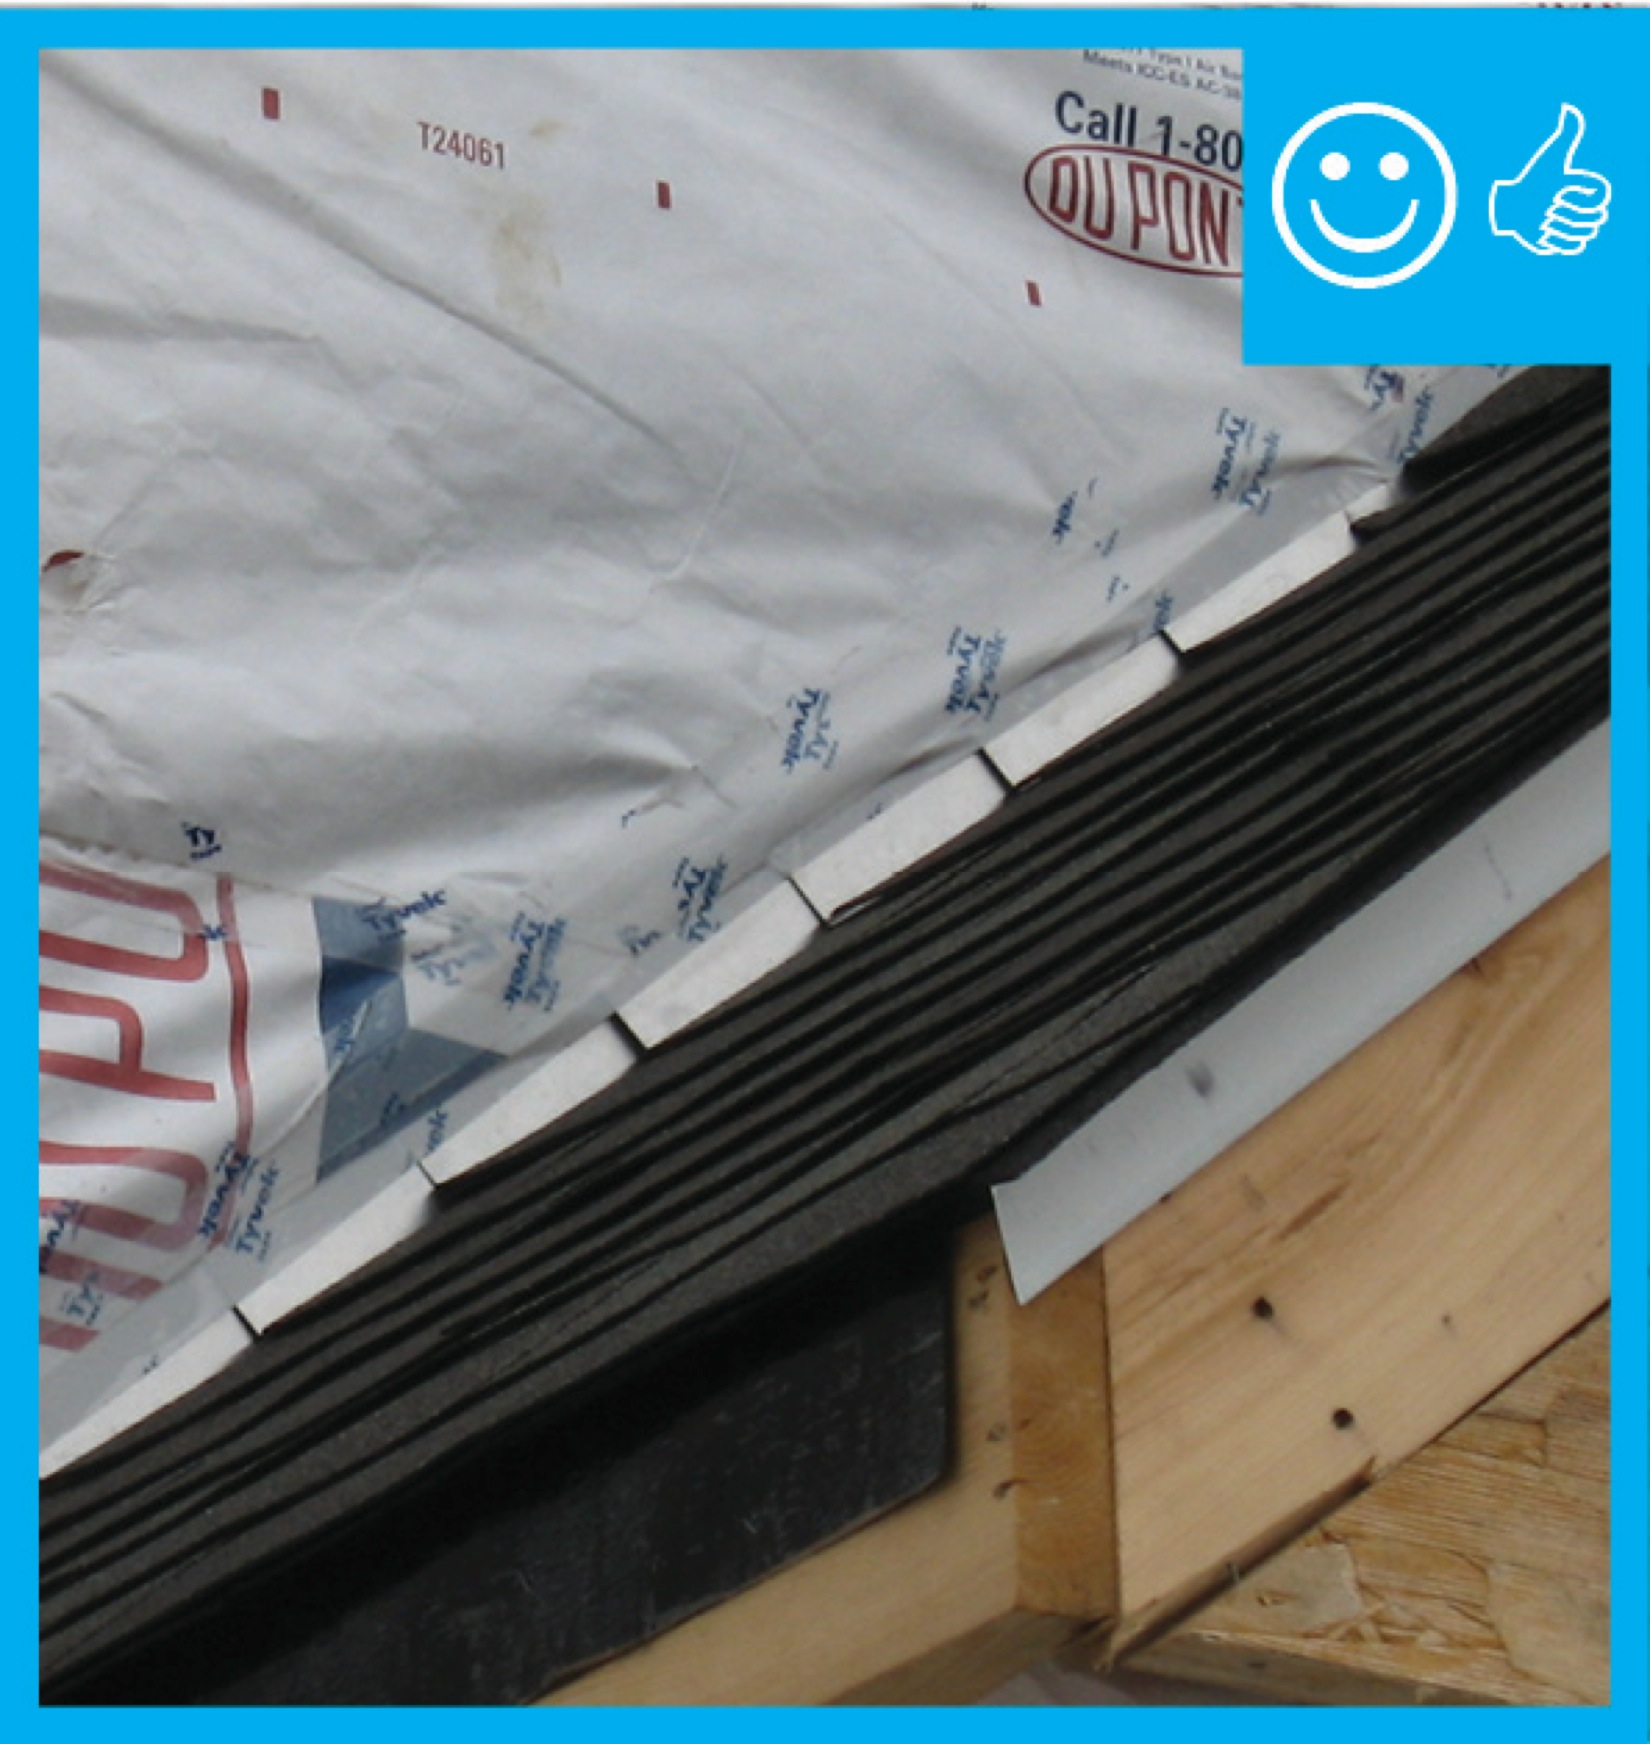
Right – The water-resistant barrier is layered over the step flashing to provide a complete drainage system
Image
Right – There is flashing installed along the top of the window and the water-resistant barrier is layered over to create a complete drainage system
Image
Right – There is flashing installed at the bottom of the wall to create a satisfactory drainage system
Image
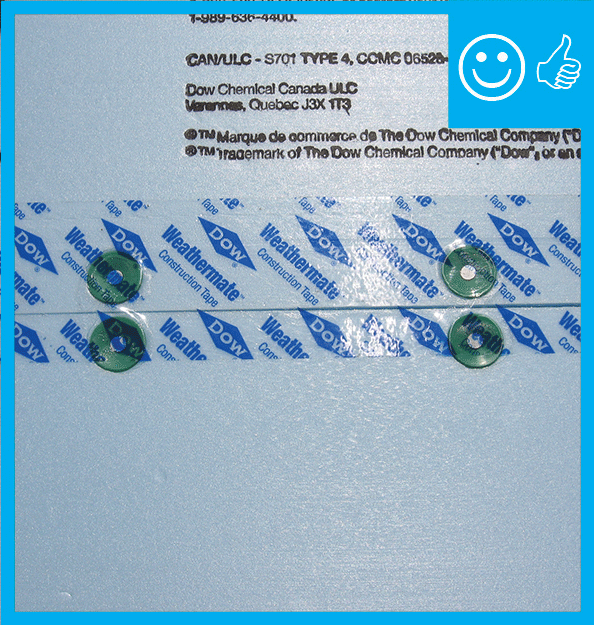
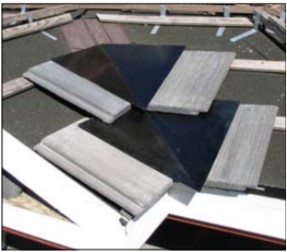
Right – Two-thirds of acrylic tape is offset above the joint and over and above the fasteners
Image
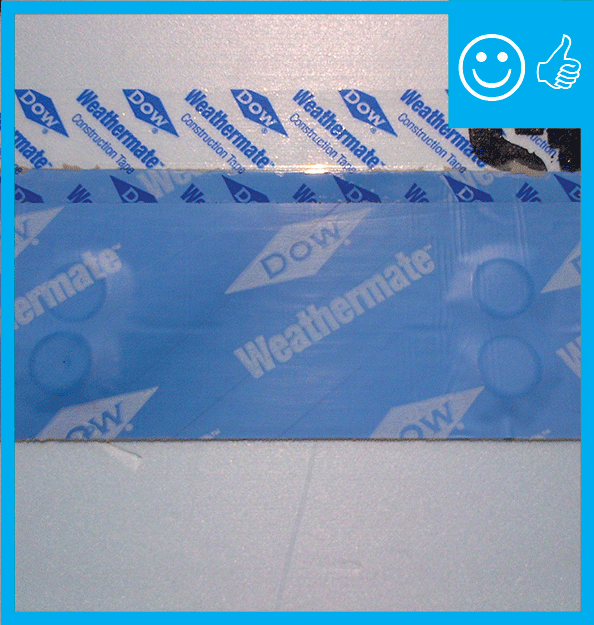
Right – two-thirds of the blue butyl flashing tape is above the sheathing seam; the top edge of the butyl flashing tape is covered with clear sheathing tape that is also offset so two-thirds is above the top edge of the butyl flashing.
Image
Right – Windows are installed and flashed in the factory for these modular homes.
Image
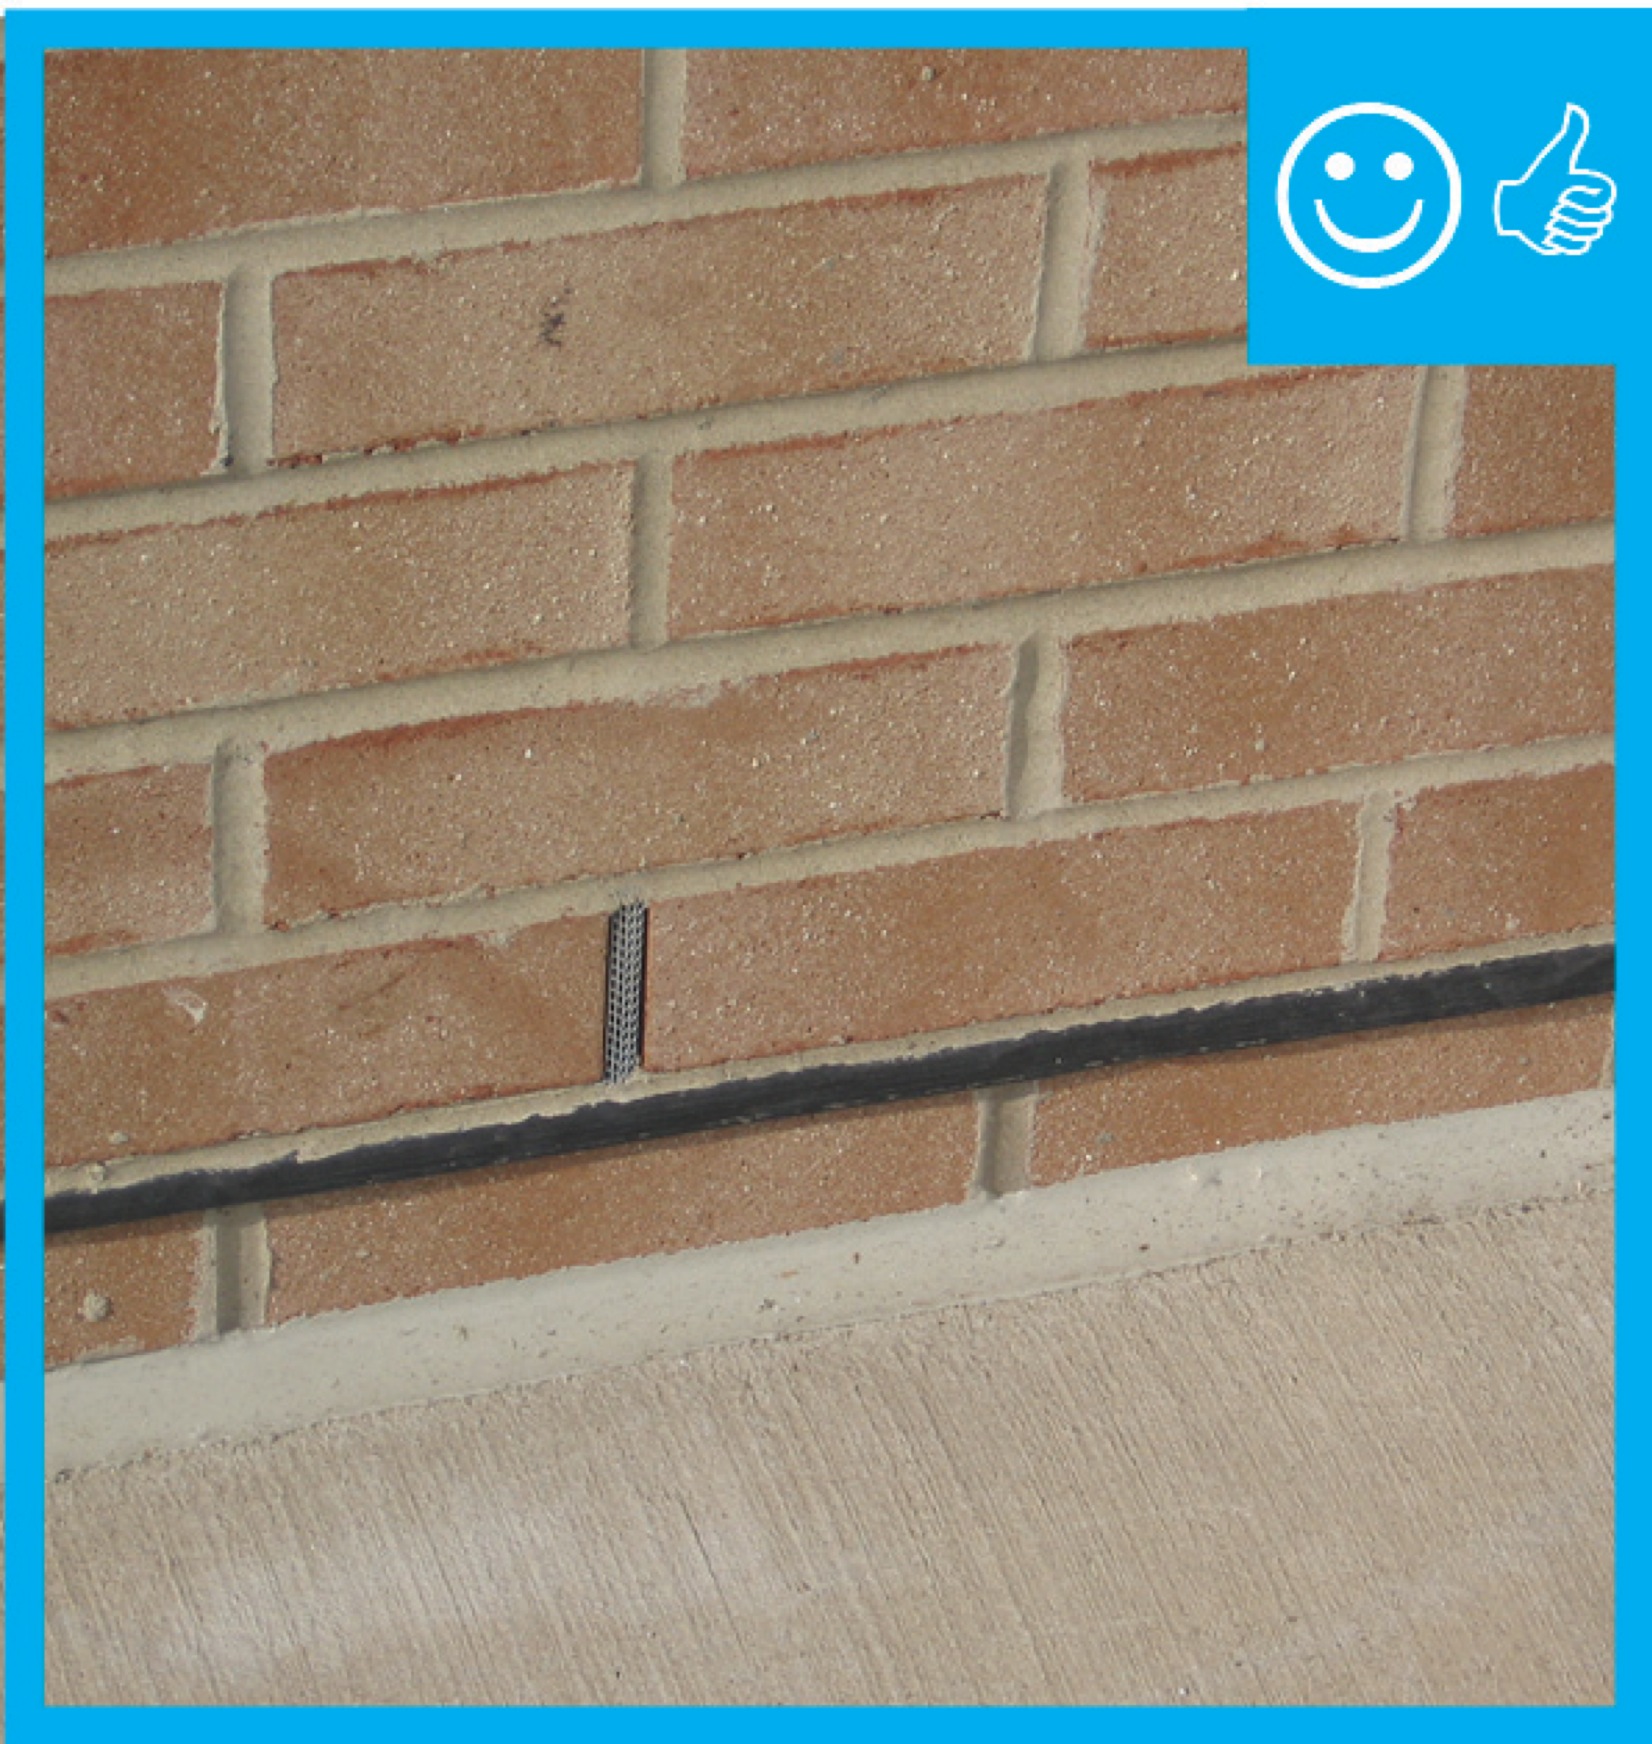
Right: Brick veneer is flashed correctly with weep holes and a fine mesh screen is installed to prevent pest entry.
Image
Right: Flashing the butt joints in lap siding installations is a better practice than relying on caulk to seal the joints.
Image

Right: This vent was correctly flashed providing proper waterproofing detailing for this siding penetration.