Introduction
Looking at your home with an infrared (IR) camera can reveal missing insulation and air leakage.
Why
An infrared camera detects heat rather than visible light. Colors on the screen indicate hotter or cooler surface temperatures with darker blue purple colors indicating cooler areas and brighter yellow areas indicating hot temperatures. This makes the infrared (or IR) camera a handy device for helping you detect missing insulation in the walls or ceiling of your home. It can also help detect air leakage. Thermal imaging cameras are available to rent from hardware rental shops. Thermal imaging devices that attach to a smartphone are now available to purchase for as low as $250 to $500.
What You'll Need
- Infrared Camera
1. Select an appropriate time to look.
The best time to perform thermal imaging is when there is a significant temperature difference between inside and outside the home. In the winter, this may be early morning or evening when it’s coldest outside compared to inside. In the summer, this may be mid to late afternoon, when it’s warmest outside compared to the air conditioned indoors.
To help spot air leakage with an IR camera, it helps to depressurize your home, which will pull outside air in through any leaks in the home’s building envelope. To depressurize your home, close all of the windows and exterior doors and turn off the air conditioning or heating at the thermostat, then turn on all exhaust fans and your clothes dryer and open all interior doors. This will suck the interior air out through the exhaust fan and draw in outside air through any gaps in the walls, ceiling, or foundation. If the outside air is significantly different in temperature than the inside air, it will appear as streaks in the IR images. For example, in winter, it may look like dark streaks along the base of the wall or around window trim if those areas have air leakage (Figure 1).
Source
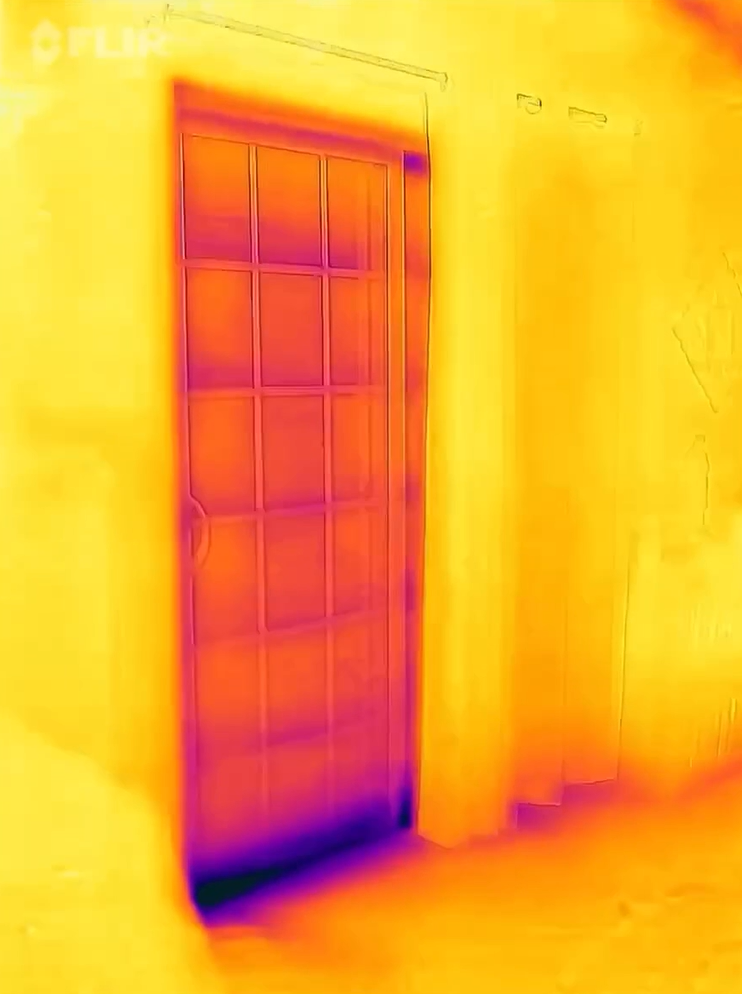
2. Look at Doors.
Use the IR camera to look at all of the exterior doors of your home. Some temperature difference is expected around the edges of door and through glass doors but if dark coloring indicates a great deal of temperature difference and/or if you see streaking in the IR camera images when you depressurize the house, then you likely have air leakage around the door, which could indicate poor-fitting doors, lack of weather stripping, or unsealed rough openings around the door. Figure 2 shows significant temperature loss at the bottom of a sliding door, which could indicate a poor fitting door, the need for new threshold sweep weather stripping made for sliding doors, or lack of air sealing beneath the door frame. Figure 3 shows some expected heat loss around the perimeter of an exterior door but more significant heat loss along the bottom of the door, which could indicate a poor fitting door threshold or air leaks below the door frame.
Record the location and severity of air leakage at each location and take photos for later reference. To remedy air leakage around doors, see the DIY guide “Air Sealing Exterior Doors.”
Source

Source
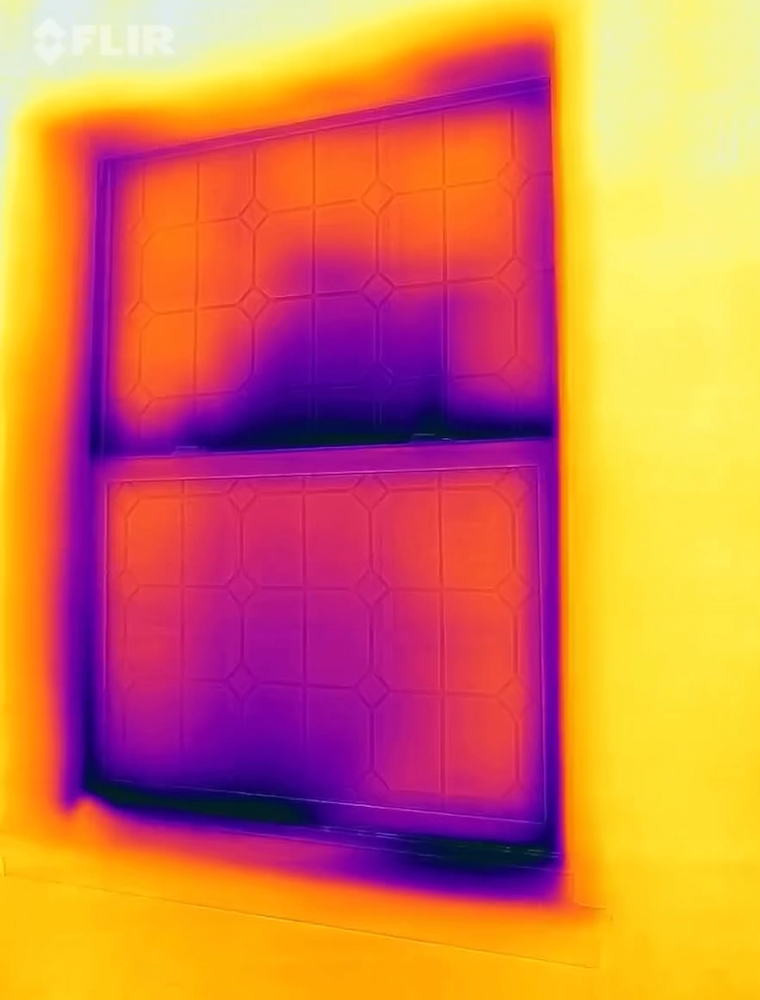
3. Look at Windows.
Use the IR camera to look at all the windows in your home. Like doors, there will be some expected temperature difference at the glass and around the edges of the window. The key is to look for extreme and irregular differences. In Figure 4, the dark purple indicates air leakage at the window sill and at the meeting rail in the middle of the window. The air leakage and heat loss at the window sill might be helped by weather stripping or insulating the rough opening around the window. (See the DIY guides Weatherstrip Windows and Doors and Air Seal and Insulate Window Rough Openings). The air leakage at the meeting rail of this single-hung double-pane window is difficult to repair. You might consider replacing the windows or installing modern insulated storm windows. (See the DIY guides Install Exterior Storm Windows and Install Interior Storm Windows.)
Source
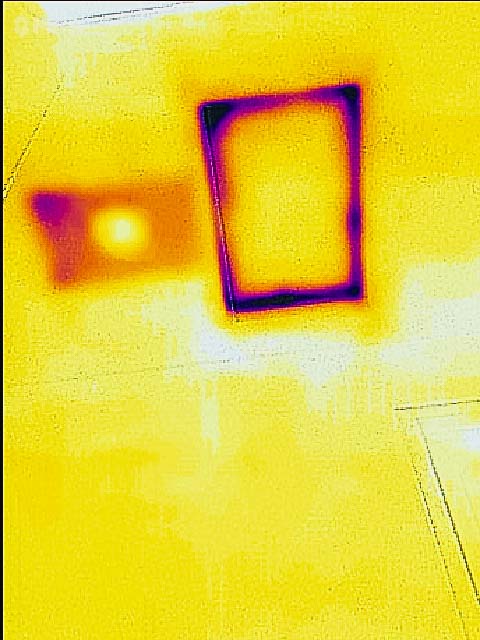
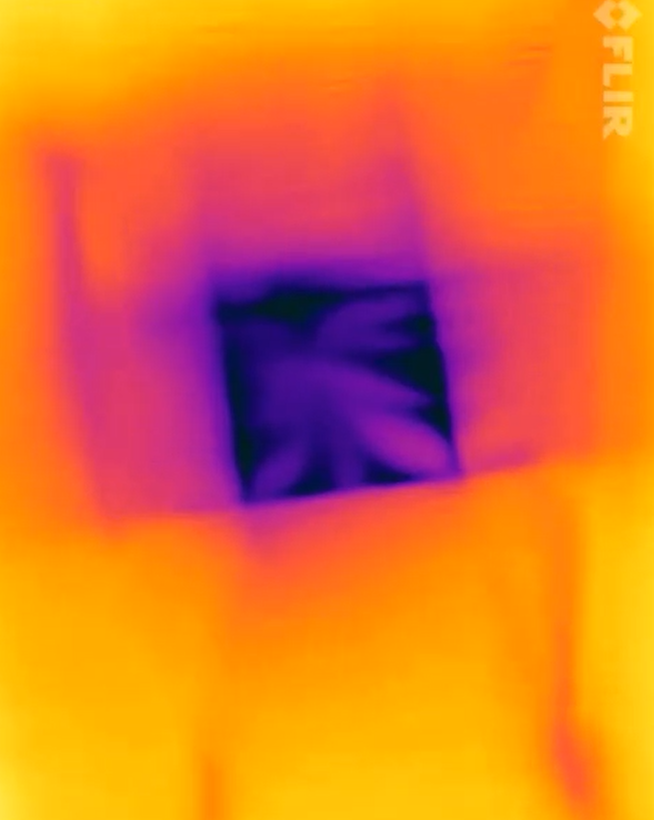
4. Look at Attic Door.
Look at the attic access hatch or door. Dark areas (Figure 5) and dark streaks (Figure 6) surrounding the attic entrance indicate heat loss and air leakage. Dark areas across the attic door can indicate that the attic door needs to be insulated. See the DIY guide “Air Seal and Insulate Attic Access” for ways to fix these issues.
Source
Source
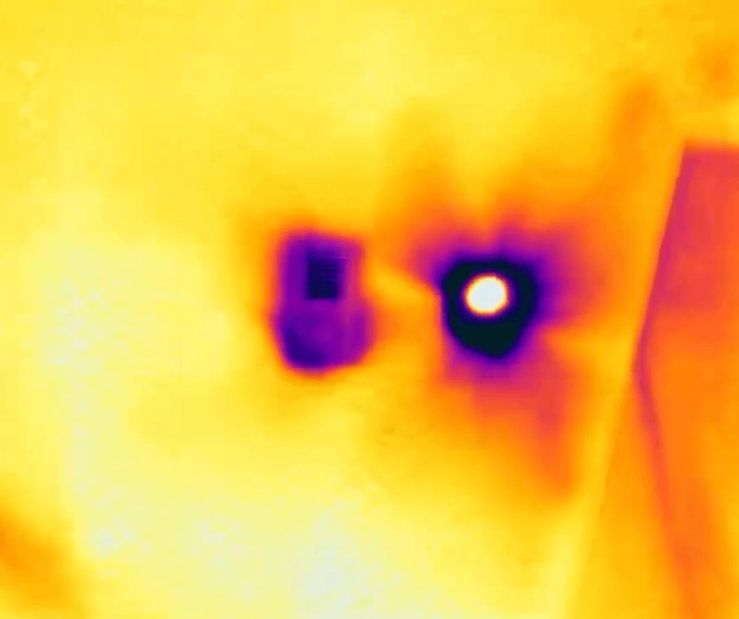
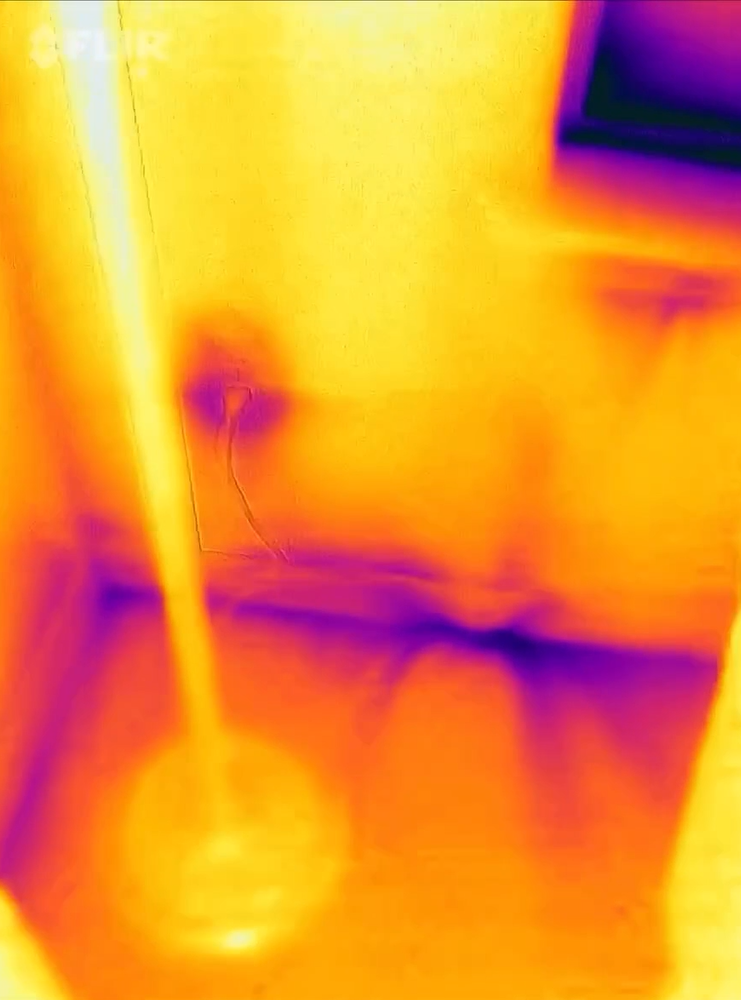
5. Look at Outlets, Switches, and other Wall Penetrations.
Using the IR camera, look at outlets, switches, and other wall penetrations (Figure 7). Note that there will nearly always be some temperature difference at these locations, but you are looking for and noting large dark areas that indicate significant air leakage and heat loss. There may be some things you can do to reduce the air leakage and heat loss. See the Building America Solution Center DIY guide Air Seal Electric Outlets and Switches.
Source
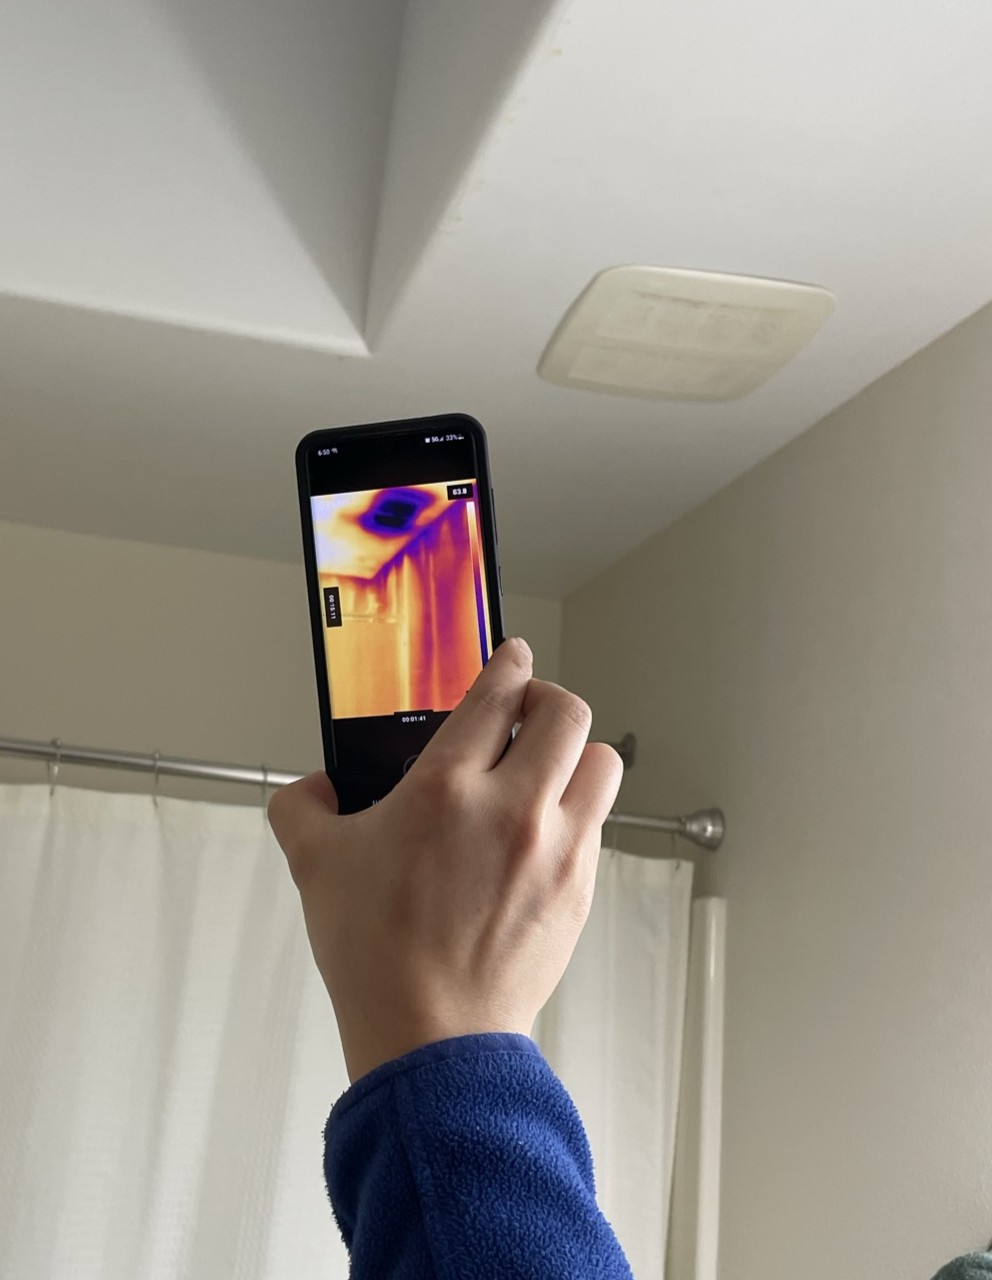
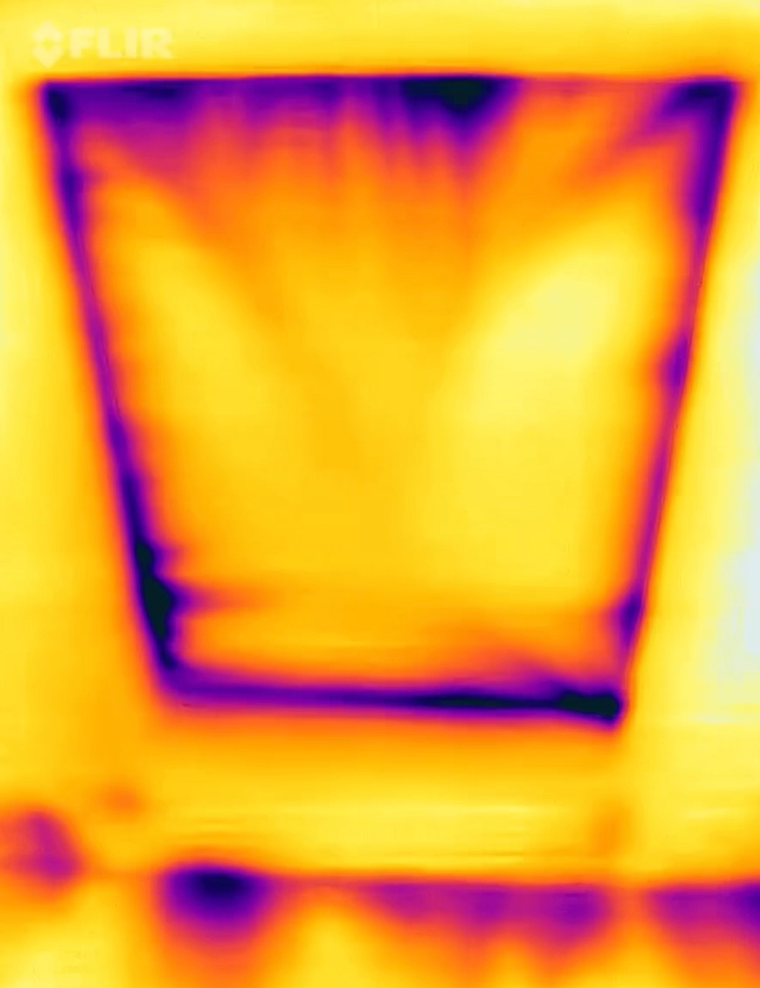
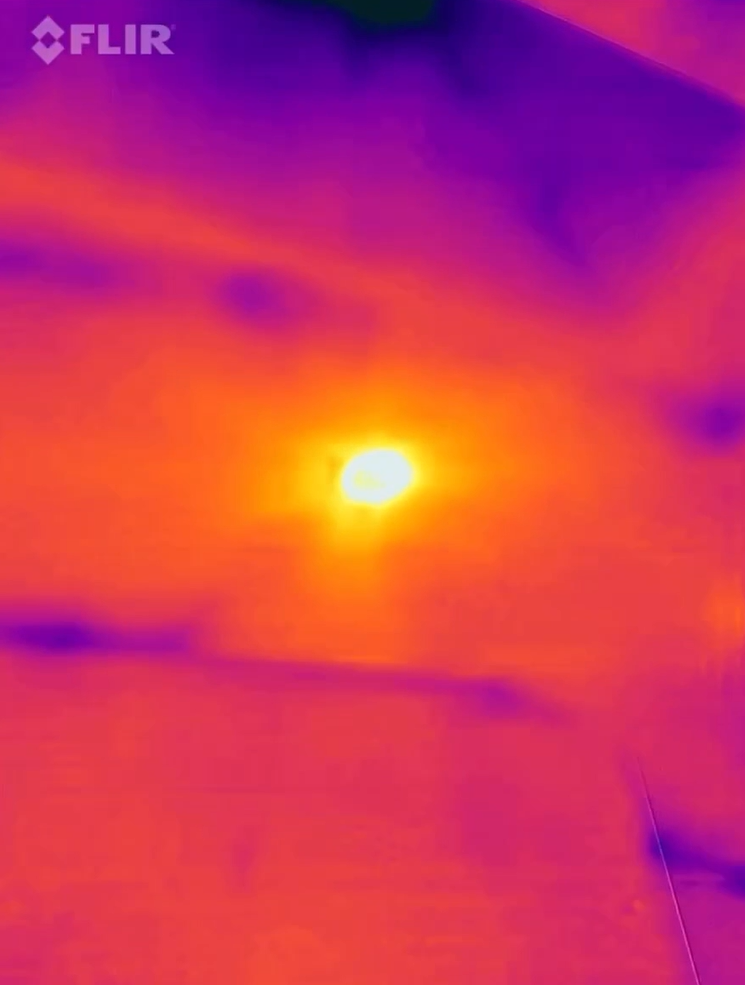
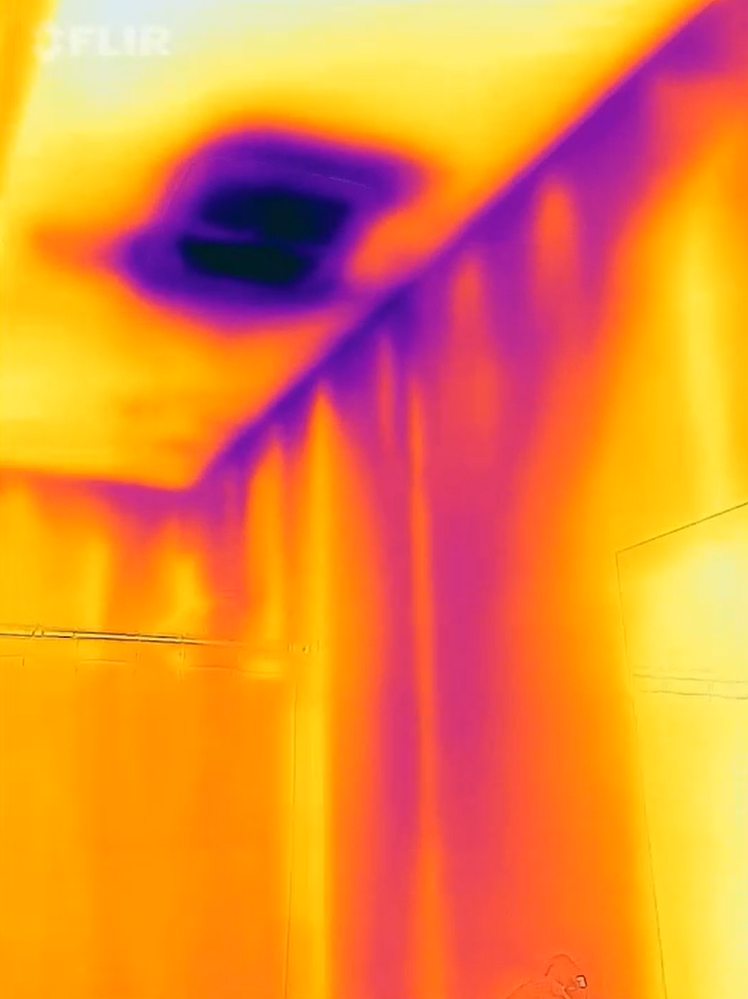
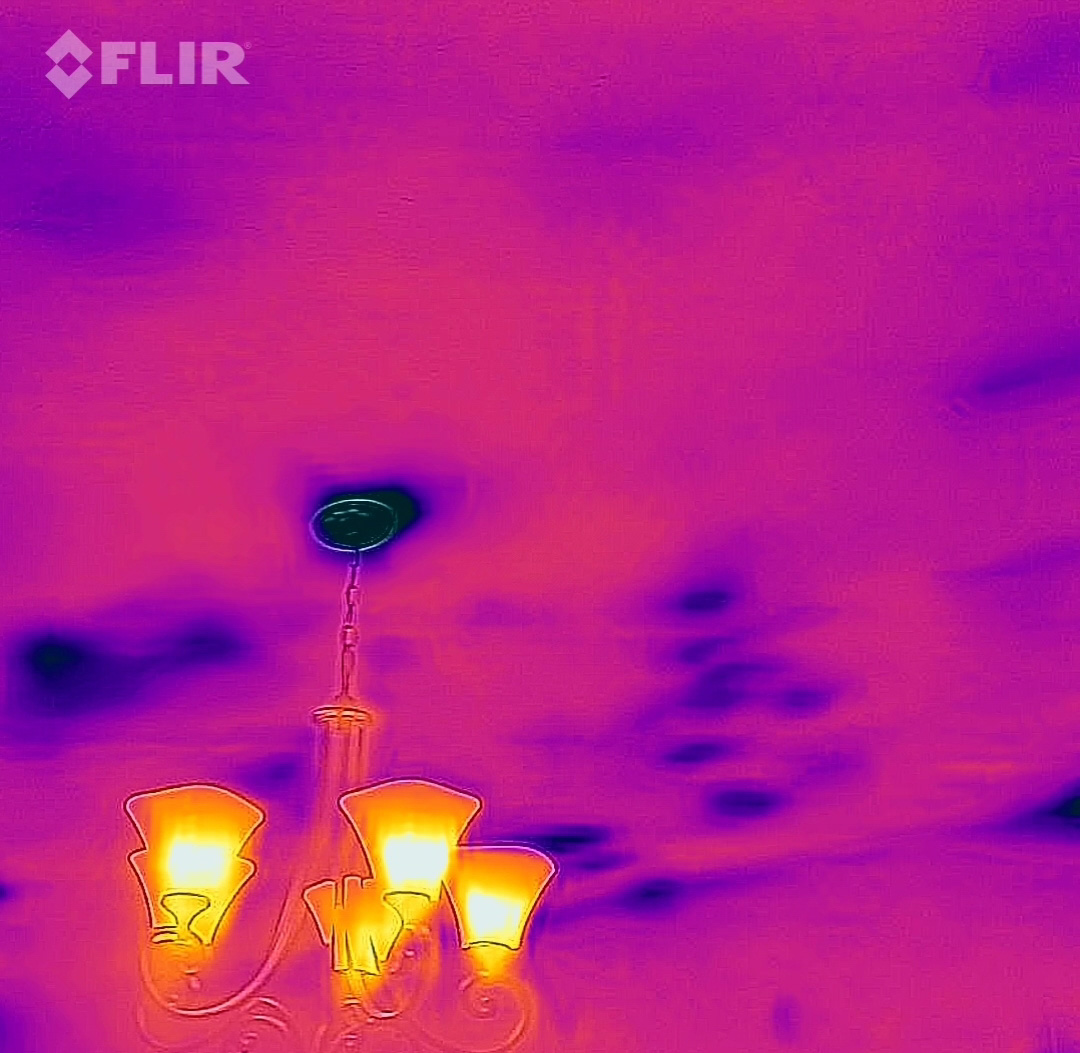
6. Look at Recessed Lights, Vents, and other Ceiling Penetrations.
Look at penetrations in the ceiling such as lights, vents, or skylights. Note the dark purple area and the purple streaks radiating from the light in Figure 8 indicate air leakage and heat loss. In Figure 9, the light is well insulated and sealed, showing no cold spots. To remedy air leakage around lights, see the DIY guides Air Sealing Recessed Lights from Inside the House.
Source
Source
Skylights and vents can also be sources of air and heat loss. Figure 10 shows a skylight shaft that is well insulated and air sealed. While the glass itself is dark, the shaft around it is relatively light and even colored, with no purple streaks or spots that would indicate air leakage or heat loss.
Source
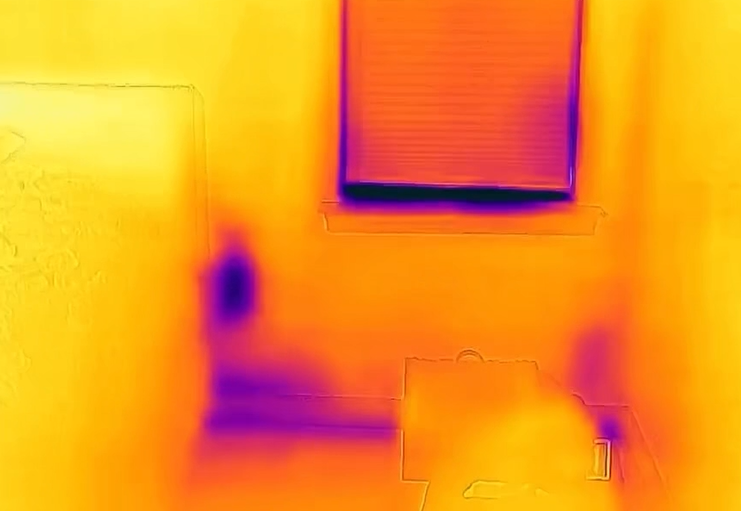
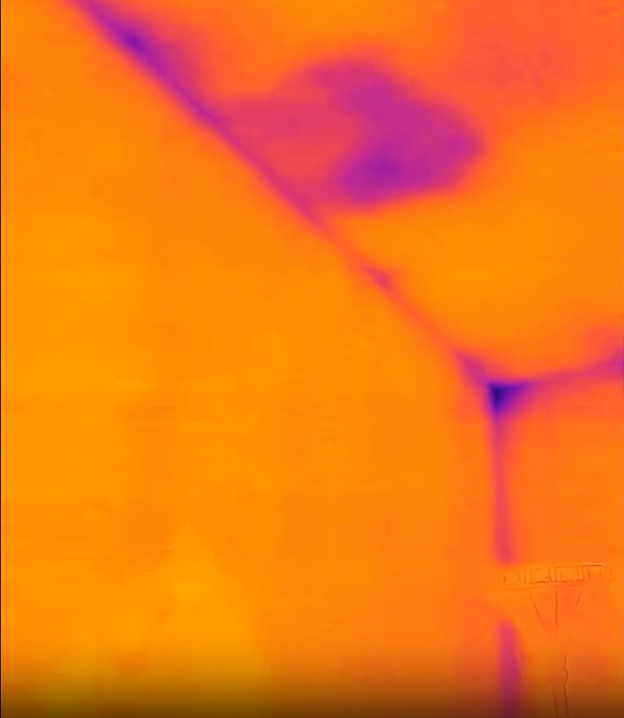
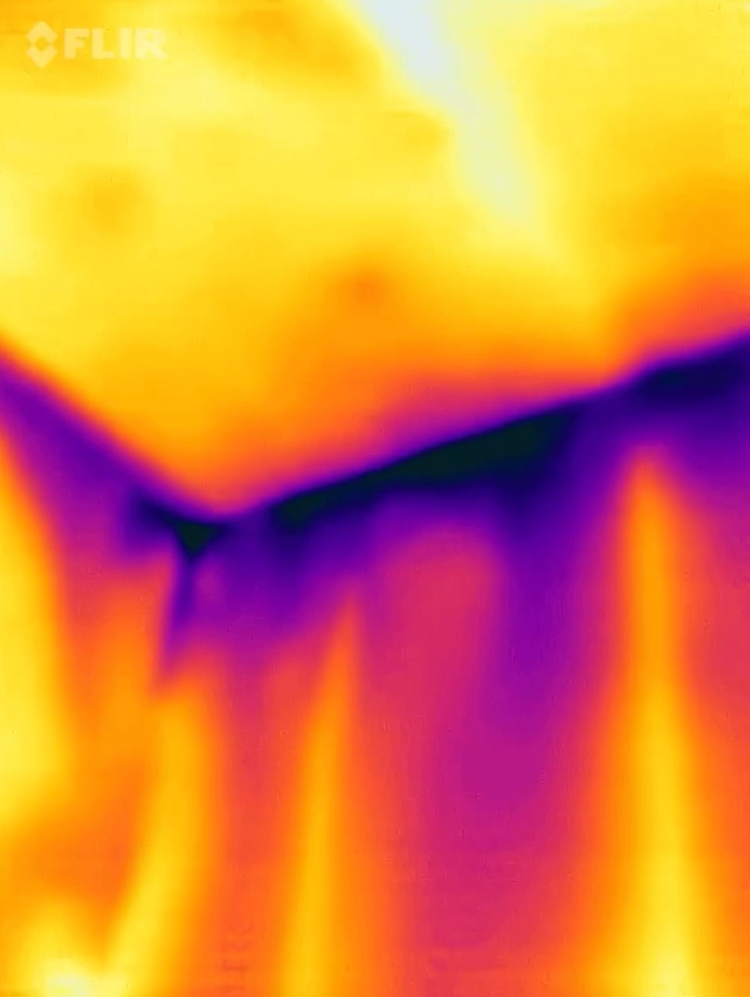
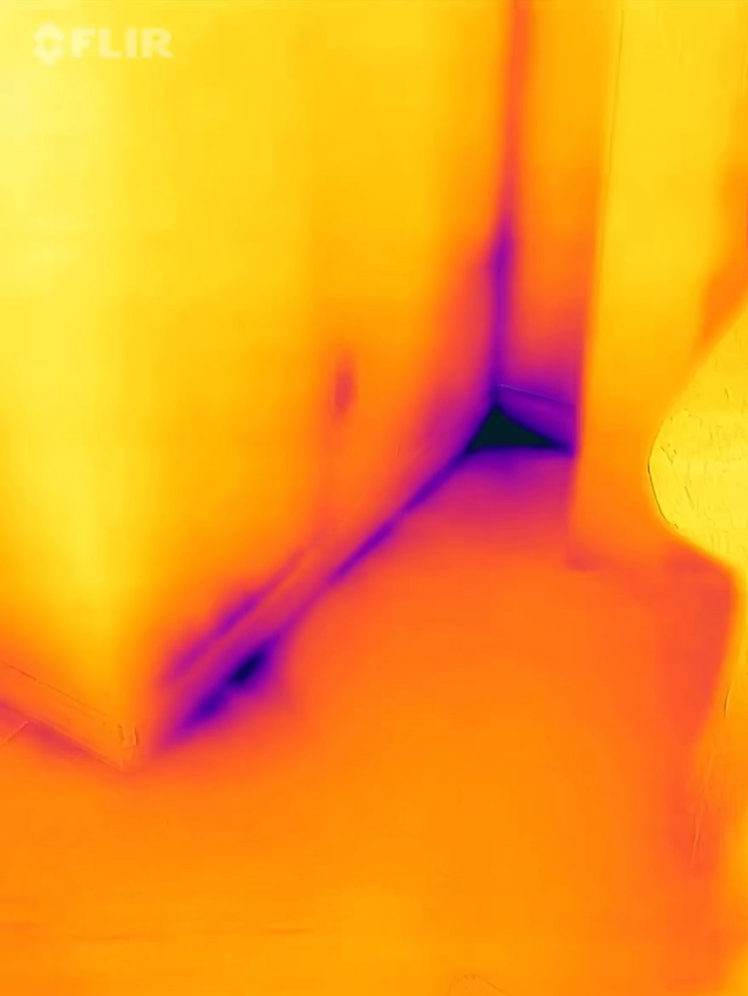
7. Look at Walls, Tops Plates, and Bottom Plates.
Look at the walls and all wall-to-ceiling seams and wall-to-floor seams to determine areas of missing insulation and air leakage. The IR image of the exterior wall in Figure 11 looks fairly even in color - the wall studs are just barely detectable, indicating good insulation coverage across the wall. However, heat loss can also occur at the top plate and bottom plate, where the wall drywall meets the ceiling drywall and floor subfloor or slab. The dark purple streaks in Figures 12 and 13 are indicative of significant amounts of air leakage at the top plates of these walls. Figures 14 and 15 show some signs of air leakage occurring at the bottom plate (or the sill plate), where the wall meets the floor.
Source
Source
Source
Source
Source
8. Look at the Ceiling.
Looking at the ceiling using the IR camera can help you identify areas in your attic with missing or displaced insulation. Sometimes, the attic insulation is displaced by ducts laying on the attic floor. You can tell this is the case if you see a dark line along the ceiling that leads to an HVAC register (Figure 16). Since it is desirable to have the HVAC ducts laying on the attic floor where they can be buried by attic insulation, this is not a cause for concern. If you are seeing dark spots in the ceiling in your IR camera and they don’t lead to a heating register, that is an indication that you have missing or displaced insulation (Figure 17). If you are noticing a lot of displaced insulation in the ceilings, or cold ceilings throughout the home, you may want to hire a contractor to insulate your attic.

Source
Source
9. Consolidate Results and Consider Solutions.
Once you’ve completed an IR camera examination of your home and noted the areas you’d like to work on, you can prioritize your list and start tackling the air sealing and insulating projects you’ve identified, using the guides mentioned here.