



Materials Cost: 1
Difficulty Level: 1
Introduction
Sealing air leaks around electrical outlets and switches helps prevent conditioned air from escaping through wall cavities to reduce energy loss and improve home comfort.
Why
Air sealing electrical outlets and switches can reduce energy consumption, reduce drafts, and help to maintain consistent temperatures throughout your home—lowering heating and cooling costs over time. Indoor air quality can also be improved by preventing dust, bugs, and allergens from entering through wall cavities.
What You'll Need
- Caulk
- Canned spray foam
- Electric outlet foam gaskets
- Caulk gun (if using caulk)
- Masking tape
- Rag or paper towels
- Screwdriver (flathead and Phillips)
- Utility knife or scissors
- Voltage tester
- Flashlight or headlamp
- Work gloves
1. Gather your materials and tools.
Gather up the tools and supplies you’ll need for air sealing the outlets including caulk and a caulk gun, canned spray foam and a foam gun (Figure 1), masking tape, gloves to protect your hands, a rag or paper towels to catch drips, etc.
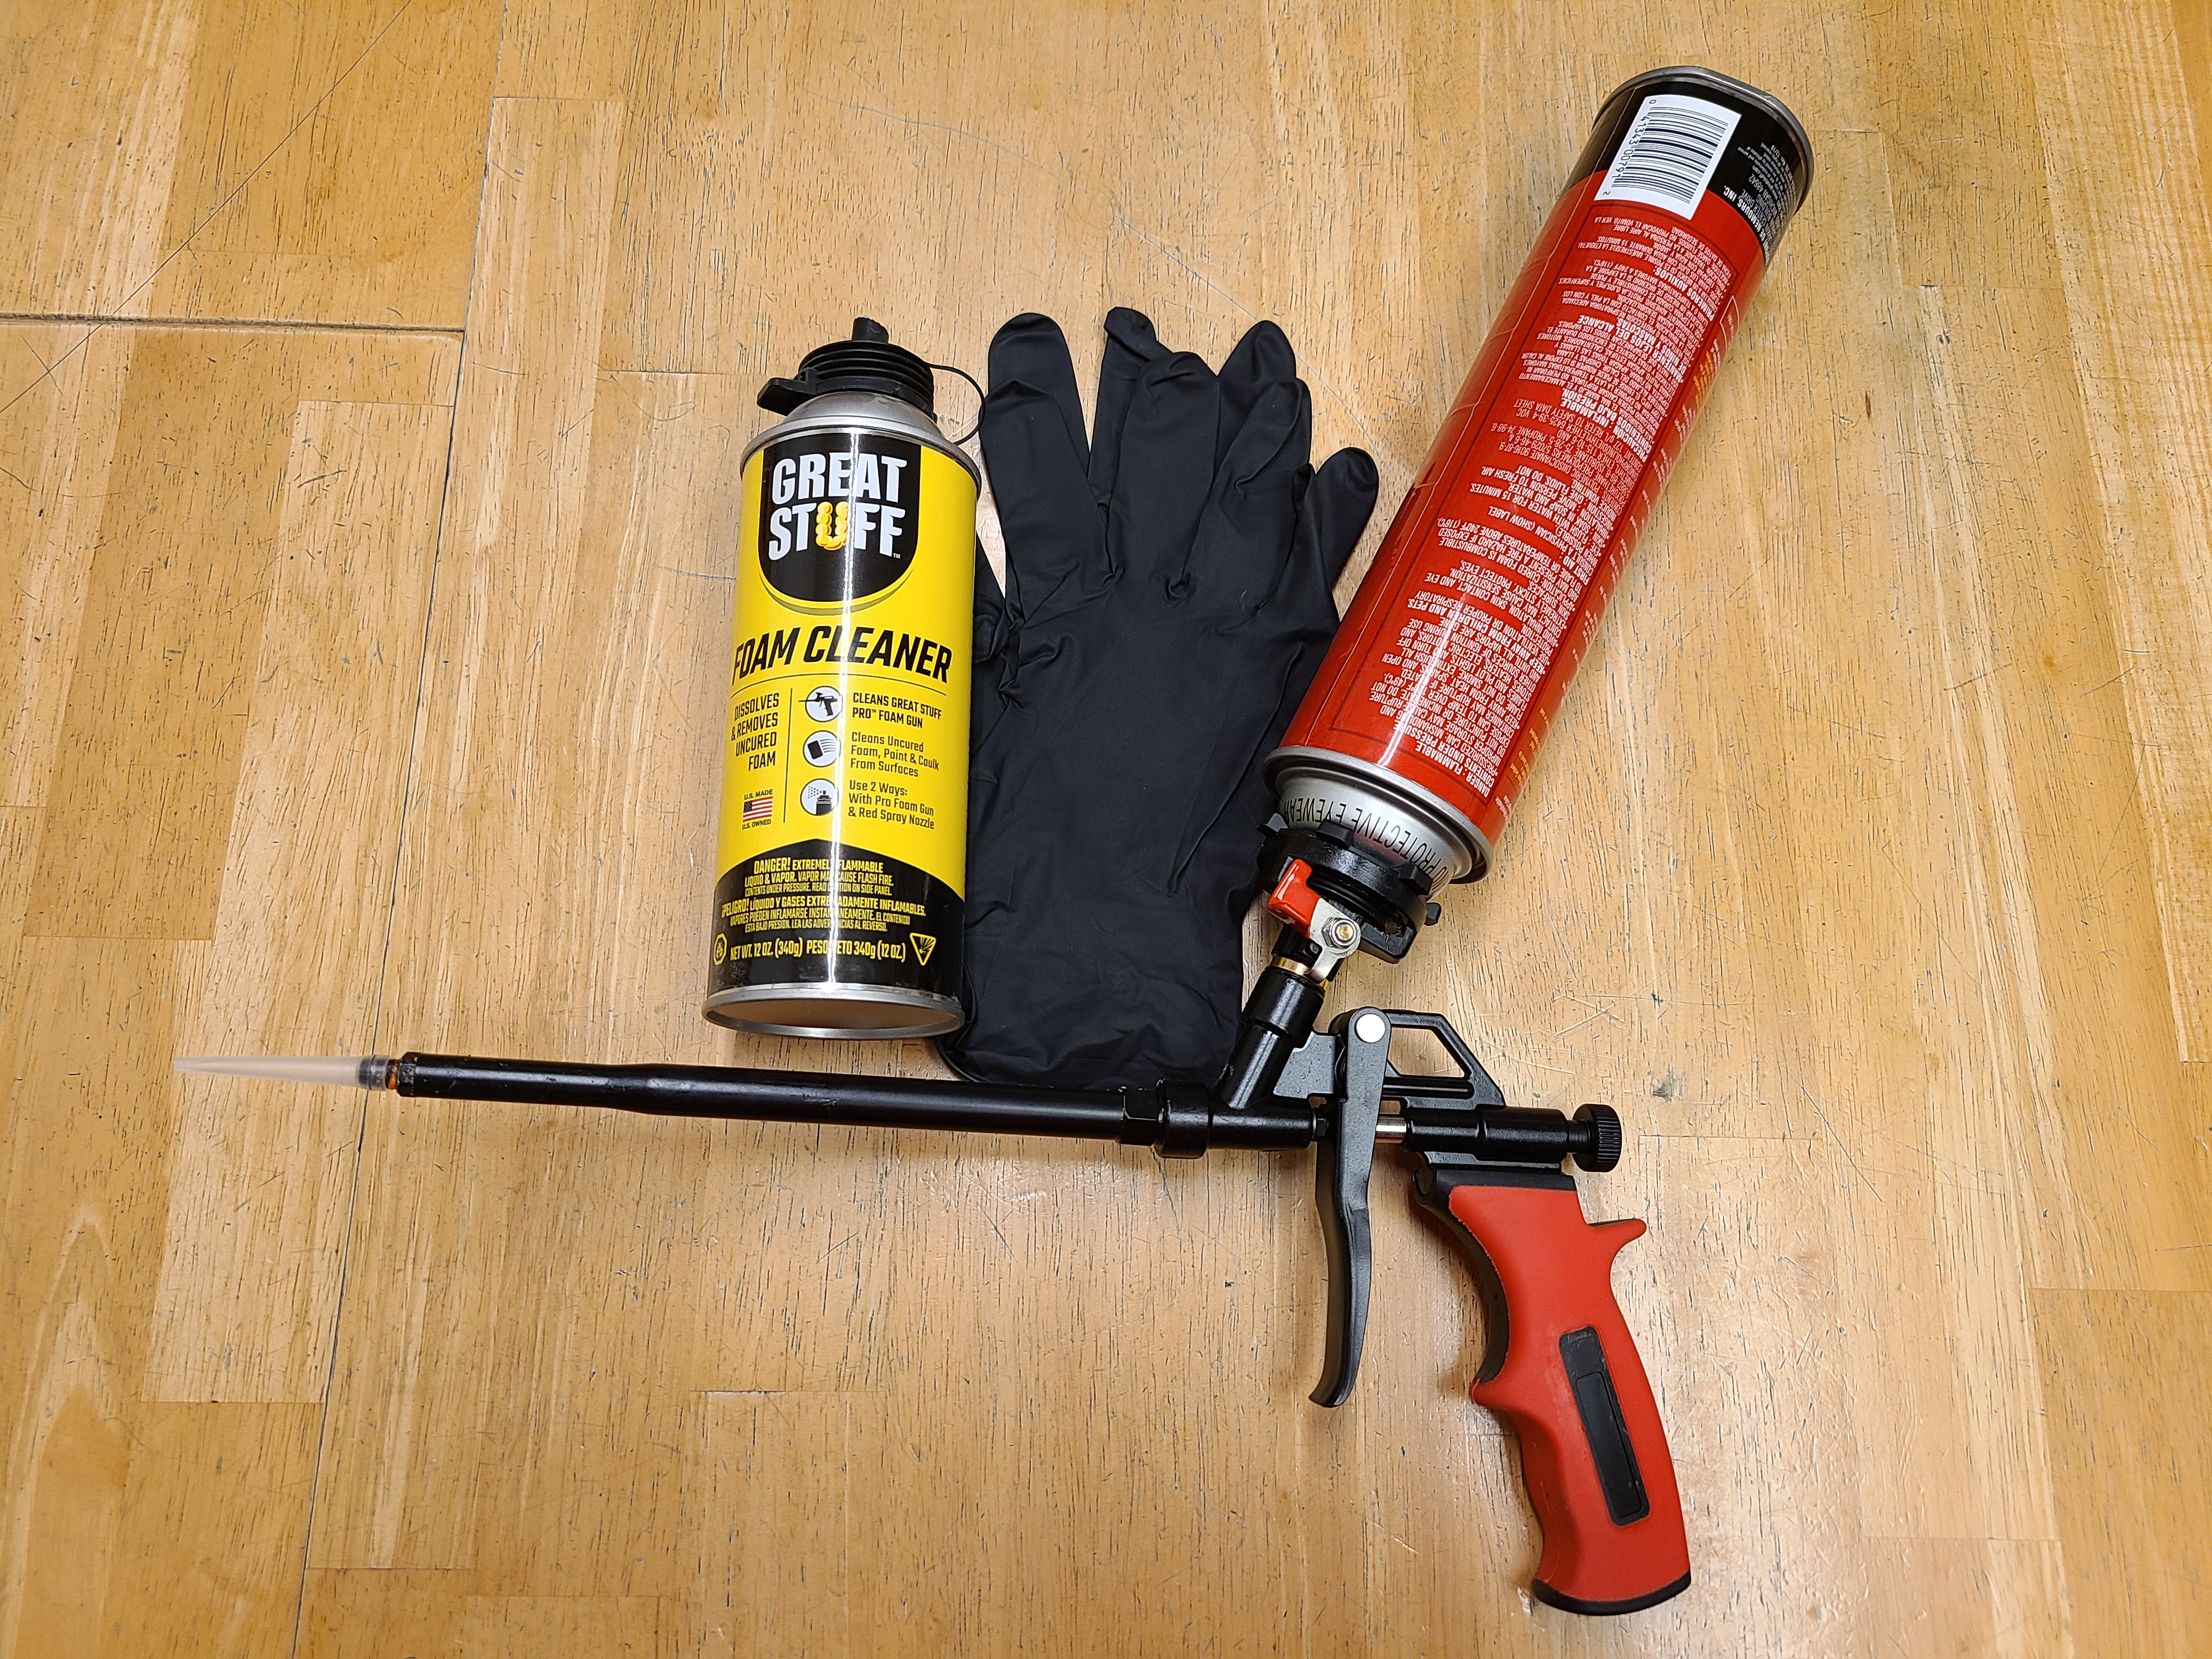
Caulk, a caulk gun, canned spray foam, a spray foam applicator, and gloves are among the materials you will need for most home air sealing projects.
Source
Courtesy Of
2. Turn off power to the outlet or switch.
- Locate and turn off the appropriate circuit breaker (Figure 2).
- Verify power is off using a non-contact voltage tester or a plug-in outlet tester. If you do not have a voltage tester, or cannot verify power is off, do not proceed.
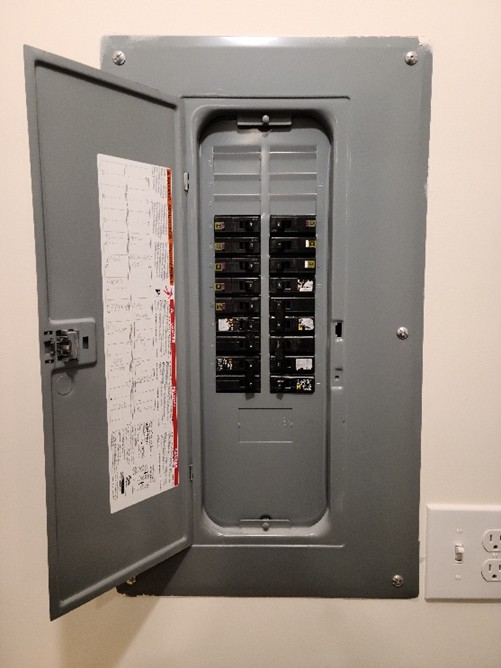
Before performing any work on an outlet, locate and turn off the electric circuit to the outlet at the electric panel.
Source
Courtesy Of
3. Remove the cover plate.
- Use a screwdriver to unscrew the cover plate screws (Figure 3).
- Set screws aside in a safe place.
- Gently remove the cover plate from the wall. If the cover plate has gotten sealed to the wall by paint that may have overlapped the edges of the cover plate, you may want to cut through the paint around the edge of the cover plate using a utility knife to avoid tearing the paint.
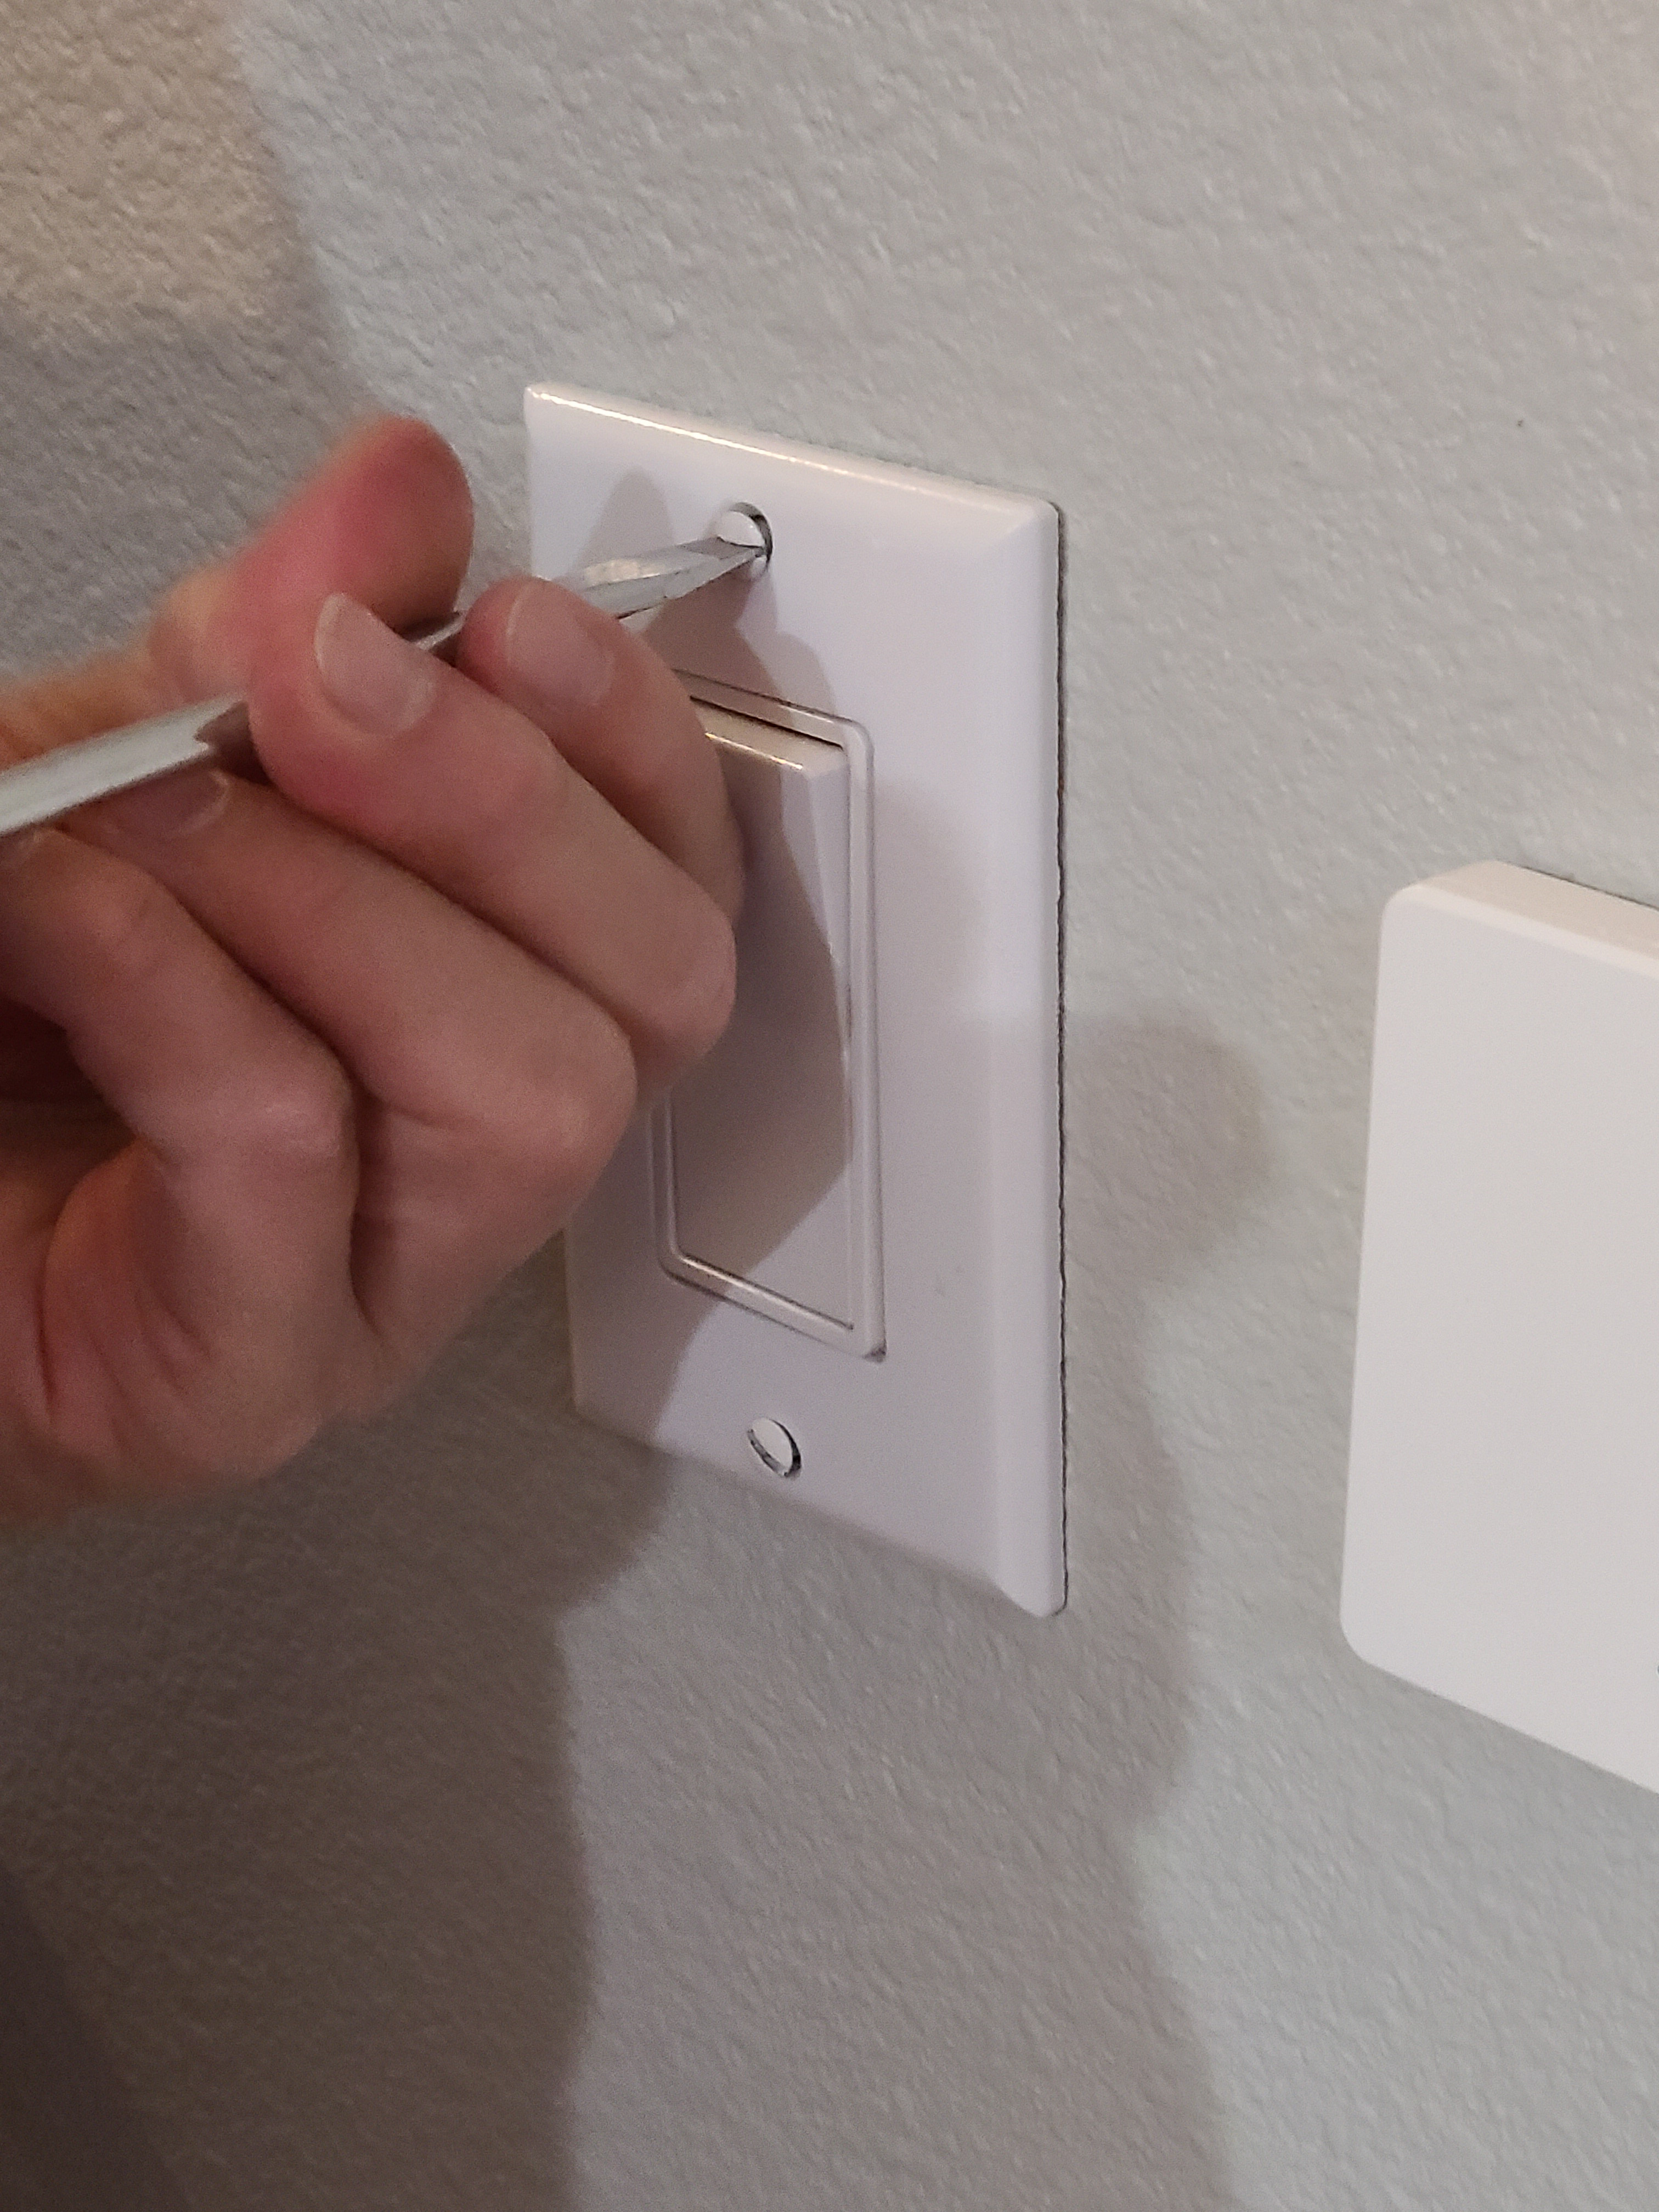
Remove the cover plate of the outlet or switch plate by unscrewing the screws, often one at the top and at the bottom for switches and just one in the center for outlets.
Source
Courtesy Of
4. Look at the electrical box.
- Examine the electrical box and see if there are gaps between the electrical box and the drywall (Figure 4).
- Use a flashlight to look beyond the outlets to see if there are unsealed holes where the wires penetrate the box. (Use a flashlight to improve visibility if necessary.)
- Check for air drafts with your hand.
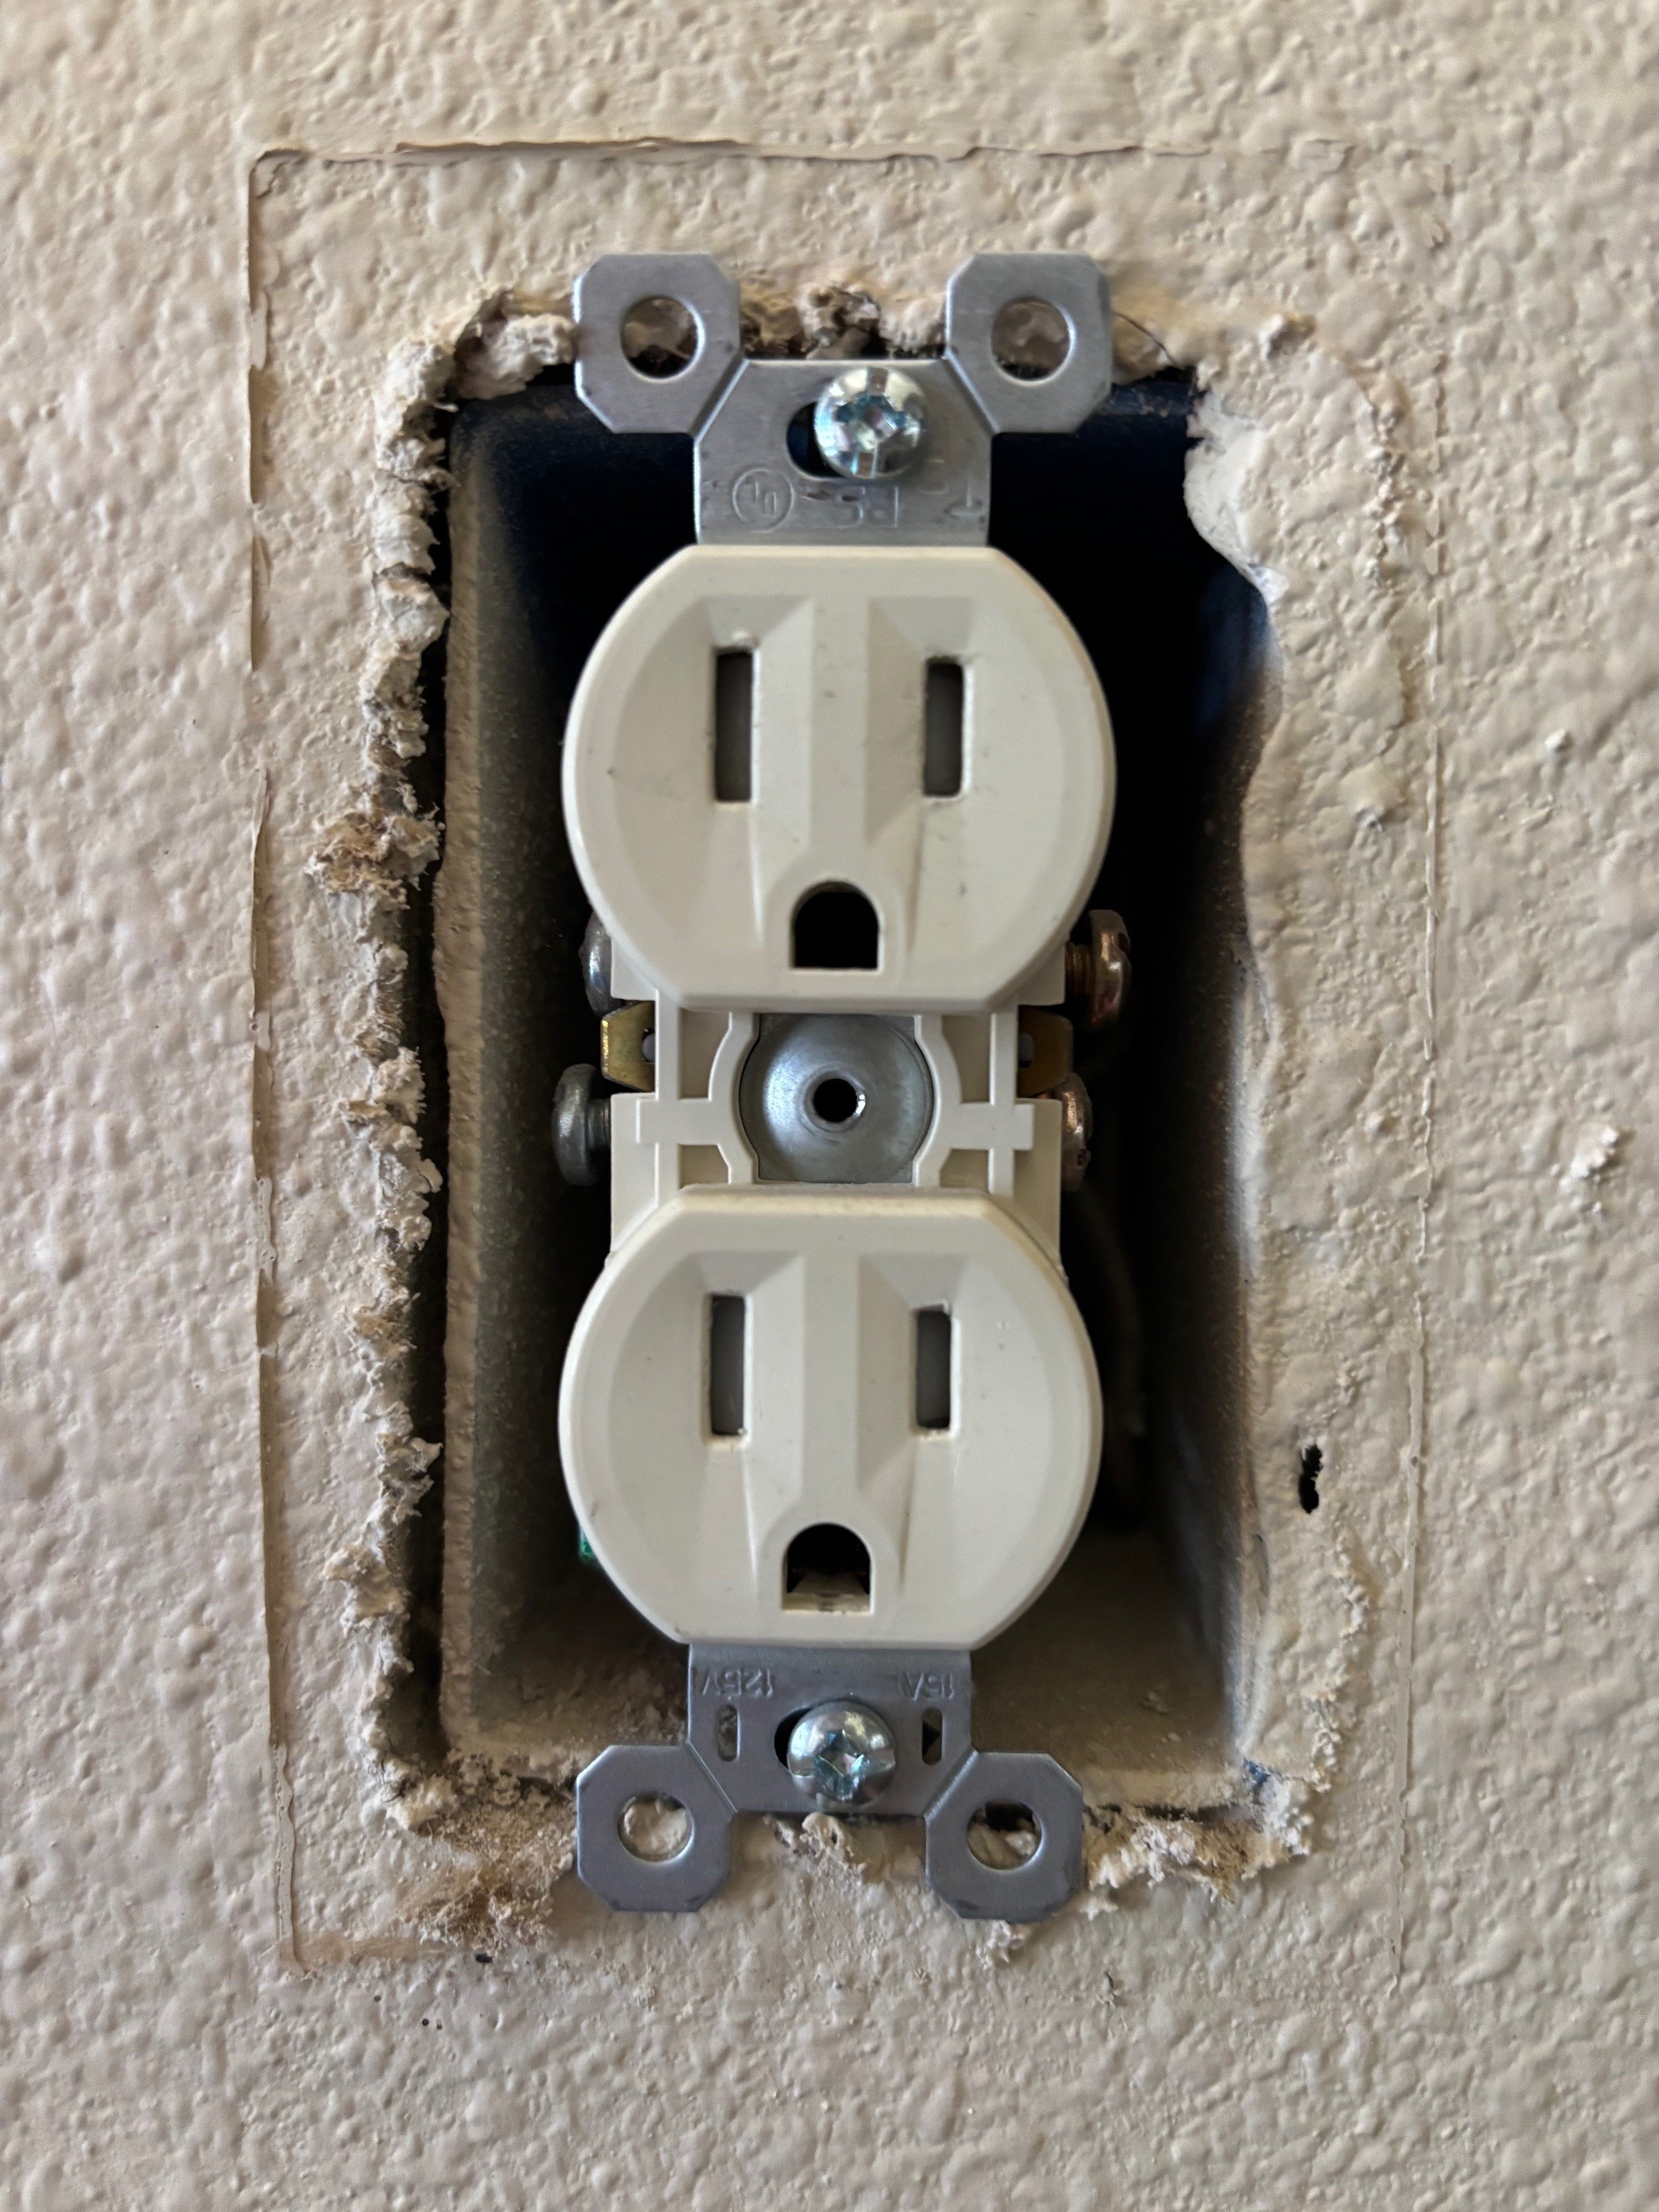
The cover plate has been removed from this outlet, exposing the gap between the electrical box and the drywall.
Source
Courtesy Of
5. Unscrew and pull out the outlet.
- Use a screwdriver to unscrew the screws holding the outlet in place (Figure 5). There are typically two screws, one at the top and one at the bottom.
- Set the screws aside in a safe place.
- Gently pull the outlet a few inches away from the wall. It should remain connected to the electrical wires.
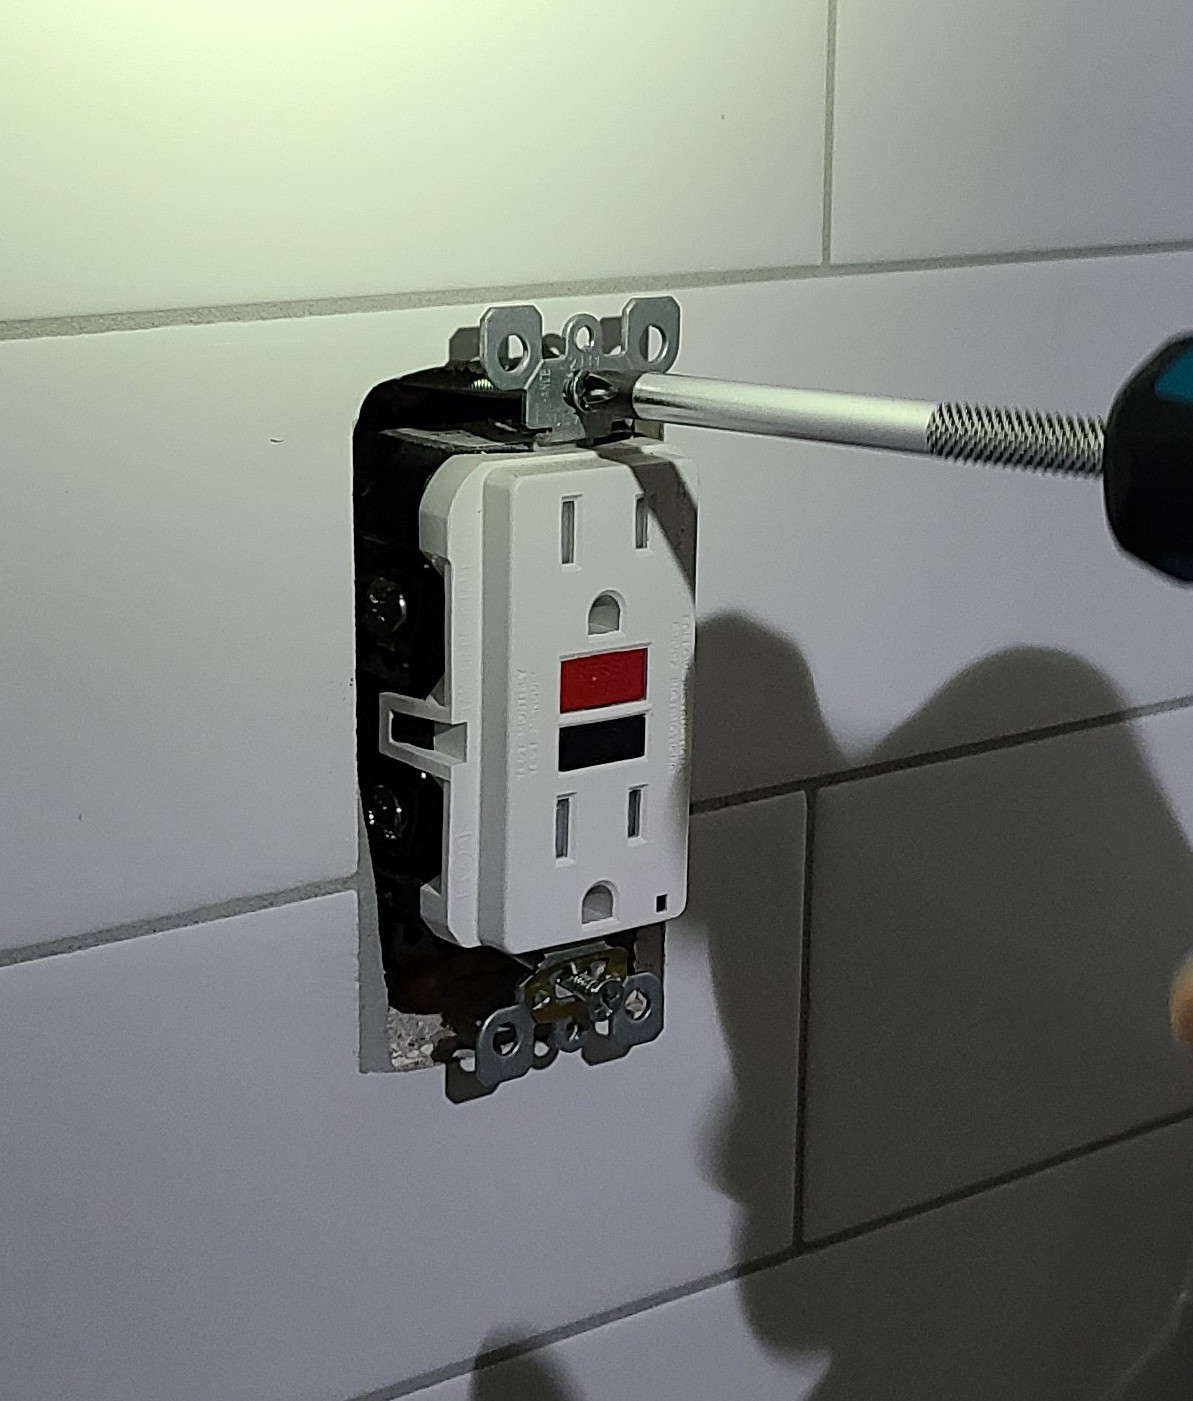
Unscrew the screws on the outlet or switch to take it out of the electrical box to access and air seal any holes in the back of the box.
Source
Courtesy Of
6. Seal holes in electrical box.
- Use caulk or low-expanding canned spray foam to seal unused wiring holes and gaps around electrical wires and seams in the box (Figure 6).
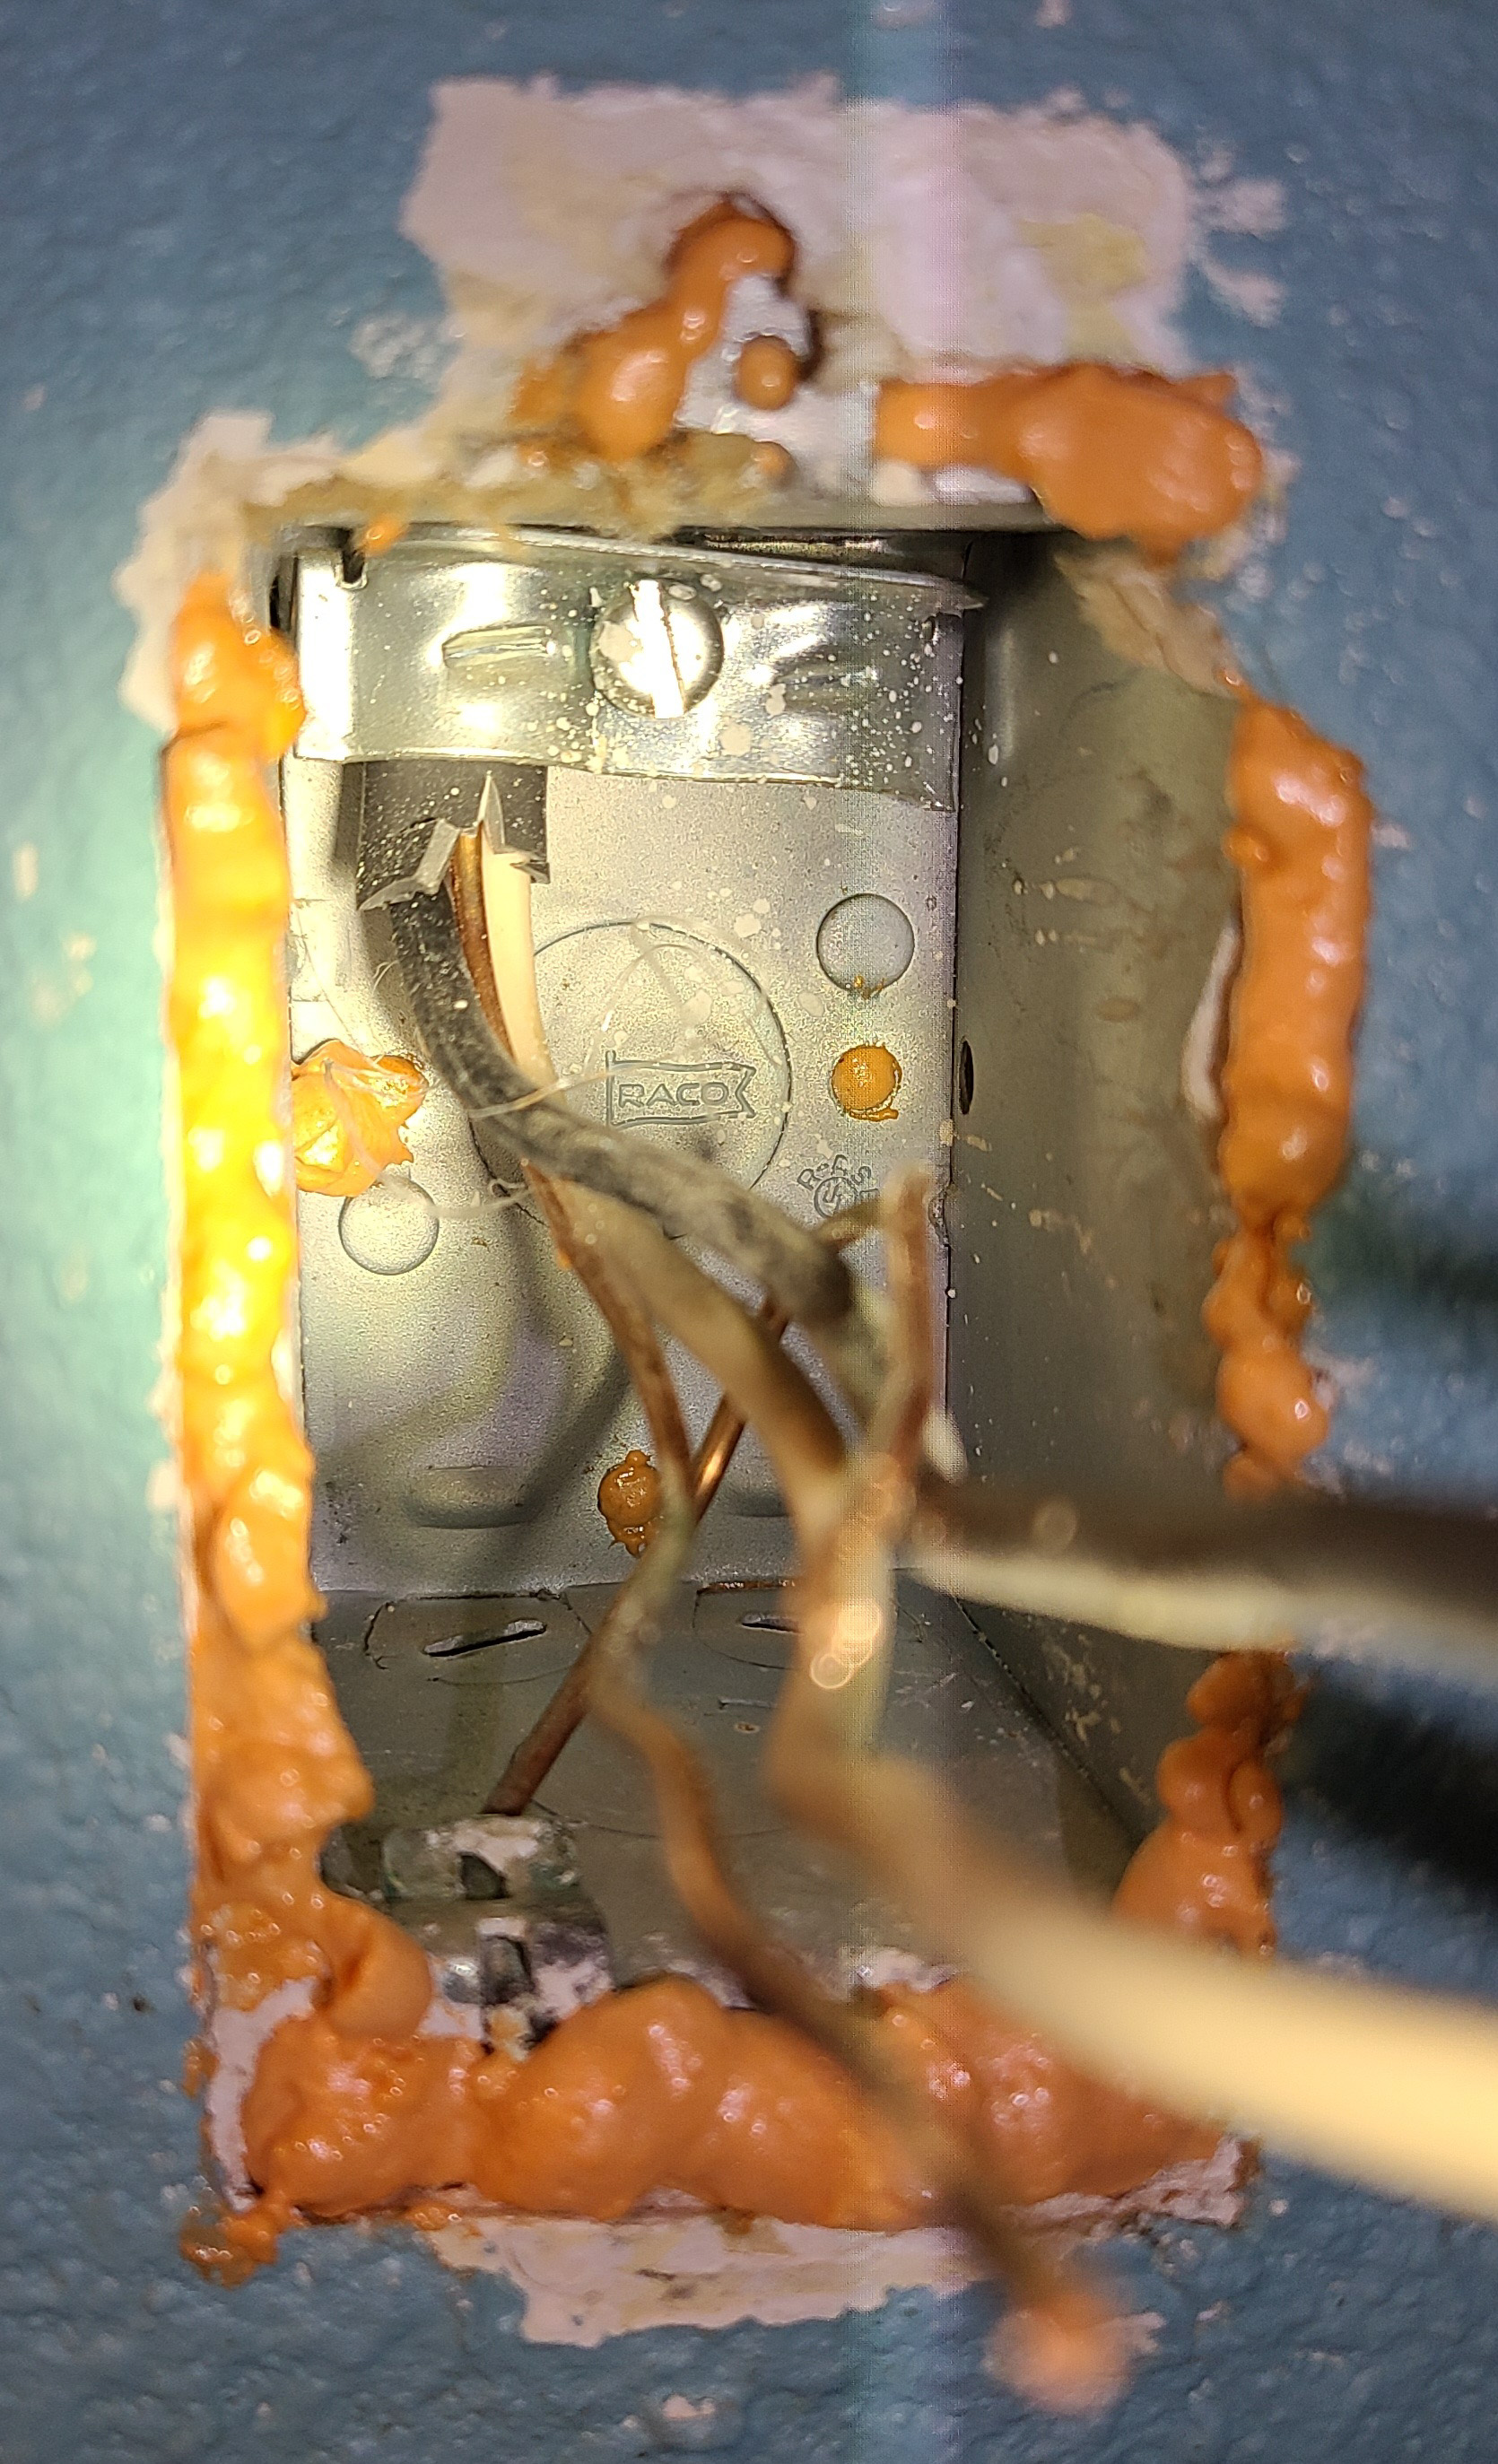
Use low-expanding canned spray foam to seal unused holes, gaps around wires, and seams in the outlet box.
Source
Courtesy Of
7. Seal gaps around the electrical box.
- Apply caulk or low-expanding canned spray foam around the perimeter of the electrical box to fill any gaps between the box and the drywall (Figure 7). Be careful not to fill in the holes for the screws that hold on the cover plate.
- For caulk, smooth any uneven sections with your finger before it dries. For spray foam, allow it to dry and cure and then cut away any portions that stick out from the wall.
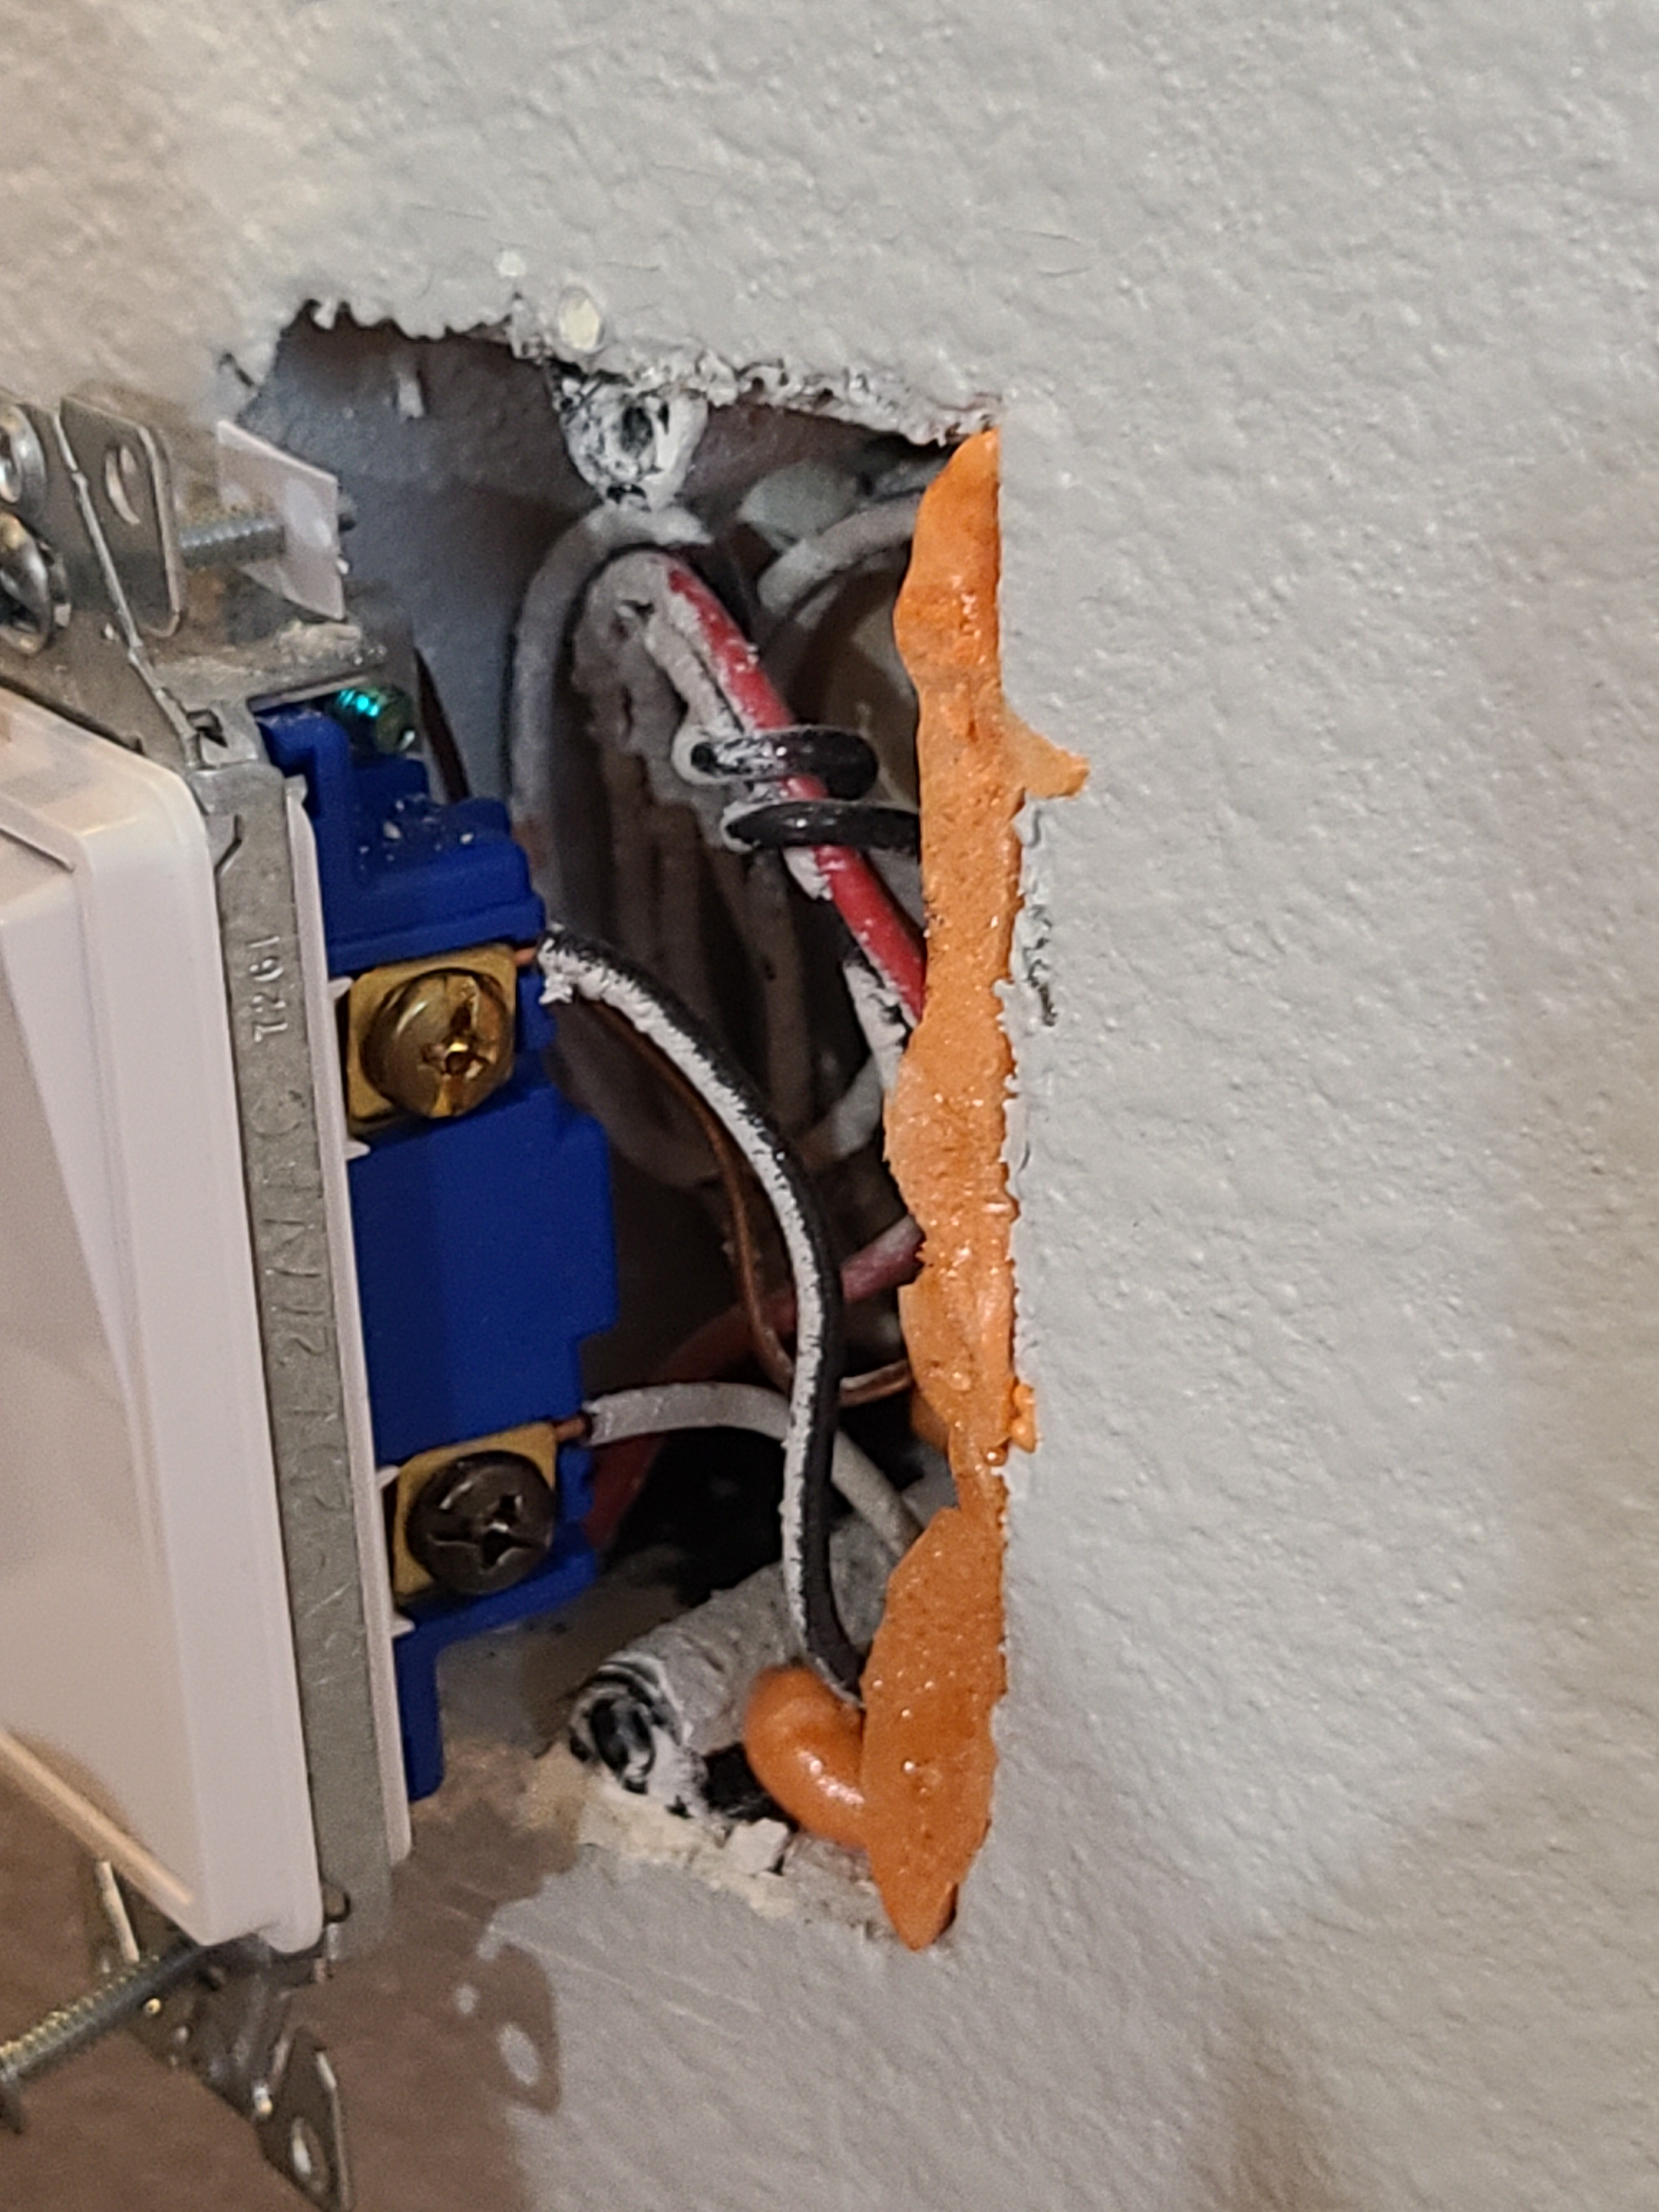
Air seal gaps between the electrical box and the drywall with caulk or low-expanding canned spray foam
Source
Courtesy Of
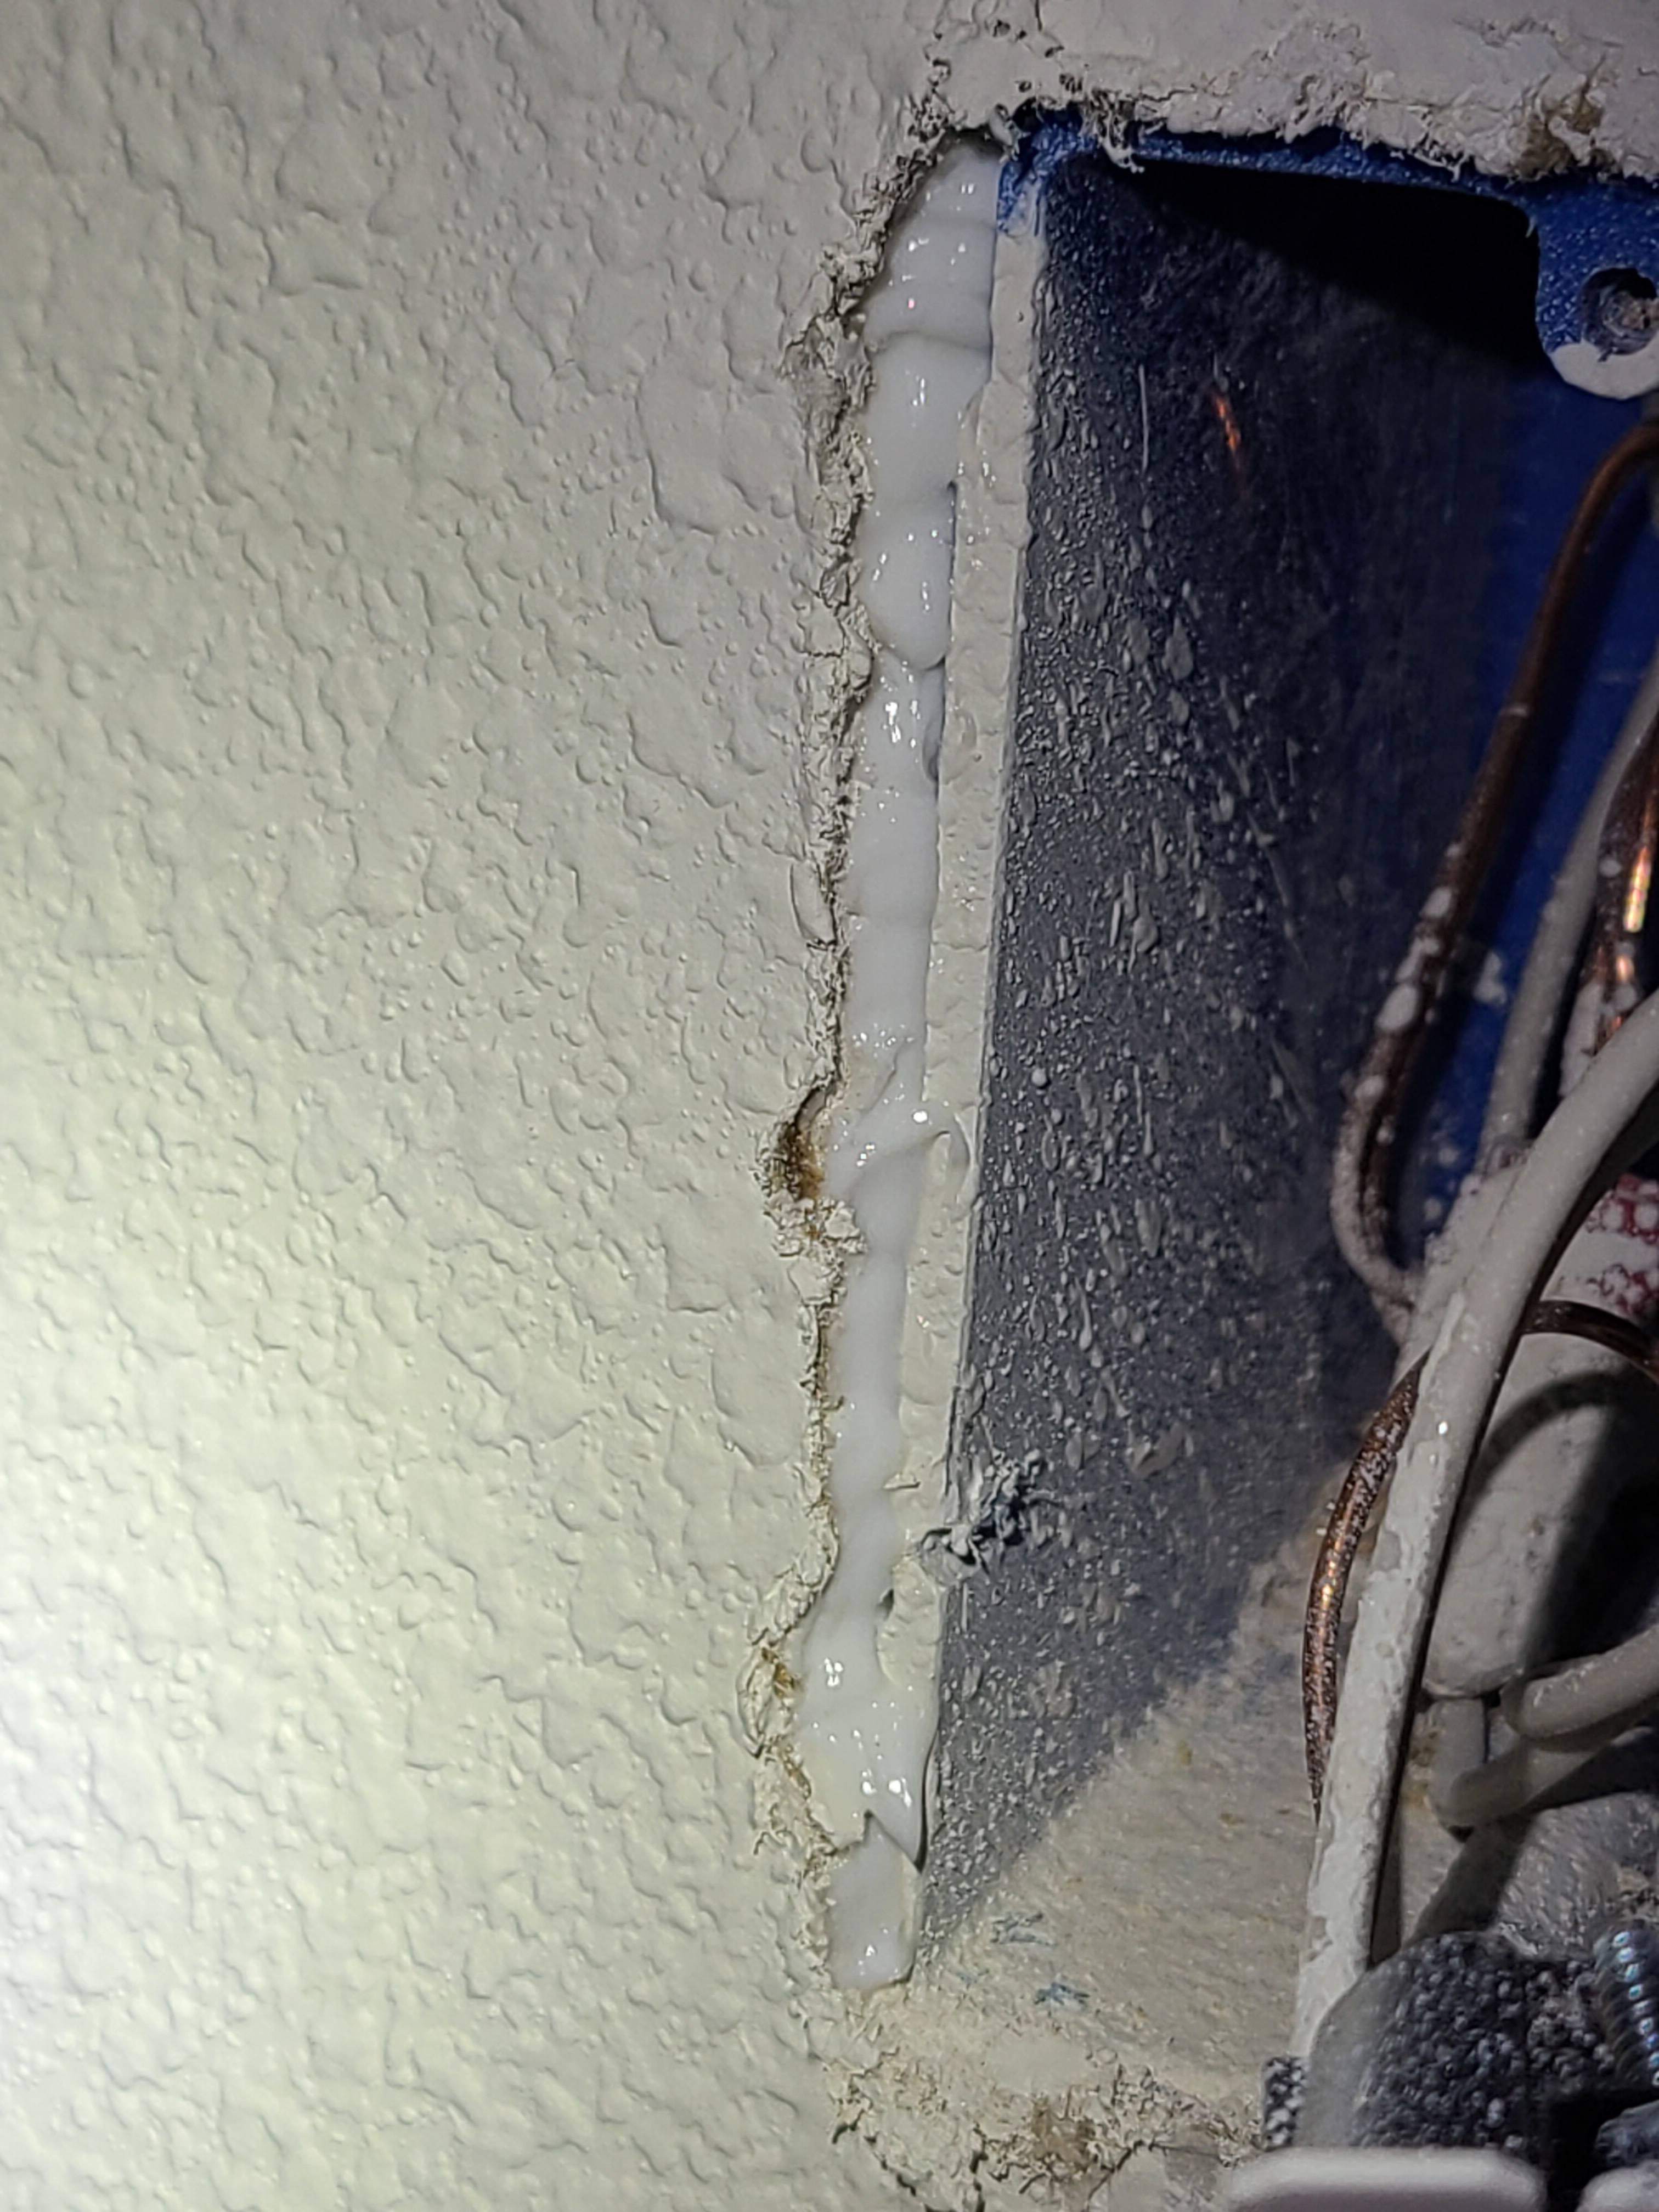
Caulk was used here to air seal the gap between the electrical box and the drywall.
Source
Courtesy Of
8. Allow time for the sealant to cure.
- Allow the sealant to fully dry and cure, per the directions on the product’s packaging, before reinstalling the switch plate (Figure 9).
- Check that the sealant has cured or hardened before continuing.
- Trim any protruding spray foam with a knife or small saw once it is cured.
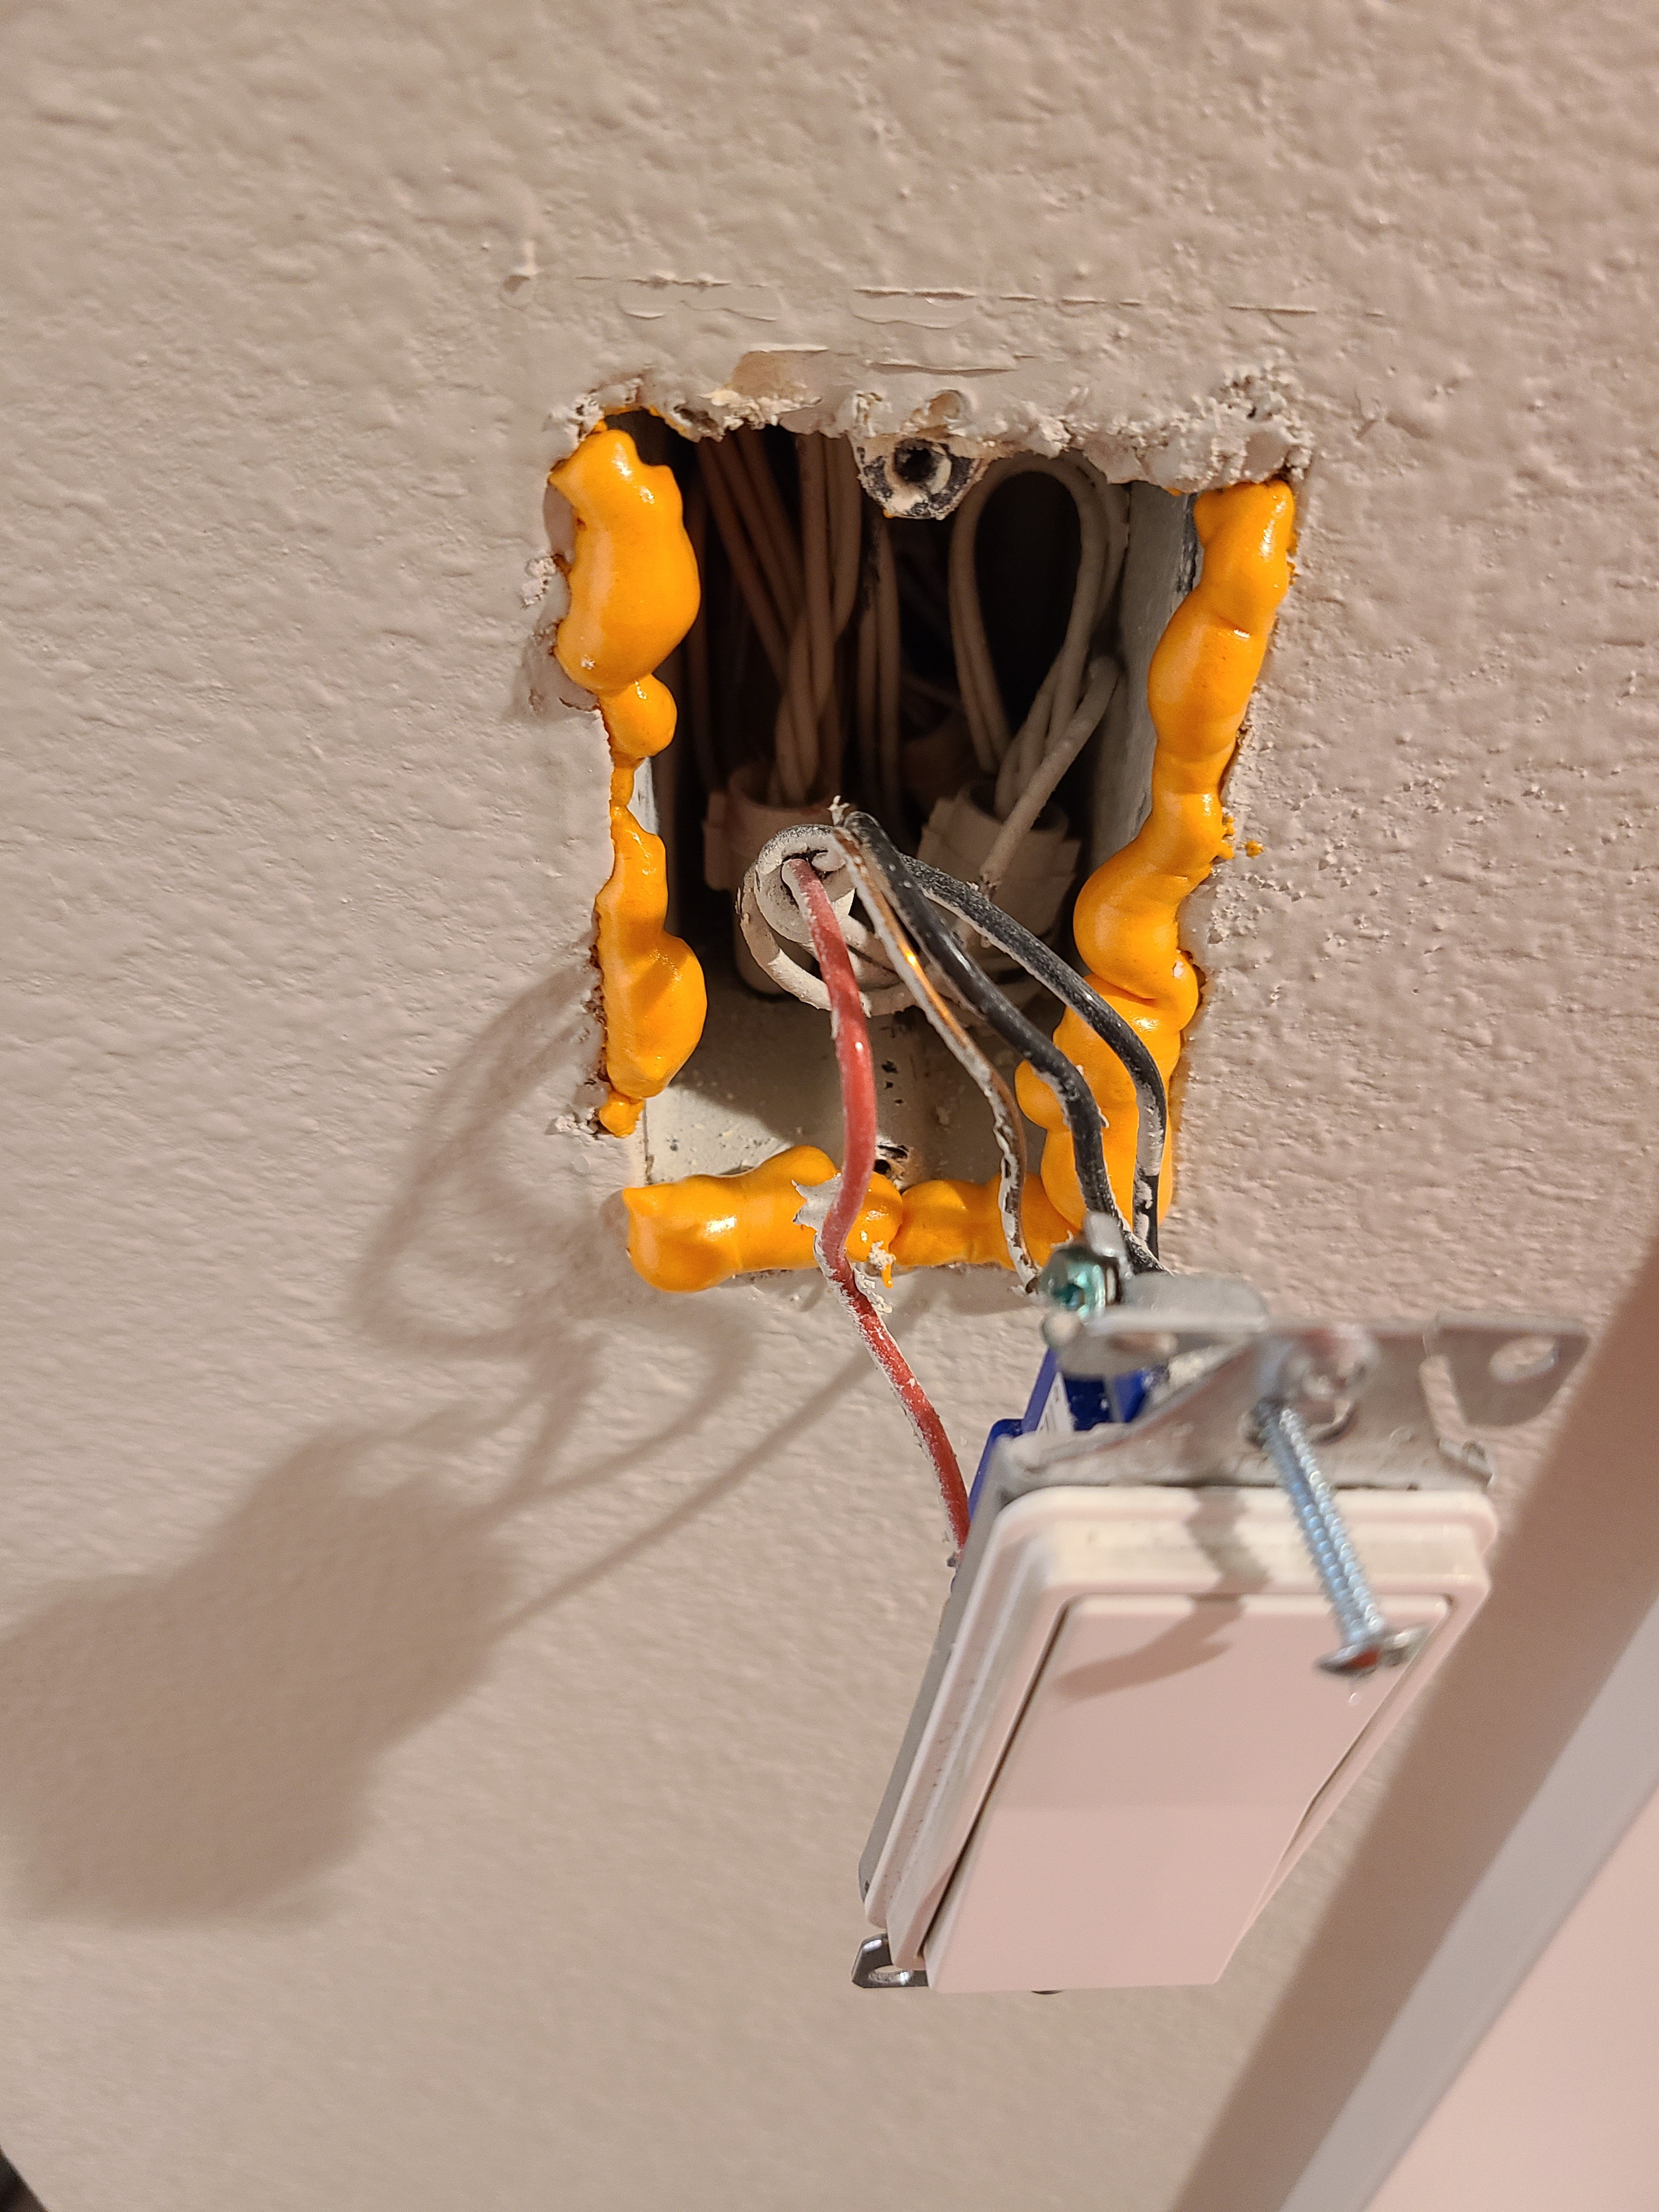
Allow sealant around the electrical switch box to fully cure before reinstalling.
Source
Courtesy Of
9. Install foam insert.
- Install a foam gasket if desired (Figure 10).
- Verify plate screws are long enough to compensate for any added thickness and that plate will still lay flat against the wall.
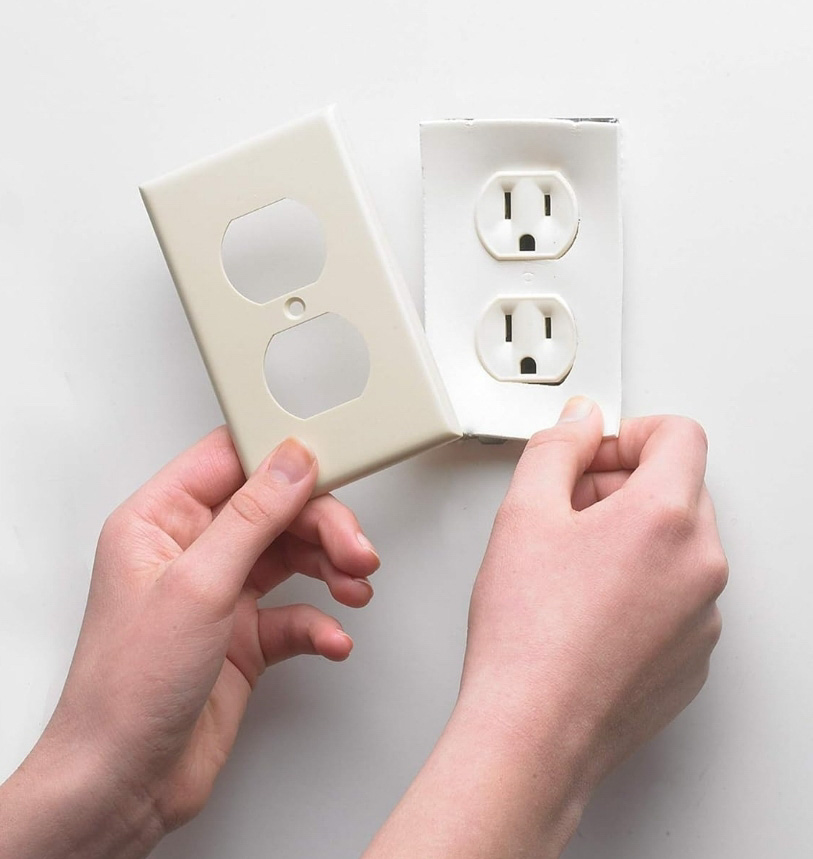
Foam gaskets are available that may provide some air sealing and sound insulation benefit
Source
Courtesy Of
10. Reinstall the outlet.
- Replace the screws and use a screwdriver to screw the outlet back in (Figure 11).
- Make sure the electrical box is firmly reconnected. (Be careful not to overtighten the screws)
Unscrew the screws on the outlet or switch to take it out of the electrical box to access and air seal any holes in the back of the box.
Source
Courtesy Of
11. Reinstall the cover plate.
- Align the cover plate with the electrical box.
- Replace the screws and use a screwdriver to tighten until the cover is firm against the wall. (Be careful not to overtighten the screws or you can crack the cover plate) (Figure12).
Remove the cover plate of the outlet or switch plate by unscrewing the screws, often one at the top and at the bottom for switches and just one in the center for outlets.
Source
Courtesy Of
12. Restore power and test.
- Turn the circuit breaker back on (Figure 13).
- Test the outlet or switch operation with a voltage tester. (Electric shock warning: If the outlet or switch is not working, turn off the power to the circuit at the breaker before doing any further troubleshooting work).
Before performing any work on an outlet, locate and turn off the electric circuit to the outlet at the electric panel.
Source
Courtesy Of
13. Repeat steps for additional outlets or switches.
- Repeat the previous steps for all outlets or switches that you want to seal.
- Keep track or mark which ones have already been sealed.