Materials Cost: FREE
Difficulty Level: 1

Introduction

DIY guide showing how to replace the filter in a home’s HVAC system when the air filter is located in an air filter slot on the furnace.

Why

Replacing the air filter in your home’s HVAC (heating, ventilation, and air conditioning) system every 3 to 6 months ensures the equipment has unrestricted airflow which is important for energy efficiency and heating and cooling performance as well as maintaining good indoor air quality.

What You'll Need

  • A replacement air filter
  • A ladder if the filter slot is in the attic
  • A magnetic seal filter slot cover if the filter slot doesn’t have a door
  • A flat-head and a Phillip screwdriver if the filter slot cover has thumb screws that are very snug
  • Foam weatherstripping tape

1. Locate the air filter slot.

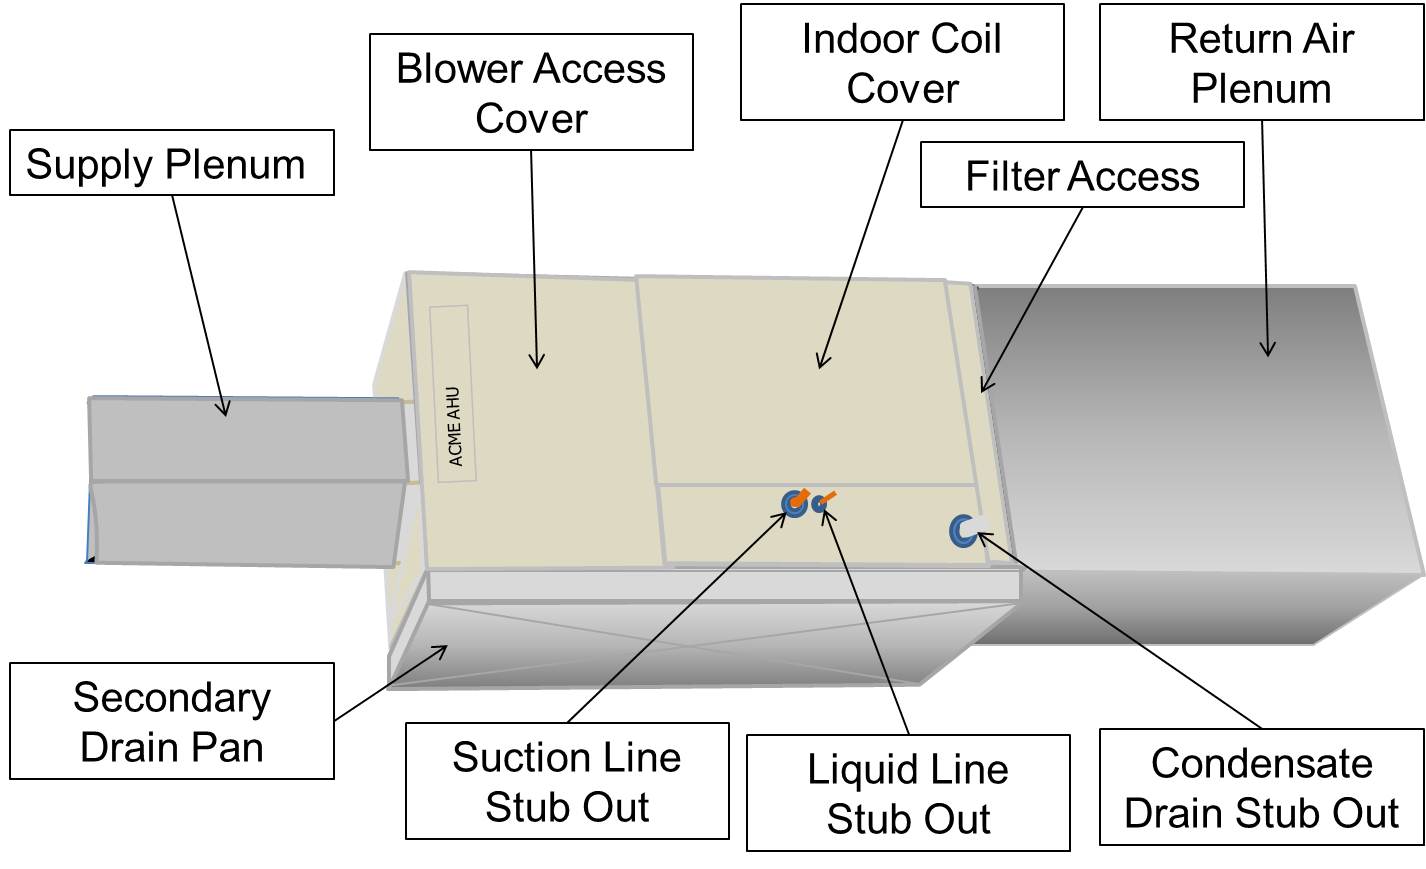
Locate the HVAC air handler. This might be a furnace, a furnace and air conditioner, or a central heat pump. It may be located in a utility room, in the basement, in the crawlspace, in the attic, or in the garage. Look at the duct work connected to the air handler. If your home’s air handler has a filter slot, it would be located between the return air plenum and the air handler cabinet (labeled “Filter Access” in Figure 1) or in the first few feet of duct work; it is also possible for the filter to be at the return grille, see the DIY guide "Replace Air Filter at Return Air Grille" for more information. Figures 2 through 7 show some examples of the air filter slot in various air handlers and furnaces. The filter slot should have a door or cover; it could have a cover that is held in place using clips, tabs, or thumb screws; a sliding door; or, it might have no door and be covered instead with a piece of plastic held in place with magnets.

Install the filter media box between the return air plenum and the air handler box
Source
Figure 1. The air filter on this furnace is installed between the return air plenum and the air handler box (Source: Calcs Plus).
The filter access panel on this vertical upflow air handler is located between the return ductwork below and the coils above.
Source
Figure 2. This HVAC air filter slot is covered with a door held in place with thumb screws (Source: PNNL).
Figure 3. This HVAC air filter slot is covered with a door that is held in place with spring clips and tabs (Source: PNNL).
Figure 4. . Example of an HVAC air filter slot with a sliding cover door (Source: PNNL).
Figure 5. Example of an HVAC air filter slot with a latch cover door (Source: PNNL).
Figure 6. The air filter slot on this air handler has no cover (Source: PNNL).
Figure 7. The air filter slot on this furnace is covered with a magnetic seal (Source: PNNL).

2. Turn off the HVAC unit at the thermostat.


3. Remove the existing filter from the air filter slot.

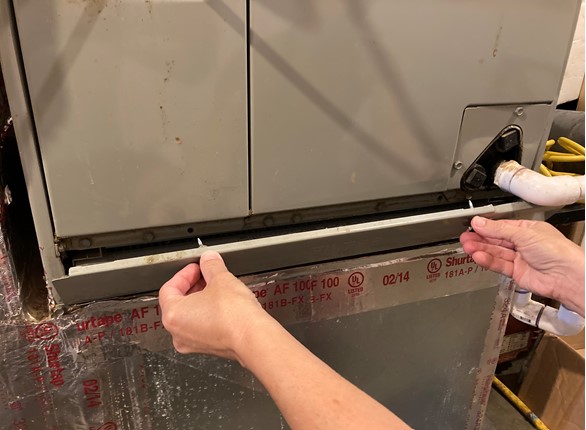
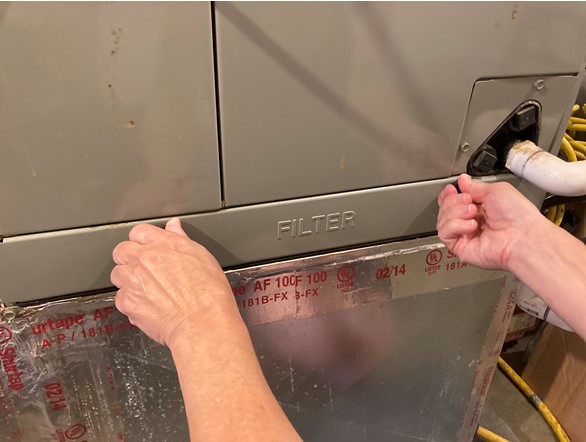
If the slot has a cover, remove the slot cover by removing the screws or latches (Figure 8).

After inserting the new filter, replace the filter slot cover to minimize air leakage and heat loss.
Source
Figure 8. To access the air filter on this furnace, unfasten the two screws holding the filter slot cover in place (Source: PNNL).

4. Measure the size of the filter slot.

The old filter you are replacing should have length and width dimensions printed on the cardboard frame. If that filter fits correctly, replace it with a filter of the same length and width dimensions. If the filter does not fit correctly, measure the slot dimensions to determine the correct size. A properly sized filter will fit in the slot, should completely cover the duct opening, and will lay flush with the frame (Figure 9).

Figure 9. This air filter is too big for the air filter slot; the filter should not be installed diagonally; it should lay flat against the opening (Source: PNNL).

5. Choose a replacement filter.

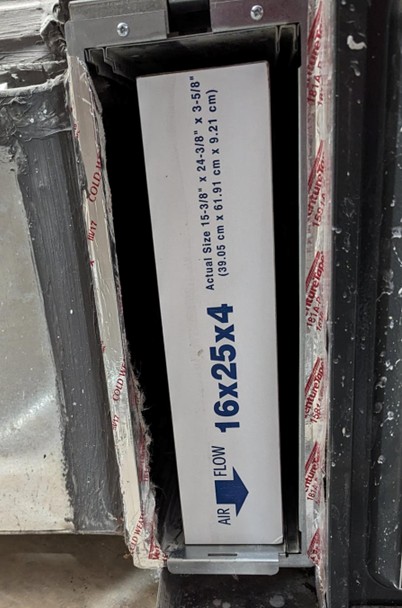
If the filter slot can accommodate a thicker filter, you may want to install a filter that is thicker than the one you are replacing. Ideally you will want to install the thickest air filter that the filter slot can accommodate. For example, in Figure 10 below, the filter slot can fit either a 1-inch filter or a 4-inch filter. Although the current filter is 1 inch thick, it would be better to order and install a 4-inch filter because the deeper the pleats on the air filter, the more actual surface area the filter has. 

The ability of furnace filters to filter out particles is rated on a MERV (Minimum Efficiency Reporting Value) scale:

  • MERV 1–4: Catches large particles like lint, dust mites, and pollen. 
  • MERV 5–8: Captures finer dust particles, pet dander, and mold spores. 
  • MERV 9–12: Filters out auto emissions, lead dust, and larger bacteria. 
  • MERV 13–16: Traps very fine particles, including smoke, sneeze droplets, and bacteria. 
  • HEPA-level (MERV 17-20): Used in hospitals and cleanrooms to filter ultrafine particles, including viruses and other extremely small particles.

Higher MERV filters are better at filtering out small particles but they can also clog more quickly, restricting air flow, causing increased wear on your HVAC system, and limiting its ability to heat and cool. A filter with deeper pleats has more surface area and therefore provides better air flow for a longer time period before needing to be replaced. When shopping for a filter, pay attention to the MERV rating (Figure 11), the thickness, and the actual dimensions of the filter not just the nominal size. Check with your HVAC service company before switching from a MERV 1 to a MERV 13 or higher filter to make sure it won’t adversely impact your HVAC system’s performance.

Figure 10. This HVAC air filter slot contains a 1-inch-thick filter but the slot is designed to accept either a 1-inch or a 4-inch air filter (Source: PNNL).
The MERV rating, particle capture efficiencies, and pressure drops are printed on the side of this 1-inch pleated filter
Source
Figure 11. The MERV ratings for this furnace filter are printed on the cardboard frame of the filter (Source: PNNL).

6. Install the replacement filter.

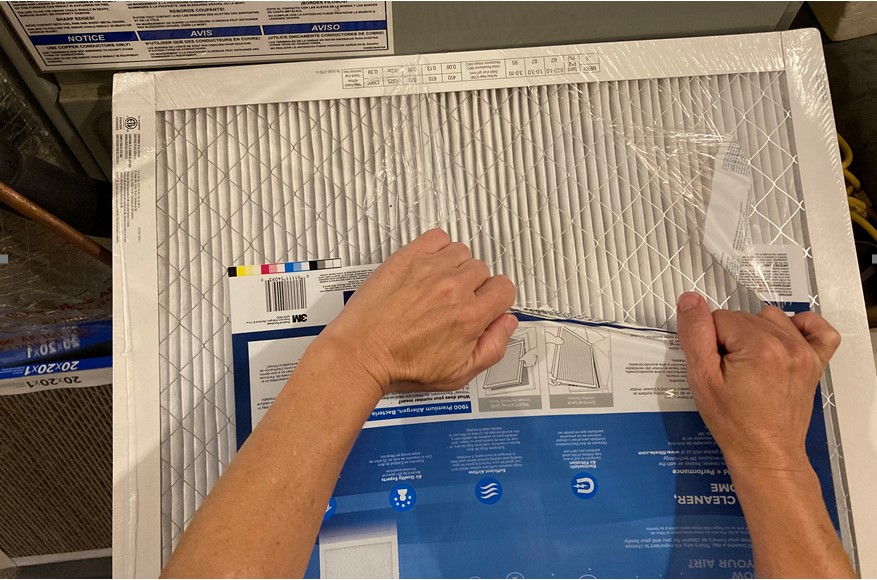
Remove the plastic wrap (if there is plastic wrap on the filter) but not the cardboard frame of the filter (Figure 12). Write the installation date on the cardboard frame on the side of the filter that will be visible when the filter is installed to help you keep track of when it was last changed. 

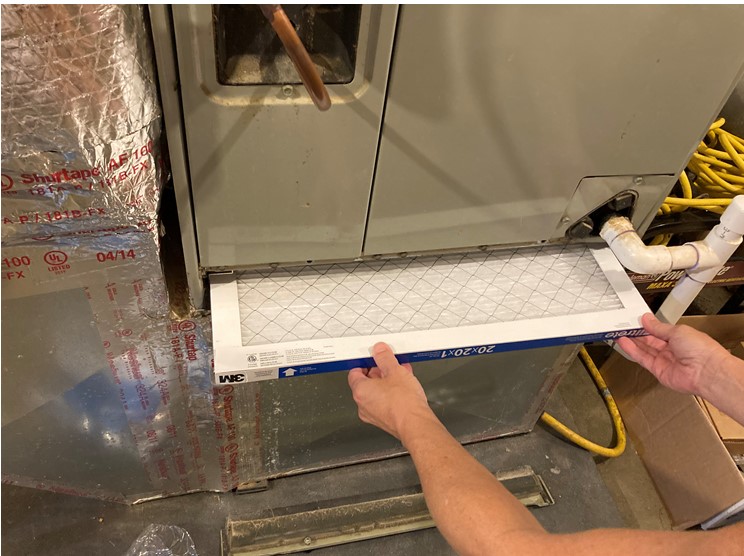
Insert the air filter into the slot (Figure 13). Pay attention to the airflow direction arrows when installing the new air filter. The arrows should point into the duct. 

Check the fit. If the filter is quite loose (Figure 14), consider getting some adhesive weatherstripping foam tape and installing it around the perimeter of the air filter to minimize the amount of air bypassing the filter.

Remove the plastic wrap, but not the cardboard frame, before installing the furnace/air handler filter in the filter slot or above the return grate; note, the metal wire over the filter fabric can be very sharp.
Source
Figure 12. Remove the plastic wrap, but not the cardboard frame, before installing the furnace/air handler filter in the filter slot or above the return grate; note, the metal wire over the filter fabric can be very sharp (Source: PNNL).
This new filter is inserted into furnace filter slot on the return side of the furnace with the arrow on the side of the filter frame pointing in the direction of airflow, which is toward the furnace.
Source
Figure 13. Remove the plastic wrap, but not the cardboard frame, before installing the furnace/air handler filter in the filter slot or above the return grate; note, the metal wire over the filter fabric can be very sharp (Source: PNNL).
Figure 14. If the air filter is quite loose in the slot, you can add adhesive weatherstripping foam tape around the perimeter of the cardboard frame to minimize the amount of air passing around the filter (Source: PNNL).

7. Re-install air filter door cover.

Re-install the slot cover and reposition any levers, gaskets, or seals to close the slot (Figure 15). If the air filter slot doesn’t have a door, consider purchasing and installing a magnetic air-sealing filter slot cover (Figure 16).

The furnace filter slot cover should fit tightly to minimize air leakage but it should not be taped or caulked to enable frequent filter replacements.
Source
Figure 15. After replacing the HVAC filter, reinstall the cover over the air filter slot (Source: PNNL).

8. Turn on the HVAC.

Turn the HVAC equipment back on or return the thermostat to the appropriate temperature and mode.


Additional Info

Last Updated

Disclaimer

This content is a work created with funding provided by the United States Department of Energy under Contract no DE-AC05-076RL01830 for the operation of Pacific Northwest National Laboratory. The information and guidance provided by Pacific Northwest National Laboratory (PNNL) in the content are intended solely for educational purposes only and do not constitute formal training or certification. It is provided with the explicit understanding that neither the United States Government nor the United States Department of Energy, nor the Contractor, nor any or their employees, nor any jurisdiction or organization that has cooperated in the development of these materials, makes any warranty, express or implied, or assumes any legal liability or responsibility for the accuracy, completeness, or usefulness or any information, apparatus, product, software, or process disclosed, or represents that its use would not infringe privately owned rights. Reference herein to any specific commercial product, process, or service by trade name, trademark, manufacturer, or otherwise does not constitute or imply its endorsement, recommendation, or favoring by the United States Government or any agency thereof, or Battelle Memorial Institute. The views and opinions of authors expressed herein do not necessarily state or reflect those of the United States Government or any agency thereof. Viewers assumes full responsibility for all actions that they may take from information provided in this content including ensuring the safety, code compliance, and proper functionality of any products they choose to install. Installation and use of such products should be performed in accordance with local regulations and manufacturer instructions.